1
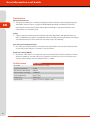
Montaggio e uso delle botole da tetto
User information roof hatches
Benutzerinformation Dachluken
IT
EN
DE
RHT / RHTX
i
G - REG
SK
I
2
PANY
OM
ERED - C
ST
1
IT
EN
DE
2
Importante
Vi preghiamo di leggere attentamente questo fascicolo e conservarlo anche dopo
l’installazione della botola. Queste istruzioni di montaggio sono solamente un aiuto generico
ed il fornitore Gorter ed i suoi rappresentanti e venditori non si assumono responsabilitá per
eventuali danni alle persone o cose. Prima di effettuare lavori di una certa entitá siete pregati
di consultare degli esperti in merito.
Important
Please read this manual carefully and keep it in a safe place for later reference. These installation
instructions are for general advice only and neither Gorter nor any of its affiliates will accept
any liability for claims arising from personal injury or damage to property. A licensed building
contractor should always be consulted before undertaking any major structural work.
Wichtig
Bitte lesen Sie diese Benutzerinformation sorgfältig durch und bewahren Sie sie zur späteren
Verwendung gut auf. Diese Montageanweisungen sind lediglich eine allgemeine Anleitung
und Gorter oder seine Handelsvertreter übernehmen keinerlei Haftung für Klagen aufgrund
von Verletzungen oder Sachschäden. Vor Inangriffnahme von größeren Bauarbeiten sollte
immer ein zugelassenes Bauunternehmen um Rat gefragt werden.
IT
Guida per l’utilizzatore delle botole di accesso al tetto........................................................4
Montaggio e uso delle botole da tetto..................................................................................... 12
EN
User Information roof hatch............................................................................................................6
i
Installation and use......................................................................................................................... 12
DE
Benutzerinformation Dachluken...................................................................................................8
Installation und Benutzung.......................................................................................................... 12
3
Montaggio e uso delle botole da tetto
Descrizione
Prestazione generica
YY
IT
xx La prestazione delle botole è stata verificata dalla “Stichting Kwaliteit Gevelbouw (SKG)” di
Wageningen (NL) e sono attestate dalla KOMO®. SKG è una società certificatrice (notified body)
no. 0960, riconosciuta dal consiglio accreditante olandese in base alle norme
ISO/IEC 17025-2005 e EN 45011:1998. Tutte le botole di accesso al tetto e le loro combinazioni
con scale sono certificate dal TÜV NORD germanico.
Sicurezza
Le prove per la sicurezza sono state eseguite dalla Aboma a norma delle prescrizioni
internazionale riguardante la salute e la sicurezza sul lavoro no. EN1050, EN-ISO14122,
EN131 e NEN2484. I relativi certificati possono essere usati per la redazione del fascicolo della
valutazione dei rischi e della sicurezza nella costruzione di edifici.
xx
Prevenzione d’incendi ed evacuazione fumo
Le classificazioni antincendio ed evacuazione dei fumi sono state verificate dalla SKG ed
attestate dalla KOMO ed è stata redatta una perizia (assessment) a norma EN 1634-1,
EN 13501-1 e AS 1530-4/7.
xx
Botole Gorter antiesplosione
Le botole antiesplosione sono costruite in alluminio e sono provviste di un sistema
ERC - “explosion release control” - (brevetto no. 2000112). Il sistema ERC fa aprire la botola
appena la pressione da sotto supera i 100 kg. Norma attuale: EN 1991-1-7:2006.
xx
Prestazioni
Isolamento termico Rc
Isolamento acustico
Resistenza al vento
ed acqua
Valore costruttivo
Passaggio d’aria
Peso pedonabile
Impiego
RHT / RHTX
: 3,57 m2.K/W
: 27 dB
: 650 Pa
:
:
:
:
(U=0,28)
± 3000 Pa
0,5 m3/hm
1070 kg/m2
comune, anche su costruzioni molto alte
4
Vi preghiamo di visitare il nostro sito www.gortergroup.com per avere sempre le istruzioni di montaggio e d’uso aggiornate.
Montaggio e uso delle botole da tetto
Manutenzione
xx Per garantire un lungo impiego del prodotto raccomandiamo di pulirò regolarmente perché
xx
xx
xx
sporco e detriti possono provocare malfunzioni. Cerniere e punti di chiusura devono avere
una manutenzione annua, usando del lubrificante.
Sconsigliamo l’uso di prodotti a base di acidi, aggressivi, in quanto possono subire dei danni
le parti in gomma (guarnizioni ecc.) e la protezione anticorrosione.
Per la pulizia dei pistoni a gas consigliamo l’uso di un panno umido, evitare altri prodotti.
Se la vernice a polveri su una botola antincendio in acciaio è stata danneggiata bisogna
provvedere immediatamente al ritocco con lo stesso colore (RAL 7011 esterno e RAL 9010
interno) per evitare la formazione di corrosione. Le botole in alluminio hanno una mano
di fondo anticorrosione, tuttavia per motivi estetici anche su queste ritocchi sono possibili
(RAL 9010 interno e RAL 7047 esterno).
Ispezione annua:
Stringere le viti e perni se necessario.
Pulire le cerniere e lubrificare.
La verniciatura rimane lucida usando spray protettivi tipo “car polish”.
xx
xx
xx
In caso di malfunzione oppure danni prego contattare il fornitore.
Informazione di sicurezza
Botole antincendio devono essere assolutamente chiuse e rimanere chiuse dopo l’uso!
La botola di accesso al tetto viene arretata automaticatamente se aperta. Puó essere chiusa con
una sola mano. In fase di permanenza sul tetto la botola chiusa rappresenta una protezione contro
la caduta accidentale nel foro. La botola puó essere riaperta anche dall’esterno, usando l’apposita
chiave fornita in tre copie all’acquisto.
Garanzia
Se, in condizioni normali d’uso, un componente della botola entro i 10 anni dalla fornitura non dovesse
funzionare correttamente oppure rompersi, la Gorter lo sostituirà gratuitamente. Tutti i componenti ed
i ricambi possono essere montati oppure sostituiti senza la necessità di attrezzature speciali.
Sono esclusi dalla garanzia:
xx Uso non corretto del prodotto
xx Danni dovuti al trasporto
xx Montaggio non eseguito a regola d’arte
xx Schade door niet aanpassen van de positie van ontgrendeling en handleuning
naar uitstapzijde
5
La GORTER é certificata EN-ISO-9001
User Information roof hatch
Declaration
General performance
EN
xx The general performance is tested by Stichting Kwaliteit Gevelbouw (SKG) in Wageningen (NL)
and KOMO® attested. SKG is a European Notified Body No. 0960, accredited by the Dutch
Accreditation Council under ISO/IEC17025:2005 and EN45011:1998. All roof hatches and
combinations are certified by TÜV.
Safety
Safety is approved under International Health and Safety Regulations, EN1050, EN-ISO14122,
EN131 and NEN2484 by Aboma, a qualified and licensed safety approving institution. The reports
are useful documents in terms of the risk and safety analysis of a building.
xx
Fire rating and smoke protection
Fire rating and smoke protection are approved by SKG, KOMO® attested and completed with
assessments under EN1634-1, EN13501-1 and AS1530-4/7.
xx
Explosion venting (RHTX)
Aluminium roof hatches as an explosion vent are provided with an Explosion Release Control
(Patent Nr. 2000112). The ERC releases the explosion vent if the pressure on the inside cover
exceeds approx.100 kg. Actual standard EN1991-1-7:2006.
xx
Performance
Rc-value
Acoustic damping
Wind and water proof
Construction strength
Air permeability
Snow load
Application
:
:
:
:
:
:
:
RHT / RHTX
3,57 m2.K/W (U = 0,28)
27 dB
650 Pa
± 3000 Pa
0.5 m3/hm
1070 kg/m2
general, also on higher roofs
6
Please visit our website www.gortergroup.com to download the most recent manual.
User Information roof hatch
Maintenance
xx To guarantee long and trouble free service, it is important that the hatch is kept clean.
xx
xx
xx
Dirt may cause loss of function. Rotating points must be cleaned at least once a year and a small
amount of Teflon spray should be applied to the moving parts.
Do not apply any aggressive or corrosive cleaning products, as these will corrode the rubber
parts and affect the corrosion protection.
Clean the rod of the gas loaded spring(s) with a soft cleaning-rag. Do not use scouring pads.
To prevent rust formation, repair any damage to the powder coated surface of steel fire rated
roof hatches immediately. The standard colours of a steel fire rated roof hatch are
RAL7011 (outside) and RAL9010 (inside). Aluminium is self-protecting and therefore does not
require immediate repair to any incurred damage.
Check once a year:
Check fastening of screws and bolts and correct any faults.
Clean and apply a small amount of Teflon spray on all moving and gliding parts.
Clean powder coated surfaces. Treat them with a regular car wax for better results.
xx
xx
xx
Please consult your supplier in case of failure or damage.
Safety Information
Close fire doors after use and keep closed!
The roof hatch automatically locks in the open position and can be released with one hand.
Fall prevention: keeps cover shut while on the roof. The cover can be opened from the outside.
Warranty
Should a part fail to function in normal use within a period of 10 years from the date of delivery, the
part will be replaced at no charge. No special skills or tools are required to install the parts.
Excluded from warranty are:
xx Improper application
xx Damage at the construction site
xx Incorrect installation
xx Damage due to failure to move the position of the latch and hand rail to the exit side
7
Gorter is an EN-ISO-9001 certified company
Benutzerinformation Dachluken
Erklärung
Allgemeine Leistung
DE
xx Die allgemeine Leistung ist überprüft von der Stichting Kwaliteit Gevelbouw (SKG) in
Wageningen (NL) und KOMO® attestiert. SKG ist eine europäische benannte Prüfstelle (notified
body) Nr. 0960, die durch den niederländischen Akkreditierungsrat nach ISO/IEC 17025-2005 und
EN45011:1998 akkreditiert wurde. Alle Dachluken und Kombinationen sind TÜV-zertifiziert.
Sicherheit
Die Sicherheitsbeurteilungen sind nach den internationalen Arbeits- und Gesundheitsschutzbestimmungen, EN1050, EN-ISO14122, EN131 und NEN2484 von Aboma ausgeführt.
Die Berichte können als Dokumente bei der Risiko- und Sicherheitsbeurteilung eines Gebäudes
benutzt werden. Aboma ist ein anerkanntes Überprüfungsinstitut im Bereich der Sicherheit am
Bau und in Gebäuden.
xx
Brand- und Rauchschutz
Die Brand- und Rauchschutzklassen wurden von der SKG überprüft, von KOMO attestiert und
um ein Gutachten (Assessment) nach EN 1634-1, EN 13501-1 und AS 1530-4/7 ergänzt.
xx
Explosionsentlastende Dachluken (RHTX)
Explosionsentlastende Dachluken werden aus Aluminium gefertigt und sind mit einer
Explosion Release Control (Patentnr. 2000112) ausgestattet. Die ERC öffnet die Dachluke, sobald
ein Druck von etwa 100 kg an der Innenseite des Deckels überschritten wird. Aktuelle Norm
EN1991-1-7:2006.
xx
Leistungen
Rc-Isolationwert
Schalldämpfung
Wind- und
Wasserdichtigkeit
Konstruktionsstärke
Luftdurchlässigkeit
Belastbarkeit
Anwendbarkeit
RHT / RHTX
: 3,57 m2.K/W (U = 0,28)
: 27 dB
: 650 Pa
:
:
:
:
± 3000 Pa
0,5 m3/hm
1070 kg/m2
allgemein, auch auf höheren Dächern
8
Bitte besuchen Sie unsere Website unter www.gortergroup.com, um die neuesten Bedienungsanleitungen herunterzuladen.
Benutzerinformation Dachluken
Pflege
xx Um eine langlebige Funktion zu gewährleisten, sollte die Luke regelmäßig gereinigt werden.
xx
xx
xx
Schmutzbildung kann eine Störung verursachen. Vor allem sollten die Drehpunkte einmal pro
Jahr gereinigt und mit einem Teflonspray o.ä. geschmiert werden.
Von der Benutzung aggressiver Reinigungsmitteln wird abgeraten, weil sie die Gummiteile und
den Korrossionsschutz angreifen könnten.
Bei der Reinigung der Kolbenstange der Gasfedern sollte ein weiches Tuch benutzt werden.
Der Gebrauch eines Scheuerschwamms sollte vermieden werden.
Falls die Pulverbeschichtung einer hochfeuerhemmenden stählernen Dachluke beschädigt wurde,
sollte die Pulverbeschichtung möglichst umgehend mit derselben Farbe ausgebessert werden,
um eine Rostbildung zu verhindern. Die Standardfarben der hochfeuerhemmenden stählernen
Dachluke sind RAL7011 (Außenseite) und RAL9010 (Innenseite). Dachluken aus Aluminium sind
selbstschützend. Eine Nachbesserung aus kosmetischen Gründen ist jedoch möglich.
Jährliche Inspektion:
Schrauben und Bolzen falls notwendig nachziehen.
Drehpunkte reinigen und mit Teflonspray schmieren.
Die Pulverbeschichtung bleibt länger ansehnlich, wenn Sie sie nach der Reinigung mit einem
Autopflegemittel behandeln.
xx
xx
xx
Bitte nehmen Sie bei Störungen oder Schäden
Kontakt mit Ihrem Lieferant auf.
Sicherheitsinformation
Brandschutzluken nach der Benutzung schließen und geschlossen halten!
Die Dachluke wird in geöffneter Stellung automatisch arretiert und mit einer Hand entriegelt.
Beim Dachaufenthalt bildet die geschlossene Dachluke einen Schutz vor dem Hineinfallen.
Die Dachluke läßt sich von außen öffnen.
Garantie
Sollte ein Teil bei normaler Benutzung innerhalb eines Zeitraums von zehn Jahren ab dem
Lieferdatum nicht richtig funktionieren oder einen Defekt aufweisen, werden wir es kostenlos
ersetzen. Alle Teile können ohne spezielle Kenntnisse oder Spezialwerkzeuge installiert werden.
Ausgeschlossen von der Garantie sind:
xx Unzweckmäβiger Gebrauch
xx Beschädigung auf der Baustelle
xx Unsachgemäβe Montage
xx Beschädigung infolge der verkehrten ausstiegsseitigen Position der Entriegelung
und des Handlaufs
9
Gorter ist EN-ISO-9001 zertifiziert
10
11
1
12
IT
xx Prego rimuovere l’imballo e controllare il contenuto (fig. 1).
xx Montaggio su tetti normali con coperture in acciaio, cemento o legno; pendenza massima 30°.
EN
xx Remove packaging and check contents (fig. 1).
xx Installation on insulated and non-insulated steel, concrete and wooden roofs. Roof pitch up to 30°.
DE
xx Bitte entfernen Sie die Verpackung und überprüfen Sie den Inhalt (Abb. 1).
xx Montage auf isolierte und nicht isolierte Stahl-, Beton- und Holzdächer. Dachneigung bis 30°.
2A
*
2B *
2
1
not/not/nicht RHTX
* RHT 7090/9090/7014/1015/1212 → 1 point lock, 1 point lock, 1 Punktverriegelung
IT
xx Aprire la botola con l’apposita chiave facente parte della fornitura. Il coperchio si bloccherà
xx
EN
xx Open the roof hatch with the key supplied. The hatch will lock itself in the open position (fig. 2A).
xx
DE
a 90° (fig. 2A). Per chiuderlo (fig. 2B) premere il gancetto rosso presente sul pistone a gas per
sbloccarlo. Chiudere il coperchio tirando verso il basso l’apposita maniglia (2). Aprire e chiudere
più volte il coperchio per verificare il buon funzionamento della chiusura a cilindro.
Se si verificano dei problemi dopo il montaggio, bisogna tarare le contropiastrine (vedi passo 8B).
To close the roof hatch (fig. 2B), you need to push the “press to unlock” button (1) to unlock the
gas spring. Pull the grip (2) to close the roof hatch. Open and close the roof hatch a few times
and check that the lock is working properly.
If you come across problems after installation, you must adjust the face-plates, see step 8B.
xx Öffnen Sie die Dachluke mit dem mitgelieferten Schlüssel. Die Luke wird sich in der geöffneten
xx
Stellung selbst arretieren (Abb. 2A). Zum Schließen der Dachluke (Abb. 2B) drücken Sie auf den
Entriegelungsknopf (1), um die Gasfeder zu entriegeln. Schließen Sie die Dachluke, indem Sie
an der Stütze (2) ziehen. Öffnen und schließen Sie die Dachluke mehrmals und kontrollieren Sie,
ob das Schloss korrekt funktioniert.
Sollten Sie nach dem Montieren Probleme feststellen, müssen die Schlossplatten eingestellt
werden; siehe Schritt 8B.
13
3A
3B
Type RHT
X
3C
3D
< 180 mm
> 180 mm
X
IT
x
x
x
EN
x
x
x
DE
x
x
x
14
Posizionare la botola sopra il foro e controllare a coperchio aperto se la botola coincide con
l’apertura del foro nella soletta (vedi 3A oppure 4A).
Girare le piastrine di fissaggio (modello RHT vedi immagine 3B) oppure la flangia
(modello RHTX vedi immagine 3C).
Se il materiale isolante supera i 180 mm, consigliamo di predisporre uno spessore in legno
o altro per alzare la botola della misura necessaria (vedi immagine 3D).
Posizionamento normale = spessore del materiale isolante meno 180 mm.
Place the hatch over the roof opening and check with the cover open that the hatch is properly
aligned with the opening in the roof (fig. 3A or fig 4A).
Place the mounting tabs (spread out as per fig. 3B) directly on the roof deck (fig. 3C).
If the roof insulation material exceeds 180 mm we recommend installing the mounting tabs on
a structural (e.g. timber or concrete) upstand (fig. 3D). The height of the upstand should equal
the thickness of insulation material minus 180 mm.
Platzieren Sie die Luke über der Dachöffnung und kontrollieren Sie bei geöffnetem Deckel, ob
die Luke korrekt mit der Öffnung im Dach fluchtet (Abb. 3A oder Abb. 4A).
Stellen Sie die Montagelippen (Ausklappen wie in Abb. 3B dargestellt) direkt auf die
Dachoberfläche (Abb. 3C).
Wenn eine Isolationsstärke von 180 mm überschritten wird, empfehlen wir, den Montagelippen
auf einem bauseitigen Aufbau (z.B. aus Holz) zu montieren (Abb. 3D).
Aufbauhöhe = Isolationsstärke minus 180 mm.
4A
4C
X
T
X
T
4B
A=B
B
IT
xx Per potere rivestire l’apertura in soletta è necessario che la stessa sia ingrandita/allargata sui lati
xx
xx
EN
X e T (immag. 4A) dello spessore del rivestimento stesso.
Vedi anche immagine 7 – rivestimento soletta
Posizionate il telaio in modo tale che non possa avere torsioni (immagine 4B).
Potrebbe rendersi necessario riempire eventuali spessori tra la superfice della soletta e
basamento del telaio usando apposito materiale.
Si raccomanda la posa e la verifica che la botola sia in bolla sempre con coperchio CHIUSO.
(immagine 4C)
xx If the roof opening is clad with panels, it will be necessary to enlarge the dimensions of the
xx
xx
DE
=
A
opening size by the thickness of the panels around the perimeter (X + T) (fig. 4A).
Also see step 7 - Interior panelling of the structural roof opening.
Check the curb on the roof, ensuring the hatch is torsion free after fastening (fig. 4B).
If necessary, fill the gaps between the hatch and roof deck with suitable material.
Always fit with closed cover (fig. 4C).
xx Für eine Verkleidung der Dachöffnung muss die Aussparung um die Panelenstärke rundum
xx
xx
vergrößert werden (X + T) (Abb. 4A).
Siehe auch Schritt 7 - Innenverkleidung der Rohbauöffnung
Platzieren Sie den Aufsatzkranz so, dass er nach der Befestigung nicht tordieren kann (Abb. 4B).
Es könnte notwendig sein, die Spalte zwischen Dachoberfläche und Dachluke mit
geeignetem Füllmaterial auszustopfen.
Führen Sie die Montage immer bei geschlossenem Deckel durch (Abb. 4C).
15
5
IT
Fastening of the roof hatch and the roofing
Fissare la botola al tetto usando gli appositi fori predisposti sui ganci girevoli (modello RHT)
oppure nel telaio (modello RHTX). Usare materiale addatto come viti e rondelle in acciaio inox.
Attenzione carpentieri - il telaio ha l’isolamento tutt’intorno ed è previsto di un profilo
particolare per un perfetto raccordo con la guaina in modo da essere a tenuta stagna.
Il profilo di colore azzurro a 90° come nell’immagine sopra non fa parte della fornitura ed è a
carico del carpentiere.
x
x
x
EN
Fastening of the roof hatch and the roofing
Use all the mounting tabs for proper mounting of the hatch. Ensure that the appropriate fasteners are used.
Attention roofer - The curb is provided with a special profile around the perimeter for a perfect
finish with the roof covering material. The curb is already provided with insulation material.
Supply of the triangular roofing profile shown by roofer.
x
x
x
DE
Befestigung der Dachluke und der Dacheindeckung
Verwenden Sie alle Montagelippen zur richtige Befestigung der Luke. Verwenden Sie
geeignetes Befestigungsmaterial.
Achtung Dachdecker - Der Aufsatzkranz ist werkseitig rundum isoliert und mit einem Sonderprofil
zur wasserdichten Anbindung der Dachbedeckung versehen.
Lieferung des abgebildeten Eckprofils durch den Dachdecker.
x
x
x
16
6
Rivestimento del foro in soletta
L’apertura nella soletta può essere allargata dello spessore del materiale di rivestimento, p.e.: 18 mm.
Lo spessore del telaio della botola è abbastanza largo (70 mm) da permettere comunque un
comodo fissaggio in soletta. Le dimensioni nette di passaggio, dopo avere rivestito il foro,
dovrebbero coincidere con le misure di passaggio della botola (vedi anche immagine no. 3C e 3D).
IT
x
EN
Interior panelling of the structural opening
The flange width (70 mm) is large to allow the interior of the structural opening in the roof to
be clad with panelling such as 18 mm MDF or sheet metal. The internal opening of the panelling should be equal to the opening size of the hatch and finished flush with the inside opening
of the roof hatch, and should fit tightly against the bottom of the flange (also see fig. 3C en 3D).
DE
Innenverkleidung der Rohbauöffnung
Die Dachöffnung kann um die Stärke des Verkleidungsmaterials vergrößert werden, z.B. 18 mm.
Die Flanschbreite von 70 mm bietet genügend Auflagefläche, um die Luke am Dach zu
befestigen. Die inneren Verkleidungsabmessungen sollten dem Durchgangsmaß der Luke
entsprechen. Die Verkleidung sollte stabil und gerade an der Unterseite der Luke anliegen
(siehe auch Abb. 3C und 3D).
x
x
17
7
IT
Check the position of the hand rail and latch release
The hand rail and the damper with the latch release must be installed in the exit direction
according to the image above.
If necessary, unscrew the hand rail and the two dampers. Move the railing and switch the
two dampers.
After switching and moving the elements, tighten all the bolts securely.
x
x
x
EN
Check the position of the hand rail and latch release
The hand rail and the damper with the latch release must be installed in the exit direction
according to the image above.
If necessary, unscrew the hand rail and the two dampers. Move the railing and switch the
two dampers.
After switching and moving the elements, tighten all the bolts securely.
x
x
x
DE
Position des Handlaufs und der Entriegelung prüfen
Der Handlauf und die Gasdruckfeder mit der Entriegelung müssen gemäß der obigen
Abbildung in der Ausstiegsrichtung angebracht werden.
Schrauben Sie bei Bedarf den Handlauf und die beiden Gasdruckfedern los. Verlagern Sie den
Handlauf und tauschen Sie die beiden Gasdruckfedern.
Drehen Sie nach dem Wechsel und der Verlagerung alle Schrauben und Muttern dieser Teile
fest an.
x
x
x
18
8A
*
8B
2
*
1
3
* not/not/nicht RHTX
** RHT 7090/9090/7014/1015/1212 → 1 point lock, 1 point lock, 1 Punktverriegelung
IT
xx Controllare che la botola chiuda bene, aprendo e chiudendo più volte (immagine 8A).
Se ci sono problemi, bisogna intervenire sulle contropiastre (immagine 8B).
xx Aggiustamento contropiastre: Smontare le piastrine (2) e (3) e posizionare bene la piastra
(1), in modo che la chiave si giri facilmente. Dopo rimontare la piastra (2) e riprovare a
chiudere e, se funziona bene, alla fine fissare la piastra (3) e tararla bene.
EN
xx Check that the roof hatch closes properly by opening and closing it a few times (fig. 8A).
If you come across problems, you need to adjust the face-plates (fig. 8B).
xx Adjust face-plates: Remove face-plate (2) and (3) and adjust face-plate (1) so that the key can
turn smoothly in the closed position. Fit face-plate (2) again and check that the lock still turns
smoothly in the closed position. If so, fit plate (3) and adjust it until the lock closes easily.
DE
xx Kontrollieren Sie, ob die Dachluke gut schließt, indem Sie sie mehrmals öffnen und schließen
(Abb. 8A). Wenn Sie Probleme feststellen, müssen die Schlossplatten eingestellt werden (Abb. 8B).
xx Einstellen der Schlossplatten: Demontieren Sie die Schlossplatten (2) und (3) und stellen
Sie die Schlossplatte (1) so ein, dass sich der Schlüssel bei geschlossener Dachluke leicht drehen
lässt. Montieren Sie die Schlossplatte (2) wieder und kontrollieren Sie, ob sich das Schloss in
der geschlossenen Stellung noch immer leicht drehen lässt. Ist dies der Fall, montieren Sie die
Schlossplatte (3) und stellen Sie sie so ein, dass das Schloss leichtgängig schließt.
19
Gorter Group
Hungary
Gorter Hungary Kft.
Visit address:
Harmenkaag 1
NL-1741 LA SCHAGEN
THE NETHERLANDS
6000 Kecskemét Sás Utca 21
HUNGARY
Postbus 265
NL-1740 AG SCHAGEN
THE NETHERLANDS
Tel:
Fax:
E-mail:
Website:
+31 224 21 98 60
+31 224 21 98 61
[email protected]
www.gorterluiken.nl
Belgium and Luxembourg
Gorter - Obelux
Meersbloem - Leupegem 21
B-9700 OUDENAARDE
BELGIUM
Tel:
Fax:
E-mail:
Website:
+32 5 523 2590
+32 5 531 9126
[email protected]
www.obelux.be
Germany
Gorter Deutschland BV
Postfach 265
NL-1740 AG SCHAGEN
THE NETHERLANDS
ZEVEN
Tel:
Fax:
+49 4281 9593045
+49 4281 9593064
Phone:
Fax:
E-mail:
Website:
+36 76 546013
+36 76 546010
[email protected]
www.gorterhungary.hu
Italy
Gorter Italia™
Via Nazionale 64
39040 Ora (BZ)
Phone:
Fax:
E-mail:
Website:
+39 0471 810089
+39 0471 810875
[email protected]
www.gorter.it
Russia
Gorter Russia™
E-mail:
[email protected]
Website: www.gorter.ru
Switzerland and Liechtenstein
Gorter Schweiz GmbH
Juchstrasse 4
CH-4312 MAGDEN
SWITZERLAND
Tel:
Fax:
E-mail:
Website:
+41 61 843 17 18
+41 61 843 17 19
[email protected]
www.gorter.ch
FRANKFURT AM MAIN
Tel:
+49 69 509575727
Argentina
Gorter Argentina™
E-mail:
[email protected]
Website: www.gorterdeutschland.de
Juan Agustín García 1111
(1416) BUENOS AIRES
ARGENTINA
United States and Canada
Gorter of North America
E-mail:
[email protected]
Website: www.gorterusa.com
Phone:
Fax:
E-mail:
Website:
+54 11 4582 2011
+54 11 4588 2418
[email protected]
www.gorter.com.ar
New Zealand
Gorter Hatches™
AUCKLAND
Phone:
+64 9 280 4726
Fax:
+64 9 280 4727
E-mail:
[email protected]
Website: www.gorterhatches.co.nz
Australia, Asia and Middle East
Gorter Hatches Pty Ltd
PERTH
PO Box 2203
Yokine South, WA 6060
WESTERN AUSTRALIA
Phone:
+61 8 9463 6636
Fax:
+61 8 9463 6637
MELBOURNE
3/29-30 Grattan Street
Prahran, Melbourne
VICTORIA
Phone:
+61 3 8648 6636
Fax:
+61 3 8648 6637
ADELAIDE
Phone:
+61 8 8311 1136
Fax:
+61 8 8311 1137
BRISBANE
Phone:
+61 7 3337 9936
Fax:
+61 7 3337 9937
SYDNEY
Phone:
Fax:
+61 2 8580 4436
+61 2 8580 4437
E-mail:
[email protected]
Website: www.gorterhatches.com.au
©2014, Gorter Group™. Any illustrations and drawings only serve to provide an impression of the product; and do not constitute any legal obligation.
All rights and technical modifications reserved.
Design: www.emogy.nl 201407V26A
The Netherlands
Gorter Luiken BV
TM