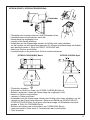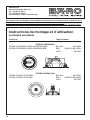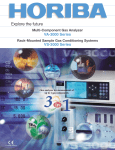
1
Wolfstall 54-56 D-42799 Leichlingen (Germany) Tel. +49 (0)21 74 799-0 Fax +49 (0)2174 799799 www.baero.com · E-Mail: [email protected] Montage- und Bedienungsanleitung Mounting and Operating Instructions Instructions de montage et d´utilisation Instrucciones de montaje y uso Installazione e istruzioni per l’uso Инструкция по монтажу и эксплуатации Einbauleuchten INTARA-CARINA(BH) Basic-MBFL Recessed fixtures INTARA-CARINA(BH) Basic-BBS Luminaire encastrés INTARA-CARINA Spot-MBFL Luminaria empotrada INTARA-CARINA Spot-BBS Fari da incasso INTARA-DRACO-MBFL Встроенный светильник INTARA-DRACO-BBS INTARA-PEGASUS Wall-MBFL INTARA-PEGASUS Wall-BBS Stand: 7-2011 Da unsere Erzeugnisse technischen Veränderungen / Optimierungen unterliegen, übernehmen wir keine Gewähr, dass alle Angaben immer aktualisiert sind. Bei Fragen steht Ihnen selbstverständlich unsere Abteilung Technik unter der Rufnummer +49 (0)2174 799-0 gerne zur Verfügung. Sicherheitshinweise für Betrieb und Montage von Leuchten beachten Wichtiger Hinweis für Leuchten mit BFL und BBS7E-bfl-Leuchtmitteln: Bei Flackern, Totalausfall oder sehr gelbem Licht (Lebensdauerende) sofort die Leuchte außer Betrieb setzen und das Leuchtmittel auswechseln. - Anschluss darf nur vom Elektriker ausgeführt werden - Bei Montage örtliche Vorschriften beachten - Die Leuchten sind anschlussfertig verdrahtet: - VDE 0711 - Schutzklasse I (Schutzleiteranschluss), IP 20 - Angaben auf Polybox und Leuchte sind zu beachten - Leuchtmittel, Leuchte und Polybox werden im Betrieb heiß - Leuchte und Polybox nicht mit Dämmmaterial abdecken - Bei Einbauleuchten ist ein Freiraum von mindestens 600 x 500 mm x Leuchtenhöhe einzuhalten. - Polyboxen nicht aufeinander legen - Hochspannung auf Ausgangsseite der Polybox; Lebensgefahr - Sind Leitungen der Polybox beschädigt, muss die Polybox ausgetauscht werden - Anschluss Polyboxen Netzseite: EVG: 220-240 V, 50/60 Hz - An einem Stromkreis (mit der Absicherung B16A) dürfen maximal betrieben werden: Watt 20 35 50 70 100 150 210 BFL Mini 24 14 BBS/e-BFL 18 12 24 12 7 8 13 - Die einschaltenden Relais (Schütze) sind für Schaltströme bis 50A / 500µs auszulegen - Nur bei netzseitig ausgeschalteter Leuchte Leuchtmittel wechseln - Bei Montage oder Reparatur einer Leuchte ist der Stromkreis abzuschalten - Der Lampe beigelegte Sicherheitshinweise beachten - Nach ca. 3 – 5 Minuten erreicht das Leuchtmittel seinen vollen Lichtstrom - Nach Abschalten oder Netzausfall benötigt das Leuchtmittel eine Abkühlzeit bis zum Wiederzünden. Die Leuchte zum Abkühlen vom Netz trennen. - Das EVG schaltet bei thermischer Überlastung, bei Lampenausfall und am Lebensdauerende der Lampe ab. Vor der Wiederinbetriebnahme der Leuchte muss das EVG von der Netzspannung getrennt werden. Dies gilt auch für den Lampenwechsel - Die zulässige Deckenlast beachten - Abstandshalter auf der Leuchte nicht entfernen oder verändern - Beschädigte Leitungen der Leuchte dürfen nur durch vom Hersteller gelieferte Leitungen ersetzt werden - Anschluss nur an geeignete Vorschaltgeräte mit entsprechender Lampenleistung - BFL Mini-Leuchten (50/100 W) nur mit elektronischem Vorschaltgerät (EVG) betreiben. - BBS/e-BFL, CDM-TC-Leuchten mit beschädigter oder zerbrochener Glasscheibe sind außer Betrieb zu setzen bis die Scheibe ersetzt ist. Die Lampe kann zerplatzen. - Abstand zur angestrahlten Fläche (Aufkleber im Reflektor) - 0,3 m bei BFL 35 / 50 / 100 W - 0,5 m bei BBS/e-BFL, CDM-TC 20 / 35 / 50 / 70 W - 1,0 m bei BBS/e-BFL 100 / 150 W - 1,5 m bei BBS/e-BFL 210 Watt - Nur das für die Leuchte zugelassene Leuchtmittel verwenden. Aufkleber im Reflektor oder Typenschild beachten - Hinweis für 3-Phasen-Betrieb: Vor und während Betrieb sicherstellen, dass der Neutralleiter an allen EVG-Leuchten ordnungsgemäß angeschlossen ist. - An Leuchten, Lichtrohren und Trägersystemen nichts anbringen, zum Beispiel Preistafeln, Deko-Elemente. EVG: Elektronisches Vorschaltgerät 2 As our products are subject to technical modifications, we cannot guarantee, that all information is always up to date. Please contact our technical department on +49 (0)2174 799-0 with any queries. Observe safety information for operating and installing lighting fixtures. Important information for fixtures with BFL and BBS/e-BFL lamps: When the light flickers or there is a total loss of power or very yellow light (signifying end of life), the fixture should be switched off immediately and the lamp replaced - The fixtures must only be connected by a fully qualified electrician - Observe all safety regulations when assembling - The fixtures are wired up ready for connection: - VDE 0711 - Protection class I (protective earth connection), IP 20 - Information provided on the Polybox and fixtures must be followed - Lamps, Fixtures and the Polybox become hot during use - Do not put polyboxes on top of each other - For recessed luminaires there must be clearance of at least 600 x 500 mm x luminaire height. - Do not cover the Fixtures or Polybox with insulating material - DANGER OF DEATH: High voltages are present at the output of the Polybox - The Polybox must be replaced if its cables are damaged - Polybox mains connections: Electronic ballast: 220-240 V, 50/60 Hz - The following maximum number of fixtures may be operated in a circuit (with a B16A fuse): W 20 35 50 70 100 150 210 BFL Mini 24 14 BBS/e-BFL 18 12 24 12 7 8 13 - The energizing relays (contactors) must be designed for switching current of up to 50A / 500µs - Only change lamps when mains power is disconnected - Observe the safety instructions included with the fixtures - The current in the fixture rises to its maximum within approx. 3 to 5 minutes - After being switched off, or following a mains failure, the lamp must cool down before being restarted. Disconnect the power from the fixture to allow it to cool down. - The electronic ballast is fitted with an internal overload. The ballast must be briefly disconnected from the mains supply for the overload to reset. - The electronic ballast switches off in the event of thermal overload, when the lamp fails and when the lamp reaches the end of its life. Before the fixture is put into operation again the electronic ballast must be disconnected from the power supply. This also applies when lamps are replaced - Do not remove or modify the fixtures spacers - If any of the internal wires of the fixture are damaged they must only be replaced by wires supplied by the manufacturer - Only connect to suitable ballast matching the fixture power - BFL Mini-fixtures (50/100 W) are only for operation with an electronic ballast - When the glass filter is damaged or broken in a BBS, CDM-TC fixture, the fixture must not be operated until the filter is replaced, because the lamp could explode. - Minimum distance to irradiated surface (adhesive label in reflector) - 0.3 m for BFL 35 / 50 / 100 W - 0.5 m for BBS/e-BFL, CDM-TC 20 / 35 / 50 / 70 W 100 / 150 W - 1.0 m for BBS/e-BFL 210 W - 1.5 m for BBS/e-BFL - Only use the lamp that is approved for the fixture. Observe the instructions on the adhesive label in the reflector or the type plate - Information for 3-phase operation: Before and during operation ensure that the neutral wire is properly connected on all fixtures with electronic ballasts - Do not attach anything to fixtures, light tubes and support systems, for example price boards or decorations. 3 Nos produits sont susceptibles d’être modifiés techniquement à tout moment. Nous ne pouvons de ce fait garantir que toutes les informations de cette fiche technique soient à jour. Notre service technique se tient à votre entière disposition pour toute information. +49 (0)2174 799-0 Se conformer aux consignes de sécurité pour l’exploitation et le montage de luminaires. Remarque importante pour les luminaires équipés d´ampoules BFL et BBS/e-BFL : Lors d´un vacillement de la lumière, d´un arrêt total ou lorsque la lumière devient très jaune (fin de la durée d´existence), éteindre immédiatement les luminaires et remplacer l´ampoule. - Le raccordement doit être effectué par un électricien - Lors du montage, respecter les consignes de sécurité spécifiques - Les luminaires sont câblés pour raccordement - VDE 0711 - Classe de protection I (conducteur de protection), IP 20 - Respecter les données figurant sur le Polybox et le luminaire - Lors du fonctionnement, les lampes, luminaires et Polybox chauffent - Ne pas couvrir les luminaires et les Polybox avec du matériau isolant - Pour les luminaires encastrables, il faut respecter un intervalle de 600 x 500 mm x hauteur du luminaire. - Ne pas poser les platines de commande l’une sur l’autre - Haute tension à la sortie du Polybox; danger de mort - Si les câbles du Polybox sont endommagés, échanger le Polybox - Raccordement du Polybox au réseau: ballast électronique: 220-240 V, 50/60 Hz - Ne faire fonctionner sur un circuit (avec la protection par fusible B16A) qu’au maximum : W 20 35 50 70 100 150 210 BFL Mini 24 14 BBS/e-BFL 18 12 24 12 7 8 13 - Les relais (contacteurs-interrupteurs) activés doivent être conçus pour des courants de commutation de jusqu’à 50 A / 500 µs - Ne remplacer la lampe qu’avec un luminaire hors tension - Observer les consignes de sécurité accompagnant la lampe - La lampe atteint son flux lumineux maximal après 3 à 5 minutes - Après avoir éteint ou en cas de panne de secteur, la lampe doit refroidir avant un rallumage. Déconnecter le luminaire pendant le refroidissement - Couper momentanément le bloc d’alimentation électronique du réseau après avoir déclencher le dispositif de sécurité. - Le ballast électronique s’éteind en cas de surcharge thermique ou si la lampe lâche ou si la lampe atteint sa fin de vie. Avant toute remise en service de l’installation, le ballast électronique doit être coupé de l’alimentation. Il en est de même pour le remplacement de lampes - Ne pas enlever ou modifier la protection du luminaire - Les câbles endommagés du luminaire ne peuvent être remplacés que par des câbles fournis par le fabricant - Raccordement exclusivement au ballast adéquat avec puissance de lampe correspondante - Utiliser les lampes BFL Mini (50/100 W) uniquement avec des Polybox électroniques - Les luminaires avec filtre endommagé ou cassé seront mis hors service jusqu’au remplacement de celui-ci. La lampe peut exploser - Distance par rapport à la surface éclairée (étiquette sur réflecteur) - 0,3 m pour BFL 35 / 50 / 100 W - 0,5 m pour BBS/e-BFL, CDM-TC 20 / 35 / 50 / 70 W - 1,0 m pour BBS/e-BFL 100 / 150 W - 1,5 m pour BBS/e-BFL 210 W - N’utiliser que des lampes correspondant au luminaire. Observer l’étiquette sur le réflecteur ou la plaque d’identification - Remarque pour le fonctionnement triphasé : Vérifier avant et pendant l´utilisation que le conducteur neutre est raccordé en bonne et due forme à tous les luminaires à bloc d´alimentation électronique. - Ne rien attacher d’aucune manière sur les luminaires, structures et supports comme par exemple tableaux de prix ou décorations. 4 Nuestros productos están sujetos a cambios técnicos u optimizaciones por ello no nos responsabilizamos que toda la informacion técnica este actualizada. En caso de preguntas, no vacile en llamar a nuestro Dpto. Técnico bajo el número de teléfono +49 (0)2174 799-0. Obsérvense las advertencias de seguridad durante la operación y el montaje de las luminarias. Información importante para luminarias con lámpara BFL y BBS/e-BFL: En caso de que la lámpara parpadee, pierda totalmente su potencia o dé una luz muy amarilla (final dela vida lámpara), des conectar la luminaria enseguida de la red y sustituir la lámpara. - La conexión sólo debe ser realizada por un electricista - Cumpla las disposiciones locales durante el montaje - Las lámparas se entregan con los cables listos para su conexión: - VDE 0711 - Clase de protección I (Conexión del conductor protector), IP 20 - Tenga en cuenta los datos que figuran en la Polybox y en la luminaria - La lampara, la luminaria y la Polybox se calientan cuando están en funcionamiento - No cubra la luminaria ni la Polybox con material aislante - Al instalar luminarias empotradas debe mantenerse una separación mínima de 600 x 500 mm x altura de la luminaria. - No desmontar el equipo electronico - Alta tensión en la salida de la Polybox: Peligro de muerte - Si los cables de la Polybox están dañados, reemplace esta última - Conexión de las Polybox, lado de la red: 230 V +6% -10%, 50Hz equipo electrónico: 220-240 V, 50/60 Hz - En un circuito (con protección por fusible B16A) pueden conectarse como máximo: W 20 35 50 70 100 150 210 BFL Mini 24 14 BBS/e-BFL 18 12 24 12 7 8 13 - Los relés conectados (contactores) tienen que dimensionarse para intensidades de conmutación de hasta 50A / 500 µs - Sólo cambie las lamparas con la luminaria desconectada de la red - Cumpla las instrucciones de seguridad adjuntas a la luminaria - La lampara alcanza su pleno flujo luminoso transcurridos entre 3 y 5 minutos. - Después del apagado o de un corte de corriente, la lampara requiere un período de enfriamiento para volver a encenderse. Desconecte la luminaria de la red para que se enfríe. - El equipo electronico ha de ser desconectado de la red una vez halla funcionado el circuito interno de seguridad - El equipo electrónico se desconecta en caso de sobrecarga térmica, fallo de una de las bombillas y al término de la vida útil de las mismas. Antes de activar de nuevo la lámpara deberá desconectarse de la red el equipo electrónico. Lo mismo debe tenerse en cuenta al efectuar un cambio de bombillas - No retire ni modifique los espaciadores de la luminaria - Sustituya los cables dañados de la luminaria únicamente por cables originales del fabricante - Realice la conexión únicamente a equipos de la capacidad adecuada - Luminarias BFL Mini (50/100 W) solo funcionan con equipos electrónicos - No utilice luminarias con cristales dañados o rotos hasta sustituirlos. La lámpara puede explotar. - Distancia minima a la superficie irradiada (Etiqueta en el reflector) - 0,3 m con BFL 35 / 50 / 100 W - 0,5 m con BBS/e-BFL, CDM-TC 20 / 35 / 50 / 70 W - 1,0 m con BBS/e-BFL 100 / 150 W - 1,5 m con BBS/e-BFL 210 W - Utilice únicamente las lamperas autorizadas para la luminaria. Consulte la etiqueta colocada sobre el reflector o la placa de tipo. - Infomación para el uso en tres fases: Antes y durante el uso asegurarse que el neutro este conectado a todos los equipos segun la normativa. - No colgar ni apoyar elementos extraños de las luminarias ni de los sistemas suspendidos. 5 I nostri prodotti sono soggetti a modifiche / migliorie tecniche costanti e pertanto non possiamo garantire che tutti i dati forniti siano stati aggiornati. Il nostro Ufficio Tecnico ‑ raggiungibile al numero di telefono +49 (0)2174 799-0 è a Vostra disposizione per eventuali domande in merito. Osservare le avvertenze per la sicurezza durante il funzionamento ed il montaggio dei fari Nota importante per fari dotati di lampade BFL e BBS/e-BFL: in caso di sfarfallamenti, spegnimento improvviso o luce molto giallastra (termine ciclo di vita) spegnere immediatamente il faro e sostituire la lampada. - L’allacciamento deve essere effettuato solo da un elettricista - Durante il montaggio osservare le norme locali - I fari sono pronti per l’allacciamento e dotati di cavi: - VDE 0711 - Classe di protezione I (collegamento a massa), IP 20 - Osservare le indicazioni riportate sul polybox e sul faro - Durante il funzionamento la lampada, il faro e il polybox si surriscaldano - Non posizionare i polybox a distanza l’uno dall’altro - Con fari da incasso rispettare uno spazio libero di almeno 600 x 500mm x altezza faro. - Dal polybox esce dell’alta tensione; pericolo di morte - Se i cavi del polybox sono danneggiati bisogna sostituire il polybox - Allacciamento dei polybox, lato rete: EVG: 220-240 V, 50/60 Hz - Su un circuito elettrico (con il fusibile B16A) possono operare al massimo: W 20 35 50 70 100 150 210 BFL Mini 24 14 BBS/e-BFL 18 12 24 12 7 8 13 - I relè di commutazione (teleruttori) devono essere dimensionati per correnti d’inserzione fino a 50A /500 µs - Sostituire le lampade solo quando i fari non sono più allacciati alla rete elettrica - Osservare le indicazioni sulla sicurezza contenute nella confezione del faro - La lampada raggiunge il pieno flusso luminoso dopo ca. 3-5 minuti - Dopo lo spegnimento o interruzione dell’erogazione di corrente la lampada richiede un periodo di raffreddamento prima di poter accendere nuovamente il faro. Per il raffreddamento staccare il faro dalla rete elettrica. - Dopo che è scattato il fusibile interno bisogna separare per breve tempo l’unità ausiliaria elettronica dall’alimentazione di corrente - L’alimentatore elettronico si disattiva in caso di sovraccarico termico, spegnimento delle lampade e al termine della durata di vita delle lampade. Prima di riaccendere il faro staccare l’alimentatore dalla tensione di rete. Procedere allo stesso modo anche in caso di sostituzione delle lampade - Non rimuovere o spostare il distanziatore sul faro - Eventuali cavi danneggiati del faro possono essere sostituiti solo con cavi forniti dal produttore. - Allacciare solo ad un ballast adatto con potenza corrispondente a quella del faro. - Far funzionare le lampade mini BFL (50/100 W) solo con ballast elettronico (EVG) - I fari con copertura anteriore in vetro danneggiata o rotta devono essere spenti e tenuti spenti fino alla sostituzione della copertura. La lampada potrebbe scoppiare. - Distanza dalla superficie illuminata (vedere etichetta nel riflettore) - 0,3 m per lampade BFL 35 / 50 / 100 W - 0,5 m per lampade BBS/e-BFL, CDM-TC 20 / 35 / 50 / 70 W - 1,0 m per lampade BBS/e-BFL 100 / 150 W - 1,5 m per lampade BBS/e-BFL 210 W - Utilizzare solo lampade omologate per questo tipo di fari. Vedere l’etichetta nel riflettore o la targhetta con il tipo di modello - Nota per il funzionamento trifase: prima e durante il funzionamento assicurarsi che il conduttore neutro sia allacciato correttamente a tutte le unità ausiliare elettroniche (polybox) dei fari. - Non applicare nulla, p.e. tabelle con i prezzi, elementi decorativi ecc., su fari, strutture tubolari e sistemi portanti. EVG: Ballast elettronico 6 Так как на наши изделия распространяются технические изменения / меры по оптимизации, мы не берем на себя гарантии за то, что все данные соответствуют актуальному состоянию. С вопросами просьба обращаться в наш технический отдел по телефону номер +49 (0)2174 799-0. Осуществляя эксплуатацию и монтаж светильников, соблюдать указания по технике безопасности. - - - - - - - - Важное указание для светильников с лампочками BFL и BBS/e-BFL: при мигании, полном отказе или очень желтом свете (конец срока службы) немедленно отключить светильник и заменить лампочку. Подсоединение разрешается проводить только электрику. Проводя монтаж, соблюдать местные предписания. Светильники прошли электромонтаж и готовы к подсоединению: VDE 0711 класс защиты I (подключение защитного провода), IP 20 Соблюдать сведения, приведенные на приборе Polybox и на светильнике. в процессе эксплуатации лампочка, светильник и прибор Polybox нагреваются. Для встроенных светильников соблюдать свободное пространство как минимум 600 x 500 мм x высота светильника. - Не покрывать изоляционным материалом светильник и прибор Polybox. - Не ставить друг на друга приборы Polybox. - Высокое напряжение на стороне выхода Polybox; опасность для жизни. - Если провода прибора Polybox повреждены, необходимо заменить прибор Polybox. - Подсоединение приборов Polybox со стороны сети: EVG: 220-240 В, 50/60 Гц - В одной цепи тока (с предохранителем B16A) разрешается эксплуатировать не более: Вт 20 35 50 70 100 150 210 BFL Mini 24 14 BBS/e-BFL 18 12 24 12 7 8 13 - Включаемые реле (контакторы) следует подбирать, исходя из коммутационного тока до 50А / 500 µсек - Заменять лампочки только тогда, когда светильник отключен от сети. - При монтаже или ремонте светильника отключать цепь тока. - Соблюдать указания по безопасности, приложенные к лампе. - Спустя прибл. 3 - 5 минуты лампочка достигает своего полного светового тока. - После отключения или отказа сети лампочке требуется время для охлаждения, прежде чем она опять зажжется. Для охлаждения отсоединять светильник от сети. - EVG отключается при тепловой перегрузке, отказе лампы и в конце срока службы лампы. Перед повторным вводом светильника в эксплуатацию необходимо отсоединить EVG от сетевого напряжения. Это правило распространяется и на замену ламп. - Соблюдать допустимую нагрузку на перекрытие. - Не удалять или изменять распорки на светильнике. - Поврежденные провода светильника разрешается заменять только на провода, поставленные заводом-изготовителем. - Подсоединять только к подходящим предвключаемым приборам с лампами достаточной мощности. - Эксплуатировать светильники BFL Mini (50/100 Вт) только с электронным предвключаемым прибором (EVG). - Вывести из эксплуатации светильники BBS, CDM-TC с поврежденным или разбитым стеклом до тех пор, пока не будет заменено стекло. Лампа может лопнуть. - Расстояние до облучаемой поверхности (наклейка в рефлекторе): - 0,3 м для BFL 35 / 50 / 100 Вт - 0,5 м для BBS/e-BFL, CDM-TC 20 / 35 / 50 / 70 Вт - 1,0 м для BBS/e-BFL 100 / 150 Вт - 1,5 м для BBS/e-BFL 210 Вт - Использовать только допущенные для светильника лампочки. Соблюдать наклейку в рефлекторе или фирменную табличку с параметрами. - Указание для 3-фазного режима эксплуатации: до эксплуатации и во время нее обеспечить, чтобы нейтральный провод был надлежащим образом подсоединен ко всем светильникам EVG. - Не размещать ничего на светильниках, световых трубках и несущих системах, например, ценники, декоративные элементы. EVG: электронный предвключаемый прибор 7 Reinigung der Leuchten Die Leuchten sollten mindestens einmal im Jahr gereinigt werden, gegebenenfalls auch öfters. Trennen Sie die Leuchten vor der Reinigung vom Netz. Verwenden Sie keine scheuernden oder aggressive Reinigungsmittel. Das Leuchtengehäuse mit einem trockenen – bei stärkerer Verschmutzung mit einem feuchten -, weichen Tuch reinigen. Eventuell angebrachte Filterscheiben reinigen Sie mit einem weichen trockenen Tuch, bei stärkerer Verschmutzung mit einem Glasreiniger. Dazu die Filterscheibe von der Leuchte entfernen. Die Reflektoren mit einem weichen Vliestuch reinigen. Bei stärkerer Verschmutzung befeuchten Sie das Tuch mit entspanntem Wasser. Bei LED-Leuchten entfernen Sie den Staub von Kühlkörper oder Lüfter. Einbauleuchten müssen dazu ausgebaut werden. Eine funktionierende Kühlung ist wichtig für Lichtausbeute und Lebensdauer der Leuchte. Achten Sie darauf, dass elektrische Komponenten der Leuchte nicht nass werden. Cleaning the luminaires The luminaires should be cleaned at least once a year, or more frequently if necessary. Disconnect the luminaires from the power supply before cleaning. Do not use any abrasive or aggressive cleaning agents. Clean the luminaire housing with a soft dry cloth – or a damp cloth if necessary. Clean any filter discs with a soft dry cloth, or with glass cleaner if necessary. For this remove the filter disc from the luminaire. Clean the reflectors with a soft fleece cloth. If this is not sufficient to remove dirt, moisten the cloth with low-surfacetension water. Take care to ensure that the electrical components of the luminaire do not become wet. For LED luminaires remove the dust from the heat sink or ventilator. Recessed luminaires must be dismantled for this. Functioning cooling is important for the luminous efficacy and service life of the luminaire. Take care to ensure that the electrical components of the luminaire do not become wet. Nettoyage des luminaires Les luminaires doivent être nettoyés au moins une fois par an ou même plus souvent si nécessaire. Avant de nettoyer les luminaires, mettez-les hors tension. N’utilisez pas de nettoyants abrasifs ou agressifs. Le boîtier du luminaire doit être nettoyé avec un chiffon doux et sec – ou humidifié en cas de fort encrassement. Si les luminaires sont dotés de disques filtrants, nettoyez ces derniers à l’aide d’un chiffon doux et sec. En cas de fort encrassement, utilisez un nettoyant pour vitres. Le disque filtrant doit alors être retiré du luminaire. Nettoyez les réflecteurs avec un chiffon doux non tissé. En cas de fort encrassement, humidifiez le chiffon dans de l’eau contenant quelques gouttes de produit vaisselle. Faites bien attention à ne pas mouiller les composants électriques du luminaire. Avec les luminaires à LED, éliminez la poussière sur le refroidisseur ou ventilateur. Les luminaires encastrés doivent pour cela être démontés. Le bon fonctionnement du refroidissement est important pour le rendement et la durée de vie du luminaire. Faites bien attention à ne pas mouiller les composants électriques du luminaire. 8 Limpieza de las luminarias Conviene limpiar las luminarias por lo menos una vez al año (en caso necesario, con mayor frecuencia). Antes de proceder a su limpieza, desconecte las luminarias de la red. No utilice detergentes abrasivos ni agentes agresivos. Pase un paño suave seco para eliminar la suciedad de la carcasa de la luminaria; si no consigue eliminarla por completo, humedezca ligeramente el paño. En caso de haber instalado discos de filtro, estos deberán limpiarse con un paño suave seco; si no es suficiente, utilice limpiacristales. Para ello habrá que desmontar el disco de filtro de la luminaria. Limpiar los reflectores con una gamuza suave. Si no es suficiente, humedezca el paño con agua de baja tensión superficial. Asegúrese de que los componentes eléctricos de la luminaria no entren en contacto con el agua. En caso de luminarias LED, debe eliminarse el polvo de los disipadores de calor o ventiladores. Para este fin es necesario desmontar las luminarias empotradas. Una buena refrigeración es decisiva para el rendimiento luminoso y la durabilidad de la luminaria. Pulizia dei fari I fari dovrebbero essere puliti almeno una volta all’anno, se possibile anche più spesso. Prima di pulire il faro separarlo dall’alimentazione elettrica. Non utilizzare prodotti abrasivi o aggressivi. Pulire il corpo del faro con un panno asciutto; in caso di sporco tenace utilizzare un panno morbido inumidito. Pulire eventuali filtri montati con un panno morbido e asciutto; in caso di sporco tenace usare un prodotto per la pulizia dei vetri. Per pulirlo, rimuovere il filtro dal faro. Pulire i riflettori con un panno TNT morbido; in caso di sporco tenace inumidire il panno con acqua a bassa tensione superficiale (acqua saponata). Fare attenzione a non bagnare i componenti elettrici del faro. Nel caso di fari a LED rimuovere la polvere dal dispositivo di raffreddamento o dal ventilatore. A tale scopo smontare i fari da incasso. È importante che il raffreddamento funzioni, per preservare la resa luminosa e la durata del faro. Очистка светильников Следует чистить светильники не реже одного раза в год, а при необходимости и чаще. Перед очисткой отсоедините светильники от электрической сети. Не пользуйтесь абразивными или агрессивными средствами для очистки. Протереть корпус светильника сухой, а при наличии сильных загрязнений влажной мягкой тряпкой. Возможно имеющиеся фильтровые стекла чистятся мягкой сухой тряпкой, а при наличии сильных загрязнений – средством для чистки стекла. Для этого фильтровальное стекло снимается со светильника. Рефлекторы следует чистить мягкой салфеткой из нетканого материала. При наличии сильных загрязнений смочите тряпку дистиллированной водой. Следите за тем, чтобы электрические узлы светильника не становились мокрыми. В светильниках на светодиодах (СИД) удалите пыль с охладителя или с вентилятора. Для этого необходимо демонтировать встроенные светильники. Работающее охлаждение имеет важное значение для светоотдачи и для срока службы светильника. 9 Wolfstall 54-56 D-42799 Leichlingen (Germany) Tel. +49 (0)21 74 799-0 Fax +49 (0)2174 799799 www.baero.com · E-Mail: [email protected] Da unsere Erzeugnisse technischen Veränderungen / Optimierungen unterliegen, übernehmen wir keine Gewähr, dass alle Angaben immer aktualisiert sind. Bei Fragen steht Ihnen selbstverständlich unsere Abteilung Technik unter der Rufnummer +49 (0)2174 799-0 gerne zur Verfügung. Montage- und Bedienungsanleitung Einbauleuchten Artikelnummer Leuchtentyp INTARA-CARINA(BH) INTARA-CARINA(BH) BASIC/MAXBEAM-MBFL BFL Mini 50/100 W INTARA-CARINA(BH) BASIC/MAXBEAM-BBS BBS 35/50/70/100/150 W e-BFL 50/70 W INTARA-CARINA Spot INTARA-CARINA SPOT-MBFL INTARA-CARINA SPOT-BBS 10 BFL Mini 50/100 W BBS 35/50/70/100/150 W e-BFL 50/70 W Artikelnummer Leuchtentyp INTARA-DRACO INTARA-DRACO BASIC/MAXBEAM-MBFL INTARA- DRACO BASIC/MAXBEAM-BBS BFL Mini 50/100 W BBS 35/50/70/100/150 W e-BFL 50/70 W INTARA-PEGASUS Wall INTARA-PEGASUS II WALLWASHER-MBFL BFL Mini 50/100 W INTARA- PEGASUS II WALLWASHER-BBS BBS 35/50/70/100/150 W e-BFL 50/70 W 1. Leuchtenanschluss Netzanschluss Sicherheitshinweise für Betrieb und Montage von Leuchten beachten 11 2. Auswechseln des Leuchtmittels - Leuchte stromlos schalten. - Abkühlung des Leuchtmittel abwarten. - Eventuell vorhandene Filter entfernen. Filterhalter für Leuchten: CARINA Spot, CARINA(BH) Basic Filterhalter herausziehen DRACO PEGASUS Wall Schrauben lösen Schrauben lösen - Leuchtmittel durch Herausziehen entfernen. - Neues Leuchtmittel einsetzen. Bei BFL Mini (50 und 100 W) auf richtige Sockelstellung achten. - Hinweise von , die jeder Lampenpackung beigelegt sind, unbedingt beachten - Entfernte Filter wieder anbringen. 3. Ein- und Ausbau der Leuchten Achtung: Polybox zuletzt an Netz anschließen. Deckenausschnitt: Carina Spot ø =165 mm Einbautiefe = 170 mm, 150 Watt = 195 mm Carina(BH) Basic ø =165 mm Einbautiefe = 130 mm, 150 Watt = 190 mm Draco 175 x 175 mm Einbautiefe = 130 mm, 150 Watt = 180 mm Pegasus Wall 175 x 175 mm Einbautiefe = 150 mm, 150 Watt = 180 mm Netzanschluss Die Polybox muss nach fünf Seiten Wärme frei abstrahlen können. Kurzes Kabel, mit weisser Buchse, der Polybox in Leuchte einrasten 12 INTARA-DRACO, INTARA-PEGASUS Wall: Haltefeder - Filterhalter der Leuchte entfernen, dazu Schrauben lösen - Leuchtenkörper ausschwenken, damit die Klemmstege frei zugänglich sind - Leuchte in die Decke einführen - Haltefedern auf die Klemmstege stecken und kräftig nach unten schieben, um die Leuchte an der Decke festzuspannen. Es müssen alle Klemmstege mit Haltefedern bestückt werden. 4 Stück für DRACO, PEGASUS Wall - Kabel von Polybox anschließen - Leuchtenkörper in die gewünschte Position zurückschwenken. INTARA-CARINA(BH) Basic INTARA-CARINA Spot - Filterhalter abziehen - Schraube im Reflektor lösen (nur INTARA-CARINA(BH Basic)) - Reflektor entfernen, damit die Klemmstege frei zugänglich sind - Kabel von Polybox anschließen - Leuchte in Decke einführen - Haltefedern auf die Klemmstege stecken und kräftig nach unten schieben, um die Leuchte an der Decke festzuspannen. Siehe auch Abbildung INTARA-DRACO, INTARA-PEGASUS Wall. Es müssen alle Klemmstege mit Haltefedern bestückt werden. 4 Stück für CARINABH Basic - Reflektor einsetzen und anschrauben (nur CARINA(BH) Basic) - Lampe einsetzen. Siehe auch: 2. Auswechseln des Leuchtmittels - Filter einsetzen 13 Wolfstall 54-56 D-42799 Leichlingen (Germany) Tel. +49 (0)21 74 799-0 Fax +49 (0)2174 799799 www.baero.com · E-Mail: [email protected] As our products are subject to technical modifications, we cannot guarantee, that all information is always up to date. Please contact our technical department on +49 (0)2174 799-0 with any queries. Mounting and Operating Instructions Recessed fixtures Article numbers Light Model INTARA-CARINA(BH) INTARA-CARINA(BH) BASIC/MAXBEAM-MBFL BFL Mini 50/100 W INTARA-CARINA(BH) BASIC/MAXBEAM-BBS BBS 35/50/70/100/150 W e-BFL 50/70 W INTARA-CARINA Spot INTARA-CARINA SPOT-MBFL INTARA-CARINA SPOT-BBS 14 BFL Mini 50/100 W BBS 35/50/70/100/150 W e-BFL 50/70 W Article numbers Light Model INTARA-DRACO INTARA-DRACO BASIC/MAXBEAM-MBFL INTARA- DRACO BASIC/MAXBEAM-BBS BFL Mini 50/100 W BBS 35/50/70/100/150 W e-BFL 50/70 W INTARA-PEGASUS Wall INTARA-PEGASUS II WALLWASHER-MBFL BFL Mini 50/100 W INTARA- PEGASUS II WALLWASHER-BBS BBS 35/50/70/100/150 W e-BFL 50/70 W 1. Light connection mains supply Observe safety information for operating and installing lighting fixtures. 15 2. Replacing the lamp - Switch off the power supply to the fixture. - Wait until the lamp cools down - Remove any filters. Filter holder for fixtures: CARINA Spot, CARINA(BH) Basic DRACO PEGASUS Wall Pull out filter holder Unscrew screws Unscrew screws - Remove lamp by pulling it out. - Insert new lamp. Make sure that the position of the base of BFL mini (50 and 100 W) fixtures is correct. - It is important to pay attention to the every lamp pack - Replace any filters which were removed. information supplied with 3. Fitting and dismantling the fixtures Note: the polybox should be connected to the power supply last. Ceiling cutout: Carina Spot Carina(BH) Basic Draco Pegasus Wall ø =165 mm ø =165 mm 175 x 175 mm 175 x 175 mm Fitting = 170 mm, 150 watt = 195 mm Fitting = 130 mm, 150 watt = 190 mm Fitting = 130 mm, 150 watt = 180 mm Fitting = 150 mm, 150 watt = 180 mm mains supply The polybox must be able to freely emit heat to five sides. Plug the short cable of the polybox, with the white socket, into the fixture. 16 INTARA-DRACO, INTARA-PEGASUS Wall: ceiling - - - - - - - - - - - - - - - Remove the luminaire‘s filter holder by unscrewing the screws Swing the lamp out so that the clamping frames are freely accessible. Insert the fixture into the ceiling Place the retaining springs onto the clamping frames and firmly push them downwards to fix the light to the ceiling. All clamping pieces must be fitted with spring clips. 4 pieces for DRACO, PEGASUS Wall Swing the fittings into the desired position. Swing the lamp back into the desired position. INTARA-CARINA(BH) Basic INTARA-CARINA Spot Pull off the filter holder Unscrew the screw in the reflector Remove the reflector so that the clamping frames are freely accessible. Connect the polybox cable Insert the fixture into the ceiling cutout Place the retaining springs on the clamping frames and firmly push them downwards to fix the light to the ceiling. Also refer to diagram for fixtures INTARA-DRACO, INTARA-PEGASUS Wall. All clamping pieces must be fitted with spring clips. 4 pieces for CARINABH Basic Insert the reflector and screw it in place (CARINA(BH) Spot only). Insert the lamp. Also refer to: 2 (Replacing the lamp) Insert filter 17 Wolfstall 54-56 D-42799 Leichlingen (Germany) Tel. +49 (0)21 74 799-0 Fax +49 (0)2174 799799 www.baero.com · E-Mail: [email protected] Nos produits sont susceptibles d’être modifiés techniquement à tout moment. Nous ne pouvons de ce fait garantir que toutes les informations de cette fiche technique soient à jour. Notre service technique se tient à votre entière disposition pour toute information. +49 (0)2174 799-0 Instructions de montage et d´utilisation Luminaire encastrés Article no Type de lampe INTARA-CARINA(BH) INTARA-CARINA(BH) BASIC/MAXBEAM-MBFL BFL Mini 50/100 W INTARA-CARINA(BH) BASIC/MAXBEAM-BBS BBS 35/50/70/100/150 W e-BFL 50/70 W INTARA-CARINA Spot INTARA-CARINA SPOT-MBFL INTARA-CARINA SPOT-BBS 18 BFL Mini 50/100 W BBS 35/50/70/100/150 W e-BFL 50/70 W Article no Type de lampe INTARA-DRACO INTARA-DRACO BASIC/MAXBEAM-MBFL INTARA- DRACO BASIC/MAXBEAM-BBS BFL Mini 50/100 W BBS 35/50/70/100/150 W e-BFL 50/70 W INTARA-PEGASUS Wall INTARA-PEGASUS II WALLWASHER-MBFL BFL Mini 50/100 W INTARA- PEGASUS II WALLWASHER-BBS BBS 35/50/70/100/150 W e-BFL 50/70 W 1. Branchement des luminaires Branchement sur le réseau Se conformer aux consignes de sécurité pour l’exploitation et le montage de luminaires. 19 2. Remplacement des lampes - Eteindre les luminaires - Attendre le refroidissement des lampes - Si nécessaire, retirer les filtres existants Supports de filtre pour luminaires : CARINA Spot, CARINA(BH) Basic Retirer le support de filtre DRACO PEGASUS Wall dévisser les vis dévisser les vis - Retirer la lampe en tirant - Monter la nouvelle la lampe Dans le cas des BFL Mini (50 et 100 W), veiller à la position du culot - Il est indispensable de respecter les indications de BÄ.RO incluses dans chaque emballage de luminaire - Replacer les filtres retirés auparavant 3. Montage et démontage des luminaires Attention : raccorder la platine de commande sur le réseau en dernier lieu ! Découpe du plafond : Carina Spot Carina(BH) Basic Draco Pegasus Wall ø =165 mm ø =165 mm 175 x 175 mm 175 x 175 mm profondeur = 170 mm, 150 Watt = 195 mm profondeur = 130 mm, 150 Watt = 190 mm profondeur = 130 mm, 150 Watt = 180 mm profondeur = 150 mm, 150 Watt = 180 mm Branchement sur le réseau La platine de commande doit pouvoir dégager de la chaleur sur cinq côtés. Encliqueter le câble court, à douille blanche, de la Polybox dans le luminaire. 20 INTARA-DRACO, INTARA-PEGASUS Wall: ressort de retenue - Enlever le support de filtre du luminaire en desserrant les vis. - Faire pivoter le corps de lampe de manière à ce que les borniers soient accessibles. - Introduire le luminaire dans le plafond. - Enfoncer le ressort de retenue sur le point de serrage et appuyer fortement contre le bas pour fixer le luminaire au plafond. Tous les borniers doivent être équipés de ressorts de retenue. 4 pièces pour DRACO, PEGASUS Wall. - Orienter les luminaires dans la position désirée. - Pivoter à nouveau le corps de lampe dans la position souhaitée. INTARA-CARINA(BH) Basic INTARA-CARINA Spot - - - - - - Retirer le filtre Desserrer les vis sur le réflecteur Enlever le réflecteur de manière à ce que les borniers soient accessibles. Brancher le câble de la platine de commande Introduire le luminaire dans le plafond Enfoncer le ressort de retenue sur le point de serrage et appuyer fortement contre le bas pour fixer le luminaire au plafond. Voir également l´illustration pour le luminaire INTARA-DRACO, INTARA-PEGASUS Wall. Tous les borniers doivent être équipés de ressorts de retenue. 4 pièces pour CARINABH Basic - Mettre le réflecteur en place et le visser (uniquement CARINA(BH) Basic) - Introduire la lampe. Voir aussi : 2. Remplacement des lampes - Poser le filtre 21 Wolfstall 54-56 D-42799 Leichlingen (Germany) Tel. +49 (0)21 74 799-0 Fax +49 (0)2174 799799 www.baero.com · E-Mail: [email protected] Nuestros productos están sujetos a cambios técnicos u optimizaciones por ello no nos responsabilizamos que toda la informacion técnica este actualizada. En caso de preguntas, no vacile en llamar a nuestro Dpto. Técnico bajo el número de teléfono +49 (0)2174 799-0. Instrucciones de montaje y uso Luminaria empotradas No. de ref. Tipo de lámpara INTARA-CARINA(BH) INTARA-CARINA(BH) BASIC/MAXBEAM-MBFL BFL Mini 50/100 W INTARA-CARINA(BH) BASIC/MAXBEAM-BBS BBS 35/50/70/100/150 W e-BFL 50/70 W INTARA-CARINA Spot INTARA-CARINA SPOT-MBFL INTARA-CARINA SPOT-BBS 22 BFL Mini 50/100 W BBS 35/50/70/100/150 W e-BFL 50/70 W No. de ref. Tipo de lámpara INTARA-DRACO INTARA-DRACO BASIC/MAXBEAM-MBFL INTARA- DRACO BASIC/MAXBEAM-BBS BFL Mini 50/100 W BBS 35/50/70/100/150 W e-BFL 50/70 W INTARA-PEGASUS Wall INTARA-PEGASUS II WALLWASHER-MBFL BFL Mini 50/100 W INTARA- PEGASUS II WALLWASHER-BBS BBS 35/50/70/100/150 W e-BFL 50/70 W 1. Conexión de la luminaria Conexión a la lámpara Obsérvense las advertencias de seguridad durante la operación y el montaje de las luminarias. 23 2. Cambio de la lámpara: - Desconectar la corriente. - Esperar el enfriamiento de la lámpara. - Quitar posibles filtros. Porta filtros para luminarias: CARINA Spot, CARINA(BH) Basic Extraer el porta filtro tornillos DRACO PEGASUS Wall Soltar los tornillos Soltar los - Extraer la lámpara. - Introducir una nueva lámpara. En BFL Mini (50 y 100 W) prestar atención a la posición de zócalo correcta. - Es imprescindible respetar los avisos de BÄRO â adjuntos a cada caja de embalaje de la lámpara. - Volver a montar los filtros. 3. Montaje y desmontaje de la luminaria Atención: El polybox el es último componente en ser conectado a la red. Recorte en el techo: Carina Spot ø =165 mm Profundidad de montaje = 170 mm, 150 Watt = 195 mm Carina(BH) Basic ø =165 mm Profundidad de montaje = 130 mm, 150 Watt = 190 mm Draco 175 x 175 mm Profundidad de montaje = 130 mm, 150 Watt = 180 mm Pegasus Wall 175 x 175 mm Profundidad de montaje = 150 mm, 150 Watt = 180 mm Conexión a la lámpara Debe procurarse que el polybox irradie calor libremente hacia los cinco lados. Cable corto, con casquillo blanco, insertar polybox en la luminaria. 24 INTARA-DRACO, INTARA-PEGASUS Wall: Resorte de sujeción - Extraer el portafiltro de la luminaria aflojando los tornillos. - Girar el cuerpo de la luminaria para acceder a los puentes de bornes. - Introducir la luminaria en el techo. - Resorte de sujeción. - Deslizar los flejes de acero por las pletinas con firmeza hacia abajo fijandolas al techo. Girar la lámpara a la posición deseada. Todos los puentes de bornes deben incorporar resortes de sujeción (4 unidades para los modelos DRACO, PEGASUS Wall). - Volver a colocar el cuerpo de la luminaria en la posición deseada. INTARA-CARINA(BH) Basic INTARA-CARINA Spot - - - - - - Retirar el porta filtros Soltar el tornillo en el reflector Retirar el reflector para acceder a los puentes de bornes. Conectar el cable del polybox Introducir la luminaria en el techo Deslizar los flejes de acero por las pletinas con firmeza hacia abajo fijandolas al techo.Véase también la figura para luminarias INTARA-DRACO, INTARA-PEGASUS Wall. Todos los puentes de bornes deben incorporar resortes de sujeción (4 unidades para los modelos CARINABH Basic. - Colocar el reflector y atornillar (sólo en el modelo CARINA(BH) Basic). - Insertar la lámpara. Véase también: 2. Cambio de la lámpara - Insertar el filtro 25 Wolfstall 54-56 D-42799 Leichlingen (Germany) Tel. +49 (0)21 74 799-0 Fax +49 (0)2174 799799 www.baero.com · E-Mail: [email protected] I nostri prodotti sono soggetti a modifiche / migliorie tecniche costanti e pertanto non possiamo garantire che tutti i dati forniti siano stati aggiornati. Il nostro Ufficio Tecnico ‑ raggiungibile al numero di telefono +49 (0)2174 799-0 è a Vostra disposizione per eventuali domande in merito. Installazione e istruzioni per l’uso Fari da incasso No. articolo Modello lampada INTARA-CARINA(BH) INTARA-CARINA(BH) BASIC/MAXBEAM-MBFL BFL Mini 50/100 W INTARA-CARINA(BH) BASIC/MAXBEAM-BBS BBS 35/50/70/100/150 W e-BFL 50/70 W INTARA-CARINA Spot INTARA-CARINA SPOT-MBFL INTARA-CARINA SPOT-BBS 26 BFL Mini 50/100 W BBS 35/50/70/100/150 W e-BFL 50/70 W No. articolo Modello lampada INTARA-DRACO INTARA-DRACO BASIC/MAXBEAM-MBFL INTARA- DRACO BASIC/MAXBEAM-BBS BFL Mini 50/100 W BBS 35/50/70/100/150 W e-BFL 50/70 W INTARA-PEGASUS Wall INTARA-PEGASUS II WALLWASHER-MBFL BFL Mini 50/100 W INTARA- PEGASUS II WALLWASHER-BBS BBS 35/50/70/100/150 W e-BFL 50/70 W 1. Allacciamento fari Allacciamento alla rete Osservare le avvertenze per la sicurezza durante il funzionamento ed il montaggio dei fari 27 2. Sostituzione delle lampade - Interrompere l’alimentazione di corrente al faro - Attendere che la lampada si sia raffreddata - Rimuovere il filtro se presente Supporto filtro per fari: CARINA Spot, CARINA(BH) Basic Estrarre il supporto del filtro DRACO PEGASUS Wall Svitare le viti Svitare le viti - Estrarre tirando la lampada - Inserire la nuova lampada. Per le lampade BFL Mini (50 e 100 W) verificare l’esatta posizione dell’attacco. - Leggere attentamente le istruzioni della BA*RO contenute in ogni confezione - Applicare nuovamente il filtro rimosso 3. Montaggio e smontaggio dei fari Attenzione: Allacciare il polybox alla rete per ultimo Superficie soffitto richiesta: Carina Spot Ø =165 mm Profondità di montaggio = 170 mm, 150 Watt = 195 mm Carina(BH) Basic Ø =165 mm Profondità di montaggio = 130 mm, 150 Watt = 190 mm Draco 175 x 175 mm Profondità di montaggio = 130 mm, 150 Watt = 180 mm Pegasus Wall 175 x 175 mm Profondità di montaggio = 150 mm, 150 Watt = 180 mm Allacciamento alla rete Il polybox deve essere in grado di dissipare calore su cinque lati. Inserire il cavo corto con connettore femmina del polybox nel faro 28 INTARA-DRACO, INTARA-PEGASUS Wall: molle di sostegno - Rimuovere il portafiltro del faro svitando le apposite viti. - Ruotare il corpo del faro in modo tale da poter raggiungere facilmente la morsettiera. - Inserire i fari nel soffitto. - Infilare le molle di sostegno sui listelli di fissaggio e spingere con forza verso il basso per fissare saldamente il faro al soffitto. Tutti i listelli di fissaggio devono essere provvisti di molle di sostegno. Per i fari DRACO, PEGASUS Wall sono da prevedere 4 molle. - Orientare la lampada nella posizione desiderata. - Riportare il corpo del faro nella posizione desiderata. INTARA-CARINA(BH) INTARA-CAPELLA - - - - - - Estrarre il supporto del filtro Svitare la vite del riflettore Rimuovere il riflettore in modo tale da poter raggiungere facilmente la morsettiera. Collegare il cavo del polybox Inserire il faro nel soffitto Infilare le molle di sostegno sui listelli di fissaggio e spingere con forza verso il basso per fissare saldamente il faro al soffitto. Vedere anche la figura per il faro INTARA-DRACO, INTARA-PEGASUS Wall. Tutti i listelli di fissaggio devono essere provvisti di molle di sostegno. Per i fari CARINABH Basic sono da prevedere 4 molle. - Posizionare il riflettore ed avvitarlo (solo per faro CARINA(BH) Basic) - Inserire la lampada. Vedere anche: Punto 2 - Sostituzione della lampada - Montare il filtro 29 Wolfstall 54-56 D-42799 Leichlingen (Germany) Tel. +49 (0)21 74 799-0 Fax +49 (0)2174 799799 www.baero.com · E-Mail: [email protected] Так как на наши изделия распространяются технические изменения / меры по оптимизации, мы не берем на себя гарантии за то, что все данные соответствуют актуальному состоянию. С вопросами просьба обращаться в наш технический отдел по телефону номер +49 (0)2174 799-0. Инструкция по монтажу и эксплуатации Встроенные светильники Артикул номер Тип светильника INTARA-CARINA(BH) INTARA-CARINA(BH) BASIC/MAXBEAM-MBFL BFL Mini 50/100 W INTARA-CARINA(BH) BASIC/MAXBEAM-BBS BBS 35/50/70/100/150 W e-BFL 50/70 W INTARA-CARINA Spot INTARA-CARINA SPOT-MBFL INTARA-CARINA SPOT-BBS 30 BFL Mini 50/100 W BBS 35/50/70/100/150 W e-BFL 50/70 W Артикул номер Тип светильника INTARA-DRACO INTARA-DRACO BASIC/MAXBEAM-MBFL INTARA- DRACO BASIC/MAXBEAM-BBS BFL Mini 50/100 W BBS 35/50/70/100/150 W e-BFL 50/70 W INTARA-PEGASUS Wall INTARA-PEGASUS II WALLWASHER-MBFL BFL Mini 50/100 W INTARA- PEGASUS II WALLWASHER-BBS BBS 35/50/70/100/150 W e-BFL 50/70 W 1. Подсоединение светильника Сетевое подсоединение Осуществляя эксплуатацию и монтаж светильников, соблюдать указания по технике безопасности. 31 2. Замена лампочки - Обесточить светильник. - Подождать, пока лампочка не остынет. - Удалить возможно имеющиеся фильтры. Держатели фильтров для светильников: CARINA Spot, CARINA(BH) Basic DRACO PEGASUS Wall Вынуть держатели фильтров. Ослабить винты. Ослабить винты. - Удалить лампочку, вытащив ее. - Вставить новую лампочку. Следить за правильным положением цоколя лампочек BFL Mini (50 и 100 Вт). - Обязательно учитывать указания фирмы BД·RO, приложенные к каждой упаковке лампы. - Опять установить удаленные фильтры. 3. Монтаж и демонтаж светильников Внимание: прибор Polybox подсоединяется к сети в последнюю очередь. Вырезы в потолке: Carina Spot Ø =165 mm Монтажная глубина = 170 мм, 150 Ватт = 195 мм CarinaBH Basic Ø =165 mm Монтажная глубина = 130 мм, 150 Ватт = 190 мм Draco 175 x 175 mm Монтажная глубина = 130 мм, 150 Ватт = 180 мм Pegasus Wall 175 x 175 mm Монтажная глубина = 150 мм, 150 Ватт = 180 мм Сетевое подсоединение Polybox должен иметь возможность свободно излучать на пять сторон. Зафиксировать в защелке светильника короткий кабель с белым гнездом прибора Polybox. 32 INTARA-DRACO, INTARA-PEGASUS Wall: Haltefeder - Удалить держатель фильтра - для этого следует предварительно ослабить винты - Отвести вбок корпус светильника, чтобы обеспечить свободный доступ к зажимным перемычкам. - Ввести светильник в потолок. - Вставить удерживающие пружины в зажимные перемычки и энергично надавить книзу, чтобы закрепить светильник с натяжением на потолке. - Повернуть корпус светильника в требуемое положение. Необходимо укомплектовать удерживающими пружинами все зажимные перемычки. 4 шт. для моделей DRACO, PEGASUS Wall. - Отвести корпус светильника назад в требуемое положение. INTARA-CARINA(BH) Basic INTARA-CARINA Spot - Удалить держатель фильтра. - Ослабить винт в рефлекторе. - Удалить рефлектор, чтобы обеспечить свободный доступ к зажимным перемычкам. - Подсоединить кабель прибора Polybox. - Ввести светильник в потолок. - Вставить удерживающие пружины в зажимные перемычки и энергично надавить книзу, чтобы закрепить светильник с натяжением на потолке. См. также рисунок светильников INTARA-DRACO, INTARA-PEGASUS Wall. Необходимо укомплектовать удерживающими пружинами все зажимные перемычки. 4 шт. для моделей CARINABH Basic, DRACO, PEGASUS Wall. Необходимо укомплектовать удерживающими пружинами все зажимные перемычки. 4 шт. для моделей CARINABH Basic. - Вставить и привинтить рефлектор (только CARINA(BH) Basic). - Вставить лампу. См. также: 2. Замена лампочки - Вставить фильтр. 33