1
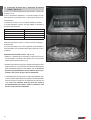
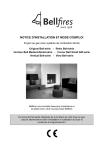
CAMINETTI A GAS
IG70-IG90-IG120-IG120B
GAS FIRES
ISTRUZIONI PER L’INSTALLATORE
E IL MANUTENTORE
INSTRUCTIONS FOR INSTALLATION
AND MAINTENANCE
ATTENZIONE! L’APERTURA E LA MANUTENZIONE DELLA CAMERA DI COMBUSTIONE
DELL’APPARECCHIO DOVRANNO ESSERE AFFIDATE ESCLUSIVAMENTE AD UN TECNICO ABILITATO
CAUTION! THE GAS FIRE MUST ONLY BE OPENED AND MAINTAINED BY A QUALIFIED TECHNICIAN
Il presente libretto d’istruzioni dovrà essere lasciato al cliente e da questi conservato per ogni ulteriore consultazione.
This instruction booklet must be left with the customer to keep for future reference
INDICAZIONI IMPORTANTI
Italiano
LE NORME VIGENTI PREVEDONO:
• CHE QUALSIASI APPARECCHIO ALIMENTATO A GAS NATURALE O GPL SIA INSTALLATO DA UN OPERATORE ABILITATO IN
POSSESSO DI DETERMINATI REQUISITI TECNICO-PROFESSIONALI, ATTESTATI DA UN DOCUMENTO RILASCIATO DALLE
CAMERE DI COMMERCIO O DALLE COMMISSIONI PROVINCIALI PER L’ARTIGIANATO (LEGGE 5 marzo1990. n°46).
• L’OBBLIGO DI PROGGETTO FIRMATO DA PROFESSIONISTI
PER TUTTI GLI IMPIANTI CON PORTATA TERMICA TOTALE
INSTALLATA MAGGIORE DI 34.8 KW UBICATI ENTRO EDIFICI
AD USO CIVILE.
• CHE PER OGNI IMPIANTO L’INSTALLATORE DEBBA RILASCIARE UNA DICHIARAZIONE DI CONFORMITA’ ALLE NORME
VIGENTI.
L’INSTALLAZIONE DEVE ESSERE CONFORME ALLE ISTRUZIONI
CONTENUTE NEL PRESENTE LIBRETTO ED AI REQUISITI STABILITI DALLE NORME NAZIONALIE LOCALI.
• Il presente libretto, redatto dal costruttore, include tutte le informazioni indirizzate a quelle persone che a vario titolo concorrono all’installazione ed alla manutenzione del prodotto.
• Leggere con attenzione le istruzioni e le informazioni tecniche contenute in questo manuale, prima di procedere all’installazione, all’utilizzo e a qualsiasi intervento sul prodotto.
• L’osservanza delle indicazioni contenute nel presente manuale garantisce la sicurezza dell’uomo e del prodotto, l’economia di esercizio ed
una più lunga durata di funzionamento.
• Questo apparecchio è stato progettato, collaudato e omologato in
conformità alle norme vigenti in materia di utilizzo, rendimento e
sicurezza dei prodotti.
• L’apparecchio è dotato di fiamma pilota dell’uscita del gas, che blocca la valvola di alimentazione del gas quando l’ossigeno scende a
livelli inferiori a quelli stabiliti (sistema di sicurezza uscita gas).
Questo dispositivo è situato nella parte anteriore del bruciatore e non
necessita di regolazione da parte dell’installatore. Il sistema non deve
essere disinserito ed in caso di sostituzione di parti si dovranno
impiegare esclusivamente ricambi originali.
DT2010738-00
• L’apparecchio è stato progettato per fungere da efficiente dispositivo
di riscaldamento e di conseguenza tutti i componenti del corpo raggiungono temperature molto elevate durante l’uso. Si raccomanda di
non appoggiare le mani sulle superfici di esercizio. Fanno eccezione
la manopola di comando e lo sportello di accesso ai comandi.
• Il vetro ed il telaio di questo apparecchio fungono da parafuoco.
Nessun componente della porta o del telaio dell’apparecchio dovrà
essere rimosso in via permanente. Esso non garantisce la completa
sicurezza di bambini o disabili, in simili circostanze si dovrebbe pertanto prendere in considerazione l’opportunità di una protezione supplementare.
• Questo apparecchio è dotato di piano fuoco con braci e ceppi ceramici contenenti fibre ceramiche refrattarie, costituite da fibre artificiali di silicato vetroso. Una eccessiva esposizione a questi materiali può
causare irritazione agli occhi, alla cute ed agli organi dell’apparato
respiratorio. Si raccomanda pertanto di contenere al minimo il rilascio
di polveri durante la movimentazione di questi materiali. Ove si renda
necessario sostituire uno dei componenti del letto di braci o dei ceppi
ceramici, raccomandiamo di sigillare in un sacchetto di polietilene
pesante le parti rimosse e portarle in un centro smaltimento rifiuti
autorizzato (isola ecologica).
• L’apparecchio non deve essere utilizzato in caso di rottura del vetro e
non deve mai essere utilizzato con la porta del focolare aperta trattandosi di apparecchio a camera stagna. E’ questa la miglior garanzia di sicurezza per l’ambiente nel quale è installato in quanto non vi
è pericolo per la fuoriuscita dei residui della combustione e non vi è
prelievo di ossigeno dall’ambiente di installazione.
• Trattandosi di apparecchio a camera stagna può essere installato in
qualunque tipo di locale purchè ventilabile. Fanno eccezione, se
l’apparecchio funziona a GPL, quei locali che hanno il piano di calpestio (pavimento) situato sotto il piano esterno di riferimento, o che
sono direttamente collegati e/o comunicanti con locali che presentano la stessa tipologia. Fanno inoltre eccezione quei locali adibiti ad
autorimessa, a magazzino di materiale combustibile o ad attività con
pericolo d’incendio
Per i termini, limiti ed esclusioni fare riferimento al certificato di garanzia allegato al prodotto.
Il costruttore nell’intento di perseguire una politica di costante sviluppo e rinnovamento del prodotto può apportare, senza preavviso alcuno, le
modifiche che riterrà opportune.
Questo documento è di proprietà del Gruppo Piazzetta S.p.A.; non può essere divulgato totalmente o in parte a terzi senza autorizzazione scritta del Gruppo Piazzetta S.p.A. Il Gruppo Piazzetta S.p.A. si riserva tutti i diritti a rigore di legge.
La manomissione o l’intervento non autorizzato per iscritto, fa decadere le omologazioni ottenute. In tale caso il prodotto può essere un
pericolo per le persone e per l’abitato; il costruttore diniega ogni responsabilità e può reclamare i diritti di danno dell’immagine.
NORME DI RIFERIMENTO
UNI 7129
UNI 7131
DT2010354-01
Impianti a gas per uso domestico alimentati da rete di distribuzione. Progettazione, installazione e manutenzione.
Impianti a GPL per uso domestico non alimentati da rete di distribuzione. Progettazione, installazione esercizio e
manutenzione.
UNI 10738
Impianti alimentati a gas combustibile per uso domestico preesistenti alla data del 13 marzo 1990. Linee guida
per la verifica delle caratteristiche funzionali.
EN 1856-1-2
Camini – Requisiti per camini metallici.
EN 1443
Camini – Requisiti generali.
Legge 5 marzo1990, n°46
Norme per la sicurezza degli impianti.
D.P.R. 6 dicembre 1991, n°447 Regolamento di attuazione della legge 5 marzo 1990, n°46, in materia di sicurezza degli impianti.
2
INDICE
DT2010187-00
Titolo
Pag.
1.1
1.2
1.3
1.4
1.5
1.6
1.7
Norme generali
Ambiente di installazione
Alimentazione del gas
Scarico fumi
Portata del solaio
Isolanti termici idonei
Distanze di sicurezza
Controparete
4
4
4
5
9
9
10
11
2.1
2.2
2.3
2.4
Caratteristiche e dati tecnici
Caratteristiche
Dati tecnici
Accessori
Dimensioni e Pesi
12
12
12
12
13
3.1
3.2
3.3
3.4
Installazione
Installazione camino e rivestimento
Collegamento valvola gas manuale
Collegamento ricevitore in radiofrequenza
Preparazione del letto di braci e disposizione dei tronchetti ceramici
14
14
16
16
18
4.0
Manutenzione
20
DT2010748-00
5.0
Anomalie e rimedi
20
DT2010361-00
1.0
2.0
3.0
cod. txt
Italiano
Cap.
DT2010751-00
DT2010358-01
DT2010359-00
DT2010741-00
DT2010742-00
DT2010173-00
DT2010368-00
DT2010743-00
DT2010744-00
DT2010363-00
DT2010745-00
DT2010364-02
DT2010746-00
DT2010747-00
-
Questo libretto cod. H07020350 / DT2000215 - Rev. 01 - (09/2007) è composto da 40 pagg.
3
Italiano
1.0 NORME GENERALI
DT2010751-00
I caminetti a gas PIAZZETTA sono apparecchi a gas classificati di tipo C, termine usato per descrivere un apparecchio il cui circuito di combustione (prelievo aria comburente, camera di combustione, scambiatore di calore e scarico dei prodotti della combustione) è a tenuta rispetto al locale in cui l’apparecchio è installato.
In particolare si tratta di apparecchi a camera stagna e tiraggio naturale a flusso bilanciato la cui sigla di identificazione è C11.
Il prelievo dell’aria comburente e lo scarico dei prodotti della combustione avvengono direttamente all’esterno del locale mediante un tubo coassiale. L’evacuazione dei fumi avviene in modo naturale nell’ambiente esterno attraverso il condotto interno, mentre l’aria necessaria alla combustione entra attraverso l’intercapedine creata dal rivestimento esterno del tubo ed il tubo interno.
L’apparecchio a gas, associato alla canna fumaria a tubi coassiali rigidi, è stato omologato in conformità alla norma CE europea per gli
apparecchi a gas e può pertanto essere utilizzato esclusivamente con questo sistema.
La garanzia decade nel caso l’apparecchio venga (integralmente o parzialmente) installato con un sistema diverso .
Il condotto di scarico fumi, comprensivo del terminale di scarico a parete o a tetto, viene fornito dal costruttore, in base alle esigenze di
collegamento e fa parte integrante dell’apparecchio.
Nel paragrafo “Scarico fumi - POSSIBILI CONFIGURAZIONI DI COLLEGAMENTO PER EVACUAZIONE FUMI” sono fornite a scopo dimostrativo alcune possibili configurazioni di collegamento.
Il caminetto è stato progettato per funzionare a gas naturale (metano) oppure a GPL. Non è possibile trasformare il funzionamento dell’apparecchio da metano a GPL o viceversa. Il tipo e la pressione del gas con il quale funziona l’apparecchio sono definiti da una targhetta applicata sotto
al bruciatore.
Sia il bruciatore che la fiamma pilota vengono tarati dal produttore. Le impostazioni di fabbrica dell’unità di controllo del gas o del ricevitore non vanno modificate prima dell’installazione.
Il caminetto deve essere collegato al tipo di gas indicato sul bruciatore. Non collegare mai un bruciatore a metano sul GPL o viceversa.
Il caminetto è predisposto dal costruttore con comando manuale o con radiocomando.
1.1 Ambiente di installazione - Fig. 1
I caminetti a gas PIAZZETTA sono apparecchi a camera stagna e quindi si possono installare in qualunque tipo di locale. Fanno eccezione i
locali adibiti ad autorimessa, a magazzino di materiale combustibile o
ad attività con pericolo d’incendio ed inoltre, per apparecchi funzionanti a GPL, i locali che hanno il pavimento sotto il piano esterno di riferimento (Fig. 1), o che sono direttamente collegati e/o comunicanti con
locali che presentano la stessa tipologia. Il locale dove viene installato
il caminetto PIAZZETTA non ha necessità di proprie aperture di aerazione, se non quelle già previste per la presenza di altri dispositivi a
gas. Deve però in ogni caso essere ventilabile, cioè deve avere porte o
finestre comunicanti verso l’esterno, che eventualmente possano essere aperte.
1.2 Alimentazione del gas
Il buon funzionamento dell’apparecchio è subordinato anche alle
dimensioni delle tubazioni che formano l’impianto a valle del punto di
distribuzione. Le norme tecniche UNI7131 4.1.1 con relativa appendice
A e la norma tecnica UNI7129 3.1 con relativa appendice A forniscono
le modalità di calcolo.
Si dovrà prevedere, sul tubo entrata gas, un rubinetto di servizio, posizionato vicino al caminetto, visibile e ben accessibile.
4
Fig. 1
PIANO DI RIFERIMENTO
NO
DT2030576-00
Italiano
1.3 Scarico fumi
Lo scarico può essere a parete o a tetto ferme restando le prescrizioni delle norme nazionali e dei regolamenti locali.
I tubi di scarico, eventuali curve ed il terminale devono poter essere collocati correttamente e costituire un insieme stabile e rigido.
Ogni innesto va sigillato con la relativa guarnizione siliconica più fascetta.
SCARICO A PARETE (Distanze di rispetto) - Fig. 2
Fig. 2
DT2030564-00
POSIZIONAMENTO DEL TERMINALE
DISTANZA MINIMA PORTATA TERMICA NOMINALE OLTRE 7 kW FINO A 16 kW
Sotto finestra
A
150 cm
Sotto apertura di aerazione
B
150 cm
Sotto gronda
C
40 cm
Sotto balcone (*)
D
40 cm
Da una finestra adiacente
E
40 cm
Da una apertura di aerreazione adiacente
F
60 cm
Da tubazioni o scarichi verticali o orizzontali (**)
G
30 cm
Da un angolo dell’edificio
H
50 cm
Da una rientranza dell’edificio
I
50 cm
Dal suolo o da altro piano di calpestio
L
150 cm
Fra due terminali in verticale
M
150 cm
Fra due terminali in orizzontale
N
50 cm
Da una superficie frontale prospicente senza aperture o terminali entro un
raggio di 3 m dallo sbocco dei fumi
O
100 cm
Idem, ma con aperture o terminali entro un raggio di 3 m dallo sbocco dei
fumi
P
190 cm
(*) I terminali sotto un balcone praticabile devono essere collocati in posizione tale che il percorso dei fumi, dal punto di uscita del terminale al
loro sbocco dal perimetro esterno del balcone, compresa l’altezza dell’eventuale balaustra di protezione chiusa, non sia minore di 2 metri.
(**) Nella collocazione dei terminali devono essere adottate distanze non minori di 50 cm da materiali sensibili all’azione dei prodotti della combustione ( ad esempio, gronde e pluviali di materia plastica, elementi sporgenti di legno, ecc.) per distanze minori adottare adeguate schermature nei riguardi di detti materiali.
5
A)
Apertura di areazione, griglia o finestra con possibilità di apertura.
Fig. 3
6m
Fig. 3) Apertura di areazione, griglia o finestra con possibilità di apertura, asservite a stanze abitate, bagni o servizi igienici poste
alla stessa altezza dell’uscita tubo scarico fumi.
A
DT2030565-00
Fig. 4) Apertura di areazione, griglia o finestra con possibilità di apertura, asservite a stanze abitate, bagni o servizi igienici posizionate ad almeno 1 m sotto l’uscita del tubo scarico fumi.
Fig. 4
3m
1m
A
DT2030566-00
Fig. 5) Apertura di areazione, griglia o finestra con possibilità di apertura, asservite a stanze abitate, bagni o servizi igienici posizionate su parete verticale ad almeno 1 m al di sotto dell’uscita
tubo scarico fumi.
Fig. 5
2m
1m
Italiano
SCARICO A TETTO (Distanze di rispetto) - Fig. 3 ÷ 6
A
DT2030567-00
Fig. 6) Apertura di areazione, griglia o finestra con possibilità di apertura, asservite a stanze abitate, bagni o servizi igienici posizionate su superficie inclinata poste più in alto dell’uscita tubo
scarico fumi.
Fig. 6
6m
A
DT2030568-00
6
Fig. 7
27 26
9
X
8
4
5
6
7
18
14 28
23 24 25
18
Y
min. 1,19 m
SOLUZIONE 1 (Fig. 7)
SCARICO FUMI A PARETE
Distanza “X”: 0 (min) - 3m (max)
Distanza “Y”: 1m (min) - 3m (max)
Italiano
POSSIBILI CONFIGURAZIONI DI COLLEGAMENTO PER EVACUAZIONE FUMI - Fig. 7 ÷ 9
2
16
17
3 30
15
1
DT2030561-00
SOLUZIONE 2 (Fig. 8)
SCARICO FUMI A TETTO SENZA CURVE
Distanza “Y”: 2m (min) - 11m (max)
Fig. 8
10 11
12
19
Y
13
19
4
5
6
7
18
23 24 25
18
2
3 30
1
DT2030562-00
Fig. 9
10 11
19
27 26
(1) (Y1+Y2) > 2X
Il verticale (o ascendente a 45°) è sempre almeno
Il doppio di quello orizzontale
9
X
8
4
5
6
7
23 24 25
4
Y1
N° massimo di curve: 2 a 90°
N° massimo di curve: 4 a 45°
12
Y2
SOLUZIONE 3 (Fig. 9)
SCARICO FUMI A TETTO CON CURVE
Distanza “X” (1):
0 (min) - 3m (max)
Distanza “Y1” (1):
1m (min) - 10m (max)
Distanza “Y1+Y2” (1): 1m (min) - 10m (max)
18
5
6
7
18
20
23 24 25
2
3 30
1
DT2030563-01
7
Italiano
ELENCO COMPONENTI - Fig. 7 ÷ 9
Pos. n°
Descrizione
1
Apparecchio
2
Adattatore Ø 150 bloccaggio rapido 2871042
3
Colore (*)
Inox
Antracite
P08091170
•
•
Fascetta per adattatore Ø 150 2841150
P08091120
•
4
Tubo coassiale cm 50 2871015
P08091000
•
5
Tubo coassiale cm 100 2871016
P08091010
•
6
Tubo telescopico cm 35,2 - 44 2871017
P08091020
•
7
Tubo coassiale accorciabile cm 50 2871018
P08091030
•
8
Curva coassiale 90° 2871031
P08091040
•
9
Curva coassiale 45° 2871032
P08091050
•
10
Terminale scarico a tetto cm 136 2871024
P08091060
•
•
11
Terminale scarico a tetto cm 61 2871138
P08091070
•
•
12
Tegola uscita camino inclinazione 20° - 45° 2841025
P08099010
•
13
Flangia tamponamento tetto alluminio 2841026
P08093030
•
14
Terminale scarico a parete 2871030
P08091080
•
15
Fascetta Ø 150 bloccaggio rapido 2841021
P08091090
•
16
Guarnizione siliconica Ø 150 2841022
P08099020
17
Guarnizione siliconica Ø 100 2841023
P08099030
18
Fascetta fissaggio a muro Ø 150 2841029
P08091100
•
19
Piastra protezione antifiamma Ø 150 2841027
P08091110
•
20
Tubo coassiale a T con ispezione 2871035
P08091130
•
21
Tubo coassiale cm 16,5 con prelievo 2871036
P08091140
•
22
Curva coassiale 90° con ispezione 2871040
P08091150
•
23
Tubo coassiale cm 50 verniciato 90008101
P08092000
•
24
Tubo coassiale cm 100 verniciato 90008100
P08092010
•
25
Tubo coassiale accorciabile cm 50 verniciato 90008102
P08092030
•
26
Curva coassiale 90° verniciata 90008103
P08092040
•
27
Curva coassiale 45° verniciata 90008108
P08092050
•
28
Terminale scarico a parete verniciato 90008106
P08092080
•
29
Fascetta Ø 150 bloccaggio rapido verniciata 90008107
P08092090
•
30
Fascetta per adattatore Ø 150 verniciata 90008005
P08092120
•
Tubo coassiale a T con ispezione verniciato 90008109
P08092130
•
Tubo coassiale cm 16,5 con prelievo verniciato 90008110
P08092140
•
Curva coassiale 90° con ispezione verniciata 90008111
P08092150
•
Tegola uscita camino inclinazione > 45° 2441039
P08099040
•
Flangia universale fissaggio a muro per Ø 150 99920002
P08091160
(*) Colore
inox: tinta acciaio inossidabile naturale
antracite: vernice color antracite
8
Codice Articolo
Fig. 10
Italiano
DIMENSIONI TUBI E CURVE PER SCARICO FUMI - Fig. 10
TUBO COASSIALE
LUNGH. 100 cm
TUBO TELESCOPICO
LUNGH. 32,5-44 cm
TUBO COASSIALE
ACCORCIABILE L. 50 cm
TUBO COASSIALE
LUNGH. 50 cm
14
28
25
INNESTO cm 4
INNESTO cm 4
28,5-40
60
TERMINALE SCARICO A PARETE
ACCORCIABILE
INNESTO cm 4
CURVA COASSIALE A 90°
INNESTO cm 4
8
21,3
18,8
26
TUBO COASSIALE A T
CON ISPEZIONE
22,8
24
45,5
7
56
32,5-44
6
5
49,5
95,5
45,5
23
49,5
4
99,5
INNESTO cm 4
30
15,5
INNESTO cm 4
INNESTO cm 4
24
27
4
111,5
77,5
10
9
INNESTO cm 4
32,15
23
19,25
9
23,25
5
67,55
TUBO COASSIALE L. 50 cm
INCLINATO A 45°
CURVA COASSIALE A 45°
2
7,
TUBO COASSIALE L. 100 cm
INCLINATO A 45°
20
20
30
11
11,5
INNESTO cm 4
TERMINALE SCARICO A TETTO
ACCORCIABILE
32,15
67,55
DT2030569-01
Per il calcolo dei tubi necessari tenere conto che l’altezza utile dell’adattatore è di 9 cm e che ad ogni innesto vanno tolti 4 cm sulla lunghezza
totale del tubo (l’innesto sulla parte esterna del tubo è di 2,5 cm).
1.4 Portata del solaio
Verificare la idonea capacità portante del solaio sommando: il peso delle protezioni (contropareti), degli isolanti, del rivestimento e del monoblocco (riportato al paragrafo “Dimensioni e Pesi”).
Se il solaio non ha una idonea capacità portante si devono prendere adeguate contromisure, ad esempio utilizzando una piastra in lamiera per
distribuire il carico o la costruzione di una lastra portante in cemento armato con spessore minimo di 6 cm.
1.5 Isolanti termici idonei
Tipologia dei materiali isolanti termici idonei.
Materiale:
fibra minerale; fibra ceramica; fibra di roccia.
Forma:
lastre; tappeto; gusci.
Caratteristiche: essere con peso specifico uguale o superiore a 80 Kg/m3 con temperatura limite d’utilizzo di almeno 700°C.
Spessore:
come riportato nelle figure al paragrafo “Distanze di sicurezza”.
Se il materiale isolante non è all’interno di pareti è necessario fissarlo su tutta la superficie delle pareti con dei punti di ancoraggio ogni 30cm.
Per l'isolamento termico è ammesso materiale codificato “AGI Q132” o “DIN 18895”.
9
Fig. 11
5 CM DI ARIA DALLA PARETE
CONTOPARETE IN MATERIALE IGNIFUGO AD ESEMPIO
CARTONGESSO
10 CM ISOLANTE
TERMICO
PROFONDITÀ RIVESTIMENTO
Pareti
PARETI INFIAMMABILI: L’apparecchio dovrà essere sempre distanziato da 10cm di isolante termico e distanziato da 5cm di aria.
Dovendo distanziare l’apparecchio dalla pareti infiammabili è necessario costruire delle contropareti di materiale non infiammabile, per
installare correttamente il rivestimento.
Nel caso di attraversamento di pareti, solai o tetti in materiale infiammabile (legno ecc.) è necessario escludere il contatto tra il tubo di scarico ed il materiale medesimo mediante opportuno isolamento termico
per alte temperature (coppella in lana minerale o lana di vetro ecc.) o
intercapedine d'aria.
Mantenere una distanza minima, tra i due elementi, di almeno 5 cm.
PARETI INFIAMMABILI
DT2030265-00
Fig. 12
PARETI NON INFIAMMABILI
5 CM DI ARIA DALLA PARETE
PARETI NON INFIAMMABILI: L’apparecchio dovrà essere sempre
distanziato da 5cm di aria dalla parete.
PROFONDITÀ RIVESTIMENTO
Italiano
1.6 Distanze di sicurezza - Fig. 11 ÷ 17
Se il tubo di scarico o terminale passano attraverso murature o pareti
non infiammabili, le intercapedini vanno riempite con materiali non
infiammabili, indeformabili e con ridotta capacità di trasmissione del
calore (per es. calcestruzzo leggero).
Possono eventualmente essere protette con appositi tubi di protezione.
DT2030266-00
Fig. 13
MATERIALE
INFIAMMABILE
5 cm
ISOLANTE TERMICO O
INTERCAPEDINE D’ARIA
DT2030575-00
Fig. 14
Fig. 15
MATERIALE DI
RIEMPIMENTO
DT2030571-00
10
DIAFRAMMA
DT2030572-00
Italiano
R1
00
cm
100 cm
Zona di irraggiamento
DT2030573-01
10
0c
m
Fig. 17
R
Zona di irraggiamento
DT2030574-01
Fig. 18
MINIMO 30CM
ELEMENTI INFIAMMABILI
MINIMO 50 CM
SOFFITTO DI MATERIALE INFIAMMABILE
ELEMENTI INFIAMMABILI
1.7 Controparete
I caminetti a gas PIAZZETTA Design hanno bisogno di contropareti di
rivestimento da effettuare in loco dopo aver posizionato l’apparecchio,
realizzato i collegamenti e verificato il suo funzionamento.
Le contropareti di rivestimento devono essere autoportanti, indipendentemente dai materiali di costruzione, e per nessun motivo devono andare a contatto con il caminetto.
Mantenere almeno 3 mm di luce tutt’attorno all’apparecchio per permettere la dilatazione del camino.
Il rivestimento deve essere costruito con materiali non infiammabili nel
rispetto delle normative.
Per garantire l’uscita per convezione naturale del calore generato dal
camino, occorre installare sulle contropareti del rivestimento almeno
due griglie, non richiudibili, di sezione utile pari a 350 cm2 ciascuna.
Una sarà posizionata nella parte bassa, poco sopra il pavimento, e
l’altra nella parte alta ad una distanza da materiali nfiammabili quali:
soffitti, travi, mobili, tentaggi ecc. di almeno 50 cm dal soffitto e di 30
cm sui lati (fig. 18).
Con soffitto superiore a 3 m di altezza i 50 cm possono essere
ridotti a 30 cm.
Fig. 16
100 cm
Zona d’irraggiamento
Si raccomanda di tenere all’infuori della zona di irraggiamento del
camino, e comunque alla distanza di almeno 1 m dal blocco riscaldante, qualsiasi oggetto di materiale combustibile o infiammabile come:
tendaggi, arredi in legno, soprammobili ecc. (fig. 16-17)
MINIMO 30CM
DT2030271-00
11
Italiano
2.0 CARATTERISTICHE E DATI TECNICI
DT2010744-00
2.1 Caratteristiche
Tubo attacco gas
12 mm
Tubo alimentazione da valvola gas a bruciatore ø 8 mm lungh. max.1 m
Tubo scarico coassiale
øi 100 mm - øe 150 mm
2.2 Dati tecnici
Unità di misura
Gas naturale (Metano)
Gas propano (GPL)
Famiglia gas
I2H
I3P
Gas
G20
G31
Pressione alimentazione
mbar
Codice identificazione prodotto
Classe di rendimento
Bruciatore pilota (SIT OP)
20
37
0063BL5625
0063BL5625
2
2
0.977.113
0.977.148
IG 70
Potenza termica nominale
kW
8.3
8.5
Portata gas (max)
3
m /h
0.79
0.312
Pressione bruciatore (a caldo)
mbar
16.0
29.4
560
260
Iniettore bruciatore (Bray)
IG 90
Potenza termica nominale
kW
9.5
9.5
Portata gas (max)
3
m /h
0.90
0.345
Pressione bruciatore (a caldo)
mbar
16.8
29.2
650
280
Iniettore bruciatore (Bray)
IG 120
Potenza termica nominale
kW
11.5
11.5
Portata gas (max)
3
m /h
1.10
0.415
Pressione bruciatore (a caldo)
mbar
10.6
29.1
1200
320
Iniettore bruciatore (Bray)
IG 120 B
Potenza termica nominale
kW
11.5
11.5
Portata gas (max)
3
m /h
1.10
0.415
Pressione bruciatore (a caldo)
mbar
10.6
29.1
1200
320
Iniettore bruciatore (Bray)
2.3 Accessori
ACCESSORI IN DOTAZIONE
Adattatore Ø 150 mm
Fascetta per adattatore Ø 150 mm
Confezione Logs
Viti e tasselli per ancoraggio a parete
Scatola incasso valvola gas
Valvola gas (MANUALE o PER TELECOMANDO)
Tubo rame Ø 8
12
Per apparecchi con radiocomando sono inoltre previsti:
Unità ricevente
Telecomando
Cavo collegamento piezoelettrico
Cavo collegamento valvola gas – unità ricevente
Confezione batterie
ACCESSORI DI COMPLEMENTO
Tubi e curve coassiali per sistema canna fumaria (vedi paragrafo
“Scarico fumi-ELENCO COMPONENTI“)
Caminetto a gas IG 70
Italiano
2.4 Dimensioni e Pesi - Fig. 19 ÷ 22
Caminetto a gas IG 90
Fig. 19
Peso kg 60
Fig. 20
Peso kg 90
69.3
63.1
3.2
89,5
43,5
50,5
9,5
35,9
53
9.5
3,8
50.5
13,6
44.1
3.2
10.8
3,8
81,9
73.5
38
40,4
2.4
2,4
37.9
35.5
10.2
12,3
54
DT1020274-00
Caminetto a gas IG 120
DT1020314-00
Caminetto a gas IG 120B
Fig. 21
Peso kg 120
Fig. 22
Peso kg 115
117,5
109,9
47,5
54,5
9,5
39,9
3,8
9
2,4
2,4
=
38
40,4
38
42,8
=
139
121
13,6
54,5
9,5
12,3
9
2,4
39,9
47,5
3,8
13,6
3,8
3,8
117,5
109,9
DT1020315-00
DT1020316-00
13
3.0 INSTALLAZIONE
Italiano
3.1 Installazione camino e rivestimento - Fig. 23 ÷ 26
DT2010747-00
Fig. 23
L’installazione e l’allacciamento devono essere effettuati
esclusivamente da un tecnico abilitato, conformemente alla
legislazione nazionale e locale.
• Verificare l’idoneità della zona di installazione tenendo conto
che all’interno del rivestimento, dopo aver montato le contropareti, vi sono temperature molto elevate a partire dal focolare del
caminetto verso l’alto.
• Verificare che l’area d’installazione, sottostante la portina antiesplosione, sia libera da impedimenti che ne possono ostacolare
l’apertura in caso di necessità.
• Prima di procedere all’installazione, verificare che i dati indicati
in targhetta corrispondano al tipo e alla pressione di gas cui
l’apparecchio verrà allacciato.
• Assicurarsi che il condotto d’arrivo del gas abbia la portata sufficiente e che sia previsto un rubinetto di servizio posizionato
vicino al caminetto, visibile e ben accessibile.
GRIGLIA
CONTROPARETE DI
RIVESTIMENTO
STAFFE DI
ANCORAGGIO
A PARETE
Per l’installazione procedere nel modo seguente:
• creare un supporto od una base idonea in modo da posizionare il
caminetto all’altezza prevista dal tipo di rivestimento prescelto (vedi
istruzioni sul manuale del rivestimento).
• Fissare il caminetto alla parete prospicente lo schienale utilizzando le
due staffe di ancoraggio posizionate sulla parte superiore della camera
rispettando le distanze previste al paragrafo “Distanze di sicurezza”.
SUPPORTO
CAMINETTO
DT2030579-01
Fig. 24
SUPPORTO PER STAFFE
STAFFE DI
ANCORAGGIO
• In caso di caminetto installato ad angolo prevedere un supporto
per le staffe di ancoraggio.
• Installare il condotto di scarico in base ad una delle configurazioni
previste nel paragrafo “Scarico fumi - POSSIBILI CONFIGURAZIONI
DI COLLEGAMENTO PER EVACUAZIONE FUMI” ed accertarsi che tutte
le connessioni siano a tenuta.
CONTROPARETE DI RIVESTIMENTO
• Procedere con la costruzione parziale della controparete ed installare
la scatola metallica di comando contenente la valvola gas e
l’eventuale ricevitore se presente.
E’ importante che la scatola metallica di comando sia posta
in basso rispetto all’apparecchio in modo da non risentire del
calore di irraggiamento del bruciatore. I componenti elettrici
si danneggiano se esposti a temperature superiori a 60°C.
La scatola di comando deve essere installata all’interno dell’abitazione, per essere protetta dalle intemperie, e la distanza tra la valvola gas ed il bruciatore non deve superare il
metro.
Collegare la scatola metallica di comando al corpo dell’apparecchio , usando un filo di messa a terra giallo/verde con
sezione 1,5 mm2. Se possibile collegare l’intera unità all’impianto di terra dell’abitazione.
DT2030580-00
Fig. 25
ARIA
CONVETTIVA
IN USCITA
SCATOLA PER
VALVOLA GAS
DT2030581-01
14
Fig. 26
Italiano
• Effettuare l’allacciamento del gas (metano) o GPL rispettando le
dimensioni dei tubi. Il tubo principale di collegamento, nonché i tubi
in rame tagliati ed il tubo in alluminio della fiamma pilota, devono
essere privi di bave e soffiati con aria compressa secca e pulita.
15
Prima di procedere con il completamento dell’opera eseguire
tutte le operazioni della buona norma tecnica, nonché quelle
riportate nelle norme UNI7129/7131/10738.
E’ importante verificare:
- che l’apparecchio sia a tenuta,
- il buon funzionamento del condotto di scarico,
- il funzionamento del rubinetto di regolazione, dell’accensione della fiamma pilota, del bruciatore principale e della
termocoppia.
Effettuare una prova di pressione del gas, mediante un micromanometro da inserire negli attacchi 5 e 6 di fig. 28 e 29.
• Verificato che i collegamenti ed il funzionamento sono corretti, prima
di completare con il montaggio delle contropareti e del rivestimento è
importante isolare l’apparecchio per evitare il rischio di fessurazioni o
deterioramento di questi materiali. Si può utilizzare a questo scopo un
materassino in fibra ceramica, da 15 cm massimo, da stendere nelle
seguenti posizioni:
- Parte anteriore della faccia superiore
- Parte anteriore delle due faccie laterali (fig. 26).
DT2031107-00
Non isolare mai la parte posteriore dell’apparecchio!!
In questa fase, fino a quando tutti i lavori di costruzione, intonacatura e
pittura non saranno completati, proteggere la scatola metallica di
comando da sporco e umidità, ad esempio con una pellicola di plastica.
15
Italiano
3.2 Collegamento valvola gas manuale - Fig. 27 - 28
Questo dispositivo va sistemato nella scatola metallica di comando.
Nelle immagini 27 - 28 sono riportate le indicazioni per il collegamento.
1)
2)
3)
4)
6)
7)
Fig. 27
1
raccordo da 12 mm entrata gas
uscita gas alimentazione bruciatore
collegamento termocoppia
uscita gas fiamma pilota
attacco rilievo pressione gas alimentazione bruciatore
cavo collegamento piezoelettrico
7
2
4
3
DT2030582-00
Fig. 28
6
DT2030639-00
3.3 Collegamento ricevitore in radiofrequenza - Fig. 29 ÷ 32
La versione con radiocomando prevede il collegamento tra la valvola
gas (fig. 29) e l’unità ricevente (fig. 30) secondo lo schema riportato
nell’immagine (fig. 32).
Prestare attenzione che i cavi che escono dal connettore
posizionato sul blocchetto collegamento termocoppia siano
collegati correttamente. Il cavo con terminale nero (12) va
collegato all’interruttore “O-I” e il cavo con terminale rosso
(9) va collegato al ricevitore (fig. 32).
L’alimentazione elettrica è di tipo autonomo data dalle batterie di tipo
alcalino inserite nell’unità ricevente e nel telecomando.
Utilizzare una batteria 9V PP3 nel telecomando e 4 batterie 1,5V AA nell’unità ricevente.
Inserire le batterie solo dopo che tutti i fili verso l’unità ricevente,
la valvola gas e la fiamma pilota sono stati collegati.
Il ricevitore/telecomando funzionano in radiofrequenza e per questo non
è necessario puntare direttamente il telecomando verso il ricevitore
perché i due dispositivi entrino in comunicazione. Il sistema funzionerà
comunque a condizione che la distanza tra ricevitore e telecomando sia
inferiore ai 10 m.
Il comando a distanza a radiofrequenza è preimpostato su un unico
codice che, all’occorrenza può essere modificato (vedi paragrafo
“Telecomando - MODIFICA CANALI DI FREQUENZA” su manuale utente).
L’unità ricevente va piazzata all’interno della scatola metallica di
comando assieme alla valvola gas. E’ importante comunque che l’unità
ricevente sia in una zona accessibile, sia per la sostituzione delle batterie, sia per l’eventuale scollegamento del cavo alimentazione piezoelettrico che nel caso di intervento manuale va collegato alla valvola gas
(vedi paragrafo “Funzionamento con telecomando - MECCANISMO DI
INTERVENTO MANUALE” sul manuale utente).
Fig. 29
5
6
4
1
2
3
DT2030583-00
Fig. 30
8
9
10
7
11
DT2030584-00
Fig. 31
8
9
12
13
DT2030626-00
16
Fig. 32
Italiano
1) raccordo da 12 mm entrata gas
2) uscita gas alimentazione bruciatore
3) collegamento termocoppia
4) uscita gas fiamma pilota
5) attacco per rilievo pressione gas di rete
6) attacco rilievo pressione gas alimentazione bruciatore
7) cavo collegamento piezoelettrico
8) cavo collegamento ricevitore - interruttore “O-I” su valvola gas
9) cavo collegamento ricevitore – blocchetto termocoppia
10) antenna
11) cavo a 8 vie collegamento unità ricevente con valvola gas
12) cavo collegamento blocchetto termocoppia - interruttore “O-I”
13) dado bloccaggio collegamento termocoppia
INTERRUTTORE “0-I”
12
CAVO CON TERMINALE NERO
Non stringere eccessivamente il dado (13) al fine di non danneggiare la sensibilità della termocoppia. Tale attenzione va
estesa anche al collegamento sulla valvola manuale.
Il filo dell’antenna va liberato dai morsetti sulla scatola del
ricevitore e posizionato ad una distanza adeguata dal cavo
collegamento piezoelettrico (7). Accertarsi che i due non si
incrocino ed evitare qualsiasi contatto con i componenti in
metallo.
CAVO 8 VIE
11
CAVO CON TERMINALE ROSSO
CAVO COLLEGAMENTO
PIEZOELETTRICO
7
8
TERMOCOPPIA
PIEZOELETTRICO
ANT
SPARK
9
SW TC
VANO PER
BATTERIE
4 AA Batteries
DT2030638-00
17
Italiano
3.4 Preparazione del letto di braci e disposizione dei tronchetti
ceramici - Fig. 33 ÷ 37
Di serie con il caminetto vengono forniti dei tronchetti in ceramica raggruppati in un set.
Un set è normalmente composto da un tronchetto grande, due tronchetti ramificati, un tronchetto ricurvo, 1 tronchetto piccolo ed un sacchettino di braci.
La quantità di set fornita, varia a seconda del modello di caminetto
Lo schema sottostante riassume, per ogni modello di caminetto, la
quantità di tronchetti fornita.
Modello
IG70
IG 90
IG 120
IG 120B
Quantità
1 Set
1 Set
2 Set
2 Set
Fig. 33
DT2030586-00
Fig. 34
.
Utilizzare esclusivamente le braci e i tronchetti ceramici in dotazione
all’apparecchio.
Per le parti di ricambio, tra cui anche il tappettino, potrete rivolgervi al
vostro rivenditore, ma l’installazione dovrà essere affidata ad un tecnico abilitato.
Disposizione dei tronchetti ceramici - Fig. 33 - 34
• Collocare il tappettino sopra il bruciatore in maniera tale che tutti i
fori del tappettino coincidano e siano allineati con i fori ricavati nella
piastra superiore del bruciatore. (Fig. 33)
• Distribuire parte delle braci sulla parte superiore del tappettino e della
griglia avendo cura che non penetrino all’interno della protezione del
pilota danneggiando il pilota o la termocoppia. (Fig. 34). Assicurarsi
durante il loro posizionamento che non vadano a coprire o parzializzare i fori d’uscita del gas e dell’aria comburente.
• La disposizione dei tronchetti varia in funzione del modello di apparecchio installato. Nelle immagini che seguono indichiamo la disposizione più razionale ed estetica per la sistemazione dei tronchetti per
i vari modelli. Fare attenzione, anche per questi, che durante il
loro posizionamento non vadano a coprire o parzializzare i fori
d’uscita del gas e dell’aria comburente.
18
DT2030587-00
Fig. 35
Modello: IG 120 – Fig. 36
• Collocare simmetricamente i due tronchetti grandi (1) sul retro del bruciatore, senza andare in appoggio allo schienale del focolare.
• Collocare i quattro tronchetti “ramificati” (2) con l’estremità ramificata in
appoggio a ciascuna estremità dei tronchetti grandi. L’altra estremità sarà per
i due esterni in appoggio sulla griglia, per i due interni sopra o vicino la protezione del pilota.
• Sistemare i due tronchetti ricurvi (3) in posizione centrale tra i tronchetti
ramificati con una estremità sopra il tronchetto grande posteriore e l’altra
sopra la griglia.
• Collocare i due rimanenti tronchetti piccoli (4) in modo simmetrico nella parte
anteriore del bruciatore con una estremità sul tronchetto ricurvo e l’altra sulla
griglia.
• Ultimata la sistemazione dei ceppi, controllare che le braci non si siano spostate ed eventualmente completare con la distribuzione delle rimanenti.
Fig. 36
Modello: IG 120 B – Fig. 37
• Essendo il caminetto bifacciale sono previste due soluzioni: la prima privilegiando una delle due facciate con disposizione dei tronchetti come sui
modelli IG 90 – IG 120, la seconda con disposizione dei tronchetti in modo
simmetrico rispetto alle due facciate (vedi figura) come sui modelli IG 70.
• Ultimata la sistemazione dei ceppi, controllare che le braci non si siano spostate ed eventualmente completare con la distribuzione delle rimanenti.
Fig. 37
Italiano
Modelli: IG 70 / IG 90 – Fig. 35
• Collocare in posizione centrale il tronchetto grande (1) sul retro del bruciatore, senza andare in appoggio allo schienale del focolare.
• Collocare i due tronchetti “ramificati” (2) con l’estremità ramificata in appoggio a ciascuna estremità del tronchetto grande e l’altra in appoggio sulla griglia.
• Sistemare il tronchetto ricurvo (3) in posizione centrale con una estremità
sopra il tronchetto grande posteriore e l’altra vicino la protezione del pilota.
• Collocare il rimanente tronchetto piccolo (4) con una estremità sopra il tronchetto ricurvo e l’altra sulla griglia.
• Ultimata la sistemazione dei ceppi, controllare che le braci non si siano spostate ed eventualmente completare con la distribuzione delle rimanenti.
DT2030590-00
➁
➂
➀
➃
➁
DT2030593-00
➁
➃
➂
➀
➁
DT2030816-00
➁
➃
➂
➀
➁
Disposizione della ghiaia
• Collocare il tappettino sopra il bruciatore assicurandosi che tutti i fori siano
allineati.
• Distribuire uniformemente il contenuto dei sacchetti di ghiaino sopra il tappettino. Distribuire la ghiaia in modo che ricopra uniformemente l’intero bruciatore; parte della ghiaia potrà anche essere distribuita sulla piastra della
griglia.
• Assicurarsi che la ghiaia non finisca all’interno della protezione del bruciatore pilota.
19
4.0 MANUTENZIONE
DT2010748-00
Italiano
Di seguito vengono indicati gli interventi minimi da eseguire con cadenza almeno annuale prima del periodo di funzionamento.
Gli interventi di manutenzione specificati, come ogni altro intervento sull’apparecchio, devono essere eseguiti esclusivamente da
un tecnico abilitato.
PULIZIA DEL FOCOLARE
• Aprire lo sportello e togliere tutti gli elementi ceramici.
• Rimuovere il tappettino dal piano superiore del bruciatore, controllarne l’integrità ed asportare eventuali detriti con l’ausilio di un aspirapolvere
e di un spazzola sufficientemente morbida e non metallica.
• Rimettere il tappettino nella sua posizione.
• Spazzolare e risistemare gli elementi ceramici, seguendo le istruzioni riportate al paragrafo “Preparazione del letto di braci e disposizione dei
tronchetti ceramici”, sostituendo all’occorrenza gli elementi rotti o danneggiati.
• Controllare tutte le guarnizioni dello sportello (vetro incluso) e richiudere.
CONTROLLO BRUCIATORE E VERIFICA FUGHE GAS
• Controllare lo stato di pulizia e l’integrità del bruciatore.
• Eseguire un controllo del sistema di sicurezza uscita gas. Se fosse necessario intervenire sul bruciatore , il tecnico dovrà verificare la pressione
di regolazione all’ingresso del bruciatore. Il dato di pressione corretto è riportato al paragrafo “Dati tecnici”.
• Verificare l’esistenza di eventuali fughe di gas nell’impianto.
• Procedere ad un controllo dell’accensione.
CONTROLLO CANNA FUMARIA
Controllare la corretta funzionalità del condotto evacuazione fumi e aspirazione aria comburente.
In caso di sostituzione componenti usare solo ricambi originali PIAZZETTA; ricambi non originali comportano la decadenza della garanzia e possono risultare pericolosi.
5.0 ANOMALIE E RIMEDI
DT2010361-00
LA FIAMMA PILOTA NON SI ACCENDE O NON RESTA ACCESA
Verificare che il rubinetto del gas sull’apparecchio e sul contatore / sulla bombola sia aperto.
Tenere premuta la manopola di comando per almeno venti secondi dopo l’accensione della fiamma pilota per garantire il funzionamento della valvola di sicurezza della termocoppia. Assicurarsi che l’iniettore del bruciatore pilota non sia ostruito o bloccato e sia libero da polvere o sporco.
Assicurarsi che la termocoppia non sia stata danneggiata durante il trasporto. Questo dispositivo elettromagnetico è infatti molto delicato.
In caso di impianto alimentato a propano (GPL) accertare la presenza di gas nella bombola.
IL PILOTA NON BRUCIA O NON FUNZIONA CORRETTAMENTE
Verificare che la fiamma del bruciatore pilota sia di dimensioni corrette per il tipo di gas impiegato. La fiamma dovrebbe convergere sul sensore
della termocoppia.
Verificare che la fiamma pilota sia stata regolata.
IL BRUCIATORE PRINCIPALE NON FUNZIONA CORRETTAMENTE
Assicurarsi che vi sia un’adeguata pressione di alimentazione del gas all’apparecchio. Controllare la pressione con un manometro collegandolo
all’attaco rilievo pressione gas sulla valvola gas. Assicurarsi che venga impiegato un adeguato volume di gas. Lasciar funzionare l’apparecchio al
massimo della potenza, chiudere tutte le altre utenze gas eventualmente esistenti in casa e calcolare la quantità di combustibile bruciato leggendo il contatore.
Verificare che la combustione del bruciatore avvenga correttamente. La fiamma dovrebbe essere uniforme sull’intero piano superiore del bruciatore prima di sistemarvi qualsiasi elemento.
20
IMPORTANT INSTRUCTIONS
• This booklet has been prepared by the manufacturer and contains
information addressed to anyone involved in the installation and
maintenance of the product.
• Read the instructions and the technical information contained in this
booklet carefully before proceeding with installation, use or repairs.
• Compliance with the instructions in this booklet guarantees the safety of persons and of the product; it also ensures more efficient operation and an increased lifespan.
• This appliance has been designed, tested and approved in conformity with current applicable regulations concerning the use, efficiency
and safety of the products.
• The appliance has a pilot light at the gas outlet, which locks the gas
feed valve when the oxygen level falls to below established values
(gas outlet safety system). This device is located toward the front of
the burner and needs no adjustment by the installer. The system must
not be disconnected and if any parts need replacing, only use original
spare parts.
• The glass and the frame of this appliance act as a fireguard. No part
of the door or the frame of the appliance must be permanently removed. In such circumstances the safety of children or disabled persons
cannot be guaranteed and the advisability of providing extra protection should therefore be considered.
• This appliance is fitted with a grate that has embers and ceramic logs
containing refractory ceramic fibres consisting of artificial vitreous
silicate fibres. Excessive exposure to these materials could cause irritation to the eyes, skin and the respiratory system. Keep the release
of powder and dust to a minimum when handling these materials.
Whenever one of the components of the bed of embers or the ceramic logs has to be replaced, seal the removed part in a heavy polyethylene bag and take it to an authorised waste disposal centre (ecological island).
• The appliance must not be used if the glass is broken and must never
be used with the door open, as it is a room-sealed fireplace. This is
the best guarantee of safety for the environment in which the fire is
installed, since there is no danger of escaping combustion residues
or of removal of oxygen from the room.
• Being a room-sealed appliance, it may he installed in any type of
room that can be ventilated. LPG-fired appliances are, however,
unsuitable for installation in rooms that have the floor located below
ground level or are directly connected or communicating with rooms
that are of this type. Also premises used as a garage, storeroom for
combustible material or for activities with fire risk are unsuitable.
• The appliance has been designed to act as an efficient heating device and consequently all the body components become very hot
during use. Do not touch working surfaces. The only exception is the
control knob and the flap protecting the controls.
See the guarantee certificate enclosed with the product for the terms, limitations and exclusions.
In line with its policy of constant product improvement and renewal, the manufacturer may make changes without notice.
This document is the property of Gruppo Piazzetta S.p.A.; no part of it may be disclosed to third parties without the written permission
of Gruppo Piazzetta S.p.A. All rights reserved by Gruppo Piazzetta S.p.A.
Any alterations or repair work that is not authorised in writing invalidates the type-approval certificates. In this case the product could
be a danger for persons and property; the manufacturer is relieved from all liability and may claim damages to its image.
21
English
ANY NATURAL GAS- OR LPG-FIRED APPLIANCE MUST BE
INSTALLED BY A QUALIFIED TECHNICIAN IN CONFORMITY
WITH CURRENT REGULATIONS ESTABLISHED BY NATIONAL
AND LOCAL LEGISLATION AND IN COMPLIANCE WITH THE
INSTRUCTIONS CONTAINED IN THIS BOOKLET.
DT2010738-00
English
CONTENTS
DT2010187-00
Section
Title
Page
1.0
1.1
1.2
1.3
1.4
1.5
General information
Flue
Load-bearing capacity of the floor
Suitable heat insulating materials
Safety distances
Lining wall
23
24
28
28
29
30
2.1
2.2
2.3
2.4
Technical data and specifications
Specifications
Technical data
Accessories
Size and weight
31
31
31
31
32
3.1
3.2
3.3
3.4
Installation
Installation of flue and surround/lining wall
Manual gas valve connection
Radiofrequency receiver connection
Preparation of the bed of embers and positioning the ceramic logs
33
33
35
35
37
4.0
Maintenance
39
DT2010748-00
5.0
Troubleshooting
39
DT2010361-00
2.0
3.0
This booklet code H07020350 / DT2000215 – Rev.01 - (09-2007) comprises 40 pages.
22
Code
DT2010740-00
DT2010741-00
DT2010742-00
DT2010173-00
DT2010368-00
DT2010743-00
DT2010744-00
DT2010363-00
DT2010745-00
DT2010364-02
DT2010746-00
DT2010747-00
-
1.0 GENERAL INFORMATION
PIAZZETTA gas fires are appliances with a combustion circuit (combustion air intake, firebox, heat exchanger and flue) that is sealed in relation to
the room where the appliance is installed.
The combustion air intake and the flue gas discharge take place outside the room through a concentric pipe. The flue gas is expelled naturally into
the external environment through the inner flue pipe, while the air for combustion enters through the annular space created between the outer
pipe and the inner flue pipe.
The gas appliance connected to the flue system with rigid concentric pipes has been approved in conformity with the CE standard for
gas appliances and can therefore only be used with this system.
The warranty is invalidated if the appliance is installed (completely or partly) with another system.
The flue pipe, including the wall or roof terminal, is supplied by the manufacturer according to connection requirements and is an integral part of the appliance.
Some possible connection layouts are given purely by way of demonstration in the paragraph Flue (FLUE CONNECTION EXAMPLES).
The fireplace has been designed to operate on natural (methane) gas or LPG. It is impossible to transform appliance operation from methane to
LPG or vice versa. The type and pressure of the gas with which the appliance is designed to operate are given on a rating plate attached under
the burner.
Both the burner and the pilot light are calibrated by the manufacturer. The factory settings of the gas control unit or the receiver should
not be touched prior to installation.
The fireplace must be connected to the type of gas indicated on the burner. Never connect a methane burner to LPG or vice versa.
The fireplace is designed by the manufacturer for operation with manual or remote control.
23
English
DT2010740-00
1.1 Flue
The flue may discharge to an outside wall or the roof and in any case in compliance with the provisions of national laws and local regulations.
The flue pipes, any bends and the flue termination must be positioned correctly and form a stable, rigid assembly.
Every joint must be sealed with the relative silicone seal plus clamp.
English
WALL OUTLET (Safety distances) – Fig. 1
Fig. 1
DT2030564-00
POSITION OF THE FLUE TERMINAL
MINIMUM DISTANCE
RATED HEAT OUTPUT OVER 7kW UP TO 16 kW
Below a window
A
150 cm
Below a vent
B
150 cm
Below the gutter
C
40 cm
Below a balcony (*)
D
40 cm
From an adjacent window
E
40 cm
From an adjacent vent
F
60 cm
From vertical or horizontal pipes or outlets (**)
G
30 cm
From a corner of the building
H
50 cm
From a building recess
I
50 cm
From the ground or another floor
L
150 cm
Between two terminals in vertical
M
150 cm
Between two terminals in horizontal
N
50 cm
From a facing wall without apertures or terminals within a radius
of 3 m from the flue gas outlet
O
100 cm
As above, but with apertures or terminals within a radius
of 3 m from the flue gas outlet
P
190 cm
(*) The flue terminals under a useable balcony must be located so that the flue gas route, from the point of exit of the terminal to their discharge
from the outer edge of the balcony including the height of any closed balustrade, is at least 2 metres.
(**) When placing the flue terminals there must be at least 50 cm gap from materials sensitive to the action of the combustion products (e.g. plastic gutters and downpipes, projecting wood elements, etc.); if the distance is less, use adequate screening for these materials.
24
ROOF OUTLET (Safety distances) - Fig. 2 / 5
Vent, grille or window that can be opened.
Fig. 2
Fig. 2) Vent, grille or window that can be opened, serving inhabited
rooms, bathrooms or toilets located at the same height as the
flue pipe outlet.
6m
English
A)
A
DT2030565-00
Fig. 3
3m
1m
Fig. 3) Vent, grille or window that can be opened, serving inhabited
rooms, bathrooms or toilets located at least 1 m below the flue
pipe outlet.
A
DT2030566-00
Fig. 4
2m
1m
Fig. 4) Vent, grille or window that can be opened, serving inhabited
rooms, bathrooms or toilets located on a vertical wall at least 1
m below the flue pipe outlet.
A
DT2030567-00
Fig. 5) Vent, grille or window that can be opened, serving inhabited
rooms, bathrooms or toilets located on an inclined surface and
in a higher position than the flue pipe outlet.
Fig. 5
6m
A
DT2030568-00
25
FLUE CONNECTION EXAMPLES - Fig. 6 / 8
Fig. 6
27 26
9
X
8
4
5
6
7
18
14 28
23 24 25
18
Y
min. 1,19 m
English
SOLUTION 1 (Fig. 6)
DISCHARGE TO OUTSIDE WALL
Distance “X”: 0 (min) – 3m (max)
Distance “Y”: 1m (min) – 3m (max)
2
16
17
3 30
15
1
DT2030561-00
SOLUTION 2 (Fig. 7)
DISCHARGE TO ROOF WITHOUT BENDS
Distance “Y”: 2m (min) – 11m (max)
Fig. 7
10 11
12
19
Y
13
19
4
5
6
7
18
23 24 25
18
2
3 30
1
DT2030562-00
Fig. 8
10 11
19
27 26
(1) (Y1+Y2) > 2X
The vertical part (or riser at 45°) is always at least double the horizontal part
9
X
8
4
5
6
7
23 24 25
4
Y1
Maximum number of bends: 2 at 90°
Maximum number of bends: 4 at 45°
12
Y2
SOLUTION 3 (Fig. 8)
DISCHARGE TO ROOF WITH BENDS
Distance “X” (1):
0 (min) – 3m (max)
Distance “Y1” (1):
1m (min) – 10m (max)
Distance “Y1+Y2” (1): 1m (min) – 10m (max)
18
5
6
7
18
20
23 24 25
2
3 30
1
DT2030563-01
26
PARTS LIST - Fig. 6 / 8
Description
1
Appliance
2
Adaptor Ø 150 quick fit 2871042
3
Article code
Colour (*)
Stainless st
Anthracite
P08091170
•
•
Adaptor clamp Ø 150 2841150
P08091120
•
4
Concentric pipe 50 cm 2871015
P08091000
•
5
Concentric pipe 100 cm 2871016
P08091010
•
6
Telescopic pipe 35.2 cm – 44 2871017
P08091020
•
7
Adjustable concentric pipe 50 cm 2871018
P08091030
•
8
Concentric 90° bend 2871031
P08091040
•
9
Concentric 45° bend 2871032
P08091050
•
10
Roof terminal 136 cm 2871024
P08091060
•
•
11
Roof terminal 61 cm 2871138
P08091070
•
•
12
Roof flue tile with slope 20° - 45° 2841025
P08099010
•
13
Aluminium roof flashing 2841026
P08093030
•
14
Wall terminal 2871030
P08091080
•
15
Quick fit clamp Ø 150 2841021
P08091090
•
16
Silicone seal Ø 150 2841022
P08099020
17
Silicone seal Ø 100 2841023
P08099030
18
Wall clamp Ø 150 2841029
P08091100
•
19
Flame protection plate Ø 150 2841027
P08091110
•
20
Concentric tee with cleaning cover 2871035
P08091130
•
21
Concentric pipe 16.5 cm with take-off 2871036
P08091140
•
22
Concentric 90° bend with cleaning cover 2871040
P08091150
•
23
Enamelled concentric pipe 50 cm 90008101
P08092000
•
24
Enamelled concentric pipe 100 cm 90008100
P08092010
•
25
Adjustable enamelled concentric pipe 50 cm 90008102
P08092030
•
26
Enamelled concentric 90° bend 90008103
P08092040
•
27
Enamelled concentric 45° bend 90008108
P08092050
•
28
Enamelled wall terminal 90008106
P08092080
•
29
Enamelled quick fit clamp Ø 150 90008107
P08092090
•
30
Enamelled adaptor clamp Ø 150 90008005
P08092120
•
Enamelled concentric tee with cleaning cover 90008109
P08092130
•
Enamelled concentric pipe 16.5 cm with take-off 90008110
P08092140
•
Enamelled concentric 90° bend with cleaning cover 90008111
P08092150
•
Roof flue tile with slope > 45° 2441039
P08099040
•
Universal wall plate Ø 150 99920002
P08091160
English
Pos. n°
(*) Colour
stainless steel: natural stainless steel colour
anthracite: anthracite grey enamel
27
SIZES OF FLUE PIPES AND BENDS - Fig. 9
Fig. 9
CONCENTRIC PIPE
LENGTH 100 cm
TELESCOPIC PIPE
LENGTH 32.5 – 44 cm
24
25
graft cm4
graft cm4
45,5
7
28,5-40
32,5-44
56
60
ADJUSTABLE WALL TERMINAL
graft cm4
graft cm4
CONCENTRIC 90° BEND
8
21,3
18,8
26
CONCENTRIC TEE WITH
CLEANING COVER
22,8
23
6
5
28
graft cm4
49,5
45,5
4
49,5
95,5
ADJUSTABLE CONCENTRIC
PIPE, LENGTH 50cm
99,5
English
CONCENTRIC PIPE
LENGTH 50 cm
14
graft cm4
30
15,5
graft cm4
24
27
4
111,5
9
graft cm4
32,15
23
10
23,25
9
67,55
5
19,25
2
7,
CONCENTRIC PIPE LENGTH
50 cm SLOPING 45°
77,5
CONCENTRIC 45° BEND
CONCENTRIC PIPE LENGTH
100 cm SLOPING 45°
20
20
30
11
11,5
graft cm4
ADJUSTABLE ROOF TERMINAL
32,15
67,55
DT2030569-01
To calculate the number of pipes required, take into account that the useful height of the adaptor is 9 cm and that 4 cm must be deducted from
the total pipe length for each joint (the socket/spigot on the pipe is 2.5 cm).
1.2 Load-bearing capacity of the floor
Check the load-bearing capacity of the floor by adding together: the weight of the protective parts (lining walls), insulating materials, surround and
the fireplace (given in the paragraph “Size and weight”).
If the floor has an unsuitable load-bearing capacity, take adequate countermeasures, for example, by using a sheet metal plate to distribute the
load or by constructing a load-bearing reinforced concrete slab at least 6 cm thick.
1.3 Suitable heat insulating materials
Type of suitable heat insulating materials.
Material:
mineral fibre; ceramic fibre; rock wool.
Form:
sheets; mat; shells.
Specifications: specific weight of at least 80kg/m3 with limit working temperature of at least 700°C.
Thickness:
as shown in the figures in the paragraph “Safety distances”.
If the insulating material is not lining the walls, it must be fixed all over the surface of the walls with anchorage points every 30cm.
Material coded “AGI Q132” or “DIN 18895” is allowed for heat insulation.
28
Fig. 10
5 CM AIR GAP
LINING WALL IN FIRE
RETARDANT MATERIAL
SUCH AS PLASTERBOARD
10 CM INSULATING
MATERIAL
SURROUND DEPTH
Walls
INFLAMMABLE WALLS: there must always be 10 cm of insulating
material and 5 cm air gap between the appliance and inflammable
walls.
As the appliance must be at a safe distance from inflammable walls,
lining walls in a non-flammable material must be constructed so that
the surround may be correctly installed.
If pipes have to be passed through walls, ceilings or roofs in inflammable material (wood, etc.), suitable high temperature insulation (mineral
wool or glass wool covering, etc.) must be installed or an air gap provided to ensure there is no contact between the flue pipe and the material.
Leave at least 5 cm gap between the two elements.
FLAMMABLE WALLS
English
1.4 Safety distances - Fig. 10 / 16
DT2030265-00
Fig. 11
NON-FLAMMABLE WALLS
5 CM AIR GAP
NON-FLAMMABLE WALLS: there must always be 5cm air gap between the appliance and the wall.
SURROUND DEPTH
If the flue pipe or terminal passes through a non-flammable wall or roof,
the cavities must be filled with non-flammable, resilient materials with
a reduced heat transmission capacity (e.g. light concrete).
They may be protected with special protective pipes if necessary.
DT2030266-00
Fig. 12
COMBUSTIBLE
MATERIAL
5 cm
INSULATING MATERIAL
OR AIR GAP
DT2030575-00
Fig. 13
Fig. 14
FILLER
DT2030571-00
PROTECTIVE
TUBE
DT2030572-00
29
R1
00
cm
100 cm
Heat radiation area
DT2030573-01
10
0c
m
Fig. 16
R
1.5 Lining wall
PIAZZETTA Design gas fires need lining walls to be constructed on the
spot after having put the appliance in its final location, completed the
connections and checked that it is working properly.
The lining walls must be self-supporting irrespective of the materials
with which they are made and under no circumstances must they come
into contact with the fireplace.
Leave at least 3 mm gap all around the appliance to allow for expansion of the fireplace.
The surround/lining walls must be made with non-flammable materials
in compliance with regulations.
To ensure diffusion by natural convection of the heat generated by the
fire, at least two non-closable grilles must be installed on the lining
walls with a useful section of 350 cm2 each.
One should be placed low down near the floor and the other towards
the top but at a safe distance from inflammable materials such as: ceilings, beams, furniture, curtains, etc. The distances to be observed are
at least 50 cm from the ceiling and 30 cm at the sides (fig. 17).
With ceilings that are over 3 m high, the 50 cm may be reduced to
30 cm.
Fig. 15
100 cm
Heat radiation area
DT2030574-01
Fig. 17
MIN. 30 CM
FLAMMABILE MATERIALS
MIN. 50 CM
CELING IN FLAMMABILE MATERIAL
FLAMMABILE MATERIALS
English
Radiation area
Keep any object made of combustible or inflammable material, such as
curtains, wood furnishings, ornaments, etc., outside the radiation area
of the fireplace and in any case at a distance of at least 1 m from the
heating block. (fig. 15-16).
MIN. 30 CM
DT2030271-00
30
2.0 TECHNICAL DATA AND SPECIFICATIONS
2.1 Specifications
Gas fitting pipe
Supply pipe from gas valve to burner
Concentric flue
DT2010744-00
12 mm
ø 8 mm max. length 1 m
øi 100 mm – øo 150 mm
Unit of measurement
Natural gas (Methane)
Propane gas (LPG)
Family of gas
I2H
I3P
Gas
G20
G31
Supply pressure
mbar
Product identification code
Class of efficiency
Pilot burner (SIT OP)
English
2.2 Technical data
20
37
0063BL5625
0063BL5625
2
2
0.977.113
0.977.148
IG 70
Rated heat output
kW
8.3
8.5
Gas flow rate (max)
3
m /h
0.79
0.312
Burner pressure (hot)
mbar
16.0
29.4
560
260
Burner injector (Bray)
IG 90
Rated heat output
kW
9.5
9.5
Gas flow rate (max)
3
m /h
0.90
0.345
Burner pressure (hot)
mbar
16.8
29.2
650
280
Burner injector (Bray)
IG 120
Rated heat output
kW
11.5
11.5
Gas flow rate (max)
3
m /h
1.10
0.415
Burner pressure (hot)
mbar
10.6
29.1
1200
320
Burner injector (Bray)
IG 120 B
Rated heat output
kW
11.5
11.5
Gas flow rate (max)
3
m /h
1.10
0.415
Burner pressure (hot)
mbar
10.6
29.1
1200
320
Burner injector (Bray)
2.3 Accessories
ACCESSORIES PROVIDED IN THE KIT
Adaptor ø 150 mm
Adaptor clamp ø 150 mm
Log set
Screws and screw anchors for wall mounting
Gas valve box
Gas valve (MANUAL or FOR REMOTE CONTROL)
Copper pipe Ø 8
For appliances with remote control the following are also provided:
Receiver unit
Remote control
Piezoelectric igniter connecting cable
Gas valve – receiver unit connecting cable
Set of batteries
FINISHING ACCESSORIES
Concentric pipes and bends for the flue system (see paragraph “FluePARTS LIST“)
31
2.4 Size and weight - Fig. 18 / 21
Gas fire IG 70
Gas fire IG 90
Fig. 18
Weight 60 kg
Fig. 19
Weight 90 kg
69.3
63.1
81,9
43,5
50,5
9,5
35,9
53
9.5
3,8
50.5
13,6
44.1
3.2
10.8
3,8
English
3.2
89,5
73.5
38
40,4
2.4
2,4
37.9
35.5
10.2
12,3
54
DT1020274-00
Gas fire IG 120
DT1020314-00
Gas fire IG 120B
Fig. 20
Weight 120 kg
Fig. 21
Weight 115 kg
117,5
109,9
47,5
54,5
9,5
39,9
3,8
9
2,4
2,4
=
38
40,4
38
42,8
=
139
121
13,6
54,5
9,5
12,3
9
2,4
39,9
47,5
3,8
13,6
3,8
3,8
117,5
109,9
DT1020315-00
32
DT1020316-00
3.0 INSTALLATION
DT2010747-00
Fig. 22
The appliance must be installed and connected by a qualified
technician only, in conformity with national and local legislation.
• Check that the area of installation is suitable, taking into
account the very high temperatures that are reached from the
hearth upwards inside the surround after having installed the
lining walls.
• Check that there are no obstacles in the area of installation
below the anti-explosion door, which could obstruct opening of
the same in an emergency.
• Before proceeding with installation, check that the data on the
rating plate correspond to the type and pressure of the gas supply to which the appliance will be connected.
• Ensure that the gas supply pipe is of the correct size to provide
a sufficient flow rate and that a clearly identifiable and readily
accessible stopcock is inserted near the fireplace.
GRILLE
GRIGLIA
LINING
WALL DI
CONTROPARETE
RIVESTIMENTO
WALL MOUNTING
STAFFE DI
BRACKETS
ANCORAGGIO
A PARETE
GAS FIRE
SUPPORTO
SUPPORT
CAMINETTO
To install, proceed as described below.
•
Create a suitable support or base on which the gas fire can be placed at the height envisaged by the type of surround that has been
chosen (see instructions in the “surround” guide)
•
Fix the gas fire to the wall at the rear using the two anchoring
brackets located on the upper part of the fire, observing the
distances specified in the paragraph “Safety distances”.
•
If the gas fire is being installed in a corner, fix a support for
the anchoring brackets.
•
Install the flue in one of the ways described in the paragraph
“Flue –FLUE CONNECTION EXAMPLES” and make sure that all the
joints are tight.
•
Partially construct the lining wall and install the metal control box
containing the gas valve and any receiver to be installed.
English
3.1 Installation of flue and surround/lining wall - Fig. 22 / 25
DT2030579-01
Fig. 23
SUPPORT
FOR
BRACKETS
SUPPORTO
PER
STAFFE
ANCHORING
STAFFE DI
BRACKETS
ANCORAGGIO
LININGDI
WALL
CONTROPARETE
RIVESTIMENTO
DT2030580-00
Fig. 24
It is important that the metal control box is positioned lower
than the appliance so that the radiant heat from the burner
does not affect it. The electrical parts will be damaged if
exposed to temperatures above 60°C.
The control box must be installed inside the dwelling so that
it is protected against the weather. There must be no more
than one metre between the gas valve and the burner.
Install the box so that the distance between the gas valve and
the burner is not more than one metre.
Connect the metal control box to the body of the appliance
using a green/yellow earth wire with section 1.5 mm2. If possible connect the whole unit to the earthing system of the
dwelling.
CONVECTIVE
AIR FLOW
GAS VALVE
BOX
DT2030581-01
33
• Connect to the natural gas (methane) or LPG supply, complying with
the recommended pipe sizes. The main connecting pipe as well as
the cut copper pipes and the aluminium pipe for the pilot light must
be burr-free and blown clean with dry, clean compressed air.
Fig. 25
15
English
Before completing the installation, check:
- the appliance for leaks,
- efficient operation of the flue,
- operation of the stopcock, ignition of the pilot light and the
main burner as well as operation of the thermocouple.
Carry out a gas pressure test using a micromanometer, which
is to be inserted into fittings 5 and 6 as shown in fig. 27 and 28.
• Having checked that connections and operation are correct, before
completing installation of the lining walls and the surround it is important to insulate the appliance to prevent the risk of cracking or deterioration of these materials. Ceramic fibre mat with maximum thickness of 15 cm may be used for this purpose, applied in the following
positions:
- front part of the top surface
- front part of the two side surfaces (fig. 25).
Never insulate the rear part of the appliance!!
From now on until all the building work, plastering and painting has been
finished, protect the metal control box from dirt and humidity, for example by covering with a plastic film.
34
DT2031107-00
1)
2)
3)
4)
6)
7)
Fig. 26
1
12 mm gas inlet fitting
burner supply gas outlet
thermocouple connection
pilot light gas outlet
burner supply gas pressure tap
piezoelectric igniter connecting cable
7
2
English
3.2 Manual gas valve connection - Fig. 26 - 27
This device is placed inside the metal control box.
Figures 26 and 27 give indications for connection.
4
3
DT2030582-00
Fig. 27
6
DT2030639-00
3.3 Radiofrequency receiver connection - Fig. 28 / 31
For the version with radio control, the gas valve (fig. 28) must be connected to the receiver unit (fig. 29) as shown in the picture (fig. 31).
Make sure that the cables coming out of the connector on the
thermocouple terminal block are correctly connected. The
cable with black terminal (12) must be connected to the
“O-I” switch and the cable with red terminal (9) to the receiver (fig. 31).
The electrical supply is independent and comes from alkaline batteries
inserted into the receiver unit and the remote control.
Use one 9V PP3 battery in the remote control and four 1.5V AA batteries in the receiver.
Only insert the batteries after all the wires to the receiver, the gas
valve and the pilot light have been connected.
The receiver/remote control work in radiofrequency making it unnecessary to point the remote control directly at the receiver for them to
communicate. The system works properly, however, provided that the
distance between the receiver and remote control does not exceed
10 m.
The radiofrequency remote control is set on a single code, which may
be changed if necessary (see user guide, paragraph “Remote control”
under the heading CHANGING THE FREQUENCY CHANNELS).
The receiver is placed inside the metal control box together with the
gas valve. In any case it is important for the receiver to be readily
accessible so that the batteries can be easily replaced and the piezoelectric igniter supply cable disconnected, which in the case of manual
override must be connected to the gas valve (see user guide, paragraph
“Operation with remote control” under the heading MANUAL OVERRIDE MECHANISM).
Fig. 28
5
6
4
1
2
3
DT2030583-00
Fig. 29
8
9
10
7
11
DT2030584-00
Fig. 30
8
9
12
13
DT2030626-00
35
English
1) 12 mm gas inlet fitting
2) burner supply gas outlet
3) thermocouple connection
4) pilot light gas outlet
5) mains gas pressure tap
6) burner supply gas pressure tap
7) piezoelectric igniter connecting cable
8) connecting cable for receiver - “O-I” switch on gas valve
9) connecting cable for receiver – thermocouple terminal block
10) antenna
11) 8-wire cable for connecting receiver unit and gas valve
12) connecting cable for thermocouple terminal block - “O-I” switch
13) thermocouple connection lock nut
Fig. 31
“O - I” SWITCH
12
CABLE WITH BLACK TERMINAL
Do not overtighten the nut (13) or the sensitivity of the thermocouple could be damaged. This also applies to the connection on the manual valve.
Disconnect the antenna wire from the terminals on the receiver box and locate at a suitable distance from the piezoelectric igniter connecting cable (7). Ensure that the two do not
cross and avoid any contact with metal parts.
8-WIRE CABLE
11
CABLE WITH RED TERMINAL
PIEZOELECTRIC IGNITER
CONNECTING CABLE
7
8
THERMOCOUPLE
PIEZOELECTRIC
IGNITER
SPARK
ANT
9
SW TC
BATTERY
COMPARTMENT
4 AA Batteries
DT2030638-00
36
Model
IG70
IG 90
IG 120
IG 120B
Fig. 32
English
3.4 Preparation of the bed of embers and positioning the ceramic
logs - Fig. 32 / 36
The gas fire comes with the standard supply of a set of ceramic logs.
One set normally consists of one large log, two branched logs, one curved log, one small log and a bag of embers.
The number of supplied sets depends on the gas fire model.
The chart below sums up the quantity of supplied logs for each gas fire
model.
Quantity
1 Set
1 Set
2 Set
2 Set
DT2030586-00
Fig. 33
Only use the embers and ceramic logs supplied with the appliance.
Contact your local dealer for spare parts, including the mat, although
installation must be carried out by a qualified technician.
Positioning the ceramic logs - Fig. 32 - 33
• Place the mat over the burner so that the holes in the mat coincide
and are aligned with the holes in the upper plate of the burner.
(Fig. 32)
• Distribute some of the embers over the top of the mat and the grid,
taking care that they do not penetrate inside the pilot light shield and
damage the pilot light and the thermocouple. (Fig. 33). When placing
them ensure that they do not cover or shut off the gas and the
combustion air holes.
DT2030587-00
• The arrangement of the logs varies according to the installed model.
The pictures that follow show the most rational and aesthetic arrangement of the logs for the various models. Also for these take care
when placing them that they do not cover or shut off the gas and
the combustion air holes.
37
English
Models: IG70 / IG90 – Fig. 34
• Put the large log in the centre (1) at the back of the burner, but without touching the rear panel of the hearth.
• Put the two “branched” logs (2) so that their branched ends rest on each end
of the large log while the other end rests on the grid.
• Place the curved log (3) in the centre with one end on top of the large log at
the rear and the other near to the pilot light shield.
• Put the remaining small log (4) with one end on top of the curved log and the
other on the grid.
• Having finished laying the logs, check that the embers have not been moved
and if desired add the remaining embers.
Fig. 34
Model: IG 120 – Fig. 35
• Arrange the two large logs (1) symmetrically at the back of the burner, but
without touching the rear panel of the hearth.
• Put the four “branched” logs (2) so that their branched ends rest on each end
of the large logs. The other end of the two external logs will rest on the grid,
while that of the two internal logs will rest on top of or near the pilot flame
shield.
• Place the two curved logs (3) in the centre between the branched logs with
one end on top of the large log at the rear and the other on the grid.
• Arrange the two remaining small logs (4) symmetrically at the front of the
burner with one end on top of the curved log and the other on the grid.
• Having finished laying the logs, check that the embers have not been moved
and if desired add the remaining embers.
Fig. 35
Models: IG 120 B – Fig. 36
• As the gas fire is double-sided, there are two solutions: the first favours one
of the two sides with the logs being distributed as for models IG120, whereas the second has the logs arranged symmetrically in relation to the two sides
(see figure) as for models IG70.
• Having finished laying the logs, check that the embers have not been moved
and if desired add the remaining embers.
Fig. 36
DT2030590-00
➁
➂
➀
➃
➁
DT2030593-00
➁
➃
➂
➀
➁
DT2030816-00
➁
Positioning the pebbles
• Place the mat over the burner, ensuring that all the holes are aligned.
• Distribute the contents of the bags of pebbles evenly over the mat. Distribute
the pebbles so that they form an even layer over the whole burner; some of
them may also be distributed on the grid plate.
• Make sure that no pebbles go inside the pilot light shield.
38
➃
➂
➀
➁
4.0 MAINTENANCE
DT2010748-00
The minimum maintenance work to be carried out at least once a year is described below.
CLEANING THE HEARTH
• Open the door and remove all the ceramic elements.
• Remove the mat from the top of the burner, check for damage and remove any debris with the help of a vacuum cleaner and a sufficiently soft
non-metal brush.
• Replace the mat.
• Brush and replace the ceramic elements, following the instructions given in the paragraph “Preparing the bed of embers and positioning the
ceramic logs”, replacing broken or damaged elements as necessary.
• Check all the seals and gaskets of the door (glass included) and close.
CHECKING THE BURNER AND CHECKING FOR GAS LEAKS
• Check the burner for damage and for dirt.
• Check the gas outlet safety system. If necessary control the burner; the technician must check the cold setting pressure at the burner inlet. The
correct pressure is given under “Technical data”.
• Check for gas leaks in the installation.
• Check ignition.
CHECKING THE FLUE
Check that the flue and the combustion air intake are in proper working order.
Only use PIAZZETTA original spare parts when carrying out replacements; use of other than original spare parts invalidates the warranty and could be dangerous.
5.0 TROUBLESHOOTING
DT2010361-00
THE PILOT LIGHT DOES NOT IGNITE OR STAY LIT
Check that the gas tap on the appliance and on the meter/gas cylinder is open.
Keep the control knob pressed down for at least twenty seconds after igniting the pilot light to ensure that the thermocouple safety valve will operate correctly. Check the pilot burner injector for obstruction, blockage, dust or dirt.
Check that the thermocouple has not been damaged during transportation. This electromagnetic device is very delicate.
In the case of a propane-fired system (LPG), check that there is gas in the cylinder.
THE PILOT LIGHT DOES NOT BURN OR BURNS INCORRECTLY
Check that the pilot light flame is of the correct size for the type of gas being used. The flame should engulf the thermocouple sensor.
Check that the pilot light has been adjusted correctly.
THE MAIN BURNER DOES NOT BURN CORRECTLY
Check that there is sufficient gas supply pressure at the appliance. Check the pressure with a manometer, connecting it to the pressure tap on the
gas valve. Make sure that an adequate volume of gas is used. Let the appliance operate at full power, shut off all other gas appliances in the house
and calculate the quantity of burned gas by reading the meter.
Check that burner combustion is correct. The flame should be even over the whole top surface of the burner before putting any element over it.
39
English
The specified maintenance, like all other work on the appliance, must be carried out solely by a qualified technician.
www.miotto.it
Gruppo Piazzetta S.p.A. Technical Department - H07020350 / DT2000215 - Rev. 01 - (09/2007)
Via Montello, 22
31011 Casella d’Asolo (TV) - ITALY
Tel. +39.04235271 - Fax +39.042355178
http://www.piazzettadesign.com
e-mail:[email protected]