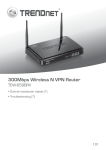
Download Quick Installation Guide TEW-652BRP
Transcript
Quick Installation Guide
TEW-652BRP
H/W: V1.0R
Table
of Contents
Table
of Contents
Español .......................................................................................................
1. Antes de iniciar ...................................................................................
2. Instalación del Hardware ....................................................................
3. Configuración del enrutador inalámbrico ...........................................
1
1
2
3
Troubleshooting ........................................................................................
7
Version 06.25.2008
1. Antes de iniciar
Contenidos del paquete
TEW-652BRP
?
?
CD-ROM para guía del usuario
Guía de instalación rápida
?
multilingüe
1 Cable Ethernet RJ-45
?
2 antena de 2dBi
?
AC Adaptador de alimentación
?
(5V, 2A)
Requisitos de instalación
?
Un PC con adaptador de red alámbrico o inalámbrico instalado de
manera correcta
Navegador Web: Internet Explorer (5.0 ó superior)
?
Internet de banda ancha
?
Cable Módem o DSL instalado
?
Aplicación
Wireless N Home Router
(TEW-652BRP)
Notebook with
Wireless N PC Card
(TEW-641PC)
Workstation with
Wireless N USB Adapter
(TEW-644UB)
Internet
Workstation with
Wireless N PCI Adapter
(TEW-643PI)
Cable/DSL
Modem
300Mbps, share multimedia throughout the house
1
Español
2. Instalación del Hardware
Nota: Reúna toda la información relacionada con su conexión a Internet antes
de empezar. Si es necesario, póngase en contacto con su proveedor de
servicios de Internet (ISP).
1. Compruebe que usted tiene una
conexión a Internet cuando
conecte su PC directamente al
cable o módem DSL. Abra su web
browser, (e.g. Internet Explorer) y
mecanografíe adentro un URL (e.g.
http://www.trendnet.com) en la
barra de la dirección.
2. Conecte la punta del cable RJ-45
amarillo a uno de los puertos LAN
del TEW-652BRP. Conecte la otra
punta del cable al puerto Etnernet
del PC. Después, conecte la
antena desmontable de 2dBi.
3. Conecte un extremo del cable
RJ-45 al puerto WAN del
TEW-652BRP. Conecte el otro
extremo del cable a su módem.
4. Conecte el adaptador de
alimentación AC al enrutador
inalámbrico y luego a una toma de
corriente.
5. Compruebe que las siguientes
luces del panel están encendidas:
Power (Encendido), LAN, WAN y
WLAN
2
Español
Internet
Cable/DSL Modem
3. Configuración del enrutador inalámbrico
Nota: Es recomendable configurar el enrutador inalámbrico desde un PC por
cableado.
1. Abra el navegador Web, introduzca
http://192.168.10.1 en la barra de
direcciones, luego pulse la tecla
Enter (Intro).
2. Introduzca el User name (Nombre
de Usuario) y Password
(contraseña), y después pulse
Log In (Conectarse).
User Name: admin
Password: admin.
3. El asistente le aparecerá
automáticamente. Haga clic en
Wizard (Asistente) si el asistente
no aparece de manera automática.
4. Haga clic en Next (siguiente).
3
Español
5. Introduzca un Password
(contraseña), confirme el
Password (contraseña), y luego
haga clic en Next (Siguiente). La
contraseña predeterminada es
admin.
6. Seleccione su Time Zone (Zona
horaria) y después haga clic en
Next (siguiente).
7. Haga clic en Next (Siguiente).
Nota: No modifique las
configuraciones por defecto a
menos que haya un conflicto con
su hardware.
4
Español
8. Establezca las opciones de
configuración tomando como base
la información suministrada por su
ISP. Siga las instrucciones del
asistente para completar la
configuración.
Nota: Cada tipo de conexión a
Internet podría tener diferentes
opciones.
9. Haga clic en Next (Siguiente).
Nota: Es recomendable activar la encriptación del enrutador inalámbrico. Para
más información sobre como configurar la encriptación del enrutador
inalámbrico por favor consulte la Guía de Usuario que se incluye en el CDROM de Guía Usuario.
10. Haga clic en Restart (Reiniciar).
5
Español
11. Haga clic en Close (Cerrar).
La instalación ha sido completada
Para obtener información más detallada sobre la configuración así como de las
configuraciones avanzadas del TEW-652BRP, por favor consulte la sección de
resolución de problemas, el CD-ROM de la Guía del Usuario, o el sitio Web de
TRENDnet en http://www.trendnet.com.
Registre su producto
Para asegurar los más altos niveles de servicio y apoyo al cliente, registre su producto
en línea en: www.trendnet.com/register
Gracias por elegir TRENDnet
6
Español
Troubleshooting
Q1: I typed http://192.168.10.1 in my Internet Browser's Address Bar, but an error
message says “The page cannot be displayed.” How can I get into the TEW652BRP’s web configuration page?
A1: First, check your hardware settings again by following the instructions in
Section 2. Second, make sure the LAN and WLAN lights are lit. Third, make sure
your TCP/IP settings are set to Obtain an IP address automatically (see the
steps below).
1. Go into the Control Panel, double-click
the Network Connections icon and
then right-click the Local Area
Connection icon and then click
Properties.
2. Click Internet Protocol (TCP/IP) and
then click Properties. Then click on
Obtain an IP address automatically.
Fourth, press on the factory reset button for 15 seconds.
Q2: I am not sure what type of Internet Account Type I have for my Cable/DSL
connection. How do I find out?
A2: Contact your Internet Service Provider's (ISP) support service for the correct
information.
Q3: The Wizard does not appear. What should I do?
A3: First, click on Wizard on the left hand side. Second, near the top of the
browser, “Pop-up blocked” message may appear. Right click on the message and
select Always Allow Pop-ups from This Site. Third, disable your browser's pop up
blocker.
7
Q4: I went through the Wizard, but I can not get onto the Internet. What should I
do?
A4: First, verify that you can get onto the Internet with a direct connection into your
modem. Second, contact your ISP and verify all the information that you have in
regards to your Internet connection settings is correct. Third, power cycle your
modem and router. Unplug the power to the modem and router. Wait 30
seconds, and then reconnect the power to the modem. Wait for the modem to fully
boot up, and then reconnect the power to the router.
Q5: I can not make a wireless connection to the Router. What should I do?
A5: First, make sure that the antenna is connected to the TEW-652BRP. Second,
double check that the WLAN light on the Router is lit. Third, power cycle the TEW652BRP. Unplug the power to the TEW-632BRP. Wait 15 seconds, then plug the
power back in to the TEW-652BRP. Fourth, contact the manufacturer of your
wireless network adapter and make sure the wireless network adapter is
configured with the proper SSID. The preset SSID is TRENDnet.
If you still encounter problems or have any questions regarding the TEW-652BRP,
please contact TRENDnet's Technical Support Department.
8
Certifications
This equipment has been tested and found to comply with FCC and CE Rules.
Operation is subject to the following two conditions:
(1) This device may not cause harmful interference.
(2) This device must accept any interference received. Including interference that may
cause undesired operation.
Waste electrical and electronic products must not
be disposed of with household waste. Please
recycle where facilities exist. Check with you Local
Authority or Retailer for recycling advice.
NOTE: THE MANUFACTURER IS NOT RESPONSIBLE FOR ANY RADIO OR TV
INTERFERENCE CAUSED BY UNAUTHORIZED MODIFICATIONS TO THIS
EQUIPMENT. SUCH MODIFICATIONS COULD VOID THE USER’S AUTHORITY TO
OPERATE THE EQUIPMENT.
ADVERTENCIA
En todos nuestros equipos se mencionan claramente las caracteristicas del adaptador de alimentacón
necesario para su funcionamiento. El uso de un adaptador distinto al mencionado puede producir
daños fisicos y/o daños al equipo conectado. El adaptador de alimentación debe operar con voltaje y
frecuencia de la energia electrica domiciliaria existente en el pais o zona de instalación.
Product Warranty Registration
Please take a moment to register your product online.
Go to TRENDnet’s website at http://www.trendnet.com/register
20675 Manhattan Place
Torrance, CA 90501
USA
Copyright ©2008. All Rights Reserved. TRENDnet.
This document in other languages
- español: Trendnet TEW-652BRP


