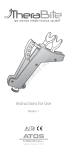
1
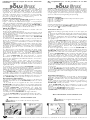
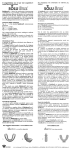
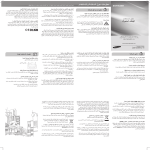
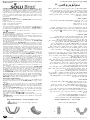
Nous vous félicitons pour l’achat de notre gouttière antibruxisme نهنئكم على شراء واقي األسنان ضد الصرير ® سولوبروكس SoluBrux® est la première gouttière antibruxisme dynamiquement modelable, pour usage immédiat. L’adaptation individuelle est norma- lement effectuée par le dentiste, mais le patient peut cependant la réaliser aussi lui-même, en suivant les instructions ci-après. Correctement ajustée, la gouttière offre un confort de port élevé, ainsi qu’une protection contre les conséquences du bruxisme (grincements de dents et compressions). سولوبروكس ® أول واقي أسنان ضد الصرير قابل لتغيير الشكل من المفروض أن يتم ذلك من طرف.بحيوية والستعمال فوري طبيب األسنان و لكن يستطيع المريض أيضا القيام بذلك وحده يوفر واقي، إذا تم ضبطه بشكل صحيح.بإتباع الدليل أدناه األسنان راحة حمل مرتفعة و حماية ضد عواقب الصرير (طحن .)األسنان و الضغط Contenu du paquet : Fig.A: 1x gouttière dentaire SoluBrux® anatomiquement préformée Fig.B: 1x boîte de conservation Fig.C: 1x fourche de maintien Fig.D: 1x feuillet occlusal : محتويات العلبة واقي األسنان سولوبروكس ® مشكل مسبقا تشريحيا1 :ص ا علبة حفظ1 :ص ب شوكة إحكام1 :ص ت ورقة إطباق1 :ص ث Tous les matériaux employés sont atoxiques et anallergiques, et certifiés pour usage dans la cavité buccale. SoluBrux® est protégée par la législation sur les brevets, et désignée par le sigle comme produit médical de classe I. Mode d’emploi : En règle générale, l’ajustement individuel s’effectue sur les dents de la mâchoire supérieure. 1 - Reliez (assemblez) la fourche de maintien (fig.C) avec le feuillet occlusal (fig.D). Veillez bien à orienter la fourche de maintien avec marquage vers le haut! 2 - Insérez jusqu’à la butée la combinaison feuillet occlusal / fourche de maintien sur la partie anterieure de SoluBrux® (voir illustration 1). 3 - Placez maintenant SoluBrux® avec le feuillet occlusal, avant la la phase d’échauffement, dans la bouche. Ceci est important pour deux raisons. 1. Si vous deviez éprouver un reflex nauséeux (petite mâchoire), la gouttière peut être raccourcie (ciseaux à ongles, scalpel). 2. Pour un ajustement parfait, il est essentiel de presser la langue contre le palais et d’évacuer la salive par suc- -cion, afin de générer un vide. Il conviendrait donc de s’y exercer au préalable. 4 - Portez une quantité suffisante d’eau à ébullition, puis versez l’eau bouillante dans un récipient adéquat. À l’aide de la fourche de maintien, immergez SoluBrux® et le feuillet occlusal durant 12-15 secondes. Pour contrôle, veuillez utiliser un chronomètre ou une montre avec trotteuse! (illustration 2) 5 - Sortez SoluBrux® de l’eau bouillante, et égouttez brièvement l’eau. Avant l’introduction dans la bouche, veillez à ce que la gouttière soit totalement ouverte. Si nécessaire, ouvrez avec les doigts en “écartant” un peu, pour éviter un retournement des bords lors de l’insertion et lors de la morsure, ce qui rendrait la gouttière inutilisable. Et tout ceci doit aller très vite, avant que le matériau ne retrouve sa rigidité en se refroidissant. 6 - Insérez maintenant précautionneusement SoluBrux® dans la bouche, fermez la bouche, serrez fortement les dents et générez un vide, afin que le matériau encore chaud et malléable s’adapte aux contours de vos dents. (illustration 3) 7 - Maintenez ce “vide” aussi longtemps que possible. Sortez SoluBrux® de la bouche après 1 à 2 mn, et plongez-la plusieurs minutes dans de l’eau froide. Enlevez maintenant la fourche de maintien, avec le feuillet occlusal, et conservez-les soigneusement pour d’éventuelles adaptations ultérieures, SoluBrux® pouvant subir un réajustement si nécessaire. Précisions importantes : - En cas de troubles parodontaux sévères ou de délabrements dentaires importants le port de SoluBrux® peut être contreindiqué - Si malgré un port régulier de 2 à 3 semaines de SoluBrux®, les phénomènes douloureux associés au bruxisme ne s’améliorent pas (ou même empirent), consultez impérativement votre dentiste - Ne brossez SoluBrux® que sous l’eau froide, avec du dentifrice ou du savon. Si nécessaire, des pastilles de nettoyage à effet rapide peuvent être également utilisées, dans l’eau ou dans un bain d’ultrasons. - Ne jamais nettoyer SoluBrux® à l’eau chaude! - Ne pas conserver SoluBrux® à proximité de sources de chaleur - SoluBrux® ne convient pas pour les dentitions comportant des dents de lait Plus d’informations : www.solubrux.com est un nom de marque déposée. كل المواد المستعملة غير سامة و ال تسبب حساسية و معتمدة تحمي سولوبروكس ® قوانين.إلمكانية االستعمال في فجوة الفم براءات االختراع ومعين باالسم المختصر كمنتج طبي من .الدرجة األولى : كيفية االستعمال . يتم التسوية الفردية على أسنان الفك العلوي،بشكل عام أوصل (اجمع) شوكة اإلحكام (ص ت) بورقة اإلطباق (ص-1 . تأكد من توجيه إشارة شوكة اإلحكام إلى األعلى.)ث شوكة اإلحكام إلى الحاجز على/ أدخل التركيبة ورق اإلطباق-2 .)1 الجزء األمامي لسولوبروكس ® (انظر التوضيح ضع اآلن سولوبروكس ® مع ورقة اإلطباق قبل مرحلة-3 األول يمكنكم قص واقي: هذا هام جدا لسببين.التسخين في الفم مشرط) إذا لديكم رد فعل غثياني (فك،األسنان (مقص األظافر من الضروري ضغط،صغير) و الثاني للتحصل على تسوية مثيلة اللسان ضد أعلى باطن الفم وإزالة اللعاب باالمتصاص إلنشاء .فراغ فينبغي لكل هذا التمرن مسبقا . قم بغليان كمية كافية من الماء و افرغ الماء في حاوية مناسبة-4 اغطس سولوبروكس ® وورقة اإلطباق،بمساعدة شوكة اإلحكام استعمل جهاز توقيت أو ساعة، ثانية و للمراقبة15 إلى12 مدة .)2 ذات عقارب (التوضيح أخرج سولوبروكس ® من الماء المغلي و انزع الماء-5 تأكد أن واقي األسنان مفتوح كلية، قبل إدخاله في فمك.باختصار افتح بأصابعك للتوسيع قليال فتتجنب بذلك،وإذا اقتضى األمر انقالب الحواف أثناء اإلدخال و أثناء العض مما قد يجعل واقي يجب أن تتم هذه العملية بسرعة.األسنان غير صالح لالستعمال .قبل أن تصبح المادة صلبة بعد برودتها أغلق فمك وشد، أدخل اآلن سولوبروكس ® بعناية في فمك-6 بقوة على أسنانك وأنشئ فراغ حتى تنسجم المادة التي بقيت ساخنة )3 (التوضيح.و سلسة حول أسنانك أخرج. حافظ على هذا «الفراغ» أطول مدة ممكنة-7 سولوبروكس ® من فمك بعد دقيقة إلى دقيقتين و أغطسه في ماء انزع اآلن شوكة اإلحكام مع ورقة اإلطباق و أحتفظ عليها.بارد ® بعناية لتعديالت ممكنة في المستقبل حيث أن سولوبروكس .قابل للتسوية عند الحاجة : تفاصيل هامة قد ال يسمح باستعمال سولوبروكس ® في حالة اضطرابات.شديدة و تشوهات معتبرة لألسنان إذا لم تخف اآلالم المتعلقة بالصرير (أو تسوء) رغم وضع استشر،منتظم لسولوبروكس ® مدة أسبوعين أو ثالث أسابيع .طبيبك فورا ال تغسل سولوبروكس ® بالفرشاة إال تحت الماء البارد إما يمكن استعمال،بمعجون األسنان أو بالصابون و إذا استلزم األمر أقراص تنظيف سريعة األثر في الماء أو في حمام موجات فوق .صوتية . ال تغسل أبدا سولوبروكس ® بالماء الساخن. ال تحتفظ ب سولوبروكس ® أمام مصدر حرارة. ال يصلح سولوبروكس ® ألسنان تشمل أسنان لبنيةwww.solubrux.com : لمعلومات أكثر سولوبروكس ® عالمة مسجلة 3 SOLUTIONS 4, ch. de la Bobinette CH-1263 Crassier - info-line: CH-0445869616 ou 0225483848 - DE- 04172 245 34 08 - F-0977196196 - [email protected] Felicitaciones por la compra de nuestro canal antibruxismo We congratulate you on the purchase of our bite tray Solubrux®es el primer aparato anti-bruxismo dina micamente moldeable para uso inmediato. La adaptación individual suele efectuarla habitualmente el Dentista, pero el paciente sin embargo puede realizar la por sí mismo siguiendo las instrucciones a continuación. Correctamente ajustado, el aparato ofrece un confort de uso muy elevado, así como una protección contra las consecuencias del bruxismo ( rechinar de dientes y compresiones ). SoluBrux® is the first dynamic mouldable bite splint for immediate use. Individual adjustment should be made by a dentist, but can also be made by patients themselves under compliance with the following instructions. Correctly moulded, it offers a high degree of comfort and protection against the consequences of bruxism (teeth grinding and pressing). Contenido del paquete : Fig A : 1 x aparato dental Solubrux® anatómica mente pre formado. Fig B : 1 x caja de conservación Fig C : 1 x horca de mantenimiento Fig D : 1 x hoja oclusal Todos los materiales empleados son a tóxicos y analérgicos, y certificados para uso en la cavidad bucal. Solubrux® es protegido por la legislación sobre las patentes y designada por la sigla como producto medical de classe 1. Modo de empleo : En regla general, el ajuste individual se efectúa sobre los dientes de la mandíbula superior. 1 - Unir la horca de mantenimiento ( fig. C) con la hoja oclusal (fig.D). Fijarse bien en orientar la horca de mantenimiento con señal hacia arriba. 2 – Insertar hasta el tope la combinación hoja oclusal/horca de mantenimiento sobre la parte anterior de Solubrux® (ver ilustración 1). 3 – Ahora colocar Solubrux® con la hoja oclusal, antes de la fase de calentamiento, en la boca. Esto es importante por dos motivos :1. Si por casualidad, se sintiera un reflejo de náusea ( pequeña mandíbula) el aparato puede ser acortado ( tijeras de uñas, escalpelo).2. Para un ajuste perfecto, es es esencial apretar la lengua contra el paladar y evacuar la saliva chupando, con el fin de generar un vacío convendría pues ejercitarse previamente. 4 – Hacer hervir una cantidad suficiente de agua, luego verterla hirviente en un recipiente adecuado. Con la ayuda de la horca de mantenimiento, inmergir Solubrux® y la hoja oclusal durante 12 – 15 segundos. Para controlar utilizar un cronometro o el segunderos de un reloj ( ilustración 2). 5 – Sacar Solubrux® del agua hirviente, y escurrir brevemente el agua. Antes de la introducción en la boca, fijarse en que el aparato esté totalmente abierto. Si necesario, abrir con los dedos apartando un poco, para evitar que dos bordes se arremanguen durante la inserción y durante la mordedura, lo que volvería inutilizable el aparato. Todo esto tiene que ir muy de prisa, ante de que el material vuelva a encontrar su rigidez al resfriar. 6 – Insertar pues con precaución Solubrux® en la boca, cerrar la boca, apretar fuertemente los dientes y generar un vacío, con el fin de que el material aún caliente y maleable se adapte al contorno de los dientes (ilustración 3). 7 – Mantener este « vacío » el más largo tiemposible. Sacar Solubrux® de la boca después de 1 o 2 minutos y sumirlo varios minutos en el agua fría. Sacar luego la horca de mantenimiento con lahoja oclusal, y conservarlos cuidadosamente para eventuales adaptaciones ulteriores, ya que Solubrux® puede soportar un reajuste si necesario. Precauciones importantes. • En caso de disturbios parodontales severos o de deterioros dentales importante el uso de Solubrux® puede ser contraindicado. • Si, a pesar de un uso regular de dos a tres semanas de Solubrux® los fenómenos dolorosos asociados al bruxismo no se mejoran (o hasta empeoran), consultar imperativamente al Dentista. • Limpiar Solubrux® exclusivamente con agua fría, con pasta dentífrica o jabón. Si es necesario, pastillas de limpieza con efecto rápido pueden ser igualmente utilizadas en agua o en baño de ultrasonidos. • No limpiar nunca Solubrux® can agua calientes. • No dejar Solubrux® a proximidad de fuentes de calor. • Solubrux no conviene a dentaras que tienen dientes de leche. Package contents : Figure A: 1 SoluBrux®, anatomically formed bite splint Figure B: 1 storage box Figure C: 1 holding fork Figure D: 1 bite liner All utilised materials are non-toxic, anallergic and approved for use in the «oral» cavity. SoluBrux® is patented and marked with the symbol as a Class I medicinal device. Instructions for use : Individual moulding is generally carried out on the upper jaw teeth. 1 - Connect the holding fork (Figure C) to the bite liner (Figure D). Caution, make sure the holding fork has the marking facing upward ! 2 - Insert the combination bite liner/holding fork all the way into the provided apertures on the front side of SoluBrux® (see graphic 1). 3 - Now insert SoluBrux® with bite liner in the mouth before heating up. This is important for two reasons: 1. Should you feel an urge to gag, the splint can be shortened (nail scissors, scalpel). 2. For perfect moulding (see Point 6), it is important to press the tongue to the gums and remove the saliva through suction, to gene- rate a vacuum. This is why this should be practiced beforehand. 4 - Pour enough boiling water to cover the SoluBrux® into a container and with the help of the holding fork, immerse SoluBrux® and bite liner for 12-15 seconds. Please use a stopwatch or a watch with a second hand for control! (graphic 2) 5 - Remove SoluBrux® from the container and shake off any excess water. Before inserting in the mouth, make sure that the splint is entirely open. If necessary, “bend up” and open a bit with the fingers in order to prevent the edges from being pressed down during insertion and biting, which would make the splint useless. Please note that the instruction in the above point must be followed quickly in order to prenvent the material from cooling down and becoming un-mouldable. 6 - Insert SoluBrux® carefully into mouth, close mouth, and clench teeth firmly. Generate a vacuum (Please refer to point 3 (2) above) so that the warm, soft material adjusts to the contours of your teeth. 7 - Hold the “vacuum” as long as possible. After 1-2 minutes, re- move SoluBrux® from mouth and place in cold water for several minutes. Remove the holding fork and the bite liner and store in a safe place until needed again should an re-moulding be necessary. Important references : - In the event of malfunctions of the dental or dental holding apparatus, extreme malposition of teeth, wearing of removable dentures or dental braces, ask your dentist before using SoluBrux®. - If the symptoms associated with bruxism do not improve or even get worse within 2-3 weeks, despite regularly wearing SoluBrux®, consult your dentist. - Brush SoluBrux® with either toothpaste or soap in cold water. Fast-acting cleansing tablets or ultrasonic bath can also be used. - Never clean SoluBrux® with hot water! - Do not store SoluBrux® in the proximity of heat sources. - SoluBrux® is not suitable for milk teeth. More information: www.solubrux.com Más informes : www.solubrux.com es un nombre de marca depositada. is a registered brand name 3 SOLUTIONS 4, ch. de la Bobinette CH-1263 Crassier - info-line: CH-0445869616 ou 0225483848 - DE- 04172 245 34 08 - F-0977196196 - [email protected]