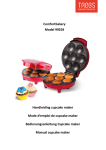
1
GARANTIE
Für dieses Gerät übernehmen wir eine Garantie von 12 Monaten ab
Kaufdatum. Während der Garantiezeit beseitigen wir durch Reparatur oder
Austausch Sämtliche Schäden, die auf Material oder Herstellungsfehler
zurückzuführen sind. Schäden, die auf unsachgemäßen Gebrauch
zurückzuführen sind (Gerät bleibt pausenlos an das Netz angeschlossen,
Betrieb mit falscher Spannung, falschem Stecker, Bruch usw.) normale
Abnutzung und Mängel, die Gebrauchstauglichkeit des Gerätes nicht
beeinflussen, sind von der Garantie ausgenommen. Bitte nicht
fachmännisch ausgeführte Reparaturen oder der Verwendung ungeeigneter
Ersatzteile liegt kein Garantiefall vor. Die Garantie wird nur wirksam, wenn
der Garantieschein beim Kauf des Gerätes vom Händler gestempelt und
unterschrieben wurde. Im Garantiefall senden Sie bitte das Gerät und die
Garantiekarte an unsere Kundendienststelle. Alle andere Ansprüche sind von
der Garantie ausgeschlossen, es sei denn, sie wären Änderseitig gesetzlich festgelegt.
GARANTIA
Damos una garantía de 12 meses a los productos que distribuímos a
partir de la fecha de compra. Durante la duración de la garantía, está
cubierta de forma gratuita la reparación de los defectos de fabricación o
de los materiales, reservándonos el derecho a decidir si ciertas piezas
deben ser reparadas o cambiadas o incluso si el equipo completo debe ser
reemplazado. Los daños ocasionados por un empleo indebido (golpe,
conexión a corriente continua, error de voltaje, ...). el desgaste normal por
su uso, están excluídos de la garantía. La garantía caduca cuando se
realizan reparaciones por personas no homologadas por el fabricante o
si las piezas de recambio no son de la misma marca. La garantía sólo será
válida cuando el sello del fabricante y la fecha de compra aparezcan en
el bono de garantía. Cualquier otra forma de acceso a la cobertura de la
garantía está excluída, salvo disposiciones legales en contra.
GARANTIE
We verzekeren een garantie van 12 maanden op de producten die wij
verdelen vanaf de datum van aankoop. Gedurende deze garantietijd
garanderen wij het herstellen van fabricagefouten of het materiaal, we
behouden het recht te beslissen of sommige delen moeten worden hersteld
of vervangen of indien het gans toestel moet vervangen worden.
Beschadigingen door verkeerd gebruik, (stoten, verkeerde aansluiting,
vergissing in het voltage, kalkafzetting...),normaal slijtage, dat de goede
werking en de waarde van het toestel niet benadeligt, sluit elke vorm van
garantie uit. De garantie is ongeldig indien herstellingen werden
uitgevoerd door niet officieel erkende of indien er vervangingsstukken
werden gebruikt van een ander merk. De garantie zal enkel verzekerd zijn
indien op de garantiekaart de datum van aankoop, de stempel en de
handtekening van de winkel staan of indien u het cassabon kan voorleggen.
Elke andere aanspraak op garantie is uitgesloten, behalve indien het
wettelijk voorschrift het tegenstelde specifieert.
WARRANTY
This appliance is guaranteed for 12 months from the date of purchase.
During the period of the guarantee, the distributor will take responsibility for
defects occur, the appliance will be repaired or exchanged as the
distributor deems necessary. Damage arising from improper use or normal
wear and defects, which do not materially affect the performance of the appliance, is not covered under this guarantee. The guarantee is not valid if
unauthorized repairs have been attempted or if replacement parts used are
not approved by the supplier. The guarantee is valid only if it is stamped
and signed by the retailer at the time of the purchase. For all claims made
during the period of the guarantee, send the appliance and the warranty
card to your retailer. All other claims are excluded from the guarantee
unless specifically prohibited by law.
COMBINÉ DENTAIRE
FR
D
USA
RO
ES
NL
CE(89/336/CEE)CEM
CE (2006/99/EC) LVD
RoHS (2002/95/EC)
IP24
Fabriqué en P.R.C
CARTE DE GARANTIE / GARANTIE-KARTE / WARRANTY CARD / GARANTIA
12 MOIS / 12 MONATE / 12 MONTHS / 12 MESES / 12 MAANDEN
JP-38 COMBI
Nom /Nahme/
Name / Nombre / Naam
......................................................................................................................................
Adresse /Anschrift/
Adress / Dirección / Adres
......................................................................................................................................
Ville
......................................................................................................................................
Stadt
Code Postal /Postleitzahl /
Place
......................................................................................................................................
Ciudad
Stad
CACHET DU REVENDEUR / STEMPEL VOM HÄNDLER /
STAMP OF RETAILER / SELLO DEL VENDEDOR /
STEMPEL VAN DE VERKOPER
Postcode / Código Postal / Postcode
DATE D'ACHAT / EINKAUFSDATUM / DATE OF PURCHASE/
FECHA DE COMPRA / VERKOOPSDATUM
NOTICE D'EMPLOI
En cas de panne retournez l'appareil accompagné de cette carte de garantie à votre revendeur
Im Garantiefall, senden Sie bitte das Gerät mit der Garantiekarte an unsere Kundendienstelle
In case of damage, please return appliance and warranty card to your retailer
En caso de defectos, por favor entregue al vendedor el equipo junto con esta garantía.
In geval van defect stuur het artikel terug naar de verkoper vergezeld van deze garantiekaart
MDE 911
SPORT-ELEC® Institut - 31 Rue du Val Breton - BP 35 - 27520 Bourgtheroulde Infreville-FRANCE
TEL : + 33 (0)2 32 96 50 50 - FAX : + 33 (0)2 32 96 50 59
[email protected]
Réf : JP38 COMBI
SPORT-ELEC® Institut - 31 Rue du Val Breton - BP 35 - 27520 Bourgtheroulde Infreville-FRANCE
TEL : + 33 (0)2 32 96 50 50 - FAX : + 33 (0)2 32 96 50 59
[email protected]
Photos non contractuelles / Nicht vertragliche Fotos / Poze noncontractuale / Fotos no contractuales / Foto non contrattuali / A termék eltérhet a fényképt
GARANTIE
Nous accordons une garantie de 12 mois sur les produits que nous distribuons
à partir de la date d'achat. Pendant la durée de la garantie, nous prendrons
gratuitement à notre charge, la réparation des vices de fabrication ou de
matières, en se réservant le droit de décider si certaines pièces doivent être
réparées ou échangées ou encore si l'appareil lui-même doit être échangé.
Les dommages occasionnés par une utilisation inadéquate, (choc, branchement sur courant continu, erreur de voltage, détartrage...), l'usure normale
ne portant préjudice ni au bon fonctionnement, ni à la valeur de l'appareil,
excluent toute prétention à la garantie. La garantie devient caduque si des
réparations ont été effectuées par des personnes non agréées ou si des
pièces de rechange ne provenant pas de la même marque ont été utilisées.
La garantie ne sera valable que si la date d'achat ainsi que le cachet et la
signature du magasin figurent sur la carte de garantie ou sur présentation
du ticket de caisse. Toute autre forme de prétention à la garantie est exclue,
sauf si des dispositions légales spécifient le contraire.
- N'utilisez une rallonge pour votre cordon que si elle est
appropriée et en parfait état.
11
5
4
- Ne débranchez jamais en tirant sur le cordon.
10
- Les enfants ne reconnaissent pas les dangers qui émanent d'un
appareil électrique. Ne laissez pas l'appareil en fonctionnement
à la portée des enfants.
8
3
9
- N'immergez jamais l'appareil dans l'eau ou dans
d'autres liquides.
6
2
- Les parties qui peuvent être fixées doivent l'être de façon
à ce qu'elles ne puissent tomber dans l'eau.
- N'utilisez pas l'appareil à l'extérieur.
1
12
chaque utilisation afin d'enlever des restes éventuels. Si
l'appareil n'a pas été utilisé pendant un certain temps, il est
conseillé, pour des raisons d'hygiène, de suivre les instructions
pour l'emploi initial et de laisser passer un réservoir complet d'eau.
Enlevez tout liquide de l'appareil après l'usage.
Note : quand l'appareil est utilisé avec une solution d'hygiène
buccale, un réservoir complet d'eau devra être passé à travers après
chaque emploi afin de rincer et d'enlever les restes de cette solution.
3. Choisissez une tête irrigatrice (8) (il existe 4
couleurs différentes pour plusieurs utilisateurs) et
placez-la sur la poignée de la base de sorte
que la tête colorée se trouve dans le même sens
que le bouton “arrêt eau” (Figure 1)
BROSSE A DENTS :
Pour maintenir la tête de brossage en bon état de fonctionnement,
rincez-la soigneusement pendant plusieurs secondes sous l'eau.
La brosse à dents doit être en marche durant l'opération. Pour une
hygiène parfaite, vous pouvez faire tremper la tête de brossage
une fois par semaine dans un récipient d'eau dans lequel vous
aurez mis un nettoyant pour prothèse dentaire.
4. Mettez le bouton du contrôle de pression à
base
de
la
l'appareil au minimum (tournez dans le sens des aiguilles d'une
montre) lors du premier emploi. Vous pouvez augmenter la pression graduellement afin de trouver la position la plus confortable.
7
- Ne posez pas l'appareil lorsqu'il est en fonctionnement.
1 - Base
2 - Brosse à dents
3 - Bouton « marche/arrêt » de la brosse à dents
4 - Compartiments de rangements des 4 têtes de brossage
5 - Réservoir d'eau
6 - Jet dentaire
7 - Bouton “marche/arrêt” du jet dentaire
8 - Compartiments de rangements des 4 têtes du jet
dentaire (canules)
9 - Bouton “arrêt/marche” eau du jet dentaire
10 - Bouton de verrouillage des têtes
11 - Contrôle jet direct et spray hydromassage
12 - Contrôle de pression du jet dentaire
- N'utilisez pas d'accessoires autres que ceux fournis avec votre
appareil, il pourrait en résulter un danger. Débranchez la prise
de courant lorsque vous n'utilisez pas votre appareil, avant de
monter ou de démonter les accessoires ou avant tout nettoyage.
- Nettoyez l'appareil simplement à l'aide d'un chiffon sec ou
légèrement humide. N'utilisez pas d'éponges métalliques ou de
produits abrasifs pour son nettoyage.
- Assurez-vous avant de brancher votre appareil qu'il est
parfaitement sec.
- Ne faites pas fonctionner l'appareil en présence d'explosifs ou
de fumées.
NOTICE D'UTILISATION
PRECAUTIONS D'USAGE LIEES A L'UTILISATION D'UN
APPAREIL ELECTRIQUE :
- ATTENTION : Pour éviter tout risque de feu ou d'électrocution, ne
pas démonter l'appareil - Toute intervention ou
réparation doit être effectuée par un réparateur agréé.
Lors de l'utilisation d'appareils électriques, il est nécessaire de
respecter quelques consignes de sécurité afin d'éviter tout
accident. Bien lire le mode d'emploi avant d'utiliser l'appareil et
le conserver pour toute utilisation ultérieure.
- N'utilisez pas votre appareil et débranchez-le immédiatement si :
- Celui-ci est endommagé.
- Le cordon d'alimentation ou la prise sont endommagés
- Vous avez remarqué un fonctionnement anormal après incident
- Avant la mise en marche de votre appareil, lisez attentivement ce mode
d'emploi, il contient des informations importantes concernant
l'utilisation, la sécurité et l'entretien de votre appareil.
- Des réparations non professionnelles peuvent être à l'origine de
dangers pour l'utilisateur.
- Il est recommandé que les appareils soient alimentés par
l'intermédiaire d'un dispositif à courant différentiel résiduel (DDR) ayant
un courant nominal de déclenchement n'excédant pas 30 mA.
- Si le câble d'alimentation est endommagé, il doit être remplacé
par le Fabricant, son Service Après-Vente ou une personne de
qualification similaire, afin d'éviter un danger.
- Pour prendre connaissance de la notice, reportez-vous aux
figures explicatives.
- Votre appareil est prévu pour un usage domestique. Une
utilisation non adéquate et non conforme au mode d'emploi annule
la garantie et ne peut engager la responsabilité du fabricant
Eviter d'utiliser l'appareil dans une pièce embuée.
TOUTE DETERIORATION RESULTANT DU NON-RESPECT
DE
CES
PRECAUTIONS
D'USAGE
ENTRAINE
AUTOMATIQUEMENT LA SUPPRESSION DE LA GARANTIE
CONSERVEZ CES INSTRUCTIONS
- Utilisez cet appareil uniquement avec du courant alternatif 230 V,
vérifiez avant de le brancher que la tension du réseau
correspond à celle mentionnée sur la plaque signalétique du
produit. L'appareil ne doit être branché que sur un réseau
électrique dont l'installation est conforme aux normes de sécurité.
-
NETTOYAGE ET ENTRETIEN
Eteignez et débranchez votre appareil dans les cas suivants :
en cas d'anomalie pendant l'utilisation,
avant tout nettoyage, entretien ou maintenance,
immédiatement après utilisation.
Cet appareil ne peut être installé dans la
salle de bains que dans le volume 3 (voir
schéma). Il est interdit de l'utiliser dans
les volume 1 et 2.Il doit être fixé au mur
à l'aide de son dispositif(vis, chevilles,
plaque de réception ) mais pas au-dessus
du lavabo.
- Ne laissez pas pendre le cordon sur le rebord d'une table, sur
des arrêtes vives ou entrer en contact avec des surfaces chaudes.
- Tenez l'appareil à l'écart des sources de chaleur.
3
FR
Nettoyer le corps de la brosse à dents à l'aide d'un chiffon doux
et légèrement humide. Le bloc d'alimentation doit être parfaitement
sec avant de le reposer sur la base de chargement.
Base de chargement :
Essuyez les parois externes de la base de chargement à l'aide
d'un chiffon doux et légèrement humide.
5. Avant de brancher l'appareil, contrôlez si le bouton “arrêt/
marche eau” sur la poignée se trouve dans la position “off” (O).
Mettez l'appareil en marche en mettant le bouton « marche/arrêt
» du jet dentaire sur “ I “ de la base, penchez-vous sur le lavabo
et mettez la tête irrigatrice dans votre bouche. Mettez le bouton
“arrêt/ marche eau' dans la position “on” (I) .
JET DENTAIRE :
1 - Enlevez la fiche de la prise de courant.
2 - Rincez la tête irrigatrice et la poignée séparément pendant
quelques secondes sous de l'eau courante.
Note : veillez à tourner la poignée vers le dessus pendant le rinçage.
Attention : veillez à ce que l'eau n'entre pas dans la poignée.
3 - Replacez la tête irrigatrice dans le compartiment de rangement
après le nettoyage. Remettez la poignée sur la base.
4 - Nettoyez la base régulièrement avec un chiffon doux. La base
doit être complètement sèche avant de remettre la fiche dans la
prise de courant.
Note : Gardez votre bouche légèrement ouverte et tenez votre
coude à hauteur de votre bouche, de sorte que l'eau puisse
couler à nouveau dans le lavabo.
6. Dirigez l'eau le long de votre gencive et
aussi entre vos dents.
Ne jamais pointer la tête irrigatrice directement
vers votre gencive.
Pour un meilleur résultat, il est à conseiller de
commencer avec
vos dents arrières et de travailler vers l'avant.
Consultez votre dentiste pour des informations
u
l
t
é
r
i
e
u
r
e
s
concernant l'emploi.
ATTENTION :
NE JAMAIS TREMPER LA BASE DE CHARGEMENT OU LE
BLOC D'ALIMENTATION DANS L'EAU.
NE JAMAIS UTILISER DE PRODUITS OU D'EPONGE
ABRASIFS
7. Afin de passer de la fonction jet direct à la
fonction spray hydromassage
(ou vice-versa), faites tourner la tête irrigatrice
colorée (Figure 9).
Utilisez le jet pour un nettoyage précis et le spray hydromassage
pour un nettoyage et massage plus général.
MESURES DE SÉCURITÉ MÉDICALES POUR LE JET
DENTAIRE
Veuillez bien tenir compte des mesures de sécurité suivantes,
afin de garantir votre sûreté.
1 - Contactez votre dentiste avant d'utiliser le jet dentaire si vous
avez subi une opération orale ou périodontale.
2 - Consultez votre dentiste dans le cas d'un saignement excessif
des gencives. De même si ce saignement continue après 2 semaines.
Note : Afin d'éviter des éclaboussures, démarrez le jet dentaire
sur la fonction jet quand l'appareil est hors de votre bouche.
Tenez l'appareil au-dessus du lavabo et pointez-le vers le bas.
COMMENT UTILISER LE JET DENTAIRE
8. Une fois terminé, mettez le bouton 'marche/arrêt eau' dans la
position 'off' (O) et débranchez l'appareil. Enlevez la tête
irrigatrice en appuyant sur le bouton de détachage et replacezla dans le compartiment de rangement avec couvercle. Enlevez
tout liquide de l'appareil. Tirez la fiche de la prise de courant.
1 - Enlevez le réservoir. Faites attention à bien tenir la base (1) en
place d'une main, tandis que vous soulevez le réservoir de l'autre
main. Remplissez le réservoir d'eau tiède et replacez-le sur l'appareil.
2 - Branchez l'appareil à la prise de courant
Note : ne jamais laisser l'appareil dans la position 'on' (I) quand
celui-ci n' est pas utilisé. La pression d'eau continuera à se
former et pourra endommager l'appareil. Mettez toujours le
bouton 'marche/arrêt eau' et le bouton 'marche/arrêt' dans la
Note : Avant le premier usage : rincez l'appareil en laissant
passer un réservoir complet d'eau. Si l'appareil est utilisé avec
une eau dentifrice , il faut rincer l'appareil avec de l'eau pure après
4
FR
COMMENT UTILISER LA BROSSE A DENTS
toutefois de changer la tête de brossage aussi régulièrement
qu'une brosse à dents manuelle.
- Après avoir utilisé la brosse à dents, rincez soigneusement la tête
de brossage sous l'eau.
- Reposez la brosse à dents sur sa base de chargement
RACCORDEMENT DE L'APPAREIL - CHARGEMENT DE LA
BATTERIE
La base de chargement peut être raccordée à n'importe quelle prise
de courant alternatif 220-240 Volts (~), y compris les prises pour
rasoirs.
Placez la brosse à dents sur la base de chargement. Le témoin
lumineux vert de charge s'allume lorsque le bloc d'alimentation
est connecté au chargeur.
Le bloc d'alimentation peut légèrement chauffer pendant le temps
de charge ; ceci n'a aucune incidence sur son fonctionnement,
la surcharge étant impossible.
SUPPORT MURAL
Il est obligatoire d'utiliser le support mural pour assurer
un maintien de l'appareil et éviter les chutes dans le
lavabo.
Fixer les vis et les chevilles au mur. Faites ensuite glisser la base
de chargement sur les vis de haut en bas. Faites passer le cordon
entre le support et la base de chargement. Ne pas utiliser une
longueur de cordon supérieure à celle nécessaire pour atteindre
la prise de courant.
PROTECTION DE L'ENVIRONNEMENT
Avant la première utilisation et pour prolonger la durée
de la batterie, il est nécessaire de procéder comme suit
:
1 - chargez la batterie à bloc pendant 16 heures.
2 - puis déchargez complètement la batterie en mettant la brosse
à dents en marche jusqu'à l'arrêt automatique
3 - rechargez au maximum la batterie ensuite la brosse à dents
à bloc pendant 16 heures.
Cette opération "déchargement / rechargement " est à
répéter tous les six mois.
Retirer la batterie si vous souhaitez vous débarrasser de
votre appareil.
Avant de la retirer, la batterie doit être complètement
vidée. Laissez l'appareil fonctionner jusqu'à ce qu'il
s'arrête tout seul.
Ne dévissez le fond que pour retirer la batterie.
L'appareil ne sera plus étanche après avoir dévissé le
fond.
La brosse à dents contient des batteries au Nickel
Cadmium. Dans un souci de préservation de
l'environnement, nous vous prions de ne pas jeter votre
brosse à dents aux ordures ménagères lorsqu'elle arrive
en fin de vie sans en avoir retiré la batterie au préal-
N.B. : Lorsque l'appareil commence à se décharger, la brosse à
dents s'arrête automatiquement de fonctionner pour éviter que les
piles ne se déchargent totalement. Il faut alors reposer l'appareil
sur sa base pour recharger les piles.
Après avoir effectué l'opération "déchargement / rechargement"
décrite ci-dessus, vous pouvez utiliser la brosse à dents.
NB : Afin de garder à la brosse à dents sa pleine puissance, replacez-la toujours sur sa base de chargement.
Caractéristiques techniques:
Alimentation secteur: 230 V ~ 50 Hz
Puissance: 15 W
Bloc d'alimentation : 2,4 Volts.
Durée de fonctionnement à pleine charge environ 30-45 minutes.
Indice de protection : IP24 (indice de protection contre les corps étrangers
solides supérieurs à 12.5 mm et contre les éclaboussures et projections
d'eau.
CE (89/336/CEE) CEM
- Fixez une tête de brossage sur le bloc d'alimentation.
- Avant la première utilisation d'une tête de brossage, rincez
soigneusement la brossette sous l'eau.
- Appliquez votre dentifrice habituel sur la brossette.
- Rincez votre bouche
- Afin d'évitez les éclaboussures, appliquez la brossette contre vos
dents avant de mettre l'appareil en marche.
- Placez la brossette de biais par rapport à vos dents, puis mettez la brosse à dents en marche et faites circuler la brossette sur
vos dents de haut en bas. Guidez-la le long des faces internes et
externes en veillant à nettoyer également les gencives.
Il n'est pas nécessaire d'appuyer fortement sur la brosse.
Nettoyer les côtés et la surface des molaires avec un mouvement
de rotation.
- Besondere Vorsicht soll genommen sein, als dieses Gerät in der Nähe der
Kinder oder der Behinderten benutzt ist.
10
- Tauchen Sie nie das Gerät, dessen Kabel und Steckdose in Wasser oder
andere Flüssigkeit und nie bespritzen Sie ihn.
5
4
8
- Benutzen Sie nicht das Gerät draußen.
9
- Stellen Sie nicht das Gerät, wenn er im Funktionieren ist.
3
6
2
1
12
7
1 - Ladebasis
2 - Zahnbürste
3 - Ein- /Ausschalter Zahnbürste
4 - Aufbewahrungsbox für 4 Bürstenköpfe
5 - Wasserbehälter
6 - Munddusche
7 - Ein- /Ausschalter Munddusche
8 - Aufbewahrungsbox für 4 Aufsteckdüsen
9 - Wasser Ein-/Ausschalter Munddusche
10 - Knöpfen, um die Düse loszubinden
11 - Wasserstrahlsdruckregler
12 - Wasserdruck-Kontrolle
Lorsque vous vous séparez de votre produit en fin de vie, veillez
à respecter la réglementation nationale. Nous vous remercions
ainsi de le déposer à un endroit prévu à cet effet afin d'assurer
son élimination de façon sûre dans le respect de l'environnement.
- Benutzen Sie nicht das Gerät in der Nähe der Aerosolprodukte oder
Sauerstoffes.
- ACHTUNG: um jedes Risiko von Feuer oder Stromstößen zu vermeiden,
zerlegen Sie Ihr Gerät nicht - Jede Reparatur von einem zugelassnen
Mechaniker ausgeführt werden darf.
Verwenden Sie das Gerät unter keinen Umständen:
Wenn es ein beschädigtes Kabel ausweist
Wenn es hingefallen ist oder beschädigt wurde
Wenn es nicht ordnungsgemäß funktioniert
Wenn es ins Wasser gefallen ist.
BEIM GEBRAUCH EINES ELEKTRISCHEN GERÄTES MÜSSEN IMMER VORSICHTSMASSNAHMEN BEACHTEN WERDEN:
- Nicht berufliche Reparaturen können am Anfang der Gefahren für den
Benutzer sein.
Während der Benutzung von Elektrogeräten ist es notwendig, einige
Sicherheitsanweisungen zu achten, um jeden Unfall zu vermeiden. Es ist
wichtig, die Bedienungsanleitung vor erster Benutzung sorgfältig durch zu lesen
und sie für jede folgende Benutzung zu bewahren.
- Wenn das Zuleitungskabel dieses Gerätes beschädigt ist, soll es durch den
Hersteller, sein Kundendienst oder die Person gleichartiger Qualifikation
ersetzt sein, um eine Gefahr zu vermeiden, da Spezialwerkzeug
erforderlich ist.
- Vor dem Betrieb Ihrer Munddusche, lesen Sie diese Bedienungsanleitung
aufmerksam, sie enthält wichtige Informationen, die die Benutzung, die
Sicherheit und die Pflege Ihres Gerätes betreffen.
- Dieses Gerät ist nur für einen ausschließlich häuslichen Gebrauch geeignet
gewesen, nie, es für einen anderen Gebrauch zu benutzen. Eine Benutzung,
die nicht angemessen und nicht der Gebrauchsanweisung entsprechend
ist, hebt die Garantie auf und kann die Verantwortlichkeit vom Hersteller nicht
verpflichten.
- Benutzen Sie dieses Gerät nur mit dem Wechselstrom 230 Volt.
Überprüfen Sie vor Benutzung, daß die Netzspannung derjenigen gut
entspricht, die auf dem beschreibenden Fleck des Produktes erwähnt ist. Das
Gerät soll in einem elektrischen Netz angeschlossen sein, dessen Einrichtung
den Sicherheitsnormen entspricht.
- Schalten Sie Ihr Gerät aus und ziehen Sie den Stecker immer aus der
Steckdose in den folgenden Fällen :
im Falle der Anomalie während der Benutzung,
vor jeder Reinigung, Wartung und Pflege
sofort nach Benutzung.
RoHS (2002/95/EC) : Le produit est fabriqué sans matériaux pouvant avoir un effet néfaste sur l'écologie
- Wischen Sie das Gerät mit einem weichen, feuchten Tuch. BENUTZEN SIE
NIE AGGRESSIVE PUTZMITTEL, STAHLWOLLE ODER ANDERE SCHEUERMITTEL UM DAS GERÄT ZU SÄUBERN
BEDIENUNGSANLEITUNG
- Um Bekanntschaft der Bedienungsanleitung zu nehmen, beziehen Sie sich
auf die erklärenden Abbildungen.
.
- Benutzen Sie keine Zubehörteile andere als diejenigen, die mit Ihrem
Gerät geliefert sind, es könnte sich daraus eine Gefahr ergeben. Ziehen Sie
den Stecker immer aus der Steckdose wenn Ihr Gerät funktioniert nicht,
wenn Sie die Aufsätze wechseln und vor jeder Reinigung.
-
- Wir empfehlen das Gerät mit Hilfe eines Differentials mit Strom zu
versorgen, dessen Nominalverluststrom 30 m A nicht übersteigt.
able.
- Pour éliminer complètement la plaque dentaire, brossez-vous les
dents pendant deux minutes au moins.
- Rincez-vous soigneusement la bouche après le brossage.
- Lors des premières utilisations, vos gencives risquent de saigner
un peu en particulier si elles sont très sensibles après quelques jours
d'utilisation, les saignements devraient cesser. Si vos gencives
continuent de saigner après une quinzaine de jours d'utilisation,
nous vous conseillons de consulter un dentiste.
La méthode de nettoyage la plus efficace consiste à faire passer
doucement la brossette d'une dent à l'autre, sans appuyer.
La forme de la brossette change au fur et à mesure de
l'utilisation, ce qui est tout à fait normal et dépend aussi de votre
façon personnelle de vous brosser les dents. Cette déformation
n'a aucune incidence sur l'efficacité de la brosse. N'oubliez pas
11
- Vermeiden Sie, das Gerät in einem beschlagenen Zimmer zu benutzen.
JEDE VERSCHLECHTERUNG DIE SICH AUS DER NICHTBEACHTUNG
DIESES GEBRAUCHTVORSICHTS ERGIBT, SCHAFFT AUTOMATISCH DIE
GARANTIE AB.
BEWAHREN SIE DIESE BEDIENUNGSANLEITUNG AUF
Dieses Gerät kann im Badezimmer nur im
Volumen 3 eingerichtet sein (sieh Schema).
Es ist verboten, es in Volumen 1 und 2 zu
benutzen. Er soll an der Wand mit Hilfe von
seiner Anlage festgelegt sein (Schrauben, Knöchel,
Empfangsplatte) aber nicht über dem
Waschbecken.
- Lassen Sie das Kabel nicht von der Ecke des Tisches abhängen.
- Halten Sie das Kabel von Heißen Flächen fern.
- Benutzen Sie eine Kabelverlängerung nur wenn es nötig ist und achten Sie
darauf dass sie die Voltangabe übereinstimmt.
5
FR
- Um das Gerät auszuschalten, halten Sie die Steckdose. Ziehen Sie nie auf
das Kabel.
6
D
REINIGUNG
Wenn das Gerät während langer Zeit nicht benutzt gewesen ist, ist es
empfohlen, aus hygienischen Gründen, den Bedienungsvorschriften anfänglich
zu folgen und einen vollständigen Wasserbehälter passieren zu lassen.
Nach Gebrauch, entleeren Sie jede Flüssigkeit, die im Gerät bleibt.
Note : Wenn das Gerät mit einem Mundwasser benutzt wurde, muß man
den Wasserbehälter mit reinem Wasser nach jeder Benutzung abspülen, um
eventuelle Reste wegzunehmen.
4. Legen Sie den Wasserdruck-Kontrolle auf der Ladebasis zu minimaler
Position (drehen Sie im Uhrzeigersinn) während erster Benutzung.
Sie können den Druck schrittweise erhöhen, um die bequemste Lage zu finden.
Wischen Sie das Motorteil mit einem feuchten Lumpen. Das Motorteil soll
vollkommen trocken sein, bevor ihn auf Ladebasis zurückzulegen.
Ladebasis :
Reinigen Sie die Ladebasis regelmäßig mit einem sanften Lumpen. Der
Ladebasis soll vollständig trocken sein, bevor den Stecker in der Steckdose
anzuschließen.
5. Bevor das Gerät anzuschließen, prüfen Sie, ob sich den Wasserein/Ausschalter (5) auf dem Griff in der Position ' OFF ' findet. Starten Sie das
Gerät mit dem Druck auf dem Ein-/Ausschalter ( 10 ) der Ladebasis,
beugen Sie sich über das Waschbecken und legen Sie die Aufsteckdüse in
Ihren Mund. Legen Sie den Wasser Ein-/Ausschalter in der Position ' ON '
(in der Richtung nach dem Kopf) um den Massage- und Reinigungsprozeß
zu beginnen.
MUNDDUSCHE :
1. Ziehen Sie den Stecker aus der Steckdose.
Note : Bleiben Sie Ihr Mund leicht geöffnet und halten Ihren Ellbogen an
Mund-Niveau, so daß das Wasser ins Becken zurücklaufen kann.
2. Spülen Sie die Aufsteckdüse und den Griff einzeln während einiger
Sekunden unter fließendem Wasser ab.
6. Leiten Sie Wasser längs Ihres Zahnfleisches
(Abbildung 2) und auch zwischen ihren Zähnen. Richten
Sie nie die Düse direkt zu Ihrem Zahnfleisch. Für ein
besseres Ergebnis ist es empfohlen, mit ihren hinteren
Zähnen anzufangen und vorwärts zu arbeiten. Sehen
Sie Ihren Zahnarzt für weitere Empfehlungen auf
Gebrauch.
Note : Achten Sie, den Griff drunter und drüber während der Abspülung zu
drehen. Achten Sie darauf, daß Wasser nicht im Griff abzutropfen.
3. Stellen Sie die Aufsteckdüse nach der Reinigung in die Aufbewahrungsbox
zurück. Reichen Sie den Griff auf den Ladebasis ein.
ACHTUNG :
TAUCHEN SIE NIE DIE LADEBASIS ODER MOTORTEILE IM WASSER.
Wischen Sie das Gerät mit einem weichen, feuchten Tuch. BENUTZEN SIE
NIE AGGRESSIVE PUTZMITTEL, STAHLWOLLE ODER ANDERE
SCHEUERMITTEL UM DAS GERÄT ZU SÄUBERN
8. Ein Mal beendet, legen Sie den Wasserein-/Ausschalter in die Position
' OFF ' und schalten Sie das Gerät aus. Nehmen Sie die Aufsteckdüse weg,
mit dem Drück auf den Knopf (6) und stellen Sie sie in die Aufbewahrungsbox
zurück. Nehmen Sie jede Flüssigkeit des Geräts weg. Ziehen Sie den Stecker
aus der Steckdose.
Berücksichtigen Sie bitte folgende Sicherheitsmaßnahmen wirklich, um Ihre
Sicherheit zu garantieren.
1. Beraten Sie bitte Ihren Zahnarzt, bevor Sie die Munddusche zu benutzen,
wenn Sie eine mündliche oder periodontale Operation erfahren haben.
Note : Lassen Sie das Gerät nie in der Position 'ON' zurück, wenn es nicht
benutzt ist. Der Wasserdruck wird sich zu bilden fortsetzen und wird das
Gerät beschädigen können. Legen Sie immer den Wasser Ein-/Ausschalter
( 5 ) und den Ein-/Ausschalter ( 10 ) in der Position ' OFF ' wenn das Gerät
nicht benutzt ist.
2. Beraten Sie Ihren Zahnarzt im Fall einer übermäßigen Blutung des
Zahnfleisches . Ebenso, wenn diese Blutung nach 2 Wochen weitergeht.
Legen Sie die Schrauben und die Knöchel an der Wand fest.
Lassen Sie dann die Ladebasis auf den Schrauben von oben bis unten
Technische Eigenschaften :
Betrieb: Netzanschluß : 230 V ~ 50 Hz/Leistung: 15 Watts
Bloc d'alimentation : 2,4 Volts. Durée de fonctionnement à pleine
charge environ 30-45 minutes.
Schutzhinweis: IP24
(Schutzhinweis gegen die festen Fremdkörper über 12.5 mm und
gegen die Spritzer und Wasservorführungen.)
CE (89/336/EWG) EMV
Vor erster Benutzung und um die Dauer die Batterie zu
verlängern, ist es notwendig, folgendermaßen vorzugehen :
1 - Vor dem ersten Gebrauch mindestens 16 Stunden laden.
2 - Dann laden Sie die Batterie vollständig ab, durch die Inbetriebnahme
der Zahnbürste bis zum automatischen Stoppen.
3 - Laden Sie dann die Batterie der Zahnbürste auf dem Ladesockel während
16 Stunden wieder auf.
schieben.
Lassen Sie das Kabel zwischen dem Träger und der Ladebasis verbringen.
Benutzen Sie das Kabel nicht länger, als notwendig, um die Steckdose zu
erreichen.
UMWELTSCHUTZ
Wenn Sie Ihr Gerät zu gegebener Zeit außer Betrieb nehmen, muß der
Akku herausgenommen werden.
Der Akku muß bei der Entnahme völlig leer sein. Lassen Sie hierzu das
Gerät laufen, bis der Motor anhält.
Schrauben Sie dann nur den Boden der Zahnbürste auf. Entfernen Sie den
integrierten Akku, und geben Sie ihn bei einer autorisierten Sammelstelle ab.
Dieses Gerät enthält Nickel-Cadmium-Akkus. ImInteresse des Umweltschutzes
bitte am Ende ihrer Lebensdauer nicht mit dem Hausmüll entsorgen. Eine
Entsorgung kann über eine entsprechende Sammelstellen nach nationalen
Vorschritten erfolgen.
Diese Lade-/Entladevorgang alle 6 Monate wiederholen.
N.B.: Als das Gerät sich abzuladen beginnt, hört die Zahnbürste zu
funktionieren automatisch auf, um zu vermeiden, daß sich die Batterien
völlig abladen.
Man muß dann das Gerät auf seiner Ladebasis zurücklegen, um die Batterien
wieder aufzuladen.
NB : Um die volle Leistung des Motorteils zu erhalten, sollten Sie das
Motorteil stets auf dem Ladesockel aufbewahren.
Note: Um Spritzer zu vermeiden, lassen Sie die Munddusche auf der Funktion
"Strahl" an, wenn das Gerät außer Ihrem Mund ist. Halten Sie das Gerät
über dem Waschbecken und richten Sie ihn abwärts.
MEDIZINISCHE SICHERHEITSMAßNAHMEN BEIM GEBRAUCH VON
MUNDDUSCHE
VERBINDUNG DES GERÄTES - LADEN DAHER BATTERIE
Nachdem Sie die oben beschriebene Operation Lade-/Entladevorgang
ausgeführt haben ", können Sie die Zahnbürste benutzen.
7. Um den Wasserstrahl von der Funktion "Strahl" zur
Funktion "Spray- Hydro-Massage" (oder Gegenteil) zu
ordnen, drehen Sie die farbige Düse (Abbildung 9).
Benutzen Sie den „Strahl“ für eine präzise Reinigung und
„Spray- Hydro-Massage“ für eine Reinigung mit der allgemeinen Massage.
4. Reinigen Sie die Ladebasis regelmäßig mit einem sanften Lumpen. Der
Ladebasis soll vollständig trocken sein, bevor den Stecker in der Steckdose
anzuschließen.
Er ist nötig, den Mauerträger zu benutzen, um eine Haltung des Gerätes zu
versichern
und
die
Stürze
im
Waschbecken
zu
vermeiden.
Schließen Sied as Ladeteil an 220-240V Wechselspannung (~) an. Es ist auch
an einer Rasierersteckdose möglich.
Stellen Sie die Zahnbürste auf Ladebasis. Placez la brosse à dents sur la base
de chargement. Die grüne kontrollampe leuchtet, wenn das Motorteil sich
auf dem Ladesockel des ans Netz angeschlossenen Ladeteils befindet.
Das Motorteil erwärmt sich im Ladeteil leicht, was jedoch ohne Bedeutung
ist. Ein Überladen ist nicht möglich.
3. Wählen Sie eine der Aufsteckdüsen (8) (Es geben
unterschiedliche Farben für mehrere Benutzer). Nehmen
Sie den Griff (3) der Basis weg und fügen Sie die
Aufsteckdüse darin ein, so daß sich der gefärbte Kopf
derselben
Richtung
findet
wie
die
in
Wasserdruck-Kontrolle. (Abbildung 1).
ZAHNBURSTE :
Um die hygienische Funktion der Aufsteckbürste zu erhalten, spülen Sie
diese nach jedem Gebrauch gründlich unter warmem, fließendem Wasser.
Dabei sollte das Motorteil eingeschaltet sein. Für eine vollkommene Hygiene
können Sie den Bürstenkopf einmal pro Woche in einem Wasserbehälter
durchnässen lassen, in den Sie ein Reinigungsmittel für Zahnersatz gelegt
haben werden.
ZAHNBÜRSTE ANWENDUNGSHINWEISE
MUNDDUSCHE ANWENDUNGSHINWEISE
1 Nehmen Sie den Wasserbehälter weg. Versuchen Sie, die Ladebasis (1)
mit einer Hand fest zu halten, während Sie den Wasserbehälter mit der
anderen Hand heben. Füllen Sie den Wasserbehälter mit warmem Wasser
und stellen Sie ihn auf dem Gerät zurück.
2. Schließen Sie den Stecker in der Netzdose an.
- Befestigen Sie einen Bürstenkopf am Motorteil.
- Vor der ersten Benutzung eines Bürstkopfes spülen ihn sorgsam unter dem
Wasser.
- Verwenden Zahnpasta Ihrer Wahl.
- Spülen Sie Ihren Mund
- Um ein Verspitze zu vermeiden, schalten Sied as Motorteil erst ein,
nachdem Sie die Bürste an die Zähne geführt haben.
Führen Sie die Bürste zuerst über die Kauflächen Ihrer Zähne, dann im
Winkel von ca.90° an den Außenseiten der Zähne entlang und anschließend
an den Innenseiten, ebenfalls im Winkel von ca.90°.
Achten Sie darauf, dass Sie auch die Zahnzwischenräume und den
Zahnfleischraum bürsten.
Wenn Sie sich am Ende seiner Lebensdauer von Ihrem Produkt
trennen, beachten Sie bitte die gesetzlichen Bestimmungen.
Daher sind wir Ihnen dankbar, wenn Sie es bei einer zu diesem
Zweck vorgesehen Stelle deponieren, um seine sichere
Beseitigung im Sinne der Umwelt zu gewährleisten.
RoHS
(2002/95/EC): Das Produkt ist ohne gefährliche Baustoffe hergestellt.
- Zur gründlichen Plaque-Entfernung sollten Sie Ihre Zähne mindestens 2
Minuten lang putzen.
- Spülen Sie sorgfältig Ihr Mund nach dem Bürsten aus.
- In den ersten Tagen der Verwendung Ihrer Zahnbürste, kann es bei dafür
disponiertem Zahnfleisch zu leichtem Zahnfleischbluten kommen, was jedoch
in der Regel nach einigen Tagen verschwindet. Falls das Zahnfleischbluten
länger als zwei Wochen anhält, sollten Sie Ihren Zahnarzt aufsuchen.
Klinische Tests haben eindeutig gezeigt, dass auch eine optimale
Zahnreinigung zu ersielen ist, wenn das Gerät ohne Druck, sanft von Zahn
zu Zahn geführt wird.
Eine leichte Deformation des Borstenfeldes durch gebrauch ist normal und
wird von Ihrer individuellen Putztechnik beeinflußt. Sie beeinträchtigt die
Putzwirkung nicht.
Vergessen Sie jedoch nicht, den Bürstenkopf ebenso regelmäßig zu ändern,
wie eine Handzahnbürste.
- Nach dem Gebrauch, spülen Sie sorgfältig den den Bürstenkopf unter
Wasser ab.
- Legen Sie die Zahnbürste auf ihrer Ladebasis zurück.
Note : Vor anfänglichem Gebrauch, spülen Sie das Gerät ab. Lassen Sie
den Wasserpaß durch den vollen Wasserbehälter verbringen. Wenn das
Gerät mit einem Mundwasser benutzt wurde, muß man das Gerät mit reinem
Wasser nach jeder Benutzung abspülen, um eventuelle Reste wegzunehmen.
7
D
8
D
- Clean the apparatus with a dry or slightly damp cloth. Don't use metal
sponges or abrasive agents for cleaning.
11
5
4
10
8
3
9
6
2
- Make sure that the charge base is perfectly dry before plugging your
device.
1. Remove the beaker. Pay attention to hold well the base ( 1 ) in its place
by your hand, whereas you raise the beaker by the other hand. Fill the beaker
with warm water and put it back on the device.
- Do not make the device function in presence of explosives or fumes.
2. Plug the device to outlet
- WARNING : To avoid any risk of fire or electric shock, do not dismantle
the device - Any interference and repairing must be carried out by an
approved specialist.
- Do not use your apparatus or unplug it or do not plu git if :
- It is damaged.
- The electrical cord or the socket are damaged.
- You have noticed the abnormal functioning after some incident.
Note : Prior to initial use, rinse the unit by letting water pass through a full
water beaker. If the unit is used with a mouthwash solution, it should be rinsed
with clean water after each use to remove any traces of mouthwash. If the
unit has not been used for an extended period of time, to maintain hygiene
it is recommended that you follow the instructions for initial
use: let a full water beaker pass through.
- Non-professional interferences can cause danger to the user.
1
12
- If the electrical cable is damaged, it should be replaced by the Manufacturer,
its After-Sales service or a person with a similar qualification, in order to avoid
any danger.
7
- This device is for household use only. Any inadequate use and non
conformity to the instructions cancels the guarantee and cannot engage the
responsibility of the manufacturer.
Don't use the apparatus in a damp room.
1 - Base
2 - Toothbrush
3 - Toothbrush handle with ON/OFF button
4 - Storage for 4 brush heads
5 - Water beaker
6 - Oral irrigator
7 - ON/OFF button of the irrigator's handle
8 - Storage for 4 nozzles
9 - ON/OFF button of the water jet
10 - Heads locking button
11 - Water jet control : direct stream and spray hydro-massage
12 - Water jet pressure control
ANY DETERIORATION RESULTING FROM THE NON-OBSERVANCE OF
THESE PRECAUTIONS OF USE SUPPRESSES AUTOMATICALLY THE GUARANTIE
SAVE THESE INSTRUCTIONS
This apparatus can only be installed
in the bathroom in volume 3 (see the
picture).It is prohibited to use it in
volumes 1 et 2.It must be fixed at the
wall using the screws, ankles and
reception plate which come with it
and not above the wash-hand basin.
NOTE OF USE
PRECAUTIONS BY USING AN ELECTRIC DEVICE :
When using electrical appliances, basic safety precautions should be always
followed to avoid any accident. Read attentively all instructions before using
the appliance, it's cleaning, charging and maintenance.
CLEANING AND MAINTENANCE
- Before starting your device read carefully the instructions manual. It
contains important information concerning the use, the safety and the
maintenance of your apparatus.
Always empty the water beaker completely after use.
Note: if the unit is used with a mouthwash solution, a full water beaker
should be run through by water after each use to rinse it and remove any
traces of mouthwash solution.
- It is recommended to use this appliance on an electrical installation using
a differential with nominal current loss not exceeding 30 mA.
TOOTHBRUSH :
To maintain the brushing head in good operating condition, carefully rinse
it during several seconds under water. To rinse the toothbrush switch it on,
it should operate. For a perfect hygiene we recommend soaking the
brushing head in a denture cleaner once a week.
- While reading this manual, please, refer to explanatory pictures.
- Use this device only with AC current 230V. Before connecting the device
make sure that the tension of your electrical network corresponds to the
one mentioned on the bottom of the charge base. The device should be
connected only to that electrical supply network installation of which is in
conformity with the standardsof safety.
Clean the body of the toothbrush with a soft and slightly wet cloth. The
toothbrush must be perfectly dry before placing it on its charging base.
- Switch off and disconnect your device in the following cases :
Charging Base :
Dry the external sides of the charging base with a damp soft cloth.
- in case of any anomaly during use,
before any cleaning or maintenance,
immediately after use.
ORAL IRRIGATOR :
1. Unplug the outlet.
2. Rincez la tête irrigatrice et la poignée séparément pendant quelques
secondes sous de l'eau courante.
Note: Rinse the nozzles and the dental jet separately during a few. Attention:
make sure that the water does not enter the handle.
3. Put back the nozzle into the storage after cleaning. Put back the handle
on the base.
4. Clean the base with a soft and slightly wet cloth regularly. The base
must be completely dry before plugging in the power socket.
ATTENTION :
NEVER SOAK THE CHARGING BASE OF THE POWER SUPPLY UNIT IN
WATER.
NEVER USE ABRASIVE PRODUCTS OR SPONGES
- Do not less the cord hang on the edge of the table.
- Keep the cord away from heated and sharp surfaces
- Use an extension for your cord only if it is suitable and in a perfect state.
- Do not excessively bend or pull the cord. Unplug by grasping the plug, not
the cord.
- Children do not recognize that electrical appliances can cause danger. Do
not leave apparatus under operation within the range of children.
- Never submerge the apparatus in water or any other liquid.
- Do not place or store the device where it can fall into water ( tub, sink or toilet).
MEDICAL SAFETY MEASURES FOR THE DENTAL JET
Please mind the following in order to guarantee your safety.
1. Consult your dentist before using the dental jet if you underwent an oral
intervention or periodontal.
2. Consult your dentist in the case of an excessive bleeding of the gums.
Do the same if this bleeding persists after 2 weeks.
- Do not use the apparatus outdoors.
- Do not put your device anywhere when it is functioning.
- Do not use accessories other than those provided by the manufacturer
with this unit to avoid danger. Unplug the device when you do not use it,
before mounting or dismounting the accessories or before any cleaning.
9
HOW TO USE YOUR ORAL IRRIGATOR
USA
3. Choose a nozzle (8) (there are 4 different colours for
several users) and attach it on the handle so that its coloured
head faces the same direction as water 'stop' switch
(Picture 1)
4. Put the water jet pressure control on the base of the device into a
minimum position (turn clockwise
during the first use). You can increase the pressure gradually to find the most
comfortable position.
5. Before plugging the device, make sure that ON/OFF button of the water
jet of the handle is in the position 'off' (O). Start your dental jet by pushing
the switch from the position “Off” to position « I » of the base, lean over the
sink and put the nozzle in your mouth. Push the button of the water jet into
position 'on' (I) .
Note : Keep your mouth slightly open and hold your elbow at height of your
mouth, so that water can run in the sink.
6. Direct the water jet along your gum line and also
between your teeth.
The nozzle should never be in direct contact with your
gum.
For better results, it is advised to begin with molars
towards the canines.
Consult your dentist for further information concerning use.
NB : To obtain maximum power of brushing we recommend keeping your
brush on the charging base when not in use to maintain a full battery
charge.
- Fix a toothbrush head to the supply block.
- Before the first use of a toothbrush head, rinse it carefully under the water.
- Apply your ordinary toothpaste.
- Rinse your mouth
- To avoid the splatters, apply the brushing head against your teeth before
starting the unit.
- Place the brushing head on the surface of your teeth, then switch on the
toothbrush and make circular motions on your teeth from top to bottom for
the teeth best cleaning and gum massaging effect.
It is not necessary to press strongly on the brush.
Clean all areas of your teeth including the inner and chewing surfaces and
behind the back teeth.
- To eliminate the dental plaque completely, brush your teeth during two
minutes at least.
- Rinse your mouth carefully after the brushing.
- When you first use the toothbrush, you may experience slight bleeding.This
should stop after a few days when your gums get used to the toothbrush. If
the bleeding persists during fifteen days we recommend you to consult your
dentist.
The most effective method brushing consists in making gently pass the
toothbrush from one tooth to the other, without pressing it.
The form of the brushing head change gradually within the time of use, what
is normal and this also depends on your personal way of brushing your teeth.
This deformation has no incidence on the efficiency of the brush. Do not
however forget to change the head of brushing as regularly as a manual
toothbrush.
- After use your toothbrush, rinse its brush head under tap water.
- Put your tooth brush back to its charging base.
WALL MOUNTING
Use only the mural support to ensure the maintenance of the apparatus and
to avoid the falls into the sink.
Fix the screws and the dowels to the wall. Now you can shift the mouth shower
out upward. Make the cord pass between the support and the charging base.
Do not use the cord longer than necessary to reach the socket outlet.
7. To change the function “direct jet” to the function “spray
hydro-massage” (or vice versa), turn the coloured nozzle
(Picture 9).
Use the jet for a precise cleaning and the spray hydro-massage
for usual cleaning and massage.
Technical features :
Power supply: 230 V ~ 50 Hz - Intensity: 15 W
Batteries : 2,4 Volts. Operation life full charge 30-45 minutes.
Protection index : IP24 (index of protection against the solid foreign
bodies larger than 12.5 mm and against the splashes and water projections.
CE (89/336/CEE) EMC
Note : In order to avoid splashes start the dental jet when it is out of your
mouth. Hold the apparatus above the sink and point it downward.
8.Once finished, put the control switch to the position 'off' (O) and unplug
the device. Remove the nozzle by pressing on the lock button and put it back
into the storage. Empty the liquid of the apparatus. Unplug the outlet
Never leave the device in the position 'on' I) when it is not used. The
pressure of water will continue to form and can damage the device. Always
put ON/OFF button of the water jet and the ON/OFF button in the position ' off ' (O) when the device is not used.
HOIW TO USE THE TOOTHBRUSH
CONNECTION OF THE APPARATUS - CHARGING THE BATTERY
The charging base can be connected to any plug of AC current 220-240
(~), including shaving sockets.
Place the toothbrush on the charging base. The green charging light will light
up indicating the handle under charging. The base may warm up slightly
during charge. This has no effect on the unit's operation. Overcharging is
impossible.
Before the first use and in order to prolong the battery life, it is necessary
to proceed as follows:
1. charge the battery during 16 hours ( full charge duration).
2. then discharge the battery completely by starting the toothbrush until
automatic stop.
3. recharge to the maximum the battery of the toothbrush during 16 hours.
This operation "discharging / recharging" is to be repeated every six
months.
N.B.: When the apparatus starts to discharge, the intensity of brushing
becomes definitely lower and automatically stops functioning. So it is necessary
to place back the toothbrush on its base and to recharge the batteries.
ENVIRONMENTAL PROTECTION
Remove the rechargeable battery at the end of the unit's life.
Before removing, the battery must be completely emptied. Let the
apparatus function until it stops alone.
Unscrew the bottom only to remove the battery. The apparatus will not be
waterproof any more after having unscrewd the bottom.
La brosse à dents contient des batteries au Nickel Cadmium. The
toothbrush contains Nickel Cadmium batteries. In a concern of environmental
protection, you are asked not to throw your toothbrush to household refuse
when it arrives at the end of life without having removed the battery from it
beforehand.
When you throw your product at the end of its life, respect
your national or local regulations for environmental protection
and recycling of raw materials. We thank you for deposing it
in a place provided for that purpose to secure its elimination in
an environmentally respectful way.
RoHS
(2002/95/EC) : This product is manufactured without materials which could
have a harmful effect on ecology.
After having carried out the operation "discharging / recharging" described
above, you can use the toothbrush.
10
USA
- Feriti aparatul de surse de caldura.
CUM SE UTILIZEAZA JETUL DENTAR
- Nu folositi un prelungitor decat daca acesta este in stare
perfecta de functionare.
1 - Scoateti rezervorul. Cu atentie, tineti aparatul la baza (1) cu o mana,
in timp ce ridicati rezervorul cu cealalta mana. Umpleti rezervorul cu apa
si asezati-l pe aparat.
11
5
4
10
- Nu scoateti din priza aparatul tragand de cordon.
8
9
- Copii nu constientizeaza pericolul ce-l reprezinta un aparat
electric. Nu-l lasati la indemana copiilor.
6
- Nu scufundati niciodata aparatul in apa sau in alte
lichide.
3
2
1
12
- Partile ce se fixeaza trebuie sa fie montate astfel incat
sa nu existe posibilitatea caderii in apa.
7
masaj
(sau
vice-versa),
puneti
capatul
irigativ colorat (Figura 9).
Utilizati jetul pentru a curata perfect sprayul hidromasant
pentru o curatare si un masaj mai general.
Nota: Pentru a evita stropirile, demarati jetul dentar la functia jet cand aparatul este aproape de gura d-voastra. Tineti
aparatul deasupra chiuvetei si ridicati-l spre gura.
2 - Bransati aparatul la opriza de curent.
Nota: Inainte de prima utilizare: umpleti rezervorul cu apa. Daca aparatul
este folosit cu apa pentru intretinerea dintilor, trebuie clatit aparatul cu apa
pura dupa fiecare utilizare inainte de a indeparta resturile. Daca aparatul
nu a fost folosit mai mult timp va sfatuim, din motive igienice, sa urmariti
instructiunile si sa folositi un rezervor de apa.
8 - Odata terminat, tineti butonul «pornit/oprit» al apei in pozitia «OFF»
(O) si debransati aparatul. Scoateti capatul de irigare apasand pe butonul
de detasare si plasati-l in compartimentul de aranjare acoperindu-l cu
suportul lui. Scoateti tot lichidul din aparat. Scoateti fisa de curent.
Nota: Nu lasati niciodata aparatul in pozitia «ON» (I) cand acesta nu este
folosit. Presiunea apei va contiuna sa se formeze si aparatul se poate
strica. Puneti intotdeauna butonul «pornit/oprit» al apei in pozitia «OFF»
(O) cand aparatul nu este folosit.
3 - Gasiti un capat irigatoriu (8) (exista 4 canule diferite
pentru mai multe utilizari) si plasati-l la baza aparatului iar
capatul colorat sa se gaseasca in acelasi sens cu butonul
«oprirea apei» (Figura 1)
CUM SE FOLOSESTE PERIUTA DE DINTI
MOD DE FOLOSIRE
- Nu folositi aparatul in exterior.
1 - Baza
2 - Periuta de dinti
3 - Buton « pornit/oprit » al periutei de dinti
4 - Compartimente de pastrare a celor 4 capuri de periuta
5 - Rezervor pentru apa
6 - Jet dentar
7 - Buton pornit/oprit al jetului dentar
8 - Compartimente de pastrare a celor 4 capuri de jet dentar (canule)
9 - Buton « pornit/oprit » apa pentru jet dentar
10 - Buton montare capuri
11 - Control jet direct si spray hidromasaj
12 - Control presiune jet dentar
- Nu puneti jos aparatul in functiune.
4 - Puneti butonul de control al puterii aflat la baza aparatului la minimum
(intorceti-l in sensul de miscare al unui ceas). Puteti mari presiunea dupa
ce va gasiti o pozitie confortabila.
- Nu folositi alte accesorii decat cele furnizate aparatului. Scoateti
din priza aparatul dupa utilizare, inainte de a monta, demonta
accesoriile, inainte de curatare.
- Curatarea se face cu un tifon umed. Nu folositi produse abrazive
sau metalice la curatare.
- Asigurati-va inainte de bransare la priza ca aparatul este perfect uscat.
- Nu folositi aparatul in preajma substantelor explozibile.
PRECAUTII DE UTILIZARE A UNUI APARAT ELECTRIC :
- Inainte de folosirea periutei de dinti cititi cu atentie aceste
instructiuni pentru ca contin informatii importante in ceea ce
priveste folosirea , siguranta si intretinerea aparatului.
- Pastrati instructiunile pentru o consultare ulterioara.
- Pentru mai multe detalii consultati figurele explicative.
- Este recomandat ca aparatele sa fie alimentate prin intermediul
unui dispozitiv cu un curent diferential rezidual (DDR) avand un
curent nominal de declansare nu mai mare de 30 m A.
- Utilizati acest aparat numai cu un curent alternativ de 230 V,
verificati inainte de folosire daca tensiunea retelei corespunde celei
mentionate pe placa sinaleptica a produsului. Aparatul nu se va
folosi la o retea electrica ce nu respecta toate normele de securitate.
- ATENTIE : Pentru a evita riscul electrocutarii, nu demontati
aparatul. Orice interventie trebuie efectuata de catre un
specialist.
-
Nu mai folositi aparatul si se scoate imediat din priza daca :
Acesta este spart sau deteriorat.
Cordonul sau priza sunt deteriorate.
Ati remarcat o functionare anormala dupa incident.
- Reparatiile nespecializate pot reprezenta un pericol.
- Daca cablul de alimentare este deteriorat, el trebuie inlocuit de
Fabricant, Serviciul Dupa-vanzare sau o persoana cu calificarea
respectiva, inainte de a reprezenta un pericol.
- Aparatul este conceput pentru folosire la domiciliu, utilizarea
neadecvata afecteaza modul de functionare.
5 - Inainte de bransarea aparatului, verificati daca butonul oprit/pornit al
apei se gaseste in pozitia «OFF» (O). Puneti aparatul in functiune apasand
butonul «pornit/oprit» al jetului dentar pe «I» de la baza, si puneti capul
irigabil in gura d-vs. Puneti butonul «oprit/pornit» al apei in pozitia «ON»
(I).
Nota: Tineti gura lejer deschisa si tineti-va coatele la inaltimea gurii, din
momentul in care apa incepe sa curga la chiuveta.
- in caz de anomalii in timpul utilizarii,
DE INDATA ce produsul Dumneavoastra si-a incheiat ciclul de
viata si nu-l mai folositi, urmariti respectarea prevederilor nationale
in acest sens. Noi va suntem recunoscatori pentru depozitarea
intr-un mediu prevazut pentru acest lucru asigurand astfel
eliminarea lui intr-o maniera sigura de protejare a mediului
6 - Dirijati apa pentru curatarea gingiilor si a dintilor
d-voastra.
Nu pozitionati niciodata capatul irigativ direct pe
gingiile d-voastra.
Pentru un rezultat mai bun este bine sa incepeti cu dintii din fata si apoi si cu restul dintilor.
Consultati dentistul d-voastra pentru informatii utile cu privire la modul de
folosire.
7 - Inainte de a trece de la functia jetului dentar, la functia sprayului de hidroGARANTIE
Noi acordam o garantie de 12 luni asupra produselor pe care le distribuim,
incepand cu ziua de cumparare. Pe parcursul intregii garantii, ne
insarcinam sa purtam raspundere in mod gratuit asupra repararii viciilor de
fabricatie sau de materie, rezervandu-ne dreptul de a decide daca anumite
piese necesita reparare sau schimbare sau daca aparatul insusi ar trebui
schimbat. Daunele provocate de o folosire inadecvata (soc, contact la curent
continuu, eroare de tensiune, detartraj...), folosirea corespunzatoare
neaducand nici un prejudiciu bunei functionari sau valorii aparatului, exclud
orice cerere de garantie. Garantia devine caduca si in cazul in care
reparatiile au fost efectuate de persoane neautorizate sau cu piese de
schimb neapartinand marcii. Garantia nu e valabila decat in situatia in
care exista bonul cu data achizitiei, precum si stampila magazinului pe actul
de garantie, iar produsul sa fie prezent in ambalajul original. Orice alta forma
de prezentare pentru cererea garantiei este exclusa, decat daca exista alte
dispozitii legale in acest sens.
CARTE DE GARANTIE 12 LUNI
NUME
COMBI DENTAR
JP38COMBI
..........................................................................................................................................................................
Adresa
..........................................................................................................................................................................
..........................................................................................................................................................................
Cod Postal
- Inchideti si scoateti din priza aparatul in urmatoarele situatii:
RACORDAREA LA APARAT - SCHIMBAREA BATERIILOR
Baza de schimbare poate fi racordata la orice priza de curent
alternativ 220-240 Volti (~), cuprinzand si prizele pentru masinile de ras.
Plasati periuta de dinti pe baza de schimbare. Becul luminos verde se
aprinde atunci cand blocul de alimentare este conectat la priza.
Blocul de alimentare se poate incalzii in timpul alimentarii ; acesta nu
poate provoca niciun incident in timpul de functionare, supragreutatea
fiind imposibila.
RoHS (2002/95/EC) : Podusul nu contine materiale ce ar putea avea un
efect nefast asupra ecologiei
Oras
..........................................................................................................................................................................
STAMPILA DISTRIBUITORULUI
- in timpul curateniei, intretinerii aparatului,
DATA ACHIZITIEI
- imediat dupa folosire.
- Nu lasati cordonul aparatului sa intre in contact cu suprafete calde
sau fierbinti.
11
Acest aparat poate fi instalat in sala de baie in volumul 3
(vezi schema).Este interzisa folosirea in volumul 1 si 2.
Trebuie fixat pe un perete cu ajutorul dispozitivului sau, dar nu deasupra chiuvetei.
RO
In cazul unor probleme returnati aparatul insotit de aceasta carte de garantie distribuitorului :
PROTEC IDEAL RELAX S.R.L., BUCURESTI, tel/fax : 0 21.317.63.03
www.sport-elec.ro
SPORT-ELEC® Institut - 31 Rue du Val Breton - BP 35 - 27520 Bourgtheroulde Infreville-FRANCE
TEL : + 33 (0)2 32 96 50 50 - FAX : + 33 (0)2 32 96 50 59 - [email protected]
12
RO
5
4
COMO EMPLEAR EL JUEGO DENTAL
- En caso de emplear una alargadera, ésta deberá ser apropiada para
el uso destinado y deberá estar en perfecto estado.
11
1 - Coja el depósito. Sujete bien la base con una
mano mientras con la otra tira suavemente del
depósito. Rellene el depósito con agua tipia y vuelva
a colocarlo en el equipo.
- No desconecte nunca el equipo tirando del cable.
10
- No deje el aparato al alcance de los niños.
8
9
- No sumerja nunca el aparato en el agua o en otros
líquidos.
6
- Deberá asegurarse que las partes que se pueden fijar
no puedan caerse al agua.
3
2
- No emplee el aparato en el exterior.
1
12
7
1 - Base
2 - Cepillo de dientes
3 - Interruptor « Marcha / Parada » del cepillo de dientes
4 - Compartimento de los 4 cabezales de cepillado
5 - Depósito de agua
6 - Juego dental
7 - Interruptor « Marcha / Parada » del juego dental
8 - Compartimento de los 4 cabezales del juego dental (canulas)
9 - Interruptor « Marcha / Parada » agua del juego dental
10 - Botón de cierre de los cabezales
11 - Control juego dental y spray hidromasaje
12 - Control de presión del juego dental
Durante el empleo de equipos eléctricos, es necesario
respetar algunas consignas de seguridad con el fin de
evitar cualquier accidente. Lea atentamente este
manual de instrucciones antes de emplear el equipo y
consérvelo para cualquier consulta posterior.
- Antes de la puesta en marcha del cepillo de dientes, lea
atentamente este manual de instrucciones. Contiene información
importante en relación a su uso, la seguridad y el mantenimiento
del aparato.
- Para comprender las explicaciones, fíjese en los dibujos explicativos.
- Se recomienda que los aparatos se alimenten mediante un
dispositivo de corriente diferencial con una corriente nominal
que no exceda de los 30 mA.
- Emplee este equipo sólo con una corriente alterna de 230 V.
Verifique antes de la conexión que la tensión de la red corresponde
a la indicada en la placa del producto. El equipo sólo puede ser
conectado a una red eléctrica cuya instalación sea conforme a
las normas de seguridad.
-
LIMPIEZA Y MANTENIMIENTO
- No emplee otro tipo de accesorios que no sean los suministrados con
su aparato.
Eliminar el líquido del equipo después de usarlo.
Nota: cuando el equipo se utilice con una disolución de higiene
bucal, se deberá enjuagar el recipiente con agua limpia con el
fin de eliminar los restos de dicha disolución.
- Desconecte el equipo de la corriente cuando no vaya a emplearlo,
antes de montar o desmontar los accesorios y antes de cualquier
limpieza.
- Limpie el aparato con la ayuda de un trapo seco o ligeramente
humedecido. No emplee esponjas metálicas o productos
abrasivos para su limpieza.
- Asegúrese antes de conectar su equipo que éste está
perfectamente seco.
- No ponga en funcionamiento el equipo en presencia de explosivos
o de humos.
- ATENCION : para evitar cualquier riesgo de electrocución, no
desmonte el equipo - Cualquier intervención o reparación
del equipo deberá ser realizada por un profesional
- No emplee el aparato y desconéctelo de forma inmediata si.
- Está estropeado
- El cable de alimentación o la toma de corriente están dañados
- Ha notado un funcionamiento anómalo después de algún incidente.
- Las reparaciones realizadas por personal no profesional pueden
originar daños en el usuario.
- Si el cable de alimentación está dañado deberá ser
reemplazado por el Fabricante, su Servicio Post-Venta - una persona
con una cualificación similar con el fin de evitar cualquier daño.
- El aparato está previsto para un uso doméstico. Una utilización
inadecuada y no conforme a este manual de instrucciones anula la
garantía y no se puede reclamar la responsabilidad del fabricante.
CUALQUIER DETERIORO QUE RESULTE DE NO HABER
RESPETADO LAS PRECAUCIONES DE USO IMPLICA
AUTOMATICAMENTE LA SUPRESION DE LA GARANTIA.
CONSERVE ESTE MANUAL DE INSTRUCCIONES
Desconecte su equipo en los siguentes casos :
si existe alguna anomalía durante su uso
antes de cualquier limpieza o mantenimiento
inmediatamente después de su empleo.
13
CEPILLO DE DIENTES
Para mantener el cabezal de cepillado en buen estado de
funcionamiento, lavélo bien durante varios segundos debajo del
agua. El cepillo debe estare en marcha durante esta operación.
Para una higiene perfecta, se recomienda sumergir el cabezal de
cepillado una vez por semana en un recipiente con agua y un
agente de limpieza de prótesis dentales.
Limpiar el mango del cepillo de dientes con un paño suave y
ligeramente humedecido. El bloque de alimentación debe estar
bien seco antes de colocarlo sobre la base de recarga.
Base de regarga
Limpie las paredes externas de la base de recarga con un paño
suave y ligeramente humedecido.
JUEGO DENTAL :
1 - Desconecte el equipo de la corriente
2 - Lave el cabezal irrigador y el mango de forma separada
durante varios segundos debajo del agua.
Nota: gire el mango hacia abajo durante su limpieza. Atención
: procure que no entre agua en el interior del mango.
3 - Coloque el cabezal irrigador en el compartimento después de
su limpieza. Vuelva a colocar el mango en su sitio.
4 - Limpie el mango regularmente con un paño suave. El mango
debe estar completamente seco antes de volver a conectar a la
corriente.
ATENCION: NO SUMERGIR NUNCA LA BASE DE RECARGA
O EL BLOQUE DE ALIMENTACIÓN EN EL AGUA. NO
EMPLEAR
PRODUCTOS
O
ESPONJAS
ABRASIVOS.
MEDIDAS DE SEGURIDAD MEDICAS PARA EL JUEGO DENTAL
Tenga en cuenta las medidas de seguridad siguientes con el fin
de garantizar su propia seguridad.
1 - Consulte a su dentista anes de utilizar el juego dental o si ha
tenido una operación oral o periodental.
2 - Consulte a su dentista si las encías le sangran mucho. Consulte
también si este sangrado se va repitiendo durante 2 semanas.
- Evite que el cable eléctrico se pueda dañar con las aristas vivas
de una mesa o entrando en contacto con superficies calientes.
- Mantenga el equipo alejado de las fuentes de calor.
Este equipo sólo se puede instalar en el área señalada en el esquema
como « volume 3 » del cuarto de baño.(ver esquema).
Está prohibido su empleo en las zonas señaladas como “volume 1 et
2”.Se debe fijar a la pared mediante su propio dispositivo (tornillos,
clavijas, placa) pero no encima del lavabo.
- No deje el aparato solo funcionando
MANUAL DE INSTRUCCIONES
PRECAUCIONES POR EL USO DE UN APARATO ELECTRICO
2 - Enchufe el equipo a la corriente eléctrica.
Nota. Antes del primer uso: lave el equipo con agua limpiea
después de cada uso con el fin de eliminar posibles restos. Si el
equipo lleva un tiempo sin utilizarse, se recomienda por razones
de higiene seguir las instrucciones del modo de empleo por
primera vez y dejar pasar un depósito lleno de agua.
ES
3 - Elija el cabezal irrigador (8). (hay 4 colores diferentes según
los diferentes usos) y colóquelo en el mango de forma que el
cabezal coloreado se encuentre en el mismo plano que el botón
“arrêt eau, arranque agua” (Figura 1)
4 - Situe el botón de control de presión de la base
del equipo al mínimo
(gire en el sentido de las agujas del reloj) durante
el primer uso. Se puede ir aumentado la presión
hasta encontrar la posición más favorable.
5 - Antes de conectar el equipo, verifique si el
botón “parada / arranque agua” del mango se encuentra en la
posición “OFF” (0). Ponga el equipo en marcha apretando el botón
“arranque / parada” del juego dental “I”, inclínese sobre el
lavabo
e
introduzca el cabezal irrigador en la boca.
Seleecione el botón “parada / arranque agua”
en la posición “ON” ( I ).
Nota: mantenga la boca ligeramente abierta con
el codo a la altura de la boca de forma que el agua
pueda caer dentro del lavabo.
6 - Dirija el agua a lo largo de las encías y
también entre los dientes.
No toque directamente con el cabezal irrigador las encías.
Para un mejor resultado se recomienda comenzar con los dientes
de atrás y continuar hacia delante.
Consulte a su dentista para más información en relación a su
empleo.
7 - Para pasar de la función juego dental a spray hidromasaje
(o
viceversa),
gire
el
cabezar
irrigador
coloreado
(figura
9).
Emplle
el
juego dental parauna limpieza precisa y el spray hidromasaje
para una limpieza y masajes
más generales.
Nota: con el fin de evitar salpicaduras, ponga el juego dental en
fa función jet cuando el aparato esté fuera de su boca. Mantenga
el aparato por encima del lavabo y colóquelo hacia abajo.
8 - Cuando haya terminado, ponga el botón “arranque / parada
agua” en la posición “OFF” (0) y desconecte el equipo. Quite el
cabezal irrigador apoyando sobre el botón de cierre de los
cabezales y colóquelo en el compartimento con su tapa. Elimine
el líquido del equipo. Desenchufe el aparato de la corriente.
Nota: no dejar el equipo en la posición “ON” (I) cuando no se
vaya a emplear. La presión de agua continúa y podría dañar el
equipo. Ponga siempre el interruptor “arranque / parada agua”
y el interruptor “arranque / parada” en la posición “OFF” (0)
cuando el equipo no se vaya a emplear.
14
ES
COMO EMPLEAR EL CEPILLO DE DIENTES
CONEXION DEL EQUIPO - CARGA DE LA BATERIA
La base de recarga se puede conectar a cualquier toma de corriente alterna 220-240 Volts (~) incluídas las tomas de corriente
para máquinas de afeitar.
Coloque el cepillo de dientes sobre la base de recarga. El testigo luminoso verde se ilumina mientras el bloque se alimentación
está conectado al cargador.
El bloque de alimentación se podría calentar ligeramente durante
el tiempo de recarga lo cual no entraña ninguna consecuencia
en su funcionamiento. La sobrecarga no es posible.
Antes de la primera utilización y para prolongar la duración de
la batería, es necesario proceder como se indica a continuación:
1 - cargar la batería durante 16 horas
2 - descargar completamente la batería poniendo el cepillo de
dientes en marcha hasta que pare de forma automática.
3 - recargue la batería al máximo durante 16 horas.
Esta operación de “carga/descarga” se deberá repetir
cada 6 meses.
Nota: cuando el equipo comienza a descargarse, el cepillo de
dientes se para automáticamente para evitar que las pilas se
descarguen por completo. Es preciso colocar el equipo en su base
para recargar las pilas.
Una vez completada la operación « carga/descarga » descrita,
ya puede empezar a utilizar su cepillo de dientes.
Nota : con el fin de mantener el cepillo de dientes a plena potencia, colóquelo siempre sobre la base de carga.
- Fije un cabezal de cepillado sobre el cepillo
- Antes del primera utilización de un cabezal de cepillado,
limpiélo bien debajo del agua.
- Aplique su dentífrico habitual en el cabezal de cepillado.
- Proceda al aclarado de la boca
- Con el fin evitar salpicaduras, apoye el cabezal sobre los
dientes antes de poner el equipo en marcha.
- Coloque el cepillo en perpendicular a los dientes y ponga el
cepillo en marcha. Mueva el cepillo sobre los dientes de arriba
hacia abajo. Limpie también las caras interiores y las encías.
No es preciso apretar fuertemente.
Limpie los laterales y las superficies de los molares con un
movimiento de rotación.
- Para eliminar completamente la placa dental, cepíllese los
dientes durante varios minutos.
- Aclare la boca bien después del cepillado.
- Durante las primeras utilizaciones, las encías podrían sangrar
un poco, especialmente si son muy sensibles. Después de varios
días de empleo los sangrados no deberían producirse. Si por el
contrario sí sangran después de quince días de empleo del
equipo, le aconsejamos que consulte a su dentista.
- El método de limpieza más eficaz consiste en hacer pasar
suavemente el cabezal de cepillado de un diente a otro sin apoyar.
- La forma del cabezal puede cambiar a medida que se va
usando, lo que no es síntoma de un funcionamiento anormal y
depende mucho de la forma personal de cepillarse los dientes.
De todos modos, no olvide cambiar el cabezal de cepillado con
la misma frecuencia que un cepillo de dientes manual
aangepast is en dat het in goede staat verkeert.
Características técnicas
Sector de alimentación: 230 V ~ 50 Hz
Potencia: 15 W
Bloque de alimentación: 2,4 Volts. Duración de funcionamiento con
plena carga aproximadamente 30-45 minutos.
Indice de protección. IP24 (índice de protección contra los cuerpos
extraños sólidos superiores a 12,5 mm y contra las salpicaduras y
proyecciones de agua). CE (89/336/CEE) CEM
- Una vez empleado el cepillo, limpie bien el cabezal con agua.
- Coloque el cepillo sobre la base de recarga.
SOPORTE MURAL
Es obligatorio emplear el soporte mural para asegurar un mantenimiento del equipo y evitar caídas al lavabo.
Fije los tornillos y clavijas a la pared. Deslice la base de recarga
sobre los tornillos de arriba hacia abajo. Pase el cable entre el
soporte y la base de recarga. No emplear nunca una longitud
de cable superior a la que sea necesaria para llegar a la toma
de corriente.
Si va a proceder a eliminar el producto, respete la reglamentación
nacional. Deposítelo en el lugar previsto a tal efecto con el fin
de asegurar su eliminación de forma segura para el medio
ambiente..
11
- Trek nooit aan het snoer om het apparaat uit te schakelen.
5
4
- Kinderen zijn zich niet altijd bewust van de gevaren die kunnen
voortvloeien door elektrische apparaten, laat dus een functionerend
apparaat buiten hun bereik.
10
8
3
- Dompel het apparaat nooit in water of in andere vloeistoffen.
9
- De delen die men kan bevestigen op het apparaat plaatst
men zodanig dat ze niet in het water kunnen vallen.
6
2
- Gebruik het apparaat nooit buiten.
- Nooit een apparaat in werking ergens neerleggen, schakel het eerst uit.
1
12
7
1 - Het voetstuk
2 - De tandenborstel
3 - Knop “aan / uit” van de tandenborstel
4 - Opbergruimte voor de 4 borsteltjes
5 - Waterreservoir
6 - Waterstraal
7 - Knop « aan / uit » van de waterstraal
8 - Opbergruimte voor de 4 kopstukken van de waterstraal (canulen)
9 - Knop “aan / uit” van de waterstraal
10 - Vergrendelende knop voor de kopstukken
11 - Controle van de rechtstreekse straal en de hydromasserende verstuiver
12 - Drukcontrole van de waterstraal
GEBRUIKSAANWIJZING
PROTECCIÓN DEL MEDIO AMBIENTE
Retire la batería si desea eliminar su equipo.
Antes de retirar la batería debe estar completamente vacía. Deje
el aparato en funcionamiento hasta que se desconecte sólo.
Desmonte sólo el fondo para retirar la batería. El equipo deja de
ser estanco una vez desmontado dicho fondo.
El cepillo de dientes contiene baterías de Niquel Cadmio. Con
el fin de preservar el medio ambiente, no está permitido tirar el
equipo a la basura sin haber retirado previamente la batería.
RoHS (2002/95/EC) : El producto está fabricado sin materiales
que pudieran tener un efecto perjudicial para el medio ambiente.
15
VOORZORGSMAATREGELEN BIJ HET GEBRUIK VAN EEN
ELEKTRISCH TOESTEL
Bij het gebruik van elektrische toestellen, is het nodig enkele
veiligheidsinstructies te respecteren om ongevallen te
voorkomen. Lees goed de gebruiksaanwijzing voor het gebruik
van hat apparaat en bewaar het om later te kunnen raadplegen.
- Lees aandachtig de gebruiksaanwijzing alvorens uw apparaat in werking te stellen, het bevat belangrijke informaties betreffende gebruik,
veiligheid en onderhoud van uw toestel.
- Het is aanbevolen de apparaten te installeren op een elektriciteitsnet
met residuele diffirentiale stroom, waarvan de nominale werkingswaarde
de 30 mA niet overschrijdt.
- We verwijzen naar de verklarende tekeningen om deze bijsluiter
te begrijpen.
- Gebruik dit apparaat enkel op stroom 230 Volt, controleer of de netspanning overeenstemt met de gegevens vermeld op het kenmerkend
plaatje op het toestel.
Het apparaat mag enkel aangesloten worden indien de elektriciteitsinstallatie
voldoet aan de veiligheidsvoorschriften.
- Gebruik geen andere accessoires dan deze die bij het apparaat geleverd
werden, het zou gevaarlijk kunnen zijn. Trek de stekker uit het stopcontact
om accessoires te plaatsen of te verwijderen of vóór elke reiniging.
- Maak het apparaat proper met een droog of lichtbevochtigd doekje.
Gebruik geen metalen sponsjes of schuurmiddelen bij het schoonmaken.
- Controleer, alvorens het apparaat in te schakelen, of het volledig droog is.
- Schakel het apparaat niet in in de nabijheid van springstoffen of van rook.
- LET OP: nooit zelf het apparaat demonteren (om elk brandgevaar of
elektrocutie te voorkomen). Elke ingreep of herstelling moet gebeuren door
een officiëel erkende hersteller.
- Gebruik het apparaat niet en schakel het onmiddellijk uit als:
- het beschadigd is,
- het snoer of de stekker beschadigd is,
- er een onregelmatige werking wordt vastgesteld na een
incident.
- Onvakkundige herstellingen kunnen aan gevaarlijk zijn voor de
gebruiker.
- Een beschadigd snoer moet vervangen worden door de fabrikant, de
dienst na verkoop of door een persoon met een gelijkaardige
beroepsbekwaamheid om gevaar te vermijden.
- Dit apparaat werd speciaal ontworpen voor huiselijk gebruik. Een
niet-aangepast of toegelaten gebruik (zie gebruiksaanwijzingen) annuleren
de garantie , de fabrikant kan niet aansprakelijk worden gesteld.
- Plaats het apparaat niet in een wazige ruimte
INDIEN DE GEBRUIKSVOORSCHRIFTEN NIET WORDEN
GERESPECTEERD, ZAL DE GARANTIE AUTOMATISCH NIETIG
VERKLAARD WORDEN, ZELKS BIJ BESCHADIGING.
- Stop het apparaat en schakel het uit in de volgende gevallen:
- bij een onregelmatigheid tijdens het gebruik,
- alvorens het te reinigen of het te onderhouden,
- onmiddellijk na het gebruik ervan.
- Draag er zorg voor dat het snoer niet blijft vasthaken aan een tafelrand,
uitstekende voorwerpen of een warme ondergrond raakt.
- Houd het apparaat verwijderd van elke warmtebron.
ES
- Indien het gebruik van een verlengsnoer noodzakelijk is, zorg dan dat het
16
Dit apparaat mag in de badkamer enkel geplaatst
worden in ruimte 3 (zie schema).
Het is verboden het te gebruiken in de ruimten 1 en 2
Het moet aan de muur bevestigd worden met het bijgevoegd materiaal (schroeven, pluggen, ophangsysteem), maar niet boven de wastafel.
NL
ONDERHOUD
Verwijder alle vochtigheid en maak het apparaat droog.
Nota: indien het apparaat gebruikt wordt met een mondverzorgend
product, spoel dan goed het waterreservoir om alzo de resten van dit
product te verwijderen.
DE TANDENBORSTEL :
Om de borstels in goede staat te houden en de goede werking
te verzekeren, is het aangeraden om ze zorgvuldig te reingen
onder stromend water gedurende enkele seconden.
De tandenborstel moet ingesteld zijn gedurende deze behandeling.
Voor een perfecte hygiëne, kan u de borstels eens per week
plaatsen in wat water met een product om kunstgebitten te reinigen.
Reinig het middenstuk met een zachte, lichtbevochtigde doek.
Dit deel moet volledig droog zijn alvorens het terug te plaatsen
op de oplaadbasis.
De oplaadbasis :
Maak de buitenwanden van deze basis proper met behulp van
een zacht, lichtbevochtigde doek.
DE WATERSTRAAL :
1 - Trek de stekker uit het stopcontact.
2 - Reinig het kopstuk en de tandenborstel apart gedurende
enkele seconden onder stromend water.
Nota : let op dat er geen water dringt in de tandenborstel
3 - Plaats het kopstuk in de voorziene bergruimte na het gebruik
ervan. Plaats de tandenborstel op zijn basis.
4 - Maak de basis ook regelmatig proper met een zachte doek.
Alvorens de strekker opnieuw in het stopcontact te steken moet
het voetstuk (de basis) helemaal droog zijn.
AANDACHT :
DOMPEL DE OPLAADBASIS EN/OF HET MIDDENSTUK VAN
DE TANDENBORSTEL NOOIT IN HET WATER !
GEBRUIK NOOIT SCHURENDE PRODUCTEN OF SPONSEN !
MEDISCHE VEILIGHEIDSVOORSCHRIFTEN BIJ HET
GEBRUIK VAN DE WATERSTRAAL
Gelieve met deze medische veiligheidsvoorschriften rekening te
houden, om zo uw veiligheid te garanderen.
1 - Indien u een mondoperatie hebt ondergaan raadpleeg dan
uw tandarts alvorens de waterstraal te gebruiken
2 - Raadpleeg ook uw tandarts indien het tandvlees erg bloedt
of bij gebruik van de waterstraal, na twee weken, nog steeds
bloedt.
HET GEBRUIK VAN DE WATERSTRAAL
zoals voor het eerste gebruik en dat u het waterreservoir volledig
laat doorspoelen.
3 - Kies een kopstuk (8) (er zijn 4 verschillende
kleuren borstels voor 4 verschillende gebruikers)
plaats het op de tandenborstel, zodanig dat het
gekleurd uiteinde èzich in dezelfde zin bevindt dan
de knop 'stop water' (fig.1)
4 - Voor het eerste gebruik plaatst u de knop, aan
de basis van het apparaat , zodanig dat de waterdruk klein is
(draai
in
de
richting van de wijzers van een klok). U kan de druk progressief
vergroten ten einde die druk te bekomen die aangenaam is voor u.
5 - Controleer of de knop, op de tandenborstel : 'water aan / uit',
zich op de stand “off” (O) bevindt, alvorens het apparaat in te
schakelen. Start het apparaat door de knop 'aan / uit' van de
waterstraal op 'I' te plaatsen, buigt u zich over de wastafel en
plaats het kopstuk in uw mond. Plaats dan de knop 'water aan
/ uit' op stand “on” (I).
Nota : houd de mond lichtjes open en houd uw elleboog ter
hoogte van uw mond, zodanig dat het water in de wastafel
terecht komt.
AANSLUITING VAN HET APPARAAT EN ONDERHOUD VAN DE
HERLAADBARE BATTERIJEN
De oplader kan op eender welke wisselstroom worden aangesloten
220-240 Volt ( ), stopcontacten voor scheerapparaten inbegrepen.
Plaats de tandenborstel op de oplader. U ziet een groen lichtje
branden dat getuigt dat de tandenborstel aangesloten is op de oplader.
Dit middendeel van de tandenborstel kan lichtjes opwarmen
gedurende de ladingstijd; dit heeft geen invloed op de goede
werking, een 'overlading' is uitgesloten.
Vóór het eerste gebruik en om een langdurige werking
van de batterij te verzekeren is het nodig als volgt te
handelen :
1 - laad de batterij op gedurende 16 uren.
2 - ledig vervolgens de batterij volledig door de tandenborstel in
werking te stellen totdat hij automatisch stopt.
3 - laad vervolgens opnieuw de batterij volledig op gedurende
16 uren
Deze handeling “ontladen / opladen” hoort u elke 6
maanden te herhalen.
N.B. : Als het apparaat niet meer genoeg geladen is, zal de
tandenborstel automatisch stilvallen om te voorkomen dat de
batterijen volledig zullen geledigd worden. Laat het toestel dan
rusten en laad de batterijen opnieuw op.
Na de handeling “ontladen / opladen” , zoals het in de vorige alinea
beschreven staat, is nu de tandenborstel gebruiksklaar.
6 - Richt en verplaats het water naar uw
tandvlees en ook naar uw tanden. Nooit volledig
richten op uw tandvlees alleen. Om een beter
resultaat te bekomen is het aangeraden om te
beginnen bij de achterste tanden en om zo
geleidelijk naar voor te komen (Raadpleeg
eventueel uw
tandarts voor later richtlijnen wat het gebruik betreft)
7 - Om over te schakelen van de waterstraal naar
de verstuiving (of omgekeerd), draait u lichtjes
het gekleurde kopstuk. Gebruik de waterstraal om
één plaats te behandelen en de verstuiving voor
een algemene reiniging en massage.
Nota : om niet te spatten raden wij u aan het
apparaat in de mond te plaatsen alvorens de waterstraal te activeren. Houd het apparaat boven de wastafel en richt het
naar beneden.
8 - Bent u klaar, plaats dan de knop 'water aan / uit' op stand
“off” (O) en schakel het toestel uit.
Neem het kopstuk weg door een lichte druk op het knopje en plaats
het is de opbergruimte met deksel. Verwijder al het water uit het
apparaat. Trek de stekker uit het stopcontact.
Nota : laat het apparaat nooit op stand “on” als het niet gebruikt
wordt.
De waterdruk blijft dan toenemen en zou het toestel kunnen
beschadigen.
Plaats de knop 'water aan / uit op stand “off” als het toestel niet
gebruikt wordt.
1 - Verwijder het waterresservoir. Let erop dat u het goed aan de
onderzijde vastneemt met een hand, terwijl u met de andere
hand het reservoir opheft. Vul het met lauw water en plaats het
terug op zijn plaats.
- Het borsteltje dat u kiest kan veranderen van vorm naarmate het
gebruik, dit is normaal en het is afhankelijk van uw manier van
tandenpoetsen .
Deze vormverandering heeft geen invloed op de efficiënte
werking van het borsteltje. Desondanks mag u niet vergeten het
borsteltje regelmatig te vervangen zoals een gewone tandenborstel.
- Na gebruik van de tandenborstel hoort u het kopstuk (de borstel) goed te reingen onder stromend water.
- Plaats de tandenborstel op de oplader.
OPHANGSYSTEEM
Het is verplicht het ophangsysteem te gebruiken om het apparaat
een stevige basis te geven en om een val in de wastafel te
voorkomen .
Plaats de plugjes en de schroeven in de muur. Glijd de basis van
de oplader over de schroeven van boven naar beneden. Zorg dat
het snoer tussen de hechtplaats en de oplader blijft .
Gebruik geen snoer dat te lang is, enkel de lengte die nodig is
om het stopcontact te bereiken.
TECHNISCHE EIGENSCHAPPEN
Elektrciteitsnet : 230V 50Hz
Kracht 15 W
Elektriciteitsvoorziening : 2,4 Volt. Een volledig opgeladen
apparaat werkt ongeveer 30 tot 45 minuten.
Veiligheidsaanwijzing : IP24 (veiligheid tegen harde voorwerpen
groter dan 12,5 mm en tegen water en waterspatten.
CE(89/336/CEE)CEM
- Plaats één van de 4 borstels naar keuze op het middenstuk.
- Spoel zorgvuldig het kopstuk (de borstel) onder stromend water
alvorens het de eerste maal te gebruiken.
- Smeer naar gewoonte de tandpasta uit op de borstel.
- Spoel uw mond.
- Om het spatten te vermijden, is het aangeraden de
tandenborstel tegen de tanden te houden alvorens het apparaat
in werking te stellen.
- Plaats de borstel schuin ten opzichte van uw tanden, stel het
apparaat in werking en maak dan kleine cirkelvormige
bewegingen over uw tanden van boven naar beneden.
Glijd dan over de binnen- en over de buitenzijden en draag er
zorg voor om eveneens
de tussenruimten en het tandvlees te reinigen.
Het is niet nodig om hard te drukken op de tandenborstel.
Reinig de zijkanten en de oppervlakten van de kiezen door een
draaiende beweging.
Om volledig tandaanslag te verwijderen is het noodzakelijk de
tanden te poetsen gedurende minstens twee minuten.
- Bij de eerste behandelingen kan het zijn dat uw tandvlees een
beetje bloedt, zeker wanneer het zeer gevoelig is, maar na
enkele dagen gebruik te maken van uw nieuwe tandenborstel zal
het bloeden nalaten en verdwijnen.
Indien het tandvlees, na twee weken, nog steeds bloedt, raden
wij u aan een bezoekje te brengen bij de tandarts.
NL
N.B. : klinische testen hebben aangetoond dat de meest
efficiënte behandeling erin bestaat door het borsteltje op een
zachte manier te verplaatsen van de ene tand op de andere, zonder te drukken.
Om de goede werking van de tandenborstel de
verzekeren is het aangeraden om hem na gebruik altijd
te plaatsen op de oplader.
- Spoel zorgvuldig de mond na het poetsen.
2 - Schakel het apparaat in.
Nota : vóór het eerste gebruik : spoel het apparaat goed onder
stromend water. Indien het apparaat wordt gebruik met tand
reinigend water, dan moet u het apparaat na elk gebruik goed
te reinigen met zuiver water om alle eventele resten te verwijderen.
Indien het apparaat lange tijd niet gebruikt wordt, is het
aangeraden dat u, omwille van de hygiëne, het toestel reinigt
17
HET GEBRUIK VAN DE TANDENBORSTEL
NATUURBESCHERMING
Indien u het toestel niet meer wilt, verwijder dan eerst de batterijen.
Alvorens de batterij te verwijderen moet deze leeg zijn; laat het
apparaat dus functioneren totdat het automatisch stilvalt.
Draai de schroeven enkel los om de batterijen te verwijderen, zoniet
zal het apparaat niet meer waterdicht zijn.
De tandenborstel bevat batterijen met Nickel Cadmium. Voor het
behoud van de natuur vragen wij u uw tandenborstels niet te
werpen bij het normaal huisvuil, maar wel de batterijen te
verwijderen en ze te brengen naar de daarvoor voorziene
bakjes. U kan het apparaat ook terugbrengen naar uw verkoper
die ervoor zorgt dat het op de juiste plaats terecht komt.
Wanneer u zich tenslotte ontdoet van het apparaat , gelieve dan
de nationale reglementering te respecteren.
We zijn u dankbaar indien u het afzet op de daarvoor voorziene plek
Rohs (2002/95/EC) :
Het product werd ontworpen met materialen die geen schadelijke
invloed hebben op de ecologie.
18
NL
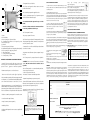
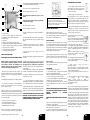
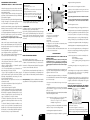
![JET DENTAIRE [HC5305] User Manual SPORT - Sport](http://vs1.manualzilla.com/store/data/006881523_1-4343a8491e73353d6d54dc94829a9101-150x150.png)
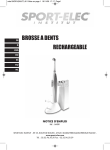
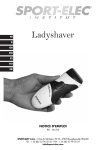


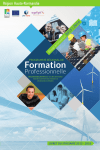
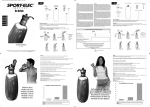
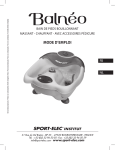
![BROSSE A DENTS [HC5339] User Manual SPORT - Sport](http://vs1.manualzilla.com/store/data/006728934_1-8cb6ca7588917298aca9e265f8b61f5b-150x150.png)