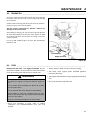
1
4131595-ES
Technical Manual
Manual técnico
PGM
PGM
63280 – PGM 22, Honda GX120 Engine
63280 – PGM 22, Motor Honda GX120
WARNING: If incorrectly used, this machine can cause severe injury. Those who
use and maintain this machine should be trained in its proper use, warned of its
dangers and should read the entire manual before attempting to set up, operate,
adjust or service the machine.
ADVERTENCIA: Si se usa de forma incorrecta esta máquina puede causar graves
lesiones. Cualquier persona que use y mantenga esta máquina deberá estar
entrenado en su uso correcto, instruido de sus peligros y deberá leer el manual
completamente antes de tratar de instalar, operar, ajustar o revisar la máquina.
GB
ES
To Order Parts
1. Write your full name and complete address on the
order.
2. Explain where and how to make shipment.
3. Give product number, name and serial number that is
stamped on the name plate or serial plate of your product.
4. Order by the quantity desired, the part number, paint
code, and description of the part as given in the parts
list.
5. Send or bring the order to an authorized Jacobsen.
6. Inspect all shipments on receipt. If any parts are damaged or missing, file a claim with the carrier before
accepting.
7. Do not return material without a letter of explanation,
listing the parts being returned. Transportation charges
must be prepaid.
Use of other than authorized parts will void the warranty.
Table of Contents
1
1.1
1.2
2
2.1
2.2
2.3
2.4
2.5
2.6
3
3.1
4
4.1
4.2
5
5.1
5.2
6
6.1
6.2
6.3
6.4
6.5
6.6
6.7
6.8
Safety
Operating Safety.................................................. 4
Important Safety Notes ........................................ 5
Specifications
Product Identification ........................................... 6
Engine .................................................................. 6
Mower .................................................................. 6
Traction and Differential ....................................... 6
Weight .................................................................. 7
Accessories ......................................................... 7
Decals
Decals.................................................................. 8
Initial Inspection
General ................................................................ 9
Initial inspection ................................................... 9
Controls
Icons .................................................................. 10
Controls ............................................................. 10
Operation
Daily Inspection ................................................. 12
Operator Presence Control ................................ 12
Operating Procedures ........................................ 13
Starting/Stopping Engine ................................... 14
Transport Wheels (Optional Kit 62293) ............. 15
Grass Catcher .................................................... 15
Mowing .............................................................. 16
Daily Maintenance ............................................. 17
7
7.1
7.2
7.3
7.4
7.5
7.6
7.7
8
8.1
8.2
8.3
8.4
8.5
8.6
8.7
8.8
8.9
8.10
8.11
8.12
9
10
10.1
Adjustments
General............................................................... 18
Reel To Bedknife ................................................18
Bedknife .............................................................19
Brake ..................................................................19
Cutting Height .....................................................20
Handle ................................................................20
Torque Specification ...........................................21
Maintenance
General............................................................... 22
Engine ................................................................22
Engine Oil ...........................................................23
Fuel ....................................................................23
Bedknife Shoe Removal .....................................24
Backlapping And Grinding ..................................24
Transport Tires (Option) .....................................24
Wheel Bearing ....................................................25
Storage ...............................................................25
Troubleshooting ..................................................26
Lubrication ..........................................................27
Maintenance Chart .............................................27
Notes
Parts Catalog
Table of Contents ............................................... 29
This manual is designed for the Maintenance and Adjustment of this equipment.
Use the maintenance and adjustment instructions included in this manual and the operating
instructions included in the Safety and Operation Manual to service the machine.
The Safety and Operation Manual must be kept available for reference by the operator.
Copyright 2005 Textron Inc. “All rights reserved, including the
right to reproduce this material or portions thereof in any form.”
LITHO IN U.S.A. 4-2006
Suggested Stocking Guide
To Keep your Equipment fully operational and productive, maintain a stock of the more commonly used maintenance
items. We have included part numbers for additional support materials and training aids. A more complete listing of
accessories and attachments can be found in the Specifications Section.
Service Parts
Qty. Part No.
Description
Qty. Part No.
Description
5002605 11 Blade Reel
101804
Spider
503477
22” High Profile Bedknife
102098
Pinion, Idler
503478
22” Low Profile Bedknife
202947
Pinion
503479
22” Tournament Bedknife
164056
Brake Band
5002887 22” Super Tournament Bedknife
366648
Seal, Grease
3006511 Washer
337677
Seal, Oil
Service Support Material
Qty. Part No.
Description
Qty.
4131595 Technical Manual
Description
Service Manual
Operator Training Video
How To Use This Manual
Abbreviations
N/S - Not serviced seperately, can only be obtained by ordering main component or kit.
AR -Variable quantity or measurement is required to obtain correct adjustment.
Symbols such as ▲, next to the item number, indicate that a note exists which contain additional information
important in ordering that part.
Indented Items
Bulleted items indicate component parts that are included as part of an assembly or another component. These parts
can be ordered separetely or as part of the main component.
Item
▲
Part No.
1
2
3
4
5
123456
789012
345678
N/S
901234.6
Qty
1
1
1
1
1
Description
Mount, Valve
Valve, Lift
• Handle
• Seal Kit
Screw, 1/4-20 x 2” Hex Head
Serial Numbers/Notes
Indicates a piece part
Includes Items 2 and 3
Serviced part included with Item 2
Non serviced part included with Item 2
Indicates a part painted Jacobsen Orange
3
1
1
1.1
SAFETY
SAFETY
OPERATING SAFETY ______________________________________________________
! WARNING
EQUIPMENT OPERATED IMPROPERLY OR BY UNTRAINED PERSONNEL CAN BE DANGEROUS.
Familiarize yourself with the location and proper use of all controls. Inexperienced operator’s should receive
instruction from someone familiar with the equipment before being allowed to operate the machine.
1. Safety is dependent upon the awareness, concern
and prudence of those who operate or service the
equipment. Never allow minors to operate any
equipment.
2. It is your responsibility to read this manual and all
publications associated with this equipment (Engine
manual, accessories and attachments). If the
operator can not read English it is the owner’s
responsibility to explain the material contained in
this manual to them.
3. Learn the proper use of the machine, the location
and purpose of all the controls before you operate
the equipment. Working with unfamiliar equipment
can lead to accidents.
4. Never allow anyone to operate or service the
machine or its attachments without proper training
and instructions; or while under the influence of
alcohol or drugs.
5. Wear all the necessary protective clothing and
personal safety devices to protect your head, eyes,
ears hands and feet. Long hair, loose clothing or
jewelry may get tangled in moving parts. Operate
the machine only in daylight or in good artificial light.
6. Evaluate the terrain to determine what accessories
and attachments are needed to properly and safely
perform the job. Only use accessories and
attachments approved by Jacobsen.
7. Stay alert for holes in the terrain and other hidden
hazards.
8. Inspect the area where the equipment will be used.
Pick up all the debris you can find before operating.
Beware of overhead obstructions (low tree limbs,
electrical wires, etc.) and also underground
obstacles (sprinklers, pipes, tree roots, etc.) Enter a
new area cautiously. Stay alert for hidden hazards.
9. Do not carry passengers. Keep bystanders and pets
a safe distance away.
10. Never direct discharge of material toward
bystanders, nor allow anyone near the machine
while in operation. The owner/operator can prevent
and is responsible for injuries inflicted to
themselves, to bystanders and damage to property.
11. Never operate equipment that is not in perfect
working order or is without decals, guards, shields,
discharge deflectors or other protective devices
securely fastened in place.
12. Never disconnect or bypass any switch.
13. Carbon monoxide in the exhaust fumes can be fatal
when inhaled. Never operate the engine without
proper ventilation.
14. Fuel is highly flammable, handle with care. See
Section 8.4
15. Keep the engine clean. Allow the engine to cool and
always close fuel shut off valve and remove the
spark plug wire from the spark plug before storing.
Do not store unit near an open flame or flammable
debris.
16. Place unit on a flat surface, disengage all drives and
engage parking brake before starting the engine.
17. Local regulations may restrict the age of the
operator.
18. Operate the machine across the face of the slope
(horizontally), not up and down the slope (vertically).
Never operate on wet grass.
19. Always operate at speeds that allow you to have
complete control of the machine. Be sure of your
footing; keep a firm hold on the handle and walk;
never run.
20. Before you clean, adjust or repair this equipment,
stop the engine, disconnect the spark plug wire, and
keep the wire away from the plug to prevent
accidental starting.
This machine is to be operated and maintained as specified in this manual and is intended for the professional
maintenance of specialized turf grasses. It is not intended for use on rough terrain or long grasses.
4
SAFETY
1.2
1
IMPORTANT SAFETY NOTES ________________________________________________
!
This safety alert symbol is used to alert you to potential hazards.
DANGER - Indicates an imminently hazardous situation which, if not avoided, WILL result in death or serious injury.
WARNING - Indicates a potentially hazardous situation which, if not avoided, COULD result in death or serious
injury.
CAUTION - Indicates a potentially hazardous situation which, if not avoided, MAY result in minor or moderate injury
and property damage. It may also be used to alert against unsafe practices.
For pictoral clarity, some illustrations in this manual may show shields, guards or plates open or removed. Under no
circumstances should this equipment be operated without these devices securely fastened in place
! WARNING
The Operator Presence Control (OPC) on this machine will shut off the reel
and traction drive if the operator releases the OPC bail.
To protect the operator and others from injury, never operate equipment with
the OPC system disconnected or malfunctioning.
! WARNING
1. Before leaving the operator’s position for any reason:
a.
b.
c.
Disengage all drives.
Engage parking brake.
Stop engine.
2. Keep hands, feet, and clothing away from moving parts. Wait for all
movement to stop before you clean, adjust or service the machine.
3. Keep the area of operation clear of all bystanders and pets.
4. Chock or block the wheels if the machine is left on an incline.
5. Never operate mowing equipment without the discharge deflector
securely fastened in place.
By following all instructions in this manual, you will prolong the life of your machine and maintain its maximum
efficiency. Adjustments and maintenance should always be performed by a qualified technician.
If additional information or service is needed, contact your Authorized Jacobsen who is kept informed of the latest
methods to service this equipment and can provide prompt and efficient service. Use of other than original or
authorized Jacobsen parts and Accessories will void the warranty.
5
2
2
2.1
SPECIFICATIONS
SPECIFICATIONS
PRODUCT IDENTIFICATION _________________________________________________
63280.........22 in., (559 mm) Professional Greens Mower
with InCommand™ control system, 4.0 H.P.
gasoline engine (Honda), Operator Presence
Control, grass catcher, brakes and
kickstand.
Serial Number ................ An identification plate, like the one
shown, listing the serial number, is
attached to the right side frame.
Always provide the serial number of the unit when ordering
replacement parts or requesting service information.
®
A Textron Company
CHARLOTTE, NC
MADE IN U.S.A.
2005
YEAR OF
PRODUCTION:
63280
2.2
1601
Product
EEC Sound
Power
Vibration m/s2
Arms
63280
94
8.237
ENGINE__________________________________________________________________
Engine ....................... Honda GX-120 K1Q JG2 4-Cycle,
4 HP (2.98 kW) at 4000 RPM
Use clean, fresh, regular unleaded gasoline, 86 octane
minimum.
Speed ........................ High Idle - 3300 + 100 RPM
Low Idle - 1700 + 100 RPM
Engine Oil . . . . . . . . . Capacity: 5/8 qt. (0.6 l)
Fuel............................ Regular Grade (Unleaded)
Type: SAE 10W-30, API Classification SF or SG
Fuel Tank................... 0.66 Gallon (2.5 liter)
2.3
MOWER _________________________________________________________________
Height of cut ................. 5/64 to 7/16 in., (2 to 11 mm)
Cutting Frequency .........13/64 in., (5 mm)
Bedknives ..................... Hardened carbon steel
Reel ...............................11 blades, 5 in., (127 mm)
diameter hardened high
manganese, carbon steel
High profile ................... yields 5/32 in., (4 mm) cut.
Low profile .................... yields 7/64 in., (2.8 mm) cut.
Tournament .................. yields 5/64 in., (2 mm) cut.
Super Tounament ........... Yields 1/16 in. (1.6 mm) cut
2.4
Reel Clutch ....................Separate Cog-type
Reel Reduction Ratio ....2.25:1
Width of cut ...................22 in., (559 mm)
TRACTION AND DIFFERENTIAL _____________________________________________
Drive Clutch .........................Centifugal, Engages at 2000
RPM
housed in traction drum
Traction and Reel Drive .......Chain drive
Rear Drive Drum .................Machined aluminum alloy
2 sections: 7-3/4 in., (O.D.) x
10.97 in., (197 x 278 mm)
Transport Wheels ................(2) bidirectional, pneumatic
11 x 4 Goodyear Softrac
Travel Speed .......................2.9 mph (4.7 km/h) @ 3000
rpm
Traction Reduction Ratio .....24:1
Tire Pressure .......................6 to 8 psi (41 to 55 kPa)
Differential ...........................Full automotive type,
6
SPECIFICATIONS
2.5
2
WEIGHT__________________________________________________________________
Weight (Mass) PGM 22....... 187 lb., (85 kg) with catcher,
roller, kickstand.
2.6
ACCESSORIES ____________________________________________________________
Contact your authorized Jacobsen dealer for a complete
listing of accessories and implements.
PGM MagKnife Conversion Kit ...........................4131020
Pneumatic Transport Tires......................................62293
Front Gear Drive .....................................................68557
Front Roller Brush ...................................................68536
Grass Catcher .........................................................68121
Grooved Assembled Disc Roller .............................68527
Grooved Machined Aluminum Roller ......................68614
Grooved Machined Steel Roller ..............................68613
Guide Wheels .........................................................68612
Height of Cut Gauge .............................................158568
Lapping Compound (120 grit) ... 5002489 - 10 Pound Pail
5002491 - 25 Pound Pail
Light Kit ...............................................................5002962
Orange Paint (12 oz. spray) ..................................554598
Push Brush .............................................................68500
Smooth Roller with Scraper ....................................68530
Soft Touch Rotary Brush (Requires 68557) ............68560
Solid tube Roller with Scraper.................................68641
Turf Groomer ..........................................................68579
Vertical Reel ...........................................................68556
2-1/2 Gallon Fuel Can ...........................................554948
5-1/4 Gallon Fuel Can ...........................................554949
Mower Caddy PGM Latch Kit..................................68652
Mower Caddy ..........................................................68648
7
3
DECALS
3
DECALS
3.1
DECALS _________________________________________________________________
Familiarize yourself with the decals, they are critical to the safe operation of the mower.
REPLACE DAMAGED DECALS IMMEDIATELY.
! CAUTION
! DANGER
1. Read operator’s manual before operating
machine.
2. Keep shields in place and hardware
securely fastened.
3. Before you clean, adjust or repair this
equipment, disengage all drives, engage
parking brake and stop engine.
4. Keep hands, feet and clothing away from
moving parts.
5. Never carry passengers.
6. Keep bystanders away.
361854
To avoid serious bodily injury stop
engine and disengage reels before
working on mower or emptying baskets.
3001235
CAUTION
BE SURE THE TRACTION CLUTCH
LEVER IS IN NEUTRAL BEFORE
STARTING THE ENGINE.
3001790
! CAUTION
! PRECAUCION
1. No opere esta maquina sin previo
entrenamiento, instruccion y sin haber
leido el manual de operacion.
2. Tenga todas las guardas en su lugar y
plezas bien aseguradas.
3. Neutralice todas las velocidades y
apague el motor antes de vaciar los
recolectores de pasto, darie servicio,
limplar, ajustar y destrabar la maquina.
4. Mantenga las manos, los ples y ropa
suelta lejos de plezas en movimiento.
5. No deberan transportar pasajeros si no
existe un asiento para ellos.
6. Si no sabe leer ingles, pida que aiguien
le lea las calcomanias de avisos y los
manuales de instruccion y operacion.
340830
ALLOW ENGINE
TO COOL FOR 2
MINUTES BEFORE
REFUELING
362764
4127335
Vehicle Mass:
Model PGM 19
Model PGM 22
Model 518A
Model 522TA
Model 522A
Model 526A
Model TC22
84.0 kg
85.0 kg
95.3 kg
100.7 kg
101.2 kg
123.4 kg
101.1 kg
! WARNING
Keep Bystanders Away. Do
Not Operate Without Guards
In Place
2811102
WARNING
TO PREVENT INJURY AND ACCIDENTAL
CLUTCH ENGAGEMENT DO NOT ADJUST
ENGINE SPEED USING THROTTLE LEVER
ON ENGINE. ALWAYS ADJUST ENGINE
SPEED USING THE OPC HANDLE AND
THROTTLE PADDLE
4146636
8
INITIAL INSPECTION
4
4.1
INITIAL INSPECTION
GENERAL ________________________________________________________________
The set-up and testing of the unit should always be
performed by a trained technician, familiar with the
operation of the equipment.
Read each instruction completely and make sure you
understand it before proceeding with the assembly. Stay
alert for potential hazards and obey all safety
precautions.
The RIGHT, LEFT, FRONT and REAR of the machine
are referenced from the operator’s seat, facing forward.
4.2
4
Accessories not included with this product must be
ordered separately. See instructions provided with
accessory for installation and parts.
! CAUTION
Do not attempt to operate the machine unless
you are familiar with this type of equipment and
know how to operate all controls correctly.
This machine is shipped assembled. After unpacking,
perform the initial inspection, operating checks, and test
the Operator Presence Control (OPC).
INITIAL INSPECTION _______________________________________________________
! CAUTION
The initial inspection should be performed only when the engine is off and all fluids are cold.
Disengage all drives, engage parking brake, stop engine and disconnect spark plug wire.
1. Perform a visual inspection of the entire unit, look for
signs of wear, loose hardware, and components that
may have been damaged during transport.
2. Inspect paint and decals for damage or scratches.
Decals provide important operating and safety
information. Replace all missing or hard to read
decals.
3. Check that the engine oil level is at the full level
mark with the engine cold.
4. Visually check for fuel or oil leaks.
5. Inspect lube points for proper lubrication.
9
5
5
CONTROLS
CONTROLS
5.1
ICONS ___________________________________________________________________
Operator Presence Control
Engine
Unlock
Engine Off
Throttle
Fast
Engine Run
Slow
Lock
Parking Brake
Engaged Disengaged
Fuel
Gasoline
Choke
! WARNING
Never attempt to operate the machine unless you have read the Safety and Operation
Manual, the Parts and Maintenance Manual, the engine manual and know how to operate
all controls correctly.
Familiarize yourself with the icons shown above and what they represent. Learn the
location and purpose of all the controls before operating this mower.
5.2
A.
CONTROLS ______________________________________________________________
Parking Brake – Used whenever the mower is left
unattended or as a service brake while transporting.
B. Paddle Throttle – Controls the speed of the engine
when OPC Bail is engaged. Push (+) side of lever to
increase engine speed. Push (-) side of lever to
decrease engine speed.
C. O.P.C. Bail – Engaging bail increases engine speed
which engages the centrifugal clutch. Release bail
to return engine to idle. The bail must be
disengaged to start the engine.
D. Engine Switch – The engine switch enables and
disables the ignition system. The engine switch
must be in the ON position for the engine to run.
Turning the engine switch to the OFF position stops
the engine.
B
B
C
H
C
P
A
N
D
A
Figure 5A
D
OFF
ON
Figure 5B
10
CONTROLS
5
E. Reel Clutch Lever – To disengage, turn handle (E)
to point downwards. Always disengage clutch when
mower is being transported.
! WARNING
E
To prevent bodily injury or property damage,
never engage the reel clutch lever while the
engine is running or the O.P.C. bail is engaged.
! DANGER
Figure 5C
Keep hands and feet away from the cutting unit to
prevent serious cuts.
F. Choke Lever - The choke lever opens and closes
the choke valve in the carburetor. The CLOSED
position enriches the fuel mixture for starting a cold
engine. The OPEN position provides the correct fuel
mixture for operation after starting, and for restarting
a warm engine.
G. Fuel Valve Lever - The fuel valve opens and closes
the connection between the fuel tank and the
carburetor. The fuel valve lever must be in the ON
position for the engine to run. When the engine is
not in use, leave the fuel valve lever in the OFF
position to prevent carburetor flooding and to reduce
the possibility of fuel leakage.
Note: Before tipping mower back for adjustments,
the fuel lever must be moved to the OFF position to
prevent fuel from leaking into the crankcase.
F
OFF
ON
G
Figure 5D
H. E-Stop - Used to stop the engine. Push switch
down to disable engine ignition, pull up for normal
operation.
11
6
OPERATION
6
OPERATION
6.1
DAILY INSPECTION________________________________________________________
! CAUTION
The daily inspection should be performed only
when the engine is off and all fluids are cold.
Disengage all drives, engage parking brake, stop
engine and disconnect spark plug wire.
1. Perform a visual inspection of the entire unit, look for
signs of wear, loose hardware, and missing or
damaged components. Check for fuel or oil leaks.
6.2
2. Check the fuel supply and crankcase oil level. All
fluids must be at the full level mark.
3. Make sure the mower is adjusted to the required
cutting height.
4. Make sure the machine is lubricated and the
transport tires are properly inflated.
5. Check the O.P.C. system (Section 6.2).
OPERATOR PRESENCE CONTROL __________________________________________
1. The O.P.C. system is intended to protect the
operator and others from injury by stopping the reel
and drive mechanism as soon as the operator
releases the O.P.C. bail. The unit is also equipped
with an engine stop (E-Stop) switch that will stop the
engine from the operator’s position.
3. Start the engine.
a.
Slide bail to the left and engage OPC Bail.
b.
Engine speed will increase, the drive mechanism
will engage and the wheels will begin to turn.
c.
Release the O.P.C. bail. The bail must
disengage, engine speed return to idle and drive
mechanism must stop.
d.
Push E-Stop switch down. Engine must stop
immediately.
! WARNING
Never operate equipment with the O.P.C. system
disconnected or malfunctioning. Do not
disconnect or bypass any switch.
2. To test the system:
12
a.
Place mower on the kickstand.
b.
Disengage the reel clutch lever (E).
4. If the drive mechanism engages before the O.P.C.
bail is engaged or the drive mechanism continue to
turn after the O.P.C. bail is released; stop the
engine immediately and have the system repaired.
OPERATION
6.3
6
OPERATING PROCEDURES _________________________________________________
! CAUTION
To help prevent injury, always wear safety glasses, leather work shoes or boots, a hard hat, and ear protection.
Long hair, loose clothing or jewelry may get tangled in moving parts.
1. Under no circumstances should the engine be
started with operator or bystanders standing in front
of the reel.
2.
Never run the engine in an enclosed area.
3.
Keep hands and feet away from moving parts and
cutting units. If possible, do not make adjustments with
the engine running.
4. Do not operate mower or attachments with loose,
damaged or missing components. Whenever
possible mow when grass is dry.
5. First mow in a test area to become thoroughly
familiar with the operation of the mower and control
levers.
Note:To prevent damage to the reel and bedknife
never operate the reels when they are not cutting grass.
Excessive friction and heat will develop between the
bedknife and reel and damage the cutting edge .
6. Study the area to determine the best and safest
operating procedure. Consider the height of the
grass, type of terrain, and condition of the surface.
Each condition will require certain adjustments or
precautions. Only use accessories and attachments
approved by Jacobsen.
10. Disengage the reel clutch when crossing paths or
roadways. Look out for traffic.
11. Stop and inspect the equipment for damage
immediately after striking an obstruction or if the
machine begins to vibrate abnormally. Have the
equipment repaired before resuming operation.
! WARNING
Before you clean, adjust, or repair this
equipment, always disengage all drives, engage
parking brake, stop engine and remove spark
plug wire to prevent injuries.
12. Slow down and use extra care on hillsides. Use
caution when operating near drop offs.
13. Look behind and down before backing up to be sure
of a clear path. Use care when approaching blind
corners, shrubs, trees or other objects that may
obscure vision.
14. Never use your hands to clean cutting units. Use a
brush to remove grass clippings from blades.
Blades are extremely sharp and can cause serious
injuries
7. Be aware of mower discharge direction and never
direct discharge of material toward bystanders.
Never allow anyone near the machine while in
operation. The owner/operator is responsible for
injuries inflicted to bystanders and/or damage to
their property.
! CAUTION
Before mowing, pick up all debris such as rocks, toys
and wire which can be thrown by the machine. Enter a
new area cautiously. Always operate at speeds that
allow you to have complete control of the mower.
8. Use discretion when mowing near gravel areas
(roadway, parking areas, cart paths, etc.). Stones
discharged from the mower may cause serious
injuries to bystanders and/or damage the
equipment.
9. Disengage the reel clutch to stop blades when not
mowing.
13
6
OPERATION
6.4
STARTING/STOPPING ENGINE ______________________________________________
! CAUTION
OFF
Always start and stop the engine when the mower is
on level ground. Keep feet away from blade when
starting engine.
ON
D
Starting
1. Check oil level and fuel supply then open fuel valve
lever (G).
2. Move the choke lever (F) to the “CLOSED” position.
3. Set engine switch (D) to “ON”.
4. Make certain the O.P.C. bail (C) is disengaged and
the parking brake (A) is engaged.
5. Select desired position for reel clutch lever (E).
To cut - engage reel clutch (E).
ON
OFF
To transport - disengage reel clutch (E).
F
G
Figure 6A
! WARNING
To prevent bodily injury or property damage,
never engage the reel clutch lever while the
engine is running or the O.P.C. bail is engaged.
B
B
C
6. Start the engine. Do not allow the cord to “snap”
back into the starter. Do not tilt the mower back
when starting.
7. When engine starts, move choke lever (F) to the
“OPEN” position. Intermittent choking may be
required while engine is cold.
C
P
A
N
D
A
Figure 6B
8. Allow engine to warm up gradually.
Stopping
1. To stop the engine, release the O.P.C. bail (C), and
set engine switch (D) to “OFF” position. Close fuel
valve (G)
E
2. Engage parking brake (A).
Figure 6C
14
OPERATION
6.5
6
TRANSPORT WHEELS (OPTIONAL KIT 62293) _________________________________
! WARNING
Always stop the engine and disengage the drive
levers before installing or removing the transport
wheels.
6.
When using a vehicle to transport the mower, apply
parking brake, stop engine and close fuel shut-off
valve. Chock or block the wheels.
7.
Keep tires inflated to 6 to 8 psi (41 to 55 kPa)
1. Push and hold the kickstand against the ground then
pull the mower handle back until the mower rests on
the stand (L).
2. To remove wheels, press retaining clip (J) away
from the hub and pull wheel off hub.
3. To install wheels, set brake, press retaining clip (J),
place wheel on hub and turn the wheel backwards
until studs on back of wheel line up with holes in
hub (K). Push wheel in and release clip.
4. Always disengage reel clutch lever (E), prior to
transporting the mower more than a few feet.
Figure 6D
5. Push the mower forward off the kickstand, start the
engine and engage the O.P.C. bail (C).
6.6
GRASS CATCHER _________________________________________________________
1. When the basket is about two thirds (2/3) full of grass
clippings, move mower off the green.
2. Stop on a flat surface, disengage all drives and stop
the engine.
3. Remove and empty the grass catcher. Use a long
handle brush to remove grass clippings from the
mower.
! DANGER
To prevent serious injury, always stop the engine
and disengage all drives before emptying grass
catcher.
15
6
OPERATION
6.7
MOWING _________________________________________________________________
1. Stop engine. Place mower on kickstand and remove
the transport wheels if installed. (See Section 6.5)
2. Engage the reel lever (E) and push mower off the
kickstand. Start the engine.
! WARNING
To prevent bodily injury or property damage,
never engage the reel clutch lever while the
engine is running or the O.P.C. bail is engaged.
5. For a more even playing surface and neater
appearance, alter the mowing pattern each time a
green is mowed. The patterns shown in Figure 6F
are suggestions only, the operator or course
superintendant can arrange patterns to suit each
green.
6. Use caution while operating on hillside and dropoffs.
3. Position mower slightly off the green.
a.
Adjust engine speed (B) to provide a safe,
comfortable walking speed.
b.
Push handle down to lift the mower head above
the grass then engage the O.P.C. bail (C).
c.
As the mower crosses the edge of the green,
lower the mower head to the ground and
proceed across the green in a straight line. While
mowing support the handle so the handle tubes
do not contact the handle stops. Allowing the
handle to rest on the handle stops or pushing the
handle up into the stops may result in an uneven
cut.
d.
e.
3
2
4
1
5
When the opposite side of the green is reached,
push down of the handle to lift the mower head
without disengaging the O.P.C. bail and proceed
off the green to turn around or simply release
O.P.C. bail and turn around.
To turn to the right, start by turning mower
slightly to the left (2). When the mower has
moved approximately 1/2 its own width to the
left, swing it around quickly to the right (3 and 4),
guiding the mower with your right hand. This
method makes it possible to turn around quickly
with very few steps. [Figure 6E]
Figure 6E
Second
Mowing
First
Mowing
Note:To prevent damage to the reel and bedknife
never operate the reels when they are not cutting grass.
Excessive friction and heat will develop between the
bedknife and reel and damage the cutting edge .
4. To assure complete, even cutting, overlap swaths
by 1 to 2 in., (25 to 50 mm), then make one or more
passes around the perimeter of the green to clean
ragged edges and separate the putting green
surface from the apron.
16
Fourth
Mowing
Third
Mowing
Figure 6F
OPERATION
6.8
6
DAILY MAINTENANCE______________________________________________________
1. Park the mower on a flat, level surface. Engage
parking brake and stop the engine.
4.
2. Grease and lubricate all points if required.
3. To prevent fires, wash the mower after each use.
Clean all grass clippings and debris off reel, drives,
engine and muffler
a.
Use only fresh
equipment.
water
for
cleaning
your
Note: Use of salt water or affluent water has been
known to encourage rust and corrosion of metal parts
resulting in premature deterioration or failure.
Damage of this nature is not covered by the factory
warranty.
b.
c.
Do not use high pressure spray.
Do not spray water into the cooling fins or the
engine air intake.
Note: Do not wash a hot or running engine. Use
compressed air to clean the engine.
Fill fuel tank at the end of each operating day. Do
not fill above the fuel strainer shoulder. Close fuel
valve (G) when unit is not in use.
Use clean, fresh, unleaded gasoline, 86 octane
minimum.
Handle fuel with care - it is highly flammable. Use an
approved container, the spout must fit inside the fuel filler
neck. Avoid using cans and funnels to transfer fuel.
! WARNING
Never remove the fuel cap from the fuel tank, or add
fuel, when the engine is running or while the engine is
hot.
Do not smoke when handling fuel. Never fill or drain
the fuel tank indoors.
Do not spill fuel and clean spilled fuel immediately.
Never handle or store fuel containers near an open
flame or any device that may create sparks and ignite
the fuel or fuel vapors.
Be sure to reinstall and tighten fuel cap securely.
5.
Store fuel according to local, state or federal
ordinances and recommendations from your fuel
supplier.
6.
Check the engine oil at the start and end of each
day, before starting the engine. If the oil level is low,
remove the oil filler cap and add oil as required. Do
not overfill.
17
7
ADJUSTMENTS
7
ADJUSTMENTS
7.1
GENERAL________________________________________________________________
! WARNING
Before you adjust, clean or repair this equipment,
always disengage all drives, engage parking brake
and stop engine to prevent serious injury.
Whenever performing maintenance other than
carburetor adjustments, remove the spark plug wire
and place the wire away from the plug to prevent
accidental starting and bodily injury.
1. Adjustments and maintenance should always be
performed by a qualified technician. If proper
adjustment cannot be made, contact an authorized
Jacobsen.
7.2
2. Replace, do
components.
not
adjust,
worn
or
damaged
3. Long hair, jewelry or loose fitting clothing may get
tangled in moving parts.
! CAUTION
Be careful to prevent entrapment of the hands and
fingers between moving and fixed components of the
machine.
4. Do not change governor settings or overspeed the
engine.
REEL TO BEDKNIFE _______________________________________________________
(Pre-adjustment Check)
1. Check the reel bearings for end play or radial play. If
there is any abnormal movement of the reel, up and
down or side to side, adjust or replace components
as needed.
5. The reel must be parallel to the bedknife. An
improperly adjusted reel will lose its sharp edges
prematurely and may result in serious damage to
the reel and bedknife.
6. Grass conditions will also affect the adjustment.
a.
Dry, sparse conditions will require a wider gap to
prevent heat buildup and damage to the reel and
bedknife.
b.
High quality grass with a good moisture content
requires a closer gap (near zero).
! CAUTION
To prevent personal injury and damage to the cutting
edges, handle the reel with extreme care.
2. Inspect the reel blades and bedknife to insure good
sharp edges without bends or nicks.
a.
The cutting edges of the reel blades and
bedknife must be sharp, free of burrs and show
no signs of rounding off.
b.
The bedknife and bedknife backing must be
securely tightened. The bedknife must be
straight and sharp.
c.
A flat surface of 1/32 (0.8 mm) minimum must be
maintained on the front face of the bedknife. Use
a standard flat file to dress the bedknife.
3. If wear or damage is beyond the point where the
reel or bedknife can be corrected by the lapping
process, they must be reground.
4. Proper reel-to-bedknife adjustment is critical. A gap
of 0.001 to 0.003” (0.025 to 0.076 mm) must be
maintained across the entire length of the reel and
bedknife.
18
1/32”
(0.8 mm)
90°
Figure 7A
ADJUSTMENTS
7.3
7
BEDKNIFE _______________________________________________________________
1. Read Section 7.2 before making the adjustment.
2. Start adjustment at the leading end of the reel,
followed by the trailing end. The leading end of the
reel blade is the end that passes over the bedknife
first during normal reel rotation.
b.
4.
Adjust the trailing end of the reel in the same
manner, then recheck the adjustment at the
leading end.
Tighten nut (A). Recheck adjustment.
When the reel and bedknife are properly adjusted, the
reel will spin freely and will cut a piece of newspaper
along the full length of the reel when the paper is held at
90° to the bedknife.
Rotation
Leading Edge
A
TK13
B
Figure 7B
C
! CAUTION
To prevent personal injury and damage to the cutting
edges, handle the reel with extreme care.
3. Loosen nut (A) and turn nut (B) clockwise to bring
the bedknife closer to the reel or counterclockwise
to back the bedknife away from the reel.
a.
F
E
D
G
Slide a feeler gauge or shim stock 0.001 - 0.003
in., (0.025 - 0.075 mm) between the reel blade
and the bedknife. Do not turn the reel.
Figure 7C
7.4
BRAKE __________________________________________________________________
A properly adjusted brake requires 10 lb. pull at top of
brake lever to engage and must have 1.50” (38 mm)
center to center when released.
1. Minor adjustments are made at the handle. Loosen
nut (H), turn nut (J) to adjust the brake cable, then
tighten nut (H).
1.50”
(38 mm)
2. If adjustments cannot be made at the handle,
remove the transport wheel and make the
adjustment at the brake band.
H
3. Loosen screw (K) and pull cable to obtain desired
brake tension. Tighten screw (K). Readjust (H) and
(J).
J
K
Brake Band
Figure 7D
19
7
ADJUSTMENTS
7.5
CUTTING HEIGHT _________________________________________________________
Note: Make sure the bedknife is properly adjusted before
setting the cutting height. (Section 7.3).
1. Tip mower back on traction drum or tires. Do not
leave the mower tipped back for an extended length
of time or oil may migrate into the combustion
chamber.
6. Repeat Steps 4 and 5 on the opposite end of the
reel then tighten nuts (M). Recheck and readjust the
cutting height if necessary.
L
2. Loosen nuts (M) on both sides just enough to allow
knob (L) to raise the front roller or Turf Groomer.
Raise both sides an equal amount.
M
3. Set gauge screw (P) to the desired cutting height
(O). Measure from the gauge bar (N) to the
underside of the screw head (P) then tighten wing
nut to lock the adjustment.
4. Place gauge bar between front roller and traction
roller, near the outer end of the rollers.
5. Slide screw head over bedknife (Q) and adjust knob
(L) so roller just contacts the gauge bar. Tighten nut
(M).
7.6
N
P
Q
O
Figure 7E
HANDLE _________________________________________________________________
1. To adjust the angle of the handle bar (Y), loosen
screw (W) on both sides of the mower and adjust the
handle bar to the desired position.
2. After adjusting handle bar, adjust bracket (X) so that
the handle bar just rests on the bottom of the slot in
bracket. Tighten screw (W).
Y
X
W
Figure 7F
20
ADJUSTMENTS
7.7
7
TORQUE SPECIFICATION ___________________________________________________
CAUTION
All torque values included in these charts are approximate and are for reference only. Use of these torque values is
at your sole risk. Jacobsen is not responsible for any loss, claim, or damage arising from the use of these charts.
Extreme caution should always be used when using any torque value.
Jacobsen uses Grade 5 Plated bolts as standard, unless otherwise noted. When tightening plated bolts, use the value
given for lubricated.
AMERICAN NATIONAL STANDARD FASTENERS
SIZE
UNITS
GRADE 5
GRADE 8
SIZE
Lubricated
Dry
Lubricated
Dry
UNITS
GRADE 5
#6-32
in-lb (Nm)
–
20 (2.3)
–
–
7/16-14
ft-lb (Nm)
GRADE 8
Lubricated
Dry
Lubricated
Dry
37 (50.1)
50 (67.8)
53 (71.8)
70 (94.9)
#8-32
in-lb (Nm)
–
24 (2.7)
–
30 (3.4)
7/16-20
ft-lb (Nm)
42 (56.9)
55 (74.6)
59 (80.0)
78 (105)
#10-24
in-lb (Nm)
–
35 (4.0)
–
45 (5.1)
1/2-13
ft-lb (Nm)
57 (77.2)
75 (101)
80 (108)
107 (145)
#10-32
in-lb (Nm)
–
40 (4.5)
–
50 (5.7)
1/2-20
ft-lb (Nm)
64 (86.7)
85 (115)
90 (122)
120 (162)
#12-24
in-lb (Nm)
–
50 (5.7)
–
65 (7.3)
9/16-12
ft-lb (Nm)
82 (111)
109 (148)
115 (156)
154 (209)
1/4-20
in-lb (Nm)
75 (8.4)
100 (11.3)
107 (12.1)
143 (16.1)
9/16-18
ft-lb (Nm)
92 (124)
122 (165)
129 (174)
172 (233)
1/4-28
in-lb (Nm)
85 (9.6)
115 (13.0)
120 (13.5)
163 (18.4)
5/8-11
ft-lb (Nm)
113 (153)
151 (204)
159 (215)
211 (286)
5/16-18
in-lb (Nm)
157 (17.7)
210 (23.7)
220 (24.8)
305 (34.4)
5/8-18
ft-lb (Nm)
128 (173)
170 (230)
180 (244)
240 (325)
5/16-24
in-lb (Nm)
173 (19.5)
230 (26.0)
245 (27.6)
325 (36.7)
3/4-10
ft-lb (Nm)
200 (271)
266 (360)
282 (382)
376 (509)
3/8-16
ft-lb (Nm)
23 (31.1)
31 (42.0)
32 (43.3)
44 (59.6)
3/4-16
ft-lb (Nm)
223 (302)
298 404
315 (427)
420 (569)
3/8-24
ft-lb (Nm)
26 (35.2)
35 (47.4)
37 (50.1)
50 (67.8)
7/8-14
ft-lb (Nm)
355 (481)
473 (641)
500 (678)
668 (905)
METRIC FASTENERS
4.6
SIZE
8.8
10.9
Non Critical
Fasteners
into
Aluminum
12.9
UNITS
Lubricated
Dry
Lubricated
Dry
Lubricated
Dry
Lubricated
Dry
M4
Nm (in-lb)
–
–
–
–
–
–
3.83 (34)
5.11 (45)
2.0 (18)
M5
Nm (in-lb)
1.80 (16)
2.40 (21)
4.63 (41)
6.18 (54)
6.63 (59)
8.84 (78)
7.75 (68)
10.3 (910
4.0 (35)
M6
Nm (in-lb)
3.05 (27)
4.07 (36)
7.87 (69)
10.5 (93)
11.3 (102)
15.0 (133)
13.2 (117)
17.6 (156)
6.8 (60)
M8
Nm (in-lb)
7.41 (65)
9.98 (88)
19.1 (69)
25.5 (226)
27.3 (241)
36.5 (323)
32.0 (283)
42.6 (377)
17.0 (150)
M10
Nm (ft-lb)
14.7 (11)
19.6 (14)
37.8 (29)
50.5 (37)
54.1 (40)
72.2 (53)
63.3 (46)
84.4 (62)
33.9 (25)
M12
Nm (ft-lb)
25.6 (19)
34.1 (25)
66.0 (48)
88.0 (65)
94.5 (70)
125 (92)
110 (81)
147 (108)
61.0 (45)
M14
Nm (ft-lb)
40.8 (30)
54.3 (40)
105 (77)
140 (103)
150 (110)
200 (147)
175 (129)
234 (172)
94.9 (70)
21
8
MAINTENANCE
8
MAINTENANCE
8.1
GENERAL________________________________________________________________
c.
Replace worn or damaged parts before operating
the machine.
Before you clean, adjust, or repair this equipment,
disengage all drives, engage parking brake and stop
engine to prevent injuries.
d.
Keep all fluids at their proper levels.
e.
Keep shields in place and all hardware securely
fastened.
Whenever performing maintenance other than
carburetor adjustments, remove the spark plug wire
and place the wire away from the plug to prevent
accidental starting and bodily injury.
f.
Keep tires properly inflated.
! WARNING
1. Adjustment and maintenance should always be
performed by a qualified technician. If proper
adjustments cannot be made, contact an Authorized
Jacobsen.
2. Inspect the equipment on a regular basis, establish
a maintenance schedule and keep detailed records.
8.2
4. Use the illustrations in the Parts Catalog as
reference for the disassembly and reassembly of
components.
5. Recycle or dispose of all hazardous materials
(batteries, fuel, lubricants, anti-freeze, etc.)
according to local, state or federal regulations.
a.
Keep the equipment clean.
6. Wash the mower and accessories after each use.
Keep the equipment clean.
b.
Keep all moving parts properly adjusted and
lubricated.
7. Repair damaged metal surfaces and use Jacobsen
“Orange” touch-up paint.
ENGINE _________________________________________________________________
IMPORTANT: A separate Engine Manual, prepared by
the engine manufacturer, is supplied with this machine.
Read the engine manual carefully until you are familiar
with the operation and maintenance of the engine.
Proper attention to the engine manufacturer’s
directions will assure maximum service life of the
engine. To order replacement engine manuals contact
the engine manufacturer.
The proper break-in of a new engine can make a
considerable difference to the performance and life of the
engine.
Note: The mower is designed to operate and cut most
efficiently at the preset governor setting. Do not change the
engine governor settings or overspeed the engine.
During the break-in period, Jacobsen recommends the
following:
1.
Operate machine modestly for the first 25 hours at
reduced engine speed.
2.
Avoid full throttle starts and rapid acceleration.
3.
Allow the engine to reach operating temperature before
operating at full load.
4.
Change the engine oil after the first 20 hours of
operation.
22
3. Long hair, jewelry or loose fitting clothing may get
tangled in moving parts.
5. Refer to Section 8.12 and Engine Manual for
specific maintenance intervals.
MAINTENANCE
8.3
8
ENGINE OIL ______________________________________________________________
Check the engine oil at the start of each day, before starting
the engine. If the oil level is low, remove oil filler cap and add
oil as required.
Perform initial oil change after the first 20 hours of operation.
Change oil every 100 hours thereafter.
See the engine manufacturer’s Owners’s Manual for
detailed service information.
After adding or changing oil, start and run engine at idle with
all drives disengaged for 30 seconds. Shut engine off. Wait
30 seconds and check oil level. Add oil to bring up to FULL
mark on dipstick.
Use only SAE 10W30 engine oils with API classification
SG.SF/CC.CD
Oil Filler Cap
Upper Oil Level
Figure 8A
8.4
FUEL ____________________________________________________________________
Handle fuel with care - it is highly flammable. Use an
approved container, the spout must fit inside the fuel filler
neck. Avoid using cans and funnels to transfer fuel.
! WARNING
Never remove the fuel cap from the fuel tank, or add
fuel, when the engine is running or while the engine is
hot.
• Never overfill or allow the tank to become empty.
• Use clean, fresh, regular grade, unleaded gasoline
minimum 86 Octane.
• See engine manual before using oxygenated (blended)
fuel.
• Do not fill above the fuel filler neck.
Do not smoke when handling fuel. Never fill or drain
the fuel tank indoors.
Do not spill fuel and clean spilled fuel immediately.
Never handle or store fuel containers near an open
flame or any device that may create sparks and ignite
the fuel or fuel vapors.
Be sure to reinstall and tighten fuel cap securely.
• Store fuel according to local, state or federal
ordinances and recommendations from your fuel
supplier.
23
8
MAINTENANCE
8.5
BEDKNIFE SHOE REMOVAL ________________________________________________
1. To remove the shoe (E), loosen nut (A) and turn
nuts (B) counterclockwise 1/4 turn or more to bring
the bedknife into light contact with the reel blades.
A
2. Remove mounting hardware (D) from both sides of
the shoe.
B
C
3. Turn locknut (C) counterclockwise until the shoe
ends are relieved of all spring pressure.
F
4. Rotate shoe ends out from between spring cups (F)
and rod (G).
5. To replace bedknife shoe, place shoe ends between
spring cups and adjusting rod ends, rotate shoe into
position.
6. Align shoe mounting holes
reassemble hardware (D).
with
frame
E
D
G
and
7. Adjust the bedknife to the reel. Tighten all hardware.
Figure 8B
8.6
BACKLAPPING AND GRINDING _____________________________________________
Check for damage to the bedknife and reel blades.
Refer to Section 7.2.
1. Determine if backlapping or grinding will restore the
proper cutting edge.
2. For optimum performance use a bedknife grinder to
touch-up the blade then reassemble and adjust the
bedknife to the reel as described in Section 7.3.
3. Disengage reel clutch and tip machine back to rest
on the handle.
4. Remove shaft cover and gasket from left side of
reel. Assemble a 3/8-24 bolt and locknut to the end
8.7
a.
b.
Apply lapping compound with a long handle
brush along the entire length of the reel, (120
grit is recommended, Section 2.6).
Continue lapping and at the same time make a
fine adjustment on the reel and bedknife until
there is a uniform clearance along the full length
of the cutting edges.
5. Carefully and thoroughly remove all lapping
compound from reel and bedknife before running
the reel in forward direction.
TRANSPORT TIRES (OPTION) _______________________________________________
1. Keep tire properly inflated to prolong tire life. Check
pressure only when the tires are cool.
2. Use an accurate, low pressure tire gauge.
6 - 8 psi - (41.3 - 55.1 kPa)
! CAUTION
Unless you have the proper training, tools and
experience, DO NOT attempt to mount a tire on a rim.
Improper mounting can produce an explosion that
may result in serious injury.
24
of the shaft and attach to lapping machine.
MAINTENANCE
8.8
WHEEL BEARING _________________________________________________________
The bearing has the word “lock” and an arrow stamped
on the face. When replacing the bearing, make
absolutely certain that the bearing is installed in the
proper direction of rotation.
Inside
Outside
For the Right wheel, install the bearing with the “lock➡”
arrow to the Outside of the housing.
GK14
For the Left wheel, install the bearing with the “lock➡”
arrow to the Inside of the housing.
8.9
8
Figure 8C
STORAGE ________________________________________________________________
General
5.
Remove the spark plug and pour about one ounce
of SAE 30 oil into the cylinder. Crank engine slowly
by hand to distribute oil over the cylinder wall.
Replace the spark plug.
6.
Pull the starter rope slowly until resistance is felt.
Continue pulling until the notch on the starter pulley
aligns with the hole on the recoil starter. At this
point, the intake and exhaust valves are closed.
1. Wash the mower thoroughly and lubricate.
2. Repair and paint damaged or exposed metal.
3. Inspect the mower, tighten all hardware, replace
worn or damaged components. Refurbish the reel
and bedknife.
4. Back the bedknife away from the reel and apply a
light coat of rust preventative oil on the reel blades
and bedknife,
5. Store the mower on kickstand so the load is off the
tires. The front roller or Turf Groomer should be
resting on a wood board.
6. Keep the mower and all its accessories clean, dry
and protected from the elements during storage.
Never store equipment with fuel in the tank inside a
building where fumes may reach an open flame or
spark.
7. Do not store near flammable debris.
Engine
1. While the engine is warm, remove drain plug, drain
the oil from the crankcase. Install drain plug and refill
with fresh oil. Torque drain plug to 22 ft. lb. (30 Nm).
2. Clean exterior of engine. Paint the exposed metal or
apply a light coat of rust preventative oil.
3. To prevent the build-up of gum residues and vanish
films, fill the tank with stabilized fuel. Use an antioxidant fuel conditioner, such STA-BIL®. Read and
follow the instructions on the container.
After Storage
1.
Check or service the fuel filter and air cleaner.
2.
Check oil level in the engine crankcase.
3.
Fill the fuel tank with fresh fuel. Open fuel shut off
valve.
4.
Remove all oil from the cutting edges. Readjust
reel-to-bedknife and cutting height.
5.
Support mower so traction drum is off the ground
and disengage reel clutch. Start the engine and
operate at 1/2 throttle. Allow enough time for the
engine to become properly warmed and lubricated.
NOTE: The traction drum will rotate with engine running
at 1/2 throttle.
! WARNING
Never operate the engine without proper ventilation;
exhaust fumes can be fatal if inhaled.
4. Operate the engine for about 5 minutes to distribute
the treated fuel. Stop the engine, close the fuel
shut-off valve and let the engine cool. Drain fuel.
25
8
MAINTENANCE
8.10 TROUBLESHOOTING ______________________________________________________
Before making any adjustments or performing maintenance, read maintenance section for procedures and warnings.
Symptoms
Probable Causes
Solution
Engines does not start
Choke in wrong position
Empty fuel tank or dirty fuel
Fuel shut-off valve
Engine / Spark Plug
Engine switch off
See Engine Manual
Drain and refill with fresh, clean fuel
Open valve
See Engine Manual
Turn on switch
Engine hard to start or runs erratically,
stalls, looses power or stops
Choke in wrong position
Fuel leaks, dirty or incorrect fuel
Loose wiring
Air intake plugged
Vent in fuel cap plugged
See Engine Manual
Tighten fuel hose clamps
Refill with proper grade, clean fuel
Check spark plug wire
Clean air-intake and air cleaner
Clean fuel cap
Mower does not react to O.P.C. lever
Parking brake engaged
Reel clutch
Disengage brake
See Section 5.2
Reel does not cut, cuts unevenly
Misadjusted
Adjust, see (Section 7.2, Section 7.3
and Section 7.5)
Engage lever
Position of reel clutch lever
26
MAINTENANCE
8
8.11 LUBRICATION ____________________________________________________________
The mower was designed for minimum lubrication. Over
greasing will produce high loads on the bearings and
engine; thereby reducing the performance of the
machine.
All maintenance intervals must be performed more
frequently when operating in extremely dusty conditions.
11
4
1. Always clean the grease fitting before and after
lubricating.
2. Apply grease with a manual grease gun and fill
slowly until grease begins to seep out. DO NOT use
compressed air guns.
9
5
8
3. For smooth operation of pivot points and other
friction points, apply several drops of SAE 30W oil.
10
2
1
3
7
6
1
2
Figure 8D
8.12 MAINTENANCE CHART _____________________________________________________
Recommended Inspection and Lubrication Intervals.
Daily
20
50
100
300
Yearly
Lubricant
Air Cleaner.......................................I ........................................C
Combustion Chamber........................................................................................................... C
Engine Oil ........................................ I .................. R ........................................R.......................................... ...................... I
Fuel Line ............................................................................................................................................... R - 2 yrs
Spark Plug ..................................................................................................... A/R
Valve Clearance ................................................................................................................... A
Grease Locations (Figure 7C)
1 - Roller .......................................................... L.................................................................................... L.................... II
2 - Height Adj. ........................................................................ L ............................................................................................ II
3 - RT Reel Shaft ............................................. L...................................................................................... ..................... II
4 - Traction Roller............................................. L...................................................................................... ..................... II
5 - Clutch Shaft Bearing .......................................................................................................................... L.................... II
6 - Clutch Pivot Shaft .............................................................................................................................. L....................III
7 - Clutch Needle Bearing ........................................................................................................................ ................... III★
8 - Traction Hub ........................... ................... L...................................................................................... .....................III
9 - Wheel Bearings ............................................................................................................ .................... L.................... II
10 - Reel Clutch Lever ..................................... L...................................................................................... ..................... II
11 - Chain Case ................................................................................................................. ....................R....................IV
A - Add or Adjust
C - Clean
I - Inspect
L- Lubricate
R - Replace
Lubricants
I
- SAE 10W-30 Classified API SF or SG.
II - Lithium Grease NLGI - Grade 2.
III - Lubriplate® grease, Jacobsen Part No. 5001581
IV - SAE EP-140 Oil - Drain and Refill
★ - Apply a light coat
27
9
9
28
NOTES
NOTES
NOTES
9
29
Para hacer pedidos de piezas
1. Escribir el nombre y dirección completos en el pedido.
2. Explicar a dónde y cómo hacer el envío.
5. Enviar o llevar el pedido a un Distribuidor autorizado
Jacobsen.
3. Facilitar el número, nombre y número de serie del
artículo, estampado en la placa del fabricante, o placa
de serie de su artículo.
6. Revisar todos los envíos al recibirlos. Si alguna pieza
está dañada o faltante, enviar una reclamación con el
transportista antes de aceptar.
4. Pedir por cantidad deseada, el número de pieza, código
de pintura y descripción de la pieza según aparece en
la lista de piezas.
7. No enviar material sin una carta de explicación,
enumerando las piezas que se envían. Se deben pagar
de antemano los gastos de transporte.
El uso de piezas no autorizadas invalidará la garantía.
Indice
1
1.1
1.2
2
2.1
2.2
2.3
2.4
2.5
2.6
3
3.1
4
4.1
4.2
5
5.1
5.2
6
6.1
6.2
6.3
6.4
6.5
6.6
6.7
6.8
SEGURIDAD
Funcionamiento seguro ....................................... 4
Avisos importantes sobre seguridad .................... 5
ESPECIFICACIONES
Identificación del producto ................................... 6
Motor .................................................................... 6
Cortacésped ........................................................ 6
Tracción y diferencial ........................................... 6
Peso ..................................................................... 7
Accesorios ........................................................... 7
ADHESIVOS
Adhesivos ............................................................ 8
INSPECCION INICIAL
Generalidades ..................................................... 9
Inspección inicial .................................................. 9
CONTROLES
Iconos ................................................................ 10
Controles ........................................................... 10
FUNCIONAMIENTO
Inspección diaria................................................ 12
Control de presencia del operador (OPC) ......... 12
Procedimientos de uso ...................................... 13
Encendido/apagado del motor ........................... 14
Ruedas de transporte (juego opcional 62293) ... 15
Recogedor de hierba ......................................... 15
Corte del césped ................................................ 16
Mantenimiento diario ......................................... 17
7
7.1
7.2
7.3
7.4
7.5
7.6
7.7
8
8.1
8.2
8.3
8.4
8.5
8.6
8.7
8.8
8.9
8.10
8.11
8.12
9
AJUSTES
Generalidades .................................................... 18
Carrete a cuchilla fija ..........................................18
Cuchilla fija .........................................................19
Freno ..................................................................19
Altura de corte ....................................................20
Manubrio ............................................................20
Especificación del par de torsión ........................21
MANTENIMIENTO
Generalidades .................................................... 22
Motor ..................................................................22
Aceite del motor .................................................23
Combustible .......................................................23
Retirada de la zapata de la cuchilla fija ..............24
Retropulido y rectificación ..................................24
Ruedas de transporte (opción) ...........................24
Cojinete de rueda ...............................................25
Almacenamiento .................................................25
Resolución de problemas ...................................26
Lubricación .........................................................27
Cuadro de mantenimiento ..................................27
NOTAS
Este manual está concebido para el mantenimiento y ajuste de su equipo.
Siga las instrucciones de mantenimiento y ajuste incluidas con este manual y las instrucciones de
funcionamiento incluidas con el Manuel de seguridad y funcionamiento para revisar la
máquina.
El Manual de seguridad y funcionamiento debe estar disponible para referencia del operador.
Copyright 2005, Textron Inc. “Se reservan todos los derechos, incluido el derecho
para reproducir este material y porciones del mismo en cualquier forma”
LITO EN U.S.A. 6-2005
Guía de inventario sugerido
Para mantener su equipo operativo y productivo, mantenga un inventario de los componentes usados con más
frecuencia en el mantenimiento. Hemos incluido los números de piezas de materiales auxiliares y ayudas de
capacitación. Una lista más completa de piezas y accesorios aparece en la Sección de Especificaciones.
Piezas de revisión
Cant Nº Pieza
Descripción
Cant Nº Pieza
5002605 Carrete de 11 cuchillas
101804
Descripción
Spider
503477
Cuchilla fija de perfil alto de 55 cm
102098
Piñón, polea
503478
Cuchilla fija de perfil bajo de 55 cm
202947
Piñón
503479
Cuchilla fija Tournament de 55 cm
164056
Banda de freno
5002887 Cuchilla fija Super Tournament de 55 cm
366648
Junta, engrase
3006511 Arandela
337677
Junta, aceite
Material de apoyo al servicio
Cant Nº Pieza
Descripción
Cant
4131595 Manual técnico
Descripción
Manual de servicio
Vídeo de capacitación para el operador
Cómo usar este manual
Abreviaturas
N/R - No revisado por separado, sólo se puede obtener pidiendo el componente principal o el juego.
N/S - Es necesaria cantidad o medida variable para obtener el ajuste correcto.
Símbolos como ▲, junto al número de artículo, indica que existe una nota con información adicional importante
al hacer el pedido de esa pieza.
Artículos seleccionados
Los artículos con una marca de sangría indican las piezas de componentes incluidas como parte de una unidad u
otro componente. Estas piezas se pueden pedir por separado o como parte del componente principal.
Item
▲
Nº Pieza
1
2
3
4
5
123456
789012
345678
N/S
901234.6
Cant.
1
1
1
1
1
Descripción
Números de Serie / Notas
Montura, Válvula
Válvula, Elevación
Indica una parte de una pieza
• Manillar
• Juego de Junta
Tornillo 1/4-20 x 2 cabeza hexagonal
Parte revisada incluida con artículo 2
Parte no revisada incluida con el artículo 2
Incluye artículos 2 y 3
Indica pieza pintada naranja Jacobsen
3
1
1
SEGURIDAD
SEGURIDAD
1.1
FUNCIONAMIENTO SEGURO ________________________________________________
! ADVERTENCIA
EL EQUIPO MANIPULADO INCORRECTAMENTE O POR PERSONAL NO CUALIFICADOPUEDE SER PELIGROSO
Familiarícese con la ubicación y correcta utilización de todos los mandos. Todo operador sin experiencia debe recibir
instrucciones de alguien que esté familiarizado con el equipo antes de que se le permita manipular la máquina.
1.
2.
3.
4.
5.
6.
La seguridad depende del grado de concienciación,
interés y prudencia de quienes utilicen o se encarguen
del servicio técnico del equipo. Nunca permitir que
menores de edad manejen ningún equipo.
Es responsabilidad del operador leer este manual y
todas las publicaciones relacionadas con este equipo
(Manual del motor, accesorios y acoplamientos). Si el
operador no puede leer en español, el propietario será
responsable de explicarle la información contenida en
este manual.
Aprenda el manejo correcto de la máquina, la
ubicación y la finalidad de todos los controles e
instrumentos antes de manejar el equipo. Si utiliza el
equipo sin conocerlo a fondo, pueden producirse
accidentes.
Nunca permita que nadie utilice o repare la máquina o
sus implementos sin tener la capacitación y
conocimiento adecuados, o si está bajo la influencia
del alcohol o las drogas.
Lleve puesta toda la ropa de protección y dispositivos
de seguridad personal necesarios para protegerse la
cabeza, los ojos, los oídos, las manos y los pies.
Maneje la máquina solamente a la luz del día o con
buena iluminación artificial.
Inspeccione el terreno para determinar qué accesorios
y acoplamientos son necesarios para realizar el trabajo
de modo apropiado y seguro. Utilice accesorios y
acoplamientos aprobados por Jacobsen.
7.
Sea consciente de los posibles agujeros en el terreno
y otros peligros ocultos.
8.
Inspeccione la zona en que se tenga previsto utilizar el
equipo y recoja la basura de la zona de corte antes de
empezar los trabajos. Esté atento a las obstrucciones
por encima de la cabeza (ramas de árboles bajas,
cables eléctricos, etc.) y también a los obstáculos
subterráneos (regadores, tubos, raíces de árboles,
etc.). Entre a una zona nueva con cuidado.
Permanecer alerta por si existen riesgos ocultos.
9.
No transporte pasajeros. Manténgase alejado de
peatones y animales.
10. Nunca dirija la descarga de material hacia las
personas en la cercanía ni permitir que nadie se
acerque a la máquina mientras está trabajando. El
operador es responsable de las lesiones causadas a
las demás personas y/o los daños a la propiedad.
11. Nunca maneje el equipo que no esté en perfectas
condiciones de trabajo o que no tenga las etiquetas,
protecciones, escudos, deflectores de descarga u
otros dispositivos de protección firmemente colocados
en su sitio.
12. No desconecte ni derive ningún interruptor.
13. El monóxido de carbono presente en los gases de
escape es fatal si se inhala. Nunca haga funcionar el
motor sin tener la ventilación adecuada.
14. Trate el combustible con cuidado, es altamente
inflamable.
15. Mantenga el motor limpio. Deje que el motor se enfríe
y siempre desconectar el cable de la bujía antes de
guardar la máquina.
16. Coloque la unidad en una superficie llana,
desengranar todos los mandos y aplicar el freno de
estacionamiento antes de arrancar el motor.
17. Las reglamentaciones locales podrán restringir la edad
del operador.
18. Maniobre la máquina por las pendientes en sentido
vertical, nunca horizontalmente.
19. Conduzca siempre a velocidades que permitan tener
un control total de la máquina. Mantenga los pies
estabilizados; sujete el manillar con fimerza y camine,
no corra.
20. Antes de limpiar, ajustar o reparar este equipo, pare el
motor, desconecte el cable de la bujía y aléjelo de la
misma para evitar un encendido accidental.
Esta máquina debe ser manipulada y puesta en servicio según se especifica en este manual y ha sido diseñada para
el mantenimiento profesional de céspedes especializados. No está prevista para ser usada en terreno irregular o en
zonas con hierba alta.
4
SEGURIDAD
1.2
1
AVISOS IMPORTANTES SOBRE SEGURIDAD __________________________________
!
Este símbolo de seguridad sirve para alertarle de posibles peligros.
PELIGRO - Indica una situación de inminente peligro que, de no ser evitada, PROVOCARÁ la muerte o graves
lesiones.
ADVERTENCIA - Indica una situación potencialmente peligrosa que, de no ser evitada, PUEDE PROVOCAR la
muerte o graves lesiones.
PRECAUCION - Indica una situación potencialmente peligrosa que, de no ser evitada, PODRÍA PROVOCAR
lesiones moderadas o daños materiales menores. También podría utilizarse para alertar sobre prácticas no seguras.
Para una mayor claridad, algunas de las ilustraciones de este manual podrían mostrar protectores, dispositivos de
protección o chapas abiertas o retiradas. En ninguna circunstancia se debe manipular este equipo sin que estén
dichos dispositivos firmemente asegurados .
! ADVERTENCIA
El control de presencia del operador (OPC) del cortacésped detiene el
carrete y el mecanismo de mando tan pronto el operador suelta la palanca
del OPC.
Para proteger al conductor y a otros de posibles lesiones, nunca manejar el
equipo con el sistema OPC desconectado o averiado.
! ADVERTENCIA
1. Antes de abandonar el puesto del operador por cualquier motivo:
a.
b.
c.
Desengranar todos los mandos.
Aplicar el freno de estacionamiento.
Apagar el motor.
2. No acercar las manos, los pies y la ropa a las piezas en movimiento.
Esperar a que se detengan todos los movimientos antes de realizar
ningún ajuste o reparar la máquina.
3. Mantener la zona de trabajo despejada de espectadores.
4. Bloquear las ruedas si se deja el cortacésped desatendido en una
pendiente.
5. Nunca usar un cortacésped sin tener un deflector de descarga
instalado firmemente en su lugar.
Si sigue todas las instrucciones de este manual, conseguirá prolongar la vida de su máquina y mantener su máxima
eficacia. Los ajustes y operaciones de mantenimiento siempre deberán ser realizadas por un técnico cualificado.
Si necesita más información, póngase en contacto con su distribuidor Jacobsen, quien le informará de los métodos de
mantenimiento más recientes y le proporcionará un servicio puntual y eficaz. El uso de piezas y accesorios no
autorizados por Jacobsen anulará la garantía.
5
2
2
2.1
ESPECIFICACIONES
ESPECIFICACIONES
IDENTIFICACION DEL PRODUCTO ___________________________________________
63280 .............................. Cortacésped de green profesional
de 559 mm con sistema de control
InCommand™, motor Honda de
gasolina de 2,98 kW, control de
presencia del operador, recogedor
de hierba, frenos y elevador.
Número de serie ............ En el marco derecho hay
colocada una placa de
identificación, como la que se
muestra, con el número de serie.
Proporcionar siempre el número de serie de la unidad
cuando se ordenen piezas de repuesto o se pida
información de servicio.
®
A Textron Company
CHARLOTTE, NC
MADE IN U.S.A.
2005
YEAR OF
PRODUCTION:
63280
2.2
1601
Producto
Potencia
sonora CEE
Vibración m/s2
Brazos
63280
94
8,237
MOTOR __________________________________________________________________
Motor................................ Honda GX-120 K1Q JG2 de 4
tiempos, 2,98 kW a 4000 rpm
Velocidad ......................... Ralentí alto - 3300 ± 100 rpm
Ralentí bajo - 1700 ± 100 rpm
Combustible ..................... Grado regular (sin plomo)
Usar gasolina regular sin plomo nueva y limpia, con un
octanaje mínimo de 85.
Aceite de motor ........... Capacidad: 0,6 l
Tipo: SAE 10W-30, clasificación API
SF o SG
Depósito de
combustible ..................... 2,5 l
2.3
CORTACESPED___________________________________________________________
Altura de corte ................ 2 a 11 mm
Cuchillas fijas .................. Acero de carbono templado
Perfil alto ......................... Corte de 4 mm
Perfil bajo ........................ Corte de 2,8 mm
Tournament .................... Corte de 2 mm
Super Tounament ........... Corte de 1,6 mm
Frecuencia de corte ........ 5 mm
2.4
TRACCION Y DIFERENCIAL _________________________________________________
Embrague de transmisión ......Centrífugo, se activa a
2000 rpm
Coeficiente de reducción
de tracción .............................24:1
Transmisión de tracción
y carrete .................................Tracción de cadena
Ruedas de transporte ............(2) bidireccionales,
neumáticas 11 x 4 Goodyear
Softrac
Presión de neumáticos ..........41 a 55 kPa
6
Carrete............................ 11 cuchillas, 127 mm de diámetro,
acero de carbono templado y
manganeso
Embrague de carrete ...... Dentado independiente
Radio de reducción
de carrete ....................... 2.25:1
Anchura de corte ............ 559 mm
Diferencial.............................. Tipo automotor completo, en
tambor tracción
Tambor de dirección
trasera ................................... Aleación aluminio maquinado
2 secciones: 197 x 278 mm
D.E.
Velocidad de transporte......... 4,7 km/h a 3000 rpm
ESPECIFICACIONES
2.5
2
PESO ____________________________________________________________________
Peso (Masa) PGM 22 ............85 kg con recogedor, rodillo y
elevador
2.6
ACCESORIOS _____________________________________________________________
Ponerse en contacto con su distribuidor autorizado
Jacobsen para recibir una lista completa de accesorios y
herramientas.
Juego de conversión PGM MagKnife ..................... 4131020
Ruedas neumáticas de transporte .............................. 62293
Transmisión de engranaje delanteros......................... 68557
Cepillo de rodillo delantero ......................................... 68536
Recogedor de hierba .................................................. 68121
Rodillo de disco montado ranurado ............................ 68527
Rodillo de aluminio maquinado ranurado ................... 68614
Rodillo de acero maquinado ranurado ........................ 68613
Ruedas guía................................................................ 68612
Indicador de altura de corte ...................................... 158568
Compuesto retropulido (120 limaduras)........ 5002489 - 5 kg
5002491 - 12, 5 kg
Juego de luces ........................................................ 5002962
Pintura naranja (spray de 450 ml)............................. 554598
Cepillo de empuje ....................................................... 68500
Rodillo suave con raspador ........................................ 68530
Cepillo giratorio suave (se requiere 68557) ................ 68560
Rodillo de tubo sólido con raspador............................ 68641
Turf Groomer .............................................................. 68579
Carrete vertical ........................................................... 68556
Lata de combustible de 10 l ...................................... 554948
Lata de combustible de 20 l ...................................... 554949
Juego de enganche de carro de transporte PGM ....... 68652
Carro de transporte ..................................................... 68648
7
3
ADHESIVOS
3
ADHESIVOS
3.1
ADHESIVOS ______________________________________________________________
Familiarícese con los adhesivos, éstos son críticos para la buena operación de la máquina.
LOS ADHESIVOS DAÑADOS SE DEBEN CAMBIAR INMEDIATAMENTE.
! PRECAUCION
! PELIGRO
1. Leer el manual del operario antes de operar
la máquina.
2. Mantener las protecciones en su lugar y el
equipo bien sujeto.
3. Antes de limpiar, ajustar o reparar este
equipo, desenganchar todas las
direcciones, poner el freno de
estacionamiento y parar el motor.
4. Mantener las manos, pies y ropa alejados
de las piezas en movimiento.
5. No llevar nunca pasajeros.
6. Mantenerse alejado de los peatones.
Para evitar las lesiones corporales
graves, parar el motor y desengranar los
carretes antes de trabajar en el
cortacésped o vaciar los cestos.
3001235
PRECAUCION
ASEGURARSE DE QUE LA PALANCA DE EMBRAGUE
DE TRACCION ESTA PUNTO MUERTO ANTES DE
ENCENDER EL MOTOR.
3001790
361854
! PRECAUCION
ADVERTENCIA
PARA EVITAR HERIDAS Y LA ACTIVACION
ACCIDENTAL DEL EMBRAGUE, NO AJUSTE LA
VELOCIDAD DEL MOTOR CON LA PALANCA
DEL ACELERADOR. AJUSTE SIEMPRE LA
VELOCIDAD DEL MOTOR CON EL ASA OPC Y
EL ACELERADOR.
DEJAR QUE EL MOTOR SE ENFRIE
DURANTE 2 MINUTOS ANTES DE
APROVISIONARLO DE COMBUSTIBLE.
362764
4146636
4127335
Masa del vehículo:
Modelo PGM 19
Modelo PGM 22
Modelo 518A
Modelo 522TA
Modelo 522A
Modelo 526A
Modelo TC22
8
! ADVERTENCIA
84 kg
85 kg
Mantenerse alejado de los
95,3 kg
100,7 kg transeúntes. No operar sin
101,2 kg las protecciones.
123,4 kg
101,1 kg
2811102
INSPECCION INICIAL
4
4.1
INSPECCION INICIAL
GENERALIDADES _________________________________________________________
La instalación y prueba de la unidad debe ser realizada
siempre por un técnico cualificado y familiarizado con el
funcionamiento de este equipo.
Lea las instrucciones completamente y asegúrese de
entenderlas antes de seguir con el montaje. Esté alerta
de los posibles peligros y siga las precauciones de
seguridad.
Las partes DERECHA, IZQUIERDA, DELANTERA y
TRASERA de la máquina son citadas mirando desde el
asiento del operador hacia delante.
4.2
4
Los accesorios no incluidos con este producto deben
pedirse por separado. Consulte las instrucciones
proporcionadas con el accesorio para obtener
información sobre su instalación y sus piezas.
! PRECAUCION
No conduzca la máquina a menos que esté
familiarizado con este tipo de equipo y sepa cómo
utilizar los controles correctamente.
Esta máquina se entrega montada. Al desembalarla,
realice
una
inspección,
comprobaciones
de
funcionamiento y pruebe el Control de presencia del
operador (OPC).
INSPECCION INICIAL_______________________________________________________
! PRECAUCION
La inspección inicial debe realizarse con el motor apagado y con todos los líquidos fríos.
Desactive las transmisiones, ponga el freno de estacionamiento y pare el motor.
1. Realice una inspección visual de la unidad, busque
indicios de desgaste, piezas sueltas y componentes
dañados durante el transporte.
2. Revise la pintura y las etiquetas en busca de daños
o arañazos. Los adhesivos ofrecen consejos
importantes sobre funcionamiento y seguridad.
Sustituya los adhesivos que falten o que sean
difíciles de leer.
3. Asegúrese de que el nivel de aceite del motor esté
en la marca “lleno” con el motor frío.
4. Compruebe que no haya fugas de combustible o
aceite.
5. Revise los puntos de lubricación.
9
5
5
5.1
CONTROLES
CONTROLES
ICONOS _________________________________________________________________
Control de presencia del operador
Motor
Desbloqueado
Acelerador
Rápido
Motor
funcionando
Motor
apagado
Lento
Bloqueado
Freno de estacionmiento
Puesto Quitado
Combustible
Gasolina
Estrangulador
! ADVERTENCIA
No trate nunca de conducir el tractor a menos que haya leído el Manual de
Funcionamiento y Seguridad, el Manual de Piezas y Mantenimiento, el manual del motor y
sepa como operar todos los controles correctamente.
Familiarícese con los iconos indicados anteriormente y lo que representan. Conozca la
situación y uso de todos los controles y marcas antes de operar este cotacésped.
5.2
A.
CONTROLES _____________________________________________________________
Freno de estacionamiento – Se usa al dejar el
cortacésped desatendido o como freno de servicio
al transportar la máquina.
B. Acelerador – Controla la velocidad del motor
cuando el enganche del OPC está activado. Empuje
el lado (+) de la palanca para aumentar la velocidad
del motor. Empuje el lado (-) de la palanca para
disminuir la velocidad del motor.
C. Enganche del OPC – Al activar el enganche
aumenta la velocidad del motor, lo cual activa el
embrague centrífugo. Suelte el elnganche para
volver a poner el motor en ralentí. El enganche
debe desactivarse para encender el motor.
D. Interruptor del motor – El interruptor del motor se
encuentra ubicado en el motor y debe estar en la
posición de CONECTADO para arrancar el motor.
Ver el manual del motor. Al poner el interruptor del
motor en posición DESCONECTADO el motor se
para.
10
B
B
C
H
C
P
A
N
D
A
Figura 5A
D
OFF
ON
Figura 5B
CONTROLES
5
E. Palanca del embrague del carrete – Para
desengranar, girar el asa (E) hasta que apunte
hacia abajo. Desengranar el embrague siempre que
se transporte el cortacésped.
E
! ADVERTENCIA
Para evitar las lesiones corporales y los daños a
la propiedad, nunca engranar la palanca del
carrete mientras el motor esté funcionando o la
palanca del OPC esté engranada.
Figura 5C
! PELIGRO
Mantener las manos y los pies alejados de la
unidad de corte para evitar las cortaduras.
F
F. Palanca de estrangulación – La palanca de
estrangulación abre y cierra la válvula de estrangulación en el carburador. La posición CERRADO
enriquece la mezcla de combustible para encender
un motor frío. La posición ABIERTO proporciona la
mezcla de combustible correcta para la operación
después de encender, y para volver a poner en
marcha un motor caliente.
G. Palanca de la válvula de combustible – La
válvula del combustible abre y cierra la conexión
entre el depósito de combustible y el carburador. La
palanca de la válvula del combustible debe estar en
posición CONECTADO para que el motor gire.
Cuando el motor no esté en uso, dejar la palanca
de la válvula del combustible en posición
DESCONECTADO para evitar una inundación en el
carburador y reducir la posibilidad de una fuga de
combustible.
OFF
ON
G
Figura 5D
Nota: Antes de inclinar el cortacésped para su
puesta a punto, la válvula del combustible debe
estar en posición DESCONECTADO para evitar que
el combustible se filtre en el cárter.
H. Parada-E – Utilizada para parar el motor. Baje el
interruptor para apagar el motor y súbalo para
encenderlo.
11
6
FUNCIONAMIENTO
6
FUNCIONAMIENTO
6.1
INSPECCION DIARIA_______________________________________________________
! PRECAUCION
Las inspecciones diarias deben realizarse sólamente
cuando el motor está apagado y todos los fluidos
están fríos. Desengranar todas las direcciones,
engranar el freno de estacionamiento, parar el motor
y desconectar el cable de las bujías.
1. Realizar una inspección visual de toda la máquina,
buscar indicios de desgaste, tornillería suelta, componentes perdidos o dañados. Revisar en busca de
fugas de combustible o de aceite.
6.2
3. Asegurarse que el cortacésped esté ajustado a la
altura de corte requerida.
4. Asegurarse que la máquina está lubricada y los
neumáticos de transporte están bien inflados.
5. Revisar el sistema OPC (Sección 6.2).
CONTROL DE PRESENCIA DEL OPERADOR (OPC) _____________________________
1. El sistema OPC protege al operador y a los peatones
contra posibles heridas deteniendo el carrete y el
mecanismo de transmisión en cuanto el operador
suelta el enganche OPC. La unidad tambien va
equipada con un interruptor de parada del motor
(Parada E) que para el motor desde la posición del
operador.
! ADVERTENCIA
No opere nunca el equipo si el sistema O.P.C.
está desconectado o funciona incorrectamente.
No desconecte ni derive ningún interruptor.
2. Para probar el sistema:
12
2. Revisar el suministro de combustible y el nivel de
aceite del cárter. Todos los líquidos deben estar en
la marca de nivel lleno.
a.
Ponga la máquina en el elevador.
b.
Suelte la palanca del embrague del carrete (E).
3. Encienda el motor.
a.
Mueva el enganche a la izquierda y active el
enganche OPC.
b.
La velocidad del motor aumentará, se activará el
mecanismo de la transmisión y las ruedas
comenzarán a girar.
c.
Suelte el enganche OPC. El enganche deberá
desactivarse, la velocidad del motor volverá a
ralentí y el mecanismo deberá pararse.
d.
Pulse el interruptor de la Parada E. El motor
debe pararse inmediatamente.
4. Si el mecanismo de la transmisión se activa antes
de activar el enganche OPC o sigue funcionando
después de soltar el enganche OPC, pare el motor
inmediatamente y haga que reparen el sistema.
FUNCIONAMIENTO
6.3
6
PROCEDIMIENTOS DE USO _________________________________________________
! PRECAUCION
Para evitar las lesiones, usar gafas protectoras, zapatos o botas de cuero, casco y protectores en los oídos.
El pelo largo, la ropa amplia o las joyas pueden quedar atrapadas en las piezas en movimiento.
1. El motor no debe encenderse cuando el operador o
los peatones estén delante del carrete.
9.
2. No encender nunca el motor en una zona cerrada.
10. Desengranar el embrague del carrete cuando se
crucen caminos o carreteras. Prestar atención al
tráfico.
3. Alejar las manos y los pies de las piezas en
movimiento y las unidades de corte. Si es posible,
no realizar ajustes con el motor en funcionamiento.
4. No usar el cortacésped con componentes sueltos,
dañados o faltantes. Siempre que sea posible,
cortar el césped cuando está seco.
5. Primero cortar en una zona de prueba para
familiarizarse por completo con el manejo del
cortacésped y las palancas de control.
Nota: Para evitar daños al carrete y a la cuchilla fija
no operar nunca los carretes cuando no se corte
hierba. Producirá fricción y calor excesivos entre la
cuchilla fija y el carrete, causando desperfectos al
borde de corte.
6. Examinar el lugar para determinar el procedimiento
óptimo y más seguro de operación. Tener en cuenta
la altura del césped, el tipo de terreno y la condición
de la superficie. Cada una de estas condiciones
requerirá ciertos ajustes o precauciones. Utilizar
sólamente accesorios aprobados por Jacobsen.
7. Sea consciente de la dirección de descarga del
cortacésped y no la dirija nunca sobre los peatones.
No permita acercarse a nadie con la máquina en
funcionamiento.
El
propietario/operador
es
responsable de las lesiones producidas a los
peatones y/o daños a su propiedad.
Desactivar el embrague del carrete para parar las
cuchillas cuando no corte césped.
11. Parar e inspeccionar el equipo en busca de daños
inmediatamente después de chocar con un
obstáculo o si la máquina comienza a vibrar
anormalmente. Tenga el equipo reparado antes de
reanudar el trabajo.
! ADVERTENCIA
Antes de limpiar, ajustar o reparar este equipo,
desengranar siempre las direcciones, engranar el
freno de estacionamiento, parar el motor y retirar
el cable de bujías para evitar lesiones.
12. Reducir la velocidad y proceder con extremo
cuidado en las cuestas. Obrar con precaución
cuando se trabaje cerca de precipicios.
13. Mirar hacia detrás y hacia abajo antes de recular
para asegurarse de que el camino está libre. Tener
cuidado al acercarse a esquinas ciegas, setos,
árboles y otros objetos que puedan oscurecer la
visión.
14. No usar nunca las manos para limpiar las unidades
de corte. Usar un cepillo para retirar los restos de
hierba de las cuchillas. Estas están muy afiladas y
pueden causar graves lesiones.
! PRECAUCION
Antes de segar, recoger toda la basura como piedras,
juguetes y alambres que pueda tirar la máquina.
Entrar en una nueva área con precaución. Operar
siempre a velocidades que permitan el control total
del tractor.
8. Trabajar con discreción cuando se corta cerca de
zonas con gravilla (caminos, zonas de estacionamiento, senderos para carros, etc.). Las piedras
pueden causar lesiones graves a las personas y
dañar el equipo.
13
6
FUNCIONAMIENTO
6.4
ENCENDIDO/APAGADO DEL MOTOR_________________________________________
! PRECAUCION
OFF
Encienda y apague siempre el motor cuando el
cortacésped esté en una superficie llana. Aleje los
pies de la cuchilla cuando encienda el motor.
ON
D
Encendido
1. Compruebe el nivel de aceite y el suministro de
combustible y abra la palanca de la válvula de
combustible (G).
2. Coloque la palanca del estrangulador (F) en la
posición “CERRADO”.
3. Coloque el interruptor
“CONECTADO”.
del
motor
(D)
en
4. Asegúrese de que el enganche OPC (C) esté
desactivado y el freno de estacionamiento (A) esté
puesto.
ON
OFF
F
G
5. Seleccione la posición deseada para la palanca del
embrague del carrete (E).
Figura 6A
Para cortar – active el embrague del carrete (E).
Para transportar – desactive el embrague del
carrete (E).
! ADVERTENCIA
Para evitar heridas personales o daños a la
propiedad, no active nunca la palanca del
embrague del carrete con el motor en
uncionamiento o el enganche OPC activado.
C
P
A
N
D
A
6. Encienda el motor. No deje que el cable vuelva al
motor de arranque. No incline el cortacésped hacia
atrás al encender el motor.
7. Cuando se encienda el motor, mueva la palanca del
estrangulador (F) hasta la posición “ABIERTO”.
Puede que sea necesario usar de modo
intermitente el estrangulador cuando el motor esté
frío.
B
B
C
Figura 6B
E
8. Deje que se caliente el motor poco a poco.
Parada
1. Para parar el motor, suelte el enganche OPC (C), y
coloque el interruptor del motor (D) en
“DESCONECTADO”. Cierre la válcula de paso de
combustible (G).
2. Ponga el freno de estacionamiento (A).
14
Figura 6C
FUNCIONAMIENTO
6.5
6
RUEDAS DE TRANSPORTE (JUEGO OPCIONAL 62293) __________________________
! ADVERTENCIA
Siempre apagar el motor y desengranar los
mandos antes de instalar o de retirar las ruedas
de transporte.
6.
Si se transporta el cortacésped sobre un vehículo,
aplicar el freno de estacionamiento, apagar el motor
y cerrar la válvula de corte de combustible.
Bloquear las ruedas.
7.
Mantener la presión de los neumáticos de 41 a
55 kPa.
1. Pisar y sostener el soporte hacia el suelo y luego
tirar del manubrio del cortacésped hasta que repose
sobre el soporte (L).
2. Para retirar las ruedas, tirar la presilla de retención
(J) hacia afuera y quitar la rueda del cubo.
3. Para instalar las ruedas, aplicar el freno, oprimir la
presilla (J), colocar la rueda sobre el cubo y girarla
en sentido de retroceso hasta que los espárragos
de la parte trasera de la rueda queden alineados
con los agujeros (K). Empujar la rueda hacia
adentro y soltar la presilla.
4. Desengranar siempre la palanca de embrague del
carrete (E) antes de transportar el cortacésped más
de unos cuantos metros.
Figura 6D
5. Empujar el cortacésped hacia adelante para quitarlo
de su soporte, arrancar el motor y engranar la
palanca del OPC (C).
6.6
RECOGEDOR DE HIERBA___________________________________________________
1. Cuando el recogedor esté aproximadamente a 2/3
de su capacidad de hierba cortada, sacar el
cortacésped del green.
2. Detenerse sobre una superficie plana, desengranar
todos los mandos y apagar el motor.
! PELIGRO
Para evitar las lesiones graves, apagar el motor y
desengranar todos los mandos antes de vaciar el
recogedor de hierba.
3. Quitar el recogedor de hierba y vaciarlo.
15
6
FUNCIONAMIENTO
6.7
CORTE DEL CESPED ______________________________________________________
1. Apagar el motor. Colocar el cortacésped sobre su
soporte y retirar las ruedas de transporte si están
instaladas (ver Sección 6.5).
2. Engranar la palanca del carrete (E) y sacar el
cortacésped del soporte. Encender el motor.
! ADVERTENCIA
5. Para conseguir una superficie de juego más regular
y más atractiva, cambiar el patrón de corte cada
vez que se corte el césped del green. Los patrones
mostrados en la Figura 6F son sólo sugerencias, el
operador o el encargado pueden crear patrones
adecuados para cada green.
6. Tener cuidado
desniveles.
Para evitar las lesiones corporales y los daños a
la propiedad, nunca engranar la palanca del
embrague carrete mientras el motor esté
funcionando o la palanca del OPC esté
engranada.
al
trabajar
en
pendientes
o
3
3. Colocar el cortacésped ligeramente fuera del green.
a.
Ajustar la velocidad del motor (B) a una
velocidad lenta, segura y cómoda.
b.
Empujar el manubrio hacia abajo para levantar la
parte delantera del cortacésped y luego
engranar la palanca del OPC (C).
c.
d.
2
Cuando el cortacésped atraviesa el borde del
green, bajar su parte delantera al suelo y
avanzar por el green en línea recta. Mientras
corta el césped, sujete el asa para que los tubos
de la misma no toquen los topes del asa.
Permitir que el asa toque lo topes o empujarla
para arriba en los topes puede dar lugar a un
corte irregular.
Al llegar al borde opuesto del green, levantar la
parte delantera del cortacésped sin desengranar
la palanca del OPC y continuar avanzando fuera
del green para dar media vuelta o bien
desengranar el OPC y dar media vuelta.
Para girar a la derecha, gire el cortacésped
ligeramente a la izquierda (2). Cuando se haya
movido alrededor de la mitad de su propia
anchura ala izquierda, gírelo rápidamente a la
derecha (3 y 4), guiándolo con la mano derecha.
Este método permite girar rápidamente en pocos
pasos. [Figura 6E]
Nota: Para evitar daños al carrete y a la cuchilla fija
no operar nunca los carretes cuando no se corte
hierba. Producirá fricción y calor excesivos entre la
cuchilla fija y el carrete, causando desperfectos al
borde de corte.
4
1
5
Figura 6E
Segundo
corte
e.
4. Para asegurar un corte completo y uniforme,
traslapar las pasadas unos 25 o 50 mm y luego
hacer una o más pasadas en torno al perímetro del
green para limpiar los bordes desiguales y para
separar la superficie del putting green del césped a
su alrededor.
16
Primer
corte
Cuarto
corte
Tercer
corte
Figura 6F
FUNCIONAMIENTO
6.8
6
MANTENIMIENTO DIARIO ___________________________________________________
1. Aparque el cortacésped en una superficie llana y
nivelada. Ponga el freno de estacionamiento y pare
el motor.
2. Engrase y lubrique todos los puntos si es necesario.
3. Lave el cortacésped después de cada uso para
evitar incendios. Limpie los recortes de hierba y la
suciedad del carrete, las transmisiones, el motor y
el silenciador.
a.
Utilice agua fría para limpiar el equipo.
Nota: Se sabe que la utilización de agua marina o
aguas residuales estimula la oxidación y la
corrosión de las partes metálicas, dando lugar a un
deterioro o fallo prematuro. La garantía de fábrica
no cubre un daño de esta naturaleza.
b.
No utilice sprays de alta presión.
c.
No rocíe de agua directamente sobre ningún
componente eléctrico.
Nota: Nunca lave el motor mientras esté caliente o
funcionando. Utilice aire comprimido para limpiar las
aletas del motor y el radiador.
4. Llene el depósito de combustible al final de cada
día de operación. No llene por encima del cuello de
llenado. Cierre la válvula de combustible (G)
cuando no la use.
Utilice gasolina limpia, fresca y sin plomo, de 85
octanos como mínimo.
Manipule con cuidado el combustible - es muy
inflamable. Utilice un contenedor adecuado de modo
que la espita quepa en el cuello del tubo de llenado de
combustible. Evite la utilización de latas y embudos para
transferir el combustible.
! ADVERTENCIA
Nunca retire el tapón del depósito de combustible ni
añada combustible con el motor en marcha o caliente.
No fume cuando manipule combustible. No llene ni
vacíe nunca el depósito de combustible en espacios
cerrados.
No derrame combustible y limpie el combustible
derramado inmediatamente.
Nunca manipule o almacene contenedores con
combustible cerca de llamas o de ningún dispositivo
que pudiera lanzar chispas y hacer prender el
combustible o los vapores que éste despide.
Asegúrese de volver a instalar y apretar el tapón de
combustible.
5.
Almacene el combustible de acuerdo con las
normativas locales y las recomendaciones de su
proveedor.
6.
Revise el aceite del motor al comienzo de cada día,
antes de arrancar el motor. Si el nivel de aceite
está bajo, retire la tapa de llenado de aceite y
añada aceite según necesidad. No llene demasiado.
17
7
AJUSTES
7
AJUST ES
7.1
GENERALIDADES _________________________________________________________
! ADVERTENCIA
Para impedir lesiones graves, antes de ajustar,
limpiar o reparar este equipo, desengranar todos los
mandos, aplicar el freno de estacionamiento y apagar
el motor.
Siempre que se efectúen trabajos de mantenimiento
aparte de los ajustes al carburador, desconectar el
cable de la bujía y alejarlo de ésta para evitar el
arranque inesperado del motor y las lesiones
corporales.
1. Los ajustes y las tareas de mantenimiento siempre
deben ser acometidas por un técnico cualificado. Si
no se puede realizar el ajuste deseado, póngase en
contacto con un distribuidor Jacobsen autorizado.
2. Sustituya, y no ajuste,
desgastados y dañados.
los
componentes
3. El cabello largo, las joyas o los accesorios sueltos
de prendas de ropa pueden enredarse en las piezas
móviles.
! PRECAUCION
Tenga cuidado para evitar que las manos y los dedos
queden atrapados entre los componentes móviles y
fijos de la máquina.
4. No modifique los valores del regulador ni sobrepase
la velocidad de régimen de la máquina.
7.2 CARRETE A CUCHILLA FIJA ________________________________________________
(Revisión antes del ajuste)
1. Comprobar los cojinetes del carrete para la holgura
radial o longitudinal. Si hay algún movimiento
anormal del carrete, de arriba a abajo o de lado a
lado, ajuste o reemplace los componentes que se
necesiten.
! PRECAUCION
Manejar el carrete con sumo cuidado para impedir
que ocurran lesiones personales y daños a los bordes
cortantes.
2. Inspeccionar las cuchillas del carrete y la cuchilla
fija para asegurar filos bien afilados, sin curvaturas
ni hendiduras.
a.
El borde anterior de las cuchillas de los carretes
debe estar afilado, sin rebabas y sin indicios de
estar redondeado.
b.
La cuchilla fija y su soporte de respaldo deben
estar firmemente sujetos. La cuchilla fija debe
estar recta y afilada.
c.
Es necesario mantener una superficie plana de
al menos 0,8 mm en la cara frontal de la cuchilla
fija. Usar una lima plana corriente para reavivar
la cuchilla fija.
3. Si el desgaste o los daños sobrepasan el punto en
que puede corregirse el carrete o la cuchilla fija
mediante el proceso de lapidado, se deben
rectificar.
18
4. El ajuste correcto entre el carrete y la cuchilla fija es
esencial. Se debe mantener una separación de
0,025 a 0,076 mm a lo largo de toda la longitud del
carrete y la cuchilla fija.
5. El carrete debe estar paralelo respecto a la cuchilla
fija. Si el carrete está mal ajustado, perderá su filo
prematuramente y el carrete y cuchilla fija pueden
sufrir daños graves.
6. Las condiciones del césped también afectan el
ajuste.
a.
El césped seco y ralo requerirá una mayor
separación para impedir el aumento de calor y
daños al carrete y cuchilla fija.
b.
Si se corta hierba de alta calidad con buen
contenido de humedad, la separación debe ser
más pequeña (casi nula).
°
°
0,8 mm
90°
Figura 7A
AJUSTES
7.3
7
CUCHILLA FIJA ___________________________________________________________
b.
1. Leer la Sección 7.2 antes de hacer este ajuste.
2. Comenzar el ajuste en el extremo anterior del
carrete y seguir con el extremo posterior. El
extremo anterior de la cuchilla del carrete es el
extremo que primero pasa por encima de la cuchilla
fija durante la rotación normal del carrete.
4.
Ajustar el extremo posterior del carrete de la
misma manera y luego volver a comprobar el
ajuste del extremo anterior.
Apriete la tuerca (A). Vuelva a comprobar el ajuste.
Cuando el carrete y la cuchilla de platina están bien
ajustados, el carrete girará libremente y podrá cortar un
trozo de periódico a todo el largo del carretecarrete,
cuando el papel se sujeta a 90° respecto a la cuchilla fija.
A
Rotación
Extremo anterior
B
Figura 7B
C
! PRECAUCION
Manejar el carrete con sumo cuidado para impedir
que ocurran lesiones personales y daños a los bordes
de corte.
3. Afloje la tuerca (A) y gire la tuerca (B) a la derecha
para acercar la cuchilla fija al carrete o a la
izquierda para alejarla.
a.
7.4
F
E
D
G
Deslizar un calibrador de separaciones o
material para suplemento de 0,025 - 0,075 mm
de espesor entre la cuchilla del carrete y la
cuchilla fija. No hacer girar el carrete.
Figura 7C
FRENO __________________________________________________________________
Un freno ajustado apropiadamente requiere una
resistencia de 4,5 kg en el vértice de la palanca del freno
para engranar, y debe haber una distancia de 38 mm de
centro a centro cuando es soltado.
1. Los ajustes menores se hacen en el manubrio. Aflojar
la tuerca (H), hacer girar la tuerca (J) para ajustar el
cable de los frenos y luego apretar la tuerca (H).
2. Si no es posible hacer los ajustes en el manubrio,
retirar las ruedas de transporte y hacer el ajuste en la
banda de los frenos.
3. Aflojar el tornillo (K) y tirar el cable hasta obtener la
tensión deseada en los frenos. Apretar el tornillo
(K). Volver a ajustar (H) y (J).
38 mm
H
J
K
Banda del freno
Figura 7D
19
7
AJUSTES
7.5
ALTURA DE CORTE _______________________________________________________
Nota: Asegurarse que la cuchilla de platina esté
correctamente ajustada antes de ajustar la altura de
corte (Sección 7.3).
1. Inclinar el cortacésped sobre el tambor de tracción o
las ruedas. No dejar el cortacésped inclinado por un
período prolongado, ya que el aceite podría ingresar
en la cámara de combustión.
2. Aflojar las tuercas (M) en ambos lados lo suficiente
para permitir que la perilla (L) levante el rodillo
delantero o el rastrillo Turf Groomer. Levantar
ambos lados a una altura igual.
5. Deslizar la cabeza del tornillo sobre la cuchilla de
platina (Q) y ajustar la perilla (L) para reducir la
separación entre el rodillo y la barra calibradora.
Apretar la tuerca (M).
6. Repetir los pasos 4 y 5 en el extremo opuesto del
carrete y luego apretar las tuercas (M). Comprobar
la altura de corte y volverla a ajustar de ser
necesario.
L
3. Ajustar el tornillo calibrador (P) para obtener la
altura de corte (O) deseada. Medir desde la barra
calibradora (N) hasta el lado inferior de la cabeza
del tornillo (P) y luego apretar la tuerca mariposa
para asegurar el ajuste.
M
4. Colocar la barra calibradora entre el rodillo
delantero y el rodillo de tracción, cerca del extremo
exterior de los rodillos.
N
P
Q
O
Figura 7E
7.6
MANUBRIO_______________________________________________________________
1. Para ajustar el ángulo del manubrio (Y), aflojar el
perno (W) en ambos lados del cortacésped y ajustar
la posición del manubrio según se desee.
2. Después de ajustar el manubrio, ajustar la escuadra
(X) de manera que el manubrio apenas repose en
la parte inferior de la ranura de la escuadra. Apretar
el tornillo (W).
Y
X
W
Figura 7F
20
AJUSTES
7.7
7
ESPECIFICACION DEL PAR DE TORSION _____________________________________
PRECAUCION
Todos los valores del par motor incluidos en estas tablas son aproximados y son sólo a título orientativo. La
utilización de estos valores del par de torsión es a su riesgo. Jacobsen no se responsabiliza de ninguna pérdida,
reclamación o daño producido por la utilización de estas tablas.
Tener siempre muchísima precaución al utilizar cualquier valor del par de torsión.
Jacobsen utiliza pernos revestidos Grado 5 de serie, a menos que se cite lo contrario. Al apretar los pernos revestidos,
utilice el valor dado a los pernos lubrificados.
DISPOSITIVOS DE FIJACION ESTANDAR NACIONALES AMERICANOS
TAMAÑO
UNIDADES
GRADO 5
TAMAÑO
GRADO 8
Lubricado
Seco
Lubricado
UNIDADES
GRADO 5
Seco
Lubricado
GRADO 8
Seco
Lubricado
Seco
#6-32
in-lb (Nm)
–
20 (2.3)
–
–
7/16-14
ft-lb (Nm)
37 (50.1)
50 (67.8)
53 (71.8)
70 (94.9)
#8-32
in-lb (Nm)
–
24 (2.7)
–
30 (3.4)
7/16-20
ft-lb (Nm)
42 (56.9)
55 (74.6)
59 (80.0)
78 (105)
#10-24
in-lb (Nm)
–
35 (4.0)
–
45 (5.1)
1/2-13
ft-lb (Nm)
57 (77.2)
75 (101)
80 (108)
107 (145)
#10-32
in-lb (Nm)
–
40 (4.5)
–
50 (5.7)
1/2-20
ft-lb (Nm)
64 (86.7)
85 (115)
90 (122)
120 (162)
#12-24
in-lb (Nm)
–
50 (5.7)
–
65 (7.3)
9/16-12
ft-lb (Nm)
82 (111)
109 (148)
115 (156)
154 (209)
1/4-20
in-lb (Nm)
75 (8.4)
100 (11.3)
107 (12.1)
143 (16.1)
9/16-18
ft-lb (Nm)
92 (124)
122 (165)
129 (174)
172 (233)
1/4-28
in-lb (Nm)
85 (9.6)
115 (13.0)
120 (13.5)
163 (18.4)
5/8-11
ft-lb (Nm)
113 (153)
151 (204)
159 (215)
211 (286)
5/16-18
in-lb (Nm)
157 (17.7)
210 (23.7)
220 (24.8)
305 (34.4)
5/8-18
ft-lb (Nm)
128 (173)
170 (230)
180 (244)
240 (325)
5/16-24
in-lb (Nm)
173 (19.5)
230 (26.0)
245 (27.6)
325 (36.7)
3/4-10
ft-lb (Nm)
200 (271)
266 (360)
282 (382)
376 (509)
3/8-16
ft-lb (Nm)
23 (31.1)
31 (42.0)
32 (43.3)
44 (59.6)
3/4-16
ft-lb (Nm)
223 (302)
298 404
315 (427)
420 (569)
3/8-24
ft-lb (Nm)
26 (35.2)
35 (47.4)
37 (50.1)
50 (67.8)
7/8-14
ft-lb (Nm)
355 (481)
473 (641)
500 (678)
668 (905)
DISPOSITIVOS DE FIJACION METRICOS
4.6
TAMAÑO
8.8
10.9
Dispositivo
de fijación
no crítico
para el
aluminio
12.9
UNIDADES
Lubricado
Seco
Lubricado
Seco
Lubricado
Seco
Lubricado
Seco
M4
Nm (in-lb)
–
–
–
–
–
–
3.83 (34)
5.11 (45)
2.0 (18)
M5
Nm (in-lb)
1.80 (16)
2.40 (21)
4.63 (41)
6.18 (54)
6.63 (59)
8.84 (78)
7.75 (68)
10.3 (910
4.0 (35)
M6
Nm (in-lb)
3.05 (27)
4.07 (36)
7.87 (69)
10.5 (93)
11.3 (102)
15.0 (133)
13.2 (117)
17.6 (156)
6.8 (60)
M8
Nm (in-lb)
7.41 (65)
9.98 (88)
19.1 (69)
25.5 (226)
27.3 (241)
36.5 (323)
32.0 (283)
42.6 (377)
17.0 (150)
M10
Nm (ft-lb)
14.7 (11)
19.6 (14)
37.8 (29)
50.5 (37)
54.1 (40)
72.2 (53)
63.3 (46)
84.4 (62)
33.9 (25)
M12
Nm (ft-lb)
25.6 (19)
34.1 (25)
66.0 (48)
88.0 (65)
94.5 (70)
125 (92)
110 (81)
147 (108)
61.0 (45)
M14
Nm (ft-lb)
40.8 (30)
54.3 (40)
105 (77)
140 (103)
150 (110)
200 (147)
175 (129)
234 (172)
94.9 (70)
21
8
MANTENIMIENTO
8
MANTENIMIEN TO
8.1
GENERALIDADES _________________________________________________________
c.
Cambiar las piezas gastadas o dañadas antes
de operar la máquina.
Para impedir lesiones graves, antes de ajustar,
limpiar o reparar este equipo, desengranar todos los
mandos, aplicar el freno de estacionamiento y apagar
el motor.
d.
Mantener todos los líquidos a los niveles
correspondientes.
e.
Mantener las protecciones en su lugar y todo el
equipo bien sujeto.
Siempre que se efectúen trabajos de mantenimiento
aparte de los ajustes al carburador, desconectar el
cable de la bujía y alejarlo de ésta para evitar el
arranque inesperado del motor y las lesiones
corporales.
f.
Mantener las llantas debidamente infladas.
! ADVERTENCIA
1. Los ajustes y las tareas de mantenimiento siempre
deben ser acometidas por un técnico cualificado. Si
no es posible realizar los ajustes deseados, póngase
en contacto con un distribuidor Jacobsen autorizado.
2. Revisar el equipo regularmente, establecer un
programa de mantenimiento y mantener los
registros detallados.
8.2
a.
Mantener el equipo limpio.
b.
Mantener todas las piezas móviles debidamente
ajustadas y lubricadas.
El cabello largo, las joyas o los accesorios sueltos
de prendas de ropa pueden enredarse en las piezas
móviles.
4. Usar las ilustraciones en el Catálogo de Piezas
como referencia para desmontar y volver a montar
los componentes.
5. Reciclar o tirar todos los materiales peligrosos
(combustible, lubricantes etc.) conforme a las
normativas locales, estatales o federales.
6. Lavar el cortacésped y los accesorios después de
cada uso. Mantener el equipo limpio.
7. Reparar las superficies metálicas dañadas y usar
pintura de retoque naranja Jacobsen.
MOTOR __________________________________________________________________
IMPORTANTE: Con esta máquina se incluye un
Manual del Motor adicional, preparado por el
fabricante del motor.
Lea este manual
detenidamente hasta familiarizarse con la operación
y mantenimiento del motor. La atención adecuada a
las indicaciones del fabricante asegurarán una vida
de servicio máxima del mismo. Para pedir manuales
de recambio del motor se deberá poner en contacto
con el fabricante del mismo.
El rodaje adecuado de un nuevo motor puede aportar
considerables diferencias a su rendimiento y duración.
Nota: El cortacésped está concebido para operar y
cortar de la forma más eficaz en el ajuste pre establecido
del regulador. No cambie estos ajustes ni la velocidad
del motor.
22
3.
Durante el período de rodaje, Jacobsen recomienda lo
siguiente:
1. Operar la máquina de forma suave a una velocidad
baja durante las primeras 25 horas.
2. Evitar arranques y aceleración rápida.
3. Dejar que el motor llegue a la temperatura de
operación antes de operar con carga completa.
4. Cambiar el aceite y filtro después de las primeras
20 horas de operación.
5. Consultar la Sección 8.12 y el Manual del Motor
sobre intervalos específicos de mantenimiento.
MANTENIMIENTO
8.3
8
ACEITE DEL MOTOR _______________________________________________________
Revisar el aceite del motor al principio de cada día, antes
de arrancar el motor. Si el nivel de aceite está bajo,
retirar la tapa de rellenado y añadir el aceite necesario.
Cambiar el aceite inicial a las primeras 20 horas de
operación. Después cambiar el aceite cada 100 horas.
Para información detallada del servicio, consultar el
Manual del Propietario facilitado por el fabricante del
motor.
Una vez añadido o después de cambiar el aceite,
arrancar y operar el motor en ralentí en neutro durante
30 segundos. Apagar el motor. Esperar 30 segundos y
revisar el nivel de aceite. Añadir aceite hasta que llegue
a la marca LLENO en la varilla.
Usar sólo aceites para motor SAE
clasificación API SG.SF/CC.CD.
10W30
con
Tapón de llenado
de aceite
Nivel superior
de aceite
Figura 8A
8.4
COMBUSTIBLE____________________________________________________________
Manipule el combustible con cuidado, es muy
inflamable. Use un contenedor adecuado para que la
espita quepa en el cuello del tubo de llenado. Evite la
utilización de latas y embudos para transferir el
combustible.
! ADVERTENCIA
No retire el tapón del depósito de combustible ni
añada combustible con el motor en marcha o caliente.
No fume al manipular combustible. No llene o drene el
depósito en espacios cerrados.
• Almacene el combustible siguiendo las ordenanzas
locales y estatales y las recomendaciones del
proveedor de combustible.
• Nunca llene en exceso o permita que el depósito se
vacíe completamente.
• Use gasolina limpia y nueva sin plomo de 85 octanos o
más.
• Consulte el manual del motor antes de utilizar
combustible oxigenado (mezcla).
• No llene por encima del cuello de llenado.
No derrame combustible. Limpie cualquier vertido
inmediatamente.
No manipule o almacene contenedores con
combustible cerca de llamas o dispositivos que lancen
chispas y prender el combustible o los vapores que
éste despide.
Asegúrese de volver a instalar y de apretar el tapón.
23
8
MANTENIMIENTO
8.5
RETIRADA DE LA ZAPATA DE LA CUCHILLA FIJA _____________________________
1. Para quitar la zapata (E), aflojar la tuerca (A) y girar
las tuercas (B) 1/4 de giro a la izquierda o más para
que la cuchilla fija toque ligeramente las cuchillas
del carrete.
7. Ajustar la cuchilla fija al carrete. Apretar las piezas.
A
2. Quitar las piezas de montaje (D) de ambos lados de
la zapata.
B
3. Girar la tuerca de fijación (C) a la izquierda hasta
que los bordes de la zapata dejen de tener presión
de los muelles.
C
F
4. Girar y sacar los bordes de la zapata de las copas
de los muelles (F) y de la barra (G).
E
5. Para volver a colocar la zapata de la cuchilla fija,
colocar los bordes de la zapata entre las copas de
los muelles y los bordes de la barra de ajuste,
después meter la zapata en su posición.
D
G
6. Alinear los orificios de montaje de la zapata con el
marco y volver a montar las piezas (D).
Figura 8B
8.6
RETROPULIDO Y RECTIFICACION ___________________________________________
Comprobar si la cuchilla fija y las cuchillas del carrete
han sufrido daños. Consultar la Sección 7.2.
1. Determinar si es posible amolar o rectificar el borde
cortante para restaurarlo.
2. Para obtener el rendimiento óptimo, usar un
rectificador de cuchillas de platina para darle
acabado a la cuchilla; luego volver a armar la
cuchilla fija y ajustar su separación del carrete de la
manera descrita en la Sección 7.3.
3. Desactivar el embrague del carrete e inclinar la
máquina hacia atrás para que descanse sobre el
asa.
a.
Aplicar pasta de lapidar con un cepillo de mango
largo en toda la longitud del carrete (se
recomienda pasta de granularidad 120, Sección
2.6).
b.
Continuar el amolado y al mismo tiempo hacer
un ajuste fino de la distancia entre el carrete y la
cuchilla fija hasta que haya una separación
uniforme a lo largo de todos los bordes
cortantes.
5. Quitar la pasta para amolar cuidadosa y
completamente del carrete y de la cuchilla fija antes
de hacer funcionar el carrete en sentido de avance.
4. Quitar la cubierta del eje y la empaquetadura del
lado derecho del carrete. Instalar un perno de 3/824 y una contratuerca en el extremo del eje y
conectarlo a una máquina de amolado.
8.7
RUEDAS DE TRANSPORTE (OPCION) ________________________________________
1. Mantener los neumáticos bien inflados para
prolongar su duración. Revisar la presión
únicamente cuando los neumáticos están fríos.
2. Usar un manómetro de precisión para neumáticos
de baja presión (41,3 - 55,1 kPa).
24
! PRECAUCION
A menos que se tenga la capacitación, herramientas
y experiencia debidas, NO tratar de montar un
neumático en una llanta. El montaje incorrecto puede
provocar una explosión, lo cual podría dar como
resultado lesiones graves.
MANTENIMIENTO
8.8
8
COJINETE DE RUEDA ______________________________________________________
El cojinete tiene estampadas la palabra “LOCK” y una
flecha en su cara. Al sustituir el cojinete, asegurarse que
el mismo se instala en el sentido de giro correcto.
Interior
Exterior
En la rueda derecha, instalar el cojinete con la flecha
“LOCK➡ ” apuntando hacia el exterior de la caja.
En la rueda izquierda, instalar el cojinete con la flecha
“LOCK➡ ” apuntando hacia el interior de la caja.
GK14
Figura 8C
8.9
ALMACENAMIENTO _______________________________________________________
Generalidades
5.
Sacar la bujía y verter aproximadamente 30 ml de
aceite SAE 30 en el cilindro. Hacer girar el motor
lentamente a mano para distribuir el aceite por las
paredes del cilindro. Volver a colocar la bujía.
6.
Tirar de la cuerda de arranque lentamente hasta
sentir resistencia. Continuar tirando hasta que la
muesca de la polea del arrancador quede alineada
con el agujero del mecanismo de la cuerda de
arranque. En este punto, las válvulas de admisión y
de escape están cerradas.
1. Lavar el tractor completamente y luego lubricar.
2. Reparar y pintar el metal dañado o al descubierto.
3. Inspeccionar el cortacésped, apretar toda la
tornillería, cambiar los componentes que estén
desgastados o dañados. Revisar el carrete y la
cuchilla fija.
4. Retirar la cuchilla fija del carrete y engrasar las
cuchillas del carrete y la cuchilla fija.
5. Colocar el cortacésped sobre el elevador para que
las ruedas no soporten peso. El rodillo delantero o
Turf Groomer debe estar apoyado sobre una
plancha de madera.
6. Mantener el cortacésped y todos sus accesorios
limpios, secos y protegidos de la intemperie durante
el almacenamiento. Nunca guardar la máquina con
combustible en el tanque dentro de un edificio
donde los vapores pueden quedar en contacto con
llama expuesta o chispas.
7. No almacenar cerca de material inflamable.
Motor
1. Mientras el motor está caliente, quitar el tapón de
vaciado y vaciar el aceite del cárter. Instalar el tapón
de vaciado y volver a llenar con aceite fresco. Apretar el tapón a 30 Nm.
2. Limpiar el exterior del motor. Pintar el metal al
descubierto o aplicar una capa delgada de aceite
antioxidante.
3. Para impedir la acumulación de residuos gomosos y
películas de barniz, llenar el tanque con un
combustible estabilizado. Usar un acondicionador
de combustible antioxidante, tal como STA-BIL®.
Leer y seguir las instrucciones dadas en el envase.
Después del almacenamiento
1.
Revisar o cambiar el filtro de combustible y el limpiador de aire.
2.
Comprobar el nivel de aceite en el cárter del motor.
3.
Llenar el tanque de combustible con combustible
fresco. Abrir la válvula de paso.
4.
Retirar todo el aceite de los carretes y la fija.
Ajustar la cuchilla fija y la altura de corte.
5.
Sujetar el cortacésped para que el tambor de
tracción esté levantado y desactivar el embrague
del carrete. Arrancar el motor y dejarlo a media
aceleración. Dejar pasar tiempo suficiente para que
el motor se caliente y lubrique bien.
Nota: El tambor de tracción girará con el motor a media
aceleración.
! ADVERTENCIA
No hacer funcionar nunca el motor sin tener la
ventilación adecuada; los gases de escape son
fatales si se inhalan.
4. Hacer funcionar el motor por unos 5 minutos para
distribuir el combustible tratado. Apagar el motor,
cerrar la válvula de corte de combustible y dejar
que el motor se enfríe. Vaciar el combustible.
25
8
MANTENIMIENTO
8.10 RESOLUCION DE PROBLEMAS _____________________________________________
Antes de realizar ningún ajuste o tareas de mantenimiento, lea las sección de mantenimiento para conocer los
procedimientos y advertencias.
Síntoma
El motor no arranca
Causa probable
Solución
Estrangulador en posición incorrecta
Depósito de combustible
combustible sucio
vacío
Ver el manual del motor
o Vaciar y llenar con combustible fresco y limpio
Válvula de paso de combustible
Abrir la válvula
Motor / bujía
Ver el manual del motor
Interruptpor de llave de contacto de Conectar el interruptpor
motor desconectado
El motor arranca con Estrangulador en posición incorrecta
dificultad o funciona Fugas de combustible, combustible sucio
irregularmente, falla, o de tipo incorrecto
pierde potencia o se
apaga
Cableado suelto
Entrada de aire taponada
Ver el manual del motor
Apretar las abrazaderas de las mangueras de
combustible
Rellenar con combustible nuvo de grado correcto
Revisar el cable de la bujía
Limpiar la entrada de aire y el filtro de aire
Respiradero de tapa de combustible Limpiar la tapa de combustible
taponado
El cortacésped no Freno de estacionamiento aplicado
responde a la palanca Embrague del carrete
del OPC
Soltar el freno
Ver Sección 5.2
Los
carretes
no Ajuste incorrecto
Ajustar (ver Sección 7.2, Sección 7.3 y Sección 7.5)
cortan, o cortan de Posición de la palanca del embrague del Activar la palanca
modo irregular
carrete
26
MANTENIMIENTO
8
8.11 LUBRICACION ____________________________________________________________
El cortacésped ha sido diseñado de modo que requiere
un mínimo de lubricación. El engrase excesivo produce
cargas altas sobre los cojinetes y el motor, lo cual reduce
el rendimiento de la máquina.
Los intervalos de mantenimiento deben realizarse con
más frecuencia cuando se trabaje en lugares con gran
cantidad de polvo.
11
4
1. Limpiar sempre los puntos de engrase antes y
después de la lubricación.
2. Aplicar grasa con una pistola engrasadora manual y
llenar lentamente hasta que comience a rezumar
grasa. NO usar pistolas de aire comprimido.
9
3. Para el funcionamiento correcto de todos los puntos
de pivote y otros puntos de fricción, aplicar varias
gotas de aceite SAE 30W.
5
8
10
2
1
3
7
6
1
2
Figura 8D
8.12 CUADRO DE MANTENIMIENTO ______________________________________________
Intervalos recomendados de inspección y lubricación.
Diariamente
20
50
100
300
Anualmente
Lubricante
Filtro de aire.....................................I ........................................C
Cámara de combustión ........................................................................................................ C
Aceite de motor ...............................I .................. R ........................................R.......................................... ...................... I
Conducto de combustible .................................................................................................................... R - 2 años
Bujía .............................................................................................................. A/R
Separación de válvulas ........................................................................................................ A
Puntos de engrase (Figura 7C)
1 - Rodillo ......................................................... L.................................................................................... L.................... II
2 - Ajuste de altura................................................................. L ............................................................................................ II
3 - Eje de carrete RT........................................ L...................................................................................... ..................... II
4 - Rodillo de tracción ...................................... L...................................................................................... ..................... II
5 - Cojinete del eje del embrague ........................................................................................................... L.................... II
6 - Eje del pivote del embrague .............................................................................................................. L....................III
7 - Cojinete de aguja del embrague.......................................................................................................... ................... III★
8 - Cubo de tracción..................... ................... L...................................................................................... .....................III
9 - Cojinetes de rueda........................................................................................................ .................... L.................... II
10 - Palanca de embrague del carrete............. L...................................................................................... ..................... II
11 - Bastidor de cadena ..................................................................................................... ....................R....................IV
A - Añadir o Ajustar C - Limpiar I - Inspeccionar L - Lubricar R - Reemplazar
Lubricantes
I
II
-
SAE 10W-30 Clasificación API SF o SG
Grasa de litio NLGI - Grado 2
III - Grasa Lubriplate®, número de pieza Jacobsen 5001581
IV - Aceite SAE EP-140 -Vaciar y rellenar
★ - Aplicar una capa fina
27
9
9
28
NOTAS
NOTAS
1.1. . . . . . . . . . . . . . . . . . . Decals . . . . . . . . . . . . . . . . . . . . . . . . . . . . . . . . . . . . . . . . . . . . . ..2
2.1. . . . . . . . . . . . . . . . . . . Handle and Controls . . . . . . . . . . . . . . . . . . . . . . . . . . . . . . . . . . . 4
3.1. . . . . . . . . . . . . . . . . . . Left Chain Cover . . . . . . . . . . . . . . . . . . . . . . . . . . . . . . . . . . . . . . 6
4.1. . . . . . . . . . . . . . . . . . . Left Side Frame . . . . . . . . . . . . . . . . . . . . . . . . . . . . . . . . . . . . . . . 8
5.1. . . . . . . . . . . . . . . . . . . Right Side Frame. . . . . . . . . . . . . . . . . . . . . . . . . . . . . . . . . . . . . .10
6.1. . . . . . . . . . . . . . . . . . . Cross Bars, Reel and BedKnife. . . . . . . . . . . . . . . . . . . . . . . . . . .12
7.1. . . . . . . . . . . . . . . . . . . Engine and Clutch . . . . . . . . . . . . . . . . . . . . . . . . . . . . . . . . . . . . .14
8.1. . . . . . . . . . . . . . . . . . . Traction Rollers . . . . . . . . . . . . . . . . . . . . . . . . . . . . . . . . . . . . . . .16
9.1. . . . . . . . . . . . . . . . . . . Transport Wheels . . . . . . . . . . . . . . . . . . . . . . . . . . . . . . . . . . . . .18
PGM
Serial No. All
1.1 Decals
REEL CLUTCH CONTROL
! CAUTION
CAUTION
DISENGAGE
BE SURE THE TRACTION CLUTCH
LEVER IS IN NEUTRAL BEFORE
STARTING THE ENGINE.
ALLOW ENGINE
TO COOL FOR 2
MINUTES BEFORE
REFUELING
ENGAGE
J-T-3001792
10
2
1
9
15
7
1
2
3
TO ENGAGE TRACTION
1. SLIDE BAIL TO THE LEFT.
2. SQUEEZE BAIL TO HANDLE.
14
6
4
10
16
14
16
9
5
12
13
11
8
L WA
98 dB
8
1
PGM
! PRECAUCION
1. No opere esta maquina sin previo
entrenamiento, instruccion y sin haber
leido el manual de operacion.
2. Tenga todas las guardas en su lugar y
plezas bien aseguradas.
3. Neutralice todas las velocidades y
apague el motor antes de vaciar los
recolectores de pasto, darie servicio,
limplar, ajustar y destrabar la maquina.
4. Mantenga las manos, los ples y ropa
suelta lejos de plezas en movimiento.
5. No deberan transportar pasajeros si no
existe un asiento para ellos.
6. Si no sabe leer ingles, pida que aiguien
le lea las calcomanias de avisos y los
manuales de instruccion y operacion.
! CAUTION
1. Read operators manual before
operating machine.
2. Keep shields in place and hardware
securely fastened..
3. Before you clean, adjust or repair this
equipment, disengage all drives,
engage parking brake and stop engine.
4. Keep hands, feet and clothing away
from moving parts.
5. Never carry passengers.
6. Keep bystanders away.
!
To avoid serious bodily injury stop engine
and disengage reels before working on
mower or emptying baskets.
5
Vehicle Mass:
Model PGM 19
Model PGM 22
Model 518A
Model 522TA
Model 522A
Model 526A
Model TC22
84.0 kg
85.0 kg
95.3 kg
100.7 kg
101.2 kg
123.4 kg
101.1 kg
6
DANGER
PGM 22
11
! WARNING
Keep Bystanders Away. Do
Not Operate Without Guards
In Place
2811102
4
3
WARNING
TO PREVENT INJURY AND ACCIDENTAL
CLUTCH ENGAGEMENT DO NOT ADJUST
ENGINE SPEED USING THROTTLE LEVER
ON ENGINE. ALWAYS ADJUST ENGINE
SPEED USING THE OPC HANDLE AND
THROTTLE PADDLE
4146636
15
Item
1
2
3
4
5
6
7
8
9
10
11
12
13
14
15
16
Part No.
Qty.
Description
362764
1
Decal, Caution
3001790
4125685
2811102
340830
361854
4127335
4131528
3002753
3001792
3001235
4124759
NS
4139678
4146636
4147495
1
1
1
1
1
1
1
1
1
1
1
1
1
1
1
Decal, Caution
Decal, PGM 22
Decal, EU
Decal, Spanish
Decal, Caution
Decal, Danger
Decal, Noise 98 dB
Decal, Parking Brake
Decal, Reel Clutch
Decal, Danger
Decal, Jacobsen Emblem
Plate, Serial
Decal, Bail Operation
Decal, Throttle Warning
Decal, E-Stop
Serial Numbers/Notes
> Change from previous revision
2
PGM
Serial No. All
2.1 Handle and Controls
37
38
C
31
22
29
11
30
26
39
24
35
7
36
5
C
34
28
7
5
12
10
1
A B
27
5
21
4
6
8
16
6
27
3
1
15
33
14
13
17 / 18
9
8
2
23
19 / 20
25
3
32
A
B
PGM
Item
1
2
3
4
5
6
7
8
9
10
11
12
13
14
15
16
17
18
19
20
21
22
23
24
25
26
27
28
29
30
31
32
33
34
35
36
37
38
39
Part No.
Qty.
366708
2
400262
400268
434029
443102
443110
444718
446142
453011
453023
454008
454008
455012
458006
461181
2000067
2809900
2809901
4117380
4117381
446130
4147697
4127051
4127340
4128662
4128933
4130762
4131414
4136323
4136325
4147696
4136328
4136539
4136551
4136552
434010
434032
4147835
4147215
2
1
4
7
2
5
3
2
4
1
AR
2
2
1
1
1
1
1
1
4
1
1
1
4
4
2
1
1
1
1
1
1
1
1
2
1
1
1
Description
Serial Numbers/Notes
Flanged Bearing
Screw, 3/8-16 x 1” Hex Head
Screw, 3/8-16 x 1-3/4” Hex Head
Screw, 1/4-20 x 1” Socket Head
Nut, 1/4-20 Hex
Nut, 3/8-16 Hex
Locknut, 5/16-18 Center
Lockwasher, 3/8 Heavy
Flat Washer, 3/8
Flat Washer, 1/4
Washer, 1/2 Spring
Washer, 1/2 Spring
Flat Washer, 3/4
Retaining RIng, 1/2 Truarc
Groove Pin, 3/16 x 3/4”
Lever, Brake
Left Side Torsion Spring
Right Side Torsion Spring
Right Side Handle Stop
Left Side Handle Stop
Lockwasher, 1/4 Heavy
Cover, Front
Cover, Back
Knob
Screw, #10-32 x 3/8” Socket Head
Screw, 5/16-18 x 1-1/2” Socket Head
Brake Cable, PGM
Lever, Brake
Plate, Throttle
Bail Lever
Handle, Overmolded
Plate, Tilt
Handle, PGM
Cable, Paddle Throttle
Cable, Bail Throttle
Screw, 1/4-20 x 1-3/4 Socket Head
Screw, 5/16-18 x 1-3/4” Socket Head
E-Stop Switch
Harness, E-Stop
See 7.1 for Engine Connection
See 7.1 for Engine Connection
> Change from previous revision
4
PGM
Serial No. All
3.1 Left Chain Cover
20
18
3
4
5
6
7
4
18
11
10
9
2
8
1
16
14
12
5
13
15
17
20
19
PGM
Item
●▲
◆
◆
◆
●▲
◆
◆
●
▲
◆
1
2
3
4
5
6
7
8
9
10
11
12
13
14
15
16
17
18
19
20
Part No.
Qty.
Description
207480
1
Cover, Chain
472201
400102
446130
304756
503438
339910
403528
446110
304758
304757
434041
1001309
313777
3002906.7
303566
304747
434043
434042
3006511
1
1
4
1
1
1
2
2
1
1
4
1
1
1
1
1
3
5
5
Plug, 1/8 Pipe,Square Head
Screw, 1/4-20 x 3/8” Hex Head
Lockwasher, 1/4 Heavy
Retainer
Lever, Shift
• O-Ring
Screw, #8-32 x 3/8” Hex Head
Lockwasher, #8 Medium
Cover
Gasket
Screw, 1/4-20 x 3/4” Flat Soc Hd
Bracket, L.H. Brake Mounting
Seal, Oil
Housing, Bearing
Bearing
Gasket
Screw, 1/4-20 x 2-1/4” Socket Head
Screw, 1/4-20 x 1-1/2” Socket Head
Washer
Required for proper sealing of Left Side Frame
473194
AR Loctite Primer
473195
AR Loctite 518 Gasket Eliminator
473130
AR Loctite 242 (Blue)
Serial Numbers/Notes
6 oz Aerosol Can
15 oz cartridge
> Change from previous revision
6
PGM
Serial No. All
4.1 Left Side Frame
40
10
11
9
17
14
3
7
8
1
4
5
18
20
21
23
29
28
19
24
22
5
26
31
36
7
16
30
35
33
12
27
24
34
13
2
30
31
37
39
6
38
15
32
25
PGM
Item
●
◆
●
◆
1
2
3
4
5
6
7
8
9
10
11
12
13
14
15
16
17
18
19
20
21
22
23
24
25
26
27
28
29
30
31
32
33
34
35
36
37
Part No.
2811557
Qty.
Description
1
Serial Numbers/Notes
Frame, L.H.
337677
1 • Seal, Oil
2811124
1 • Stud, Handle
336962
1 • Seal, Oil
500534
2 • Bearing Cup and Cone
545940
2 • Bushing
365753
1 • Seal, Grease
303490
1 • Bearing
307959
1 • Washer
446116
1 • Lockwasher, #10 Medium
403912
1 • Screw, #10-24 x 5/8” Truss Head
2500463
1 • Gear, Internal
461165
3 • Pin, 5/32 x 1/2” Groove, Type 1
472005
1 Plug, 3/8 Pipe, Headless
434028
1 Screw, 1/4-20 x 3/4” Soc Head
446130
1 Lockwasher, 1/4 Heavy
106790
1 Guide, Chain
325654
1 Collar
461173
1 Pin, 5/32 x 1” Groove, Type 1
503448
1 Sprocket, Reel
304743
1 • Bushing
304745
1 Washer
304746
1 Clutch, Reel
463113
2 Key, 3/4 x 3/16 Morton
1004944
1 Guide, Chain
2500020
1 Planetary Gear Set Spider
463017
1 Key, Woodruff #9
415007
1 Screw, 5/16-18 x 3/8” Set , Soc Hd
428511
1 Screw, 5/16-18 x 5/16” Set , Soc Hd
2500024
3 Pinion, Idler
304718
3 • Bushing
131832
1 Drive Pinion and Socket
304730
1 • Bushing
307374
AR Washer, Thrust
458013
1 Ring, Retaining
364079
1 Chain, Reel to Traction Shaft
500326
1 Chain, PTO to Reel
470503
1 • Link, Chain
38
453023
1 Washer, 1/4 Flat
39
306828
AR Washer, Thrust
40
471214
1 Fitting, Grease
Required for proper sealing of Left Side Frame
473194
AR Loctite Primer
473130
AR Loctite 242 (Blue)
6 oz Aerosol Can
> Change from previous revision
8
PGM
Serial No. All
5.1 Right Side Frame
16
15
14
13
8
17
9
11
10
12
18
20
4
3
7
4
2
6
5
9
1
21
13
19
PGM
Item
◆
◆
1
2
3
4
5
6
7
8
9
10
11
12
13
14
15
16
17
18
19
20
21
Part No.
Qty.
Description
2811558
1
Frame, R.H.
337677
336962
500534
2811124
545940
307377
471223
471214
363047
453020
444713
304747
348847
446130
434028
434041
1001308
3002907.7
343667
445798
1
1
2
1
1
1
1
1
1
1
1
2
1
4
4
4
1
1
1
1
• Seal, Oil
• Seal, Oil
• Bearing Cup and Cone
• Stud, Handle
• Bushing
Spacer, Shaft
Fitting, Grease
Fitting, Grease
Spring, Tension
Flat Washer, 5/8
Locknut, 5/8-16 Center Jam
Gasket
Cover, Reel Bearing
Lockwasher, 1/4 Heavy
Screw, 1/4-20 x 3/4” Socket Hd
Screw, 1/4-20 x 3/4” Flat Socket Hd
Bracket, R.H. Brake Mounting
Housing, Bearing
Bearing, Ball
Locknut, 3/4-16 Stover
473130
AR
Serial Numbers/Notes
Loctite 242 (Blue)
> Change from previous revision
10
PGM
Serial No. All
6.1 Cross Bars, Reel and BedKnife
29
28
37
35 16
31/33
3
4
34
39
21
38
12
36
22
1
26
39
13 8
15
17
11
19
25
24
18
12
22
14
23
20
7
6
4
3
5
Standard Bedknife Options
30
16
503477
503478
503479
5002887
9
32
2
10
40
27
11
22" High Profile
22" Low Profile
22" Tournament
22" Special Tournament
Optional MagKnife Bedknife
4131369
4131001
4131370
4131003
4131005
22" High Profile
22" Low Profile
22" Tournament
22" Special Tournament
22” Medium Section
PGM
Item
●▲
●
▲
1
2
3
4
5
6
7
8
9
10
11
12
13
14
15
15
16
17
18
19
20
21
22
23
24
25
26
27
28
29
30
31
32
33
34
35
36
37
38
39
40
Part No.
Qty.
Description
122544
1
122545
400266
446142
304740
443114
446148
363328
343732
5002605
400106
348849
446130
4139463
500627
4130298
446136
443112
See Chart
3009138
365502
365501
454017
332516
307456
307360
350626
307373
343616
3005692
400184
3008438
103399
3008439
441677
452006
NS
443106
352737
443102
461181
1
8
8
1
2
2
1
1
1
1
AR
1
1
1
1
4
2
1
13
1
1
2
2
4
2
4
1
2
2
2
1
1
1
2
2
1
2
2
3
1
Serial Numbers/Notes
Cross Bar, Front
Cross Bar, Rear
Screw, 3/8-16 x 1-1/2”
Lockwasher, 3/8 Heavy
Tie Rod, Front
Nut, 7/16-14 Hex
Lockwasher, 7/16
Strap, Grass Shield
Bracket, Support
Reel, 22” 11 Blade
Screw, 1/4-20 x 5/8” Hex Head
Shim
Lockwasher, 1/4 Heavy
Shield, Grass
Shoe, Bedknife
Bedknife Backing, PGM MagKnife
Lockwasher, 5/16 Heavy
Nut, 3/8-24 Hex
Bedknife
Screw, 1/4-20 x 1/2” Flat Head
Screw, L.H. Bedknife Mounting
Screw, R.H. Bedknife Mounting
Washer, Shakeproof Cone
Rod, Bedknife Adjusting
Cup, Bedknife Adjusting Spring
Spring, Bedknife Adjusting
Nut, Bedknife Adjusting
Support, Spring
Stud
Nut, Roller Adjusting
Screw, 5/16-18 x 3/4” Hex Head
Bracket, R.H. Roller
Support Rod and Foot Rest
Bracket, L.H. Roller
Bolt, 5/16-18 x 1-1/2” Carriage
Washer, 5/16 Flat
Plate, Serial
Nut, 5/16-18 Hex
Screw, 1/4-20 x 7/8” Set, Sq Head
Nut, 1/4-20 Hex
Pin, 3/16 x 3/4” Groove
Required for proper sealing of Left Side Frame
473194
AR Loctite Primer
473195
AR Loctite 518 Gasket Eliminator
Optional MagKnife
Apply Never Sieze to bolt
Apply Never Sieze to bolt
6 oz Aerosol Can
15 oz cartridge
> Change from previous revision
12
PGM
Serial No. All
7.1 Engine and Clutch
Part of
Engine
22
31
28
29
19
21
16
20
14
Part of
Engine
Throttle Cable Installation
27
15
17
8
1
11
5
29
23
24
18
4
11
10
6
13
27
26
25
12
3
9
7
13
2
PGM
Item
1
2
3
4
5
6
7
8
9
10
11
12
13
14
15
16
17
18
19
20
21
22
23
24
25
26
27
28
29
30
31
Part No.
303873
309756
365658
400194
306369
434029
441677
443106
443820
446130
446136
446154
463003
503532
320774
4108643
4135990
4136546
4136549
4136554
4137299
400218
400108
444708
2811846
4148539
REF
REF
453009
4147695
Qty.
Description
1
Serial Numbers/Notes
Washer
1 Sprocket,
4 Spacer, Engine Mounting
4 Screw, 5/16-18 x 1-3/4” Hex Head
1 Screw, 5/16-24 x 1” Hex Head
3 Screw, 1/4-20 x 1” Socket Head
4 Carriage Bolt, 5/16-18 x 1-1/2”
4 Nut, 5/16-18 Hex
1 Nut, 1/2-20 Hex Jam
3 Lockwasher, 1/4 Heavy
8 Lockwasher, 5/16 Heavy
1 Lockwasher, 1/2 Heavy
1 Key, 1/2 x 1/8” Woodruff
1 Engine, 4HP Honda
1 • Key, 3/16 x1-1/2” Square
1 Spring, Throttle Plate
1 Torque Clutch
1 Clutch Shaft, PGM
1 Guide, Cable
1 Collar, Cable Stop
1 • Set Screw, #6-32
1 Set Screw, #6-32 x 3/16” Cup
2 Screw, 5/16-24 x 1/2” Hex Head
4 Screw, 1/4-20 x 3/4” Hex Head
4 Locknut, 1/4-20 Center
1 Engine Base
1 Cover, Clutch
1 Cable, Bail Throttle
1 Cable, Paddle Throttle
2 Flat Washer, 5/16
1 Throttle Cover
Engages at 2000 RPM
Includes Decals
Includes Decal
See 2.1
See 2.1
Includes Decal
> Change from previous revision
14
PGM
Serial No. All
8.1 Traction Rollers
12
11
9
7
6
15
4
5
2
8
14
13
20
16
3
11
1
21
5
10
3
19
6
15
2
4
8
15
7
17
18
PGM 22
Item
1
2
3
4
5
6
7
8
9
10
11
12
13
14
15
16
17
18
19
20
21
Part No.
Qty.
Description
3004026
1
Shaft, Roller
163801
325656
344745
202947
308030
103862
308033
403723
444782
338394
471214
400190
446136
163523
471222
304569
366648
364171
308028
365307
2
2
2
2
2
2
2
6
6
2
2
6
6
2
2
2
2
8
1
1
Gear, Differential
• Bushing
Washer, Thrust
Pinion
Washer, Pinion Thrust
Housing, Differential
• Bushing
Screw, #10-24 x 5/8” Hex Head
Locknut, #10-24 Center
Hub, Roller
FItting, Grease
Screw, 5/16-18 x 1-1/4” Hex Head
Lockwasher, 5/16 Heavy
Roller, Traction
• Fitting, Grease
• Bushing
• Seal, Grease
Bolt, Special
Shaft, Pinion
Hub
Serial Numbers/Notes
> Change from previous revision
16
PGM
Serial No. All
9.1 Transport Wheels
12
9
10
11
1/4
8
5
17
13
3
16
2
3
5
6
7
15
18
22
21
22
14
19 20
23
17
PGM
Item
1
2
3
4
5
6
7
8
9
10
11
12
13
14
15
16
17
18
19
20
21
22
23
Part No.
Qty.
Description
1000477
1
Hub, L.H. Wheel
338766
366705
1000476
366697
366718
445801
361451
164056
366742
415513
461389
3004621
1
2
1
4
1
1
1
2
2
2
2
2
• Bearing
• Seal
Hub, R.H. Wheel
Bushing
Collar, Latching
Nut, 5/8-18 Hex Jam Lock
Washer
Band, Brake
Pin, Brake Band
Screw, 1/4-20 x 1/2” Socket Set
Pin, 7/32 x 1-1/4” Roll
Sleeve, Clutch
62293
5002905
360111
554847
434049
271920
366719
366716
366704
452004
444718
1
1
1
1
3
1
1
3
1
6
3
Pneumatic Transport Tires
• Wheel
• Valve
• Tire
• Screw, 5/16-18 x 2” Socket Head
• Spacer, Wheel
• Latch
• Spacer
• Spring
• Flat Washer, 5/16
• Locknut, 5/16-18 Center
Serial Numbers/Notes
(Includes 2 and 3)
Optional Kit
> Change from previous revision
18
Equipment from Jacobsen is built to exacting
standards ensured by ISO 9001 and ISO 14001
registration at all of our manufacturing locations.
A worldwide dealer network and factory trained
technicians backed by Textron Parts Xpress
provide reliable, high-quality product support.
Calidad, Rendimiento y Asistencia de Clase Mundial
El equipo de Jacobsen está construido exactamente
conforme a las normas establecidas por el registro de la
ISO 9001 e ISO 14001 en todas nuestras plantas de fabricación.
Una red mundial de distribuidores y técnicos capacitados
en fábrica y respaldados por Textron Parts Xpress
que ofrece asistencia de producto segura y de alta calidad.
Textron Golf, Turf & Specialty Products
PO Box 7708, Charlotte, NC 28241-7708
www.ttcsp.com