1
GEBRAUCHSANWEISUNG
69 0450 20 - TELE PACK VET X
INSTRUCTION MANUAL
69 0450 20 - TELE PACK VET X
MANUAL DE INSTRUCCIONES
69 0450 20 - TELE PACK VET X
I
11/2011
V 1.0.0
II
Wichtiger Hinweis für die
Benutzer von KarL StOrZ
Geräten
important information for users of KarL StOrZ devices
indicaciones importantes para
los usuarios de aparatos
KarL StOrZ
1
1
1
Wichtiger Hinweis für die
Benutzer von KARL STORZ
Geräten
Important information for
users of KARL STORZ devices
Indicaciones importantes
para los usuarios de
aparatos KARL STORZ
Vielen Dank für Ihr Vertrauen in den Namen
KARL STORZ. Auch in diesem Produkt steckt
unsere ganze Erfahrung und Sorgfalt. Sie und
Ihr Haus haben sich damit für ein modernes und
hochwertiges Gerät der Firma KARL STORZ entschieden.
Die vorliegende Anleitung soll helfen, den
TELE PACK VET X richtig anzuwenden und desinfizierend zu reinigen. Alle notwendigen Einzelheiten
und Handgriffe werden anschaulich erklärt. Bitte
lesen Sie deshalb diese Anleitung sorgfältig durch;
bewahren Sie sie zum etwaigen Nachlesen sorgfältig auf.
Thank you for your expression of confidence in
the KARL STORZ brand name. Like all of our
other products, this product is the result of years
of experience and great care in manufacture. You
and your organization have decided in favor of
a modern, high-quality item of equipment from
KARL STORZ.
This instruction manual is intended to serve as
an aid in the proper handling, disinfection, and
cleaning of the TELE PACK VET X. All the necessary details and actions are clearly explained. We
thus ask that you read this manual carefully before
proceeding to work with the instrument. Keep this
manual available for ready reference.
Agradecemos la confianza que ha depositado en la
marca KARL STORZ. Este producto, como el resto
de los que fabricamos, es el resultado de nuestra
amplia experiencia y capacidad técnicas. Con esta
adquisición, tanto usted como su institución se han
decidido por un producto KARL STORZ de gran
precisión, alta calidad y tecnología vanguardista.
Esta Instrucción contiene todas las indicaciones
necesarias para la aplicación, limpieza y desinfección correctas del TELE PACK VET X. Con ese
fin, se explican detalladamente todas las manipulaciones necesarias. Recomendamos su lectura
detenida y colocación en un lugar visible cercano al
aparato para facilitar la consulta.
KARL STORZ arbeitet ständig an der
Weiterentwicklung aller Produkte. Bitte haben Sie
Verständnis dafür, dass deshalb Änderungen in
Form, Ausstattung und Technik möglich sind. Aus
den Angaben, Abbildungen und Beschreibungen
dieser Anleitung können daher keine Ansprüche
hergeleitet werden.
KARL STORZ is constantly working on the further
development of all products. Please appreciate that changes to the scope of supply in form,
equipment and technology may occur for this
reason. Therefore, no claims may be deduced from
the information, figures, and descriptions in this
manual.
KARL STORZ trabaja constantemente en el desarrollo de todos sus productos. Por este motivo,
les rogamos comprendan que pueden producirse
modificaciones en el suministro, tanto en cuanto
a forma, como a equipamiento y técnica. De las
indicaciones, ilustraciones y descripciones de esta
Instrucción no emana por ello derecho alguno.
© Alle Produktabbildungen, Produktbeschreibungen und Texte sind geistiges Eigentum der
KARL STORZ GmbH & Co. KG
Weiterverwendungen und
Vervielfältigung durch Dritte bedürfen
der ausdrücklichen Genehmigung der
KARL STORZ GmbH & Co. KG
Alle Rechte vorbehalten.
© All product pictures, photos and descriptions and texts are the intellectual property of
KARL STORZ GmbH & Co. KG
Their use for other purposes and reproduction
by third parties require the express approval of
KARL STORZ GmbH & Co. KG.
All rights reserved.
© Todas las ilustraciones, descripciones y textos
sobre este producto son propiedad intelectual
de KARL STORZ GmbH & Co. KG
La utilización y reproducción por parte de terceros precisa de la expresa autorización por
parte de KARL STORZ & Co. KG
Reservados todos los derechos.
Nur für den Veterinärgebrauch
For veterinary use only
Sólo para uso veterinario
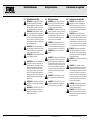
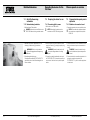
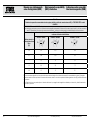
Geräteabbildungen
Photographs of the unit
imágenes del equipo
2
2
2
Geräteabbildungen
T
Q
III
R
W E
Nur für den Veterinärgebrauch
Photographs of the unit
}
Y
For veterinary use only
{
Imágenes del equipo
P O
I
U
Sólo para uso veterinario
IV
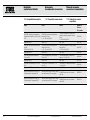
Bedienelemente, anzeigen,
anschlüsse und ihre Funktion
Controls, displays, connectors,
and their uses
Elementos de mando,
indicadores, conexiones
y sus funciones
3
3
3
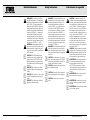
Bedienelemente, Anzeigen,
Anschlüsse und ihre
Funktion
Controls, displays, connectors, and their uses
Elementos de mando,
indicadores, conexiones
y sus funciones
Q
Funktionstasten
Q
Function buttons
Q
Teclas de función
W
Ein/Aus Taste
W
On/Off switch
W
Tecla de CONEXION/
DESCONEXION
E
Hilfe-Taste
E
Help button
E
Tecla de ayuda
R
Sector lateral de conexiones
(“7. 3 Sinopsis de conexiones” en la
pág. 11)
R
Seitlicher Anschlussbereich
(„7. 3 Anschlussübersicht“ auf Seite
11)
R
Lateral connection panel
(‘7. 3 Overview of connections’ on
page 11)
T
Steuerkreuz
T
Arrow buttons
T
Cruceta de mandos
Y
Abdeckklappe für Lampenwechsel
Y
Cover for changing lamp
Y
Tapa de cobertura para cambio de
la lámpara
U
VESA 100 Halterung
U
VESA 100 holder
U
Soporte VESA 100
I
Potenzialausgleichsanschluss
I
Potential equalization connector
I
Conexión equipotencial
O
Netzanschlussbuchse
O
Power cord socket
O
Conector de la red
P
Netzsicherungshalter
P
Fuse holder
P
Portafusible de la red
{
Hinterer Anschlussbereich
(„7. 3 Anschlussübersicht“ auf Seite
11)
{
Rear connection panel
(‘7. 3 Overview of connections’ on
page 11)
{
Sector posterior de conexiones
(“7. 3 Sinopsis de conexiones” en la
pág. 11)
}
Kabelaufwicklung
}
Cable winding
}
Dispositivos para enrollar el cable
Nur für den Veterinärgebrauch
For veterinary use only
Sólo para uso veterinario
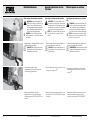
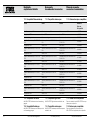
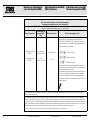
Symbolerläuterungen
Symbols employed
Explicación de los símbolos
4
4
4
Symbolerläuterungen
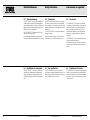
SD
ACC
V
Symbols employed
Explicación de los símbolos
Gebrauchsanweisung beachten
bzw. Aufruf der Kurzanleitung!
Observe the instruction manual or
refer to the ready reference guide!
Observe el Manual de instrucciones o las indicaciones de las
Instrucciones resumidas.
Vorsicht
Caution
Advertencia:
Verbrennungsgefahr
Risk of burns
Peligro de quemaduras
Standby
Standby
Standby
Status: Ein
Status: On
Estado: Con.
Anwendungsteil des Typs CF nach
IEC 60601-1
Type C applied part according to
IEC 60601-1
Pieza de aplicación del tipo CF
según CEI 60601-1
Lichtleiteranschluss
Light cable connection
Conexión para portaluz
Anwendungsteil des Typs BF nach
IEC 60601-1
Type BF applied part according to
IEC 60601-1
Pieza de aplicación del tipo BF
según CEI 60601-1
Farbvideokamera
Color video camera
Cámara de vídeo a color
Mikrofoneingang seitlich
Lateral microphone input
Entrada lateral para micrófono
USB Anschluss
SD-Karteneinschub
SD
USB port
SD card slot
SD
Conexión USB
Unidad de tarjeta SD
Conector para el interruptor de
pedal
Anschlussbuchse für Fußschalter
Footswitch socket
Line-Out
Line out
Line-Out
Line-In
Line in
Line-In
Mikrofoneingang hinten
Rear microphone input
Anschlussbuchse für die
Fernbedienung von Zusatzgeräten
ACC
Connection socket for the remote
control of peripheral units
Service-Schnittstelle
Service interface
Potentialausgleichsanschluss
Potential equalization
connector
Vermeidung von
Umweltverschmutzung durch elektronische Geräte (China RoHS)
Electronic information product pollution control (China RoHS)
Nur für den Veterinärgebrauch
For veterinary use only
Entrada posterior para micrófono
ACC
Conector para el control remoto de
aparatos accesorios
Interfaz para el Servicio Técnico
Conexión equipotencial
Control de la contaminación causada por productos de información
electrónica (directiva RoHS china)
Sólo para uso veterinario
inhalt
Contents
Contenido del manual
1
Wichtiger Hinweis für die Benutzer
von KARL STORZ Geräten....................II
1
Important information for users of
KARL STORZ devices............................II
1
Indicaciones importantes para los
usuarios de aparatos KARL STORZ ....II
3
Bedienelemente, Anzeigen,
Anschlüsse und ihre Funktion .............IV
3
Controls, displays, connectors, and
their uses ...............................................IV
3
Elementos de mando, indicadores,
conexiones y sus funciones ................IV
4
Symbolerläuterungen ............................V
4
Symbols employed ................................V
4
Explicación de los símbolos .................V
5
Gerätebeschreibung ..............................4
5
Description of the device ......................4
5
Descripción del aparato........................4
6
6. 1
Sicherheitshinweise ..............................5
Erklärung zu Warn- und
Vorsichtshinweisen ...................................5
Sicherheitsvorschriften ..............................6
Zweckbestimmung ...................................8
Qualifikation des Anwenders .....................8
Sicherheitsmaßnahmen am Aufstellort ......9
Sicherheitsmaßnahmen beim Einsatz
des Gerätes ..............................................9
6
6. 1
6. 2
6. 3
6. 4
6. 5
Safety instructions.................................5
Explanation of warnings and cautions .......5
Safety instructions ....................................6
Intended use.............................................8
User qualification ......................................8
Safety precautions at the site of
installation .................................................9
Safety precautions when operating the
device .......................................................9
6
6. 1
Instrucciones de seguridad ..................5
Explicación referente a las indicaciones
de alarma y advertencia............................5
Indicaciones de seguridad ........................6
Uso previsto .............................................8
Cualificación del usuario ...........................8
Medidas de seguridad en el lugar de
emplazamiento .........................................9
Medidas de seguridad durante el
empleo del equipo ....................................9
6. 2
6. 3
6. 4
6. 5
6. 6
7
7. 1
7. 2
7. 3
7. 4
7. 4. 1
7. 4. 2
7. 4. 3
7. 4. 4
7. 5
7. 5. 1
7. 5. 2
7. 5. 3
7. 5. 4
7. 5. 5
7. 6
7. 6. 1
7. 7
7. 7. 1
7. 7. 2
1
Erstinbetriebnahme .............................10
Auspacken .............................................10
Grundausstattung ...................................10
Anschlussübersicht .................................11
Gerät für Anwendung
vorbereiten..............................................13
Netzverbindung herstellen.......................13
Kamerakopf/Videoendoskop
anschließen.............................................14
Weißabgleich durchführen ......................17
Funktionstest ..........................................17
Zubehör anschließen ..............................18
Anschließen von USB-Geräten ...............18
Anschließen einer SD-Karte ....................18
Anschließen eines Fußschalters ..............19
Anschließen eines externen Monitors ......19
Externe Videoquelle ................................19
Lichtquelle ein-/ausschalten ....................20
Einschalten .............................................20
Pumpe ein-/ausschalten .........................21
Einschalten .............................................21
Ausschalten ............................................21
Nur für den Veterinärgebrauch
6. 6
7
7. 1
7. 2
7. 3
7. 4
7. 4. 1
7. 4. 2
7. 4. 3
7. 4. 4
7. 5
7. 5. 1
7. 5. 2
7. 5. 3
7. 5. 4
7. 5. 5
7. 6
7. 6. 1
7. 7
7. 7. 1
7. 7. 2
Operating the device for the first
time .......................................................10
Unpacking the equipment .......................10
Basic equipment .....................................10
Overview of connections.........................11
Preparing the device for use ...................13
Connecting light to power.......................13
Connecting the camera head/
videoscope .............................................14
White balance .........................................17
Test for proper functioning......................17
Connecting the accessories....................18
Connecting USB devices ........................18
Connecting an SD card ..........................18
Connecting the footswitch ......................19
Connecting an external monitor ..............19
External Video Source ............................19
Turning the light source on/off ...............20
Turning on ..............................................20
Turning the pump on/off .........................21
Turning on ..............................................21
Turning off ..............................................21
For veterinary use only
6. 2
6. 3
6. 4
6. 5
6. 6
7
7. 1
7. 2
7. 3
7. 4
7. 4. 1
7. 4. 2
7. 4. 3
7. 4. 4
7. 5
7. 5. 1
7. 5. 2
7. 5. 3
7. 5. 4
7. 5. 5
7. 6
7. 6. 1
7. 7
7. 7. 1
7. 7. 2
Primera puesta en marcha ................10
Desembalaje ...........................................10
Equipo básico.........................................10
Sinopsis de conexiones ..........................11
Preparación del aparato para la
aplicación ...............................................13
Establecer la conexión a la red. ..............13
Conexión del cabezal de la cámara/
videoendoscopio ....................................14
Realizar el balance de blancos................17
Prueba de funcionamiento ......................17
Conexión de los accesorios ....................18
Conexión de aparatos USB ....................18
Conexión de una tarjeta SD ....................18
Conexión de un interruptor de pedal ......19
Conexión de un monitor externo.............19
Fuente de vídeo externa .........................19
Conexión/desconexión fuente de luz ......20
Conexión ................................................20
Conexión/desconexión de la bomba.......21
Conexión ................................................21
Desconexión ...........................................21
Sólo para uso veterinario
inhalt
Contents
Contenido del manual
8
8. 1
8. 1. 1
8. 1. 2
8. 1. 3
8. 1. 4
8. 1. 5
8. 2
8. 2. 1
8
8. 1
8. 1. 1
8. 1. 2
8. 1. 3
8. 1. 4
8. 1. 5
8. 2
8. 2. 1
8
8. 1
8. 1. 1
8. 1. 2
8. 1. 3
8. 1. 4
8. 1. 5
8. 2
8. 2. 1
8. 2. 2
8. 2. 3
8. 2. 4
8. 2. 5
8. 3
8. 3. 1
8. 3. 2
8. 3. 3
8. 3. 4
8. 4
8. 4. 1
8. 4. 2
9
9. 1
9. 2
9. 3
9. 4
9. 5
9. 5. 1
9. 5. 2
9. 6
9. 7
9. 8
2
Bedienhinweise ....................................22
Grundsätzliches zur Bedienung ..............22
Navigationstasten ...................................22
Funktionstasten ......................................22
Kamerakopftasten ..................................22
Fußschalter .............................................23
Tastatur und Maus .................................23
Hauptscreen ...........................................24
Übersicht der Funktionstasten des
Hauptscreens .........................................25
Menü ......................................................26
Voreinstellungen .....................................27
Einstellungen ..........................................28
Infoleiste .................................................30
Behandlungsübersicht ............................31
Übersicht der Funktionstasten der
Behandlungsübersicht ............................32
Bilder Drucken ........................................33
Bilder/Videos löschen: ............................33
Bilder/Videos umbenennen: ....................33
Übersicht Datenbrowser .........................34
Übersicht der Funktionstasten des
Datenbrowsers .......................................35
Behandlungen über Datenbrowser
anzeigen .................................................35
Instandhaltung .....................................36
Sicherungswechsel .................................36
Lampe wechseln ....................................37
Lampenstundenzähler zurücksetzen .......38
Reinigung und Desinfektion ....................38
Wartung und
Sicherheitsüberprüfung ...........................39
Wartung..................................................39
Sicherheitsüberprüfung ...........................39
Instandsetzung .......................................41
Wichtige Hinweise ..................................41
Entsorgung .............................................42
Nur für den Veterinärgebrauch
8. 4. 2
Operating instructions ........................22
Basic information on operation ...............22
Navigation keys ......................................22
Function buttons.....................................22
Camera head buttons .............................22
Footswitch ..............................................23
Keyboard and mouse .............................23
Main screen ............................................24
Overview of the main screen’s function
buttons ...................................................25
Menu ......................................................26
Presets ...................................................27
Settings ..................................................28
Info bar ...................................................30
Treatment overview ................................31
Overview of the treatment overview’s
function buttons......................................32
Printing images .......................................33
Deleting images/videos: ..........................33
Renaming images/videos: .......................33
Data browser overview ...........................34
Overview of the data browser’s function
buttons ...................................................35
Display treatments via data browser .......35
9
9. 1
9. 2
9. 3
9. 4
9. 5
9. 5. 1
9. 5. 2
9. 6
9. 7
9. 8
Service and repair ...............................36
Fuse replacement ...................................36
Replacing the lamp .................................37
Resetting the lamp runtime counter ........38
Cleaning and disinfection ........................38
Maintenance and safety check ...............39
Maintenance ...........................................39
Safety check ...........................................39
Servicing and repair ................................41
Important information..............................41
Disposal..................................................42
8. 2. 2
8. 2. 3
8. 2. 4
8. 2. 5
8. 3
8. 3. 1
8. 3. 2
8. 3. 3
8. 3. 4
8. 4
8. 4. 1
For veterinary use only
8. 2. 2
8. 2. 3
8. 2. 4
8. 2. 5
8. 3
8. 3. 1
8. 3. 2
8. 3. 3
8. 3. 4
8. 4
8. 4. 1
8. 4. 2
9
9. 1
9. 2
9. 3
9. 4
9. 5
9. 5. 1
9. 5. 2
9. 6
9. 7
9. 8
Instrucciones operativas ....................22
Principios operativos básicos..................22
Teclas de navegación .............................22
Teclas de función ...................................22
Botones del cabezal de la cámara ..........22
Interruptor de pedal ................................23
Teclado y ratón.......................................23
Pantalla principal.....................................24
Sinopsis de las teclas de función de la
pantalla principal .....................................25
Menú: .....................................................26
Preajustes ...............................................27
Ajustes....................................................28
Barra de información ..............................30
Sinopsis de tratamientos ........................31
Sinopsis de las teclas de función de la
sinopsis de tratamientos .........................32
Imprimir imágenes ..................................33
Borrar imágenes/vídeos: .........................33
Cambiar el nombre de imágenes/
vídeos: ....................................................33
Sinopsis del navegador de datos ............34
Sinopsis de las teclas de función del
navegador de datos................................35
Indicar los tratamientos a través del
navegador de datos................................35
Mantenimiento .....................................36
Cambio de fusibles .................................36
Cambio de la lámpara ............................37
Reponer a cero el contador de horas
de la lámpara ..........................................38
Limpieza y desinfección ..........................38
Mantenimiento y control técnico de
seguridad ...............................................39
Mantenimiento ........................................39
Control técnico de seguridad ..................39
Reparaciones..........................................41
Observaciones importantes ....................41
Gestión de desecho ...............................42
Sólo para uso veterinario
inhalt
Contents
Contenido del manual
10
10. 1
10. 2
10. 3
10. 4
Technische Beschreibung ..................43
Fehlersuchliste ........................................43
Technische Daten ...................................46
Normenkonformität .................................48
Richtlinienkonformität ..............................48
10
10. 1
10. 2
10. 3
10. 4
Technical description ..........................43
Troubleshooting ......................................43
Technical data ........................................46
Standard compliance..............................48
Directive compliance...............................48
10
10. 1
10. 2
10. 3
10. 4
Descripciones técnicas.......................43
Localización de errores ...........................43
Datos técnicos........................................46
Conformidad con las normas..................48
Conformidad con la directiva ..................48
11
Ersatzteile,
empfohlenes Zubehör .........................49
Ersatzteilliste ...........................................49
Kompatible Kameraköpfe .......................50
Kompatible Videoendoskope ..................51
Kompatible Lichtkabel ............................51
Kompatible Endoskope...........................51
Empfohlenes Zubehör.............................52
11
Spare parts, recommended
accessories ..........................................49
List of spare parts ...................................49
Compatible camera heads ......................50
Compatible videoscopes ........................51
Compatible light cable ............................51
Compatible endoscopes .........................51
Recommended accessories ...................52
11
Piezas de repuesto, accesorios
recomendados .....................................49
Piezas de repuesto .................................49
Cabezales de cámara
compatibles ............................................50
Videoendoscopios compatibles ..............51
Cables de luz compatibles ......................51
Endoscopios compatibles .......................51
Accesorios recomendados .....................52
11. 1
11. 2
11. 3
11. 4
11. 5
11. 6
12
3
Hinweise zur elektromagnetischen
Verträglichkeit (EMV) ...........................53
Nur für den Veterinärgebrauch
11. 1
11. 2
11. 3
11. 4
11. 5
11. 6
12
Electromagnetic compatibility (EMC)
information ...........................................53
For veterinary use only
11. 1
11. 2
11. 3
11. 4
11. 5
11. 6
12
Indicaciones sobre compatibilidad
electromagnética (CEM) .....................53
Sólo para uso veterinario
4
Gerätebeschreibung
Description of the device
Descripción del aparato
5
5
5
Gerätebeschreibung
Description of the device
Descripción del aparato
Der TELE PACK VET X ist ein revolutionäres Kombigerät und vereint die Funktionen
Beleuchtung, Bilddarstellung, Bildverarbeitung und
eine umfangreiche Behandlungsdokumentation in
einem kompakten System.
Der TELE PACK VET X ist mit den TELECAM
Kameraköpfen, dem Veterinär Kamerakopf und
KARL STORZ CCD basierten Videoendoskopen
kompatibel.
Das Gerät bietet zahlreiche Funktionen auf dem
neusten Stand der Technik. Hierzu zählen unter
anderem:
• Dokumentation der Behandlung auf USB
Speicher oder SD Karte
• Verbesserung von Kontrast und Bildschärfe
durch digitale Bildoptimierung und faseroptische
Filtermöglichkeiten für Fiberskope
• Digitaler Videoausgang zum Anschluss eines
externen Monitors
• Standbild-Funktion zum „Einfrieren“ des
Videobildes auf dem Bildschirm
• Digitaler Zoom
• 5 individuelle programmierbare Voreinstellungen
für verschiedene Ärzte oder Eingriffe
The TELE PACK VET X is a revolutionary combi
unit and combines the functions of illumination,
image orientation, image processing and a comprehensive treatment documentation program in
one compact system.
The TELE PACK VET X is compatible with the
TELECAM camera heads, the veterinary camera
head and KARL STORZ CCD-based videoscopes.
The unit offers numerous state-of-the-art functions.
These include:
• documentation of the treatment on USB stick or
SD card
• improved contrast and image sharpness thanks
to image optimization and fiberoptic filter
possibilities for fiberscopes.
• digital video output for connecting an external
monitor
• still image function for ‘freezing’ the video image
on the screen
• digital Zoom
• 5 individually programmable presets for different
physicians or interventions
El TELE PACK VET X es un revolucionario aparato
combinado que reúne las funciones de iluminación,
representación de imagen, procesamiento de imagen y una amplia documentación de tratamiento en
un sistema compacto.
El TELE PACK VET X es compatible con los cabezales de cámara TELECAM, el cabezal de la cámara para veterinaria y los videoendoscopios basados
en CCD de KARL STORZ.
El aparato ofrece numerosas funciones en su
versión técnica más moderna. Entre ellas pueden
enumerarse:
• Documentación del tratamiento en memoria USB
o tarjeta SD
• Mejora del contraste y la nitidez de la imagen
mediante optimización digital de la imagen y
posibilidades de filtraje por fibra óptica para
fibroscopios
• Salida digital de vídeo para la conexión de un
monitor externo
• Función de imagen fija para “congelar” la imagen
de vídeo en la pantalla
• Zoom digital
• 5 preajustes individualmente programables para
diferentes médicos o intervenciones quirúrgicas
Nur für den Veterinärgebrauch
For veterinary use only
Sólo para uso veterinario
Sicherheitshinweise
Safety instructions
instrucciones de seguridad
6
Sicherheitshinweise
6
Safety instructions
6
Instrucciones de seguridad
6. 1
Erklärung zu Warn- und
Vorsichtshinweisen
6. 1
Explanation of warnings and
cautions
6. 1
Explicación referente a las indicaciones de alarma y
advertencia
Die Bezeichnungen Warnung, Vorsicht und Hinweis
haben spezielle Bedeutungen. Wo immer sie in
der Gebrauchsanweisung verwendet werden,
sollte der nachfolgende Text genau gelesen werden, um einen sicheren und effizienten Betrieb
des Systems zu gewährleisten. Zur deutlicheren
Hervorhebung steht den Bezeichnungen zusätzlich
ein Piktogramm voran.
The words Warning, Caution, and Note convey
special meanings. Wherever they are used in
this manual, they should be carefully reviewed to
ensure the safe and effective operation of this system. To make the words stand out more clearly,
they are accompanied by a pictogram.
3
3
3
2
2
2
1
WARNUNG: Warnung macht auf eine Gefährdung des Patienten oder des Anwenders aufmerksam. Die Nichtbeachtung einer
Warnung kann Verletzungen des Patienten
oder Anwenders zur Folge haben.
VORSICHT: Vorsicht macht darauf aufmerksam, dass bestimmte Wartungs- oder
Sicherheitsmaßnahmen zu treffen sind, um
eine Beschädigung des Systems zu vermeiden.
HINWEIS: Hinweise enthalten spezielle Informationen zur Bedienung des Systems oder
sie erklären wichtige Sachverhalte.
3
5
WARNUNG: Lesen Sie diese Gebrauchsanweisung genau durch, bevor Sie das Gerät
in Betrieb nehmen. Lesen Sie besonders
das Kapitel Sicherheitshinweise aufmerksam
durch, um Gefährdungen Ihrer Patienten,
Ihres Personals, sowie Ihrer eigenen Person
zu vermeiden.
Nur für den Veterinärgebrauch
1
WARNING: A Warning indicates that the
personal safety of the patient or user may be
endangered. Failure to observe a Warning
could result in injury to the patient or user.
CAUTION: A Caution indicates that particular service procedures or precautions must
be followed to avoid possible damage to the
system.
NOTE: A Note indicates special information
about operating the system, or clarifies important issues.
3
WARNING: Read this instruction manual
thoroughly and be familiar with its contents
prior to using this device. Read the section
on safety instructions carefully to avoid putting your patients, personnel, or yourself at
risk.
For veterinary use only
Los términos Cuidado, Advertencia y Nota tienen
significados especiales. Cuando aparezcan en
alguna parte de este Manual, revise esa sección
cuidadosamente para asegurar la operación inocua
y eficaz del instrumento. Para destacar más claramente los términos, los mismos están precedidos
por un pictograma adicional.
1
CUIDADO: El término Cuidado llama la
atención sobre una situación de peligro para
el paciente o para el usuario. La inobservancia de este aviso podría conllevar lesiones
para el paciente o para el usuario.
ADVERTENCIA: El término Advertencia llama la atención sobre determinadas medidas
de mantenimiento o de seguridad que han
de llevarse a cabo a fin de evitar el deterioro
del sistema.
NOTA: Los párrafos denominados con el
término Nota contienen informaciones especiales para el manejo del sistema o aclaran
procedimientos importantes.
3
CUIDADO: Lea detenidamente este Manual
de instrucciones antes de usar el equipo.
Lea con especial atención el capítulo Instrucciones de seguridad, a fin de evitar poner en peligro a sus pacientes, a su personal
o a usted mismo.
Sólo para uso veterinario
Sicherheitshinweise
Safety instructions
instrucciones de seguridad
6. 2
6. 2
6. 2
3
3
3
3
3
3
3
6
Sicherheitsvorschriften
WARNUNG: Verletzungsgefahr für Patienten und/oder Anwender. Beim Betrieb in
explosionsgefährdeten Bereichen besteht
Explosionsgefahr. Betreiben Sie das Gerät
nie in explosionsgefährdeten Bereichen!
WARNUNG: Infektionsgefahr für Patienten.
Die Systemkomponenten: Versorgungsgerät, Tastatur, Maus, Printer und Speichermedien sind keine Patientenanwendungsteile.
Sie dürfen daher nicht in Berührung mit dem
Patienten kommen oder in der Patientenumgebung abgelegt werden.
WARNUNG: Prüfen Sie dieses Gerät vor jeder Anwendung auf seine Funktionsfähigkeit.
Sollte das Gerät bzw. die Lampe ausfallen,
ist ein Ersatzgerät bereitzuhalten.
WARNUNG: Gerät außerhalb der Reichweite von Patienten aufstellen.
WARNUNG: Das durch das Endoskop ausgestrahlte Licht kann am Lichtausgang, an
den Endflächen des Lichtkabels und an der
Spitze des Endoskops zu hohen Temperaturen führen. Um das Risiko von Verbrennungen gering zu halten, ist die Lichtquelle
immer mit der kleinstmöglichen Helligkeitseinstellung zu betreiben, die für die optimale
Beleuchtung des endoskopischen Gebiets
erforderlich ist.
WARNUNG: Zur Vermeidung von Embolien
Insufflation nur im physiologischen Rahmen
durchführen.
WARNUNG: Der TELE PACK VET X ist nur
für veterinär medizinische Anwendungen
geeignet. Eine Verwendung in der Humanmedizin ist nicht zulässig.
Nur für den Veterinärgebrauch
3
3
3
3
3
3
3
Safety instructions
WARNING: Danger of injury to the patient
and/or user. There is a risk of explosion if
used in explosive atmospheres. Never use
the device in explosive atmospheres!
WARNING: Risk of infection for patient. The
system components: supply unit; keyboard;
mouse; printer; and storage media are not
patient applied parts. They must thus not
come into contact with the patient or be
placed in the vicinity of the patient.
WARNING: Test this equipment prior to
each use to ensure that it functions correctly. A replacement device should be kept at
hand in case the device or lamp should fail.
WARNING: Keep the unit out of reach of
patients.
WARNING: The light which radiates through
the endoscope can lead to high temperatures at the light outlet, at the end faces of
the fiberoptic light cable, and at the tip of the
endoscope. To reduce the risk of burns, the
light source should always be operated at
the lowest possible brightness setting which
still allows optimal illumination of the endoscopic field.
WARNING: To avoid embolisms, only perform insufflation within physiological limits.
WARNING: The TELE PACK VET X is only
suitable for veterinary medical applications.
It may not be used in human medicine.
For veterinary use only
3
3
3
3
3
3
3
Indicaciones de seguridad
CUIDADO: Riesgo de lesiones para el
paciente y/o el usuario. Existe peligro de
explosión si se pone en servicio en zonas
expuestas a este riesgo. No ponga nunca
el aparato en servicio en zonas expuestas a
posibles explosiones.
CUIDADO: Riesgo de infección para el
paciente. Los componentes del sistema: La
unidad de alimentación, el teclado, el ratón,
la impresora y los soportes de datos no son
piezas de aplicación en el paciente. Por ello,
no han de entrar en contacto con el paciente ni ser depositados en sus inmediaciones.
CUIDADO: Compruebe la capacidad de
funcionamiento de este aparato antes de
cada aplicación. En caso de que el aparato
o la lámpara fallen, hay que tener disponible
un aparato de repuesto.
CUIDADO: Instale el equipo fuera del alcance de los pacientes.
CUIDADO: La luz irradiada a través del
endoscopio puede producir temperaturas
elevadas en la salida de luz, en las superficies finales del cable de luz y en la punta del
endoscopio. Para reducir el riesgo de quemaduras, utilice siempre la fuente de luz con
el ajuste de luminosidad mínimo posible que
resulte necesario para iluminar de manera
óptima el área endoscópica.
CUIDADO: Para evitar posibles embolias,
lleve a cabo la insuflación sólo dentro del
marco de valores fisiológicos.
CUIDADO: El TELE PACK VET X sólo es
adecuado para su aplicación en medicina
veterinaria. No está permitida su aplicación
en medicina humana.
Sólo para uso veterinario
Sicherheitshinweise
Safety instructions
instrucciones de seguridad
3
3
3
3
2
2
2
2
7
WARNUNG: Die an Analog- und Digitalschnittstellen (Signalein- und ausgänge) anschließbaren Zusatzgeräte müssen gemäß
der IEC 60601-1 für elektromedizinische
Geräte oder der IEC 60950 für Datenverarbeitungsgeräte aufgebaut und geprüft sein.
Außerdem müssen alle Kombinationen der
Systemnorm IEC 60601-1-1 entsprechen.
Wer zusätzliche Geräte an die Signaleinoder ausgänge anschließt, konfiguriert ein
medizinisches System und ist deshalb dafür
verantwortlich, dass das System die Anforderungen gem. IEC 60601-1-1 erfüllt.
WARNUNG: Verletzungsgefahr beim Umgang mit der Lampe. Im Extremfall kann die
Lampe explodieren. Tragen Sie beim Umgang mit der Lampe immer Schutzkleidung
und Schutzbrille.
VORSICHT: Für die Datensicherheit ist
es zwingend erforderlich, die Daten regelmäßig zu sichern. KARL STORZ kann für
Datenverluste keine Haftung übernehmen.
Die Verantwortung für die Daten liegt beim
Betreiber.
VORSICHT: Das Eindringen von Flüssigkeiten in das Gehäuse ist unbedingt zu vermeiden.
VORSICHT: Das Gerät nur mit der auf dem
Typenschild angegebenen Spannung betreiben.
VORSICHT: Nur Sicherungen mit den angegebenen Werten verwenden.
Nur für den Veterinärgebrauch
3
2
2
2
2
WARNING: The auxiliary devices which can
be connected up to the analog and digital
interfaces (signal inputs and outputs) must
be assembled and tested in accordance
with the IEC 60601-1 for medical electrical
equipment or the IEC 60950 for data processing equipment. In addition, all combinations must comply with the IEC 60601-1-1
system standard. Any person who connects
additional equipment to the signal inputs or
signal outputs configures a medical system,
and is therefore responsible for ensuring that
the system complies with the requirements
according to IEC 60601-1-1.
WARNING: Risk of injury when handling the
lamp. In extreme cases, the lamp could explode. When handling the lamp you should
wear protective clothing and safety goggles
at all times.
CAUTION: For data protection, it is essential to save the data regularly. KARL STORZ
cannot accept any liability for lost data. The
operator is responsible for the data.
CAUTION: Any liquids must be prevented
from entering the housing.
CAUTION: The device may only be operated at the voltage stated on the rating plate.
CAUTION: Use only fuses of the correct
rating.
For veterinary use only
3
2
2
2
2
CUIDADO: Los equipos accesorios conectados a las interfaces analógica y digital
(entradas y salidas de señales) han de haber
sido construidos y verificados conforme a la
norma CEI 60601-1 para aparatos electromédicos y, asimismo, la norma CEI 60950
para equipos de procesamiento de datos.
Asimismo, todas las configuraciones han de
cumplir con el estándar CEI 60601-1-1 para
sistemas. Cualquier persona que conecte
un equipo adicional a las entradas o salidas
de señales está configurando un sistema
médico y es, por lo tanto, responsable de
que el sistema cumpla con los requisitos del
estándar CEI 60601-1-1.
CUIDADO: Riesgo de lesiones al manipular
la lámpara. En un caso extremo, la lámpara
podría llegar a explotar. Mientras esté manipulando la lámpara, lleve siempre indumentaria de protección y gafas de protección.
ADVERTENCIA: Para la seguridad de los
datos es imprescindiblemente necesario
asegurar periódicamente los datos.
KARL STORZ no puede asumir ninguna
responsabilidad por la pérdida de datos. La
responsabilidad por los datos recae en el
usuario.
ADVERTENCIA: Evite a toda costa la infiltración de líquidos en la carcasa.
ADVERTENCIA: Conecte a la red sólo con
la tensión indicada en la placa de especificaciones.
ADVERTENCIA: Utilice únicamente fusibles
con los valores indicados.
Sólo para uso veterinario
Sicherheitshinweise
Safety instructions
instrucciones de seguridad
6. 3
6. 3
6. 3
Zweckbestimmung
The TELE PACK X is a combi-device comprising a
light source, camera control unit, documentation
unit, and display for illumination, image processing,
treatment documentation, and image orientation in
endoscopy.
The TELE PACK VET X is exclusively permitted for
veterinary medicine.
Use of the device in fields other than those indicated above is not allowed for safety reasons.
6. 4
6. 4
Qualifikation des Anwenders
Der TELE PACK VET X darf nur von Ärzten und
medizinischem Assistenzpersonal angewendet
werden, die über eine entsprechende fachliche
Qualifikation verfügen und am Gerät eingewiesen
sind.
8
Intended use
Der TELE PACK VET X ist ein Kombinationsgerät
bestehend aus Lichtquelle, Kamerakontrolleinheit,
Dokumentationseinheit und Display zur Beleuchtung,
Bildverarbeitung, Behandlungsdokumentation und
Bilddarstellung in der Endoskopie.
Der TELE PACK VET X ist ausschließlich für die
Veterinärmedizin zugelassen.
Die Verwendung des Gerätes anders als oben
bestimmt ist aus Sicherheitsgründen nicht zulässig.
Nur für den Veterinärgebrauch
User qualification
Uso previsto
El TELE PACK VET X es un aparato combinado
compuesto por una fuente de luz, una unidad de
control de la cámara, una unidad de documentación y un display para la iluminación, el procesamiento de imágenes, la documentación del
tratamiento y la representación de imágenes en
endoscopia.
El TELE PACK VET X está homologado exclusivamente para medicina veterinaria.
Por razones de seguridad, no está permitida la utilización del equipo de forma diferente de la arriba
prevista.
6. 4
Cualificación del usuario
The TELE PACK VET X may only be used by
physicians and medical assistants who have a corresponding specialized qualification and who have
been instructed in the use of the unit.
El TELE PACK VET X sólo puede ser empleado por
médicos y personal de asistencia médica que dispongan de una cualificación profesional adecuada
y que hayan recibido instrucciones sobre la utilización del aparato.
For veterinary use only
Sólo para uso veterinario
60°
Sicherheitshinweise
Safety instructions
instrucciones de seguridad
6. 5
6. 5
6. 5
Sicherheitsmaßnahmen am
Aufstellort
Medidas de seguridad en el
lugar de emplazamiento
Das Gerät darf nur in medizinisch genutzten
Räumen benutzt werden, deren elektrische
Anlagen nach den national gültigen Vorschriften
installiert sind.
Es ist nicht für den Betrieb in explosionsgefährdeten Bereichen bestimmt. Dies bedeutet u. a.:
• Bei Verwendung von leicht brennbaren und
explosionsfähigen Inhalations-Anästhesiemitteln
und deren Gemischen darf das Gerät nicht in der
dargestellten Gefahrenzone betrieben werden.
• Dieses gilt auch für leicht brennbare und explosionsfähige Chemikalien, z. B. Hautdesinfektionsund Flächenschnelldesinfektionsmittel.
Das Gerät ist mit einer Steckvorrichtung für
den Potenzialausgleich ausgerüstet. Diese nach
Maßgabe der national gültigen Vorschriften
anschließen.
The unit may only be used in medical rooms whose
electrical systems have been installed in accordance with applicable national regulations.
It is not intended for use in hazardous zones. This
means, among other things:
• Wherever easily combustible and explosive inhalation anesthetics and their mixtures are used,
the device may not be operated in the demarcated hazard zone.
• This also applies for easily combustible and
explosive chemicals, e.g., skin disinfectants and
fast-acting surface disinfectants.
The unit is equipped with a connector for attaching
a ground line. It should be connected up in accordance with the applicable national regulations.
El equipo sólo podrá ser utilizado en espacios
médicos cuya instalación eléctrica haya sido efectuada de acuerdo con las normas nacionales de
seguridad vigentes.
El mismo no está previsto para ser utilizado en
zonas expuestas a posibles explosiones. Esto significa, entre otras cosas:
• Si se emplean productos anestésicos para
inhalación fácilmente inflamables y explosivos
o sus mezclas, no podrá utilizarse el equipo en
las zonas calificadas como peligrosas por este
motivo.
• Esto es válido también para productos químicos
fácilmente inflamables y explosivos tales como,
p. ej., productos para desinfección de la piel y
desinfectantes rápidos para superficies.
El equipo está provisto de un enchufe para
conexión equipotencial. La conexión ha de efectuarse de acuerdo con las normas nacionales de
seguridad vigentes.
6. 6
6. 6
6. 6
Sicherheitsmaßnahmen beim
Einsatz des Gerätes
Der Anwender hat sich vor der Anwendung des
Gerätes von der Funktionssicherheit und dem
ordnungsgemäßen Zustand des Gerätes zu überzeugen.
HINWEIS: Beachten Sie auch die produktbegleitenden Unterlagen des verwendeten
Zubehörs.
1
9
Safety precautions at the site of
installation
Nur für den Veterinärgebrauch
Safety precautions when
operating the device
It is the user’s responsibility to make sure the
equipment is safe and operates properly before
use.
1
NOTE: The documentation accompanying
the accessories used must also be observed.
For veterinary use only
Medidas de seguridad durante
el empleo del equipo
El usuario ha de cerciorarse de la seguridad de
funcionamiento y el buen estado del equipo antes
de cada aplicación del aparato.
1
NOTA: Preste también atención a la documentación adjunta a los accesorios utilizados.
Sólo para uso veterinario
Erstinbetriebnahme
Operating the device for the
first time
Primera puesta en servicio
7
Erstinbetriebnahme
7
Operating the device for the
first time
7
Primera puesta en marcha
7. 1
Auspacken
7. 1
Unpacking the equipment
7. 1
Desembalaje
Entnehmen Sie den TELE PACK VET X und
das Zubehör vorsichtig aus der Verpackung.
Überprüfen Sie die Lieferung auf Vollständigkeit
und auf eventuelle Beschädigungen.
Sollte die Lieferung Anlass zur Reklamation geben,
so wenden Sie sich bitte umgehend an den
Hersteller oder Lieferanten. Wenn möglich, bewahren Sie die Originalverpackung auf, sie kann bei
einem Transport des Gerätes nützlich sein.
Carefully unpack the TELE PACK VET X and
remove the unit and its accessories from their
packaging. Check for missing items and evidence
of shipping damage.
Please file any complaints with the manufacturer or
supplier immediately. If possible, retain the original
packing materials for later use; these can come in
handy if the unit has to be transported.
Extraiga cuidadosamente el TELE PACK VET X
y sus accesorios del embalaje. Revise si el envío
está completo y compruebe posibles averías de
transporte.
En caso de reclamaciones, diríjase inmediatamente al fabricante o al proveedor. Es recomendable
guardar el embalaje original para volver a utilizarlo
en un posible transporte posterior del equipo.
7. 2
7. 2
7. 2
1
2
1
1
10
Grundausstattung
TELE PACK VET X 69 0450 20
Netzkabel
USB Stick
Gebrauchsanweisung
Nur für den Veterinärgebrauch
1
2
1
1
Basic equipment
TELE PACK VET X 69 0450 20
Power cord
USB stick
Instruction manual
For veterinary use only
1
2
1
1
Equipo básico
TELE PACK VET X 69 0450 20
Cable de red
Stick USB
Manual de instrucciones
Sólo para uso veterinario
Erstinbetriebnahme
Operating the device for the
first time
Primera puesta en servicio
7. 3
7. 3
7. 3
Anschlussübersicht
Overview of connections
Sinopsis de conexiones
OUT DVI IN
ACC
q
OUT DVI IN
i
ry
w
o
u
ACC
e
11
t
q
Fußschalter
q
Footswitch
q
Interruptor de pedal
w
Line-Out
w
Line out
w
Line-Out
e
Mikrofoneingang
e
Microphone input
e
Entrada para micrófono:
r
Line-In
r
Line in
r
Line-In
t
Anschlussbuchse für die
Fernbedienung von Zusatzgeräten
t
Connection socket for the remote
control of peripheral units
t
Conector para el control remoto de
aparatos accesorios
y
DVI Out (Externer Monitor)
y
DVI Out (external monitor)
y
DVI Out (monitor externo)
u
DVI In
u
DVI In
u
DVI In
i
4 x USB
i
4 x USB
i
4 x USB:
o
Service-Schnittstelle
o
Service interface
o
Interfaz para el Servicio Técnico
Nur für den Veterinärgebrauch
For veterinary use only
Sólo para uso veterinario
Erstinbetriebnahme
Operating the device for the
first time
Primera puesta en servicio
SD
p
[
]
SD
A
D
12
S
p
SD-Karteneinschub
p
SD card slot
p
Unidad de tarjeta SD
[
2 x USB
[
2 x USB
[
2 x USB:
]
Mikrofoneingang
]
Microphone input
]
Entrada para micrófono
A
Kameraanschluss
A
Camera connector
A
Conexión de cámara
S
Lichtanschluss
S
Light connector
S
Conexión de luz
D
Parkstutzen für Lichtkabel
D
Connector for light cable
D
Pitón de aparcamiento para cable
de luz
Nur für den Veterinärgebrauch
For veterinary use only
Sólo para uso veterinario
Erstinbetriebnahme
Operating the device for the
first time
Primera puesta en servicio
7. 4
7. 4
7. 4
Gerät für Anwendung
vorbereiten
Preparación del aparato para la
aplicación
7. 4. 1 Netzverbindung herstellen
7. 4. 1 Connecting light to power
7. 4. 1 Establecer la conexión a la red.
1. Gerät auf ebene Fläche stellen.
HINWEIS: Alternativ kann das Gerät an eine
VESA 100 Haltevorrichtung montiert werden.
1
1. Set the device on a flat surface.
NOTE: Alternatively, the device can be
mounted on a VESA 100 holding device.
1
1. Deposite el aparato sobre una superficie plana
NOTA: Como alternativa, el aparato puede
ser montado en un dispositivo de sujeción
VESA 100.
1
2. Netzkabel anschließen, Netzstecker bis zum
Anschlag in Netzbuchse O einschieben.
2. Insert the power cord into the device’s power
supply cord socket O, pushing the power plug
firmly home.
WARNING: Operate the device only with
the system voltage stated on the rating
plate.
3. Connect the potential equalization cable up to
the TELE PACK VET X’s potential connector pin
and connect it with the room’s potential equalization.
2. Conecte el cable de la red, introduzca el enchufe de la red hasta el tope en el conector de la
red O.
CUIDADO: ¡Conecte a la red sólo con la
tensión indicada en la placa de especificaciones!
3. Conecte el cable de conexión equipotencial a la
espiga de conexión equipotencial del
TELE PACK VET X y con la conexión equipotencial de la sala.
3
WARNUNG: Gerät nur mit der auf dem
Typenschild angegebenen Netzspannung
betreiben.
3. Potentialausgleichsleitung am
Potentialanschlussstift des TELE PACK VET X
anschließen und mit dem Potentialausgleich im
Raum verbinden.
13
Preparing the device for use
Nur für den Veterinärgebrauch
3
For veterinary use only
3
Sólo para uso veterinario
Erstinbetriebnahme
Operating the device for the
first time
Primera puesta en servicio
7. 4. 2 Kamerakopf/Videoendoskop anschließen
7. 4. 2 Connecting the camera head/videoscope
7. 4. 2 Conexión del cabezal de la cámara/videoendoscopio
Kamerakopf und Lichtkabel anschließen
Connecting camera heads and light cables
Conexión del cabezal de la cámara y el cable
de luz
NOTA: El TELE PACK VET X puede ser
conectado alternativamente a un videoendoscopio o a un cable de luz estándar de
KARL STORZ. Al hacerlo, preste atención a
utilizar el adaptador correcto.
1
HINWEIS: Sie können wahlweise ein Videoendoskop oder ein Standard KARL STORZ
Lichtkabel an den TELE PACK VET X anschließen. Achten Sie dabei darauf, den richtigen Adapter zu verwenden.
1. Lichtkabel mit aufgesetzem Adapter 495KS mit
dem Lichtanschluss des TELE PACK VET X verbinden.
HINWEIS: Zum Verwenden eines
KARL STORZ Lichtkabels muss der Adapter
495KS in die Lichtentnahmebuchse eingesteckt werden.
14
1
NOTE: You can either connect a videoscope
or a standard KARL STORZ light cable to the
TELE PACK VET X. When doing so, make
sure to use the right adaptor.
1. Connect the light cable with attached adaptor 495KS to the light connection of the
TELE PACK VET X.
NOTE: To use a KARL STORZ light cable,
the adaptor 495KS must be inserted into the
light outlet socket.
1
1. Conecte el cable de luz, con el adaptador
495KS aplicado, a la conexión de luz del
TELE PACK VET X.
NOTA: Para utilizar un cable de luz de
KARL STORZ, el adaptador 495KS ha de
estar enchufado en el conector para toma
de luz.
1
1
1
2. Kamerakopfstecker bis zum Anschlag in die
Kameraanschlussbuchse einschieben.
3. Kamerakopf mit Endoskop verbinden.
4. Lichtkabel mit dem Endoskop verbinden
(Vierteldrehung der Rändelschraube auf den
Schraubsockel).
5. Gerät durch Drücken der Taste
einschalten.
2. Insert the camera head connector into the camera connection socket as far as it will go.
3. Connect the camera head up to the endoscope.
4. Connect the light cable to the endoscope (twist
the knurled screw on the screw base through a
quarter turn).
5. Turn the device on by pressing the
button.
2. Introduzca el enchufe del cabezal de la cámara
hasta el tope en el conector previsto para la
conexión de la cámara.
3. Conecte el cabezal de la cámara con el endoscopio.
4. Conecte el cable de luz con el endoscopio (cuarto de vuelta del tornillo moleteado en el casquillo
roscado).
5. Conecte el aparato pulsando la tecla
.
For veterinary use only
Sólo para uso veterinario
Nur für den Veterinärgebrauch
Erstinbetriebnahme
Operating the device for the
first time
Primera puesta en servicio
Videoendoskop mit Insufflation anschließen
WARNUNG: Kontaminationsgefahr! Um
Rückfluss von Wasser in das Gerät zu vermeiden, muss die Wasserflasche in der
dafür vorgesehenen Halterung eingesetzt
werden. Die gefüllte Wasserflasche darf
nicht auf den Kopf gestellt werden.
HINWEIS: Nur zu 2/3 gefüllte Wasserflaschen verwenden. 1/3 wird für das Luftpolster benötigt.
Connecting the videoscope with insufflation
WARNING: Risk of contamination! To prevent water from flowing back into the device,
the water bottle must be placed in the holder intended for this purpose. The filled water
bottle must not be turned upside down.
NOTE: Only use water bottles which are two
thirds full. One third is required for the air
cushion.
Conexión del videoendoscopio con la insuflación
CUIDADO: ¡Peligro de contaminación! A fin
de evitar el reflujo de agua dentro del aparato, la botella de agua ha de utilizarse en
el soporte previsto al efecto. La botella de
agua llena no ha de colocarse cabeza abajo.
NOTA: Utilice únicamente botellas de agua
llenas hasta un 2/3 de su capacidad. 1/3 se
requiere como cojín de aire.
3
1
1. Wasserflasche für Spülung/Insufflation in die vorgesehene Halterung einsetzen.
VORSICHT: Die Wasserflasche zum Befüllen/Entleeren vom Gerät entfernen um
Wassereintritt zu vermeiden.
15
3
1
1. Place the water bottle for irrigation/insufflation in
the holder intended for this purpose.
CAUTION: Remove the water bottle for filling/emptying from the device to prevent the
ingress of water.
3
1
1. Coloque la botella de agua para irrigación/insuflación en el soporte previsto al efecto.
ADVERTENCIA: Para llenar/vaciar la botella
de agua, retírela del aparato para evitar que
penetre agua en el mismo.
2
2
2
2. Den Anschlussstecker Licht des
Videoendoskops bis zum Anschlag in den
Lichtanschluss S einschieben.
2. Insert the videoscope‘s light connector as far as
it will go into the light port S.
2. Introduzca el enchufe de conexión de luz del
videoendoscopio hasta el tope en la conexión
para luz S.
3. Den Anschlussstecker Kamera des
Videoendoskops bis zum Anschlag in den
Kameraanschluss des TELE PACK VET X einschieben.
3. Insert the videoscope‘s camera connector as far
as it will go into the TELE PACK VET X‘s camera
connection.
3. Introduzca el enchufe de conexión de la cámara del videoendoscopio hasta el tope en la
conexión para cámara del TELE PACK VET X.
Nur für den Veterinärgebrauch
For veterinary use only
Sólo para uso veterinario
16
Erstinbetriebnahme
Operating the device for the
first time
Primera puesta en servicio
4. Den Schlauch der Wasserflasche (im Deckel integriert) am Videoendoskop-Versorgungsstecker
anschließen.
Weitere Hinweise zur Spülung und Insufflation entnehmen sie bitte der Gebrauchsanweisung des
zum Einsatz kommenden Videoendoskopes.
HINWEIS: Zum Verwenden eines
KARL STORZ Lichtkabels muss der Adapter
495KS in die Lichtentnahmebuchse eingesteckt werden.
4. Connect the tube of the water bottle (integrated
into the lid) up to the videoscope supply connector.
For further information on irrigation and insufflation,
please refer to the instruction manual of the videoscope to be used.
NOTE: To use a KARL STORZ light cable,
the adaptor 495KS must be inserted in the
light outlet socket.
4. Conecte el tubo flexible de la botella de agua
(integrada en la tapa) al enchufe de abastecimiento del videoendoscopio.
En el Manual de instrucciones del videoendoscopio
que se va a utilizar encontrará otras indicaciones
referidas a irrigación e insuflación.
NOTA: Para utilizar un cable de luz
KARL STORZ, el adaptador 495KS ha de
estar enchufado en el conector para toma
de luz.
1
1
1
5. Gerät durch Drücken des Netzschalters W einschalten.
Das Gerät ist jetzt betriebsbereit. Der
Funktionstest kann durchgeführt werden.
5. Switch on the device by pressing the
power switch W.
The device is now ready for use. The test for
proper functioning can now be performed.
5. Conecte el aparato presionando el interruptor de
red W.
El aparato se encuentra ahora listo para el servicio. Se puede llevar a cabo el test de funcionamiento.
Nur für den Veterinärgebrauch
For veterinary use only
Sólo para uso veterinario
Erstinbetriebnahme
Operating the device for the
first time
Primera puesta en servicio
7. 4. 3 Weißabgleich durchführen
7. 4. 3 White balance
7. 4. 3 Realizar el balance de blancos
HINWEIS: Führen Sie vor jeder Anwendung
einen Weißabgleich durch. Wenn zuvor die
gleichen Instrumente und die gleiche Lichtquelle verwendet wurden, kann der Weißabgleich entfallen.
1. Wählen Sie die gewünschte Lichtintensität durch
Drücken der Taste
aus.
2. Richten Sie das Endoskop bzw. Videoendoskop
auf eine weiße Fläche.
3. Weißabgleich durch Drücken der Taste
auslösen.
Der Weißabgleich ist abgeschlossen. Sie können
jetzt den Funktionstest durchführen.
WARNUNG: Blendgefahr! Bei angeschlossenem Lichtleiter nicht in das offene Ende
schauen.
1
1
3
1. Select the desired light intensity by pressing the
button
.
2. Point the endoscope/videoscope at a white
surface.
3. Perform the white balance by pressing the
button.
The white balance is complete. You may now
perform the test for proper functioning.
WARNING: Danger of glare! Never look
in the open end when a light cable is connected.
3
NOTA: Antes de cada aplicación, lleve a
cabo un balance de blancos. Si anteriormente se utilizaron los mismos instrumentos y la
misma fuente de luz, se puede prescindir del
balance de blancos.
1. Seleccione la intensidad lumínica deseada presionando la tecla
.
2. Oriente el endoscopio o el videoendoscopio
hacia una superficie blanca.
3. Active el balance de blancos presionando la
tecla
.
El balance de blancos ha concluído. Ahora
puede llevar a cabo la prueba de funcionamiento.
CUIDADO: Riesgo de deslumbramiento. No
mire nunca en el extremo libre de un portaluz conectado.
7. 4. 4 Funktionstest
7. 4. 4 Test for proper functioning
7. 4. 4 Prueba de funcionamiento
Kontrollieren Sie vor jeder Anwendung das Gerät
und Zubehör auf Beschädigungen und auf den
hygienischen Zustand.
Halten Sie das Endoskop auf ein Objekt und überprüfen Sie die Bildqualität.
HINWEIS: Erst nach erfolgreichem Funktionstest dürfen das Gerät und das Zubehör
verwendet werden.
Before every use check the device and accessories for damage and hygienic status.
Focus the endoscope on an object and check the
image quality.
Antes de cada aplicación, controle el estado higiénico del aparato y los accesorios y compruebe si
presenta deterioros.
Oriente el endoscopio hacia un objeto y compruebe la calidad de la imagen.
NOTA: El aparato y los accesorios sólo pueden ser utilizados después de que la prueba
de funcionamiento haya concluído con éxito.
1
17
Nur für den Veterinärgebrauch
1
NOTE: Perform a white balance before every
use. If the same instruments and the same
light source were used previously, the white
balance may be omitted.
NOTE: The device and accessories may only
be used once the test for proper functioning
has been successfully completed.
For veterinary use only
1
3
1
Sólo para uso veterinario
Erstinbetriebnahme
Operating the device for the
first time
Primera puesta en servicio
7. 5
7. 5
7. 5
Connecting the accessories
Conexión de los accesorios
7. 5. 1 Anschließen von USB-Geräten
7. 5. 1 Connecting USB devices
7. 5. 1 Conexión de aparatos USB
Die USB Schnittstellen sind zum Anschluss folgender optionaler Peripheriegeräte geeignet:
• Tastatur
• Maus
• USB Stick
• Drucker
The USB ports are suitable for connecting up the
following optional peripherals:
• Keyboard
• Mouse
• USB stick
• Printer
Las interfaces USB son apropiadas para la
conexión de los siguientes aparatos periféricos
opcionales:
• Teclado
• Ratón
• Stick USB
• Impresora
NOTA: Conecte sólo una impresora al aparato. La conexión de más de una impresora
puede conllevar fallos de funcionamiento.
NOTA: Previa solicitud, obtiene usted soportes de datos e impresoras compatibles.
NOTA: Las impresoras o soportes informáticos con alimentación externa de corriente
han de estar desconectados de la tensión
de alimentación conforme a la norma CEI
60601-1, o estar conectados a través de un
transformador de separación.
1
1
1
18
Zubehör anschließen
HINWEIS: Schließen sie nur einen Drucker
an das Gerät an. Das Anschließen von mehr
als einem Drucker kann zu Funktionsstörungen führen.
HINWEIS: Unterstützte Speichermedien und
Drucker erhalten Sie auf Anfrage.
HINWEIS: Drucker oder Speichermedien mit
externer Stromversorgung müssen von der
Versorgungsspannung gemäß IEC 60601-1
getrennt bzw. über einen Trenntransformator
angeschlossen werden.
1
1
1
NOTE: Only connect one printer up to the
unit. Connecting up more than one printer
may cause the unit to malfunction.
NOTE: A list of supported storage media and
printers is available on request.
NOTE: Printers and storage media with
external power supplies must be isolated
from the line voltage in accordance with IEC
60601-1 or connected via an isolation transformer.
1
1
1
1. Stecken Sie das USB Gerät an eine der vorhandenen USB Schnittstellen ein.
Das USB Gerät wird automatisch erkannt. Es
wird eine Meldung auf den Bildschirm ausgegeben.
Am unteren rechten Bildschirmrand wird der
Name des Speichermediums sowie die restliche
Videoaufnahmekapazität angezeigt.
1. Insert the USB device in one of the available
USB ports.
The USB device is recognized automatically. A
message appears on the screen.
1. Introduzca el aparato USB en una de las interfaces existentes para USB.
El aparato USB es reconocido automáticamente. Aparece un mensaje en la pantalla.
The name of the storage media and the remaining
video recording capacity appear in the bottom right
hand corner of the screen.
En la parte inferior derecha del borde de la pantalla
aparece indicado el nombre del soporte de datos,
así como la capacidad restante para grabación de
vídeo.
7. 5. 2 Anschließen einer SD-Karte
7. 5. 2 Connecting an SD card
7. 5. 2 Conexión de una tarjeta SD
1. Schieben Sie die SD-Karte in den
SD-Karteneinschub.
Die SD-Karte wird automatisch erkannt. Es wird
eine Meldung auf den Bildschirm ausgegeben.
Am unteren rechten Bildschirmrand wird der
Name des Speichermediums sowie die restliche
Videoaufnahmekapazität angezeigt.
1. Insert the SD card into the SD card slot.
1. Deslice la tarjeta SD en la unidad de tarjeta SD.
The SD card is recognized automatically. A
message appears on the screen.
The name of the storage media and the remaining
video recording capacity appear in the bottom right
hand corner of the screen.
La tarjeta SD es reconocida automáticamente.
Aparece un mensaje en la pantalla.
En la parte inferior derecha del borde de la pantalla
aparece indicado el nombre del soporte de datos,
así como la capacidad restante para grabación de
vídeo.
For veterinary use only
Sólo para uso veterinario
Nur für den Veterinärgebrauch
Erstinbetriebnahme
Operating the device for the
first time
Primera puesta en servicio
7. 5. 3 Anschließen eines Fußschalters
7. 5. 3 Connecting the footswitch
7. 5. 3 Conexión de un interruptor de
pedal
1. Stecken Sie den Fußschalter an der
Anschlussbuchse Fußschalter ein.
2. Überprüfen Sie die richtige Funktion des
Fußschalters.
Nach der Funktionsprüfung ist der Fußschalter
einsatzbereit.
1. Connect the footswitch up to the footswitch
socket.
2. Check that the footswitch is functioning correctly.
If the test for proper operation is successful, the
footswitch is ready for use.
1. Enchufe el interruptor de pedal en el conector
correspondiente.
2. Verifique el correcto funcionamiento del interruptor de pedal.
Después de una verificación de funcionamiento,
el interruptor de pedal está listo para el servicio.
7. 5. 4 Anschließen eines externen
Monitors
7. 5. 4 Connecting an external monitor
7. 5. 4 Conexión de un monitor externo
Zum Anschließen eines externen Monitors, steht
auf der Rückseite ein DVI-D Videoausgang zur
Verfügung.
1. Verbinden Sie den Monitor mit dem DVI-D
Videoausgang.
HINWEIS: Der angeschlossene Monitor
muss die Auflösung von 1024 x 768 Pixel
(XGA) unterstützen.
2. Schalten Sie den externen Monitor ein und wählen Sie das richtige Eingangssignal.
Das Videosignal wird auf dem Bildschirm des
TELE PACK VET X und auf dem externen
Monitor ausgegeben.
There is a DVI-D video output available on the rear
of the device for connecting up an external monitor.
En la parte posterior está disponible una salida de
vídeo DVI-D para conexión de un monitor externo.
1. Connect the monitor up to the DVI-D video output.
NOTE: The connected monitor must support
a resolution of 1024 x 768 pixels (XGA).
1. Conecte el monitor con la salida de vídeo DVI-D.
1
1
2. Turn on the external monitor and select the
correct input signal.
The video signal is displayed on the screen of
the TELE PACK VET X and the external monitor.
2. Conecte el monitor externo y seleccione la
correcta señal de entrada.
La señal de vídeo es emitida sobre la pantalla
del TELE PACK VET X y en el monitor externo.
7. 5. 5 Externe Videoquelle
7. 5. 5 External Video Source
7. 5. 5 Fuente de vídeo externa
Zum Anschluss einer externen Videoquelle, steht
auf der Rückseite ein DVI-D Videoeingang zur
Verfügung.
HINWEIS: Beachten Sie bei der Schnittstelle
die unterstützte Auflösung von
1024 x 768 Pixel (XGA).
1. Verbinden Sie das externe Gerät mit dem DVI-D
Videoeingang.
2. Wählen Sie unter dem Menü „Einstellungen/
Video/Videoquelle/DVI“ input aus.
HINWEIS: Durch Drücken einer beliebigen
Taste wird der DVI Darstellungsmodus beendet.
There is a DVI-D video input available on the rear
of the device for connecting up an external video
source.
NOTE: Please take the supported resolution
of 1024 x 768 pixels (XGA) into account for
this interface.
1. Connect the external device up to the DVI-D
video input.
2. Choose ‘input’ under the menu point ‘Settings/
Video/Video Source/DVI’.
NOTE: Press any key to quit the DVI mode.
En la parte posterior está disponible una entrada
de vídeo DVI-D para conexión de una fuente de luz
externa.
NOTA: Preste atención en la interfaz a la
resolución apoyada de 1.024 x 768 píxeles
(XGA).
1. Conecte el aparato externo con la entrada de
vídeo DVI-D.
2. Seleccione input en el menú “Ajustes/Vídeo/
Fuente de vídeo/DVI”.
NOTA: Presionando una tecla cualquiera se
finaliza el modo de representación DVI.
1
19
1
1
1
1
1
1
Nur für den Veterinärgebrauch
For veterinary use only
NOTA: El monitor conectado ha de apoyar
una resolución de 1.024 x 768 píxeles (XGA).
Sólo para uso veterinario
Erstinbetriebnahme
Operating the device for the
first time
Primera puesta en servicio
7. 6
7. 6
7. 6
Turning the light source on/off
Conexión/desconexión de una
fuente de luz
7. 6. 1 Einschalten
7. 6. 1 Turning on
7. 6. 1 Conexión
Der TELE PACK VET X verfügt über eine eigene
Lichtquelle. Die Lichtquelle ist nach Anschalten des
Gerätes immer eingeschaltet.
1. Zum Regeln der Lichtintensität drücken Sie kurz
auf die Taste
.
Es erscheint ein Balken, der die Intensität
der Lichtquelle anzeigt. Die notwendige
Lichtintensität kann in 3 Stufen gewählt werden.
The TELE PACK VET X has its own light source.
After turning on the device, the light source is
always switched on.
1. The light intensity can be controlled by briefly
pressing the button
.
A bar appears showing the intensity of the light
source. The necessary light intensity can be
selected in 3 levels.
El TELE PACK VET X dispone de una fuente de luz
propia. Después de conectar el aparato, la fuente
de luz está siempre encendida.
1. Para regular la intensidad lumínica, pulse brevemente la tecla
.
Aparece una barra que muestra la intensidad de
la fuente de luz. La intensidad lumínica puede
seleccionarse en 3 niveles.
NOTA: Pulsando brevemente varias veces la
tecla
puede modificar usted la intensidad
de la fuente de luz.
ADVERTENCIA: Evite la conexión y desconexión frecuente del TELE PACK VET X.
Deje enfriar la lámpara aprox. 50 segundos,
antes de volver a conectar el aparato. La
conexión frecuente o los períodos breves de
servicio acortan considerablemente la vida
útil de la lámpara.
1
2
20
Lichtquelle ein-/ausschalten
HINWEIS: Durch mehrmaliges kurzes drücken der Taste
können Sie die Intensität
der Lichtquelle verändern.
VORSICHT: Vermeiden Sie häufiges Einund Ausschalten des TELE PACK VET X.
Lassen Sie die Lampe ca. 50 Sekunden
abkühlen, bevor sie das Gerät erneut einschalten. Häufiges Einschalten bzw. kurze
Betriebsdauer verkürzen die Lampenlebensdauer erheblich.
Nur für den Veterinärgebrauch
1
2
NOTE: By briefly pressing the
button
several times, you can change the intensity of
the light source.
CAUTION: Avoid turning the
TELE PACK VET X on and off frequently.
Allow the lamp to cool down for approx.
50 seconds before turning the device on
again. Turning on too often or using short
operating times will considerably reduce the
lamp’s service life.
For veterinary use only
1
2
Sólo para uso veterinario
21
Erstinbetriebnahme
Operating the device for the
first time
Primera puesta en servicio
7. 7
7. 7
7. 7
Pumpe ein-/ausschalten
Turning the pump on/off
Conexión/desconexión de la
bomba
7. 7. 1 Einschalten
7. 7. 1 Turning on
Der TELE PACK VET X verfügt über eine eigene
Pumpe.
1. Zum Einschalten der Pumpe drücken Sie kurz
auf die Taste
.
Die Pumpe wird eingeschaltet. Es erscheint ein
Balken, der den Pumpendurchfluss anzeigt.
The TELE PACK VET X has its own pump.
1. To turn on the pump, press the button briefly
.
The pump is turned on. A bar appears showing
the pump flow.
7. 7. 1 Conexión
1
HINWEIS: Die Pumpengeschwindigkeit kann
in drei Stufen eingestellt werden.
2. Durch mehrmaliges kurzes drücken auf die Taste
können Sie den Pumpendurchfluss regeln.
1
NOTE: The speed of the pump can be set to
three levels.
2. By briefly pressing the
button several times,
you can control the pump flow.
1
7. 7. 2 Ausschalten
7. 7. 2 Turning off
7. 7. 2 Desconexión
1. Zum Ausschalten der Pumpe, drücken Sie
3 Sekunden auf die Taste
.
1. To turn off the pump, press the button for 3 seconds
.
1. Para desconectar la bomba, presione durante
3 segundos la tecla
.
Nur für den Veterinärgebrauch
For veterinary use only
El TELE PACK VET X dispone de una bomba propia.
1. Para conectar la bomba, pulse brevemente la
tecla
.
La bomba se enciende. Aparece una barra que
muestra el caudal de la bomba.
NOTA: La velocidad de la bomba puede
ajustarse en tres niveles.
2. Pulsando varias veces brevemente la tecla
puede regular el caudal de la bomba.
Sólo para uso veterinario
22
Bedienhinweise
Operating instructions
instrucciones operativas
8
Bedienhinweise
8
Operating instructions
8
Instrucciones operativas
8. 1
Grundsätzliches zur Bedienung
8. 1
Basic information on operation
8. 1
Principios operativos básicos
8. 1. 1 Navigationstasten
8. 1. 1 Navigation keys
8. 1. 1 Teclas de navegación
Mit den Navigationstasten können Sie in den
Menüs navigieren.
• Durch Drücken der Enter Taste (in der Mitte
des Steuerkreuzes) können Sie die Änderungen
übernehmen.
• Durch Drücken des ESC Taste können Sie die
Änderungen verwerfen bzw. das Menü schließen.
The navigation keys are used to navigate in the
menus.
• You can accept the changes by pressing the
enter key (center of arrow keys)
• Pressing the ESC key rejects the changes and
closes the menu.
Con las teclas de navegación puede navegar por
los menús.
• Presionando la tecla Intro (en el centro de la
cruceta de mandos) puede adoptar las modificaciones.
• Presionando la tecla ESC puede desechar las
modificaciones o cerrar el menú.
8. 1. 2 Funktionstasten
8. 1. 2 Function buttons
8. 1. 2 Teclas de función
• Seitlich und unterhalb des Monitors sind
Funktionstasten, mit denen die abgebildete
Funktion ausgelöst werden kann.
• Sind die Symbole ausgegraut, so steht die
Funktion nicht zur Verfügung.
• There are function buttons on the side of and
below the monitor, which are used to perform
the displayed functions.
• If the symbols are gray, the function is not available.
• A los lados y en la parte inferior del monitor
están las teclas de función, con las cuales puede
activarse la función ilustrada.
• Si los símbolos aparecen de color gris, la función
no está disponible.
8. 1. 3 Kamerakopftasten
8. 1. 3 Camera head buttons
8. 1. 3 Botones del cabezal de la cámara
Abhängig vom angeschlossenen Kameratyp variiert
die Anzahl der Kamerakopftasten.
Mit jeder Kamerakopftaste lassen sich zwei
Funktionen steuern. Die Primärfunktion wird durch
einen kurzen Tastendruck, die Sekundärfunktion
durch einen langen Tastendruck (2 Sekunden) aktiviert. Beim Betätigen der Kamerakopftasten wird
entweder die zugeordnete Funktion aktiviert oder
ein Menü geöffnet, in dem die aktuelle Einstellung
markiert ist. Zum Blättern durch das Menü kann eine
beliebige Taste gedrückt werden. Nach 3 Sekunden
wird das Menü geschlossen und die markierte
Einstellung wird gespeichert. Die jeweilige Funktion
der Tasten könnten Sie unter „Einstellungen/Externe
Bedienelemente/Kamerakopftasten“ zuordnen.
Voreinstellung/Standard:
Primärfunktion (kurz drücken)
Blaue Taste:
Standbild
Silberne Taste: Bild speichern
Schwarze Taste: Zoom
Sekundärfunktion:
(2 Sekunden drücken)
Blaue Taste:
Video aufzeichnen (Start/Stopp)
Silberne Taste: Filter
Schwarze Taste: Belichtungszeit
The number of camera head buttons is dependent
on the type of camera connected.
Two functions can be controlled with each camera
head button. The primary function is activated by
pressing the button briefly, the secondary function by pressing the button for longer (2 seconds).
Pressing the camera head button either activates
the assigned function or opens the menu in which
the current setting is marked. Any button can be
pressed to browse the menu. After 3 seconds, the
menu is closed and the marked setting is saved.
The respective function for the buttons can be
assigned under ‘Settings/External Control Devices/
Camera Head Buttons’.
Preset/Default
Primary function (press quickly)
Blue button
Still image
Silver button
Capture Still Image
Black button
Zoom
Secondary function
(press for 2 seconds)
Blue button:
Capture video (start/stop)
Silver button:
Filter
Black button:
Shutter Speed
Dependiendo del tipo de cámara conectada varía
la cantidad de botones del cabezal de la cámara.
Con cada uno de los botones del cabezal de la
cámara se pueden controlar dos funciones. La
función primaria se activa pulsando brevemente el
botón, y la función secundaria manteniendo pulsado el botón durante más tiempo (2 segundos). Al
accionar los botones del cabezal de la cámara se
activa una función asignada o se abre un menú,
en el cual aparece marcado el ajuste actual. Para
hojear a través del menú puede presionarse cualquier botón. Después de 3 segundos, el menú se
cierra y el ajuste marcado se guarda. Usted puede
asignar la función respectiva del botón en “Ajustes/
Elementos de mando externos/Botones del cabezal de la cámara”.
Preajuste/Estándar:
Función primaria (pulsar brevemente)
Botón azul:
Imagen fija
Botón plateado: Guardar imagen
Botón negro:
Zoom
Función secundaria:
(presionar durante 2 segundos)
Botón azul:
Grabar vídeo (Iniciar/detener)
Botón plateado: Filtro
Botón negro:
Tiempo de exposición
Nur für den Veterinärgebrauch
For veterinary use only
Sólo para uso veterinario
Bedienhinweise
Operating instructions
instrucciones operativas
8. 1. 4 Fußschalter
8. 1. 4 Footswitch
8. 1. 4 Interruptor de pedal
Mit jedem Pedal des Fußschalters lassen sich
zwei Funktionen steuern. Die Funktionen des
Pedals können Sie unter „Einstellungen/Externe
Bedienelemente/Fußschalter“ zuordnen.
Voreinstellung/Standard
Zweipedalfußschalter 20014330:
Primärfunktion (kurz drücken):
Linkes Pedal:
Standbild
Rechtes Pedal: Bild speichern
Sekundärfunktion
(2 Sekunden drücken):
Linkes Pedal:
Video aufzeichnen (Start/Stopp)
Rechtes Pedal: Filter
Voreinstellung/Standard
Einpedalfußschalter 20014130:
Primärfunktion:
Linkes Pedal:
Bild speichern
Sekundärfunktion
(2 Sekunden drücken):
Linkes Pedal:
Video aufzeichnen (Start/Stopp)
Two functions can be controlled with each footswitch pedal. The functions for the pedal can be
assigned under ‘Settings/External Control Devices/
Foot Switch Pedals’.
Preset/standard
dual-pedal footswitch 20014330:
Primary function (press briefly):
Left pedal:
Still image
Right pedal:
Image Capture
Secondary function (press for 2 seconds):
Left pedal:
Capture Video (Start / Stop)
Right pedal:
Filter
Preset/standard
single-pedal footswitch 20014130:
Primary function:
Left pedal:
Image Capture
Secondary function (press for 2 seconds):
Left pedal:
Capture Video (Start / Stop)
Con cada uno de los pedales del interruptor de
pedal pueden controlarse dos funciones. Usted
puede asignar la función respectiva del pedal en
“Ajustes/Elementos de mando externos/Interruptor
de pedal”.
Preajuste/Estándar
Interruptor de doble pedal 20014330:
Función primaria (pulsar brevemente):
Pedal izquierdo:
Imagen fija
Pedal derecho:
Guardar imagen
Función secundaria (presionar durante 2
segundos):
Pedal izquierdo:
Grabar vídeo (Iniciar/detener)
Pedal derecho:
Filtro
Preajuste/Estándar
Interruptor monopedal 20014130:
Función primaria:
Pedal izquierdo:
Guardar imagen
Función secundaria (presionar durante 2
segundos):
Pedal izquierdo:
Grabar vídeo (Iniciar/detener)
8. 1. 5 Tastatur und Maus
8. 1. 5 Keyboard and mouse
8. 1. 5 Teclado y ratón
The keyboard and mouse can also be used to
navigate in the menus. A keyboard is required to
enter patient data.
Con el teclado y el ratón se puede asimismo navegar por los menús. Para introducir los datos del
paciente es necesario contar con un teclado.
Mit der Tastatur und Maus können Sie ebenfalls in den Menüs navigieren. Zum Eingeben der
Patientendaten ist eine Tastatur erforderlich.
23
Nur für den Veterinärgebrauch
For veterinary use only
Sólo para uso veterinario
Bedienhinweise
Operating instructions
instrucciones operativas
8. 2
8. 2
8. 2
Hauptscreen
Main screen
Pantalla principal
1
W
Q
E
24
Q
Menü
Q
Menu
Q
Menú
W
Infoleiste
W
Info bar
W
Barra de información
E
Funktionstasten des
Hauptscreens
E
Function buttons of the main
screen
E
Teclas de función de la pantalla
principal
Nur für den Veterinärgebrauch
For veterinary use only
Sólo para uso veterinario
Bedienhinweise
Operating instructions
instrucciones operativas
8. 2. 1 Übersicht der Funktionstasten des
Hauptscreens
8. 2. 1 Overview of the main screen’s
function buttons
8. 2. 1 Sinopsis de las teclas de función
de la pantalla principal
Die Funktionen der unterschiedlichen Symbole sind
wie folgt:
The functions of the different symbols are as
follows:
Las funciones de los diferentes símbolos son las
siguientes:
1
25
Lichtquelle
Hier können Sie die Lichtintensität
verändern.
Light Source
You can change the light intensity
here.
Fuente de luz
Aquí puede modificar la intensidad lumínica.
Weißabgleich
White Balance
Balance de blancos
Pumpe
Pump
Bomba
Digital Zoom 2x
Digital Zoom 2x
Zoom digital 2x
Vollbild/Menü ausblenden
Full screen/Hide menu
Imagen de pantalla completa/
ocultar el menú
Datenbrowser
Data Browser
Navegador de datos
Behandlungsübersicht *
Öffnet die Behandlungsübersicht.
Treatment overview *
Opens the treatment overview
Sinopsis de tratamientos *
Abre la sinopsis de tratamientos.
Tonaufnahme (Start/Stopp) *
Capture Audio (Start/Stop) *
Grabación de sonido (Iniciar/
detener) *
Videoaufnahme (Start/Stopp) *
Capture Video (Start/Stop) *
Grabación de vídeo (Iniciar/
detener) *
Standbild
Still Image
Imagen fija
Bildaufnahme *
Capture Still Image *
Captura de imagen *
HINWEIS: * Die Symbole sind erst sichtbar,
nachdem ein Patient/Behandlung angelegt
wurde (siehe 8.2.2 Behandlung anlegen):
Nur für den Veterinärgebrauch
1
NOTE: * The symbols only become visible
when a patient/treatment has been created
(see 8.2.2 Creating a treatment):
For veterinary use only
1
NOTA: * Los símbolos sólo serán visibles
después de haber ingresado un paciente/tratamiento (véase 8.2.2: Crear tratamiento):
Sólo para uso veterinario
Bedienhinweise
Operating instructions
instrucciones operativas
8. 2. 2 Menü
8. 2. 2 Menu
8. 2. 2 Menú:
Über das Menü können Sie eine neue Behandlung
anlegen, Voreinstellungen speichern/laden und
Einstellungen vornehmen.
Neue Behandlung anlegen
Neue Behandlungen können Sie über das
Patienten-Menü Q anlegen.
1. Verbinden Sie ein Speichermedium (USB oder
SD) mit dem Gerät.
2. Klicken Sie auf das Patienten-Menü.
3. Wählen Sie den Menüpunkt „Neuer Patient“ aus
(Shortcut: Strg + N).
Es öffnet sich das Menü Patientendaten.
HINWEIS: Sie können die Patientendaten
auch nach der Behandlung in der Behandlungsübersicht eingeben.
Datenbrowser
Der Datenbrowser listet alle Speichermedien und
die darauf gespeicherten Behandlungen übersichtlich auf. Sie können sich die Daten der gewünschten Behandlungen durch Drücken der Enter Taste
bzw. der Taste
in der Behandlungsübersicht
anzeigen lassen.
Patientendaten importieren
Über diesen Menüpunkt können Sie sich die
Patientendaten einer auf dem Speichermedium
bereits vorhandenen Behandlung in die
Patienteneingabemaske importieren.
1. Wählen Sie „Patientendaten importieren“ aus.
Es öffnet sich der Datenbrowser.
2. Wählen Sie den gewünschten Datensatz aus.
Die Daten werden durch Drücken der Enter
Taste bzw. durch Drücken der Taste
übernommen.
Es erscheint das Menü „Neuer Patient“ mit den
ausgewählten Patientendaten ausgefüllt.
This menu can be used to create a new treatment,
save/load presets and perform changes.
Por medio del menú puede crear un nuevo tratamiento, guardar/cargar preajustes y realizar ajustes.
Creating a new treatment
New treatments can be created via the patient
menu Q.
1. Connect a storage medium (USB or SD) up to
the unit.
2. Click on the patient menu.
3. Select the menu item ‘New Patient’.
(Shortcut: Ctrl + N).
The patient data menu opens.
NOTE: You can also add the patient data in
the treatment overview after the treatment.
Crear nuevo tratamiento
1
26
Nur für den Veterinärgebrauch
1
Data Browser
The data browser lists all the storage media and
the treatments saved there clearly. You can view
the data for the required treatment in the treatment
overview by pressing the Enter button or the
button.
Importing patient data
This menu item is used to import the patient data
into the patient mask from a treatment already
saved on the storage medium.
1. Select ‘Import Patient Data’.
The data browser opens.
2. Select the required data set. The data are adopted by pressing the enter key or the
key.
The ‘New Patient’ menu appears with the selected patient data completed.
For veterinary use only
Mediante el menú del paciente Q puede crear
nuevos tratamientos.
1. Conecte un soporte de datos (USB o SD) con el
aparato.
2. Haga clic en el menú del paciente.
3. Seleccione el punto del menú “Nuevo paciente”
(combinación de teclas: Ctrl + N).
Se abre el menú Datos del paciente.
NOTA: Usted puede ingresar los datos del
paciente también después del tratamiento en
la sinopsis de tratamientos.
Navegador de datos
El navegador de datos lista todos los soportes de
datos y los tratamientos allí guardados de forma
clara y ordenada. Usted puede hacer aparecer los
datos de los tratamientos deseados presionando
la tecla Intro o la tecla
en la sinopsis de tratamientos.
Importar datos del paciente
A través de este punto del menú, usted puede
importar los datos del paciente de un tratamiento
ya existente en el soporte de datos a la plantilla de
ingreso de pacientes.
1. Seleccione “Importar datos del paciente”.
Se abre el navegador de datos.
2. Seleccione el juego de datos que usted desee.
Los datos se adoptan presionando la tecla Intro
o presionando la tecla
.
Aparece el menú “Nuevo paciente”, rellenado
con los datos seleccionados del paciente.
1
Sólo para uso veterinario
Bedienhinweise
Operating instructions
instrucciones operativas
8. 2. 3 Voreinstellungen
8. 2. 3 Presets
8. 2. 3 Preajustes
Sie können zusätzlich zur Grundeinstellung 5 individuelle Einstellungen als Voreinstellung speichern
bzw. laden. Alle Einstellungen, die unter Kapitel
8. 2. 4 auf Seite 28 beschrieben sind, können
individuell für einen Arzt oder speziell für eine
Behandlung gespeichert werden.
HINWEIS: Die aktuell ausgewählte Voreinstellung wird oben im Menü angezeigt.
In addition to the default setting, you can also
save/load 5 individual settings as presets. All of
the settings described in chapter 8. 2. 4 on page 28
can be individually saved for a physician or
specially for a treatment.
Además de los ajustes básicos, usted puede
guardar o cargar 5 ajustes individuales como preajustes. Todos los ajustes, descritos en el capitulo
8. 2. 4 en la pág 28, puede guardarse de forma
individual para un médico o de forma especial para
un tratamiento.
NOTA: El preajuste seleccionado actualmente aparece indicado en la parte superior del
menú.
Sobreescribir/guardar preajustes
1. Realice los ajustes que desee.
2. Para guardar los ajustes realizados, haga clic en
el menú sobre Preajuste.
3. Haga clic sobre el espacio de memoria deseado.
Se abre el submenú.
4. Haga clic en el submenú sobre el punto “sobreescribir... ”.
Se le solicita ingresar un nombre para el ajuste.
También puede continuar usando el nombre del
ajuste anterior.
5. Para concluir el procedimiento, haga clic en
“OK”.
Los ajustes han sido guardados.
1
1
Voreinstellung überschreiben/speichern
1. Nehmen Sie die von Ihnen gewünschten
Einstellungen vor.
2. Zum Speichern der vorgenommenen
Einstellungen, klicken Sie im Menü auf
Voreinstellung.
3. Klicken Sie auf den gewünschten Speicherplatz.
Das Untermenü wird geöffnet.
4. Klicken Sie im Untermenü auf den Menüpunkt
„überschreiben... “.
Sie werden aufgefordert, der Einstellung einen
Namen zu vergeben. Sie können auch den
Name der vorherigen Einstellung weiter verwenden.
5. Zum Abschließen des Vorgangs klicken Sie auf
„OK“.
Die Einstellungen wurden gespeichert.
Voreinstellung aktivieren/auswählen
1. Öffnen sie mit den Pfeiltasten das Menü
Voreinstellung.
2. Klicken Sie auf den gewünschten Speicherplatz.
Das Untermenü wird geöffnet.
3. Klicken Sie im Untermenü auf den Menüpunkt
„aktivieren“.
Die gewünschte Voreinstellungen wurden übernommen.
HINWEIS: Die zuletzt verwendete Voreinstellung wird beim nächsten Start des
TELE PACK VET X wieder geladen.
Overwriting/saving a preset
1. Make the required changes.
2. Click on Preset in the menu to save the changes
you have made.
3. Click on the required storage space.
The submenu opens.
4. Click on the ‘Overwrite...’ menu item in the
submenu.
You will be prompted to enter a name for the
setting. You can also reuse the name of the
previous setting.
5. To finish the process, click ‘OK’.
The settings are saved.
1
27
Nur für den Veterinärgebrauch
NOTE: The currently selected preset is displayed above in the menu.
Activating/selecting a preset
1. Open the Preset menu with the arrow keys.
2. Click on the required storage space.
The submenu opens.
3. Click on the ‘Activate’ menu entry in the
submenu.
The desired presets are now applied.
1
NOTE: The last used preset is loaded again
when the TELE PACK VET X is next turned
on.
For veterinary use only
1
Activar/seleccionar preajuste
1. Abra el menú Preajuste con las teclas de flechas.
2. Haga clic sobre el espacio de memoria deseado.
Se abre el submenú.
3. Haga clic en el submenú sobre el punto “activar”.
Ahora se adoptan los preajustes deseados.
1
NOTA: El preajuste utilizado en último lugar
vuelve a cargarse la próxima vez que se inicia
el TELE PACK VET X.
Sólo para uso veterinario
Bedienhinweise
Operating instructions
instrucciones operativas
8. 2. 4 Einstellungen
8. 2. 4 Settings
8. 2. 4 Ajustes
Hier können Sie verschiedene Einstellungen zu
Video, Bedienelemente, Audio, Drucker und allgemeine Geräteeinstellungen vornehmen.
HINWEIS: Es wird immer die zuletzt ausgewählte Voreinstellung beim Neustart
übernommen. Sollen die Einstellungen nach
einem Neustart übernommen werden, müssen die Einstellungen in einer Voreinstellung
gespeichert werden (8. 2. 3 auf Seite 27).
Video
Hier können Sie alle Einstellungen zur Kamera vornehmen.
The different settings for video, operating elements,
audio, printer, and general device settings can be
made here.
NOTE: The last selected preset is adopted
when the device is restarted. If settings are
to be selected after a restart, they must be
saved in a preset (in chapter 8. 2. 3 on page
27).
Aquí puede realizar diferentes ajustes para vídeo,
elementos de mando, audio, impresora y ajustes
generales del aparato.
NOTA: En cada nuevo inicio se adopta el
preajuste seleccionado en último lugar. Si
después de un nuevo inicio han de adoptarse estos ajustes, es necesario guardar los
ajustes en un preajuste (el capitulo 8. 2. 3 en
la pág 27).
Vídeo
Aquí puede realizar todos los ajustes de la cámara.
1
28
1
Video
Camera settings can be made here.
1
Brightness
Allows you to set the image brightness to Low,
Medium, and High.
Filter
The contrast can be changed electronically
between Off, Low, and High. When using fiberoptic endoscopes you can choose between
filters A and B.
PIP
Here you can choose the position of the still
image or where the saved image is displayed.
Video Source
Here you can choose between the camera
image and the DVI input.
Color System
The TELE PACK VET X is compatible with PAL
and NTSC camera heads. This option can be
used to select the required default.
Zoom
Allows you to set the image size to 1.25x, 1.5x,
1.75x, 2x.
Image Presentation
Here you can mirror the image or rotate it 180°.
Tiempo de exposición
La selección del tiempo de exposición de la
cámara ofrece, junto al modo automático, siete
tiempos de exposición diferentes entre 1/50 y
1/10.000 segundos.
Brillo
Permite el ajuste del brillo de la imagen con los
ajustes Bajo, Medio y Alto.
Filtro
Aquí puede ajustar de forma electrónica el
contraste entre Apagado, Bajo y Alto. Al utilizar
endoscopios de fibra óptica puede seleccionar
entre Filtro A y B.
PIP
Aquí puede seleccionar la posición de la imagen
fija o la indicación de la imagen guardada.
Fuente de vídeo
Aquí puede seleccionar entre la imagen de la
cámara o la entrada DVI.
Sistema de color
El TELE PACK VET X es copatible con botones
PAL y NTSC de la cámara. Con esta opción
puede seleccionar el estándar deseado.
Zoom
Permite el ajuste del tamaño de la imagen a
1,25x, 1,5x, 1,75x, 2x.
Representación de la imagen
Aquí puede reflejar la imagen o girarla en 180°.
Color
Here you can adjust the color display (red, green,
blue) of the monitor.
Color
Aquí puede adaptar la representación de colores
(rojo, verde, azul) del monitor.
For veterinary use only
Sólo para uso veterinario
Belichtungszeit
Auswahl der Belichtungszeit der Kamera, bietet
neben einer automatischen sieben verschiedene
Belichtungszeiten zwischen 1/50 und 1/10.000
Sekunden.
Helligkeit
Ermöglicht die Einstellung der Bildhelligkeit mit
den Einstellungen Niedrig, Mittel und Hoch.
Filter
Hier können Sie elektronisch den Kontrast zwischen Aus, Niedrig und Hoch einstellen. Bei der
Verwendung von faseroptischen Endoskopen
können Sie zwischen Filter A und B wählen.
PIP
Hier können Sie die Position des Standbild bzw.
die Anzeige des gespeicherten Bildes auswählen.
Videoquelle
Hier können Sie zwischen dem Bild der Kamera
oder dem DVI Eingang wählen.
Farbsystem
Der TELE PACK VET X ist mit PAL- und NTSC
Kameraköpfen kompatibel. Mit dieser Option können Sie den gewünschten Standard auswählen.
Zoom
Ermöglich die Einstellung der Bildgröße auf
1,25x, 1,5x, 1,75x, 2x.
Bilddarstellung
Hier können Sie das Bild spiegeln bzw. um 180°
drehen.
Farbe
Hier können Sie die Farbdarstellung (Rot, Grün,
Blau) des Monitors anpassen.
Shutter
Selection of the camera’s shutter, offers seven
different shutter periods between 1/50 and
1/10,000 seconds alongside one automatic one.
Nur für den Veterinärgebrauch
29
Bedienhinweise
Operating instructions
instrucciones operativas
Externe Bedienelemente
Hier können Sie die Funktionen der
Kamerakopftasten bzw. des Fußschalter programmieren.
Audio
Hier können Sie die Lautstärke des internen
Lautsprechers, Line Out und des Mikrofons einstellen.
Drucker
External controls
Here you can program the functions of the camera
head buttons and the footswitch.
Audio
Here you can set the volume for the internal speakers, Line out, and the microphone.
Elementos de mando externos
Aquí puede programar las funciones de los botones del cabezal de la cámara o del interruptor de
pedal.
Audio
Aquí puede ajustar el volumen de los altavoces
internos, del Line Out y del micrófono.
Printer
Impresora
Anzahl Ausdrucke
Legt fest, wie viele Exemplare jeder Seite ausgedruckt werden.
Direkt Drucken
Bietet die Möglichkeit, Bilder unmittelbar nach
der Speicherung zu Drucken. Der Druck wird
direkt nach Erreichen der eingestellten Bilder pro
Seite ausgelöst.
Bilder pro Seite
Legt die Anzahl der Bilder pro Seite fest.
Print Copies
Specifies how many copies of each page are
printed.
Direct Print
Offers you the possibility of printing directly after
saving. The print job begins directly when the set
number of images per page is attained.
Número de impresiones
Fija el número de ejemplares de cada hoja que
habrán de imprimirse.
Imprimir directamente
Ofrece la posibilidad de imprimir imágenes inmediatamente después de guardarlas. La impresión
se activa directamente después de alcanzar la
cifra ajustada de imágenes por hoja.
Images Per Page
Specifies the number of images per page.
Imágenes por hoja
Fija la cantidad de imágenes por hoja.
Nur für den Veterinärgebrauch
For veterinary use only
Sólo para uso veterinario
Bedienhinweise
Operating instructions
instrucciones operativas
Geräte
Devices
Aparatos
Sprache
Hier können Sie die Sprache des Gerätes auswählen (Neustart erforderlich).
Tastatur
Hier können Sie das gewünschte Länderlayout
der Tastatur auswählen.
Datum/Uhrzeit einstellen
Hier können Sie das Datum bzw. die Uhrzeit des
Gerätes sowie das Datumsformat einstellen.
Lichtquelle zurücksetzen
Hier können Sie den Lampenstundenzähler nach
einem Lampenwechsel zurücksetzen (Kapitel 9. 3
auf Seite 38).
Software aktualisieren
Mit diesem Menüpunkt können Sie das Gerät
aktualisieren.
Geräteinformationen
Zeigt alle Informationen des Gerätes an.
8. 2. 5 Infoleiste
In der Infoleiste werden wichtige Geräteinformationen
angezeigt. Ändern Sie eine Einstellung, wird das
jeweilige Symbol in der Infoleiste angezeigt.
30
Language
You can select the language of the device here
(reboot necessary).
Keyboard
You can select the required keyboard countryspecific layout here.
Set Date/Time
You can set the date and time of the device as
well as the date format here.
Reset Light Source
You can reset the lamp runtime counter after
changing the lamp here (in chapter 9. 3 on page
38).
Software Update
This menu item can be used to update the
device.
Device Information
Displays all device information.
8. 2. 5 Info bar
The info bar displays important device information.
If you change a setting, the respective symbol is
displayed in the info bar.
Digitaler Zoom aktiviert
Digital zoom activated
Manueller Shutter aktiviert
Manual shutter activated
Bild spiegeln über vertikale Achse
aktiviert
Mirror image over vertical axis
activated
Bild spiegeln über horizontale
Achse aktiviert
Mirror image over horizontal axis
activated
Bild drehen um 180° aktiviert
Rotate image 180° activated
Filter zur Kontrastanhebung bzw.
für Fiberskope aktiviert.
Filter for contrast enhancement or
for fiberscopes activated
Farbveränderungen am Display
vorgenommen
Color changes made to display
Nur für den Veterinärgebrauch
For veterinary use only
Idioma
Aquí puede seleccionar el idioma del aparato (es
necesario un reinicio).
Teclado
Aquí puede seleccionar el formato de país
deseado para el teclado.
Ajustar fecha/hora
Aquí puede ajustar la fecha o la hora del aparato, así como el formato de la fecha.
Reponer fuente de luz
Aquí puede reponer a cero el contador de horas
de la lámpara después de un cambio de lámpara
(el capitulo 9. 3 en la pág 38).
Actualizar software
Con este punto del menú puede actualizar el
aparato.
Información del aparato
Muestra toda la información relativa al aparato.
8. 2. 5 Barra de información
En la barra de información aparecen indicadas
informaciones importantes del aparato. Si modifica usted un ajuste, aparece indicado el símbolo
correspondiente en la barra de información.
Zoom digital activado
Shutter manual activado
Reflejar la imagen sobre el eje vertical, activado
Reflejar la imagen sobre el eje horizontal, activado
Girar la imagen en 180° activado
Filtro para realce de contraste o
para fibroscopio, activado.
Se han realizado modificaciones de
color en el display
Sólo para uso veterinario
Bedienhinweise
Operating instructions
instrucciones operativas
8. 3
8. 3
8. 3
Behandlungsübersicht
In die Behandlungsübersicht gelangen Sie durch
Drücken der Taste
. Hier können Sie die aufgenommenen Daten anschauen, Patientendaten
ändern und Dateinamen umbenennen bzw.
löschen.
Q
31
Treatment overview
You can enter the treatment overview by pressing
the
button. Here you can view the saved data,
change patient data, and rename/delete file names.
W
E
Sinopsis de tratamientos
Usted alcanza la sinopsis de tratamientos presionando la tecla
. Aquí puede ver los datos adoptados, modificar los datos de paciente y cambiar
un nombre de fichero o borrar.
R
Q
Reiter: Patientendaten
Q
Tab: Patient data
Q
Pestaña: Datos del paciente
W
Reiter: Bilder
W
Tab: Images
W
Pestaña: Imágenes
E
Reiter: Videos
E
Tab: Videos
E
Pestaña: Vídeos
R
Reiter: Audios
R
Tab: Audios
R
Pestaña: Audios
Nur für den Veterinärgebrauch
For veterinary use only
Sólo para uso veterinario
32
Bedienhinweise
Operating instructions
instrucciones operativas
8. 3. 1 Übersicht der Funktionstasten der
Behandlungsübersicht
8. 3. 1 Overview of the treatment overview’s function buttons
8. 3. 1 Sinopsis de las teclas de función
de la sinopsis de tratamientos
Die Funktionen der unterschiedlichen Symbole sind
wie folgt:
The functions of the different symbols are as
follows:
Las funciones de los diferentes símbolos son las
siguientes:
Zurück
Zurück zum Hauptscreen
Back
Back to the main screen
Atrás
Retrocede a la pantalla principal
Neuer Patient
New Patient
Nuevo paciente
Drucken
Druckt die markierten Bilder aus.
Print
Print the selected images.
Imprimir
Imprime las imágenes marcadas.
Vergrößern
Maximize
Aumentar
Verkleinern
Minimize
Reducir
Vollbild
Full screen
Imagen completa
Bildaufnahme
Bildaufnahme aus dem gespeicherten Video. Die Bilder sind
nach der Aufnahme unter dem
Reiter Bilder zu finden.
Capture Still Image
Capture images from the saved
video. After capture, the images
can be found in the Images tab.
Captura de imagen
Captura de imagen del vídeo
guardado. Después de la captura,
las imágenes se encuentran dentro de la pestaña Imágenes.
Lauter
Louder
Más alto
Leiser
Quieter
Más bajo
Abspielen/Pause
Play/Pause
Reproducir/pausa
Stop
Stop
Detener
Nächster Marker
Next marker
Próxima marca
Letzter Marker
Last marker
Última marca
Marker setzen/löschen
Set/Delete marker
Aplicar/borrar marca
Nur für den Veterinärgebrauch
For veterinary use only
Sólo para uso veterinario
33
Bedienhinweise
Operating instructions
instrucciones operativas
8. 3. 2 Bilder Drucken
8. 3. 2 Printing images
8. 3. 2 Imprimir imágenes
1. Wählen Sie das zu druckende Bild aus.
2. Öffnen Sie das Zusatzmenü durch Enter oder mit
einem Doppelklick.
3. Bestätigen Sie „Zum Drucken markieren“.
Die markierten Dateien werden mit einem
Symbol versehen.
4. Lösen Sie den Druck mit der Taste
aus.
1. Select the image to be printed.
2. Open the auxiliary menu by pressing ‘Enter’ or
with a double click.
3. Confirm with ‘mark for print’.
The selected files are furnished with a symbol.
4. Perform the print with the
button.
1. Seleccione la imagen que desea imprimir.
2. Abra el menú adicional presionando Intro o con
un doble clic.
3. Confirme con “Marcar para imprimir”.
Los ficheros marcados están provistos con un
símbolo.
4. Active la impresión con la tecla
.
8. 3. 3 Bilder/Videos löschen:
8. 3. 3 Deleting images/videos:
8. 3. 3 Borrar imágenes/vídeos:
1. Wählen Sie das zu löschende Bild oder Video
aus.
2. Öffnen Sie das Zusatzmenü durch Enter oder mit
einem Doppelklick.
3. Wählen Sie den Menüpunkt „löschen“ aus und
bestätigen Sie die Rückfrage.
Das Bild/Video wird gelöscht.
1. Select the image or video to be deleted.
2. Open the auxiliary menu by pressing ‘Enter’ or
with a double click.
3. Select the menu point ‘Delete’ and confirm the
query.
The image/video is deleted.
1. Seleccione la imagen o la secuencia de vídeo
que desea borrar.
2. Abra el menú adicional presionando Intro o con
un doble clic.
3. Seleccione el punto Borrar del menú y confirme
la consulta de seguridad.
Se borra la imagen/el vídeo.
8. 3. 4 Bilder/Videos umbenennen:
8. 3. 4 Renaming images/videos:
1. Wählen Sie das Bild oder Video aus, das Sie
umbenennen möchten.
2. Öffnen Sie das Zusatzmenü durch Enter oder mit
einem Doppelklick.
3. Wählen Sie den Menüpunkt „Umbenennen“ aus.
4. Geben Sie einen neuen Dateinamen ein und
bestätigen diesen.
Das Bild/Video wird umbenannt.
1. Select the image/video that you would like to
rename.
2. Open the auxiliary menu by pressing ‘Enter’ or
with a double click.
3. Select the menu item ‘Rename’.
4. Enter a new file name and confirm.
The image/video is renamed.
8. 3. 4 Cambiar el nombre de imágenes/
vídeos:
Nur für den Veterinärgebrauch
For veterinary use only
1. Seleccione la imagen o la secuencia de vídeo a
la que desea cambiarle el nombre.
2. Abra el menú adicional presionando Intro o con
un doble clic.
3. Seleccione el punto del menú “Renombrar”.
4. Ingrese un nuevo nombre de fichero y confírmelo.
Cambia el nombre de la imagen/el vídeo.
Sólo para uso veterinario
Bedienhinweise
Operating instructions
instrucciones operativas
8. 4
8. 4
8. 4
Übersicht Datenbrowser
Der Datenbrowser zeigt alle Speichermedien und
die darauf gespeicherten Behandlungen an.
Data browser overview
The data browser displays all the storage media
and the treatments saved there clearly.
Q
Sinopsis del navegador de datos
El navegador de datos muestra todos los soportes
de datos y los tratamientos allí guardados.
W
E
34
Q
Medium
Übersicht der vorhandenen
Speichermedien
Q
Medium
Overview of existing storage media
Q
Soporte
Sinopsis de los soportes de datos
existentes
W
Daten
Übersicht der vorhandenen
Prozeduren
W
Data
Overview of existing procedures
W
Datos
Sinopsis de los procedimientos
existentes
E
Infobereich
Anzeige von Zusatzinformationen
der markierten Behandlung
E
Info area
Displays additional information
about the selected treatment
E
Sector de información
Indicación de información adicional
del tratamiento marcado
Nur für den Veterinärgebrauch
For veterinary use only
Sólo para uso veterinario
35
Bedienhinweise
Operating instructions
instrucciones operativas
8. 4. 1 Übersicht der Funktionstasten des
Datenbrowsers
8. 4. 1 Overview of the data browser’s
function buttons
8. 4. 1 Sinopsis de las teclas de función
del navegador de datos
Über den Datenbrowser können Sie sich die zuvor
gespeicherten Behandlungen der angeschlossenen
Speichermedien anzeigen lassen.
Die Funktionen der unterschiedlichen Symbole sind
wie folgt:
You can use the data browser to view the treatments saved on the connected storage media.
The functions of the different symbols are as
follows:
A través del navegador de datos puede hacer que
aparezcan indicados los tratamientos previamente
guardados de los soportes de datos conectados.
Las funciones de los diferentes símbolos son las
siguientes:
Speichermedium sicher entfernen
Removing the storage medium
safely
Expulsar de forma segura el
soporte de datos
Behandlung Löschen
Deleting treatment
Borrar el tratamiento
Behandlungsübersicht
Treatment overview
Sinopsis de tratamientos
Zurück
Back
Atrás
8. 4. 2 Behandlungen über Datenbrowser
anzeigen
8. 4. 2 Display treatments via data
browser
8. 4. 2 Indicar los tratamientos a través
del navegador de datos
Über den Datenbrowser können Sie sich die
Behandlungen anzeigen lassen.
1. Klicken Sie auf das Patienten-Menü.
2. Wählen Sie den Menüpunkt „Datenbrowser“ aus.
Der Datenbrowser wird geöffnet und die Daten
vom Speichermedium geladen.
3. Sie können jetzt über die Navigationstasten oder
mit der Mause den gewünschten Datensatz auswählen.
Der ausgewählte Datensatz wird geladen.
You can use the data browser to view the
treatments.
1. Click on the patient menu.
2. Select the menu item ‘Data Browser’.
The data browser opens and the data are loaded from the storage medium.
3. You can now use the navigation keys or the
mouse to select the required data set.
The selected data set is loaded.
A través del navegador de datos puede hacer que
aparezcan indicados los tratamientos.
1. Haga clic en el menú del paciente.
2. Seleccione el punto del menú “Navegador de
datos”.
Se abre el navegador de datos y se cargan los
datos del soporte de datos.
3. Ahora puede seleccionar el juego de datos
deseado mediante las teclas de navegación o
el ratón.
Se carga el juego de datos seleccionado.
Nur für den Veterinärgebrauch
For veterinary use only
Sólo para uso veterinario
36
instandhaltung
Service and repair
Mantenimiento
9
Instandhaltung
9
Service and repair
9
Mantenimiento
9. 1
Sicherungswechsel
9. 1
Fuse replacement
9. 1
Cambio de fusibles
4. Schalten Sie das Gerät aus und trennen Sie die
Netzverbindung.
5. Lösen Sie den Sicherungshalter i mit einem
Schraubendreher.
4. Switch the device off and disconnect from the
power supply.
5. Remove the fuse holder i using a screwdriver.
4. Desconecte el aparato y desenchúfelo de la red.
5. Afloje el portafusibles i con un destornillador.
2
VORSICHT: Bei Sicherungswechsel
nur Sicherungen mit den angegebenen
Werten verwenden (Netzsicherung: 2 x
T1,6AL250V).
6. Setzen Sie die neue Sicherung in den
Netzsicherungshalter ein.
7. Setzen Sie den Netzsicherungshalter wieder in
das Gerät ein.
2
CAUTION: When replacing fuses, use only
fuses of the correct rating.
(Fuse: 2 x T1.6AL250V).
6. Insert the new fuse into the fuse holder.
7. Place the fuse holder back into the unit.
2
8. Stellen Sie die Netzverbindung wieder her und
schalten das Gerät ein.
Das Gerät ist einsatzbereit. Führen Sie eine
Funktionsprüfung durch.
8. Reconnect the power supply and turn the unit
on.
The unit is now ready for operation. Perform a
test for proper operation.
8. Enchufe nuevamente el aparato a la red y
conéctelo.
El aparato está dispuesto para el servicio. Lleve
a cabo una comprobación de funcionamiento.
Nur für den Veterinärgebrauch
For veterinary use only
ADVERTENCIA: Al cambiar los fusibles,
utilice sólo fusibles con los valores indicados
(fusible de la red: 2 un. T1.6AL250V).
6. Coloque el fusible nuevo en el portafusibles de
la red.
7. Vuelva a montar el portafusibles en el aparato.
Sólo para uso veterinario
instandhaltung
Service and repair
Mantenimiento
9. 2
9. 2
9. 2
3
Lampe wechseln
Cambio de la lámpara
3
3
3
WARNING: Risk of injury for user. Turn the
device off and remove the power cord from
the electrical outlet.
1. Turn the device off and disconnect from the
power supply.
2. Open the cover for changing the lamp.
WARNING: Risk of burns for user. The lamp
may be hot.
3
3
3. Entriegeln Sie den Sicherungsbügel der Lampe
durch leichtes Drücken des Bügels nach oben.
4. Entnehmen Sie die Lampe aus der Halterung.
3. Unlock the lamp’s safety clip by pressing the clip
upward gently.
4. Remove the lamp from its holder.
3. Desenclave el pasador de seguridad de la lámpara presionando ligeramente el pasador hacia
arriba.
4. Extraiga la lámpara del soporte.
5. Lösen Sie die Steckverbindungen der Lampe.
5. Undo the lamp’s connectors.
5. Afloje las conexiones de enchufe de la lámpara.
6. Verbinden Sie die neue Lampe mit den
Steckverbindungen und setzen Sie die Lampe
wieder in die Halterung ein.
HINWEIS: Achten Sie beim Einsetzen der
Lampe auf die richtige Positionierung. Die
Lampenbeschriftung „up“ muss oben sein!
7. Verriegeln Sie den Sicherungsbügel der Lampe.
8. Schließen Sie die Lichtklappe für Lampenwechsel.
Führen Sie eine Funktionsprüfung durch und setzen Sie den Lampenzähler zurück.
6. Connect the new lamp with the connectors and
insert the lamp back into the holder.
6. Conecte la nueva lámpara con las conexiones
de enchufe y colóquela de nuevo en el soporte.
NOTE: Pay attention to the correct positioning when inserting the lamp. The word ‘up’
on the lamp must point upward!
7. Lock the lamp’s safety clip in place.
8. Close the cover for changing the lamp.
Perform a test for proper functioning and reset
the lamp counter.
1
1
37
Replacing the lamp
WARNUNG: Verletzungsgefahr für den
Anwender. Gerät ausschalten und Netzverbindung trennen.
1. Schalten Sie das Gerät aus und trennen die
Netzverbindung.
2. Öffnen Sie die Abdeckklappe für Lampenwechsel.
WARNUNG: Verbrennungsgefahr für Anwender. Lampe kann heiß sein.
Nur für den Veterinärgebrauch
1
For veterinary use only
CUIDADO: Riesgo de lesiones para el
usuario. Desconecte el aparato y desenchúfelo de la red.
1. Desconecte el aparato y desenchúfelo de la red.
2. Abra la tapa de cobertura para efectuar el cambio de la lámpara.
CUIDADO: Riesgo de quemaduras para el
usuario. La lámpara puede estar caliente.
NOTA: Al montar la lámpara, preste atención
al posicionamiento correcto de la misma. El
rótulo “up” de la lámpara ha de estar arriba.
7. Enclave el pasador de seguridad de la lámpara.
8. Cierre la tapa de luz para cambio de la lámpara.
Lleve a cabo una comprobación de funcionamiento y reponga a cero el contador de la lámpara.
Sólo para uso veterinario
instandhaltung
Service and repair
Mantenimiento
9. 3
9. 3
9. 3
Lampenstundenzähler zurücksetzen
1. Wählen Sie zum Zurücksetzen des
Lampenzählers den Menüpunkt „Einstellungen,
Geräteeinstellungen - Lampe zurücksetzen“ aus.
2. Bestätigen Sie die Sicherheitsabfrage.
HINWEIS: Den aktuellen Lampenstundenzähler können Sie sich unter „Einstellungen/
Gerät/Geräteinformationen...“ einsehen.
1
9. 4
3
2
38
Reinigung und Desinfektion
WARNUNG: Vor sämtlichen Reinigungsarbeiten ist das Gerät vom Netz zu trennen.
VORSICHT: Unbedingt vermeiden, dass
Flüssigkeit in das Gehäuse eindringt.
Resetting the lamp runtime
counter
1. To reset the lamp counter, select the menu entry
‘Settings/device settings/Reset lamp’.
2. Confirm the prompt.
1
9. 4
NOTE: You can view the current lamp runtime under ‘Settings/device/device information...’.
3
2
Cleaning and disinfection
WARNING: Always unplug power before
cleaning.
CAUTION: Avoid allowing fluids to enter the
housing at all costs.
Reponer a cero el contador de
horas de la lámpara
1. Para reponer a cero el contador de la lámpara,
seleccione el punto del menú “Ajustes, Ajustes
del aparato - Reponer a cero la lámpara”.
2. Confirme la consulta de seguridad.
NOTA: Usted puede ver el contador actual
de horas de la lámpara en “Ajustes/Aparato/
Información de aparato...”.
1
9. 4
3
2
Limpieza y desinfección
CUIDADO: Antes de cualquier trabajo de
limpieza, desconecte el aparato de la red.
ADVERTENCIA: Evite a toda costa la infiltración de líquido en la carcasa.
Die Außenflächen des Gerätes mit einem in
Desinfektionsmittel getränktem Einmaltuch
wischend reinigen. Zur Wischdesinfektion empfehlen wir ausschließlich Flächendesinfektionsmittel auf
der Basis von quatären Ammoniumverbindungen
oder gebrauchsfertige Schnelldesinfektionsmittel
als Einwegwischverfahren auf der Basis von
Ammoniumchloriden.
Wipe-clean the exterior surfaces of the device with
a disposable cloth moistened with disinfectant. For
wipe-down disinfection, we recommend using only
surface disinfectants based on quarternary ammonium compounds or ready-to-use rapid-action disposable disinfectant methods based on ammonium
chloride.
Limpie las superficies exteriores del aparato frotándolas con un paño desechable embebido con un
producto desinfectante. Para la desinfección por
frotado recomendamos exclusivamente el uso de
productos para la desinfección de superficies (a
base de compuestos cuaternarios de amonio), así
como procedimientos de frotado con un producto
desechable listo para su uso, a base de cloruro de
amonio.
Nur für den Veterinärgebrauch
For veterinary use only
Sólo para uso veterinario
39
instandhaltung
Service and repair
Mantenimiento
9. 5
9. 5
9. 5
Wartung und
Sicherheitsüberprüfung
Maintenance and
safety check
Mantenimiento y control
técnico de seguridad
9. 5. 1 Wartung
9. 5. 1 Maintenance
9. 5. 1 Mantenimiento
Eine vorbeugende Wartung ist nicht zwingend
erforderlich. Regelmäßige Wartungen können aber
dazu beitragen, eventuelle Störungen frühzeitig zu
erkennen und so die Sicherheit und Lebensdauer
des Gerätes erhöhen. Wartungsdienste können
bei Ihrer zuständigen Gebietsvertretung oder beim
Hersteller erfragt werden.
Preventive maintenance is not essential. Regular
maintenance can, however, contribute to identifying potential problems before they become serious, thus enhancing the instrument’s reliability
and extending its useful service life. Maintenance
services can be obtained from your local representative or from the manufacturer.
El equipo no precisa forzosamente de mantenimiento preventivo. Sin embargo, los mantenimientos periódicos contribuyen a detectar a tiempo
posibles averías, aumentando así la seguridad y
la durabilidad del aparato. El servicio de mantenimiento puede usted solicitarlo de su concesionario
local o del fabricante.
9. 5. 2 Sicherheitsüberprüfung
9. 5. 2 Safety check
9. 5. 2 Control técnico de seguridad
Unabhängig von den in den verschiedenen Ländern
vorgeschriebenen Unfallverhütungsvorschriften
oder Prüfungsintervallen für Medizingeräte müssen
an diesem Gerät folgende Kontrollen mindestens
einmal im Jahr von Personen durchgeführt werden,
die aufgrund ihrer Ausbildung, ihrer Kenntnisse
und ihrer durch praktische Tätigkeit gewonnenen Erfahrungen solche sicherheitstechnischen
Kontrollen ordnungsgemäß durchführen können
und die hinsichtlich dieser Kontrolltätigkeit keinen
Weisungen unterliegen.
Regardless of the accident prevention regulations
or testing intervals for medical devices prescribed
in different countries, the following checks must be
carried out on this device by persons who, due to
their training, knowledge and practical experience,
are able to properly carry out such safety checks
and who are not subject to any instructions as far
as such checking activities are concerned.
Sichtprüfung:
1. Gerät und Zubehör auf funktionsbeeinträchtigende mechanische Schäden kontrollieren.
2. Sicherheitsrelevante Aufschriften auf Lesbarkeit
kontrollieren.
Visual inspection
1. Check the device and accessories for any
mechanical damage which may impair functionality.
2. Check that inscriptions relevant to safety are
legible.
Independientemente de las disposiciones legales
locales acerca de prevención de accidentes o de
intervalos de control técnico de aparatos médicos,
en este aparato han de llevarse a cabo los siguientes controles como mínimo una vez al año por
parte de personas que, debido a su formación, sus
conocimientos y su experiencia obtenida a través
de la actividad práctica estén capacitadas para
efectuar correctamente estos controles técnicos de
seguridad y no estén supeditados a recibir ningún
tipo de instrucciones en cuanto a su actividad de
control.
Inspección visual:
1. Compruebe el aparato y los accesorios con
respecto a deterioros mecánicos que puedan
menoscabar el funcionamiento.
2. Compruebe la legibilidad de los rótulos relevantes para la seguridad.
Nur für den Veterinärgebrauch
For veterinary use only
Sólo para uso veterinario
40
instandhaltung
Service and repair
Mantenimiento
Elektrische Messungen:
• Kontrolle der Geräteschutzsicherungen
• Schutzleiterwiderstand gemäß IEC 62353 ed1.0
messen: Grenzwert: 0,2 Ohm
• Erdableitstrom gemäß IEC 62353 ed1.0 messen:
Grenzwert: NC: 500 µA, SFC: 1000 µA
• Patientenableitstrom gemäß IEC 62353 ed1.0
messen: Grenzwert: 100 μA (BF), 10 μA (CF)
• Ableitströme dürfen nicht größer als die oben
genannten Grenzwerte sein.
Electric measurements:
• Inspecting the device safety fuses
• Protective ground resistance measured according to IEC 62353 ed1.0: Limit value: 0.2 ohms
• Earth leakage current measured according to
IEC 62353 ed1.05: Limit value: NC 500 µA, SFC:
1000 µA
• Patient leakage current measured according to
IEC 62353 ed1.0: Limit value: 100 μA (BF), 10
μA (CF)
• Leakage currents must not exceed the limit values specified above.
Funktionsprüfung:
Funktionskontrolle nach Gebrauchsanweisung
durchführen.
Die sicherheitstechnische Kontrolle ist in das
Gerätebuch einzutragen und die Kontrollergebnisse
sind zu dokumentieren.
Ist das Gerät nicht funktions- und/oder betriebssicher, muss es instandgesetzt werden.
Test for proper functioning:
A functional check must be carried out in accordance with the instruction manual.
The safety check must be entered in the unit logbook and the results of the check must be documented.
If the device does not function reliably and/or safely,
it must be repaired.
Mediciones eléctricas:
• Control de los fusibles del aparato
• Medir la resistencia del conductor de protección
conforme a CEI 62353 ed1.0: Valor límite: 0,2
ohmios
• Medir la corriente de fuga a tierra conforme a
CEI 62353 ed1.0: Valor límite: Condiciones normales: 500 µA, en condición de primer defecto:
1000 µA
• Medir la corriente de fuga del paciente conforme
a CEI 62353 ed1.0: Valor límite: 100 μA (BF), 10
μA (CF)
• Las corrientes de fuga no han de superar los
valores límite mencionados arriba.
Verificación de funcionamiento:
Lleve a cabo un control de funcionamiento según
el Manual de instrucciones.
Los controles técnicos de seguridad han de registrarse en el libro del aparato y los resultados del
control han de documentarse.
Si el aparato no está en condiciones de funcionar
y/o su servicio no es seguro, hay que repararlo.
Nur für den Veterinärgebrauch
For veterinary use only
Sólo para uso veterinario
41
instandhaltung
Service and repair
Mantenimiento
9. 6
9. 6
9. 6
Instandsetzung
Servicing and repair
Reparaciones
Die Instandsetzung von defekten Geräten darf nur
durch von uns autorisierte Personen und unter
Verwendung von KARL STORZ Originalteilen erfolgen.
Defective items of equipment must be serviced and
repaired exclusively by persons authorized by us;
all repair work must employ genuine KARL STORZ
parts only.
La reparación de aparatos defectuosos sólo ha de
ser efectuada por personal autorizado por nosotros y utilizando piezas de repuesto originales de
KARL STORZ.
9. 7
9. 7
9. 7
Wichtige Hinweise
Important information
Observaciones importantes
Aus infektionspräventiven Gründen ist ein Versand
von kontaminierten Medizinprodukten strikt
abzulehnen. Medizinprodukte sind direkt vor
Ort zu dekontaminieren, um Kontakt- und aerogene Infektionen (beim Personal) zu vermeiden.
Wir behalten uns das Recht vor, kontaminierte
Instrumente/Geräte an den Absender zurückzuschicken.
Reparaturen, Änderungen oder Erweiterungen,
die nicht von KARL STORZ oder durch von
KARL STORZ autorisierte Fachleute durchgeführt werden, führen zum Verlust aller
Garantieansprüche. KARL STORZ übernimmt keine
Garantie für die Funktionsfähigkeit von Geräten
oder Instrumenten, deren Reparatur durch nicht
autorisierte Dritte durchgeführt wurde.
In order to prevent infection, it is strictly forbidden
to ship contaminated medical devices. All medical
devices must be decontaminated on site, to avoid
contact and aerogenous infections (among staff).
We reserve the right to return contaminated instruments/equipment to the sender.
Repairs, modifications, or expansions which are
not carried out by KARL STORZ or by experts
authorized by KARL STORZ will invalidate all warranty rights. KARL STORZ gives no guarantee on
the correct functioning of equipment or instruments
which have been repaired by unauthorized third
parties.
Con el fin de prevenir infecciones rechazamos
estrictamente la recepción de envíos de productos
sanitarios contaminados. Los productos sanitarios
han de ser descontaminados directamente in situ,
con el fin de evitar infecciones aerógenas o por
contacto (entre el personal). Nos reservamos el
derecho de devolver a su propietario aquellos instrumentos/aparatos que estuvieran contaminados.
Las reparaciones, modificaciones o ampliaciones
que no hayan sido realizadas por KARL STORZ o
por personal experto autorizado por KARL STORZ
implican la pérdida de los derechos de garantía.
KARL STORZ no asume garantía alguna en cuanto
a la funcionalidad de aquellos aparatos o instrumentos, cuya reparación haya sido realizada por
terceros no autorizados.
Nur für den Veterinärgebrauch
For veterinary use only
Sólo para uso veterinario
42
instandhaltung
Service and repair
Mantenimiento
9. 8
9. 8
9. 8
Entsorgung
Disposal
Gestión de desecho
Dieses Gerät ist entsprechend der europäischen
Richtlinie 2002/96/EG über Elektro- und ElektronikAltgeräte (waste electrical and electronic equipment
- WEEE) gekennzeichnet.
Nach Ablauf der Lebensdauer ist das Gerät als
Elektronikschrott zu entsorgen. Hierzu erfragen
Sie bitte die für Sie zuständige Sammelstelle bei
KARL STORZ GmbH & Co. KG, einer KARL STORZ
Niederlassung oder Ihrem Fachhändler.
Im Geltungsbereich der Richtlinie ist
KARL STORZ GmbH & Co. KG für die ordnungsgemäße Entsorgung des Gerätes verantwortlich.
This device has been marked in accordance with
the European Directive 2002/96/EC on waste electrical and electronic equipment (WEEE).
At the end of its useful operating life, dispose of
the unit as electronic scrap. Please ask either
KARL STORZ GmbH & Co. KG, a KARL STORZ
subsidiary or your specialist dealer for information
on your local collection point.
Within the scope of application of this Directive,
KARL STORZ GmbH & Co. KG is responsible for
the proper disposal of this device.
Este equipo está identificado conforme a la directiva europea 2002/96/CE referida a aparatos
eléctricos y electrónicos viejos (waste electrical and
electronic equipment - WEEE).
Después de concluída su vida útil, deseche el equipo como residuo electrónico. Para ello, consulte
a KARL STORZ GmbH & Co. KG, a una sociedad
distribuidora de KARL STORZ o a su comercio
especializado para averiguar el centro de recogida
que le corresponde.
En el área de validez de la directiva,
KARL STORZ GmbH & Co. KG es responsable de
la correcta gestión residual del aparato.
Vermeidung von Umweltverschmutzung durch
elektronische Geräte (China RoHS).
Electronic information product pollution control
(China RoHS)
Evitación de contaminación ambiental debida a
aparatos electrónicos (China RoHS)
Nur für den Veterinärgebrauch
For veterinary use only
Sólo para uso veterinario
technische Beschreibung
technical description
Descripciones técnicas
10
10
10
Technische Beschreibung
10. 1 Fehlersuchliste
43
Technical description
10. 1 Troubleshooting
Descripciones técnicas
10. 1 Localización de errores
WARNUNG: Vor sämtlichen Wartungsarbeiten das Gerät vom Netz trennen und die
Lampe abkühlen lassen.
Fehlerbeschreibung:
• Gerät ganz ausgefallen
Mögliche Ursachen:
• Netzversorgung ausgefallen
• Sicherung defekt
• Unzureichende Verbindung: NetzgerätesteckerGerätebuchse
• Lichtklappe für Lampenwechsel offen bzw. nicht
richtig geschlossen
Abhilfe:
• Versorgungsnetz überprüfen
• Sicherung auswechseln
• Netzgerätestecker fest in Gerätebuchse eindrücken
• Lichtklappe für Lampenwechsel schließen
• Gerät zur Reparatur einsenden
3
WARNING: Always unplug the device and
allow the lamp to cool down before carrying
out any maintenance work.
Symptom:
• Complete failure of the unit
Possible causes:
• No power from the power line
• Defective fuse
• Power cord connector is not properly connected
to power cord receptacle
• Light cover for changing lamp open or not
closed properly
Remedy:
• Check that there is electricity to the wall outlet.
• Fit new fuse.
• Push power cord connector firmly into power
cord receptacle.
• Close light cover for changing lamp.
• Send equipment in for repair.
3
3
Fehlerbeschreibung:
• Kein Bild, TFT-Flachbildschirm dunkel
Mögliche Ursachen
• Deckel auf Kamera
• Kameraelektronik defekt
• TFT-Flachbildschirm defekt
Abhilfe:
• Kameradeckel abnehmen
• Kamerakopf bzw. Gerät zur Überprüfung an
KARL STORZ senden
Symptom:
• No picture, TFT flat screen dark
Possible causes
• The cover is on the camera
• Defective camera electronics
• Defective TFT flat screen
Remedy:
• Remove camera cover.
• Send camera head or device to KARL STORZ to
be checked.
Descripción del error:
• No hay imagen, pantalla plana TFT oscura
Causas posibles
• Tapa sobre la cámara
• Electrónica de la cámara defectuosa
• Pantalla plana TFT defectuosa
Solución:
• Retire la tapa de la cámara
• Envíe el cabezal de la cámara o el aparato para
su verificación a KARL STORZ.
Nur für den Veterinärgebrauch
For veterinary use only
CUIDADO: ¡Antes de cualquier trabajo de
mantenimiento, desenchufe el aparato de la
red y deje enfriar la lámpara!
Descripción del error:
• Inactivación total del equipo
Causa posible:
• Falta alimentación de la red
• Fusible defectuoso
• Conexión insuficiente: Enchufe de la red conector del aparato
• La tapa de luz para cambio de la lámpara está
abierta o no está correctamente cerrada
Solución:
• Verifique la red de alimentación
• Cambie el fusible
• Apriete bien el enchufe de la red en el conector
del aparato
• Cierre la tapa de luz para cambio de la lámpara
• Envíe el aparato a reparación.
Sólo para uso veterinario
44
technische Beschreibung
technical description
Descripciones técnicas
Fehlerbeschreibung:
• Trübes Bild, Streifen, Schlieren und Ähnliches
Mögliche Ursachen
• Optik des Endoskops oder des Kameraobjektivs
verschmutzt
• Kontakt des Kamerasteckers verschmutzt
Abhilfe:
• Reinigung mit Wattestäbchen und Alkohollösung
oder Spezial-Reinigungspaste.
• Kontakte des Kamerasteckers reinigen.
Symptom:
• Cloudy picture, stripes, streaks, or similar
Possible causes
• The lens of the endoscope or camera lens is
dirty.
• The contact of the camera plug is dirty.
Remedy:
• Clean with cotton swab and alcohol solution or
special cleaning paste.
• Clean the contacts of the camera plug.
Descripción del error:
• Imagen borrosa, rayas, fallos de imagen y similares
Causas posibles
• El sistema óptico del endoscopio o del objetivo
de la cámara están sucios
• El contacto de enchufe de la cámara está sucio.
Solución:
• Limpie con un bastoncillo de algodón y solución
de alcohol o pasta especial de limpieza.
• Limpie el contacto de enchufe de la cámara.
Fehlerbeschreibung:
• Farbverfälschungen
Mögliche Ursachen
• Weißabgleich nicht korrekt durchgeführt
• Farbanpassungen des Monitors durchgeführt
• TFT Flachbildschirm oder Kamera defekt
Abhilfe:
• Weißabgleich durchführen
• Farbanpassungen des Monitors wieder rückgängig machen und ggf. Grundeinstellungen laden
• Gerät zur Reparatur an KARL STORZ senden
Symptom:
• Color distortions
Possible causes
• White balance not carried out correctly
• Color adjustment of monitor performed
• Defective TFT flat screen or camera.
Remedy:
• White balance
• Undo the color adjustment of the monitor and
restore factory settings if necessary.
• Send device to KARL STORZ for repair.
Fehlerbeschreibung:
• Farbwiedergabe wechselt
Mögliche Ursachen
• Kameraanschlusskabel gebrochen
Abhilfe:
• Kamerakopf zur Reparatur an KARL STORZ
senden.
Symptom:
• Color rendering alternates
Possible causes
• Camera connecting cord is broken
Remedy:
• Send camera head to KARL STORZ for repair.
Descripción del error:
• Distorsión de colores
Causas posibles
• El balance de blancos no se ha efectuado
correctamente
• Se han llevado a cabo adaptaciones de color del
monitor
• La pantalla plana TFT o la cámara están defectuosas.
Solución:
• Realice el balance de blancos
• Deshaga nuevamente las adaptaciones de color
del monitor y, si es necesario, cargue los ajustes
básicos
• Envíe el aparato a KARL STORZ para su reparación.
Nur für den Veterinärgebrauch
For veterinary use only
Descripción del error:
• La reproducción del color cambia
Causas posibles
• El cable de conexión de la cámara está quebrado
Solución:
• Envíe el cabezal de la cámara a KARL STORZ
para su reparación.
Sólo para uso veterinario
technische Beschreibung
technical description
Descripciones técnicas
Fehlerbeschreibung:
• Lichtquelle funktionslos, Kamera funktioniert
Mögliche Ursachen
• Lampe zu heiß
• Lampe defekt
• Lampenlüfter blockiert bzw. Zündeinheit der
Lampe defekt
Abhilfe:
• Lampe ca. 60 Sekunden abkühlen lassen, bevor
die Lampe bzw. das Gerät erneut eingeschaltet
wird
• Lampe wechseln
• Gerät zur Reparatur an KARL STORZ senden
Symptom:
• Light source not functioning, camera functioning
Possible causes
• Lamp too hot
• Defective lamp
• Lamp fan blocked or lamp ignition unit defective
Remedy:
• Allow the lamp to cool for approx. 60 seconds
before turning on the lamp or device again
• Replace the lamp.
• Send device to KARL STORZ for repair.
Descripción del error:
• La fuente de luz no funciona, la cámara funciona
Causas posibles
• Lámpara demasiado caliente
• Lámpara defectuosa
• El ventilador de la lámpara está bloqueado o la
unidad de encendido de la lámpara está defectuosa
Solución:
• Deje enfriar la lámpara durante aprox. 60 segundos antes de volver a encender la lámpara o el
aparato
• Cambio de la lámpara
• Envíe el aparato a KARL STORZ para su reparación.
Fehlerbeschreibung:
• Bild lässt sich nicht speichern
Mögliche Ursachen
• Kein Patient bzw. keine Behandlung angelegt
• Keine Speicherkarte oder USB-Stick eingesetzt
• Datenspeicher voll
Abhilfe:
• Patient anlegen
• Speicherkarte einstecken
• Datenspeicher wechseln
45
Nur für den Veterinärgebrauch
Symptom:
• Image cannot be stored
Possible causes
• No patient or treatment saved
• No memory card or USB stick inserted
• Memory full
Remedy:
• Create patients
• Insert memory card
• Change memory
For veterinary use only
Descripción del error:
• La imagen no se puede guardar
Causas posibles
• No se ha generado ningún paciente o ningún
tratamiento
• No se ha colocado ninguna tarjeta de memoria o
ningún stick USB
• La memoria de datos está llena
Solución:
• Crear nuevo paciente
• Inserte una tarjeta de memoria
• Cambie la memoria de datos
Sólo para uso veterinario
46
technische Beschreibung
technical description
Descripciones técnicas
10. 2 Technische Daten
10. 2 Technical data
10. 2 Datos técnicos
TELE PACK VET X
TELE PACK VET X
TELE PACK VET X
Netzspannung
Line voltage
Tensión de la red
100….240 V~
Netzfrequenz
Line frequency
Frecuencia de la red
50-60 Hz
Leistungsaufnahme
Power consumption
Potencia consumida
110 VA (AC)/100 W
Abmessungen in mm
Dimensions in mm
Dimensiones en mm
450x350x150
Gewicht
Weight
Peso
7 kg
Betriebsbedingungen
Operating conditions
Condiciones de servicio
+10 °C bis +40 °C, Luftfeuchtigkeit/air humidity/humedad del
aire: 5-95 % relative Feuchte/relative humidity/humedad relativa,
Luftdruck/air pressure/presión del aire: 500 hPa – 1080 hPa
Lagertemperatur
Storage temperature
Temperatura de almacenamiento
-10 °C bis +60 °C, Luftfeuchtigkeit/air humidity/humedad del
aire: 5-95 % relative Feuchte/relative humidity/humedad relativa,
Luftdruck/air pressure/presión del aire: 500 hPa – 1080 hPa/
Lichtquelle
Light source
Fuente de luz
Lampe
Lamp
Lámpara
Metal Halid 50 Watt/watts
Farbtemperatur
Color temperature
Temperatura de color
5700 K
Mittlere
Lampenlebensdauer
Medium lamp service life
Durabilidad promedio de la
lámpara
Ca. 1.000 Stunden/approx. 1,000 hours/aprox. 1.000 horas
TFT-Bildschirm
TFT screen
Pantalla plana TFT
Bildschirmgröße
Screen size
Tamaño de pantalla
15"
Auflösung
Resolution
Resolución
1024 x 768 Pixel/pixels/píxeles (XGA)
Kontrast
Contrast
Contraste
700:1
Lautsprecher
Speaker
Altavoz
Leistung
Power
Potencia
Nur für den Veterinärgebrauch
For veterinary use only
2 Watt/watts
Sólo para uso veterinario
technische Beschreibung
47
technical description
Descripciones técnicas
Technische Daten
Speichereinheit
Technical Data
Memory device
Datos técnicos
Unidad de memoria
Speicherschnittstelle
Memory interface
Interfaz de memoria
USB 2.0
SD-Speicherkarte (SDHC kompatibel) /
USB 2.0
SD memory card (SDHC-compatible) /
USB 2.0
Tarjeta de memoria SD (compatible SDHC)
Bildformat
Image format
Formato de imagen:
JPEG
Videocodec
Video codec
Codec de vídeo
MPEG-4
Videoformat
Video format
Formato de vídeo
PAL/NTSC
Schnittstellen
Interfaces
Interfaces
Videoschnittstellen
Video interfaces
Interfaces de vídeo
DVI-D (in/out)
Audio
Audio
Audio
3,5 mm Klinke,
2 x Mikrofon (1 x seitlich, 1 x hinten), Line-in, Line-out/
3.5 mm jack,
2 x microphone (1 x lateral, 1 x rear), Line-in, Line-out/
Enchufe jack de 3,5 mm,
2 para micrófono (1 lateral, 1 posterior) Line-in, Line-out
Fußschalteranschluss
Footswitch connection
Conexión del interruptor de
pedal
5-pin-Buchse für KARL STORZ Zweipedalfußschalter 20 014330
und Einpedalfußschalter 20 014130/
5-pin socket for KARL STORZ dual-pedal footswitch 20 014330
and single-pedal footswitch 20 014130/
Conector de 5 patillas para los interruptores de KARL STORZ: de
doble pedal 20 014330 y monopedal 20 014130
Druckeranschluss
Printer port
Conexión para impresora
USB
Druckersprachen
Printer language
Lenguajes de descripción
de página
PostScript
Nur für den Veterinärgebrauch
For veterinary use only
Sólo para uso veterinario
48
technische Beschreibung
technical description
Descripciones técnicas
10. 3 Normenkonformität
10. 3 Standard compliance
10. 3 Conformidad con las normas
(für 69 0450 20)
Nach EN60601-1 1990, A1:1993, A2:1995
Hauptabschnitt 3:
• Schutz gegen die Gefahr eines elektrischen
Schlages
Nach EN 55011/DIN EN 61326, EMVAnforderungen
• Grenzwerte und Messverfahren für
Funkentstörung von industriellen, wissenschaftlichen und medizinischen Hochfrequenzgeräten
(ISM-Geräten)
(for 69 0450 20)
According to EN60601-1 1990 / A1:1993 /
A2:1995 Main section 3:
• Protection against risk of electric shock
According to EN 55011 / DIN EN 61326, EMC
requirements
• Limits and methods of measurement for noise
interference suppression of industrial, scientific
and high-frequency devices (ISM)
(para 69 0450 20)
Según EN 61010-1 1990, A1:1993, A2:1995
Sección principal 3.
• Protección frente al riesgo de descarga eléctrica
Según EN 55011 / DIN EN 61326, requisitos
CEM
• Valores límite y procedimientos de medición para
protección antiparasitaria de aparatos industriales, científicos y médicos de alta frecuencia
(aparatos ISM)
10. 4 Richtlinienkonformität
10. 4 Directive compliance
10. 4 Conformidad con la directiva
(für 69 0450 20)
Dieses Produkt ist kein Medizinprodukt.
Dieses Produkt ist mit CE-Kennzeichen versehen
(for 69 0450 20)
This is not a medical device.
This device bears the CE mark.
(para 69 0450 20)
Este no es un producto médico.
Este producto está identificado con el símbolo CE.
Nur für den Veterinärgebrauch
For veterinary use only
Sólo para uso veterinario
Ersatzteile,
empfohlenes Zubehör
Spare parts,
recommended accessories
Piezas de repuesto,
accesorios recomendados
11
11
11
Ersatzteile,
empfohlenes Zubehör
11. 1 Ersatzteilliste
Artikel
49
Spare parts, recommended
accessories
11. 1 List of spare parts
Article
Piezas de repuesto, accesorios recomendados
11. 1 Piezas de repuesto
Artículo
Bestell-Nr.
Order no.
Nº de pedido
Ersatzlampe 50 Watt
50 watt spare lamp
Lámpara de repuesto 50 W
81131021
Netzsicherung
Power fuse
Fusible para la red
1069500
Gebrauchsanweisung
Instruction manual
Manual de instrucciones
96186009D
Lichtadapter Standard
Standard light adapter
Adaptador estándar para luz
20045030
Lichtadapter für Gastroskope
Light adaptor for gastroscopes
Adaptador de luz para gastroscopios
20045031
Adapter für KARL STORZ Lichtkabel
Adaptor for KARL STORZ light cable
Adaptador para el cable de luz
KARL STORZ
494 KS
Nur für den Veterinärgebrauch
For veterinary use only
Sólo para uso veterinario
50
Ersatzteile,
empfohlenes Zubehör
Spare parts,
recommended accessories
Piezas de repuesto,
accesorios recomendados
11. 2 Kompatible Kameraköpfe
11. 2 Compatible camera heads
11. 2 Cabezales de cámara
compatibles
Artikel
Article
Artículo
Bestell-Nr.
Order no.
Nº de pedido
TELECAM, Kamerakopf, autoklavierbar,
Parfocal-Zoom-Objektiv f=14–28 mm (2X),
PAL
TELECAM, camera head, autoclavable,
Parfocal Zoom lens
f = 14 – 28 mm (2X), PAL
TELECAM, cabezal de la cámara, esterilizable en autoclave, objetivo ParfocalZoom
f = 14–28 mm (2X), PAL
20212040
Desgleichen, NTSC
Same, NTSC
Idem, NTSC
20212140
TELECAM, Kamerakopf, Parfocal-ZoomObjektiv
f=25–50 mm (2X), PAL
TELECAM, camera head, autoclavable,
Parfocal Zoom lens
f = 25 – 28 mm (2X), PAL
TELECAM, cabezal de la cámara, objetivo
Parfocal-Zoom
f = 25–50 mm (2X), PAL
20212030
Desgleichen, NTSC
Same, NTSC
Idem, NTSC
20212130
TELECAM Beamsplitter, Kamerakopf,
f=25 mm, PAL
TELECAM Beamsplitter, camera head, f =
25 mm, PAL
TELECAM Beamsplitter, cabezal de la
cámara, f = 25 mm, PAL
20212032
Desgleichen, NTSC
Same, NTSC
Idem, NTSC
20212132
TELECAM DCI II Kamerakopf, f=16 mm,
PAL
TELECAM DCI II camera head, f = 16
mm, PAL
TELECAM DCI II, cabezal de la cámara, f
= 16 mm, PAL
20262030
Desgleichen, NTSC
Same, NTSC
Idem, NTSC
20262130
Veterinär Video Kamera C-MOUNT EinChip-Kamerakopf, Farbsystem PAL
Veterinary video camera C-MOUNT singlechip camera head, PAL color system
Cámara de vídeo para veterinaria, cabezal
C-MOUNT de un solo chip, norma de
color PAL
69215034
Veterinär Video Kamera C-MOUNT EinChip-Kamerakopf, Farbsystem NTSC
Veterinary video camera C-MOUNT singlechip camera head, NTSC color system
Cámara de vídeo para veterinaria, cabezal
C-MOUNT de un solo chip, norma de
color NTSC
69215134
Nur für den Veterinärgebrauch
For veterinary use only
Sólo para uso veterinario
51
Ersatzteile,
empfohlenes Zubehör
Spare parts,
recommended accessories
Piezas de repuesto,
accesorios recomendados
11. 3 Kompatible Videoendoskope
11. 3 Compatible videoscopes
11. 3 Videoendoscopios compatibles
Artikel
Article
Artículo
Bestell-Nr.
Order no.
Nº de pedido
Video Bronchoscope, PAL
Video bronchoscope, PAL
Videobroncoscopio, PAL
11900BP
Desgleichen, NTSC
Same, NTSC
Idem, NTSC
11900BN
Video-Verbindungskabel
Video connecting cord
Cable de conexión de vídeo
20213070
Veterinär-Videoendoskop PV-SG 22-140,
PAL
Veterinary videoscope PV-SG 22-140,
PAL
Videoendoscopio para veterinaria PV-SG
22-140, PAL
60814PKS
Desgleichen, NTSC
Same, NTSC
Idem, NTSC
60814NKS
Veterinär-Videoendoskop PV-SG 28-140,
PAL
Veterinary videoscope PV-SG 28-140,
PAL
Videoendoscopio para veterinaria PV-SG
28-140, PAL
60914PKS
Desgleichen, NTSC
Same, NTSC
Idem, NTSC
60914NKS
Veterinär-Videoendoskop PV-SG 28-140,
PAL
Veterinary videoscope PV-SG 28-140,
PAL
Videoendoscopio para veterinaria PV-SG
28-140, PAL
60714PKS
Desgleichen, NTSC
Same, NTSC
Idem, NTSC
60714NKS
Veterinär-Videoendoskop PV-G 28-180,
PAL
Veterinary videoscope PV-G 28-180,
PAL
Videoendoscopio para veterinaria PV-G
28-180, PAL
60118PKS
Desgleichen, NTSC
Same, NTSC
Idem, NTSC
60118NKS
Veterinär-Videoendoskop PV-G 28-250,
PAL
Veterinary videoscope PV-G 28-250,
PAL
Videoendoscopio para veterinaria PV-G
28-250, PAL
60125PKS
Desgleichen, NTSC
Same, NTSC
Idem, NTSC
60125NKS
Veterinär-Videoendoskop PV-G 28-300,
PAL
Veterinary videoscope PV-G 28-300,
PAL
Videoendoscopio para veterinaria PV-G
28-300, PAL
60130PKS
Desgleichen, NTSC
Same, NTSC
Idem, NTSC
60130NKS
Veterinär-Videoendoskop PV-G 34-325,
PAL
Veterinary videoscope PV-G 34-325,
PAL
Videoendoscopio para veterinaria PV-G
34-325, PAL
60332PKS
Desgleichen, NTSC
Same, NTSC
Idem, NTSC
60332NKS
11. 4 Kompatible Lichtkabel
11. 4 Compatible light cable
11. 4 Cables de luz compatibles
Alle KARL STORZ Lichtkabel sind zur Verwendung
geeignet.
All KARL STORZ light cables are suitable for use.
Todos los cables de luz de KARL STORZ son apropiados para su aplicación.
11. 5 Kompatible Endoskope
11. 5 Compatible endoscopes
11. 5 Endoscopios compatibles
Alle KARL STORZ Endoskope und Fiberskope sind
zur Verwendung geeignet.
All KARL STORZ endoscopes and fiberscopes are
suitable for use.
Todos los endoscopios y fibroscopios de
KARL STORZ son apropiados para su aplicación.
Nur für den Veterinärgebrauch
For veterinary use only
Sólo para uso veterinario
52
Ersatzteile,
empfohlenes Zubehör
Spare parts,
recommended accessories
Piezas de repuesto,
accesorios recomendados
11. 6 Empfohlenes Zubehör
11. 6 Recommended accessories
11. 6 Accesorios recomendados
Artikel
Article
Artículo
Bestell-Nr.
Order no.
Nº de pedido
KARL STORZ USB Stick (4GB)
KARL STORZ USB stick (4GB)
Stick USB KARL STORZ (4GB)
20040280
Headset
Headset
Headset
W21341
DVI Verbindungskabel, 2 m
DVI connecting cable, 2 m
Cable de conexión DVI, 2 m
20040086
Desgleichen, 3 m
Same, 3 m
Ídem, 3 m
20040089
Desgleichen, 7,60 m
Same, 7.60 m
Ídem, 7,60 m
20040286
Faseroptisches DVI-D Kabel, 10 m
Fiberoptic DVI-D cable, 10 m
Cable DVI-D de fibra óptica, 10 m
W26091
Desgleichen, 20 m
Same, 20 m
Ídem, 20 m
W26093
Netzkabel, 300 cm
Mains cord, 300 cm
Cable de la red, 300 cm
400F
Einpedal Fußschalter
Single-pedal footswitch
Interruptor monopedal
20014130
Zweipedal Fußschalter
Dual-pedal footswitch
Interruptor de doble pedal
20014330
Nur für den Veterinärgebrauch
For veterinary use only
Sólo para uso veterinario
Hinweise zur elektromagnetischen Verträglichkeit (EMV)
12
Hinweise zur elektromagne- 12
tischen Verträglichkeit (EMV)
3
WARNUNG: Medizinische elektrische
Geräte unterliegen besonderen Vorsichtsmaßnahmen hinsichtlich der Elektromagnetischen Verträglichkeit (EMV). Beachten Sie
die in diesem Anhang angegebenen EMVHinweise bei Installation und Betrieb.
WARNUNG: Der TELE PACK VET X Modell
69 0450 20 ist nur für den Gebrauch von
Ärzten und medizinischem Assistenzpersonal bestimmt. Das Gerät entspricht Klasse A
nach CISPR 11 (HF-Aussendungen) und ist
für den Gebrauch in anderen Einrichtungen
als dem Wohnbereich und solchen geeignet,
die unmittelbar an ein öffentliches Versorgungsnetz angeschlossen sind, das auch
Gebäude versorgt, die zu Wohnzwecken
benutzt werden. Wird der TELE PACK VET X
Modell 69 0450 20 im Wohnbereich angeschlossen, kann das Gerät EMV–Störungen
verursachen, die es notwendig machen, das
Gerät neu auszurichten, es an einem anderen Ort aufzustellen, das Gerät zu schirmen
oder die Anbindung an das öffentliche Versorgungsnetz zu filtern.
WARNUNG: Der TELE PACK VET X Modell
69 0450 20 sollte nicht unmittelbar neben
oder auf anderen Geräten gestapelt werden.
Ist der Betrieb nahe oder mit anderen Geräten gestapelt notwendig, dann sollten Sie
das Gerät bzw. das System zur Prüfung beobachten, damit der bestimmungsgemäße
Betrieb in dieser Kombination gewährleistet
ist.
WARNUNG: Der Gebrauch von tragbaren
und mobilen HF-Kommunikationsgeräten
kann dieses oder andere medizinische elektrische Geräte beeinflussen.
3
3
3
53
Electromagnetic compatibility
(EMC) information
Nur für den Veterinärgebrauch
3
3
3
3
indicaciones sobre compatibilidad electromagnética (CEM)
Electromagnetic compatibility (EMC) information
12
WARNING: Medical electrical equipment
needs special precautions regarding electromagnetic compatibility (EMC). Observe
the EMC instructions in this appendix during
installation and commissioning.
WARNING: The TELE PACK VET X model
69 0450 20 is intended for use by healthcare
professionals only. This is a CISPR 11 Class
A medical system (RF emissions) and is
suitable for use in all establishments other
than domestic and those directly connected
to the public low voltage power supply
network that supplies buildings used for
domestic purposes. In residential areas, the
TELE PACK VET X model 69 0450 20 may
cause EMC interference, in which case it
may be necessary to take adequate mitigation measures, such as re-orienting, relocating, or shielding the TELE PACK VET X
model 69 0450 20 or filtering the connection
to the public mains network.
WARNING: The TELE PACK VET X model
69 0450 20 should not be used adjacent to
or stacked on other equipment. If adjacent
or stacked use is necessary, the device or
system should be observed to verify normal
operation in the configuration in which it will
be used.
WARNING: The use of portable and mobile
RF equipment may have an impact on this
or other pieces of medical equipment.
3
3
3
3
For veterinary use only
Indicaciones sobre compatibilidad electromagnética
(CEM)
CUIDADO: Los equipos electromédicos
están sujetos a determinadas medidas de
precaución con referencia a la Compatibilidad Electromagnética (CEM). Observe las
indicaciones sobre CEM contenidas en este
Anexo durante la instalación y el servicio del
equipo.
CUIDADO: El TELE PACK VET X modelo
69 0450 20 sólo está previsto para ser utilizado por médicos o personal de asistencia
médica. El equipo corresponde a la clase
A según CISPR 11 (emisiones de RF) y es
adecuado para usarse en todos los establecimientos diferentes a los domésticos
y aquellos conectados directamente a la
red pública de alimentación de baja tensión
que alimenta a los edificios de viviendas. Si
el TELE PACK VET X modelo 69 0450 20
se conecta en el área doméstica, el equipo
puede generar interferencias CEM, en cuyo
caso puede ser necesario reorientar el equipo, montarlo en otro lugar, apantallarlo o
filtrar el punto de conexión a la red pública
de alimentación.
CUIDADO: El TELE PACK VET X modelo
69 0450 20 no se debe colocar adyacente
a o apilado con otros equipos. Si el servicio
requiere su utilización adyacente a o apilado
con otros equipos, entonces el equipo o el
sistema han de permanecer bajo observación con el fin de verificar su funcionamiento
conforme al uso previsto en la configuración
utilizada.
CUIDADO: La utilización de equipos de RF
de comunicación portátiles y móviles puede
influir sobre los mismos o bien sobre otros
equipos electromédicos.
Sólo para uso veterinario
Hinweise zur elektromagnetischen Verträglichkeit (EMV)
Electromagnetic compatibility
(EMC) information
indicaciones sobre compatibilidad electromagnética (CEM)
3
3
3
WARNUNG: Die Verwendung von anderem
Zubehör, anderer Wandler und Leitungen,
als in den KARL STORZ Gebrauchsanweisungen aufgeführt, können zu einer erhöhten Aussendung oder einer reduzierten
Störfestigkeit der TELE PACK VET X Modell
69 0450 20 führen. Für die in der nachfolgenden Tabelle (Tabelle 200) aufgeführten
Leitungen wurde eine Übereinstimmung mit
den Forderungen der EN IEC 60601-1-2
ermittelt. Bei der Verwendung von anderen
als den hier angegebenen Leitungen liegt
es in der Verantwortung des Betreibers, die
Übereinstimmung mit der EN IEC 60601-1-2
nachzuprüfen.
HINWEIS: Die in diesem Anhang eingefügten
Tabellen und Richtlinien liefern dem Kunden
oder Anwender grundlegende Hinweise um
zu entscheiden, ob das Gerät oder System
für die gegebenen EMV-Umgebungsbedingungen geeignet ist, beziehungsweise welche
Maßnahmen ergriffen werden können, um
das Gerät/System im bestimmungsgemäßen
Gebrauch zu betreiben, ohne andere medizinische oder nicht medizinische Geräte zu
stören. Treten bei der Benutzung des Gerätes
elektromagnetische Störungen auf, kann der
Anwender durch folgende Maßnahmen die
Störungen beseitigen:
• veränderte Ausrichtung oder einen
anderen Standort wählen
• den Abstand zwischen den einzelnen
Geräten vergrößern
• Geräte mit unterschiedlichen
Stromkreisen verbinden.
Bei weiteren Fragen wenden Sie sich bitte an
Ihre zuständige Gebietsvertretung oder an unsere
Serviceabteilung.
1
54
Nur für den Veterinärgebrauch
WARNING: The use of accessories, transducers, and cables other than those specified in the KARL STORZ instruction manual
may result in increased emissions or decreased immunity of the TELE PACK VET X
model 69 0450 20. The cables listed in the
following table (Table 200) have been shown
to comply with the requirements of EN IEC
60601-1-2. When using cables other than
those specified here, it is the responsibility of
the user to ensure that they comply with EN
IEC 60601-1-2.
NOTE: The tables and guidelines that are
included in this appendix provide information to the customer or user that is essential
in determining the suitability of the device or
system for the electromagnetic environment
of use, and in managing the electromagnetic
environment of use to permit the device or
system to perform its intended use without
causing interferences in other devices or
systems, or non-medical electrical devices.
If this device does cause electromagnetic
interferences with other devices, the user is
encouraged to try to correct the interferences
by one or more of the following measures:
• reorient or relocate the receiving device;
• increase the distance between the
equipment;
• connect the devices to different
electrical circuits.
If you have any further questions, please contact
your local representative or our service department.
1
For veterinary use only
CUIDADO: La utilización de otros accesorios, transductores y cables, diferentes de
los indicados en el Manual de instrucciones
de KARL STORZ, puede conllevar un aumento de las emisiones o una reducción
de la inmunidad a perturbaciones del
TELE PACK VET X modelo 69 0450 20. Para
los cables detallados en la tabla siguiente
(tabla 200) se ha comprobado una concordancia con los requisitos de la norma EN
CEI 60601-1-2. Si se utilizan cables diferentes de los que aquí se indican, es responsabilidad del usuario verificar la concordancia
con la EN CEI 60601-1-2.
NOTA: Las tablas y directivas incorporadas
en este Anexo le proporcionan al cliente o
al usuario indicaciones básicas para decidir
si el equipo o sistema es adecuado para las
condiciones del entorno CEM imperantes,
o adoptar las medidas que puedan tomarse
con el fin de utilizar el equipo/sistema conforme al uso previsto, sin que el mismo llegue
a interferir sobre otros equipos para uso médico o no médico. Si aparecen interferencias
electromagnéticas durante la utilización del
equipo, el usuario puede eliminarlas aplicando las siguientes medidas:
• modificación de la orientación o bien
colocación en otro emplazamiento
• aumento de la distancia entre cada uno
de los equipos
• conexión de los equipos a circuitos
eléctricos diferentes.
Si tiene usted otras preguntas, le rogamos dirigirse
a su representante local correspondiente o bien a
nuestro departamento de servicio técnico.
1
Sólo para uso veterinario
Hinweise zur elektromagnetischen Verträglichkeit (EMV)
Electromagnetic compatibility
(EMC) information
indicaciones sobre compatibilidad electromagnética (CEM)
Tabelle 200
Zubehör und Leitungen mit der die Übereinstimmung mit der EN/IEC 60601-1-2 nachgewiesen wurde:
Typ
Schirm
Länge [m]
Ferrite
Verwendung
Netzkabel
Nein
3
Nein
Spannungsversorgung
Zweipedalfußschalter
Ja
2
Nein
Gerätesteuerung, Buchse Rückseite
USB Tastatur mit
Touchpad
Nein
2
Nein
Dateneingabe
Mikrofon
Nein
2
Nein
Sprachaufnahme
Kamera
Ja
3
Nein
Bildübertragung
DVI Kabel
Ja
3
Ja
Signalübertragung
Table 200
Accessories and cables which have been shown to comply with EN/IEC 60601-1-2:
Type
Shielded
Length [m]
Ferrite
Used for
AC power cord
No
3
No
Voltage supply
Dual-pedal footswitch
Yes
2
No
Unit control, socket reverse
USB keyboard with
touchpad
No
2
No
Data input
Microphone
No
2
No
Speech recording
Camera
Yes
3
No
Image transmission
DVI cable
Yes
3
Yes
Signal transmission
Tabla 200
Accesorios y cables para los que se ha comprobado la conformidad con la norma EN/CEI 60601-1-2:
55
Tipo
Pantalla
Longitud [m]
Ferrita
Utilización
Cable de red
No
3
No
Alimentación de tensión
Interruptor de doble
pedal
Sí
2
No
Mando del aparato, conector en el lado posterior
Teclado USB con tableta táctil
No
2
No
Ingreso de datos
Micrófono
No
2
No
Grabación de voz
Cámara
Sí
3
No
Transmisión de imagen
Cable DVI
Sí
3
Sí
Transmisión de señal
Nur für den Veterinärgebrauch
For veterinary use only
Sólo para uso veterinario
Hinweise zur elektromagnetischen Verträglichkeit (EMV)
Electromagnetic compatibility
(EMC) information
indicaciones sobre compatibilidad electromagnética (CEM)
Tabelle 201
Leitlinien und Herstellererklärung – Elektromagnetische Aussendungen
TELE PACK VET X Modell 69 0450 20 ist für den Betrieb in einer wie unten angegebenen Umgebung bestimmt. Der Anwender des Geräts sollte
sicherstellen, dass der TELE PACK VET X Modell 69 0450 20 in einer derartigen Umgebung betrieben wird.
Störaussendungsmessungen
Übereinstimmung
Elektromagnetische Umgebung – Leitlinien
HF-Aussendungen
Stimmt überein mit
Der TELE PACK VET X Modell 69 0450 20 verwendet HF-Energie ausschließlich zu seiner
nach CISPR 11
Gruppe 1
internen Funktion. Daher ist seine HF-Aussendung sehr gering und es ist
unwahrscheinlich, dass benachbarte elektronische Geräte gestört werden.
HF-Aussendungen
Stimmt überein mit
Der TELE PACK VET X Modell 69 0450 20 ist für den Gebrauch in allen Einrichtungen
nach CISPR 11
Klasse A
(z. B. Krankenhäuser und Arztpraxen) einschließlich denen im Wohnbereich und
solchen geeignet, die unmittelbar an ein öffentliches Versorgungsnetz angeschlossen
Aussendung von Oberschwingungen
Stimmt überein mit
sind, das auch Gebäude versorgt, die zu Wohnzwecken benutzt werden.
nach IEC 61000-3-2
Klasse A
Aussendungen von Spannungsschwankungen/Flicker nach
IEC 61000-3-3
Stimmt überein
Table 201
Guidance and Manufacturer’s Declaration – Electromagnetic Emissions
The TELE PACK VET X model 69 0450 20 is designed for operation in an environment as defined below. The user of the device must make sure that the
TELE PACK VET X model 69 0450 20 is operated in such an environment.
Emissions test
Compliance
Electromagnetic environment – guidelines
RF emissions
Complies with Group
Der TELE PACK VET X model 69 0450 20 uses RF energy only for its internal function.
acc. to CISPR 11
1
Therefore, its RF emissions are very low and are not likely to cause interference in nearby
electronic equipment.
RF emissions
Complies with Class A The TELE PACK VET X model 69 0450 20 is suitable for use in all establishments (e.g.,
acc. to CISPR 11
hospitals and doctors’ offices) including domestic environments and those directly conEmission of harmonic oscillations
Complies with Class A nected to the public power supply network that also supplies buildings used for domestic
purposes.
acc. to IEC 61000-3-2
Voltage fluctuations/flicker emissions
Complies
IEC 61000-3-3
Tabla 201
Guía y declaración del fabricante – emisiones electromagnéticas
El TELE PACK VET X modelo 69 0450 20 está previsto para el uso en un entorno electromagnético especificado debajo. El usuario del equipo se debería
asegurar que el TELE PACK VET X modelo 69 0450 20 se use en dicho entorno.
Ensayo de emisiones
Conformidad
Entorno electromagnético – Guía
Emisiones de RF
Está conforme con el
El TELE PACK VET X modelo 69 0450 20 usa energía de RF sólo para su función interna.
Norma CISPR 11
Grupo 1
Por ello, sus emisiones de RF son muy bajas y no es probable que causen cualquier interferencia en los equipos electrónicos en las proximidades.
Emisiones de RF
Está conforme con la
El TELE PACK VET X modelo 69 0450 20 es adecuado para usarse en todos los estaNorma CISPR 11
clase A
blecimientos (p. ej., hospitales y consultorios médicos), incluyendo los establecimientos
domésticos y aquellos conectados directamente a la red pública de alimentación en baja
Emisiones de armónicos Norma CEI
Está conforme con la
tensión que alimenta a los edificios de viviendas.
61000-3-2
clase A
Fluctuaciones de tensión/flickers
Cumple
Norma CEI 61000-3-3
56
Nur für den Veterinärgebrauch
For veterinary use only
Sólo para uso veterinario
Hinweise zur elektromagnetischen Verträglichkeit (EMV)
Electromagnetic compatibility
(EMC) information
indicaciones sobre compatibilidad electromagnética (CEM)
Tabelle 202
Leitlinien und Herstellererklärung – Elektromagnetische Störfestigkeit
TELE PACK VET X Modell 69 0450 20 ist für den Betrieb in der unten angegebenen elektromagnetischen Umgebung bestimmt. Der Anwender des
TELE PACK VET X Modell 69 0450 20 sollte sicherstellen, dass es in einer solchen Umgebung benutzt wird.
Störfestigkeitsprüfungen
EN/IEC 60601 Prüfpegel
Übereinstimmungspegel
Elektromagnetische Umgebung – Leitlinien
Entladung statischer Elektrizität
Stimmt überein
Fußböden sollten aus Holz oder Beton bestehen oder
(ESD) nach IEC 61000-4-2
± 4 kV Kontaktentladung
± 4 kV Kontaktentladung
mit Keramikfliesen versehen sein. Wenn der Fußboden
± 8 kV Luftentladung
± 8 kV Luftentladung
mit synthetischem Material versehen ist, muss die
relative Luftfeuchte mindestens 30 % betragen.
Schnelle transiente elektrische
Stimmt überein
Die Qualität der Versorgungsspannung sollte der einer
Störgrößen/Bursts nach
± 2 kV für Netzleitungen
± 2 kV für Netzleitungen
typischen Geschäfts- oder Krankenhausumgebung
IEC 61000-4-4
± 1 kV für Eingangs- und
± 1 kV für Eingangs- und
entsprechen.
Ausgangsleitungen
Ausgangsleitungen
Stoßspannungen (Surges)
nach IEC 61000-4-5
Spannungseinbrüche,
Kurzzeitunterbrechungen
und Schwankungen
der Versorgungsspannung
nach IEC 61000-4-11
± 1 kV Außenleiter-Außenleiter
± 2 kV Außenleiter-Erde
<5 % UT *
(>95 % Einbruch der UT)
für 1/2 Periode
40 % UT
(60 % Einbruch der UT)
für 5 Perioden
70 % UT
(30 % Einbruch der UT)
für 25 Perioden
<5 % UT
(>95 % Einbruch der UT)
für 5 Sekunden
Stimmt überein
± 1 kV AußenleiterAußenleiter
± 2 kV Außenleiter-Erde
Stimmt überein
<5 % UT
(>95 % Einbruch der UT)
für 1/2 Periode
Stimmt überein
40 % UT
(60 % Einbruch der UT)
für 5 Perioden
Stimmt überein
70 % UT
(30 % Einbruch der UT)
für 25 Perioden
Stimmt überein
<5 % UT
(>95 % Einbruch der UT)
für 5 Sekunden
Magnetfeld bei der
Stimmt überein
Versorgungsfrequenz
3 A/m
3 A/m
(50/60 Hz) nach
IEC 61000-4-8
* Anmerkung: UT ist die Netzwechselspannung vor der Anwendung der Prüfpegel.
57
Nur für den Veterinärgebrauch
For veterinary use only
Die Qualität der Versorgungsspannung sollte der einer
typischen Geschäfts- oder Krankenhausumgebung entsprechen.
Die Qualität der Versorgungsspannung sollte der einer
typischen Geschäfts- oder Krankenhausumgebung entsprechen.
Wenn der Anwender des Geräts fortgesetzte Funktion
auch beim Auftreten von Unterbrechungen der
Energieversorgung fordert, wird empfohlen, das Gerät aus
einer unterbrechungsfreien Stromversorgung oder einer
Batterie zu speisen.
Magnetfelder bei der Netzfrequenz sollten den
typischen Werten, wie sie in der Geschäfts- und
Krankenhausumgebung vorzufinden sind, entsprechen.
Sólo para uso veterinario
Hinweise zur elektromagnetischen Verträglichkeit (EMV)
Electromagnetic compatibility
(EMC) information
indicaciones sobre compatibilidad electromagnética (CEM)
Table 202
Guidance and Manufacturer’s Declaration – Electromagnetic Immunity
The TELE PACK VET X model 69 0450 20 is designed for operation in the electromagnetic environment defined below.
The user of the TELE PACK VET X model 69 0450 20 should make sure that it is used in such an environment.
Interference immunity tests
EN/IEC 60601 test level
Conformity level
Electromagnetic environment – guidelines
Electrostatic discharge (ESD)
Complies
Floors should be made of wood or concrete, or provided
acc. to IEC 61000-4-2
± 4 kV contact discharge
± 4 kV contact discharge
with ceramic tiles. If floors are covered with synthetic
± 8 kV air discharge
± 8 kV air discharge
material, the relative humidity must be at least 30%.
Rapid transient electric interferences/bursts acc. to IEC
61000-4-4
Surges acc. to IEC 61000-4-5
Voltage dips, short-time interruptions, and fluctuations of
the supply voltage acc. to IEC
61000-4-11
Complies
± 2 kV for mains lines
± 1 kV for input and output
lines
The quality of the supply voltage should be that of a typical business or hospital environment.
The quality of the supply voltage should be that of a typical business or hospital environment.
< 5% UT
(> 95% dip of the UT)
for 5 seconds
Complies
± 1 kV outer conductor –
outer conductor
± 2 kV outer conductor –
earth
Conforms
< 5% UT *
(> 95% dip of the UT)
for ½ cycle
Conforms
40% UT
(60% dip of the UT)
for 5 cycles
Conforms
70% UT
(30% dip of the UT)
for 25 cycles
Conforms
<5% UT
(> 95% dip of the UT)
for 5 seconds
3 A/m
Conforms
3 A/m
The magnetic fields at the mains frequency should be at
the values typical of business or hospital environments.
± 2 kV for mains lines
± 1 kV for input and output
lines
± 1 kV outer conductor –
outer conductor
± 2 kV outer conductor –
earth
< 5% UT *
(> 95% dip of the UT)
for ½ cycle
40% UT
(60% dip of the UT)
for 5 cycles
70% UT
(30% dip of the UT)
for 25 cycles
Magnetic field at the supply
frequency (50/60 Hz) acc. to
IEC 61000-4-8
The quality of the supply voltage should be that of a typical business or hospital environment.
If the user of the device requests continued functioning
even when interruptions of the power supply occur, it is
recommended to supply the device from a power supply
that is free of interruptions or a battery.
* Note: UT is the mains alternating voltage before applying the test levels.
58
Nur für den Veterinärgebrauch
For veterinary use only
Sólo para uso veterinario
Hinweise zur elektromagnetischen Verträglichkeit (EMV)
Electromagnetic compatibility
(EMC) information
indicaciones sobre compatibilidad electromagnética (CEM)
Tabla 202
Guía y declaración del fabricante - emisiones electromagnéticas
El TELE PACK VET X modelo 69 0450 20 está previsto para el uso en un entorno electromagnético especificado debajo. El usuario del TELE PACK VET X
modelo 69 0450 20 se debería asegurar que se use en dicho entorno.
Nivel de ensayo de la
Ensayo de inmunidad
Nivel de conformidad
Entorno electromagnético - Guía
norma EN/CEI 60601
Descarga electrostática (DES)
Cumple
Los suelos deberían ser de madera, hormigón o baldosa
Norma CEI 61000-4-2
± 4 kV por contacto
± 4 kV por contacto
cerámica. Si los suelos están cubiertos con material sinté± 8 kV por aire
± 8 kV por aire
tico, la humedad relativa debería ser al menos del 30 %.
Transitorios/ráfagas rápidas
Norma CEI 61000-4-4
Onda de choque
Norma CEI 61000-4-5
Caídas de tensión, interrupciones y variaciones de tensión
en las líneas de entrada de
alimentación
Norma CEI 61000-4-11
<5 % UT
(caída >95 % en UT)
para 5 segundos
Cumple
± 2 kV para líneas de alimentación de red
± 1 kV para líneas de entrada y salida
Cumple
± 1 kV línea externa-línea
externa
± 2 kV línea externa-tierra
Cumple
<5 % UT*
(caída >95 % en UT)
para 1/2 ciclo
Cumple
40 % UT
(caída 60 % en UT)
para 5 ciclos
Cumple
70 % UT
(caída 30 % en UT)
para 25 ciclos
Cumple
<5 % UT
(caída >95 % en UT)
para 5 segundos
3 A/m
Cumple
3 A/m
± 2 kV para líneas de alimentación de red
± 1 kV para líneas de entrada
y salida
± 1 kV línea externa-línea
externa
± 2 kV línea externa-tierra
<5 % UT *
(caída >95 % en UT)
para 1/2 ciclo
40 % UT
(caída 60 % en UT)
para 5 ciclos
70 % UT
(caída 30 % en UT)
para 25 ciclos
Campo magnético a frecuencia de red (50/60 Hz)
Norma CEI 61000-4-8
La calidad de la red de alimentación debería ser la de un
entorno comercial típico o la de un hospital.
La calidad de la red de alimentación debería ser la de un
entorno comercial típico o la de un hospital.
La calidad de la red de alimentación debería ser la de un
entorno comercial típico o la de un hospital.
Si el usuario del equipo requiere un funcionamiento
continuo durante las interrupciones de alimentación, se
recomienda que el equipo se alimente de una fuente de
alimentación ininterrumpida.
Los campos magnéticos a frecuencia de red deberían
estar a niveles característicos de una localización típica
de un entorno comercial típico o de un hospital.
* Nota: UT es la tensión de alimentación de corriente alterna antes de la aplicación del nivel de ensayo.
59
Nur für den Veterinärgebrauch
For veterinary use only
Sólo para uso veterinario
Hinweise zur elektromagnetischen Verträglichkeit (EMV)
Electromagnetic compatibility
(EMC) information
indicaciones sobre compatibilidad electromagnética (CEM)
Tabelle 204
Leitlinien und Herstellererklärung – Elektromagnetische Störfestigkeit –
Für medizinische elektrische Geräte, die nicht lebenserhaltend sind
Der TELE PACK VET X Modell 69 0450 20 ist für den Betrieb in der unten angegebenen elektromagnetischen Umgebung bestimmt.
Der Anwender des Gerätes sollte sicherstellen, dass das Gerät in einer solchen Umgebung benutzt wird.
EN/IEC 60601
Störfestigkeitsprüfungen
Übereinstimmungspegel
Elektromagnetische Umgebung – Leitlinien
Prüfpegel
Tragbare und mobile Funkgeräte sollten in keinem geringeren Abstand
zum TELE PACK VET X Modell 69 0450 20 einschließlich Leitungen
verwendet werden als dem empfohlenen Schutzabstand, der nach der
für die Sendefrequenz zutreffenden Gleichung berechnet wird.
Empfohlene Schutzabstände:
Geleitete HF-Störgrößen
nach IEC 61000-4-6
3 Veff
150 kHz bis < 80 MHz
3 Veff
Gestrahlte HF-Störgrößen
nach IEC 61000-4-3
3 V/m
80 MHz bis 2,5 GHz
3 V/m
d = [3,5 / 3] P
150 kHz bis < 80 MHz
d = [3,5 / 3] P
80 MHz bis < 800 MHz
d = [7 / 3] P
800 MHz bis 2,5 GHz
Mit P als Nennleistung des Senders in Watt [W] gemäß den Angaben
des Senderherstellers und d als empfohlenem Schutzabstand in
Metern [m].
Die Feldstärke stationärer Funksender sollte bei allen Frequenzen
gemäß einer Untersuchung vor Ort a geringer als der
Übereinstimmungspegel sein. b
In der Umgebung von Geräten, die das folgende Bildzeichen tragen,
sind Störungen möglich:
Anmerkung: Diese Leitlinien mögen nicht in allen Fällen anwendbar sein. Die Ausbreitung elektromagnetischer Größen wird durch Absorptionen und
Reflexionen der Gebäude, Gegenstände und Menschen beeinflusst.
a Die Feldstärke stationärer Sender, wie z. B. Basisstationen von Funktelefonen und mobilen Landfunkgeräten, Amateurfunkstationen, AM- und
FM-Rundfunk- und Fernsehsendern können theoretisch nicht genau vorbestimmt werden. Um die elektromagnetische Umgebung hinsichtlich der stationären
Sender zu ermitteln, sollte eine Studie des Standorts erwogen werden. Wenn die gemessene Feldstärke an dem Standort, an dem das Gerät benutzt wird,
die obigen Übereinstimmungspegel überschreitet, sollte das Gerät beobachtet werden, um die bestimmungsgemäße Funktion nachzuweisen. Wenn ungewöhnliche Leistungsmerkmale beobachtet werden, können zusätzliche Maßnahmen erforderlich sein, wie z. B. eine veränderte Ausrichtung oder ein anderer
Standort des Gerätes.
b Über den Frequenzbereich von 150 kHz bis 80 MHz sollte die Feldstärke geringer als 3 V/m sein.
60
Nur für den Veterinärgebrauch
For veterinary use only
Sólo para uso veterinario
Hinweise zur elektromagnetischen Verträglichkeit (EMV)
Electromagnetic compatibility
(EMC) information
indicaciones sobre compatibilidad electromagnética (CEM)
Table 204
Guidelines and manufacturer’s declaration – electromagnetic interference immunity for medical electrical devices that are not life-supporting
The TELE PACK VET X model 69 0450 20 is designed for operation in the electromagnetic environment defined below.
The user of the TELE PACK VET X model 69 0450 20 should ensure that it is used in such an environment.
Interference immunity
EN/IEC 60601
Conformity level
Electromagnetic environment – guidelines
tests
test level
Portable and mobile RF communications equipment should be used
no closer to any part of the TELE PACK VET X model 69 0450 20,
including cables, than the recommended separation distance calculated from the equation applicable to the frequency of the transmitter.
Recommended separation distance:
Conducted RF
disturbance acc. to
IEC 61000-4-6
3 Vrms
150 kHz to < 80 MHz
3 Vrms
Radiated RF disturbance
acc. to IEC 61000-4-3
3 V/m
80 MHz to 2.5 GHz
3 V/m
d = [3,5 / 3] P
150 kHz to < 80 MHz
d = [3,5 / 3] P
80 MHz to < 800 MHz
d = [7 / 3] P
800 MHz to 2.5 GHz
Where P is the nominal power of the transmitter in Watt [W] according
to the information provided by the manufacturer of the transmitter and
d is the recommended separation distance in meters [m].
The field strength of stationary transmitters at all frequencies on site a
should be, according to a study, less than the conformity level. b
Interferences may occur in the vicinity of devices that carry the following symbol:
Note: These guidelines may not apply in all situations. The propagation of electromagnetic quantities is affected by absorptions and reflections of buildings,
objects, and persons.
a The field strength of stationary transmitters, such as base stations of radio phones and land mobile radio services, CB radio stations, AM and FM radio,
and TV stations cannot be exactly predetermined by theory. For the determination of the electromagnetic environment of the stationary transmitters, a site
survey should be considered. If the measured field strength in the location at which the device is used exceeds the above conformity levels, the device
should be observed to verify normal operation. If unusual performance characteristics are observed, additional measures may be necessary, such as a modified alignment or a different location for the device.
b Above the frequency range 150 kHz to 80 MHz, field strength should be less than 3 V/m.
61
Nur für den Veterinärgebrauch
For veterinary use only
Sólo para uso veterinario
Hinweise zur elektromagnetischen Verträglichkeit (EMV)
Electromagnetic compatibility
(EMC) information
indicaciones sobre compatibilidad electromagnética (CEM)
Tabla 204
Guía y declaración del fabricante – inmunidad electromagnética –
para equipos electromédicos que no son de asistencia vital
El TELE PACK VET X modelo 69 0450 20 está previsto para el uso en un entorno electromagnético especificado debajo.
El usuario del equipo se debería asegurar que se use en dicho entorno.
Nivel de ensayo de
Ensayo de inmunidad
la norma EN/CEI
Nivel de conformidad
Entorno electromagnético – Guía
60601
Los equipos portátiles y móviles de comunicaciones de RF
no se deberían usar a menor distancia de cualquier parte del
TELE PACK VET X Modell 69 0450 20, incluyendo los cables, que la
distancia de separación recomendada a la frecuencia del transmisor.
Distancia de separación recomendada:
RF conducida Norma CEI
61000-4-6
3 Ven valor eficaz
150 kHz a < 80 MHz
3 Ven valor eficaz
RF radiada Norma CEI
61000-4-3
3 V/m
80 MHz a < 2,5 GHz
3 V/m
d = [3,5 / 3] P
150 kHz a < 80 MHz
d = [3,5 / 3] P
80 MHz a < 800 MHz
d = [7 / 3] P
800 MHz a < 2,5 GHz
donde P es la máxima potencia de salida asignada al transmisor en
vatios [W] conforme al fabricante del transmisor y d es la distancia de
separación recomendada en metros [m].
Las intensidades del campo desde el transmisor fijo de RF, según se
determina por un estudio electromagnético del lugar a, debería ser
menor que el nivel de conformidad en cada rango de frecuencia. b
La interferencia puede ocurrir en la vecindad del equipo marcado con
el siguiente símbolo:
Nota: Estas directrices no se pueden aplicar en todas las situaciones. La propagación electromagnética es afectada por la absorción y reflexión desde
estructuras, objetos y personas.
a Las intensidades de campo de los transmisores fijos, tales como estaciones base para radioteléfonos y radios móviles terrestres, emisoras amateur,
emisiones de radio AM y FM y emisiones de TV no se pueden predecir teóricamente con precisión. Para valorar el entorno electromagnético debido a los
transmisores fijos de RF, se debería considerar un estudio del lugar electromagnético. Si la medida de la intensidad del campo en la localización en la que el
equipo se usa excede el nivel de conformidad anterior de RF aplicable, se debería observar el equipo para verificar el funcionamiento normal. Si se observa
un funcionamiento anormal, pueden ser necesarias medidas adicionales, tales como reorientación o relocalización del equipo.
b Sobre el rango de frecuencia de 150 kHz a 80 MHz, la intensidad del campo debería ser menor que 3 V/m.
62
Nur für den Veterinärgebrauch
For veterinary use only
Sólo para uso veterinario
Hinweise zur elektromagnetischen Verträglichkeit (EMV)
Electromagnetic compatibility
(EMC) information
indicaciones sobre compatibilidad electromagnética (CEM)
Tabelle 206
Empfohlene Schutzabstände zwischen tragbaren und mobilen HF-Telekommunikationsgeräten und dem
TELE PACK VET X Modell 69 0450 20
Der TELE PACK VET X Modell 69 0450 20 ist für den Betrieb in einer elektromagnetischen Umgebung bestimmt, in der die HF-Störgrößen kontrolliert sind. Der
Anwender des Gerätes kann dadurch helfen, elektromagnetische Störungen zu vermeiden, indem er den Mindestabstand zwischen tragbaren und mobilen
HF-Telekommunikationsgeräten (Sendern) und dem Gerät – abhängig von der Ausgangsleistung des Kommunikationsgerätes, wie unten angegeben – einhält.
Schutzabstand d [m]
abhängig von der Sendefrequenz
150 kHz bis < 80 MHz
80 MHz bis < 800 MH
3,5
d = P
3
3,5
d = P
3
0,01
0,12
0,12
0,23
0,1
0,38
0,38
0,73
1
1,2
1,2
2,3
10
3,8
3,8
7,3
100
12
12
23
Nennleistung des
Senders
[W]
800 MHz bis 2,5 GHz
7
d = P
3
Für Sender, deren maximale Nennleistung in obiger Tabelle nicht angegeben ist, kann der empfohlene Schutzabstand d in Metern [m] unter Verwendung der
Gleichung ermittelt werden, die zur jeweiligen Spalte gehört, wobei P die maximale Nennleistung des Senders in Watt [W] gemäß Angabe des Senderherstellers
ist.
Anmerkung: Diese Leitlinien mögen nicht in allen Fällen anwendbar sein. Die Ausbreitung elektromagnetischer Größen wird durch Absorptionen und Reflexionen
von Gebäuden, Gegenständen und Menschen beeinflusst.
63
Nur für den Veterinärgebrauch
For veterinary use only
Sólo para uso veterinario
Hinweise zur elektromagnetischen Verträglichkeit (EMV)
Electromagnetic compatibility
(EMC) information
indicaciones sobre compatibilidad electromagnética (CEM)
Table 206
Recommended separation distances between portable and mobile RF communications equipment and the TELE PACK VET X model 69 0450 20
The TELE PACK VET X model 69 0450 20 is intended for use in an electromagnetic environment in which the RF disturbances are controlled. The user of the
device can help prevent electromagnetic interference by maintaining a minimum distance between portable and mobile RF communications equipment (transmitters) and the device, according to the output power of the communications equipment as recommended below.
Separation distance d [m]
according to frequency of transmitter
150 kHz to < 80 MHz
80 MHz to < 800 MHz
3,5
d = P
3
3,5
d = P
3
0.01
0.12
0.12
0.23
0.1
0.38
0.38
0.73
1
1.2
1.2
2.3
10
3.8
3.8
7.3
100
12
12
23
Nominal power of transmitter
[W]
800 MHz to 2.5 GHz
7
d = P
3
For transmitters whose maximum nominal power is not listed in the above table, the recommended safety distance d in meters [m] can be determined using
the equation belonging to the relevant column, where P is the maximum nominal power of the transmitter in Watt [W] as specified by the manufacturer of the
transmitter.
Note: These guidelines may not apply in all situations. The propagation of electromagnetic quantities is affected by absorptions and reflections of buildings,
objects and persons.
64
Nur für den Veterinärgebrauch
For veterinary use only
Sólo para uso veterinario
Hinweise zur elektromagnetischen Verträglichkeit (EMV)
Electromagnetic compatibility
(EMC) information
indicaciones sobre compatibilidad electromagnética (CEM)
Tabla 206
Distancias de separación recomendadas entre los equipos portátiles y móviles de comunicaciones de RF y el TELE PACK VET X modelo
69 0450 20.
El TELE PACK VET X modelo 69 0450 20 está previsto para el uso en un entorno electromagnético en el que se controlan las perturbaciones radiadas de RF. El
usuario del equipo puede ayudar a prevenir la interferencia electromagnética manteniendo una distancia mínima entre el equipo portátil y móvil de comunicaciones de RF (transmisores) y el equipo según se recomienda más abajo – conforme a la máxima potencia de salida del equipo de comunicaciones.
Distancia de separación d [m]
conforme a la frecuencia del transmisor
150 kHz a < 80 MHz
80 MHz a < 800 MHz
800 MHz a < 2,5 GHz
Máxima potencia de
7
salida asignada al trans 3,5
3,5
d = P
d = P
d = P
misor
3
3
3
[W]
0,01
0,12
0,12
0,23
0,1
0,38
0,38
0,73
1
1,2
1,2
2,3
10
3,8
3,8
7,3
100
12
12
23
Para los transmisores asignados con una potencia máxima de salida no listados arriba, la distancia de separación recomendada d en metros [m] se puede
determinar usando la ecuación aplicable a la frecuencia del transmisor, donde P es la máxima potencia de salida asignada en vatios [W] conforme al fabricante
del transmisor.
Nota: Estas directrices no se pueden aplicar en todas las situaciones. La propagación electromagnética es afectada por la absorción y reflexión desde estructuras, objetos y personas.
65
Nur für den Veterinärgebrauch
For veterinary use only
Sólo para uso veterinario
GarantiA
Garantiekarte bei Kauf/Lieferung
ausfüllen lassen und möglichst
bald zurücksenden an:
KARL STORZ GmbH & Co. KG
Postfach 230
78503 Tuttlingen
Vom Lieferanten/Importeur auszufüllen:
Firmenstempel/Unterschrift:
Warranty
GarantiE
Für die Dauer von zwei Jahren
ab Übergabe an den Endkunden
leisten wir unentgeltlich Ersatz für
nachweisbar fehlerhaftes Material
oder mangelhafte Verarbeitung.
Transportkosten und Versand
risiko können dabei nicht übernommen werden. Im übrigen
gilt die in unseren allgemeinen
Geschäftsbedingungen ange
gebene Gewährleistung.
Durante un período de dos años,
a partir de la fecha de entrega
al cliente final, procedemos a
la reposición gratuita por fallos
comprobables del material o acabados defectuosos.
No nos hacemos cargo de los
gastos de transporte ni nos
responsabilizamos del riesgo
de envío. Por lo demás, rige
la garantía especificada en
nuestras condiciones generales
de venta.
A rellenar por el suministrador/importador:
Sello de la empresa/Firma:
Rellenar la tarjeta de garantía en el
momento de la compra o suministro
y enviar inmediatamente a la siguiente
dirección:
KARL STORZ GmbH & Co. KG
Postfach 230
78503 Tuttlingen, Alemania
For a period of two years after
delivery to the end-user, we shall
replace free of charge equipment that can be proven to have
defects in material or workman
ship.
In doing so we cannot accept
the cost of transportation or
the risks associated with shipment. The warranty referred to
in our Standard Conditions of
Business shall apply.
Complete warranty card upon purchase/
delivery and return immediately to:
KARL STORZ GmbH & Co. KG
Postfach 230
78503 Tuttlingen, Germany
To be completed by the supplier/importer:
Company stamp/signature:
Rellenar por el propietario del equipo:
Remitente/Sello de la empresa:
Sello o
estampilla
Campo de aplicación:
Tipo del aparato:
Número de serie:
Tarjeta de respuesta
Fecha de compra:
KARL STORZ GmbH & Co. KG
Postfach 230
78503 Tuttlingen
Alemania
Firma/Fecha:
To be filled out by instrument owner:
Return address/company stamp:
Please attach
sufficient
postage
Field of application:
Type of instrument:
Vom Geräte-Besitzer auszufüllen:
Absender/Firmenstempel:
Bitte
ausreichend
frankieren
Anwendungsgebiet:
Serial no.:
Geräte-Typ:
Reply card
Purchase date:
Serien-Nr.:
Antwortkarte
Kauf-Dat.:
KARL STORZ GmbH & Co. KG
Postfach 230
78503 Tuttlingen
Germany
Signature/Date:
KARL STORZ GmbH & Co. KG
Postfach 230
78503 Tuttlingen
Unterschrift/Datum:
KARL STORZ Endoscopy Canada Ltd.
7171 Millcreek Drive, Mississauga
Ontario, L5N 3R3, Canada
Phone: +1 905 816-4500, Fax: +1 905 858-4599
E-Mail: [email protected]
KARL STORZ Endoscopy-America, Inc.
2151 East Grand Avenue
El Segundo, CA 90245-5017, USA
Phone: +1 424 218-8100,
Toll free: 800 421-0837 (USA only)
Fax: +1 424 218-8526
Toll free: 800 321-1304 (USA only)
E-Mail: [email protected]
KARL STORZ Veterinary Endoscopy America, Inc.
175 Cremona Drive
Goleta, CA 93117, USA
Phone: +1 805 968-7776, Fax: +1 805 685-2588
E-Mail: [email protected]
KARL STORZ Endoscopia Latino-America, Inc.
815 N. W. 57th Avenue, Suite 480
Miami, FL 33126-2042, USA
Phone: +1 305 262-8980, Fax: +1 305 262-8986
E-Mail: [email protected]
KARL STORZ Endoscopia
Miramar Trade Center
Edificio Jerusalem, Oficina 108,
La Habana, Cuba
Phone: +53 72041097, Fax: +53 72041098
KARL STORZ Endoscopia México S.A. de C.V
Lago Constanza No 326
Col. Chapultepec Morales
D.F.C.P. 11520, México, México
Phone: +52 55 5250-5607 , Fax: +52 55 55450174
11-2011
KARL STORZ Marketing América Do Sul Ltda.
Rua Joaquin Floriano, nº. 413, 20º andar/floor, Itaim Bibi,
CEP-04534-011 São Paulo, Brasil
Phone: +55 11 3526-4600, Fax: +55 11 3526-4680
E-Mail: [email protected]
71
KARL STORZ Endoskopi Norge AS
P.O. Box 153, Rolf Olsenvei 28
N-2007 Kjeller, Norway
Phone: +47 6380 5600, Fax: +47 6380 5601
[email protected]
KARL STORZ Endoskop Sverige AB
Storsätragränd 14,
12724 Skärholmen, Sweden
Postal address: Po Box 8013,
14108 Kungens Kurva, Sweden
Phone: +46 8 50 56 4800, Fax: +46 8 50 56 4848
E-Mail: [email protected]
KARL STORZ Endoscopy Suomi OY
Itälahdenkatu 23a, 00210 Helsinki, Finland
Phone: +35-896824774, Fax: +35-8968247755
E-Mail: [email protected]
KARL STORZ Endoskopi Danmark A/S
Skovlytoften 33
2840 Holte, Denmark
Phone: +45 45162600, Fax: +45 45162609
E-Mail: [email protected]
KARL STORZ Endoscopy (UK) Ltd.
392 Edinburgh Avenue, Slough
Berkshire, SL1 4UF, Great Britain
Phone: +44 1753 503500, Fax: +44 1753 578124
E-Mail: [email protected]
KARL STORZ Endoscopie Nederland B. V.
Phone: +31 651 938 738, Fax: +31 135 302 231
KARL STORZ Endoscopy Belgium N. V.
Phone: +32 473 810 451, E-Mail: [email protected]
KARL STORZ Endoscopie France S. A.
12, rue Georges Guynemer, Quartier de l’Europe
78280 Guyancourt, France
Phone: +33 1 30484200, Fax: +33 1 30484201
E-Mail: [email protected]
KARL STORZ Endoscopia Italia S. r. l.
Via dell’Artigianato, 3
37135 Verona, Italy
Phone: +39 045 8222000, Fax: +39 045 8222001
E-Mail: [email protected]
KARL STORZ Endoscopy (South Africa) (Pty) Ltd.
P.O. 6061
Roggebaai 8012, South Africa
Phone: +27 21 417 2600, Fax: +27 21 421 5103
E-Mail: [email protected]
KARL STORZ Adria Eos d.o.o.
Zadarska 80
10000 Zagreb, Croatia
Phone: +385 1 6406 070, Fax: +385 1 6406 077
E-Mail: [email protected]
TOO KARL STORZ Endoskopy Kasachstan
Bokeykhan Ulica 8/2, VP – 1
010000 Astana, Respublika Kasachstan
Phone: +7 7172 57-52 16 / 57 28 49 / 57 09 34
Fax +7 7172 43 96 96
E-Mail: [email protected]
KARL STORZ Endoskopija d.o.o.
Verovškova c. 60A
1000 Ljubljana, Slovenia
Phone: +386 1 620 5880, Fax: + 386 1 620 5882
E-Mail: [email protected]
KARL STORZ Endoscopia Romania srl
Str. Prof. Dr. Anton Colorian, nr. 74, Sector 4
041393 Bukarest, Romania
Phone: +40 (0)31 4250800, Fax: +40 (0)31 4250801
E-Mail: [email protected]
KARL STORZ Endoskope Greece M.E.P.E.
Gounari 40,
15343 Agia Paraskevi/Athens, Greece
Phone: +30 210 61 31 386, Fax: +30 210 61 31 392
E-Mail: [email protected]
KARL STORZ Endoskope Greece Ltd.*
Ipsilantou Str. 32
54248 Thessaloniki, Greece
Phone: +30 2310 304868 Fax: +30 2310 304862
*Repair & Service Subsidiary
KARL STORZ Industrial**
Gedik Is Merkezi B Blok
Kat 5, D 38-39, Bagdat Cad. No: 162
Maltepe Istanbul, Turkey
Phone: +90 216 442 9500, Fax: +90 216 442 9030
**Sales for Industrial Endoscopy
OOO KARL STORZ Endoskopy – WOSTOK
Derbenyevskaya nab. 7, building 4
115114 Moscow, Russia
Phone: +7 495 983 02 40, Fax: +7 495 983 02 41
E-Mail: [email protected]
KARL STORZ Endoskop Austria GmbH
Landstraßer Hauptstr. 148/1/G1
1030 Wien, Austria
Phone: +43 1 71 56 0470, Fax: +43 1 71 56 0479
E-Mail: [email protected]
TOV KARL STORZ Ukraine
Obolonska naberezhna, 15
building 3, office 3
04210 Kiev, Ukraine
Phone: +380 44 42668-14, -15, -19
Fax: +380 44 42668-20
KARL STORZ Endoscopia Ibérica S. A.
Parque Empresarial San Fernando
Edificio Munich – Planta Baja
28830 Madrid, Spain
Phone: +34 91 6771051, Fax: +34 91 6772981
E-Mail: [email protected]
KARL STORZ Endoskope
Regional Center for Endoscopy S.A.L.
Solidere – Beirut Souks
Block M, 3rd Floor
2012 3301 Beirut, Lebanon
Phone: +961 1 1999390, Fax +961 1 1999391
Nur für den Veterinärgebrauch
KARL STORZ Endoscopy – Gulf & Near East
Villa # 7, Mushrif Business Park
Mushrif District, P.O.Box: 30635
Abu Dhabi, United Arab Emirates
Phone: +971-2-4477593, Fax: +971-2-4477594
E-Mail: [email protected]
KARL STORZ Endoscopy India Private Ltd.
D-181, Okhla Industrial Area, Phase-1
New Delhi 110020, India
Phone: +91 11 26815445-51,
Fax: +91 11 268129 86
E-Mail: [email protected]
KARL STORZ GmbH & Co. KG
Resident Representative Office
80/33 (44/19) Dang Van Ngu,
F.10–Q. Phu Nhuan
Ho Chi Minh City, Vietnam
Phone: +848 991 8442, Fax: +848 844 0320
KARL STORZ Endoscopy Australia Pty Ltd
15 Orion Road Lane Cove NSW 2066
P O Box 50 Lane Cove NSW 1595, Australia
Phone: +61 (0)2 9490 6700
Toll free: 1800 996 562 (Australia only)
Fax: +61 (0)2 9420 0695
E-Mail: [email protected]
KARL STORZ Endoscopy China Ltd.
Hong Kong Representative Office
Unit 1601, Chinachem Exchange Square
1 Hoi Wan Street, Quarry Bay,
Hong Kong, People’s Republic of China
Phone: +8 52 28 65 2411, Fax: +8 52 28 65 4114
E-Mail: [email protected]
KARL STORZ Endoscopy (Shanghai) Ltd.
Beijing Branch Company,
Room 610, China Life Tower No. 6, Chaowai Street,
Beijing, 100020, People’s Republic of China
Phone: +86 10 8525 3725, Fax: +86 10 8525 3728
E-Mail: [email protected]
KARL STORZ Endoscopy (Shanghai) Ltd.
Unit 3901-3904, Tower 1 Grand Gateway
No. 1 Hong Qiao Road
Shanghai, 200030, People’s Republic of China
Phone: +86 21 6113-1188, Fax: +86 21 6113-1199
E-Mail: [email protected]
For veterinary use only
KARL STORZ Endoscopy (Shanghai) Ltd.
Chengdu Branch Company
F-5, 24/F., Chuanxing Mansion,
No. 18 Renming Road South
Chengdu, Sichuan, 610016, People’s Rep. of China
Phone: +86 28 8620-0175, Fax: +86 28 8620-0177
E-Mail: [email protected]
KARL STORZ Endoscopy (Shanghai) Ltd,
Shenyang Branch Company,
Rm 2225, Tower B, City Plaza,
No. 83, Zhongshan Road, Heping District,
Shenyang, Liaoning, 110001,
People‘s Republic of China
Phone: +86 24 6258 9911
Fax: +86 24 6258 9922
E-Mail: [email protected]
KARL STORZ Endoscopy (Shanghai) Ltd.
Guangzhou Branch Company
Room 1119-20, Dongshan Plaza
69 Xianlie Road Middle, Dongshan District,
Guangzhou, Guangdong, 510095,
People’s Rep. of China
Phone: +86 20 8732-1281, Fax: +86 20 8732-1286
E-Mail: [email protected]
KARL STORZ Endoscopy Asia Marketing Pte Ltd
3791 Jalan Bukit Merah
06-11 e-Centre @ Redhill
Singapore 159471, Singapore
Phone: +65 63761066, Fax: +65 63761068
E-Mail: [email protected]
E-Mail: [email protected]
KARL STORZ Endoscopy Singapore Sales Pte Ltd
3791 Jalan Bukit Merah
06-07 e-Centre @ Redhill
Singapore 159471, Singapore
Phone: +65 65325548, Fax: +65 65323832
E-Mail: [email protected]
E-Mail: [email protected]
KARL STORZ Endoscopy Taiwan Ltd.
6F-1, No. 10, Sec. 1, Beisin Rd.
Sindian, Taipei County 231, Taiwan (R.O.C.)
Phone: +886 933 014 160
Fax: +886 2 8672 6399
E-Mail: [email protected]
KARL STORZ Endoscopy Japan K. K.
Stage Bldg. 8F, 2-7-2 Fujimi
Chiyoda-ku, Tokyo 102-0071, Japan
Phone: +81 3 6380-8622, Fax: +81 (0)3 6380-8633
E-Mail: [email protected]
0.0.5
KARL STORZ Endoskope Berlin GmbH
Ohlauer Straße 43
10999 Berlin, Germany
Phone: +49 (0)30 30 69090
Fax: +49 (0)30 30 19452
KARL STORZ Endoscopia Argentina S.A.
Zufriategui 627 6° Piso
B1638 CAA - Vicente Lopez
Provincia de Buenos Aires, Argentina
Phone: +54 11 4718 0919, Fax: +54 11 4718 2773
E-Mail: [email protected]
Sociedades distribuidoras
11-2011
KARL STORZ GmbH & Co. KG
Mittelstraße 8, 78532 Tuttlingen, Germany
Postfach 230, 78503 Tuttlingen, Germany
Phone: +49 (0)7461 708-0,
Fax: +49 (0)7461 708-105
E-Mail: [email protected]
Web: www.karlstorz.com
Subsidiaries
www.karlstorz.com
96186009D
niederlassungen
Sólo para uso veterinario
KARL STORZ GmbH & Co. KG
Mittelstraße 8
78532 Tuttlingen
Postfach 230
78503 Tuttlingen
Germany
Telefon:
Telefax:
E-Mail:
Web:
+49 (0)7461 708-0
+49 (0)7461 708-105
[email protected]
www.karlstorz.com