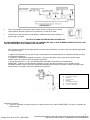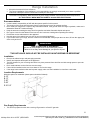
1
STM W10668149 Rev. C No. Parte W10665437 Rev. C ESTUFAS A GAS 30” MANUAL DE INSTRUCCIONES, INSTALACIÓN Y USO LEA CUIDADOSAMENTE ESTE INSTRUCTIVO ANTES DE USAR POR PRIMERA VEZ SU ESTUFA Ampara los siguientes modelos: LWF7200 LWF7230 LWF7550 LWF7551 30” GAS RANGE INSTRUCTIONS MANUAL, INSTALLATION AND USE GUIDE PLEASE READ THIS DOCUMENT CAREFULLY BEFORE USING YOUR RANGE FOR THE FIRST TIME This document in English language covers the following models: LWF7200 LWF7230 LWF7550 LWF7551 09-May-2014 18:21:12 EDT | RELEASED In some European factories the letter "W" of the part code mentioned herein will be automatically 5 replaced by the number "4000" (e.g. "W12345678" becomes "400012345678") ÍNDICE Seguridad de la Estufa Instalación de la Estufa, Recomendaciones Generales e Instalación Requisitos de Ubicación Requisitos del Suministro de Gas Conexión a la Línea de Gas Requisitos del Suministro Eléctrico Características Eléctricas Nominales Verificación de Funcionamiento Ajuste de Flamas Uso de la Estufa Perillas de Control Quemadores Superiores Comal Uso del Horno Cuidado y Limpieza de la Estufa Limpieza General Solución de Problemas Diagramas Eléctricos Garantía Servicio 3 4 5 5 5 8 8 8 9 10 10 10 11 11 14 15 17 31 33 34 TABLE OF CONTENTS Range safety Electrical Specifications for Power Supply Range installation Recommendations Installation Location Requirements Gas Supply Requirements Connect the Gas Supply Line Electrical Requirements Testing your Range Adjusting the flames Range Use Cooktop Controls Power Shutdown Cooktop Burners Griddle Oven Use Range Care and Cleaning General Cleaning Troubleshooting Electrical diagrams Warranty Service 18 18 19 19 19 19 19 20 22 23 23 24 24 24 24 25 25 28 28 30 31 33 34 PRODUCTO FABRICADO POR / PRODUCT MANUFACTURED BY: Industrias Acros Whirlpool S.A. de C.V., Unidad Celaya Carretera Panamericana Km. 280 C.P. 38020, Celaya, Gto. Tel. 01 (461) 6 18 55 00 2 09-May-2014 18:21:12 EDT | RELEASED In some European factories the letter "W" of the part code mentioned herein will be automatically replaced by the number "4000" (e.g. "W12345678" becomes "400012345678") ¡Felicidades por la compra de su nueva estufa! Acaba de adquirir un producto desarrollado con las más avanzadas técnicas de diseño y fabricación, con calidad Whirlpool. Le sugerimos que antes de usar su estufa lea cuidadosamente las instrucciones de este manual. Consérvelo ya que la información contenida en el mismo será importante para el buen funcionamiento de su estufa durante muchos años. Seguridad de la Estufa Su seguridad y la de terceros son muy importantes. Este manual y su producto tienen muchos mensajes de seguridad importantes. Siempre lea y siga los mensajes de seguridad. Éste es el símbolo de advertencia de seguridad. Este símbolo le llama la atención sobre peligros potenciales que pueden ocasionar la muerte o una lesión a usted y a los demás. Todos los mensajes de seguridad irán a continuación del símbolo de advertencia de seguridad y de la palabra ‘’PELIGRO’’ o ‘’ADVERTENCIA’’. Estas palabras significan: Si no sigue las instrucciones de inmediato, usted puede morir o sufrir una lesión grave. PELIGRO ADVERTENCIA Si no sigue las instrucciones, usted puede morir o sufrir una lesión grave. Todos los mensajes de seguridad le dirán el peligro potencial, le dirán cómo reducir las posibilidades de sufrir una lesión y lo que puede suceder si no se siguen las instrucciones. 3 09-May-2014 18:21:12 EDT | RELEASED In some European factories the letter "W" of the part code mentioned herein will be automatically replaced by the number "4000" (e.g. "W12345678" becomes "400012345678") INSTRUCCIONES IMPORTANTES DE SEGURIDAD Esta estufa de gas está equipada con un enchufe de tres puntas con contacto a tierra para protección contra riesgo de electrocución. Debe enchufarse directamente a un tomacorriente aterrizado. No corte ni quite la punta para conexión a tierra del enchufe. Desconecte el interruptor automático o desconecte el producto de la corriente antes de efectuar cualquier mantenimiento en él. Reposicione todos los componentes antes de encender el producto. Si el cable de suministro de energía está dañado, debe ser reemplazado por el fabricante, póngase en contacto con el centro de servicio Whirlpool. No utilice extensiones eléctricas o contactos múltiples. No tenga las manos húmedas al conectar o desconectar su aparato. Utilice dos o más personas para mover e instalar su producto. No permita que la usen niños o personas que no conozcan su funcionamiento. Para cualquier reparación, cambio de partes o mantenimiento póngase en contacto con el centro de servicio Whirlpool. “ESTE PRODUCTO NO DEBE INSTALARSE EN BAÑOS NI DORMITORIOS” “LAS CONDICIONES DE AJUSTE PARA ESTE ARTEFACTO SE ENCUENTRAN EN LA ETIQUETA” “ESTE ARTEFACTO DEBE INSTALARSE EN UNA COCINA Ó AMBIENTES QUE TENGAN UNA VENTILACIÓN ADECUADA” Instalación de la Estufa Conserve estas instrucciones para referencia futura. Leer las instrucciones técnicas antes de instalar este artefacto. Leer las instrucciones de uso antes de encender este artefacto. “Antes de la instalación, asegúrese de que las condiciones de distribución locales (naturaleza y presión del gas) y el ajuste del artefacto sean compatibles”. La instalación apropiada es su responsabilidad, por lo cual es recomendable que su estufa sea instalada por personal calificado o un técnico de Whirlpool Service. Revise las normas locales. Revise que existan suministros eléctricos. Vea la sección “Requisitos del Suministro Eléctrico”. TODAS LAS CONEXIONES ELÉCTRICAS LAS DEBERÁ HACER UN ELECTRICISTA CALIFICADO. Recomendaciones Generales Es responsabilidad del instalador cumplir con todos los espacios especificados en estas instrucciones. Instale su estufa en un lugar protegido de las inclemencias del tiempo y sobre una superficie plana y resistente para soportar su peso. No instale su estufa sobre alfombra o algún material inflamable. Si el piso es sintético, verifique que éste material soporte una temperatura de al menos 95°C sin deformarse. Mantenga los alrededores del aparato libres de materiales combustibles, gasolina y otros vapores o líquidos flamables. No se acerque demasiado a las flamas de los quemadores, ni use ropa suelta, ya que se puede encender y causar quemaduras. Proporciónele el mantenimiento adecuado. Utilice la estufa sólo en labores del hogar. No es un aparato de uso comercial. No obstruya las ranuras de la charola del horno. De ser necesario desplazar o mover su estufa, no la cargue o desplace tomándola de la jaladera, abra la puerta del horno y tómela de la parte superior de la cavidad de horno, y desplácela. Instalación “Este artefacto no está conectado a un dispositivo de evacuación de los productos de la combustión. Debe instalarse y conectarse de acuerdo con los requisitos de instalación vigentes. Se debe dar especial atención a los requisitos pertinentes sobre ventilación”. ADVERTENCIA Riesgo de lesiones por exceso de peso Use dos o más personas para mover e instalar su producto. No seguir esta instrucción puede causar daños a su columna o heridas. 4 09-May-2014 18:21:12 EDT | RELEASED In some European factories the letter "W" of the part code mentioned herein will be automatically replaced by the number "4000" (e.g. "W12345678" becomes "400012345678") Retire todos los adhesivos y elementos de empaque. Identificar y separar los accesorios de la estufa. Seleccione la mejor ubicación para su estufa, no debe quedar expuesta a corrientes de aire y debe tener espacio suficiente para abrir la puerta del horno. No instale gabinetes o muebles de cocina encima de la estufa. Si instala campana extractora, colóquela a 61 cm como mínimo desde la cubierta de la estufa. Si su estufa cuenta con accesorios eléctricos, colóquela cerca de un tomacorriente de pared. Requisitos de Ubicación Espacios mínimos requeridos para la instalación (estas dimensiones deben de respetarse). . Requisitos del Suministro de Gas El técnico calificado debe realizar la conversión tanto de las espreas de los quemadores superiores como del horno; debe cerciorarse que la conexión no tiene fugas y que la presión de gas en la estufa es la que aparece a continuación: GAS LP PRESIÓN DE OPERACIÓN 2,75 kPa; 2750 Pa; 27,5 mbar; 28cm COL. AGUA GAS NATURAL PRESIÓN DE OPERACIÓN 1,76 kPa; 1760Pa; 17,6 mbar; 18cm COL. AGUA NOTA: El tipo de gas que utiliza esta estufa es Gas LP “G30” [Tercera familia (Grupo 3B/P)], para operar esta estufa con Gas Natural [Segunda Familia (Grupo 2H)], se requiere el juego de conversión de acuerdo con la siguiente tabla y puede solicitarlo en su Centro de Soluciones Whirlpool Autorizado, de lo contrario su estufa generará hollín y esto incurrirá en un servicio de limpieza de la misma, el cual no se incluye en la garantía del producto, para cambiar las espreas y hacer los ajustes necesarios. Vea la sección “Servicio” en la pág. 34. Modelo LWF7200 LWF7230 LWF7550 LWF7551 Kit de Gas LP a Gas Natural W10665114 W10693387 W10665116 Conexión a la Línea de Gas Se debe usar una combinación de tubos de unión para conectar la estufa a la línea de suministro de gas existente. Su conexión puede ser distinta, de acuerdo con el tipo de línea de suministro, tamaño y ubicación. 1. Para conectar su estufa modelo (dependiendo el modelo) utilice el material especificado en la siguiente figura: 5 09-May-2014 18:21:12 EDT | RELEASED In some European factories the letter "W" of the part code mentioned herein will be automatically replaced by the number "4000" (e.g. "W12345678" becomes "400012345678") Salida 5/8” Flared 2. Una vez conectado su línea de gas, abra el paso de gas y verifique que no existan fugas vertiendo espuma de jabón en las conexiones y curvas de los tubos. 3. Verifique que el tubo de cobre no esté dañado o doblado de manera que obstruya el paso de gas a su estufa. NO UTILICE FLAMA PARA DETECTAR FUGAS DE GAS. NO USE MANGUERAS DE PLÁSTICO PARA LA CONEXIÓN DE GAS YA QUE PUEDEN PRESENTAR FUGAS, AÚN LAS QUE TIENEN MALLA DE ACERO EN SU SUPERFICIE. Para conectar su estufa modelo (dependiendo el modelo Control Electrónico en Horno) utilice el material especificado en la siguiente figura: 1. Aplique una junta para uso con gas LP gas a la terminación de rosca pequeña de los conectores flexibles (ver B y F en la siguiente ilustración). 2. Ensamble un adaptador al regulador de presión y a otro a la válvula de corte de gas. Apriete ambos coples, estando seguro de no girar o mover el regulador de presión. 3. Use una herramienta ¹⁵⁄₁₆" fija y una ajustable para ensamblar los conectores a los adaptadores. IMPORTANT: Todas las conexiones deben apretarse con llave. No haga conexiones con el regulador de gas demasiado apretado. Hacer conexiones demasiado apretadas puede romper el regulador y causar una fuga de gas. No permita que el regulador se mueva al apretar las conexiones. A. B. C. D. E. F. G. H. Conector macho ½´´a regulador de presión Use una Junta compuesta Adaptador Conector flexible Adaptador Use una Junta compuesta Valvula de cierre manual ½´´ o ¾´´ tubo de gas Complete la Conexion 1. Localice el regulador de presión de gas en la parte posterior de la estufa. IMPORTANTE: No quite el regulador de presión de gas. 6 09-May-2014 18:21:12 EDT | RELEASED In some European factories the letter "W" of the part code mentioned herein will be automatically replaced by the number "4000" (e.g. "W12345678" becomes "400012345678") A. Regulador de presión de Gas 2. Compruebe que la válvula de cierre del regulador de presión de gas esté en la posición "ON". IMPORTANTE: El ajuste predeterminado de fábrica es la posición "ON". Si la estufa no funciona, verifique que la válvula está en la posición "ON". posición 3. Abra la válvula de cierre manual en la línea de suministro de gas. La válvula está abierta cuando el mango es paralelo a la tubería de gas. A. Valvula Cerrada B. Valvula Abierta 4. Pruebe todas las conexiones aplicando con un cepillo una solución de detección de fugas que no sea corrosiva y aprobada. Burbujas mostraran si hay fuga. Corrija cualquier fuga que encuentre. Retire las tapas y parrillas de los quemadores de la estufa y empaque. Alinee las tapas de los quemadores con la base del quemador. Tapas de los quemadores deben estar al mismo nivel cuando se coloca correctamente. Si las tapas de los quemadores no están colocados correctamente, los quemadores no encenderan. Coloque los quemadores, las tapas y las parrillas en la estufa. Recomendaciones Si la instalación no es nueva, limpie los tubos para evitar que se tapen las espreas. Con el fin de facilitar el movimiento del aparato, el instalador debe hacer una espiral con el tubo flexible de cobre e instalar una llave de paso en la línea de suministro de gas. Esta llave debe estar fuera de la estufa y accesible a las personas que la usan. Al mover su estufa, evite que la conexión de gas, se estrangule o muerda, para evitar fugas de gas. ADVERTENCIA Riesgo de Incendio Siempre utilice tubos y reguladores de presión de acuerdo a las normas locales. Verifique la validez de los tubos y reguladores de presión y sustitúyalos si fuera necesario. Apriete adecuadamente todas las conexiones de gas durante la instalación. Instale el aparato de acuerdo a las especificaciones descritas en el manual de instrucciones. Si no se siguen estas instrucciones puede causar explosión, incendio o posibles daños a la integridad física 09-May-2014 18:21:12 EDTde| RELEASED las personas. 7 In some European factories the letter "W" of the part code mentioned herein will be automatically replaced by the number "4000" (e.g. "W12345678" becomes "400012345678") Requisitos del Suministro Eléctrico Si su estufa cuenta con accesorios eléctricos, colóquela cerca de un tomacorriente de pared. El cable tomacorriente debe conectarse a una toma de corriente con un voltaje de 105V -140V ~. Cerciórese de que la instalación está apropiadamente aterrizada. Terminada la conexión a la línea de gas, conecte la estufa a la corriente eléctrica. ADVERTENCIA Riesgo de choque eléctrico No use cable de extensión. No use el producto sin conexión a tierra. No use adaptadores o triples. Desconecte el suministro de energía antes de darle mantenimiento. Vuelva a colocar todos los componentes y paneles antes de hacerlo funcionar. No quite la terminal de conexión a una tierra efectiva en su instalación. Si no se siguen estas instrucciones, puede traer riesgo de vida, incendio o choque eléctrico. Características Eléctricas Nominales Voltaje: 105V-140 V ~ Frecuencia: 50/60 Hz Corriente: 1,0 A Max Modelos LWF7230 Voltaje: 105V-140 V ~ Frecuencia: 50 Hz Corriente: 10,0 A Max Modelo LWF7550 Voltaje: 105V-140 V ~ Frecuencia: 60 Hz Corriente: 10,0 A Max Modelo LWF7551 Verificación de Funcionamiento Ya que la estufa fue instalada es necesario verificar que la conexión de gas y eléctrica hayan sido realizadas con éxito. Para esta actividad, coloque la estufa en su posición final y proceda a iniciar el funcionamiento de los quemadores superiores y del horno. Quemadores superiores De acuerdo con el modelo, su estufa puede tener encendido electrónico de uno ó dos pasos, así como encendido cerillo. Siga esta secuencia para corroborar el funcionamiento(dependiendo el modelo): Si su estufa es encendido con Cerillo 1. 2. Acerque un cerillo encendido al quemador que desea encender. Gire la perilla de dicho quemador hasta el símbolo “Ignite” (Encendido), la flama deberá encenderse. Para estufas con encendido electrónico de dos pasos: Si su estufa es encendido con botón: presione, y mantenga así, el botón con la figura localizado junto a la perilla de extrema izquierda y gire cualquiera de las perillas de los quemadores superiores hasta el símbolo “Ignite” (Encendido), como se muestra en la figura inferior. Escuchará el sonido de la chispa de la bujía y se encenderá la flama, en cuanto la flama encienda, libere el interruptor. Si su estufa es de encendido de un solo paso (es decir en la perilla): Presione y gire cualquiera de las seis perillas de quemadores superiores, hacia la posición “Ignite” (Encendido), se escuchará el sonido de la chispa de la bujía y se encenderá la flama. En cuanto la flama encienda, gire la perilla a la flama deseada. Quemador de horno Dependiendo del modelo, su estufa cuenta con un quemador de horno controlado por un control electrónico, o por un termostato. 8 09-May-2014 18:21:12 EDT | RELEASED In some European factories the letter "W" of the part code mentioned herein will be automatically replaced by the number "4000" (e.g. "W12345678" becomes "400012345678") Si la estufa tiene termostato con encendido manual (cerillo) o eléctrico, según modelo, la perilla está rodeada o indica en la perilla temperaturas que van desde 150 °C hasta 250 °C. Para corroborar el correcto funcionamiento del quemador, siga los siguientes pasos (dependiendo del modelo) de su estufa. 1. Abra la puerta del horno. 2. Encienda un cerillo y acérquelo a la entrada del quemador de horno mostrada en la A figura (encendido cerillo), y en el caso de encendido eléctrico solo presione el switch de 3. 4. 5. 6. botón como la figura . Gire la perilla de control de horno a su posición de 150 °C y presione firmemente hasta el fondo manteniendo así 4 segundos. La flama deberá encenderse y empezara a generar calor. Gire la perilla a la temperatura deseada. B Cierre la puerta de horno y abra la puerta del asador (modelos con puerta tipo Asador A. Charola abatible), en los modelos donde no cuente con puerta de asador (tapa) deberá abrir la B. Entrada quemador puerta de horno y retirar la charola. La flama del quemador deberá cubrir todos los orificios y normalmente debe ser azulada y estable con una altura aproximada de 1 cm; si no es así, vea la sección de “Ajuste de flamas”, “Flama del quemador de horno”, en caso de haber retirado la charola deberá colocarla en su posición inicial . Habiendo verificado el quemador de horno y ajustado las flamas, gire la perilla a la posición de apagado. 7. Una vez realizados los pasos anteriores su horno quedará listo para ser usado. Si la flama no enciende revise lo siguiente: a) Gire la perilla a la posición de apagado (inicial) y verifique que haya suministro de gas, ya sea en el tanque o en la línea. También revise las conexiones y tubos, podrían estar doblados o bloqueados. b) Repita el procedimiento, desde el paso 3. Ajuste de Flamas Flama de quemadores superiores Al realizar conversión de su producto de gas LP a gas natural, algunos componentes requieren de ajustes para poder utilizar su estufa correctamente. Para realizar este ajuste llame al técnico especializado Whirlpool. Flama del quemador de horno Las diferentes altitudes sobre el nivel del mar, las variaciones en el suministro de gas y el cambio de configuración de la estufa para ser utilizada con gas LP o gas Natural, hacen necesario regular la entrada de aire primario del quemador de horno para obtener una adecuada mezcla de aire-gas y obtener un buen funcionamiento cuando se utiliza. Cuando se enciende por primera vez el quemador de horno, o cuando se cambia la configuración de la estufa para ser utilizada con gas LP o gas natural, puede ser necesario ajustar la altura de la flama del quemador. La flama del quemador de horno debe ser azulada y estable, siga esta secuencia para mejorar ésta condición: 1. Verifique que la estufa esté completamente fría y todas las perillas en la posición de apagado. 2. Desconecte el cable tomacorriente. Retire la charola del piso de horno, tome la charola por la parte posterior en ambos lados donde se muestra en la figura y jale hacia arriba y retírela de la estufa. 3. Localice el tornillo que sujeta el quemador y jálelo de manera que la parte posterior se suelte de la esprea. 4. Sujete el quemador y jálelo de manera que la parte posterior se suelte de la esprea. 5. Para ajustar el aire afloje el tornillo del regulador de aire localizado en la parte posterior del A quemador y gire para abrir o cerrar la ventana (ver figura). 6. Si la flama esta amarilla es necesario abrir la ventana del quemador. Cuando la flama es inestable o se separa del quemador, es necesario cerrar ligeramente la ventana. 7. Cuando termine de ajustar la ventana, apriete el tornillo del regulador y retorne el quemador a su posición original, alineándolo con la esprea posterior. 8. Coloque el tornillo con la rondana sujetando el bastidor frontal y el quemador, y apriete para sujetarlo. B A. Charola 9. Conecte el cable tomacorriente de la estufa. B. Entrada quemador 10. Encienda el quemador de horno tal y como se explica en la sección “Verificación de funcionamiento”, “Quemador de horno”. Si la flama ya está estable y azulada, la estufa ha quedado lista para su operación; de lo contrario espere a que el quemador se enfríe y retorne al paso 2. 9 09-May-2014 18:21:12 EDT | RELEASED In some European factories the letter "W" of the part code mentioned herein will be automatically replaced by the number "4000" (e.g. "W12345678" becomes "400012345678") 11. Cuando el quemador de horno ha sido ajustado y está colocado dentro de la estufa, retorne la charola del piso a su posición original. Continúe con la verificación de funcionamiento del quemador de horno. NOTA: No obstruya la salida de aire del horno, no cubra los orificios de la charola de horno. Uso de la Estufa Perillas de Control Para fijar la temperatura del quemador: 1. Para el encendido de los quemadores revise la sección “Verificación de funcionamiento”. 2. Gire la perilla hacia cualquier posición entre los símbolos “High” (flama máxima), “Med” (flama media) y “Min” (flama mínima). Use el cuadro siguiente para fijar los niveles de calor. Ajuste “High” (Flama Máxima) Posición media “Med”(Flama Media) “Low” (Flama Mínima) Uso Recomendado para Comenzar a cocinar los alimentos. Hacer hervir un líquido. Mantener un hervor rápido. Dorar rápidamente los alimentos. Freír o sofreír los alimentos. Preparar sopas y salsas Guisar o cocer al vapor los alimentos. Mantener los alimentos calientes. Dejar hervir a fuego lento. Cortes de corriente En el caso de un corte de corriente prolongado, se pueden encender los quemadores exteriores manualmente. Para encender los quemadores exteriores manualmente, realice lo siguiente: 1. Acerque un cerillo encendido al quemador que desea encender. 2. Gire la perilla de dicho quemador hasta el símbolo “Ignite” (Encendido), la flama deberá encenderse. Abertura del tubo de gas El gas debe fluir con libertad a través de la abertura del tubo de gas para que el quemador se encienda adecuadamente. Mantenga esta zona libre de suciedad y no permita el ingreso de derrames, alimentos, productos de limpieza o cualquier otro material. Para protegerla de los derrames, siempre use la tapa del quemador. Orificios del quemador Una buena flama es de color azul, no amarillo. Mantenga los orificios libres de suciedad y no permita el ingreso de derrames, alimentos, productos de limpieza o cualquier otro material. No obstruya el flujo de aire de combustión y de ventilación alrededor de los bordes de la parrilla del quemador. No coloque aluminio ni ningún otro material que pueda provocar un mal funcionamiento de su estufa. Tapa del quemador Estándar Cuando use los quemadores superiores mantenga siempre la tapa del quemador en su lugar. La tapa limpia del quemador ayudará a prevenir el encendido inadecuado y las llamas desiguales. Siempre limpie la tapa del quemador después de un derrame, y como rutina quite y limpie las tapas y bases tal como lo indica la sección “Cuidado de la estufa”, “Quemadores superiores”. Quemadores Superiores Su estufa está equipada con quemadores superiores, que hacen que el producto que usted adquirió funcione correctamente, A continuación se muestra gráficamente las características de los quemadores: Quemador tipo aluminio estándar. A D A. B. C. D. B C Tapa del quemador Bujía Base del quemador Abertura del tubo de gas 10 09-May-2014 18:21:12 EDT | RELEASED In some European factories the letter "W" of the part code mentioned herein will be automatically replaced by the number "4000" (e.g. "W12345678" becomes "400012345678") La estufa cuenta con quemadores de distintas capacidades. Para conseguir un rendimiento óptimo de los quemadores se recomienda respetar lo siguiente: - Utilice recipientes cuya base tenga un diámetro igual o ligeramente superior al de los quemadores (consulte tabla). - Utilice exclusivamente ollas y sartenes con fondo plano. Quemador Estandar Ø de recipiente De 16 a 22 cm Quemador superior encendido cerillo. En caso de que su estufa sea quemador superior con encendido cerillo siga los siguientes pasos: 1.- Encienda un cerillo y acérquelo al quemador que desea encender. 2.- Gire la perilla de ese quemador en contra de las manecillas del reloj hasta la posición de “Ignite” (Encendido) y después a la posición deseada. 3.- Si el quemador no enciende, retorne la perilla a la posición de apagado y apague el cerillo. 4.- Verifique que haya suministro de gas, ya sea en el tanque o en la línea. También revise las conexiones y tubos, podrían estar dobladas o bloqueadas. 5.- Habiendo corroborado el paso de gas, encienda otro cerillo, acérquelo al quemador y gire la perilla hasta la posición de flama máxima. Esta misma secuencia puede realizarla para los otros quemadores superiores. 6.- Terminada la verificación, apague todos los quemadores. Comal Dentro de los accesorios de su estufa, usted encontrará el comal (dependiendo del modelo de estufa) éste puede ser: El comal de Aluminio teflonizado, puede colocarse sobre el quemador central o sobre cualquiera de los quemadores laterales. USE EL COMAL CON FLAMA BAJA. ANTES DE USAR POR PRIMERA VEZ: Lavar el comal con agua con jabón, limpie y seque totalmente, cubra la superficie del comal con aceite vegetal y limpie el exceso con una toalla de papel. No dejar vacío el comal cerca del área de los quemadores. No precaliente el comal. El teflón puede dañarse. El comal no puede usarse en el horno, asador, ni en el microondas. Para reducir el salpicar de grasa, evite cocinar con exceso de grasa. Evite cortar carne en el comal, puede dañar el recubrimiento. Evite el uso de utensilios de metal. Uso del Horno Utensilios para hornear Para la cocción uniforme, el aire caliente debe poder circular. Deje 5 cm de espacio alrededor del utensilio para hornear y las paredes del horno. Use el siguiente cuadro como guía: Número de Ubicación en la parrilla Cacerola(s) 1 Centro de la parrilla. 2 Lado a lado o ligeramente en zigzag. 3ó4 En esquinas opuestas en cada parrilla. Cerciórese de que ningún utensilio para hornear esté directamente encima del otro. Perilla de control del horno Modelos con termostato encendido manual o eléctrico. 1. Abra la puerta del horno. 2. Encienda un cerillo y acérquelo a la entrada del quemador de horno mostrada en la figura, en el caso de encendido eléctrico 3. 4. 5. presione la figura . Presione y gire la perilla de control del horno su posición inicial, en modelos de termostato en la marca de 150°C. Verifique visualmente que haya encendido el quemador del horno a través de la abertura del piso del horno. Ajuste la perilla del horno a la posición de temperatura indicada en la receta. A B A. B. Charola Entrada quemador 11 09-May-2014 18:21:12 EDT | RELEASED In some European factories the letter "W" of the part code mentioned herein will be automatically replaced by the number "4000" (e.g. "W12345678" becomes "400012345678") 6. Al terminar de hornear gire la perilla a la posición de apagado. “En el evento de que se extingan accidentalmente las flamas del quemador, apague el control del quemador y no intente volver a encender por lo menos durante 1 min.” Parrillas del horno Las parrillas interiores del horno son deslizadas de manera, abra la puerta del horno y/o broiler (en el modelo que aplique). Deslizamiento manual El horno tiene 5 diferentes posiciones de elevación para las parillas interiores; éstas tienen un tope que evita se salgan completamente cuando son movidas hacia fuera. Para cambiar la posición de la parrilla, siga los siguientes pasos: 1. Jale la parrilla hasta el tope. 2. Levante la parrilla de la parte frontal. 3. Jale nuevamente para liberarla. 4. Seleccione la altura a la cual desea cambiarla. 5. Empuje la parrilla hasta el tope. 6. Levante la parrilla de la parte frontal. 7. Empújela nuevamente para que llegue hasta el fondo del horno. Luz de horno (En algunos modelos) Su estufa cuenta con luz en el horno, esta iluminación es importante para revisar el horneado sin necesidad de abrir la puerta. La luz de horno se enciende cuando se presiona hacia abajo el interruptor que se localiza junto a la perilla externa que tiene el símbolo . Para apagar la luz, presione nuevamente el interruptor. Cuando el foco interior deje de funcionar, reemplácelo siguiendo estos pasos: Desconecte el cable tomacorriente de la estufa. Retire el foco girándolo en contra de las manecillas del reloj. 1. 2. Coloque un nuevo foco de 40 Watts especial para aparatos electrodomésticos. Conecte la estufa a la toma de corriente. Uso del Control Electrónico del horno modelo LWF7550 / LWF7551 Pantalla Cuando se suministre energía al electrodoméstico por primera vez, aparecerá en la pantalla la hora destellando. Presione OFF/CANCEL (Apagar/Cancelar) para despejar la hora que destella en la pantalla. Si aparece la hora destellando, ha ocurrido un corte de corriente. Presione OFF/CANCEL (Apagar/Cancelar) y vuelva a fijar el reloj, si fuera necesario. Cuando el horno no esté en uso, la pantalla mostrará la hora del día. Cuando esté utilizando una función de cocción o de temporizador, la pantalla mostrará horas y minutos, o minutos y segundos. Luces indicadoras del horno Las luces indicadoras están ubicadas a ambos lados de la pantalla. Las luces indicadoras se encienden o destellan cuando el horno está en uno de los siguientes modos: Bake (Hornear), Broil (Asar a la parrilla) o Timer (Temporizador). 12 09-May-2014 18:21:12 EDT | RELEASED In some European factories the letter "W" of the part code mentioned herein will be automatically replaced by the number "4000" (e.g. "W12345678" becomes "400012345678") Inicio Start (Inicio) iniciará cualquier función del horno. Si no se presiona Start (Inicio) dentro de los 5segundos después de presionar el botón de una característica, la luz indicadora de “PSH” (Empuje para iniciar) destellará y se escuchará el tono de presionar para poner en marcha, como recordatorio.Si no se presiona Start en menos de 1minuto después de haber presionado un botón de función, la pantalla del horno volverá al modo de la hora del día y la función programada se cancelará. Apagar/Cancelar Off/Cancel (Apagar/Cancelar) detiene cualquier función, con excepción de Clock (Reloj), Timer (Temporizador) y Control Lock (Bloqueo de control). Reloj (Clock) Se trata de un reloj de 12 horas que no muestra a.m. ni p.m. Para fijar: Antes de fijarlo, cerciórese de que el horno y el temporizador estén apagados. Presione OFF/CANCEL (Apagar/Cancelar) para anular el horno y presione TIMER SET/OFF (Fijar/Apagar el temporizador) para anular el temporizador. 1. Presione CLOCK (Reloj). 2. Presione los botones con las flechas de TEMP/TIME (Temperatura/Tiempo) hacia "arriba" o hacia "abajo" para fijar la hora del día. 3. Presione CLOCK (Reloj) o START (Inicio). Tonos Los tonos son señales audibles que indican lo siguiente: Un tono ■Ingreso válido ■El horno está precalentado (tono largo) ■Se ha ingresado una función Tres tonos ■Al presionar un botón inválido ■Recordatorio de presionar para poner en marcha Tonos de ciclo ■Señal de fin de ciclo Fahrenheit y centígrados La temperatura está prefijada en Fahrenheit, pero puede cambiarse a centígrados. Para cambiar: Presione y sostenga BROIL (Asar a la parrilla) por 5segundos. Se escuchará un tono y aparecerá “C” en la pantalla. Repita el procedimiento para volver a Fahrenheit. Para salir del modo, presione OFF/CANCEL (Apagar/Cancelar) o espere 3 segundos. Temporizador El temporizador puede fijarse en horas o minutos, hasta 12 horas y 59 minutos, y hará la cuenta regresiva del tiempo fijado en horas y minutos o en minutos y segundos. El temporizador no pone en marcha ni detiene el horno. Para fijar: 1.Oprima TIMER SET/OFF (Fijar/Apagar el temporizador). La luz indicadora del temporizador se encenderá. 2.Presione los botones con las flechas de TEMP/TIME (Temperatura/Tiempo) hacia "arriba" o hacia "abajo" para fijar la duración. 3.Presione START (Inicio). Cuando termine el tiempo fijado, se escucharán los tonos de fin de ciclo. 4.Presione TIMER SET/OFF (Fijar/Apagar el temporizador) dos veces en cualquier momento para cancelar el temporizador y los tonos recordatorios. Si se presiona Off/Cancel (Apagar/Cancelar), el horno se apagará y se desactivará la función de cocción. Para ver la hora del día por 5 segundos cuando el temporizador está haciendo la cuenta regresiva, presione CLOCK (Reloj).Si no se presiona Start (Inicio) dentro de los 5segundos después de presionar TIMER SET/OFF (Fijar/Apagar el temporizador) o los botones con flechas de TEMP/TIME (Temperatura/Tiempo), la luz indicadora “PSH” destellará y se escuchará el tono de presione para poner en marcha, como recordatorio. Puede volver a programarse el temporizador para cambiar la hora mientras el mismo está funcionando. Para volver a programarlo: 1. Oprima TIMER SET/OFF (Fijar/Apagar el temporizador). 2. Presione los botones de TEMP/TIME (Temperatura/Tiempo) hacia “arriba” o hacia “abajo” para ajustar la hora. 3. Presione START (Inicio). Bloqueo de control La función de Control Lock (Bloqueo de control) bloquea los botones del panel de control para evitar el uso accidental de las funciones de cocción.Cuando el control está bloqueado, sólo funcionarán Clock (Reloj), Oven Light (Luz del horno) y Timer Set/Off (Fijar/Apagar el temporizador). Para bloquear/desbloquear el control: 13 09-May-2014 18:21:12 EDT | RELEASED In some European factories the letter "W" of the part code mentioned herein will be automatically replaced by the number "4000" (e.g. "W12345678" becomes "400012345678") Antes de bloquearlo, asegúrese de que las funciones de cocción estén apagadas. Presione y sostenga START (Inicio) por 3 segundos y aparecerá en la pantalla “Lock” (Bloqueo). Repita el procedimiento para desbloquearlo. “Lock” (Bloqueo) desaparecerá de la pantalla. Control de temperatura del horno IMPORTANTE: No use un termómetro para medir la temperatura del horno, ya que el abrir la puerta del mismo puede hacer que el ciclo del quemador dé una lectura incorrecta. El horno proporciona temperaturas acertadas; sin embargo, es posible que cocine más rápido o más despacio que su horno anterior, de manera que se puede ajustar el calibrado de la temperatura. Puede cambiarse a Fahrenheit o a centígrados. Un signo de menos significa que el horno estará más frío con la cantidad que se muestra en la pantalla. La ausencia de signo significa que el horno estará más caliente con la cantidad que se muestra en la pantalla. Use como guía la tabla. 20°F (11°C) Para ajustar el calibrado de la temperatura del horno: 1. Presione y sostenga BAKE (Hornear) por 5 segundos hasta que la pantalla del horno muestre el calibrado actual, por ejemplo “00” 2. Presione el botón de TEMP/TIME (Temperatura/Tiempo) con las flechas hacia “arriba” o hacia “abajo” para aumentar o disminuir la temperatura en cantidades de 10°F (6°C). El ajuste puede fijarse entre 30°F (17°C) y -30°F (-17°C). 3. Presione START (Inicio) para guardar el ajuste o presione OFF/CANCEL(Apagar/Cancelar) para salir sin guardar los cambios. Cómo hornear y asar IMPORTANTE: Para evitar daños en el acabado del interior, no coloque alimentos ni utensilios de cocción directamente sobre la puerta o la base del horno. Para hornear o asar: 1.Presione BAKE (Hornear).Presione TEMP/TIME (Temperatura/Tiempo) o TEMP/HOUR (Temperatura/Hora) con las flechas hacia “arriba” o hacia “abajo” para ingresar una temperatura que no sea 350°F (177°C) en cantidades de 5°. La escala del horneado puede fijarse entre 170°F y 500°F (77°C y 260°C). 2. Presione START (Inicio) o START/ENTER (Inicio/Ingreso).Después de este primer paso, puede cambiar la temperatura en cualquier momento que lo necesite, presionando el botón Temp/Time (Temperatura/Tiempo) o Temp/Hour (Temperatura/Hora) con las flechas hacia “arriba” o hacia “abajo”. No necesitará presionar nuevamente Start. Si está horneando o asando cuando el temporizador está haciendo la cuenta regresiva, podrá ver en la pantalla la temperatura fijada para el horneado/asado por 5 segundos presionando BAKE( hornear). 3. Presione CANCEL (Cancelar), OFF/CANCEL (Apagar/Cancelar) o CANCEL/OFF (Cancelar/Apagado) cuando haya terminado. EL ASADOR (SOLO EN CIERTOS MODELOS) Para los modelos que aplique el asador está ubicado debajo del la puerta del horno. Utilice una parrilla del horno para asar. Para quitar una parrilla, jálela hasta la posición de tope, levante el borde delantero y luego sáquela. Realice los pasos en forma invertida para volver a colocar la rejilla. Siempre ase con la puerta del horno y del asador cerradas. ■Para evitar daños en el asador, no se apoye en la puerta del mismo ni aplique peso mientras esté abierta. ■Precaliente el asador antes de usar. Cierre por completo el asador mientras esté asando. ■No use la cavidad del asador para almacenamiento. ■El asador usa calor radiante directo para cocinar los alimentos. Para obtener un control más preciso al cocinar, cambie la temperatura mientras esté asando. Cuanto más baja sea la temperatura, más lenta será la cocción. Los cortes más gruesos y los trozos de carne, pescado y aves con forma irregular se pueden cocinar mejor a temperaturas para asar más bajas. ■Para obtener los mejores resultados, utilice una charola para asar y una parrilla. Se han diseñado para drenar el jugo y ayudar a evitar salpicaduras y humo. ■Jale la parrilla hasta la posición de tope antes de dar vuelta o de quitar los alimentos. Use pinzas para dar vuelta los alimentos, y así evitar que éstos pierdan el jugo. Los cortes muy delgados de pescado, aves o carne tal vez no necesiten darse vuelta. Para asar: 1. Abra la puerta del asador y jale la parrilla hasta la posición de tope. 2. Coloque el alimento sobre la parrilla, en una charola para asar, después colóquelo en el centro de la parrilla del horno. 3. Empuje la parrilla del horno para volverla a colocar en su posición original. Cierre la puerta para asegurar la temperatura adecuada para asar. 4. Presione BROIL (Asar a la parrilla).Se encenderá la luz indicadora de BROIL (Asar). 5. Presione START (Inicio).Se encenderá la luz indicadora. El ajuste de temperatura se puede cambiar en cualquier momento mientras se asa. Si está asando mientras que el temporizador hace la cuenta regresiva, puede presionar BROIL (Asar) para que el ajuste de temperatura para asar se muestre en la pantalla por 5segundos. 6. Presione Cancel (Cancelar), OFF/CANCEL (Apagar/Cancelar) o CANCEL/OFF (Cancelar/Apagar) cuando termine de asar. Cuidado y Limpieza de la Estufa Su estufa está fabricada para darle muchos años de servicio; no obstante, es importante brindarle los cuidados óptimos a fin de lograr disfrutar largo tiempo de su servicio. 14 09-May-2014 18:21:12 EDT | RELEASED In some European factories the letter "W" of the part code mentioned herein will be automatically replaced by the number "4000" (e.g. "W12345678" becomes "400012345678") Recomendaciones de Cuidados Siga las siguientes recomendaciones de cuidado de su estufa: Cubierta Superior No exponga los quemadores de su estufa a periodos prolongados de uso. No sobrecargue las parrillas de su estufa con ollas excesivamente pesadas soportan una carga máxima de 20 kg aproximadamente. Evite azotar las parrillas sobre las cubierta o las cacerolas sobre las parrillas Puerta de Horno Nunca utilice la puerta del horno como peldaño o escalón para alcanzar algún gabinete alto, puede ocasionar un accidente. No azote la puerta del horno, puede dañar los empaques y reducir la eficiencia del horno. No intente remover ni desarmar la puerta de la estufa por ningún motivo. No permita que los niños jueguen alrededor de la estufa. Limpieza General Es importante darle limpieza regular a su estufa para su óptimo funcionamiento, siga las siguientes recomendaciones para su limpieza: Antes de limpiar, asegúrese de que todos los controles estén apagados y de que el horno y la parrilla estén fríos. Siempre siga las instrucciones de las etiquetas de los productos de limpieza comerciales. A menos que se indique lo contrario, se recomienda utilizar agua, jabón y un paño suave o una esponja como material primario de limpieza. No utilice sosa cáustica o productos de limpieza que la contengan para limpiar la estufa. De no seguir esta instrucción se ocasionarán daños permanentes en las superficies donde se aplique. Parrillas de Hierro Fundido Método de limpieza: Detergente Líquido o limpiadores multiusos: Enjuague con agua limpia y limpie con un paño seco. Parrillas de Esmalte (Algunos Modelos) Las salpicaduras de comida que contienen ácidos, tales como vinagre y tomate, deben limpiarse tan pronto como la cubierta, parrillas y tapas se enfríen. Estas salpicaduras pueden afectar el acabado. Para evitar desportilladuras, no golpee las parrillas contra las tapas o contra ninguna superficie dura como recipientes de acero inoxidable. NO META LAS PARRILLAS A UNA MÁQUINA LAVAVAJILLAS. Método de limpieza: Estropajo de plástico no abrasivo y limpiador líquido ligeramente abrasivo. Limpie tan pronto las parrillas se enfríen. Quemadores superiores Antes de limpiar, cerciórese de que todos los controles estén apagados y que el horno y la superficie de cocción estén fríos. No utilice limpiadores de horno, blanqueadores o disolventes de óxido. Quemadores removibles (según modelo) Para mantener en buen estado los quemadores de su estufa, es necesario realizarles limpieza periódica o cada vez que haya un derrame(según modelo). Realice los siguientes pasos: 1. 2. A B Quite las parrillas superiores. Retire la tapa, el quemador y lave con agua jabonosa y una esponja. Enjuague perfectamente y seque. 3. Limpie la abertura del tubo de gas con un paño húmedo. 4. Cuando los quemadores estén secos, coloque nuevamente cada uno en su posición correspondiente junto con su tapa, asegurándose de centrarla correctamente. 5. Si el flujo de gas está obstruido ocasionado probablemente por derrame de alimentos, residuos de comida o residuos de productos usados para la limpieza, siga las siguientes recomendaciones: i) Quite las parrillas y quemadores de la cubierta. ii) Introduzca un plastinudo (alambre que se utiliza para cerrar bolsas de pan), retire el plástico que cubre el plastinudo o bien si lo prefiere también puede utilizar un alfiler recto o aguja. NO UTILICE PALILLOS DE DIENTES. 6. Vuelva a colocar las parrillas del quemador exterior en su lugar. 7. Encienda el quemador. Si el quemador no se enciende, no intente reparar el quemador por su cuenta. Póngase en contacto con un técnico de reparación competente. A. Plastinudo / Alfiler / Aguja B. Orificio de la esprea 09-May-2014 18:21:12 EDT | RELEASED NO COLOQUE LAS TAPAS DE LOS QUEMADORES, MIENTRAS ESTÉN HÚMEDAS, HÁGALO HASTA QUE ESTÉN BIEN SECAS. 15 In some European factories the letter "W" of the part code mentioned herein will be automatically replaced by the number "4000" (e.g. "W12345678" becomes "400012345678") Quemadores superiores estampados (algunos modelos) Colocación Antes de encender los quemadores asegúrese que estén bien colocados en su sitio. Orificios del quemador Una buena flama es de color azul, no amarillo. Mantenga los orificios libres de suciedad y no permita el ingreso de derrames, alimentos, productos de limpieza o cualquier otro material. Quemadores sellados Dependiendo el modelo de su estufa puede presentar quemadores sellados atornillados. Perillas de Control Método de limpieza: Trapo húmedo 1. 2. No utilice productos de limpieza abrasivos o de fibra metálica. NO SUMERJA EN AGUA O REMOJE LAS PERILLAS. 3. Si por algún motivo hubo un derrame sobre las perillas, séquelas inmediatamente con un paño seco y limpio. Exterior de la Puerta del Horno Método de limpieza: Producto para limpiar vidrios y toallas de papel o estropajo de plástico no abrasivo. Aplique el limpiavidrios con un trapo suave o una esponja pero no directamente sobre el panel. Panel de Control Método de limpieza: Producto limpia vidrios y un paño suave o esponja. Aplique el producto al paño suave o esponja, no lo haga directamente sobre el panel. No utilice productos de limpieza abrasivos, estropajos de fibra de acero, paños ásperos o ciertas toallas de papel ya que podrían dañar el panel. Cavidad del Horno Las paredes y techo del horno tienen un recubrimiento liso, para su limpieza siga el método de limpieza sugerido. Retire la charola del horno, siguiendo estos sencillos pasos: o Tome la charola según se muestra en la figura abajo y jale hacia arriba. o Después jale hacia usted y retírela. Método de limpieza: Estropajo de plástico no abrasivo con agua y jabón. Limpie tan pronto la cubierta se enfríe. No utilice limpiadores comerciales. Parrillas del Horno Puede retirar las parrillas para tener una mejor limpieza de estos accesorios. Método de limpieza: Estropajo de plástico no abrasivo y limpiador líquido ligeramente abrasivo. Limpie tan pronto se enfríen parrillas. Comal Método de limpieza: No use materiales abrasivos, fibras de plástico o metal para limpiarlo, utilice agua jabonosa y una esponja. 16 09-May-2014 18:21:12 EDT | RELEASED In some European factories the letter "W" of the part code mentioned herein will be automatically replaced by the number "4000" (e.g. "W12345678" becomes "400012345678") Solución de Problemas Antes de llamar a Servicio, pruebe las soluciones aquí sugeridas. Problema Nada funciona Quemadores superiores no funcionan Las llamas del quemador exterior están desiguales, amarilla y/o ruidosas El quemador exterior hace estallidos La bujía de encendido no acciona Calor excesivo alrededor del utensilio de cocina en la superficie de cocción El horno no funciona o no enciende Las llamas del quemador del horno están desiguales, amarillas y/o ruidosas La temperatura del horno está muy alta o muy baja Revisar Si su regulador tiene un buen funcionamiento y/o está en buen estado Si se ha cableado y polarizado debidamente el contacto al suministro de energía Se ha quemado un fusible en la casa o se disparo el disyuntor Si hay gas en su casa, verifique si otros aparatos domésticos que empleen gas funcionan Si la estufa está bien conectada al suministro de gas. Si hay gas en su casa, verifique si otros aparatos domésticos que empleen gas funcionan Si están obstruidos los orificios del quemador Si están colocadas correctamente las tapas del quemador Tipo de gas está usando en su casa (Gas LP). Que no esté mojado el quemador, ni su tapa. Que la estufa este conectada a la corriente eléctrica Existe chispeo y no enciende El tamaño del utensilio de cocina Tiempos de cocción y temperatura seleccionada Tipo de gas está usando en su casa (Gas LP). Que la estufa este conectada a la corriente eléctrica La activación de la perilla Tipo de gas está usando en su casa (Gas LP). El ajuste de calibración de la temperatura del horno Solución Es responsabilidad del cliente mantener en buen estado el regulador Conecte a un tomacorriente aterrizado Cambie el fusible o vuelva a conectar el circuito Llame a su proveedor de gas. Vea las instrucciones de operación o póngase en contacto con un especialista. Llame a su proveedor de gas. Retire los quemadores y Ver las instrucciones de funcionamiento de quemadores. Ver sección de funcionamiento de quemadores. Si no usa gas LP, hay que realizar la conversión, ponga en contacto con un técnico de servicio autorizado. Déjelo secar Conectar a la corriente eléctrica debidamente aterrizada Llame a un técnico de servicio autorizado Revisar la ubicación y tamaño de utensilio. Consulte el recetario, y programe precalentar. Si no usa gas LP, hay que realizar la conversión, ponga en contacto con un técnico de servicio autorizado. Conecte a un tomacorriente aterrizado Ver la sección de funcionamiento de horno Si no usa gas LP, hay que realizar la conversión, ponga en contacto con un técnico de servicio autorizado. Ver la sección “Ajuste de flama de quemador horno”. 17 09-May-2014 18:21:12 EDT | RELEASED In some European factories the letter "W" of the part code mentioned herein will be automatically replaced by the number "4000" (e.g. "W12345678" becomes "400012345678") Congratulations for your new appliance! You just purchased a new appliance, designed and manufactured following the most advanced techniques, Whirlpool guaranteed! We strongly recommend you to read the instructions on this manual before using your range. Please keep this literature in a safe place for further reference; it will help you to keep your range in good conditions for years. Range safetyS DE SEGURIDAD Your safety and the safety of others are very important. We have provided many important safety messages in this manual and your appliance. Always read and obey all safety messages. This is the safety alert symbol. This symbol alerts you to potential hazards that can kill or hurt you and others. All safety messages will follow the safety alert symbol and either the word “DANGER” or “WARNING”. These words mean: DANGER WARNING You can killed or seriously injured if you don´t immediately follow instructions. You can be killed or seriously injured if you don´t follow instructions. All safety messages will tell you what the potential hazard is, tell you how to reduce the chance of injury, and tell you what can happen if the instructions are not followed. For your safety: Do not store gasoline or other flammable liquids close from your appliance. Make sure the cabinets and other furniture surrounding your range as well as the wall and floor withstand temperatures of 180°C to avoid deformations and damage. For your safety: If you smell gas Open the windows. Don´t touch the electrical switches. Turn off all flames by turning of the valve of the gas supply line. Contact your gas supply provider company immediately. Don´t use your range to warm up the room, it’s dangerous. IMPORTANT SAFETY INSTRUCTIONS This gas range is equipped with a grounded plug for your safety. The wall outlet should be grounded. Reset all components before starting the product. Unplug the range or turn off the power supply before giving maintenance to the range. Don’t cut or remove the grounded plug from the cable. If the power supply cord is damaged it must be replaced by the manufacturer, contact Whirlpool service center. Don’t use cable extension or an electrical jack connector. Do not have wet hands when plugging or unplugging your appliance. Move this appliance only with the help of two or more people. Don´t allow children or other inexperienced person to operate the range. If you need maintenance or replace parts to the appliance please contact the Whirlpool service. Electrical Specifications for Power Supply Voltage: 105V-140 V ~ Frequency: 50/60 Hz Voltage: 105V-140 V ~ Frequency: 50 Hz Voltage: 105V-140 V ~ Frequency: 60 Hz Current: 1.0 A Max Mod (LWF7230) Current: 10.0 A Max Mod ( LWF7550) Current: 10.0 A Max Mod ( LWF7551) 18 09-May-2014 18:21:12 EDT | RELEASED In some European factories the letter "W" of the part code mentioned herein will be automatically replaced by the number "4000" (e.g. "W12345678" becomes "400012345678") Range Installation Keep this document for future reference. The correct installation of this appliance is your responsibility, we strongly recommend you to have a qualified technician or Whirlpool Service Technician to install your new range. Check the local regulations. Make sure there is power supply available. See section Electrical Requirements. ALL ELECTRICAL WORK MUST BE DONE BY A QUALIFIED ELECTRICIAN. Recommendations It’s the installer’s responsibility to fulfill with the spaces specified in this manual. The location of the range should be away from the elements and over a flat resistant surface. Don’t install your range over a carpet or any flammable material. If the ground under the range is synthetic, make sure it withstand at least 95°C without damage. Keep the areas surrounding the range free from gasoline and other flammable liquids and vapors. Don´t get to close from the flames on the burners, don’t use loose clothing when operating the cooktop. Provide the correct maintenance to the appliance. Use this range for household use only, this is not a commercial appliance. If you need to move your range, don’t lift or take it from the handles. Always open the oven door, lift from the upper part of the cavity and move. WARNING Risk of injury due to overweight Use two or more people to move and install your product. Failure to do so may cause damage to your spine or injured. “THIS APPLIANCE SHOULD NOT BE INSTALLED IN BATHROOMS OR BEDROOMS” Installation Remove the adhesive tape and packaging materials. Identify and separate all the parts of the appliance. The best location for your new range should be in a place protected from wind flow and with enough space to open the door oven. Don’t install cabinets or other furniture over the range. If hood will be installed, make sure it is at least 61 cm from the range. If the range has accessories that need a power supply, make sure the installation is close from a wall outlet. Location Requirements Minimum spaces for installation (these spaces should be followed) A.18” B.13” C.30” D.24” E.30 1/8” Gas Supply Requirements This stove is prepared to work with a moving LP gas tank or a fixed LP gas tank. 19 09-May-2014 18:21:12 EDT | RELEASED In some European factories the letter "W" of the part code mentioned herein will be automatically replaced by the number "4000" (e.g. "W12345678" becomes "400012345678") To use your stove with natural gas you should contact Whirlpool Service to change the nozzle and make the necessary adjustments. See the “Service” section in page 34. The qualified technician should make the conversion on the nozzles of each cooktop burner; the technician must test the connection and the gas pressure in the oven, the values should be like the following: OPERATING LP GAS PRESSURE 2.75 kPa; 2750 Pa; 27.5 mbar; 28 cm WATER COLUMN OPERATING NATURAL GAS PRESSURE 1.76 kPa; 1760 Pa; 17.6 mbar; 18 cm WATER COLUMN NOTE: The gas type used for this range is LP. If you wish to use Natural gas with this range you will need a conversion kit according to the following table. This kit can be ordered from the Authorized Whirlpool Solution Center. If you don’t follow theses indications your stove will generate soot and will require cleaning service which is not covered by the warranty of this product. Model LWF7200 LWF7230 Conversion kit LP gas – Natural gas W10665114 LWF7550 W10693387 LWF7551 W10665116 Connect the Gas Supply Line Depending of model a combination of fittings and pipes must be used to connect the stove to the existing gas supply line. Your connection may be different than the diagram below, according to the supply line type, size, location and Range model. 1. To connect your stove use the material specified on the diagram below. Outlet 5/8” Flared 2. Once you have connected the stove to the gas supply line, TURN ON the shutoff valve and test all connections by brushing on an approved noncorrosive leak-detection solution. Bubbles will show a leak. Correct any leak found. 3. Check the cooper piping for kinks or other damage so the gas flows freely throw the pipe. DON’T USE A LIGHTER TO LOOK FOR GAS LEAKS. DON’T USE PLASTIC HOSES FOR THE CONNECTION TO THE SUPPLY LINE, EVEN THE FLEXIBLE METAL TUBING, LEAKS MAY OCCUR. In case of Range Model with full oven control follow instructions : 1. Apply pipe-joint compound made for use with LP gas to the smaller thread ends of the flexible connector adapters (see B and F in the following illustration). 20 09-May-2014 18:21:12 EDT | RELEASED In some European factories the letter "W" of the part code mentioned herein will be automatically replaced by the number "4000" (e.g. "W12345678" becomes "400012345678") 2. Attach one adapter to the gas pressure regulator and the other adapter to the gas shutoff valve. Tighten both adapters, being certain not to move or turn the gas pressure regulator. 3. Use a ¹⁵⁄₁₆" combination wrench and an adjustable wrench to attach the flexible connector to the adapters. IMPORTANT: All connections must be wrench-tightened. Do not make connections to the gas regulator too tight. Making the connections too tight may crack the regulator and cause a gas leak. Do not allow the regulator to turn when tightening fittings. Use a connection fitting male ½´´to Range (see A). Complete Connection 1. Locate gas pressure regulator in the back of the range. IMPORTANT: Do not remove the gas pressure regulator. 2. Check that the gas pressure regulator shutoff valve is in the “ON” position. IMPORTANT: The factory default setting is the “ON” position. If the range does not work, verify that the valve is in the “ON” position. 3. Open the manual shutoff valve in the gas supply line. The valve is open when the handle is parallel to the gas pipe. 21 22 09-May-2014 18:21:12 EDT | RELEASED In some European factories the letter "W" of the part code mentioned herein will be automatically replaced by the number "4000" (e.g. "W12345678" becomes "400012345678") 4. Test all connections by brushing on an approved noncorrosive leak-detection solution. Bubbles will show a leak. Correct any leak found. Remove cooktop burner caps and grates from parts package. Align burner caps with burner base. Burner caps should be level when properly positioned. If burner caps are not properly positioned, surface burners will not light. Place burners, burner caps and grates on the cooktop. Recommendations If the installation is not new, clean the pipes to avoid clogging the burner nozzles. To facilitate the movement of the appliance, the installer should make a coil with the flexible copper piping and install a shutoff valve in the supply line. The valve should be installed separate from the range and accessible for whoever is operating the range. Always check the tightness of the connections during installation. If you move the range, make sure to gas pipe doesn’t get kinked or damaged. WARNING Fire or explosion Hazard Always use tubes and pressure regulator components according local codes. Check the validity of the tubes and pressure regulators and replace if necessary. Properly tighten all gas connections during installation. Install in accordance with specifications described in the user care and guide. If these instructions are not followed may cause explosion, fire or damage to the physical integrity of persons. Electrical Requirements If the range has accessories that need a power supply, make sure the installation is close from a wall outlet. The plug has to be connected to a power supply of 105V-140 V ~. Make sure the installation is properly grounded. When the gas installation is done, connect the range to the electric supply. WARNING Electrical Shock Hazard Do not use an extension cord. Don´t use the product without ground prong. Don´t use universal plugs. Unplug the power supply before giving maintenance. Do not remove ground prong. Failure to follow these instructions can result in death, fire, or electrical shock. 22 09-May-2014 18:21:12 EDT | RELEASED In some European factories the letter "W" of the part code mentioned herein will be automatically replaced by the number "4000" (e.g. "W12345678" becomes "400012345678") Testing your Range Once the range has been installed, it’s necessary to test the correct installation of the gas and power supply. For this, place the range on its final location and turn on the cooktop burners and the oven. Cooktop burners Depending on the model of your range, the appliance may have 1 step or 2 step electronic ignition, some models with Match Ignition. Follow this sequence to test the electronic ignition: Ranges with 2 step electronic ignition: If your range has the electronic ignition button: press and hold the button with the image position (Ignition). See the following image. next to the cooktop controls to the “Ignite” Light switch You will hear a click, this is the spark’s noise, it will light up the flame, once it is on, release the button. The spark will ignite and the flame will be on the Ignite setting (Ignition). Once the burner is lighted, set the knob on the desired position. The same procedure can be followed to light up the other burners. Once you have finished the test, turn off all the burners. If for any burner the flame doesn’t light up after 5 seconds or you can’t hear the click of the spark, follow these steps: a) Turn the knob back to the OFF position (release the electronic ignition button if your range is equipped with this button). b) Make sure the range is connected to the power supply. The electronic ignition system won’t work if the range is unplugged. c) Make sure the gas supply line is open (tank or shutoff valve). Check the gas lines are not kinked, bended or damaged. d) Repeat procedure depending the cause. Even when the power is down, the burners can still be lighted up. For this case, follow these steps (match ignition model): 1. Light up a match and hold it close from the burner that you want to use. 2. Turn the knob to the Hi position (maximum flame), the flame should light up. Oven burner Depending on the model, your range may have an oven burner controlled by an oven control or by a thermostat. The model with oven control have different temperature values and thermostat will haves the settings around the knob will go from 150°C to 250°C. To test the burner, follow these steps: Model with thermostat match ignition or electronic ignition. (In some models). 1. 2. Open the oven door. Light up a match and hold it close from the oven burner (match burner), in case of ignition press and hold button at same time oven knob to bottom. Turn the oven knob to its original or desired temperature for thermostat models set to 150°C holding knob for 4 seconds in order to keep oven burner on, check oven burner flames are maintained once knob is released. 4. Close the oven door and open the grill door (models where apply). If the range have a Broiler Cap open oven door and remove the shelf on the bottom of the oven, be carefully of handling. A. Shelf Grab the shelf from both sides on the back part (see image), pull out and remove. The flame B. Burner opening should flow from all over the openings on the burner. Normally the flame should look blue, steady and 1 cm tall. Otherwise see the section “Flame Adjustment”, “Oven Burner Flame”. 5. After the oven burner checkup and adjustment of the flame, turn the knob to the off position and if you have removed shelf replace the bottom shelf to its original location. 6. After all these steps your oven is ready for use. If the flame doesn’t light up check the following: a) Turn the knob to the off position (initial position) and make sure the gas supply valve is open. Check the gas piping looking for kinks or other damage on the line. b) Repeat the procedure from step 3. 3. Adjusting the flames Flame on cooktop burners When converting your range from LP gas to Natural gas, you will need to adjust some components to get the best performance from your appliance. Please contact a qualified Whirlpool technician for this fix. 2223 09-May-2014 18:21:12 EDT | RELEASED In some European factories the letter "W" of the part code mentioned herein will be automatically replaced by the number "4000" (e.g. "W12345678" becomes "400012345678") Oven Burner Flame The different altitudes from the sea level, the variations on the gas supply line and the type gas conversion may cause the need to adjust the primary air intake in the oven burner for an adequate air-gas blend, and therefore a better performance of the burner. The oven burner flame should be blue colored and steady, follow these steps to adjust the flame: 1. Check the range is cold and all the cooktop burners are in the OFF position. 2. Unplug the range or turn off the power supply. Remove the shelf on the bottom of the oven. Grab the shelf from both sides on the back part (see image below), pull out and remove. 3. Locate the screw that holds the burner to the frontal range chassis and use a small flat screwdriver to remove it. Place the screw in a safe place. 4. Hold the burner and pull it off to release the back part from the nozzle, try not to pull the pigtail on the back if your range is equipped with electronic ignition. 5. To adjust the air, loose the air regulator screw located behind the burner and turn to open or close the air window (see image). 6. If the flame is yellow you need to open the window. When the flame is noisy or levitates our of the burner you need to slightly close the window. 7. When the adjustment has been done, tighten the air regulator screw and set the burner to its original position, align with the nozzle on the back and make sure the pigtail is set to the back of the range. 8. Place the screw with the washer holding the frontal range frame and the burner. Tighten the screw. 9. Connect the power cable or turn on the power supply. 10. Turn on the burner again following the steps on section “Testing your Range”, “Oven Burner”. If the A. Oven burner flame is steady and blue, the range is ready to use. Otherwise wait until the range is cold and return to B. Screw C. Air regulator step 3. 11. When the oven burner has been adjusted and placed inside the oven, replace the bottom shelf to its original location. Continue with the oven burner testing. NOTE: Don’t block the air outlet of the oven, don’t wrap or cover the vents in the oven shelf. Range Use Cooktop Controls The electronic ignition burners turn on the outer burner automatically when the knob is turned to Ignite (Ignition). See “Testing your Range”, “Cooktop Burners”. Before turning ON one of the burners, place the cookware with food over the cooktop. Don’t turn on a burner with an empty cookware or without it. To set the burner temperature: 1. 2. Push and turn the knob to the left. The burners will click(depending of model) but only the active burner will turn on. Turn the knob to any position between High (maximum flame) and Low (minimum flame) or Hi (maximum flame), Medium (medium flame) and (minimum flame). The click will stop. Use this table to set the temperature levels. Setting High (max flame) MED (medium flame) Low (minimum flame) Recommended use Start cooking food. Boil liquids. Keep a quick boiling. Deeply fry food. Fry food lightly. Cook soups and sauces. Steam or cook food. Keep the food warm. Simmer food. Power Shutdown In case of an extended power shutdown, the burners can be turned on manually. Light up a match and hold it close from the burner that you want to use, turn the knob left to Ignite position. After the burner is on, set the knob to the desired setting. Cooktop Burners Your range is equipped with cooktop burners. To better understand how to use the cooktop burners, the different types and how to adjust them please see page 24. Cap of standard Burner Always keep the burner cap when using the cooktop burners. 23 24 09-May-2014 18:21:12 EDT | RELEASED In some European factories the letter "W" of the part code mentioned herein will be automatically replaced by the number "4000" (e.g. "W12345678" becomes "400012345678") The clean cap over the burner will help to ignite the burner correctly and keep the flame uniform. Always keep the burner cap clean after spilling any liquids and periodically remove and clean the burner caps as indicated on the section “Range Care”, “Cooktop Burners”. Opening on gas line The gas should flow freely through the line gas opening for the burner to turn on correctly. Keep this zone free of dirt and debris, avoid the entrance of spills, food, cleaning products or any other materials. Always use the burner caps to protect the gas line from liquid spills. Burner openings A good flame should look blue, not yellow. Keep the openings free from dirt and debris, avoid the entrance of spills, food, cleaning products or any other materials. Don’t block the combustion air flow and the vents around the borders or the burner grates. Don’t cover your range with aluminum foil or other material that could affect the performance of your range. Burner Types and Features: Standard aluminum burner (in some models.) A D A.- Burner Cap B.- Igniter C.- Burner D.- Gas Inlet Burner B C Upper Burner (match ignition). In case of your Range has aluminum Burner without igniter (match) follow next steps: 1.- Light up a match and hold it close from the desired burner. 2.- Push and turn counterclockwise the knob to Maximum Flame, set up to desired position. 3.- If the flame doesn’t light up check the following: a) b) Turn the knob to the off position (initial position) and make sure the gas supply valve is open. Check the gas piping looking for kinks or other damage on the line. Repeat the procedure from step 1, wait a minute before start again. This same sequence should be following for others upper burners. Once finish verification, turn off all burners. Griddle In any case the accessories included with your appliance you will find the griddle(not all models), the type of griddle may vary depending on the model of your range: The Aluminum-non stick griddle can be placed over the central burner or over any of the side burners. BEFORE USING FOR THE FIRST TIME: Wash the griddle with water and soap and dry. Put a coat of vegetable oil and clean the excess with a paper towel. Don’t leave the griddle empty nearby the cooktop burners. Don’t preheat the griddle. Damage can happen to the non-stick surface. The griddle shouldn’t be used to cook, grill or in the microwave. To avoid splashing fat when cooking, use moderate oil and fat. Don’t cut meat or other food directly in the griddle, you could damage the non-stick coating. Avoid using metal utensils. Oven Use Cookware For an even cooking, the hot air must be able to flow around the food. Leave a 5 cm space around the cookware and the oven walls. Use this table as a reference: Amount of cookware Location in the oven rack 1 Centered in the rack 2 Side by side or slightly in zigzag. 3 or 4 In opposite corners of the rack. Make sure any dish is directly over another. 25 21 09-May-2014 18:21:12 EDT | RELEASED In some European factories the letter "W" of the part code mentioned herein will be automatically replaced by the number "4000" (e.g. "W12345678" becomes "400012345678") Oven Racks Manual sliding The oven has 5 different rack positions. There is a bump in the oven rails that stop the rack from falling when they are slide out. To change the position of the racks follow these steps: 1. Pull the oven rack out until the bump. 2. Lift the rack from the front. A.Oven rack 3. Pull out again to release the rack. B. Bump 4. Choose the new rack position. 5. Place the shelf and push it until the bump. 6. Lift the rack from the front. 7. Push the rack again until you can feel the back wall of the oven with the rack. Your range is equipped with an oven light (some models), this is a very important feature that allows you to check the food without opening the door. The oven light turns on when the light button is pressed next to the knob on the end (some models). To turn off the light, press the button again, in model with full oven control, oven control use (below section). When the light bulb is blown, replace it following these steps: 1. Unplug the range cable or disconnect the power supply. 2. Remove the light bulb unscrew counterclockwise. 3. Replace with a new especial 40 Watts light bulb for appliances. 4. Reconnect the range or turn on the power supply. Oven Control Use (Some Models) Display When power is first supplied to the appliance, a flashing time will appear on the display. Press OFF/CANCEL to clear flashing time from the display. If flashing time appears, a power failure has occurred. Press OFF/CANCEL and reset the clock if needed. When the oven is not in use, the display shows the time of day. When performing a cook or timer function, the display will show either hours and minutes and seconds. Oven indicator light The indicator light are located on both sides of the display. The indicator lights light up or flash when the oven is one of the following modes: Bake, Broil or Timer. Start Start begins any oven function. If Stars is not pressed within 5 seconds after pressing a function pad, the push to Start (“PSH”) indicator light will flash and the push to start tone will sound as a reminder If Start is not pressed within 1 minute after pressing a function pad, the oven display will return to the time of day mode and the programmed function will be canceled. Off/cancel Off/Cancel stops any function except the Clock, Timer and Control Lock. Clock This is a 12-hour clock and does not show a.m. or p.m.To Set:Before setting, make sure the oven and Timer are off. Press OFF/CANCEL to cancel the oven, and press TIMER SET/OFF twice to cancel the timer.1.Press CLOCK.2.Press the TEMP/TIME “up” or “down” arrow pads to set the time of day.3.Press CLOCK or START. Tones Tones are audible signals, indicating the following: One tone ■Valid pad press ■Oven is preheated (long tone) 26 21 09-May-2014 18:21:12 EDT | RELEASED In some European factories the letter "W" of the part code mentioned herein will be automatically replaced by the number "4000" (e.g. "W12345678" becomes "400012345678") ■Function has been entered Three tones ■Invalid pad press ■Push to start reminder Cycling tones ■End of cycle Fahrenheit and Celsius The temperature is preset at Fahrenheit, but can be changed to Celsius. To Change: Press and hold BROIL for 5seconds. A tone will sound, and “C” will appear on the display. Repeat to change back to Fahrenheit. To exit mode, press OFF/CANCEL or wait 3 seconds. Timer The timer can be set in hours or minutes up to 12 hours and 59 minutes, and counts down the set time either in hours and minutes, or in minutes and seconds. The timer does not start or stop the oven .To Set: 1. Press TIMER SET/OFF. The timer indicator light will light up. 2. Press the TEMP/TIME “up” or “down” arrow pads to set the length of time. 3. Press START. When the set time ends, end-of-cycle tones will sound. 4. Press TIMER SET/OFF pad twice anytime to cancel the timer and reminder tones. If Off/Cancel is pressed, the oven will turn off and the cook function will be disabled. To display the time of day for 5 seconds when the timer is counting down, press CLOCK. If Start is not pressed within 5 seconds after pressing TimerSet/Off or Temp/Time arrow pads, the “PSH” indicator light will flash and the push to start tone will sound as a reminder. If no action is taken after 1minute, the display will return to the time of day or bake or broil mode. The timer can be reprogrammed to change the time while it is running. To Reprogram: 1. Press TIMER SET/OFF. 2. Press the TEMP/TIME “up” or “down” arrow pads to adjust time. 3. Press START. Control Lock The Control Lock function blocks the control panel pads to avoid unintended use of cook functions. When the control is locked, only Clock, Oven Light and Timer Set/Off will function. To Lock/Unlock Control: Before locking, make sure the cook functions are off. Press and hold START for 3 seconds, and “Loc” will appear on the display. Repeat to unlock. “Loc” will disappear from the display. Oven Temperature Control IMPORTANT: Do not use a thermometer to measure oven temperature because opening the oven door may cause the burner cycling to give incorrect readings.The oven provides accurate temperatures; however, it may cook faster or slower than your previous oven, so the temperature calibration can be adjusted. It can be changed in Fahrenheit or Celsius.A minus sign means the oven will be cooler by the displayed amount. The absence of a minus sign means the oven will be warmer by the displayed amount. Use the following chart as a guide. To Adjust Oven Temperature Calibration: 1. Press and hold BAKE for 5 seconds until the oven display shows the current calibration, for example “00.” 2. Press the TEMP/TIME “up” or “down” arrow pad(s) to increase or to decrease the temperature in 10°F (6°C) amounts. The adjustment can be set between 30°F (17°C) and -30°F (-17°C). 3. Press START to save the adjustment, or press OFF/CANCEL to exit without change. 20°F (11°C) Baking and Roasting IMPORTANT: To avoid damage to the interior finish, do not place food or cookware on the oven door or oven bottom. To Bake or Roast: 1. Press BAKE. Press TEMP/TIME or TEMP/HOUR “up” or “down” arrow pads to set a temperature other than 350°F (175°C) in 5° amounts. The bake range can be set between 170°F and 500°F (75°C and 260°C). 2. Press START or START/ENTER. 30 27 09-May-2014 18:21:12 EDT | RELEASED In some European factories the letter "W" of the part code mentioned herein will be automatically replaced by the number "4000" (e.g. "W12345678" becomes "400012345678") The temperature can be changed at any time after this step by pressing the Temp/Time or Temp/Hour “up” or “down” arrow pads. Start does not need to be pressed again. If baking/roasting while the Timer is counting down, the set baking/roasting temperature can be displayed for 5 seconds by pressing Bake. 3. Press OFF/CANCEL or CANCEL/OFF when finished. BROILER The broiler is located below the oven door. Use an oven rack for broiling. To remove a rack, pull it out to the stop position, raise the front edge, then lift out. Reverse the steps to replace a rack. Always broil with both the broiler and the oven doors closed. ■To avoid damage to the broiler, do not step on or apply weight to the broiler door while it is open. ■ Preheat the broiler before use. Completely close broiler door during broiling. ■ Do not use broiler cavity for storage. ■ Broiling uses direct radiant heat to cook food. Changing the temperature when broiling allows more precise control when cooking. The lower the temperature, the slower the cooking. Thicker cuts and unevenly shaped pieces of meat, fish and poultry may cook better at lower broiling temperatures ■ For best results, use a broiler pan and grid. It is designed to drain juices and help avoid spatter and smoke. To Broil: 1. Open the broiler door and pull the rack out to the stop position. 2. Place food on a grid in a broiler pan, then place it in the center of the oven rack. 3. Push the oven rack back to the original position. Close the door to ensure proper broiling temperature. 4. Press BROIL. The BROIL indicator light will light up. 5. Press START. The indicator light will light up. The temperature setting can be changed at any time during broiling. If broiling while the Timer is counting down, the set broiling temperature can be displayed for 5 seconds by touching BROIL. 6. Press OFF/CANCEL or CANCEL/OFF when finished broiling. Range Care and cleaning Your range is designed and manufactured to last many years of service, however, it´s very important to provide care and cleaning to keep your appliance in good conditions. Care recommendations: Follow these recommendations: Cooktop Don’t leave the burners of your cooktop ON for long periods of time. Don’t put a lot of weight the grates on the cooktop with overloaded cookware. The maximum load is 20 kgs. Avoid dropping the grates over the cooktop, don’t drop cookware over the grates. Oven door Never use the oven door as a step to reach a cabinet or high locations, an accident may happen. Close the oven door gently, otherwise you could damage the oven sealings and therefore reduce the performance of the oven. Don’t try to remove or disassemble the oven door for any reason. Don’t allow the children to play around the range. General cleaning It’s very important to keep your range clean to keep an optimum performance, follow these recommendations for cleaning: Before cleaning the range, make sure all the controls are in the off position and make sure the cooktop and oven are cold. Always follow the instructions of the cleaning products. Unless otherwise is noted, we recommend to use water, soap and a soft cloth or a sponge to clean the range. Don’t use caustic soda or cleaning products with this ingredient to clean the range. If you don’t follow this direction, permanent damage may occur to the surfaces cleaned with this product. Enamel Grates (in some models) The food splashing that contains acids, like vinegar and tomato should be cleaned as soon as the cooktop, grates and caps are cold. This splashing may damage the finish. To avoid cracks and chips, don’t hit the grates against the caps or against any hard surface like stainless steel cookware. DON’T USE DISHWASHER TO WASH THE GRATES. Cleaning Method: Use non abrasive scouring pad and mild abrasive liquid cleaner. Clean as soon as the grates are cold. Cooktop burners Before cleaning, make sure all the controls are off and the oven and cooktop are cold. Don’t use oven cleaners, bleach or oxide removers. Control knob 28 30 09-May-2014 18:21:12 EDT | RELEASED In some European factories the letter "W" of the part code mentioned herein will be automatically replaced by the number "4000" (e.g. "W12345678" becomes "400012345678") Cleaning method: Damp cloth 1. Do not use abrasive cleaners or steel wool. 2. NOT immerse in water or soak knobs. 3. If for some reason there was a spill on the knobs, dry immediately with a dry and clean cloth. Outer glass door Cleaning method: Glass cleaner and paper towels or nonabrasive plastic scrubber. Apply the cleaner with a soft cloth or sponge, not directly on panel. Control panel Cleaning method: Product cleaner and a soft cloth or sponge. Apply to soft cloth or sponge, not directly on panel. Do not use abrasive cleaners, steel wool pads, gritty washcloths or some paper towels as they may damage the panel. Oven cavity The walls and ceiling have a smooth coating oven for cleaning follow the suggested cleaning method. Remove the pan from the oven, following these simple steps: Take the tray and pull up. After you pull and remove. Cleaning method: • Non-abrasive plastic scouring pad with soap and water. • Clean as soon as cooktop to cool. • Do not use commercial cleaners. Oven racks You can remove the grills for a better cleaning of these accessories. Cleaning method: • Non-abrasive plastic scouring pad and mildly abrasive liquid cleaner. • Clean as soon cool grills. Griddle Cleaning method: • Do not use abrasive materials, plastic or metal fibers to clean, use soapy water and a sponge. Standard burner (removable burners depending of model) To keep the cooktop burners fully functional, it’s necessary to perform periodic cleaning or clean every time a liquid spills over the burner. Follow these steps: 1. Remove the grates. 2. Remove the cap, the burner and wash with soapy water and a sponge. Rinse deeply and dry. 3. Clean the gas line opening with a wet cloth. 4. When the burners are dry, replace each one along with the burner cap. Make sure the burners are aligned with the burner. 5. If the gas flow is obstructed by food spills, food residues or cleaning product residues, then follow these recommendations: i) Remove the grates and burners from the cooktop. ¡¡) Insert a twistie (wire to close bread bags), remove the plastic covering the twistie or if you prefer use a safety pin or needle. DON’T USE A TOOTHPICK. 6. If the burner needs regulation, contact a qualified repair technician. A. Twistie / Safety pin / Needle 7. Replace the burner grates on the cooktop. B. Nozzle opening 8. Turn on the burner. If the burner doesn’t turn on, don’t try to fix the burner by yourself. Contact a qualified repair technician. DON’T ASSY THE BURNER CAPS IF THEY ARE STILL WET, WAIT UNTIL ALL PIECES ARE TOTALLY DRY If your Range have assembly burner it must be reviewed by Whirlpool Service. 29 30 09-May-2014 18:21:12 EDT | RELEASED In some European factories the letter "W" of the part code mentioned herein will be automatically replaced by the number "4000" (e.g. "W12345678" becomes "400012345678") Troubleshooting Before calling to Service, prove the solutions here suggested. Problem Nothing works Burners do not work Burner flames are uneven, yellow and / or noisy The burner makes popping The spark plug does not trigger Excessive heat around cookware on cooktop The oven does not work or does not light The oven burner flames are uneven, yellow and / or noisy The oven temperature is too high or too low Check over If wiring is properly connected and polarized energy supply Has blown a fuse in the house or tripped circuit breaker If there is gas in your home, check if other gas appliances that use work If the stove is properly connected to the gas supply If there is gas in your home, check if other gas appliances that use work If clogged burner orifice Solution Connect to a properly grounded Replace fuse or reconnect the circuit Call your gas supplier See the operating instructions or contact an expert. Call your gas supplier That is not the burner wet or cap. Remove the burners and See the operating instructions of burners. Check burner operation section. If not using LP gas, the conversion must be made, contact an authorized service technician. Let it dry The heater is connected to a power source There sparking and will not turn The size of the cooking utensil Connect to properly grounded power Call an authorized service Check the location and size of pan. Cooking time and temperature selected Type of gas being used at home (LP Gas). See recipe and preheat schedule. If not using LP gas, the conversion must be made, contact an authorized service technician. Connect to a properly grounded See the operation section of oven If not using LP gas, the conversion must be made, contact an authorized service technician. If you are properly positioned the burner caps Type of gas being used at home (LP Gas). The heater is connected to a power source The activation of the knob Type of gas being used at home (LP Gas). The calibration setting oven temperature See the section "Adjusting oven burner flame." 30 09-May-2014 18:21:12 EDT | RELEASED In some European factories the letter "W" of the part code mentioned herein will be automatically replaced by the number "4000" (e.g. "W12345678" becomes "400012345678") Diagramas Eléctricos/ Wiring diagrams Modelos/ Models: LWF7230 31 09-May-2014 18:21:12 EDT | RELEASED In some European factories the letter "W" of the part code mentioned herein will be automatically replaced by the number "4000" (e.g. "W12345678" becomes "400012345678") Modelos/ Models: LWF7550 / LWF7551 32 09-May-2014 18:21:12 EDT | RELEASED In some European factories the letter "W" of the part code mentioned herein will be automatically replaced by the number "4000" (e.g. "W12345678" becomes "400012345678") 33 09-May-2014 18:21:12 EDT | RELEASED In some European factories the letter "W" of the part code mentioned herein will be automatically replaced by the number "4000" (e.g. "W12345678" becomes "400012345678") 34 09-May-2014 18:21:12 EDT | RELEASED In some European factories the letter "W" of the part code mentioned herein will be automatically replaced by the number "4000" (e.g. "W12345678" becomes "400012345678") 35 09-May-2014 18:21:12 EDT | RELEASED In some European factories the letter "W" of the part code mentioned herein will be automatically replaced by the number "4000" (e.g. "W12345678" becomes "400012345678") 09-May-2014 18:21:12 EDT | RELEASED In some European factories the letter "W" of the part code mentioned herein will be automatically 36 replaced by the number "4000" (e.g. "W12345678" becomes "400012345678") 37 09-May-2014 18:21:12 EDT | RELEASED In some European factories the letter "W" of the part code mentioned herein will be automatically replaced by the number "4000" (e.g. "W12345678" becomes "400012345678") 09-May-2014 18:21:12 EDT | RELEASED In some European factories the letter "W" of the part code mentioned herein will be automatically 38 replaced by the number "4000" (e.g. "W12345678" becomes "400012345678") NOTAS: 31 39 09-May-2014 18:21:12 EDT | RELEASED In some European factories the letter "W" of the part code mentioned herein will be automatically replaced by the number "4000" (e.g. "W12345678" becomes "400012345678") NOTAS: 31 40 09-May-2014 18:21:12 EDT | RELEASED In some European factories the letter "W" of the part code mentioned herein will be automatically replaced by the number "4000" (e.g. "W12345678" becomes "400012345678")