1
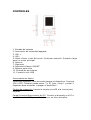
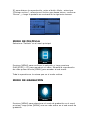
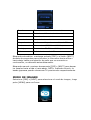
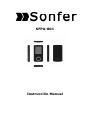
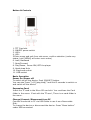
SFPA-801
Manual de Instrucciones
CONTENIDO
CARACTERÍSTICAS
PRECAUCIONES
ADVERTENCIA
CONTROLES
MENÚ PRINCIPAL
MODO DE MÚSICA
MODO DE PELÍCULA
MODO DE GRABACIÓN
MODO VOZ
MODO FM RADIO
MODO DE IMAGEN
AJUSTE DEL SISTEMA
MODO TEXTO
HERRAMIENTA DE CONVERSIÓN DE VÍDEO
SOLUCIÓN DE PROBLEMAS
CARACTERÍSTICAS
-
Pantalla de 1,8” TFT
Resolución: 128 x 160 píxeles.
Auriculares.
Reproduce AVI (128x160), AMV.
Reproduce MP3, WMA, WAV.
Reproduce JPEG.
Entrada de tarjetas Micro-SD hasta 8 GB.
Batería de litio 390mAh.
Radio FM
Soporta archivos de texto TXT
Multi-idioma
Disponible en dos colores: azul y rojo.
PRECAUCIONES
Siga estos consejos para preservar la vida de su reproductor digital:
- Cargue la batería se cargue completamente antes de usar el
dispositivo por primera vez. No lo mantenga en carga más de4 horas.
- No sostenga el aparato por los auriculares, puede provocar daños
internos.
- Nunca fuerce las conexiones de cables como auriculares o USB.
Asegúrese siempre de que los conectores de los cables son los
correctos y compatibles antes de intentar conectar el reproductor.
- Al desconectar el reproductor de medios digitales use el modo
seguro siempre.
- No desconecte el reproductor de medios digitales, mientras que esté
en modo de transmisión de datos.
ADVERTENCIA
- No utilice este reproductor bajo temperaturas extremas. Mantener
alejado del calor extremo, frío y zonas húmedas.
- No desmonte el reproductor.
- No permita que los niños pequeños usen el reproductor sin
supervisión.
- No instale software externos a nuestra marca el reproductor.
CONTROLES
1. Entrada de tarjetas
2. Interruptor de encendido/apagado
3. VOL +
4. VOL5. Menú: Entrar y salir del menú. Confirmar selección. Pulsación larga
para ir a menú principal.
6. Anterior
7. Siguiente
8. Reproducir/Pausa. ON/OFF
9. Espacio para cinta
10. Entrada de auriculares
11. Conexión mini-USB
Funcionamiento básico
Encendido/Apagado: Para encender/apagar el dispositivo. Presione
[ON / OFF]. También puede pulsar "[> II] (play / stop)" y pulsar 3
segundos para encender y apagar el dispositivo.
Tarjeta de expansión: Inserte la tarjeta microSD a la ranura para
tarjetas.
Carga/Conectar/Desconectar del PC: Conecte el dispositivo al PC a
través del cable USB para utilizarlo como un disco extraíble.
MENÚ PRINCIPAL
Mantenga pulsado [MENU] para acceder al menú principal. Pulse
[PRE] o [NEXT] para cambiar los modos.
MODO DE MÚSICA
Seleccione "Música" en el menú principal:
Presione [MENU] para confirmar la selección y luego presione PLAY /
STOP [> II] para reproducir la canción. Durante la reproducción de
música, pulse el botón [MENU] para acceder al sub-menú:
Seleccione el modo MUSIC en el menú principal, presione [MENU]
para confirmar la selección y luego presione PLAY/STOP [> II] para
reproducir la canción. Durante la reproducción de música, pulse el
botón [MENU] para acceder al sub-menú:
Todas las canciones
Album
Artista
Género
Crear lista de
reproducción
Repetir
Ecualizador
Ajustes
Modo de
repetición
Salir
Muestra todas las canciones
Muestra el Album
Muestra el cantante
Muestra el género
Crea una lista de reproducción
Normal, Repeat one; Folder; Repeat
Folder; Repeat All; Random; Intro.
NATURAL,ROCK,POP,CLASSIC,SOFT,JAZ
Z, DBB
Repetición AB, cuando "A" parpadea,
presione [NEXT] para confirmar el punto
de partida y luego [NEXT] como punto
Repetición
"B". El reproductor volverá a reproducir
de A a B de acuerdo con el ajuste de los
tiempos de repetición.
Frecuencia
Establecer cuantas veces el punto A-B se
de repetición reproducirá. Máximo 10 veces (1-10)
Replay gap
Establece el tiempo de cada repetición
Salir del submenú
El dispositivo soporta Lyrics. Para visualizar completamente el
contenido de la canción, debe asegurarse de que el nombre de la
canción, en la carpeta de música, debe ser exactamente el mismo
que el nombre del archivo Lyrics.
Carpeta local
Borrar archivo
Borrar todo
Indica la carpeta actual
Borra el archivo actual
Borra todos los archivos
Si desea borrar una canción mientras se está reproduciendo, pulse [>
II] para detener la reproducción, pulse el botón Mode, seleccione
"Eliminar archivo", seleccione el archivo que desea borrar, confirmar
"Borrar", y luego la pantalla se mostrará de la siguiente manera:
MODO DE PELÍCULA
Seleccione "Película" en el menú principal
Presione [MENU] para confirmar la selección y luego presione
PLAY/STOP [> II] para reproducir el vídeo. Durante la reproducción
de vídeo pulsar la tecla [MENU] para acceder al sub-menú.
Toda la operativa es la misma que en el modo música.
MODO DE GRABACIÓN
Presione [MENU] para seleccionar el modo de grabación en el menú
principal, luego pulse [MENU] una vez más entrar en el sub-menú de
grabación
Carpeta Local
Tipo REC
Indica la carpeta de grabación
32K BPS、64K BPS、128K BPS、256K BPS
Salida
Para salir del sub-meú
Después del ajuste, presione [> II] para iniciar la grabación. Las
opciones [>II] (reproducir / detener) y [MENU] se pueden utilizar
durante la grabación. Para iniciar un nuevo archivo de grabación, por
favor presione [>II] (reproducir / detener) brevemente para guardar
el archivo de grabación actual.
NOTA: este dispositivo es compatible con grabación de voz de 99
archivos de almacenamiento en cada directorio. Si aparece en la
pantalla "fuera del espacio" indica que el directorio actual ya ha
guardado 99 archivos de grabación de voz, por lo que el usuario
necesitará cambiar a un nuevo directorio.
MODO VOZ
Pulse [PRE] o [NEXT] para seleccionar el modo VOZ, a continuación,
pulse [MENU] para confirmar la selección, pulse [>II] para reproducir
el archivo de grabación.
Pulse [>II] para pausar la reproducción, pulse [PRE] o [NEXT] para
seleccionar los archivos de grabación.
Sub-menú durante la reproducción:
Repetir
Modo de repetición
Salida
Ver modo repetir de música
Ver modo de repetición de música
Salir del sub-menú
Sub-menú, mientras que el estado es de parada:
Carpeta local
Borrar archivo
Borrar todo
Salir
Indica la carpeta actual
Borra el archivo actual
Borra todos los archivos
Salir del sub-menú
MODO FM RADIO
Seleccione [PRE] o [NEXT] para elegir el modo de FM y [MENU], pulse
para confirmar.
Pulse [>II] (reproducir / detener) para guardar la emisora. Si no hay
ninguna emisora guardada, puede buscar canales por auto o
búsqueda manual. Presione [MENU] para obtener sub-menú de la
siguiente manera:
Guardar
Guarda la emisora de radio actual
Grabar
Graba la emisión actual en la emisora actual
Borrar
Borra la emisora actual
Borrar todo
Borra todas las emisoras
Búsqueda auto
Realiza una búsqueda automática de FM
Banda normal
Frecuencias: 87.5MHz---108MHz;
Banda japonesa
Frecuencias: 76.5MHz---90MHz;
Salir
Salir del sub-menú de FM
Búsqueda automática: mantenga pulsado [PRE] o el botón [NEXT]
durante dos segundos para sintonizar la frecuencia hacia arriba o
hacia abajo hasta una estación de radio que se encuentre a
continuación, se detendrá automáticamente.
Búsqueda manual: presione brevemente [PRE] o [NEXT] para buscar
los canales hacia arriba o hacia abajo. NOTA: la banda normal y la
banda japonesa pueden almacenar 20 presintonías respectivamente.
MODO DE IMAGEN
Seleccione [PRE] o [NEXT] para seleccionar el modo de imagen, luego
pulse [MENU] para confirmar:
Presione [MENU] una vez más para acceder al sub-menú:
Carpeta local
Reproducción
Borrar imagen
Borrar todo
Salir
Seleccione la carpeta dónde se encuentra la imagen
Reproducción AUTO o MANUAL (Existe un tiempo de paso
de imagen de 1-10 segundos)
Borra una imagen
Borra todas las imágenes
Sale del sub-menú
Pulse [> II] (reproducir / detener) para mostrar la imagen de forma
automática o manual según el ajuste deL menú anterior.
AJUSTE DEL SISTEMA
Seleccione [PRE] o [NEXT] para seleccionar Configuración SYS, a
continuación, presione [MENU] para confirmar:
Presione [MENU] una vez más para acceder al sub-menú:
Tiempo de
grabación
Estilo
Apagado
pantalla
Idioma
Apagado
Modo en
línea
Memoria
info.
Firmware
Actualización
firmware
Salida
Presione [MENU] para editar el tiempo de grabación. Mantenga
botón [NEXT] y el dígito de año aumentará; oscilar [VOL +] para
editar próximo dígito, pulse [PRE] o [NEXT] para ajustar el dígito.
Presione [MENU] para confirmar el ajuste
Azul, verde, naranja, rosa, rojo y amarillo
Siempre encendido
10 Sec
20 Sec
30 Sec
Simple Chinese, English, Trad Chinese, Japanese, French,
German, Italian, Dutch, Portuguese, Spanish, Swedish, Czech,
Denmark, Polish etc.
Apagado auto: seleccione el tiempo de apagado cuando el
reproductor está parado y no se pulsa ningún botón. Se
establece en segundos. 0 significa que no se apagará
Multi Drive; Normal only; Encrypted only
Para comprobar aspectos de la memoria: tamaño, etc.
Muestra la versión del firmware
El firmware se puede actualizar vía PC
Salida de este sub-menú
MODO TEXTO
Seleccione [PRE] o [NEXT] para seleccionar texto, a continuación,
presione [MENU] para confirmar:
Entre en el modo de texto pulsando el botón de modo podrá leer y
editar el artículo en el dispositivo. El dispositivo sólo puede reconocer
archivos en formato "txt".
Presione [MENU] una vez más para acceder al sub-menú:
Seleccione [PRE] o [NEXT] para seleccionar texto, a continuación,
presione [MENU] para confirmar:
HERRAMIENTA DE CONVERSIÓN DE VÍDEO
Por favor, siga los pasos a continuación para instalar la herramienta
de conversión de vídeo.
Asegúrese de haber instalado Windows Media Player 9.exe y
DirectX9.0 antes de empezar.
Coloque la unidad de CD en el ordenador y abra la unidad
◊ Ejecutar Setup.exe para instalar el software, reinicie el equipo
◊ Seleccione el menú: inicio ------- ------ programa MP3 Player
Utilities --- AMV / AVI herramienta de conversión
◊ Aparecerá una ventana, seleccione el archivo que desea convertir y
seleccione la carpeta en la que desea colocar el nuevo archivo
convertido, haga clic en "iniciar la conversión"
SOLUCIÓN DE PROBLEMAS
Compruebe la batería
No enciende
Recargue la batería
No
reconoce/reproduce
archivos
Compruebe si el formato es compatible
Compruebe si el archivo se encuentra en otro
directorio
Compruebe el volúmen
No se oye la música
por los auriculares
Compruebe la conexión de los auriculares
Compruebe si el archivo es compatible
No carga la batería
No descarga música
Comprobar si está correctamente conectado el
cable a la unidad y a la fuente de carga
Comrpuebe si dispone de espacio en el
reproductor
Compruebe si las conexiones al PC son correctas
PC no reconoce la
unidad
Compruebe si la conexión por cable es correcta
Pruebe otros puertos USB de su ordenador
Importado: Ideas y Recursos Promocionales, S.L.
Avda. Santa Clara de Cuba nave 5
41007 Sevilla
Spain
DECLARACIÓN DE CONFORMIDAD
I.R.P., S.L. declara bajo su responsabilidad que el aparato indicado
cumple los requisitos de las siguientes directivas:
DIRECTIVAS EMC
EN55022: 2006+A1:2007
EN55024: 1998+A1 2001+A2 2003
EN55013: 2001+A1:2003+A2:2006
EN61000-3-2: 2006+A2:2009
EN61000-3-3:2008
EN55020:2007
Descripción del aparato:
Modelo SONFER SFPA-801
Reproductor MP3
Importador: I.R.P., S.L.
Dirección: Avda. Santa Clara de Cuba 5, 41007, Sevilla.
SFPA-801
Instrucción Manual
CONTENT
FEATURES
PRECAUTIONS
WARNING
CONTROLS
MAIN MENU
MUSIC MODE
MOVIE MODE
RECORD MODE
VOICE MODE
FM Radio
PICTURE MODE
SYSTEM SETTING
TEXT MODE
Conversion Tool VIDEO
TROUBLESHOOTING
Features
● 1.8-inch TFT display
● 128 x 160 pixels display resolution
● Color-matching earphone included
● Plays AVI (128x160), AMV video format files
● Plays MP3, WMA, WAV audio format files
● Picture browsing of JPEG format files
● Built in Micro-SD card slot, supports up to 8GB
● Built-in 390mAh Li-poly battery
● Built-in FM Radio (optional)
● Built-in game function
● Supports TXT E-book format
● Multi-language support
● Available in wide range of attractive colors
Precautions
Follow these tips to preserve the operational lifespan of your Digital
Media Player:
● It is recommended that you allow the battery to fully charge before
using the device for
the first time. Do not recharge unattended for longer than 4 hours.
● Do not hang the player by its earphones or cables
● Never force any cable connectors into the ports of your Digital
Media Player or
computer. Always make sure that your cable connectors are
identical in shape and size
before attempting to connect.
● When disconnecting your digital media player from a computer, use
the Safely Remove
Device function on your computer. Do not disconnect your digital
media player while
transmitting data.
Warning
● Do not use this player in extreme temperatures. Keep away from
extreme hot, cold, dry,
or damp areas. Also keep away from water, fire, and radiation.
● Do not disassemble your digital media player.
● Do not allow young children to use your player unsupervised.
● Do not install foreign software onto your digital media player.
Button & Controls
1. TFT Card slot
2. ON/OFF power switch
3. VOL+
4. VOL5.Enter menu and exit from sub-menu, confirm selection (under any
status, hold [MENU] will enter main menu)
6. Last/ Backward
7. Next/Forward
8. Play/Pause、Power ON/ OFF the player
9. Hand strap Hole
10. Earphone socket
11. USB socket
Basic Operation
Power On/Power off
To switch on/off the device. Push [ON/OFF] button.
You can also Press “[>II](play/stop)” and hold 3 seconds to switch on
and switch off the device.
Expansion Card:
Insert the TF card to the Micro SD card slot. You could see the Card
folder in the menu. If not with the TF card , There is no card folder in
the menu .
Charge/Connect/Disconnect from PC
Connect the device to PC via USB Cable to use it as a Removable
Disk.
To charge the device or disconnect the device. Press “Menu button”
under USB connected.
Main menu
Hold [MENU] to enter main menu. Press [PRE] or [NEXT] to switch
the modes.
Music
Select “Music” in the main menu
Press [MENU] to confirm selection and then press PLAY/STOP [>II]
button to play the song. While music playing, press [MENU] button to
enter sub-menu:
Select MUSIC mode in main menu, press [MENU] to confirm selection
and then press PLAY/STOP [>II] button to play the song. While music
playing, press [MENU] button to enter sub-menu:
All Songs
Album list
Artists
Genre
Create Playlist
Repeat
Setting
Exit
Display all the songs
Display the album
Display the singer of the song
Display the genre of the song
Create the playlist
Normal, Repeat one; Folder;
Repeat Folder; Repeat All;
Random; Intro.
Equalizer
NATURAL,ROCK,POP,CLASSIC,SOF
T,JAZZ, DBB
A-B repeat, when “A” in the icon
blinks, swing [NEXT] to confirm
start point, swing [NEXT] as “B”
point . The player will replay from
Replay
A to B according to the setting in
the replay times. (Return to A-B
replay mode by swing [PRE]
Replay mode
button in such status)
Set how many times the A-B point
Replay times replay Maximum is 10 times (110)
set replay time gap between
Replay gap
every replay
Exit from sub-menu
This device support Lyrics display. To fully display the contents of the
song, you must make sure the name of the song under the music
folder should be exactly the same one under LRC file.e.g
You put a “song.mp3” in music folder, a same name “song.lrc” should
be placed under LRC file.
Local folder
Delete file
Delete All
Indicate the folder of present playing file
Delete the present playing song
Delete All songs
If you want to delete a song while it is playing, press [>II] to stop
playing, then press Mode button). select “Delete file”, choose the file
you want to delete, confirm “Delete”, then the screen shows below:
Movie
Select “Movie” in the main menu
Press [MENU] to confirm selection and then press PLAY/STOP [>II]
button to play the video. While playing video. press [MENU] button to
enter sub-menu.
All the operation is same as Music.
Record Mode
Press [MENU] button to select Record mode in main menu, then press
[MENU] again enter into recording sub-menu.
Local folder
Indicate the folder of present
recording file
REC type:
32K BPS、64K BPS、128K
BPS、256K BPS
Exit
Exit form sub-menu
After setting, press [>II] to start recording. only [>II] (play/stop)
and [MENU] can be used during recording. To start a new recording
file, please press [>II] (play/stop) button shortly will save present
recording file.
Noted that this device supports 99 voice recording files storage in
each directory. If the screen displays “ out of space”, which indicates
the current directory has already saved 99 voice recording files, the
user need to change to a new directory.
Voice
Press [PRE] or [NEXT]to select the Voice mode, then press [MENU] to
confirm the selection, press [>II] to play the recording file.
Press [>II] button to pause playback, swing [PRE] or [NEXT] button
to select recording files.
Sub-menu while playing status:
Repeat
Replay mode
Exit
Sub-menu while stop status:
Refers to “repeat” in music
mode
Refers to “replay” in music mode
Exit from sub-menu
Local folder
Delete
Delete All
exit
Indicate the folder of present
recording file
Delete recording song
Delete all recording files
Exit from the sub-menu
FM mode
Select [PRE] or [NEXT] button to choose FM mode and press [MENU]
to confirm.
Press [>II] (play/stop) to save channel. If no channel is saved, you
can look for channels by auto or manual searching. Press [MENU]
again to get sub-menu as below:
Save
Save currently tuned frequency;
Record
Record current preset channel;
Delete
delete current preset channel;
Delete All
delete all saved channels;
Auto Search
Auto search FM channel
Normal Band
Frequencies from 87.5MHz---108MHz;
Japan Band
frequencies from76.5MHz---90MHz;
Exit
exit from FM sub-menu
Auto search: Holding [PRE] button or [NEXT] button for two seconds
will tune frequency upward or downward until a radio station is
located then it stop automatically.
Manual search: swing [PRE] or [NEXT] button to search channel
upward or downward one-step Notice: Normal band and Japan band
can store 20 preset channels respectively.
Picture
Select [PRE] or [NEXT] button to select Picture mode, then press
[MENU] to confirm,
Press [MENU] button again to enter sub-menu:
local folder
playback set
Delete file
Delete All
exit
choose the folder where picture is saved;
manual play or auto play(there is a time gap for
auto play from 1-10 seconds)
Delete picture;
Delete all pictures
Exit from sub-menu
Press [>II] (play/stop) button to display the picture automatically or
manually according to previous playing setting.
SYS Setup
Select [PRE] or [NEXT] button to select SYS Setup, then press
[MENU] to confirm,
Press [MENU] button again to enter sub-menu:
Record
time
Main Style
LCD set
Language
Power off
Online
mode
Memory
info.
Firmware
version
Firmware
upgrade
Exit
Press [MENU] to edit recording time. Swing [NEXT] button and
the digit of year will increase; swing [VOL+] button to edit next
digit, push [PRE] or [NEXT] button to adjust the digit. Press
[MENU] to confirm the setting
Blue、Green 、Orange、Pink、Red、Yellow
Always light
10 Sec
20 Sec
30 Sec
Simple Chinese, English, Trad Chinese, Japanese, French,
German, Italian, Dutch, Portuguese, Spanish, Swedish, Czech,
Denmark, Polish etc.
Off time: set self-power off time when the player is stopped
and no button is pressed. The time unit is seconds. 0 means
set off the function.
Sleep time: set self-power off time after last key pressed,
regardless of whether the player is active or stopped. The time
unit is minutes.
Multi Drive; Normal only; Encrypted only
Check the memory size and the remaining memory
Display the player’s firmware version
Firmware can be upgraded via connection to PC
Exit from the sub-menu
TEXT
Select [PRE] or [NEXT] button to select Text, then press [MENU] to
confirm,
Seleccione [PRE] o [NEXT] para seleccionar texto, a continuación,
presione [MENU] para confirmar,
Enter TEXT mode by pressing Mode button, then you can read and
edit the article in the device. The device only can recognize the article
in “txt.” Format.
Press [MENU] button again to enter sub-menu:
local folder
playback set
Delete file
Delete all
Exit
choose the folder where picture is saved;
manual play or auto play(there is a time gap for auto
play from 1-10 seconds)
Delete picture;
Delete all pictures
Exit from sub-menu
Video Conversion Tool
Please follow the steps here below to install the video conversion tool.
Please make sure you have installed Windows media player 9.exe and
Directx9.0 before you start.
Put CD drive into computer and open the drive Run Setup.exe to
install the software, then restart the computer Choose menu: start------program------mp3 player utilities --- AMV/AVI convert tool
There’s a window appears, choose the file you want to convert, then
choose the folder you want to put the new converted file, click “start
converting”
Trouble Shooting
Check battery level.
No power
Recharge as per directions in User Manual
Unable to locate or
play files
Check that the file is in a compatible format
Check to see if the file is stored in a different
directory.
Check the volume level
No music is heard in Check the connection (earphone to the earphone
the earphones
jack)
Check if your music file is compatible with your MP3
player.
Not charging
Unable to download
music.
Computer not
recognizing Digital
Media Player
Check to make sure that your Digital Media Player
is connected to a USB port on your computer.
Check if you have enough space on your Digital
Media Player to download the music file.
Check to make sure that the USB cable is connected
to the PC and to the Digital Media Player.
Check that the USB cable is properly connected to
your computer.
Try plugging the USB cable into one of the back
ports of your computer.
Importado: Ideas y Recursos Promocionales, S.L.
Avda. Santa Clara de Cuba nave 5
41007 Sevilla
Spain
DECLARATION OF CONFORMITY
I.R.P., SL declare under our responsibility that the equipment meets
the requirements indicated in the following directives:
EMC DIRECTIVES
EN55022: 2006+A1:2007
EN55024: 1998+A1 2001+A2 2003
EN55013: 2001+A1:2003+A2:2006
EN61000-3-2: 2006+A2:2009
EN61000-3-3:2008
EN55020:2007
Description of apparatus:
SONFER model SFPA-801
MP3 Player
Importer: I.R.P., SL
Address: Avenida Santa Clara de Cuba 5, 41007, Sevilla.