1
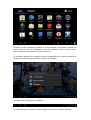
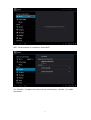
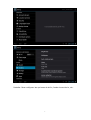
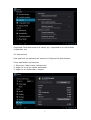
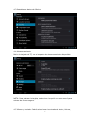
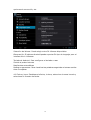
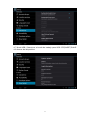
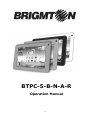
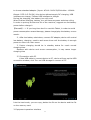
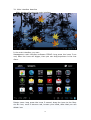
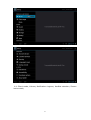
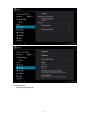
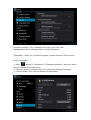
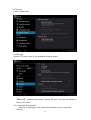
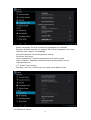
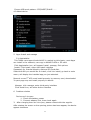
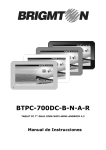
BTPC-5-B-N-A-R
Manual de Instrucciones
ATENCIÓN
Este manual contiene importantes medidas de seguridad y uso correcto de
la información del producto, con el fin de evitar accidentes. Por favor
asegúrese de leer el manual antes de utilizar el dispositivo.
- Por favor, no usar el dispositivo bajo alta temperaturas, condiciones de
humedad extrema o suciedad.
- Evite guardar el dispositivo en lugares con altas temperaturas, por ejemplo,
dentro de vehículos al sol.
- Evite caídas o golpes violentos del dispositivo ya que podría causar daños
irreparables en la pantalla TFT o un funcionamiento anormal.
- Por favor, seleccione el volumen apropiado para su uso. Cuando use
auriculares no use un volumen demasiado elevado ya que podría causar
daños en sus oídos.
- Cargue el dispositivo si:
a) El icono de carga se lo indica.
b) Si la unidad se apaga automáticamente.
c) Los botones de operación no responden bien.
d) Los iconos de la esquina superior derecha se muestran en rojo.
- Cuando el dispositivo se encuentre cargando o descargando archivos
desde el PC, por favor no lo desconecte de repente, esto podría provocar
error de aplicación.
- La firma no se hace responsable de daños en el producto, reparación u
otros efectos provocados por el borrado de la memoria. Por favor, siga las
instrucciones para el funcionamiento normalizado del dispositivo.
- No desmonte el producto. No utilice alcohol, disolvente u otros líquidos
para la limpieza del producto.
- No utilice el dispositivo en lugares donde esté prohibido el uso de
dispositivos electrónicos o de conexión a redes.
- Por favor, no utilizar el dispositivo mientras se hacen otras actividades
como conducir, etc.
1. CONTROLES Y APARIENCIA
1.1 Panel táctil: Pantalla 7 " capacitiva.
1.2 Encendido: Mantener pulsado el botón ON/OFF, el sistema entrará en la
interfaz principal
Apagado: En la interfaz del menú principal, pulse el botón de
encendido/apagado unos 5 segundos para apagar el sistema, seleccione la
opción apagar.
Bloquear pantalla: Puede bloquear la pantalla mediante una pulsación corta.
Para desbloquear realice la misma operación. Si no se usa por un
determinado tiempo el sistema pasará a la inactividad.
1
1.3 ESC: Pulse brevemente el botón ESC regresará la última interfaz. Si lo
pulsa prolongadamente volverá a la interfaz principal.
1.4 Menú: Pulse el botón menú M para volver a la pantalla de inicio.
1.5 Volumen+/Volumen-: Para subir o bajar el volumen.
1.6 Entrada de auriculares: entrada estándar de 3,5 mm para auriculares
jack.
1.7 Tarjeta MicroSD: Slot para tarjeta MicroSD para expansión de memoria.
1.8 Entrada USB: Se puede utilizar para conectar la unidad a un PC para la
transmisión de datos, carga y conexión externa USB Flash Drive, mediante
cable OTG (no incluido)
1.9 Restablecer: Cuando la unidad se quede bloqueada, presione el botón
reset con un objeto fino, para forzar el apagado y reseteo.
NOTA: Asegúrese de utilizar la opción RESET cuando sea imposible el
apagado o la unidad esté realmente bloqueada.
2. PRIMER USO
2.1 Batería: Antes de usar el equipo por primera vez cargue la batería por
completo. Conecte el adaptador de corriente a la toma de corriente y el otro
extremo a la entrada USB de la tablet. Las dos primeras veces debe cargarse
por periodos de al menos 6 horas. Tras esto periodos de 4 horas.
NOTA: La tablet usa una batería de polímeros de litio. Use siempre el
adaptador suministrado (entrada: AC110 ~ 240V 50/60Hz Max: 180mA ..
salida: DC5.0 ~ 5.5V/2A). También admite carga a través de la entrada USB.
Durante la carga, el icono de la batería se moverá hasta mostrar que está
completamente cargada. Con objeto de alargar al máximo la vida de la
batería se recomienda usarla hasta gastarla por completo, para iniciar una
nueva carga.
IMPORTANTE:
1. Si no va a usar el aparato por un tiempo prolongado, se recomienda que
al menos una vez al mes la use, descargue y cargue la batería, para evitar
daños en la unidad y alargar la vida de la misma.
2. Cuando la batería se encuentre en un estado especialmente bajo de carga,
conecte el cargador, necesitará esperar un tiempo para poder entrar al menú
principal, debido ese estado de baja carga de batería.
3. Para conseguir que la batería se recargue por completo en el menor
tiempo posible, debe dejar la unidad en espera y no usarla. Si la usa el
tiempo de carga se incrementará.
2.2 Conexión a PC: Utilice un cable USB para conectar el dispositivo al PC.
EN la unidad se abrirá una ventada de mostrando información sobre la
conexión, haga clic en Activar el almacenamiento USB para conectar al PC.
2
Durante el proceso de carga se podrán gestionar archivos de la memoria
principal y tarjeta de memoria.
3. OPERACIONES
3.1 Interfaz principal: Después del arranque entrará en la interfaz principal:
En el menú principal podrá gestionar los principales. Para ello mantenga
pulsado el icono durante 3 segundos, de esta forma podrá arrastrarlos a la
posición deseada o eliminarlos.
3
Eliminar iconos: Mantener pulsado el icono durante 3 segundos. Arrastre el
icono hacia el icono de la papelera. Una vez cambie su color a rojo, suelte
para confirmar que desea eliminar ese icono.
Si mantiene pulsado en cualquier sitio de la pantalla (sin iconos) durante un
tiempo prolongado, aparecerá el cuadro de diálogo:
3.2 Barra de descripción de estado:
En esta barra se muestra la información actual de la unidad. Muestra
4
información referente a la batería, la hora, la tarjeta microSD conectada o
no, etc.
Además muestra botones para desplegar las aplicaciones abiertas, volver al
menú principal y regreso a la pantalla anterior.
3.3 Utilización del panel táctil: Para volver a la pantalla principal pulse el
. Para volver a una pantalla anterior pulse el botón
.
botón
En otras aplicaciones, en la parte superior derecha se mostrará este icono
para poder ver las opciones disponibles para cada aplicación en concreto.
Los botones en la pantalla
y
pueden ser sustituidos por los que se
encuentran en la unidad, botones físicos
y
que realizan la misma
función.
En la interfaz principal, puede pulsar en los iconos concretos para abrir las
APPs concretas.
4. ICONOS BÁSICO
Configuración. Presione en este icono para acceder a las opciones
configurables:
5
WiFi: Para localizar y conectar a redes WiFi
4.1 Sonidos: Configure las opciones de volúmenes y sonidos y el modo
silenciado.
6
Pantalla: Para configurar las opciones de brillo, fondo de escritorio, etc.
7
Seguridad: Para determinar sus claves, pin, seguridad en la información
compartida, etc.
4.2 Aplicaciones
Para gestionar las aplicaciones acceda a Configuración-Aplicaciones:
Cómo desinstalar Aplicaciones
1. Seleccione "Administrar aplicaciones"
2. Haga clic en la que desea desinstalar
3. Haga clic en Desinstalar y acepte:
8
4.3 Restablecer datos de fábrica:
4.4 Almacenamiento
Retire la tarjeta de TF, ver el espacio de almacenamiento disponible:
NOTA: Para extraer la tarjeta, seleccione la opción en este menú para
extraer de forma segura.
4.5 Idioma y teclado: Podrá seleccionar la entrada de texto, idioma,
9
opciones de corrección, etc.
Selección de idioma: Puede elegir entre 54 idiomas disponibles.
Observación: El sistema Android puede soportar 54 tipo de lenguaje pero el
interfaz sólo 14 idiomas.
Teclado de Android: Para configurar el teclado a usar.
Sonido al pulsar botones
Mayúsculas automáticas
Mostrar sugerencias: Para visualizar las palabras sugeridas mientras escribe.
Auto-Completar
4.6 Fecha y hora: Establezca la fecha, la hora, seleccione la zona horaria y
seleccione el formato de fecha.
10
4.7 Modo USB: Seleccione el modo de trabajo para USB: OTG/HOST/SLAVE
4.8 Acerca del dispositivo
11
5. APLICACIONES: INSTALAR Y ADMINISTRAR
5.1 AppInstaller: El dispositivo soporta aplicaciones APP Android de Market,
la mayoría de aplicaciones se puede instalar en NAND FLASH o en la tarjeta
SD.
Haga clic en el icono AppInstaller icono, aparecerá Instalar, Administrar,
Salir y Opciones:
Instalar: Haga clic en instalar. Seleccione el destino (memoria/SD)
Seleccione la APK que desea instalar, haga clic en él para instalar y al volver
al menú principal, se mostrará la aplicación instalada.
Nota: algunas APP deben instalarse correctamente en la tarjeta de memoria
ya que puede que no se permita la instalación en el dispositivo.
Administrar: Para gestionar las aplicaciones instaladas.
6. SOLUCIÓN DE PROBLEMAS
El dispositivo no se puede encender:
1. Compruebe que la batería está cargada
2. Conecte el adaptador para cargar la batería
3. Si tras la carga de la batería no enciende, contacte con nuestro servicio
técnico.
Enciende pero se apaga al momento:
1. La batería disponible no es suficiente. Por favor cárguela por completo.
No hay sonido por auriculares
1. Comprobar el volumen
12
2. Compruebe que el archivo de música no está dañado.
No puede copiar archivos o pasarlos al PC
1. Compruebe que la conexión entre la unidad y el PC es correcta
2. Comprobar que existe espacio suficiente
3. Compruebe el cable USB de conexión
“Las especificaciones pueden cambiar sin previo aviso”
IMPORTADO
I.R.P., S.L.
AVDA. SANTA CLARA DE CUBA 5
SEVILLA, SPAIN
DECLARACIÓN DE CONFORMIDAD
I.R.P., S.L. declara bajo su responsabilidad que el aparato indicado cumple
los requisitos de las siguientes directivas:
DIRECTIVAS EMC
ETSI EN 301 489-1 V1.9.2(2011-09)
ETSI EN 301 489-17 V2.1.1(2009-05)
EN60950-1:2006+A11:2009+A12:2011
ETSI EN300328 V1.7.1
Descripción del aparato:
Modelo SONFER BTPC-5-B-N-A-R
Dispositivo de conexión a internet
Importador: I.R.P., S.L.
Dirección: Avda. Santa Clara de Cuba 5, 41007, Sevilla.
13
BTPC-5-B-N-A-R
Operation Manual
14
Attention:
This handbook contains important security measures and the correct use of
the product information, in order to avoid accidents. Please make sure to
reading the manual carefully before use the device.
Please don’t be in high temperature, moisture or very dust place
Please don’t be in high temperature, especially in summer don't put the
device in the car when Windows closed.
Avoid fall or Violent collision of the device, don’t make the TFT display screen
were violent tremor this could cause TFT display screen abnormal or
damage.
Please choose the appropriate volume, Use headphones should not be too
big volume, If feel tinnitus, Lower the volume or stop using it please charge
In the following condition,
A、 The battery power ICONS shows have no power
B、 The system automatically shut off, startup after power off soon
C、 Operation buttons no response
D、 The machine that the top right corner show red icons
When the device in the format or ongoing upload and download file, pl
ease don't suddenly disconnect, This could cause application error.
For those who because of damage to the product, repair, or other causes of
erased the memory, the company shall not be liable for any responsibility,
please follow the user manual for the standardized operation to use the
device.
Don’t disassemble the product, don’t use alcohol、Thinner or benzene to
scrubbing products
Don't use the device one of the place of prohibit to use electronic equipment
in regional (such as the plane)
Please don't using the Tablet PC when you in driving or walking down the
street,
USB just only be used for data transmission
The company reserves the right to improve product, products specificati
on and design have any change, the information is subject to changes
without prior notice.
(This tablet is no waterproof function)
【Remark】All pictures in this manual is just for your reference. product
s specification and design have any change, The information is subject
to changes without prior notice.
1. Appearance and button:
15
1.1 Touch panel
7” Capacitive touch panel: In The Operation, to click, dragging on the
touch panel
1.2 POWER
Startup: Long Press and hold the power button, the system will enter
the main interface
shutdown: In the main menu interface, Press the power button about 5
second to shutdown, The system can hint "power off" option, Clike”ok”. you
can safely shut down.
Lock screen: Short press Power button to lock screen or unlock screen.
Remark 1.When power is empty, system will shut down automatically.
2. Illegal turn off the device, restart will scan and restore the disk,
it may take longer time to enter into system
1.3 ESC
Short Press ESC button will return the last interface, long Press ESC
button will return the main interface
1,4 Menu
the Tablet under normal operating conditions, short press M button will
Back to the home screen
1.5 Volume +, Volumethe buttons on top Volume +, Volume-achieve changes in the volume.
1.6 earphone jack
3.5 mm standard earphone jack
1.7 TF card
TF-CARD solt: external T-FLASH card
1.8 MiniUSB
MiniUSB jack: you can use it to connect the computer for data
transmission, charging and external connection USB flash drive
1.9 Reset
When the Tablet under the condition of the crash, use the small objects to
short press RESET button, Tablet will force to shutdown.
【Remark】: unless unable to shutdown, otherwise don’t use the reset,
suggest you to shutdown by normal, if no will easy to damage the machine
system.
2. First use
2.1 Battery management and charge
Before first use, please set the device's battery is fully charged
Just need to connect the adaptor or USB interface, then you can charge
The first two times charging please keep about 6 hours, after that you
just need 4 hours to charge.
【Remark】: This tablet using Built-in type polymer battery, Charge must be
16
to choose standard adaptor (Input: AC110~240V 50/60Hz Max:180MA..
Output: DC5.0~5.5V/2A), this device without supply DC charging, USB
interface can charge, Choose USB interface to charger
During the charging, the battery icon will scroll
When finished charging, battery icon will become green and stop rolling
In order to prolong the service life of the machine, suggest use out battery
power before charge it
【Remark】: 1. If you long time don’t to use this Tablet, in order to avoid
power consumption caused damage, please charge/play the battery once a
month.
2、After low battery shut down, connect DC adaptor, device will remind
low battery, charging, need to wait some time until the battery is enough
power to enter into main menu.
3. Device charging should be in standby status for reach normal
charging time.
Because with device and screen consumption, it may cause longer
charging time
2.2 Connection with PC
U Use USB cable to connect device to PC, device will pop up the USB
connection window, click Turn on USB storage to connect to PC
Into the load mode, you can copy; delete the file on the device and the file
on the memory card.
3. Equipment operation interface
17
3.1 Main interface describe
After startup will enter the main interface
In the main interface, you can:
Management main interface software ICONS: long press the icons 3 sec
ond, after the icons will bigger, then you can drag anywhere in the inte
rface.
Delete icons: long press the icons 3 second, drag the icons to the Recy
cle Bin icon, once it become red, Loosen your hand, after that you can
delete icon
18
You touch the screen keep a time; appear the dialog box “Add Home screen”
as shown below:
3.2 status bar describe
●
The status bar above of the screen
Top left display main interface software, T-Flash card, USB
connection status and so on
Top right display the battery, battery charge icons, current time,
set time, Settings Menu, ESC button.
3.3 Use touch panel
Device equipped with a 7” touch screen. Following the main touch
screen area is described, and describes some of the tips for how to use the
touch screen.
No matter which interface you are on the screen, can go back to main
screen through pressing the soft key
on the bottom right corner of
the main screen.
【Attention】The main screen soft key
functions as the machine
back key
In different applications, by tapping the back soft key
on the bottom right corner on the touch screen, you can return to its
interface on the up floor.
In different applications, by tapping the menu key
on the
upper right corner of touch screen, the screen will appear the operation
19
setting interface as follows,
【Remark】: The main screen soft key
functions as the machine
menu
In the main interface, you can touch the icon to open the APPs
In different browser (file, music, video, pictures), you shift and drag
the scroll bar, so that the file list can up or down to roll.
4. Equipment basic set
Setting: Click setting icons
, enter setting interface
20
4.1 Silent mode, Volume, Notifcation ringtone, Audible selection, Screen
lock sounds,
21
4.2Application
Manage applications
22
Unknown sources: Click “Unknown Sources”, then click “OK”
Manage application: manager and uninstall Application
【Remark】: when you Firmware Upgrade, please close the USB connect
How to uninstall?
1. enter
“setting”>”Application”>”Manage application” And then there
will be installed the program list
2. Click you want to uninstall icons, will enter the following interface
3. Click Uninstall, then you can delete the application
23
4.3Privacy
Factory data reset
4.4Storage
Remove TF card, view of the available storage space
【Remark】: please touch option “delete SD card”, so that can safety to
remove SD card
4.6. Language & keyboard
Setting: (Language), text input and automatic error correction
options;
24
Select Language: 54 kind of national languages are available
Remark: Android system can support 54 kind of language, now menu
interface just support 14 language,
Android keyboard: Android keyboard setting
Sound on Key-press
Show suggestions: Display suggested words while typing
Auto-complete: Spacebar and punctuation automatically insert
highlighted word
4.7. Date & time setting
Set date, set time, Select time zone and select date format
4.8 USB Mode Select
25
Choose USB work pattern: OTG/HOST/SLAVE……..
4.9 About device
5. Apps Install and manage
5.1 Appinstaller
This Tablet can support Android APP in market by third party, most Apps
can install in the network, can copy to NAND FLASH or SD card.
Click Appinstaller icon, will appear Install, manage, Exit options.
Install: Click install, enter Apk install interface
Separately for Internal Memory disk and SD Card disk.
Select the APK you would like to install, click it to install, go back to main
menu, will display the installed app you just selected.
Remark: some 3rd APP must install properly by memory card, downloaded
3rd party app may not install properly on device.
Manage: click manage, enter third party interface
Click install icon, will enter Action interface
6. Problem solution
Device can’t to open
1. Check the battery power
2. Connect adaptor first, then check again
3. After charging then can’t to open, please contact with the supplier
After startup the screen or the opening picture has been appear, the device
appear shutdown
26
1. Power is not enough, please charge
Headset can't hear the voice
1. Please check the volume whether set to 0
2. Check the music file wherther damaged. Try playing other music,
if the file have damaged may lead to serious noise or hop soun
ds.
Can copy file or play music and so on
1. Please check between computer and device is correct connection
2. check the memory storage space is already full
3. check the USB cable is good or not
4. USB connection is disconnected
“Features can change without notice”
Imported: I.R.P., S.L.
Avda. Santa Clara de Cuba 5
41007 Sevilla
Spain
DECLARATION OF CONFORMITY
I.R.P., SL declare under our responsibility that the equipment meets
the requirements indicated in the following directives:
EMC DIRECTIVES
ETSI EN 301 489-1 V1.9.2(2011-09)
ETSI EN 301 489-17 V2.1.1(2009-05)
EN60950-1:2006+A11:2009+A12:2011
ETSI EN300328 V1.7.1
Description of apparatus:
SONFER Model BTPC-5-B-N-A-R
Mobile Internet Device
Importer: I.R.P., SL
Address: Avenida Santa Clara de Cuba 5, 41007, Sevilla.
27