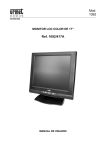
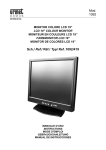
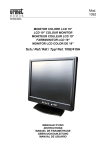
Download Mod. 1092 Sch./ Ref.1092/427
Transcript
Mod. 1092 DS1092-151 MONITOR LCD A LED 27” LED LCD 27” MONITOR 68,6cm (27”) LED LCD MONITOR MONITOR LED LCD 27” Sch./ Ref.1092/427 MANUALE D’USO USER MANUAL GEBRAUCHSANLEITUNG MANUAL DE USUARIO ITALIANO INDICE 1 Informazioni generali ............................................................................................................................. 3 1.1 Descrizione prodotto e tipo di impiego......................................................................................... 3 1.1.1 1.2 Apertura della confezione ............................................................................................................ 3 1.2.1 1.3 Alimentazione ....................................................................................................................................... 4 Precauzioni per la sicurezza ................................................................................................................ 4 Precauzioni per l’installazione .............................................................................................................. 4 Pulizia del dispositivo ........................................................................................................................... 4 Privacy e Copyright .............................................................................................................................. 4 Comandi e regolazioni ........................................................................................................................... 5 Utilizzo del telecomando ....................................................................................................................... 6 3.1 Controlli diretti .............................................................................................................................. 7 3.2 Controlli con menu TVCC OSD ................................................................................................... 8 3.2.1 3.2.2 3.2.3 3.2.4 4 5 Contenuto della confezione .................................................................................................................. 3 Avvertenze ................................................................................................................................... 4 1.3.1 1.3.2 1.3.3 1.3.4 1.3.5 2 3 Caratteristiche generali ........................................................................................................................ 3 Immagine ............................................................................................................................................. 8 Audio .................................................................................................................................................... 9 Impostazioni ....................................................................................................................................... 10 Funzione ............................................................................................................................................ 11 Qualità dei monitor lcd a led e pixel ................................................................................................... 12 Specifiche prodotto .............................................................................................................................. 12 DS1092-151 2 1 INFORMAZIONI GENERALI Caro Cliente, La ringraziamo dell’acquisto di questo prodotto. Il presente documento descrive come installare ed utilizzare il modello di Monitor LCD A LED 27” URMET S.p.A. Sch.1092/427. Prima di usare l’apparecchiatura, leggere il presente manuale che ne descrive l’uso corretto e sicuro. Conservare questo manuale con attenzione ed in un luogo facilmente reperibile per poterlo consultare prontamente quando necessario. 1.1 DESCRIZIONE PRODOTTO E TIPO DI IMPIEGO Il monitor a colori “LCD A LED” Sch.1092/427 ha una struttura molto solida ed è progettato per funzionare in modo continuativo, per cui può essere impiegato in impianti a TV a circuito chiuso senza rischi di sovra-affaticamento. Il monitor a schermo piatto dispone di uno schermo a cristalli liquidi (liquid crystal display, LCD) con illuminazione a LED. NOTA BENE Il prodotto URMET S.p.A. Sch.1092/427 è destinato ad impianti TVCC. 1.1.1 1.2 CARATTERISTICHE GENERALI Area visualizzabile 27” Predisposto per il fissaggio a muro tramite apposita staffa. Ingresso audio su prese RCA Ingresso HDMI Due canali d’ingresso video composito (BNC) Ampia inclinazione per consentire la visualizzazione da una posizione seduta o in piedi, o durante gli spostamenti da un lato all’altro Menù OSD multilingua per facilitare l’impostazione e l’ottimizzazione della schermata APERTURA DELLA CONFEZIONE Verificare che l’imballo ed il contenuto non presentino danni visibili. Se alcune parti non sono presenti o risultano danneggiate, contattare immediatamente il rivenditore. In questi casi non tentare di utilizzare il dispositivo. Se il prodotto dovesse essere rimandato al fornitore, assicurarsi di spedirlo con il suo imballo originale. 1.2.1 CONTENUTO DELLA CONFEZIONE Monitor LCD A LED Una base d’appoggio Telecomando con batteria (CR2025, 3V) inclusa Alimentatore 12Vcc - 4A Cavo di alimentazione Cavo VGA Manuale istruzioni NOTA BENE La composizione degli accessori a corredo può essere variata senza alcun preavviso. DS1092-151 3 1.3 AVVERTENZE 1.3.1 1.3.2 1.3.3 1.3.4 1.3.5 ALIMENTAZIONE Questo dispositivo deve essere alimentato esclusivamente con l’alimentatore fornito in dotazione. Verificare il valore della tensione di rete alla quale l’alimentatore dovrà essere collegato. Per scollegare il cavo di alimentazione dalla presa impugnare la spina evitando di tirare il cavo. PRECAUZIONI PER LA SICUREZZA Per prevenire il rischio di incendio e folgorazione evitare di esporre il dispositivo alla pioggia o all'umidità e di introdurre al suo interno qualsiasi oggetto solido o liquido. Se ciò dovesse avvenire scollegare il dispositivo dalla rete di alimentazione e farlo controllare da personale qualificato. In nessun caso il dispositivo deve essere aperto. Per qualsiasi intervento di riparazione rivolgersi a personale qualificato oppure contattare il centro assistenza tecnico autorizzato. Conservare questa apparecchiatura lontano dalla portata dei bambini; in caso contrario questi potrebbero danneggiarla, o danneggiarla accidentalmente. Non toccare questa apparecchiatura con le mani bagnate per evitare scosse elettriche o danni meccanici. Se l’apparecchiatura dovesse cadere o il contenitore esterno dovesse risultare danneggiato, cessarne l’utilizzo. Se si continuasse ad utilizzarla in queste condizioni, potrebbe essere provocata una scossa elettrica. In questo caso contattare il rivenditore, o l’installatore autorizzato. Si consiglia di scollegare il cavo di alimentazione qualora il monitor non dovesse essere utilizzato per parecchio tempo. PRECAUZIONI PER L’INSTALLAZIONE Per prevenire il surriscaldamento del dispositivo, collocarlo in una posizione che permetta il passaggio dell'aria attraverso i fori previsti sullo chassis. Nel caso di installazione all’interno di un rack, assicurarsi che vi siano almeno 5 cm di spazio libero. Per lo stesso motivo non deve essere installato vicino a fonti di calore come radiatori o condotti d'aria calda o in posizioni dove sia esposto direttamente all’irradiazione solare, così come non deve essere installato in locali soggetti a eccessiva polvere, vibrazioni meccaniche o urti. Non posizionare questa apparecchiatura su alcuna superficie instabile come un tavolo traballante o inclinato. In caso contrario l’apparecchiatura potrebbe cadere con conseguenti lesioni o guasti meccanici. Non installare questa apparecchiatura in alcun luogo dove possa essere esposta a umidità o acqua. Non bagnarla con un getto d’acqua diretto per evitare la possibilità di incendio, scosse elettriche o guasto meccanico. Se all’interno dell’apparecchiatura dovesse penetrare acqua o qualche altro materiale estraneo cessarne l’utilizzo al fine di evitare la possibilità di incendio e scosse elettriche. In questo caso contattare il rivenditore, o l’installatore autorizzato. Non posare sul dispositivo oggetti pesanti o che generino calore, dato che ciò può danneggiare il mobile o far aumentare la temperatura interna, causando anomalie di funzionamento. Le feritoie e le aperture del monitor servono per la ventilazione e non devono essere ostruite o coperte. Non usare questa apparecchiatura in ambienti con presenza di fumo, vapore, umidità, polvere, o vibrazioni intense. Non mettere in funzione il dispositivo immediatamente dopo il trasporto da un luogo freddo ad un luogo caldo e viceversa. Attendere mediamente tre ore: questo intervallo di tempo è necessario al dispositivo per adattarsi al nuovo ambiente (temperatura, umidità, ecc... ). Il monitor è dotato di una base in plastica con piedini in gomma e può essere posizionato su una superficie orizzontale come una scrivania o un tavolo. Accertarsi che l’apparecchio sia fissato in maniera solida ed affidabile e non poggi su supporti o superfici instabili; un’eventuale caduta potrebbe causare seri danni a persone e all’apparecchiatura stessa. Ricordarsi di regolare i comandi di luminosità e contrasto per ottenere la migliore immagine. Il monitor può essere anche installato a parete mediante una staffa (non fornita a corredo). PULIZIA DEL DISPOSITIVO Usare un panno asciutto e strofinare leggermente per eliminare polvere e sporcizia. Nel caso in cui la sporcizia non fosse eliminabile con un panno asciutto, compiere l’operazione con un panno inumidito con detergente neutro. Non usare liquidi volatili come benzina, alcool, solventi ecc. o panni trattati chimicamente per pulire il dispositivo al fine di evitare deformazioni, deterioramenti o graffi della finitura della vernice. PRIVACY E COPYRIGHT Il monitor LCD Sch.1092/427 è un dispositivo per sistemi TVCC. La registrazione delle immagini è subordinata alle leggi vigenti nel paese di utilizzo. È inoltre vietata la registrazione di immagini protette da Copyright. Gli utenti del prodotto sono responsabili per il controllo ed il rispetto di tutte le norme e gli statuti locali relativi al monitoraggio e alla registrazione di segnali video. Il produttore NON potrà essere ritenuto responsabile per un utilizzo di questo prodotto che non sia in conformità con le norme in vigore. Per maggiori informazioni consultare l’indirizzo web http://www.garanteprivacy.it DS1092-151 4 2 COMANDI E REGOLAZIONI Posizionare la base nella sede posta sul lato inferiore del monitor. Il corretto posizionamento farà scattare le due alette poste nella sede. 7 6 5 4 3 2 1 14 DS1092-151 13 5 12 11 10 9 8 3 UTILIZZO DEL TELECOMANDO Il monitor Sch.1092/427 è dotato di telecomando. E’ possibile: Accendere / spegnere il monitor (tasto ROSSO. Attivare / disattivare il menu OSD (tasto MENU). Aumentare/ diminuire il volume audio – Spostarsi all’interno del menu OSD se attivato (tasti FRECCIA). Selezionare la sorgente video desiderata AV1 – AV2 – HDMI – VGA (tasto INPUT). Visualizzare la temperatura in °C del monitor (tasto °C). Selezionare velocemente la sorgente VGA (tasto VGA). Selezionare velocemente la sorgente HDMI (tasto HDMI). Selezionare velocemente la sorgente AV (tasto AV). Selezionare il modo immagine scegliendo fra le varie opzioni del menu OSD (tasto PICTURE). Tasto FREEZE non utilizzabile. Tasto YPBPR non utilizzabile. Tasto S-VIDEO non utilizzabile. Tasto DVI non utilizzabile. Sostituzione della batteria DS1092-151 6 3.1 CONTROLLI DIRETTI CONNETTORE D’ALIMENTAZIONE (DC) [14] Connettere il cavo d’alimentazione dell’adattatore in dotazione nel rispettivo connettore DC. TASTO ACCENSIONE/SPEGNIMENTO [1] Consente l’accensione/spegnimento del monitor. L’illuminazione del led in blu sul frontale del monitor indica lo stato d’accensione; l’illuminazione del led in rosso indica lo stato di standby; se il led è spento il monitor non è attivo . NOTA BENE Se dopo aver premuto il tasto (1) sul monitor dovesse apparire il seguente messaggio: NO SIGNAL significa che non è stato selezionato il corretto segnale video. Per selezionarlo, vedere uso tasto selezione [7]. TASTI SELEZIONE [2-3] Consentono di selezionare le voci di menù presenti all’interno del menù OSD TASTI VOLUME [4-5] E CONFERMA [4] Consentono di variare il volume (Tasto 5 aumenta il volume – Tasto 4 diminuisce il volume). Il Tasto 4 consente anche di confermare le impostazioni . TASTO MENÙ OSD [6] E CONFERMA Consente l’accesso e l’uscita dal menù OSD (On Screen Display) e di confermare le impostazioni selezionate . TASTO DI SELEZIONE INGRESSO VIDEO [7] Consente la visualizzazione del menù di selezione dei segnali d’input. Per selezionare il segnale video premere il tasto [7] e selezionare la voce “AV1, AV2,HDMI o VGA” mediante i tasti [2 e 3] . Premere il tasto [4] per confermare. INGRESSO HDMI [13] Questo connettore consente il collegamento di dispositivi video HDMI. INGRESSO SEGNALE PC (VGA) [12] Ingresso PC. INGRESSO/USCITA AUDIO PC (PC AUDIO) [8] Ingresso/Uscita audio PC su presa Jack. INGRESSI VIDEO (AV1 - AV2 INPUT) [10] [11] Questi connettori BNC consentono il collegamento del segnale video. USCITA VIDEO (AV1 - AV2 OUTPUT) [9] Questo connettore BNC consente di prelevare il segnale video proveniente da “AV1-AV2 INPUT” [10] [11] e di inviarlo ad un altro ingresso video (come per esempio un altro monitor o un DVR). DS1092-151 7 3.2 CONTROLLI CON MENU TVCC OSD Tramite la pressione del tasto “MENU [6] è possibile accedere ai menù e sottomenù d’impostazione, definendo le funzioni di controllo. Premendo il tasto [6] apparirà la seguente videata. Procedure d’uso Selezione ingresso video Per visualizzare gli ingressi video disponibili utilizzare il tasto [7] Per selezionare l’ingresso video utilizzare il tasto [2-3] Per confermare la selezione utilizzare il tasto [4]. Selezione dei menu Per visualizzare il menu principale utilizzare il tasto [6]. Per selezionare i diversi menù d’impostazione della barra orizzontale utilizzare i tasti [4-5]. Per selezionare le voci di menu utilizzare il tasto [2]. Per effettuare una variazione (dopo aver selezionato la voce) utilizzare i tasti [4-5]. Per confermare la selezione premere il tasto [6]. Per uscire dal menù o dai sottomenù premere il tasto [6]. Regolazione del volume Per variare il volume senza entrare nel menu utilizzare i tasti [4-5]. 3.2.1 IMMAGINE Selezionando l’icona AV/HDMI DS1092-151 apparirà una delle seguenti schermate (a seconda del tipo di segnale utilizzato):. VGA 8 CONTRASTO Consente di modificare il contrasto tra le parti bianche e quelle nere dell'immagine. Regolando correttamente il contrasto è possibile ottenere una chiara risoluzione delle gradazioni bianche, nere e grigie. Premere il tasto “4” per diminuire ed il tasto “5” per aumentare il valore del parametro. LUMINOSITÀ Consente di variare la luminosità dell’immagine in funzione della luce ambientale. Premere il tasto “4” per diminuire ed il tasto “5” per aumentare il valore del parametro. TINTA Operativo solo nei sistemi NTSC. COLORE Consente di regolare l’intensità del colore. Premere il tasto “4” per diminuire ed il tasto “5” per aumentare il valore del parametro. NITIDEZZA Consente di variare la nitidezza dell’immagine in funzione della luce ambientale. Premere il tasto “4” per diminuire ed il tasto “5” per aumentare il valore del parametro. TEMP. COLORE Consente di variare le impostazioni dei colori. Le impostazioni selezionabili sono:”Caldo – Freddo – Normale”. Premere i tasti “4 e 5” per selezionare l’impostazione preferita. SCALA Consente di modificare il formato video di visualizzazione delle immagini. Le impostazioni selezionabili sono: “Full, 4:3, Zoom2, Zoom1”. MODO IMMAGINI Consente di variare le impostazioni delle immagini. Le impostazioni selezionabili sono:”Utente- Standard- Film- Brillante”. Premere i tasti “4 e 5” per selezionare l’impostazione preferita. 3.2.2 AUDIO Selezionando l’icona apparirà la seguente schermata. BASSI Consente di regolare l’intensità dei suoni bassi . Premere il tasto “4” per diminuire ed il tasto “5” per aumentare il valore del parametro. ALTI Consente di regolare l’intensità dei suoni alti . Premere il tasto “4” per diminuire ed il tasto “5” per aumentare il valore del parametro. BILANCIAMENTO Consente di regolare il bilanciamento del suono. Premere il tasto “4” per diminuire ed il tasto “5” per variare il parametro. MODO AUDIO Consente di ottimizzare il suono utilizzando delle impostazioni predefinite . Le impostazioni selezionabili sono:”Utente - Standard - Film – Musica”. Premere i tasti “4 e 5” per selezionare l’impostazione preferita. DS1092-151 9 EQUALIZZATORE Consente di personalizzare la resa audio. Selezionando questa voce di menu si accede al relativo sotto menu nel quale è possibile variare i valori di frequenza audio. Premere il tasto “4” per diminuire ed il tasto “5” per aumentare il valore del parametro. AVC Consente di regolare l’audio in modo automatico evitando così sbalzi di volume. Premere il tasto “4 e 5” per attivare o disattivare la funzione. EFFETTI SUONO Consente di selezionare l’effetto sonoro. Selezionando questa voce di menu si accede al relativo sotto menu nel quale è possibile variare l’effetto sonoro Le impostazioni selezionabili sono:”SRS – MSTAR - NO” (Surround – equalizzazione M-Star – Nessuna equalizzazione). Selezionando la voce “SRS” è possibile selezionare il tipo di Surround desiderato. NOTA BENE E’ possibile variare il volume utilizzando i tasti [4-5] senza dover attivare la finestra di menu. 3.2.3 IMPOSTAZIONI Selezionando l’icona apparirà la seguente schermata con le impostazioni relative alla selezione della lingua, alla regolazione delle dimensioni dell’immagine e alla posizione dell’immagine sullo schermo. SLEEP TIMER Consente di selezionare il tempo di spegnimento automatico del video. Le opzioni selezionabili sono:”NO – 15M – 30M – 45M – 60M”. Premere i tasti “4 e 5” per selezionare l’impostazione preferita. LINGUA Consente di scegliere la lingua di visualizzazione. Le lingue selezionabili sono: “Inglese- Tedesco- Francese- SpagnoloItaliano”. POSIZIONE ORIZ Consente di variare la posizione orizzontale dell’immagine ripresa sullo schermo. Premere il tasto “4” per spostare l’immagine verso sinistra ed il tasto “5” per spostare l’immagine verso destra. POSIZIONE VERT Consente di variare la posizione verticale dell’immagine ripresa sullo schermo. Premere il tasto “4” per spostare l’immagine verso l’alto ed il tasto “5” per spostare l’immagine verso il basso. DURATA Consente di selezionare il tempo di visualizzazione a video del menu OSD. Premere i tasti “4 e 5” per selezionare l’impostazione preferita. TRASPARENZA Consente di variare la trasparenza della finestra relativa al menu OSD. Premere i tasti “4 e 5” per selezionare l’impostazione preferita. SCHERMO BLU Consente di variare il colore dello sfondo in mancanza del segnale video DS1092-151 10 IMMAG. A SPECCHIO Consente di rovesciare verticalmente (specchiare) l’immagine a video. NOTA BENE Se questa funzione viene attivata anche li informazioni relative al menu OSD verranno ribaltate. RIPRISTINO Consente di riportare il monitor alle impostazioni iniziali di fabbrica. Le impostazioni selezionate dall’utente verranno perse. 3.2.4 FUNZIONE Selezionando l’icona apparirà la seguente schermata. VGA/AV RIDUZIONE DEL RUMORE Consente di disabilitare o selezionare i tre possibili valori di filtro rumore: “Alto – Medio – Basso”. Premere i tasti “4 e 5” per selezionare l’impostazione preferita. FILTRO MPEG Consente di disabilitare o selezionare i tre possibili valori di filtro di rumore del tipo MPEG: “Alto – Basso - No”. Premere i tasti “4 e 5” per selezionare l’impostazione preferita. DLC Consente di regolare automaticamente la luminosità del video. ALLARME TEMP. Funzione non operativa. MODE SOURCE Funzione non operativa. DS1092-151 11 4 QUALITÀ DEI MONITOR LCD A LED E PIXEL I monitor TFT (thin-film transistor, con transistor a pellicola sottile) a matrice attiva utilizzano una tecnologia ad alta precisione, conforme agli standard Urmet, in grado di garantire prestazioni esenti da disturbi. Tuttavia, lo schermo potrebbe presentare piccole imperfezioni di carattere estetico, come ad esempio punti neri o brillanti. Si tratta di una accezione comune, connessa con la natura specifica della tecnologia TFT, che determina l’eventuale presenza di discontinuità sullo schermo e non specifica di Urmet. Le imperfezioni sono provocate da uno o più pixel o sub-pixel difettosi. Un pixel è costituito da un sub-pixel rosso, uno verde e uno blu. Un pixel intero difettoso è sempre acceso (un punto luminoso su uno sfondo scuro), oppure è sempre spento (un punto scuro su uno sfondo luminoso). Un sub-pixel difettoso (dot defect) è meno visibile di quanto non sia un pixel intero difettoso, ed è visibile solo su uno sfondo specifico. Urmet assicura che i suoi monitor LCD A LED sono conformi agli standard di qualità vigenti, e garantisce dunque non più di: 1 punto (dot) luminoso. 1 punto scuro. 2 punti luminosi e scuri in totale. Urmet si aspetta, col tempo, di continuare a migliorare la qualità dei display a cristalli liquidi con un numero sempre inferiore di imperfezioni estetiche. La presente comunicazione informa il Cliente Urmet relativamente allo standard qualitativo dei display LCD A LED al fine di rendere un servizio il più trasparente possibile. 5 SPECIFICHE PRODOTTO LCD Display: .................................................................................................................................................. 27” TFT (16:9) Backlight......................................................................................................................................................................... LED Tempo di risposta: ..........................................................................................................................................................3 ms Risoluzione:........................................................................................................................................................1920 x 1080 Visualizzazione colori: ......................................................................................................................................... 16.7 milioni Rapporto di contrasto: .................................................................................................................................................. 700:1 2 Luminosità: ............................................................................................................................................................ 300 cd/m Angolo di visuale: ........................................................................................................................................170° orizzontale ........................................................................................................................................................................160° verticale Ingressi video composito: .............................................................................. 2 Segnali video composito - 1.0Vpp 75 BNC Uscite video composito loop-through: ......................................................................................................................... 2 BNC Ingresso HDMI: ............................................................................................................................................................ HDMI Ingressi / uscita audio: .................................................................................................................................................... jack Uscite audio: .......................................................................................................................................... 2 altoparlanti – 3 W Comandi OSD: .....................................................................................Impostazioni di visualizzazione - Impostazioni audio Controlli pannello laterale: ....................................................................................... On/Off - Menù OSD - Tasti di selezione Alimentazione: ............................................................................................................................................................. 12Vcc Adattatore di alimentazione: ..................................................................................... AC Input: 100 - 240 V ~ 4,1A, 50/60Hz ........................................................................................................................................................... DC Output: 12V/4.16A Consumo: ....................................................................................................................................................................... 35W Temperatura di funzionamento: ....................................................................................................................... 0 °C / +40 °C Temperatura di immagazzinamento: ............................................................................................................. -25 °C / +60 °C Umidità: ............................................................................................................... 10%90% Senza formazione di condensa Dimensioni con base (alt. x larg. x prof.): .............................................................................................. 382 x 540 x 136 mm Peso netto: .................................................................................................................................................................. 5.9 Kg NOTA BENE Le caratteristiche tecniche possono essere soggette a variazione senza alcun preavviso. DS1092-151 12 ENGLISH TABLE OF CONTENTS 1 General information ............................................................................................................................. 14 1.1 Product description and type of use .......................................................................................... 14 1.1.1 1.2 Opening the box ......................................................................................................................... 14 1.2.1 1.3 Power ................................................................................................................................................. 15 Safety precautions ............................................................................................................................. 15 Installation precautions....................................................................................................................... 15 Cleaning the device ............................................................................................................................ 15 Privacy and copyright ......................................................................................................................... 15 Controls and settings .......................................................................................................................... 16 Remote Control Use ............................................................................................................................. 17 3.1 Direct controls ............................................................................................................................ 18 3.2 OSD CCTV menu controls ......................................................................................................... 19 3.2.1 3.2.2 3.2.3 3.2.4 4 5 Contents of the box ............................................................................................................................ 14 Warnings .................................................................................................................................... 15 1.3.1 1.3.2 1.3.3 1.3.4 1.3.5 2 3 General features ................................................................................................................................ 14 Picture ................................................................................................................................................ 19 Audio .................................................................................................................................................. 20 OSD ................................................................................................................................................... 22 Functions ............................................................................................................................................ 23 LCD monitor quality and pixel ............................................................................................................ 24 Product specifications ......................................................................................................................... 24 DS1092-151 13 1 GENERAL INFORMATION Dear Customer, Thank you for having purchased this Urmet product. This document describes how to install and use the URMET S.p.A. LCD 27” colour monitor ref. 1092/427. Read this manual which contains information for correct, safe use carefully. Keep this manual at hand so that you can refer to it when needed. 1.1 PRODUCT DESCRIPTION AND TYPE OF USE The LCD colour monitor 1092/427 presents a very rugged structure. It is designed for continuous operation and can be used in closed circuit TV systems without risks of excessive fatigue. The Flat Panel Display has an active matrix, thin-film transistor (TFT), liquid crystal display (LCD). IMPORTANT NOTE URMET Domus Ref.1092/427 is a product intended for use in CCTV systems. 1.1.1 1.2 GENERAL FEATURES 27” display area Wall mounting with not included bracket RCA socket audio input HDMI video input Two composite video input channels (BNC) Wide inclination to allow viewing either from a seated position or standing up and when moving from one position to the other Multilingual OSD menu for easy setting and optimisation of the display OPENING THE BOX Check that the packing and the contents are not visibly damaged. Contact the retailer immediately if parts are either missing or damaged. Do not attempt to use the device in this case. Send the product back in its original packing if it is damaged. 1.2.1 CONTENTS OF THE BOX LCD monitor Table stand Remote Control with included battery (CR2025, 3V) Power unit 12VDC 4.1A Power cable VGA cable Instruction manual IMPORTANT NOTE Accessories may be changed without prior notice. DS1092-151 14 1.3 WARNINGS 1.3.1 POWER Only use the power unit provided to power the device. Check mains rating before plugging the power unit in. Do not pull the cable to unplug the device. 1.3.2 SAFETY PRECAUTIONS Keep the device away from rain and humidity to prevent risk of fire and electrocution. Do not introduce material (solid or liquid) inside. If this should accidentally occur, disconnect the device from the mains and have it inspected by qualified personnel. Never open the device. In all cases, contact a qualified personnel or authorised service centre for repairs. Keep the device away from children, to prevent accidental damage. Do not touch the device with wet hands to prevent electrical shock or mechanical damage. Do not use the device if it should fall or the external casing is damaged. Risk of electrocution if the device is used in such conditions. Contact the retailer or authorised installer. It is advisable to disconnect the power wire if the monitor is not used for a certain time. 1.3.3 INSTALLATION PRECAUTIONS To prevent overheating the device, arrange it in a position allowing the flow of air through the slots in the casing. Ensure at least 5 cm of free space when installing inside a rack. For the same reason, do not install sources of heat, such as radiators or hot air ducts. Keep away from direct sunlight. Do not install in areas subject to excessive dust, mechanical vibrations or shocks. Do not arrange this device on an unstable surface, such as a tottering or slanted table. The device could fall causing injury or mechanical failures. Do not install the device in a place where it could be exposed to humidity or water. Do not direct a jet of water onto the device: risk of fire, electrocution or mechanical failure. Stop using the device if water or other material should penetrate inside: risk of fire and electrocution. Contact the retailer or authorised installer. Slots and openings in the cabinet are provided for ventilation. These openings must not be blocked or covered. Do not place heavy or heat generating objects on top of the device: this could damage the casing and/or increase internal temperature causing faults. Do not cover the device with a cloth while it is running to prevent deforming the external casing and overheating the internal parts: risk of fire, electrocution and mechanical failure. Keep magnets and magnetised objects away from the device to prevent faults. Do not use the device in presence of smoke, vapour, humidity, dust or intense vibrations. Wait for a while before operating a device immediately after transporting it from a cold place to a warm place and vice versa. Wait on average for three hours: this will allow the device to adapt to the new ambient (temperature, humidity, etc.). The monitor is provided with a plastic base and rubber feet. It can be positioned on a horizontal surface, such as a desk or a table. Make sure that the device is fastened firmly and that it is not resting on unstable supports or surfaces. Dropping could cause severe injury and damage the device. Remember to adjust the brightness and contrast to obtain a perfect image. The monitor can also be installed on the wall by means of a bracket (not provided). 1.3.4 CLEANING THE DEVICE Rub delicately with a dry cloth to remove dust and dirt. Dip the cloth in neutral detergent if dirt cannot be eliminated with a dry cloth alone. Do not use volatile liquids (such a petrol, alcohol, solvents, etc.) or chemically treated clothes to clean the device to prevent deformation, deterioration or scratches to the paint finish. 1.3.5 PRIVACY AND COPYRIGHT The 1092/427 LCD monitor is a device for CCTV systems. Recording of images is subject to the laws in force in your country. Recording of images protected by copyright is forbidden. Product users shall be responsible for checking and respecting all local rules and regulations concerning monitoring and recording video signals. The manufacturing SHALL NOT BE LIABLE for use of this product not in compliance with the laws in force. DS1092-151 15 2 CONTROLS AND SETTINGS 7 6 5 4 3 2 1 DS1092-151 14 16 13 12 11 10 9 8 3 REMOTE CONTROL USE The monitor Ref. 1092/427 is provided with a remote control. The following operations are possible: Power the monitor on/off (RED button). Activate/deactivate the OSD menu (MENU button). Increase/Decrease the volume – Navigate the OSD menu, if active (ARROW buttons). Select the desired video source AV1 – AV2 – HDMI – VGA (INPUT button). Display the monitor internal temperature in °C (°C button). Quickly select the VGA source (VGA button). Quickly select the HDMI source (HDMI button). Quickly select the AV source (AV button). Select the picture modes choosing among many options of the OSD Menu (PICTURE button). FREEZE button is not operative. YPBPR button is not operative. S-VIDEO button is not operative. DVI button is not operative. Battery replacement DS1092-151 17 3.1 DIRECT CONTROLS POWER CONNECTOR (DC) [14] Plug the power wire of the adapter provided into the respective DC. ON/OFF BUTTON [7] This is used to switch the monitor on and off. The blue LED lights up when the monitor is on while when it is in red stands for standby condition. IMPORTANT NOTE If the following message appears on the monitor after pressing the button (1): NO SIGNAL It means that a not connected video signal has been selected as input. SELECTION BUTTONS [2-3] They allow to select the menu options inside the OSD Menu. VOLUME BUTTONS [4-5] AND CONFIRM [4] They allow to change the volume (5 button increases the volume – 4 button decreases the volume). 4 button also allows to confirm each setting. MENU BUTTON [6] AND CONFIRM This is used to access and quit the OSD (On-Screen Display) Menu and to confirm the selected settings VIDEO INPUT SELECTION BUTTON [7] To select the desired signal (“”PC”, “HDMI”, “AV1” or “AV2”) press the button (7) and select the desired item with the buttons (2-3) “DOWN” and “UP”. Press the button “4” to confirm. HDMI INPUT [13] It allows the connection of an HDMI signal and an audio signal, coming from an external source provided with an HDMI output PC SIGNAL INPUT (VGA) [12] PC input. AUDIO INPUT/OUTPUT(VGA) [8] Jack plugs audio input/output. AV1 - AV2 VIDEO INPUTS [10] [11] They allow the connection of video signals coming from external sources AV1 - AV2 VIDEO OUTPUT [9] This BNC output allows to repeat the AV1-AV2 video signals to another video input (another monitor or DVR). DS1092-151 18 3.2 OSD CCTV MENU CONTROLS Select the menu using the MENU [6] button in order to access the Menus and Submenus and their functions Use of the buttons Selection of the video input In order to show the possible video inputs, press the [7] button In order to scroll the options, use [2-3] buttons In order to confirm the selection press the [4] button. Selection of the Menus In order to show the main Menu, press the [6] button. In order to select the Menus of the horizontal bar, press the [4-5] buttons. In order to select each single Menu, press the [2] button. In order to change a value (once the option is selected), press the [4-5] buttons. In order to confirm the selection, press the [6] button. In order to exit from Menus and Submenus, press the [6] button. Volume adjustment In order to vary the volume without entering the OSD Menu, use [4-5] buttons. 3.2.1 PICTURE Selecting the icon, the following screen will appear (depending the signal type): AV/HDMI DS1092-151 VGA 19 CONTRAST It allows to change contrast between white and black areas of the image. A clear resolution of good white, black and grey gradation is achieved by a proper setting of contrast. Press “4” and “5” buttons to change the values of this parameter. BRIGHTNESS It allows to change image brightness, according to ambient light. Press “4” and “5” buttons to change the values of this parameter. HUE Only used in NTSC system. COLOR It allows to change colors of the image. Press “4” and “5” buttons to change the values of this parameter. SHARPNESS It allows to optimize image sharpness parameters according to ambient light. Press “4” and “5” buttons to change the values of this parameter. COLOR TEMP. It allows to change the color settings among the following: ”Warm – Cool – Normal”. Press “4” and “5” buttons to change the values of this parameter. SCALE It allows to change the video format of the images among: “Full, 4:3, Zoom2, Zoom1”. Press “4” and “5” buttons to change the values of this parameter PICTURE MODE It allows to change the image settings among the following:” User - Vivid - Soft - Standard”. Press “4” and “5” buttons to change the values of this parameter. 3.2.2 AUDIO Selecting the DS1092-151 icon, the following screen will appear: 20 BASS It allows to adjust the bass levels of the sound. Press “4” and “5” buttons to change the values of this parameter TREBLE It allows to adjust the treble levels of the sound. Press “4” and “5” buttons to change the values of this parameter BALANCE It allows to balance the sounds of the 2 speakers. Press “4” and “5” buttons to change the values of this parameter AUDIO MODE It allows to change the sound settings among the following: ” User - Music - Movie - Standard”. Press “4” and “5” buttons to change the values of this parameter. EQUALIZER It allows to optimize the sound effects. Selecting this option you can access to the menu that permits the user to regulate the audio frequencies. Press “4” and “5” buttons to change the values of this parameter. AVC It allows to automatically adjust the audio volume in order to avoid unwanted peaks. Press “4” and “5” buttons to change the values of this parameter. SOUND EFFECT It allows to change the sound effects among the following: ” SRS – MSTAR - NO” (Surround – M-Star equalizationNone). Press “4” and “5” buttons to change the values of this parameter. Selecting “SRS” it is possible to set the desired Surround effect. DS1092-151 21 3.2.3 OSD Selecting the icon, the following screen will appear: SLEEP TIMER It allows to set the automatic switch-off time. Options are: ”NO – 15M – 30M – 45M – 60M”. Press “4” and “5” buttons to change the values of this parameter. LANGUAGE It allows to select the desired language: “English- Deutsch- French – Spanish - Italian”. Press “4” and “5” buttons to change the values of this parameter. HORIZONTAL POSITION It allows to change horizontal position of the display image. Press “4” and “5” buttons to horizontally move the image. VERTICAL POSITION It allows to change vertical position of the display image. Press “4” and “5” buttons to vertically move the image. DURATION It allows to set the OSD duration time on the screen. Press “4” and “5” buttons to change the values of this parameter. HALFTONE It allows to set the OSD transparency time on the screen. Press “4” and “5” buttons to change the values of this parameter. BLUE SCREEN It allows to determine the background color when the video signal is missing. Press “4” and “5” buttons to change the values of this parameter. IMAGE REVERSE It allows to verically mirror the image on the screen. Press “4” and “5” buttons to change the values of this parameter NOTE Whne the image is mirrored, also the OSD Menu gets mirrored. RESTORE It allows to load the Factory Defaults. All the user settings will be lost. DS1092-151 22 3.2.4 FUNCTIONS Selecting the icon, the following screen will appear: AV/HDMI VGA NOISE REDUCTION It allows to enable/disable the Noise Filter with 3 possible values: HIGH - LOW - MID Press “4” and “5” buttons to change the values of this parameter. MPEG NR It allows to enable/disable the MPEG Noise Reduction Filter with 2 possible values: HIGH – LOW. Press “4” and “5” buttons to change the values of this parameter. DLC It allows to automatically adjust the image brightness. Press “4” and “5” buttons to change the values of this parameter. ALLARME TEMP. Not operative option. MODE SOURCE Not operative option. DS1092-151 23 4 LCD MONITOR QUALITY AND PIXEL The TFT monitor uses high-precision technology, manufactured according to Urmet standards, to guarantee trouble-free performance. Nevertheless, the display may have cosmetic imperfections that appear as small bright or dark spots. This a common matter related to the specific nature of TFT technology which determines the possible presence of discontinuity on the screen and is not specific to Urmet products. These imperfections are caused by one or more defective pixels or sub-pixels. A pixel consists of one red, one green, and one blue sub-pixel. A defective whole pixel is always turned on (a bright spot on a dark background), or it is always off (a dark spot on a bright background). The first is the more visible of the two. A defective sub-pixel (dot defect) is less visible than a defective whole pixel and is small and only visible on a specific background. Urmet guarantees that LCD monitors comply to the current quality standards and consequently no more than: 1 bright dots. 1 dark dots. 2 total bright and dark dots. No more than two adjacent (less than 2.5 mm edge-to-edge) defective pixels. Urmet expects that the quality of liquid crystal displays will improve in time with a decrease in the number of imperfections. With the present communication Urmet wishes to inform customers of the quality standard of the LCD to ensure a service as transparent as possible. 5 PRODUCT SPECIFICATIONS LCD Display: .................................................................................................................................................. 27” TFT (16:9) Backlight:........................................................................................................................................................................ LED Response time: ..............................................................................................................................................................3 ms Resolution: .........................................................................................................................................................1920 x 1080 Colours: ................................................................................................................................................................ 16.7 milion Contrast ratio:............................................................................................................................................................... 700:1 2 Brightness: ............................................................................................................................................................ 300 cd/m Frame angle: ................................................................................................................................................. 170° horizontal ...........................................................................................................................................................................160° vertical Composite video input: .................................................................................. 2 Composite video signals - 1.0Vpp 75 BNC Composite loop-through video output: ....................................................................................................................... 2 BNC HDMI input: .................................................................................................................................................................. HDMI Audio input / output: ........................................................................................................................................................ jack Audio outputs: ........................................................................................................................................... 2 speakers – 3 W OSD controls: ...................................................................................................................... View settings – Various settings Front panel controls: ............................................................................... On/Off - Volume - OSD Menù – Selection buttons Power: ......................................................................................................................................................................... 12Vcc Power adapter: ............................................................................................................ AC Input: 100 - 240 V ~ 4A, 50/60Hz ........................................................................................................................................................... DC Output: 12V/4.16A MAX Consumption: ........................................................................................................................................................ 35W Working temperature range:............................................................................................................................. 0 °C / +40 °C Storage temperature range: .......................................................................................................................... -25 °C / +60 °C Humidity: ............................................................................................................................ 10%90% Without condensation Dimensions (L x W x D):........................................................................................................................ 382 x 540 x 136 mm Net weigh: ................................................................................................................................................................... 5.9 Kg Important note: Product specifications may be subject to change without prior notice. DS1092-151 24 DEUTSCH INHALTSVERZEICHNIS 1 Allgemeine Informationen ................................................................................................................... 26 1.1 Produktbeschreibung und Art der Nutzung................................................................................ 26 1.1.1 1.2 Verpackungsinhalt ..................................................................................................................... 26 1.2.1 1.3 Stromversorgung ................................................................................................................................ 27 Sicherheitshinweise............................................................................................................................ 27 Vorsichtsmassnahmen bei der Aufstellung ........................................................................................ 27 Reinigung des Gerätes....................................................................................................................... 27 Vertraulichkeit und Copyright ............................................................................................................. 27 Steuerung und Einstellungen ............................................................................................................. 28 Infrarot-Fernbedienung ........................................................................................................................ 29 3.1.1 3.2 3.3 Batterien ............................................................................................................................................. 29 Direkte Steuerung ...................................................................................................................... 30 OSD CCTV Menü Steuerungen ................................................................................................. 31 3.3.1 3.3.2 3.3.3 3.3.4 4 5 Inhalt der Verpackung ........................................................................................................................ 26 Warnungen ................................................................................................................................ 27 1.3.1 1.3.2 1.3.3 1.3.4 1.3.5 2 3 Allgemeine Leistungsmerkmale ......................................................................................................... 26 Bild ..................................................................................................................................................... 32 Ton ..................................................................................................................................................... 33 Einstellungen ...................................................................................................................................... 34 Funktionen ......................................................................................................................................... 35 LCD Monitor Qualität und Pixel Fehler............................................................................................... 36 Technische Daten des Produkts ......................................................................................................... 36 DS1092-151 25 1. ALLGEMEINE INFORMATIONEN Sehr geehrter Kunde, wir danken Ihnen für den Kauf dieses Produktes. Dieses Dokument beschreibt die Inbetriebnahme und Bedienung des URMET Domus LCD 54,6cm (27”) Farbmonitors Typ 1092/427. Lesen dieses Dokument sorgfältig. Es enthält Informationen über die richtige und sichere Nutzung. Halten Sie diese Bedienungsanleitung stets griffbereit damit Sie bei Bedarf die Informationen nachschlagen können. 1.1 PRODUKTBESCHREIBUNG UND ART DER NUTZUNG Der LCD Farbmonitor 1092/427 eine sehr robuste Bauweise. Er ist für den Dauerbetrieb ausgelegt und kann in CCTVAnlagen ohne Überlastungsrisiken eingesetzt werden. Der Flachbildschirm hat eine aktive Matrix, Thin-Film Transistor (TFT), Liquid Crystal Display (LCD). WICHTIGER HINWEIS URMET Domus Typ 1092/427 ist ein Produkt das für den Einsatz in CCTV Systemen bestimmt ist. 1.1.1. ALLGEMEINE LEISTUNGSMERKMALE 54,6cm (27”) Bildschirmdiagonale Geeignet für Wandmontage(Halter seperat bestellen) RCA Buchse für Audio Eingang HDMI Video Eingang Zwei Composite Video Eingangskanäle (BNC) Ein Composite Video Ausgangskanal (BNC) Weiter Neigungswinkel gestattet die Ansicht entweder aus einer sitzenden oder stehenden Position sowie den Wechsel von einer zur anderen Position Mehrsprachiges OSD Menü für einfache Einstellung und Optimierung des Display 1.2 VERPACKUNGSINHALT Überprüfen Sie die Verpackung und den Verpackungsinhalt auf erkennbare Schäden. Fehlen Teile, oder weisen diese Beschädigungen auf, wenden Sie sich bitte umgehend an Ihren Fachhändler. Versuchen Sie in diesen Fällen nicht das Gerät in Betrieb zu nehmen. Sollte das Gerät an den Lieferanten zurückgeschickt werden müssen, vergewissern Sie sich bitte, dass dies in der Originalverpackung erfolgt. 1.2.1 INHALT DER VERPACKUNG LCD Monitor Tischständer Fernbedienung Batterie für Fernbedienung (CR2025, 3V) Netzteil 12V (DC) 4.1A Netzkabel VGA-Kabel Bedienungsanleitung WICHTIGER HINWEIS Die Zusammensetzung der in der Lieferung enthaltenen Zubehörteile kann ohne Vorankündigung geändert werden. DS1092-151 26 1.3 WARNUNGEN 1.3.1 STROMVERSORGUNG Verwenden Sie nur das Netzteil, das für die Stromversorgung des Gerätes mitgeliefert wurde. Prüfen Sie die Netzspannung, bevor Sie das Netzteil anschließen. Ziehen Sie nicht an dem Kabel, wenn Sie das Gerät vom Netz trennen wollen. 1.3.2 1.3.3 1.3.4 1.3.5 SICHERHEITSHINWEISE Halten Sie das Gerät von Regen und Feuchtigkeit fern, um einen Brand oder einen elektrischen Schlag zu verhindern. Lassen Sie kein Material (fest oder flüssig) in das Geräteinnere gelangen. Wenn dies versehentlich passiert, trennen Sie das Gerät vom Netz und lassen Sie es durch einen Fachmann überprüfen. Öffnen Sie niemals das Gerät. Nehmen Sie in jedem Fall Kontakt mit einer Fachfirma auf, um das Gerät reparieren zu lassen. Halten Sie das Gerät von Kindern fern, um eine versehentliche Beschädigung zu vermeiden. Berühren Sie das Gerät nicht mit nassen Händen, damit Sie keinen elektrischen Schlag bekommen oder mechanische Schäden verursachen. Benutzen Sie das Gerät nicht, wenn es heruntergefallen oder das Gehäuse beschädigt ist. Es besteht die Gefahr eines Stromschlags, wenn Sie das Gerät in einem solchen Zustand benutzen. Nehmen Sie Kontakt mit dem Händler oder einer Fachfirma auf. Es ist empfohlen das Netzkabel vom Stromnetz zu trennen wenn Sie den Monitor für längere Zeit nicht benutzten. VORSICHTSMASSNAHMEN BEI DER AUFSTELLUNG Um ein Überhitzen des Geräts zu vermeiden, stellen Sie es so auf, dass immer Luft durch die Belüftungsschlitze im Gehäuse zirkulieren kann. Lassen Sie mindestens 5 cm Platz frei, wenn Sie das Gerät in einem Regal aufstellen. Stellen Sie aus dem gleichen Grund keine Heizquellen, wie z.B. Heizkörper oder Heizstrahler in der Nähe des Gerätes auf. Von direkter Sonneneinstrahlung fernhalten. Nicht an Plätzen mit extremer Staubbelastung, mechanischen Vibrationen oder Erschütterungen aufstellen. Stellen Sie das Gerät nicht auf einer instabilen Unterlage auf, wie z.B. wackelnden oder schrägen Tischen. Das Gerät könnte herabfallen und Verletzungen verursachen oder mechanisch beschädigt werden. Stellen Sie das Gerät nicht an einem Platz auf, an dem es Feuchtigkeit oder Wasser ausgesetzt sein könnte. Richten Sie keinen Wasserstrahl auf das Gerät: es besteht Brandgefahr, Gefahr eines elektrischen Schlags oder mechanischer Fehlfunktion. Benutzen Sie das Gerät nicht weiter, wenn Wasser oder andere Substanzen in das Geräteinnere gelangt sind. Es besteht Brandgefahr und die Gefahr eines elektrischen Schlags. Nehmen Sie Kontakt mit dem Händler oder einer Fachfirma auf. Stellen Sie keine schweren oder Wärme erzeugenden Geräte auf das Gerät: dies könnte zu Beschädigungen des Gehäuses führen und/oder die Temperatur im Geräteinneren erhöhen und zu Fehlfunktionen führen. Decken Sie das Gerät im Betrieb nicht mit einem Tuch ab, um ein Überhitzen und eine Deformation des Gehäuses und des Geräts zu vermeiden: Es besteht Brandgefahr, Gefahr eines elektrischen Schlags oder mechanischer Fehlfunktion. Halten Sie Magnete und magnetisierte Objekte vom Gerät fern, um Fehlfunktionen zu vermeiden. Benutzen Sie das Gerät nicht bei Rauch, Dampf, Feuchtigkeit, Staub oder intensiven Vibrationen. Warten Sie mit dem Einschalten des Gerätes nach einem Transport von einem kalten an einen warmen Ort und umgekehrt. Warten Sie ungefähr drei Stunden, um das Gerät an die neue Umgebung (Temperatur, Feuchtigkeit etc.) anzupassen. Der Monitor wird mit einem Kunststoffgehäuse und Gummifüßen ausgeliefert. Er kann auf einer horizontalen Oberfläche, wie ein Schreibtisch oder Tisch, aufgestellt werden. Stellen Sie sicher das das Gerät nicht auf unstabilen Untergründen steht. Ein herunterfallen kann zu ernsten Verletzungen und Schäden am Gerät führen. Denken Sie daran die Helligkeit und den Kontrast für ein perfektes Bild einzustellen. Der Monitor kann auch mit einem entsprechenden Halter an der Wand montiert werden (im Lieferumfang nicht enthalten). REINIGUNG DES GERÄTES Reinigen Sie die Oberfläche mit einem trockenen, weichen Tuch um Staub und Verschmutzungen zu entfernen. Befeuchten Sie das Tuch mit einem neutralen Reinigungsmittel wenn der Schmutz nicht mit einem trockenen Tuch entfernt werden kann. Benutzen Sie keine Flüssigkeiten (wie Benzin, Alkohol, Lösungsmittel, etc.) oder chemisch behandelte Putzlappen um Verformungen, Zerstörung oder Kratzer im Lack zu verhindern. VERTRAULICHKEIT UND COPYRIGHT Der 1092/427 LCD Monitor ist ein Gerät für CCTV-Systeme. Bildaufnahmen unterliegen den geltenden gesetzlichen Bestimmungen in Ihrem Land. Bildaufnahmen von durch Copyright geschützten Objekten sind verboten. Die Benutzer der Geräte sind für die Überprüfung und Einhaltung aller örtlichen Bestimmungen in Bezug auf Überwachung und Aufzeichnungen von Videosignalen verantwortlich. Der Hersteller ist NICHT HAFTBAR für den Einsatz dieses Gerätes, bei dem die gültigen Gesetze nicht beachtet werden. DS1092-151 27 2. STEUERUNG UND EINSTELLUNGEN 7 6 5 4 3 2 1 14 DS1092-151 28 13 12 11 10 9 8 3. INFRAROT-FERNBEDIENUNG Der Monitor Typ 1092/427 ist mit einer Fernebdienung ausgestattet. Folgende Steuerbefehle mit der Fernbedienung sind möglich: EIN/AUS-Schalten des Monitors (Rote Taste). Aktivieren/Deaktivieren des OSD Menüs (MENU Taste). Verringern/Erhöhen der Lautstärke – Navigieren im OSD-Menü, wenn aktiv (PFEIL Tasten). Auswahl des gewünschten Videoquelle AV1 – AV2 – HDMI – VGA (INPUT Taste). Anzeige der internen Monitortemperatur in °C (°C Taste). Schnellauswahl VGA (VGA Taste). Schnellauswahl HDMI (HDMI Taste). Schnellauswahl AV (AV Taste). Auswahl des Bildmodus anhand der Optionen im OSD-Menü (PICTURE Taste). FREEZE Taste – Nicht Funktionsfähig. YPBPR Taste – Nicht Funktionsfähig. S-VIDEO Taste – Nicht Funktionsfähig. DVI Taste – Nicht Funktionsfähig. 3.1.1 BATTERIE Die Spannungsversorgung der Fernbedienung erfolgt durch a Batterie (im Lieferumfang enthalten). Um diese einzusetzen, öffnen Sie die Batteriefachabdeckung und setzten Sie die Batterie in der abgebildeten Polarität ein. Schließen Sie nach dem einsetzten der Batterien die Abdeckung. Halten Sie die Fernbedienung in die Richtung des Monitor Empfängers um sie zu benutzten. Entsorgen fachgerecht. Hausmüll. Sie verbrauchte Entsorgen Sie sie Batterien nicht im WICHTIGER HINWEIS Wechseln Sie immer beide Batterien zur gleichen Zeit. Entfernen Sie die Batterien, wenn die Fernbedienung für längere Zeit nicht benutzt wird. DS1092-151 29 3.2 DIREKTE STEUERUNG STROMVERSORGUNG (DC) [14] P Schließen Sie das DC-Stromkabel an die Stromversorgung an. EIN/AUS SCHALTER [7] Wird verwendet zum Ein- und Ausschalten des Monitors. Die blaue LED leuchtet wenn der Monitor eingeschaltet ist, während für den Standby- Modus die LED rot leuchtet. WICHTIGER HINWEIS Wenn die folgende Nachricht nach Drücken des Schalters (7) erscheint: KEIN SIGNAL Bedeutet, dass das richtige Videosignal ausgewählt werden muss. AUSWAHL TASTEN [2-3] Gestattet die Auswahl der Optionen innerhalb des OSD-Menüs. LAUTSTÄRKE [4-5] UND BESTÄTIGUNGS TASTE [4] Gestatten die Änderung der Lautstärke (Taste 5 zur Steigerung der Lautstärke, Taste 5 zur Verringerung der Lautstärke). Die Taste 4 gestattet die Bestätigung jeder Einstellung. MENÜ TASTE [6] UND BESTÄTIGUNG Gestattet den Zugriff und das Verlassen des OSD (On-Screen Display) Menüs und Bestätigung der ausgewählten Einstellungen. AUSWAHLTASTE VIDEOEINGANG [7] Auswahl des gewünschten Signaleingangs (“”PC”, “HDMI”, “AV1” or “AV2”), die Taste (7) betätigen, auswählen mit den Tasten (2-3) “HOCH” und “RUNTER” und mit der Taste “4” bestätigen. HDMI EINGANG [13] Gestattet den Anschluss eines HDMI Video Gerätes. PC EINGANG (VGA) [12] Gestattet zum Beispiel den Anschluss eines PCs. AUDIO EINGANG/AUSGANG (RCA) [8] Klinkenbuchse Audio Eingang/Ausgang. AV1 - AV2 VIDEOEINGÄNGE [10] [11] Diese BNC Anschlüsse werden zum Anschluss des Video Signals verwendet. AV VIDEOAUSGANG [9] Diese BNC Anschlüsse gestatten das Videosignal von “AV2 EINGANG” [11] zu ziehen und es zu einem anderen Videoeingang zu senden (wie zum Beispiel einen anderen Monitor oder einen DVR). DS1092-151 30 3.3 OSD CCTV MENÜ STEUERUNGEN Betätigen der Menütaste [6] um in das OSD-Menü inklusiv der Untermenüs mit deren Funktionen zu gelangen. Einsatz der Bedientasten Auswahl des Videoeingangs Um die möglichen Videoeingänge anzuzeigen, die Taste [7] betätigen. Um in den einzelnen Optionen zu wechseln, die Tasten [2-3] betätigen. Um die Auswahl zu bestätigen, die Taste [4] betätigen. Auswahl der Menüpunkte Um das Menü anzuzeigen, die Taste [6] betätigen. Um zwischen den einzelnen Menüpunkten in der horizontalen Menüleiste zu springen, die Tasten [4-5] betätigen. Um einen einzelnen Menüpunkt auszuwählen, die Taste [2] betätigen. Um einen Wert zu ändern (wenn die Option ausgewählt ist), die Tasten [4-5] betätigen. Um die Änderung zu bestätigen, die Taste [6] betätigen. Um das Menü oder die Untermenüs zu Verlassen, die Taste [6] betätigen. Einstellung Lautstärke Um die Lautstärke am Monitor zu ändern ohne in das Menü zu gehen, die Tasten [4-5] betätigen. DS1092-151 31 3.3.1 BILD Bei Auswahl des Symbols , öffnet sich folgende Darstellung (in Abhängigkeit des Videoeingangssignals): AV/HDMI VGA KONTRAST Diese Einstellung wird verwendet um den Kontrast zwischen schwarzen und weißen Bereichen des Bildes zu verändern. Klare Auflösung der Weiß, Schwarz und Grauskala kann durch eine korrekte Kontrasteinstellung erreicht werden. Drücken Sie die Tasten “4” oder “5” um die Werte zu erhöhen oder zu verringern. BRIGHTNESS Diese Einstellung wird verwendet, um die Helligkeit des Bildes entsprechend dem Umgebungslicht zu verändern. Drücken Sie die Tasten “4” oder “5” um die Werte zu erhöhen oder zu verringern. FARBTON Wir nur im NTSC System genutzt. FARBE Diese Einstellung wird zur Änderung der Farbwerte verwendet. Drücken Sie die Tasten “ 4” oder “5” um die gewünschte Einstellung auszuwählen. SCHÄRFE Diese Einstellung wird zur Einstellung der Schärfe des Bildes verwendet. Drücken Sie die Tasten “4” oder “5” um die Werte zu erhöhen oder zu verringern. FARBTEMPERATUR Diese Einstellung wird zur Änderung folgender Farbwerte wie „Warm“, „Kalt“, „Normal“ verwendet. Drücken Sie die Tasten “ 4” oder “5” um die gewünschten Parameter auszuwählen. SCALE Gestattet die Änderung des Videoformats des Bildes in folgende Werte: “Full, 4:3, Zoom2, Zoom1”. Drücken Sie die Tasten “ 4” oder “5” um die gewünschten Parameter auszuwählen. Bildmodus Gestattet die Änderung der Bildparameter durch folgende Einstellungen: ” User - Vivid - Soft - Standard”. Betätigen der Taste “4” und “5” um die Werte des Parameters zu ändern. DS1092-151 32 3.3.2 TON Bei Auswahl des Symbols , öffnet sich folgende Darstellung: BASS Gestattet die Einstellung des Bassbereichs für den Ton. Betätigen der Taste “4” und “5” um die Werte des Parameters zu ändern. TREBLE (Tiefen) Gestattet die Einstellung der Tiefen für den Ton. Betätigen der Taste “4” und “5” um die Werte des Parameters zu ändern. BALANCE Gestattet die Balancierung des Tons auf den zwei Lautsprecher. Betätigen der Taste “4” und “5” um die Werte des Parameters zu ändern. AUDIO MODE Gestattet die Einstellungen des Tons in folgende Werte: ” Persönlich - Musik - Film - Standard”. Betätigen der Taste “4” und “5” um die Werte des Parameters zu ändern. EQUALIZER Gestattet die Optimierung des Toneffekts. Bei Auswahl dieser Option kann der Nutzer die Audiofrequenzen regulieren. Betätigen der Taste “4” und “5” um die Werte des Parameters zu ändern. AVC Gestattet die automatische Justierung der Lautstärke bei ungewünschten Lautstärke-Spitzen. Betätigen der Taste “4” und “5” um die Werte des Parameters zu ändern. SOUND EFFECT Gestattet die Einstellungen des Tons in folgende Werte: ” SRS – MSTAR - NO” (Surround – M-Star Entzerrung- Keine). Betätigen der Taste “4” und “5” um die Werte des Parameters zu ändern. Auswahl der Option “SRS” und es besteht die Möglichkeit den gewünschten Soundeffekt auszuwählen. DS1092-151 33 3.3.3 EINSTELLUNGEN Bei Auswahl des Symbols , öffnet sich folgende Darstellung: SCHLAFTIMER Gestattet die Einstellung einer automatischen Ausschaltzeit für den Monitor mit den Optionen: ”NO – 15M – 30M – 45M – 60M”. Betätigen der Taste “4” und “5” um die Werte des Parameters zu ändern. LANGUAGE (Sprache) Gestattet die Auswahl der gewünschten Sprache des OSD-Menüs: “Englisch- Deutsch- Französisch – Spanisch Italienisch”. Betätigen der Taste “4” und “5” um die Werte des Parameters zu ändern. HORIZONTALE POSITION Gestattet die Änderung der horizontalen Position des Bildes auf dem Bildschirm. Betätigen der Taste “4” und “5” um das Bild horizontal zu bewegen. VERTIKALE POSITION Gestattet die Änderung der vertikalen Position des Bildes auf dem Bildschirm. Betätigen der Taste “4” und “5” um das Bild vertikal zu bewegen. DURATION (Verweilzeit) Gestattet die Auswahl der Verweilzeit des OSD-Menüs auf dem Bildschirm. Betätigen der Taste “4” und “5” um die Werte des Parameters zu ändern. HALFTONE (Transparenz) Gestattet die Einstellung der Transparenz des OSD-Menüs auf dem Bildschirm. Betätigen der Taste “4” und “5” um die Werte des Parameters zu ändern. BLUE SCREEN (Hintergrund) Gestattet die Vergabe einer Hintergrundfarbe, wenn das Videosignal weggefallen ist. Betätigen der Taste “4” und “5” um die Werte des Parameters zu ändern. IMAGE REVERSE (Bilddrehung) Gestattet die vertikale Spiegelung des Bildes. Betätigen der Taste “4” und “5” um die Werte des Parameters zu ändern. HINWEIS Wird das Bild gespiegelt, wird ebenfalls das OSD-Menü gespiegelt. RESTORE (Werkeseinstellungen) Gestattet die Rücksetzung des Monitors auf Werkseinstellungen, hierbei gehen alle Einstellungen verloren. DS1092-151 34 3.3.4 FUNKTIONEN Bei Auswahl des Symbols , öffnet sich folgende Darstellung: AV/HDMI VGA NOISE REDUCTION (Rauschreduzierung) Gestattet die Freigabe/Sperrung der Rauschreduzierung mit drei Werten: HIGH - LOW - MID Betätigen der Taste “4” und “5” um die Werte des Parameters zu ändern. MPEG NR (MPEG-Rauschreduzierung) Gestattet die Freigabe/Sperrung der MPEG-Rauschreduzierung mit zwei Werten: HIGH – LOW. Betätigen der Taste “4” und “5” um die Werte des Parameters zu ändern. DLC Gestattet die automatische EInstellung der Bildhelligkeit. Betätigen der Taste “4” und “5” um die Werte des Parameters zu ändern. ALARM TEMP. Nicht verfügbar. MODE SOURCE Nicht verfügbar. DS1092-151 35 4. LCD MONITOR QUALITÄT UND PIXEL FEHLER Der TFT-Monitor ist mit einer Hochpräzisionstechnologie ausgestattet und wurde gemäß den Urmet Standards gefertigt, um einen störungsfreien Betrieb zu gewährleisten. Trotzdem ist es möglich, dass der Monitor leichte Unregelmäßigkeiten aufweist, die sich in kleinen hellen oder dunklen Punkten auf dem Bildschirm äußern. Es handelt sich um eine normale Erscheinung, die mit der spezifischen Natur der TFT-Technologie zusammenhängt, die eventuelle Anzeichen von Diskontinuität auf dem Bildschirm mit sich bringt und nicht für Urmet spezifisch. Die Unregelmäßigkeiten rühren von einem oder mehreren defekten Pixel bzw. Subpixel her. Ein Pixel besteht aus einem roten, einem grünen und einem blauen Subpixel. Ein defektes Pixel leuchtet entweder ständig (heller Punkt auf dunklem Hintergrund) oder bleibt immer dunkel (dunkler Punkt auf hellem Hintergrund. Das leuchtende Pixel fällt stärker auf als das dunkle Ein defektes Subpixel fällt weniger auf als ein defektes Komplettpixel, da es klein und nur auf einem bestimmten Hintergrund sichtbar ist. Urmet garantiert, dass seine LCD-Monitor den geltenden Qualitätsstandards entsprechen und garantiert daher nicht mehr als: 1 heller Punkt. 1 dunkler Punkt. Zusammen 2 helle und dunkle Punkte. Nicht mehr als zwei angrenzende (kleiner als 2.5 mm Ecke-zu-Ecke) defekte Pixel. Urmet erwartet, im Laufe der Zeit die Qualität der Flüssigkristallanzeigen weiterhin verbessern zu können, so dass immer weniger ästhetische Makel vorhanden sein werden. Diese Mitteilung zur Informierung der Kunden von Urmet bezüglich des Qualitätsstandards der LCD-Displays dient dem Zweck, den Dienst am Kunden so transparent wie möglich zu gestalten. 5. TECHNISCHE DATEN DES PRODUKTS LCD Anzeige: .....................................................................................................................................54,6cm TFT (27”,16:9) Ansprechzeit: .................................................................................................................................................................3 ms Auflösung: ..........................................................................................................................................................1920 x 1080 Farben: ............................................................................................................................................................ 16.7 Millionen Kontrastverhältnis: ....................................................................................................................................................... 700:1 Helligkeit:............................................................................................................................................................... 300 cd/m2 Sichtwinkel: ................................................................................................................................................... 170° Horizontal .......................................................................................................................................................................... 160° Vertikal Audioeingang: ...................................................................................................................................................Jack-Stecker Composite Videoeingang: ............................................................................. 2 Composite Videosignale - 1.0Vpp 75 BNC Composite Durchschleif Videoausgang: .................................................................................................................... 2 BNC HDMI Eingang: ............................................................................................................................................................. HDMI Netzteil Spannungsversorgung: ............................................................................. Eingang AC: 100 - 240 V ~ 4A, 50/60Hz ....................................................................................................................................................... Ausgang DC: 12V/4.16A Betriebstemperatur: ......................................................................................................................................... 0°C bis +40°C Lagertemperatur:......................................................................................................................................... -25°C bis +60°C Front-Steuertasten: ............................................................................... Ein/Aus - Lautstärke - OSD Menü – Auswahltasten OSD Steuerungen: ...................................................................................... Ansichtseinstellungen – Variable Einstellungen Luftfeuchtigkeit: ................................................................................................................. 10% bis 90% ohne Kondensation Abmessungen (H x B x T): .................................................................................................................... 382 x 540 x 136 mm Gewicht: ...................................................................................................................................................................... 5.9 Kg Audioausgänge: ............................................................................................................................... 2 Lautsprecher – á 3 W Spannung: ................................................................................................................................................................. 12V DC Max. Leistungsaufnahme: .............................................................................................................................................. 35W WICHTIGER HINWEIS: Die technischen Charakteristiken können Änderungen ohne Vorankündigung unterliegen. DS1092-151 36 ESPAÑOL ÍNDICE 1 Información general ............................................................................................................................. 38 1.1 Utilización y descripción del producto........................................................................................ 38 1.1.1 1.2 Comprobación del paquete ........................................................................................................ 38 1.2.1 1.3 Consumo ............................................................................................................................................ 39 Precauciones de seguridad ................................................................................................................ 39 Precauciones de instalación ............................................................................................................... 39 Limpieza del dispositivo ..................................................................................................................... 39 Privacidad y Copyright ....................................................................................................................... 39 Controles y ajustes .............................................................................................................................. 40 Uso del mando a distancia .................................................................................................................. 40 3.1 Controles directos ...................................................................................................................... 42 3.2 Controles con el menú OSD ...................................................................................................... 43 3.2.1 3.2.2 3.2.3 3.2.4 4 5 Contenido del paquete ....................................................................................................................... 38 Advertencias .............................................................................................................................. 39 1.3.1 1.3.2 1.3.3 1.3.4 1.3.5 2 3 Características generales ................................................................................................................... 38 Imagen ............................................................................................................................................... 43 Audio .................................................................................................................................................. 44 OSD ................................................................................................................................................... 45 Funciones ........................................................................................................................................... 46 Calidad del monitor LCD y píxeles ..................................................................................................... 47 Especificaciones del producto ........................................................................................................... 47 DS1092-151 37 1 INFORMACIÓN GENERAL Estimado cliente: Le agradecemos que haya comprado este producto. En este documento se describe cómo instalar y utilizar el monitor de color 27” LCD URMET ref. 1092/427. Lea con atención este manual, ya que contiene información sobre el uso correcto y seguro de los dispositivos. Guarde el manual en un lugar fácilmente accesible para poder consultarlo cuando sea necesario. 1.1 UTILIZACIÓN Y DESCRIPCIÓN DEL PRODUCTO El monitor LCD de color 1092/427 presenta una estructura robusta, es ideal para aplicaciones de operación continua y puede usarse en sistemas CCTV sin temor a que sufra una fatiga excesiva. La pantalla plana de cristal líquido LCD (Liquid Crystal Display) con matriz activa es de tecnología TFT (Thin-Film Transistor). NOTA El equipo Ref. 1092/427 de URMET Domus es especial para sistemas CCTV. 1.1.1 CARACTERÍSTICAS GENERALES Pantalla de 27” Preparado para montaje en pared (soporte no incluido) Toma RCA de entrada de audio Entrada de vídeo HDMI 2 entradas de vídeo compuesto (BNC) Gran ángulo de visión que permite trabajar sentado, incorporado o mientras está desplazándose Menú OSD multilingüe en pantalla para configurar y optimizar la pantalla fácilmente 1.2 COMPROBACIÓN DEL PAQUETE Compruebe visualmente que el paquete y su contenido no presentan ningún daño. Si falta algún componente o está dañado, póngase en contacto con su distribuidor. En este caso, no intente utilizar el dispositivo. Si el producto presenta daños, devuélvalo en su embalaje original. 1.2.1 CONTENIDO DEL PAQUETE Monitor LCD Base de apoyo Mando a distancia Batería para el mando a distancia (CR2025, 3 V) (incluido en el mando a distancia). Alimentador 12 VDC y 4,1 A Cable de alimentación Cable VGA Manual de usuario NOTA Los accesorios están sujetos a modificaciones sin previo aviso. DS1092-151 38 1.3 ADVERTENCIAS 1.3.1 CONSUMO Utilice únicamente el alimentador suministrado con el equipo. Compruebe la tensión eléctrica AC antes de conectar el alimentador. Para desconectar el cable de alimentación del dispositivo, no tire del cable sino del conector. 1.3.2 1.3.3 PRECAUCIONES DE SEGURIDAD Para evitar cualquier riesgo de incendio y descargas eléctricas, no exponga el dispositivo a la lluvia o a la humedad. No introduzca dentro ningún material sólido o líquido. Si esto se produjera de manera accidental, desconecte el equipo de la red eléctrica y haga que lo inspeccione personal cualificado. No intente en ningún caso abrir el dispositivo o repararlo por su cuenta. En caso de avería, póngase en contacto con personal cualificado o con el servicio de asistencia técnica. Mantenga el equipo alejado de los niños, para evitar daños accidentales. No opere el equipo con las manos húmedas, para evitar descargas eléctricas o daños mecánicos. No utilice el equipo si se ha caído o si la carcasa externa está dañada, ya que podría producirse una descarga eléctrica. En este caso, contacte con el distribuidor o instalador autorizado. Si no va a utilizar el monitor durante un periodo prolongado, se recomienda desconectar el cable de alimentación. PRECAUCIONES DE INSTALACIÓN Para que el equipo no se sobrecaliente, colóquelo de tal forma que no se obstruya el paso de aire a través de las ranuras de la carcasa. Si el equipo se instala en un rack, asegúrese de dejar un espacio libre de al menos 5 cm. Asimismo, no lo instale junto a fuentes de calor, como radiadores o conductos de aire caliente, ni lo exponga a la luz solar directa. No instale el dispositivo en zonas con mucho polvo, o sometidas a vibraciones mecánicas o choques. No coloque el dispositivo sobre una superficie inestable, como una mesa tambaleante o inclinada, ya que podría caerse y causar lesiones o fallos mecánicos. No instale el dispositivo en un lugar expuesto a la humedad o al agua. No dirija un chorro de agua directamente sobre el dispositivo ya que podría producirse un incendio, una descarga eléctrica o un fallo mecánico. Si entra agua o cualquier otro material extraño dentro del dispositivo, desconéctelo inmediatamente a fin de evitar cualquier riesgo de incendio o descarga eléctrica. En este caso, contacte con el distribuidor o instalador autorizado. Las ranuras y aberturas del monitor sirven para la ventilación y no deben quedar obstruidas o cubiertas. No coloque objetos pesados o que generen calor sobre el equipo, ya que podrían dañar la carcasa o aumentar la temperatura interna, causando un mal funcionamiento. No cubra el equipo con una tela mientras esté funcionando para evitar deformar la carcasa y sobrecalentar las piezas internas, con el consiguiente riesgo de incendio, descarga eléctrica o fallo mecánico. No deje imanes u objetos magnéticos cerca del equipo ya que podrían causar fallos. No utilice este equipo en presencia de humo, vapor, humedad, polvo o vibraciones intensas. No ponga en funcionamiento el dispositivo inmediatamente después de transportarlo de un lugar frío a otro caliente o viceversa. Espere unas tres horas para que el dispositivo se adapte al nuevo ambiente (temperatura, humedad, etc.). El monitor está equipado con una base de plástico con patas de goma y se puede colocar sobre una superficie horizontal, como una mesa o escritorio. Asegúrese de que el equipo está firmemente colocado sobre una superficie estable, ya que podría caer y causar lesiones graves a las personas y al propio equipo. Recuerde que debe ajustar el brillo y el contraste para obtener una imagen óptima. El monitor también se puede instalar en una pared mediante un soporte de montaje (no incluido en el embalaje). 1.3.4 LIMPIEZA DEL DISPOSITIVO Frote delicadamente el dispositivo con un paño seco para quitar el polvo y la suciedad. Si la suciedad no desaparece con el paño seco, utilice un paño humedecido en detergente neutro. No utilice líquidos volátiles (como gasolina, alcohol, disolventes, etc.) ni paños tratados químicamente en la limpieza del equipo para evitar la deformación, deterioro o arañazos en su superficie. 1.3.5 PRIVACIDAD Y COPYRIGHT El monitor LCD 1092/427 es un dispositivo para sistemas CCTV. La grabación de imágenes está sujeta a la legislación vigente en cada país. No se permite grabar imágenes que estén protegidas por derechos de autor. Los usuarios del producto son responsables de conocer y cumplir todas las normas y reglamentos locales relativos a la vigilancia y grabación de señales de vídeo. El fabricante no se hace responsable del uso de este producto no conforme con la legislación vigente. DS1092-151 39 2 CONTROLES Y AJUSTES 7 6 5 4 3 2 1 14 DS1092-151 40 13 12 11 10 9 8 3 USO DEL MANDO A DISTANCIA El monitor 1092/427 se suministra con un mando a distancia. Las posibles funciones son las siguientes: Encender y apagar el monitor (botón ROJO). Activar/desactivar el menú en pantalla u OSD (botón MENU). Subir o bajar el volumen. Desplazarse por el menú OSD, si está activo (botones de FLECHA). Seleccionar una entrada de vídeo: AV1, AV2, HDMI, VGA (botón INPUT). Mostrar la temperatura interna del monitor en °C (botón °C). Seleccionar rápidamente la entrada VGA (botón VGA). Seleccionar rápidamente la entrada HDMI (botón HDMI). Seleccionar rápidamente la entrada AV (botón AV). Seleccionar el modo de imagen entre los varios existentes para el menú OSD (botón PICTURE). El botón FREEZE no está operativo. El botón YPBPR no está operativo. El botón S-VIDEO no está operativo. El botón DVI no está operativo. Sustitución de bateria DS1092-151 41 3.2 CONTROLES DIRECTOS CONECTOR DE ALIMENTACIÓN (DC) [14] Conecte el cable de alimentación al alimentador suministrado en la toma DC correspondiente. BOTÓN DE APAGADO/ENCENDIDO [7] Se utiliza para encender o apagar el monitor. El LED se ilumina de color azul cuando el monitor está encendido; se ilumina de color rojo cuando está en modo En espera. NOTA Si en el monitor aparece el siguiente mensaje después de pulsar el botón (1): SIN SEÑAL Significa que no se ha conectado una señal de vídeo a la entrada. BOTONES DE SELECCIÓN [2-3] Permiten seleccionar las opciones dentro del menú OSD. BOTONES DE VOLUMEN [4-5] Y DE CONFIRMACIÓN [4] Permiten cambiar el volumen. Pulse el botón [5] para aumentar el volumen y el botón [4] para disminuirlo. El botón [4] confirma la selección. BOTÓN DE MENÚ [6] Y DE CONFIRMACIÓN Se utiliza para entrar y salir del menú OSD (On-Screen Display) en pantalla y para confirmar la selección. BOTÓN DE SELECCIÓN DE LA ENTRADA DE VÍDEO [7] Para seleccionar la entrada (“PC”, “HDMI”, “AV1” o “AV2”), pulse el botón (7) y seleccione la opción deseada con los botones “ABAJO” y “ARRIBA” ([2] y [3]). Pulse el botón [4] para confirmar. ENTRADA HDMI [13] Permite conectar una señal HDMI con audio de una fuente externa con salida HDMI. ENTRADA DE LA SEÑAL DE PC (VGA) [12] Entrada de la señal de vídeo del PC. ENTRADA/SALIDA DE AUDIO (JACK) [8] Conectores jack para la entrada/salida de audio. ENTRADAS DE VÍDEO AV1 Y AV2 [10] [11] Permiten conectar señales de vídeo de fuentes externas. SALIDA DE VÍDEO AV [9] Esta salida BNC permite enviar las salidas de vídeo AV1/AV2 ([10] [11]) a otra entrada de vídeo de otro monitor o de un DVR. DS1092-151 42 3.3 CONTROLES CON EL MENÚ OSD Pulse el botón MENU [6] para entrar al menú y acceder a los menús y submenús. Uso de los botones Selección de la entrada de vídeo Para ver las entradas de vídeo disponibles, pulse el botón [7]. Para desplazarse por las opciones, use los botones [2] y [3]. Para confirmar la selección, pulse el botón [4]. Selección de los menús Para mostrar el menú principal, pulse el botón [6]. Para seleccionar los menús de la barra horizontal, pulse los botones [4] y [5]. Para seleccionar la opción de menú, pulse el botón [2]. Para cambiar el valor de la opción seleccionada, pulse los botones [4] y [5]. Para confirmar la selección, pulse el botón [6]. Para salir del menú o de un submenú, pulse el botón [6]. Ajuste del volumen Para cambiar el volumen sin entrar al menú OSD, use los botones [4] y [5]. 3.3.1 IMAGEN Seleccione el icono : aparecerá la siguiente pantalla (depende del tipo de señal). AV/HDMI VGA CONTRASTE Permite cambiar el contraste entre las áreas blancas y negras de la imagen. Con un buen ajuste del contraste, se conseguirá una buena resolución entre blancos y negros, con una buena escala de grises. Pulse los botones [4] y [5] para cambiar el valor de este parámetro. BRILLO Permite cambiar el brillo, en función de las condiciones ambientales de luz. Pulse los botones [4] y [5] para cambiar el valor de este parámetro. DS1092-151 43 TONO Sólo se emplea con el sistema NTSC. COLOR Permite cambiar los colores de la imagen. Pulse los botones [4] y [5] para cambiar el valor de este parámetro. NITIDEZ Permite optimizar la nitidez de la imagen, en función de las condiciones ambientales de luz. Pulse los botones [4] y [5] para cambiar el valor de este parámetro. TEMP. COLOR Permite seleccionar la configuración de color entre los siguientes valores: CÁLIDO / FRÍO / NORMAL. Pulse los botones [4] y [5] para cambiar el valor de este parámetro. ESCALAR Permite cambiar el formato de vídeo de la imagen entre los siguientes valores: COMPLETA / 4:3 / ZOOM2 / ZOOM1. Pulse los botones [4] y [5] para cambiar el valor de este parámetro. MODO IMAGEN Permite seleccionar la configuración de imagen entre los siguientes valores: USUARIO / CONTRASTADO / SUAVE / ESTÁNDAR. Pulse los botones [4] y [5] para cambiar el valor de este parámetro. 3.3.2 AUDIO Seleccione el icono : aparecerá la siguiente pantalla. BAJOS Permite ajustar el nivel de graves del sonido. Pulse los botones [4] y [5] para cambiar el valor de este parámetro. AGUDOS Permite ajustar el nivel de agudos del sonido. Pulse los botones [4] y [5] para cambiar el valor de este parámetro. BALANCE Permite balancear el sonido de 2 altavoces. Pulse los botones [4] y [5] para cambiar el valor de este parámetro. MODO AUDIO Permite seleccionar la configuración de sonido entre los siguientes valores: USUARIO / MÚSICA / PELÍCULA / ESTÁNDAR. Pulse los botones [4] y [5] para cambiar el valor de este parámetro. ECUALIZADOR Permite optimizar el efecto de sonido. Seleccione esta opción para acceder al menú que le permitirá ajustar las frecuencias de audio. Pulse los botones [4] y [5] para cambiar el valor de este parámetro. AUTO VOLUMEN Permite ajustar automáticamente el volumen de audio para evitar picos molestos de volumen. Pulse los botones [4] y [5] para cambiar el valor de este parámetro. EFECTO SONIDO Permite seleccionar el efecto de sonido entre los siguientes valores: SRS / MSTAR / NINGUNO (Surround / ecualización M-Star / Ninguno). Pulse los botones [4] y [5] para cambiar el valor de este parámetro. Con la opción SRS podrá establecer el efecto surround deseado. DS1092-151 44 3.3.3 OSD Seleccione el icono : aparecerá la siguiente pantalla. TEMPORIZADOR Permite establecer el tiempo de apagado automático. Las opciones son: OFF / 15M / 30M / 45M / 60M. Pulse los botones [4] y [5] para cambiar el valor de este parámetro. IDIOMA Permite seleccionar el idioma entre: inglés, alemán, francés, español, italiano. Pulse los botones [4] y [5] para cambiar el valor de este parámetro. POSICIÓN - H Permite cambiar la posición horizontal de la imagen. Pulse los botones [4] y [5] para desplazar la imagen horizontalmente. POSICIÓN - V Permite cambiar la posición vertical de la imagen. Pulse los botones [4] y [5] para desplazar la imagen verticalmente. DURACIÓN Permite establecer el tiempo que permanece el menú OSD activo en la pantalla. Pulse los botones [4] y [5] para cambiar el valor de este parámetro. TRANSPARENCIA Permite establecer el nivel de transparencia del menú OSD. Pulse los botones [4] y [5] para cambiar el valor de este parámetro. PANTALLA AZUL Permite establecer el color de fondo cuando no hay señal de vídeo. Pulse los botones [4] y [5] para cambiar el valor de este parámetro. EFECTO ESPEJO Permite poner la imagen invertida en espejo. Pulse los botones [4] y [5] para cambiar el valor de este parámetro. NOTA Cuando la imagen está en espejo, el menú OSD también lo estará. RESTAURAR Permite cargar la configuración original de fábrica. Se borrarán todos los ajustes de usuario. DS1092-151 45 3.3.4 FUNCIONES Seleccione el icono : aparecerá la siguiente pantalla. AV/HDMI VGA REDUCCIÓN DE RUIDO Permite activar/desactivar el filtro de ruido, con 3 valores posibles: ALTO / BAJO / MEDIO Pulse los botones [4] y [5] para cambiar el valor de este parámetro. REDUCCIÓN MPEG Permite activar/desactivar el filtro de reducción de ruido MPEG, con 2 valores posibles: ALTO / BAJO. Pulse los botones [4] y [5] para cambiar el valor de este parámetro. DLC Permite ajustar automáticamente el brillo de la imagen. Pulse los botones [4] y [5] para cambiar el valor de este parámetro. TEMP. ALARMA No operativo. MODE SOURCE No operativo. DS1092-151 46 4 CALIDAD DEL MONITOR LCD Y PÍXELES El monitor TFT utiliza una tecnología de alta precisión, fabricada de acuerdo con los estándares de Urmet, que garantiza un funcionamiento correcto. Sin embargo, la pantalla puede presentar pequeñas imperfecciones en forma de pequeños puntos oscuros o brillantes. Son defectos muy comunes relacionados con la naturaleza específica de la tecnología TFT, que determina la posible presencia de discontinuidades en la pantalla, y que en ningún caso son específicos de los productos de Urmet. Estas imperfecciones son causadas por algún píxel o subpíxel defectuoso. Un píxel es una combinación de un subpíxel rojo, uno verde y uno azul. Un píxel completo defectuoso estará permanentemente encendido (un punto brillante sobre un fondo oscuro) o permanentemente apagado (un punto oscuro sobre un fondo brillante). El primer caso es el más perceptible. Un subpíxel defectuoso es menos visible que un píxel completo defectuoso y es visible solo sobre un fondo específico. Urmet garantiza que los monitores LCD cumplen los estándares de calidad vigentes y, por lo tanto, no presentan más de: 1 punto brillante. 1 punto oscuro. 2 puntos brillantes y oscuros en total. No más de dos píxeles defectuosos adyacentes (menos de 2,5 mm de separación). Urmet espera que la calidad de las pantallas de cristal líquido mejoren con el tiempo y se reduzca el número de defectos perceptibles. Con la presente comunicación, se informa al cliente de Urmet acerca del estándar de calidad de la pantalla LCD con el fin de prestar un servicio lo más transparente posible. 5 ESPECIFICACIONES DEL PRODUCTO Pantalla LCD: ................................................................................................................................................. 21" TFT (16:9) Tiempo de respuesta: ....................................................................................................................................................3 ms Resolución: ........................................................................................................................................................1920 x 1080 Colores: ............................................................................................................................................................ 16,7 millones Contraste:..................................................................................................................................................................... 700:1 Brillo: ..................................................................................................................................................................... 300 cd/m2 Ángulo de visión: ........................................................................................................................................... 170° horizontal ...........................................................................................................................................................................160° vertical Entradas de audio: .......................................................................................................................................................... jack Entradas de vídeo compuesto:............................................................. 2 señales de vídeo compuesto: 1,0 Vpp 75 , BNC Salidas de vídeo compuesto en bucle: ........................................................................................................................ 2 BNC Entrada HDMI: ............................................................................................................................................................. HDMI Alimentador de tensión: ........................................................................................ Entrada AC: 100/240 VAC, 4A, 50/60 Hz ....................................................................................................................................................... Salida DC: 12 V y 4,16 A Temperatura de funcionamiento: .................................................................................................................... 0 °C a +40 °C Temperatura de almacenamiento: ................................................................................................................. -25°C a +60°C Controles del panel frontal: ............................................... Botones de Encender/Apagar, Volumen, Menú OSD, Selección Controles OSD: ................................................................................................................ Ajustes de imagen; ajustes varios Humedad:............................................................................................................................... 10% a 90% sin condensación Dimensiones (Al. x An. x Pr.): ............................................................................................................... 382 x 540 x 136 mm Peso neto: ....................................................................................................................................................................5,9 kg Salidas de audio: ..................................................................................................................................... 2 altavoces de 3 W Alimentación eléctrica: .............................................................................................................................................. 12 VDC Consumo máx.: ............................................................................................................................................................. 35 W Nota: Las especificaciones del producto pueden sufrir variaciones sin previo aviso. DS1092-151 47 Prodotto in Cina su specifica URMET Made in China to URMET specifications DS1092-151 Area Tecnica Servizio Clienti 011.23.39.810 http://www.urmetdomus.com e-mail: [email protected] URMET DOMUS S.p.A. 10154 TORINO (ITALY) VIA BOLOGNA 188/C Telef. 011.24.00.000 (RIC.AUT.) Fax 011.24.00.300 - 323 DS1092-151 48


