1
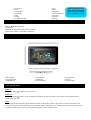
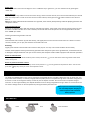
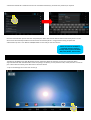
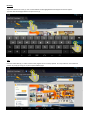
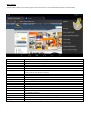
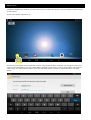
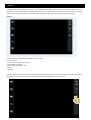
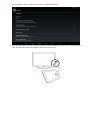
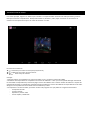
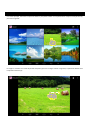
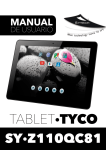
Use of the Manual
To ensure proper use of the tablet, read this user manual carefully before first use.
These instructions are based on the factory settings of the device.
It may be possible that some of the images and screenshots in this manual do not match the final product.
It is possible that the contents in this user manual do not match the final performance of the unit due to firmware upgrades.
Please visit www.sytech.es for the latest version of the user manual and firmware upgrades.
WELCOME
Sytech thanks you for buying the ZEUS SY‐Z110QC8 10.1” multi touch screen display tablet which has been specially designed
to fulfil your needs and allow you to experience the new portable entertainment generation with just a few touches! Thanks
to the Android operating system you can gain access to the internet, check your e‐mail or even watch or listen to multimedia
content anywhere at anytime. Furthermore, download and enjoy one of the thousands of applications and games available to
get the most out of your ZEUS SY‐Z110QC8.C
CARE AND MAINTENANCE
ARE AND MAINTENANCE
-
-
Do not expose your tablet to direct sunlight, humidity, high temperatures, dirt or anything that can cause its malfunction.
Do not use abrasive liquids or cleaners to clean the unit.
Always maintain the device free from dust using a soft and dry cloth.
When the battery level is low, please charge the unit avoiding it to discharge completely.
Do not service the unit by yourself, please contact Sytech Service Centre for any assistance.
NOTE: Sytech recommends
the use of a screen protector
in order to maintain the
tablet in perfect conditions.
MAIN FEATURES
‐
-
Portable Internet Tablet designed for Android 4.2
Multi‐touch 5 point capacitive screen
10.1” 16:9 TFT‐LCD (1024x600 pixels)
Allwinner A31S, Arm Cortex A7, 1.2Ghz ‐ Qual Core / GPU: SGX544MP2
1GB DDR3 RAM
Integrated Wi‐Fi ‐ Supports Wi‐Fi USB 3G modem
Integrated Bluetooth function. Ver 2.1 + EDR
Front and Rear camera – 0.3 and 2MegaPixels respectively
Integrated Omni‐directional microphone
Integrated speaker
Motion Sensor (accelerometer)
USB‐OTG – easy access to the memory of the tablet through the computer (cable included)
8GB built in memory
HDMI output version 1.4 – 2160P HD
Memory expandable via Micro SD‐HC/XC cards (up to 32GB)
3.5mm earphone jack connector
Charger: 5V, 2A
6000 mAh: up to 480 hours in standby mode and 5 hours in video/audio mode
Weight: ~556g
Dimensions: 260.8 x 163.5 x 10.5 mm
Allows to install thousands of Applications and games available for Android operating system.
Applications installed:
o Adobe reader
o Calendar
o Aldiko
o Camera
o Browser
o Chrome
o Calculator
o Clock
o
o
o
o
o
o
o
Documents
Email
File manager
Flash player
Gmail
Google
Hi‐Q MP3 recorder
o
o
o
o
o
o
o
Local
Maps
Navigation
News and weather
Play music
Play store
Settings
NOTE: Some applications
may not work on the ZEUS
tablet as they are specially
created for Mobile phones
PACKAGE CONTENTS
ONTENTS OF PACKAGE
ZEUS SY‐Z110QC8 Tablet 8GB
User Manual
USB OTG 2.0 High speed Cable for PC connection
AC/DC power adaptor – 100‐240V AC 50‐60Hz
PARTS OF THE ZEUS TABLET
1 2
1. Microphone
4. Earphones jack
7. USB/OTB slot
3
4
5
6
7
2. Reset button
5. HDMI plug
8. Volume button
8
9
3. Micro SD slot
6. DC jack
9. Power button
BASIC OPERATIONS
Power on
Press and hold the " " button to turn on the unit.
Power off
Press and hold the " " button. A pop‐up dialogue box appears on the screen with various options, select “Power off” for
shutting down the unit.
Sleep
Shortly press the power button and the device will switch to hibernation mode. In this mode, only the screen will turn off
however the unit is still working. Shortly press the power button once again to return back to the normal working mode. Use
this feature mainly when you are not using the unit regularly and to save battery life.
Power reset
If for any unknown reason the unit begins to act in a different way or get frozen, you can reset the unit by pressing the
“reset” key.
Screen time out
If you do not press any button or touch the screen during a certain amount of time, the screen will automatically turn off and
enter into sleep mode. In order to resume normal use of the device, shortly press the " " button and the screen will turn
back on.
Note: If you want to deactivate the automatic turn off mode, enter into the [SLEEP] settings under the [display] functions and
change it to “Never”
Using the Micro SD card
When you connect the device with the computer, two disks will appear. The first disk is the internal memory of the unit and
the other is the Micro SD disk. If no card is inserted, the second disk cannot be opened. This unit supports Micro SD cards
from 128MB up to 32GB.
Inserting and Removing the Micro SD card
Inserting:
Insert the Micro SD card face up (side with words), and slightly force the card into the socket of the card. Once it has been
correctly inserted, you can play the content from the Micro SD card.
Removing:
Slightly push towards inside the Micro SD card and it will pop out. You may now remove the Micro SD card safely.
Caution: Please perform inserting and removing operation when the power of the unit is off! Otherwise, it will lead to the loss
or damage to the files within the unit! If no card is inserted, the computer will be unable to perform read and write operations.
Return to main interface
When using the device, or while inside any menu screen, touch the "
screen at any time.
Return to previous interface or menu
When using the device or while inside any menu screen press the "
press the " " key very shortly to return to the previous menu.
" icon on the touch screen to go back to the home
" icon to go back to the previous menu. You can also
BATTERY AND POWER MANAGEMENT
The ZEUS SY‐Z110QC8 tablet comes with an integrated rechargeable lithium ion battery. Before the first use of the unit, you
may notice that the battery is relatively charged, however please perform a complete charge of the unit before using for the
first time. In order to recharge the battery use the AC / DC 5V adaptor included. The usual time for a complete charge is
around 3 – 4 hours approximately, this depends whether the unit is being charged while using or while it is turned off. There
are certain settings which can be manipulated to prolong the battery life of the unit.
NOTE: Sytech recommends turning off
the unit always before charging in
order to improve and extend the
battery lifetime.
GESTURES KEY
Press
Flick
Press and Hold
MAIN SCREEN
1.
2.
3.
4.
5.
6.
Volume down
Applications/Widgets on desktop
Screen shot
Home
Return
Volume up
7.
8.
9.
10.
11.
Battery level
Time
Google search
Voice search
Applications / Widget menu
Changing the wallpaper
Press and hold anywhere on the desktop screen and a pop up message will appear asking you to choose the wallpaper.
Choose the desired wallpaper and confirm to establish it as the background of the desktop.
Applications and widgets on desktop
Flick the screen right or left to see which applications and widgets have been installed and placed on the desktop. For
all the applications and widgets which are on the ZEUS, please access the applications and widgets menu (11).
Tabs
Press the button (2) to see which programs or tasks are currently running on the device. You may switch from one
program to another through this option or you may choose to close the program as well.
GENERAL SETTINGS
Set your ZEUS tablets parameters to fit your needs. Enter into the settings menu and a list of options will appear.
Wireless & Networks
Wi‐Fi
Bluetooth
Data Usage
More
Turn the Wi‐Fi on or off
Turn on the Bluetooth and serach available devices for pairing.
Press this option to see the data usage of your ZEUS tablet
Press this option to see more options under the Wireless and Networks settings.
Device
Sound
Display
Storage
Battery
Apps
Configure the volume levels and sound options
Configure the different display settings (brightness, wallpaper, sleep, HDMI settings, etc…)
Check the amount of space which is available on your ZEUS tablet.
Check to see which application is using the most battery and check the current battery level
Check to see which applications have been downloaded, where they are stored, and which ones
are currently running.
Personal
Location Services
Security
Language & Input
Backup & Reset
Manage your location settings.
Manage your security information through this option. (Passwords, user information etc…)
Set the device language and keyboard language through this option.
Backup the data on your ZEUS tablet or perform a reset of the unit.
Accounts
Add Account
Manage your accounts through this section. You may add a new account if you do not have one
already.
System
Date & Time
Accessibility
Developer Options
About Tablet
Set the date and the time, manage the time zones, and select the formats for the time and date
to be displayed.
Manage the system settings through this option.
Configure different options for the device when connected to a PC; configure User Interface, and
configure Apps settings.
Verify all the settings and hardware information of your ZEUS tablet through this option.
WIDGETS
Widgets are applications, which allow easy access to some applications. In fact, it is more than a shortcut to an application
as when you place them on your home screen like icons, they can show you the time, current weather or even your e‐mail
inbox without launching the application. To add widgets onto the desktop follow the steps below:
1. Press the Applications and Widgets button as shown below (1)
2. Press on the “Widgets” tab (1) which is situated in the middle of the screen
3. Flick (2) through the widgets installed
4. Press and hold on the desired widget. (3)
5. After a few seconds the desktop screen will appear (Continue pressing the icon at this point)
6. Drop and place the icon in the desired position on the desktop. The icon will now appear on your desktop as shown
below.
Once the widget is on the desktop, you can move it around or delete it. To do this you must press and hold on the widget
until it is highlighted. You may then move it around, or delete it by dragging it to the “X” icon which appears on screen.
SETTING UP THE WIFI NETWORK
1. Tap on the Settings icon on the main screen (1)
2. Under the “wireless and networks” section, flick the Wi‐Fi switch to “ON” (1)
3. Select the desired Wi‐Fi network from the list of available networks (1) and enter the password, if required
Once the authentication process has been completed; the device will save the data so that the next time you turn on the
device it will automatically establish connection with the network (when in range) without having to repeat the
authentication process. Your ZEUS SY‐Z110QC8 tablet is now ready to surf the internet!
NOTE: The ZEUS SY-Z110QC8 is
compatible with the following
security and encryption standards:
WEP, WPA, WPA2, TKIP and AES.
SETTING UP THE BLUETOOTH FUNCTION
The ZEUS SY‐Z110QC8 comes with Bluetooth function integrated. With this function you may pair any device which
supports Bluetooth with the ZEUS tablet. Once the pairing is complete, you may transfer music, videos, files etc. In order to
pair a device with the tablet, please follow the instructions below.
1. Tap on the Settings icon on the main screen (1)
2. Under the “wireless and networks” section, flick the Bluetooth switch to “ON” (1)
3. Select the desired Bluetooth device from the list of available devices (1). Press “Pair” (2) to establish the connection.
Some devices may require you to enter a password, please enter the password which is shown when requesting to pair the
ZEUS tablet to the device.
Once the pairing process has been completed; the device will save the data so that the next time you turn on the device it
will automatically establish connection with the device (when in range) without having to repeat the pairing process. Your
ZEUS SY‐Z110QC8 tablet is now ready to send and receive data through Bluetooth!
NOTE: The ZEUS SY-Z110QC8 can share
and receive files with devices that
support the A2DP function. Devices
which do not support this feature will be
unable to connect with the ZEUS.
INTERNET BROWSER
Your device comes with a powerful Web Browser which has already been pre‐installed. The browser will allow you to surf
the internet quickly and easily. When the device is connected to a Wi‐Fi network, tap on the browser application icon (1)
from the desktop or from the applications menu to begin using the internet. The default homepage will be displayed on
screen; however, it is possible to modify the homepage and other parameters through the settings.
Homepage
Browsing
Tap on the address bar once (1). The current address will be highlighted and the keypad screen will appear.
Type the desired webpage address and press enter (2).
Tabs
Press the tabs button (1) in order to view all the pages that are currently opened. You may shift from one website to
another by simply pressing on any of the opened Web pages.
Menu Options
Press the Menu Button (1) on the top right corner of the screen to access the different options as shown below.
Refresh
Press this button to reload the page
Forward
Press this button to move a page forward in your browser
New Tab
Press this button to open a new tab
New Incognito Tab
Press this button to open a new tab which will not be saved in the browser history, search
history and will not create any cookies.
Share Page
Share the page you are browsing with someone through social media or e‐mail.
Find on Page
Find a particular word or section within a page.
Request Desktop Size
Fit the page to the screen size.
Save for Offline Reading
Press this button in order to save the page and have later access to it even though there is
no internet connection.
Page Info
Shows the information of the webpage that is being viewed
Settings
Press this button to change browser settings.
EMAIL SETUP
The ZEUS SY‐110QC8 is also made to send and receive e‐mails. In order to set up your e‐mail on the device, follow the steps
as shown below.
1) Click on the “E‐Mail” application (1)
2) Insert your email address and the password. Once the setup process has been completed, you will begin to receive your
e‐mails on your ZEUS tablet. If you have a POP3, IMAP or Exchange e‐mail account, enter the email address and password
and then press the “Manual Setup” button. Follow the steps which appear on screen to proceed with the e‐mail setup
process.
Mail Box Features
1. Number of e‐mails received
2. Compose new e‐mail
3. Search
4. Refresh / Check for new e‐mails
5. E‐mail settings
6. Email address which is linked to tablet
7. Received mail (New)
8. Email Folders
9. Received mail (Read)
VIDEO PLAYER
In the main menu, click on "Gallery" to access the video folder. Select the video which you desire and press PLAY to
commence playback. You will be able to rewind, fast forward and increase/decrease the volume. Below is a preview of
what you will see before starting a video.
Function of keys
" ": Press it to come back to the main interface
" ": Press it to return to the upper interface
“ / ”: Press this to increase or decrease the volume
Tips:
1. This player supports maximum 2160p resolution video files.
2. Subtitle display: This player supports "*.SRT" subtitle files (The user can download it from the appropriate websites).
When there is any subtitle file with the same name in the video playing folder, the player will be automatically playback the
corresponding subtitle file with the video. A synchronous playback will be achieved between the lyrics and video.
3. When playing back the video file, a progress bar appears where you can see the following information:
‐
Time elapsed
‐
Time remaining
‐
Play/Pause video
‐
Fast forward/Rewind video
AUDIO PLAYER
In the main menu, select the option of "Music" to access the music folder. The following screen will appear:
Function of keys
: Return to main interface
: Return to upper interface
Slide the screen up/down to be able to see all the files
Artist: Music files sorted according to the artist
Album: music files sorted according to albums
Songs: Displays all the music files which are saved on the device
Playlist: Displays which songs are currently on the playlist
Now playing: Shows which song is currently playing
When playing a music file, the following screen will appear
Function of keys
: Return to main menu
: Return to previous menu
/ : Press and hold to rewind/Fast Forward – Press shortly to go to the next track or previous track accordingly.
: Play or Pause the music playback.
: Click to view the playlist
: Press to select random play mode
key: Press to select a repeat mode
Lyric Display
This player supports "*.LRC" lyric files (The user can download it from the appropriate website). When the lyrics file is
named the same way as the music file, the lyrics will automatically be displayed and achieve a synchronous playback
between the lyrics and music.
PICTURE GALLERY
In the main menu, select the option of "Gallery" to be able to access Photo folder. Tap on any picture (1) to view it in large.
The image will be shown in full screen mode and. To view the next or previous image simply flick through the images (2)
Function of keys
: Pictures management ‐ Select items or group them by location, time, people or tags (in thumbnails interface) – start
Slideshow, Edit, Rotate left, Rotate right, Crop, Details, Set picture as and get picture details (in full screen interface).
: Share the picture through social media or email.
: Delete picture
CAMERA
The ZEUS tablet has two integrated cameras – Front 0.3MP and Rear 2MP ‐ which allow you to take pictures on the go and
allows you to use the applications created for video chat. All the images taken with the camera will be saved in your picture
folders. You may access these pictures by exiting the camera application and then going into the picture gallery.
Camera
1. Switch between Video Recorder Mode or camera mode
2. Take a picture
3. Front camera / Rear Camera switch
4. Continuous snap mode
5. Snap mode‐ Panoramic mode
6. Share
7. Settings
Press the shutter (2) to take a picture. Once the picture has been taken, you may view it by clicking on the thumbnail which
will appear on the top right, and options to Share via Email or Social Media will come into view.
Video Recorder
When you press on the Video Camera icon, the following screen will appear and the dot on the right will turn red. Press the
Record button (1) and the device will begin recording. The Time elapsed will be shown on the top left corner.
CONNECTING THE TABLET TO A PC
CONNECTING THE TABLET TO A PC
To connect the tablet to the PC, make sure the USB cable is connected to the PC ad then onto the tablet. When connecting
it to the tablet, the following screen will automatically appear: Press the “Turn on USB storage” (1) button and the device is
now connected to the PC. At this point, some applications which you are using will be unavailable until the device has been
disconnected from the PC.
To disconnect the device from the PC, press the “Turn off USB storage” button at the bottom of the screen (2)
CONNECTING TO THE TV
The ZEUS SY‐Z110QC8 can be connected to your TV set. In order to achieve this you will need an A‐C type HDMI cable (Mini
HDMI to Normal HDMI).
1.
Tap on the Settings icon on the main screen (1)
2.
Press the setting ‐ Display ‐ HDMI full screen mode and HDMI output mode
3.
Once the “Auto Switch” has been enabled, proceed to connect the HDMI cable to the Tablet. Once this has been
done, the tablet will automatically establish connection with the TV set.
TROUBLESHOOT
Below are a few problems that you may encounter during the use of your ZEUS SY‐Z110QC8 tablet. Please read the
following guide carefully. However if a major problem has been encountered with the device, please contact Sytech Service
Centre for further assistance.
The device does not turn on
Make sure that the battery has some charge which is sufficient for the device to turn on. If after having the device fully
charged the problem still persists, please contact Sytech Service Centre for further assistance.
Some MP3 files do not work on the ZEUS SY-Z110QC8.
The MP3 file must respect the layer 3 rules of MPEG1, MPEG2 and MPEG 2.5. Alternatively the file must be converted using
special software.
Some WMA files do not work on the ZEUS SY-Z110QC8.
Some WMA files may be protected with DRM rights which do not permit the file to be played on the device.
Some Music, Video and Image formats do not work on the device.
Your ZEUS SY‐Z110QC8 supports many different types of formats. However the ability to playback different formats also
depends on the application being used. If for some reason one format cannot be played, please search for another
application which is able to support the format required.
Some Apps do not work on the device after downloading and installing.
Due to the different configurations of all the hardware’s available, not all the applications will work in all the tablets. If an
App doesn’t work on your tablet, please contact the application developer for further information.
I connect the tablet to the PC but the PC does not recognize it.
You have to disable the USB debug mode from your settings menu. The PC will then be able to detect the hardware
connected to it. On the tablet you will see a screen asking if you want to turn on usb storage mode.
I upgraded the firmware and I want to retrieve my data back on the tablet.
Sytech recommends the end user to perform a complete backup of the tablet before upgrading the firmware. If the backup
has not been done and the firmware upgrade has taken place, it is not possible to retrieve all the data lost.
Is it possible to use 3G modems on SYTECH TABLETS?
Depending on each tablet, you may or may not use any USB 3G modems. For the tablets that have a USB HOST port, you
may use any USB 3G modem with Wi‐Fi access.
Make sure your Wi-Fi is working well.
If the Wi‐Fi doesn’t connect for any reason to the available network, and other devices, such as your personal laptop, cell
phone etc it does connect; try changing around the security and encryption standards ‐ WEP, WPA, WPA2, TKIP, and AES.
One other possible problem could be the channels of the router. Change them around and configure it in different ways,
however if it still does not work, you maybe having IP conflicts or experiencing a weak internet signal. Please contact your
internet provider for further assistance.
You will be unable to download applications or use some applications properly without a proper internet connection.
Please always make sure that the Wi‐Fi is working properly.
My ZEUS SY-Z110QC8 battery charge level runs out very quickly / Works very slowly from the first time I got it
In order to preserve the battery charge for the longest time possible, always make sure that not too many applications are
running in the background. However you may end these applications using the Task Killer application which has been pre‐
installed. E‐mail also uses up a large portion of the battery level. It is recommended to change e‐mail settings so that it
checks for mail once every hour instead of once every 10 minutes. When the internet is not needed, it is recommended to
turn off the Wi‐Fi so that the battery charge can last longer. The same applies with the brightness, set it to a medium/low
level to conserve the battery charge. Having it on 100% bright mode means that the battery charge will drain out quickly.
All the above will also help your tablet to process tasks and applications quicker, therefore avoiding it to work slowly.
My ZEUS SY-Z110QC8 froze
In order to unfreeze the device you may perform a soft reset. With the aid of a thin sharp object, insert it into the pinhole
button on the back of the unit to restart it. The unit will then shut down first and restart after a few minutes.
DECLARATION OF CONFORMITY
Manufacturer Name: Satyatrade S. L.
Address: Pol.Ind.La Raya. C/ Guadalquivir, 2.
Camarma de Esteruelas, 28816 Madrid
Tel: 902 430 967
Fax: 91 8864285
NIF: B83254763
Manufacturing country: China
Sytech® SY‐Z110QC8‐ZEUS
Description: Tablet
The following product complies with the Following directives:
CE Standard: 2004/95/EC
ROHS standard: 2002/95/EC Restriction of Hazardous Substance
Signed: Ajeet Nebhwani Utamchandani
Sole Administrator
Uso del manual
Para garantizar el uso apropiado de la tableta, lea este manual de uso cuidadosamente antes de utilizarla.
Estas instrucciones se basan en la configuración de fábrica del dispositivo.
Es posible que algunas de las imágenes y pantallas de este manual no coincidan con el producto final.
Es posible que el contenido de este manual no coincida con el funcionamiento final de la unidad debido a actualizaciones del firmware.
Por favor, visite www.sytech.es para obtener la última versión del manual y actualizaciones del firmware.
BIENVENIDO
Sytech le agradece que haya comprado la tableta ZEUS SY‐Z110QC8 con pantalla multitáctil de 10,1" que ha sido
especialmente diseñada para cumplir sus necesidades y permitirle experimentar la nueva generación de entretenimiento
portátil ¡con sólo unos toques! Gracias al sistema operativo Android, puede acceder a Internet, comprobar sus correos o
incluso ver o escuchar contenido multimedia en cualquier momento y lugar. Además, descargue y disfrute de una de las miles
de aplicaciones y juegos disponibles para obtener todas las ventajas de su ZEUS SY‐Z110QC8.
CUIDADOS Y MANTENIMIENTO
ARE
- No exponga su tableta a la luz solar directa, la humedad, altas temperaturas, suciedad o a nada que pueda causar
disfunciones.
- No utilice líquidos o limpiadores abrasivos para limpiar la unidad.
- Mantenga siempre el dispositivo sin polvo utilizando un paño suave y seco.
- Cuando el nivel de la batería esté bajo, cargue la unidad evitando que se descargue totalmente.
- No intente reparar la unidad usted mismo, contacte con el Centro de Asistencia de Sytech para cualquier ayuda.
AND MAINTENANCE
NOTA: Sytech recomienda el uso
de un protector de pantalla para
mantener la tableta en perfectas
condiciones.
ESPECIFICACIONES
-
Tableta portátil de cuatro núcleos
navega por Internet con la ultima versión de Android 4.2
Pantalla capacitiva de 5 puntos de contacto.
Pantalla TFT‐LCD 16:9 de 10.1” (1024x600 píxeles)
Procesador Allwinner A31S, Arm Cortex A7, 1.2Ghz ‐ Qual Core / GPU: SGX544MP2
1GB DDR3 RAM
Wi‐Fi integrada ‐ Soporta módem Wi‐Fi USB de 3G
Función Bluetooth integrada, Ver 2.1 + EDR
Cámara frontal de 0.3 Megapíxel y trasera de 2 Megapíxel respectivamente
Micrófono omni‐direccional integrado
Altavoz integrado
Sensor de movimiento (acelerómetro)
USB‐OTG – fácil acceso a la memoria de la tableta a través del ordenador (cable incluido)
Memoria interna incorporada de 8 GB.
Salida HDMI versión 1.4 – 2160P
Memoria ampliable a través de tarjetas Micro SD‐HC/XC (hasta 32 GB)
Clavija para auriculares de 3,5 mm
Cargador: 5V, 2A.
Batería de 6000 mAh: hasta 480 horas en modo standby y 5 en modo de video/audio
Peso: ~556g
Dimensiones: 260.8 x 163.5 x 10.5 mm
- Permite instalar miles de Aplicaciones y juegos disponibles para el sistema operativo Android.
- Aplicaciones instaladas:
o Adobe reader
o Play store
o Aldiko
o Configuración
o Navegador Web
o Calculadora
o Calendario
o Cámara
o Chrome
o Reloj
NOTA: Algunas aplicaciones
o Documentos
pueden no funcionar en la
o Correo
tableta ZEUS ya que han sido
o Archivos
especialmente creadas para
o Flash player
teléfonos móviles
o Gmail
o Google
o Grabadora Hi‐Q MP3
o Local
o Mapas
o Navegación
o Noticias y tiempo
o Reproductor de música
CONTENIDO DE LA CAJA
ONTENTS OF PACKAGE
Tableta ZEUS SY‐Z110QC8 de 8 GB.
Manual de usuario
Cable USB OTG 2.0 de alta velocidad para conexión al PC
Adaptador de corriente AC/DC – 100‐240V AC 50‐60 Hz
PARTES DE LA TABLETA ZEUS
1 2
1. Micrófono
4. Entada auriculares
7. Puerto USB/OTB
3
4
5
6
7
8
2. Botón de Reinicio
5. Puerto HDMI
8. Botón de Volumen
9
3. Ranura Micro SD
6. Entrada DC
9. Botón de encendido
OPERACIONES BASICAS
Encendido
Mantenga pulsado el botón " " para encender la unidad.
Apagado
Mantenga pulsado el botón" ". Aparecerá un cuadro de diálogo en la pantalla con varias opciones, seleccione "Apagar" para
apagar la unidad.
Dormir
Pulse brevemente el botón de encendido y el dispositivo entrara en el modo de hibernación. En este modo, sólo la pantalla se
apagará pero la unidad seguirá funcionando. Pulse brevemente el botón de encendido de nuevo para volver al modo de
funcionamiento normal. Utilice esta función sobre todo cuando no se está utilizando la unidad regularmente y para salvar la
vida de la batería.
Reinicio
Si por alguna razón desconocida, la unidad comienza a actuar de una manera diferente, puede reiniciar la unidad pulsando el
botón “reset”
Auto-Apagado de la pantalla
Si no se presiona ningún botón o no se toca la pantalla durante un período de tiempo determinado, la pantalla se apagará
automáticamente y entrara en modo de hibernación. Con el fin de reanudar el uso normal del dispositivo, pulse brevemente
el botón" " y la pantalla se encenderá de nuevo.
Nota: Si desea desactivar el modo de apagado automático, entra en el configuración en el menú de [Apagar Después De] y
cambiarlo a [Nunca]
Uso de la tarjeta Micro SD
Cuando se conecta el dispositivo con el ordenador, aparecerán dos discos externos. El primer disco es la memoria interna de
la unidad y el otro es el disco Micro SD. Si no hay ninguna tarjeta, el segundo disco no se puede abrir. Esta unidad es
compatible con tarjetas Micro SD de 128 MB hasta 32 GB.
Inserción y extracción de la tarjeta Micro SD
Insertar la tarjeta:
Coloque la tarjeta Micro SD boca arriba (lado con palabras), y empuje suavemente la tarjeta en la ranura. Una vez que se ha
insertado correctamente, puede reproducir el contenido de la tarjeta Micro SD.
Extraer la tarjeta:
Presione ligeramente hacia el interior de la tarjeta Micro SD y saldrá. Ahora puede retirar la tarjeta Micro SD de forma segura.
Precaución: Por favor, realice la operación de insertar y extraer cuando la unidad esté apagada! De lo contrario, dará lugar a
la pérdida o daño de los archivos dentro de la unidad! Si no hay ninguna tarjeta insertada, el equipo no podrá realizar
operaciones de lectura y escritura.
Volver a la interfaz principal
Al utilizar el dispositivo, o mientras en el interior de cualquier pantalla de menú, toque el icono "
volver a la pantalla principal en cualquier momento.
Volver a la interfaz anterior o al menú
Cuando se utiliza el dispositivo o en el interior de cualquier pantalla de menú pulse el icono"
También puede pulsar la tecla" " brevemente para volver al menú anterior
" en la pantalla táctil para
" para volver al menú anterior.
BATERÍA Y GESTIÓN DE LA ENERGÍA
La tableta ZEUS SY‐Z110QC8 viene con una batería de litio‐ion recargable integrada. Antes de utilizar la unidad por primera
vez, debe tener en cuenta que la batería está cargada parcialmente, sin embargo, es recomendable que cargue la unidad
completamente antes de su primer uso. Para recargar la batería, utilice el adaptador de corriente AC / DC de 5 V incluido. El
tiempo normal para una carga completa es de 3 – 4 horas aproximadamente estando la Tableta apagada. Dependerá de si la
unidad se está cargando durante su uso o mientras está apagada. Existen determinadas configuraciones que se pueden
ajustar para prolongar la vida de la batería de la unidad.
NOTA: Sytech recomienda apagar la
unidad antes de cargar para mejorar y
ampliar la vida útil de la batería.
GESTOS
Presiona
Arrastra
Mantén presionado
PANTALLA PRINCIPAL
1.
2.
Disminuir volumen
Aplicaciones / Widgets
3.
4.
Captura de pantalla
Escritorio
5.
6.
7.
Volver
Incrementar volumen
Nivel de batería
8.
9.
10.
11.
Reloj
Búsqueda Google
Búsqueda por voz
Menú aplicaciones y Widgets
Cambiar el fondo de pantalla
Mantenga pulsado en cualquier lugar de la pantalla del escritorio y un mensaje emergente aparecerá pidiéndole que
seleccione el fondo de pantalla. Elija el fondo de pantalla deseado y confírmelo.
Aplicaciones y widgets en el escritorio
Muévase por la pantalla de derecha o izquierda para ver qué aplicaciones y widgets se han instalado y están colocados
en el escritorio. Para todas las aplicaciones y widgets que están en la ZEUS, pulse el botón de Menú (11).
Pestaña
Pulse el botón (2) para ver qué programas o tareas se están ejecutando actualmente en el dispositivo. Puede cambiar
de un programa a otro a través de esta opción, o puede optar por cerrar el programa también
CONFIGURACION GENERAL
Configure los parámetros de su ZEUS para que se ajuste a sus necesidades. Entre en el menú de configuración y verá una
lista de operaciones.
Redes y Conexiones Inalámbricas
Wi‐Fi
Bluetooth
Uso de datos
Más
Enciende o apaga la red Wi‐Fi.
Active esta función para utilizar la función de Bluetooth.
Presione esta opción para ver el uso de datos de su tableta ZEUS
Presione esta opción para ver más opciones en la configuración de Redes y conexiones
inalámbricas.
Dispositivo
Sonido
Pantalla
Almacenamiento
Batería
Apps
Configure los niveles de volumen y las opciones de sonido
Configure las diferentes opciones de pantalla. (Brillo, fondo de pantalla, apagado automático,
configuración HDMI, etc…)
Compruebe la cantidad de espacio disponible en su tableta ZEUS.
Compruebe qué aplicación está utilizando más batería y compruebe el nivel de batería actual.
Compruebe qué aplicaciones se han descargado, dónde se han guardado y cuáles están
funcionando actualmente.
Personal
Servicios de localización
Seguridad
Idioma y Entrada
Copia de seguridad y Reinicio
Gestione su configuración de localización.
Gestione su información de seguridad a través de esta opción. (Contraseñas, información
de usuario, etc…)
Establezca el idioma del dispositivo y el idioma del teclado a través de esta opción.
Copie los datos de su tableta ZEUS para realizar un reinicio de la unidad.
Cuentas
Añadir Cuenta
Gestione sus cuentas a través de esta sección. Puede añadir una nueva cuenta si no tiene
ninguna todavía.
Sistema
Fecha y Hora
Configure la fecha y la hora, gestione las zonas horarias, y seleccione los formatos para
mostrar la hora y la fecha.
Accesibilidad
Gestione la configuración del sistema a través de esta opción.
Opciones de desarrollo Configure diferentes opciones para el dispositivo cuando se conecta al PC, configure la
Interfaz de Usuario y configure las opciones de Apps.
Información de la tableta Verifique toda la configuración y la información del hardware de su tableta ZEUS a través
de esta opción.
WIDGETS
Los Widgets son aplicaciones que permiten un acceso fácil o directo a algunas aplicaciones. De hecho, es más que un acceso
directo a una aplicación, ya que cuando los coloca en su pantalla de inicio como iconos, pueden mostrarle la hora, el tiempo
atmosférico actual o incluso su bandeja de entrada de correo sin tener que abrir la aplicación. Para añadir widgets a su
escritorio, siga estos pasos:
1. Presione el icono “Aplicaciones y Widgets” situado en la parte media de la pantalla (1)
2. Presione la pestaña “Widgets” (1) que está situada en la parte superior de la pantalla
3. Navegue (2) por los Widgets instalados
4. Mantenga presionado el Widget deseado. (3)
5. Tras unos segundos aparecerá la pantalla de inicio (continúe presionando el icono en este punto)
6. Arrastre y coloque el icono en la posición deseada del escritorio. El icono aparecerá en su escritorio como se muestra a
continuación.
Una vez que el Widget esté en el escritorio, puede moverlo o borrarlo. Para hacerlo, debe mantener presionado el Widget
hasta que esté destacado. Entonces puede moverlo, o borrarlo arrastrándolo hasta el icono “X” que aparecerá en la
pantalla.
CONFIGURAR LA RED WI‐FI
1. Pulse sobre el icono de Ajustes de la pantalla principal (1).
2. En la sección “redes y conexión inalámbrica”, pase el botón Wi‐Fi a “SI” (1)
3. Seleccione la red Wi‐Fi deseada de la lista de redes disponibles e introduzca la contraseña si se requiere.
Una vez que se haya completado el proceso de autenticación, el dispositivo guardará los datos para que la siguiente vez que
encienda su dispositivo, se establecerá la conexión automáticamente con la red (si está disponible) sin tener que repetir el
proceso de autenticación. ¡Su tableta ZEUS‐SY‐Z110QC8 ya está lista para navegar por internet!
NOTA: La ZEUS SY-Z110QC8 es
compatible con los siguientes
estándares de seguridad y
encriptación: WEP, WPA, WPA2,
TKIP, y a AES .
CONFIGURAR BLUETOOTH
La ZEUS SY‐Z110QC8 incluye la función Bluetooth. Con esta función se puede emparejar cualquier dispositivo que soporte
Bluetooth con la tableta ZEUS. Una vez que se completa la conexión, puede transferir música, videos, archivos, etc. Para
emparejar un dispositivo con la tableta, por favor, siga las siguientes instrucciones.
1. Toque en el icono de Ajustes en la pantalla principal (1)
2. En la sección "Conexiones inalámbricas", deslice el interruptor de Bluetooth en "SI" (1)
3. Seleccione el dispositivo Bluetooth que desee en la lista de dispositivos disponibles (1). Pulse el botón "Sincronizar" (2)
para establecer la conexión. Algunos dispositivos pueden requerir que introduzca una contraseña, por favor introduzca la
contraseña que se muestra en la pantalla cuando se esta sincronizando la tableta ZEUS al dispositivo.
Una vez que el proceso de emparejamiento se ha completado, el dispositivo guardará los datos de modo que la próxima vez
que encienda el dispositivo se establecerá automáticamente la conexión con el dispositivo (cuando se encuentre en rango)
sin tener que repetir el proceso de sincronización. La tableta SY‐Z110QC8 ZEUS está lista para enviar y recibir datos a través
de Bluetooth!
NOTA: La ZEUS SY-Z110QC8 puede
compartir y recibir archivos con dispositivos
que admiten la función A2DP. Los
dispositivos que no son compatibles con
esta característica serán incapaces de
conectar con la ZEUS.
NAVEGAR POR INTERNET
Su dispositivo incluye un potente navegador de Internet que ya está preinstalado. El navegador le permitirá navegar por
Internet rápidamente y fácilmente. Cuando el dispositivo se conecte a una red Wi‐Fi, pulse sobre el icono de la aplicación
de navegador (1) del escritorio o del menú de aplicaciones para comenzar a utilizar Internet. La página de inicio por defecto
se mostrará en la pantalla; sin embargo, es posible modificar la página de inicio y otros parámetros a través de la
configuración.
Inicio
Navegar
Pulse sobre la barra de direcciones una vez (1). La dirección actual se iluminará y aparecerá el teclado de pantalla.
Teclee la dirección Web deseada y presione el botón “IR” (2).
Pestañas
Presione el botón de Pestañas (1) para ver todas las páginas que están abiertas actualmente. Puede cambiar de una página
Web a otra simplemente presionando en cualquiera de las páginas abiertas.
Opciones de menú
Presione el botón de Menú (1) en la esquina superior derecha de la pantalla para acceder a las diferentes opciones
mostradas a continuación.
Actualizar / Detener
Presiones este botón para recargar la página o detener la página para que no se cargue.
(Opción se mostrara según el estado en el que se encuentre la página).
Siguiente
Presione este botón para avanzar una página en su navegador
Nueva Pestaña
Pulse este botón para abrir una pestaña nueva.
Nueva pestaña de
incognito
Presione este botón para abrir una pestaña nueva que no almacenara los datos en el
historial y no guardara ningún cookie.
Compartir página
Comparta la página que está visitando con alguien a través de una red social o por correo.
Buscar en la página
Busca una palabra o sección particular dentro de una página.
Ver como en ordenador
Ajuste la página al tamaño de la pantalla.
Disponible sin conexión
Presione este botón para guardar la página y poder acceder más tarde a la misma incluso si
no existe conexión a Internet.
Información de la página
Muestra la información de la pagina que se esta viendo en esos momentos.
Ajustes
Presione este botón para cambiar la configuración del navegador.
CONFIGURACIÓN DEL CORREO
La ZEUS SY‐Z110QC8 también envía y recibe correos electrónicos. Para configurar su correo en el dispositivo, siga estos
pasos mostrados a continuación.
1) Pulse en la aplicación “Correo” (1)
2) Introduzca su dirección de correo y su contraseña. Cuando se haya completado el proceso de configuración, comenzará a
recibir correos en su tableta ZEUS. Si tiene una cuenta de correo POP3, IMAP o Exchange, introduzca la dirección de correo
y la contraseña y pulse el botón “Configuración Manual”. Siga los pasos que aparecerán en la pantalla para realizar la
configuración del correo.
Características de la Bandeja de entrada
1. Número de mensajes de correo electrónico recibido
2. Redactar un nuevo correo
3. Buscar
4. Actualizar / Comprobar si hay nuevos mensajes de correo electrónico
5. Configuración del correo electrónico
6. Dirección de correo electrónico que está vinculado con la tableta
7. Correo recibido (Nuevo)
8. Carpetas de correo electrónico
9. Correo recibido (Leído)
REPRODUCTOR DE VÍDEO
En el menú principal, haga clic en "Galería" para acceder a la carpeta de vídeo. Seleccione el vídeo que desee y presione
PLAY para comenzar la reproducción. Usted podrá rebobinar, adelantar y subir / bajar el volumen. A continuación se
muestra una vista previa de lo que se ve antes de comenzar un video.
Funciones de los botones
" ": Presiónalo para volver al menú principal (escritorio)
" ": Presiónalo para volver al menú anterior
“ / ”: Subir o bajar el volumen
Consejos:
1. Este reproductor es compatible con archivos de vídeo con una resolución máxima de 2160p.
2. Subtítulos: Este reproductor es compatible con archivos de subtítulos "* SRT." (El usuario puede descargar estos desde
los sitios Web correspondientes). Cuando hay algún archivo de subtítulos con el mismo nombre del video en la carpeta de
reproducción de vídeo, el reproductor automáticamente reproducirá el archivo de subtítulos correspondiente con el vídeo.
Se lograra una reproducción sincronizada entre los subtítulos y videos.
3. Al reproducir el archivo de vídeo, aparecerá una barra de progreso en la que podrá ver la siguiente información:
‐
Tiempo transcurrido
‐
Tiempo restante
‐
Reproducir / Pausar video
‐
Avance rápido / rebobinado
REPRODUCTOR DE MÚSICA
En el menú principal, seleccione la opción de "Música" para acceder a la carpeta de música. Aparecerá la siguiente pantalla
Funciones de los botones
: Volver al escritorio principal
: Volver al menú anterior
Deslice la pantalla de arriba a abajo par ver todos los archivos
Artistas: Archivos de música están clasificados por artista
Álbumes: Archivos de música clasificados por álbum
Canciones: Todos los archivos de audio
Listas: Muestra las listas de reproducción
Reproduciendo: Muestra que canción esta reproduciendo actualmente.
Al reproducir un archivo de audio, aparecerá la siguiente pantalla:
Funciones de los botones
: Volver al escritorio
: Volver al menú anterior
/ : Presione y manténgalo presionado para avanzar o rebobinar – Presiónelo brevemente para saltar a la pista
siguiente o anterior.
: Reproduce o Pausar música.
: Presiónelo para ver la lista de reproducción
: Presiónelo para seleccionar modo aleatorio
Presiónelo para seleccionar reproducción repetida
Letra de Canción
Este reproductor es compatible con "*.LRC" (El usuario puede descargarlos desde el sitio web correspondiente). Cuando el
archivo de letras se llama del mismo modo que el archivo de música, las letras se muestran de forma automática y logran
una reproducción sincronizada entre las letras y la música.
GALERÍA DE IMÁGENES
En el menú principal, seleccione la opción de "Galería" para poder acceder a la carpeta de fotos. Toque en cualquier foto (1)
para verla en grande
La imagen se muestra en el modo de pantalla completa y para ver la imagen anterior o siguiente, simplemente deslice hacia
la izquierda o derecha (2)
Funciones de los botones
: Manejar fotos ‐ Seleccionar elementos o agruparlos según la ubicación, el tiempo, las personas o etiquetas (en la
interfaz de miniaturas) ‐ Presentación de diapositivas, editar, girar a la izquierda, girar a la derecha, Cortar, Detalles,
establecer imagen como y obtener datos de imagen (en la interfaz de pantalla completa).
: Comparte la foto por correo o redes sociales.
: Eliminar imagen
CAMARA
La tableta ZEUS incorpora 2 cámaras. Una cámara frontal de 0.3 Megapixels y otra trasera de 2 Megapixels que permite
tomar fotos sobre la marcha. Todas las imágenes tomadas con la cámara se guardarán en su carpeta de imágenes. Puede
acceder a estas imágenes saliendo de la aplicación de la cámara y pasando a la galería de imágenes.
Cámara
1. Cambia el modo de grabación de video a cámara de foto.
2. Tomar una foto
3. Botón para cambiar la cámara frontal a la cámara trasera
4. Botón de modo continuo
5. Modo captura / Panorámico
6. Compartir
7. Configuración
Presione el obturador (botón 2) para tomar una fotografía. Cuando se haya tomado la fotografía, podrá verla pulsando
sobre la miniatura en la parte superior derecha, y aparecerá la opción de compartirla a través de correo electrónico o de
una red social.
Grabadora de video
Cuando se presiona sobre el icono de la grabadora de vídeo, aparecerá la siguiente pantalla y el botón de la derecha se
pondrá en rojo. Presione el botón de Grabar (1) y el dispositivo comenzará la grabación. La parte superior izquierda de la
pantalla le mostrará el tiempo transcurrido desde que se presionó el botón de grabar.
CONECTAR LA TABLETA A UN PC
CONNECTING THE TABLET TO A PC
Para conectar la tableta al ordenador, asegúrese de que el cable USB este conectado al PC y luego en la tableta. Cuando se
conecta al ZEUS, aparecerá automáticamente la siguiente pantalla: Presione el botón "Activar almacenamiento USB" (1) y el
dispositivo se conectara al PC. En este punto, algunas aplicaciones que está utilizando no estarán disponibles hasta que el
dispositivo se ha desconectado del PC.
Para desconectar el dispositivo del PC, pulse el botón "Desactivar almacenamiento USB" en la parte inferior de la pantalla
(2)
CONECTAR LA TABLETA AL TELEVISOR
la ZEUS SY‐Z110QC8 puede conectarse a su televisor. Para lograr esto se necesita un cable HDMI de tipo A‐C (Mini HDMI
a HDMI normal).
1.
Presione el icono de Ajustes en el escritorio principal (1)
2.
Presione la opción ‐ Display ‐ HDMI full screen mode and HDMI output mode
3.
Una vez que el “cambio automático” se ha activado, procede a conectar el cable HDMI a la tableta. Una vez que
esto se ha hecho, la tableta establecerá la conexión con su televisor automáticamente.
RESOLUCION DE PROBLEMAS
A continuación se muestran algunos problemas que puede encontrar durante el uso de su tableta ZEUS SY‐Z110QC8. Lea la
siguiente guía atentamente. Si se encuentra con un problema más grave durante el uso del dispositivo, contacte con el
Centro de Ayuda de Sytech para que le guíen.
El dispositivo no se enciende
Asegúrese de que la batería tiene carga suficiente para encender el dispositivo. Si el problema persiste tras haber cargado el
dispositivo por completo, contacte con el Centro de Ayuda de Sytech para una reparación.
Algunos archivos MP3 no funcionan en la ZEUS SY-Z110QC8.
El archivo MP3 debe respetar las 3 normas para MPEG1, MPEG2 y MPEG 2.5. Como alternativa, el archivo de debe convertir
utilizando un software especial.
Algunos archivos WMA no funcionan en la ZEUS SY-Z110QC8.
Algunos archivos WMA pueden estar protegidos con derechos de DRM que no permiten la reproducción del archivo en el
dispositivo.
Algunos formatos de música, vídeo e imagen no funcionan en el dispositivo.
Su ZEUS SY‐Z110QC8 admite muchos tipos diferentes de formatos. Sin embargo, la capacidad para reproducir diferentes
formatos también depende de la aplicación que se esté utilizando. Si, por alguna razón, no se puede reproducir un formato,
busque otra aplicación que sea capaz de reproducir el formato requerido.
Algunas Apps no funcionan en el dispositivo tras descargarlas e instalarlas.
Debido a las diferentes configuraciones de todo el hardware disponible, no todas las aplicaciones funcionan en todas las
tabletas. Si una App no funciona en su tableta, contacte con el desarrollador de la aplicación para más información.
Conecto la tableta al PC, pero no la reconoce.
Debe desconectar el modo de desactivación USB de su menú de configuración. Entonces el PC será capaz de detectar el
hardware conectado. En la tableta, verá una pantalla que le preguntará si desea encender el modo de almacenamiento
USB.
He actualizado el firmware y deseo recuperar mis datos a la tableta.
Sytech recomienda al usuario que realice una copia de seguridad completa de la tableta antes de actualizar el firmware. Si
no se ha realizado una copia de seguridad y se ha actualizado el firmware, no se pueden recuperar los datos perdidos.
¿Se pueden utilizar módems 3G con las TABLETAS DE SYTECH?
Dependiendo de cada tableta, podrá o no utilizar módems USB 3G. Para las tabletas que tienen un puerto USB, puede
utilizar cualquier módem USB 3G con acceso Wi‐Fi.
Asegúrese de que su Wi-Fi funciona bien.
Si la Wi‐Fi no se conecta por alguna razón a la red disponible, y otros dispositivos, como un ordenador portátil, teléfonos
móviles, etc, intente cambiar los estándares de seguridad y encriptación – WEP, WPA, WPA2, TKIP y AES. Otro posible
problema pueden ser los canales del router. Cámbielos y configúrelos de formas diferentes, pero si sigue sin funcionar, es
posible que haya conflictos entre direcciones IP o que la señal de internet sea débil. Contacte con su proveedor de internet
para que le ayude. No podrá descargar aplicaciones o utilizar algunas aplicaciones adecuadamente sin una conexión a
internet adecuada. Asegúrese siempre de que la Wi‐Fi funciona adecuadamente.
La batería de mi ZEUS SY-Z110QC8 se agota muy rápidamente / el dispositivo va muy lento desde que lo obtuve
Para conservar la carga de la batería el mayor tiempo posible, asegúrese de que no están funcionando demasiadas
aplicaciones en un segundo plano. Puede finalizar estas aplicaciones utilizando la aplicación “Task Killer” que está
preinstalada. El correo electrónico también consume una gran parte del nivel de la batería. Se recomienda cambiar la
configuración del correo para que compruebe los mensajes nuevos cada hora en vez de cada 10 minutos. Cuando no es
necesario utilizar internet, se recomienda apagar la Wi‐Fi para que la batería dure más tiempo. Lo mismo se aplica al brillo,
establézcalo a un nivel medio/bajo para conservar la carga de la batería. Tenerlo al 100% de intensidad significa que la
batería se agotará rápidamente. Todo lo anterior ayudará también a que su tableta procese las tareas y aplicaciones con
mayor velocidad, evitando, por lo tanto, que funcione lentamente.
Mi ZEUS SY-Z110QC8 se cuelga
Para reactivar el dispositivo, debe realizar un reinicio. Con la ayuda de un objeto puntiagudo fino, pulse el botoncito situado
en el agujero de la parte trasera de la unidad para reiniciarla. La unidad se apagará y se reiniciará tras unos minutos.
DECLARACION DE CONFORMIDAD
Nombre del fabricante: Satyatrade S. L.
Dirección: Pol.Ind.La Raya. C/ Guadalquivir, 2.
Camarma de Esteruelas, 28816 Madrid
Tel: 902 430 967
Fax: 91 8864285
NIF: B83254763
País de fabricación: China
Sytech® SY‐Z110QC8‐ZEUS
Descripción: Tablet
El siguiente producto cumple con las normativas:
CE Standard: 2004/95/EC
ROHS standard: 2002/95/EC Restricción de sustancias peligrosas
Firmado: Ajeet Nebhwani Utamchandani
Administrador único
S.A.T: Atencion al Cliente:
Tel: 902430967
Fax: 918864285
Email: [email protected]
CERTIFICADO DE GARANTIA
Modelo: ...........................
Nº Serie: .........................
Fecha Venta: .................
Termino y condiciones de la Garantía
1.
2.
3.
4.
5.
6.
7.
Este producto esta garantizado por SYTECH sobre defectos de fabricación por un periodo de 24 meses desde la fecha de compra del
producto.
En caso de avería o mal funcionamiento es necesario presentar el certificado de garantía sellado por el establecimiento que lo vendió, así
como una descripción detallada de la avería que se haya producido en el equipo.
El usuario deberá enviar por correo electrónico, fax el ticket o factura de compra al departamento Servicio técnico de Sytech.
Las actualizaciones de firmware son validas únicamente para el modelo indicado. En caso de instalación defectuosa, instalación de un
firmware diferente al indicado para su producto o instalación de firmware de otro fabricante el producto automáticamente perdera la
garantía y la reparación del mismo será a cargo del cliente (gastos de transporte, materiales y mano de obra)
El cambio o reparación del producto no prorroga el periodo de garantía inicial.
Los accesorios de los productos tendrán una garantía de 6 meses (comprendiendo como accesorios todos los componentes incluidos en la
caja original, fuentes de alimentación, mando, cables, etc…)
El periodo de garantía de las baterías es de 6 meses. Las baterías son objeto de desgaste y su perdida de capacidad por el uso regular no
esta cubierto por la garantía.
Cualquiera de las siguientes circunstancias anula la presente garantía: (Condiciones)
1.
2.
3.
4.
5.
6.
7.
8.
Rotura o manipulación del precinto de Garantía.
Material dañado, sin embalaje adecuado y/o daños de transporte.
El desgaste, muestras de una manipulación incorrecta, uso indebido, maltrato, golpes, caídas, suciedad, serán tratados como
REPARACIÓN ordinaria bajo presupuesto.
Quedan excluidos de garantía los productos que vengan dañados por averías producidas por causas ajenas al aparato (fuego, agua, subida
de tensión eléctrica, uso en condiciones extremas de temperatura y/o humedad etc…). En ningún caso Sytech será responsable de
aquellos defectos que el producto pudiera tener debido a un uso inapropiado o a un defectuoso mantenimiento.
Los datos contenidos en los productos no están en ningún caso cubiertos por ninguna garantía ni será garantizada su integridad. Será
responsabilidad del cliente realizar una copia de seguridad de los datos antes del envío del producto a nuestro servicio técnico. Sytech no
cubre la incorrecta configuración o instalación de software/hardware, por parte del cliente.
Los gastos derivados por devoluciones no autorizadas irán por cuenta del cliente.
Cualquier incidencia detectada a la recepción de la mercancía debe ser notificada al Departamento Atención al cliente de Sytech. De
acuerdo con el Articulo 366 del Código de Comercio, Sytech no admitirá reclamaciones sobre roturas, golpes o falta de bultos
transcurridas 24 horas a partir de la entrega de la mercancía, por lo tanto no podrá ser cursada ninguna reclamación fuera de ese plazo.
La legislación sobre garantías establece algunas limitaciones. “La garantía no cubre componentes adicionales como las baterías, o
elementos sujetos a mantenimiento debido a su uso, como el desgaste de cabezales u ópticas. “LOS ACCESORIOS TIENEN UNA
GARANTIA DE 6 MESES”. Para la adquisición de accesorios ya sea en garantía o no deberá dirigirse a :[email protected].
NO SE ADMITIRAN DEVOLUCIONES DE NINGUN ACCESORIO.
Producto fuera de Garantía
1.
Si el producto se encuentra fuera de garantía, (Consultar Condiciones), el departamento técnico de Sytech
facilitara un presupuesto de la reparación por teléfono, fax o correo electrónico. Dicho presupuesto deberá ser
aceptado y firmado para poder proceder a su reparación. El usuario deberá hacerse cargo del coste de la
reparación así como los gastos de transporte tanto de ida como de vuelta.
Diagnostico
1.
2.
3.
4.
5.
Si el producto se encuentra fuera de garantía y no es aceptado el presupuesto previo, se devengara un cargo en concepto de diagnostico.
El presupuesto de reparación tiene una validez de 15 días.
las reparaciones fuera de las condiciones de garantía esta garantizadas para 90 días, siempre que se trate de la misma avería.
Todo producto (en garantía o no) remitido a este Servicio Técnico que no presente avería tras su revisión y diagnostico tendrá un cargo
mínimo por el tiempo empleado en su revisión.
Los gastos de transporte de los artículos en garantía que no presenten avería serán abonados por el cliente.