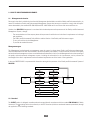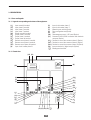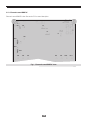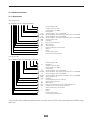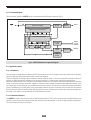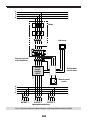
1
VOLTAGE DIMMER-STABILIZER ILUEST NE series. STABILISATEUR-RÉDUCTEUR DE TENSION, ILUEST série NE User’s and operating manual. Manuel d’installation et d’opération EK462D11 -1- -2- SAFETY WARNINGS . ..................................................................................................... 6-8 MISES EN GARDE DE SÉCURITÉ . ................................................................................. 34-36 User’s manual, installation and start up. .............................................................4-30 Manuel d’utilisateur, installation et mise en service. ......................................... 32-58 -3- General contents. 1.- INTRODUCTION. 1.1.- Gratefulness letter. 1.2.- Using this manual. 1.2.1.- Conventions and used symbols. 1.2.2.- For more information and/or help. 2.- QUALITY AND STANDARD ASSURANCE. 2.1.- Management declaration. 2.2.- Standard. 2.3.- Safety and first aids. 2.4.- Environment. 3.- PRESENTATION. 3.1.- Views and legends. 3.1.1.- Legends corresponding to the views of the equipment. 3.1.2.- Frontal view. 3.1.3.- Electronic control BM478* 3.2.- Definition and structure. 3.2.1.- Nomenclature. 3.2.2.- Structural diagram. 3.3.- System description. 3.3.1.- Introduction. 3.3.2.- Constructive features. 3.3.3.- Operating principle. 3.3.4.- Versions. 3.4.- Options. 3.4.1.- Automatic bypass witch contactors. 3.4.3.- Manual Bypass. 3.4.3.- Timer. 3.4.4.- Astronomical clock. 3.4.5.- LCD display. 3.4.6.- Telemanagement pack. 3.4.7.- GSM modem. 3.4.8.- Lightning arrestor. 3.4.9.- Extended communications PCB. 4.- INSTALLATION. 4.1.- Important safety instructions. 4.2.- Equipment reception. 4.2.1.- Unpacking and contents checking. 4.2.2.- Storing. 4.2.3.- Location. 4.3.- Assembling of the different versions. 4.4.- Communication ports. 4.5.- Recommended protection devices and cross section cables. 4.5.1.- Recommended protections. 4.5.2.- Recommended cross section cables. 4.5.3.- Installation diagrams. 4.6.- Connection. 4.6.1.- Power supply connection. -4- 4.6.2.- Remote control connection (saving order). 4.6.3.- Output connection. 5.- OPERATION. 5.1.- Start up and shutdown. 5.1.1.- Controls before starting up. 5.1.2.- Start up. 5.1.3.- Complete shutdown of the equipment. 5.2.- Indications, selectors and adjustments of the electronic control BM478*. 5.2.1.- Indications per phase. 5.2.2.- Selectors per phase. 5.2.3.- Adjustment per phase. 6.- MAINTENANCE, WARRANTY AND SERVICE. 6.1.- Basic maintenance guide. 6.2.- Troubleshooting and F.A.Q.. 6.3.- Warranty conditions. 6.3.1.- Product covering. 6.3.2.- Warranty terms. 6.3.3.- Exclusions. 6.4.- Description of the available maintenance contracts and services. 6.5.- Technical service network. 7.- ANNEXS. 7.1.- General technical specifications. 7.2.- Glossary. -5- 1.- INTRODUCTION. 1.1.- Gratefulness letter. We thank in advance the trust deposited in us by acquiring this product. Read carefully this instruction manual before starting up the equipment and keep it for future consultations that you can arise. We are at your complete disposition for any additional information or consultations that you want to do. Yours sincerely, SALICRU The described equipment can cause important physical injury under wrong handling. This is why, the installation, maintenance and/or repairing of the equipment, here stated, must be carried out by SALICRU or specifically authorised staff. According to our policy of constant evolution, we reserve the right to modify the total or partial features without previous warning. It is forbidden the reproduction or transference to third parties of this manual without previous writing authorization by our firm. 1.2.- Using this manual. • In this manual is described the main installation and operating features of the DIMMER-STABILIZER, being able to identify all connection parts, manoeuvring, etc., in an orderly way. • This DIMMER-STABILIZER must be installed by qualified personnel, and with the helping of this manual only, can be used by personnel without any specific training. 1.2.1.- Conventions and used symbols. «Warning» symbol. Carefully read the indicated paragraph and take the indicated prevention measures. «Danger of electrical discharge» symbol. Pay special attention to this both in the indication on the device and that of the paragraphs referred to in this Instructions Manual. «Main protective earting terminal» symbol. Connect the earth cable from the installation to this terminal. «Notes of information» symbol. Preservation of the Environment. The presence of this symbol in the product or in their associate documentation indicates that, when concluding its cycle of useful life, this won’t be disposed with the domestic residuals. To avoid the possible damages to the environment, please separate this product from other residuals and recycle it suitably. The users can contact with their provider or with the pertinent local authorities to be informed on how and where they can take the product to be recycled and/or dispose correctly. 1.2.2.- For more information and/or help. • For more information and/or help of the specific version of your equipment, ask for it to our Service and Technical Support (S.T.S.) department . -6- 2.- QUALITY AND STANDARD ASSURANCE. 2.1.- Management declaration. Our target is the client’s satisfaction, therefore this Management has decided to establish a Quality and Environmental policy, by means of installation a Quality and Environmental Management System that becomes us capable to comply with the requirements demanded by the standard ISO 9001:2000 and ISO 14001:2004 and for our Clients and concerned Parts too. Likewise, the SALICRU Management is committed with the development and improvement of the Quality and Environmental Management System, through: - The communication to all the company about the importance of satisfaction as in the client’s requirements as in the legal and regulations. - The Quality and Environmental Policy diffusion and the fixation of the Quality and Environment targets. - To carry out revisions by the Management. - To provide the needed resources. Management agent. The Management has designated as management agent the person in charge about Quality and Environment department, who with independence of other responsibilities, has the responsibility and authority: to assure that the processes of the quality and environmental management system are established and maintained; to inform to the Management about the operating of the quality and environmental management system, including the necessities for the improvement; and to promote the knowledge of the client’s requirements and environmental requirements at all the levels of the organization. In the next PROCESS MAP is represented the interaction among all the processes of the Quality and Environmental System of SALICRU: CONTINUOUS IMPROVEMENT PROCESS / MANAGEMENT REVISION QUALITY MANAGEMENT PROCESS ENVIRONMENT MANAGEMENT PROCESS R&D PROCESS TECHNICAL OFFICE PROCESS CLIENTS: - PRODUCT - SERVICE CLIENTS COMMERCIAL PROCESS MANUFACTURING PROCESS INTERNAL LOGISTICS PROCESS MAINTENANCE PROCESS TRAINING PROCESS 2.2.- Standard. The ILUEST product is designed, manufactured and commercialised in accordance with the standard EN ISO 9001 of Quality Assurance. The marking shows the conformity to the EEC Directives (which are mentioned between parenthesis) through the application of the following standards: -7- • 73/23/EEC of Low Voltage Safety • 89/336/EEC of Electromagnetic Compatibility (EMC) In accordance with the specifications of the harmonised standards. Reference standards: • EN 60950-1: IT equiments. Safety. Part 1: General requirements. • EN 61000-6-3: Electromagnetic compatibility. Generic standard of emission. Residential, commercial and light industry environment. • EN 61000-6-2: Electromagnetic compatibility. Generic standard of immunity. Industrial environment. When a ILUEST is used as a part of a complex installation or system, the Generic or Product Standards of it must be applied to this installation or specific system. It is possible that when adding elements, or when being under the requiriments of a specific standard, the system must undergo to corrections to assure the conformity of the Eurpean Directives and to the current national legislation. The Planner and/or fitter are/is the responsible of the standards compliance, by addding the needed corrective elements to the installation. Besides, the interference phenomenon due the harmonics currents at the input exists, which although it is not regulated by any standard, it is necessary to correct some installations. Depending on the installation conditions of the ILUEST the corrections of the Electromagnetic Compatibility corrections must be applied or not. For any version and regarding to the Safety (standard EN 60950-1), must be kept in mind the aspects of the product stated in the INSTALLATION section. 2.3.- Safety and first aids. • Together with the equipment and this «Installation and operating manual» is supplied the relative information to «Safety instructions» (See document EK266*08). Before installing or starting up the equipment, check that both documents are available; othwerwise request them. It is mandatory the compliance of the «Safety Instructions», being legally responsible the user for their observance. Once read, keep them for future consultations that can arise. 2.4.- Environment. This product has been designed to respect the environment and has been manufactured in accordance with the standard ISO 14001. ILUEST recycling at the end of its useful life: SALICRU commits to use the services of authorised societies and according to the regulations in order to treat the recovered product at the end of its useful life (contact your distributor). Packing: To recycle the packing, follow the legal regulations in force. Batteries: The batteries mean a serious danger for the health and environment. The disposal of them must be done in accordance with the standards in force. -8- 3.- PRESENTATION. 3.1.- Views and legends. 3.1.1.- Legends corresponding to the views of the equipment. (1N) (1R) (1S) (1T) (2N) (2U) (2V) (2W) (3U) (3V) (3W) (4) (5) (6) (7) (8) (9) (10) (11) Input neutral N terminal. Input phase R terminal. Input phase S terminal. Input phase T terminal. Output neutral N terminal. Output phase U terminal. Output phase V terminal. Output phase W terminal. Remote control phase U terminal. Remote control phase V terminal. Remote control phase W terminal. Input circuit breaker phase R. (12U) (12V) (12W) (13) ( ) Input circuit breaker phase S. Input circuit breaker phase T. Manual bypass switch (Option). Timer, saving order start (Option). Fans. Telemanagement pack / LCD panel (Option). Connector RJ45 for GSM connection with notebook computer (Option). Terminal to control the contactor phase U (Option). Terminal to control the contactor phase V (Option). Terminal to control the contactor phase W (Option). Input terminal strip / digital outputs (Option). Bonding earth terminal. 3.1.2.- Frontal view. (13) (11) (9) (8) (10) (6) (5) (4) (12U) (3U) (12V) (3V) (12W) (3W) ( ) (2W) (1R) (1N) (2N) (2N) (2U) ( ) (1N) (1T) (1S) (1N) (2N) (2V) ( -9- ) (8) 3.1.3.- Electronic control BM478* Electronic control BM478* view. See section 5.2 for control description. 2 1 10 CN3 9 CN49 CN18 M2 THERMAL N VIN SWITCH CN47 LD3 Bypass P2 POWER SUPPLY CALIBRATION P3 FS1 CUT PHASE CN46 FS2 NOMINAL OUTPUT VOLTAGE 1 SAVING ORDER ACTIVATED CN48 (remote control) GND7 LD1 MP4 1 FAN CN2 P1 SAVING VOLTAGE LD2 SW2 ON 12345 + CN22 - 1 SW1 ON 2345 LD5 LD4 LD6 LD7 LD8 Fig. 1. Electronic control BM478* view. - 10 - LD9 LD10 LD11 3.2.- Definition and structure. 3.2.1.- Nomenclature. Single phase ILUEST NE 10-2ISBMD-COM "AC" I 220V 60Hz "EE84526" I "AC" "AC-BCN" "AR" "AR-BCN" COM LCD D BM BA1 S I T Special equipment "EE" Frequency unless it is 50Hz Voltage unless it is 3x400Vac Relay interface Special equipment witch control BM158 Special equipment. Three phase input breaker witch control BM158 Special equipment witch control BM503 Special equipment. Three phase input breaker witch control BM503 Com munications card LCD display Lightning arrestor of 6.5 kA Manual bypass Autom atic bypass ILUEST at 180V (om it it if is standard) Outdoors Indoor First digit of the voltage Power of the equipment in kVA Three phase ILUEST NET 10-3ISBMDV-COM "AC" I 3x380V 60Hz T/T "EE84526" T/T I "AC" "AC-BCN" "AR" "AR-BCN" COM LCD V D BM BA1 BA3 S I T Special equipment "EE" Delta/Delta Frequency unless it is 50Hz Voltage unless it is 3x400Vac Relay interface Special equipment witch control BM158 Special equipment. Three phase input breaker witch control BM158 Special equipment witch control BM503 Special equipment. Three phase input breaker witch control BM503 Com munications card LCD display Vertical assembly (only units to 45 kVA). Lightning arrestor of 6.5 kA Manual bypass Com mon automatic bypass for the com plete equipmm ent Independent autom atic bypass per each phase ILUEST at 180V (om it it if is standard) Outdoors Indoor First digit of the voltage Power of the equipment in kVA - The first letters mean, besides the equipment name, its elctrical conection: NET for three phase equipments and NE for single phase ones. - 11 - 3.2.2.- Structural diagram. The flow dimmer-stabilizers, ILUEST series, are manufactured with Booster transformer (Fig.2). Input Automatic By-pass «Booster» transformer Manual By-pass (Optional) Output Multi-tap transformer Automatic Solid state static switches Remote control terminals Soft starts control FA CR C REF CAD Output control ON/OFF saving programmer Optional Comunicación serie RS-485 Fig. 2. ILUEST with booster single line diagram. 3.3.- System description. 3.3.1.- Introduction. The new range of voltage dimmer-stabilizers ILUEST series operates, both in the voltage power supply stabilization of the lights, and in the light flow dimming during the period of lower light demands. Thanks to its design, the voltage supplies the lights is always inside the range ±2 % of the nominal value, therefore it allows to operate, the lights and auxiliary equipment in the foreseen conditions, by obtaining the optimal flow and light levels. Advantge, nothing worthless, is to consider the lamp lifetime because, as it is kown, the night overvoltages are one of the main causes of the lamp premature exhaustion. Indeed, on one hand, a stable voltage increases the discharge lamp lifetime, and if the overvoltages are eliminated, there is an additional performance, which is to reduce the consumption because the absorbed power is maintained to its nominal value (a 10% overvoltage increases the power consumption in more than 20 % and reduces the lamp lifetime in 50%). On the other hand, dimming the power supply voltage to preset values, allow maintaning the light level according to the needs in such periods that the visual demands are lower. 3.3.2.- Constructive features. The ILUEST is based in the well-kown and accredited voltage stabilizer “RE2” series, which has been manufactured for more than thirty years and they have been improved with the last and new technologies, to assure its high reliability and efficiency. The main constructive parts are (see fig.2): - 12 - Multitap autotransformer per phase. Booster transformer per phase. Electronic control with microprocessor per phase. Automatic bypass of solid state per phase. Soft start through remote control. RS-485 communication port . Timer for controlling the saving level (Optional). Manual bypass (Optional). The static switches are semiconductors controlled by an electronic system, so that, at every moment it is triggered the corresponding one to the tap that gives the wanted voltage. In the figure 2, the secondary of the booster transformer is fed by the voltage obtained in the secondary of the tap autotransformer, which is supplied directly from the mains through a circuit breaker. This tap is connected to the booster transformer through the static switches which are controlled by an electronic PCB, so that there is always one semiconductor in operation only, the one which is giving the right output voltage in that moment. This voltage is add in phase or counterphase to the mains, through the secondary of the mentioned booster, and correcting any fluctuation in the mains. 3.3.3.- Operating principle. The dimmer-stabilizer is installed in the head of the light feeder pillar, either in the same control board or in a separate case, it is not needed any additional control wiring till the lamps (see fig.11 «Typical installation wiring diagram»). In the moment that the equipment receives voltage, the daily start up cycle starts (see fig.3), doing a "soft start " of the installation, starting at 210 V and staying at this level for 2' 30'', after them there is an ascent ramp till reaching the 230 V nominal which takes an additional 5 minutes. During all the start up process , the voltage is stabilized to the corresponding values. Once the start up process is ended, the equipment is feeding the installation with stabilized voltage at its nominal value, till the dimming flow order is received. This order comes from an external device (timer, astronomical clock, remote control, manual operation, ...), which will be connected to the terminales described as «Remote control». Then a descent ramp starts, which takes 10 minutes, till reaching the saving value. This process will be repeated as many times as it has been programmed, as well as if there is a black out in the mains. - 13 - VM.- Mercury vapour lamp. VSAP.- High Pressure Sodium lamp. Un (V) 230 V 210 V VM saving level HPS saving level t 0 1 2 0.1.2.3.- 5 6 3 4 Start-up of the system. Beginning of the «soft ramp» ignition. Reaching the nominal level. Command input at reduced saving level Start of down «Soft Ramp». 7 4.- Reaching to full saving level, dependo¡ing on the type of lamps. 5.- End of operation at reduced level and return (or not) to the nominal level, also up ramping. 6.- Operation at nominal voltage until it is turned off. 7.- Daily turn off. Fig. 3. Operating cycle. 3.3.4.- Versions. The ILUEST is manufactured in two versions. • Indoor version (T). It is destined to be installed inside the distribution, protection and control boards, never outdoors. The protection degree is IP20. Important: The enclosure, like the distribution boards, must have openings for the convection cooling of ILUEST, but the protection degree of itself must be still complied. • Outdoor version (I). It is designed to be installed outdoors, it is not requiring any addictional enclosure because the protection degree is already IP54. Important: Do not place the equipment in areas exposed or with possibility of flooding. Constructively, the enclosure of the version (T) is made of galvanised steel and the version (I) is made of either polyester with grey colour or in steel metallic case with high resistance treatment (cataphoresys) and painted with epoxy in colour RAL-7032. 3.4.- Options. 3.4.1.- Automatic bypass with contactors Optionally an automatic Bypass with contactors can be added to the standard static Bypass. It can be common for the complete equipment (BA1) or independent per each phase (BA3). - 14 - 3.4.2.- Manual Bypass. Optionally the ILUEST is supplied with a manual Bypass switch of two positions, that allows selecting the output voltage either directly from the mains (position 1), or from the ILUEST (position 2). If the ILUEST has this optional included, it is added its respective «User’s manual EK203*». Read it, for its correct utilization. 3.4.3.- Timer. When the ILUEST is requested with this optional, the settings of itself will be done according to the attached sheet of the timer. 3.4.4.- Astronomical clock. When the ILUEST is requested with this optional, the settings of itself will be done according to the attached sheet of the astronomical clock. 3.4.5.- LCD display. With the purpose of endowing the equipment with a practical and powerful display, optionally there is a LCD panel. Read the specific manual of itself (EK437*05). 3.4.6.- Telemanagement pack. With the purpose of endowing the equipment with remote communications, optionally the Telemanagement pack can be installed, it consists in an electronic PCB which is placed in the ILUEST and allows local and/or remote communication of the equipment with a control centre. For its right operation read the specific manual of itself (EK381*00). 3.4.7.- GSM modem. In case the ILUEST is requested with Telemanagement pack, it is possible to acquire the GSM modem for its remote communication with the control centre. Read carefully the manufacturer instructions attached with itself. 3.4.8.- Lightning arrestor. In those installations that it is required (important voltage fluctuations at the input due to frequent lightnings), it is possible its installation at the input of the equipment. 3.4.9.- Extended communication card. This card will allow the ILUEST to accept analogical signals (0-20mA, +5V -5V, etc.) from programmable logic controllers (PLC), lighting sensors, etc. and will provide some saving levels. - 15 - 4.- INSTALLATION. 4.1.- Important safety instructions. • Check the "Safety instructions" (see document EK266*08). • Check all the data in the nameplate corresponds with the required in the installation. • Both ILUEST versions have 4 drills for their fixing to a solid and levelled base, for equipment immobilizing purposes. It is needed to make this mechanical operation before proceeding with the installation. • The location will be cooled and with easy access and in case of the indoor version (T), will never be outdoors. For this version will be kept in mind the following declaration. Important: The enclosures like the distribution boards, must have cooling openings for the ILUEST, without affecting to its protection degree standard compliance. • The cooling holes will never be blocked. • The input switch (4) or switches (4), (5), and (6) of the equipment must be turned "Off" or "0". • It is necessary to remove the screws (t) which are fixing the cover (a) of the version (T) or to open the door (b) through the lock (c) in the version (I) to have access to ILUEST the terminals . • The equipments have two cable glands, located at the bottom of the enclosure to enter the connecting cables in. Never make this previous operation, neither the connection to the ILUEST terminals, with electrical mains present. • The input, output and earth cross section cables will be sized according to the nominal current stated in the nameplate, and according with the Local Low Voltage Regulations. • The ILUESTconnection will be done at the head of the feeder pillar. As an example, in the figure 12 it is showed the location in a three-phase installation. • In case it is needed to install an external manual bypass, follow the following recommendations: The bypass must avoid connecting voltage to the output of the equipment. Either to avoid damages to the equipment (the equipment is not protected from voltage backfeeds at its output) or to manipulate the output terminals of the equipment without voltage and no risk. Therefore, the Bypass must disconnect the output of the equipment in the instant that it is connected. The best option is to install a two positions rotary switch with connected as follows: common contact connected to the loads, one contact to the output of the equipment and the other contact to the reserve line in case of fault. Therefore, the best option is a rotary switch with two positions and double circuit. 4.2.- Equipment reception. 4.2.1.- Unpacking and contents checking. For the correct equipment unpacking, see figures from 4 to 9 and act in consequence. Although the pictures show an outdoor equipment (I), proceed in the same way with the indoor version (T). • During the equipment reception, check that it has not been damaged during its transport. If it is damaged, make all suitable claims to your supplier or, short of this, to our firm. Also check if the data of the nameplate sticked to the equipment package corresponds to those specified in the order. If it is not being in this way, please make the claim as soon as possible, by mentioning the serial number of the equipment and the references of the delivery invoice. - 16 - Plastic cover Documentation (User and operating manual) Lower cardboard Wooden pallet Fig. 4. Fig. 5. 4 EPS butt plates 2 EPS side plates Cardboard packing Fig. 7. 4 polyester ribbons Fig. 6. 8 butt plates for ribbons Nameplate packing Upper cardboard Fig. 8. Fig. 9. Figs. 4 a 9. Unpacking procedure. - 17 - • Having the reception completed, it is best to pack the equipment in its original package until it is put into service in order to protect it from mechanical impacts, dust, dirt, etc. • The equipment packaging consists of a wooden pallet, cardboard or wooden package depending on the case, butt plates protectors of expanded polyesthylene (EPS) or polyethylene foam (PE), polyethylene wrap and polyester strap. All of them are recyclable materials, therefore if they are to be disposed, it must be done according to the effective laws. We recommend to keep the packaging in case it would have to be used in the future. • Until the moment of its definitive installation, it is convenient not to download the equipment of its wooden pallet with the purpose of facilitating its mobility. • Check that, together with the equipment, the Installation and User’s manual is attached. 4.2.2.- Storing. Due to the battery absence and/or other sensitive components to the ageing, the standards to follow for its correct storing will be to store the unit in places free of dust and humidity and protected from chemical agents and high temperatures. In case of piling up, do not exceed two units of height. 4.2.3.- Location. The location of the equipment will depend on the version. In case of outdoor units (I), the equipment must be placed over a pedestal and firmly anchored through bolts. Thanks to is protection degree IP54, it can be located outdoors. In case of the indoor units (T), the equipment, due to its protection degree IP20, must be placed inside an existing control centre, never outdoor. 4.3.- Assembling of the different versions. Depending on the equipment version either outdoor (I) or indoor (T), the fixing drawing of the equipment baseboard will be as follows: Types 1, 2 and 3: for all the indoor ILUEST version (T). Types 4, 5, 6 and 7: for all the outdoor ILUEST version (I). TYPE 1 - TYPE 2 - TYPE 3 - TYPE 7 TYPE 4 - TYPE 5 - TYPE 6 NOTE: The distance among the drills D, E, G, H and φ are stated in the following table: TYPE ILUEST VERSION Type 1 Type 2 Type 3 Type 4 Type 5 Type 6 Type 7 T -single phaseT -three phase ≤ 45 kVAT -three phase > 45 kVAI -single phaseI -three phase ≤ 60 kVAI -three phase 80-100 kVAI -three phase 120 kVA- Fig. 10. Fixing drawing. - 18 - D 160 100 100 223 186 286 350 E 240 615 623 380 630 630 500 FIXING ∅F 10,5 11 11 14 14 14 11 G 195 295 295 - H 157,5 167,5 167,5 - 4.4.- Communication ports. The ILUEST has 3 serial ports RS485, one per each phase, which allow the connection of the following optionals: • LCD panel. • Telemanagement card . • Extended communication card. 4.5.- Recommended protection devices and cross section cables. 4.5.1.- Recommended protections. Install the protections against over currents (overloads and short-circuits), earth leakage current and overvoltages according to the local regulations. Regarding the overvoltages, although the equipment is already protected by varistors, it is recommended to use other protection methods (like lightning arrrestors) if it is required by the environment conditions. 4.5.2.- Recommended cross section cables. Never mind the installation type (undergrounded or to air ), it is recommended to consult the Low Voltage Regulation : ITC-BT07 - UNDERGROUND MAINS FOR LOW VOLTAGE DISTRIBUTION, in case of installation in Spain, or the relevant local standards in case of its installation out of Spain. 4.5.3.- Installation diagrams. In the figure 11, it is showed the typical installation diagram of the ILUEST. Always, it is important to comply the following features: • The ILUEST must ALWAYS be installed at the head of the lighting feeder pillar. • It is recommended to install it after the light contactor, because, in this way the equipment will be turned off during the period that the lights are off, avoiding overheatings and needless consumption. 4.6.- Connection. The typical connection diagram of the ILUEST is showed in the figure 11. 4.6.1.- Power supply connection. • The earth connection must be connected ( ), by assuring that it is already done before proceeding to feed the input of the equipment. • Connect to the input terminals (1), the cables coming from the start up contactor of the system, by respecting the phase rotation and neutral stated in the labelling of the equipment and in the figures 12 and 13 of this manual. Attention: It is a must to connect the neutral in any three phase star system, by recognising it in the terminal labels with a «N». - 19 - R S T N Mains Ligh sensor Start up contactor of the installation Voltage dimmerstabilizer ILUEST Astronomical clock or timer Manual control switch R S T N OUTPUT 1 OUTPUT 2 OUTPUT 3 Lighting distribution lines Fig. 11. Typical three phase installation diagram, with voltage Dimmer-stabilizer ILUEST. - 20 - 4.6.2.- Remote control connection (saving order). • Never mind the structure, version and power of the equipment, there are three groups of two terminals for connecting, the remote control or the saving order, and they are labelled in the equipment as «Remote Control». • To order the flow dimming: Connect to the remote control terminals one of the normally open contacts of an astronomical clock or timer. The saving level will start and remains meanwhile this contact is closed. To be installed by the client. DO NOT apply voltage to these terminals, because they are free potential contacts. CONNECTION DIAGRAM CONNECTION DIAGRAM ILUEST ILUEST R IP/OP N U R-S-T-N INPUT S IP/OP N V U-V-W-N OUTPUT T IP/OP N W R R-N INPUT R-S-T REMOTE CONTROL Fig. 12 Three phase ILUEST connection with BM478* U-N OUTPUT IP/OP N U REMOTE CONTROL Fig. 13 Single phase ILUEST connection with BM478* 4.6.3.- Output connection. • Connect the cables coming from the distribution lines to the output terminals (2*), by respecting the phase rotation and neutral stated in the labelling of the equipment and in the figures 12 and 13 of this manual. • Either the light installatio existed before installing the ILUEST, or it were new, the load must be distributed correctly in order to balance it among the phases. - 21 - 5.- OPERATION. 5.1.- Start up and shutdown. 5.1.1.- Controls before starting up. Before starting up the system, the following adjustments and checkings must be carried out: • Check the right connection of the power supply and load cables to the equipment, according to the previous section. • Check that the output voltages of the equipment have been adjusted correctly, according to the section 5.2.3.: - Nominal voltage: it is adjusted to the wanted nominal value (230Vac by default). - Saving voltage: it is adjusted depending on the lamp to be fed (HPSV, MV, MH, etc.) and the dropping voltage in the lighting mains , with the purpose of avoiding sudden light shutdowns at the end of the line. • Check that the saving voltage 1 or 2 has been selected through the dipswitches of control PCB BM478 of each phase (table 1). • Check that there is an external device which is ready to give the saving order to the equipment (astronomical clock, timer, telemanagement pack , PLC, etc.) and it is connected properly (see specific manuals). • In case of existing any optional device installed, check its correct connection and configuration before starting up the equipment (see specific manuals). 5.1.2.- Start up. • Turn the input voltage Vin to the equipment with the circuit breaker (4) or (4), (5) and (6), if the ILUEST is single or three phase, respectively, to «0» or «Off» and disconenct the loads. Check that the input voltage Vin is correct. • Turn the circuit breaker (4) or (4), (5) and (6), if the ILUEST is single or three phase, respectively, to «I» or «On». Check that the output voltage Vout is correct. • Shutdown, by turning the circuit breaker (4) or (4), (5) and (6), if the ILUEST is single or three phase, respectively, to «0» or «Off», connect the loads and start up the equipment by turning the circuit breaker (4) or (4), (5) and (6) again, if the ILUEST is single or three phase, respectively, to «I» or «On». • Now the loads are fed. The start up and shutdown of the system is done by closing and opening, respectively, the start up contactor of the system in the installation, and it is not needed any daily operation because it is automatic: everyday it will start up or shutdown when the main light contactor is closed or opened, and the saving order will be activated or cancelled depending on the external time settings of the astronomical clock or timer, as it is described in the section 4.6.2 and 4.6.3. 5.1.3.- Complete shutdown of the equipment. The complete manual shutdown of the equipment will only have sense in case of corrective (fault) or preventive maintenances of the equipment, because in normal conditions the shutdown will be fully automatic and unattended through the main contactor of the remote control. • Turn the circuit breaker (4) or (4), (5) and (6), if the ILUEST is single or three phase, respectively, to «0» or «Off». - 22 - 5.2.- Indications, selectors and adjustments of the electronic control BM478*. In the figure 1 of section 3.1.3. it is showed the location of all indicators. 5.2.1.- Indications per phase. • LD1. Saving order activated. (Yellow). • LD2. Acoustic alarm on. (Red). If this LED is ON, call to Service and Technical Support (S.T.S.). The equipment can still be connected, although the phase with this led ON doesn’t operate and stabilize. This LED goes with an acoustic alarm. • LD3. The equipment is on Bypass. (Red). If this LED is ON, call to Service and Technical Support (S.T.S.). The equipment can still be connected, although the phase with this led ON doesn’t operate and stabilize. This LED goes with an acoustic alarm. • LD4. ILUEST status with LD2 inactive. (Green). - LD4 off. SAVING status. - LD4 on. START UP or NOMINAL status. - LD4 blinking. Output voltage RAMP. From START UP to NOMINAL voltage, from NOMINAL to SAVING voltage or from SAVING To NOMINAL voltage. Bypass causes with LD2 blinking (equipment in Bypass). (Green). - LD4 off. Triac opened. - LD4 on. Triac short-circuited. • LD5 ÷ 11. It shows the static switch tap which is triggered. (Red). 5.2.2.- Selectors per phase. • SW1. EEPROM redording or normal running. Factory preset. Do not touch. • SW2. Speed running / adjustment, see table 1. ON – 1 2 3 4 5 OFF 1-2-3-4-5 2-3-4-5 1-3-4-5 1-2-4-5 1-2-3-5 1-2-3-4 FUNCIÓN ––– TensiónSaving reducida 1 y1velocidad normal voltage and normal speed Saving voltage 2 and normal speed TensiónSaving reducida 1 y1velocidad rápida ajuste voltage and fast speed Saving voltage 2 and fast speed ––– Tabla 1. Selectors per phase SW2 for control BM478*. • SW1 + SW2. Start up voltage selection. By default the ILUEST has the setting of start up voltage set to a lower voltage than the nominal (210Vac); to set the start voltage to nominal, follow the below steps: - 23 - • • • • Put the dipswitches nº4 of SW1 and SW2 to ON. The rest to OFF. Turn on the power supply. The equipment transfer to bypass and beeps continuously. The microprocessor has been recorded. Shutdown the equipment. Put the dipswitches of SW1 and SW2 to the wanted running position according to the table 1 and start up the equipment again. Note: This operation must be done the last one, because if the dipswitch 5 of SW1 is positioned to ON the equipment will start up at lower voltage than the nominal again. 5.2.3.- Adjustment per phase. • • • P1. P2. P3. Control PCB power supply. Factory preset. Do not touch. Nominal output voltage adjustment. Saving voltage adjustment. Note 1: P2 and P3 can be adjusted with the equipment in operation. The adjustment of P3 when the equipment is running at normal speedand we are reducing the saving voltage, must be done very slowly otherwise we will provoke a «Reset» of the equipment . Nota 2: If the default economy voltage is not apropiate, make the ajustment of the following form: SW2-1 or SW2-3 at ON and make the ajustment witch the potenciometer P3. - 24 - 6.- MAINTENANCE , WARRANTY AND SERVICE. 6.1.- Basic maintenance guide. The main guidelines for a correct maintenance are almost the same to the ones that our Service and Technical Support does as preventive maintenance (see section 6.4). 6.2.- Troubleshooting and F.A.Q.. Before calling to Service and Technical Support (S.T.S.) in front of a wrong operation of the equipment, the end user can try to solve the problem by himself, in case the symptoms are one of the followings: 1. If the control is OFF , • Check the fuses FS1 and FS2. • Check the connection between the terminals CN46. • If the above steps are correct, the control PCB must be replaced. Call to Service and Technical Support (S.T.S.). 2. If the equipment is in bypass and the acoustic alarm sounds, check the fuses from FS3 to FS7 (voltage between both fuse ends = 0V AC). • If any fuse is blown up, shutdown the equipment and replace the fuse by otherone with the same size. • Re-start up the equipment and wait for a complete saving cycle. Check if the bypass alarm is repeated . • If the alarm is repeated, the control PCB must be replaced. Call to Service and Technical Support (S.T.S.) 6.3.- Warranty conditions. SALICRU, S.A. provides a limited warranty, and it only applies to those products which have been purchased with an industrial or commercial purpose in your normal business development . 6.3.1.- Product covering. Light flow dimmer-stabilizer, ILUEST model. 6.3.2.- Warranty terms. SALICRU guarantees the product against any material deffect and/or manpower for 12 months period starting from its start up date done by SALICRU or other specifically authorised staff, or for 18 months from the factory delivery date, whichever expires first. In case of fault during the warranty period, SALICRU will repair at no cost the damaged part/s , in your facilities. The transport and packaging expenses will be under the charge of the end user. SALICRU guarantees, for a 10 years period, as minimum, the availability of spare parts, either hardware or software, and also a complete assistance in the reparations, parts replacement and software updating. 6.3.3.- Exclusions. The product is out of warranty if the fault doesn’t exist or it was due to a wrong operation, negligence, installation and/or unsuitable testing, fixing or modification fixing, which has not been authorised, or any other cause beyond of its foreseen using, or by accident, fire, lightning or other danger. Also, in any case there will not be any compensation by damages or injuries. - 25 - 6.4.- Description of the available maintenance contracts and services. When the warranty is expired, SALICRU, can be adapted to the client needs, with different maintenance contracts: • Preventive. It guarantees a better safety for its conservation and well operation of the equipment with an yearly Preventive visit. During it, the specialized technicians of SALICRU make several tests and adjusments in the system: - Measure and write down the input and output voltages phase to phase and current per phase. - Check the data logger (if the Telemangement optional is installed). - Check and test all the readings of the LCD panel. - LCD panel: input and output voltages and currents and temperatures. - Other measurements. - Check the status of the fans. - Check the load level. - Check the selected language. - Check the correct situation of the equipment. - General clean of the equipment. - 26 - 7.- ANNEXS. 7.1.- General technical specifications. INPUT Single phase voltage ................................................................... 120V, 220V, 230V, 240V. Three phase voltage .................................................................... 208V, 220V, 230V, 240V, 380V, 400V, 415V + N + E. Voltage range .............................................................................. +33% / -8% nominal voltage. +4% / -29% saving voltage 1. +10% / -2,4% savinf voltage 2. Frecuency From ............................................................................ 48 to 63Hz. Protection per phase ................................................................... Single pole circuit breaker. OUTPUT Single phase voltage ................................................................... 120V, 220V, 230V, 240V. Three phase voltage .................................................................... 208V, 220V, 230V, 240V, 380V, 400V, 415V + N + E. Accuracy ...................................................................................... better than ±2% Soft start voltage ........................................................................ 210V. Minimum saving voltage .............................................................. 188V (phase to neutral ). Control ......................................................................................... Independent per phase. Harmonic distortion ...................................................................... Nil. Efficiency ...................................................................................... >97%. Permissible load power factor ...................................................... from 0,5 lagging to 0,7 leading. Unbalancing between phases ..................................................... Permissible 100%. Saving voltage selection 1 or 2.................................................... Through dipswitches per phase. BYPASS Included and automatic and solid state and independent per phase .................................................................................... Yes. ENVIRONMENT Operating temperature ................................................................ from -40ºC to +45ºC. Relative humidity ......................................................................... from 0% to 95%, non-condensing. Maximum operating altitude ....................................................... 2.400 m.a.s.l. Mean Time Between Failures (MTBF) ......................................... 60.000 hours. Mean Time To Repair (MTTR) ..................................................... 30 minutes. Acoustic noise at 1 meter ............................................................ <35dB. INDICATIONS Optical (per phase) ...................................................................... Process «Mode» Saving order activated «Saving ON». Selected tap. Automatic and solid state Bypass . Automatic and solid state Bypass alarm. Acoustic (per phase) ................................................................... Automatic and solid state Bypass alarm. - 27 - ENCLOSURES The equipments are manufactured in the following versions: .......... Indoor version built in a bichromated steel enclosure at carbon, with baseboard with four holes for fixing it to the floor where it will be installed. Outdoor version built in metallic cabinets of steel at carbon, and cathephoresis treatment. Or in polyester cabinets. OPTIONALS Telemanagement pack. GSM modem. Lightning arrestors. Manual bypass. Timer / astronomical clock. LCD panel. Extended communications card. 7.2.- Glossary. • Soft start Start up or switching type of the lights. It is done, in order to avoid both the mechanica stress of the lamps have and the overload that it is done when they are started up at nominal voltage. • Autotransformer Input transformer type in the equipment, which its feature is not to have galvanic isolation. • Booster Or compensator transformer, it is used to control the system through a sample of the total input current. • Terminal Appropriate connector to connect a cable of important dimensions. • Bypass It is the system that connects the output with the input when there is a problem in the loads or equipment. It avoids the light shutdown. • Control centre board Electrical board destined to supply, distribute, protect, etc., the light installations. • Electromagnetic compatibility Its target, is to establish the evaluation procedures for the conformity and protection requirements regarding to the electromagnetic compatibilty of the equipments, systems and installations for its later commercialising and start up. • Contactor The contactor is used to connect the power parts and it will allow to make automatic the maneuvers. Basically it is a three phase switch that it is turned on remotely, with minimum physical effort and high safety through a coil. - 28 - • Dry contacts The electrical contacts are controlled parts that they are connected or disconnected to our receivers (coils, lights, motors, etc.). Those contacts are located in the contact chambers and they are turned on by different systems, i.e. buttons, switches, relays, etc. • Harmonic currents They are currents added to the fundamental frequency of a predetermined sinewave. It is named in this way when these harmonic currents are distorting the original wave dueto different reasons. • Star Standard connection type of the three phase transformers, which has a cable that makes the neutral function. • Phase Each one that the three phase system has: R, S and T, or single phase: R. • Outdoor Name used to describe the features of the enclosure, according to its protection degree, when it is placed outdoors. • Relay interface Communication port of the equipment with the environment, it is normally made by dry contacts . • Static switch Electrically speaking, it is an electronic switch without any physical movement and it is based on a silicon chip with particular features. • IP54 Protection degree ready to support the weather inclemencies. • Led Light Emitting Diode that irradiates light when it is polarised properly. • Circuit Breaker It is a combination of thermal and magnetic switch, which can trip with both magnitudes combined. • CE marking Certificate that all electrical equipment must pass in Europe. All the manufacturers has capacity to be certified by himself. • Neutral In a poliphase system, it is the point that in the foreseen operation, has the same potential difference, in relation to each one of the phases of the system. • Telemanagement pack Optional Pack, which has been designed to establish a local and/or remote communication with the ILUEST. It is composed by a PCB, built in the equipment and management software. • Pin Usually, it is the numbered contact in the integrated circuits. • Timer It is a clock with the feature to temporize the activation of one or several contacts. • Astronomical Clock It is a clock with an algorithm inside, where setting the latitude and longitude of a geographic point, it saves the sun rise and sunset of every day in one year. Usually, it is used to start up or shutdown the lights in an accurate way. • RS485 Transmission system of communication, in which two twisted cables will establish the communication with an established address. - 29 - • RE2 series Automatic voltage stabilizer for industrial applications that SALICRU developed and it was world-wide patented in the seventies. • Triac The triac is a semiconductor with three pins, and it is used to control the average current flow toward the load, with the particularity that it is trigered in both senses and it can be blocked by both reverse voltage and if the current is lower than the maintenance value. Never mind the gate polarisation, the triac can also be triggered, it means that the current gate can be positive or negative. • Taps Each one of the contacts extracted in the secondary of the input autotransformer of the equipment. • Indoor Name used to describe the enclosure location into an existent board or control centre. - 30 - - 31 - Table des matières. 1.- INTRODUCTION 1.1.- Lettre de remerciement 1.2.- Utilisation du manuel 1.2.1.- Conventions et symboles utilisés 1.2.2.- Renseignements complémentaires et/ou assistance 2.- ASSURANCE DE LA QUALITÉ ET RÉGLEMENTATION 2.1.- Déclaration de la Direction 2.2.- Réglementation 2.3.- Sécurité et premiers secours 2.4.- Environnement 3.- PRÉSENTATION 3.1.- Vues et légendes 3.1.1.- Légendes des vues de l’appareil 3.1.2.- Vue frontale 3.1.3.- Contrôle électronique BM478* 3.2.- Définition et structure 3.2.1.- Nomenclature 3.2.2.- Schéma structurel 3.3.- Description du système 3.3.1.- Introduction 3.3.2.- Caractéristiques constructives 3.3.3.- Principe de fonctionnement 3.3.4.- Versions 3.4.- Options 3.4.1.- Bypass automatique à contacteurs 3.4.2.- Bypass manuel 3.4.3.- Programmateur horaire 3.4.4.- Horloge astronomique 3.4.5.- Afficheur LCD 3.4.6.- Pack Télégestion 3.4.7.- Modem GSM 3.4.8.- Déchargeur de gaz 3.4.9.- Carte de communications étendues 4.- INSTALLATION 4.1.- Instructions de sécurité importantes 4.2.- Réception de l’appareil 4.2.1.- Déballage et vérification du contenu 4.2.2.- Stockage 4.2.3.- Emplacement 4.3.- Montage des différentes versions 4.4.- Ports de communication 4.5.- Organes de protection et sections de câbles recommandées 4.5.1.- Protections recommandées 4.5.2.- Sections de câbles recommandées 4.5.3.- Plans d’installation 4.6.- Branchement 4.6.1.- Connexion de l’alimentation - 32 - 4.6.2.- Connexion du contrôle à distance (Ordre d’économie) 4.6.3.- Connexion de la sortie 5.- OPÉRATION 5.1.- Mise en marche et arrêt 5.1.1.- Contrôles avant la mise en marche 5.1.2.- Mise en marche 5.1.3.- Arrêt complet de l’appareil 5.2.- Indications, sélecteurs et réglages des contrôles électroniques BM478* 5.2.1.- Indications par phase 5.2.2.- Sétecteurs par phase 5.2.3.- Réglages par phase 6.- MAINTENANCE, GARANTIE ET SERVICE 6.2.- Guide des problèmes et des solutions (F.A.Q.) 6.3.- Conditions de la garantie 6.3.1.- Produit couvert 6.3.2.- Termes de la garantie 6.3.3.- Exclusions 6.4.- Description des contrats de maintenance et de service disponibles 7.- ANNEXES 7.1.- Caractéristiques techniques générales 7.2.- Glossaire - 33 - 1.- INTRODUCTION 1.1.- Lettre de remerciement Nous tenons à vous remercier de la confiance dont vous nous témoignez en achetant notre produit. Veuillez lire ce manuel attentivement avant de mettre l’appareil en marche et conservez-le de façon à pouvoir le consulter ultérieurement. Nous demeurons à votre entière disposition pour tout renseignement complémentaire ou toute consultation. Sincères salutations. SALICRU L’appareil décrit dans ce manuel peut causer des dommages physiques importants s’il n’est pas manipulé correctement. C’est pourquoi l’installation, la maintenance et/ou la réparation de l’appareil référencé seront obligatoirement confiées au personnel de SALICRU ou à du personnel qualifié expressément agréé. Fidèle à sa politique d’évolution constante, notre société se réserve le droit de modifier sans préavis les caractéristiques de l’appareil, en totalité ou en partie. La reproduction et la cession de ce manuel à des tiers sans l’autorisation écrite de notre société sont rigoureusement interdites. 1.2.- Utilisation du manuel • Nous avons décrit dans ce manuel les principales caractéristiques d’installation et de fonctionnement du STABILISATEURRÉDUCTEUR, en ordonnant tous les éléments de connexion, manœuvre, etc., pour mieux les identifier. • Ce STABILISATEUR-RÉDUCTEUR doit être installé par du personnel qualifié et, à l’aide de ce manuel, il peut être utilisé par du personnel non formé spécifiquement. 1.2.1.- Conventions et symboles utilisés Symbole de «Danger de décharge électrique». Il y a un risque d’électrocution, tenez-en compte. Symbole «Attention». Sur l’appareil : consultez le manuel d’instructions pour plus de détails. Dans le manuel: lisez attentivement le paragraphe indiqué et prenez les mesures préventives recommandées. Symbole «Borne de mise à la terre». Branchez le câble de terre de l’installation à cette borne. Symbole «Notes d’information». Préservation de l’environnement. La présence de ce symbole sur le produit ou la documentation jointe indique que, au terme de sa vie utile, il ne faudra pas l’éliminer avec les ordures ménagères. Pour préserver la qualité de l’environnement, séparer ce produit des autres déchets et le recycler correctement. Les consommateurs peuvent contacter leur fournisseur ou les autorités locales correspondantes pour se renseigner sur les points de ramassage destinés au recyclage de ce produit ou à sa correcte élimination. 1.2.2.- Renseignements complémentaires et/ou assistance • Pour en savoir davantage et/ou obtenir de l’aide sur la version spécifique de votre unité, contactez notre département Service et Support technique (S.S.T.). - 34 - 2.- ASSURANCE DE LA QUALITÉ ET RÉGLEMENTATION 2.1.- Déclaration de la Direction. Nôtre objectif est la satisfaction du client, par conséquent cette Direction a décidé établir une Politique de Qualité et Environnement, à travers de l’implantation d’un Système de Gestion de la Qualité et Environnement, lequel fasse nous soyons capables de l’accomplissement des conditions requises exigées dans la norme ISO 9001 :2000 et ISO 14001 :2004 et aussi pour nos Client et Parts Intéressées. De la même manière, la Direction de SALICRU est engagé avec le développement et amélioration du Système de Gestion de la Qualité et Environnement, à travers: - La communication à toute la Société de la importance de satisfaire tant les conditions requises du client comme les légales et réglementaires. - La diffusion de la Politique de Qualité et Environnement et la fixation des objectifs de la Qualité et Environnement. - La réalisation de révisions par la Direction. - La fourniture des recours nécessaires. Représentant de la Direction: La Direction a désignée le Responsable de Qualité et Environnement en tant que représentant de la direction, qui avec indépendance d’autres responsabilités, a la responsabilité et autorité d’assurer que les processus du système de gestion de la qualité et environnement soient établies et maintenus ; informer à la Direction du fonctionnement du système de gestion de la qualité et environnement, en incluant les besoins pour l’amélioration ; et promouvoir la connaissance des conditions requises des clients et des conditions requises environnementales à tous les niveaux de la organisation. On peut voir sur le suivant DIAGRAMME DE PROCESSUS la interaction entre tous les processus du Système de Qualité et Environnement de SALICRU. PROCESSUS AMELIORATION CONTINUE / REVISION DIRECTION PROCESSUS GESTION QUALITE PROCESSUS GESTION ENVIRONNEMENT PROCESSUS R&D PROCESSUS BUREAU TECHNIQUE CLIENTS: - PRODUIT - SERVICE CLIENTS PROCESSUS COMMERCIEL PROCESSUS FABRICATION PROCESSUS LOGISTIQUE INTERNE PROCESSUS MAINTENANCE PROCESSUS FORMATION 2.2.- Réglementation Le produit ILUEST décrit dans ce manuel d’utilisation est conçu, fabriqué et commercialisé conformément à la norme EN ISO 9001 d’assurance de la qualité. L’estampillage indique sa conformité aux directives de la CEE (citées entre parenthèses) par l’application des normes suivantes: - 35 - • 73/23/EEC sur la sécurité de la basse tension • 89/336/EEC sur la compatibilité électromagnétique (CEM) selon les spécifications des normes harmonisées. Normes de référence : • EN 60950-1 : équipements de technologie de l’information. Sécurité. Partie 1 : conditions générales. • EN 61000-6-3 : compatibilité électromagnétique. Norme générique d’émission. Environnement commerce et industrie légère. • EN 61000-6-2 : compatibilité électromagnétique. Norme générique d’immunité. Environnement industriel. Quand on utilise un ILUEST comme composant d’une installation complexe ou système, il faut appliquer les normes génériques ou de produit qui correspondent spécifiquement à cette installation ou à ce système. Si on ajoute des éléments ou pour être conforme aux conditions d’une réglementation déterminée, il se peut que l’ensemble demande à être corrigé et mis en conformité avec les directives européennes et la législation nationale correspondante. Il incombe au projeteur et/ou installateur de vérifier la mise aux normes et de doter l’installation des éléments correcteurs nécessaires. Il faut également tenir compte du phénomène de l’interférence par des courants harmoniques à l’entrée qu’il faudra corriger dans certaines installations, même si la législation ne l’impose pas. Selon les conditions d’installation du ILUEST,, il faudra adopter ou pas les corrections détaillées au paragraphe Compatibilité électromagnétique. Pour toutes les variantes et en matière de sécurité (norme EN 60950-1), il faut tenir compte des aspects du produit détaillés au paragraphe INSTALLATION. 2.3.- Sécurité et premiers secours • L’information sur les «Instructions de sécurité» (voir document EK266*08) est livrée avec l’appareil et ce « Manuel d’installation et d’opération ». Avant de commencer la procédure d’installation ou de mise en marche, vérifiez que vous ayez ces deux documents ; si ce n’est pas le cas, demandez-les. Il faut obligatoirement tenir compte des «Instructions de sécurité», l’utilisateur en étant légalement responsable. Après les avoir lues, conservez-les pour pouvoir les consulter plus tard en cas de besoin. 2.4.- Environnement. Ce produit a été dessiné pour respecter l’environnement et fabriqué selon la norme ISO 14001. Recyclage de l’ILUEST à la fin de sa vie utile: SALICRU s’engage à utiliser les services de sociétés autorisées et conformes avec la réglementation pour le traitement de l’ensemble des produits récupérés à la fin de sa vie utile (nous vous prions de mettre en contact avec votre distributeur). Emballage: Pour le recyclage de l’emballage, mettez vous en conformité avec les exigences légales en vigueur. Batteries: Les batteries représentent un danger sérieux pour la santé et le environnement.. Son élimination devra être réalisée conformément avec les lois en vigueur. - 36 - 3.- PRÉSENTATION 3.1.- Vues et légendes 3.1.1.- Légendes des vues de l’appareil (1N) (1R) (1S) (1T) (2N) (2U) (2V) (2W) (3U) (3V) (3W) (4) (5) Borne neutre N d’entrée. Borne phase R d’entrée. Borne phase S d’entrée. Borne phase T d’entrée. Borne neutre N de sortie. Borne phase U de sortie Borne phase V de sortie Borne phase W de sortie Borne pour le contrôle à distance phase U Borne pour le contrôle à distance phase V Borne pour le contrôle à distance phase W Magnétothermique d’entrée phase R Magnétothermique d’entrée phase S (6) (7) (8) Magnétothermique d’entrée phase T Commutateur By-pass manuel (en option) Programmateur horaire, ordre démarrage mode éco nomique (en option) (9) Ventilateurs (10) Pack télégestion / Display LCD (en option) (11) Connecteur RJ45 pour connexion GSM / PC porta ble (en option). (12U) Borne pour contrôle contacteur phase U (en option). (12V) Borne pour contrôle contacteur phase V (en option). (12W)Borne pour contrôle contacteur phase W (en option). (13) Réglette entrées / sorties numériques (en option). ( ) Borne de prise de terre 3.1.2.- Vue frontale (13) (11) (9) (8) (10) (6) (5) (4) (12U) (3U) (12V) (3V) (12W) (3W) ( ) (2W) (1R) (1N) (2N) (2N) (2U) ( ) (1N) (1T) (1S) (1N) (2N) (2V) ( - 37 - ) (8) 3.1.3.- Contrôle électronique BM478* Vue du contrôle électronique BM478*. Voir explication sur les contrôles au paragraphe 5.2. 2 CN49 10 CN18 CN2 M2 (remote control) VIN CN47 P2 FS2 NOMINAL OUTPUT VOLTAGE P3 FS1 CUT PHASE CN46 Bypass SAVING ORDER ACTIVATED CN48 THERMAL N SWITCH LD3 LD1 MP4 1 FAN POWER SUPPLY P1 SAVING VOLTAGE LD2 SW2 ON 1 5 2 3 4 + CN22 SW1 - ON 1 5 2 3 4 LD4 LD5 LD6 LD7 LD8 Fig. 1. Vue du contrôle électronique BM478* - 38 - LD9 LD10 LD11 3.2.- Définition et structure 3.2.1.- Nomenclature Serie ILUEST monofhasé NE 10-2ISBMD-COM "AC" I 220V 60Hz "EE84526" Appareil spécial "EE" Frequence si n'est pas 50Hz Tension si n'est pas 230Vac I Interface à relais "AC" Equipement spécial avec contrôle BM158 "AC-BCN" Equipement spécial. Magnetothermique d'entrée tripolaire avec contrôle BM158 "AR" Equipement spécial avec contrôle BM503 "AR-BCN" Equipement spécial. Magnetothermique d'entrée tripolaire avec contrôle BM503 COM Carte de communications LCD Display LCD D Éjecteur à gaz de 6,5 kA BM Bypass manual BA1 Bypass automatique S ILUEST à 180V (omettre s'il est ILUEST standard) I Intempérie T Tableau Premier numéro de la tension Puissance de l'appareil en kVA Three phase ILUEST NET 10-3ISBMDV-COM "AC" I 3x380V 60Hz T/T "EE84526" Appareil spécial "EE" Triangle/Triangle Frequence si n'est pas 50Hz Tension si n'est pas 230Vac I Interface à relais "AC" Equipement spécial avec contrôle BM158 "AC-BCN" Equipement spécial. Magnetothermique d'entrée tripolaire avec contrôle BM158 "AR" Equipement spécial avec contrôle BM503 "AR-BCN" Equipement spécial. Magnetothermique d'entrée tripolaire avec contrôle BM503 COM Carte de communications LCD Display LCD V Format vertical (seulement les équipes à 45 kVA) D Éjecteur à gaz de 6,5 kA BM Bypass manual BA1 Bypass automatique commun pour l'ensemble de l'équipement BA3 Bypass automatique independent pour chacune des phases S ILUEST à 180V (omettre s'il est ILUEST standard) I Intempérie T Tableau Premier numéro de la tension Puissance de l'appareil en kVA T/T - Les premières lettres indiquent, outre l’appellation de l’appareil, sa nature électrique : NET pour les appareils triphasés et NE pour les monophasés. - 39 - 3.2.2.- Schéma structurel Les stabilisateurs-réducteurs de flux, série ILUEST, sont fabriqués avec un transformateur compensateur ou Booster (fig. 2). By-pass automatique Transformateur rapport «Booster» Entrée By-pass manuel (en option) Sortie Autotransformateur multiprises Interrupteurs statiques d’état solide Contrôle à distance Démarrages progressifs FA CR C REF CAD Contrôle de sortie ON/OFF saving programmer Optionnels Communication série RS-485 Fig. 2. Diagramme des blocs ILUEST équipé d’un booster 3.3.- Description du système 3.3.1.- Introduction La nouvelle gamme de stabilisateurs-réducteurs de tension, série ILUEST, intervient autant dans la stabilisation de la tension d’alimentation de l’éclairage que dans la réduction éventuelle du flux lumineux aux heures où la demande lumineuse est moins exigeante. De par sa conception, elle garantit que la tension qui arrive aux lampes sera toujours dans des marges de ±2 % de la valeur nominale, ce qui assure un fonctionnement dans les conditions prévues pour les lampes et pour les appareils auxiliaires associés, avec un flux et des niveaux d’éclairage optimaux. Elle présente un avantage en rien négligeable, à savoir la plus grande longévité des lampes. En effet, tout le monde sait que les surtensions nocturnes sont l’une des principales causes de leur épuisement prématuré. D’une part, une tension stable prolonge la vie des lampes de décharge et, si les surtensions sont éliminées, on réussit en outre à diminuer la consommation puisque la puissance absorbée reste sur sa valeur nominale (une surtension de 10 % augmente la consommation de plus de 20 % et réduit la vie des lampes de 50 %). D’une part, réduire la tension d’alimentation jusqu’à certaines valeurs prédéterminées permet de conserver des niveaux d’éclairage satisfaisant les besoins luminotechniques aux moments où les exigences visuelles sont mineures. 3.3.2.- Caractéristiques constructives Les ILUEST s’inspirent des stabilisateurs de tension bien connus et accrédités de la série RE2, fabriqués depuis plus de trente ans et améliorés grâce aux dernières technologies, d’où leur excellente fiabilité et leur haut rendement. - 40 - Les principaux éléments constructifs sont (voir fig.2) : Autotransformateur multiprise par phase Transformateur booster par phase Contrôle électronique avec microprocesseur par phase By-pass automatique d’état solide par phase Démarrage progressif par contrôle à distance Canal de communication RS-485 Programmateur horaire de contrôle de niveau d’économie (en option) By-pass manuel (en option) Les interrupteurs statiques sont des semi-conducteurs contrôlés par un système électronique, de sorte à conduire, à tout moment, le semi-conducteur correspondant à la prise qui fournit la tension de sortie souhaitée à cet instant. Sur la figure 2, le secondaire du transformateur booster est alimenté à partir de la tension obtenue de l’une des prises secondaires de l’autotransformateur, lequel est directement alimenté par le réseau commercial avec un interrupteur magnétothermique. Cette prise est branchée au transformateur booster avec les interrupteurs statiques gouvernés par un contrôle électronique, de sorte qu’il y ait toujours un seul semi-conducteur en fonctionnement, le semi-conducteur correspondant à la prise qui fournit la tension de sortie correcte à cet instant. Cette tension s’ajoute en phase ou en contre-phase au réseau, par l’intermédiaire du secondaire du booster cité, en corrigeant les fluctuations qui se produisent sur la tension. 3.3.3.- Principe de fonctionnement Le stabilisateur-réducteur s’installe en tête de ligne d’éclairage, que ce soit sur le tableau de commande ou dans un boîtier à part, sans nécessité de câblage de contrôle supplémentaire jusqu’aux lampes (voir fig.11 «Schéma de branchement d’une installation type »). Dès que l’appareil est sous tension, le cycle quotidien de mise en marche commence (voir fig.3), avec un « démarrage en douceur » de l’installation qui part de 210 V et s’y stabilise pendant 2' 30'’, après quoi elle amorce la rampe ascendante jusqu’à une valeur nominale de 230 V pendant 5 minutes de plus. Lors de cette phase de démarrage, la tension est stabilisée sur les valeurs correspondantes. La mise en marche étant terminée, l’appareil continuera à fournir à l’installation une tension stabilisée sur la valeur nominale, jusqu’au moment où elle recevra l’ordre de réduire le flux. Cet ordre proviendra du dispositif extérieur choisi (programmateur horaire, horloge astronomique, contrôle à distance, actionnement manuel...), qui sera branché aux bornes signalées sur l’appareil comme «Remote control». Commence alors un processus de « réduction en rampe douce » qui dure 10 minutes, jusqu’à la valeur d’économie. Ce processus sera répété autant de fois qu’il aura été programmé, de même qu’en cas de coupure d’électricité. - 41 - Un (V) 230 V 210 V VM saving level HPS saving level t 0 1 2 0.1.2.3.- 5 6 3 4 Mise en marche du système Démarrage en « rampe douce » d’allumage Arrivée au niveau nominal Ordre d’entrée en niveau d’économie réduite. Amorçage de la descente en « rampe douce » 7 4.- Arrivée au niveau d’économie, selon le type de lampes 5.- Fin de fonctionnement en niveau réduit et retour (ou non) au niveau nominal, également en rampe progressive ascendante 6.- Fonctionnement en tension nominale jusqu’à la déconnexion 7.- Déconnexion quotidienne Fig. 3. Cycle de fonctionnement 3.3.4.- Versions Les ILUEST sont disponibles en deux versions. • Version tableau (T). Installation dans les tableaux de distribution, protection et commande, jamais à l’intempérie. Le niveau de protection est IP20. Important : Les conteneurs tels que les tableaux de distribution devront disposer d’ouvertures pour la ventilation par convection de l’ILUEST, sans enfreindre la réglementation applicable au niveau de protection. • Version intempérie (I) (I). Installation à l’intempérie, sans nécessité de contenants additionnels puisque le niveau de protection est IP54. Important : Ne pas installer l’appareil à des endroits exposés ou inondables. La version (T) est construite dans une carcasse métallique en acier galvanisé et la version (I) dans une carcasse en polyester de couleur grise ou bien dans une carcasse métallique en acier revêtue d’un traitement ultra résistant (cataphorèse) et peinte avec de la peinture époxy couleur RAL-7032. 3.4.- Options 3.4.1.- Bypass automatique à contacteurs Optionnellement on peut y ajouter, au Bypass automatique et statique de série, un autre Bypass automatique à contacteurs, commun par l’ensemble de l’équipement (BA1) ou indépendant pour chacune des phases (BA3). - 42 - 3.4.2.- Bypass manuel L’ILUEST est livré avec, en option, un commutateur de bypass manuel à 2 positions, qui permet de sélectionner l’alimentation de sortie soit directement du réseau commercial (position 1),, soit de l’ILUEST (position 2). Si l’ILUEST incorpore cette option, il est livré avec le manuel d’instructions correspondant EK203*. Lisez-le pour utiliser l’appareil correctement. 3.4.3.- Programmateur horaire Quand l’ILUEST est commandé avec cette option, il faudra procéder à sa programmation en suivant les indications de la fiche qui accompagne le programmateur. 3.4.4.- Horloge astronomique Quand l’ILUEST est commandé avec cette option, il faudra procéder à sa programmation en suivant les indications de la fiche qui accompagne l’horloge. 3.4.5.- Display LCD Pour doter l’appareil d’un visualisateur pratique et puissant, on peut installer un synoptique LCD. Lisez le manuel spécifique (EK437*05). 3.4.6.- Pack télégestion Pour équiper l’appareil de communications à distance, on peut installer le Pack télégestion, qui est formé d’une carte électronique à monter sur l’ILUEST pour une communication locale et/ou distante de l’appareil avec un centre de contrôle. Pour procéder correctement, lisez le manuel spécifique (EK381*00). 3.4.7.- Modem GSM Dans le cas où l’ILUEST serait commandé avec le Pack télégestion, il serait possible d’acquérir le ou les modèles GSM pour une communication distante avec le centre de contrôle. Lisez attentivement les instructions du fabricant jointes au modem. 3.4.8.- Éjecteur à gaz Pour les installations qui le requièrent (grandes oscillations de tension d’entrée dues à fréquence appareil électrique), il est possible de l’installer à l’entrée de l’appareil. 3.4.9.- Carte de communications étendues Cette carte permettra à l’ILUEST d’accepter des signaux analogiques (0-20mA, +5V -5V, etc.) d’automates programmables (PLC), de sondes lumineuses, etc., pour travailler avec plusieurs niveaux d’économie. - 43 - 4.- INSTALLATION 4.1.- Instructions de sécurité importantes • Réviser les « Instructions de sécurité » (voir document EK266*08). • Vérifier que les données de la plaque des caractéristiques correspondent aux données requises pour l’installation. • Les deux versions de l’ILUEST disposent de 4 trous pour pouvoir les fixer sur un socle solide nivelé, afin d’immobiliser l’appareil. Il faut réaliser cette opération mécanique avant de poursuivre l’installation. • L’emplacement sera aéré, facilement accessible et, dans le cas de la version tableau (T), il ne sera jamais à l’intempérie. Pour cette version, on tiendra compte de l’énoncé suivant. Important : Les contenants tels que les tableaux de distribution devront disposer d’ouvertures pour la ventilation par convection de l’ILUEST, sans enfreindre la réglementation applicable au niveau de protection. • Ne jamais obstruer les trous de ventilation. • L’interrupteur (4) ou les interrupteurs (4), (5) et (6) d’entrée de l’appareil seront placés sur la position “0” ou “Off”. • Il faut enlever les vis (t) qui fixent le couvercle (a) pour accéder aux bornes de connexion sur les ILUEST version (T) ou ouvrir la porte (b) en actionnant la serrure (c) sur la version (I). • Les appareils disposent d’orifices avec des bornes de traversée, placées à la base de la carcasse, pour y introduire les câbles de connexion. Ne jamais réaliser cette opération, ni connecter aux bornes de l’ILUEST, avec le réseau électrique présent. • Les sections des câbles d’entrée, de sortie et de prise de terre seront adaptées au courant nominal indiqué sur la plaque des caractéristiques et conformes au règlement électrotechnique local de la basse tension. • L’ILUEST sera branché à la tête de la fourniture. Sur la figure 12 et à titre d’exemple, il est représenté monté sur une installation triphasée. • Dans le cas de préciser l’installation du Bypass manuel extérieur, suivre les suivantes recommandations: Le Bypass doit éviter la connexion de tension à la sortie de l’appareil, pour éviter tant des dommages à l’appareil (celui-ci n’est pas protéger contre la connexion de tensión à la sortie) comme pour pouvoir manipuler les bouts de sortie de l’appareil sans tension et sans aucun risque. Par conséquent, le Bypass doit faire le débranchement de la sortie de l’appareil au moment de la connexion. La meilleure option est un commutateur de deux positions avec le commun branché à la charge, un contact à la sortie de l’appareil et l’autre à la source alternative pour le cas de panne. Par conséquent, la meilleure option est un commutateur de double circuit et deux positions. 4.2.- Réception de l’appareil 4.2.1.- Déballage et vérification du contenu Pour déballer correctement l’appareil, voir figures 4 à 9 et agir en conséquence. Même si les photos sont celles de la version intempérie (I), procéder de la même manière pour la version tableau (T). • À la réception de l’appareil, vérifiez qu’il n’a subi aucun dommage pendant le transport. S’il est endommagé, adressez les réclamations pertinentes à votre fournisseur ou, à défaut, à notre société ; vérifiez que ses caractéristiques correspondent à celles de votre commande. Si ce n’est pas le cas, communiquez-le le plus tôt possible, en indiquant le nº de fabrication de l’appareil et les références du bon de livraison. • Cela fait, nous recommandons de remballer l’appareil dans son emballage d’origine jusqu’à sa mise en service pour le protéger contre les chocs mécaniques, la poussière, la saleté, etc. - 44 - Housse en plastique Documentation (Manuel d’installation et d’opération) Carton inférieur Palette en bois 4 protections d’angle EPS. 2 plaques latérales EPS. Emballage carton 4 cerclages polyester 8 éléments de guidage pour cerclage Étiquette emballage Carton supérieur Figures 4 à 9. Déballage - 45 - • L’emballage de l’appareil comprend une palette en bois, un habillage en carton ou en bois selon les cas, des protections d’angle en polyéthylène expansé (EPS) ou en mousse de polyéthylène (PE), une housse en polyéthylène et un cerclage en polyester. Tous les matériaux étant recyclables, prière de respecter la réglementation en vigueur si vous devez les jeter. Nous recommandons de conserver l’emballage, car vous pourriez en avoir besoin plus tard. • Jusqu’à l’installation définitive, il convient de ne pas retirer l’appareil de la palette en bois pour faciliter son transport éventuel. • Vérifier que le manuel d’installation et d’opération a été livré avec l’appareil. 4.2.2.- Stockage Ne contenant pas de batteries, ni de composants sensibles au passage du temps, les seules normes à observer pour bien le stocker consistent à le ranger à l’abri de la poussière, de l’humidité, des agents chimiques ou d’une température excessive. Ne pas empiler plus de deux unités dans la hauteur. 4.2.3.- Emplacement L’emplacement de l’appareil dépendra de la version. Pour la version intempérie (I), l’appareil sera posé sur un socle en maçonnerie et solidement ancré avec des vis. Grâce à son niveau de protection IP54, il supportera l’intempérie. Pour la version tableau (T), du fait de son niveau de protection IP20, l’appareil sera placé à l’intérieur d’un centre de commande, jamais à l’intempérie. 4.3.- Montage des différentes versions Selon que vous aurez la version intempérie (I) ou tableau (T), le schéma de fixation de la base de l’appareil sera de type: Types 1, 2 et 3: pour tous les ILUEST version arrière tableau (T). Types 4, 5, 6 et 7: pour tous les ILUEST version intempérie (I). NOTE: Les distances entre les trous D, E, G, H et O se reflètent sur la table suivante: TYPE 1 - TYPE 2 - TYPE 3 - TYPE 7 TYPE VERSION ILUEST Type 1 Type 2 Type 3 Type 4 Type 5 Type 6 Type 7 T -monophaséT -triphasé ≤ 45 kVAT -triphasé > 45 kVAI -monophaséI -triphasé ≤ 60 kVAI -triphasé 80-100 kVAI -triphasé 120 kVA- TYPE 4 - TYPE 5 - TYPE 6 Fig. 10. Plan de fixations - 46 - D 160 100 100 223 186 286 350 E 240 615 623 380 630 630 500 FIXATIONS ∅F G 10,5 11 11 14 195 14 295 14 295 11 - H 157,5 167,5 167,5 - 4.4.- Ports de communication L’ILUEST dispose de 3 ports série RS485, un par phase, pour le branchement des éléments optionnels : • Display LCD • La carte Pack télégestion • La carte de communications étendues 4.5.- Organes de protection et sections de câbles recommandées 4.5.1.- Protections recommandées Installer les protections contre les surintensités (surcharges et courts-circuits), contre les courants de défaut à la terre et contre les surtensions selon le règlement local. Par rapport aux surtensions, même si l’appareil est protégé à la sortie d’usine par des varistances, nous recommandons d’utiliser d’autres méthodes de protection (des éclateurs à gaz, par exemple) si les conditions ambiantes du local le requièrent. 4.5.2.- Sections de câbles recommandées Quel que soit le type d’installation (enterrée ou extérieure), nous recommandons de consulter le règlement de la basse tension : ITC-BT-07 RÉSEAUX SOUTERRAINS POUR LA DISTRIBUTION EN BASSE TENSION, dans le cas d’une installation en Espagne, ou les réglementations locales pertinentes en vigueur dans le pays d’installation. 4.5.3.- Plans d’installation La figure 11 correspond au schéma d’une installation type de l’ILUEST. Il est important de veiller à réunir les caractéristiques suivantes: • L’ILUEST sera TOUJOURS installé en tête de ligne d’éclairage. • Il est fortement recommandé de l’installer en aval du contacteur d’éclairage, grâce à quoi, lorsque l’éclairage sera éteint, l’appareil ne sera pas sous tension, de sorte à éviter toute surchauffe ainsi que des consommations inutiles de courant. 4.6.- Branchement Le schéma type de branchement de l’ILUEST est représenté sur la figure 11. 4.6.1.- Connexion de l’alimentation • Brancher obligatoirement la connexion à la terre ( ) et vérifier de l’avoir fait avant de fournir la tension à l’entrée de l’appareil. • Connecter les bornes d’entrée (1), les câbles issus du contacteur de mise en marche du système, en respectant l’ordre de la ou des phases et du neutre indiqué sur l’étiquetage de l’appareil et sur les figures 12 et 13 de ce manuel. Attention : le branchement du neutre est indispensable dans tout système triphasé en étoile, reconnaissable immédiatement sur l’étiquetage des bornes grâce au « N ». - 47 - R S T N Ligne de liaison Sonde lumineuse Contacteur de mise en marche du système Stabilisateurréducteur de tension ILUEST Horloge astronomique ou programmateur horaire Interrupteur contrôle manuel R S T N SORTIE 1 SORTIE 2 SORTIE 3 Lignes de distribution éclairage Fig. 11. Schéma des branchements sur une installation type triphasée, munie d’un stabilisateur-réducteur de tension ILUEST. - 48 - 4.6.2.- Connexion du contrôle à distance (ordre d’économie) • Indépendamment de la structure, de la version et de la puissance de l’appareil, pour les branchements, nous disposons de trois groupes de deux bornes, destinés au contrôle à distance ou à l’ordre d’économie, étiquetés sur l’appareil comme «Remote Control». • Pour ordonner la réduction de flux : connecter aux bornes l’un des contacts normalement ouverts d’une horloge astronomique ou programmable. Le démarrage et la permanence du niveau d’économie se feront en fermant ce contact, à installer par le client. Ne JAMAIS appliquer de tension à ces bornes, car il s’agit de contacts sans potentiel. CONNECTION DIAGRAM CONNECTION DIAGRAM ILUEST ILUEST R IP/OP N U R-S-T-N INPUT S IP/OP N V U-V-W-N OUTPUT T IP/OP N W R R-N INPUT R-S-T REMOTE CONTROL Fig. 12 Connexion ILUEST triphasé avec BM478* U-N OUTPUT IP/OP N U REMOTE CONTROL Fig. 13 Connexion ILUEST monophasé avec BM478* 4.6.3.- Connexion de la sortie • Brancher les câbles, destinés aux lignes de distribution, aux bornes de sortie (2*), en respectant l’ordre de la ou des phases et du neutre, indiqué sur l’étiquetage de l’appareil et sur les figures 12 et 13 de ce manuel. • Que l’installation d’éclairage soit antérieure à la mise en place de l’ILUEST ou qu’elle soit neuve, il faut vérifier la correction de la distribution de la charge pour minimiser le plus possible le déséquilibre des phases. - 49 - 5.- OPÉRATION 5.1.- Mise en marche et arrêt 5.1.1.- Contrôles avant la mise en marche Avant de procéder à la mise en marche du système, il convient de faire quelques réglages et de procéder à des vérifications: • Vérifier la correcte connexion de l’alimentation à l’appareil et aux charges, conformément aux procédures décrites au chapitre précédent. • Vérifier que les tensions de sortie de l’appareil sont correctement réglées, comme indiqué au paragraphe 5.2.3. : - Tension nominale : réglée sur la valeur nominale désirée (230Vac par défaut). - Tension d’économie : réglée selon le type de lampes à alimenter (VSAP, VM, HM, etc.) et la chute de tension des lignes d’éclairage, afin d’éviter d’éventuelles extinctions de fin de ligne. • Vérifier que la tension réduite 1 ou 2 a été sélectionnée avec les micro-interrupteurs des cartes de contrôle BM478 pour chacune des phases (tableau 1). • Vérifier qu’il y a un dispositif extérieur capable de donner l’ordre d’économie à l’appareil (horloge astronomique, horloge programmateur, pack télégestion, PLC, etc.) et qu’il est correctement connecté (voir manuels spécifiques). • Si l’installation est équipée d’un dispositif optionnel, vérifier la correction de la connexion et de la configuration avant de procéder à la mise en marche de l’appareil (voir manuels spécifiques). 5.1.2.- Mise en marche • Brancher la tension d’entrée Vin à l’appareil avec l’interrupteur magnétothermique (4) ou (4), (5) et (6), respectivement, si ILUEST est monophasé ou triphasé, sur la position «0» ou «Off» et débrancher les charges. Vérifier la correction de la tension l’ILUEST d’entrée Vin. • Actionner l’interrupteur magnétothermique (4) ou (4), (5) et (6), respectivement, si l’ILUEST est monophasé ou triphasé, sur la position «I» ou «On». Vérifier la correction de la tension de sortie Vout. • Arrêter en actionnant l’interrupteur magnétothermique (4) ou (4), (5) et (6), respectivement, si l’ILUEST est monophasé ou triphasé, sur la position «0» ou «Off», connecter les charges et remettre en marche en actionnant l’interrupteur magnétothermique (4) ou (4), (5) et (6), respectivement, si l’ILUEST est monophasé ou triphasé, sur la position «I» ou «On». • À cet instant, la tension alimente les charges. Pour la mise en marche et l’arrêt du système, fermer et ouvrir, respectivement, le contacteur du système placé dans l’installation, aucune opération quotidienne n’étant nécessaire car le fonctionnement est automatique : chaque jour la mise en marche et l’arrêt se feront en fermant et en ouvrant le contacteur principal de l’éclairage, et l’ordre d’économie sera activé ou annulé selon la programmation externe des horaires de l’horloge astronomique ou programmateur, comme décrit aux points 4.6.2 et 4.6.3. 5.1.3.- Arrêt complet de l’appareil L’arrêt complet et manuel de l’appareil n’aura de sens qu’en cas de maintenance corrective (panne) ou préventive de l’appareil, car dans des conditions normales, l’arrêt sera entièrement automatique, sans manoeuvre particulière, à partir du contacteur principal du centre de commande. • Actionner l’interrupteur magnétothermique ((4) ou (4), (5) et (6), respectivement, si l’ILUEST est monophasé ou triphasé, sur la position «0» ou «Off». - 50 - 5.2.- Indications, sélecteurs et réglages des contrôles électroniques BM478* Sur la figure 1 du paragraphe 3.1.3. nous pouvons voir la disposition des différents indicateurs. 5.2.1.- Indications par phase • LD1. Ordre d’économie activé (jaune). • LD2. Alarme acoustique active (rouge). Si ce voyant s’allume, prévenir le Service et Support technique (S.S.T.)). L’appareil peut rester branché, bien que la phase correspondante du voyant allumé ne se stabilise pas ni ne réalise aucune des fonctions de réglage. Ce voyant s’accompagne d’une alarme acoustique. • LD3. L’appareil est en by-pass (rouge). Si ce voyant s’allume, prévenir le Service et Support technique (S.S.T.)). L’appareil peut rester branché, bien que la phase correspondante du voyant allumé ne se stabilise pas ni ne réalise aucune des fonctions de réglage. Ce voyant s’accompagne d’une alarme acoustique. • LD4. État de l’ILUEST avec LD2 inactif (vert). - LD4 inactif. État d’ÉCONOMIE. - LD4 actif. État de DÉMARRAGE ou valeur NOMINALE. - LD4 intermittent. RAMPE tension de sortie. De tension de DÉMARRAGE à NOMINALE, de tension de sortie NOMINALE à tension d’ÉCONOMIE ou d’ÉCONOMIE à NOMINALE. Cause du by-pass avec un LD2 intermittent (appareil sur bypass) (vert). - LD4 inactif. Triac ouvert. - LD4 actif. Triac en court circuit. • LD5 ÷ 11. Indique le numéro de l’interrupteur d’état solide qui sert de conducteur (rouge). 5.2.2.- Sétecteurs par phase • SW1. Enregistrement EEPROM ou travail normal. Sélectionné à l’usine. Ne pas toucher. • SW2. Vitesse de travail / réglage, voir tableau 1. ON ON – 1 2 3 4 5 OFF OFF 1-2-3-4-5 2-3-4-5 1-3-4-5 1-2-4-5 1-2-3-5 1-2-3-4 FUNCIÓN FONCTION ––– Tension réduite 1 et vitesse normalenormal Tensión reducida 1 y velocidad Tension réduite 2 et vitesse normale Tensión reducida 1 y velocidad rápida ajuste Tension réduite 1 et vitesse élevée réglage Tension réduite 2 et vitesse élevée réglage ––– Tableau 1. Sélecteur par phase SW2 pour contrôle BM478* • SW1 + SW2. Sélection tension de démarrage. Par défaut, l’ILUEST est programmé avec un démarrage à une tension inférieure à la tension nominale ((210Vac); pour programmer le démarrage à une tension nominale, il faut suivre la procédure ci-après: - 51 - • Placer le pin nº4 de SW1 et de SW2 sur ON. Le reste sur OFF. • Donner la tension. L’appareil passe sur by-pass et émet un sifflement. Le micro a été enregistré. • Arrêter l’appareil. • Sélectionner les pins de SW1 et SW2 sur la position de travail voulue suivant le tableau 1 et redémarrer. Remarque : cette opération doit se faire en dernier lieu, car si nous plaçons le pin nº5 du SW1 sur ON nous le ferons revenir sur un démarrage à une tension inférieure à la tension nominale. 5.2.3.- Réglages par phase • P1. Réglage tension alimentation pour la carte de contrôle. Réglé à l’usine. Ne pas toucher. • P2. Réglage tension de sortie nominale. • P3. Réglage tension d’économie. Remarque 1: P2 et P3 peuvent être réglés avec l’appareil en marche. Le réglage de P3 consistant à réduire la tension d’économie et quand l’appareil travaille à une vitesse normale, doit se faire lentement, en cas contraire cela provoquera le «Reset» de l’appareil. Remarque 2: Si la tension d’économie par default n’est pas la plus approprie, le réglement se realise de la suivante manière: A. Tension d’économie entre 180Vac et 190Vac (équipements avec des marges agrandies): SW2-1 ou SW2-3 à ON et régler avec le potentiometre P3. - 52 - 6.- MAINTENANCE, GARANTIE ET SERVICE. 6.1.- Guide de base de maintenance. Les principales directrices à suivre pour obtenir une maintenance correcte sont celles que notre département Service et Support technique préconise dans la modalité de la maintenance préventive (voir paragraphe 6.4). 6.2.- Guide des problèmes et des solutions (F.A.Q.). En cas de mauvais fonctionnement de l’appareil et avant de prendre contact avec le Service et Support technique (S.S.T.), l’utilisateur peut essayer de résoudre le problème lui-même, si les symptômes ressemblent à l’un de ceux qui apparaissent ciaprès: 1. Si le contrôle ne s’allume pas, • Vérifier les fusibles FS1 et FS2. • Vérifier la conduction entre les terminaux CN46. • Si non, il faut changer la carte de contrôle. Avertir le Service et Support technique (S.S.T.). 2. Si l’appareil se met sur by-pass et que l’alarme retentit, vérifier les fusibles FS3 à FS7 (tension aux extrémités de chaque fusible = 0V AC). • Si un fusible a fondu, arrêter l’appareil et le remplacer par un fusible neuf de mêmes caractéristiques. • Redémarrer l’appareil et attendre un cycle complet vers le mode économie. Observer si l’alarme de by-pass se reproduit. • Si c’est le cas, il faut changer la carte de contrôle. Avertir le Service et Support technique (S.S.T.). 6.3.- Conditions de la garantie. La garantie limitée fournie par SALICRU s’applique seulement à des produits destinés à un usage commercial ou industriel dans le déroulement habituel de vos activités. 6.3.1.- Produit couvert. Stabilisateur-réducteur de flux lumineux, modèle ILUEST. 6.3.2.- Termes de la garantie. SALICRU garantit le produit contre tout défaut de matériel et/ou main-d’œuvre pour une période de 12 mois à compter de sa mise en marche confiée au personnel de SALICRU ou à du personnel expressément agréé, ou pour une période de 18 mois à compter de sa sortie d’usine, le premier délai écoulé étant à appliquer. En cas de défaillance du produit dans la période de garantie, SALICRU devra réparer, dans ses installations, et sans coût, la ou les parties défectueuses. Les frais de transport et d’emballages seront pris en charge par le bénéficiaire. SALICRU garantit, pour une période non inférieure à 10 ans, la disponibilité des matériaux et des pièces de rechange, pour le matériel informatique aussi bien que pour les logiciels, ainsi que l’assistance complète pour les réparations, remplacements de composants et actualisation des logiciels. 6.3.3.- Exclusions. SALICRU ne sera pas tenue d’appliquer la garantie si elle estime que le défaut n’existe pas ou provient d’un mauvais usage, d’une négligence, d’une mauvaise installation ou vérification, de tentatives de réparation ou de modification non autorisées ou de toute autre cause au-delà de l’usage prévu, ou d’un accident, incendie, foudre ou d’autres dangers. Dans ces cas, aucune indemnisation en dommages et intérêts ne sera versée. - 53 - 6.4.- Description des contrats de maintenance et de service disponibles. À partir de l’expiration de la garantie, SALICRU, en s’adaptant aux besoins des clients, leur proposera différentes modalités de maintenance : • Préventive. Ces modalités garantissent une meilleure sécurité pour la conservation et le bon fonctionnement des appareils, grâce à une visite préventive annuelle au cours de laquelle des techniciens spécialisés de SALICRU réalisent une série de vérifications et de réglages des systèmes: - Mesurer et noter les tensions et les courants d’entrée et de sortie entre phases. - Vérifier les alarmes enregistrées (cas Pack télégestion optionnel). - Vérifier les lectures du display numérique. - Display numérique : tension et intensité d’entrée, de sortie et températures. - Autres mesures. - Vérifier l’état des ventilateurs. - Vérifier le niveau de charge. - Vérifier la langue sélectionnée. - Vérifier si l’emplacement de l’appareil est correct. - Nettoyage général de l’appareil. - 54 - 7.- ANNEXES. 7.1.- Caractéristiques techniques générales. ENTRÉE Tension monophasée .................................................................. 120V, 220V, 230V, 240V Tension triphasée ........................................................................ 208V, 220V, 230V, 240V, 380V, 400V, 415V + N + T Marge de régulation .................................................................... +33% / -8% tension nominale +4% / -29% tension économie 1. +10% / -24% tension économie 2. Fréquence .................................................................................... de 48 à 63Hz Protection par phase ................................................................... magnétothermique unipolaire SORTIE Tension monophasée .................................................................. 120V, 220V, 230V, 240V. Tension triphasée ........................................................................ 208V, 220V, 230V, 240V, 380V, 400V, 415V + N + T Précision ...................................................................................... supérieure à ±2% Tension de démarrage en douceur .............................................. 210V Tension minimale de niveau d’économie ..................................... 188V (entre phase et neutre). Réglage ....................................................................................... indépendant par phase Distorsion harmonique ................................................................. nulle Rendement ................................................................................. >97% Facteur de puissance admissible ................................................. de 0,5 inductif à 0,7 capacitif Déséquilibre admissible entre phases .......................................... 100% Sélection tension réduite 1 ou 2 .................................................. avec des micro-interrupteurs par phase BYPASS Automatique d’état solide incorporé et indépendant par phase .... Oui ENVIRONNEMENTALES Température de fonctionnement .................................................. de -40 ºC à +45 ºC Humidité relative ........................................................................... de 0% à 95%, non condensée Altitude maximale de travail ......................................................... 2400 m Temps moyen entre défaillances (MTBF) ..................................... 60 000 heures Temps moyen de réparation (MTTR) ........................................... 30 minutes Niveau de bruit à 1 mètre ............................................................. <35dB. INDICATIONS Optiques (par phase) ................................................................... Processus «Mode» Ordre d’économie activé «Saving ON» Prise sélectionnée By-pass automatique d’état solide Alarme by-pass automatique d’état solide Acoustiques (par phase) Alarme By-pass .................................... automatique d’état solide - 55 - PRÉSENTATION Les appareils sont disponibles dans les versions : ....................... Version Tableau montage dans une carcasse en acier au carbone bichromé, avec un socle ayant quatre orifices pour fixation au sol de l’armoire dans laquelle il sera installé. Version Intempérie, installation dans des armoires métalliques en acier au carbone et traitement de cataphorèse. Ou bien armoires en polyester. OPTIONS Pack télégestion Modem GSM Éjecteurs à gaz By-pass manuel Programmateur horaire / Horloge astronomique Display LCD Carte de communications étendues 7.2.- Glossaire • Démarrage en douceur Type de démarrage ou allumage de l’éclairage. Réalisé ainsi pour éviter le stress mécanique des lampes et la surcharge que représente un démarrage à une tension nominale. • Autotransformateur Type de transformateur d’entrée de l’appareil qui se caractErise en ce qu’il est dépourvu d’isolation galvanique. • Booster ou transformateur compensateur, utilisé pour permettre d’effectuer le réglage avec un échantillon de l’intensité totale d’entrée. • Borne Connecteur approprié pour la connexion de câble pelé de grandes dimensions. • By-pass Système qui connecte directement la sortie à l’entrée de l’appareil dès l’apparition d’un problème dans l’appareil ou les charges. Évite l’extinction de l’éclairage. • Centre de commande Tableau électrique destiné à alimenter, distribuer, protéger, etc., les installations d’éclairage. • Compatibilité électromagnétique A pour objet d’établir les procédures d’évaluation de la conformité et les conditions de protection requises pour la compatibilité électromagnétique des appareils, des systèmes et des installations en vue de leur commercialisation postérieure et de leur mise en service. • Contacteur Le contacteur est utilisé pour la connexion d’éléments de puissance et il nous permettra d’automatiser nos manœuvres. C’est essentiellement un interrupteur triphasé que nous pouvons actionner à distance, au lieu de le faire manuellement, avec un effort physique moindre et une plus grande sécurité par l’intermédiaire d’une bobine. - 56 - • Contacts sans potentiel Les contacts électriques sont les éléments de commande qui brancheront ou débrancheront nos récepteurs (bobines, lumières, moteurs, etc.). Ces contacts sont placés dans les logements prévus à cet effet et actionnés par divers systèmes, par exemple des boutons, interrupteurs, relais, etc. • Courants harmoniques Courants ajoutés à la fréquence fondamentale d’une certaine forme d’onde sinusoïdale. On les appelle ainsi quand les harmoniques apparaissent pour des causes diverses et déforment l’onde originale. • Étoile Type de branchement habituel sur les transformateurs triphasés, comprenant un conducteur qui fait office de neutre. • Phase Chacune des phases qui composent un système triphasé : R, S et T, ou monophasé : R. • Intempérie Appellation désignant la capacité d’un habillage du supporter l’exposition en plein air, grâce à son niveau de protection. • Interface à relais Port de communication de l’appareil avec l’extérieur, généralement formé de plusieurs contacts sans potentiel. • Interrupteur d’état solide Électriquement parlant, c’est un interrupteur électronique dépourvu de mouvement physique, constitué d’une pièce de silicium avec un dopage particulier. • IP54 Niveau de protection adéquat pour résister aux inclémences du temps. • Led Type de diode qui envoie de la lumière en étant polarisé d’une certaine manière. • Magnétothermique C’est la combinaison d’un interrupteur magnétique et thermique, qui sera capable de s’ouvrir, sous l’action combinée des deux grandeurs. • Marquage CE Certificat que doivent avoir tous les appareils électriques commercialisés en Europe. Les fabricants sont habilités à délivrer eux-mêmes ces certificats. • Neutre C’est le point d’un système polyphasé qui, dans les conditions de fonctionnement prévues, présente le même différentiel de potentiel, par rapport à chacun des pôles ou chacune des phases du système. • Pack télégestion Pack optionnel conçu pour établir une communication locale et/ou distante avec l’ILUEST. Comprend une carte, l’installation sur l’appareil et le logiciel de gestion. • Pin habituellement, contact numéroté dans les circuits intégrés. • Programmateur horaire Horloge capable de temporiser l’action d’un ou de plusieurs relais. • Horloge astronomique Horloge dotée d’un algorithme qui est capable, après avoir programmé la latitude et le longitude d’un point géographique déterminé, de conserver dans ses tables les heures de lever et de coucher de soleil de tous les jours de l’année. Sert généralement à programmer avec précision l’allumage et l’extinction de l’éclairage. • RS485 Système de transmission de la communication dans lequel deux fils tressés seront capables d’établir la communication dans une direction préalablement établie. - 57 - • Série RE2 Série de stabilisateurs statiques de tension pour des applications industrielles que SALICRU a développées et dont elle a obtenu le brevet mondial dans les années soixante-dix. • Triac Le triac est un dispositif semi-conducteur à trois terminaux, utilisé pour contrôler le flux de courant moyen vers une charge, avec la particularité qu’il conduit le flux dans les deux sens et peut être bloqué par inversion de la tension ou en réduisant le courant au-dessous de la valeur de maintenance. Le triac peut être déclenché indépendamment de la polarisation de porte, c’est-à-dire, avec un courant de porte positif ou négatif. • Prises Chacun des contacts extraits du secondaire de l’autotransformateur d’entrée de l’appareil. • Tableau Appellation employée pour désigner le logement de l’appareil dans un tableau ou centre de commande existant. - 58 - - 59 - salicru.com 08460 Palautordera Tel. +34 93 848 24 00 [email protected]