1
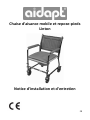
Linton Mobile Commode & Footrests
Fixing and Maintenance Instructions
EN
INTRODUCTION
Thank you for choosing to purchase the Linton Mobile Commode/Footrests from Aidapt. The
Linton Mobile Commode and Footrests are manufactured using only the finest materials
available. If used in accordance with the user instructions they should give you many years of
continuous service.
NB. This equipment must be installed by a competent person and a risk assessment
may be needed as to the suitability of the chair for the particular user.
VR164
VR166
VR167
Linton Commode
Linton Commode w/Footrests
Footrests (Pair)
Weight Limit: 190 kg (30 stone)
Do not exceed the weight limit stated – doing so could put the user at risk.
BEFORE USE
•
•
Carefully remove all packaging. Avoid using any knives of other sharp instruments
as this may damage the surface of the product.
Check the product for any visible damage If you see any damage or suspect a fault,
do not use your product as it may compromise the safety of the user, but contact
your supplier for support.
ASSEMBLY
The package (VR164) contains the following components:
•
The main frame with four brake castors attached
•
White commode plastic aperture seat (attached to the main frame)
•
Grey commode seat cover
•
A pair of detachable arms
•
Detachable back
•
One pair of Footrests (VR166 and VR167 only)
Please read the following installation instructions carefully:
1. Remove all contents from the box
2. Place the assembled base on a level floor
3. At the rear of the commode you will see two black threaded wheel nuts; undo the
wheel nuts so that the locking holes are clear
4. Place the two back legs into the locating holes on the back edge of the commode
frame
5. Secure the back by turning the black lock nuts until you feel the nut biting against
the back leg.
6. Do no over tighten
7. Do not use tools as it is only necessary to have the back secured finger tight
8. Place the two detachable arms into the four locating holes featured two each side
of the commode
Fixing and Maintenance Instructions
Ver.3 08/2012 (1548)
2
FOOTRESTS (IF SUPPLIED)
Footrests are supplied separately to the main commode. Please examine your footrests for
any visible damage before use. If you see any damage or suspect a fault, please contact your
supplier immediately.
In this case, please do not use your product as it may compromise your safety.
1.
Remove the commode footrests from their packaging
2.
You will see on each of the front legs of the commode main frame about 150 mm
high from the castor 2 retaining lugs either side
3.
Take the footrests and align the holes in the inverted ‘U’ section with the lugs and
lower down into place.
4.
Rotate the footrests towards the commode so that they clip into place.
COMPOSITION
The frame is made from chromium-plated mild steel. You must not, under any
circumstances, use any abrasive cleaners or cleaners which attack chromium plating.
USE OF THE COMMODE
When moving always lift the commode by placing you hands on the tubular metal frame
beneath the blow moulded seat.
•
Do not allow children or unauthorised persons to play with or use the commode.
•
Do not rock back and forth or sideways when using the commode as this will cause
excessive stress and possible damage and failure which may cause injury.
•
Do not use the commode outside the home or on uneven surfaces (such as in the
garden) as this will cause stress to the legs and possible damage which may cause
injury.
•
Do not place fingers or foreign objects into any of the exposed tubular sections as
this can lead to serious injury.
•
When operating the brake mechanism, do not stamp on the lever as this may cause
damage to the mechanism and possible failure.
CLEANING
Simply hose down/wash or pressure wash with a mild detergent solution, ensuring that all
detergents are washed off thoroughly. Wipe the commode thoroughly dry, paying particular
attention to all joints and abutments.
It is recommended that all joints, abutments and castors are then sprayed with a water
dispersing agent such as WD-40 after cleaning, this will give your Linton Commode greater
longevity and avoid premature rusting.
Fixing and Maintenance Instructions
Ver.3 08/2012 (1548)
3
COMMODE BUCKET
To remove the commode bucket, simply slide the bucket out from the chrome runners at the
rear of the commode. Cover the top of the bucket to avoid splashing, carefully dispose of the
contents into a proper sluice or WC.
Never use an open drain, sink or basin. This could cause a serious health risk.
Clean out the residue with a suitable disinfectant and refit to the commode after use.
REISSUE
If you reissue or are about to reissue this product, please thoroughly check all components
for their safety.
This includes:
•
Tightness of all nuts/bolts/castors and other screw in/bolt in/push in components.
•
Also check all upholstery (if applicable) for security, splits, exposed staples, etc.
If in any doubt, please do not issue or use, but immediately contact your supplier for
service support.
When reissuing, a risk assessment may be required as to the suitability of the chair for a
particular user
CARE & MAINTENANCE
Please make a safety check of the product at regular intervals or if you have any concerns.
IMPORTANT INFORMATION
The information given in this instruction booklet must not be taken as forming part of or
establishing any contractual or other commitment by Aidapt Bathrooms Limited, Aidapt
(Wales) Ltd or its agents or its subsidiaries and no warranty or representation concerning the
information is given.
Please exercise common sense and do not take any unnecessary risks when using this
product; as the user you must accept liability for safety when using the product.
Please do not hesitate to contact the person who issued this product to you or the
manufacturer (detailed below) if you have any queries concerning the assembly/use of your
product.
Aidapt Bathrooms Ltd, Lancots Lane, Sutton Oak, St Helens, WA9 3EX
Telephone: +44 (0) 1744 745 020 • Fax: +44 (0) 1744 745 001 • Web: www.aidapt.co.uk
Email: [email protected] • [email protected] • [email protected]
Fixing and Maintenance Instructions
Ver.3 08/2012 (1548)
4
Chaise d'aisance mobile et repose-pieds
Linton
Notice d'installation et d'entretien
FR
INTRODUCTION
Nous vous remercions d’avoir acheté chez Aidapt le siège d'aisance mobile/repose-pieds Linton. La
chaise d'aisance mobile et repose-pieds Linton Si utilisés conformément au manuel d'utilisation, ils vous
serviront pendant de nombreuses années.
NB. Cet équipement doit être installé par une personne compétente et une évaluation des risques
est nécessaire afin d'assurer la commodité du siège pour un utilisateur particulier.
VR164
VR166
VR167
Chaise d'aisance Linton
Chaise d'aisance Linton avec repose-pieds
Repose-pieds (Paire)
Limite de poids: 190 kg (30 stones)
Veuillez ne pas excéder la limite de poids indiquée, un manquement à cette recommandation
pourrait mettre à risque son utilisateur.
AVANT UTILISATION
•
Retirez parfaitement l'emballage. Évitez d'utiliser un couteau ou tout instrument coupant qui
pourrait endommager la surface du produit.
•
Vérifiez votre produit pour tout dommage visible. En cas de dommage ou de défaut suspect,
veuillez ne pas utiliser votre produit car il pourrait compromettre la sécurité de l'utilisateur et
contactez votre fournisseur.
ASSEMBLAGE
L'emballage (VR164) contient les composants suivants:
•
Le cadre principal avec quatre roulettes frein
•
Siège de toilette en plastique blanc du siège d'aisance (fixé au cadre principal)
•
Couvercle du siège d'aisance gris
•
Une paire d'accoudoirs amovibles
•
Dossier amovible
•
Une paire de repose-pieds (VR166 et VR167 uniquement)
Veuillez lire attentivement les instructions d'installation suivantes.
1.
Retirez de l'emballage tout son contenu.
2.
Placez la base de montage sur le sol
3.
À l'arrière du siège d'aisance, vous voyez deux écrous de roues filetés noirs; desserrez les
écrous de roues afin que les orifices de verrouillage soient libres
4.
Placez les deux pieds arrière dans les orifices de montage sur l'arrière du cadre du siège
d'aisance.
5.
Sécurisez l'arrière en tournant les vis de verrouillage jusqu'à ce que vous sentiez l'écrou
toucher les pieds arrière.
6.
Ne pas serrer excessivement
7.
N'utilisez pas d'outils, le serrage à la main étant suffisant à la sécurité
8.
Placez les deux accoudoirs amovibles dans les orifices de montage sur chaque côté du siège
d'aisance
Notice d'installation et d'entretien
Ver.3 08/2012 (1548)
6
REPOSE-PIEDS (SI FOURNIS)
Les repose-pieds sont fournis séparément du siège d'aisance. Veuillez examiner les repose-pieds pour
tout dommage visible avant utilisation. En cas de dommage ou de défaut suspect, veuillez contacter
votre fournisseur immédiatement.
Dans ce cas, veuillez ne pas utiliser votre produit car il pourrait compromettre votre sécurité.
1.
Retirez les repose-pieds de leur emballage.
2.
Vous verrez sur chaque pied à l'avant du cadre principal du siège d'aisance à peu près à 150
mm au-dessus des roulettes, 2 œillets de retenue sur chaque côté.
3.
Munissez-vous des repose-pieds et alignez les trous dans les section en "U" inversé avec les
œillets et les mettre en place.
4.
Tournez les repose-pieds vers la chaise pour qu'ils se clippent.
COMPOSITION
Le cadre est fabriqué en acier doux chromé. Vous ne devez, en aucune circonstance, utiliser des
nettoyants abrasifs ou des nettoyants affectant le chromage.
UTILISATION DE LA CHAISE D'AISANCE
Lors d'un déplacement, soulevez toujours la chaise d'aisance en plaçant vos mains sur le cadre en métal
sous le siège moulé.
•
Ne permettez pas aux enfants ou aux personnes non autorisées de jouer avec la chaise
d'aisance ou de l'utiliser.
•
Ne vous balancez pas en arrière, en avant ou sur le côté lors de l'utilisation de la chaise
d'aisance, cela pouvant causer une tension excessive et un dommage possible pouvant
causer des blessures.
•
N'utilisez pas la chaise d'aisance à l'extérieur du domicile ou des surfaces non stable (telles
que le jardin), cela pouvant causer une tension sur les pieds et un dommage possible
pouvant causer des blessures.
•
Ne pas placer vos doigts ou des objets sur les sections exposées des tubes, cela pouvant
causer de sérieuses blessures.
•
Lors du fonctionnement du mécanisme de frein, ne pas taper sur le levier avec le pied, cela
pouvant endommager le mécanisme.
NETTOYAGE
Nettoyez ou lavez tout simplement à grande eau ou lavez sous pression avec un détergeant doux en
vous assurant que tous les détergents sont parfaitement rincés. Essuyez minutieusement la chaise
d'aisance, en portant une attention particulière aux joints.
Il est recommandé que tous les joints et que les roulettes soient ensuite aspergés avec un agent de
dispersion tel que WD40 après nettoyage; cela procurera à votre chaise d'aisance Linton une durée de
vie plus longue et lui évitera une oxydation précoce.
Notice d'installation et d'entretien
Ver.3 08/2012 (1548)
7
SEAU DE LA CHAISE D'AISANCE
Pour retirer le seau de la chaise d'aisance, faîtes simplement glisser le seau des glissières en chrome à
l'arrière de la chaise d'aisance. Couvrez le seau afin d'éviter des éclaboussures et jetez avec précaution le
contenu dans un bac adapté ou dans les toilettes.
Ne jamais utiliser une évacuation ouverte, un évier ou un bassin. Cela pourrait causer un risque de
santé sérieux.
Nettoyez les résidus avec un désinfectant adapté et replacez au-dessous de la chaise après utilisation.
RÉUTILISATION
Si vous réutilisez ce produit ou si vous êtes sur le point de le réutiliser, veuillez vérifier minutieusement la
sureté de tous les composants.
Cela comprend:
•
Serrage de tout écrou/boulon et autres vis des composants.
•
Vérifiez également le revêtement (si applicable) pour la sécurité, les déchirures, les agrafes
exposées, etc.
En cas de doute, veuillez ne pas utiliser le produit et contactez immédiatement votre fournisseur.
Lors de la réutilisation, une évaluation du risque est nécessaire afin d'assurer la commodité de la chaise
pour un utilisateur particulier.
SOIN ET ENTRETIEN
Effectuez un contrôle de sécurité régulier de votre produit ou dans le cas où vous auriez un doute.
INFORMATIONS IMPORTANTES
Les informations contenues dans ce livret d’instructions ne doivent pas être considérées comme faisant
partie de ou établissant un contrat ou un engagement quelconque par la société Aidapt Bathrooms
Limited, Aidapt (Wales) Ltd ni par ses représentants ou ses filiales et aucune garantie concernant les
informations n'est donnée.
Nous vous remercions de bien vouloir faire preuve de bon sens et de ne pas prendre de risques inutiles
lorsque vous utilisez ce produit; en tant qu'utilisateur, vous devez accepter et être conscient de votre
responsabilité quant à votre sécurité lorsque vous utilisez ce produit.
Veuillez ne pas hésiter à contacter la personne qui vous a fourni ce produit ou le fabricant (coordonnées
ci-dessous) pour davantage de renseignements concernant l’installation/utilisation de votre produit.
Altai France (Altai Europe Ltd)
Z.A. du Bel Air, 17D rue de Creil, 95340 BERNES-SUR-OISE, France
Tél: 01.30.34.90.84 | Fax: 01.30.34.00.68 | E-mail: [email protected]
Notice d'installation et d'entretien
Ver.3 08/2012 (1548)
8
Mobiler Nachtstuhl “Linton”
mit Fußstützen
Aufbau- und Wartungsanleitung
DE
EINFÜHRUNG
Vielen Dank für Ihren Erwerb des mobilen Nachtstuhls “Linton” mit Fußstützen von Aidapt. Dieses
Produkt wurde aus den besten verfügbaren Materialien angefertigt. Es wurde entwickelt, um bei
richtiger Anwendung viele Jahre zuverlässig und störungsfrei zu funktionieren.
Achtung! Dieses Gerät muss von sachkundigem Fachpersonal installiert werden und eine
Beurteilung ist notwendig, ob der Stuhl für den/die jeweilige/n Benutzer/in geeignet ist.
VR164
VR166
VR167
Nachtstuhl “Linton”
Nachtstuhl “Linton” mit Fußstützen
Fußstützen (Paar)
Die Gewichtsbeschränkung beträgt 190 kg.
Auf keinen Fall die Gewichtsbeschränkung überschreiten – dies könnte den/die Benutzer/in
gefährden.
VOR GEBRAUCH
•
•
Entfernen Sie vorsichtig die Verpackung. Verwenden Sie keine Messer oder andere scharfe
Instrumente, da diese die Oberfläche des Produkts beschädigen können.
Bitte überprüfen Sie Ihr Produkt vor der Verwendung auf sichtbare Schäden. Falls Sie einen
Schaden erkennen oder einen Fehler vermuten, bitte verwenden Sie das Produkt nicht,
sondern wenden Sie sich bitte an Ihren Händler.
AUFBAU
Die Packung (VR164) enthält die folgenden Komponenten:
•
Hauptrahmen mit vier angebrachten bremsbaren Rollen
•
weißer Kunststoff-Sitz mit Öffnung (am Hauptrahmen angebracht)
•
grauer Sitzbezug
•
2x abnehmbare Armlehnen
•
abnehmbares Rückenteil
•
abnehmbare Fußstützen (nur bei VR166 und VR167)
Bitte lesen Sie die nachstehenden Aufbauhinweise sorgfältig durch:
1.
Nehmen Sie alle Inhalte aus der Box.
2.
Entfernen Sie die weißen Kartonröhren, die um den Rahmen geklebt sind (diese sind dazu da,
um Transportschäden zu vermeiden und sind nicht Teil des Stuhls).
3.
Platzieren Sie die vormontierte Basis auf einem ebenen Boden.
4.
Auf der Rückseite des Stuhls (oder der abnehmbaren Rückwand) sehen Sie zwei schwarze
Stellschrauben; lösen Sie die Stellschrauben und entfernen Sie sie vom Rahmen.
5.
Platzieren Sie die beiden hinteren Schenkel in die Fixierlöcher auf der Rückseite des
Stuhlrahmens.
6.
Führen Sie die beiden schwarzen Stellschrauben wieder durch die Rückseite des Rahmens
und drehen Sie diese, bis Sie deren Widerstand gegen die hinteren Stuhlbeine spüren.
7.
Die Stellschrauben nicht zu fest anziehen.
8.
Verwenden Sie keine Werkzeuge, denn die Rückseite des Stuhls soll nur handfest
gesichert sein.
9.
Fügen Sie die abnehmbaren Arme in die vier dafür vorgesehenen Löcher (zwei auf jeder
Seite).
Aufbau- und Wartungsanleitung
Ver.3 08/2012 (1548)
10
FUßSTÜTZEN (FALLS ZUTREFFEND)
Ihre Fußstützen können getrennt vom Stuhl verpackt sein. Bitte überprüfen Sie Ihre Fußstützen auf
sichtbare Schäden vor dem Gebrauch. Wenn Sie einen Schaden feststellen oder Verdacht auf eine
Störung haben, kontaktieren Sie bitte sofort Ihren Händler.
In diesem Fall verwenden Sie bitte Ihr Produkt nicht, da es Ihre Sicherheit gefährden könnte.
1.
Entfernen Sie die Fußstützen aus der Verpackung.
2.
Sie sehen an den beiden Vorderbeinen des Hauptrahmens etwa 15 cm über der Rolle zwei
Haltenasen auf beiden Seiten.
3.
Nehmen Sie die Fußstützen und richten Sie deren Löcher in der Sektion, die wie ein
umgekehrtes U aussieht, an den Haltenasen weiter unten aus.
4.
Drehen Sie die Fußrasten hin zum Stuhl, sodass sie einrasten.
BESTANDTEILE
Der Rahmen ist aus verchromtem Stahl hergestellt. Sie dürfen keinesfalls scheuernde Reiniger
verwenden oder solche, die Verchromungen angreifen.
GEBRAUCH
Zum Transport heben Sie den Stuhl bitte stets am Metallrahmen unterhalb der Sitzfläche an.
•
Erlauben Sie weder Kindern noch Unbefugten, mit dem Stuhl zu spielen oder ihn zu
gebrauchen.
•
Wippen Sie mit dem Stuhl nicht hin und her, wenn Sie ihn benutzen, da dies die
Komponenten übermäßig abnutzt, was zu Verletzungen führen kann.
•
Benutzen Sie den Stuhl nicht im Freien oder auf unebenen Untergründen (z.B. im Garten), da
dies die Beine des Stuhls übermäßig belastet, was zu Verletzungen führen kann.
•
Führen Sie keine Finger oder andere Objekte in ggf. offene Röhren des Stuhlrahmens ein, da
dies zu ernsthaften Verletzungen führen kann.
•
Drücken Sie nicht zu heftig auf die Bremsen, um diese zu aktivieren, da dies den
Bremsmechanismus beschädigen könnte.
REINIGUNG
Einfach mit einer milden Reinigungslösung abwaschen oder mit einem Druckreiniger abspritzen. Stellen
Sie sicher, dass alle Waschmittel gründlich abgewaschen werden. Wischen Sie den Nachtstuhl gründlich
trocken, wobei besonderes Augenmerk auf Gelenke und Lager gerichtet werden muss.
Es wird empfohlen, dass alle Gelenke, Lager und Rollen sodann mit einem Wasserdispergiermittel wie
WD40 eingesprüht werden; dies verleiht Ihrem “Linton” größere Langlebigkeit und verhindert
vorzeitiges Rosten.
TOILETTEN-EIMER
Um den Eimer aus dem Stuhl zu entfernen, ziehen Sie einfach den Eimer auf den Chromschienen an der
Rückseite des Stuhls heraus. Decken Sie den Eimer vorher ab, um ein Spritzen zu vermeiden. Entsorgen
Sie den Inhalt sorgfältig über eine Schleuse oder WC.
Verwenden Sie niemals einen offenen Abfluss oder ein Waschbecken. Dies könnte ein ernstes
Gesundheitsrisiko verursachen.
Reinigen Sie die Rückstände mit einem geeigneten Desinfektionsmittel und setzen Sie den Eimer danach
wieder in den Stuhl ein.
Aufbau- und Wartungsanleitung
Ver.3 08/2012 (1548)
11
NEUVERGABE
Wenn Sie dieses Produkt neu vergeben oder gerade dabei sind, es neu zu vergeben, überprüfen Sie bitte
alle Komponenten gründlich auf ihre Sicherheit.
Dazu gehören:
•
Dichtheit aller Muttern, Schrauben und Rollen und andere Schraub-, Bolzen- und EindrückKomponenten.
•
Kontrollieren Sie auch alle Polsterungen (falls zutreffend) auf ihre Sicherheit, Risse, etc.
Im Zweifelsfall bitte nicht verwenden oder neu vergeben, sondern sofort Ihren Händler
kontaktieren.
Bei Neuvergabe kann eine Beurteilung notwendig sein, ob der Stuhl für den/die jeweilige/n Benutzer/in
geeignet ist.
WARTUNG
Überprüfen Sie das Produkt regelmäßig auf Anzeichen von Schäden. Im Zweifelsfall wenden Sie sich
bitte an Ihren Händler.
WICHTIGE INFORMATIONEN
Die Informationen, die in dieser Gebrauchsanweisung angegeben sind, sind nicht Grundlage oder Teil
einer vertraglichen oder anderweitigen Verpflichtung von Aidapt Bathrooms Limited, Aidapt (Wales) Ltd.
oder einer ihrer Vertreter oder ihrer Tochtergesellschaften und es wird keine Garantie oder verbindliche
Vertretung bezüglich der betreffenden Informationen gegeben.
Bitte handeln Sie nach gesundem Menschenverstand und nehmen Sie keine unnötigen Risiken bei der
Verwendung dieses Produkts in Kauf; als Nutzer haften Sie für die Sicherheit bei der Verwendung des
Produkts.
Bitte zögern Sie nicht, die Person, die dieses Produkt an Sie vergeben hat, oder den Hersteller (unten
beschrieben) zu kontaktieren, wenn Sie Fragen zur Montage/Verwendung Ihres Produkts haben.
Altai Germany (Altai Europe Ltd.)
Reklamationen & Rücksendungen an:
W.H. Elektronik, Merowingerstraße 83, 47533 Kleve
Tel: 02821/971620 | Fax: 02821/12815
Aufbau- und Wartungsanleitung
Ver.3 08/2012 (1548)
12