1
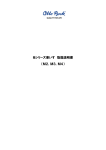
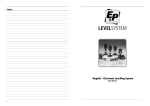
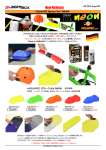
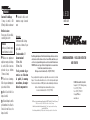
FRANÇAIS
Outils nécessaires:
Perceuse accu, vrille, serre-câbles,
cossecâble/pince à sertir
Attention:
Avant la pose, débrancher impéra
tivement la batterie du véhicule!
1 Choisissez un emplacement
adapté au montage de la lampe
de contrôle. Veillez à avoir une
profondeur de pose suffisante
(18 mm ou 16 mm).
2 Percez le trou de montage.
Veillez à ne pas endommager des
pièces situées à l‘arrière.
3 Retirez l‘écrou du filet de la
lampe de contrôle.
4 SInsérez la lampe de contrôle
par l‘avant dans le trou. Vissez de
l‘arrière à la main l‘écrou sur la
lampe de contrôle.
LED
5Raccordez les câbles conformément au croquis de raccordement.
CONTROL LIGHT
Attention:
À l‘intérieur du câble électrique
se situe une résistance. Ne pas
plier le câble!
Tension nominale: 12V
Courant nominal: Ø 10mm: 20mA
Ø 14mm: 25mA
Pas de prestation de garantie en cas d‘inversion
de polarité, de montage
non conforme, de manipulation des composants etc.
Diese Montageanleitung kann auf Grund technischer Änderungen durch eine neue Version
ersetzt worden sein. Bitte informieren Sie sich auf unserer Website www.foliatec.com, ob
es sich bei der vorliegenden Anleitung um die neueste Version handelt. Informationen zu
FOLIATEC Produkten sowie Tipps und Tricks zur Montage finden Sie in unserem InternetTechnik-Forum unter www.foliatec.com/service
Oder fragen Sie unser Technik-Team (Tel.: +49 (0)911/97544-0)
MONtAGEANLEITUNG
These operating instructions may have been replaced with a newer version due to technical
changes. Visit our website at www.foliatec.com to see if the instructions provided represent
the latest version. Information on FOLIATEC products as well as installation tips and tricks can be
found in our Internet-Technique-Forum under www.foliatec.com/service
Or contact our technical team (Tel.: +49 (0)911/97544-0)
FOLIATEC.com. ist ein international eingetragenes Warenzeichen der FOLIATEC® Böhm GmbH & Co Vertriebs KG, Germany.
FOLIATEC.com is an int. reg. TM of FOLIATEC® Böhm GmbH + Co.Vertriebs KG, Germany.
Druckfehler, Irrtum und technische Änderungen vorbehalten. | Subject to misprints, errors and technical changes.
Copyright by FOLIATEC.com
Verstöße werden gerichtlich verfolgt. | All rights reserved. Violators will be prosecuted to the full extent of the law.
•
INSTALLATION INSTRUCTION
mode d‘emploi
Stand 11/12
Contenu de l‘emballage:
1 lampe de contrôle à LED
(Ø 5mm), câble de raccordement
FOLIATEC Böhm GmbH & Co Vertriebs KG
Neumeyerstr. 70, 90411 Nürnberg, Germany
Tel.: +49(0)911/97544-0
Fax: +49(0)911/97544-333
[email protected]
www.foliatec.com
�
�
�
DEUTSCH
Packungsinhalt:
DEUTSCH
1 Kontroll-Leuchte
mit LED
(5VERSION
mm Ø),MIT
Anschlusskabel
CHROMRINGEN
Packungsinhalt:
1 Kontroll-Leuchte mit
Benötigte
Hilfsmittel:
LED (Ø 8mm), Anschlußkabel
Akkubohrer,
Bohrer, Kabelbinder,
benötigte Hilfsmittel: Akkubohrer,
Klemmschuhe/Quetschverbinder
Bohrer (13mm), Kabelbinder, Klemmschuhe/Quetschverbinder
�
Achtung:
Achtung: Vor Montage unbedingt
Fahrzeugbatterie
abklemmen!FahrzeugVor
Montage unbedingt
� Wählen
Sie eine geeignete Position für
batterie
abklemmen!
den Einbau der Kontroll-Leuchte.
�
Sicherungskasten (Klemme 30 oder 15) bzw Batterie/Fuse box
1(terminal
Sicherungskasten
30 oder 15)debzw.
Batterie
30 or 15)(Klemme
or battery/Coffret
fusibles
(borne 30 ou 15)
Fuse box (terminal 30 or 15) or battery
ou pile/
Caja de fusibles (borne 30 ó 15) y/o batería/Alloggiamento
Coffret de fusibles (borne 30 ou 15) ou pile
fusibili (morsetto 30 o 15) e/o batteria
2 empfohlener Einbau eines Ein-/Ausschalters
� empfohlener
Einbau eines Ein-/Ausschalters (z.B. FOLIA TEC KILL
(z.B. FOLIATEC KILLSwitch ohne Beleuchtung)
ohne Beleuchtung)/Recommended
Switch
Recommended
installation of an On/ Off switchinstallation of an On / Off
(e.g.
FOLIAKILL-Switch
TEC KILL-Switch
without illumination)/Pose recom switch
(e.g.
FOLIATEC
without illumination)
mandée
Pose recommandée
d‘un interrupteur
de marche/arrêt
d'un interrupteur
de marche/arrêt
(p. ex. KILL-Switch
FOLIA(p.TEC
ex. sans
KILL-Switch
FOLIATEC sans
éclairage)el montaje de un interruptor
éclairage)/se
recomienda
3
de encendido
y apagado (p.ej. FOLIA TEC KILL-Switch sin iluminaKontroll-Leuchte
Control-light
ción)/Montaggio consigliato di un interruttore on/off (ad es. FOLIA
TEC KILL-Switch
Lampe de contrôle
senza illuminazione
�4
Verbraucher (z.B. LED-Leuchte)
Kontroll-Leuchte/Control-light/Lampe
de contrôle/piloto de con trol/Spia
User (e.g. LED-light)/
Récepteur
(p.
ex.
lampe
à
LED)
�
Verbraucher (z.B. LED-Leuchte)/User (e.g. LED-light)/Récepteur
(p. ex. lampe à LED)/dispositivo consumidor (p.ej. diodo
1 Achten
WählenSieSiedabei
eineauch
geeignete
auf die
Einbautiefe
Position
für (26cm).
den Einbau der
� Bohren Sie das Achten
Einbauloch.
Kontroll-Leuchte.
SieDabei
dabeidürfen keine dahinterliegende Teile
auchbeschädigt
auf die Einbautiefe
(18 mm
werden.
bzw.
16 mm).
� Stecken
Sie die Kontroll-Leuchte von
vorn in das Loch ein und drücken Sie
2 sieBohren
Sieandas
vorsichtig
bis Einbauloch.
die Haltenasen
Dabeieinrasten.
dürfen keine dahinterlie� Schließen Sie die Kabel entsprechend
genden
Teile beschädigt
der Schaltskizze
an. werden.
3 Entfernen Sie die Mutter vom
Nennspannung:
12V
Gewinde
der Kontoll-Leuchte.
Nennstrom:
4
Stecken 25mA
Sie die KontrollLeuchte
vonMIT
vornREFLEKTOR
in das Loch ein.
VERSION
Packungsinhalt:
1 Kontroll-Leuchte
Schrauben
Sie die
Mutter vonmit
LED, Anschlußkabel
hinten handfest auf die Kontroll-
benötigte Hilfsmittel: Akkubohrer,
Bohrer, Kabelbinder, Klemmschuhe/
Leuchte auf.
5Schließen Sie die Kabel entsprechend
der Schaltskizze
an.
Achtung:
Vor Montage
unbedingt Fahrzeug-
batterie abklemmen!
�Achtung:
Wählen Sie eine geeignete Position für
den Einbau der Kontroll-Leuchte.
ImAchten
stromführenden
KabelaufbefinSie dabei auch
die
(18mm).
detEinbautiefe
sich ein
Widerstand. Nicht
�knicken!
Bohren Sie das Einbauloch. Dabei dürfen keine dahinterliegende Teile
beschädigt werden 12V
Nennspannung:
�Nennstrom:
Entfernen Sie dieMutter vom Gewinde
der Kontoll-Leuchte
Ø 10mm: 20mA
� Stecken Sie die Kontroll-Leuchte von
Øvorn
14mm:
in das25mA
Loch ein. Schrauben Sie
die Mutter von hinten handfest auf die
Kontroll-Leuchte
auf.
Keine
Gewährleistungs�ansprüche
Schließen Sie diebeiKabelVerpolung,
entsprechend
der Schaltskizze an.
unsachmäßem
Einbau,
MaAchtung: Im stromführenden Kabel befinder Bauteile etc.
detnipulation
sich der LED-Kondensator/Widerstand.
Nicht knicken!
Nennspannung: 12V
Nennstrom: Ø 10mm: 20mA
Ø 14mm: 25mA
VERSION OIL WARNING LAMP
Packungsinhalt: 1 Kontroll-Leuchte mit
LED (Ø 8mm), Anschlußkabel
benötigte Hilfsmittel: Akkubohrer,
Bohrer, Kabelbinder, Klemmschuhe/
Quetschverbinder
Achtung: Vor Montage unbedingt Fahrzeug-
english
Package content:
1 control-light with
LED
(5 mm Ø), connection cable
� Wählen Sie eine geeignete Position für
Einbau der Kontroll-Leuchte.
Youden
also
need:
Achten
Sie
dabei auch auf die
Rechargeable
drill, drill bit, cable
Einbautiefe (40mm).
� Bohren
Einbauloch
ties,
clamp Sietype dassocket/crimp
(Ø 25mm). Dabei dürfen keine dahinconnection.
terliegende Teile beschädigt werden.
� Schrauben Sie das Oberteil der
Caution:
Kontroll-Leuchte ab.
Make
sure to disconnect
the vehi� Entfernen
Sie die Mutter
und
cle battery
prior tovom
installation!
Unterlegscheibe
Gewinde der
Kontoll-Leuchte.
1
Select Sie
a suitable
position
for
� Stecken
das Oberteil
der Kontroll-
von of
vornthein control-light.
das Loch ein.
the Leuchte
installation
Schrauben Sie die Mutter von hinten
Alsohandfest
note auf
thedieinstallation
depth
Kontroll-Leuchte
auf.
(18
mm or 16Siemm).
� Schrauben
das Unterteil der
von hinten wieder auf
2 Kontroll-Leuchte
the installation hole.
dasDrill
Oberteil.
Make
sure Sie
notdietoKabel
damage
any
� Schließen
entsprechend
der Schaltskizze
underlying
parts. an.
Nennspannung: 12V
3
Remove25mA
the nut from the
Nennstrom:
screw
thread of0,3W
the control-light.
Nennleistung:
4 Push the control-light into the
hole
the front. Screw the nut
Keinefrom
Gewährleistungsansprüche
beitheVerpolung,
unsachmäßem
on
control light from
the back
Einbau,
Manipulation
der Bauteile
by
hand.
etc..
5Connect the cable according
ENGLISH
to the schematic
diagram.
VERSION WITH CHROME RINGS
Caution:
Package
content: 1 control-light with
located incable
the power
LEDA(8resistor
mm Ø),isconnection
Youcable,
alsodo need:
Rechargeable drill,
not buckle!
drill bit (13 mm), cable ties, clamp type
Rated voltage:
socket/crimp
connection.12V
RatedMake
current:
Caution:
sure to disconnect the
vehicle
battery prior
to installation!
Ø 10mm:
20mA
�ØSelect
a suitable
14mm:
25mA position for the
installation of the control-light.
Also note the installation depth
Warranty
claims for re(26 cm).
pole hole.
connection,
�verse
Drill the installation
Make sure
not to damageinstallation,
any underlying parts.
improper
ma�nipulation
Push the control-light
into the hole
of components
from the front and press carefully
etc.
will not be honored.
until the retention hook snaps in
place.
� Connect the cable according to the
schematic diagram.
Rated voltage: 12V
Rated current: 25mA
VERSION WITH REFLECTOR
Package content: 1 control-light with
LED (5 mm Ø), connection cable
You also need: Rechargeable drill,
drill bit (13 mm), cable ties, clamp type