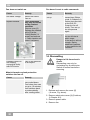
1
DE Montage- und Betriebsanleitung Kleinraumventilatoren EN Mounting and Operating instructions Small room fans FR Instructions de montage et Mode d’emploi Aérateurs pour petites pièces ECA 100 ipro RC ECA 100 ipro RCH www.maico -v entilatoren.com Anschluss an einem einzelnen ECA 100 ipro RC oder ECA 100 ipro RCH ● 1 Funksteuerung RLS RC ● Max. 5 Funkschalter (5 Bedienplätze) ● Max. 2 Funk-Fensterkontakte Connection on an individual ECA 100 ipro RC or ECA 100 ipro RCH ● 1 RLS RC radio control ● Max. 5 radio switches (5 operating locations) ● Max. 2 radio window contacts Connexion sur un ECA 100 ipro RC ou ECA 100 ipro RCH individuel ● 1 commande radio RLS RC ● 5 interrupteurs radio max. (5 postes de commande) ● 2 contacts de fenêtres radio max. Anschluss an einem MasterVentilator ECA 100 ipro RC oder ECA 100 ipro RCH ● Max. 2 Slave-Ventilatoren ● 1 Funksteuerung RLS RC für den Master/Slave-Betrieb ● Max. 5 Funkschalter (5 Bedienplätze) ● Max. 2 FunkFensterkontakte Connection on a master fan ECA 100 ipro RC or ECA 100 ipro RCH ● Max. 2 slave fans ● 1 RLS RC radio control for the master/slave operation ● Max. 5 radio switches (5 operating locations) ● Max. 2 radio window contacts Connexion sur un aérateur maître ECA 100 ipro RC ou ECA 100 ipro RCH ● 2 aérateurs esclaves max. ● 1 commande radio RLS RC pour le mode maître/esclave ● 5 interrupteurs radio max. (5 postes de commande) ● 2 contacts de fenêtres radio max. Anschluss an einem SlaveVentilator ECA 100 ipro RC oder ECA 100 ipro RCH ● Max. 5 Funkschalter (5 Bedienplätze) ● Max. 2 FunkFensterkontakte Connection on a slave fan ECA 100 ipro RC or ECA 100 ipro RCH ● Max. 5 radio switches (5 operating locations) ● Max. 2 radio window contacts Connexion sur un aérateur esclave ECA 100 ipro RC ou ECA 100 ipro RCH ● 5 interrupteurs radio max. (5 postes de commande) ● 2 contacts de fenêtres radio max. A C B DE ECA 100 ipro RC Inhaltsverzeichnis 1. Lieferumfang ............................................ 3 7. Montagevorbereitungen ........................... 8 1.1 Ventilator ECA 100 ipro RC ............... 3 1.2 Ventilator ECA 100 ipro RCH ............ 3 8. Montage ................................................... 9 8.1 Gehäuseeinbau ................................. 9 1.3 Funkschalter DS RC.......................... 3 1.4 Raumluftsteuerung RLS RC .............. 3 8.2 Elektrischer Anschluss ...................... 9 8.3 Inbetriebnahme ............................... 10 2. Allgemeine Hinweise ................................ 3 9. Funkteilnehmer einlernen oder löschen . 11 9.1 Programmebenen ........................... 11 9.2 Tipps zum Einlernen ....................... 11 2.1 Installationspersonal.......................... 3 2.2 Verwendete Symbole ........................ 3 3. Produktinformationen ............................... 3 3.1 Geräteübersicht ................................. 3 3.2 Bestimmungsgemäße Verwendung... 4 3.3 Vorhersehbare Fehlanwendungen .... 4 3.4 Systembeschreibung Maico smart Netzwerk mit Funkelektronik................ 4 3.5 Weitere Funkkomponenten ............... 5 9.3 Master-Slave-Zuordnung ................ 12 9.4 Empfänger in den Einlernmodus schalten .......................................... 12 9.5 Sender einlernen ............................. 12 9.6 Sender löschen ............................... 13 9.7 Ventilator als Signalverstärker einstellen (Repeater) ....................... 13 4. Umgebungsbedingungen und Grenzen für den Betrieb.......................................... 6 10. Bedienung ............................................ 14 5. Technische Daten .................................... 6 12. Reinigung ............................................. 14 6. Sicherheitshinweise ................................. 7 6.1 Allgemein .......................................... 7 13. Störungsbehebung ............................... 14 6.2 Sicheres und korrektes Verhalten für den Betrieb................................... 7 15. Entsorgung........................................... 16 11. Wartung ............................................... 14 14. Demontage .......................................... 15 16. Schaltbild ............................................. 16 6.3 Zuluftnachströmung innerhalb der Wohnung ........................................... 8 Impressum © Maico Elektroapparate-Fabrik GmbH. Originalanleitung. Druckfehler, Irrtümer und technische Änderungen vorbehalten. In diesem Dokument erwähnten Marken, Handelsmarken und geschützte Warenzeichen beziehen sich auf deren Eigentümer oder deren Produkte. 2 DE 1. Lieferumfang i Je nach Bestellung, bestehend aus Ventilator(en), Funkschalter(n), Raumluftsteuerung RLS RC und bauseitig bereitzustellende FunkFensterkontakten. 1.1 Ventilator ECA 100 ipro RC Art.-Nr. 0084.0210 ● ● ● ● Ventilator ECA 100 ipro RC Elektronikabdeckung Schaumstoffband Montage- und Betriebsanleitung 2.1 Installationspersonal Die Montage ist nur durch Fachkräfte mit Kenntnissen und Erfahrungen in der Lüftungstechnik zulässig. Der elektrische Anschluss darf nur von Elektrofachkräften vorgenommen werden. Diese besitzen eine elektrotechnische Ausbildung und das Wissen über die Gefahren und Auswirkungen, die durch einen elektrischen Schlag erfolgen können. 2.2 Verwendete Symbole GEFAHR 1.2 Ventilator ECA 100 ipro RCH Art.-Nr. 0084.0211 ● ● ● ● ● ACHTUNG Ventilator ECA 100 ipro RCH Elektronikabdeckung Feuchtesensor Schaumstoffband Montage- und Betriebsanleitung 1.3 Funkschalter DS RC Art.-Nr. 0157.0832 ● EnOcean-Funkschalter mit Doppelwippe (2 Funkkanäle, separat einlernbar) 1.4 Raumluftsteuerung RLS RC Art.-Nr. 0157.0849 ● Die Raumluftsteuerung RLS RC ist eine Funksteuerung mit integrierter Solarzelle ● Montagehinweise 2. Allgemeine Hinweise Lesen Sie diese Montage- und Betriebsanleitung vor der ersten Benutzung des Ventilators aufmerksam durch. Folgen Sie den Anweisungen. Bewahren Sie diese Anleitung für einen späteren Gebrauch gut auf. Unmittelbar drohende Gefahr, die bei Nichtbeachtung zu schweren Körperverletzungen oder zum Tod führt. Mögliche Situation, die zu Sachschäden am Produkt oder seiner Umgebung führen könnte. i INFO-Symbol für wichtige Informationen und Tipps. ● Aufzählungssymbol für Informationen zum jeweiligen Thema. 1. Handlungsanweisung. Führen Sie die angegebenen Anweisungen der Reihe nach durch. 3. Produktinformationen 3.1 Geräteübersicht 1 2 3 4 5 6 7 8 9 10 Gehäuse mit Motor Flügelrad Leitungstülle Elektronikabdeckung Innengitter, feststehend Abdeckung Designabdeckung Elektronikplatine Feuchtesensor Einlerntaste 3 DE 3.2 Bestimmungsgemäße Verwendung ● Kleinraumventilator zum Entlüften von Bädern, WC´s, Abstellräumen, Büros, Umkleidekabinen und ähnlichen Räumen. ● Bis zu 3 Ventilatoren vernetzbar. ● Dieses Gerät ist ausschließlich für den Hausgebrauch und ähnliche Zwecke vorgesehen. ● Zulässig ist ein Betrieb nur bei: ● Festinstallation innerhalb von Gebäuden. ● Aufputzinstallation an Wand, Decke oder Rohr. ● Luftführung über Schacht oder Rohr. ● elektrischem Festanschluss (Unterputz). ● mit ausreichendem Platz zur Wand und Decke. ● komplett montiertem Gerät. ● Betrieb mit Außenluftdurchlässen gemäß Planungsunterlagen. 3.3 Vorhersehbare Fehlanwendungen Maico haftet nicht für Schäden durch bestimmungswidrigen Gebrauch. Gerät auf keinen Fall einsetzen: ● in Kombination mit Dunstabzugshauben oder Laborabsaugungen. ● in Einzelentlüftungsanlagen nach DIN 18017-3. ● in der Nähe von brennbaren Materialien, Flüssigkeiten oder Gasen. ● für die Förderung von Chemikalien, aggressiven Gasen oder Dämpfen. ● in explosionsfähiger Atmosphäre. ● im Außenbereich. ● wenn auf der Ausblasseite ein Berührungsschutz des Flügelrades nach EN ISO 13857 fehlt. Schalter und Steuerungskomponenten nicht im Bereich der Dusche anbringen ‒ kein Spritzwasserschutz. 4 3.4 Systembeschreibung Maico smart Netzwerk mit Funkelektronik Ausklapp Maico Smart mit ECA100 ipro-Geräten ● Empfänger sind ECA 100 ipro-Ventilatoren der Geräteausführungen RC und RCH. ● Sender sind Systemkomponenten wie die Raumluftsteuerung RLS RC, der Funkschalter DS RC, Funk-Fensterkontakte und weitere ECA 100 ipro-Ventilatoren der Geräteausführungen RC und RCH. ● Alle ECA 100 ipro RC/RCH-Ausführungen im Netzwerk sind miteinander kombinierbar. ● RCH-Geräte besitzen zusätzlich eine Feuchtesteuerung (Feuchte-Vollautomatik). ● Bedienen lässt sich das System per Funkschalter und/oder RLS RC: ● Per Funkschalter lassen sich 2 Leistungsstufen anwählen oder das System ausschalten. ● Mit der Raumluftsteuerung RLS RC lassen sich 3 Systemstufen manuell einschalten ( Tabelle in Kapitel 10). ● Ab Werk ist die Aus-Funktion deaktiviert, um eine Dauerlüftung sicherzustellen. Bei Bedarf kann diese Funktion auch aktiviert werden ( Montageanleitung RLS RC). ● Mit Funk-Fensterkontakten (Fenster offen/geschlossen) wird der Ventilator ebenfalls aus-/eingeschaltet. ● Bei der Inbetriebnahme müssen die Sender an den Empfängern eingelernt (bekannt gemacht) werden. ECA 100 ipro RC ● Zweistufig, 78 m³/h oder 92 m³/h. ● Leistungsstufen manuell mit Funkschalter und/oder automatisch mit RLS RC-Funksteuerung einstellbar. ECA 100 ipro RCH Ausführung wie ECA 100 ipro RC, zusätzlich mit Feuchte-Vollautomatik. Normalerweise läuft der Ventilator im Standardbetrieb mit manuell eingestellter oder per RLS RC vorgegebener Leistungsstufe. Bei der Inbetriebnahme des RCH-Ventilators regelt sich dieser auf die aktuell vorherrschende relative Raumfeuchte ein. DE Diese Feuchte wird als erster Referenzwert gespeichert. Es ist keine manuelle Vorgabe eines Referenzwertes mehr nötig. Sinkt die relative Feuchte direkt nach der Installation, wird diese als neuer Referenzwert gespeichert. Der kleinstmögliche Referenzwert liegt bei 48 % relativer Luftfeuchte. Steigt die Raumfeuchte um 7 % an, schaltet der Ventilator automatisch mit Leistungsstufe 1 (78 m³/h) ein. ● Steigt die Raumfeuchte weiter an, schaltet das Gerät in Leistungsstufe 2 (92 m³/h). ● Findet kein weiterer Anstieg statt, läuft das Gerät solange in Leistungsstufe 1 (78 m³/h) weiter, bis der gespeicherte Referenzwert wieder unterschritten wird. Wird der Referenzwert unterschritten, wird auch die Leistungsstufe zurückgeschaltet: ● Bei Verwendung einer RLS RC erfolgt ein Betrieb gemäß Einstellung an der RLS RC. Ventilator mit mehreren Funkschaltern im Einzelbetrieb ● Bei Betrieb ohne RLS RC (Einzelgerät) schaltet der Ventilator in die zuletzt aktive Leistungsstufe vor dem Feuchtebetrieb zurück. Die aktuell vorherrschende Raumfeuchte wird als neuer Referenzwert gespeichert. Bei Betätigung des Funkschalters während des Feuchtebetriebs wird ebenfalls ein neuer Referenzwert gespeichert. ● Bei der RCH-Version arbeitet die Feuchteautomatik im Urlaubsmodus mit Vorrang. Während des Feuchtebetriebs ist das Schalten mit DS RC oder Funk-Fensterkontakt möglich. 3.5 Weitere Funkkomponenten 3.5.1 Funkschalter DS RC (EnOcean-Schalter) Ventilator mit einem Funkschalter im Einzelbetrieb ● Funkschalter (Doppelwippenschalter) zur Einstellung verschiedener Leistungsstufen des Ventilators. ● Zum Hoch- oder Herunterschalten einer Leistungsstufe die Schaltwippe drücken. i i Die linke und rechte Wippe müssen separat eingelernt werden: Linke Wippe für Ein/Aus, rechte Wippe um die Leistungsstufe hoch-/herunterzuschalten. Funkschalter immer an dem im selben Raum befindlichen Ventilator einlernen. Funktion wie zuvor beschrieben. Bis zu 5 Funkschalter je Ventilator einlernbar. Funkschalter im Master/Slave-Netzwerk Der Betrieb des Lüftungssystems erfolgt wie an der RLS RC eingestellt. Jedoch hat jeder Schaltvorgang per Funkschalter Vorrang vor der RLS RC-Einstellung. ● Wird ein Funkschalter betätigt, schaltet der zugeordnete Ventilator in die manuell gewählte Leistungsstufe. i ● Nach 30 Minuten ohne Betätigung (Timeout) wird wieder auf die Einstellung gemäß RLS RC zurückgeschaltet. Wird während des Timeouts die Einstellung an der RLS RC verändert, reagiert der zugeordnete Ventilator auf diesen Befehl erst nach Ablauf des Timeouts. 3.5.2 Funk-Fensterkontakt (EnOcean-Schalter) ● An jedem Ventilator sind max. 2 FunkFensterkontakte einlernbar. ● Der Funk-Fensterkontakt übermittelt den Status „Fenster offen“ oder „Fenster geschlossen“ an den zugeordneten Ventilator. ● Wird das Fenster geöffnet, schaltet der zugeordnete Ventilator automatisch aus. ● Ist dennoch ein Betrieb des Ventilators gewünscht, kann dieser mit einem zugeordneten Funkschalter wieder eingeschaltet werden. ● Der Funkschalter hat Vorrang vor dem FunkFensterkontakt und/oder der RLS RC. ● Der Ventilator schaltet nach einem Timeout von ca. 30 min wieder aus (Fenster noch offen) oder auf den an der RLS RC eingestellten Betrieb zurück (Fenster zu). 5 DE 3.5.3 Raumluftsteuerung RLS RC (EnOcean-Funksteuerung) Für Informationen zur RLS RCSteuerung separate Montageanleitung. ● Die Raumluftsteuerung RLS RC ist eine Funksteuerung für die manuelle Bedienung von Master- und Slavegeräten. Für den Betrieb stehen 2 Programme (P1/P2) mit unterschiedlichen Leistungsstufen-Kombinationen zur Verfügung. Das zur Anwendung passende Programm (P1 für kleine/P2 für große Wohneinheiten, auch Tabelle in Kapitel 10, Bedienung) wird bei der Inbetriebnahme festgelegt. ● Im Display der RLS RC angezeigt wird: ● Systemstufe 0 / Aus: kein Balken ● Systemstufe 1: 2 Balken ● Systemstufe 2: 4 Balken ● Systemstufe 3: 6 Balken i ● Im Display befindet sich außerdem eine Zeit- und Temperaturanzeige. ● Der Urlaubsmodus ist mit einem Intervallbetrieb ausgestattet. Der Ein-Aus-Wechsel an allen Ventilatoren findet im 30 Minutentakt statt (Feuchteschutz). Funkbefehle weiterer Funknetz-Teilnehmer werden bis zum Ausschalten des Urlaubsmodus ignoriert. ● Bestimmungen für den Betrieb mit Feuerstätten Bei Betrieb mit raumluftabhängigen Feuerstätten muss für ausreichende Zuluftnachströmung gesorgt werden. Die maximal zulässige Druckdifferenz pro Wohneinheit beträgt 4 Pa. Der Ventilator darf in Wohneinheiten mit raumluftabhängigen Feuerstätten nur installiert werden, wenn: ● die Beurteilungskriterien in Abstimmung mit dem zuständigen Bezirksschornsteinfegermeister erfüllt werden. ● ein gleichzeitiger Betrieb von raumluftabhängigen Feuerstätten für flüssige oder gasförmige Brennstoffe und der luftabsaugenden Anlage durch Sicherheitseinrichtungen verhindert wird oder ● die Abgasführung der raumluftabhängigen Feuerstätte durch besondere Sicherheitseinrichtungen überwacht wird. Im Auslösefall muss die Lüftungsanlage oder die Feuerstätte abgeschaltet werden. 5. Technische Daten Für technische Daten Typenschild. Für Abmessungen und Kennlinien: Katalog, oder Internet (maico-ventilatoren.com). ● Servicemenü: Für Systemeinstellungen. 4. Umgebungsbedingungen und Grenzen für den Betrieb ● Zulässige Höchsttemperatur des Fördermediums: + 40 °C ● Die Geräte besitzen eine Störfestigkeit nach EN 55014-2 (je nach Impulsform und Energieanteil 1000 bis 4000 V). Bei Betrieb mit Leuchtstoffröhren können diese Werte überschritten werden. In diesem Fall sind zusätzliche Entstörmaßnahmen erforderlich (L-, C- oder RC-Glieder, Schutzdioden, Varistoren). 6 Bemessungsspannung 230 V Netzfrequenz 50 Hz Schutzart ● Ventilator ● Schalter, Steuerung IP X5 IP 00 Funk-Komponenten: Frequenzbereich (nach EN 300220-1) Reichweiten im Gebäude, je nach Bausubstanz ● Raumluftsteuerung RLS RC Ventilator ● Funkschalter DS RC Ventilator ● Ventilator Ventilator ● Signalverstärker Ventilator 868,35 MHz bis zu: 30 m 30 m 30 m 40 m DE 6. Sicherheitshinweise 6.1 Allgemein ● Lesen Sie diese Betriebsanleitung vor Montage und Inbetriebnahme aufmerksam durch. ● Die Montage und der elektrische Anschluss ist nur durch Fachkräfte gemäß Kapitel 2.1 zulässig. ● Gerät nur an eine fest verlegte elektrische Installation mit Leitungen vom Typ NYM-O oder NYM-J (3 x 1,5 mm² oder 5 x 1,5 mm²) anschließen. Eine Vorrichtung zur Trennung vom Netz mit mind. 3 mm Kontaktöffnung je Pol ist vorgeschrieben. ● Gerät nur mit auf Typenschild angegebener Spannung und Frequenz betreiben. ● Gerät nie ohne Elektronikabdeckung [4] und Abdeckung [6] betreiben. ● Eine ausreichende Zuluftnachströmung ist sicherzustellen. ● Veränderungen und Umbauten am Gerät sind nicht zulässig und entbinden den Hersteller von jeglicher Gewährleistung und Haftung. 6.2 Sicheres und korrektes Verhalten für den Betrieb Verletzungsgefahr durch Gegenstände im Flügelrad. Keine Gegenstände in das Gerät hineinstecken. Verletzungsgefahr durch sich drehendes Laufrad. Nicht zu nahe an das Gerät gehen, damit Haare, Kleidung oder Schmuck nicht in das Gerät hineingezogen werden können. ● Dieses Gerät kann von Kindern ab 8 Jahren und darüber sowie von Personen mit verringerten physischen, sensorischen oder mentalen Fähigkeiten oder Mangel an Erfahrung und Wissen benutzt werden, wenn sie beaufsichtigt oder bezüglich des sicheren Gebrauchs des Gerätes unterwiesen wurden und die daraus resultierenden Gefahren verstehen. Kinder dürfen nicht mit dem Gerät spielen. Reinigung und Benutzerwartung dürfen nicht von Kindern ohne Beaufsichtigung durchgeführt werden. 7 DE 6.3 Zuluftnachströmung innerhalb der Wohnung ● Die Luftführung in der Wohnung muss so erfolgen, dass möglichst keine Luft aus Küche, Bad und WC in die Wohnräume überströmen kann. ● Es muss für ausreichende Zuluft innerhalb der Wohnung gesorgt werden. Hierzu sind unverschließbare Überströmdurchlässe vorzusehen. 7. Montagevorbereitungen Wand Vorgeschriebene Mindestabstände zur Wand und Decke gemäß Abbildung einhalten. i i Empfehlung: Wandhülse WH 100 einbauen. i Bei rechteckigen Wanddurchbrüchen Montageplatte ZM 11 verwenden. i Bei der Elektroinstallation und Gerätemontage unbedingt die einschlägigen Vorschriften beachten, in Deutschland insbesondere DIN VDE 0100 mit den entsprechenden Teilen. 3. Netzleitung (Unterputz) bis an den Montageort verlegen, Abstandsmaße siehe oben. Dabei die Netzleitung mindestens 100 mm aus der Wand herausführen. Decke Kurzschlussgefahr und Gerätebeschädigung durch Kondenswasserbildung im Ventilatorgehäuse. Lüftungsleitungen fachgerecht thermisch isolieren. Kondenswasserableitung oder Kondenswassersammler in der Steigleitung einplanen. Montagevorbereitungen wie unter „Wand“ beschrieben vornehmen. ACHTUNG Rohr 1. Kanten der Rohrinnenseite entgraten. 2. Montagevorbereitungen wie unter „Wand“ beschrieben vornehmen. Ventilator 1. Im Bereich des Gehäuses für einen ebenen Untergrund sorgen. 2. Wanddurchbruch anbringen oder Kernloch bohren. Mindestdurchmesser 105 mm. 8 1. ECA auspacken und Abdeckung [6] abnehmen. Zum Lösen der Abdeckung Rasthaken ( Pfeil, Abb. oben) mit Schraubendreher entriegeln. DE ACHTUNG 2. Beigefügtes Schaumstoffband am Stutzen mittig anbringen. An ECA 100 ipro RCH unbedingt das Schaumstoffband anbringen, damit die Geräte keine Fehlluft von außen anziehen. i 8. Montage Kurzschlussgefahr und Gerätebeschädigung. Eindringendes Wasser bei falscher Einführung der Netzleitung in das Ventilatorgehäuse oder bei nicht fachgerecht eingebauter Leitungstülle. Kappe der Leitungstülle [3] so abschneiden, dass die Leitungstülle die Netzleitung dicht umschließt. Dabei die Kappe max. 5 mm abschneiden (Netzleitung lässt sich besser biegen und Elektronikabdeckung [4] korrekt aufsetzen). Leitungstülle [3] fachgerecht anbringen, ggf. bauseitig abdichten. 8.1 Gehäuseeinbau 1. Gehäuse [1] in Wanddurchbruch/Wandhülse stecken (TOP = oben). 5. Leitungstülle in Gehäuse einsetzen. i Netzleitung so in den Anschlussraum führen, dass die Leitungstülle den Leitungsmantel komplett umschließt und nicht zu weit in den Anschlussraum hineinragt. 8.2 Elektrischer Anschluss 2. Gehäuse waagerecht ausrichten und die beiden Dübellöcher (Pfeile, Abb. oben) markieren. 3. Gehäuse [1] abnehmen, M6-Dübellöcher Ø 6 mm bohren und Dübel einstecken. GEFAHR ACHTUNG 4. Leitungstülle [3] vorsichtig aus dem Gehäuse drücken und herausnehmen. i Lebensgefahr durch Stromschlag. Netzsicherung ausschalten. Gerätebeschädigung bei Kurzschluss. Schutzleiter und nicht benötigte Adern isolieren. Bei der Elektroinstallation und Gerätemontage unbedingt die einschlägigen Vorschriften beachten, in Deutschland insbesondere DIN VDE 0100 mit den entsprechenden Teilen. 9 DE i Zulässige Netzzuleitung: min. 3 x 1,5 mm². 1. Im Gerät nur Einzeladern verlegen. Dazu Mantel der Netzleitung auf einer Länge von 90 mm entfernen. Einzelne Adern auf 9 bis 10 mm abisolieren. 2. Gehäuse [1] in Wanddurchbruch/Wandhülse einsetzen und mit zwei Schrauben befestigen. Gehäuse weder verspannt noch gequetscht einsetzen. Ausreichend dimensioniertes Befestigungsmaterial verwenden. 3. Netzleitung an Federklemme [11] gemäß Anschlussschaltbild [12] elektrisch anschließen Schaltbild in Kapitel 16. 4. Sitz der Leitungstülle kontrollieren. Diese muss gut abdichten. 5. Elektronikabdeckung anbringen. ACHTUNG Kurzschlussgefahr und Gerätebeschädigung. Eindringende Feuchtigkeit bei falsch eingesetzter Elektronikabdeckung. Elektronikabdeckung fest an das Gehäuse drücken, so dass diese ringsum dichtend und plan anliegt. Nicht auf Einlerntaste [10] drücken. 7. Bei Geräteausführungen RCH mitgelieferten Sensor [9] lagerichtig (Pfeile X) in den Anschlusssockel einstecken. 8. Abdeckung [6] anbringen. 9. Designabdeckung [7] anbringen ( Ausklappseite, Abb. B). 10. Alle weiteren Systemkomponenten gemäß deren Montageanleitungen installieren. 8.3 Inbetriebnahme Betrieb mit einem einzelnen Ventilator (Einzelbetrieb). 1. Netzsicherung einschalten. 2. Am Ventilator zuerst die Raumluftsteuerung RLS RC, dann die Funkschalter und/oder Funkfensterkontakte gemäß Kapitel 9 einlernen. 3. Weitere Systemkomponenten einlernen. 4. Funktionstest mit allen Systemkomponenten durchführen. Betrieb im Master-Slave-Netzwerk 1. Netzsicherung einschalten. 2. Am Masterventilator die vorkonfigurierte Raumluftsteuerung RLS RC einlernen. 3. Am Master-Ventilator die Funkschalter, Funk-Fensterkontakte und weitere SlaveVentilatoren gemäß Kapitel 9 einlernen. 4. An den Slave-Ventilatoren (max. 2 Stück) weitere Funkschalter und/oder FunkFensterkontakte einlernen. 6. Elektronikabdeckung an den Gehäuseaussparungen I, II und III auf die 3 Rastnasen stecken bis diese einrastet. Zusätzlich die Elektronikabdeckung an beiden Positionen „PRESS“ fest in das Gehäuse drücken. 10 5. Abdeckung [6] (mit Designabdeckung [7]) vorsichtig auf das Gehäuse drücken, bis diese in die Schnapper einrastet. 6. Funktionstest mit allen Systemkomponenten durchführen. DE 9. Funkteilnehmer einlernen oder löschen Empfänger = Ventilatoren ECA 100 ipro RC oder ECA 100 ipro RCH. Sender = Raumluftsteuerung RLS RC, Funkschalter, Funk-Fensterkontakte, Ventilatoren ECA 100 ipro RC oder ECA 100 ipro RCH. 9.1 Programmebenen 9.2 Tipps zum Einlernen ● Zum Slave-Gerät wird ein Ventilator, wenn vom Slave-Ventilator ein Einlerntelegramm an das Mastergerät übertragen und von diesem bestätigt wird. ● Empfängt der Master- oder Slave-Ventilator ein gültiges Einlerntelegramm (von einem noch nicht eingelernten Gerät), werden die Daten ausgewertet und gespeichert. Ist das Gerät bereits eingelernt, wird das Einlerntelegramm wieder gelöscht. ● Erfolgt innerhalb von 60 Sekunden kein Empfang, wird das Einlernen beendet (LED am Ventilator schaltet aus). ● Einlerntelegramme von nicht unterstützten Geräten werden ignoriert. i Wird ein Master-Ventilator versehentlich an einem Slave-Ventilator eingelernt erlischt die Master-Zuordnung (Master- wird zum Slavegerät). Dies kann eine Neueingabe aller Systemkomponenten zur Folge haben. 11 DE 9.3 Master-Slave-Zuordnung i Ein Ventilator wird automatisch zum Master, wenn das Mastergerät in den Empfangsmodus gestellt und von einem Slave-Ventilator ein Einlerntelegramm empfangen wird. 9.4 Empfänger in den Einlernmodus schalten 1. Am Empfänger (Ventilator) die Einlerntaste [10] mindestens 2 Sekunden drücken. > Die Tasten-LED blinkt, der Einlernmodus ist aktiviert. 2. Innerhalb von 60 Sekunden muss nun ein Einlerntelegramm empfangen werden, andernfalls wird der Einlernmodus verlassen. 9.5 Sender einlernen i Bei korrektem Empfang eines Einlerntelegramms leuchtet die Tasten-LED des Empfängers jeweils 1 Sekunde lang. Der Sender ist nun eingelernt. Funkschalter einlernen Bei Doppelwippenschaltern (DS RC) beide Wippen separat einlernen (2 Kanäle). 1. Am Empfänger (Ventilator) den Einlernmodus aktivieren. > LED blinkt. Einlernmodus ist aktiviert. 2. Am Funkschalter die rechte Wippe innerhalb von 2 Sekunden 3-mal drücken. > Das Einlerntelegramm wird gesendet. Bei erfolgreichem Einlernen leuchtet die LED ca. 1 Sekunde. Bei fehlerhafter Übertragung blinkt die Tasten-LED 3-mal kurz. 3. Am Empfänger (Ventilator) den Einlernmodus erneut aktivieren. 4. Am Funkschalter die linke Wippe innerhalb von 2 Sekunden 3-mal drücken. > Das Einlerntelegramm wird gesendet. Bei erfolgreichem Einlernen leuchtet die LED ca. 1 Sekunde. Bei fehlerhafter Übertragung blinkt die Tasten-LED 3-mal kurz. 12 5. Am Empfänger (Ventilator) den Einlernmodus erneut aktivieren. 6. Die rechte Wippe 3-mal innerhalb von 2 Sekunden drücken. > Das Einlerntelegramm wird gesendet. Funk-Fensterkontakt einlernen 1. Am Empfänger (Ventilator) den Einlernmodus aktivieren. > LED blinkt, der Einlernmodus ist aktiviert. 2. Am Funk-Fensterkontakt die Einlerntaste drücken. > Das Einlerntelegramm wird gesendet. Bei erfolgreichem Einlernen leuchtet die LED ca. 1 Sekunde. Raumluftsteuerung RLS RC einlernen Die Einlerntaste befindet sich auf der Rückseite der Steuerung. 1. Am Empfänger (Ventilator) den Einlernmodus aktivieren. > Am Ventilator blinkt die LED, der Einlernmodus ist aktiviert. 2. An der RLS RC die Einlerntaste 3-mal innerhalb von 2 Sekunden drücken. > Das Einlerntelegramm wird gesendet. Bei erfolgreichem Einlernen blinkt das Funksymbol im Display 3-mal kurz. Das Funksymbol ist dann dauerhaft im Display sichtbar. Slave-Ventilator einlernen 1. Am Master-Empfänger und einem noch nicht eingelernten Ventilator (geplanter Slave) den Einlernmodus aktivieren. > LED blinkt, der Einlernmodus ist aktiviert. 2. Slave-Ventilator in den Sendemodus schalten. Dazu am Slave-Ventilator die Einlerntaste [10] 1-mal kurz drücken. > Die LED am Slave leuchtet kurze Zeit und blinkt danach 1-mal kurz auf. Der Slave-Ventilator befindet sich nun im Send-Learn-Modus. DE 3. Einlerntaste [10] am Slave-Ventilator so lange drücken (>1 Sekunde), bis die LED am Slave-Ventilator 1-mal kurz aufleuchtet. > Das Einlerntelegramm wird gesendet. Bei erfolgreichem Einlernen leuchtet die Tasten-LED 1-mal für ca. 1,5 Sekunden. Bei fehlerhafter Übertragung blinkt die Tasten-LED 3-mal kurz. Bei fehlgeschlagenem Einlernvorgang blinkt die LED am Slave-Ventilator 3-mal kurz auf. Der Vorgang ist zu wiederholen. 9.6 Sender löschen Einzelnen Sender löschen i Bei defektem oder nicht mehr identifizierbarem Sender müssen eventuell alle Sender gelöscht werden. Systemkomponenten sind dann wieder neu einzulernen (empfehlenswert, falls ein Sender verloren wurde oder defekt ist). 1. Um den gewünschten Sender zu löschen, muss der Einlernvorgang des Senders (RLS RC, Funkschalter oder Fensterkontakt) wiederholt werden ( Kap. 9.5). Alle Sender löschen 1. Am Ventilator den Einlernmodus aktivieren. > LED blinkt, Einlernmodus ist aktiviert. 2. Einlerntaste [10] 2-mal kurz betätigen. > LED blinkt 2-mal kurz auf und geht aus. 3. Einlerntaste [10] am Ventilator so lange drücken (> 1 Sekunde), bis die LED am Ventilator 1-mal kurz aufleuchtet. > Alle eingelernten Sender sind nun gelöscht. Der Ventilator befindet sich wieder im Grundzustand. 9.7 Ventilator als Signalverstärker einstellen (Repeater) Die im Ventilator befindliche Funkelektronik kann auch für eine Signalverstärkung genutzt werden. Hierbei arbeitet der so eingestellte Ventilator zusätzlich als Signalverstärker. Parallel zur laufenden Anwendung werden EnOcean-Telegramme empfangen und weiter gesendet. Dies kann zum Beispiel erforderlich sein, bei Anwendungen in Einfamilienhäusern, die komplett mit EnOcean-Produkten automatisiert sind. Einstellwerte ● Aus ● Level 1 = Original-Telegramme werden verstärkt ● Level 2 = Original- und bereits verstärkte Telegramme werden verstärkt Ventilator als Signalverstärker einstellen 1. Am Empfänger (Ventilator) den Einlernmodus aktivieren. > LED blinkt, der Einlernmodus ist aktiviert. 2. Einlerntaste [10] 3-mal kurz drücken. > LED leuchtet für kurze Zeit und blinkt danach 3-mal kurz auf. 3. Für Repeatermodus die Einlerntaste [10] x-mal kurz drücken: Repeater Aus 1-mal LED blinkt 1-mal Repeater Level 1 2-mal LED blinkt 2-mal Repeater Level 2 3-mal LED blinkt 3-mal 4. Einlerntaste [10] so lange drücken (≥ 5 Sekunden), bis die LED am Ventilator 1-mal ca. 1 Sekunde aufleuchtet. > Die Einstellung ist gespeichert. 13 DE 10. Bedienung Nachfolgende Tabelle zeigt die Leistungsstufen der Master- und Slave-Ventilatoren, die den unterschiedlichen RLS RC-Systemstufen zugeordnet sind. RLS RC-Programme für ECA 100 ipro RC und ECA 100 ipro RCH Systemstufe 0 Systemstufe 1 Systemstufe 2 Systemstufe 3 Programm P1 Master Aus Leistungsstufe 1 Leistungsstufe 1 Leistungsstufe 2 Slave(s) Aus Aus Leistungsstufe 1 Leistungsstufe 1 Programm P2 Master Aus Leistungsstufe 2 Leistungsstufe 1 Leistungsstufe 2 Slave(s) Aus Aus Leistungsstufe 1 Leistungsstufe 2 Leistungsstufe 1 = 78 m³/h Leistungsstufe 2 = 92 m³/h (Angaben frei blasend) 12. Reinigung Programmauswahl Programm Wohnungsgröße P1 30 m² / 50 m² / 70 m² P2 90 m² / 110 m² / 130 ² / 140 m² ECA 100 ipro RC Ein- und ausgeschaltet werden die Ventilatoren entweder an der Raumluftsteuerung RLS RC, mit Funkschalter DS RC oder mit einem bauseitig bereitgestellten FunkFensterkontakt. Für Funktion der Funkkomponenten Systembeschreibung Maico Smart in Kapitel 3.4. ECA 100 ipro RCH Das Gerät ist barrierefrei. Die Entlüftung erfolgt gemäß Feuchteautomatik. Bei geringer Feuchte schaltet das Gerät ganz aus. Für eine manuelle Bedienung per Funkkomponente ECA 100 ipro RC. 11. Wartung Das Gerät ist wartungsfrei. 14 GEFAHR Lebensgefahr, Gerät steht unter Spannung. Netzsicherung ausschalten. Gerätebeschädigung bei falschem Reinigungsmittel. Abdeckung [6] und Designabdeckung [7] nur mit Wasser reinigen. Keine aggressiven Reinigungsmittel verwenden. 1. Innenteile des Ventilators nur mit einem trockenem Tuch reinigen. 2. Bei stark verunreinigter Designabdeckung [7] diese vorsichtig abnehmen ( Ausklappseite, Abb. B) und mit Wasser reinigen. 3. Designabdeckung [7] anbringen. ACHTUNG 13. Störungsbehebung ● Bei jeder Störung eine Elektrofachkraft hinzuziehen. ● Reparaturen sind nur durch Elektrofachkräfte zulässig. GEFAHR Lebensgefahr, Gerät steht unter Spannung. Vor Arbeiten am elektrischen Anschluss die Netzsicherung ausschalten und ein Warnschild gegen Wiedereinschalten anbringen. DE Ventilator schaltet nicht ein. Ventilator reagiert nicht auf Funk-Befehle Abhilfe Ursache Keine Netzspannung. Netzsicherung einschalten. Laufrad blockiert. Störungsbeseitigung nur durch Fachkraft zulässig! Abdeckung [6] abnehmen. Innengitter [5] über Rasthaken ( Pfeile) entriegeln und ausbauen. Flügelrad überprüfen und ggf. reinigen Ventilatoren sind nicht Sender aller Komkorrekt eingelernt. ponenten löschen (Delete-Modus Kapitel 9.6). Sender an der RLS RC löschen. Ursache Abhilfe Ventilatoren kurzzeitig stromlos schalten. Danach Komponenten neu einlernen. Ventilatoren sind außerhalb der Reichweite. Repeater Modus an einem in Reichweite liegenden Ventilator einschalten. Bei zu geringer Reichweite zusätzlichen Repeater (bauseitig) einsetzen. Feuchtesteuerung bei RCH-Geräten arbeitet nicht korrekt/ist defekt. Fachkraft hinzuziehen. 14. Demontage GEFAHR Thermischer Überlastungsschutz des Motors schaltet den Ventilator aus Ursache Abhilfe Motor zu heiß. Warten Sie bis der Motor abgekühlt ist. Die Abkühlzeit kann bis zu 10 Minuten betragen. Gerät schaltet nach Abkühlung selbsttätig wieder ein. Lebensgefahr durch Stromschlag. Die Demontage darf nur von einer Elektrofachkraft vorgenommen werden. Vor dem Ausbau die Netzsicherung ausschalten. 1. Abdeckung [6] ( Pfeil, Abb. oben) entriegeln und abnehmen. 2. Elektronikabdeckung [4] entfernen (3 Rastnasen, Kapitel 8.2). 3. Netzleitung entfernen. 4. Ventilator ausbauen. 15 DE 15. Entsorgung i Nicht in den Restmüll Das Gerät enthält teils wiederverwertbare Stoffe, teils Substanzen, die nicht in den Restmüll gelangen dürfen. Entsorgen Sie das Gerät nach Ablauf seiner Lebensdauer nach den in Ihrem Land geltenden Umweltrichtlinien und Vorschriften. 16. Schaltbild ECA 100 ipro RC / ECA 100 ipro RCH 16 EN ECA 100 ipro RC Table of contents 1. Scope of delivery ................................... 18 7. Installation preparations .......................... 23 1.1 ECA 100 ipro RC fan....................... 18 1.2 ECA 100 ipro RC fan....................... 18 8. Mounting ................................................. 24 1.3 DS RC radio switch ......................... 18 1.4 RLS RC room air control ................. 18 2. General notes ........................................ 18 2.1 Installation staff ............................... 18 2.2 Symbols used ................................. 18 3. Product information ................................ 18 3.1 Unit overview .................................. 18 3.2 Intended use ................................... 19 3.3 Predictable misuse .......................... 19 3.4 System description Maico smart Network with radio electronics ........... 19 3.5 Further radio components ............... 20 8.1 Housinginstallation ........................... 24 8.2 Electrical connection ........................ 24 8.3 Commissioning ................................ 25 9. Setting up or deleting radio devices ........ 26 9.1 Program levels ................................. 26 9.2 Teaching-in tips ............................... 26 9.3 Master-slave assignment ................. 27 9.4 Switching a receiver to teach-in mode................................................ 27 9.5 Setting up transmitters ..................... 27 9.6 Deleting transmitters ........................ 28 9.7 Setting up the fan as a signal amplifier (Repeater) ......................... 28 4. Environmental conditions and operating limits ....................................... 21 10. Operation .............................................. 29 5. Technical data........................................ 21 12. Cleaning ............................................... 29 6. Safety instructions .................................. 22 6.1 General ........................................... 22 13. Fault rectification ................................... 29 6.2 Safe and correct practices during operation ......................................... 22 15. Disposal ................................................ 31 11. Maintenance ......................................... 29 14. Dismantling ........................................... 30 16. Wiring diagram ...................................... 31 6.3 Supply air intake within the living area ....................................... 23 Acknowledgements © Maico Elektroapparate-Fabrik GmbH. This instruction is a translation of the German original operating instructions. Misprints, errors and technical changes are reserved. Brand names, private labels and protected trade marks that are referred to in this document refer to their owners or their products. 17 EN 1. Scope of delivery i Order-dependent, consisting of fan(s), radio switch(es), RLS RC room air control and radio window contacts that are to be provided by the customer. 1.1 ECA 100 ipro RC fan Article no. 0084.0210 ● ● ● ● ECA 100 ipro RC fan Electronics cover Foam strip Mounting and operating instructions 2.1 Installation staff Installation may only be carried out by specialists who have the necessary knowledge and experience in ventilation engineering. Only qualified electricians are permitted to make the electrical connections. They are trained in electrical engineering and are aware of the risks and consequences of an electric shock. 2.2 Symbols used DANGER 1.2 ECA 100 ipro RC fan Article no. 0084.0211 ● ● ● ● ● Direct risk of danger. Failure to observe will result in severe injury or death. NOTICE Possible situation which could cause damage to the product or its surroundings. i INFO symbol indicating important information and tips. ● Bullet point for information on the corresponding subject. 1. Instructions. Follow the instructtions given in the order stated. ECA 100 ipro RCH fan Electronics cover Humidity sensor Foam strip Mounting and operating instructions 1.3 DS RC radio switch Article no. 0157.0832 ● EnOcean radio switch with double-rocker (2 radio channels, with separate set-up options) 3. Product information 1.4 RLS RC room air control Article no. 0157.0849 ● The RLS RC room air control is a radio controller with an integrated solar cell ● Mounting instructions 2. General notes 18 Read these installation and operating instructions carefully before using the fan for the first time. Follow the instructions. Keep these instructions safe for use later on. 3.1 Unit overview 1 2 3 4 5 6 7 8 9 10 Housing with motor Impeller Cable grommet Electronics cover Internal grille, fixed Cover Designer cover Electronic circuit board Humidity sensor Teach-in button EN 3.2 Intended use ● Small room fan for the ventilation of bathrooms, WCs. storage rooms, offices, change cubicles and similar spaces. ● Up to 3 fans can be networked to one another. ● The unit is only intended for domestic use and similar purposes. ● Operation is only permitted with: ● a fixed installation within buildings. ● a surface installation on walls, ceilings or ducts. ● an air supply via shaft or duct. ● a permanent electrical connection, (recessed-mounted). ● sufficient space from the wall or ceiling. ● a unit that is completely installed. ● outside air openings as laid out in the planning documentation. 3.3 Predictable misuse Maico is not liable for damages caused by use contrary to the intended use. Under no circumstances should the unit be used: ● in combination with range hoods or laboratory extractors. ● in single air extraction systems according to DIN 18017-3. ● close to flammable materials, liquids or gases, ● for the conveying of chemicals, aggressive gases or vapours. ● in explosive atmospheres. ● outdoors, ● if there is no protection against accidental contact with the impeller on the discharge side in accordance with EN ISO 13857. Do not install switches and control components near showers - there is no splash water protection. 3.4 System description Maico smart Network with radio electronics fold-out page Maico Smart with ECA100 ipro units ● Receivers are ECA 100 ipro fans from the RC and RCH unit models. ● Transmitters are system components such as RLS RC room air control, DS RC radio switches, radio window contacts and further ECA 100 ipro fans from the RC and RCH unit models. ● All the ECA 100 ipro RC/RCH models in the network can be combined with each other. ● RCH units also have a humidity control (fully automatic humidity operation). ● The system can be operated with a radio switch and /or RLS RC: ● Per radio switch, 2 performance levels can be selected, or the system can be switched off. ● With the RLS RC3 room air control, 3 system levels can be switched on manually ( see table in Chapter 10). ● This function is deactivated ex works in order to guarantee continuous ventilation. If need be, this function can also be activated ( see RLS RC) mounting instructions). ● The fan can also be switched on/off with radio window contacts (window open/closed). ● During commissioning, the transmitters must be taught-in on the receivers (must be paired with each other). ECA 100 ipro RC ● Two-level, 78 m³/h or 92 m³/h. ● Performance levels can be set manually with radio switch and/or automatically with RLS RC radio controller. ECA 100 ipro RCH Model similar to the ECA 100 ipro RC with additional fully automatic humidity control. Normally, the fan runs in standard operation at a performance level that is manually set or predefined through an RLS RC. When starting up the RCH fan, this fan is set in line with the current relative room humidity. 19 EN This humidity is saved as the first reference value. No further manual setting of a reference value is necessary. If the relative humidity drops directly following the installation, this is saved as the new reference value. The lowest possible reference value is 48 % relative air humidity. If the room humidity increases by 7 %, the fan switches on automatically at performance level 1 (78 m³/h). ● If the room humidity increases even further, the unit switches to performance level 2 (92 m³/h). ● If there are no further increases, the unit continues to run at performance level 1 (78 m³/h) until the humidity again falls below the saved reference value. If humidity falls below the reference value, the performance level is also throttled back. ● If an RLS RC is deployed, operation is done in line with the setting at the RLS RC. ● In the case of operation without an RLS RC (individual unit), the unit switches back to the last performance level to have been active before humidity operation. The currently prevailing room humidity is saved as the new reference value. A new reference value is also saved if the radio switch is operated during humidity operation. 3.5 Further radio components 3.5.1 DS RC radio switch (EnOcean switch) Fan with a radio switch in individual operation ● Radio switch, (double-rocker switch) for setting different fan performance levels. ● Press the rocker switch to switch up or down one performance level. The left and right rocker have to be set up separately: Left rocker for on/off, right rocker to switch the performance level up and down. Always set up the radio switch for the fan that is located in the same room as the switch. i i 20 Fan with several radio switches in individual operation Function as described above. Up to 5 radio switches can be set up per fan. Radio switches in master/slave network The ventilation system is operated as per the settings made at the RLS RC. However, every switching action made by radio switch has priority over the RLS RC setting. ● If a radio switch is operated, the assigned fan switches to the manually selected performance level. i ● After 30 minutes of the switch not being operated (timeout), the unit returns to the setting according to RLS RC. If the setting is changed at the RLS RC during the timeout, the assigned fan only reacts to this command once the timeout has elapsed. ● In the case of the RCH version, the automatic humidity function has priority when operating in vacation mode. Switching through the DS RC or through a radio window contact is possible during humidity operation. 3.5.2 Radio window contact (EnOcean switch) ● A maximum of 2 radio window contacts can be taught-in for each fan. ● The radio window contact sends the "Window open" or "Window closed" status to the assigned fan. ● The assigned fan switches off automatically if the window is opened. ● If you want the fan to continue to operate even when the window is open, it can be switched on with the assigned radio switch. ● The radio switch has priority over the radio window contact and/or the RLS RC. ● The fan either switches off again after a timeout of approx. 30 minutes if the window is still open or back to the operation mode set through the RLS RC if the window is closed. EN 3.5.3 RLS RC room air control (EnOcean radio control) For information about the RLS RC control, separate Mounting instructions. The room air control RLS RC is a radio control for the manual operation of master and slave devices. Two programs, P1/P2, with different combinations of performance levels, are available for operation. The appropriate program for the application, (P1 for small / P2 for large living units, table in Chapter 10, Operation), is defined during commissioning. The RLS RC display shows: ● System level 0 / Off: No bar ● System level 1: 2 bars ● System level 2: 4 bars ● System level 3: 6 bars The display also shows time and temperature. Vacation mode is fitted with interval operation. The switch between on and off is done on a 30 minute cycle for all fans (humidity protection). Radio commands from further radio network devices are ignored until vacation mode is switched off. Service menu: For system settings. i ● ● ● ● ● 4. Environmental conditions and operating limits ● Maximum permitted temperature of the air medium: + 40 °C ● The units have resistance to interference in line with EN 55014-2 (depending on pulse form and energy factor 1000 to 4000 V). These values can be exceeded when operating with fluorescent tubes. In this case, additional interference suppression measures (L, C components or RC module, protection diodes, varistors) are required. ● Regulations for operation with fireplaces Sufficient supply air intake must be ensured during operation with air-ventilated fireplaces. The maximum permitted pressure difference per living unit is 4 Pa. The fan may only be installed in rooms with air-ventilated fireplaces if: ● the evaluation criteria drawn up by the responsible, regional master chimney sweep are met, ● a parallel operation of air-ventilated fireplaces for liquid or gaseous fuels and the air-extracting equipment can be prevented, or ● the extraction of exhaust gas from the air-ventilated fireplaces is monitored by special safety equipment. The ventilation unit or the fireplaces must be switched off if the equipment is triggered. 5. Technical data For technical data, rating plate. For dimensions and characteristic curves: catalogue or Internet (maico-ventilatoren.com). Rated voltage 230 V Power frequency 50 Hz Protection type ● Fan ● Switch, control IP X5 IP 00 Radio components: Frequency range (in acc. to EN 300220-1) Operating distances in the building are dependant on the building materials used ● Room air control RLS RC Fan ● Radio switch DS RC Fan ● Fan Fan ● Signal amplifier Fan 868.35 MHz up to: 30 m 30 m 30 m 40 m 21 EN 6. Safety instructions 6.1 General ● Read these operating instructions carefully before mounting and commissioning. ● Assembly and electrical connection may only be undertaken by trained specialists in accordance with Chapter 2.1. ● Only connect unit to a permanently wired electrical installlation with NYM-O or NYM-J (3 x 1.5 mm² or 5 x 1.5 mm²) cables. A mains isolation device with contact openings of at least 3 mm at each pole is mandatory. ● The unit may only be operated using the voltage and frequency shown on the rating plate. ● Never operate unit without electronics cover [4] and cover [6]. ● Ensure a sufficient fresh air supply intake. ● Modifications and alterations to the unit are not permitted and release the manufacturer from any guarantee and liability. 22 6.2 Safe and correct practices during operation Danger of injury from objects in the impeller. Do not insert any objects in the unit. Danger of injury from rotating impeller. Do not get too close to the unit, to avoid hair, clothing or jewellery being drawn into the unit. ● This fan unit can be used by children aged 8 and above, and by people with reduced physical, sensory or mental capabilities or by persons with insufficient experience or knowledge provided they are supervised by a person responsible for their safety, or they have been instructed about the safe operation of the unit and can understand the resulting risks thereof. Children must not play with the unit. Cleaning and maintenance must not be carried out by children without supervision. EN 6.3 Supply air intake within the living area ● The domestic air supply must be set up so that virtually no air can flow into the living areas from the kitchen, bathroom and WC. ● There must be sufficient supply air within the living unit. Non-lockable overflow outlets must be used for this purpose. 7. Installation preparations Wall i The prescribed minimum distances between the wall and the ceiling shown in the figure must be observed. i Always note the relevant specifications for electrical installations and when installing equipment. In Germany particular attention must be paid to the DIN VDE 0100 and the corresponding parts. 3. Lay power cable (recessed) up to place of installation, see above for spacing. Feed the power cable at least 100 mm out from the wall. Ceiling Danger of short-circuits and damage to unit if condensation builds up in the fan housing. Thermally insulate ventilation ducts in a professional manner. Allow for a condensation drain or condensed water collector in the riser. Carry out the ceiling installation as described in the "Wall" mounting section. NOTICE Duct 1. Debur edges on the inside of the duct. 2. Carry out the ceiling installation as described in the "Wall" mounting section. Fan 1. Make sure the housing has a level base. 2. Fit wall breakthrough or drill core hole. Minimum diameter, 105 mm. i Recommendation: Fit WH 100 wall sleeve. i Use ZM 11 mounting plate for rectangular wall breakthroughs. 1. Unpack ECA and remove cover [6]. Release the locking hook ( arrow in the Fig. above) using a screwdriver. 23 EN NOTICE 2. Fit foam strip supplied to connector in centre. The foam strip must be fitted to the ECA 100 ipro RCH such that the units do not draw in any unwanted air from outside. i Danger of short-circuits and damage to the unit. Water will penetrate if the power cable is incorrectly fed into the fan housing or if the cable grommet is not fitted correctly. Cut off cable grommet cap [3] such that the cable grommet fits tightly round the power cable. Cut a maximum of 5 mm off the cap (power cable can bend better and electronics cover [4] can be positioned correctly). Fit cable grommet [3] correctly, seal on both sides if required. 8. Mounting 8.1 Housinginstallation 1. Insert housing [1] into wall breakthrough/ wall sleeve (TOP must be at top). 5. Insert cable grommet into housing. Feed power cable into the connection area such that the cable grommet fits around the cable sheathing completely and does not penetrate too far into the connection area. i 8.2 Electrical connection DANGER NOTICE 2. Align housing horizontally and mark the two dowel holes (arrows, fig. above). 3. Remove housing [1], drill M6 dowel holes with a Ø of 6 mm and insert dowels. 4. Push cable grommet [3] carefully out of housing and remove. i i 24 Danger to life from electric shock. Switch the mains fuse off. Risk of damage to unit in the event of short-circuits. Insulate PE conductor and individual cable cores that are not required. Always note the relevant specifications for electrical installations and when installing equipment. In Germany particular attention must be paid to the DIN VDE 0100 and the correspondding parts. Permitted mains cable: min. 3 x 1.5 mm². EN 1. Only lay single cable cores in the unit. To do this, remove power cable sheathing over a length of 90 mm. Strip single cable cores to 9 to 10 mm. 2. Insert housing [1] into wall breakthrough/ wall sleeve and secure with two screws. Do not insert the housing such that it is twisted or crushed. Make sure you use mounting material which is sized for the purpose. 7. With RCH unit models, plug the supplied sensor [9] correctly (arrow X) into the connector sockets. 8. Fit cover [6]. 9. Fit designer cover [7] ( fold-out page, Fig. B). 10. Install all other system components according to their mounting instructions. 3. Electrically connect power cable to spring clip [11] according to connection wiring diagram [12] wiring diagrams in Chap. 16. 4. Check position of cable grommet. It must be well sealed. 5. Fit electronics cover. Danger of short-circuits and NOTICE damage to the unit. Humidity will penetrate if electronics cover is not positioned correctly. Press electronics cover firmly onto housing such that it is sealed and flush all the way around. Do not press the set up button [10]. 8.3 Commissioning Operation with a single fan (individual operation) 1. Switch the mains fuse on. 2. First set up the RLS RC room air control and then the radio switch and/or radio window contacts at the fan, as described in Chapter 9. 3. Set up the remaining system components. 4. Carry out a function test with all system components. Operation in master/slave network 1. Switch the mains fuse on. 2. Set up the pre-configured RLS RC room air control at the master fan. 6. Locate the 3 locking tabs on the electronic cover over the housing cut-outs I, II and III and press the cover in, until the tabs engage. In addition, press the electronics cover firmly on to the housing at the points indicated by the word "PRESS". 3. Set up the radio switch, radio window contacts and further slave fans at the master fan, as described in Chapter 9. 4. Set up further radio switches and/or radio window contacts at the slave fans (max. 2 fans). 5. Carefully press the cover [6] (with designer cover [7]) onto the housing, until it locks into the safety catches. 6. Carry out a function test with all system components. 25 EN 9. Teaching-in or deleting radio devices Receiver = ECA 100 ipro RC or ECA 100 ipro RCH fans Transmitter = RLS RC room air control, radio switches, radio window contacts, ECA 100 ipro RC or ECA 100 ipro RCH fans. 9.1 Program levels 9.2 Teaching-in tips ● A fan becomes a slave device if a teach-in telegram is sent by the slave fan to the master unit and if the master unit confirms the telegram. ● If the master or slave fan receives a valid teach-in telegram from a unit that has not yet been set up, the data is evaluated and stored. If the device has already been taught-in, the teach-in telegram is deleted again. 26 ● If nothing is received within 60 seconds, the teach-in process is ended (the LED on the fan switches off). ● Teach-in telegrams from non-supported units are ignored. i If a master fan is unintentionally set up at a slave fan, the master assignment is deleted and the master unit becomes a slave unit. This can result in having to re-enter all system components. EN 9.3 Master-slave assignment i A fan automatically becomes a master fan if the master unit is set to receive mode and a teach-in telegram is received from a slave unit. 5. Re-activate teach-in mode at the receiver (fan). 6. Press the right-hand rocker 3 times within 2 seconds > The teach-in telegram is sent. Teaching-in radio window contacts 9.4 Switching a receiver to teach-in mode 1. Press and hold the teach-in button [10] at the receiver (fan) for at least 2 seconds. > The button LED flashes, the teach-in mode is activated. 2. Now, a teach-in telegram must be received within 60 seconds or the teach-in mode is terminated. 1. Activate teach-in mode at the receiver (fan). > The LED flashes, the teach-in mode is activated. 2. Press the teach-in button at the radio window contact. > The teach-in telegram is sent. If teaching-in is completed successfully, the LED lights up for approx. 1 second. Teaching-in an RLS RC room air control 9.5 Setting up transmitters i When a teach-in telegram is correctly received, the receiver's button LED lights up for 1 second. The transmitter is now set up. Teaching-in radio switches In the case of double-rocker switches (DS RC), both rockers have to be set up separately (2 channels). 1. Activate teach-in mode at the receiver (fan). > LED flashes. Teach-in mode is activated. 2. Press the radio switch's right-hand rocker 3 times within 2 seconds. > The teach-in telegram is sent. If teaching-in is completed successfully, the LED lights up for approx. 1 second. If transfer was faulty, the button LED flashes briefly 3 times. 3. Re-activate teach-in mode at the receiver (fan). 4. Press the radio switch's left-hand rocker 3 times within 2 seconds. > The teach-in telegram is sent. If teaching-in is completed successfully, the LED lights up for approx. 1 second. If transfer was faulty, the button LED flashes briefly 3 times. The teach-in button is on the rear of the controller. 1. Activate teach-in mode at the receiver (fan). > The LED flashes at the fan, the teach-in mode is activated. 2. Press the RLS RC teach-in button 3 times within 2 seconds. > The teach-in telegram is sent. If teaching-in is completed successfully, the radio icon in the display flashes briefly 3 times. The radio icon is then permanently visible in the display. Teaching-in a slave fan 1. Activate teach-in mode at the master receiver and at a fan that is not yet set up (planned slave). > The LED flashes, the teach-in mode is activated. 2. Switch the slave to send mode. To do this, press the teach-in button [10] at the slave fan briefly once. > The LED at the slave lights up briefly and then flashes briefly once. The slave fan is now in send-learn mode. 27 EN 3. Press and hold the teach-in button [10] at the fan (>1 second), until the LED on the slave fan lights up briefly once. > The teach-in telegram is sent. If teaching-in is completed successfully, the button LED lights up once for approx. 1.5 seconds. If transfer was faulty, the button LED flashes briefly 3 times. If the teach-in process fails, the LED on the slave fan flashes briefly three times. The process has to be repeated. 9.6 Deleting transmitters Deleting an individual transmitter i If there is a transmitter that is faulty or that can no longer be identified, it is possible that all transmitters must be deleted. System components than have to be taught-in again. This is recommended if a transmitter was lost or is faulty. 1. In order to delete the required transmitter, the transmitter teach-in process (RLS RC, radio switch or window contact) has to be repeated ( Chapter 9.5). Deleting all transmitters 1. Activate teach-in mode at the fan. > The LED flashes, teach-in mode is activated. 2. Press the teach-in button [10] briefly twice. > LED flashes briefly twice and then goes out. 3. Press and hold the teach-in button [10] on the fan (>1 second), until the LED on the fan lights up briefly once. > All transmitters that have been set up, are now deleted. The fan is again in its initial state. 28 9.7 Setting up the fan as a signal amplifier (Repeater) The radio electronics in the fan can also be used as a signal amplifier. In this case, the fan that is set up this way works additionally as a signal amplifier. EnOcean telegrams are received and forwarded in parallel to the running application. This can be necessary for example, with applications in single-family houses that are completely automated with EnOcean products. Settings values ● Off ● Level 1 = Original telegrams are amplified ● Level 2 = Original telegrams and telegrams that have already been amplified are amplified Setting up the fan as a signal amplifier 1. Activate teach-in mode at the receiver (fan). > The LED flashes, the teach-in mode is activated. 2. Press the teach-in button [10] briefly three times. > The LED lights up briefly and then flashes briefly three times. 3. Press the teach-in button [10] x times for repeater mode: Repeater off once LED flashes once Repeater Level 1 twice LED flashes twice Repeater level 2 three times LED flashes three times 4. Press and hold the teach-in button [10] on the fan (>5 seconds), until the LED on the fan lights up briefly once for approx. 1 second. > The setting is saved. EN 10. Operation The following table shows the performance levels of the master and slave fans that are assigned to the different RLS RC system levels. RLS RC program for ECA 100 ipro RC and ECA 100 ipro RCH Program P1 Program P2 System level 0 System level 1 System level 2 System level 3 Master Off Perform. level 1 Perform. level 1 Perform. level 2 Slave(s) Off Off Perform. level 1 Perform. level 1 Master Off Perform. level 2 Perform. level 1 Perform. level 2 Slave(s) Off Off Perform. level 1 Perform. level 2 Performance level 1 = 78 m³/h Performance level 2 = 92 m³/h (Free outlet specifications) 12. Cleaning Program selection Program Apartment size P1 30 m² / 50 m² / 70 m² P2 90 m² / 110 m² / 130² / 140 m² ECA 100 ipro RC The fan is switched on/off either at the RLS RC room air control, with the DS RC radio switch, or with a window radio contact to be supplied by the customer. For the function of radio components Maico Smart System Description Chapter 3.4. DANGER Danger to life. Unit is powered up. Switch the mains fuse off. Risk of damage to unit if incorrect cleaning agent is used. Only use water to clean cover [6] and designer cover [7]. Do not use aggressive cleaning agents. 1. Only use a dry cloth to clean the internal parts of the fan. 2. If the designer cover [7] is very dirty, remove it carefully from the fan ( fold-out page, Fig. B) and clean with water. 3. Fit designer cover [7]. NOTICE ECA 100 ipro RCH The unit is barrier-free. Air extraction is executed according to automatic humidity operation. If there is little humidity, the unit switches off completely. For manual operation via radio components, ECA 100 ipro RC. 11. Maintenance The unit is maintenance-free. 13. Fault rectification ● Call on the services of a trained electrician any time there is a fault. ● Repairs should only be carried out by a trained electrician. DANGER Danger to life. Unit is powered up. Switch off at the mains fuse before starting work on the electrical connection and position a sign warning against switching it back on. 29 EN Fan does not switch on. Fan doesn't react to radio commands Remedy Cause No mains voltage. Switch the mains fuse on. Impeller blocked. Fault rectification may only be carried out by a trained specialist. Remove cover [6]. Fans are not correctly Delete all component set up. transmitters (Delete mode Chapter 9.6). Delete the transmitter at the RLS RC. Cause Release the internal grille [5] at the locking hooks ( arrow) and remove it. Check impeller and Remedy Power the fan off briefly. Then set up the components again. Fans are out of range. Switch repeater mode on at a fan that is within range. clean if necessary. If the range is still not enough, deploy additional repeaters, to be supplied by the customer. 14. Dismantling Humidity control is not working correctly/is faulty with RCH units. Call on the services of an expert. DANGER Danger to life from electric shock. Dismantling may only be undertaken by an electrician. Switch off mains fuse before removing. Motor's thermal overload protection switches the fan off. Cause Remedy Motor too hot. Wait until the motor has cooled down. Cool-down time can be up to 10 minutes. Unit switches back on automatically after cooling down. 1. Release and remove the cover [6] ( arrow, Fig. above). 2. Remove electronics cover [4] (3 latches, Chapter 8.2). 3. Remove power cable. 4. Remove fan. 30 EN 15. Disposal i Not in domestic waste. The unit contains, in part, material that can be recycled and, in part, substances that should not end up as domestic waste. 16. Wiring diagram ECA 100 ipro RC / ECA 100 ipro RCH Once it has reached the end of its working life, dispose of the unit according to the environmental guidelines and specifications valid where you are. 31 FR ECA 100 ipro RC Sommaire 1. Volume de fourniture .............................. 33 7. Préparatifs de montage .......................... 38 1.1 Aérateur ECA 100 ipro RC .............. 33 1.2 Aérateur ECA 100 ipro RCH............ 33 8. Montage ................................................. 39 8.1 Montage duboîtier ........................... 39 1.3 Interrupteur radio DS RC ................. 33 1.4 Commande d'air ambiant RLS RC .. 33 8.2 Branchement électrique .................. 40 8.3 Mise en service ............................... 41 2. Remarques générales ............................ 33 9. Initialisation ou effacement des parties prenantes au réseau radio ..................... 42 9.1 Niveaux de programme ................... 42 2.1 Installateurs ..................................... 33 2.2 Symboles utilisés ............................ 33 3. Informations produit ............................... 33 3.1 Vue d'ensemble de l'appareil ........... 33 3.2 Utilisation conforme ......................... 34 3.3 Erreurs d'application prévisibles ...... 34 3.4 Description du système Maico smart Réseau avec électronique radio ........ 34 3.5 Autres composants radio ................. 35 4. Conditions ambiantes et limites d'utilisation ............................................. 36 5. Caractéristiques techniques ................... 37 6. Consignes de sécurité ............................ 37 6.1 Généralités ...................................... 37 6.2 Comportement sûr et correct lors du fonctionnement ........................... 37 6.3 Arrivée d'air à l'intérieur du logement .................................... 38 9.2 Conseils pour l'initialisation (apprentissage) ............................... 42 9.3 Affectation maître – esclave ............ 43 9.4 Commutation du récepteur sur le mode Initialisation (apprentissage) .. 43 9.5 Initialisation de l'émetteur ................ 43 9.6 Effacement d'émetteurs .................. 44 9.7 Régler l'aérateur comme amplificateur de signal (Repeater) .. 44 10. Utilisation ............................................. 45 11. Entretien .............................................. 46 12. Nettoyage ............................................ 46 13. Élimination des dysfonctionnements .... 46 14. Démontage .......................................... 47 15. Élimination ........................................... 47 16. Schéma de branchement ..................... 47 Mentions légales © Maico Elektroapparate-Fabrik GmbH. Cette instruction est une traduction de l'instruction allemande originale. Sous réserve de fautes d'impression, d'erreurs et de modifications techniques. Les marques, marques commerciales et marques déposées dont il est fait mention dans ce document se rapportent à leurs propriétaires ou leurs produits. 32 FR 1. Volume de fourniture i En fonction de la commande, la volume de fourniture comprend un/des aérateur(s), un/des interrupteur(s) radio, une commande d'air ambiant RLS RC et des contacts de fenêtres radio à fournir par le client. 1.1 Aérateur ECA 100 ipro RC N° de réf. 0084.0210 ● ● ● ● Aérateur ECA 100 ipro RC Cache électronique Bande en mousse Instructions de montage et Mode d'emploi 1.2 Aérateur ECA 100 ipro RCH N° de réf. 0084.0211 ● ● ● ● ● 2.1 Installateurs Seul un personnel qualifié, disposant de connaissances et d'expérience dans la technique de ventilation, est autorisé à effectuer le montage. Le branchement électrique doit exclusivement être réalisé par des électriciens qualifiés. Les installateurs doivent avoir une formation électrotechnique et connaître les dangers et les effets d'un choc électrique. 2.2 Symboles utilisés DANGER ATTENTION Aérateur ECA 100 ipro RCH Cache électronique Capteur d'humidité Bande en mousse Instructions de montage et Mode d'emploi Situation pouvant entraîner des dommages matériels du produit ou de son environnement. i Symbole INFO pour informations et conseils importants. ● Symbole d'énumération signalant des informations relatives au sujet correspondant. 1. Marche à suivre. Suivez les instructions fournies dans l'ordre. 1.3 Interrupteur radio DS RC N° de réf. 0157.0832 ● Interrupteur radio EnOcean à double bascule (2 canaux radio, à programmer/ initialiser séparément) Danger immédiat qui, s'il n'est pas pris en compte, entraîne de graves blessures corporelles ou la mort. 1.4 Commande d'air ambiant RLS RC N° de réf. 0157.0849 3. Informations produit ● La commande d'air ambiant RLS RC est une commande radio à cellule solaire intégrée ● Consignes de montage 3.1 Vue d'ensemble de l'appareil 2. Remarques générales Lisez attentivement les présentes instructions de montage et le mode d'emploi avant la première utilisation de l'aérateur. Suivez les instructions. Conservez ces instructions pour une utilisation ultérieure. 1 2 3 4 5 6 7 8 9 10 Boîtier avec moteur Hélice Manchon de câble Cache électronique Grille intérieure, fixe Cache de protection Cache design Platine électronique Capteur d'humidité Touche d'initialisation 33 FR 3.2 Utilisation conforme ● Aérateur pour petites pièces pour l'aération de salles de bains, WC, débarras, bureaux, vestiaires et espaces similaires. ● Jusqu'à 3 aérateurs peuvent être interconnectés. ● Cet appareil est exclusivement réservé à l'usage domestique et similaire. ● Le fonctionnement est uniquement autorisé aux conditions suivantes : ● Installation fixe à l'intérieur d'un bâtiment. ● Installation apparente au mur, plafond ou gaine ronde. ● Circulation de l'air par gaine rectangulaire ou ronde. ● Branchement électrique fixe (montage encastré). ● Distance suffisante par rapport au mur et au plafond. ● Appareil entièrement assemblé. ● Exploitation avec passages d'air extérieur conformément aux documents de conception. 3.3 Erreurs d'application prévisibles Maico décline toute responsabilité en cas de dommages résultant d'une utilisation non conforme. Ne jamais utiliser l'appareil : ● En association avec des hottes d'extraction ou des systèmes d'aspiration de laboratoire. ● Dans des installations individuelles d'extraction d'air conformes à la norme DIN 18017-3. ● À proximité de matériaux, liquides ou gaz inflammables. ● Pour l'acheminement de produits chimiques, de gaz ou de vapeurs agressifs. ● Dans des atmosphères explosives. ● À l'extérieur. ● En l'absence de protection de l'hélice contre les contacts selon EN ISO 13857 du côté soufflage. ● Ne pas poser les interrupteurs et éléments de commande à proximité d'une douche ‒ pas de protection contre les projections d'eau. 34 3.4 Description du système Maico smart Réseau avec électronique radio cf. page rabattable Maico Smart avec appareils ECA100 ipro ● Les récepteurs sont des aérateurs ECA 100 ipro dans les versions RC et RCH. ● Les émetteurs sont des composants du système tels que la commande d'air ambiant RLS RC, l'interrupteur radio DS RC, les contacts de fenêtres radio et d'autres aérateurs ECA 100 ipro dans les versions RC et RCH. ● Toutes les versions ECA 100 ipro RC/RCH en réseau sont combinables entre elles. ● Les appareils RCH sont équipés en supplément d'une commande en fonction de l'humidité (contrôleur d'humidité automatique). ● Le système peut être commandé par interrupteur radio et/ou RLS RC : ● Par l'interrupteur radio, 2 niveaux de puissance peuvent être sélectionnés ou le système peut être mis hors service. ● Par la commande d'air ambiant RLS RC, 3 niveaux peuvent être enclenchés manuellement ( cf. Tableau au chapitre 10). ● La fonction Arrêt est désactivée départ usine pour assurer une ventilation permanente. Cette fonction peut être activée si besoin est ( cf. Instructions de montage RLS RC). ● L'aérateur est aussi mis en marche / à l'arrêt par des contacts de fenêtres radio (fenêtre ouverte / fermée). ● Au moment de la mise en service, les émetteurs doivent être initialisés sur les récepteurs (apprentissage). ECA 100 ipro RC ● Deux niveaux, 78 m³/h ou 92 m³/h. ● Les niveaux de puissance peuvent être réglés manuellement avec l'interrupteur radio et/ou automatiquement avec la commande radio RLS RC. FR ECA 100 ipro RCH Version ECA 100 ipro RC avec contrôleur d'humidité automatique en supplément. Normalement, l'aérateur fonctionne en mode Standard avec un niveau de puissance réglé manuellement ou imposé par RLS RC. Au moment de la mise en service de l'aérateur RCH, celui-ci se règle sur l'humidité ambiante relative qui règne dans la pièce. Cette humidité est enregistrée comme première valeur de référence. Il n'est plus nécessaire d'effectuer manuellement une sélection de la valeur de référence. Si l'humidité relative chute immédiatement après l'installation, cette valeur est enregistrée comme nouvelle valeur de référence. La plus petite valeur de référence est de 48 % d'humidité relative. Si l'humidité de la pièce augmente de 7 %, l'aérateur se met automatiquement en marche au niveau de puissance 1 (78 m³/h). ● Si l'humidité de la pièce continue d'augmenter, l'aérateur passe au niveau de puissance 2 (92 m³/h). ● Sans augmentation de l'humidité, l'aérateur continue à fonctionner au niveau de puissance 1 (78 m³/h), jusqu'à ce que l'humidité repasse sous la valeur de référence enregistrée. Si la valeur de référence est dépassée par le bas, le niveau de puissance est lui aussi réduit : ● Avec une RLS RC, l'aérateur fonctionne selon les réglages effectués sur la RLS RC. ● Sans RLS RC (appareil individuel), l'aérateur retourne au dernier niveau de puissance activé avant le fonctionnement en mode Humidité. L'humidité actuelle régnant dans la pièce est enregistrée comme nouvelle valeur de référence. L'actionnement de l'interrupteur radio en mode Humidité entraîne également l'enregistrement d'une nouvelle valeur de référence. 3.5 Autres composants radio 3.5.1 Interrupteur radio DS RC (Interrupteur EnOcean) Aérateur avec interrupteur radio en mode de fonctionnement individuel ● Interrupteur radio (à double bascule) servant à régler différents niveaux de puissance de l'aérateur. ● Appuyer sur la bascule pour augmenter ou réduire le niveau de puissance. i Les bascules gauche et droite doivent être initialisées séparément : bascule gauche pour Marche / Arrêt, bascule droite pour augmenter ou réduire le niveau de puissance. Toujours initialiser l'interrupteur radio sur l'aérateur se trouvant dans la même pièce. Aérateur avec plusieurs interrupteurs radio en mode de fonctionnement individuel Fonctionnement comme décrit précédemment. Jusqu'à 5 interrupteurs radio peuvent être initialisés par aérateur. i Interrupteur radio installé en réseau maître – esclave Le système de ventilation fonctionne selon les réglages effectués sur la RLS RC. Toutefois, chaque commutation par interrupteur radio a priorité sur le réglage RLS RC. ● L'actionnement d'un interrupteur radio entraîne la commutation de l'aérateur correspondant au niveau de puissance sélectionné manuellement. ● Après 30 minutes sans actionnement (Timeout), l'appareil revient au réglage RLS RC. En cas de modification du réglage RLS RC pendant le Timeout, l'aérateur correspondant ne réagit à cet ordre qu'après écoulement du Timeout. i ● Sur la version RCH, le contrôleur d'humidité automatique fonctionne en priorité en mode Vacances. La commutation avec DS RC ou le contact de fenêtre radio est possible pendant le fonctionnement en mode Humidité. 35 FR 3.5.2 Contact de fenêtre radio (Interrupteur EnOcean) ● Chaque aérateur possède au maximum 2 contacts de fenêtres radio initialisables (apprentissage). ● Le contact de fenêtre radio transmet l'état « fenêtre ouverte » ou « fenêtre fermée » à l'aérateur correspondant. ● À l'ouverture de la fenêtre, l'aérateur correspondant s'arrête automatiquement. ● Toutefois, si l'on souhaite que l'aérateur fonctionne, celui-ci peut être remis en marche avec un interrupteur radio correspondant. ● L'interrupteur radio a priorité sur le contact de fenêtre radio et/ou la RLS RC. ● Après un Timeout d'environ 30 minutes, l'aérateur s'arrête à nouveau (fenêtre encore ouverte) ou revient au mode réglé sur la RLS RC (fenêtre fermée). 3.5.3 Commande d'air ambiant RLS RC (Commande radio EnOcean) Pour tout complément d'information sur la commande RLS RC cf. Instructions de montage séparées. ● La commande d'air ambiant RLS RC est une commande radio pour l'utilisation manuelle des appareils maîtres / esclaves. Deux programmes (P1 / P2) à combinaison différente des niveaux de puissance sont disponibles. Le programme adapté à l'application (P1 pour les petites / P2 pour les grandes unités d'habitation, voir aussi Tableau au chapitre 10, Commande) est déterminé à la mise en service. ● L'écran de la RLS RC affiche : ● Niveau 0 / Arrêt : pas de barre ● Niveau 1 : 2 barres ● Niveau 2 : 4 barres ● Niveau 3 : 6 barres i ● En plus, l'écran affiche l'heure et la température. ● Le mode Vacances dispose d'un fonctionnement par intervalle. Sur tous les aérateurs, la commutation Marche / Arrêt s'effectue à intervalle de 30 minutes 36 (protection contre l'humidité). Les ordres radio d'autres parties prenantes au réseau radio sont ignorés jusqu'à l'arrêt du mode Vacances. ● Menu contextuel : pour les réglages du système. 4. Conditions ambiantes et limites d'utilisation ● Température maximale admissible du fluide refoulé : + 40 °C ● Les appareils sont équipés d'une résistance aux interférences selon EN 55014-2 (en fonction de la forme de l'impulsion et de la proportion d'énergie de 1000 à 4000 V). En cas de fonctionnement avec tubes fluorescents, ces valeurs risquent d'être dépassées. Des mesures antiparasitage supplémentaires sont dans ce cas nécessaires (composants L, C ou RC, diodes de protection, varistors). ● Directives relatives à une utilisation avec un foyer Lors d'une utilisation avec des foyers dépendants de l'air ambiant, veiller à une arrivée d'air suffisante. La différence de pression maximale par unité d'habitation est de 4 Pa. L'aérateur ne peut être installé dans des unités d'habitation équipées de foyers dépendants de l'air ambiant que si : ● les critères d'évaluation sont satisfaits, en accord avec la Fédération des maîtres ramoneurs compétente ; ● le fonctionnement simultané de foyers dépendants de l'air ambiant pour des combustibles liquides ou gazéiformes ou bien de l'installation d'aspiration d'air est prévenu par des dispositifs de sécurité ou ● que la conduite de gaz d'échappement des foyers dépendants de l'air ambiant est contrôlée par des dispositifs de sécurité. En cas de déclenchement, l'installation de ventilation ou les foyers doivent être mis à l'arrêt. FR 5. Caractéristiques techniques Pour les caractéristiques techniques cf. Plaque signalétique. Pour les dimensions et courbes caractéristiques consulter Catalogue ou Internet (maico-ventilatoren.com). Tension de service Fréquence du secteur Type de protection ● Aérateur ● Interrupteur, commande Composants radio : Plage de fréquence (selon EN 300220-1) Portées à l'intérieur du bâtiment selon le matériau de construction ● Commande d'air ambiant RLS RC aérateur ● Interrupteur radio DS RC aérateur ● Aérateur aérateur ● Amplificateur du signal aérateur 230 V 50 Hz IP X5 IP 00 868,35 MHz jusqu'à : 30 m 30 m 30 m 40 m 6. Consignes de sécurité 6.1 Généralités ● Avant le montage et la mise en service, prière de lire attentivement le présent mode d'emploi. ● Montage et branchement électrique doivent exclusivement être effectués par des spécialistes selon les instructions du chapitre 2.1. ● Brancher exclusivement l'appareil sur une installation électrique permanente avec des câbles de type NYM-O ou NYM-J (3 x 1,5 mm² ou 5 x 1,5 mm²). Prévoir un dispositif de coupure du secteur avec une ouverture de contact d'au moins 3 mm par pôle. ● Utiliser exclusivement l'appareil à la tension et à la fréquence indiquées sur la plaque signalétique. ● Ne jamais utiliser l'appareil sans cache électronique [4] et cache de protection [6]. ● Assurer une affluence d'air suffisante. ● Les modifications et transformations apportées sur l'appareil sont rigoureusement interdites et dégagent le fabricant de toute responsabilité et garantie. 6.2 Comportement sûr et correct lors du fonctionnement Risque de blessure en présence d'objets dans l'hélice. Ne jamais enfoncer d'objet dans l'appareil ! 37 FR Risque de blessure par rotation de la turbine ! Ne pas s'approcher trop près de l'appareil afin d'éviter que les cheveux, les vêtements ou les bijoux ne soient happés. ● Cet appareil peut être utilisé par des enfants de 8 ans et plus, ainsi que par des personnes à capacités physiques, sensorielles ou mentales amoindries, ou encore manquant d'expérience et de connaissances, dans la mesure où elles sont surveillées, ont reçu les instructions nécessaires à un emploi en toute sécurité de l'appareil, et ont été mises en garde contre les dangers qu'il représente. Les enfants ne doivent pas jouer avec l'appareil. Les enfants sans surveillance ne doivent pas nettoyer l'appareil ou procéder à des travaux d'entretien revenant à l'utilisateur. 6.3 Arrivée d'air à l'intérieur du logement ● La circulation de l'air à l'intérieur du logement doit être réalisée de telle manière que l'air en provenance de la cuisine, de la salle de bains et des toilettes ne puisse pas se propager dans les pièces d'habitation. ● Assurer une arrivée d'air suffisante dans le logement. Pour ce faire, prévoir des passages de décharge ouverts en permanence. 7. Préparatifs de montage Mur i Respecter les distances minimum prescrites par rapport au mur et au plafond selon la figure. 1. Assurer un support plan au niveau du boîtier. 2. Pratiquer un perçage de cloison ou percer un avant-trou. Diamètre minimal 105 mm. 38 FR i Recommandation : utiliser une gaine murale WH 100. i Pour les perçages de cloison rectangulaires, utiliser une plaque de montage ZM 11. i 1. Déballer l'ECA et retirer le cache de protection [6]. Pour détacher le cache de protection, déverrouiller les crochets d'arrêt ( flèche, voir Fig. ci-dessus) avec un tournevis. Lors de l'installation électrique et du montage de l'appareil, respecter impérativement les directives applicables et, pour l'Allemagne, plus particulièrement la norme DIN VDE 0100 et les parties correspondantes. 3. Poser le câble secteur (montage encastré) jusqu'au site de montage, pour les écarts à respecter, voir plus haut. Ce faisant, faire sortir le câble secteur d'au moins 100 mm du mur. Plafond Risque de court-circuit et d'endommagement de l'appareil résultant de la formation de condensat dans le boîtier de l'aérateur ! Effectuer une isolation thermique des gaines d'air dans les règles de l'art. Prévoir une gaine de sortie des condensats ou un collecteur de condensats dans la colonne montante. Effectuer les préparatifs de montage comme décrits sous « mur ». ATTENTION 2. Poser le ruban de mousse fourni au centre de la tubulure. i Sur le modèle ECA 100 ipro RCH, poser impérativement le ruban de mousse pour que les appareils n'aspirent pas d'air d'appoint de l'extérieur. 8. Montage 8.1 Montage du boîtier 1. Introduire le boîtier [1] dans le perçage de cloison / gaine murale (TOP = en haut). Gaine ronde 1. Ébarber les bords de l'intérieur de la gaine. 2. Effectuer les préparatifs de montage comme décrits sous « mur ». Aérateur 2. Positionner le boîtier à l'horizontale et marquer les deux orifices des chevilles (flèches, voir Fig. ci-dessus). 3. Déposer le boîtier [1], percer les orifices des chevilles M6 de Ø 6 mm et y introduire les chevilles. 4. Pousser avec précaution le manchon de câble [3] hors du boîtier et le sortir. 39 FR ATTENTION Risque de court-circuit et Lors de l'installation électrique et du d'endommagement de l'apmontage de l'appareil, respecter pareil ! Risque de pénétration impérativement les directives d'eau en cas d'insertion applicables et, pour l'Allemagne, plus incorrecte du câble secteur particulièrement la norme DIN VDE dans le boîtier de l'aérateur 0100 et les parties correspondantes. ou en cas de montage non Câble d'alimentation secteur autorisé : conforme du manchon de 3 x 1,5 mm² au minimum. câble ! 1. Ne poser que des conducteurs individuels Couper le capuchon du dans l'appareil. Pour ce faire, dénuder le manchon de câble [3] de câble secteur sur une longueur de 90 mm. manière à ce qu'il enserre Isoler les conducteurs individuels sur 9 à étroitement le câble secteur. 10 mm. Couper au maximum 5 mm de capuchon (ce qui permet de 2. Placer le boîtier [1] dans le perçage du ployer plus facilement le câble mur / la gaine murale et le fixer avec deux secteur, et poser correctement le vis. Installer le boîtier sans tension ni cache électronique [4]). écrasement. Utiliser du matériel de fixation Poser le manchon de câble [3] de dimension suffisante. dans les règles de l'art, étanchéifier sur site, si besoin est. i i 5. Introduire le manchon de câble dans le boîtier. Introduire le câble secteur dans l'espace de raccordement de manière à ce que le manchon de câble enserre complètement l'enveloppe de câble sans pénétrer trop à fond dans l'espace de raccordement. i 8.2 Branchement électrique DANGER ATTENTION 40 Danger de mort par électrocution ! Désactiver le fusible secteur. Endommagement de l'appareil en cas de court-circuit ! Isoler le conducteur de protection et les conducteurs non utilisés. 3. Brancher électriquement le câble secteur sur la borne à ressorts [11] conformément au schéma de branchement [12] cf. Schéma de branchement au chapitre 16. 4. Contrôler l'assise du manchon de câble qui doit assurer une bonne étanchéité. 5. Poser le cache électronique. ATTENTION Risque de court-circuit et d'endommagement de l'appareil ! Pénétration d'humidité en cas de mauvais positionnement du cache électronique ! Appuyer fortement le cache électronique sur le boîtier de manière à ce qu'il assure l'étanchéité et qu'il repose bien à plat. Ne pas appuyer sur la touche d'initialisation [10]. FR 8.3 Mise en service Fonctionnement avec aérateur individuel (mode de fonctionnement individuel). 1. Activer le fusible secteur. 2. Sur l'aérateur, initialiser en premier lieu la commande d'air ambiant RLS RC, puis les interrupteurs radio et/ou les contacts de fenêtres radio conformément au chap. 9. 6. Enficher le cache électronique dans les évidements du boîtier I, II et III, sur les 3 ergots jusqu'à enclenchement. De plus, enfoncer fermement le cache électronique aux deux positions « PRESS » dans le boîtier. 7. Avec les versions RCH, enficher le détecteur [9] fourni dans le socle de connexion en veillant à le positionner correctement (flèches X). 8. Poser le cache de protection [6]. 9. Poser le cache design [7] ( cf. page rabattable, Fig. B). 10. Installer tous les autres composants du système selon leurs notices de montage respectives. 3. Initialiser les autres composants du système. 4. Effectuer un test de fonctionnement avec tous les composants du système. Fonctionnement dans le réseau maître – esclave 1. Activer le fusible secteur. 2. Sur l'aérateur maître, initialiser la commande d'air ambiant RLS RC préconfigurée. 3. Sur l'aérateur maître, initialiser les interrupteurs radio, les contacts de fenêtres radio et les autres aérateurs esclaves conformément au chapitre 9. 4. Sur les aérateurs esclaves (2 unités max.), initialiser les autres interrupteurs radio et/ou contacts de fenêtres radio. 5. Appuyer avec précaution le cache de protection [6] (avec cache design [7]) sur le boîtier jusqu'à ce qu'il encliquette dans les loquets. 6. Effectuer un test de fonctionnement avec tous les composants du système. 41 FR 9. Initialisation ou effacement des parties prenantes au réseau radio Récepteurs = aérateurs ECA 100 ipro RC ou ECA 100 ipro RCH. Émetteurs = commande d'air ambiant RLS RC, interrupteurs radio, contacts de fenêtres radio, aérateurs ECA 100 ipro RC ou ECA 100 ipro RCH. 9.1 Niveaux de programme 9.2 Conseils pour l'initialisation (apprentissage) ● L'aérateur devient appareil esclave lorsqu'un télégramme d'initialisation est transféré de l'appareil esclave à l'appareil maître et confirmé par ce dernier. ● Si l'aérateur maître ou esclave reçoit un télégramme d'initialisation valide (d'un appareil qui n'a pas encore été initialisé), les valeurs sont analysées et mémorisées. Si l'appareil est déjà initialisé, le télégramme d'initialisation est effacé. 42 ● En l'absence de réception pendant 60 secondes, l'initialisation (la LED de l'aérateur s'éteint) est interrompue. ● Les télégrammes d'initialisation d'appareils non pris en charge sont ignorés. i Si un aérateur maître est initialisé par mégarde sur un aérateur esclave, l'affectation maître est supprimée (l'appareil maître devient esclave). Ce qui peut entraîner une nouvelle saisie de tous les composants du système. FR 9.3 Affectation maître – esclave i Un aérateur devient automatiquement maître lorsque l'appareil maître placé en mode de réception reçoit un télégramme d'initialisation d'un aérateur esclave. 9.4 Commutation du récepteur sur le mode initialisation (apprentissage) 1. Sur le récepteur (aérateur), appuyer au moins 2 secondes sur la touche d'initialisation [10]. > La LED de la touche clignote, le mode Initialisation est activé. 2. Un télégramme d'initialisation doit maintenant être reçu dans les 60 secondes, sinon le mode Initialisation se termine. 9.5 Initialisation de l'émetteur i Lorsque le télégramme d'initialisation a été correctement reçu, la LED de la touche du récepteur reste allumée pendant 1 seconde. L'émetteur a été initialisé. Initialisation de l'interrupteur radio En présence de doubles bascules (DS RC), initialiser séparément les deux bascules (2 canaux). 1. Activer le mode Initialisation sur le récepteur (aérateur). > La LED clignote. Le mode Initialisation est activé. 2. Sur l'interrupteur radio, appuyer 3 fois sur la bascule droite en l'espace de 2 secondes. > Le télégramme d'initialisation est envoyé. Une initialisation réussie est signalée par l'allumage de la LED pendant env. 1 seconde. L'échec de la transmission est signalé par 3 clignotements brefs de la LED. 3. Sur le récepteur (aérateur), activer de nouveau le mode Initialisation. 4. Sur l'interrupteur radio, appuyer 3 fois sur la bascule gauche en l'espace de 2 secondes. > Le télégramme d'initialisation est envoyé. Une initialisation réussie est signalée par l'allumage de la LED pendant env. 1 seconde. L'échec de la transmission est signalé par 3 clignotements brefs de la LED. 5. Sur le récepteur (aérateur), activer de nouveau le mode Initialisation. 6. Appuyer 3 fois sur la bascule droite en l'espace de 2 secondes. > Le télégramme d'initialisation est envoyé. Initialisation du contact de fenêtre radio 1. Sur le récepteur (aérateur), activer le mode Initialisation. > La LED clignote, le mode Initialisation est activé. 2. Sur le contact de fenêtre radio, appuyer sur la touche d'initialisation. > Le télégramme d'initialisation est envoyé. Une initialisation réussie est signalée par l'allumage de la LED pendant env. 1 seconde. Initialisation de la commande d'air ambiant RLS RC La touche d'initialisation se trouve au dos de la commande. 1. Sur le récepteur (aérateur), activer le mode Initialisation. > La LED clignote sur l'aérateur, le mode Initialisation est activé. 2. Sur la RLS RC, appuyer 3 fois sur la touche d'initialisation en l'espace de 2 secondes. > Le télégramme d'initialisation est envoyé. Une initialisation réussie est signalée par 3 clignotements brefs du symbole radio à l'écran. Le symbole radio reste alors visible en permanence à l'écran. 43 FR Initialisation de l'aérateur esclave 1. Activer le mode Initialisation sur le récepteur maître et sur un aérateur qui n'a pas encore été initialisé (esclave prévu). > La LED clignote, le mode Initialisation est activé. 2. Commuter l'aérateur esclave sur le mode Émission. Pour ce faire, appuyer 1 fois brièvement sur la touche d'initialisation [10] de l'aérateur esclave. > La LED de l'esclave s'allume brièvement puis clignote ensuite 1 fois brièvement. L'aérateur esclave se trouve alors en mode Émission-Initialisation (send-learn mode). 3. Appuyer (> 1 seconde) sur la touche d'initialisation [10] de l'aérateur esclave jusqu'à ce que la LED de l'aérateur esclave s'allume 1 fois brièvement. > Le télégramme d'initialisation est envoyé. Une initialisation réussie est signalée par l'allumage de la LED de la touche (1 fois) pendant environ 1,5 seconde. L'échec de la transmission est signalé par 3 clignotements brefs de la LED. En cas d'échec de l'opération d'initialisation, la LED de l'aérateur esclave clignote 3 fois brièvement. L'opération doit être répétée. 9.6 Effacement d'émetteurs Effacement d'émetteurs individuels i En présence d'un émetteur défectueux ou devenu impossible à identifier, tous les émetteurs doivent éventuellement être effacés. Les composants du système doivent alors être réinitialisés (conseillé en cas de perte ou de défaut d'un émetteur). 1. Pour effacer l'émetteur souhaité, l'opération d'initialisation de l'émetteur (RLS RC, interrupteur radio ou contact de fenêtre) doit être répétée ( cf. chapitre 9.5). Effacement de tous les émetteurs 1. Activer le mode Initialisation sur l'aérateur. > La LED clignote, le mode Initialisation est activé. 2. Appuyer 2 fois brièvement sur la touche d'initialisation [10]. > La LED clignote 2 fois brièvement et s'éteint. 3. Appuyer (> 1 seconde) sur la touche d'initialisation [10] de l'aérateur jusqu'à ce que la LED de l'aérateur s'allume 1 fois brièvement. > Tous les émetteurs initialisés sont désormais effacés. L'aérateur est revenu à l'état initial. 9.7 Régler l'aérateur comme amplificateur de signal (Repeater) L'électronique radio intégrée à l'aérateur peut aussi servir à amplifier le signal. Pour ce faire, l'aérateur ainsi réglé fonctionne en plus comme amplificateur de signal. Parallèlement à l'application en cours, les télégrammes EnOcean sont reçus et transférés. Ceci peut par exemple s'avérer nécessaire pour les applications dans les maisons individuelles entièrement automatisées avec les produits EnOcean. Valeurs de réglage ● Arrêt ● Level 1 = amplification des télégrammes d'origine ● Level 2 = amplification des télégrammes d'origine et des télégrammes déjà amplifiés Réglage de l'aérateur comme amplificateur de signal 1. Sur le récepteur (aérateur), activer le mode Initialisation. > La LED clignote, le mode Initialisation est activé. 2. Appuyer 3 fois brièvement sur la touche d'initialisation [10]. > La LED s'allume brièvement puis clignote ensuite 3 fois brièvement. 44 FR 3. Pour le mode Répéteur [Repeater], appuyer x-fois brièvement sur la touche d'initialisation [10] : 1 fois Repeater LED clignote Arrêt 1 fois 2 fois Repeater Level 1 LED clignote 2 fois 3 fois Repeater Level 2 LED clignote 3 fois 4. Appuyer (≥ 5 secondes) sur la touche d'initialisation [10] jusqu'à ce que la LED de l'aérateur s'allume 1 fois (env. 1 seconde). > Le réglage est mémorisé. 10. Utilisation Le tableau suivant indique les niveaux de puissance des aérateurs maîtres et esclaves, affectés aux différents niveaux du système RLS RC. Programmes RLS RC pour ECA 100 ipro RC et ECA 100 ipro RCH Programme P1 Programme P2 Niveau système 0 Niveau système 1 Niveau système 2 Niveau système 3 Maître Arrêt Niveau de puissance 1 Niveau de puissance 1 Niveau de puissance 2 Esclave(s) Arrêt Arrêt Niveau de puissance 1 Niveau de puissance 1 Maître Arrêt Niveau de puissance 2 Niveau de puissance 1 Niveau de puissance 2 Esclave(s) Arrêt Arrêt Niveau de puissance 1 Niveau de puissance 2 Niveau de puissance 1 = 78 m³/h Niveau de puissance 2 = 92 m³/h (indications pour soufflage libre) Sélection du programme Programme P1 P2 Taille du logement 30 m² / 50 m² / 70 m² 90 m² / 110 m² / 130 m² / 140 m² 45 FR ECA 100 ipro RC Les aérateurs sont mis en marche / à l'arrêt soit sur la commande d'air ambiant RLS RC, soit par l'interrupteur radio DS RC, soit par un contact de fenêtre radio à fournir par le client. Pour le fonctionnement des composants radio cf. Description du système Maico Smart au chapitre 3.4. ECA 100 ipro RCH L'appareil convient aux personnes handicapées. L'évacuation d'air se fait conformément au contrôleur d'humidité. L'appareil s'arrête complètement en cas de faible humidité. Pour la commande manuelle par composant radio ECA 100 ipro RC. 11. Entretien L'appareil ne nécessite aucun entretien. 13. Élimination des dysfonctionnements ● Lors de tout dysfonctionnement, consulter un électricien qualifié. ● Les réparations sont exclusivement réservées à des électriciens qualifiés ! Danger de mort, l'appareil est sous tension ! Avant de travailler sur le branchement DANGER électrique, désactiver le fusible secteur et apposer un panneau d'avertissement contre la remise sous tension. L'aérateur ne se met pas en marche. Cause Remède Pas de tension du secteur. Activer le fusible secteur. La turbine est bloquée. Élimination du défaut uniquement réservée aux personnel qualifié ! Déposer le cache de protection [6]. 12. Nettoyage DANGER Danger de mort, l'appareil est sous tension ! Désactiver le fusible secteur. Déverrouiller la grille intérieure [5] avec les crochets d'arrêt ( flèches) et la déposer. Contrôler l'hélice, la nettoyer si besoin est. ATTENTION Risque d'endommagement de l'appareil en cas d'utilisation de produits de nettoyage incorrects ! Nettoyer le cache de protection [6] et le cache design [7] uniquement à l'eau. Ne pas utiliser de produits de nettoyage agressifs. 1. Nettoyer les pièces intérieures de l'aérateur uniquement avec un chiffon sec. 2. Si le cache design [7] est très sale, le déposer avec précaution (, cf. page rabattable, Fig. B) et le nettoyer à l'eau. 3. Poser le cache design [7]. 46 La commande en fonction de l'humidité des appareils RCH ne fonctionne pas correctement / est défectueuse. Faire intervenir un spécialiste. FR La protection thermique contre les surcharges du moteur met l'aérateur hors circuit. Cause Remède Moteur trop chaud. Attendre le refroidissement du moteur. Le temps de refroidissement peut durer jusqu'à 10 minutes. L'appareil se remet automatiquement en marche dès qu'il a refroidi. 1. Déverrouiller le cache de protection [6] ( flèche, cf. Figure ci-dessus) et le déposer. 2. Retirer le cache électronique [4] (3 ergots, cf. chapitre 8.2). 3. Retirer le câble secteur. 4. Démonter l'aérateur L'aérateur ne réagit pas aux ordres radio Cause Remède L'aérateur n'est pas correctement initialisé. Effacer l'émetteur de tous les composants (Mode Effacer (Delete) cf. chapitre 9.6). Effacer l'émetteur sur la RLS RC. Mettre brièvement les aérateurs hors tension. Puis réinitialiser les composants. Les aérateurs sont hors de portée. Activer le mode Répéteur [Repeater] sur un aérateur situé à proximité. En cas de portée trop réduite, utiliser un répéteur [Repeater] supplémentaire (sur site). 15. Élimination i Ne pas jeter avec les ordures ménagères ! L'appareil contient certaines matières recyclables mais également d'autres substances qui ne doivent pas être éliminées avec les ordures ménagères. Éliminez l'appareil arrivé en fin de vie en respectant les directives environnementales et prescriptions locales applicables dans votre pays. 16. Schéma de branchement ECA 100 ipro RC / ECA 100 ipro RCH 14. Démontage DANGER Danger de mort par électrocution ! Seul un électricien qualifié peut se charger du démontage. Couper le fusible secteur avant la dépose. 47 01.15_Es Maico Elektroapparate-Fabrik GmbH • Steinbeisstr. 20 • 78056 Villingen-Schwenningen • Germany • Service +49 7720 694 447 • [email protected] 0185.1148.0000_RLF.3_01.15_DSW 48