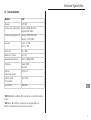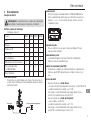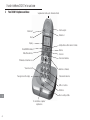
1
Telefon DC60x und Basisstation
Téléphone DC60x et son combiné
Telefono DC60x e la sua base
DC60x Telephone and Base
Bedienungsanleitung
Mode d’emploi
Istruzioni per l’uso
Operating Instructions
DC60x
D
F
I
GB
Bedienungsanleitung . . . . . . . . . . . . . . . . . . . . . . . . . . . . . . . . . . . . . . . . . . . . . . . . . . . . . . . . . . . . . 3
Mode d’emploi. . . . . . . . . . . . . . . . . . . . . . . . . . . . . . . . . . . . . . . . . . . . . . . . . . . . . . . . . . . . . . . . . 23
Istruzioni per l’uso . . . . . . . . . . . . . . . . . . . . . . . . . . . . . . . . . . . . . . . . . . . . . . . . . . . . . . . . . . . . . . 43
Operating Instructions . . . . . . . . . . . . . . . . . . . . . . . . . . . . . . . . . . . . . . . . . . . . . . . . . . . . . . . . . . . 63
Inhalt
1
2
3
4
5
6
7
8
9
10
11
12
13
14
15
Sicherheitsinformationen . . . . . . . . . . . . . . . .4
Inbetriebnahme . . . . . . . . . . . . . . . . . . . . . . .5
Ihr Telefon DC601 und Basisstation . . . . . . . . .6
Bedienung des Telefons . . . . . . . . . . . . . . . . .7
Telefonieren . . . . . . . . . . . . . . . . . . . . . . . . . .9
Verwendung des Menüs . . . . . . . . . . . . . . . .11
Telefonbuch . . . . . . . . . . . . . . . . . . . . . . . . .13
Anrufliste . . . . . . . . . . . . . . . . . . . . . . . . . . .14
Verwendung zusätzlicher Handsets . . . . . . . .15
Nebenstellenanlagen . . . . . . . . . . . . . . . . . .17
Wenn Probleme auftreten . . . . . . . . . . . . . . .18
Technische Eigenschaften. . . . . . . . . . . . . . .19
Werkseinstellungen . . . . . . . . . . . . . . . . . . .20
Wartung/Garantie . . . . . . . . . . . . . . . . . . . . .21
Stichwortverzeichnis. . . . . . . . . . . . . . . . . . .22
D
3
Sicherheitsinformationen
1
Sicherheitsinformationen
Bitte lesen Sie diese Bedienungsanleitung sorgfältig durch.
Vorgesehene Anwendung
Das Telefon eignet sich für das Telefonieren innerhalb eines öffentlichen
Telefonnetzes. Jegliche andere Nutzung wird als nicht vorgesehene
Nutzung angesehen. Die unauthorisierte Modifikation oder Rekonstruktion
ist nicht erlaubt. Öffnen Sie unter keinen Umständen das Gerät oder führen
selbst etwaige Reparaturarbeiten durch.
Installationsort
Vermeiden Sie eine übermäßige Einwirkung von Rauch, Staub, Vibration,
Chemikalien, Feuchtigkeit, Hitze und direktem Sonnenlicht.
Stromversorgung
Vorsicht: Verwenden Sie nur den mitgelieferten
Netzadapterstecker, da andere Netzgeräte das Telefon
beschädigen könnten. Stellen Sie sicher, dass der
Netzadapterstecker nicht aufgrund von Möbeln und ähnlichem
unzugänglich ist.
Stromausfall
Dieses Telefon kann im Fall eines Stromausfalls nicht für Anrufe verwendet
werden. Für den Zugriff auf Notdienste müssen alternative Vorkehrungen
getroffen werden.
D
Wiederaufladbare Batterien (Akkus)
Werfen Sie die Batterien nicht ins Feuer oder Wasser!
Kompatibilität mit Hörgeräten
Das Telefon ist mit den meisten Hörgeräten auf dem Markt kompatibel.
Allerdings besteht aufgrund des breiten Sortiments an verfügbaren
Hörgeräten keine Garantie, dass das Telefon mit jedem Modell ‘problemlos’
arbeitet.
4
Vorsicht: Dieses Telefon ist in der Lage, bei Einschalten des
‘Verstärkers’ und voll aufgedrehtem Lautstärkeregler sehr
hohe Lautstärkepegel zu produzieren. Extreme Vorsicht ist
geboten, wenn das Mobilteil gemeinsam von Nutzern mit
normalem Gehör und solchen mit Hörstörungen verwendet
wird.
Medizinische Geräte
Verwenden Sie Ihr Telefon NICHT in der Nähe von Notfallintensivmedizinischen Geräten, wenn Sie einen Herzschrittmacher
besitzen oder während eines Gewitters.
Entsorgung
Sie sind verpflichtet, Verbrauchsgüter in Übereinstimmung
mit den zutreffenden gesetzlichen Bestimmungen
ordnungsgemäß zu entsorgen. Das nebenstehende
Symbol auf dem Telefon zeigt an, dass elektrische und
elektronische Geräte sowie Batterien, die nicht mehr
benötigt werden, separat vom Hausmüll entsorgt werden
müssen.
Elektrische und elektronische Geräte müssen an einer
geeigneten, durch die öffentlichen Entsorgungsbehörden
eingerichteten Sammelstelle entsorgt werden.
Batterien müssen an der Verkaufsstelle oder einer
geeigneten, durch die öffentlichen Entsorgungsbehörden
eingerichteten Sammelstelle entsorgt werden.
Verpackungsmaterial muss örtlichen Bestimmungen
gemäß entsorgt werden.
Inbetriebnahme
2
Inbetriebnahme
Sicherheitshinweis
Vorsicht: Es ist unerlässlich, die Sicherheitsinformationen im Kapitel 1
zu lesen, bevor das Telefon zur Nutzung vorbereitet wird.
Einsetzen der Batterien (Akkus)
Setzen Sie die beiden mitgelieferten wiederaufladbaren AAA 1.2V 800mAh
NiMH Batterien in das Batteriefach des Mobilteils ein. Achten Sie auf
die ‘+’ und ‘-’ Markierungen und positionieren Sie die Batterien in der
richtigen Richtung. Schließen Sie die Abdeckung des Batteriefachs.
Prüfen Sie den Inhalt der Verpackung
Die Verpackung enthält:
Inhalt
DC601
DC602
DC603
DC604
Basisstation
1
1
1
1
Ladestation
0
1
2
3
Mobilteil
1
2
3
4
Batterieabdeckung
1
2
3
4
Netzadapterstecker
1
2
3
4
Telefonanschlusskabel
1
1
1
1
AAA 1.2V 800mAh NiMH
wiederaufladbare Batterien
2
4
6
8
Bedienungsanleitung
1
1
1
1
Anschluss der Basisstation
Schließen Sie die Basisstation wie in der Abbildung gezeigt an. Verwenden
Sie aus Sicherheitsgründen nur den Netzadapterstecker und das
Telefonanschlusskabel, die zum Lieferumfang gehören.
5L[aZ[LJRKVZL
;LSLMVUHUZJOS\ZZKVZL
Aufladen der Batterien (Akkus)
Platzieren Sie das Mobilteil vor dem ersten Betrieb mindestens
15 Stunden lang zum Aufladen in der Basisstation.
Nebenstellenanlagen
Die Informationen auf Seite 17 erklären, wie Sie Ihr Telefon in
einer Nebenstellenanlage installieren.
Strahlungsreduzierung (ECOmode)
Im Standby-Modus wird die Strahlung im Vergleich zu Standard-DECTTelefonen erheblich gesenkt, wenn der Hörer sich in der Basisstation
befindet.
Stromverbrauch
Die Leistungsaufnahme der Basisstation beträgt:
- im Betrieb (Bereitschaft/Gespräch): ca. 0,87 W / ca. 1,36 W
- während der Ladung des Mobilteils: ca. 2,15 W.
Die Nulllast des Netzteils beträgt ca. 0,2 W.
Die durchschnittliche Effizienz beträgt ca. 67,3 %.
Die Leistungsaufnahme der Ladestation beträgt:
- ohne Mobilteil: ca. 0,32 W
- während der Ladung des Mobilteils: ca. 1,7 W.
Die Nulllast des Netzteils beträgt ca. 0,32 W.
Die durchschnittliche Effizienz beträgt ca. 44 %.
D
5
Ihr Telefon DC601 und Basisstation
3
Ihr Telefon DC601 und Basisstation
Lampe für eingehenden Anruf
Lautstärke auf/ab
Speicher 1
Speicher 2
Verstärker 25dB
Anzeige
Auf/Wahlwiederholung
Menü/OK/R-Taste
Telefonbuch
Intern-Taste
Stumm/Löschen
Anruf beenden
Externer Anruf/Freisprechen
*/Rufton ein/aus
Ab/Anrufliste
Pause (0 lange drücken)
Alphanumerische Tastatur
D
#/Tastatursperre
Mikrofon
Mobilteil finden
Lädt/Leitung in Gebrauch/
Anmeldung
6
Bedienung des Telefons
4
Bedienung des Telefons
Anzeige und Erklärung von Bedienungsabläufen.
Symbole in der Anzeige
Symbol
Beschreibung
Ziffern oder Buchstaben eingeben
Telefonbuchmodus
Drücken Sie die gezeigte Taste kurz
Batteriezustand
2x
Drücken Sie die gezeigte Taste zwei Mal kurz
Rufton aus
2 Sek
Drücken Sie die gezeigte Taste 2 Sekunden lang
Gedrückt halten
Halten Sie die gezeigte Taste gedrückt
Loslassen
Gezeigte Taste loslassen
Tastatursperre ist aktiv
Freisprechmodus
Anruf
Verstärkung der Hörerlautstärke ist aktiv
Mobilteil klingelt
Basisstation klingelt
Taste für externen Anruf
Beenden eines Anrufs und/oder Rückkehr zum
Standby
DEUTSCH oder
Text oder Symbol in der Anzeige
Mobilteil-Mikrofon ist stumm
Sie haben neue Anrufe
Zeigt an, dass sich das Mobilteil in Reichweite der
Basisstation befindet. Blinken zeigt an, dass sich das
Mobilteil außerhalb der Reichweite der Basisstation
befindet.
Interner Anruf
Nachricht liegt vor
D
7
Bedienung des Telefons
Navigation im Menü
Telefonbucheinträge erstellen - Beispiel
Alle Funktionen des Mobilteils können über das Menü erreicht werden.
Informationen, wie Sie jede einzelne Funktion erreichen, finden Sie unter
‘Verwendung des Menüs’ auf Seite 11.
Alle Beschreibungen in dieser Bedienungsanleitung gehen davon aus,
dass sich das Mobilteil im Standby-Modus befindet.
Dieses Beispiel erklärt, wie Sie sich im Telefonbuch bewegen und Einträge
erstellen können. Gehen Sie bei allen Einstellungen wie in diesem Beispiel
gezeigt vor.
2 Sek
Geben Sie denNamen ein (max. 12 Buchstaben) und
bestätigen ihn
Öffnen Sie das Hauptmenü
oder
oder
Wählen Sie die gewünschte Funktion
Öffnen Sie die Funktion
oder
2 Sek M1 oder
M2
Öffnet Modus zum Hinzufügen eines Kurzwahleintrags
Geben Sie den Namen ein (max. 12 Buchstaben) und
bestätigen Sie diesen
Geben Sie mit Hilfe der entsprechenden Tasten Ziffern
oder Buchstaben ein
GebenSie die Telefonnummer ein (max. 24 Zeichen) und
bestätigen Sie diesen
Abbrechen und in den Standby-Modus zurückkehren
8
Speichern eines Kurzwahleintrags
Wählen Sie die gewünschte Einstellung
Bestätigen Sie die Eingaben
D
Geben Sie die Telefonnummer ein (max. 24 Zeichen) und
bestätigen sie
Wählen Sie das gewünschte Untermenü
Öffnen Sie das Untermenü
Öffnet Modus zum Hinzufügen eines Telefonbucheintrags
Jeder Vorgang wird automatisch abgebrochen, wenn
innerhalb von 20 Sekunden keine Eingabe erfolgt.
Telefonieren
5
Verpasste Anrufe zurückrufen
Ihr Telefon speichert die letzten 30 eingegangenen Anrufe in der Anrufliste.
Telefonieren
Tätigen eines Anrufs
Öffnen Sie die Anrufliste
Geben Sie die Telefonnummer ein (max. 24
Zeichen)
Nach einer fehlerhaften Eingabe zum Löschen
der letzten Ziffer drücken
Wählen Sie die Telefonnummer
oder
Es ist auch möglich, die Taste für externe Anrufe zuerst zu drücken,
um einen Wählton zu erhalten. Die eingegebenen Ziffern werden dann
umgehend gewählt. Es ist bei diesem Wählverfahren nicht möglich, falsch
gewählte Ziffern einzeln zu korrigieren..
Einen Anruf beenden
Den Anruf beenden
oder
Einen Anruf annehmen
oder
,
,
oder
Öffnen Sie das Telefonbuch
oder
,
oder
Wählen Sie einen Eintrag und wählen
die Nummer
Kurzwahl
Telefonnummern müssen als Kurzwahlnummern gespeichert worden sein.
Siehe Seite 8.
Den Anruf annehmen
Wahlwiederholung
Ihr Telefon speichert die letzten 3 gewählten Telefonnummern
(jeweils max. 25 Ziffern).
Wählen Sie einen Eintrag und wählen
Sie die Nummer
Telefonnummern aus dem Telefonbuch wählen
Im Telefonbuch müssen Telefonnummern gespeichert sein. Siehe Seite 13.
Ihr Telefon kann bis zu 50 Namens- und Nummerneinträge im Telefonbuch
speichern.
M1 oder M2
,
oder
oder
Drücken Sie die erforderliche
Kurzwahltaste
Wählen Sie die Nummer
D
Öffnen Sie die Wahlwiederholungsliste
,
oder
Wählen Sie einen Eintrag und wählen Sie die
Nummer
9
Telefonieren
Kettenwahl
Diese Eigenschaft wird für komplexere Telefonservices wie beispielsweise
Telefonbanking oder Calling Card Verfahren verwendet. Mehrere im
Telefonbuch gespeicherte Nummern können nacheinander gewählt
werden, nachdem eine Verbindung erstellt worden ist. Es ist auch möglich,
Nummern aus dem Telefonbuch mit manuell eingegebenen Nummern zu
kombinieren. Im Telefonbuch gespeicherte Nummern können nach Bedarf
verkettet und übertragen werden.
Öffnen Sie das Telefonbuch, nachdem eine
Verbindung erstellt wurde.
Wählen Sie den Telefonbucheintrag und übertragen
oder ,
Sie die Nummer
oder
Regulierung der Hörerlautstärke
Die Lautstärke Ihres DC601-Telefons ist lauter als bei einem normalen
Telefon. Drücken Sie auf oder ab und lassen die Taste für jede
Lautstärkestufe los.
Wenn Sie sich in einem Gespräch befinden, können
Sie die Einstellung mit dem Schalter an der Seite
regulieren
Verstärkung der Hörerlautstärke
Wenn Sie sich in einem Gespräch befinden, können Sie die Lautstärke
Taste erhöhen.
jeder Lautstärkeneinstellung durch einen Druck auf die
D
Drücken Sie die Taste, ein Symbol blinkt in der
Anzeige
Freisprecheinrichtung
Verwenden Sie die Freisprecheinrichtung, um Ihrem Anrufer über den
Lautsprecher zuzuhören
2x
Freisprechmodus einschalten
Freisprechmodus ausschalten
10
Lautstärke der Freisprecheinrichtung regulieren
Es stehen 5 Lautstärkepegel für die Freisprecheinrichtung zur Verfügung.
Die ‘Verstärker’-Eigenschaft steht im Freisprechmodus nicht zur Verfügung.
Während eines Gespräch können Sie die
Einstellung mit dem Schalter an der Seite
regulieren
Sprechzeitanzeige
Die Dauer eines jeden Anrufs wird während des Gesprächs in Minuten und
Sekunden angezeigt.
Stummschalten des Mikrofons im Mobilteil
Das Mikrofon des Mobilteil kann während eines Telefonats aktiviert und
deaktiviert werden, wenn Sie sich im Hörer- oder Freisprechmodus
befinden.
, MUTED,
Schaltet das Mikrofon aus (Stumm)
Schaltet das Mikrofon ein
Rufton ein/aus
Sie können den Ruften ein- und ausschalten.
2 Sek
Schaltet den Ruften aus
2 Sek
Schaltet den Ruften ein
Tastatursperre
Wenn die Tastatursperre aktiv ist, können Anrufe trotzdem in der
herkömmlichen Weise angenommen werden.
2 Sek
Sperrt die Tastatur
2 Sek
Entsperrt die Tastatur
Verwendung des Menüs
6. Verwendung des Menüs
Name des Mobilteils
Sie können Ihrem Mobilteil einen Namen geben, um es zu personalisieren
(max. 12 Buchstaben).
oder
Öffnen Sie das Menü, wählen Sie ‘MT NAME’
,
Löschen Sie den aktuellen Namen
Geben Sie den neuen Namen ein und bestätigen
Sie ihn
,
Datum/Zeit
,
oder
,
Öffnen Sie das Menü, wählen Sie ‘TAG/ZEIT’
,
Geben Sie das Jahr ein und bestätigen Sie
,
Geben Sie den Monat ein und bestätigen Sie
,
Geben Sie den Tag ein und bestätigen Sie
,
Geben Sie die Stunden (24-Stunden-Uhr) ein und
bestätigen Sie
.
Geben Sie die Minuten ein und bestätigen Sie
Ruftonmelodie des Mobilteils
Es stehen 9 verschiedene Ruftonmelodien zur Verfügung.
,
oder
MELODIE 7
oder
,
Öffnen Sie das Menü, wählen Sie ‘MT MELODIE’
Ruftonlautstärke des Mobilteils
Es gibt 5 Einstellungen für die Ruftonlautstärke und ‘AUS’
,
oder
Öffnen Sie das Menü, wählen Sie ‘MT
RUFLAUTST’
,
LAUTST 5
und
Es wird die aktuelle Einstellung angezeigt
Wählen und bestätigen Sie eine
Ruftonlautstärke oder ‘AUS’
,
Ruftonmelodie der Basisstation
Es stehen 9 verschiedene Ruftonmelodien zur Verfügung.
,
oder
,
MELODIE 8
oder
Öffnen Sie das Menü, wählen Sie ‘BS
MELODIE’
Es wird die aktuelle Einstellung angezeigt
Wählen und bestätigen Sie eine Ruftonmelodie
,
Ruftonlautstärke der Basisstation
Es gibt 5 Einstellungen für die Ruftonlautstärke und ‘AUS’
,
oder
LAUTST 5
und
,
Öffnen Sie das Menü, wählen Sie ‘BS
RUFLAUTST’
Es wird die aktuelle Einstellung angezeigt
,
Wählen und bestätigen Sie eine
Ruftonlautstärke
D
Es wird die aktuelle Einstellung angezeigt
,
Wählen und bestätigen Sie eine Ruftonmelodie
11
Verwendung des Menüs
Verstärker-Speicher
Wenn Sie diese Eigenschaft auf ‘EIN’ einstellen und die
Taste
verwenden, wird Ihr Mobilteil Ihre letzte Verstärkereinstellung speichern
und bei jedem Anruf verwenden.
,
oder
,
AUS
Öffnen Sie das Menü, wählen Sie ‘IMMER LAUT’
Es wird die aktuelle Einstellung angezeigt
oder
Wählen und bestätigen Sie ‘EIN’ oder ‘AUS
,
Direktannahme
Wenn diese Funktion auf ‘EIN’ gestellt ist, nehmen Sie das Gespräch
automatisch an, sobald Sie Ihr Mobilteil aus der Basis nehmen. Dies ist die
Werkseinstellung.
,
oder
,
EIN
Öffnen Sie das Menü, und wählen Sie
‘DIREKTANNAHM’
Es wird die aktuelle Einstellung angezeigt
oder
Wählen und bestätigen Sie ‘EIN’ oder ‘AUS
,
Sprache
Es stehen 5 Sprachen zur Verfügung: Englisch, Deutsch, Französisch,
Spanisch und Italienisch.
oder
D
DEUTSCH
oder
12
,
Öffnen Sie das Menü, und wählen Sie ‘SPRACHE’
Es wird die aktuelle Einstellung angezeigt
,
Wählen und bestätigen Sie eine Sprache
Telefonbuch
Bearbeitung von Telefonbucheinträgen
7. Telefonbuch
Im Telefonbuch können fünfzig Namen und Telefonnummern mit maximal
12 Buchstaben und 24 Ziffern für jeden Eintrag gespeichert werden.
* Geben Sie bei jedem Telefonbucheintrag die Vorwahl mit ein.
* Die Telefonbucheinträge werden alphabetisch verwaltet. Um
schnell zu einem Telefonbucheintrag zu gelangen, geben Sie den
Anfangsbuchstaben des entsprechenden Eintrags ein.
Eingabe eines Namens
Die Zifferntasten sind auch mit Buchstaben zur Eingabe der
entsprechenden Buchstaben beschriftet. Das mehrmalige Drücken der
entsprechenden Taste ermöglicht die Eingabe von Großbuchstaben und
Ziffern.
,
oder
2 Sek
Öffnen Sie das Telefonbuch
Wählen Sie einen Telefonbucheintrag
Aktivieren Sie den Bearbeitungsvorgang
Bearbeiten Sie den Namen (max. 12 Buchstaben)
und bestätigen Sie ihn
Bearbeiten Sie die Telefonnummer (max. 24
Zeichen) und bestätigen sie diese
Löschen von Telefonbucheinträgen
Öffnen Sie das Telefonbuch
Leerstelle
,
Löschen
oder
Wählen Sie einen Telefonbucheintrag
, LOESCHEN?
Aktivieren Sie den Löschvorgang
oder
Löschung bestätigen oder abbrechen
Um denselben Buchstaben zwei Mal einzugeben, drücken Sie die Taste zur
Eingabe des Buchstabens. Warten Sie, bis der Cursor eine Stelle vorrückt.
Geben Sie den Buchstaben erneut ein.
Telefonbucheinträge erstellen
2 Sek
,
Öffnet Modus zum Hinzufügen eines
Telefonbucheintrags
D
Geben Sie den Namen ein (max. 12 Buchstaben)
und bestätigen ihn
Geben Sie die Telefonnummer ein (max. 24
Zeichen) und bestätigen sie
13
Anrufliste
8. Anrufliste
Inder Anrufliste Ihres Telefons wird die Telefonnummer des Anrufers
angezeigt (CLIP1) sofern dieser Service von Ihrem Netzbetreiber
freigeschaltet ist.
Die Nummer des Anrufers (oder der Name, wenn im Telefonbuch
gespeichert) erscheint im Display, wenn das Telefon klingelt. Wenn der
Anrufer seine Nummer vorenthält, erscheint eine entsprechende Mitteilung
in der Anzeige. Die Telefonnummer wird nicht angezeigt und wird nicht in
der Anrufliste gespeichert.
Es können bis zu 30 eingehende Anrufe mit maximal 12 Buchstaben für
den Namen und 23 Ziffern für die Nummer in der Anrufliste gespeichert
zeigen an, dass sich neue Anrufe in der
werden. Die blinkenden
Anrufliste befinden.
Anzeige von Einträgen in der Anrufliste
Öffnet die Anrufliste beim neuesten Eintrag
oder
1x - 2x
Speicherung von Einträgen aus der Anrufliste im Telefonbuch
Eine in der Anrufliste gespeicherte Telefonnummer kann direkt im
Telefonbuch gespeichert werden
Öffnet die Anrufliste beim neuesten Eintrag
oder
Öffnen Sie das Telefonbuch
,
Geben Sie den neuen Namen ein und bestätigen
Sie ihn
,
Bearbeiten Sie die Nummer und bestätigen Sie
diese
Löschung von Einträgen in der Anrufliste
Löschung eines einzelnen Eintrags in der Anrufliste
Öffnet die Anrufliste beim neuesten Eintrag
Wählen Sie einen Eintrag
Zur Anzeige weiterer Informationen.
Wählen Sie einen Eintrag
oder
Wählen Sie einen Eintrag
, LOESCHEN?
Aktivieren Sie den Löschvorgang
oder
Bestätigen oder abbrechen
Löschung aller Einträge in der Anrufliste
D
Öffnet die Anrufliste beim neuesten Eintrag
, ALLE
2 Sek
LOESCH?
oder
1
14
CLIP: Calling Line Identification Presentation
Aktivieren Sie den Löschvorgang
Bestätigen oder abbrechen
Verwendung zusätzlicher Handsets
9. Verwendung zusätzlicher Mobilteile
Tätigen interner Anrufe
Es müssen zwei oder mehr Mobilteile (MT1, MT2) an der Basisstation
angemeldet sein, um interne kostenlose Gespräche führen zu können.
MT1:
,
, zt: 2
MT2:
,
, zt: 2
,
Wählen Sie während eines externen Anrufs
die Nummer des gewünschten Mobilteils
, zt 2
MT2:
Nehmen Sie den internen Anruf am anderen
Mobilteil an
Nehmen Sie den internen Anruf am anderen
Mobilteil an
MT1: 2 Sek
Aktiviert Konferenzgespräch
MT1/MT2:
Stellt externen Anruf auf Halten
MT1/MT2:
Beendet Konferenzgespräch
Interne Weiterleitung von externen Anrufen
MT1:
MT1:
Wählen Sie die interne Rufnummer des
gewünschten Mobilteils
Den internen Anruf beenden
MT1/MT2:
Konferenzgespräche
Sie können ein Konferenzgespräch zwischen maximal 1 externen und 2
internen Anrufern abhalten.
Wählen Sie während eines externen Anrufs die
Nummer des gewünschten Mobilteils
MT2:
Nehmen Sie den internen Anruf am anderen
Mobilteil an
MT1:
Externer Anruf wird an das andere Mobilteil
übertragen
Mobilteil-Anmeldung
Sie brauchen nur ein Mobilteil anzumelden, das von der Basis abgemeldet
wurde oder falls Sie ein neues Mobilteil gekauft haben.
Neue Mobilteil müssen vollständig aufgeladen worden sein,
bevor Sie den Versuch unternehmen können, sie anzumelden.
An der Basisstation
Falls das angerufene Mobilteil nicht antwortet, können Sie den Anruf durch
Drücken der
Taste zurücknehmen.
10 Sek
Anmeldemodus aktivieren
,
Am Handset
D
,
oder
Öffnen Sie das Menü, wählen Sie
‘ANMELDEN’
,
Geben Sie die Basis-Nummer ein (1,2,3 oder
4)
,
,
Geben Sie den PIN-Code ein und bestätigen
ihn
15
Verwendung zusätzlicher Handsets
Mobilteil-Abmeldung
,
oder
,
MT ABMELDEN?,
D
16
Öffnen Sie das Menü, wählen Sie ‘MT
ABMELDEN’
,
,
Geben Sie den PIN-Code ein und
bestätigen ihn
,
Geben Sie die Mobiltein-Nummer ein
und bestätigen sie
Nebenstellenanlagen
10. Nebenstellenanlagen
R-Taste in Nebenstellenanlagen
Wenn das Telefon an einer Nebenstellenanlage angeschlossen ist, können
Funktionen wie Gesprächsvermittlung und automatischer Rückruf mit Hilfe
der R-Taste verwendet werden. Bitte sehen Sie in der Bedienungsanleitung
Ihrer Nebenstellenanlage nach, um festzustellen, welche Recall (Flash-)Zeit eingestellt werden muss, um diese Funktionen nutzen zu können. Der
Händler, bei dem Sie die Anlage gekauft haben, kann Ihnen Informationen
dazu geben, ob das Telefon ordentlich mit der Anlage zusammenarbeiten
wird.
Einstellung der Flash-Zeit
Es stehen zwei Flash-Zeiten zur Verfügung. Kurze 100ms und
lange 300ms.
,
oder
KURZ
oder
,
Öffnen Sie das Menü, wählen Sie ‘RUECKRUF’
Es wird die aktuelle Einstellung angezeigt
,
Wählen und bestätigen Sie ‘KURZ’ oder ‘LANG’
Wählpause
Im Fall von Nebenstellenanlagen ist es notwendig, einen Zugangscode
einzugeben, um eine Amtsleitung mit dem entsprechenden Freizeichen
zu bekommen. Bei der Verwendung einiger älterer Nebenstellenanlagen
kann es einen Moment dauern, bis der Wählton zur Verfügung steht.
Insbesondere im Fall solcher Nebenstellenanlagen ist es möglich, eine
Wählpause nach der Nummer für die Amtsleitung einzusetzen, so dass die
Nummer in einem kontinuierlichen Vorgang gewählt werden kann, ohne auf
das Freizeichen warten zu müssen.
2 Sek
R-Taste und ergänzende Services
Ihr Telefon unterstützt die von Ihrem Telefonnetzbetreiber
angebotenen ergänzenden Services, wie Anrufvermittlung, Warten und
Konferenzgespräche. Die ergänzenden Services können in Verbindung
mit der R-Taste verwendet werden. Wenden Sie sich in Bezug auf die
Aktivierung der ergänzenden Services und Informationen dazu, welche
Flash-Zeit verwendet werden muss, bitte an Ihren Telefonnetzbetreiber.
Wählmodus
Es stehen zwei Wählmodi zur Verfügung: Ton und Impuls. Ändern Sie diese
Einstellung nur, wenn Ihnen der Verkäufer Ihrer Nebenstellenanlage dazu
geraten hat.
,
oder
,
TON
Öffnen Sie das Menü, wählen Sie ‘WÄHLVERF’
Es wird die aktuelle Einstellung angezeigt
oder
Wählen und bestätigen Sie ‘TON’ oder
‘IMPULS’
,
Zurücksetzen der Standardeinstellungen
Sie können die originalen Standardeinstellungen Ihres Mobilteils
zurücksetzen. Das Telefonbuch, Anruf- und Wahlwiederholungslisten
werden nicht gelöscht, wenn Sie das Mobilteil zurücksetzen.
,
oder
,
,
Öffnen Sie das Menü, wählen Sie ‘RESET’
Geben Sie den PIN-Code ein und bestätigen
ihn
D
Einsetzen einer Wählpause. In der Anzeige wird ‘P’
angezeigt
Die Pause kann auch mit der Telefonnummer im Telefonbuch eingegeben
werden.
17
Wenn Probleme auftreten
11. Wenn Probleme auftreten
Verbindung ist gestört oder getrennt
Service-Hotline
Sollten mit dem Telefon Probleme auftauchen, halten Sie sich bitte
zunächst an die folgenden Informationen. Im Fall technischer Probleme
können Sie auch unsere Hotline anrufen: Tel. 0900 00 1675 innerhalb
der Schweiz (kosten Swisscom bei Drucklegung: CHF 2.60/min). Im Fall
von Garantieansprüchen wenden Sie sich an Ihren Händler. Die Garantiezeit
beträgt 2 Jahre
Stellen Sie sicher, dass Sie sich in
Reichweite der Basisstation aufhalten
(bei idealen Bedingungen 300 m im
Freien und 50 m in Gebäuden)
Die Basisstation befindet sich an
einem ungeeigneten Ort
Das Mobilteil schaltet sich selbst aus
Platzieren Sie das Mobilteil für
15 Stunden zum Aufladen in der
Basisstation.
Ersetzen Sie die wiederaufladbaren
Batterien.
Das System reagiert nicht mehr
oder befindet sich in einem
undefinierbaren Zustand
Setzen Sie alle Funktionen in ihre
Standardeinstellung zurück. Siehe
Seite 17.
Die Anzeige der Nummer des
Anrufers (CLIP) funktioniert nicht
Prüfen Sie, dass Ihnen dieser
Service auf Ihrer Leitung zur
Verfügung steht. Bitte rufen Sie Ihren
Netzwerkbetreiber an.
Der Anrufer hat seine Telefonnummer
vorenthalten
Das Mobilteil klingelt nicht
Prüfen Sie, dass der Rufton nicht
ausgeschaltet ist. Siehe Seiten 10
& 11.
Brummendes Geräusch im Radio,
Fernseher oder Computer
Wir empfehlen, dass Sie zu
elektrischn Geräten und Handys einen
Abstand von 1 Meter einhalten.
Problem
Lösung
Keine Anrufe möglich
Die Telefonleitung ist nicht ordentlich
angeschlossen oder ist defekt.
Verwenden Sie nur das mitgelieferte
Telefonanschlusskabel.
Prüfen Sie die Telefonleitung/
Anschlussdose mit Hilfe eines
anderen Telefons.
Der Netzadapter ist nicht eingesteckt/
eingeschaltet oder es liegt ein
kompletter Stromausfall vor.
Stellen Sie sicher, dass Sie sich in
Reichweite der Basisstation aufhalten
(bei idealen Bedingungen 300 m im
Freien und 50 m in Gebäuden)
D
Wahl nach draußen nicht möglich
18
Ist die Tastatursperre aktiv? Halten
Sie die Taste
gedrückt, um die
Tastatur zu entsperren.
Technische Eigenschaften
12. Technische Daten
Merkmal
Wert
Standard
DECT1 GAP2
Stromversorgung (Basisstation)
Eingang: 230VAC 50Hz 35mA
Ausgang: 6VDC 300mA
Stromversorgung (Ladestation)
Eingang: 230VAC 50Hz 30mA
Ausgang: 7,5VDC 100mA
Reichweite
Aussen: ca. 300m
Innen: ca. 50m
Bereitschaft
Bis zu 100 h
Max Gespr ä chsdauer
Bis zu 10 h
Wiederaufladbare Batterien
AAA 1,2V 800mAh NiMH
Wählmodus
Tonwahl (DTMF)
Impulswahl
Zulässige
Umgebungsternperatur
0oC bis 45oC
Zulässige relative
Leftfeuchtigkeit
20% bis 80%
Flash-Funktion
100, 300 ms
D
1
DECT: Digital Enhanced Cordless Telecommunication = Standard für kabellose
Telefone.
2
GAP: Generic Access Profile = Standard für das Zusammenwirken von
Mobilteilen und Basisstationen unterschiedlicher Hersteller.
19
Werkseinstellungen
13. Werkseinstellungen
Mobilteil
Die Werkseinstellungen werden über das Menü wiederhergestellt. Auf Seite
17 finden Sie die Position im Menü.
D
20
Sprache
Deutsch
Name des Mobilteils
DC601
Klingelton
7
Ruftonlautstärke
5
Verstärker-Speicher
Aus
Direktannahme
Ein
Recall Flash-Zeit
100 ms
Wählmodus
Ton
PIN-Code
0000
Wartung/Garantie
14. Wartung/Garantie
Wartung
•
Reinigen Sie die Oberfläche des Produkts mit einem weichen, flusenfreien
Tuch
•
Niemals Reinigungsmittel oder Lösungen verwenden
Garantie
SWITEL-Geräte werden gemäß neuester Produktionsmethoden hergestellt
und geprüft. Die Nutzung sorgfältig ausgewählten Materials und
hochentwickelter Technologien gewähren eine störungsfreie Funktion und
eine lange Betriebsdauer. Die Garantiebedingungen gelten nicht, wenn ein
Fehler des Telefonnetzwerkbetreibers oder jeglichen zwischengeschalteten
Nebenstellen-Erweiterungssystems die Ursache für die Fehlfunktion des
Geräts darstellt. Die Garantiebedingungen sind nicht auf wiederaufladbare
Batterien oder in den Produkten verwendete Akkusätze anwendbar. Der
Garantiezeitraum beträgt 24 Monate ab Kaufdatum.
Alle Unzulänglichkeiten, die aus Material- oder Produktionsfehlern
resultieren und während der Garantiezeit entstehen, werden kostenlos
beseitigt. Das Anspruchsrecht gemäß der Garantiebedingungen wird
nach Intervention des Käufers oder dritter Parteien annulliert. Schäden,
die das Ergebnis unsachgemäßer Handhabung oder Betriebs, inkorrekter
Platzierung oder Lagerung, unsachgemäßen Anschlusses oder Installation,
höherer Gewalt oder anderer externer Einflüsse sind, sind durch die
Garantiebedingungen nicht abgedeckt. Im Beschwerdefall behalten wir
uns das Recht vor, defekte Teile zu reparieren oder zu ersetzen oder ein
Ersatzgerät zu liefern. Ersatzteile oder -geräte gehen in unser Eigentum
über. Erstattungsrechte sind im Fall der Beschädigung ausgeschlossen,
wenn keine Beweise der Absicht oder groben Fahrlässigkeit seitens
des Herstellers vorliegen.
Wenn Ihr Gerät im Verlauf des Garantiezeitraums Anzeichen eines Defekts
aufweist, bringen Sie es bitte zusammen mit dem Kaufbeleg zu Ihrem
Händler zurück, bei dem Sie das SWITEL-Gerät gekauft haben. Alle Rechte
auf Ansprüche gemäß der Garantiebedingungen in Übereinstimmung mit
dieser Vereinbarung müssen ausschließlich gegenüber Ihrem Händler
geltend gemacht werden. Zwei Jahre nach dem Kauf und der Übertragung
unserer Produkte können Ansprüche gemäß der Garantiebedingungen
nicht mehr geltend gemacht werden.
Konformitätserklärung
Dieses Gerät erfüllt die in der folgenden
EU-Richtlinie aufgestellten Anforderungen: 2005/32/EC, 1275/2008/EC,
278/2009/EC, 2009/125/EC/EuP
1999/5 EU-Richtlinie über Funkanlagen und
Telekommunikationsendeinrichtungen und die gegenseitige Anerkennung
ihrer Konformität. Die Konformität mit der oben genannten Richtlinie
wird durch das CE-Symbol auf dem Gerät bestätigt. Um die vollständige
Konformitätserklärung anzusehen, wenden Sie sich bitte an den auf
unserer Website www.switel.com. kostenlos verfügbaren Download.
D
21
Stichwortverzeichnis
15. Stichwortverzeichnis
D
22
A
Anruf annehmen, 9
Anruf beenden, 9
Anrufliste, 14
Anschluss der Basisstation, 5
Anzeige von Einträgen in der
Anrufliste, 14
Aufladen der Batterien, 5
B
Bearbeitung von
Telefonbucheinträgen, 13
Bedienung des Telefons, 7
Strahlungsreduzierung (ECOmode), 5
D
Datum/Zeit, 11
Direktannahme, 12
E
Eingabe eines Namens, 13
Einsetzen der Batterien, 5
Einstellung der Flash-zeit, 17
F
Freisprecheinrichtung, 10
G
Garantie, 21
I
Ihr Telefon DC601 und Basisstation , 6
Inbetriebnahme, 5
Interne Weiterleitung von externen
Anrufen, 15
K
Kettenwahl, 10
Konferenzgespräche, 15
Konformitätserklärung, 21
Kurzwahl, 9
L
Lautstärke der Freisprecheinrichtung
regulieren, 10
Löschen von Telefonbucheinträgen, 13
Löschung aller Einträge in der
Anrufliste, 14
Löschung eines einzelnen
Eintrags in der Anrufliste, 14
Löschung von Einträgen in der
Anrufliste,14
M
Mobilteil-Abmeldung, 16
Mobilteil-Anmeldung, 15
N
Name des Mobilteils, 11
Navigation im Menü, 8
Nebenstellenanlagen, 17
P
Prüfen Sie den Inhalt der Verpackung, 5
R
Regulierung der Hörerlautstärke, 10
R-Taste in Nebenstellenanlagen, 17
R-Taste und ergänzende Services, 17
Rufton ein/aus, 10
Ruftonlautstärke des Mobilteils, 11
Ruftonlautstärke der Basisstation, 11
Ruftonmelodie der Basisstation, 11
Ruftonmelodie des Mobilteils, 11
S
Sicherheitsinformationen, 4
Speichern eines Kurzwahleintrags, 8
Speicherung von Einträgen aus der
Anrufliste im Telefonbuch, 14
Sprache, 12
Sprechzeitanzeige, 10
Stummschalten des Mikrofons im
Handset, 10
Symbole in der Anzeige, 7
T
Tätigen eines Anrufs, 9
Tätigen interner Anrufe, 15
Tastatursperre, 10
Technische Eigenschaften, 19
Telefonbuch, 13
Telefonbucheinträge erstellen, 13
Telefonieren, 9
Telefonnummern aus dem Telefonbuch
wählen, 9
V
Verpasste Anrufe zurückrufen, 9
Verstärker-Speicher, 12
Verstärkung der Hörerlautstärke, 10
Verwendung des Menüs, 11
Verwendung zusätzlicher Mobilteile, 16
W
Wählmodus, 17
Wählpause, 17
Wahlwiederholung, 9
Wartung, 21
Wenn Probleme auftreten, 18
Werkseinstellungen, 20
Z
Zurückstellung der
Standardeinstellungen, 17
Table des matières
1
2
3
4
5
6
7
8
9
10
11
12
13
14
15
Consignes de sécurité . . . . . . . . . . . . . . . . .24
Bien commencer . . . . . . . . . . . . . . . . . . . . .25
Votre téléphone DC601 et son combiné. . . . .26
Fonctionnement du téléphone . . . . . . . . . . . .27
Téléphoner . . . . . . . . . . . . . . . . . . . . . . . . .29
Utilisation du Menu . . . . . . . . . . . . . . . . . . .31
Annuaire . . . . . . . . . . . . . . . . . . . . . . . . . . .33
Liste d’appels . . . . . . . . . . . . . . . . . . . . . . .34
Utilisation de combinés supplémentaire . . . . .35
Autocommutateurs privés . . . . . . . . . . . . . . .37
En cas de problème . . . . . . . . . . . . . . . . . . .38
Caractèristiques techniques . . . . . . . . . . . . .39
Règlages usine . . . . . . . . . . . . . . . . . . . . . .40
Entretien/Garantie . . . . . . . . . . . . . . . . . . . .41
Index . . . . . . . . . . . . . . . . . . . . . . . . . . . . . .42
F
23
Consignes de sécurité
1
Consignes de sécurité
Veuillez lire attentivement ce manuel d’instruction.
Fonction prévue
Le téléphone est conçu pour être utilisé sur un réseau téléphonique public.
Il ne peut être utilisé à d’autres fins. Toute modification ou adaptation ne
sera autorisée. N’ouvrez en aucun cas l’appareil ou ne procédez à aucune
réparation.
Emplacement de l’installation
Évitez toute exposition excessive à la fumée, la poussière, les vibrations,
les substances chimiques, l’humidité, la chaleur et les rayons du soleil.
Alimentation
Avertissement : N’utilisez que la fiche d’adaptation fournie,
d’autres alimentations risquant d’endommager le téléphone.
Veillez à ce que l’accès à la fiche d’adaptation ne soit pas
obstruée par un meuble ou autre.
F
24
Panne d’alimentation
Ce téléphone ne peut être utilisé pour effectuer des appels en cas de
panne d’alimentation. Des branchements alternatifs doivent être effectués
pour permettre l’accès aux services d’urgence.
Piles rechargeables
Ne jetez pas les piles au feu ou ne les plongez pas dans l’eau.
Compatibilité de l’audioprothèse
Le téléphone est compatible avec la plupart des audioprothèses du
marché. Au vu toutefois du grand nombre de prothèses audio disponibles,
il ne nous impossible de garantir que l’absence de panne avec chacun
des modèles.
Avertissement : Ce téléphone est capable de produire des
niveaux de volume très élevés lorsque la fonction « Boost » est
activée et la commande volume est réglée sur le maximum.
Il convient de prêter une attention particulière lors du partage
du combiné entre plusieurs utilisateurs en écoute normale et
ceux utilisant une prothèse audio.
Appareil médical
N’utilisez PAS le téléphone à proximité d’appareils médicaux de soins
intensifs/d’urgence; si vous utilisez un pacemaker pendant une tempête.
Mise au rebut
Vous êtes tenu de jeter tous les consommables
conformément aux réglementations applicables. Le
symbole figurant sur le téléphone indique que l’appareil
électronique et électrique et les piles usagés ne doivent
pas être jetés avec les déchets domestiques.
Les appareils électriques et électroniques doivent être
jetés dans des points de ramassage installés par les
autorités en charge de la gestion des déchets.
Les piles doivent être jetées sur le point de vente ou dans
les points de ramassage installés par les autorités en
charge de la gestion des déchets.
Les matériaux d’emballage doivent être jetés
conformément aux réglementations locales.
Bien commencer
2
Bien commencer
Consigne de sécurité
Avertissement : Il est primordial de lire les consignes de sécurité figurant
dans le Chapitre 1 avant de préparer le téléphone à son utilisation.
Insertion des piles
Insérez les deux piles rechargeables AAA 1,2 V 800 mAh NiMH fournies,
dans le compartiment du combiné prévu à cet effet. Veillez à respecter les
symboles « + » et « - » lors de l’insertion des piles. Fermez le cache du
compartiment à piles.
Vérifiez le contenu de l’emballage
L’emballage comprend :
Contenu
DC601
DC602
DC603
DC604
Socle
1
1
1
1
Chargeur
0
1
2
3
Combiné sans fil
1
2
3
4
Cache de pile
1
2
3
4
Fiche d’adaptation
1
2
3
4
Câble de branchement du téléphone
1
1
1
1
Piles rechargeables AAA
1,2 V 800 mAh NiMH
2
4
6
8
Manuel d’utilisation
1
1
1
1
Branchement du socle
Connectez le socle comme indiqué sur le schéma. Pour des raisons de
sécurité, veillez à n’utiliser que la fiche d’adaptation ainsi que le câble de
branchement fournis.
7YPZLYtZLH\
7YPZLKLYHJJVYKLTLU[[tStWOVUPX\L
Chargement des piles
Placez le combiné sur le socle pour le charger au minimum 15 heures
avant sa première utilisation.
Autocommutateurs privés
Les informations figurant sur la Page 37 traitent de l’installation du
téléphone sur un autocommutateur privé.
Réduction du rayonnement (mode ECO)
En mode Veille, la radiation est sensiblement moindre en comparaison aux
téléphones sans fil DECT standard lorsque le combiné se trouve sur son
socle.
Puissance absorbée
Puissance absorbée de la station de base :
- en mode de fonctionnement (disponible/conversation) : env. 0,87 W/1,36 W
- pendant le chargement du combiné : env. 2,15 W.
Sans charge, le courant d’alimentation à découpage entrant s‘élève à
env. 0,2 W. Le rendement moyen est d’env. 67,3 %.
Puissance absorbée de la station de chargement :
- sans le combiné : env. 0,32 W
- pendant le chargement du combiné : env. 1,7 W.
Sans charge, le courant d’alimentation à découpage entrant s‘élève à
env. 0,32 W. Le rendement moyen est d’env. 44 %.
F
25
Votre téléphone DC601 et son combiné
3
Votre téléphone DC601 et son combiné
Diode d’appel entrant
Mémoire 1
Boost
Volume bas/haut
Mémoire 2
Affichage
Up/Rappel automatique
Menu/OK/Rappel
Silence/Supprimer
Appel externe/Mains libres
*/ Sonnerie activée/
désactivée
Pause (appuyez
longuement sur 0)
Annuaire téléphonique
Interphone
Terminer l’appel
Bas/Liste d’appels
Clavier alphanumérique
#/Verrouillage clavier
F
Micro
Rechercher le combine
Chargement en cours/Ligne
occupée/Enregistrement)
26
Fonctionnement du téléphone
4
Fonctionnement du téléphone
Affichage et description des séquences de fonctionnement.
Icônes apparaissant à l’écran
Icône
Description
Saisie de chiffres ou de letters
Mode Annuaire
Appuyer sur le bouton affiché, un bref
instant
État de la pile
2x
Appuyer sur le bouton affiché, deux
fois brièvement
Verrouillage clavier activé
2 sec
Appuyer sur le bouton affiché pendant
2 secondes
Appuyez et enfoncez
Appuyez sur le bouton affiché et
maintenez-le enfoncé
Boost du volume du récepteur activé
Release
Relâchez le bouton affiché
Le micro du combiné est silencieux
Sonneries de combiné
Vous avez reçu de nouveaux appels
Sonneries de socle
Une fois stable, ceci indique que le combiné est dans la
portée du socle ou station de base. S’il clignote, ceci
indique que le combiné est hors de portée du socle.
Bouton appel externe
Terminer un appel et/ou revenir sur
veille
VOLUME 1 ou
Sonnerie désactivée
Mode mains libres
Appel en cours
Appel interne en cours
Message en attente
Texte ou icône sur l’écran
F
27
Fonctionnement du téléphone
Navigation dans le menu
L’ensemble des fonctions du combiné sont accessibles via le menu.
Veuillez vous reporter à la section « Utilisation du menu » figurant sur la
page 29 pour en savoir plus sur la manière d’accéder à chaque fonction.
L’ensemble des descriptions figurant dans le manuel d’utilisation sont
valables si le combiné est en mode Veille.
Créer des entrées d’annuaire - exemple
Cet exemple traite de la navigation et de la création d’entrées dans
l’annuaire. Veuillez suivre la procédure indiquée dans l’exemple pour
l’ensemble des réglages.
2 sec
Saisir le nom (12 lettres au maximum)
et confirmer
Ouvrir le menu principal
ou
ou
Sélectionner la fonction requise
Ouvrez la fonction
ou
2 sec M1 ou M2
Ouvrir le mode Ajouter une entrée en
numérotation rapide
Saisir le nom (12 lettres au maximum)
et confirmer
Saisir des chiffres ou des lettres à l’aide des touches
adéquates
Saisir le numéro de téléphone (24
chiffres au maximum) et confirmer
Annuler et revenir au mode Veille
28
Mémorisation d’une entrée en numérotation rapide
Sélectionner le paramètre requis
Confirmer les entrées
F
Saisir le numéro de téléphone (24
chiffres au maximum) et confirmer
Sélectionner le menu secondaire requis
Ouvrer le menu secondaire
Ouvrir le mode ajouter une entrée
d’annuaire
Tout processus est automatiquement annulé en l’absence de courant dans
un délai de 20 secondes. Le combine repassera en mode veille.
Téléphoner
5
Rappeler les appels en absence
Votre telephone mémorise les 30 derniers appels entrants dans la liste
d’appels
Téléphoner
Effectuer un appel
Saisir le numéro de téléphone (24
chiffres au maximum)
En cas d’entrée erronée, appuyer
pour supprimer le dernier chiffre
Composer le numéro de téléphone
ou
Il est également possible d’appuyer sur le bouton d’appel externe pour
obtenir la tonalité d’appel. Les numéros saisis seront automatiquement
composés. Il n’est pas possible de corriger individuellement les numéros
erronés à l’aide de cette procédure de numérotation.
Terminer l’appel
ou
Prendre un appel
,
ou
ou
Prendre l’appel
Recomposition
Votre téléphone mémorise les 3 derniers numéros de téléphone composés
(25 numéros chacun).
,
ou
Sélectionner une entrée et composer
le numéro
Composer les numéros de téléphone à partir de l’annuaire
Des numéros de téléphone doivent être mémorisés dans l’annuaire. Voir la
page 31. Votre téléphone peut stocker jusqu’à 50 entrées de nom et de
numéro dans l’annuaire.
Ouvrir l’annuaire
ou
Terminer un appel
,
Ouvrir la liste d’appels
,
ou
Sélectionner une entrée et composer
le numéro
Numérotation rapide
Les numéros de téléphone ont dû être mémorisés comme numéros en
numérotation rapide. Voir la page 28.
M1 ou M2
ou
Appuyer sur le bouton de
numérotation rapide
Composer le numéro
Ouvrir la liste de recomposition
F
,
ou
Sélectionner une entrée et composer
le numéro
29
Téléphoner
Numérotation en chaîne
Cette fonction est utilisée pour les services téléphoniques complexes,
à savoir les procédures de carte téléphonique ou bancaire. Plusieurs
numéros mémorisés dans l’annuaire peuvent être composés à la suite dès
lors qu’une connexion a été établie. Il est également possible d’associer
les numéros de l’annuaire aux numéros saisis manuellement. Les
numéros mémorisés dans l’annuaire peuvent être associés et transmis si
nécessaire.
Ouvrir l’annuaire dès lors qu’une connexion a été
établie
ou
,
ou
Sélectionner une entrée de l’annuaire et
transmettre le numéro
Réglage du volume du récepteur
Le volume du récepteur de votre DC601 est plus élevé que celui d’un
téléphone standard. Augmentez ou baissez et relâchez pour chaque
niveau de volume.
Pendant un appel, réglez le niveau à l’aide de
l’interrupteur latéral
Booster le volume du récepteur
Pendant un appel, vous pouvez augmenter l’intensité de chaque niveau de
volume en appuyant sur le
bouton.
Appuyez sur le bouton, une icône clignote sur
l’écran
F
Mains libres
Utilisez le mode Mains libres pour écouter l’appelant via le haut-parleur
2x
Activez le mode Mains libres
Désactivez le mode Mains libres
30
Réglage du volume du kit mains libres
Le mode mains libres compte 5 niveaux de volume. La fonction « Boost »
n’est pas disponible en mode mains libres.
Pendant un appel, réglez le niveau à l’aide de
l’interrupteur latéral
Affichage du temps de conversation
La durée de chaque appel s’affiche en minutes et en secondes pendant
l’appel.
Coupez le son du micro du combiné
Le micro du combine peut être active ou désactivé lors d’une conversation
téléphonique lorsque vous êtes en mode mains libres ou combiné.
, MUET,
Coupez le micro (Silencieux).
, SONORE
Activez le micro
Sonnerie activée/désactivée
Vous pouvez activer ou désactiver la sonnerie.
2 sec
Désactive la sonnerie
2 sec
Active la sonnerie
Verrouillage clavier
Il est possible de répondre aux appels normalement même lorsque le
clavier est verrouillé.
2 sec
Verrouille le clavier
2 sec
Déverrouille le clavier
Utilisation du Menu
6. Utilisation du Menu
Nom du combiné
Vous pouvez personnaliser votre combiné en le nommant (12 lettres au
maximum)
ou
Ouvrir le Menu, sélectionner « COMB NOM »
,
Supprimer le nom actuel
Saisir un nouveau nom et confirmer
,
Date/Heure
,
or
Ouvrir le Menu, sélectionner « DATE/HEURE »
,
,
Saisir l’année et confirmer
,
Saisir le mois et confirmer
,
Saisir le jour et confirmer
,
Saisir les heures (24 heures) et confirmer
.
Saisir les minutes et confirmer
Mélodie de sonnerie de combiné
9 mélodies de sonnerie sont disponibles.
,
ou
MELODIE 7
ou
,
,
Ouvrir le Menu, sélectionner « COMBINE SON »
La configuration actuelle s’affiche
Sélectionner et confirmer une mélodie de
sonnerie
Volume de sonnerie de combiné
5 niveaux de volume de sonnerie sont disponibles et OFF (Silence).
,
ou
,
VOLUME 5
Ouvrir le Menu, sélectionner « COMB VOL SON »
La configuration actuelle s’affiche
Sélectionner et confirmer un volume de mélodie
de sonnerie ou « OFF »
Mélodie de sonnerie du socle
9 mélodies de sonnerie sont disponibles.
et
,
,
ou
,
MELODIE 8
Ouvrir le Menu, sélectionner ‘BASE SON’
La configuration actuelle s’affiche
Sélectionner et confirmer une mélodie de
sonnerie
Volume de sonnerie du socle
5 niveaux de volume de sonnerie sont disponibles et OFF (Silence).
ou
,
,
ou
,
VOLUME 5
et
Ouvrir le Menu, sélectionner « BASE SON VOL »
La configuration actuelle s’affiche
Sélectionner et confirmer un volume de mélodie
de sonnerie
,
Boost Mem
bouton, votre
Lorsque cette fonction est sur « ON » , si vous utilisez le
combiné retiendra et utilisera votre dernier réglage Boost pour chaque
appel.
,
ou
OFF
ou
,
Ouvrir le Menu, sélectionner « MEMOR VOL »
F
La configuration actuelle s’affiche
,
Sélectionner et confirmer « ON » ou « OFF »
31
Utilisation du Menu
Conversation auto
Si cette fonctionnalité est sur ON, votre combiné répondra
automatiquement à l’appel lorsque vous décrochez le combiné de son
socle. Il s’agit de la configuration par défaut.
,
ou
,
ON
Ouvrir le Menu, sélectionner
«DECROCH AUT»
La configuration actuelle s’affiche
ou
Sélectionner et confirmer « ON » ou
« OFF »
,
Langue
5 langues sont disponibles, l’anglais, l’allemand, le français, l’espagnol et
l’italien.
ou
DEUTSCH
ou
F
32
,
,
Ouvrir le Menu, sélectionner
« LANGUE »
La configuration actuelle s’affiche
Sélectionner et confirmer une langue
Annuaire
Modifier des entrées d’annuaire
7. Annuaire
Cinquante noms et numéros de téléphone peuvent être mémorisés dans
,
l’annuaire avec un maximum de 12 lettres et 24 chiffres pour chaque
entrée.
ou
* Toujours saisir le code de numérotation de zone avec chaque entrée
2 sec
d’annuaire téléphonique.
* Les entrées de l’annuaire sont classées dans l’ordre alphabétique. Pour
aller rapidement sur une entrée d’annuaire, saisissez la première lettre
de l’entrée correspondante.
Saisie d’un nom
Les touches de chiffres sont également composées de lettres pour la saisie Suppression d’entrées d’annuaire
des lettres respectives. Si vous appuyez sur la lettre respective, le nombre
de fois nécessaire, vous activez l’écriture des lettres majuscules et des
,
chiffres.
ou
Espace
, EFFACER?
Supprimer
ou
Pour saisir la même lettre deux fois, appuyez sur le bouton pour saisir la
lettre. Patientez jusqu’à ce que le curseur avance d’une place. Saisir la
lettre à nouveau.
Ouvrir l’annuaire
Sélectionnez une entrée d’annuaire
Activer le processus de modification
Saisir le nom (12 lettres) et confirmer
Modifier le numéro de téléphone (24
chiffres) et confirmer
Ouvrir l’annuaire
Sélectionnez une entrée d’annuaire
Activer le processus de suppression
Confirmer la suppression ou Annuler
Créer des entrées d’annuaire
2 sec
,
Ouvrir le mode ajouter une entrée
d’annuaire
Saisir le nom (12 lettres) et confirmer
F
Saisir le numéro de téléphone (24
chiffres) et confirmer
33
Liste d’appels
8. Liste d’appels
La liste d’appels de votre téléphone fonctionne avec le service d’affichage
du numéro de l’appelant (CLIP1) fourni par votre fournisseur de réseau
téléphonique. Veuillez contact votre fournisseur de réseau pour contracter
ce service.
Le numéro de l’appelant (ou le nom s’il est stocké dans l’annuaire)
s’affiche à l’écran lorsque le téléphone sonne. Si l’appelant a retenu leur
numéro de téléphone, un message s’affiche à l’écran. Le numéro de
téléphone n’est pas affiché et ne sera pas stocké dans la liste d’appels.
30 appels entrants au total, avec 12 lettres au maximum pour le nom et
23 chiffres pour le numéro peuvent être enregistrés dans la liste d’appels.
Le
clignotant indique de nouveaux appels dans la liste d’appels.
Affichage des entrées de la liste d’appels
Ouvre la liste d’appels sur l’entrée la
plus récente
ou
1x - 2x
Mémorisation des entrées de la liste d’appels dans l’annuaire
Un numéro de téléphone mémorisé dans la liste d’appels peut être
directement mémorisé dans l’annuaire
Ouvre la liste d’appels sur l’entrée la
plus récente
Sélectionnez une entrée
ou
Ouvrir l’annuaire
,
Saisir le nom et confirmer
,
Saisir le numéro et confirmer
Suppression des entrées de la liste d’appels
Suppression une entrée de la liste d’appels
Ouvre la liste d’appels sur l’entrée la
plus récente
Sélectionnez une entrée
Pour afficher des informations
complémentaires
ou
Sélectionnez une entrée
, EFFACER?
Activer le processus de suppression
ou
Confirmer ou Annuler
Suppression de toutes les entrées de la liste d’appels
Ouvre la liste d’appels sur l’entrée la
plus récente
F
2 sec
ou
1
CLIP: Calling Line Identification Presentation = Affichage du numéro d’appel
d’un correspondant.
34
, EFFAC TOUT?
Activer le processus de suppression
Confirmer ou Annuler
Utilisation de combinés supplémentaires
9. Utilisation de combinés supplémentaires
Effectuer des appels internes
Au moins deux combinés (CB1, CB2) doivent être enregistrés sur la base
ou socle afin d’effectuer des appels internes gratuitement.
CB1:
,
, eg 2
Composez le numéro d’appel interne du combiné
requis
CB2:
Accepter l’appel interne sur l’autre combiné
CB1/CB2:
Terminer l’appel interne
Transfert des appels externes en interne
CB1:
,
, eg 2
Pendant un appel externe, composez le numéro
du combiné requis
CB2:
Accepter l’appel interne sur l’autre combiné
CB1:
L’appel externe est transféré sur l’autre combiné
Si le combiné appelé ne répond pas, vous pouvez prendre le rappel en
appuyant sur le bouton INTERPHONE.
Appels en conférence
Vous pouvez organiser un appel en conférence entre 1 appelant externe et
2 appelants internes.
CB1:
,
, eg 2
Pendant un appel externe, composez le numéro
du combiné requis
CB2:
Accepter l’appel interne sur l’autre combiné
CB1: 2 sec
Active l’appel en conférence
CB1/CB2:
Mettre l’appel externe en attente
CB1/CB2:
Terminer l’appel en conférence
Enregistrement du combiné
Vous n’avez qu’à enregistrer un combiné qui a été désinscrit de la base ou
si vous en avez acheté un nouveau.
Les combinés neufs doivent être entièrement chargés avant de les
enregistrer.
Sur la base
10 sec
Activer le mode enregistrement
,
Sur le combiné
,
ou
,
Ouvrir le Menu, sélectionner « ANNONCER »
Saisir le numéro de poste (1,2,3 ou 4)
,
F
Saisir le code PIN et confirmer
,
35
Utilisation de combinés supplémentaires
Désinscription du combiné
,
F
36
ou
Ouvrir le Menu, sélectionner « SUP
COMBINE »
,
,
,
Saisir le code PIN et confirmer
SUP COMBINE?,
,
Saisir le numéro de combiné et
confirmer
Autocommutateurs privés
10. Autocommutateurs privés
Bouton R et autocommutateurs privés
Si le téléphone est connecté à un autocommutateur privé, les fonctions
telles que le transfert d’appels et le rappel automatique peuvent être
utilisées via le bouton R. Veuillez vous reporter au manuel d’utilisation
fourni avec votre autocommutateur privé afin de déterminer le temps
de rappel (Flash) qui doit être configuré pour utiliser ces fonctions. Le
revendeur de votre commutateur peut vous fournir des informations sur la
manière dont le téléphone fonctionnera avec le commutateur.
Configurer le temps de rappel
Deux délais de rappel sont disponibles. Court 100 ms et Long 300 ms.
,
ou
COURT
ou
,
Ouvrir le Menu, sélectionner « RAPPEL »
Mode Numérotation
Deux modes de numérotation sont disponibles, Tone (Tonalité) et Pulse
(Impulsion). Ne modifiez ce paramètre que si le revendeur de votre
autocommutateur privé vous l’a recommandé.
,
ou
Ouvrir le Menu, sélectionner « MODE DE
NUM »
,
La configuration actuelle s’affiche
,
Sélectionner et confirmer « COURT » ou « LONG »
Pause de numérotation
En cas d’autocommutateur privé, il est nécessaire de saisir un code
d’accès pour obtenir une ligne extérieure avec la tonalité de numérotation
correspondante. Si vous utilisez d’anciens autocommutateurs privés, il ne
faut attendre qu’un court instant pour entendre la tonalité de numérotation.
Notamment dans le cas des autocommutateurs privés, il est possible
d’introduire une pause de numérotation après le numéro pour la ligne
réseau de manière que le numéro puisse être composé dans un processus
continu sans avoir à attendre la tonalité.
2 sec
Bouton R et services supplémentaires
Votre téléphone prend en charge les services supplémentaires fournis par
votre fournisseur de réseau, tels que le double appel, la mise en attente
et les appels en conférence. Les services supplémentaires peuvent être
utilisés en association avec le bouton R. Veuillez contacter votre fournisseur
de services téléphoniques pour l’activation des services supplémentaires et
quant au délai de rappel utilisé.
Introduire une pause de numérotation. « P »
s’affiche à l’écran.
FREQUENCE
ou
La configuration actuelle s’affiche
Sélectionner et confirmer «FREQUENCE » ou
« IMPULSION »
,
Revenir aux réglages par défaut
Vous pouvez reconfigurer votre combiné par défaut. L’annuaire, les appels
et les listes de rappels ne sont pas supprimés lors de la reconfiguration du
combiné.
,
ou
,
Ouvrir le Menu, sélectionner « RESET »
,
,
Saisir le code PIN et confirmer
F
La pause peut également être saisie avec le numéro de téléphone dans
l’annuaire.
37
En cas de problème
11. En cas de problème
Service d’assistance
Si vous rencontrez des problèmes avec votre téléphone, veuillez
d’abord vous reporter aux informations suivantes. En cas de problèmes
techniques, vous pouvez également contacter service d’assistance, tél..
0900 00 1675 en Suisse (frais Suiss à la date d’impression de ce manuel:
CHF 2.60/min). En cas de réclamations conforme aux conditions de la
garantie, veuillez contacter votre revendeur. La garantie est valable deux
ans.
F
38
Problème
Solution
Aucun appel n’est possible
La ligne téléphonique n’est pas
correctement connectée ou est
défectueuse. N’utilisez que le câble
de branchement fourni.
Testez la ligne/prise téléphonique en
utilisant un autre téléphone
L’adaptateur secteur n’est pas
branché/allumé ou il y a une panne
d’alimentation.
Veillez à vous assurer que vous vous
trouvez dans une portée du poste
(300 m en extérieur et 50 m en
intérieur dans des conditions idéales)
mpossible d’appeler
Le verrouillage du clavier est-il
activé ? Appuyez sur et maintenez
la touche
enfoncée pour
déverrouiller le clavier.
La connexion est perturbée ou
coupée
Veillez à vous assurer que vous vous
trouvez dans une portée du poste
(300 m en extérieur et 50 m en
intérieur dans des conditions idéales)
Le poste d’accès se trouve dans un
mauvais emplacement
Le combine s’éteint tout seul
Placez le combiné dans le poste
d’accès pour le charger pendant 15
heures.
Remplacez les piles rechargeables.
Le système ne répond plus ou son
état n’est pas spécifié
Réinitialiser toutes les fonctions en
configurant les valeurs par défaut.
Voir la page 37.
L’affichage du numéro de l’appelant
(CLIP) ne fonctionne pas
Vérifiez que vous disposez de ce
service sur votre ligne téléphonique.
Veuillez appeler votre fournisseur de
réseau téléphonique.
L’appelant a masqué son numéro de
téléphone.
Le combiné ne sonne pas
Assurez-vous que la sonnerie ne soit
pas désactivée. Voir les pages 30
et 31.
Bruit assourdissant de la radio, TV ou
de l’ordinateur
Nous vous recommandons de
laisser une distance de 1 mètre
entre les appareils électriques et les
téléphones portables.
Caractèristiques techniques
12. Caractèristiques techniques
Caractéristique
Valuer
Standard
DECT1 GAP2
Alimentation en courant (base)
Entrée: 230VAC 50Hz 33mA
Sortie: 6VDC 300mA
Alimentation en courant
chargeur)
Entrée: 230VAC 50Hz 30mA
Sortie: 7,5VDC 100mA
Portée
Extérieur env. 300m
Intérieur env. 50m
Mode veille
Jusqu’ à 100 h
Durée max. de communication
Jusqu’ à 10 h
Pack de piles rechargeables
AAA 1.2V 800mAh NiMH
Systéme de numérotation
Tonalité (DTMF)
Impulsions (IWV)
Température ambiante
autorisée
0oC à 45oC
Humidité atmosphérique
relative autorisée
20% à 80%
Fonction de flash
100, 300 ms
F
1
DECT: Digital Enhanced Cordless Telecommunication = Standard pour les
téléphones sans fil.
2 GAP: Generic Access Profile = Standard pour l’action conjointe de combinés et
de bases de fabricants différents.
39
Règlages usine
13. Règlages usine
Combinè
Les paramètrages en using sont rètablis via le menu. La page 37 vous
donnera la position dons le menu.
F
40
Langue
Deutsch
Nom du combiné
DC601
Melodie
7
Vol. sonnerie
5
Boost Mem.
Dèsactivè
Conversation auto
Activer
Temps flash
100 ms
Mode de num.
Tonalitè
PIN-Système
0000
Entretien/Garantie
14. Entretien/Garantie
Entretien
•
Nettoyez les surfaces du produit à l’aide d’un chiffon doux sans peluches
•
N’utilisez jamais agents nettoyants ou de solvants
Garantie
Les appareils SWITEL sont conçus et testés conformément aux techniques de
production les plus récentes. L’utilisation de matériaux choisis avec minutie et
technologies sophistiquées garantit un fonctionnement sans problèmes et un
cycle de vie prolongé. Les termes de la garantie ne s’appliquent pas lorsque
la cause du dysfonctionnement de l’appareil est dû à l’opérateur du réseau
téléphonique ou à tout système d’extension d’autocommutateur privé interposé.
Les termes de la garantie ne s’appliquent pas aux piles rechargeables ou aux
packs d’accus utilisés dans les appareils. La période de garantie est de 24
mois à compter de la date d’achat.
Tous les désagréments résultant de défauts des matériaux de fabrication
se produisant pendant la période de garantie seront résolus gratuitement.
Les droits de réclamation conformément aux termes de la garantie sont
annulés après l’intervention par l’acheteur ou des tierces parties. Les
dommages résultant d’une mauvaise manipulation ou fonctionnement,
d’un positionnement ou d’un stockage inappropriés, un branchement ou
une installation déficients, les impondérables ou tout autre évènement
extérieur ne sont pas couverts par les termes de la garantie. En cas de
réclamations, nous nous réservons le droit de réparer ou remplacer les
parties défectueuses ou de fournir un appareil de rechange. Les appareils
ou les pièces de rechange sont de notre propriété. Les droits à une
compensation en cas de dommage sont exclus en l’absence de preuve ou
d’intention ou de négligence flagrante par le fabricant.
Si votre appareil montre des signes de défaillance pendant la période
de garantie, veuillez le renvoyer au point de vente dans lequel vous avez
acheté l’appareil SWITEL accompagné du reçu. Les droits de réclamation
conformément à la garantie dans le cadre de cet accord doivent
exclusivement certifiés pour ce qui est du point de vente. Deux ans après
l’achat et le transfert de nos produits, les réclamations dans la garantie ne
peuvent plus être présentées.
Attestation de conformité
Cet appareil est conforme aux normes stipulées dans la directive
européenne: 2005/32/EC, 1275/2008/EC, 278/2009/EC, 2009/125/EC/EuP
La directive 1999/5 EU sur les appareils radio et les équipements de
télécommunications et la reconnaissance mutuelle de leur conformité. La
conformité avec la directive susmentionnée est confirmée par le symbole
CE figurant sur l’appareil. Pour lire l’attestation de conformité dans son
intégralité, veuillez vous reporter au téléchargement gratuit sur notre site
Internet
www.switel.com.
F
41
Index
15. Index
F
42
A
Affichage des entrées de la liste
d’appels, 34
Affichage du temps de conversation, 30
Annuaire, 33
Appels en conférence, 35
Attestation de conformité, 41
Autocommutateurs privés, 37
B
Bien commencer, 25
Boost Mem, 31
Booster le volume du récepteur, 30
Bouton R et autocommutateurs privés, 37
Bouton R et services supplémentaires, 37
Branchement du socle, 25
C
Caractèristiques techniques, 39
Chargement des piles, 25
Composer les numéros de téléphone à
partir de l’annuaire, 29
Configurer le temps de rappel, 37
Consignes de sécurité, 24
Couper le son du micro du combiné, 30
Créer des entrées d’annuaire, 33
D
Date/Heure, 31
Désinscription du combiné, 36
E
Effectuer des appels internes, 35
Effectuer un appel, 29
En cas de problème, 38
Entretien, 41
F
Fonction téléphone, 29
Fonctionnement du téléphone, 27
G
Garantie, 41
I
Icônes apparaissant à l’écran, 27
Inscription du combiné, 35
Insertion des piles, 25
L
Langue, 32
Liste d’appels, 34
M
Mains libres, 30
Mélodie de sonnerie de combiné, 31
Mélodie de sonnerie du socle, 31
Mode Numérotation, 37
Modifier des entrées d’annuaire, 33
N
Naviguer dans le menu, 28
Nom du combiné, 31
Numérotation en chaîne, 30
Numérotation rapide, 29
P
Pause de numérotation, 37
Prendre un appel, 29
R
Rappel des appels en absence, 29
Recomposition, 29
Réduction du rayonnement
(mode ECO), 25
Réglage du bouton volume , 30
Réglage du volume du kit mains libres, 30
Règlages usine, 40
Réglage du volume du kit mains libres, 30
Revenir aux réglages par défaut, 37
S
Saisie d’un nom, 33
Sonnerie activée/désactivée, 30
Stockage des entrées de la liste,
d’appels dans l’annuaire, 31
Suppression d’entrées d’annuaire, 33
Suppression des entrées de la liste
d’appels, 33
Suppression une entrée de la liste
d’appels, 33
T
Terminer un appel, 29
Transfert des appels externes en
interne, 35
U
Utilisation du menu, 31
V
Vérifier le contenu de l’emballage, 25
Verrouillage clavier, 30
Volume de sonnerie de combiné, 31
Volume de sonnerie du socle, 31
Votre téléphone DC601 et son socle, 26
Y
Contenuto
1
2
3
4
5
6
7
8
9
10
11
12
13
14
15
Informazioni relative alla sicurezza. . . . . . . . .44
Per cominciare. . . . . . . . . . . . . . . . . . . . . . .45
Il vostro telefono DC601 e la sua base . . . . .46
Funzionamento del telefono . . . . . . . . . . . . .47
Effettuazione delle chiamate . . . . . . . . . . . . .49
Utilizzo del menù . . . . . . . . . . . . . . . . . . . . .51
Rubrica . . . . . . . . . . . . . . . . . . . . . . . . . . .53
Elenco chiamate . . . . . . . . . . . . . . . . . . . . .54
Utilizzo di micro telefoni addizionali . . . . . . . .55
Private Branch Exchanges (centralini interni) .57
In caso di problemi . . . . . . . . . . . . . . . . . . . .58
Specifiche techniche . . . . . . . . . . . . . . . . . .59
Configurazione iniziale . . . . . . . . . . . . . . . . .60
Manutenzione/garanzia . . . . . . . . . . . . . . . .61
Indice . . . . . . . . . . . . . . . . . . . . . . . . . . . . .62
I
43
Informazioni relative alla sicurezza
1
Informazioni relative alla sicurezza
Si prega di leggere interamente e con attenzione il presente manuale di
istruzioni.
Destinazione d’uso
Questo telefono è adatto per effettuare chiamate telefoniche in una
rete telefonica pubblica. Qualsiasi altro tipo di utilizzo è da considerarsi
improprio. Modifiche o ricostruzioni non autorizzate non sono permesse.
In nessun caso si deve aprire l’apparecchio od effettuare qualsiasi tipo di
riparazione da soli.
Luogo di installazione
Evitare eccessiva esposizione a fumo, polvere, vibrazioni, sostanze
chimiche, umidità, calore e luce solare diretta.
Alimentazione
Attenzione: utilizzare soltanto l’alimentatore a rete fornito
perché qualsiasi altro tipo di alimentazione elettrica può
danneggiare il telefono. Controllare che l’accesso alla spina
dell’alimentatore non sia impedito da mobili od altro del
genere.
I
44
Mancanza di alimentazione elettrica
Questo telefono non può essere utilizzato per effettuare chiamate
telefoniche in caso di black-out. È quindi necessario prevedere soluzioni
alternative per rendere possibile l’accesso ai servizi di emergenza in simili
situazioni.
Batterie ricaricabili
Non gettare le batterie nel fuoco e non immergerle nell’acqua.
Compatibilità con apparecchi acustici
Questo telefono è compatibile con la maggior parte degli apparecchi
acustici presenti sul mercato. Comunque, a causa della grande varietà di
apparecchi acustici disponibili, non è possibile dare alcuna garanzia che il
telefono funzionerà senza problemi con qualsiasi modello.
Attenzione: questo telefono produce i livelli acustici molto
elevati quando la funzione ‘Boost’ è attivata e il controllo di
volume viene messo al massimo. È pertanto necessario fare
estrema attenzione se il microtelefono viene condiviso fra
utilizzatori con normale udito ed altri con apparecchi acustici.
Apparecchiature mediche
NON utilizzare il telefono in vicinanza di apparecchiature mediche di
emergenza o di terapia intensiva, nel caso si sia portatori di pacemaker
oppure durante un temporale.
Smaltimento dell’apparecchio
È necessario smaltire i vari beni di consumo in accordo con le leggi e
i regolamenti legali applicabili. Il simbolo adiacente sul
telefono indica che gli apparecchi elettrici ed elettronici e
le batterie esaurite devono essere smaltiti separatamente
dai rifiuti domestici.
Gli apparecchi elettrici ed elettronici devono essere smaltiti
presso gli adatti punti di raccolta previsti dalle autorità
preposte alla raccolta e alla gestione dei rifiuti pubblici.
Le batterie devono essere smaltite presso il punto di
vendita o presso gli adatti punti di raccolta previsti dalle
autorità preposte alla raccolta e alla gestione dei rifiuti
pubblici.
I materiali di imballaggio devono essere smaltiti in accordo
con i regolamenti locali.
Per cominciare
2
Per cominciare
Note relative alla sicurezza
Attenzione: è essenziale leggere le informazioni relative alla sicurezza
contenuta nel capitolo 1 prima di preparare il telefono per il suo utilizzo.
Inserzione delle batterie
Inserire le 2 batterie ricaricabili tipo AAA 1.2V 800mAh NiMH fornite nel
vano batterie dell’unità portatile. Fare attenzione a rispettare la corretta
polarità osservando i contrassegni di ‘+’ e ‘-’ e posizionare le batterie in
modo corretto. Chiudere il coperchio del vano batterie.
Controllare il contenuto della confezione
La confezione contiene:
Contenuto
DC601
DC602
DC603
DC604
Unità base
1
1
1
1
Stazione di carica con alimentatore
0
1
2
3
Unità portatile
1
2
3
4
Coperchio batteria e
1
2
3
4
Alimentatore a rete
1
2
3
4
Cavo telefonico di collegamento
1
1
1
1
Batterie ricaricabili tipo AAA 1.2V
800mAh NiMH
2
4
6
8
Manuale di istruzioni
1
1
1
1
Collegamento dell’unità base
Collegare l’unità base come illustrato nello schema Per motivi di
sicurezza, utilizzare soltanto l’alimentatore a rete e il cavo telefonico di
collegamento forniti.
7YLZHLSL[[YPJH
7YLZHKPJVSSLNHTLU[V[LSLMVUPJV
Caricamento delle batterie.
Mettere l’unità portatile sulla base per caricare le batterie; è della massima
importanza che la prima volta le batterie vengano caricate per un tempo
minimo di 15 ore.
Private Branch Exchanges (centralini interni)
Le informazioni riportate alla pagina 57 spiegano come installare il vostro
telefono come derivato interno di un centralino.
Funzionamento a basse radiazioni (modo Eco)
Nella modalità di standby, le radiazioni sono ridotte in confronto ai telefoni
DECT cordless standard, quando il ricevitore viene messo sul suo supporto.
Potenza assorbita
La potenza assorbita dalla stazione base ammonta a:
- in servizio (stand-by/conversazione): ca. 0,87 W / ca. 1,36 W
- durante la carica dell'unità mobile: ca. 2,15 W.
Il carico nullo de circuito di alimentazione rete è pari a circa 0,2 W.
L'efficienza media è pari a circa il 67,3 %.
La potenza assorbita dalla stazione di carica ammonta a:
- senza unità mobile: ca. 0,32 W
- durante la carica dell'unità mobile: ca. 1,7 W.
Il carico nullo de circuito di alimentazione rete è pari a circa 0,32 W.
L'efficienza media è pari a circa il 44 %.
I
45
Il vostro telefono DC601 e la sua base
3
Your DC601 telephone and base
Segnalazione luminosa di chiamata entrante
Volume su/giù
Memoria 1
Memoria 2
Boost
Display
Su/Ripetizione ultimo numero formato
Menu/OK/Richiamata
Rubrica
Intercom
Mute/Cancellazione
Fine della chiamata
Chiamata esterna/viva voce
*/Suoneria on/off
Giù/elenco chiamate
Pausa (premere 0 a lungo)
Tastiera alfa numerica
#/Blocco tastiera
Microfono
Ricerca unità portatile
I
In carica/linea occupata/
registrazione
46
Funzionamento del telefono
4
Funzionamento del telefono
Display e spiegazione delle sequenze operative.
Icone sul display
Icona
Descrizione
Introdurre cifre o lettere
Modalità rubrica
Premere brevemente il tasto indicato
Stato batterie
2x
Premere brevemente per due volte il
tasto indicato
Suoneria disabilitata
2 sec
Premere il tasto indicato per 2
secondi.
Premere e tenere premuto
Premere e tenere premuto il tasto
indicato
Rilasciare
Rilasciare il tasto indicato
Modalità mani libere
Chiamata in corso
La funzione di Boost è attiva
Il microfono dell’unità portatile è escluso
Suoneria unità portatile
Sono presenti nuove chiamate
Suoneria unità base
Quando è fissa indica che l’unità portatile si trova all’interno
del raggio di azione massimo dell’unità base. Quando
lampeggia indica che l’unità portatile è fuori dal raggio di
azione massimo dell’unità base.
Tasto di chiamata esterna
Per finire una chiamata e/o ritornare
in standby
VOLUME 1 o
La tastiera è attiva
Testo o icona sul display
Chiamata interna in corso
Messaggi in attesa
I
47
Funzionamento del telefono
Scorrimento del menù
Si può accedere a tutte le funzioni dell’unità portatile attraverso il menù.
Vedere ‘Utilizzo del menù’ a pagina 51 per ulteriori informazioni su come
accedere a ciascuna funzione.
La descrizione di tutte le procedure riportate nel presente manuale di
istruzioni parte dal presupposto che l’unità portatile si trovi nella modalità
Standby.
Creazione di nominativi nella rubrica telefonica - esempio
Questo esempio spiega come scorrere la rubrica e creare nominativi.
Seguire questo esempio per tutte le impostazioni.
2 sec
Introdurre il nome (max. 12 lettere) e
confermare
Introdurre il numero telefonico (max.
24 cifre) e confermare
Aprire il menù principale
o
Selezionare il sotto menù necessario
Aprire il sotto menù
Memorizzazione di un numero in selezione abbreviata
2 sec M1 o M2
o
Selezionare la funzione richiesta
Aprire la funzione
o
Selezionare le impostazioni richieste
Introdurre cifre o lettere utilizzando i tasti relativi
Confermare i dati introdotti
Cancellazione e ritorno alla modalità standby
Ogni processo viene cancellato automaticamente in assenza di input entro
20 secondi. Il ricevitore torna alla modalità di standby.
I
48
Entra nella modalità di aggiunta
nominativi alla rubrica
Entra nella modalità di aggiunta
numeri in selezione abbreviata
Introdurre il nome (max. 12 lettere) e
confermare
Introdurre il numero telefonico (max.
24 cifre) e confermare
Effettuazione delle chiamate
5
Effettuazione delle chiamate
Effettuazione di una chiamata
Riselezione delle chiamate perse
Il vostro telefono memorizza le ultime 30 chiamate entranti nell’elenco
chiamate.
Introdurre il numero telefonico (max.
24 cifre)
In caso di errore, premere per
cancellare l’ultima cifra digitata
Comporre il numero telefonico
o
È anche possibile premere prima il tasto di chiamata esterna per ottenere
il tono di selezione Le cifre introdotte saranno in questo caso composte
immediatamente Non è possibile correggere individualmente eventuali
cifre sbagliate utilizzando questa procedura di selezione.
Apre l’elenco chiamate
o
,
o
Seleziona una chiamata e compone
il numero
Selezione di numeri telefonici dalla rubrica
Devono essere presenti numeri telefonici memorizzati nella rubrica; vedere
pagina 53. Il vostro telefono può memorizzare fino a 50 nomi e numeri
telefonici nella rubrica.
Apre la rubrica
o
,
o
Seleziona una chiamata e compone
il numero
Per terminare una chiamata
Termina la chiamata
o
Per rispondere a una chiamata
,
,
o
Risponde alla chiamata
Ripetizione ultimo numero formato
Il vostro telefono memorizza gli ultimi 3 numeri selezionati (max. 25 cifre
ciascuno).
Apre l’elenco delle ultime chiamate
,
o
Selezione abbreviata
Devono essere stati definiti dei numeri telefonici come numeri in selezione
abbreviata. Vedere pagina 48.
M1 o M2
o
Premere il tasto di selezione
abbreviata che si desidera chiamare
Selezione del numero
I
Seleziona una chiamata e compone
il numero
49
Effettuazione delle chiamate
Selezione a catena
Regolazione del volume viva voce
Sono disponibili cinque livelli di volume per la modalità viva voce. La
Questa caratteristica è utilizzata per accedere a servizi telefonici speciali,
come ad esempio accesso a servizi bancari o procedure relative a
funzione ‘Boost’ non è disponibile in modalità viva voce.
carte telefoniche. Diversi numeri telefonici memorizzati nella rubrica
Durante una chiamata, regolare l’impostazione
possono essere selezionati in successione dopo che è stata stabilita una
con l’interruttore laterale.
connessione. È anche possibile combinare i numeri presenti nella rubrica
con numeri introdotti manualmente. I numeri presenti nella rubrica possono
Visualizzazione tempo di conversazione trascorso
essere concatenati e trasmessi come richiesto.
La durata di ciascuna chiamata viene visualizzata in minuti e secondi
Aprire la rubrica dopo che è stata stabilita la
durante la chiamata stessa.
connessione.
Esclusione del microfono sull’unità portatile
Il microfono sull’unità portatile può essere attivato e disattivato durante una
Selezionare il numero della rubrica desiderato e
o ,
o
conversazione telefonica sia in modalità normale sia in modalità viva voce.
trasmetterlo
Regolazione del volume del ricevitore
Il volume del ricevitore del vostro telefono DC601 è più elevato di quello
di un telefono standard. Premere su o giù e rilasciare per passare in
successione i vari passi di volume.
Durante una chiamata, regolare l’impostazione
con l’interruttore laterale.
Elevazione del volume di ricezione
Durante una chiamata, è possibile aumentare di una quota fissa il volume
attualmente selezionato premendo questo tasto
Premere il tasto; un’icona lampeggia sul display
Conversazione in viva voce
Utilizzare la funzione viva voce per ascoltare il vostro corrispondente
attraverso l’altoparlante
I
2x
Passaggio alla modalità viva voce
Disattivazione della modalità viva voce
50
, MUTE,
Esclusione microfono (Mute).
, NO MUTE
Riattivazione microfono
Suoneria on/off
È possibile attivare e disattivare la suoneria.
2 sec
Esclusione suoneria
2 sec
Riattivazione suoneria
Blocco tastiera
È possibile comunque continuare a rispondere alle chiamate entranti nel
modo usuale anche quando la tastiera è bloccata.
2 sec
Blocco tastiera
2 sec
Sblocco tastiera
Utilizzo del menù
6. Utilizzo del menù
Nome unità portatile
È possibile personalizzare la vostra unità portatile attribuendogli un nome
(max. 12 lettere)
o
Aprire il menù e quindi selezionare ‘NOME PT’
,
Cancella il nome corrente
o
,
Aprire il menù e quindi selezionare ‘DATA/ORA’
,
Introdurre l’anno e quindi confermare
,
Introdurre il mese e quindi confermare
,
Introdurre il giorno e quindi confermare
,
Introdurre l’ora (visualizzazione in formato 24
ore) e quindi confermare
.
Introdurre i minuti e quindi confermare
Melodia della suoneria unità portatile
Sono disponibili 9 differenti melodie per la suoneria.
o
MELODIA 7
o
o
Aprire il menù e quindi selezionare ‘VOLUME PT’
,
VOLUME 5
e
Vengono mostrate le impostazione attuali
Selezionare e confermare il volume della
suoneria oppure l’opzione ‘OFF’
,
Melodia della suoneria dell’unità base
Sono disponibili 9 differenti melodie per la soneria.
Data/ora
,
,
Introdurre il nuovo nome e confermare
,
,
Volume suoneria unità portatile
Sono disponibili cinque diversi livelli di volume per la suoneria più l’opzione
‘OFF’
,
,
Aprire il menù e quindi selezionare ‘MELODIA PT’
Vengono mostrate le impostazione attuali
Selezionare e quindi confermare la melodia scelta
per la suoneria
,
o
,
MELODIA 8
o
Aprire il menù e quindi selezionare ‘MELODIA
BS’
Vengono mostrate le impostazione attuali
Selezionare e quindi confermare la melodia
scelta per la suoneria
,
Volume suoneria unità base
Sono disponibili cinque diversi livelli di volume per la suoneria più l’opzione
‘OFF’
,
o
VOLUME 5
e
,
,
Aprire il menù e quindi selezionare ‘VOLUME BS’
Vengono mostrate le impostazione attuali
Selezionare e confermare il volume della
suoneria
I
51
Utilizzo del menù
Boost Mem
Con questa opzione impostata a ‘ON’ , quando si utilizza il
tasto
relativo, l’unità portatile e ricorderà e utilizzerà l’ultima impostazione Boost
per ciascuna chiamata.
,
o
,
OFF
o
Aprire il menù e quindi selezionare ‘SAVRAMEM’
Vengono mostrate le impostazione attuali
Selezionare e confermare ‘ON’ o ‘OFF’
,
Risposta automatica
Quando questa funzione è impostata su ‘ON’, l’apparecchio risponde
automaticamente quando il ricevitore viene sollevate dalla base di
supporto. Questa è l’impostazione
,
o
,
ON
Aprire il menù e quindi selezionare ‘RISP AUTO’
Vengono mostrate le impostazione attuali
o
Selezionare e confermare ‘ON’ o ‘OFF’
,
Lingua
Sono disponibili cinque lingue: inglese, tedesco, francese, spagnolo e
italiano.
o
DEUTSCH
o
I
52
,
,
Aprire il menù e quindi selezionare ‘LINGUA’
Vengono mostrate le impostazione attuali
Selezionare e confermare la lingua
Rubrica
Modifica di nominativi della rubrica
7. Rubrica
Nella rubrica telefonica possono essere memorizzati fino a 50 nomi e
relativi numeri telefonici per un massimo di 12 lettere e 24 cifre per
ciascun nominativo.
* Introdurre sempre anche il prefisso di zona per ciascun nominativo
memorizzato nella rubrica.
* I nominativi memorizzati nella rubrica sono ordinati alfabeticamente.
Per andare velocemente ad un nominativo della rubrica, digitare la
prima lettera . del nominativo corrispondente.
Introduzione di un nome
I tasti numerici sono anche marcati con lettere per il nominativo della
rubrica contraddistinto dalle lettere relative. Premendo il tasto relativo il
numero necessario di volte consente l’introduzione delle lettere riportate
sul tasto e del numero del tasto stesso.
,
Apre la rubrica
Selezione di un nominativo della rubrica
o
2 sec
Attivazione della procedura di modifica
Modificare il nome (max. 12 lettere) e
confermare
Modificare il numero telefonico (max. 24 cifre) e
confermare
Cancellazione di nominativi della rubrica
,
Apre la rubrica
Spazio
o
Selezione di un nominativo della rubrica
Cancellazione
, CANCELLA?
Attivazione della procedura di cancellazione
o
Conferma della cancellazione o uscita dalla
procedura senza modificare
Per introdurre due volte la stessa lettera, premere questo tasto. Attendere
finché il cursore si sposta in avanti di una posizione. Introdurre nuovamente
la lettera.
Creazione di nominativi nella rubrica telefonica
2 sec
,
Entra nella modalità di aggiunta nominativi alla
rubrica
Introdurre il nome (max. 12 lettere) e confermare
Introdurre il numero telefonico (max. 24 cifre) e
confermare
I
53
Elenco chiamate
8. Elenco chiamate
L’elenco delle chiamate visualizzate sul vostro telefono utilizza il servizio
di visualizzazione numero chiamante (CLIP1) fornito dal vostro gestore
telefonico. Si prega di contattare la vostra compagnia telefonica per
effettuare l’abbonamento a questo servizio.
Il numero del chiamante (oppure il nome qualora il chiamante sia
memorizzato nella rubrica) appare sul display quando il telefono comincia
a suonare. Se il chiamante ha nascosto il proprio numero telefonico,
il relativo messaggio appare sul display. Il numero telefonico non è
visualizzato e non verrà memorizzato nell’elenco chiamate.
Nell’elenco chiamate può essere memorizzato un totale di 30 chiamate
entranti, con un massimo di 12 lettere per il nome e 23 cifre per il numero
telefonico. Il
lampeggiante indica la presenza di nuove chiamate
nell’elenco chiamate entranti.
Visualizzazione chiamate entranti
Apre l’elenco chiamate entranti in corrispondenza
della chiamata più recente
o
1x - 2x
Selezionare una chiamata
Per visualizzare il ulteriori informazioni.
Memorizzazione delle chiamate presenti nell’elenco chiamate entranti
nella rubrica telefonica
Un numero telefonico memorizzato nell’elenco chiamate entranti può
essere memorizzato direttamente sulla rubrica telefonica.
Apre l’elenco chiamate entranti in
corrispondenza della chiamata più recente
Apre la rubrica
1
CLIP: Calling Line Identification Presentation = Visualizzazione del numero
telefonico del chiamante
54
,
Introdurre il nome e confermare
,
Modificare il numero e confermare
Cancellazione di singole chiamate presenti nell’elenco chiamate entranti
Cancellazione di una singola chiamata presente nell’elenco chiamate
entranti
Apre l’elenco chiamate entranti in
corrispondenza della chiamata più recente
o
Selezionare una chiamata
, CANCELLA?
Attivazione della procedura di cancellazione
Conferma o esce dalla procedura senza
modificare
Cancellazione di tutte le chiamate presenti nell’elenco chiamate entranti
o
Apre l’elenco chiamate entranti in
corrispondenza della chiamata più recente
2 sec
o
I
Selezionare una chiamata
o
, CANC TUTTO?
Attivazione della procedura di cancellazione
Conferma o esce dalla procedura senza
modificare
Utilizzo di micro telefoni addizionali
9. Utilizzo di micro telefoni addizionali
Effettuazione di chiamate interne
Devono essere registrate due o più unità portatili (PT1, PT2) sulla stazione
base per poter effettuare chiamate interne gratuitamente.
PT1:
,
, es 2
Chiamate in conferenza
È possibile effettuare una chiamata in conferenza fra un chiamante esterno
e due interni.
PT1:
,
, es 2
Comporre il numero di chiamata interno
dell’unità portatile desiderata
Durante una chiamata esterna, comporre il
numero dell’unità portatili a cui si vuole trasferire
la chiamata
PT2:
Accettazione della chiamata interna sull’altra
unità portatile
PT2:
Accettazione della chiamata interna sull’altra
unità portatile
PT1/PT2:
Conclusione della chiamata interna
PT1: 2 sec
Attiva la chiamata in conferenza
PT1/PT2:
Mette il chiamante esterno in attesa
PT1/PT2:
Conclusione della conferenza
Trasferimento interno di chiamate esterne
PT1:
,
, es 2
Durante una chiamata esterna, comporre il
numero dell’unità portatili a cui si vuole trasferire
la chiamata
PT2:
Accettazione della chiamata interna sull’altra
unità portatile
PT1:
La chiamata esterna viene trasferita all’altra unità
portatile
Registrazione unità portatile
È necessario effettuare la procedura di registrazione di un’unità portatile
che è stata deregistrata dall’unità base oppure nel caso in cui si sia
acquistata una nuova unità portatile separatamente.
Le nuove unità portatili devono essere caricate completamente prima
dell’effettuazione della procedura di registrazione.
Sull’unità base
Se l’unità portatile chiamata non risponde, è possibile riprendere la
chiamata esterna in attesa premendo il tasto INTERCOM.
10 sec
Attivazione modalità di registrazione
,
Sull’unità portatile
,
o
,
Aprire il menù e quindi selezionare ‘REGISTRR’
Digitare il numero della base (1,2,3 o 4)
,
I
Introdurre il codice PIN e quindi confermare
,
55
Utilizzo di micro telefoni addizionali
Deregistrazione dell’unità portatile
,
o
Aprire il menù e quindi selezionare
‘RIMUOVI PT’
,
,
RIMOUVI PT?,
I
56
,
,
ntrodurre il codice PIN e quindi
confermare
Introdurre il numero dell’unità
portatile e quindi confermare
Private Branch Exchanges (centralini interni)
10. Private Branch Exchanges (centralini interni)
Tasto R per collegamento come derivato interno di un centralino
Nel caso in cui il telefono sia collegato a un centralino privato, funzioni
come il trasferimento delle chiamate e la richiamata automatica possono
essere utilizzate per mezzo del tasto R. Si prega di vedere il manuale di
funzionamento fornito insieme al centralino privato per determinare quale
tempo di rilascio linea (Flash) deve essere impostato per poter utilizzare
queste funzioni. Il rivenditore dove si è acquistato il centralino potrà fornire
le informazioni necessarie e potrà giudicare se il telefono potrà funzionare
correttamente con il centralino.
Impostazione del tempo di rilascio linea (flash)
Sono disponibili due tempi di rilascio linea. Corto 100ms e lungo 300ms.
,
o
CORTO
o
,
Aprire il menù e quindi selezionare ‘RIPETI’
,
o
Aprire il menù e quindi selezionare ‘MODO
SELEZ’
,
Vengono mostrate le impostazione attuali
,
Selezionare e quindi confermare ‘CORTO’ o
‘LUNGO’
Pausa durante la selezione
Quando il telefono viene collegato come derivato interno di un centralino
privato, è necessario formare un codice per accedere alla linea esterna e
per ottenere il corrispondente tono di selezione. Nel caso il centralino sia
un modello vecchio, può essere necessario attendere un certo periodo
di tempo prima di poter udire il tono di selezione della linea esterna.
Particolarmente nel caso di tali centralini privati, è possibile inserire una
pausa dopo la selezione del codice di accesso alla linea esterna in modo
tale che il numero possa essere selezionato in modo continuo senza dover
attendere il tono di selezione.
2 sec
Tasto R e servizi telefonici supplementari
Il vostro telefono supporta i servizi telefonici supplementari offerti dalla
vostra compagnia telefonica, come la mediazione di chiamata, la messa
in attesa della chiamata e la conferenza. I servizi telefonici supplementari
possono essere utilizzati per mezzo del tasto R. Si prega di contattare la
vostra compagnia telefonica per ottenere l’abilitazione dei servizi telefonici
supplementari e per conoscere il tempo di rilascio linea che deve essere
utilizzato.
Modalità di selezione
Sono disponibili due modalità di selezione, Tone e Pulse. Modificare questa
impostazione solo se il rivenditore del vostro centralino privato vi ha
esplicitamente detto di fare così.
Inserimento di una pausa di selezione. Sul display
appare ‘P’
MULTIFREQ
o
Vengono mostrate le impostazione attuali
Selezionare e confermare ‘MULTIFREQ’ o
‘DECADICA’
,
Ritorno alle impostazioni di default
È possibile riportare la vostra unità portatile alle impostazioni originali di
default. La rubrica, l’elenco delle chiamate ricevute e l’elenco di riselezione
non vengono cancellati quando si resetta l’unità portatile.
,
o
,
Aprire il menù e quindi selezionare ‘RESET’
,
,
ntrodurre il codice PIN e quindi confermare
I
La pausa può anche essere introdotta per i numeri della rubrica.
57
In caso di problemi
11. In caso di problemi
Servizio Hotline
In caso di problemi con il telefono, si prega per prima cosa di leggere le
seguenti informazioni. In caso di problemi tecnici, potete anche contattare il
nostro servizio hotline, Tel. 0900 00 1675 valido per la Svizzera (spese da
rete Swisscom alla data distampa: CHF 2.60/min). In caso di problemi nei
termini della garanzia, si prega di contattare il vostro rivenditore. Il periodo
di garanzia è di due anni.
Problema
Soluzione
Non è possibile effettuare nessuna
chiamata
La linea telefonica non è collegata
in maniera corretta oppure è guasta.
Utilizzare soltanto il cavo telefonico di
collegamento fornito.
Controllare l’efficienza della presa
della linea telefonica utilizzando un
altro telefono
L’alimentatore non è inserito nella
presa di corrente, non è acceso
oppure manca la corrente elettrica.
Assicurarsi di essere all’interno del
raggio di portata dell’unità base (300
m all’esterno e 50 m all’interno in
condizioni ideali)
Non è possibile effettuare nessuna
selezione
I
58
La tastiera è bloccata? Premere
e tenere premuto il tasto
per
sbloccare la tastiera
Il collegamento è disturbato oppure si
interrompe
Assicurarsi di essere all’interno del
raggio di portata dell’unità base (300
m all’esterno e 50 m all’interno in
condizioni ideali)
L’unità base è stata collocata in una
posizione non adatta.
L’unità portatile si spenge da sola
Riporre l’unità portatile sull’unità
base in modo che le batterie possono
caricarsi per 15 ore.
Sostituire le batterie ricaricabili.
Il sistema non risponde più oppure si
trova in uno stato non definito
Riportare tutte le funzioni alle loro
impostazioni di default. Vedere pagina
57.
La visualizzazione del numero del
chiamante (CLIP) non funziona
Controllare che il servizio sia
disponibile sulla linea telefonica alla
quale è stato collegato il telefono.
Eventualmente, chiamare la propria
compagnia telefonica.
Il chiamante ha nascosto il proprio
numero telefonico
L’unità portatile non squilla
Controllare che la suoneria non sia
stata disabilitata. Vedere le pagine
50 & 51.
È presente un disturbo in forma di
ronzio sulla radio, sul televisore o sul
computer
Si raccomanda di lasciare sempre
una distanza di almeno 1 m tra
qualsiasi apparecchio elettrico e
telefoni mobili.
Specifiche techniche
12. Specifiche techniche
Carateristica
Valore
Standard
DECT1 GAP2
Alimentazione elettrica
(stazione base)
Ingresso: 230VAC 50Hz 35mA
Uscita: 6VDC 300mA
Alimentazione elettrica
(stazione di carica)
Ingresso: 230VAC 50Hz 30mA
Uscita: 7,5VDC 100mA
Portata
Externo: ca. 300m
Interno: ca. 50m
Stand-by
fino a 100 ore
Max. durata di conversazione
fino a 10 ore
Accumulatore ricaricabile
AAA 1.2V 800mAh NiMH
Procedura di selezione
Tone (DTMF)
Impulsi (IWV)
Temperatura ambiente
ammessa
da 0oC a 45oC
Umidità dell’aria relativa
ammessa
da 20% a 80%
Funzione flash
100, 300 ms
1
DECT: Digital Enhanced Cordless Telecommunication = Standard per telefoni
senza cavo.
2 GAP: Generic Access Profile = Standard per l’interazione di unità portatili e
stazioni base di altri costruttori differenti.
I
59
Configurazione iniziale
13. Configurazione iniziale
Unità portatile
La configurazione iniziale é ripristinata nel menu. A pagina 57 é indicata la
posizione da scorrere nel menu.
I
60
Lingua
Deutsch
Nome unità portatile
DC601
Melodia della suoneria unità
portatile
7
Volume suoneria unità portatile
5
Boost Mem.
Off
Risposta automatica
On
Tempo flash
100 ms
Proc. selezione
Toni
PIN-sistema
0000
Manutenzione/garanzia
14. Manutenzione/garanzia
Manutenzione
•
Pulire le superfici dell’apparecchio utilizzando un panno morbido che
non speli
•
Non utilizzare mai detergenti o solventi
Garanzia
Questo apparecchio SWITEL è stato prodotto e controllato utilizzando
i metodi più moderni. L’utilizzo di materiali accuratamente scelti e di
tecnologie produttive altamente evolute garantiscono un funzionamento
esente da problemi e una lunga vita dell’apparecchio. I termini della
garanzia non si applicano quando la causa del malfunzionamento
dell’apparecchio è da imputare alla compagnia telefonica oppure a
qualsiasi tipo di impianto telefonico interno. I termini della garanzia non si
applicano alle batterie ricaricabili o ai moduli di alimentazione utilizzati nei
vari apparecchi. Il periodo di garanzia è di 24 mesi dalla data di acquisto.
Qualsiasi problema dipendente da difetti di materiali o di produzione
che intervenga durante il periodo di garanzia verrà eliminato senza
spese. La garanzia decade nel caso in cui siano stati effettuati interventi
sull’apparecchio dall’acquirente o da terze parti. Danni causati da utilizzo
improprio, collocazione o conservazione non corrette, collegamenti ho
installazione errati, fenomeni naturali o cause di forza maggiore non sono
coperti dalla garanzia. In caso di reclami, ci riserviamo il diritto di riparare o
sostituire i componenti difettosi oppure fornire un apparecchio sostitutivo.
Le parti o i componenti di ricambio diventano nostra proprietà. La rifusione
di danni è esclusa quando non vi sia un evidente intento o grossolane
negligenze da parte del produttore.
Qualora il vostro apparecchio evidenzi difetti durante il periodo di
garanzia, si prega di riportarlo presso il negozio dove è stato acquistato
insieme alla ricevuta di acquisto. Qualsiasi diritto ad avvalersi della
copertura della garanzia secondo il presente accordo deve essere fatto
valere esclusivamente nei confronti del negozio dove è stato acquistato
l’apparecchio. Due anni dopo l’acquisto di un nostro prodotto, non è più
possibile avvalersi della copertura della garanzia.
Dichiarazione di conformità
Questo apparecchio soddisfa i requisiti contenuti nella direttiva EU:
2005/32/EC, 1275/2008/EC, 278/2009/EC, 2009/125/EC/EuP
1999/5 EU - direttiva relativa ad apparecchiature radio e a dispositivi
terminali di telecomunicazioni e al mutuo riconoscimento della loro
conformità. La conformità relativa alla direttiva sopra menzionata è
confermata dal simbolo CE presente sull’apparecchio. Per leggere la
dichiarazione di conformità completa, si prega di scaricare il relativo
documento disponibile sul nostro sito Web www.switel.com.
I
61
Indice
15. Indice
I
62
B
Blocco tastiera, 50
Boost Mem, 52
C
Cancellazione di nominativi della
rubrica, 53
Cancellazione di singole chiamate
presenti nell’elenco chiamate entranti, 54
Cancellazione di tutte le chiamate
presenti nell’elenco chiamate entranti, 54
Cancellazione di una singola chiamata
presente nell’elenco chiamate entranti, 54
Caricamento delle batterie, 45
Chiamate in conferenza, 55
Collegamento dell’unità base, 45
Configurazione iniziale, 60
Controllare il contenuto della
confezione, 45
Conversazione in viva voce, 70
Creazione di nominativi nella rubrica
telefonica, 53
D
Data/ora, 51
Deregistrazione dell’unità portatile, 46
Dichiarazione di conformità, 61
E
Effettuazione di chiamate interne, 55
Effettuazione delle chiamate, 49
Effettuazione di una chiamata, 49
Elenco chiamate, 54
Elevazione del volume di ricezione, 50
Esclusione del microfono sull’unità
portatile, 50
F
Funzionamento a basse radiazioni
(modo Eco), 45
Funzionamento del telefono, 47
G
Garanzia, 61
I
Icone sul display, 47
Il vostro telefono DC601 e la sua base,
46
Impostazione del tempo di rilascio linea
(flash), 57
In caso di problemi, 58
Informazioni relative alla sicurezza, 44
Inserzione delle batterie, 45
Introduzione di un nome, 53
L
Lingua, 52
M
Manutenzione, 61
Melodia della suoneria dell’unità base, 51
Memorizzazione delle chiamate
presenti nell’elenco chiamate entranti
nella rubrica Telefonica, 53
Modalità di selezione, 57
Modifica di nominativi della rubrica, 53
N
Nome unità portatile, 51
P
Pausa durante la selezione, 57
Per cominciare, 45
Per rispondere a una chiamata, 49
Per terminare una chiamata, 49
Private Branch Exchanges (centralini
interni), 57
R
Registrazione unità portatile, 45
Regolazione del volume viva voce, 50
Ripetizione ultimo numero formato, 49
Riselezione delle chiamate perse, 49
Ritorno alle impostazioni di default, 57
Rubrica, 53
S
Scorrimento del menù, 48
Selezione abbreviata, 49
Selezione a catena, 70
Selezione di numeri telefonici dalla
rubrica, 49
Specifiche techniche, 59
Suoneria on/off, 50
T
Tasto R e servizi telefonici
supplementari, 57
Tasto R per collegamento come
derivato interno di un centralino, 57
Trasferimento interno di chiamate
esterne, 55
U
Utilizzo delle regolatore di volume, 50
Utilizzo del menù, 51
V
Visualizzazione chiamate entranti, 54
Visualizzazione tempo di conversazione
trascorso, 50
Volume suoneria unità base, 51
Volume suoneria unità portatile, 51
Contents
1
2
3
4
5
6
7
8
9
10
11
12
13
14
15
Safety Information . . . . . . . . . . . . . . . . . . . .64
Starting Up . . . . . . . . . . . . . . . . . . . . . . . . .65
Your DC601 Telephone and Base . . . . . . . . .66
Operating the Telephone . . . . . . . . . . . . . . . .67
Telephoning . . . . . . . . . . . . . . . . . . . . . . . . .69
Using the Menu . . . . . . . . . . . . . . . . . . . . . .71
Phone Book . . . . . . . . . . . . . . . . . . . . . . . .73
Calls List . . . . . . . . . . . . . . . . . . . . . . . . . . .74
Using Additional Handsets . . . . . . . . . . . . . .75
Private Branch Exchanges . . . . . . . . . . . . . .77
If Problems Occur . . . . . . . . . . . . . . . . . . . .78
Technical Properties . . . . . . . . . . . . . . . . . . .79
Default Settings . . . . . . . . . . . . . . . . . . . . . .80
Maintenance/Guarantee . . . . . . . . . . . . . . . .81
Index . . . . . . . . . . . . . . . . . . . . . . . . . . . . . .82
GB
63
Safety Information
1
Safety Information
Please read this operating instruction manual thoroughly.
Intended use
The telephone is suitable for telephoning within a public telephone network
system. Any other use is considered unintended use. Unauthorised
modification or reconstruction is not permitted. Under no circumstances
open the device or complete any repair work yourself.
Installation location
Prevent excessive exposure to smoke, dust, vibration, chemicals, moisture,
heat and direct sunlight.
Power supply
Caution: Only use the power adapter plug supplied because
other power supplies could damage the telephone. Ensure
access to the power adapter plug is not obstructed by
furniture or such.
Power failure
This telephone cannot be used to make calls in the event of
a power failure. Alternative arrangements should be made
for access to emergency services.
Rechargeable batteries
Do not throw the batteries into a fire or immerse them in water.
Hearing aid compatibility
The telephone is compatible with most popular hearing aids on the market.
However, due to the wide range of hearing aids available, there is no
guarantee that the telephone will function ‘problem free’ with every model
GB
64
Caution: This telephone is capable of producing very high
volume levels when the ‘Boost’ is switched on and the
volume control is set to maximum. Extreme caution should
be taken if the handset is to be shared between users with
normal hearing and those with hearing impairment.
Medical equipment
DO NOT use your telephone near emergency/intensive care medical
equipment; if you have a pacemaker fitted or during an electrical storm.
Disposal
You are obliged to dispose of consumable goods properly
in accordance with the applicable legal regulations. The
adjacent symbol on the telephone indicates that electrical
and electronic apparatus and batteries no longer required
must be disposed of separately from domestic waste.
Electrical and electronic devices must be disposed of
at suitable collection points provided by the public waste
authorities.
Batteries must be disposed of at the point of sale or at the
appropriate collection points provided by the public waste
authorities.
Packaging materials must be disposed of according to
local regulations.
Starting Up
2
Inserting the batteries
Insert the 2 x AAA 1.2V 800mAh NiMH rechargeable batteries supplied,
into the handset battery compartment. Take care to note the ‘+’ and ‘-’
markings and position the batteries the correct way around. Close the
battery compartment cover.
Starting Up
Safety note
Caution: It is essential to read the Safety Information in
Chapter 1 before preparing the telephone for use.
Check the contents of the package
The package contains:
Content
DC601
DC602
DC603
DC604
Base unit
1
1
1
1
Charger unit
0
1
2
3
Cordless handset
1
2
3
4
Battery cover
1
2
3
4
Power adapter plug
1
2
3
4
Telephone connection cable
1
1
1
1
AAA 1.2V 800mAh NiMH
rechargeable batteries
2
4
6
8
Operating manual
1
1
1
1
Connecting the base unit
Connect the base station as illustrated in the diagram.
For reasons of safety, only use the power adaptor plug and telephone
connection cable supplied.
4HPUZWV^LYV\[SL[
9LJLP]LYJVUULJ[PVU
Charging the batteries
Place the handset in the base to charge for a minimum of 15
hours before first use.
Private branch exchanges
The information on Page 77 explains how to install your
telephone on a private branch exchange.
Low-radiation operation (ECO mode)
In Standby mode, the radiation is reduced considerably as compared to
standard, cordless DECT telephones when the handset is on the cradle.
Electrical consumption
The electrical consumption of the base is:
- in operation mode (idle/call): approx. 0.87 W/1.36 W
- during charging of the handset: approx. 2.15 W.
The adaptor input power without load is approx. 0.20 W.
The average efficiency is approx. 67.3 %.
The electrical consumption of the charger is:
- without handset charging: approx. 0.32 W
- during charging of the handset: approx. 1.7 W.
The adaptor input power without load is approx. 0.32 W.
The average efficiency is approx. 44 %.
GB
65
Your DC601Telephone and Base
3
Your DC601 telephone and base
Incoming call light
Volume up/down
Memory 1
Memory 2
Boost
Display
Up/Redial
Menu/OK/Recall
Phone Book
Intercom
Mute/Delete
End call
External call/Handsfree
*/Ringer on/off
Down/Calls list
Pause (long press 0)
Alphanumeric keypad
#/Keylock
Microphone
GB
Find handset
Charging/Line in use/
Registration
66
Operating the Telephone
4
Icons in the display
Operating the Telephone
Display and explanation of operation sequences.
Icon
Description
Enter digits or letters
Phone Book mode
Press the button shown, briefly
Battery status
2x
Press the button shown, twice briefly
Ringer off
2 sec
Press the button shown for 2 seconds
Keylock is on
Press and hold
Press and hold the button shown
Handsfree mode
Release
Release button shown
Call in progress
Handset rings
Base station rings
External call button
End a call and/or return to standby
VOLUME 1 or
Text or icon in the display
Boost receiver volume is on
Handset microphone is muted
You have new calls
When steady indicates that the handset is in range of the
base. When flashing indicates that the handset is out of
range of the base.
Internal call in progress
Message waiting
Note: This feature is not compatible with the UK 1571
service
GB
67
Operating the Telephone
Navigating in the menu
All the handset functions can be accessed via the menu.
Please refer to ‘Using the menu’ on page 71 for information on how to
access each function.
Creating phone book entries - example
This example explains how to navigate and create entries in the phone
book. Proceed as in this example for all the settings.
2 sec
All descriptions in this operating manual assume that the handset is in
Standby mode.
Enter the name (max. 12 letters) and
confirm it
Open the main menu
or
or
Select the function required
Open the function
or
Select the setting required
Enter digits or letters using the relevant keys
Confirm the entries
Cancel and return to standby mode
Every process is automatically cancelled if there is no input within 20
seconds. The handset will return to standby mode.
GB
68
Enter the phone number (max. 24
digits) and confirm it
Select the submenu required
Open the submenu
Opens add phone book entry mode
Storing a quick dial entry
2 sec M1 or M2
Opens add quick dial entry mode
Enter the name (max. 12 letters) and
confirm it
Enter the phone number (max. 24
digits) and confirm it
Telephoning
5
Calling back missed calls
Your telephone stores the last 30 incoming calls in the calls list.
Telephoning
Making a call
Open the calls list
Enter the phone number (max. 24
digits)
Following incorrect input, press to
delete the last digit
Dial the phone number
or
It is also possible to press the external call button first to obtain dialling
tone. The digits entered will then be dialled immediately. It is not possible
to correct wrong digits individually using this dialling procedure.
or
,
or
Select an entry and dial the number
Dialling phone numbers from the phone book
There must be phone numbers stored in the phone book.
See page 73. Your telephone can store up to 50 name and number entries
in the phone book.
Open the phone book
or
,
or
Select an entry and dial the number
End a call
End the call
or
Take a call
,
,
or
Take the call
Redial
Your telephone stores the last 3 telephone numbers dialled
(max. 25 digits each).
Quick dial
Phone numbers must have been stored as quick dial numbers.
See page 68.
M1 or M2
or
Press the required quick dial button
Dial the number
Open the redial list
,
or
Select an entry and dial the number
GB
69
Telephoning
Chain dialling
This feature is used for more complex telephone services, eg for telephone
banking or calling card procedures. Several numbers stored in the phone
book can be dialled successively when a connection has already been
made. It is also possible to combine numbers from the phone book with
numbers entered manually. Numbers stored in the phone book can be
chained and transmitted as required.
Open the phone book when a
connection has been made
or
,
or
Select the phone book entry and
transmit the number
Adjusting the receiver volume
The receiver volume of your DC601 telephone is louder than with a
standard telephone. Push up or down and release for each volume step.
When in a call, adjust the setting with
the side switch
Boosting the receiver volume
When in a call, you can increase the loudness of each volume
setting if you press the
button.
Press the button, an icon flashes in
the display
Handsfree
Use Handsfree to listen to your caller via the loudspeaker
2x
GB
70
Switch on handsfree mode
Deactivate handsfree mode
Adjusting the Handsfree volume
There are 5 handsfree volume levels available. The ‘Boost’
feature is not available in handsfree mode.
When in a call, adjust the setting with
the side switch.
Talk time display
The duration of each call is displayed in minutes and seconds
during the call.
Muting the microphone in the handset
The microphone in the handset can be activated and deactivated during a
telephone conversation when you are in handset or handsfree mode.
, MUTED,
Switch the microphone off (Mute).
, UNMUTED
Switch the microphone on
Ringer on/off
You can turn the bell of the ringer on and off.
2 sec
Switches the bell ringer off
2 sec
Switches the bell ringer on
Keylock
Calls can still be answered in the normal way when the keylock is on.
2 sec
Locks the keypad
2 sec
Unlocks the keypad
Using the Menu
6. Using the menu
Handset name
You can personalise your handset by naming it (max. 12 letters)
or
Open the Menu, select ‘HS NAME’
,
Delete the current name
Enter new name and confirm it
,
Date/Time
,
or
,
Open the Menu, select ‘DATE/TIME’
,
Enter the year and confirm
,
Enter the month and confirm
,
Enter the day and confirm
,
Enter the hours (24 hour clock) and
confirm
.
Enter the minutes and confirm
Handset Ringing melody
There are 9 different ringing melodies available.
,
or
MELODY 7
or
,
,
Handset Ringing volume
There are 5 ringing volume settings available and ‘OFF’
,
or
Open the Menu, select ‘HS RING VOL’
,
VOLUME 5
and
The current setting is shown
Select and confirm a ringing tone
volume or ‘OFF’
,
Base Ringing melody
There are 9 different ringing melodies available.
,
or
,
MELODY 8
or
Open the Menu, select ‘BS MELODY’
The current setting is shown
Select and confirm a ringing melody
,
Base Ringing volume
There are 5 ringing volume settings available and ‘OFF’
,
or
,
VOLUME 5
and
,
Open the Menu, select ‘BS RING VOL’
The current setting is shown
Select and confirm a ringing tone
volume
Open the Menu, select ‘HS MELODY’
The current setting is shown
Select and confirm a ringing melody
GB
71
Using the Menu
Boost Mem
With this feature set to ‘ON’ , if you use the
button, your handset will
remember and use your last Boost setting for each call.
,
or
,
OFF
or
Open the Menu, select ‘BOOST MEM’
The current setting is shown
Select and confirm ‘ON’ or ‘OFF’
,
Auto talk
With this feature set to ‘ON’, your handset will automatically answer the
call when you pick up the handset from the base. This is the default
setting.
,
or
,
ON
Open the Menu, select ‘AUTO TALK’
The current setting is shown
or
Select and confirm ‘ON’ or ‘OFF’
,
Language
There are 5 languages available, English, German, French, Spanish and
Italian.
or
ENGLISH
or
GB
72
,
,
Open the Menu, select ‘LANGUAGE’
The current setting is shown
Select and confirm a language
Phone Book
Editing phone book entries
7. Phone Book
Fifty names and phone numbers can be stored in the phone book with a
maximum of 12 letters and 24 digits for each entry.
* Always enter the area dialling code with each phone book
entry.
,
or
2 sec
* The phone book entries are managed alphabetically.
To go quickly to a phone book entry, enter the first letter of the
corresponding entry.
Entering a name
The digit keys are also labelled with letters for the entry of the respective
letters. Pressing the respective key the necessary number of times
enables capital letters and digits to be entered.
Space
Delete
To enter the same letter twice, press the button to enter the
letter. Wait until the cursor moves forward one place. Enter
the letter again.
Open the phone book
Select a phone book entry
Activate the editing process
Edit the name (max. 12 letters) and
confirm it
Edit the phone number (max. 24
digits) and confirm it
Deleting phone book entries
,
Open the phone book
or
Select a phone book entry
, DELETE?
Activate the deletion process
or
Confirm the deletion or Cancel
Creating phone book entries
2 sec
,
Opens add phone book entry mode
Enter the name (max. 12 letters) and
confirm it
Enter the phone number (max. 24
digits) and confirm it
GB
73
Calls List
8. Calls List
The Calls List on your telephone works together with the Caller number
display (CLIP1) service supplied by your telephony network provider.
Please contact your telephony network provider to arrange for subscription
to this service.
The number of the caller (or name if stored in the Phone Book) appears in
the display when the phone rings. If the caller has withheld their phone
number, a corresponding message appears in the display. The phone
number is not displayed and will not be stored in the calls list.
A total of 30 incoming calls, with a maximum of 12 letters for the name
and 23 digits for the number can be stored in the calls list. The flashing
indicates new calls in the calls list.
Displaying calls list entries
Opens the calls list at most recent
entry
or
1x to 2x
1
74
Opens the calls list at most recent
entry
Select an entry
or
Open the phone book
,
Enter the name and confirm it
,
Edit the number and confirm it
Deleting calls list entries
Deleting a single calls list entry
Opens the calls list at most recent
entry
Select an entry
To display further information.
Other messages you may see in the display, if your telephone network
provider supports this service, are:
GB
Storing calls list entries in the phone book
A phone number stored in the calls list can be stored directly to the phone
book
WITHHELD
PRIVATE
The caller has withheld their number
or the information is not available
INTERNATIONA
The caller is dialling you whilst abroad
or may be using an internet telephony
service.
PAYPHONE
The caller has dialled you from a
public payphone
OPERATOR
Call from a network operator
CLIP: Calling Line Identification Presentation
or
Select an entry
, DELETE?
Activate the deletion process
or
Confirm or Cancel
Deleting all calls list entries
Opens the calls list at most recent
entry
2 sec
or
, DELETE ALL?
Activate the deletion process
Confirm or Cancel
Using Additional Handsets
9. Using Additional Handsets
Making Internal Calls
There must be two or more handsets (HS1, HS2) registered to a base
station in order to make internal calls free of charge.
Conference calls
You can hold a conference call between 1 external and 2 internal callers.
HS1:
,
, eg 2
During an external call, dial the number of the
required handset
Dial the internal call number of the required
handset
HS2:
Accept the internal call on the other handset
HS2:
Accept the internal call on the other handset
HS1: 2 sec
Activates conference call
HS1/HS2:
End the internal call
HS1/HS2:
Put external call on hold
HS1/HS2:
End conference call
HS1:
,
, eg 2
Transferring external calls internally
HS1:
,
, eg 2
During an external call, dial the number of the
required handset
HS2:
Accept the internal call on the other handset
HS1:
External call is transferred to the other handset
If the called handset does not answer, you can take the call
back by pressing the INTERCOM button.
Handset registration
You only need to register a handset that has become deregistered from the
base or if you have purchased a new handset.
New handsets must be fully charged before you attempt to
register them.
At the base
10 sec
Activate registration mode
,
At the handset
,
or
,
Open the menu, select ‘REGISTER’
Enter the base number (1,2,3 or 4)
,
Enter the PIN code and confirm
,
GB
75
Using Additional Handsets
Handset deregistration
,
or
Open the menu, select ‘REMOVE HS’
,
,
REMOVE HS?,
GB
76
,
,
Enter the PIN code and confirm
Enter the handset number and
confirm
Private Branch Exchanges
10. Private Branch Exchanges
R button on private branch exchanges
If the telephone is connected to a private branch exchange, functions such
as transferring calls and automatic call back can be used via the R button.
Please refer to the operating manual supplied with your private branch
exchange to determine which recall (Flash) time must be set in order to
use these functions. The dealer where you purchased the exchange can
provide information as to whether the telephone will work properly with the
exchange.
Setting the Recall time
Two recall timings are available. Short 100ms and Long 300ms.
,
or
SHORT
or
,
Open the Menu, select ‘RECALL’
The current setting is shown
,
Select and confirm ‘SHORT’ or ‘LONG’
Dialling pause
In the case of private branch exchanges, it is necessary to enter an access
code to get an outside line with its corresponding dialling tone. When
using some older private branch exchanges, it takes a little time before the
dialling tone becomes available. Particularly in the case of such private
branch exchanges, it is possible to insert a dialling pause after the number
for the outside line so that the number can be dialled in a continuous
process without having to wait for the dialling tone.
2 sec
R button and Supplementary services
Your telephone supports the supplementary services offered by your
telephone network provider, such as call brokering, call waiting and
conference calls. The supplementary services can be used in conjunction
with the R button. Please contact your telephone network provider with
regard to enabling the supplementary services and which recall time must
be used.
Dial mode
Two dialling modes are available, Tone and Pulse. Only change this setting
if you are advised to do so by your private branch exchange dealer.
,
or
Open the Menu, select ‘DIAL MODE’
,
TONE
The current setting is shown
or
Select and confirm ‘TONE’ or ‘PULSE’
,
Reset to default settings
You can reset your handset to its original default settings. The phone book,
calls and redial lists are not deleted when you reset the handset.
,
or
,
Open the Menu, select ‘RESET’
,
,
Enter the PIN code and confirm
Insert a dialling pause. ‘P’ is shown
in the display.
The pause can also be entered with the phone number in the phone book.
GB
77
If Problems Occur
GB
78
11. If Problems Occur
The handset switches itself off
Service Hotline
Should problems arise with the telephone, please refer to the following
information first. In the case of technical problems, you can contact our
hotline service, Tel. 0900 00 1675 within Switzerland (cost via Swisscom
at time of going to print CHF 2.60/min). In the case of claims under the
terms of the guarantee, contact your sales outlet. There is a 2 year period
of guarantee.
The system nolonger responds or is in Reset all the functions to their default
an undefined state
settings. See page 77.
Problem
Solution
No telephone calls possible
The telephone line is not connected
properly or is defective. Only use the
telephone connection cable supplied.
Test the telephone line/socket by
using another telephone
The power adaptor is not plugged
in/switched on or there is a complete
power failure.
Ensure that you are in range of the
base (300m outdoors and 50m
indoors in ideal conditions)
Unable to dial out
Is the keylock on? Press and hold the
key to unlock the keypad.
Connection is disturbed or cut off
Ensure that you are in range of the
base (300m outdoors and 50m
indoors in ideal conditions)
The base station is in an unsuitable
location
Place the handset in the base station
to charge for 15 hours.
Replace the rechargeable batteries.
The caller number display (CLIP) does
not function
Check that you have this service on
your telephone line. Please call your
network provider.
The caller has withheld their
telephone number
The handset does not ring
Check that the ringer is not set to off.
See pages 70 & 71.
Buzzing noise on radio, TV or
computer
We recommend that you leave a
distance of 1 metre from electrical
equipment and mobile phones.
Technical Properties
12. Technical data
Feature
Value
Standard
DECT1 GAP2
Power supply (base station)
Input: 230VAC 50Hz 35mA
Output: 6VDC 300mA
Power supply (charging station)
Input: 230VAC 50Hz 30mA
Output: 7.5VDC 100mA
Range
Outdoors approx. 300m
Indoors approx. 50m
Standby
Up to 100 h
Max. talk time
Up to 10 h
Rechargeable batteries
AAA 1.2V 800mAh NiMH
Dialling mode
Tone (DTMF)
Pulse
Permissable ambient
temperature
0oC to 45oC
Permissable relative humidity
20% to 80%
Recall
100, 300 ms
1
DECT: Digital Enhanced Cordless Telecommunication = Standard for cordless
telephones.
2 GAP: Generic Access Profile = Standard for the interoperation of handsets and
base stations from different manufacturers.
GB
79
Default settings
13. Default settings
Cordless handset
The default settings can be restored via the menu. Refer to page 77 for
the sequence of menu option selections.
GB
80
Language
German
Handset name
DC601
Ringer melody
7
Ringer volume
5
Boost Memory
Off
Auto answer
On
Recall time
100 ms
Dialling mode
Tone
PIN-Code
0000
Maintenance/Guarantee
14. Maintenance/Guarantee
Maintenance
•
Clean the product surfaces with a soft, fluff-free cloth
•
Never use cleaning agents or solvents
Guarantee
SWITEL equipment is produced and tested according to the latest
production methods. The implementation of carefully chosen materials
and highly developed technologies ensure trouble-free functioning and
a long service life. The terms of the guarantee do not apply where the
cause of the equipment malfunction is the fault of the telephone network
operator or any interposed private branch extension system. The terms of
guarantee do not apply to the rechargeable batteries or power packs used
in the products. The period of guarantee is 24 months from the date of
purchase.
All deficiencies resulting from material of production faults which occur
during the period of guarantee will be eliminated free of charge. Rights to
claims under the terms of guarantee are annulled following intervention
by the purchaser or third parties. Damage caused as a result of improper
handling or operation, incorrect positioning or storing, improper connection
or installation, Acts of God or other external influence are not covered
by the terms of guarantee. In the case of complaints, we reserve the
right to repair or replace defect parts of provide a replacement device.
Replacement parts or devices become our property.
Rights to compensation in the case of damage are excluded where there is
no evidence or intent or gross negligence by the manufacturer.
If your equipment shows signs of defect during the period of guarantee,
please return it to the sales outlet in which you purchased the SWITEL
equipment together with the purchase receipt. All rights to claims under
the terms of the guarantee in accordance with this agreement must be
asserted exclusively with regard to your sales outlet.
Two years after the purchase and transfer of our products, claims under
the terms of guarantee can no longer be asserted.
Declaration of Conformity
This device fulfils the requirements stipulated in the EU directive:
2005/32/EC, 1275/2008/EC, 278/2009/EC, 2009/125/EC/EuP
1999/5 EU directive on radio equipment and telecommunications terminal
equipment and the mutual recognition of their conformity.
Conformity with the above mentioned directive is confirmed by the CE
symbol on the device.
To view the complete Declaration of Conformity, please refer to the free
download available on our website www.switel.com.
GB
81
Index
15. Index
GB
82
A
Adjusting the handsfree volume, 70
Adjusting the receiver volume, 70
Adjusting the volume switch, 70
Auto talk, 72
B
Base ringing melody, 71
Base ringing volume, 71
Boost mem, 72
Boosting the receiver volume, 70
C
Calling back missed calls, 69
Calls list, 74
Chain dialling, 70
Charging the batteries, 65
Check the contents of the package, 65
Conference calls, 75
Connecting the base unit, 65
Creating phone book entries, 73
D
Date/time, 71
Declaration of Conformity, 81
Default settings, 80
Deleting calls list entries, 74
Deleting all calls list entries, 74
Deleting a single calls list entry, 74
Deleting phone book entries, 73
Dialling phone numbers from the
phone book, 69
Dialling pause, 77
Dial mode, 77
Displaying calls list entries, 74
E
Editing phone book entries, 73
End a call, 69
Entering a name, 73
G
Guarantee, 81
H
Handset deregistration, 76
Handset name, 71
Handset registration, 75
Handset ringing melody, 71
Handset ringing volume, 71
Handsfree, 70
I
Icons in the display, 67
If problems occur, 78
Inserting the batteries, 63
K
Keylock, 70
L
Language, 72
Low radiation operation, 65
M
Maintenance, 81
Making a call, 69
Making internal calls, 75
Muting the microphone in the handset, 70
N
Navigating in the menu, 68
O
Operating the telephone, 67
P
Phone book, 73
Private branch exchanges, 77
Q
Quickdial, 69
R
R button and supplementary
services, 77
R button on private branch
exchanges, 77
Redial, 69
Reset to default settings, 77
Ringer on/off, 70
S
Safety information, 64
Setting the recall time, 77
Starting up, 65
Storing a quickdial entry, 73
Storing calls list entries in the
phone book, 73
T
Take a call, 69
Talk time display, 70
Technical properties, 79
Telephoning, 69
Transferring external calls internally, 75
U
Using additional handsets, 75
Using the menu, 71
Y
Your DC601 telephone and base, 66
April10: Issue 1.8