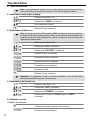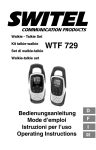
1
KombiSet aus schnurgebundenem Telefon und
Schnurlostelefon mit XLTasten
Kit téléphone filaire et téléphone sans fil avec grandes touches
Combinazione di telefono a cavo e telefono cordless con tasti XL
Combination set comprising cableconnected telephone and
cordless telephone with XLkeys
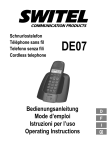
DCC632x
Combo
Bedienungsanleitung
Mode d'emploi
Istruzioni per l'uso
Operating Instructions
2
Bedienungsanleitung . . . . . . . . . . . . . . . . . . . 3
Mode d'emploi . . . . . . . . . . . . . . . . . . . . . . . 35
Istruzioni per l'uso . . . . . . . . . . . . . . . . . . . . . 67
Operating Instructions . . . . . . . . . . . . . . . . . . 99
1
1
2
3
4
5
6
7
8
9
10
11
12
13
14
Inhaltsverzeichnis
Allgemeine Hinweise . . . . . . . . . . . . . . . . . . . . . . . . . . . . 4
Sicherheitshinweise . . . . . . . . . . . . . . . . . . . . . . . . . . . . 6
Erste Schritte . . . . . . . . . . . . . . . . . . . . . . . . . . . . . . . . . 8
Benutzen des Telefons . . . . . . . . . . . . . . . . . . . . . . . . . . 14
Benutzen des schnurlosen Mobilteils . . . . . . . . . . . . . . . . 21
Anmelden und Abmelden des Mobilteils . . . . . . . . . . . . . . 27
Anrufweiterleitung und interne Anrufe . . . . . . . . . . . . . . . . 29
Abkürzungen und technische Begriffe . . . . . . . . . . . . . . . . 30
Fehlerbehebung . . . . . . . . . . . . . . . . . . . . . . . . . . . . . . . 31
Pflege . . . . . . . . . . . . . . . . . . . . . . . . . . . . . . . . . . . . . . 32
Technische Daten . . . . . . . . . . . . . . . . . . . . . . . . . . . . . . 33
Herstellergarantie . . . . . . . . . . . . . . . . . . . . . . . . . . . . . . 34
Konformitätserklärung . . . . . . . . . . . . . . . . . . . . . . . . . . . 34
Stromverbrauch . . . . . . . . . . . . . . . . . . . . . . . . . . . . . . . 34
3
Allgemeine Hinweise
1 Allgemeine Hinweise
Vor der Erstbenutzung
Danke, dass Sie sich für den Kauf dieses neuen schnurlosen Digitaltelefons entschieden haben.
Bestimmungsgemäße Verwendung:
Dieses Produkt dient dem Innenanschluss an eine analoge Telefonleitung.
Die Ausführung dieses Produkts entspricht den Richtlinien der digitalen, verbesserten schnurlosen
Telekommunikation (DECT). Der Einsatz der DECT-Technologie stellt einen
Hochsicherheitsabhörschutz und ein hochwertiges digitales Übertragungsverfahren sicher. Die
Entwicklung dieses Telefons ist auf eine breite Anwendungspalette ausgelegt. So kann es
beispielsweise in einem Telefonnetz mit 5 Mobilteilen eingesetzt werden.
Die Übertragung der Anruferkennung ist eine Leistung des Diensteanbieter. Nach dem Abonnieren
der Anruferkennung zeigt dieses Telefon die Anruferkennung des eingehenden Anrufs an.
Wichtig
Zur Nutzung der „Caller ID“-Funktion (Anruferkennung wird angezeigt) muss dieser Dienst für Ihre
Telefonleitung aktiviert sein. In der Regel ist zur Aktivierung dieser Funktion ein separates Abonnieren
des Dienstes erforderlich. Wenn für Ihre Telefonleitung keine Anruferkennung-Funktion möglich ist,
kann die Rufnummer der eingehenden Telefonanrufe NICHT auf dem Display Ihres Telefons
angezeigt werden.
Achtung: Dieses Produkt darf nur mit Akkus betrieben werden. Der Einsatz von nicht
wiederaufladbaren Batterien kann beim Einlegen in die Basisstation zu Beschädigungen des
Geräts führen, die von der Gewährleistung AUSGESCHLOSSEN sind.
Für den Anschluss an ein öffentliches analoges Telefonnetz.
Die in diesem Benutzerhandbuch beschriebenen Funktionen werden unter Änderungsvorbehalt
veröffentlicht.
Dieses Benutzerhandbuch enthält alle Informationen, die zur Installation, Einrichtung und Bedienung
des Geräts erforderlich sind. Es enthält außerdem wichtige Sicherheitshinweise und
Problemlösungen. Benutzerhandbuch in der Nähe des Geräts aufbewahren. Benutzerhandbuch an
einem sicheren Ort aufbewahren und bei Bedarf anderen Benutzern zugänglich machen.
1.1 Das Produkt: DCC632x
Dieses Produkt wurde nach den Standards der einheitlichen digitalen Telekommunikation (DECT)
hergestellt. Die DECT-Technologie zeichnet sich durch eine hochwertige digitale Übertragung und
einen Hochsicherheitsabhörschutz aus. Dieses Telefon wurde für einen breiten Anwendungsbereich
entwickelt, z. B. für ein Netzwerk von Basisstationen und schnurlosen Mobilteilen, die zusammen eine
komplette Telefonanlage bilden: Es können bis zu 5 schnurlose Mobilteile mit einer Basisstation
betrieben werden; ein schnurloses Mobilteil kann für bis zu 4 Basisstationen benutzt werden. Es kann
zwischen der Basisstation und einem Mobilteil oder zwischen zwei Mobilteilen intern telefoniert
werden. Anruferkennung und SMS-Service Ihres Netzanbieters können auf diesem Telefon genutzt
werden, wenn diese Funktionen für Ihren Anschluss verfügbar sind. Wenn Sie diese Dienste
verwenden, wird die Rufnummer des Anrufers auf dem Display des Telefons angezeigt.
Wichtig: Damit die „Anruferkennung“ verwendet werden kann, muss diese Funktion
zunächst für Ihre Telefonleitung aktiviert werden. Kontaktieren Sie Ihre Telefongesellschaft,
um Näheres über die Aktivierung dieser Funktion zu erfahren. Falls diese Funktion nicht
angeboten wird, erscheint die Rufnummer des Anrufers NICHT auf dem Display des
Telefons.
4
Allgemeine Hinweise
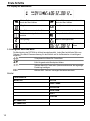
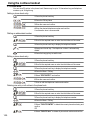
1.2 Signalwörter und Symbole
Symbol
Keine
Signalwort
Bedeutung
Warnung
Warnung vor schweren Verletzungen oder Todesgefahren, falls
die gegebenen Informationen nicht befolgt werden.
Vorsicht
Warnung vor leichten Verletzungsgefahren, falls die gegebenen
Informationen nicht befolgt werden.
Vorsicht
Risiko, Material zu beschädigen oder Umwelt zu belasten.
Wichtig
Enthält wichtige Informationen über die Gerätefunktion.
Information,
Hinweise
Allgemeine Informationen oder besondere Hinweise.
1.3 Bestimmungsgemäße Verwendung
Mit diesem Gerät können Telefonanrufe über eine Festnetzleitung eines Telefonnetzes getätigt
werden. Die Grundvoraussetzung für einen ordnungsgemäßen Gebrauch des Telefons ist eine
fachkundige Installation, bei der alle im Benutzerhandbuch gegebenen Informationen zu beachten
sind. Jeder abweichende Verwendungszweck wird als nicht ordnungsgemäß erachtet und ist
untersagt. Veränderungen oder andere in diesem Benutzerhandbuch nicht beschriebene Maßnahmen
sind nicht ordnungsgemäß und sind verboten. Wir haften für keinerlei Schäden, die durch
unsachgemäßen Gebrauch entstehen.
1.4 Verpackungsinhalt
Der Verpackungsinhalt ist auf Vollständigkeit und Unversehrtheit zu überprüfen. Bei fehlenden oder
beschädigten Komponenten ist der zuständige Fachhändler zu kontaktieren. Die Verpackung ist für
eine Rücksendung oder Reparatursendung des Telefons aufzubewahren.
1 Basisstation mit Telefonhörer und Anschlusskabel
1 Netzadapter für Basisstation
1 Telefonkabel für Basisstation
1 Ladestation inkl. Netzadapter
1 Schnurloses Mobilteil einschl. 2 Akkus (AAA, 1,2 V/450 mAh, NiMH) und eine Akkufachabdeckung
1 Benutzerhandbuch
Warnung: Für Kinder besteht Erstickungsgefahr! Verpackungsfolie unzugänglich für Kinder
aufbewahren.
Wichtig: Verpackungsmaterial dieses Produkts umweltverträglich entsorgen.
5
Sicherheitshinweise
2 Sicherheitshinweise
Bei der Benutzung elektrischer Geräte sind stets die folgenden grundsätzlichen Sicherheitshinweise
zu berücksichtigen. Die folgenden Sicherheitshinweise zur ordnungsgemäßen Verwendung des
Geräts sind genau zu beachten. Es ist sich mit allen Funktionen des Geräts vertraut zu machen.
Benutzerhandbuch an einem sicheren Ort in der Nähe des Geräts aufbewahren und bei Bedarf
anderen Benutzern zugänglich machen. Bei Weiterverkauf des Geräts an Dritte das
Benutzerhandbuch beilegen.
Stromschlagrisiken:
Warnung: Verletzungs- oder Todesgefahr durch Stromschlag! Bei Gefahr ist das Gerät
unverzüglich von der 230 V-Netzversorgung zu nehmen.
Gerät nicht bei Beschädigung des Netzadapters, eines Kabels oder des Geräts selbst benutzen.
Beschädigung des Geräts durch Fallenlassen vermeiden.
Die im Gerät anliegende Spannung ist lebensgefährlich. Nie das Gehäuse des Geräts öffnen
bzw. Gegenstände in die Belüftungsschlitze einführen.
Vermeiden, dass Flüssigkeiten in das Gerät gelangen. In diesem Fall Stecker des Netzadapters
aus der Netzsteckdose und den Telefonkabelstecker aus der Wandbuchse ziehen.
Auch bei Funktionsstörungen und vor dem Reinigen des Geräts Stecker des Netzadapters aus
der Netzsteckdose und Telefonkabelstecker aus der Wandbuchse ziehen.
Beschädigungen der Ladestation und der Steckeranschlüsse mit scharfen oder metallischen
Gegenständen vermeiden.
Keine Veränderungen oder Reparaturen am Gerät vornehmen. Gerät oder Kabel ausschließlich
durch einen qualifizierten Fach- bzw. Wartungsbetrieb reparieren. Nicht ordnungsgemäß
ausgeführte Reparaturen können für den Benutzer erhebliche Risiken darstellen.
Kinder unterschätzen häufig die Gefahren, die bei der Handhabung elektrischer Geräte
entstehen. Kinder von elektrischen Geräten fernhalten.
Kinder nicht mit elektrischen Geräten oder Gerätekomponenten spielen lassen.
Achtung: Gerät kann beschädigt werden. Bei Gefahr ist das Gerät unverzüglich von der
230 V-Netzversorgung zu nehmen.
Der Einsatz des Geräts in Feuchträumen (z. B. Badezimmern) oder sehr staubigen Bereichen ist
zu vermeiden.
An das Stromnetz angeschlossene elektrische Geräte können bei Gewitter beschädigt werden.
Daher ist das Gerät bei einem Gewitter stets vom Netz zu nehmen.
Stecker des Netzadapters komplett aus der Netzsteckdose ziehen, um das Gerät vollständig vom
Stromnetz zu trennen. Nur am Stecker und nicht am Kabel ziehen.
Kabel regelmäßig auf Beschädigungen überprüfen, heiße Oberflächen und andere
Gefahrenstellen meiden. Kabel stets vollständig abwickeln und so verlegen, dass sie weder
Stolperfallen bilden noch eingeklemmt werden.
Brandrisiko:
Warnung: Verletzungs- oder Todesgefahr durch Feuer! Gerät keiner übermäßigen Hitze
aussetzen und bei Gefahr unverzüglich von der 230 V-Netzversorgung nehmen.
Die im Inneren des Geräts erzeugte Hitze kann eine Störung oder ein Brand im Gerät verursachen.
Dieses Gerät daher keinen extremen Temperaturen aussetzen:
Direktes Sonnenlicht und Hitze vermeiden
Belüftungsöffnungen des Geräts nicht abdecken
6
Sicherheitshinweise
Explosionsgefahr!
Warnung: Verletzungsgefahr durch Explosion! Besondere Achtsamkeit ist bei Kindern
geboten!
Einwegbatterien bzw. Akkus niemals in ein Feuer werfen!
Geräte nicht in einer explosionsgefährdeten Umgebung benutzen!
Explosionsgefahr!
Warnung: Verletzungsgefahr durch Vergiftung! Besondere Achtsamkeit ist bei Kindern
geboten!
Akkus für Kinder unzugänglich aufbewahren.
Erstickungsgefahr!
Warnung: Verletzungsgefahr durch Erstickung! Besondere Achtsamkeit ist bei Kindern
geboten!
Verpackungsfolien unzugänglich für Kinder aufbewahren.
Bei der Verwendung von Verlängerungskabeln, mögliche Risiken für Kinder
(Strangulierungsgefahr) berücksichtigen.
Störungen:
Warnung: Verletzungsgefahr durch Gerätestörungen! Bei der Handhabung medizinischer
Geräte ist bei Kindern besondere Achtsamkeit geboten!
Elektromagnetische Strahlungen, die von Ihrem Gerät erzeugt werden, können die
Funktionsfähigkeit elektrisch betriebener medizinischer Geräte beeinträchtigen. Daher ist
sicherzustellen, dass das Gerät in einem ausreichenden Abstand von elektrisch betriebenen
medizinischen Geräten installiert und betrieben wird. Gleiches gilt für implantierte medizinische
Geräte, wie Herzschrittmacher.
Da das schnurlose Mobilteil gegebenenfalls unangenehme Störgeräusche in Hörgeräten
verursachen kann, ist es in ausreichendem Abstand von diesen Hörgeräten aufzubewahren.
Mögliche Schäden:
Achtung: Gerät kann beschädigt werden. Informationen in diesem Benutzerhandbuch
beachten.
Nur die mitgelieferten Netzadapter verwenden. Um eine Beschädigung der Akkus zu vermeiden,
dürfen keine Netzadapter von Drittlieferanten verwendet werden.
Die Steckdose für den Anschluss des Netzadapters muss sich in der Nähe des Geräts befinden
und leicht zugänglich sein.
Nur die mitgelieferten Akkus verwenden. Bei Akkuwechsel nur Akkus des gleichen Typs
verwenden! Sicherstellen, dass die Akkus ordnungsgemäß eingesetzt sind (Informationen sind
dem Akkufach des Geräts zu entnehmen). Niemals normale Einwegbatterien verwenden!
Wichtig: Bei einem Stromausfall können Anrufe nur an der Basisstation vorgenommen
werden.
2.1 Hinweise für einen strahlungsarmen Betrieb
Dieses schnurlose Telefon ermöglicht (gemäß dem DECT-Standard) einen strahlungsarmen Betrieb
(ECO-Modus). Während eines Anrufs verringert das Mobilteil, abhängig von der Entfernung zur
Basisstation, die Abstrahlleistung. Wenn kein Anruf getätigt wird, verringert das Mobilteil die Abstrahl
leistung auf ein Minimum. Dies bedeutet nicht, dass normale DECT-Strahlung gesundheitsgefährdend
ist. Eher verhindert ein strahlungsarmer Betrieb eine unnötige Strahlungsexposition. Die Basisstation
reduziert keine Abstrahlleistung! Basisstation an einem Standort platzieren, an dem nicht sehr viel Zeit
verbracht wird, zum Beispiel im Flur. Ein ungeeigneter Standort für die Basisstation sind
Kinderzimmer, Schlafzimmer oder Wohnzimmer.
7
Erste Schritte
3 Erste Schritte
3.1 Verwenden dieses Benutzerhandbuchs
In diesem Benutzerhandbuch kommt bei der Erläuterung von Anweisungen die folgende
Verfahrensweise zum Einsatz:
Text ….. MOBILTEIL
Zu betätigende Taste
Auf dem Display angezeigter Text
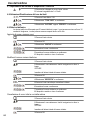
3.2 Installieren der Basisstation
Basisstation wie folgt installieren:
1 Netzadapter zuerst an der Basisstation anschließen und erst dann in eine Netzsteckdose stecken.
2 Den Telefonstecker am Kabels in die wandmontierte Telefonsteckdose und den Stecker am
anderen Ende in die passende Buchse an der Rückseite der Basisstation einführen.
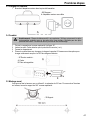
3 Der Anschluss der Telefonleitung und des Netzkabels erfolgt wie in Abbildung 3A dargestellt.
A
- 3A Basisstation A. Telefonsteckdose
B. Netzadapter mit Kabel
C. Telefonkabel
8
Erste Schritte
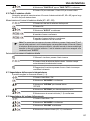
3.3 Ladestation des Mobilteils
1
Stecker des Netzadapters in die Steckdose einführen.
- 3B Ladestation A. Netzadapter mit Kabel
3.4 Mobilteil
Achtung: Verletzungsgefahr durch Explosion! Nur die mitgelieferten Akkus oder Akkus des
gleichen Typs verwenden. Niemals normale Einwegbatterien verwenden! Das schnurlose
Mobilteil kann sonst beschädigt werden.
1
2
3
4
Akkufach öffnen, wie in Abbildung 3C dargestellt.
Einsetzen der Akkus. Sicherstellen, dass die Polung korrekt ist (+ und -).
Akkufach schließen.
Mobilteil in die Ladestation legen. Die Ladezeit des Mobilteils beträgt 16 Stunden. Die
Ladezustand-LED leuchtet.
- 3C Rückseite des MobilteilsA. Abdeckung
B. Akkus
3.5 Wandmontage
Sie können die Basisstation mit 2 Schrauben (Schraubenabstand 100 mm) an der Wand befestigen.
Um den Hörer an der Basisstation aufzuhängen, muss der Einsatz um 180° gedreht werden, wie
nachfolgend dargestellt.
- 3D Einsatz -
9
Erste Schritte
3.6 Anzeige des Akkuladezustands
Das Mobilteil funktioniert bei einem niedrigen Akkuladezustand nicht mehr ordnungsgemäß. Auch
wenn die Akkus vollständig entladen sind, zeigt die Akkuladeanzeige an, wenn das Mobilteil nur für
eine kurze Dauer auf die Basisstation gelegt wird, dass die Akkus vollständig geladen sind. Da dies
jedoch nicht zutreffend ist, verschlechtert sich die Akkuleistung sehr schnell. Mobilteil für eine Dauer
von 16 Stunden in der Ladestation lassen, bis die Akkus vollständig aufgeladen sind.
Aufgeladene Akkus
Leere Akkus
Das Mobilteil wird einen Warnton abgeben, wenn die Akkus
während eines Anrufs fast leer sind. Mobilteil in die Ladestation
legen, um die Akkus aufzuladen.
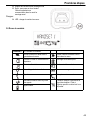
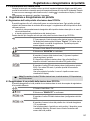
3.7 Tasten/Display
Schnurloses Mobilteil
1. Wahlwiederholungstaste/
Nach-Oben-Taste
2. Telefonbuchtaste
3. Stummschalt-/Löschtaste
4. Auflegetaste
5. Alphanummerische Tasten
6. Tastensperre-Taste
7. Pause-Taste
8. Klingelton ein/aus
9. Anruferliste-/Nach-Unten-Taste
10. Verbindungs-/Freisprech-Taste
11. INT/ESC-Taste
12. Menü/OK/Flash-Taste
13. Display
14. Rote LED, blinkt bei Anruf
Basisstation
15.
16.
17.
18.
19.
20.
21.
22.
23.
24.
25.
26.
27.
28.
29.
30.
10
ESC-Taste
Menü-/OK-Taste
Nach-Links-Taste
Wahlwiederholungstaste/
Nach-Oben-Taste
Pfeil-Rechts-Taste
Display
Telefonbuchtaste
Anruferliste/Flash-Taste
Nach-Unten-Taste
Kurzwahltasten (M1 - M2 - M3)
Freisprechtaste
Alphanummerische Tasten
Rote LED an Basisstation,
blinkt bei Anruf
Paging-/Anrufumleitungs-/
Interne Anruftaste
Stummschalt-/Löschtaste
Lautstärkeregelung
Erste Schritte
31. Lautsprecher
32. Hörerhalterung für Wandmontage
33. Haltevorrichtung: zum kurzzeitigen
Ablegen des Hörers während eines
Anrufs, bei Wandmontage
Ladestation
34. LED: Aufladevorgang des Mobilteils.
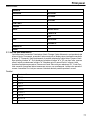
3.8 Display des Mobilteils
MOBILTEIL X X = Mobilteilnummer
Weitere Rufnummern oder nach
links durch das Menü blättern
Weitere Rufnummern oder nach
rechts durch das Menü blättern
Telefonbucheinträge finden oder
erstellen
Anzeige des Akkuladezustands
Klingelton aus
Freisprechbetrieb aktiviert
Tastensperre ein
Neue Sprachnachricht
Anruf getätigt
Mikrofon stummgeschaltet
Neue Rufnummern in derAnrufliste
Das Antennensymbol zeigt die
Stärke des Empfangssignals. Das
Antennensymbol blinkt, wenn das
Mobilteil außerhalb der Reichweite
ist.
Interner Anruf
11
Erste Schritte
3.9. Display der Basisstation
CLIP
Weitere Rufnummern oder nach links
durch das Menü blättern
Weitere Rufnummern oder nach rechts
durch das Menü blättern
Klingelton aus
Neue Sprachnachricht
Neue Rufnummern in der Anrufliste
04
Positionsnummer in der Anruferliste
Telefonbucheinträge finden oder
erstellen
Freisprechbetrieb aktiviert
Anruf getätigt
Mikrofon stummgeschaltet
Interner Anruf
Uhrzeit und
Datum
3.10 Navigieren durch das Menü
Die Menüstruktur des DCC632x ist äußerst benutzerfreundlich. Jedes Menü enthält eine Reihe von
Optionen. Eine Menü-Zusammenfassung für das Mobilteil und für die Basisstation ist nachfolgend
aufgeführt.
1 Hauptmenü mit Menü/OK-Taste öffnen.
2 Auf die gewünschte Menüoption blättern.
3 Mit der Menü/OK-Taste mehr Optionen aufrufen bzw. die angezeigte
Einstellung bestätigen.
4 Mit der ESC-Taste zur vorherigen Menüebene wechseln.
Mobilteil
TELEFONBUCH
MOBILTEIL
RUFTON
MOBILT NAME
TASTENTON
BASIS AUSW
RESET
SPRACHE
MT ANMELDEN
MT ABMELDEN
12
Erste Schritte
Basisstation
TELEFONBUCH
RUFTON
EXTERN
INTERN
LAUTSTARKE
TASTENTON
SPRACHE
BASIS
ANRUF TYP
FLASH
PIN NUMMER
UHR
DATUM/UHR
FORMAT
MT ABMELDEN
RUCKSET
3.11 Verwenden der alphanummerischen Tasten
Text kann mit den alphanummerischen Tasten eingegeben werden. Um einen Buchstaben
auszuwählen, die entsprechende alphanummerische Taste betätigen. Mit der nummerischen Taste 5
wird der Buchstabe „j“ im Display angezeigt. Durch wiederholte Betätigung der Taste können andere
Buchstaben ausgewählt werden. Mit einmaliger Betätigung der Taste 2 wird der Buchstabe „a“
ausgewählt. Um die Buchstaben „a“ und „b“ nacheinander einzugeben, muss zuerst die Taste 2
einmal betätigt werden, um den Buchstaben „a“ auszuwählen. Nach ca. 2 Sekunden bewegt sich der
Cursor auf die nächste Zeichenstelle. Um den Buchstaben „b“ auszuwählen, muss die Taste 2
zweimal hintereinander betätigt werden. Mit der Löschtaste werden falsch eingegebene Buchstaben
gelöscht. Dabei wird der Buchstabe gelöscht, der sich vor dem Cursor befindet. Mit der NachLinks-/Rechts-Taste wird der Cursor bewegt.
Tabelle der verfügbaren Zeichen
1
Leerschritt + -/1
2
2A B C 2
3
DEF3
4
GHI4
5
JKL5
6
MNO6
7
PQRS7
8
TUV8
9
WXYZ9
0
_0
13
Benutzen des Telefons
4 Benutzen des Telefons
Information: Dieser Abschnitt beschreibt nur die Funktion der Basisstation! Informationen
zur Benutzung des Mobilteils befinden sich in Abschnitt „5 Benutzen des schnurlosen
Mobilteils“.
4.1 Einstellen der Display-Sprache
1 Menü/OK-Taste betätigen.
2 „SPRACHE“ auswählen und bestätigen.
3 Sprache auswählen.
4 Mit OK bestätigen.
4.2 Einstellen von Datum und Uhrzeit
Information: Wenn die Anruferkennung (CLIP) für die Telefonleitung aktiviert ist und der
Anbieter Datum und Uhrzeit übermittelt, stellt sich die Uhr automatisch, wenn ein Anruf
eingeht. Nach Einstellung der Zeit werden die Einstellungen von allen Mobilteilen, die für die
Basisstation registriert sind, übernommen.
1 Menü/OK-Taste betätigen.
2 „UHR“ auswählen und bestätigen.
3 „DATUM/UHR“ auswählen und bestätigen.
4 Jahr eingeben und bestätigen.
5 Monat eingeben und bestätigen.
6 Tag eingeben und bestätigen.
7 Stunden eingeben und bestätigen.
8 Minuten eingeben.
9 Mit OK bestätigen.
Wichtig: Datum- und Uhrzeiteinstellungen werden gelöscht, wenn die Basisstation nicht mit
Strom versorgt wird.
4.3 Einstellen des Zeitformats
1 Menü/OK-Taste betätigen.
2 „UHR“ auswählen und bestätigen.
3 „FORMAT“ auswählen und bestätigen.
4 Zeitformat auswählen als „24-STUNDEN“ oder „12-STUNDEN“ und
bestätigen.
4.4 Ausgehende Anrufe
Telefonieren
1 Hörer abheben oder die Freisprechtaste betätigen.
2 Rufnummer eingeben.
14
Benutzen des Telefons
3 Hörer auflegen oder erneut die Freisprechtaste betätigen, um den
Anruf zu beenden.
ODER
1 Rufnummer eingeben.
2 Hörer abheben oder die Freisprechtaste betätigen.
3 Hörer auflegen oder erneut die Freisprechtaste betätigen, um den
Anruf zu beenden.
Wahlwiederholung der zuletzt angerufenen Rufnummer
1 Hörer abheben oder die Freisprechtaste betätigen.
2 Wahlwiederholungstaste betätigen. Die zuletzt eingegebene
Rufnummer wird automatisch angerufen.
Wahlwiederholung einer der 3 zuletzt angerufenen Rufnummern
1 Wahlwiederholungstaste betätigen.
2 Eine der 3 zuletzt angerufenen Rufnummern auswählen.
3 Hörer abheben oder die Freisprechtaste betätigen.
Eine Rufnummer im Telefonbuch anrufen:
1 Telefonbuchtaste betätigen.
2 Zum gewünschten Namen blättern oder die Anfangsbuchstaben des
Namens eingeben.
3 Menü/OK-Taste betätigen, um die Rufnummer anzuzeigen.
4 Hörer abheben oder die Freisprechtaste betätigen. Die
Telefonnummer wird automatisch angewählt.
4.5 Aktivieren/Deaktivieren des Freisprechbetriebs
Diese Funktion ermöglicht es, einen Anruf anzunehmen, ohne den Hörer abzuheben, oder zu
sprechen, wenn der Hörer bereits abgehoben worden ist.
1 Freisprechtaste betätigen, um die Funktion zu aktivieren.
2 Freisprechtaste erneut betätigen, um den Anruf zurück zum Hörer zu
schalten.
4.6 Stummschalten
Das Mikrofon kann während eines Telefonats stummgeschaltet werden, sodass die Person am
anderen Ende der Leitung nicht hört, was gerade gesprochen wird.
1 Stummschalttaste betätigen. Das Mikrofon ist stummgeschaltet.
2 Stummschalttaste erneut betätigen, um das Mikrofon wieder
anzuschalten.
15
Benutzen des Telefons
4.7 Einstellen der Sprecher- und Hörerlautstärke
1 Lautstärketaste während eines Telefonats betätigen.
2 Die Lautstärke ist in 5 Stufen einstellbar.
4.8 Aktivieren und Deaktivieren der Tastentöne
1 Menü/OK-Taste betätigen.
2 „TASTENTON“ auswählen und bestätigen.
3 „EIN“ oder „AUS“ auswählen und bestätigen.
4.9 Telefonbuch
Im Telefonbuch können 50 Rufnnummern und Namen gespeichert werden. Namen können bis zu
16 Buchstaben und Rufnummern bis zu 24 Zeichen lang sein.
Einen neuen Namen und eine neue Rufnummer hinzufügen
1 Telefonbuchtaste betätigen.
2 Mit OK bestätigen.
3 „NEUER“ auswählen und bestätigen.
4 Namen eingeben und bestätigen.
5 Rufnummer eingeben und bestätigen.
6 Er ertönt ein Bestätigungssignal.
Eingeben von Name und Rufnummer
1 Telefonbuchtaste betätigen.
2 Namen mit der Nach-Oben/Nach-Unten-Taste auswählen.
ODER
Anfangsbuchstaben des Namens eingeben.
3 Mit OK bestätigen.
4 „BEARB“ auswählen und bestätigen.
5 Löschtaste betätigen, um Buchstaben zu löschen.
6 Namen eingeben und bestätigen.
7 Rufnummer eingeben und bestätigen.
8 Es ertönt ein Bestätigungssignal.
Löschen von Einträgen im Telefonbuch
1 Telefonbuchtaste betätigen.
2 Namen mit der Nach-Oben/Nach-Unten-Taste auswählen.
ODER
Anfangsbuchstaben des Namens eingeben.
3 Mit OK bestätigen.
4 „LOESCHEN“ oder „ALLE LOESCH“ auswählen und bestätigen.
16
Benutzen des Telefons
5 Mit OK bestätigen oder die ESC-Taste betätigen, um zurückzugehen.
4.10 Kurzwahltasten
In der Basisstation können 3 Rufnummern unter den Kurzwahltasten M1, M2 und M3 (jeweils mit bis
zu 24 Zeichen ) gespeichert werden.
Belegen der Kurzwahltasten (M1 - M2 - M3)
1 Eine der Kurzwahltasten betätigen.
2 Mit OK bestätigen.
3 „NEUER“ auswählen und bestätigen.
4 Namen eingeben und bestätigen.
5 Rufnummer eingeben und bestätigen.
Es ertönt ein Bestätigungssignal.
Information: An der gewünschten Stelle die Pause-Taste „P“ für eine Dauer von
2 Sekunden gedrückt halten, um eine 3-Sekunden-Pause zu speichern. Belegte
Kurzwahltasten können auf dieselbe Art wie das Telefonbuch (siehe Beschreibung oben)
bearbeitet oder gelöscht werden. Nicht belegte Kurzwahltasten werden als „LEER“
angezeigt.
Benutzen der Kurzwahltasten
1 Hörer abheben oder die Freisprechtaste betätigen.
2 Kurzwahltasten betätigen. Die Telefonnummer wird automatisch
angewählt.
3 Hörer auflegen oder erneut die Freisprechtaste betätigen, um den
Anruf zu beenden.
4.11 Einstellen des internen/externen Klingeltons
Es sind 9 verschiedene Klingeltöne verfügbar (1-9).
1 Menü/OK-Taste betätigen.
2 „RUFTON“ auswählen und bestätigen.
3 „INTERN“ für interne Anrufe auswählen.
ODER
4 „EXTERN“ für eingehende externe Anrufe auswählen.
5 Einen Klingelton (1-9) auswählen und bestätigen.
4.12 Einstellen der Klingeltonlautstärke
1 Menü/OK-Taste betätigen.
2 „RUFTON“ auswählen und bestätigen.
3 „LAUTSTARKE“ auswählen und bestätigen.
4 Gewünschte Lautstärke auswählen (Aus, 1-5) und bestätigen.
17
Benutzen des Telefons
4.13 Einstellen des Wählmodus
Es gibt 2 Wählmodi für die Telefonverbindung:
Mehrfrequenzwahlverfahren (MFV)/Tonwahl (am häufigsten)
Impulswahlverfahren (IWV) ist nur notwendig, wenn dieses Gerät mit einer älteren
Telefonanalage betrieben wird.
1 Menü/OK-Taste betätigen.
2 „BASIS“ auswählen und bestätigen.
3 „ANRUF TYP“ auswählen und bestätigen.
4 „TON“ oder „IMPULS“ auswählen und bestätigen.
4.14 Einstellen der System-PIN
Einige Funktionen sind nur mit Eingabe des PIN-Codes für die Basisstation zugänglich. Der PIN-Code
ist 4 Zeichen lang. Die Werkseinstellung des PIN-Codes lautet 0000. Ändern des PIN-Codes und
Eingeben des eigenen PIN:
1 Menü/OK-Taste betätigen.
2 „BASIS“ auswählen und bestätigen.
3 „PIN NUMMER“ auswählen und bestätigen.
4 „ALTE-“ auswählen und mit OK bestätigen.
5 „NEUE-“ eingeben und bestätigen.
4.15 Zurücksetzen der Basisstation
Alle Einstellungen der Basisstation können zurückgesetzt und alle Einträge im Telefonbuch sowie
Anrufer-, Favoriten- und Wahlwiederholungslisten gelöscht werden. Um auf Werkseinstellungen
zurückzusetzen:
1 Menü/OK-Taste betätigen.
2 „RUCKSET“ auswählen und bestätigen.
3 Mit OK bestätigen.
4 PIN-Code (0000) eingeben und bestätigen.
Werkseinstellungen:
Externer Klingelton 8
Interner Klingelton 1
Klingeltonlautstärke 4
Tastentöne EIN
Hörerlautstärke 4
Freisprecher-Lautstärke 4
Datums- und Uhrzeitformat 24
Wichtig: Alle gespeicherten Daten (Wahlwiederholung, Telefonbuch, Anruferliste,
Kurzwahltasten) werden gelöscht.
4.16 Anruferliste
Eingehende Anrufe werden in einer Anruferliste (max.30 Rufnummern) auf der Basisstation und dem
Mobilteil gespeichert. Die Anzahl entgangener Anrufe wird mit „X VERPASST“ (X = Anzahl
entgangener Anrufe) und dem blinkenden CLIP-Symbol angezeigt. Kurz die Anruferlistentaste
betätigen, um den letzten Anruf anzuzeigen.
18
Benutzen des Telefons
Wichtig: Die Anruferkennung (CLIP) funktioniert nur, wenn diese Funktion für die
Telefonleitung aktiviert ist. Telefongesellschaft kontaktieren, um weitere Informationen zu
erhalten.
Rufnummer und Name des letzten Anrufers werden auf dem Display angezeigt. Falls die Rufnummer
länger als 12 Zeichen ist, können mit der Taste die fehlenden Zahlen angezeigt werden. Falls die
Anruferliste leer ist, wird das Wort „LEER“ auf dem Display angezeigt. Datum und Uhrzeit der
eingehenden Anrufe werden oberhalb der Rufnummer angezeigt.
1 Mit den Nach-Oben/Nach-Unten-Tasten durch die Liste blättern.
Die Positionsnummer des Anrufs in der Anruferliste erscheint neben
dem CLIP-Symbol.
2 Nach-Links- oder Nach-Rechts-Taste betätigen, um Namen oder
Nummer anzuzeigen.
Information: Das Telefon kehrt in den Bereitschaftsmodus zurück, wenn nicht innerhalb von
15 Sekunden die Nach-Oben- oder die Nach-Unten-Taste betätigt wird. Wenn ein Anruf
eingeht, wird die Rufnummer nach dem letzten Klingeln für weitere 5-8 Sekunden auf dem
Display angezeigt.
Anrufen einer Rufnummer in der Anruferliste
1 Anruferliste-Taste betätigen.
2 Mit Nach-Oben/Nach-Unten-Tasten durch die Liste blättern.
3 Hörer abnehmen oder erneut die Freisprechtaste betätigen, um
anzurufen.
Speichern einer Rufnummer im Telefonbuch oder unter den Kurzwahltasten M1-M3
1 Anruferliste-Taste betätigen.
2 Mit den Nach-Oben/Nach-Unten-Tasten durch die Liste blättern und
bestätigen.
3 „PB SPEICHERN“ oder „MX SPEICHERN“ (MX = M1-M3) und
bestätigen.
4 Namen kann eingeben oder bearbeitet und anschließend bestätigt
werden.
5 Rufnummer eingeben oder bearbeiten und anschließend bestätigen.
Löschen eines oder aller Einträge in der Anruferliste
1 Anruferliste-Taste betätigen.
2 Mit den Nach-Oben/Nach-Unten-Tasten durch die Liste durch die
Liste blättern und bestätigen.
3 „LOESCHEN“ oder „ALLE LOESCH“ auswählen und zweimal
bestätigen.
Wichtig: Es werden nur alte Anrufe gelöscht. Neue Anrufe, die noch nicht gesehen wurden
oder noch unbeantwortet sind, werden nicht gelöscht.
19
Benutzen des Telefons
4.17 Tätigen eines internen Anrufs auf einem Mobilteil und Weiterleiten eines Anrufs auf
ein schnurloses Mobilteil
Anrufe können von der Basisstation auf ein Mobilteil weitergeleitet werden; es kann zeitgleich mit dem
externen Teilnehmer und einem zweiten Teilnehmer auf dem schnurlosen Mobilteil gesprochen
werden (Telefonkonferenz).
1 INT-Taste für eine Dauer von 3 Sekunden gedrückt halten, bis ein
Signalton ertönt, anschließend Taste loslassen. „INTERN“ erscheint
auf dem Display.
2 Nummer des Mobilteils eingeben. Sobald eine Verbindung zum
Mobilteil hergestellt wurde, kann intern gesprochen werden.
3 Hörer auflegen, um den Anruf zum schnurlosen Mobilteil
weiterzuleiten.
ODER
4 INT-Taste für eine Dauer von 3 Sekunden gedrückt halten, um eine
Telefonkonferenz einzuleiten.
4.18 Auffinden des Mobilteils (Ruffunktion)
Diese Funktion dient zum Auffinden des Mobilteils.
1 Ruftaste an der Basisstation betätigen.
Das Mobilteil wird 30 Sekunden lang klingeln und die rote LED auf dem
Mobilteil blinken.
2 Das Klingeln kann mit jeder Taste des Mobilteils beendet werden.
4.19 R-Taste (Flash-Taste)
Mit der Flash-Taste an der Basisstation können auf der externen Leitung besondere Funktionen
benutzt werden, wie z. B. „Anklopfen“ (wenn diese Funktion vom Telefonanbieter angeboten wird)
oder Anrufweiterleitung bei einer Telefonanlage. Mit der Flash-Taste (R-Taste) wird der Anruf kurz
unterbrochen. Die Flash-Zeit kann auf 100 ms oder 300 ms eingestellt werden. Wenn systembedingt
erforderlich, kann eine längere Flash-Zeit eingestellt werden.
1 Menü/OK-Taste betätigen.
2 „BASIS“ auswählen und bestätigen.
3 „FLASH“ auswählen und bestätigen.
4 „LANGE“ oder „KURZ“ auswählen und bestätigen.
20
Benutzen des schnurlosen Mobilteils
5 Benutzen des schnurlosen Mobilteils
Information: Dieser Abschnitt beschreibt nur die Funktion des schnurlosen Mobilteils!
Informationen über die Benutzung der Basisstation befinden sich in Abschnitt „4 Benutzen
des Telefons“.
5.1 Ändern der Sprache
1 Menü/OK-Taste betätigen.
2 „MOBILTEIL“ auswählen und bestätigen.
3 „SPRACHE“ auswählen und bestätigen.
4 Gewünschte Sprache auswählen und bestätigen.
5 Mit der ESC-Taste zum Bereitschaftsmodus zurückkehren.
5.2 Ausgehende Anrufe
Telefonieren
1 Verbindungstaste betätigen.
2 Rufnummer eingeben.
3 Mit der Auflegetaste den Anruf beenden.
Wahlvorbereitung
1 Telefonnummer eingeben
Mit der Stummschalttaste können falsch eingegebene Rufnummern
korrigiert werden.
Wenn für eine Dauer von 10 Sekunden keine Taste betätigt wird,
erlischt die Nummer und das Mobilteil kehrt in den Bereitschaftsmodus
zurück.
2 Verbindungstaste betätigen.
Die Telefonnummer wird automatisch angewählt.
3 Mit der Auflegetaste den Anruf beenden.
Wahlwiederholung der zuletzt angerufenen Rufnummer
1 Verbindungstaste betätigen.
2 Wahlwiederholungstaste betätigen.
Die zuletzt eingegebene Rufnummer wird automatisch angerufen.
3 Mit der Auflegetaste den Anruf beenden.
Wahlwiederholung einer der 3 zuletzt angerufenen Rufnummern
1 Wahlwiederholungstaste betätigen.
Die zuletzt angerufene Rufnummer erscheint auf dem Display.
Wenn eine der 3 zuletzt gewählten Rufnummern erneut gewählt
werden soll, Wahlwiederholungstaste solange drücken, bis die
gewünschte Rufnummer auf dem Display erscheint.
2 Verbindungstaste betätigen.
Die Telefonnummer wird automatisch angewählt.
21
Benutzen des schnurlosen Mobilteils
3 Mit der Auflegetaste den Anruf beenden.
5.3 Eingehende Anrufe
Wenn ein eingehender Anruf empfangen wird, klingeln das Mobilteil und die Basisstation und die LED
der „Optischen Anrufsignalisierung“ blinkt auf dem Mobilteil und der Basisstation.
1 Verbindungstaste betätigen, um den Anruf anzunehmen.
2 Mit der Auflegetaste den Anruf beenden.
5.4 Aktivieren/Deaktivieren des Freisprechbetriebs
Mit dieser Funktion kann ein Anruf angenommen werden oder ein Gespräch geführt werden, ohne das
Mobilteil halten zu müssen.
Während des Gesprächs:
1 Freisprechtaste betätigen, um die Funktion zu aktivieren.
2 Freisprechtaste erneut betätigen, um den Anruf zurück zum Mobilteil
zu schalten.
Wichtig: Die Akkus entladen sich schneller, wenn der Freisprechbetrieb für längere Zeit
eingeschaltet ist!
5.5 Stummschalten
Das Mikrofon kann während eines Telefonats stummgeschaltet werden, sodass die Person am
anderen Ende der Leitung nicht hört, was gerade gesprochen wird.
1 Stummschalttaste betätigen.
Das Mikrofon ist stummgeschaltet und „MIKROFON AUS“ wird
angezeigt.
2 Stummschalttaste erneut betätigen, um das Mikrofon wieder
anzuschalten.
5.6 Einstellen der Hörer/Freispecherlautstärke
Während eines Anrufs:
1 Navigationstaste betätigen.
Die Lautstärke ist in 5 Stufen (1-5) einstellbar.
5.7 R-Taste (Flash-Taste)
R
Die Flash-Taste auf der Basisstation dient der Nutzung besonderer
Funktionen, wie z. B. „Anklopfen“ (wenn vom Telefonanbieter
angeboten) oder Anrufweiterleitung bei einer Telefonanlage. Mit der
Flash-Taste (R-Taste) wird der Anruf kurz unterbrochen. Die Flash-Zeit
kann auf 100 ms oder 300 ms eingestellt werden. Um die Flash-Zeit zu
ändern, siehe „4.19 R-Taste (Flash-Taste)“.
5.8 Einstellen des Klingeltons und der Klingeltonlautstärke
Klingelton des Mobilteils für interne und externe Anrufe
1 Menü/OK-Taste betätigen.
2 „MOBILTEIL“ auswählen und bestätigen.
3 „RUFTON“ auswählen und bestätigen.
4 „INTERN“ oder „EXTERN“ auswählen und bestätigen.
22
Benutzen des schnurlosen Mobilteils
5 Klingelton (1-9) auswählen und bestätigen.
Klingeltonlautstärke des Mobilteils
1 Menü/OK-Taste betätigen.
2 „MOBILTEIL“ auswählen und bestätigen.
3 „RUFTON“ auswählen und bestätigen.
4 „LAUTSTARKE“ auswählen und bestätigen.
5 Gewünschte Lautstärke auswählen (Aus, 1-5) und bestätigen.
Wichtig: Die Klingeltonlautstärke jedes einzelnen Mobilteils kann mit der EIN/AUS-Taste
des Klingeltons im Bereitschaftsmodus ein- oder ausgeschaltet werden.
5.9 Tastensperre
Bei aktivierter Tastensperre hat das Betätigen von Tasten im Bereitschaftsmodus keine Auswirkungen
(mit Ausnahme der Tastensperre-Taste).
1 Tastensperre-Taste betätigen und gedrückt halten.
Das Symbol erscheint auf dem Display.
2 Zum Deaktivieren Tastesperre-Taste erneut betätigen.
Wenn die Tastensperre aktiviert ist, können durch Betätigen der
Verbindungstaste trotzdem eingehende Anrufe angenommen werden.
Die Tastatur funktioniert während des Anrufs ganz normal. Nach
Beendigung des Anrufs wird die Tastensperre wieder aktiviert.
5.10 Name des Mobilteils
Der im Display angezeigte Name kann geändert werden (max. 12 Zeichen), sofern kein Anruf geführt
wird.
1 Menü/OK-Taste betätigen.
2 „MOBILTEIL“ auswählen und bestätigen.
3 „MOBILT NAME“ auswählen und bestätigen.
4 Den alten Namen mithilfe der Stummschalttaste löschen und neuen
Namen eingeben.
5 Mit OK bestätigen.
6 ESC-Taste betätigen, um zum Bereitschaftsmodus zurückzukehren.
5.11 Aktivieren/Deaktivieren der Tastentöne
1 Menü/OK-Taste betätigen.
2 „MOBILTEIL“ auswählen und bestätigen.
3 „TASTENTON“ auswählen und bestätigen.
4 „EIN“ oder „AUS“ auswählen und bestätigen.
5 Mit OK bestätigen.
6 ESC-Taste betätigen, um zum Bereitschaftsmodus zurückzukehren.
23
Benutzen des schnurlosen Mobilteils
5.12 Telefonbuch
Es können 50 Einträge im Telefonbuch gespeichert werden. Namen können bis zu 16 Zeichen und
Rufnummern bis zu 24 Zeichen lang sein.
Hinzufügen eines neuen Telefonbucheintrags
1 Telefonbuchtaste betätigen.
2 Mit OK zweimal bestätigen.
3 Namen eingeben und bestätigen.
4 Gewünschte Rufnummer eingeben und bestätigen.
Es ertönt ein Bestätigungssignal.
Benutzen der Kurzwahltasten
1 Telefonbuchtaste betätigen.
2 Zum gewünschten Namen blättern oder die Anfangsbuchstaben des
Namens eingeben.
3 Telefonbuchtaste betätigen, um die Telefonnummer anzuzeigen.
4 Verbindungstaste betätigen. Die Telefonnummer wird automatisch
angewählt.
5 Mit der Auflegetaste den Anruf beenden.
Bearbeiten eines Telefonbucheintrags
1 Telefonbuchtaste betätigen.
2 Zum gewünschten Namen blättern oder die Anfangsbuchstaben des
Namens eingeben.
3 Telefonbuchtaste betätigen, um die Telefonnummer anzuzeigen.
4 Menü/OK-Taste betätigen.
5 „BEARB“ auswählen und bestätigen.
6 Namen eingeben und bestätigen.
7 Rufnummer eingeben oder bearbeiten und anschließend bestätigen.
Löschen von Einträgen im Telefonbuch
1 Telefonbuchtaste betätigen.
2 Zum gewünschten Namen blättern oder die Anfangsbuchstaben des
Namens eingeben.
3 Telefonbuchtaste betätigen, um die Telefonnummer anzuzeigen.
4 Menü/OK-Taste betätigen.
24
Benutzen des schnurlosen Mobilteils
5 „LOESCHEN“ auswählen, um den aktuellen Telefonbucheintrag zu
löschen und anschließend bestätigen.
ODER
6 „ALLE LOESCH“ auswählen, um alle Telefonbucheinträge zu
löschen und anschließend bestätigen.
7 Erneut bestätigen oder die ESC-Taste betätigen, um den Vorgang zu
überspringen.
5.13 Anruferkennung (CLIP)
Das DCC632x zeigt die Rufnummer eingehender Anrufe an. Diese Funktion kann nur genutzt werden,
wenn die Anruferkennung bei der Telefongesellschaft aktiviert ist. Telefongesellschaft kontaktieren,
um weitere Informationen zu erhalten. Wird ein Anruf empfangen, wird die Rufnummer in einer
Anruferliste gespeichert. In dieser Liste können bis zu 30 Rufnummern gespeichert werden (jede
Rufnummer kann bis zu 23 Zeichen enthalten).
Bei Rufnummern mit einer Länge von mehr als 12 Zeichen kann zur
Anzeige der restlichen Zeichen im Display nach rechts geblättert
werden.
Neue Anrufe
Bei Anzeige eines neuen Anrufs in der Anruferliste blinkt das
CLIP-Symbol im Display.
Öffnen der Anrufliste
1 Anruferliste-Taste betätigen.
Der zuletzt empfangene Anruf wird angezeigt. Falls die Anruferliste leer
ist, wird das Wort „LEER“ auf dem Display angezeigt.
2 Telefonbuchtaste betätigen, um die Rufnummer zu überspringen.
3 Telefonbuchtaste betätigen, um Datum und Uhrzeit zu überspringen.
4 Navigationstaste betätigen, um durch die Liste zu blättern.
5 Mit der ESC-Taste Anruferliste verlassen.
Anrufen einer Rufnummer in der Anruferliste
1 Anruferliste-Taste betätigen.
2 Durch die Anruferliste blättern, bis die gewünschte Rufnummer
angezeigt wird.
3 Verbindungstaste betätigen, um Anruf zu tätigen. Die Telefonnummer
wird automatisch angewählt.
4 Mit der Auflegetaste den Anruf beenden.
Löschen einer Rufnummer aus der Anruferliste
1 Anruferliste-Taste betätigen.
2 Durch die Anruferliste blättern, bis die gewünschte Rufnummer
angezeigt wird.
3 Menü/OK-Taste betätigen.
25
Benutzen des schnurlosen Mobilteils
4 „LOESCHEN“ auswählen, um den aktuellen Eintrag zu löschen und
anschließend bestätigen.
ODER
5 „ALLE LOESCH“ auswählen, um alle Einträge in der Anrufliste zu
löschen und anschließend bestätigen.
6 Bestätigen oder mit ESC-Taste zurückkehren.
Speichern einer Rufnummer als Kurzwahl in der Anruferliste
1 Anruferliste-Taste betätigen.
2 Durch die Anruferliste blättern, bis die gewünschte Rufnummer
angezeigt wird.
3 Menü/OK-Taste betätigen.
4 „PB SPEICHERN“ auswählen und bestätigen.
5 Namen bearbeiten oder hinzufügen und anschließend bestätigen.
6 Rufnummer eingeben und bestätigen.
5.14 Zurücksetzen des Mobilteils auf Werkseinstellungen
Mit dieser Funktion werden alle Änderungen rückgängig gemacht und die Werkseinstellungen
wiederhergestellt (Klingeltonlautstärke, Klingelton usw.). Anruferliste, Wahlwiederholungsliste und
Telefonbuch werden ebenfalls gelöscht!
1 Menü/OK-Taste betätigen.
2 „MOBILTEIL“ auswählen und bestätigen.
3 „RESET“ auswählen und bestätigen.
4 PIN-Code der Basisstation eingeben (Werkseinstellung 0000).
5 Gerät kehrt zurück in den Bereitschaftsmodus.
Werkseinstellungen:
Name des Mobilteils
SWITEL
Hörerlautstärke
Stufe 3
Tonlautstärke
Stufe 3
Externer Klingelton
Klingelton 8
Interner Klingelton
Klingelton 1
Tastentöne
Ein
5.15 Sprachnachricht-Display
Dieses Display wird nur angezeigt, wenn der Sprachnachricht-Service und telefonische
Anrufbeantworter eingerichtet sind und die Telefongesellschaft diese Informationen mit der
Anruferkennung übermittelt! Wenn eine neue Nachricht in der Sprachnachrichtbox empfangen wird,
wird das
Symbol auf dem Display angezeigt. Das
Symbol erlischt nach Abruf der Nachricht.
26
Anmelden und Abmelden des Mobilteils
6 Anmelden und Abmelden des Mobilteils
6.1 Anmelden eines Mobilteils bei der DCC632x-Basisstation
Auf einer Basisstation können 5 Mobilteile angemeldet werden. Jedes Mobilteil ist bei Lieferung
bereits an der Basisstation angemeldet. Das Mobilteil muss nur angemeldet werden, wenn:
das Mobilteil kürzlich von dieser Basisstation abgemeldet wurde (z. B. zur Reinitialisierung)
ein anderes Mobilteil an der Basisstation angemeldet werden soll
Die folgende Beschreibung findet nur auf Mobilteile und Basisstationen des DCC632x Anwendung.
1 Ruftaste an der Basisstation für eine Dauer von 10 Sekunden
gedrückt halten.
„Anmelden“ wird nun auf dem Display der Basisstation angezeigt.
D. h., dass sich die Basisstation im Anmeldemodus befindet. Nun kann
das Mobilteil wie folgt angemeldet werden:
2 Menü/OK-Taste auf dem Mobilteil betätigen.
3 „MT ANMELDEN“ auswählen und bestätigen.
4 Nummer der Basisstation (1-4) eingeben, auf die das Mobilteil
angemeldet werden soll.
5 Das Gerät sucht die Basisstation. Bei erfolgreicher Suche muss der
(4-stellige) PIN-Code eingegeben werden.
6 PIN-Code der Basisstation eingeben (Werkseinstellung 0000). Bei
Eingabe des falschen PIN-Codes sucht das Mobilteil weiter nach der
Basisstation.
Nach Anmeldung des Mobilteils werden Name und Rufnummer auf
dem Display angezeigt.
Information: Um den PIN-Code der Basisstation zu ändern, siehe „4.14 Einstellen der
System-PIN“.
6.2 Abmelden eines Mobilteils von der DCC632x-Basisstation
Ein Mobilteil kann von der Basisstation abgemeldet werden, damit ein anderes Mobilteil angemeldet
werden kann.
1 Menü/OK-Taste betätigen.
2 „MT ABMELDEN“ auswählen und bestätigen.
3 PIN-Code der Basisstation eingeben (Werkseinstellung 0000).
4 Interne Nummer des Mobilteils (1-5) eingeben, das abgemeldet
werden soll, und bestätigen.
Nachdem das Mobilteil erfolgreich abgemeldet worden ist, wechselt es
zurück in den Bereitschaftsmodus. Ansonsten muss die Nummer des
Mobilteils erneut eingegeben werden.
6.3 Abmelden eines Mobilteils von der DCC632x-Basisstation über das Mobilteil
1 Menü/OK-Taste betätigen.
2 „MT ABMELDEN“ auswählen und bestätigen.
3 PIN-Code der Basisstation eingeben (Werkseinstellung 0000).
27
Anmelden und Abmelden des Mobilteils
4 Interne Nummer des Mobilteils (1-5) eingeben, das abgemeldet
werden soll, und bestätigen.
Nachdem das Mobilteil erfolgreich abgemeldet worden ist, wechselt es
zurück in den Bereitschaftsmodus. Ansonsten muss die Nummer des
Mobilteils erneut eingegeben werden.
Wichtig: Mobilteile können nur abgemeldet werden, wenn sie nicht in Gebrauch sind.
6.4 Auswählen einer Basisstation
Wenn das Mobilteil bei mehreren Basisstationen (max.4) angemeldet ist, muss eine dieser
Basisstationen ausgewählt werden, da ein Mobilteil zur gleichen Zeit nur mit einer Basisstation
kommunizieren kann. Es gibt zwei Möglichkeiten:
Automatisches Auswählen
Falls im Mobilteil die Einstellung „Automatisches Auswählen“ aktiviert ist, sucht das Mobilteil
automatisch nach der am nähesten gelegenen Basisstation im Bereitschaftsmodus.
1 Menü/OK-Taste betätigen.
2 „MOBILTEIL“ auswählen und bestätigen.
3 „BASIS AUSW“ auswählen und bestätigen.
4 „AUTOMATISCH“ auswählen und bestätigen.
Information: Falls im Mobilteil die Einstellung „Automatisches Auswählen“ aktiviert ist und
sich das Mobilteil zu weit von der Basisstation entfernt befindet, sucht das Mobilteil nur nach
der stärksten Basisstation im Bereitschaftsmodus (jedoch nicht während eines Anrufs).
Manuelles Auswählen
Falls im Mobilteil die Einstellung „Manuelles Auswählen“ aktiviert ist, sucht das Mobilteil nur nach der
festgelegten Basisstation.
1 Menü/OK-Taste betätigen.
2 „MOBILTEIL“ auswählen und bestätigen.
3 „BASIS AUSW“ auswählen und bestätigen.
4 „MANUELL“ auswählen und bestätigen.
5 Basisstation auswählen und bestätigen.
Wichtig: Das Mobilteil muss bei der Basisstation angemeldet sein, damit diese miteinander
kommunizieren können.
28
Anrufweiterleitung und interne Anrufe
7 Anrufweiterleitung und interne Anrufe
7.1 Anrufweiterleitung und Telefonkonferenz während eines externen Anrufs
INT
INT
INT
1 Während eines externen Anrufs INT-Taste betätigen und die
Nummer des Mobilteils (1-5, "0" für die Basisstation) auswählen.
Das andere Mobilteil klingelt.
Wenn die Verbindung zum anderen Mobilteil hergestellt wurde, kann
intern gesprochen werden. Nach Beendigung des internen Gesprächs
wird der Anruf zum anderen Mobilteil weitergeleitet.
2 INT-Taste für eine Dauer von 3 Sekunden gedrückt halten. Nun kann
mit dem zweiten Mobilteil und dem externen Anrufer zur selben Zeit
telefoniert werden (Telefonkonferenz).
3 INT-Taste erneut betätigen, um zurück zum externen Anrufer zu
schalten.
4 Mit der Auflegetaste den Anruf beenden.
7.2 Interner Anruf (Haustelefon-Funktion)
Information: Ein Anruf kann zwischen der Basisstation und einem schnurlosen Mobilteil
weitergeleitet werden. Die Basisstation hat die interne Nummer „0“.
INT
1 Im Bereitschaftsmodus INT-Taste betätigen und die Nummer des
Mobilteils (1-5, "0" für die Basisstation) auswählen.
Das angerufene Gerät (Mobilteil oder Basisstation) klingelt.
2 Verbindungstaste betätigen oder den Hörer von der Basisstation
abheben.
Nun kann intern telefoniert werden.
29
Abkürzungen und technische Begriffe
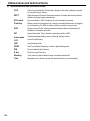
8 Abkürzungen und technische Begriffe
CLIP
Übertragung der Rufnummern („Calling Line Identification Presentation“),
Anzeige der Rufnummer des Anrufers auf dem Display des angerufenen
Teilnehmers
DECT
Digitale, verbesserte schnurlose Telekommunikation (Digital Enhanced
Cordless Telecommunication), europäischer Telekommunikationsstandard für
digitale schnurlose Telefone
ECO-Modus
Sparmodus, strahlungsarmer Betrieb bei DECT-Telefonen
Flash-Taste
Bewirkt eine kurzzeitige Leitungsunterbrechung, die zur Aktivierung von
Funktionen, wie z. B. der Umschaltung oder Anrufweiterleitung benutzt wird. Am
PBXs wird die Flash- oder R-Taste für die interne Rückruffunktion benutzt.
GAP
„Generic Access Profile“ ist ein Standard für das Zusammenwirken von
Mobilteilen und Basisstationen, mit dem die schnurlose Kommunikaton geregelt
wird.
INT
Interner Teilnehmer, weitere Mobilteile oder Nebenstellen innerhalb einer PBX
(TK-Anlage)
Impulswahl
Veraltetes analoges Wahlverfahren („Klacker“-Geräusche beim Wählen)
LCD
Flüssigkristallanzeige
LED
Leuchtdioden
DTMF
Tonwahlverfahren, modernes, digitales Wahlverfahren
PIN
Persönliche Idenfikationsnummer
Flash-Taste
(R-Taste)
Rückfragetaste (siehe Flash-Taste)
Bereitschafts Ruhezustand eines Geräts ohne vollständiges Abschalten
modus
Twin
30
Bezeichnung für eine Geräteeinheit mit zwei identischen Geräten, z. B. zwei
Mobilteilen
Fehlerbehebung
9 Fehlerbehebung
Probleme
Mögliche Ursache
Lösung
Keine Anzeige.
Batterien sind nicht geladen.
Überprüfen, ob beide Batterien
ordnungsgemäß eingesetzt
sind.
Akkus aufladen.
Kein Ton.
Das Telefonkabel ist nicht
ordnungsgemäß
angeschlossen.
Kabelanschluss überprüfen.
Die Leitung ist von einem
anderen Mobilteil belegt.
Warten bis das andere
Mobilteil aufgelegt wurde.
Der Anrufer ist zu leise.
Lautstärke während des Anrufs
mit der Lautstärketaste
anpassen.
Die Klingeltonlautstärke des
Mobilteils ist zu niedrig.
Klingeltonlautstärke anpassen.
Eine Rufnummer kann nicht
gewählt werden.
Der Wählmodus ist nicht
korrekt eingestellt.
Siehe „4.13 Einstellen des
Wählmodus“, um den richtigen
Wählmodus einzustellen.
Das Antennensymbol blinkt.
Das Mobilteil ist außerhalb der
Reichweite.
Mobilteil in die Reichweite der
Basisstation bringen.
Keine Stromversorgung der
Basisstation.
Netzadapter und Kabel
überprüfen.
Das Mobilteil ist nicht an der
Basisstation angemeldet.
Mobilteil an der Basisstation
anmelden.
Die Basisstation oder das
Mobilteil klingelt nicht.
Die Klingeltonlautstärke ist
ausgeschaltet oder zu niedrig
eingestellt.
Klingeltonlautstärke anpassen.
Ein Anruf kann nicht an eine
Nebenstellen weitergeleitet
werden.
Die Flash-Zeit ist zu kurz.
Für das Gerät eine längere
Flash-Zeit einstellen.
Das Telefon reagiert beim
Betätigen von Tasten nicht.
Betriebsfehler
Batterien herausnehmen und
erneut einsetzen.
„LTG BELEGT“
Die Leitung ist von einem
anderen Mobilteil belegt.
Warten bis das andere
Mobilteil aufgelegt wurde.
Keine Veränderungen oder Reparaturen am Gerät vornehmen. Nicht ordnungsgemäß ausgeführte
Reparaturen können für den Benutzer erhebliche Risiken darstellen.
Bei technischen Problemen können Sie sich an unsere Service-Hotline unter Tel.0900 00 1675
innerhalb der Schweiz (Kosten Swisscom bei Drucklegung: CHF 2,60/min) wenden. Bei
Garantieansprüchen wenden Sie sich an Ihren Fachhändler. Die Garantiezeit beträgt 2 Jahre.
31
Pflege
10 Pflege
10.1 Wartung
Das Gerät benötigt keine Wartung. Von Zeit zu Zeit ist der Allgemeinzustand der Akkus zu überprüfen
und durch neue Akkus des gleichen Typs zu ersetzen, wenn sich die Telefonleistung verschlechtert
oder die Akkus auslaufen.
Warnung: Gefahr durch Verätzungen!
Zum Ausbauen ausgelaufener Akkus Schutzhandschuhe tragen.
Bei Flüssigkeitseintritt sind unverzüglich die Akkus des Geräts herauszunehmen und das Gerät ist
vom Stromnetz (Basisstation) zu trennen und vorsichtig zu trocknen. Der Betrieb des Geräts ist nach
2-3 Tagen zu überprüfen.
10.2 Reinigen
Warnung: Stromschlagrisiko bei Berührung von stromleitenden Komponenten. Vermeiden,
dass Flüssigkeiten in das Gerät gelangen. In diesem Fall Netzstecker des Geräts aus der
Netzsteckdose und den Telefonkabelstecker aus der Wandbuchse ziehen und Akkus
herausnehmen. Gleichermaßen bei Beschädigungen von Gerät, Kabel oder Netzadapter
vorgehen, direkten Flüssigkeitskontakt vermeiden und Gerät unverzüglich vom Stromnetz
trennen.
Telefon mit einem mit lauwarmen Wasser befeuchteten Tuch oder einem antistatischen Tuch reinigen.
Verwenden Sie keine Reinigungs- oder Lösungsmittel.
10.3 Außerbetriebnahme, Lagerung
Um das Gerät vorübergehend außer Betrieb zu nehmen, Telefonkabel aus der Wandsteckdose und
Telefonstecker von der Basisstation nehmen. Netzadapter der Basisstation und des Mobilteils vom
Stromnetz (230 V) trennen.
Akkus aus den Mobilteilen herausnehmen. Sollte das Telefon für eine längere Zeit außer Betrieb sein,
Akkus bei Wiederinbetriebnahme durch neue Akkus des gleichen Typs austauschen. Geräte und
Akkus an einem trockenen nicht zu warmen Ort lagern.
10.4 Entsorgung
Wollen Sie Ihr Gerät entsorgen, bringen Sie es zur Sammelstelle Ihres kommunalen
Entsorgungsträgers (z. B. Wertstoffhof). Nach dem Elektro- und Elektronikgerätegesetz sind
Besitzer von Altgeräten gesetzlich verpflichtet, alte Elektro- und Elektronikgeräte einer
getrennten Abfallerfassung zuzuführen. Das nebenstehende Symbol zeigt an, dass das
Gerät nicht über den normalen Hausmüll entsorgt werden darf!
Gefährdung von Gesundheit und Umwelt durch Akkus und Batterien!
Akkus und Akkupacks nie öffnen, beschädigen, verschlucken oder in die Umwelt
gelangen lassen. Sie enthalte toxische und umweltgefährdende Schwermetalle. Sie
sind gesetzlich verpflichtet, Akkus und Akkupacks beim Fachhandel sowie bei
zuständigen Sammelstellen, die entsprechende Behälter bereitstellen, sicher zu
entsorgen. Die Entsorgung ist unentgeltlich. Die Symbole bedeuten, dass Sie Akkus
auf keinen Fall in den Hausmüll werfen dürfen und sie über Sammelstellen der
Entsorgung zugeführt werden müssen.
Verpackungsmaterialien entsorgen Sie entsprechend den lokalen Vorschriften.
32
Technische
11 Technische Daten
Standard
DECT (Digital Enhanced Cordless
Telecommunications)
GAP (Generic Access Profile )
Frequenzbereich
1.880 MHz bis 1.900 MHz
Emissionen
10 mW (durchschnittliche Leistung pro Kanal)
Reichweite
Bis 300 m im Freien - bis 50 m in Gebäuden
Mobilteil-Akkus:
NiMh-Akkus, 2 x 1,2 V, 450 mAh Typ AAA
Stromversorgung der Basisstation
Eingang: 100~240 VAC / 50-60 Hz
Ausgang: 6 VDC / 500 mA
Stromversorgung der Ladestation:
Eingang: 100~240 VAC / 50-60 Hz
Ausgang: 7 VDC / 420 mA
Bereitschaftszeit des Mobilteils
100 Stunden
Gesprächszeit des Mobilteils
10 Stunden
Ladezeit:
16 Stunden
Zulässige Betriebstemperaturen
+5 °C bis + 45 °C
Zulässige relative Luftfeuchtigkeit
25 % bis 85 %
Wahlverfahren
Impuls- und Mehrfrequenzwahlverfahren
(DTMF)
Flash-Zeit
100 bzw.300 ms
Rufnummerspeicher des Mobilteils
50 Telefonbucheinträge bis 24 Zeichen und
16 Buchstaben.
Rufnummerspeicher der Basisstation
Rufnummerspeicherung unter 3 DirektKurzwahltasten (M1-M3) mit bis zu 24 Zeichen.
50 Telefonbucheinträge bis zu 24 Zeichen und
16 Buchstaben.
Abmessungen von Basisstation/
Ladestation/
Mobilteil
200 mm x 71 mm x 183 mm/
104 mm x 100 mm x 59 mm/
182 mm x 284 mm x 58 mm
Gewicht von Basisstation
Ladestation/
Mobilteil
763 g mit Netzadapter/
185 g mit Netzadapter/
147 g mit Akkus
Max. Stromverbrauch
Basisstation mit Empfänger: 2,0 W
Ladestation mit Mobilteil: 1,3 W
33
Herstellergarantie
12 Herstellergarantie
SWITEL-Geräte werden nach den modernsten Produktionsverfahren hergestellt und geprüft. Ausge
suchte Materialien und hoch entwickelte Technologien sorgen für einwandfreie Funktion und lange
Lebensdauer. Ein Garantiefall liegt nicht vor, wenn die Ursache einer Fehlfunktion des Geräts bei dem
Telefonnetzbetreiber oder einer eventuell zwischengeschalteten Nebenstellenanlage liegt. Die Garan
tie gilt nicht für die in den Produkten verwendeten Akkus oder Akkupacks. Die Garantiezeit beträgt
24 Monate ab Kaufdatum.
Alle innerhalb der Garantiezeit auftretenden Mängel werden kostenfrei behoben, sofern sie auf
Material- oder Herstellungsfehler zurückzuführen sind. Der Garantieanspruch erlischt bei Eingriffen
durch den Käufer oder durch Dritte. Schäden, die durch unsachgemäße Behandlung oder Bedienung,
natürliche Abnutzung, falsches Aufstellen oder Aufbewahren, unsachgemäßen Anschluss oder
Installation sowie durch höhere Gewalt oder sonstige äußere Einflüsse entstehen, fallen nicht unter
die Garantieleistung. Wir behalten uns vor, bei Reklamationen die defekten Teile auszubessern, zu
ersetzen oder das Gerät auszutauschen. Ausgetauschte Teile oder ausgetauschte Geräte gehen in
unser Eigentum über. Schadensersatzansprüche gelten nur bei Vorsatz oder grober Fahrlässigkeit
seitens des Herstellers.
Sollte Ihr Gerät dennoch einen Defekt innerhalb der Garantiezeit aufweisen, wenden Sie sich bitte
unter Vorlage Ihrer Kaufquittung ausschließlich an das Geschäft, in dem Sie Ihr SWITEL- Gerät
gekauft haben. Alle Gewährleistungsansprüche nach diesen Bestimmungen sind ausschließlich
gegenüber Ihrem Fachhändler geltend zu machen. Nach Ablauf von zwei Jahren nach Kauf und
Übergabe unserer Produkte können Gewährleistungsrechte nicht mehr geltend gemacht werden.
13 Konformitätserklärung
Dieses Gerät erfüllt die Anforderungen der EU-Richtlinie 1999/5/EC über Funkanlagen
und Telekommunikationsendeinrichtungen und die gegenseitige Anerkennung ihrer
Konformität. Die Konformität mit der oben genannten Richtlinie wird durch das auf dem
Gerät befindliche CE-Zeichen bestätigt. Der vollständige Text der Konformitätserklärung
ist im Downloadbereich unserer Internetseite www.switel.com verfügbar.
14 Stromverbrauch
Die Basisstation ist mit einem energieeffizienten Schaltnetzteil ausgestattet (Eingang
100~240 VAC, Ausgang 6 VDC, 500 mA). Die Leistungsaufnahme ohne Last beträgt ca.
0,06 W. Der durchschnittliche Wirkungsgrad liegt bei ca. 71%. Der Stromverbrauch der
Basisstation beträgt:
- in Betrieb (Bereitschaft/Telefonieren): ca. 0,52 W, ca.0,68 W
Die dem Telefonset beiliegende Ladestation ist mit einem energieeffizienten Schaltnetzteil
ausgestattet (Eingang 100~240 VAC, Ausgang 7 VDC, 420 mA). Die Leistungsaufnahme
ohne Last beträgt ca. 0,06 W. Der durchschnittliche Wirkungsgrad liegt bei ca. 72,1 %. Der
Stromverbrauch der Ladestation beträgt:
- ohne Mobilteil: ca. 0,06 W
- wenn das Mobilteil aufgeladen wird: ca. 0,65 W
34
2
1
2
3
4
5
6
7
8
9
10
11
12
13
14
Table des matières
Informations générales . . . . . . . . . . . . . . . . . . . . . . . . . . 36
Informations relatives à la sécurité . . . . . . . . . . . . . . . . . . 38
Premières étapes . . . . . . . . . . . . . . . . . . . . . . . . . . . . . . 40
Fonctionnement du téléphone . . . . . . . . . . . . . . . . . . . . . 46
Comment utiliser le combiné sans fil . . . . . . . . . . . . . . . . . 53
Enregistrer et supprimer un combiné . . . . . . . . . . . . . . . . . 59
Transfert d'appel et appels internes . . . . . . . . . . . . . . . . . . 61
Abréviations et termes techniques . . . . . . . . . . . . . . . . . . 62
Remédier aux problèmes . . . . . . . . . . . . . . . . . . . . . . . . . 63
Consignes générales concernant l'appareil . . . . . . . . . . . . 64
Données techniques . . . . . . . . . . . . . . . . . . . . . . . . . . . . 65
Garantie . . . . . . . . . . . . . . . . . . . . . . . . . . . . . . . . . . . . . 66
Déclaration de conformité . . . . . . . . . . . . . . . . . . . . . . . . 66
Consommation électrique . . . . . . . . . . . . . . . . . . . . . . . . 66
35
Informations générales
1 Informations générales
Avant la première utilisation
Nous vous remercions d'avoir acheté ce nouveau téléphone numérique avec base filaire et combiné
sans fil.
Usage prévu :
Cet appareil est prévu pour être raccordé en intérieur à une ligne téléphonique analogique.
Cet appareil est fabriqué en conformité avec la norme DECT (Digital Enhanced Cordless
Telecommunications) (norme de téléphonie numérique sans fil optimisée). La technologie DECT se
caractérise par une protection haute sécurité contre les interceptions et une qualité de transmission
numérique supérieure. Ce téléphone a été conçu pour une vaste gamme d'applications. Il peut être
utilisé par exemple à l'intérieur d'un réseau de 5 combinés.
L'identification de l'appelant est un service de votre opérateur. Après vous y être abonné, votre
téléphone affichera le numéro de l'appelant sur l'écran.
Important
Afin de pouvoir utiliser la fonction «Identification de l'appelant» (affichage de son numéro), ce service
doit être activé sur votre ligne téléphonique. Normalement vous avez besoin de souscrire à un
abonnement distinct auprès de votre opérateur pour activer cette fonction. Si vous ne disposez pas de
celle-ci, les numéros entrants ne seront PAS affichés sur l'écran de votre téléphone.
Attention : Cet appareil fonctionne seulement avec des piles rechargeables. Si vous insérez
des piles non rechargeables dans le combiné et placez celui-ci sur la base, il en sera
endommagé et vous ne serez PAS couvert par la garantie.
Se connecter au réseau téléphonique analogique public.
Les caractéristiques décrites dans ce manuel sont publiées sous réserve de modifications.
Le manuel d'utilisation contient toutes les informations dont vous avez besoin pour installer,
programmer et faire fonctionner votre appareil. Il contient également des informations et des
remarques importantes relatives à votre sécurité qui vous aideront en cas de problèmes. Conservez
toujours le manuel près de votre téléphone. Gardez-le à un endroit sûr et transmettez-le à un autre
utilisateur si nécessaire.
1.1 Le produit : DCC632x
Ce produit a été fabriqué en conformité avec la norme DECT (norme de téléphonie numérique sans fil
optimisée). La technologie DECT se caractérise par une protection haute sécurité contre les
interceptions et une qualité de transmission numérique supérieure. Ce téléphone est prévu pour
différentes applications, par exemple pour fonctionner à l'intérieur d'un réseau de bases et de
combinés sans fil qui en font un PBX (autocommutateur téléphonique privé) : 5 combinés sans fils
max. peuvent être raccordés à une base et un combiné sans fil peut être raccordé jusqu'à 4 bases.
Vous pouvez passer des appels internes entre la base et le combiné ou entre deux combinés. Si
disponibles sur votre ligne, l'identification de l'appelant et les services SMS de votre opérateur sont
possibles sur ce téléphone. Si vous bénéficiez de ces services, le numéro de l'appelant s'affichera sur
l'écran .
Important : Afin de pouvoir utiliser la fonction «Identification de l'appelant», celle-ci doit
d'abord être activée pour votre ligne téléphonique. Contactez votre opérateur pour recevoir
de plus amples informations sur l'activation de cette fonction. Si cette fonction n'est pas
activée, les numéros d'appels entrants ne seront PAS affichés sur l'écran.
36
Informations générales
1.2 Termes et symboles de signalisation
Symbole
Terme de
signalisation
Signification
Avertissement Situation éventuellement dangereuse entraînant des blessures
corporelles graves ou la mort si vous ne respectez pas cette
information.
Aucun
Attention
Situation éventuellement dangereuse entraînant des blessures
corporelles légères si vous ne respectez pas cette information.
Attention
Risque de dommages matériels ou environnementaux
Important
Procure des informations importantes sur la fonction.
Info, conseil
Informations générales ou conseils particuliers.
1.3 Utilisation prévue
Ce produit est prévu pour passer des communications téléphoniques via une ligne fixe à l'intérieur
d'un réseau téléphonique. Les conditions préalables pour une utilisation correcte de votre téléphone
sont une installation professionelle qui tiendra compte des informations contenues dans ce manuel.
Toute autre utilisation est estimée irrégulière et est interdite. Toute modification ou transformation
arbitraire de la part de l'utilisateur non décrite dans ce guide est irrégulière et interdite. Nous ne nous
portons pas garants d'un quelconque dommage pouvant en résulter.
1.4 Contenu du coffret
Vérifiez l'intégralité du contenu du coffret et l'état des éléments Contactez immédiatement votre
revendeur si des éléments manquent ou sont défectueux. Conservez l'emballage si vous devez
retourner le téléphone ou l'envoyer pour réparation.
1 Base avec écouteur et câble de raccordement téléphonique
1 Adaptateur secteur pour la base
1 Câble téléphonique pour la base
1 Chargeur avec adaptateur secteur
1 combiné sans fil, y compris 2 piles rechargeables (AAA, 1.2 V / 450 mAh, NiMH)
et un cache-piles
1 Manuel d'utilisation
Avertissement : Risque d'étouffement pour les enfants ! Placez les plastiques d'emballage
hors de leur portée.
Important : Soyez éco-responsable lorsque vous déirez vous débarrasser de votre matériel
d'emballage !
37
Informations relatives à la sécurité
2 Informations relatives à la sécurité
Tenez compte des informations de base suivantes sur la sécurité lorsque vous utilisez des appareils
électriques. Lisez attentivement les informations sur la sécurité ainsi que les renseignements
concernant l'utilisation correcte du téléphone. Familiarisez-vous avec toutes les fonctions de l'appareil.
Gardez le manuel d'utilisation près de celui-ci et transmettez-le à un autre utilisateur si nécessaire.
N'omettez pas de joindre le manuel si vous remettez votre téléphone à une tierce personne.
Risques électriques :
Avertissement : Risque de blessures ou de mort à cause du courant électrique ! En cas de
danger, débranchez immédiatement l'appareil du secteur 230 V.
N'utilisez pas l'appareil si l'adaptateur secteur, le câble ou l'appareil lui-même sont endommagés.
Évitez de le faire tomber, cela pourrait l'endommager.
Des tensions dangereuses peuvent circuler à l'intérieur de l'appareil. N'ouvrez jamais le boîtier ou
n'insérez jamais d'objet dans la fente d'aération.
Empêchez que des liquides ne pénètrent dans l'appareil. Si cela se produisait, débranchez
l'adaptateur secteur de la prise d'alimentation et la fiche du câble téléphonique de la prise murale.
Débranchez également l'adaptateur secteur de la prise d'alimentation et la fiche du câble
téléphonique de la prise murale si des problèmes surgissent pendant que vous vous servez du
téléphone et avant de le nettoyer.
Ne touchez pas le chargeur et ne branchez pas les fiches avec des objets pointus ou en métal.
Ne modifiez pas ni ne réparez l'appareil vous-même. Celui-ci ou le câble ne doit être réparé que
par un spécialiste du centre de maintenance. Des réparations effectuées incorrectement peuvent
engendrer des risques importants pour l'utilisateur.
Les enfants sous-estiment fréquemment les dangers issus de la manipulation d' appareils
électriques. Ne les laissez jamais sans surveillance près de ces derniers.
Ne les autorisez jamais à jouer avec les appareils ou leurs éléments.
Attention : Éventuels dommages matériels de l'appareil. En cas de danger, débranchez
immédiatement l'appareil de l'alimentation secteur 230 V.
N'utilisez pas l'appareil dans des lieux humides (p. ex. salle de bain) ou très poussiéreux.
Les appareils raccordés au secteur peuvent être endommagés pendant un orage. Dans un tel
cas, débranchez-les.
Retirez complètement l'adaptateur secteur de la prise afin de débrancher complètement l'appareil
de l'alimentation en courant. Faites-le toujours en tirant avec la fiche et jamais avec le câble.
Contrôlez régulièrement le bon état des câbles, protégez-les contre des surfaces chaudes ou
autres dangers, déroulez-les complètement, posez-les de telle sorte que personne ne puisse
trébucher à cause d'eux et ne les «étranglez» pas.
Risques d'incendie :
Avertissement : Risque de blessures ou de mort par suite d'incendie ! N'exposez pas
l'appareil à une chaleur excessive et débranchez-le immédiatement de l'alimentation secteur
230 V en cas de danger.
La chaleur générée dans l'appareil peut causer un dérangement ou l'appareil peut prendre feu. C'est
pourquoi vous ne devez pas l'exposer à des températures extrêmes :
Évitez un ensoleillement direct et la chaleur
Ne recouvrez pas la fente d'aération de l'appareil
38
Informations relatives à la sécurité
Risque d'explosion :
Avertissement : Risque de blessures dû à une explosion ! Soyez particulièrement prudent
avec les enfants !
Ne jetez jamais des piles primaires ou rechargeables dans le feu.
Ne vous servez pas de l'appareil dans un environnement explosif.
Risque d'empoisonnement :
Avertissement : Risque de blessures dû à un empoisonnement ! Soyez particulièrement
prudent avec les enfants !
Placez les piles primaires et rechargeables hors de portée des enfants.
Risque d'asphyxie :
Avertissement : Risque de blessures dû à une asphyxie ! Soyez particulièrement prudent
avec les enfants !
Placez les plastiques d'emballage hors de leur portée.
Tenez compte des risques éventuels pour les enfants (étranglement) si vous utilisez des câbles
de raccordement.
Défauts :
Avertissement : Risque éventuel de blessure dû à des défauts de l'appareil ! Soyez
particulièrement prudent en ce qui concerne les appareils médicaux !
Leur fonction peut être affectée par la radiation électromagnétique de votre appareil. C'est
pourquoi vous devez vous assurer que celui-ci est placé et utilisé suffisamment loin d'appareils
médicaux électriques. Il en va de même pour les appareils médicaux implantés tels que
stimulateurs cardiaques.
Le combiné sans fil peut causer un bourdonnement désagréable dans les aides auditives, vous
devez donc le tenir suffisamment éloigné de celles-ci.
Dommages éventuels :
Attention : Éventuels dommages de l'appareil ! Veuillez lire l' information contenue dans ce
manuel.
Utilisez uniquement les adaptateurs secteur vendus avec. N'utilisez pas d'adaptateurs d'autres
fabricants, les piles rechargeables pourraient en être endommagées.
La prise de raccordement de l'adaptateur doit être à proximité de l'appareil et facilement
accessible.
Utilisez uniquement les piles rechargeables vendues avec. Quand vous devez les remplacer,
utilisez des piles du même type. Faites attention que la polarité soit correcte (vous trouverez des
informations dans le cache-piles). N'utilisez jamais des piles primaires ordinaires !
Important : En cas de panne de courant, il est seulement possible de téléphoner avec la
base.
2.1 Remarques sur le fonctionnement à faible rayonnement
Le rayonnement de ce téléphone sans fil (agréé à la norme DECT) est considérablement réduit (mode
ÉCO). Pendant une communication, le rayonnement est réduit en fonction de l’éloignement du
combiné par rapport à la base. Si vous ne téléphonez pas, le combiné réduit le rayonnement radio à
un minimum. Ceci ne signifie pas que le rayonnement normal d'un DECT est nuisible à la santé. Plus
exactement, le fonctionnement à faible rayonnement évite toute exposition à un rayonnement inutile.
La base ne réduit pas le rayonnement radio ! Installez la base à un endroit où vous ne séjournez pas
longtemps, par exemple dans l'entrée. Évitez de l'installer dans votre chambre ou dans celle des
enfants ou encore dans le salon.
39
Premières étapes
3 Premières étapes
3.1 Comment utiliser votre manuel de l'utilisateur
La méthode suivante est utilisée dans ce manuel pour clarifier les instructions :
Texte ….. COMBINE
Appuyer sur la touche
Texte qui s'affiche sur l'écran
3.2 Installer la base
Raccorder la base comme suit :
5 Raccordez l'adaptateur secteur premièrement à la base puis à la prise.
6 Raccordez l'une des extrémités du câble téléphonique à la prise téléphonique murale et l'autre à
la prise située à l'arrière de la base.
7 Veuillez raccorder votre téléphone et les câbles comme représenté à la figure 3A.
A
- 3A Base A. Prise téléphonique murale
B. Adaptateur secteur avec
câble
C. Câble téléphonique
40
Premières étapes
3.3 Chargeur du combiné
1
Brancher l'adaptateur secteur dans la prise d'alimentation.
- 3B Chargeur A. Adaptateur secteur avec câble
3.4 Combiné
Avertissement : Risque de blessures dû à une explosion ! Utilisez uniquement les piles
rechargeables vendues avec ou des piles d'un type similaire. N'utilisez pas des piles
primaires ordinaires ! Le combiné sans fil pourrait en être endommagé.
1
2
3
4
Ouvrez le compartiment comme représenté à la figure 3C.
Insérez les piles. Faites attention que la polorité soit correcte (+ et -).
Fermez le compartiment.
Placez le combiné dans son chargeur et chargez-le pendant 16 heures sans interruption pour
charger entièrement ses piles. La LED de charge est allumée
- 3C Dos du combiné A. Cache
B. Piles rechargeables
3.5 Montage mural
Vous pouvez fixer la base au mur en utilisant 2 vis séparées de 100 mm. Pour accrocher l'écouteur
sur la base, tourner le support de 180° comme représenté.
- 3D Support
-
41
Premières étapes
3.6 Affichage de l'état des piles
Le combiné ne marchera plus si les piles sont vides. Si vous placez brièvement le combiné sur le
chargeur alors que les piles sont complètement vides l'indicateur de charge des piles affichera
qu'elles sont pleines. Toutefois elles ne le sont pas et leur performance va se dégrader rapidement.
Vous devez placer le combiné sur le chargeur pendant 16 heures pour charger complètement les
piles.
Piles chargées
Piles vides
Pendant une communication, le combiné émet un son d'avertissement
lorsque les piles sont presque vides. Placez-le sur son chargeur pour
recharger les piles.
3.7 Touches/Écran
Combiné sans fil
1.
2.
3.
4.
5.
6.
7.
8.
9.
10.
11.
12.
13.
14.
Rappel du dernier numéro/ Défiler vers le haut
Répertoire
Muet / Effacement
Raccrocher
Touches alphanumériques
Verrouillage du clavier
Pause
Sonnerie activée/désactivée
Journal des appels / Défiler vers le bas
Répondre à un appel / Mode mains-libres / Touche d'appel
INT / Échappement
Menu / OK / Flash
Écran
LED rouge, clignote pendant une communication
15.
16.
17.
18.
Échappement
Menu / OK
Défiler vers la gauche
Rappel du dernier numéro /
Défiler vers le haut
Défiler vers la droite
Écran
Répertoire
Journal des appels / Flash
Défiler vers le bas
Sélection abrégée (M1 - M2 - M3)
Mode mains-libres
Touches alphanumériques
LED rouge sur la base,
clignote pendant une communication
Paging / Transfert d'appel /
Appel interne
Muet / Effacement
Réglage du volume
Haut-parleur
Base
19.
20.
21.
22.
23.
24.
25.
26.
27.
28.
29.
30.
31.
42
Premières étapes
32. Support de l'écouteur pour montage mural
33. Ergot : pour poser un court instant
l'écouteur pendant une
communication dans le cas d'un
montage mural
Chargeur
34. LED : charge du combiné en cours.
3.8 Écran du combiné
COMBINE X
X = Numéro du combiné
Autres numéros ou défiler vers la
gauche dans le menu
Autres numéros ou défiler vers la
droite dans le menu
Trouver ou créer un contact dans le
répertoire
Affichage de l'état des piles
Sonnerie désactivée
Mode mains-libres activé
Verrouillage du clavier activé
Nouveau message vocal
Appel
Microphone mis en muet
Nouveaux numéros dans le journal
des appels
L'antenne indique la puissance du
signal de réception. Celle-ci
clignote quand le combiné est hors
de portée.
Appel interne
43
Premières étapes
3.9 Écran de la base
CLIP
Autres numéros ou défiler vers la
gauche dans le menu
Autres numéros ou défiler vers la droite
dans le menu
Sonnerie désactivée
Nouveau message vocal
Nouveaux numéros dans le journal des
appels
04
Numéro du contact dans le journal des
appels
Trouver ou ajouter un contact dans le
répertoire
Mode mains-libres activé
Appel
Microphone mis en muet
Appel interne
Date et heure
3.10 Naviguer dans le menu
Le DCC632x est doté d'un système de menu très facile d'utilisation. Chaque menu consiste en une
série d'options. Vous trouverez ci-dessous un résumé des menus du combiné et de la base.
1 Appuyez sur la touche Menu / OK pour ouvrir le menu principal.
2 Défilez jusqu'à l'option requise.
3 Appuyez sur la touche Menu / OK pour ouvrir plus d'options ou pour
valider la programmation affichée.
4 Appuyez sur la touche Échappement pour retourner au niveau de
menu précédent.
Combiné
REPERTOIRE
COMBINE
SONNERIE
NOM COMBINE
BIP TOUCHE
CHOIX BASE
RAZ
LANGUE
ENREG COMB
SUPPR COMB
44
Premières étapes
Base
REPERTOIRE
SONNERIE
EXTERNE
INTERNE
VOLUME
BIP TOUCHE
LANGUE
BASE
MODE COMPOS
RAPPEL
PIN SYSTEME
HEURE
JOUR/HEURE
FORMAT
SUPPR CB
RAZ
3.11 Utilisation des touches alphanumériques
Vous pouvez utiliser les touches alphanumériques pour saisir un texte. Appuyez sur la touche
adéquate pour sélectionner une lettre. Par exemple, si vous appuyez sur la touche 5, la lettre «j»
s'affiche à l'écran. Appuyez plusieurs fois sur la touche pour sélectionner les autres lettres. Appuyez
une fois sur la touche 2 pour sélectionner la lettre «a». Si vous voulez entrer les lettres «a» et «b»
l'une après l'autre, appuyez d'abord sur la touche 2 pour sélectionner la lettre «a». Attendez 2
secondes jusqu'à ce que le curseur passe à la prochaine position. Appuyez maintenant deux fois sur
la touche 2 pour sélectionner la lettre «b». Vous pouvez utiliser la touche d'effacement pour effacer
les lettres que vous avez entrées incorrectement. La lettre placée devant le curseur est effacée.
Utilisez la touche gauche/droite pour déplacer le curseur.
Tableau des caractères
1
Espace+ - / 1
2
ABC2
3
DEF3
4
GHI4
5
JKL5
6
MNO6
7
PQRS7
8
TUV8
9
WXYZ9
0
_0
45
Fonctionnement du téléphone
4 Fonctionnement du téléphone
Info : cette section décrit seulement les fonctions de la base ! Vous trouverez des
informations sur la manière d'utiliser votre combiné à la section «5 Comment utiliser le
combiné sans fil».
4.1 Programmer la langue de l'écran
1 Appuyez sur la touche Menu / OK.
2 Selectionnez «LANGUE» et validez.
3 Sélectionnez maintenant la langue.
4 Appuyez sur OK pour confirmer.
4.2 Programmer la date et l'heure
Info : Si l'identification de l'appelant (CLIP) est activée sur votre ligne téléphonique et que
l'opérateur transmette la date et l'heure, l' horloge est automatiquement affichée quand vous
recevez un appel. Si vous avez programme l'heure, elle sera adoptée par tous les combinés
enregistrés sur la base.
1 Appuyez sur la touche Menu / OK.
2 Selectionnez «HEURE» et validez.
3 Selectionnez «JOUR/HEURE» et validez.
4 Entrez l'année et validez.
5 Entrez le mois et validez.
6 Entrez le jour et validez.
7 Entrez les heures et validez.
8 Entrez les minutes.
9 Appuyez sur OK pour valider.
Important : La date et l'heure seront perdues dans le cas d'une panne de courant de la base.
4.3 Programmer le format de l'heure
1 Appuyez sur la touche Menu / OK.
2 Selectionnez «HEURE» et validez.
3 Selectionnez «FORMAT» et validez.
4 Selectionnez le format «24 HEURES» ou «12 HEURES» et validez.
4.4 Appels sortants
Passer une communication
1 Décrochez l'écouteur ou appuyez sur la touche mode mains-libres.
2 Entrez le numéro de téléphone.
46
Fonctionnement du téléphone
3 Raccrochez l'écouteur ou appuyez à nouveau sur la touche mode
mains-libres pour terminer la communication.
OU
1 Entrez le numéro de téléphone.
2 Décrochez l'écouteur ou appuyez sur la touche mode mains-libres.
3 Raccrochez l'écouteur ou appuyez à nouveau sur la touche mode
mains-libres pour terminer la communication.
Recomposer le dernier numéro appelé
1 Décrochez l'écouteur ou appuyez sur la touche mode mains-libres.
2 Appuyez sur la touche de rappel BIS. Le dernier numéro appelé est
automatiquement composé.
Recomposer l'un des 3 numéros derniers numéros appelés
1 Appuyez sur la touche de rappel BIS.
2 Sélectionner l'un des 3 derniers numéros composés.
3 Décrochez l'écouteur ou appuyez sur la touche mode mains-libres.
Appeler un numéro depuis le répertoire
1 Appuyez sur la touche répertoire
2 Défilez jusqu'àu contact requis ou entrez l'initiale du nom.
3 Appuyez sur la touche Menu / OK pour faire afficher le numéro de
téléphone.
4 Décrochez l'écouteur ou appuyez sur la touche mode mains-libres.
Le numéro est automatiquement composé.
4.5 Activer/Désactiver le mode mains-libres
Vous pouvez utiliser cette fonction pour répondre à un appel sans besoin d'avoir à décrocher
l'écouteur ou si celui-ci a déjà été décroché.
1 Appuyez sur la touche mode mains-libres pour activer la fonction.
2 Appuyez à nouveau sur la touche mode mains-libres pour basculer la
communication sur l'écouteur.
4.6 Mode Muet
Le microphone peut être mis en mode muet pendant une communication de telle sorte que vous
puissiez parler sans que quiconque puisse entendre ce que dit votre correspondant.
1 Appuyez sur la touche Muet. Le microphone est mis en mode Muet.
2 Appuyez à nouveau sur la touche Muet pour réactiver le microphone.
47
Fonctionnement du téléphone
4.7 Régler le volume du haut-parleur et de l'écouteur
1 Appuyer sur la touche Volume pendant une communication.
2 Vous pouvez régler le volume sur les niveaux 1 à 5.
4.8 Activer et désactiver le bip du clavier
1 Appuyez sur la touche Menu / OK.
2 Selectionnez «BIP TOUCHE» et validez.
3 Sélectionnez «MARCHE» ou «ARRET» et validez.
4.9 Répertoire
Vous pouvez enregistrer 50 numéros et noms dans le répertoire. Les noms peuvent contenir jusqu'à
16 caractères et les numéros jusqu'à 24 chiffres.
Ajouter un nouveau nom et un nouveau numéro
1 Appuyez sur la touche répertoire
2 Appuyez sur OK.
3 Selectionnez «AJOUTE» et validez.
4 Entrez le nom et validez.
5 Entrez le numéro de téléphone et validez.
6 Vous entendez alors un bip de validation.
Éditer le nom et le numéro de téléphone
1 Appuyez sur la touche répertoire
2 Sélectionnez le nom en vous servant des touches «Défiler vers le
haut et le bas».
OU
Entrez les initiales du nom.
3 Appuyez sur OK.
4 Selectionnez «MODIFIE» et validez.
5 Appuyez sur la touche d'effacement pour effacer les lettres.
6 Entrez le nom et validez.
7 Entrez le numéro de téléphone et validez.
8 Vous entendez alors un bip de validation.
Effacer un contact ou tous les contacts du répertoire
1 Appuyez sur la touche répertoire
2 Sélectionnez le nom en vous servant des touches «Défiler vers le
haut et le bas».
OU
Entrez les initiales du nom.
3 Appuyez sur OK.
48
Fonctionnement du téléphone
4 Sélectionnez «EFFACE» ou «EFFACE TOUT» et validez.
5 Appuyez sur la touche OK ou sur Échappement pour retourner au
niveau de menu précédent.
4.10 Touches de sélection abrégée
Vous pouvez enregistrer 3 numéros à sélection abrégée M1, M2 et M3 (chacun de 24 chiffres
maximum) dans la base.
Enregistrer des numéros composés avec les touches de sélection abrégée (M1 - M2 - M3)
1 Appuyez sur l'une des touches de sélection abrégée.
2 Appuyez sur OK.
3 Selectionnez «AJOUTE» et validez.
4 Entrez le nom et validez.
5 Entrez le numéro de téléphone et validez.
Vous entendez alors un bip de validation.
Info : Pour enregistrer une pause dans le numéro, appuyez sur la touche de pause «P»
pendant 2 secondes à l'endroit ou vous voulez l'insertion d'une pause de 3 secondes. Vous
pouvez éditer ou effacer les numéros à sélection abrégée de la même façon que pour le
répertoire , voir ci-dessus. Les touches de sélection abrégée non attribuées sont affichées
comme étant «VIDE».
Composer un numéro à sélection abrégée
1 Décrochez l'écouteur ou appuyez sur la touche mode mains-libres.
2 Appuyez sur la touche de sélection abrégée. Le numéro est
automatiquement composé.
3 Raccrochez l'écouteur ou appuyez à nouveau sur la touche mode
mains-libres pour terminer la communication.
4.11 Programmer la mélodie de la sonnerie interne / externe
Vous pouvez choisir parmi 9 mélodies prédéfinies (1 à 9).
1 Appuyez sur la touche Menu / OK.
2 Selectionnez «SONNERIE» et validez.
3 Selectionnez «INTERNE» pour des appels internes.
OU
4 Selectionnez «EXTERNE» pour des appels externes entrants.
5 Sélectionnez maintenant une mélodie (1 à 9) et validez.
4.12 Régler le volume sonore de la mélodie de la sonnerie
1 Appuyez sur la touche Menu / OK.
2 Selectionnez «SONNERIE» et validez.
3 Selectionnez «VOLUME» et validez.
4 Selectionnez le volume requis (désactivé, 1 à 5) et validez.
49
Fonctionnement du téléphone
4.13 Programmer le mode de numérotation
Il existe deux modes de numérotation :
DTMF / numérotation par tonalité ( la plus courante)
Numérotation par impulsions (nécessaire uniquement si cet appareil fonctionne sur un PBX plus
ancien !)
1 Appuyez sur la touche Menu / OK.
2 Selectionnez «BASE» et validez.
3 Selectionnez «MODE COMPOS» et validez.
4 Selectionnez «TONALITES» ou «IMPULSIONS» et validez.
4.14 Programmer le code PIN
Certaines fonctions sont seulement disponibles si vous connaissez le code PIN de la base. Le code
PIN a 4 chiffres. Le code PIN par défaut est "0000". Procéder comme suit pour le modifier et
programmer votre propre code :
1 Appuyez sur la touche Menu / OK.
2 Selectionnez «BASE» et validez.
3 Selectionnez «PIN SYSTEME» et validez.
4 Entrez le «ACTUEL-» et appuyez sur OK.
5 Entrez le «NOUVEAU-» et validez.
4.15 Réinitialiser la base
Vous pouvez réinitialiser toutes les programmations/réglages effectués sur la base et effacer toutes
les entrées du répertoire, du journal des appels, de la liste VIP et de celle des derniers numéros. Pour
restaurer les réglages par défaut :
1 Appuyez sur la touche Menu / OK.
2 Selectionnez «RAZ» et validez.
3 Appuyez sur OK pour valider.
4 Entrez le code PIN (0000) et validez.
Les réglages par défaut sont :
Mélodie de la sonnerie externe 8
Mélodie de la sonnerie interne 1
Volume de la mélodie de la sonnerie 4
Bip clavier activé
Volume de l'écouteur 4
Volume du mode mains-libres 4
Format date et heure 24
Important : Toutes les données enregistrées (rappel du dernier numéro, répertoire, journal
des appels, numéros abrégés) seront effacées
4.16 Journal des appels
Les appels entrants sont enregistrés dans un journal des appels (max. 30 numéros) sur la base et les
combinés. Le nombre des appels manqués est affiché avec «X PERDU» (X = nombre des appels
manqués) et l'icône clignotant CLIP. Appuyez brièvement sur la touche journal des appels pour faire
afficher le dernier appel.
50
Fonctionnement du téléphone
Important : La fonction «Identification de l'appelant» (CLIP) est seulement disponible si elle
est activée pour votre ligne. Contactez votre opérateur pour recevoir de plus amples
informations sur cette fonction.
Le numéro de téléphone et le nom du dernier appelant s'affiche à l'écran. Si ce numéro contient plus
de 12 chiffres, vous pouvez voir le restant des chiffres en appuyant sur la touche. Si le journal des
appels est vide, le mot «VIDE» s'affiche. La date et l'heure de l'appel entrant sont affichés en haut à
droite pour chaque appel.
1 Appuyez sur les touches de défilement vers le haut et le bas pour
naviguer dans le journal.
Le numéro de la position de l'appel dans le journal des appels s'affiche
à côté de l'icône de CLIP.
2 Appuyez sur les touches de défilement gauche et droite pour faire
afficher le nom ou le numéro.
Info : Le téléphone bascule sur le mode veille si vous n'appuyez pas sur l'une des deux
touches pendant 15 secondes. Lorsque vous recevez un appel, le numéro de l'appelant
s'affiche pendant encore 5 à 8 secondes après la dernière sonnerie.
Composer un numéro depuis le journal des appels
1 Appuyez sur la touche du journal des appels.
2 Appuyez sur les touches de défilement vers le haut et le bas pour
naviguer dans le journal.
3 Décrochez l'écouteur ou appuyez à nouveau sur la touche mode
mains-libres pour appeler votre correspondant.
Enregistrer un numéro dans le répertoire ou comme numéro à sélection abrégée avec les
touches M1 à M3
1 Appuyez sur la touche du journal des appels.
2 Appuyez sur les touches de défilement vers le haut et le bas pour
naviguer dans le journal et validez.
3 Sélectionnez «ENREG REPERT» ou «ENREG MX» (MX = M1 to
M3) et validez.
4 Vous pouvez maintenant entrer ou éditer le nom et valider.
5 Entrez ou éditez le numéro de téléphone et validez.
Effacer un contact ou tous les contacts du journal des appels
1 Appuyez sur la touche du journal des appels.
2 Appuyez sur les touches de défilement vers le haut et le bas pour
naviguer dans le journal et validez.
3 Sélectionnez «EFFACE» ou «EFFACE TOUT» et validez.
Important : Seuls les anciens appels sont effacés. Les nouveaux appels qui n'ont pas encore
été consultés ou auxquels vous n'avez pas encore répondu sont conservés.
51
Fonctionnement du téléphone
4.17 Passer un appel interne sur un combiné et le transmettre au combiné sans fil
Vous pouvez en même temps transmettre un appel de la base au combiné ou parler au correspondant
externe et à un second correspondant sur le combiné sans (conférence téléphonique).
1 Appuyez sur la touche INT et maintenez-la enfoncée pendant 3
secondes jusqu'à ce que vous entendiez un signal audio puis
relâchez-la. «INTERNE» s'affiche.
2 Entrez le numéro du combiné. Une fois que la communication a été
établie avec le combiné, vous pouvez téléphoner en interne.
3 Raccrocher l'écouteurpour transférer la communication vers le
combiné.
OU
4 Appuyez sur la touche INT et maintenez-la enfoncée pendant 3
secondes pour lancer une conférence
4.18 Trouver le combiné (fonction paging)
Vous pouvez utiliser cette fonction pour retrouver votre combiné.
1 Appuyez sur la touche paging qui se trouve sur la base.
Le combiné va sonne 30 secondes et la LED rouge qui se trouve sur le
combiné va clignoter.
2 Appuyez sur une touche quelconque pour arrêter la sonnerie.
4.19 La touche R (Flash)
Appuyez sur la touche Flash qui se trouve sur la base pour utiliser les services spéciaux de votre ligne
externe tels que «Mise en attente» (à condition que votre opérateur offre ce service) ou pour
transmettre un appel si vous utilisez un PBX. La touche Flash R interrompt brièvement votre
communication. Vous pouvez régler ce temps d'interruption sur 100 ms ou 300 ms. Cependant si votre
système requiert un temps de flash plus long, vous pouvez le modifier.
1 Appuyez sur la touche Menu / OK.
2 Selectionnez «BASE» et validez.
3 Selectionnez «RAPPEL» et validez.
4 Sélectionnez maintenant «LONG» ou «COURT» et validez.
52
Comment utiliser le combiné sans fil
5 Comment utiliser le combiné sans fil
Info : Cette section décrit seulement les fonctions du combiné sans fil ! Vous trouverez des
informations sur la manière d'utiliser votre base à la section «4 Fonctionnement du
téléphone».
5.1 Changer de langue
1 Appuyez sur la touche Menu / OK.
2 Selectionnez «COMBINE» et validez.
3 Selectionnez «LANGUE» et validez.
4 Selectionnez la langue requise et validez.
5 Appuyez sur la touche Échappement pour retourner au mode veille.
5.2 Appels sortants
Passer une communication
1 Appuyez sur la touche d'appel.
2 Entrez le numéro de téléphone.
3 Appuyez sur la touche Raccrocher pour terminer la communication.
Préparer la communication
1 Entrez le numéro de téléphone.
Vous pouvez corriger un numéro incorrect en utilisant la touche mode
Muet.
Si vous n'appuyez pas sur une touche quelconque pendant 10
secondes, le numéro disparaît et le combiné retourne en mode veille.
2 Appuyez sur la touche d'appel.
Le numéro est automatiquement composé.
3 Appuyez sur la touche Raccrocher pour terminer la communication.
Recomposer le dernier numéro appelé
1 Appuyez sur la touche d'appel.
2 Appuyez sur la touche Rappel du dernier numéro.
Le dernier numéro appelé est automatiquement composé.
3 Appuyez sur la touche Raccrocher pour terminer la communication.
Recomposer l'un des 3 numéros derniers numéros appelés
1 Appuyez sur la touche Rappel du dernier numéro. Le dernier numéro
appelé s'affiche.
Si vous voulez recomposer l'un des 3 numéros, maintenez enfoncée la
touche Rappel du dernier numéro jusqu'à ce que le numéro que vous
voulez recomposer s'affiche.
2 Appuyez sur la touche d'appel.
Le numéro est automatiquement composé.
53
Comment utiliser le combiné sans fil
3 Appuyez sur la touche Raccrocher pour terminer la communication.
5.3 Appels entrants
Lorsque vous recevez un appel, le combiné et la base sonnent et la LED de «signal visuel d'appel»
clignote sur ce combiné et cette base.
1 Appuyez sur la touche «Prise d'appel» pour répondre.
2 Appuyez sur la touche Raccrocher pour terminer la communication.
5.4 Activer/Désactiver le mode mains-libres
Vous pouvez utiliser cette fonction pour répondre à un appel sans avoir besoin de tenir le ou si l'appel
a déjà été dirigé vers le combiné.
Pendant la communication :
1 Appuyez sur la touche mode mains-libres pour activer la fonction.
2 Appuyez à nouveau sur la touche mode mains-libres pour refaire
basculer la communication sur le combiné.
Important : les piles se déchargent plus rapidement si vous utilisez le mode mains-libres
pendant longtemps !
5.5 Mute (mode Muet)
Vous pouvez couper le microphone du combiné pour parler à un tiers sans que votre correspondant
puisse entendre votre conversation.
1 Appuyez sur la touche Muet.
Le microphone est mis en mode Muet et «MUET ENCL» s' affiche.
2 Appuyez à nouveau sur la touche Muet pour réactiver le microphone.
5.6 Régler le volume de l'écouteur/mode mains-libres
Pendant la communication :
1 Appuyez sur les touches de défilement vers le haut et le bas. Vous
pouvez régler le volume sur les niveaux 1 à 5.
5.7 La touche R (Flash)
R
Appuyez sur la touche Flash qui se trouve sur la base pour utiliser les
services spéciaux de votre ligne externe tels que «Mise en attente» (à
condition que votre opérateur offre ce service) ou pour transmettre un
appel si vous utilisez un PBX. La touche Flash R interrompt brièvement
votre communication. Vous pouvez régler ce temps d'interruption sur
100 ms ou 300 ms. Pour régler un temps de flash différent, voir la
section «4.19 La touche R (Flash)».
5.8 Sélectionner la mélodie de la sonnerie et régler son volume sonore
Mélodie de la sonnerie du combiné pour des appels internes/externes
1 Appuyez sur la touche Menu / OK.
2 Sélectionnez «COMBINE» et validez.
3 Sélectionnez «SONNERIE» et validez.
4 Sélectionnez «INTERNE» ou «EXTERNE» et validez.
5 Sélectionnez maintenant une mélodie (1 à 9) et validez.
54
Comment utiliser le combiné sans fil
Volume de la mélodie de la sonnerie du combiné
1 Appuyez sur la touche Menu / OK.
2 Sélectionnez «COMBINE» et validez.
3 Sélectionnez «SONNERIE» et validez.
4 Selectionnez «VOLUME» et validez.
5 Selectionnez le volume requis (désactivé, 1 à 5) et validez.
Important : Vous pouvez activer ou désactiver le volume de la mélodie de n'importe quel
combiné simplement en maintenant appuyée la touche de mélodie activée/désactivée en
mode veille
5.9. Verrouillage des touches
Lorsque le verrouillage des touches est activé, appuyer en mode veille sur une touche quelconque
n'aura aucun effet (à l'exception de la touche de verrouillage des touches).
1 Appuyez sur la touche de verrouillage des touches et maintenez-la
appuyée.
L'icône s'affiche à l'écran.
2 Appuyez à nouveau sur la touche de verrouillage des touches pour
désactiver le verrouillage.
Lorsque le verrouillage des touches est activé, vous pouvez continuer
de répondre à des appels entrants en appuyant sur la touche de prise
d'appel. Le clavier fonctionne comme d'habitude pendant la
communication. Le verrouillage du clavier est à nouveau activé après
la communication.
5.10 Nom du combiné
Vous pouvez changer le nom qui s'affiche à l'écran (max. 12 caractères) si une communication n'est
pas passée.
1 Appuyez sur la touche Menu / OK.
2 Sélectionnez «COMBINE» et validez.
3 Sélectionnez «NOM COMBINE» et validez.
4 Effacez le nom précédent en utilisant la touche mode Muet et
entrez-en un nouveau.
5 Appuyez sur OK pour valider.
6 Appuyez sur la touche Échappement pour retourner en mode veille.
5.11 Activer/Désactiver le bip du clavier
1 Appuyez sur la touche Menu / OK.
2 Sélectionnez «COMBINE» et validez.
3 Selectionnez «BIP TOUCHE» et validez.
4 Sélectionnez maintenant «MARCHE» ou«ARRET» et validez.
55
Comment utiliser le combiné sans fil
5 Appuyez pour valider.
6 Appuyez sur la touche Échappement pour retourner en mode veille.
5.12 Répertoire
Vous pouvez enregistrer 50 contacts dans le répertoire Les noms peuvent contenir jusqu'à 16
caractères et les numéros jusqu'à 24 chiffres.
Ajouter un contact dans le répertoire
1 Appuyez sur la touche répertoire
2 Appuyez deux fois sur la touche Menu / OK.
3 Entrez le nom et validez.
4 Entrez le numéro de téléphone et validez.
Vous entendez alors un bip de validation.
Composer un numéro à sélection abrégée
1 Appuyez sur la touche répertoire
2 Défilez jusqu'àu contact requis ou entrez l'initiale du nom.
3 Appuyez sur la touche Répertoire pour faire afficher le numéro de
téléphone.
4 Puis appuyez sur la touche d'appel. Le numéro est automatiquement
composé.
5 Appuyez sur la touche Raccrocher pour terminer la communication.
Éditer un contact dans le répertoire
1 Appuyez sur la touche répertoire
2 Défilez jusqu'àu contact requis ou entrez l'initiale du nom.
3 Appuyez sur la touche Répertoire pour faire afficher le numéro de
téléphone.
4 Appuyez sur la touche Menu / OK.
5 Selectionnez «MODIFIE» et validez.
6 Entrez le nom et validez.
7 Entrez ou éditez le numéro de téléphone et validez.
Effacer un contact ou tous les contacts du répertoire
1 Appuyez sur la touche répertoire
2 Défilez jusqu'àu contact requis ou entrez l'initiale du nom.
3 Appuyez sur la touche Répertoire pour faire afficher le numéro de
téléphone.
56
Comment utiliser le combiné sans fil
4 Appuyez sur la touche Menu / OK.
5 Sélectionnez «EFFACE» pour effacer le contact actuel et confirmez.
OU
6 Sélectionnez «EFFACE TOUT» pour effacer tous les contacts et
confirmez.
7 Validez à nouveau ou appuyez sur la touche Échappement pour
sauter.
5.13 Identification de l'appelant (CLIP)
Le DCC632x affiche le numéro de téléphone d'appels entrants. Vous ne pouvez utiliser cette fonction
que si vous bénéficiez de ce service auprès de votre opérateur. Veuillez le contacter pour obtenir de
plus amples informations. Lorsque vous recevez un appel, le numéro est enregistré dans un journal
des appels. Celui-ci peut contenir jusqu'à 30 numéros (à 23 chiffres chacun).
Si le numéro contient plus de 12 chiffres, vous pouvez défilez vers la
droite dans l'écran pour voir les autres chiffres.
Nouveaux appels
Si un nouvel appel est enregistré dans le journal des apels, l'icône
CLIP clignote sur l'écran.
Ouvrir le journal des appels
1 Appuyez sur la touche du journal des appels.
Le dernier appel reçu s'affiche. Si le journal est vide, le mot «VIDE»
s'affiche.
2 Appuyez sur la touche répertoire pour sauter le numéro.
3 Appuyez sur la touche répertoire pour sauter la date et l'heure.
4 Appuyez sur les touches de défilement vers le haut et le bas pour
naviguer dans le journal.
5 Appuyez sur la touche Échappement pour quitter le journal des
appels.
Composer un numéro depuis le journal des appels
1 Appuyez sur la touche du journal des appels.
2 Naviguez dans le journal jusqu'à ce que s'affiche le numéro de
téléphone de votre choix.
3 Appuyez sur la touche d'appel pour commencer la communication.
Le numéro est automatiquement composé.
4 Appuyez sur la touche Raccrocher pour terminer la communication.
57
Comment utiliser le combiné sans fil
Effacer un numéro du journal des appels
1 Appuyez sur la touche du journal des appels.
2 Naviguez dans le journal jusqu'à ce que s'affiche le numéro de
téléphone de votre choix.
3 Appuyez sur la touche Menu / OK.
4 Sélectionnez «EFFACE» pour effacer le contact actuel et validez.
OU
5 Sélectionnez «EFFACE TOUT» pour effacer tous les contacts et
validez.
6 Appuyez sur OK pour valider ou sur la touche Échappement pour
retourner au menu précédent.
Enregistrer un numéro dans le journal des appels comme numéro à sélection abrégée
1 Appuyez sur la touche du journal des appels.
2 Naviguez dans le journal jusqu'à ce que s'affiche le numéro de
téléphone de votre choix.
3 Appuyez sur la touche Menu / OK.
4 Sélectionnez «MEMO NUMERO» et validez.
5 Éditez ou ajoutez un nom et validez.
6 Éditez le numéro de téléphone et validez.
5.14 Remettre le combiné aux réglages en usine
Cette action efface toutes les modifications et restaure tous les réglages par défaut (volume de la
mélodie de la sonnerie , mélodie de la sonnerie, etc.). Le journal des appels, la liste de rappel du
dernier numéro et le répertoire sont également effacés !
1 Appuyez sur la touche Menu / OK.
2 Sélectionnez «COMBINE» et validez.
3 Sélectionnez «RAZ» et validez.
4 Entrez le code PIN de la base (par défaut 0000).
5 L'appareil retourne en mode veille.
Les réglages par défaut sont les suivants :
58
Nom du combiné
SWITEL
Volume de l'écouteur
Niveau 3
Volume de la mélodie de la sonnerie
Niveau 3
Mélodie de la sonnerie externe
Mélodie de la sonnerie 8
Mélodie de la sonnerie interne
Mélodie de la sonnerie 1
Bip du clavier
Activé
Enregistrer et supprimer un combiné
5.15 Écran de la messagerie vocale
Cet écran fonctionne uniquement si vous avez activé la messagerie vocale ou le service de message
téléphonique et si votre opérateur transmet cette information avec l'identification de l'appelant !
l'icône s'affiche à
Lorsque vous recevez un nouveau message dans votre messagerie vocale,
disparaît dès que vous avez écouté votre message.
l'écran. L'icône
6 Enregistrer et supprimer un combiné
6.1 Enregistrer un combiné sur la base du DCC632x
Vous pouvez enregistrer jusqu'à 5 combinés sur une base. Chaque combiné est déjà enregistré sur la
base à sa livraison. Vous devez uniquement enregistrer le combiné si :
celui-ci a été auparavant supprimé de sa base (p. ex. pour réinitialisation)
vous voulez enregistrer un combiné différent sur la base.
La description suivante s'applique uniquement aux combinés et bases DCC632x.
1 Appuyez sur la touche paging qui se trouve sur la base pendant 10
secondes. «Annoncer» s'affiche sur l'écran de la base. Cela signifie
que celle-ci est en mode enregistrement. Vous pouvez maintenant
enregistrer le combiné comme suit :
2 Appuyez sur la touche Menu / OK qui se trouve sur le combiné.
3 Sélectionnez «ENREG COMB» et validez.
4 Entrez le numéro de la base (1 à 4) sur laquelle vous voulez
enregistrer le combiné.
5 L'appareil va rechercher la base. Quand il l'a trouvée, on vous
demande d'entrer le code PIN à 4 chiffres.
6 Entrez le code PIN de la base (par défaut 0000). Si le code PIN code
est incorrect, le combiné va recommencer à rechercher la base.
Lorsque le combiné a été enregistré, son nom et son numéro s'affiche.
Info : Pour modifier le code de la base, voir «4.14 Programmer le code PIN».
6.2 Supprimer un combiné de la base du DCC632x
Vous pouvez supprimer un combiné d'une base pour en enregistrer un autre.
1 Appuyez sur la touche Menu / OK.
2 Sélectionnez «SUPPR CB» et validez.
3 Entrez le code PIN de la base (par défaut 0000).
4 Entrez le numéro interne du combiné que vous voulez supprimer (1 à
5) et validez.
Lorsque la suppression du combiné a réussi, il retourne en mode veille.
Sinon on vous demande d'entrer à nouveau le numéro du combiné.
6.3 Supprimer un combiné de la base du DCC632x via le combiné
1 Appuyez sur la touche Menu / OK.
2 Sélectionnez «SUPPR COMB» et validez.
3 Entrez le code PIN de la base (par défaut 0000).
59
Enregistrer et supprimer un combiné
4 Entrez le numéro interne du combiné que vous voulez supprimer (1 à
5) et validez.
Lorsque la suppression du combiné a réussi, il retourne en mode veille.
Sinon on vous demande d'entrer à nouveau le numéro du combiné.
Important : vous ne pouvez supprimer des combinés que si vous ne les utilisez pas.
6.4 Sélectionner une base
Si votre combiné est enregistré sur plus d'une base (max. 4), vous devez sélectionner l'une de ces
bases puisque le combiné communique seulement avec une base à la fois. Vous disposez de deux
options :
Sélection automatique
Si vous réglez le combiné sur «Auto», celui-ci recherchera automatiquement la base la plus proche en
mode veille.
1 Appuyez sur la touche Menu / OK.
2 Sélectionnez «COMBINE» et validez.
3 Sélectionnez «CHOIX BASE» et validez.
4 Sélectionnez «AUTO» et validez.
Info : Si vous autorisez la base à être sélectionnée automatiquement et que le combiné est
hors de portée de ladite base, celui-ci recherchera uniquement la base la plus puissante en
mode veille (pas pendant une communication).
Sélection manuelle
Si vous réglez le combiné sur «Manuel», celui-ci recherchera seulement la base la plus proche que
vous avez programmée.
1 Appuyez sur la touche Menu / OK.
2 Sélectionnez «COMBINE» et validez.
3 Sélectionnez «CHOIX BASE» et validez.
4 Sélectionnez «MANUEL» et validez.
5 Sélectionnez la base et validez.
Important : Pour que la base et le combiné puissent communiquer, ce dernier doit être
enregistré sur celle-ci.
60
Transfert d'appel et appels internes
7 Transfert d'appel et appels internes
7.1 Transfert d'appel et conférences pendant une communication externe
INT
INT
INT
1 Pendant une communication externe, appuyez sur la touche INT et
ensuite sur le numéro du combiné (1 à 5, sélectionnez «0» pour la
base).
L'autre combiné va sonner.
Si la communication avait été établie avec l'autre combiné, vous
pouvez téléphoner en interne. Si vous raccrochez, l'appel externe sera
transféré vers l'autre combiné.
2 Appuyez sur la touche INT et maintenez-la appuyée pendant 3
secondes. Maintenant vous pouvez communiquer avec le deuxième
combiné et l'appel externe en même temps (conférence téléphonique).
3 Appuyez à nouveau sur la touche INT pour retourner à l'appel
externe.
4 Appuyez sur la touche Raccrocher pour terminer la communication.
7.2 Communication interne (fonction téléphoner en interne)
Info : Vous pouvez passer une communication entre la base et le combiné sans fil. La base
a le numéro interne «0».
INT
1 En mode veille, appuyez sur la touche INT et ensuite sur le numéro
du combiné (1 à 5, sélectionnez «0» pour la base).
Le combiné ou la base que vous avez appelé(e) va maintenant sonner.
2 Appuyez sur la touche d'appel ou décrochez l'écouteur de la base.
Vous pouvez maintenant téléphoner en interne.
61
Abréviations et termes techniques
8 Abréviations et termes techniques
CLIP
Calling Line Identification Presentation (affichage du numéro de l'appelant).
DECT
Digital Enhanced Cordless Telecommunication; Norme européenne de
téléphonie numérique sans fil optimisée.
Mode ECO
Mode économique ; Le téléphone DECT offre une faible consommation
d’énergie et une réduction des émissions.
Touche Flash Produit une brève interruption de la ligne utilisée pour activer des fonctions
telles que basculement ou transfert d'appel. Sur les PBXs, la touche flash ou R
est utilisée pour rappeler en interne.
62
GAP
Generic Access Profile ; interface sans-fil normalisée entre la base et le
combiné pour faciliter l'établissement de la communication.
INT
Abonné interne. Autre combiné ou installations PABX à l'intérieur d'un PBX.
Mode par
impulsions
Mode de numération analogique obsolète («bruits de cliquetis» émis pendant la
composition du numéro).
LCD
Écran à cristaux liquides
LED
Diode électroluminescente
DTMF
Dual Tone Multiple Frequency; moderne, mode de composition du numéro
numérique.
PIN
Personal Identification Number ; numéro d'identification personnelle.
Touche R
Touche Rappel (voir touche Flash )
Mode veille
État «mort» d'un appareil sans être complètement éteint.
Twin
Désignation d'un appareil ayant deux unités identiques, p. ex. deux combinés.
Remédier aux problèmes
9 Remédier aux problèmes
Problème
Cause possible :
Solution
Pas d'écran
Les piles ne sont pas chargées
Vérifiez que les deux piles ont
été insérées correctement
Pas de son
Le câble téléphonique n'est
pas raccordé correctement.
Vérifier le raccordement.
La ligne est occupée par un
combiné différent
Attendre que l'autre combiné
soit raccroché
Recharger les piles
La voix de l'appelant est trop
faible.
Régler le volume pendant la
communication en utilisant la
touche de volume
Le volume de la mélodie de la
sonnerie est trop faible.
Régler le volume
Il n'est pas possible de
composer un numéro.
Le mode de numérotation est
programmé incorrectement.
Voir «4.13 Programmer le
mode de numérotation» pour
programmer le mode de
numérotation correct
L'icône de l'antenne clignote
Le combiné est hors de portée.
Déplacer le combiné à
l'intérieur de la portée de la
base.
La base n'a pas de courant.
Contrôler l'adaptateur secteur
et le câble.
Le combiné n'est pas
enregistré sur la base
Enregistrer le combiné sur la
base
La base ou le combiné ne
sonne pas
Le volume de la mélodie de la
sonnerie est désactivée ou
faible
Régler le volume de la mélodie
Un appel ne peut être transféré
vers un téléphone.
Le temps de flash est trop court Programmer un temps de flash
plus long sur l' appareil
Le téléphone ne répond pas
quand vous appuyez sur les
touches
Erreur de fonctionnement
Retirer les piles et les réinsérer
«REPOND ON»
La ligne est occupée par un
combiné différent
Attendre que l'autre combiné
soit raccroché
Ne modifiez pas ni ne réparez l'appareil vous-même. Des réparations effectuées incorrectement
peuvent engendrer des risques importants pour l'utilisateur.
En cas de problèmes techniques, vous pouvez contacter notre ligne directe, Tél. 0900 00 1675 en
Suisse (frais Swisscom au moment de l'impression de ce manuel : CHF 2.60/min). En cas de
réclamations répondant aux termes de la garantie, veuillez contacter notre service après-vente. La
période de garantie est de 2 ans.
63
Consignes générales concernant l'appareil
10 Consignes générales concernant l'appareil
10.1 Maintenance
L'appareil est sans entretien. Vérifier de temps en temps l'état despiles et remplacez-les par des
nouvelles du même type si leur performance diminue ou si elles commencent à fuir.
Avertissement : Risque de brûlures dû à des substances chimiques !
Porter des gants de protection pour retirer les piles.
Si l'appareil entre en contact avec du liquide, retirer immédiatement les piles, le débrancher de
l'alimentation électrique (base) et l'essuyer avec précaution. Contrôler son fonctionnement au bout de
2 à 3 jours.
10.2 Nettoyage
Avertissement : Risque de choc électrique ou de court-circuit provenant du contact avec
des conducteurs d'électricité. Empêchez que des liquides ne pénètrent dans l'appareil. Si
cela se produisait débrancher l'adaptateur secteur de la prise d'alimentation et la fiche du
câble téléphonique de la prise murale puis retirer les piles. Faire de même si l'appareil, le
câble ou l'adaptateur secteur sont endommagés : éviter un contact direct avec des liquides
et débrancher immédiatement l'appareil du secteur 230 V.
Nettoyer le téléphone avec un chiffon humide que vous aurez auparavant trempé dans de l'eau tiède
ou avec un chiffon antistatique. Ne jamais utiliser de produit de nettoyage ou d'abrasifs.
10.3 Mise hors service, entreposage
Pour mettre l'appareil temporairement hors service, débrancher le câble du téléphone de la prise
murale et de celle du téléphone sur la base. Débrancher les adaptateurs secteur de la base et du
combiné des prises 230 V.
Retirer les piles du combiné. Si le téléphone est mis hors service pendant une période prolongée,
remplacer les piles par des nouvelles du même type au moment de sa remise en service. Entreposer
les appareils et les piles à un endroit sec et pas trop chaud.
10.4 Traitement des appareils
Si vous ne voulez plus vous servir de votre appareil, veuillez l’apporter au centre de
collecte de l’organisme d’élimination des déchets de votre commune (par ex. centre de
recyclage). D’après la loi relative aux appareils électriques et électroniques, les
propriétaires d’appareils usagés sont tenus d’apporter tous les appareils électriques et
électroniques hors de service dans un collecteur séparé. L’icône ci−contre signifie que
vous ne devez en aucun cas jeter votre appareil dans les ordures ménagères !
Risque pour l’homme et l’environnement dû aux piles !
Ne jamais ouvrir, endommager, avaler les piles ou ne jamais faire pénétrer leur
contenu dans l’environnement. Elles peuvent contenir des métaux lourds toxiques
nuisibles pour celui−ci. Vous êtes tenus par la loi d’éliminer vos piles et piles
rechargeables auprès d’un revendeur de piles ainsi qu’auprès de centres de collecte
responsables de leur élimination qui mettent des conteneurs adéquats à disposition.
L’élimination des piles est gratuite. L’icône ci-contre signifie que vous ne devez en
aucun cas jeter les piles dans les ordures ménagères, mais que vous devez les
éliminer auprès de centres de collecte !
Éliminer les matériaux d'emballage conformément au règlement local.
64
Données techniques
11 Données techniques
Standard
DECT (Digital Enhanced Cordless
Telecommunications) (norme de téléphonie
numérique sans-fil optimisée)
GAP ( Generic Access Profile ) (facilité de
l'établissement de la communication)
Bande de fréquences
1,880 MHz à 1,900 MHz
Émissions
10 mW (puissance de sortie moyenne par
bande)
Portée
Jusqu'à 300 m en terrain dégagé- jusqu'à 50 m
en intérieur
Piles du combiné :
2 x 1.2 V, 450mAh AAA type piles rechargeables
NiMh
Alimentation électrique de la base
Entrée : 100~240 V CA / 50-60 Hz
Sortie : 6 V CC / 500 mA
Alimentation électrique du chargeur
Entrée : 230 V AC / 50 Hz
Sortie : 7 V DC / 420 mA
Autonomie du combiné en veille :
100 heures
Autonomie du combiné en communication :
10 heures
Temps de charge :
16 heures
Températures ambiantes autorisées
+5 °C à + 45 °C
Humidité atmosphérique relative autorisée
25 à 85 %
Mode de numérotation
Numérotation par impulsions et tonalité (DTMF)
Temps de flash :
100 ou 300 ms
Mémoire des numéros du combiné
50 contacts de 1 à 24 chiffres et 16 caractères.
Mémoire des numéros de la base
3 numéros à sélection abrégée (M1 à M3) de 1
à 24 chiffres.
50 contacts dans le répertoire de 1 à 24 chiffres
et 16 caractères.
Dimensions base /
Chargeur/
Combiné
200 mm x 71 mm x 183 mm /
104 mm x 100 mm x 59 mm /
182 mm x 284 mm x 58 mm
Poids base /
Chargeur/
Combiné
763 g avec adaptateur secteur /
185 g avec adaptateur secteur /
147 g avec piles
Puissance absorbée maximum
Base avec écouteur : 2.0 W
Chargeur avec combiné : 1.3 W
65
Garantie
12 Garantie
Les appareilsSWITEL sont fabriqués selon des procédés et contrôles de pointe. Des matériels
sélectionnés et des technologies très développées garantissent un fonctionnement irréprochable et
une longue durée de vie. La garantie ne s’applique pas si la cause d’une erreur de fonctionnement de
l’appareil repose sur l’opérateur de réseau de téléphonie mobile/fournisseur ou sur tout autre système
de raccordement privé interposé. La garantie ne s'applique pas aux piles ou packs de piles utilisés
dans les produits. La durée de la garantie est de 24 mois à partir de la date d’achat.
Pendant la durée de la garantie, tous les défauts dus à des vices de matériel ou de fabrication seront
éliminés gratuitement. Le droit à la garantie expire en cas d’intervention de l’acheteur ou de tiers. Les
dommages provenant d’un maniement ou d’une manipulation incorrect(e), d’une usure naturelle,
d’une mauvaise mise en place ou d’une mauvaise conservation, d’un raccordement ou d’une
installation incorrects ainsi que d’un cas de force majeure ou autres influences extérieures sont exclus
de la garantie. Nous nous réservons le droit, en cas de réclamations, de réparer ou de remplacer les
composants défectueux ou d’échanger l’appareil. Les composants remplacés ou les appareils
échangés deviennent notre propriété. Les demandes de dommages et intérêts sont exclues tant
qu’elles ne reposent pas sur l’intention ou une négligence grossière du fabricant.
Si toutefois votre portable présentait un défaut pendant la période de garantie, veuillez vous adresser
exclusivement au revendeur auprès duquel vous avez acheté votre appareil SWITEL, en n’oubliant
pas de vous munir de votre bon d’achat. Vous pouvez faire valoir vos droits à la garantie selon ces
dispositions exclusivement auprès de votre revendeur. Deux ans après l’achat et la remise de nos
produits, il n’est plus possible de faire valoir les droits à la garantie.
13 Déclaration de conformité
Cet appareil répond aux exigences des directives de l’union européenne (UE) :
1999/5/CE Directive sur les installations de radio et de télécommunication et la
reconnaissance réciproque de leur conformité. La conformité à la directive nommée
ci−dessus est confirmée par la marque CE apposée sur l’appareil Pour obtenir la
déclaration de conformité intégrale, veuillez vous servir du téléchargement gratuit de
notre site Internet www.switel.com.
14 Consommation électrique
La base du téléphone est équipée d'une alimentation à découpage à efficacité énergétique
élevée (entrée 100~240 VCA, sortie 6 VCC, 500 mA). La puissance nulle est d’env. 0.06 W.
L’efficacité moyenne est d’env. 71%. La puissance absorbée de la base est :
- en fonctionnement (veille/communication) : env. 0.52 W, env. 0.68 W
La station d'accueil fournie avec le kit téléphone est équipée d'une alimentation à dé
coupage à efficacité énergétique élevée (entrée 100~240 VCA, sortie 7 VCC, 420 mA). La
puissance nulle est d’env. 0.06 W. L’efficacité moyenne est d’env. 72.1%.La puissance ab
sorbée de la station d'accueil est :
- sans combiné : env. 0.06 W,
- pendant la charge du combiné : env. 0.65 W
66
3
1
2
3
4
5
6
7
8
9
10
11
12
13
14
Contenuto
In generale . . . . . . . . . . . . . . . . . . . . . . . . . . . . . . . . . . . 68
Indicazioni di sicurezza . . . . . . . . . . . . . . . . . . . . . . . . . . 70
Primi passi . . . . . . . . . . . . . . . . . . . . . . . . . . . . . . . . . . . 72
Uso del telefono . . . . . . . . . . . . . . . . . . . . . . . . . . . . . . . 78
Uso dell’unità portatile cordless . . . . . . . . . . . . . . . . . . . . 85
Registrazione e deregistrazione del portatile . . . . . . . . . . . 91
Inoltro di chiamata e chiamate interne . . . . . . . . . . . . . . . . 93
Sigle e dati tecnici . . . . . . . . . . . . . . . . . . . . . . . . . . . . . . 94
In caso di guasti . . . . . . . . . . . . . . . . . . . . . . . . . . . . . . . 95
Assistenza . . . . . . . . . . . . . . . . . . . . . . . . . . . . . . . . . . . 96
Dati tecnici . . . . . . . . . . . . . . . . . . . . . . . . . . . . . . . . . . . 97
Garanzia . . . . . . . . . . . . . . . . . . . . . . . . . . . . . . . . . . . . 98
Dichiarazione di conformità . . . . . . . . . . . . . . . . . . . . . . . 98
Consumo elettrico . . . . . . . . . . . . . . . . . . . . . . . . . . . . . . 98
67
In generale
1 In generale
Prima della messa in funzione
Grazie per aver acquistato questo nuovo telefono digitale senza fili.
Scopo d’impiego:
Il prodotto è concepito per il collegamento ad una linea telefonica analogica in ambienti interni.
Il prodotto è conforme allo standard DECT = Digital Enhanced Cordless Telecommunications. La
tecnologia DECT consente una ricezione esente da interferenze e una trasmissione digitale d’alta
qualità. Il telefono è stato progettato per un ampio numero di applicazioni. Il telefono è utilizzabile, per
esempio, all’interno di una rete con 5 unità portatili.
La visualizzazione dell’ID del chiamante è un servizio a cura del provider di rete. Una volta attivato
l’inoltro dell’ID del chiamante, il telefono visualizza il numero telefonico del chiamante.
Importante
L’uso della funzione 'ID chiamante' (visualizzazione del chiamante) presuppone l’abilitazione della
propria linea telefonica a questo servizio. L’attivazione della funzione richiede, in linea generale,
un’abilitazione separata da parte della vostra società telefonica. Con funzione di inoltro ID del
chiamante disattivata, in caso di chiamate in arrivo i numeri telefonici NON sono visualizzati sul
display del vostro dispositivo.
Attenzione: Il prodotto funziona solo con batterie ricaricabili. In caso di inserimento di pile
non ricaricabili nell’unità portatile e posizionamento della stessa nella base, i possibili danni
causati all’unità portatile NON sono coperti da garanzia.
Connessione alla rete telefonica pubblica analogica.
Con riserva di modifiche alle caratteristiche descritte in questo manuale.
Il manuale d’uso riporta tutte le informazioni necessarie all’installazione, l’impostazione ed il
funzionamento del vostro dispositivo. Il manuale contiene in più informazioni e note importanti in
termini di sicurezza ed offre aiuto in caso di problemi. Tenere sempre il manuale d’uso nelle vicinanze
del dispositivo. Conservare questo manuale d’uso in un luogo sicuro e consegnarlo al nuovo
utilizzatore in caso di ulteriore cessione.
1.1 Il prodotto: DCC632x
Questo prodotto è stato realizzato in osservanza dello standard digitale per telefoni cordless (DECT).
La tecnologia DECT assicura un alto livello di sicurezza contro possibili interferenze e provvede ad
una trasmissione digitale d’alta qualità. Il presente telefono è destinato a varie applicazioni, per
esempio all’uso in un sistema telefonico PBX di stazioni base e unità portatili cordless: fino a 5 unità
cordless utilizzabili su una sola stazione base e una unità cordless registrabile su fino a 4 stazioni
base. Chiamate interne sono possibili tra la stazione base e l’unità portatile, oppure tra due unità
portatili. Se offerti dal vostro provider di servizi telefonici, il presente telefono è abilitato alle funzioni di
trasmissione dell’ID del chiamante e a servizi SMS. Utilizzando questi servizi, il numero telefonico del
chiamante è visualizzato sul display del telefono.
Importante: L’uso della funzione 'ID chiamante’ presuppone l’abilitazione della propria linea
telefonica a questo servizio. Vi preghiamo di consultare il vostro provider di rete telefonica
per informazioni sull’attivazione di questa funzione. Con funzione di inoltro dell’ID del
chiamante disattivata, in caso di chiamate in arrivo i numeri telefonici NON sono visualizzati
sul display del vostro dispositivo.
68
In generale
1.2 Parole chiave e simboli
Simbolo
Nessun
simbolo
Parola chiave
Significato
Avvertenza
Segnala il subentro di possibili lesioni gravi o di pericolo di vita
in caso di inosservanza delle informazioni indicate.
Attenzione
Segnala il subentro di possibili lesioni lievi in caso di
inosservanza delle informazioni indicate.
Attenzione
Segnala il subentro di possibili danni materiali o ambientali.
Importante
Richiama l’attenzione su importanti informazioni sul
funzionamento del dispositivo.
Nota,
Fornisce informazioni in generale o particolari suggerimenti.
suggerimento
1.3 Scopo d’impiego
Il prodotto è previsto per lo svolgimento di telefonate da rete fissa all’interno di una rete telefonica.
L’uso conforme del telefono è subordinato alla sua corretta installazione rispetto a quanto specificato
nel presente manuale d’uso. Qualsiasi altro impiego è ritenuto improprio e non è pertanto ammesso.
Ogni modifica o conversione del dispositivo da parte dell’utilizzatore non descritta in questo manuale
d’uso a come non conforme e non è pertanto ammessa. Si declina qualsiasi responsabilità per
qualsivoglia danno da ciò risultante.
1.4 Contenuto della confezione
Assicurarsi che il contenuto della confezione sia completo e non presenti danni. In caso di parti
mancanti o difettose, mettersi subito in contatto con il proprio rivenditore. Conservare la confezione in
caso di restituzione o invio del telefono per una possibile riparazione.
1 stazione base con ricevitore e cavo di connessione
1 adattatore di alimentazione per la stazione base
1 cavo telefonico per la stazione base
1 stazione di carica completa di apposito adattatore di alimentazione
1 unità portatile senza fili completa di 2 batterie ricaricabili (AAA, 1,2 V / 450 mAh, NiMH)
e coperchio del vano batterie
1 manuale d’uso
Avvertenza: Pericolo di soffocamento per bambini! Tenere lontano le pellicole d’imballo
dalla portata dei bambini.
Importante: Smaltire il materiale d’imballo in modo ecocompatibile e a rispetto
dell’ambiente!
69
Indicazioni di sicurezza
2 Indicazioni di sicurezza
Le seguenti indicazioni di sicurezza vanno sempre osservate quando si tratta di adoperare dispositivi
elettrici. Leggere con cura le seguenti indicazioni di sicurezza e i dettagli sul corretto uso del
dispositivo. È necessario che l’utilizzatore acquisisca familiarità con le funzioni del dispositivo.
Conservare questo manuale d’uso in un luogo sicuro e consegnarlo al nuovo utilizzatore in caso di
ulteriore cessione. Non passare il telefono a terzi se non dotato di manuale d’uso.
Rischi elettrici:
Avvertenza: Pericolo di lesioni o di vita dovuto a corrente elettrica! In caso di pericolo,
scollegare immediatamente il dispositivo dalla rete elettrica principale a 230 V.
Non utilizzare il dispositivo con connettore di rete danneggiato visto altrimenti il rischio di danni a
cavo o dispositivo. Evitare di fare cadere il dispositivo a terra visto altrimenti il rischio di un
danneggiamento.
La tensione elettrica all’interno del dispositivo è tale da raggiungere livelli pericolosi. Non aprire
mai l’involucro o non introdurre mai oggetti estranei attraverso le fessure di ventilazione.
Evitare la penetrazione di liquidi dentro il dispositivo. Se necessario, scollegare il connettore di
rete dalla presa elettrica e il cavo telefonico dalla presa a muro.
Anche in presenza di anomalie durante l’utilizzo del dispositivo e prima di procedere alla rispettiva
pulizia, scollegare il connettore di rete e il cavo telefonico dalla presa a muro.
Non toccare il caricatore e i connettori con oggetti appuntiti o metallici.
Non sottoporre il dispositivo a modifiche o riparazioni. La riparazione di dispositivo o cavo va
affidata unicamente ad un tecnico specializzato del centro di assistenza. Riparazioni eseguite non
correttamente possono costituire un rischio per l’utilizzatore.
Spesso i bambini sottovalutano i pericoli legati all’utilizzo di dispositivi elettrici. Non lasciare mai
bambini in prossimità di dispositivi elettrici senza la dovuta sorveglianza.
Non lasciare giocare bambini con il dispositivo o sue parti.
Attenzione: Pericolo di possibili danni al dispositivo. In caso di pericolo , scollegare
immediatamente il dispositivo dalla rete elettrica principale a 230 V.
Non utilizzare il dispositivo in ambienti umidi (ad es. in bagno) o molto polverosi.
In caso di temporale, i dispositivi collegati alla rete elettrica principale possono subire dei danni.
Scollegare pertanto sempre il dispositivo in caso di temporale.
Estrarre il connettore di rete dalla presa in modo da scollegare il dispositivo dall’alimentazione
elettrica. Tirare sempre dalla spina, mai dal cavo.
Controllare regolarmente i cavi alla presenza di danni, proteggerli dal contatto con superfici calde
o da altri pericoli, srotolarli completamente e posarli in modo da evitare che possano essere
inciampati o incastrati.
Rischio di incendio:
Avvertenza: Pericolo di lesioni o di vita dovuto a fuoco! In caso di pericolo, non esporre il
dispositivo a caldo eccessivo e scollegare immediatamente il dispositivo dalla rete elettrica
principale a 230 V.
Il calore generato dal dispositivo può causare danni o un incendio al suo interno. Non esporre
pertanto il dispositivo a temperature estreme:
Evitare un’esposizione a calore e ai raggi solari diretti.
Non coprire le fessure di ventilazione sul dispositivo.
70
Indicazioni di sicurezza
Rischio di esplosione:
Avvertenza: Pericolo di lesioni dovuto a esplosioni! Prestare particolare attenzione in
presenza di bambini!
Non gettare mai pile o batterie ricaricabili nel fuoco.
Non utilizzare il dispositivo in un ambiente a rischio di esplosioni!
Rischio di avvelenamento:
Avvertenza: Pericolo di lesioni dovuto ad avvelenamento! Prestare particolare attenzione
in presenza di bambini!
Tenere lontano pile e batterie ricaricabili dalla portata dei bambini.
Rischio di soffocamento:
Avvertenza: Pericolo di lesioni dovuto a soffocamento! Prestare particolare attenzione in
presenza di bambini!
Tenere lontano le pellicole d’imballo dalla portata dei bambini.
L’uso di prolunghe di cavo rappresenta un possibile rischio per i bambini (pericolo di
strangolamento).
Guasti:
Avvertenza: Possibile pericolo di lesioni dovuto a guasti del dispositivo! Adoperare
particolare attenzione in presenza di apparecchiature mediche.
Il funzionamento di apparecchiature mediche può subire interferenze per via delle radiazioni
elettromagnetiche emanate dal vostro dispositivo. Assicurarsi pertanto che il dispositivo sia
installato e messo in funzione a sufficiente distanza da eventuali apparecchiature mediche. Lo
stesso vale per apparecchiature mediche impiantate come nel caso di pacemaker.
Il portatile senza fili può causare un ronzio indesiderato in apparecchi acustici; tenere pertanto
lontano il portatile da eventuali apparecchi acustici.
Rischio di un possibile danneggiamento:
Attenzione: Pericolo di possibili danni al dispositivo! Leggere le informazioni di cui nel
presente manuale d’uso.
Utilizzare solo gli adattatori di alimentazione forniti in dotazione. Non utilizzare adattatori differenti
visto il pericolo di danni alle batterie ricaricabili.
La presa per il collegamento del connettore di rete deve trovarsi nelle immediate prossimità ed
essere facilmente accessibile.
Utilizzare solo le batterie ricaricabili fornite in dotazione. Dovendo sostituire le batterie, utilizzare
batterie ricaricabili dello stesso tipo. Assicurarsi che le batterie sono inserite con la giusta polarità
(il vano batterie del dispositivo riporta rispettive indicazioni). Non utilizzare pile convenzionali!
Importante: In caso di una caduta di corrente, la conduzione di telefonate è possibile solo
utilizzando la stazione base.
2.1 Note sull’esercizio a basse radiazioni
Il presente telefono cordless (compatibile con lo standard DECT) facilita l’esercizio a basse radiazioni
(modalità ECO). Con chiamata in corso, il portatile riduce la tensione di uscita radio a seconda della
distanza dalla stazione base. Se non si svolgono chiamate, il portatile riduce le emissioni radio ad un
minimo. Ciò non significa che le normali radiazioni DECT costituiscono un rischio per la salute. Un
esercizio a bassa tensione di uscita radio consente piuttosto di evitare un’esposizione alle radiazioni
superflua e prolungata. La stazione base non riduce invece la tensione di uscita radio! Installare la
stazione base in un punto facilmente accessibile, ad esempio in corridoio. Evitare di installare il
dispositivo nella stanza dei bambini o in soggiorno.
71
Primi passi
3 Primi passi
3.1 Uso del manuale d’uso
Nel presente manuale, le istruzioni d’uso sono strutturate come segue:
Testo ….. PORTATILE
Tasto da premere
Testo visualizzato sul display del telefono
3.2 Installazione della stazione base
Procedere all’installazione della stazione base come segue:
1 Collegare prima l’adattatore di alimentazione alla stazione base, quindi alla presa.
2 Collegare un’estremità del cavo telefonico alla presa telefonica a parete, l’altra estremità va
introdotta nell’innesto presente sul retro della stazione base.
3 Il cavo telefonico e il cavo di alimentazione vanno collegati secondo quanto illustrato in figura 3A.
A
- 3A Stazione base A. Presa telefonica a parete
B. Adattatore di alimenta
zione con cavo
C. Cavo telefonico
72
Primi passi
3.3 Caricatore dell’unità portatile
1
Introdurre l’adattatore di alimentazione in una presa elettrica.
- 3B Caricatore A. Adattatore di alimentazione con cavo
3.4 Unità portatile
Avvertenza: Pericolo di lesioni dovuto al rischio di esplosioni! Utilizzare solo le batterie ricari
cabili fornite in dotazioni o batterie dello stesso tipo. Non utilizzare pile convenzionali!
Altrimenti l’unità portatile potrebbe subire danni.
1
2
3
4
Aprire il vano batterie secondo quanto illustrato in figura 3C.
Inserire le batterie ricaricabili. Assicurarsi della corretta polarità (+ e -).
Chiudere il vano batterie.
Posizionare l’unità portatile nel caricatore e caricare le batterie per 16 ore. Il LED di carica è
acceso.
- 3C Retro dell’unità portatile A. Vano
B. Batterie ricaricabili
3.5 Montaggio a parete
La stazione base può essere montata a parete utilizzando 2 viti distanti 100 mm l’una dall’altra. Per
agganciare il ricevitore alla stazione base, il rispettivo supporto va girato di 180° secondo quanto
visualizzato.
- Supporto in
3D -
73
Primi passi
3.6 Indicazione dello stato delle batterie
L’unità portatile non funziona con batterie scariche. Con batterie completamente scariche,
posizionando brevemente l’unità portatile sulla stazione base si otterrà l’indicazione secondo cui le
batterie risultano cariche, mentre invece non lo sono e la capacità delle batterie si ridurrà
rapidamente. Lasciare in questo caso l’unità portatile nel caricatore per 16 ore, finché le batterie
risultano completamente cariche.
Batterie cariche
Batterie scariche
Con chiamata in corso, l’unità portatile emette un segnale acustico non
appena le batterie sono pressoché scariche. Posizionare l’unità portatile
nel caricatore in modo da ricaricare le batterie.
3.7 Tasti/Display
Unità portatile cordless
1.
2.
3.
4.
5.
6.
7.
8.
9.
10.
11.
12.
13.
14.
Ripeti selezione / Naviga in alto
Rubrica
Silenziamento / Cancella
Riaggancia
Tasti alfanumerici
Blocco dei tasti
Pausa
Suoneria ON/OFF
Lista chiamate / Naviga in basso
Accetta chiamata / Vivavoce / Tasto chiamata
INT / ESC
Menu / OK / Flash
Display
LED rosso, lampeggia con chiamata in arrivo
Stazione base
15.
16.
17.
18.
19.
20.
21.
22.
23.
24.
25.
26.
27.
28.
29.
30.
31.
32.
74
ESC
Menu / OK
Sinistra
Ripeti selezione / Naviga in alto
Destra
Display
Rubrica
Lista chiamate / Flash
Naviga in basso
Selezione diretta (M1 - M2 - M3)
Vivavoce
Tasti alfanumerici
LED rosso sulla stazione base,
lampeggia con chiamata in corso
Paging / Deviazione di chiamata /
Chiamata interna
Silenziamento / Cancella
Regolazione volume
Altoparlante
Supporto del ricevitore per montaggio a parete
Primi passi
33. Nottolino: per fissare il ricevitore
brevemente durante una chiamata
con telefono montato a parete
Caricatore
34. LED: caricamento dell’unità portatile in corso
3.8 Display dell’unità portatile
PORTATILE X X = numero del portatile
Ulteriori cifre o scorrere a sinistra
nel menu
Ulteriori cifre o scorrere a destra
nel menu
Individuare o creare voci della
rubrica
Indicazione dello stato di carica
delle batterie
Suoneria OFF
Modalità vivavoce attivata
Blocco dei tasti attivato
Nuovo messaggio nella casella
vocale
Chiamata in corso
Microfono in silenziamento
Nuovi numeri nella lista chiamate
L’antenna segnala l’intensità del
segnale di ricezione. L’antenna
lampeggia con unità portatile fuori
portata.
Chiamate interne
75
Primi passi
3.9 Display della stazione base
CLIP
Ulteriori cifre o scorrere a sinistra nel
menu
Ulteriori cifre o scorrere a destra nel
menu
Suoneria OFF
Nuovo messaggio nella casella vocale
Nuovi numeri nella lista chiamate
04
Numero progressivo nella lista
chiamate
Individuare o creare voci nella rubrica
Modalità vivavoce attivata
Chiamata in corso
Microfono in silenziamento
Chiamate interne
Ora e data
3.10 Navigazione nel menu
Il DCC632x è dotato di una struttura di menu di facile uso. Ogni menu include una serie di opzioni.
Una vista generale dei menu di unità portatile e stazione base è riportata qui di seguito.
1 Premere il tasto Menu/OK per accedere al menu principale.
2 Scorrere fino alla voce richiesta.
3 Premere il tasto Menu/OK per aprire ulteriori opzioni o confermare le
impostazioni visualizzate.
4 Premere il tasto ESC per tornare indietro alla voce di menu
precedente.
Unità portatile
RUBRICA
PORTATILE
SUONERIA
NOME PORT
TONI TASTI
SELEZ BASE
RIPRISTINA
LINGUA
REGISTRA
DE-REGISTRA
76
Primi passi
Stazione base
RUBRICA
SUONERIA
ESTERNA
INTERNA
VOLUME
TONI TASTI
LINGUA
BASE
MODO SELEZ
TASATO R
PIN
ORE
DATA/ORE
FORMATO
RIMUOVI PT
RESET
3.11 Uso dei tasti alfanumerici
I tasti alfanumerici consentono l’immissione di testo. Premere il tasto alfanumerico corrispondente alla
lettera richiesta. Per esempio, premendo il tasto numerico 5 sul display viene visualizzata innanzitutto
la lettera ”j”. Premendo il tasto ripetutamente, è possibile selezionare le altre lettere. Premere il tasto
2 per ottenere la lettera ”a”. Se si desiderano immettere le lettere ”a” e ”b” una dopo l’altra, premere
prima il tasto 2 per selezionare la lettera ”a”. Attendere quindi 2 secondi finché il cursore si sarà
spostato alla posizione successiva. Premere ora il tasto 2 due volte per selezionare ”b”. Il tasto Can
cella consente di cancellare lettere immesse per errore o non correttamente. La lettera che precede il
cursore è cancellata.Con i tasti per scorrere a sinistra/a destra è possibile spostare il cursore.
Caratteri
1
Spazio + - / 1
2
ABC2
3
DEF3
4
GHI4
5
JKL5
6
MNO6
7
PQRS7
8
TUV8
9
WXYZ9
0
_0
77
Uso del telefono
4 Uso del telefono
Nota: La sezione descrive soltanto le funzioni della stazione base! Informazioni sull’uso
dell’unità portatile sono riportate nella sezione „5 Uso dell’unità portatile cordless”.
4.1 Impostazione della lingua di display
1 Premere il tasto Menu / OK.
2 Selezionare ”LINGUA” e confermare.
3 Ora selezionare la lingua.
4 Premere OK per confermare.
4.2 Impostazione di data e ora
Nota: Con funzione di inoltro dell’ID chiamante (CLIP) attivata per la vostra linea telefonica
e trasmissione di data e ora da parte del provider, l’ora è impostata automaticamente con
chiamate in arrivo.Una volta impostata l’ora, questa è assunta per tutte le unità portatili
registrate sulla stazione base.
1 Premere il tasto Menu / OK.
2 Selezionare ”ORE” e confermare.
3 Selezionare ”DATA/ORE” e confermare.
4 Immettere l’anno e confermare.
5 Immettere il mese e confermare.
6 Immettere il giorno e confermare.
7 Immettere le ore e confermare.
8 Immettere i minuti.
9 Premere OK per confermare.
Importante: Le impostazioni di data e ora sono cancellate in caso di interruzione
dell’alimentazione elettrica presso la stazione base.
4.3 Impostazione del formato ore
1 Premere il tasto Menu / OK.
2 Selezionare ”ORE” e confermare.
3 Selezionare ”FORMATO” e confermare.
4 Selezionare il formato ore ”24 ORE” oppure ”12 ORE” e
confermare.
4.4 Chiamate in uscita
Compiere una chiamata
1 Sollevare il ricevitore o premere il tasto vivavoce.
2 Immettere il numero telefonico.
78
Uso del telefono
3 Riagganciare il ricevitore o premere di nuovo il tasto vivavoce per
concludere la chiamata.
OPPURE
1 Immettere il numero telefonico.
2 Sollevare il ricevitore o premere il tasto vivavoce.
3 Riagganciare il ricevitore o premere di nuovo il tasto vivavoce per
concludere la chiamata.
Ripetizione dell’ultimo numero telefonico chiamato
1 Sollevare il ricevitore o premere il tasto vivavoce.
2 Premere il tasto di ripetizione chiamata. L’ultimo numero telefonico
composto è selezionato automaticamente.
Ripetizione di uno degli ultimi 3 numeri telefonici chiamati
1 Premere il tasto di ripetizione di chiamata.
2 Selezionare uno degli ultimi 3 numeri telefonici chiamati.
3 Sollevare il ricevitore o premere il tasto vivavoce.
Selezione di un numero dalla rubrica
1 Premere il tasto rubrica telefonica.
2 Scorrere fino al nome desiderato oppure immettere la lettera iniziale
del nome richiesto.
3 Premere il tasto Menu / OK per visualizzare il numero telefonico.
4 Sollevare il ricevitore o premere il tasto vivavoce. Il numero telefonico
è composto automaticamente.
4.5 Attivazione/Disattivazione della modalità vivavoce
La funzione consente di rispondere a chiamate senza bisogno di sollevare il ricevitore o con ricevitore
già sollevato.
1 Premere il tasto vivavoce per attivare la funzione.
2 Premere di nuovo il tasto vivavoce per passare la chiamata al
ricevitore.
4.6 Silenziamento
Il microfono può essere disattivato nel corso di una chiamata senza che la persona dall’altra parte
della linea se ne accorga.
1 Premere il tasto silenziamento. Il microfono è disattivato.
2 Premere di nuovo il tasto silenziamento per riattivare il microfono.
79
Uso del telefono
4.7 Impostazione del volume di altoparlante e ricevitore
1 Premere con chiamata in corso il tasto volume.
2 Il volume è regolabile da 1 a 5 livelli.
4.8 Attivazione/Disattivazione del tono dei tasti
1 Premere il tasto Menu / OK.
2 Selezionare ”TONI TASTI” e confermare.
3 Selezionare ”ACCESO” oppure ”SPENTO” e confermare.
4.9 Rubrica telefonica
La rubrica telefonica offre spazio per 50 numeri telefonici e nomi. I nomi possono arrivare a fino a 16
caratteri di lunghezza, i numeri possono essere composti da fino a 24 cifre.
Aggiunta di nome e numero nuovi
1 Premere il tasto rubrica.
2 Premere OK.
3 Selezionare ”NUOVO” e confermare.
4 Immettere il nome e confermare.
5 Immettere il numero telefonico e confermare.
6 Il dispositivo emette un tono di conferma.
Modifica di nome e numero telefonico
1 Premere il tasto rubrica.
2 Selezionare il nome attraverso i tasti di navigazione in alto e in
basso.
OPPURE
Immettere la lettera iniziale del nome richiesto.
3 Premere OK.
4 Selezionare ”MODIFICA” e confermare.
5 Premere il tasto cancella per cancellare le lettere.
6 Immettere il nome e confermare.
7 Immettere il numero telefonico e confermare.
8 Il dispositivo emette un tono di conferma.
Cancellazione di una o tutte le voci della rubrica
1 Premere il tasto rubrica.
2 Selezionare il nome attraverso i tasti di navigazione in alto e in
basso.
OPPURE
Immettere la lettera iniziale del nome richiesto.
3 Premere OK.
80
Uso del telefono
4 Selezionare ”CANCELLA” oppure ”CANC TUTTI” e confermare.
5 Premere OK per confermare o il tasto ESC per tornare indietro.
4.10 Tasti di selezione diretta
Il dispositivo prevede la memorizzazione di 3 numeri di selezione diretta M1, M2 e M3 (ognuno lungo
fino a 24 cifre) sulla stazione base.
Memorizzazione di numeri di selezione diretta (M1 - M2 - M3)
1 Premere uno dei tasti di selezione diretta previsti.
2 Premere OK.
3 Selezionare ”NUOVO” e confermare.
4 Immettere il nome e confermare.
5 Immettere il numero telefonico e confermare.
Il dispositivo emette un tono di conferma.
Nota: Per memorizzare una pausa nel numero telefonico, premere il tasto pausa 'P' per 2
secondi nella posizione in cui si intende inserire una pausa della durata di 3 secondi. Numeri
di selezione diretta possono essere modificati o cancellati secondo le stesse modalità già
descritte in alto per la rubrica telefonica. I tasti di selezione rapida non assegnati sono
visualizzati come ”VUOTO”.
Selezione di un numero di selezione diretta
1 Sollevare il ricevitore o premere il tasto vivavoce.
2 Premere il tasto di selezione diretta richiesto. Il telefono compie
automaticamente la selezione del numero.
3 Riagganciare il ricevitore o premere di nuovo il tasto vivavoce per
concludere la chiamata.
4.11 Impostazione della suoneria interna/esterna
È possibile scegliere tra 9 suonerie differenti (1 - 9).
1 Premere il tasto Menu / OK.
2 Selezionare ”SUONERIA” e confermare.
3 Selezionare ”INTERNA” per chiamate interne.
OPPURE
4 Selezionare ”ESTERNA” per chiamate esterne in arrivo.
5 Selezionare ora la suoneria richiesta (1 - 9) e confermare.
4.12 Impostazione del volume della suoneria
1 Premere il tasto Menu / OK.
2 Selezionare ”SUONERIA” e confermare.
3 Selezionare ”VOLUME” e confermare.
4 Selezionare il volume richiesto (Off, 1-5) e confermare.
81
Uso del telefono
4.13 Impostazione della modalità di selezione
È possibile scegliere tra due modalità di selezione per instaurare una connessione telefonica:
DTMF / selezione a toni (più diffusa)
Selezione a impulsi (necessaria solo se si adopera il dispositivo su un sistema telefonico PBX di
vecchia data!)
1 Premere il tasto Menu / OK.
2 Selezionare ”BASE” e confermare.
3 Selezionare ”MODO SELEZ” e confermare.
4 Selezionare ”MULTIFREQ” oppure ”DECADICA” e confermare.
4.14 Impostazione del PIN di sistema
Alcune funzioni sono accessibili solo in seguito all’immissione del codice PIN valido per la stazione
base. Il codice PIN è composto da 4 caratteri. Il codice PIN iniziale corrisponde a ”0000”. Per
modificare il codice PIN o impostare un codice PIN personale, procedere come segue:
1 Premere il tasto Menu / OK.
2 Selezionare ”BASE” e confermare.
3 Selezionare ”PIN” e confermare.
4 Immettere il ”VECCHIO-” e premere OK.
5 Immettere il ”NUOVA-” e confermare.
4.15 Reset della stazione base
Il dispositivo prevede il reset di tutte le impostazioni della stazione base e la cancellazione di tutte le
voci presenti nella rubrica, nelle liste chiamate, nella lista VIP e nella lista di ripetizione di chiamata.
Per ripristinare la configurazione iniziale:
1 Premere il tasto Menu / OK.
2 Selezionare ”RESET” e confermare.
3 Premere OK per confermare.
4 Immettere il codice PIN (0000) e confermare.
La configurazione iniziale prevede:
Suoneria per chiamate esterne 8
Suoneria per chiamate interne 1
Volume della suoneria 4
Tono dei tasti ON
Volume del ricevitore 4
Volume del vivavoce 4
Formato di data e ora 24
Nota: Tutti i dati memorizzati (lista di ripetizione di chiamata, rubrica telefonica, lista
chiamate, numeri di selezione rapida) sono cancellati.
4.16 Lista chiamate
Chiamate in arrivo sono salvate in una lista chiamate (max. 30 numeri) su stazione base e unità
portatili. Il numero di chiamate perse è visualizzato con ”X PERDITO” (X = numero di chiamate perse)
e il simbolo CLIP lampeggiante. Premere brevemente il tasto lista chiamate per ottenere la
visualizzazione dell’ultima chiamata.
82
Uso del telefono
Importante: La funzione 'ID chiamante’ (CLIP) presuppone l’abilitazione della propria linea
telefonica a questo servizio. Vi preghiamo di consultare il vostro provider di rete telefonica
per ulteriori informazioni.
Il display visualizza numero telefonico e nome dell’ultimo chiamante. Con numero telefonico più lungo
di 12 cifre, le rimanenti cifre sono visualizzate premendo il tasto. Con lista chiamate vuota, sul display
compare l’indicazione ”VUOTO” . Data e ora di ciascuna chiamata in arrivo sono visualizzati in alto a
destra sul telefono .
1 Premere i tasti di navigazione in alto e in basso per scorrere nella
lista.
Il numero di posizione della chiamata all’interno della lista chiamate è
visualizzato accanto al simbolo CLIP .
2 Premere il tasto sinistra e destra per visualizzare il nome o numero.
Nota: Il telefono passa nuovamente in modalità di stand-by se il tasto di navigazione in alto
o in basso non è premuto entro 15 secondi. Con chiamata in arrivo, il numero del chiamante
è visualizzato sul display per altri 5-8 secondi dall’ultimo squillo.
Selezione di un numero dalla lista chiamate
1 Premere il tasto della lista chiamate.
2 Premere i tasti di navigazione in alto e in basso per scorrere nella
lista.
3 Sollevare il ricevitore o premere di nuovo il tasto vivavoce per
compiere la chiamata.
Memorizzazione di un numero nella rubrica o come numero di selezione rapida M1-M3
1 Premere il tasto della lista chiamate.
2 Premere i tasti di navigazione in alto e in basso per scorrere nella
lista e confermare.
3 Selezionare ”SALVA” oppure ”SALVA IN MX” (MX = M1 - M3) e
confermare.
4 Immettere o modificare il nome, quindi confermare.
5 Immettere o modificare il numero telefonico, quindi confermare.
Cancellazione di una o tutte le voci della lista chiamate
1 Premere il tasto della lista chiamate.
2 Premere i tasti di navigazione in alto e in basso per scorrere nella
lista e confermare.
3 Selezionare ”DELETE ENTRY” oppure ”CANC TUTTI” e
confermare due volte.
Importante: Il dispositivo cancella solo le chiamate di vecchia data. Nuove chiamate non an
cora viste o rimaste senza risposta non sono cancellate.
83
Uso del telefono
4.17 Chiamata interna di un’unità portatile e inoltro della chiamata ad un’unità portatile
È possibile inoltrare una chiamata dalla stazione base all’unità portatile oppure condurre una
conversazione contemporaneamente con un interlocutore esterno e un secondo interlocutore
sull’unità portatile cordless (chiamata in conferenza).
1 Tenere premuto il tasto INT per 3 secondi fino ad avvertire un
segnale audio, quindi rilasciare il tasto. ”INTERNO” appare sul
display.
2 Immettere il numero dell’unità portatile. Una volta instaurata la
chiamata attraverso l’unità portatile, è possibile svolgere una
conversazione interna.
3 Agganciare il ricevitore per trasferire la chiamata sull’unità portatile
cordless.
OPPURE
4 Tenere premuto il tasto INT per 3 secondi fino a instaurare una
chiamata in conferenza.
4.18 Recupero del portatile (paging)
La funzione consente di localizzare l’unità portatile.
1 Premere il tasto paging sulla stazione base.L’unità portatile squilla
per 30 secondi e il LED rosso sull’unità portatile lampeggia.
2 Premere quindi un qualsiasi tasto sull’unità portatile per interrompere
lo squillo.
4.19 Tasto R (flash)
Premendo il tasto flash sulla stazione base si accede ai servizi speciali esterni alla linea telefonica
come ”avviso di chiamata” (a condizione che il vostro provider di rete telefonica offra questo servizio) o
inoltro di chiamata utilizzando un sistema telefonico PBX. Il tasto flash R interrompe brevemente la
chiamata. Il tempo flash può variare da 100 ms a 300 ms. Ad ogni modo, se il vostro sistema
richiedesse un tempo di flash superiore, l’impostazione può essere modificata conformemente.
1 Premere il tasto Menu / OK.
2 Selezionare ”BASE” e confermare.
3 Selezionare ”TASATO R” e confermare.
4 Selezionare quindi ”LUNGO” oppure ”CORTO” e confermare.
84
Uso dell’unità portatile cordless
5 Uso dell’unità portatile cordless
Nota: La sezione descrive unicamente le funzioni dell’unità portatile cordless! Informazioni
sull’uso della stazione base sono riportate nella sezione „4 Uso del telefono”.
5.1 Impostazione della lingua
1 Premere il tasto Menu / OK.
2 Selezionare ”PORTATILE” e confermare.
3 Selezionare ”LINGUA” e confermare.
4 Selezionare la lingua richiesta e confermare.
5 Premere il tasto ESC per tornare alla modalità di stand-by.
5.2 Chiamate in uscita
Compiere una chiamata
1 Premere il tasto chiamata
2 Immettere il numero telefonico.
3 Premere il tasto di riaggancio per concludere la telefonata.
Preparare una chiamata
1 Immettere il numero di chiamata.
Per correggere l’immissione di un numero errato, utilizzare il tasto
silenziamento.
Se non si preme alcun tasto per 10 secondi, il numero scompare e
l’unità portatile passa di nuovo alla modalità di stand-by.
2 Premere il tasto chiamata.
Il numero telefonico è composto automaticamente.
3 Premere il tasto di riaggancio per concludere la telefonata.
Ripetizione dell’ultimo numero telefonico chiamato
1 Premere il tasto chiamata
2 Premere il tasto di ripetizione di chiamata.
L’ultimo numero telefonico composto è selezionato automaticamente.
3 Premere il tasto di riaggancio per concludere la telefonata.
Ripetizione di uno degli ultimi 3 numeri telefonici chiamati
1 Premere il tasto di ripetizione di chiamata.
L’ultimo numero chiamato appare sul display.
Volendo richiamare uno degli ultimi 3 numeri telefonici, tenere premuto
il tasto di riselezione finché il numero richiesto appare sul display.
2 Premere il tasto chiamata.
Il numero telefonico è composto automaticamente.
3 Premere il tasto di riaggancio per concludere la telefonata.
85
Uso dell’unità portatile cordless
5.3 Chiamate in arrivo
Con chiamata in arrivo, unità portatile e stazione base squillano e il LED di ”segnalazione ottica di
chiamata” lampeggia sia sull’unità portatile sia sulla stazione base.
1 Premere il tasto di accettazione di chiamata per rispondere alla
telefonata.
2 Premere il tasto di riaggancio per concludere la telefonata.
5.4 Attivazione/Disattivazione del vivavoce
La funzione consente di rispondere alle chiamate senza bisogno di tenere in mano l’unità portatile o di
proseguire una telefonata già in corso sul portatile.
Durante la chiamata:
1 Premere il tasto vivavoce per attivare la funzione.
2 Premere di nuovo il tasto vivavoce per trasferire la chiamata all’unità
portatile.
Importante: Le batterie di scaricano più rapidamente se si utilizza la modalità vivavoce per
un periodo prolungato!
5.5 Silenziamento
Il microfono può essere disattivato nel corso di una chiamata senza che la persona dall’altra parte
della linea se ne accorga.
1 Premere il tasto silenziamento.
Il microfono è disattivato e ”MUTE” appare sul display.
2 Premere di nuovo il tasto silenziamento per riattivare il microfono.
5.6 Impostazione del volume di ricevitore/vivavoce
Durante una chiamata:
1 Premere i tasti di navigazione in alto e in basso.
Il volume è regolabile da 1 a 5 livelli.
5.7 Tasto R (flash)
R
Premendo il tasto flash sulla stazione base si accede ai servizi speciali
esterni alla linea telefonica come ”avviso di chiamata” (a condizione
che il vostro provider di rete telefonica offra questo servizio) o inoltro di
chiamata utilizzando un sistema telefonico PBX. Il tasto flash R
interrompe brevemente la chiamata in corso. Il tempo flash può variare
da 100 ms a 300 ms. Per impostare un tempo flash diverso, vedi „4.19
Tasto R (flash)”.
5.8 Selezione di una suoneria e impostazione del volume
Suoneria dell’unità portatile per chiamate interne/esterne
1 Premere il tasto Menu / OK.
2 Selezionare ”PORTATILE” e confermare.
3 Selezionare ”SUONERIA” e confermare.
4 Selezionare ”INTERNA” oppure ”ESTERNA” e confermare.
5 Selezionare ora la suoneria richiesta (1 - 9) e confermare.
86
Uso dell’unità portatile cordless
Volume della suoneria dell’unità portatile
1 Premere il tasto Menu / OK.
2 Selezionare ”PORTATILE” e confermare.
3 Selezionare ”SUONERIA” e confermare.
4 Selezionare ”VOLUME” e confermare.
5 Selezionare il livello di volume richiesto (Off, 1-5) e confermare.
Importante: Il volume della suoneria si lascia attivare (ON) o disattivare (OFF)
individualmente per ciascuna unità portatile tenendo semplicemente premuto il tasto ON/
OFF in modalità di stand-by.
5.9 Blocco dei tasti
Con blocco attivato, la pressione di un qualsiasi tasto in modalità di stand-by non determina alcun
effetto (tranne il tasto di blocco dei tasti).
1 Premere e tenere premuto il tasto di blocco dei tasti.
Il simbolo è visualizzato sul display.
2 Premere di nuovo il tasto di blocco dei tasti per disattivare il blocco.
Con blocco dei tasti attivato, il dispositivo consente di rispondere a
chiamate in arrivo premendo il tasto di accettazione di chiamata. La
tastiera funziona normalmente con chiamata in corso. Il blocco dei tasti
è invece riattivato appena conclusa la telefonata.
5.10 Nome dell’unità portatile
Il nome dell’unità portatile visualizzato sul display (max. 12 caratteri) è modificabile purché non vi
siano telefonate in corso.
1 Premere il tasto Menu / OK.
2 Selezionare ”PORTATILE” e confermare.
3 Selezionare ”NOME PORT” e confermare.
4 Cancellare il nome precedente utilizzando il tasto silenziamento e
immettere un nuovo nome.
5 Premere per confermare.
6 Premere il tasto ESC per tornare alla modalità di stand-by.
5.11 Attivazione/Disattivazione del tono dei tasti
1 Premere il tasto Menu / OK.
2 Selezionare ”PORTATILE” e confermare.
3 Selezionare ”TONI TASTI” e confermare.
4 Selezionare ora”ACCESO” oppure ”SPENTO”.
5 Premere per confermare.
6 Premere il tasto ESC per tornare alla modalità di stand-by.
87
Uso dell’unità portatile cordless
5.12 Rubrica telefonica
La rubrica offre spazio per 50 voci. I nomi da immettere possono essere lunghi fino a 16 caratteri, i
numeri telefonici possono occupare fino a 24 cifre.
Aggiunta di una voce nella rubrica
1 Premere il tasto rubrica.
2 Premere il tasto OK due volte.
3 Immettere il nome e confermare.
4 Immettere il numero telefonico richiesto e confermare.
Il dispositivo emette un tono di conferma.
Selezione di un numero di selezione diretta
1 Premere il tasto rubrica.
2 Scorrere fino al nome desiderato oppure immettere la lettera iniziale
del nome richiesto.
3 Premere il tasto rubrica per visualizzare il numero telefonico.
4 Premere ora il tasto chiamata. Il numero telefonico è composto
automaticamente.
5 Premere il tasto di riaggancio per concludere la telefonata.
Modifica di una voce nella rubrica
1 Premere il tasto rubrica.
2 Scorrere fino al nome desiderato oppure immettere la lettera iniziale
del nome richiesto.
3 Premere il tasto rubrica per visualizzare il numero telefonico.
4 Premere il tasto Menu / OK.
5 Selezionare ”MODIFICA” e confermare.
6 Immettere il nome e confermare.
7 Immettere o modificare il numero telefonico e confermare.
Cancellazione di una o tutte le voci della rubrica
1 Premere il tasto rubrica.
2 Scorrere fino al nome desiderato oppure immettere la lettera iniziale
del nome richiesto.
3 Premere il tasto rubrica per visualizzare il numero telefonico.
4 Premere il tasto Menu / OK.
88
Uso dell’unità portatile cordless
5 Selezionare ”CANCELLA” per cancellare l’attuale voce della rubrica
telefonica e confermare.
OPPURE
6 Selezionare ”CANC TUTTI” per cancellare tutte le voci della rubrica
telefonica e confermare.
7 Confermare di nuovo oppure premere il tasto ESC per uscire.
5.13 ID chiamante (CLIP)
Il telefono DCC632x visualizza il numero di chiamate in arrivo. La funzione è utilizzabile solo in caso di
precedente attivazione del servizio presso il vostro provider di rete telefonica. Si prega di contattare il
proprio provider per ottenere maggiori informazioni. Una volta ricevuta una chiamata, il rispettivo
numero telefonico è memorizzato in una lista chiamate. Questa lista accoglie fino a 30 numeri
(ciascun numero lungo fino a 23 cifre).
Se il numero telefonico è formato da più di 12 cifre, scorrere a destra
sul display per ottenere la visualizzazione delle altre cifre.
Nuove chiamate
In presenza di una nuova chiamata nella lista chiamate, il simbolo
CLIP lampeggia sul display.
Visione della lista chiamate
1 Premere il tasto relativo alla lista chiamate.
L’ultima chiamata ricevuta è visualizzata. Con lista chiamate vuota, sul
display compare l’indicazione ”VUOTO” .
2 Premere il tasto rubrica per saltare il numero.
3 Premere il tasto rubrica per saltare data e ora.
4 Premere i tasti di navigazione in alto e in basso per scorrere nella
lista.
5 Premere il tasto ESC per uscire dalla lista chiamate.
Selezione di un numero dalla lista chiamate
1 Premere il tasto della lista chiamate.
2 Scorrere la lista chiamate fino a raggiungere il numero telefonico
richiesto.
3 Premere il tasto chiamata per avviare la telefonata. Il numero
telefonico è composto automaticamente.
4 Premere il tasto di riaggancio per concludere la telefonata.
89
Uso dell’unità portatile cordless
Cancellazione di un numero dalla lista chiamate
1 Premere il tasto della lista chiamate.
2 Scorrere la lista chiamate fino a raggiungere il numero telefonico
richiesto.
3 Premere il tasto Menu / OK.
4 Selezionare ”CANCELLA” per cancellare il numero telefonico
attuale e confermare.
OPPURE
5 Selezionare ”CANC TUTTI” per cancellare tutte le voci della lista
chiamate e confermare.
6 Premere per confermare o premere il tasto ESC per tornare indietro.
Memorizzazione di un numero dalla lista chiamate come numero di selezione rapida
1 Premere il tasto della lista chiamate.
2 Scorrere la lista chiamate fino a raggiungere il numero telefonico
richiesto.
3 Premere il tasto Menu / OK.
4 Selezionare ”SALVA A RUB” e confermare.
5 Modificare o aggiungere un nome, quindi confermare.
6 Modificare il numero telefonico e confermare.
5.14 Ripristino della configurazione iniziale sul portatile
La funzione cancella tutte le modifiche e ripristina la configurazione iniziale (volume della suoneria,
melodia della suoneria ecc.). Anche la lista chiamate, la lista di riselezione e la rubrica sono cancellati!
1 Premere il tasto Menu / OK.
2 Selezionare ”PORTATILE” e confermare.
3 Selezionare ”RIPRISTINA” e confermare.
4 Immettere il codice PIN della stazione base (configurazione iniziale
0000).
5 Il dispositivo passa alla modalità di stand-by.
La configurazione iniziale prevede:
90
Nome dell’unità portatile
SWITEL
Volume del ricevitore
Livello 3
Volume della suoneria
Livello 3
Suoneria per chiamate esterne
Suoneria 8
Suoneria per chiamate interne
Suoneria 1
Tono dei tasti
On
Registrazione e deregistrazione del portatile
5.15 Visualizzazione della casella vocale
Il display funziona solo con casella vocale o servizio di segreteria telefonica attivato e purché il vostro
provider di rete telefonica trasmetta questa informazione assieme all’inoltro dell’ID chiamante! Quando
è visualizzato sul display. Il simbolo
si riceve un nuovo messaggio nella casella vocale, il simbolo
scompare non appena si è ascoltato il messaggio.
6 Registrazione e deregistrazione del portatile
6.1 Registrazione dell’unità portatile alla stazione base DCC632x
È possibile registrare fino a 5 unità portatili presso una sola stazione base. Ogni portatile risulta già
registrato alla stazione base al momento della consegna. La registrazione dell’unità portatile si rende
necessaria solo se:
il portatile è stato precedentemente deregistrato dalla rispettiva stazione base (ad es. in caso di
nuova inizializzazione).
si intende registrare un portatile diverso alla stazione base.
Quanto descritto qui di seguito vale solo per unità portatili e stazioni base di tipo DCC632x.
1 Tenere premuto il tasto di paging sulla stazione base per 10 secondi.
Sul display della stazione base compare ”Registr”. Ciò indica che la
stazione base è in modalità di registrazione. Il portatile può quindi
essere registrato come segue:
2 Premere il tasto Menu/OK sull’unità portatile.
3 Selezionare ”REGISTRA” e confermare.
4 Immettere il numero della stazione base (1-4) presso la quale si
intende registrare il portatile.
5 Il dispositivo individua la stazione base. Una volta identificata, il
dispositivo richiede l’immissione del codice PIN (quattro cifre).
6 Immettere il codice PIN sulla stazione base (configurazione iniziale
0000). Con codice PIN errato, il portatile riprende la ricerca della
stazione base.
Una volta registrato il portatile, il nome e il rispettivo numero sono
visualizzati sul display.
Nota: Per cambiare il codice PIN della stazione base, si veda la sezione „4.14 Impostazione
del PIN di sistema”.
6.2 Deregistrazione di un portatile dalla stazione base DCC632x
È possibile deregistrare un’unità portatile da una stazione base in modo da compiere la registrazione
di un portatile differente.
1 Premere il tasto Menu / OK.
2 Selezionare ”RIMUOVI PT” e confermare.
3 Immettere il codice PIN della stazione base (configurazione iniziale
0000).
4 Immettere il numero interno del portatile che si intende deregistrare
(1-5) e confermare.
Una volta deregistrato il portatile con esito positivo, il dispositivo passa
in modalità di stand-by. Altrimenti viene richiesta l’immissione del
numero dell’unità portatile.
91
Registrazione e deregistrazione del portatile
6.3 Deregistrazione di un portatile dalla stazione base DCC632x attraverso il portatile
1 Premere il tasto Menu / OK.
2 Selezionare ”DE-REGISTRA” e confermare.
3 Immettere il codice PIN della stazione base (configurazione iniziale
0000).
4 Immettere il numero interno del portatile che si intende deregistrare
(1-5) e confermare.
Una volta deregistrato il portatile con esito positivo, il dispositivo passa
in modalità di stand-by. Altrimenti viene richiesta l’immissione del
numero dell’unità portatile.
Importante: La deregistrazione di unità portatili è possibile solo con dispositivi disinseriti.
6.4 Selezione di una stazione base
In presenza di portatile registrato presso più di una stazione base (max. 4), è necessario selezionare
una determinata stazione base poiché il portatile è in grado di comunicare con una sola stazione base
per volta. È possibile scegliere tra due opzioni:
Selezione automatica
Con impostazione ‘Selezione automatica’ attivata presso l’unità portatile, il portatile cerca
automaticamente la stazione base in stand-by più vicina.
1 Premere il tasto Menu / OK.
2 Selezionare ”PORTATILE” e confermare.
3 Selezionare ”SELEZ BASE” e confermare.
4 Selezionare ”AUTO” e confermare.
Nota: Se si opta per la selezione automatica della stazione base e il portatile esce dalla porta
ta della stazione base attuale, il portatile individua unicamente la stazione base in modalità
di stand-by con segnale più forte (non con chiamata in corso).
Selezione manuale
Con impostazione ‘Selezione manuale’ attivata presso l’unità portatile, il portatile cerca solo la
stazione base precedentemente impostata.
1 Premere il tasto Menu / OK.
2 Selezionare ”PORTATILE” e confermare.
3 Selezionare ”SELEZ BASE” e confermare.
4 Selezionare ”MANUALE” e confermare.
5 Selezionare la stazione base e confermare.
Importante: Affinché base e portatile siano in grado di comunicare, l’unità portatile deve
risultare registrata a questa base.
92
Inoltro di chiamata e chiamate interne
7 Inoltro di chiamata e chiamate interne
7.1 Inoltro di chiamata e chiamata in conferenza con chiamata esterna in corso
INT
INT
INT
1 Con chiamata esterna in corso, premere il tasto INT e quindi il
numero relativo al portatile (1-5, selezionare ”0” per la stazione base).
L’altro portatile squilla.
Se la chiamata è stata effettuata con l’altro portatile, è possibile
svolgere una conversazione interna. Una volta riagganciato, la
chiamata esterna è inoltrata all’altro portatile.
2 Tenere premuto il tasto INT per 3 secondi. Ora è possibile parlare
con gli interlocutori del secondo portatile e della chiamata esterna
contemporaneamente (chiamata in conferenza).
3 Premere il tasto INT di nuovo per passare alla chiamata esterna.
4 Premere il tasto di riaggancio per concludere la telefonata.
7.2 Chiamata interna (chiamata domestica)
Nota: È possibile svolgere una chiamata tra stazione base e unità portatile cordless. Alla
stazione base risulta assegnato il numero interno ”0”.
INT
1 In modalità di stand-by, premere il tasto INT seguito dal numero del
portatile (1-5, selezionare ”0” per la stazione base).
L’unità portatile o la stazione base chiamata squilla.
2 Premere il tasto di chiamata o sollevare il ricevitore sulla stazione
base.È possibile svolgere una chiamata interna.
93
Sigle e dati tecnici
8 Sigle e dati tecnici
94
CLIP
Calling Line Identification Presentation; indica il numero telefonico del
chiamante sul display dell’interlocutore chiamato.
DECT
Digital Enhanced Cordless Telecommunication; standard di telecomunicazione
europeo per telefoni cordless digitali.
Modalità
ECO
Modalità a risparmio energetico; in modalità DECT, il telefono consente
l’esercizio a basse radiazioni.
Tasto flash
Provvede ad una breve interruzione della linea in modo da attivare determinate
funzioni come commutazione o inoltro di chiamata. Con sistemi telefonici PBX, il
tasto flash o R consente di svolgere chiamate interne.
GAP
Generic Access Profile; interfaccia tra la stazione base e il portatile per facilitare
la connessione senza fili.
INT
Chiamante interno. Altro portatile o estensione all’interno di un sistema
telefonico PBX.
Selezione a
impulsi
Modalità di selezione analogica non più in uso (produce specifici rumori di
selezione).
LCD
Display a cristalli liquidi
LED
Diodo luminoso
DTMF
Dual Tone Multiple Frequency; modalità di selezione digitale moderna.
PIN
Numero di identificazione personale
Tasto R
Tasto di richiamata (vedi tasto flash)
Stand-by
Modalità di un dispositivo in cui risulta pronto all’esercizio senza essere
completamente spento.
Twin
Indica un dispositivo con due periferiche identiche, ad es. due unità portatili.
In caso di guasti
9 In caso di guasti
Problema
Possibile causa
Rimedio
Nessuna indicazione sul
display
Le batterie non sono cariche
Assicurarsi che entrambe le
batterie siano inserite
correttamente
Caricare le batterie
Nessun suono
Il cavo telefonico non è
allacciato correttamente
Verificare il collegamento del
cavo
La linea risulta occupata da
un’altra unità portatile
Attendere finché l’atro portatile
riaggancia
Il chiamante è troppo silenzioso
Impostare il volume durante la
chiamata utilizzando il tasto
relativo al volume
Lo squillo del portatile è troppo
basso
Impostare il volume della
suoneria
Un numero non è selezionabile
La modalità di selezione è
impostata correttamente
Vedi la sezione „4.13
Impostazione della modalità di
selezione” per impostare la
modalità di selezione corretta
Il simbolo antenna lampeggia
Il portatile è fuori portata
Passare con l’unità portatile
nell’ambito di portata della
stazione base
La stazione base non è
alimentata
Controllare il connettore di rete
e il cavo
Il portatile non risulta registrato
alla stazione base
Registrare l’unità portatile alla
stazione base
La stazione base o l’unità
portatile non squilla
Il volume della suoneria è
disattivato oppure è troppo
basso
Impostare il volume della
suoneria
Una chiamata non può essere
inoltrata internamente
Il tempo flash è troppo corto
Prevedere per il dispositivo
l’impostazione di un tempo
flash più lungo
Il telefono non risponde
premendo i rispettivi tasti
Errore funzionale
Rimuovere le batterie, quindi
reinserirle
”LINEA IN USO”
La linea risulta occupata da
un’altra unità portatile
Attendere finché l’atro portatile
riaggancia
Non sottoporre il dispositivo a modifiche o riparazioni. Riparazioni eseguite in modo improprio o non
correttamente rappresentano un rischio per l’utilizzatore.
In caso di problemi tecnici è possibile rivolgersi alla nostra linea di assistenza chiamando al numero
tel. 0900 00 1675 valido per la Svizzera (spese da rete Swisscom alla data di stampa: CHF 2.60/min).
In caso di reclami entro il periodo di garanzia commerciale, rivolgersi al rivenditore autorizzato. Il
periodo di garanzia commerciale ricopre 2 anni.
95
Assistenza
10 Assistenza
10.1 Manutenzione
Il dispositivo è esente da manutenzione. Controllare di tanto in tanto le condizioni delle batterie e
sostituirle con nuove batterie dello stesso tipo in caso di una riduzione delle prestazioni o se si
riscontrano perdite di acido.
Avvertenza: Pericolo di ustioni chimiche!
Indossare guanti di protezione per eliminare batterie completamente scariche.
In caso di contatto del dispositivo con liquidi, togliere immediatamente le batterie e scollegare il
dispositivo dall’alimentazione elettrica (stazione base), asciugare quindi con cura i componenti
bagnati. Verificarne il funzionamento dopo 2-3 giorni.
10.2 Pulizia
Avvertenza: Pericolo di scossa elettrica o corto circuito dovuto al contatto con componenti
che conducono corrente. Evitare la penetrazione di liquidi dentro il dispositivo. Se
necessario, scollegare il connettore di rete dalla presa elettrica e il cavo telefonico dalla presa
a muro ed estrarre quindi le batterie. Seguire la stessa procedura in caso di dispositivo, cavo
o connettore di rete danneggiati: evitare il contatto diretto con liquidi e scollegare
immediatamente il dispositivo dall’alimentazione a 230 V.
Pulire il telefono con un panno umido bagnato in acqua tiepida o con un panno antistatico. Non usare
detergenti o abrasivi.
10.3 Messa fuori servizio, stoccaggio
Per mettere fuori servizio temporaneamente il dispositivo, scollegare il cavo telefonico dalla presa a
parete e dal punto di innesto del cavo sulla stazione base. Scollegare i connettori di rete di stazione
base e unità portatile dalle rispettive prese elettriche a 230 V.
Rimuovere le batterie dalle unità portatili. In caso di messa fuori servizio del telefono per un periodo
prolungato, sostituire le batterie ricaricabili con nuove batterie dello stesso tipo una volta che si rimette
in funzione il telefono. Conservare il dispositivo e le batterie ricaricabili in luogo asciutto e non troppo
caldo.
10.4 Smaltimento
Lo smaltimento del dispositivo va eseguito consegnandolo ad un apposito centro di raccolta
istituito dalla vostra amministrazione comunale (ad es. centro per la raccolta differenziata).
Conformemente alle norme sullo smaltimento di apparecchiature elettriche ed elettroniche, i
proprietari di apparecchi esauriti sono per legge tenuti allo smaltimento di dispositivi
elettrici ed elettronici esausti all'interno di un raccoglitore per rifiuti separato. Il simbolo
qui a fianco indica che non è assolutamente consentito smaltire il dispositivo assieme ai
normali rifiuti domestici!
Accumulatori e batterie possono causare danni alla salute e all’ambiente!
Non aprire, danneggiare, ingerire o disperdere nell’ambiente batterie e pile. Queste
possono contenere metalli pesanti nocivi e dannosi per l’ambiente. Per legge
sussiste l’obbligo allo smaltimento corretto di batterie ricaricabili e pile utilizzando gli
appositi contenitori di raccolta in uso presso i rivenditori di batterie o i centri di
raccolta rifiuti. Lo smaltimento è gratuito. I simboli indicano che non è assolutamente
consentito gettare batterie ricaricabili e pile nei rifiuti domestici, consegnandoli ai fini
dello smaltimento nei rispettivi punti di raccolta.
Confezioni ed imballaggi vanno smaltiti secondo quanto indicato dalle norme in vigore a livello
locale.
96
Dati tecnici
11 Dati tecnici
Standard
DECT (Digital Enhanced Cordless
Telecommunications)
GAP ( Generic Access Profile )
Campo di frequenza
1,880 MHz - 1,900 MHz
Emissioni
10 mW (media per canale)
Portata
Fino a 300 m all’aperto - fino a 50 m all’interno
di edifici
Batterie del portatile
2 batterie ricaricabili NiMh da 1,2 V, 450mAh
AAA
Alimentazione della stazione base
Input: 100~240 V AC / 50-60 Hz
Output: 6 V DC / 500 mA
Alimentazione del caricatore
Input: 230 V AC / 50 Hz
Output: 7 V DC / 420 mA
Autonomia del portatile
100 ore
Durata di conversazione del portatile
10 ore
Durata di ricarica
16 ore
Temperature d’esercizio consentite
+5 °C - + 45 °C
Umidità relativa consentita
25% - 85 %
Modalità di selezione
Selezione a impulsi e a toni (DTMF)
Tempo flash
100 ms oppure 300 ms
Spazio memoria per numeri sul portatile
50 voci di rubrica con fino a 24 cifre e 16 lettere
Spazio memoria per numeri sulla stazione base
3 numeri di selezione rapida (M1-M3) con fino a
24 cifre.
50 voci di rubrica con fino a 24 cifre e 16 lettere.
Dimensioni di stazione base / caricatore / unità
portatile
200 mm x 71 mm x 183 mm /
104 mm x 100 mm x 59 mm /
182 mm x 284 mm x 58 mm
Peso di stazione base / caricatore / unità
portatile
763 g con adattatore di alimentazione /
185 g con adattatore di alimentazione /
147 g con batterie
Max. consumo energetico
Stazione base con ricevitore: 2,0 W
Caricatore con portatile: 1,3 W
97
Garanzia
12 Garanzia
I dispositivi SWITEL sono costruiti e collaudati in osservanza dei processi di produzione più moderni.
L’impiego di materiali selezionati e tecnologie altamente sviluppate sono garanti di una perfetta
funzionalità e lunga durata in vita. La garanzia non è valida in caso di un malfunzionamento
dell’apparecchio dovuto ad interferenze nella rete telefonica del provider o gestore o in qualsiasi
sistema privato interposto. La garanzia non si estende a batterie, batterie ricaricabili o pile utilizzate
all’interno degli apparecchi. Il periodo di garanzia ricopre 24 mesi a partire dalla data di acquisto.
Entro il periodo di garanzia si procederà all’eliminazione gratuita di tutti i guasti dovuti a difetti di
materiale o produzione. Il diritto di garanzia cessa in caso di interventi da parte dell’acquirente o di
terzi. Danni derivanti da un impiego o esercizio improprio, da naturale usura, da errato montaggio o
errata conservazione, da collegamento o installazione impropri, da forza maggiore o altri influssi
esterni sono esclusi dalla garanzia. In qualità di produttore ci riserviamo il diritto, in caso di reclami, di
riparare o sostituire le parti difettose o di rimpiazzare il dispositivo. Parti sostituite o apparecchi
rimpiazzati passano di nostra proprietà. Sono esclusi diritti di risarcimento per danni qualora non siano
dovuti a dolo o colpa grave del produttore.
In caso di difetti del dispositivo durante il periodo di garanzia, rivolgetevi esclusivamente al negozio di
rivendita dell’apparecchio SWITEL assieme al relativo scontrino di acquisto. In base a quanto previsto
dai termini di garanzia, tutte le rivendicazioni di garanzia andranno presentate unicamente nei
confronti del rivenditore autorizzato. Decorso il termine di due anni dalla data di acquisto e consegna
dei nostri prodotti non sarà più possibile fare valere alcun diritto di garanzia.
13 Dichiarazione di conformità
L’apparecchio risponde a quanto disposto dalla Direttiva europea 1999/5/CE: Direttiva
concernente le apparecchiature radio, le apparecchiature terminali di telecomunicazioni e
il reciproco riconoscimento della loro conformità. La conformità della direttiva sopra
indicata è confermata dal marchio CE applicato sul dispositivo. Per la dichiarazione di
conformità completa si prega di usufruire del download gratuito dal nostro sito web
www.switel.com.
14 Consumo elettrico
La stazione base del telefono è dotata di alimentatore (input 100~240 VAC, output 6 VDC,
500 mA) particolarmente efficiente in termini di consumo energetico. La potenza a vuoto
corrisponde a ca. 0,06 W. L’efficienza media è di ca. 71%. L’assorbimento di corrente della
stazione base corrisponde a:
- in fase di esercizio (stand-by/conversazione): ca. 0,52 W, ca. 0,68 W
La(e) stazione(i) di carica fornita(e) con il set telefonico è/sono dotata(e) di alimentatore (in
put 100~240 VAC, output 7 VDC, 420 mA) particolarmente efficiente in termini di consumo
energetico. La potenza a vuoto corrisponde a ca. 0,06 W. L’efficienza media è di ca. 72,1%.
L’assorbimento di corrente della stazione di carica corrisponde a:
- senza unità portatile: ca. 0,06 W
- con unità portatile in fase di ricarica: ca. 0,65 W
98
4
1
2
3
4
5
6
7
8
9
10
11
12
13
14
Contents
General information . . . . . . . . . . . . . . . . . . . . . . . . . . . . . 100
Safety notes . . . . . . . . . . . . . . . . . . . . . . . . . . . . . . . . . . 102
First steps . . . . . . . . . . . . . . . . . . . . . . . . . . . . . . . . . . . 104
Operating the telephone . . . . . . . . . . . . . . . . . . . . . . . . . . 110
Using the cordless handset . . . . . . . . . . . . . . . . . . . . . . . 117
Registering and de-registering a handset . . . . . . . . . . . . . . 123
Call forwarding and internal calls . . . . . . . . . . . . . . . . . . . 125
Abbreviations and technical terms . . . . . . . . . . . . . . . . . . 126
Troubleshooting . . . . . . . . . . . . . . . . . . . . . . . . . . . . . . . 127
Servicing . . . . . . . . . . . . . . . . . . . . . . . . . . . . . . . . . . . . 128
Technical data . . . . . . . . . . . . . . . . . . . . . . . . . . . . . . . . 129
Warranty . . . . . . . . . . . . . . . . . . . . . . . . . . . . . . . . . . . . 130
Declaration of Conformity . . . . . . . . . . . . . . . . . . . . . . . . . 130
Electrical consumption . . . . . . . . . . . . . . . . . . . . . . . . . . . 130
99
General information
1 General information
Before Initial use
Thank you for purchasing this new digital cordless telephone.
Intended Purpose:
This product is intend to be connected indoor to an analogue telephone line.
This product is made in accordance with the Digital Enhanced Cordless Telecommunications (DECT).
DECT technology is characterized by high-security protection against interceptions as well as highquality digital transmission. This telephone was designed for a wide range of applications. For
example, this telephone can be used within a network of 5 handsets.
Caller ID is a network provider service. After subscribing to Caller ID, this phone will display the
caller's phone number.
Important
To use `Caller ID' (display caller), this service has to be activated on your phone line. Normally you
need a separate subscription from your telephone company to activate this function. If you don't have
the Caller ID function on your phone line, the incoming telephone numbers will NOT be shown on the
display of your telephone.
Caution: This product works with rechargeable batteries only. If you put nonrechargeable
batteries in the handset and place it on the base, the handset will be damaged and this in NOT
covered under the warranty conditions.
To be connected to the public analogue telephone network.
The features described in this manual are published with reservation to modifications.
This User Guide contains all the information you need to install, set up and operate your device. It also
contains information and important notes for your safety and help in the event of problems. Always
keep the User Guide near the device. Keep this User Guide in a safe place and pass it on to another
user if necessary.
1.1 The product: DCC632x
This product has been manufactured in accordance with the uniform digital standard for cordless
telephones (DECT). DECT technology features a high level of security against interception as well as
highquality digital transmission. This telephone is intended for various applications, for example on a
network of base stations and cordless handsets that make up a complete PBX: up to 5 cordless
handsets can be operated on one base station and one cordless handset can be operated on up to 4
base stations. Internal calls can be made between the base station and handset or between two
handsets. If available on your line, caller ID and SMS services from your telephone service provider
are possible on this telephone. If you use these services, the caller's telephone number is shown in
the telephone display.
Important: To use "Caller ID", this feature must first be enabled for your telephone line.
Contact your telephone line provider for information about activating this feature. If this
feature is not enabled, the numbers from which incoming calls originate will NOT be shown
in the telephone display.
100
General information
1.2 Signal words and symbols
Symbol
None
Signal word
Meaning
Warning
Warning of risk of potential serious injury or death if you fail to
comply with this information.
Caution
Warning of risk of potential minor injury if you fail to comply with
this information.
Caution
Risk of material or environmental damage.
Important
This provides important information about the function.
Info, tip
General information or particular tips.
1.3 Intended use
This product is intended for making telephone calls via a fixed line within a telephone network. The
pre-requisite for proper use of the phone is professional installation taking account of the information
in this User Guide. Any other use is deemed improper and is not permitted. Any modifications or
conversions by the user that are not described in this User Guide, are deemed improper and are not
permitted. We accept no liability for any damage that may arise from these.
1.4 Contents of box
Check that the contents of the box are complete and undamaged. Contact your dealer immediately if
parts are missing or defective. Keep the packaging in case you need to return the telephone or send it
for repair.
1 Base station with receiver and connecting cable
1 Mains adapter for base station
1 Telephone cable for base station
1 Charging station incl. mains adapter
1 Cordless handset incl. 2 rechargeable batteries (AAA, 1.2 V / 450 mAh, NiMH)
and a battery compartment cover
1 User Guide
Warning: Risk of suffocation for children! Keep packaging films out of the reach of children.
Important: Dispose of packaging material in an environmentally responsible way!
101
Safety notes
2 Safety notes
The following basic safety notes must always be taken into account when using electrical devices.
Carefully read the following safety notes and details on the correct use of the device. Familiarise
yourself with all the functions of the device. Keep this User Guide in a safe place near the device and
pass it on to another user if necessary. Do not pass the telephone on to third parties without the User
Guide.
Electrical risks:
Warning: Risk of injury or death due to electrical current! In the event of danger, disconnect
the device from the 230 V mains immediately.
Do not use the device if the mains adapter, cable or device are damaged. Take care not to drop
the device as it could be damaged.
The voltage within the device is at hazardous levels. Never open the casing or insert object
through the ventilation slot.
Prevent liquids penetrating the device. If this should occur, unplug the mains adapter from the
power socket and the telephone cable connector from the wall socket.
Also unplug the mains adapter from the power socket and the telephone cable connector from the
wall socket if faults occur during operation and before cleaning the device.
Do not touch the charger and plug connectors with sharp or metal objects.
Do not modify or repair the device. The device or cable should only be repaired by a specialist in
the service centre. Repairs that are not carried out properly can cause significant risks to the user.
Children frequently underestimate the dangers of handling electrical devices. Never allow children
near electrical devices unsupervised.
Do not allow children to play with the devices or their parts.
Caution: Possible damage to the device. In the event of danger, disconnect the device from
the 230 V mains immediately.
Do not use the device in humid areas (e.g. bathroom) or very dusty areas.
Devices connected to the mains may be damaged during thunderstorms. Therefore always
unplug the device in a thunderstorm.
The mains adapter must be completely removed from the socket to disconnect the device fully
from the power supply. Always pull the plug and never the cable.
Check cables regularly for damage, protect them against hot surfaces and other hazards, unwind
them fully, lay them so that nobody can trip over them and do not constrict them.
Fire risks:
Warning: Risk of injury or death due to fire! Do not expose the device to excessive heat and
disconnect it from the 230 V mains supply immediately in the event of danger.
The heat generated inside the device may cause a fault or a fire in the device. Therefore do not
expose this device to extreme temperatures:
Avoid direct sunlight and heat
Do not cover the ventilation slot on the device
102
Safety notes
Risk of explosion:
Warning: Risk of injury due to explosion! Exercise particular caution in respect of children!
Never throw disposable or rechargeable batteries into fire.
Do not operate the device in an environment with a risk of explosions!
Risk of poisoning:
Warning: Risk of injury due to poisoning! Exercise particular caution in respect of children!
Keep disposable and rechargeable batteries out of the reach of children.
Risk of suffocation:
Warning: Risk of injury due to suffocation! Exercise particular caution in respect of children!
Keep packaging films out of the reach of children.
Consider possible risks to children (risk of strangulation) if you use extension cables.
Faults:
Warning: Possible risk of injury due to faults in the device! Exercise particular caution in
respect of medical equipment.
The function of medical electrical devices may be affected by electromagnetic radiation from your
device. Therefore make sure that the device is installed and operated sufficiently far away from
medical electrical devices. The same applies to implanted medical devices such as pacemakers.
The cordless handset may cause an unpleasant buzz in hearing aids so keep it sufficiently far
away from hearing aids.
Possible damage:
Caution: Possible damage to the device! Read the information in this User Guide.
Only use the supplied main adapters. Do not use any third-party adapters as the rechargeable
batteries could be damaged.
The socket for connecting the mains adapter must be near the device and easily accessible.
Only use the supplied rechargeable batteries. When they need to be replaced, use rechargeable
batteries of the same type. Make sure the batteries are inserted the right way round (information
can be found in the battery compartment on the device). Never use ordinary disposable batteries!
Important: In the event of a power failure, it is only possible to make calls using the base
station.
2.1 Notes on low-radiation operation
This cordless telephone (compliant with the DECT standard) facilitates low-radiation operation (ECO
mode). During a call, the handset reduces the radio output depending on the distance from the base
station. When no call is being conducted, the handset reduces the radio output to a minimum. This
does not mean that normal DECT radiation is harmful to health. Rather, low-radiation operation avoids
any unnecessary radiation exposure. The base does not reduce radio output! Set up the base station
in a location where you do not spend much time, for example in the hallway. Avoid setting it up in your
or your children's bedrooms or the lounge.
103
First steps
3 First steps
3.1 How to use this User Guide
The following method is used in this User Guide to clarify instructions:
Text ….. HANDSET
Key to be pressed
Text that appears on the telephone display
3.2 Installing the base station
Install the base station as follows:
1 Connect the mains adapter to the base station first and then to a socket.
2 Connect one end of the telephone cable to the telephone socket on the wall and the other to the
connector on the back of the base station.
3 The telephone and power cables should be connected as shown in figure 3A.
A
- 3A Base station A. Telephone wall socket
B. Mains adapter with cable
C. Telephone cable
104
First steps
3.3 Handset charger
1
Plug the mains adapter into a power socket.
- 3B Charger A. Mains adapter with cable
3.4 Handset
Caution: Risk of injury due to explosion! Only use the supplied rechargeable batteries or
batteries of a similar type. Do not use ordinary disposable batteries! Otherwise the cordless
handset may be damaged.
1
2
3
4
Open the battery compartment as shown in figure 3C.
Insert the rechargeable batteries. Make sure the polarity is correct (+ and -).
Close the battery compartment.
Place the handset in the charger and charge it for 16 hours. The charging LED is illuminated
- 3C Back of the handset A. Cover
B. Rechargeable batteries
3.5 Wall mounting
You can fix the base station to the wall using 2 screws, 100 mm apart. To hang the receiver on the
base station, the insert must be turned 180° as shown.
- 3D Insert -
105
First steps
3.6 Battery status display
The handset will stop working when the batteries are flat. If the batteries are completely flat and you
place the handset on the handset charger for just a short time, the battery charge indicator will show
that they are full. However they are not and the battery performance will deteriorate rapidly. You must
leave the handset on the charger for 16 hours to charge batteries fully.
Charged batteries
Flat batteries
The handset will emit a warning tone when the batteries are nearly flat
during a call. Place the handset on the handset charger to recharge the
batteries.
3.7 Keys/Display
Cordless handset
1.
2.
3.
4.
5.
6.
7.
8.
9.
10.
11.
12.
13.
14.
Redial / Up
Phone book
Mute / Delete
Hang up
Alphanumeric keys
Key lock
Pause
Ringer ON/OFF
Calls list / Down
Answer call / Hands free / Call button
INT / Escape
Menu / OK / Flash
Display
Red LED, flashes during a call
Base station
15.
16.
17.
18.
19.
20.
21.
22.
23.
24.
25.
26.
27.
28.
29.
30.
31.
32.
33.
106
Escape
Menu / OK
Left
Redial / Up
Right
Display
Phone book
Calls list / Flash
Down
Abbreviated dialling (M1 - M2 - M3)
Hands free
Alphanumeric keys
Red LED on the base station, flashes during a call
Paging / Call diversion / Internal call
Mute / Delete
Volume control
Loudspeaker
Receiver holder for wall mounting
Lug: for putting down the receiver
briefly during a call when the phone
is wallmounted
First steps
Charger
34. LED: Handset charging in progress.
3.8 Handset display
HANDSET X X = handset number
Other numbers or scroll left through
the menu
Other numbers or scroll right
through the menu
Find or create phone book entries
Battery status display
Ringer off
Hands free mode on
Key lock on
New voicemail message
Call created
Microphone muted
New numbers in the calls list
The antenna indicates the strength
of the reception signal. The antenna
flashes when the handset is out of
range.
Internal call
107
First steps
3.9 Base station display
CLIP
Other numbers or scroll left through the
menu
Other numbers or scroll right through
the menu
Ringer off
New voicemail message
New numbers in the calls list
04
Item number in the calls list
Find or create phone book entries
Hands free mode on
Call created
Microphone muted
Internal call
Time and date
3.10 Navigating through the menu
The DCC632x has an easy-to-use menu system. Every menu consists of a series of options. A
summary of the menus on the handset and base station can be found below.
1 Press the Menu/OK key to open the main menu.
2 Scroll to the required menu option.
3 Press the Menu/OK key to open more options or to confirm the
displayed setting.
4 Press the Escape key to go back to the previous menu level
Handset
PHONEBOOK
HANDSET
RING TONE
HANDSET NAME
KEYPAD BEEP
SELECT BASE
RESET
LANGUAGE
REGISTER
DE-REGISTER
108
First steps
Base station
PHONEBOOK
RING TONE
EXTERNAL
INTERNAL
VOLUME
KEYPAD BEEP
LANGUAGE
SETTINGS
DIAL MODE
RECALL
SYSTEM PIN
TIME
DATE TIME
FORMAT
REMOVE HS
RESET
3.11 Using the alphanumeric keys
You can use the alphanumeric keys to enter text. Press the appropriate alphanumeric key to select a
letter. For example, if you press the 5 numeric key, the letter 'j' appears in the display first. Press the
key several times to select the other letters. Press the 2 key once to select the letter "a". If you want to
enter the letters "a" and "b" in succession, first press the 2 key once to select the letter "a". Wait 2
seconds until the cursor has moved to the next position. Now press the 2 key twice to select "b". You
can use the delete key to delete letters that have been entered incorrectly. The letter before the cursor
is deleted. Use the Left/Right key to move the cursor.
Table of characters
1
Space+ - / 1
2
ABC2
3
DEF3
4
GHI4
5
JKL5
6
MNO6
7
PQRS7
8
TUV8
9
WXYZ9
0
_0
109
Operating the telephone
4 Operating the telephone
Info: This section only describes the functions of the base station! Information on using the
handset can be found in „5 Using the cordless handset“.
4.1 Setting the display language
1 Press the Menu / OK key.
2 Select "LANGUAGE" and confirm.
3 Now select the language.
4 Press OK to confirm.
4.2 Setting the date and time
Info: If caller ID (CLIP) is activated on your telephone line and the provider transmits the date
and time, the clock is set automatically when an incoming call is received. When you have
set the time, it will be adopted by all handsets registered to the base station.
1 Press the Menu / OK key.
2 Select "TIME" and confirm.
3 Select "DATE TIME" and confirm.
4 Enter the year and confirm.
5 Enter the month and confirm.
6 Enter the day and confirm.
7 Enter the hours and confirm.
8 Enter the minutes.
9 Press OK to confirm.
Important: The date and time will be lost in the event of a base station power failure.
4.3 Setting the time format
1 Press the Menu / OK key.
2 Select "TIME" and confirm.
3 Select "FORMAT" and confirm.
4 Select the time format as "24 HOUR" or "12 HOUR" and confirm.
4.4 Outgoing calls
Making a call
1 Lift the receiver or press the hands free key.
2 Enter the telephone number.
3 Hang up the receiver or press the hands free key again to end the
call.
110
Operating the telephone
OR
1 Enter the telephone number.
2 Lift the receiver or press the hands free key.
3 Hang up the receiver or press the hands free key again to end the
call.
Redialling the last telephone number called
1 Lift the receiver or press the hands free key.
2 Press the redial key. The last telephone number is automatically
dialled.
Redialling one of the last 3 telephone numbers called
1 Press the redial key.
2 Select one of the last 3 numbers dialled.
3 Lift the receiver or press the hands free key.
Calling a number in the phone book
1 Press the phone book key.
2 Scroll to the required name or enter the initial letters of the name.
3 Press the Menu / OK key to display the telephone number.
4 Lift the receiver or press the hands free key. The telephone number is
automatically dialled.
4.5 Activating/deactivating hands free mode
You can use this function to answer a call without having to lift the receiver or if the receiver has
already been lifted.
1 Press the hands free key to activate the function.
2 Press the hands free key again to switch the call back to the receiver.
4.6 Mute
The microphone can be muted during a call so that you can talk without being overheard by the
person on the other end of the line.
1 Press the mute key. The microphone is muted.
2 Press the mute key again to reactivate the microphone.
4.7 Setting the speaker and receiver volume
1 Press the volume key during a call.
2 You can set the volume to levels 1 to 5.
111
Operating the telephone
4.8 Activating and deactivating the keypad beep
1 Press the Menu / OK key.
2 Select "KEYPAD BEEP" and confirm.
3 Select "ON“ or "OFF“ and confirm.
4.9 Phone book
50 telephone numbers and names can be stored in the phone book. Names may be up to 16
characters long and numbers up to 24 digits long.
Adding a new name and number
1 Press the phone book key.
2 Press OK.
3 Select "NEW ENTRY" and confirm.
4 Enter the name and confirm.
5 Enter the telephone number and confirm.
6 A confirmation tone is now sounded.
Editing the name and telephone number
1 Press the phone book key.
2 Select the name using the up and down keys.
OR
Enter the initial letters of the name.
3 Press OK.
4 Select "EDIT ENTRY" and confirm.
5 Press the delete key to delete the letters.
6 Enter the name and confirm.
7 Enter the telephone number and confirm.
8 A confirmation tone is now sounded.
Deleting one entry or all entries in the phone book
1 Press the phone book key.
2 Select the name using the up and down keys.
OR
Enter the initial letters of the name.
3 Press OK.
4 Select "DELETE ENTRY" or "DELETE ALL" and confirm.
5 Press OK to confirm or press the Escape key to go back.
112
Operating the telephone
4.10 Abbreviated dialling keys
You can store 3 direct abbreviated numbers M1, M2 and M3 (each up to 24 digits) in the base station.
Saving direct abbreviated dialling numbers (M1 - M2 - M3)
1 Press one of the abbreviated dialling keys.
2 Press OK.
3 Select "NEW ENTRY" and confirm.
4 Enter the name and confirm.
5 Enter the telephone number and confirm.
A confirmation tone is now sounded.
Info: To save a pause in the telephone number, press the pause key 'P' for 2 seconds at the
place where you want to inserted a 3 -second pause. Abbreviated dialling numbers can be
edited or deleted in the same way described for the phone book above. Unassigned
abbreviated dialling keys are displayed as "EMPTY".
Dialling an abbreviated number
1 Lift the receiver or press the hands free key.
2 Press the abbreviated dialling key. The telephone number is
automatically dialled.
3 Hang up the receiver or press the hands free key again to end the
call.
4.11 Setting the internal / external ring tone
There are 9 different ring tones available (1 - 9).
1 Press the Menu / OK key.
2 Select "RING TONE" and confirm.
3 Select "INTERNAL" for internal calls.
OR
4 Select "EXTERNAL" for incoming external calls.
5 Now select a ring tone (1 to 9) and confirm.
4.12 Setting the ring tone volume
1 Press the Menu / OK key.
2 Select "RING TONE" and confirm.
3 Select "VOLUME" and confirm.
4 Select the required volume (Off, 1-5) and confirm.
4.13 Setting the dialling mode
There are two dialling modes for telephone connections:
DTMF / tone dialling (most common)
Pulse dialling mode (only necessary if this devices is operated on an older PBX!)
1 Press the Menu / OK key.
113
Operating the telephone
2 Select "SETTINGS" and confirm.
3 Select "DIAL MODE" and confirm.
4 Select "TONE" or "PULSE" and confirm.
4.14 Setting the system PIN
Some functions are only available if you know the PIN code for the base station. The PIN code is 4
characters long. The default PIN code is "0000". Proceed as follows to change the PIN code and set
your own PIN:
1 Press the Menu / OK key.
2 Select "SETTINGS" and confirm.
3 Select "SYSTEM PIN" and confirm.
4 Enter the "OLD PIN-" and press OK.
5 Enter the "NEW PIN-" and confirm.
4.15 Resetting the base station
You can reset all the settings on the base station and delete all entries in the phone book, calls list,
VIP list and redial list. To restore the default settings:
1 Press the Menu / OK key.
2 Select "RESET" and confirm.
3 Press OK to confirm.
4 Enter the PIN code (0000) and confirm.
The default settings are:
External ring tone 8
Internal ring tone 1
Ring tone volume 4
Keypad beep ON
Earpiece volume 4
Hands free volume 4
Date and time format 24
Important: All the stored data (redial, phone book, call list, abbreviated numbers) will be
deleted.
4.16 The call list
Incoming calls are stored in a calls list (max. 30 numbers) on the base station and the handsets. The
number of missed calls is shown by "X MISSED" (X = number of missed calls) and the flashing CLIP
symbol. Briefly press the calls list key to display the last call.
Important: The "caller ID" (CLIP) feature is only available if it is activated for your line.
Contact your telephone line provider for additional information.
The telephone number and name of the last caller appear in the display. If the telephone number is
longer than 12 digits, you can show the remaining digits by pressing the key. If the calls list is empty,
the word "EMPTY" appears in the display. The date and time of the incoming call are displayed at the
top right for every call.
114
Operating the telephone
1 Press the up and down keys to scroll through the list.
The position number of the call in the calls list appears next to the CLIP
symbol.
2 Press the left and right keys to display the name or number.
Info: The phone reverts to standby mode if neither the up or down key is pressed within 15
seconds. When a call is received, the caller's number is shown in the display for another 5-8
seconds after the last ring.
Calling a number in the call list
1 Press the calls list key.
2 Press the up and down keys to scroll through the list.
3 Pick up the receiver or press the hands free key again to make the
call.
Storing a number in the phone book or as an abbreviated dialling number under M1 to M3
1 Press the calls list key.
2 Press the up and down keys to scroll through the list and confirm.
3 Select "SAVE TO PB" or "SAVE TO MX" (MX = M1 to M3) and
confirm.
4 You can now enter or edit the name and then confirm.
5 Enter or edit the telephone number and confirm.
Deleting one entry or all entries in the calls list
1 Press the calls list key.
2 Press the up and down keys to scroll through the list and confirm.
3 Select "DELETE ENTRY" or "DELETE ALL" and confirm twice.
Important: Only old calls will be deleted. New calls that have not been viewed or were
unanswered will be kept.
4.17 Making an internal call to a handset and forwarding a call to the cordless handset
You can forward a call from the base station to the handset or talk to the external subscriber and a
second subscriber on the cordless handset at the same time (conference call).
1 Hold down the INT key for 3 seconds until you hear an audio signal,
then release the key. "INT" appears in the display.
2 Enter the number of the handset. Once the call has been set up with
the handset, you can talk internally.
3 Put the receiver down to transfer the call to the cordless handset.
OR
4 Hold down the INT key for 3 seconds to set up a conference call.
115
Operating the telephone
4.18 Finding the handset (paging function)
You can use this function to locate your handset.
1 Press the paging key on the base station.
The handset will ring for 30 seconds and the red LED on the handset
will flash.
2 Press any key on the handset to stop it ringing.
4.19 The R key (Flash)
Press the Flash key on the base station to use special services on your external line such as "call
waiting" (providing your telephone line provider offers this service) or to forward a call when you are
using a PBX. The flash key R briefly interrupts your call. You can set this interruption time to 100 ms or
300 ms. However, if your system requires a longer flash time, you can change this.
1 Press the Menu / OK key.
2 Select "SETTINGS" and confirm.
3 Select "RECALL" and confirm.
4 Now select "LONG" or "SHORT" and confirm.
116
Using the cordless handset
5 Using the cordless handset
Info: This section only describes the functions of the cordless handset! Information on using
the base station can be found in „4 Operating the telephone“.
5.1 Changing the language
1 Press the Menu / OK key.
2 Select "HANDSET" and confirm.
3 Select "LANGUAGE" and confirm.
4 Select the desired language and confirm.
5 Press the Esc key to return to standby mode.
5.2 Outgoing calls
Making a call
1 Press the call button.
2 Enter the telephone number.
3 Press the hang up key to end the call.
Call preparation
1 Enter the telephone number.
You can correct a wrong number using the mute key.
If you do not press any key for 10 seconds, the number disappears and
the handset reverts to standby mode.
2 Press the call button.
The telephone number is automatically dialled.
3 Press the hang up key to end the call.
Redialling the last telephone number called
1 Press the call button.
2 Press the redial button.
The last telephone number is automatically dialled.
3 Press the hang up key to end the call.
Redialling one of the last 3 telephone numbers called
1 Press the redial key.
The last number called appears in the display.
If you want to redial one of the last 3 numbers, keep pressing the redial
key until the number you want appears in the display.
2 Press the call button.
The telephone number is automatically dialled.
3 Press the hang up key to end the call.
5.3 Incoming calls
When an incoming call is received, the handset and the base station ring and the "Visual call signal"
117
Using the cordless handset
LED flashes on the handset and base station.
1 Press the answer call key to answer the call.
2 Press the hang up key to end the call.
5.4 Activating/deactivating hands free mode
You can use this function to answer a call without having to hold the handset or if the a call is already
being conducted on the handset.
During the call:
1 Press the hands free key to activate the function.
2 Press the hands free key again to switch the call back to the handset.
Important: The batteries discharge more quickly if you use hands free mode for a long time!
5.5 Mute
The microphone can be muted during a call so that you can talk without being overheard by the
person on the other end of the line.
1 Press the mute key.
The microphone is muted and "MUTE ON" is displayed.
2 Press the mute key again to reactivate the microphone.
5.6 Setting the earpiece/hands free volume
During a call:
1 Press the up and down keys.
You can set the volume to levels 1 to 5.
5.7 The R key (Flash)
R
Press the Flash key on the base station to use special services on your
external line such as "call waiting" (providing your telephone line
provider offers this service) or to forward a call when you are using a
PBX. The flash key R briefly interrupts your call. You can set this
interruption time to 100 ms or 300 ms. To set a different flash time, see
„4.19 The R key (Flash)“.
5.8 Selecting the ring tone and setting the volume
Handset ring tone for internal/external calls
1 Press the Menu / OK key.
2 Select "HANDSET" and confirm.
3 Select "RING TONE" and confirm.
4 Select "INTERNAL" or "EXTERNAL" and confirm.
5 Now select a ring tone (1 to 9) and confirm.
118
Using the cordless handset
Handset ring tone volume
1 Press the Menu / OK key.
2 Select "HANDSET" and confirm.
3 Select "RING TONE" and confirm.
4 Select "VOLUME" and confirm.
5 Select the required volume (Off, 1-5) and confirm.
Important: You can switch the ring tone volume of any individual handset ON or OFF by
simply holding the ring tone ON/OFF key in standby mode.
5.9 Key lock
When the key lock is on, pressing any key in standby mode has no effect (with the exception of the key
lock key).
1 Press and hold the key lock key.
The symbol appears in the display.
2 Press the key lock key again to deactivate key lock.
When key lock is activated, you can still answer incoming calls by
pressing the answer call key . The keypad functions as usual during the
call. Key lock is activated again after the call.
5.10 Handset name
You can change the name that appears in the display (max. 12 characters) if no call is being
conducted.
1 Press the Menu / OK key.
2 Select "HANDSET" and confirm.
3 Select "HANDSET NAME" and confirm.
4 Delete the previous name using the mute key and enter a new one.
5 Press to confirm.
6 Press the Esc key to return to standby mode.
5.11 Activate / deactivate keypad beep
1 Press the Menu / OK key.
2 Select "HANDSET" and confirm.
3 Select "KEYPAD BEEP" and confirm.
4 Now select "ON“ or "OFF“.
5 Press to confirm.
6 Press the Esc key to return to standby mode.
119
Using the cordless handset
5.12 Phone book
You can store 50 entries in the phone book. Names may be up to 16 characters long and telephone
numbers up to 24 digits long.
Adding a phone book entry
1 Press the phone book key.
2 Press the OK key twice.
3 Enter the name and confirm.
4 Enter the desired telephone number and confirm.
A confirmation tone is now sounded.
Dialling an abbreviated number
1 Press the phone book key.
2 Scroll to the required name or enter the initial letters of the name.
3 Press the phone book key to display the telephone number.
4 Now press the call key. The telephone number is automatically
dialled.
5 Press the hang up key to end the call.
Editing a phone book entry
1 Press the phone book key.
2 Scroll to the required name or enter the initial letters of the name.
3 Press the phone book key to display the telephone number.
4 Press the Menu / OK key.
5 Select "EDIT ENTRY" and confirm.
6 Enter the name and confirm.
7 Enter or edit the telephone number and confirm.
Deleting one entry or all entries in the phone book
1 Press the phone book key.
2 Scroll to the required name or enter the initial letters of the name.
3 Press the phone book key to display the telephone number.
4 Press the Menu / OK key.
5 Select "DELETE ENTRY" to delete the current phone book entry and
confirm.
OR
6 Select "DELETE ALL" to delete all phone book entries and confirm.
120
Using the cordless handset
7 Confirm again or press the Esc key to skip.
5.13 Caller ID (CLIP)
The DCC632x displays the telephone number of incoming calls. This function can only be used if you
are registered for this service with your telephone line provider. Contact your provider for more
information. When you receive a call, the telephone number is stored in a calls list. This list can hold
up to 30 numbers (each of up to 23 digits).
If the telephone number consists of more than 12 digits, you can scroll
to the right in the display to see the other digits.
New calls
When there is a new call received in the calls list, the CLIP symbol
flashes in the display.
Opening the calls list
1 Press the calls list key.
The last call received is displayed. If the calls list is empty, the word
"EMPTY" appears in the display.
2 Press the phone book key to skip the number.
3 Press the phone book key to skip the date and time.
4 Press the up and down keys to scroll through the list.
5 Press the Esc key to exit the calls list.
Calling a number in the call list
1 Press the calls list key.
2 Scroll through the calls list until the telephone number you want is
displayed.
3 Press the call key to start the call. The telephone number is
automatically dialled.
4 Press the hang up key to end the call.
121
Using the cordless handset
Deleting a number from the call list
1 Press the calls list key.
2 Scroll through the calls list until the telephone number you want is
displayed.
3 Press the Menu / OK key.
4 Select "DELETE" to delete the current telephone number and
confirm.
OR
5 Select "DELETE ALL" to delete all calls list entries and confirm.
6 Press to confirm or press the Esc key to return.
Storing a number in the call list as an abbreviated dial number
1 Press the calls list key.
2 Scroll through the calls list until the telephone number you want is
displayed.
3 Press the Menu / OK key.
4 Select "SAVE TO PB" and confirm.
5 Edit or add a name and then confirm.
6 Edit the telephone number and confirm.
5.14 Resetting the handset to default settings
This deletes all the changes and restores all the defaults (ring tone volume, ring tone etc.). The calls
list, redial list and phone book are also deleted!
1 Press the Menu / OK key.
2 Select "HANDSET" and confirm.
3 Select "RESET" and confirm.
4 Enter the PIN number of the base station (default 0000).
5 The device reverts to standby mode.
The default settings are:
Handset name
SWITEL
Earpiece volume
Level 3
Ring tone volume
Level 3
External ring tone
Ring tone 8
Internal ring tone
Ring tone 1
Keypad beep
On
5.15 Voicemail display
This display only works if you have enabled the voicemail or telephone message service and your
telephone service provider transmits this information along with the caller ID! When you receive a new
message in your voicemail box, the
symbol appears in the display. The
symbol disappears
when you have listened to your message.
122
Registering and de-registering a handset
6 Registering and de-registering a handset
6.1 Registering a handset to the DCC632x base station
You can register to 5 handsets onto one base station. Every handset is already registered to the base
station on delivery. You only need to register the handset if:
the handset has previously been de-registered from this base station (e. g. to reinitialise it)
you want to register a different handset to the base station.
The following description only applies to DCC632x handsets and base stations.
1 Hold down the paging key on the base station for 10 seconds.
"REGISTER" is now shown in the base station display. This means
that the base station is in registration mode. The handset can now be
registered as follows:
2 Press the Menu/OK key on the handset.
3 Select "REGISTER" and confirm.
4 Enter the number of the base station (1-4) to which you want register
the handset.
5 The device will search for the base station. When it has found it, you
will be asked to enter the (fourdigit) PIN code.
6 Enter the PIN code of the base station (default 0000). If the PIN code
if wrong, the handset will search for the base station again.
Once the handset has been registered, its name and number appear
on the display.
Info: To change the base station PIN code, see „4.14 Setting the system PIN“.
6.2 De-registering a handset from the DCC632x base station
You can de-register a handset from a base station in order to register a different handset.
1 Press the Menu / OK key.
2 Select "REMOVE HS" and confirm.
3 Enter the PIN code of the base station (default 0000).
4 Enter the internal number of the handset you want to de-register (1-5)
and confirm.
Once the handset has been successfully deregistered, it reverts to
standby mode. Otherwise you will be asked to enter the handset
number again.
6.3 De-registering a handset from the DCC632x base station via the handset
1 Press the Menu / OK key.
2 Select "DE-REGISTER" and confirm.
3 Enter the PIN code of the base station (default 0000).
123
Registering and de-registering a handset
4 Enter the internal number of the handset you want to de-register (1-5)
and confirm.
Once the handset has been successfully deregistered, it reverts to
standby mode. Otherwise you will be asked to enter the handset
number again.
Important: Handsets can only be de-registered when they are not in use.
6.4 Selecting a base station
If your handset is registered to more than one base station (max. 4), you must select one of these base
stations since the handset only communicates with one base station at a time. There are two options:
Auto Select
If you set the handset to 'Auto Select', the handset will automatically search for the nearest base
station in standby mode.
1 Press the Menu / OK key.
2 Select "HANDSET" and confirm.
3 Select "SELECT BASE" and confirm.
4 Select "AUTO" and confirm.
Info: If you allow the base station to be selected automatically and the handset goes out of
range of the current base station, the handset will only search for the strongest base station
in standby mode (not during a call).
Manual Select
If you set the handset to 'Manual Select', the handset will only search for the base station you have
set.
1 Press the Menu / OK key.
2 Select "HANDSET" and confirm.
3 Select "SELECT BASE" and confirm.
4 Select "MANUAL" and confirm.
5 Select the base station and confirm.
Important: For the base and the handset to be able to communicate, the handset must be
registered to that base.
124
Call forwarding and internal calls
7 Call forwarding and internal calls
7.1 Call forwarding and conference calls during an external call
INT
INT
INT
1 During an external call, press the INT key and then the number of the
handset (1-5, select "0" for the base station).
The other handset will ring.
If the call was set up with the other handset, you can talk internally.
When you hang up, the external call will be forwarded to the other
handset.
2 Hold down the INT key for 3 seconds. You can now talk to the second
handset and the external call at the same time (conference call).
3 Press the INT key again to switch back to the external call.
4 Press the hang up key to end the call.
7.2 Internal call (house phone function)
Info: You can conduct a call between the base station and the cordless handset. The base
station has the internal number "0".
INT
1 In standby mode, press the INT key and then the number of the
handset (1-5, select "0" for the base station).
The handset or base station you have called will now ring.
2 Press the call key or pick up the receiver on the base station.
You can now talk internally.
125
Abbreviations and technical terms
8 Abbreviations and technical terms
126
CLIP
Calling Line Identification Presentation, display of the caller's telephone number
on the called party's display.
DECT
Digital Enhanced Cordless Telecommunication; European telecommunications
standard for digital cordless telephones.
ECO mode
Economic Mode; in DECT telephony this is low-radiation operation.
Flash key
Effects a brief line interruption that is used to activated features such as toggling
or call forwarding. On PBXs, the flash or R key is used for internal recall.
GAP
Generic Access Profile; interface between the base station and handset that
facilitates the cordless connection.
INT
Internal subscriber. Other handset or extensions within a PBX.
Pulse mode
Obsolete analogue dialling mode ("clattering" dialling noises).
LCD
Liquid Crystal Display
LED
Light Emitting Diode
DTMF
Dual Tone Multiple Frequency; modern, digital dialling mode.
PIN
Personal Identification Number.
R key
Recall key (see Flash key)
Stand by
"Idle" status of a device without being completely switched off.
Twin
Designation for a device unit with two identical devices e.g. two handsets.
Troubleshooting
9 Troubleshooting
Problem
Possible cause
Solution
No display
The batteries are not charged
Check that both batteries have
been inserted correctly
No sound
The telephone cable is not
connected correctly.
Check the cable connection.
The line is engaged by a
different handset
Wait until the other handset
hangs up
Charge the batteries
The caller is too quiet.
Adjust the volume during the
call using the volume key
The handset ring tone is too
quiet.
Adjust the ring tone volume
A number cannot be dialled.
The dialling mode is incorrectly
set.
See „4.13 Setting the dialling
mode“ to set the correct dialling
mode
The antenna symbol is flashing
Handset is out of range
Move the handset within range
of the base station.
The base station has no power
Check the mains adapter and
cable.
The handset is not registered
to the base station
Register the handset to the
base
The base station or handset
does not ring
The ring tone volume is off or
too low
Adjust the ring tone volume
A call cannot be forwarded to
an extension.
The flash time is too short
Set the device to a long flash
time
The telephone does not
respond when keys are
pressed
Operating error
Remove the batteries and
reinsert them.
"LINE IN USE"
The line is engaged by a
different handset
Wait until the other handset
hangs up
Do not modify or repair the device. Repairs that are not carried out properly can cause significant risks
to the user.
In the case of technical problems, you can contact our hotline service, Tel. 0900 00 1675 within
Switzerland (Swisscom fees at time of going to print: CHF 2.60/min). In the case of claims under the
terms of guarantee, please contact your sales outlet. There is a 2 year period of guarantee.
127
Servicing
10 Servicing
10.1 Maintenance
The device is maintenance-free. Occasionally check the condition of the batteries and replace them
with new batteries of the same type if performance is impaired or if they are beginning to leak.
Warning: Danger of chemical burns!
Wear protective gloves to remove flat rechargeable batteries.
If the device comes into contact with liquid, remove the batteries immediately and disconnect the
device from the power supply (base station) and dry it out carefully. Check its operation after 2-3 days.
10.2 Cleaning
Warning: Risk of electric shock or short circuit from contact with components that conduct
electricity. Prevent liquids penetrating the device. If this should occur, unplug the mains
adapter from the power socket and the telephone cable connector from the wall socket and
remove the batteries. Do the same if the device, cable or mains adapter are damaged: avoid
direct contact with liquids and disconnect the device from the 230 V mains immediately.
Clean the telephone with a damp cloth that has been dipped in lukewarm water or an anti-static cloth.
Never use cleaning agents or abrasives.
10.3 Decommissioning, storage
To decommission the device temporarily, disconnect the telephone cable from the wall socket and
from the telephone jack on the base station. Unplug the base station and handset mains adapters from
the 230 V sockets.
Remove the batteries from the handsets. If the telephone is decommissioned for a long time, replace
the rechargeable batteries with new ones of the same type when the phone is recommissioned. Store
the devices and rechargeable batteries in a dry place that is not too warm.
10.4 Disposal
In order to dispose of your device, take it to a collection point provided by your local public
waste authorities (e.g. recycling centre). According to laws on the disposal of electronic and
electrical devices, owners are obliged to dispose of old electronic and electrical devices
in a separate waste container. The adjacent symbol indicates that the device must not be
disposed of in normal domestic waste!
Risks to health and the environment from batteries!
Never open, damage or swallow batteries or allow them to pollute the environment.
They could contain toxic and ecologically harmful heavy metals. You are legally
obliged to dispose of power packs and batteries at the point of sale or in the
corresponding containers provided at collection points by local public waste
authorities. Disposal is free of charge. The above symbols indicate that the batteries
must not be disposed of in domestic waste and that they must be disposed of at an
authorised collection point.
Packaging materials must be disposed of according to local regulations.
128
Technical data
11 Technical data
Standard
DECT (Digital Enhanced Cordless
Telecommunications)
GAP ( Generic Access Profile )
Frequency range
1,880 MHz to 1,900 MHz
Emissions
10 mW (average output per channel)
Range
Up to 300 m in open terrain - up to 50 m in
buildings
Handset batteries:
2 x 1.2 V, 450mAh AAA type rechargeable NiMh
batteries
Base station power supply
Input: 100~240 V AC / 50-60 Hz
Output: 6 V DC / 500 mA
Charger power supply:
Input: 230 V AC / 50 Hz
Output: 7 V DC / 420 mA
Handset standby time:
100 hours
Handset talk time
10 hours
Charging time:
16 hours
Permitted operating temperatures
+5 °C to + 45 °C
Permitted relative humidity
25 to 85 %
Dialling mode
Pulse and tone dialling (DTMF)
Flash time
100 or 300 ms
Handset number memory
50 phone book entries of up to 24 digits and 16
letters.
Base station number memory
3 direct abbreviated dial numbers (M1-M3) of up
to 24 digits.
50 phone book entries of up to 24 digits and 16
letters.
Dimensions Base station /
Charger /
Handset
200 mm x 71 mm x 183 mm /
104 mm x 100 mm x 59 mm /
182 mm x 284 mm x 58 mm
Weight Base station /
Charger /
Handset
763 g with mains adapter /
185 g with mains adapter /
147 g with batteries
Maximum power consumption
Base station with receiver: 2.0 W
Charger with handset: 1.3 W
129
Warranty
12 Warranty
SWITEL equipment is produced and tested according to the latest production methods. The
implementation of carefully chosen materials and highly developed technologies ensure trouble-free
functioning and a long service life. The terms of guarantee do not apply where the cause of equipment
malfunction is the fault of the telephone network operator or any interposed private branch extension
system. The terms of guarantee do not apply to the batteries or power packs used in the products. The
period of guarantee is 24 months from the date of purchase.
All deficiencies related to material or manufacturing errors within the period of guarantee will be
redressed free of charge. Rights to claims under the terms of guarantee are annulled following
tampering by the purchaser or third parties. Damage caused as the result of improper handling or
operation, normal wear and tear, incorrect positioning or storage, improper connection or installation
or Acts of God and other external influences are excluded from the terms of guarantee. In the case of
complaints, we reserve the right to repair defect parts, replace them or replace the entire device.
Replaced parts or devices become our property. Rights to compensation in the case of damage are
excluded where there is no evidence of intent or gross negligence by the manufacturer.
If your device does show signs of a defect within the period of guarantee, please contact the sales
outlet where you purchased the SWITEL device, producing the purchase receipt as evidence. All
claims under the terms of guarantee in accordance with this agreement can only be asserted at the
sales outlet. No claims under the terms of guarantee can be asserted after a period of two years from
the date of purchase and hand-over of the product.
13 Declaration of Conformity
This device fulfils the requirements stipulated in the EU directive: 1999/5/EC directive on
radio equipment and telecommunications terminal equipment and the mutual recognition
of their conformity. Conformity with the above mentioned directive is confirmed by the CE
mark on the device. To view the complete Declaration of Conformity, please refer to the
free download available on our web site www.switel.com.
14 Electrical consumption
The telephone base station is equipped with an energy-efficient switching power supply
(input 100~240 VAC, output 6 VDC, 500 mA). The zero load is approx. 0.06 W. The average
efficiency is approx. 71%. The power consumption of the base station is:
- in operation (standby/talking): approx. 0.52 W, approx. 0.68 W
The charging station(s) supplied with the telephone set is/are equipped with an energy-effi
cient switching power supply (input 100~240 VAC, output 7 VDC, 420 mA). The zero load is
approx. 0.06 W. The average efficiency is approx. 72.1%. The power consumption of the
charging station is:
- without handset: approx. 0.06 W
- when charging the handset: approx. 0.65 W
130
131
Declaration of Conformity 5
Diese Anlage entspricht der europäischen R&TTE Richtlinie.
Für die komplette Konformitätserklärung nutzen Sie bitte den kostenlosen Download von unserer Website
www.switel.com.
Cet équipement est conforme à la directive européenne R&TTE.
Pour obtenir la déclaration de conformité intégrale, veuillez vous servir du téléchargement gratuit de notre
site Internet www.switel.com.
Quest'apparecchiatura è conforme alla direttiva europea R&TTE.
Per la dichiarazione di conformità completa si prega di voler usufruire del servizio gratuito di download dal
nostro sito Internet www.switel.com.
This equipment complies with the European R&TTE directive.
To view the complete Declaration of Conformity, please refer to the free download available at our web site:
www.switel.com.
Service Hotline
Bei technischen Problemen können Sie sich an unsere Service-Hotline unter Tel. 0900 00 1675 innerhalb
der Schweiz (Kosten Swisscom bei Drucklegung: CHF 2.60/min) wenden.
S'il s'agit de problèmes techniques, vous pouvez vous adresser à notre hotline de service en Suisse en
appelant le numéro 0900 00 1675 (frais Swisscom à la date d'impression de ce manuel : CHF 2.60/min).
In caso di problemi tecnici è possibile rivolgersi alla nostra hotline di assistenza tecnica chiamando al nu
mero 0900 00 1675 valido per la Svizzera (spese da rete Swisscom alla data di stampa: CHF 2.60 / min).
In the event of technical problems, you can contact our hotline service, Tel. 0900 00 1675 within Switzerland
(cost via Swisscom at time of going to print: CHF 2.60/min).
Version 1.0 - 25.05.2012