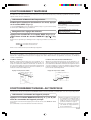
1
OPERATING MANUAL MODE D’EMPLOI MANUAL DE FUNCIONAMIENTO HEAT&COOLING MODEL (REVERSE CYCLE) ROOM AIR CONDITIONER WALL MOUNTED TYPE English Indoor Unit ASU24RLQ Outdoor Unit Español Français AOU24RLQ KEEP THIS OPERATION MANUAL FOR FUTURE REFERENCE FUJITSU GENERAL LIMITED P/N9315345073-01 1 E Fig. 1 8 Ջࣱݻବ MANUAL AUTO 9 2 Fig. 2 1 3 3 OPERATION D A TIMER AIR CLEAN = CB Fig. 5 F Fig. 3 5 6 7 4 8 H G I Fig. 6 Fig. 4 O Z a K L M N J P Y R S T U [ ] a c d e f _ \ V Fig. 7 W Q X To facilitate explanation, the accompanying illustration has been drawn to show all possible indicators; in actral operation, however, the display will only show those indicators appropriate to the current operation. WIRED REMOTE CONTROL UNIT (OPTION) The optional wired remote control unit (model No.: UTB-UUB) can be used. When you use wired remote control unit, there are following different points as compared with using wireless remote control unit. [The additional functions for wired ones] • Weekly timer • Temperature set back timer [The restricted functions for wired ones] • QUIET can't be selected in FAN MODE. • Sleep-timer can't be used. • Coil dry can’t be used. And you can't use both wired remote control unit and wireless simultaneously. (Only one kind can be selected) TYPE TYPE TIPO HEAT & COOL MODEL MODÈLE RÉVERSIBLE MODELO DE REFRIGERACIÓN Y CAlEFACCÓN MODEL MODÈLE MODELO INDOOR UNIT UNIDAD INTERIOR UNITÉ INTÉRIEURE ASU24RLQ OUTDOOR UNIT UNIDAD EXTERIOR UNITÉ EXTÉRIEURE AOU24RLQ SPECIFICATIONS POWER SUPPLY ........................................................................................................................................................................................................................................................ 208/230 V~60 Hz COOLING CAPACITY .................................................................................................................................................................................................................................................................. 24,200 BTU/h INPUT POWER ................................................................................................................................................................................................................................................................... 2.31 kW CURRENT .............................................................................................................................................................................................................................................................................. 10.1 A HEATING CAPACITY ................................................................................................................................................................................................................................................................. 27,600 BTU/h INPUT POWER ................................................................................................................................................................................................................................................................... 2.47 kW CURRENT ............................................................................................................................................................................................................................................................................. 10.8 A FICHE TECHNIQUE ALIMENTATION ......................................................................................................................................................................................................................................................... 208/230 V~60 Hz REFROIDISSEMENT PUISSANCE FRIGORIFIQUE ..................................................................................................................................................................................................................................... 24,200 BTU/h PUISSANCE ABSORBÉE .................................................................................................................................................................................................................................................... 2,31 kW INTENSITÉ ............................................................................................................................................................................................................................................................................ 10,1 A CHAUFFAGE PUISSANCE FRIGORIFIQUE ..................................................................................................................................................................................................................................... 27,600 BTU/h PUISSANCE ABSORBÉE ................................................................................................................................................................................................................................................... 2,47 kW INTENSITE ............................................................................................................................................................................................................................................................................ 10,8 A ESPECIFICACIONES ALIMENTACIÓN ........................................................................................................................................................................................................................................................ 208/230 V~60 Hz REFRIGERACIÓN CAPACIDAD ............................................................................................................................................................................................................................................................... 24,200 BTU/h ENTRADA DE ALIMENTACIÓN ........................................................................................................................................................................................................................................ 2,31 kW CORRIENTE ........................................................................................................................................................................................................................................................................... 10,1 A CALEFACCIÓN CAPACIDAD .............................................................................................................................................................................................................................................................. 27,600 BTU/h ENTRADA DE ALIMENTACIÓN ........................................................................................................................................................................................................................................ 2,47 kW CORRIENTE .......................................................................................................................................................................................................................................................................... 10,8 A CONTENTS SAFETY PRECAUTIONS ..................................... FEATURES AND FUNCTIONS ............................ NAME OF PARTS ................................................ PREPARATION .................................................... OPERATION ........................................................ AIR CLEANING OPERATION .............................. TIMER OPERATION ............................................ SLEEP TIMER OPERATION ................................ MANUAL AUTO OPERATION ............................ En-1 En-2 En-3 En-4 En-5 En-7 En-8 En-9 En-9 ADJUSTING THE DIRECTION OF AIR CIRCULATION ............................................ En-10 SWING OPERATION .......................................... En-11 COIL DRY OPERATION ...................................... En-11 CLEANING AND CARE ..................................... En-12 CLEANING THE PLASMA AIR CLEANING FILTER ..................................... En-13 TROUBLESHOOTING ....................................... En-16 OPERATING TIPS ............................................. En-17 SAFETY PRECAUTIONS DANGER! CAUTION! ● Do not attempt to install this air conditioner by yourself. ● This unit contains no user-serviceable parts. Always consult authorized service personnel for repairs. ● When moving, consult authorized service personnel for disconnection and installation of the unit. ● Do not become excessively chilled by staying for lengthy periods in the direct cooling airflow. ● Do not insert fingers or objects into the outlet port or intake grilles. ● Do not start and stop air conditioner operation by disconnecting the power supply cord and so on. ● Take care not to damage the power supply cord. ● In the event of a malfunction (burning smell, etc.), immediately stop operation, disconnect the power supply plug, and consult authorized service personnel. ● ● ● ● ● ● ● ● ● ● ● ● ● ● ● ● ● ● ● ● ● En-1 Provide occasional ventilation during use. Do not direct air flow at fireplaces or heating apparatus. Do not climb on, or place objects on, the air conditioner. Do not hang objects from the indoor unit. Do not set flower vases or water containers on top of air conditioners. Do not expose the air conditioner directly to water. Do not operate the air conditioner with wet hands. Do not pull power supply cord. Turn off power source when not using the unit for extended periods. Check the condition of the installation stand for damage. Do not place animals or plants in the direct path of the air flow. Do not drink the water drained from the air conditioner. Do not use in applications involving the storage of foods, plants or animals, precision equipment, or art works. Connection valves become hot during Heating; handle with care. Do not apply any heavy pressure to radiator fins. Operate only with air filters installed. Do not block or cover the intake grille and outlet port. Ensure that any electronic equipment is at least one metre away from either the indoor or outdoor units. Avoid installing the air conditioner near a fireplace or other heating apparatus. When installing the indoor and outdoor unit, take precautions to prevent access to infants. Do not use inflammable gases near the air conditioner. FEATURES AND FUNCTIONS INVERTER At the start of operation, a large power is used to bring the room quickly to the desired temperature. Afterwards, the unit automatically switches to a low power setting for economic and comfortable operation. COIL DRY OPERATION The Indoor unit can be dried by pressing the COIL DRY button on the Remote Control Unit so as to avoid going moldy and restrain the breed of bacterium. AUTO CHANGEOVER The operation mode (cooling, dry, heating) is switched automatically to maintain the set temperature, and the temperature is kept constant at all times. OMNI-DIRECTIONAL AIR FLOW (SWING OPERATION) Three-dimensional control over air direction swing is possible through dual use of both an UP/DOWN air direction swing and RIGHT/LEFT air direction swing. Since UP/DOWN air direction flaps operate automatically according to the operating mode of the unit, it is possible to set air direction based on the operating mode. REMOVABLE OPEN PANEL The indoor unit’s Open Panel can be removed for easy cleaning and maintenance. MILDEW-RESISTANT FILTER The AIR FILTER has been treated to resist mildew growth, thus allowing cleaner use and easier care. PROGRAM TIMER The program timer allows you to integrate OFF timer and ON timer operations in a single sequence. The sequence can involve one transition from OFF timer to ON timer, or from ON timer to OFF timer, within a twenty-four hour period. SLEEP TIMER When the SLEEP button is pressed during Heating mode, the air conditioner’s thermostat setting is gradually lowered during the period of operation; during cooling mode, the thermostat setting is gradually raised during the period of operation. When the set time is reached, the unit automatically turns off. WIRELESS REMOTE CONTROL UNIT The Wireless Remote Control Unit allows convenient control of air conditioner operation. SUPER QUIET OPERATION When the FAN CONTROL button is used to select QUIET, the unit begins super-quiet operation; the indoor unit’s airflow is reduced to produce quieter operation. AIR CLEANING MODE Relies on the air conditioner’s power to quickly purify the air in the room. ELECTRONIC AIR CLEAN FILTER Install for use inside of the dust collection unit. For details on how to install the filter, please refer to page 15. Electrical power is used to charge the filter to remove contaminants from the air and to effectively collect dust and remove odors. It also helps to reduce the bacterial activity. HORIZONTAL AIRFLOW: COOLING/ DOWNWARD AIRFLOW: HEATING For cooling, use horizontal airflow so the cool air does not blow directly on the occupants in the room. For heating, use downward airflow to send powerful, warm air to the floor and create a comfortable environment. En-2 NAME OF PARTS Fig. 1 Indoor Unit Fig. 6 Remote Control Unit 1 Operating Control Panel (Fig. 2) 2 MANUAL AUTO button ● When kept on pressing the MANUAL J K L M N O P Q R S T U V W X SLEEP button MASTER CONTROL button AIR CLEAN button SET TEMP. button ( / ) COIL DRY button Signal Transmitter TIMER MODE button / ) button TIMER SET ( FAN CONTROL button START/STOP button SET button (Vertical) SET button (Horizontal) SWING button RESET button TEST RUN button Y Z [ \ ] _ a b c d e f CLOCK ADJUST button Remote Control Unit Display (Fig. 7) Transmit Indicator Clock Display Operating Mode Display Timer Mode Display Fan Speed Display Temperature SET Display AIR CLEAN Display COIL DRY Display SLEEP Display SWING Display AUTO button for more than 10 seconds, the forced cooling operation will start. ● The forced cooling operation is used at the time of installation. Only for authorized service personnel's use. ● When the forced cooling operation starts by any chance, press the START/STOP button to stop the operation. 3 4 5 6 Indicator (Fig. 3) Remote Control Signal Receiver OPERATION Indicator Lamp (red) TIMER Indicator Lamp (green) ● If the TIMER indicator lamp flashes when the timer is operating, it indicates that a fault has occurred with the timer setting (See Page 14 Auto Restart). 7 AIR CLEAN Indicator Lamp (orange) 8 9 0 A B C Intake Grille (Fig. 4) Front Panel Air Filter Air Flow Direction Louver Power Diffuser Right-Left Louver (behind Air Flow Direction Louver) D Drain Hose E Electrical Air Cleaning Filter Fig. 5 Outdoor Unit F G H I Intake Port Outlet Port Pipe Unit Drain port (bottom) ● Refer to the folded out page on the cover. En-3 ● This button is used when installing the conditioner, and should not be used under normal conditions, as it will cause the air conditioner’s thermostat function to operate incorrectly. ● If this button is pressed during normal operation, the unit will switch to test operation mode, and the Indoor Unit’s OPERATION Indicator Lamp and TIMER Indicator Lamp will begin to flash simultaneously. ● To stop the test operation mode, press the START/STOP button to stop the air conditioner. PREPARATION CAUTION! Load Batteries (AAA/R03/LR03 × 2) 1 Press and slide the battery compartment lid on the reverse side to open it. Slide in the direction of the arrow while pressing the 2 Insert batteries. 3 Close the battery compartment lid. Be sure to align the battery polarities ( mark. ) correctly. Set the Current time 1 2 Press the CLOCK ADJUST button (Fig. 6 Y). Use the tip of a ball-point pen or other small object to press the button. Use the TIMER SET ( / ) buttons (Fig. 6 Q) to adjust the clock to the current time. ● Take care to prevent infants from accidentally swallowing batteries. ● When not using the Remote Control Unit for an extended period, remove the batteries to avoid possible leakage and damage to the unit. ● If leaking battery fluid comes in contact with your skin, eyes, or mouth, immediately wash with copious amounts of water, and consult your physician. ● Dead batteries should be removed immediately and disposed of properly, either in a battery collection receptacle or to the appropriate authority. ● Do not attempt to recharge dry batteries. Never mix new and used batteries, or batteries of different types. Batteries should last about one year under normal use. If the Remote Control Unit’s operating range becomes appreciably reduced, replace the batteries and press the RESET button with the tip of a ballpoint pen or other small object. button: Press to advance the time. button: Press to reverse the time. (Each time the buttons are pressed, the time will be advanced/reversed in one-minute increments; hold the buttons depressed to change the time quickly in ten-minute increments.) 3 Press the CLOCK ADJUST button (Fig. 6 Y) again. This completes the time setting and starts the clock. To Use the Remote Control Unit ● The Remote Control Unit must be pointed at signal receiver (Fig. 1 4) to operate correctly. ● Operating Range: About 7 meters. ● When a signal is properly received by the air conditioner, a beeping sound will be heard. ● If no beep is heard, press the Remote Control Unit button again. Remote Control Unit Holder Insert Slide up Press in Pull out Screws 1 Mount the Holder. 2 Set the Remote Control Unit. 3 To remove the Remote Control Unit (when use at hand). En-4 OPERATION To Select Mode Operation 1 Press the START/STOP button (Fig.6 S). 2 Press the MASTER CONTROL button (Fig.6 K) to select the desired mode. The indoor unit’s OPERATION Indicator Lamp (red) (Fig. 3 5) will light. The air conditioner will start operating. Each time the button is pressed, the mode will change in the following order. s AUTO s COOL s DRY HEAT t FAN t About three seconds later, the entire display will reappear. To Set the Thermostat Example: When set to COOL. Press the SET TEMP. button (Fig. 6 M). button: Press to raise the thermostat setting. button: Press to lower the thermostat setting. ●Thermostat setting range: AUTO .................................. 64-88 °F Heating ............................... 60-88 °F Cooling/Dry ........................ 64-88 °F The thermostat cannot be used to set room temperature during the FAN mode (the temperature will not appear on the Remote Control Unit’s Display). About three seconds later, the entire display will reappear. The thermostat setting should be considered a standard value, and may differ somewhat from the actual room temperature. Example: When set to 80°F. To Set the Fan Speed Press the FAN CONTROL button (Fig. 6 R). Each time the button is pressed, the fan speed changes in the following order: sAUTO s HIGH s MED sLOW s QUIET About three seconds later, the entire display will reappear. When set to AUTO: Heating : Fan operates so as to optimally circulate warmed air. However, the fan will operate at very low speed when the temperature of the air issued from the indoor unit is low. Cooling : As the room temperature approaches that of the thermostat setting, the fan speed becomes slower. Fan : The fan runs at the low fan speed. The fan will operate at a very low setting during Monitor operation and at the start of the Heating mode. SUPER QUIET Operation When set to Quiet: SUPER QUIET operation begins. The indoor unit’s airflow will be reduced for quieter operation. ● SUPER QUIET operation cannot be used during Dry mode. (The same is true when dry mode is selected during AUTO mode operation.) ● During Super Quiet operation, Heating and Cooling performance will be reduced somewhat. If the room does not warm up/ cool down when using SUPER QUIET Operation, please adjust the air conditioner’s Fan Speed. En-5 Example: When set to AUTO. To Stop Operation Press the START/STOP button (Fig. 6 S). The OPERATION Indicator Lamp (red) (Fig. 3 5) will go out. About AUTO CHANGEOVER Operation AUTO: ● When AUTO CHANGEOVER operation first selected, the fan will operate at very low speed for about one minute, during which time the unit detects the room conditions and selects the proper operating mode. If the differance between thermostat setting and actual room temperature is more than +4 °F → Cooling or dry operation If the difference between thermostat setting and actual room temperature is within ±4 °F → Monitor operation If the difference between thermostat setting and actual room temperature is more than –4 °F → Heating operation ● When the air conditioner has adjusted your room’s temperature to near the thermostat setting, it will begin monitor operation. In the monitor operation mode, the fan will operate at low speed. If the room temperature subsequently changes, the air conditioner will once again select the appropriate operation (Heating, Cooling) to adjust the temperature to the value set in the thermostat. (The monitor operation range is ±4 °F relative to the thermostat setting.) ● If the mode automatically selected by the unit is not what you wish, select one of the mode operation (HEAT, COOL, DRY, FAN). About Mode Operation Heating: ● Use to warm your room. ● When Heating mode is selected, the air conditioner will operate at very low fan speed for about 3 to 5 minutes, after which it will switch to the selected fan setting. This period of time is provided to allow the indoor unit to warm up before begin full operation. ● When the room temperature is very low, frost may form on the outside unit, and its performance may be reduced. In order to remove such frost, the unit will automatically enter the defrost cycle from time to time. During Automatic Defrosting operation, the OPERATION Indicator Lamp (Fig. 3 5) will flash, and the heat operation will be interrupted. ● After the start of heating operation, it takes some time before the room gets warmer. Cooling: ● Use to cool your room. Dry: ● Use for gently cooling while dehumidifying your room. During Heating mode: Set the thermostat to a temperature setting that is higher than the current room temperature. The Heating mode will not operate if the thermostat is set lower than the actual room temperature. During Cooling/Dry mode: Set the thermostat to a temperature setting that is lower than the current room temperature. The Cooling and Dry modes will not operate if the thermostat is set higher than the actual room temperature (in Cooling mode, the fan alone will operate). During Fan mode: You can not use the unit to heat and cool your room. ● You cannot heat the room during Dry mode. ● During Dry mode, the unit will operate at low speed; in order to adjust room humidity, the indoor unit’s fan may stop from time to time. Also, the fan may operate at very low speed when adjusting room humidity. ● The fan speed cannot be changed manually when Dry mode has been selected. Fan: ● Use to circulate the air throughout your room. En-6 AIR CLEANING OPERATION If you wish to eliminate dirt,dust,cigarette smoke, pollen, or just simply purify the air of the room, use the Air Cleaning Mode. 1 Press the START/STOP button (Fig. 6 S). 2 Press the AIR CLEAN button (Fig. 6 L). The OPERATION Indicator Lamp (red) (Fig. 3 5) will light. (If the unit is already in operation, please proceed to step 2.) The AIR CLEAN Indicator Lamp (green) (Fig. 3 7) will light up. ● Air conditioning and Air Cleaning will function simultaneously. If you wish to stop Air Clean Press the AIR CLEAN button (Fig. 6 L) once again. The AIR CLEAN Indicator Lamp (orange) (Fig. 3 7) will go out. ● This will only stop the Air Cleaning, the air conditioner will continue operating. To also stop the air conditioner Press the START/STOP button (Fig. 6 S). The OPERATION Indicator Lamp (red) (Fig. 3 5) will go out. ● The next time the START / STOP button (Fig. 6 S) is pressed air conditioning and air cleaning will both resume operating. Air cleaning ● During operation, the unit produces a small amount of ozone that can be smelled. ● When this unit is used in combination with the ultrasonic humidifier, white parti- cles may become attached to the plasma filter unit. If this happens, clean the plasma filter unit as soon as possible. (Refer to page 13, 14.) ● The air cleaning operation cannot remove gases such as carbon monoxide and alcohol from the air. During operation, ventilate the room often to prevent asphyxiation or suffocation. ● If the intake filter is removed during operation, a safety device will stop the op- eration of the plasma filter unit. If this happens, the AIR CLEAN Indicator Lamp (orange) on the indoor unit will flash after some time has passed. Use the START/ STOP button on the remote controller to stop the operation, install the intake filter, and then use the START/STOP button to restart the operation. ● Use the FAN CONTROL button to change the fan speed. (Refer to page 5.) The plasma filter unit operates most effectively at the highest fan speed. ● The AIR CLEAN Indicator Lamp (orange) will flash to inform you that the periodic cleaning of the plasma filter unit is required. (Refer to page 13, 14.) En-7 TIMER OPERATION Before using the timer function, be sure that the Remote Control Unit is set to the correct current time (☞ P. 4). To Use the ON timer or OFF timer 1 Press the START/STOP button (Fig. 6 S) (if the unit is already operating, proceed to step 2). The indoor unit’s OPERATION Indicator Lamp (red) (Fig. 3 5) will light. 2 Press the TIMER MODE button (Fig. 6 P) to select the OFF timer or ON timer operation. Each time the button is pressed the timer function changes in the following order: s CANCEL s OFF sON PROGRAM(OFF → ON, OFF ← ON) t The indoor unit’s green TIMER Indicator Lamp (Fig. 3 6) will light. 3 Use the TIMER SET buttons (Fig. 6 Q) to adjust the desired OFF time or ON time. To Cancel the Timer Use the TIMER button to select “CANCEL”. The air conditioner will return to normal operation. To Change the Timer Settings Perform steps 2 and 3. To Stop Air Conditioner Operation while the Timer is Operating Press the START/STOP button. To Change Operating Conditions If you wish to change operating conditions (Mode, Fan Speed, Thermostat Setting, SUPER QUIET mode), after making the timer setting wait until the entire display reappears, then press the appropriate buttons to change the operating condition desired. Set the time while the time display is flashing (the flashing will continue for about five seconds). button: Press to advance the time. button: Press to reverse the time. About five seconds later, the entire display will reappear. To Use the Program timer 1 Press the START/STOP button (Fig. 6 S). (if the unit is already operating, proceed to step 2). The indoor unit’s OPERATION Indicator Lamp (red) (Fig. 3 5) will light. 2 3 Set the desired times for OFF timer and ON timer. See the section “To Use the ON timer or OFF timer” to set the desired mode and times. About three seconds later, the entire display will reappear. The indoor unit’s TIMER Indicator Lamp (green) (Fig. 3 6) will light. Press the TIMER MODE button (Fig. 6 P) to select the ON or OFF ON PROGRAM timer operation (OFF will display). The display will alternately show “OFF timer” and “ON timer”, then change to show the time setting for the operation to occur first. ● The program timer will begin operation. (If the ON timer has been selected to operate first, the unit will stop operating at this point.) About five seconds later, the entire display will reappear. About the Program timer To Cancel the Timer Use the TIMER MODE button to select “CANCEL”. The air conditioner will return to normal operation. To Change the Timer Settings 1. Follow the instructions given in the section “To Use the ON Timer or OFF Timer” to select the timer setting you wish to change. 2. Press the TIMER MODE button to select either OFF ON or OFF ON. To Stop Air Conditioner Operation while the Timer is Operating Press the START/STOP button. To Change Operating Conditions If you wish to change operating conditions (Mode, Fan Speed, Thermostat Setting, SUPER QUIET mode), after making the timer setting wait until the entire display reappears, then press the appropriate buttons to change the operating condition desired. ● The program timer allows you to integrate OFF timer and ON timer operations in a single sequence. The sequence can involve one transition from OFF timer to ON timer, or from ON timer to OFF timer, within a twenty-four hour period. ● The first timer function to operate will be the one set nearest to the current time. The order of operation is indicated by the arrow in the Remote Control Unit’s Display (OFF → ON, or OFF ← ON). ● One example of Program timer use might be to have the air conditioner auto- matically stop (OFF timer) after you go to sleep, then start (ON timer) automatically in the morning before you arise. En-8 SLEEP TIMER OPERATION Unlike other timer functions, the SLEEP timer is used to set the length of time until air conditioner operate is stopped. To Use the SLEEP Timer While the air conditioner is operating or stopped, press the SLEEP button (Fig. 6 J). The indoor unit’s OPERATION Indicator Lamp (red) (Fig. 3 5) lights and the TIMER Indicator Lamp (green) (Fig. 3 6) light. To Cancel the Timer: Use the TIMER MODE button to select “CANCEL”. The air conditioner will return to normal operation. To Stop the Air Conditioner During Timer Operation: To Change the Timer Settings Press the START/STOP button. Press the SLEEP button (Fig. 6 J) once again and set the time / ) buttons (Fig. 6 Q). using the TIMER SET ( Set the time while the Timer Mode Display is flashing (the flashing will continue about five seconds). button: Press to advance the time. button: Press to reverse the time. About five seconds later, the entire display will reappear. About the SLEEP Timer To prevent excessive warming or cooling during sleep, the SLEEP timer function automatically modifies the thermostat setting in accordance with the set time setting. When the set time has elapsed, the air conditioner completely stops. During Heating operation: When the SLEEP timer is set, the thermostat setting is automatically lowered 2 °F every thirty minutes. When the thermostat has been lowered a total of 8 °F, the thermostat setting at that time is maintained until the set time has elapsed, at which time the air conditioner automatically turns off. SLEEP timer setting During Cooling/Dry operation: When the SLEEP timer is set, the thermostat setting is automatically raised 2 °F every sixty minutes. When the thermostat has been raised a total of 4 °F, the thermostat setting at that time is maintained until the set time has elapsed, at which time the air conditioner automatically turns off. SLEEP timer setting 2 °F 4 °F 6 °F 8 °F 30 minutes Set time 1 hour 1 hour 1 hour 30 minutes 2 °F 4 °F Set time MANUAL AUTO OPERATION Use the MANUAL AUTO operation in the event the Remote Control Unit is lost or otherwise unavailable. How To Use the Main Unit Controls Press the MANUAL AUTO button (Fig. 2 2) on the main unit control panel. To stop operation, press the MANUAL AUTO button (Fig. 2 2) once again. (Controls are located inside the Open Panel) En-9 ● When the air conditioner is operated with the controls on the Main Unit, it will operate under the same mode as the AUTO mode selected on the Remote Control Unit (see page 6). ● The fan speed selected will be “AUTO” and the thermostat setting will be standard.(76°F) ADJUSTING THE DIRECTION OF AIR CIRCULATION ● Adjust the up, down, left, and right AIR directions with the AIR DIRECTION buttons on the Remote Control Unit. ● Use the AIR DIRECTION buttons after the Indoor Unit has started operating and the airflow-direction louvers have stopped moving. R DANGER! Vertical Air Direction Adjustment Press the SET button (Vertical) (Fig. 6 T). Each time the button is pressed, the air direction range will change as follows: 1 2 3 4 5 6 ● Always use the Remote Control Unit’s SET button to adjust the vertical airflow louvers. Attempting to move them manually could result in improper operation; in this case, stop operation and restart. The louvers should begin to operate properly again. Types of Air flow Direction Setting: 1,2,3 : During Cooling/Dry modes 4,5,6 : During Heating mode The Remote Control Unit’s display does not change. 1 2 3 4 5 6 ● Use the air direction adjustments within the ranges shown above. ● The vertical airflow direction is set automatically as shown, in accordance with the type of operation selected. During Cooling/Dry mode : Horizontal flow 1 : Downward flow 5 During Heating mode ● During AUTO mode operation, for the first minute after beginning operation, airflow will be horizontal 1; the air direction cannot be adjusted during this period. ● Direction 1 ● Never place fingers or foreign objects inside the outlet ports, since the internal fan operates at high speed and could cause personal injury. 2 Only the direction of the Air Flow Direction Louver changes; the direction of the Power Diffuser does not change. ● During use of the Cooling and Dry modes, do not set the Air Flow Direction Louvers in the Heating range (4 6) for long periods of time, since water vapor may condense near the outlet louvers and drops of water may drip from the air conditioner. During the Cooling and Dry modes, if the Air Flow Direction Louvers are left in the heating range for more than 30 minutes, they will automatically return to position 3. ● When used in a room with infants, children, elderly or sick persons, the air direction and room temperature should be considered carefully when making settings. Horizontal Air Direction Adjustment Press the SET button (Horizontal)(Fig. 6 U). ● Each time the button is pressed, the air direction range will change as follows: 1 2 3 4 5 The remote control unit’s display does not change. 1 2 3 4 5 En-10 SWING OPERATION Begin air conditioner operation before performing this procedure. To select SWING Operation Press the SWING button (Fig. 6 V). The SWING Display (Fig. 7 f) will light. Each time the SWING button is pressed, the swing operation will change in the following order. Up/down swing operation Swing operation stops Left/right swing operation Up/down/left/right swing operation To stop SWING Operation Press the SWING button and select STOP. Airflow direction will return to the setting before swing was begun. About Swing Operation ● Up/down swing: Swing operation begins using the following range according to the current airflow direction. Airflow direction is 1–4 (for cooling, dry). With the upper airflow-direction louver in the horizontal position, the lower airflow-direction louver moves (swings) to direct airflow to a wide area. Airflow direction is 3–6 (for heating). With the airflow-direction louvers set for downward or straight down airflow, airflow is directly mainly at the floor. ● Left/right swing: The airflow-direction louvers move (swing) in the left/right airflow direction. ● Up/down/left/right swing: The airflow-direction louvers move (swing) in both the up/down and left/right airflow directions. ● The SWING operation may stop temporarily when the air conditioner’s fan is not operating, or when operating at very low speeds. ● If the SET button(Vertical) is pressed during the up/ down swing operation, the up/down swing operation will stop and if the SET button(Horizontal) is pressed during the left/right swing operation, the left/right swing operation will stop. COIL DRY OPERATION The Indoor unit can be dried by pressing the COIL DRY button on the Remote Control Unit so as to avoid going moldy and restrain the breed of bacterium. The COIL DRY Operation will operate for 20 minutes after pressing the COIL DRY button and it will stop automatically. To select COIL DRY Operation Press the COIL DRY button (Fig. 6 N) during operation or when it stops. The COIL DRY Display (Fig. 7 d) will light. Then it will disappear after 20 minutes. To cancel COIL DRY Operation Press the START/STOP button (Fig. 6 S) during COIL DRY Operation. The COIL DRY Display (Fig. 7 d) will go out . Then the operation stops. About COIL DRY Operation ● Press the COIL DRY button again during COIL DRY Operation, COIL DRY Operation can be reset. ● The COIL DRY Operation cannot get rid of the existed mould or bacterium, and it has no sterilization effect either. En-11 CLEANING AND CARE ● Before cleaning the air conditioner, be sure to turn it off and disconnect the Power Supply Cord. CAUTION! ● Be sure the Intake Grille (Fig. 1 8) is installed securely. ● When removing and replacing the air filters, be sure not to touch the heat exchanger, as personal injury may result. Cleaning the Intake Grille Cleaning the Air Filter 1. Remove the Intake Grille. 1 Place your fingers at both lower ends of the grille panel, and lift forward; if the grille seems to catch partway through its movement, continue lifting upward to remove. 1. Open the Intake Grille, and remove the air filter. Lift up the air filter’s handle, disconnect the two lower tabs, and pull out. Air filter handle 2 Pull past the intermediate catch and open the Intake Grille wide so that it become horizontal. Intake Grille 2 2 Hooks (two places) 2. Remove dust with a vacuum cleaner or by washing. 1 1 Intake Grille After washing, allow to dry thoroughly in a shaded place. Mounting shaft 3. Replace the Air Filter and close the Intake Grille. 1 Align the sides of the air filter with the panel, and push in fully, making sure the two lower tabs are returned properly to their holes in the panel. Knob 2. Clean with water. Remove dust with a vacuum cleaner; wipe the unit with warm water, then dry with a clean, soft cloth. 3. Replace the Intake Grille. 1 Pull the knobs all the way. 2 Hold the grille horizontal and set the left and right mounting shafts into the bearings at the top of the panel. 3 Press the place where the arrow on the diagram indicates and close the Intake Grille. 2 Hooks (two places) (For purposes of example, the illustration shows the unit without Intake Grille installed.) Bearing ● Dust can be cleaned from the air filter either with a vacuum cleaner, or by washing the filter in a solution of mild detergent and warm water. If you wash the filter, be sure to allow it to dry thoroughly in a shady place before reinstalling. Knob ● If dirt is allowed to accumulate on the air filter, air flow will be reduced, lowering operating efficiency and increasing noise. Mounting shaft Intake Grille 2 Close the Intake Grille. 1 ● During periods of normal use, the Air Filters should be cleaned every two weeks. Intake Grille Mounting shaft Knob ● When used for extended periods, the unit may accumulate dirt inside, reducing its performance. We recommend that the unit be inspected regularly, in addition to your own cleaning and care. For more information, consult authorized service personnel. ● When cleaning the unit’s body, do not use water hotter than 104 °F, harsh abrasive cleansers, or volatile agents like benzene or thinner. ● Do not expose the unit body to liquid insecticides or hairsprays. ● When shutting down the unit for one month or more, first allow the fan mode to operate continuously for about one-half day to allow internal parts to dry thoroughly. En-12 CLEANING THE PLASMA AIR CLEANING FILTER WARNING! Before cleaning the plasma filter unit, be sure to turn off the power supply to the air conditioner. Electric shock may result. CAUTION! ● Make sure the plasma filter unit is properly mounted before cleaning or performing other tasks on it. If the unit is not properly mounted, it could fall off and cause damage or injury. ● You can be injured if you touch the heat exchanger when removing or installing the plasma filter unit. Do not insert your fingers between the plasma filter unit and the heat exchanger. Regarding the Air Cleaning check function ● This function is illustrated by the flashing of the AIR CLEAN Indicator Lamp (orange), indicating that the unit requires maintenance. After Air Cleaning Mode has been in use for approximately 400 hours, the AIR CLEAN Indicator Lamp (orange) will begin to slowly flash (approximately once every 7 seconds). When this occurs, the unit requires maintenance. After Air Cleaning Mode has been in use for approximately 500 hours, the AIR CLEAN Indicator Lamp (orange) will begin to flash quickly (approximately once every 3 seconds). At this point, Air Cleaning will cease functioning. Please carry out appropriate maintenance for the unit. ● Please carry out unit maintenance every 6 months. ● If a squeaking or chirping sound is heard, unit maintenance needs to be carried out, even if the AIR CLEAN Indicator Lamp (orange) is not flashing. Cleaning the dust collection unit 1. Open the intake grille and remove the air filter on the right. ● Please consult the instructions for cleaning the air filter on page 12. 2. Remove the dust collection unit. 4. Wash with water and dry. 1 Soak the plasma filter unit in warm water (104 to 113˚F) for 10 to 15 minutes. If the plasma filter unit is extremely dirty, extremely dilute a mild synthetic laundry detergent (low alkalinity or isotope detergent) to 15 times the standard concentration and allow the plasma filter unit to soak in it. 2 Gently move up and down and to the right and left. A soft sponge can also be used to wipe the surface. 3 Rinse with clean water. 4 Shake the plasma filter unit to drain off the water. (If the plasma filter unit is extremely dirty, repeat Steps 1 through 4 two or three more times.) 5 Place the plasma filter unit in the shade and allow it to dry completely. handle Securely grasp the dust collection unit by the handle and pull it out (as shown by the arrow). (The above figure is only for reference, so the intake grille is not included). 3. Remove the air cleaning & deodorizing filter from the cleaning unit. 1 Open the filter case at the rear of cleaning unit. Claw ● Never disassemble the plasma filter unit. Claw Filter case ● Never soak the plasma filter unit in hot water. ● Never wipe the plasma filter unit with a scrub brush or other hard or abrasive items. This will damage the honey comb filter. 2 Remove the air cleaning & deodorizing filter. Air cleaning & deodorizing filter En-13 ● Only use a mild synthetic laundry detergent (low alkalinity or isotope detergent). ● Never insert a brush into the inside of plasma filter unit for washing.This will damage the internal parts and cause malfunctioning of the plasma filter unit. ● Never use dryer or other device to blow hot air on the plasma filter unit. This will cause deformation or other damage. ● Before re-installing the unit, please wait until it is completely dry. If the unit is installed when still wet and then put into operation, the OPERATION Indicator Lamp (red) and the TIMER Indicator Lamp (green) will flash and Air Cleaning will stop. Cleaning the dust collection unit 5. Install the unit. 6. Install the air filter. (The above figure is only for reference, so the intake grille is not included.) ● Please consult instructions for cleaning the air filter on page 12. 7. Close the intake grille. Push the intake grill in at 4 points (the two ends of its lower side as well as two center points of the lower side, as shown in the figure) to close it. 1 Align the two ends of the dust collection unit with the guide rail and slide in. Guide rail Please ensure that the intake grille is closed properly. ● If, after cleaning the dust collection unit, the operation indicator lamp and the timer indicator lamp flash during Air Cleaning, please ensure that the unit is not damp and that the intake grille is properly closed. ● If, after having checked that the unit is fully dry and that the intake grille is closed properly, the indicator lamps continue to flash, the dust collection unit may be damaged. Please consult an authorised dealer to obtain a replacement. 2 Slide in until it clicks. “Click” “Click” WARNING! ● Be sure the Intake Grille (Fig. 4 8) is installed securely. ● Please ensure that the dust collection unit is completely dry before installing. ● After installing the dust collection unit, please ensure that it has been inserted fully into its place. If it has not been installed correctly, the OPERATION Indicator Lamp (red) and the TIMER Indicator Lamp (green) will flash, and Air Cleaning will stop. En-14 How to install or remove the Aircleaning and Deodorizing filter 1. Remove the dust-collecting unit. ● Please consult steps 1 and 2 of cleaning the dustcollecting unit on page 13. 2. Install or remove the Air-cleaning and Deodorizing filter into the unit. 1 Open the filter case inside the dust-collecting unit. Hook Air-cleaning and Deodorizing filter maintenance As well as ensuring the maintenance of the dust collecting unit, please also take care of the filter. (Please carry out maintenance on the filter every 6 months.) 1. Open the intake grille and remove the air filter from the right side. ● Please consult step 1 of cleaning the air filter on page 12. 2. Take out the unit and remove the Aircleaning and Deodorizing filter. Hook Filter case ● Please consult steps 2 and 3 of cleaning the air filter on page 13. 3. Air-dry after washing. 1 Wash using lukewarm or warm water. If quite dirty, wash using a mild detergent. 2 Insert or remove the Air-cleaning and Deodorizing filter into the dust-collecting unit. Please do not rub the filter, it may cause its Aircleaning performance to be reduced. 2 Rinse it under running water. Install 3 Allow it to dry thoroughly in a shaded place. 4. Install the Air-cleaning and Deodorizing filter. ● Please consult the instructions on how to install the filter on page 15. Filter Remove ● Please place the air cleaning & deodorizing filter, with the black surface upward. 3 Close the filter case. Filter Case “Click” Hook Hook “Click” ● Please ensure that the filter case is properly closed. If the filter case is not properly closed, the filter could fall out. 3. Install the dust-collection unit. ● Please consult steps 5, 6 and 7 of cleaning the dustcollection unit on page 14. ❇ When removing the filter, please follow these steps backwards. En-15 5. Install the air filter and close the intake grille. ● Please consult step 3 of cleaning the air filter on page 12. Regarding the Air-cleaning and Deodorizing filter ● Please change the filter approximately every 2 years to ensure good Air-cleaning performance. (This is only possible if the filter is cleaned once every six months) When changing the filter, please make sure you purchase the correct model (UTR – FA15). ● Please only install filters that are licensed by our company. ● Regarding storage and care of the filter, please avoid exposing it to high temperatures and high humidity. Also, use it as soon as possible after opening its packaging. TROUBLESHOOTING WARNING! In the event of a malfunction (burning smell, etc.), immediately stop operation, turn off the electrical breaker or disconnect the power supply plug, and consult authorized service personnel. Merely turning off the unit’s power switch will not completely disconnect the unit from the power source. Always be sure to turn off the electrical breaker or disconnect the power supply plug to ensure that power is completely off. Before requesting service, perform the following checks: NORMAL FUNCTION Symptom Problem See Page Doesn’t operate immediately: ● If the unit is stopped and then immediately started again, the compressor will not operate for about 3 minutes, in order to prevent fuse blowouts. ● Whenever the Power Supply Plug is disconnected and then reconnected to a power outlet, the protection circuit will operate for about 3 minutes, preventing unit operation during that period. — ● During operation and immediately after stopping the unit, the sound of water flowing in the air conditioner’s piping may be heard. Also, noise may be particularly noticeable for about 2 to 3 minutes after starting operation (sound of coolant flowing). ● During operation, a slight squeaking sound may be heard. This is the result of minute expansion and contraction of the front cover due to temperature changes. — ● During Heating operation, a sizzling sound may be heard occasional. This sound is produced by the Automatic Defrosting operation. 17 ● Some smell may be emitted from the indoor unit. This smell is the result of room smells (furniture, tobacco, etc.) which have been taken into the air conditioner. — ● During Cooling or Dry operation, a thin mist may be seen emitted from the indoor unit.This results from the sudden Cooling of room air by the air emitted from the air conditioner, resulting in condensation and misting. — ● During Heating operation, the outdoor unit’s fan may stop, and steam may be seen rising from the unit. This is due to Automatic Defrosting operation. 17 ● When Heating operation is started, fan speed is temporarily very low, to allow internal parts to warm up. ● During Heating operation, if the room temperature rises above the thermostat setting, the outdoor unit will stop, and the indoor unit will operate at very low fan speed. If you wish to warm the room further, set the thermostat for a higher setting. — ● During Heating operation, the unit will temporarily stop operation (between 7 and 15 minutes) as the Automatic Defrosting mode operates. During Automatic Defrosting operation, the OPERATION Indicator Lamp will flash. 17 ● The fan may operate at very low speed during Dry operation or when the unit is monitoring the room’s temperature. 5 ● During SUPER QUIET operation, the fan will operate at very low speed. 5 ● In the monitor AUTO operation, the fan will operate at very low speed. 5 Water is produced from the outdoor unit: ● During Heating operation, water may be produced from the outdoor unit due to Automatic Defrosting operation. 17 The AIR CLEAN Indicator Lamp (orange) will begin to slowly flash (as shown in the figure): ● After approximately 400 hours of Air Cleaning Mode use, the AIR CLEAN Indicator Lamp will begin to flash slowly (as shown in the figure). When this occurs, please stop the system, remove the mains socket and carry out maintenance on the dust collecting unit's air filter. 13 - 14 The AIR CLEAN Indicator Lamp (orange) will begin to flash quickly (as shown in the figure): ● After approximately 500 hours of Air Cleaning Mode use, the AIR CLEAN Indicator Lamp will begin to flash quickly (as shown in the figure). At this point, Air Cleaning will stop functioning. Please stop the system, remove the mains socket and carry out maintenance on the dust collecting unit's air filter. 13 - 14 Noise is heard: Smells: Mist or steam are emitted: Airflow is weak or stops: En-16 TROUBLESHOOTING Items to check Symptom CHECK ONCE MORE Doesn’t operate at all: See Page ● Is the Power Supply Plug disconnected its outlet? ● Has there been a power failure? — ● Has a fuse blown out, or a circuit breaker been tripped? ● Is the timer operating? 8-9 ● Is the Air Filter dirty? ● Air the air conditioner’s intake grille or outlet port blocked? Poor Cooling performance: ● Did you adjust the room temperature settings (thermostat) correctly? ● Is there a window or door open? — ● In the case of Cooling operation, is a window allowing bright sunlight to enter? (Close the curtains.) ● In the case of Cooling operation, are there heating apparatus and computers inside the room, or are there too many people in the room? ● Is the unit set for SUPER QUIET operation? The unit operates differently from the Remote Control Unit’s setting: 5 ● Are the Remote Control Unit’s batteries dead? ● Are the Remote Control Unit’s batteries loaded properly? 4 If the problem persists after performing these checks, or if you notice burning smells, or both the ORERATION Indicator Lamp (Fig. 3 5) and the TIMER Indicator Lamp (Fig. 3 6) flashes, or only the TIMER Indicator Lamp (Fig. 3 6) flashes, immediately stop operation, disconnect the Power Supply, and consult authorized service personnel. OPERATING TIPS Operation and Performance Heating Performance ● This air conditioner operates on the heat-pump principle, absorbing heat from outdoor air and transferring that heat indoors. As a result, the operating performance is reduced as outdoor air temperature drops. If you feel that insufficient heating performance is being produced, we recommend you use this air conditioner in conjunction with another kind of heating appliance. ● Heat-pump air conditioners heat your entire room by recirculating air throughout the room, with the result that some time may be required after first starting the air conditioner until the room is heated. Microcomputer-controlled Automatic Defrosting ● When using the Heating mode under conditions of low outdoor temperature and high humidity, frost may form on the outdoor unit, resulting in reduced operating performance. In order to prevent this kind of reduced performance, this unit is equipped with a Microcomputer-controlled Automatic Defrosting function. If frost forms, the air conditioner will temporarily stop, and the defrosting circuit will operate briefly (for about 7-15 minutes). During Automatic Defrosting operation, the OPERATION Indicator Lamp (red) will flash. AUTO Restart In Event of Power Interruption ● The air conditioner power has been interrupted by a power failure. The air conditioner will then restart automatically in its previous mode when the power is restored. ● Operated by setting before the power failure. En-17 ● If a power failure occurs during TIMER operation, the timer will be reset and the unit will begin (or stop) operation at the new time setting. In the event that this kind of timer fault occurs the TIMER Indicator Lamp will flash (see Page. 3). ● Use of other electrical appliances (electric shaver, etc.) or nearby use of a wireless radio transmitter may cause the air conditioner to malfunction. In this event, temporarily disconnect the Power Supply Plug, reconnect it, and then use the Remote Control Unit to resume operation. OPERATING TIPS Temperature and Humidity Range Cooling Mode Dry Mode Heating Mode Outdoor temperature About 14 to 115 °F About 14 to 115 °F About 5 to 75 °F Indoor temperature About 64 to 90 °F About 64 to 90 °F About 88 °F or less ● If the air conditioner is used under higher temperature conditioner than those listed, the built-in protection circuit may operate to prevent internal circuit damage. Also, during Cooling and Dry modes, if the unit is used under conditions of lower temperature than those listed above, the heat-exchanger may freeze, leading to water leakage and other damage. ● Do not use this unit for any purposes other than the Cooling, Dehumidifying, and air-circulation of rooms in ordinary dwellings. ● If the unit is used for long periods under high-humidity conditions, condensation may form on the surface of the indoor unit, and drip onto the floor or other objects underneath. (About 80% or more). ● If the outdoor temperature is lower than the temperature scope in the list above, in order to keep safety operation of device, the outdoor unit may stop operation for certain period of time. En-18 SOMMAIRE PRÉCAUTIONS DE SÉCURITÉ ............................ CARACTÉRISTIQUES ET FONCTIONS .............. NOMENCLATURE DES ORGANES ..................... PRÉPARATIFS ...................................................... FONCTIONNEMENT ............................................ FONCTIONNEMENT PAR MINUTERIE DE PROGRAMMATION ....................................... FONCTIONNEMENT TEMPORISÉ ...................... FONCTIONNEMENT MANUEL-AUTOMATIQUE .................................. Fr-1 Fr-2 Fr-3 Fr-4 Fr-5 Fr-7 Fr-8 RÉGLAGE DE LA DIRECTION DU FLUX D’AIR .................................................... Fr-9 FONCTIONNEMENT OSCILLANT ..................... Fr-10 FONCTIONNEMENT DU SÉCHAGE DU SERPENTIN .................................................. Fr-10 NETTOYAGE ET ENTRETIEN ............................ Fr-11 GUIDE DE DÉPANNAGE ................................... Fr-13 CONSEILS D’UTILISATION ............................... Fr-14 Fr-8 PRÉCAUTIONS DE SÉCURITÉ DANGER! ATTENTION! ● N’essayez pas d’installer vous-même ce climatiseur. ● Cet appareil ne renferme aucune pièce réparable par l’utilisateur. Consultez toujours le personnel de service compétent en cas de réparation. ● En cas de déménagement, consultez un personnel de service compétent pour effectuer le débranchement et l’installation de l’appareil. ● Veillez à ne pas rester trop longtemps dans le passage direct de l’air froid de l’appareil. ● N’introduisez pas vos doigts ou des objets par la fente de sortie ou la grille d’admission d’air. ● Ne mettez pas le climatiseur en service ou hors service en branchant ou débranchant son alimentation electrique. ● Prenez soin de ne pas endommager le cordon d’alimentation electrique. ● En cas de d’efaillance (odeur de brûlé, etc.), mettez immédiatement l’appareil hors tension, coupez l’alimentation électrique via le disjoncteur et contactez un centre de réparation agréé. ● ● ● ● ● ● ● ● ● ● ● ● ● ● ● ● ● ● ● ● ● Fr-1 Assurez une ventilation régulière pendant le fonctionnement de l’appareil. Ne dirigez pas le flux d’air vers un feu ouvert ou un appareil de chauffage. Ne montez pas et ne placez pas d’objets sur le climatiseur. Ne suspendez pas des objets à l’appareil intérieur. Ne posez pas de vases de fleurs ou de récipient contenant de l’eau sur un climatiseur. N’exposez pas directement le climatiseur à de l’eau. N’utilisez pas le climatiseur avec des mains humides. Ne tirez pas sur le cordon d’alimentation. Coupez l’alimentation si vous n’utilisez pas le climatiseur pendant longtemps. Vérifiez si le support d’installation est en bon état. Ne placez pas des animaux ou des plantes directement dans le courant d’air de l’appareil. Ne buvez pas l’eau de vidange du climatiseur. N’utilisez pas le climatiseur pour l’entreposage d’aliments, de plantes, d’animaux, d’instruments de précision ou d’objets d’art. Les raccords de tuyauterie deviennent chauds pendant le chauffage; faites attention. N’appliquez aucune forte pression sur les ailettes du radiateur. Utilisez l’appareil uniquement quand les filtres à air sont installés. N’obstruez pas et ne couvrez pas la grille d’admission et la fente de sortie. Veillez à tenir tout équipement électronique à un mètre au moins des appareils intérieur et extérieur. Évitez d’installer le climatiseur près d’un feu ouvert ou d’autres équipements de chauffage. Lors de l’installation des unités intérieure et extérieure, évitez tout accès par des petits enfants. N’utilisez pas de gaz inflammables à près du climatiseur. CARACTÉRISTIQUES ET FONCTIONS INVERSEUR Lors de la mise en fonctionnement, une grande quantité de courant est nécessaire pour amener rapidement la température de la pièce à la température souhaitée. Pour des raisons de confort et d’économie d’énergie, la consommation de l’appareil diminue ensuite automatiquement. FONCTIONNEMENT DU SÉCHAGE DU SERPENTIN FLUX D’AIR OMNIDIRECTIONNEL (MODE OSCILLANT) L’oscillation simultanée haut/bas et droite/gauche du flux d’air offre un contrôle optimal de la ventilation. Les clapets de direction verticale du flux d’air oscillent automatiquement selon le mode opératoire sélectionné. Aussi, il est possible de régler la direction du flux d’air en sélectionnant le mode adapté. PANNEAU D’ACCÈS AMOVIBLE Il est possible, pour éviter l’accumulation de moisissure et la prolifération des bactéries, de sécher l’appareil intérieur en appuyant sur la touche COIL DRY de la télécommande. FCHANGEMENT AUTOMATIQUE Le mode de fonctionnement (Refroidissement, Déshumidification, Chauffage) change automatiquement afin de conserver la température programmée de manière constante. LA PROGRAMMATION COMBINÉE MARCHE/ARRÊT La programmation combinée marche/arrêt vous permet de combiner la mise hors service (OFF) et en service (ON). Cette combinaison concerne la transition de OFF à ON ou de ON à OFF pendant une période de 24 heures. FONCTIONNEMENT TEMPORISÉ Lorsque la touche de minuterie SLEEP est actionnée en mode Chauffage, la réglage du thermostat du climatiseur est progressivement abaissé; en revanche, en mode Refroidissement, le réglage du thermostat est progressivement élevé. Quand la durée programmée pour le compte à rebours est écoulée, l’appareil se met hors tension automatiquement. La Panneau d’accès de l’unité intérieur peut être retirée pour faciliter le nettoyage et l’entretien. FILTRE RÉSISTANT ÀUX MOISISSURE Le Filtre à air a reçu un traitement anti-moisissure, ce qui assure sa propreté et la facilité de son entretien. FONCTIONNEMENT SUPER SILENCIEUX Quand la touche FAN CONTROL est utilisée pour sélectionner QUIET (silencieux), l’appareil commence le fonctionnement super silencieuxl; le flux d’air de l’unité intérieure est réduit pour assurer un fonctionnement plus silencieux. FILTRE DE NETTOYAGE D’AIR À LA CATÉCHINE (POLYPHÉNOL) Le filtre de nettoyage d’air à la catéchine (polyphénol) utilise de l’électricité statique pour épurer l’air des fines particules et de la poussière, comme la fumée de tabac et le pollen des plantes, qui sont trop petites pour être visibles. Le filtre contient de la catéchine qui permet de lutter efficacement contre diverses bactéries en mettant fin à la croissance de celles absorbées par le filtre. Une fois le filtre de nettoyage d’air installé, la quantité d’air produite diminue et réduit ainsi légèrement les performances du climatiseur. TÉLÉCOMMANDE À INFRAROUGE La Télécommande sans fil autorise un contrôle facile du fonctionnement du climatiseur. FLUX D’AIR HORIZONTAL : REFROIDISSEMENT/FLUX D’AIR VERS LE BAS : CHAUFFAGE FILTRE D’AIR DÉSODORISANT À IONS NÉGATIFS Il se compose de super micro particules de céramique pouvant produire des ions négatifs d’air dont l’effet désodorisant et le pouvoir d’absorption contribuent à atténuer les odeurs désagréables à la maison. En mode Refroidissement, optez pour le flux d’air horizontal afin que l’air frais ne soit pas propulsé directement sur les personnes présentes dans la pièce. En mode Chauffage, optez pour le flux d’air vers le bas pour propulser un air chaud et puissant sur le sol afin de produire un environnement confortable. Fr-2 NOMENCLATURE DES ORGANES Fig. 1 Unité intérieur Fig. 6 Télécommande 1 Panneau de contrôle de fonctionnement (Fig. 2) 2 Bouton manuel-automatique (MANUAL AUTO) ● Si vous maintenez le bouton manuel-auto- J Touche de fonctionnement temporisé (SLEEP) K Touche de contrôle principal (MASTER CONTROL) L Touche SET TEMP ( / ) M Touche COIL DRY N Emetteur du signal O Touche TIMER MODE P Touche TIMER SET ( / ) Q Touche de contrôle de ventilateur (FAN CONTROL) R Touche de marche/arrêt (START/STOP) S Touche SET (vertical) T Touche SET (horizontal) U Touche SWING V Touche RESET W Touche d’essai de fonctionnement (TEST RUN) matique (MANUAL AUTO) enfoncé pendant plus de 10 secondes, le système de refroidissement forcé se déclenche. ● Le système de refroidissement forcé est utilisé au moment de l’installation et uniquement par un technicien agréé. ● Si le système de refroidissement forcé se déclenche par hasard, appuyez sur la touche de marche/arrêt (START/STOP) pour l’arrêter. 3 Voyant (Fig.3) 4 Récepteur du signal de télécommande 5 Voyant rouge de fonctionnement (OPERATION) (rouge) 6 Voyant vert de minuterie (TIMER) (vert) ● Si le voyant TIMER clignote en mode de ● Cette touche s’emploie lors de l’installation du climatiseur et elle ne sera pas utilisée en temps normal car le thermostat du climatiseur pourrait alors fonctionner de façon incorrecte. ● Si cette touche est actionnée pendant un fonctionnement normal, l’appareil passera au mode d’essai; le voyant de fonctionnement de l’unité intérieure et le voyant de minuterie commenceront alors à clignoter de façon simultanée. ● Pour arrêter le mode d’essai de fonctionnement, appuyez sur la touche START/ STOP pour arrêter le climatiseur. fonctionnement de la minuterie, le climatiseur vous indique que la minuterie n’a pas été correctement réglée. (Voir “Remise en marche automatique” à la page 14.) 7 Voyant SÉCHAGE DU SERPENTIN (COIL DRY) (orange) 8 9 0 A B C Grille d’admission (Fig.4) Panneau avant Filtre à air Volet de direction du flux d’air Redresseur de puissance Volets Gauche-Droite (derrière le volet de direction verticale du flux d’air) D Tuyau de vidange E Filtre de nettoyage d’air Fig. 5 Unité extérieur F G H I Orifice d’admission Orifice de sortie Canalisation Orifice de vidange (fond) ● Reportez-vous à la page dépliée de la couverture. Fr-3 X Y Z [ \ ] ` a b c d Touche CLOCK ADJUST Affichage de la télécommande (Fig. 7) Voyant de transmission Affichage d’horloge Affichage du mode de fonctionnement Affichage du mode de minuterie Affichage de vitesse de ventilation Affichage de réglage de température Affichage du séchage du serpentin Ecran de veille (SLEEP) Affichage d’oscillation PRÉPARATIFS ATTENTION! Mise en place des Piles (AAA/R03/LR03 × 2) 1 Appuyez sur le couvercle du logement des Piles à l’arrière et faites le glisser pour l’ouvrir. Faites glisser dans le sens de la flèche en appuyant sur le repère ( 2 3 ). Installez les Piles. Veillez à respecter la polarité ( ) des piles. Refermez le couvercle du logement des Piles. Mise à l’heure 1 2 Appuyez sur la touche CLOCK ADJUST (Fig. 6 X). 3 Rappuyez sur la touche CLOCK ADJUST (Fig. 6 X). Appuyez sur le bouton avec la pointe d’une stylo-bille ou d’un autre objet. Utilisez les touches TIMER SET ( / ) (Fig. 6 P) Touche : Pour faire avancer les chiffres. : Pour faire reculer les chiffres. Touche (A chaque poussée sur la touche, la valeur avance/recule par palier d’une minute. Elle changera par palier de 10 minutes si la touche est maintenue enfoncée.) ● Prenez soin de ne pas laisser des piles à la portée des petits enfants qui pourraient les avaler par accident. ● Si vous prévoyez de ne pas utiliser la télécommande pendant longtemps, retirez-en les piles pour éviter un suintement de leur électrolyte. ● Si de l’électrolyte des piles entre en contact avec la peau, les yeux ou les muqueuses, lavez immédiatement avec beaucoup d’eau fraîche et consultez votre médecin. ● Des piles usagées doivent être retirées rapidement de la télécommande et éliminées correctement soit en les plaçant dans un récipient public adhoc, soit en les rendant à l’autorité compétente. ● N’essayez jamais de recharger des piles. Ne mélangez jamais de piles neuves et usagées ou des piles de types différents. La durée de vie des piles est d’environ une année pour une utilisation normale. Si la plage de fonctionnement de la télécommande diminue sensiblement, remplacez les piles et appuyez sur la touche RESET à l’aide de la pointe d’un stylo à bille ou d’un autre objet de petite taille. Le réglage est ainsi terminé et l’horloge commence à fonctionner. Utilisation de la Télécommande ● La télécommande doit être dirigée vers le récepteur du signal (Fig. 1 4) du climatiseur pour fonctionner correctement. ● Portée de la télécommande est d’environ 7 mètres. ● Quand un signal est correctement reçu par le climatiseur, un bip se fait entendre. ● Si aucun bip n’est audible, appuyez à nouveau sur la touche souhaitée de la Télécommande. Support de la Télécommande Insérer Glisser vers le haut Enfoncer Tirer vers soi Vis 1 Fixez le support. 2 Installez la Télécommande. 3 Pour retirer la Télécommande (utilisation séparée). Fr-4 FONCTIONNEMENT Sélection du mode de Fonctionnement 1 Appuyez sur la touche START/STOP (Fig. 6 R). 2 Appuyez sur la touche MASTER CONTROL (Fig. 6 K) pour choisir le mode souhaité. Le voyant rouge de fonctionnement (OPERATION) de l’appareil intérieur (Fig. 3 5) s’allume. Le climatiseur se met en marche. A chaque pression de la touche, le mode change dans l’ordre suivant: sCOOL sDRY sAUTO (Automatique) (Refroidissement) (Déshumidification) HEAT t FAN t (Chauffage) (Ventilation) Après trois secondes environ, l’affichage entier réapparaît. Exemple: réglage sur COOL. Réglage du thermostat Appuyez sur la touche SET TEMP. (fig. 6 L). Touche Touche : Appuyez pour élever le réglage du thermostat. : Appuyez pour abaisser le réglage du thermostat. ●Plage de réglage du thermostat: Automatique ........................................... 64-88 °F Chauffage ................................................ 60-88 °F Refroidissement/Déshumidification ...... 64-88 °F Le thermostat ne permet pas de régler la température en mode Ventilation (FAN); la température n’apparaît pas sur l’affichage de la télécommande dans ce mode. Environ 3 secondes plus tard, tout l’affichage réapparaît. Le réglage du thermostat doit être considéré comme une valeur indicative et elle peut être légèrement différente de la température réelle de la pièce en fonction des caractéristiques de cell-ciou de la position de l’appareil. Exemple: réglage sur 80 °F. Réglage de la vitesse du ventilateur Appuyez sur la touche FAN CONTROL (Fig. 6 Q). A chaque pression de la touche, la vitesse du ventilateur change dans l’ordre suivant: s AUTO s HIGH (Automatique) (Rapide) sMED (Moyen) sLOW (Lent) sQUIET (Silencieux) Environ 3 secondes plus tard, tout l’affichage réapparaît. Lors d’un réglage sur AUTO: Chauffage : Le ventilateur agit afin de faire circular l’air chauffé de façon optimale. Cependant, le ventilateur fonctionne très lentement quand la températura de l’air émis par l’unité intérieure est basse. Refroidissement: À mesure que la température de la pièce approche du réglage de thermostat, la vitesse du ventilateur diminue. Ventilation : Le ventilateur se met alternativement en service et hors service; quand il est en service, il fonctionne à la vitesse LOW (lent). Le ventilateur fonctionne à très basse vitesse en mode Surveillance au début du mode Chauffage. Fonctionnement SUPER SILENCIEUX Lors d’un réglage sur SILENCIEUX (Quiet): Le fonctionnement SUPER SILENCIEUX commence. Le flux d’air de l’unité intérieure sera réduit pour rendre plus doux le fonctionnement. ● Le fonctionnement SUPER SILENCIEUX n’est pas utilisable en mode Déshumidification. (La même chose est vraie quand le mode Déshumidification est sélectionné pendant le fonctionnement en mode AUTO.) ● Pendant le fonctionnement Super Silencieux, les performances de chauffage et de légèrement réduites. Si la pièce ne se réchauffe pas/ne refroidit pas lors du fonctionnement SUPER SILENCIEUX, réglez la vitesse du ventilateur du climatiseur. Fr-5 Exemple: réglage sur AUTO. Arrêt du climatiseur Appuyez sur la touche START/STOP (Fig. 6 R). Le voyant rouge de fonctionnement (OPERATION) (fig. 3 5) s’éteint. A propos du mode de fonctionnement AUTO CHANGEOVER (changement automatique) AUTO: ● Lorsque le mode AUTO CHANGEOVER (changement automatique) est sélectionné, le ventilateur fonctionne dans un premier temps à très faible vitesse pendant environ une minute. Pendant ce temps, l’appareil détecte les conditions ambiantes et choisit le mode de fonctionnement adéquat. Si la différence entre le réglage du thermostat et la température réelle de la pièce dépasse +4 °F → Fonctionnement en mode Refroidissement ou Déshumidification Si la différence entre le réglage du thermostat et la température réelle de la pièce est inférieure à ±4 °F → Opération de surveillance Si la différence entre le réglage du thermostat et la température réelle de la pièce dépasse les -4 °F → Fonctionnement en mode Chauffage ● Lorsque le climatiseur a rapproché la température de la pièce du réglage du thermostat, il commence son opération de surveillance. En mode d’opération de surveillance, le ventilateur fonctionne à faible vitesse. Si la température de la pièce change par la suite, le climatiseur sélectionne le mode de fonctionnement approprié (Chauffage ou, Refroidissement) pour que la température corresponde à celle programmée sur le thermostat. (La plage de fonctionnement de la surveillance est de plus ou moins ±4 °F en fonction de la programmation du thermostat.) ● Si le mode sélectionné automatiquement par l’appareil ne correspond pas au mode souhaité, sélectionnez un des modes de fonctionnement (CHAUFFAGE, REFFROIDISSEMENT, DESHUMIDIFICATION, VENTILATION). A propos du mode de fonctionnement Chauffage (HEAT): ● Utilisé pour chauffer la pièce. ● Quand le mode Chauffage est choisi, le climatiseur fait fonctionner son ventilateur à très basse vitesse pendant 3 à 5 minutes, puis il passe au réglage de ventilation sélectionné. Cette durée permet à l’unité intérieure de se préchauffer avant d’entrer pleinement en service. ● Lorsque la température de la pièce est très basse, du givre peut apparaître sur l’appareil extérieur, ce qui peut réduire ses performances. Pour empêcher cette formation de givre, l’appareil enclenche automatiquement un cycle de dégivrage de temps en temps. Pendant le mode de dégivrage automatique, le voyant rouge de fonctionnement (OPERATION) (Fig. 3 5) clignote, et le mode de chauffage est interrompu. ● Aprés la mise en route du chauffage, il faut un certain temps pour gue la piéce se réchauffe. Refroidissement (COOL): ● Utilisé pour rafraichir la pièce. Déshumidification (DRY): ● Utilisé pour rafraîchir légèrement la pièce en éliminant l’humidité. ● Il n’est pas possible de chauffer la pièce en mode Déshumidification. ● En mode Déshumidification, l’appareil fonctionne à basse vitesse; pour ajuster l’humidité de la pièce, il arrive que le ventilateur de l’unité intérieure s’arrête de temps à autre. Le ventilateur risque également de fonctionner à très basse vitesse pendant l’ajustement du niveau d’humidité de la pièce. ● La vitesse du ventilateur ne peut pas être changée manuellement quand le mode Déshumidification est sélectionné. En mode Chauffage: Réglez le thermostat à une valeur plus haute que la température actuelle de la pièce. Le mode Chauffage ne fonctionnera pas si le thermostat est réglé plus bas que la température réelle de la pièce. En mode Refroidissement/Déshumidification: Réglez le thermostat à une valeur plus basse que la température actuelle de la pièce. Les modes Déshumidification et Refroidissement ne fonctionneront pas si le thermostat est réglé plus haut que la température réelle de la pièce (en mode Refroidissement, seul le ventilateur fonctionnera). En mode Ventilation: L’appareil ne permet pas de réchauffer ou rafraîchir la pièce. Ventilation (FAN): ● A utiliser pour faire circuler l’air dans toute la pièce. Fr-6 FONCTIONNEMENT PAR MINUTERIE DE PROGRAMMATION Avant d’utiliser la minuterie, vérifiez que la Télécommande est réglée sur l’heure exacte (cf. page 4). Emploi des fonctions de déclenchement ou d’arrêt différé 1 Appuyez sur la touche START/STOP (marche/arrêt) (Fig. 6 R). (Si le climatiseur fonctionne déjà, passez à l’étape 2.) Le voyant OPERATION rouge de l’unité intérieure (Fig. 3 5) s’allume. 2 Appuyez sur la touche TIMER MODE (Fig. 6 O) pour sélectionner la minuterie d’arrêt (OFF) ou de marche (ON). À chaque poussée sur la touche, la fonction de la minuterie change dans l’ordre suivant: s CANCEL s OFF Le voyant vert de minuterie (TIMER) de l’appareil intérieur (Fig. 3 6) s’allume. Utilisez les touches TIMER SET (Fig. 6 P) pour régler l’heure d’arrêt et de mise en marche souhaitées. Réglez l’heure pendant que l’affichage horaire clignote (le clignotement dure 5 secondes). Touche Touche Changement du réglage de la minuterie Effectuez les étapes 2 et 3. Arrêt du climatiseur pendant due la minuterie fonctionne Appuyez sur la touche START/STOP. s ON (Annulation) (Arrêt) (Marche) PROGRAM (OFF → ON, OFF ← ON) t (Programme) 3 Annulation de la minuterie Utilisez la touche TIMER MODE pour sélectionner “CANCEL”. Le climatiseur repasse au fonctionnement normal. Changement des conditions de fonctionnement Si vous souhaitez changer les conditions de fonctionnement (Mode, Vitesse de ventilation, Réglage du thermostat) après avoir réglé la minuterie, attendez que tout l’affichage réapparaisse, puis appuyez sur les touches appropriées pour changer le fonctionnement. : Appuyez pour avancer l’heure. : Appuyez pour reculer l’heure. Environ 5 secondes plus tard, tout l’affichage réapparaît. Utilisation de la programmation combinée Marche/Arrêt 1 Appuyez sur la touche START/STOP (Fig. 6 R) (marche/arrêt). (Si l’appareil est déjà en service, passez à l’étape 2.) Le voyant OPERATION rouge de l’unité intérieure (Fig. 3 5) s’allume. 2 Programmez les heures souhaitées pour la mise à l’arrêt (OFF) et la mise en marche (ON) par minuterie. Consultez la section “Emploi de la minuterie de marche (ON) ou d”arrêt (OFF)” pour régler le mode et les heures de fonctionnement souhaités. Environ 3 secondes plus tard, tout l’affichage réapparaît. Le voyant TIMER vert de l’unité intérieure (Fig. 3 6) s’allume. 3 Appuyez sur la touche TIMER MODE (Fig. 6 O) pour choisir PROGRAM (OFF → ON ou OFF ← ON s’affiche). L’affichage indique alternativement “OFF” et “ON”, puis il change pour indiquer le réglage horaire de l’opération qui se produira la premiére. ● La programmation se met en service. (Si la mise en service (ON) doit fonctionner d’abord, l’appareil cesse de fonctionner à ce moment.) Environ 5 secondes plus tard, tout l’affichage réapparaît. À propos de la programmation combinée Marche/Arrêt ● La programmation combinée marche/arrêt vous permet de combiner la mise hors service (OFF) et en service (ON). Cette combinaison concerne la transition de OFF à ON ou de ON à OFF pendant une période de 24 heures. ● La première fonction à agir est celle qui est la plus proche de l’heure actuelle. L’ordre des opérations est indiqué par la flèche sur l’affichage de la télécommande (OFF → ON ou OFF ← ON). ● Un exemple d’utilisation est de faire s’arrêter (OFF) le climatiseur automatiquement après que vous vous êtes endormi et de l’allumer (ON) automatiquement le matin avant votre réveil. Fr-7 Annulation de la minuterie Utilisez la touche TIMER MODE pous sélectionner “CANCEL”. Le climatiseur repasse au mode de fonctionnement normal. Changement du réglage de la minuterie 1. Effectuez les démarches expliquées à la section “Emploi de la minuterie de marche (ON) ou d”arrêt (OFF)” pour choisir les réglages de minuterie à changer. 2. Appuyez sur la touche TIMER MODE pour sélectionner OFF → ON ou OFF ← ON. Arrêt du climatiseur pendant que la minuterie fonctionne Appuyez sur la touche START/STOP. Changement des conditions de fonctionnement Si vous souhaitez changer les conditions de fonctionnement (Mode, Vitesse de ventilation, Réglage du thermostat) après avoir réglé la minuterie, attendez que tout l’affichage réapparaisse, puis appuyez sur les touches appropriées pour changer le fonctionnement. FONCTIONNEMENT TEMPORISÉ A la différence des autres fonctions de la minuterie, le fonctionnement temporisé permet de programmer une durée pendant laquelle fonctionnera le climatiseur. Utilisation de la Minuterie de Temporisation Pendant que le climatiseur fonctionne ou est arrêté, appuyez sur la touche SLEEP. (Fig. 6 J) Le voyant OPERATION (rouge) de l’appareil intérieur (Fig. 3 5) et le témoin (vert) de la minuterie TIMER (Fig. 3 6) s’allument. Annulation de la minuterie Utilisez la touche TIMER MODE pous sélectionner “CANCEL”. Le climatiseur repasse au mode de fonctionnement normal. Arrêt du climatiseur après le déclenchement du temporisateur Changement des réglages du minuterie Appuyez sur la touche START/STOP. Appuyez une nouvelle fois sur la touche SLEEP (Fig. 6 J) et / ) (Fig. réglez l’heure à l’aide des touches TIMER SET ( 6 P). Ajustez l’heure pendant que l’affichage horaire clignote (pendant 5 secondes environ). Touche Touche : Pour faire avancer l’heure. : Pour faire reculer l’heure. Environ 5 secondes plus tard, tout l’affichage réapparaît. À propos de la minuterie à temporisateur Pour éviter un chauffage ou un refroidissement excessif pendant le sommeil, la minuterie de temporisation modifie automatiquement le réglage du thermostat selon le réglage de la durée. Quand la durée programmée est écoulée, le climatiseur s’arrête complètement. Pendant le chauffage: Quand le fonctionnement temporisé est programmé, le réglage du thermostat est automatiquement abaissé de 2 °F toutes les 30 minutes. Quand le thermostat été abaissé de 8 °F en tout, le réglage à ce niveau est maintenu jusqu’à la fin de la durée programmée; quand ce moment est atteint, le climatiseur s’arrête automatiquement. Réglage du temporisateur (SLEEP) 2 °F 4 °F 6 °F Pendant le Refroidissement/Déshumidification: Quand le fonctionnement temporisé est programmé, le réglage du thermostat est automatiquement élevé de 2 °F toutes les 60 minutes. Quand le thermostat été augmenté de 4 °F en tout, le réglage à ce niveau est maintenu jusqu’à la fin de la durée programmée; quand ce moment est atteint, le climatiseur s’arrête automatiquement. Réglage du temporisateur (SLEEP) 8 °F Durée programmée 1 heure 30 minutes 1 heure 4 °F 2 °F 1 heure 30 minutes Durée programmée FONCTIONNEMENT MANUEL-AUTOMATIQUE Sélectionnez le mode de fonctionnement MANUAL AUTO si la télécommande est inutilisable ou si elle n’est pas disponible. Utilisation des commandes de l’appareil principal Appuyez sur la touche MANUAL AUTO (Fig. 2 2) sur le panneau des commandes de l’appareil principal. Pour arrêter le fonctionnement, appuyez à nouveau sur la touche MANUAL AUTO (Fig.2 2). (Les commandes se trouvent derrière la Panneau d’accès.) ● Quand le climatiseur est contôlé par les commandes de l’unité principale, il fonctionne selon le même mode AUTO que celui qui a été sélectionné par la télécommande. (cf. page 6) ● La vitesse de ventilation sélectionnée sera “AUTO” et le réglage du thermostat sera standard.(76°F) Fr-8 RÉGLAGE DE LA DIRECTION DU FLUX D’AIR ● Réglez le flux d’air vertical (haut/bas) et horizontal (droite/gauche) à l’aide des touches de direction du flux d’air (AIR DIRECTION) de la télécommande. ● Utilisez les touches de direction du flux d’air (AIR DIRECTION) après la mise en marche de l’appareil intérieur et l’arrêt des volets de direction du flux d’air. Réglage de la direction verticale du flux d’air Appuyez sur la touche SET (vertical) (Fig. 6 S). À chaque pression sur la touche, le flux d’air se modifie comme suit: 2 1 3 4 5 6 Positions de réglage de direction du flux d’air: 1,2,3 : En mode Refroidissement/Déshumidification 4,5,6 : En mode Ventilation L’affichage de la télécommande ne change pas. 1 2 3 4 5 6 ● Servez-vous du réglage de la direction de l’air dans la plage indiquée ci-dessus. ● La direction verticale du flux d’air sera réglée automatiquement comme indiqué, en fonction du type de fonctionnement sélectionné. En mode Refroidissement/Déshumidification : Flux horizontal 1 En mode Ventilation : Flux vers le bas 5 ● Lors d’un fonctionnement en mode AUTO, le flux d’air sera horizontal 1 pendant la première minute et la direction de l’air ne peut pas être ajustée pendant cette période. ● Direction 1 2 Seule la direction du volet de direction du flux d’air change ; celle du redresseur de puissance ne change pas. Réglage de la direction horizontale du flux d’air Appuyez sur la touche SET (horizontal) (Fig. 6 T). ● À chaque pression sur la touche, le flux d’air se modifie comme suit : 1 2 3 4 5 L’affichage de la télécommande ne change pas. 1 Fr-9 2 3 4 5 DANGER! ● N’introduisez jamais les doigts ou des objets étrangers dans les orifices de sortie car le ventilateur interne fonctionne à grande vitesse et il pourrait provoquer des blessures. ● Utilisez toujours la touche SET de la télécommande pour ajuster les volets de flux d’air vertical. Un déplacement manuel de ces volets pourrait entraîner un fonctionnement inadéquat. Dans ce cas, arrêtez l’appareil et remettez-le en marche; les volets devraient à nouveau fonctionner correctement. ● En modes Refroidissement et Déshumidification, ne réglez pas les volets de direction du flux d’air pendant longtemps dans la plage de chauffage (4 - 6) car de la vapeur d’eau pourrait se condenser près des volets de sortie et des gouttes d’eau pourraient s’écouler du climatiseur. En mode Refroidissement et Deshumidification, si les volets de direction du flux d’air sont laissés dans la plage de chauffage pendant plus de 30 minutes, ils reviendront automatiquement au niveau 3. ● Lorsque l’appareil est installé dans une pièce où se trouvent des nourrissons, des enfants, des personnes âgées ou alitées, tenez compte de leur position en réglant la température et la direction du flux d’air. FONCTIONNEMENT OSCILLANT Mettez le climatiseur en marche avant de procéder aux démarches suivantes. Sélection du fonctionnement oscillant (SWING) Appuyez sur la touche d’oscillation (SWING) (Fig. 6 U). L’affichage d’oscillation (Fig. 7 d) s’allume. Chaque fois que vous appuyez sur la touche d’oscillation (SWING), l’oscillation change comme suit. Oscillation horizontale (haut/bas) Arrêt de l’oscillation Oscillation verticale (gauche/droite) Oscillation horizontale/verticale Arrêt du fonctionnement oscillant (SWING) Appuyez sur la touche d’oscillation (SWING), puis sélectionnez Arrêter (STOP). Le réglage de la direction du flux d’air précédant la sélection du mode oscillant est rétabli. À propos du mode oscillant (Swing) ● Oscillation verticale : le fonctionnement oscillant commence dans la plage suivante en fonction de la direction actuelle du flux de l’air. Flux de l’air entre 1 et 4 (refroidissement, déshumidification). Lorsque le volet de direction du flux d’air supérieur est placé à l’horizontale, le volet de direction du flux d’air inférieur bouge (oscille) pour diriger le flux d’air dans une grande pièce. Flux de l’air entre 3 et 6 (chauffage). Lorsque les volets de direction du flux d’air sont réglés pour une propagation vers le bas, le flux d’air est directement et principalement dirigé vers le sol. ● Oscillation horizontale : les volets de direction du flux d’air bougent (oscillent) dans la direction horizontale du flux d’air. ● Oscillation verticale/horizontale : les volets de direction du flux d’air bougent (oscillent) dans les directions verticale et horizontale du flux d’air. ● Le fonctionnement oscillant s’arrête parfois temporairement lorsque le ventilateur du climatiseur ne fonctionne pas ou lorsqu’il tourne à une vitesse très lente. ● Si vous appuyez sur la touche SET (vertical) pendant le fonctionnement oscillant vertical, celui-cis’arrête. Si vous appuyez sur la touche SET (horizontal) pendant le fonctionnement oscillant horizontal, celui-ci s’arrête. FONCTIONNEMENT DU SÉCHAGE DU SERPENTIN Il est possible, pour éviter l’accumulation de moisissure et la prolifération des bactéries, de sécher l’appareil intérieur en appuyant sur la touche COIL DRY de la télécommande. Suite à la pression de la touche COIL DRY, le séchage du serpentin durera 20 minutes et s’arrêtera automatiquement. Sélection du séchage du serpentin Appuyez sur la touche COIL DRY (Fig. 6 M) pendant le fonctionnement ou l’arrêt de l’appareil. L’affichage du séchage du serpentin (Fig.7 b) s’allumera. Il disparaîtra après 20 minutes. Annulation du séchage du serpentin Appuyez sur la touche START / STOP (marche/arrêt) (Fig. 6 R) pendant l’opération de séchage. L’affichage du séchage du serpentin (Fig.7 b) s’éteint. le séchage s’arrêtera. À propos du séchage du serpentin ● Appuyez de nouveau sur la touche COIL DRY durant le séchage du serpentin. Il est alors possible de reprogrammer le séchage du serpentin. ● Le séchage du serpentin ne peut débarrasser le système de la moisissure ou des bactéries existantes. Il ne permet pas non plus de stériliser le système. Fr-10 NETTOYAGE ET ENTRETIEN ATTENTION! ● Avant de nettoyer le climatiseur, prenez soin de le mettre hors tension et de déconnecter l’alimentation. ● Vérifiez que la grille d’admission (Fig. 1 8) est fermement installée. ● Lors du retrait et du remplacement des filtres d’air, ne touchez pas l’échangeur thermique. Nettoyage de la grille d’admission 1. Déposez la grille d’admission. 1 Placer les doigts aux deux extrémités inférieures du panneau de calandre, et soulever vers l’avant; si la calandre semble s’accrocher à mi-chemin au cours de son déplacement, continuer de la lever vers le haut pour l’enlever. 2 Tirer au-delà du crochet intermédiaire et ouvrir tout grand la calandre jusqu’à ce qu’elle soit àl’horizontale. Nettoyage du filtre à air 1. Ouvrez la grille d’admission et déposez le filtre à air. Soulevez la poignée du filtre à air, débloquez les deux taquets inférieurs et tirez vers l’extérieur. Poignée du filtre à air Grille d’admission 2 2 Crochets (deux) 2. Nettoyez la poussière avec un aspirateur ou en lavant. 1 1 Après le lavage, laissez sécher convenablement dans un endroit à l’ombre. Grille d’admission Axe de montage Bouton 2. Nettoyez à l’eau. 3. Remettez le filtre à air en place et refermez la grille d’admission. 1 Alignez les côtés du filtre à air avec le panneau et enfoncez à fond en vérifiant que les deux taquets inférieurs sont revenus correctement dans leurs orifices sur le panneau. Enlevez poussière avec un aspirateur; frottez l’appareil avec de l’eau chaude, puis séchez avec un linge doux et propre. 3. Remettez la grille d’admission. 1 Tirer à fond sur les boutons. 2 Maintenir la calandre à l’horizontale et disposer les axes de montage droit et gauche dans les portages situés en haut du panneau. 3 Appuyez à l’endroit indiqué par la flèche sur le schéma et fermez la grille d’admission. Axe de montage Grille d’admission 2 Portage 1 Bouton Grille d’admission Crochets (deux) 2 Refermez la grille d’admission. (Pour la facilité, la grille d’admission n’est pas installée sur cette illustration.) ● La poussière peut être éliminée du filtre à air soit par un aspirateur, soit en le lavant dans une solution de détergent doux et d’eau chaude. Si vous lavez le filtre, veillez à le laisser sécher complètement dans un endroit à l’ombre avant de l’installer à nouveau. ● Si de la poussière s’accumule sur le filtre à air, le flux d’air sera réduit, ce qui abaissera l’efficacité du fonctionnement et augmentera le bruit du climatiseur. ● Pendant une période de fonctionnement normal, le filtre à air doit être nettoyé toutes le deux semaines. Axe de montage Bouton ● Quand l’appareil est utilisé pendant longtemps, de la poussière s’accumule à l’intérieur et ceci réduit ses performances. Il est conseillé de le faire inspecter régulièrement en plus de l’entretien que vous faites vous-même. Pour les détails, consultez le personnel de service agréé. ● Pour nettoyer le coffret de l’appareil, n’utilisez pas d’eau plus chaude que 104°F, de détergents abrasifs ou de produits volatils comme de la benzine ou un diluant. ● Ne soumettez pas le coffret de l’appareil à des insecticides ou des vaporisateurs pour cheveux. ● Avant une inutilisation de plus d’un mois, faites fonctionner pendant une demi journée par beau temps pour faire sécher complètement ses organes internes. Fr-11 NETTOYAGE ET ENTRETIEN Installation du filtre de nettoyage d’air 1. Ouvrez la grille d’admission et déposez les filtres à air. Remplacement de filtres de nettoyage d’air sales Pour remplacer les filtres, utilisez les composants suivants (achetés séparément). ● FILTRE DE NETTOYAGE D’AIR À LA CATÉCHINE : UTR-FA13-1 ● Filtre désodorisant d’ions négatifs d’air : UTR-FA13-2 Filtre à air (droit et gauche) 1. Ouvrez la grille d’admission et déposez les filtres à air. 2. Installez le kit du filtre de nettoyage d’air (2). 1 Fixez le filtre de nettoyage d’air sur le cadre prévu à cet effet. Kit du filtre de nettoyage d’air Cadre du filtre de nettoyage d’air Filtre à air (droit et gauche) 2. Remplacez-les par deux nouveaux filtres de nettoyage d’air. 1 Déposez les anciens filtres de nettoyage d’air dans l’ordre inverse de leur installation. 2 L’installation est identique à celle du kit du filtre de nettoyage d’air. Filtre de nettoyage d’air 2 Enclenchez l’ergot aux deux extrémités du filtre dans les deux crochets à l’arrière du cadre du filtre de nettoyage d’air. 3. Réinstallez les deux filtres à air et refermez la grille d’admission. Crochet (deux à l’arrière) Filtre à air (droit et gauche) Remarques sur les filtres de nettoyage d’air Ergot (deux) Veillez à ce que le filtre de nettoyage d’air ne dépasse pas du cadre. 3 Enclenchez les quatre emplacements de fixation en haut et en bas du filtre de nettoyage d’air dans les crochets du filtre à air. FILTRE DE NETTOYAGE D’AIR À LA CATÉCHINE (une feuille) ● Les filtres de nettoyage d’air sont jetables (ils ne peuvent pas être lavés ni réutilisés). ● En ce qui concerne leur conservation, utilisez-les dès que possible après l’ouverture de l’emballage (l’effet du nettoyage d’air diminue si les filtres restent dans l’emballage ouvert) ● En général, les filtres doivent être changés environ tous les trois mois. Achetez les filtres de nettoyage d’air appropriés (UTRFA13-1) (vendus séparément) pour remplacer les filtres sales usagés. Arrière du filtre Emplacement de fixation, crochets (6) [Filtre désodorisant d’ions négatifs d’air (une feuille) — bleu clair] ● Les filtres doivent être changés environ tous les trois ans pour conserver l’effet désodorisant. ● Le cadre du filtre n’est pas un produit à usage unique. 3. Réinstallez les deux filtres à air et refermez la grille d’admission. Filtre à air (droit et gauche) ● Lors de l’utilisation des filtres de nettoyage d’air, augmentez leur effet en réglant la vitesse du ventilateur sur “Élevé”. Achetez le filtre désodorisant approprié (UTR-FA13-2) (vendu séparément) pour remplacer les filtres. Entretien des filtres désodorisants Pour conserver l’effet désodorisant, nettoyez le filtre de la manière suivante une fois tous les trois mois. 1 Déposez le filtre désodorisant. 2 Nettoyez-le à l’eau et séchez-le à l’air. 1) Lavez les filtres à l’eau chaude haute pression jusqu’à ce que leur surface soit recouverte d’eau. Lavez-les avec un détergent neutre soluble. ne les frottez jamais sous peine d’endommager l’effet désodorisant. 2) Rincez-les abondamment à l’eau. 3) Séchez-les à l’ombre. 3 Réinstallez le filtre désodorisant. Fr-12 GUIDE DE DÉPANNAGE AVERTISSEMENT! En cas de dysfonctionnement (odeur de brûlé, etc.), mettez immédiatement l’appareil hors tension, coupez l’alimentation électrique via le disjoncteur ou le cordon d’alimentation et contactez un centre de réparation agréé. Il ne suffit pas d’éteindre l’appareil. Assurez-vous toujours de couper le disjoncteur ou de débrancher le cordon d’alimentation secteur pour couper l’alimentation de l’appareil. Avant de faire appel à un technicien, vérifiez les points suivants: Symptôme FONCTIONS NORMALES L’appareil ne fonctionne pas immédiatement: Un bruit se fait entendre: Odeurs: Du brouillard ou de la vapeur est émis: Le courant d’air est faible ou nul: De l’eau ressort de l’unite extérieur: Fr-13 Problème Voyez page ● Si l’appareil est arrêté, puis immédiatement remis en marche, le compresseur ne fonctionne pas pendant 3 minutes environ, pour éviter que le fusible ne soit grillé. ● Quand l’alimentation est déconnectée et reconnectée, le circuit de protection agit pendant 3 minutes environ pour arrêter l’appareil pendant cette durée. — ● Pendant le fonctionnement ou sitôt après l’arrêt de l’appareil, on peut entendre le bruit du fluide dans les canalisations climatiseur. Un bruit peut aussi être constaté 2 à 3 minutes après la mise en marche (écoulement du réfrigérant). ● Pendant le fonctionnement, un très léger craquement est parfois audible. Il provient du dilatement ou de la contraction des matériaux par suite du changement de température. — ● En mode Chauffage, un sifflement est parfois audible. Il provient du dégivrage automatique. 14 ● Une certaine odeur est émise par l’appareil intérieur. Elle peut provenir des odeurs de la pièce (mobilier, tabac, etc.) qui ont pénétré dans l’appareil. — ● Pendant le Refroidissement ou la Déshumidification, un léger brouillard peut être émis par l’unité intérieure. Il provient d’un refroidissement subit de l’air ambiant par l’air provenant du climatiseur, ce qui provoque une condensation. — ● Pendant le Chauffage, il arrive que le volet de l’appareil s’arrête et que de la vapeur s’en échappe. Ceci provient du dégivrage automatique. 14 ● A la mise en marche du Chauffage, la vitesse du ventilateur est d’abord très lente pour permettre un échauffement des organes internes. ● En mode Chauffage, si la température de la pièce dépasse le réglage du thermostat, l’unité extérieure s’arrête et l’unité intérieure fonctionne à très basse vitesse. Pour continuer à chauffer la pièce, réglez le thermostat à une valeur plus haute. — ● En mode de chauffage, l’appareil s’arrête temporairement (entre 7 et 15 minutes) tant que le mode de dégivrage automatique fonctionne. Pendant le mode de dégivrage automatique, le voyant de fonctionnement (OPERATION) clignote. 14 ● Le ventilateur fonctionne à très basse vitesse en mode Déshumidification ou quand l’appareil vérifie la température de la pièce. 5 ● Pendant le fonctionnement super silencieux, le ventilateur agit à vitesse très lente. 5 ● En mode de surveillance AUTO, le ventilateur fonctionne à très basse vitesse. 5 ● En mode Chauffage, il arrive que de l’eau sorte de l’unité extérieure en particulier lors des dégivrages. 14 GUIDE DE DÉPANNAGE Symptôme VÉRIFIEZ À NOUVEAU L’appareil ne fonctionne pas du tout: Problème Voyez page ● La fiche du cordon est débranchée de la prise secteur? ● Il s’est produit une panne de courant? — ● Le fusible a sauté ou le dijoncteur s’est déclenché? ● La minuterie fonctionne-t-elle? 7à8 ● Le filtre à air est-il sale? Mauvaises performances de refroidissement (ou chauffaqe): ● La grille d’admission d’air et/ou la fente de sortie sont-elles obstruées? ● A-t-on correctement ajusté la température de la pièce (sur le thermostat)? ● Y a-t-il une porte ou une fenêtre ouverte? — ● En cas de Refroidissement, une fenêtre est-elle exposée en plein soleil? (Fermez les rideaux.) ● En cas de Refroidissement, y a-t-il des appareils de chauffage ou des ordinateurs en service dans la pièce ou trop de monde dans la salle? ● L’appareil est-il réglé pour le fonctionnement SUPER SILENCIEUX? L’appareil n’exécute pas les fonctionnement réglé par la télécommande: 5 ● Les piles de la télécommande sont-elles épuisées? ● Les piles de la télécommande sont-elles bien installées. 4 Si le problème persiste après ces vérifications, ou si vous remarquez des odeurs de combustion, ou si le voyant de fonctionnement (OPERATION) (Fig. 3 5) et le voyant de minuterie (TIMER) (Fig. 3 6) clignotent, ou si seul ce dernier clignote, arrêtez immédiatement le fonctionnement de l’appareil, débranchez-le et consultez un technicien agréé. CONSEILS D’UTILISATION Fonctionnement et performance Performance de chauffage ● Cet appareil utilise pour le chauffage le principe du chauffage thermodynamique pompe à chaleur. Par conséquent, son rendement sera réduit à mesure que la température de l’air extérieur baisse. Si vous trouvez que le chauffage ne suffit pas, utilisez ce climatiseur en le combinant à d’autres appareils de chauffage. ● Les climatiseurs de type réversibles font circuler l’air pour réchauffer toute la pièce. Par conséquent, un certain délai est nécessaire avant d’arriver à une température suffisamment élevée. Dégivrage automatique contrôlé par microprocesseur ● Quand la température de l’air extérieur est basse et que l’humidité est élevée, l’emploi du mode Chauffage peut provoquer dans l’unité extérieure un givrage qui ferait baisser les performances de chauffage. Pour éviter cette baisse des performances, l’appareil est muni d’une fonction de dégivrage automatique, contrôlée par micro-processeur. Si du givre se forme, le climatiseur s’arrête temporairement et le circuit de dégivrage agit brièvement (environ 7 à 15 minutes.) Pendant le mode de dégivrage automatique, le voyant rouge de fonctionnement (OPERATION) clignote. Remise en marche automatique En cas de coupure de courant ● Si l’alimentation a été interrompue par une panne de courant, le climatiseur se remettra automatiquement en marche selon le mode utilisé au moment de la panne quand le courant sera rétabli. ● Actionné selon les réglages d’avant la panne de courant. ● Si une panne de courant se produit pendant le fonctionnement de la minuterie, celle-ci sera réinitialisée et l’appareil commencera (arrêtera) le fonctionnement au niveau réglage horaire. Si ce genre d’erreur de la minuterie se produit, le voyant TIMER clignote (cf. page 3). ● L’emploi d’autres appareils électriques (rasoir électrique, etc.) ou la présence d’un émetteur radio sans fil peut entraîner un mauvais fonctionnement du climatiseur. Dans ce cas, débranchez temporairement la fiche du cordon d’alimentation, rebranchez-la et servez-vous de la télécommande pour remettre l’appareil en service. Fr-14 CONSEILS D’UTILISATION Plage de température et d’humidité Mode Refroidissement Mode Déshumidification Mode Chau Température extérieure Environ 14 à 115 °F Environ 14 à 115 °F Environ 5 à 75 °F Température intérieure Environ 64 à 90 °F Environ 64 à 90 °F Environ 88 °F ou moins ● Si le climatiseur doit fonctionner par une température plus haute que celles indiquées ci-dessus, il se peut que le circuit de protection incorporé entre en service pour protéger les circuits internes. En revanche, en mode Refroidissement et Déshumidification, si le climatiseur doit fonctionner par une température inférieure à celles indiquées ci-dessus, l’échangeur thermique risque de geler et de provoquer une fuite d’eau ou d’autres dégâts. ● N’utilisez pas ce climatiseur pour autre chose que la Refroidissement, le Chauffage, la Déshumidification et la ventilation de pièces d’habitations ordinaires. ● Si l’appareil est utilisé pendant de longues périodes dans des milieux très humides, de la condensation pourrait se former à la surface de l’appareil intérieur et des gouttes pourraient tomber sur le sol ou sur d’autres objets situés au-dessous de l’appareil. (ca. 80 % ou plus). ● Si la température extérieure est inférieure à la plage de température dans la liste ci-dessus, afin de garantir une utilisation en toute sécurité de l’appareil, il est possible que l’appareil extérieur arrête de fonctionner pendant un certain temps. Fr-15