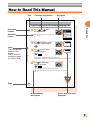
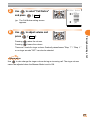
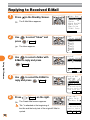
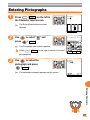
1
Preparation
Placing/
Answering a Call
Using
Overseas
Using the
Address Book
Using
Mail Features
Using
the Camera
Using the
EZweb Service
Entering
Characters
Troubleshooting
Other Features •
INDEX
Basic Operation Guide/A1305SA
Preface
Thank you very much for purchasing the A1305SA.
Carefully read the Manual and Basic Operation Guide to ensure proper operation before
using the A1305SA. Keep these manuals handy so that you can refer to them at any time
after reading.
Contact au Customer Service Center or au shop nearest you when you lose any of these
manuals.
■ Printed Manuals for A1305SA (Japanese)
The A1305SA comes with the Basic Operation Guide and the Manual.
A1305SA Basic Operation Guide
準備する
電話を
かける/受ける
Equivalent to this English PDF manual.
海外で使う
アドレス帳を
使う
メールを
使う
カメラを
使う
EZwebを
使う
文字を
入力する
故障とお考えに
なる前に
その他の機能・
索引
基本操作ガイド/ A 1 3 0 5 S A
目次
Including English Simple Manual
ご利用
いただく前に
A1305SA Manual
電話を
かける
電話を
受ける
English version is not available.
海外で使う
アドレス帳を使う
メールを使う
カメラを使う
EZwebを使う
データ
フォルダを使う
文字を入力する
その他の便利な
機能を使う
各種機能を
設定する
auのネット
ワークサービス
取扱説明書/A1305SA
その他・索引
GLOBAL PASSPORT (Owner's Manual)
English version is available at the au web site.
The URL is: http://www.au.kddi.com/kaigai/goriyo/english.html
Information
Upper and lower part of screen indication may be omitted in this manual. Also, font or
indication may be different from that on the actual screen or may be partly omitted.
Manners for Using Mobile Phones
■A mobile phone always generates weak electric waves while its power
is ON.
■Be considerate of the people and environment around you, and have
fun using your mobile phone safely.
● There are places where the use
of mobile phones is prohibited.
• Do not use mobile phones while
you are driving. Doing so is both
dangerous and forbidden by law.
• Do not use mobile phones on the
airplane. Doing so is forbidden by
law. Turn your mobile phone OFF.
● Electric waves from mobile
phones may adversely influence
medical apparatus and
equipment.
• Some people close to you in busy
places such as crowded trains may
be using a pacemaker.
Turn your mobile phone OFF in
such places.
• Abide by the instructions of
hospitals and other medical
institutions where it is forbidden to
use or carry mobile phone.
● Consider where to use your
mobile phone and be careful of
how loudly you talk.
• Do not place calls from cinemas,
theaters, museums, libraries and other
similar places. Turn your mobile phone
OFF or set it to the Manner Mode to
prevent others around you from being
inconvenienced by the Ringer.
• Use your mobile phone in places
where you will not prevent others
from passing through.
• Move to areas where you will not
cause others inconvenience on
Shinkansen (bullet train) or in hotel
lobbies.
• Take care not to talk too loudly
during conversations.
• Get other people's permission before
you start recording images with the
mobile phone's camera.
1
Basics of the Mobile Phone
What You Can Do with the A1305SA
Phone Calls
Using Overseas
Your mobile phone has many useful
functions including the Address
Book, history management, and the
Manner Mode.
You can place or answer
calls while overseas the
same way as in Japan.
→Page 34
→Page 23
Mail
You can send mails
to other mobile
phones or personal
computers.
→Page 45
2
Internet
Camera
You can take
photographs and easily
send them via E-Mail.
→Page 61
You can access the
Internet to check the
news or download the
Ringers and Wall Paper.
→Page 66
Useful Manner Mode and Answer Phone
■Manner Mode
- For turning sound OFF
In the Manner Mode, the Ringer
does not sound so as not to
bother the people around you.
for over a
Press and hold
second in the Standby Screen.
→ Page 28
■Answer Phone
- When you cannot
answer the phone
The caller can record a
message after the answering
message when you cannot
answer the call.
for
Press and hold
over a second in the Standby
Screen.
→ Page 31
3
Check the Power, Reception and Battery
■Keep the "power" ON
for usual use.
Keep the power ON to place or
answer calls.
for over a
Press and hold
second.
→ Page 13
■You cannot talk on the
phone if the "electric
waves" are too weak.
It is sometimes difficult to
receive electric waves in some
places even in service areas.
indicates the reception state.
→ Page 13
10:10
10月10日(金)
10:10
■Pay attention to the
remaining "battery"
power.
If the remaining battery power
is too low, you may not be able
to use the phone properly.
indicates the remaining battery
power.
→ Page 13
4
10:10
10月10日(金)
10:10
Watch Out for Malicious Mails and One Ring Calls!
■If you receive
malicious mails...
Using the mail filter function,
reject particular mail or mail
including " 未承諾広告※
(Unsolicited Ad mail)" in the
title, which is mostly malicious
mail.
The following mail functions are
available for preventing arrival of
malicious mails:
• " 未承諾広告フィルター ": Rejects 未承諾広告 (unsolicited Ad) mails
• "アドレスフィルター ":
Rejects specified address
• "指定受信設定 " Accepts only specified mails
• "指定拒否設定 " Rejects specified mails
→ Page 53
■If you receive a call
from an unknown
number...
The call leads you to call back
and access vicious toll
programs that may be "One
Ring Call".
Incoming calls from unknown
numbers that are hung up within
)
3 seconds, an orange icon (
indicated in the Incoming Calls.
→ Page 25
10:10
O.C IncomingCalls
01 22:35 10/ 6
0900001XXXX
02 0:14 10/ 3
030001XXXX
5
Contents
Manners for Using Mobile Phones ........................................ 1
Basics of the
Mobile Phone
Contents
6
What You Can Do with the A1305SA ..................................... 2
Useful Manner Mode and Answer Phone .............................. 3
Check the Power, Reception and Battery .............................. 4
Watch Out for Malicious Mails and One Ring Calls! ............... 5
6
Preparation
Confirming the Packed Contents ........................................... 8
How to Read This Manual ..................................................... 9
Names of Each Part ............................................................ 10
Charging the Battery Pack .................................................. 11
Extending the Antenna ........................................................ 12
Turning the Power ON ......................................................... 13
Turning the Power OFF ....................................................... 13
Initializing ............................................................................ 14
About Initial Settings ........................................................... 14
Switching the Screen Display to English ............................. 15
Understanding Basic Usage of the Phone ........................... 17
Icon Display ........................................................................ 19
Initializing E-Mail and EZweb Functions .............................. 20
Confirming Your Phone Number and E-Mail Address .......... 22
Placing/Answering
a Call
Placing a Call ...................................................................... 23
Answering a Call ................................................................. 24
Calling Back (Outgoing Calls/Incoming Calls) ..................... 25
Countermeasure for One Ring Calls ................................... 25
Adjusting Ringer Volume ..................................................... 26
Setting the Manner Mode .................................................... 28
Adjusting the Other Party's Voice Volume ............................ 28
Changing Ringer Type ......................................................... 29
Recording Messages When You Are Unable to Answer a Call .... 31
Playing Back/Erasing Recorded Messages ......................... 32
Using Overseas
Setting Area ........................................................................ 34
Calling Japan from Overseas .............................................. 36
Calling Overseas from Japan .............................................. 37
Using the Address
Book
Saving in the Address Book ................................................ 38
Placing a Call to a Saved Phone Number ............................ 41
Editing the Address Book Data ........................................... 42
Registering Data from the Incoming/Outgoing Calls ............ 44
Using Mail Features Using E-Mail Features ......................................................... 45
Changing Your E-Mail Address ............................................ 46
Creating and Sending E-Mail .............................................. 48
Reading Received E-Mail .................................................... 51
Reading E-Mail from the Inbox ............................................ 52
Countermeasures for Malicious Mail ................................... 53
Replying to Received E-Mail ............................................... 54
Using C-Mail Features ........................................................ 56
Creating and Sending C-Mail .............................................. 57
Reading Received C-Mail ................................................... 59
Reading C-Mail from the Inbox ............................................ 60
Using the Camera
Taking a Still Image (Photo) ................................................ 61
Recording a Moving Image (Movie) ..................................... 62
Viewing Taken/Recorded Images ........................................ 64
Attaching the Taken/Recorded Image to an E-Mail and Sending It ... 65
Photo Mail ........................................................................... 65
Using the EZweb
Service
EZweb (Internet) ................................................................. 66
Understanding Basic Operations ......................................... 67
Viewing an Informational Site .............................................. 69
Downloading Ringers .......................................................... 70
Saving Frequently-Accessed Sites ...................................... 73
Accessing Sites Saved as Bookmarks ................................ 74
Confirming Charges ............................................................ 75
Entering Characters Switching Over the Input Mode ........................................... 76
Entering Kana ..................................................................... 76
Entering Kanji ..................................................................... 78
Entering E-Mail Addresses .................................................. 79
Entering Pictographs ........................................................... 81
Inputting Fixed Expressions ................................................ 82
Troubleshooting
83
Other Features
84
INDEX
85
7
Preparation
Confirming the Packed Contents
The A1305SA main unit and accessories are included in the package.
Preparation
A1305SA Main Unit
Battery Pack
SANYO AC Adapter 02
Desktop Holder
Warranty
Basic Operation Guide (Japanese)
Manual (Japanese)
目次
ご利用
いただく前に
準備する
電話を
かける
電話を
受ける
電話を
かける/受ける
海外で使う
Precautions on Use (Japanese)
海外で使う
アドレス帳を使う
アドレス帳を
使う
メールを使う
メールを
使う
カメラを使う
カメラを
使う
EZwebを使う
データ
フォルダを使う
EZwebを
使う
文字を入力する
文字を
入力する
その他の便利な
機能を使う
故障とお考えに
なる前に
GLOBAL PASSPORT
Owner's Manual
(Japanese)
8
各種機能を
設定する
auのネット
ワークサービス
その他の機能・
索引
基本操作ガイド/ A 1 3 0 5 S A
Including English Simple Manual
取扱説明書/A1305SA
その他・索引
How to Read This Manual
Title
Contents of operation
Key layout
Registering Data from the Incoming/Outgoing Calls
Operation
results
Press
or
Standby Screen.
Preparation
1
Operation
number
O.C IncomingCalls
in the
01 15:15 10/ 9
Cathy Johnes
02 16:22 10/ 7
Robin Smith
03 22:35 10/ 6
0900001XXXX
04 0:14 10/ 3
0900002XXXX
The Incoming Calls or Outgoing Calls
appears.
Add'l# Detail MailRec.
Incoming Calls
2
Using the Address Book
Index
The index position
shifts for each
chapter.
This is useful for
locating the page
you wish to read.
3
Use
to select the phone
number to register and press
.
1 Dial
2 Reg.to Adrs.Bk.
3 IncomingRej.Reg
4 Reject Calls
5 Create E−Mail
6 Create C−Mail
to select "Reg.to
Use
Adrs.Bk." and press
( OK ).
1 New Register
2 Add’l Register
"New Register": Register new data to the Address Book.
"Add'l Register": Add or Edit existing data and then register to the Address Book.
4
Use
to select "New
Register" and press
( OK ).
The Classify Phone # selection screen appears.
For the Address Book saving method, see Steps 6 to 10 on page 39.
Page
44
Supplementary
description
Screen after operation
(Example)
9
Names of Each Part
Receiver (Earpiece)
Preparation
Main Display
Center Key
Flexible Key
Cursor Key
Clear/Manner Key
Sub Menu/Jump Key
Mail Key
Power/End Key
Start Key
EZ Key
Dial Key
External Connector
Microphone
Antenna
Incoming Illuminator
Speaker
Built-in Camera
Flash
(Side Key)
Sub Display
(Back-panel)
EarphoneMicrophone
Jack
10
Battery Pack
Charging the Battery Pack
The battery pack is not fully charged at the time of purchase.
Be sure to charge the battery pack with the exclusive charger when you use the
A1305SA for the first time or after a long break.
■How to charge the Battery Pack
Connect the SANYO AC Adapter 02 to the Desktop Holder.
2
Plug the power plug of the SANYO AC Adapter 02 into an AC outlet.
3
Preparation
1
Attach the A1305SA on which the Battery Pack is installed to
the Desktop Holder.
To detach, hold down the Desktop Holder and detach it.
The A1305SA
Main Unit with
Battery Pack
attached
Incoming Illuminator
(light is red)
SANYO AC Adapter 02
2
3 -2
1
3 -1
AC outlet
Desktop Holder
• Incoming Illuminator red light stays lit → charge in progress
• The light goes off → charge completed
Information
The battery charger can also be charged by directly inserting the
SANYO AC Adapter 02 connector into the external connection
terminal on the A1305SA Main Unit.
11
Extending the Antenna
Hold the tip of the antenna and pull out until it stops.
●Extending the antenna ●Retracting the antenna
②
Preparation
①
● To retract the antenna, hold the lower part of the antenna and push
straight down ( ① ), then hold the upper part of the antenna and
push straight down ( ② ). Attempting to retract by force while holding
the upper part, it may result in damage.
● If the antenna is not extended far enough, it loses sensitivity and
may fail to pick up a sufficient signal.
Information
Do not touch the antenna or entangle it in the metal strap, as these actions may result in
weak electric waves.
12
Turning the Power ON
1
Press and hold
second.
Roaming Area
Japan
for over a
Change Area −
Go to GlobalFunc./
Roam.Area Setup
When the power is turned ON, the
<Standby Screen>
and the Standby Screen appears.
10:10
10:10
Sun Oct 10
Preparation
specified country name is displayed
Check the battery level.
High
Medium
Low
Zero
MainMenu
Check the electric wave reception.
Strong
Mid
Weak
Very weak Out of service area Electric wave OFF
" or "
" is displayed, you cannot use the functions
• When "
with the electric wave reception.
• When " " is displayed, you may not be able to use the functions
with the electric wave reception.
Press
( MainMenu ) to display the Initialize Screen at the time of purchase
(or after All Reset). See page 14.
Turning the Power OFF
1
Press and hold
second.
for over a
Keep the power ON to answer calls.
13
Initializing
Press
( メインメニュー ) at the time of purchase or after All Reset enables settings for
change the Lock No., Font Size setup, and Number Notice (whether or not to display your
phone number to the receiver when you place a call).
Preparation
1
初期設定
Press
( メインメニュー ) in the
Standby Screen.
1 今すぐ設定
2 後で設定
3 自動設定
0 フ゜ロフィール表示
The 初期設定 (Initialize) Screen appears.
2
Use
to select " 自動設定
(Auto-Setup)" and press
( OK ).
Setting is made as default, and the メ
インメニュー (MainMenu) appears.
選択
切替
About Initial Settings
When purchased, A1305SA is configured with the following initial settings.
LockNo.
Font Size
14
1234
Entry Size
Standard
Mail Display
Standard
EZweb Display
Small
AddressBookList
Standard
Phone Number Entry
Standard
Number Notice
No Auto-Add
Call Notice
Ringer : "Pineapple Rag"
Vibrator : OFF
Image : Water Mist
Lamp
: PriorDate Color3
Switching the Screen Display to English
Menus, messages and other screen displays can be switched to either Japanese or
English.
1
The メインメニュー (Main Menu)
appears.
選択
2
Use
to select " 基本設定
(Basic Setup)" and press
( 選択 ).
The 基本設定(Basic Setup) screen
appears.
3
Use
to select "ユーザー補助
(User Support)" and press
( 選択 ).
The ユーザー補助 (User Support) setup
screen appears.
切替
Preparation
Press
( メインメニュー ) in the
Standby Screen.
基本設定
M0フ゜ロフィール
M1通話/料金
M2音/ハ゛イフ゛
M3画面表示
M4フ゜ライハ゛シー
M5ユーサ゛ー補助
M6留守メモ/マナー
M7時計
選択
M5 ユーサ゛ー補助
1文字入力
2エニーキーアンサー
3市外局番メモリ
4開閉通話設定
5通信
6ぶるっとチェック
7Set Language
M6 留守メモ/マナー
選択
15
4
Use
to select "Set
Language" and press
( 選択 ).
M57Set Language
日本語
English
The Set Language setup screen
Set
appears.
Preparation
5
Use
to select "English" and
press
(
Set
).
The screen display is set to English.
16
Understanding Basic Usage of the Phone
■Basic operation
Various functions and settings of the A1305SA can be accessed from the MainMenu.
Use the Cursor Key (
Key (
) on the MainMenu to select the item, then press the Center
) to determine and access the selected function.
MainMenu
Preparation
In this Basic Operation Guide, usage of the cursor and center keys is indicated as follows.
(Example) Press the Up or Down Key →
Press the Left or Right Key→
17
■Flexible key
Use for operate items indicated in the lower part of the Main Display.
The items displayed may differ depending on the screen.
MainMenu
As in the figure on the left, this
document indicates
Preparation
MainMenu , the left
as
as
and the right
.
Also,
is indicated as
■How to use the keys
Incoming Calls (See page 25)
Loading the Address Book
Loading the Calendar
Outgoing Calls (See page 25)
Erasing characters or
cancelling operations
Setting or releasing the
Manner Mode
Placing/Answering a Call
Sending/Receiving E-Mail
Entering phone
numbers or characters
Loading the Shortcut
Menu or Sub Menu
Powering ON/OFF or
finishing a call
Connecting to the
EZweb (Internet)
Setting or releasing
the Answer Phone
Loading the Memo Menu
Information
Press
to return to the previous screen when you get confused or make a wrong
operation. Press
18
as
to return to the Standby Screen.
.
Icon Display
Incoming Mails or status of the function settings can be checked by icons (pictures
indicating status). It is useful to remember the main icons.
■General icon display
While using the EZweb
Preparation
On calling
※While on standby, the icons are displayed as follows.
・ appears when the Call Notice Setup is set to OFF.
・ appears when the Vibrator is set to ON.
Unread Mail
While in overseas roaming※
10:10
While the Answer Phone is being set
10:10
Sun Oct 10
While in the Manner Mode
※ Roaming
When the area setting (see page 34) is set to any country other than
"Japan" for using the A1305SA overseas, it is called roaming.
19
Initializing E-Mail and EZweb Functions
A subscription for the EZweb (Internet) service is required to use the E-Mail and EZweb
(Internet) services. Please contact an au Customer Service Center or an au shop if you
did not subscribe for the service at the time of purchase.
Be sure to perform initialization before using the E-Mail and EZweb services.
Initialization automatically provides your E-Mail address. To change that E-Mail address to
Preparation
your preferred address, see page 46.
1
Press
or
Screen.
in the Standby
Initialize
Initializes to
Use EZweb
Halt Connect
2
Press
(
Connect
).
Initializing subscriber account.
Please be patient... Wait for a while until the screen on the right appears.
Welcome to EZweb.
Your e−mail address
is:
△△△△△△△△△△△△△△@ezwe
b.ne.jp
−Hint−
If you want to
change your e−mail
20
3
Press
(
OK
).
E-Mail Menu appears after
. EZ Menu appears
after pressing
in Step 1.
C-mail Select
When press
EZ Menu
1Top Menu
2Favorite Site
3URL Input
4Previous Disp.
5Data Folder
6Screen Memo
7Clr.BrowserRec
8EZ Setup
Preparation
pressing
E−Mail Menu
1Create New
2Inbox
3Outbox
4Check New Mail
5Batch Send
6Data Folder
7E−Mail Setup
Select
When press
Information
Be sure to set the Area Setting (see page 34) to Japan. Perform the Initializing
somewhere in Japan where the electric wave is strong enough.
21
Confirming Your Phone Number and E-Mail Address
1
Press
( MainMenu ) in the
Standby Screen.
Preparation
Select Switch
2
Personal Info
1Profile
2Address Book
3Calendar
4Memo
5Dial−Memo
6Confirm Memory
7Calls
Use
to select "Personal
Info" and press
( Select ).
The Personal Info Screen appears.
Select
3
Use
Profile
to select "Profile" and
press
(
Select
My # Detail Items
0900001XXXX
□□□@ezweb.n
e.jp
).
The Profile appears and your phone
number and E-Mail address can be
Select Edit
confirmed.
Information
• Your phone number and E-Mail address can also be confirmed by pressing
( MainMenu ) in the Standby Screen and then pressing
.
• Select "Basic Settings" in Step 2, then select "Profile" to confirm your own phone
number and E-Mail address.
22
Placing/Answering a Call
Placing a Call
1
Use the
to enter the
receiver's phone number and
press .
Enter the phone number starting with the area code.
0900001XXXX
Add'l# Reg.
P/−
Placing a call to a mobile phone, car phone, or PHS
Always enter the whole (11-digit) phone number.
How to Place a Call
Add "184" before the phone number: Your phone number is not displayed for the
receiver.
Add "186" before the phone number: Your phone number is displayed for the
Placing/Answering a Call
Placing a call to a landline telephone
receiver.
Add nothing:
The call is placed in accordance with the
Number Notice (Caller ID) setting.
Press
2
Press
( Add'l# ) on the left side of the screen to add "184" or "186".
to hang up.
Information
To place a call from overseas, set the Roaming Area. (See page 34)
23
Answering a Call
1
Incoming
Cathy Johnes
Press
during incoming call
and answer it.
When the caller's phone number is displayed
The caller is setting the phone number to be displayed.
Placing/Answering a Call
The caller's name is also displayed when the caller's
0900001XXXX
Fwd
Reject
Incoming
ID Unsent
information is registered in the Address Book.
When "ID Unsent" is displayed
The caller is setting the phone number not to be displayed.
Fwd
When "Payphone" is displayed
Reject
The call is placed from a payphone.
When "Not Support" is displayed
The call is placed from a phone that does not support ID notification.
2
Press
to hang up.
Screen display if the call is not answered
The message shows that there are unanswered incoming
calls if you could not answer the call. Press
or
( Confirm )
Missed Call
X
10:10 10/10
in the screen display to confirm the caller's phone
number and call them back. See page 25.
Confirm Switch
Information
The phone will ring and the LED will flash when there is an oncoming call. However, when
the Manner Mode is ON, the phone will work according to the settings of the Manner
Mode.
24
Calling Back (Outgoing Calls/Incoming Calls)
The previously called (Outgoing Calls) or previously received call with a caller's phone
number (Incoming Calls) can be used for calling back.
1
Press
or
Standby Screen.
Pressing
in the
displays the Outgoing
Calls.
displays the Incoming
Calls.
The phone number of last
called or received call is
displayed first.
OutgoingCalls I.C
O.C IncomingCalls
01 15:15 10/ 9
Cathy Johnes
02 16:22 10/ 7
Robin Smith
03 22:35 10/ 6
0900001XXXX
04 0:14 10/ 3
0900002XXXX
01 15:15 10/ 9
Cathy Johnes
02 16:22 10/ 7
Robin Smith
03 22:35 10/ 6
0900001XXXX
04 0:14 10/ 3
0900002XXXX
Add'l# Detail MailRec.
Add'l# Detail MailRec.
Outgoing Calls
2
Use
Incoming Calls
to select the phone
number and press
Placing/Answering a Call
Pressing
.
A call is placed to the selected phone
number.
Information
Up to 20 phone numbers can be recorded in each history.
Countermeasure for One Ring Calls
■ What are One Ring Calls?
One Ring Call is a vicious act in which a call is hung up after only 1 ring so as to be left in
the Incoming Calls history. Receivers who call back will access programs for which they
must pay.
■ Icon as a countermeasure for One Ring Calls
With the A1305SA, one-ring calls are indicated with an orange icon
in the Incoming Calls history. Be careful if you are not familiar
with such phone numbers.
O.C IncomingCalls
01 22:35 10/ 6
0900001XXXX
02 0:14 10/ 3
030001XXXX
25
Adjusting Ringer Volume
1
Press
( MainMenu ) in the
Standby Screen.
The MainMenu appears.
Select Switch
Placing/Answering a Call
2
Use
to select "Basic Setup"
and press
(
Select
).
The Basic Setup screen appears.
Basic Setup
M0Profile
M1Call/Toll
M2Sounds/Vibes
M3Screen
M4Privacy
M5User Support
M6Ans.Ph/Manner
M7Clock
Select
3
Use
to select "Sounds/
Vibes" and press
(
Select
).
The Sounds/Vibes setting screen
appears.
M2 Sounds/Vibes
1Speaker Vol.
2Ringer/Vibes
3Sound Effect
4Wake−Up
5Power OFF
6Quality Alert
7Rcvr.Vol.Adj.
8Call Vibes
Select
4
Use
to select "Speaker Vol."
and press
(
Select
).
The Speaker Vol. setting screen
appears.
M21 Speaker Vol.
1Call Notice
2E−MailNotice
3Unreg.E−Mail
4ServerNotice
5C−MailNotice
6Chat Notice
7Alarm
8Browser
Select Batch
26
5
Use
to select "Call Notice"
(
and press
Select
M211Call Notice
).
The Call Notice setting screen
appears.
STEP
6
Use
STEP
to adjust volume and
(
Set
).
Pressing
raises the volume.
Pressing
lowers the volume.
There are 5 levels for ringer volume. Gradually raises/lowers "Step ↑ " / "Step ↓ "
or no ringer sounds "OFF" can also be selected.
Information
Use
Placing/Answering a Call
press
Set
to also change the ringer volume during an incoming call. The ringer volume
cannot be adjusted when the Manner Mode is set to ON.
27
Setting the Manner Mode
The sound such as Ringer does not sound when the Manner Mode is set to ON.
The A1305SA notifies you of the incoming call by vibrate (Vibrator).
1
Press and hold
for over a
second in the Standby Screen.
"
" and "
10:10
10:10
Sun Oct 10
" appear on the screen.
The Answer Phone is set at the same
Placing/Answering a Call
time and "
" appears on the screen.
MainMenu
To release the Manner Mode
Press and hold
"
" and "
for over a second when the Manner Mode is set to ON.
" disappear when released from the Manner Mode.
The Answer Phone is released at the same time, and "
" disappears.
Adjusting the Other Party's Voice Volume
The other party's voice volume can be adjusted in 9 levels during the call.
1
Use
to adjust volume
during a call.
Pressing
raises the volume.
Pressing
lowers the volume.
Rcvr.Vol.Adj.
Level6
Set
28
Changing Ringer Type
1
Press
( MainMenu ) in the
Standby Screen.
The MainMenu appears.
Select Switch
Use
to select "Basic Setup"
and press
(
Select
).
The Basic Setup screen appears.
Basic Setup
M0Profile
M1Call/Toll
M2Sounds/Vibes
M3Screen
M4Privacy
M5User Support
M6Ans.Ph/Manner
M7Clock
Select
3
Use
to select "Sounds/
Vibes" and press
(
Select
).
The Sounds/Vibes setting screen
appears.
M2 Sounds/Vibes
1Speaker Vol.
2Ringer/Vibes
3Sound Effect
4Wake−Up
5Power OFF
6Quality Alert
7Rcvr.Vol.Adj.
8Call Vibes
Placing/Answering a Call
2
Select
4
Use
to select "Ringer/
Vibes" and press
(
Select
The Ringer/Vibes setting screen
).
M22 Ringer/Vibes
1Call Notice
2E−MailNotice
3Unreg.E−Mail
4ServerNotice
5C−MailNotice
6Chat Notice
appears.
Select
Continued on the next page
29
5
Use
to select "Call Notice"
(
and press
Select
).
M221Call Notice
Pineapple Rag
Water Mist
OFF
Prior Data
The Call Notice setting screen
appears.
Preview
Set
( Preview ) on the left plays back the
Pressing
selected ringer.
Placing/Answering a Call
6
Use
to select " " and
press
(
Set
Call Ringer
Original XXXX
).
The folder selection screen appears.
Only "Original" is displayed at the time of purchase.
7
Press
(
Select
).
The melody selection screen
appears.
( Play ) on the right plays back the
Pressing
Select
Original
Pineapple R
I Got Rhyth
Dance of th Donald lost
Donald in D
HOKOUSYAYUU
,,
Donald Humm
Jewel
Set
selected ringer.
Play
HOKOUSHAYUUSEN
T-0430101
8
Use
to select a melody
(ringer) and press
( Set ).
M221Call Notice
Pattern5
Water Mist
OFF
Prior Data
The Ringer is set.
( Preview ) on the left plays back the
Pressing
selected ringer.
9
30
Press
(
Define
) on the right.
Preview
Set Define
Recording Messages When You Are Unable to Answer a Call
1
Press and hold the Side Key
(
) for over a second in
the Standby Screen.
The Answer Phone is set and "
10:10
Sun Oct 10
"
MainMenu
appears on the screen.
Press and hold the Side Key (
) for over a second in the Standby
Screen.
Information
• Use Voice Mail when you have turned off the power or where Electric waves are
Placing/Answering a Call
To release the Answer Phone
blocked.
• Up to 3 Answer Phone including Phone Memo can be recorded.
• Erase messages after playing them back. See page 32.
• When 3 Answer Phone messages are recorded,
changes from light blue to yellow.
The number of unheard messages is also indicated along with
.
31
Playing Back/Erasing Recorded Messages
1
Press the Side Key (
the Standby Screen.
) in
Memo Menu
1VoiceData Opr.
2Memo
3Dial−Memo
The Memo Menu appears.
Select
Placing/Answering a Call
2
Use
to select "VoiceData
Opr." and press
(
Select
).
Voice Data Opr.
1Record MyVoice
2Rec.Phone Memo
3Ans.Ph/Ph.Memo
4MyVoice Folder
The Voice Data Opr. selection screen
appears.
Select
3
Use
to select "Ans.Ph/
Ph.Memo" and press
(
Select
Ans.Ph/Ph.Memo
110:10 10/ 9
215:15 10/ 5
).
The Ans.Ph/Ph. Memo selection
screen appears.
4
Use
to select the recorded
message to play back and press
(
Play
).
The recorded message is played
back.
The Ans.Ph/Ph. Memo selection screen returns when
play back is completed.
Erase Play
Answer Phone
Playing
1 10:10 10/ 9 Cathy Johnes
0900001XXXX
Add'l#
OK
Ans.Ph/Ph.Memo
110:10 10/ 9
215:15 10/ 5
Icons Display
: Unheard Answer Phone messages
: Heard Answer Phone messsages
32
Erase Play
5
6
Use
to select the playedback message and press
( Erase ) on the left.
1 Erase One
2 Erase All
Use
to select "Erase
One" and press
( OK ).
The message is erased.
If an Answer Phone message is recorded for an incoming call you
could not answer, pressing
( Confirm ) displays the Incoming
Calls history.
Press
( Detail ) and
the message.
( Play ) on the right to play back
Missed Call
X
10:10 10/10
Answer Phone X
Placing/Answering a Call
Information
Confirm Switch
33
Using Overseas
A call can be placed or answered in overseas the same way as in Japan by using the
international roaming feature.
Information
For details on the international roaming feature, refer to the "GLOBAL PASSPORT
Owner's Manual".
Setting Area
An area (country name) can be selected where you will use the A1305SA.
Using Overseas
1
Press
( MainMenu ) in the
Standby Screen.
The MainMenu appears.
Select Switch
2
Use
to select "Global
Func." and press
( Select ).
The Global Function screen appears.
GlobalFunction
1Roam.AreaSetup
2Intl.Access #
3Reg.Area Code
4Intl.Area Info
5Dictionary
6Lingo Phrase
7Jpn.Time Disp.
8Flight Mode
Select
3
Use
to select "Roam.
AreaSetup" and press
( Select ).
The Roam.Area Setup screen appears.
Roam.Area Setup
Japan
USA
Canada
Australia
Indonesia
Korea
China(HK)
China(Other)
Set
34
4
Use
to select an area and
press
(
Set
).
The area is set.
Using Overseas
35
Calling Japan from Overseas
When placing a call to Japan from overseas (inside the Roaming Area), the international
access number and the country code of Japan (country code: 81) can be added to the
phone number (international prefix).
1
Enter the receiver's phone
number.
0900001XXXX
Add'l# Reg.
Using Overseas
2
(
Press
Add'l#
) on the left.
The selection screen for the special
P/−
1 184
2 186
3 Voice Mail
4 Separate Bills
5 Prepaid
6 Intl.Call:Japan
numbers to be added appears.
3
Use
to select "Intl.Call:
Japan" and press
( Add ).
The international access number and
the country code of Japan (81) are
added.
4
Press
011
81900001XXXX
Add'l# Reg.
P/−
.
Information
" " appears when A1305SA is enabled for roaming use. For details on how to place a
call or on charges, refer to the "GLOBAL PASSPORT Owner’s Manual".
36
Calling Overseas from Japan
The international access number and the area code (country code) of the receiver can be
added to the phone number (international prefix) when placing a call overseas from Japan.
Example: Calling to South Korea
1
Enter the receiver's phone
number.
031234XXXX
Add'l# Reg.
2
Press
(
Add'l#
) on the left.
3
Use
to select "Intl.Call" and
press
(
Add
).
The Intl.Area Code selection screen
appears.
1 184
2 186
3 Voice Mail
4 Separate Bills
5 Prepaid
6 Intl.Call
Intl.Area Code
Korea
Taiwan
Philippines
China(Other)
China(HK)
Indonesia
Thailand
Bangladesh
Using Overseas
The selection screen for the special
numbers to be added appears.
P/−
OK
4
Use
press
to select "Korea" and
( OK ).
The international access number and
the selected area code are added.
5
Press
00534
58231234XXXX
Add'l# Reg.
P/−
.
Information
No international access number or country code is needed when calling from Japan to an
overseas phone supporting the GLOBAL PASSPORT. Place the call as usual.
37
Using the Address Book
The receiver's phone number can be loaded and a call is placed easily by saving
frequently called phone numbers in the Address book.
Saving in the Address Book
Up to 500 phone numbers and E-Mail addresses can be saved.
1
Press and hold
second.
for over a
The Address Book edit screen appears.
Address Book
000
なし
OFF
Same as Group
Select Save
Using the Address Book
2
Use
to select " " (Name)
and press
( Select ).
Name
The Name input screen appears.
3
Enter a name and press
( OK ).
Address Book
000
Margaret Watso
MargaretWatson
The READ is automatically entered.
For the method of entering characters, see page 76.
なし
OFF
Same as Group
Select Save
4
Use
to select " " (Phone
Number 1) and press
( Select ).
The Phone Number input screen appears.
Phone Number
XX/XX
Add'l#
38
OK
5
Classify Phone #
Other
Mobile
PHS
Home
Work
FAX
Enter a phone number and press
( OK ).
The Classify Phone # selection
screen appears.
Select
Enter the area code when saving a landline telephone
number. Be sure to enter an 11-digit phone number
when saving a mobile phone or PHS number.
6
Use
Address Book
000
Margaret Watso
MargaretWatson
0900001XXXX
to select classify and
press
(
Select
).
The Address Book edit screen
When you do not enter any E-Mail addresses, go to
Select Save
Step 10.
7
Use
to select " "
(E-Mail Address 1) and press
( Select ).
E−Mail Address
Using the Address Book
なし
OFF
returns.
The E-Mail Address input screen appears.
Continued on the next page
39
8
Enter an E-Mail address and
press
( OK ).
The Classify E-Mail selection screen
appears.
For the method of entering
Classify E−Mail
Other
Mobile
PHS
Home
School
Work
Select
E-Mail addresses, see page 79.
9
Use
to select classify and
press
(
Select
).
The Address Book edit screen
returns.
Address Book
000
Margaret Watso
MargaretWatson
0900001XXXX
△△△@□□□.ne.
なし
Select Save
Using the Address Book
10
Press
(
Save
) on the right.
The number of memory left and the
option items left appears.
Information
• The smallest empty No. between 000 and 499 is automatically selected in the memory.
• In addition, items such as group and image can be registered.
• You can register up to three phone numbers and two E-Mail address per item in the
address book.
40
Placing a Call to a Saved Phone Number
1
Press
Screen.
Adrs.Bk.List
in the Standby
アカサタナハマ
愛川めぐみ
秋山昇
伊藤次郎
井上知子
植田佳子
江田さつき
小川浩二
The Address Book screen appears.
Mode Detail New
2
Adrs.Bk.List
Use
to switch between
headings ( ア , カ , サ , タ , ナ ,
etc.).
ナハマヤラワ英
Cathy Johnes
Margaret Watson
Robin Smith
Virginia Freeman
Mode Detail New
Use
call.
Adrs.Bk.List
to select the number to
ナハマヤラワ英
Cathy Johnes
Margaret Watson
Robin Smith
Virginia Freeman
Pressing
( Detail ) displays the Address Book
detail screen to confirm the saved contents such as
Mode Detail New
Using the Address Book
3
phone numbers and E-Mail addresses.
4
Press
.
A call is placed to the selected phone
number.
A call is placed to the number with
when the
selected Address Book data has more than 1 phone
number.
41
Editing the Address Book Data
Example: To change a phone number
1
Press
Screen.
in the Standby
The Address Book screen appears.
Adrs.Bk.List
アカサタナハマ
愛川めぐみ
秋山昇
伊藤次郎
井上知子
植田佳子
江田さつき
小川浩二
Mode Detail New
2
Use
to switch between
headings ( ア , カ , サ , タ , ナ ,
etc.), and use
to select the
data to edit.
Adrs.Bk.List
ナハマヤラワ英
Cathy Johnes
Margaret Watson
Robin Smith
Virginia Freeman
Using the Address Book
Mode Detail New
3
Press
(
Detail
).
The Address Book detail screen
appears.
The saved contents including phone number and
E-Mail addresses can be confirmed.
4
Press
(
Edit
) on the right.
The Address Book edit screen
appears.
Address Book
Ph.Bk. Items Option
000
Margaret Watso
MargaretWatson
0900001XXXX
□□△@△△□.ne.
jp
なし
Add'l# Select Edit
Address Book
000
Margaret Watso
MargaretWatson
0900001XXXX
□□△@△△□.ne.
なし
Select
42
5
Use
to select "
press
(
Select
" and
0900001XXXX
).
XX/XX
Add'l#
6
Edit data and press
( OK ).
Pressing
erases the saved
characters.
Press and holding
for over a second
OK
P/−
Classify Phone #
Other
Mobile
PHS
Home
Work
FAX
Select
erases all characters.
7
Use
to select a classification
and press
(
Select
).
returns.
□□△@△△□.ne.
なし
Select Save
8
Press
(
Save
) on the right.
The overwrite confirmation screen
000
Overwrite?
1 YES
2 NO
Using the Address Book
The Address Book edit screen
Address Book
000
Margaret Watso
MargaretWatson
0900002XXXX
appears.
9
Use
to select "Yes" and
press
(
OK
).
The Address Book data is edited.
Information
To edit names, see Steps 2 and 3 on page 38.
43
Registering Data from the Incoming/Outgoing Calls
1
Press
or
Standby Screen.
in the
The Incoming Calls or Outgoing Calls
appears.
O.C IncomingCalls
01 15:15 10/ 9
Cathy Johnes
02 16:22 10/ 7
Robin Smith
03 22:35 10/ 6
0900001XXXX
04 0:14 10/ 3
0900002XXXX
Add'l# Detail MailRec.
Incoming Calls
2
Using the Address Book
3
Use
to select the phone
number to register and press
.
1 Dial
2 Reg.to Adrs.Bk.
3 IncomingRej.Reg
4 Reject Calls
5 Create E−Mail
6 Create C−Mail
Use
to select "Reg.to
Adrs.Bk." and press
( OK ).
1 New Register
2 Add’l Register
"New Register": Register new data to the Address Book.
"Add'l Register": Add or Edit existing data and then register to the Address Book.
4
Use
to select "New
Register" and press
( OK ).
The Classify Phone # selection screen appears.
For the Address Book saving method, see Steps 6 to 10 on page 39.
44
Using Mail Features
A subscription for the EZweb (Internet) service is required to use the E-Mail service.
Please contact an au Customer Service Center or an au shop if you did not subscribe for
the service at the time of purchase.
Be sure to perform initialization before using the E-Mail and EZweb services. If you have
not performed initialization yet, see page 20.
Using E-Mail Features
E-Mail is a service that send/receive mail to/from E-Mail compatible mobile phones and
personal computers by using an Internet E-Mail address. Up to 5,000 2-byte characters
can be sent in an E-Mail. Still images (photos), and moving images (movies) can also be
sent via E-Mail.
キャラクターイラスト
未
Using Mail Features
Information
Sending or receiving E-Mails is disabled when the area setting (see page 34) is set to any
country other than "Japan".
45
Changing Your E-Mail Address
E-Mail address
Example: △△△@ezweb.ne.jp
Changeable part
1
Press
Domain
in the Standby Screen.
The E-Mail Menu appears.
E−Mail Menu
1Create New
2Inbox
3Outbox
4Check New Mail
5Batch Send
6Data Folder
7E−Mail Setup
C-mail Select
2
Using Mail Features
3
4
5
Use
to select "E-Mail
Setup" and press
( Select ).
E−Mail Setup
1Receive/Disp.
2Send/Create
3Other Setup
4Confirm Setup
Use
to select "Other Setup"
and press
( Select ).
その他の設定
1 Eメールアト゛レスの変更
2 自動転送先
3 メールフィルター
4 au.NET接続の設定
5 その他の設定の確認
Use
to select "E メールアド
レスの変更 (Change E-Mail
Address)" and press
( Select ).
お客様の暗証番号を入
力してください。
暗証番号を1日に3回間
違えると、翌日まで設
定操作はできません。
Enter your PIN number and
select " 送信 (Send)", and then
press
( Select ).
Eメールアト゛レスを変更しま
す。以下のご注意を確
認した上でアト゛レスの変
更を行ってください。
If you enter a wrong number for your PIN number three
times in one day, you will not be allowed to perform
setup operations until the following day.
46
※入力前の注意※
1.Eメールアト゛レスを変更し
た場合、変更前の
6
7
8
Use
to select " 承諾する
(Agree)" after checking the
cautions, and press
( Select ).
Eメールアト゛レスを変更しま
す。ご希望の
Eメールアト゛レスを入力して
ください。
※入力時の注意※
1.半角英数小文字で
[@ezweb.ne.jp]より左
側のみご入力ください
。
Use
to select the entering
area and press
( Edit ).
Entry
Enter an E-Mail address and
press
( OK ).
と最後には利用できま
せん。最後に数字の
[0]を使用することは
できません。
For the method of entering
@ezweb.ne.jp
E-Mail addresses, see page 79.
送信 リセット
Select
Use
to select " 送信 (Send)"
and press
( Select ).
When your specified E-Mail address is not accepted
• The E-Mail address you entered is already being used.
新しいEメールアト゛レスは
△△△△△@ezweb.ne.jp
です。
変更しますか?
***ご注意***
アト゛レスを変更した場合
は変更前のアト゛レスを再
Back
Enter a different E-Mail address.
• An invalid character is used. Be sure to use characters valid for E-Mail
Using Mail Features
9
addresses (see page 80).
10
Use
to scroll down to "OK"
after confirming the new address
and press
( Select ).
Press
Update is complete.
return to the Standby Screen.
OK
Information
• The layout and contents of the screen are examples, and they may be changed.
• To confirm your current E-Mail address, see page 22.
47
Creating and Sending E-Mail
Let's create a new E-Mail and send it.
1
Press
in the Standby Screen.
The E-Mail Menu appears.
E−Mail Menu
1Create New
2Inbox
3Outbox
4Check New Mail
5Batch Send
6Data Folder
7E−Mail Setup
C-mail Select
2
Use
to select "Create New"
and press
( Select ).
Create Mail
The Create Mail screen appears.
Icons
: "To" to which you send E-Mail
Save Select Send
: "Title" of E-Mail
: "Attached data" of E-Mail
Using Mail Features
: "Body" which is the mail contents.
3
Use
to select " " (To) and
press
(
Select
Address List
XXX/640
).
The Address List screen appears.
Complete Select Group
4
Press
(
Select
).
To(Must)
The enter address screen appears.
There are 3 types of addresses: To, Cc, and Bcc. You can send your mail to
up to 5 addresses at once (within total 640 one-byte characters including
Cc and Bcc).
48
5
Address List
XXX/640
△△△@□□□.ne.jp
Enter the address and press
( OK ).
The Address List screen returns.
For the method of entering E-Mail addresses, see
Complete Select Group
page 79.
Press
to enter an address from the Address Book, Sent Records, or
Received Records also.
6
Press
(
Complete
Create Mail
△△△@□□□.ne.jp
) on the left.
The Create Mail screen returns.
For the method of entering E-Mail
addresses, see page 79.
Save Select Send
7
Title
The Title input screen appears.
8
Create Mail
△△△@□□□.ne.jp
Notice about
Enter the title and press
( OK ).
Using Mail Features
Use
to select " " (title)
( Select ).
and press
The Create Mail screen returns.
For the method of entering characters, see page 76.
Save Select Send
Continued on the next page
49
9
Use
to select " " (body)
and press
( Select ).
Body
The Body input screen appears.
:Pastel Menu
XXXXX/10000
Char.
10
Enter the body sentences and
( OK ).
press
The Create Mail screen returns.
For the method of entering characters, see page 76.
11
Press
(
Send
) on the right.
OK
Create Mail
△△△@□□□.ne.jp
Notice about
I would like to
inform you that
the meeting sche
duled at 17:00 h
Save Select Send
1 Send
2 Photo Mail
3 MyPictograph
4 Easy Pictograph
The "Photo Mail", "MyPictograph",
and "Easy Pictograph" features are
Using Mail Features
services that send your mail by automatically changing part of an address.
"MyPictograph" and "Easy Pictograph" are pay services. A separate
subscription is required for the "Pictograph Mails" service on the EZweb
contents before using.
12
Use
to select "Send " and
press
(
OK
E−Mail Sending
).
Halt
The E-Mail is sent when the screen shown on the right
appears.
50
Sent
Reading Received E-Mail
The message "New E-Mail X" appears when receive new E-Mail. The received E-Mail is
stored in the Inbox.
When you receive E-Mail
A message appears on the Standby Screen.
New E−Mail
XXX
10:10 10/10
Confirm Switch
1
Press
(
Confirm
).
The Inbox appears.
The received E-Mail is usually stored
in the "メインフォルダ (Main folder)".
Inbox
Unread XXX/XXX
メインフォルタ゛ : X
フォルタ゛1
フォルタ゛2
フォルタ゛3
フォルタ゛4
フォルタ゛5
フォルタ゛6
Select All Mail
Use
to select the folder with
stored new E-Mail and press
( Select ).
メインフォルタ゛
Unread XXX/XXX
001 Robin
002 □□□□□@△
Icons
Happy Birthday
I am looking f
: Now-Read Mail
Disp.
: Unread Mail
3
Using Mail Features
2
Use
to select the new
E-Mail and press
( Disp. ).
The image (photo/movie) is played back when
attached.
How to read the received E-Mail
Indicates the now-read mail.
Indicates the date and time of the mail is received.
Indicates the sender of the mail.
Received Mail
001
10:10Fri Oct10
Robin Smith Happy Birthday
I am looking for
ward to have a d
inner with you.
Select Reply
51
Reading E-Mail from the Inbox
Read E-Mail can be read from the Inbox when you read any now-read mail.
1
Press
in the Standby Screen.
The E-Mail Menu appears.
Icons
: Indicates that "Unread Mail" exists. The number on the
right is the number of Unread Mails.
2
Use
to select "Inbox" and
press
(
Select
).
The Inbox appears.
E−Mail Menu
1Create New
2Inbox XXX
3Outbox
4Check New Mail
5Batch Send
6Data Folder
7E−Mail Setup
C-mail Select
Inbox
Unread XXX/XXX
メインフォルタ゛ : X
フォルタ゛1
フォルタ゛2
フォルタ゛3
フォルタ゛4
フォルタ゛5
フォルタ゛6
Select All Mail
Using Mail Features
3
Use
to select the folder with
the E-Mail to read and press
( Select ).
Happy Birthday
I am looking f
Disp.
4
Use
to select the E-Mail to
read and press
( Disp. ).
The image (photo/movie) is played
back when attached. The body texts
are displayed after it.
52
メインフォルタ゛
Unread XXX/XXX
001 Robin
002 □□□□□@△
Received Mail
001
10:10Fri Oct10
Robin Smith Happy Birthday
I am looking for
ward to have a d
inner with you.
Select Reply
Countermeasures for Malicious Mail
Malicious mail can be rejected with the mail filter feature.
1
Press
in the Standby Screen.
2
Use
to select "E-Mail Setup" and press
(
3
Use
to select "Other Setup" and press
(
4
Use
5
Select
Select
).
).
to select " メールフィルター (Mail Filter)" and press
( Select ).
Enter your PIN number and select " 送信
(Send)", and then press
( Select ).
The メールフィルター (Mail Filter) screen appears.
メールフィルター
The screen layout and contents may be changed without prior notification.
The Mail Filters for preventing from malicious mails as follows:
● 未承諾広告フィルター (Unsolicited Ad mail filter)
Rejects mails under the title of " 未承諾広告※ (Unsolicited Ad mail)" in the
title, which is mostly malicious mail.
Using Mail Features
お知らせ
「####@jp− .ne.jp」を
アドレスフィルターへ個別設定
しているお客様は
「####@ .vodafone.ne.
jp」へ変更するようお
願いします。なお、一括
● アドレスフィルター (Address filter)
• " 指定受信設定 (Specified Mail Accept)"
Receives mail only from specified mail addresses. E-Mail addresses to
be rejected can be specified individually after registering the Specified
Mail Accept.
• " 指定拒否設定 (Specified Mail Reject)"
Rejects mail from specified mail addresses.
• " なりすまし規制 (Regulate Impersonation)"
"Impersonation mail" rejection can be set for each address filter setting.
"Impersonation mail" is malicious mail sent via mobile phones or PHS
E-Mail addresses.
The malicious mail can also be prevented by changing your E-Mail address.
53
Replying to Received E-Mail
1
Press
in the Standby Screen.
The E-Mail Menu appears.
E−Mail Menu
1Create New
2Inbox XXX
3Outbox
4Check New Mail
5Batch Send
6Data Folder
7E−Mail Setup
C-mail Select
2
Use
to select "Inbox" and
press
(
Select
).
The Inbox appears.
Inbox
Unread XXX/XXX
メインフォルタ゛ : X
フォルタ゛1
フォルタ゛2
フォルタ゛3
フォルタ゛4
フォルタ゛5
フォルタ゛6
Select All Mail
3
Using Mail Features
Use
to select a folder with
E-Mail to reply and press
( Select ).
メインフォルタ゛
Unread XXX/XXX
001 Robin
002 □□□□□@△
Happy Birthday
I am looking f
Disp.
4
Use
to select the E-Mail to
reply and press
( Disp. ).
Received Mail
001
10:10Fri Oct10
Robin Smith Happy Birthday
I am looking for
ward to have a d
inner with you.
Select Reply
5
Press
(
Reply
) on the right.
The Create Mail screen appears.
"Re:" is attached at the beginning of
the title and the body text of the original E-Mail is
quoted.
54
Create Mail
Robin Smith
Re:Happy Bir
>I am looking fo
rward to have a
dinner with you.
Save Select Send
6
Use
to select " " (body)
and press
( Select ).
The Body input screen appears.
Body
>I am looking fo
rward to have a
dinner with you.
::Pastel Menu
XXXXX/10000
Char.
7
Enter the body sentences and
press
( OK ).
The Create Mail screen appears.
For the method of entering characters, see page 76.
OK
Highlight
Create Mail
Robin Smith
Re:Happy Bir
Me too! Tell Me
if you have some
thing to eat.
>I am looking fo
Save Select Send
8
Press
(
Send
) on the right.
1 Send
2 Photo Mail
3 MyPictograph
4 Easy Pictograph
The "Photo Mail", "MyPictograph",
and "Easy Pictograph" features are
"MyPictograph" and "Easy Pictograph" are pay services. A separate
subscription is required for the "Pictograph Mails" service on the EZweb
contents before using.
9
Use
to select "Send " and
press
(
OK
E−Mail Sending
Using Mail Features
services that send your mail by automatically changing part of an address.
).
Halt
E-Mail is sent when the screen shown on the right
Sent
appears.
55
Using C-Mail Features
C-Mail is a service that send/receive mail to/from C-Mail compatible au mobile phones via
phone numbers. Up to 50 2-byte characters can be sent.
キャラクターイラスト
未
Using Mail Features
Information
• For customers in Kanto and Chubu regions, C-Mail service can be used with no
subscriptions. Customers in other regions require a subscription.
• C-Mail features are disabled when the Roaming Area (see page 34) is set to any
country other than "Japan".
56
Creating and Sending C-Mail
1
C−Mail Menu
1Create New
2Inbox
3Outbox
4Chat Records
5C−Mail Setup
Press and hold
for over a
second in the Standby Screen.
The C-Mail Menu appears.
E-mail Select
2
Body
Use
to select "Create New"
and press
( Select ).
The Body input screen appears.
3
Create Mail
Enter body sentences and press
( OK ).
The Create Mail screen appears.
Save
4
Edit
Send
Slct Send Method
1Usual
2Chat
Use
to select " " (receiver)
and press
( Edit ).
Using Mail Features
For the method of entering characters, see page 76.
I am sorry. I ca
nnot go to the s
tation on time.
Shall we get to
gether at ABC ho
The Slct Send Method screen
appears.
Sending methods
"Usual" : Sends mail to C-Mail compatible au mobile phones
"Chat" : Sends mail in the chat mode as send and receive mail continuously.
Continued on the next page
57
5
Use
to select "Usual" and
press
(
Select
Phone Number
).
The Phone Number input screen
appears.
XX/XX
OK
6
Enter the Phone Number and
press
( OK ).
The Create Mail screen returns.
The phone number can be loaded and entered from
the Address Book, Outgoing Calls or Incoming Calls
record by pressing
7
Press
(
Send
Create Mail
0900002XXXX
Usual
I am sorry. I ca
nnot go to the s
tation on time.
Shall we get to
gether at ABC ho
Save
Edit
Send
.
) on the right.
C−Mail Sending
(Usual Mode)
The C-Mail is sent.
Using Mail Features
When the receiver receives the mail,
the message "Mail Arrived to Receiver" appears and
the mail is stored in the Outbox as sent mail.
Halt
Information
• 184/186 cannot be added to the receiver's phone number.
• When you send a C-Mail, if the receiver does not turn on the power or is out of the
service area, it is possible to store the mail at the C-Mail center.
58
Reading Received C-Mail
The message "New C-Mail X" appears when receive new C-Mail.
The received C-Mail is stored in the Inbox.
When you receive C-Mail
A message appears on the Standby Screen.
New C−Mail
X
10:10 10/10
Confirm Switch
1
Press
(
Confirm
).
The Inbox appears.
The received C-Mail is usually stored
in the "メインフォルダ (Main folder)" .
Inbox
Unread XXX/XXX
メインフォルタ゛ : X
フォルタ゛1
フォルタ゛2
フォルタ゛3
フォルタ゛4
フォルタ゛5
フォルタ゛6
Select All Mail
Use
to select the folder with
stored new C-Mail and press
( Select ).
メインフォルタ゛
Unread XXX/XXX
001 Robin
002 □□□□□@△
Icons
Have you ever
been to Kyoto? Y
: Now-Read Mail
Disp.
: Unread Mail
3
Use
to select the new
C-Mail and press
( Disp. ).
The mail contents appears.
Using Mail Features
2
Received Mail
001
10:10Fri Oct10
Robin Smith Have you ever
been to Kyoto? Y
ou will like it.
Select Reply
59
Reading C-Mail from the Inbox
C-Mail can be read from the Standby Screen when any now-read mail read again.
1
Press and hold
for over a
second in the Standby Screen.
The C-Mail Menu appears.
C−Mail Menu
1Create New
2Inbox XXX
3Outbox
4Chat Records
5C−Mail Setup
Icons
: Indicates that "Unread Mail" exists. The number on the
E-mail Select
right is the number of Unread Mails.
2
Use
to select "Inbox" and
press
(
Select
).
The Inbox appears.
Inbox
Unread XXX/XXX
メインフォルタ゛ : X
フォルタ゛1
フォルタ゛2
フォルタ゛3
フォルタ゛4
フォルタ゛5
フォルタ゛6
Select All Mail
Using Mail Features
3
Use
to select the folder with
the C-Mail to read and press
( Select ).
メインフォルタ゛
Unread XXX/XXX
001 Robin
002 □□□□□@△
Have you ever
been to Kyoto? Y
Disp.
4
Use
to select the C-Mail to
read and press
( Disp. ).
The mail contents appears.
Received Mail
001
10:10Fri Oct10
Robin Smith Have you ever
been to Kyoto? Y
ou will like it.
Select Reply
60
Using the Camera
Still images (photos) can be taken and moving images (movies) can be recorded by
using the A1305SA camera feature.
The saved photos or movies can be attached to E-Mail and sent.
Taking a Still Image (Photo)
Use the Standby Screen as a monitor for taking a photo, and direct the lens to the object.
1
Press
(
) on the left in
the Standby Screen.
The image is displayed on the main display.
Pressing
switches between 16 zoom levels.
Pressing
(
) on the right turns the light or
(
) on the left turn to take a movie.
Shoot
flash ON/OFF.
Pressing
2
Determine the photographing
( Shoot ).
range and press
You will hear the shutter sound and
You can also press the Side Key (
) to take a
Full-Scr. Save E-mail
photo.
Press
3
Press
to re-take a photo.
(
Save
Using the Camera
the photo appears as a still image (Preview screen).
).
A message appears that the saving
operation is in progress, and the
photo is saved.
Information
• Photos are saved in the "MyPhoto" folder of the Data folder.
• The title of the photo is saved in the form of "photographing date_photographing
time˜consecutive numbers".
For example, the title of a photo taken at 19:30 on December 24, 2004, would be
"041224_1930˜01".
61
Recording a Moving Image (Movie)
Use the Standby Screen as a monitor for recording a movie, and direct the lens to the
object.
1
Press and hold
(
) on
the left for over a second in the
Standby Screen.
The image is displayed on the main display.
2
5sec
Pressing
switches between 16 zoom levels.
Pressing
(
) on the right turns the light ON/OFF.
Pressing
(
) on the left turn to take a photo.
Record
Determine the photographing
( Record ).
range and press
The recording start tone sounds and
the moving image which is being
●REC 1sec
recorded appears.
Using the Camera
You can also press the Side Key (
) to record
Suspend Stop
a moving image.
"●REC" appears while recording. When recording
ends, you hear the recording end tone.
Press
Press
( Suspend ) to pause the shooting.
( Play ) on the left to play back the
recorded movie.
Press
to re-record a moving image.
The recording time is set to 5 seconds at the time of
purchase. The movie can be recorded up to
15 seconds when setting is changed.
62
Play
Save E-mail
3
Press
(
Save
).
A message appears that the saving
operation is in progress, and the
movie is saved.
Information
• Movies are saved in the "MyMovie" folder of the Data folder.
• The title of the movie is saved in the form of "S_recording date _recording
time˜consecutive numbers".
For example, the title of a movie recorded at 19:30 on December 24, 2004, would be
"S_041224_1930˜01".
Taking/Recording with the
Main Display
Taking/Recording with the
Sub Display
Shoot
Using the Camera
63
Viewing Taken/Recorded Images
1
Press
(
) on the left in
the Standby Screen and press
.
Press and hold
(
1 Frame
2 Special Effect
3 Self Timer ON
4 Scene−Select
5 Sequential Mode
6 Date Stamp
) on the left for over a
second in the Standby Screen to display the movie.
2
Use
to select "MyPhoto
Folder" or "MyMovie Folder" and
press
( OK ).
The contents of the MyPhoto or MyMovie folder
appears.
3
Select
Use
to select a taken/
recorded date folder and press
(
MyPhoto
10/10/2004 XX
10/09/2004 XX
10/05/2004 XX
09/25/2004 XX
09/11/2004 XX
08/12/2004 XX
08/01/2004 XX
07/23/2004 XX
Select
10/10/2004
).
Using the Camera
The images taken or recorded on the selected date
041010_1010∼0
appear in reduced sizes.
4
Use
Select E-mail
to select the image and
press
(
Select
).
The selected image appears.
Back
64
Set
Next
Attaching the Taken/Recorded Image to an E-Mail and Sending
1
2
Perform Steps 1and 2 on pages 61 or 62 to take/record images.
Create Mail
Press
( E-mail ) on the right,
immediately after taking/
recording the image.
(9k)041010_1
The Mail Create screen appears with the image
attached.
Save Select Send
See Steps 3 to 12 on page 48 for the following operation procedures.
Photo Mail
The receiver can see images by using "Photo Mail" feature which
automatically converts images to proper size/format when displayed
on mobile phones other than au. To use the Photo Mail feature, you
1 Send
2 Photo Mail
3 MyPictograph
4 Easy Pictograph
need to change the receiver's E-Mail address to the relevant Photo
Mail address.
You can select "Photo Mail" under the automatic address transfer function (from the
as follows.
Receiver
E-Mail address
Address after change
DoCoMo
△△△@docomo.ne.jp
△△△ @d.nepm.jp
Vodafone
△△△@ .vodafone.ne.jp
△△△ @ .vodafone.nepm.jp
TU-KA or au not
△△△@ezweb.ne.jp
supporting movie mail
Using the Camera
screen shown on the right) to have the receiver’s E-Mail address automatically converted
△△△ @ezweb.nepm.jp
: differs depending on area.
65
Using the EZweb Service
A subscription is required to use the EZweb (internet) service. Please contact an au
Customer Service Center or an au shop if you did not subscribe for the service at the
time of purchase.
Be sure to perform initialization before using the E-Mail and EZweb services. If you have
not performed initialization yet, see page 20.
EZweb (Internet)
EZweb is a data service for enjoying the Internet via your mobile phone. The contents
such as Ringer or latest news can be obtained from the information sites (homepages
providing information).
Ringer
Wall Paper
Connecting to the Internet
Latest News
Games
Weather Forecast
Traffic Information
Using the EZweb Service
66
Information
• EZweb services are disabled when the area setting (see page 34) is set to any country
other than "Japan".
• The layout and contents of the screen are examples, and they may be changed.
Understanding Basic Operations
Let's access the EZ Top Menu which allows entrance to the Internet.
1
Press
in the Standby Screen.
The EZ Menu appears.
EZ Menu
1Top Menu
2Favorite Site
3URL Input 4Previous Disp.
5Data Folder
6Screen Memo
7Clr.BrowserRec
8EZ Setup
Select
2
Use
to select "Top
Menu" and press
( Select ).
The EZトップメニュー (EZ Top Menu) appears.
It may take some time to display the screen.
EZトッフ゜メニュー
オフィシャる?au
△△△△△△△△△
おトク・知っトク
ケータイ・ツカエル機能
□□□□□□□□□
カテコ゛リで探す(EZインターネット)
音・画像をケ゛ット
最新情報をチェック
生活情報を調べる
Select
The layout and contents of the screen are examples
and may be changed.
Using the EZweb Service
67
■Accessing informational sites
Use
to select the informational site and press
EZトッフ゜メニュー
EZトッフ゜メニュー
オフィシャる?au
△△△△△△△△△
おトク・知っトク
ケータイ・ツカエル機能
□□□□□□□□□
オフィシャる?au
△△△△△△△△△
おトク・知っトク
ケータイ・ツカエル機能
□□□□□□□□□
カテコ゛リで探す(EZインターネット)
音・画像をケ゛ット
最新情報をチェック
生活情報を調べる
カテコ゛リで探す(EZインターネット)
音・画像をケ゛ット
最新情報をチェック
生活情報を調べる
Select
Select
EZトッフ゜メニュー
オフィシャる?au
△△△△△△△△△
おトク・知っトク
ケータイ・ツカエル機能
□□□□□□□□□
カテコ゛リで探す(EZインターネット)
音・画像をケ゛ット
最新情報をチェック
生活情報を調べる
Select
音・画像をケ゛ット
オフィシャる?au
着うた
着ムーヒ゛ー 着信メロテ゛ィ
待ち受け画面
フォト・フレーム・アルハ゛ム
ホ゛イス・サウント゛
カラオケ
数字ホ゛タンでシ゛ャンフ゜
着うた
△△□□サウンド
○○音楽
△△!洋楽
○○Selection
△△Melo
もっと探す
着うた
数字ホ゛タンでシ゛ャンフ゜
Select
OK
Select
OK
Press and hold
Press
( Select ).
or
for over a second.
to return to the Standby Screen.
Information
Some informational sites may charge for the information they provide in addition to the
Using the EZweb Service
68
transmission charge.
Viewing an Informational Site
The EZweb (Internet) can be accessed from the EZトップメニュー (EZ Top Menu).
Many useful and entertaining informational sites (programs) can be accessed via the
EZweb.
オフィシャる?au (Official? au)
Provides useful au information, such as the latest
news on the EZweb.
おトク・知っトク (Lucky Chance)
Offers presents and prizes.
10:10
EZトッフ゜メニュー
オフィシャる?au
△△△△△△△△△
おトク・知っトク
ケータイ・ツカエル機能
□□□□□□□□□
ケータイ・ツカエル機能 (Useful mobile phone
features)
Entrance to recommended sites for fun and
convenience.
カテゴリで探す(EZインターネット)(Search by
category (EZ Internet))
Provides access to all official sites categorized.
音・画像をゲット(Get sounds/images)
Data such as EZ " 着うた TM," Ringers, and Standby
Screen can be downloaded.
最新情報をチェック (Check the latest information)
Entrance to sites on news, weather reports and stocks.
カテコ゛リで探す(EZインターネット)
音・画像をケ゛ット
最新情報をチェック
生活情報を調べる
ショッヒ゜ンク゛する
コミュニケーションする
遊ぶ・楽しむ
ショッピングする (Shopping)
Shopping sites offering various products.
検索・数字でアクセス
コミュニケーションする (Communication)
Entrance to greeting mail, bulletin boards and chat sites.
料金・申込・インフォ
[解説付トッフ゜メニュー]
(C)2004 KDDI
Select
遊ぶ・楽しむ (Have fun)
Provides various information on recreation and having
fun.
検索・数字でアクセス (Search/access by numbers)
Provides access to sites by entering keywords and
Internet numbers.
料金・申込・インフォ (Charges, application and
information)
Provides charge confirmation and au information
services.
地域情報 (Regional information)
Provides information on specific districts.
Using the EZweb Service
地域情報
生活情報を調べる (Check useful daily life information)
Entrance to sites providing daily life information.
解説付トップメニュー (Top menu with descriptions)
Provides the EZ Top Menu with descriptions.
The layout and contents of the screen are examples and may be changed.
69
Downloading Ringers
Example: Download the latest Ringer melodies and set them to the Ringer.
1
Press
in the Standby Screen.
The EZ Menu appears.
EZ Menu
1Top Menu
2Favorite Site
3URL Input
4Previous Disp.
5Data Folder
6Screen Memo
7Clr.BrowserRec
8EZ Setup
Select
2
Use
to select "Top
Menu" and press
( Select ).
The EZトップメニュー (EZ Top Menu) appears.
EZトッフ゜メニュー
オフィシャる?au
△△△△△△△△△
おトク・知っトク
ケータイ・ツカエル機能
□□□□□□□□□
カテコ゛リで探す(EZインターネット)
音・画像をケ゛ット
最新情報をチェック
生活情報を調べる
Select
3
Use
to select " 音・画像を
ゲット (Get Sounds/Images)" and
( Select ).
press
音・画像をケ゛ット
着うた
着ムーヒ゛ー 着信メロテ゛ィ
待ち受け画面
フォト・フレーム・アルハ゛ム
ホ゛イス・サウント゛
カラオケ
The 音・画像をゲット (Get Sounds/Images) screen
appears.
Using the EZweb Service
70
4
Use
to select " 着信メロディ
(Ringer melodies)" and press
( Select ).
The 着信メロディ (Ringer melodies) screen appears.
Select
OK
着信メロテ゛ィ
メロ着クラフ゛15円∼
無制限★99円[日替
メロDAM20円
オリコンWOサウント゛
いろメロミックス
全曲15円メロディ!
すごメロ取り放題
もっと探す
着信メロテ゛ィ(307)
数字ホ゛タンでシ゛ャンフ゜
(C)2004 KDDI
Select
OK
5
Use
<メロテ゛ィハ゜ーク>
新着
ランキンク゛
Jホ゜ッフ゜
クラシック
to select the site and
press
(
Select
).
Back
6
△△△
Saved in Data Folder
Play?
Use
to select the Ringer
melody and download.
Download following screen instructions.
EZ password is require to use the information site
which charges information fee. Perform EZ password
Play
OK
setting when using it for the first time. Please write
down the EZ password.
7
Press
(
Play
) on the left.
△△△
The downloaded Ringer melody is
played back.
Sound Playing
00:01
Set
Press
(
Set
).
Select Setup to
01Call Notice
02E−Mail Notice
03Unreg.E−Mail
04Server Notice
05C−Mail Notice
06Chat Notice
07Address Book
08Alarm Clock
Select
Continued on the next page
Using the EZweb Service
8
71
9
10
Use
to select "Call Notice"
and press
( Select ).
Use
Data is Already
Set to the Items.
Rewrite?
1 YES
2 NO
to select "YES" and
press
(
OK
).
The Ringer is set.
Information
The layout and contents of the screen are examples and may be changed.
Using the EZweb Service
72
Saving Frequently-Accessed Sites
Up to 100 frequently-accessed URLs can be saved.
1
Display the site to save and
press
.
The Browser menu appears.
2
Use
to select "New
bookmark" and press
( Select ).
The screen for saving the title and URL appears.
3
Use
to select "Save" and
press
Pressing
(
Select
New bookmark
Save Items
Take snapshot
Reload
Bookmark(s)
View snapshots
Go To URL
Current
Certificate
Title:
EZmark
URL:
http://www.△△△.ne.jp
Folder:
Bookmarks
Save
Cancel Edit
EZmark was stored in
Bookmarks
).
several times selects
"Save".
The currently-displayed site is saved as a "Bookmark".
OK
Some sites cannot be saved as "Bookmark".
Using the EZweb Service
73
Accessing Sites Saved as Bookmarks
1
Press
in the Standby Screen.
The EZ Menu appears.
EZ Menu
1Top Menu
2Favorite Site
3URL Input
4Previous Disp.
5Data Folder
6Screen Memo
7Clr.BrowserRec
8EZ Setup
Select
2
1 お気に入り
2 フ゜ロ野球速報
3 今日のMLB
4 サッカーニュース
Use
to select "Favorite
Site" and press
( Select ).
The bookmarks appear.
Menu
3
Use
Go
to select the site and
press
(
Go
).
The selected site appears.
Select the folder and press
folder divided.
Using the EZweb Service
74
(
Go
) when you saved bookmarks in
Confirming Charges
Calls and transmission charges can be confirmed from the EZweb.
1
Press
in the Standby Screen.
The EZ Menu appears.
EZ Menu
1Top Menu
2Favorite Site
3URL Input
4Previous Disp.
5Data Folder
6Screen Memo
7Clr.BrowserRec
8EZ Setup
Select
2
Use
to select "Top Menu"
and press
( Select ).
The EZトップメニュー (EZ Top
Menu) appears.
3
Use
to select " 料金・申込・
インフォ (Charge, Application, and
Information)" and press
( Select ).
EZトッフ゜メニュー
オフィシャる?au
△△△△△△△△△
おトク・知っトク
ケータイ・ツカエル機能
□□□□□□□□□
カテコ゛リで探す(EZインターネット)
音・画像をケ゛ット
最新情報をチェック
生活情報を調べる
料金・申込・インフォ
auホームヘ゜ーシ゛
auからのお知らせ
料金照会
料金お知らせサーヒ゛ス
各種申込
auオンラインショッフ゜
有料サーヒ゛ス利用情報
お客様の収容サーハ゛
設定情報
Select
The 料金・申込・インフォ (Charge, Application and
Information) screen appears.
The list of toll sites you are currently using is available with the Toll service
premium EZ password to use the Toll services.
4
Use
to select " 料金照会
(Charge Inquiry)" and press
( Select ).
The 料金照会 (Charge Inquiry) screen appears. Select
the items to confirm.
■料金照会■
1 料金お知らせサーヒ゛ス
2 通話料・通信料照会
説明
3 ご請求金額照会
説明
4 未払い料金照会
説明
5 累計ポイント照会
説明
6 トップメニュー
Using the EZweb Service
usage information feature. You may need an EZ password and/or a
Select
The layout and contents of the screen are examples
and may be changed.
75
Entering Characters
Switching Over the Input Mode
On the character entry screen, press
(
Char.
to select an input mode and press
(
) on the left to
display the input mode selection screen.
Use
OK
).
Entering Kana
to
dial keys can be used to enter Kana characters.
corresponds to " あ行 ",
to " か行 " and so on. The character displays as shown in the following table when
press the key each time.
Example: The character to be entered shifts in the order of " か ", " き ", "く", " け ", " こ ",
" か ", " き ", and so on when press the key each time.
When the desired character is reached, press the key of the character to enter next.
Number of pressing times
Key
Entering Characters
1
2
3
4
5
6
7
8
9
10
あ
い
う
え
お
ぁ
ぃ
ぅ
ぇ
ぉ
か
き
く
け
こ
さ
し
す
せ
そ
た
ち
つ
て
と
な
に
ぬ
ね
の
は
ひ
ふ
へ
ほ
ま
み
む
め
も
や
ゆ
よ
ゃ
ゅ
ら
り
る
れ
ろ
わ
を
ん
ゎ
、
―
(macron)
・
∼
!
11
12
?
Space
っ
ょ
。
Switches to “ ゛” (voiced sound symbol), “ ゜” (semi-voiced sound symbol),Uppercase
lettters, or Lowercase letters (before entering the selected character)
Shifts selection from the character assigned to the key preceding the one you pressed
(before entering the character), or inputs a line feed (after entering the character)
76
■Entering same key character continually
After entering the first character, press
then the next key.
Example: Entering " あい "
Memo
あ
Memo
あい
Memo
あ
Press
once.
Press
.
Press
twice.
■Entering "゛
" and "゜
"
Enter the character to which to add " ゛" or " ゜
", then press
Example: Entering " ば "
(1) Press
once to enter "は".
(2) Press
once.
.
Example: Entering " ぱ"
(1) Press
once to enter "は".
(2) Press
twice.
■Erasing a character
Press
to erase a character.
Press and hold
for over a second to erase all characters after the cursor (■ ). All
characters are erased when the cursor (■ ) is at the end of the text.
■Entering Hiragana characters
Enter characters and press
( Define ).
Entering Characters
77
Entering Kanji
The Predict feature can be used for converting entered Kana characters into Kanji
characters. It is frequently-used words that are memorized, and the word can be entered
without pressing all the character keys.
Example: To enter " 中川 " as a name for the address book
1
Press
( Char. ) on the left in
the input screen.
Name
The Enter Mode selection screen
appears.
Char.
2
Use
to select "
press
(
OK
OK
Name
" and
).
The Name input screen returns.
XX/XX
Char.
3
Name
なかがわ
Enter " なかがわ ".
Press
once. Press
once.
Press
once. Press
once.
Press
once. Press
once.
中川 仲川
那珂川 那賀川
中河 ナカガワ
▼Select Predict
The Prediction candidates appear.
Entering Characters
4
to select " 中川 " and
Use
press
(
Define
If "中川" is not included as a Prediction candidate,
( Convert ) on the left to switch to the usual
Kanji conversion. Pressing
"中川" and press
78
Convert Define E/1/Kana
Name
中川
).
The name "中川" is entered.
press
OK
です が に の
は で って も
か だ を ね
▼Select Predict
Char.
OK
Undo
displays the conversion candidates. Select
( Define ) to enter it.
Entering E-Mail Addresses
to
can be used for entering characters and numbers.
Example: Entering "[email protected]"
1
To(Must)
taro
Enter "taro".
t : Press
once.
a : Press
once.
r : Press
3 times.
o : Press
3 times.
Char.
2
Press
.
1 Use
2 Paste Data
3イFormat
4 Font Size Setup
Entry Method
# Predict OFF
3
Use
XXX/XXX
to select "Format" and
press
(
OK
).
OK
Format Category
1Internet
2Greeting
3Message
4Reply
5Business
6Free Format
Select
4
Use
to select "Internet" and
press
(
Select
).
Internet
0TEL0900001XXXX
1△△△□□□□@ezweb.n
2@ezweb.ne.jp
3http://www.
4.ne.jp
5.co.jp
6.com
7.or.jp
5
Use
to select
"@ezweb.ne.jp" and press
( Select ).
"@ezweb.ne.jp" is entered.
Press
once to enter "." and twice to enter "@".
To(Must)
taro@ezweb.ne.jp
Entering Characters
Select Detail
XXX/XXX
Char.
OK
Undo
79
■Keys available for E-Mail addresses
The character displays as shown in the following table when each time a key is pressed.
Key
Lowercase letter input mode
Uppercase letter input mode
Number of pressing times
Number of pressing times
1
2
3
4
5
6
7
8
1
2
3
4
5
6
7
8
.
@
-
_
/
:
~
1
.
@
-
_
/
:
~
1
a
b
c
2
A
B
C
2
d
e
f
3
D
E
F
3
g
h
i
4
G
H
I
4
j
k
l
5
J
K
L
5
m
n
o
6
M
N
O
6
p
q
r
s
P
Q
R
S
t
u
v
8
T
U
V
8
w
x
y
z
W
X
Y
Z
7
9
0
7
9
0
Information
Up to 20 lowercase characters including "-" (hyphen) and "." (period) can be used for your
E-Mail address. However, "." cannot be used continually or at the beginning or end of the
address. Also, "0" cannot be used at the beginning of the address.
The characters and symbols in the gray cells (
" △△△ @ezweb.ne.jp".
Entering Characters
80
) cannot be used before the "@" as in
Entering Pictographs
1
Press
( Char. ) on the left in
the Character input screen.
Summary
Wow
The Enter Mode selection screen
appears.
Char.
2
Use
to select "
press
(
OK
" and
).
OK
Pictograph Entry
Picto.List 1/13
The Pictograph input screen appears.
Press
( Next ) on the right to switch to the next
XX/XX
Cont. Select Next
pictograph list.
3
Use
to select the
pictograph and press
( Select ).
The selected pictograph appears on the screen.
Summary
Wow
XX/XX
Char.
OK
Undo
Entering Characters
81
Inputting Fixed Expressions
1
2
Press
on the character
entry screen.
1 Use
2 Paste Data
3イFormat
4 Font Size Setup
Entry Method
# Predict OFF
Use
Format Category
1Internet
2Greeting
3Message
4Reply
5Business
6Free Format
to select "Format", and
press
(
OK
).
The Format Category screen appears.
Select
3
Use
to select a category,
and press
( Select ).
The fixed expression selection screen
appears.
Pressing
Internet
0TEL0900001XXXX
1△△△□□□□@ezweb.n
2@ezweb.ne.jp
3http://www.
4.ne.jp
5.co.jp
6.com
7.or.jp
Select Detail
( Detail ) on the right displays the
fixed expression detail screen.
4
Use
to select the fixed
expression that you want to
input, and press
( Select ).
The fixed expression appears on the entry screen.
Entering Characters
82
Memo No.1
http://www.
XXX/XXX
Char.
OK
Undo
Troubleshooting
Symptom
Confirmation
−
Is the Battery Pack
charged?
●Charge the Battery Pack.
11
Did you press and hold
for over a second?
●Press and hold
13
Does
screen?
for over a second.
appear on the ●Extend the antenna and try to make
a call again at a place where
does not appear on the screen.
Did you include the area ●If you are making a call to any phone
code?
other than a mobile phone, include
the area code, even when calling
from the same city.
●Hold the tip of the antenna and pull
out until it stops.
Is the antenna
extended?
Does
screen?
appear on the ●Cancel the Emission.
Is the power turned ON? ●Please turn the power ON.
Did you press
Cannot receive a call.
Keys do not respond.
Page
●Attach the Battery Pack properly.
Cannot turn the power Is the Battery Pack
ON.
attached properly?
Cannot make a call.
Correction
?
●Press
after the phone number.
12
23
12
−
13
23
Does
screen?
appear on the ●Extend the antenna and move to a
place where
does not appear on
the screen.
12
Does
screen?
appear on the ●Cancel the Emission.
−
Is the power turned ON? ●Press and hold
for over a second.
13
Is the power turned ON? ●Press and hold
for over a second.
13
The power is turned off The Battery Pack level is ●Charge the Battery Pack.
after an alarm sounds. low.
11
Is the Answer Phone
set?
●Press and hold
for over a
second to release the Answer Phone.
31
Cannot hear the other
party's voice.
Is the Receiver Volume
setting high enough?
●Press
on calling. The receiver
volume is raised.
28
Troubleshooting
Calls are answered
automatically.
83
Other Features
The A1305SA is provided with some other useful features.
Screen Display setting
Used for setting preferred Standby Screen and Screen Savers.
Incoming setting
Used for selecting colors and patterns for the Incoming Illuminator during incoming calls
or while receiving mail.
Pocket Light
The A1305SA can be used as jacklight to light up outdoor garages, campgrounds or the
keyhole at the entrance of your house at night.
with Donald!
The Wall Paper, Ringers and Call Images can be changed into the Donald mode.
Mirror Display
The A1305SA main display can be used as a mirror with simple operation.
Photo Mixer
Used for adding a message to a still image (photo) taken or downloaded to easily create
photo animation. The photo animation you create can be attached to E-Mail.
EZ " 着うたTM " supported (Ringer)
A segment of an artist's singing voice can be downloaded to be used as a Ringer or just
Other Features
for playback.
Downloaded Dictionary
It is possible to download a dictionary from “SANYO ケータイプラネット ” and use its
entries when entering characters as conversion candidates.
Powerful Dictionary Features
The A1305SA is provided with English-Japanese and Japanese-English dictionaries. You
can translate an English word into a Japanese word and vice versa. Moreover, you can
enjoy English Word Quiz.
84
INDEX
○A○ ○ ○ ○ ○ ○ ○ ○ ○ ○ ○ ○ ○ ○ ○ ○ ○ ○ ○ ○
Accessories .................................................. 8
Address Book ............................................. 38
Edit ......................................................... 42
Place a call ............................................. 41
Save ....................................................... 38
Save from the Incoming/Outgoing Calls ... 44
Address Filter .......................................... 5,53
Adjustment Receiver Volume ..................... 28
Answer Phone ............................................. 31
Play Back ............................................... 32
Erase ..................................................... 32
Record ................................................... 31
Answer a Call .............................................. 24
Antenna ....................................................... 12
Area Setting ................................................ 34
○B○ ○ ○ ○ ○ ○ ○ ○ ○ ○ ○ ○ ○ ○ ○ ○ ○ ○ ○ ○
Basic Operations ........................................ 17
Battery Pack ............................................. 8,11
Bookmarks ............................................. 73,74
○C○ ○ ○ ○ ○ ○ ○ ○ ○ ○ ○ ○ ○ ○ ○ ○ ○ ○ ○ ○
○F○ ○ ○ ○ ○ ○ ○ ○ ○ ○ ○ ○ ○ ○ ○ ○ ○ ○ ○ ○
Favorite Site ................................................ 74
Fixed Expressions ...................................... 82
Flexible Key ................................................. 18
○H○ ○ ○ ○ ○ ○ ○ ○ ○ ○ ○ ○ ○ ○ ○ ○ ○ ○ ○ ○
How to Use the Keys .................................. 18
○I ○ ○ ○ ○ ○ ○ ○ ○ ○ ○ ○ ○ ○ ○ ○ ○ ○ ○ ○ ○
Icon .............................................................. 19
ID Unsent ..................................................... 24
Incoming Calls ....................................... 18,25
Incoming Illuminator .................................. 10
Informational Sites ................................ 68,69
Initialize .................................................. 14,20
Internet ........................................................ 66
○K○ ○ ○ ○ ○ ○ ○ ○ ○ ○ ○ ○ ○ ○ ○ ○ ○ ○ ○ ○
○D○ ○ ○ ○ ○ ○ ○ ○ ○ ○ ○ ○ ○ ○ ○ ○ ○ ○ ○ ○
Kana ............................................................
Same Key Character ..............................
"゛
" and "゜
" ..............................................
Kanji ............................................................
Desktop Holder ........................................ 8,11
Download .................................................... 70
○M○ ○ ○ ○ ○ ○ ○ ○ ○ ○ ○ ○ ○ ○ ○ ○ ○ ○ ○ ○
○E○ ○ ○ ○ ○ ○ ○ ○ ○ ○ ○ ○ ○ ○ ○ ○ ○ ○ ○ ○
Mail .............................................................. 45
C-Mail .................................................... 56
Create and Send C-Mail ......................... 57
E-Mail ..................................................... 45
Create and Send E-Mail ......................... 48
Mail Filter .................................................. 5,53
Enter the Character ....................................
EZweb ..........................................................
Basic Operations ....................................
Initialize ..................................................
76
66
67
20
76
77
77
78
Other Features
Call Back ..................................................... 25
Center Key ............................................. 10,17
Charge the Battery Pack ............................ 11
Confirm the Charge .................................... 75
Cursor Key ............................................. 10,17
C-Mail .......................................................... 56
Create and Send .................................... 57
Read ................................................. 59,60
E-Mail address ....................................... 22,46
Enter the E-Mail Address ....................... 79
Change the E-Mail Address .................... 46
E-Mail ........................................................... 45
Attach the image (photo or movie) to an
E-Mail and send it ............................ 65
Create and Send .................................... 48
Initialize .................................................. 20
Reply ...................................................... 54
Read ................................................. 51,52
85
Malicious Mail .......................................... 5,53
Manner Mode ...................................... 3,19,28
Manner .......................................................... 1
Movies
Attach to E-Mail ...................................... 65
Record ................................................... 62
View ....................................................... 64
Moving Image
Attached to E-Mail .................................. 65
Record ................................................... 62
View ....................................................... 64
○N○ ○ ○ ○ ○ ○ ○ ○ ○ ○ ○ ○ ○ ○ ○ ○ ○ ○ ○ ○
Names of Each Part .................................... 10
○O○ ○ ○ ○ ○ ○ ○ ○ ○ ○ ○ ○ ○ ○ ○ ○ ○ ○ ○ ○
One Ring Calls ......................................... 5,25
Outgoing Calls ....................................... 18,25
○P○ ○ ○ ○ ○ ○ ○ ○ ○ ○ ○ ○ ○ ○ ○ ○ ○ ○ ○ ○
Other Features
86
Pictographs ................................................. 81
Phone Number ............................................ 22
Photos
Attach to E-Mail ...................................... 65
Take ....................................................... 61
View ....................................................... 64
Photo Mail ................................................... 65
Place a Call ................................................. 23
Use the Address Book ............................ 41
Call to Japan from Overseas ................. 36
Call to Overseas from Japan .................. 37
Play Back
Answer Phone ........................................ 32
Photo (Still Image) .................................. 64
Movie (Moving Image) ............................ 64
Power ..................................................... 1,4,13
○R○ ○ ○ ○ ○ ○ ○ ○ ○ ○ ○ ○ ○ ○ ○ ○ ○ ○ ○ ○
Read the Received Mail
Read the Received C-Mail ................. 59,60
Read the Received E-Mail ................. 51,52
Ringer Melodies .......................................... 70
Ringer
Adjust the Volume ................................... 26
Change the Ringer ................................. 29
Roaming ...................................................... 19
○S○ ○ ○ ○ ○ ○ ○ ○ ○ ○ ○ ○ ○ ○ ○ ○ ○ ○ ○ ○
SANYO AC Adapter 02 ............................. 8,11
Set Language .............................................. 15
Site
Access to Bookmark .............................. 74
Save the Bookmark ................................ 73
Standby Screen .......................................... 13
Still Image
Attached to E-Mail .................................. 65
Take ....................................................... 61
View ....................................................... 64
○T○ ○ ○ ○ ○ ○ ○ ○ ○ ○ ○ ○ ○ ○ ○ ○ ○ ○ ○ ○
Top Menu ................................................ 67,69
○U○ ○ ○ ○ ○ ○ ○ ○ ○ ○ ○ ○ ○ ○ ○ ○ ○ ○ ○ ○
Unsolicited Ad Mail Filter ........................ 5,53
Use in Overseas .......................................... 34
Area Setting ........................................... 34
Call from Japan ...................................... 37
Call from Overseas ................................. 36
Use Camera ................................................. 61
Take a Still Image (Photo) ...................... 61
Record a Moving Image (Movie) ............. 62
For inquiries, call:
au Customer Service Center (General Information)
From regular phones:
0077-7-111
(toll free)
From au cellphones
157 area code not required
(toll free)
Pressing "zero" will connect you
to an operator, after calling "157"
on your au cellphone.
Sales:KDDI CORPORATION•
OKINAWA CELLULAR TELEPHONE COMPANY
Manufactured by:SANYO Electric Co., Ltd.
Cellphone and PHS operators collect and recycle unused
telephones, batteries and battery chargers at stores bearing the
logo regardless of brand and manufacturer to protect the
environment and reuse valuable resources.
April 2004 Edition