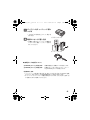
1
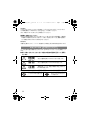
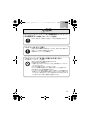
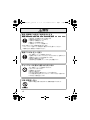
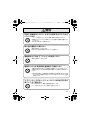
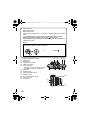
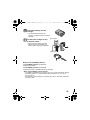
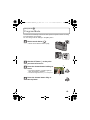
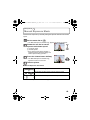
LEICA D - LUX 5 取扱説明書 / Instructions / Notice d'utilisation / Instrucciones r_Instructions_D-Lux 5_93359_rz2.indd 1 20.08.10 09 D-LUX5_short_jpn.book 2 ページ 2010年8月30日 月曜日 午後3時43分 はじめに このたびは LEICA D-LUX 5をお買い上げいただき、ありがとうございます。 この説明書をよくお読みのうえ、安全に正しくお使いください。 また、お読みになったあとは、必ず保管してください。 著作権にお気をつけください • あなたが撮影や録音したものは、個人として楽しむ以外は、著作権法上権利者 に無断では使用できません。個人として楽しむ目的であっても、撮影を制限し ている場合がありますのでお気をつけください。 おしらせ 本書に記載のイラスト・メニュー画面などは実物と多少異なる場合があります。 安全上のご注意 必ずお守りください 人への危害、財産の損害を防止するため、必ずお守りいただくことを説明してい ます。 ∫ 誤った使い方をしたときに生じる危害や損害の程度を区分して、説明し ています。 危険 警告 注意 「死亡や重傷を負うおそれが大きい内容」です。 「死亡や重傷を負うおそれがある内容」です。 「軽傷を負うことや、財産の損害が発生するおそ れがある内容」 です。 (次は図記号の例です) ∫ お守りいただく内容を次の図記号で説明しています。 してはいけない内容です。 2 実行しなければならな い内容です。 D-LUX5_short_jpn.book 3 ページ 2010年8月30日 月曜日 午後3時43分 危険 バッテリーチャージャー※ は、本機専用のバッテリーに のみ使用する(※以降は、 「チャージャー」と表記) 液もれ・発熱・発火・破裂などを起こし、けがをする原因になります。 バッテリーは、 正しく使う 指定以外の充電器で充電すると、 液もれ・発熱・発火・破裂など を起こし、けがをする原因になります。 • 専用のチャージャーで充電する バッテリーパック※は、 誤った使いかたをしない (※以降は、 「バッテリー」と表記) 液もれ・発熱・発火・破裂の原因になります。 • 指定外のものは使わない • 分解や加工(はんだづけなど) 、 加圧、加熱 (電子レンジやオー ブンなどで)しない • 水などの液体や火の中へ入れたりしない • 炎天下(特に真夏の車内)など、高温になるところに放置しない • 端子部(+・-)に金属を接触させない • バッテリーの液もれが起こったら、お買い上げの販売店にご 相談ください。液が身体や衣服についたら、 水でよく洗い流し てください。液が目に入ったら、失明のおそれがあります。 す ぐにきれいな水で洗い、医師にご相談ください。 3 D-LUX5_short_jpn.book 4 ページ 2010年8月25日 水曜日 午後3時58分 警告 異常・故障時には直ちに使用を中止する 異常があったときには、 バッテリーを外す • • • • • 煙が出たり、異常なにおいや音がする 映像や音声が出ないことがある 内部に水や異物が入った 電源プラグが異常に熱い 本体やチャージャーが破損した そのまま使うと火災・感電の原因になります。 – チャージャーを使っている場合は、電源プラグを抜いてください。 – 電源を切り、販売店にご相談ください。 電源プラグは、正しく扱う 火災・感電・ショートの原因になります。 • 定期的に乾いた布でふく(ほこりなどがたまると、 湿気などで 絶縁不良となり、火災の原因になります) • 根元まで確実に差し込む • 接点部周辺に金属類(クリップなど)を放置しない チャージャーは、 誤った使いかたをしない 火災・感電・ショートの原因になります。 • 加工しない・傷つけない • 熱器具に近づけない • 傷んだら使わない • 差し込みがゆるい電源コンセントには使わない • たこ足配線や定格外(交流 100 V∼240 V以外) で使わない • ぬれた手で抜き差ししない 分解、改造をしない 内部には電圧の高い部分があり、感電の原因になります。 4 D-LUX5_short_jpn.book 5 ページ 2010年8月25日 水曜日 午後3時58分 警告 内部に金属物を入れたり、水などの液体をかけたりぬら したりしない ショートや発熱により、火災・感電・故障の原因になります。 • 機器の近くに水などの液体の入った容器や金属物を置かない でください。 • 特にお子様にはご注意ください。 乗り物の運転中に使わない 事故の誘発につながります。 • 歩行中も、周囲や路面の状況に十分注意する 運転者などに向けてフラッシュを発光しない 事故の誘発につながります。 電源を入れたまま長時間、直接触れて使用しない 本機の温度の高い部分に長時間、直接触れていると低温やけど※ の原因になります。長時間ご使用の場合は、三脚などをお使いく ださい。 ※血流状態が悪い人(血管障害、血液循環不良、糖尿病、強い圧迫を受 けている)や皮膚感覚が弱い人などは、低温やけどになりやすい傾 向があります。 メモリーカードやホットシューカバーは乳幼児の手の 届くところに置かない 誤って飲み込むと、身体に悪影響を及ぼします。 • 万一、飲み込んだら、すぐ医師にご相談ください。 5 D-LUX5_short_jpn.book 6 ページ 2010年8月25日 水曜日 午後3時58分 警告 可燃性・爆発性・引火性のガスなどのある場所で使わない 火災や爆発の原因になります。 • 粉じんの発生する場所でも使わない 雷が鳴ったら、触れない 感電の原因になります。 • 本体やチャージャーには、金属部があります。 ショルダーストラップは肩に掛けて使う けがや事故の原因になります。 • 首に掛けての使用はしない ショルダーストラップを乳幼児の手の届くところに置 かない 誤ってショルダーストラップを首に巻きつけ、 事故につながる おそれがあります。 6 D-LUX5_short_jpn.book 7 ページ 2010年8月25日 水曜日 午後3時58分 注意 フラッシュ発光部および AF補助光は、至近距離 (数cm) で直接見ない 誤って発光した場合、視力障害などの原因になることがあります。 フラッシュを人の目に近づけて発光しない 視力障害などの原因になることがあります。 • 乳幼児を撮影するときは、1 m以上離してください。 フラッシュの発光部分を直接手で触らない・ごみなどの 異物が付いたまま使わない・テープなどでふさがない やけどの原因になることがあります。 発光熱によって煙などが 出る原因になることがあります。 • 発光直後は、しばらく触らないでください。 病院内や機内では、病院や航空会社の指示に従う 本機からの電磁波などが、計器類に影響を及ぼすことがあります。 次のような場所に放置しない 火災や感電の原因になることがあります。 • 異常に温度が高くなるところ (特に真夏の車内やボンネット の上など) • 油煙や湯気の当たるところ • 湿気やほこりの多いところ 7 D-LUX5_short_jpn.book 8 ページ 2010年8月30日 月曜日 午後3時43分 注意 レンズを太陽や強い光源に向けたままにしない 集光により、内部部品が破損し、火災の原因になることがあります。 次のときは、バッテリーを取り出す バッテリーを入れたまま放置すると、 絶縁劣化やろう電などに より、火災の原因になることがあります。 • 長期間使わないとき • お手入れのとき レンズキャップやひもを持って、本機をぶら下げたり、 振り回したりしない ひもが切れて本機が落下し、けがや破損の原因になることがあ ります。 この装置は、クラス B 情報技術装置です。この装置は、家庭環境で使用するこ とを目的としていますが、この装置がラジオやテレビジョン受信機に近接し て使用されると、受信障害を引き起こすことがあります。取扱説明書に従って 正しい取り扱いをしてください。 VCCI-B 8 D-LUX5_short_jpn.book 9 ページ 2010年8月30日 月曜日 午後3時43分 もくじ 安全上のご注意 必ずお守りください.......................................................... 2 付属品............................................................................................................. 10 別売品のご紹介 ............................................................................................. 10 各部の名前 ..................................................................................................... 11 バッテリーを充電する.................................................................................. 14 内蔵メモリー/カードについて ................................................................... 17 バッテリー/カードを入れる・取り出す .................................................... 18 時計を設定する ............................................................................................. 19 ・ 時計設定を変更する .............................................................................. 19 メニューを使って設定する.......................................................................... 20 撮影モードを選ぶ ......................................................................................... 21 プログラムAEモード ................................................................................... 23 ・ プログラムシフトについて................................................................... 24 スナップショットモード.............................................................................. 25 ・ 自動シーン判別について ...................................................................... 26 ・ 追尾 AF 機能 .......................................................................................... 26 露出補正......................................................................................................... 27 絞り/シャッター優先 AE モード................................................................ 28 ・ 絞り優先 AE モード [±] ...................................................................... 28 ・ シャッター優先 AE モード [´]........................................................... 28 マニュアル露出モード.................................................................................. 29 動画を撮る ..................................................................................................... 30 画像を見る ([ 通常再生 ]) ............................................................................ 31 画像を消去する ............................................................................................. 32 付属CD-ROMに収録されている取扱説明書を読む ................................. 33 仕様 ................................................................................................................ 34 ライカサービスアドレス.............................................................................. 37 9 D-LUX5_short_jpn.book 10 ページ 2010年8月30日 月曜日 午後3時43分 別売品のご紹介 付属品 オーダー番号 オーダー番号 バッテリーパック BP-DC10-E BP-DC10-U 18 719 18 720 バッテリー チャージャー BC-DC10-E BC-DC10-U 423-092.001-010 423-092.002-010 電源ケーブル EU UK AUS 台湾 中国 韓国 ショルダー ストラップ 423-068.801-019 423-068.801-020 423-068.801-023 424-025.002-000 423-082.805-004 423-082.805-005 (仕向 け 地 に よ り異 な ります) 速写ケース レザーケース ソフトレザーケース ハンドグリップ D-LUX5 電子ビュー ファインダーEVF1 HDMI ミニケーブル LEICA CF 22 フラッシュ ミニ三脚 卓上三脚 自由雲台 18 18 18 18 722 723 724 715 18 716 14 491 18 694 14 320 14 110 14 100 423-092.001-014 レンズキャップ 423-092.001-018 レンズキャップひも 423-092.001-019 CD-ROM 423-092.001-016 (取扱説明書収録) USB接続ケーブル 423-092.001-020 AVケーブル 423-092.001-022 バッテリーケース 424-036.001-000 ホットシューカバー 423-092.001-015 ボタン表示シール (カナダ/台湾向け) 423-092.001-025 取扱説明書(本書) 93 357 -360 (仕向 け 地 に よ り異 な ります) 登 録、ソ フ ト ウ ェ ア 93 367 のダウンロードにつ いての取扱説明書 保証書 439-399.100-026 お知らせ • メモリーカードは別売です。カードがないときは、内蔵メモリーを使って、画像 を撮影したり再生したりできます。 • お使いの前に、付属品をご確認ください。 • 付属品の種類や形状は、購入された国や地域によって異なる場合があります。 • 包装材料などは、商品を取り出したあと、適切に処理をしてください。(P40) 10 D-LUX5_short_jpn.book 11 ページ 2010年8月25日 水曜日 午後3時58分 各部の名前 1 2 3 4 5 レンズ部 セルフタイマーランプ AF 補助光ランプ フラッシュ発光部 ショルダーストラップ取付部 フォーカス切換スイッチ 6 7 8 9 液晶モニター [AF/AE LOCK]ボタン 再生ボタン 動作表示ランプ メ ニ ュ ー 1 2 6 3 7 13 4 5 8 セ ッ ト 10 [MENU/SET]ボタン デ ィ ス プ レ イ 11 [DISPLAY] ボタン クイックメニュー 12 [Q.MENU]/消去ボタン 9 10 11 12 14 13 後ダイヤル 本書では、後ダイヤルを下図のように説明しています: 例: 左右に回すとき 例: 後ダイヤルを押すとき 11 VQT3A31~Body1_jpn.fm 12 ページ 2010年8月30日 月曜日 午後7時14分 14 カーソルボタン 3/[FOCUS]ボタン ファンクション 4/ Fn ボタン 4 ボタンに撮影メニューを割り当てることができます。よく使う撮影メ ニューを登録しておくと便利です。 [フィルムモード]/[クオリティ]/[測光モード]/[ホワイトバランス]/ [オートフォーカスモード]/[暗部補正]/[ガイドライン表示]/[動画記録枠表示]/ [残量表示切換]/[フラッシュ]/[オートブラケット]/[アスペクトブラケット] 2/ セルフタイマー 1/ISO 感度 本書ではカーソルボタンを下図のように、または、3/4/2/1 で説明 しています。 例: 4(下)ボタンを押すとき 4 を押す または アスペクト切換スイッチ マイク ズームレバー 動画ボタン フラッシュOPEN スイッチ ホットシューカバー • 誤 っ て 飲 み 込 ま な い よ う に、ホ ッ ト シューカバーは乳幼児の手の届くと ころに置かないでください。 21 モードダイヤル 22 シャッターボタン 23 電源スイッチ 15 15 16 17 18 19 20 12 19 20 16 17 18 21 22 23 D-LUX5_short_jpn.book 13 ページ 2010年8月25日 水曜日 午後3時58分 24 [HDMI] 端子 ア ウ ト デ ジ タ 26 ル 25 [AV OUT/DIGITAL]端子 26 レンズリングフロント 27 レンズ鏡筒 24 25 27 28 三脚取付部 • 三脚を使用する場合は、本機を取り付 けた状態で三脚が安定していることを 確認してください。 29 スピーカー • スピーカーを指でふさがないでください。 30 カード/バッテリー扉 • 動画を撮影する際は、十分に充電された バッテリーの使用をおすすめします。 31 開閉レバー 28 29 30 31 13 D-LUX5_short_jpn.book 14 ページ 2010年8月25日 水曜日 午後3時58分 Preparation バッテリーを充電する ∫ 本機で使えるバッテリー 本機で使えるバッテリーは、ライカ純正バッテリーBP-DC10 E/U のみです。(P10) ライカカメラ AG 製純正品に非常によく似た外観をした模造品のバッテ リーが一部国内外で流通していることが判明しております。このようなバッ テリーの模造品の中には、一定の品質基準を満たした保護装置を備えていな いものも存在しており、そのようなバッテリーを使用した場合には、発火・破 裂等を伴う事故や故障につながる可能性があります。 ライカカメラ AG では模造品のバッテリーが原因で発生した事故・故障につ きましては、一切の責任を負いかねますのでご了承ください。 安全に商品をご使用いただくために、ライカ純正バッテリーBP-DC10 E/U (P10) のご使用をおすすめいたします。 • 本機専用のチャージャーとバッテリーを使用してください。 • 本機には、安全に使用できるバッテリーを判別する機能があり、 ライ カ純 正バッテリーは、この機能に対応しています。本機で使用できるバッテリーは、 ライカカメラ AG 製の純正品BP-DC10 E/U (P10) のみです。 (この機能に 対応していないバッテリーは使用できません) なお、純正品以外の他社製バッテリーの品質・性能・安全性については一切保証 できません。 ∫ 充電する • お買い上げ時、バッテリーは充電されていませんので、充電してからお使いく ださい。 • チャージャーは屋内で使用してください。 • 充電は周囲の温度が10 ℃∼30 ℃(バッテリーの温度も同様)のところで行 うことをおすすめします。 14 D-LUX5_short_jpn.book 15 ページ 2010年8月25日 水曜日 午後3時58分 バッテリーをチャージャーに取り つける •“LEICA”ロゴ表示を上にして、端子を 合わせる。 電源コンセントに差し込む プラグインタイプ • 充電完了後は、チャージャーを電源コ ンセントから抜き、バッテリーを取り 外してください。 90 インレットタイプ ∫ 充電ランプの表示について [CHARGE]ランプAが点灯する : 充電が開始され充電ランプが点灯します。 [CHARGE]ランプAが消灯する : 充電が正しく完了すると、チャージャー の[CHARGE]ランプが消灯します。 • 点滅するときは – バ ッ テ リ ー の 温 度 が 高 す ぎ る、あ る い は 低 す ぎ ま す。周 囲 の 温 度 が10 ℃∼30 ℃のところで再度充電することをおすすめします。 – チャージャーやバッテリーの端子部が汚れています。このようなときは、汚 れを乾いた布でふき取ってください。 15 D-LUX5_short_jpn.book 16 ページ 2010年8月25日 水曜日 午後3時58分 ∫ 充電時間 充電時間 約155分 ∫ 写真記録[液晶モニター/電子ビューファインダーEVF1(別売、P10)使用時] 記録可能枚数 約400枚 撮影使用時間 約200分 条件はCIPA規格で プログラムAEモード時 CIPA規格による撮影条件 • CIPAは、カメラ映像機器工業会 (Camera & Imaging Products Association) の略称です。 • 温度23 ℃/湿度50%RH、液晶モニターを点灯 • SDメモリーカード(32 MB)使用 • 付属バッテリー使用 • 電源を入れてから30秒経過後、撮影を開始(手ブレ補正[AUTO]使用) • 30秒間隔で1回撮影、フラッシュを2回に1回フル発光 • 撮影ごとに、T端→W端またはW端→T端にズームを動かす • 10枚撮影ごとに電源を切り、バッテリーの温度が下がるまで放置 ∫ 再生 [ 液晶モニター/ 電子ビューファインダーEVF1 (別売、P10) 使用時 ] 再生使用時間 16 約360分 D-LUX5_short_jpn.book 17 ページ 2010年8月25日 水曜日 午後3時58分 内蔵メモリー/カードについて 内蔵メモリー • 容量:約40 MB • カードの容量がなくなった場合の臨時用メモリーとしてお使いいただけます。 • カードよりアクセス時間が長い場合があります。 カード 本機ではSD規格に準拠した以下のカードが使用できます。 本機で使えるカードの種類 SD メモリーカード (8 MB∼2 GB) SDHC メモリーカード (4 GB∼32 GB) SD XCメモリーカード (48 GB、64 GB) 備考 • SDHCメ モ リ ー カ ー ド は、SDHCメ モ リ ー カードまたはSDXCメモリーカード対応機器 で使用できます。 • SDXCメ モ リ ー カ ー ド は、SDXCメ モ リ ー カード対応機器でのみ使用できます。 • SDXC メモリーカードをお使いの場合は、パソ コンなどが対応しているかご確認ください。 • 4 GB∼32 GBのカードはSDHCロゴのある(SD規格準拠)カードのみ使用 できます。 • 48 GB、64 GBのカードはSDXCロゴのある(SD規格準拠)カードのみ使用 できます。 • [AVCHD Lite]で動画撮影の際は、SD スピードクラス ※ が「Class4」以上の カードを使用してください。また、[MOTION JPEG]で動画撮影の際は、SDス ピードクラスが「Class6」以上のカードを使用してください。 ※SD スピードクラスとは、連続的な書き込みに関する速度規格です。 お知らせ • 誤って飲み込まないように、メモリーカードは乳幼児の手の届くところに置か ないでください。 17 D-LUX5_short_jpn.book 18 ページ 2010年8月25日 水曜日 午後3時58分 バッテリー/カードを入れる・取り出す • 電源スイッチが [OFF] になっていることを確認する。 • フラッシュを閉じる。 開閉レバーを矢印側にスライド させて、 カード/バッテリー扉を 開く • ラ イ カ 純 正 の バ ッ テ リ ーBP-DC10 E/U (P10) をお使いください。 • 純正品以外の他社製バッテリーを使用した 場合、品質については一切保証できません。 バッテリー: A のレバー 向きに気をつけて、 でロックされるまで入れる 取り出すときは、A のレバーを 矢印の方向に引いて取り出す カード: 向きに気をつけて、 「カチッ」 と音が するまで奥まで入れる 取り出すときは、 「カチッ」と音がす るまで押し、 まっすぐ引き抜く B: 端子部には触れないでください。 • カードを奥まで入れないと、カードが壊れる原因になることがあります。 1:カード / バッテリー扉を閉じる 2:開閉レバーを矢印側にスライド させる 18 D-LUX5_short_jpn.book 19 ページ 2010年8月25日 水曜日 午後3時58分 時計を設定する • お買い上げ時は、時計設定されていません。 電源スイッチを[ON]にする A [MENU/SET] ボタン B カーソルボタン [MENU/SET]を押す 3/4 で表示言語を選び、[MENU/SET] を押す [MENU/SET]を押す 2/1で 合 わ せ た い 項 目(年・月・日・ 時・分・表 示 順・時 刻 表 示 形 式)を 選 び、3/4で設定する • [‚]を押すと、時計を設定せずに中止することができます。 [MENU/SET]を押して決定する [MENU/SET]を押す • [‚]を押すと、設定画面に戻ります。 時計設定を変更する 撮影メニューまたはセットアップメニューの [ 時計設定 ] を選び、1を押してく ださい。 • 上記の手順 5、6 の操作で変更できます。 19 D-LUX5_short_jpn.book 20 ページ 2010年8月30日 月曜日 午後3時43分 メニューを使って設定する ここでは、撮影メニューの設定方法を説明していますが、動画撮影メニューや再 生メニュー、セットアップメニューも同じ方法で設定できます。 例: プログラムAEモードで、[オートフォーカスモード]を[Ø](1点)から [š](顔認識)に設定する [MENU/SET]を押してメニューを表示させる 3/4で[ オートフォーカスモード]を選び、 1を押す • 項目によっては、設定が表示されないものや、表示 のされかたが異なるものがあります。 3/4で[š]を選 び、 [MENU/SET]を 押し て決定する [MENU/SET]を押してメニューを終了する 他のメニューとの切り換え 例)セットアップメニューとの切り換え 1 2 3 4 20 [MENU/SET]を押してメニューを表示さ せる 2を押す 4でセットアップメニューアイコン[ ] を選ぶ 1を押す • 続けてメニュー項目を選んで設定してください。 D-LUX5_short_jpn.book 21 ページ 2010年8月25日 水曜日 午後3時58分 撮影モードの切り換え Basic 撮影モードを選ぶ 電源スイッチを[ON]にする A モードダイヤル • 電源が入ると1動作表示ランプ 2 が点灯 します。 (約 1 秒後に消灯) モードダイヤルを切り換える B の部分に使用したいモードを合わせる。 • モードダイヤルはゆっくり回して確実に 各モードに合わせてください。 (モードダイヤルは360°回転します) ∫ 基本 プログラム AE モード お好みの設定で撮影します。 スナップショットモード カメラにおまかせで撮影します。 21 D-LUX5_short_jpn.book 22 ページ 2010年8月25日 水曜日 午後3時58分 ∫ 応用 絞り優先 AE モード 絞り値を決めて撮影します。 シャッター優先 AE モード シャッタースピードを決めて撮影します。 マニュアル露出モード 絞り値とシャッタースピードを決めて撮影します。 クリエイティブ動画モード マニュアル操作で動画を撮影します。 カスタムモード あらかじめ登録しておいた設定で撮影します。 シーンモード 撮影シーンに合わせて撮影します。 マイカラーモード 色の効果を確認し、12 種類のカラーモードから選択して撮影します。 22 D-LUX5_short_jpn.book 23 ページ 2010年8月25日 水曜日 午後3時58分 撮影モード: ³ プログラムAEモード 被写体の明るさに応じて、シャッタースピードと絞り値をカメラが自動的に設定 します。撮影メニューで多彩な設定をすることで、自由度の高い撮影ができます。 モードダイヤルを[ ]に合わせる • フォーカス切換スイッチを[AF]にする。 AF AF MF ピントを合わせたい位置にAFエリ ア 1 を合わせる 2 シャッターボタンを半押し(軽く押す) してピントを合わせる • ピントが合うと、フォーカス表示 2(緑)が 点灯します。 • ピントが合う範囲は50 cm ∼∞です。 1 半押しのままさらにシャッターボタンを 全押し (さらに押し込む) して撮影する 23 D-LUX5_short_jpn.book 24 ページ 2010年8月25日 水曜日 午後3時58分 プログラムシフトについて プログラムAEで本機が自動的に設定したシャッ タースピードと絞り値の組み合わせを、同じ露出の ままで変えることができます。これをプログラムシ フトといいます。 プログラムAEでの撮影時に、 より背景をぼかした い(絞り値を小さくする) 、動きを表現した (シャッ タースピードを遅くする)などの設定が可能です。 A • シャッターボタンを半押しして、液晶モニター/ファインダーに絞り値と シャッタースピードの数値が表示されている間に (約10秒間)、後ダイヤルで プログラムシフトしてください。 • プログラムシフトされている場合は、画面にプログラムシフト表示Aが出ます。 • プログラムシフトを解除するには、電源スイッチを [OFF] にするか、プログラ ムシフト表示が消えるまで後ダイヤルを回してください。 ∫ プログラムシフトの例 (A): 絞り値 (B): シャッタースピード 1 プログラムシフト範囲 2 自動設定値 3 プログラムシフト限界 1 2 3 4 5 1 1/2 1/4 1/8 1/15 6 7 8 9 10 11 12 13 2 2.8 (A) 4 5.6 8 11 24 1/30 1/60 1/125 1/250 1/500 1/1000 1/2000 1/4000 (B) 14 (Ev) D-LUX5_short_jpn.book 25 ページ 2010年8月25日 水曜日 午後3時58分 撮影モード: スナップショットモード 被写体や撮影状況に合わせてカメラが最適な設定を行うので、 カメラまかせで 気軽に撮りたいときや初心者におすすめです。 モードダイヤルを[ ]に合わせる 1 シャッターボタンを半押ししてピン トを合わせる • ピントが合うと、フォーカス表示 1(緑)が 点灯します。 • 顔認識機能により、顔に合わせてAFエリ ア2が表示されます。その他の場合は、ピ ントの合ったところにAF エリアが表示さ れます。 • ピントが合う範囲は1 cm(W端時)/ 30 cm(T 端時)∼∞です。 2 シャッターボタンを全押しして撮影する 25 D-LUX5_short_jpn.book 26 ページ 2010年8月25日 水曜日 午後3時58分 自動シーン判別について カメラが最適なシーンを判別すると、各シーンのアイコンが2秒間青色で表示 後、通常の赤色に変わります。 > i 人物 i 風景 i マクロ •[ i 夜景&人物 ]選択時のみ i 夜景 i夕焼け i赤ちゃん • どのシーンにもあてはまらない場合は [ ]になり、標準的な設定を行います。 • [ ]、[ ]、[ ]のときは、カメラが人の顔を自動的に検知し、認識した顔にピ ントや露出を合わせます。( 顔認識) 追尾 AF 機能 指定した被写体にピントや露出を合わせることができます。さらに、被写体が動 いても、自動でピントと露出を合わせ続けます。 1 3(FOCUS)を押す • 画面左上に[ ]が表示されます。 • 画面中央に追尾AF枠が表示されます。 • もう一度3(FOCUS)を押すと、追尾AFは解除 2 被写体を追尾AF枠に合わせ、 [AF/AE LOCK]を押して被写体にロックする • 追尾 AF 枠が黄色に変わります。 • ロックした被写体に最適なシーンを判別します。 • 3(FOCUS)を押すと、ロックは解除されます。 されます。 26 D-LUX5_short_jpn.book 27 ページ 2010年8月25日 水曜日 午後3時58分 撮影モード: 露出補正 被写体と背景の明るさに大きく差がある場合など、 適正な露出が得られないと きに補正します。 後 ダイヤル を押して[È]を 有効に し、後ダイヤルを回して露出を補正 する A 露出補正値 • 後ダイヤルを押すごとに、有効な操作が切 り換わります。 • 画面左下の[È]がオレンジ色に変わると、露 出補正操作が有効になります。 • 露出補正値は−3 EV∼+3 EVの範囲で 設定可能です。 • 露出を補正しない場合は、 “È”のみ (0 EV) を選んでください。 A 撮影する 27 D-LUX5_short_jpn.book 28 ページ 2010年8月25日 水曜日 午後3時58分 撮影モード: 絞り/シャッター優先 AE モード 絞り優先 AE モード [±] 背景までピントを合わせて撮りたいときは絞り値を大きく、背景をぼかして撮 りたいときは絞り値を小さくしてください。 モードダイヤルを[ ]に合わせる 後ダイヤルを回して絞り値を設定する A 絞り値 A 撮影する シャッター優先 AE モード [´] 動きを止めて撮りたいときはシャッタースピードを速く、 動きを表現したいと きにはシャッタースピードを遅くしてください。 モードダイヤルを[ ]に合わせる 後ダイヤル を回してシ ャッタース ピードを設定する B シャッタースピード B 撮影する 28 D-LUX5_short_jpn.book 29 ページ 2010年8月25日 水曜日 午後3時58分 撮影モード: マニュアル露出モード 絞り値とシャッタースピードを手動で設定して、露出を決定します。 モードダイヤルを[²]に合わせる • マニュアル露出アシストAが約10秒間表示されます。 後ダイヤルを回して絞り値とシャッ タースピードを設定する B 絞り値 B C C シャッタースピード • 後ダイヤルを押すごとに、絞り設定操作と シャッタースピード設定操作が切り換わります。 シャッターボタンを半押しする • マニュアル露出アシストAが約10秒間表 示されます。 A 撮影する ∫ マニュアル露出アシストについて 適正露出になります。 シャッタースピードを速くするか、 絞り値を大きくしてく ださい。 シャッタースピードを遅くするか、 絞り値を小さくしてく ださい。 • マニュアル露出アシストは目安です。 29 D-LUX5_short_jpn.book 30 ページ 2010年8月25日 水曜日 午後3時58分 撮影モード: Advanced (Recording pictures) 動画を撮る AVCHD規格に準拠したハイビジョン映像や、 Motion JPEGで記録される動 画を撮影できます。 音声はモノラルで記録されます。 モードダイヤルを切り換える A 動画ボタンを押して撮影を開始する A 記録可能時間 B 記録経過時間 • アスペクト切換スイッチの位置に関係な く、[画質設定]での画像横縦比で撮影され ます。 • 動画ボタンを押したあと、すぐに離してく ださい。 • 動画の記録中は、記録動作表示(赤)Cが点 滅します。 C B 再度動画ボタンを押して撮影を終了する • 記録途中で内蔵メモリーまたはカードの容量がいっぱいになると、自 動的に撮影が終了します。 お知らせ • カメラモデル18 151/18 152について: [MOTION JPEG]で動画を連続で撮影できるのは、 最大2 GBまでです。 画面 には、2 GBで記録できる最大記録可能時間までしか表示されません。 [AVCHD Lite]で動画を連続で撮影できるのは、最大13時間3分20秒まで です。 画面には13時間3分20秒までしか表示 されません。 ただし、バッテ リー残量によっては、撮影が途中で終了する場合があります。 • カメラモデル18 150 について: 動画を連続して撮影できるのは、29 分までです。また [MOTION JPEG]で動画 を連続で撮影できるのは、最大 2 GB までです。 (例:[8m 20s]、[ ] 設定時) 連続撮影可能な残り時間が表示されます。 30 D-LUX5_short_jpn.book 31 ページ 2010年8月25日 水曜日 午後3時58分 再生モード: ¸ 画像を見る ([ 通常再生 ]) [(] を押す 2/1で画像を送る • 動画を見る場合は、3 を押して再生を開始 してください。 31 D-LUX5_short_jpn.book 32 ページ 2010年8月25日 水曜日 午後3時58分 再生モード: ¸ 画像を消去する 画像は一度消去すると元に戻すことができません。 • 内蔵メモリーまたはカードの再生されている側の画像が消去されます。 消去する画像を選び、[‚]を押す A [‚] ボタン 2で[はい]を選び、[MENU/SET]を 押す 32 D-LUX5_short_jpn.book 33 ページ 2010年8月25日 水曜日 午後3時58分 付属CD-ROMに収録されている取扱説明書 を読む • 本書の内容を理解し、他の機能や応用操作について知りたいとき •「Q&A 故障かな?と思ったら」を参照したいとき そのようなときは、付属の CD-ROM に収録されている取扱説明書(PDF 形式) をご覧ください。 パソコンの電源を入れ、付属の CD-ROM をセットする CD-ROM を開く 表示したい言語の PDF ファイルをダブルクリックして開く ∫ 取扱説明書 (PDF 形式) が開かなかった場合 取扱説明書(PDF 形式) を閲覧・印刷するためには、 Adobe Acrobat Reader 5.0 以降、 または Adobe Reader 7.0 以降が必要です。 • 下記のサイトから、お使いのパソコンの OS に対応したバージョンの Adobe Reader をダウンロードして、インストールしてください。 http://get.adobe.com/reader/otherversions 33 VQT3A31~Body3_jpn.fm 34 ページ 2010年8月31日 火曜日 午後6時2分 Others 仕様 撮像素子 1/1.63型 CCD 総画素数1130万画素、 原色カラーフィルター 有効画素数 1010 万画素 最低照度 約 3 lx(iローライト時) レンズ LEICA DC VARIO-SUMMICRON 1:2∼ 3.3/ 5.1∼19.2 mm ASPH. 35 mmフィルムカメラ換算:24∼90 mm 撮影可能範囲 P/A/S/M 50 cm ∼ ∞ マクロ / スナップショット 1 cm (W端時 )/30 cm (T端時 ) ∼ ∞ シーンモード 上記範囲と異なる場合あり デジタルズーム 最大4倍 シャッターシステム 電子シャッター連動メカニカルシャッター シャッタースピード 60 秒 ∼ 1/4000 秒、 シーンモードの[星空]:15 秒、 30 秒、60 秒 連写性能 連写 連写速度 2.5 コマ / 秒 連写枚数 最大 5 コマ /3 コマ (スタンダード / ファイン) 高速連写 連写速度 連写枚数 34 約 10 コマ / 秒(速度優先) 約 6.5 コマ / 秒(画質優先) [記録画素数:2.5M (1:1) 、3M(4:3) 、 2.5M(3:2) 、2M(16:9)] 内蔵メモリー使用時 :約 15 枚 (フォーマット直後) カード使用時 :最大 100 枚 (カードの種類、撮影条件によって異なる) D-LUX5_short_jpn.book 35 ページ 2010年8月30日 月曜日 午後3時43分 露出モード プログラム AE (P)、絞り優先 AE (A) 、 シャッター優先 AE (S) 、マニュアル露出 (M) 露出補正 ( 補正値:1/3 EV ステップ、補正範囲:± 3 EV ) 測光方式 マルチ測光/中央重点測光/スポット測光 フラッシュ 内蔵ポップアップ式 フラッシュモード オート/赤目軽減オート/強制発光(赤目軽減強制発光)/ 赤目軽減スローシンクロ/発光禁止 フラッシュ撮影可能範囲 (ISO AUTO 設定時) 約 80 cm∼約7.2 m(W端) 液晶モニター 3.0 型 TFT 液晶(約460,000ドット)、 視野率約 100% マイク モノラル スピーカー モノラル 記録メディア 内蔵メモリー (約40 MB) /SDメモリーカード/ SDHCメモリーカード /SDXCメモリーカード 記録画像ファイル形式 写真 RAW/JPEG(Exif2.3準拠) 、DPOF対応 動画(音声付き) AVCHD Lite/QuickTime Motion JPEG 35 D-LUX5_short_jpn.book 推奨使用温度/ 許容相対湿度 インターフェース 端子 36 ページ 2010年8月30日 月曜日 午後3時43分 0 ℃∼40 ℃/10%RH∼80%RH デジタル:USB 2.0(High Speed) (モデル番号18 150 では、USB 接続ケーブルを使っ てパソコンからカメラにデータを書き込むことはでき ません。 ) アナログビデオ/オーディオ: NTSC/PAL コンポジット出力(メニューで切り換え)、 オーディオライン出力(モノラル) HDMI: miniHDMI(C タイプ) AV OUT/DIGITAL:専用ジャック(8 pin) 寸法 ( 幅 k 高さ k 奥行き; レンズ格納時 ) 約 109.7 k 65.5 k 43 mm 質量 (カード、バッテリー を含む / 本体のみ) 約 271 g/233 g バッテリー (リチウムイオン) 電圧/容量 3.6 V / 1250 mAh バッテリー チャージャー 定格入力 AC 110 ∼ 240 V 50/60 Hz, 0.2 A 定格出力 DC 4.2 V 0.65 A 36 D-LUX5_short_jpn.book 37 ページ 2010年8月25日 水曜日 午後3時58分 ライカサービスアドレス ライカ・アカデミー 自然観察用具から再生機器まで、高性能な精度の高い製品を提供しているライ カは、長年、特別サービスとしてライカ・アカデミーを開催してきました。ライ カ・アカデミーは実践に即したセミナーおよび講習会で、初心者はもちろん、上 級者の方まで、写真撮影や投影、そして引き伸ばし写真の世界をもっと身近に 体験することができます。コースは、ライカのソルムス工場内や近郊にある グート・アルテンベルク (Gut Altenberg)にある近代設備の整ったセミナー室 で行なわれます。講師陣は、熟練の専門家たち。コースの内容は、写真撮影全 般に関する事柄から、興味深い専門分野までさまざまです。多くの実践に役立 つヒントや情報、そしてアドバイスをご提供いたします。 詳しい情報および写真撮影ツアーを含む最新のセミナー・プログラムについて のお問い合わせ: Leica Camera AG Leica Akademie Oskar-Barnack-Str. 11 D-35606 Solms 電 話 +49 (0) 6442-208-421 ファックス +49 (0) 6442-208-425 [email protected] ライカのホームページ 製品、新製品、イベント、ライカについての最新情報は、次のアドレスのホー ムページに掲載されています。 http://www.leica-camera.co.jp 37 D-LUX5_short_jpn.book 38 ページ 2010年8月25日 水曜日 午後3時58分 ライカインフォメーションサービス お客様からのライカ製品の使用技術上の質問には、ライカインフォメーション サービスが書面、電話、ファックス、e メールで回答いたします。次の連絡先に お問い合わせください。 Leica Camera AG Informations-Service Postfach 1180 D-35599 Solms 電 話 +49 (0) 6442-208-111 ファックス +49 (0) 6442-208-339 [email protected] ライカカスタマーサービス お手持ちのライカ製品のメンテナンスが必要な場合もしくは破損した場合、ラ イカカスタマーサービスまたは各国のライカ代理店の修理サービスが対応いた します(所在地一覧表は保証書をご覧ください)。 Leica Camera AG Customer Service Solmser Gewerbepark 8 D-35606 Solms 電 話 +49 (0) 6442-208-189 ファックス +49 (0) 6442-208-339 [email protected] 38 D-LUX5_short_jpn.book 39 ページ 2010年8月30日 月曜日 午後3時43分 ∫ ご使用上のお願い • 付属の AV ケーブル以外のものを使用しないでください。 • 付属の USB 接続ケーブル以外のものを使用しないでください。 • ライカ純正のHDMIミニケーブルをお使いください。 (別売、 P10) 磁気が発生するところや電磁波が発生するところ(電子レンジ、テレビやゲーム 機など)からはできるだけ離れてお使いください • テレビの上や近くで操作すると、電磁波の影響で画像や音声が乱れることがあ ります。 • スピーカーや大型モーターなどが出す強い磁気により、記録が損なわれたり、 画像がゆがんだりします。 • マイコンを含めたデジタル回路の出す電磁波により、お互いに影響をおよぼ し、画像や音声が乱れることがあります。 • 本機が影響を受け、正常に動作しないときは、バッテリーを一度外してから、あ らためて接続し電源を入れ直してください。 電波塔や高圧線が近くにあるときは、なるべく使わないでください • 近くで撮ると、電波や高電圧の影響で撮影画像や音声が悪くなることがあります。 39 D-LUX5_short_jpn.book 40 ページ 2010年8月30日 月曜日 午後3時43分 ヨーロッパ連合以外の国の廃棄処分に関する情報 このシンボルマークは EU 域内でのみ有効です。 製品を廃棄する場合には、 最寄りの市町村窓口、 または販売 店で、正しい廃棄方法をお問い合わせください。 使用済み充電式電池の届け先 不要になった電池は、捨てないで充電式電 池リサイクル協力店へご持参ください。 詳細は、一般社団法人 JBRC のホーム ページをご参照ください。 ホームページ http://www.jbrc.net/hp 使用済み充電式電池の取り扱いについて • 端子部をセロハンテープなどで絶縁してください。 • 分解しないでください。 40 充電式 リチウムイオン 電池使用 D-LUX5_short_jpn.book 41 ページ 2010年8月30日 月曜日 午後3時43分 • SDXC ロゴは SD-3C, LLC の商標です。 •“AVCHD”, “AVCHD Lite”および “AVCHD”, “AVCHD Lite”ロゴはパ ナソニック株式会社とソニー株式会社の商標です。 • ドルビーラボラトリーズからの実施権に基づき製造されています。Dolby、 ドルビー及びダブル D 記号はドルビーラボラトリーズの商標です。 • HDMI、HDMI ロゴ、および High-Definition Multimedia Interface は、 米国およびその他の国におけるHDMI Licensing LLCの商標または、登 録商標です。 • QuickTimeおよびQuickTimeロゴは、ライセンスに基づいて使用される Apple Inc. の商標または登録商標です。 • LEICA/ライカは、ライカマイクロシステムIR GmbHの登録商標です。 • SUMMICRON/ ズミクロンは、ライカカメラ AG の登録商標です。 • その他、本書に記載されている各種名称、会社名、商品名などは各社の商標 または登録商標です。 本製品は、 AVC Patent Portfolio License に基づきライセンスされてお り、 お客様が個人的かつ非営利目的において以下に記載する行為にかかわ る個人使用を除いてはライセンスされておりません。 • AVC 規格に準拠する動画(以下、AVC ビデオ)を記録する場合 • 個人的かつ非営利的活動に従事する消費者によって記録された AVC ビデ オを再生する場合 • ライセンスを受けた提供者から入手された AVC ビデオを再生する場合 詳細については米国法人 MPEG LA, LLC (http://www.mpegla.com) をご参照ください。 41 LEICA D-LUX5U-VQT3A31_eng.book 42 ページ 2010年8月30日 月曜日 午後5時49分 Dear Customer, We would like to take this opportunity to thank you for purchasing this LEICA D-LUX 5. Please read these instructions carefully and keep them handy for future reference. Carefully observe copyright laws. • Recording of pre-recorded tapes or discs or other published or broadcast material for purposes other than your own private use may infringe copyright laws. Even for the purpose of private use, recording of certain material may be restricted. Notice: Please note that the actual controls, components, menu items, menu screen illustrations etc. of your LEICA D-LUX 5 may look somewhat different from those shown in the illustrations in these instructions. 42 LEICA D-LUX5U-VQT3A31_eng.book 43 ページ 2010年8月30日 月曜日 午後5時49分 Information for Your Safety To reduce the risk of fire, burns, or shock hazard and annoying interference: • Use only the recommended accessories. • Do not expose this equipment to rain or moisture, dripping or splashing water and make sure no objects filled with liquids such as vases are placed on the equipment. • Do not expose to heat above 60 xC (140 oF). • Do not remove the cover (back): there are no user serviceable parts inside. Refer servicing to your Leica dealer, an authorized Leica service station / the Leica distributer in your country (for addresses, see Warranty Card), or the Leica Customer Service department (for address (>78)). • The mains outlet must be located near the connected equipment and it must be easily accessible. 43 LEICA D-LUX5U-VQT3A31_eng.book 44 ページ 2010年8月30日 月曜日 午後5時49分 FCC Note: (U.S. only) This equipment has been tested and found to comply with the limits for a Class B digital device, pursuant to Part 15 of the FCC Rules. These limits are designed to provide reasonable protection against harmful interference in a residential installation. This equipment generates, uses, and can radiate radio frequency energy and, if not installed and used in accordance with the instructions, may cause harmful interference to radio communications. However, there is no guarantee that interference will not occur in a particular installation. If this equipment does cause harmful interference to radio or television reception, which can be determined by turning the equipment off and on, the user is encouraged to try to correct the interference by one or more of the following measures: • Reorient or relocate the receiving antenna. • Increase the separation between the equipment and receiver. • Connect the equipment into an outlet on a circuit different from that to which the receiver is connected. • Consult the dealer or an experienced radio/TV technician for help. FCC Caution: To assure continued compliance, follow the attached installation instructions and use only shielded interface cables with ferrite core when connecting to computer or peripheral devices. Any changes or modifications not expressly approved by the party responsible for compliance could void the user’s authority to operate this equipment. Declaration of Conformity Trade Name: Leica Model No.: LEICA D-LUX 5 Responsible party/ Support contact: Leica Camera Inc. 1 Pearl Court, Unit A Allendale, New Jersey 07401 Tel.: i1 201 995 0051 232 Fax: i1 201 995 1684 e-mail: [email protected] This device complies with Part 15 of the FCC Rules. Operation is subject to the following two conditions: (1) This device may not cause harmful interference, and (2) this device must accept any interference received, including interference that may cause undesired operation. 44 FOR HOME OR OFFICE USE LEICA D-LUX5U-VQT3A31_eng.book 45 ページ 2010年8月30日 月曜日 午後5時49分 (U.K. only) Caution for AC mains lead For your safety, please read the following text carefully. This appliance is supplied with a moulded three pin mains plug for your safety and convenience. A 5-ampere fuse is fitted in this plug. Should the fuse need to be replaced please ensure that the replacement fuse has a rating of 5-ampere and that it is approved by ASTA or BSI to BS1362. Check for the ASTA mark or the BSI mark on the body of the fuse. If the plug contains a removable fuse cover you must ensure that it is refitted when the fuse is replaced. If you lose the fuse cover the plug must not be used until a replacement cover is obtained. A replacement fuse cover can be purchased from your local dealer. CAUTION! IF THE FITTED MOULDED PLUG IS UNSUITABLE FOR THE SOCKET OUTLET IN YOUR HOME THEN THE FUSE SHOULD BE REMOVED AND THE PLUG CUT OFF AND DISPOSED OF SAFELY. THERE IS A DANGER OF SEVERE ELECTRICAL SHOCK IF THE CUT OFF PLUG IS INSERTED INTO ANY 13AMPERE SOCKET. If a new plug is to be fitted please observe the wiring code as stated below. If in any doubt please consult a qualified electrician. IMPORTANT The wires in this mains lead are coloured in accordance with the following code: Blue: Neutral, Brown: Live. As these colours may not correspond with the coloured markings identifying the terminals in your plug, proceed as follows: The wire which is coloured Blue must be connected to the terminal which is marked with the letter N or coloured Black or Blue. The wire which is coloured Brown must be connected to the terminal which is marked with the letter L or coloured Brown or Red. WARNING: DO NOT CONNECT EITHER WIRE TO THE EARTH TERMINAL WHICH IS MARKED WITH THE LETTER E, BY THE EARTH SYMBOL OR COLOURED GREEN OR GREEN/YELLOW. THIS PLUG IS NOT WATERPROOFKEEP DRY. Before use Remove the connector cover. How to replace the fuse The location of the fuse differ according to the type of AC mains plug (figures A and B). Confirm the AC mains plug fitted and follow the instructions below. Illustrations may differ from actual AC mains plug. 1. Open the fuse cover with a screwdriver. Figure A Figure B Fuse cover 2. Replace the fuse and close or attach the fuse cover. Figure A Figure B Fuse (5 ampere) Fuse (5 ampere) 45 LEICA D-LUX5U-VQT3A31_eng.book 46 ページ 2010年8月30日 月曜日 午後5時49分 ∫ About the battery CAUTION Battery (Lithium ion battery) • Use the specified unit to recharge the battery. • Do not use the battery with equipment other than the specified unit. • Do not get dirt, sand, liquids, or other foreign matter on the terminals. • Do not touch the plug terminals (i and j) with metal objects. • Do not disassemble, remodel, heat or throw into fire. If any electrolyte should come into contact with your hands or clothes, wash it off thoroughly with water. If any electrolyte should come into contact with your eyes, never rub the eyes. Rinse eyes thoroughly with water, and then consult a doctor. CAUTION Danger of explosion if battery is incorrectly replaced. Replace only with the same or equivalent type recommended by Leica Camera AG (>50). Dispose of used batteries according to the instructions (>48). • Do not heat or expose to flame. • Do not leave the battery(ies) in an automobile exposed to direct sunlight for a long period of time with doors and windows closed. Warning Risk of fire, explosion and burns. Do not disassemble, heat above 60 xC (140 oF) or incinerate. (U.S. only) A recyclable lithium ion/polymer battery powers the product you have purchased. Please call 1-800-8-BATTERY for information on how to recycle this battery. This Class B digital apparatus complies with Canadian ICES-003. 46 LEICA D-LUX5U-VQT3A31_eng.book 47 ページ 2010年8月30日 月曜日 午後5時49分 ∫ About the charger CAUTION! • DO NOT INSTALL OR PLACE THE CHARGER IN A BOOKCASE, BUILT-IN CABINET OR IN ANOTHER CONFINED SPACE. ENSURE IT IS WELL VENTILATED. TO PREVENT RISK OF ELECTRIC SHOCK OR FIRE HAZARD DUE TO OVERHEATING, ENSURE THAT CURTAINS AND ANY OTHER MATERIALS DO NOT OBSTRUCT THE VENTILATION VENTS. • DO NOT OBSTRUCT THE CHARGER’S VENTILATION OPENINGS WITH NEWSPAPERS, TABLECLOTHS, CURTAINS, AND SIMILAR ITEMS. • DO NOT PLACE SOURCES OF NAKED FLAMES, SUCH AS LIGHTED CANDLES, ON THE CHARGER. • DISPOSE OF BATTERIES IN AN ENVIRONMENTALLY FRIENDLY MANNER. Charger This charger operates on AC between 110 V and 240 V. But • In the U.S.A. and Canada, the charger must be connected to a 120 V AC power supply only. • When connecting to an AC supply outside of the U.S.A. or Canada, use a plug adaptor to suit the AC outlet configuration. • The charger is in the standby condition when it is connected. The primary circuit is always “live” as long as the charger is connected to an electrical outlet. ∫ Cautions for Use • Do not use any other AV cables except the supplied one. • Do not use any other USB connection cables except the supplied one. • Always use the genuine Leica HDMI mini cable (available as accessory >50). Keep the camera as far away as possible from electromagnetic equipment (such as microwave ovens, TVs, video games etc.). • If you use the camera on top of or near a TV, the pictures and/or sound on the camera may be disrupted by electromagnetic wave radiation. • Do not use the camera near cell phones because doing so may result in noise adversely affecting the pictures and/or sound. • Recorded data may be damaged, or pictures may be distorted, by strong magnetic fields created by speakers or large motors. • Electromagnetic wave radiation generated by microprocessors may adversely affect the camera, disturbing the pictures and/or sound. • If the camera is adversely affected by electromagnetic equipment and stops functioning properly, turn the camera off and remove the battery. Then reinsert the battery and turn the camera on. Do not use the camera near radio transmitters or high-voltage lines. • If you record near radio transmitters or high-voltage lines, the recorded pictures and/or sound may be adversely affected. 47 LEICA D-LUX5U-VQT3A31_eng.book 48 ページ 2010年8月30日 月曜日 午後5時49分 Information for Users on Collection and Disposal of Old Equipment and used Batteries These symbols on the products, packaging, and/or accompanying documents mean that used electrical and electronic products and batteries should not be mixed with general household waste. For proper treatment, recovery and recycling of old products and used batteries, please take them to applicable collection points, in accordance with your national legislation and the Directives 2002/96/EC and 2006/66/EC. By disposing of these products and batteries correctly, you will help to save valuable resources and prevent any potential negative effects on human health and the environment which could otherwise arise from inappropriate waste handling. For more information about collection and recycling of old products and batteries, please contact your local municipality, your waste disposal service or the point of sale where you purchased the items. Penalties may be applicable for incorrect disposal of this waste, in accordance with national legislation. For business users in the European Union If you wish to discard electrical and electronic equipment, please contact your dealer or supplier for further information. [Information on Disposal in other Countries outside the European Union] These symbols are only valid in the European Union. If you wish to discard these items, please contact your local authorities or dealer and ask for the correct method of disposal. Note for the battery symbol (bottom two symbol examples): This symbol might be used in combination with a chemical symbol. In this case it complies with the requirement set by the Directive for the chemical involved. Cd 48 LEICA D-LUX5U-VQT3A31_eng.book 49 ページ 2010年8月30日 月曜日 午後5時49分 Table of Contents Information for Your Safety .......................................................................43 Scope of Delivery ......................................................................................50 Accessories...............................................................................................50 Names of the Components .......................................................................51 Charging the Battery .................................................................................54 About the Internal Memory/the Card.........................................................57 Inserting and Removing Card and Battery ................................................58 Setting Date/Time (Clock Set) ..................................................................59 • Changing the Clock Setting ................................................................59 Setting the Menu.......................................................................................60 Selecting the [REC] Mode.........................................................................61 Program Mode ..........................................................................................63 • Program Shift ......................................................................................64 Snapshot Mode.........................................................................................65 • Scene Detection..................................................................................66 • AF Tracking Function..........................................................................66 Exposure Compensation...........................................................................67 Aperture- and Shutter-Priority Modes .......................................................68 • Aperture-Priority Mode [±] .................................................................68 • Shutter-Priority Mode [´] ...................................................................68 Manual Exposure Mode ............................................................................69 Recording Motion Pictures ........................................................................70 Playing Back Pictures ([NORMAL PLAY]) ................................................71 Deleting Pictures.......................................................................................72 Using the Instructions on the supplied CD-ROM ......................................73 Technical Data ..........................................................................................74 Leica Service Addresses ..........................................................................77 49 LEICA D-LUX5U-VQT3A31_eng.book Scope of Delivery 50 ページ 2010年8月30日 月曜日 午後5時49分 Accessories Order No. Rechargeable battery BP-DC10-E BP-DC10-U Charger BC-DC10-E BC-DC10-U Mains cable EU UK AUS TW CN KR Order No. Everready case 18 722 18 719 18 720 Leather case 18 723 Soft leather case 18 724 423-092.001-010 423-092.002-010 Hand grip D-LUX 5 18 715 Electronic Viewfinder EVF1 18 716 423-068.801-019 423-068.801-020 423-068.801-023 424-025.002-000 423-082.805-004 423-082.805-005 (delivery differs depending on markets) HDMI mini cable 14 491 LEICA CF 22 Flash unit 18 694 Shoulder strap 423-092.001-014 Lens cap 423-092.001-018 Lens cap string 423-092.001-019 CD with instr. PDFs 423-092.001-016 USB cable 423-092.001-020 AV cable 423-092.001-022 Battery case 424-036.001-000 Hot shoe cover 423-092.001-015 Button template for Canada / Taiwan 423-092.001-025 Short instructions 93 357 -360 (delivery differs depending on markets) Notice regarding registration and SW download 93 367 Warranty Card 439-399.100-026 Mini tripod 14 320 Tabletop tripod 14 110 Ball and Socket head 14 100 Notes: • Cards are optional. You can record or play back pictures on the internal memory when you are not using a card. • Check that all items belonging to the scope of delivery are included before using the camera. • The items and their shape may differ depending on the country or area where the camera was purchased. • Please dispose of all packaging appropriately (>48). 50 LEICA D-LUX5U-VQT3A31_eng.book 51 ページ 2010年8月30日 月曜日 午後5時49分 Names of the Components 1 2 3 4 5 Lens Self-timer indicator AF Assist Lamp Flash Shoulder strap eyelet Focus selector switch 6 7 8 9 10 11 12 LCD monitor [AF/AE LOCK] button Playback button Status indicator [MENU/SET] button [DISPLAY] button [Q.MENU]/Delete button 1 2 6 3 7 13 4 5 8 9 10 11 12 14 13 Rear dial Rear dial operation is indicated as follows in these instructions: e.g.: Rotate to the left or to the right e.g.: Press 51 LEICA D-LUX5U-VQT3A31_eng.book 52 ページ 2010年8月30日 月曜日 午後5時49分 14 Cursor buttons 3/[FOCUS] button 4/Function button Assign Menu to 4 button. It is convenient to register a Menu that is used often. [FILM MODE]/[QUALITY]/[METERING MODE]/[WHITE BALANCE]/ [AF MODE]/[I.EXPOSURE]/[GUIDE LINE]/[ REC AREA]/ [REMAINING DISP.]/[FLASH]/[AUTO BRACKET]/[ASPECT BRACKET] 2/Self-timer button 1/ISO Cursor button operation, e.g. when one of them should be pressed, is indicated as follows in these instructions: or Aspect ratio selector switch Microphone Zoom lever Motion picture button Flash open switch Hot shoe cover • Keep the hot shoe cover out of reach of children to prevent swallowing. 21 Mode dial 22 Shutter button 23 Camera ON/OFF switch Press 4 15 16 17 18 19 20 24 25 26 27 [HDMI] socket [AV OUT/DIGITAL] socket Lens ring front Lens barrel 15 19 20 16 17 18 21 22 23 26 24 25 27 52 LEICA D-LUX5U-VQT3A31_eng.book 53 ページ 2010年8月30日 月曜日 午後5時49分 28 Tripod thread 28 29 30 • When you use a tripod, make sure the tripod is stable when the camera is attached to it. 29 Speaker • Do not cover the speaker with your 31 fingers. 30 Card/Battery door • We recommend using a battery with sufficient power when recording motion pictures. 31 Release lever 53 LEICA D-LUX5U-VQT3A31_eng.book 54 ページ 2010年8月30日 月曜日 午後5時49分 Charging the Battery ∫ About batteries you can use with this camera Use only the Leica battery BP-DC10 E/U (>50). It has been found that counterfeit batteries which look very similar to the genuine product are made available to purchase in some markets. Some of these batteries are not adequately protected with internal protection to meet the requirements of appropriate safety standards. There is a possibility that these batteries may lead to fire or explosion. Please be advised that we are not liable for any accident or failure occurring as a result of use of a counterfeit battery. To ensure safe operation we urgently recommend to use only the Leica battery BP-DC10 E/U (>50). • Use only the specified charger and battery. • The camera has a function for distinguishing batteries which can be used safely. The dedicated battery supports this function. The only batteries suitable for use with this camera is the Leica battery BP-DC10 E/U (>50). (Batteries which do not support this function cannot be used.) Leica cannot in any way guarantee the quality, performance or safety of any other batteries. ∫ Charging • The battery is not charged when the camera is shipped. Charge the battery before use. • Charge the battery with the charger indoors. • It is recommended to charge the battery in a temperature between 10 oC to 30 oC (50 oF to 86 oF). (The battery temperature should also be the same.) 54 LEICA D-LUX5U-VQT3A31_eng.book 55 ページ 2010年8月30日 月曜日 午後5時49分 Insert the battery into the charger. • The terminals should face the charger’s contacts and the Leica logo upwards. Connect the charger to the electrical outlet. plug-in type • Disconnect the charger from the electrical socket and detach the battery after charging is completed. 90 cable type ∫ About the [CHARGE] indicator The [CHARGE] indicator A turns on: Charging has started. The [CHARGE] indicator A turns off: Charging has been completed without any problem. • When the [CHARGE] indicator flashes – The battery temperature is too high or too low. It is recommended to charge the battery again in an ambient temperature of between 10 oC to 30 oC (50 oF to 86 oF). – The terminals of the charger or the battery are dirty. In this case, wipe them with a dry cloth. 55 LEICA D-LUX5U-VQT3A31_eng.book 56 ページ 2010年8月30日 月曜日 午後5時49分 ∫ Charging time Charging time Approx. 155 min ∫ Recording still pictures [when using the LCD monitor/the Electronic Viewfinder EVF1 (available as accessory >50)] Number of recordable pictures Approx. 400 pictures Recording time Approx. 200 min By CIPA standard in Program Mode Recording conditions by CIPA standard • CIPA is an abbreviation of [Camera & Imaging Products Association]. • Temperature: 23 oC (73.4 oF)/Humidity: 50%RH when LCD monitor is on. • Using a 32 MB SD Memory Card. • Using the supplied battery. • Starting recording 30 seconds after the camera is turned on. (When the Optical Image Stabilizer function is set to [AUTO].) • Recording once every 30 seconds with full flash every second recording. • Rotating the zoom lever from Tele to Wide or vice versa in every recording. • Turning the camera off every 10 recordings and leaving it until the temperature of the battery decreases. ∫ Playback [when using the LCD monitor/the Electronic Viewfinder EVF1 (available as accessory >50)] Playback time 56 Approx. 360 min LEICA D-LUX5U-VQT3A31_eng.book 57 ページ 2010年8月30日 月曜日 午後5時49分 About the Internal Memory/the Card Internal Memory • Memory size: Approx. 40 MB • The internal memory can be used as a temporary storage device when the card being used becomes full. • The access time for the internal memory may be longer than the access time for a card. Card The following cards which conform to the SD video standard can be used with the camera. Type of card which can be used with the camera SD Memory Card (8 MB to 2 GB) SDHC Memory Card (4 GB to 32 GB) SDXC Memory Card (48 GB, 64 GB) Remarks • SDHC Memory Card can be used with SDHC Memory Card or SDXC Memory Card compatible equipment. • SDXC Memory Card can only be used with SDXC Memory Card compatible equipment. • Check that the PC and other equipment are compatible when using the SDXC Memory Cards. • Only cards bearing the SDHC logo (indicating that the card conforms to SD video standards) may be used as 4 GB to 32 GB cards. • Only cards bearing the SDXC logo (indicating that the card conforms to SD video standards) may be used as 48 GB and 64 GB cards. • Use a card with SD Speed Class¢ with “Class 4” or higher when recording motion pictures in [AVCHD Lite]. Also, use a card with SD Speed Class with “Class 6” or higher when recording motion pictures in [MOTION JPEG]. ¢ SD Speed Class is the speed standard regarding continuous writing. Note • Keep the Memory Card out of reach of children to prevent swallowing. 57 LEICA D-LUX5U-VQT3A31_eng.book 58 ページ 2010年8月30日 月曜日 午後5時49分 Inserting and Removing Card and Battery • Check that the camera is turned off. • Close the flash. Set the camera ON/OFF switch to OFF, slide the release lever in the direction of the arrow, and open the card/battery door. • Use only the Leica battery BP-DC10 E/U (>50). • We cannot guarantee the quality of any other batteries. Insert battery and card. Be sure to insert in the correct orientation. Battery: Push it in until it is locked by the lever A. To remove, pull this lever in the direction of the arrow. Card: Push it down until it clicks into place. To remove, push it further down until it clicks, then pull it out upright. B: Do not touch the connection terminals of the card. • The card may be damaged if it is not fully inserted. 1:Close the card/battery door. 2:Slide the release lever in the direction of the arrow. 58 LEICA D-LUX5U-VQT3A31_eng.book 59 ページ 2010年8月30日 月曜日 午後5時49分 Setting Date/Time (Clock Set) • The clock is not set when the camera is shipped. Turn the camera on. A [MENU/SET] button B Cursor buttons Press [MENU/SET]. Press 3/4 to select the language, and press [MENU/SET]. Press [MENU/SET]. Press 2/1 to select the items (year, month, day, hour, minute, display sequence or time display format), and press 3/4 to set. • You can cancel without setting the clock by pressing [‚]. Press [MENU/SET] to set. Press [MENU/SET]. • Press [‚] to return to the settings screen. Changing the Clock Setting Select [CLOCK SET] in the [REC] or [SETUP] menu, and press 1. • It can be changed in steps 5 and 6 to set the clock. 59 LEICA D-LUX5U-VQT3A31_eng.book 60 ページ 2010年8月30日 月曜日 午後5時49分 Setting the Menu This section describes how to select the [REC] Mode menu settings. The same setting can also be used for the [MOTION PICTURE], [PLAYBACK], and [SETUP] menus. Example: Setting [AF MODE] from [Ø] to [š] in the Program Mode Press [MENU/SET] to display the menu. Press 3/4 to select [AF MODE] and then press 1. • Depending on the item, its setting may not appear or it may be displayed in a different way. Press 3/4 to select [š] and then press [MENU/SET] to set. Press [MENU/SET] to close the menu. Switching to other menus e.g.: Switching to the [SETUP] menu 60 1 2 3 Press [MENU/SET] to display the menu. 4 Press 1. • Select a menu item next and set it. Press 2. Press 4 to select the [SETUP] menu icon [ ]. LEICA D-LUX5U-VQT3A31_eng.book 61 ページ 2010年8月30日 月曜日 午後5時49分 Mode switching Selecting the [REC] Mode Turn the camera on. A Mode dial • The status indicator 2 lights up when you turn the camera on 1. (It turns off after about 1 second.) Change modes by rotating the mode dial. Align the desired mode with index B. • Make sure the dial is set exactly to the click-stop position of the desired mode. (The mode dial rotates 360o) ∫ Basic Program Mode For taking pictures with automatic exposure control. Snapshot Mode For taking pictures with extended automatic settings. 61 LEICA D-LUX5U-VQT3A31_eng.book 62 ページ 2010年8月30日 月曜日 午後5時49分 ∫ Advanced Aperture-Priority Mode The exposure is determined by the automatically controlled shutter speed, based on the manually set aperture value. Shutter-Priority Mode The exposure is determined by the automatically controlled aperture value, based on the manually set shutter speed. Manual Exposure Mode The exposure is determined by the manually set aperture value and shutter speed. Creative Motion Picture Mode For recording motion pictures with manual settings. Custom Mode For taking pictures with previously registered settings. Scene Mode For taking pictures that match the scene being recorded. My Color Mode For taking pictures with one of twelve color modes, the effects of which can be checked before on the monitor. 62 LEICA D-LUX5U-VQT3A31_eng.book 63 ページ 2010年8月30日 月曜日 午後5時49分 [REC] Mode: ³ Program Mode The camera automatically sets both shutter speed and aperture value according to the brightness of the subject. You can change various settings in the [REC] menu. Set the mode dial to [ ]. • Set the focus selector switch to [AF]. AF AF MF Aim the AF frame 1 at the point you want to focus on. 2 Press the shutter button halfway to focus. • The focus indication 2 (green) lights up when the subject is focused. • The focus range is 50 cm (1p 7 11/16q) to ¶. 1 Press the shutter button fully to take a picture. 63 LEICA D-LUX5U-VQT3A31_eng.book 64 ページ 2010年8月30日 月曜日 午後5時49分 Program Shift In Program Mode, you can change the preset aperture value and shutter speed without changing the exposure. This is called Program Shift. You can make the background more blurred by decreasing the aperture value or record a moving subject more dynamically by slowing the shutter speed. A • Press the shutter button halfway and then use the rear dial to activate Program Shift while the aperture value and the shutter speed are displayed on the screen (about 10 seconds). • The Program Shift indication A appears on the screen when Program Shift is activated. • Program Shift is canceled if the camera is turned off or the rear dial is rotated back until the Program Shift indication disappears, i.e. is set back to 0. ∫ Example of Program Shift (A): Aperture value (B): Shutter speed 1 Program Shift range 2 Automatic camera setting 3 Program Shift limit 1 2 3 4 5 1 1/2 1/4 1/8 1/15 6 7 8 9 10 11 12 13 2 2.8 (A) 4 5.6 8 11 64 1/30 1/60 1/125 1/250 1/500 1/1000 1/2000 1/4000 (B) 14 (Ev) LEICA D-LUX5U-VQT3A31_eng.book 65 ページ 2010年8月30日 月曜日 午後5時49分 [REC] Mode: Snapshot Mode The camera will set the most appropriate settings to match the subject and the recording conditions so we recommend this mode for beginners or those who want to leave the settings to the camera and take pictures easily. Set the mode dial to [ ]. 1 Press the shutter button halfway to focus. • The focus indication 1 (green) lights up when the subject is focused. • The AF frame 2 is placed over the subject’s face by the Face Detection function. In other cases, it is placed at the point on the subject which is in focus. • The focus range is 1 cm (3/8q) (Wide)/ 30 cm (1p) (Tele) to ¶. 2 Press the shutter button fully to take a picture. 65 LEICA D-LUX5U-VQT3A31_eng.book 66 ページ 2010年8月30日 月曜日 午後5時49分 Scene Detection When the camera identifies the optimum scene, the icon of the scene concerned is displayed in blue for 2 seconds, after which its color changes to the usual red. > [i-PORTRAIT] [i-SCENERY] [i-MACRO] [i-NIGHT PORTRAIT] • Only when [ ] is selected [i-NIGHT SCENERY] [i-SUNSET] [i-BABY] •[ ] is set if none of the scenes are applicable, and the standard settings are set. • When [ ], [ ] or [ ] is selected, the camera automatically detects a person’s face, and it will adjust the focus and exposure. (Face Detection) AF Tracking Function It is possible to have the focus set to the targeted subject. Focus and exposure will keep following the subject automatically even if it moves. 1 Press 3 (FOCUS). • [ ] is displayed in the upper left of the screen. • AF Tracking frame is displayed in the center of the screen. 2 • Press 3 (FOCUS) again to cancel. Aim the AF Tracking frame at your subject and press [AF/AE LOCK] to lock the subject. • The AF Tracking frame will turn yellow. • An optimum scene mode for the framed subject will be chosen. • Press 3 (FOCUS) to cancel. 66 LEICA D-LUX5U-VQT3A31_eng.book 67 ページ 2010年8月30日 月曜日 午後5時49分 [REC] Mode: Exposure Compensation Use this function to adjust the exposure to the important part of the subject in case of large differences in brightness within the frame. Press the rear dial to select [È], and then rotate it to compensate the exposure. A Exposure compensation value • Every time the rear dial is pressed, it switches the activated operation. • Exposure compensation operation is active when [È] at the bottom left of the screen changes to orange. • The exposure compensation value can be set within a range of j3 EV to i3 EV. • Select [È] only to return to the original exposure (0 EV). A Take a picture. 67 LEICA D-LUX5U-VQT3A31_eng.book 68 ページ 2010年8月30日 月曜日 午後5時49分 [REC] Mode: Aperture- and Shutter-Priority Modes Aperture-Priority Mode [±] Set the aperture value to a higher number when you want a larger in-focus area (in front of and behind the main subject), to a lower number for a smaller in-focus area. Set the mode dial to [ ]. Rotate the rear dial to set the aperture value. A Aperture Value Take a picture. A Shutter-Priority Mode [´] When you want to take a sharp picture of a fast moving subject, set with a faster shutter speed. When you want to create a trailing effect, set to a slower shutter speed. Set the mode dial to [ ]. Rotate the rear dial to set the shutter speed. B Shutter Speed Take a picture. 68 B LEICA D-LUX5U-VQT3A31_eng.book 69 ページ 2010年8月30日 月曜日 午後5時49分 [REC] Mode: Manual Exposure Mode Determine the exposure by manually setting the aperture value and the shutter speed. Set the mode dial to [²]. • The Manual Exposure Assistance A appears for about 10 seconds. Rotate the rear dial to set the aperture and shutter speed. B Aperture Value C Shutter Speed • Every time the rear dial is pressed, it switches between aperture setting and shutter speed setting operation. B C Press the shutter button halfway. • The Manual Exposure Assistance A appears for about 10 seconds. Take the picture. A ∫ Manual Exposure Assistance The exposure is appropriate. Set to faster shutter speed or larger aperture value. Set to slower shutter speed or smaller aperture value. • The Manual Exposure Assistance is an approximation. 69 LEICA D-LUX5U-VQT3A31_eng.book 70 ページ 2010年8月30日 月曜日 午後5時49分 [REC] Mode: Recording Motion Pictures You can record high definition motion pictures compatible either with the AVCHD format or Motion JPEG. Audio will be recorded in monaural. Select the desired mode with the Mode dial. A Start recording by pressing the motion picture button. A Available recording time B Elapsed recording time • Motion pictures will be recorded in the aspect ratio set in [REC QUALITY] regardless of the position of the aspect ratio selector switch. • Release the motion picture button right after you press it. • The recording state indicator (red) C will flash while recording motion pictures. C B Stop the recording by pressing the motion picture button again. • If the internal memory or the card becomes full during recording, the process will be stopped automatically. Note • With camera models 18 151 / 18 152: Motion pictures can be recorded continuously in [MOTION JPEG] up to a capacity of 2 GB. Only the maximum recordable time for 2 GB is displayed on the screen. Maximum time to record motion pictures continuously with [AVCHD Lite] is 13 hours 3 minutes 20 seconds. Screen will only display up to 13 hours 3 minutes 20 seconds. However, the recording may stop before that depending on the remaining battery level. • With camera model 18 150: Motion pictures can be recorded continuously for up to 29 minutes. Also, motion pictures can be recorded continuously in [MOTION JPEG] up to a capacity of 2 GB. (Example: [8m 20s] with [ ]) Remaining time for continuous recording is displayed on the screen. 70 LEICA D-LUX5U-VQT3A31_eng.book 71 ページ 2010年8月30日 月曜日 午後5時49分 [PLAYBACK] Mode: ¸ Playing Back Pictures ([NORMAL PLAY]) Press [(]. Press 2/1 to select the picture. • After selecting a motion picture, press 3 to start playback. 71 LEICA D-LUX5U-VQT3A31_eng.book 72 ページ 2010年8月30日 月曜日 午後5時49分 [PLAYBACK] Mode: ¸ Deleting Pictures Once deleted, pictures cannot be recovered. • The picture being played back is deleted, regardless of whether it is recorded on the internal memory or the card. Select the picture to be deleted, and then press [‚]. A [‚] button Press 2 to select [YES] and then press [MENU/SET]. 72 LEICA D-LUX5U-VQT3A31_eng.book 73 ページ 2010年8月30日 月曜日 午後5時49分 Using the Instructions on the supplied CD-ROM • You have practised the basic operations introduced in these instructions and want to progress to advanced operations. • You want to check the Troubleshooting. In these kinds of situations refer to instructions (PDF format) on the supplied CD-ROM. Turn the PC on and insert the supplied CD-ROM. Open the CD-ROM. Double click on the PDF with the desired language to open it. ∫ When the Instructions (PDF format) will not open You will need Adobe Acrobat Reader 5.0 or later or Adobe Reader 7.0 or later to browse or print the instructions (PDF format). • You can download and install a version of Adobe Reader that you can use with your OS from the following Web Site. http://get.adobe.com/reader/otherversions 73 LEICA D-LUX5U-VQT3A31_eng.book 74 ページ 2010年8月30日 月曜日 午後5時49分 Technical Data Image sensor 1/1.63q CCD sensor, total pixel number: 11,300,000, primary color filter Effective pixels 10,100,000 Minimum illuminance approx. 3 lx (when i-low light is used) Lens LEICA DC VARIO-SUMMICRON f/2.0 (wide) – 3.3 (tele) 5.1 – 19.2 mm ASPH. 35 mm camera equivalent: 24 – 90 mm Focus range P/A/S/M 50 cm/1p 7 11/16q to ¶ Macro/ Snapshot 1 cm/3/8q (Wide)/30 cm/1p (Tele) to ¶ Scene modes May differ from ranges above. Digital Zoom max. 4k Shutter system Electronically and mechanically controlled Shutter speed 60 s to 1/4000 s, [STARRY SKY] mode: 15 s/30 s/ 60 s Series exposures Low speed Exposure frequency 2.5 fps Number of recordable pictures max. 5/3 (Standard/Fine) High speed Exposure frequency 74 approx. 10/6.5 fps (Speed/Image priority) LEICA D-LUX5U-VQT3A31_eng.book Number of recordable pictures 75 ページ 2010年8月30日 月曜日 午後5時49分 [2.5M (1:1), 3M (4:3), 2.5M (3:2) or 2M (16:9) is selected as the resolution.] approx. 15 when using the internal memory, immediately after formatting/ max. 100 when using a card (may differ depending on the type of card and the recording conditions) Exposure modes Program (P), Aperture-Priority (A), Shutter-Priority (S), Manual setting (M) Exposure compensation (increments: 1/3 EV Steps, range: n3 EV) Metering modes Multiple/Center weighted/Spot Flash Built-in pop-up flash unit Flash modes AUTO, AUTO w. Red-eye reduction, ON (ON w. Red-eye reduction), Slow sync. w. Red-eye reduction, OFF Flash range (with ISO AUTO) approx. 80 cm/2p 7 3/32q – 7.2 m/23p 7q (with maximum wide angle setting) LCD monitor 3.0q TFT LCD (approx. 460,000 dots), shows approx. 100% of the captured frame Microphone Monaural Speaker Monaural Recording media Internal Memory (approx. 40 MB), SD/SDHC/SDXC Memory Card Recording file format Still Pictures Motion pictures (with audio) RAW/JPEG (based on Exif 2.3 standard)/DPOF compatible AVCHD Lite/QuickTime Motion JPEG 75 LEICA D-LUX5U-VQT3A31_eng.book Operating temperature/ humidity 76 ページ 2010年8月30日 月曜日 午後5時49分 0 o – 40 oC/32 o – 104 oF/10 – 80%RH Interface Digital: USB 2.0 (High Speed) (With model no. 18 150, data from the PC cannot be written to the camera using the USB connection cable.) Analog video/audio: NTSC/PAL Composite (Switched by menu), Audio line output (monaural) Terminals HDMI: for HDMI mini cable (type C) AV OUT/DIGITAL: Dedicated jack (8 pin) Dimensions (WkHkD; lens retracted) Weight (with/without card and battery) approx. 109.7k65.5k43 mm/ 4 5/16k2 9/16k1 11/16q approx. 271 g/0.597 lbs/233 g/0.514 lbs Battery (lithium-ion) Voltage/capacity 3.6 V/1250 mAh Charger Input AC 110 – 240 V 50/60 Hz, 0.2 A Output DC 4.2 V 0.65 A 76 LEICA D-LUX5U-VQT3A31_eng.book 77 ページ 2010年8月30日 月曜日 午後5時49分 Leica Service Addresses Leica Academy As well as outstanding high-performance products for taking and viewing photographs, for many years we have also been offering the special services of the Leica Akademie, with practical seminars and training courses, which are intended to share our knowledge about the world of photography, projection and magnification with both beginners and advanced photographic enthusiasts. The contents of the courses, which are run by a trained team of experts in the modern, well-equipped training suite at our Solms factory and in the nearby Gut Altenberg, vary from general photography to areas of special interest and offer a range of suggestions, information and advice for your own work. More detailed information and the current Leica Akademy brochure are available from: Leica Camera AG Leica Akademie Oskar-Barnack-Str. 11 D-35606 Solms Phone: +49 (0) 6442-208-421 Fax: +49 (0) 6442-208-425 [email protected] Leica on the Internet Current information about products, news, events and the Leica company is available on our homepage on the Internet at: http://www.leica-camera.us http://www.leica-camera.co.uk 77 LEICA D-LUX5U-VQT3A31_eng.book 78 ページ 2010年8月30日 月曜日 午後5時49分 Leica information service The Leica information service can provide you with an answer to any technical questions relating to the Leica range either in writing, on the telephone or by e-mail. Leica Camera AG Informations-Service Postfach 1180 D-35599 Solms Phone: +49 (0) 6442-208-111 Fax: +49 (0) 6442-208-339 [email protected] Leica Customer Service Leica AG’s Customer Service center, or the repair service of the Leica national offices (see the Warranty Card for an address list), is available to assist you in maintaining your Leica equipment or in case of damage. Please contact your nearest authorised Leica dealer. Leica Camera AG Customer Service Solmser Gewerbepark 8 D-35606 Solms Phone: +49 (0) 6442-208-189 Fax: +49 (0) 6442-208-339 [email protected] 78 LEICA D-LUX5U-VQT3A31_eng.book 79 ページ 2010年8月30日 月曜日 午後5時49分 • SDXC Logo is a trademark of SD-3C, LLC. • The “AVCHD”, “AVCHD Lite” and the “AVCHD”, “AVCHD Lite” logo are trademarks of Panasonic Corporation and Sony Corporation. • Manufactured under license from Dolby Laboratories. Dolby and the double-D symbol are trademarks of Dolby Laboratories. • HDMI, the HDMI Logo, and High-Definition Multimedia Interface are trademarks or registered trademarks of HDMI Licensing LLC in the United States and other countries. • QuickTime and the QuickTime logo are trademarks or registered trademarks of Apple Inc., used under license therefrom. • Leica is a registered trademark of Leica Microsystems IR GmbH. • Summicron is a registered trademark of Leica Camera AG. • Other names, company names, and product names printed in these instructions are trademarks or registered trademarks of the companies concerned. This product is licensed under the AVC patent portfolio license for the personal and non-commercial use of a consumer to (i) encode video in compliance with the AVC Standard (“AVC Video”) and/or (ii) decode AVC Video that was encoded by a consumer engaged in a personal and non-commercial activity and/or was obtained from a video provider licensed to provide AVC Video. No license is granted or shall be implied for any other use. Additional information may be obtained from MPEG LA, LLC. See http://www.mpegla.com. EU 79 ENGLISH NEDERLANDS Errata: The software available for downloading on the Leica Camera AG homepage Errata: De software die na registratie van het toestel beschikbaar is om gedownload after registering your camera is Adobe® Lightroom® 3! te worden naar de home-pagina van de Leica Camera AG, is Adobe® (Not Adobe® Premiere® Elements®, as mistakenly stated in the instructions.) Lightroom® 3! DEUTSCH (Niet Adobe® Premiere® Elements®, zoals verkeerd in de instructies vermeld werd.) Korrektur: Die Software, die für Ihre Kamera nach der Registrierung kostenlos zum Download von der Leica Camera AG Homepage zur Verfügung steht, ist 中文 Adobe® Lightroom® 3! (Nicht Adobe® Premiere® Elements®, wie in der Anleitung irrtümlich vermerkt.) FRANÇAIS Errata: Le logiciel disponible en téléchargement sur le site web Leica Camera AG après l’enregistrement de votre appareil photo est Adobe® Lightroom® 3! (Et non Adobe® Premiere® Elements®, comme déclaré par erreur dans le mode d’emploi.) ESPAÑOL Errata: El software disponible para descargar desde la página de inicio de Leica 正誤表: 在 Leica Camera AG 的首頁上註冊了您的相機後下載並可用的軟體 為 Adobe® Lightroom® 3! (說明書中記述錯誤,不是 Adobe® Premiere® Elements®。) 简体中文 正误表 : 在 Leica Camera AG 的主页上注册了您的相机后下载并可用的软件 为 Adobe® Lightroom® 3! (说明书中记述错误,不是 Adobe® Premiere® Elements®。) Camera AG luego de registrar su cámara es Adobe® Lightroom® 3! (No Adobe® Premiere® Elements®, como se indicó erróneamente en las instrucciones.) ITALIANO Errata corrige: Il software disponibile per il download sulla home page di Leica Camera AG dopo aver registrato la propria fotocamera è Adobe® Lightroom® 3! (Non Adobe® Premiere® Elements®, come indicato per errore nelle istruzioni.) XX XXX / VQC8256 日本語 正誤表: ライカ・カメラのホームページで、ご登録後にダウンロードできるソフト ウェアは Adobe® Lightroom® 3 です! (Adobe® Premiere® Elements® ではありません。取扱説明書の記載は 誤りです) Leica Camera AG / Oskar-Barnack-Straße 11 / 35606 SOLMS / GERMANY Telephone +49(0)6442-208-0 / Telefax +49(0)6442-208-333 www.leica-camera.com 93 358 / VQT3A34 r_Instructions_D-Lux 5_93358_rz.indd 2 22.07.10 13