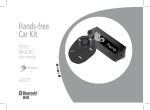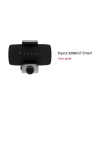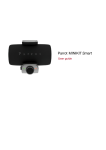
1
PARROT
MINIKIT Slim Series
Quick start guide
Guide d’utilisation rapide
Guía de instalación rápida
Bedienungsanleitung
Guida all’uso
Gebruikershandleiding
Manual do utilizador
- USB/mini USB cable
- câble USB-MiniUSB
- cable USB-Mini USB
- USB/Mini-USB-Anschlusskabel
- cavo USB-mini-USB
- USB/mini-USB kabel
- cabo USB-MiniUSB
- 12 V accessory socket charger - mini USB
- chargeur allume-cigare 12V type miniUSB
- carregador de isqueiro de 12V tipo miniUSB
- 12 V-Ladegerät für den Zigarettenanzünder, Typ Mini-USB
- caricatore accendisigari da 12 V di tipo mini-USB
- sigarenaansteker oplader 12V type mini-USB
- cargador de mechero 12 V, tipo mini USB
Parrot MINIKIT Slim
English..............................................p.07
Français............................................p.11
Español.............................................p.15
Deutsch............................................ p.19
Italiano.............................................. p.23
Nederlands....................................... p.27
Portuguese....................................... p.31
General Information..........................p.35
www.parrot.com
A
B
Mini USB
Reset
PIN code : 1234
C
4
English
Before you begin
Warning
-- The explanations provided in this guide are for any MINIKIT Slim model (MINIKIT Slim, MINIKIT Limited
Edition etc.)
-- If your MINIKIT Slim gets out of reach while driving, stop the vehicle in a safe location before picking
or hanging up a call.
-- The MINIKIT Slim is a high technology product. Please handle the speaker with care.
-- The cigar lighter charger of the MINIKIT Slim can only be used in cars.
About this
guide
In order to limit our paper consumption, and as part of our environmentally friendly and responsible approach, Parrot prefers to put user documents online rather than print them out.
This simplified guide to the MINIKIT Slim is therefore limited to providing you with the main instructions
that will make it easy for you to use the device. More information can be found on the Support & Downloads section of our website, www.parrot.com: the full manual, FAQs, tutorials, and more.
Software
updates
Download the latest update for free (and check the update procedure) on our website www.parrot.com,
in the Support & Downloads section. These updates will enable you to receive new features and improve
the product’s compatibility.
http://www.parrot.com/uk/support
Complete user guide, tutorials, software updates...
5
Getting started
Charging the MINIKIT Slim
•  The MINIKIT Slim must be charged before being used for
the first time. To do so, plug the charger into your vehicle’s
cigar lighter or connect the MINIKIT Slim to your computer
using the provided USB/mini-USB cable (► figure A p.5).
•  The LED located next to the mini-USB port turns red toindicate that the battery is being charged. The LED turns off
once the battery is fully charged.
•  When the battery level is low, the MINIKIT Slim emits a
series of beeps.
Installing the MINIKIT Slim Use the clip located on the back of the MINIKIT Slim to fix it to
the sun visor of your vehicle (► figure C p.5).
Turning the MINIKIT Slim on / off
•  Press the red
•  Hold down the
6
button to turn on the MINIKIT Slim.
button for 2 seconds to turn it off.
Accessing the MINIKIT Slim menu
•  Press the jog wheel to access the main menu.
•  Browse through the menus by turning the jog wheel and
confirm with the green button or by pressing the jog
wheel.
•  To exit the menu, press the red
few seconds.
button or wait for a Pairing and connecting a phone / PDA
by Bluetooth®
•  Before using the MINIKIT Slim with your phone, you first
have to pair both devices. The pairing process is only
required once.
1. From your Bluetooth phone, search for Bluetooth
peripherals.
2. Select “MINIKIT Slim”.
3. Enter the “1234” PIN code and validate.
> The MINIKIT Slim says «Pairing successful» when
both devices are paired.
•  Depending on the model of your phone, the connection
will then be automatic as soon as you enter your vehicle.
Using the telephone function
•  With some Bluetooth phones, the phonebook is
automatically synchronized in the kit’s memory.
Receiving a call
•  If your phone doesn’t support automatic synchronization,
you can also send contacts manually from your mobile to
the car kit via Bluetooth. To do so:
•  An incoming call is indicated by a ringtone. The name
of the caller is announced if his number is recorded in
the phonebook of the phone connected to the MINIKIT
Slim.
Synchronising the phonebook
1. From the main menu, select Receive contacts.
> The kit says «Awaiting a contact».
2. Refer to your phones’ user guide for more information about sending contacts (via Object Push).
Recording voice tags
•  All your contacts, after automatic synchronization or Object
Push process, are directly provided with a voice tag in the
MINIKIT Slim. Consequently, you don’t have to record your
own voice tag on each contact to make a call via the voice
recognition process.
•  However, if the MINIKIT Slim doesn’t understand the name
of one of your contacts or if a voice tag is too long, you can
record a new one. To do so, press the jog wheel and select
Add voice tags.
•  If you want to answer the call, press the green button. Then
press the red button to end the call.
•  If you want to refuse this call, press the red button.
Making a call
•  To make a call via voice recognition:
1. Press the green button to launch the voice
recognition feature.
> The MINIKIT Slim asks you the name of the contact
you want to call.
2. Say the name of the contact and the type of number
(«Work», «Cellphone»...) if there are several numbers associated to your contact.
> The call is automatically launched if the voice tag is
correctly understood.
> If it is not the case, a confirmation message is
asked by the kit. Confirm by saying “Yes” or “Call”.
7
At any time, press the red key to exit voice recognition
mode.
•  To make a call manually:
1. Press the jog wheel to enter the main menu and select
Phonebook.
> You access the phonebook of the connected phone.
2. Select a letter and push the jog wheel.
3. Once the contact chosen:
-- Press the green key to call this contact;
-- Use the jog wheel to choose between different numbers of the same contact.
•  Hold down the green key of the MINIKIT Slim for two
seconds to redial the last dialled number.
Using the MINIKIT Slim while on a call
•  Use the jog wheel during a call to adjust the communication
volume. The volume setting is saved for subsequent calls.
•  During a call, if you want to continue the conversation on
your phone (private conversation), press the button of the
MINIKIT Slim.
•  During a call, the MINIKIT Slim allows you to send DTMFs
to manage your voice mail for example. To do so, press the
jog wheel to access the DTMF menu.
8
Troubleshooting
The kit says «Memory full»
You can pair up to five devices. If you attempt to pair a sixth
phone, the kit says «memory full». You must clear the memory
by holding down both the red and green buttons for three
seconds. Doing so also clears all the contacts.
The kit seems to be frozen
In case of malfunction, you can reboot the MINIKIT Slim.
1. Press simultaneously the jog wheel and the Reset button located at the back of the MINIKIT Slim (► figure A p.6).
2. Release the Reset button.
> You can now release the jog wheel.
The kit does not seem to work with my phone
•  Make sure your phone is compatible with the MINIKIT Slim.
To do so, refer to the compatibility list of the MINIKIT Slim
available on our website www.parrot.com, in the Support
& Downloads section.
•  If your phone is compatible with the MINIKIT Slim, make
sure you have the latest software version on your MINIKIT
This update and the update procedure are available on our
website www.parrot.com, in the Support & Downloads
section.
Français
Avant de commencer
Avertissement
-- Les explications contenues dans ce document sont valables quel que soit le modèle de votre
MINIKIT (MINIKIT Slim, MINIKIT Limited Edition etc.)
-- Si au cours de la conduite, le MINIKIT Slim n’est pas à portée de votre main, arrêtez votre véhicule à
un emplacement approprié pour prendre ou mettre fin à un appel.
-- Le chargeur allume-cigare du MINIKIT Slim s’utilise uniquement sur les voitures équipées de
batteries 12V.
-- Le MINIKIT Slim est un appareil de haute technologie. Manipulez notamment le haut-parleur
avec précaution.
A propos de
ce guide
Afin de limiter notre consommation de papier et dans le cadre de notre démarche aussi responsable et
respectueuse que possible de l’environnement, Parrot privilégie la mise en ligne des documents utilisateurs plutôt que leur impression.
Ce guide simplifié du MINIKIT Slim se limite donc à vous fournir les principales instructions qui vous permettront d’utiliser facilement cet appareil. Vous trouverez plus d’informations sur la section Support et
téléchargement de notre site web www.parrot.com : notice complète, FAQ, didacticiels...
Mise à jour
Téléchargez gratuitement la dernière mise à jour de votre produit (et consultez la procédure de mise à
jour) sur notre site web www.parrot.com section Support et téléchargements. Ces mises à jour vous
permettront de bénéficier de nouvelles fonctionnalités et d’améliorer la compatibilité du produit.
http://www.parrot.com/fr/support
Notice complète, didacticiels, mises à jour...
9
Première utilisation
Charger le MINIKIT Slim
•  Appuyez sur la molette pour accéder aux menus.
> Le kit énonce le nom du menu atteint.
•  Avant la première utilisation, le MINIKIT Slim doit être chargé. Pour cela, utilisez la prise allume cigare de votre véhicule ou connectez le MINIKIT Slim à votre PC en utilisant le
câble USB / mini USB fourni (► schéma A p.5).
•  La LED située à côté de la prise mini-USB devient rouge
pour indiquer que la charge est en cours. Une fois la charge terminée, la LED s’éteint. La durée de chargement est
de 3h30.
•  Lorsque la batterie est faible, le MINIKIT Slim émet une
série de bips.
Installer le MINIKIT Slim Utilisez l’attache située au dos du MINIKIT Slim pour le fixer
au pare-soleil de votre véhicule (► schéma C p.5).
Allumer / éteindre le MINIKIT Slim
•  Appuyez sur le bouton
•  Appuyez sur le bouton
éteindre le MINIKIT Slim.
10
pour allumer le MINIKIT Slim.
pendant 2 secondes pour
Accéder aux menus du MINIKIT Slim
• Naviguez dans les menus en tournant la molette, et validez avec le bouton vert ou en appuyant sur la molette.
• Pour sortir du menu, appuyez sur le bouton
patientez quelques secondes.
ou Appairer et connecter un téléphone / PDA
par Bluetooth
•  Avant d’utiliser le MINIKIT Slim avec votre téléphone,
vous devez appairer les deux appareils. Lorsque les deux
appareils se seront détectés mutuellement, il ne sera plus
nécessaire de procéder à cette opération.
1. Depuis votre téléphone Bluetooth, lancez une
recherche de périphériques Bluetooth.
2. Sélectionnez «MINIKIT Slim».
3. Entrez « 1234 » sur votre téléphone lorsque celui-ci
vous y invite.
> Le MINIKIT Slim annonce « Appairage réussi » .
•  La connexion avec votre téléphone se fera ensuite
automatiquement dès que vous allumerez le MINIKIT Slim.
Selon le modèle de votre téléphone, vous devrez peut-être
autoriser la connexion au MINIKIT Slim pour permettre
cette connexion automatique.
Synchroniser le répertoire du téléphone
•  Avec certains téléphones Bluetooth, le répertoire du
téléphone est automatiquement synchronisé dans la
mémoire du kit.
•  Si votre téléphone n’effectue pas la synchronisation
automatique, vous pouvez aussi envoyer vos contacts
manuellement vers le MINIKIT Slim par Bluetooth.
Pour cela :
Utiliser la fonction téléphonie
Recevoir un appel
•  Un appel entrant est indiqué par une sonnerie. Le nom
du contact est annoncé si le numéro de ce contact est
enregistré dans le répertoire du téléphone connecté au
MINIKIT Slim.
1. Appuyez sur la molette et sélectionnez Recevoir des
contacts.
•  Si vous souhaitez accepter cet appel, appuyez sur la
touche verte. Appuyez ensuite sur la touche rouge pour
terminer l’appel.
2. Consultez la notice de votre téléphone pour connaître
la procédure d’envoi de contacts par Bluetooth.
•  Si vous souhaitez refuser cet appel, appuyez sur la
touche rouge.
Enregistrer des empreintes vocales
•  Tous vos contacts, après synchronisation ou envoi par
Bluetooth, sont automatiquement dotés d’une empreinte
vocale dans le MINIKIT Slim. Vous n’avez donc pas à
enregistrer votre propre empreinte sur chaque contact
avant de procéder à un appel par reconnaissance vocale.
•  Si le MINIKIT Slim interprète mal le nom d’un de vos
contacts ou si vous souhaitez enregistrer une empreinte
vocale plus courte, il vous est possible d’enregistrer une
nouvelle empreinte. Pour cela, appuyez sur la molette et
sélectionnez l’option Ajouter des empreintes vocales.
Emettre un appel
•  Pour émettre un appel par reconnaissance vocale:
1. Appuyez sur le bouton vert pour initier le processus
de reconnaissance vocale.
> Le MINIKIT Slim vous demande le nom du contact
que vous souhaitez appeler.
2. Prononcez le nom du contact que vous souhaitez
appeler suivi du type de numéro («Bureau», «Portable»...) si ce contact dispose de plusieurs numéros.
> L’appel vers ce contact est automatiquement initié
si la commande vocale a été bien comprise.
> Dans le cas contraire, le kit mains libres diffuse un
11
message de confirmation. Confirmez en prononçant
« oui », « appelle » ou « appeler ».
3. Une fois le contact choisi, appuyez sur le bouton
vert pour lancer l’appel vers le numéro par défaut
ou utilisez la molette pour choisir parmi les différents
numéros du contact («Bureau», «Portable»...).
Le MINIKIT Slim semble bloqué
En cas de problème, vous pouvez redémarrer le MINIKIT
Slim. Pour cela :
•  Pour émettre un appel manuellement:
1. Appuyez sur la molette et sélectionnez Répertoire.
•  Si vous souhaitez rappeler le dernier numéro composé,
appuyez deux secondes sur le bouton vert.
Utiliser le MINIKIT Slim pendant un appel
•  Pour régler le volume sonore lors d’une communication,
utilisez la molette. Le volume est sauvegardé pour les
communications suivantes.
•  Si vous souhaitez transférer une communication en cours
sur votre téléphone, appuyez sur la touche verte.
•  Le MINIKIT Slim vous permet d’envoyer des DTMF en
communication pour gérer votre messagerie vocale par
exemple. Pour cela, appuyez sur la molette au cours de
la communication.
12
Problèmes fréquents
2. Sélectionnez une lettre et appuyez sur la molette.
A tout moment, appuyez sur la touche rouge pour
quitter le mode de reconnaissance vocale.
Le MINIKIT Slim annonce «Mémoire pleine»
Vous pouvez jumeler jusqu’à 5 appareils avec le MINIKIT
Slim. Si vous jumelez un sixième téléphone, le kit annonce
« Mémoire pleine ». Vous devez alors effacer la mémoire du
MINIKIT Slim en appuyant simultanément sur les touches
verte et rouge pendant 3 secondes. Ceci effacera aussi tous
les contacts.
1. Appuyez simultanément sur la molette et sur le bouton Reset situé au dos du MINIKIT Slim (► schéma A p.5).
2. Relâchez le bouton Reset.
> Vous pouvez maintenant relâcher la molette.
Je n’arrive pas à utiliser mon téléphone avec le MINIKIT
Slim
•  Vérifiez la compatibilité de votre téléphone avec le
MINIKIT Slim. Vous trouverez la liste de compatibilité
du MINIKIT Slim sur notre site web www.parrot.com,
section Support et Téléchargement.
•  Si votre téléphone est affiché compatible, vous devez peutêtre mettre à jour votre MINIKIT Slim. Vous trouverez la procédure de mise à jour du MINIKIT Slim sur notre site web
www.parrot.com, section Support et Téléchargement.
Español
Antes de comenzar
Advertencia
-- Las explicaciones que contiene este documento son válidas para todos los modelos de MINIKIT Slim
(MINIKIT Slim, MINIKIT Limited Edition, etc.).
-- Si el MINIKIT Slim no está al alcance de la mano mientras conduce, pare su vehículo en un emplazamiento adecuado para descolgar o colgar una llamada.
-- El cargador encendedor del MINIKIT Slim está diseñado solamente para coches.
A propósito
de este
manual
Para limitar nuestro consumo de papel, siguiendo nuestra actuación lo más responsable y respetuosa
posible con el medio ambiente, Parrot prefiere poner en línea los documentos para los usuarios en lugar
de imprimirlos.
Este manual simplificado del MINIKIT Slim se limita por tanto a aportarle las principales instrucciones
que le permitirán utilizar el aparato con facilidad. Podrá encontrar más información en la sección Apoyo
al cliente de nuestra página web www.parrot.com: manual completo, preguntas frecuentes, softwares
didácticos...
Actualización
del software
Descargue gratis la última actualización del MINIKIT Slim (y consulte el procedimiento de actualización
en nuestra página web www.parrot.com, sección Apoyo al cliente. Las actualizaciones le permitirán
disfrutar de nuevas funciones y mejorar la compatibilidad del MINIKIT Slim.
http://www.parrot.com/es/apoyoalcliente
Manual completo, softwares didácticos y actualizaciones...
13
Primera utilización
Cargar el MINIKIT Slim
•  Antes de utilizar el MINIKIT Slim por primera vez, hay que
cargarlo completamente. Utilice la toma encendedor de su
vehículo o conecte el MINIKIT Slim a su ordenador utilizando el cale USB / mini USB provisto (► esquema A p.5).
•  La LED ubicada a lado de la toma mini USB se vuelve
roja para indicarle que la carga está procesando. Una vez
finalizada la carga, la LED se apaga. El tiempo de carga
es de 3h30.
•  Cuando el nivel de la batería es bajo, el MINIKIT Slim emite
una serie de señales acústicas.
Instalar el MINIKIT Slim .
•  Para apagar el MINIKIT Slim mantenga presionado el botón
durante 2 segundos.
14
•  Para salir del menú, pulse la tecla
o espere
Enlazar y conectar un teléfono / PDA
mediante Bluetooth ®
•  Antes de utilizar el MINIKIT Slim con su teléfono, hay que
enlazar ambos aparatos. El proceso de enlace se requiere
solamente una vez.
1. Desde su teléfono, inicie una búsqueda de
dispositivos Bluetooth.
3. Introduzca « 1234 » cuando se requiere el
código PIN.
> El MINIKIT Slim enuncia « Enlace realizada » una
vez finalizada el proceso de conexión entre ambos
dispositivos.
Encender / apagar el MINIKIT Slim
•  Para encender el MINIKIT Slim pulse sobre el botón
•  Navegue por los menús girando la rueda, y valide pulsando
la tecla verde o la rueda.
2. Seleccione «MINIKIT Slim».
Utilice el enganche ubicado en la parte trasera del MINIKIT
Slim para fijarlo a la visera de su vehículo (► esquema C
p.5).
Entrar en los menús del MINIKIT Slim
•  Pulse la rueda central para acceder a los menús.
•  Según el modelo de teléfono que tenga, es posible que
deba autorizar la conexión al MINIKIT Slim para que
se pueda efectuar la conexión automática entre los 2
aparatos.
Utilizar el modo Teléfono
•  Con algunos teléfonos Bluetooth, la agenda del teléfono se
sincroniza automáticamente en la memoria del kit.
Recibir una llamada
•  Si no es el caso, puede utilizar la función Object Push de
su teléfono para enviar contactos de su teléfono hacia el
MINIKIT Slim mediante Bluetooth. Para hacer esto:
•  Una llamada entrante se indica por un timbre. El nombre del
contacto está anunciado si su número está memorizado en
la agenda del teléfono conectado al MINIKIT Slim.
Sincronizar la agenda del teléfono
1. Pulse la rueda y seleccione la opción Recibir
contactos.
•  Si desea aceptar esta llamada, pulse la tecla verde.
Después, pulse la tecla roja para acabar la comunicación.
2. Consulte el manual de usuario de su teléfono para
conocer el proceso de envío de contactos mediante
Object Push.
•  Si desea rechazar esta llamada, pulse la tecla roja.
Grabar etiquetas vocales
•  Tras la sincronización o el envío por Object Push, todos sus
contactos están dotados de una etiqueta vocal en el MINIKIT Slim. Entonces, no necesita grabar su propia etiqueta
vocal en cada contacto para realizar una llamada mediante
reconocimiento de voz.
•  Sin embargo, si el MINIKIT Slim no entiende el nombre de
uno de sus contactos, se puede grabar una nueva etiqueta. Para hacer esto, pulse la rueda y seleccione la opción
Añadir registros de voz.
Realizar una llamada
•  Para hacer una llamada a través del reconocimiento
de voz:
1. Pulse el botón verde para iniciar el proceso de
reconocimiento de voz.
> El MINIKIT Slim le pedirá el nombre del contacto al
que desea llamar.
2. Diga el nombre del contacto seguido del tipo de
número (“Trabajo”, “Móvil”…) si el contacto tiene
varios números.
> La llamada a ese contacto se hará automáticamente si la instrucción de voz ha sido comprendida.
> En caso contrario, el kit de manos libres emitirá un
mensaje de confirmación. Confirme diciendo “sí”,
“llama” o “llamar”.
15
Para salir del modo de reconocimiento de voz, puede
pulsar en cualquier momento el botón rojo.
•  Para hacer una llamada manualmente:
1. Pulse la rueda y seleccione la opción Agenda.
2. Seleccione una letra y pulse la rueda.
3. Una vez seleccionado el contacto:
-- Pulse la tecla verde para realizar la llamada al
número por defecto.
-- Si es necesario, utilice la rueda para elegir entre
los distintos números del contacto.
•  Mantenga pulsado el botón verde���������������������
��������������������������
del MINIKIT Slim durante 2 segundos para llamar al último número marcado.
Problemas frecuentes
El MINIKIT Slim anuncia “Memoria llena”
Se puede enlazar hasta 5 dispositivos. Al enlazar un sexto
teléfono, el kit enuncia “memoria llena”. Hay que borrarla
pulsando simultáneamente las teclas verde y rojo durante 3
segundos. Este proceso borra también todos los contactos.
El MINIKIT Slim parece que está bloqueado
En caso de problema, puede reiniciar el MINIKIT Slim. Para
hacer esto:
1. Pulse simultáneamente la rueda y el botón Reset
ubicado al lado posterior del MINIKIT Slim
(► esquema C p.5).
2. Suelte el botón Reset.
Utilizar el MINIKIT Slim durante una llamada
•  Durante una llamada, el MINIKIT Slim le permite ajustar
el volumen de la comunicación. Para hacer esto, utilice
la rueda. El volumen está guardado para las próximas
llamadas.
•  Durante una llamada, pulse el botón verde para transferir
una llamada a su teléfono. La llamada pasa automáticamente en su teléfono.
•  El MINIKIT Slim le permite enviar DTMF durante una llamada para gestionar su buzón por ejemplo. Pulse la rueda
para entrar en el menú de los DTMF.
16
No consigo utilizar mi teléfono con el MINIKIT Slim
•  Compruebe la compatibilidad del teléfono con el MINIKIT
Slim. Encontrará la lista de compatibilidad del MINIKIT
Slim en nuestra página web www.parrot.com, sección
Apoyo al cliente.
•  Si su teléfono aparece como compatible, es posible que
tenga que actualizar su MINIKIT Slim. Encontrará el modo
de actualización del MINIKIT Slim en nuestra página web
www.parrot.com, sección Apoyo al cliente.
Deutsch
Bevor Sie beginnen
Warnung
-- Die Erläuterungen in diesem Dokument gelten für alle MINIKIT Slim-Modelle (MINIKIT Slim, MINIKIT
Limited Edition, etc.).
-- Sollte sich die MINIKIT Slim während des Fahrens nicht in Reichweite befinden, dann halten Sie den
Wagen an einem sicheren Ort an, um einen Anruf entgegenzunehmen oder zu beenden.
-- Das Kfz-Ladegerät der MINIKIT Slim wurde speziell für den Anschluss an einen Zigarettenanzünder
konzipiert und darf ausschließlich in Kraftfahrzeugen verwendet werden.
Zu diesem
Leitfaden
Wir wollen unseren Papierverbrauch einschränken und so verantwortungsbewusst und umweltfreundlich wie möglich handeln. Daher zieht Parrot es vor, Dokumente für die Benutzer im Internet zu
veröffentlichen, anstatt sie auszudrucken.
Diese vereinfachte Anleitung des MINIKIT Slim beschränkt sich daher auf die wichtigsten Anweisungen, damit Sie dieses Gerät leicht benutzen können. Weitere Angaben finden Sie im Bereich Support
und Downloads auf unserer Website www.parrot.com: Vollständige Anleitung, häufige Fragen, Lernsoftware...
Update der
Software
Das letzte Update Ihres MINIKIT Slim können Sie kostenlos von unserer Website www.parrot.com aus
dem Bereich Support und Downloads herunter laden (und sich gleichzeitig über das Update-Verfahren
informieren). Dank dieser Updates können Sie neue Funktionen nutzen und die Kompatibilität des
MINIKIT Slim verbessern.
http://www.parrot.com/de/kundenkontakt
Vollständige Anleitung, Lernsoftware, Updates...
17
Erste Verwendung
Laden des MINIKIT Slim
•  Drücken Sie das zentrale Reglerrad, um auf die Menüs zuzugreifen.
•  Vor der ersten Verwendung muss die MINIKIT Slim aufgeladen werden. Der Ladevorgang kann über den Zigarettenanzünder Ihres Wagens erfolgen. Sie können die MINIKIT
Slim jedoch auch mithilfe des im Lieferumfang enthaltenen USB/Mini-USB-Kabels an Ihren PC anschließen
(► Abb. A s.5).
•  Während des laufenden Ladevorgangs leuchtet die LEDAnzeige neben dem Mini-USB-Anschluss rot. Sobald der
Ladevorgang abgeschlossen ist, erlischt die LED. Die Ladezeit beträgt 3 ½ Stunden.Bei einem niedrigen Akkuladezustand gibt das Gerät eine Reihe von Signaltönen aus.
Installation der Freisprechanlage Im Lieferumfang des MINIKIT Slim ist eine Befestigungsvorrichtung enthalten, mit der Sie die Freisprechanlage an der
Sonnenblende Ihres Kraftfahrzeugs anbringen können
(► Abb. C s.5).
Das MINIKIT Slim ein-/ausschalten
•  Drücken Sie die
zuschalten.
Taste um das MINIKIT Slim ein-
•  Halten Sie die
Taste zwei Sekunden gedrückt um das
MINIKIT Slim auszuschalten.
18
Zugriff auf die Menüs der Freisprechanlage
•  Die Fortbewegung in den Menüs erfolgt durch Drehen des Reglerrads, zur Bestätigung einer Auswahl drücken Sie die
grüne Taste oder das Reglerrad.
•  Um die Menüs wieder zu verlassen, drücken Sie die
Taste oder warten Sie einfach ein paar Sekunden.
Kopplung Ihres Bluetooth-Mobiltelefons/-PDAs ®
•  Bei der ersten Verwendung des Telefons mit dem
MINIKIT Slim müssen Sie beide Geräte zunächst miteinander koppeln. Sobald sich die zwei Geräte einmal gegenseitig identifiziert haben, braucht dieser Vorgang nicht
mehr wiederholt zu werden.
1. Starten Sie ausgehend von Ihrem Bluetooth-Telefon
eine Suche nach Bluetooth-Peripheriegeräten.
2. Wählen Sie «MINIKIT Slim».
3. Geben Sie bei der entsprechenden Aufforderung den Code «1234» auf Ihrem Telefon ein.
•  Je nach Modell Ihres Telefons müssen Sie eventuell die
Verbindung zum MINIKIT Slim freigeben, damit eine automatische Verbindung (zwischen den beiden Geräten)
hergestellt werden kann.
Verwendung der Telefoniefunktion
Verwendung des Adressbuchs
•  Für zahlreiche Telefone wird automatisch eine Synchronisation des Adressbuchs mit der MINIKIT Slim durchgeführt.
•  Sollte Ihr Telefon keine automatische Synchronisation unterstützen, können Sie Ihre Telefonkontakte per Object
Push auf die MINIKIT Slim übertragen.
•  Ein eingehender Anruf wird durch einen Rufton ausgewiesen.
Der Name des Kontakts wird laut ausgegeben, sofern
die zugehörige Rufnummer im Adressbuch des mit der
MINIKIT Slim verbundenen Telefons enthalten ist.
1. Wählen Sie im Hauptmenü der MINIKIT Slim die
Option Kontakte empfangen.
2. Detaillierte Anweisungen zur Übertragung der Kontakte per Object Push können Sie der Bedienungsanleitung Ihres Telefons entnehmen.
Speichern von Stimmabdrücken
•  Nach der Synchronisation oder der Übertragung per Object Push
���������������������������������������������������
werden Ihre Kontakte in der MINIKIT Slim automatisch mit einem Stimmabdruck versehen. Sie selbst
brauchen somit keine Stimmabdrücke für Ihre Kontakte
aufzuzeichnen, sondern können für Ihre Anrufe direkt auf
die Spracherkennung zurückgreifen.
•  Es kann jedoch vorkommen, dass die MINIKIT Slim den
Namen eines Kontakts falsch interpretiert. In diesem Fall
kann für den betroffenen Kontakt ein neuer Stimmabdruck
aufgezeichnet werden. Drücken Sie dazu das Reglerrad
und wählen Sie die Option Stimmabdrücke hinzufügen.
Empfangen eines Anrufs
• Wenn Sie den Anruf annehmen möchten, drücken Sie die grüne Taste.
• Wenn Sie den Anruf ablehnen möchten, drücken Sie
die rote Taste.
Tätigen eines Anrufs
•  Um einen Anruf durch Spracherkennung einzuleiten:
1. Auf den grünen Knopf drücken, um die Spracherkennung zu initiieren.
> Das MINIKIT Slim fragt Sie nach dem Namen des
Kontaktes, den Sie anrufen wollen.
2. Nennen Sie den Namen des Kontaktes gefolgt von
der Art der Nummer („Büro“, „Handy“ ...), sofern für
den Kontakt mehrere Nummern vorhanden sind.
> Der Kontakt wird automatisch angerufen, wenn die
Sprachanweisung richtig verstanden wurde.
> Ansonsten gibt die Freisprechanlage eine Bestätigung aus. Bestätigen Sie über „Ja“, „Ruft an“ oder
„Anrufen“.
19
Durch einen Druck auf die rote Taste können Sie die
Spracherkennung jederzeit ausschalten.
•  Um einen Anruf manuell einzuleiten:
1. Drücken Sie das Reglerrad und wählen Sie
Telefonbuch .
2. Wählen Sie den gewünschten Kontakt und drücken Sie dann das Reglerrad.
•  Halten Sie die grüne Taste der MINIKIT Slim zwei
Sekunden lang gedrückt, um die letzte gewählte Nummer
anzurufen.
Verwendung des MINIKIT Slim während eines Anrufs
•  Drehen Sie während eines laufenden Gesprächs das Drehknopf auf dem MINIKIT Slim. Die eingestellte Lautstärke
wird für alle folgenden Gespräche gespeichert.
•  Wenn Sie ein Gespräch auf Ihr Telefon übertragen möchten,
drücken Sie auf die grüne Taste Ihrer MINIKIT Slim.
•  Die MINIKIT Slim ermöglicht Ihnen, DTMFs zu versenden,
um z.B. Ihren Sprachspeicherdients zu verwalten. Drücken
Sie das zentrale Reglerrad, um auf das DTMF-Menü zuzugreifen.
Häufig auftretende Probleme
Das MINIKIT Slim meldet „Speicher voll“
Sie können die Freisprecheinrichtung mit bis zu 5 Geräten
koppeln. Bei dem Versuch, ein sechstes Telefon zu koppeln,
gibt die Freisprecheinrichtung den Hinweis «Speicher voll»
aus. Sie müssen in diesem Fall den Speicher leeren. Drücken
Sie dazu gleichzeitig die rote und die grüne Taste und halten
Sie sie 3 Sekunden lang gedrückt.
Das MINIKIT Slim scheint blockiert zu sein
Sollten Probleme auftreten, dann können Sie die Parrot
MINIKIT Slim neu starten. Gehen Sie dazu vor wie folgt:
1. Drücken Sie gleichzeitig das Reglerrad und die Reset-
Taste auf der Rückseite der MINIKIT Slim (► Abb. A s.5).
2. Lassen Sie zunächst nur die Reset-Taste los.
> Anschließend können Sie auch das Reglerrad wieder loslassen.
Ich kann mein Telefon nicht mit dem MINIKIT Slim
verwenden
•  Prüfen Sie, ob Ihr Telefon mit dem MINIKIT Slim kompatibel
ist. Die Liste der mit dem MINIKIT Slim kompatiblen Geräte
können Sie von unserer Website www.parrot.com.
•  Wenn Ihr Telefon in der Liste kompatibler Geräte aufgeführt
ist, müssen Sie Ihr MINIKIT Slim u. U. aktualisieren. Das
Verfahren zur Aktualisierung des MINIKIT Slim können Sie
von unserer Website www.parrot.com abrufen.
20
Italiano
Prima di iniziare
Avvertenza
-- Le spiegazioni contenute in questo documento sono valide per tutti i modelli di MINIKIT Slim (MINIKIT
Slim, MINIKIT Slim Limited Edition, ecc.).
-- Se durante la guida il MINIKIT Slim non si trova a portata di mano, arrestare l’auto in un luogo appropriato per rispondere o terminare una chiamata.
-- Il caricatore per la presa dell’accendisigari del MINIKIT Slim si utilizza esclusivamente sulle auto.
A proposito di
questa guida
Per limitare il nostro consumo di carta e nell’ambito della nostra azione responsabile volta alla tutela
dell’ambiente, abbiamo scelto l’immissione on line dei documenti destinati agli utenti, che quindi non
saranno più stampati.
La presente guida semplificata del MINIKIT Slim si limita quindi a dare le principali istruzioni che vi
consentiranno di utilizzare facilmente questo apparecchio. Troverete maggiori informazioni nella sezione Assistenza / Scaricare del nostro sito web www.parrot.com: manuale completo, FAQ, documenti
didattici, ecc
Aggiornamento
del software
Scaricate gratuitamente l’ultimo aggiornamento del MINIKIT Slim (e consultate la procedura di aggiornamento) nel nostro sito web www.parrot.com, alla sezione Assistenza / Scaricare. Questi aggiornamenti
vi permetteranno di utilizzare le nuove funzionalità e di migliorare la compatibilità del MINIKIT Slim.
http://www.parrot.com/it/assistenza
Manuale completo, documenti didattici, aggiornamenti...
21
Primo utilizzo
Come caricare il MINIKIT Slim
•  Prima di utilizzarlo per la prima volta, è necessario caricare il MINIKIT Slim. A tale scopo, utilizzare la presa
dell’accendisigari dell’auto oppure collegare il Parrot
MINIKIT Slim al PC utilizzando il cavo USB/mini-USB in
dotazione (► schemi A p.5).
•  Il LED situato a fianco della presa mini-USB si illumina in
rosso ad indicare che la carica è in corso. Una volta terminata la carica, il LED si spegne. Per scaricare il documento
ci vogliono 3 ore e mezza.
•  Quando la batteria è quasi scarica, l’apparecchio emette una serie di segnali acustici.
Installazione del kit Per poter utilizzare il MINIKIT Slim come kit vivavoce durante
la guida, viene fornito un gancio per fissare il MINIKIT Slim
all’aletta parasole dell’auto (► schemi C p.5).
Accendere /spegnere il MINIKIT Slim
•  Premere il pulsante
per accendere il MINIKIT Slim.
•  Per spegnere il MINIKIT Slim, tenere premuto il pulsante
per circa due secondi.
22
Accesso ai menu del kit
•  Premere la rotellina centrale per accedere ai menu.
•  Utilizzare i menu ruotando la rotellina e confermare con il
tasto verde oppure premendo la rotellina stessa.
•  Per uscire da un menu, premere il tasto
attendere alcuni secondi.
oppure
Connessione del telefono/PDA Bluetooth ®
•  Prima di utilizzare MINIKIT Slim con il telefono cellulare,
è necessario effettuare la connessione tra i due apparecchi. Se è la prima volta che si utilizza l’apparecchio con il
MINIKIT Slim, è necessario innanzitutto effettuare l’associazione dei due apparecchi; una volta che i due apparecchi si sono rilevati a vicenda, non sarà più necessario
eseguire questa operazione.
1. Dal telefono Bluetooth, avviare una ricerca delle
periferiche Bluetooth.
2. Selezionare «MINIKIT Slim».
3. Immettere «1234» sul telefono, quando richiesto.
> Quando i due apparecchi sono connessi, il Parrot
MINIKIT emette un messaggio ad indicare che
l’associazio ne é stata eseguita.
•  A seconda del telefono in uso, sarà necessario autorizzare la
connessione al MINIKIT Slim per consentire l’associazione
automatica (tra i 2 apparecchi).
Uso della funzione telefono
•  La sincronizzazione della rubrica telefonica con il MINIKIT
Slim avviene automaticamente per molti telefoni cellulari.
Ricezione delle chiamate
•  Se il telefono in uso non consente di effettuare la sincronizzazione automatica, è possibile trasferire i contatti del
telefono sul kit tramite il profilo Object Push. A tale scopo:
•  La chiamata in arrivo è indicata da una suoneria. Se il numero del contatto è registrato nella rubrica del telefono
connesso al MINIKIT Slim, viene emesso il nome di tale
contatto.
Sincronizzazione della rubrica telefonica
1. Nel menu principale di MINIKIT Slim, selezionare
Ricevi contatti.
•  Per accettare la chiamata, premere il tasto verde. Per terminare la chiamata, premere il tasto rosso.
2. Per informazioni sulla procedura di invio di ontatti
tramite il profilo Object Push, consultare le istruzioni
del telefono in uso.
Salvataggio dei nomi vocali
•  Per rifiutare la chiamata premere il tasto rosso.
•  In seguito alla sincronizzazione o all’invio tramite il profilo
Object Push, tutti i contatti vengono dotati automaticamente di un nome vocale nel MINIKIT Slim. Pertanto, non
è necessario salvare personalmente i nomi vocali per ciascun contatto per effettuare una chiamata tramite la funzione di riconoscimento vocale.
•  Tuttavia, se il MINIKIT Slim interpreta erroneamente il nome
di un contatto, è possibile salvare un nuovo nome vocale.A
tale scopo, premere la rotellina e selezionare l’opzione
Aggiungere dei nomi vocali.
Come effettuare le chiamate
•  Per effettuare una chiamata mediante riconoscimento
vocale:
1. Per iniziare il processo di riconoscimento vocale,
premere il tasto verde.
> Il MINIKIT Slim chiede il nome del contatto che si
intende chiamare.
2. Dire il nome del contatto seguito dal tipo di numero
di telefono («Lavoro», «Cellulare», ecc.) se questo
contatto ha più numeri di telefono.
> La chiamata di questo contatto inizia automaticamente se il comando vocale è stato capito
correttamente.
23
Per uscire dal modo riconoscimento vocale, premere
il tasto rosso.
•  Per effettuare una chiamata manualmente:
1. Premere la rotellina per accedere al menu principale, quindi selezionare Rubrica.
2. Selezionare il contatto seguito dal tipo di numero
di telefono («Ufficio», «Cellulare», ecc.) se questo
contatto ha più numeri di telefono.
•  Per richiamare l’ultimo numero composto, tenere premuto
il tasto verde per due secondi.
Come utilizzare il MINIKIT Slim durante
una chiamata
•  Per regolare il volume sonoro durante una comunicazione,
servirsi della rotella. Il volume è salvato per le conversazioni
successive.
•  Se si desidera trasferire una comunicazione in corso sul
telefono, premere il tasto verde.
•  Il MINIKIT Slim permette di inviare DTMF in conversazione per gestire – per esempio – la messaggeria vocale.
Premere la rotellina per accedere al menu dei DTMF.
Problemi frequenti
Il MINIKIT Slim annuncia «Memoria piena»
È possibile eseguire l’associazione di un massimo di 5 apparecchi. Se viene associato un sesto telefono, il kit chiede un
messaggio ad indicare che la memoria è piena. È necessario
svuotare la memoria premendo contemporaneamente il tasto
verde e il tasto rosso per 3 secondi. Questa operazione elimina inoltre tutti i contatti.
Il MINIKIT Slim sembra bloccato
In caso di problemi, è possibile riavviare il MINIKIT Slim.
1. Premere contemporaneamente la rotellina e il tasto
Reset situato sulla parte posteriore del MINIKIT Slim
(► schemi A p.5).
2. Rilasciare il tasto Reset.
> Quindi, rilasciare la rotellina.
E’ impossibile utilizzare il telefono con il MINIKIT Slim
•  Verificare la compatibilità del telefono con il MINIKIT Slim.
La lista dei telefoni compatibili con il MINIKIT Slim è disponibile nel nostro sito web www.parrot.com, alla sezione
Assistenza / Scaricare.
•  Se il telefono è compatibile, forse sarà necessario aggiornare il vostro MINIKIT Slim. La procedura di aggiornamento del MINIKIT Slim è disponibile nel nostro sito web
www.parrot.com, alla sezione Assistenza / Scaricare.
24
Nederlands
Voordat u begint
Waarschuwing
-- De uitleg in dit document is van toepassing op alle uitvoeringen van uw MINIKIT Slim (MINIKIT Slim,
MINIKIT Limited Edition etc.).
-- Als u tijdens het rijden de MINIKIT Slim niet binnen handbereik hebt, zet uw auto dan op een geschikte
plaats stil om een oproep te beantwoorden of te beëindigen.
-- De sigarenaansteker oplader van de MINIKIT Slim is alleen geschikt voor gebruik in de auto.
Over deze
gids
Om ons papierverbruik te beperken en in het kader van onze zo verantwoordelijk mogelijke aanpak op
het gebied van milieubehoud, geeft Parrot er de voorkeur aan om documentatie online beschikbaar te
stellen in plaats van deze af te drukken.
Deze vereenvoudigde gids voor de MINIKIT Slim geeft u dus slechts de belangrijkste instructies die u
nodig heeft om dit apparaat makkelijk te gebruiken. U vindt meer informatie in het onderdeel Support &
Downloads van onze website www.parrot.com: complete documentatie, FAQ, educatieve software…
De software
updaten
Download gratis de recentste versie van uw MINIKIT Slim (en raadpleeg de updateprocedure) op onze
website www.parrot.com, onderdeel Support & Downloads. Via deze updates profiteert u van nieuwe
functies en een verbeterde compatibiliteit van uw MINIKIT Slim.
http://www.parrot.com/nl/support
Complete documentatie, educatieve software, updates...
25
Eerste ingebruikneming
De MINIKIT Slim opladen
•  Druk op de draaitoets in het midden om de menu’s op
te roepen.
•  Voordat u de MINIKIT Slim voor het eerst in gebruik neemt,
moet hij worden opgeladen. U kunt hier voor de sigarenaansteker van uw auto gebruiken of u kunt de MINIKIT
Slim met de meegeleverde USB- / mini-USB-kabel op uw
pc aansluiten (► schema A bladzijde 5).
•  De rode LED die zich naast de mini-USB-aansluiting
bevindt, gaat branden om aan te duiden dat het laden aan de gang is. Zodra het opladen beëindigd is, gaat de LED
uit. Het opladen duurt 3.30 uur.
•  Wanneer de accu bijna leeg is, laat het apparaat een serie pieptonen horen.
De handsfree-set installeren Een clip om de MINIKIT Slim aan de zonneklep te bevestigen
is meegeleverd om de MINIKIT Slim als handsfree-set in de
auto te kunnen gebruiken (► schema C bladzijde 5).
De MINIKIT Slim in- en uitschakelen
•  Druk op de
knop om de MINIKIT Slim aan te zetten.
•  Druk 2 seconden op de
te schakelen.
26
knop om de MINIKIT Slim uit
De menu’s van de set oproepen
•  Navigeer in de menu’s door de draaiknop te draaien en bevestig uw keuzes door een druk op de groene toets of op de draaiknop.
•  Om het menu te verlaten, drukt u op de
u enkele seconden.
toets of wacht
Uw Bluetooth telefoon /PDA koppelen ®
•  Als u uw telefoon voor het eerst met de MINIKIT Slim
gebruikt, moet u de twee apparaten eerst koppelen. Als
de twee apparaten elkaar eenmaal wederzijds hebben
gedetecteerd, is het voortaan niet meer nodig deze
handeling uit te voeren.
1. Start op uw Bluetooth telefoon de functie Bluetooth randapparaten zoeken.
2. Selecteer ‘MINIKIT Slim’.
3. Toets ‘1234’ in op uw telefoon, wanneer deze u
dit vraagt.
> Zodra de twee apparaten gekoppeld zijn, meldt de
MINIKIT Slim dat de ‘Koppeling voltooid’ is.
•  Volgens het model van uw telefoon zult u misschien de
verbinding met de MINIKIT Slim moeten toestaan om een
automatische verbinding tussen 2 apparaten mogelijk te
maken.
Het telefoonboek gebruiken
•  Bij vele telefoons wordt het telefoonboek van uw telefoon
automatisch met de MINIKIT Slim gesynchroniseerd.
•  Als uw telefoon deze automatische synchronisatie niet toelaat, kunt u met behulp van Object Push uw contacten van
de telefoon naar de MINIKIT Slim overbrengen.
1. In het hoofdmenu van de MINIKIT Slim selecteert u
Contacten ontvangen.
2. Zie de gebruiksaanwijzing van uw telefoon om te
weten wat de procedure is voor het verzenden van
contacten via Object Push.
Gesproken namen opnemen
•  Na synchronisatie of verzending door Object Push wordt
aan al uw contacten automatisch een gesproken naam
(voice tag) toegevoegd in de MINIKIT Slim. U hoeft dus niet
zelf voor ieder contact een gesproken naam op te nemen
om deze via spraakherkenning te kunnen bellen.
•  Maar als de MINIKIT Slim de naam van een van uwcontacten verkeerd uitspreekt, kunt u hiervoor een nieuwe voice
tag opnemen. Om dit te doen drukt u op de scrollknop en
selecteert de optie Gesproken namen toevoegen.
De telefoonfunctie gebruiken
Een oproep ontvangen
•  Een inkomend gesprek wordt gemeld door een beltoon. De
naam van de contactpersoon wordt uitgesproken als het
nummer van deze persoon is opgenomen in het telefoonboek van de met de MINIKIT Slim verbonden telefoon.
•  Als u de oproep wilt aannemen, drukt u op de groene
knop. Druk als u uitgesproken bent op de rode knop om
de oproep te beëindigen.
•  Om de oproep te weigeren, drukt u meteen op de rode knop.
Een oproep starten
•  Om te bellen met behulp van de spraakherkenning:
1. Druk op de groene toets om het spraakherkenningproces te initialiseren.
> De MINIKIT Slim vraagt u naar de naam van het
contact dat u wilt bellen.
2. Spreek de naam van het contact uit, gevolgd door
het soort nummer (“Werk”, “Mobiel”, enz.) als dit
contact verschillende nummers heeft.
> Als de spraakopdracht goed begrepen is, wordt
automatisch begonnen met bellen.
> In het tegengestelde geval wordt om bevestiging
gevraagd door de hands-free set. Bevestig door “ja”,
27
«bel» of «bellen» te zeggen.
Op elk moment kunt u op de rode toets drukken om
de modus spraakherkenning te verlaten.
•  Om handmatig te bellen:
1.Druk
op de scrollknop om het hoofdmenu te openen en selecteer Telefoonboek.
2. Selecteer het contact en druk op de scrollknop.
•  Houdt de groene knop twee seconden lang ingedrukt om
het laatst gebelde nummer nogmaals te bellen.
De MINIKIT Slim tijdens het bellen
•  Om het geluidsvolume van een gesprek in te stellen gebruikt u de scrollknop. Het volume wordt opgeslagen voor
volgende gesprekken.
•  Als u een lopend gesprek wilt overzetten op uw telefoon,
drukt u op de groene knop.
•  Met de MINIKIT Slim kunt u DTMF’s verzenden tijdens een
gesprek om bijvoorbeeld uw voicemail te beheren. Drukt u
op de scrollknop om het DTMF menu te openen.
Vaak voorkomende problemen
De MINIKIT Slim geeft aan “Geheugen vol”
U kunt maximaal 5 apparaten koppelen. Als u een zesde telefoon koppelt, meldt de set ‘geheugen vol’. U moet het geheugen wissen door 3 seconden lang tegelijk op de groene en
de rode knop te drukken. Dit wist eveneens alle bijbehorende
telefoonnummers.
De MINIKIT Slim lijkt geblokkeerd
Als er een probleem is, kunt u de MINIKIT Slim opnieuw
opstarten. Hiervoor doet u het volgende:
1. Druk gelijktijdig op de scrollknop en op de Reset knop
op de achterkant van de MINIKIT Slim (► schema A
bladzijde 5).
2. Laat de Reset knop los.
> U kunt nu de scrollknop loslaten.
Ik kan mijn telefoon niet gebruiken met de MINIKIT Slim
•  Controleer of uw telefoon compatibel is met de MINIKIT
Slim. U vindt de compatibiliteitslijst van de MINIKIT Slim
op onze website www.parrot.com, onderdeel Support &
Downloads.
•  Als uw telefoon als compatibel wordt aangegeven, moet
u uw MINIKIT Slim misschien updaten. U vindt de updateprocedure van de MINIKIT Slim op onze website www.
parrot.com, onderdeel Support & Downloads.
28
Portuguese
Antes de começar
Aviso
-- As explicações existentes neste documento são válidas, seja qual for o modelo do seu MINIKIT Slim
(MINIKIT Slim, MINIKIT Limited Edition etc.)
-- Se ao conduzir o MINIKIT Slim não estiver ao alcance da sua mão, pare o seu veículo num local
adequado para realizar ou terminar uma chamada.
-- O carregador de isqueiro do MINIKIT Slim utiliza-se única e exclusivamente nos veículos.
Acerca
deste guia
De modo a limitar o nosso consumo de papel, e no âmbito do nosso procedimento também responsável
e respeitando ao máximo o ambiente, a Parrot privilegia a colocação online dos documentos para os
utilizadores, em vez de os imprimir.
Este guia simplificado do MINIKIT Slim limita-se a fornecer-lhe as principais instruções, que lhe irão permitir utilizar facilmente este aparelho. Encontrará mais informações na secção Support & Downloads
do nosso website www.parrot.com: Manual completo, perguntas frequentes, software didáctico…
Actualização
do software
Descarregue gratuitamente a última actualização do seu MINIKIT Slim (e consulte o processo de actualização) no nosso website www.parrot.com na secção Support & Downloads. Estas actualizações irão
permitir-lhe beneficiar de novas funcionalidades e melhorar a compatibilidade do MINIKIT Slim.
http://www.parrot.com/uk/support
Complete user guide, tutorials, software updates...
29
Primeira utilização
Carregamento do MINIKIT Slim
•  Antes de usar o MINIKIT Slim pela primeira vez, deverá
carregá-lo. Para tal, utilize a ficha do isqueiro do seu veículo ou ligue o MINIKIT Slim ao seu PC utilizando o cabo
USB / mini USB fornecido (► esquema A da p.5).
•  O LED junto à ficha mini-USB fica vermelho, indicando que
está a decorrer o carregamento. Concluído o carregamento, o LED apaga-se. O tempo de carregamento é de 3h30.
•  Se a bateria estiver fraca, o aparelho emitirá uma série de sinais sonoros.
Instalação do MINIKIT Slim É fornecido um grampo para fixar o MINIKIT Slim à pala de
sol do seu veículo e poder utilizar o MINIKIT Slim como kit
de mãos livres (► esquema C da p.5).
30
Ligar / desligar o MINIKIT Slim
•  Prima o botão
para ligar o MINIKIT Slim.
•  Prima o botão
MINIKIT Slim.
durante 2 segundos para desligar o
Acesso aos menus do MINIKIT Slim
•  Prima o botão rotativo central para aceder aos menus.
•  Para navegar entre menus utilize o botão rotativo, validando a sua opção com o botão verde ou premindo o botão
rotativo.
•  Para sair do menu, prima o botão
segundos.
ou aguarde alguns
Ligar o seu telefone/PDA Bluetooth ®
•  Antes de utilizar o MINIKIT Slim com o seu telefone, deverá ligar os dois aparelhos. Se for a 1ª vez que utiliza este
aparelho com o MINIKIT Slim deverá, em primeiro lugar,
efectuar um emparelhamento dos dois aparelhos: depois
de detectados os dois aparelhos em simultâneo, não será
necessário voltar a executar esta operação.
1. No seu telefone Bluetooth, faça uma busca a periféricos Bluetooth.
2. Seleccione «MINIKIT Slim».
3. Digite «1234» no seu telefone logo que este o pedir.
> O aviso do MINIKIT Slim «Emparelhamento
concluído com êxito» indica que os dois aparelhos
estão ligados.
•  De acordo com o modelo do seu telefone, poderá ter de
autorizar a ligação ao MINIKIT Slim para permitir a ligação
automática entre os 2 aparelhos.
Utilizar o directório
•  A sincronização do seu directório (lista) telefónico com o
MINIKIT Slim é automática com a maior parte dos telefones.
•  No caso do seu telefone não permitir esta sincronização
automática, pode transferir os seus contactos do telefone
para o MINIKIT Slim através de Object Push. Para tal :
Utilizar a função de telefone
Receber uma chamada
•  A recepção de uma chamada é assinalada por um sinal sonoro. O nome do contacto é anunciado no caso do número
deste contacto estar registado no directório do telefone
ligado ao MINIKIT Slim.
1. No menu principal do MINIKIT Slim, seleccione
Receber contactos.
•  Se pretender aceitar a chamada, prima o botão verde. A
seguir, prima o botão vermelho para terminar a chamada.
2. Consulte o folheto informativo do seu telefone para conhecer o procedimento de envio de contactos
através do Object Push.
•  Se pretender rejeitar a chamada, prima o botão vermelho.
Registar os comandos de voz
•  Para fazer uma chamada através do reconhecimento
de voz:
•  Todos os seus contactos, após a sincronização ou envio
por Object Push, possuem automaticamente um comando
de voz no MINIKIT Slim. Não será necessário registar o seu
próprio comando para cada contacto, de modo a efectuar
uma chamada por meio de reconhecimento de voz.
•  De qualquer modo, caso o MINIKIT Slim interprete incorrectamente o nome de um dos seus contactos, poderá adicionar um novo comando. Para tal, prima o botão rotativo
e seleccione a opção Adicionar comandos de voz.
Fazer uma chamada
1. Prima o botão verde para iniciar o processo de
reconhecimento de voz.
> O MINIKIT Slim pede-lhe o nome do contacto que
deseja contactar.
2. Pronuncie o nome do contacto, seguido do tipo
de número (“Casa”, “Telemóvel”...), caso este
contacto tenha vários números.
> A chamada para este contacto é iniciada automaticamente, caso o comando de voz seja compreendido correctamente.
31
> Caso contrário, o kit mãos-livres emite uma mensagem de confirmação. Confirme, dizendo “sim”,
“telefonar” ou “chamada”.
A qualquer altura, prima o botão vermelho para sair do
modo de reconhecimento de voz.
•  Para fazer uma chamada manualmente:
1. Prima o botão para aceder ao menu principal, depois seleccione Directório.
2. Seleccione o contacto seguido do tipo de número
(“Casa”, “Telemóvel”...), caso este contacto tenha vários
números.
•  Prima o botão verde do kit durante dois segundos para
voltar a ligar para o último número marcado.
Utilizar o MINIKIT Slim durante uma chamada
•  O MINIKIT Slim permite-lhe regular o volume da comunicação durante uma chamada. Para tal, utilize o botão rotativo.
O volume é guardado para as comunicações seguintes.
•  Durante uma comunicação, se pretender retomar a chamada no seu telefone (comunicação privada), deve premir o
botão verde do Parrot RKi8400.
•  O MINIKIT Slim permite-lhe enviar DTMF em comunicação
para gerir, por exemplo, a sua caixa de correio de voz.
Prima o botão rotativo para aceder ao menu dos DTMF.
32
Problemas frequentes
O MINIKIT Slim indica “Memória cheia”
Pode emparelhar um máximo de 5 aparelhos. Se tentar
emparelhar um sexto aparelho, o kit indicará «memória
cheia». Para apagar a memória, prima simultaneamente o
botão verde e o botão vermelho durante 3 segundos. Esse
procedimento apagará também todos os contactos.
O MINIKIT Slim parece bloqueado
Em caso de problemas, poderá reiniciar o MINIKIT Slim.
Para tal:
1. Prima em simultâneo o botão rotativo e o botão
Reiniciar situado na parte posterior do MINIKIT Slim (► esquema A da p.5).
2. Solte o botão Reiniciar.
Não consigo utilizar o meu telemóvel com o MINIKIT Slim
•  Verifique a compatibilidade do seu telemóvel com o MINIKIT Slim. Encontrará a lista de compatibilidade do MINIKIT
Slim no nosso website www.parrot.com, secção Support
& Downloads.
•  Se o seu telemóvel for indicado como compatível, poderá
ter de actualizar o seu MINIKIT Slim. Encontrará o processo de actualização do MINIKIT Slim no nosso website
www.parrot.com, secção Support & Downloads.
General Information
Warranty
Without prejudice of legal warranty,
Parrot products are warranted during
1 year from the date of purchase for
defects in materials and workmanship,
provided that no deterioration to the
product has been made, and upon presentation of proof of purchase (date of
purchase, location of sale and product
serial number) to the retailer.
Warranty does not cover: upgrading of
the software items of the Parrot products with Bluetooth® cell phones for
compatibility purpose, data recovery,
deterioration of the external aspect
due to normal use of the product, any
damage caused by accident, misuse,
misapplication, or non-Parrot products.
Parrot is not responsible for storage,
loss or damaged to data during transit
or repair.
Any product wrongfully declared to be
defective will be returned to sender and
inspection, process and carriage costs
will be invoiced to him.
Information relating to the battery and
to the charger
Safety precautions
Charging : Only use the cigar-lighter
adaptable charger provided.
Never use a damaged charger.
Remember to charge the device before
storing for a long period of time.
Temperature: Do not leave your device
in hot or cold areas (car in direct sunlight or parked in a garage in winter).
Always store in area where temperatures remain stable.
The charger and the device can become
hot during charging Do not cover.
Protection against water and dampness: Do not use your device under the
rain or in/near any damp area.
Leak: Do not disassemble the device.
In the event of battery leakage, avoid
contact of the liquid with skin and
eyes. If contact occurs, rinse affected
areas with plenty of water and contact
a doctor.
Preserving lifespan of batteries and
charger
Charging: If the battery is not used for
a long period of time, its charge level
diminishes of its own accord.
When the battery is entirely charged,
disconnect it from the charger. Overcharge may reduce the battery’s lifespan.
Do not leave the cigar-lighter adaptable charger connected when it is not
in use.
Temperature: Very low or very high temperatures may affect the battery charge
capacity and battery lifespan.
Disposal: You must dispose of your
product in accordance with the laws
and regulations in force. Since the device contains electronic components
and a battery, it must not be disposed
of with household waste.
Contact your local authority to find out
more about disposal options and recycling.
33
Correct disposal of This Product
(Waste
Electrical
&
Electronic
Equipment)
This marking shown on the product
or its literature, indicates that it
should not be disposed with other
household wastes at the end of its
working life. To prevent possible harm to
the environment or human health from
uncontrolled waste disposal, please separate this from other types of wastes
and recycle it responsibly to promote the
sustainable reuse of material resources.
Household users should contact either
the retailer where they purchased this
product, or their local government office, for details of where and how they
can take this item for environmentally
safe recycling. Business users should
contract their supplier and the terms
and conditions of the purchase contract.
This product should not be mixed with
other commercial wastes for disposal.
Modifications
The explanations and specifications
in this guide are given for information
purposes only and may be modified without prior notice. They are deemed to
34
be correct at time of going to press. The
utmost care has been taken when writing
this guide,as part of the aim to provide
you with accurate information.
However, Parrot shall not be held responsible for any consequences arising
from any errors or omissions in the guide,
nor for any damage or accidental loss of
data resulting directly or indirectly from
the use of the information herein. Parrot
reserves the right to amend or improve
the product design or user guide without any restrictions and without any
obligation to notify users. As part of our
ongoing concern to upgrade and improve our products, the product that
you have purchased may differ slightly
from the model described in this guide.
If so, a later version of this guide might be available in electronic format at
Parrot’s website at www.parrot.com.
FCC Compliance Statement
This device complies with part 15 of the
FCC rules. Operation is subject to the following two conditions:
(1). this device may not cause harmful interference, and
(2). this device must accept any interference received, including interference that may cause unde
sired operation.
Note:
The
manufacturer
is
not
responsible for any radio or tv
interference caused by unauthorized
modifications to this equipment. Such
modifications could void the user’s
authority to operate the equipment.
FCC §15.105 statement:
This equipment has been tested and
found to comply with the limits for a Class
B digital device, pursuant to part 15 of the
FCC Rules. These limits are designed to
provide reasonable protection against
harmful interference in a residential
installation.
This equipment generates, uses and
can radiate radio frequency energy and,
if not installed and used in accordance
with the instructions, may cause harmful
interference to radio communications.
However, there is no guarantee that
interference will not occur in a particular
installation. If this equipment does cause
harmful interference to radio or television
reception, which can be determined
by turning the equipment off and on,
the user is encouraged to try to correct
the interference by one or more of the
following measures:
—Reorient or relocate the receiving
antenna.
—Increase the separation between the
equipment and receiver.
—Connect the equipment into an outlet
on a circuit different from that to which
the receiver is connected.
—Consult the dealer or an experienced
radio/TV technician for help.
Canada Class B statement:
This Class B digital apparatus complies
with Canadian ICES-003
Cet appareil numérique de la classe B
est conforme à la norme NMB-003 du
Canada.
Declaration of Conformity
We, Parrot S.A. of 174 quai de Jemmapes,
75010 Paris, France, declare under our
sole responsibility that our product, the
MINIKIT Slim to which this declaration
relates in conformity with appropriate
standards EN300328, EN301489-17,
EN60950 following the provision of Radio
Equipment
and
Telecommunication
Equipment directive (1999/5/EC R&TTE),
with requirements covering EMC directive
2004/108/EC, Low Voltage directive
73/23/EEC and automotive directive
72/245/EEC amended by 2006/28/EC
directive.
Identification N. 394 149 496 R.C.S.
PARIS - Parrot S.A.
Copyrights
Copyright © 2009 Parrot.
Licences
The Bluetooth ® word mark and logos
are owned by the Bluetooth SIG, Inc. and
any use of such marks by Parrot S.A. is
under license.
NXT is a trademark of New Transducers
Limited.
Bluetooth QDID :
B013654, B013838, B012423
Other trademarks and trade names are
those of their respective owners.
Informations générales
Garantie
Sans préjudice de la garantie légale, les
produits Parrot sont garantis, pièces et
main d’oeuvre, pendant 1 an à compter
de la date d’achat, sauf altération du
produit, et sur présentation d’une preuve
d’achat (date et lieu d’achat n° de série
du produit) au revendeur.
La garantie ne couvre pas la mise à jour
des logiciels inclus dans les produits
Parrot avec des téléphones mobiles
Bluetooth® à des fins de compatibilité, la
récupération de données, la détérioration
extérieure du produit due à une utilisation
normale du produit, tout dommage causé
par accident, une utilisation anormale ou
non autorisée du produit, un produit non
Parrot. Parrot n’est pas responsable du
stockage, de la perte ou de l’endommagement des données durant le transport
ou la réparation.
Tout produit s’avérant non défectueux sera retourné à l’expéditeur et
les frais de traitement, de vérification
et de transport lui seront facturés.
Comment recycler ce produit
Déchets d’équipements électriques et
électroniques
Le symbole sur le produit ou sa
documentation indique qu’il ne
doit pas être éliminé en fin de vie
avec les autres déchets ménagers.
L’élimination incontrôlée des déchets
35
pouvant porter préjudice à l’environnement ou à la santé humaine, veuillez le
séparer des autres types de déchets et le
recycler de façon responsable. Vous favoriserez ainsi la réutilisation durable des
ressources matérielles.
Les particuliers sont invités à contacter
le distributeur leur ayant vendu le produit
ou à se renseigner auprès de leur mairie
pour savoir où et comment ils peuvent se
débarrasser de ce produit afin qu’il soit
recyclé en respectant l’environnement.
Les entreprises sont invitées à contacter leurs fournisseurs et à consulter les
conditions de leur contrat de vente. Ce
produit ne doit pas être éliminé avec les
autres déchets commerciaux.
Informations relatives à la batterie et au
chargeur
Précautions de sécurité
Chargement:Utilisez uniquement le chargeur allume-cigare fourni.
N’utilisez jamais un chargeur endommagé.
Pensez à charger le produit avant un
stockage de longue durée.
Température:Ne laissez pas votre appareil dans des endroits chauds ou froids
36
(voiture en plein soleil ou stationnée dans
un garage en hiver). Essayez toujours de
le conserver à température ambiante.
Le chargeur et le produit peuvent chauffer
lors du chargement. Ne les couvrez pas.
Protection contre l’eau et l’humidité :
N’utilisez pas votre appareil sous la pluie
ni à proximité de tout autre endroit humide.
Fuite: Ne démontez pas l’appareil. Dans
le cas d’une fuite de la batterie, empêchez le liquide d’entrer en contact avec
votre peau ou vos yeux. Si cela se produit, rincez immédiatement les zones
touchées avec de l’eau et contactez un
médecin.
Préservation de la durée de vie des batteries et du chargeur
Chargement:En cas d’inutilisation prolongée, une batterie pleine se décharge
d’elle-même progressivement.
Lorsque la batterie est entièrement chargée, déconnectez-la du chargeur : toute
surcharge risque de réduire sa durée de
vie.
Ne laissez pas le chargeur allume-cigare
branché lorsqu’il n’est pas utilisé.
Température:Les températures très fai-
bles ou très élevées peuvent affecter la
capacité de charge et la durée de vie des
batteries.
Mise au rebut:Vous devez éliminer votre
appareil conformément aux lois et réglementations en vigueur. Du fait que cet appareil contient des composants électroniques et une batterie, il doit être éliminé
séparément des ordures ménagères.
Contactez les autorités locales pour en
savoir plus sur les options d’élimination
et de recyclage.
Modifications
Les explications et spécifications contenues dans ce guide utilisateur ne sont
fournies qu’à titre d’information et peuvent être modifiées sans notification
préalable. Ces informations sont correctes au moment de l’impression et le plus
grand soin est apporté lors de leur rédaction afin de vous fournir des informations
les plus précises possible.
Cependant, Parrot S.A. ne saurait être
tenu responsable, directement ou indirectement, des éventuels préjudices ou
pertes de données accidentelles résultant d’une erreur ou omission au sein
du présent document. Parrot S.A. se
réserve le droit d’amender ou améliorer
le produit ainsi que son guide utilisateur
sans aucune restriction ou obligation
de prévenir l’utilisateur. Dans le cadre
de l’attention portée par Parrot S.A.
sur l’amélioration de nos produits, il est
possible que le produit que vous avez
acheté diffère légèrement de celui décrit
au sein du présent document. Dans ce
cas, vous pourrez éventuellement trouver une nouvelle version du guide utilisateur au format électronique sur le site
www.parrot.com.
Déclaration de conformité
Parrot SA, 174 quai de Jemmapes, 75010
Paris, France, déclare sous son unique responsabilité que le produit décrit
dans le présent guide utilisateur est en
conformité avec les normes techniques
EN300328, EN301489-17, EN60950
suivant les dispositions de la directive
R&TTE 99/5/EC, ainsi qu’avec les exigences de la directive EMC 2004/108/
CE, de la directive 73/23/CEE relative
aux appareils à basse tension et de la
directive Automobile 72/245/CEE amendée par la directive 2006/28/CE.
Copyright
Copyright © 2009 Parrot.
Tous droits réservés.
Información general
dos en los productos Parrot con teléfonos móviles dotados de la funcionalidad
Bluetooth® con objetivo de compatibilidad, la recuperación de datos, la deterioración exterior del producto causada
por la utilización cotidiana del producto,
cualquier daño causado por un accidente, un uso anormal o no autorizado
del producto, un producto de una marca
diferente. Parrot no es responsable del
almacenamiento de los datos, de sus
pérdidas o de daños ocurridos durante
el transporte o la reparación.
Cualquier producto que no sería defectuoso se retornará al cliente, y los gastos
de intervención y de transporte serán a
su carga.
Garantía
Sin perjudicar la garantía legal, Parrot garantiza sus productos, piezas y mano de
obra incluidos, por el período de 1 año
a partir de la fecha de compra, salvo en
caso de alteración del producto.
Esta fecha de compra debe estar certificada por una prueba de compra original
del producto (fecha y lugar de compra,
número de serie del producto) presentada al dependiente. La garantía no cubre:
la actualización de los programas inclui-
Eliminación correcta de este producto
(material eléctrico y electrónico de
descarte)
La presencia de esta marca en el producto o en el material informativo que
lo acompaña, indica que al finalizar su
vida útil no deberá eliminarse junto con
otros residuos domésticos. Para evitar
los posibles daños al medio ambiente
o a la salud humana que representa la
eliminación incontrolada de residuos,
separe este producto de otros tipos de
Marques déposées
Le nom et le logo Bluetooth sont des
marques déposées de Bluetooth ® SIG,
Inc. et toute utilisation de ces derniers
par Parrot S.A. est faite sous licence.
NXT est une marque déposée de New
Transducers Limited.
Toutes les autres marques de commerce
et marques déposées mentionnées dans
le présent document sont protégées par
Copyright et sont la propriété de leurs
propriétaires respectifs.
37
residuos y recíclelo correctamente para
promover la reutilización sostenible de
recursos materiales.
Los usuarios particulares pueden contactar con el establecimiento donde adquirieron el producto, o con las autoridades
locales pertinentes, para
informarse sobre cómo y dónde pue
den llevarlo para que sea sometido a
un reciclaje ecológico y seguro. Los
usuarios comerciales pueden contactar con su proveedor y consultar las
condiciones del contrato de compra.
Este producto no debe eliminarse mezclado con otros residuos comerciales.
Informaciones relativas a la batería y el
cargador
Precauciones de seguridad
Carga:Utilice únicamente el cargador
encendedor suministrado.
No utilice nunca un cargador que esté
deteriorado.
Acuérdese de cargar el producto antes
de guardarlo durante un período prolongado.
Temperatura:No deje el aparato en un
lugar demasiado caliente o frío (coche al
38
sol o aparcado en un garaje en invierno).
Intente mantenerlo siempre a la temperatura ambiente.
El cargador y el producto se pueden calentar durante el proceso de carga. No
los tape.
Protección del agua y la humedad:
No utilice el aparato bajo la lluvia ni cerca
de algún otro lugar húmedo.
Fuga:No desmonte el aparato. Si se produce una fuga en la batería, impida que
el líquido entre en contacto con su piel
o sus ojos. Si a pesar de todo esto se
produjera, enjuague inmediatamente con
agua las zonas afectadas y consulte a un
médico.
Protección de la vida útil de las baterías
y del cargador
Carga:Cuando no se utiliza durante un
período prolongado, una batería llena
se va descargando progresivamente por
sí sola.
Cuando la batería esté completamente
cargada, desconéctela del cargador,
cualquier sobrecarga podría reducir su
vida útil.
No deje el cargador encendedor enchu-
fado si no lo está utilizando.
Temperatura:Las temperaturas demasiado bajas o demasiado elevadas pueden
afectar a la capacidad de carga y a la vida
útil de las baterías.
Tirarlo al final de su vida útil
Debe deshacerse del aparato de acuerdo
con las leyes y normativas vigentes. Este
aparato contiene componentes electrónicos y una batería, por lo que no se debe
tirar con las basuras domésticas.
Consulte a las autoridades locales para
obtener más información sobre las opciones de eliminación y reciclaje.
Modificaciones
Las explicaciones y especificaciones
contenidas en este manual son meramente informativas y pueden ser modificadas
sin previo aviso. Se consideran correctas
en el momento de enviar la publicación
a imprenta. Este manual se ha redactado
con el máximo cuidado, con el fin de proporcionarle una información precisa.
Sin embargo, Parrot no asume responsabilidad alguna por las consecuencias
derivadas de los errores u omisiones que
pueda haber en el manual, ni por los da-
ños o pérdidas accidentales de datos que
se produzcan como consecuencia directa
o indirecta del uso de la información aquí
contenida. Parrot se reserva el derecho
a modificar o mejorar el diseño del producto o el manual de usuario sin restricciones y sin la obligación de notificárselo
a los usuarios.
En aras de actualizar y mejorar nuestros
productos, es posible que el producto
que usted haya adquirido sea ligeramente distinto al modelo que se describe
en este manual. En tal caso, tiene a su
disposición una versión más reciente de
este manual en formato electrónico en la
página web de Parrot: www.parrot.com.
Declaración de conformidad
Parrot SA, 174 quai de Jemmapes, 75010
París, Francia, declara bajo su exclusiva
responsabilidad la conformidad del producto descrito en este mismo manual de
usuario con las siguientes normas técnicas: EN300328, EN301489-17, EN60950
de acuerdo con las disposiciones de la
Directiva R&TTE 1999/5/EC, de la directiva EMC 2004/108/CE, de la directiva de
Bajo Voltaje 73/23/EEC y de la directiva
Automóvil 72/245/EEC enmendada por la
Directiva 2006/28/CE.
Número de identificación: N.394 149 496
R.C.S. París
Marcas registradas
El nombre y el logotipo Bluetooth son
marcas registradas de Bluetooth ® SIG,
Inc. y toda utilización de estos últimos
por Parrot S.A se hace con una licencia.
NXT es una marca comercial de New
Transducers Ltd.
Todas las otras marcas de comercio y
las marcas registradas mencionadas en
este documento están protegidas por el
Copyright y pertenecen a sus respectivos
propietarios.
Copyright
Copyright © 2009 Parrot.
Todos los derechos reservados. Cualquiera reproducción, que sea total o parcial,
del contenido de este documento con el
objetivo de ser publicada o difundida por
cualquier medio y bajo cualquiera forma
que sea, incluso de manera gratuita, está
prohibida sin la autorización previa y escrita de Parrot.
Allgemeine Hinweise
Änderungen
Die in dieser Anleitung enthaltenen Beschreibungen und technischen Kenndaten
dienen ausschließlich der Information und
können Änderungen ohne vorhergehende
Ankündigung unterliegen. Zum Zeitpunkt
des Drucks galten die enthaltenen Angaben als zutreffend. Bei der Verfassung
dieser Anleitung wurde größte Sorgfalt
auf deren Inhalt angewendet, damit Ihnen möglichst präzise Informationen bereitgestellt werden können.
Parrot haftet jedoch weder für Folgen,
die sich aus ggf. in dieser Anleitung enthaltenen Fehlern oder Unterlassungen
ergeben, noch für Schäden oder den versehentlichen Verlust von Daten als direkte
oder indirekte Folge der Verwendung der
enthaltenen Informationen. Parrot behält
sich das Recht vor, das Produktdesign
oder die Bedienungsanleitung zu ändern
bzw. zu verbessern, ohne dass diesbezüglich Beschränkungen vorliegen und
ohne jede Verpflichtung, die Benutzer
hiervon in Kenntnis zu setzen.
Korrekte Entsorgung dieses Produkts
39
(Elektromüll)
(Anzuwenden in den Ländern der Europäischen Union und anderen europäischen Ländern mit einem separaten
Sammelsystem) Die Kennzeichnung auf
dem Produkt bzw. auf der dazugehörigen Literatur gibt an, dass
es nach seiner Lebensdauer nicht
zusammen mit dem normalen
Haushaltsmüll entsorgt werden darf.
Entsorgen Sie dieses Gerätbitte getrennt
von anderen Abfällen, um der Umwelt
bzw. der menschlichen Gesundheit nicht
durch unkontrollierte Müllbeseitigung zu
schaden. Recyceln Sie das Gerät, um die
nachhaltige Wiederverwertung von stoffl
ichen Ressourcen zu fördern.
Private Nutzer sollten den Händler, bei
dem das Produkt gekauft wurde, oder
die zuständigen Behörden kontaktieren,
um in Erfahrung zu bringen, wie sie das
Gerät auf umweltfreundliche Weise recyceln können. Gewerbliche Nutzer sollten
sich an Ihren Lieferanten wenden und
die Bedingungen des Verkaufsvertrags
konsultieren. Dieses Produkt darf nicht
zusammen mit anderem Gewerbemüll
entsorgt werden.
Informationen zu Batterie und Ladegerät
Sicherheitsmaßnahmen
Aufladen:Nur das mitgelieferte Ladegerät
für den Zigarettenanzünder verwenden.
Nie ein beschädigtes Ladegerät benutzen.
Wenn das Produkt länger gelagert werden
soll, es zuvor ganz aufladen.
Temperatur:Das Gerät nicht in heißer oder
kalter Umgebung lassen (Auto in praller
Sonne oder im Winter in einer Garage
abgestellt). Versuchen Sie, es immer bei
Umgebungstemperatur aufzubewahren.
Ladegerät und Produkt können beim
Aufladen warm werden. Nicht abdecken.
Schutz vor Wasser und Feuchtigkeit:
Das Gerät weder im Regen, noch in der
Nähe anderer feuchter Stellen benutzen.
Leckagen:Das Gerät nicht demontieren.
Bei Leckage der Batterie dafür sorgen,
dass die Batterieflüssigkeit weder mit
Ihrer Haut, noch mit Ihren Augen in Kontakt kommt. Sollte es doch zu derartigem
Kontakt kommen, die betroffenen Bereiche sofort mit Wasser waschen und mit
einem Arzt Kontakt aufnehmen.
Erhalt der Lebensdauer der Batterien
40
und des Ladegerätes
Aufladen:Sollte sie länger nicht in Betrieb
sein, entlädt eine volle Batterie sich nach
und nach von selbst.
Wenn die Batterie ganz aufgeladen ist,
sie vom Ladegerät trennen: Bei zu langer
Ladezeit besteht die Gefahr, die Lebensdauer der Batterie zu verkürzen.
Das Ladegerät nicht im Zigarettenanzünder belassen, wenn es nicht in Betrieb
ist.
Temperatur:Sehr niedrige oder sehr hohe
Temperaturen können Ladekapazität und
Lebensdauer der Batterien beeinträchtigen.
Entsorgung
Sie sind verpflichtet, Ihr Gerät in Übereinstimmung mit den geltenden Gesetzen und
Vorschriften zu entsorgen. Da das Gerät
elektronische Bestandteile und eine Batterie enthält, muss es getrennt von dem
normalen Hausmüll entsorgt werden.
Die Behörden vor Ort werden Ihnen Auskunft über Entsorgungs- und Recyclingmöglichkeiten geben können.
Garantie
Unbeschadet der gesetzlichen Garan-
tie gilt für die Produkte von Parrot eine
1-jährige Garantie ab Kaufdatum für Ersatzteile und Reparaturkosten, sofern am
Produkt keine Änderungen vorgenommen
werden. Für die Inanspruchnahme der
Garantie ist dem Fachhändler ein Kaufnachweis (Datum und Ort des Erwerbs,
Seriennummer des Produkts) vorzulegen.
Die Garantie deckt weder die Aktualisierung der im Lieferumfang der Parrot-Produkte enthaltenen Softwareprogramme
mit Bluetooth®-Mobiltelefonen zu Kompatibilitätszwecken noch die Wiederherstellung von Daten, die äußere Abnutzung
der Produkte aufgrund einer normalen
Produktverwendung, die auf einen Unfall oder eine unsachgemäße bzw. nicht
autorisierte Verwendung der Produkte
zurückzuführenden Schäden oder Produkte anderer Hersteller. Parrot haftet
keinesfalls für die Speicherung, den Verlust oder die Beschädigung von Daten
während des Transports oder im Rahmen
von Reparaturarbeiten.
Jedes Produkt, an dem keine Mängel
festzustellen sind, wird an den Absender
zurückgeschickt, wobei die Kosten für
Bearbeitung, Prüfung und Transport dem
Absender in Rechnung gestellt werden.
Eingetragene Marken
Die Marke und das Logo Bluetooth sind
eingetragene Marken der Bluetooth
NXT ist eine Handelsmarke der New
Transducers Ltd.
Alle anderen Handelsmarken und
eingetragenen
Marken,
die
im
vorliegenden Dokument erwähnt werden,
sind durch Copyright geschützt und das
Eigentum ihrer jeweiligen Inhaber.
Informazioni generali
Garanzia
Senza pregiudizio della garanzia legale, i
prodotti Parrot sono garantiti, per sostituzione pezzi e mano d’opera, per 1 anno a
partire dalla data di acquisto, salvo alterazioni del prodotto, e su presentazione
di una prova di acquisto (data e luogo di
acquisto, numero di serie del prodotto) al
rivenditore.
La garanzia non copre gli aggiornamenti
dei software inclusi nei prodotti Par-
rot con i telefoni cellulari Bluetooth® ai
fini di compatibilità, il recupero di dati,
il deterioramento esterno del prodotto
dovuto al normale uso del prodotto
stesso, i danni causati accidentalmente,
da un uso anomalo o non autorizzato
del prodotto, un prodotto non Parrot.
Parrot non è responsabile della memoria, della perdita o del danneggiamento
dei dati durante il trasporto o la riparazione. Date le caratteristiche tecniche del
presente prodotto, l’installazione deve
essere effettuata da un tecnico. Parrot
non potrà in alcun caso essere ritenuta
responsabile per eventuali problemi di
funzionamento dovuti ad un’installazione non conforme a quanto indicato
nelle istruzioni e/o ad un’installazione non
conforme effettuata dall’utente stesso.
Corretto smaltimento del prodotto
(rifi uti elettrici ed elettronici)
(Applicabile nei Paesi dell’Unione Europea e in quelli con sistema di raccolta
differenziata)
Il marchio riportato sul prodotto o
sulla sua documentazione indica
che il prodotto non deve essere
smaltito con altri rifi uti domestici
41
al termine del ciclo di vita. Per evitare
eventuali danni all‘ambiente o alla salute
causati dall‘inopportuno smaltimento dei
rifi uti, si invita l‘utente a separare questo
prodotto da altri tipi di rifi uti e di riciclarlo
in maniera responsabile per favorire il riutilizzo sostenibile delle risorse materiali.
Gli utenti domestici sono invitati a contattare il rivenditore presso il quale è stato
acquistato il prodotto o l‘uffi cio locale
preposto per tutte le informazioni relative
alla raccolta differenziata e al riciclaggio
per questo tipo di prodotto. Gli utenti
aziendali sono invitati a contattare il
proprio fornitore e verifi care i termini e
le condizioni del contratto di acquisto.
Questo prodotto non deve essere smaltito unitamente ad altri rifi uti commerciali.
Informazioni relative alla batteria ed al
caricabatterie
Precauzioni di sicurezza
Carica:Utilizzare esclusivamente il caricabatterie da accendisigari fornito.
Non utilizzare mai un caricabatterie danneggiato. Ricordarsi di caricare il prodotto
prima di riporlo per lungo tempo.
Temperatura:Non lasciare il proprio apparecchio in luoghi caldi o freddi (auto42
mobile in pieno sole o parcheggiata in
un garage d’inverno). Cercare sempre di
tenerlo a temperatura ambiente.
Il caricabatterie ed il prodotto possono
surriscaldarsi al momento della carica.
Non coprirli.
Protezione dall’acqua e dall’umidità:
Non utilizzare l’apparecchio sotto la pioggia né in prossimità di qualsiasi posto
umido. Perdita dalla batteria:
Non smontare l’apparecchio. In caso di
perdita eventuale dalla batteria, fare in
modo che il liquido non entri in contatto
con la pelle o gli occhi. Se ciò avviene,
sciacquare immediatamente con acqua
le zone colpite e contattare un medico.
Conservazione della durata di vita delle
batterie e del caricabatterie
Carica:In caso di non utilizzo prolungato,
la batteria carica si scaricherà da sola in
modo progressivo. Quando la batteria è
completamente carica, staccarla dal caricabatterie: l’eccessiva carica rischia di
diminuire la sua durata di vita.
Non lasciare il caricabatterie collegato
all’accendisigari quando non è in uso.
Temperatura:Le temperature troppo basse o troppo alte possono influenzare la
capacità di carica e la durata di vita delle
batterie.
Smaltimento
L’apparecchio dovrà essere smaltito in
conformità alle leggi e normative in vigore. Poiché questo apparecchio contiene
componenti elettronici ed una batteria,
deve essere smaltito separatamente dai
rifiuti domestici.
Contattare le autorità locali per avere
maggiori informazioni sulle possibilità di
smaltimento e riciclaggio.
Modifiche
Le spiegazioni e le specifiche riportate
nella presente guida sono solo a scopo
informativo e possono subire modifiche
senza preavviso. Tali informazioni sono
da considerarsi corrette al momento della
pubblicazione. La presente guida è stata
redatta prestando grande attenzione, al
fine di fornire ai clienti informazioni precise e attendibili.
Tuttavia, Parrot non può essere ritenuta
responsabile per eventuali conseguenze
derivanti da omissioni o errori nella presente guida, né per eventuali danni o
perdite accidentali di dati causati diret-
tamente o indirettamente dall’uso delle
informazioni ivi contenute. Parrot si riserva il diritto di modificare/migliorare
il prodotto o la guida per l’utente senza
limitazione alcuna e senza l’obbligo di
notifica agli utenti.
Poiché il costante impegno dell’azienda
è volto a garantire continui aggiornamenti
e miglioramenti, il prodotto acquistato
dall’utente potrebbe risultare leggermente diverso dal modello descritto nella presente guida. In tal caso, verificare la disponibilità di una versione aggiornata della
guida in formato elettronico nel sito Web
di Parrot all’indirizzo www.parrot.com.
Marchi registrati
Il nome e il logo Bluetooth sono marchi
registrati di Bluetooth ® SIG, Inc. e il loro
uso da parte di Parrot S.A. è soggetto a
regolari contratti di licenza.
NXT è un marchio di New Transducers
Ltd
Tutti gli altri marchi commerciali e marchi
registrati citati nel presente documento
sono protetti da Copyright e sono di proprietà dei rispettivi proprietari.
Algemene informatie
Garantie
Op de Parrot producten rust gedurende 1
jaar vanaf de verkoopdatum garantie op
onderdelen en arbeidsloon, behoudens
aan het product aangebrachte veranderingen, tegen overlegging van de koopbon (met datum en plaats van aankoop
en serienummer van het product) aan de
leverancier.
De garantie heeft geen betrekking op
het voor doeleinden van compatibiliteit
met de mobiele Bluetooth ® telefoons
updaten van de in de Parrot producten
inbegrepen software, het terughalen van
gegevens, de uitwendige verslechtering
van het product tengevolge van normaal
gebruik van het product, per ongeluk
veroorzaakte schade, abnormaal of ongeoorloofd gebruik van het product, een
niet-Parrot product. Parrot is niet aansprakelijk voor de opslag, het verlies of
de beschadiging van gegevens tijdens
het transport of de reparatie. Ieder product dat niet defect blijkt te zijn zal aan
de afzender worden geretourneerd en de
kosten voor behandeling, verificatie en
transport zullen hem in rekening worden
gebracht.
Wegens het technisch karakter van dit
product raden wij u aan de installatie te
laten verrichten door uw garagehouder.
Parrot is in geen geval aansprakelijk voor
een verkeerde werking veroorzaakt door
een installatie die niet overeenkomt met
de in de gebruiksaanwijzing gegeven
aanwijzingen en/of een door uzelf uitgevoerde niet-conforme installatie.
Afgedankte
elektrische
en
elektronische
apparatuur
(WEEE)
In overeenstemming met de Europese
richtlijn 2002/96/EG betreffende afgedankte elektrische en elektronische
apparatuur (AEEA) geeft de vermelding
van het hierboven vermelde symbool
op het product of de verpakking aan dat
dit artikel niet in de normale, niet-gesorteerde stedelijke afvalstroom mag worden verwerkt. In plaats daarvan ligt de
verantwoordelijkheid van de afvoer van
dit product bij de gebruiker, die het dient
aan te bieden bij een inzamelpunt voor de
recyclage van afgedankte elektrische en
elektronische apparatuur. De gescheiden
inzameling van dit afval helpt de eventuele te recupereren materialen terug te
winnen of te recycleren en vermindert de
43
impact ervan op het milieu en de gezondheid van de mens. Voor meer informatie
betreffende de juiste afvoermethode.
Informatie met betrekking tot de accu en
de oplader
Veiligheidsmaatregels
Laden:Gebruik uitsluitend de meegeleverde oplader voor de sigarettenaansteker.
Gebruik nooit een beschadigde oplader.
Denk aan het opladen van het product
voordat u het voor langere tijd opslaat.
Temperatuur:Laat uw apparaat niet in
warme of koude ruimtes (auto in volle zon
of in een garage geparkeerd in de winter)
liggen. Probeer het altijd in omgevingstemperatuur te houden.
De oplader en het product kunnen warm
worden tijdens het laden. Bedek ze niet.
Bescherming tegen water en vochtigheid:
Gebruik uw apparaat niet in de regen of in
een vochtige ruimte.
Lekken: Demonteer het apparaat niet. Indien de batterij lekt, zorg er dan voor dat
de vloeistof niet in contact komt met uw
huid of ogen. Als dit wel gebeurt moet u
de geraakte zones onmiddellijk spoelen
met water en een arts raadplegen.
Behoud van de levensduur van de accu
en de oplader
Laden:Indien het apparaat langere tijd niet
wordt gebruikt, zal een volle accu langzaam leeg lopen.
Als de accu geheel geladen is, moet u
deze van de oplader loskoppelen: overbelasting kan de levensduur ervan verkorten. Laat de oplader niet aangesloten op
de sigarettenaansteker als hij niet wordt
gebruikt.
Temperatuur:Bijzonder lage of hoge temperaturen kunnen de laadcapaciteit en de
levensduur van accu’s verminderen.
Elimineren
U moet uw apparaat elimineren volgens
de geldende wetten en regelgevingen.
Omdat dit apparaat elektronische onderdelen en een accu bevat, mag het niet met
het huisvuil worden weggegooid.
Neem contact op met de plaatselijke
autoriteiten om informatie over de opties
voor elimineren of hergebruik.
Wijzigingen
De in deze handleiding gegeven uitleg en
technische gegevens dienen uitsluitend
ter informatie en kunnen zonder voorafgaande kennisgeving worden gewijzigd. Deze gegevens worden geacht correct
te zijn op het moment van het ter perse
gaan van deze handleiding. Aan het opstellen van deze handleiding is de uiterste
zorg besteed in het kader van ons streven
u accurate informatie te verschaffen.
Parrot zal echter niet aansprakelijk gesteld kunnen worden voor de gevolgen die
voortvloeien uit vergissingen of weglatingen in deze handleiding, evenmin als
voor enige beschadiging of accidenteel
verlies van gegevens die direct of indirect
voortkomen uit het gebruik van de in deze
handleiding vervatte informatie. Parrot
behoudt zich het recht voor het productontwerp of de gebruikershandleiding te
wijzigen of verbeteren zonder enige beperkingen en zonder de verplichting de gebruikers hiervan op de hoogte te stellen.
In het kader van ons voortdurende streven om onze producten uit te breiden en
te verbeteren, kan het door u gekochte
product enigszins verschillen van het in
deze handleiding beschreven model. In dit
geval is mogelijk een recentere versie van
deze handleiding in elektronische vorm
beschikbaar op de Parrot website: www.
parrot.com.
Gedeponeerde merken
De naam en het logo Bluetooth zijn gedeponeerde merken van Bluetooth ® SIG,
Inc. en ieder gebruik hiervan door Parrot
S.A. gebeurt onder licentie.
Alle andere in dit document vermelde handelsmerken en gedeponeerde merken worden door Copyright
beschermd en zijn het eigendom van hun
respectieve eigenaren.
Informação geral
Garantia
Os produtos Parrot, peças e mão-deobra, têm garantia de 1 ano a contar da
data de aquisição, salvo alteração do
produto e mediante a apresentação da
prova de compra (data e local de compra,
n.º de série do produto) ao revendedor.
A garantia não cobre a actualização dos
softwares incluídos nos produtos Parrot
com telemóveis Bluetooth ® com vista
a torná-los compatíveis, a recuperação
de dados, a deterioração exterior do
produto causada pelo seu uso normal,
qualquer dano resultante de acidentes,
uma utilização anormal ou não conforme
do produto, um produto que não seja
Parrot. A Parrot não é responsável pela
armazenagem, perda ou dano de dados
durante o transporte ou reparação.
Todos os produtos considerados sem
defeito serão remetidos ao expedidor e
os custos de tratamento, de verificação e
transporte ser-lhe-ão imputados.
Devido à especificidade técnica deste
produto, recomendamos que a sua instalação seja feita pelo seu mecânico. Em
nenhum caso a Parrot será responsável
por qualquer dano causado por uma
instalação que não esteja em conformidade com as instruções constantes
no folheto informativo e/ou uma instalação incorrecta efectuada pelo cliente.
Eliminação correta deste produto
(Resíduos de Equipamentos Elétricos e
Eletrônicos)
Esta marca, apresentada no produto ou
no seu manual indica que ele não deverá ser eliminado juntamente com os
resíduos domésticos comuns no final
do seu período de vida útil. Para impedir danos ao ambiente e à saúde humana causados pela eliminação incontrolada de resíduos, este equipamento
deverá ser separado de outros tipos
de resíduos e reciclado de forma responsável, para promover uma reutilização sustentável dos recursos materiais.
Informações relativas à bateria e ao
carregador
Precauções de segurança
Carregamento:Utilize apenas o carregador para isqueiro fornecido.
Nunca utilize um carregador danificado.
Carregue o produto antes de guardá-lo
durante um longo período de tempo.
Temperatura:Não deixe o seu aparelho
em locais quentes ou frios (automóvel
em dias de muito calor ou estacionado
numa garagem durante o Inverno). Tente
manter sempre a temperatura ambiente.
O carregador e o produto podem aquecer durante o carregamento. Não os cubra.
Protecção contra a água e humidade:
Não utilize o seu aparelho à chuva, nem
perto de qualquer local húmido.
Fuga:Não desmonte o aparelho. No caso
de uma fuga da bateria, impeça o líquido
de entrar em contacto com a sua pele ou
olhos. Se isso acontecer, passe imediatamente as zonas afectadas com água
abundante e contacte um médico.
Preservação da duração de vida das
baterias e do carregador
Carregamento:Caso não utilize a bateria durante um longo período de tempo,
45
esta vai-se descarregando progressivamente.
Quando a bateria estiver completamente carregada, desligue-a do
carregador: Qualquer sobrecarga pode
reduzir a sua duração de vida.
Não deixe o carregador do isqueiro ligado quando não for utilizado.
Temperatura As temperaturas muito
fracas ou muito elevadas podem afectar a capacidade de carregamento e a
duração de vida das baterias.
Eliminação
Deve eliminar o seu aparelho em conformidade com as leis e regulamentações
em vigor. Como este aparelho contém
componentes electrónicos e uma bateria, deve ser eliminado separadamente
do lixo doméstico comum.
Contacte as autoridades locais para
saber mais acerca das opções de eliminação e de reciclagem.
Modificações
As explicações e especificações presentes neste manual são meras informações concedidas, podendo ser
modificadas sem aviso prévio. Pode46
rão ainda ser sujeitas a correcções
aquando da sua impressão. Este manual foi redigido com bastante atenção,
visando o fornecimento de informação
o mais precisa possível.
No entanto, a Parrot não será responsável por consequências resultantes de erros ou omissões no presente
manual, nem por danos ou perdas acidentais resultante directa ou indirectamente da utilização da informação aqui
constante. A Parrot reserva-se o direito
de alterar ou aperfeiçoar o design do
produto ou o manual de utilização sem
quaisquer restrições e sem qualquer
obrigação de notificar o utilizador.
Como parte da nossa preocupação
contínua em actualizar e aperfeiçoar
os nossos produtos, o produto que
adquiriu pode ser ligeiramente diferente do modelo descrito no presente manual. Se for o caso, poderá
existir uma versão mais recente do
presente manual em formato electrónico no sítio da Internet da Parrot, em
www.parrot.com.
Marca registada
O nome e o logotipo Bluetooth são
marcas registadas de Bluetooth ® SIG,
Inc., e qualquer utilização pela Parrot
S.A. encontra-se licenciada.
Todas as outras marcas comerciais e
marcas registadas indicadas no presente documento estão protegidas
pelos Direitos de autor e são da exclusiva propriedade dos respectivos
proprietários.
Hotline
Our hotline is at your disposal from Monday to Friday between 9 am and 6 pm (GMT + 1) - [email protected]
Italy : [+39] 02 59 90 15 97
Spain : [+34] 902 404 202
UK : [+44] (0)844 472 2360
Germany : 0900 1727768
USA : [+1] (877) 9 Parrot (toll free)
China : [+86] 755 8203 3307
Hong Kong : [+852] 2736 1169
France : 01 48 03 60 69
Europe : [+33] 1 48 03 60 69 (Spoken languages : French, English and Spanish)
Trademark of New Transducers Limited
FCC ID: RKXMYNOS2
w w w. p a r ro t . c o m