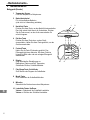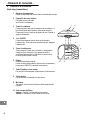
1
Babyphon
mit digitaler, rauschfreier Funkübertragung
Interphone bébé
avec radio transmission numérique et sans bruit
Baby controllo
con trasmissione radio digitale e antifruscio
Baby Monitor
with digital, noiseless Radio Communication
Bedienungsanleitung
Mode d’emploi
Istruzioni per l’uso
Operating Instructions
BCC 51
2
Bedienungsanleitung . . . . . . . . . . . . . . . . . . . 3
Mode d’emploi . . . . . . . . . . . . . . . . . . . . . . . 19
Istruzioni per l’uso . . . . . . . . . . . . . . . . . . . . . 35
Operating Instructions . . . . . . . . . . . . . . . . . . 51
Declaration of Conformity . . . . . . . . . . . . . . . 68
2
1
Inhaltsverzeichnis
1
2
3
4
5
6
7
8
Allgemeine Hinweise . . . . . . . . . . . . . . . . . . . . . . . . .
4
Bestimmungsgemäße Verwendung . . . . . . . . . . . . . . . . . . . . . . .
Sicherheitshinweise . . . . . . . . . . . . . . . . . . . . . . . . . . . . . . . . . .
Entsorgung . . . . . . . . . . . . . . . . . . . . . . . . . . . . . . . . . . . . . . . .
4
4
4
Menüstruktur . . . . . . . . . . . . . . . . . . . . . . . . . . . . . . .
Bedienelemente . . . . . . . . . . . . . . . . . . . . . . . . . . . .
5
6
Babygerät (Sender) . . . . . . . . . . . . . . . . . . . . . . . . . . . . . . . . . .
Elterngerät (Empfänger) . . . . . . . . . . . . . . . . . . . . . . . . . . . . . . .
Ladeschale . . . . . . . . . . . . . . . . . . . . . . . . . . . . . . . . . . . . . . . .
6
7
7
Inbetriebnahme . . . . . . . . . . . . . . . . . . . . . . . . . . . . .
8
Sicherheitshinweise . . . . . . . . . . . . . . . . . . . . . . . . . . . . . . . . . .
Verpackungsinhalt prüfen . . . . . . . . . . . . . . . . . . . . . . . . . . . . . .
Elterngerät . . . . . . . . . . . . . . . . . . . . . . . . . . . . . . . . . . . . . . . .
Babygerät . . . . . . . . . . . . . . . . . . . . . . . . . . . . . . . . . . . . . . . . .
8
8
8
8
Bedienung Ihres Babyphons . . . . . . . . . . . . . . . . . . .
9
Lautstärke . . . . . . . . . . . . . . . . . . . . . . . . . . . . . . . . . . . . . . . . .
Akkuladeanzeige / Akku-Leerwarnung . . . . . . . . . . . . . . . . . . . . .
Sprache . . . . . . . . . . . . . . . . . . . . . . . . . . . . . . . . . . . . . . . . . .
Uhrzeit . . . . . . . . . . . . . . . . . . . . . . . . . . . . . . . . . . . . . . . . . . .
Babyalarm . . . . . . . . . . . . . . . . . . . . . . . . . . . . . . . . . . . . . . . .
Schlaflieder . . . . . . . . . . . . . . . . . . . . . . . . . . . . . . . . . . . . . . . .
Schlaflieder auswählen und starten . . . . . . . . . . . . . . . . . . . . . . .
Temperatur . . . . . . . . . . . . . . . . . . . . . . . . . . . . . . . . . . . . . . . .
Temperaturbereich ändern . . . . . . . . . . . . . . . . . . . . . . . . . . . . .
Temperaturalarm einstellen . . . . . . . . . . . . . . . . . . . . . . . . . . . .
Umstellen von ° C auf ° F . . . . . . . . . . . . . . . . . . . . . . . . . . . . . .
Funkruf zwischen Baby- und Elterngerät (Paging) . . . . . . . . . . . .
Zum Baby sprechen . . . . . . . . . . . . . . . . . . . . . . . . . . . . . . . . . .
Nachtlicht . . . . . . . . . . . . . . . . . . . . . . . . . . . . . . . . . . . . . . . . .
Taschenlampe . . . . . . . . . . . . . . . . . . . . . . . . . . . . . . . . . . . . . .
Babyfütterung . . . . . . . . . . . . . . . . . . . . . . . . . . . . . . . . . . . . . .
Erste bzw. nächste Babyfütterungszeit einstellen . . . . . . . . . . . . .
Babyfütterungsintervalle einstellen . . . . . . . . . . . . . . . . . . . . . . .
Babyfütterungsalarm einschalten . . . . . . . . . . . . . . . . . . . . . . . .
Babyfütterungsalarm ausschalten . . . . . . . . . . . . . . . . . . . . . . . .
Anpassen der Empfindlichkeit des Babyphons . . . . . . . . . . . . . . .
Eco Mode . . . . . . . . . . . . . . . . . . . . . . . . . . . . . . . . . . . . . . . . .
9
9
9
9
10
10
11
11
11
12
12
12
12
13
13
13
13
14
14
14
14
14
Fehlerbeseitigung . . . . . . . . . . . . . . . . . . . . . . . . . . .
Technische Daten . . . . . . . . . . . . . . . . . . . . . . . . . . .
15
16
Reinigung und Pflege . . . . . . . . . . . . . . . . . . . . . . . . . . . . . . . . .
Konformitätserklärung . . . . . . . . . . . . . . . . . . . . . . . . . . . . . . . .
16
16
Garantie . . . . . . . . . . . . . . . . . . . . . . . . . . . . . . . . . .
17
3
− Allgemeine Hinweise −
1 Allgemeine Hinweise
Bitte lesen Sie diese Bedienungsanleitung sorgfältig durch. Öffnen Sie niemals die Geräte und führen
Sie keine Reparaturen durch. Wenden Sie sich im Garantiefall an Ihren Fachhändler. Im Zuge von
Projektverbesserungen behalten wir uns technische und optische Veränderungen am Artikel vor.
Bestimmungsgemäße Verwendung
Das Babyphon dient zur Raumüberwachung. Das Babygerät (Sender) überträgt Stimmen und andere
Geräusche vom Baby zum Elterngerät (Empfänger). Jede andere Verwendung gilt als nicht
bestimmungsgemäß. Die Verwendung dieser Geräte ersetzt nicht die persönliche Anwesenheit und
das Aufpassen auf Ihr Kind. Schadensersatzansprüche, die über die gesetzlichen Bestimmungen
hinausgehen, sind ausgeschlossen.
Sicherheitshinweise
Das Babyphon wurde entwickelt, um Ihnen zusätzliche Sicherheit zu bieten, wenn Sie einmal nicht im
selben Zimmer wie Ihr Baby sein können. Es ist KEIN Ersatz für das Aufpassen durch Erwachsene.
Während der Benutzung muss sich ein Elternteil immer in Reichweite des Babyphons aufhalten. Ihr
Babyphon ist weder ein medizinisches Gerät noch kann es den "plötzlichen Kindstod" verhindern.
Verlassen Sie sich in Bezug auf das Wohlbefinden Ihres Kindes nicht auf dieses Gerät. Überprüfen
Sie regelmäßig persönlich, ob es Ihrem Kind gut geht.
Legen Sie niemals etwas über Ihr Babyphon bzw. decken Sie es niemals ab.
Legen Sie das Eltern− oder Babygerät niemals in Wassernähe oder in einer feuchten Umgebung ab.
Achten Sie bei Auslandsreisen darauf, dass die am Netzteil angegebene Spannung mit der
Spannung vor Ort übereinstimmt.
Werfen Sie Batterien/Akkus niemals in den Hausmüll. Beachten Sie die
Entsorgungsmöglichkeiten Ihrer Kommunalbehörden.
Verwenden Sie in Ihrem Elterngerät niemals Einwegbatterien. Verwenden Sie nur die
empfohlenen Akkus − 2 x AAA 1,2 V 800 mAH NiMH.
Verwenden Sie nur das mitgelieferte Netzteil, andernfalls riskieren Sie die Beschädigung Ihres
Babyphons.
Ziehen Sie das Netzteil und entfernen Sie die Batterien/Akkus, wenn Sie das Babyphon nicht
benutzen.
Besprühen Sie das Gerät nicht mit Reinigungspolitur. Ziehen Sie das Netzteil, bevor Sie das
Gerät reinigen.
Während der Benutzung können die Netzteile warm werden.
Setzen Sie Ihr Eltern− oder Babygerät keinem direkten Sonnenlicht aus.
Die Ladekapazität der wiederaufladbaren Akkus im Elterngerät lässt mit der Zeit nach, so dass diese
unter Umständen ersetzt werden müssen. Neue Akkus können über unsere Hotline bezogen werden.
Entsorgung
Wollen Sie Ihr Gerät entsorgen, bringen Sie es zur Sammelstelle Ihres kommunalen
Entsorgungsträgers (z. B. Wertstoffhof). Das nebenstehende Symbol bedeutet, dass Sie das
Gerät auf keinen Fall in den Hausmüll werfen dürfen! Nach dem Elektro− und
Elektronikgerätegesetz sind Besitzer von Altgeräten gesetzlich gehalten, alte Elektro− und
Elektronikgeräte einer getrennten Abfallerfassung zuzuführen.
Akkus/Batterien entsorgen Sie beim batterievertreibenden Handel
sowie bei zuständigen Sammelstellen, die entsprechende Behälter
bereitstellen.
Verpackungsmaterialien entsorgen Sie entsprechend den lokalen
Vorschriften.
4
− Menüstruktur −
2 Menüstruktur
1. Ebene
2. Ebene
Nachtlicht
Ein?IAus?
Schlaflied
Abspielen?IStopp?
Neu wählen
Empfindlk.
Stufe
Geräu. Alarm
Ein?IAus?
Lautst.
Stufe
Bereichswahl
Obere Gr. xx
Untere Gr. xx
Temp. Alarm
Ein?IAus?
Lautst.
Temperatur
3. Ebene
4. Ebene
Twinkle
Silent Night
Minuet in G
Danny Boy
Gymnopedie
Alle absp.
Stufe
Grad CIGrad F
Uhr
Fütterung
Sprache
Zeit einst.
Jahr
Monat
Tag
Stunde
Minute
Stundeformat
12 Std?I24 Std?
Zeit einst.
Stunde
Minute
Fü.Intervall
Stunde
Minute
Alarm
Ein?IAus?
Lautst.
Stufe
Deutsch
Espanol
Italiano
PYCCKÈÉ
English
Francais
Zum Navigieren öffnen Sie mit der Menü−Taste das Hauptmenü (1. Ebene), wählen mit den
Up/Down−Tasten einen Menüpunkt aus und bestätigen ihn mit der OK−Taste. Dieses Prinzip gilt auch
für die anderen Menüebenen.
5
− Bedienelemente −
3 Bedienelemente
Babygerät (Sender)
1
Temperatur Sensor
Fühlt die Temperatur im Babyzimmer.
2
Batteriefachdeckel
Für nicht aufladbare Batterien
(sind nicht im Lieferumfang enthalten).
3
Nachtlicht−Taste
Drücken Sie diese Taste, um das Nachtlicht einzuschalten.
Das Licht scheint leicht durch die Vorderleiste. Drücken
Sie die Taste erneut, um das Licht auszuschalten. Es
erlischt langsam.
4
Ein/Aus−Taste
Drücken Sie diese Taste kurz, um das Gerät
einzuschalten. Halten Sie diese Taste gedrückt, um das
Gerät auszuschalten.
5
Funkruf−Taste
Halten Sie die Taste 2 Sekunden gedrückt. Das
Elterngerät gibt einen Alarmton. Mit dieser Funktion
können Sie Hilfe rufen oder ein verlegtes Elterngerät
wiederfinden.
6
Display
Zeigt die aktuellen Einstellungen an:
Batterielevel, Datum und Zeit, Temperatur,
Schlaflieder Ein/Aus, Schlaflied−Melodie.
7
Play/Stopp−Taste, Schlaflieder
Zum Starten oder Stoppen der Schlaflieder.
8
Musik−Taste
Zum Auswählen der Schlaflied−Melodien.
9
Mikrofon
Übermittelt die Geräusche aus dem Babyzimmer.
10 Lautstärke−Tasten Up/Down
Volume −: Reduzieren der Schlaflied−Lautstärke.
Volume +: Erhöhen der Schlaflied−Lautstärke.
6
1
3 4 5
2
6
7
8
10
9
− Bedienelemente −
Elterngerät (Empfänger)
11 Akkufachdeckel
Wiederaufladbare Akkus.
12 Gürtelclip
13 Lautstärke−Tasten Up/Down
Stellen Sie die Lautstärke ein, in der Sie die Geräusche
aus dem Babyzimmer hören möchten und nutzen Sie
diese Tasten zur Navigation im Menü.
14 Ein/Aus−Taste
Drücken Sie diese Taste, um das Gerät einzuschalten.
Halten Sie die Taste gedrückt, um auszuschalten.
13
12
14
11
15 Menü−Taste, OK−Taste
Die Menü−Taste und OK−Taste bilden mit den Up/Down
Tasten eine Einheit und dienen der Einstellung des
Babyphons. Drücken Sie die Menü−Taste, um Zugang zu
den Menüoptionen zu bekommen. Danach wählen Sie mit
den Up/Down−Tasten eine Option aus und bestätigen
diese mit der OK−Taste. Mit der Menü−Taste verlassen Sie
auch die aktuelle Menüebene um einen Schritt zurück.
16 Verbindungs−LED
Grünes Licht: Verbunden mit Babygerät
Blinkendes Licht: Verbindung unterbrochen.
18
19
17
16
15
17 Display
Zeigt die aktuellen Einstellungen an:
Batterielevel, Datum und Zeit, Temperatur,
Schlaflieder Ein/Aus, Schlaflied−Melodie.
18 Lampen−Taste
Halten Sie die Lampen−Taste gedrückt, um einen weichen
Lichtstrahl zu erzeugen.
19 Sprech−Taste (zur Babyberuhigung)
Halten Sie die Sprech−Taste gedrückt, um zu Ihrem Baby
oder Partner zu sprechen.
Ladeschale
20 Ladeleuchte
Wenn das Elterngerät in die Ladeschale gelegt wird,
leuchtet die rote Ladeleuchte, um den Ladevorgang
anzuzeigen. Die Leuchte bleibt eingeschaltet, um
anzuzeigen, dass ein optimaler Ladevorgang eingehalten
wird.
20
7
− Inbetriebnahme −
4 Inbetriebnahme
Sicherheitshinweise
Lesen Sie vor Inbetriebnahme unbedingt die "Allgemeinen Hinweise" am Anfang dieser
Bedienungsanleitung.
Verpackungsinhalt prüfen
Zum Lieferumfang gehören:
1 Elterngerät (Empfänger)
1 Ladeschale mit Netzteil
2 wiederaufladbare Akkus Typ AAA, 800 mAh
1 Babygerät (Sender)
1 Netzteil mit Netzschnur
Elterngerät
12
1. Entfernen Sie den Gürtelclip, indem Sie den Clip (12) oben
anheben und nach unten schieben.
2. Entfernen Sie anschließend den Akkufachdeckel (11) an der Rückseite
des Elterngeräts, indem Sie auf den Deckel drücken und ihn nach unten
schieben. Legen Sie die wiederaufladbaren Akkus entsprechend der
Markierungen im Gerät ein und schließen Sie den Deckel wieder.
3. Stellen Sie das Elterngerät in die Ladeschale.
11
4. Stecken Sie das Netzteil in die Steckdose.
Die rote Ladeleuchte an der Ladeschale leuchtet auf, um anzuzeigen, dass das Elterngerät
geladen wird (die Leuchte bleibt eingeschaltet, um anzuzeigen, dass optimal geladen wird).
5. Drücken Sie die Ein/Aus−Taste, um das Gerät einzuschalten.
Vor der ersten Benutzung oder nach einer langen Nutzungspause muss das Elterngerät
13 Stunden geladen werden. Während dieser Zeit kann das Elterngerät in der Ladeschale
weiter genutzt werden, wenn es eingeschaltet ist. Ohne Akkus ist ein Betrieb von der
Ladestation nicht möglich.
Babygerät
1. Bei einem Stromausfall kann Ihr Babyphon auf Batterieversorgung umschalten. Aus diesem
Grund wird das Einlegen von Batterien in das Babygerät empfohlen.
2. Entfernen Sie den Batteriedeckel an der Rückseite des Babygeräts, indem Sie auf den Deckel
drücken und ihn nach unten schieben. Legen Sie 3 Alkaline−Batterien des
Typs AA (nicht im Lieferumfang enthalten) entsprechend der Markierung im Gerät ein und
schließen Sie den Deckel wieder. Verwenden Sie keine Akkus im Babygerät.
3. Stecken Sie das Stromkabel in den Eingang an der Seite des Babygeräts und stecken Sie das
Netzteil in die Steckdose.
4. Drücken Sie die Ein/Aus−Taste, um das Gerät einzuschalten.
Das Babygerät sollte in ca. 1 bis 1,5 m Entfernung vom Kinderbett auf einer geraden
Oberfläche aufgestellt werden. Stellen Sie das Babygerät niemals in das Kinderbett, Bett oder
in den Laufstall. Stellen Sie sicher, dass sich das Gerät, die Kabel und das Netzteil außerhalb
der Reichweite von Babys und anderen Kleinkindern befindet. Stellen Sie die Geräte niemals
auf antike oder polierte Oberflächen.
8
− Bedienung −
5 Bedienung Ihres Babyphons
Sobald Sie Ihr Babyphon eingeschaltet haben, können Sie die Geräusche aus dem Babyzimmer über
das Elterngerät hören. Außerdem können Sie die Geräusche "sehen", da die grünen und roten
Sensorleuchten oben am Elterngerät mit dem Geräuschpegel aufleuchten und erlöschen.
Wenn die Verbindung zwischen Eltern− und Babygerät zu irgendeinem Zeitpunkt ausfällt,
blinkt die grüne "Verbindungsleuchte" am Elterngerät, es ertönt ein Warnton, der auf die fehlende Verbindung hinweist und die grünen und roten Sensorleuchten reagieren nicht mehr
auf Geräusche. Befolgen Sie die Anweisungen im Kapitel "Fehlerbeseitigung", um die "Verbindung" wiederherzustellen.
Lautstärke
Mit den Up/Down−Tasten an der Seite des Elterngeräts können Sie die Lautstärke einstellen, mit der
Sie Ihr Baby hören. Diese Einstellung verändert nicht die Empfindlichkeit des Babyphons, nur die
Lautstärke mit der Sie die Geräusche hören, wird verändert.
Akkuladeanzeige / Akku-Leerwarnung
Das Elterngerät funktioniert außerhalb der Ladeschale bis zu 10 Stunden. Dies hängt jedoch davon
ab, wie stark die Akkus geladen sind. Wenn die Akkus nur gering geladen sind, beginnt das
"Batteriesymbol" am Elterngerät zu blinken und ein Warnton ertönt. Sie sollten das Gerät zurück in die
Ladeschale legen, um die Akkus zu laden. Auch in der Ladeschale können Sie Ihr Elterngerät weiter
benutzen.
Sprache
Ihr Babyphon kann für verschiedene Sprachen eingestellt werden.
Sprache ändern
Am Elterngerät
1. Drücken Sie die Menü−Taste, um danach mit den Up/Down−Tasten den Eintrag [Language]
auszuwählen. Danach OK−Taste betätigen.
2. Das Display zeigt [English]. Drücken Sie die Up/Down−Tasten, um die gewünschte Sprache
auzuwählen. Danach OK−Taste betätigen. Das Display zeigt [Gespeichert] und die gewünschte
Sprache ist jetzt aktiviert.
Uhrzeit
Sie können am Elterngerät Datum und Uhrzeit einstellen und zwischen den Formaten 12 und 24
Stundenanzeige wählen (voreingestellt ist die 24 Stundenanzeige). Wenn Sie die
Fütterungs−Funktion" nutzen wollen, müssen Sie die Uhrzeit einstellen.
Wenn Sie Ihr Babyphon von der Stromversorgung getrennt haben, müssen Sie die Uhrzeit
neu einstellen.
Uhrzeit einstellen
Am Elterngerät
1. Drücken Sie die Menü−Taste, um danach mit den Up/Down−Tasten den Eintrag [Uhr]
auszuwählen. Danach OK−Taste betätigen.
2. Das Display zeigt [Zeit einst]. OK−Taste betätigen.
3. Das Display zeigt [Jahr]. Mit den Up/Down−Tasten das aktuelle Jahr auswählen. OK−Taste
betätigen.
4. Das Display zeigt [Monat]. Mit den Up/Down−Tasten den aktuellen Monat auswählen. OK−Taste
betätigen.
9
− Bedienung −
5. Das Display zeigt [Tag]. Mit den Up/Down−Tasten den aktuellen Tag auswählen. OK−Taste
betätigen.
6. Das Display zeigt [Stunde]. Mit den Up/Down−Tasten die aktuelle Stunde im 24 Stundenformat
auswählen. OK−Taste betätigen.
7. Das Display zeigt [Minute]. Mit den Up/Down−Tasten die aktuelle Minute auswählen. OK−Taste
betätigen. Das Display zeigt [Gespeichert] und ein Quittungssignal wird ausgegeben. Datum und
Uhrzeit werden nun angezeigt.
12 oder 24 Stundenformat einstellen
Am Elterngerät
1. Drücken Sie die Menü−Taste, um danach mit den Up/Down−Tasten den Eintrag [Uhr]
auszuwählen. Danach OK−Taste betätigen.
2. Das Display zeigt [Zeit einst]. OK−Taste betätigen. Mit den Up/Down−Tasten den Eintrag
[Stundeformat] wählen. OK−Taste betätigen.
3. Das Display zeigt [12 Std?]. OK−Taste betätigen oder Menü−Taste betätigen, falls Sie keine
Änderung vornehmen möchten. Das Display zeigt [Gespeichert], um zu bestätigen, dass das 12
Stundenformat aktiviert ist.
Bei der 12 Stundenanzeige wird ein kleines a" für AM oder ein kleines p" für PM im Display
angezeigt.
4. Um in das 24 Stundenformat zu wechseln, wiederholen Sie die oben genannten Schritte. Im
Schritt 3 wird [24 Std?] angezeit. Danach OK−Taste betätigen.
Babyalarm
Sie können das Elterngerät so einstellen, dass ein zusätzlicher Warnton ausgegeben wird, wenn der
Geräuschpegel im Babyzimmer so laut ist, dass am Elterngerät die roten Geräuschsensorleuchten
aufleuchten. Dieses ist besonders hilfreich, wenn die Lautstärke Ihres Elterngeräts ganz nach unten
gestellt ist, weil Sie nur die Geräuschsensorleuchten zur Überwachung benutzen möchten.
Am Elterngerät
1. Drücken Sie die Menü−Taste, um danach mit den Up/Down−Tasten den Eintrag [Geräu. Alarm]
auszuwählen. Danach OK−Taste betätigen.
2. Das Display zeigt [Ein?]. Danach OK−Taste betätigen. OK−Taste betätigen oder Menü−Taste
betätigen, falls Sie keine Änderung vornehmen möchten. Das Display zeigt [Gespeichert] und
ein Quittungssignal ertönt.
3. Wenn Sie die Alarmierungslautstärke einstellen wollen, drücken Sie die Menü−Taste und
navigieren zum Eintrag [Geräu. Alarm], betätigen die OK−Taste und navigieren zum Eintrag
[Lautst] und drücken die OK−Taste. Das Display zeigt [Stufe] und eine Anzahl von Balken.
Diese Balken sind repräsentativ für die gewünschte Alarmierungslautstärke. Ändern Sie die
Lautstärke mit den Up/Down−Tasten (alle Balken = max. Lautstärke).
4. Das Display zeigt [Gespeichert]. Ein Alarmierungston wird dann am Elterngerät ausgegeben,
wenn die Geräusche im Babyzimmer so laut geworden sind, dass auch die roten LEDs
aufleuchten.
5. Um den Babyalarm auszuschalten, verfahren Sie in gleicher Weise. Das Display zeigt jetzt
[Aus?]. Danach OK−Taste betätigen. Das Display zeigt [Gespeichert].
Schlaflieder
Ihr Baby kann mit sanften Schlafliedern des Babygeräts einschlafen. Sie haben 5 verschiedene
Melodien zur Auswahl oder Sie können alle nacheinander abspielen lassen [Abspielen?]. Sie
können die Schlaflieder sowohl am Babygerät als auch am Elterngerät ein− und ausschalten. Im
eingeschalteten Zustand wird eine Musiknote in beiden Displays angezeigt und der Titel des gerade
aktuellen Schlafliedes. Die Schlaflieder werden 15 Minuten lang abgespielt.
10
− Bedienung −
Schlaflieder auswählen und starten
Am Babygerät
1. Drücken Sie die Musik−Taste. Das Display wird eingeschaltet. Das Schlaflied wird angezeigt.
2. Drücken Sie die Musik−Taste erneut so oft, bis Sie das gewünschte Schlaflied gefunden haben
oder wählen Sie [Alle absp?].
3. Drücken Sie die Play/Stopp−Taste, um die Auswahl zu starten oder zu stoppen.
Am Elterngerät
1. Drücken Sie die Menü−Taste, um danach mit den Up/Down−Tasten den Eintrag [Schlaflied]
auszuwählen. Danach OK−Taste betätigen.
2. Das Display zeigt [Abspielen?]. Drücken Sie die Up/Down−Tasten, um den Eintrag [Neu
wählen] auszuwählen. Danach OK−Taste betätigen.
3. Das Display zeigt das aktuelle Schlaflied. Drücken Sie die Up/Down−Tasten, um das gewünschte
Schlaflied auszuwählen oder wählen Sie [Alle absp.]. Das Display bestätigt die Aktion mit der
Meldung [Gespeichert].
4. Das Display zeigt [Schlaflied]. Danach 2−mal die OK−Taste betätigen.
5. Um das Abspielen zu stoppen, drücken Sie 2−mal die OK−Taste wenn Sie sich immer noch im
Schlaflied Menü befinden.
Wenn Sie das Abspielen nicht stoppen, wird es automatisch nach 15 Minuten beendet.
Temperatur
Es ist sehr wichtig für die Gesundheit Ihres Babys, dass es sich in einem gleichmäßigen
Temperaturbereich befindet. Dazu gehören Raum−, Körper−, Kleidungs− und Schlafraumtemperatur
(erkundigen Sie sich bei Ihrem örtlichen Gesundheitsamt nach den geeigneten Temperaturen). Ihr
Babyphon kann Sie bei der Temperaturüberwachung unterstützen, indem die Temperaturen am
Eltern− und Babygerät angezeigt werden. Des Weiteren können Sie sich alarmieren lassen, wenn die
Temperaturen sich außerhalb der erlaubten Grenzen befinden.
Temperaturbereich ändern
Falls Sie möchten, können Sie eine untere und obere Temperaturschwelle an Ihrem Babygerät
programmieren. Wenn die Temperatur im Babyzimmer sich dann unterhalb oder oberhalb dieser
Grenzen verändert, blinkt die Temperaturanzeige am Elterngerät und ein Alarmton wird ausgegeben
(falls er aktiviert wurde). Zusätzlich wird Hoch" oder Niedrig" angezeigt.
Am Elterngerät
1. Drücken Sie die Menü−Taste, um danach mit den Up/Down−Tasten den Eintrag [Temperatur]
auszuwählen. Danach OK−Taste betätigen.
2. Das Display zeigt [Bereichswahl]. Danach OK−Taste betätigen. Der aktuelle obere
Temperaturwert [Obere Gr. xx] wird angezeigt.
3. Drücken Sie die Up/Down−Tasten, um die gewünschte obere Temperaturgrenze einzustellen.
Danach OK−Taste betätigen. Das Display zeigt erst [Gespeichert] und danach wird der untere
aktuelle Temperaturwert [Untere Gr. xx] angezeigt.
4. Drücken Sie die Up/Down−Tasten, um die gewünschte untere Temperaturgrenze einzustellen.
Danach OK−Taste betätigen. Das Display zeigt [Gespeichert].
Sie haben nun den Temperaturbereich, der überwacht werden soll, programmiert.
11
− Bedienung −
Temperaturalarm einstellen
Falls Sie möchten, können Sie Ihr Elterngerät so programmieren, dass es einen zweifachen Alarmton
aussendet, wenn die Raumtemperatur im Babyzimmer sich außerhalb des Temperaturbereiches
befindet.
Am Elterngerät
1. Drücken Sie die Menü−Taste, um danach mit den Up/Down−Tasten den Eintrag [Temperatur]
auszuwählen. Danach OK−Taste betätigen.
2. Drücken Sie die Up/Down−Tasten, um den Eintrag [Temp. Alarm] auszuwählen. Danach
OK−Taste betätigen.
3. Das Display zeigt [Ein?]. Danach OK−Taste betätigen oder Menü−Taste betätigen, falls Sie keine
Änderung vornehmen möchten. Das Display zeigt [Gespeichert]. Die Alarmierung ist
eingeschaltet.
4. Wenn Sie die Alarmierungslautstärke einstellen wollen, wählen Sie mit den Up/Down−Tasten den
Unterpunkt [Lautst] und bestätigen Sie ihn mit der OK−Taste. Das Display zeigt [Stufe] und eine
Anzahl von Balken. Diese Balken sind repräsentativ für die gewünschte Alarmierungslautstärke.
Ändern Sie die Lautstärke mit den Up/Down−Tasten. Das Display zeigt [Gespeichert].
5. Um die Alarmierung auszuschalten, verfahren Sie in gleicher Weise. Das Display zeigt jetzt im
Schritt 3 [Aus?]. Danach OK−Taste betätigen.
Umstellen von ° C auf ° F
Sie können die Temperaturanzeige in Grad Celsius oder in Grad Fahrenheit ausgeben. Die
Voreinstellung ist Grad Celsius. Wenn Sie umschalten möchten verfahren Sie wie folgt:
Am Elterngerät
1. Drücken Sie die Menü−Taste, um danach mit den Up/Down−Tasten den Eintrag [Temperatur]
auszuwählen. Danach OK−Taste betätigen.
2. Drücken Sie die Up/Down−Tasten, um den Eintrag [Grad F?] auszuwählen. Danach OK−Taste
oder Menü−Taste betätigen, falls Sie keine Änderung vornehmen möchten. Das Display zeigt
[Gespeichert]. Die Temperaturanzeige erfolgt jetzt in ° F.
3. Um die Temperaturanzeige in ° C umzuschalten, verfahren Sie in gleicher Weise. Im Schritt 2
zeigt das Display jetzt [Grad C?]. Danach OK−Taste betätigen.
Funkruf zwischen Baby- und Elterngerät (Paging)
Diese Funktion ist nützlich, wenn sich ein Elternteil im Babyzimmer befindet und Kontakt mit dem
anderen Elternteil aufnehmen möchte. Außerdem hilft diese Funktion dabei, ein verlegtes Elterngerät
zu finden.
Am Babygerät
1. Drücken und halten Sie die Funkruf−Taste ca. 2 Sekunden. Das Elterngerät sendet eine
Signaltonfolge.
Am Elterngerät
1. Wenn die Signaltonfolge ertönt, drücken Sie eine beliebige Taste, um sie auszuschalten.
2. Sie können sich auch mit Ihrem Partner im Babyzimmer unterhalten. Dazu halten Sie die
Sprech−Taste gedrückt und sprechen in das Mikrofon des Elterngeräts. Um den Partner aus dem
Babyzimmer hören zu können, müssen Sie die Sprech−Taste wieder loslassen.
Zum Baby sprechen
Sie können von Ihrem Elterngerät aus beruhigend auf das Baby einwirken, z. B. indem Sie sagen: ich
komme sofort".
Am Elterngerät
1. Halten Sie die Sprech−Taste gedrückt und sprechen in das Mikrofon des Elterngeräts.
12
− Bedienung −
Um Ihr Baby aus dem Babyzimmer hören zu können, müssen Sie die Sprech−Taste wieder
loslassen.
Nachtlicht
Das Babygerät hat ein Nachtlicht, das durch einmaliges Berühren ein weiches, gleichmäßiges Licht
ausstrahlt, das Ihrem Baby Sicherheit vermittelt und Ihnen ermöglicht, Ihr Baby in einem dunklen
Raum zu sehen. Sie können das Nachtlicht auch von Ihrem Elterngerät aus ein− und ausschalten.
Am Babygerät
1. Drücken Sie die Licht−Taste oben am Gerät. Ein weiches Licht wird langsam eingeschaltet.
Durch erneutes Drücken der Taste erlischt das Licht langsam.
Am Elterngerät
1. Drücken Sie die Menü−Taste, um danach mit den Up/Down−Tasten den Eintrag [Nachtlicht]
auszuwählen. Danach OK−Taste betätigen.
2. Das Display zeigt [Ein?]. Drücken Sie die OK−Taste, wenn Sie das Nachtlicht einschalten wollen.
Das Display bestätigt die Aktion mit der Meldung [Gespeichert] und ein Quittungssignal wird
ausgegeben. Das Nachtlicht wird sachte eingeschaltet. Das Symbol einer Glühbirne erscheint im
Display Ihres Elterngeräts.
3. Um das Nachtlicht auszuschalten, verfahren Sie in gleicher Weise. Das Display zeigt jetzt [Aus?].
Danach OK−Taste betätigen. Das Display zeigt [Gespeichert] und sendet einen Quittungston
aus. Die Glühbirne erlischt im Display.
Taschenlampe
Ihr Elterngerät hat eine nützliche Taschenlampenfunktion. Per Tastendruck kann ein weiches Licht
erzeugt werden; nützlich, um in das dunkle Babyzimmer hineinzuleuchten.
Am Elterngerät
1. Drücken und halten Sie die Lampen−Taste, um die Lampe zu aktivieren.
Die Taschenlampe funktioniert nur bei eingeschaltetem Elterngerät.
Babyfütterung
Wenn Ihr Baby sich an feste Fütterungsintervalle gewöhnt hat, können Sie Ihr Elterngerät auch dazu
nutzen, sich an die Fütterungszeiten erinnern zu lassen. Sie haben die Wahl zwischen der
Programmierung einer nächsten Fütterung oder nachfolgenden Fütterungsintervallen. Allerdings
muss dazu das Datum und die Uhrzeit bereits programmiert sein. Wenn das erfolgt ist, können Sie:
1. Uhrzeit einstellen (24 Stunden) z. B. 10:30 und danach, wenn Sie möchten
2. Intervalle für weitere Fütterungen festlegen z. B. alle 3 Stunden 30 Minuten. Denken Sie daran,
dass Sie die Fütterungszeit mit berücksichtigen.
3. Abschließend muss der Babyfütterungsalarm noch eingeschaltet werden. Wenn der
Fütterungszeitpunkt erreicht ist, sendet das Elterngerät eine Signaltonfolge aus und das Display
zeigt [Fütterung]. Drücken Sie eine beliebige Taste, um die Signaltonfolge auszuschalten. Falls
Sie ein Fütterungsintervall eingestellt haben, wird das Elterngerät Sie zum nächsten
Fütterungstermin erneut alarmieren.
Erste bzw. nächste Babyfütterungszeit einstellen
Am Elterngerät
1. Drücken Sie die Menü−Taste, um danach mit den Up/Down−Tasten den Eintrag [Fütterung]
auszuwählen. Danach OK−Taste betätigen.
2. Das Display zeigt [Zeit einst]. Danach OK−Taste betätigen.
3. Das Display zeigt [Stunde] und eine Nummer zwischen 00 und 23 für die Stunden eines Tages.
Drücken Sie die Up/Down−Tasten, um die gewünschte Stunde einzustellen. Danach OK−Taste
betätigen.
13
− Bedienung −
4. Das Display zeigt [Minute] und eine Nummer zwischen 00 und 59 für die Minuten einer Stunde.
Drücken Sie die Up/Down−Tasten, um die gewünschte Minuten einzustellen. Danach OK−Taste
betätigen. Das Display zeigt [Gespeichert]. Die Fütterungszeit ist jetzt programmiert.
Babyfütterungsintervalle einstellen
Am Elterngerät Nach den Schritten 1 bis 4:
5. Das Display zeigt [Zeit einst.]. Mit den Up/Down−Tasten den Eintrag [Fü.Intervall] auswählen.
Danach OK−Taste betätigen.
6. Das Display zeigt [Stunde] und eine zweistellige Nummer, stellvertretend für die Stunden
zwischen den Fütterungszeiten (z. B. 03). Drücken Sie die Up/Down−Tasten, um das
gewünschte Stundenintervall einzustellen. Danach OK−Taste betätigen.
7. Das Display zeigt [Minute] und eine zweistellige Nummer, stellvertretend für die Minuten
zwischen den Fütterungszeiten (z. B. 30).
Drücken Sie die Up/Down−Tasten, um das gewünschte Minutenintervall einzustellen. Danach
OK−Taste betätigen. Das Display zeigt [Gespeichert]. Das Fütterungsintervall (in diesem Fall
3 Stunden 30 Minuten) ist jetzt programmiert. Denken Sie bitte daran, dass Sie den Alarm noch
aktivieren müssen (siehe nächster Absatz).
Berücksichtigen Sie bei der Intervall−Programmierung bitte auch die Zeit, die Sie für die
Fütterung benötigen.
Babyfütterungsalarm einschalten
Am Elterngerät Nach den Schritten 1 bis 7:
8. Das Display zeigt [Fü.Intervall]. Mit den Up/Down−Tasten den Eintrag [Alarm] auswählen.
Danach OK−Taste betätigen.
9. Das Display zeigt [Ein?]. Danach OK−Taste betätigen oder Menü−Taste betätigen, falls Sie keine
Änderung vornehmen möchten. Danach OK−Taste betätigen.
10. Wenn Sie die Alarmierungslautstärke einstellen wollen, wählen Sie mit den Up/Down−Tasten den
Unterpunkt [Lautst] und bestätigen Sie ihn mit der OK−Taste. Das Display zeigt [Stufe] und eine
Anzahl von Balken. Diese Balken sind repräsentativ für die gewünschte Alarmierungslautstärke.
Ändern Sie die Lautstärke mit den den Up/Down−Tasten. Danach OK−Taste betätigen. Das
Display zeigt [Gespeichert]. Die Alarmierung wiederholt sich zum nächsten Fütterungstermin.
Um die Alarmierung auszuschalten, betätigen Sie eine beliebige Taste am Elterngerät.
Babyfütterungsalarm ausschalten
Wenn Sie zu den Fütterungszeiten nicht mehr alarmiert werden möchten, müssen Sie den Alarm
ausschalten. Folgen Sie den Schritten 8−9.
11. Das Display zeigt jetzt [Aus?]. Danach OK−Taste betätigen. Das Display zeigt [Gespeichert].
Der Alarm ist jetzt ausgeschaltet und es wird zum nächsten Fütterungszeitpunkt keine Sinalfolge
ertönen.
Anpassen der Empfindlichkeit des Babyphons
Einige Babys sind lauter als andere. Sie können die Empfindlichkeit für Ihr Babyphon dem Baby
anpassen. Setzen Sie die Empfindlichkeit für ein Baby mit zarter Stimme auf High" und für eines mit
kräftiger Stimme auf Low". Besonders dann, wenn das Baby im Schlaf auch laute Geräusche macht.
Am Elterngerät
1. Drücken Sie die Menü−Taste, um danach mit den Up/Down−Tasten den Eintrag [Empfindlk.]
auszuwählen. Danach OK−Taste betätigen.
2. Das Display zeigt [Stufe]. Drücken Sie die Up/Down−Tasten, um die geeignete Empfindlichkeit
auszuwählen. Danach OK−Taste betätigen. Das Display zeigt [Gespeichert].
Eco Mode
Das Babygerät ist mit einer speziellen Sendetechnik ausgestattet.
Es sendet mit erheblich reduzierter Sendeleistung bzw. Strahlung bei gleichzeitiger Erhöhung der
Empfangsempfindlichkeit auf der Empfängerseite.
14
− Fehlerbeseitigung −
6 Fehlerbeseitigung
Bei technischen Problemen können Sie sich an unsere Service−Hotline unter Tel. 0900 00 1675
innerhalb der Schweiz (Kosten Swisscom bei Drucklegung: CHF 2.60/min) wenden. Bei
Garantieansprüchen wenden Sie sich an Ihren Fachhändler. Die Garantiezeit beträgt 2 Jahre.
Fehler
Ursachen
Geräte lassen sich
nicht einschalten.
− Prüfen Sie, ob die Stromversorgung besteht und ob alle Verbindungen fest
sind.
Die grüne
"Verbindungsleuchte" am
Elterngerät blinkt
und Sie können
keine Geräusche
aus dem
Babyzimmer
hören.
− 1. Sie befinden sich möglicherweise außerhalb der Reichweite. Gehen Sie
näher an das Babygerät und warten Sie 5 Sekunden, damit sich die
"Verbindung" aufbauen kann.
− 2. Unter Umständen müssen Sie die "Verbindung" zwischen den beiden
Geräten neu einrichten. Schalten Sie beide Geräte aus und gehen Sie wie
folgt vor:
Am Babygerät:
− Drücken Sie die Ein/Aus−Taste kurz.
Am Elterngerät:
− Drücken Sie die Ein/Aus−Taste kurz. Die grüne "Verbindungsleuchte"
leuchtet (dies kann einige Sekunden dauern).
Sie können Ihr
Baby im
Elterngerät nicht
hören, aber die
"Verbindungsleuchte" leuchtet
immer noch
durchgehend.
− 1. Prüfen Sie, ob die Lautstärke am Elterngerät eingeschaltet ist.
− 2. Sie sollten die Empfindlichkeit Ihres Babyphons erhöhen.
Ihr Babyphon gibt
einen hohen
Piepton aus.
− Dies kann passieren, wenn sich Eltern− und Babygerät zu nah beieinander
befinden. Erhöhen Sie den Abstand zwischen den Geräten.
15
− Technische Daten −
7 Technische Daten
Merkmal
Betriebsfrequenz
Reichweite
Wert
1,8 GHz
Unter optimalen Bedingungen bis zu 300 m. Innerhalb
von Gebäuden reduziert sich die Reichweite (bis zu
50 m) aufgrund von Wänden, Türen usw.
Netzteil, Babygerät (Sender)
Input: 230 VAC, 35 mA
Output: 6 VDC, 300 mA, Innen = +
Nicht aufladbare Batterien
für Babygerät (Sender)
(nicht im Lieferumfang enthalten)
Typ AA, 1,5 V Alkaline
Sendeleistung
Durchschnitt: 10 mW
Maximum: 250 mW
Netzteil mit Ladeschale für Elterngerät
(direkt verdrahtet)
Input: 230 VAC, 30 mA
Output: 6 VDC, 200 mA
Wiederaufladbare Akkus für
Elterngerät (Empfänger)
Typ AAA 1,2 V 800 mAh NiMH
Betriebszeit mit aufgeladenen
Akkus
Ca. 10 Stunden
Zulässige Umgebungstemperatur
Zulässige relative Luftfeuchtigkeit
10 °C bis 30 °C
20 % bis 75 %
Reinigung und Pflege
Reinigen Sie die Geräte mit einem trockenen, weichen, flusenfreien Tuch. Verwenden Sie keine
Reinigungsmittel oder Lösungsmittel.
Konformitätserklärung
Dieses Gerät erfüllt die Anforderungen der EU−Richtlinie:
1999/5/EG Richtlinie über Funkanlagen und Telekommunikationsendeinrichtungen und
die gegenseitige Anerkennung ihrer Konformität. Die Konformität mit oben genannter
Richtlinie wird durch das CE−Symbol auf dem Gerät bestätigt.
Für die komplette Konformitätserklärung nutzen Sie bitte den kostenlosen Download von
unserer Website www.switel.com.
16
− Garantie −
8 Garantie
SWITEL − Geräte werden nach den modernsten Produktionsverfahren hergestellt und geprüft.
Ausgesuchte Materialien und hoch entwickelte Technologien sorgen für einwandfreie Funktion und
lange Lebensdauer. Die Garantie gilt nicht für die in den Produkten verwendeten Batterien, Akkus
oder Akkupacks. Die Garantiezeit beträgt 24 Monate, gerechnet vom Tage des Kaufs.
Innerhalb der Garantiezeit werden alle Mängel, die auf Material− oder Herstellungsfehler
zurückzuführen sind, kostenlos beseitigt. Der Garantieanspruch erlischt bei Eingriffen durch den
Käufer oder durch Dritte. Schäden, die durch unsachgemäße Behandlung oder Bedienung, natürliche
Abnutzung, durch falsches Aufstellen oder Aufbewahren, durch unsachgemäßen Anschluss oder
Installation sowie durch höhere Gewalt oder sonstige äußere Einflüsse entstehen, fallen nicht unter
die Garantieleistung. Wir behalten uns vor, bei Reklamationen die defekten Teile auszubessern, zu
ersetzen oder das Gerät auszutauschen. Ausgetauschte Teile oder ausgetauschte Geräte gehen in
unser Eigentum über. Schadenersatzansprüche sind ausgeschlossen, soweit sie nicht auf Vorsatz
oder grober Fahrlässigkeit des Herstellers beruhen.
Sollte Ihr Gerät dennoch einen Defekt innerhalb der Garantiezeit aufweisen, wenden Sie sich bitte
unter Vorlage Ihrer Kaufquittung ausschließlich an das Geschäft, in dem Sie Ihr SWITEL − Gerät
gekauft haben. Alle Gewährleistungsansprüche nach diesen Bestimmungen sind ausschließlich
gegenüber Ihrem Fachhändler geltend zu machen. Nach Ablauf von zwei Jahren nach Kauf und
Übergabe unserer Produkte können Gewährleistungsrechte nicht mehr geltend gemacht werden.
17
Notizen
Notizen
18
2
Table des matières
1
2
3
4
5
6
7
8
Généralités . . . . . . . . . . . . . . . . . . . . . . . . . . . . . . . .
20
Utilisation conforme aux prescriptions . . . . . . . . . . . . . . . . . . . . . . .
Remarques concernant la sécurité . . . . . . . . . . . . . . . . . . . . . . . . .
Élimination . . . . . . . . . . . . . . . . . . . . . . . . . . . . . . . . . . . . . . . . . .
20
20
20
Structure du menu . . . . . . . . . . . . . . . . . . . . . . . . . .
Éléments de manipulation . . . . . . . . . . . . . . . . . . . . .
21
22
Unité bébé (émetteur) . . . . . . . . . . . . . . . . . . . . . . . . . . . . . . . . . .
Unité parents (récepteur) . . . . . . . . . . . . . . . . . . . . . . . . . . . . . . . .
Base de chargement . . . . . . . . . . . . . . . . . . . . . . . . . . . . . . . . . . .
22
23
23
Mise en service . . . . . . . . . . . . . . . . . . . . . . . . . . . . .
24
Remarques concernant la sécurité . . . . . . . . . . . . . . . . . . . . . . . . .
Contrôle du contenu du paquet . . . . . . . . . . . . . . . . . . . . . . . . . . .
Unité parents . . . . . . . . . . . . . . . . . . . . . . . . . . . . . . . . . . . . . . . .
Unité bébé . . . . . . . . . . . . . . . . . . . . . . . . . . . . . . . . . . . . . . . . . .
24
24
24
24
Utilisation de votre interphone bébé . . . . . . . . . . . . .
25
Volume sonore . . . . . . . . . . . . . . . . . . . . . . . . . . . . . . . . . . . . . . .
Affichage de chargement des piles rechargeables /
Avertissement "piles rechargeables vides" . . . . . . . . . . . . . . . . . . .
Langue . . . . . . . . . . . . . . . . . . . . . . . . . . . . . . . . . . . . . . . . . . . . .
Heure . . . . . . . . . . . . . . . . . . . . . . . . . . . . . . . . . . . . . . . . . . . . . .
Alarme bébé . . . . . . . . . . . . . . . . . . . . . . . . . . . . . . . . . . . . . . . . .
Berceuses . . . . . . . . . . . . . . . . . . . . . . . . . . . . . . . . . . . . . . . . . .
Sélectionner les berceuses et démarrer . . . . . . . . . . . . . . . . . . . . .
Température . . . . . . . . . . . . . . . . . . . . . . . . . . . . . . . . . . . . . . . . .
Modifier la plage de température . . . . . . . . . . . . . . . . . . . . . . . . . .
Régler l’alarme température . . . . . . . . . . . . . . . . . . . . . . . . . . . . . .
Passer de ° C à ° F . . . . . . . . . . . . . . . . . . . . . . . . . . . . . . . . . . . .
Appel radio entre l’unité du bébé et l’unité parents (paging) . . . . . . .
Parler au bébé . . . . . . . . . . . . . . . . . . . . . . . . . . . . . . . . . . . . . . .
Veilleuse . . . . . . . . . . . . . . . . . . . . . . . . . . . . . . . . . . . . . . . . . . .
Lampe de poche . . . . . . . . . . . . . . . . . . . . . . . . . . . . . . . . . . . . . .
Repas bébé . . . . . . . . . . . . . . . . . . . . . . . . . . . . . . . . . . . . . . . . .
Régler la première ou la prochaine heure du repas du bébé . . . . . . .
Régler les intervalles entre les repas du bébé . . . . . . . . . . . . . . . . .
Activer l’alarme repas du bébé . . . . . . . . . . . . . . . . . . . . . . . . . . . .
Désactiver l’alarme repas du bébé . . . . . . . . . . . . . . . . . . . . . . . . .
Personnaliser la sensibilité de l’interphone bébé . . . . . . . . . . . . . . .
Mode Eco . . . . . . . . . . . . . . . . . . . . . . . . . . . . . . . . . . . . . . . . . . .
25
25
25
25
26
26
27
27
27
28
28
28
28
29
29
29
29
30
30
30
30
30
Élimination des défauts . . . . . . . . . . . . . . . . . . . . . . .
Caractéristiques techniques . . . . . . . . . . . . . . . . . . .
31
32
Nettoyage et entretien . . . . . . . . . . . . . . . . . . . . . . . . . . . . . . . . . .
Déclaration de conformité . . . . . . . . . . . . . . . . . . . . . . . . . . . . . . .
32
32
Garantie . . . . . . . . . . . . . . . . . . . . . . . . . . . . . . . . . .
33
19
− Généralités −
1 Généralités
Veuillez lire ce mode d’emploi attentivement et complètement. N’ouvrez jamais les appareils et
n’effectuez aucune réparation. Si vous avez des droits de garantie, adressez−vous à votre revendeur.
Dans le cadre des améliorations de produit, nous nous réservons le droit d’apporter à l’article des
modifications techniques et d’optique.
Utilisation conforme aux prescriptions
L’interphone bébé sert à la surveillance de pièces. L’unité bébé (émetteur) transmet les voix et
d’autres bruits du bébé à l’unité parents (récepteur). Toute autre utilisation est considérée comme non
conforme à son utilisation. L’utilisation de ces appareils ne remplace pas la présense personnelle et la
surveillance de votre enfant. Toutes demandes de dommages et intérêts dépassant les dispositions
légales sont exclues.
Remarques concernant la sécurité
L’interphone bébé a été développé pour vous donner une sécurité supplémentaire quand vous ne
pouvez pas être dans la même pièce que votre bébé. Il ne remplace PAS la surveillance des adultes.
Pendant son utilisation, un parent doit toujours se trouver à portée de l’interphone bébé. Votre
interphone bébé n’est pas un appareil médical et ne peut empêcher la "mort subite du nourrisson".
Pour ce qui est du bien−être de votre enfant, ne vous fiez pas à cet appareil. Contrôlez vous−même
régulièrement si votre enfant va bien.
Ne posez jamais quelque chose sur votre interphone bébé ou ne le recouvrez pas.
Ne placez jamais l’unité parents ou celle du bébé près d’une source d’eau ou dans un environnement
humide.
En cas de voyages à l’étranger, veillez à ce que la tension indiquée sur la bloc secteur de
corresponde à la tension locale.
Ne jetez jamais les piles/piles rechargeables dans les ordures ménagères. Tenez compte des
possibilités d’élimination des déchets offertes par votre commune.
N’utilisez jamais de piles à usage unique dans l’unité parents. N’utilisez que les piles
rechargeables recommandées − 2 x AAA 1,2 V 800 mAH NiMH.
Servez−vous uniquement du bloc secteur fourni avec l’appareil, sinon vous risquez
d’endommager votre interphone bébé.
Retirez la fiche de secteur et enlevez les piles/piles rechargeables quand vous n’utilisez pas
l’interphone bébé.
Ne pulvérisez pas de produit de lustrage sur l’appareil. Retirez la fiche de secteur avant de
nettoyer l’appareil.
Les blocs secteur peuvent chauffer pendant l’utilisation.
N’exposez pas l’unité parents ou celle du bébé à l’ensoleillement direct.
La capacité de charge des piles rechargeables de l’unité parents diminue avec le temps si bien qu’il
faut éventuellement les changer. De nouvelles piles rechargeables peuvent être commandées auprès
de notre hotline.
Élimination
Si vous ne voulez plus vous servir de votre appareil, veuillez l’apporter au centre de collecte
de l’organisme d’élimination des déchets de votre commune (par ex. centre de recyclage).
L’icône ci−contre signifie que vous ne devez, en aucun cas, jeter votre appareil dans les
ordures ménagères ! D’après la loi relative aux appareils électriques et électroniques, les
propriétaires d’appareils usagés sont tenus de mettre tous les appareils électriques et
électroniques usagés dans un collecteur séparé.
Éliminez les piles/piles rechargeables auprès d’un revendeur
spécialisé ainsi que dans des centres de collecte qui tiennent à votre
disposition les collecteurs appropriés correspondants.
Éliminez les matériaux d’emballage conformément au règlement
local.
20
− Structure du menu −
2 Structure du menu
1. Niveau
2. Niveau
Veilleuse
Allumé?IÉteint?
Berceuse
Lecture?IStop?
Sél. nouveau
Sensibilité
Niveau
Alerte son
Allumé?IÉteint?
Volume
Niveau
Déf. plage
Lim. sup. xx
Limi. inf. xx
Alerte temp.
Allumé?IÉteint?
Volume
Température
3. Niveau
4. Viveau
Twinkle
Silent Night
Minuet in G
Danny Boy
Gymnopedie
Lire tout
Niveau
Degrés CIDegrés F
Heure
Délai repas
Choix langue
Régler délai
Annéé
Mois
Jour
Heure
Minute
Format heure
12 heures?I24 heures?
Régler délai
Heure
Minute
Intervale
Heure
Minute
Alarme
Allumé?IÉteint?
Volume
Niveau
Deutsch
Espanol
Italiano
PYCCKÈÉ
English
Francais
Pour naviguer, ouvrez avec la touche de menu le menu principal (1er niveau), sélectionnez
avec les touches Haut/Bas un sous−menu et confirmez le avec la touche OK. Ce principe
est également valable pour les autres niveaux de menu.
21
− Eléments de manipulation−
3 Éléments de manipulation
Unité bébé (émetteur)
1
Détecteur de température
Détecte la température dans la chambre du bébé.
2
Cache du compartiment à piles
Pour des piles non rechargeables
(non contenues dans la livraison).
3
Touche de veilleuse
Appuyez sur cette touche pour allumer la veilleuse. La
lumière passe faiblement à travers la nervure avant.
Réappuyez sur la touche pour éteindre la lumière. Elle
s’éteint lentement.
4
Touche Marche/Arrêt
Appuyez rapidement sur cette touche pour mettre
l’appareil en marche. Maintenez cette touche appuyée
pour éteindre l’appareil.
5
Touche d’appel radio
Maintenez la touche 2 secondes appuyée. L’unité parents
fait entendre un son d’alarme. Cette fonction vous permet
d’appeler de l’aide ou de retrouver une unité parents
égarée.
6
Écran
Affiche les réglages actuels :
niveau de chargement des piles, date et heure,
température,
berceuses Marche/Arrêt, mélodie de la berceuse.
7
Touche Play/Stop berceuses
Pour démarrer ou arrêter les berceuses.
8
Touche musique
Pour sélectionner les mélodies des berceuses.
9
Microphone
Transmet les bruits venant de la chambre du bébé.
10 Touche de volume sonore Haut/Bas
Volume −: réduit le volume sonore de la berceuse.
Volume +: augmente le volume sonore de la berceuse.
22
1
3 4 5
2
6
7
8
10
9
− Eléments de manipulation−
Unité parents (récepteur)
11 Couvercle du compartiment à piles rechargeables
Piles rechargeables.
12 Clip de ceinture
13 Touche de volume sonore Haut/Bas
Réglez le volume sonore auquel vous désirez entendre les
bruits de la chambre du bébé et utilisez ces touches pour
naviguer dans le menu.
14 Touche Marche/Arrêt
Appuyez sur cette touche pour allumer l’appareil.
Maintenez la touche appuyée pour l’éteindre.
15 Touche de menu, Touche OK
Les touches de menu et OK constituent avec les touches
Haut/Bas une unité et servent à régler l’interphone bébé.
Appuyez sur la touche de menu pour accéder aux options
de menus. Sélectionnez ensuite une option avec les
touches Haut/Bas et confirmez celle−ci avec la touche OK.
Cette touche de menu vous permet également de quitter
le niveau de menu actuel pour retourner au niveau
précédent.
16 LED de connexion
LED verte : connexion à l’unité bébé
LED clignotante : connexion interrompue.
13
12
14
11
18
19
17
16
15
17 Écran
Affiche les réglages actuels :
niveau de chargement des piles, date et heure,
température,
berceuses Marche/Arrêt, mélodie de la berceuse.
18 Toupe lampe
Maintenez la touche lampe appuyée pour produire un
doux jet de lumière.
19 Touche de conversation (pour apaiser le bébé)
Maintenez la touche de conversation appuyée pour parler
au bébé ou à votre partenaire.
Base de chargement
20 Lampe de chargement
Quand l’unité parents repose dans la base de
chargement, la lampe de chargement rouge s’allume pour
afficher l’opération de chargement. La lampe reste
allumée pour indiquer qu’une opération de chargement
optimal est respectée.
20
23
− Mise en service −
4 Mise en service
Remarques concernant la sécurité
Lisez impérativement les "Généralités" au début de ce mode d’emploi avant de mettre l’appareil en
service.
Contrôle du contenu du paquet
Les éléments suivants font partie de la livraison :
1 unité parents (récepteur)
1 base de chargement avec bloc secteur
2 piles rechargeables Type AAA, 800 mAh
1 unité bébé (émetteur)
1 bloc secteur avec cordon d’alimentation
Unité parents
12
1. Retirez le clip de ceinture en le soulevant (12) en haut et en le
poussant vers le bas.
2. Retirez ensuite le couvercle du compartiment à piles
rechargeables (11) sur la face arrière de l’unité parents en appuyant
sur le couvercle et en le poussant vers le bas. Insérez les piles
rechargeables conformément aux marques lisibles dans l’appareil
et refermez le couvercle.
11
3. Placez l’unité parents dans la coupe de chargement.
4. Mettez le bloc secteur dans la prise de courant.
La lampe rouge de chargement sur la coupe de chargement s’allume pour indiquer que l’unité
parents se charge (la lampe reste allumée pour indiquer que le chargement se fait de manière
optimale).
5. Appuyez sur la touche Marche/Arrêt pour allumer l’appareil.
Avant le premier emploi ou après une longue pause sans utilisation, l’unité parents doit être
chargé pendant 13 heures. Pendant ce temps, l’unité parents dans sa coupe de chargement
peut continuer d’être utilisée si celle−ci est branchée. Sans piles rechargeables, un
fonctionnement à partir du chargeur n’est pas possible.
Unité bébé
1. En cas de panne de courant, votre interphone bébé peut être commuté sur l’alimentation par
piles. C’est pourquoi, il est recommandé de placer des piles dans l’unité bébé.
2. Retirez le couvercle du compartiment à piles sur la face arrière de l’unité bébé en appuyant sur le
couvercle et en le poussant vers le bas. Insérez 3 piles alcalines de
type AA (non comprises dans la livraison) conformément à la marque visible dans l’appareil et
refermez le couvercle. N’utilisez pas de piles rechargeables dans l’unité bébé.
3. Mettez le câble électrique à l’entrée située sur le côté de l’unité bébé et mettez le bloc secteur
dans la prise de courant.
4. Appuyez sur la touche Marche/Arrêt pour allumer l’appareil.
Il est recommandé de placer l’unité bébé sur une surface droite à env. 1 à 1,5 m du lit du bébé.
Ne posez jamais l’unité bébé dans le lit de l’enfant, dans le lit ou dans le parc du bébé.
Assurez−vous que l’appareil, le câble et le bloc secteur se trouvent hors de portée des bébés
et d’autres enfants en bas âge. Ne placez jamais les appareils sur des surfaces anciennes
ou polies.
24
− Utilisation −
5 Utilisation de votre interphone bébé
Dès que vous avez mis en marche votre interphone bébé, vous pouvez entendre les bruits provenant de la
chambre du bébé par l’intermédiaire de l’unité parents. En outre, vous pouvez "voir" les bruits car les témoins
lumineux verts et rouges situés en haut sur l’unité parents s’allument et s’éteignent avec le niveau sonore.
Si la connexion entre l’unité parents et l’unité bébé n’a pas lieu à un moment quelconque, la
"lampe de connexion" verte de l’unité parents clignote lentement, un signal sonore d’avertissement se fait entendre pour indiquer que la connexion est interrompue et les témoins lumineux verts et rouges ne réagissent plus aux bruits. Suivez les instructions mentionnées au
chapitre "Élimination des erreurs" pour rétablir la "connexion".
Volume sonore
Les touches Haut/Bas situées sur le côté de l’unité parents vous permet de régler le volume auquel
vous entendez votre bébé. Ce réglage ne modifie pas la sensibilité de l’interphone, seul le volume
des bruits est modifié.
Affichage de chargement des piles rechargeables / Avertissement "piles rechargeables
vides"
En dehors de la base de chargement, l’unité parents fonctionne jusqu’à 10 heures. Toutefois, cela
dépend de l’intensité de chargement des piles rechargeables. Si celles−ci sont faiblement chargées,
l’icône "piles" sur l’unité parents commence à clignoter et un signal d’avertissement se fait entendre.
Nous vous conseillons de reposer l’appareil dans sa coupe pour charger les piles. Même dans la
coupe de chargement, vous pouvez continuer à vous servir de l’unité parents.
Langue
Vous pouvez configurer votre interphone bébé en plusieurs langues.
Modifier la langue
Sur l’unité parents
1. Appuyez sur la touche de menu pour ensuite sélectionner avec les touches Haut/Bas la saisie
[Choix langue]. Puis appuyer sur la touche OK.
2. L’écran affiche [English]. Appuyez sur les touches Haut/Bas pour sélectionner la langue de
votre choix. Puis appuyer sur la touche OK. L’écran affiche [Enregistré]et la langue de votre
choix est désormais activée.
Heure
Vous avez la possibilité, sur l’unité parents, de régler la date et l’heure et de choisir entre les formats
d’affichage horaire 12 et 24 ( l’affichage 24 heures est préréglé).Si vous désirez utiliser la fonction
repas", vous devez régler l’heure.
Si vous avez coupé l’alimentation en courant de votre interphone bébé, vous devez de nouveau régler l’heure.
Réglage de l’heure
Sur l’unité parents
1. Appuyez sur la touche de menu pour ensuite sélectionner avec les touchesHaut/Bas la
saisie[l’heure]. Puis appuyer sur la touche OK.
2. L’écran affiche [Régler délai]. Appuyer sur la touche OK.
3. L’écran affiche [Annee]. Sélectionner avec les touches Haut/Bas l’année actuelle. Appuyer sur
la touche OK.
4. L’écran affiche [Mois]. Sélectionner avec les touches Haut/Bas le mois actuel. Appuyer sur la
touche OK.
25
− Utilisation −
5. L’écran affiche [Jour]. Sélectionner avec les touches Haut/Bas le jour actuel. Appuyer sur la
touche OK.
6. L’écran affiche [Heure]. Sélectionner avec les touches Haut/Bas l’heure actuelle dans le format
24 heures. Appuyer sur la touche OK.
7. L’écran affiche[Minute]. Sélectionner avec les touches Haut/Bas la minute actuelle. Appuyer
sur la touche OK. L’écran affiche [Enregistré] et un signal de validation est émis. La date et
l’heure sont désormais affichées.
Régler le format 12−24 heures
Sur l’unité parents
1. Appuyez sur la touche de menu pour ensuite sélectionner avec les touches Haut/Bas la
saisie[l’heure]. Appuyer ensuite sur la touche.
2. L’écran affiche [Régler délai]. Appuyer sur la touche OK. Sélectionner avec les touches
Haut/Bas la saisie [Format heure]. Appuyer sur la touche OK.
3. L’écran affiche [12 heures?]. Appuyer sur la touche OK ou la touche de menu au cas où vous
ne voudriez pas entreprendre de modifications. L’écran affiche [Enregistré] pour confirmer que le
format 12 heures est activé.
Pour le format 12 heures est affiché un a" minuscule pour AM ou un p" minuscule pour PM.
4. Pour passer au format 24 heures, répéter les étapes sus−mentionnées. À l’étape 3 [24 heures?]
est affiché. Appuyer ensuite sur la touche.
Alarme bébé
Vous pouvez régler l’unité parents de telle sorte qu’un signal sonore d’avertissement supplémentaire
soit émis lorsque le niveau sonore dans la chambre du bébé est si fort que les témoins lumineux
rouges de niveau sonore s’allument sur votre base. Ceci aide particulièrement lorsque le volume
sonore de votre unité parents est complètement baissé parce que vous désirez utiliser uniquement
les témoins lumineux de niveau sonore pour surveiller votre enfant.
Sur l’unité parents
1. Appuyez sur la touche de menu pour sélectionner ensuite avec les touches Haut/Bas la saisie
[Alerte son]. Appuyer ensuite sur la touche.
2. L’écran affiche [Allumé?]. Appuyer ensuite sur la touche. Appuyer sur la touche OK ou la
touche de menu au cas où vous ne voudriez pas entreprendre de modifications. L’écran affiche
[Enregistré] et un signal de validation est émis.
3. Si vous désirez régler le volume de l’alarme, appuyez sur la touche de menu et naviguez vers la
saisie [Alerte son] , appuyez sur la touche OK et naviguez vers la saisie[Volume] et appuyez
sur la touche OK. L’écran affiche [Niveau] et un nombre de barres. Ces barres représentent le
volume d’alarme voulu. Modifiez le volume avec les touches Haut/Bas (toutes les barres =
Volume max.).
4. L’écran affiche [Enregistré]. Un son d’alarme est alors émis sur l’unité parents si les bruits dans
la chambre du bébé sont si forts que les LEDs rouges s’allument également.
5. Pour désactiver l’alarme bébé, procédez de manière identique. L’écran affiche maintenant
[Éteint?]. Appuyer ensuite sur la touche. L’écran affiche [Enregistré].
Berceuses
Votre bébé peut s’endormir au son des berceuses. Vous avez 5 mélodies au choix ou vous pouvez
les jouer les unes après les autres. [Lecture?]. Vous pouvez désactiver les berceuses sur l’unité
bébé et l’unité parents. Lorsqu’elles sont activées, une note de musique est affichée sur l’écran ainsi
que le titre de la berceuse actuellement jouée. Les berceuses sont jouées pendant 15 minutes.
26
− Utilisation −
Sélectionner les berceuses et démarrer
Sur l’unité du bébé
1. Appuyez sur la touche musique. L’écran s’active. La berceuse est affichée.
2. Appuyez sur la touche musique jusqu’à ce que vous ayez trouvé la berceuse de votre choix ou
sélectionnez [Lire tout].
3. Appuyez sur la touche Play/Stop pour démarrer la sélection ou l’arrêter.
Sur l’unité parents
1. Appuyez sur la touche de menu pour sélectionner ensuite avec les touches Haut/Bas la saisie
[Berceuse]. Appuyer ensuite sur la touche.
2. L’écran affiche [LECTURE?]. Appuyez sur les touches Haut/Bas pour sélectionner la saisie
[Sél. nouveau]. Appuyer ensuite sur la touche.
3. L’écran affiche la berceuse actuelle. Appuyez sur les touches Haut/Bas pour sélectionner la
berceuse ou sélectionnez [Lire tout]. L’écran confirme l’action par le message [Enregistré].
4. L’écran affiche [Berceuse]. Appuyez ensuite 2 fois sur la touche OK.
5. Pour arrêter la lecture, appuyez 2 fois sur la touche OK quand vous êtes toujours dans le menu
Berceuse.
Si vous n’arrêtez pas la lecture, la berceuse s’arrêtera automatiquement au bout de 15
minutes.
Température
Il est très important pour la santé de votre bébé qu’il se trouve dans une plage de température
uniforme. Ceci concerne la température de la pièce, du corps, des vêtements et celle de la chambre
du bébé (demandez les températuares appropriées auprès de votre dispensaire. Votre interphone
peut vous aider dans la surveillance de la températures en affichant les températures sur les unités
parents et bébé. Par ailleurs, vous pouvez revevoir une alarme si les températures se trouvent en
dehors des limites autorisées.
Modifier la plage de température
Si vous le désirez, vous pouvez programmer sur votre unité bébé un seuil inférieur et un seuil
supérieur de température. Si la température de la pièce de votre bébé se trouve alors en−dessous ou
au−dessus de ces valeurs, l’affichage de la température clignote sur l’unité parents et un signal sonore
d’avertissement est émis (au cas où il ait été activé). Haut" ou Bas" est également affiché.
Sur l’unité parents
1. Appuyez sur la touche de menu pour ensuite sélectionner avec les touches Haut/Bas la saisie
[Température]. Appuyer ensuite sur la touche.
2. L’écran affiche [Déf. plage]. Appuyer ensuite sur la touche. La valeur de température actuelle
supérieure [Lim. sup.]est affichée.
3. Appuyez sur les touches Haut/Bas pour régler le seuil supérieur de température de votre choix.
Appuyer ensuite sur la touche. L’écran affiche d’abord [Enregistré] et puis la valeur de
température actuelle inférieure [Limi. inf.] est affichée.
4. Appuyez sur les touches Haut/Bas pour régler le seuil inférieure de température de votre choix.
Appuyer ensuite sur la touche. L’écran affiche [Enregistré].
Vous avez maintenant programmé la plage de température devant être surveillée.
27
− Utilisation −
Régler l’alarme température
Si vous le désirez, vous pouvez programmer votre unité parents de la sorte qu’elle émette un signal
d’alarme double lorsque la température de la chambre du bébé se trouve en dehors de la plage
voulue.
Sur l’unité parents
1. Appuyez sur la touche de menu pour ensuite sélectionner avec les touches Haut/Bas la saisie
[Température]. Appuyer ensuite sur la touche.
2. Appuyez sur les touches Haut/Bas pour sélectionner la saisie [Alerte temp.]. Appuyer ensuite
sur la touche.
3. L’écran affiche [Allumé?]. Appuyer ensuite sur la touche OK ou la touche de menu au cas où
vous ne voudriez pas entreprendre de modifications. L’écran affiche [Enregistré]. L’alarme est
activée.
4. Si vous désirez régler le volume de l’alarme, sélectionner avec les touches Haut/Bas le
sous−menu [Volume] et confirmez avec la touche OK. L’écran affiche [Niveau] et un nombre de
barres. Ces barres représentent le volume d’alarme voulu. Modifiez le volume avec les touches
Haut/Bas. L’écran affiche [Enregistré].
5. Pour désactiver l’alarme, procédez de manière identique. L’écran affiche maintenant à l’étape 3
[Éteint?]. Appuyer ensuite sur la touche.
Passer de ° C à ° F
Vous pouvez faire afficher la température en degré Celcius ou en degré Fahrenheit. Le préréglage est
en degré Celcius. Si vous désirez commuter, procédez comme suit :
Sur l’unité parents
1. Appuyez sur la touche de menu pour ensuite sélectionner avec les touches Haut/Bas la saisie
[Température]. Appuyer ensuite sur la touche.
2. Appuyez sur les touches Haut/Bas pour sélectionner la saisie [Degrés F]. Appuyer ensuite sur
la touche OK ou la touche de menu au cas où vous ne voudriez pas entreprendre de
modifications. L’écran affiche [Enregistré]. La température s’effectue maintenant en ° F.
3. Pour commuter à l’affichage de la température en ° C, procédez de manière identique. L’écran
affiche maintenant à l’étape 2 [Degrés C]. Appuyer ensuite sur la touche.
Appel radio entre l’unité du bébé et l’unité parents (paging)
Cette fonction est utile quand un parent se trouve dans la pièce du bébé et désire entrer en contact
avec l’autre parent. En outre, cette fonction vous aide à retrouver une unité parents égarée.
Sur l’unité du bébé
1. Appuyez sur la touche d’appel radio et maintenez−la appuyée pendant env. 2 secondes. L’unité
parents émet une suite de signaux sonores.
Sur l’unité parents
1. Lorsque la suite de signaux sonores est émise, appuyez sur une touche quelconque pour
l’éteindre.
2. Vous pouvez également parler avec votre partenaire se trouvant dans la chambre du bébé, Pour
cela, maintenez la touche de conversation appuyée et parlez dans le microphone de l’unité
parents. Afin de pouvoir entendre votre partenaire dans la chambre du bébé, vous devez relâcher
la touche de conversation.
Parler au bébé
Vous pouvez calmer votre bébé depuis votre unité parents, p. ex. en lui disant : j’arrive tout de suite".
Sur l’unité parents
1. Pour cela, maintenez la touche de conversation appuyée et parlez dans le microphone de
l’unité parents.
28
− Utilisation −
Afin de pouvoir entendre votre bébé dans sa chambre, vous devez relâcher la touche de
conversation.
Veilleuse
L’unité bébé est équipée d’une veilleuse qui, par simple toucher, donne une lumière régulière et
douce qui sécurise votre bébé et vous permet de le voir dans une pièce sombre. Vous pouvez
également allumer et éteindre la veilleuse depuis votre unité parents.
Sur l’unité du bébé
1. Appuyez sur la touche veilleuse" en haut de l’unité. Une lumière douce s’allume lentement. En
appuyant à nouveau sur la touche, vous éteignez lentement la lumière.
Sur l’unité parents
1. Appuyez sur la touche de menu pour sélectionner ensuite avec les touches Haut/Bas la saisie
[Veilleuse]. Appuyer ensuite sur la touche.
2. L’écran affiche [Allumé?]. Appuyez sur la touche OK si vous désirez activer la veilleuse. L’écran
confirme l’action par le message [Enregistré] et un signal de validation est émis. La veilleuse est
activée, donnant une lumière tamisée. L’icône d’une ampoule apparaît sur l’écran de votre unité
parents.
3. Pour désactiver la veilleuse, procédez de manière identique. L’écran affiche maintenant
[Éteint?]. Appuyer ensuite sur la touche. L’écran affiche [Enregistré] et émet un signal de
validation. L’ampoule disparaît de l’écran.
Lampe de poche
Votre unité parents possède une fonction de lampe de poche utile. Une lumière douce peut être
produite par un simple pression de touche ; utile pour éclairer la chambre sombre de bébé.
Sur l’unité parents
1. Appuyez sur la touche lampe et maintenez−la appuyée pour activer la lampe.
La lampe de poche fonctionne uniquement si l’unité parents est activée.
Repas bébé
Lorsque votre bébé s’est habitué à des repas fixes, vous pouvez également utiliser l’unité parents
pour qu’elle vous rappelle les heures des repas. Vous avez le choix entre la programmation d’une
prochain repas ou des intervalles de repas suivants. Il faut toutefois que la date et l’heure soient déjà
programmées. Lorsque ceci est fait, vous pouvez :
1. Programmer l’heure (24 heures) p. ex. 10:30 et puis, si vous le désirez
2. fixer des intervalles pour d’autres repas, p. ex. toutes les 3 heures 30 minutes. Pensez que vous
prenez en compte le temps du repas.
3. Enfin, vous devez activer l’alarme du repas de bébé. Lorsque le moment du repas est atteinte,
l’unité parents émet une suite de signaux sonores et l’écran affiche [Délai repas]. Appuyez sur
une touche quelconque pour éteindre la suite de signaux sonores. Au cas où vous auriez réglé
un intervalle pour les repas, l’appareil vous le rappellera au prochain délai.
Régler la première ou la prochaine heure du repas du bébé
Sur l’unité parents
1. Appuyez sur la touche de menu pour ensuite sélectionner avec les touches Haut/Bas la saisie
[Délai repas]. Appuyer ensuite sur la touche.
2. L’écran affiche [Régler délai]. Appuyer ensuite sur la touche.
3. L’écran affiche [Heure] et un numéro situé entre 00 et 23 pour les heures d’un jour.
Appuyez sur les touches Haut/Bas pour sélectionner l’heure de votre choix. Appuyer ensuite sur
la touche.
29
− Utilisation −
4. L’écran affiche [Minute] et un numéro situé entre 00 et 59 pour les minutes d’une heure.
Appuyez sur les touches Haut/Bas pour sélectionner les minutes votre choix. Appuyer ensuite
sur la touche. L’écran affiche [Enregistré]. L’heure de repas est maintenant programmée.
Régler les intervalles entre les repas du bébé
Sur l’unité bébé Après les étapes 1 à 4 :
5. L’écran affiche [Régler délai]. Sélectionner avec les touches Haut/Bas la saisie [Intervale].
Appuyer ensuite sur la touche.
6. L’écran affiche [Heure] et un numéro à deux chiffres, représentant les heures entre celles des
repas (p. ex. 03). Appuyez sur les touches Haut/Bas pour sélectionner l’intervalle entre les
heures de votre choix. Appuyer ensuite sur la touche.
7. L’écran affiche [Minute] et un numéro à deux chiffres, représentant les minutes entre celles des
repas (p. ex. 30).
Appuyez sur les touches Haut/Bas pour sélectionner l’intervalle entre les minutes de votre choix.
Appuyer ensuite sur la touche. L’écran affiche [Enregistré]. L’intervalle entre les repas (dans ce
cas 3 heures 30 minutes ) est maintenant programmé. Pensez que vous devez encore activer
l’alarme (voir prochain paragraphe).
Lors de la programmation des intervalles, tenez également compte du temps dont vous avez
besoin pour le repas.
Activer l’alarme repas du bébé
Sur l’unité bébé Après les étapes 1 à 7 :
8. L’écran affiche [Intervale]. Sélectionner avec les touches Haut/Bas la saisie [Alarme].
Appuyer ensuite sur la touche.
9. L’écran affiche [Allumé?]. Appuyer ensuite sur la touche OK ou la touche de menu au cas où
vous ne voudriez pas entreprendre de modifications. Appuyer ensuite sur la touche.
10. Si vous désirez régler le volume de l’alarme, sélectionner avec les touches Haut/Bas le
sous−menu [Volume] et confirmez avec la touche OK. L’écran affiche [Niveau] et un nombre de
barres. Ces barres représentent le volume d’alarme voulu. Modifiez le volume avec les touches
Haut/Bas. Appuyer ensuite sur la touche. L’écran affiche [Enregistré]. L’alarme se répète à la
prochaine heure de repas. Pour désactiver l’alarme, appuyez sur une touche quelconque de
l’unité bébé.
Désactiver l’alarme repas du bébé
Si vous ne désirez plus entendre l’alarme aux heures des repas, vous devez la désactiver. Suivez les
étapes 8−9.
11. L’écran affiche maintenant [Éteint?]. Appuyer ensuite sur la touche. L’écran affiche [Enregistré].
L’alarme est maintenant désactivée et vous n’entendrez plus de suite de signaux lors de l’heure
du prochain repas.
Personnaliser la sensibilité de l’interphone bébé
Certains bébés crient plus fort que d’autres. Vous pouvez personnaliser la sensibilité de votre
interphone selon votre bébé. Réglez la sensibilité pour un bébé avec une voix douce sur Fort" et pour
un bébé à voix plus forte sur Bas". Particulièrement si le bébé émet des bruits pendant son sommeil.
Sur l’unité parents
1. Appuyez sur la touche de menu pour ensuite sélectionner avec les touches Haut/Bas la saisie
[Sensibilité]. Appuyer ensuite sur la touche.
2. L’écran affiche [Niveau]. Appuyez sur les touches Haut/Bas pour sélectionner la sensibilité de
votre choix. Appuyer ensuite sur la touche. L’écran affiche [Enregistré].
Mode Eco
L’unité bébé est équipée d’une technologie de transmission spéciale.
La puissance d’émission étant réduite dans l’unité bébé (à faible rayonnement), la sensibilité du
récepteur est augmentée afin de maintenir la portée de transmission.
30
− Elimination des défauts −
6 Élimination des défauts
En cas de problèmes techniques, vous pouvez également vous adresser à notre hotline de service au
numéro de tel. 0900 00 1675 en Suisse (frais Swisscom lors de l’impression de ce manuel : CHF
2.60/min). Si vous avez des droits de garantie, adressez−vous à votre revendeur. La durée de la
garantie est de 2 ans.
Défauts
Causes
Vous ne pouvez
pas mettre votre
appareil en
marche.
− Vérifiez si l’alimentation en courant est présente et si toutes les connexions
sont bien fixées.
La "lampe
de connexion"
verte de l’unité
parents clignote et
vous ne pouvez
pas entendre les
bruits provenant
de la chambre du
bébé.
− 1. Il est possible que l’unité parents se trouve hors de portée de l’appareil.
Rapprochez l’unité parents de l’unité bébé et attendez 5 secondes afin que
la "connexion" puisse s’établir.
− 2. Vous devez éventuellement rétablir la "connexion" entre les deux
appareils. Débranchez les deux appareils et procédez comme suit :
Sur l’unité bébé :
− Appuyez brièvement sur la touche Marche/Arrêt.
Sur l’unité parents :
− Appuyez brièvement sur la touche Marche/Arrêt. La "lampe de
connexion" verte s’alllume (ceci peut durer quelques secondes).
Vous ne pouvez
pas entendre votre
bébé dans l’unité
parents mais la
"lampe
de connexion" est
allumée de
manière continue.
− 1. Contrôlez si le volume sonore de l’unité parents est branché.
− 2. Augmentez la sensibilité de votre interphone.
Votre interphone
bébé produit un
bip sonore aigu.
− Cela peut arriver quand l’unité parents et celle du bébé sont trop près l’une
de l’autre. Augmentez la distance entre les unités.
31
− Caractéristiques techniques −
7 − Caractéristiques techniques −
Caractéristique
Fréquence de service
Hors portée
Valeur
1,8 GHz
Dans des conditions optimales, de 300 m. max. Dans
les bâtiments, la portée (de 50 m max.) diminue en
raison des murs, des portes etc.
Bloc secteur, unité bébé (émetteur)
Entrée : 230 VAC, 35 mA
Sortie : 6 VDC, 300 mA, à l’intérieur = +
Piles non recharbeables
pour l’unité bébé (émetteur)
(non contenues dans la livraison)
Type AA, 1,5 V alcalines
Puissance d’émission
Moyenne : 10 mW
Maximum : 250 mW
Bloc secteur avec coupe de chargement
pour l’unité parents
(câblé directement)
Entrée : 230 VAC, 30 mA
Sortie : 6 VDC, 200 mA,
Piles rechargeables pour
l’unité parents (récepteur)
Type AAA 1,2 V 800 mAh NiMH
Durée de fonctionnement avec des
piles rechargeables chargées
Env. 10 heures
Température ambiante autorisée
Humidité atmosphérique relative
autorisée
10°C à 30°C
20% à 75%
Nettoyage et entretien
Nettoyez les appareils avec un chiffon doux, sec et non pelucheux. N’utilisez pas de produits
nettoyants ou de solvants.
Déclaration de conformité
Cet appareil répond aux exigences des directives de l’union européenne (UE) :
1999/5/CE Directive sur les installations de radio et de télécommunication et la
reconnaissance réciproque de leur conformité. La conformité avec la directive
mentionnée ci−dessus est confirmée sur l’appareil par le symbole CE.
Si vous désirez la déclaration de conformité intégrale, veuillez télécharger gratuitement notre site
Internet www.switel.com.
32
− Garantie −
8 Garantie
Les appareils SWITEL sont fabriqués selon les procédés les plus modernes et contrôlés. Des
matériaux sélectionnés et des technologies de pointe ont pour effet un fonctionnement irréprochable
et une longue durée de vie. La garantie n’est pas valable pour les piles, piles rechargeables ou packs
de piles utilisés dans le produits. La durée de la garantie est de 24 mois à partir de la date d’achat.
Pendant la période de garantie, tous les défauts dus à des vices de matériel ou de fabrication seront
éliminés gratuitement. Le droit à la garantie expire en cas d’intervention de l’acheteur ou de tiers. Les
dommages provenant d’un maniement ou d’une manipulation incorrects, d’une usure naturelle, d’une
mauvaise mise en place ou d’une mauvaise conservation, d’un raccordement ou d’une installation
incorrects ainsi que d’un cas de force majeure ou autres influences extérieures sont exclus de la
garantie. En cas de réclamations, nous nous réservons le droit de réparer, de remplacer les pièces
défectueuses ou d’échanger l’appareil. Les pièces ou appareils échangés passent en notre propriété.
Les demandes de dommages et intérêts sont exclues tant qu’elles ne reposent pas sur l’intention ou
une négligence grossière du fabricant.
Si votre appareil devait malgré tout présenter une défectuosité pendant la période de garantie,
veuillez vous adressez, muni de la quittance d’achat, exclusivement au magasin où vous avez acheté
votre appareil SWITEL. Tous les droits de garantie basés sur ces dispositions ne peuvent être
revendiqués qu’auprès de votre revendeur. A l’échéance des deux ans après l’achat et la remise de
nosproduits, les droits en matière de garantie ne sont plus applicables.
33
Notices
Notices
34
3
1
2
3
4
5
6
7
8
Contenuto
Indicazioni generali . . . . . . . . . . . . . . . . . . . . . . . . . .
36
Impiego conforme agli usi previsti . . . . . . . . . . . . . . . . . . . . . . . .
Indicazioni di sicurezza . . . . . . . . . . . . . . . . . . . . . . . . . . . . . . .
Smaltimento . . . . . . . . . . . . . . . . . . . . . . . . . . . . . . . . . . . . . . .
36
36
36
Struttura menu . . . . . . . . . . . . . . . . . . . . . . . . . . . . .
Elementi di comando . . . . . . . . . . . . . . . . . . . . . . . . .
37
38
Unità baby (trasmettitore) . . . . . . . . . . . . . . . . . . . . . . . . . . . . . .
Unità genitori (ricevitore) . . . . . . . . . . . . . . . . . . . . . . . . . . . . . .
Vano di ricarica . . . . . . . . . . . . . . . . . . . . . . . . . . . . . . . . . . . . .
38
39
39
Messa in funzione . . . . . . . . . . . . . . . . . . . . . . . . . . .
40
Indicazioni di sicurezza . . . . . . . . . . . . . . . . . . . . . . . . . . . . . . .
Verifica del contenuto della confezione . . . . . . . . . . . . . . . . . . . .
Unità genitori . . . . . . . . . . . . . . . . . . . . . . . . . . . . . . . . . . . . . . .
Unità baby . . . . . . . . . . . . . . . . . . . . . . . . . . . . . . . . . . . . . . . .
40
40
40
40
Esercizio del baby controllo . . . . . . . . . . . . . . . . . . .
41
Volume . . . . . . . . . . . . . . . . . . . . . . . . . . . . . . . . . . . . . . . . . . .
Indicazione dello stato di carica degli accumulatori/Avviso
di accumulatori scarichi . . . . . . . . . . . . . . . . . . . . . . . . . . . . . . .
Lingua . . . . . . . . . . . . . . . . . . . . . . . . . . . . . . . . . . . . . . . . . . .
Orario . . . . . . . . . . . . . . . . . . . . . . . . . . . . . . . . . . . . . . . . . . . .
Allarme baby . . . . . . . . . . . . . . . . . . . . . . . . . . . . . . . . . . . . . . .
Ninna nanna . . . . . . . . . . . . . . . . . . . . . . . . . . . . . . . . . . . . . . .
Selezione e avvio della ninna nanna . . . . . . . . . . . . . . . . . . . . . .
Temperatura . . . . . . . . . . . . . . . . . . . . . . . . . . . . . . . . . . . . . . .
Modifica del range di temperatura . . . . . . . . . . . . . . . . . . . . . . . .
Impostazione dell’allarme temperatura . . . . . . . . . . . . . . . . . . . .
Passaggio da ° C a ° F . . . . . . . . . . . . . . . . . . . . . . . . . . . . . . .
Radioavviso tra unità baby e unità genitori (paging) . . . . . . . . . . .
Parlare al baby . . . . . . . . . . . . . . . . . . . . . . . . . . . . . . . . . . . . .
Luce notturna . . . . . . . . . . . . . . . . . . . . . . . . . . . . . . . . . . . . . .
Lampadina tascabile . . . . . . . . . . . . . . . . . . . . . . . . . . . . . . . . .
Pasto del neonato . . . . . . . . . . . . . . . . . . . . . . . . . . . . . . . . . . .
Impostazione di primo o successivo orario di pasto del neonato . .
Impostazione di intervalli di pasto del neonato . . . . . . . . . . . . . . .
Attivazione dell’allarme di pasto del neonato . . . . . . . . . . . . . . . .
Disattivazione dell’allarme di pasto del neonato . . . . . . . . . . . . . .
Impostazione della sensibilità del baby controllo . . . . . . . . . . . . . .
Modalitá eco . . . . . . . . . . . . . . . . . . . . . . . . . . . . . . . . . . . . . . .
41
41
41
41
42
42
43
43
43
44
44
44
44
45
45
45
45
46
46
46
46
46
Eliminazione di errori . . . . . . . . . . . . . . . . . . . . . . . .
Specifiche tecniche . . . . . . . . . . . . . . . . . . . . . . . . . .
47
48
Pulizia e cura . . . . . . . . . . . . . . . . . . . . . . . . . . . . . . . . . . . . . .
Dichiarazione di conformità . . . . . . . . . . . . . . . . . . . . . . . . . . . .
48
48
Garanzia . . . . . . . . . . . . . . . . . . . . . . . . . . . . . . . . . .
49
35
− Indicazioni generali −
1 Indicazioni generali
Si prega di leggere attentamente le presenti istruzioni per l’uso. Non aprire mai gli apparecchi e non
compiere riparazioni di propria iniziativa. Rivolgersi in caso di reclami entro il periodo di garanzia al
rivenditore autorizzato. Con riserva di modifiche tecniche e ottiche dovute a migliorie del prodotto.
Impiego conforme agli usi previsti
Il baby controllo è un dispositivo di monitoraggio del locale. L’unità baby (trasmettitore) trasmette voci
e altri rumori emessi dal bambino ad un’unità genitori (ricevitore). Qualsiasi altro impiego è
considerato come non conforme agli usi previsti. L’utilizzo di questi apparecchi non sostituisce in
nessun modo la rispettiva presenza badando di persona al proprio bambino. Si escludono pertanto
richieste di risarcimento danni al di là di quanto previsto dalle disposizioni di legge.
Indicazioni di sicurezza
Il baby controllo è stato sviluppato appositamente per dare maggiore sicurezza nel caso in cui non si
rimanesse a badare al bambino nella stessa stanza. Esso NON sostituisce comunque la presenza di un
adulto non badando al bambino come una persona. Durante l’utilizzo dei dispositivi, un’unità genitori deve
sempre rimanere nelle immediate vicinanze del baby controllo facendo attenzione alla rispettiva portata. Il
baby controllo non è un apparecchio medico e non è neppure in grado di impedire la "morte infantile
improvvisa". Si consiglia di non fare affidamento al presente apparecchio se si tratta di valutare il
benessere del proprio bambino. Controllare regolarmente e di persona lo stato del vostro bambino.
Non appoggiare mai oggetti sul vostro baby controllo e non ricoprirlo in alcun modo.
Non posizionare mai l’unità genitori o l’unità baby nelle vicinanze di acqua o in un ambiente esposto a
umidità.
Viaggiando all’estero, osservare la compatibilità della tensione indicata sull’alimentatore con la
tensione presente sul luogo di utilizzo.
Non smaltire mai batterie/accumulatori gettandoli assieme ai rifiuti domestici. Attenersi alle
possibilità di smaltimento predisposte dalle autorità locali.
Non adoperare mai l’unità genitori con batterie monouso. Ricorrere esclusivamente ad
accumulatori del tipo consigliato − 2 x AAA 1,2 V 800 mAH NiMH.
Utilizzare soltanto l’alimentatore di rete fornito in dotazione, altrimenti si corre il rischio di
danneggiare il baby controllo.
Estrarre l’alimentatore e rimuovere le batterie/gli accumulatori nel caso di inutilizzo del baby
controllo.
Non applicare detergenti di alcun tipo sull’apparecchio. Estrarre l’alimentatore prima di pulire
l’apparecchio.
Gli alimentatori possono surriscaldarsi in fase di utilizzo.
Non esporre l’unità genitori o l’unità baby ai diretti raggi del sole.
La capacità di carica degli accumulatori presenti all’interno dell’unità genitori si riduce con il tempo e si
può pertanto rendere necessario prevederne la sostituzione. Nuove batterie ricaricabili possono
essere ordinate presso la nostra hotline.
Smaltimento
Procedere allo smaltimento dell’apparecchio esaurito consegnandolo presso uno dei punti di
raccolta istituiti dalla propria società di smaltimento rifiuti comunale (per es. centro di riciclo
materiali). Il simbolo riportato qui a lato indica che non è assolutamente consentito smaltire
l’apparecchio assieme ai normali rifiuti domestici! Secondo quanto previsto dalla legge sugli
apparecchi elettrici ed elettronici, i proprietari di apparecchi esauriti sono per legge tenuti alla
consegna di tutti gli apparecchi elettrici ed elettronici presso un centro di rilievo rifiuti in
raccolta differenziata.
Consegnare accumulatori / batterie standard per lo smaltimento
presso rivenditori al dettaglio di batterie o centri di raccolta che mettono
a disposizione appositi contenitori.
Smaltire confezioni ed imballaggi in base a quanto indicato dalle
norme in vigore a livello locale.
36
− Struttura menu −
2 Struttura menu
1. Livello
2. Livello
Luce nottur.
Acceso?ISpento?
Ninnananna
Riproduci?IInterrompi?
Selez. Nuovo
Sensibilità
Livello
Not. Sonora
Acceso?ISpento?
Volume
Livello
Imp. Coper.
Lim.Sup. xx
Lim. Inf. xx
Notif. Temp.
Acceso?ISpento?
Volume
Temperatura
3. Livello
4. Livello
Twinkle
Silent Night
Minuet in G
Danny Boy
Gymnopedie
Pipr. Tutto
Livello
Gradi CIGradi F
Orologio
Orario pasto
Lingua
Orario imp.
Anno
Mese
Giorno
Ora
Minuto
Formato ora
12 oreI24 ore
Orario imp.
Ora
Minuto
Interv. pasti
Ora
Minuto
Allarme
Acceso?ISpento?
Volume
Livello
Deutsch
Espanol
Italiano
PYCCKÈÉ
English
Francais
Per navigare, aprire con il tasto menu il menu principale (1° livello), selezionare con i tasti
Up/Down una voce di menu e confermare quindi con il tasto OK. Questa procedura è altresì
applicabile per gli altri livelli di menu.
37
− Elementi di comando −
3 Elementi di comando
Unità baby (trasmettitore)
1
Sensore di temperatura
Rileva la temperatura all’interno della cameretta del neonato.
2
Coperchio del vano batterie
Per batterie non ricaricabili
(non fornite in dotazione).
3
Tasto luce notturna
Premere questo tasto per accendere la luce notturna. La
luce fioca trapela dalle aperture sulla parte anteriore.
Premere di nuovo il tasto per spegnere la luce. Questa si
spegne lentamente.
4
Tasto ON/OFF
Premere brevemente questo tasto per accendere
l’apparecchio. Tenere premuto questo tasto per spegnere
l’apparecchio.
5
Tasto di radioavviso
Tenere premuto il tasto per 2 secondi. L’unità genitori
emette un tono di allarme. Con questa funzione è
possibile chiamare aiuto o individuare la posizione di
un’unità genitori persa d’occhio.
6
Display
Indica le impostazioni attuali:
Livello di carica delle batterie, data e orario, temperatura,
ninna nanna ON/OFF, melodia di ninna nanna.
7
Tasto Play/Stop, ninna nanna
Per avviare o interrompere le filastrocche di ninna nanna.
8
Tasto musica
Per selezionare la melodia di ninna nanna.
9
Microfono
Trasmette i rumori rilevati all’interno della cameretta del
neonato.
10 Tasti volume Up/Down
Volume −: Riduce il volume della ninna nanna.
Volume +: Aumenta il volume della ninna nanna.
38
1
3 4 5
2
6
7
8
10
9
− Elementi di comando −
Unità genitori (ricevitore)
11 Coperchio del vano batterie
Batterie ricaricabili.
12 Gancio per cintura
13 Tasti volume Up/Down
Impostare il volume in cui si desidera percepire i rumori
provenienti dalla cameretta del bambino e servirsi di
questo tasto per navigare nel menu.
14 Tasto ON/OFF
Premere questo tasto per inserire l’apparecchio. Tenere
premuto il tasto per spegnere di nuovo l’apparecchio.
13
12
14
11
15 Tasto menu, Tasto OK
Il tasto menu e il tasto OK costituiscono assieme ai tasti
Up/Down un’unità necessaria alle impostazioni del baby
controllo. Premere il tasto menu per accedere alle opzioni
di menu. Con i tasti Up/Down si ha modo di selezionare
un’opzione e di confermare quindi premendo il tasto OK.
Con il tasto menu si esce dal livello di menu attualmente
selezionato tornando indietro di un passo.
16 LED di collegamento
Luce verde: Collegato con unità baby
Luce lampeggiante: Collegamento interrotto.
18
19
17
16
15
17 Display
Indica le impostazioni attuali:
Livello di carica delle batterie, data e orario, temperatura,
ninna nanna ON/OFF, melodia di ninna nanna.
18 Tasto delle spie
Tenere premuto il tasto delle spie per generare un raggio
di luce fioca.
19 Tasto di conversazione (per calmare il baby)
Tenere premuto il tasto di conversazione per parlare al
neonato o al partner.
Vano di ricarica
20 Spia di ricarica
Non appena l’unità genitori è riposta nel vano di ricarica, la
spia di ricarica si accende in rosso indicando in tal modo la
procedura di caricamento in corso di svolgimento. La spia
rimane accesa per indicare il corretto svolgimento della
procedura di caricamento.
20
39
− Messa in funzione −
4 Messa in funzione
Indicazioni di sicurezza
Leggere necessariamente prima della messa in funzione le "Indicazioni generali" riportate all’inizio
delle presenti istruzioni per l’uso.
Verifica del contenuto della confezione
La confezione contiene:
1 unità genitori (ricevitore)
1 vano di ricarica con alimentatore di rete
2 accumulatori tipo AAA, 800 mAh
1 unità baby (trasmettitore)
1 alimentatore con cavo di rete
Unità genitori
12
1. Rimuovere il gancio per cintura sollevando in alto il clip (12)
e facendolo scorrere verso sotto.
2. Rimuovere quindi il coperchio del vano batterie (11) sul retro
dell’unità genitori premendo sul coperchio e spingendolo verso sotto.
Posizionare le batterie ricaricabili in osservanza delle marcature
all’interno dell’apparecchio e richiudere quindi il coperchio.
3. Posizionare l’unità genitori nel vano di ricarica.
11
4. Inserire l’alimentatore di rete nella presa di corrente.
La spia di ricarica rossa presente sul vano di ricarica si accende per indicare che l’unità genitori è
in fase di caricamento (la spia rimane accesa per indicare un corretto caricamento).
5. Premere il tasto di ON/OFF per inserire l’apparecchio.
Prima del primo utilizzo o in seguito ad una pausa di utilizzo prolungata, sottoporre l’unità
genitori alla procedura di caricamento per una durata di 13 ore. Durante questo periodo l’unità
genitori risposta nel vano di ricarica può essere ulteriormente utilizzata se inserita. Non è
possibile utilizzare la stazione di carica senza batterie ricaricabili.
Unità baby
1. In caso di caduta di tensione, utilizzare il baby controllo passando all’alimentazione a batterie.
Per tale eventualità di consiglia infatti di dotare l’unità baby di batterie.
2. Rimuovere il coperchio del vano batterie sul retro dell’unità baby premendo sul coperchio e
spingendolo verso sotto. Inserire 3 batterie alcaline di tipo AA (non fornite in dotazione) in
osservanza delle marcature all’interno dell’apparecchio e richiudere quindi il coperchio. Non
impiegare accumulatori per l’unità baby.
3. Introdurre il cavo di corrente nella rispettiva rientranza presente di lato dell’unità baby e inserire
l’alimentatore di rete nella presa di corrente.
4. Premere il tasto di ON/OFF per inserire l’apparecchio.
Si consiglia di posizionare l’unità baby ad una distanza di ca. 1 − 1,5 m dal letto del bambino
poggiandola su una superficie diritta e piana. Non poggiare mai l’unità baby sulla culla del
neonato, sul letto o all’interno del box. Assicurarsi che apparecchio, cavi e alimentatore di rete
siano fuori dalla portata del neonato e di qualsiasi altro bambino. Non poggiare mai gli
apparecchi su superfici antiche o lucide.
40
− Esercizio −
5 Esercizio del baby controllo
In seguito all’inserimento del baby controllo sarà possibile sentire attraverso l’unità genitori tutti i
rumori provenienti dalla cameretta del vostro bambino. L’apparecchio consente inoltre di "vedere" i
rumori visto che le spie rossa e verde presenti in alto sull’unità genitori si accendono e si spengono in
base al livello di rumore.
In caso di una qualsiasi interruzione del collegamento tra unità genitori e unità baby, il LED
"indicazione di connessione" verde dell’unità genitori si accende subito lampeggiando, si avverte un suono di avviso che segnala l’assenza di collegamento e le spie verde e rossa non
reagiscono più ai rumori. Seguire le indicazioni riportate nel capitolo "Eliminazione di errori"
allo scopo di ripristinare il collegamento.
Volume
Con i tasti Up/Down presenti di lato sull’unità genitori è dato modo di regolare il volume con cui si
desidera percepire i rumori emessi dal proprio baby.. Questa impostazione non modifica la sensibilità
del baby controllo bensì solo il volume con cui i rumori sono percepiti e riprodotti.
Indicazione dello stato di carica degli accumulatori/Avviso di accumulatori scarichi
L’unità genitori è in grado di funzionare autonomamente se utilizzata fuori dal vano di ricarica fino a
10 ore. Ciò dipende comunque dallo stato di carica delle batterie ricaricabili. Non appena gli
accumulatori presentano uno scarso livello di carica, il "simbolo batteria" presso l’unità genitori
comincia a lampeggiare e contemporaneamente si avverte un suono di avviso. In tal caso è
necessario riporre l’apparecchio nel vano di ricarica per consentire agli accumulatori di caricarsi.
Anche una volta riposta nel vano di ricarica è possibile proseguire l’utilizzo dell’unità genitori.
Lingua
Il baby controllo prevede l’impostazione di lingue differenti.
Modifica della lingua
Presso l’unità genitori
1. Premere il tasto menu per selezionare quindi con i tasti Up/Down la voce [Lingua]. Fatto
questo, premere il tasto OK.
2. Il display indica [English]. Premere i tasti Up/Down per selezionare la lingua desiderata. Fatto
questo, premere il tasto OK. Sul display è visualizzato [Salvato] ad indicare che la lingua
desiderata è stata attivata.
Orario
L’impostazione di data e orario è svolta presso l’unità genitori con possibilità di scegliere ulteriormente
tra la visualizzazione nel formato 12 e 24 ore (la configurazione iniziale prevede la visualizzazione nel
formato 24). Nel caso si desiderasse utilizzare la funzione pasto del neonato" si rende necessario
impostare l’orario.
Avendo staccato il baby controllo dall’alimentazione elettrica, l’orario va impostato di nuovo.
Impostare l’orario
Presso l’unità genitori
1. Premere il tasto menu per selezionare quindi con i tasti Up/Down la voce [Ora]. Fatto questo,
premere il tasto OK.
2. Il display indica [Orario imp.]. Premere il tasto OK.
3. Il display indica [Anno]. Selezionare con i tasti Up/Down l’anno corrente. Premere il tasto OK.
4. Il display indica [Mese]. Selezionare con i tasti Up/Down il mese corrente. Premere il tasto OK.
41
− Esercizio −
5. Il display indica [Giorno]. Selezionare con i tasti Up/Down il giorno corrente. Premere il tasto
OK.
6. Il display indica [Ora]. Impostare con i tasti Up/Down l’ora attuale nel formato 24 ore. Premere il
tasto OK.
7. Il display indica [Minuto]. Selezionare con i tasti Up/Down il minuto corrente. Premere il tasto
OK. Il display indica [Salvato]mentre viene emesso un segnale di riscontro. Data e ora sono
quindi visualizzati.
Impostazione del formato 12 o 24 ore
Presso l’unità genitori
1. Premere il tasto menu per selezionare quindi con i tasti Up/Down la voce [Ora]. Fatto questo,
premere il tasto OK.
2. Il display indica [Orario imp.]. Premere il tasto OK. Selezionare con i tasti Up/Down la voce
[Formato ora]. Premere il tasto OK.
3. Il display indica [12 ore]. Premere il tasto OK oppure il tasto menu nel caso in cui non si
desiderasse compiere alcuna modifica. Il display indica [Salvato] per confermare l’attivazione
della visualizzazione dell’orario nel formato 12 ore.
Avendo impostato il formato 12 ore, sul display sono visualizzate una a" minuscola per AM
oppure una p" minuscola per PM.
4. Per passare al formato 24 ore, ripetere i passi di cui sopra. Nel passo 3 il display indica [24 ore].
Fatto questo, premere il tasto OK.
Allarme baby
L’unità genitori consente di impostare l’emissione di un suono di avviso supplementare, non appena il
livello di rumore proveniente dalla cameretta del neonato è talmente alto da accendere le spie di
rumorosità presso l’unità genitori. Ciò è particolarmente d’ausilio nel caso in cui il volume dell’unità
genitori è al minimo e il controllo è eseguito solo tramite spie di rumorosità.
Presso l’unità genitori
1. Premere il tasto menu per selezionare quindi con i tasti Up/Down la voce [Not. Sonora]. Fatto
questo, premere il tasto OK.
2. Il display indica [Acceso?]. Fatto questo, premere il tasto OK. Premere il tasto OK oppure il
tasto menu nel caso in cui non si desiderasse compiere alcuna modifica. Il display indica
[Salvato]mentre viene emesso un segnale di riscontro.
3. Volendo impostare il volume di allarme, premere il tasto menu e scorrere fino alla voce
[Not. Sonora], premere il tasto OK e scorrere quindi fino alla voce [Volume] e premere il tasto
OK. Il display indica [Livello]e un certo numero di segmenti. Questi segmenti rappresentano il
volume di allarme prescelto. Modificare il volume con i tasti Up/Down (tutti i segmenti = max.
volume).
4. Il display indica [Salvato]. Fatto questo, l’unità genitori emette un tono di allarme non appena i
rumori rilevati nella cameretta del neonato raggiungono il volume impostato e i LED rossi si
accendono.
5. Per disattivare l’allarme baby, procedere allo stesso modo. Il display indica adesso [Spento?].
Fatto questo, premere il tasto OK.Il display indica [Salvato].
Ninna nanna
Il baby può addormentarsi ascoltando le soavi filastrocche di ninna nanna dell’unità baby. È possibile
scegliere tra 5 melodie differenti oppure riprodurle una dopo l’altra con [Riproduci?]. Le filastrocche
di ninna nanna possono essere inserite e disinserite sia presso l’unità baby che presso l’unità genitori.
Appena inserita la modalità, sui due display appare una nota musicale assieme al titolo della ninna
nanna attualmente riprodotta. La filastrocche di ninna nanna sono riprodotte per 15 minuti.
42
− Esercizio −
Selezione e avvio della ninna nanna
Presso l’unità baby
1. Premere il tasto musica. Il display si accende. La ninna nanna è visualizzata.
2. Premere il tasto musica di nuovo fino a quando la ninna nanna desiderata risulta selezionata
oppure premere [Ripr. Tutto].
3. Premere il tasto Play/Stop per avviare o interrompere la selezione.
Presso l’unità genitori
1. Premere il tasto menu per selezionare quindi con i tasti Up/Down la voce [Ninnananna]. Fatto
questo, premere il tasto OK.
2. Il display indica [Riproduci?]. Premere i tasti Up/Down per selezionare la voce [Selez. Nuovo].
Fatto questo, premere il tasto OK.
3. Il display indica la ninna nanna attuale. Premere i tasti Up/Down per selezionare la ninna nanna
desiderata oppure premere [Ripr. Tutto]. Il display conferma l’azione visualizzando l’indicazione
[Salvato].
4. Il display indica [Ninnananna]. Fatto questo, premere 2 volte il tasto OK.
5. Per interrompere la riproduzione, premere 2 volte il tasto OK trovandosi ancora nel menu Ninna
nanna.
Qualora non si volesse interrompere la riproduzione, questa si conclude automaticamente
dopo 15 minuti.
Temperatura
È fondamentale per la salute del vostro baby, che il range di temperatura rimanga costante. Ciò
interessa in particolare la temperatura ambiente, corporea, degli indumenti e di sonno (si consiglia di
informarsi presso l’unità sanitaria locale sulla temperatura più adatta). Il baby controllo fornisce un
supporto in sede di controllo della temperatura attraverso la visualizzazione delle temperature presso
unità genitori e unità baby. È inoltre possibile ottenere un allarme non appena queste temperature
subiscono uno scostamento al di là dei limiti consentiti.
Modifica del range di temperatura
Presso l’unità baby è possibile programmare i limiti di temperatura minimo e massimo. Non appena la
temperatura misurata nella cameretta del neonato passa al di sotto o al di sopra di tali limiti,
l’indicazione della temperatura lampeggia presso l’unità genitori ed in più si avverte un tono di allarme
(se attivato). Sul display appare inoltre l’indicazione Alto" o Basso".
Presso l’unità genitori
1. Premere il tasto menu per selezionare quindi con i tasti Up/Down la voce [Temperatura]. Fatto
questo, premere il tasto OK.
2. Il display indica [Imp. Coper.]. Fatto questo, premere il tasto OK. Il valore di temperatura
massima attualmente impostato è indicato con [Lim. Sup.].
3. Premere i tasti Up/Down per selezionare il limite di temperatura massimo desiderato. Fatto
questo, premere il tasto OK. Il display indica prima [Salvato]ed in seguito viene visualizzato il
limite di temperatura minimo attuale [Lim. Inf.].
4. Premere i tasti Up/Down per selezionare il limite di temperatura minimo desiderato. Fatto
questo, premere il tasto OK. Il display indica [Salvato].
A questo punto, il range di temperatura che si intende sorvegliare risulta programmato.
43
− Esercizio −
Impostazione dell’allarme temperatura
L’unità genitori è programmabile in modo da emettere un duplice tono di allarme non appena la
temperatura ambiente rilevata all’interno della cameretta del neonato si trova al di là del range di
temperatura impostato.
Presso l’unità genitori
1. Premere il tasto menu per selezionare quindi con i tasti Up/Down la voce [Temperatura]. Fatto
questo, premere il tasto OK.
2. Premere i tasti Up/Down per selezionare la voce [Notif. Temp.]. Fatto questo, premere il
tasto OK.
3. Il display indica [Acceso?]. Premere quindi il tasto OK o il tasto menu nel caso non si
desiderasse compiere alcuna modifica. Il display indica [Salvato]. L’allarme è attivato.
4. Volendo impostare il volume di allarme, selezionare con i tasti Up/Down la sottovoce [Volume] e
confermare con il tasto OK. Il display indica [Livello] e un certo numero di segmenti. Questi
segmenti rappresentano il volume di allarme prescelto. Modificare il volume con l’ausilio dei tasti
Up/Down. Il display indica [Salvato].
5. Per disattivare l’allarme, procedere allo stesso modo. Il display indica come passo 3 [Spento?].
Fatto questo, premere il tasto OK.
Passaggio da ° C a ° F
La temperatura può essere visualizzata in gradi Celsius oppure in gradi Fahrenheit. La configurazione
iniziale prevede la visualizzazione in gradi Celsius. Per passare da una scala di temperatura all’altra,
procedere come segue:
Presso l’unità genitori
1. Premere il tasto menu per selezionare quindi con i tasti Up/Down la voce [Temperatura]. Fatto
questo, premere il tasto OK.
2. Premere i tasti Up/Down per selezionare la voce [Gradi F]. Premere quindi il tasto OK oppure il
tasto menu nel caso in cui non si desiderasse compiere alcuna modifica. Il display indica
[Salvato]. La temperatura è ora visualizzata in ° F.
3. Per passare alla scala di temperatura in ° C, procedere allo stesso modo. Il display visualizza
come passo 2 [Gradi C]. Fatto questo, premere il tasto OK.
Radioavviso tra unità baby e unità genitori (paging)
Questa funzione è utile nel caso in cui un’unità genitori si trovasse all’interno della cameretta del
vostro bambino e si desiderasse entrare in contatto con un’unità genitori. La funzione consente inoltre
di individuare la posizione di un’unità genitori persa d’occhio.
Presso l’unità baby
1. Tenere premuto il tasto radioavviso ca. 2 secondi. L’unità genitori trasmette una sequenza di
segnali acustici.
Presso l’unità genitori
1. Non appena si avverte la sequenza di segnali acustici, premere un tasto qualsiasi per disattivarli.
2. È altresì possibile comunicare con il proprio partner all’interno della cameretta del neonato. A tale
scopo, tenere premuto il tasto di conversazione e parlare rivolti verso il microfono dell’unità
genitori. Per poter ascoltare il partner nella cameretta del neonato, rilasciare di nuovo il
tasto di conversazione.
Parlare al baby
Dall’unità genitori è possibile parlare al proprio baby cercando di calmarlo, dicendo ad es: arrivo
subito".
Presso l’unità genitori
1. Tenere premuto il tasto di conversazione e parlare rivolti verso il microfono dell’unità genitori.
44
− Esercizio −
Per poter ascoltare il baby nella propria cameretta, rilasciare di nuovo il tasto di
conversazione.
Luce notturna
L’unità baby è dotata di luce notturna, una luce fioca e uniforme che viene emessa non appena si
tocca una sola volta il dispositivo, circostanza che rassicura il vostro bambino e che consente ai
genitori di vedere il proprio bambino all’interno di una stanza buia. La luce notturna può essere
attivata e disattivata presso l’unità genitori.
Presso l’unità baby
1. Premere il tasto luce presente in alto sull’apparecchio. Si accende lentamente una luce fioca e
piacevole. Premendo di nuovo il tasto la luce si spegne.
Presso l’unità genitori
1. Premere il tasto menu per selezionare quindi con i tasti Up/Down la voce [Luce<nottur.]. Fatto
questo, premere il tasto OK.
2. Il display indica [Acceso?]. Premere il tasto OK se si desidera attivare la luce notturna. Il display
conferma l’azione visualizzando l’indicazione [Salvato]ed emettendo contemporaneamente un
segnale di riscontro. La luce notturna si accende fiocamente. Il simbolo di una lampadina appare
sul display dell’unità genitori.
3. Per disattivare la luce notturna, procedere allo stesso modo. Il display indica adesso [Spento?].
Fatto questo, premere il tasto OK. Il display indica [Salvato] ed emette un segnale di riscontro.
La lampadina scompare dal display.
Lampadina tascabile
Nell’unità genitori si trova integrata un’utile funzione lampadina. Premendo un tasto l’apparecchio
genera una luce fioca, utile soprattutto per illuminare la cameretta del neonato al buio..
Presso l’unità genitori
1. Tenere premuto il tasto lampadina per attivare la lampadina.
La lampadina tascabile funziona solo con unità genitori inserita.
Pasto del neonato
Qualora il vostro baby fosse abituato a intervalli fissi tra un pasto e l’altro, l’unità genitori è altresì utilizzabile
per impostare l’emissione di un allarme una volta raggiunto l’orario del pasto. È possibile scegliere tra la
programmazione del prossimo pasto o di determinati intervalli di pasto del neonato. Ciò richiede la precedente
impostazione di data e orario. Una volta compiuta tale programmazione, procedere come segue:
1. Impostare l’orario (24 ore) ad es. 10:30 e quindi, se si desidera,
2. gli intervalli per i pasti successivi, ad es. ogni 3 ore e 30 minuti. Si prega di tenere altresì conto
del tempo necessario alla somministrazione del pasto.
3. Infine va attivato l’allarme di pasto del neonato. Una volta raggiunto l’orario di pasto, l’unità
genitori emette una sequenza di segnali e sul display è visualizzato [Orario pasto]. Premere un
tasto qualsiasi per disattivare la sequenza di segnali. Nel caso di impostazione di un intervallo di
pasto, l’unità genitori emetterà di nuovo un allarme appena raggiunto l’orario per la
somministrazione del successivo pasto al neonato.
Impostazione di primo o successivo orario di pasto del neonato
Presso l’unità genitori
1. Premere il tasto menu per selezionare quindi con i tasti Up/Down la voce [Orario pasto]. Fatto
questo, premere il tasto OK.
2. Il display indica [Orario imp.].Fatto questo, premere il tasto OK.
3. Il display indica [Ora] ed un numero compreso tra 00 e 23 per le ore del giorno.
Premere i tasti Up/Down per selezionare l’ora desiderata. Fatto questo, premere il tasto OK.
45
− Esercizio −
4. Il display indica [Minuto] ed un numero compreso tra 00 e 59 per i minuti del giorno.
Premere i tasti Up/Down per selezionare i minuti desiderati. Fatto questo, premere il tasto OK. Il
display indica [Salvato]. L’orario del pasto risulta quindi programmato.
Impostazione di intervalli di pasto del neonato
Presso l’unità genitori Dopo i passi 1 − 4:
5. Il display indica [Orario imp.]. Selezionare con i tasti Up/Down la voce [Interv.pasti]. Fatto
questo, premere il tasto OK.
6. Il display indica [Ora] ed un numero composto da due cifre per l’intervallo in ore tra un pasto e
l’altro (ad es. 03). Premere i tasti Up/Down per selezionare l’intervallo in ore desiderato. Fatto
questo, premere il tasto OK.
7. Il display indica [Minuto] ed un numero composto da due cifre per l’intervallo in minuti tra un
pasto e l’altro (ad es. 30).
Premere i tasti Up/Down per selezionare l’intervallo in minuti desiderato. Fatto questo, premere il
tasto OK. Il display indica [Salvato]. L’intervallo di pasto (in questo caso 3 ore 30 minuti) risulta
programmato. Si prega di tenere presente che è necessario attivare la funzione di allarme (si
veda il paragrafo successivo).
Si prega di tenere altresì conto in sede di programmazione il tempo necessario alla
somministrazione del pasto.
Attivazione dell’allarme di pasto del neonato
Presso l’unità genitori Dopo i passi 1 − 7:
8. Il display indica [Interv.pasti]. Selezionare con i tasti Up/Down la voce [Allarme].
Fatto questo, premere il tasto OK.
9. Il display indica [Acceso?]. Premere quindi il tasto OK o il tasto menu nel caso non si
desiderasse compiere alcuna modifica. Fatto questo, premere il tasto OK.
10. Volendo impostare il volume di allarme, selezionare con i tasti Up/Down la sottovoce [Volume] e
confermare con il tasto OK. Il display indica [Livello] e un certo numero di segmenti. Questi
segmenti rappresentano il volume di allarme prescelto. Modificare il volume con l’ausilio dei tasti
Up/Down. Fatto questo, premere il tasto OK. Il display indica [Salvato]. L’allarme è ripetuto fino
al successivo orario di pasto. Per disattivare l’allarme, premere un tasto qualsiasi presso l’unità
genitori.
Disattivazione dell’allarme di pasto del neonato
Nel caso in cui non si volesse più essere allarmati raggiunto l’orario di pasto, l’allarme andrà
disattivato. Seguire le indicazioni dei passi 8−9.
11. Il display indica adesso [Spento?]. Fatto questo, premere il tasto OK. Il display indica [Salvato].
L’allarme è disattivato e al successivo orario di pasto il dispositivo non emetterà alcuna sequenza
di segnali acustici.
Impostazione della sensibilità del baby controllo
Alcuni baby sono più rumorosi rispetto ad altri. Per questo motivo è possibile adeguare la sensibilità
del proprio baby controllo al neonato. Aumentare la sensibilità per baby con una voce delicata
premendo High" e per baby con una voce forte premendo Low". Ciò è consigliabile in particolare nel
caso in cui il baby emetta rumori forti durante il sonno.
Presso l’unità genitori
1. Premere il tasto menu per selezionare quindi con i tasti Up/Down la voce [Sensibilità]. Fatto
questo, premere il tasto OK.
2. Il display indica [Livello]. Premere con i tasti Up/Down per selezionare la sensibilità adatta.
Fatto questo, premere il tasto OK. Il display indica [Salvato].
Modalitá eco
L’unità del baby monitor è dotata di una speciale tecnologia di trasmissione. La riduzione delle radiazioni
viene ottenuta abbassando la potenza della trasmissione delle radiazioni dall’unità del baby, e allo stesso
tempo incrementando la sensibilità del ricevitore per mantenere il campo normale.
46
− Eliminazione di errori −
6 Eliminazione di errori
In caso di problemi tecnici è possibile rivolgersi alla nostra hotline di assistenza tecnica chiamando al
numero 0900 00 1675 valido per la Svizzera (spese da rete Swisscom alla data di stampa: CHF 2.60 /
min). In caso di reclami entro il periodo di garanzia, rivolgersi al rivenditore autorizzato. Il periodo di
garanzia ricopre 2 anni.
Errore
Cause
Gli apparecchi non
si inseriscono.
− Verificare la presenza dell’alimentazione elettrica e la correttezza dei
rispettivi collegamenti.
Il LED "indicazione
di connessione"
verde presente
presso l’unità
genitori lampeggia
e non è possibile
sentire rumori
provenienti dalla
cameretta del
bambino.
− 1. Probabilmente ci si trova al di là della portata. Avvicinarsi all’unità baby e
attendere 5 secondi per consentire l’instaurarsi di una "connessione".
− 2. A volte può rendersi necessario ripetere l’impostazione del
"Collegamento" tra i due apparecchi. Spegnere i due apparecchi e
procedere come segue:
Presso l’unità baby:
− Premere brevemente il tasto ON/OFF.
Presso l’unità genitori:
− Premere brevemente il tasto ON/OFF. Il LED "indicazione di connessione"
verde è accesa (ciò può durare alcuni secondi).
Non è possibile
sentire il vostro
bambino sull’unità
genitori, ma il LED
"indicazione di
connessione"
rimane
permanentemente
acceso.
− 1. Verificare se presso l’unità genitori è stato attivato il volume.
− 2. Aumentare la sensibilità del baby controllo.
Il baby controllo
emette un beep ad
alta frequenza.
− Ciò accade nel momento in cui unità genitori e unità baby risultano troppo
vicine l’una rispetto all’altra. Aumentare la distanza tra gli apparecchi.
47
− Specifiche tecniche −
7 Specifiche tecniche
Caratteristica
Frequenza di esercizio
Portata
Valore
1,8 GHz
In condizioni ottimali fino a 300 m. All’interno di edifici la
portata si riduce (fino a 50 m) per la presenza di pareti,
porte e così via.
Alimentatore di rete, unità baby
(trasmettitore)
Input: 230 VCA, 35 mA
Output: 6 VCC, 300 mA, Interni = +
Batterie non ricaricabili
per l’unità baby (trasmettitore)
(non fornite in dotazione)
Tipo AA, 1,5 V alcaline
Potenza di trasmissione
Mediamente: 10 mW
Massimo: 250 mW
Alimentatore di rete con vano di ricarica
per unità genitori
(direttamente cablato)
Input: 230 VCA, 30 mA
Output: 6 VCC, 200 mA
Accumulatori per
unità genitori (ricevitore)
Tipo AAA 1,2 V 800 mAh NiMH
Durata di autonomia con accumulatori
carichi
Ca. 10 ore
Temperatura ambiente ammessa
Umidità dell’aria relativa ammessa
da 10 °C a 30 °C
da 20% a 75%
Pulizia e cura
Pulire gli apparecchi con un panno asciutto, morbido e antipilling. Non utilizzare mai detergenti o
solventi.
Dichiarazione di conformità
Questo apparecchio risponde a quanto disposto dalla Direttiva UE:
1999/5/CE Direttiva concernente le apparecchiature radio, le apparecchiature terminali di
telecomunicazioni e il reciproco riconoscimento della loro conformità. La conformità con
la direttiva di cui sopra è confermata dal simbolo CE applicato sull’apparecchio.
Per la dichiarazione di conformità completa si prega di voler usufruire del servizio gratuito
di download dal nostro sito web www.switel.com.
48
− Garanzia −
8 Garanzia
Gli apparecchi SWITEL sono costruiti e collaudati in osservanza dei processi di produzione più
moderni. L’impiego di materiali selezionati e tecnologie altamente sviluppate sono garanti di una
perfetta funzionalità e lunga durata in vita. La garanzia non si estende a batterie, accumulatori o
pacchi batteria utilizzati all’interno degli apparecchi. Il periodo di garanzia ricopre 24 mesi a partire
dalla data di acquisto.
Entro il periodo di garanzia si procederà all’eliminazione gratuita di tutti i guasti dovuti a difetti di
materiale o produzione. Il diritto di garanzia cessa in caso di interventi da parte dell’acquirente o di
terzi. Danni derivanti da un impiego o esercizio non conforme agli usi previsti, a naturale usura, a
errato montaggio o errata conservazione, a collegamento o installazione impropri, dovuti a forza
maggiore o ad altri influssi esterni non sono coperti da garanzia. In qualità di produttore ci riserviamo
il diritto, in caso di reclami, di riparare o sostituire le parti difettose o di rimpiazzare l’apparecchio. Parti
o apparecchi sostituiti passano di nostra proprietà. Sono esclusi diritti di risarcimento per danni
qualora non siano dovuti a intenzione o colpa grave del costruttore.
Nel caso in cui il presente apparecchio dovesse ciò nonostante presentare un difetto durante il
periodo di garanzia, si prega di rivolgersi esclusivamente al negozio di rivendita dell’apparecchio
SWITEL assieme al relativo scontrino di acquisto. In base alle presenti disposizioni, tutti i diritti di
garanzia dovranno essere fatti valere esclusivamente nei confronti del rivenditore autorizzato.
Decorso il termine di due anni dalla data di acquisto e consegna dei nostri prodotti non sarà più
possibile fare valere alcun diritto di garanzia.
49
Appunti
Appunti
50
4
1
2
3
4
5
6
7
8
Contents
General Information . . . . . . . . . . . . . . . . . . . . . . . . .
52
Intended use . . . . . . . . . . . . . . . . . . . . . . . . . . . . . . . . . . . . . . .
Safety notes . . . . . . . . . . . . . . . . . . . . . . . . . . . . . . . . . . . . . . .
Disposal . . . . . . . . . . . . . . . . . . . . . . . . . . . . . . . . . . . . . . . . . .
52
52
52
Menu Structure . . . . . . . . . . . . . . . . . . . . . . . . . . . . .
Operating Elements . . . . . . . . . . . . . . . . . . . . . . . . . .
53
54
Baby unit (Sender) . . . . . . . . . . . . . . . . . . . . . . . . . . . . . . . . . . .
Parent unit (Receiver) . . . . . . . . . . . . . . . . . . . . . . . . . . . . . . . .
Charger Pod . . . . . . . . . . . . . . . . . . . . . . . . . . . . . . . . . . . . . . .
54
55
55
Starting Up . . . . . . . . . . . . . . . . . . . . . . . . . . . . . . . .
56
Safety notes . . . . . . . . . . . . . . . . . . . . . . . . . . . . . . . . . . . . . . .
Checking the package contents . . . . . . . . . . . . . . . . . . . . . . . . .
At the Parent Unit . . . . . . . . . . . . . . . . . . . . . . . . . . . . . . . . . . .
At the Baby Unit . . . . . . . . . . . . . . . . . . . . . . . . . . . . . . . . . . . .
56
56
56
56
Operation . . . . . . . . . . . . . . . . . . . . . . . . . . . . . . . . .
57
Volume . . . . . . . . . . . . . . . . . . . . . . . . . . . . . . . . . . . . . . . . . . .
Battery Charge indicator and battery low warning . . . . . . . . . . . . .
Language . . . . . . . . . . . . . . . . . . . . . . . . . . . . . . . . . . . . . . . . .
Clock . . . . . . . . . . . . . . . . . . . . . . . . . . . . . . . . . . . . . . . . . . . .
Baby alert! . . . . . . . . . . . . . . . . . . . . . . . . . . . . . . . . . . . . . . . .
Lullaby . . . . . . . . . . . . . . . . . . . . . . . . . . . . . . . . . . . . . . . . . . .
To select and start a lullaby . . . . . . . . . . . . . . . . . . . . . . . . . . . .
Temperature . . . . . . . . . . . . . . . . . . . . . . . . . . . . . . . . . . . . . . .
Changing the temperature range . . . . . . . . . . . . . . . . . . . . . . . .
Setting the Temperature Alert . . . . . . . . . . . . . . . . . . . . . . . . . . .
Changing from Centigrade to Fahrenheit . . . . . . . . . . . . . . . . . . .
Parent to parent paging . . . . . . . . . . . . . . . . . . . . . . . . . . . . . . .
Talk to your Baby . . . . . . . . . . . . . . . . . . . . . . . . . . . . . . . . . . . .
Night Light . . . . . . . . . . . . . . . . . . . . . . . . . . . . . . . . . . . . . . . .
Torch . . . . . . . . . . . . . . . . . . . . . . . . . . . . . . . . . . . . . . . . . . . .
Time for a Feed . . . . . . . . . . . . . . . . . . . . . . . . . . . . . . . . . . . . .
To set the first or next feed time . . . . . . . . . . . . . . . . . . . . . . . . .
To set the interval for following feeds . . . . . . . . . . . . . . . . . . . . . .
To turn the feed alarm on . . . . . . . . . . . . . . . . . . . . . . . . . . . . . .
To turn the feed alarm off . . . . . . . . . . . . . . . . . . . . . . . . . . . . . .
Customise your Baby Monitor to your Baby . . . . . . . . . . . . . . . . .
Eco Mode . . . . . . . . . . . . . . . . . . . . . . . . . . . . . . . . . . . . . . . . .
57
57
57
57
58
58
58
59
59
59
59
60
60
60
60
61
61
61
61
62
62
62
Troubleshooting . . . . . . . . . . . . . . . . . . . . . . . . . . . .
Technical Data . . . . . . . . . . . . . . . . . . . . . . . . . . . . .
63
64
Cleaning and upkeep . . . . . . . . . . . . . . . . . . . . . . . . . . . . . . . . .
Declaration of Conformity . . . . . . . . . . . . . . . . . . . . . . . . . . . . . .
64
64
Guarantee . . . . . . . . . . . . . . . . . . . . . . . . . . . . . . . . .
65
51
− General Information −
1 General Information
Please read this operating instruction manual thoroughly.
Under no circumstances open the equipment or complete any repair work yourself. In the case of
claims under the terms of guarantee, contact your sales outlet.
We reserve the right to make technical and appearance modifications to the product during the course
of product improvement.
Intended use
The Baby Monitor serves to monitor rooms. The baby unit (sender) transmits vocal sounds and other
noises from the baby to the parent unit (receiver). Any other use is considered unintended use.
Use of the equipment is no substitute for personal attention and supervision of a child. Rights to
claims for liability beyond the scope of legal regulations are excluded.
Safety notes
The Baby Monitor has been designed to provide added reassurance for those times when you cannot
be in the same room as your baby. It is NOT a substitute for adult supervision. A parent must always
stay within range of the monitor during use. Your Baby Monitor is not a medical device, nor a device to
prevent cases of Sudden Infant Death Syndrome or `cot death´, and you should not rely on it for your
baby´s wellbeing. It is important that you regularly check on your baby personally
Never place anything over your Baby Monitor or cover it in any way.
Do not place your Parent or Baby Unit near water or in a damp environment.
If travelling abroad, make sure that the voltage shown on the mains power adaptor corresponds
to the local mains power supply.
Never dispose of batteries in the household rubbish. Check with you local authority for correct
disposal options.
Never use non−rechargeable batteries in your Parent Unit. Use only the recommended type
− 2 x AAA 1.2 V 800 mAH NiMH.
Use only the mains adaptor supplied or you may risk damaging your Baby Monitor.
When your Baby Monitor is not in use, it is recommended that you disconnect it from the mains
supply and remove the batteries.
Do not spray it with cleaning polish. Disconnect it from the mains power before cleaning.
The adaptors may become warm during use, please take care when handling.
Do not place your Parent or Baby Unit in direct sunlight.
The charge capacity of the re−chargeable batteries in the Parent Unit will reduce with time and will
eventually need to be replaced. New re-chargeable batteries are obtainable from our Helpline.
Disposal
In order to dispose of your device, take it to a collection point
provided by your local public waste authorities (e.g. recycling centre). The adjacent symbol
indicates that the device must not be disposed of in normal domestic waste! According to
laws on the disposal of electronic and electrical devices, owners are obliged to dispose of old
electronic and electrical devices in a separate waste container.
Batteries/Rechargeable batteries must be disposed of at the point of
sale or at the appropriate collection points provided by the public waste
authorities.
Packaging materials must be disposed of according to local
regulations.
52
− Menu Structure −
2 Menu Structure
Level 1
Level 2
Night Light
On?IOff?
Lullaby
Play?IStop?
Select new
Sensitivity
Level
Sound Alert
On?IOff?
Volume
Level
Set Range
Up Limit xx
Low Limit xx
Temp. Alert
Alert On?IAlert Off?
Volume
Temperature
Level 3
Level 4
Twinkle
Silent Night
Minuet in G
Danny Boy
Gymnopedie
Play All
Level
Degree CIDegree F
Clock
Feed Time
Language
Set Time
Year
Month
Day
Hour
Minute
Hour Format
12 Hrs?I24 Hrs?
Set Time
Hour
Minute
Set Interval
Hour
Minute
Alarm
On?IOff?
Volume
Level
Deutsch
Espanol
Italiano
PYCCKÈÉ
English
Francais
To navigate, open the main menu via the Menu Key (Level 1), select a menu item via the Up/Down
Keys and confirm with the OK Key. This principle is the same for the other menu levels.
53
− Operating Elements −
3 Operating Elements
Baby unit (Sender)
1
Temperature Sensor
Picks up the temperature in your baby’s room.
2
Battery Cover
For non rechargeable batteries (not supplied).
3
Night Light Key
Press to turn On the night light. The light will glow softly
through the front panel. Press again to fade the
light to Off.
4
Power Key On/Off
Press and release to turn ON the Baby unit.
Press and hold to turn OFF.
5
Page Key
Press and hold for 2 seconds to Page" the Parent
Unit with an audible alert. Useful to call for assistance or to
locate a missing Parent Unit.
6
Display
Indicates the current settings of your Baby Monitor
including: Battery level, Date and Time, Temperature,
Lullaby on/off, Lullaby melody.
7
Play/Stop Key (Lullabies)
Starts or stops the lullaby music.
8
Music Key (Lullabies)
Selects the lullaby melody.
9
Microphone
Picks up the sounds from your baby’s room.
10 Volume Key Up/Down
Volume −: Reduces the lullaby volume.
Volume +: Increases the lullaby volume.
54
1
3 4 5
2
6
7
8
10
9
− Operating Elements −
Parent unit (Receiver)
11 Battery Cover
Rechargeable batteries.
12 Belt Clip
13 Volume Key Up/Down
Adjust the volume at which you hear the sounds from your
baby’s room and also to navigate through the menu‘s.
14 Power Key On/Off
Press and release to switch the unit ON.
Press and hold to switch OFF.
13
12
14
11
15 Menu Key, OK Key
The Menu and OK key work as a team with the Up and Down
keys to help you adjust the features of your Baby Monitor.
Press the Menu Key to enter the menu options, use the Up
and Down keys to scroll through the menu choices and the OK
Key to select. Press the Menu key, if you want to step back
one level in the Menu.
16 Link Light
Green light ON means Linked" to the Baby Unit.
A flashing light means the Link" has been lost.
17 Display
Indicates the current settings of your Baby Monitor including:
Battery level, Date and Time, Temperature, Lullaby on/off,
Lullaby melody.
18
19
17
16
15
18 Torch Key
Press and hold to emit a soft beam of light from the top of the Parent Unit.
19 Talk Key
Press and hold to talk to your baby or partner in the baby‘s
room via the Baby Unit.
Charger Pod
20 Charging Light
When the Parent unit is placed in the Charger Pod the red
charger light comes ON to indicate that the batteries are
charging. The light will remain ON to ensure optimum charge is
maintained.
20
55
− Starting Up −
4 Starting Up
Safety notes
It is essential to read the General Information" at the beginning of this manual before starting
up.
Checking the package contents
The package contains:
1 Parent unit (receiver)
1 mains adapter with charger pod
2 NiMH rechargeable batteries
Type AAA, 800 mAh
1 Baby unit (sender)
1 mains adapter with power cord
At the Parent Unit
12
1. Remove the Belt Clip by lifting the clip (12) at the top and sliding it
downwards.
2. Then remove the battery cover (11) on the back of the Parent
Unit by applying pressure and sliding it down. Insert the
rechargeable batteries as marked on the unit and close the
cover again.
3. Place the Parent Unit into the Charger Pod.
11
4. Plug the mains adaptor into a mains power socket. The red charger light on the charger pod will
illuminate indicating that the Parent Unit is charging (the light will remain on to ensure optimum
charge is maintained).
5. Press and release the Power Key" to turn the Parent Unit on.
Before first use, or if it has been out of use for a long time, the Parent Unit will need to be
charged for 13 hours. During this time, the Parent Unit will operate from the Charger pod when
switched on. Note that the Parent Unit cannot be used without batteries, even if it is placed
in the charger.
At the Baby Unit
1. In event of a power failure, your Baby Monitor can switch to battery power. It is therefore
recommended that you insert non-rechargeable batteries in the Baby Unit.
2. Remove the battery cover on the back of the Baby Unit by applying pressure and sliding it down.
Insert 3 alkaline batteries of the type AA (not provided) as marked on the unit and close the cover
again. Do not use rechargeable batteries in the Baby Unit.
3. Plug the power cord into the power input at the side of the Baby Unit and plug the adaptor plug
into a mains power socket.
4. Press and release the Power Key" to turn the Baby Unit on.
The Baby Unit should be placed about 1 m to 1.5 m away from the baby‘s cot on a flat surface.
Never place the Baby Unit inside the cot, bed or playpen. Make sure the unit, cords and mains
adaptor are out of reach of the baby and other young children. Never place either Unit on
antique or polished surfaces.
56
− Operation −
5 Operation
Once you have set up your Baby Monitor, you will be able to hear the sounds in your baby´s room
through the Parent Unit. You will also be able to see those sounds as green and red sound sensor
lights around the top of the Parent Unit, which rise and fall with the volume level − the more lights, the
louder the noise, with the red lights being the loudest.
If the connection between the Parent Unit and Baby Unit is broken at any time the green Link"
light on the Parent Unit will flash and the green and red sensor lights will cease to react to any
sounds. To re−establish the Link", follow the directions in the Troubleshooting" chapter.
Volume
You can adjust the volume at which you hear your baby by using the Up/Down Keys on the side of
the Parent Unit. This will not effect the sensitivity of your Baby Monitor, only the volume at which you
hear those sounds through the Parent Unit.
Battery Charge indicator and battery low warning
The Parent Unit will work up to 10 hours out of the Charger Pod, but this depends on the level of
charge in the batteries. The charge level is indicated by the battery icon on the Display. If the charge
becomes low, a battery low warning beep" will sound and the battery icon on the Parent Unit´s
Display will begin to flash. If this occurs you should return the Parent Unit to the Charger Pod to
re−charge the batteries. You can still use your Parent Unit from the Charger Pod.
Language
Your Baby Monitor can be set to Display its information in different languages.
To change the language
At the Parent Unit
1. Press the Menu Key, then use the Up/Down Keys to scroll to [Language]. Press the OK Key.
2. The Display shows [ENGLISH]. Use the Up/Down Keys to scroll to your chosen language. Press
the OK Key. The Display briefly shows [Saved] and your chosen language will now be set.
Clock
You can set the Display of the Parent Unit to show the current day and time. This can be shown as
either the 24 or 12 hour clock (your monitor is pre−set to show the 24 hour clock). You will need to set
the clock if you wish to use the Feed Timer feature.
If you have unplugged your Baby Monitor from the power supply, you will need to reset the
Clock the next time you use it.
To set the time
At the Parent Unit
1. Press the Menu Key then use the Up/Down Keys to scroll to [Clock]. Press the OK Key.
2. Display shows [Set time]. Press the OK Key.
3. Display shows [Year]. Use the Up/Down Keys to scroll to the correct year. Press the OK Key.
4. Display shows [Month]. Use the Up/Down Keys to scroll to the correct month. Press the
OK Key.
5. Display shows [Day]. Use the Up/Down Keys to scroll to the correct day. Press the OK Key.
6. Display shows [Hour]. Use the Up/Down Keys to scroll to the correct hour using the 24 hour
clock. Press the OK Key.
57
− Operation −
7. Display shows [Minute]. Use the Up/Down Keys to scroll to the correct minute. Press the
OK Key. The display briefly shows [Saved] and gives a confirming beep". The date and time will
now be displayed on the Parent Unit.
To select the 12 or 24 hour clock format
At the Parent Unit
1. Press the Menu Key then use the Up/Down Keys to scroll to [Clock]. Press the OK Key.
2. The Display shows [Set time]. Press the Up/Down Keys to scroll to [Hour Format]. Press the
OK Key.
3. The Display shows [12 Hrs?] (asking if you would like to change to the 12 hour clock format).
Press the OK Key or if you do not want to change, press the Menu Key to exit without changing.
The Display briefly shows [Saved] to confirm that the 12 hour clock has been set.
Time displayed in the 12 hour clock format will include a small a" to denote AM and a small
p" for PM.
4. To change back to the 24 hour clock format ,repeat the steps above, at step 3 the Display will
show [24 Hrs?]. Press the OK Key to confirm.
Baby alert!
You can set your Parent Unit to give an extra warning beep" should the noise levels in your baby’s
room activate the red lights on the sound sensor. This is particularly useful if the volume of your
Parent Unit is turned down and you are just using the sensor lights to monitor the noise levels in your
baby’s room.
On the Parent Unit
1. Press the Menu Key then use the Up/Down Keys to scroll to [Sound Alert]. Press the OK Key.
2. The Display shows [On?]. Press the OK Key to turn the alert on or Menu Key to exit without
change. The Display will briefly show [Saved] and a confirmation tone sounds.
3. If you want to change the volume level of the alarm tone, press the Menu Key and navigate to
the [Sound Alert] Menu, press the OK Key and navigate to the [Volume] Menu and press the
OK Key and adjust the volume. The display shows [Level] and a row of blocks representing the
volume of the Baby Alert tone. Use the Up/Down Keys to select the required volume level
(full =l oudest).
4. The display will briefly show [Saved]. An alert tone will now sound at the Parent Unit should your
babys noise levels reach the red.
5. To turn the Baby Alert alarm off, just follow the steps above. The display will show [Off?]. Press
the OK Key. The Display will briefly show [Saved].
Lullaby
Your baby can be soothed to sleep by a gentle lullaby from the Baby Unit. There are 5 tunes from
which to choose, or you can opt to play through all of them in turn by selecting [Play All]. The lullaby
feature can be turned on and off from both the Baby Unit and the Parent Unit and is indicated on both
by a musical note icon. The icon and the lullaby title show on both Displays whilst the lullaby is
playing. The lullabies will play for 15 minutes.
To select and start a lullaby
At the Baby Unit
1. Press the Music Key. The Display will illuminate. The lullaby is shown.
2. Continue to press the Music Key to scroll to the tune of your choice, or to select
[Play all?].
3. Press the Play/Stop Key again to start or stop the lullaby.
58
− Operation −
At the Parent Unit
1. Press the Menu Key, then use the Up/Down Keys to scroll to [Lullaby]. Press the OK Key.
2. The Display shows [Play?]. Use the Up/Down Keys to scroll to [Select New]. Press the OK Key.
3. The Display shows the current lullaby. Use the Up/Down Keys to scroll to your choice of tune, or
to [Play All]. Press the OK Key. The Display briefly shows [Saved].
4. The Display shows [Lullaby]. Press the OK Key twice.
5. To stop playing press the OK Key twice when you are still in the lullaby mode.
Even if you do not stop the lullaby, it will automatically stop playing after 15 minutes.
Temperature
It is very important for your baby’s health to ensure that they are a kept at a safe temperature. This
includes the room temperature, baby’s temperature, baby clothing and bedding (contact your local
health authority to ensure you are aware of the current guidelines). Your Baby Monitor can help by
displaying the current room temperature on the Baby Unit and the Parent Unit − and can even be set
to alert you if the temperature falls outside of a definable range.
Changing the temperature range
If you wish, you can set the upper and lower temperature limits of your Baby Monitor so that if the
temperature in the babys room goes above or below your pre−set range and the temperature
displayed on the Parent Unit will flash and an alert, if set, will sound. Additional High" or Low" is
shown.
At the Parent Unit
1. Press the Menu Key, then use the Up/Down Keys to scroll to [Temperature]. Press the OK Key.
2. Use the Up/Down Keys to scroll to [Set Range]. Press the OK Key. The current upper
temperature range is displayed as [Up Limit xx].
3. Use the Up/Down Keys to scroll up or down the temperature setting until you reach the number
of degrees you wish to set as the maximum, then press the OK Key. The Display briefly shows
[Saved]. The lower range limit is now displayed as [Low Limit xx].
4. Use the Up/Down Keys to scroll up or down the temperature settings until you reach the number
of degrees you wish to set as the minimum, then press the OK Key. The display briefly shows
[Saved].
You have now set your minimum and maximum temperature range.
Setting the Temperature Alert
If you wish, you can set your Parent Unit to give an additional double−beep" warning to alert you that
the temperature has moved outside of the set temperature range.
At the Parent Unit
1. Press the Menu Key, then use the Up/Down Keys to scroll to [Temperature]. Press the OK Key.
2. Use the Up/Down Keys to scroll to [Temp Alert]. Press the OK Key.
3. The Display will show [On?]. Press the OK Key to turn the alert on, or Menu Key to exit without
change. Display briefly shows [Saved]. The Temperature alert is now on.
4. If you wish to turn the Temperature Alert, follow the instructions above. At step 3 the Display will
show [Off?]. Press the OK Key to confirm.
Changing from Centigrade to Fahrenheit
You can choose whether to view the temperature of your babys room in degrees Centigrade or degrees
Fahrenheit. Your monitor is pre−set to Centigrade, but if you wish to change it, follow the steps below.
At the Parent Unit
1. Press the Menu Key, then use the keys to scroll to [Temperature]. Press the OK Key.
59
− Operation −
2. Use the Up/Down Keys to scroll to [Degree F?]. Press the OK Key to select Fahrenheit or
Menu Key to exit without change. Display will briefly show [Saved]. The temperature of your
babys room will now be shown in degrees Fahrenheit.
3. If you wish to change the temperature display back to degrees Centigrade, follow the above
steps. At step 2 the display will show [Degree C?]. Press the OK Key.
Parent to parent paging
Useful if one parent is in the baby’s room and needs to contact the other. Also helps to find a mislaid
Parent Unit.
At the Baby Unit
1. Press and hold the Page Key for 2 seconds. The Parent Unit will emit a tone.
At the Parent Unit
1. When the Page tone sounds you can silence it by pressing any key on the Parent Unit.
2. If you wish, you can then speak to your partner in the baby’s room. Press and hold the Talk Key
and speak into the front of the Parent Unit. Release the Talk Key and you can hear what is said
in the baby’s room again.
Talk to your Baby
You can speak to your baby from the Parent Unit −perhaps to re−assure them that you are on your
way.
At the Parent Unit
1. Press and hold the Talk Key and speak into the front of the Parent Unit. Release the key to hear
your baby again.
Please note that you will not be able to hear your baby while you are speaking to
them until you release the Talk Key again.
Night Light
The Baby Unit has a one touch night light which emits a soft starry glow, providing comfort and
re−assurance for your baby and allowing you to see them in a darkened room. You may also turn the
night light on and off from the Parent Unit.
At the Baby Unit
1. Press the Light Key on the top of the unit. A soft light will gently turn on. Press again and the light
will fade away.
At the Parent Unit
1. Press the Menu Key, then use the Up/Down Keys to scroll to [Night Light]. Press the OK Key.
2. The Display will show [On?] (asking if you would like to switch the night light on). Press the
OK Key. The display will briefly show [Saved] and gives a confirming beep". The night light on
the Baby Unit will gently turn on. A lightbulb icon will appear on the Display of the Parent Unit to
let you know the night light on the Baby Unit is on.
3. To turn the night light off again from the Parent Unit, follow the above steps. The Display will show
[Off?]. Press the OK Key. The Display will briefly show [Saved] and gives a confirming beep".
The lightbulb icon will disappear.
Torch
Your Parent Unit has a useful Torch feature. At the press of a button a soft beam of light is emitted
from the top of the Parent Unit − helpful when peeping into a darkened room to check on your baby.
60
− Operation −
At the Parent Unit
1. Press and hold the Torch Key (indicated by the lightbulb icon above the Display) to turn the light
on. A soft beam of light will turn on.
The torch only works whilst the Parent Unit is turned on.
Time for a Feed
If your baby is in a routine of regular feeding intervals, you may wish to set your Baby Monitor to alert
you when your baby’s feeds are due. You have the choice to either set an alert just for your baby’s
next feed time, or for your baby’s next feed time plus subsequent feeds based on the interval time
between them.
Firstly you will need to ensure that you have set the date and time on your Parent Unit’s inbuilt clock.
Once you have done this, you can either:
1. Set the Time of day or night (24hr clock) at which your baby’s next feed is due (eg. 10.30) and
then if you wish,
2. set the Interval between your baby’s following feed start times, (eg. every 3hrs 30mins) − be sure
to include the time it takes to feed your baby.
3. Finally, you will need to switch the Feed Alarm on. Now, when your baby’s next
feed is due, your Parent Unit will start beeping and the Display will show [Feed Alarm]. Pressing
any button on the Parent Unit will silence the alert and you can feed your baby. If you have set the
interval, the alert will sound again when the next feed is due.
To set the first or next feed time
At the Parent Unit
1. Press the Menu Key, then use the Up/Down Keys to scroll to [Feed Time]. Press the OK Key.
2. The Display shows [Set time]. Press the OK Key.
3. The Display shows [Hour] and a number between 00 and 23, representing hours of the day. Use
the Up/Down Keys to scroll to the hour of your baby’s feed. Press the OK Key.
4. The Display shows [Minute] and a number between 00 and 59, representing the minutes of an
hour. Use the Up/Down Keys to scroll to the minutes past the hour of your baby’s feed. Press the
OK Key. The Display briefly shows [Saved] and the time of your baby’s first feed is stored.
To set the interval for following feeds
At the Parent Unit Follow steps 1−4 above then,
5. The Display shows [Set Time]. Use the Up/Down Keys to scroll to [Set Interval]. Press the
OK Key.
6. The Display shows [Hour] and a two digit number representing the hours between your baby’s
feeds. Use the Up/Down Keys to scroll to the hour between your babys feeds (e.g. 03) Press the
OK Key.
7. Display shows [Minute]. Use the Up/Down Keys to scroll to the minutes after the hour between
your baby’s feed’s (eg. 30) Press the OK Key. Display briefly shows [Saved] and the interval
between your baby’s feeds is stored (in this case as 3hrs 30mins).
When calculating feed interval, please remember to include the time it takes to feed your baby.
Please remember to turn the alarm on as detailed in the next section.
To turn the feed alarm on
At the Parent Unit Follow steps 1−7 then,
8. The Display shows [Set Interval]. Use the Up/Down Keys to scroll to [Set Interval]. Press the
OK Key to set or the Menu Key to exit without change.
9. The Display shows [On?]. Press the OK Key.
61
− Operation −
10. If you will change the volume level of the alarm tone, select with the Up/Down Keys the subitem
[Volume] and press the OK Key. The display shows [Level] and a row of blocks representing the
volume of the Baby Alert tone. Use the Up/Down Keys to select the required volume level
(full = loudest). Press the OK Key. Display briefly shows [Saved]. The alarm will now sound at
the Parent Unit each time a feed is due. Press any button on the Parent Unit to silence the alarm.
To turn the feed alarm off
If you no longer want the alarm to sound when a feed is due, you will need to turn the feed alarm off.
Follow steps 8−9 above.
11. Display shows [Off?]. Press the OK Key. The Display briefly shows [Saved]. The alarm is now
turned off and will not sound when the next feed is due.
Customise your Baby Monitor to your Baby
Some babys are louder than others! You can customise the sound sensitivity of your Baby Monitor to
suit your baby. Set the sensitivity High" for a quiet sleeper with a soft cry and set to Low" sensitivity if
they tend to make noise whilst sleeping or can make quite loud noises before they are truly crying.
At the Parent Unit
1. Press the Menu Key, then use the Up/Down Keys to scroll to [Sensitivity]. Press the OK Key.
2. The Display shows [Level] and a row of blocks indicating the volume level
(full = high sensitivity). Use the Up/Down Keys to select the sensitivity level. Press the OK Key.
The Display briefly shows [Saved].
Eco Mode
The Baby Unit is equipped with a special transmission technology.
The low radiation feature works by lowering the radiated radio transmission power from the Baby Unit,
and at the same time increasing the sensitivity of the receiver to maintain the normal range.
62
− Troubleshooting −
6 Troubleshooting
In the case of technical problems, you can contact our hotline service, Tel. 0900 00 1675 within Switzerland (cost via Swisscom at time of going to print: CHF 2.60/min). In the case of claims under the
terms of guarantee, contact your sales outlet. There is a 2 year period of guarantee.
Faults
Causes
Units cannot be
turned on.
− Check that you have turned the power on from the mains and that the
connections are firm.
The green Link"
light on the Parent
Unit is flashing
and you cannot
hear the sounds
from your baby‘s
room.
− 1. You may have moved out of range −move closer to the Baby Unit and
wait 5 seconds for the Link" to establish.
− 2. You may need to re−establish the Link" between the two units. Turn both
units off and then:
On the Baby Unit:
−Press and release the On/Off key.
On the Parent Unit:
−Press and release the On/Off key. The green Link" light comes on (this
may take a few seconds).
Can’t hear your
baby on the
Parent Unit, but
the Link" light is
still glowing
steadily.
− 1. Check the volume is turned up on the Parent Unit.
− 2. You may need to turn up the sensitivity of your Baby Monitor.
Your Baby Monitor
is emitting an high
pitched
ear−piercing noise.
− This may happen if your Parent and Baby Units are too close together.
Move them further apart.
63
− Technical Data −
7 Technical Data
Feature
Operating Frequency
Range
Value
1.8 GHz
Up to 300 m under optimum conditions. The range is
reduced in buildings (up to 50 m) as a result of walls,
doors etc.
Power supply, baby unit (sender)
Input: 230 VAC, 35 mA
Output: 6 VDC, 300 mA, Center is +
Non rechargeable batteries
for the baby unit (sender)
(not included in the package contents)
Type: AA, 1.5 V Alkaline
Transmitting power
Average: 10 mW
Maximum: 250 mW
Power supply, parent unit (receiver)
(hard wired)
Input: 230 VAC, 30 mA
Output: 6 VDC, 200 mA
Rechargeable batteries
for the parent unit (receiver)
Type: AAA, 1.2 V, 800 mAh NiMH
Operating time with charged battery
Permissible ambient temperature
Permissible relative humidity
Approx. 10 hours
10 °C to 30 °C
20 % to 75 %
Cleaning and upkeep
Clean the equipment with a dry, soft, lint−free cloth. Never use cleaning agents or solvents.
Declaration of Conformity
This device fulfils the requirements stipulated in the EU directive:
1999/5/EU directive on radio equipment and telecommunications terminal equipment
and the mutual recognition of their conformity. Conformity with the above mentioned
directive is confirmed by the CE symbol on the device.
To view the complete Declaration of Conformity, please refer to the free download available
on our web site www.switel.com.
64
− Guarantee −
8 Guarantee
SWITEL equipment is produced and tested according to the latest production methods. Carefully
selected materials and highly developed technology ensure perfect functioning and a long service life.
The terms of guarantee do not apply to the batteries or power packs used in the products. The period
of guarantee is 24 months from the date of purchase.
All deficiencies related to material or manufacturing errors within the period of guarantee will be
redressed free of charge. Rights to claims under the terms of guarantee are annulled following
tampering by the purchaser or third parties. Damage caused as the result of improper handling or
operation, incorrect positioning or storage, improper connection or installation or Acts of God and
other external influences are excluded from the terms of guarantee. In the case of complaints, we
reserve the right to repair defect parts, replace them or replace the entire device. Replaced parts or
devices become our property. Rights to compensation in the case of damage are excluded where
there is no evidence of intent or gross negligence by the manufacturer.
If your device does show signs of a defect within the period of guarantee, please contact the sales
outlet where you purchased the SWITEL device, producing the purchase receipt as evidence. All
claims under the terms of guarantee in accordance with this agreement can only be asserted at the
sales outlet. No claims under the terms of guarantee can be asserted after a period of two years from
the date of purchase and hand−over of the product.
65
Notes
Notes
66
Notes
Notes
67
Declaration of Conformity 5
Diese Anlage entspricht der europäischen R&TTE Richtlinie.
Für die komplette Konformitätserklärung nutzen Sie bitte den kostenlosen
Download von unserer Website www.switel.com.
Cet équipement est conforme à la directive européenne R&TTE.
Pour obtenir la déclaration de conformité intégrale, veuillez vous servir du téléchargement gratuit de notre site
Internet www.switel.com.
Quest’apparecchiatura è conforme alla direttiva europea R&TTE.
Per la dichiarazione di conformità completa si prega di voler usufruire del servizio gratuito di download dal
nostro sito Internet www.switel.com.
This equipment complies with the European R&TTE directive.
To view the complete Declaration of Conformity, please refer to the free download available
at our web site: www.switel.com.
Service Hotline
Bei technischen Problemen können Sie sich an unsere Service−Hotline unter Tel. 0900 00 1675 innerhalb der
Schweiz (Kosten Swisscom bei Drucklegung: CHF 2.60/min) wenden.
S’il s’agit de problèmes techniques, vous pouvez vous adresser à notre hotline de service en Suisse en
appelant le numéro 0900 00 1675 (frais Swisscom à la date d’impression de ce manuel : CHF 2.60/min).
In caso di problemi tecnici è possibile rivolgersi alla nostra hotline di assistenza tecnica chiamando al numero
0900 00 1675 valido per la Svizzera (spese da rete Swisscom alla data di stampa: CHF 2.60 / min).
In the event of technical problems, you can contact our hotline service, Tel. 0900 00 1675 within Switzerland
(cost via Swisscom at time of going to print: CHF 2.60/min).
Version 1.2 − 07.08.2008