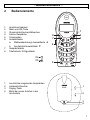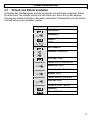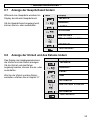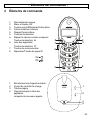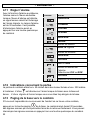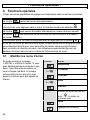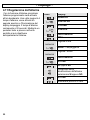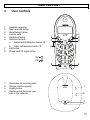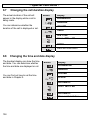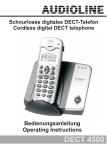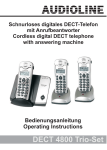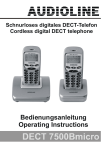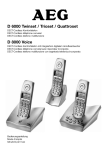
1
Schnurlos Telefon
Téléphone sans fil
Telefono senza fili
Cordless telephone
D7210
Bedienungsanleitung
Mode d’emploi
Istruzioni per l'uso
Operating Instructions
D7210
Bedienungsanleitung_________________ 3
Die Displayanzeigen sind in den Sprachen Deutsch, Französisch,
Englisch und Italienisch einstellbar. Siehe dazu Kapitel 8.6.
Mode d’emploi_____________________ 39
Les messages peuvent être affichés à l’écran en allemand, en
français, en anglais et en italien. Voir à cet effet le chapitre 8.6.
Istruzioni per l'uso _________________ 75
Le visualizzazioni del display possono essere selezionate nelle lingue
tedesco, francese, inglese ed italiano. Si veda a tal fine al capitolo 8.6.
Operating Instructions _____________ 113
The display messages can be set up in German, French, English
and Italian. For more information see Chapter 8.6.
Declaration of conformity __________ 148
2
- Inhaltsverzeichnis 1
2
3
3.1
3.2
3.3
3.4
3.5
3.6
3.7
4
4.1
4.2
4.3
4.4
4.5
4.6
4.7
4.8
4.9
4.10
4.11
4.12
4.13
5
5.1
5.2
5.3
5.4
5.5
6
6.1
6.2
6.3
Allgemeine Hinweise ........................................................................ 5
Bedienelemente ................................................................................ 7
Inbetriebnahme ................................................................................. 8
Sicherheitshinweise....................................................................................... 8
Verpackungsinhalt prüfen.............................................................................. 8
Basisstation anschließen............................................................................... 8
Standard-Akkus einbauen ............................................................................. 9
Aufladen der Standard-Akkus........................................................................ 9
Displaysprache einstellen............................................................................ 10
Uhrzeit und Datum einstellen ...................................................................... 11
Bedienung ....................................................................................... 12
Das Display ................................................................................................. 12
Anrufe entgegennehmen ............................................................................. 12
Anrufe führen ............................................................................................... 13
Einstellung der Hörer- und Freisprechlautstärke ......................................... 13
Freisprechen................................................................................................ 13
Wahlwiederholung ....................................................................................... 14
4.6.1 Einzelne Rufnummer der Wahlwiederholung in das
Telefonbuch speichern .................................................................... 14
Handapparat ein-ausschalten...................................................................... 14
Stummtaste ................................................................................................. 15
Tastatursperre ............................................................................................. 15
Headsetanschluss ....................................................................................... 15
Alarm einstellen ........................................................................................... 16
Hinweise zur Reichweite ............................................................................. 16
Paging von der Basisstation zum Handapparat .......................................... 16
Das Telefonbuch............................................................................. 17
Rufnummern und Namen in das Telefonbuch eingeben ............................. 17
Gespeicherte Rufnummern aus dem Telefonbuch anwählen ..................... 17
Telefonbucheintrag ändern.......................................................................... 18
Gespeicherte Rufnummern aus dem Telefonbuch löschen ........................ 19
Telefonbuch komplett löschen..................................................................... 19
Rufnummernanzeige (CLIP)........................................................... 20
Die Anruferliste ............................................................................................ 21
Einzelne Rufnummer der Anruferliste in das Telefonbuch
speichern ..................................................................................................... 21
Einzelne Rufnummer aus der Anruferliste löschen ..................................... 22
3
- Inhaltsverzeichnis 7
7.1
8
8.1
8.2
8.3
8.4
8.5
8.6
8.7
8.8
8.9
8.10
9
9.1
9.2
9.3
9.4
9.5
9.6
9.7
Nebenstellenanlagen ...................................................................... 23
Amtskennziffer ............................................................................................ 23
Sonderfunktionen ........................................................................... 24
Displaynamen ändern ................................................................................. 24
Einstellen von Klingelmelodien und Klingellautstärken ............................... 25
Wahlsperren einrichten ............................................................................... 26
Signaltöne ein- oder ausschalten................................................................ 27
Ton (MFV)- oder Impuls (IWV) – Wahlverfahren ........................................ 28
Displaysprache einstellen ........................................................................... 28
Anzeige der Gesprächszeit ändern............................................................. 29
Anzeige der Uhrzeit und des Datums ändern ............................................. 29
PIN-Code der Basisstation ändern............................................................. 30
Werkseinstellungen..................................................................................... 31
Mehrere Handapparate ................................................................... 32
An- und Abmelden von Handapparaten...................................................... 32
9.1.1 Anmelden von Handapparaten ...................................................... 32
9.1.2 Anmelden von anderen DECT-GAP Telefonen an die
Basisstation..................................................................................... 33
9.1.3 Abmelden von Handapparaten ....................................................... 33
Intern telefonieren ....................................................................................... 33
Externe Gespräche auf einen anderen Handapparat verbinden ................ 34
Konferenzgespräche führen........................................................................ 34
Vorrang beim Klingeln................................................................................. 35
Zusätzliche Basisstationen.......................................................................... 36
Raumüberwachung (Babysitter).................................................................. 36
10 Fehlerbeseitigung ........................................................................... 37
11 Technische Daten ........................................................................... 38
4
- Allgemeine Hinweise -
1
Allgemeine Hinweise
Aufladbare Batterien
Keine anderen aufladbaren Batterien oder Akkupacks verwenden. Diese können
möglicherweise einen Kurzschluss verursachen.
Verwenden Sie beim Austauschen immer nur wiederaufladbare Batterien des
Typs AAA 1,2 Volt, 550mA.
Batterien nicht ins Feuer werfen oder ins Wasser tauchen. Alte oder defekte Batterien
nicht mit dem normalen Hausmüll entsorgen.
Sollte sich der Handapparat beim Laden erwärmen, so ist dies normal und ungefährlich.
Laden Sie den Handapparat nicht mit fremden Aufladegeräten, da sonst
Beschädigungen auftreten können.
Aufstellort
Am Aufstellort muss sich eine Netzsteckdose 230Volt befinden. Stellen Sie die
Basisstation nicht in die unmittelbare Umgebung von anderen elektronischen Geräten
wie z. B. Mikrowellen oder HIFI-Geräten, da es sonst zu gegenseitiger Beeinflussung
kommen kann. Der Aufstellort hat einen entscheidenden Einfluss auf einen
einwandfreien Betrieb des Telefons.
Stellen Sie die Basisstation auf eine ebene und rutschfeste Fläche. Normalerweise
hinterlassen die Füsse der Basisstation keine Spuren auf der Aufstellfläche. Wegen der
Vielzahl der verwendeten Lacke und Oberflächen kann es jedoch nicht ausgeschlossen
werden, dass durch die Gerätefüsse Spuren auf der Abstellfläche entstehen.
Verwenden Sie den Handapparat nicht in explosionsgefährdeten Bereichen.
Übermässige Belastungen durch Rauch, Staub, Erschütterungen, Chemikalien,
Feuchtigkeit, Hitze oder direkte Sonneneinstrahlung müssen vermieden werden.
Medizinischer Hinweis
Das Telefon arbeitet mit einer sehr geringen Sendeleistung. Diese geringe
Sendeleistung schliesst eine gesundheitliche Gefährdung nach dem derzeitigen Stand
von Forschung und Technik aus. Es hat sich aber gezeigt, dass eingeschaltete tragbare
Telefone medizinische Geräte beeinflussen können. Halten Sie deshalb bei
medizinischen Geräten einen Abstand von mindestens einem Meter ein.
5
- Allgemeine Hinweise Entsorgung
Ist die Gebrauchszeit der wiederaufladbaren Batterien oder der gesamten Anlage
abgelaufen, entsorgen Sie diese bitte umweltfreundlich gemäss den gesetzlichen
Bestimmungen.
Temperatur und Umgebungsbedingungen
Das Telefon ist für den Betrieb in geschützten Räumen mit einem Temperaturbereich
von 10 °C bis 30 °C ausgelegt.
Die Basisstation darf nicht in Feuchträumen wie Bad oder Waschküche aufgestellt
werden. Vermeiden Sie die Nähe zu Wärmequellen wie Heizkörpern und setzen Sie das
Gerät keiner direkten Sonnenbestrahlung aus.
Reinigung und Pflege
Die Gehäuseoberflächen können mit einem trockenen, weichen und fusselfreien Tuch
gereinigt werden. Niemals Reinigungsmittel oder gar aggressive Lösungsmittel
verwenden. Ausser einer gelegentlichen Gehäusereinigung ist keine weitere Pflege
erforderlich. Die Gummifüsse der Basisstation sind nicht gegen alle Reinigungsmittel
beständig. Der Hersteller kann daher nicht für evtl. Schäden an Möbeln o. ä. haftbar
gemacht werden.
6
- Bedienelemente -
2
1.
2.
3.
4.
5.
6.
7.
8.
Bedienelemente
Anschluss Headset
Menü und OK-Taste
Stummtaste/Löschen/Abbrechen
Interne Gespräche
Freisprechen
Auswahltasten
a. Wahlwiederholung/ Auswahltaste b. Anruferliste/Auswahltaste Gesprächstaste
Telefonbuch/ R-Signaltaste
6a
6b
1.
2.
3.
4.
8
7
1
2
3
6
RD
?
Leuchtet bei eingehende Gesprächen
Ladekontrollleuchte
Paging-Taste
Blinkt bei neuen Anrufen in der
Anruferliste
5
4
1
2
3
4
7
- Inbetriebnahme -
3
Inbetriebnahme
3.1
Sicherheitshinweise
ACHTUNG! Lesen Sie vor der Inbetriebnahme unbedingt die allgemeinen Hinweise am
Anfang dieser Anleitung.
3.2
Verpackungsinhalt prüfen
Zum Lieferumfang gehören:
eine Basisstation
ein Handapparat mit Gürtelclip
ein Telefonanschlusskabel
3.3
ein Steckernetzteil
zwei Standard-Akkus
eine Bedienungsanleitung
Basisstation anschließen
Stellen Sie die Basisstation in die Nähe Ihrer Telefonanschlussdose und einer
Netzsteckdose auf.
1.
2.
3.
Stecken Sie den Stecker des Netzteils in die Buchse auf der Unterseite der
Basisstation und das Steckernetzteil in eine vorschriftsmäßig installierte
Netzsteckdose mit 230V. Das Steckernetzteil der Basisstation muss immer
angeschlossen sein. Verwenden Sie aus Sicherheitsgründen nur das mitgelieferte
Steckernetzteil.
Verbinden Sie das beiliegende Telefonkabel mit der Telefonsteckdose und der
Telefonbuchse auf der Unterseite der Basisstation. Verwenden Sie nur das neue
beiliegende Telefonkabel.
Verlegen Sie die beiden Kabel durch die Kabelkanäle unter der Fußstütze der
Basisstation nach hinten.
Hinweis: Die beiden Stecker müssen
hörbar einrasten, damit diese nicht wieder
herausrutschen.
8
- Inbetriebnahme Standard-Akkus einbauen
+
+
AAA
Um die mitgelieferten wiederaufladbaren Standard-Akkus in den
Handapparat einzulegen, drücken Sie auf den Batteriefachdeckel
am oberen Rand und schieben Sie ihn nach unten. Legen Sie
nun die Batterien ein und achten Sie auf die richtige Polung.
Schließen Sie den Batteriefachdeckel.
AAA
3.4
Wichtiger Hinweis: Stellen Sie den Handapparat mit dem Display nach
vorne für mindestens 16 Stunden auf die Basisstation. Bei nicht richtig
geladenen Batterien kann es zu Fehlfunktionen des Telefons kommen. An
der Basisstation leuchtet die Ladekontrollleuchte.
3.5
Aufladen der Standard-Akkus
Die wiederaufladbaren Standard-Akkus des Handapparates besitzen eine Standby-Zeit
bei Zimmertemperatur von max. 85 Stunden und eine maximale Gesprächsdauer von 6
Stunden. Zum Laden stellen Sie den Handapparat mit dem Display nach vorne auf die
Basisstation.
Die aktuelle Batteriekapazität wird im Display angezeigt:
Hinweis: Die aufladbaren Standard-Akkus unterliegen genau wie Ihre Autobatterie
unvermeidlich einer gewissen Alterung. Allerdings können Sie auf diesen
Alterungsprozess Einfluss nehmen, indem Sie die Standard-Akkus gewissermaßen
"trainieren". Wenn Sie bei regelmäßiger Benutzung Ihres Telefons die Standard-Akkus
zyklisch aufladen und dann wieder "leer" telefonieren, bis die Anzeige
im Display
blinkt, werden die Standard-Akkus gefordert und danken dies durch volle
Leistungsfähigkeit und eine lange Lebensdauer. Dauerladung und Dauerentladung
schaden dagegen sowohl der Kapazität wie auch der Lebensdauer der Standard-Akkus.
9
- Inbetriebnahme 3.6
Displaysprache einstellen
Die Displayanzeigen sind in den Sprachen Deutsch, Französisch, Englisch und
Italienisch einstellbar.
Taste
Display
TEL-BUCH
RD
2x
RD
?
SPRACHE
FRANCAIS, DEUTSCH,
ENGLISH oder ITALIANO
FRANCAIS, DEUTSCH,
ENGLISH oder ITALIANO
auswählen
SPRACHE
Taste festhalten
10
- Inbetriebnahme 3.7
Uhrzeit und Datum einstellen
Im Display des Handapparates wird die die Uhrzeit und das Datum angezeigt. Geben
Sie also zuerst die aktuelle Uhrzeit und das Datum ein, bevor Sie mit der weiteren
Nutzung des Telefons fortfahren. Bei einem eventuellen Stromausfall muss die Uhrzeit
und das Datum erneut eingeben werden.
Taste
Display
TEL-BUCH
?
1x
HANDAPP.
LAUST.
RD
2x
UHR
AUTOMATIK
UHRZEIT auswählen
RD
?
STUNDE blinkt
?
Geben Sie die Stunden ein
MINUTEN blinkt
?
Geben Sie die Minuten ein
MONAT blinkt
?
Geben Sie den Monat ein
DATUM blinkt
Zahlenfeld
1x
Zahlenfeld
1x
Zahlenfeld
1x
Zahlenfeld
Geben Sie den Tag ein
UHRZEIT
Taste festhalten
11
- Bedienung -
4
Bedienung
4.1
Das Display
=>
=>
Voll
Sie führen ein Gespräch.
=>
Entladen.
Eine neue Rufnummer wurde in der Anruferliste CLIP gespeichert oder Sie
befinden sich gerade in der Anruferliste.
Die Klingelmelodie ist ausgeschaltet.
Das Mikrofon ist ausgeschaltet.
X
Erscheint, wenn der Handapparat sich innerhalb der Reichweite der
Basisstation befindet.
Die Raumüberwachung die eingeschaltet.
Sie befinden sich im Programmiermodus.
Die Tastatursperre ist eingeschaltet.
Die Freisprecheinrichtung ist eingeschaltet.
Die befinden sich im Telefonbuch.
4.2
Anrufe entgegennehmen
Erreicht Sie ein externer Anruf, ertönt der Tonruf am Handapparat und der
Basisstation. Nehmen Sie den Handapparat von der Basisstation oder drücken Sie die
am Handapparat und die Verbindung wird hergestellt. Um das
Gesprächstaste
Gespräch zu beenden, stellen Sie den Handapparat zurück in die Basisstation oder
drücken Sie die Gesprächstaste
am Handapparat.
Wichtiger Hinweis: Kann ein Anruf nicht entgegengenommen werden,
erscheint im Display das Symbol . So können Sie erkennen, dass Sie
während Ihrer Abwesenheit einen Anruf erhalten haben. Drücken Sie die
?
Taste
und
und das Symbol erlischt. Verfügt Ihr
Telefonanschluss über die Rufnummernanzeige (CLIP) erhalten Sie
weitere Möglichkeiten. Siehe dazu Kapitel 6.
12
- Bedienung 4.3
Anrufe führen
1.
Geben Sie die gewünschte Telefonnummer mit max. 25 Stellen über das
Tastenfeld ein.
2.
Drücken Sie die Gesprächstaste
hergestellt.
3.
Um das Gespräch zu beenden, drücken Sie die Gesprächstaste
oder
stellen Sie den Handapparat auf die Basisstation. Nach Beendigung des
Gesprächs erscheint für einige Zeit die Anzeige der Gesprächsdauer in
Stunden und Minuten.
und die gewünschte Verbindung wird
Hinweis: Haben Sie eine falsche Zahl eingegeben, können Sie durch mehrmaliges
Drücken der Taste
die Telefonnummer löschen. Durch langes Drücken der Taste
wird die Rufnummer komplett gelöscht.
drücken und erhalten damit das
Sie können auch zuerst die Gesprächstaste
Freizeichen. Durch Eingabe der Zahlen Ihrer gewünschten Rufnummer wählt Ihr
Telefon die Rufnummer direkt an. Eine Korrektur einzelner Zahlen der Rufnummer, wie
oben erwähnt, ist bei dieser Form des Gesprächsaufbaus nicht möglich.
4.4
Einstellung der Hörer- und Freisprechlautstärke
Möchten Sie die Hörer- und Freisprechlautstärke am Handapparat ändern, stehen
Ihnen 5 Lautstärkestufen zur Verfügung.
RD
?
4.5
Drücken Sie während eines Gesprächs die Auswahltasten um die Lautstärke
zu verändern. Im Display wird die gewählte Lautstärke angezeigt.
Freisprechen
Drücken Sie während eines Gesprächs die Freisprechtaste
. Nun hören Sie den
Gesprächspartner über den Lautsprecher des Handapparates.
Drücken Sie erneut die Freisprechtaste
abzuschalten.
, um das Freisprechen wieder
13
- Bedienung 4.6
Wahlwiederholung
Die Wahlwiederholung nutzen Sie, wenn der angerufene Teilnehmer besetzt ist oder
sich nicht meldet. Ihr Telefon speichert die letzten 10 Rufnummern. Sobald die Liste
voll ist, wird immer die älteste Rufnummer aus der Liste gelöscht.
1.
Drücken Sie die Taste
Display angezeigt.
RD
und die zuletzt gewählte Telefonnummer wird im
RD
2.
Wählen Sie mit den Auswahltasten
drücken Sie die Gesprächstaste
?
die gewünschte Rufnummer und
.
4.6.1 Einzelne Rufnummer der Wahlwiederholung in das Telefonbuch
speichern
Taste
1x
RD
RD
?
Display
Zuletzt gewählte
Rufnummer
Hinweis
Ausgewählte
Rufnummer
SPEICHERN
Gewünschte Rufnummer auswählen.
Name eingeben.
Ausgewählte
Rufnummer
Name
4.7
Rufnummer kann bearbeitet werden.
Rufnummer ist gespeichert.
Handapparat ein-ausschalten
Handapparat ausschalten: Halten Sie die Taste
für 2 Sekunden gedrückt.
für 2 Sekunden
Handapparat wieder einschalten: Halten Sie die Taste
gedrückt. Sobald Sie den Handapparat wieder auf die Basisstation stellen, schaltet sich
dieser automatisch ein.
14
- Bedienung 4.8
Stummtaste
Mit der Stummtaste können Sie das Mikrofon im Handapparat ausschalten. So können
Sie sprechen, ohne dass der Gesprächspartner Sie hört.
. Im Display erscheint das Symbol
Mikrofon ausschalten: Drücken Sie die Taste
.
Mikrofon wieder einsschalten: Drücken Sie erneut die Taste
X
erlischt das Symbol
4.9
X
. Im Display
und Sie können wieder mit Ihrem Gesprächpartner sprechen.
Tastatursperre
Mit der Tastatursperre können Sie verhindern, dass unbeabsichtigt eine Taste am
Handapparat gedrückt wird. Eingehende Gespräche können auch bei eingeschalteter
Tastatursperre normal entgegengenommen werden.
Tastatursperre einschalten
Bei eingeschalteter Tastatursperre
im Display.
erscheint das Symbol
Taste
Display
TEL-BUCH
?
3x
TASTSPERRE
JA oder NEIN
RD
JA oder NEIN auswählen
?
Tastatursperre ausschalten
. Das
Um die Tastatursperre auszuschalten, drücken Sie dreimal die Taste
Symbol
erlischt und Sie können den Handapparat wieder normal bedienen.
4.10 Headsetanschluss
Auf der rechten Seite des Handapparates befindet sich eine Anschlussmöglichkeit für
ein handelsübliches Headset mit einem Mini-Stereo-Klinkenstecker.
15
- Bedienung 4.11 Alarm einstellen
Mit der täglichen Alarmfunktion wird der
Alarm zu der gewünschten Uhrzeit
ausgeführt. Ist die Alarmzeit erreicht
ertönt ein Signal und die
Displaybeleuchtung blinkt. Die
Alarmzeit beträgt 30 Sekunden. Mit
einer beliebigen Taste am Handapparat
kann der Alarm vorzeitig beendet
werden.
Taste
Display
TEL-BUCH
?
1x
HANDAPP.
LAUST.
RD
1x
ALARM
ALARM ZEIT
STUNDE
Zahlenfeld
?
1x
Zahlenfeld
?
1x
Geben Sie die Stunden ein
MINUTEN blinkt
Geben Sie die Minuten ein
ALARM ZEIT
ALARMZEIT
JA oder Nein
RD
?
Alarm ein- oder ausschalten
JA oder Nein auswählen
ALARMZEIT
Taste festhalten
4.12 Hinweise zur Reichweite
Die Reichweite des Handapparates beträgt ca. 50 Meter in geschlossenen Räumen und
ca. 300 Meter im Freien. Bei einer guten Verbindung zur Basisstation leuchtet im
Display das Symbol
das Symbol.
. Haben Sie sich zu weit von der Basisstation entfernt, blinkt
4.13 Paging von der Basisstation zum Handapparat
Wenn Sie sich nicht mehr erinnern können, wo Sie Ihren Handapparat liegen gelassen
der Basisstation. Sie werden nun 30
haben, drücken Sie die Pagingtaste
Sekunden lang Tonsignale des Handapparates hören und ihn so leicht wieder finden.
Mit einer beliebigen Taste am Handapparat können Sie die Tonsignale beenden.
16
- Das Telefonbuch -
5
Das Telefonbuch
Im Telefonbuch Ihres Handapparates können Sie 40 Rufnummern mit jeweils 18 Stellen
und einem zugehörigen Namen mit bis zu 8 Buchstaben speichern.
5.1
Rufnummern und Namen in das Telefonbuch eingeben
Taste
Display
TEL-BUCH
Hinweis
NEU
NAME?
Namen eingeben.
NUMMER?
Rufnummer eingeben.
NEU
Rufnummer ist gespeichert.
Taste festhalten, um zum Hauptdisplay
zurückzukehren.
Hinweise:
Durch das Festhalten der Taste
Mit der Taste
können Sie den Vorgang jederzeit abbrechen.
können einzelne Zahlen oder Buchstaben gelöscht werden.
Mit der Taste 1 kann ein Leerzeichen, ein Bindestrich und die Zahl 1 eingegeben
werden.
5.2
Gespeicherte Rufnummern aus dem Telefonbuch anwählen
Taste
RD
?
Display
Hinweis
Ausgewählter
Telefonbucheintrag
Gewünschten Telefonbucheintrag auswählen.
Die Rufnummer wird gewählt.
Um einen Telefonbucheintrag direkt alphabetisch anzuwählen, drücken Sie den
entsprechenden Buchstaben.
17
- Das Telefonbuch 5.3
Telefonbucheintrag ändern
Taste
Display
TEL-BUCH
Hinweis
NEU
RD
AENDERN
?
Telefonbucheintrag
RD
?
Ausgewählter
Telefonbucheintrag
Name
Rufnummer
ÄENDERN
18
Gewünschten Telefonbucheintrag auswählen.
Der Name kann mit der Taste
und neu eingegeben werden.
gelöscht
Die Rufnummer kann mit der Taste
gelöscht und neu eingegeben werden.
Der Telefonbucheintrag wurde wieder
gespeichert.
Taste festhalten, um zum Hauptdisplay
zurückzukehren.
- Das Telefonbuch 5.4
Gespeicherte Rufnummern aus dem Telefonbuch löschen
Taste
Display
TEL-BUCH
Hinweis
NEU
RD
LOESCHEN
?
Telefonbucheintrag
RD
?
Ausgewählter
Telefonbucheintrag
Gewünschten Telefonbucheintrag auswählen.
Rufnummer
BESTAET.?
LOESCHEN
Sicherheitsabfrage
Telefonbucheintrag ist gelöscht.
Taste festhalten, um zum Hauptdisplay
zurückzukehren.
5.5
Telefonbuch komplett löschen
Taste
Display
TEL-BUCH
Hinweis
NEU
RD
ALLES LOES.
?
BESTAET.?
Sicherheitsabfrage
ALLES LOES.
Telefonbuch ist gelöscht.
Taste festhalten, um zum Hauptdisplay
zurückzukehren.
19
- Rufnummernanzeige (CLIP) -
6
Rufnummernanzeige (CLIP)
In der Schweiz ist diese Funktion nicht bei jedem Netzanbieter
verfügbar.
Achtung!
Die Rufnummernanzeige ist ein optionaler Service Ihres Telefonproviders. Ihr
Telefon zeigt die Rufnummern im Display, wenn Ihr Telefonprovider diesen
Service anbietet. Die Anzeige des Datums und der Uhrzeit wird nicht von
allen Telefonprovidern übertragen. Bitte fragen Sie Ihren Telefonprovider für
weitere Informationen. Auch bei manchen Nebenstellenanlagen ist eine
Übertragung der Rufnummer nicht möglich.
Mit der Rufnummernanzeige können Sie bei eingehenden Gesprächen erkennen, wer
Sie anruft. Wenn diese Funktion an Ihrer Telefonleitung zur Verfügung steht, zeigt Ihnen
das Display bereits die Rufnummer des Anrufers, wenn das Telefon klingelt. Ist diese
Rufnummer bereits im Telefonbuch gespeichert, wird direkt der Name des Anrufers
angezeigt.
Erscheint die Meldung PRIVAT anstatt einer Rufnummer, handelt es sich um einen
Anruf, bei dem das Senden der Rufnummer vom Anrufer unterdrückt wurde. Erscheint
die Meldung NICHT VERF (nicht verfügbar) kann die Rufnummer aus technischen
Gründen nicht angezeigt werden kann.
Alle Anrufe werden in einer Anruferliste gespeichert, so dass Sie auch während Ihrer
Abwesenheit keinen Anruf verpassen werden. Insgesamt können 25 Rufnummern in
der Liste gespeichert werden. Sobald die Liste voll ist, wird immer die älteste
Rufnummer aus der Liste gelöscht.
Wurden während Ihrer Abwesenheit neue Rufnummern in der Anruferliste gespeichert,
blinkt an der Basisstation die Anzeige unter der Paging-Taste und das Display zeigt das
Symbol .
20
- Rufnummernanzeige (CLIP) 6.1
Die Anruferliste
Um die Rufnummern der Anruferliste im Display zu sehen, gehen Sie bitte wie folgt vor:
Taste
Display
Hinweis
1x
Letzter gespeicherter
Anruf
?
Ausgewählte
Rufnummer
RD
?
Datum und Uhrzeit
des Anrufes
Mit den Auswahltasten können Sie nun die
gesamte Liste einsehen. Ist die Rufnummer
bereits in Ihrem Telefonbuch gespeichert,
erscheint nicht die Rufnummer, sondern der
Name des Anrufers.
Ist die Rufnummer bereits in Ihrem
Telefonbuch gespeichert, erscheint zuerst die
Rufnummer und beim zweiten Betätigen von
das Datum und die Uhrzeit.
Möchten Sie eine Rufnummer der Anruferliste
direkt zurückrufen, drücken Sie einfach die
Gesprächstaste
und die Nummer wird
sofort angewählt.
Um die Anruferliste zu verlassen.
6.2
Einzelne Rufnummer der Anruferliste in das Telefonbuch
speichern
Taste
?
1x
RD
?
mehrmals
Display
Letzter
gespeicherter Anruf
Ausgewählte
Rufnummer
Hinweis
Gewünschte Rufnummer auswählen.
SPEICHERN
Name eingeben.
Ausgewählte
Rufnummer
LOESCHEN
Rufnummer kann bearbeitet werden.
Rufnummer ist gespeichert.
Taste festhalten, um zum Hauptdisplay
zurückzukehren.
21
- Rufnummernanzeige (CLIP) 6.3
Einzelne Rufnummer aus der Anruferliste löschen
Taste
?
1x
RD
?
mehrmals
Display
Letzter
gespeicherter
Anruf
Ausgewählte
Rufnummer
Hinweis
SPEICHERN
Ist die Rufnummer bereits im Telefonbuch
gespeichert, erscheint hier direkt die Anzeige
LOESCHEN.
LÖSCHEN
Weitere
Rufnummer der
Anruferliste
Gewünschte Rufnummer auswählen.
Rufnummer ist gelöscht.
Taste festhalten, um zum Hauptdisplay
zurückzukehren.
.
22
- Nebenstellenanlagen -
7
Nebenstellenanlagen
Die "R" Signaltaste
Ihres Telefons können Sie an Nebenstellenanlagen nutzen.
Haben Sie Ihr Telefon mit einer Nebenstellenanlage verbunden, können Sie alle
Möglichkeiten, wie z.B. Anrufe weiterleiten, automatischen Rückruf usw. nutzen. Die „R“
Signaltaste verschafft Ihnen den Zugang zu diesen Möglichkeiten. An einer
Nebenstellenanlage wird die FLASH-Zeit "100ms" benötigt. Ob Ihr Telefon an Ihrer
Nebenstellenanlage einwandfrei funktioniert, erfahren Sie bei dem Händler, bei dem die
Anlage gekauft wurde.
7.1
Amtskennziffer
Bei Nebenstellenanlagen ist es
erforderlich, eine bestimmte Nummer
zu wählen (z. B. “9” oder “0”), um ein
Freizeichen für eine Amtsleitung auf
den Apparat zu bekommen. Bei
wenigen, älteren Nebenstellenanlagen
dauert es einige Zeit bis das
Freizeichen zu hören ist. Speziell für
diese Nebenstellenanlagen kann nach
der Amtsholung eine automatische
Pause eingefügt werden, so dass Sie
direkt weiterwählen können, ohne das
Freizeichen abzuwarten.
Besonderer Hinweis: Haben Sie Ihr
Telefon nicht an einer
Nebenstellenanlage angeschlossen,
oder arbeitet Ihre Nebenstellenanlage
ohne Pause oder ohne Amtsholung,
nehmen Sie in diesem Bereich bitte
keinen Einstellungen vor.
Taste
Display
TEL-BUCH
?
2x
BASIS
RUFTON
?
1x
ERWEITERT
PIN (Werkseinstellung 0000)
WAHLSPERRE
?
3x
PABX PAUSE
PBX CODE
Amtskennziffer eingeben oder
mit
bereits eingegebene
Zahlen löschen
PBX CODE
?
1x
PAUSE
3 oder 5 SEKUNDEN
RD
?
Gewünschte Pause
aussuchen
PAUSE
Taste festhalten
23
- Sonderfunktionen -
8
Sonderfunktionen
Alle weiteren Einstellmöglichkeiten werden in den folgenden Abschnitten erklärt.
Mit der Taste
wird die Programmierung gestartet.
RD
Mit den Auswahltasten
Mit der Taste
Mit der Taste
Stufe höher.
?
können Sie sich im Menü bewegen.
gelangen Sie in die nächste Menüebene.
verlassen Sie die aktuelle Menüebene und gelangen eine
Durch das Festhalten der Taste
können Sie die Programmierung verlassen.
Bei den folgenden Beschreibungen ist jeder Programmiervorgang komplett
beschrieben, so dass Sie ohne Kenntnisse der Menüstruktur jede Programmierung
durchführen können. Erfahrene Benutzer können sich auch anhand des
Menübaums frei im Menü bewegen.
8.1
Displaynamen ändern
Im normalen Betrieb erscheint im
Display die Anzeige „SWITEL“. Haben
Sie mehrere Handapparate an einer
Basisstation angemeldet, kann es
nützlich sein, jedem Handapparat einen
eigenen Namen zu geben. Die Nummer
hinter dem Namen zeigt, mit welcher
Nummer der Handapparat intern zu
erreichen ist.
Taste
Display
TEL-BUCH
1x
?
5x
?
HANDAPP.
LAUST.
HAND NAM.
SWITEL
Vorhandene Buchstaben mit
löschen und neuen
Namen eingeben
HAND NAM.
Taste festhalten
24
- Sonderfunktionen 8.2
Einstellen von Klingelmelodien und Klingellautstärken
Am Handapparat stehen 17 unterschiedliche Melodien als Klingelzeichen für den
Handapparat zur Verfügung. Die Klingellautstärke kann separat für den Handapparat
und die Basisstation eingestellt werden.
Klingelmelodie am Handapparat
für externe Gespräche
Taste
Display
TEL-BUCH
?
1x
HANDAPP.
Klingelmelodie am Handapparat
für externe Gespräche
Taste
Display
TEL-BUCH
?
1x
LAUTST.
LAUTST.
?
1x
EXT RUFTON
?
2x
Melodie aussuchen
Melodie aussuchen
RD
?
?
INT RUFTON
MELODIE 1 bis 17
MELODIE 1 bis 17
RD
HANDAPP.
.
EXT RUFTON
INT RUFTON
Taste festhalten
Taste festhalten
Klingellautstärke am Handapparat
Taste
Display
TEL-BUCH
?
1x
HANDAPP.
Hinweis: Bei der Einstellung LAUT AUS
werden eingehende Gespräche nicht mehr
akustisch am Handapparat sondern nur noch
an der Basisstation signalisiert!
LAUTST.
LAUTST. 1 bis 4
RD
?
Lautstärke oder LAUT
AUS auswählen
LAUTSTÄRKE
Taste festhalten
25
- Sonderfunktionen Klingelmelodie an der Basisstation
Taste
Taste
Display
TEL-BUCH
?
2x
?
1x
BASIS
Display
TEL-BUCH
BASIS
2x
RUFTON
RUFTON
LAUST.
LAUST.
MELODIEN
Lautstärke 1 bis 5 und
LAUT. AUS.
Lautstärke oder LAUT.
AUS. auswählen
MELODIE 1 bis 5
RD
Melodie aussuchen
RD
Klingellautstärke an der Basisstation
?
LAUST.
?
MELODIEN
Taste festhalten
Taste festhalten
8.3
Wahlsperren einrichten
Mit den Wahlsperren können Sie Ortsgespräche (alle Rufnumern), Ferngespräche
(beginnend mit 0) und internationale Gespräche (beginnend mit 00) sperren. Die
Wahlsperren lassen sich für jeden Handapparat separat einstellen.
Taste
Display
TEL-BUCH
2x
?
1x
?
Hinweis
BASIS
RUFTON
ERWEITERT
PIN
PIN-Code der Basisstation eingeben
(Werkseinstellung 0 0 0 0)
WAHLSPERRE
HANDAPP. 1
RD
?
HANDAPP. 1
bis 5
Aktuelle
Einstellung
26
Gewünschten Handapparat auswählen, für den
die Wahlsperren eingerichtet werden sollen.
- Sonderfunktionen RD
?
ORTSGESPR.
FERNGESPR.
INTERNATIO
KEINE SPE.
WAHLSPERRE
Wählen Sie die gewünschte Option.
Ortsgespräche (alle Rufnumern)
Ferngespräche (beginnend mit 0)
Internationale Gespräche (beginnend mit 00)
Taste festhalten, um zum Hauptdisplay
zurückzukehren.
8.4
Signaltöne ein- oder ausschalten
Ihr Telefon verfügt über vier Signaltöne, die ein- oder ausgeschaltet werden können.
Tastenklick:
Jeder Tastendruck am Handapparat wird mit einem kurzen
Signalton bestätigt.
Bestätigungston:
Signalton, wenn eine Einstellung erfolgreich durchgeführt wurde.
Batteriekapazität: Signalton, sobald die Batteriekapazität zu schwach wird.
Reichweite:
Haben Sie die maximale Reichweite überschritten, hören Sie
Warntöne.
Taste
Display
TEL-BUCH
?
1x
HANDAPP.
LAUTST.
?
3x
WARNTOENE
TASTATUR
RD
?
TASTATUR , BESTAETIG.,
BATTERIE oder
REICHWEITE auswählen
EIN oder AUS
EIN oder AUS auswählen
TASTATUR , BESTAETIG.,
BATTERIE oder
REICHWEITE
Taste festhalten
27
- Sonderfunktionen 8.5
Ton (MFV)- oder Impuls (IWV) – Wahlverfahren
Dieses Merkmal ermöglicht Ihnen Ihr
Telefon sowohl an den analogen
Vermittlungsstellen (IWV/IMPULS) als
auch an den neuen digitalen
Vermittlungsstellen (MFV/TON) zu
betreiben. Als Werkseinstellung ist
das MFV/TON-Wahlverfahren
eingestellt.
Taste
Display
TEL-BUCH
?
2x
BASIS
RUFTON
?
1x
ERWEITERT
PIN (Werkseinstellung 0000)
WAHLSPERRE
?
2x
WAHLVERF.
TON oder PULS
TON oder PULS auswählen
RD
?
WAHLMODUS
Taste festhalten
8.6
Displaysprache
einstellen
Die Displayanzeigen sind in den
Sprachen Deutsch, Französisch,
Englisch und Italienisch einstellbar.
Taste
Display
TEL-BUCH
RD
2x
RD
?
SPRACHE
FRANCAIS, DEUTSCH,
ENGLISH oder ITALIANO
FRANCAIS, DEUTSCH,
ENGLISH oder ITALIANO
auswählen
SPRACHE
Taste festhalten
28
- Sonderfunktionen 8.7
Anzeige der Gesprächszeit ändern
Während eine Gesprächs erscheint im
Display die aktuelle Gesprächszeit.
Taste
Ob die Gesprächszeit angezeigt wird,
können Sie ein- oder ausschalten.
1x
Display
TEL-BUCH
HANDAPP.
?
LAUTST.
STOPPUHR
?
4x
EIN oder AUS
EIN oder AUS auswählen
RD
?
STOPPUHR
Taste festhalten
8.8
Anzeige der Uhrzeit und des Datums ändern
Das Display des Handapparates kann
die Uhrzeit und das Datum anzeigen.
Ob die Uhrzeit und das Datum
angezeigt werden, können Sie ein- oder
ausschalten.
Wie Sie die Uhrzeit und das Datum
einstellen, erfahren Sie im Kapitel 3.7.
Taste
Display
TEL-BUCH
?
1x
HANDAPP.
LAUST.
RD
2x
UHR
AUTOMATIK
RD
EIN oder AUS auswählen
?
AUTOMATIK
Taste festhalten
29
- Sonderfunktionen 8.9
PIN-Code der Basisstation ändern
Einige Funktionen des Telefonsystems
werden mit einem PIN Code vor
unerlaubter Benutzung geschützt. Der
PIN-Code besteht aus bis zu acht
Zahlen. Im Lieferzustand wurde der
PIN-Code „0000“ eingestellt.
Taste
2x
Display
TEL-BUCH
?
BASIS
RUFTON
1x
?
ERWEITERT
PIN
Zahlenfeld
1x
?
Alten PIN-Code eingeben.
WAHLSPERRE
PIN CODE
NEUE PIN
Zahlenfeld
Zahlenfeld
Neuen PIN-Code eingeben.
WIEDERHOL.
Neuen PIN-Code erneut
eingeben.
PIN CODE
Taste festhalten
30
- Sonderfunktionen 8.10 Werkseinstellungen
Mit der Funktion Werkseinstellungen
können Sie die Einstellungen des
Handapparates wieder auf die
Werkseinstellungen zurücksetzen.
Taste
2x
Display
TEL-BUCH
?
BASIS
RUFTON
1x
?
ERWEITERT
PIN (Werkseinstellung 0000)
WAHLSPERRE
1x
RD
ZURUECKSE.
BESTAET.?
Klingelmelodie extern 1
Klingelmelodie intern 5
Klingelmelodie Basis 1
Klingellautstärke Handapp. 4
Klingellautstärke Basis 5
Alarm aus
PIN 0 0 0 0
Hörerlautstärke 3
Priorität aus
Bestätigungston ein
Ton-Wahlverfahren
Sprache Deutsch
Pause aus
Datum und Uhr ein
Babyruf aus
LCR aus
Wahlwiederholung leer
CLIP-Liste leer
Wahlsperren aus
31
- Mehrere Handapparate -
9
Mehrere Handapparate
Es können bis zu vier weitere Handapparate an Ihre Basisstation angemeldet werden.
Hinweis: Über den international genormten GAP Standard können auch Handapparate
von Fremdherstellern in das Telefonsystem integriert werden. Genauso können Sie
einen SWITEL Handapparat an Basisstationen anderer Hersteller anschließen, sofern
diese Geräte mit dem GAP Standard arbeiten.
Bei der Benutzung von mehreren Handapparaten erhalten Sie folgende Möglichkeiten:
Interne Gespräche zwischen den Handapparaten.
Externe Gespräche können zwischen den Handapparaten weitergeleitet werden.
Eingehende externe Gespräche werden an allen Handapparaten signalisiert.
Ein externes Gespräch kann mit einem weiteren internen Teilnehmer zum
Konferenzgespräch geschaltet werden.
Raumüberwachung
Hinweise: Benutzt bereits ein anderer Handapparat die externe Leitung, erscheint an
allen Handapparaten die Anzeige BELEGT. Ein weiteres externes Gespräch ist in
diesem Fall nicht möglich.
9.1
An- und Abmelden von Handapparaten
9.1.1 Anmelden von Handapparaten
Taste
3x
Display
TEL-BUCH
RD
Zahlenfeld
1-2-3-4
Zahlenfeld
ANMELDEN
BS 1 2 3 4
Ist der Handapparat bereits mit einer Basisstation verbunden,
blinken die entsprechenden Nummern.
Wählen Sie die Basisstation auf dem Zahlenfeld.
PIN
PIN-Code eingeben (Werkseinstellung 0 0 0 0).
SUCHEN
Taste an der Basisstation drücken
Nach einiger Zeit ist der Handapparat angemeldet. Im Display
erscheint die interne Rufnummer des neuen Handapparates.
32
- Mehrere Handapparate 9.1.2 Anmelden von anderen DECT-GAP Telefonen an die Basisstation
Um einen DECT-GAP Handapparat anzumelden, folgen Sie den Hinweisen in der
Bedienungsanleitung des Fremdherstellers und drücken dann die Taste
der Basisstation. Benutzen Sie zur Anmeldung den PIN-Code 0 0 0 0.
an
Hinweis: Besitzt ein neuer Handapparat nicht die Anzeige der Uhrzeit und des Datums,
kann es vorkommen, dass nach einiger Zeit automatisch die Paging-Funktion
ausgeführt wird.
9.1.3 Abmelden von Handapparaten
Ein Handapparat kann nur über einen anderen, noch angemeldeten Handapparat
abgemeldet werden. Es ist also nicht möglich diese Abmeldung mit dem Handapparat
durchzuführen, der abgemeldet werden soll.
Taste
2x
?
1x
?
Display
TEL-BUCH
BASIS
RUFTON
ERWEITERT
PIN => Enter PIN Code(Factory setting 0000)
WAHLSPERRE
RD
2x
HAND LOE.
HANDAPP 1
RD
Wählen Sie, welchen Handapparat Sie abmelden möchten.
?
BESTAET.?
Nach einiger Zeit ist der Handapparat abgemeldet.
33
- Mehrere Handapparate 9.2
Intern telefonieren
Sobald Sie mehrere Handapparate an eine Basisstation angeschlossen haben, können
Sie interne Gespräche führen. Drücken Sie dazu die Taste
und dann die Nummer
des gewünschten Handapparates. Das Gespräch wird mit der Gesprächstaste
gerufenen Handapparat entgegengenommen.
9.3
am
Externe Gespräche auf einen anderen Handapparat
verbinden
Haben Sie ein externes Gespräch an einem Handapparat entgegengenommen, können
Sie das externe Gespräch auf einen anderen Handapparat weiterverbinden. Drücken
und dann die Nummer des gewünschten Handapparates.
Sie dazu die Taste
Nachdem das interne Gespräch an dem anderen Handapparat entgegengenommen
wurde, haben Sie folgende Möglichkeiten:
A. Rücksprache / Makeln: Sie können nun mit dem internen Teilnehmer sprechen,
zum externen Gesprächspartner zurückkehren.
und durch das Drücken der Taste
Sie können so beliebig oft, zwischen dem externen und internen Gespräch wechseln.
B. Gespräch weiterleiten: Durch das Drücken der Gesprächstaste
am ersten
Handapparat, wird das externe Gespräch an den gerufenen Handapparat weitergeleitet.
9.4
Konferenzgespräche führen
Ein externes Gespräch kann mit einem weiteren internen Teilnehmer zum
Konferenzgespräch geschaltet werden. So können zwei Handapparate gleichzeitig mit
dem externen Teilnehmer sprechen. Stellen Sie die gewünschte Verbindung zu dem
und die interne Nummer des
externen Teilnehmer her. Drücken Sie dann die Taste
gewünschten zweiten Handapparates. Hat der zweite, interne Teilnehmer das
für 2 Sekunden und alle drei
Gespräch entgegengenommen, halten Sie die Taste
Teilnehmer sind zu einer Konferenz zusammengeschaltet. Die Konferenz wird durch
das Auflegen eines der internen Gesprächspartner beendet.
34
- Mehrere Handapparate 9.5
Vorrang beim Klingeln
Bei der Benutzung mehrerer Handapparate können Sie einen Handapparat festlegen,
der zuerst klingelt bevor die anderen Handapparate klingeln. Sie können auch die
Basisstation wählen, wenn Sie z.B. ein parallelgeschaltetes, schnurgebundenes Telefon
besitzen. In diesem Fall klingeln das Telefon und die Basisstation zuerst, bevor die
Handapparate klingeln.
Vorrang ein- oder ausschalten
Taste
?
2x
Display
TEL-BUCH
BASIS
RUFTON
LAUST.
?
2x
VORRANG
JA oder NEIN
RD
EINSTELL. auswählen
?
HANDAPP. 1
RD
HANDAPP. 1 bis 5 oder BASIS auswählen
?
KLINGEL 1 bis 9 oder BASIS
RD
?
KLINGEL 1 bis 9 auswählen. Dies ist die Anzahl der Klingeltöne
bis die anderen Handapparate klingeln.
VORRANG
JA oder NEIN
RD
JA oder NEIN auswählen
?
VORRANG
Taste festhalten
35
- Mehrere Handapparate 9.6
Zusätzliche Basisstationen
Bei der Verwendung von mehreren Basisstationen können Sie die Reichweite der
Handapparate vergrößern. Um diesen Effekt zu nutzen, müssen alle Basisstationen mit
einem Telefonanschluss verbunden sein. Je nach Verwendungszweck können Sie jede
Basisstation mit der gleichen Telefonnummer belegen oder geben Sie den
Basisstationen unterschiedliche Rufnummern.
Achten Sie darauf, dass sich alle Basisstationen in ihrer Reichweite überschneiden.
Bitte testen Sie vor jeder Inbetriebnahme einer neuen Basisstation die Reichweite der
Handapparate.
Ist ein Handapparat an den Basisstationen angemeldet, wird der Handapparat immer
automatisch an die nächste Basisstation weitergeleitet. Laufende Gespräche können
nicht von einer zur anderen Basisstation übertragen werden.
Im Kapitel 9.1.1 erfahren Sie, wie der Handapparat an mehrere Basisstationen
angemeldet werden kann.
9.7
Raumüberwachung (Babysitter)
Mit der Raumüberwachung legen
Sie einen Handapparat in den
gewünschten Raum und
aktivieren die Monitor-Funktion.
Dann können Sie auf diesen
Handapparat anrufen und in den
Raum hineinhören, ohne dass der
Handapparat klingelt. Auch bei
externen Gesprächen klingelt der
betreffende Handapparat nicht
mit.
Taste
Display
TEL-BUCH
?
4x
BABYRUF
JA oder NEIN
RD
JA oder NEIN aussuchen
?
Wichtiger Hinweis: Die Funktion Raumüberwachung ist nur mit zwei
Handapparaten möglich.
36
- Fehlerbeseitigung -
10
Fehlerbeseitigung
Haben Sie Probleme mit Ihrem Telefon, kontrollieren Sie bitte zuerst die folgenden
Hinweise. Bei Garantieansprüchen wenden Sie sich bitte an Ihren Fachhändler. Die
Garantiezeit beträgt 2 Jahre. Für die wiederaufladbaren Batterien gilt eine Garantiezeit
von 12 Monaten.
Kein Telefongespräch
möglich
Verbindung abgehackt,
fällt aus
Die Standard-Akkus
sind sehr schnell
entladen.
Display-Anzeige dunkel
Uhrzeit falsch
o Die Telefonleitung ist nicht korrekt
angeschlossen oder gestört.
o Verwenden Sie nur das mitgelieferte
Telefonkabel.
o Testen Sie mit einem anderen Telefon, ob Ihr
Telefonanschluss in Ordnung ist.
o Das Steckernetzteil ist nicht eingesteckt oder
es liegt ein totaler Stromausfall vor.
o Die aufladbaren Standard-Akkus sind leer oder
defekt.
o Sie haben sich zu weit von der Basisstation
entfernt.
o Sie haben sich zu weit von der Basisstation
entfernt oder falscher Aufstellungsort der
Basisstation.
o Laden Sie den Handapparat. Hilft dies nicht,
erneuern Sie die Standard-Akkus.
o Verursacht durch direkte Sonnenbestrahlung,
Handapparat abkühlen lassen.
o Die Stromzufuhr zur Basisstation war
unterbrochen und die Uhrzeit muss neu
eingestellt werden.
37
- Technische Daten -
11
Technische Daten
Standard
Stromversorgung
Reichweite
Reichweite
Standby
Max. Gesprächsdauer
Aufladbare Standard-Akkus
Wählverfahren
Zulässige Umgebungstemperatur
Zulässige relative Luftfeuchtigkeit
Signaltastenfunktion
38
DECT-GAP
Basisstation 220/230V, 50 Hz
Innen bis zu 50m
Außen bis zu 300m
bis zu 85 Stunden
über 6 Stunden
Typ AAA 1,2V 550mAh
MFV (Tonwahl)
10°C bis 30°C
20 bis 75%
100 ms
- Sommaire 1
2
3
3.1
3.2
3.3
3.4
3.5
3.6
3.7
4
4.1
4.2
4.3
4.4
4.5
4.6
Remarques générales..................................................................41
Éléments de commande..............................................................43
Mise en service ............................................................................44
Consignes de sécurité ............................................................................. 44
Vérifier le contenu de l’emballage ........................................................... 44
Raccorder la base ................................................................................... 44
Mettre les batteries standard en place .................................................... 45
Charge des batteries standard ................................................................ 45
Régler la langue d’affichage à l’écran ..................................................... 46
Régler l’heure et la date .......................................................................... 47
Utilisation .....................................................................................48
L’écran ..................................................................................................... 48
Réceptionner les appels .......................................................................... 48
Appeler .................................................................................................... 49
Réglage du volume du combiné et du dispositif mains-libres.................. 49
Dispositif mains-libres.............................................................................. 49
Rappel du dernier numéro composé ....................................................... 50
4.6.1
4.7
4.8
4.9
4.10
4.11
4.12
4.13
5
5.1
5.2
5.3
5.4
5.5
6
6.1
6.2
6.3
Enregistrer dans le répertoire des numéros de la fonction de rappel du
dernier numéro composé ..........................................................................50
Activer / désactiver le combiné................................................................ 50
Touche secret .......................................................................................... 51
Verrouillage du clavier ............................................................................. 51
Raccordement d’un micro-casque........................................................... 51
Régler l’alarme ........................................................................................ 52
Indications concernant la portée.............................................................. 52
Paging de la base vers le combiné.......................................................... 52
Le répertoire.................................................................................53
Entrer des numéros de téléphone et des noms dans le répertoire.......... 53
Composer les numéros de téléphone enregistrés dans le répertoire...... 54
Modifier l’inscription de répertoire............................................................ 54
Effacer des numéros de téléphone enregistrés dans le répertoire.......... 55
Effacer le répertoire en entier .................................................................. 55
Présentation du numéro de téléphone (CLIP) ...........................56
La liste des appelants .............................................................................. 57
Enregistrer dans le répertoire des numéros de la liste des appelants..... 58
Effacer des numéros de téléphone de la liste des appelants .................. 58
39
- Sommaire 7
7.1
8
8.1
8.2
8.3
8.4
8.5
8.6
8.7
8.8
8.9
8.10
9
9.1
Autocommutateurs ..................................................................... 59
Numéro d’accès au réseau ..................................................................... 59
Fonctions spéciales.................................................................... 60
Modifier les noms d’écran ....................................................................... 60
Réglage des mélodies et des volumes de sonnerie................................ 61
Établir un verrouillage sélectif ................................................................. 62
Activer ou désactiver les signaux sonores .............................................. 63
Mode tonalités (MFV) ou impulsions (IWV)............................................. 64
Régler la langue d’affichage à l’écran ..................................................... 64
Modifier l’indication de la durée de communication ................................ 65
Modifier l’indication de l’heure et de la date ............................................ 65
Modifier le code PIN de la base .............................................................. 66
Réglages par défaut................................................................................ 67
Plusieurs combinés .................................................................... 68
Déclaration et annulation de la déclaration de combinés........................ 68
9.1.1
9.1.2
9.1.3
9.2
9.3
9.4
9.5
9.6
9.7
Déclaration de combinés...........................................................................68
Déclaration d’autres téléphones DECT-GAP à la base .............................69
Annuler la déclaration de combinés ..........................................................69
Effectuer des appels internes.................................................................. 70
Transférer des appels externes sur un autre combiné............................ 70
Conférences ............................................................................................ 70
Priorité pour la sonnerie .......................................................................... 71
Bases supplémentaires........................................................................... 72
Surveillance de local ............................................................................... 72
10 Suppression des erreurs............................................................ 73
11 Caractéristiques techniques ...................................................... 74
40
- Remarques générales -
1
Remarques générales
Batteries rechargeables
Ne pas utiliser d’autres batteries rechargeables ou bloc de batterie qui risqueraient
éventuellement de provoquer un court-circuit.
Pour le remplacement, utilisez toujours uniquement des batteries rechargeables
de type AAA 1,2 volts, 550mA.
Ne pas jeter les batteries au feu, ni les plonger dans l’eau. Ne pas jeter les batteries
usées ou défectueuses en même temps que les ordures ménagères.
Le réchauffement du combiné se produisant éventuellement lors de sa charge est
normal et sans danger.
Ne chargez pas le combiné à l’aide de chargeurs d’autres marques car cela risquerait
de provoquer des détériorations.
Lieu d’installation
Le lieu d’installation doit être pourvu d’une prise de courant de 230 volts. N’installez pas
la base à proximité directe d’autres appareils électroniques tels que par ex. les fours à
micro-ondes ou les chaînes hi-fi car cela pourrait provoquer des perturbations
mutuelles. Le lieu d’installation a une grande influence sur le parfait fonctionnement du
téléphone.
Placez la base sur une surface plane et antidérapante. Normalement, les pieds de la
base ne marquent pas la surface sur laquelle elle est posée. La multitude de vernis et
de surfaces utilisés ne permet cependant pas d’exclure l’éventualité de traces laissées
par les pieds de l’appareil sur la surface sur laquelle il est posé.
N’utilisez pas le combiné dans des zones menacées d’explosion.
Évitez les expositions excessives à la fumée, à la poussière, aux secousses, à des
substances chimiques, à l'humidité, à la chaleur ou l'exposition directe au soleil.
41
- Remarques générales Remarque d’ordre médical
Le téléphone fonctionne avec une très faible puissance d’émission. Selon le niveau
actuel de la recherche et de la technique, cette faible puissance d’émission exclue une
mise en danger de la santé. Il a cependant été établi que les téléphones portables
allumés peuvent perturber des appareils médicaux. Respectez en conséquence une
distance minimale d’un mètre avec les appareils médicaux.
Élimination
Lorsque les batteries rechargeables ou l’installation entière arrivent en fin de vie,
veuillez les éliminer en respectant l’environnement conformément aux dispositions
légales.
Température et conditions ambiantes
Le téléphone est conçu pour une utilisation dans des locaux abrités avec une plage de
températures de 10 °C à 30 °C.
La base ne doit pas être installée dans des pièces humides telles que la salle de bains
ou la buanderie. Évitez de placer l’appareil à proximité de sources de chaleur telles que
les radiateurs et évitez une exposition directe au soleil.
Nettoyage et entretien
Vous pouvez utiliser un chiffon sec, doux et non-pelucheux pour nettoyer les surfaces
du boîtier. N'utilisez jamais de produit nettoyant ou de solvants agressifs. Aucun
entretien n’est nécessaire hormis le nettoyage du boîtier de temps en temps. Les pieds
en caoutchouc de la base ne sont pas résistants à tous les produits nettoyants. Par
conséquent, le fabricant ne peut être tenu responsable d’éventuelles détériorations
survenant aux meubles ou autres.
42
- Éléments de commande -
2
Éléments de commande
1.
2.
3.
4.
5.
6.
a.
b.
7.
8.
Raccordement casque
Menu et touche OK
Touche secret/Effacement/Interruption
Communications internes
Dispositif mains-libres
Touches de sélection
Rappel du dernier numéro composé/
Touche de sélection Liste des appelants/
Touche de sélection Touche de communication
Répertoire/Touche de signal R
6a
6b
8
7
6
RD
?
5
1.
2.
3.
4.
1
2
3
Est allumée lors d’appels entrants
Voyant de contrôle de charge
Touche paging
Clignote lorsque la liste des
appelants
comporte de nouveaux appels
4
1
2
3
4
43
- Mise en service -
3
3.1
Mise en service
Consignes de sécurité
ATTENTION ! Veuillez impérativement lire, avant la mise en service, les remarques
générales faites au début du présent mode d’emploi.
3.2
Vérifier le contenu de l’emballage
Le contenu de l’emballage :
une base
un combiné avec clip-ceinture
un cordon téléphonique
3.3
un bloc d’alimentation
deux batteries standard
un mode d’emploi
Raccorder la base
Placez la base à proximité de votre prise téléphonique et d’une prise de courant. Votre
téléphone fonctionne avec le mode multifréquence MF (mode tonalités).
1.
2.
3.
Enfoncez la fiche du bloc d’alimentation dans la prise située sur la face inférieure
de la base et le bloc d’alimentation dans une prise de courant de 230 V installée
conformément aux dispositions réglementaires.
Reliez le cordon téléphonique fourni à la prise téléphonique et à la prise située sur
la face inférieure de la base.
Passez les deux câbles dans les passe-câbles vers l’arrière sous le pied-support
de la base.
Remarque : Les deux fiches doivent
s’enclencher de manière audible afin
qu’elles soient correctement enfoncée
dans la prise.
44
- Mise en service 3.4
Mettre les batteries standard en place
AAA
+
AAA
Pour mettre en place dans le combiné les batteries standard
rechargeables fournies, appuyez sur le bord supérieur du
couvercle du compartiment de batteries et faites-le coulisser vers+
le bas. Placez-y ensuite les piles en respectant la polarité
adéquate. Refermez le compartiment de batteries.
Remarque importante : Laissez le combiné posé sur la base avec l’écran
vers l’avant pendant au moins 16 heures. Des batteries incorrectement
chargées peuvent provoquer des dysfonctionnements du téléphone. Le
voyant de contrôle de charge est allumé sur la base.
3.5
Charge des batteries standard
Les batteries standard rechargeables de votre combiné sont dotées à température
ambiante d’une autonomie en veille max. de 85 heures et d’une durée de
communication maximale de 6 heures. Pour charger les batteries, placez le combiné
sur la base avec l’écran vers l’avant.
La capacité de batterie actuelle est affichée à l’écran :
Remarque : Tout comme la batterie de votre voiture, les batteries standard
rechargeables sont inévitablement soumises à un processus de vieillissement. Vous
pouvez néanmoins influencer ce processus de vieillissement en leur faisant subir un
« entraînement ». Lors d’une utilisation régulière de votre téléphone, si vous chargez
cycliquement les batteries standard et les « videz » à nouveau en téléphonant jusqu’à
ce que l’icône
clignote à l’écran, cela sollicite les batteries standard en
augmentant leur capacité et leur durée de vie. En revanche, une batterie standard
chargée ou déchargée en permanence détériore tant la capacité que la longévité de la
batterie.
45
- Mise en service 3.6
Régler la langue d’affichage à l’écran
Les messages peuvent être affichés à l’écran en allemand, en français, en anglais et en
italien.
Touche
RD
2x
RD
?
Écran
ANNUAIRE
LANGUE
FRANCAIS, DEUTSCH,
ENGLISH ou ITALIANO
Sélectionner FRANCAIS,
DEUTSCH, ENGLISH ou
ITALIANO
LANGUE
Appuyer sur la touche
46
- Mise en service 3.7
Régler l’heure et la date
L’heure et la date sont affichées sur l’écran du combiné. Vous devez donc d’abord
entrer l’heure actuelle et la date avant de continuer à utiliser le téléphone. En cas
d’éventuelle panne de courant, vous devez à nouveau entrer l’heure et la date.
Touche
Écran
ANNUAIRE
?
1x
COMBINE
VOLUME
RD
2x
HORLOGE
AUTOMATIQU
Sélectionner REGLAGE
RD
?
HEURE clignote
Clavier
?
Entrez les heures
MINUTE clignote
?
Entrez les minutes
MOIS clignote
1x
Clavier
1x
Clavier
1x
?
Clavier
Entrez le mois
DATE clignote
Entrez le jour
REGLAGE
Maintenir la touche enfoncée
47
- Utilisation -
4
Utilisation
4.1
L’écran
=>
=>
pleine
Vous êtes en communication.
=>
déchargée.
Un nouveau numéro de téléphone a été enregistré dans la liste des
appelants CLIP ou vous vous trouvez dans la liste des appelants.
La mélodie de sonnerie est désactivée.
Le micro est désactivé.
X
Apparaît lorsque le combiné se trouve à l’intérieur de la zone de portée de la
base.
Le surveillance de local est activé.
Vous vous trouvez en mode de programmation.
Le verrouillage du clavier est activé.
Le dispositif mains-libres est activé.
Vous vous trouvez dans le répertoire.
4.2
Réceptionner les appels
Lorsque vous recevez un appel, la sonnerie retentit sur le combiné et sur la base.
Prenez en main le combiné qui est dans la base ou appuyez sur la touche de
du combiné et la liaison est établie. Pour mettre fin à la
communication
communication, replacez le combiné dans la base ou appuyez sur la touche de
communication
du combiné.
Remarque importante : L’icône s’affiche à l’écran lorsqu’un appel ne
peut pas être réceptionné. Vous pouvez ainsi savoir que vous avez reçu
?
un appel durant votre absence. Appuyez fois sur la touche
et
et l’icône disparaît. Si votre raccordement téléphonique permet
l’affichage des numéros de téléphone (CLIP), vous pouvez bénéficier
d’autres possibilités. Voir à cet effet le chapitre 6.
48
- Utilisation 4.3
Appeler
1. Entrez au clavier le numéro de téléphone souhaité comportant au max. 25
chiffres. Les chiffres des touches enfoncées s’affichent à l’écran.
2. Appuyez sur la touche de communication
établie.
et la liaison souhaitée est
3. Pour mettre fin à la communication, appuyez sur la touche de communication
ou posez le combiné sur la base. Après la fin de la communication, la
durée de communication s’affiche en heures et en minutes durant un
moment.
Remarque : Si vous avez entré un chiffre erroné, vous pouvez effacer le numéro de
téléphone en appuyant plusieurs fois sur la touche
. Vous pouvez effacer
entièrement le numéro de téléphone en appuyant longuement sur la touche
.
Vous pouvez également d’abord appuyer sur la touche de communication
et
obtenir ainsi la tonalité. Votre téléphone compose alors directement le numéro de
téléphone lorsque vous entrez les chiffres du numéro de téléphone souhaité. Cette
forme d’établissement de la communication ne permet pas la correction individuelle des
chiffres du numéro de téléphone mentionnée ci-dessus.
4.4
Réglage du volume du combiné et du dispositif mainslibres
Vous disposez de 5 niveaux de volume pour pouvoir, si vous le souhaitez, modifier le
volume du combiné et du dispositif mains-libres.
RD
?
4.5
Appuyez en cours de communication sur les touches de sélection pour
modifier le volume. Le volume sélectionné s’affiche à l’écran.
Dispositif mains-libres
Appuyez sur la touche mains-libres
en cours de communication. Vous entendez
alors la voix de votre correspondant par le haut-parleur du combiné.
Appuyez de nouveau sur la touche mains-libres
mains-libres.
pour désactiver le dispositif
49
- Utilisation 4.6
Rappel du dernier numéro composé
Vous pouvez utiliser la fonction de rappel du dernier numéro composé lorsque la ligne
de votre correspondant est occupée ou si celui-ci ne répond pas. Votre téléphone
enregistre les 10 derniers numéros de téléphone. Le numéro de téléphone le plus
ancien est toujours effacé de la liste dès que celle-ci est pleine.
1.
Appuyez sur la touche
s’affiche à l’écran.
RD
et le dernier numéro de téléphone composé
RD
2.
Sélectionnez à l’aide des touches de sélection
?
le numéro de téléphone
souhaité et appuyez sur la touche de communication
.
4.6.1 Enregistrer dans le répertoire des numéros de la fonction de
rappel du dernier numéro composé
Touche
RD
1x
RD
?
Écran
Dernier numéro
de téléphone
composé
Numéro de
téléphone
sélectionné
CONSERVER ?
Remarque
Sélectionner le numéro de téléphone souhaité.
Entrer le nom.
Numéro de
téléphone
sélectionné
Nom
4.7
Le numéro de téléphone peut être traité.
Le numéro de téléphone est enregistré.
Activer / désactiver le combiné
Désactiver le combiné : Maintenez la touche
enfoncée durant 2 secondes.
enfoncée durant 2 secondes. Il se
Réactiver le combiné : Maintenez la touche
réactive automatiquement dès que le combiné est à nouveau posé sur la base.
50
- Utilisation 4.8
Touche secret
La touche secret vous permet de désactiver le micro du combiné. Vous pouvez ainsi
parler sans être entendu de votre correspondant.
. L’icône
Désactiver le micro : Appuyez sur la touche
X
s’affiche à l’écran.
. L’icône
Réactiver le micro : Appuyez de nouveau sur la touche
l’écran et vous pouvez de nouveau converser avec votre interlocuteur.
4.9
X
disparaît de
Verrouillage du clavier
Le verrouillage du clavier vous permet d’empêcher l’enfoncement involontaire d’une
touche sur le combiné. Les appels entrants peuvent être réceptionnés normalement
lorsque le verrouillage du clavier est activé.
Activer le verrouillage du clavier.
Lorsque le verrouillage du clavier est
s’affiche à l’écran.
activé, l’icône
Touche
Écran
ANNUAIRE
?
3x
CLAVIER
OUI ou NON
RD
Sélectionner OUI ou NON
?
Désactiver le verrouillage du clavier.
.
Pour désactiver le verrouillage du clavier, appuyez trois fois sur la touche
L’icône
disparaît de l’écran et vous pouvez de nouveau utiliser normalement le
combiné.
4.10 Raccordement d’un micro-casque
Vous pouvez raccorder sur le côté droit du combiné un modèle courant de microcasque avec fiche jack mini-stéréo.
51
- Utilisation 4.11 Régler l’alarme
Avec la fonction d’alarme quotidienne,
l’alarme sonne à l’heure souhaitée.
Lorsque l’heure d’alarme est atteinte,
un signal sonore retentit et l’éclairage
de l’écran clignote. Le temps d’alarme
est de 30 secondes. Il est possible
d’interrompre l’alarme avant en
appuyant sur une touche quelconque
du combiné.
Touche
Écran
ANNUAIRE
?
1x
COMBINE
VOLUME
RD
1x
ALARME
REGLAGE
HEURE
Clavier
?
1x
Clavier
?
1x
Entrez les heures
MINUTE clignote
Entrez les minutes
REGLAGE
QUI/NON
OUI ou NON
RD
?
Activer ou désactiver
l’alarme
Sélectionner OUI ou NON
QUI/NON
Maintenir la touche enfoncée
4.12 Indications concernant la portée
La portée du combiné atteint env. 50 mètres dans des locaux fermés et env. 300 mètres
est allumée sur l’écran lorsque la liaison avec la base est
à l’extérieur. L’icône
bonne. L’icône clignote à l’écran lorsque vous vous êtes trop éloigné de la base.
4.13 Paging de la base vers le combiné
S’il vous est impossible de vous souvenir de l’endroit où se trouve votre combiné,
appuyez sur la touche paging
de la base. Le combiné émet durant 30 secondes
des signaux sonores qui vous permettent ainsi de le retrouver facilement. Vous pouvez
interrompre les signaux sonores en appuyant sur une touche quelconque du combiné.
52
- Le répertoire -
5
Le répertoire
Vous pouvez enregistrer dans le répertoire de votre combiné 40 numéros de téléphone
comportant 18 chiffres avec un nom de 8 lettres.
5.1
Entrer des numéros de téléphone et des noms dans le
répertoire
Touche
Écran
ANNUAIRE
Remarque
NOUVEAU
NOM ?
Entrer le nom.
NUMERO ?
Entrer le numéro de téléphone.
NOUVEAU
Le numéro de téléphone est enregistré.
Maintenir la touche enfoncée pour retourner à
l’écran d’affichage principal.
Remarques :
Vous pouvez interrompre à tout moment la procédure en appuyant sur la touche
.
La touche
permet d’effacer individuellement des chiffres ou des lettres.
Vous pouvez entrer un espace, un trait d’union et le chiffre 1 à l’aide de la touche 1.
53
- Le répertoire 5.2
Composer les numéros de téléphone enregistrés dans le
répertoire
Touche
RD
?
Écran
Remarque
Inscription de
répertoire
sélectionnée
Sélectionner l’inscription de répertoire
souhaitée.
Le numéro de téléphone est composé.
Pour sélectionner directement par ordre alphabétique une inscription de répertoire,
appuyez sur les lettres correspondantes.
5.3
Modifier l’inscription de répertoire
Touche
Écran
ANNUAIRE
Remarque
NUOVEAU
RD
MODIFIER
?
inscription de répertoire
RD
?
Inscription de répertoire
sélectionnée
Sélectionner l’inscription de répertoire
souhaitée.
Nom
Vous pouvez effacer le nom à l’aide de la
Numéro de téléphone
et en entrer un nouveau.
touche
Vous pouvez effacer le numéro de
MODIFIER
54
et en
téléphone l’aide de la touche
entrer un nouveau.
L’inscription de répertoire a été de
nouveau enregistrée.
Maintenir la touche enfoncée pour
retourner à l’écran d’affichage principal.
- Le répertoire 5.4
Effacer des numéros de téléphone enregistrés dans le
répertoire
Touche
Écran
ANNUAIRE
Remarque
NUOVEAU
EFFACER
RD
?
Répertoire souhaitée
Inscription de répertoire
sélectionnée
RD
?
Sélectionner l’inscription de répertoire
souhaitée.
Numéro de téléphone
CONFIRME
EFFACER
L’inscription de répertoire est effacée.
Maintenir la touche enfoncée pour retourner
à l’écran d’affichage principal.
5.5
Effacer le répertoire en entier
Touche
Écran
ANNUAIRE
Remarque
NUOVEAU
RD
EFF TOUS
?
CONFIRME
EFF TOUS
L’inscription de répertoire est effacée.
Maintenir la touche enfoncée pour retourner
à l’écran d’affichage principal.
55
- Affichage des numéros de téléphone (CLIP) -
6
Présentation du numéro de téléphone (CLIP)
En Suisse, cette fonction, n'est pas disponible chez tous les opérateurs des
réseaux téléphoniques.
Attention !
L’affichage des numéros de téléphone est un service proposé en option par
votre opérateur de téléphonie. Votre téléphone affiche les numéros de
téléphone à l’écran lorsque votre opérateur de téléphonie propose ce service.
L’affichage de la date et de l’heure n’est pas transmise par tous les
opérateurs de téléphonie. Veuillez vous adresser à celui-ci pour recevoir de
plus amples informations. De plus, certains autocommutateurs ne permettent
pas la transmission du numéro de téléphone.
La présentation du numéro de téléphone vous permet pour chaque appel entrant de
connaître l’identité de l’appelant. Si votre ligne téléphonique vous permet d’utiliser cette
fonction, l’écran vous indique le numéro de téléphone de l’appelant dès que le
téléphone sonne. Si ce numéro de téléphone est déjà enregistré dans le répertoire, le
nom de l’appelant s’affiche directement.
Si l’icône PRIVE apparaît à la place d’un numéro de téléphone, il s’agit d’un appel d’une
personne ayant masqué son numéro de téléphone. Si le message INDISP ou NON
DISP s’affiche, le numéro de téléphone ne peut pas être affiché pour des raisons
techniques.
Tous les appels sont enregistrés dans une liste des appelants de manière à ce que
vous ne ratiez aucun appel durant votre absence. 25 numéros de téléphone au total
peuvent être enregistrés dans la liste. Le numéro de téléphone le plus ancien est
toujours effacé de la liste dès que celle-ci est pleine.
Si des nouveaux numéros de téléphone ont été enregistrés durant votre absence dans
la liste des appelants, l’indication sous la touche paging de la base clignote et l’écran
affiche l’icône .
56
- Affichage des numéros de téléphone (CLIP) 6.1
La liste des appelants
Procédez de la manière suivante pour afficher à l’écran la liste des appelants :
Touche
?
1x
RD
?
Écran
Dernier appel
enregistré
Numéro de
téléphone
sélectionné
Date et heure de
l’appel
Remarque
Vous pouvez consulter l’intégralité de la liste à
l’aide des touches de sélection. Si le numéro
de téléphone est déjà enregistré dans votre
répertoire, le nom de l’appelant s’affiche à la
place du numéro de téléphone.
Si le numéro de téléphone est déjà enregistré
dans votre répertoire, le numéro de téléphone
s’affiche d’abord, puis la date et l’heure lorsque
.
vous appuyez une deuxième fois sur
Si vous souhaitez rappeler directement un
numéro de téléphone de la liste des appelants,
il vous suffit d’appuyer sur la touche de
et le numéro est
communication
immédiatement composé.
Pour quitter la liste des appelants.
57
- Affichage des numéros de téléphone (CLIP) 6.2
Enregistrer dans le répertoire des numéros de la liste des
appelants
Touche
?
1x
RD
?
Plusieurs
fois
Écran
Dernier appel
enregistré
Numéro de
téléphone
sélectionné
CONSERVER ?
Remarque
Sélectionner le numéro de téléphone souhaité.
Entrer le nom.
Numéro de
téléphone
sélectionné
EFFACER ?
Le numéro de téléphone peut être traité.
Le numéro de téléphone est enregistré.
Maintenir la touche enfoncée pour retourner à
l’écran d’affichage principal.
6.3
Effacer des numéros de téléphone de la liste des appelants
Touche
?
1x
RD
?
Plusieurs
fois
Écran
Dernier appel
enregistré
Numéro de
téléphone
sélectionné
CONSERVER ?
EFFACER ?
Autre numéro de
téléphone de la
liste des appelants
Remarque
Sélectionner le numéro de téléphone souhaité.
Si le numéro de téléphone est déjà enregistré
dans le répertoire, le message
EFFACER ? s’affiche ici directement.
Le numéro de téléphone est effacé.
Maintenir la touche enfoncée pour retourner à
l’écran d’affichage principal.
58
- Autocommutateurs -
7
Autocommutateurs
Vous pouvez utiliser la touche de signal « R »
autocommutateurs.
de votre téléphone sur des
Si vous avez raccordé votre téléphone à un autocommutateur, vous pouvez bénéficier
de toutes les possibilités telles que par ex. le transfert d’appels, le rappel automatique,
etc. grâce à la touche de signal « R ». La durée de FLASH « 100ms » est requise pour
l’utilisation avec un autocommutateur. Renseignez-vous auprès du vendeur de votre
installation pour savoir si votre téléphone fonctionne parfaitement avec votre
autocommutateur.
7.1
Numéro d’accès au réseau
Quelques anciens autocommutateurs
requièrent la composition d’un certain
numéro (p. ex. « 9 » ou « 0 ») pour
obtenir au terme d’une brève pause la
tonalité indiquant l’obtention de la ligne
principale. Après l’adaptation à votre
autocommutateur, votre téléphone
insère automatiquement une pause
lors de la composition lorsque le
numéro d’accès au réseau a été
reconnu.
Remarque particulière : Ne procédez
à aucun réglage si vous n’avez pas
raccordé votre téléphone à un
autocommutateur.
.
Touche
Écran
ANNUAIRE
?
2x
BASE
STANDARD
?
1x
PROTEGE
CODE (défaut 0000)
RESTRICT
?
3x
PABX
CODE PABX
?
1x
Entrer le numéro d’accès au
réseau ou effacer à l’aide de
les chiffres déjà entrés
PAUSE
2 SEC ou 5 SEC
RD
?
Sélectionner 2 SEC ou 5
SEC
PAUSE
Appuyer sur la touche
59
- Fonctions spéciales -
8
Fonctions spéciales
Toutes les autres possibilités de réglage sont expliquées dans les sections suivantes.
La touche
permet de lancer la programmation.
RD
Vous pouvez vous déplacer dans le menu à l’aide des touches de sélection
La touche
?
.
vous permet d’accéder directement au niveau de menu suivant.
La touche
vous permet de quitter le niveau de menu actuel et d’accéder à
un niveau supérieur.
Vous pouvez quitter le mode de programmation en appuyant sur la touche
.
En ce qui concerne les descriptions ci-après, chaque procédure de programmation
est entièrement décrite pour vous permettre de réaliser chaque programmation
sans connaître la structure de menu. Les utilisateurs expérimentés peuvent se
déplacer librement dans le menu à l’aide de l’arborescence de menu.
8.1
Modifier les noms d’écran
En mode normal, le message
« SWITEL » s’affiche à l’écran. Si vous
avez déclaré plusieurs combinés à une
base, il peut être utile de donner un
nom à chaque combiné. Le numéro
indiqué après le nom est celui avec
lequel le combiné peut être appelé en
interne.
Touche
1x
Écran
ANNUAIRE
?
COMBINE
VOLUME
5x
?
NOM
SWITEL
Effacer les lettres existantes
et entrer un
avec
nouveau nom.
NOM
Appuyer sur la touche
60
- Fonctions spéciales 8.2
Réglage des mélodies et des volumes de sonnerie
Sur le combiné, 17 mélodies différentes sont disponibles en tant que signaux de
sonnerie pour le combiné. Le volume de sonnerie peut être réglé individuellement pour
le combiné et la base.
Mélodie de sonnerie du combiné
pour les appels externes
Touche
Écran
ANNUAIRE
1x
?
1x
?
COMBINE
VOLUME
EXT MEL
MELODIE 1 à 17
Sélectionner la
mélodie
RD
?
Mélodie de sonnerie du combiné
pour les appels internes
Touche
Écran
ANNUAIRE
?
1x
COMBINE
VOLUME
?
2x
INT MEL
MELODIE 1 à 17
RD
?
Sélectionner la
mélodie
EXT MEL
INT MEL
Appuyer sur la
touche
Appuyer sur la
touche
Volume de sonnerie sur le combiné
Touche
Écran
FONCTIONS
?
1x
SONNERIES
VOLUME
RD
?
VOLUME 1 à 4 et VOL
NUL
Sélectionner le volume
ou VOL NUL
Remarque : Pour le réglage FORT ARRET,
les appels entrants ne sont plus signalés par
une sonnerie sur le combiné mais seulement
sur la base !
VOLUME
Appuyer sur la touche
61
- Fonctions spéciales Mélodie de sonnerie sur la base
Touche
?
1x
Touche
Écran
ANNUAIRE
?
2x
Mélodie de sonnerie sur la base
BASE
BASE
STANDARD
STANDARD
VOLUME
VOLUME
MELODIES
VOLUME 1 à 5 et VOL
NUL
Sélectionner le volume
ou VOL NUL
RD
?
Sélectionner la
mélodie
?
?
2x
MELODIE 1 à 5
RD
Écran
ANNUAIRE
VOLUME
MELODIES
Appuyer sur la touche
Appuyer sur la
touche
8.3
Établir un verrouillage sélectif
Le verrouillage sélectif vous permet de verrouiller des communications locales (tous les
numéros de téléphone), des communications interurbaines (commençant par 0) et des
communications internationales (commençant par 00). Le verrouillage sélectif s’effectue
individuellement pour chaque combiné.
Touche
2x
?
Écran
ANNUAIRE
Remarque
BASE
STANDARD
1x
?
PROTEGE
CODE
RESTRICT
COMBINE 1
62
Entrer le code PIN de la base (réglage par
défaut 0 0 0 0)
- Fonctions spéciales RD
COMBINE 1 à 5
?
Sélectionner le combiné souhaité pour lequel
un verrouillage doit être établi.
Réglage actuel
RD
?
AUCUN
LOCAL
NATIONAL
INTERNAL
RESTRICT
Sélectionnez l’option souhaitée.
Locales (tous les numéros de téléphone)
Interurbaines (commençant par 0)
Internationales (commençant par 00)
Maintenir la touche enfoncée pour retourner à
l’écran d’affichage principal.
8.4
Activer ou désactiver les signaux sonores
Votre téléphone est doté de quatre signaux sonores qui peuvent être activés ou
désactivés.
Clic touch :
chaque pression de touche sur le combiné est validée par un
bref signal sonore.
Signal avert :
signal sonore signalant qu’un réglage a réussi.
Capacité de batterie : signal sonore dès que la capacité de batterie est trop faible.
Portée :
des signaux sonores retentissent si vous vous trouvez en dehors
de la zone de portée maximale.
Touche
Écran
ANNUAIRE
?
1x
COMBINE
VOLUME
?
3x
BIPS
TOUCHE
RD
?
RD
Sélectionner TOUCHE ,
CONFIRME, BATTERIE ou
PORTEE
OUI ou NON
Sélectionner OUI ou NON
?
TOUCHE , CONFIRME,
BATTERIE ou PORTEE
Appuyer sur la touche
63
- Fonctions spéciales 8.5
Mode tonalités (MFV) ou impulsions (IWV)
Cette caractéristique vous permet
d’utiliser votre téléphone aussi bien
avec des installations téléphoniques
analogiques (IWV/IMPULSIONS)
qu’avec les nouvelles installations
numériques (MFV/TONALITÉS). Le
téléphone a été préréglé par défaut
sur le mode MFV/TONALITÉS.
Touche
Écran
ANNUAIRE
?
2x
BASE
STANDARD
?
1x
PROTEGE
CODE (défaut 0000)
RESTRICT
?
2x
NUMEROT
DTMF ou IMPULS
Sélectionner DTMF ou
IMPULS
RD
?
NUMEROT
Appuyer sur la touche
8.6
Régler la langue d’affichage à l’écran
Les messages peuvent être affichés à
l’écran en allemand, en français, en
anglais et en italien.
Touche
RD
2x
RD
?
Écran
ANNUAIRE
LANGUE
FRANCAIS, DEUTSCH,
ENGLISH ou ITALIANO
Sélectionner FRANCAIS,
DEUTSCH, ENGLISH ou
ITALIANO
LANGUE
Appuyer sur la touche
64
- Fonctions spéciales 8.7
Modifier l’indication de la durée de communication
La durée de communication actuelle
s’affiche à l’écran en cours de
communication.
Vous pouvez activer ou désactiver
l’affichage de la durée de
communication.
Touche
Écran
ANNUAIRE
COMBINE
?
1x
VOLUME
DUREE AP
?
2x
OUI ou NON
Sélectionner OUI ou NON
RD
?
DUREE AP
Appuyer sur la touche
8.8
Modifier l’indication de l’heure et de la date
L’écran du combiné peut afficher
l’heure et la date. Vous pouvez activer
ou désactiver la fonction permettant
l’affichage de l’heure et de la date.
Reportez-vous au chapitre 3.7. pour
savoir comment régler l’heure et la
date.
Touche
Écran
REPERTOIRE
?
1x
COMBINE
VOLUME
RD
2x
HEURE
AUTOMATIQUE
RD
?
Sélectionner ACTIVE ou
DESACTIVE
AUTOMATIQUE
Maintenir la touche enfoncée
65
- Fonctions spéciales 8.9
Modifier le code PIN de la base
Quelques fonctions du système
téléphonique sont protégées par un
code PIN contre une utilisation non
autorisée. Le code PIN peut comporter
jusqu’à huit chiffres. Votre téléphone
est livré avec le réglage de code PIN
« 0000 ».
Touche
2x
Écran
ANNUAIRE
?
BASE
STANDARD
1x
?
PROTEGE
CODE
Clavier
1x
?
Entrer l’ancien code PIN
RESTRICT
CODE
NOU CODE
Clavier
Clavier
Entrer le nouveau code PIN.
REPETER
Entrer à nouveau le nouveau
code PIN.
CODE
Appuyer sur la touche
66
- Fonctions spéciales 8.10 Réglages par défaut
La fonction réglages par défaut vous
permet de restaurer les réglages
initiaux du combiné.
Touche
2x
Écran
ANNUAIRE
?
BASE
STANDARD
1x
?
PROTEGE
CODE (défaut 0000)
RESTRICT
1x
RD
REG USIN
CONFIRME
Mélodie de sonnerie externe 1
Mélodie de sonnerie interne 5
Mélodie de sonnerie base 1
Volume de sonnerie du
combiné 4
Volume de sonnerie base 5
Alarme désactivée
Volume de combiné 3
Priorité désactivée
Signal sonore de
validation activé
Mode de sélection
tonalités
Langue allemand
Pause désactivée
Date et heure activées
Babycall désactivé
LCR désactivé
Rappel du dernier
numéro composé vide
Liste CLIP vide
Verrouillage sélectif
désactivé
PIN 0 0 0 0
67
- Plusieurs combinés -
9
Plusieurs combinés
Vous avez la possibilité de déclarer jusqu’à quatre combinés supplémentaires à votre
base.
Remarque : Le standard GAP normalisé à l’échelle internationale permet également
d’intégrer dans le système téléphonique des combinés d’autres fabricants. Vous
pouvez de même raccorder un combiné SWITEL à des bases d’autres fabricants dans
la mesure où ces appareils fonctionnent avec le standard GAP.
L’utilisation de plusieurs combinés vous octroie les possibilités suivantes :
Communications internes entre les combinés.
Possibilité de transfert d’appels externes entre les combinés.
Les appels externes entrants sont signalisés sur tous les combinés.
Il est possible de transformer une communication externe en conférence avec un
autre interlocuteur interne.
Surveillance de local
Remarque : Si la ligne externe est déjà occupée par un autre combiné, le message
OCCUPEE apparaît sur tous les autres combinés. Dans ce cas, il n’est pas possible
d’effectuer un autre appel externe.
9.1
Déclaration et annulation de la déclaration de combinés
9.1.1
Déclaration de combinés
Touche
3x
Écran
ANNUAIRE
RD
Number pad
1-2-3-4
Number pad
DECLARER
BS 1 2 3 4
Si le combiné est déjà relié à une base, les numéros
correspondants clignotent.
Sélectionnez la base sur le clavier.
CODE
Entrer le code PIN (réglage par défaut 0 0 0 0)
CHERCHE
Appuyer sur la touche de la base.
Le combiné est déclaré au bout d’un certain temps. Le numéro
interne du nouveau combiné s’affiche sur l’écran.
68
- Plusieurs combinés 9.1.2
Déclaration d’autres téléphones DECT-GAP à la base
Pour déclarer un combiné DECT-GAP, suivez les instructions du mode d’emploi du
fabricant des combinés et appuyez ensuite sur la touche
pour la déclaration le code PIN 0 0 0 0.
sur la base. Utilisez
Si un nouveau combiné n’est pas équipé de l’affichage de l’heure et de la date, il se
peut que la fonction paging soit automatiquement exécutée au bout d’un certain temps.
9.1.3
Annuler la déclaration de combinés
L’annulation de la déclaration d’un combiné ne peut se faire qu’au moyen d’un autre
combiné qui est encore déclaré. Il n’est donc pas possible de procéder à cette
annulation de la déclaration en utilisant le combiné dont la déclaration doit être annulée.
Touche
2x
?
1x
?
Écran
ANNUAIRE
BASE
STANDARD
PROTEGE
PIN => Entrer le code PIN (réglage par défaut 0 0 0 0)
RESTRICT
RD
2x
SUPPRIME
COMBINE 1
RD
Sélectionnez le combiné que vous souhaitez déclarer.
?
La déclaration du combiné est annulée au bout d’un certain
temps.
69
- Plusieurs combinés 9.2
Effectuer des appels internes
Vous pouvez effectuer des appels internes dès que vous avez raccordé plusieurs
combinés à une base. Appuyez à cet effet sur la touche
combiné souhaité. La touche de communication
le combiné appelé.
9.3
, puis sur le numéro de
permet de répondre à l’appel sur
Transférer des appels externes sur un autre combiné
Si vous avez répondu à un appel externe sur un combiné, vous avez la possibilité de le
, puis sur le
transférer sur un autre combiné. Appuyez à cet effet sur la touche
numéro de combiné souhaité. Lorsque l’appel est réceptionné sur l’autre combiné, vous
disposez des possibilités suivantes :
A. Consultation / Va-et-vient : Vous pouvez alors parler avec l’interlocuteur interne et
rétablir la communication avec votre correspondant externe en appuyant sur la touche
. Vous pouvez ainsi permuter autant de fois que vous le souhaitez entre la
communication interne et la communication externe.
B. Transfert d’appel : L’appel externe se transfère sur le combiné appelé en appuyant
sur la touche de communication
9.4
du premier combiné.
Conférences
Il est possible de transformer une communication externe en conférence avec un autre
interlocuteur interne. Deux combinés peuvent ainsi converser en même temps avec le
correspondant externe. Établissez la liaison souhaitée avec l’appelant externe. Appuyez
, puis sur le numéro interne du deuxième combiné souhaité.
ensuite sur la touche
Lorsque le deuxième correspondant interne a répondu à l’appel, appuyez sur la touche
durant 2 secondes et les trois interlocuteurs peuvent alors mener une conférence.
Les messages INT et EXT s’affichent à l’écran. La conférence prend fin lorsque l’un des
interlocuteurs raccroche.
70
- Plusieurs combinés 9.5
Priorité pour la sonnerie
Si vous utilisez plusieurs combinés, vous pouvez choisir le combiné qui sonnera avant
les autres. Vous pouvez également choisir la base lorsque vous possédez par ex. un
téléphone filaire raccordé parallèlement. Dans ce cas, le téléphone et la base sonnent
avant les combinés.
Activer ou désactiver la priorité
Touche
Écran
ANNUAIRE
?
2x
BASE
STANDARD
VOLUME
?
2x
PRIORITÉ
ACTIVE ou DESACTIVE
RD
Sélectionner CHOISIR
?
COMBINE 1
RD
Sélectionner COMBINE 1 à 5 ou BASE
?
Sélectionner SONN 1 à 9 ou BASE
RD
?
Sélectionner SONN 1 à 9. C’est le nombre de signaux de
sonnerie avant que les autres combinés ne sonnent.
PRIORITÉ
ACTIVE ou DESACTIVE
RD
Sélectionner ACTIVE ou DESACTIVE
?
PRIORITÉ
Maintenir la touche enfoncée
71
- Plusieurs combinés 9.6
Bases supplémentaires
Vous pouvez augmenter la portée des combinés en utilisant plusieurs bases. Pour cela,
toutes les bases doivent être reliées à un raccordement téléphonique. Selon
l’application, vous pouvez affecter le même numéro de téléphone à toutes les bases ou
leur attribuer des numéros de téléphone distincts.
Veillez à ce que les portées de toutes les bases se chevauchent. Veuillez tester la
portée des combinés avant chaque mise en service d’une nouvelle base.
Lorsque vous avez déclaré un combiné aux bases, le combiné est toujours dirigé
automatiquement vers la base la plus proche. Il n’est pas possible de transférer les
communications en cours d’une base sur une autre.
Reportez-vous au chapitre 9.1.1 pour savoir comment déclarer le combiné à plusieurs
bases.
9.7
Surveillance de local
Pour la surveillance de local,
placez un combiné dans la pièce
souhaitée et activez la fonction
moniteur. Vous pouvez ensuite
effectuer des appels sur ce
combiné et écouter dans la pièce
sans que le combiné ne sonne.
Même lorsque vous recevez des
appels externes, le combiné
concerné ne sonne pas.
Touche
Écran
ANNUAIRE
?
4x
SURVEILL
OUI ou NON
RD
Sélectionner OUI ou NON
?
Remarque importante : .La fonction surveillance de local n'est possible
qu'avec deux combinés.
72
- Suppression des erreurs -
10 Suppression des erreurs
Si vous avez des problèmes avec votre téléphone, veuillez d’abord contrôler les
indications ci-après. Veuillez vous adresser à votre revendeur en cas de droits à la
garantie. La garantie dure 2 ans. Les batteries rechargeables bénéficient d’une garantie
de 12 mois.
Aucune communication
possible
o
o
o
o
o
Liaison entrecoupée ou
interrompue
Les batteries standard
sont très rapidement
déchargées
Affichage d’écran
sombre
Heure incorrecte
o
o
o
o
La ligne téléphonique n’est pas
correctement raccordée ou est en
dérangement.
Utilisez uniquement le cordon téléphonique
fourni.
Testez à l’aide d’un autre téléphone le
fonctionnement de votre ligne téléphonique.
Le bloc d’alimentation n’est pas branché ou
il y a une panne de secteur.
Les batteries standard rechargeables sont
vides ou défectueuses.
Vous vous êtes trop éloigné de la base.
Vous vous êtes trop éloigné de la base ou le
lieu d’installation de la base est incorrect.
Chargez le combiné. Si cela n’a rien
changé, remplacez les batteries standard.
Provoqué par le rayonnement soleil direct,
laissez le combiné se refroidir.
o
L’alimentation en courant vers la base a
été interrompue et vous devez à
nouveau régler l’heure.
73
- Caractéristiques techniques -
11 Caractéristiques techniques
Standard
Alimentation électrique
Portée
Portée
Autonomie en veille
Durée max. de communication
Batteries standard rechargeables
Mode de sélection
Température ambiante admissible
Humidité ambiante relative
admissible
Fonction de touche de signal
74
DECT-GAP
Base 220/230V, 50 Hz
à l’intérieur jusqu’à 50m
à l’extérieur jusqu’à 300m
jusqu’à 85 heures
plus de 6 heures
Type AAA 1,2V 550mAh
MFV (mode tonalités)
10°C à 30°C
20 à 75%
100ms
- Sommario 1
2
3
3.1
3.2
3.3
3.4
3.5
3.6
3.7
4
4.1
4.2
4.3
4.4
4.5
4.6
Informazioni generali...................................................................... 77
Elementi di comando...................................................................... 79
Messa in funzione........................................................................... 80
Informazioni di sicurezza ............................................................................. 80
Controllare il contenuto dell'imballaggio ...................................................... 80
Collegamento della stazione base............................................................... 80
Inserimento delle batterie ricaricabili standard ............................................ 81
Ricarica delle batterie standard ................................................................... 81
Selezione della lingua nel display................................................................ 82
Regolazione dell'ora e della data................................................................. 83
Impiego ............................................................................................ 84
Il display....................................................................................................... 84
Ricezione delle telefonate ........................................................................... 84
Conversazioni telefoniche ........................................................................... 85
Regolazione del volume audio della cornetta o del sistema viva voce........ 85
Conversazioni in viva voce .......................................................................... 85
Ripetizione della chiamata........................................................................... 86
4.6.1
4.7
4.8
4.9
4.10
4.11
4.12
4.13
5
5.1
5.2
5.3
5.4
5.5
6
6.1
6.2
6.3
Memorizzazione di numeri telefonici singoli dalla lista di ripetizione delle
chiamate nella rubrica telefonica ....................................................................86
Inserimento/disinserimento dell'unità portatile............................................. 86
Tasto d'ammutolazione................................................................................ 87
Blocco della tastiera .................................................................................... 87
Collegamento dell'auricolare ....................................................................... 87
Regolazione dell'allarme.............................................................................. 88
Informazioni riguardanti il raggio d'azione ................................................... 89
Paging dalla stazione base all'unità portatile............................................... 89
La rubrica telefonica....................................................................... 90
Immissione dei numeri telefonici e dei nomi nella rubrica telefonica........... 90
Selezione del numero di telefono memorizzato dalla rubrica telefonica...... 90
Modifica delle voci nella rubrica telefonica .................................................. 91
Cancellazione del numero di telefono dalla rubrica telefonica .................... 91
Cancellazione dell'intera rubrica telefonica ................................................. 92
Indicazione del numero degli interlocutori (CLIP) ....................... 93
La lista delle chiamate ................................................................................. 94
Memorizzazione di numeri telefonici singoli dalla lista delle chiamate nella
rubrica telefonica ......................................................................................... 95
Cancellazione di singoli numeri telefonici dalla lista delle chiamate............ 95
75
- Sommario 7
7.1
8
8.1
8.2
8.3
8.4
8.5
8.6
8.7
8.8
8.9
8.10
9
9.1
Impianti interni di centralino .......................................................... 96
Numero d'accesso alla rete esterna.............................................................97
Funzioni speciali ............................................................................. 98
Modifica dei nomi nel display .......................................................................98
Regolazione delle melodie e del volume della suoneria ..............................99
Programmazione del blocco di selezione...................................................100
Attivazione ossia disattivazione dei segnali acustici ..................................101
Modalità di selezione a FREQUENZE (MF) oppure ad IMPULSI (DC) .....102
Selezione della lingua nel display ..............................................................102
Modifica dell'indicazione della durata di conversazione.............................103
Modifica dell'indicazione della data e dell'ora ............................................103
Modifica del codice PIN della stazione base..............................................104
Impostazioni di fabbrica .............................................................................105
Parecchie unità portatili ............................................................... 106
Registrazione e deregistrazione di unità portatili .......................................106
9.1.1
9.1.2
9.1.3
9.2
9.3
9.4
9.5
9.6
9.7
Registrazione di unità portatili ......................................................................106
Registrazione di altri telefoni DECT-GAP alla stazione base........................107
Deregistrazione di unità portatili ...................................................................107
Telefonate interne ......................................................................................108
Deviazione delle telefonate esterne ad un'altra unità portatile...................108
Conversazioni in conferenza......................................................................108
Segnale di chiamata con priorità................................................................109
Stazioni base supplementari ......................................................................110
Monitoraggio del locale ..............................................................................110
10 Eliminazione di errori.................................................................... 111
11 Dati tecnici..................................................................................... 112
76
- Informazioni generali -
1
Informazioni generali
Batterie ricaricabili
Non utilizzare altre batterie ricaricabili o degli accumulatori universali. Questi potrebbero
causare eventualmente un corto circuito.
Per il cambio delle batterie è necessario utilizzare esclusivamente batterie ricaricabili
del tipo AAA 1,2 Volt, 550mA.
Non gettare mai le batterie nel fuoco o immergerle nell'acqua. Le batterie vecchie o
difettose non devono mai essere smaltite nei normali rifiuti urbani.
Nel caso l'unità portatile dovesse riscaldarsi durante il procedimento di ricarica degli
accumulatori, non dovete assolutamente preoccuparvi, dato che ciò è del tutto normale
e non costituisce alcun pericolo.
Non ricaricare mai l'unità portatile con delle unità di ricarica estranee, poiché, altrimenti,
non sarebbero da escludere dei danneggiamenti.
Luogo d'installazione
Nel luogo d'installazione deve trovarsi una presa di corrente da 230Volt. Non disporre la
stazione base nelle immediate vicinanze di apparecchi elettronici, quali ad esempio
forni a microonde o impianti stereofonici, poiché in questa circostanza non sarebbero da
escludere delle interferenze reciproche. Il luogo d'installazione ha un influsso
determinante per un funzionamento perfetto ed irreprensibile del telefono.
Disporre la stazione base sopra una superficie piana e non scivolante. Normalmente i
piedini di gomma della stazione base non lasciano alcune tracce sulla superficie
d'appoggio. A causa degli innumerevoli tipi di smalto utilizzati sulle superfici, non è,
tuttavia, possibile escludere sempre, che sulla superficie d'appoggio rimangano delle
tracce dei piedini di gomma dell'apparecchio.
Non utilizzare mai l'unità portatile in zone esposte al pericolo di deflagrazioni.
Evitare di gran lunga di esporre l'apparecchio ad eccessive sollecitazioni, quali ad
esempio fumo, polvere, urti, sostanze chimiche, umidità, calore o diretta esposizione ai
raggi solari.
77
- Informazioni generali Informazione medica
Il telefono lavora con una potenza di trasmissione notevolmente ridotta.
Conformemente alle prescrizioni nonché allo stato attuale delle ricerche scientifiche e
della tecnica, con questa ridotta potenza di trasmissione sono da escludere comunque
dei danni alla salute. Tuttavia, è stato dimostrato, che i telefonini portatili in stato inserito
possono causare delle notevoli interferenze in prossimità di apparecchiature
elettromedicali. Pertanto, si raccomanda di mantenere una minima distanza di almeno
un metro dalle apparecchiature elettromedicali.
Smaltimento
Quando le batterie ricaricabili si sono completamente esaurite, sarà necessario
provvedere ad uno smaltimento appropriato e conforme alle prescrizioni vigenti per la
protezione ambientale.
Temperatura e condizioni ambientali
Il telefono è concepito per funzionare in ambienti protetti in un campo di temperatura di
10 °C fino 30 °C.
La stazione base non deve essere installata in ambienti umidi, come ad esempio in
bagno o nella lavanderia. Evitare possibilmente fonti di calore, quali riscaldamenti,
termosifoni, ecc. e non esporre l'apparecchio direttamente ai raggi solari.
Pulizia e manutenzione
Le superfici del contenitore possono essere pulite con un panno pulito, asciutto e privo
di peluria. Non utilizzare mai dei detergenti o delle soluzioni aggressive. Oltre ad una
pulizia occasionale del contenitore dell'apparecchio non è necessaria alcuna particolare
manutenzione. I piedini di gomma della stazione base non sono comunque resistenti
contro tutti i tipi di detergenti. Pertanto, il costruttore non potrà assumersi alcuna
responsabilità per eventuali danni causati ai mobili o simili.
78
- Elementi di comando -
2
Elementi di comando
1.
2.
3.
collegamento per auricolare
menu e tasto OK
tasto
d'ammutolazione/cancellazione//annullamento
conversazioni interne
conversazioni in viva voce
tasti di selezione
a. ripetizione chiamate/tasto di selezione 4.
5.
6.
7.
8.
b. lista chiamate/tasto di selezione tasto di conversazione
rubrica telefonica/tasto di segnale R
6a
6b
8
7
6
RD
?
5
1.
2.
3.
4.
1
2
3
lampeggia nelle chiamate
dall'esterno
spia di controllo della carica
tasto paging
lampeggia in nuove telefonate nella
lista delle chiamate
4
1
2
3
4
79
- Messa in funzione -
3
Messa in funzione
3.1 Informazioni di sicurezza
ATTENZIONE! Prima della messa in funzione è assolutamente necessario leggere le
informazioni di sicurezza generali riportate all'inizio di queste istruzioni per l'uso.
3.2 Controllare il contenuto dell'imballaggio
La dotazione comprende:
una stazione base
una unità portatile con clip per cintura
un cavo telefonico di collegamento
un alimentatore di rete
due batterie ricaricabili standard
istruzioni per l'uso
3.3 Collegamento della stazione base
Disporre la stazione base in prossimità di una presa telefonica e di una presa di
corrente. Il Vostro telefono lavora nella modalità di selezione MF (selezione a
frequenze).
1.
2.
3.
Inserire la spina dell'alimentatore di rete nella boccola situata nella parte inferiore
della stazione base e l'alimentatore di rete in una presa di corrente da 230V
installata conformemente alle prescrizioni vigenti sul luogo.
Collegare il presente cavo telefonico con la presa della linea telefonica e la
boccola telefonica situata nella parte inferiore della stazione base.
Posare i due cavi attraverso le canaline e farli uscire dalla parte inferiore della
stazione base.
Nota: Le due spine devono scattare
sensibilmente in posizione, affinché non
possano ristaccarsi.
80
- Messa in funzione -
+
+
AAA
Per inserire le batterie ricaricabili standard fornite in dotazione
nell'unità portatile, premere sul bordo superiore del coperchio
dello scompartimento delle batterie e spingerlo quindi dentro
verso il basso. Introdurre a questo punto le batterie e rispettare la
corretta polarità. Chiudere infine lo il coperchio scompartimento
delle batterie.
AAA
3.4 Inserimento delle batterie ricaricabili standard
Informazione importante: Appoggiare l'unità portatile sopra la stazione
base con il display rivolto in avanti per la durata di almeno 16 ore. Nel
caso di una carica non corretta delle batterie, non sono da escludere delle
disfunzioni nel telefono. Nella stazione base si illumina la spia di controllo
del procedimento di ricarica.
3.5 Ricarica delle batterie standard
Le batterie ricaricabili standard della Vostra unità portatile sono previste per funzionare
con un periodo standby a temperatura ambiente di max. 85 ore ed una durata di
conversazione massima di 6 ore. Per ricaricare le batterie basta immettere l'unità portatile
nella stazione base con il display rivolto in avanti. La capacità attuale delle batterie viene
indicata nel display.
Nota: Le batterie ricaricabili standard sono soggette ad un inevitabile invecchiamento,
come ad esempio anche le batterie delle automobili. Tuttavia, è possibile influenzare
questo processo d'invecchiamento, "allenando" in un certo qual modo le batterie
ricaricabili standard. Se in un regolare impiego del Vostro telefono ricaricate
periodicamente le batterie ricaricabili standard, per poi riscaricarle a "suon di
telefonate", fino a quando non incomincia a lampeggiare l'indicazione
nel display,
stimolate praticamente le batterie, che Vi ricompenseranno così con un rendimento
completo ed efficace nonché una lunga durata di funzionamento. Contrariamente a ciò,
una carica continua ed uno scaricamento altrettanto continuo, danneggiano le batterie
ricaricabili standard, pregiudicandone, inoltre, la capacità e la durata di funzionamento.
81
- Messa in funzione 3.6 Selezione della lingua nel display
Le visualizzazioni del display possono essere selezionate nelle lingue tedesco,
francese, inglese ed italiano.
Tasto
Display
RUBRICA
RD
2x
RD
?
LINGUA
FRANCAIS, DEUTSCH,
ENGLISH oppure ITALIANO
Selezionare FRANCAIS,
DEUTSCH, ENGLISH oppure
ITALIANO
LINGUA
mantenere premuto il tasto
82
- Messa in funzione 3.7 Regolazione dell'ora e della data
Nel display dell'unità portatile viene indicata l'ora e la data. Digitare innanzitutto l'ora
attuale e la data, prima di utilizzare ulteriormente il telefono. In caso di una eventuale
mancanza di corrente, sarà necessario regolare nuovamente l'ora e la data.
Tasto
Display
RUBRICA
?
1x
PORTATILE
SUONERIA
RD
2x
DATA E ORA
AUTOMATICA
Selezione IMPOSTA
RD
?
ORA lampeggiante
Tastiera
numerica
?
1x
Tastiera
numerica
?
1x
Tastiera
numerica
?
1x
Tastiera
numerica
Digitare le ore
MINUTI lampeggiante
Digitare i minuti
MESE lampeggiante
Digitare il mese
GIORNO lampeggiante
Digitare il giorno
IMPOSTA
mantenere premuto il tasto
83
- Impiego -
4
Impiego
4.1 Il display
=>
=>
=>
carica
conversazione attualmente in corso.
esaurite.
Nella lista delle chiamate CLIP è stato memorizzato un nuovo numero
telefonico o attualmente Vi trovate nella lista delle chiamate.
La melodia della suoneria è disinserita.
Il microfono è commutato allo stato d'ammutolazione.
X
Appare, quando l'unità portatile si trova ancora entro la portata della
stazione base.
Monitoraggio del locale attivato.
Vi trovate nel modo di programmazione.
Blocco della tastiera attivato.
Dispositivo di viva voce attivato.
Vi trovate nella rubrica telefonica.
4.2 Ricezione delle telefonate
In una chiamata dall'esterno si sente il segnale acustico (squillo) nell'unità portatile e
nella stazione base. Sollevare l'unità portatile dalla stazione base o premere
sull'unità portatile per stabilire il
direttamente il tasto di conversazione
collegamento. Per terminare la conversazione, immettere come di consueto l'unità
nella
portatile nella stazione base oppure premere il tasto di conversazione
stazione di base.
Informazione importante: Se una telefonata non può essere ricevuta, nel
display verrà visualizzato il simbolo . In questo modo potete riconoscere la
ricezione di una telefonata durante la Vostra assenza. Premere volte il tasto
?
e
e il simbolo scompare. Se il Vostro allacciamento telefonico
dispone dell'indicazione del numero telefonico (CLIP) dell'interlocutore, avrete
ulteriori comode possibilità. Si veda a tal fine al capitolo 6.
84
- Impiego 4.3 Conversazioni telefoniche
1.
Digitare il numero di telefono desiderato nella tastiera numerica con
massimo 25 posizioni. Le cifre digitate vengono visualizzate nel display.
2.
Premere il tasto di conversazione
subito stabilito.
3.
Per terminare la telefonata, occorre premere il tasto di conversazione
o appoggiare direttamente l'unità portatile sulla stazione base. Al termine
della conversazione per un certo periodo viene visualizzata l'indicazione
della durata in ore e minuti.
ed il collegamento desiderato viene
Nota: Se avete accidentalmente digitato un numero telefonico non corretto, allora
potete cancellare il numero sbagliato, premendo ripetutamente il tasto
.
Mantenendo premuto più a lungo il tasto
, il numero telefonico viene
completamente cancellato.
, per ottenere in tal modo
Potete anche premere prima il tasto di conversazione
un immediato segnale di linea libera. Tramite l'inserimento delle cifre corrispondenti al
vostro numero telefonico, il telefono può comporre direttamente il numero da chiamare.
In questa modalità di stabilire un collegamento non è, tuttavia, possibile eseguire una
correzione delle singole cifre del numero telefonico, come descritto sopra.
4.4 Regolazione del volume audio della cornetta o del sistema
viva voce
Se desiderate modificare il volume della cornetta o del sistema di conversazione in viva
voce nell'unità portatile, avete a disposizione 5 livelli di volume.
RD
Premere durante una conversazione i rispettivi tasti di selezione per variare il
volume. Nel display viene indicato il volume attualmente regolato.
?
4.5 Conversazioni in viva voce
Premere il tasto del dispositivo viva voce
durante una conversazione. A questo
punto potete sentire l'interlocutore in linea attraverso l'altoparlante dell'unità portatile.
Premere nuovamente il tasto del dispositivo viva voce
funzione selezionata.
, per disinserire di nuovo la
85
- Impiego 4.6 Ripetizione della chiamata
La funzione di ripetizione della chiamata può essere utilizzata nel caso in cui la persona
chiamata non dovesse rispondere al telefono. Il Vostro telefono memorizza
direttamente gli ultimi 10 numeri telefonici. Non appena la lista è piena, verrà sempre
cancellato rispettivamente l'ultimo numero della lista, cioè quello più vecchio.
1.
Premere il tasto
display.
RD
ed il numero chiamato per ultimo viene visualizzato nel
RD
2.
Selezionare tramite i tasti di selezione
?
il numero telefonico desiderato e
premere successivamente il tasto di conversazione
4.6.1 Memorizzazione di numeri telefonici singoli dalla lista di
ripetizione delle chiamate nella rubrica telefonica
Tasto
1x
RD
RD
?
Display
numero telefonico
composto per
ultimo
numero telefonico
composto
SAVE?
Nota
selezione del numero telefonico desiderato.
immissione del nome.
numero telefonico
composto
Nome
il numero telefonico può essere modificato.
il numero telefonico è stato memorizzato.
4.7 Inserimento/disinserimento dell'unità portatile
Disinserimento dell'unità portatile: Mantenere premuto per 2 secondi il
tasto
.
.
Reinserimento dell'unità portatile: Mantenere premuto per 2 secondi il tasto
L'unità portatile si inserisce automaticamente non appena la riappoggiate sulla stazione
base.
86
- Impiego 4.8 Tasto d'ammutolazione
Tramite il tasto d'ammutolazione potete disattivare il microfono nell'unità portatile. In tal
modo è possibile parlare con altre persone, senza essere ascoltati dall'utente in linea.
. Nel display viene visualizzato il
Disattivazione del microfono: Premere il tasto
simbolo X .
Riattivazione del microfono: Premere nuovamente il tasto
scompare il simbolo
Vostro interlocutore.
X
. Nel display
e dopodiché potrete di nuovo parlare come di consueto con il
4.9 Blocco della tastiera
Tramite il blocco della tastiera potete prevenire una pressione involontaria o non
autorizzata sui tasti dell'unità portatile. Nella funzione di blocco tastiera inserita, le
chiamate dall'esterno possono essere ricevute come di consueto.
Attivazione del blocco tastiera
Con il blocco della tastiera attivato
nel
viene visualizzato il simbolo
display.
Tasto
Display
RUBRRICA
?
3x
BLOC TASTI
SI oppure NO
RD
selezionare SI oppure NO
?
Disattivazione del blocco tastiera
. Nel display
Per disattivare il blocco della tastiera, premere tre volte il tasto
scompare il simbolo
e dopodiché potrete riutilizzare normalmente l'unità portatile.
4.10 Collegamento dell'auricolare
Dalla parte di destra dell'unità portatile si trova una boccola di collegamento per un
tradizionale auricolare munito di una spina a jack del tipo Mini-Stereo
87
- Impiego 4.11 Regolazione dell'allarme
Con la funzione d'allarme giornaliera
l'allarme programmato viene attivato
all'ora desiderata. Una volta raggiunto il
tempo d'allarme, viene attivato un
segnale acustico e l'illuminazione del
display lampeggia. Il tempo d'allarme
corrisponde a 30 secondi. Mediante un
qualsiasi tasto a piacere nell'unità
portatile si può disattivare
anticipatamente l'allarme.
Tasto
Display
RUBRICA
?
1x
PORTATILE
VOLUME
RD
1x
SVEGLIA
ORA SVEGLIA
ORA
Tastiera
numerica
?
1x
Tastiera
numerica
Digitare le ore
MINUTI lampeggiante
Digitare i minuti
ORA SVEGLIA
?
1x
ATTIVA
SI oppure NO
RD
?
Attivazione ossia
disattivazione dell'allarme
selezionare SI oppure NO
ATTIVA
mantenere premuto il tasto
88
- Impiego 4.12 Informazioni riguardanti il raggio d'azione
Il raggio d'azione dell'unità portatile corrisponde a ca. 50 metri in ambienti chiusi e a ca.
300 metri all'aperto. In una buona trasmissione con la stazione base, nel display si
. Quando Vi allontanate eccessivamente dalla stazione base,
illumina il simbolo
allora nel display incomincia a lampeggiare il simbolo.
4.13 Paging dalla stazione base all'unità portatile
Se qualche volta Vi siete dimenticati, dove avete lasciato per ultimo l'unità portatile,
della stazione di base. A questo
basta semplicemente premere il tasto paging
punto, per la durata di soli 30 secondi, si sentono dei segnali acustici, provenienti
dall'unità portatile, che vi permettono facilmente di ritrovare l'apparecchio. Mediante un
qualsiasi tasto a piacere nell'unità portatile si possono disattivare anticipatamente i
segnali acustici di localizzazione.
89
- La rubrica telefonica -
5
La rubrica telefonica
Nella rubrica telefonica della Vostra unità portatile possono essere memorizzati
complessivamente 40 numeri telefonici con rispettivamente 18 posizioni ed un rispettivo
nome comprendente al massimo 8 lettere.
5.1 Immissione dei numeri telefonici e dei nomi nella rubrica
telefonica
Tasto
Display
RUBRICA
Nota
NUOVA
NOME?
immissione del nome.
NUMERO?
immissione del numero telefonico.
NUOVA
il numero telefonico è stato memorizzato.
mantenere premuto il tasto, per ritornare indietro
alla visualizzazione principale.
Avvertenze:
Il procedimento può essere annullato in qualsiasi momento, mantenendo premuto più a
lungo il tasto
Tramite il tasto
.
potete cancellare singoli numeri o lettere.
Tramite il tasto 1 si può introdurre uno spazio, un trattino e la cifra 1.
5.2 Selezione del numero di telefono memorizzato dalla rubrica
telefonica
Tasto
RD
?
Display
Nota
voce selezionata nella
rubrica telefonica
selezionare la voce desiderata nella rubrica
telefonica.
Il numero telefonico viene ora chiamato
automaticamente.
Per selezionare direttamente in ordine alfabetico una voce nella rubrica telefonica
occorre premere il tasto della rispettiva lettera.
90
- La rubrica telefonica 5.3 Modifica delle voci nella rubrica telefonica
Tasto
Display
RUBRICA
Nota
NUOVA
RD
MODIFICA
?
rubrica telefonica
RD
?
voce selezionata nella
rubrica telefonica
nome
numero telefonico
MODIFICA
selezionare la voce desiderata nella rubrica
telefonica.
il nome può essere cancellato tramite il tasto
e digitato nuovamente per un'eventuale
correzione.
il numero di telefono può essere cancellato
tramite il tasto
e digitato nuovamente per
un'eventuale correzione.
la voce è stata nuovamente memorizzata nella
rubrica telefonica.
mantenere premuto il tasto, per ritornare indietro
alla visualizzazione principale.
5.4 Cancellazione del numero di telefono dalla rubrica telefonica
Tasto
Display
RUBRICA
Nota
NUOVA
RD
CANCELLA
?
rubrica telefonica
RD
?
voce selezionata
nella rubrica
telefonica
numero telefonico
selezionare la voce desiderata nella rubrica
telefonica.
CONFERMA?
interrogazione di sicurezza
CANCELLA
la voce è stata cancellata dalla rubrica telefonica.
mantenere premuto il tasto, per ritornare indietro
alla visualizzazione principale.
91
- La rubrica telefonica 5.5 Cancellazione dell'intera rubrica telefonica
Tasto
Display
RUBRICA
Nota
NUOVA
RD
CANC TUTTO
?
92
CONFERMA?
interrogazione di sicurezza
CANC TUTTO
la voce è stata cancellata dalla rubrica
telefonica.
mantenere premuto il tasto, per ritornare indietro
alla visualizzazione principale.
- Indicazione del numero degli interlocutori (CLIP) -
6
Indicazione del numero degli interlocutori (CLIP)
In Svizzera questa funzione non viene offerta da tutti i gestori di reti telefoniche.
Attenzione!
L'indicazione del numero degli interlocutori è un servizio opzionale della
Vostra società telefonica. Il Vostro telefono visualizza il numero telefonico nel
display, purché la Vostra società telefonica offra questo servizio. L'indicazione
della data e dell'ora non viene trasmessa da tutte le società telefoniche.
Richiedete ulteriori informazioni al Vostro consulente telefonico. Anche in
alcuni impianti interni di centralino non è possibile trasmettere il numero
telefonico.
Grazie all'indicazione del numero degli interlocutori potete subito riconoscere da chi
provengono le chiamate in arrivo. Se questa funzione è disponibile nel Vostro
allacciamento telefonico, non appena squilla il telefono, nel display viene
immediatamente visualizzato il numero telefonico della persona che chiama. Se il
rispettivo numero telefonico è già memorizzato nella rubrica telefonica, allora verrà
direttamente indicato il nome dell'interlocutore anziché il numero telefonico.
Se appare il messaggio PRIVATO al posto di un numero telefonico, si tratta di una
telefonata, in cui viene soppressa la trasmissione del numero telefonico del rispettivo
interlocutore. Se invece appare il messaggio NON DISP, allora il numero telefonico non
potrà essere indicato per motivi tecnici.
Tutte le telefonate vengono memorizzate in una rispettiva lista, in modo tale da non
perdere nessuna chiamata neanche durante l'assenza. Complessivamente possono
essere memorizzati 25 numeri telefonici nella lista. Non appena la lista è piena, verrà
sempre cancellato rispettivamente l'ultimo numero della lista, cioè quello più vecchio.
Se durante la Vostra assenza è stato memorizzato un nuovo numero telefonico nella
lista delle chiamate, nella stazione base lampeggia l'indicazione sotto il tasto paging e
nel display viene visualizzato il simbolo .
93
- Indicazione del numero degli interlocutori (CLIP) 6.1 La lista delle chiamate
Per vedere il numero telefonico dell'interlocutore nel display, occorre procedere nel
modo seguente:
Tasto
?
1x
RD
Display
ultima telefonata
memorizzata
numero telefonico
composto
?
Data e ora della
chiamata
Nota
A questo punto tramite i tasti di selezione
potete intravedere l'intera lista. Se avete già
memorizzato questo numero di telefono nella
Vostra rubrica telefonica, al posto del numero
verrà indicato il nome dell'interlocutore.
Se avete già memorizzato questo numero di
telefono nella Vostra rubrica telefonica, verrà
indicato prima il numero telefonico e premendo
la data e l'ora.
una seconda volta su
Se desiderate richiamare direttamente un
numero telefonico dalla lista delle chiamate,
basta premere semplicemente il tasto di
ed il numero viene
conversazione
immediatamente chiamato.
mantenere premuto il tasto, per uscire dalla lista
delle chiamate.
94
- Indicazione del numero degli interlocutori (CLIP) 6.2
Memorizzazione di numeri telefonici singoli dalla lista delle
chiamate nella rubrica telefonica
Tasto
?
1x
RD
Display
ultima telefonata
memorizzata
numero telefonico composto
?
più volte
Nota
selezione del numero telefonico
desiderato.
SAVE?
immissione del nome.
numero telefonico composto
CANCELLA ?
6.3
il numero telefonico può essere
modificato.
il numero telefonico è stato
memorizzato.
mantenere premuto il tasto, per
ritornare indietro alla
visualizzazione principale.
Cancellazione di singoli numeri telefonici dalla lista delle
chiamate
Tasto
?
1x
RD
?
più volte
Display
ultima telefonata
memorizzata
numero telefonico
composto
Nota
SAVE?
Se il rispettivo numero telefonico è già
memorizzato nella rubrica telefonica, allora
verrà direttamente indicata la segnalazione
CANCELLA.
CANCELLA?
ulteriori numeri
telefonici della lista
delle chiamate
selezione del numero telefonico desiderato.
il numero telefonico è stato cancellato.
mantenere premuto il tasto, per ritornare
indietro alla visualizzazione principale.
.
95
- Impianti interni di centralino -
7
Impianti interni di centralino
Il tasto di segnale "R"
del Vostro telefono può essere utilizzato in combinazione
con impianti interni di centralino.
Se avete collegato il Vostro telefono ad un impianto interno di centralino, potete
sfruttare tutte le più moderne possibilità oggigiorno offerte dai gestori delle reti
telefoniche, come ad esempio la deviazione delle telefonate, il richiamo automatico,
ecc. Il tasto di segnale „R“ Vi permette di accedere a tutte queste comodissime
possibilità e funzioni. Generalmente in un impianto interno di centralino viene utilizzato
un periodo FLASH di "100ms". Potete comunque domandare al Vostro rivenditore di
fiducia specializzato, che Vi ha venduto l'impianto interno di centralino, se il Vostro
telefono funziona perfettamente ed in modo irreprensibile e quali ulteriori possibilità
poter sfruttare con questo sistema.
96
- Impianti interni di centralino 7.1 Numero d'accesso alla rete esterna
In alcuni impianti interni di centralino è
necessario comporre prima un
determinato numero (ad esempio “9”
oppure “0”), per ottenere quindi un
segnale d'accesso alla rete esterna
nel telefono dopo una breve pausa. In
seguito ad un rispettivo adattamento
nel Vostro impianto interno di
centralino, dopo ogni prima cifra il
Vostro telefono introduce
automaticamente una pausa di
selezione, per ottenere così l'accesso
alla rete esterna dopo il
riconoscimento della rispettiva cifra.
Tasto
Display
RUBRICA
2x
?
1x
?
BASE
SUONERIA
AVANZATE
PIN (impost. di fabbrica 0000)
BLOC CHIAM
?
3x
PAUSE PABX
CODICE PBX
Inserimento del numero
d'accesso alla rete esterna o
cancellazione di cifre già
inserite con
CODICE PBX
Informazione importante: Se non
avete collegato il vostro telefono ad
un impianto interno di centralino, si
raccomanda di non effettuare alcune
altre impostazioni.
?
1x
RD
?
PAUSA
3 SECONDII oppure 5
SECUNDI
selezionare 3 SECONDII
oppure 5 SECUNDI
PAUSA
mantenere premuto il tasto
97
- La segreteria telefonica -
8
Funzioni speciali
Tutte le ulteriori possibilità d'impostazione vengono spiegate nei paragrafi seguenti.
Tramite il tasto
potete avviare il livello di programmazione.
RD
Tramite i tasti di selezione
Tramite il tasto
Tramite il tasto
superiore.
?
potete muoverVi all'interno del menu.
si accede direttamente al prossimo livello menu.
uscite dall'attuale livello menu ed accedete ad un livello
Mantenendo premuto il tasto
, potete abbandonare il livello di
programmazione.
Nelle descrizioni seguenti ogni procedimento di programmazione viene spiegato
completamente, affinché possiate facilmente eseguire ogni programmazione,
senza bisogno di particolari nozioni sulla struttura del menu. Gli utenti più esperti
possono muoversi liberamente all'interno del menu in base all'albero menu.
8.1 Modifica dei nomi nel display
Nel funzionamento normale il display
visualizza l'indicazione „SWITEL“. Se
avete registrato parecchie unità portatili
ad una stazione base, può essere utile
assegnare ad ogni unità portatile un
nome proprio. Il numero dietro il nome
indica con quale numero potete
raggiungere la rispettiva unità portatile
per le chiamate interne.
Tasto
Display
RUBRICA
1x
?
5x
?
PORTATILE
SUONERIA
NOME PORT
SWITEL
cancellare le lettere già
e
esistenti col tasto
digitare il nome nuovo
NOME PORT
mantenere premuto il tasto
98
- La segreteria telefonica 8.2 Regolazione delle melodie e del volume della suoneria
Nell'unità portatile sono disponibili 17 melodie diverse come segnale di chiamata
nell'unità portatile. Il volume della suoneria può essere regolato separatamente sia
nell'unità portatile che nella stazione base.
Melodia dello squillo nell'unità portatile
per conversazioni esterne
Tasto
Display
RUBRICA
1x
?
1x
?
PORTATILE
Melodia dello squillo nell'unità
portatile per conversazioni interne
Tasto
Display
RUBRICA
1x
?
2x
?
SUONERIA
SUONERIA
SUONER EST
ricerca della melodia
SUONER INT
MELODIA 1 - 17
MELODIA 1 - 17
RD
PORTATILE
RD
ricerca della melodia
?
?
SUONER EST .
MEL. INT
mantenere premuto il
tasto
mantenere premuto il
tasto
Melodia dello squillo nell'unità portatile
Tasto
Display
RUBRICA
?
1x
PORTATILE
SUONERIA
RD
?
VOLUME 1 fino 4 ed
SPENTA.
volume o selezione
SPENTA
SUONERIA
Nota: Nell'impostazione ALTO OFF le
chiamate in arrivo non verranno più
segnalate acusticamente nell'unità portatile
bensì soltanto nella stazione base!
mantenere premuto il
tasto
99
- La segreteria telefonica Melodia del segnale di chiamata
nella stazione base
Tasto
Display
RUBRICA
?
1x
?
1x
Tasto
BASE
Display
RUBRICA
?
1x
BASE
SUONERIA
SUONERIA
VOLUME
VOLUME
MELODIA
VOLUME 1 fino 5 ed
SPENTA.
volume o selezione OFF
MELODIA 1 FINO 5
ricerca della melodia
RD
Volume della melodia del segnale di
chiamata nella stazione base
?
RD
?
VOLUME
MELODIA
mantenere premuto il
tasto
mantenere premuto il
tasto
8.3 Programmazione del blocco di selezione
Con i blocchi di selezione potete interdire le telefonate locali (tutti i numeri telefonici), le
interurbane (che iniziano con lo 0) e le telefonate internazionali (che iniziano con lo 00).I
blocchi di selezione possono essere impostati separatamente per ogni unità portatile.
Tasto
Display
RUBRICA
?
2x
Nota
BASE
SUONERIA
?
1x
AVANZATE
PIN
digitare il codice PIN della stazione base
(impostazione di fabbrica 0 0 0 0)
BLOC CHIAM
PORTATIL 1
RD
?
100
PORTATIL 1 fino
5
impostazione
attuale
selezione dell'unità portatile desiderata per la
programmazione dei blocchi di selezione.
- La segreteria telefonica RD
?
NESSUNO
TUTTE
NAZIONALI
INTERNAZIO
BLOC CHIAM
selezionare l'opzione desiderata.
Locali (tutti i numeri telefonici)
Interurbane (che iniziano con lo 0)
Internazionali (che iniziano con lo 00)
mantenere premuto il tasto, per ritornare indietro
alla visualizzazione principale.
8.4 Attivazione ossia disattivazione dei segnali acustici
Il Vostro telefono possiede quadri segnali acustici, che possono essere attivati ossia
disattivati.
Click tasti:
ogni volta che premete un tasto, nell'unità portatile sentite un
breve segnale acustico.
Beep:
segnale acustico per confermare un'impostazione riuscita con
successo.
Capacità delle batterie: segnale acustico non appena viene registrata una capacità
insufficiente delle batterie.
Raggio d'azione:
in un superamento del massimo raggio d'azione si sentono dei
segnali acustici d'avvertimento.
Tasto
Display
RUBRICA
?
1x
PORTATILE
MEL. MANO
?
3x
TONI
CLIC TASTI
RD
?
RD
selezionare il TASTI,
CONFERMA, BT SCARICA
oppure FUORI CAMP
SI oppure NO
selezionare SI oppure NO
?
TASTI, CONFERMA, BT
SCARICA oppure FUORI
CAMP
mantenere premuto il tasto
101
- La segreteria telefonica 8.5 Modalità di selezione a FREQUENZE (MF) oppure ad
IMPULSI (DC)
Questa proprietà avveniristica
permette di utilizzare il Vostro telefono
sia nei centralini analogici (selezione
ad IMPULSI/DC), che nei moderni
centralini digitali (selezione a
FREQUENZE/MF). In fabbrica è stata
impostata la modalità di selezione a
FREQUENZE/MF.
Tasto
Display
RUBRICA
2x
?
1x
?
BASE
SUONERIA
AVANZATE
PIN (impost. di fabbrica 0000)
BLOC CHIAM
?
2x
SELEZIONE.
DTMF-TONI
oppureDECADICA
selezionare DTMF-TONI
oppureDECADICA
SELEZIONE.
RD
?
mantenere premuto il tasto
8.6 Selezione della lingua nel display
Le visualizzazioni del display possono
essere selezionate nelle lingue
tedesco, francese, inglese ed italiano.
Tasto
Display
RUBRICA
RD
2x
RD
?
LINGUA
FRANCAIS, DEUTSCH,
ENGLISH oppure ITALIANO
Selezionare FRANCAIS,
DEUTSCH, ENGLISH oppure
ITALIANO
LINGUA
mantenere premuto il tasto
102
- La segreteria telefonica 8.7 Modifica dell'indicazione della durata di conversazione
Durante una conversazione nel display
viene indicata la rispettiva durata.
Quest'indicazione può essere attivata
ovvero disattivata.
Tasto
Display
RUBRICA
1x
?
4x
?
PORTATILE
SUONERIA
TIMER
SI oppure NO
selezionare SI oppure NO
RD
?
TIMER
mantenere premuto il tasto
8.8 Modifica dell'indicazione della data e dell'ora
Nel display dell'unità portatile può
essere indicata l'ora e la data.
L'indicazione dell'ora e della data può
essere attivata ovvero disattivata.
La modalità di regolazione dell'ora e
della data è da apprendere al capitolo
3.7.
Tasto
Display
RUBRICA
?
1x
PORTATILE
VOLUME
RD
2x
DATA E ORA
AUTOMATICA
RD
selezionare NO oppure SI
?
AUTOMATICA
mantenere premuto il tasto
103
- La segreteria telefonica 8.9 Modifica del codice PIN della stazione base
Alcune funzioni del sistema telefonico
sono protette per mezzo di un codice
PIN contro l'uso non autorizzato. Il
codice PIN consiste al massimo di
otto cifre. In fabbrica è stato
preimpostato il codice PIN „0000“.
Tasto
2x
Display
RUBRICA
?
BASE
SUONERIA
AVANZATE
1x
PIN
Tastiera
numerica
digitare il codice PIN vecchio
BLOC CHIAM
1x
?
CODICE PIN
NUOVO PIN
Tastiera
numerica
digitare il codice PIN nuovo
Tastiera
numerica
Digitare nuovamente il codice
PIN nuovo
CODICE PIN
RIPETERE
mantenere premuto il tasto
104
- La segreteria telefonica 8.10 Impostazioni di fabbrica
Tramite la funzione impostazioni di
fabbrica potete ripristinare tutte le
impostazioni dell'unità portatile allo
stato di consegna.
Tasto
2x
Display
RUBRICA
?
BASE
SUONERIA
1x
?
AVANZATE
PIN (factory setting 0000)
BLOC CHIAM
1x
RD
RIPRISTINA
CONFERMA ?
Melodia dello squillo esterno 1
Melodia della suoneria interna 5
Melodia della suoneria della
stazione base 1
Volume della suoneria dell'unità
portatile 4
Volume della suoneria della
stazione base 5
Allarme OFF
PIN 0 0 0 0
Volume della cornetta 3
Priorità OFF
Segnale acustico di
conferma ON
Modalità di selezione a
FREQUENZE
Lingua tedesco
Data e ora ON
Baby-Call OFF
LCR OFF
Pausa OFF
Blocchi di selezione OFF
Memoria ripetizione
chiamate vuota
Lista CLIP vuota
105
- Parecchie unità portatili -
9
Parecchie unità portatili
Alla Vostra stazione base potete registrare fino a quattro ulteriori unità portatili.
Nota: Grazie alla normativa internazionale GAP standard potete anche integrare
nel Vostro sistema telefonico delle unità portatili di altri produttori. Altrettanto potete
collegare la Vostra unità portatile SWITEL a stazioni base di altri produttori, per
quanto siano previste per funzionare con la modalità GAP standard.
Nell'impiego di parecchie unità portatili avete le possibilità seguenti:
conversazioni interne e gratuite tra le unità portatili.
le conversazioni esterne possono essere deviate tra le singole unità portatili.
le telefonate in arrivo dall'esterno possono essere segnalate in tutte le unità
portatili.
Una telefonata esterna può essere allacciata ad un ulteriore utente interno, per
formare così una conversazione in conferenza.
monitoraggio del locale.
Nota: Se momentaneamente un'altra unità portatile sta utilizzando la linea esterna, in
tutte le altre unità portatili verrà visualizzata l'indicazione LINEA IMP. In questo caso
non saranno possibili ulteriori conversazioni esterne.
9.1 Registrazione e deregistrazione di unità portatili
9.1.1 Registrazione di unità portatili
Tasto
3x
Display
RUBRICA
RD
Number pad
1-2-3-4
Number pad
AFFILIA
BS 1 2 3 4
Se l'unità portatile è già collegata ad una stazione base, allora
lampeggiano i rispettivi numeri ad essa assegnati.
Selezionare la rispettiva stazione base sulla tastiera numerica.
PIN ?
digitare il codice PIN (impostazione di fabbrica 0 0 0 0).
RICERCA
Mantenere premuto il tasto nella stazione base
L'unità portatile è registrata dopo alcuni secondi. Dopodiché nel
display viene visualizzato il numero della nuova unità portatile.
106
- Parecchie unità portatili 9.1.2 Registrazione di altri telefoni DECT-GAP alla stazione base
Per registrare un'unità portatile DECT-GAP, consultate le istruzioni per l'uso del
rispettivo produttore e mantenere successivamente premuto il tasto
stazione base. Per la registrazione occorre digitare il codice PIN 0 0 0 0.
sulla
Se una nuova unità portatile non possiede la funzione di indicazione dell'ora e della
data, in alcuni casi può capitare che dopo breve tempo viene automaticamente eseguita
la funzione Paging.
9.1.3 Deregistrazione di unità portatili
Un'unità portatile può essere deregistrata soltanto attraverso un'altra unità portatile
ancora registrata. Perciò non è possibile eseguire questa deregistrazione con l'unità
portatile da voler deregistrare.
Tasto
2x
Display
RUBRICA
?
BASE
?
AVANZATE
SUONERIA
1x
PIN => digitare il codice PIN (impostazione di fabbrica 0 0 0 0).
BLOC CHIAM
RD
2x
CANC PORT
PORTATIL 1
RD
Selezionare l'unità portatile da voler deregistrare.
?
CONFERMA?
L'unità portatile è deregistrata dopo alcuni secondi.
107
- Parecchie unità portatili 9.2 Telefonate interne
Se avete collegato parecchie unità portatili ad una stazione base, potete anche fare
e dopodiché il numero dell'unità
delle telefonate interne. Premere a tal fine il tasto
portatile desiderata. La telefonata viene ricevuta, premendo il tasto di conversazione
nell'unità portatile chiamata.
9.3 Deviazione delle telefonate esterne ad un'altra unità portatile
Se avete ricevuto una telefonata esterna in un'unità portatile, potete anche deviarla ad
e
un'altra unità portatile integrata nel sistema telefonico. Premere a tal fine il tasto
dopodiché il numero dell'unità portatile desiderata. Dopo aver ricevuto la telefonata
interna nell'altra unità portatile, avete le possibilità seguenti:
A. Conferire / intermediare: A questo punto potete parlare con l'utente interno e
. In questo
ricommutare successivamente all'utente esterno, premendo il tasto
modo potete commutare con una frequenza a piacere tra conversazione esterna ed
interna.
B. Deviazione delle telefonate: La telefonata esterna viene deviata, premendo il tasto
di conversazione
nella prima unità portatile chiamata.
9.4 Conversazioni in conferenza
Una telefonata esterna può essere allacciata ad un ulteriore utente interno, per formare
così una conversazione in conferenza. In questo modo è possibile parlare
contemporaneamente con due unità portatili con l'utente esterno. Stabilire il
ed il
collegamento desiderato con l'utente esterno. Dopodiché premere il tasto
numero interno della seconda unità portatile desiderata. Non appena il secondo utente
per 2 secondi,
interno ha ricevuto la chiamata, basta mantenere premuto il tasto
per riunire così tutti i tre utenti nella conversazione in conferenza. Nel display viene
visualizzato il messaggio INT e EXT. La conferenza viene terminata quando uno degli
interlocutori interni riattacca la cornetta.
108
- Parecchie unità portatili 9.5 Segnale di chiamata con priorità
Nell'impiego di parecchie unità portatili potete anche stabilire quale delle unità portatili
deve segnalare per prima le telefonate in arrivo, prima della segnalazione delle altre
unità portatili. Potete anche selezionare la stazione base, ad esempio se siete in
possesso di un normale telefono con fili collegato in parallelo. In questo caso squillano
prima il telefono e la stazione base, prima della segnalazione delle altre unità portatili.
Attivazione ossia disattivazione della funzione di priorità
Tasto
Display
RUBRICA
?
2x
BASE
SUONERIA
VOLUME
?
2x
PRIORITÀ
SI oppure NO
RD
selezionare IMPOSTA
?
PORTATIL1
RD
PORTATIL1 fino 5 oppure selezionare BASE
?
PORTATIL fino 9 oppure BASE
RD
?
selezionare SQUILLI 1 fino 9 Questo è il numero di squilli,
finché squlillano le altre unità portatili.
PRIORITÀ
SI oppure NO
RD
selezionare SI oppure NO
?
PRIORITÀ
mantenere premuto il tasto
109
- Parecchie unità portatili 9.6 Stazioni base supplementari
Nell'impiego di parecchie stazioni base potete aumentare notevolmente il raggio
d'azione delle unità portatili integrate nel Vostro sistema telefonico. Per poter sfruttare
questo effetto, è necessario che tutte le stazioni base siano collegate ad un
allacciamento telefonico. A seconda della modalità e scopo d'impiego potete occupare
ogni stazione base con lo stesso numero telefonico oppure assegnare alle stazioni base
diversi numeri telefonici.
Accertarsi che tutte le stazioni base siano in contatto reciproco entro il loro raggio
d'azione. Prima di ogni mesa in funzione di una nuova stazione base si consiglia di
effettuare un test del raggio d'azione dell'unità portatile.
Se avete registrato un'unità portatile alle stazioni base, l'unità portatile verrà sempre
deviata automaticamente alla prossima stazione base. Le conversazioni in corso non
possono essere trasmesse da una stazione base all'altra.
Al capitolo 9.1.1 potete apprendere come registrare l'unità portatile a parecchie stazioni
base.
9.7 Monitoraggio del locale
Mediante il monitoraggio del locale Tasto
disponete un'unità portatile nel
locale desiderato ed attivate la
?
4x
funzione di monitoraggio.
Dopodiché potete chiamare
questa unità portatile ed ascoltare
cosa succede nel locale, senza
?
fare squillare l'unità portatile. La
rispettiva unità portatile non squilla
neanche dopo la ricezione di telefonate esterne.
RD
Display
RUBRICA
BABYSIT
SI oppure NO
selezionare SI oppure NO
Nota Importante: Il controllo della stanza di funzione è soltanto possibile
con due microtelefoni del telefono.
110
- Eliminazione di errori -
10 Eliminazione di errori
Nel caso di eventuali complicazioni con il Vostro telefono, si prega di attenersi
innanzitutto alle seguenti istruzioni. Per le richieste di garanzia Vi preghiamo di
rivolgerVi al Vostro rivenditore di fiducia. La validità della garanzia corrisponde a 2 anni.
Per le batterie ricaricabili si concede una garanzia di 12 mesi.
Nessuna possibilità di
conversazione
o
o
o
o
o
o
Collegamento
interrotto, avaria
o
Le batterie ricaricabili
standard si scaricano
molto rapidamente.
o
Indicazione scura del
display
o
Ora non corretta
o
La linea telefonica non è correttamente
collegata oppure è disturbata.
Utilizzare esclusivamente il cavo telefonico
fornito in dotazione.
Eseguire un test con un altro telefono, per
verificare il funzionamento corretto del Vostro
allacciamento telefonico.
L'alimentatore di rete non è correttamente
inserito nella presa di corrente o mancanza
totale di corrente (black-out).
Le batterie ricaricabili standard sono difettose
oppure esaurite.
Vi siete allontanati eccessivamente dalla
stazione base.
Vi siete allontanati eccessivamente dalla
stazione base o avete scelto un luogo
d'installazione errato.
Ricaricare completamente l'unità portatile.
Nel caso ciò non fosse il rimedio, sarà
opportuno cambiare le batterie ricaricabili
standard.
La causa è da attribuire ad una diretta
esposizione ai raggi solari, lasciare
raffreddare l'unità portatile.
L'alimentazione elettrica della stazione base è
stata interrotta con la conseguenza di dover di
nuovo regolare l'ora.
111
- Dati tecnici -
11 Dati tecnici
Standard
Alimentazione di corrente
Raggio d'azione
Raggio d'azione
Standby
Max. durata di conversazione
Batterie ricaricabili standard
Modalità di selezione
Temperatura ambientale ammessa
Relativa umidità d'aria ammessa
Funzione dei tasti di segnalazione
112
DECT-GAP
stazione base 220/230V, 50 Hz
in edifici fino a 50m
all'aperto fino a 300m
fino a 85 ore
Oltre 6 ore
tipo AAA 1,2V 550mAh
MF (selezione a frequenze)
10°C fino 30°C
20 fino 75%
100 ms
- Contents 1
2
3
3.1
3.2
3.3
3.4
3.5
3.6
4
4.1
4.2
4.3
4.4
4.5
4.6
General Information...................................................................... 115
User controls................................................................................. 117
Setting up ...................................................................................... 118
Safety Information ....................................................................... 118
Check contents of pack ............................................................... 118
Connecting the base station........................................................ 118
Fitting standard batteries............................................................. 119
Charging the standard batteries .................................................. 119
Setting the time and date ............................................................ 120
Operation....................................................................................... 121
The display.................................................................................. 121
Receiving calls ............................................................................ 121
Making calls ................................................................................ 122
Adjusting the receiver volume ..................................................... 122
Handsfree facility......................................................................... 122
Redial facility ............................................................................... 123
4.6.1
Storing individual redial numbers in the phone book ................................... 123
4.7
Switching the handset on and off ................................................ 123
4.8
Mute button ................................................................................. 123
4.9
Keypad lock................................................................................. 124
4.10 Headset connector ...................................................................... 124
4.11 Setting the alarm ......................................................................... 125
4.12 Range information ....................................................................... 125
4.13 Paging from the base station to the handset ............................... 125
5 The phone book ............................................................................ 126
5.1
Entering numbers and names in the phone book........................ 126
5.2
Dialling stored numbers from the phone book............................. 126
5.3
Changing a phone book entry ..................................................... 127
5.4
Deleting stored numbers from the phone book ........................... 127
5.5
Delete all phone book entries...................................................... 128
6 Caller display (CLID)..................................................................... 129
6.1
The caller list ............................................................................... 130
6.2
Storing individual numbers on the caller list in the phone book... 130
6.3
Deleting individual telephone numbers from the caller list........... 131
113
- Contents 7 Private exchanges......................................................................... 132
7.1
Outside line code......................................................................... 132
8 Special functions .......................................................................... 133
8.1
Changing display names ............................................................. 133
8.2
Setting ring tones and ringer volumes ......................................... 134
8.3
Setting up dialling blocks ............................................................. 135
8.4
Turning signal tones on or off. ..................................................... 136
8.5
Touch-tone (TTD) or pulse (PD) dialling...................................... 137
8.6
Setting the display language ....................................................... 137
8.7
Changing the call duration display............................................... 138
8.8
Changing the time and date display ............................................ 138
8.9
Changing the PIN code on the base station ................................ 139
8.10 Factory settings ........................................................................... 140
9 Multiple handsets.......................................................................... 141
9.1
Making an internal call................................................................. 143
9.2
Connecting external calls to another handset.............................. 143
9.3
Holding conference calls ............................................................. 143
9.4
Room monitoring ......................................................................... 145
9.5
Ring priority ................................................................................. 144
9.6
Logging on and logging off handsets........................................... 141
9.6.1
9.6.2
9.6.3
Logging on handsets................................................................................... 141
Logging on other DECT-GAP telephones to the base station...................... 142
Logging off handsets................................................................................... 142
9.7
Additional base stations............................................................... 145
10 Troubleshooting............................................................................ 146
11 Technical data ............................................................................... 147
114
- General information -
1
General Information
Standard rechargeable batteries - do not use any other rechargeable batteries or
battery packs. These could possibly cause a short circuit.
When changing batteries, always use standard batteries, Type AAA 1.2V 550mA.
Do not throw standard batteries into the fire or immerse in water. Do not dispose of old
or defective standard batteries with the normal household waste.
It is normal for the handset to become warm when charging and is not dangerous.
Do not use other manufacturer's charging equipment for charging the handset, as
otherwise damage could occur.
Position
There must be a 230 Volt mains socket near to where the telephone is positioned. Do
not set up the base station in the immediate vicinity of other electrical equipment such
as microwaves or hi-fi systems, as this may result in mutual interference. The location
has a decisive influence on the trouble-free operation of the telephone.
Place the base station on a flat and non-slip surface. The feet of the base station do not
normally leave any marks on the surface. However, due to the large number of
varnishes and surfaces in use, it may not be possible to prevent marks occurring on the
surface due to the feet of the unit.
Do not use the handset in areas where there is a risk of explosion.
Excessive exposure to smoke, dust, vibrations, chemicals, moisture, heat or the direct
rays of the sun must be avoided.
Information regarding medical equipment - The telephone works with a very low
transmission power. This low transmission power prevents any risk to health according
to the current state of research and technology. However, it has been shown that
portable telephones can interfere with medical equipment when switched on. Therefore,
please maintain a distance of at least one metre from medical equipment.
115
- General information Disposal
If the useful life of the standard batteries or the complete equipment has expired, please
dispose of these carefully in accordance with the statutory requirements and in a
manner friendly to the environment.
Temperature and Ambient Conditions
The telephone is designed for use in protected rooms with a temperature range of 10 °C
to 30 °C.
The base station must not be installed in damp rooms such as a bathroom or laundry
room. Avoid proximity to sources of heat such as radiators and do not expose the unit to
direct sunlight.
Cleaning and care - The surface of the case can be cleaned with a soft, dry, lint-free
cloth. Never use cleaning agents, particularly aggressive solvents. No attention is
necessary apart from cleaning the case occasionally. The rubber feet of the base
station are not resistant to all cleaning agents. The manufacturer can therefore not
accept any liability for possible damage to furniture or the like.
116
- User controls -
2
1.
2.
3.
4.
5.
6.
7.
8.
User controls
Headset connector
Menu and OK button
Mute/Delete/Cancel
Internal calls
Handsfree facility
Selection buttons
a. Redial facility/Selection button b. Caller list/Selection button Call button
Phone book/ R signal button
6a
6b
8
7
6
RD
?
5
1.
2.
3.
4.
Illuminates for incoming calls
Charge monitoring lamp
Paging button.
Flashes when there are new
calls in the caller list
1
2
3
4
1
2
3
4
117
- Setting up -
3
Setting up
3.1
Safety Information
NOTE Before setting-up, it is essential that you read the General Information at the
beginning of this manual.
3.2
Check contents of pack
The following items are supplied:
one base station
one handset with belt clip
one telephone connecting cable
3.3
one mains power supply
two standard batteries
one instruction manual
Connecting the base station
Position the base station near to your telephone connection socket and to a mains
socket. Your telephone works using Touch-Tone Dialling.
1.
Insert the plug of the power supply into the socket on the underside of the base
station and plug the power supply into a properly installed 230 V mains socket.
2.
Connect the telephone cable supplied to the telephone socket and the telephone
jack on the underside of the base station.
3.
Run the two cables through the cable channels under the base station foot support
to the rear of the base station.
Note: The two plugs must audibly click
into place so that they do not fall out
again.
118
- Setting up Fitting standard batteries
+
+
AAA
To fit the standard rechargeable batteries supplied into the
handset, press on the upper edge of the battery compartment
and slide it downwards. Now insert the batteries taking care to
ensure that the polarity is correct. Close the battery compartment
cover.
AAA
3.4
Important note: Place the handset in the base station with the display to
the front for at least 16 hours. The telephone may malfunction if the
batteries are not properly charged. The charging light on the base station
will come on.
3.5
Charging the standard batteries
The standard rechargeable batteries for the handset have a stand-by time of max. 85
hours at room temperature and a maximum talk time of 6 hours. To charge the
batteries, place the handset in the base station with the display to the front.
The current battery capacity is shown in the display.
Note: Exactly like your car battery, the standard rechargeable batteries are unavoidably
subject to a certain ageing. However, you can have an influence on this ageing process
by "training" the standard batteries to a certain extent. In regular use of the phone, if you
cyclically charge and fully discharge the standard batteries by using the telephone until
the
symbol flashes in the display, a demand is placed on the batteries and they
will repay you by giving maximum performance and a long life. Extended charging and
extended discharging on the other hand will both degrade the capacity and shorten the
life of the standard batteries.
119
- Setting up 3.6
Setting the display language
The display messages can be set up in German, French, English and Italian.
Button
Display
PHONEBOOK
RD
2x
LANGUAGE
FRANCAIS, DEUTSCH, ENGLISH or ITALIANO
RD
?
Select FRANCAIS, DEUTSCH, ENGLISH or
ITALIANO
LANGUAGE
Press and hold button
3.7
Setting the
time and date
The time and date are
shown in the handset
display. Therefore, first
enter the current time and
date before continuing to
use the telephone. In the
event of a power failure, the
time and date must be reentered.
Button
Display
PHONEBOOK
?
1x
HANDSET
VOLUME
RD
2x
CLOCK
AUTOMATIC
Select SET CLOCK
RD
?
HOUR flashes
Number pad
?
Enter the hours
MINUTE flashes
?
Enter the minutes
MONTH flashes
?
Enter the month
DATE flashes
1x
Number pad
1x
Number pad
1x
Number pad
120
Enter the day
HOUR
Press and hold button
- Operation -
4
Operation
4.1
The display
=>
=>
Full
You are making a call.
=>
Discharged.
A new phone number has been stored in the caller list CLID or you are
currently in the caller list.
The ring tone is switched off.
The microphone is switched off.
X
Appears when the handset is within range of the base station.
The room monitoring is activated.
You are in programming mode.
The keypad lock is activated.
The handsfree facility is switched on.
You are in the phone book.
4.2
Receiving calls
When an external call arrives, the ringing tone sounds on the handset and the base
station. Lift the handset from the base station or press the call button
on the handset
and the connection will be made. To end the call, replace the handset in the base
station or press the call button
on the handset.
Important note: If it is not possible to accept a call, the symbol will
appear in the display. In this way, you will be able to tell that you have
?
received a call during your absence. Press the
e
button and the
symbol will go off. If your phone line has the caller display feature (CLID),
then you will have further options. For more information see Chapter 6.
121
- Operation 4.3
Making calls
1.
Enter the required telephone number with a maximum of 25 digits using the
number pad. The numbers pressed are shown in the display.
2.
Press the call button
3.
To end the call, press the call button
or replace the handset on the
base station. The call duration in hours and minutes will be displayed for a
short time after the call has been ended.
and the required connection will be made.
Note: If you have entered a number incorrectly, you can delete the number by
repeatedly pressing the
button. The number is completely deleted by pressing the
button for a long time.
. On entering the
You can also get a dialling tone by first pressing the call button
digits of your required phone number, your telephone will dial the number directly. With
this method of making a call, it is not possible to correct individual digits in the number
in the manner described above.
4.4
Adjusting the receiver volume
There are 5 volume levels available to you if you should want to change the receiver
volume on the handset.
RD
Press the selection buttons during a call to change the receiver volume. The
selected volume will be shown in the display.
?
4.5
Handsfree facility
Press the handsfree button
during a call. You will now hear the person you are
speaking to over the loudspeaker in the handset.
Press the handsfree button
122
again to switch off the handsfree facility.
- Operation 4.6
Redial facility
Use Redial if the person called is engaged or does not reply. Your telephone
remembers the last ten numbers. When the list is full, the oldest number is always
deleted from the list.
1.
Press the
display.
RD
button and the last phone number dialled will be shown in the
RD
2.
?
Select the required number using the selection buttons
and press the
call button.
4.6.1 Storing individual redial numbers in the phone book
Button
1x
Display
Last number dialled
Comment
Selected number
Select required telephone number.
RD
RD
?
SAVE?
Enter name.
4.7
Selected number
Number can be edited.
Name
Number is saved.
Switching the handset on and off
Switching the handset off: Press and hold the
button for 2 seconds.
button for 2 seconds. The
Switching the handset on again: Press and hold the
handset will switch itself on automatically as soon as you replace it on the base station.
4.8
Mute button
You can turn off the microphone in the handset by using the mute button. In this way,
you will be able to speak without the other person hearing you.
Switching off the microphone: Press the
the display.
button. The
X
symbol will appear in
button again. The X symbol in
Switching on the microphone again: Press the
the display will go off and you will be able to speak to the other person once more.
123
- Operation 4.9
Keypad lock
With the keypad lock, you can prevent a button on the handset being pressed
accidentally. Incoming calls can be received as normal even when the keypad lock is
switched on.
Activating the keypad lock
symbol will appear in the
The
display when the keypad lock is
activated.
Button
Display
PHONEBOOK
?
3x
KEY LOCK
YES or NO
RD
Select YES or NO
?
Deactivating the keypad lock
button three times. The
To deactivate the keypad lock, press the
will go off and you will be able to use the handset normally once more.
symbol
4.10 Headset connector
On the right side of the telephone handset is a connection for a commercial Headset
with a mini-stereo plug.
124
- Operation 4.11 Setting the alarm
The alarm is sounded at the required
time by means of the daily alarm
function. When the alarm time is
reached, a signal will sound and the
display light will flash. The alarm will
sound for 30 seconds. The alarm can
be cancelled prematurely by pressing
any button on the handset.
Button
Display
PHONEBOOK
?
1x
HANDSET
VOLUME
RD
1x
ALARM
ALARM TIME
HOUR
Number
pad
?
1x
Number
pad
Enter the hours
MINUTE flashes
Enter the minutes
ALARM TIME
?
1x
SET ALARM
YES or NO
RD
?
Switch alarm on or off
Select YES or NO
SET ALARM
4.12 Range information
Press and hold button
The range of the handset is ca. 50 metres in closed rooms and ca. 300 metres
outdoors. When there is a good contact with the base station, the
symbol will come
on in the display. If you are too far away from the base station, the symbol will flash.
4.13 Paging from the base station to the handset
If you cannot remember where you have left the handset, press the paging button
on the base station. You will now hear the handset audible signal for 30
seconds and thus be easily able to find it again. You can cancel the audible signal by
pressing any button on the handset.
125
- The phone book -
5
The phone book
You can store 40 phone numbers, each with 18 digits, and an associated name, with up
to 8 letters, in the phone book of your handset.
5.1
Entering numbers and names in the phone book
Button
Display
PHONEBOOK
Comment
NEW
NAME?
Enter name.
NUMBER?
Enter number.
NEW
Number is saved.
Hold button pressed to return to main display.
Notes:
You can terminate the process at any time by pressing and holding the
Individual numbers or letters can be deleted with the
button.
A space, a hyphen and the number 1 can be entered with the 1 button.
5.2
Dialling stored numbers from the phone book
Button
RD
?
Display
Comment
Selected phone book
entry
Select required phone book entry.
The phone number will be dialled.
Press the appropriate letter to directly choose an entry from the phone book
alphabetically.
126
button.
- The phone book 5.3
Changing a phone book entry
Button
Display
PHONEBOOK
Comment
NEW
EDIT
RD
?
phone book entry
Selected phone book
entry
RD
?
Name
Number
EDIT
Select required phone book entry.
The name can be deleted with the
button and then re-entered.
The number can be deleted with the
button and then re-entered.
The phonebook entry has been re-saved.
Hold button pressed to return to main display.
5.4
Deleting stored numbers from the phone book
Button
Display
PHONEBOOK
Comment
NEW
RD
DELETE
?
phone book entry
RD
?
Selected phone
book entry
Select required phone book entry.
number
CONFIRM?
Safety prompt
DELETE
Phone book entry is deleted.
Hold button pressed to return to main display.
127
- The phone book 5.5
Delete all phone book entries
Button
Display
PHONEBOOK
Comment
NEW
RD
DEL ALL
?
CONFIRM?
Safety prompt
DELALL
Phone book is deleted.
Hold button pressed to return to main display.
128
- Caller display (CLID) -
6
Caller display (CLID)
In Switzerland, this function is not available with all network providers.
Note!
Caller display is an optional service from your telephone provider. Your
telephone will show the number in the display if your telephone provider offers
this service. The display of date and time is not transmitted by all telephone
service providers. Please ask your telephone provider for further information.
Furthermore, transmission of the phone number is not possible with many
private exchanges.
Using caller display, you can see with incoming calls who is calling you. If this function
is available on your telephone, the display will show you the caller's telephone number
when the telephone rings. If this number has already been saved in the phone book, the
name of the caller will be displayed directly.
If the message PRIVAT appears instead of a phone number, the call is one where the
caller has suppressed the transmission of the phone number. If the message UNAVAIL
(unavailable) or NOT AVAIL (not available) appears, the phone number cannot be
displayed for technical reasons.
All calls are stored in a caller list so that you will not miss any calls even in your
absence. A total of 25 phone numbers can be stored in the list. When the list is full, the
oldest number is always deleted from the list.
If new numbers are stored in the caller list during your absence, the indicator below the
paging button will flash and the symbol will appear in the display.
129
- Caller display (CLID) 6.1
The caller list
To view the phone numbers on the caller list, please proceed as follows:
Button
1x
Display
Last call saved
Comment
Selected number
You can now view the whole list using the
selection buttons. If the phone number is
already stored in your phone book, the name of
the caller will appear instead of the number.
If the phone number is already stored in your
phone book, the number will appear first and
then the date and time will be displayed when
?
RD
?
Date and time of call
is pressed for the second time.
If you want to call back a number on the caller
list directly, simply press the call button
and the number will be dialled immediately.
To exit the caller list.
6.2
Storing individual numbers on the caller list in the phone
book
Button
?
1x
RD
Display
Last call saved
Comment
Selected number
Select required telephone number.
?
repeatedly
SAVE
Enter name.
Selected number
Number can be edited.
DELETE
Number is saved.
Hold button pressed to return to main display.
130
- Caller display (CLID) 6.3
Deleting individual telephone numbers from the caller list
Button
?
1x
RD
Display
Last call saved
Comment
Selected number
Select required telephone number.
SAVE
If the phone number is already stored in the
phone book, the message DELETE will
appear here directly.
?
repeatedly
DELETE
Further numbers
on the caller list
Number is deleted.
Hold button pressed to return to main display.
.
131
- Private exchanges -
7
Private exchanges
You can use the "R" signal button
on your telephone on private exchanges.
If you have connected your telephone to a private exchange, you can use all the
facilities such as call transfer, automatic recall, etc. The "R" signal button gives you
access to these facilities. The FLASH time "100ms" will be required on a private
exchange. You can find out from the dealer from whom the equipment was purchased
whether your telephone will work on your private exchange without any problems.
7.1
Outside line code
With private exchanges, it is necessary
to dial a certain number (e.g. "9" or
"0") in order to obtain a dialling tone for
an outside line on the extension. With
some, older private exchanges, it
takes some time before the dialling
tone can be heard.
Especially for these private
exchanges, an automatic pause can
be inserted after connecting to the
outside line so that you can dial
directly without waiting for the dialling
tone.
Special note: If you have not
connected your telephone to a private
exchange or if your private exchange
works without a pause or without
connecting to an outside line, please
do not enter any settings in this area.
Button
Display
PHONEBOOK
?
2x
BASIS
RINGER
?
1x
ADVANCED
PIN (Factory setting 0000)
CALL BAR
?
3x
PABX PAUSE
PBX CODE
Insert number or delete
existing numbers with
PBX CODE
?
1x
PAUSE
3 or 5 SECONDS
RD
Select required pause
?
PAUSE
Press and hold button
132
- Special functions -
8
Special functions
All further setting options are described in the following sections.
Programming is started by means of the
button.
RD
You can scroll through the menu using the selection buttons
Press the
Press the
?
.
button to move to the next menu level.
button to exit the current menu level and to move one step higher.
You can exit programming by holding the
button pressed.
In the following descriptions, each programming procedure is described in full so
that you can program any feature without knowledge of the menu structure.
Experienced users can move freely within the menu with the help of the menu tree.
8.1
Changing display names
In normal operation, the message
"SWITEL" appears in the display. If you
have logged on several handsets to one
base station, it can be useful to give
each handset its own name. The
number after the name shows with
which number the handset can be
called internally.
Button
1x
Display
PHONEBOOK
?
HANDSET
VOLUME
5x
?
HS NAME
SWITEL
Delete existing letters with
and enter new name.
HS NAME
Press and hold button
133
- Special functions 8.2
Setting ring tones and ringer volumes
17 different tunes are available on the handset as ring tones for the handset. The ringer
volume can be adjusted separately for the handset and the base station.
Handset ring tone
for external calls
Button
Display
PHONEBOOK
?
1x
HANDSET
Handset ring tone
for internal calls
Button
Display
PHONEBOOK
?
1x
VOLUME
VOLUME
?
1x
EXT RING
?
2x
Select tune
INT RING
MELODIE 1 to 10
MELODY 1 - 17
RD
HANDSET
RD
Select tune
?
?
EXT RING
INT MELOD.
Press and hold
button
Press and hold
button
Handset ringer volume
Button
Display
FUNKTIONEN
?
1x
HANDSET
VOLUME
RD
?
Volume 1 to 4 and
VOL OFF.
Select volume level or
VOL OFF
VOLUME
Press and hold button
134
Note: With the setting VOL OFF, incoming
calls are no longer audibly signalled at the
handset but only at the base station.
- Special functions Base station ring tone
Button
Base station ringer volume
Button
Display
PHONEBOOK
?
2x
?
1x
BASE
?
2x
BASE
RINGER
RINGER
VOLUME
VOLUME
MELODIES
VOLULME 1 – 5 and
VOL. OFF
Select volume level or
VOL. OFF
MELODIE 1 to 5
RD
Select tune
RD
Display
PHONEBOOK
?
VOLUME
?
MELODIES
Press and hold button
Press and hold
button
8.3
Setting up dialling blocks
With the dialling blocks, you can block local calls (all numbers), long-distance calls
(beginning with 0) and international calls (beginning with 00). The dialling blocks can be
set up separately for each handset.
Button
Display
PHONEBOOK
?
2x
Comment
BASE
RINGER
?
1x
ADVANCED
PIN
Enter the PIN Code for the base station (factory
setting 0 0 0 0).
CALLBAR
HANDSET 1
RD
HANDSET 1to 5
?
Select the required handset for which the
dialling blocks are to be set up.
Current setting
135
- Special functions RD
?
NO BARRING
LOCAL
NATIONAL
INTERNATIO
CALL BAR
Select the required option.
Local calls (all numbers)
Long-distance calls (beginning with 0)
International calls (beginning with 00)
Hold button pressed to return to main display.
8.4
Turning signal tones on or off.
Your telephone has four signal tones that can be turned on or off.
Button click:
Each time a button on the handset is pressed, this is confirmed with
a short signal tone.
Confirmation tone: Signal tone when a setting has been successfully completed.
Battery capacity:
Signal tone when the battery capacity is too low.
Range:
If you have exceeded the maximum range, you will hear warning
tones.
Button
Display
PHONEBOOK
?
1x
HANDSET
VOLUME
?
3x
TONES
KEY
RD
?
Select KEY, CONFIRM ,
LOW BATT or RANGE
YES or NO
RD
Select YES or NO
?
KEY, CONFIRM , LOW BATT
or RANGE
Press and hold button
136
- Special functions 8.5
Touch-tone (TTD) or pulse (PD) dialling
This feature enables you to use your
telephone both on analogue
exchanges (PD) and on the new digital
exchanges (TTD). The factory setting
is TONE dialling.
Button
Display
PHONEBOOK
?
2x
BASIS
RINGER
?
1x
ADVANCED
PIN (Factory setting 0000)
CALL BAR
?
2x
DIAL MODE
TONE or PULSE
Select TONE or PULSE
RD
?
DIAL MODE
Press and hold button
8.6
Setting the display
language
The display messages can be set up in
German, French, English and Italian.
Button
Display
PHONEBOOK
RD
2x
RD
?
LANGUAGE
FRANCAIS, DEUTSCH,
ENGLISH or ITALIANO
Select FRANCAIS,
DEUTSCH, ENGLISH or
ITALIANO
LANGUAGE
Press and hold button
137
- Special functions 8.7
Changing the call duration display
The actual duration of the call will
appear in the display while a call is
being made.
You can determine whether the
duration of the call is displayed or not.
Button
Display
PHONEBOOK
HANDSER
?
1x
VOLUME
TIMER
?
4x
YES or NO
Select YES or NO
RD
?
TIMER
Press and hold button
8.8
Changing the time and date display
The handset display can show the time
and date. You can determine whether
the time and date are displayed or not.
Button
?
1x
You can find out how to set the time
and date in Chapter 0.
Display
PHONEBOOK
HANDSET
VOLUME
RD
2x
CLOCK
AUTOMATIC
RD
Select YES or NO
?
AUTOMATIC
Press and hold button
138
- Special functions 8.9
Changing the PIN code on the base station
Some functions of the telephone system are protected against unauthorised use by a
PIN code. The PIN code consists of up to eight numbers. As supplied, the PIN code is
set to "0000".
Button
Display
PHONEBOOK
2x
?
1x
?
BASE
RINGER
ADVANCED
PIN
Number
pad
Enter old PIN code.
CALL BAR
1x
?
PIN CODE
NEW PIN
Number
pad
Enter new PIN code
REPEAT
Number
pad
Enter new PIN code again.
PIN CODE
Press and hold button
139
- Special functions 8.10 Factory settings
You can reset the handset to the
factory settings once more by means
of the Factory Settings function.
Button
2x
Display
PHONEBOOK
?
BASE
RINGER
1x
?
ADVANCED
PIN (factory setting 0000)
CALL BAR
1x
RD
DEFAULT
CONFIRM?
External ring tone 1
Internal ring tone 5
Base station ring tone 1
Handset ringer volume 4
Base station ringer volume 5
Alarm off
PIN 0 0 0 0
140
Receiver volume 3
Priority off
Confirmation tone on
Tone dialling
Language: German
Pause off
Date and time on
Baby call off
LCR off
Redial list empty
CLIP list empty
Call barring off
- Multiple handsets -
9
Multiple handsets
Up to four additional handsets can be logged on to your base station.
Note: Handsets from other manufacturers can also be integrated into the telephone
system by means of the internationally adopted GAP standard. In the same way, you
can use an SWITEL handset on base stations from other manufacturers, as long as
these units work using the GAP standard.
When you use multiple handsets you will have the following options:
Internal calls between handsets.
External calls can be forwarded between handsets.
Incoming external calls are signalled on all handsets.
An external call can be connected to a further internal subscriber as a conference
call.
Room monitoring
Notes: If another handset is already using the external line, the message LINE BUSY
will appear on all handsets. In this case, it is not possible to make a further external call.
9.1
Logging on and logging off handsets
9.1.1 Logging on handsets
Button
3x
Display
PHONEBOOK
RD
Number pad
1-2-3-4
Number pad
ANMELDEN
BS 1 2 3 4
If the handset is already connected to a base station, the
corresponding numbers will flash.
Select the base station on the number pad.
PIN?
Enter the PIN Code (factory setting 0 0 0 0).
SEARCH
Press the button on the base station.
After a short time the handset will be logged on. The internal
number of the new handset will appear in the display.
141
- Multiple handsets 9.1.2
Logging on other DECT-GAP telephones to the base station
To log on a DECT-GAP handset, follow the instructions in the other manufacturer's
operating manual and then press the
code 0 0 0 0 for logging on.
button on the base station. Use the PIN
Note: If a new handset does not have a display for the time and date, it is possible that
the paging function may be carried out automatically after a little time.
9.1.3
Logging off handsets
A handset can only be logged off using another handset that is still logged-on. It is
therefore not possible to carry out the logging-off procedure using the handset that is to
be logged off.
Button
?
2x
Display
PHONEBOOK
BASE
RINGER
?
1x
ADVANCED
PIN => Enter the PIN Code (factory setting 0 0 0 0).
CALL BAR
RD
2x
DEL HS
HANDSET 1
RD
Select the handset that you want to log off.
?
CONFIRM?
After a short time the handset will be logged off.
142
- Multiple handsets 9.2
Making an internal call
When you have connected multiple handsets to a base station, you will be able to make
internal calls. To do this, press the
button and then the number of the required
handset. The call is accepted with the call button
9.3
on the handset called.
Connecting external calls to another handset
If you have accepted an external call on one handset, you can forward the external call
button and then the number of the
to another handset. To do this, press the
required handset. After the internal call has been accepted at the other handset, you
have the following options:
A. Consultation / Brokering: You can now speak to the internal subscriber and return
button. You can switch between the external
to the external caller by pressing the
and the internal call as many times as you like in this way.
B. Forward the call: The external call is forwarded to the handset called by pressing
the call button
9.4
on the first handset.
Holding conference calls
An external call can be connected to a further internal subscriber as a conference call.
In this way, two handsets can talk to the external caller simultaneously. Establish the
button and the
required connection with the external subscriber. Then press the
internal number of the second handset required. When the second internal subscriber
button for 2 seconds and all three
has accepted the call, press and hold the
subscribers will be connected together on a conference call. The messages INT and
EXT will appear in the display. The conference is ended by one of the internal
participants hanging up.
143
- Multiple handsets 9.5
Ring priority
When multiple handsets are used, you can specify one handset to ring before the other
handsets. You can also select the base station if you have a cord-connected telephone
connected in parallel, for example. In this case, the telephone and the base station will
ring first before the handsets.
Switching priority on or off
Button
?
2x
Display
PHONEBOOK
BASE
RING TONE
VOLUME
?
2x
PRIORITY
YES or NO
RD
Select SETUP
?
HANDSET 1
RD
Select HANDSET 1 to 5 or BASE
?
RINGS 1 to 9 or BASE
RD
?
Select RINGS 1 to 9. This is the number of rings before the
other handsets ring.
PRIORITY
YES or NO
RD
Select YES or NO
?
PRIORITY
Press and hold button
144
- Multiple handsets 9.6
Additional base stations
You can increase the range of the handsets by using multiple base stations. In order to
use this effect, all base stations must be connected to one telephone line. Depending
upon how you want to use the system, you can allocate the same phone number to
each base station or you can give the base stations different numbers.
Make sure that the range of each base station overlaps. Please check the range of the
handsets each time before setting up a new base station.
If a handset is logged on to the base station, the handset will always be forwarded to
the nearest base station automatically. Current calls cannot be transferred from one
base station to another.
You can find out how the handset can be logged on to several base stations in
Chapter 9.1.1.
9.7
Room monitoring
With the room monitoring feature, you place a handset in the required room and activate
the monitor function. You can then call up this handset and listen-in to the room without
the handset ringing. Also in the case of an external call, the handset concerned does
not ring.
Button
Display
PHONEBOOK
?
4x
BABYSIT
YES or NO
RD
Select YES or NO
?
Important Note: The function room monitoring is only possible with two
telephone handsets.
145
- Troubleshooting -
10 Troubleshooting
If you have problems with your telephone, please check the following points first. For
any claims under the warranty, please refer to your dealer. The warranty period is 2
years and 1 year for the rechargeable batteries.
No calls possible
Connection is cut off or
drops out
The standard batteries
discharge very quickly.
Display dark
Wrong time
146
o The telephone line is not correctly connected
or is faulty.
o Use only the telephone cable provided.
o Test whether your telephone connection is in
order by using another telephone.
o The power supply is not plugged in or there is
a total power failure.
o The rechargeable batteries are flat or
defective.
o You are too far away from the base station.
o You are too far away from the base station or
the base station is wrongly positioned.
o Charge the handset. If this does not help,
replace the standard batteries.
o Caused by direct sunlight, allow the handset to
cool down.
o The power supply to the base station has been
interrupted and the time will have to be reset.
- Technical data -
11
Technical data
Standard
Power supply
Range
Range
Standby
Max. call duration
Standard rechargeable batteries
Dialling method
Permissible ambient temperature
Permissible relative humidity
Signal button function
DECT-GAP
Base station 220/230V, 50 Hz
Indoors up to 50 m
Outdoors up to 300 m
up to 85 hours
more than 6 hours
Type AAA 1.2V 550 mAh
Touch-Tone Dialling
10°C to 30°C
20 to 75%
100ms
147
- Declaration of Conformity WE
Of
TELGO AG
Route d'Englisberg 17, CH-1763 Granges Paccot
Declare under our sole responsibility that the product
Model:
Description:
D7210
CORDLESS DECT TELEPHONE
Is in conformity with directives: R&TTE Directive (1999/5/EC)
Compliance is achieved by conformity to the following:
CONFORMANCE TEST REPORT FOR EN301 489-01/-06
Report No. ET92S-11-029-01
CONFORMANCE TEST REPORT FOR EN301 489-01/-06
Report No. ET92S-11-029-02
CONFORMANCE TEST REPORT FOR SAFETY OF
Report No. ET92B-11-010
INFORMATION TECHNOLOGY EQUIPMENT, INCLUDING ET92B-11-010-1
ELECTRICAL BUSINESS EQUIPMENT EN 60950 : 2000
PARTICULAR REQUIREMENT OF EN 60335-1/A1, EN 301 406V1.4.1 (2001.03)
Authorised signatory:
Signature:
Name:
Position in the company:
Date of issue:
______________________
Selim Dusi
Managing Director
17.01.2004
Copies of this document will be held on file for a period of 10 years after the last production.
Supplier:
Product:
TELGO AG, Route d'Englisberg 17, CH-1763 Granges Paccot
SWITEL D7210
This product is intended for connection to analogue PSTN lines within Switzerland.
However, due to differences between the individual PSTNs provided in the different countries, the approval
does not, of itself, give an unconditional assurance of successful operation on every PSTN network
termination point.
ADDITIONAL INFORMATION
In the event of a mains power failure it will not be possible to dial emergency services numbers.
www.switel.com
148