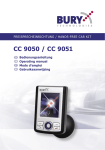
Download 25_0983_0_02_051206_A4_CC 905
Transcript
CC 9050 / CC 9051 D Einbau- und Bedienungsanleitung Kfz-Freisprecheinrichtung CC 9050 für Mobiltelefone E Instrucciones de montaje y servicio Equipo de manos libres CC 9050 para teléfonos móviles en vehículos F Notice de montage et mode d'emploi Kit mains-libres voiture CC 9050 pour téléphones mobiles GB Installation and operating manual Hands-free car kit CC 9050 for mobile phones I Istruzioni di montaggio e per l'uso Dispositivo viva voce per autoveicoli CC 9050 per cellulari NL Firmensitz: Bury GmbH & Co. KG Robert-Koch-Str. 1-7 D-32584 Löhne www.bury.com Serviceannahme: Bury GmbH & Co. KG im Hause DPD Depot 103 D-03222 Lübbenau Stand 12/2006 25.0983.0-02-051206 Irrtum und Änderungen vorbehalten Salvo errores y modificaciones Sous réserve de fautes et de modifications Subject to alterations and errors excepted Con riserva di errori e modifiche Vergissingen en wijzigingen voorbehouden Reserva-se o direito a erros e alterações Zastrzega siê prawo do pomy³ek i zmian Inbouwhandleiding en gebruiksaanwijzing Handsfree carkit CC 9050 voor mobiele telefoons P Instruções de montagem e operação Kit de mãos livres para automóvel CC 9050 para telemóveis PL Instrukcja monta¿u i obs³ugi Samochodowy zestawg³oœnomówi¹cy CC 9050 do telefonów komórkowych U.K. Low Tariff BURY-Hotline: +49 (0) 18 05 / 842 468 Service-Tel: +49 (0) 57 32 / 97 06 -170 / -431 / BURY-Faxline: +49 (0) 18 05 / 842 329 / Service-Fax: +49 (0) 57 32 / 97 06 - 470 BURY-Hotline: + 44 (0) 870-870-7410 / BURY-Faxline: +44 (0) 870-870-7412 D Inhaltsverzeichnis ............................................................................................... 3 Einleitung ....................................................................................................................... 5 Lieferumfang und Abmessungen .......................................... ........................................ 9-10 Zubehör .......................................................................................................................... 11 Einbauanleitung ............................................................................................................. 12 Sicherheitshinweise ....................................................................................................... 13 Installation und Handhabung der Komponenten ............................................................ 14-15 Bedienungsanleitung ...................................................................................................... 16-18 Einbauanleitung Sicherungen ........................................................................................ 61 Legende ......................................................................................................................... 62-64 Contenido ........................................................................................................... 3 Introducción .................................................................................................................... 5 Alcance de suministro y dimensiones .......................................... ................................. 9-10 Accesorios ..................................................................................................................... 11 Instrucciones de montaje ............................................................................................... 12 Indicaciones de seguridad ............................................................................................. 19 Instalación y manejo de los componentes ..................................................................... 20-21 Instrucciones de servicio ............................................................................................... 22-24 Instrucciones de montaje para fusible ................................................................................. 61 Leyenda ......................................................................................................................... 62-64 Contenu .............................................................................................................. 3 Introduction .................................................................................................................... 6 Fourniture et dimensions .......................................... .................................................... 9-10 Accessoires ................................................................................................................... 11 Notice de montage ......................................................................................................... 12 Consignes de sécurité .................................................................................................... 25 Installation et utilisation des composants ....................................................................... 26-27 Mode d'emploi ............................................................................................................... 28-30 Notice de montage des fusibles ....................................................................................................... 61 Légende ......................................................................................................................... 62-64 Index ................................................................................................................... 3 Introduction .................................................................................................................... 6 Scope of supply & dimensions .......................................... ............................................ 9-10 Accessories .................................................................................................................... 11 Installation instructions ................................................................................................... 12 Security guidelines ......................................................................................................... 31 Installation and handling of the components .................................................................. 32-33 Operation instructions .................................................................................................... 34-36 Installation instructions for the fuses .......................................................................................... 61 Caption ........................................................................................................................... 62-64 66 3 Indice ................................................................................................................. 4 Introduzione ................................................................................................................... 7 Contenuto della fornitura & misure .......................................... ..................................... 9-10 Accessori ....................................................................................................................... 11 Istruzioni di montaggio ................................................................................................... 12 Indicazioni di sicurezza .................................................................................................. 37 Installazione e manipolazione dei componenti .............................................................. 38-39 Istruzioni d'uso ............................................................................................................... 40-42 Istruzioni di montaggio dell'interruttore di sicurezza ............................................................ 61 Leggenda ...................................................................................................................... 62-64 Inhoud ................................................................................................................ 4 Inleiding ......................................................................................................................... 7 Leveringsomvang & afmetingen .......................................... ......................................... 9-10 Toebehoren ................................................................................................................... 11 Inbouwinstructies ........................................................................................................... 12 Veiligheidsaanwijzingen ................................................................................................. 43 Installatie en bediening van de onderdelen.................................................................... 44-45 Handleiding ................................................................................................................... 46-48 Inbouwinstructies zekering ................................................................................................... 61 Legende ........................................................................................................................ 62-64 Índice ................................................................................................................. 4 Manual de Instruções .................................................................................................... 8 Âmbito de fornecimento e dimensões .......................................... ................................ 9-10 Acessórios ..................................................................................................................... 11 Instruções de montagem ............................................................................................... 12 Instruções de segurança ............................................................................................... 49 Instalação e manuseamento dos componentes ............................................................ 50-51 Instruções de operação ................................................................................................. 52-54 Instruções de montagem-fusível .......................................................................................... 61 Legendas ....................................................................................................................... 62-64 Spis treœci .......................................................................................................... 4 Wstêp ............................................................................................................................ 8 Zawartoœæ i wymiary .......................................... ........................................................... 9-10 Akcesoria ....................................................................................................................... 11 Instrukcja monta¿u ........................................................................................................ 12 Zasady bezpieczeñstwa ................................................................................................ 55 Instalacja i obs³uga komponentów.................................................................................. 56-57 Instrukcja obs³ugi ........................................................................................................... 58-60 Instrukcja monta¿u bezpiecznika ......................................................................................... 61 Legenda ......................................................................................................................... 62-64 4 65 CODE (-) Achtung! Radio-Codierung ¡Atención! Codificación de radio Attention! Codage radio Attention! Radio-coding Attenzione! Codice radio Let op! Radio-codering Atenção! Codificação de rádio Uwaga! Kodowanie radioodbiornika Achtung! Schwarzes Kabel (Masse) zuerst anklemmen ¡Atención! Conectar primero el cable negro (masa) Attention! Connectez d'abord le câble noir (câble de masse) Attention! Connect black cable (ground cable) first Attenzione! Collegare prima il cavo nero (massa) Let op! Zwarte kabel (massa) eerst aanklemmen Atenção! Apertar primeiro o cabo preto (terra) Uwaga! Czarny kabel (masa) pod³¹czyæ w pierwszej kolejnoœci D Einleitung Sehr geehrte Kundin, sehr geehrter Kunde, Sie haben eine Freisprecheinrichtung der Marke Bury erworben und sich so für ein Produkt mit hoher Qualität sowie höchstem Bedienungskomfort entschieden. Einkauf, Produktion sowie Service und Vertrieb unterliegen bei Bury einem strengen Qualitätsmanagement nach DIN EN ISO 9001. Alle Bury-Freisprechanlagen entsprechen den Sicherheitsnormen CE und e1. Außerdem geben wir auf alle Komponenten zwei Jahre Gewährleistung. Damit Sie den vollen Komfort Ihrer Bury-Freisprechanlage genießen können, lesen Sie sich die Bedienungsanleitung bitte sorgfältig durch. Falls Sie zusätzlich Fragen zum Einbau oder Betrieb haben, wenden Sie sich bitte an Ihren Händler. Er berät Sie gerne und zuverlässig und leitet Ihre Erfahrungen und Anregungen an den Hersteller weiter. In besonders dringenden Fällen wenden Sie sich bitte an unsere Hotline. Die Telefon- und Faxnummern finden Sie unten auf der Titelseite der Bedienungsanleitung. Wir wünschen Ihnen eine gute Fahrt. Introducción Apreciado cliente: Usted ha adquirido un equipo de telefonía manos libres de la marca Bury, optando con ello por un producto de alta calidad y m ximo confort de manejo. En Bury, las áreas de compras, producción, servicio y ventas se encuentran sometidas a una estricta gestión de calidad conforme a DIN EN ISO 9001. Todos los equipos manos libres de Bury cumplen las normas de seguridad CE así como e1. Además, concedemos una garantía de dos años para todos los componentes. Rogamos lea detenidamente las instrucciones de servicio para poder disfrutar de todo el confort que le ofrece su nuevo equipo de manos libres de Bury. En caso de que tenga más dudas sobre el montaje o manejo, rogamos diríjase a su distribuidor que con mucho gusto le asesorará de forma fiable y transmitirá sus experiencias y sugerencias al fabricante. En casos especialmente urgentes, rogamos llame a nuestro servicio hotline. Los números de teléfono y fax los encontrará al pie de la portada del manual de instrucciones de servicio. ¡Le deseamos un buen viaje! 64 5 Introduction Chère cliente, cher client, Vous venez d'acheter un kit mains-libres de la marque Bury pour votre téléphone portable et avez ainsi choisi un produit de haute qualité ainsi que de confort d'utilisation le plus élevé. Bury applique un système de gestion de la qualité rigoureux selon la norme DIN EN ISO 9001 pour les achats, la production, la distribution et le service après-vente. Tous les kits mains-libres Bury sont conformes aux normes de sécurité CE et e1. Nous vous assurons en plus une garantie de deux ans sur toutes les pièces. Pour profiter pleinement du confort de votre appareil Bury, veuillez lire attentivement ce mode d'emploi. Pour tout renseignement complémentaire sur le montage ou l'utilisation de votre appareil, consultez votre revendeur. Celui-ci saura vous conseiller de manière fiable et transmettre vos remarques et vos propositions au fabricant. Dans les cas particulièrement urgents, contactez notre hot-line. Les numéros de téléphone et de télécopie de ce service se trouvent sur la page de garde du mode d'emploi. Nous vous souhaitons un bon voyage ! Introduction Dear customer, Congratulation on purchasing a Bury hands-free car kit. You have chosen a high quality product that is extremely easy to use. All aspects of Bury production through to sales and service are subject to strict quality management according to DIN EN ISO 9001. All Bury hands-free car kits meet CE and e1 security standards. Furthermore, we provide a two-year warranty on all components. Please read the operating manual carefully so that you can fully enjoy your Bury hands-free car kit. If you have any further questions concerning installation or operation of your car kit, please contact your dealer. He will be happy to give you reliable advice. Please contact our hotline in especially urgent cases. You will find the telephone and fax number on the bottom of the title page of the operating manual. Have a good trip! Vor Nässe und Feuchtigkeit schützen ¡Preservar de la humedad! Mettre à l'abri de l'humidité Avoid expose to moisture Tenere al riparo da acqua ed umidità Beschermen tegen water of vochtigheid Proteger da água e humidade Chroniæ przed zawilgoceniem Extreme Temperaturen vermeiden ¡No exponer a temperaturas extremas! Eviter les températures extrêmes Avoid extreme temperatures Evitare temperature estreme Extreme temperaturen vermijden Evitar temperaturas extremas Unikaæ ekstremalnych temperatur Ist Ihr Fahrzeug mit einer hohlen A-Säule ausgestattet, kann es zur Entstehung von Nebengeräuschen durch Resonanz kommen. Bringen Sie bitte dann das Mikrofon im Rückspiegelbereich an. Si su vehículo está equipado con una columna A hueca, puede que se produzcan interferencias causadas por resonancias. En este caso, instale el micrófono en la zona del retrovisor. Si votre véhicule est équipé d'un pilier 'A' creux (pilier situé sous le point d'attache de la ceinture), des bruits parasites peuvent survenir en raison de l'effet de résonance. Dans ce cas, veuillez placer le microphone près du rétroviseur. If your vehicle is equipped with a concave A-pillar, ambient noise due to resonance can occur. Then place the microphone near the driving mirror. Se il veicolo è dotato di una colonna A vuota, si possono produrre rumori supplementari dovuti alla risonanza. In questo caso, portare il microfono nell'area dello specchietto retrovisore. Wanneer uw voertuig is uitgerust met een holle A-zuil, dan kan er resonantie optreden door het ontstaan van nevengeluiden. Breng de microfoon dan a.u.b. vlakbij de achteruitkijkspiegel aan. Caso o seu veículo esteja equipado com um pilar A oco, podem surgir ruídos parasitas devido a ressonância. Coloque então o microfone na zona do espelho retrovisor. Je¿eli pojazd wyposa¿ony jest w pusty wewn¹trz s³upek, mo¿e dojœæ do powstania zak³óceñ poprzez rezonans. W taki wypadku mikrofon nale¿y przymocowaæ w okolicy lusterka wstecznego. 6 63 Legende Introduzione Leyenda Légende Caption Leggenda Legende Legendas Legenda Achtung! wichtige Information ¡Atención! Información importante Attention! informations importantes Attention! important information Attenzione! informazioni importanti Let op! belangrijke informatie Atenção! Informações importantes Uwaga! wa¿na informacja Egregia clientela, avete acquistato un dispositivo viva voce di marca Bury, optando così per un prodotto di grande qualità e di massimo comfort di utilizzo. Acquisto, produzione, assistenza e distribuzione sono sottoposti alla Bury, ad una severa gestione della qualità, a norma della DIN EN ISO 9001. Tutti i dispositivi viva voce Bury corrispondono alle norme di sicurezza CE ed e1, inoltre tutto vi offriamo una garanzia di due anni su tutti i componenti dell dispositivo. Affinché possiate godere del massimo comfort del vostro dispositivo viva voce Bury, vi preghiamo di leggere attentamente le istruzioni per l'uso. Nel caso che, abbiate domande inoltrate relative al montaggio o all'esercizio del vostro dispositivo, vi preghiamo di rivolgervi al vostro rivenditore, il quale è a vostra disposizione per offrirvi la sua affidabile consulenza e che inoltrerà le vostre esperienze e suggerimenti al produttore. In casi particolarmente urgenti, vi preghiamo di rivolgervi alla nostra Hotline. Troverete i numeri di telefono e di fax a seguito, nella prima pagina delle istruzioni. Vi auguriamo un buon viaggio! Inleiding Airbag- und Prallzonen meiden ¡Evitar las zonas de airbag y de impacto! Eviter les zones de déploiement des airbags et les zones d'impact Avoid airbag and impact zones Evitare le zone riservate ad airbag e di scontro Unngå kollisjonspute- og støtsoner Evitar as zonas do airbag e de impacto Nie montowaæ w obszarze dzia³ania poduszki powietrznej 24V/12V 62 Spannungswandler notwendig Se requiere transformador Transformateur de tension nécessaire Voltage transformer required Necessario trasformatore di tensione Spanningsomvormer noodzakelijk É necessário um transformador Niezbêdny konwerter napiêcia zasilania Apreciado cliente: Usted ha adquirido un equipo de telefonía manos libres de la marca Bury, optando con ello por un producto de alta calidad y m ximo confort de manejo. En Bury, las áreas de compras, producción, servicio y ventas se encuentran sometidas a una estricta gestión de calidad conforme a DIN EN ISO 9001. Todos los equipos manos libres de Bury cumplen las normas de seguridad CE así como e1. Además, concedemos una garantía de dos años para todos los componentes. Rogamos lea detenidamente las instrucciones de servicio para poder disfrutar de todo el confort que le ofrece su nuevo equipo de manos libres de Bury. En caso de que tenga más dudas sobre el montaje o manejo, rogamos diríjase a su distribuidor que con mucho gusto le asesorará de forma fiable y transmitirá sus experiencias y sugerencias al fabricante. En casos especialmente urgentes, rogamos llame a nuestro servicio hotline. Los números de teléfono y fax los encontrará al pie de la portada del manual de instrucciones de servicio. Vi ønsker deg god tur! 7 Einbauanleitung Sicherung Manual de Instruções Instrucciones de montaje para fusible Estimado/a cliente, Adquiriu um kit de mãos livres da marca Bury e decidiu-se por um produto com elevada qualidade, bem como por um grande conforto de operação. Na Bury, a compra, a produção, bem como a assistência técnica e a comercialização, estão sujeitos a uma estrita gestão da qualidade em conformidade com a norma DIN EN ISO 9001. Todos os kits de mãos livres da Bury correspondem às normas de segurança CE e e1. Além disso, todos os componentes têm uma garantia de dois anos. Para que possa apreciar todo o conforto do seu kit de mãos livres da Bury, leia atentamente o manual de instruções. Caso tenha dúvidas adicionais sobre a montagem ou operação, contacte o seu agente. Ele terá todo o prazer em aconselhá-lo/a e transmitirá as suas experiências e sugestões ao fabricante. Em questões bastante urgentes, ligue para a nossa Linha de Apoio ao Cliente. Encontra os nossos números de telefone e fax na capa do manual de instruções. F Notice de montage des fusibles Installation instructions for the fuses Istruzioni di montaggio dell'interruttore di sicurezza Inbouwinstructies zekering Instruções de montagem-fusível Instrukcja monta¿u bezpiecznika 1 2 3 4 Desejamos-lhe boa viagem! Wstêp Szanowna Klientko, szanowny Kliencie, zakupiliœcie samochodowy zestaw g³oœnomówi¹cy firmy Bury i tym samym zdecydowaliœcie siê na produkt wysokiej jakoœci o najwy¿szym komforcie obs³ugi. Produkcja, serwis i zbyt podlegaj¹ œcis³ej kontroli jakoœci wg norm DIN EN ISO 9001. Wszystkie zestawy g³oœnomówi¹ce Bury spe³niaj¹ normy bezpieczeñstwa CE i e1. Udzielamy 2 lata gwarancji na wszystkie komponenty zestawu. Prosimy przeczytaæ niniejsz¹ instrukcjê obs³ugi w celu poznania wszystkich mo¿liwoœci naszego zestawu. Z ewentualnymi pytaniami dotycz¹cymi monta¿u i eksploatacji proszê zwróciæ siê do sprzedawcy, który udzieli fachowych porad i przeka¿e producentowi Pañstwa uwagi i sugestie. W szczególnych, nie cierpi¹cych zw³oki przypadkach proszê skorzystaæ z naszej infolinii. Numer telefonu i faxu znajd¹ Pañstwo na dole strony tytu³owej niniejszej instrukcji. ¯yczymy Pañstwu szerokiej drogi! 8 61 Lieferumfang und Abmessungen Alcance de suministro y dimensiones F Fourniture et dimensions Scope of supply & dimensions Contenuto della fornitura & misure Leveringsomvang & afmetingen Âmbito de fornecimento e dimensões Zawartoœæ i wymiary CC 9050 0 05 9 CC 200 cm 295 cm a 150 cm b 60 9 Przerwanie po³¹czenia Bluetooth Je¿eli po³¹czenie Bluetooth ma zostaæ zakoñczone, mo¿na je w wygodny sposób przerwaæ przy pomocy urz¹dzenia g³oœnomówi¹cego lub telefonu komórkowego. Oprócz tego, po³¹czenie zostaje przerwane w przypadku oddalenia siê od pojazdu poza zasiêg odbioru urz¹dzenia g³oœnomówi¹cego. CC 9051 1 05 9 CC Nale¿y pamiêtaæ, ¿e akumulator telefonu szybciej siê roz³adowuje, gdy aktywna jest funkcja Bluetooth. Je¿eli zakoñczono korzystanie z funkcji Bluetooth, np. w razie opuszczenia pojazdu na d³u¿szy czas, funkcjê nale¿y wy³¹czyæ. Menu: Nale¿y pamiêtaæ, ¿e korzystanie z niektórych opisanych poni¿ej funkcji/komunikatów mo¿liwe jest wy³¹cznie wtedy, gdy obs³uguje je telefon komórkowy! 200 cm 295 cm 150 cm a Po w³¹czeniu urz¹dzenia g³oœnomówi¹cego pokazuje siê ekran g³ówny. Informuje on nas o tym, czy telefon pod³¹czony jest przez Bluetooth czy nie. Tutaj nale¿y, w zale¿noœci od statusu pod³¹czenia, wywo³aæ menu g³ówne wciskaj¹c przycisk 5. Zaznaczona paskiem mo¿liwoœæ mo¿e zostaæ wybrana przez ponowne wciœniêcie przycisku 5. Za pomoc¹ przycisku 4 wychodzi siê z menu. - Jêzyk -- angielski / niemiecki / hiszpañski (wybór jêzyka menu) - Serwis -- Update (przeprowadzanie aktualizacji oprogramowania firmware urz¹dzenia g³oœnomówi¹cego) -- Kolor --- Kolor podstawowy (wybór koloru t³a) ---Tekst (wybór koloru tekstu) -- Software (wskazanie aktualnej wersji oprogramowania firmware urz¹dzenia g³oœnomówi¹cego) W celu wgrania aktualizacji oprogramowania firmware konieczny jest komputer (najlepiej laptop) ze z³¹czem Bluetooth. Aktualne wersje oprogramowania firmware znaleŸæ mo¿na na stronie zawieraj¹cej oprogramowanie dla tego urz¹dzenia g³oœnomówi¹cego w Internecie pod adresem www.bury.com. b 100 cm 100 cm 10 Funkcje w przypadku nieaktywnego po³¹czenia Bluetooth: Jeœli nie jest pod³¹czony ¿aden telefon komórkowy, pokazuje siê na wyœwietlaczu komunikat Brak po³¹czenia. (4) = Nawi¹zanie po³¹czenia z ostatnim pod³¹czonym telefonem komórkowym (5) = Aktywowanie menu / wywo³anie punktów menu (6) = Zwijanie punktów menu Inne przyciski = brak funkcji Funkcje w przypadku aktywnego po³¹czenia Bluetooth: Jeœli telefon jest pod³¹czony z urz¹dzeniem g³oœnomówi¹cym, pokazuje siê na wyœwietlaczu jego nazwa identyfikacyjna BT. Pojawia siê tak¿e natê¿enie pola zasiêgu (dla odbioru) oraz wskaŸnik na³adowania baterii telefonu komórkowego oraz si³a g³osu urz¹dzenia g³oœnomówi¹cego. 59 D Instrukcja obs³ugi F Zubehör Accessori Accesorios Toebehoren Accessoires Acessórios Accessories Akcesoria Car CD-Adapter 1 2 5 6 4 3 W³¹czanie Jeœli zasilanie elektryczne urz¹dzenia g³oœnomówi¹cego zostanie pod³¹czone prawid³owo, urz¹dzenie to aktywuje siê po w³¹czeniu zap³onu. Wyœwietlacz w³¹cza siê i rozlega siê krótki dŸwiêk. Po ekranie powitalnym pokazuje siê menu g³ówne i rozlega siê dalszy, ni¿szy dŸwiêk, jeœli przez Bluetooth nie zostanie automatycznie po³¹czony ¿aden telefon z urz¹dzeniem g³oœnomówi¹cym. W przypadku stworzenia po³¹czenia rozlega siê d³u¿szy, wy¿szy dŸwiêk. Inicjalizacja po³¹czenia Bluetooth (zestrajanie) Je¿eli po³¹czenie Bluetooth ma byæ ustanowione po raz pierwszy, nale¿y uaktywniæ funkcjê Bluetooth w telefonie komórkowym i w³¹czyæ funkcjê wyszukiwania urz¹dzeñ typu Bluetooth. W takim wypadku trzeba odnaleŸæ urz¹dzenia okreœlone mianem „CC 9050...“. . W razie wykrycia kilku urz¹dzeñ nale¿y wybraæ opcjê “urz¹dzenie g³oœnomówi¹ce” i wprowadziæ PIN 1234. Telefon komórkowy po³¹czy siê wówczas (zestroi) wykorzystuj¹c po³¹czenie Bluetooth z urz¹dzeniem g³oœnomówi¹cym. Urz¹dzenie g³oœnomówi¹ce obs³uguje profile “g³oœne mówienie” i „A2DP“. Prosimy odpowiednio ustawiæ telefon lub sprawdziæ, czy obs³uguje on te profile. 12V / 24V Spannungswandler Phone-In Kabel externer Lautsprecher 165 cm Je¿eli nie mo¿na ustanowiæ po³¹czenia, nale¿y sprawdziæ i zaktualizowaæ stan oprogramowania (firmware) telefonu komórkowego lub urz¹dzenia g³oœnomówi¹cego. Informacje dotycz¹ce tej tematyki znajduj¹ siê w Internecie na stronie www.bury.com. Ponadto mo¿e okazaæ siê, ¿e konieczne bêdzie wykasowanie danego telefonu komórkowego z listy pod³¹czonych urz¹dzeñ, aby urz¹dzenie g³oœnomówi¹ce mog³o zostaæ poprawnie rozpoznane i aby mo¿liwe by³o nawi¹zanie po³¹czenia. W razie w¹tpliwoœci dotycz¹cych menu, funkcji i obs³ugi prosimy o zapoznanie siê z instrukcj¹ obs³ugi posiadanego telefonu komórkowego, gdy¿ ró¿ni¹ siê one znacznie w zale¿noœci od producenta i modelu telefonu. Urz¹dzenie g³oœnomówi¹ce wyposa¿one jest w pamiêæ, w której zapisane zostaj¹ dane maksymalnie 10 telefonów komórkowych. W przypadku pod³¹czenia jedenastego telefonu z pamiêci urz¹dzenia, wykasowaniu ulegaj¹ dane pierwszego zapamiêtanego telefonu. Po uruchomieniu urz¹dzenia g³oœnomówi¹cego próbuje ono automatycznie siê po³¹czyæ z zachowanym w pamiêci telefonem komórkowym w profilu "g³oœne mówienie". 58 Mini-Umschaltbox 11 F Einbauanleitung Istruzioni di montaggio Instrucciones de montaje Inbouwinstructies Notice de montage Instruções de montagem Installation instructions Instrukcja monta¿u Teraz pod³¹czyæ mikrofon (przy³¹cze 4) i wtyczkê monitora (przy³¹cze 5) do z³¹cza skrzynki elektronicznej. Z³¹cze 3 umo¿liwia g³oœne odtwarzanie g³osu partnera podczas rozmowy telefonicznej. Do tego z³¹cza mo¿na pod³¹czyæ oddzielny g³oœnik (akcesoria firmy Bury) lub wejœcie phone-in radia (jeœli takie jest) poprzez adapter phone-in (akcesoria firmy Bury). Przy³¹cze elementu prze³¹czaj¹cego na g³oœne mówienie (akcesoria firmy Bury) jest równie¿ mo¿liwe. W przypadku obu ostatnich wariantów mo¿na wykorzystaæ wewnêtrzny system nag³oœnienia pojazdu do odtwarzania rozmowy. Muzyka w jakoœci stereo odtwarzana jest na z³¹czu 2. Tutaj mo¿na pod³¹czyæ wejœcie aux-in radia (jeœli takie jest) za pomoc¹ dostêpnego w handlu adaptera. Adapter musi posiadaæ w celu pod³¹czenia do urz¹dzenia g³oœnomówi¹cego gniazdo zapadkowe stereo 3,5 mm. Drugi koniec musi byæ odpowiedni do radia. Jeœli radio nie dysponuje wejœciem aux-in, mo¿na wykorzystaæ car CD adapter z oferty akcesoriów firmy Bury w celu umo¿liwienia odtwarzania muzyki przez radio. 2 1 CC 90 50 4 1 3 2 34 5 (-) 24V/12V CODE 5 cm opt. 3 min .8 12 0c m 57 Instalacja i obs³uga komponentów Krok 1: Prosimy wybraæ odpowiednie miejsce dla monitora. Nale¿y zwróciæ uwagê na powierzchniê na której bêdzie mocowany. Nie mo¿e on ograniczaæ dzia³ania poduszek powietrznych, ani widocznoœci kierowcy. Przewody ³¹cz¹ce monitor z urz¹dzeniem powinny byæ swobodnie u³o¿one. Nale¿y zapewniæ swobodny dostêp do monitora, aby mo¿na go by³o go ³atwo zdejmowaæ z podstawki. Po wybraniu optymalnego miejsca nale¿y w pierwszej kolejnoœci przymocowaæ do powierzchni podstawkê, a nastêpnie umiejscowiæ na niej monitor i ewentualnie wypozycjonowaæ go. Proszê u¿yæ zawart¹ w zestawie chusteczkê oczyszczaj¹c¹ do odt³uszczenia powierzchni, na której ma byæ umieszczona podstawa do nawigacji. Proszê wzi¹æ tak¿e pod uwagê, ¿e poprzez du¿e zmiany temperatury przy u¿ytkowaniu powierzchnia - w zale¿noœci od materia³u i struktury mo¿e siê odbarwiæ. Krok 2: Mikrofon pod³¹czyæ do gniazda na lewym boku monitora. Je¿eli to mo¿liwe przewód nale¿y poprowadziæ w taki sposób, aby by³ przymocowany i nie zwisa³ lub nie le¿a³ swobodnie utrudniaj¹c prowadzenie pojazdu. Uk³adaj¹c przewód nale¿y pamiêtaæ, aby nie by³ on naci¹gniêty, lecz w miarê luŸny. Nale¿y uwa¿aæ, aby nie przyci¹æ przewodu, gdy¿ mo¿e to spowodowaæ uszkodzenie izolacji w wyniku przetarcia. Krok 3 Je¿eli to mo¿liwe, przewody nale¿y poprowadziæ w taki sposób, aby by³y przymocowane i nie zwisa³y lub nie le¿a³y swobodnie w sposób utrudniaj¹cy prowadzenie pojazdu. Uk³adaj¹c przewód nale¿y pamiêtaæ, aby nie by³ on naci¹gniêty, lecz w miarê luŸny. Nale¿y uwa¿aæ, aby nie przyci¹æ przewodu, gdy¿ mo¿e to spowodowaæ uszkodzenie izolacji w wyniku przetarcia. D Sicherheitshinweise Der Einbau dieses Systems kann durch Sie vorgenommen werden. Beachten Sie aber bitte die Einbauvorgaben des Kfz-Herstellers (VAS 1978). Stellen Sie das Fahrzeug während der Installation an einem Ort ab, wo es den Straßenverkehr nicht behindert. Wir empfehlen Ihnen, den Einbau durch eine Fachwerkstatt durchführen zu lassen. Dieses System ist für den Einsatz in Kraftfahrzeugen mit einem Bordnetz von 12 Volt (PKW) ausgelegt. Möchten Sie das Gerät in ein Kraftfahrzeug mit einem Bordnetz von 24 Volt (z. B. LKW) einbauen, verwenden Sie bitte einen Spannungswandler. Falls Sie dazu Fragen haben, informieren Sie sich bitte vorab telefonisch bei unserer Hotline. Installieren Sie die Komponenten des Gerätes so im Fahrzeug, das Ihre Sicht nicht beeinträchtigt wird und die Komponenten nicht in einer Personenaufprallzone der Fahrgastzelle oder in Entfaltungsbereichen von Airbags montiert sind. Zum Herauslösen von Verkleidungen oder Komponenten des Armaturenbretts sind in einigen Fällen spezielles Werkzeug erforderlich. Nehmen Sie das Gerät nicht in Betrieb, wenn Sie einen Defekt bemerken bzw. vermuten. Nehmen Sie in diesem Fall Kontakt mit unserer Hotline auf. Unsachgemäße Reparaturversuche können für Sie gefährlich sein. Deshalb darf nur qualifiziertes Personal Überprüfungen vornehmen. Krok 4 Skrzynkê elektroniczn¹ zainstalowaæ w odpowiednim miejscu w pojeŸdzie. Mo¿e to byæ miejsce np. za radiem, w skrytce lub na œrodku konsoli. Nale¿y zwróciæ uwagê na to, aby by³ dobry dostêp do jej przy³¹czy. Przed pod³¹czeniem komponentów nale¿y najpierw w celu zachowania bezpieczeñstwa od³¹czyæ akumulator. Trzeba przy tym mieæ na uwadze ewentualne kodowanie radia (patrz podrêcznik u¿ytkowania radia). Zasilanie elektryczne urz¹dzenia g³oœnomówi¹cego odbywa siê przez kabel 4-¿y³owy. Pod³¹czyæ kabel czarny (zacisk 31 - minus), czerwony (zacisk 30 - zasilanie sta³e plus) i niebieski (zacisk 15 zasilanie po przekrêceniu kluczyka w stacyjce) do zasilania elektrycznego radia (w razie potrzeby przez gniazdo zapalniczki lub skrzynkê bezpiecznikow¹). ¯ó³ty kabel s³u¿y do pod³¹czenia do przeciwnego elementu wyciszania radia podczas rozmowy telefonicznej. Bia³¹ wtyczkê Molex po³¹czyæ z przy³¹czem 1 (patrz rysunek na nastêpnej stronie). Für Beschädigungen und Störungen durch unsachgemäße Installation und Handhabung des Systems übernehmen wir keine Haftung. Setzen Sie deshalb das Gerät weder Nässe, extremen Temperaturen oder Erschütterungen aus und befolgen Sie genau die in der Einbau- und Bedienungsanleitung vorgegebenen Arbeitsschritte. Bedienen Sie das System nur in Situationen, in denen es Ihnen die Verkehrslage erlaubt und Sie dabei andere Verkehrsteilnehmer nicht gefährden, schädigen, behindern oder belästigen. Die Lautstärke des Geräts ist so einzustellen, dass Außengeräusche weiterhin wahrgenommen werden können. UWAGA! Kabel niebieski pod³¹czyæ tak¿e do zacisku 30, wówczas urz¹dzenie g³oœnomówi¹ce bêdzie ca³y czas zasilane pr¹dem. W przypadku d³u¿szego przestoju samochodu mo¿e do doprowadziæ do roz³adowania akumulatora. 56 13 Installation und Handhabung der Komponenten Schritt 1: Wählen Sie bitte zuerst den für Sie in Ihrem Fahrzeug am besten geeigneten Standort für den Monitor samt Montagefuss aus, in dem Sie den Monitor auf den Fuss aufstecken und an verschiedenen Positionen im Fahrzeug einmal anhalten, bzw. positionieren. Achten Sie dabei unbedingt auf Personenaufprallzonen (unter anderem Airbagbereiche), Untergrundbeschaffenheit (je nach Befestigungsart), freier Sicht zum Monitor (Nichteinschränkung der Sicht in Richtung Windschutzscheibe), Abnehmbarkeit des Monitors vom Montagefuss sowie auf günstige Verlegemöglichkeiten der Kabel. Haben Sie eine geeignete Position für den Monitor im Fahrzeug gefunden, können Sie nun den Montagefuss entsprechend anbringen / befestigen. Nutzen Sie bitte das beiliegende Säuberungstuch zum Entfetten der Oberflächen, auf die Sie den Montagefuß anbringen möchten. Bitte beachten Sie, dass es bei starken Temperaturschwankungen während der späteren Nutzung je nach Struktur und Beschaffenheit zu Entfärbungen der Oberflächen kommen kann. Zasady bezpieczeñstwa Monta¿ systemu mo¿na przeprowadziæ samodzielnie. Nale¿y przy tym przestrzegaæ instrukcji monta¿u producenta samochodu (VAS 1978). Podczas instalowania samochód nale¿y zaparkowaæ w takim miejscu, w którym nie bêdzie on utrudnia³ ruchu drogowego. Zalecamy jednak zlecenie przeprowadzenia monta¿u w specjalistycznym serwisie. System ten przeznaczony jest do stosowania w samochodach wyposa¿onych w instalacjê elektryczn¹ o napiêciu 12 V (samochody osobowe). W przypadku zamiaru zamontowania urz¹dzenia w samochodach wyposa¿onych instalacjê elektryczn¹ o napiêciu 24 V (np. samochody ciê¿arowe), prosimy o u¿ycie przek³adnika napiêcia. Informacji na ten temat udzieli nasza infolinia. Schritt 2: Je nach Fahrzeugtyp und dessen Ausstattung (z. B. Airbags) ist es sinnvoll, das Mikrofon entweder an der A-Säule, an der Sonnenblende oder am Dachhimmel zu installieren. Hinweise zu den Ausstattungsmerkmalen entnehmen Sie bitte aus den Fahrzeugunterlagen. Beachten Sie bitte weiterhin die in der Einbauanleitung dargestellten Entfernungshinweise zu anderen Komponenten und zu dem Fahrzeugführer bzw. Sprecher. Poszczególne komponenty urz¹dzenia nale¿y zamontowaæ w taki sposób i w takim miejscu, aby nie ogranicza³y widocznoœci, ani nie znajdowa³y siê w strefie uderzenia osób kabiny pasa¿erskiej lub w obszarze otwierania siê poduszek powietrznych. Do demonta¿u os³on (z i bez poduszek powietrznych) lub elementów tablicy przyrz¹dów, mog¹ byæ w niektórych przypadkach konieczne specjalistyczne narzêdzia oraz specjalne umiejêtnoœci. Schritt 3: Verlegen Sie bitte die Kabel möglichst so, das sie nicht unbefestigt im Fahrzeug liegen/hängen und keinen Einfluss auf das Führen des Fahrzeugs ausüben können. Achten Sie beim Verlegen eines Kabels darauf, das es nicht auf Zug beansprucht wird sondern noch Spiel besitzt. Vermeiden Sie Kabelquetschungen, die zu Beschädigungen der Isolierungen durch Reibung/Scheuern entstehen können. Prosimy nie w³¹czaæ urz¹dzenia w wypadku stwierdzenia lub przypuszczenia, ¿e urz¹dzenie jest uszkodzone. W takim wypadku nale¿y skontaktowaæ siê z naszym serwisem hotline. Podejmowanie niefachowych prób naprawy mo¿e byæ niebezpieczne. Z tego powodu kontrola urz¹dzenia mo¿e byæ przeprowadzona wy³¹cznie przez wykwalifikowany personel. Schritt 4: Installieren Sie die Elektronikbox an geeigneter Stelle im Fahrzeug. Dies kann z. B. hinter dem Radio, im Handschuhfach oder in der Mittelkonsole sein. Achten Sie darauf, dass Sie ohne Probleme an die Anschlüsse der Box kommen. Bevor Sie Komponenten an der Elektronikbox anschliessen, sollten Sie zur Sicherheit die Batterie abklemmen. Achten Sie hierbei auf eine eventuelle Radiokodierung (siehe Radio-Handbuch). Die Stromversorgung der Freisprecheinrichtung wird über ein 4adriges Kabel hergestellt. Schliessen Sie das schwarze (Klemme 31 - Minus), das rote (Klemme 30 - Dauerplus) und das blaue Kabel (Klemme 15 - Zündungsplus) an die Stromversorgung Ihres Radios (ggf. über Zigarettenanzünder oder Sicherungskasten) an. Das gelbe Kabel dient nach Anschluss am Pendant zur Stummschaltung des Radios bei einem Telefongespräch. Den weißen Molex Stecker verbinden Sie bitte mit Anschluss 1 (siehe Zeichnung auf nächster Seite). Za ewentualne uszkodzenia i usterki powsta³e na skutek nieprawid³owego monta¿u oraz niew³aœciwego pos³ugiwania siê systemem producent nie ponosi odpowiedzialnoœci. Dlatego nie nale¿y nara¿aæ urz¹dzenia na dzia³anie wilgoci, ekstremalnych temperatur oraz wstrz¹sów. Nale¿y równie¿ dok³adnie przestrzegaæ zaleceñ podanych w instrukcji monta¿u i obs³ugi urz¹dzenia. Systemem nale¿y pos³ugiwaæ siê tylko wtedy, gdy pozwala na to sytuacja w ruchu drogowym oraz jeœli nie spowoduje to powstania zagro¿enia, szkody, utrudnienia lub uci¹¿liwoœci dla innych uczestników ruchu drogowego. G³oœnoœæ urz¹dzenia nale¿y ustawiæ na takim poziomie, aby by³y s³yszalne odg³osy dobiegaj¹ce z zewn¹trz pojazdu. ACHTUNG: Schliessen Sie das blaue Kabel ebenfalls an Klemme 30 an, dann wird die Freisprecheinrichtung permanent mit Strom versorgt. Dies könnte bei längerem Stillstand des Fahrzeugs zur Entladung der Autobatterie führen. 14 55 Schliessen Sie nun das Mikrofon (Anschluss 4) und den Stecker des Monitors (Anschluss 5) an die Elektronikbox an. Über den Anschluss 3 gibt die Freisprecheinrichtung die Sprachausgabe des Gesprächspartners während eines Telefonats wieder. An diesen Anschluss können Sie einen separaten Lautsprecher (Bury Zubehör) oder den Phone-In Eingang Ihres Radios (falls vorhanden) über einen Phone-In Adapter (Bury Zubehör) anschliessen. Der Anschluss einer Lautsprecherumschaltbox (Bury Zubehör) ist ebenfalls möglich. Bei den beiden letzteren Varianten nutzen Sie das fahrzeuginterne Soundsystem zur Sprachausgabe. Musik in Stereoqualität wird am Anschluss 2 ausgegeben. Hier können Sie den Aux-In Eingang Ihres Radios (falls vorhanden) über im Fachhandel erhältliche Adapter anschliessen. Der Adapter muss für den Anschluss an der Freisprecheinrichtung eine 3,5 mm Stereoklinkenbuchse besitzen. Je nach Autoradio ist das andere Ende verschieden zu wählen. Falls Ihr Radio nicht über einen Aux-In verfügt, können Sie den Car CD-Adapter aus dem Bury Zubehörprogramm nutzen, um die Musikwiedergabe über Ihr Radio zu ermöglichen. CC 1 90 50 2 34 54 5 15 D Cancelamento de uma ligação Bluetooth: Se deseja cancelar uma ligação Bluetooth, tem a possibilidade de o fazer confortavelmente através do kit de mãos livres ou a partir do seu telemóvel. Além disso, a ligação será interrompida, caso se afaste demasiado com o telemóvel do veículo e, consequentemente, do raio de recepção do kit de mãos livres. Bedienungsanleitung 1 = linke Funktionstaste 2 = Anrufannahmetaste 3 = rechte Funktionstaste 4 = Anrufbeendigungstaste 5 = Auswahltaste 6 = Scrolltaste (links/oben/rechts/unten) 1 2 5 6 4 3 Einschalten: Falls die Stromversorgung der Freisprecheinrichtung (FSE) ordnungsgemäß angeschlossen wurde, aktiviert sich die FSE nachdem Sie die Zündung eingeschaltet haben. Das Display schaltet sich ein und ein kurzer hoher Ton erklinkt. Nach der Initialisierungsmaske erscheint das Hauptmenü und ein weiterer tiefer Ton, falls kein Mobiltelefon automatisch via Bluetooth mit der FSE verbunden wurde. Bei erfolgreich hergestellter Verbindung ertönt ein langer hoher Ton. Herstellen einer Bluetooth Verbindung (Kopplung): Möchten Sie zum ersten Mal eine Bluetooth-Verbindung herstellen, müssen Sie die BluetoothFunktion bei Ihrem Mobiltelefon aktivieren und nach Bluetooth-Geräten suchen lassen. In diesem Fall nach einem Gerät mit der Bezeichnung „CC 9050...“. Falls mehrere Geräte entdeckt worden sind, wählen Sie bitte die FSE aus und geben die PIN-Nummer 1234 ein. Die Bluetooth-Verbindung (Kopplung) wird anschließend zwischen Ihrem Mobiltelefon und der FSE hergestellt. Die FSE unterstützt die Profile "Freisprechen" und „A2DP“. Bitte stellen Sie Ihr Mobiltelefon entsprechend ein, bzw. prüfen Sie, ob diese Profile unterstützt werden. Läßt sich keine Verbindung aufbauen, überprüfen und aktualisieren Sie bitte den Stand der Software (Firmware) auf Ihrem Mobiltelefon oder bei der FSE. Eine Übersicht zu dieser Thematik finden Sie im Internet unter www.bury.com. Weiterhin ist es möglich, das Sie erst die Liste der gekoppelten Geräte in Ihrem Telefon löschen müssen, damit die FSE richtig erkannt und eine Verbindung aufgebaut werden kann. Lesen Sie sich die Bedienungsanleitung Ihres Mobiltelefons durch, falls Sie Fragen zu dessen Menüführung, Funktionen und Bedienung haben sollten. Diese weicht je nach Hersteller und Typ stark voneinander ab. Die FSE besitzt einen Speicher, in denen die Kennungen von bis zu 10 Mobiltelefonen abgespeichert werden. Wird ein elfstes Mobiltelefon gekoppelt, wird der jeweils älteste Speichereintrag in der FSE gelöscht. Nach Inbetriebnahme der FSE versucht diese automatisch, sich mit einem bereits gespeicherten Mobiltelefon im Profile "Freisprechen" zu verbinden. Abrechen können Sie diese Funktion durch Drücken auf die Taste 5. 16 Tenha em atenção que, com a função Bluetooth activa, a capacidade da bateria do seu telemóvel pode diminuir rapidamente. Se não deseja utilizar mais a função Bluetooth, por exemplo, em longos períodos fora do veículo, então deve desactivá-la. Navegação por menus: Tenha em atenção que algumas das funções/visualizações a seguir descritas só são possíveis, se forem suportadas pelo telemóvel! Depois de ligar o kit de mãos livres, aparece a máscara principal. Esta informa-o se está, ou não, acoplado um telemóvel por Bluetooth. Aqui tem, em função do estado de acoplamento, a possibilidade de chamar o menu principal premindo a tecla 5. O registo realçado com uma barra pode ser seleccionado premindo novamente a tecla 5. Com a tecla 4, a navegação por menus pode ser cancelada. - Idioma -- Inglês / Alemão / Espanhol (selecção do idioma dos menus) - Serviço -- Actualização (execução de actualizações de firmware do kit de mãos livres) -- Cor --- Fundo (selecção da cor de fundo) ---Texto (selecção da cor do texto) -- Software (informação sobre a actual versão de firmware do kit de mãos livres) Para reproduzir uma actualização de firmware necessita de um PC (de preferência um portátil) com interface Bluetooth. As versões de firmware actuais e software de instalação para este kit de mãos livres encontram-se na Internet em www.bury.com. Funções com ligação Bluetooth inactiva: Se não estiver um telemóvel acoplado, aparece a mensagem Interrompido no visor. (4) = criação de uma ligação com o último telemóvel acoplado (5) = activação do menu / chamada de um ponto do menu (6) = deslocamento entre os pontos dos menus Outras teclas = sem função Funções com ligação Bluetooth activa: Se está ligado um telemóvel ao kit de mãos livres, aparece o seu nome de identificação BT no visor. Aparece igualmente a intensidade de campo (da recepção) e a capacidade do carregador do telemóvel, bem como o nível de volume do kit de mãos livres. 53 D Instruções de operação Trennung einer Bluetooth Verbindung: Möchten Sie eine Bluetooth-Verbindung aufheben, besteht die Möglichkeit, diese komfortabel an der FSE oder von Ihrem Mobiltelefon aus zu unterbrechen. Des weiteren wird die Verbindung unterbrochen, wenn Sie sich samt Mobiltelefon zu weit vom Fahrzeug und damit vom Empfangsradius der FSE entfernen. Beachten Sie bitte, das die Kapazität des Akkus Ihres Mobiltelefons bei aktivierter BluetoothFunktion schnell abnehmen kann. Möchten Sie die Bluetooth-Funktion nicht mehr nutzen, z. B. beim längeren Verlassen des Fahrzeugs, so sollten Sie diese deaktivieren. Menüführung: Beachten Sie bitte, das einige der nachfolgend beschriebenen Funktionen/Anzeigen nur möglich sind, falls diese durch das Mobiltelefon unterstützt werden! 1 2 5 6 4 3 Ligação: Caso a alimentação do kit de mãos livres tenha sido ligada correctamente, o kit activa-se depois de ligar a ignição. O visor liga-se e ouve-se um som alto. Depois da máscara de inicialização, aparece o menu principal e um som mais profundo, caso não tenha sido ligado um telemóvel via Bluetooth ao kit de mãos livres. No caso de uma ligação efectuada com sucesso, ouve-se um som alto mais prolongado. Criação de uma ligação Bluetooth (acoplamento): Se quiser estabelecer uma ligação Bluetooth pela primeira vez, tem de activar a função Bluetooth no seu telemóvel e iniciar uma procura de dispositivos Bluetooth. Neste caso, deverá procurar um dispositivo com a designação "CC9050…". Caso sejam encontrados vários dispositivos, seleccione o kit de mãos livres e introduza o PIN 1234. De seguida, será estabelecida a ligação Bluetooth (emparelhamento) entre o seu telemóvel e o kit de mãos livres. O kit de mãos livres suporta apenas os perfis "Mãos livres" e “A2DP”. Regule o seu telemóvel em conformidade ou verifique se estes perfis são suportados. Se não for possível estabelecer ligação, verifique e actualize a versão do software (firmware) do seu automóvel ou do kit de mãos livres. Na Internet, encontra informação sobre este tema em www.bury.com. Para além disso, é possível que tenha de apagar a lista dos dispositivos emparelhados no seu telemóvel, para que o kit de mãos livres reconheça correctamente e possa ser estabelecida uma ligação. Se tiver dúvidas sobre a navegação dos menus, funções e operação, leia o manual de instruções do seu telemóvel. Estes aspectos podem variar bastante conforme o fabricante e modelo. O kit de mãos livres possui uma memória, na qual são guardadas as identificações de 10 telemóveis. Se for acoplado um sexto telemóvel, o registo de memória mais antigo será apagado no kit de mãos livres. Após a colocação em funcionamento do kit de mãos livres, este tenta automaticamente acoplar-se a um telemóvel já guardado no perfil "Mãos livres". 52 Nach dem Einschalten der FSE erscheint die Hauptmaske. Diese informiert Sie, ob ein Mobiltelefon per Bluetooth verbunden ist oder nicht. Hier haben Sie, abhängig vom Verbindungsstatus, durch Drücken der Taste 5 die Möglichkeit das Hauptmenü aufzurufen. Der jeweils mit einem Balken hinterlegte Eintrag kann durch erneutes Drücken der Taste 5 ausgewählt werden. Mit der Taste 4 kann die Menüführung abgebrochen werden. -> Anrufliste -> Telefonbuch -> Nachricht -> Service -> Update (Durchführen von Firmwareupdates der Freisprecheinrichtung) -> Farbe -> Grundfarbe ( Auswahl der Hintergrundfarbe) ->Text (Auswahl der Textfarbe) -> Info -> SW Version (Anzeige der Softwarestände der FSE) -> Hardware (Anzeige der Hardwarestände der FSE) -> Bluetooth ->Kopplungsliste (Anzeige der gekoppelten Geräte) -> Sprache -- Englisch / Deutsch / Spanisch (Auswahl der Menüsprache) Das Untermenü 'Anrufliste' ist ähnlich der Menüführung aufgebaut, wie Sie es von Mobiltelefonen gewohnt sind. So lässt sich nachverfolgen, welche Nummern Sie gewählt, welche Anrufe Sie angenommen und welche Anrufe Sie verpasst haben. Im Untermenü 'Telefonbuch' werden Ihnen die Speichereinträge des Telefonbuches (SIMKarte) und des Adressbuches des Mobiltelefones angezeigt. Eingegangene SMS-Nachrichten können Sie sich im Untermenü 'Nachricht' anzeigen lassen. 17 Funktionen bei inaktiver Bluetooth-Verbindung: Ist kein Mobiltelefon mit der FSE verbunden, erscheint die Meldung Unterbrochen im Display. (4) = Herstellung einer Verbindung mit dem zuletzt gekoppelten Mobiltelefon, Abbruch der Menüführung (5) = Aktivierung des Menüs / Aufrufen eines Menüpunktes (6) = Scrollen zwischen den Menüpunkten, Veränderung der Displayhelligkeit (links / rechts) wenn Menü inaktiv Funktionen bei aktiver Bluetooth-Verbindung - Profil HF: Ist ein Mobiltelefon mit der FSE verbunden, erscheint dessen BT-Identifikationsname auf dem Display. Es erscheint ebenfalls die Feldstärke (der Empfang) und die Akkukapazität des Mobiltelefons sowie der Netzbetreibername und der Lautstärkepegel der FSE. (1) = Nummer wählen (Eingabe der Rufnummer durch Auswahl der entsprechenden Ziffern über Scroll- und Auswahltaste) (2) = Aufrufen von Voice-Tags (Sprachwahlfunktion) (4) = Bluetooth Verbindung unterbrechen Agora, ligue o microfone (ligação 4) e o conector do monitor (ligação 5) à caixa electrónica. Através da ligação 3, o kit de mãos livres reproduz a saída de voz do interlocutor durante um telefonema. Nesta ligação, pode ligar um altifalante separado (acessório da Bury) ou a entrada Phone-In do seu rádio (se disponível) através de um adaptador (acessório da Bury). É igualmente possível a ligação de uma “switch box” (caixa de distribuição) do altifalante. Nas duas últimas variantes, utilize o sistema de som da viatura para a saída de voz. Na ligação 2, é emitida música em qualidade estéreo. Aqui pode ligar a entrada Aux-In do seu rádio (se disponível) através de um adaptador vendido no comércio especializado. O adaptador tem de possuir um conector de jaque de estéreo de 3,5 mm para a ligação ao kit de mãos livres. Conforme o rádio da viatura, a outra extremidade deve ser escolhida de forma diferente. Caso o seu rádio não disponha de uma Aux-In, pode utilizar o adaptador do Car CD do programa de acessórios da Bury, para permitir a reprodução musical através do seu rádio. Um die Sprachwahlfunktionen Ihres Mobiltelefons mit der FSE nutzen zu können, müssen Sie vorab Rufnummern in Ihrem Mobiltelefon entsprechend gekennzeichnet haben. Meistens können Sie Voice-Tags nur für gespeicherte Rufnummern im Adressbuch Ihres Mobiltelefons aufnehmen. Funktionen bei aktiver Bluetooth-Verbindung - Profil A2DP: Verfügt Ihr Mobiltelefon über das Bluetooth Profil A2DP, dann lassen sich Musiktitel (z. B. MP3 Dateien) über die FSE in Stereoqualität abspielen. Wichtig ist, das Sie den jeweils angewählten Musiktitel über die Funktion "Abspielen über..." auf der FSE wiedergeben. Da die Menüführung der Mobiltelefonhersteller sehr unterschiedlich ist, kann die Bezeichnung der Auswahl "...Bluetooth-Stereo-Headset" voneinander abweichen. Nehmen Sie diese Einstellung vor, so wird die Musikwiedergabe über das an die FSE angeschlossene Soundsystem wiedergegeben. (2) = Start / Stop der Wiedergabe (6) = Wechseln der Titel (links = zurück, rechts = vor), Lautstärkeeinstellung (lauter = oben, leiser = unten) CC 1 90 50 2 34 5 Sollte während der Wiedergabe eines Musiktitels ein Anruf eingehen, so wird das Abspielen unterbrochen und graphisch wie akustisch auf den anruf hingewiesen. Mit der Taste 1 können Sie das Gespräch annehmen, mit der Taste 3 das Gespräch ablehnen. Nach Gesprächsende wird die Wiedergabe des Musiktitels fortgesetzt. 18 51 Instalação e manuseamento dos componentes Passo 1: Primeiro, escolha o local mais adequado no seu veículo para encaixar o monitor na base de forma mantê-lo ou colocá-lo em diferentes posições. Por conseguinte, é obrigatório prestar atenção às zonas de impacto do lugar do passageiro (entre outras coisas, as zonas de airbags), constituição da superfície (conforme o tipo de fixação), visão livre em relação ao monitor (não restrição da visão na direcção do pára-brisas), possibilidade de desmontagem do monitor da base, bem como possibilidades favoráveis de colocação do cabo. Se encontrou uma posição adequada para o monitor no veículo, pode então colocar / fixar a base de montagem. Utilize o pano de limpeza incluído para desengordurar as superfícies onde quer colocar a base de montagem. Tenha em atenção que no caso de grandes variações da temperatura - dependendo da estrutura e das características - pode ocorrer descoloração das superfícies durante a utilização posterior. Passo 2: Conforme o modelo do veículo e respectivo equipamento (por ex. airbags), é conveniente instalar o microfone no pilar A, na pala de sol ou no revestimento do tejadilho. Consulte as características do equipamento na documentação do veículo. Tenha ainda em atenção as instruções de distância, representadas no manual, em relação a outros componentes e ao condutor da viatura e/ou outro passageiro. Passo 3: Coloque o cabo de forma a que este não fique solto/pendurado no veículo e não possa exercer qualquer influência sobre a condução. Ao colocar um cabo tenha atenção para que este não seja submetido a tensão, nem tenha folga. Evite que o cabo seja esmagado, para que não surjam danos no isolamento devido a fricção/desgaste por atrito. Passo 3: Conforme o modelo do veículo e respectivo equipamento (por ex. airbags), é conveniente instalar o microfone no pilar A, na pala de sol ou no revestimento do tejadilho. Consulte as características do equipamento na documentação do veículo. Tenha ainda em atenção as instruções de distância, representadas no manual, em relação a outros componentes e ao condutor da viatura e/ou outro passageiro. Passo 4: Instale a caixa electrónica num local adequado da viatura, como, por exemplo, por trás do rádio, no porta-luvas ou na consola central. Tenha em atenção para que possa chegar sem problemas às ligações da caixa. Antes de ligar os componentes na caixa electrónica, deve desligar a bateria por razões de segurança. Por conseguinte, tenha em atenção uma eventual codificação do rádio (veja o manual do rádio). A alimentação do kit de mãos livres é feita através de um cabo de 4 condutores. Ligue o cabo preto (terminal 31 - negativo), o vermelho (terminal 30 corrente positiva permanente) e o cabo azul (terminal 15 corrente de ignição) à alimentação do seu rádio (se necessário, através do isqueiro ou caixa de fusíveis). O cabo amarelo, após ligação à contraparte, serve para silenciar o rádio no caso de uma conversa telefónica. Ligue o conector Molex branco à ligação 1 (veja o desenho na próxima página). Indicaciones de seguridad El montaje de este sistema lo puede efectuar usted mismo/a. Por favor, observe para ello las pautas de montaje del fabricante del automóvil (VAS 1978). Durante el tiempo de instalación, el vehículo deberá estar estacionado en un lugar donde no interfiera con el tráfico vial. Recomendamos encargar el montaje a un taller especializado. Este sistema está dimensionado para su empleo en automóviles con redes de a bordo de 12 voltios (turismos). Si usted tiene la intención de montar el equipo en un vehículo con una red de a bordo de 24 voltios (camión), deberá usar un transformador de tensión. Para aclarar cualquier duda al respecto, por favor, consulte a nuestro servicio hotline. Instale los componentes de este equipo de tal forma en el vehículo, que la visibilidad no quede obstaculizada, y no monte los componentes en ninguna zona del habitáculo susceptible de impacto de personas, ni en las áreas de despliegue de los airbags. En algunos casos, el desmontaje de paneles de revestimiento (con y sin airbags) o de componentes del tablero de instrumentos requerirá herramientas y conocimientos especiales. En caso de detectar o sospechar un defecto, no siga utilizando el equipo, sino póngase en contacto con nuestro servicio hotline. Los intentos de reparación inadecuados pueden entrañar peligro para usted, por lo que toda revisión deberá ser efectuada por personal cualificado. No asumimos ninguna responsabilidad en caso de deterioros o averías a causa de un montaje o manejo inadecuados del sistema. Por lo tanto, no exponga el equipo a la humedad ni a temperaturas extremas o vibraciones, y siga estrictamente los pasos establecidos en las instrucciones de montaje y servicio. Maneje el sistema únicamente cuando así lo permita la situación vial y sin poner en peligro, obstaculizar o molestar a otros usuarios de las vías públicas. Ajuste el volumen del equipo a un nivel que le permita seguir percibiendo los ruidos externos. ATENÇÃO: Ligue também o cabo azul ao terminal 30 e, assim, o kit de mãos livres é alimentado permanentemente com corrente. No caso de uma imobilização prolongada da viatura, isto pode originar a descarga da bateria da viatura. 50 19 Instalación y manejo de los componentes Paso 1: En primer lugar, escoja dentro de su vehículo el lugar de instalación más adecuado para el monitor y el pie de montaje. Para ello, inserte el monitor en el pie y vaya probando diferentes posiciones dentro del habitáculo, pero sin fijar el pie todavía. Al hacer esto, tenga muy en cuenta las zonas de impacto de personas (por ejemplo, áreas de despliegue de los airbags), la consistencia de la superficie de soporte (según el tipo de fijación), la libre visibilidad hacia el monitor (sin obstruir la vista en dirección al parabrisas), la facilidad para sacar el monitor del pie de montaje, así como las posibilidades de colocación de los cables. Una vez encontrada una posición apropiada para el monitor, podrá proceder a montar/fijar el pie de montaje dentro del vehículo. Por favor, utilice el paño de limpieza adjunto para desengrasar la superficie sobre la cual vaya a fijar el pie de montaje. Rogamos observe que los cambios fuertes de temperatura durante la utilización posterior pueden producir descoloraciones en la superficie más o menos intensas dependiendo de la estructura y de las propiedades del material. Instruções de segurança A montagem deste sistema pode ser efectuada pelo utilizador, mas é preciso ter em atenção as especificações de montagem do fabricante da viatura (VAS 1978). Durante a instalação, pare a viatura num local que não perturbe o trânsito. Aconselhamos que a montagem seja efectuada por uma oficina especializada. Este sistema é para ser utilizado em viaturas com uma rede de alimentação de bordo de 12 V (veículo ligeiro de passageiros). Se tenciona montar o equipamento numa viatura com uma rede de alimentação de bordo de 24 V (camião), utilize um transformador de tensão. A nossa Linha de Apoio ao Cliente terá todo o prazer em responder a questões sobre este tema. Paso 2: Conecte el micrófono por el lado izquierdo del monitor. Procure colocar el cable de tal manera que no quede suelto o colgando dentro del habitáculo y no pueda afectar al manejo del vehículo. Al colocar el cable, preste atención a que no quede demasiado tensado, sino que tenga todavía un poco de holgura. Evite el aplastamiento del cable para que su aislamiento no pueda deteriorarse por fricción o rozamiento. Instale os componentes do equipamento na viatura, de forma a não prejudicar a sua visão. Os componentes não devem ser montados numa zona de impacto do lugar do passageiro ou nas zonas de abertura dos airbags. Para retirar revestimentos (com e sem airbags) ou componentes do painel de instrumentos, são necessários, nalguns casos, ferramentas especiais e conhecimentos específicos. Paso 3: Procure colocar los cables de tal manera que no queden sueltos o colgando dentro del habitáculo y que no puedan afectar al manejo del vehículo. Al colocar un cable, preste atención a que no quede demasiado tensado, sino que tenga todavía un poco de holgura. Evite el aplastamiento del cable para que su aislamiento no pueda deteriorarse por fricción o rozamiento. Não ponha o equipamento a trabalhar, se detectar e/ou presumir que existe uma avaria. Neste caso, telefone para a nossa Linha de Apoio ao Cliente. Tentativas de reparação incorrectas podem ser perigosas. Por isso, apenas pessoal qualificado deve realizar as verificações. Paso 4: Instale la caja electrónica en un lugar apropiado dentro del vehículo, por ejemplo, detrás de la radio, en la guantera o en la consola central. Vigile que tenga libre acceso a los conectores de la caja. Antes de conectar los componentes a la caja electrónica, y como medida de precaución, conviene desembornar la batería. Al hacerlo, preste atención a una posible codificación de la radio (véase el manual de la radio). Não assumimos qualquer responsabilidade por danos e avarias devido a instalação e manuseamento incorrectos do sistema. Não exponha o equipamento à humidade, temperaturas extremas ou vibrações e siga exactamente os passos de trabalho descritos no manual de instruções e montagem. La alimentación eléctrica del kit manos libres se establece a través de un cable de 4 hilos. Conecte el negro (borne 31 - negativo), el rojo (borne 30 - positivo permanente) y el azul (borne 15 - positivo de encendido) a la alimentación de su radio (a través del encendedor de cigarrillos o la caja de fusibles, según sea el caso). El hilo amarillo, una vez conectado al borne correspondiente, sirve para silenciar la radio durante una llamada telefónica. Conecte el conector Molex al terminal 1 (véase la página siguiente). Utilize o sistema apenas em situações nas quais o trânsito o permita e, desta forma, não ponha em perigo, magoe, prejudique ou incomode terceiros. O volume de som do equipamento deve ser regulado de forma a que possa continuar a perceber os ruídos exteriores. ATENCIÓN: Si conecta el hilo azul también al borne 30, el kit manos libres será permanentemente alimentado con corriente, lo cual podría provocar la descarga de la batería del coche en caso de paradas prolongadas. 20 49 Conecte ahora el micrófono (terminal 4), así como el conector del monitor (terminal 5), a la caja electrónica. A través del terminal 3, el kit manos libres reproduce la voz del interlocutor durante una llamada telefónica. A través de este terminal puede conectar un altavoz separado (accesorios Bury) o la entrada Phone-In (si la hay) de su radio a través de un adaptador Phone-In (accesorios Bury). Asimismo es posible la conexión a una caja de conmutación para altavoces (accesorios Bury). Las últimas dos variantes mencionadas utilizan el sistema de sonido interno del vehículo para la reproducción de voz. A través del terminal 2 se emite música en calidad estéreo. Aquí puede conectar la entrada Aux-In (si la hay) de su radio a través de un adaptador que puede obtenerse en comercios especializados. El adaptador tiene que estar dotado de un jack hembra estéreo de 3,5 mm para poder conectarlo al kit manos libres. El otro terminal debe elegirse en función del tipo de radio de coche. Si su radio no dispone de una entrada Aux-In, puede utilizar el adaptador de CD de la gama de accesorios Bury, para permitir la reproducción de música a través de su radio. CC 1 90 50 2 34 48 5 21 Instrucciones de servicio Verbreken van een Bluetooth-verbinding: Wanneer u een Bluetooth-verbinding wilt beëindigen, bestaat de mogelijkheid deze comfortabel op de handsfreeset of vanaf uw mobiele telefoon te onderbreken. Verder wordt de verbinding onderbroken, wanneer u zich met u mobiele telefoon te ver van het voertuig en daarmee van de ontvangstradius van de handsfreeset verwijdert. Let er a.u.b. op, dat de capaciteit van de accu van uw mobiele telefoon bij geactiveerde Bluetooth-functie snel kan verminderen. Wilt u geen gebruik meer maken van de Bluetoothfunctie, b.v. als u het voertuig voor langere tijd verlaat, dan moet u deze deactiveren. Menubesturing: Denk er a.u.b. aan dat enkele van de hierna beschreven functies/aanduidingen alleen mogelijk zijn, wanneer deze door de mobiele telefoon worden ondersteund! 1 2 5 6 4 3 Activación del kit: El kit manos libres se activa al encenderse el contacto del vehículo, siempre y cuando la conexión de la alimentación eléctrica del kit se haya realizado correctamente. El display se enciende a la vez que suena un tono corto agudo. Después de la pantalla de inicialización aparece el menú principal junto con un tono bajo, si no se ha conectado automáticamente un teléfono móvil vía Bluetooth al kit manos libres. Si la conexión se ha realizado con éxito, se escucha un tono agudo prolongado. Establecimiento de una conexión Bluetooth (emparejamiento): Si desea establecer por primera vez una conexión Bluetooth, deberá activar la función Bluetooth en su teléfono móvil y lanzar una búsqueda de equipos Bluetooth. En este caso, deberá buscar un equipo con el nombre " CC 9050...”. Si se encuentra más de un equipo, seleccione el kit manos libres e introduzca el número de PIN 1234. Seguidamente, se establecerá una conexión Bluetooth (emparejamiento) entre su teléfono móvil y el kit manos libres. Éste último soporta los perfiles “Manos libres” y “A2DP”. Por favor, configure su teléfono móvil de forma correspondiente o compruebe si soporta dichos perfiles. Si no fuese posible establecer una conexión, por favor, revise y actualice la versión de software (firmware) de su teléfono móvil o del kit manos libres. Para obtener una visión de conjunto de este tema, consulte el sitio web www.bury.com. Además, puede que sea necesario borrar primero la lista de los equipos emparejados guardada en su teléfono móvil, antes de que el kit manos libre pueda ser detectado y pueda establecerse una comunicación. Si tuviera alguna duda sobre el control de los menús, las funciones y el manejo de su teléfono móvil, consulte las instrucciones de uso del mismo, ya que estos aspectos pueden diferir mucho según el fabricante y tipo de aparato. El kit manos libres dispone de una memoria en la que pueden almacenarse las identificaciones de hasta 10 teléfonos móviles. Al emparejar el undécimo teléfono móvil, se borrará de la memoria del kit manos libres el registro de mayor antigüedad. Tras la puesta en marcha del kit manos libres, éste intenta automáticamente conectar con un teléfono móvil ya almacenado en el perfil “Manos libres”. 22 Na inschakelen van de handsfreeset verschijnt het hoofdscherm. Dit informeert u of een mobiele telefoon per Bluetooth is verbonden of niet. Hier heeft u, afhankelijk van de verbindingsstatus, door drukken op toets 5 de mogelijkheid het hoofdmenu op te vragen. De telkens met een balk gemarkeerde invoer kan door opnieuw indrukken van toets 5 worden geselecteerd. Met toets 4 kan de menubesturing worden afgebroken. - Taal -- Engels / Duits / Spaans (keuze van menutaal) - Service -- Update (uitvoeren van firmware-updates van de handsfreeset) -- Kleur --- Basiskleur (keuze van achtergrondkleur) --- Tekst (keuze van tekstkleur) -- Software (aanwijzing m.b.t. huidige firmwareversie van de handsfreeset) Voor het installeren van een firmware-update heeft u een PC nodig (het beste een laptop) met Bluetooth poort. Actuele firmwareversies en installatiesoftware voor deze handsfreeset vindt u op internet op www.bury.com. Functies bij niet actieve Bluetooth-verbinding: Is er geen mobiele telefoon verbonden, dan verschijnt de melding Verbroken in het display. (4) = tot stand brengen van een verbinding met de laatst gekoppelde mobiele telefoon (5) = activering van het menu / opvragen van een menupunt (6) = scrollen tussen de menupunten Andere toetsen = geen functie Functies bij actieve Bluetooth-verbinding: Is een mobiele telefoon met de handsfreeset verbonden, dan verschijnt de BTidentificatienaam ervan op het display. Ook de veldsterkte (de ontvangst) en de accucapaciteit van de mobiele telefoon alsmede het volumeniveau van de handsfreeset verschijnen op het display. 47 Handleiding Desactivación de una conexión Bluetooth: Si desea desactivar una conexión Bluetooth, tiene la posibilidad de hacerlo cómodamente a través del kit manos libres o desde su teléfono móvil. Además, la conexión se interrumpirá si usted se aleja con el teléfono móvil demasiado del vehículo y, en consecuencia, del radio de recepción del kit manos libres. Por favor, observe que la capacidad de la batería de su teléfono móvil puede disminuir rápidamente estando la función Bluetooth activada. Si ya no desea hacer uso de dicha función, por ejemplo, por no utilizar el vehículo durante un tiempo prolongado, convendrá desactivarla. Control de menús: ¡Por favor, recuerde que algunas de las funciones/indicaciones descritas a continuación sólo son posibles si su teléfono móvil las soporta! 1 2 5 6 4 3 Inschakelen: Als de stroomvoorziening van de handsfreeset correct werd aangesloten, wordt de handsfreeset geactiveerd nadat u de ontsteking heeft ingeschakeld. Het display wordt ingeschakeld en een kort aanhoudend hoog geluid is te horen. Na het initialisatiescherm verschijnt het hoofdmenu en is nog een laag geluid te horen, als er geen mobiele telefoon automatisch via Bluetooth met de handsfreeset werd verbonden. Bij een met succes tot stand gebrachte verbinding is een lang aanhoudend hoog geluid te horen. Tot stand brengen van een Bluetooth-verbinding (koppeling): Wanneer u voor de eerste keer een Bluetooth-verbinding tot stand wilt brengen, moet u de Bluetooth-functie bij uw mobiele telefoon activeren en naar Bluetooth-apparaten laten zoeken. In dit geval naar een apparaat met de aanduiding „CC 9050…“. Indien er meerdere apparaten zijn ontdekt, selecteer dan a.u.b. de handsfreeset en voer het PIN-nummer 1234 in. Vervolgens wordt de Bluetooth-verbinding (koppeling) tussen uw mobiele telefoon en de handsfreeset tot stand gebracht. De handsfreeset ondersteunt alleen de profielen "handsfree" en "A2DP". Stel a.u.b. uw mobiele telefoon dienovereenkomstig in of controleer of deze profielen worden ondersteund. Kan er geen verbinding tot stand worden gebracht, controleer dan a.u.b. de stand van de software (firmware) op uw mobiele telefoon of bij de handsfreeset en actualiseer deze. Een overzicht over dit onderwerp vindt u op Internet op www.bury.com. Verder is het mogelijk dat u eerst de lijst van de gekoppelde apparaten in uw telefoon moet wissen, zodat de handsfreeset juist kan worden herkend en een verbinding kan worden opgebouwd. Lees de bedieningshandleiding van uw mobiele telefoon door, wanneer u vragen heeft over de menubesturing, functies en bediening ervan. Deze wijken naargelang fabrikant en type sterk van elkaar af. Al encenderse el kit manos libres, se abre la pantalla principal que le informa si hay o no conectado un teléfono móvil vía Bluetooth. En función del estado de conexión, tiene usted aquí la posibilidad de abrir el menú principal pulsando la tecla 5. El registro marcado con una barra puede seleccionarse pulsando nuevamente la tecla 5. Para salir del menú, pulse la tecla 4. - Idioma -- Inglés / Alemán / Español (selección del idioma del menú) - Servicio -- Update (actualización del firmware del kit manos libres) -- Color --- Color de fondo (selección del color de fondo) --- Texto (selección del color del texto) -- Software (información de la versión actual del firmware instalado en el kit manos libres) Para instalar la actualización de un firmware, usted necesita un PC (a ser posible, un portátil) con puerto Bluetooth. Para encontrar las versiones actuales de firmware y el software de instalación para este kit manos libres, consulte la página web: www.bury.com. Funciones con conexión Bluetooth inactiva: Si no hay un teléfono móvil conectado, aparece el mensaje “No conectado” en el display. (4) = Establecimiento de una conexión con el último teléfono móvil emparejado. (5) = Activación del menú / acceso a una opción de menú. (6) = Navegación entre las opciones del menú. Otras teclas = Sin función asignada. Funciones con conexión Bluetooth activa: Si hay un teléfono móvil conectado al kit manos libres, su nombre de identificación BT aparecerá en el display. Además, se visualizarán la intensidad de campo (recepción) y la capacidad de la batería del teléfono móvil, así como el nivel de volumen del kit manos libres. De handsfreeset heeft een geheugen waarin de kenmerken van maximaal 10 mobiele telefoons worden opgeslagen. Wordt een elfde mobiele telefoon gekoppeld, dan wordt telkens de oudste invoer in het geheugen van de handsfreeset gewist. Na inbedrijfstelling van de handsfreeset probeert deze automatisch een verbinding te maken met een reeds opgeslagen mobiele telefoon in het profiel "handsfree". 46 23 Sluit nu de microfoon (aansluiting 4) en de stekker van de monitor (aansluiting 5) op de elektronicabox aan. Via aansluiting 3 geeft de handsfreeset het gesproken woord van de gesprekspartner tijdens een telefoongesprek weer. Op deze aansluiting kunt u een aparte luidspreker (Bury toebehoren) of de Phone-In ingang van uw radio (indien aanwezig) via een Phone-In adapter (Bury toebehoren) aansluiten. De aansluiting van een luidsprekeromschakelbox (Bury toebehoren) is eveneens mogelijk. Bij de beide laatste varianten maakt u gebruik van het voertuiginterne geluidssysteem voor spraakweergave. Aansluiting 2 is de uitgang voor muziek in stereokwaliteit. Hier kunt u de Aux-In ingang van uw radio (indien aanwezig) via in de speciaalzaak verkrijgbare adapters aansluiten. De adapter moet voor de aansluiting op de handsfreeset een 3,5 mm stereostekkerbus hebben. Afhankelijk van autoradio moet het andere uiteinde verschillend worden gekozen. Als uw radio niet over een Aux-In beschikt, kunt u de Car CD-adapter uit het Bury toebehorenprogramma gebruiken om de muziekweergave via uw radio mogelijk te maken. CC 1 90 50 2 34 24 5 45 Installatie en bediening van de onderdelen Stap 1: Kies a.u.b. eerst de voor u in uw voertuig geschiktste plaats voor de monitor plus montagevoet, door de monitor op de voet te steken en deze op verschillende plaatsen in het voertuig te houden of te plaatsen. Let daarbij vooral op zones voor inzittendenbescherming (onder andere airbagbereiken), hoedanigheid van de ondergrond (afhankelijk van bevestigingsmethode), vrij zicht naar de monitor (zonder beperking van het zicht in de richting van de voorruit), afneembaarheid van de monitor van de montagevoet alsmede op gunstige legmogelijkheden voor de kabels. Heeft u een geschikte positie voor de monitor in het voertuig gevonden, dan kunt u nu de montagevoet dienovereenkomstig aanbrengen / bevestigen. Gebruik a.u.b. het meegeleverde schoonmaakdoekje om de oppervlakken te ontvetten waarop u de montagevoet wilt aanbrengen. Let er a.u.b. op, dat bij sterke temperatuurschommelingen tijdens het latere gebruik naargelang structuur en kwaliteit de oppervlakken kunnen verkleuren. Stap 2: De microfoon sluit u aan de linkerkant van de monitor aan. Leg de kabel a.u.b. zodanig dat deze niet onbevestigd in het voertuig ligt/hangt en geen invloed kan uitoefenen op het besturen van het voertuig. Let er bij het leggen van een kabel op dat deze niet op trek wordt belast, maar nog speling heeft. Voorkom dat de kabel klem komt te zitten, wat tot beschadigingen van de isolatie door wrijving/schuren kan leiden. Consignes de sécurité Vous pouvez installer ce système vous-même. Respectez toutefois les consignes de montage du fabricant du véhicule (VAS 1978). Pour l'installation, garez votre véhicule de manière à ce qu'il ne gêne pas la circulation. Nous vous recommandons de vous adresser à un garage professionnel pour l'installation du système. Ce système est prévu pour des véhicules alimentés en 12 volts. Si vous envisagez d'installer l'appareil dans un véhicule alimenté en 24 volts (camion), veuillez utiliser un convertisseur de tension. Notre Hotline se tient à votre disposition pour toute question à ce sujet. Les composants du système ne doivent pas vous boucher la vue ni se trouver dans une zone de l'habitacle présentant des risques d'impact sur les personnes ou dans la zone de déploiement des airbags. Pour détacher certains revêtements (avec ou sans airbags) ou des composants du tableau de bord, des outils ou des connaissances spécifiques sont nécessaires dans certains cas. Stap 3: Leg de kabels a.u.b. zodanig dat deze niet onbevestigd in het voertuig liggen/hangen en geen invloed kunnen uitoefenen op het besturen van het voertuig. Let er bij het leggen van een kabel op dat deze niet op trek wordt belast, maar nog speling heeft. Voorkom dat de kabel klem komt te zitten, wat tot beschadigingen van de isolatie door wrijving/schuren kan leiden. N'allumez pas l'appareil si vous constatez ou supposez un défaut. Dans ce cas, appelez notre Hotline. Toute réparation effectuée par une personne non qualifiée peut être source de danger pour vous. C'est pourquoi les réparations doivent être effectuées uniquement par du personnel qualifié. Stap 4: Installeer de elektronicabox op een geschikte plek in het voertuig. Dit kan b.v. achter de radio, in het handschoenenvak of in de middenconsole zijn. Let erop, dat u zonder problemen bij de aansluitingen van de box komt. Voordat u componenten aansluit op de elektronicabox, moet u voor de zekerheid de accu loskoppelen. Let hierbij op een eventuele radiocodering (zie handleiding van radio). Nous ne sommes pas responsables des dommages ni anomalies causés par une installation ou utilisation inappropriée de l'appareil. Conservez donc votre appareil à l'abri de l'humidité, des températures extrêmes et des chocs, et suivez scrupuleusement les étapes définies dans cette notice. De stroomvoorziening van de handsfreeset wordt tot stand gebracht via een 4-aderige kabel. Sluit de zwarte (klem 31 - min), de rode (klem 30 - continuplus) en de blauwe kabel (klem 15 ontstekingsplus) aan op de stroomvoorziening van uw radio (evt. via sigarettenaansteker of zekeringkastje). De gele kabel dient na aansluiting op het tegenstuk voor uitzetten van het geluid van de radio bij een telefoongesprek. De witte molex-stekker verbindt u met aansluiting 1 (zie tekening op volgende pagina). Utilisez le système uniquement si l'état de la circulation le permet. Ne mettez pas en danger, ne portez pas tort, ne gênez pas, et n'incommodez pas les autres usagers. Le volume sonore de l'appareil doit être réglé de sorte à ce que les bruits extérieurs puissent encore être perçus. LET OP: Sluit u de blauwe kabel eveneens op klem 30 aan, dan wordt de handsfreeset permanent van stroom voorzien. Dit zou bij langere stilstand van het voertuig kunnen leiden tot ontlading van de voertuigaccu. 44 25 Installation et utilisation des composants 1ème étape : Choisissez d'abord l'emplacement le plus adapté de votre véhicule pour installer le moniteur sur son pied et le fixer dans différentes positions à l'intérieur du véhicule. Veillez à éviter absolument les zones de l'habitacle présentant des risques d'impact sur les personnes (notamment les zones de déploiement des airbags), à choisir des endroits stables pour la fixation, veillez à ce que le moniteur ne bouche ou ne limite pas la visibilité en direction du parebrise, à ce qu'il puisse facilement être retiré du pied et que le câblage soit correct. Une fois que vous avez trouvé un emplacement approprié, vous pouvez y installer ou fixer le pied. Utilisez le chiffon nettoyant inclus pour dégraisser la surface où vous fixez le support de la système de navigation. Faites attention au fait que de grands changements de la température pendant l’utilisation peuvent mener à une décoloration de la surface selon le matériel et la structure. ème 2 étape : Branchez le microphone sur le côté gauche de l'écran. Fixez le câble de sorte à ce qu'il ne pende pas / ne traîne pas dans le véhicule et qu'il ne puisse pas perturber la conduite du véhicule. Lors de la pose d'un câble, veillez à le fixer fermement, sans toutefois trop tirer dessus. Evitez d'entortiller les câbles, ce qui pourrait provoquer des dommages à l'isolation suite à des frottements/frictions. 3ème étape : Fixez les câbles de sorte à ce qu'ils ne pendent pas / ne traînent pas dans le véhicule et qu'ils ne puissent pas perturber la conduite du véhicule. Lors de la pose d'un câble, veillez à ne pas le placer dans un courant d'air, ni à le fixer de manière trop souple. Evitez d'entortiller les câbles, ce qui pourrait provoquer des dommages à l'isolation suite à des frottements/frictions. 4ème étape : Installez le boîtier électronique à un endroit adéquat dans le véhicule, par exemple derrière la radio, dans la boîte à gants ou dans la console centrale. Veillez à ce que les branchements du boîtier soient aisément accessibles. Avant de brancher les composants au boîtier électronique, veuillez débrancher la batterie pour des raisons de sécurité. Attention : la radio possède éventuellement un code spécifique (cf. mode d'emploi de la radio). L'alimentation électrique du kit mains libres est à réaliser avec un câble à 4 conducteurs. Reliez le câble noir (borne 31 moins), le câble rouge (borne 30 pôle positif permanent) et le câble bleu (borne 15 pôle d'allumage) à l'alimentation électrique de votre radio (le cas échéant à l'allumecigares ou à la boîte à fusibles). Le câble jaune sert, après connexion, à mettre en sourdine la radio en cas de conversation téléphonique. Veuillez raccorder la prise blanche Molex au connecteur 1 (voir croquis sur pages suivante). ATTENTION : Si vous reliez le câble bleu également à la borne 30, le kit mains libre sera alimenté en permanence avec de l'électricité. Ceci pourrait entraîner une décharge de la batterie si le véhicule n'est pas utilisé pendant de longues périodes. 26 Veiligheidsaanwijzingen Het inbouwen van het systeem kan door u worden uitgevoerd. Neem dan echter goed nota van de inbouwinstructies van de autofabrikant (VAS 1978). Parkeer het voertuig tijdens de installatie op een plaats waar het verkeer niet wordt gehinderd. Wij adviseren u het inbouwen te laten uitvoeren door een erkende garage. Dit systeem is ontworpen voor gebruik in motorvoertuigen met een boordnet van 12 Volt (personenauto's). Wanneer u van plan bent het apparaat in te bouwen in een motorvoertuig met een boordnet van 24 Volt (vrachtwagens), gebruik dan a.u.b. een spanningsomvormer. Heeft u vragen over dit onderwerp, dan kunt u altijd bij onze hotline terecht. Installeer de onderdelen van het apparaat zo in het voertuig, dat uw uitzicht niet wordt belemmerd en de onderdelen niet zijn gemonteerd in een kreukelzone van het passagierscompartiment of binnen het ontvouwgebied van airbags. Voor het losmaken van bekledingen (met en zonder airbags) of onderdelen van het dashboard zijn in enkele gevallen speciaal gereedschap en speciale kennis nodig. Neem het apparaat niet in gebruik, wanneer u een defect opmerkt resp. vermoedt. Neem in dat geval contact op met onze hotline. Ondeskundige reparatiepogingen kunnen gevaarlijk voor u zijn. Daarom mag alleen gekwalificeerd personeel controles uitvoeren. Wij zijn niet aansprakelijk voor beschadigingen en storingen door een ondeskundige installatie van en omgang met het systeem. Stel het apparaat daarom niet bloot aan natheid, extreme temperaturen of trillingen en volg de in de inbouw- en bedieningshandleiding aangegeven stappen nauwkeurig op. Bedien het systeem alleen in situaties waarin de verkeersomstandigheden het toelaten en waarbij andere verkeersdeelnemers niet in gevaar gebracht, gehinderd of lastig gevallen worden. Het volume van het apparaat dient zo te worden ingesteld, dat geluiden van buitenaf ook nog kunnen worden waargenomen. 43 Raccordez désormais le microphone (connecteur 4) et la prise du moniteur (connecteur 5) au boîtier électronique. Le kit mains libres utilise le connecteur 3 pour la transmission de la voix de l'interlocuteur pendant une conversation téléphonique. Vous avez la possibilité de brancher un haut-parleur séparé (accessoires Bury) ou l'entrée Phone-IN de votre radio (si disponible) par le biais d'un adaptateur Phone-In (accessoires Bury). Le branchement d'un boîtier de commutation pour les haut-parleurs (accessoires Bury) est également possible. Pour les deux dernières possibilités, veuillez utiliser le système sonore interne au véhicule pour la reproduction vocale. La musique en qualité stéréo est diffusée par le connecteur 2. Vous y pouvez connecter l'entrée Aux-In de votre radio (si disponible) avec un adaptateur disponible dans le commerce spécialisé. L'adaptateur doit posséder une fiche stéréo 3,5 mm pour être raccordé au kit mains libres. En fonction des autoradios, il faudra peut-être choisir une autre extrémité. Si votre radio ne dispose pas d'un Aux-In, vous pouvez utiliser l'adaptateur Car CD du programme accessoires de Bury pour permettre une diffusion de la musique par votre radio. CC 1 90 50 2 34 42 5 27 Mode d'emploi Cancellazione di un collegamento Bluetooth: Se si desidera cancellare il collegamento Bluetooth, si ha la possibilità di interromperlo comodamente con il DVV o con il proprio cellulare. Il collegamento s'interrompe inoltre se ci si allontana troppo dal veicolo con il cellulare e quindi dal raggio di ricezione del DVV. Ricordare che la capacità dell'accumulatore del cellulare può diminuire velocemente se è stata attivata la funzione Bluetooth. Se non si desidera più usare la funzione Bluetooth, p.e. quando si esce dal veicolo per un periodo prolungato, la si dovrebbe disattivare. Guida a menu: Ricordare che alcune delle funzioni/visualizzazioni descritte qui a seguito sono possibili solo se sono supportate dal cellulare! 1 2 5 6 4 3 Mise en service : Si l'alimentation électrique du kit mains libres a été reliée en bonne et due forme, le kit mains libres s'active après avoir mis le contact. L'écran s'allume et un bref signal sonore aigu est émis. Après le masque d'initialisation, le menu principal apparaît et un signal grave sera émis si aucun téléphone portable n'est relié automatiquement au kit mains libres par le biais de Bluetooth. En cas de connexion établie avec réussite, un signal aigu et long est émis. Etablir une connexion Bluetooth (couplage) : Pour établir une première connexion Bluetooth, vous devez activer la fonction Bluetooth sur votre téléphone portable et rechercher les appareils compatibles Bluetooth. Dans ce cas, vous devez effectuer la recherche pour un appareil avec désignation "CC 9050….". Si plusieurs appareils ont été détectés, sélectionnez le kit mains-libres et indiquez le numéro PIN 1234. La connexion Bluetooth (couplage) sera ensuite établie entre votre portable et le kit mains-libres. Le kit mains-libres supporte les profils "mains-libres" et "A2DP". Veuillez régler votre téléphone portable en conséquence ou vérifier si votre téléphone portable supporte ces profils. Si aucune connexion ne peut être établie, contrôlez et mettez à jour le logiciel (microprogramme) de votre téléphone portable ou de votre kit mains libres. Pour de plus amples informations sur ce thème, veuillez consulter le site Internet www.bury.com. En outre, il est possible que vous deviez d'abord effacer dans votre téléphone la liste des téléphones reliés afin que le kit mains libres soit vraiment reconnu et qu'une connexion puisse être établie. Pour toute question sur les menus, fonctions et l'utilisation de votre téléphone portable, veuillez lire le mode d'emploi. L'utilisation diffère considérablement selon les fabricants et les types de téléphone. Dopo l'accensione del DVV appare la maschera principale che informa se è collegato o meno un cellulare via Bluetooth. Indipendentemente dallo stato del collegamento, premendo il tasto 5 si ha la possibilità di richiamare il menu principale. La voce selezionata con una barra si può selezionare ripremendo il tasto 5. Con il tasto 4 si può interrompere la guida a menu. - Lingua -- Inglese / tedesco / spagnolo (scelta della lingua dei menu) - Assistenza -- Aggiornamento (esecuzione degli aggiornamenti del firmware del dispositivo viva voce) -- Colore --- Colore di fondo ( selezione del colore dello sfondo) ---Testo (selezione del colore del testo) -- Software (la versione attuale di firmware del DVV) Per eseguire l'aggiornamento del firmware è necessario un PC (possibilmente un portatile) con interfaccia Bluetooth. Su Internet, all'indirizzo www.bury.com si possono trovare la versione attuale del firmware ed il software d'installazione per questo DVV. Funzioni del collegamento Bluetooth non attivato: Se un cellulare non è collegato, sul display apparirà il messaggio “Interrotto“. (4) = Instaurazione di un collegamento con l'ultimo cellulare accoppiato (5) = Attivazione del menu / richiamo di un comando (6) = Passare da un comando all'altro Altri tasti = nessuna funzione Funzioni del collegamento Bluetooth attivato: Se un cellulare è collegato al DVV, apparirà sul display il suo identificativo BT, l'intensità di campo (la ricezione), la capacità dell'accumulatore del cellulare e il livello d'intensità sonora del DVV. Le kit mains libres possède une mémoire qui peut contenir les caractéristiques de jusqu'à 10 téléphones portables. Si un onzième téléphone portable est relié, les données les plus anciennes en mémoire dans le kit mains libres seront alors effacées. Après la mise en service du kit mains libres, ce dernier tente de se connecter avec un téléphone portable déjà sauvegardé dans le profil "Mains libres". 28 41 Istruzioni d'uso Interrompre une connexion Bluetooth : Si vous souhaitez interrompre une connexion Bluetooth, vous avez la possibilité de le faire en tout confort à partir de votre kit mains libres ou à partir de votre téléphone portable. De plus, une connexion sera également interrompue si vous vous trouvez avec votre téléphone portable trop loin du véhicule et que vous vous éloignez ainsi de la zone de réception du kit mains libres. La capacité des batteries de votre téléphone portable peut diminuer rapidement si la fonction Bluetooth est activée. Si vous n'utilisez pas la fonction Bluetooth pendant une longue période, par ex. lors d'une absence prolongée hors du véhicule, vous devez désactiver cette fonction. Menus : Certaines fonctions ou certains affichages décrits ci-dessous sont possibles uniquement s'ils sont supportés par le téléphone portable ! 1 2 5 6 4 3 Accendere: Se l'alimentazione della corrente del dispositivo viva voce (DVV) è stata allacciata correttamente, il DVV si attiva dopo che si è acceso il motore. Il display si accende e si sente un breve tono alto. Dopo la maschera d'inizializzazione appare il menu principale ed un altro tono profondo, se non è stato collegato automaticamente al DVV un cellulare via Bluetooth. Se il collegamento è stato effettuato correttamente si sentirà un lungo tono alto. Stabilire un collegamento Bluetooth (accoppiamento): Se si desidera stabilire per la prima volta un collegamento Bluetooth, si dovrà attivare la funzione Bluetooth del cellulare e far cercare i dispositivi Bluetooth. In questo caso, cercare un dispositivo denominato “CC 9050…“. Se sono stati individuati vari dispositivi, disselezionare il dispositivo viva voce e digitare il numero di PIN 1234. Alla fine verrà stabilito il collegamento Bluetooth (accoppiamento) tra il cellulare e il dispositivo viva voce. Il dispositivo viva voce supporta i profili "viva voce" ed “A2DP”. Impostare il cellulare, ovvero controllare che siano supportati questi profili. Se non è possibile effettuare il collegamento, controllare ed attualizzare la versione del software (firmware) del cellulare o del DVV. Troverete un sommario di questo tema su Internet all'indirizzo www.bury.com. È inoltre possibile cancellare prima la lista degli apparecchi accoppiati nel telefono perché il DVV possa essere individuato correttamente e si possa stabilire un collegamento. Se si hanno domande sulla guida a menu, le funzioni e l'uso del proprio cellulare, leggere il manuale d'istruzioni del cellulare. Queste si differenziano notevolmente l'una dall'altra, secondo il produttore ed il tipo. Il DVV possiede una memoria nella quale vengono memorizzati gli identificatori di fino a 10 cellulari. Se si collega un undicesimo cellulare, verrà cancellato l'inserimento in memoria più vecchio del DVV. Dopo avere messo in funzione il DVV, quest'ultimo cercherà automaticamente di collegarsi con un cellulare già memorizzato nel profilo "Viva voce“. 40 Après la mise en service du kit mains libres, le masque principal apparaît. Ce dernier vous informe si un téléphone portable est relié par Bluetooth ou non. Vous avez la possibilité ici, en fonction de votre statut de connexion, de consulter le menu principal en appuyant sur la touche 5. L'option éclairée par une barre peut être sélectionnée en appuyant une fois de plus sur la touche 5. La sélection des menus peut être interrompue avec la touche 4. - Langue -- Anglais / allemand / espagnol (sélection de la langue pour le menu) - Service -- Mise à jour (réalisation de mise à jour de microprogramme pour le kit mains libres) -- Couleur --- Couleur de base (sélection de la couleur de fond) ---Texte (sélection de la couleur du texte) -- Logiciel (indication de la version actuelle du microprogramme du kit mains libres) Pour mettre à jour le microprogramme, vous avez besoin d'un ordinateur (le cas idéal, un ordinateur portable) avec interface Bluetooth. Vous trouverez les versions actuelles du microprogramme et du logiciel d'installation pour ce kit mains libres sur Internet sur www.bury.com. Les fonctions en cas de connexion Bluetooth inactive : Si aucun téléphone portable n'est relié, le message Interrompu apparaît sur le display. (4) = établir une connexion avec le dernier téléphone portable relié (5) = activer le menu / consulter une option du menu (6) = faire défiler les options du menu Autres touches = aucune fonction Fonctions en cas de liaison Bluetooth active : Si un téléphone portable est relié avec le kit mains libres, son nom d'identification BT apparaît à l'écran. En outre, la puissance de champ (de la réception), l'état de charge des batteries du téléphone portable ainsi que le niveau de volume du kit mains libres sont indiqués. 29 Ora collegare il microfono (allacciamento 4) e la spina del monitor (allacciamento 5) alla scatola elettronica. Con l'allacciamento 3, il dispositivo viva voce riproduce l'emissione della lingua dell'interlocutore durante una telefonata. A questo allacciamento si può collegare un altoparlante separato (accessori Bury) o l'ingresso phone-in della radio (se lo si ha) con un adattatore phone-in (accessori Bury). È possibile anche il collegamento di una scatola di commutazione per altoparlanti (accessori Bury). Per le due ultime varianti, per l'emissione vocale usare il sistema audio interno del veicolo. Per la musica in qualità stereo usare l'allacciamento 2, al quale si può collegare l'entrata Aux-In della radio (se disponibile) con l'adattatore in vendita nel commercio specializzato. L'adattatore deve essere munito di una presa stereo da 3,5 mm per l'allacciamento al dispositivo viva voce. L'altra estremità deve essere diversa, secondo il tipo d'autoradio. Se la propria radio non dispone di Aux-In, si può usare il Car CD-Adapter del programma d'accessori Bury per consentire la trasmissione della musica tramite radio. CC 1 90 50 2 34 30 5 39 Installazione e manipolazione dei componenti Operazione 1: Innanzitutto, selezionare la posizione più adatta per sé nella propria auto per il monitor più il piede di montaggio nel quale inserire il monitor sul piede e fermarlo, ovvero posizionarlo in diverse posizioni nel veicolo. Nel compiere questa operazione, fare assolutamente attenzione alle zone di scontro con le persone (tra l'altro quelle dell'airbag), alla conformazione del fondo (secondo il tipo di fissaggio), alla possibilità di vedere il monitor senza ostacoli (nessuna limitazione della vista in direzione parabrezza), alla possibilità di togliere il monitor dal piede di montaggio ed alle buone possibilità di spostare il cavo. Dopo avere trovata una posizione adatta per il monitor nel veicolo, applicare / fissare il piede di montaggio.Si prega di utilizzare il panno detergente allegato per sgrassare le superfici sulle quali si vuole applicare il piede di montaggio. Ricordare che in caso di forti oscillazioni di temperatura durante il successivo utilizzo, si possono eventualmente decolorare le superfici secondo la struttura ed il tipo di materiale. Operazione 2: Collegare il microfono al lato sinistro del monitor. Posare il cavo in modo che non si trovi/non penda liberamente nel veicolo e che non possa esercitare alcun influsso sulla guida del veicolo. Quando si posa un cavo, accertarsi che non sia tirato ma che abbia un certo gioco. Evitare di schiacciare il cavo per non provocare danni agli isolamenti dovuti a strofinamento / sfregamento. Operazione 3: Posare i cavi in modo che non si trovino/non pendano liberamente nel veicolo e che non possano esercitare alcun influsso sulla guida del veicolo. Quando si posa un cavo, accertarsi che non sia tirato ma che abbia un certo gioco. Evitare di schiacciare il cavo per non provocare danni agli isolamenti dovuti a strofinamento / sfregamento. Operazione 4: Installare la scatola elettronica in una sede adeguata all'interno del veicolo, per esempio dietro la radio, nel vano portaoggetti o nella consolle centrale. Accertarsi di riuscire a raggiungere senza problemi gli allacciamenti della scatola. Prima di collegare i componenti alla scatola elettronica, per sicurezza staccare la batteria, evitando possibilmente un'eventuale codifica radio (vedi il manuale della radio). L'alimentazione della corrente del dispositivo viva voce ha luogo con un cavo a 4 fili. Collegare quello nero (morsetto 31 negativo), quello rosso (morsetto 30 positivo continuo) ed il cavo blu (morsetto 15 positivo dell'accensione) all'alimentazione della corrente della radio (event. con l'accendisigari o la scatola die fusibili). Dopo il collegamento al pezzo opposto, il cavo giallo serve al silenziamento della radio durante un colloquio telefonico. Collegare la presa bianca Molex all'allacciamento 1 (consultare il disegno nella pagina seguente). Security guidelines The installation of this system can be carried through by yourself but please observe the installation requirements of the automotive manufacturer (VAS 1978). During the installation, park the car at a place where the road traffic is not impaired. We recommend to let a specialized workshop perform the installation. This system has been designed for the use in vehicles with an on-board supply system of 12 volts (passenger car). If you intend to install the device in a vehicle with an on-board supply system of 24 volts (lorry), please use a voltage converter. If you have queries regarding this subject, please contact our hotline. Install the components of the device in the vehicle so that your field of vision is not impaired and the components are not mounted in the impact zone of the passenger compartment or in the airbag inflation zones. The removal of coverings (with and without airbags) or components of the dashboard requires in some cases special tools and special knowledge. Do not commission the device if you detect or assume a defect. In this case, contact our hotline. Improper repair efforts can be dangerous for you. Therefore, only skilled personnel may perform inspections. We shall not be liable for damages or malfunctions due to improper use of the navigation system. Therefore, do not expose the device to moisture, extreme temperatures or shocks and carefully follow the procedure described in the installation and operating guidelines. Operate the system only when the situation allows it and when you do not endanger, harm, constrain, or annoy other road users. The volume of the device has to be set in a way that exterior noise is still audible. ATTENZIONE: se si collega anche il cavo blu al morsetto 30, il dispositivo viva voce sarà alimentato permanentemente da corrente ed in caso di inattività prolungata del veicolo, ciò potrebbe causare lo scarico della batteria dell'automobile. 38 31 Installation and handling of the components Step 1: First of all, please choose the most convenient position for the monitor and the installation pad in your vehicle by attaching the monitor to the pad and checking different positions in the vehicle. It is very important to observe impact areas for occupants (amongst others the airbag zone), surface consistency (depending on the type of fastening), free sight to the monitor (no impaired sight out of the windshield), removability of the monitor from the installation pad as well as to a convenient possibility for placing the cable. After having found a suitable position for the monitor in the vehicle you can mount / attach the installation pad accordingly. Please use the enclosed cleaning cloth for degreasing the surfaces you want to attach the retainer to. Please note that in case of high variations in temperature - depending on the structure and the features - decolorizations of the surfaces can occur during the subsequent utilization. Indicazioni di sicurezza Il montaggio del sistema di navigazione può essere eseguito da voi, rispettando le indicazioni per il montaggio del produttore dell'auto (VAS 1978). Durante l'installazione, parcheggiare il veicolo in modo che non intralci il traffico stradale. Consigliamo di fare effettuare il montaggio da un'officina specializzata. Questo sistema è stato progettato per l'uso in autoveicoli con rete di bordo di 12 Volt (autovetture). Prima di installare il dispositivo in un autoveicolo con una rete di bordo di 24 Volt (camion) usare un trasformatore di tensione. La nostra hotline risponderà volentieri a qualsiasi domanda relativa a questo tema. Step 2: Connect the microphone to the left side of the monitor. If possible, please pass the cable in a way that it does not lie or hang about unfastened in the vehicle and that it may not influence the conducting of the vehicle. When passing the cable, please take care that it is not under traction stress but that it has some tolerance. Avoid crushing the cable as damages of the insulation can be caused by friction/rubbing. Installare i componenti del dispositivo nell'autoveicolo in modo tale che non ostacoli la vista e che i componenti non siano montati in una zona di scontro degli occupanti del vano accanto al guidatore o nell'area di apertura dell'airbag. Per staccare l'abbigliamento (con e senza airbag) o i componenti del cruscotto, in alcuni casi sono necessari attrezzi e nozioni speciali. Step 3: Please lay the cables in a way that they do not lie/hang unsecured in the vehicle and that they may not influence the conducting of the vehicle. When laying a cable, please take care that it is not under traction stress but that it has some tolerance. Avoid crushing the cable as damages of the insulation can be caused by friction/rubbing. Non mettere in funzione il dispositivo se si nota o presume un difetto. In questo caso contattare la nostra hotline. Riparazioni non effettuate da esperti possono rivelarsi pericolose. Per questo motivo, ogni controllo deve essere eseguito solo da personale qualificato. Step 4: Install the electronics box at a convenient place in the vehicle. This can e.g. be behind the radio, in the glove box, or in the centre console. Please mind that you can access the connections of the box without difficulty. Before connecting the components to the electronics box you should branch off the battery for safety reasons. In doing so, take into account that there might be a radio coding (confer radio manual). Non rispondiamo di danni e guasti causati dall'installazione e dall'uso non conforme del sistema. Non esporre dunque l'apparecchio all'umidità, a temperature estreme o a scosse e seguire precisamente le fasi di lavorazione previste nelle istruzioni di montaggio e d'uso. The power supply of the hands-free car kit is established via a 4-core cable. Connect the black (clamp 31 minus), the red (clamp 30 steady plus) and the blue cable (clamp 15 ignition plus) to the power supply of your radio (where required via the cigarette lighter or the fuse box). After connection to the counterpart, the yellow cable provides for radio muting during a phone conversation. Please connect the white Molex connector with connection 1 (confer picture on the next page). Fare uso del sistema solo in situazioni consentite dalla situazione del traffico ed in cui non si compromette la sicurezza, danneggia, mette in difficoltà o disturba gli altri partecipanti al traffico. Il volume dell'apparecchio deve essere impostato in modo da poter continuare a percepire i rumori esterni. ATTENTION: If you also connect the blue cable to clamp 30, the hands-free car kit will be permanently supplied with power. If the vehicle is not running for a longer period, this could lead to a discharge of the car battery. 32 37 Now connect the microphone (connection 4) and the monitor plug (connection 5) to the electronics box. The hands-free car kit reproduces the interlocutor's voice output during a phone conversation via connection 3. You can connect a separate loudspeaker (Bury accessories) or the phone-in input of your radio (if available) to this connection via a phone-in adapter (Bury accessories). The connection of a loudspeaker switch box (Bury accessories) is also possible. The two latter models use the vehicle's sound system for voice output. Stereo music is output at connection 2. Here you can connect the aux-in input of your radio (if existent) via adapters available at local retailers. For the connection to the hands-free car kit, the adapter must have a 3.5 mm stereo jack. Depending on the car radio, the other end must be selected otherwise. If your radio does not have an aux-in, you can use the car CD adapter from the Bury accessories programme to enable the reproduction of music via your radio. CC 1 90 50 2 34 36 5 33 Operation instructions Disconnect a Bluetooth connection: If you wish to cancel a Bluetooth connection, you can either disconnect it conveniently at the HFCK or at your mobile phone. In addition, the connection is disconnected, if you move too far away from the vehicle while taking your mobile phone with you and thus leave the reception radius of the HFCK. Please note that the capacity of your mobile phone's storage battery can quickly decrease when the Bluetooth function is active. If you do not want to use the Bluetooth function anymore, e.g. if you leave the vehicle for a longer period, it is recommended to deactivate this function. Menu navigation: Please note that some of the functions/displays specified subsequently are only possible if they are supported by the mobile phone! 1 2 5 6 4 3 Switch-on: If the power supply of the hands-free car kit (HFCK) is connected properly, the HFCK is activated after having started the ignition. The display is switched on and a short high sound is audible. After the initialisation mask, the main menu is displayed and another deep sound appears if no mobile phone has been connected automatically to the HFCK via Bluetooth. In case of a successfully established connection, a long high sound appears. Establishing a Bluetooth connection (pairing): If you wish to establish a Bluetooth connection for the first time, you have to activate the Bluetooth function of your mobile phone and search for Bluetooth devices. In this case, search for a device labelled "CC 9050…“. If several devices were identified, please select the HFCK and enter the PIN number 1234. The Bluetooth connection (pairing) will then be established between your mobile phone and the HFCK. The HFCK supports the profiles "hands-free operation" and "A2DP". Please set your mobile phone accordingly or check whether these profiles are supported. If it is not possible to establish a connection, please check and update the software release (firmware) of your mobile phone or of the HFCK. You will find an overview dealing with this subject on the Internet at www.bury.com. In addition it is possible that you must delete all devices connected to your mobile phone first in order to enable a correct identification of the HFCK and a connection can be established. If you have queries regarding the menu navigation, functions and operation of your mobile phone, please refer to the operating guidelines of your mobile phone. Depending on the manufacturer and type, this can differ considerably between phones. The HFCK has a memory for the storage of the identification of up to 10 mobile phones. In case an eleventh mobile phone is connected, the oldest entry in the HFCK memory will be cancelled. After the commissioning of the HFCK it automatically tries - "hands-free operation" profile - to connect with a mobile telephone already saved. 34 The main menu is displayed after having switched on the HFCK. It informs you whether or not your mobile telephone is connected via Bluetooth. Depending on the connection state, you can call the main menu here by pressing key 5. The entry, marked with a bar can be selected by again pressing key 5. The menu navigation can be interrupted with key 4. - Language -- English / German / Spanish (selection of the menu language) - Service -- Update (performing firmware updates of the hands-free car kit) -- Colour --- Primary colour (selection of the background colour) ---Text (selection of the text colour) -- Software (reference to the current firmware version of the HFCK) To install a firmware update you need a PC equipped with a Bluetooth interface (most suitably a laptop). You can find up-to-date firmware versions and installation software for this HFCK on the internet at www.bury.com Functions while Bluetooth connection is inactive: If no mobile telephone is connected, the notice 'disconnected' appears on the display. (4) = Establishment of a connection with the mobile telephone connected last (5) = Activation of the menu / calling up a menu item (6) = Scrolling between the menu items Other keys = no function Functions while Bluetooth connection is active: If a mobile telephone is connected to the HFCK, its BT identification name is displayed. The field strength equally appears (the reception) as well as the capacity of the storage battery and the volume level of the HFCK. 35


