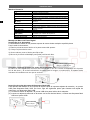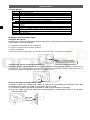
1
ODYS DPF- Shine
BEDIENUNGSANLEITUNG
HERZLICHEN GLÜCKWUNSCH zum Kauf dieses digitalen 7" LCD-Fotorahmens! Lesen Sie die
Warnhinweise und Anweisungen in dieser Bedienungsanleitung und auf dem Produkt sorgfältig durch,
bevor Sie das Produkt zum ersten Mal verwenden. Sollten Sie diese Warnhinweise nicht beachten, kann
es zu Verletzungen oder Beschädigungen des digitalen Fotorahmens kommen. Bewähren Sie diese
Bedienungsanleitung für ein späteres Nachschlagen gut auf.
Wichtig: Heben Sie die Originalverpackung und sämtliches Verpackungsmaterial für etwaige spätere
Transportzwecke auf.
WICHTIGE SICHERHEITSHINWEISE FÜR DAS PRODUKT
Richtiger Umgang mit dem digitalen Fotorahmen
Gehen Sie immer sorgfältig mit dem digitalen Fotorahmen um. Berühren Sie das LCD-Display nicht, da
sich Fettflecken und Fingerabdrücke nur schwer entfernen lassen.
Stellen Sie den digitalen Fotorahmen immer auf eine stabile und gerade Fläche. Andernfalls kann der
digitale Fotorahmen herunterfallen, was zu Verletzungen oder Beschädigungen führen kann.
Setzen Sie den digitalen Fotorahmen nicht direktem Sonnenlicht oder hohen Temperaturen aus, da
dieser sonst beschädigt werden kann oder sich die Nutzungsdauer verkürzt. Stellen Sie das Produkt nicht
in der Nähe von Wärmequellen wie Heizkörpern und anderen Wärme erzeugenden Geräten auf. Achten
Sie darauf, dass der digitale Fotorahmen nicht in direktem Sonnenlicht steht, da es sonst zu
Spiegelungen kommen kann.
Setzen Sie den digitalen Fotorahmen nicht Regen, Wasser, Nässe oder hoher Luftfeuchtigkeit aus.
Stellen Sie ihn nicht im Badezimmer oder in der Küche neben einem Wasch- oder Spülbecken auf, und
vermeiden Sie Kontakt mit Wasser.
Stellen Sie niemals schwere oder scharfe Gegenstände auf das LCD-Display, den Rahmen oder das
Netzkabel.
Überlastung der Steckdose
Überlasten Sie mit der Verwendung des digitalen Fotorahmens nicht die Stromquellen. Durch eine
Überlastung der Wandsteckdosen oder Verlängerungskabel kann es zu Überhitzung, Brand oder
Stromschlag kommen. Verwenden Sie nur geerdete oder polarisierte Steckdosen.
Schutz des Netzkabels
Vermeiden Sie eine Abnutzung des Netzkabels. Das Netzkabel sollte so verlegt werden, dass niemand
darauf treten kann und keine Gegenstände mit dem Kabel in Kontakt kommen. Legen Sie das Netzkabel
nicht unter einen Teppich. Das Kabel darf niemals stark gebogen, zusammengedrückt oder verdreht
werden. Prüfen Sie das Netzkabel und die Kabelenden regelmäßig auf Abnutzung oder
Beschädigungen.
Belüftung
Die Schlitze und Öffnungen an dem digitalen Fotorahmen dienen der Belüftung. Damit das Produkt
zuverlässig funktioniert und vor Überhitzung geschützt ist, dürfen diese Öffnungen nicht verdeckt oder
blockiert werden. Der digitale Fotorahmen muss mindestens 10 cm von der Wand entfernt stehen, damit
eine ausreichende Luftzufuhr und Belüftung gewährleistet ist. Wird das Produkt zu heiß, kann es zu
einem Brand oder Ausfall des Geräts kommen.
Um eine richtige Belüftung zu gewährleisten, dürfen Sie den digitalen Fotorahmen nicht auf ein Bett, ein
Sofa, einen Teppich oder eine ähnliche Fläche stellen, da die Öffnungen sonst nicht frei sind. Stellen Sie
ihn nur dann in Einbauschränke oder ähnliche Einbauten, wenn für eine ausreichende Belüftung gesorgt
ist.
1/8
DE
ODYS DPF-Shine
ODYS DPF-Shine
Sonstige Hinweise und Vorsichtsmaßnahmen
DE
Vorsicht: Nehmen Sie niemals das Kunststoffgehäuse ab. Im Inneren befinden sich keine Teile, die vom
Benutzer gewartet oder ausgetauscht werden können. Der digitale Fotorahmen enthält
Hochspannungsteile. Bei einer Berührung besteht die Gefahr, dass Sie schwer verletzt werden.
Versuchen Sie nicht, das Produkt selbst zu reparieren. Die Garantie deckt keine Reparaturen oder
Reparaturversuche ab, die nicht auf Anweisung eines autorisierten Händlers durchgeführt wurden.
Nehmen Sie für alle Wartungs- und Reparaturarbeiten die Hilfe qualifizierter Servicemitarbeiter in
Anspruch.
Falls aus dem Rahmen Rauch austritt oder Sie ungewöhnliche Geräusche hören oder einen seltsamen
Geruch wahrnehmen, schalten Sie ihn sofort aus und ziehen das Netzkabel ab. Wenden Sie sich an den
Kundendienst des autorisierten Händlers.
Wird der digitale Fotorahmen längere Zeit nicht verwendet, ziehen Sie das Netzkabel ab.
Reinigung des digitalen Fotorahmens
• SCHALTEN SIE DEN DIGITALEN FOTORAHMEN AUS.
• SPRÜHEN ODER SPRITZEN SIE KEINE FLÜSSIGKEIT DIREKT AUF DAS DISPLAY ODER DAS
KUNSTSTOFFGEHÄUSE.
So reinigen Sie das Display:
1. Wischen Sie das Display mit einem sauberen und weichen flusenfreien Tuch ab, um Staub und
andere Partikel zu entfernen.
2. Ist das Display danach noch nicht sauber, geben Sie etwas Glasreiniger (ammoniakfrei und nicht
alkoholbasiert) auf ein sauberes und weiches flusenfreies Tuch und reinigen es damit.
So reinigen Sie das Kunststoffgehäuse:
1. Verwenden Sie ein weiches, trockenes Tuch.
2. Ist das Gehäuse danach noch nicht sauber, geben Sie etwas Reinigungsmittel (ammoniakfrei, nicht
alkoholbasiert, nicht aggressiv und nicht scheuernd) auf ein sauberes und weiches flusenfreies
Tuch und reinigen es damit.
So reinigen Sie den Rahmen:
Verwenden Sie ein weiches, trockenes Tuch.
Haftungsausschluss
Ihr autorisierter Händler rät von der Verwendung ammoniak- oder alkoholbasierter Reinigungsmittel
für das LCD-Display oder das Kunststoffgehäuse ab. Nach der Verwendung bestimmter chemischer
Reinigungsmittel kam es in einigen Fällen zu Beschädigungen des Displays und/oder des Gehäuses. Ihr
autorisierter Händler haftet nicht für Schäden in Folge einer Verwendung ammoniak- oder
alkoholbasierter Reinigungsmittel.
Hinweise zum Umweltschutz
Dieses Produkt darf am Ende seiner Lebensdauer nicht über den normalen Haushaltsabfall entsorgt werden,
sondern muss an einem Sammelpunkt für das Recycling von elektrischen und elektronischen Geräten abgegeben
werden. Das Symbol auf dem Produkt, in der Gebrauchsanleitung oder auf der Verpackung weist darauf hin.
Die Werkstoffe sind gemäß ihrer Kennzeichnung wieder verwertbar. Mit der Wiederverwendung, der stofflichen
Verwertung oder anderen Formen der Verwertung von Altgeräten leisten Sie einen wichtigen Beitrag zum Schutze
unserer Umwelt. Bitte fragen Sie bei Ihrer Gemeindeverwaltung nach der zuständigen Entsorgungsstelle.
Entsorgungshinweis
Bitte werfen Sie defekte und entladene Batterien nicht in den normalen Hausmüll. Bringen Sie verbrauchte Batterien
zu Ihrem Fachhändler oder zu einer entsprechenden Sammelstelle. Damit ermöglichen Sie eine umweltgerechte
Entsorgung. Entladen sind Batterien in der Regel dann, wenn das Gerät abschaltet und „Batterie leer“ signalisiert
oder nach längerer Gebrauchsdauer der Batterie „nicht mehr einwandfrei funktioniert“.
Bitte werfen Sie das eventuell defekte Gerät nicht in den normalen Hausmüll. Bringen Sie das defekte Gerät zu
Ihrem Fachhändler oder zu einer entsprechenden Sammelstelle. Damit ermöglichen Sie eine umweltgerechte
Entsorgung.
ODYS DPF-Shine
Produkt Übersicht.....................................................3
Spracheinstellung .....................................................3
Verpackungsinhalt....................................................3
Gerätebeschreibung .................................................3
Fernbedienung .........................................................4
Aufstellen des Bilderrahmens ...................................4
Aufsteller anbringen ............................................................................................................................... 4
Stromversorgung mit dem beiliegenden Netzteil .................................................................................... 4
Einsetzen einer Speicherkarte/Verwenden eines USB Speichers ............................................................. 4
Ein- und Ausschalten................................................5
Fotos wiedergeben...................................................5
Kalender Funktionen ................................................6
System Einstellungen ...............................................7
Fehlerbehebung .......................................................7
Technische Daten.....................................................7
Garantiebedingungen ..............................................8
Produkt Übersicht
Der digitale Bilderrahmen gibt Ihnen die Möglichkeit Ihre Fotos auf einem
qualitativ hochwertigen LCD Bildschirm darzustellen. Schließen Sie einfach ein
USB Speichermedium an oder stecken Sie eine SD Karte in den Kartenslot auf der
Rückseite des Geräts und Ihre Fotos können auf dem Gerät dargestellt werden
ohne Sie auszudrucken.
Spracheinstellung
Für eine einfache Bedienung des Gerätes verwenden sie am besten die beiliegende Fernbedienung.
Entfernen Sie hierzu bitte zunächst die Batteriesicherung an der Fernbedienung oder legen Sie eine
Batterie in die Fernbedienung ein. Schalten Sie das Gerät ein. Es startet im Hauptmenü.
2x Drücken Sie zwei Mal die-Taste um den Menüpunkt „Setting“ (Einstellunen) zu wählen.
OK
Bestätigen Sie mit der „OK“-Taste
3x Drücken Sie drei Mal die-Taste um den Menüpunkt „Language“ (Sprache) zu wählen.
/ Verwenden Sie die /-Tasten um die gewünschte Sprache zu ändern.
ESC Verlassen Sie das Menü mit der ESC-Taste. Ihre Einstellungen sind nun gespeichert.
Verpackungsinhalt
• Digitaler Bilderrahmen
• Benutzerhandbuch
• Netzteil
• Fernbedienung
Gerätebeschreibung
1.
2.
1
4
2
3
3
5
6
7
8
9
10
11
2
12
13
3.
4.
5.
6.
7.
8.
9.
10.
11.
12.
13.
3/8
LCD Bildschirm
Abdeckung für den Kartenschacht –
Öffnen Sie die Abdeckung um an den KArtenschacht zu gelangen.
Standfuß
Halter für den Standfuß
– Hauptschater zum ein- und ausschalten des Gerätes
MENU – Auswahl bestätigen
ESC – Zurück, Abbrechen
– Kursorbewegung nach links
– Kursorbewegung nach rechts
– Kursorbewegung nach oben
– Kursorbewegung nach unten \ Bildvorschau
USB Anschluss
Stromversorgung
DE
Inhaltsangabe
ODYS DPF-Shine
Fernbedienung
Taste
DE
Funktion
Bildschirm einschalten
Ändern des Übergangseffektes
Setzt das Seitenverhältnis auf 4:3, 16:9 oder Original
Bewegt den Kursor nach oben / Aufrufen der
Helligkeitseinstellung im Foto Modus
Bewegt den Kursor nach unten / Einzelbildvorschau
SLIDE
MODE
Kursorbewegung nach links / vorheriges Bild.
Kursorbewegung nach rechts / nächstes Bild.
ENTER
ESC
SETUP
TIME
ZOOM
ROTATE
Auswahl bestätigen / Anzeige der Funktionsleiste im Foto Modus
Zurück
System Einstellungen aufrufen
Kalender anzeigen / Anzeigezeit der Fotos im Foto Modus ändern
Fotos vergrößern oder verkleinern
90° Drehung des Bildes nach rechts
Aufstellen des Bilderrahmens
Aufsteller anbringen
Der beiliegende Aufsteller kann zum Aufstellen des Rahmens auf jeder ebenen Oberfläche verwendet
werden.
Um den Aufsteller anzubringen,
1) Entfernen Sie bitte zunächst den Knopf auf der Rückseite des Gerätes.
2) Plazieren Sie den Aufsteller über der Gewindeöffnung.
3) Schrauben Sie nun den Knopf wieder in das Gerät, um den Aufsteller zu befestigen.
4) Bewegen Sie den Aufsteller bis zu der gewünschten Position.
Drehen Sie den Knopf
um den Aufsteller zu
lösen oder zu befestigen.
Stromversorgung mit dem beiliegenden Netzteil
Der digitale Fotorahmen wird mit 5V Gleichspannung betrieben. Verbinden Sie das Netzteil mit dem
Stromanschluss auf der Geräterückseite und einer freien Steckdose. (Siehe nachfolgende Abbildung).
Das Gerät startet automatisch.
Einsetzen einer Speicherkarte/Verwenden eines USB Speichers
Das Gerät verfügt über einen Kartenschacht für Speicherkarten und über einen USB Anschluss für
USB Speichermedien. Bitte folgen Sie den Anweisungen um Speicherkarten oder USB Speicher
anzuschließen:
(1) Lokalisieren Sie die Anschlüsse auf der Rückseite.
(2) Setzen Sie eine Speicherkarte in den Kartenschacht ein. Stellen Sie sicher, dass die Bedruckung
der Karte in Richtung Geräterückseite zeigt. Oder verwenden Sie einen USB Speicher.
Kartenfach
öffnen
ODYS DPF-Shine
•
Wechseln Sie nicht die SD/MMC/MS-Karte, wenn der Fotorahmen eingeschaltet ist!
Schalten Sie das Gerät vorher aus.
•
•
Solange Daten eingelesen werden, dürfen Sie keine Speicherkarte einlegen oder herausnehmen.
Ein- und Ausschalten
Mit Hilfe der -Taste können Sie den Bildschirm bei nicht verwenden abschalten. Verwenden Sie die
-Taste ebenfalls um den Bildschirm wieder ein zu schalten.
Bitte trennen Sie das Gerät vollständig von der Spannungsversorgung
wenn es längere Zeit nicht verwendet wird.
Hierdurch senken Sie Ihren Stromverbrauch und erhöhen die Lebensdauer des Gerätes.
Fotos wiedergeben
Schritt 1: Stellen Sie die Stromversorgung des Gerätes her.
Schritt 2: Das Gerät startet automatisch mit dem Hauptmenü.
Foto (Photo) – Fotos anzeigen
Kalender (Calendar) – Kalender anzeigen
Einstellungen (Setting) – System Einstellungen
Schritt 3: Verbinden Sie einen USB Speicher mit dem Gerät oder legen Sie
eine Speicherkarte in ein.
Werden eine Speicherkarte und ein USB Speicher gleichzeitig betrieben, kann
nur das Medium verwendet werden, das als erstes angeschlossen wurde.
Schritt 4: Wählen Sie mit den (hoch) / (runter) Tasten den Menüpunkt
“Photo” (Foto) und drücken Sie zur Bestätigung die “Mode” Taste. Die
Slideshow startet automatisch.
Schritt 5: Drücken Sie die “Mode” Taste zum Aufrufen der Funktionsleiste.
Wählen Sie mit den / Tasten die gewünschte Funktion aus der Leiste und
bestätigen Sie mit der “Mode” Taste.
Zurück/Vor
Wählen Sie
Wählen Sie
um das vorherige Bild zeigen zu lassen.
um das nächste Bild zeigen zu lassen.
Slide Show
Wählen Sie /
unterbrechen.
Bild drehen
Wählen Sie
um die Slidehow zu starten oder zu
um das aktuelle Bild um 90° im
Uhrzeigersinn zu drehen.
Ändern des Seitenverhältnisses
Wählen Sie
um das Seitenverhältnis zwischen 4:3, 16:9
und Original Bild um zu schalten.
Vergrößern/ Verkleinern (Zoom in/out)
Wählen Sie
um das aktuelle Bild zu
vergrößern oder zu verkleinern. Wählbare
Faktoren: 0.5, 0.7, 1, 1.5 und 2X. Bei
vergrößerten Bildern können Sie die Tasten
,, und verwenden um den
Bildausschnitt zu ändern. Drücken Sie die ESC
Taste um in die ursprüngliche Ansicht zurück zu
gelangen.
Bildinformationen anzeigen
Um Bildinformationen (Bildname, Format, Größe, etc.) über das aktuelle Bild anzeigen zu lassen,
wählen Sie bitte “ ”.
5/8
DE
Legen Sie die Karte richtig herum ein. Üben Sie beim Einlegen keinen Druck aus, da die Karte oder Komponenten des
digitalen Fotorahmens sonst beschädigt werden können. Prüfen Sie gegebenenfalls die Einlegrichtung.
ODYS DPF-Shine
Einzelbildvorschau
Wählen Sie
um die Einzelbildvorschau aufzurufen.
DE
Drücken Sie ,, und um ein Bild zu wählen.
Mit der “Mode” Taste wählen und vergrößern Sie das gewählte Bild auf
die Bildschirm Größe.
Mit der ESC Taste gelangen Sie zurück in das Hauptmenü.
Bildschirmhelligkeit einstellen
Um Foto Modus gelangen Sie durch drücken der Taste in die
Helligkeitseinstellung. Wählen Sie die gewünschte Helligkeit mit den
,Tasten.
Schritt 6: Drücken Sie die ESC Taste um den Modus zu verlassen und in das Hauptmenü zurück zu
gelangen.
Kalender Funktionen
Der digitale Bilderrahmen kann auch als Kalender oder Uhr verwendet werden.
Kalender Ansicht
Um die Kalenderansicht zu öffnen wählen Sie bitte den Menüpunkt “Kalender” (Calendar) aus dem
Hauptmenü und bestätigen Sie mit der “Mode” Taste. Kalender und Zeit werden wie abgebildet
dargestellt. Gleichzeitig werden alle auf einem angeschlossenen Datenträger verfügbaren Fotos in der
oberen linken Ecke angezeigt.
Bitte beachten Sie, dass Datum und Zeit für eine korrekte Darstellung zuvor in den System Einstellungen eingegeben
werden müssen.
Slide Show
Aktuelle Zeit
Alarm Zeit
Alarm Tag
Mit den Tasten und ändern Sie das angezeigte Jahr.
Durch drücken der Tasten und ändern Sie den Monat.
Drücken Sie die ESC Taste um den Modus zu verlassen und in das
Hauptmenü zurück zu gelangen.
Uhr Ansicht
Drücken Sie die Mode Taste während der Kalenderansicht um die Zeit
in Form einer Uhr angezeigt zu bekommen.
Drücken Sie die ESC Taste um den Modus zu verlassen und zunächst
zurück in die Kalenderansicht zu wechseln.
Alarm einstellen
Um den Alarm einzuschalten,
(1)
Wählen Sie zunächst im Hauptmenü die Option “Setting”
(Einstellungen) und bestätigen Sie mit der Mode Taste.
(2)
Wählen Sie mit Hilfe der und Tasten die Option “Alarm”.
(3)
Wählen Sie mit den und Tasten den einzustellenden Wert
(Stunde, Minute, Sekunde / Monat, Tag, Jahr).
(4)
Ändern Sie die Werte mit Hilfe der /Tasten.
ODYS DPF-Shine
DE
Alarm Wiederholung:
None (Keine) – Der Alarm ist ausgeschaltet.
Everyday (Täglich) – Der Alarm ertönt täglich.
Once (Einmal) – Der Alarm ertönt einmal.
System Einstellungen
Wählen Sie “Setting” (Einstellungen) aus dem Hauptmenü und
bestätigen Sie mit der “Mode” Taste um Systemeinstellungen
vorzunehmen.
Wählen Sie mit den / Tasten die Einstellung, die Sie ändern
möchten.
Treffen Sie mit Hilfe der/ Tasten die gewünschte Einstellung.
Drücken Sie die ESC Taste um den Modus zu verlassen und in das Hauptmenü zurück zu gelangen.
Übergangseffekt (Transition Effect) – Stellen sie hier ein, wie die einzelnen Bildübergänge
gestalltet werden sollen
Anzeigezeit (Slideshow Interval) – Setzt das Zeitintervall zwischen den Bildübergängen.
Einschalt Modus (Startup Mode) – Stellen Sie ein, in welchem Modus das Gerät starten soll.
Sprache (Language) – Stellen Sie hier die Menüsprache ein.
Alarm – Einstellung der Alarmzeit
Uhr (Clock) – Zeiteinstellung
Datum (Date) – Einstellung des Datums
Update – Funktion zum erneuern der Firmware (Falls verfügbar)
Reset – Stellt die Werkseinstellungen wieder her.
About – Zeigt Versionsinformationen über das Gerät.
Fehlerbehebung
The digital picture frame cannot be · Make sure that the AC adapter is
powered on.
connected securely to the frame and
the power source.
Remote control does not work
· Ensure that a working battery is
inserted
The images can not be displayed.
· Make sure the image file is in a
supported formats.
The image is distorted or blurred.
· Resolution of the image is too low.
Try playing a file with a higher
resolution. 480 X 234 (RGB) is
recommended.
Responds of the device is too slow
There are too many files in the
memory device.
Technische Daten
Wert
Display
USB Anschluss
Foto Format
Unterstützte Speicherkarten
Ideale Bildauflösung
Maximale Speichergröße
Speicher Karten
USB Speicher
Stromversorgung
Lagertemperatur*
Betriebstemperatur*
Luftfeuchtigkeit bei Lagerung*
Luftfeuchtigkeit bei Betrieb*
Beschreibung
7.0“ LCD Bildschirm
USB 2.0 Host(High Speed)
JPEG
SD/MMC/MS
480X234 Pixel
4GB (MS/SD bis 4GB, MMC bis 2GB)
Bis 8GB
Netzteil, Eingang 100-240V, Ausgang 5V
-20℃ - +55℃
0℃ - +55℃
20% - 90% bei 40℃
20% - 93% bei 40℃
7/8
ODYS DPF-Shine
Garantiebedingungen
Die nachstehenden Bedingungen beinhalten die Voraussetzungen und den Umfang unserer Garantieleistungen und
DE
lassen unsere gesetzlichen und vertraglichen Gewährleistungsverpflichtungen unberührt.
Für unsere Produkte leisten wir Garantie gemäß nachfolgenden Bedingungen:
1. Wir geben 24 Monate-Gewährleistung für Odys-Produkte. Innerhalb von 12 Monaten ab Kaufdatum beheben wir unentgeltlich nach
Massgabe der folgenden Garantiebedingungen Schäden oder Mängel am Produkt. Bei einem Mangel oder Defekt, der später als 12
Monate nach dem Kaufdatum festgestellt wird, muß für eine Garantiereparatur ein Fabrikationsfehler nachweislich vorliegen.
Die Garantie erstreckt sich nicht auf Batterien und andere Teile, die zu den Verbrauchsgütern zählen, leicht zerbrechliche Teile, wie
z.B. Glas oder Kunststoff sowie Defekte aufgrund des normalen Verschleißes. Eine Garantiepflicht wird nicht ausgelöst durch
geringfügige Abweichungen von der Soll-Beschaffenheit, die für die Wert- und Gebrauchstauglichkeit des Produkts unerheblich
sind, durch Schäden aus chemischen und elektrochemischen Einwirkungen, von Wasser sowie allgemein aus anormalen
Bedingungen.
2. Die Garantieleistung erfolgt in der Weise, dass mangelhafte Teile nach unserer Wahl unentgeltlich instand gesetzt oder durch
einwandfreie Teile ersetzt werden. AXDIA behält sich das Recht auf Austausch gegen ein gleichwertiges Ersatzgerät vor, falls das
eingesandte Produkt innerhalb eines angemessenen Zeit- und Kostenrahmens nicht instand gesetzt werden kann. Ebenso kann das
Produkt gegen ein anderes gleichwertiges Modell ausgetauscht werden. Instandsetzungen vor Ort können nicht verlangt werden.
Ersetzte bzw. getauschte Teile gehen in unser Eigentum über.
3. Der Garantieanspruch erlischt, wenn Reparaturen oder Eingriffe von Personen vorgenommen werden, die hierzu von uns nicht
ermächtigt sind, oder wenn unsere Produkte mit Ergänzungs- oder Zubehörteilen versehen werden, die nicht auf unsere Produkte
abgestimmt sind.
4. Garantieleistungen bewirken weder eine Verlängerung der Garantiefrist, noch setzen sie eine neue Garantiefrist in Lauf. Die
Garantiefrist für eingebaute Ersatzteile endet mit der Garantiefrist für das ganze Produkt.
5. Weitergehende und andere Ansprüche, insbesondere solche auf Ersatz außerhalb des Produkts entstandener Schäden sind –
soweit eine Haftung nicht zwingend gesetzlich angeordnet ist – ausgeschlossen. Wir haften also nicht für zufällige, indirekte oder
sonstige Folgeschäden aller Art, die zu Nutzungseinschränkungen, Datenverlusten, Gewinneinbußen oder Betriebsausfall führen.
Geltendmachung eines Garantiefalles
1. Um den Garantieservice in Anspruch zu nehmen, müssen Sie Kontakt mit AXDIA Service-Center über Email, per Fax oder Telefon
aufnehmen (Kontaktdaten siehe unten). Ebenso steht Ihnen dafür unser Serviceformular auf unserer Webseite oder auf der
Rückseite der Garantiebedienungen zur Verfügung.
2. AXDIA Service-Center wird versuchen, Ihr Problem zu diagnostizieren und zu lösen. Wird ein Garantiefall festgestellt, erhalten Sie
eine RMA Nummer (Return Material Authorization) und werden gebeten, das Produkt zu AXDIA einzusenden.
ACHTUNG: AXDIA nimmt nur Sendungen an, die mit einer RMA-Nummer versehen sind.
Für die Einsendung des Produktes ist folgendes zu beachten:
1. Die Sendung ist ausreichend frankiert, versichert und transportgerecht einzusenden. Dem Produkt darf kein Zubehör beigefügt sein
(keine Kabel, CD‘s, Speicherkarten, Handbücher, etc.), wenn nicht von AXDIA Service-Center anders bestimmt.
2. Die RMA-Nummer ist sichtbar und lesbar von außen auf der Verpackung zu vermerken.
3. Eine Kopie des Kaufbelegs muss als Garantienachweis beigefügt werden.
4. Nach Eingang des eingesandten Produkts leistet AXDIA Garantie gemäß Garantiebedienungen und sendet das Produkt frei Haus
versichert zurück.
Außerhalb der Garantie
AXDIA kann einen Serviceanspruch außerhalb der Garantie ablehnen. Willigt AXDIA in einen Service außerhalb der
Garantie ein, so werden alle Instandsetzungs- und Transportkosten in Rechnung gestellt.
AXDIA nimmt keine Sendungen an, die nicht zuvor von AXDIA durch RMA (Return Material Authorization) genehmigt
wurden.
ODYS DPF-Shine
EN
ODYS DPF-Shine
USER MANUAL
CONGRATULATIONS on your purchase of our 7’’LCD Digital Photo Frame. Please read carefully and
follow all warnings and instructions in this User’s Manual and those marked on the product before first
use. Failing to follow these warnings could result in personal injury or damage to the Digital Photo Frame.
Also, remember to keep this User’s Manual in a convenient location for future reference.
Important: Save the original box and all packing material for future shipping needs.
IMPORTANT PRODUCT SAFETY INSTRUCTIONS
Proper Handling of the Digital Photo Frame
Always handle the Digital Photo Frame with care. Avoid touching the LCD screen as natural skin oils are
often difficult to remove.
Always position the Digital Photo Frame on a stable and level surface. Unstable surfaces can cause the
Digital Photo Frame to topple and fall, resulting in possible damage or injury.
Avoid exposing the Digital Photo Frame to direct sunlight or high temperatures, which can damage or
shorten its useful life. Do not place the unit near heat sources such as radiators, heat registers, or other
appliances that generate heat. Orient the Digital Photo Frame away from direct sunlight to reduce glare.
Avoid exposing the Digital Photo Frame to rain, water, moisture or high humidity. Do not place it in a
bathroom or kitchen near a sink or where it may come in contact with water.
Never place heavy or sharp objects on the LCD panel, frame, or power cord.
Overloading Outlets
Do not overload electrical power sources when using the Digital Picture Frame. Overloading wall outlets,
or extension cords can result in overheating, fire, or electric shock. Use only grounded or polarized
outlets.
Power Cord Protection
Minimize wear on the power supply cord. The power supply cord should be routed away from foot traffic
and contact with other objects. Do not route the power cord under rugs or carpeting. The cord should
never be severely bent, pinched, or twisted. Periodically inspect the power cord and each end of the cord
for wear or damage. Periodically inspect the power cord and each end of the cord for wear or damage.
Ventilation
Slots and openings on the Digital Photo Frame are provided for ventilation purposes. To ensure reliable
operation of the product and to protect it from overheating, these openings must not be blocked or
covered. Keep the Digital Photo Frame a minimum of four (4) inches away from any wall to assure
sufficient airflow and ventilation. Increased temperatures may cause fire or device failure.
To assure proper ventilation, do not block the openings by placing the Digital Photo Frame on a bed,
sofa, rug or other similar surface. Do not place it in a built-in installation, such as a bookcase or enclosed
rack, unless proper ventilation is provided.
1/8
ODYS DPF-Shine
Other Notices and Precautions
Caution: Never remove the plastic casing. There are no user serviceable parts inside. The Digital Photo
Frame contains high voltage parts. You may be seriously injured if you touch them.
EN
Do not attempt repairs yourself. The warranty does not cover repairs or attempted repairs by anyone not
authorized by Authorize Dealer. Refer all servicing and repairs to qualified service personnel.
If the Frame begins to emit smoke, an abnormal noise, or a strange odor, immediately turn it off and
unplug the power cord. Contact the Authorize Dealer Service Center.
If the Digital Photo Frame will not be used for an extended period of time, unplug the power cord.
Cleaning the Digital Photo Frame
• MAKE SURE THE DIGITAL PHOTO FRAME IS TURNED OFF
• NEVER SPRAY OR POUR LIQUID DIRECTLY ONTO THE SCREEN OR PLASTIC CASING
To Clean the Screen:
1. Wipe the screen with a clean, soft, lint-free cloth. This removes dust and other particles.
2. If it still is not clean, apply a small amount of non-ammonia, non-alcohol based glass cleaner on a
clean, soft, lint-lint-free cloth to clean the screen.
To Clean the Plastic Casing:
1. Use a soft, dry cloth.
2. If it still is not clean, apply a small amount of non-ammonia, non-alcohol based, and mild
non-abrasive detergent on a clean, soft, lint-free cloth to clean the surface.
To Clean the Frame:
Use a soft, dry cloth.
Disclaimer
Your Authorize Dealer does not recommend the use of any ammonia or alcohol-based cleaners on
the LCD screen or plastic casing. Some chemical cleaners have been reported to damage the screen
and / or display case. Your Authorize Dealer will not be liable for damage resulting from the use of any
ammonia or alcohol-based cleaners.
Tips regarding environmental protection
At the end of its operating life, this product may not be disposed of by way of your normal household waste. Instead it must
be delivered to a collection point for recycling electrical and electronic equipment. The icon on the product, in the operating
instructions or on the packaging, indicates this.
The materials used in manufacturing this product are recyclable, depending on their identifying markings. By recycling this
equipment, by recycling its components, or through other procedures of re-using outdated equipment, you are making an
important contribution to protection our environment. Please ask you local municipal administration for the location of the
corresponding recycling point.
Battery Recycling
In order to ensure the environmently friendly disposal of batteries, please do NOT dispose of used batteries through
normal household waste. Please take the batteries to your local retail or community collection point for recycling.
The following may be an indication of a discharged battery: The device cannot be switched on. The device switches
off automatically and "Battery Empty" is shown in the display. The device and or battery do not function properly.
ODYS DPF-Shine
Product Overview .....................................................3
Language Settings...................................................3
Package Content ......................................................3
Buttons & Ports ........................................................3
Remote Control ........................................................4
Mounting the Digital Photo Frame............................4
Install the bracket.................................................................................................................................... 4
Connect to a wall outlet via the DC adaptor ............................................................................................ 4
Inserting a memory card/USB flash disk .................................................................................................. 4
Turn on or off the screen .........................................5
View Photos .............................................................5
Calendar...................................................................6
System Settings .......................................................6
Firmware Upgrade....................................................7
Troubleshooting........................................................7
Technical Specifications............................................7
Warranty condition ...................................................8
Product Overview
The 7" Digital Photo Frame enables you to view photos on a high-resolution LCD screen.
Simply insert a USB flash drive or SD memory card into the appropriate slot located on the
back of the frame and your pictures will be displayed instantly on the screen without need of
paying money for printing photos.
Language Settings
For easy operation of the device it is suggested to use the remote control included.
Remove the battery protection from the remote and insert a new battery.
Switch the device on, the device will start in the Main Menu.
Press the - key twice to enter and select the menu "Setting"
2x OK
Confirm by pressing the "OK" Key.
3x Press the - key three times and select the menu "Language".
/
Use the/keys to select the desired language.
ESC
Exit the menu by pressing the ESC-Key. The settings will now be saved.
Package Content
• 7" Digital Picture Frame
• DC Adaptor
• User manual
• Remote Control
Buttons & Ports
LCD Display
Card Slot Cover – Open the cover from the OPEN slot to show the
memory card slot.
①
④
②
Bracket
Bracket Holder
– Turn on or turn off the screen
③
③
MENU – Confirm selection
ESC – Return
⑤
⑥
⑦
⑧
⑨
⑩
Left –Move the cursor left.
Right –Move the cursor right
②
Up – Move the cursor up
Down – Move the cursor down \ Open Thumbnail preview
USB port – Connect to a USB flash drive
DC IN port – Connect to the AC adaptor
3/8
EN
TABLE OF CONTENT
ODYS DPF-Shine
Remote Control
Key
SLIDE
MODE
EN
ENTER
ESC
SETUP
TIME
ZOOM
ROTATE
Function
Turn on or off the screen
Change transition effect of slide show
Set the aspect ratio as 4:3, 16:9 and Original
Move the cursor up / Set the brightness of the screen when
viewing photo
Move the cursor down / Open Thumbnail preview
Display the previous photo or move the cursor left
Display the next photo or move the cursor right
Confirm a selection / Display the tool bar when viewing photo
Return
Enter system setting mode
Display the calendar / Set the time interval between slides when
you are in slide show
Zoom in or zoom out the photo
Rotate right 90°
Mounting the Digital Photo Frame
Install the bracket
The included bracket is used to support the frame on any flat surface.
To install the bracket,
1) Screw off the nut from the back of the device.
2) Place the bracket onto the screw hole.
3) Return the screw to the hole and tighten it for securing the bracket.
Screw the nut to release or
tighten the bracket
Connect to a wall outlet via the DC adaptor
The digital photo frame is powered by 5V DC IN input. Connect the DC adaptor to the DC IN port on the back
and the electronic wall socket (see the following figure). The device should start immediately once powered.
Inserting a memory card/USB flash disk
The device provides a card slot to support memory card and a USB port for USB flash disk. Please follow these
steps to insert a memory card or USB flash disk:
(1) Find the card slot or USB port at the bottom of the machine.
(2) Insert a memory card into the slot with the face toward the back, or insert a USB flash disk into the USB port.
Open the card
slot cover
ODYS DPF-Shine
•
Don’t change the SD / MMC/MS card while Picture Frame is powered on!
If you want to change the card turn the power off at first.
•
Please insert the card in a correct direction. Do not apply too strong a force when inserting
the card to prevent damaging the card or the component of digital photo frame. Please
EN
check for a correct inserting direction if it can not be done.
•
Don't insert or pull out the saving card while reading information.
Turn on or off the screen
When you do not want to view the photos momentarily, you can press the
saving power. To turn on the screen, press the
button again.
button to turn off the screen for
Please disconnect the device from the power source when not to be used for longer periods of
time. Doing so will save energy and extend the life of the device.
View Photos
Step 1: Connect the device to a wall outlet with the AC adaptor.
Step 2: The device should start immediately and display the main menu.
Photo – Display photos
Calendar – Display the calendar
Setting – System Setting
Step 3: Insert a USB flash disk into the USB port or a memory card into the
card slot.
If you insert both, only pictures stored in the memory device that
you inserted firstly are displayed.
Step 4: Press the (up) / (down) button to select “Photo” and then press
the “Mode” button to confirm. The slide show should start automatically.
Step 5: Press the “Mode” button to show the tool bar. Press the / button
to select a button from the tool bar and then press “Mode” button to confirm.
Previous/next
Select
to display the previous photo.
Select
to display the next photo.
Slide Show
Select
/
to start or stop slide show.
Zoom in/out
Select
to zoom in or zoom out the picture to
0.5, 0.7, 1, 1.5 and 2X. When the photo is
enlarged, you can press the ,, and button to roam on the photo. Pressing the ESC
button will restore the picture to original size.
Rotate the picture
Select
to rotate the picture clockwise by 90°.
Change the Aspect Ratio
Select
to change the aspect ratio between 4:3, 16:9 and
Original.
Display photo information
To display information (photo name, format, size etc.) about the photo, select “ ”.
5/8
ODYS DPF-Shine
Thumbnail View
Select
to enter the thumbnail view mode.
EN
Press ,, and to select a picture.
Press the “Mode” button to confirm your selection and enlarge the photo to full
screen.
Press the ESC button to return to the main menu.
Set brightness of the screen
When you are viewing a photo, you can press the or button to activate the
brightness setting.
Step 6: Press the ESC button to exit and return to the main menu.
Calendar
The Digital Photo Frame can be used as a tabletop calendar and an alarm clock.
Calendar View
To enter the calendar view mode, on the main menu, select the “Calendar” from the main menu, and then press the
“Mode” button to confirm. The calendar and the time should display. At the same time, all photos are displayed in
slide show at the left top corner.
Please note: To insure proper display, the date and time must be set in the system settings.
Slide Show
Current Time
Alarm Time
Alarm Day
Press the and button to change the year.
Press the and button to change the month.
Press the ESC button to exit and return to the main menu.
Clock View
When you are viewing the calendar, you can press the Mode button to display
the time as a clock.
Press the ESC button to exit from the clock.
Set the Alarm
To enable the alarm,
(1)On the main menu, press the “Setting” button to enter the system setting
mode.
(2)Press and button to select “Alarm”.
(3)Press the and button to select the hour, minute and day setting.
(4)Press the/button to decrease or increase the level of hour, minute and day.
Alarm day options:
None – Disable the alarm.
Everyday – Alarm rings everyday.
Once – Alarm rings once.
System Settings
On the main menu, select “Setting” and then press the “M” button to enter the
system setting mode.
ODYS DPF-Shine
Transition Effect – Set transition effect of the slide show
Slideshow Interval – Set time interval between slides.
Startup Mode – Set the first mode that you see when the device starts up.
Language – Set the language of the on-screen texts
Alarm – Set the alarm time
Clock – Set the time
Date – Set the date
Update – Update the software
Reset – Restore the system settings to default
About – Display the software version information
Firmware Upgrade
To get the latest version of software,
(1) Obtain the upgrading file.
(2) Copy the upgrading file to the root of a memory device.
(3) Insert the memory device into the photo frame.
(4) Enter the system setting mode, press the button to select “Update” and then press the “Mode” button
to continue.
(5) Press / to select “Yes” and then press the Mode button to confirm.
(6) Wait for the upgrading to complete and do not interrupt the progress.
(7) The device restarts when the upgrading is finished.
Troubleshooting
The digital picture frame cannot be powered · Make sure that the AC adapter is
on.
connected securely to the frame and the
power source.
Remote control does not work
· Ensure that a working battery is inserted
The images can not be displayed.
· Make sure the image file is in a supported
formats.
The image is distorted or blurred.
· Resolution of the image is too low. Try
playing a file with a higher resolution. 480
X 234 (RGB) is recommended.
Responds of the device is too slow
There are too many files in the memory
device.
Technical Specifications
Item
Description
Display
7.0-inch LCD screen
USB Interface
USB 2.0 Host(High Speed)
Photo Format
JPEG
Supported Memory Card
SD/MMC/MS
Image Resolution
480X234 pixel
Memory Card Capacity
4GB (MS/SD Up to 4GB, MMC Up to 2GB)
USB Flash Disk
Up to 8GB
Power Supply
AC Adapter, Input 100-240V, Output 5V
Storage Temp*
-20℃ ~ +55℃
Ambient Temp*
0℃ ~ +55℃
Operation Relative Humidity*
20% ~ 90%(40℃)
Storage Relative Humidity*
20% ~ 93%(40℃)
7/8
EN
Press the and button to select a setting item.
Press the / button to change the option for the selected setting.
Press the ESC button to confirm setting and exit.
ODYS DPF-Shine
Warranty condition
The following conditions comprise the requirements and scope of our warranty conditions and do not
EN
affect our legal and contractual warranty obligations.
We offer a warranty on our products in accordance with the following conditions:
1. Odys products are covered by a 24 month warranty. We will resolve damages or defects on Odys
products free of charge within 12 months of the purchase date under the following warranty
conditions. For any damage or defect determined later than 12 months after the purchase date,
proof of a manufacturing fault must be submitted for repair under warranty.
The warranty does not cover batteries and other parts, which are considered consumables, parts
that break easily such as glass or plastic or defects based on normal wear and tear. There is no
warranty obligation in the event of marginal differences compared to the target appearance and
workmanship provided these have a negligible effect on the product's fitness for use, in the event of
damage caused by chemical or electrochemical effects, by water or generally from abnormal
conditions.
2. The warranty will be performed in such a way that we shall decide whether to repair the defective
parts or to replace them with working parts free of charge. AXDIA reserves the right to exchange
the product for a replacement product of equal value if the product that is sent in cannot be repaired
within a reasonable time or at reasonable cost. The product can also be exchanged for a different
model of the same value. Requests cannot be made for repairs to be carried out on site. Parts that
have been replaced or exchanged become our property.
3. The warranty claim does not apply if repairs or other work is carried out by unauthorized persons
or if our products are equipped with additional parts or accessories that are not approved for our
products.
4. Warranties that have been activated do not cause the warranty period to be extended, nor do they
trigger a new warranty period. The warranty period for any replacement parts installed ends with the
warranty period for the entire product.
5. Any other or further claims are excluded, especially those for replacement due to damage caused
outside of the product, provided there is no obligatory legal liability. We therefore accept no liability
for accidental, indirect or other consequential damage of any kind, which leads to usage
restrictions, data loss, loss of earnings or interruption to business.
Asserting a warranty claim
1. To make use of the warranty service, you must contact the AXDIA Service Center by e-mail, fax or
phone (see below for contact details). You can also use the service form on our website or on the
back of the warranty conditions.
2. AXDIA Service Center will try to diagnose and solve your problem. If it is determined that a
warranty claim exists, you will be given an RMA number (Return Material Authorization) and you will
be asked to send the product to AXDIA.
IMPORTANT: AXDIA will only accept parcels that have an RMA number.
Please observe the following when sending the product:
1. Send the product suitably packaged with carriage and insurance paid. Do not enclose any
accessories with the products (no cables, CD's, memory cards, manuals, etc.), unless the AXDIA
Service Centre specifies otherwise.
2. Mark the RMA number on the outside of the package in such a way that it is visible and clearly
legible.
3. You must enclose a copy of the sales slip as proof of purchase.
4. Once AXDIA has received the product, it will meet its warranty obligations in accordance with the
warranty conditions and will return the product to the sender with carriage and insurance paid.
Service outside of warranty
AXDIA can refuse any service claim made that is not covered by the warranty. If AXDIA agrees to
provide a service outside the warranty, the customer will be invoiced for all repair and transport costs.
AXDIA will not accept any packages that have not first been approved by AXDIA by means of an RMA
(Return Material Authorization).
ODYS DPF-Shine
ENHORABUENA por la compra de su marco de fotos digital de con LCD de 7’’. Lea atentamente y siga
todas las instrucciones y advertencias que se proporcionan en este Manual del usuario y las que incluye
el producto antes de comenzar a utilizarlo. El no cumplimiento de estas advertencias podría provocar
lesiones personales o daños en el marco de fotos digital. Recuerde también que debe guardar este
Manual del usuario en un lugar seguro para consultas futuras.
Importante: Guarde la caja original y todo el material de embalaje para futuros envíos.
INSTRUCCIONES IMPORTANTES SOBRE SEGURIDAD DEL PRODUCTO
Manipulación correcta del marco de fotos digital
Manipule siempre con cuidado el marco de fotos digital. Evite tocar la pantalla de LCD ya que la grasa
natural de la piel es, con frecuencia, difícil de limpiar.
Coloque siempre el marco de fotos digital sobre una superficie nivelada y estable. Las superficies
inestables puede provocar que el marco de fotos digital se incline y caiga, provocando posibles daños o
lesiones.
Evite exponer el marco de fotos digital a la luz directa del sol o a altas temperaturas, ya que podrían
dañarlo o acortar su vida útil. No lo coloque cerca de fuentes de calor como radiadores, registros de
calefacción u otras aplicaciones que generen calor. Oriente el marco de fotos digital en dirección opuesta
a la luz del sol para reducir los brillos.
Evite exponer el marco de fotos digital a la lluvia, agua, vaho o humedad. No lo coloque en cuartos de
baño o en la cocina cerca del fregadero o en lugares en los que pueda entrar en contacto con el agua.
No coloque nunca objetos afilados ni pesados sobre el panel de LCD, el marco o el cable de
alimentación.
Tomas de corriente sobrecargadas
Evite sobrecargar la toma de corriente a la que vaya a conectar el marco de fotos digital. La sobrecarga
de las tomas de corriente o los alargadores de cable puede provocar sobrecalentamientos, incendios o
descargas eléctricas. Utilice exclusivamente tomas de corriente polarizadas o con toma de tierra.
Protección del cable de alimentación
Minimice el desgaste del cable de alimentación. El cable de alimentación debe mantenerse siempre
alejado de zonas transitadas y debe evitarse que entre en contacto con otros objetos. No coloque el
cable debajo de alfombras ni moquetas. No doble el cable excesivamente, ni lo apriete o retuerza.
Compruebe regularmente el estado del cable y observe si presenta daños en los extremos. Compruebe
regularmente el estado del cable y observe si presenta daños en los extremos.
Ventilación
Las aberturas y ranuras que hay en el marco de fotos digital sirven para su ventilación. Para asegurar un
funcionamiento fiable del producto y para protegerlo contra sobrecalentamientos, no bloquee ni tape
estas aberturas. Mantenga el marco de fotos digital a una distancia mínima de cuatro (4) pulgadas de
cualquier pared para asegurar un flujo de aire adecuado y su ventilación. A temperaturas muy altas
pueden producirse fallos de funcionamiento o incendios.
Para asegurar una ventilación correcta, no bloquee las aberturas colocando el marco de fotos digital
sobre camas, sofás, alfombras o superficies parecidas. No lo coloque en lugares profundos como
librerías o estanterías cerradas, a no ser que disponga de una ventilación adecuada.
Otras observaciones y precauciones
1/8
ES
ODYS DPF- Shine
MANUAL DEL USUARIO
ODYS DPF-Shine
Precaución: No desmonte nunca la funda de plástico. En el interior no hay piezas que haya que reparar.
El marco de fotos digital contiene piezas de alta tensión. Si las toca pueden producirse lesiones
personales de gravedad.
No intente realizar las reparaciones por sí mismo. La garantía no cubre las reparaciones o intentos de
reparación realizadas por terceros distintos al distribuidor autorizado. Avise al personal cualificado del
servicio técnico cuando necesite servicio o reparación.
ES
Si el marco comienza a desprender humo, a emitir ruidos anormales u olores extraños, apáguelo
inmediatamente y desconecte el cable de alimentación. Avise al centro de asistencia técnica del
distribuidor autorizado.
Si el marco de fotos digital no se va utilizar durante un largo periodo de tiempo, desconecte el cable de
alimentación.
Limpieza del marco de fotos digital
• ASEGÚRESE DE QUE EL MARCO DE FOTOS DIGITAL ESTÁ APAGADO
• NUNCA ROCÍE DIRECTAMENTE SPRAY O LÍQUIDO SOBRE LA PLANTALLA O LA FUNDA DE
PLÁSTICO
Para limpiar la pantalla:
1. Limpie la pantalla con un paño limpio, seco y que no desprenda fibras. Al hacerlo, eliminará el polvo
y las partículas.
2. Si aún así no queda limpia, aplique una pequeña cantidad de limpiador sin alcohol ni amoniaco
sobre un paño limpio, seco y que no desprenda fibras y limpie con el mismo la pantalla.
Para limpiar la funda de plástico:
1. Utilice un paño suave y seco.
2. Si aún así no queda limpia, aplique una pequeña cantidad de limpiador suave, no abrasivo, sin
alcohol ni amoniaco sobre un paño limpio, seco y que no desprenda fibras y limpie con el mismo la
superficie.
Para limpiar el marco:
Utilice un paño suave y seco.
Exención de responsabilidad
El Distribuidor autorizado no recomienda el uso de limpiadores con base de alcohol o amoniaco para
la limpieza de la pantalla y de la funda de plástico. Existen informes que revelan que algunos limpiadores
químicos dañan la pantalla y / o la funda de la pantalla. El Distribuidor autorizado declina toda
responsabilidad por los daños derivados del uso de cualquier limpiador con base de alcohol o amoniaco.
Aviso sobre protección medioambiental
Este producto no se puede desechar en la basura doméstica del modo habitual al final de su vida útil, sino que
deberá entregarse en un punto de recogida para reciclaje de dispositivos eléctricos y electrónicos. El símbolo que
figura en el producto, en el Manual del usuario y en el embalaje así lo indica.
Los materiales son reciclables en función de su identificación. Al reutilizar materiales reciclados o al reciclar de
cualquier otro modo los aparatos usados estará contribuyendo a la protección del medioambiente. Pregunte a las
autoridades de su localidad la ubicación de los puntos de recogida.
Por favor no tiren baterías defectuosas o pilas vacías a la basura. LLeve sus baterías/pilas a un especialista o
tiren las a un contenador adecuado para cuidar el medio ambiente.
Baterías estan descargadas por regla general cuando el aparato se apaga y indica que esta vacía o cuando tras
mucho tiempo sin usuar dejan de funcionar correctamente.
ODYS DPF-Shine
Contenido del Paquete ..................................................................... 3
Botones & Puertos............................................................................ 3
Mando a Distancia ............................................................................ 4
Montaje del Marco de Fotos Digital................................................... 4
Instalación de la abrazadera ................................................................................................................... 4
Conexión a enchufe de pared por medio de un Adaptador DC................................................................ 4
Inserción de tarjeta de memoria/disquetera flash USB ............................................................................ 4
Encendido o apagado de la pantalla ................................................. 5
Visualización de Fotos ...................................................................... 5
Calendario ........................................................................................ 6
Configuración de Sistema................................................................. 7
Solución de Problemas ..................................................................... 7
Especificaciones Técnicas................................................................ 7
Términos de garantía........................................................................ 8
Descripción del Producto
El Marco de Fotos Digital de 7" le permite ver fotos en una pantalla de cristal líquido de alta resolución.
Simplemente inserte una disquetera flash USB o una tarjeta de memoria SD en la ranura apropiada
localizada al dorso del marco y sus fotos se mostrarán al instante en la pantalla sin necesidad de pagar
dinero para imprimir fotos.
Ajuste de Idioma
Para un fácil manejo del aparato mejor utilice el mando a distancia suministrado.
Elemine el plástico de la pila o introduzca una pila en el mando a distancia. Encienda el aparato.
Se inicia el menú principal.
2x Pulse dos veces la tecla- para seleccionar el punto de menú "Ajustes".
OK
Confirme con la tecla OK
3x Pulse 3 veces la tecla- para seleccionar el punto de menú "Idioma".
/
Utlilice las teclas /amoidi le ranoicceles arap odaesed.
ESC
Abandone el menú con la tecla ESC . Sus ajustes han sido memorizados.
Contenido del Paquete
• Marco de Fotos Digital de 7"
• Adaptador DC
LCD Display (Pantalla LCD)
• Manual del Usuario
• Mando a Distancia
Card Slot Cover (Cobertura de Ranura de Tarjeta)– Abra la cobertura por
la ranura que lea OPEN (ABIERTO) para mostrar la ranura de tarjeta de
Botones & Puertos
memoria.
Bracket (Abrazadera)
Bracket Holder (Soporte de la Abrazadera)
①
– Encendido o apagado de la pantalla
④
②
MENU (MENÚ)– Confirma su selección
ESC (Espape)– Regreso
③
Previous (Previa) – Mueve el cursor hacia la izquierda.
③
Next (Siguiente) –Mueve el cursor hacia la derecha
Up (Arriba)
⑤
⑥
⑦
⑧
⑨
⑩
– Mueve el cursor hacia arriba
Down (Abajo) – Mueve el cursor hacia abajo \ Abre vista previa en
②
Miniatura
USB port (Puerto USB) – Conecta a memoria flash USB
Puerto DC IN – Conecta al adaptador de corriente alterna
3/8
ES
TABLA DE CONTENIDOS
ODYS DPF-Shine
Mando a Distancia
Key (Tecla)
Function (Función)
Enciende o apaga la pantalla
SLIDE (DIAPOSIT.)
Cambia el efecto de transición del muestreo de diapositivas
MODE (MODO)
(izquierda)
Ajusta el radio de aspecto a 4:3, 16:9 y Tamaño Original
Mueve el cursor hacia arriba / Configura el brillo de la pantalla al
visualizar la foto
Mueve el cursor hacia abajo / Abre vista preliminar de Fotos en
Miniatura
Muestra la foto anterior o mueve el cursor hacia la izquierda
(derecha)
Muestra la siguiente foto o mueve el cursor hacia la derecha
(arriba)
ES
(abajo)
ENTER
ESC (ESCAPE)
SETUP (CONFIGURACIÓN)
TIME (HORA)
ZOOM
ROTATE (ROTACIÓN)
Confirma una selección / Muestra la barra de herramientas al
visualizar una foto
Regresa
Introduce modo de configuración del sistema
Muestra el calendario / Ajusta la hora a intervalos cuando se
encuentra en el muestreo de diapositivas
Aumenta o reduce la foto
Rota 90° hacia la derecha
Montaje del Marco de Fotos Digital
Instalación de la abrazadera
La abrazadera incluida se usa para dar soporte al marco desde cualquier superficie plana.
Para instalar la abrazadera,
1) Elemine primeramente el botón en la parte trasera del aparato.
2) Coloque el pie sobre la rosca
3) Ahora vuelva a poner el botón para fijar el pie.
4) Mueve el pie hacía arriba/abajo para poder posicionarlo bien.
Mueve el botón para
aflojar o fijar el pie.
Conexión a enchufe de pared por medio de un Adaptador DC
El marco de fotos digital lleva una toma de corriente de 5V DC IN. Conecte el adaptador DC al puerto
DC IN del dorso y al enchufe electrónico de pared (vea la imagen a continuación). El aparato debe
activarse de inmediato una vez que se enchufa.
Inserción de tarjeta de memoria/disquetera flash USB
Este aparato está dotado de una ranura de tarjeta capaz de soportar tarjetas de memoria y un puerto
USB para disquetera flash USB. Por favor, siga los siguientes pasos para insertar una tarjeta de
memoria o una disquetera flash USB:
(1) Localice la ranura de tarjetas o el puerto USB de la parte inferior de la máquina.
(2) Inserte una tarjeta de memoria en la ranura con la cara hacia al dorso, o inserte una disquetera flash
USB en el puerto USB.
Abra la cobertura de
ranura de tarjetas
ODYS DPF-Shine
•
¡No cambie la tarjeta SD / MMC/MS mientras el Marco de Fotos esté enchufado!
Si desea cambiar la tarjeta, desconecte la corriente lo primero.
•
Por favor, inserte la tarjeta en la dirección correcta. No aplique una fuerza excesiva al insertar la tarjeta, para prevenir
que se dañe la tarjeta o el componente del marco digital de fotos. Por favor, compruebe la dirección de inserción que sea
No inserte ni tire de la tarjeta de almacenaje mientras se esté leyendo la información de la misma.
Encendido o apagado de la pantalla
Cuando usted no desee ver fotos de manera temporal, podrá presionar el botón
pantalla y ahorrar energía. Para encender la pantalla, presione de nuevo el botón .
para apagar la
Por favor, desconecte el aparato de la fuente de corriente cuando no se encuentre en uso por un
periodo prolongado de tiempo. Si hace esto, ahorrará energía y prolongará la vida del aparato.
Visualización de Fotos
Paso 1: Conecte el aparato a un enchufe de pared con el adaptador de
corriente alterna.
Paso 2: El aparato debe inicializarse enseguida y mostrar el menú
principal.
Photo (Foto) – Muestreo de fotos
Calendar (Calendario) – Despliegue del calendario
Setting (Configuración) – Configuración del sistema
Paso 3: Inserte una disquetera flash USB en el puerto USB o una
tarjeta de memoria en la ranura de tarjetas.
Si inserta ambos, sólo se mostrarán las imágenes
almacenadas en el dispositivo de memoria que usted
insertó en un principio.
Paso 4: Presione el botón de (arriba) / (abajo) para seleccionar
“Photo” (Foto) y después presione el botón de “Mode” (Modo) para
confirmar. El muestreo de diapositivas debe inicializarse
automáticamente.
Paso 5: Presione el botón de “Mode” para mostrar la barra de
herramientas. Presione los botones / para seleccionar un botón de la barra de herramientas y
presione el botón de “Mode” para confirmar.
Anterior/siguiente
Seleccione
para mostrar la foto anterior.
Seleccione
para mostrar la siguiente foto.
Muestreo de Diapositivas
Seleccione
/
para inicializar o parar el modo de
muestreo de diapositivas.
Aumentar/Reducir
Seleccione
para aumentar o reducir la
foto a 0,5; 0,7; 1; 1.5; y 2X. Cuando se
amplie la foto, usted podrá presionar el
botón de ,, y el botón de para
deslizarse hacia partes de la foto. Al
presionar el botón de ESC (Escape),
devolveremos a la foto su tamaño original.
Rotación de la foto
Seleccione
para rotar la foto en el sentido de las agujas del reloj en bloques de 90°.
Cambio del radio del aspecto
Seleccione
para cambiar el radio de aspecto entre 4:3, 16:9 y Original.
Despliegue de información de foto
Para desplegar la información (nombre de la foto, formato, tamaño, etc.) de foto, seleccione “ ”.
5/8
ES
correcta si esto no pudiera hacerse.
•
ODYS DPF-Shine
Visualización en Miniatura
Seleccione
para entrar en modo de visualización en miniatura.
Presione los botones de ,, y para seleccionar una foto.
Presione el botón de “Mode” para confirmar su selección y agrandar la
foto a tamaño de pantalla completa.
Presione el botón de ESC para regresar al menú principal.
ES
Ajuste del brillo de la pantalla
Cuando usted se encuentre visualizando una foto, puede presionar el
botón de o el depara activar el ajuste de brillo.
Paso 6: Presione el botón de ESC para salir y regresar al menú principal.
Calendario
El Marco de Fotos Digital puede usarse a modo de objeto de sobremesa y a modo de reloj alarma.
Visualización del Calendario
Para entrar en modo de visualización de calendario, seleccione “Calendar” (Calendario) desde el menú
principal, y después presione el botón de “Mode” para confirmar. El calendario y la hora deberían
mostrarse. Al mismo tiempo, todas las fotos se desplegarán a modo de muestreo de diapositivas en la
esquina superior izquierda.
Atención: Para asegurar un muestreo adecuado, la fecha y la hora deben ser configuradas en
la configuración del sistema.
Muestreo de Diapositivas
Hora actual
Hora de la Alarma
Día de la Alarma
Presione los botones de y para cambiar el año.
Presione los botones de y para cambiar el mes.
Presione el botón de ESC para salir y regresar el menú principal.
Visualización del Reloj
Al visualizar el calendario, usted podrá presionar el botón de Mode para
desplegar la hora a modo de reloj de agujas.
Presione el botón de ESC para salir del reloj.
Ajuste de la Alarma
Para habilitar la alarma,
(1) En el menú principal, presione el botón de “Setting”
(Configuración) para entrar en modo de configuración de
sistema.
(2) Presione los botones de y para seleccionar “Alarm” (Alarma).
(3) Presione los botones de y para seleccionar la configuración de la hora, los minutos y el
día.
(4) Presione los botones de/para reducir o aumentar el nivel de horas, minutos y día.
Opciones de la alarma diaria:
None (Ninguna) – Desactiva la alarma.
Everyday (Diaria) – La alarma suena cada día.
Once (Una vez) – La alarma suena una vez.
Transition Effect (Efecto de Transición) – Configura el efecto transitorio del muestreo de diapositivas
Slideshow Interval (Intervalo de Muestro de Diapositivas) – Configura los intervalos de tiempo entre
diapositivas.
Startup Mode (Modo de Inicio) – Configura el primer modo que usted ve cuando el aparato se
inicializa.
Language (Idioma)– Configura el lenguaje de los textos en pantalla
Alarm (Alarma) – Configura la hora de la alarma
Clock (Reloj) – Configura la hora
Date (Fecha) – Configura la fecha
Update (Acualizar) – Actualiza el programa
Reset (Reseteo) – Restaura el sistema a la configuración por defecto
About (Sobre Nosotros) – Despliega información acerca de la versión del programa
Solución de Problemas
El marco de fotos digital no se enciende.
El mando a distancia no funciona.
Las imágenes no pueden desplegarse.
La imagen se ve distorsionada o borrosa.
El aparato responde de forma lenta
· Asegúrese de que el adaptador de corriente alterna está conectado de
forma segura al marco y a la toma de corriente.
· Asegúrese de insertar una batería que funcione bien.
· Asegúrese de que el archivo de la imagen sea compatible con los
formatos que soporta el aparato.
· La resolución de la imagen es demasiado baja. Intente reproducir un
archivo con una resolución más alta. 480 X 234 (RGB) es la
recomendada.
Hay muchos archivos en el dispositivo de memoria.
Especificaciones Técnicas
Objeto
Descripción
Pantalla
7.0-inch LCD screen
Interfaz USB
USB 2.0 Servidor(Alta Velocidad)
Formato de Foto
JPEG
Tarjeta de Memoria Soportada
SD/MMC/MS
Resolución de Imagen
480X234 píxeles
Capacidad de Tarjeta de Memoria
4GB (MS/SD Hasta 4GB, MMC Hasta 2GB)
Disquetera Flash USB
Hasta 8GB
Toma de Corriente
Adaptador de Corriente Alterna, Entrada 100-240V, Salida 5V
Temp Almacenaje*
-20℃ ~ +55℃
Temp Ambiental*
0℃ ~ +55℃
Operation Relative Humidity*
20% ~ 90%(40℃)
Humedad Relativa de Almacenaje*
20% ~ 93%(40℃)
7/8
ES
ODYS DPF-Shine
Configuración de Sistema
En el menú principal, seleccione “Setting” (Configuración) y presione el
botón de “M” para entrar en el modo de configuración de sistema.
Presione los botones de y para seleccionar un objeto a
configurar.
Presione los botones de / para cambiar la opción en favor de la
configuración seleccionada.
Presione el botón de ESC para confirmar la configuración y salir.
ODYS DPF-Shine
Términos de garantía
Los siguientes términos de garantía contienen las condiciones y el alcance de nuestras prestaciones de garantía y no
afectan a nuestras obligaciones legales y contractuales de garantía.
ES
La garantía concedida para nuestros productos está sometida a las siguientes condiciones:
1. La garantía de los productos Odys tiene una validez de 24 meses. Dentro de los 12 meses siguientes a la fecha de compra
repararemos gratuitamente los daños o deficiencias en el producto según las siguientes condiciones de garantía. Transcurridos
12 meses desde la fecha de compra se realizarán reparaciones dentro de la garantía cuando las deficiencias o defectos sean
imputables a fallos de fabricación.
La garantía no incluye las pilas y otros componentes considerados como bienes de consumo, piezas que se pueden romper con
facilidad, como vidrio o plástico, ni otros defectos causados por el desgaste normal. No existe obligación de prestación de garantía
por pequeñas diferencias con las cualidades del producto a tomar en consideración contractual cuando éstas no afecten al valor y
a la utilidad del producto, por daños causados por influencias químicas o electroquímicas, por agua o por circunstancias
anormales.
2. La prestación de garantía tiene lugar mediante la reparación o reemplazo gratuitos según nuestra elección. AXDIA se reserva el
derecho a reemplazar el aparato por uno de igual valor en el caso de que el producto que se nos haya enviado no se pueda
reparar en un plazo de tiempo y en un marco de costes adecuados. Igualmente, el producto se podrá cambiar por un modelo del
mismo valor. No se podrán exigir reparaciones in situ. Las piezas reemplazadas o sustituidas pasarán a ser de nuestra propiedad.
3. Se pierden los derechos de garantía si se llevan a cabo reparaciones o manipulaciones por parte de personas que no hayan sido
autorizadas por nosotros, o si nuestros productos son dotados de complementos o accesorios no adecuados para ellos.
4. Las prestaciones de garantía no suponen una prorrogación del plazo de garantía ni constituyen uno nuevo. El plazo de garantía
de los repuestos montados finaliza con el plazo de garantía de todo el producto.
5. Quedan excluidas pretensiones que excedan lo anterior o de otro tipo, especialmente las de indemnización por los daños
producidos fuera del producto siempre que no exista obligación legal para ello. No nos responsabilizaremos de los daños
casuales, indirectos o de otro tipo que tengan como consecuencia restricciones en el uso, pérdidas de datos, mermas de
beneficios o fallos de funcionamiento.
Validación de un caso de garantía
1. Para poder hacer uso del servicio de garantía, deberá ponerse en contacto con el centro de servicios de AXDIA vía Email, fax o
teléfono (los datos de contacto se encuentran más abajo). Además, podrá disponer de nuestro formulario de servicio en nuestra
página web o en el dorso de los términos de garantía.
2. El centro de servicio de AXDIA intentará diagnosticar y resolver su problema. Si se determina un caso de garantía, recibirá un
número RMA (Return Material Authorization) y se le pedirá enviar el producto a AXDIA.
ATENCIÓN: AXDIA sólo aceptará los envíos que lleven un número RMA.
Para el envío del producto se debe observar lo siguiente:
1. El envío se debe hacer libre de gastos, asegurado y de forma adecuada para el transporte. No se deben incluir accesorios del
producto (como cables, CDs, tarjetas de memoria, manuales, etc.), a nos ser que el centro de servicios de AXDIA le haya indicado
lo contrario.
2. El número RMA se debe anotar visible y legible desde fuera en el embalaje.
3. Se debe adjuntar un copia del comprobante de compra como prueba para la garantía.
4. Una vez que el producto enviado llegue a nuestro poder, AXDIA lleva a cabo las prestaciones de garantía y envía el producto de
vuelta, libre de gastos de envío y asegurado.
Fuera de la garantía
AXDIA tiene derecho a rechazar pretensiones de servicio fuera del plazo de la garantía. Si AXDIA acepta la prestación de
servicios fuera del plazo de garantía, se facturarán todos los costes de reparación y de transporte. AXDIA no aceptará
envíos no autorizados previamente mediante número RMA (Return Material Authorization).
ODYS DPF-Shine
Nous tenons à vous FÉLICITER pour l'achat de votre cadre photo numérique LCD 7’’. Nous vous prions
de lire attentivement cette notice et d'observer toutes les consignes et avertissements qui y sont
prodigués avant de tenter d'utiliser votre cadre photo. Le non-respect des avertissements risque
d'entraîner des blessures corporelles ou d'endommager votre cadre photo numérique. C'est pourquoi il
est nécessaire de conserver cette notice dans un endroit accessible pour son utilisation future.
Important : Veuillez conserver la boîte d'origine ainsi que tout le matériel d'emballage pour un retour
éventuel.
CONSIGNES DE SÉCURITÉ IMPORTANTES CONCERNANT LE PRODUIT
Manipulation correcte
du cadre photo numérique
Manipulez toujours le cadre photo numérique avec soin. Évitez de toucher l'écran car les graisses
cutanées naturelles sont souvent difficiles à éliminer.
Disposez toujours le cadre photo numérique sur une surface plane, stable et horizontale. Avec un appui
instable, le cadre risque de se renverser et de tomber. Cela peut l'endommager ou causer des
blessures.
Évitez d'exposer le cadre photo numérique directement au soleil ou à une température élevée car cela
peut l'endommager ou réduire sa durée de vie. Évitez de placer le cadre à proximité d'une source de
chaleur (radiateur, bouche de chauffage ou autre appareil produisant de la chaleur). Pour réduire les
reflets éblouissants, orientez votre cadre photo numérique dans une direction opposée à celle de la
lumière.
Évitez d'exposer votre cadre photo numérique à la pluie, à l'humidité et aux condensations, ne projetez
pas d'eau dessus. Ne le placez pas dans une salle de bains, une cuisine, près d'un évier, ni en tout autre
endroit où il pourrait être mouillé.
Ne placez jamais d'objets lourds ou coupants sur le panneau LCD, le cadre ou le cordon secteur.
Surcharge des prises de courant
Ne surchargez pas l'alimentation électrique en branchant le cadre photo numérique. En surchargeant
une prise de courant ou une rallonge, vous pouvez causer une surchauffe, un incendie ou une
électrocution. Branchez le cadre exclusivement dans une prise avec terre ou polarisée.
Protection du cordon secteur
Évitez d'user prématurément le cordon secteur. Placez le cordon d'alimentation hors des passages et
évitez qu'il soit en contact avec d'autres objets. Ne faites pas passer le cordon sous les tapis et
moquettes. Il ne faut jamais plier, pincer ni tordre exagérément le cordon secteur. Vérifiez
périodiquement le bon état général du cordon en particulier à chaque extrémité.
Ventilation
Afin d'assurer sa bonne ventilation, des fentes et des ouvertures sont pratiquées dans le cadre photo
numérique. Pour qu'il fonctionne correctement et pour le protéger d'une possible surchauffe, ces
ouvertures doivent toujours rester dégagées. Afin de garantir une convection et une ventilation
suffisante, placez votre cadre à 10 cm au moins de toute paroi ou cloison. Une élévation de température
peut entraîner un incendie ou une panne.
Pour que la ventilation soit correcte, évitez de placer le cadre sur un lit, un tapis ou autre surface de ce
genre. Ne placez pas le cadre dans un endroit fermé comme une bibliothèque ou un tiroir sans prévoir
une ventilation appropriée.
1/8
FR
ODYS DPF- Shine
NOTICE D'UTILISATION
ODYS DPF-Shine
Autres avertissement et précautions
Attention : Ne démontez jamais le boîtier plastique. Il ne contient aucune pièce susceptible d'être
entretenue par l'utilisateur. Le cadre photo numérique renferme des pièces sous haute tension. Vous
pourriez être sérieusement blessé si vous les touchez.
FR
N'essayez jamais de le réparer vous-même. En dehors des revendeurs autorisés, les dépannages ou
tentatives de dépannage ne sont pas couverts par la garantie. Seul un SAV professionnel peut se
charger de la maintenance et du dépannage.
Si votre cadre dégage de la fumée, des odeurs anormales ou émet des bruits inhabituels, éteignez-le
immédiatement et débranchez le cordon secteur. Contactez le SAV d'un revendeur autorisé.
Si votre cadre photo numérique n'est pas utilisé pendant une longue période, débranchez le cordon
secteur.
Nettoyage du cadre photo numérique
• ASSUREZ-VOUS QUE LE CADRE PHOTO NUMÉRIQUE EST ÉTEINT
• NE PROJETEZ JAMAIS D'AÉROSOL NI DE LIQUIDE DIRECTEMENT SUR L'ÉCRAN OU LE
BOÎTIER PLASTIQUE
Nettoyage de l'écran :
1. Essuyez l'écran avec un chiffon propre, doux et non pelucheux. Vous éliminerez ainsi la poussière
et les particules.
2. Si ce nettoyage s'avère insuffisant, nettoyez l'écran avec un chiffon propre, doux et non pelucheux
sur lequel vous aurez appliqué une petite quantité d'un nettoyant à vitres sans ammoniaque ni
alcool.
Nettoyage du boîtier plastique :
1. Utilisez un chiffon doux, propre et sec.
2. Si ce nettoyage s'avère insuffisant, nettoyez la surface du boîtier avec un chiffon propre, doux et
non pelucheux sur lequel vous aurez appliqué une petite quantité d'un détergent doux, non abrasif,
sans ammoniaque ni alcool.
Nettoyage du cadre :
Utilisez un chiffon doux, propre et sec.
Réserve sur la garantie
Pour l'écran LCD et le boîtier plastique, votre revendeur autorisé ne recommande pas l'utilisation de
nettoyants à base d'ammoniac ou d'alcool. Il a été constaté que certains nettoyants chimiques pouvaient
endommager l'écran ou le boîtier. Votre revendeur déclinera toute responsabilité en cas de détérioration
résultant de l'utilisation d'un nettoyant à base d'ammoniaque ou d'alcool.
Conseils de protection de l'environnement
À la fin de son usage, ce produit ne doit pas être jeté à la poubelle, il doit au contraire être déposé en un point de
collecte des appareils électriques et électroniques en vue de son recyclage. À cet effet, le symbole correspondant
est reproduit sur l'appareil, sur son emballage ou dans la notice.
Un marquage renseigne sur les conditions de recyclage des matériaux utilisés. En permettant la réutilisation, le
recyclage ou la valorisation des matériaux des appareils usés, vous contribuez grandement à la protection de
notre environnement. Veuillez vous renseigner auprès des services administratifs de votre commune pour
connaître les points de collecte.
Consigne de recyclage
Ne jetez pas les piles ou le lecteur MP3 dans les ordures ménagères (batterie interne). Rapportez l’appareil
défectueux à votre revendeur ou déposez-les dans un conteneur mis à disposition à cet effet. Vous assurez ainsi
un recyclage écologique. Les piles sont vide quand l'appareil s'éteint et signale "pile vide" ou quand l'appareil ne
marche plus après une longue durée d'utilisationn.
ODYS DPF-Shine
Présentation du produit............................................3
Contenu de la boîte .................................................3
Boutons et Ports ......................................................3
Télécommande ........................................................4
Montage du cadre photos numérique ......................4
Installer l'applique.................................................................................................................................... 4
Brancher sur une prise murale via l'adaptateur DC ................................................................................. 4
Insérer une clé mémoire flash/carte mémoire.......................................................................................... 4
Mettre l'écran sous tension ou hors tension .............5
Voir les photos .........................................................5
Calendrier ................................................................6
Configuration du système ........................................7
Dépannage ..............................................................7
Caractéristiques techniques.....................................7
Conditions de garanti ...............................................8
Présentation du produit
Le Cadre photos numérique 7" vous permet de voir vos photos sur un écran LCD haute résolution.
Insérez simplement un lecteur USB flash ou une carte mémoire SD dans le logement prévu à cet effet à
l'arrière du cadre et vos photos apparaîtront instantanément sur l'écran sans avoir à payer l'impression
des photos.
Réglage de langue
Pour une simple application du DPF veuillez utiliser la télécommande fourni.
Avant veuillez enlever la protection des piles ou inserer le piles dans la télécommande. Veuillez allumer le DPF et vous voyez le
menu principale.
2x OK
3x /
ESC
Veuillez appuyer le touche - dois fois pour choisir "setting" (réglage) dans le menu .
Veuillez confirmer avec „OK“
Veuillez appuyer trois fois le touche- pour choisir „Language“ (langue) dans le menu.
Veuillez utiliser les touches /-pour changer la langue
Quitter le menu avec le touche ESC. Vos réglages sont memorisés.
Contenu de la boîte
• Cadre photos numérique 7"
• Adaptateur DC
• Manuel de l'utilisateur
• Télécommande
Boutons et Ports
Ecran LCD
Capot de l'emplacement carte – Ouvrir le capot de l'emplacement OPEN
pour voir l'emplacement de la carte mémoire.
①
④
②
Applique
Support d'applique
– Mettre l'écran sous tension et hors tension
③
MENU – Confirmer sélection
③
ESC – Retour
⑤
⑥
⑦
⑧
⑨
⑩
Précédent – Déplacer le curseur vers la gauche.
Suivant – Déplacer le curseur vers la droite
②
Up – Déplacer le curseur vers le haut
Down – Déplacer le curseur vers le bas \ Ouvrir l'aperçu vignette
Port USB – Raccorder une clé USB à mémoire flash
Port DC IN – Raccorder l'adaptateur AC
3/8
FR
TABLES DES MATIERES
ODYS DPF-Shine
Télécommande
Fonction
clé
Allumer et éteindre l'écran
DIAPORAMA
MODE
FR
ENTER
ESC
SETUP
TIME
ZOOM
ROTATE
Changer l'effet de transition du diaporama
Définir le format d'image sur 4:3, 16:9 et Original
Déplacer le curseur vers le haut / Définir la luminosité de l'écran
pendant l'affichage des photos
Déplacer le curseur vers le bas / Ouvrir l'aperu Vignette
Afficher la photo précédente ou déplacer le curseur vers la gauche
Afficher la photo suivante ou déplacer le curseur vers la droite
Confirmer une sélection / Afficher la barre d'outils pendant
l'affichage des photos
Retour
Accéder au mode de configuration du système
Afficher le calendrier / Définir l'intervalle entre les photos pendant
le diaporama
Zoom avant ou arrière de la photo
Pivoter vers la droite à 90°
Montage du cadre photos numérique
Installer l'applique
L'applique fournie est utilisée comme support de cadre sur toute surface plane.
Pour mettre en place le support:
1) Dévissez d’abord le bouton à l’arrière de l’appareil.
2) Placez le pied devant le filetage.
3) Revissez le bouton dans l’appareil pour tenir le pied.
4) Déplacez le pied vers le haut ou le bas pour le mettre en position.
Tournez le bouton pour
bloquer ou relâcher le pied.
Brancher sur une prise murale via l'adaptateur DC
La cadre photo numérique est alimenté par une entrée 5V DC IN. Brancher l'adaptateur DC sur le port
DC IN à l'arrière et la pris murale électronique (voir figure ci-contre). L'appareil doit démarrer
immédiatement une fois branché.
Insérer une clé mémoire flash/carte mémoire
L'appareil dispose d'un emplacement pour la carte mémoire et un port USB pour recevoir un clé
mémoire flash. Veuillez procéder aux étapes suivantes pour insérer une carte mémoire ou une clé
mémoire flash :
(1) Recherche l'emplacement carte ou le port USB au bas de l'appareil.
(2) Insérer une carte mémoire dans l'emplacement avec la face vers le bas, ou insérer une clé mémoire
flash dans le port USB.
Ouvrir le capot de
l'emplacement carte
ODYS DPF-Shine
•
Ne pas changer la carte SD / MMC/MS lorsque le cadre photos est sous tension !
Si vous voulez changer de carte, éteindre d'abord l'appareil.
•
Veuillez insérer la carte dans la bonne position. Ne pas exercer une force excessive pendant l'insertion de la carte
pour éviter d'endommager la carte ou le composant du cadre photos numériques. Veuillez vérifier le bon sens d'insertion.
Ne pas insérer ou retirer la carte mémoire pendant la lecture des informations.
Mettre l'écran sous tension ou hors tension
Lorsque vous ne voulez pas voir les photos momentanément, vous pouvez appuyer sur le
bouton
pour éteindre l'écran et économiser de l'énergie. Pour allumer l'écran, appuyer sur le bouton
à
nouveau.
Veuillez débrancher l'appareil de la source d'alimentation si vous n'utilisez pas le cadre pendant
une durée prolongée. Cela permet d''économiser de l'énergie et de prolonger la vie de l'appareil.
Voir les photos
Etape 1 : Brancher l'appareil sur une prise murale avec l'adaptateur AC.
Etape 2 : L'appareil démarre immédiatement et afficher le menu
principal.
Photo – Afficher les photos
Calendrier – Afficher le calendrier
Configuration – Configuration du système
Etape 3 : Insérer une clé mémoire flash sur le port USB ou une carte
mémoire dans l'emplacement carte.
Si vous insérez les deux, seules les photos stockées sur le
périphérique mémoire que vous avez inséré en premier
s'afficheront.
Etape 4 : Appuyer sur le bouton (up) / (down) pour sélectionner
“Photo” puis appuyer sur le bouton “Mode” pour confirmer. Le
diaporama démarre automatiquement.
Etape 5 : Appuyer sur le bouton “Mode” pour voir la barre d'outils.
Appuyer sur le bouton / pour sélectionner un bouton de la barre
d'outils puis appuyer sur le bouton “Mode” pour confirmer.
Précédent/Suivant
Sélectionner
pour voir la photo précédente.
Sélectionner
pour voir la photo suivante.
Diaporama
Sélectionner
diaporama.
/
pour démarrer ou arrêter le
Pivoter la photo
Sélectionner
pour faire pivoter la photo dans le sens
des aiguilles d'une montre à 90°.
Zoom avant/arrière
Sélectionner
pour zoomer en avant ou
en arrière de la photo 0,5, 0,7, 1, 1,5 et 2X.
Quand la photo est agrandie, vous pouvez
appuyer sur les boutons,, et pour
parcourir la photo. Appuyer sur le bouton
ESC pour restaurer la photo à sa taille
originale.
Modifier le format d'image
Sélectionner
pour modifier le format d'image entre 4:3, 16:9 et Original.
Informations sur la photo
Pour voir les informations concernant la photo (nom, format, taille etc.), sélectionner “ ”.
5/8
FR
•
ODYS DPF-Shine
Vue Vignettes
Sélectionner
pour accéder au mode vue vignettes.
Appuyer sur ,, et pour sélectionner une photo.
Appuyer sur le bouton “Mode” pour confirmer votre sélection et agrandir la
photo en plein écran.
Appuyer sur le bouton ESC pour revenir au menu principal.
FR
Définir la luminosité de l'écran
Lorsque vous regardez une photo, vous pouvez appuyer sur le bouton ou pour activer le paramètre luminosité.
Etape 6 : Appuyer sur le bouton ESC pour quitter et revenir au menu principal.
Calendrier
Le cadre photos numérique peut être utilisé comme calendrier de bureau et de réveil.
Vue Calendrier
Pour accéder au mode vue calendrier, sur le menu principal, sélectionner “Calendar” dans le menu
principal, et appuyer sur le bouton “Mode” pour confirmer. Le calendrier et l'heure apparaissent. En
même temps, toutes les photos s'affichent dans le diaporama depuis l'angle supérieur gauche.
Remarque : Pour garantir un bon affichage, la date et l'heure doivent être définies dans la
configuration du système.
Diaporama
Heure
Heure alarme
Alarme
Appuyer sur le bouton et pour changer l'année.
Appuyer sur le bouton et pour changer le mois.
Appuyer sur le bouton ESC pour quitter et revenir au menu principal.
Vue Horloge
Lorsque vous regardez le calendrier, vous pouvez appuyer sur le bouton
Mode pour afficher l'heure sous forme d'horloge.
Appuyer sur le bouton ESC pour quitter l'horloge.
Régler l'alarme
Pour activer l'alarme,
(1)
Dans le menu principal, appuyer sur le bouton “Setting” pour
accéder au mode configuration du système.
(2)
Appuyer sur le bouton et pour sélectionner “Alarm”.
(3)
Appuyer sur le bouton et pour sélectionner l'heure, les minutes et le jour.
(4)
Appuyer sur le bouton/pour augmenter ou réduire les heures, les minutes et les jours.
Options de l'alarme journalière :
Aucun – Désactive l'alarme.
Tous les jours– L'alarme sonne tous les jours.
Une fois – L'alarme sonne une fois.
ODYS DPF-Shine
Effet de transition – Définir l'effet de transition du diaporama
Intervalle diaporama – Définir la durée de l'intervalle entre chaque diapo.
Mode Démarrage – Définir le premier mode que vous voyez lorsque l'appareil se met en marche.
Langue – Définir la langue des textes sur l'écran
Alarme – Définir l'heure d'alarme
Horloge – Définir l'heure
Date – Définir la date
Mise à jour – Mise à jour du logiciel
Réinitialiser – Restaurer les paramètres du système par défaut
A propos – Afficher les informations de la version logicielle
Dépannage
Le cadre photos numérique ne s'allume pas.
· Vérifiez que l'adaptateur AC est correctement
branché au cadre et à la source d'électricité.
La télécommande ne fonctionne pas
· Assurez-vous qu'une batterie qui fonctionne est
insérée
· Assurez-vous que le fichier images est dans un
format pris en charge.
· La résolution de l'image est trop faible. Essayez
de lire un fichier avec une résolution supérieure.
480 X 234 (RGB) est recommandé.
Les images n'apparaissent pas.
L'image est déformée ou papillotée.
La réponse de l'appareil est trop lente
Caractéristiques techniques
Elément
Affichage
Interface USB
Format Photo
Carte mémoire supportée
Résolution d'image
Le périphérique mémoire contient trop de fichiers.
Description
Ecran LCD 7"
Hôte USB 2.0 (haut débit)
JPEG
SD/MMC/MS
480X234 pixels
Capacité carte mémoire
4GB (MS/SD jusqu'à 4GB, MMC jusqu'à 2GB)
Clé mémoire flash USB
Jusqu'à 8GB
Alimentation électrique
Adaptateur AC, Entrée 100-240V, Sortie 5V
Température de stockage*
-20
~ +55
~ +55
Température ambiante*
0
Humidité relative de fonctionnement*
20% ~ 90%(40 )
Humidité relative de stockage*
20% ~ 93%(40 )
7/8
FR
Configuration du système
Dans le menu principal, sélectionner “Setting” et appuyer sur le bouton
“M” pour accéder au mode configuration du système.
Appuyer sur le bouton et pour sélectionner une option de
configuration.
Appuyer sur le bouton / pour modifier l'option du paramètre
sélectionné.
Appuyer sur le bouton ESC pour confirmer le paramètre et quitter.
ODYS DPF-Shine
Conditions de garanti
Les clauses suivantes présentent les conditions et la portée de nos conditions de garantie et laissent nos obligations
légales et contractuelles inchangées.
Nous appliquons la garantie pour nos produits dans les conditions suivantes :
FR
1. Nous assurons une garantie de 24 mois sur les produits Odys. Nous réparons gratuitement, sous réserve des conditions suivantes,
les dommages ou vices du produit survenus dans un délai de 12 mois à compter de la date d’achat. Un défaut de fabrication doit être
prouvé pour tout dommage ou vice constaté 12 mois après la date d’achat pour justifier une réparation sous garantie.
La garantie ne s’applique pas aux piles et autres pièces considérées comme biens consommables, ni aux pièces fragiles telles
que le verre ou le plastique et ne s’applique pas non plus aux défauts résultant d’une usure normale. Il ne peut être fait appel au
devoir de garantie en cas de légères différences de l’état du produit qui n’ont pas d’incidences sur la valeur et le fonctionnement,
en cas de dommages d'origine chimique et électrochimique, de dommages causés par de l’eau ou par des conditions anormales.
2. La prestation de garantie comprend une réparation gratuite des pièces défectueuses ou leur remplacement par des pièces en bon
état. AXDIA se réserve le droit de remplacer le produit par un appareil de même valeur si le produit renvoyé ne peut pas être
réparé dans des délais ou à des frais raisonnables. Le produit peut également être remplacé par un modèle de même valeur. Des
réparations sur place ne peuvent pas être réclamées. Les pièces remplacées redeviennent notre propriété.
3. Le droit de garantie expire dans le cas de réparations ou d’interventions effectuées sans notre accord ou lorsque nos produits sont
équipés de pièces supplémentaires ou d’accessoires qui leur sont pas adaptés.
4. Les prestations de garantie n’engendrent ni prorogation de la période de garantie ni ne font courir une nouvelle période de
garantie. La période de garantie des pièces de remplacement montées prend fin à l’expiration de la période de garantie du produit.
5. Toute autre réclamation notamment les demandes de dommages et intérêts pour des dégâts externes aux produits – dans la
mesure ou une responsabilité n’est pas ordonnée par la loi – est exclue. Nous ne pouvons pas être tenus responsables des
dommages indirects ou consécutifs de tout ordre conduisant à une utilisation restreinte, des pertes de données, des pertes de gain
ou à des pannes.
Faire valoir son droit de garantie
1. Pour bénéficier du service de garantie, vous devez contacter le service après-vente AXDIA par e-mail, par fax ou par téléphone
(cf. données mentionnées ci-dessous). Notre formulaire après-vente est également à votre disposition sur note site Web ou au dos
des conditions de garantie.
2. Le service après-vente AXDIA essaiera de diagnostiquer votre problème et de le résoudre. Si le cas en question entre dans le
cadre de la garantie, vous obtenez un numéro RMA (Return Material Authorization) et êtes prié de retourner le produit à AXDIA.
ATTENTION : AXDIA n’accepte que les retours de produit avec un numéro RMA.
Lors du retour du produit, respectez les consignes suivantes :
1. Le produit doit être retourné port payé, assuré et préparé pour un transport. Aucun accessoire (câble, CD, cartes mémoire,
manuels etc.) ne doit être joint au produit si le service après-vente AXDIA ne l’a pas spécifié.
2. Le numéro RMA doit être noté de façon bien visible et lisible sur l’emballage.
3. Une copie du bon d’achat doit être jointe comme preuve de garantie.
4. Une fois le produit reçu, AXDIA applique la garantie conformément aux conditions de garantie et renvoie le produit port payé et
assuré.
Hors du cadre de garantie
AXDIA peut refuser une demande sortant du cadre de la garantie. Si AXDIA accepte une demande sortant du cadre de la
garantie, les frais de réparation et de transport sont facturés à l’expéditeur.
AXDIA n’accepte aucun retour de produit qui n’a pas été auparavant approuvé et doté d’un numéro RMA (Return Material
Authorization) par AXDIA.
ODYS DPF-Shine
CONGRATULATIONS on your purchase of our 7’’LCD Digital Photo Frame. Please read carefully and
follow all warnings and instructions in this User’s Manual and those marked on the product before first
use. Failing to follow these warnings could result in personal injury or damage to the Digital Photo Frame.
Also, remember to keep this User’s Manual in a convenient location for future reference.
Important: Save the original box and all packing material for future shipping needs.
IMPORTANT PRODUCT SAFETY INSTRUCTIONS
Proper Handling of the Digital Photo Frame
Always handle the Digital Photo Frame with care. Avoid touching the LCD screen as natural skin oils are
often difficult to remove.
Always position the Digital Photo Frame on a stable and level surface. Unstable surfaces can cause the
Digital Photo Frame to topple and fall, resulting in possible damage or injury.
Avoid exposing the Digital Photo Frame to direct sunlight or high temperatures, which can damage or
shorten its useful life. Do not place the unit near heat sources such as radiators, heat registers, or other
appliances that generate heat. Orient the Digital Photo Frame away from direct sunlight to reduce glare.
Avoid exposing the Digital Photo Frame to rain, water, moisture or high humidity. Do not place it in a
bathroom or kitchen near a sink or where it may come in contact with water.
Never place heavy or sharp objects on the LCD panel, frame, or power cord.
Overloading Outlets
Do not overload electrical power sources when using the Digital Picture Frame. Overloading wall outlets,
or extension cords can result in overheating, fire, or electric shock. Use only grounded or polarized
outlets.
Power Cord Protection
Minimize wear on the power supply cord. The power supply cord should be routed away from foot traffic
and contact with other objects. Do not route the power cord under rugs or carpeting. The cord should
never be severely bent, pinched, or twisted. Periodically inspect the power cord and each end of the cord
for wear or damage. Periodically inspect the power cord and each end of the cord for wear or damage.
Ventilation
Slots and openings on the Digital Photo Frame are provided for ventilation purposes. To ensure reliable
operation of the product and to protect it from overheating, these openings must not be blocked or
covered. Keep the Digital Photo Frame a minimum of four (4) inches away from any wall to assure
sufficient airflow and ventilation. Increased temperatures may cause fire or device failure.
To assure proper ventilation, do not block the openings by placing the Digital Photo Frame on a bed,
sofa, rug or other similar surface. Do not place it in a built-in installation, such as a bookcase or enclosed
rack, unless proper ventilation is provided.
1/8
PT
ODYS DPF-Shine
Manual De Instrucoes
ODYS DPF-Shine
Other Notices and Precautions
Caution: Never remove the plastic casing. There are no user serviceable parts inside. The Digital Photo
Frame contains high voltage parts. You may be seriously injured if you touch them.
Do not attempt repairs yourself. The warranty does not cover repairs or attempted repairs by anyone not
authorized by Authorize Dealer. Refer all servicing and repairs to qualified service personnel.
If the Frame begins to emit smoke, an abnormal noise, or a strange odor, immediately turn it off and
unplug the power cord. Contact the Authorize Dealer Service Center.
PT
If the Digital Photo Frame will not be used for an extended period of time, unplug the power cord.
Cleaning the Digital Photo Frame
• MAKE SURE THE DIGITAL PHOTO FRAME IS TURNED OFF
• NEVER SPRAY OR POUR LIQUID DIRECTLY ONTO THE SCREEN OR PLASTIC CASING
To Clean the Screen:
1. Wipe the screen with a clean, soft, lint-free cloth. This removes dust and other particles.
2. If it still is not clean, apply a small amount of non-ammonia, non-alcohol based glass cleaner on a
clean, soft, lint-lint-free cloth to clean the screen.
To Clean the Plastic Casing:
1. Use a soft, dry cloth.
2. If it still is not clean, apply a small amount of non-ammonia, non-alcohol based, and mild
non-abrasive detergent on a clean, soft, lint-free cloth to clean the surface.
To Clean the Frame:
Use a soft, dry cloth.
Disclaimer
Your Authorize Dealer does not recommend the use of any ammonia or alcohol-based cleaners on
the LCD screen or plastic casing. Some chemical cleaners have been reported to damage the screen
and / or display case. Your Authorize Dealer will not be liable for damage resulting from the use of any
ammonia or alcohol-based cleaners.
Aviso sobre protección medioambiental
Este producto no se puede desechar en la basura doméstica del modo habitual al final de su vida útil, sino que
deberá entregarse en un punto de recogida para reciclaje de dispositivos eléctricos y electrónicos. El símbolo que
figura en el producto, en el Manual del usuario y en el embalaje así lo indica.
Los materiales son reciclables en función de su identificación. Al reutilizar materiales reciclados o al reciclar de
cualquier otro modo los aparatos usados estará contribuyendo a la protección del medioambiente. Pregunte a las
autoridades de su localidad la ubicación de los puntos de recogida.
Aviso proteccao do ambiente
Por favor nao despache este producto no lixo normal, entregue ao fornecador ou a um ponto de recolha.
Assim ajuda á proteccao do ambiente. A bataria está descarregada se nao está ligada e mecionado "bataria vasia"
no ecra.
ODYS DPF-Shine
Visão geral do produto.............................................3
Language Settings...................................................3
Conteúdo da embalagem.........................................3
Botões e entradas....................................................3
Controlo Remoto......................................................4
Montagem do porta-retratos digital ..........................4
Instalação do suporte .............................................................................................................................. 4
Conexão com a fonte através do adaptador DC...................................................................................... 4
Inserção do cartão de memória/disco USB ............................................................................................. 4
Ligar e desligar o ecrã .............................................5
Visualização de imagens .........................................5
Calendário ...............................................................6
Configurações do sistema .......................................7
Resolução de problemas .........................................7
Especificações técnicas...........................................7
Condições de garantia .............................................8
Visão geral do produto
O Porta-retratos digital de 7" permite-lhe visualizar imagens num ecrã de cristais líquidos de alta
resolução. Basta inserir um disco USB ou um cartão de memória na entrada correcta localizada na
parte traseira do porta-retratos e as suas imagens serão mostradas instantaneamente sem a
necessidade de se gastar dinheiro com a impressão de fotos.
Language Settings
Para uma operação mais fácil do aparelho é sugerido utilizar o controle remoto que esta incluído.
Remova a protecção de bateria do aparelho e insira a nova bateria.
Pressione o botão on e o aparelho ira iniciar no menu principal.
Pressione tecla 6-duas vezes para entrar no menu “Setting”
2x 6
OK
Para confirmar pressionar a tecla"OK".
3x 6
Pressione tecla 6- três vezes e seleccione o menu "Language".
3/4
Use a tecla3/4para escolher a língua de opção.
ESC
Para sair pressione a tecla ESC. As opções serão agora guardadas.
Conteúdo da embalagem
• Porta-retratos digital de 7" • Adaptador DC
• Manual de instruções
• Controlo remoto
Ecrã de cristais líquidos
Botões e entradas
Tampa da entrada para cartão – Abra a tampa no orifício OPEN
(abrir) para ver a entrada para cartões de memória.
Suporte
①
④
②
Apoio do suporte
– Ligar e desligar o ecrã
MENU – Confirmar selecções
③
③
ESC – Retornar
Previous (anterior) – Move o cursor à esquerda
⑤
⑥
⑦
⑧
⑨
⑩
Next (próxima) – Move o cursor à direita
Up (acima) – Move o cursor para cima
②
Down (abaixo) – Move o cursor para baixo \ Abre o modo de visualização
de ícones
Entrada USB – Conexão com discos de memória USB
Entrada DC IN – Conexão com o adaptador DC
3/8
PT
ÍNDICE
ODYS DPF-Shine
Controlo Remoto
Tecla
SLIDE
MODE
Função
Ligar ou desligar o ecrã
Alterar o efeito de transição da apresentação de imagens
Alterar o formato da imagem entre 4:3, 16:9 e Original
Mover o cursor para cima / ajustar o brilho do ecrã durante a visualização de imagens
ENTER
PT
ESC
SETUP
TIME
ZOOM
ROTATE
Mover o cursor para baixo / abrir o modo de visualização de ícones
Mostrar a imagem anterior ou mover o cursor à esquerda
Mostrar a próxima imagem ou mover o cursor à direita
Confirmar uma selecção / mostrar a barra de ferramentas durante a visualização de
imagens
Retornar
Entrar no modo de configurações do sistema
Mostrar o calendário / ajustar o tempo de intervalo entre as imagens no modo de
apresentação
Aproximar ou afastar a imagem
Girar 90°à direita
Montagem do porta-retratos digital
Instalação do suporte
O suporte que vem com o aparelho é utilizado para apoiar o porta-retratos em qualquer superfície plana.
Para instalar o suporte da Moldura,
1) Desaparafuse na parte de trás da moldura.
2) Coloque o suporte sob o local do parafuso
3) volte a aparafusar
4) Desloque o suporte para cima ou para baixo de forma a ficar na posição que pretende
Aparfuse ou desaparafuse
para prender ou soltar o pé
Conexão com a fonte através do adaptador DC
A alimentação do porta-retratos digital dá-se através da entrada DC IN de 5V. Conecte o adaptador DC
à entrada DC IN na parte traseira do aparelho e à fonte de alimentação (veja a ilustração abaixo). O
aparelho deve ligar imediatamente após ser conectado à fonte.
Inserção do cartão de memória/disco USB
O aparelho possui uma entrada para cartões de memória e uma entrada para aparelhos USB. Siga
estes passos para inserir um cartão de memória ou um disco USB:
(1) Encontre a entrada para cartões ou aparelhos USB na parte de baixo do aparelho.
(2) Insira um cartão de memória voltado para a parte traseira na entrada para cartões ou um aparelho
USB na entrada USB.
Abra a tampa
da entrada
ODYS DPF-Shine
•
Não troque o cartão SD/MMC/MS enquanto o porta-retratos estiver ligado!
•
Insira o cartão na direcção correcta. Não exerça força demais ao inserir o cartão para evitar danos ao cartão ou aos
•
Não insira e nem retire o cartão enquanto o aparelho estiver a ler as informações contidas nele.
Se quiser trocar o cartão, desligue o aparelho primeiro.
componentes do porta-retratos digital. Caso não consiga, verifique se o cartão está na posição correcta.
para desligar o ecrã e economizar
Desligue o aparelho da fonte de alimentação quando não for utilizá-lo por períodos mais longos.
Assim, economiza-se energia e extende-se a vida útil do aparelho.
Visualização de imagens
Passo 1: Conecte o aparelho à fonte de alimentação com o adaptador
AC.
Passo 2: O aparelho deve ligar imediatamente e apresentar o menu
principal.
Photo – Apresentação de imagens
Calendar – Apresentação do calendário
Setting – Configurações do sistema
Passo 3: Insira um aparelho USB na entrada USB ou um cartão de
memória na entrada para cartões.
Se ambos forem inseridos, serão mostradas apenas as
imagens armazenadas no aparelho que foi conectado
primeiramente.
Passo 4: Prima os botões (acima) / (abaixo) para seleccionar a
opção “Photo” (imagens) e, em seguida, confirme com o botão “Mode”
(modo). A apresentação de imagens deve iniciar automaticamente.
Passo 5: Prima o botão “Mode” (modo) para visualizar a barra de
ferramentas. Prima os botões / para seleccionar um botão na barra
de ferramentas e, em seguida, prima “Mode” novamente para
confirmar.
Anterior/próxima
Seleccione
para visualizar a imagem anterior.
Seleccione
para visualizar a próxima imagem.
Apresentação de imagens
Seleccione
/
para iniciar ou interromper a apresentação de
imagens.
Girar a imagem
Seleccione
para girar a imagem em 90° à direita.
Alterar o formato
Seleccione
para alterar o formato entre 4:3, 16:9 e
Original.
Aproximar/afastar
Seleccione
para aproximar ou afastar a
imagem em 0,5, 0,7, 1, 1,5 e 2x. Se a
imagem for aproximada, prima os botões
,, e para navegar por ela. Prima o
botão ESC para retomar o tamanho original
da imagem.
Mostrar informações sobre a imagem
Para que o aparelho exiba informações (nome, formato, tamanho, etc.) sobre a imagem, seleccione
“ ”.
5/8
PT
Ligar e desligar o ecrã
Se não quiser ver as imagens por um tempo, prima o botão
energia. Para ligá-lo novamente, prima o botão
outra vez.
ODYS DPF-Shine
Visualização de ícones
Seleccione
para entrar no modo de visualização de ícones.
Prima ,, e para seleccionar uma imagem.
Prima o botão “Mode” (modo) para confirmar a sua selecção e visualizar a
imagem em ecrã cheio.
Prima o botão ESC para voltar ao menu principal.
PT
Ajustar o brilho do ecrã
Durante a visualização de imagens, prima os botões ou para activar
a configuração do brilho.
Passo 6: Prima o botão ESC para sair e voltar ao menu principal.
Calendário
O porta-retratos digital pode ser utilizado como calendário de mesa e despertador.
Visualização do calendário
Para entrar no modo de visualização do calendário, seleccione a opção “Calendar” (calendário) no
menu principal e prima o botão “Mode” (modo) para confirmar. Aparecerão o calendário e as horas.
Simultaneamente, todas as imagens serão exibidas no canto superior esquerdo.
Observação: para garantir uma visualização adequada, a data e a hora devem ser ajustadas
nas configurações do sistema.
Apresentação
Hora actual
Hora do alarme
Dia do alarme
Prima os botões e para mudar o ano.
Prima os botões e para mudar o mês.
Prima o botão ESC para sair e voltar ao menu principal.
Visualização do relógio
Durante a visualização do calendário, pode-se premir o botão Mode (modo) para visualizar as horas no
formato de relógio analógico.
Prima o botão ESC para sair do relógio.
Ajuste do alarme
Para activar o alarme,
(1)
No menu principal, prima o botão “Setting” (configuração) para
entrar no modo de configuração do sistema.
(2)
Prima os botões e para seleccionar “Alarm” (alarme).
(3)
Prima os botões e para seleccionar a hora, os minutos ou a data.
(4)
Prima os botões/para diminuir ou aumentar a hora, os minutos e a data.
Opções de frequência do alarme:
None (nenhum) – desactiva o alarme.
Everyday (todos os dias) – O alarme é accionado todos os dias.
Once (uma vez) – O alarme é accionado apenas uma vez.
ODYS DPF-Shine
Transition Effect (efeito de transição) – Ajuste do efeito de transição
de imagens durante a apresentação
Slideshow Interval (intervalo da apresentação) – Ajuste do intervalo entre as imagens.
Startup Mode (modo inicial) – Ajuste do primeiro modo apresentado quando o aparelho é ligado.
Language (idioma) – Ajuste do idioma dos textos no ecrã
Alarm (alarme) – Ajuste do alarme
Clock (relógio) – Ajuste da hora
Date (data) – Ajuste da data
Update (actualizar) – Actualização do software
Reset (reiniciar) – Restaurar a configuração padrão de fábrica
About (sobre) – Mostra as informações referentes à versão do software
Resolução de problemas
O porta-retratos digital não liga.
· Verifique se o adaptador AC está devidamente
conectado ao aparelho e à fonte de alimentação.
O controlo remoto não funciona.
· Verifique se há uma bateria em funcionamento
normal inserida.
As imagens não são exibidas.
· Verifique se os ficheiros de imagem estão num
formato compatível.
As imagens estão destorcidas ou
borradas.
· A resolução da imagem é muito baixa. Tente
reproduzir ficheiros com uma resolução maior.
Recomenda-se a resolução de 480 X 234 (RGB).
O tempo de resposta do aparelho
está muito demorado.
Há ficheiros demais armazenados no aparelho de
memória externa.
Especificações técnicas
Item
Descrição
Visor
Ecrã de cristais líquidos de 7 polegadas
Interface USB
USB 2.0 Host (alta velocidade)
Formato das imagens
JPEG
Cartões de memória compatíveis
SD/MMC/MS
Resolução das imagens
480X234 pixéis
Capacidade do cartão de memória
4GB (MS/SD até 4GB, MMC até 2GB)
Disco USB
Até 8GB
Alimentação
Adaptador AC, entrada de 100-240V, saída de 5V
Temperatura de armazenamento*
-20℃ ~ +55℃
Temperatura de funcionamento*
0℃ ~ +55℃
Humidade relativa de funcionamento*
20% ~ 90%(40℃)
Humidade de armazenamento*
20% ~ 93%(40℃)
7/8
PT
Configurações do sistema
No menu principal, prima o botão “Setting” (configuração) e, em seguida, prima o botão “M” para entrar
no modo de configuração do sistema.
Prima os botões e para seleccionar a opção a ser ajustada.
Prima os botões / para ajustar a opção seleccionada.
Prima o botão ESC para confirmar o ajuste e sair.
ODYS DPF-Shine
Condições de garantia
Os termos abaixo indicados contêm as condições e o âmbito da garantia oferecida pela nossa empesa, além disso,
os mesmos não afectam as nossas obrigações previstas por lei e pelo contrato.
Oferecemos garantia para os nossos produtos, de acordo com as seguintes condições:
1.
Para os produtos Odys, concedemos uma garantia de 24 meses. Dentro do prazo de 12 meses após a data de compra e nos termos de garantia
abaixo referidos, reparamos gratuitamente danos ou defeitos no produto. No caso de um defeito ou um dano detectado numa data posterior aos 12
PT
meses após a data de compra, a reparação gratuita ao abrigo da garantia só será possível tratando-se comprovadamente de um defeito de fabrico.
A garantia não é válida para: pilhas e outros componentes pertencentes ao grupo dos artigos de consumo, materiais frágeis, como, por ex., vidro ou
plástico, e, falhas causadas pelo desgaste normal. A garantia não cobre desvios desprezíveis na composição do produto, que não alteram a
funcionalidade deste e tão pouco desvalorizam o mesmo. Além disso, a garantia não cobre danos causados por influência química e electro-química,
por água e por condições anormais em geral.
2.
Segundo o procedimento da garantia, os componentes avariados são reparados gratuitamente ou, dependendo da nossa escolha, substituídos por
componentes em perfeito estado de funcionamento. No caso de um produto enviado de volta ao fabricante não poder ser reparado em um tempo
aceitável e por um custo razoável, a AXDIA reserva-se o direito de trocar o aparelho avariado por outro equivalente e de igual valor. Da mesma forma,
o produto em questão poderá ser trocado por um outro modelo de igual valor. Reparações no local do cliente não podem ser realizados. Os
componentes substituídos passam a ser propriedade exclusiva da nossa empresa.
3.
O direito à reclamação da garantia termina imediatamente quando pessoas não autorizadas por nós efectuam ou tentam efectuar trabalhos de
reparação nos produtos e quando componentes ou acessórios incompatíveis com os nossos produtos são utilizados nestes.
4.
A reivindicação da garantia não prolonga o tempo limite desta, nem é dado um novo prazo de garantia para o produto. O prazo de garantia para
peça ou componente de reposição do produto termina com o final do prazo de garantia do produto.
5.
Outras reivindicações de direito de indemnização de danos, especialmente aqueles causados na utilização de componentes ou acessórios não
fornecidos na embalagem, são consideradas – caso não haja imposição de responsabilidade prescrita por lei – inválidas. Ou seja, não nos
responsabilizamos por qualquer tipo de danos ocasionais, indirectos ou consequentes, que possam levar a restrições de desempenho, perda de dados,
redução de rendimento ou interrupção de funcionamento.
Reivindicação de um caso coberto pela garantia
1.
Para poder ser beneficiado do serviço de garantia, é necessário que o cliente entre em contacto com o Service-Center da AXDIA por email, fax
ou telefone (ver dados de contacto abaixo). Da mesma forma, é possível utilizar o formulário de serviço que se encontra no nosso site de internet ou
no verso das condições de garantia.
2.
O Service-Center da AXDIA tentará diagnosticar e resolver o seu problema.
Se um caso coberto pela garantia for registado,
o cliente
receberá um número de RMA (Return Material Authorization) e será solicitado para enviar o produto para a AXDIA.
ATENÇÃO: A AXDIA só aceitará correspondências que vierem com um número de RMA.
É necessário observar as seguintes indicações antes de enviar o produto:
1.
O produto deve ser enviado devidamente franquiado e segurado pelo ciente. O produto deverá ser enviado sem acessórios (sem cabos, CDs,
cartões de memória, manuais de operação, etc.), a não ser que o AXDIA decida de maneira divergente.
2.O número de RMA deverá estar visível e legível na parte exterior do pacote ou do envelope.
3.Uma cópia do recibo da compra deve ser incluída na correspondência como comprovante para garantia.
4.
Após a chegada do produto, a AXDIA realiza os serviços necessários de acordo com as condições de garantia. Em seguida, o produto é
franquiado, segurado e, por final, enviado de volta ao cliente.
Fora da garantia
A AXDIA poderá recusar solicitações de serviço fora âmbito da garantia. No caso de aceitação de serviços fora do
âmbito da garantia, todas as despesas de reparação e transporte são por conta do cliente.
A AXDIA não aceita pacotes ou envelopes que não tenham sido autorizados pela AXDIA através de RMA (Return
Material Authorization).