1
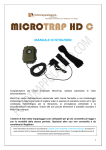
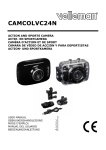
DEUTSCH
1
Inhaltsverzeichnis
Vorsichtsmaßnahmen .........................1
Struktur..............................................2
Funktionen .........................................2
Kurzanleitung .....................................3
Fehlerbehebung ..................................4
Spezifikationen ...................................5
Packliste ............................................6
Vorsichtsmaßnahmen
1. Verwenden Sie die Kamera nicht in
einer extrem heißen, kalten oder
feuchten Umgebung.
2. Die Kamera ist stoßsicher, NICHT
stoßfest. Sie sollten es vermeiden,
sie fallenzulassen.
3. Nicht in Wasser eintauchen. Die
Kamera ist wasserabweisend, NICHT
wasserdicht. Wenn Sie nach Gebrauch Wasser in der Kamera finden,
trocknen Sie sie bald.
4. Die Kamera braucht eine Micro-SDKarte, um zu funktionieren. Bitte legen Sie diese vor der Verwendung ein.
5. Die Lebensdauer der Batterie variiert
abhängig von der Umgebung. In
einem kälteren Umfeld wird sich die
Batterie schneller entleeren. Die normale Betriebszeit beträgt 2,5 Stunden.
6. Bitte prüfen Sie die Kamera und
laden Sie diese auf, wenn sie für
einen längeren Zeitraum nicht verwendet wird.
7. Trennen Sie die Kamera während des
Hoch- oder Herunterladens nicht
vom PC, sonst können Videos oder
die Kamera beschädigt werden.
8. Wir übernehmen keine Haftung für
ein Datenverlustproblem, das durch
Beschädigung oder Reparatur der
Kamera oder aus anderen Gründen
entstehen kann. Bitte befolgen Sie
die Bedienungsanleitung und sichern
Sie Ihre Daten rechtzeitig.
9. Bauen Sie die Kamera nicht selbst
auseinander. Dadurch wird das
Sicherheitssiegel beschädigt und
Ihre Garantie verfällt. Wenn Sie
irgendeine Frage oder ein Problem
haben, setzen Sie sich bitte mit
Ihrem Händler in Verbindung.
10. Verwenden Sie die Kamera nicht in
sehr dunklem oder starkem Licht.
Das Bild wird nicht gut sein und es
kann sogar zu Beschädigungen der
Linse kommen.
DEUTSCH
Aufbau
(1) Mikrophon
(2) Aufnahme/Stopp
(3) Aufnahmeanzeige
(4) Betriebsanzeige
(5) Ringöffnung
(6) Linse
(7) Karteneinschub
(8) USB-Buchse
(9) Zurücksetzen
Merkmale
• Professionelle Freihand-Sportkamera.
• Rutschfestes modisches Design.
• Wasserabweisend, IP65.
• Stoßsicher.
• Datums-/Zeitstempel auf dem Video
(auswählbar).
• Unterstützt Aufnehmen während des
Ladens.
2
• Unterstützt Überschreiben, wenn die
Karte voll ist (auswählbar).
• Energiesparmodus, automatisches
Abschalten nach 1 Minute im Standby, wenn keine weitere Aktion erfolgt.
• Einfachste Bedienung, Plug-and-Play.
• Legiertes Gehäuse, feuerfest, Gerät
kann für kurze Zeit sogar unter hohen
Temperaturen arbeiten.
• Video mit Audioaufzeichnung.
• Unterstützt Automodus. Automatische Aufnahme, wenn die externe
Stromzufuhr startet, speichern und
anhalten, wenn die externe Stromzufuhr stoppt.
• Einfaches Anbringen, besonders an
Helm, Fahrrad, Auto und Gewehr.
• Geeignet für Fahrrad- und Skifahren,
Surfen, Reiten, Jagen und Rennfahren.
DEUTSCH
Kurzanleitung
Aufnahme
1. Stecken Sie die Micro-SD-Karte
(NICHT INBEGRIFFEN) in den Karteneinschub.
2. Halten Sie die Taste gedrückt, bis
sich die Anzeigen einschalten (links
ist rot, rechts ist blau). Die Kamera
befindet sich jetzt im StandbyModus.
Achtung: Im Standby-Modus schaltet
sich die Kamera automatisch nach
60 Sekunden ab, wenn keine weitere
Aktion erfolgt.
3. Drücken Sie dann die Taste erneut,
die rechte Anzeige blinkt und die
Kamera nimmt jetzt auf.
4. Drücken Sie die Taste noch einmal,
die rechte Anzeige blinkt nicht mehr
und die Kamera nimmt nicht mehr
auf. Sie speichert die Videodatei
automatisch.
5. Halten Sie die Taste gedrückt, bis
sich die Anzeigen ausschalten. Dadurch wird die Kamera abgeschaltet.
Abspielen
1. Lassen Sie die Karte eingesteckt und
schließen Sie die Kamera mit dem
USB-Kabel an den Computer an.
2. Auf dem Computer wird angezeigt,
dass neue Hardware gefunden wurde
(beachten Sie, dass das bis zu 30
Sekunden dauern kann).
3. Öffnen Sie das Laufwerk Wechseldatenträger auf dem Computer und Sie
werden die Videodateien sehen. Bitte
übertragen Sie diese auf Ihren Computer, um die Dateien abzuspielen.
3
Sie können die Dateien von der Karte
kopieren oder sie löschen.
4. Entfernen Sie die Kamera vom Computer.
PC-Kamera
1. Halten Sie die Taste gedrückt und
schließen Sie die Kamera mit dem
USB-Kabel an den Computer an. Lassen Sie die Taste los, bis angezeigt
wird, dass neue Hardware auf dem
Computer gefunden wurde.
2. Suchen Sie das Symbol für die PCKamera, öffnen und verwenden Sie es.
3. Entfernen Sie die Kamera vom Computer.
Laden
1. Schließen Sie die Kamera mit dem
USB-Kabel an das Ladegerät an.
2. Stecken Sie das Ladegerät in die
Strombuchse ein. Die linke Anzeige
auf der Kamera verfärbt sich rot und
blinkt dann.
3. Nach etwa 3 Stunden hört sie auf zu
blinken. Die Kamera ist vollständig
aufgeladen.
4. Entfernen Sie sie vom Ladegerät.
Datum/Zeit einstellen
1. Erstellen Sie eine neue „.txt“-Datei
und nennen Sie diese „time.txt“.
2. Geben Sie das richtige Datum und
die Zeit entsprechend dem nachstehenden Format in die Datei ein.
D.h. 2011-05-01 08:55:00
2011 ist das Jahr, 05 ist der Monat,
01 ist der Tag. 08 ist die Stunde, 55
die Minute, 00 die Sekunde
DEUTSCH
3. Speichern Sie die Datei und kopieren
Sie diese auf die Micro-SD-Karte.
4. Entfernen Sie die Kamera vom Computer, starten Sie die Aufnahme neu
und Datum und Uhrzeit wurden erfolgreich eingestellt.
Einrichtung
1. Stecken Sie die Karte ein und schalten Sie die Kamera ein und wieder
aus.
2. Schließen Sie die Kamera mit dem
USB-Kabel an den Computer an.
3. Öffnen Sie das Laufwerk Wechseldatenträger und suchen Sie auf der
Karte eine Datei mit dem Namen
„setup.ini“.
CycleRecord = No
Timestamp = Yes
VideoImageSize = 0
AutoRecOnExternPower = No (Auto
mode)
Stellen Sie CycleRecord, TimeStamp
und AutoRecOnExternPower auf
"Yes" oder "No". Stellen Sie VideoImageSize auf 0, 1600.
CycleRecord = Yes
Überschreibt automatisch und fährt mit
der Aufnahme fort, wenn die Karte voll
ist.
CycleRecord = No
Stoppt und schaltet ab, wenn die Karte
voll ist.
Timestamp = Yes
Mit Datums-/Zeitstempel auf den Videoaufnahmen.
Timestamp = No
Ohne Datums-/Zeitstempel auf den
Videoaufnahmen.
4
VideoImageSize = 0
Standard: Die Videoauflösung beträgt
1280*720 @ 30 FPS
VideoImageSize = 1600
Option 2: Videoauflösung beträgt
1600*1200 @ 15 FPS
AutoRecOnExternPower = Yes
Automodus. Aufnahme, wenn die externe Stromzufuhr startet, speichern und
anhalten, wenn die externe Stromzufuhr
stoppt.
AutoRecOnExternPower = No
Manueller Modus, zum Aufnehmen
Taste drücken.
Fehlerbehebung
F1: Die Kamera funktioniert nicht, was soll
ich tun?
A1: 1. Überprüfen Sie, ob die Kamera
mit Strom versorgt wird.
2. Überprüfen Sie, ob die Karte schon
eingesteckt ist.
3. Versuchen Sie, eine andere Karte
einzustecken oder setzen Sie die Karte
zurück.
F2: Die Kamera lädt sich nicht auf, was soll
ich tun?
A2: 1. Probieren Sie es mit einem anderen USB-Kabel oder AC-Adapter.
2.Versuchen Sie, zurückzusetzen.
F3: Woher weiß ich, dass die Karte voll
ist?
A3: Wenn die Funktion Zyklusaufnahme
ausgeschaltet ist, blinkt die blaue
Anzeige schnell, wenn die Karte voll ist.
Die Kamera schaltet sich dann automatisch aus. Wenn Zyklusaufnahme einge-
DEUTSCH
schaltet ist, wird die volle Karte nicht
angezeigt, sondern von vorn überschrieben.
5
Spezifikationen
Bildsensor: CMOS
Bildwinkel: 120 Grad
F4: Woher weiß ich, dass die Stromzufuhr
schwach ist?
A4: Die rote Anzeige blinkt schnell und
die Kamera schaltet sich dann automatisch aus.
Aufnahmeauflösung:1280 x 720
Aufnahmegeschwindigkeit: 30 FPS
Videoformat: AVI
Größe der Videodatei: 75MB/Minute
F5: Auf der Karte befindet sich nach dem
Aufnehmen keine Datei, was soll ich tun?
A5: Formatieren Sie die Karte oder tauschen Sie diese aus. Versuchen Sie
noch einmal, aufzunehmen. Befolgen
Sie die Bedienungsanleitung Schritt für
Schritt.
F6: Warum ist das Video nicht deutlich
genug?
A6: Überprüfen Sie die Linse, um
sicherzustellen, dass sie sauber ist.
Und stellen Sie sicher, dass Sie beim
Aufnehmen nicht stark wackeln.
F7: Video und Ton stimmen beim Abspielen
auf dem PC nicht überein, warum?
A7: Versuchen Sie, die Videos mit
einem anderen Programm abzuspielen,
wie z.B. VLC Media Player oder Storm
Player.
Videoaufnahmeabschnitt: 20 Minuten
USB-Schnittstelle: USB 2.0
Speicher: Flash nicht eingebaut, unterstützt Micro-SD-Karte bis zu 32GB
Betriebsdauer der Batterie: 2,5 Stunden
Ladezeit der Batterie: 3 Stunden
Farbe: Schwarz
Maße: 9,5 x 2,8 x 2,8 cm
Gewicht: 64 Gramm
Zeitstempel: Auswählbar
Zyklusaufzeichnung: Auswählbar
DEUTSCH
6
Packliste
Kamera
Ladegerät
USB-Kabel
Stirnband
Klettband
Armband
Handbuch
Handgelenkband
Wasserfeste Hülle
Halterung für Fahrrad
Halterung für Auto
(optional)
Ladegerät für Auto
(optional)
ENGLISH
7
Content
Precautions ........................................7
Structure ............................................8
Features .............................................8
Quick Guide........................................9
Trouble Shooting ..............................10
Specifications ...................................11
Packing List .....................................12
Precautions
1. Do not use the camera in extremely
hot, cold, dusty or damp environment.
7. Do not disconnect the camera from
PC during uploading or downloading,
it may damage videos or the camera.
2. The camera is shock resistant, NOT
shock proof. You should avoid dropping it.
8. We will not take responsibility for the
data lost problem, which can be caused by camera damage, repair or any
other reasons. Please follow user
manual and backup your date in
time.
3. Do not submerge in water. The
camera is water resistant, NOT
waterproof. If you find water in the
camera after using, please dry it
soon.
4. The camera needs a micro SD card
to work, Please insert card before
using.
5. The life of battery varies according to
the environment. A colder environment will drain the battery faster.
Normal operating time is 2.5 hours.
6. Please check and charge the camera
when you do not use it for long period of time.
9. Do not take apart the camera yourself, this will break the tamper seal
and void our warranty. If you have
any question or problem, please
contact your dealer.
10. Do not use the camera in very dark
or strong light, The image will be
not good, and that may even hurt
Lens.
ENGLISH
8
Structure
(1) Microphone
(2) Record/stop
(3) Record indicator
(4) Power indicator
(5) Ring hole
(6) Lens
(7) Card slot
(8) USB jack
(9) Reset
• Support overwrite when card is full
(selectable).
Features
• Video with audio recording.
• Professional hands-free sport camera.
• Support Auto mode. Record when
external power starts, save then stop
when external power stops, automatically.
• Skid-proof fashion pattern design.
• Water resistant, IP65.
• Shock resistant.
• Date/Time stamp on video (selectable).
• Support recording while charging.
• Save power, turn off automatically
after 1 minute when standby, if no
further action.
• The simplest operation, plug and
play.
• Alloyed appearance, fireproof, can
even work in high temperature for a
while.
• Easy installation, especially on helmet, bike, car and shotgun.
• Suitable for biking, skiing, surfing,
horsing, hunting and racing.
ENGLISH
Quick Guide
Record
1. Put the micro SD card (SELL SEPARATELY) into card slot.
2. Press and hold the button until indicators turn on (left is red, right is
blue), it is now in standby.
Attention: It will turn off automatically after 60 seconds if no further
action when standby.
3. Then press the button again, right
indicator flashes, the camera is now
recording.
4. Press the button again, right indicator stops flashing, camera stops
recording and saves video file automatically.
5. Press and hold the button, until indicators turn off. This turns off the
camera.
Playback
1. Keep the card in, connect camera
with computer by USB cable.
2. It shows found new hardware on
computer (note this can take up to
30 seconds).
3. Open Removable Disc on computer,
you will see video files. Please transfer to your computer to play the files.
You can copy or delete the files from
the card.
4. Remove camera from computer.
9
PC Camera
1. Press and hold the button, connect
camera with computer by USB cable.
Release the button until it shows
found new hardware on computer.
2. Find the PC camera icon, open and
use it.
3. Remove camera from computer.
Charging
1. Connect camera to charger by USB
cable.
2. Plug the charger into power jack, left
indicator on camera will turn red
then flashes.
3. After around 3 hours, it stops flashing. It is full charged.
4. Remove it from charger.
Set Date/Time
1. Create a new “.txt” file, name it as
“time.txt” .
2. Put the correct date and time into the
file according below format. I.e.
2011-05-01 08:55:00
2011 is the year,
05 is the month,
01 is the day
08 is the hour,
55 is the minute,
00 is the second
3. Save file, and copy it into micro SD
card.
4. Remove camera from computer,
restart then record, the date and time
are set up successfully.
ENGLISH
Setup
1. Insert the card, turn on then turn off
the camera.
2. Connect the camera with computer
by USB cable.
3. Open the removable disc, find the file
named " setup.ini" in card.
CycleRecord = No
Timestamp = Yes
VideoImageSize = 0
AutoRecOnExternPower = No (Auto
mode)
Set CycleRecord, TimeStamp and
AutoRecOnExternPower by "Yes" or
"No". Set VideoImageSize as 0, 1600.
CycleRecord = Yes
Overwrite and continue record automatically when card is full.
CycleRecord = No
Stop and turn off when card is full.
Timestamp = Yes
With date/time stamp on video records.
Timestamp = No
Without date/time stamp on video
records.
VideoImageSize = 0
Standard: Video resolution is 1280*720
@ 30 FPS
VideoImageSize = 1600
Option 2:Video resolution is 1600*1200
@ 15 FPS
AutoRecOnExternPower = Yes
Auto mode, record when external power
starts, save then stop when external
power stops
AutoRecOnExternPower = No
Manual mode, press button to record.
10
Trouble shooting
Q1: It dose not work, what shall I do?
A1: 1.Check if it has power.
2.Check if you put card yet.
3.Try to change another card or reset it.
Q2: It is not able to charge, what should I
do?
A2: 1.Try to change another USB cable
or AC adapter.
2.Try to reset it.
Q3:How can I know the card is full?
A3: When you turn off cycle record function, the blue indicator flashes quickly
when the card is full, then camera turns
off automatically. When you turn on
cycle record, the full card will not be
indicated, but gets overwritten from
beginning..
Q4: How can I know the power is low?
A4: The red indicator flashes quickly,
then camera turns off automatically.
Q5: No file in card after recording, how
should I do?
A5:Format or change the card, try to
record again. According to user
manual, step by step.
Q6: Why the video is not clear enough?
A6: Check the lens to make sure it’s clean. And confirm you do not shake
strongly while recording.
Q7:The video and audio is out of step when
play on PC, why?
A7: Try to play videos by other player,
such as VLC Media player and Storm
player.
DEUTSCH
11
Specifications
Image Sensor: CMOS
View Angle: 120degrees
Recording Resolution: 1280 x 720
Recording Frame: 30 FPS
Video Format: AVI
Video File Size: 75MB/minute
Video Recording Section: 20 minutes
USB Interface: USB 2.0
Memory: No flash built-in.
Support micro SD card up to 32GB
Battery Working Time: 2.5 hours
Battery Charging Time: 3 hours
Color: Black
Dimension: 9.5 x 2.8 x 2.8 cm
Weight: 64 grams
Time stamp: Selectable
Cycling Record: Selectable
ENGLISH
12
Packing list
Camera
Charger
USB cable
Head Band
Velcro
Arm Band
User Manual
Wrist Ring
Waterproof case
Moundt for bike
Holder for car
(optional)
Car charger
(optional)
FRANÇAIS
13
Sommaire
Mesures de sécurité .........................13
Structure ..........................................14
Fonctions .........................................14
Mode d’emploi rapide .......................15
Dépannage .......................................16
Spécifications ...................................17
Liste de colisage...............................18
Mesures de sécurité
1. Ne pas utiliser la caméra dans un
environnement extrêmement chaud,
froid ou humide.
2. La caméra est résistante aux chocs,
PAS antichoc. Evitez de la laisser
tomber.
3. Ne pas plonger dans l’eau. La caméra est hydrofuge, PAS étanche. Si
vous remarquez des traces d’eau
après utilisation de la caméra, les
sécher immédiatement.
4. La caméra nécessite une carte
micro-SD pour fonctionner. Veuillez
insérer cette carte avant utilisation.
5. La durée de vie de la batterie varie en
fonction de l’environnement. Dans
un milieu plus froid, la batterie se
décharge plus vite. L’autonomie normale est de 2,5 heures.
6. Veuillez vérifier la caméra et la
recharger, si elle n’a pas été utilisée
pendant une longue durée.
7. Ne pas déconnecter pas la caméra du
PC pendant le téléchargement ou le
transfert, sinon les vidéos ou la
caméra risqueraient d'être endommagées.
8. Nous déclinons toute responsabilité
en cas de perte de données, pouvant
survenir suite à un dégât ou une
réparation de la caméra ou pour toute autre raison. Veuillez suivre le
mode d’emploi et sauvegarder vos
données régulièrement.
9. Ne pas démonter la caméra. Ceci
endommagerait le sceau de sécurité
et annulerait la garantie. Pour toute
question ou tout problème, veuillez
contacter votre revendeur.
10. Ne pas utiliser la caméra avec une
luminosité très faible ou très forte.
L’image ne sera pas bonne et ceci
peut éventuellement endommager
la lentille.
FRANÇAIS
14
Construction
(1) Micro
(2) Enregistrement/Stop
(3) Témoin d’enregistrement
(4) Témoin de fonctionnement
(5) Ouverture bague
(6) Lentille
(7) Logement carte
(8) prise USB
(9) Retour
• Ecrasement des données, en cas de
carte pleine (sélectionnable).
Caractéristiques
• Vidéo avec enregistrement audio.
• Caméra de sport professionnelle
mains libres.
• Supporte le mode auto. La prise de
vue auto, quand l’alimentation externe commence, sauvegarde et arrêt,
quand l’alimentation externe s’arrête.
• Design mode antidérapant.
• Hydrofuge, IP65.
• Résistant aux chocs.
• Incrustation date / heure sur la vidéo
(sélectionnable).
• Enregistrement possible pendant la
charge.
• Mode économie d’énergie, extinction
automatique après 1 minute en standby, si aucune action n’est effectuée.
• Utilisation simple, Plug and Play.
• Boîtier en alliage, résiste au feu,
l’appareil peut fonctionner brièvement
sous de hautes températures.
• Fixation facile, en particulier sur un
casque, un vélo, une voiture ou un
fusil.
• Idéal pour le vélo et le ski, le surf,
l’équitation, la chasse et la course.
FRANÇAIS
Mode d’emploi rapide
Prise de vue
1. Insérer la carte micro-SD (NON
INCLUSE) dans le logement carte.
2. Appuyer sur la touche jusqu’à
l’affichage lumineux (rouge à gauche, bleu à droite). La caméra est en
mode Stand-by.
Attention : en mode Stand-by, la
caméra s’éteint automatiquement
après 60 secondes, si aucune action
n’est effectuée.
3. Appuyer de nouveau sur la touche, le
voyant bleu clignote et la caméra
enregistre.
4. Appuyer encore sur la touche, le
voyant de droite ne clignote plus et
la caméra n’enregistre plus. Les
données sont sauvegardées automatiquement.
5. Appuyer sur la touche jusqu’à l’arrêt
de l’affichage lumineux. La caméra
est éteinte.
Lecture
1. Laisser la carte dans l’appareil et
raccorder la caméra à l’ordinateur au
moyen du câble USB.
2. L’ordinateur indique qu’un nouveau
périphérique a été détecté (cette étape peut nécessiter jusqu’à 30 secondes).
3. Ouvrir le périphérique sur l’ordinateur et les fichiers vidéo s’affichent.
Transférer les fichiers sur votre ordinateur pour les lire. Vous pouvez ensuite copier les données contenues
sur la carte ou les effacer.
4. Déconnecter la caméra de l’ordinateur.
15
Caméra PC
1. Maintenir la touche appuyée et raccorder la caméra à l’ordinateur au
moyen du câble USB. Relâcher la
touche, jusqu’à l’affichage du message de détection de nouveau périphérique.
2. Rechercher l’icône de caméra PC,
l’ouvrir et l’utiliser.
3. Déconnecter la caméra de l’ordinateur.
Recharge
1. Raccorder la caméra au chargeur au
moyen du câble USB.
2. Brancher le chargeur à la prise de
courant. Le voyant gauche de la
caméra s’allume en rouge et clignote.
3. Le clignotement s’arrête après 3 heures environ. La caméra est complètement rechargée.
4. Déconnecter la caméra du chargeur.
Réglage date / heure
1. Créer un nouveau fichier „.txt“ et le
renommer„time.txt“.
2. Saisir la date et l’heure selon le format ci-dessous. C’est à dire:
2011-05-01 08:55:00
2011 pour l’année,
05 pour le mois,
01 pour le jour,
08 pour l’heure,
55 pour les minutes,
00 pour les secondes
3. Sauvegarder le fichier et le copier
sur la carte micro-SD.
4. Déconnecter la caméra de l’ordinateur, recommencer à filmer, la date
et l’heure sont correctement réglées.
FRANÇAIS
Réglages
1. Insérer la carte et allumer puis éteindre la caméra.
2. Raccorder la caméra à l’ordinateur
au moyen du câble USB.
3. Ouvrir le périphérique et chercher
sur la carte un fichier nommé
„setup.ini“.
CycleRecord = No
Timestamp = Yes
VideoImageSize = 0
AutoRecOnExternPower = No
(mode auto)
Régler CycleRecord, TimeStamp et
AutoRecOnExternPower sur "Yes" ou
"No". Régler VideoImageSize à 0, 1600.
CycleRecord = Yes
Continue à enregistrer et écrase automatiquement l’enregistrement lorsque
la carte est pleine.
CycleRecord = No
Arrête et éteint, lorsque la carte est pleine.
Timestamp = Yes
Affiche la date / l’heure sur la vidéo.
Timestamp = No
Pas de date / heure sur la vidéo.
VideoImageSize = 0
Standard : résolution vidéo 1280*720
@ 30 FPS
VideoImageSize = 1600
Option 2 : résolution vidéo1600*1200
@ 15 FPS
AutoRecOnExternPower = Yes
Mode auto. Enregistre, quand l’alimentation externe commence, sauvegarde
et arrête, quand l’alimentation externe
s’arrête.
AutoRecOnExternPower = No
Mode manuel, appuyer sur la touche
pour enregistrer.
16
Dépannage
Q1 : La caméra ne fonctionne pas,
que faire ?
R1 : 1. Vérifiez si la caméra est alimentée en courant électrique.
2. Vérifiez si la carte a été insérée.
3. Essayez une autre carte ou remettez
la carte en place
Q2 : La caméra ne se rechange pas, que
faire ?
R2 : 1. Vérifiez avec un autre câble USB
ou un autre adaptateur secteur.
2.Essayez de réinitialiser.
Q3 : Comment je sais si la carte est pleine ?
R3 : Lorsque la fonction Cycle Record
est réglée sur Off, le voyant bleu clignote rapidement quand la carte est pleine. La caméra s’éteint alors automatiquement. Lorsque la fonction Cycle
record est réglé sur On, il n’y a pas
d’indication de carte pleine, mais
l’enregistrement écrase les données.
Q4 : Comment je sais si l’alimentation électrique est faible ?
R4 : Le voyant rouge clignote rapidement et la caméra s’éteint automatiquement.
Q5 : Après enregistrement, la carte ne
contient aucune donnée, que faire ?
R5 : Formatez la carte ou remplacez-la.
Essayez à nouveau d’enregistrer. Suivez
les instructions du mode d’emploi pas à
pas.
Q6 : Pourquoi la vidéo n’est pas nette ?
R6 : Vérifiez la lentille, pour vous assu-
FRANÇAIS
rer qu’elle est propre. Vérifiez aussi que
vous ne bougez pas trop lors de l’enregistrement.
17
Spécifications
Capteur d’image: CMOS
Angle d’image: 120 degrés
Q7 : La vidéo et le son sont décalés lors de
la lecture sur le PC, pourquoi ?
R7 : Essayez de lire les vidéos avec un
autre programme, comme par ex. VLC
Media Player ou Storm Player.
Résolution: 1280 x 720
Vitesse d’enregistrement: 30 FPS
Format vidéo: AVI
Taille de fichier vidéo: 75MB / minute
Séquence vidéo: 20 minutes
Prise USB: USB 2.0
Mémoire: Flash non inclus, supporte
les cartes micro-SD jusqu’à 32GB
Autonomie de la batterie: 2,5 heures
Durée de rechargement: 3 heures
Couleur: noir
Dimensions: 9,5 x 2,8 x 2,8 cm
Poids: 64 grammes
Affichage date: sélectionnable
Ecrasement fichier: sélectionnable
FRANÇAIS
18
Liste de colisage
Caméra
Chargeur
Câble USB
Bandeau frontal
Velcro
Bracelet
Manuel
Bandeau poignet
Etui étanche
Support pour vélo
Support pour voiture
(option)
Chargeur voiture
(option)
ITALIANO
19
Indice
Misure di sicurezza ...........................19
Struttura...........................................20
Funzioni ...........................................20
Istruzioni per l’uso in breve ..............21
Riparazione guasti ............................22
Specifiche ........................................23
Fornitura ..........................................24
Misure di sicurezza
1. Non utilizzare la telecamera in ambienti estremamente caldi, freddi o
umidi.
2. La telecamera è resistente agli urti,
ma NON indistruttibile. Evitate di farla cadere.
3. Non immergere in acqua. La telecamera è resistente all’acqua, ma NON
impermeabile. Se dopo l’utilizzo doveste accertare la presenza di acqua
nella telecamera, asciugarla immediatamente.
7. Non scollegare la telecamera durante
il caricamento o il download delle
foto, altrimenti i video o la telecamera potrebbero danneggiarsi.
8. Non ci assumiamo alcuna responsabilità per la perdita di dati, dovuti al
danneggiamento o alla riparazione
della telecamera, o da quelli causati
da altri problemi. Seguire le istruzioni e proteggere i propri dati.
4. La telecamera ha bisogno di una
scheda micro SD per poter funzionare. Inserirla prima dell’uso.
9. Non smontare la telecamera da soli.
Altrimenti danneggerete il sigillo di
sicurezza, facendo così decadere il
sigillo di garanzia. Per domande o
problemi, rivolgersi al proprio rivenditore.
5. La durata della batteria dipende
dall’ambiente circostante. In ambienti freddi la batteria si scarica più
rapidamente. La normale durata della
batteria e di 2,5 ore.
10. Non utilizzare la telecamera in presenza di luce fioca o eccessivamente forte. Le immagini non saranno
di qualità e potrebbero danneggiare
la lente.
6. Quando la telecamera è rimasta a
lungo inutilizzata controllarla e caricarla.
ITALIANO
Composizione
(1) Microfono
(2) Registrazione/Stop
(3) Indicatore registrazione
(4) Indicatore di funzionamento
(5) Apertura ad anello
(6) Obiettivo
(7) Alloggiamento scheda
(8) Presa USB
(9) Reset
Caratteristiche
• Telecamera sportiva utilizzabile senza
mani
• Design alla moda antiscivolo.
• Resistente all’acqua IP65.
• Resistente agli urti.
• Data e ora presenti sul video (a scelta).
• Supporta la registrazione durante il
caricamento.
20
• Supporta la sovrascrittura quando la
scheda è piena (a scelta).
• Modalità risparmio energetico, spegnimento automatico dopo 1 minuto di
standby, se non si effettua alcuna azione.
• Facile utilizzo, Plug-and-Play.
• Alloggiamento in lega, resistente al
fuoco, l’apparecchio può lavorare per
breve tempo anche ad elevate temperature.
• Video con audio.
• Supporta la modalità automatica.
Ripresa automatica quando inizia il
flusso di corrente esterna, salvataggio e arresto, quando il flusso di corrente esterna si ferma.
• Facile da fissare, soprattutto all’elmetto, alla bici, all’auto e al fucile.
• Adatto all’utilizzo mentre si va in bici,
si scia, si surfa, si va a cavallo, si
caccia e si corre.
ITALIANO
Istruzioni per l’uso in breve
Registrazione
1. Inserire la scheda micro USB (NON
INCLUSA) nell’alloggiamento della
scheda.
2. Tenere premuto il pulsante fino a
quando non si accende l’indicatore (a
sinistra rosso, a destra blu). Ora la
telecamera si trova in modalità
standby.
Attenzione: Nella modalità standby la
telecamera si spegne automaticamente dopo 60 secondi, nel caso in
cui non si effettui nessuna azione.
3. Premere poi nuovamente il tasto,
l’indicatore destro lampeggia e la telecamera inizia a registrare.
4. Premere nuovamente il tasto, l’indicatore destro non lampeggia più e la
telecamera smette di registrare. Salva automaticamente i file video.
5. Tenere il tasto premuto fino a quando gli indicatori si spengono. Così la
telecamera si spegne.
Riproduzione
1. Lasciare inserita la scheda e collegate la telecamera al computer con il
cavo USB.
2. Il computer rileverà la presenza si un
nuovo hardware (il processo può
durare fino a 30 secondi).
3. Aprire il drive del supporto esterno
sul computer, compariranno i file
video. Trasferirli sul computer e
riprodurli. Potete copiare o cancellare i file della scheda.
4. Scollegare la telecamera dal computer.
21
PC telecamera
1. Mantenere il tasto premuto e collegare la telecamera al computer con il
cavo USB. Rilasciare il tasto, fino a
quando non verrà indicata la presenza
di un nuovo hardware nel computer.
2. Trovare l’icona PC telecamera, aprirla e utilizzarla.
3. Scollegare la telecamera dal computer.
Carica
1. Collegare la telecamera con il cavo
USB al caricabatterie.
2. Inserire il caricabatterie nella presa
di alimentazione. Si accende l’indicatore rosso della telecamera e comincia a lampeggiare.
3. Dopo circa 3 ore smette di lampeggiare. La telecamera è completamente
carica.
4. Scollegarla dal caricabatterie.
Impostazione data/ora
1. Creare un nuovo file”.txt” e chiamarlo “time.txt”.
2. Inserire data e ora secondo il
seguente formato nel file.
Ossia 2011-05-01 08:55:00
2011 è l’anno.
05 il mese e 01 il giorno.
08 l’ora, 55 i minuti e 00 i secondi.
3. Salvare il file e copiarlo sulla scheda
micro SD.
4. Scollegare la telecamera dal computer, iniziare la registrazione nuovamente e data e ora saranno state
impostate con successo.
ITALIANO
Messa a punto
1. Inserire la scheda, accendere la
videocamera e poi spegnerla.
2. Collegare la telecamera al computer
tramite cavo USB.
3. Aprire il drive di supporto esterno e
cercare sulla sceda un file nominato
“setup.ini”.
CycleRecord = No
Timestamp = Yes
VideoImageSize = 0
AutoRecOnExternPower = No (Auto
mode)
Impostare CycleRecord, TimeStamp
e AutoRecOnExternPower su "Yes" o
"No". Impostare VideoImageSize su
0, 1600.
CycleRecord = Yes
Sovrascrive e continua a registrare
quando la scheda è piena.
CycleRecord = No
Si ferma e si spegne quando la scheda
è piena.
Timestamp = Yes
Con data e ora sulle registrazioni.
Timestamp = No
Senza data e ora sulle registrazioni.
VideoImageSize = 0
Standard: risoluzione video 1280*720
@ 30 FPS
VideoImageSize = 1600
Opzione 2: risoluzione video 1280*720
@ 15 FPS
AutoRecOnExternPower = Yes
Modalità automatica. Riprende quando
inizia il flusso di corrente esterna, salva
e si ferma, quando il flusso di corrente
esterna si ferma.
22
AutoRecOnExternPower = No
Modalità manuale, preme il tasto per
registrare.
Riparazione guasti
D1: La telecamera non funziona, cosa devo
fare?
R1: 1. Accertarsi che la telecamera riceva corrente sufficiente.
2. Accertarsi che la scheda sia stata
inserita.
3. Inserire una nuova scheda o resettare quella utilizzata.
D2: La telecamera non si carica, cosa devo
fare?
R2: 1. Provare con un altro cavo USB o
adattatore AC.
2.Effettuare il reset.
D3: Come faccio a sapere se la scheda è
piena?
R3: Quando è disattivata la funzione
registrazione ciclica, l’indicatore blu
lampeggia velocemente se la scheda è
piena. La telecamera si spegne automaticamente. Quando la funzione registrazione ciclica è attivata,non verrà indicata la scheda piena, ma comincerà ed
essere sovrascritta.
D4: Come faccio a sapere che l’alimentazione è bassa?
R4: L’indicatore rosso lampeggia velocemente e la telecamera si spegne
automaticamente.
ITALIANO
D5: Dopo la registrazione non è presente
alcun video sulla scheda, cosa devo fare?
R5: Formattare o cambiare la scheda.
Provare ad effettuare una nuova ripresa. Seguire passo per passo le istruzioni.
23
Specifiche
Sensore d’immagine: CMOS
Angolo di campo: 120 gradi
Risoluzione riprese: 1280 x 720
Velocità di ripresa: 30 FPS
D6: Perché il video non è sufficientemente
chiaro?
R6: Controllare che la lente sia pulita.
Assicurarsi di non tremare eccessivamente.
Formato video: AVI
Dimensione dei file video: 75Mb/Minuto
Segmenti riprese video: 20 minuti
Interfaccia USB: USB 2.0
D7: Le immagini e i suoni non combaciano,
perché?
R7: Provate a riprodurre i video con un
altro programma, come ad es. VLC
Media Player o Storm Player.
Salvataggio: Flash non montato,
supporta una scheda micro USB fino a
32Gb
Durata della batteria: 2,5 ore
Tempo di carica della batteria: 3 ore
Colore: nero
Dimensioni: 9,5 x 2,8 x 2,8 cm
Peso: 64 grammi
Data e ora: A scelta
Registrazione ciclica: A scelta
ITALIANO
24
Fornitura
Telecamera
Dispositivo di carica
Cavo USB
Fascia per la fronte
Chiusura a velcro
Fascia per il braccio
Manuale
Supporto per polso
Busta resistente
all’acqua
Supporto per bicicletta
Supporto per auto
(optional)
Dispositivo di carica
per l’auto
(optional)
ESPAGÑOL
25
Índice
Precauciones ....................................25
Descripción ......................................26
Características..................................26
Instrucciones básicas .......................27
Solución de problemas .....................28
Especificaciones ...............................29
Accesorios .......................................30
Precauciones
1. No utilice la cámara en situaciones
de calor o frío extremo ni en ambientes húmedos.
2. La cámara cuenta con protección
para golpes, pero NO es resistente a
los golpes. Debe evitar que se caiga.
3. No la sumerja en agua. La cámara es
repelente al agua, no resistente al
agua. Si después de usarla encuentra
agua en la cámara séquela lo antes
posible.
4. La cámara requiere una tarjeta micro
SD para funcionar. Introduzca la tarjeta antes de usar la cámara.
5. La duración de la batería varía según
el ambiente. En ambientes húmedos
la batería dura menos tiempo. El
tiempo normal de funcionamiento es
de 2 horas y media.
6. Compruebe la cámara y recárguela
cuando no vaya a utilizarla por un
largo periodo de tiempo.
7. Nunca desconecte la cámara del
ordenador mientras carga o descarga
los archivos. Puede dañar los vídeos
o la propia cámara.
8. No nos hacemos responsables de la
pérdida de archivos como consecuencia de una avería o reparación de
la cámara o por cualquier otro motivo. Siga las instrucciones de uso y
guarde sus archivos puntualmente.
9. No desmonte la cámara. De hacerlo
romperá el sello de seguridad y perderá la garantía. Si tiene algún problema o pregunta póngase en
contacto con su distribuidor.
10. No utilice la cámara en ambientes
muy oscuros o con luces fuertes.
La imagen no será buena y puede
incluso dañar la lente.
ESPAGÑOL
Descripción
(1) Micrófono
(2) Grabación/Stop
(3) Indicador de grabación
(4) Indicador de funcionamiento
(5) Apertura anillada
(6) Lente
(7) Ranura para tarjeta
(8) Puerto USB
(9) Reinicio
26
• Sobrescritura asistida cuando la tarjeta está llena (opcional)
• Modo de ahorro energético, cambio
automático a modo reposo tras 1
minuto de inactividad
• Manejo simple, Plug-and-Play.
• Carcasa de aleación, resistente al fuego, el aparato puede funcionar por un
breve espacio de tiempo incluso a
altas temperaturas
• Grabación de vídeo con audio
Características
• Cámara deportiva profesional con
manos libres
• Moderno diseño antideslizante
• Repelente al agua, IP65
• Protección contra golpes
• Impresión de fecha y hora en el vídeo
(opcional)
• Grabación asistida durante la carga
• Modo automático asistido, grabación
automática cuando la alimentación
eléctrica externa comienza, almacenamiento y pausa cuando la alimentación eléctrica externa se detiene
• De fácil instalación especialmente en
cascos, bicicletas, vehículos y fusiles
• Indicada para esquiar, montar en
bicicleta, hacer surf, montar a caballo, ir de caza y hacer carreras
ESPAGÑOL
Instrucciones básicas
Grabación
1. Introduzca la tarjeta micro SD (NO
INCLUIDA) en la ranura para tarjetas.
2. Mantenga pulsado el botón hasta que
se enciendan los indicadores (rojo a
la izquierda y azul a la derecha). La
cámara pasará a modo de reposo.
Atención: La cámara se apaga
automáticamente si se mantiene en
modo de reposo durante 60 segundos sin que se realice ninguna
acción.
3. Al pulsar de nuevo el botón parpadea
el indicador derecho y la cámara
comienza a grabar.
4. Al pulsar el botón otra vez el indicador derecho deja de parpadear y la
cámara deja de grabar. El archivo de
vídeo se guarda automáticamente.
5. Mantenga pulsado el botón hasta que
se apaguen los indicadores. De este
modo apagará la cámara.
Reproducción
1. No saque la tarjeta y conecte la
cámara al ordenador mediante el
cable USB.
2. El ordenador mostrará los nuevos
dispositivos encontrados (puede
tardar hasta 30 segundos).
3. Abra la unidad extraíble en el ordenador y podrá ver los vídeos. Cópielos
en su ordenador para visualizarlos.
Puede copiar o borrar los archivos
de la tarjeta.
4. Desconecte la cámara del ordenador.
27
Conexión PC-cámara
1. Mantenga pulsado el botón y conecte
la cámara al ordenador mediante el
cable USB. Suelte el botón hasta que
el ordenador muestre que se ha
encontrado un nuevo dispositivo.
2. Busque el icono de PC-cámara,
ábralo y utilícelo.
3. Desconecte la cámara del ordenador.
Carga
1. Conecte la cámara al cargador mediante el cable USB.
2. Enchufe el cargador a la red. Entonces el indicador izquierdo de la
cámara se pondrá rojo y parpadeará.
3. Tras unas 3 horas el indicador dejará
de parpadear. La cámara está cargada completamente.
4. Desconéctela del cargador.
Ajuste de hora y fecha
1. Cree un nuevo archivo «.txt» y llámelo «time.txt».
2. Introduzca en el archivo la fecha y la
hora correctas según el siguiente
formato. Es decir
2011-05-01 08:55:00
2011 es el año, 05 el mes, 01 el día.
08 es la hora, 55 los minutos, 00 los
segundos
3. Guarde el archivo y cópielo en la tarjeta micro SD.
4. Desconecta la cámara del ordenador,
reinicie la grabación y la fecha y hora
se habrán ajustado correctamente.
ESPAGÑOL
Instalación
1. Introduzca la tarjeta, encienda la
cámara y vuelva a apagarla.
2. Conecte la cámara al ordenador
mediante el cable USB.
3. Abra la unidad extraíble en el ordenador y busque en la tarjeta un archivo
llamado «setup.ini».
CycleRecord = No
Timestamp = Yes
VideoImageSize = 0
AutoRecOnExternPower = No (Auto
mode)
Modifique los apartados CycleRecord,
TimeStamp y AutoRecOnExternPower a
"Yes" o "No". Cambie el apartado VideoImageSize a 0, 1600.
CycleRecord = Yes
Sobrescribe automáticamente y continúa con la grabación cuando la tarjeta
está llena.
CycleRecord = No
Se para y desconecta cuando la tarjeta
está llena.
Timestamp = Yes
Con sobreimpresión de fecha y hora en
el vídeo.
Timestamp = No
Sin sobreimpresión de fecha y hora en
el vídeo.
VideoImageSize = 0
Estándar: Definición del vídeo 1280 x
720 a 30 FPS
VideoImageSize = 1600
Opción 2: Definición del vídeo 1600 x
1200 a 15 FPS
28
AutoRecOnExternPower = Yes
Modo automático. Grabación cuando la
alimentación eléctrica externa comienza, almacenamiento y pausa cuando la
alimentación eléctrica externa se detiene.
AutoRecOnExternPower = No
Modo manual; presionar el botón para
grabar.
Solución de problemas
P1: La cámara no funciona. ¿Qué debo
hacer?
R1: 1. Compruebe que la cámara tiene
energía.
2. Compruebe que la tarjeta ya está
introducida.
3. Pruebe con otra tarjeta o colóquela
de nuevo.
P2: La cámara no se carga. ¿Qué debo
hacer?
R2: 1. Pruebe otro cable USB u otro
adaptador AC.
2. Intente colocarlo de nuevo.
P3: ¿Cómo sé cuando la tarjeta está llena?
R3: Si la función de grabación cíclica
está desactivada el indicador azul parpadeará rápidamente cuando la tarjeta
esté llena. La cámara se apagará entonces automáticamente. Si la función de
grabación cíclica está activada no se
mostrará ninguna señal ya que volverá
a sobrescribir desde el comienzo.
ESPAGÑOL
29
P4: ¿Cómo sé que se está acabando la
batería?
R4: El indicador rojo parpadeará rápidamente y la cámara se apagará entonces
automáticamente.
Especificaciones
P5: No hay ningún archivo en la tarjeta
después de la grabación. ¿Qué debo
hacer?
R5: Formatee la tarjeta o cámbiela.
Intente grabar de nuevo. Siga las
instrucciones paso a paso.
Velocidad de la grabación: 30 FPS
P6: ¿Por qué no se ve bien el vídeo?
R6: Compruebe que la lente está limpia
y asegúrese de que no se producen
fuertes sacudidas durante la grabación.
P7: Al reproducir el vídeo en el ordenador
la imagen y el sonido no coinciden. ¿Por
qué?
R7: Pruebe a reproducir el vídeo con
otro programa como p. ej. VLC Media
Player o Storm Player.
Sensor de imagen: CMOS
Ángulo abarcador: 120 grados
Definición de la grabación: 1280 x 720
Formato del vídeo: AVI
Tamaño del archivo de vídeo:
75MB/minuto
Duración de la grabación: 20 minutos
Interfaz USB: USB 2.0
Memoria: Memoria flash no integrada,
tarjeta micro SD asistida de hasta 32GB
Duración de la batería:
2 horas y 30 minutos
Tiempo de carga de la batería: 3 horas
Color: Negro
Medidas: 9,5 x 2,8 x 2,8 cm
Peso: 64 gramos
Impresión de tiempo: Opcional
Grabación cíclica: Opcional
ESPAGÑOL
30
Accesorios
Cámara
Cargador
Cable USB
Cinta para la frente
Cinta de velcro
Cinta para el brazo
Manual
Cinta para la muñeca
Funda impermeable
Soporte para bicicleta
Soporte para coche
(opcional)
Cargador para coche
(opcional)
ESPAGÑOL
31
ESPAGÑOL
32