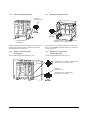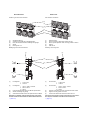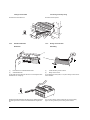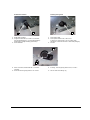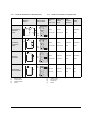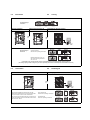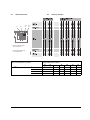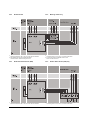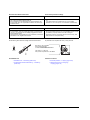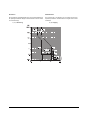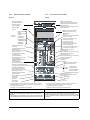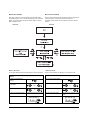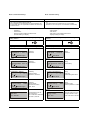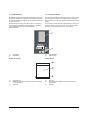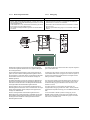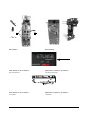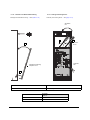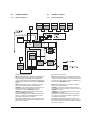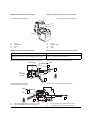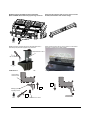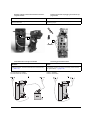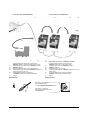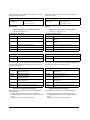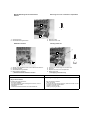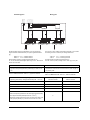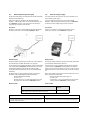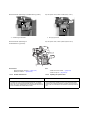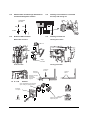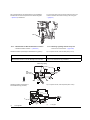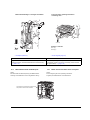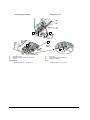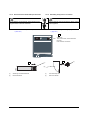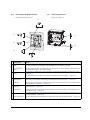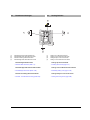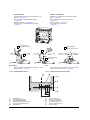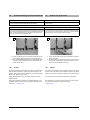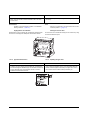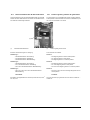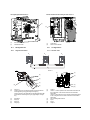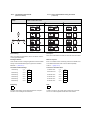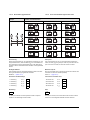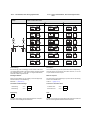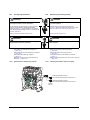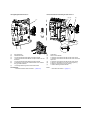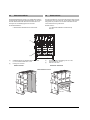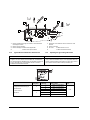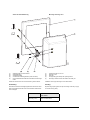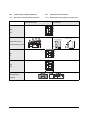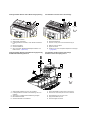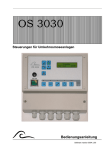
1
s /HLVWXQJVVFKDOWHU &LUFXLWEUHDNHU Bedienungsanleitung / Operating Instructions GEFAHR Bestell-Nr. / Order No.: 3ZX1812-0WL00-0AN2 DANGER Gefährliche elektrische Spannung! Hazardous voltage! Kann Tod, schwere Personenschäden sowie Schäden an Geräten und Ausrüstung bewirken. Will cause death, serious personal injury, or equipment damage. Vor dem Arbeiten an diesem Gerät, Anlage unbedingt spannungsfreischalten. Gefahr bei gespanntem Federspeicher! Federspeicher entspannen. Disconnect power before working on this equipment. 9239 9955 174 Danger if spring is charged! Discharge spring. Hinweis Note Diese Bedienungsanleitung enthält aus Gründen der Übersichtlichkeit nicht sämtliche Detailinformationen zu allen Typen des Produkts und kann auch nicht jeden denkbaren Fall der Aufstellung, des Betriebes oder der Instandhaltung berücksichtigen. For reasons of clarity, these instructions do not cover all details or variations in equipment, nor do they provide for every possible contingency to be met in connection with installation, operation or maintenance. Sollten Sie weitere Informationen wünschen, oder sollten besondere Probleme auftreten, die in der Bedienungsanleitung nicht ausführlich genug behandelt werden, können Sie die erforderliche Auskunft über die örtliche Siemens-Niederlassung anfordern. Should further information be desired or should particular problems arise which are not covered sufficiently for the Purchaser’s purposes, the matter should be referred to the local Siemens Sales Office. Außerdem weisen wir darauf hin, dass der Inhalt dieser Bedienungsanleitung nicht Teil einer früheren oder bestehenden Vereinbarung, Zusage oder eines Rechtsverhältnisses ist oder dieses abändern soll. Sämtliche Verpflichtungen von Siemens ergeben sich aus dem jeweiligen Kaufvertrag, der auch die vollständige und alleingültige Gewährleistungsregelung enthält. Diese vertraglichen Gewährleistungsbestimmungen werden durch die Ausführung dieser Bedienungsanleitung weder erweitert noch beschränkt. The contents of this instruction manual shall not became part or modify any prior or existing agreement, commitment or relationship. The sales contract contains the entire obligations of Siemens. The warranty contained in the contract between the parties in the sole warranty of Siemens. Any statements contained herein do not create new warranties or modify the existing warranty. SENTRON® ist eine eingetragene Marke der Siemens AG. Die übrigen Bezeichnungen in dieser Dokumentation können Marken sein, deren Benutzung durch Dritte für deren Zwecke die Rechte der Inhaber verletzt. SENTRON® is a trade-mark of Siemens AG. The other designations in this documentation can be trademarks. Use by third parties for their own purposes violates the owner’s rights. Symbole Symbols 10 Nm 1 Warnhinweis Warning CE-Zeichen CE identification Schlitzschraubendreher Slotted-type screwdriver Kreuzschlitzschraubendreher Philips (PH), PoziDriv (PZ) Cruciform screwdriver Philips (PH), PoziDriv (PZ) Torx-Schraubendreher (T) Torx screwdriver (T) Innensechskant-Schraubendreher Hexagon socket screwdriver Anzugsdrehmoment Tightening torque Kabelbinder Cable binder Handschriftlich ergänzen Add in writing Erster Schritt einer Handlungsabfolge First step of action sequence Inhalt Contents 1 Aufbau Leistungsschalter Einschubrahmen 1-1 1-1 1-2 1 Design Circuit-breaker Guide frame 1-1 1-1 1-2 2 Schilder Ausstattungsschild Leistungsschalter Typschild Leistungsschalter Schild Bemessungsnennstrommodul Typschild Einschubrahmen 2-1 2-1 2-1 2-2 2-2 2 Labels Circuit-breaker options label Type label circuit breaker Rating plug label Type label guide frame 2-1 2-1 2-1 2-2 2-2 3 Normen, Bestimmungen 3-1 3 Standard specifications 3-1 4 Transport Überseeverpackung Auspacken Transport mit Kran 4-1 4-1 4-1 4-2 4 Transport Overseas packing Unpacking Lifting by crane 4-1 4-1 4-1 4-2 5 Montage Einbau Einbaulage Einbau auf waagerechter Ebene Einbau an senkrechter Ebene mit Tragwinkel Anschluss-Schienen Horizontalanschluss Flanschanschluss Frontanschluss Vertikalanschluss Bestellnummern Hauptleiter anschließen Hilfsleiteranschlüsse Messerleiste Schleifkontaktmodul Hilfsstromstecker Leitungsverlegung am Einschubrahmen Bestückung mit Hilfsleiteranschlüssen Bestell-Nummern Schutzleiter anschließen Erdschutz zwischen Einschubrahmen und Einschubschalter Umrüsten Festeinbauschalter in Einschubschalter Umrüsten Schilder aktualisieren 5-1 5-1 5-1 5-2 5-2 5-4 5-4 5-4 5-5 5-7 5-10 5-12 5-14 5-15 5-16 5-17 5-19 5-19 5-20 5-21 5 Installation Mounting Mounting position Mounting on horizontal surface Mounting on vertical surface with mounting angles Connecting bars Horizontal connection Flange connection Front connection Vertical connection Order numbers Connecting the main conductors Auxiliary conductors Receptacle Sliding contact module Auxiliary connectors Wiring in guide frame Arrangement of secondary disconnects Order numbers Connecting the grounding conductor Ground protection between guide frame and draw-out circuit-breaker Converting fixed-mounted circuit-breakers into draw-out circuit-breakers Conversion Updating the labels 5-1 5-1 5-1 5-2 5-2 5-4 5-4 5-4 5-5 5-7 5-10 5-12 5-14 5-15 5-16 5-17 5-19 5-19 5-20 5-21 Commissioning Preparation of draw-out circuit-breaker Inserting the circuit-breaker in the guide frame Positions of the breaker in the guide frame Unlocking the racking handle / Withdrawing racking handle Racking Circuit-breaker into the connected position Inserting racking handle Charging the spring storage Checklist for commissioning Closing Switching off Tripping by overcurrent release Reclosing a circuit-breaker tripped by the trip unit Putting out of service Troubleshooting 6-1 6-1 6-1 6-2 6 7 Inbetriebnahme Vorbereitung des Einschubschalters Schalter in Einschubrahmen einsetzen Positionen des Schalters im Einschubrahmen Handkurbelsperre lösen / Handkurbel herausziehen Schalter in Betriebsstellung verfahren Handkurbel einschieben Federspeicher spannen Checkliste für Inbetriebnahme Einschalten Ausschalten Auslösen durch Überstromauslöser Wiederinbetriebnahme nach Auslösung durch Überstromauslöser Außerbetriebnahme Störungsbeseitigung Baugrößen / Maßbilder Baugröße I, Festeinbau, 3- und 4-polig Baugröße I, Einschubausführung, 3- und 4-polig Baugröße II, Festeinbau, 3- und 4-polig Baugröße II, Einschubausführung, 3- und 4-polig 5-22 5-24 5-24 5-27 6-1 6-1 6-1 6-2 6-3 6-3 6-3 6-4 6-5 6-6 6-6 6-7 6 6-8 6-10 6-11 7-1 7-1 7-3 7-5 7-7 7 Frame sizes / dimension drawings Frame size I, fixed-mounted version, 3-pole and 4-pole Frame size I, withdrawable version, 3-pole and 4-pole Frame size II, fixed-mounted version, 3-pole and 4-pole Frame size II, withdrawable version, 3-pole and 4-pole 5-22 5-24 5-24 5-27 6-3 6-3 6-3 6-4 6-5 6-6 6-6 6-7 6-8 6-10 6-13 7-1 7-1 7-3 7-5 7-7 1 Baugröße III, Festeinbau, 3- und 4-polig Baugröße III, Einschubausführung, 3- und 4-polig Externer Wandler für Neutralleiter Spannungswandler Weitere Maßbilder Frame size III, fixed-mounted version, 3-pole and 4-pole Frame size III, withdrawable version, 3-pole and 4-pole External transformer for neutral Voltage transformer Further dimension drawings 7-10 7-12 7-14 7-14 7-14 7-10 7-12 7-14 7-14 7-14 8 Schaltpläne Klemmenbelegung Zubehör Hilfsstromschalter Meldeschalter Hilfsauslöser / Elektrische Einschaltsperre Einschaltmagnet / Elektrisch EIN Motorantrieb Fernrücksetzmagnet Schutzkreise für ETU45B - ETU 76B Mit Breaker Status Sensor (BSS) und Messmodul Nur Messmodul Nur Breaker Status Sensor (BSS) 8-1 8-1 8-2 8-3 8-4 8-4 8-5 8-5 8-6 8-6 8-7 8-7 8 Circuit diagrams 8-1 Terminal assignment accessory 8-1 Auxiliary switches 8-2 Signalling switches 8-3 Auxiliary releases / Electrical closing lockout 8-4 Closing coil / Electrical ON 8-4 Motor operating mechanism 8-5 Remote reset coil 8-5 Trip unit circuitry for ETU45B - ETU76B 8-6 With Breaker Status Sensor (BSS) and metering module 8-6 Metering module only 8-7 Breaker Status Sensor (BSS) only 8-7 9 Elektronische Ausrüstung Überstromauslöser Funktionsübersicht Überstromauslöser ETU15B Überstromauslöser ETU25B Überstromauslöser ETU27B Überstromauslöser ETU45B Überstromauslöser ETU76B Bestell-Nummern Anzeigen Schutzfunktionen Grundschutzfunktionen Zusätzliche Funktionen Displays Alphanumerisches Display Grafikdisplay Bemessungsstrommodul Erdschlussschutzmodule Austausch des Überstromauslösers Interner Selbsttest der Überstromauslösefunktion Plombier- und Abschließvorrichtung -Module System-Architektur Interne Module Breaker Status Sensor (BSS) COM15-Modul COM16 Modul Messfunktion PLUS Nachrüsten des PROFIBUS - Kommunikationsanschlusses Schilder aktualisieren Externe -Module Allgemeines ZSI-Modul Digitales Eingangsmodul Digitale Ausgangsmodule Analoges Ausgangsmodul Bestellnummern Wandler Internen N-Wandler nachrüsten Externer Wandler für Neutralleiter Spannungswandler Externer G-Wandler Externe Spannungsversorgung Breaker Data Adapter Verwendung Ansicht 9-1 9-1 9-1 9-3 9-6 9-9 9-12 9-17 9-20 9-20 9-22 9-22 9-25 9-30 9-30 9-42 9-74 9-75 9-80 9-84 9-86 9-87 9-87 9-89 9-89 9-93 9-97 9-98 9 Electronic components Overcurrent releases Overview of functions Overcurrent release ETU15B Overcurrent release ETU25B Overcurrent release ETU27B Overcurrent release ETU45B Overcurrent release ETU76B Order numbers Indications Protective functions Basic protective functions Additional functions Displays Alphanumeric display Graphical display Rating plug Ground-fault protection modules Replacing the overcurrent release Internal self-test of the overcurrent tripping function Sealing and locking device -modules System architecture Internal modules Breaker Status Sensor (BSS) COM15 module COM16 module Metering function PLUS Retrofitting of the PROFIBUS - communication Updating the options label External -modules General ZSI-module Digital input module Digital output modules Analogue output module Order numbers Current transformer Retrofitting the internal neutral CT External transformer for neutral conductor Voltage transformers External earth-fault current transformer External voltage supply Breaker Data Adapter Application View 2 9-104 9-105 9-105 9-105 9-110 9-112 9-114 9-117 9-118 9-119 9-119 9-122 9-123 9-127 9-128 9-129 9-129 9-129 9-1 9-1 9-1 9-3 9-6 9-9 9-12 9-17 9-20 9-20 9-22 9-22 9-25 9-30 9-30 9-42 9-74 9-75 9-80 9-84 9-86 9-87 9-87 9-89 9-89 9-93 9-97 9-98 9-104 9-105 9-105 9-105 9-110 9-112 9-114 9-117 9-118 9-119 9-119 9-122 9-123 9-127 9-128 9-129 9-129 9-129 Anzeigen Anschlussvarianten Spannungsversorgung Bestellnummern Handprüfgerät Ansicht Vorbereitende Arbeiten Anschließen Spannungsversorgung Bedienung Nachbereitende Arbeiten Bestellnummern 9-129 9-130 9-132 9-132 9-133 9-133 9-133 9-134 9-134 9-135 9-137 9-137 Indications Connection versions Voltage supply Order numbers Test device View Preparations Connection Voltage supply Operation Finishing Order numbers 9-129 9-130 9-132 9-132 9-133 9-133 9-133 9-134 9-134 9-135 9-137 9-137 10 Wiedereinschaltsperre zurücksetzen Manuelle Rücksetzung Automatische Rücksetzung Automatische Rücksetzung nachrüsten Rücksetzmechanik einbauen Schilder aktualisieren Fern-Rücksetzoption nachrüsten Einbau Leitungen anschließen Funktionstest Ausstattungsschild aktualisieren 10-1 10-1 10-2 10-3 10-3 10-5 10-6 10-6 10-8 10-9 10-9 10 Reset reclosing lockout Manual reset reclosing lockout Automatic reset Retrofitting automatic reset Installing reset mechanism Updating the options label Installing the remote reset option Mounting Connecting wires Function test Updating the options label 10-1 10-1 10-2 10-3 10-3 10-5 10-6 10-6 10-8 10-9 10-9 11 Hilfsauslöser Übersicht Hilfsauslöser nachrüsten Optionale Meldeschalter am Hilfsauslöser anbringen Verzögerungszeiten am Unterspannungsauslöser einstellen Abstellschalter für übererregte Hilfsauslöser und Einschaltmagneten einbauen Elektrisch EIN nachrüsten Mechanische Funktionsprüfung Leitungen anschließen Abschließende Arbeiten Elektrische Funktionsprüfung Ausstattungsschild aktualisieren Kondensator-Speichergerät für Spannungsauslöser 11-1 11-1 11-2 11 Shunt Trip / Closing Coil / Undervoltage release Overview Installing auxiliary releases Installing optional signalling switches on auxiliary releases Setting delay times at under-voltage release Installing cut-off switch for overexcited shunt trip and closing coil Installing electrical ON Mechanical function test Connecting wires Finally Electrical function test Updating the options label Capacitor Energy Storage Unit for shunt release 11-1 11-1 11-2 11-3 11-3 11-4 11-4 11-5 11-6 11-6 11-6 11-8 11-10 11-3 11-3 11-4 11-4 11-5 11-6 11-6 11-6 11-8 11-10 12 Hilfsstromschalter Schaltergruppe Meldung Meldeschalter nachrüsten Meldeschalter am Überstromauslöser montieren Schaltergruppe Steuerung Schaltergruppe Kommunikation Leitungen anschließen 12-1 12-1 12-1 12-2 12-3 12-3 12-3 12 Auxiliary and control switches Signalling switches Mounting signalling switches Mounting signalling switches at trip unit Control switches Communication switches Connecting wires 12-1 12-1 12-1 12-2 12-3 12-3 12-3 13 Motorantrieb Nachrüsten des Motorantriebs Motorabstellschalter am Bedienpult Ausstattungsschild aktualisieren 13-1 13-1 13-2 13-4 13 Motor operating mechanism Retrofitting the motor operating mechanism Motor disconnect switch at the front panel Updating the options label 13-1 13-1 13-2 13-4 14 Anzeige- und Bedienelemente Verriegelungsset Mechanischer Schaltspielzähler Motorabstellschalter Elektrisch EIN-Taster NOT-AUS Pilzdrucktaster Ausstattungsschild aktualisieren 14-1 14-1 14-2 14-2 14-2 14-3 14-3 14 Indicators and operating elements Locking set Mechanical make-break operations counter Motor cut-off switch Electrical ON push-button EMERGENCY OFF push-button Updating the options label 14-1 14-1 14-2 14-2 14-2 14-3 14-3 15 Abschließvorrichtungen Sicherheitsschlösser Abschließvorrichtung in AUS-Stellung Sicherheitsschloss Elektrisch EIN nachrüsten Schlüsselbetätigung für Mechanisch EIN nachrüsten 15-1 15-1 15-3 15-6 15-6 15 Locking devices Safety locks Locking device in OFF position Retrofitting safety lock for electrical ON Retrofitting key protected operation for mechanical ON 15-1 15-1 15-3 15-6 15-6 3 Abschließvorrichtung gegen Verfahren aus der Trennstellung nachrüsten Abschließvorrichtung in AUS-Stellung (Schaltschranktür) nachrüsten Sicherheitsschloss Handkurbel nachrüsten Sicherheitsschloss Mechanisch AUS nachrüsten Sicherheitsschloss Rücksetzknopf nachrüsten Schilder aktualisieren Vorrichtungen für Bügelschlösser Verschlussbügel für „AUS“ Abschließvorrichtung Shutter Abschließvorrichtung Verfahrschienen Abschließvorrichtung Handkurbel Abschließvorrichtung Antriebshandhebel Abschließvorrichtung für Taster Mechanisch AUS Abschließvorrichtung für Taster Mechanisch EIN Schilder aktualisieren 15-7 15-11 15-13 15-15 15-16 15-17 15-21 15-22 15-24 15-25 15-25 15-25 15-26 15-27 15-28 Retrofitting locking device against moving from the disconnected position Retrofitting locking device in OFF position (cubicle door) Retrofitting safety lock for racking handle Retrofitting safety lock for mechanical OFF Retrofitting safety lock for reset button Updating the labels Padlocking provisions Locking bracket for "OFF" Locking device for shutter Locking device for guide rails Locking device for racking handle Locking device for spring charging lever Locking device for Mechanical OFF button Locking device for Mechanical ON button Updating the labels 15-7 15-11 15-13 15-15 15-16 15-17 15-21 15-22 15-24 15-25 15-25 15-25 15-26 15-27 15-28 16 Plombiervorrichtungen 16-1 16 Sealing facilities 16-1 17 Sperrvorrichtungen Sperrvorrichtung gegen Verfahren bei offener Schaltschranktür Verriegelung der Schaltschranktür Riegel montieren Schaltschranktür bohren Falle an Schaltschranktür montieren Funktionskontrolle Zugangssperre über Taster Mechanisch EIN und AUS nachrüsten Schilder aktualisieren 17-1 17 Interlocks Interlock to prevent racking with cubicle door open Cubicle door interlock Fit bolt Cubicle door interlock drill pattern Installing catch on cubicle door Function check Retrofitting access block over mechanical ON and OFF button Updating the labels 17-1 17-2 17-3 17-3 17-5 17-6 17-6 17-7 17-8 18 Zusatzausrüstungen für Einschubrahmen Shutter Nachrüsten Typschild aktualisieren Kodierung Schalter - Einschubrahmen Nennstromkodierung Ausstattungsabhängige Kodierung Positionsmeldeschalter für Einschubrahmen 18-1 18-1 18-2 18-5 18-6 18-6 18-8 18-14 19 Gegenseitige mechanische Verriegelung Konfigurationen Allgemeine Hinweise Zwei Schalter gegeneinander Drei Schalter untereinander Drei Schalter untereinander (Einer von Dreien) Drei Schalter gegeneinander Drei Schalter, zwei davon gegeneinander Verriegelung nachrüsten Zwischenwelle und Kupplung einbauen Verriegelungsbaustein anbauen Bowdenzüge montieren Funktionstest Schilder aktualisieren 19-1 19-2 19-2 19-4 19-5 19-6 19-7 19-8 19-9 19-9 19-13 19-15 19-16 19-17 18 Options for guide frame Shutter Retrofitting Updating the type label Coding between circuit-breaker and guide frame Rated current coding Option-related coding Position signalling switches for guide frame 17-2 17-3 17-3 17-5 17-6 17-6 17-7 17-8 18-1 18-1 18-2 18-5 18-6 18-6 18-8 18-14 19 Mutual mechanical circuit-breaker interlocking 19-1 Configurations 19-2 General notes 19-2 Two circuit-breakers against each other 19-4 Three circuit-breakers among each other 19-5 Three circuit-breakers among each other (1 out of 3) 19-6 Three circuit-breakers against each other 19-7 Three circuit-breakers, two of them against each other 19-8 Retrofitting interlocking module 19-9 Installing intermediate shaft and coupling 19-9 Fitting interlocking module 19-13 Mounting the bowden wires 19-15 Function check 19-16 Updating labels 19-17 20 Phasentrennwände 20-1 20 Phase barriers 20-1 21 Lichtbogenkammerabdeckungen Nachrüsten Typschild Einschubrahmen aktualisieren 21-1 21-1 21-3 21 Arc chute covers Retrofitting Updating the type label guide frame 21-1 21-1 21-3 22 Türdichtungsrahmen IP41 22-1 22 Door sealing frame IP41 22-1 23 Schutzabdeckung IP55 Maßbild Türausschnitt und Befestigungsbohrungen 23-1 23-1 23 Protective cover IP55 Dimension drawing for door cutout and mounting holes 23-1 23-1 24 Wartung Vorbereitung von Wartungsarbeiten 24-1 24-3 24 Maintenance Preparation for maintenance 24-1 24-3 4 Switching off and discharging the storage spring Removing the breaker from the guide frame Checking arc chutes Removing arc chutes Visual inspection Installing arc chutes Order numbers Checking contact erosion Replacing pole assembly Removing front panel Remove arc chutes Removing pole assemblies Installing pole assemblies Order numbers Attaching the front panel Mechanical function test Installing the arc chutes Replacing operating system 24-3 24-4 24-5 24-5 24-6 24-6 24-8 24-8 24-9 24-9 24-10 24-10 24-15 24-21 24-22 24-22 24-22 24-22 Ausschalten und Federspeicher entspannen Schalter aus dem Einschubrahmen entnehmen Lichtbogenkammern prüfen Lichtbogenkammer ausbauen Sichtprüfung vornehmen Lichtbogenkammer einbauen Bestell-Nummern Kontaktabbrand prüfen Strombahnen wechseln Bedienpult abnehmen Lichtbogenkammern ausbauen Strombahnen ausbauen Strombahnen einbauen Bestell-Nummern Bedienpult aufsetzen Mechanische Funktionsprüfung Lichtbogenkammern einbauen Antriebssystem austauschen 24-3 24-4 24-5 24-5 24-6 24-6 24-8 24-8 24-9 24-9 24-10 24-10 24-15 24-21 24-22 24-22 24-22 24-22 25 Entsorgung Entsorgung von Niederspannungs-Leistungsschaltern 25-1 25-1 25 Disposal Low-voltage circuit-breakers disposal 25-1 25-1 26 Abkürzungen 26-1 26 Abbreviations 26-1 27 Begriffe 27-1 27 Glossary 27-1 28 Index 28-1 28 Index 28-1 29 Formulare 29-1 29 Forms 29-1 5 1 Aufbau 1 Design 1.1 Leistungsschalter 1.1 Circuit-breaker (1) (2) (3) (4) (5) (6) (7) (8) (9) (10) (11) (12) (13) (14) (15) (16) (17) (18) (19) (20) (21) (22) (23) (24) (25) (26) (27) (28) 1–1 Lichtbogenkammer q (Seite 24-5) Tragegriff Kennzeichnungsschilder Motorabstellschalter (Option) q (Seite 13-3)oder „Elektrisch EIN“ (Option) q (Seite 11-4) Typschild Leistungsschalter q (Seite 2-1) Speicherzustandsanzeige q (Seite 6-6) Taster „Mechanisch EIN“ Bemessungsnennstromangabe Einfahrpiktogramm Schaltspielzähler (Option) Antriebshandhebel q (Seite 6-4) Handkurbel Einfahrwelle Ausstattungsschild q (Seite 2-1) Erdungsanschluss q (Seite 5-21) Positionsanzeige q (Seite 6-2) Tabelle Erdschluss-Schutz q (Seite 9-29) Sicherheitsschloss Handkurbel (Option) Mechanische Entriegelung der Handkurbel (Option) Überstromauslöser q (Seite 9-1) Bemessungsnennstrommodul Taster „Mechanisch AUS“ oder Pilzdrucktaster „NOT-AUS“ (Option) Einschaltbereitschaftsanzeige q (Seite 6-6) Schaltstellungsanzeige q (Seite 6-6) Ausgelöst-Anzeige (Rücksetzknopf) q (Seite 6-8) Abschließvorrichtung „AUS“ (Option) Bedienpult Messerleiste für Hilfsstromanschlüsse (1) (2) (3) (4) (5) (6) (7) (8) (9) (10) (11) (12) (13) (14) (15) (16) (17) (18) (19) (20) (21) (22) (23) (24) (25) (26) (27) (28) Arc chute q (page 24-5) Carrying handle Identification tags Motor disconnect switch (option) q (page 13-3) or "Electrical ON" (option) q (page 11-4) Type label circuit-breaker q (page 2-1) Stored-energy indicator q (page 6-6) "Mechanical ON" button Rated current value Racking pictogram Make-break operations counter (option) Spring charging lever q (page 6-4) Racking handle Racking shaft Option label q (page 2-1) Earthing terminal q (page 5-21) Position indicator q (page 6-2) Table for ground-fault protection q (page 9-29) Safety lock for racking handle (option) Mechanical release of racking handle (option) Overcurrent release q (page 9-1) Rating plug "Mechanical OFF" button or "EMERGENCY OFF" mushroom button (option) Ready-to-close indicator q (page 6-6) Breaker ON/OFF indicator q (page 6-6) Tripped indicator (Reset button) q (page 6-8) Locking device "OFF" (option) Front panel Receptacle for auxiliary contacts 1.2 Einschubrahmen 1.2 Guide frame (1) (2) (18) (3) (17) (4) (5) (16) (6) (7) (15) (14) (8) (13) (12) (9) (11) (10) (1) (2) (3) (4) (5) (6) (7) (8) (9) (10) (11) (12) (13) (14) (15) (16) (17) (18) Lichtbogenkammerabdeckung (Option) Ausblasöffnungen Öffnung für Kranhaken q (Seite 4-2) Shutter (Option) Abschließvorrichtung Shutter (Option) Typschild Einschubrahmen q (Seite 2-2) Trennkontakte Erdungsanschluss ; 14 mm q (Seite 5-21) Abschließvorrichtung Verfahrschiene Sperrvorrichtung gegen Verfahren bei geöffneter Schaltschranktür (Option) Türverriegelung Einschubrahmen (Option) Verfahrschiene werkseitige Bemessungsnennstromkodierung Schleifkontakt Schaltererdung (Option) Ausstattungsabhängige Kodierung (Option) Shutterbetätiger (Option) Positionsmeldeschalter (Option) Schleifkontaktmodul Hilfsleiter (Anzahl ausstattungsabhängig) (1) (2) (3) (4) (5) (6) (7) (8) (9) (10) (11) (12) (13) (14) (15) (16) (17) (18) Arc chute cover (option) Arcing openings Hole for crane hook q (page 4-2) Shutter (option) Locking device shutter (option) Type label guide frame q (page 2-2) Disconnecting contacts Earthing terminal ; 14 mm q (page 5-21) Locking device guide rail Locking device to prevent racking with cubicle door open (option) Door interlocking guide frame (option) Guide rail Ampere rating coding by factory Sliding contact for circuit-breaker earthing (option) Option-related coding (option) Shutter operating device (option) Position signalling switch (option) Auxiliary disconnects (quantity according to equipment) 1–2 2 2.1 Schilder 2 Ausstattungsschild Leistungsschalter 2.1 (Mit Anschlussbezeichnungen) Labels Circuit-breaker options label (With terminal designations) Einschaltmagnet Y1 Closing coil Y1 Hauptstrombahnen Main conducting path Erster Spannungsauslöser F1 oder elektrische Einschaltsperre First shunt trip F1 or electrical closing lockout Bestell-Nr. Leistungsschalter Order no. circuit-breaker Ergänzung der Bestell-Nr. „weitere Optionen“ Supplement order no. "further options" 2.2 Rücksetzmagnet Remote reset coil Zweiter Spannungsauslöser F2 oder Unterspannungauslöser F3 / or Second shunt trip F2 or undervoltage release F3 / F4 Typschild Leistungsschalter 2.2 Hilfskontakte Auxiliary contacts Motorantrieb Motor operating mechanism Type label circuit-breaker Normen Standards Approbationszeichen (Australien) Approval (Australia) Trennfunktion Disconnecting function Max. Bemessungsnennstrom des Leistungsschalters Max. rated current of the circuit-breaker Gebrauchskategorie Utilization category Bemessungsisolationsspannung Rated insulation voltage Bemessungsfrequenzen Range of the rated frequency Bemessungsstoßspannungsfestigkeit Rated impulse withstand voltage Bemessungsbetriebsspannung Rated operational voltage Bemessungskurzschlussausschaltvermögen Rated short-circuit breaking capacity Bemessungskurzzeitstromfestigkeit Rated short-time withstand current Hinweis für Einsatz in IT-Systemen Direction for use in IT systems Ident-Nr. Leistungsschalter Circuit-breaker ID 2–1 2.3 Schild Bemessungsnennstrommodul 2.3 Rating plug label Bestell-Nr. Bemessungsnennstrommodul Rating plug order no. Bemessungsnennstrom des Leistungsschalters Rated current of the circuit-breaker Approbationszeichen Approval 2.4 Typschild Einschubrahmen 2.4 Type label guide frame Bestell-Nr. Einschubrahmen Guide frame order no. Kennzeichen „weitere Optionen“ Supplement „further options“ Bemessungsnennstrom des Einschubrahmens Guide frame maximum current rating Bemessungsisolationsspannung Rated insulation voltage Einsetzbare Leistungsschalter Suitable circuit breakers Siemens interne Daten Siemens-internal order reference 2–2 3 Normen, Bestimmungen 3 Standard specifications WARNING GEFAHR Gefährliche Spannung! Hazardous voltage! Verursacht Tod, ernste Verletzungen oder Zerstörung von Material / Eigentum. Will cause death, serious personal injury, or equipment/ property damage. Nur qualifiziertes Personal darf an dem Gerät arbeiten, welches mit den Warn-, Sicherheitshinweisen und Wartungsvorschriften vertraut gemacht wurde. Only qualified personnel should work on this equipment, after becoming thoroughly familiar with all warnings, safety notices, and maintenance procedures contained herein and on the devices. Die erfolgreiche und sichere Funktion dieses Gerätes hängt von ordentlicher Bedienung, Installation, Behandlung und Wartung ab. Successful and safe operation of this equipment is dependant on proper handling, installation, operation and maintenance. Qualifiziertes Personal Qualified Person a) Ausbildung oder Unterweisung bzw. Berechtigung, Stromkreise und Geräte/Systeme gemäß den Standards der Sicherheitstechnik ein- und auszuschalten, zu erden und zu kennzeichnen. b) Ausbildung oder Unterweisung gemäß den Standards der Sicherheitstechnik in Pflege und Gebrauch angemessener Sicherheitsausrüstung. c) Schulung in Erster Hilfe. a) Is trained and authorized to energize, de-energize, clear, earth and tag circuits and equipment in accordance with established safety practices. Die Leistungsschalter sind für den Betrieb in geschlossenen Räumen bestimmt, in denen keine durch Staubentwicklung und ätzende Dämpfe oder Gase erschwerten Betriebsbedingungen vorliegen. Für staubige oder feuchte Räume sind entsprechende Kapselungen vorzusehen. The circuit-breaker are suited for operation in enclosed spaces not subject to operating conditions aggravated by dust, corrosive vapors or gases. Breakers to be installed in dusty or damp locations must be appropriately enclosed. Der Leistungsschalter entspricht den Normen: The circuit-breaker is in conformity with the standards: IEC 60947-2 EN 60947-2 IEC 60947-2 EN 60947-2 im Sinne dieser Bedienungsanleitung bzw. der Warnhinweise auf dem Produkt selbst sind Personen, die mit Aufstellung, Montage, Inbetriebsetzung und Betrieb des Produktes vertraut sind und über die ihrer Tätigkeit entsprechenden Qualifikationen verfügen, wie z. B.: 3–1 For the purpose of this instruction manual and product labels, a "qualified person" is one who is familiar with the installation, construction and operation of the equipment and the hazards involved and who, in addition, has the following qualifications: b) Is trained in the proper care and use of protective equipment in accordance with established safety practices. c) Is trained in rendering first aid. 4 Transport 4 Transport 4.1 Überseeverpackung 4.1 Overseas packing Feuchtigkeitsanzeigeschild überprüfen Check humidity indicator Rosa Pink Weitere Lagerung Further storage Blau Blue Dichteverpackung unwirksam Schalter auf Korrosionsschäden prüfen Schäden dem Transportunternehmen melden Sealed packing defective Inspect for corrosion Notify damages to forwarding agent 4.2 Auspacken Trockenmittel erneuern oder trocknen Kunststofffolie dicht verschweißen Verpackung regelmäßig überprüfen Renew or dry desiccant Reseal the plastic sheeting Check packing from time to time Gut Good 4.2 Unpacking Schalter auspacken und auf Transportschäden untersuchen. Unpack the circuit-breaker and inspect it for damage. Bei späterem Einbau von Schalter oder Einschubrahmen: Lagerung und Weiterversand nur in der Originalverpackung. In case of later installation of the circuit-breaker or guide frame: they may only be stored and redispatched in the original packing. VORSICHT CAUTION Schalter nicht auf die Rückseite legen! Do not place circuit-breaker on its rear side! 4–1 4.3 Transport mit Kran 4.3 Lifting by crane DANGER GEFAHR Schweres Gerät. Heavy Equipment. Falsches Kranen kann Tod, schwere Personenschäden sowie Schäden an Geräten und Ausrüstung bewirken. Improper lifting will cause death, serious personal injury, or equipment/property damage. Niemals einen Leistungsschalter, Sicherungseinschub oder Einschubrahmen über Personen heben. Bedienungshinweise zum Kranen beachten. Nur OSHA/NIOSH geprüftes Krangeschirr verwenden. Benutze personelle Schutzausrüstung zum Heben oder Bewegen von Leistungsschaltern und Einschubrahmen. Never lift a circuit-breaker, fuse carriage, or guide frame above personnel. Follow instructions for use of lifting bar assembly. Use OSHA/NIOSH approved rigging equipment and personal protection equipment for lifting/moving the circuit-breakers and guide frames. Einschubrahmen Guide frame ;max 12 mm ;PD[12 mm W1 m m m ;max 12 mm Nicht auf die Rückseite legen! Schalter + Einschubrahmen Breaker + Guide frame W 1 Schalter Breaker W1 Vorsicht Caution Do not place breaker on its rear side! 1) 1) Baugröße / Polzahl Frame size / No. of poles , , ,, ,, ,,, ,,, 1) Gewicht Weight max. 47 kg max. 55 kg max. 85 kg max. 103 kg max. 90 kg max. 108 kg Seil oberhalb des Aufklebers einhängen Schutz für Transportarbeiten. Nur für Baugröße I mit hohen Lichtbogenkammern! max. 27 kg max. 32 kg max. 52 kg max. 62 kg max. 70 kg max. 119 kg 1) max. 76 kg max. 91kg max. 121 kg max. 146 kg max. 166 kg max. 227 kg Hook cable above the label Protection for transport work. For frame size I with high arc chutes only! Achtung: Vor Inbetriebnahme entfernen Nur für Anheben des Leistungsschalters / Bitte gut aufbewahren Attention: Remove before commissioning Use only for lifting the circuit-breaker / Please keep it safe 4–2 5 Montage 5 WARNUNG Installation WARNING Sicherer Betrieb des Schalters setzt voraus, dass er von qualifiziertem Personal sachgemäß unter Beachtung der Warnhinweise dieser Bedienungsanleitung montiert und in Betrieb gesetzt wird. Safe operation is dependent upon proper handling and installation by qualified personnel under observance of all warnings contained in this instruction manual. Insbesondere sind sowohl die allgemeinen Errichtungs- und Sicherheitsvorschriften zu Arbeiten an Starkstromanlagen (z.B. DIN VDE) als auch die den fachgerechten Einsatz von Hebeeinrichtungen und Werkzeugen und die Benutzung persönlicher Schutzausstattungen (Schutzbrillen u.ä.) betreffenden Vorschriften zu beachten. In particular the general erection and safety regulations (e.g. DIN VDE, IEC) and regulations regarding the correct use of hoisting gear and tools and of personal protective gear (safety goggles and the like) shall be observed. Bei Nichtbeachtung können Tod, schwere Körperverletzung oder erheblicher Sachschaden die Folge sein. Non-observance can result in death, severe personal injury or substantial property damage. DANGER GEFAHR Schweres Gerät. Heavy Equipment. Falsches Kranen kann Tod, schwere Personenschäden sowie Schäden an Geräten und Ausrüstung bewirken. Improper lifting will cause death, serious personal injury, or equipment/property damage. Niemals einen Leistungsschalter, Sicherungseinschub oder Einschubrahmen über Personen heben. Bedienungshinweise zum Kranen beachten. Nur OSHA/NIOSH geprüftes Krangeschirr verwenden. Benutze personelle Schutzausrüstung zum Heben oder Bewegen von Leistungsschaltern und Einschubrahmen. Never lift a circuit-breaker, fuse carriage, or guide frame above personnel. Follow instructions for use of lifting bar assembly. Use OSHA/NIOSH approved rigging equipment and personal protection equipment for lifting/moving the circuit-breakers and guide frames. 5.1 Einbau 5.1 Mounting 5.1.1 Einbaulage 5.1.1 Mounting position ≤ 30° ≤ 30° ≤ 30° ≤ 30° Δ h max 1 mm Anschraubpunkte Fixing points 5–1 5.1.2 Einbau auf waagerechter Ebene 5.1.2 Mounting on horizontal surface Setzmutter Non-removable nut 4 Schrauben M8-8.8 + Muttern + Spannscheiben 4 bolts M8-8.8 + nuts + strain washers 4 Schrauben M8-8.8 4 bolts M8-8.8 Werden in Schaltschränken ohne Fachböden mehrere Einschubschalter übereinander angeordnet, empfehlen wir Lichtbogenkammerabdeckungen zu verwenden. If several draw-out circuit-breakers are arranged one above the other in cubicles without compartment bases we recommend to use arc chute covers. 5.1.3 5.1.3 Einbau an senkrechter Ebene mit Tragwinkel Nur für Festeinbauschalter der Baugrößen I und II. Mounting on vertical surface with mounting angles For fixed-mounted breaker frame size I and II only. 4 Schrauben M10-8.8 + Muttern + Spannscheiben 4 bolts M10-8.8 + nuts + strain washers Setzmutter Non-removable nut 4 Schrauben M8-8.8 + Spannscheiben 4 bolts M8-8.8 + strain washers 5–2 b Darstellung für Baugröße II mit Frontanschluss Representation for frame size II with front connection Schalter/Breaker b [mm] BG I /FS I 3pol 4pol 300 390 BG II /FS II 3pol 4pol 440 570 Bestell-Nummer Order number Tragwinkel Bracket angle 3WL9111-0BB50-0AA0 5–3 5.2 Anschluss-Schienen 5.2 WARNUNG WARNING Achtung, die Befestigungsschrauben oberhalb und unterhalb der Anschlussschienen auf der Rückseite des Einschubrahmens sind spannungsführend! Attention, the fastening screws above and below the connection bars on the back of the guide frame are voltage-carrying! q Frame sizes / dimension drawings (page 7-1) q Baugrößen / Maßbilder (Seite 7-1) 5.2.1 Connecting bars Horizontalanschluss Der Horizontalanschluss ist Standardanschluss für Festeinbauschalter und Einschubrahmen. 5.2.1 Horizontal connection The horizontal connection is the standard connection for fixedmounted circuit-breakers and guide frames. 13.5 mm Nur für Einschubrahmen: For guide frames only: q Installing horizontal connection for retrofitting (page 5-9) q Einbau des Horizontalanschlusses beim Umrüsten (Seite 5-9) 5.2.2 Flanschanschluss (nur Einschubrahmen) 5.2.2 Flange connection (guide frame only) M 12 70 ± 4 Nm X Der Einbau der Flanschanschlüsse erfolgt wie der Einbau der Vertikal- und Horizontalanschlüsse q (Seite 5-9). 5–4 Einschraubtiefe / Screw-in depth: x = 18–24 mm The flanged connections are installed in the same way as the vertical and horizontal connections q (page 5-9). 5.2.3 Frontanschluss 5.2.3 Front connection Festeinbauschalter Fixed-mounted breaker Ausführung der Anschluss-Schienen: Two variations are offered: (1) (2) (3) (1) (2) (3) (1) (2) (3) Standardausführung Ausführung nach DIN 43673 (Doppellochreihe) Bohrungen Ø 13,5 Standard version Version according to DIN 43673 (double hole row) Holes Ø 13.5 Fastening connecting bars: Befestigung der Anschluss-Schienen: (1) (2) (3) (4) 85 Nm 85 Nm (5) (6) (7) Gr. / Size 5 (8) (9) 8 Nm (1) Für Baugröße: (2) Für Baugröße: (3) (4) (5) (6) (7) (8) (9) Gr. / Size 5 I II ≤ 1000 A und ≤ 2000 A I 1250 A - 2000 A, H-Klasse II 2500 A, 3200 A III 4000 A Lange Anschluss-Schiene Kurze Innensechskantschraube ISO 4762 M6 mit Spannscheibe Kurze Distanzhülse Schlossschraube DIN 603 M12 mit Spannscheibe und Mutter Lange Distanzhülse Lange Innensechskantschraube ISO 4762 M6 mit Spannscheibe Kurze Anschluss-Schiene 8 Nm (1) For frame size: (2) For frame size: (3) (4) (5) (6) (7) (8) (9) I II ≤ 1000 A and ≤ 2000 A I 1250 A - 2000 A, H-class II 2500 A, 3200 A III 4000 A Long connecting bar Short hexagon socket-head screw ISO 4762 M6 with strain washer Short distance sleeve Coach screw DIN 603 M12 with strain washer and nut Long distance sleeve Long hexagon socket-head screw ISO 4762 M6 with strain washer Short connecting bar Hinweis NOTE Diese Anschlussart ist in der BG III Schaltleistungsklasse C nicht zulässig. This type of connection is not permitted in FS III Current interrupting class C. 5–5 Einschubrahmen Guide frame Ausführung der Anschluss-Schienen: Two variations are offered: (1) (2) (3) (4) (5) (1) (2) (3) (4) (5) Standardausführung Ausführung nach DIN 43673 (Doppellochreihe) Nuten für Phasentrennwände; Einbaulage wie gezeigt! Stützer Bohrungen Ø 13,5 (1) (2) (3) (4) (5) Befestigung der Anschluss-Schienen: Standard version Version according to DIN 43673 (double hole row) Slots for phase separation walls; mounting position as shown! Support Holes Ø 13.5 Fastening connecting bars: (1) (2) (3) (4) 85 Nm 85 Nm (5) Gr. / Size 5 Gr. / Size 5 8 Nm 8 Nm (1) Für Baugröße: (2) Für Baugröße: (3) (4) (5) I II ≤ 1000 A und ≤ 2000 A I 1250 A - 2000 A, H-Klasse II 2500 A, 3200 A III 4000 A Innensechskantschraube ISO 4762 M6 mit Spannscheibe Stützer; Einbaulage wie gezeigt! Schlossschraube DIN 603 M12 mit Spannscheibe und Mutter (1) For frame size: (2) For frame size: (3) (4) (5) I II ≤ 1000 A and ≤ 2000 A I 1250 A - 2000 A, H-class II 2500 A, 3200 A III 4000 A Hexagon socket-head screw ISO 4762 M6 with strain washer Support; mounting position as shown! Coach screw DIN 603 M12 with strain washer and nut Umrüsten von Vertikal- oder Flanschanschluss auf Frontanschluss erfordert vorher Einbau des Horizontalanschlusses! Conversion from vertical or flange connection to front connection requires installation of horizontal connection first! q (Seite 5-5) q (page 5-5) 5–6 5.2.4 Vertikalanschluss Festeinbauschalter Baugröße Frame size I 1) Vertical connection Fixed-mounted breaker Bemessungsnennstrom Rated current 1000 A 1250 A - 2000 A1) H-Klasse / H-class1) 2 Anschluss-Schienen pro Hauptanschluss, oben und unten mittels Langloch versetzt befestigt, s. Bild für Baugröße II 1) 5.2.4 1 x M12-8.8 + Mutter + Spannscheiben (oben + unten) 1 x M12-8.8 + nut + strain washers (top + bottom) 85 Nm 2 x Ø13.5 mm 2 connecting bars per main terminal, fixed . upper and lower terminal by means of elongated at hole with offset, see drawing for size II. Baugröße Frame size II Bemessungsnennstrom Rated current 2500 A 1) 3200 A 1) 1 Anschluss-Schiene pro Hauptanschluss, mittig befestigt, s. Bild für Baugröße I 1) 1 connecting bar per main terminal, fixed in the centre, see drawing for size I. Baugröße Frame size III Bemessungsnennstrom Rated current 5000 A 3 x M12-8.8 + Muttern + Spannscheiben (oben + unten) 3 x M12-8.8 + nuts + strain washers (top + bottom) 85 Nm 3 x Ø13.5 mm 4 x M12-8.8 + Muttern + Spannscheiben (oben + unten) 4 x M12-8.8 + nuts + strain washers (top + bottom) 85 Nm 4 x Ø13.5 mm 5–7 Einschubrahmen Baugröße Frame size I Guide frame Bemessungsnennstrom Rated current Baugröße Frame size 1000 A 1250 A - 2000 A H-Klasse / H-class II Bemessungsnennstrom Rated current Baugröße Frame size 2000 A, 2500 A, 3200 A III Bemessungsnennstrom Rated current 5000 A 1xM6 2xM6 2xM6 2 x Ø13,5 mm Baugröße Frame size III 3 x Ø13,5 mm 4 x Ø13,5 mm Vertikalanschlüsse links und recht asymmetrisch Bemessungsnennstrom Rated current Vertical terminals left and right asymmetrical 6300 A Ausbau der Lamellenkontakte Removing laminated contacts Rückseite Einschubrahmen Back side of guide frame 2 1 5–8 3 Einschubrahmen Guide frame Removing horizontal connection Ausbau des Horizontalanschlusses Rückseite Einschubrahmen Back side of guide frame 2 3 1 4 Gr. / Size 5 Kombischraube M6x20 Hexagon socket bolt M6x20 and strain washer assembly Einbau des Vertikalanschlusses Installing vertical connection Kombischraube M6x20 Hexagon socket-head screw M6x20 and strain washer assembly Rückseite Einschubrahmen Back side of guide frame 2 4 1 8 Nm 3 Montageschritte für Einbau von Horizontal- und Flanschanschluss analog. Mounting steps for installation of horizontal or flange connection are similar. Hinweis NOTE Die Lamellenblöcke für Leistungsschalter der Baugröße III, 4000 A, sind nicht vollständig mit Lamellen bestückt. Achtung! Bei der Montage nur gleichartig ausgestattete Lamellenblöcke verwenden. The laminated contacts for circuit-breaker frame size III, 4000 A, are not fully equiped with contact blades. Attention! Use only similarly equipped laminated contacts. 5–9 5.2.5 Bestellnummern Anschluss-Schienen Festeinbauschalter Connecting bars fixed-mounted breaker 5.2.5 Baugröße Frame size I Frontanschluss einfach oben Front connection, single hole, top II III I Frontanschluss Doppelloch oben Front connection, double hole, top II III I Frontanschluss einfach unten Front connection, single hole, buttom II III I Frontanschluss Doppelloch unten Front connection, double hole, buttom II III I Vertikalanschluss Vertical connection II III 1) Anzahl Anschluss-Schienen pro Hauptanschluss (z. B. 3poliger Leistungsschalter = sechs Hauptanschlüsse) 5 – 10 Order numbers Bemessungsnennstrom Rated current Anzahl 1) Number 1) Bestellnummer Order number ≤ 1000 A 1 3WL9111-0AL01-0AA0 1250 A -1600 A 1 3WL9111-0AL02-0AA0 ≤2000 A 1 3WL9111-0AL03-0AA0 2500 A 1 3WL9111-0AL04-0AA0 3200 A 1 3WL9111-0AL05-0AA0 ≤ 4000 A 1 3WL9111-0AL06-0AA0 1 3WL9111-0AL07-0AA0 1 3WL9111-0AL08-0AA0 ≤ 2000 A 1 3WL9111-0AL11-0AA0 2500 A 1 3WL9111-0AL12-0AA0 3200 A 1 3WL9111-0AL13-0AA0 4000 A 1 3WL9111-0AL14-0AA0 ≤ 1000 A 1 3WL9111-0AL51-0AA0 1250 A - 1600 A 1 3WL9111-0AL52-0AA0 ≤ 2000 A 1 3WL9111-0AL53-0AA0 2500 A 1 3WL9111-0AL54-0AA0 3200 A 1 3WL9111-0AL55-0AA0 ≤ 4000 A 1 3WL9111-0AL56-0AA0 1 3WL9111-0AL57-0AA0 1 3WL9111-0AL58-0AA0 ≤ 2000 A 1 3WL9111-0AL61-0AA0 2500 A 1 3WL9111-0AL62-0AA0 3200 A 1 3WL9111-0AL63-0AA0 4000 A 1 3WL9111-0AL64-0AA0 ≤ 1000 A 1250 A - 2000 A, H-Klasse H-class ≤ 1000 A 1250 A - 2000 A, H-Klasse H-class ≤ 1000 A 1250 A - 2000 A, 1 H-Klasse H-class 2 ≤ 2500 A 1 3200 A 2 5000 A 1 3WL9111-0AM01-0AA0 3WL9111-0AM02-0AA0 3WL9111-0AM03-0AA0 1) Number of connecting bars per main contact (e. g. circuit-breaker with 3 poles = 6 main contacts) Anschluss-Schienen Einschubrahmen Connecting bars guide frame Baugröße Frame size I Frontanschluss einfach Front connection, single hole II III I Frontanschluss Doppelloch Front connection, double hole II III I Vertikalanschluss Vertical connection II III I Flanschanschluss Flange connection II III I Horizontalanschluss Horizontal connection II III 1) Anzahl Anschluss-Schienen pro Hauptanschluss (z. B. 3poliger Leistungsschalter = sechs Hauptanschlüsse) Bemessungsnennstrom Rated current Anzahl 1) Number 1) Bestellnummer Order number ≤ 1000 A 1 3WL9111-0AN01-0AA0 1250 A - 1600 A 1 3WL9111-0AN02-0AA0 ≤ 2000 A 1 3WL9111-0AN03-0AA0 2500 A 1 3WL9111-0AN04-0AA0 3200 A 1 3WL9111-0AN05-0AA0 ≤ 4000 A 1 3WL9111-0AN06-0AA0 1 3WL9111-0AN07-0AA0 1 3WL9111-0AN08-0AA0 ≤ 2000 A 1 3WL9111-0AN11-0AA0 2500 A 1 3WL9111-0AN12-0AA0 3200 A 1 3WL9111-0AN13-0AA0 4000 A 1 3WL9111-0AN14-0AA0 1 3WL9111-0AN15-0AA0 1 3WL9111-0AN16-0AA0 2000 A 1 3WL9111-0AN17-0AA0 2500 A 1 3WL9111-0AN18-0AA0 3200 A 1 3WL9111-0AN21-0AA0 5000 A 1 3WL9111-0AN22-0AA0 6300 A 1 Satz / Set 3WL9111-0AN23-0AA0 ≤ 1000 A 1 3WL9111-0AN24-0AA0 1 3WL9111-0AN25-0AA0 ≤ 2000 A 1 3WL9111-0AN26-0AA0 ≤ 2500 A 1 3WL9111-0AN27-0AA0 ≤ 3200 A 1 3WL9111-0AN28-0AA0 ≤ 4000 A 1 3WL9111-0AN31-0AA0 ≤ 1000 A 1 3WL9111-0AN32-0AA0 1 3WL9111-0AN33-0AA0 ≤ 2000 A 1 3WL9111-0AN34-0AA0 ≤ 2500 A 1 3WL9111-0AN35-0AA0 ≤ 3200 A 1 3WL9111-0AN36-0AA0 ≤ 5000 A 1 3WL9111-0AN37-0AA0 ≤ 1000 A 1250 A - 2000 A, H-Klasse H-class ≤ 1000 A 1250 A - 2000 A, 1250 A - 2000 A, 1250 A - 2000 A, H-Klasse H-class H-Klasse H-class H-Klasse H-class 1) Number of connecting bars per main connection (e.g. 3-pole circuit-breaker, 6 main connections) 5 – 11 5.3 Hauptleiter anschließen 5.3 Connecting the main conductors ACHTUNG NOTICE Bei 4poligen Leistungsschaltern ist der N-Leiter immer ganz links anzuschließen. Anderenfalls kann es zu Fehlfunktionen des elektronischen Überstromauslösers kommen. Das Anschliessen von Kabeln unmittelbar an die Leistungsschalteranschlüsse ist nicht zulässig. On 4-pole circuit-breakers, the neutral conductor must always be connected all on the left. Otherwise this can cause malfunctions of the electronic overcurrent release. The connection of cables immediatly at the circuit-breaker terminals is not permitted. Hauptleiteranschluss säubern Cleaning the main conductor connection Schalter Breaker Kupfer-Anlagenschienen säubern Cleaning the copper bars Metallspäne entfernen Remove swarf Anlagenseitige Schienen festschrauben 5 – 12 Bolt tight line-side bars Hauptleiter abstützen Bracing the main conductors für N, S, H -Schaltleistungsklasse for N, S, H -current interrupting class 100 für N, S, H -Klasse for N, S, H -class BG III > 100 kA (Schaltleistungsklasse C) FS III > 100 kA (current interrupting class C) 100 5 – 13 5.4 Hilfsleiteranschlüsse 5.4 Auxiliary conductors Klemmenbelegung: Terminal assignment: q Schaltpläne (Seite 8-1) q Circuit diagrams (page 8-1) Querschnitte Anschluss-Typ Connection type Cross sections Leiter abisolieren Strip conductors 1x 2x 7 mm 0,5-2,5 mm2 AWG 20-14 + Aderendhülse 1) Wire end ferrule 1) 0,5-1,5 mm2 AWG 20-15 + Aderendhülse 1) Wire end ferrule 1) 7 mm 0,5-2,5 mm2 AWG 20-14 + Aderendhülse 2) Wire end ferrule 2) 0,5-2,5 mm2 AWG 20-14 + Aderendhülse 2) Wire end ferrule 2) Schraubklemmen (SIGUT-Technik) Screw-type terminal (SIGUT system) Schraublose Anschlusstechnik Screwless terminal system Vormontierte Leitungen Pre-assembled wires Ringösen-Schraubtechnik Ring lug system AWG 14 Länge/length: 1 m / 40“ Empfehlung: AMP, Reihe PIDG AWG 16-14 Bestell-Nr. 50881 Recommendation: AMP, PIDG series AWG 16-14 order no. 50881 1) 1 x bis 2,5 mm2 Rohrform ohne Kunststoffhülse nach DIN 46 228 T1 1 x bis 1,5 mm2 Rohrform mit Kunststoffhülse nach DIN 46 228 T2 2 x bis 1,5 mm2 Rohrform mit Kunststoffhülse, Zwillings-Aderendhülse 1) 1 no. up to 2.5 tube-type without insulating sleeve as per DIN 46 228 T1 1 no. up to 1.5 tube-type with insulating sleeve as per DIN 46 228 T2 2 nos. up to 1.5 tube-type with insulating sleeve, twin wire end ferrule 2) 2 x bis 2,5 mm2 Rohrform ohne Kunststoffhülse nach DIN 46 228 T1 2 x bis 1,5 mm2 Rohrform mit Kunststoffhülse nach DIN 46 228 T2 2) 2 nos. up to 2.5 tube-type without insulating sleeve as per DIN 46 228 T1 2 nos. up to 1.5 tube-type with insulating sleeve as per DIN DIN 46 228 T2 5 – 14 5.4.1 Messerleiste 5.4.1 Anordnung Receptacle Arrangement (1) (2) X8 X7 X6 X5 COM15 (1) (2) Lichtbogenkammer Messerleiste (1) (2) Nachrüsten Arc chute Receptacle Retrofitting 1 2 (1) (2) 3 0173-06 4 (1) (2) (1) (2) Blindblock Messerleiste Blanking cover Receptacle Only für circuit-breaker, 1000 V version Nur für Leistungsschalter, 1000 V Ausführung (3) 0173-09 5 6 (3) Messerleistenadapter für hohe Lichtbogenkammer (3) PH 1 0,7 Nm Receptacle adapter for high arc chute 5 – 15 Leitungen anschließen Connecting secondary wiring Schraublose Anschlusstechnik Screwless terminal system 3,0 x 0,6 5.4.2 Schleifkontaktmodul 5.4.2 Nachrüsten Sliding contact module Retrofitting (1) (2) 2 1 (1) (2) Einschubrahmen mit Schleifkontaktmodulen Schleifkontaktmodul Für die SIGUT-Anschlusstechnik steht auch ein einteiliges Schleifkontaktmodul zur Verfügung. (1) (2) Cradle with sliding contact modules Sliding contact module For the SIGUT terminal system, a one-piece sliding contact module is also available. 0769 3,0 x 0,6 Einteilige Schleifkontaktmodule benötigen keinen Hilfsstromstecker. Die Leitungen werden direkt am Schleifkontaktmodul angeschlossen. 5 – 16 The one-piece sliding contact modules do not require auxiliary plugs. The wiring is directly to the sliding contact module. 5.4.3 Hilfsstromstecker 5.4.3 Auxiliary connectors Ausführungen Versions (2) (1) PH 1 1P (3) 3,0 x 0,6 (4) (1) (2) (3) (4) SIGUT-Technik Ringösen-Schraubtechnik Isolierte Ringöse Schrauben ANSI B 18.6.3 #4 (1) (2) (3) (4) SIGUT system Ring lug system Insulated ring lug Screws ANSI B 18.6.3 #4 (6) (5) Länge 1 m Length 40″ 3,0 x 0,6 PH 0 (5) (6) Schraublose Anschlusstechnik, 2 Klemmen pro Kontakt Nur Festeinbauschalter:Vormontierte Leitungen (5) (6) Screwless terminal system, 2 terminals in parallel per contact Fixed-mounted breaker only:pre-assembled wires Fixed-mounted breaker only: mounting of guide tongues Nur Festeinbauschalter: Führungszungen anbringen (1) (2) (1) (2) Rückseite Hilfsstromstecker Führungszungen (1) (2) Back side of auxiliary connector Guide tongues 5 – 17 Nur Festeinbauschalter Kodierung Hilfsstromstecker - Messerleiste Fixed-mounted breaker only Coding auxiliary connectors 3 2 X5 1 X6. (1) X5 X6. X5 X6. (2) click (3) 0100-01_nu (4) (1) (2) (3) (4) Nut Führung Modulbezeichnung (hier: X5; muss nach vorn zeigen) Modul X5 (1) (2) (3) (4) Male pin: groove Female socket: guide Module designation (here X5, must be visible from the front) Module X5 Mounting secondary disconnects Hilfsstromstecker aufsetzen L (1) 1 2 (2) (1) (2) 5 – 18 Hilfsstromstecker Festeinbauschalter: Messerleiste Einschubschalter: Schleifkontaktmodul (1) (2) Auxiliary connector Fixed-mounted breaker: Breaker secondary disconnect block Draw-out circuit-breaker: Guide frame secondary disconnect block 5.4.4 Leitungsverlegung am Einschubrahmen 5.4.4 WARNUNG Wiring in guide frame WARNING Unzulässige Bereich für Leitungen: Impermissable area for wires: Leitungen können beschädigt werden. Damage to wires in this area. (1) (2) (3) (4) (1) (2) (3) (4) Ausblasraum*) Tragegriff Ausblasöffnungen Verriegelungen (1) (2) (3) (4) Arcing space*) Carrying handle Arcing openings Interlocks *) Sind Lichtbogenkammerabdeckungen vorhanden, dürfen die Hilfsleiter nicht auf diesen Abdeckungen verlegt werden. *) If there are arc chute covers installed, auxiliary wires must not lay directly on top of these covers. 5.4.5 5.4.5 Bestückung mit Hilfsleiteranschlüssen Arrangement of secondary disconnects Klemmen X6 immer vorhanden. In Abhängigkeit von der Ausrüstung des Leistungsschalters mit optionalem Zubehör sind weitere Klemmen erforderlich. The terminals X6 are standard. Depending on optional accessories, additional terminals may be necessary. Ggf. müssen die entsprechenden Messerleisten, Hilfsstromstecker und für Einschubrahmen auch Schleifkontaktmodule nachgerüstet werden. In case of necessity, additional receptacles, hand plugs and (for guide frames) sliding contact modules have to be fitted. 5 – 19 Klemme Optionales Zubehör - Motorantrieb mit Speicher mit mechanischem und elektrischem Abruf - 2. Hilfsauslöser (Spannungsauslöser F2, Unterspannungsauslöser F3, verzögerbarer Unterspannungsauslöser F4) - Hilfsstromschalter S3 + S4 oder S7 + S8 oder S3 + S8 - Motorabstellschalter S12 (nur möglich, wenn Motrantrieb gewählt) - Charging motor with mechanical and electrical closing command - 2nd auxiliary release (shunt trip F2, undervoltage release F3, delayed undervoltage release F4 X7 - - X8 - Überstromauslöser ETU 45B.ETU55B, ETU76B (interner ) - Anschlüsse für externer Stromwandler für Überlastungsschutz im N-Leiter und Erdschlussschutz - Stromwandler im N-Leiter eingebaut - Stromwandler im Sternpunkt des Transformators eingebaut - Fernrücksetzmagnet F7 - externer Spannungswandler X5 5.4.6 Ausgelöst-Meldeschalter S24 Speicherzustandsmeldung S21 Elektrisch EIN-Taster S10 Meldeschalter am 1. Hilfsauslöser S22 Meldeschalter am 2. Hilfsauslöser S23 Bestell-Nummern 5.4.6 - Auxiliary switches S3 + S4 or S7 + S8 or S3 + S8 - Motor disconnect switch S12 (only if charging motor exist) Trip signalling switch S24 Signalling switches storage spring charged S21 Electrical ON push-button S10 Signalling switches 1st auxiliary release S22 Signalling switches 2nd auxiliary release S23 - Overcurrent release ETU 45B. ETU55B, ETU76B (internal - Teminals for external current transformer for overload protection of neutral pole and ground-fault protection - Current transformer installed in the neutral conductor - Current transformer installed in the star point of the transformer - Remote reset coil for trip indication - External voltage transformer Order numbers Bestellnummern / Order numbers 5 – 20 Messerleiste Receptacle 3WL9111-0AB01-0AA0 Zusatzmesserleiste (für 1000 V-Ausführung) Receptacle extension (for 1000 V version) 3WL9111-0AB02-0AA0 Hilfsstromstecker SIGUT Hand plug SIGUT 3WL9111-0AB03-0AA0 Hilfsstromstecker schraublose Anschlusstechnik Hand plug screwless terminal system 3WL9111-0AB04-0AA0 Hilfsstromstecker Ringösen Hand plug ring lug system 3WL9111-0AB05-0AA0 Hilfsstromstecker mit vormontierten Leitungen Hand plug pre-assembled wires 3WL9111-0AB06-0AA0 Kodiersatz Coding set 3WL9111-0AB07-0AA0 Schleifkontaktmodul Secondary disconnects 3WL9111-0AB08-0AA0 Blindblock Blanking cover 3WL9111-0AB12-0AA0 Messerleiste SIGUT einteilig Receptacle SIGUT one-piece 3WL9111-0AB18-0AA0 5.5 Schutzleiter anschließen 5.5 Festeinbauschalter Connecting the grounding conductor Fixed-mounted breaker ∅14 mm Einschubrahmen Guide frame ∅14 mm 5 – 21 5.6 Erdschutz zwischen Einschubrahmen und Einschubschalter (1) (2) (3) (4) Einschubrahmen Kontaktmodul für Einschubrahmen Rückseite des Einschubschalter Kontaktmodul für Einschubschalter 5.6 (1) (2) (3) (4) Nachrüsten Ground protection between guide frame and draw-out circuit-breaker Guide frame Contact module for the guide frame Back of the draw-out circuit-breaker Contact module for the draw-out circuit-breaker Retrofitting Anbau des Kontaktmoduls am Einschubrahmen Fitting contact module on the guide frame Vor Einbau des Einschubrahmens in die Schaltanlage anbauen. Mount it before fitting the guide frame in the panel. 1 Gr. / Size 5 2 8±1 Nm 4 (1) (2) (3) (4) 3 2x Zylinderkopfschraube M6x12 DIN 6912 Rückseite des Einschubrahmens Kontaktmodul Erdungsanschluss Kontakt fetten Lamellenkontakt vor dem Zusammenbau fetten. (Fett: Isoflex Topas NB 52, Fa. Klüber) 5 – 22 (1) (2) (3) (4) 2x cheese-head screw M6x12 DIN 6912 Back of the guide frame Contact module Grounding connection Lubrication of contact Grease finger contact before assembly. (Grease: Isoflex Topas NB 52, Fa. Klüber) Kontaktmodul am Einschubschalter anbauen Fitting contact module to a draw-out circuit-breaker Gr. / Size 5 8±1 Nm (1) (2) (3) 2x Zylinderkopfschraube M6 Innenseite Einschubschalterfuß Erdungsmesser (1) (2) (3) 2x cheese-head screw M6 Inside of draw-out circuit-breaker foot Grounding blade Bestell-Nr. Order no. Kontaktmodul für Einschubrahmen mit 30% der Ausschaltleistung Baugröße I und II Contact module for guide frame for 30% of make-break capacity frame size I and II 3WL9111-0BA01-0AA0 Kontaktmodul für Einschubrahmen mit 30% der Ausschaltleistung Baugröße III Contact module for guide frame for 30% of make-break capacity frame size III 3WL9111-0BA02-0AA0 Kontaktmodul für Einschubschalter BGI / 3polig Contact module for draw-out circuit-breaker frame size I / 3-pole 3WL9111-0BA05-0AA0 Kontaktmodul für Einschubschalter BGII / 3polig Contact module for draw-out circuit-breaker frame size II / 3-pole 3WL9111-0BA06-0AA0 Kontaktmodul für Einschubschalter BGIII / 3polig Contact module for draw-out circuit-breaker frame size III / 3-pole 3WL9111-0BA07-0AA0 Kontaktmodul für Einschubschalter BGI / 4polig Contact module for draw-out circuit-breaker frame size I / 4-pole 3WL9111-0BA08-0AA0 Kontaktmodul für Einschubschalter BGII / 4polig Contact module for draw-out circuit-breaker frame size II / 4-pole 3WL9111-0BA04-0AA0 Kontaktmodul für Einschubschalter BGIII / 4polig Contact module for draw-out circuit-breaker frame size III / 4-pole 3WL9111-0BA10-0AA0 5 – 23 5.7 5.7.1 Umrüsten Festeinbauschalter in Einschubschalter 5.7 Nicht zulässig bei BG III Schaltleistungsklasse C! Not permitted in FS III current interrupting class C! - Ausschalten und Federspeicher entspannen q (Seite 24-3) - Festeinbauschalter ausbauen q (Seite 5-1) - Anschlüsse bis auf den Horizontalanschluss abrüsten q (Seite 5-4) - Bedienpult abnehmen q (Seite 24-9) - Überstromauslöser ausbauen q (Seite 9-80) - Nennstromkodierung an den neuen Schalterfüßen und am Einschubrahmen anbringen q (Seite 18-7) - Switch off and discharge the storage spring q (page 24-3) - Remove fixed-mounted circuit-breaker q (page 5-1) - Remove terminals other than horizontal terminals q (page 5-4) - Remove front panel q (page 24-9) - Remove overcurrent release q (page 9-80) - Install rated current coding at the new circuit-breaker feet and at the guide frame q (page 18-7) Umrüsten 5.7.1 Schalterfüße wechseln Gr. / Size 4 3 Gr. / Size 4 10 Nm 1 2 3 4 Conversion Replacing circuit-breaker feet 2 1 Converting fixed-mounted circuit-breakers into draw-out circuit-breakers 4 3 Senkschrauben M6x20 lösen und entfernen Baugrösse I ohne die mittlere Schraube. Schalterfuß abnehmen Schalterfuß für Einschubschalter ansetzen Schalterfuß mit 3 Senkschrauben M6x20 anschrauben 1 2 3 4 Loosen and remove screws Frame size I without the screw in the middle Remove circuit-breaker foot of fixed-mounted breaker Replace by foot for draw-out circuit-breaker Fit it finaly using 3x M6x20 screws Installing racking mechanism Einfahrantrieb einbauen 1 1 5 – 24 Einfahrantrieb einsetzen 1 Install racking mechanism Einfahrwelle einbauen 2 1 2 3 Installing racking shaft 3 1 Einfahrwelle einsetzen Ausgleichsscheibe Ø 30,1 x Ø 45 x 0,5 einsetzen, wenn Einfahrwellenspiel > 0,5 mm (BGI H-Klasse) Spielausgleich erfolgt beidseitig (links/rechts) ! Kurbel aufsetzen 1 2 3 Insert racking shaft Insert spacer washer Ø 30,1 x Ø 45 x 0,5, if clearance of racking shaft > 0,5 mm (FSI H-class) Adjustment of clearance shall be on both sides (left/right)! Fit crank 5 4 4 5 Wenn vorhanden, Stützscheiben Ø 17,2 x Ø 26 x ... einsetzen Kurbel mit Sicherungsring DIN 471-17x1 sichern 4 If existing, insert supporting washer Ø 17,2 x Ø 26 x ... 5 Secure crank with retaining ring 5 – 25 Bedienpult ausbrechen Providing cut-outs in the front panel 1 1 2 Felder im Bedienpult ausbrechen; geeignete Unterlage verwenden Kanten entgraten 2 1 Knock out the fields in the front panel using suitable support 2 Deburr the edges Klebeschild am Bedienpult anbringen Anschließend - 5 – 26 Steuerschieber einbauen q (Seite 15-3) Überstromauslöser einbauen q (Seite 9-80) Bedienpult anbauen q (Seite 24-22) Einschubrahmen mit den für die jeweilige Anschlussart erforderlichen Anschlussschienen ausrüsten (müssen separat bestellt werden) q (Seite 5-4) Fix adhesive label at the front panel Then: - Install control gate q (page 15-3) Install overcurrent release q (page 9-80) Install front panel q (page 24-22) Assemble the required terminals on the guide frame (must be ordered separately) q (page 5-4) - Einschubrahmen einbauen q (Seite 5-1) - Schalter in Einschubrahmen einsetzen und in Betriebsstellung verfahren q (Seite 6-1) 5.7.2 Schilder aktualisieren - Install guide frame q (page 5-1) - Insert circuit-breaker in guide frame and rack into connected position q (page 6-1) 5.7.2 Updating the labels Hinweis Note Nach dem Einbau zusätzlicher Komponenten sind folgende Angaben mit einem weißen Permanentstift bzw. mit Aufklebern aus dem beiliegenden Etikettenbogen zu aktualisieren! Davor ist es ggf. notwendig die zu korrigierenden Zeichen mit einem schwarzen Permanentstift zu füllen. After installing additional components, add the following data using a white and indelible ink pen or the appropiate label from the set of labels supplied! If necessary the signs which have to be corrected have to be filled a black permanent pen. Options label of the circuit-breaker Ausstattungsschild des Leistungsschalters Bestell-Nr. Order no. 12. Stelle ändern Modify 12th position Umbausatz für Festeinbau- in Einschubschalter Bg I-3polig, N-Klasse od. S-Klasse, ≤ 1600 A Conversion kit for fixed-mounted into draw-out circuit-breaker, frame size I, 3-pole, N-class or S-class, ≤ 1600 A 3WL9111-0BC11-0AA0 5 Umbausatz für Festeinbau- in Einschubschalter Bg I-3polig, 2000 A od. H-Klasse Conversion kit for fixed-mounted into draw-out circuit-breaker, frame size I, 3-pole, 2000 A or H-class 3WL9111-0BC23-0AA0 5 Umbausatz für Festeinbau- in Einschubschalter Bg I-3polig, 1000 V oder 690V(+20%) Conversion kit for fixed-mounted into draw-out circuit-breaker, frame size I, 3-pole, order code 1000 V or 690V(+20%) 3WL9111-0BC25-0AA0 5 Umbausatz für Festeinbau- in Einschubschalter Bg II-3polig Conversion kit for fixed-mounted into draw-out circuit-breaker, frame size II, 3-pole 3WL9111-0BC12-0AA0 5 Umbausatz für Festeinbau- in Einschubschalter Bg III-3polig Conversion kit for fixed-mounted into draw-out circuit-breaker, frame size III, 3-pole 3WL9111-0BC13-0AA0 5 Umbausatz für Festeinbau- in Einschubschalter Bg I-4polig, N-Klasse od. S-Klasse, ≤ 1600 A Conversion kit for fixed-mounted into draw-out circuit-breaker, rame size I, 4-pole, N-class or S-class, ≤ 1600 A 3WL9111-0BC14-0AA0 5 Umbausatz für Festeinbau- in Einschubschalter Bg I-4polig, 2000 A od. H-Klasse Conversion kit for fixed-mounted into draw-out circuit-breaker, frame size I, 4-pole, 2000 A or H-class 3WL9111-0BC24-0AA0 5 Umbausatz für Festeinbau- in Einschubschalter Bg I-4polig, 1000 V oder 690V(+20%) Conversion kit for fixed-mounted into draw-out circuit-breaker, frame size I, 4-pole, order code 1000 V or 690V(+20%) 3WL9111-0BC26-0AA0 5 Umbausatz für Festeinbau- in Einschubschalter Bg II-4polig Conversion kit for fixed-mounted into draw-out circuit-breaker, frame size II, 4-pole 3WL9111-0BC15-0AA0 5 Umbausatz für Festeinbau- in Einschubschalter Bg III-4polig Conversion kit for fixed-mounted into draw-out circuit-breaker, frame size III, 4-pole 3WL9111-0BC16-0AA0 5 Hinweis NOTICE Umbausätze können nur über die oben genannte Bestell-Nr. mit zusätzlicher Angabe der Identnummer des Schalters bestellt werden. Conversion kits may only be ordered using the above mentioned order number and only together with the identity numbers of the circuit-breakers the kits are intended for. 5 – 27 6 Inbetriebnahme 6 Commissioning 6.1 Vorbereitung des Einschubschalters 6.1 Preparation of draw-out circuit-breaker 6.1.1 Schalter in Einschubrahmen einsetzen 6.1.1 Inserting the circuit-breaker in the guide frame VORSICHT CAUTION Bügelschlösser am Shutter entfernen! Remove padlocks on the shutter! 1 2 grün green 1 2 Positionsanzeige prüfen Bei anderer Anzeige ist Einschieben des Schalters nicht möglich. Verfahrschienen herausziehen 1 2 Check breaker position indicator Ensure it shows DISCON. Otherwise the circuit-breaker cannot be inserted. Draw out guide rails 4 3 5 3 4 5 6–1 Schalter einsetzen und in Trennstellung schieben Schaltschranktür schließen 3 4 5 Place the circuit-breaker in the guide frame and push it into disconnected position Close cubicle door 6.1.2 Positionen des Schalters im Einschubrahmen Darstellung Diagram (1) Wartungsstellung Maintenance position Trennstellung Disconnected position Prüfstellung Test position 6.1.2 Positionsanzeige Positon indicator (4) Hilfstromkreis Auxiliary circuit Schaltschranktür Cubicle door Shutter Shutter getrennt getrennt offen geschlossen disconnected disconnected open closed getrennt getrennt geschlossen geschlossen disconnected disconnected closed closed getrennt verbunden geschlossen geschlossen disconnected connected closed closed verbunden verbunden geschlossen offen connected connected closed open grün green (3) grün green blau blue Betriebsstellung Connected position Hilfsstromkreis Hauptstromkreis Schaltschranktür Shutter Hauptstromkreis Power circuit (2) rot red (1) (2) (3) (4) Positions of the breaker in the guide frame (1) (2) (3) (4) Auxiliary circuit Primary circuit Cubicle door Shutter 6–2 6.1.3 Handkurbelsperre lösen / Handkurbel herausziehen 6.1.3 Unlocking the racking handle / Withdrawing racking handle 4 Halten! Hold! 1 2 1 2 3 4 5 6.1.4 3 5 1 2 3 4 5 Ausschalten Kurbel reindrücken Herausziehen des Handgriffs Hebel hochdrücken und halten Kubel herausziehen Schalter in Betriebsstellung verfahren 6.1.4 OPEN circuit-breaker Push crank Pull out the handle Lift and hold the control lever Pull out the crank Racking Circuit-breaker into the connected position Anschlag / Stop rot red Positionsanzeige Position indicatior blau blue grün green 6.1.5 Handkurbel einschieben 6.1.5 Inserting racking handle 2 1 3 4 VORSICHT CAUTION Handkurbel nicht über den Anschlag hinaus drehen! Anderenfalls wird der Einfahrantrieb beschädigt. Wenn der Anschlag erreicht ist, die Kurbel zurückdrehen, bis einschieben möglich. Do not turn the crank handle beyond the stop! Otherwise the racking mechanism will be damaged. When the stop is reached, rotate the racking handle counter-clockwise until it can be pushed inwards. 6–3 6.2 Federspeicher spannen 6.2 Spannen per Hand Charging the spring storage Charging manually WARNUNG WARNING Kann Personenschäden verursachen. May result in serious injury. Einen ausgebauten, freistehenden Leistungsschalter vor dem Spannen des Federspeichers unbedingt in geeigneter Weise abstützen (z. B. bei Wartungsarbeiten auf der Werkbank). Secure a not mounted circuit-breaker when charging it manually (e. g. during service on the work bench). F 9x 0727 (1) F n (1) Betätigungskraft Anzahl der Hübe Feder ist gespannt F n (1) 1 2 3 4 5 6 7 8 9 10 n Handle force Number of strokes Spring charged ACHTUNG NOTICE Zum Spannen des Federspeichers den Handhebel vollständig umfassen und jeden Hub gleichmäßig und vollständig bis zum Anschlag ausführen. Der 9. Hub ist genauso weit und gleichmäßig zu betätigen, wie die ersten acht Hübe, obwohl die Betätigungskraft deutlich zunimmt. Ist der Federspeicher vollständig gespannt, lässt sich der Handhebel ohne Widerstand bewegen. To charge the storage spring, grip the handle firmly and carry out each stroke evenly, moving the lever down as far as it will go. Despite a significant increase in the actuating force required, the lever must be moved as far in the ninth stroke as in the first eight. When the storage spring is fully charged, the lever can be moved without resistance. Spannen durch Motorantrieb Motorantrieb startet automatisch nach Anlegen der Steuerspannung. Am Ende des Spannvorgangs schaltet der Motor automatisch ab. Unmittelbar nach dem Entspannen des Federspeichers wird der Motor erneut eingeschaltet und damit die Feder wieder gespannt (nach einem Einschaltvorgang). q Nachrüsten des Motorantriebs (Seite 13-1) GEFAHR Charging with a motor operating mechanism The motor operating mechanism starts automatically when the control voltage is applied. The motor switches off automatically when the charging process is completed. The motor will re-engage immediately following spring discharge (closing operation). q Retrofitting the motor operating mechanism (page 13-1) DANGER Gefährliche elektrische Spannung! Hazardous voltage! Kann Tod, schwere Personenschäden sowie Schäden an Geräten und Ausrüstung bewirken. Will cause death, serious personal injury, or equipment / property damage. Vor dem Arbeiten an diesem Gerät, Anlage unbedingt spannungs freischalten. Disconnect power before working on this equipment. 6–4 6.3 Checkliste für Inbetriebnahme 6.3 Checklist for commissioning Durchzuführende Arbeiten Action required Schalter ausschalten Switch OFF circuit-breaker Einschubschalter in Betriebsstellung verfahren Rack circuit-breaker into connected position Bemessungsstrommodul stecken q Bemessungsstrommodul (Seite 9-74) Insert rating plug q Rating plug (page 9-74) Rücksetzknopf drücken Mechanische Wiedereinschaltsperre zurückgesetzt Press red pin to reset Mechanical reclosing lockout Betriebswerte am Überstromauslöser einstellen q Überstromauslöser (Seite 9-1) Set the overcurrent release to appropriate values q Overcurrent releases (page 9-1) Hilfs- und Steuerspannungen anschließen Apply auxiliary and control voltages Schaltschranktür schließen Close the cubicle door Handkurbel einschieben Push in the racking handle Federspeicher spannen Charge storage spring Bedingungen (je nach Ausführung) Please ensure following q Unterspannungsauslöser erregt Under-voltage release energized Spannungsauslöser nicht erregt Shunt trip not energized Elektrische Einschaltsperre q (Seite 8-4) nicht erregt Electrical closing lockout q (page 8-4) not energized Elektrische Verriegelung des Einschaltmagneten in der Anlagensteuerung aufgehoben Electrical interlocking of closing coil in the switch board control wiring disabled Gegenseitige mechanische Schalterverriegelungen nicht wirksam Mutual mechanical interlock not effective Sperrvorrichtungen nicht aktiviert Locking devices not activated Zustandsanzeigen Zustandsanzeigen Indications 6–5 Indications 6.4 Einschalten 6.4 Closing Zustandsanzeigen Indications EIN-Taster / ON button Elektrisch EIN / Electrical ON oder or Zustandsanzeigen Indications Fernbetätigung / Remote activation oder or Ohne Motorantrieb Without motor operating mechanism Mit Motorantrieb nach max. 12 s With motor operating mechanism after max. 12 s (Unmittelbar nach dem Einschalten wird der Federspeicher durch den Motorantrieb wieder gespannt) (The storage spring will be recharged by the motor operating mechanism immediately after the breaker has closed) 6.5 Ausschalten AUS-Taster / OFF button 6.5 Switching off Fernbetätigung / Remote activation oder or Die minimale Zeitdifferenz zwischen EIN- und AUSBefehl für den Niederspannungs-Leistungsschalters 3WL soll eine Periode von 100 ms nicht unterschreiten. Ohne Motorantrieb Without motor operating mechanism The minimum time interval between ON- and OFF-signal of the LOW-Voltage Power Circuit-Breakers 3WL shall not be shorter than 100 ms. Mit Motorantrieb With motor operating mechanism 6–6 6.6 Auslösen durch Überstromauslöser 6.6 Tripping by overcurrent release Überstromauslösung / Overcurrent trip Ausgelöst-Anzeige / Tripped indicator Zustandsanzeigen Indications Ohne Motorantrieb Without motor operating mechanism Mit Motorantrieb With motor operating mechanism 6–7 6.7 Wiederinbetriebnahme nach Auslösung durch Überstromauslöser 6.7 Reclosing a circuit-breaker tripped by the trip unit Hinweis NOTICE Der Auslösegrund kann mit der Taste „QUERY“ am Überstromauslöser abgefragt werden. Er wird für mindestens zwei Tage gespeichert, sofern der Überstromauslöser vor der Auslösung mindestens 10 min lang aktiviert war. The reason for tripping can be displayed using the "QUERY" button on the trip unit. This is stored for at least two days, provided that the trip unit was activated for at least 10 minutes before tripping. 1 Auslösegrund ermitteln/ Find reason for tripping 2 Anzeige Indicator Überlast im Hauptleiter Überstrom im N-Leiter Overload in main conductor Overload in neutral conductor - Verbraucher prüfen 3 - Einstellungen am Überstromauslöser überprüfen Ursache ermitteln und - Check downstream load beseitigen/ - Check overcurrent release settings Find and remedy causes 4 Schalter prüfen/ Inspect circuitbreaker Kurzschluss: kurzzeitverzögerte Auslösung Short circuit: short-time-delay trip Kurzschluss: unverzögerte Auslösung Short circuit: instantaneous trip Erdschluss-Auslösung Ground-fault trip - Schaltanlage überprüfen - Verbraucher prüfen - Inspect panel - Check downstream load Kontaktsystem auf eventuelle Schäden untersuchen q Wartung (Seite 24-1) Inspect contact system for possible damage q Maintenance (page 24-1) 5 Auslösegrund löschen/ Clear trip cause 6–8 6 Wiedereinschaltsperre zurücksetzen/ Reset reclosing lockout 7 AusgelöstMeldung zurücksetzen / Reset tripped indicator 8 Zustandsanzeigen / Indications 9 6–9 Mit mechanischer Wiedereinschaltsperre With mechanical reclosing lockout Automatische Rücksetzung der Wiedereinschaltsperre q (Seite 10-2) Automatic reset reclosing lockout q (page 10-2) Manuelle Rücksetzung der Wiedereinschaltsperre und der Ausgelöst-Meldung q (Seite 10-1) Manual reset reclosing lockout and reset tripped indicator q (page 10-1) Ohne Motorantrieb Without motor operating mechanism Mit Motorantrieb With motor operating mechanism q Federspeicher spannen (Seite 6-4) q Charge the storage spring (page 6-4) q Einschalten (Seite 6-6) q Close (page 6-6) 6.8 Außerbetriebnahme Festeinbauschalter / Fixed-mounted circuit-breaker 6.8 Putting out of service Einschubschalter / Draw-out circuit-breaker 1 AUS/ OFF Hilfsstromkreis Auxiliary circuit 2 Hilfstromkreise trennen Positionsanzeige Position indicator Disconnect auxiliary circuits grün green 3 EIN/ ON 4 AUS/ OFF 5 Zustandsanzeigen Indications 6 – 10 6.9 Störungsbeseitigung Festeinbauschalter X Einschubschalter X Störung Ursache Abhilfe Schalter lässt sich nicht einschalten 1. Federspeicher nicht gespannt Federspeicher spannen 2. Unterspannungsauslöser nicht erregt Unterspannungsauslöser an Spannung legen Schalter ist nicht einschaltbereit 1) Einschaltbereitschaftsanzeige: X X X X 3. Mechanische Wiedereinschaltsperre wirksam Ursache für Überstromauslösung beseitigen und Rücksetzknopf drücken X X 4. Elektrische Einschaltsperre wirksam Steuerspannung der Einschaltsperre aufheben 1) X X 5. „AUS“ mit Zylinderschloss abgeschlossen (Zubehör) Zylinderschloss aufschließen 1) X X 6. „AUS“ mit Vorhängeschlössern abgeschlossen (Zubehör) Vorhängeschlösser entfernen 1) X X 7. Taster „Mechanisch AUS“ abgeschlossen (Zubehör) Taster „Mechanisch AUS“ freige- X X 8. „Not-AUS-Taster“ in AUS-Position verriegelt (Zubehör) „Not-AUS-Taster“ entriegeln 1) Entgegen Uhrzeigersinn drehen X X 9. Sperre gegen Einschalten bei geöffneter Schaltschranktür wirksam (Zubehör) Schaltschranktür schließen X X 10. Gegenseitige mechanische Verriegelung wirksam (Zubehör) Verriegelten Schalter ausschalten X X 11. Elektronischer Überstromauslöser fehlt oder falsch eingebaut Elektronischen Überstromauslöser richtig einbauen X X 12. Spannungsauslöser ist erregt Spannungsauslöser abschalten X X 13. Einschaltmagnet ist erregt Einschaltmagnet vor Wiedereinschalten abschalten X 14. Handkurbel ist herausgezogen Schalter in Trenn-, Prüf- oder Betriebsstellung kurbeln, Handkurbel entriegeln und bündig einstecken Sicherheitseinrichtung! Aufhebung der Sicherheitsmaßnahme nur nach Überprüfen der betriebsmäßigen Zulässigkeit! 6 – 11 ben 1) bzw. in Trennstellung kurbeln1) Festeinbauschalter X Einschubschalter X Störung Ursache Abhilfe Schalter lässt sich nicht einschalten 1. Betriebsspannung des Einschaltmagneten falsch bzw. nicht vorhanden Kontrollieren bzw. richtige Spannung anlegen 2. Schalter steht in Trennstellung im Einschubrahmen Schalter in Prüfstellung bzw. Betriebsstellung kurbeln 3. Hilfsstromstecker abgezogen Hilfsstromstecker aufstecken Schalter ist einschaltbereit X Einschaltbereitschaftsanzeige: X X Schalter kann aus der Wartungsstellung nicht in die Trennstellung geschoben werden 1. Der Einfahrmechanismus steht nicht in Trennstellung Einfahrmechanismus in Trennstellung kurbeln (grüne Positionsanzeige) X Schalter kann nicht in die Einfahrschienen eingesetzt werden 1. Werkseitige Kodierung von Schalter und Einschubrahmen stimmen nicht überein Schaltertyp entsprechend Angaben am Einschubrahmen verwenden X Beim Kurbeln von der Trenn- in die Prüfstellung bewegt sich der Schalter während der ersten ca. 6 Umdrehungen nicht 1. Kein Fehler, funktionsbedingt Weiterkurbeln X Zum Verfahren lässt sich die Handkurbel nicht herausziehen 1. Schalter ist eingeschaltet Taster „Mechanisch AUS“ drücken und Handkurbelsperre anheben 2) 2. Schaltschranktür nicht vollständig geschlossen (Verfahrsperre als Zubehör) Schaltschranktür schließen 1. Handkurbel ist verriegelt Schalter in Trenn-, Prüf- oder Betriebsstellung kurbeln, Handkurbel entriegeln und bündig einstecken X X X Handkurbel lässt sich nicht zurückstecken Schaltschranktür lässt sich nicht öff- 1. Eingeschalteter Schalter verrienen (Türverriegelung als Zubehör) gelt die Schaltschranktür X 2) 2. Schalter steht in Betriebsstellung Schalter ausschalten 2) Schalter in Prüf- oder Trennstellung kurbeln 2) Nur zulässig, wenn der Hauptstromkreis unterbrochen werden darf! 6 – 12 6.9 Troubleshooting Fixedmounted circuit- breaker 1) Draw-out circuitbreaker Disturbance Cause Remedy Circuit-breaker cannot be closed and circuit-breaker not ready to close. 1. Spring not charged Charge spring 2. Undervoltage release not energized Energize undervoltage release X X X X X X 3. Mechanical reclosing lock-out effective Rectify cause of overcurrent tripping and press reset button X X 4. Electrical closing interlock effective Switch off control voltage for interlocking 1) X X 5. "OFF" locked off by cylinder lock (accessories) Unlock1) X X 6. "OFF" locked off by padlocks (accessories) Remove padlocks 1) X X 7. "Mechanical OFF" button locked off (accessories) Unlock the "Mechanical OFF" button 1) X X 8. "EMERGENCY OFF" button engaged in operating position (accessories) Release "EMERGENCY OFF" button 1) by rotating it X X 9. Lockout against closing with cubicle door open effective (accessories) Close cubicle door X X 10. Mutual mechanical circuitbreaker interlocks effective (accessories) Open second circuit-breaker or rack into disconnected position 1) X X 11. Electronic overcurrent release (trip unit) missing or incorrectly installed Fit electronic overcurrent release properly X X 12. Shunt trip energized De-energize shunt trip X X 13. Closing coil energized Closing coil has to be de-energized shortly for reclosing X 14. Racking handle withdrawn Rack circuit-breaker into disconnected, test or connected position, unlatch crank and push it fully in Ready-to-close indicator shows: Safety feature! This remedy action amounts to a reversal (disabling) of a safety precaution installed earlier. Please do ensure that such disabling is now permissible / authorized! 6 – 13 Fixedmounted circuit- breaker X Draw-out circuitbreaker Disturbance Cause Remedy X Circuit-breaker cannot be closed and circuit-breaker ready to close. 1. Closing coil not energized or incorrectly energized Check or apply correct voltage X Ready-to-close indicator: 2. Circuit-breaker in disconnected position in guide frame Rack circuit-breaker into test or connected position 3. Auxiliary connectors have been removed Plug in the auxiliary connectors X X Circuit-breaker cannot be moved from the maintenance position into the disconnected position 1. Racking mechanism of breaker not in disconnected position (note breaker position indicator) Rack the mechanism into disconnected position (green position indication) X Circuit-breaker cannot be fitted in the guide rails 1. Factory mounted coding of breaker and guide frame doesn’t match Use breaker type according to guide frame lable X When racking from the disconnected into the test position, the circuit-breaker does not move during the first 6 rotations (approximately) 1. Not a fault Continue racking X Racking handle cannot be drawn out 1. Circuit-breaker is closed Press "Mechanical OFF" button and 2. Cubicle door not completely closed (Locking device as accessory) Close cubicle door Racking handle cannot be pushed in 1. Racking handle is interlocked Rack circuit-breaker into disconnected, test or connected position, unlatch crank and push it fully in Cubicle door cannot be opened (door interlock as accessory) 1. Closed circuit-breaker is preventing opening of cubicle door Open the circuit-breaker 2) 2. Circuit-breaker in connected position Rack circuit-breaker into test or disconnected position 2) X X X X 2) pull racking handle block out 2) Only permissible if the power circuit may be interrupted! 6 – 14 7 Baugrößen / Maßbilder 7 Frame sizes / dimension drawings 7.1 Baugröße I, Festeinbau, 3- und 4-polig 7.1 Frame size I, fixed-mounted version, 3-pole and 4-pole Standardausführung Horizontalanschluss Standard version, horizontal connection 19) 1) 2) 18) 14) 8) 60,5 33,5 5) 4) 35 90 76 45 NSE0_00614h 6) 150 210 230 106 127 NSE00620 90 60 55 327,5 461,5 a 275 5,5 15 10 270 300 390 90 3) 150 123,5 437,5 275 440,5 621 541,5 516 451,5 a NSE0_00611h 9) Ø13,5 4x M8 11) 7) 3) 7) 3) 110 (150) 4x Ø9 139 320 410 58 60 Frontanschluss (einfach) 90 90 90 Front connection (single hole) 55 55 55 55 h Æ 13,5 35 NSE00617j 20 7–1 60 90 90 90 35 7) 26 42 NSE00613b 3) 11) Frontanschluss (Doppelloch) Front connection (double hole) Ø 13,5 55 55 55 NSE00616b 3) ) 40 14 80 42 NSE00615h 80 40 55 7) Vertikalanschluss 60 90 90 90 Vertical connection b NSE00619 NSE00618h 3) 7) 60 (1) (2) (3) (4) (5) (6) (7) (8) (9) (11) (14) (18) (19) Montageraum zum Entnehmen der Lichtbogenkammern Lichtbogenausblasraum ≤ 690 V-Leistungsschalter gegen geerdete oder nicht leitfähige Flächen Nuten (4 mm breit, 5 mm tief) für Abstützung von Phasentrennwänden in der Anlage Hilfsstromstecker mit SIGUT-Schraubklemmtechnik Hilfsstromstecker mit schraubloser Anschlusstechnik Maß zur Innenfläche der geschlossenen Schaltanlagentür Befestigungspunkte zur Leistungsschaltermontage in der Anlage; 4x Setzmutter M8 Abschließvorrichtung „Sicheres AUS“ Schlüsselbetätigung Anschlussfläche Raum für elektrische Hilfsanschlüsse Leistungsschalteroberkante, nur 690V(+20%) und 1000 V-Leistungsschalter, nur 3WL1-Leistungsschalter Lichtbogenausblasraum gegen geerdete oder nicht leitfähige Flächen, nur 690V(+20%) und 1000 V-Leistungsschalter, nur 3WL1-Leistungsschalter (1) (2) (3) (4) (5) (6) (7) (8) (9) (11) (14) (18) (19) 90 90 90 Mounting space for removal of the arc chutes Arc quenching space ≤ 690 V circuit-breaker facing grounded or non-conductive surfaces Slots (4 mm wide, 5 mm deep) to support the phase barriers in the switchgear Auxiliary connector with SIGUT screwing system Auxiliary connector with screwless terminal system Dimension to inside of closed cubicle door Fixing points for mounting the circuit-breaker in the switchgear; 4x setting nut M8 "Secure OFF" locking device Key operation Connection surface Space for auxiliary electrical circuit connections Circuit-breaker upper edge, only 690V(+20%) und 1000 Vcircuit-breaker, only 3WL1-circuit-breaker Arc quenching space facing grounded or non-conductive surfaces, only 690V(+20%) and 1000 V-circuit-breaker, only 3WL1-cirucuit-breaker Schalterbemessungsnennstrom / A Rated current of circuit-breaker / A a b c d e f g bis / up to 1000 10 10 10 11 451 34 541 1250–2000 oder/or H-Klasse/H-class 15 20 15 6 461 39 551 7–2 7.2 Baugröße I, Einschubausführung, 3- und 4-polig Standardausführung Horizontalanschluss 7.2 Frame size I, withdrawable version, 3-pole and 4-pole Standard version, horizontal connection 382,5 367,5 327 320 270 4) 5) 19) NSE0_00621j 13 210 300 55 55 55 40 Ø14 27 42 76 a 275 150 31 30 55 55 10) 220 45 58 88,5 121,5 140,5 6) 350 260 Ø 13,5 ) 68 25 10) Frontanschluss (einfach) 69 139 270 320 410 NSE0_00630h NSE00627a 287 3) 55 15 90 10) 90 90 h NSE00622h Front connection (single hole) 10) Front connection (double hole) h NSE00625h Frontanschluss (Doppelloch) 10) 7–3 518,5 327,5 a 620 519 460 3) 38 10) 7) 8) 9) 12) 123,5 465,5 275 468,5 2) 18) Vertical connection h Vertikalanschluss NSE00628h 10) Flanschanschluss Flange connection NSE00631h h 14 12 1 (2) (3) (4) (5) (6) (7) (8) (9) (10) (11) (18) (19) 10) Bei Einschubrahmen ≤ 690 V, ohne Lichtbogenkammerabdeckung, Lichtbogenausblasraum gegen geerdete oder nicht leitfähige Flächen Nuten (4 mm breit, 5 mm tief) für Abstützung von Phasentrennwänden in der Anlage Hilfsstromstecker mit SIGUT-Schraubklemmtechnik Hilfsstromstecker mit schraubloser Anschlusstechnik Maß zur Innenfläche der geschlossenen Schaltanlagentür Schalter in Betriebsstellung Schalter in Prüfstellung Schalter in Trennstellung Befestigungslöcher 10 mm Anschlussfläche Leistungsschalteroberkante, nur 690V(+20%) und 1000 V-Leistungsschalter, nur 3WL1-Leistungsschalter Lichtbogenausblasraum gegen geerdete oder nicht leitfähige Flächen, nur 690V(+20%) und 1000 V-Leistungsschalter, nur 3WL1-Leistungsschalter (2) (3) (4) (5) (6) (7) (8) (9) (10) (11) (18) (19) For guide frame ≤ 690 V, without arc chute cover, arc quenching space facing grounded or non-conductive surfaces Slots (4 mm wide, 5 mm deep) to support the phase barriers in the switchgear Auxiliary connector with SIGUT screwing system Auxiliary connector with screwless terminal system Dimension to inside of closed cubicle door Circuit-breaker in connected position Circuit-breaker in test position Circuit-breaker in disconnected position Fixing holes, 10 mm Connection surface Circuit-breaker upper edge, only 690V(+20%) and 1000 V circuit-breaker, only 3WL1-circuit-breaker Arc quenching space facing grounded or non-conductive surfaces, only 690V(+20%) and 1000 V circuit-breaker, only 3WL1-circuit-breaker Schalterbemessungsnennstrom / A Rated current of circuit-breaker / A a b c bis / up to 1000 10 10 10 1250–2000 oder/or H-Klasse/H-class 15 15 15 7–4 7.3 Baugröße II, Festeinbau, 3- und 4-polig 7.3 Standardausführung Horizontalanschluss Frame size II, fixed-mounted version, 3-pole and 4-pole Standard version, horizontal connection 13) 1) 2) 12) 4) 14) 5) 85 270 440 275 5,5 76 NSE0_00636h 90 30 30 130 90 30 6) 106 127 NSE00642 35 130 45 150 210 230 10 570 130 327,5 461,5 3) 150 a 123,5 437,5 275 440,5 621 541,5 516 451,5 a NSE0_00633h 3) 11) 7) Ø13,5 3) 7)110 (150) 4x Ø9 128 Frontanschluss (einfach) 4x M8 90 130 130 130 Front connection (single hole) 90 90 90 90 40 421 NSE00635c NSE00634h 40 35 139 460 590 NSE0_00639j 20 7) 7–5 26 35 3) 90 130 130 130 13,5 11) Front connection (double hole) 90 40 Frontanschluss (Doppelloch) 90 90 40 90 NSE00638c 3) 11) 40 80 14 421 NSE00637h 80 40 7) 130 13,5 b ø13,5 30 130 Vertical connection, up to 3200 A Vertikalanschluss bis 3200 A 30 90 130 NSE00641 134,5 98 290 3) 35 NSE00640h 7) 113,5 11) 90 128,5 130 130 130 Vertical connection 4000 A Vertikalanschluss 4000 A 1) 30 2) Ø 13 NSE0_01868j 541,5 516 345,5 79,5 100 30 85 Nm 4011) 142 162 (1) (2) (3) (4) (5) (6) (7) (11) (12) (13) (14) 10 20 7) Montageraum zum Entnehmen der Lichtbogenkammern Lichtbogenausblasraum, ≤ 690 V-Leistungsschalter gegen geerdete oder nicht leitfähige Flächen Nuten (4 mm breit, 5 mm tief) für Abstützung von Phasentrennwänden in der Anlage Hilfsstromstecker mit SIGUT-Schraubklemmtechnik Hilfsstromstecker mit schraubloser Anschlusstechnik Maß zur Innenfläche der geschlossenen Schaltanlagentür Befestigungspunkte zur Leistungsschaltermontage in der Anlage; 4x Setzmutter M8 Anschlussfläche Leistungsschalteroberkante, nur 1000 V- und 1150 V-Leistungsschalter, nur 3WL1-Leistungsschalter Lichtbogenkammerausblasraum gegen geerdete oder nicht leitfähige Flächen, nur 1000 V- und 1150 V-Leistungsschalter, nur 3WL1-Leistungsschalter Raum für elektrische Hilfsanschlüsse 200 (1) (2) (3) (4) (5) (6) (7) (11) (12) (13) (14) 130 200 Mounting space for removal of the arc chutes Arc quenching space ≤ 690 V circuit-breaker facing grounded or non-conductive surfaces Slots (4 mm wide, 5 mm deep) to support the phase barriers in the switchgear Auxiliary connector with SIGUT screwing system Auxiliary connector with screwless terminal system Dimension to inside of closed cubicle door Fixing points for mounting the circuit-breaker in the switchgear; 4x setting nut M8 Connection surface Circuit-breaker upper edge, only 1000 V and 1150 V circuitbreaker, only 3WL1-circuit-breaker Arc quenching space facing grounded or non-conductive surfaces, only 1000 V and 1150 V circuit-breaker, only 3WL1circuit-breaker Space for electrical auxiliary circuit-breaker connections 7–6 7.4 Schalterbemessungsnennstrom / A Rated current of circuit-breaker / A a b c d e f g bis / up to 2000 10 15 10 11 451 34 541 2500 15 15 20 6 461 39 551 3200 30 30 20 6 461 39 551 Baugröße II, Einschubausführung, 3- und 4-polig Standardausführung Horizontalanschluss 4) 7.4 Frame size II, withdrawable version, 3-pole and 4-pole Standard version, horizontal connection 382,5 367,5 327 NSE0_00646g 5) 13) 2) 12) NSE0_00643j 7) 8) 9) 518,5 327,5 a Ø14 27 42 55 10) 76 275 150 10) 270 350 3) 40 31 40 10) a 620 520 460 123,5 465,5 275 468,5 12 220 45 58 88,5 121,5 140,5 90 90 480 6) 530 30 NSE0_00652h NSE00649a 11) 3) 287 Ø 13,5 138 95 69 139 270 460 590 400 90 90 38 30 10) 55 45 Frontanschluss (einfach) 130 130 10) 130 h Front connection (single hole) 11 403 NSE00644h 62,5 7–7 6 c 169,5 10) Front connection (double hole) h Frontanschluss (Doppelloch) NSE00647h 62,5 34 493 6 10) c 169,5 Vertical connection, up to 3200 A Vertikalanschluss bis 3200 A h 135 100 290 30 30 NSE00650h 11) 38 157 172 10) Flange connection 121 h NSE00653h Flanschanschluss 10) 7–8 Vertical connection 4000 A 30 NSE0_01869j Ø 13 109,5 315,5 100 30 Vertikalanschluss 4000 A 4,6 4011) 177 197 10 20 10) 55 45 200 (2) (3) (4) (5) (6) (7) (8) (9) (10) (11) (12) (13) 7–9 Bei Einschubrahmen ≤ 690 V, ohne Lichtbogenkammerabdeckung, Lichtbogenausblasraum gegen geerdete oder nicht leitfähige Flächen Nuten (4 mm breit, 5 mm tief) für Abstützung von Phasentrennwänden in der Anlage Hilfsstromstecker mit SIGUT-Schraubklemmtechnik Hilfsstromstecker mit schraubloser Anschlusstechnik Maß zur Innenfläche der geschlossenen Schaltanlagentür Schalter in Betriebsstellung Schalter in Prüfstellung Schalter in Trennstellung Befestigungslöcher 10 mm Anschlussfläche Leitungsschalteroberkante, nur 1000 V-, 1150 V-Leistungsschalter, nur 3WL1-Leistungsschalter Lichtbogenkammerausblasraum gegen geerdete oder nicht leitfähige Flächen, nur 1000 V- und 1150 V-Leistungsschalter, nur 3WL1-Leistungsschalter 130 200 (2) For guide frame ≤ 690 V, without arc chute cover, arc quenching space facing grounded or non-conductive surfaces (3) Slots (4 mm wide, 5 mm deep) to support the phase barriers in the switchgear Auxiliary connector with SIGUT screwing system Auxiliary connector with screwless terminal system Dimension to inside of closed cubicle door Circuit-breaker in connected position Circuit-breaker in test position Circuit-breaker in disconnected position Fixing holes, 10 mm Connection surface Circuit-breaker upper edge, only 1000 V and 1150 V circuitbreaker, only 3WL1-circuit-breaker Arc quenching space facing grounded or non-conductive surfaces, only 1000 V and 1150 V circuit-breaker, only 3WL1circuit-breaker (4) (5) (6) (7) (8) (9) (10) (11) (12) (13) Schalterbemessungsnennstrom / A Rated current of circuit-breaker / A a b c bis / up to 2000 10 10 10 2500 15 15 20 3200 30 30 20 7.5 Baugröße III, Festeinbau, 3- und 4-polig 7.5 Standardausführung Horizontalanschluss Frame size III, fixed-mounted version, 3-pole and 4-pole Standard version, horizontal connection 13) 4) 1) 2) 12) 14) 5) 275 210 30 210 15 210 160 130 Ø13,5 76 45 106 127 6) NSE00664a 11) 7) 110 (150) 3) 4x Ø11 3) 139 704 248 914 Frontanschluss (einfach) NSE0_00661j 20 4x M10 210 210 130 Front connection (single hole) 160 NSE00656h 160 50 13,5 160 160 35 47 50 421 NSE00657c 3) 6 11) 130 7) Frontanschluss (Doppelloch) 210 210 160 160 50 160 160 50 NSE00660b 421 3) 11) 14 6 80 20 82 7) 40 541 NSE00659h 80 40 47 210 Front connection (double hole) Ø 13,5 11 20 82 35 26 451 210 130 34 7) 150 210 230 35 890 35 12 205 5,5 150 30 NSE0_00658h 270 680 327,5 461,5 3) 123,5 437,5 275 440,5 621 541,5 516 451,5 30 NSE0_00655h 130 210 210 210 7 – 10 Vertikalanschluss Vertical connection 15 30 107 20 10 NSE00663 11) 40 142 162 (1) (2) (3) (4) (5) (6) (7) (11) (12) (13) (14) 7 – 11 NSE00662h ø13,5 120 94,5 330,5 3) 7) Montageraum zum Entnehmen der Lichtbogenkammern Lichtbogenausblasraum, ≤ 690 V-Leistungsschalter gegen geerdete oder nicht leitfähige Flächen Nuten (4 mm breit, 5 mm tief) für Abstützung von Phasentrennwänden in der Anlage Hilfsstromstecker mit SIGUT-Schraubklemmtechnik Hilfsstromstecker mit schraubloser Anschlusstechnik Maß zur Innenfläche der geschlossenen Schaltanlagentür Befestigungspunkte zur Leistungsschaltermontage in der Anlage; 4x Setzmutter M8 Anschlussfläche Leitungsschalteroberkante, nur 1000 V-, 1150 V- und Schaltleistungsklasse C - Leistungsschalter, nur 3WL1-Leistungsschalter Lichtbogenkammerausblasraum gegen geerdete oder nicht leitfähige Flächen, nur 1000 V-, 1150 V- und Schaltleistungsklasse C - Leistungsschalter, nur 3WL1-Leistungsschalter Raum für elektrische Hilfsanschlüsse 85 (1) (2) (3) (4) (5) (6) (7) (11) (12) (13) (14) 210 210 210 Mounting space for removal of the arc chutes Arc quenching space ≤ 690 V circuit-breaker facing grounded or non-conductive surfaces Slots (4 mm wide, 5 mm deep) to support the phase barriers in the switchgear Auxiliary connector with SIGUT screwing system Auxiliary connector with screwless terminal system Dimension to inside of closed cubicle door Fixing points for mounting the circuit-breaker in the switchgear; 4x setting nut M8 Connection surface Circuit-breaker upper edge, only 1000 V, 1150 V and current interrupting class C circuit-breaker, only 3WL1-circuit-breaker Arc quenching space facing grounded or non-conductive surfaces, only 1000 V, 1150 V and current interrupting class C circuit-breaker, only 3WL1-circuit-breaker Space for electrical auxiliary circuit connections Standardausführung Horizontalanschluss 7.6 Frame size III, withdrawable version, 3-pole and 4-pole Standard version, horizontal connection 382,5 367,5 327 NSE0_00668g 4) 5) NSE0_00665b 13) 2) 12) 270 590 10) 160 10) 27 42 76 10) 220 57 800 8) 9) 327,5 30 Ø14 40 31 123,5 10) 3) 275 150 275 468,5 620 520 460 30 7) 9 518,5 Baugröße III, Einschubausführung, 3- und 4-polig 465,5 45 58 88,5 121,5 140,5 6) 840 630 160 160 Ø 13,5 38 30 160 160 NSE0_00674h 30 30 914 139 270 704 260 217 57 85 210 210 210 Front connection (single hole) h Frontanschluss (einfach) 69 NSE00671a 287 11) NSE00666h 62,5 403 6 11 20 169,5 10) Frontanschluss (Doppelloch) h Front connection (double hole) 493 NSE00669h 62,5 6 34 7.6 20 169,5 10) 7 – 12 Vertical connection NSE00672h Vertikalanschluss 38 h 330,5 94,5 124,5 30 11) 24 177 197 ø13,5 10) Flange connection 10) 121 (2) (3) (4) (5) (6) (7) (8) (9) (10) (11) (12) (13) 7 – 13 h NSE00675h Flanschanschluss Bei Einschubrahmen ≤ 690 V, ohne Lichtbogenkammerabdeckung, Lichtbogenausblasraum gegen geerdete oder nicht leitfähige Flächen Nuten (4 mm breit, 5 mm tief) für Abstützung von Phasentrennwänden in der Anlage Hilfsstromstecker mit SIGUT-Schraubklemmtechnik Hilfsstromstecker mit schraubloser Anschlusstechnik Maß zur Innenfläche der geschlossenen Schaltanlagentür Schalter in Betriebsstellung Schalter in Prüfstellung Schalter in Trennstellung Befestigungslöcher 10 mm Anschlussfläche Leitungsschalteroberkante, nur 1000 V-, 1150 V- und Schaltleistungsklasse C-Leistungsschalter, nur 3WL1-Leistungsschalter Lichtbogenkammerausblasraum gegen geerdete oder nicht leitfähige Flächen, nur 1000 V-, 1150 V- und Schaltleistungsklasse C - Leistungsschalter, nur 3WL1-Leistungsschalter (2) For guide frame ≤ 690 V, without arc chute cover, arc quenching space facing grounded or non-conductive surfaces (3) Slots (4 mm wide, 5 mm deep) to support the phase barriers in the switchgear Auxiliary connector with SIGUT screwing system Auxiliary connector with screwless terminal system Dimension to inside of closed cubicle door Circuit-breaker in connected position Circuit-breaker in test position Circuit-breaker in disconnected position Fixing holes, 10 mm Connection surface Circuit-breaker upper edge, only 1000 V, 1150 V and current interrupting class C circuit-breaker, only 3WL1-circuit-breaker Arc quenching space facing grounded or non-conductive surfaces, only 1000 V, 1150 V and current interrupting class C circuit-breaker, only 3WL1-circuit-breaker (4) (5) (6) (7) (8) (9) (10) (11) (12) (13) Schalterbemessungsstrom / A Rated current of circuit-breaker / A a b 4000 40 210 5000 40 210 6300 nur/only 3WL1 5 245 7.7 Externer Wandler für Neutralleiter 7.7 24 Frame size I 91 Baugröße I External transformer for neutral 91 Frame size II 24 Baugröße II 91 Frame size III 24 Baugröße III Der N-Leiter Wandler wird mit 2 m Kabelbaum geliefert, der mit dem passenden Steckkontakt zum Wandler ausgerüstet ist. The neutral sensor comes with a wiring of 2 m (80“) length, equipped with the mating connector fitting to the sensor. 7.8 Spannungswandler 7.8 Voltage transformer 7.9 Weitere Maßbilder 7.9 Further dimension drawings - Tragwinkel für Einbau an senkrechte Ebene q (Seite 5-2) - Türdichtungsrahmen IP40 q (Seite 22-1) - Schutzabdeckung IP55 q (Seite 23-1) - Mounting angles for mounting on vertical surface q (page 5-2) - Door sealing frame IP40 q (page 22-1) - Protective cover IP55 q (page 23-1) 7 – 14 8 Schaltpläne 8 Circuit diagrams 8.1 Klemmenbelegung Zubehör 8.1 Terminal assignment accessory L1 L2 L3 (N) input DC DC 8–1 DC I 8.2 Hilfsstromschalter S1 S2 S3 *) S7 8.2 Auxiliary switches S4**) S8 *) gleicher Einbauplatz wie S7 same location as S7 **) gleicher Einbauplatz wie S8 same location as S8 Bestell-Nr. Leistungsschalter, 16. Stelle Order no. circuit-breaker, 16th position 3WL1_ _ _ - _ _ _ _ _ - _ _ _ Ausstattung mit Hilfsstromschaltern Equipped with auxiliary switches S1 S2 2 X X 4 X X 7 X X 8 X X S3 S4 X X X S7 S8 X X X 8–2 Meldeschalter 8.3 Signalling switches 1) “Reset” S21 “Trip” S23 *) de-energized S20 energized S22 de-energized S24 1) energized 8.3 *) Gleicher Einbauplatz wie S43 *) Same installation location as S43 1) Schließer-Kontakt geschlossen bedeutet, Unterspannungsauslöser angezogen bzw. Spannungsauslöser nicht angezogen - Einschaltbereitschaft möglich. 1) NO-contact closed means that the undervoltage release is energized or shunt trip is not energized - circuit-breaker is possibly "ready to close". Schließer-Kontakt offen bedeutet, Unterspannungsauslöser abgefallen bzw. Spannungsauslöser angezogen - Schalter nicht einschaltbereit. NO-contact open means that the undervoltage release is not energized or shunt trip is energized - circuit-breaker is not "ready to close". 8–3 8.4 Hilfsauslöser / Elektrische Einschaltsperre 8.4 Auxiliary releases / Electrical closing lockout F2, F3, F4 **) F1 **) gleicher Einbauplatz same location *) NOT-AUS oder Brücke (auch bei F3 möglich) Spannungsauslöser mit 100% ED können als elektrische Einschaltsperre genutzt werden. 8.5 Einschaltmagnet / Elektrisch EIN *) EMERGENCY OFF or short terminals (also possible at F3) Shunt trips with 100% duty may act as an electrical closing lockout. 8.5 Closing coil / Electrical ON Zwillings-Aderendhülse verwenden use twin wire end ferrule Y1 S10 *) Crimpwerkzeug z. B.: Weidmüller PZ3 bis PZ6 WAGO Variocrimp 4 Crimping tool e.g.: Weidmüller PZ3 to PZ6 WAGO Variocrimp 4 *) gleicher Einbauplatz wie S12 same location as S12 8–4 8.6 Motorantrieb S12 *) 8.6 Motor operating mechanism M 25 *) gleicher Einbauplatz wie S10 same location as S10 24 - 30 V DC 48 - 60 V DC L+ L- 8.7 Fernrücksetzmagnet F7 8–5 → X5.2 → X5.1 S13 8.7 Remote reset coil 8.8 Schutzkreise für ETU45B - ETU 76B 8.8 Trip unit circuitry for ETU45B - ETU76B 8.8.1 Mit Breaker Status Sensor (BSS) und Messmodul 8.8.1 With Breaker Status Sensor (BSS) and metering module 1) Abschlusswiderstand an X8-1 / X8-2, wenn kein externes CB-Modul 2) Wenn kein Messmodul und auch kein BSS-Modul verwendet werden: Direktverbindung X8 zu ETU - BSS-Modul: Schalter Status Sensor - : Bussystem zur Verbindung von Schalterkomponenten und zum Feldbus (PROFIBUS-DP) - ETU: Elektronischer Überstromauslöser S40 Meldeschalter Einschaltbereitschaft S41 Meldeschalter Speicherzustand S43 Meldeschalter am zweiten Hilfsauslöser F2 oder F3 oder F4 - S44 Meldeschalter Schaltstellung Hauptkontakte (EIN / AUS) - S45 Ausgelöst-Meldeschalter 1) Terminating resistor on X8-1 / X8-2, if not external CB module 2) If no metering module and no BSS module is used: Direct connection X8 to ETU - BSS module: Breaker Status Sensor - : Bus system for interconnection of circuitbreaker components and connection to the fieldbus (PROFIBUS-DP) - ETU: Overcurrent release - S40 Signalling switch ready-to-close - S41 Signalling switch spring charged - S43 Signalling switch 2nd auxiliary release F2 or F3 or F4 - S44 Signalling switch ON-OFF position - S45 Trip signalling switch S43 *) S45 S40 *) gleicher Einbauplatz wie S23 same location as S23 F5 S44 S41 ETU 8–6 8.8.2 Nur Messmodul 8.8.2 Metering module only 1) Abschlusswiderstand an X8-1 / X8-2, wenn kein externes CB-Modul 1) Terminating resistor on X8-1 / X8-2, if not external CB module 2) Wenn kein Messmodul und auch kein BSS-Modul verwendet werden: Direktverbindung X8 zu ETU 2) If no metering module and no BSS module is used: Direct connection X8 to ETU 8.8.3 1) Nur Breaker Status Sensor (BSS) Abschlusswiderstand an X8-1 / X8-2, wenn kein externes CB-Modul 8–7 8.8.3 1) Breaker Status Sensor (BSS) only Terminating resistor on X8-1 / X8-2, if not external CB module 9 Elektronische Ausrüstung 9 Electronic components Hinweis NOTICE Wir haben den Inhalt der Druckschrift auf Übereinstimmung mit der beschriebenen Hardware und Software geprüft. Dennoch können Abweichungen nicht ausgeschlossen werden, so dass wir für die vollständige Übereinstimmung keine Gewähr übernehmen. Die Angaben in dieser Druckschrift werden regelmäßig überprüft, notwendige Korrekturen sind in den nachfolgenden Auflagen enthalten. The information contained in this manual has been verified to be accurate. However, the possibility of deviations can not be excluded as updates are incorporated to the product. All updates to the hardware and software will be included in the next revision of the manual. 9.1 Überstromauslöser 9.1 Overcurrent releases 9.1.1 Funktionsübersicht 9.1.1 Overview of functions Überstromauslöser / Overcurrent release Funktionen Functions ETU15B q (9-3) ETU25B q (9-6) ETU27B q (9-9) q (9-12) ETU45B q (9-17) ETU76B Überlastschutz (L-Auslösung) Overload protection (L-tripping) q q q q q Kurzzeitverzögerter Kurzschluss-Schutz (S-Auslösung) Short-time-delay short-circuit protection (S-tripping) - q q q q Unverzögerter Kurzschluss-Schutz (I-Auslösung) Instantaneous short-circuit protection (I-tripping) q q 1) q 1) q q Neutralleiter-Schutz (N-Auslösung) Neutral conductor protection (N-tripping) - - q q q Erdschlussauslösung Earth-fault tripping - - q o o Lastüberwachung Load monitoring - - - q q Voreilende Meldung „L-Auslösung“ Leading signal "L-tripping " - - - q q Thermisches Gedächtnis ein-/ausschaltbar Thermal memory can be switched on/off - - - q q Zeitverzögerte Selektivitäts-Steuerung Zone selective interlocking - - - o o N-Leiterschutz ein-/ausschaltbar Neutral conductor protection can be switched on/off - - q q q Kurzverzögerter Kurzschlussschutz ein-/ausschaltbar Short-time-delay short-circuit protection can be switched on/off - - - q q Unverzögerter Kurzschlussschutz ein-/ausschaltbar Instantaneous short-circuit protection can be switched on/off - - - q q Kurzverzögerter Kurzschlussschutz umschaltbar auf I t Short-time-delay short-circuit protection switchable to I2t - - - q q Überlastschutz umschaltbar auf I4t Overload protection switchable to I4t - - - q q Überlastschutz ein-/ausschaltbar Overload protection can be switched on/off - - - - q Umschaltbare Parametersätze Changeable parameter sets - - - - q - - - q q - - - o o Grundschutzfunktionen q (Seite 9-22) Basic protective functions q (page 9-22) Zusätzliche Funktionen q (Seite 9-25) Additional functions q (page 9-25) 2 Erdschlussschutz umschaltbar auf Earth fault switchable to I2t Erdschlussalarm Earth-fault alarm I2 t 9–1 Überstromauslöser / Overcurrent release Funktionen Functions ETU15B q (9-3) ETU25B q (9-6) ETU27B q (9-9) q (9-12) ETU45B q (9-17) ETU76B Anzeige alphanumerisch Alphanumeric display - - - o - Grafische Anzeige (fest eingebaut) Graphical display (fixed-mounted) - - - - q Kommunikation über c Communication via c - - - q q Kommunikation über PROFIBUS-DP Communication via PROFIBUS-DP - - - o o Kommunikation über Ethernet Communication via Ethernet - - - o o Messfunktion Metering function - - - o o Messfunktion PLUS Metering function PLUS - - - o o Parametrierung über Drehkodierschalter Parameterization by rotary coding switches q q q q - Parametrierung über Kommunikation (Absolutwerte) Parameterization by communication (absolute values) - - - - q Parametrierung über Menü (Absolutwerte) Parameterization by menu (absolute values) - - - - q Fernparametrierung der Grundfunktionen Remote parameterization of basic protection functions - - - - q Fernparametrierung der zusätzlichen Funktionen Remote parameterization of additional functions - - - q q - - - q q Anzeige über Display q (Seite 9-30) q (page 9-30) Kommunikation Messfunktion PLUS q (Seite 9-98) Metering function PLUS q (page 9-98) Parametrierung Parameterization Sonstiges Other Anschlussmöglichkeit für eine externe DC-24-V-Versorgung Provision for connecting to an external 24 V DC power supply q Standard o optional - nicht verfügbar 1) fest eingestellt 9–2 q standard o optional - not available 1) fixed 9.1.2 Überstromauslöser ETU15B Ansicht 9.1.2 Overcurrent release ETU15B Design Option: Sicherheitsschloss verhindert versehentliches Drücken des Resetknopfes nach Überstromauslösung Mechanisches RESET für Wiedereinschaltsperre Mechanical RESET for reclosing lockout Option: Safety lock prevents accidental resetting of the lock-out mechanism after a trip Anzeige Überstromauslöser aktiviert Indicator overcurrent release activated Release 2 Anzeige Überlastalarm Indicator overload alarm Anzeige Fehler im Überstromauslöser Trip unit error indicator Drehkodierschalter Einstellwert Überlastauslöser Rotary coding switch long time delay pickup setting Drehkodierschalter Einstellwert Kurzschlussauslösung unverzögert Plombieröse Sealing eyelet Rotary coding switch instantaneous pickup setting Prüfbuchse Test connector VORSICHT CAUTION Zum Schutz der elektrostatisch gefährdeten Bauelemente (EGB) ist die beigefügte Schutzkappe auf die Prüfbuchse zu setzen. Vor Entfernen der Schutzkappe sind anzuschließende Geräte und das Bedienpersonal auf das gleiche Potenzial zu bringen. To protect the electrostatic sensitive devices (ESD) the attached protective cover must be installed on the test connector. Before the protective cover is removed, ensure that equipment to be connected, and also operating personnel, are at the same potential. 9–3 Overcurrent protection settings Einstellen des Überstromschutzes VORSICHT CAUTION Parametereinstellungen grundsätzlich nur vornehmen, wenn der Leistungsschalter ausgeschaltet ist. Eine Veränderung der Parameter bei eingeschaltetem Leistungsschalter kann zu ungewolltem Auslösen des Leistungsschalters führen. Adjust parameters only when the circuit-breaker is switched off. If the parameters are modified with the circuit-breaker switched on, this can trip the circuit-breaker unintentionally. VORSICHT CAUTION Bei der Anlagenprojektierung und Selektivitätsbetrachtung ist sicherzustellen, dass der Leistungsschalter nicht Ströme führen kann, die oberhalb der im Katalog angegebenen Schaltleistungswerte liegen. Übergeordnete Schutzgeräte sind so einzustellen, dass diese Fehlerfälle sicher abgeschaltet werden. When planning a project and considering selectivity it has to be ensured loads carried by the circuit-breaker will not exceed the breaking capacity stated in the 3WL catalogue. Die Einstellung aller Parameter erfolgt mit Drehkodierschaltern. Upstream protection equipment has to be set in a way, that these faults are interrupted safely. All parameters are adjusted with rotary coding switches. Der Wert 0,1 ist eingestellt, wenn der Drehschalter in diesem Drehwinkelbereich steht 3 x 0,5 The value 0.1 is set if the rotary switch is positioned in this zone Schutzfunktionen q Überlastschutz – L-Auslösung (Seite 9-22) q Unverzögerte Kurzschlussauslösung – I-Auslösung (Seite 9-24) 9–4 Protective functions q Overload protection – L-tripping (page 9-22) q Instantaneous short-circuit tripping – I-tripping (page 9-24) Kennlinien Characteristics Die im Folgenden dargestellten Bereiche sind reine Einstellbereiche der jeweiligen Parameter. Mögliche Toleranzbereiche wurden dabei nicht berücksichtigt. The ranges shown in the following are only setting ranges of the respective parameters. Possible tolerance ranges have not been considered. L-, I-Auslösung L-, I-tripping 9–5 9.1.3 Überstromauslöser ETU25B Ansicht 9.1.3 Overcurrent release ETU25B Design Option: Sicherheitsschloss verhindert versehentliches Drücken des Resetknopfes nach Überstromauslösung Mechanisches RESET für Wiedereinschaltsperre Mechanical RESET for reclosing lockout Option: Safety lock prevents accidental resetting of the lock-out mechanism after a trip Anzeige Überauslöser aktiviert Indicator overcurrent release activated Release 2 Anzeige Überlastalarm Indicator overload alarm Anzeige Fehler im Überstromauslöser Trip unit error indicator Bemessungsstrommodul Rating plug Drehkodierschalter Einstellwert Überlastauslösung Anzeigen Auslöseursache 1) Trip cause indicator 1) Rotary coding switch long time delay pickup setting Drehkodierschalter Verzögerung Kurzschlussauslösung Drehkodierschalter Einstellwert kurzzeitverzögerte Kurzschlussauslösung Rotary coding switch short time delay pickup setting Rotary coding switch short time delay setting Kurzschluss-Schutz fest eingestellt Plombieröse Sealing eyelet Fixed instantaneous pickup Taste Abfrage Query button Taste Löschen Clear button Taste Prüfung Test button 1) Die Auslöseursache wird für mindestens zwei Tage gespeichert, sofern der Überstromauslöser vor der Auslösung mindestens 10 min lang aktiviert war. Prüfbuchse Test connector 1) The trip cause is stored internally for at least two days, if the overcurrent release had been activated for at least 10 min before tripping. VORSICHT CAUTION Zum Schutz der elektrostatisch gefährdeten Bauelemente (EGB) ist die beigefügte Schutzkappe auf die Prüfbuchse zu setzen. Vor Entfernen der Schutzkappe sind anzuschließende Geräte und das Bedienpersonal auf das gleiche Potenzial zu bringen. To protect the electrostatic sensitive devices (ESD) the attached protective cover must be installed on the test connector. Before the protective cover is removed, ensure that equipment to be connected, and also operating personnel, are at the same potential. 9–6 Overcurrent protection settings Einstellen des Überstromschutzes VORSICHT CAUTION Parametereinstellungen grundsätzlich nur vornehmen, wenn der Leistungsschalter ausgeschaltet ist. Eine Veränderung der Parameter bei eingeschaltetem Leistungsschalter kann zu ungewolltem Auslösen des Leistungsschalters führen. Adjust parameters only when the circuit-breaker is switched off. If the parameters are modified with the circuit-breaker switched on, this can trip the circuit-breaker unintentionally. VORSICHT CAUTION Bei der Anlagenprojektierung und Selektivitätsbetrachtung ist sicherzustellen, dass der Leistungsschalter nicht Ströme führen kann, die oberhalb der im Katalog angegebenen Schaltleistungswerte liegen. Übergeordnete Schutzgeräte sind so einzustellen, dass diese Fehlerfälle sicher abgeschaltet werden. When planning a project and considering selectivity it has to be ensured loads carried by the circuit-breaker will not exceed the breaking capacity stated in the 3WL catalogue. Die Einstellung aller Parameter erfolgt mit Drehkodierschaltern. Upstream protection equipment has to be set in a way, that these faults are interrupted safely. All parameters are adjusted with rotary coding switches. Der Wert 0,1 ist eingestellt, wenn der Drehschalter in diesem Drehwinkelbereich steht 3 x 0,5 The value 0.1 is set if the rotary switch is positioned in this zone Schutzfunktionen q Überlastschutz – L-Auslösung (Seite 9-22) q Kurzverzögerte Kurzschlussauslösung – S-Auslösung (Seite 9-22) q Unverzögerte Kurzschlussauslösung – I-Auslösung (Seite 9-24) Protective functions q Overload protection – L-tripping (page 9-22) q Short-time-delayed short-circuit tripping – S-tripping (page 9-22) q Instantaneous short-circuit tripping – I-tripping (page 9-24) 9–7 Kennlinien Characteristics Die im Folgenden dargestellten Bereiche sind reine Einstellbereiche der jeweiligen Parameter. Mögliche Toleranzbereiche wurden dabei nicht berücksichtigt. The ranges shown in the following are only setting ranges of the respective parameters. Possible tolerance ranges have not been considered. L-, S-, I-Auslösung 9–8 L-, S-, I-tripping 9.1.4 Überstromauslöser ETU27B Ansicht 9.1.4 Overcurrent release ETU27B Design Option: Sicherheitsschloss verhindert versehentliches Drücken des Resetknopfes nach Überstromauslösung Mechanisches RESET für Wiedereinschaltsperre Option: Safety lock prevents accidental resetting of the lock-out mechanism after a trip Mechanical RESET for reclosing lockout Anzeige Überstromauslöser aktiviert Indicator overcurrent release activated Anzeige Fehler im Überstromauslöser Trip unit error indicator Release 2 Anzeige Überlastalarm Indicator overload alarm N-Leiter-Schutz Ein/Aus Neutral protection On/Off Bemessungsstrommodul Rating plug Drehkodierschalter Einstellwert Überlastauslösung Rotary coding switch long time delay pickup setting Drehkodierschalter Verzögerung Kurzschlussauslösung Rotary coding switch short time delay setting Drehkodierschalter Einstellwert kurzzeitverzögert Kurzschlussauslösung Rotary coding switch short time delay pickup setting Anzeigen Auslöseursache 1) Trip cause indicator 1) Kurzschluss-Schutz fest eingestellt Plombieröse Sealing eyelet Fixed instantaneous pickup Drehkodierschalter Verzögerung Erdschlussschutz Rotary coding switch ground-fault time delay setting Drehkodierschalter Einstellwert Erdschlussschutz (siehe 9-76) Rotary coding switch ground-fault pickup setting (see 9-76) Taste Löschen Clear button Taste Prüfung Test button Prüfbuchse Test connector Taste Abfrage Query button 1) Die Auslöseursache wird für mindestens zwei Tage gespeichert, sofern der Überstromauslöser vor der Auslösung mindestens 10 min lang aktiviert war. 1) The trip cause is stored internally for at least two days, if the overcurrent release has been activated for at least 10 min before tripping. VORSICHT CAUTION Zum Schutz der elektrostatisch gefährdeten Bauelemente (EGB) ist die beigefügte Schutzkappe auf die Prüfbuchse zu setzen. Vor Entfernen der Schutzkappe sind anzuschließende Geräte und das Bedienpersonal auf das gleiche Potenzial zu bringen. To protect the electrostatic sensitive devices (ESD) the attached protective cover must be installed on the test connector. Before the protective cover is removed, ensure that equipment to be connected, and also operating personnel, are at the same potential. 9–9 Overcurrent protection settings Einstellen des Überstromschutzes VORSICHT CAUTION Parametereinstellungen grundsätzlich nur vornehmen, wenn der Leistungsschalter ausgeschaltet ist. Eine Veränderung der Parameter bei eingeschaltetem Leistungsschalter kann zu ungewolltem Auslösen des Leistungsschalters führen. Adjust parameters only when the circuit-breaker is switched off. If the parameters are modified with the circuit-breaker switched on, this can trip the circuit-breaker unintentionally. VORSICHT CAUTION Bei der Anlagenprojektierung und Selektivitätsbetrachtung ist sicherzustellen, dass der Leistungsschalter nicht Ströme führen kann, die oberhalb der im Katalog angegebenen Schaltleistungswerte liegen. Übergeordnete Schutzgeräte sind so einzustellen, dass diese Fehlerfälle sicher abgeschaltet werden. When planning a project and considering selectivity it has to be ensured loads carried by the circuit-breaker will not exceed the breaking capacity stated in the 3WL catalogue. Die Einstellung der Parameter für die Grundfunktionen erfolgt mit Drehkodierschaltern. Upstream protection equipment has to be set in a way, that these faults are interrupted safely. The parameters for the basic functions are adjusted with rotary coding switches. Der Wert 0,1 ist eingestellt, wenn der Drehschalter in diesem Drehwinkelbereich steht 3 x 0,5 The value 0.1 is set if the rotary switch is positioned in this zone Die Ein/Ausschaltung des N-Leiterschutzes erfolgt mit einem Schiebeschalter. The neutral conductor protection is switched on/off with a slide switch. Schutzfunktionen Protective functions q Überlastschutz – L-Auslösung (Seite 9-22) q Kurzverzögerte Kurzschlussauslösung – S-Auslösung (Seite 9-22) q Unverzögerte Kurzschlussauslösung – I-Auslösung (Seite 9-24) q Erdschlussauslösung – G-Auslösung (Seite 9-24) q Neutralleiterschutz – N-Auslösung (Seite 9-25) 9 – 10 q Overload protection – L-tripping (page 9-22) q Short-time-delayed short-circuit tripping – S-tripping (page 9-22) q Instantaneous short-circuit tripping – I-tripping (page 9-24) q Ground-fault tripping – G-tripping (page 9-24) q Neutral conductor protection – N-tripping (page 9-25) Kennlinien Characteristics Die im Folgenden dargestellten Bereiche sind reine Einstellbereiche der jeweiligen Parameter. Mögliche Toleranzbereiche wurden dabei nicht berücksichtigt. The ranges shown in the following are mere setting ranges of the respective parameters. Possible tolerance ranges have not been considered. L-, S-, I-, N-Auslösung L, S-, I-, N-tripping Erdschlussauslösung EarthGround-fault tripping 1) 1) Frame size I and II: Frame size III: Baugröße I und II: Baugröße III: 100 ... 1200 A 400 ... 1200 A 100 ... 1200 A 400 ... 1200 A 9 – 11 9.1.5 Überstromauslöser ETU45B Ansicht 9.1.5 Overcurrent release ETU45B Design Option: Sicherheitsschloss verhindert versehentliches Drücken des Resetknopfes nach Überstromauslösung Mechanisches RESET für Wiedereinschaltsperre Mechanical RESET for reclosing lockout Option: Safety lock prevents accidental resetting of the lock-out mechanism after a trip Blättern aufwärts Scroll up Anzeigen Indications Option: Anzeige alphanumerisch Option: Alphanumeric display Überstromauslöser aktiviert Overcurrent release activated Blättern abwärts Scroll down Anzeige Fehler im Überstromauslöser Trip unit error indicator Überlastalarm Overload alarm Thermisches Gedächtnis Ein/Aus Thermal memory On/Off KOMMUNIKATION COMMUNICATION N-Leiter-Schutz Ein/Aus Neutral protection On/Off ERWEITERT EXTENDED Release 2 Bemessungsstrommodul Rating plug Umschaltung Überlastkennlinie I2t / I4t Overload trip curve mode I2t / I4t Drehkodierschalter Einstellwert Überlastauslösung Drehkodierschalter Verzögerung Überlastauslösung Rotary coding switch long-time delay setting Drehkodierschalter Verzögerung Kurzschlussauslösung Rotary coding switch short-time delay setting Rotary coding switch long time delay pickup setting Drehkodierschalter Einstellwert kurzzeitverzögert Kurzschlussauslösung Rotary coding switch short time delay pickup setting Drehkodierschalter Einstellwert Kurzschluss-Schutz Rotary coding switch instantaneous pickup setting Anzeigen Auslöseursache 1) Trip cause indicator 1) Plombieröse Sealing eyelet Option: Erdschlussschutzmodul Option: ground-fault modul Umschalter Erdschlusserfassung 2) Changeover switch ground-fault detection mode 2) Erdschlussalarm Ground-fault alarm Drehkodierschalter Einstellwert Erdschlussschutz (siehe 9-76) Anzeigen Indications Erdschluss ausgelöst Ground-fault tripped Rotary coding switch ground-fault pickup setting (see 9-76) Drehkodierschalter Verzögerung Erdschlussschutz tg / I2tg Rotary coding switch ground-fault time delay setting tg / I2tg Drehkodierschalter Einstellwert Erdschluss-Alarm Rotary coding switch ground-fault alarm setting Taste Löschen Clear button Taste Prüfung Test button Prüfbuchse Test connector Taste Abfrage Query button 1) Die Auslöseursache wird für mindestens zwei Tage gespeichert, sofern der Überstromauslöser vor der Auslösung mindestens 10 min lang aktiviert war. (mit Hilfsenergie beliebig lange) 2) Umschalter nur bei ausgebautem Modul zugänglich. Einstellwert N-Leiter-Überlastung Neutral overload setting 1) The trip cause is stored internally for at least two days, if the overcurrent release has been activated for at least 10 min before tripping. (for unlimited time with auxiliary power). 2) Changeover switch only accessible with removed module. VORSICHT CAUTION Zum Schutz der elektrostatisch gefährdeten Bauelemente (EGB) ist die beigefügte Schutzkappe auf die Prüfbuchse zu setzen. Vor Entfernen der Schutzkappe sind anzuschließende Geräte und das Bedienpersonal auf das gleiche Potenzial zu bringen. To protect the electrostatic sensitive devices (ESD) the attached protective cover must be installed on the test connector. Before the protective cover is removed, ensure that equipment to be connected, and also operating personnel, are at the same potential. 9 – 12 Overcurrent protection settings Einstellen des Überstromschutzes VORSICHT CAUTION Parametereinstellungen grundsätzlich nur vornehmen, wenn der Leistungsschalter ausgeschaltet ist. Eine Veränderung der Parameter bei eingeschaltetem Leistungsschalter kann zu ungewolltem Auslösen des Leistungsschalters führen. Adjust parameters only when the circuit-breaker is switched off. If the parameters are modified with the circuit-breaker switched on, this can trip the circuit-breaker unintentionally. VORSICHT CAUTION Bei der Anlagenprojektierung und Selektivitätsbetrachtung ist sicherzustellen, dass der Leistungsschalter nicht Ströme führen kann, die oberhalb der im Katalog angegebenen Schaltleistungswerte liegen. Übergeordnete Schutzgeräte sind so einzustellen, dass diese Fehlerfälle sicher abgeschaltet werden. When planning a project and considering selectivity it has to be ensured loads carried by the circuit-breaker will not exceed the breaking capacity stated in the 3WL catalogue. Die Einstellung der Parameter für die Grundfunktionen erfolgt mit Drehkodierschaltern. Upstream protection equipment has to be set in a way, that these faults are interrupted safely. The parameters for the basic functions are adjusted with rotary coding switches. Der Wert 0,1 ist eingestellt, wenn der Drehschalter in diesem Drehwinkelbereich steht 3 x 0,5 The value 0.1 is set if the rotary switch is positioned in this zone Verschiedene Zusatzfunktionen werden mit Schiebeschaltern eingestellt. Various additional functions are adjusted with slide switches. Die Einstellungen für die Zusatzfunktion „Lastüberwachung“ können erfolgen über: The settings for the additional function "load monitoring" can be adjusted through: - das alphanumerische Display q (Seite 9-30) - die Prüfbuchse mit dem BDA q (Seite 9-129) - über den PROFIBUS-DP mit einem PC mit installierter Software „Switch ES Power“. (q s. „SENTRON Kommunikationshandbuch“) Diese Einstellungen können nur vorgenommen werden, wenn der Überstromauslöser aktiviert ist, d. h. eine externe 24 V DC-Spannungsversorgung angeschlossen ist. - the alphanumeric display q (page 9-30) - the test socket with the BDA q (page 9-129) - the PROFIBUS-DP with a PC and the software "Switch ES Power" (q "SENTRON communication handbook") These settings can only be adjusted if the overcurrent release is activated, i.e. it must be connected to an external 24 V DC voltage supply. 9 – 13 Schutzfunktionen q Überlastschutz – L-Auslösung (Seite 9-22) q Kurzverzögerte Kurzschlussauslösung – S-Auslösung (Seite 9-22) q Unverzögerte Kurzschlussauslösung – I-Auslösung (Seite 9-24) q Erdschlussauslösung – G-Auslösung (Seite 9-24) q Neutralleiterschutz – N-Auslösung (Seite 9-25) q Lastüberwachung („Lastaufnahme/Lastabwurf“) (Seite 9-25) q Voreilende Meldung „L-Auslösung“ (Seite 9-26) q Thermisches Gedächtnis ein-/ausschaltbar (Seite 9-26) q Erdschlussschutzmodule (Seite 9-75) Protective functions q Overload protection – L-tripping (page 9-22) q Short-time-delayed short-circuit tripping – S-tripping (page 9-22) q Instantaneous short-circuit tripping – I-tripping (page 9-24) q Ground-fault tripping – G-tripping (page 9-24) q Neutral conductor protection – N-tripping (page 9-25) q Load monitoring (load restore/load shedding) (page 9-25) q Leading signal "L-tripping" (page 9-26) q Thermal memory can be switched On/Off (page 9-26) q Ground-fault protection modules (page 9-75) Kennlinien Characteristics Die im Folgenden dargestellten Bereiche sind reine Einstellbereiche der jeweiligen Parameter. Mögliche Toleranzbereiche wurden dabei nicht berücksichtigt. The ranges shown in the following are only setting ranges of the respective parameters. Possible tolerance ranges have not been considered. Die Kennlinien gelten für einen Leistungsschalter in der Ausführung H-Klasse, 440 V, Baugröße II, mit Erdschlussschutzmodul. The characteristics apply to the circuit-breaker version H-class, at 440 V, frame size II, with earth-fault protection module. L-Auslösung 9 – 14 L-tripping S-Auslösung S-tripping I-Auslösung I-tripping 9 – 15 Erdschlussauslösung 9 – 16 Ground-fault tripping 9.1.6 Überstromauslöser ETU76B Ansicht 9.1.6 Overcurrent release ETU76B Design Option: Sicherheitsschloss verhindert versehentliches Drücken des Resetknopfes nach Überstromauslösung Mechanisches RESET für Wiedereinschaltsperre Mechanical RESET for reclosing lockout Option: Safety lock prevents accidental resetting of the lock-out mechanism after a trip Release 2 Anzeige grafisch Graphical display Überstromauslöser aktiviert Overcurrent release activated Anzeigen Indications Überlastalarm Overload alarm Anzeige Fehler im Überstromauslöser Trip unit error indicator KOMMUNIKATION COMMUNICATION Bedientasten für Einstellung des Auslöseparameter Anzeigen Auslöseursache 1) Trip cause indicator 1) Operating keys for setting tripping parameters Plombieröse Sealing eyelet Bemessungsstrommodul Rating plug Option: Erdschlussschutzmodul Option: Earth-fault modul Anzeigen Indications Felder zum Notieren der Einstellwerte Erdschlussalarm Earth-fault alarm Erdschluss ausgelöst Earth fault tripped Felder zum Notieren der Einstellwerte Areas to record protective settings Areas to record protective settings Taste Prüfung Test button Taste Löschen Clear button Taste Abfrage Query button 1) Die Auslöseursache wird für mindestens zwei Tage gespeichert, sofern der Überstromauslöser vor der Auslösung mindestens 10 min lang aktiviert war. (mit Hilfsenergie beliebig lange) Prüfbuchse Test connector 1) The trip cause is stored internally for at least two days, if the overcurrent release has been activated for at least 10 min before tripping. (for unlimited time with auxiliary power). VORSICHT CAUTION Zum Schutz der elektrostatisch gefährdeten Bauelemente (EGB) ist die beigefügte Schutzkappe auf die Prüfbuchse zu setzen. Vor Entfernen der Schutzkappe sind anzuschließende Geräte und das Bedienpersonal auf das gleiche Potenzial zu bringen. To protect the electrostatic sensitive devices (ESD) the attached protective cover must be installed on the test connector. Before the protective cover is removed, ensure that equipment to be connected, and also operating personnel, are at the same potential. 9 – 17 Einstellen des Überstromschutzes Overcurrent protection settings VORSICHT CAUTION Parametereinstellungen grundsätzlich nur vornehmen, wenn der Leistungsschalter ausgeschaltet ist. Eine Veränderung der Parameter bei eingeschaltetem Leistungsschalter kann zu ungewolltem Auslösen des Leistungsschalters führen. Adjust parameters only when the circuit-breaker is switched off. If the parameters are modified with the circuit-breaker switched on, this can trip the circuit-breaker unintentionally. VORSICHT CAUTION Bei der Anlagenprojektierung und Selektivitätsbetrachtung ist sicherzustellen, dass der Leistungsschalter nicht Ströme führen kann, die oberhalb der im Katalog angegebenen Schaltleistungswerte liegen. Übergeordnete Schutzgeräte sind so einzustellen, dass diese Fehlerfälle sicher abgeschaltet werden. When planning a project and considering selectivity it has to be ensured loads carried by the circuit-breaker will not exceed the breaking capacity stated in the 3WL catalogue. VORSICHT CAUTION Bei Abschaltung der Überlastschutzfunktion ist sicherzustellen, dass keine Überlastfälle eintreten können. Eine thermische Zerstörung des Schaltgerätes, der Anlage oder des Verbrauchers wären die Folge. Auftretende Überlastfälle können in diesem Fall nur bei Überschreiten der Ansprechwerte für die Kurzschlussschutzfunktion (verzögert oder unverzögert) durch Auslösung abgeschaltet werden. Diese Ansprechwerte sind entsprechend anzupassen. When deactivating the overload protection, it has to be ensured overloads will not occur. Otherwise, thermal destruction of the circuit-breaker, the switchgear or the consumer load could result. In these cases occurring overloads can only be handled by the short time and instantaneous protection. The pick-up values will have to be adjusted accordingly. Die Einstellung aller Parameter für die Grund- und Zusatzfunktionen kann erfolgen über: All parameters for the basic and the additional functions can be adjusted through: - das Grafikdisplay q (Seite 9-42) - die Prüfbuchse mit dem BDA q (Seite 9-129) - über den PROFIBUS-DP mit einem PC mit installierter Software „Switch ES Power“. (q s. „SENTRON Kommunikationshandbuch“) - über den Modbus mit einem PC und zusätzlicher Software Upstream protection equipment has to be set in a way, that these faults are interrupted safely. - the graphical display q (page 9-42) - the test socket with the BDA q (page 9-129) - the PROFIBUS-DP with a PC and the software "Switch ES Power" (q "SENTRON communication handbook") - the Modbus with a PC and additional software Dazu muss der Überstromauslöser aktiviert, d. h. eine externe 24 V DC-Spannungsversorgung angeschlossen sein. To do this, the overcurrent release must be activated, i.e. it must be connected to an external 24 V DC voltage supply. Schutzfunktionen Protective functions q Überlastschutz – L-Auslösung (Seite 9-22) q Kurzverzögerte Kurzschlussauslösung – S-Auslösung (Seite 9-22) q Unverzögerte Kurzschlussauslösung – I-Auslösung (Seite 9-24) q Erdschlussauslösung – G-Auslösung (Seite 9-24) q Neutralleiterschutz – N-Auslösung (Seite 9-25) q Lastüberwachung („Lastaufnahme/Lastabwurf“) (Seite 9-25) q Voreilende Meldung „L-Auslösung“ (Seite 9-26) q Thermisches Gedächtnis ein-/ausschaltbar (Seite 9-26) q Erdschlussschutzmodule (Seite 9-75) 9 – 18 q Overload protection – L-tripping (page 9-22) q Short-time-delayed short-circuit tripping – S-tripping (page 9-22) q Instantaneous short-circuit tripping – I-tripping (page 9-24) q Ground-fault tripping – G-tripping (page 9-24) q Neutral conductor protection – N-tripping (page 9-25) q Load monitoring (load restore/load shedding) (page 9-25) q Leading signal "L-tripping" (page 9-26) q Thermal memory can be switched On/Off (page 9-26) q Ground-fault protection modules (page 9-75) Kennlinien Characteristics Die im Folgenden dargestellten Bereiche sind reine Einstellbereiche der jeweiligen Parameter. Mögliche Toleranzbereiche wurden dabei nicht berücksichtigt. The ranges shown in the following are only setting ranges of the respective parameters. Possible tolerance ranges have not been considered. Die Kennlinien gelten für einen Leistungsschalter in der Ausführung H-Klasse, 440 V, Baugröße II, mit Erdschlussschutzmodul. The characteristics apply to the circuit-breaker version H-class, at 440 V, frame size II, with earth-fault protection module. L-Auslösung L-tripping q (Seite 9-14) q (page 9-14) S-Auslösung S-tripping I-Auslösung I-tripping q (Seite 9-15) q (page 9-15) Erdschlussauslösung Earth-fault tripping q (Seite 9-16) q (page 9-16) 9 – 19 9.1.7 Bestell-Nummern 9.1.7 Überstromauslöser overcurrent release Bestell-Nr. Order no. ETU15B 3WL9 311-5AA00-0AA2 ETU25B 3WL9 312-5AA00-0AA2 ETU27B 3WL9 312-7AA00-0AA2 ETU45B 3WL9 314-5AA00-0AA2 ETU45B mit Messfunktion PLUS with metering function PLUS ETU76B ETU76B 9.1.8 Order numbers 3WL9 314-5AA20-0AA2 3WL9 317-6AA00-0AA2 mit Messfunktion PLUS with metering function PLUS 3WL9 317-6AA20-0AA2 9.1.8 Anzeigen Die Ausstattung der Anzeigen ist abhängig vom Typ des Überstromauslösers. Indications Scope of indications depends on the type of overcurrent release. Überlastauslöser ist aktiviert. Overcurrent release is activated I > Imin - oder wenn 24 V Hilfsspannung anliegt I > Imin - or when 24 V auxiliary power is applied Imin: Imin: - 80 A für Baugröße I/II - 150 A für Baugröße III - 80 A for frame size I/II - 150 A for frame size III Blitzlicht / Flashing LED Overcurrent alarm Überstromalarm - Dauerlicht, wenn I ≥ IR Kommunikation aktiv - Ein anderer -Teilnehmer wurde erkannt und Kommunikation aufgenommen 9 – 20 - Steady LED, if I ≥ IR Communication active - Another participant has been recognised and communication started. Erweiterte Schutzfunktion hat ausgelöst - verursacht durch Messfunktion - Auslösegrund im Ereignisspeicher gespeichert - Auslösegrund auslesbar über: * BDA * PROFIBUS-DP und PC mit Software „Switch ES Power“ * Grafisches Display (ETU76B) * Externe digitale Ausgangsmodule Schutzfunktion hat ausgelöst (Überstrom) Extended protective function has tripped - due to metering function - trip cause saved in event memory - trip cause readable through: * BDA * PROFIBUS-DP and PC with software "Switch ES Power" * graphic display (ETU76B) * external digital output modules Protective function has tripped (Overcurrent) - Anzeige leuchtet, wenn Query-Taste gedrückt - Indicator lights up when the Query button is pressed - Nur ein Auslösegrund wird angezeigt - Only one trip cause is displayed - Nur der letzte Auslösegrund wird ange- oder zeigt - Only the last trip cause is displayed LED T.U. ERROR LED T.U. ERROR 1. T.U. Error blinkt: 1. T.U. Error flashes Schutzfunktion ist eingeschränkt, die Schutzparameter sind auf die Minimalwerte zurück gesetzt. Limited protective function, the protective parameters are reset to minimum values. Ursachen: Causes: - Bemessungsstrom des Bemessungsstrommoduls ist größer als der des Leistungsschalters - Drehkodierschalter in undefinierter Zwischenstellung - Überstromauslöser defekt - Rated current of the rating plug is higher than that of the circuit-breaker - Rotary coding switch in undefined intermediate position - Trip unit defective 2. T.U. Error leuchtet dauernd: 2. T.U. Error lights up continuously: Schutzfunktion ist nicht gewährleistet. Protective function not guaranteed. Ursachen: Causes: - Bemessungsstrommodul und Leistungsschalter sind nicht kompatibel - Überstromauslöser defekt - Rating plug not compatible with circuit-breaker type - Trip unit defective 9 – 21 9.1.9 Schutzfunktionen 9.1.9 Protective functions 9.1.9.1 Grundschutzfunktionen 9.1.9.1 Basic protective functions Die Grundschutzfunktionen des Überstromauslösers sind ohne zusätzliche Hilfsspannung sichergestellt. Die erforderliche Energie wird von schalterinternen Energiewandlern bereitgestellt. The basic protective functions of the overcurrent release are ensured without additional auxiliary voltage. The required energy is supplied by the circuit-breaker’s internal energy transformers. Für die Bewertung der Ströme wird durch die Elektronik des Überstromauslösers der Effektivwert (r.m.s.) berechnet. To evaluate the currents, the electronic system of the overcurrent release calculates the r.m.s value. Die Parametrierung der einzelnen Funktionen erfolgt typenabhängig mittels: The individual functions are parameterised according to the types through: - Drehkodierschalter (ETU15B … 45B) - elektronischer Datenübertragung (ETU55B ... 76B) über: - die Prüfbuchse mit dem BDA - den PROFIBUS-DP mit einem PC und der Software „Switch ES Power“ - Bedientastenfeld (ETU76B). - rotary coding switch (ETU15B ... 45B) - electronic data transfer (ETU55B ... 76B) through - the test socket with the BDA - the PROFIBUS-DP with a PC and the software "Switch ES Power" - the control board (ETU76B) Überlastschutz – L-Auslösung Overload protection – L-tripping Der Einstellwert IR bestimmt den maximalen Dauerstrom, bei dem der Schalter ohne Auslösung betrieben werden kann. Der Trägheitsgrad tR bestimmt, wie lange eine Überlast andauern kann, ohne dass es zu einer Auslösung kommt. The current setting IR defines the maximum continuous current the circuit-breaker can carry without tripping. The time-lag class tR determines the maximum duration of an overload without tripping. Einstellwerte für IR Current setting values for IR ETU15B IR = (0,5 / 0,6 / 0,7 / 0,8 / 0,9 / 1,0) x In ETU15B IR = (0.5 / 0.6 / 0.7 / 0.8 / 0.9 / 1.0) x In ETU25B …45B IR = (0,4 / 0,45 / 0,5 / 0,55 / 0,6 / 0,65 / 0,7 / 0,8 / 0,9 / 1,0) x In ETU25B …45B IR = (0.4 / 0.45 / 0.5 / 0.55 / 0.6 / 0.65 / 0.7 / 0.8 / 0.9 / 1.0) x In ETU55B ... 76B IR = (0,4 ... 1,0) x In (Angabe in Ampere) ETU55B ... 76B IR = (0.4 ... 1.0) x In (data in Amps) Einstellwerte für tR Settings for tR ETU15B … 27B tR = 10 s (bei 6 x IR) ETU15B … 27B tR = 10 s (at 6 x IR) ETU45B tR = 2 / 3,5 / 5,5 / 8 / 10 / 14 / 17 / 21 / 25 / 30 s (bei 6 x IR) ETU45B tR = 2 / 3.5 / 5.5 / 8 / 10 / 14 / 17 / 21 / 25 / 30 s (at 6 x IR) ETU55B ... 76B tR = 2 … 30 s (bei 6 x IR) ETU55B ... 76B tR = 2 … 30 s (at 6 x IR) Die Auslösekennlinie hat eine I2t-Charakteristik. Für einige Überstromauslöser besteht die Möglichkeit, auf eine I4t-Charakteristik umzuschalten. q (Seite 9-27) The tripping characteristic is an I2t-characteristic. Some overcurrent releases can be switched over to an I4t-characteristic. q (page 9-27) Kurzverzögerte Kurzschlussauslösung – S-Auslösung Short-time-delayed short-circuit tripping – S-tripping Bei den Überstromauslösern ETU25B … ETU76B kann die Auslösung infolge eines Kurzschlussstromes Isd um die Zeit tsd verzögert werden. On overcurrent releases ETU25B ... 76B, tripping due to the shortcircuit current Isd can be delayed by the time tsd. Damit kann eine Selektivität des Kurzschlussschutzes in Schaltanlagen mit mehreren Staffelebenen erreicht werden. This provides selectivity for the short-circuit protection in switchgear with several grading levels. Einstellwerte für Isd Current setting values for Isd ETU25B … 45B Isd = (1,25 / 1,5 / 2 / 2,5 / 3 / 4 / 6 / 8 / 10 / 12) x In ETU25B … 45B Isd = (1.25 / 1.5 / 2 / 2.5 / 3 / 4 / 6 / 8 / 10 / 12) x In ETU55B … 76B Isd = 1,25 x In … 0,8 x ICW (Angabe in Ampere) ETU55B … 76B Isd = 1.25 x In … 0.8 x ICW (data in Amps) 9 – 22 Einstellwerte für tsd Setting values for tsd 1) ETU25B ... 27B tsd = 0 / 0,02(M) / 0,1 / 0,2 / 0,3 / 0,4 s ETU25B ... 27B tsd = 0 / 0.02(M)1) / 0.1 / 0.2 / 0.3 / 0.4 s ETU45B tsd = 0,02(M)1) / 0,1 / 0,2 / 0,3 / 0,4 s; OFF ETU45B tsd = 0.02(M)1) / 0.1 / 0.2 / 0.3 / 0.4 s; OFF ETU55B … 76B tsd = 0,02(M)1) / 0,08 … 4 s 2) ; OFF ETU55B … 76B tsd = 0.02(M)1) / 0.08 … 4 s 2) ; OFF 1) Die Verzögerungszeit 0,02 s ist keine Staffelzeit! In dieser Stellung wird die Motorschutzfunktion eingeschaltet. 1) The time delay 0.02 s isn’t a grading time! In this position, the motor protection function is activated. 2) Für Einstellwerte tsd > 0,4 s erfolgt automatisch eine Reduzierung des maximal möglichen Einstellwertes Isd in Abhängigkeit von der Baugröße auf: BG I : 15 kA BG II : 20 kA BG III : 30 kA 2) For settings tsd >0.4 s, the maximum possible setting Isd is reduced automatically according to the frame size: Frame size I : 15 kA Frame size II : 20 kA Frame size III : 30 kA Die maximal zulässigen, einstellbaren Stromwerte sind vom Kurzschlussschaltvermögen und der Betriebsspannung abhängig. Die maximalen Werte können dem Typschild entnommen werden. The maximum permissible, adjustable current values depend on the short-circuit breaking capacity and the operational voltage. The maximum values can be found on the type label. Mit dem Einstellwert tsd = 0 s können die Überstromauslöser ETU25B ... 27B einen unverzögerten Kurzschlussschutz mit einstellbarem Ansprechwert realisieren, der kleiner ist, als der festeingestellte Ansprechwert Ii . With the setting tsd = 0 s, the overcurrent release s ETU25B ... 27B can provide an instantaneous short-circuit protection with an adjustable operate value which is smaller than the fixed operate value Ii. Die Einstellung „OFF“ für die Überstromauslöser ETU45B ... 76B dient dazu, den kurzverzögerten Kurzschlussschutz abzuschalten. The setting "OFF" for the overcurrent releases ETU45B ... 76B is provided to deactivate the short-time-delay short-circuit protection. Bei Verwendung der zeitverkürzten Selektivitätssteuerung (ZSI) q (Seite 9-27) wird der eingestellte Wert für die Verzögerungszeit tsd auf 50 ms gesetzt, wenn der Leistungsschalter im Kurzschlussfall kein Blockiersignal von einem nachgeordneten Leistungsschalter erhält. Er schaltet dann unabhängig vom eingestellten Wert für tsd bereits nach 50 ms ab. If the zone selective interlocking (ZSI) link q (page 9-27) is used, and the ZSI module is set to "S" or "S+G" the adjusted delay time tsd is automatically set to 50 ms provided that in the event of shortcircuit the circuit-breaker does not receive a blocking signal from a downstream circuit-breaker. In this case regardless of the adjusted tsd value the circuit-breaker will trip after 50 ms Mit Blockiersignal gilt weiter die eingestellte Zeit tsd. Zur Sicherheit wird nach längstens 3 s das Blockiersignal beendet. If a blocking signal exists the adjusted delay time tsd is valid. For safety reasons after 3 s the blocking signal is terminated. Für einige Überstromauslöser besteht die Möglichkeit, auf eine I2t-Charakteristik umzuschalten. q (Seite 9-27) Some overcurrent releases can be switched over to an I2t-characteristic. q (page 9-27) Motorschutzfunktion Motor protection function In der Schalterstellung tsd = 0 (0.02 s) wird eine spezielle Schutzfunktion für elektromotorische Antriebe eingeschaltet. Sie verhindert das Ansprechen der kurzverzögerten Kurzschlussauslösung auf die Einschaltstromspitze von Elektromotoren. Gleichzeitig wird ein Phasenausfallschutz aktiviert q (Seite 9-26) und die Zeitkonstante für die interne rechnerische Nachbildung des Erwärmungsund Abkühlungsprozesses von Anlagenschutz auf Motorschutz umgeschaltet. In the circuit-breaker position tsd = 0 (0.02 s), a special protection function for electromotive drives is activated. It prevents the shorttime-delay short-circuit tripping from being activated during the peak inrush current of electric motors. At the same time, a phase failure protection is activated q (page 9-26) and the time constant for the internally calculated reproduction of the temperature-rise and cooling process is switched over from switchgear protection to motor protection. 9 – 23 Unverzögerte Kurzschlussauslösung – I-Auslösung Instantaneous short-circuit tripping – I-tripping Die Überschreitung des Einstellwert Ii führt zu einer unverzögerten Abschaltung des Leistungsschalters. If the current setting Ii is exceeded, the circuit-breaker is tripped instantaneously. Einstellwerte für Ii Current setting values for Ii ETU15B Ii = (2 / 3 / 4 / 5 / 6 / 7 / 8) x In ETU15B Ii = (2 / 3 / 4 / 5 / 6 / 7 / 8) x In ETU25B, ETU27B Ii ≥ 20 x In (fest eingestellt) MAX = 50 kA ETU25B, ETU27B Ii ≥ 20 x In (fixed setting) MAX = 50 kA ETU45B OFF 1) Ii = (1,5 / 2,2 / 3 / 4 / 6 / 8 / 10 / 12 × In MAX = 0,8 x ICS ETU45B OFF 1) Ii = (1.5 / 2.2 / 3 / 4 / 6 / 8 / 10 / 12 × In MAX = 0.8 x ICS ETU55B … 76B Ii = 1,5 x In … 0,8 x Ics ; OFF 1) (Angabe in Ampere) ETU55B … 76B Ii = 1.5 x In … 0.8 x Ics ; OFF 1) (data in Amps) MAX = 100 kA MAX = 100 kA 1) Bei abgeschalteter I-Auslösung reduziert sich das Ausschaltvermögen des Leistungsschalters auf ICS = ICW. Für die Überstromauslöser ETU45B ... 76B ist es nicht möglich, gleichzeitig den kurzverzögerten Kurzschlussschutz, Einstellung tsd = OFF, und den unverzögerten Kurzschlussschutz, Ii = OFF, abzuschalten! Wird bei tsd = OFF die Einstellung Ii = OFF ausgewählt, erfolgt intern automatisch eine Korrektur auf Ii = 1,5 x In. 1) If the I-tripping is deactivated, the breaking capacity of the circuit-breaker is reduced to ICS = ICW. For the overcurrent releases ETU45B ... 76B it is not possible to deactivate the short-time-delay short-circuit protection, setting tsd = OFF, and the instantaneous short-circuit protection Ii = OFF at the same time ! If the setting Ii = OFF is selected with tsd = OFF, there is an automatic internal correction to Ii = 1.5 x In. Erdschlussauslösung – G-Auslösung Ground-fault tripping – G-tripping Ist der Überstromauslöser mit einem Erdschlussschutzmodul ausgestattet, können Verbraucher vor unzulässig hohen Erdschlussströmen geschützt werden. If the overcurrent release is equipped with an ground-fault protection module, loads can be protected against impermissibly high ground-fault currents. Der Überstromauslöser ETU27B verfügt standardmäßig über ein Erdschlussschutzmodul, während dieÜberstromauslöser ETU45B … 76B optional damit ausgerüstet werden können . q Erdschlussschutzmodule (Seite 9-75) The overcurrent release ETU27B is equipped with an ground-fault protection module as standard, whereas the overcurrent releases ETU45B ... 76B can be equipped with it optionally. q Ground-fault protection modules (page 9-75) Die Erdschlusserfassung kann durch zwei Arten erfolgen The ground-fault can be detected optionally as: - Bei symmetrischer Belastung der Außenleiter durch vektorielle Summenbildung der Ströme - Für bis ETU76B direkte Messung des Erdschlussstromes mit einem separaten Wandler 1200 A :1 A Der Ansprechwert Ig legt zusammen mit der Einstellung der Verzögerungszeit tg die Abschaltung von Erdschlussfehlern fest. - vectorial summation of currents, if loading is balanced to ground - ground-fault current, which will be detected with an external current transformer 1200 A : 1 A The pickup Ig, together with the setting for the time-delay tg, determines the shutdown of ground-fault currents. Current setting values for Ig Einstellwerte für Ig Frame size Baugröße I / II III A 100 A 400 A 600 A B 300 A 600 A 600 A 800 A C 600 A 800 A D 900 A 1000 A D 900 A 1000 A E 1200 A 1200 A E 1200 A 1200 A I / II III A 100 A 400 A B 300 A C OFF OFF Setting values for tg Einstellwerte für tg ETU27B … 45B tg = 0,1 / 0,2 / 0,3 / 0,4 / 0,5 s ETU27B … 45B tg = 0.1 / 0.2 / 0.3 / 0.4 / 0.5 s ETU55B … 76B tg = 0,1 … 0,5 s ETU55B … 76B tg = 0.1 … 0.5 s 9 – 24 Selektivitätssteuerung (ZSI) und am ZSI-Modul gewählter Schalterstellung „G“ oder „S+G“ q (Seite 9-27) wird der eingestellte Wert für die Verzögerungszeit tg auf 100 ms gesetzt, wenn der Leistungsschalter im Erdschlussfall kein Blockiersignal von einem nachgeordneten Leistungsschalter erhält. Er schaltet dann unabhängig vom eingestellten Wert für tg bereits nach 100 ms ab. Mit Blockiersignal gilt weiter die eingestellte Zeit tg. Zur Sicherheit wird nach längstens 3 s das Blockiersignal beendet. If the zone selective interlocking (ZSI) q (page 9-27) is used and the ZSI module is set to "S" or "S+G" the adjusted delay time tg is automatically set to 100 ms provided that in the event of earth-fault the circuit-breaker does not receive a blocking signal from a downstream circuit-breaker. In this case regardless of the adjusted tg value the circuit-breaker will trip after 100 ms. If a blocking signal exists the adjusted delay time tg is valid. For safety reasons after 3 s the blocking signal is terminated. Für einige Überstromauslöser besteht die Möglichkeit, auf eine I2t-Charakteristik umzuschalten. q (Seite 9-29) Some overcurrent releases can be switched over to an I2t-characteristic. q (page 9-29) Neutralleiterschutz – N-Auslösung Neutral conductor protection – N-tripping Die Überstromauslöser ETU27B … 76B bieten die Möglichkeit, auch den Neutralleiter vor Überlast zu schützen. Dazu ist ein Stromwandler für den Neutralleiter erforderlich, der ggf. nachgerüstet werden kann. q (Seite 9-122) The overcurrent releases ETU27B ... 76B offer the possibility to protect the neutral conductor against overload, too. This requires a current transformer for the neutral conductor, which can be retrofitted if necessary. q (page 9-122) Für die Auslösung gilt der gleiche Trägheitsgrad tR, wie für die Überlastauslösung. As for tripping, the same time-lag class tR applies as for overload tripping. Einstellwerte für IN Setting values for IN ETU27B IN = In; OFF ETU45B IN = (0,5 / 1,0) × In; OFF 1) IN = (0,2 … 2,0 ) × In; OFF ETU55B … 76B 1) Einstellwerte über 1,0 x In stehen nur für 3polige Schalter zur Verfügung. ETU27B IN = In; OFF ETU45B IN = (0.5 / 1.0) × In; OFF ETU55B … 76B IN = (0.2 … 2.01) ) × In; OFF 1) Current settings above 1.0 x IN are only available for 3-pole circuit-breakers. VORSICHT CAUTION Einstellwerte IN > 1 x In nur bei entsprechender Dimensionierung des N-Leiters verwenden! Setting values IN > 1 x In should only be used if the neutral conductor has been sufficiently dimensioned. 9.1.9.2 Zusätzliche Funktionen 9.1.9.2 Additional functions Lastüberwachung („Lastaufnahme/Lastabwurf“) Load monitoring (load restore/load shedding) Die Überstromauslöser ETU45B ... ETU76 B bieten die Möglichkeit, den Laststrom zusätzlich zu überwachen. Es lassen sich zwei Stromwerte, „Lastabwurf“ und „Lastaufnahme“, und eine Verzögerungszeit tx einstellen. The overcurrent releases ETU45B ... ETU76B offer the possibility of additional load monitoring. Two current values, "load shedding" and "load restore", as well as a delay time tx, can be set. Bei Unterschreiten des Einstellwertes „Lastaufnahme“ und gleichzeitigem Überschreiten des unteren Grenzwertes der Stromübertragung wird nach Ablauf der eingestellten Verzögerungszeit tx über den eine Meldung ausgegeben. Bei Überschreiten des Einstellwertes „Lastabwurf“ wird nach Ablauf der eingestellten Verzögerungszeit tx über den eine Meldung ausgegeben. Diese Meldungen können zum Zu- bzw. Abschalten von Verbrauchern genutzt werden. Damit lassen sich z. B. Überlastauslösungen von Einspeiseschaltern vorbeugend vermeiden. If the actual load falls below the setting "load restore" but simultaneously exceeds the "minimum of communicated currents" parameter a signal is generated through the after the set delay time tx has elapsed. Also if the the actual load exceeds the setting "load shed" a signal is generated through the after the delay time tx has elapsed. These signals can be used to connect or disconnect loads, thereby preventing an overload tripping of incoming circuit-breakers. Setting values for load monitoring Einstellwerte für Lastüberwachung „Lastabwurf“ und „Lastaufnahme“ 40 A … 1,5 x IR "Load shedding" and "load restore" 40 A … 1.5 x IR Verzögerungszeit tx = 1 … 15 s Delay time tx = 1 … 15 s Die Einstellung der Lastüberwachung kann erfolgen über: - das alphanumerisches Display (ETU45B) das Grafikdisplay (ETU76B) die Prüfbuchse mit dem BDA den PROFIBUS-DP mit einem PC und der Software „Switch ES Power“. - den Modbus mit einem PC und dafür vorgesehener Software Load monitoring can be adjusted through: - the alphanumeric display (ETU45B) the graphical display (ETU76B) the test socket with the BDA the PROFIBUS-DP with a PC and the software "Switch ES Power". - the Modbus with a PC and software 9 – 25 Voreilende Meldung „L-Auslösung“ Leading signal "L-tripping" Die Überstromauslöser ETU45B … 76B stellen eine voreilende Meldung „L-Auslösung“ bereit. Diese wird 100 ms vor der Überlastauslösung über den ausgegeben. Damit können z.B. Thyristor-Regelgeräte abgesteuert werden. Die Meldung erfolgt auch wenn der Schalter über den internen Selbsttest ausgelöst wird. The overcurrent releases ETU45B ... 76B provide a leading signal "L-tripping", which is transmitted through the 100 ms before overload tripping. In this way it is possible e.g. to disconnect thyristor controllers. The signal is also provided even if the circuitbreaker is released about the internal self-test. Phasenausfallschutz Phase failure protection Bei den Überstromauslösern ETU55B … 76B kann der Phasenausfallschutz auch eingeschaltet werden, wenn der Motorschutz nicht aktiviert ist. In overcurrent releases ETU55B ... 76B, the phase failure protection can also be activated if the motor protection is not activated. Ist bei aktiviertem Phasenausfallschutz der Betriebsstrom der am niedrigsten belasteten Phase um 50% kleiner als der Betriebsstrom der am höchsten belasteten Phase, so wird der Einstellwert IR automatisch auf 80% reduziert. Unterscheiden sich die Werte der drei Phasenströme um weniger als 50%, so gilt wieder der Einstellwert IR. If the phase failure protection is activated and the operating current of the lowest loaded phase is 50% smaller than the operating current of the highest loaded phase, the setting value IR is automatically reduced to 80%. If the values of the three phase currents differ by less than 50%, the setting IR applies again. Thermisches Gedächtnis ein-/ausschaltbar Thermal memory can be switched On/Off Die Überstromauslöser ETU45B ... 76B bieten die Möglichkeit, die interne rechnerische Nachbildung der thermischen Prozesse in nachgeordneten Anlagen und Verbrauchern auch dann fortzusetzen, wenn der Leistungsschalter ausgeschaltet und keine externe Spannungsversorgung der Elektronik gegeben ist. Damit kann auch bei häufigen Ein- und Ausschaltvorgängen und wechselnder Belastung ein wirksamer Schutz vor thermischer Überlastung gewährleistet werden. Overcurrent releases ETU45B .. 76B offer the possibility to continue with the internally calculated reproduction of the thermal processes in downstream switchgear and consumers even if the circuit-breaker is open and the electronic system has no external supply. In this way, an effective protection against thermal overload can be guaranteed for frequent closing and opening processes, too. Verhalten im Überlastbereich: Behaviour in the overload range: - oberhalb von 1.125 x IR erfolgt eine streng monotone Erwärmung gemäss Kennlinie Verhalten im Nennstrombereich: - unterhalb von 1.125 x IR erfolgt keine Erwärmung - es erfolgt eine Abkühlung nach Exponentialfunktion mit einer Zeitkonstanten von 18 x tR für Anlagenschutz bzw. 10 x tR für Motorschutz - above 1.125 x IR a strictly monotonic warming according to the overload characteristics takes place Behaviour in the nominal current range: - under 1.125 x IR no warming takes place - cooling down according to an exponential function with a time constant of 18 x tR and 10 x tR for switchgear protection and motor protection respectively Verhalten bei _ParaSwitchTherm = EIN: Behaviour with _ParaSwitchTherm = ON: Bei eingeschaltetem Thermischen Gedächtnis wird die thermischen Vorgeschichte berücksichtigt: If the thermal memory is activated the thermal prehistory will be taken into account: - nach einer Auslösung werden die thermischen Speicher der Phasen mit dem auf 90% reduzierten Wärmeequivalent der wärmsten Phase vorbesetzt (Ermöglichen des Wiedereinschaltens) - Abkühlung nach Exponentialfunktion mit einer Zeitkonstanten von 18 x tR für Anlagenschutz bzw. 10 x tR für Motorschutz. Bei eigenversorgten Auslösern wird in der Phase der Deaktivierung die Abkühlung bei Re-Aktivierung für eine Zeitspanne von max. 60 min. softwaremässig nachempfunden, so dass sich für fremd- und eigenversorgte Auslöser annähernd gleiche Auslösezeiten ergeben. 9 – 26 - after a trip the thermal memories of the phases will be set to 90% of the thermal equivalent of the warmest phase (enable re-closing) - cooling down according to an exponential function with a time constant of 18 x tR and 10 x tR for switchgear protection and motor protection respectively Trip units not connected to an external power supply will calculate the cooling down after re-closure of the circuit-breaker for a maximum period of 60 minutes. Thus trip unit powered from CTs or an external source will show a similar behaviour as regards tripping times. Verhalten bei _ParaSwitchTherm = AUS: Behaviour with _ParaSwitchTherm = OFF: Bei abgeschaltetem Thermischen Gedächtnis wird die thermische Vorgeschichte nicht berücksichtigt: If the thermal memory is deactivated the thermal prehistory will not be taken into account: - der Auslöser startet bei Aktivierung immer mit Wärmespeicher NULL - nach einer Auslösung werden die thermischen Speicher der Phasen auf NULL gesetzt Aktivieren des thermischen Gedächtnisses kann erfolgen über: - on start-up the thermal memory is set to zero - after a trip the thermal memories of the phases will be set to zero The thermal memory can be activated through: - einen Schiebeschalter (ETU45B) - a slide switch (ETU45B) - das Grafikdisplay (ETU76B) - die Prüfbuchse mit dem BDA (ETU55B … 76B) - den PROFIBUS-DP mit einem PC und der Software „Switch ES Power“ (ETU55B … 76B). - den Modbus mit einem PC und zusätzlicher Software - the graphical display (ETU76B) - the test socket with the BDA (ETU55B ... 76B) - the PROFIBUS-DP with a PC and the software "Switch ES Power" (ETU55B ... 76B). - the Modbus with a PC and additional software Zeitverzögerte Selektivitäts-Steuerung Zone selective interlocking Die Kombination des Leistungsschalters mit einem ZSI-Modul q (Seite 9-110) erlaubt es, in Schaltanlagen mit mehreren Staffelebenen einen auftretenden Kurzschluss genau zu lokalisieren. If the circuit-breaker is combined with a ZSI-module q (page 9-110), a short-circuit occurring in systems with several grading levels can be localised precisely. Dazu werden alle Leistungsschalter über ihre ZSI-Module miteinander verbunden. For this purpose, all circuit-breakers are interconnected via their ZSI-modules. Im Kurz- und/oder Erdschlussfall fragt jeder vom Kurzschlussstrom durchflossene Leistungsschalter die ihm direkt nachgeordneten Leistungsschalter ab, ob der Kurz- und/oder Erdschluss auch in der nächsten untergeordneten Staffelebene auftritt. Es löst nur der, in Energieflussrichtung gesehen, nächstgelegene, dem Kurz- und/ oder Erdschluss vorgeordnete Leistungsschalter aus. When a short-circuit or earth-fault occurs, each circuit-breaker affected by the short-circuit or earth-fault current queries its downstream circuit-breaker to determine whether the short-circuit or earth-fault is present in the next downstream grading level. In the direction of the energy flow, only the circuit-breaker nearest to the short-circuit or earth-fault in the upstream direction is tripped. Eine eingestellte Verzögerungszeit tsd für die Kurzschlussauslösung wird auf 50 ms gesetzt bei Schalterstellung am ZSI-Modul „S“ oder „S+G“, wenn der Leistungsschalter im Kurzschlussfall kein Blockiersignal ZSI-IN von einem nachgeordneten Leistungsschalter erhält. Bei einem erkannten Kurzschluss wird ein Blockiersignal ZSI-OUT an die vorgeordneten Leistungsschalter ausgegeben. Die Kurzschlussauslösung erfolgt jedoch frühestens nach 50 ms, typisch sind 80 … 90 ms. A possible delay time setting for the short-circuit tripping is set to 50 ms if "S" or "S+G" is selected on the ZSI module and if in the event of short-circuit the circuit-breaker does not receive a blocking signal ZSI-IN sent from its downstream circuit-breaker. In case of a detected short-circuit a blocking signal ZSI-OUT will sent to the preceeding circuit-breakers. The trip does take place after 50ms. It typically delays between 80 and 90 ms. Eine eingestellte Verzögerungszeit tg für die Erdschlussauslösung wird auf 100 ms gesetzt bei Schalterstellung am ZSI-Modul „G“ oder „S+G“, wenn der Leistungsschalter im Erdschlussfall kein Blockiersignal ZSI-IN von einem nachgeordneten Leistungsschalter erhält. Bei einem erkannten Erdschluss wird ein Blockiersignal ZSI-OUT an die vorgeordneten Leistungsschalter ausgegeben. Die Erschlussauslösung erfolgt jedoch frühestens nach 100 ms, typisch sind 130 ... 140 ms. Zur Sicherheit wird nach längstens 3 s ein ausgegebenes Blockiersignal ZSI-OUT beendet. A possible delay time setting for the earth-fault tripping is set to 100 ms if "S" or "S+G" is selected on the ZSI module and if in the event of earth-fault the circuit-breaker does not receive a blocking signal ZSI-IN sent from its downstream circuit-breaker. In case of a detected earth-fault a blocking signal ZSI-OUT will sent to the preceeding circuit-breakers. The trip does take place after 100 ms. It typically delays between 130 and 140 ms. For safety reason after a maximum delay time of 3 s a given blocking signal ZSI-OUT is terminated. Überlastschutz umschaltbar auf I4t Overload protection switchable to I4t Die Überstromauslöser ETU45B, ETU55B und ETU76B bieten die Möglichkeit, für den Überlastschutz mittels Schiebeschalter von der I2t- auf eine I4t-abhängige Funktion umzuschalten. Damit wird die Selektivität des Überlastschutzes in Kombination mit Sicherungen verbessert. The overcurrent releases ETU 45B, ETU55B and ETU76B offer the possibility to switch over from the I2t to an I4t inverse-time function for the overload protection by means of a slide switch. This improves the selectivity of the overload protection in combination with fuses. 9 – 27 Überlastschutz abschaltbar Switching off overload protection Bei den Überstromauslösern ETU55B und ETU76B ist es möglich, den Überlastschutz abzuschalten. Das kann z. B. erforderlich sein, wenn die Einspeisung der Anlage durch einen Generator erfolgt. On overcurrent releases ETU55B and ETU76B it is possible to switch off the overload protection. This might be necessary e.g. if the system is fed by a generator. Die Abschaltung kann erfolgen über: Switching off can be effected through: - das Grafikdisplay (ETU76B) - die Prüfbuchse mit dem BDA - den PROFIBUS-DP mit einem PC und der Software „Switch ES Power“. - den Modbus mit einem PC und zusätzlicher Software - the graphical display (ETU76B) - the test socket with the BDA - the PROFIBUS-DP with a PC and the software "Switch ES Power". - the Modbus with a PC and additional software VORSICHT CAUTION Bei Abschaltung der Überlastschutzfunktion ist sicherzustellen, dass keine Überlastfälle eintreten können. Eine thermische Zerstörung des Schaltgerätes, der Anlage oder des Verbrauchers wären die Folge. Auftretende Überlastfälle können in diesem Fall nur bei Überschreiten der Ansprechwerte für die Kurzschlussschutzfunktion (verzögert oder unverzögert) durch Auslösung abgeschaltet werden. Diese Ansprechwerte sind entsprechend anzupassen. When deactivating the overload protection, it has to be ensured overloads will not occur. Otherwise, thermal destruction of the circuit-breaker, the switchgear or the consumer load could result. In these cases occurring overloads can only be handled by the short time and instantaneous protection. The pick-up values will have to be adjusted accordingly. Kurzverzögerter Kurzschlussschutz umschaltbar auf I2t Short-time-delay short-circuit protection switchable to I2t Die Überstromauslöser ETU45B … 76B bieten die Möglichkeit, von einer konstanten Verzögerungszeit auf eine I2t -Kennlinie umzuschalten. Dadurch wird die Verzögerungszeit bei konstantem I2tsdWert abhängig vom Kurzschlussstrom und es kann eine bessere Selektivität mit nachgeschalteten Sicherungen erreicht werden. The overcurrent releases ETU 45B ... 76B offer the possibility to switch over from a constant time delay to an I2t-characteristic. In this way, the time delay depends on the short-circuit current, but with a constant I2tsd-value, providing a better selectivity with downstream fuses. In diesem Fall ändern sich die Einstellmöglichkeiten für den Trägheitsgrad wie folgt: In this case, the setting possibilities for the time-lag class change as follows: Einstellwerte für tsd ETU45B … 76B Setting values for tsd tsd = 0,1 / 0,2 / 0,3 / 0,4 s (bei 12 x In) Die Umschaltung auf die I2tsd-abhängige Kennlinie kann erfolgen über: ETU45B … 76B tsd = 0.1 / 0.2 / 0.3 / 0.4 s (at 12 x In) Switchover to the I2tsd-characteristic can be made through: - den tsd-Drehkodierschalter (ETU45B); diesen auf einen Wert im weiß gekennzeichneten Bereich stellen. - the tsd rotary coding switch (ETU45B); which must be set to a value in the white area. - das Grafikdisplay (ETU76B) - die Prüfbuchse mit dem BDA (ETU55B … 76B) - den PROFIBUS-DP mit einem PC und der Software „Switch ES Power“ (ETU55B … 76B). - den Modbus mit einem PC und zusätzlicher Software - the graphical display (ETU76B) - the test socket with the BDA (ETU 55B ...76B) - the PROFIBUS-DP with a PC and the software "Switch ES Power" (ETU55B ... 76B). - the Modbus with a PC and additional software 9 – 28 Umschaltbare Parametersätze Changeable parameter sets Die Überstromauslöser ETU55B … 76B gestatten die Speicherung von zwei unterschiedlichen Parametersätzen für die Schutzfunktionen. The overcurrent releases ETU 45B ... 76B enable the storage of two different parameter sets for protective functions. Damit ist es möglich, beim Umschalten auf eine andere Einspeisung auch anderen Schutzbedürfnissen Rechnung zu tragen. This enables changeover to new protection settings whenever there is a transfer to another supply source. Die Umschaltung kann erfolgen manuell über: Switchover can be made manually through: - das Grafikdisplay (ETU76B) - die Prüfbuchse mit dem BDA - den PROFIBUS-DP mit einem PC und der Software „Switch ES Power“ oder automatisiert über: - the graphical display (ETU76B) - the test socket with the BDA - the PROFIBUS-DP with a PC and the software "Switch ES Power" or automatically via: - den PROFIBUS-DP - den Modbus mit einem PC und zusätzlicher Software - den mit einem Eingangssignal am digitalen Eingangsmodul. - the PROFIBUS-DP - the Modbus with a PC and additional software - the with an input signal at the digital input module. Erdschlussschutz umschaltbar auf I2t-Kennlinie Ground-fault protection switchable to I2t characteristic Die Erdschlussschutzmodule für die Überstromauslöser ETU45B ... 76B bieten die Möglichkeit, von einer konstanten Verzögerungszeit auf eine I2t-Kennlinie umzuschalten. The ground-fault protection modules for the overcurrent releases ETU 45B ... 76B offer the possibility to switch over from a constant delay time to an I2t-characteristic. Dadurch erhält man eine Auslösekennlinie mit stromabhängiger Verzögerungszeit bei konstantem I2tg-Wert und kann in Schaltanlagen mit mehreren Staffelebenen eine bessere Selektivität des Erdschlussschutzes erzielen. This provides an inverse-time tripping characteristic with a constant I2tg-value, providing better selectivity of the ground-fault protection in system with several grading levels. Die Einstellbereiche für die Verzögerungszeit bleiben unverändert. The setting options for the delay time remain unchanged. I2 Die Umschaltung auf die tg-abhängige Kennlinie kann erfolgen über: Switchover to the I2tg-characteristic can be made through: - den tg-Drehkodierschalter (ETU45B); diesen auf einen Wert im weiß gekennzeichneten Bereich stellen. - the tg rotary coding switch (ETU45B); this must be set to a value in the white area - das Grafikdisplay (ETU76B) - die Prüfbuchse mit dem BDA (ETU55B … 76B) - den PROFIBUS-DP mit einem PC und der Software „Switch ES Power“ (ETU55B … 76B). - den Modbus mit einem PC und zusätzlicher Software - the graphical display (ETU76B) - the test socket with the BDA (ETU 55B ...76B) - the PROFIBUS-DP with a PC and the software "Switch ES Power" (ETU55B ... 76B). - the Modbus with a PC and additional software Erdschlussalarm q Erdschlussschutzmodule (Seite 9-75) Ground-fault alarm q Ground-fault protection modules (page 9-75) 9 – 29 9.1.10 Displays 9.1.10 Displays 9.1.10.1 Alphanumerisches Display 9.1.10.1 Alphanumeric display Das alphanumerische Display steht optional für die Überstromauslöser vom Typ ETU45B zur Verfügung. The alphanumeric display is available as an option for overcurrent releases of the types ETU45B. Aufbau Design (1) (2) (3) (1) (2) (3) Bildschirm (4 Zeilen à 20 Zeichen) Taste Nach-oben Taste Nach-unten Screen (4 lines with 20 characters each) Up-key Down-key Nachrüsten Retrofitting Der Überstromauslöser ETU45B kann nachträglich mit einem alphanumerischen Display ausgestattet werden. The overcurrent release ETU45B, can be retrofitted with an alphanumeric display. GEFAHR DANGER Gefährliche elektrische Spannung! Hazardous voltage! Kann Tod, schwere Personenschäden sowie Schäden an Geräten und Ausrüstung bewirken. Will cause death, serious personal injury, or equipment / property damage. Vor dem Arbeiten an diesem Gerät, Anlage unbedingt spannungs freischalten. Disconnect power before working on this equipment. - Ausschalten und Federspeicher entspannen q (Seite 24-3) - Externe Spannungsversorgung 24 V DC ausschalten, sofern vorhanden - Plombierhaube des Überstromauslösers entfernen, sofern vorhanden q (Seite 9-86) 9 – 30 - Switch off and discharge the storage spring q (page 24-3) - Switch off external 24 V DC voltage supply, if applicable - Remove sealing cap of overcurrent release, if applicable q (page 9-86) Blindflansch ausbauen Removing dummy flange 3 4 1 5 2 Installing display and latching it tight Display einsetzen und einrasten 2 1 3 - Plombierhaube des Überstromauslösers ggf. aufsetzen und plombieren q (Seite 9-86) - Externe Spannungsversorgung 24-V-DC einschalten, sofern vorhanden - Fit and seal trip unit sealing cap, if applicable, q (page 9-86) - Switch on external 24 V DC voltage supply, if applicable Ändern der Einbaulage Modifying the inclination of the display Werksseitig wird das alphanumerische Display nach unten geneigt eingebaut. Es kann jedoch vertikal um 180° gedreht werden. Danach ist das Display nach oben geneigt. At the factory, the alphanumeric display is installed with a downward inclination. However, it can be turned in vertical direction by 180°; then, the display is then inclined upwards. 9 – 31 GEFAHR DANGER Gefährliche elektrische Spannung! Hazardous voltage! Kann Tod, schwere Personenschäden sowie Schäden an Geräten und Ausrüstung bewirken. Will cause death, serious personal injury, or equipment / property damage. Vor dem Arbeiten an diesem Gerät, Anlage unbedingt spannungs freischalten. Disconnect power before working on this equipment. - Ausschalten und Federspeicher entspannen q (Seite 24-3) - Externe Spannungsversorgung 24 V DC ausschalten, sofern vorhanden - Plombierhaube des Überstromauslösers entfernen, sofern vorhanden q (Seite 9-86) - Switch off and discharge the storage spring q (page 24-3) - Switch off external 24 V DC voltage supply, if applicable Display ausbauen Removing the display 4 - Remove trip unit sealing cap, if applicable q (page 9-86) 3 1 5 2 Display um 180° gedreht einsetzen und einrasten Turn the display through 180°, insert and lock it into place 2 1 3 - Plombierhaube des Überstromauslösers ggf. aufsetzen und plombieren q (Seite 9-86) - Externe Spannungsversorgung 24-V-DC einschalten, sofern vorhanden 9 – 32 - Fit and seal the trip unit sealing cap, if applicable q (page 9-86) - Switch on external 24 V DC voltage supply, if applicable Schilder aktualisieren Updating the options label Hinweis Note Nach dem Einbau zusätzlicher Komponenten sind folgende Angaben mit einem weißen Permanentstift bzw. mit Aufklebern aus dem beiliegenden Etikettenbogen zu aktualisieren! Davor ist es ggf. notwendig die zu korrigierenden Zeichen mit einem schwarzen Permanentstift zu füllen. After installing additional components, add the following data using a white and indelible ink pen or the appropiate label from the set of labels supplied! If necessary the signs which have to be corrected have to be filled a black permanent pen. Ausstattungsschild des Leistungsschalters Alphanumerisches Display für ETU45B Alphanumeric display for ETU45B Options label of the circuit-breaker Bestell-Nr. Order no. 9. Stelle ändern Modify 9th position 3WL9111-0AT81-0AA0 F 9 – 33 Menüstruktur ETU45B Menu structure ETU45B Nach dem Anlegen der Versorgungsspannung wechselt die Displaydarstellung nach ca. 5 s von der Startanzeige in den AutoscrollModus. Von dort aus kann mit Hilfe der beiden Tasten in weitere Modi verzweigt werden. After the supply voltage has been applied, the display changes from "Power-up screen" to "Autoscroll" mode after about 5 s. Thereafter, further modes can be accessed by means of the two buttons. Übersicht Overview Modus „Autoscroll“ "Autoscroll" mode Im normalen Betrieb befindet sich das Display im Autoscroll-Modus. During normal operation, the display is in "Autoscroll" mode Um in den Modus „Autoscroll“ zu gelangen, folgende Taste(n) drücken: To access Autoscroll mode, press the following button(s) Im Modus „Feste Bildschirmanzeige“ In mode "Fixed screen display" Im Modus „Zähler Auslösungen zurücksetzen“ In mode "Tripping counter reset" Im Modus „Kontrasteinstellung“ Im Modus „Parametereinstellung“ Im Modus „Info Auslösungen“ 9 – 34 oder + 10 Sekunden keine Taste drücken or In mode "Contrast setting" In mode "Parameter setting" In mode "Tripping info" + Do not press any button for 10 seconds In diesem Modus wird automatisch alle 5 Sekunden zum nächsten Screen gewechselt. In this mode, the display automatically changes to the next screen every 5 seconds. Ist kein Messmodul installiert, wechselt die Anzeige ständig zwischen den Screens 1 und 2. If there is no metering module available, the display changes continuously between the screens 1 and 2. Ist ein Messmodul installiert, werden im Autoscroll-Modus insgesamt fünf Screens angezeigt. If there is a metering module available, a total of five screens are displayed in "Autoscroll" mode. Angezeigte Screens im Modus „Autoscroll“ Screens displayed in the "Autoscroll" mode ohne Messmodul without metering module Screen 1 Screen 1 ,/ ,/ ,/ ,1 $ $ $ $ Strom IL1 Strom IL2 Strom IL3 Strom IN Screen 2 , , , ,1 $ $ $ $ Current I1 Current I2 Current I3 Current IN Screen 2 ,J $ Erdschlussstrom Ig (Es wird nur dann ein Wert angezeigt, wenn ein Erdschlussschutzmodul eingebaut ist.) ,J $ Ground-fault current Ig (A value is only displayed if an ground-fault protection module is fitted.) bei eingebautem Messmodul zusätzlich with metering module installed, additionally Screen 3 Screen 3 3 6 4 FRV N: N9$ N9$5 [[[[ Wirkleistung P Scheinleistung S Blindleistung Q Leistungsfaktor Screen 4 8 9 8 9 8 9 N: N9$ N9$5 [[[[ Active power P Apparent power S Reactive power Q Power factor Screen 4 Spannung U12 Spannung U23 Spannung U31 Screen 5 W. .=...00000,00.MWh W. .=...00000,00.MWh AktRichtung........ f...=........00,0 Hz .: .9$ .9$5 3) 9 9 9 9 9 9 Voltage U12 Voltage U23 Voltage U31 Screen 5 Energie (positive Richtung) Energie (negative Richtung) Aktuelle Energieflussrichtung Frequenz W. .=...00000,00.MWh W. .=...00000,00.MWh PowerFlowDir....... f...=........00,0 Hz Energy (positive direction) Energy (negative direction) Present direction of energy flow Frequency Hinweis Note Beim erneuten Aufbau einer Bildschirmseite werden die anzuzeigenden Daten stets aktualisiert. Während der Darstellung einer Bildschirmseite erfolgt keine Aktualisierung. The data to be displayed are updated every time the screen page is set up again. No updates take place when a screen page is being displayed. 9 – 35 Tastenfunktionen im Modus „Autoscroll“ + Button functions in the "Autoscroll" mode Anzeige wird eingefroren; Wechsel in den Modus „Feste Bildschirmanzeige“ Display is frozen Switchover to mode "Fixed screen display" Wechsel in den Modus „Parametereinstellung“ Change to mode "Parameter setting" Wechsel in den Modus „Kontrasteinstellung“ Modus „Feste Bildschirmanzeige“ + Change to mode "Contrast setting" Mode "Fixed screen display" Um in den Modus „Feste Bildschirmanzeige“ zu gelangen, folgende Taste drücken: To access "Fixed screen display" mode, press the following button: Im Modus „Autoscroll“ In "Autoscroll" mode In diesem Modus werden Wartungsinformationen mit der Anzahl der Auslösungen und Schaltungen des Leistungsschalters sowie mit Wartungshinweisen angezeigt. Die angezeigten Informationen hängen von der Anzahl der Auslösungen des Leistungsschalters ab. In this mode, maintenance information is provided with the number of circuit-breaker trips and switching operations as well as with maintenance instructions. The information displayed depends on the number of circuit-breaker trips operations. $Q]$XVO|VXQJ $Q]6FKDOWXQJ Anzahl der Auslösungen Anzahl der Schaltungen 1XPRI7ULSV 1XPRI2SV Number of tripping operations Number of switching operations $Q]$XVO|VXQJ $Q]6FKDOWXQJ :DUWXQJGHU.RQWDNWH YRUEHUHLWHQ Anzahl der Auslösungen Anzahl der Schaltungen Wartungshinweise 1XPRI7ULSV 1XPRI2SV 3UHSDUHIRUFRQWDFW PDLQWHQDQFH Number of tripping operations Number of switching operations Maintenance instructions Tastenfunktionen im Modus „Feste Bildschirmanzeige“ Wenn Screen 6 angezeigt wird + 9 – 36 Button functions in mode "Fixed screen display" Wechsel in den nächsthöheren Screen Change to next higher screen level Wechsel in den Modus „Autoscroll“ Change to "Autoscroll" mode Wechsel in den Modus „Zähler Auslösungen zurücksetzen“ If screen 6 is displayed + Change to mode "Tripping counter reset" Untermodus „Zähler Auslösungen zurücksetzen“ Submode "Tripping counter reset" Dieser Modus bietet die Möglichkeit, den Zähler für die Auslösungen und Schaltungen auf den Wert Null zurückzusetzen. This mode offers the possibility to reset the counter for the trips and the switching operations to zero. VORSICHT CAUTION Das Zurücksetzen des Zählers sollte nur erfolgen, nachdem die Kontakte gewartet wurden. Wird der Zähler zurückgesetzt, ohne dass die Kontakte gewartet wurden, stimmen die angezeigten Wartungsinformationen nicht mehr mit dem tatsächlichen Zustand der Kontakte überein. Das kann zur Zerstörung der Kontakte führen If the counter is reset without contact maintenance having been performed, the maintenance information displayed will not correspond to the actual condition of the contacts. This can destroy the contacts. Um in den Modus „Zähler zurücksetzen“ zu gelangen, folgende Taste(n) drücken: To access "Tripping counter reset mode", press the following button(s) Im Modus „Feste Bildschirmanzeige“, wenn Screen 6 angezeigt wird In the mode "Fixed screen display", when screen 6 is displayed + + Angezeigte Screens im Modus „Zähler Auslösungen zurücksetzen“ Screens displayed in mode "Tripping counter reset" Screen 1 Screen 1 =lKOHUI$XVO|VJXQG 6FKDOWJUFNVHW]HQ" MD QHLQRGHU Dieser Screen dient als Sicherheitsabfrage. Das Rücksetzen des Zählers nur nach Wartung der Kontakte durchführen! 5HVHW7ULSVDQG2SV &RXQWHU" \HV QRRU This screen is used for safety queries. Reset the counter after contact maintenance only! Screen 2 Screen 2 =lKOHUI$XVO|VJXQG 6FKDOWJ ]XUFNJHVHW]W ZHLWHURGHU Das Rücksetzen der Zähler für die Auslösungen und Schaltungen wird bestätigt. 7ULSVDQG2SV &RXQWHUUHVHW FRQWLQXHRU Counter reset for trips and switching operations confirmed. Tastenfunktionen im Modus „Zähler Auslösungen zurücksetzen“ Button functions in mode "Tripping counter reset" Wenn Screen 1 angezeigt wird If screen 1 is displayed oder + Abbruch, kein Zurücksetzen der Zähler auf Null. Wechsel in den Modus „Autoscroll“ Zurücksetzen der Zähler auf Null Wechsel zu Screen 2. Wenn Screen 2 angezeigt wird oder or + Cancelling, no counter reset to zero Change to "Autoscroll" mode Counter reset to zero Change to screen 2 If screen 2 is displayed Wechsel in den Modus „Autoscroll“ or Change to "Autoscroll" mode 9 – 37 Modus „Parametereinstellung“ Mode "Parameter setting" VORSICHT CAUTION Parametereinstellungen grundsätzlich nur vornehmen, wenn der Leistungsschalter ausgeschaltet ist. Eine Veränderung der Parameter bei eingeschaltetem Leistungsschalter kann zu ungewolltem Auslösen des Leistungsschalters führen. Adjust parameters only when the circuit-breaker is switched off. If the parameters are modified with the circuit-breaker switched on, this can trip the circuit-breaker unintentionally. Dieser Modus erlaubt die Einstellung folgender Parameter: - Lastabwurf Lastaufnahme Verzögerungszeit Lastabwurf/Lastaufnahme Spracheinstellung für Display In this mode, the following parameters can be adjusted: - load shedding load restore delay time for load shedding/load restore language setting for display Um in den Modus „Parametereinstellung“ zu gelangen, folgende Taste(n) drücken: To access "Parameter setting" mode, press the following button(s): Im Modus „Autoscroll“ In "Autoscroll" mode Angezeigte Screens im Modus „Parametereinstellung“ Screens displayed in the mode "Parameter setting" Screen 1 Screen 1 3DUDPHWHUbQGHUQ /DVWDEZXUI $ XQG %HVWlWLJHQ Einstellung Lastabwurf Screen 2 3DUDPHWHUbQGHUQ /DVWDXIQDKPH $ XQG %HVWlWLJHQ Einstellung Lastaufnahme Einstellung Verzögerungszeit Lastabwurf / -aufnahme 9 – 38 Setting Load shedding &KDQJH3DUDPHWHUV W[ V XQG &RQILUP Setting Delay time Load shedding/load restore Screen 4 Einstellung Sprache Display Für XXXX kann stehen: ENGL, DEUT Screen 5 3DUDPHWHUZHUGHQ JHlQGHUW VZDUWHQ &KDQJH3DUDPHWHUV /RDG5HVWRUH $ XQG &RQILUP Screen 3 Screen 4 3DUDPHWHUbQGHUQ 6SUDFKH/DQJ ;;;; XQG %HVWlWLJHQ Setting Load shed Screen 2 Screen 3 3DUDPHWHUbQGHUQ W[ V XQG %HVWlWLJHQ &KDQJH3DUDPHWHUV /RDG6KHG $ XQG &RQILUP &KDQJH3DUDPHWHUV 6SUDFKH/DQJ ;;;; XQG &RQILUP Setting Display language XXXX may be ENGL or GERM Screen 5 Parameteränderungen werden durchgeführt, nach 10 Sekunden Wechsel in den Modus „Autoscroll“ &KDQJHG3DUDPHWHU EHLQJVDYHG ZDLWV Parameter settings are being changed, switches to "Autoscroll" mode after 10 seconds Hinweis Note Wird bei angezeigtem Screen 1, 2, 3 oder 4 innerhalb von 10 s keine Taste betätigt, wird der Modus „Parametereinstellung“ abgebrochen. Bereits vorgenommene Parameteränderungen werden nicht übernommen. Es erfolgt der Wechsel in den Modus „Autoscroll“. When screen 1, 2, 3 or 4 is displayed and no key is pressed within 10 seconds, mode "Parameter setting" is canceled. Any parameter changes performed are not accepted. Display switches back to "Autoscroll" mode Tastenfunktionen im Modus „Parametereinstellung“ + Button functions in mode "Parameter setting" Erhöht den eingestellten Wert Increases the set value Verringert den eingestellten Wert Reduces the set value + Bestätigt den eingestellten Wert, Wechsel zum nächsten Screen Confirms the set value Switches to the next screen Modus „Kontrasteinstellung“ Mode "Contrast setting" Dieser Modus erlaubt die Kontrasteinstellung des Displays. In this mode, the contrast of the display can be adjusted. Um in den Modus „Kontrasteinstellung“ zu gelangen, folgende Taste(n) drücken: To access "Contrast setting" mode, press the following button(s): Im Modus „Autoscroll“ In "Autoscroll" mode + + Angezeigte Screens im Modus „Kontrasteinstellung“ Screens displayed in the mode "Contrast setting" Screen 1 Screen 1 .RQWUDVWHLQVWHOOXQJ (QWHU Kontrasteinstellung Je länger der Balken, desto höher der Kontrast. Tastenfunktionen im Modus „Kontrasteinstellung“ + &RQWUDVW$GMXVW (QWHU Contrast setting The longer the bar, the higher the contrast Button functions in mode "Contrast setting" Erhöht den Kontrast Increases the contrast Verringert den Kontrast Reduces the contrast Eingestellten Kontrast übernehmen, Wechsel in den Modus „Autoscroll“ + Accepts the contrast, switch to the "Autoscroll" mode Anzeige „Info Auslösung“ Screen "Tripping info" In diesen Modus wird automatisch gewechelt, sobald eine Auslösung erfolgte, vorausgesetzt es ist eine externe DC-24-V-Spannung angeschlossen. In this mode, there is an automatic change as soon as there is a tripping, provided that an external 24 V DC voltage supply has been connected. 9 – 39 Angezeigte Screens im Modus „Info Auslösung“ Art der Auslösung Betroffene Phase Für XX kann stehen: L, S, I, G, N Für YY kann stehen: L1, L2, L3, N Tastenfunktionen im Modus „Info Auslösung“ + Anzeige der Wartungsinformationen Erneutes Drücken: Rücckehr in Modus „Info Auslösung“ Screens displayed in the mode "Tripping info" 7ULS&DXVH;; 7ULSSHG3KDVH<< Tripping type Phase affected XX may be: L, S, I, G, N YY may be: L1, L2, L3, N Button functions in the mode "Tripping info" + Display of maintenance instructions If pressed again: Return to the mode "Tripping info" Press CLEAR-button Switches to "Autoscroll" mode CLEAR-Taste drücken Wechsel in den Modus „Autoscroll“ Anzeige „Parameteränderungen anzeigen“ Screen "Display parameter changes" In diesen Modus wird automatisch gewechselt, sobald ein beliebiger Parameter über die Drehkodierschalter geändert wurde, vorausgesetzt es ist eine externe DC-24-V-Spannungsversorgung angeschlossen. The display automatically switches to this mode when a parameter has been changed via the rotary coding switches, provided an external 24 V DC voltage supply has been connected. Angezeigte Screens im Modus „Parameteränderungen anzeigen“ (LQVWHOOXQJJHlQGHUW [[[[[[ \\ Screens displayed in mode "Display parameter changes" 3DUDPHWHUFKDQJHG Anzeige des geänderten Wertes [[[[[[ \\\ Display of the changed value Größen sowie deren Werte und Einheiten, die in Screen 1 angezeigt Technical data with values and units that can be displayed in werden können. screen 1 *HlQGHUWH*U|H0|JOLFKH$Q]HLJH(LQKHLW ,5 <<$EVROXWZHUW$ ,6' <<$EVROXWZHUW$ ,L <<$EVROXWZHUWRGHU2))$ ,J <<$EVROXWZHUW$ ,JDODUP <<$EVROXWZHUW$ WJ <<PV ,AWJ <<PV ,AW5 <<V ,AW5 <<V W6' <<PV ,AW6' <<PV WKPHP 212)) 9 – 40 Größen sowie deren Werte und Einheiten, die in Screen 1 angezeigt Technical data with values and units that can be displayed in werden können. screen 1 &KDQJHGGDWD'LVSOD\HG9DOXHV8QLW ,5 ,6' ,L ,J ,JDOD WJ ,AWJ ,AW5 ,AW5 W6' ,AW6' WKPHP <</7SLFNXSYDOXHLQSULPDU\DPSHUHV$ <<67SLFNXSYDOXHLQSULPDU\DPSHUHV$ <<,1SLFNXSYDOXHLQSULPDU\DPSHUHV$ <<*)SLFNXSYDOXHLQSULPDU\DPSHUHV$ <<*)DODUPSLFNXSYDOXHLQSULPDU\DPSHUHV$ <<*)GHOD\PV <<*),AWGHOD\PV <</7,AWGHOD\V <</7,AWGHOD\V <<67GHOD\PV <<PV 212)) ,5 ,6' Ansprechstrom für Überlastauslösung Current for overload tripping Ansprechstrom für kurzzeitverzögerte Kurzschlussaus- Current for short-time delayed short-circuit tripping ,L ,J Ansprechstrom für unverzögerte Kurzschlussauslösung Current for instantaneous short-circuit tripping ,JDODUP lösung Ansprechstrom für Auslösung des Erdschlussschutzes Current for ground-fault protection tripping (Wird nur angezeigt, wenn ein Erdschlussschutzmodul (this is only displayed if there is an ground-fault protection module eingebaut ist. available) Ansprechstrom für Alarmanzeige des Erdschlussschut- Response current for ground-fault protection alarm indicator zes (Wird nur angezeigt, wenn ein Erdschlussschutz- (this is only displayed if a ground-fault protection module is installed) modul eingebaut ist.) WJ Verzögerungszeit für den Erdschlussschutz (Wird nur Delay time for ground-fault protection (this is only displayed if a ground- angezeigt, wenn ein Erdschlussschutzmodul eingebaut fault protection module is installed) ist.) ,WJ I2t-abhängige Verzögerung des Erdschlussschutzes Inverse-time delay (I2t-dependent) of ground-fault protection (this is only (Wird nur angezeigt, wenn ein Erdschlussschutzmodul displayed if a ground-fault protection module is installed) eingebaut ist.) ,W5 ,W5 W6' ,W6' I2t-abhängige Verzögerung der Überlastauslösung WKPHP Zeigt an, ob Temperaturgedächtnis ein-/ausgeschaltet 4 Inverse-time delay (I2t-dependent) for overload tripping I t-abhängige Verzögerung der Überlastauslösung Inverse-time delay (I4t-dependent) for overload tripping Verzögerungszeit Kurzschlussauslösung Delay time of short-circuit tripping I2t-abgängige Verzögerungszeit der Kurzschlussaus- Inverse-time delay (I2t-dependent) for short-circuit tripping lösung Indicates wether thermal memory is on/off ist Tastenfunktionen im Modus „Parameteränderungen anzeigen“ Button functions in mode "Display parameter changes" Der geänderte Wert wird für 4 Sekunden angezeigt. Danach Rückkehr in den Modus, in dem sich das Display vorher befand. The changed value is displayed for 4 seconds. The display then switches back to the previous mode. 9 – 41 9.1.10.2 Grafikdisplay 9.1.10.2 Graphical display Der Überstromauslöser ETU76B ist standardmäßig mit einem fest eingebauten Grafikdisplay ausgestattet. Dieses Display ermöglicht eine maximal 8-zeilige Textausgabe oder die grafische Darstellung von Kurvenverläufen. The overcurrent release ETU76B is equipped with a fixed-mounted graphical display as standard. This display enables a text output with a maximum of 8 lines or the graphical representation of characteristics. Es dient sowohl der Anzeige von Daten als auch zur Parametrierung des Überstromauslösers und der Messfunktion. Die Bedienung des Displays erfolgt über die Bedientasten am Überstromauslöser. It is used both to display data and to parameterise the overcurrent release as well as the metering function. The display is operated through the control provided on the overcurrent release. (1) (2) (1) (2) Grafikdisplay Bedientasten (1) (2) Graphical display Operating keys Aufbau des Displays Display design (1) (2) (1) (2) (3) 9 – 42 Menüüberschrift 8zeilige alphanumerische Anzeige oder grafische Darstellung von Kurvenverläufen Statuszeile (3) Menu title 8-line alphanumeric display or graphical representation of characteristics Status line Statuszeile Status line In der Statuszeile wird durch fett dargestellte Symbole angezeigt, welche Handlungen durch den Bediener zum gegenwärtigen Zeitpunkt möglich sind und welche Einstellungen gerade aktiv sind. The status line shows, by means of bold symbols, which actions the operator can carry out and which settings are currently active at this moment. PAR TRIG AB ESC A (1) (1) (2) (3) (4) (5) (6) (2) (3) Zugang nur mit Passwort Wartung erforderlich Eingestellter Parametersatz für die Schutzfunktionen Editiermöglichkeit Eingestellter Trigger Handlungsmöglichkeiten für den Bediener (4) (1) (2) (3) (4) (5) (6) (5) (6) Access with password only Maintenance required Set parameter set for protective functions Editing option Set trigger Possible actions by the operator Darstellung von Balkendiagrammen Representation of bar diagrams Die Messwerte für einige Parameter werden sowohl als Zahlenwert als auch grafisch als Balkendiagramm dargestellt. The measured-values for some parameters are displayed both as numerical values and graphically in form of a bar diagram. (1) (2) (3) (4) (5) (1) (2) (3) (4) (5) Gemessenes Minimum Aktueller Messwert Gemessenes Maximum 100% des zu messenden Parameters Breite des Displays Lowest measured-value Current measured value Highest measured-value 100% of the measured parameter Width of display Die Markierungen für gemessenes Minimum und Maximum werden während der Messung automatisch aktualisiert. The markings for the lowest and highest measured-value are automatically updated during the measurement. Anzeige während des Betriebes Display during operation Nach dem Anlegen der Versorgungsspannung wechselt die Displaydarstellung nach ca. 5 s von der Startanzeige in die Betriebsanzeige. Es werden die Ströme in den drei Phasen und im N-Leiter angezeigt und als Balkendiagramm dargestellt. Nach ca. 1 min schaltet sich die Hintergrundbeleuchtung des Displays ab. Sie kann durch Betätigen einer beliebigen Taste wieder eingeschaltet werden. After the supply voltage is applied, the display switches from the "power up screen" to the operational screen after approximately 5 seconds. It shows the currents in the three phases and in the neutral conductor as values and in form of a bar diagram. The background illumination of the display is automatically switched off after approximately 1 minute. It can be switched on again by pressing any button. 9 – 43 Calling the main menu (beliebige Taste) Aufrufen des Hauptmenüs Navigieren in der Menüstruktur Navigating in the menu structure Das Navigieren in der Menüstruktur erfolgt mit den Bedientasten. To navigate in the menu structure, use the operating keys. Tastenfunktionen Button functions Verschieben der Markierung Shift the marking Auswahl des markierten Menüpunktes Select the marked menu item Wechsel in das vorherige Menü Return to the previous menu Auswahl eines Menüpunktes Selection of a menu item Im folgenden wird gezeigt, wie man sich Daten anzeigen lassen kann und wie man Parameter einstellt. Der besseren Übersicht halber erfolgt die Darstellung einsprachig zunächst in deutsch, dann in englisch. The following pages describe how to display data and how to set parameters. For a better overview, the representation is given in German first, and then in English. English part continued on page q (Seite 9-60). 9 – 44 English part continued on Page 9-60 9 – 45 Messwerte anzeigen Beispiel 1: Anzeige der Ströme a nz e i g P a r a me t e r ä nde r n 7 5 2 A = 4 0 1 V P = + 2 7 7 kW S = 3 0 2 k VA v g Q c os Ei ns t e l l unge n PAR TRIG A (esc) I de nt i f i k a t i on Rü c k s t e l l u n g e n = + j = 1 2 0k VAR 0. 9 1 8 i nd W = + 2 1 2 0 7 M Wh Fr e q = 5 0. 0 2 PAR A AB I Hz TRIG L = 1 2 = 7 5 8 A I L 3 = 7 5 0 A I N P = + 2 7 7 kW S = 3 0 2 k VA Q = + 1 2 0k VAR = i nd W = + 2 1 2 0 7 M Wh Fr e q = 5 0. 0 2 Hz JWL = 4 8. 0 ° C A 0 1 m i n = 7 0 6 A 2 8- J AN- 0 1 1 6: 2 9: 3 2. 0 1 I L 1 m a x A PAR TRIG = 7 8 8 A 0 8: 5 9: 3 8. 2 1 PAR TRIG A AB (down 7x) V 0. 9 1 8 PAR L 1 AB (up 7x) St r om 4 0 1 j = A = c os I L 0 4- J AN- 0 1 (up 8x) v g A L Me ß f u n k t i o n Ua 7 6 5 I AB (down 8x) I (esc) P a r a me t e r = a v g Ua (enter) I Di a g n o s e (enter) Me ß f u n k t i o n St r om (enter) Me ß f u n k t i o n (esc) H a u p t me n ü I g = 5 A I a v g = 7 5 2 A I a v g l = 7 5 2 A Un b a l . = 1 0 % t PAR TRIG TRIG A AB AB Beispiel 2: Anzeige der Frequenz a nz e i g P a r a me t e r ä nde r n 7 5 2 A = 4 0 1 V P = + 2 7 7 kW S = 3 0 2 k VA v g Q Rü c k s t e l l u n g e n c os Ei ns t e l l unge n PAR A TRIG (esc) I de nt i f i k a t i on = + j = 1 2 0k VAR 0. 9 1 8 i nd W = + 2 1 2 0 7 M Wh Fr e q = 5 0. 0 2 PAR A AB Hz TRIG Me ß f u n k t i o n = 4 0 1 V = + 2 7 7 kW S = 3 0 2 k VA Q = + 1 2 0k VAR j = 0. 9 1 8 i nd W = + 2 1 2 0 7 M Wh Fr e q = 5 0. 0 2 Hz JWL = 4 8. 0 ° C PAR A 9 – 46 T H D UT H D TRIG AB = 5 0. 0 2 Hz = 1 0 % = 1 0 % f r e q m i n = 5 0. 0 2 Hz 2 8- J AN- 0 1 1 6: 2 9: 3 2. 0 1 f r e q m a x = 5 0. 0 2 Hz 0 4- J AN- 0 1 For m F= 4. 0 Cr e s t F = 4. 0 PAR 0 8: 5 9: 3 8. 2 1 TRIG AB (down5x) (up 5x) Fr e que nz P c os e q A (up 8x) v g I r AB (down 8x) Ua f Fr e q H a r mo n i s c h e PAR A English part continued on Page 9-60 TRIG AB (esc) P a r a me t e r = a v g Ua (enter) I Di a g n o s e (enter) Me ß f u n k t i o n Fr e que nz (enter) Me ß f u n k t i o n (esc) H a u p t me n ü PAR A TRIG AB Beispiel 3: Anzeige der Harmonischen a n z e i g P a r a me t e r ä n d e r n v g = 7 5 2 A v g = 4 0 1 V P = + 2 7 7 kW S = 3 0 2 k VA Q Rü c k s t e l l u n g e n c o s Ei n s t e l l u n g e n (esc) I d e n t i f i k a t i o n PAR A = + j = 1 2 0k VAR 0. 9 1 8 i n d W = + 2 1 2 0 7 M Wh F r e q = 5 0. 0 2 PAR TRIG A AB Hz TRIG (up 8x) = 4 0 1 V = + 2 7 7 kW S = 3 0 2 k VA Q = + 1 2 0k VAR j 5 0. 0 2 I T H D = 1 0 % = 1 0 % UT H D F o r m F = 4. 0 Cr e s t F = 4. 0 PAR Hz TRIG AB (down5x) (up 5x) H a r mo n i s c h e H a r mo n i s c h e I T HD a v g 1 0. 0% Ua v g 1 0. 0% 2 0. 0% 0. 0% 3 0. 0% 0. 0% 0. 0% 0. 9 1 8 i n d 4 0. 0% W = + 2 1 2 0 7 M Wh 5 9. 0% 9. 0% F r e q = 5 0. 0 2 Hz 6 0. 0% 0. 0% JW = 4 8. 0 ° C 7 3. 0% c o s L = = F r e q u e n z P g q e A Me ß f u n k t i o n v r AB (down 8x) Ua f PAR A TRIG AB PAR A TRIG (esc) P a r a me t e r a Ua (enter) I Di a g n o s e (enter) Me ß f u n k t i o n F r e q u e n z (enter) Me ß f u n k t i o n (esc) H a u p t me n ü PAR A AB (down 28x) 3. 0% TRIG AB (up 28x) H a r mo n i s c h e 2 2 0. 0% 0. 0% 2 3 0. 0% 0. 0% 2 4 0. 0% 0. 0% 2 5 0. 0% 0. 0% 2 6 0. 0% 0. 0% 2 7 0. 0% 0. 0% 2 8 0. 0% 0. 0% 2 9 0. 0% PAR A English part continued on Page 9-60 0. 0% TRIG AB 9 – 47 Beispiel 4: Wirkleistung anzeigen = 7 5 2 A g = 4 0 1 V P = + 2 7 7 kW S = 3 0 2 k VA I d e n t i f i k a t i o n Q = + 1 2 0k VAR Rü c k s t e l l u n g e n c o s Ei n s t e l l u n g e n a n z e i g P a r a me t e r ä n d e r n PAR TRIG A (esc) P a r a me t e r (enter) g a Ua v v j = 0. 9 1 8 i n d W = + 2 1 2 0 7 M Wh F r e q = 5 0. 0 2 PAR P P 1 = + 2 7 8 kW L 2 = + 2 7 7 kW L 3 = + 2 7 9 kW = + 2 7 7 kW L a v a v a v g g m i n = + kW 2 5 2 2 8- J AN- 0 1 1 6: 2 9: 3 2. 0 1 a v g m a x = + kW 3 0 2 0 4- J AN- 0 1 0 8: 5 9: 3 8. 2 1 PAR TRIG A AB (down 8x) g P P TRIG A AB Hz P P P (esc) I Di a g n o s e (enter) Me ß f u n k t i o n L e i s t u n g (enter) Me ß f u n k t i o n (esc) H a u p t me n ü PAR TRIG A AB AB (up 8x) Me ß f u n k t i o n Ua = 4 0 1 V P = + 2 7 7 kW S = 3 0 2 k VA Q = + 1 2 0k VAR v g j 0. 9 1 8 i n d W = + 2 1 2 0 7 M Wh F r e q = 5 0. 0 2 Hz JW = 4 8. 0 ° C c o s L = PAR A TRIG AB Parameter anzeigen Beispiel 5: Eingestellte Schutzparameter anzeigen S c h u t z p a r a m. P a r a me t e r a n z e i g P a r a me t e r ä n d e r n I d e n t i f i k a t i o n Rü c k s t e l l u n g e n A 9 – 48 T r i p = 1 0 0 0 A T r i p = 8 5 0 0 s I T r i p = 1 4 4 0 0 A Me ß f u n k t i o n N T r i p = 1 2 0 A Ei n s t e l l u n g e n G T r i p = 5 0 0 A T h e r mM e m= Au s Ph a s e Se n = Ei n S c h u t z p a r a m. B K o mmu n i k a t i o n AB PAR A TRIG AB (esc) (esc) TRIG L L A Ei n s t e l l u n g e n PAR B S S c h u t z p a r a m. (enter) A l l g e me i n Di a g n o s e (enter) Me ß f u n k t i o n a n z e i g T a u = PAR A English part continued on Page 9-60 1 0 0 TRIG AB (enter) P a r a me t e r (esc) H a u p t me n ü T r i p L St a t u s = Ei n L Pi c k u p = 1 0 0 0 L De l a y = L I * t = PAR A A 4. 8 I TRIG AB s 4 t Diagnoseinformationen aufrufen Beispiel 6: Wartungsinformationen abfragen Di a g n o s e Wa r t u n g a n z e i g P a r a me t e r ä n d e r n Au s l ö s u n g e n Ei n s t e l l u n g e n Op s = 2 2 7 w/ l o a d = Op s 1 2 5 SI T r i p s = Wa r t u n g L T r i p s = 1 I d e n t i f i k a t i o n Cu b i c a l BUS g T r i p s = 5 Rü c k s t e l l u n g e n Ku r v e n d a r s t e l l n g Bt r A TRIG AB PAR A TRIG (esc) PAR St d I n t . (esc) Ei n s t e l l u n g e n Su m = 2 1 3 2 5 4 F a u l t = I 2t PAR 3 TRIG A AB 8 L 1= AB (down 11x) (up11x) Wa r t u n g g T r i p s Bt r I n t . St d Ko n t a k t a b b r a n d = = 5 1 3 2 5 4 F a u l t = 8 Su m I 2t L 1= 3 Su m I 2t L 2= 3 Su m I 2t L 3= 3 Su m I 2t N= 0 Ko n t a k t a b b r a n d PAR A English part continued on Page 9-60 TRIG AB (enter) P a r a me t e r T o t a l (enter) Di a g n o s e (enter) Wa r n u n g e n (esc) H a u p t me n ü Me ß f u n k t i o n K on t a k t e PAR A i . O. TRIG AB 9 – 49 Beispiel 7: Kurvendarstellung einstellen Di a g n o s e Me ß f u n k t i o n Ku r v e n d a r s t e l l n g a n z e i g P a r a me t e r ä n d e r n Ei n s t e l l u n g e n (enter) P a r a me t e r (enter) Wa r n u n g e n Di a g n o s e Au s l ö s u n g e n Ei n s t e l l u n g e n Ku r v e (enter) H a u p t me n ü a n z e i g e n Wa r t u n g I d e n t i f i k a t i o n Cu b i c a l BUS Rü c k s t e l l u n g e n Ku r v e n d a r s t e l l n g TRIG A Au s l ö s u n g g Au s l ö s u n g F r e q u e n z N Au s l ö s u n g PAR A 0s (down 5X) Au s l ö s u n g PAR 9 – 50 1s s Z e i t b TRIG AB English part continued on Page 9-60 1s Au s l ö s u n g 0. 3 0 PAR A (esc) TRIG A AB Po s i t i o n T (esc) b PAR AB Po s i t i o n T 0. 8 0 TRIG A Po s i t i o n Z e i t (enter) I AB 0s Au s l ö s u n g Au s l ö s u n g Wi r k l e i s t u n g 0s (enter) PAR Sp a n n u n g L S (esc) T r i g g e r St r o m (esc) Ke i n (enter) Üb e r l a s t a l a r m AB S c h u t z p a r ame t e r S c h u t z p a r ame t e r Er e i g n i s TRIG A Au s l ö s u n g Au s l ö s u n g PAR AB (enter) T r i g g e r Se t p t TRIG A s Z e i t T 1s b Au s l ö s u n g 0. 3 0 TRIG AB PAR A s TRIG AB (enter) PAR AB (esc) TRIG A (esc) PAR (esc) Ei n s t e l l u n g e n T r i g g e r A Se t T r i g g e r B T r i g g e r A T r i g g e r = Ke i n (enter) Se t Se t (enter) (enter) Ei n s t e l l u n g e n T r i g g e r Po s i t i o n = 0s 1s T A TRIG PAR A AB (enter) Se t (esc) TRIG AB T r i g g e r A T r i g g e r = L (enter) PAR (esc) (esc) Re s e t / St a r t Au s l ö s u n g Po s i t i o n = 0s 1s T PAR A (enter) Se t (esc) (esc) Re s e t / St a r t TRIG AB T r i g g e r A Re s e t / St a r t Au s l ö s u n g Po s i t i o n = 0s T r i g g e r A 3 sec. L (enter) T r i g g e r = g e s t o p p t 2 8- J AN- 0 1 1s T Re s e t / St a r t (esc) PAR A TRIG AB PAR A English part continued on Page 9-60 TRIG AB 9 – 51 Beispiel 8: Ereignis für die Kurvendarstellung auswählen Di a g n o s e Ku r v e n d a r s t e l l n g (enter) E i n s t e l l u n g e n (enter) Wa r n u n g e n Me ß f u n k t i o n Di a g n o s e Au s l ö s u n g e n P a r a me t e r a n z e i g E i n s t e l l u n g e n P a r a me t e r ä n d e r n Wa r t u n g I d e n t i f i k a t i o n Cu b i c a l BUS Rü c k s t e l l u n g e n Ku r v e n d a r s t e l l n g Ku r v e a n z e i g e n (enter) H a u p t me n ü PAR E r e i g n i s s e A E r e i g n i s s e B L a d e n A 9 – 52 TRIG AB (esc) Bi t t e A . . . wa r t e n PAR A English part continued on Page 9-60 TRIG AB PAR A AB E r e i g n i s s e (enter) S t r ö me PAR TRIG A AB (weiter mit Display "Kurve anzeigen" in Beispiel 9) TRIG AB (esc) TRIG A (esc) PAR (esc) E i n s t e l l u n g e n a n z e i g e n Ku r v e a n z e i g n a n z e i g e n a n z e i g n S t r o m S t r ö me + g & (enter) (enter) E r e i g n i s E r e i g n i s (enter) Ku r v e N PAR A TRIG (esc) PAR A AB (enter) TRIG AB 5 sec. E r e i g n i s s e Ke i n e (esc) (esc) S p a n n u n g e n A Au s l ö s u n g PAR A TRIG AB English part continued on Page 9-60 9 – 53 Beispiel 9: Kurven anzeigen H a u p t me n ü Di a g n o s e Me ß f u n k t i o n a n z e i g P a r a me t e r ä n d e r n Au s l ö s u n g e n E i n s t e l l u n g e n (enter) P a r a me t e r (enter) Wa r n u n g e n Di a g n o s e Wa r t u n g I d e n t i f i k a t i o n Cu b i c a l BUS Rü c k s t e l l u n g e n Ku r v e n d a r s t e l l n g A Ku r v e A a n z e i g e n E r e i g n i s Ku r v e TRIG AB a n z e i g e n a n z e i g n a n z e i g e n T r i g g e r A L - Au s l ö s u n g a u f g e z e i c h n e t 2 8- J AN- 0 1 1 6: 2 9: 3 2. PAR A A AB 5 sec. a n z e i g e n Ke i n e Da t e n v e r f ü g b a r PAR A 9 – 54 PAR TRIG (enter) Ku r v e English part continued on Page 9-60 (esc) PAR AB (enter) Ku r v e TRIG TRIG AB 0 1 TRIG AB 5 sec. PAR (esc) E i n s t e l l u n g e n Ku r v e n d a r s t e l l n g (enter) a n z e i g e n (esc) Ku r v e PAR TRIG A I L AB Ku r v e n f o r m 1 I L Ku r v e n f o r m 1 L 2 L 3 XX = t = T PAR A 0. 0 A 0 0 0 s L 2 L 3 X L g L N 1 Ku r v e n f o r m 1 L 3 L g L L T (enter 8X) L 2 X I I T 5 sec. T (down 2X) (esc) (enter) E i n s t e l l u n g e n L g L N I TRIG AB L 1 = - 1 0 0, t = T + 0. PAR A 0 0 0 A 0 0 8 s L N I L 1 = - 1 0 0, t = + 0. T PAR TRIG A AB 0 0 0 A 0 0 8 s TRIG AB (enter) I L Ku r v e n f o r m 2 T L 1 Mit ESC zurück zu "Kurve anzeigen" L 3 X L g L N I L 1 = - t = T 8 0, 0 0 0 A + 0. 0 0 8 s PAR A TRIG AB English part continued on Page 9-60 9 – 55 Parameter ändern Beispiel 10: Schutzparameter einstellen S c h u t z p a r a m. Di a g n o s e P a r a me t e r a n z e i g P a r a me t e r ä n d e r n I d e n t i f i k a t i o n Rü c k s t e l l u n g e n T r i p = 1 0 0 0 S T r i p = 8 5 0 0 A I T r i p = 1 4 4 0 0 A Me ß f u n k t i o n N T r i p = 1 2 0 A E i n s t e l l u n g e n G T r i p = 5 0 0 A T h e r mMe m= Au s P h a s e S e n = E i n A S c h u t z p a r a m. B K o mmu n i k a t i o n A PAR A AB (esc) TRIG (esc) E i n s t e l l u n g e n PAR B L S c h u t z p a r a m. (enter) A l l g e me i n (enter) Me ß f u n k t i o n ä n d e r n TRIG AB S c h u t z p a r a m. B T a u = PAR A 1 0 0 TRIG AB S c h u t z p a r a m. Än d e r u n g A (enter) P a r a me t e r (esc) H a u p t me n ü B Än d e r u n g L - Au s l ö s u n g L - Au s l ö s u n g NI CHT g e s p e i c h e r t g e s p e i c h e r t ! ! PAR A PAR TRIG A AB TRIG AB Einstellungen Beispiel 11: Passwort eingeben E i n s t e l l u n g e n Di a g n o s e Ne u e s S p r a c h e P a r a me t e r a n z e i g P a s s wo r t P a r a me t e r ä n d e r n Be l e u c h t u n g I d e n t i f i k a t i o n Ko n t r a s t Rü c k s t e l l u n g e n T e mp P a s s wo r t (enter) S y s t e mz e i t (enter) Me ß f u n k t i o n P a s s wo r t (enter) H a u p t me n ü * * * * Un i t A PAR TRIG A AB TRIG AB P a s s wo r t (enter) P a s s wo r t NI CHT g e s p e i c h r t PAR A TRIG AB P a s s wo r t P a s s wo r t g e s p e i c h e r t (esc) PAR A 9 – 56 English part continued on Page 9-60 TRIG AB PAR A TRIG AB (esc) PAR (esc) (esc) E i n s t e l l u n g e n A L De l a y = 4. 8 L I * t = PAR A I TRIG AB 4 L L S t a t u s = E i n L P i c k u p = 1 0 0 0 A s L De l a y = 4. 8 s t L I * t = I PAR t S t a t u s = E i n P i c k u p = 9 5 0 L De l a y = 4. 8 L I * t = A AB Än d e r u n g L L PAR TRIG A S c h u t z p a r a m. (enter) 4 T r i p I TRIG AB (enter) 1 0 0 0 (enter) E i n P i c k u p = (esc) S t a t u s = L T r i p A s 4 t (esc) L (down) T r i p L (esc) (enter) L B d e s P a r a me t e r s s p e i c h e r n ? = E S C= J A NE I N (esc) PAR TRIG A Ne u e s PAR A TRIG (esc) 7 2 6 5 (esc) 7* * * (esc) P a s s wo r t (enter) P a s s wo r t (enter) Ne u e s P a s s wo r t (enter) P a s s wo r t AB PAR TRIG A AB AB P a s s wo r t (enter) S p e i c h e r n ? = E S C= J A NE I N (esc) PAR A TRIG AB (all greyed except key & pencil) English part continued on Page 9-60 9 – 57 Identifikationen Beispiel 12: Identifikation I d e n t i f i k a t i o n (enter) Me ß f u n k t i o n Di a g n o s e E T U Nr . E T U S e r i e n n r . UNI T S / N 4 2 3 8 1 2 6 7 5 2 3 8 P a r a me t e r a n z e i g T e s t I n f o . P a r a me t e r ä n d e r n Us e r I D- Nr . Us e r K o mme n t a r I d e n t i f i k a t i o n T RI P (enter) H a u p t me n ü Rü c k s t e l l u n g e n TRIG A PAR TRIG A AB (esc) PAR (esc) E i n s t e l l u n g e n AB PAR A TRIG AB ESC Rückstellungen Beispiel 13: Gemessene Maximal- und Minimalwerte zurücksetzen H a u p t me n ü Rü c k s t e l l u n g e n E T U- Au s l ö s u n g (enter) Me ß f u n k t i o n Di a g n o s e Mi n / Ma x Bu f f e r P a r a me t e r a n z e i g Au s l ö s u n g e n P a r a me t e r ä n d e r n Wa r t u n g s i n f o (enter) I d e n t i f i k a t i o n Rü c k s t e l l u n g e n PAR TRIG A AB (esc) E i n s t e l l u n g e n PAR A TRIG AB MI N / MA X BUF F E R MI N / MA X BUF F E R Mi n / Ma x Bu f f e r Mi n / Ma x Bu f f e r MI N / MA X BUF F E R (enter) NI CHT Wo l l e n z u r ü c k g e s e t z t S i e wi r k l i c h z u r ü c k g e s e t z t ! z u r ü c k s e t z e n ? = E S C= J A NE I N (esc) PAR A 9 – 58 TRIG AB PAR A TRIG AB English part continued on Page 9-60 PAR A TRIG AB English part continued on Page 9-60 9 – 59 Displaying measured-values Example 1: Displaying the currents I Di a g n o s t i c (enter) Me t e r i n g CURRENT a v g = 7 5 2 A Ua v g = 4 0 1 V P = + 2 7 7 kW S = 3 0 2 k VA I d e n t i f i c a t i o n Q = + Re s e t s p f = P a r a me t e r Di s p l a y Se t u p PAR TRIG A a v g 1 2 0k VAR 0. 9 1 8 = + 2 1 2 0 7 M Wh r f r e q = 5 0. 0 2 PAR 2 = 7 5 8 A I L 3 = 7 5 0 A = N (up 8x) V P = + 2 7 7 kW S = 3 0 2 k VA Q = + 1 2 0k VAR p f a v = g W 0. 9 1 8 L 1 m i 1 = n 7 0 6 A 2 8- J AN- 0 1 1 6: 2 9: 3 2. 0 1 I L 1 m a = x 7 8 8 A PAR A 0 8: 5 9: 3 8. 2 1 TRIG PAR (down 7x) TRIG A AB AB (up 7x) CURRENT 4 0 1 g 0 A = v I L 0 4- J AN- 0 1 ME T E R I N G Ua A L AB (down 8x) 7 6 5 I I Hz TRIG A = 1 l a g W AB L (esc) P a r a me t e r Ch a n g e (esc) Vi e w I I (enter) ME T E R I N G (esc) ME N U (enter) MA I N l a g I g = 5 A I a v g = 7 5 2 A I a v g l = 7 5 2 A Un b a l . = 1 0 % t = + 2 1 2 0 7 M Wh r f r e q = 5 0. 0 2 Hz T e mp = 2 2 5. 0 F PAR PAR TRIG A TRIG A AB AB Example 2: Displaying the frequency Vi e w P a r a me t e r Ch a n g e P a r a me t e r a v g = 7 5 2 A Ua v g = 4 0 1 V P = + 2 7 7 kW S = 3 0 2 k VA I d e n t i f i c a t i o n Q Re s e t s p f PAR A Se t u p TRIG (esc) Di s p l a y = + a v g = 1 2 0k VAR 0. 9 1 8 = + 2 1 2 0 7 M Wh r f r e q = 5 0. 0 2 PAR A Hz TRIG (up 8x) = 4 0 1 V = + 2 7 7 kW S = 3 0 2 k VA Q = + 1 2 0k VAR p f a v W g = UT H D 0. 9 1 8 5 0. 0 2 1 0 % = 1 0 % = 5 0. 0 2 Hz T e mp = 2 2 5. 0 F A AB f r e q m i n = 5 0. 0 2 Hz 2 8- J AN- 0 1 1 6: 2 9: 3 2. 0 1 f r e q m a x = 5 0. 0 2 Hz 0 4- J AN- 0 1 F o r m F = 4. 0 Cr e s t F = 4. 0 PAR 0 8: 5 9: 3 8. 2 1 TRIG AB (down5x) (up 5x) H a r mo n i c s l a g f r e q TRIG Hz = = + 2 1 2 0 7 M Wh r PAR 9 – 60 T H D = F RE QUE NCY P g q A ME T E R I N G v e AB (down 8x) Ua I r l a g W AB f F REQ PAR A TRIG AB (esc) I (enter) Me t e r i n g Di a g n o s t i c F RE QUE NCY (enter) ME T E R I N G (enter) ME N U (esc) MA I N PAR A TRIG AB Example 3: Displaying harmonics ME T E R I N G I a v g = 7 5 2 A Ua v g = 4 0 1 V P = + 2 7 7 kW S = 3 0 2 k VA I d e n t i f i c a t i o n Q = + Re s e t s p f = Vi e w P a r a me t e r Ch a n g e P a r a me t e r Se t u p (esc) Di s p l a y PAR A a v g 1 2 0k VAR 0. 9 1 8 = + 2 1 2 0 7 M Wh r f r e q = PAR TRIG A AB r q = 5 0. 0 2 I T H D = 1 0 % = 1 0 % UT e H D Hz TRIG F o r m F = 4. 0 Cr e s t F = 4. 0 PAR A AB (down 8x) Hz l a g W 5 0. 0 2 f (up 8x) ME T E R I N G TRIG AB (down5x) (up 5x) F RE QUE NCY H A R MON I C S = 4 0 1 V P = + 2 7 7 kW S = 3 0 2 k VA 2 0. 0% 0. 0% Q = + 1 2 0k VAR 3 0. 0% 0. 0% 0. 0% Ua v g a v g 1 0. 0% Ua v g 1 0. 0% l a g 4 0. 0% = + 2 1 2 0 7 M Wh r 5 9. 0% 9. 0% f r e q = 6 0. 0% 0. 0% T e mp = 7 3. 0% a v g 0. 9 1 8 I T HD W p f = H a r mo n i c s 5 0. 0 2 Hz 2 2 5. 0 F PAR A TRIG AB PAR A TRIG (esc) Di a g n o s t i c (enter) Me t e r i n g F RE QUE NCY (enter) ME N U (esc) MA I N PAR A AB 3. 0% TRIG AB (down 28x) (up 28x) H A R MON I C S 2 2 0. 0% 0. 0% 2 3 0. 0% 0. 0% 2 4 0. 0% 0. 0% 2 5 0. 0% 0. 0% 2 6 0. 0% 0. 0% 2 7 0. 0% 0. 0% 2 8 0. 0% 0. 0% 2 9 0. 0% PAR A 0. 0% TRIG AB 9 – 61 Displaying parameters Example 4: Displaying protection parameter settings Vi e w P a r a me t e r Ch a n g e P a r a me t e r a v g = 7 5 2 A Ua v g = 4 0 1 V P = + 2 7 7 kW S = 3 0 2 k VA I d e n t i f i c a t i o n Q Re s e t s p f Se t u p PAR TRIG A (esc) Di s p l a y = + a v g = P L 1 = + 2 7 8 kW P L 2 = + 2 7 7 kW P L = + 2 7 9 kW P a = + 2 7 7 kW 3 v g P 1 2 0k VAR 0. 9 1 8 = + 2 1 2 0 7 M Wh r f r e q = 5 0. 0 2 PAR Hz g m i n = + kW 2 5 2 1 6: 2 9: 3 2. 0 1 a v g m a x = + kW 3 0 2 0 8: 5 9: 3 8. 2 1 PAR TRIG PAR. SET B A AB (down 8x) v 0 4- J AN- 0 1 TRIG A a a v g 2 8- J AN- 0 1 P l a g W AB P (esc) I (enter) Me t e r i n g Di a g n o s t i c P O WE R (enter) ME T E R I N G (enter) ME N U (esc) MA I N PAR TRIG A AB AB (up 8x) ME T E R I N G Ua = 4 0 1 V P = + 2 7 7 kW S = 3 0 2 k VA Q = + 1 2 0k VAR p f v a g v g = 0. 9 1 8 l a g W = + 2 1 2 0 7 M Wh r f r e q = 5 0. 0 2 Hz T e mp = 2 2 5. 0 F PAR A TRIG AB Example 5: Displaying active power Sy s t e m Di a g n o s t i c P a r a me t e r Ch a n g e P a r a me t e r I d e n t i f i c a t i o n Re s e t s Co n f i g . L T r i p = 1 0 0 0 A S T r i p = 8 5 0 0 s I T r i p = 1 4 4 0 0 A Me t e r i n g N T r i p = 1 2 0 A Se t p o i n t s G T r i p = 5 0 0 A Pr o t . Pa r . Se t A Pr o t . Pa r . Se t B C o mmu n i c a t i o n PAR A T h e r mM e m= Se t u p TRIG AB Ph a s e Se n = (esc) Di s p l a y 9 – 62 P ROT . PAR A TRIG AB (esc) Vi e w (enter) Me t e r i n g P A R A ME T E R T a u = PAR A L (enter) VI EW T r i p L St a t u s = On L Pi c k u p = 1 0 0 0 L De l a y = L I * t = I On 1 0 0 TRIG AB PAR A A 4. 8 Of f (esc) ME N U (enter) MA I N TRIG AB s 4 t Calling up diagnostic information Example 6: Inquiring maintenance information DI AGNOS T I C P a r a me t e r T r i p T o t a l L o g = 2 2 7 w/ l o a d = Op s 1 2 5 SI T r i p s = L T r i p s = 1 I d e n t i f i c a t i o n Cu b i c l e BUS g T r i p s = 5 Re s e t s Wa v e f o r m Op Ho u r s P a r a me t e r PAR A Se t u p TRIG AB I n t . PAR A TRIG (esc) Di s p l a y Se t p o i n t s Op s Ma i n t e n a n c e Ch a n g e (esc) Vi e w (enter) Wa r n i n g s Di a g n o s t i c Su m = 2 1 3 2 5 4 F a u l t = I 2t PAR 3 TRIG A AB 8 L 1= AB (down 11x) (up11x) MA I N T E N A N C E g T r i p s Op Ho u r s I n t . = = CONT ACT F a u l t = 8 Su m I 2t L 1= 3 Su m I 2t L 2= 3 Su m I 2t L 3= 3 Su m I 2t N= 0 Co n t a c t PAR A E ROS I ON 5 1 3 2 5 4 Er o s i o n TRIG AB (enter) Me t e r i n g MA I N T E N A N C E (esc) ME N U (enter) MA I N T h e c o n t a c t s a r e PAR A o k . TRIG AB 9 – 63 Example 7: Adjusting representation of characteristics DI AGNOS T I C Me t e r i n g P a r a me t e r P a r a me t e r Wa v e f o r m L o g Se t p o i n t s Cu b i c a l BUS Re s e t s Wa v e f o r m PAR TR I P Pr o t . Ev e n t Ov e r l o a d Wa r n (enter) Ev e n t Se t p o i n t No n e EVENT PROT . P a r a me t e r s Vo l t a g e P o we r TRIG PAR Be f o r e PAR A 9 – 64 1s T r i g 0s (down 5X) T 0. 8 0 T r i p S T r i p I T r i p g T r i p N T r i p PAR s T i me Be f o r e TRIG AB PAR A AB P OS I T I ON T 0. 3 0 TRIG A P OS I T I ON (esc) T i me L AB 1s T r i g 0s (enter) P OS I T I ON 0s TRIG A AB s T i me 1s T Be f o r e 0. 3 0 TRIG AB (esc) A AB P AR AME T E R S (esc) (esc) F r e q u e n c y PAR TRIG A Cu r r e n t Re a l PAR AB (enter) T R I GGER T r i g g e r TRIG A AB (esc) TRIG A (enter) (esc) Se t u p PAR T r i p Se t u p Wa v e f o r m Ma i n t e n a n c e I d e n t i f i c a t i o n Di s p l a y Di s p l a y PAR A T r i g s TRIG AB (enter) Ch a n g e T r i p (enter) (enter) Wa r n i n g s Di a g n o s t i c Vi e w WA V E F O R M (enter) ME N U (esc) MA I N SET UP A Se t T r i g g e r B SET T RI GGE R A T r i g g e r = (enter) T r i g g e r (enter) (enter) WA V E F O R M Se t No n e Po s i t i o n = 0s 1s T A TRIG PAR A AB (enter) SET (esc) TRIG AB T RI GGE R A T r i g g e r = L (enter) PAR (esc) (esc) Re s e t / St a r t T r i p Po s i t i o n = 0s 1s T PAR A (enter) SET (esc) (esc) Re s e t / St a r t TRIG AB T RI GGE R A RESET / ST ART T r i p Po s i t i o n = 0s T r i g g e r No w A 3 sec. L (enter) T r i g g e r = Mo n i t o r i n g 2 8- J AN- 0 1 1s T Re s e t / St a r t (esc) PAR A TRIG AB PAR A TRIG AB 9 – 65 Example 8: Selecting event for displaying characteristics DI AGNOS T I C Me t e r i n g P a r a me t e r P a r a me t e r T r i p Wa v e f o r m L o g Se t p o i n t s I d e n t i f i c a t i o n Cu b i c a l BUS Re s e t s Wa v e f o r m A TRIG PAR A Ev e n t s Up l o a d B Ev e n t s UP L OAD (enter) CURRENT S Up l o a d TRIG A AB AB A Pl e a s e 9 – 66 AB (esc) TRIG Wa i t . . . Up l o a d PAR A A EVENT S I n Pr o c e s s PAR PAR TRIG AB (goto "DISPLAY GRAPH" in example 9) TRIG AB (esc) PAR A Se t u p Wa v e f o r m Se t u p (esc) Di s p l a y Di s p l a y Ma i n t e n a n c e (esc) Ch a n g e (enter) Wa r n i n g s Di a g n o s t i c Vi e w WA V E F O R M (enter) ME N U (enter) MA I N A Cu r r e n t s g & N Vo l t a g e s PAR A AB + (enter) (enter) (esc) TRIG (enter) UP L OAD Cu r r e n t s Gr a p h PAR TRIG AB 5 sec. UP L OAD A T r i g g e r No t EVENT Up l o a d Di s p l a y (esc) (enter) Ev e n t WA V E F O R M (esc) DI SPL AY EVENT S Ha s Oc c u r r e d PAR A TRIG AB 9 – 67 Example 9: Displaying characteristics ME N U DI AGNOS T I C Me t e r i n g (enter) Wa r n i n g s Di a g n o s t i c P a r a me t e r P a r a me t e r Ma i n t e n a n c e I d e n t i f i c a t i o n Cu b i c l e BUS Re s e t s Wa v e f o r m Se t u p PAR TRIG A PAR TRIG A AB WA V E F O R M DI SPL AY DI SPL AY AB GRAP H Up l o a d Di s p l a y (enter) Ev e n t (esc) Di s p l a y Gr a p h T r i g g e r L A T r i p Re c o r d e d 2 8- J AN- 0 1 1 6: 2 9: 3 2. 0 1 PAR PAR TRIG A A AB (enter) 5 sec. DI SPL AY No GRAP H Da t a Av a i l a b l e Pl e a s e Up l o a d Ev e n t PAR A 9 – 68 (esc) Ch a n g e L o g Se t p o i n t s TRIG AB TRIG AB 5 sec. Vi e w T r i p (enter) MA I N WA V E F O R M (enter) Se t u p Wa v e f o r m (esc) Di s p l a y PAR A I L TRIG AB WA V E F O R M 1 I L WA V E F O R M 1 L 2 L 3 XX 1 = T PAR A 0 A 0. 0 0 0 s L 2 L 3 X L g LN t = WA V E F O R M 1 L 3 L g L L T (enter 8X) L 2 X I I T 5 sec. T (down 2X) (esc) (enter) Wa v e f o r m L g LN I L 1 = - 1 0 0, 0 0 0 t = TRIG AB T + 0. 0 0 8 PAR A A LN I L s 1 = - 1 0 0, 0 0 0 t = + 0. 0 0 8 T PAR TRIG A AB A s TRIG AB (enter) I L WA V E F O R M 2 T L 1 (esc) goes to "DISPLAY WAVEFORM" menu L 3 X L g LN I L 1 = - t = T 8 0, 0 0 0 A + 0. 0 0 8 s PAR A TRIG AB 9 – 69 Changing parameters CHANGE Sy s t e m (enter) Me t e r i n g Di a g n o s t i c P a r a me t e r Ch a n g e Pa r . Se t A Pr o t . Pa r . Se t B P a r a me t e r Re s e t s Co n f i g . Pr o t . I d e n t i f i c a t i o n P ROT . TRIG AB A L T r i p = 1 0 0 0 S T r i p = 8 5 0 0 s I T r i p = 1 4 4 0 0 A N T r i p = 1 2 0 A T r i p = 5 0 0 A T h e r mM e m= Of f Ph a s e Se n = (esc) A B G Se t u p PAR SET Me t e r i n g C o mmu n i c a t i o n Di s p l a y PAR. Se t p o i n t s PAR TRIG A P ROT . L AB PAR. Pi c k u p No t (esc) Vi e w P A R A ME T E R SET B PAR 1 0 0 PAR TRIG PAR. SET A L Pi c k u p ! ! AB B Ch a n g e Sa v e d PAR TRIG A On = P ROT . Ch a n g e Sa v e d T a u (esc) ME N U (enter) MA I N (enter) Example 10: Setting protection parameters TRIG A AB AB Adjusting the settings Example 11: Entering password Sy s t e m Di a g n o s t i c P a r a me t e r Ch a n g e P a r a me t e r T i me En t e r L a n g u a g e P a s s wo r d Sc r e e n Co n t r a s t Re s e t s T e mp A P s wr d * * * * Un i t Se t u p (esc) PAR Ne w Sa v e r I d e n t i f i c a t i o n Di s p l a y P A S S WO R D PAR TRIG A AB TRIG AB P A S S WO R D (enter) P a s s wo r d Ch a n g e NOT Sa v e d PAR A TRIG AB P A S S WO R D P a s s wo r d Ch a n g e Sa v e d (esc) PAR A 9 – 70 TRIG AB PAR A TRIG AB (esc) Vi e w (enter) Me t e r i n g SET UP (enter) DI SPL AY (enter) ME N U (esc) MA I N On 1 0 0 0 A L De l a y = 4. 8 s L I * t = A TRIG AB 4 t St a t u s = On Pi c k u p = 1 0 0 0 A L De l a y = 4. 8 s L I * t = (esc) PAR I L L PAR TRIG PAR. SET A P ROT . (enter) I 4 t T r i p L St a t u s = On L Pi c k u p = 9 5 0 A L De l a y = 4. 8 s L I * t = I 4 (enter) St a t u s = Pi c k u p = L t (esc) L T r i p (down) L (enter) T r i p L (esc) (enter) L Sa v e PAR A AB TRIG AB B P a r a me t e r Ch a n g e s ? = ESC= YES No (esc) PAR TRIG A AB (all greyed except key & pencil) P s wr d En t e r Ne w P s wr d (enter) Ne w PAR A 7 2 6 5 TRIG (esc) 7* * * (esc) (esc) (enter) En t e r P A S S WO R D (enter) P A S S WO R D PAR TRIG A AB AB 1 2 3 4 5 6 7 8 9 10 11 12 13 14 15 16 P A S S WO R D (enter) Sa v e Ch a n g e s ? = ESC= YES No (esc) PAR A TRIG AB 9 – 71 Identifications Example 12: Identification ME N U I DE NT I F I CAT I ON (enter) Me t e r i n g Di a g n o s t i c Vi e w P a r a me t e r Ch a n g e P a r a me t e r I d e n t i f i c a t i o n T r i p Un i t Pa r t # T r i p Un i t S/ N T e s t I n f o . Us e r Gi v e n Us e r C o mme n t s T RI P UNI T S/ N 4 2 3 8 1 2 6 7 5 2 3 8 (enter) MA I N I D# Re s e t s PAR TRIG A PAR A AB TRIG (esc) Se t u p (esc) Di s p l a y PAR TRIG AB ESC A AB Resetting Example 13: Resetting the measured minimum and maximum values MA I N ME N U RESET S Di a g n o s t i c Vi e w P a r a me t e r Ch a n g e (enter) Me t e r i n g P a r a me t e r Cu r r e n t F a u l t Mi n / Ma x Bu f f e r T r i p (enter) L o g Ma i n t e n a n c e I n f o I d e n t i f i c a t i o n Re s e t s Se t u p PAR TRIG A AB (esc) Di s p l a y PAR TRIG A AB MI N / MA X BUF F ER MI N / MA X BUF F ER Mi n / Ma x Bu f f e r Mi n / Ma x Bu f f e r MI N / MA X BUF F ER (enter) NOT Re s e t ! ! Ar e Yo u Wa n t Re s e t T o = ESC= Su r e YES No (esc) PAR A 9 – 72 TRIG AB PAR A TRIG AB English part continued on Page 9-60 PAR A Yo u Re s e t ? TRIG AB 9 – 73 9.1.11 Bemessungsstrommodul 9.1.11 Rating plug VORSICHT CAUTION Beim Austausch des Bemessungsstrommoduls ist sicherzustellen, dass dessen Bemessungsstrom In kleiner oder gleich dem zulässigen maximalen Bemessungsnennstrom In max des Leistungsschalters ist. Anderenfalls kann es zur thermischen Überlastung des Schalters und ggf. auch der Anlage kommen. Der kleinste zulässige Bemessungsstrom für Schalter BG III ist 1250 A. If the rating plug is to be replaced the rated current In of the rating plug has to be equal to or smaller than the maximum rated current In max of the circuit-breaker. 0770 Otherwise a thermal overload of the circuit-breaker / installation can occur. Minimum permissible rating plug for circuit-breaker size III is 1250 A. Das Bemessungsstrommodul bestimmt den Bemessungsstrom innerhalb eines gewissen Bereiches für eine gegebene Baugröße des Leistungsschalters. The rating plug defines the rated current within a specific range for a given circuit-breaker size. Wird ein Bemessungsstrommodul für einen Strom gesteckt, der größer ist, als der maximal zulässige Bemessungsstrom des Leistungsschalters, so wird dieser Fehler von der Elektronik des Überstromauslösers erkannt und mit einer blinkenden Anzeige T.U. ERROR signalisiert. If a rating plug with a higher current than the maximum permissible circuit-breaker rated current is plugged in, the electronic system of the overcurrent release recognises this error and signals it with a flashing indication T.U. ERROR. Der Überstromauslöser ignoriert den vom falschen Bemessungsstrommodul vorgegebenen Wert für den Bemessungsstrom und setzt diesen auf den Wert des für die Baugröße des betreffenden Leistungsschalters kleinsten Bemessungsstrommoduls. The overcurrent release ignores the default value for the rated current provided by the false rating plug and adjusts it to the value of the smallest rating plug provided for the frame size of the circuitbreaker concerned. Gleiches passiert, wenn für einen Schalter der Baugröße III ein Bemessungsstrommodul kleiner 1250 A verwendet wird. Alle eingestellten Schutzparameter werden entsprechend angepasst; die Anzeige T.U. ERROR blinkt. The same happens if a circuit-breaker with frame size III is equipped with a rating plug smaller than 1250 A. All set protection parameters are adjusted accordingly; the T.U. ERROR indicator will flash. Wird ein Leistungsschalter ohne Bemessungsstrommodul in Betrieb genommen, blinkt die Anzeige T.U. ERROR und der Überstromauslöser setzt den Bemessungsstrom auf den Wert des für die Baugröße des betreffenden Leistungsschalters kleinsten Bemessungsstrommoduls. If a circuit-breaker is started up without a rating plug, the T.U. ERROR indicator will flash and the overcurrent release sets the rated current to the value of the smallest rating plug for the frame size of the circuit-breaker used. 9 – 74 Baugröße Frame size I II III Bemessungsstrommodul Rating plug Bestell-Nr. Order no. 250 A 3WL9111-0AA51-0AA0 315 A 3WL9111-0AA52-0AA0 400 A 3WL9111-0AA53-0AA0 500 A 3WL9111-0AA54-0AA0 630 A 3WL9111-0AA55-0AA0 800 A 3WL9111-0AA56-0AA0 1000 A 3WL9111-0AA57-0AA0 1250 A 3WL9111-0AA58-0AA0 1600 A 3WL9111-0AA61-0AA0 2000 A 3WL9111-0AA62-0AA0 2500 A 3WL9111-0AA63-0AA0 3200 A 3WL9111-0AA64-0AA0 4000 A 3WL9111-0AA65-0AA0 5000 A 3WL9111-0AA66-0AA0 6300 A 3WL9111-0AA67-0AA0 Remove Entnehmen VORSICHT CAUTION Das Bemessungsstrommodul darf nur unter folgenden Bedingungen gezogen werden: - der Einschubschalter befindet sich in der Trennposition - der Festeinbauschalter ist ausgeschaltet und der Überstromauslöser ist von der Hilfsspannungsversorgung getrennt - der Überstromauslöser ist ausgebaut. - Ein Betrieb des Überstromauslösers ohne Bemessungsstrommodul ist nicht zulässig The rating plug may be removed only if: - the draw-out circuit-breaker is in the disconnect position - the fixed-mounted breaker is switched off and the overcurrent release disconnected from control sypply - the overcurrent release has been removed from the breaker. - The Operating of overcurrent release without rating plug is not permitted. 1 AUS / OFF 3 2 9.1.12 Erdschlussschutzmodule 9.1.12 Ground-fault protection modules Für die Überstromauslöser ETU45B und ETU76 B stehen optional ein Erdschlussschutzmodule zur Verfügung. Sie dienendem Schutz nachgeordneter Verbraucher vor unzulässig hohen Erdschlussströmen. For the releases ETU45B and ETU76 B can be optionally equipped with a ground-fault protection modules. These are used to protect downstream loads against unpermissibly high ground-fault currents earth Das Überschreiten des Einstellwertes führt je nach Ausführung des Erdschlussschutzmoduls nur zur Ausgabe einer Meldung oder gleichzeitig auch zum Auslösen des Überstromauslösers. q (Seite 9-24) Depending on the earth-fault protection module version, the set value being exceeded will cause either an alarm only or an alarm and a trip at the same time. q (page 9-24) 9 – 75 Folgende Gerätekombinationen sind möglich: The following device combinations are possible: Überstromauslöser Erdschlussschutzmodul Overcurrent release Ground-fault protection module ETU45B GFM AT 45B ETU45B GFM AT 45B ETU55B … 76B GFM AT 55B-76B ETU55B … 76B GFM AT 55B-76B Die Erdschlusserfassung kann durch zwei Arten erfolgen: - bei symmetrischer Belastung der Außenleiter durch vektorielle Summenbildung der Ströme - Direkte Messung des Erdschlussstromes mit einem separaten Wandler 1200 A : 1 A. There are two means of ground-fault detection: - symmetrical load of the phase conductor by vectorial summation - Direct measuring of the ground-fault current with a seperate transform 1200 A : 1 A ACHTUNG NOTICE Bei Erdschlusserfassung mittels vektorieller Summenbildung der Ströme in einem 4 poligem Netz wird dringend empfohlen, auch den Strom des N-Leiters einzubeziehen. Dazu ist ein NWandler erforderlich, der ggf. nachgerüstet werden muss. Anderenfalls führt auch ein entsprechender Strom im N-Leiter zum Ansprechen des Erdschlussschutzes. If the earth fault is detected by vectorial summation of the currents in a 4 pole network, it is imperatively recommended to include the current of the neutral conductor, too. This requires a neutral conductor transformer, which may have to be retrofitted. Otherwise, a corresponding current in the neutral conductor will also activate the earth-fault protection. Alarm- und Ausgelöstmeldungen können über den und PROFIBUS-DP ausgegeben werden oder Modbus. Alarm and tripped signals can be transmitted through the and the PROFIBUS-DP or Modbus. Modul GFM AT 45B Module GFM AT 45B Umschalter Erdschlusserfassung Changeover switch ground-fault detection mode Drehkodierschalter Einstellwert Erdschlussschutz Rotary coding switch ground-fault pickup setting Drehkodierschalter Einstellwert Erdschluss-Alarm Rotary coding switch ground-fault alarm setting - Erdschlussschutz durch Auslösung des Leistungsschalters und Alarmmeldung - Auslösung kann abgeschaltet werden, Stellung OFF - Umschalter Erdschlusserfassung nur bei ausgebautem Modul oder ausgebautem Überstromauslöser zugänglich 9 – 76 Anzeigen Indications Erdschlussalarm Ground-fault alarm Erdschluss ausgelöst Ground-fault tripped Drehkodierschalter Erdschlussschutz Verzögerung tg / I2t Rotary coding switch ground-fault delay setting tg / I2tg - Ground-fault protection by tripping the circuit-breaker and alarm signalling - Tripping function can be switched off, OFF position - Changeover switch for ground-fault detection mode only accessible with removed module or removed overcurrent release. Modul GFM AT 55B-76B Module GFM AT 55B - 76B Anzeigen Indications Erdschlusserfassung Earth-fault detection mode Felder zum Notieren der Einstellwerte G-ALARM G ALARM G ausgelöst G tripped Felder zum Notieren der Einstellwerte Labeling areas for recording setting values Labeling areas for recording setting values - Erdschlussschutz durch Auslösung des Leistungsschalters und Alarmmeldung - Auslösung kann abgeschaltet werden - Modul parametrierbar über: - das Grafikdisplay (ETU76B) - die Prüfbuchse mit dem BDA (ETU55B … 76B) - den PROFIBUS-DP mit einem PC und der Software „Switch ES Power“ (ETU55B … 76B). - Erdschlusserfassung wählbar: - vektorielle Summenbildung S I = L1+L2+L3+N - externer Erdschlusswandler SI = 1200 A : 1 A - Earth-fault protection by way of alarm signal and tripping the circuit-breaker - Tripping function can be switched off - Module programmable via: - the graphical display (ETU76B) - the test socket with the BDA (ETU55B ... 76B) - the PROFIBUS-DP with a PC and the software "Switch ES Power" (ETU55B ... 76B). - Earth-fault detection mode selectable: - vectorial summation S I = L1+L2+L3+N - external earth-fault transformer SI = 1200 A : 1 A Einstellwerte für Ig Current Settings for Ig Baugröße Frame size I / II III A 100 A 400 A B 300 A C I / II III A 100 A 400 A 600 A B 300 A 600 A 600 A 800 A C 600 A 800 A D 900 A 1000 A D 900 A 1000 A E 1200 A 1200 A E 1200 A 1200 A OFF OFF Einstellwerte für tg Settings for tg ETU27B … 45B tg = 0,1 / 0,2 / 0,3 / 0,4 / 0,5 s ETU27B … 45B tg = 0.1 / 0.2 / 0.3 / 0.4 / 0.5 s ETU55B … 76B tg = 0,1 … 0,5 s ETU55B … 76B tg = 0.1 … 0.5 s 9 – 77 Nachrüsten Retrofitting DANGER GEFAHR Gefährliche Spannung sowie bewegliche Teile mit hoher Geschwindigkeit. Hazardous voltages and high-speed moving parts. Kann Tod, schwere Personenschäden sowie Schäden an Geräten und Ausrüstung bewirken. Will cause death, serious personal injury, or equipment / property damage. Vor dem Arbeiten an diesem Gerät, Anlage unbedingt spannungsfreischalten. Always de-energize and ground equipment before working on this equipment. Vor dem Entfernen jeglicher Abdeckungen und des Bedienpults des Leistungsschalters unbedingt Speicherfeder entspannen. (Seite 24-3) Discharge springs before removing barriers / covers (page 24-3). - Ausschalten und Federspeicher entspannen q (Seite 24-3) - Externe Spannungsversorgung 24 V DC ausschalten, sofern vorhanden - Plombierhaube des Überstromauslösers entfernen, sofern vorhanden q (Seite 9-86) Blindmodul ausbauen - Switch off and discharge the storage spring q (page 24-3) - Switch off external 24 V DC voltage supply, if applicable - Remove sealing cap of overcurrent release, if applicable q (page 9-86) Removing dummy module 2 3 1 9 – 78 Erdschlussschutzmodul einsetzen und einrasten Installing and snapping the earth-fault protection module into place 2 1 3 - Externe Spannungsversorgung 24-V-DC einschalten, sofern vorgesehen - Parameter für Erdschlussschutz einstellen - Prüfung der Auslösefunktion mit Hilfe des Handprüfgerätes q (Seite 9-136) - Plombierhaube des Überstromauslösers ggf. aufsetzen und plombieren q (Seite 9-86) Schilder aktualisieren - Switch on external voltage supply 24 V DC, if applicable - Adjust settings for ground-fault protection - Test the tripping function with the handheld test device q (page 9-136) - Install and seal sealing cap of overcurrent release, if applicable q (page 9-86) Updating the options label Hinweis Note Nach dem Einbau zusätzlicher Komponenten sind folgende Angaben mit einem weißen Permanentstift bzw. mit Aufklebern aus dem beiliegenden Etikettenbogen zu aktualisieren! Davor ist es ggf. notwendig die zu korrigierenden Zeichen mit einem schwarzen Permanentstift zu füllen. After installing additional components, add the following data using a white and indelible ink pen or the appropiate label from the set of labels supplied! If necessary the signs which have to be corrected have to be filled a black permanent pen. Ausstattungsschild des Leistungsschalters Erdschlussschutzmodul Earth-fault protection module Options label of the circuit-breaker Bestell-Nr. Order no. 10. Stelle ändern Modify 10th position GFM AT für ETU45B GFM AT for ETU45B 3WL9111-0AT53-0AA0 G GFM AT für ETU55B … 76B GFM AT for ETU55B … 76B 3WL9111-0AT56-0AA0 G 9 – 79 9.1.13 Austausch des Überstromauslösers 9.1.13 Replacing the overcurrent release GEFAHR DANGER Gefährliche elektrische Spannung! Hazardous voltage! Kann Tod, schwere Personenschäden sowie Schäden an Geräten und Ausrüstung bewirken. Will cause death, serious personal injury, or equipment / property damage. Vor dem Arbeiten an diesem Gerät, Anlage unbedingt spannungs freischalten. Disconnect power before working on this equipment. Achtung Notice Austausch nur durch Personal, welches das „Service- und Montageseminar - Niederspannungsleistungsschalter 3WL“ bei SIEMENS besucht hat. Replacement only by qualified personnel, who have participated in the "seminar for Service and assembly of low-voltage circuit-breakers 3WL" at SIEMENS. VORSICHT CAUTION Überstromauslöser nur auswechseln, wenn Schalter AUS und Federspeicher entspannt ist. Exchange overcurrent release only if circuit-breaker is OFF and storage spring is not charged. Ausbau Removing - Ausschalten und Federspeicher entspannen q (Seite 24-3) - Bedienpult abnehmen q (Seite 24-9) PH 3 - Switch off and discharge the storage spring q (page 24-3) - Remove front panel q (page 24-9) 1 2 5 Nm Bei Montage / For installing 9 – 80 3 4 5 (5) 6 (4) (3) (2) (1) (6) (1) (2) (3) (4) (5) (6) Energiewandler (X21) N-/g-Wandler (X24) Messwandler Teil 1 (X20) Messwandler Teil 2 (X28) 5poliger (X27) Anschluss Gehäusemasse (X100) (1) (2) (3) (4) (5) (6) Energy transformer (X21) N-/g-transformer (X24) Measuring transformer part 1 (X20) Measuring transformer part 2 (X28) 5-pole (X27) Connection GND (X100) Stecker abziehen Remove connectors Die Belegung der Anschlussbuchsen ist typenabhängig. The allocation of the connecting socket belongs to the types. Hinweis Note Vor dem Abziehen der Stecker Leitungsverlegung merken. Sie muss beim Einbau in gleicher Art wieder hergestellt werden, um ein Einklemmen von Leitungen beim Zusammenbau zu verhindern. Mark the position of the connector so that you can maintain the wire polarity to avoid a destruction of the wire. VORSICHT CAUTION Wandler nur mit dem vorgesehenen Prüfgerät überprüfen. Direkte Messungen an den Wandlersteckern sind zu unterlassen. Diese können beschädigt werden, was den Ausfall des Überstromauslösers zur Folge haben kann. Current transformers must only be tested using the test device provided. Do not take direct measurements at the current-transformer connectors, as they may sustain damage, which could cause the overcurrent release to fail. 9 – 81 PH 1 7 8 1,2 + 0,3 Nm ETU umrüsten ETU retrofitting Ersatz „Release 2“ durch „Release 2“ Replacement of "Release 2" by "Release 2" Tausch der ETU-Box Interchange of ETU-Box Ersatz „Release 2“ durch „Release 1“ Replacement of "Release 2" by "Release 1" nicht möglich not possible 9 – 82 Ersatz „Release 1“ durch „Release 2“ Replacement of "Release 1" by "Release 2" Tausch der Baugruppe (ETU-Box und Träger mit Ausstattung, komplette Bestellnummer MLFB erforderlich) Interchange of mounting group (ETU-Box and equiped carrier, complete order number MLFB necessary) Einbau Installation Der Einbau erfolgt in umgekehrter Reihenfolge. Installation is done in reverse order. Hinweis Note Verdrehung der Schwingmetalle vermeiden. Anziehdrehmoment beachten. Avoid distorsion of anti-vibration rubber, pay attention to tightening torque. Wird ein Überstromauslösersystem mit einer anderen Konfiguration als bisher verwendet eingebaut, so ist die Bestell-Nr. auf dem Ausstattungsschild des Leistungsschalters entsprechend den Katalogangaben zu korrigieren. If an overcurrent release with another configuration than the existing one isinstalled, the order no. on the type label of the circuit-breaker must be changed according to the catalogue data. ACHTUNG NOTICE Nach Austausch des Überstromauslösers unbedingt Prüfung mit dem Handprüfgerät durchführen! q (Seite 9-80) After replacing the overcurrent release, always test with the test unit! q (page 9-80) Das Ergebnis der Prüfung ist schriftlich zu dokumentieren. Dazu ist das Formblatt „Meldung über Leistungsschalter-Umbau“ zu nutzen. Das Formblatt kann am Ende der Bedienungsanleitung kopiert werden. Um die Zurückverfolgbarkeit der Schalterausstattung beim Hersteller zu gewährleisten, ist der Umbau dem Technischen Service von SIEMENS mitzuteilen. Dazu ist das Formblatt vollständig ausgefüllt an die angegebene Adresse zu faxen. The result of the test has to be documented. For that reason the form "Announcement of circuit-breaker modification" should be used. The form can be copied from the end of this operating instructions. To ensure the retraceability of the circuit-breaker equipment at the manufacturers site, the modification needs to be announced to the Technical Service of SIEMENS. To provide this information the form should be filled out completely and should be faxed to the given number. Zur Bestellung von Überstromauslösersystemen siehe Katalog SENTRON WL. For ordering overcurrent releases, please refer to catalogue SENTRON WL. Für diesbezügliche Rückfragen steht die Hotline (Technical assistance) zur Verfügung. Please contact the hotline for technical assistance if you have any questions. 9 – 83 9.1.14 Interner Selbsttest der Überstromauslösefunktion Für Inbetriebnahme und Funktionskontrolle. 9.1.14 Internal self-test of the overcurrent tripping function For commissioning and function testing. Voraussetzungen Conditions - Überstromauslöser ist aktiviert durch: Betriebsstrom externe Spannungsversorgung - Strom nicht im Überlastbereich q Anzeigen (Seite 9-20) - overcurrent release is activated by: normal current external voltage supply - operating current not in overload range q Indications (page 9-20) Interner Selbsttest des Schalters ohne Auslösung Internal self test of the breaker without tripping Der normale Betrieb des Leistungsschalters wird nicht beeinträchtigt Normal operation of the circuit-breaker is not impaired Der Test kann jederzeit mit CLEAR abgebrochen werden The test can be canceled at any time by pressing CLEAR 1 Lauflicht / Running light (Alle Anzeigen leuchten nacheinander auf / All indicators will light up one after other) 2 3 Dauer des Lauflichts entspricht dem eingestellten Trägheitsgrad tR Die Abweichung der Lauflichtdauer vom eingestellten Trägheitsgrad tR ist grösser als 10% The flashing time corresponds to the time-lag class tR The flashing time deviates from the set time-lag class tR more than 10% Anzeige L-Auslösung leuchtet The L-tripping indicator lights up 4 Test OK: Anzeige T.U. ERROR leuchtet LED T.U. ERROR lights up Test nicht OK / Test not OK: Test nicht OK / Test not OK Überstromauslöser ist defekt, auch wenn Anzeige L-Auslösung leuchten sollte Overcurrent release is defective, even if the L-tripping indicator lights up - Anzeige erlischt nach 30 s - Ende des Selbsttests - Vorzeitiges Beenden mit CLEAR 5 6 9 – 84 - LEDs go out after 30 s - End of internal self test - Premature ending of test by CLEAR Überstromauslöser OK Overload release OK Prüfung mit Handprüfgerät Please carry out a comprehensive testing with handheld test device Interner Selbsttest des Schalters mit Auslösung Internal circuit-breaker self-test with tripping Interner Selbsttest mit Auslösung nur durchführen, wenn nachgeordnete Stromkreise abgeschaltet werden dürfen! Internal self test with tripping should only be performed if downstream circuits are allowed to be safety disconnected! The test can be canceled Der Test kann jederzeit mit CLEAR abgebrochen werden at any time by pressing CLEAR 1 Lauflicht /Running light 2 (Alle Anzeigen leuchten nacheinander auf / All indicators will light up one after other) Dauer des Lauflichts entspricht dem eingestellten Trägheitsgrad tR Die Abweichung der Lauflichtdauer vom eingestellten Trägheitsgrad tR ist grösser als 10% The flashing time corresponds to the time-lag class tR The flashing time deviates from the set time-lag class tR more than 10% 3 4 5 Schalter löst aus Breaker trips Schalter löst nicht aus. Breaker does not trip Test OK Test nicht OK / Test not OK q Wiederinbetriebnahme nach Auslösung durch Überstromauslöser (Seite 6-8) Test nicht OK / Test not OK Überstromauslöser ist defekt, auch wenn Schalter auslösen sollte Overcurrent release is defective, even if the circuit-breaker trips - Prüfung mit Handprüfgerät - Verdrahtung Auslöser - Auslösemagnet prüfen - Auslösemagnet prüfen - Please carry out a comprehensive test with test unit q Reclosing a circuit-breaker - Check wiring between overcurrent release and tripping solenoid tripped by the trip unit (page 6-8) - Test tripping solenoid 9 – 85 9.1.15 Plombier- und Abschließvorrichtung Montage der Abschließvorrichtung q siehe (Seite 15-13) 9.1.15 Sealing and locking device Assembly of the locking device q see (page 15-13) abschließen lock 2 1 abnehmen remove 2 Release 2 plombieren seal transparente Abdeckung transparent cover 1 Hinweis Note Draht zum Plombieren möglichst kurz halten! Keep sealing wire as short as possible! Bestell-Nr. Order no. 9 – 86 ETU15B … ETU45 3WL9111-0AT45-0AA0 ETU76B 3WL9111-0AT46-0AA0 9.2 -Module 9.2 -modules 9.2.1 System-Architektur 9.2.1 System architecture Close/Open X6 - AO: Analoges Ausgangsmodul - BDA: Breaker Data Adapter; Adapter zum Parametrieren, Bedienen und Beobachten des Leistungsschalters mit einem beliebigen browserfähigen Ein-/Ausgabegerät; Anschluss über Prüfbuchse des Überstromauslösers oder Westernbuchse (RJ45) des letzten externen Moduls - BSS: Breaker Status Sensor für die Erfassung der Meldungen über den Zustand des Leistungsschalters - : Internes Bussystem für die Verbindung von Schalterkomponenten untereinander und für den Anschluss von externen -Modulen - COM15/16: Kommunikationsmodul für die Verbindung zwischen und Modbus - DI: Digitale Eingangsmodule für potentialfreie Eingangssignale „0/1“-Signale; maximal zwei Module mit unterschiedlicher Konfiguration anschließbar - DO: Digitale Ausgangsmodule mit je 6 Ausgängen; maximal drei Module mit unterschiedlicher Konfiguration bzw. Ausführung anschließbar - AO: Analogue output module - BDA: Breaker Data Adapter; adapter for parameterising, operating and monitoring the circuit-breaker via any input/ output unit with browser features; connection through test socket of overcurrent release or western socket (RJ45) of the last external -module - BSS: Breaker Status Sensor for acquisition of signals about the circuit-breaker status - : Internal bus system for interconnection of circuit-breaker components and for connection of external -modules - COM15/16: Communications module for interconnection of and Modbus - DI: Digital input modules for potential-free input signals "0/1"-signals; two modules with different configurations connectable as a maximum - DO: Digital output modules with 6 outputs each; three modules with different configurations or versions connectable a maximum of three modules with different configurations can be connected 9 – 87 - ETU: Elektronischer Überstromauslöser - Metering: Messfunktion PLUS - PROFIBUS-DP: Feldbus zur Verbindung von Automatisierungskomponenten - Protection: Schutzmodul - VT: Spannungswandler - ZSI: Modul für zeitverkürzte Selektivitätssteuerung (Zone Selective Interlocking), muss immer als erstes Modul angeschlossen werden - ETU: Electronic overcurrent release - Metering: Metering function PLUS - PROFIBUS-DP: Field bus for connection of automation components - Protection: Protection module - VT: Voltage transformer - ZSI: Module for zone selective interlocking, must always be connected as the first module Hinweis Note Die Grundschutzfunktionen der elektronischen Überstromauslöser benötigen keine Hilfsenergie. Sollen zusätzlichen Funktionen der Überstromauslöser genutzt werden, die einen Datenaustausch über den erfordern, muss eine externe 24 V DC-Spannungsversorgung angeschlossen werden. q (Seite 9-128) The basic functions of the electronic overcurrent releases do not require auxiliary power supply. To use extended functions of the overcurrent releases requiring data exchange via the , an external 24 V DC voltage supply must be connected. q (page 9-128) 9 – 88 9.2.2 Interne Module 9.2.2 Internal modules 9.2.2.1 Breaker Status Sensor (BSS) 9.2.2.1 Breaker Status Sensor (BSS) Für das Sammeln von Informationen über den Zustand des Leistungsschalters mittels Meldeschalter und deren Übertragung auf den . For collecting circuit-breaker status information via signalling switches and transmitting these data to the . Überstromauslöser Overcurrent release 2. Hilfsauslöser 2nd auxiliary release Feder Leg spring Signalling switches for BSS Meldeschalter für den BSS (5) (6) (7) (8) (4) (3) (2) (1) (1) (2) (3) (4) (5) (6) (7) (8) Meldeschalter Speicherzustand S41 Meldeschalter S44 Hauptkontakte (EIN / AUS) Meldeschalter Einschaltbereitschaft S40 Ausgelöst-Meldeschalter S45 Meldeschalter Betriebsstellung S46 Meldeschalter Prüfstellung S47 Meldeschalter Trennstellung S48 Meldeschalter S43 am zweiten Hilfsauslöser (1) (2) (3) (4) (5) (6) (7) (8) Signalling switch spring charged S41 Signalling switch ON-OFF position S4 Signalling switch ready-to-close S40 Trip signalling switch S45 Signalling switch connected position S46 Signalling switch test position S47 Signalling switch disconnected position S48 Signalling switch S43 2nd auxiliary release 9 – 89 BSS-Modul montieren Installing the BSS module WARNUNG WARNING Vor dem Arbeiten an diesem Gerät, Anlage unbedingt spannungsfreischalten sowie das Gerät erden. Always de-energize and ground equipment before working on this equipment. - Switch off and discharge the storage spring q (page 24-3) - Remove front panel q (page 24-9) - Remove the overcurrent release q (page 9-80) - Ausschalten und Federspeicher entspannen q (Seite 24-3) - Bedienpult abnehmen q (Seite 24-9) - Überstromauslöser ausbauen q (Seite 9-80) 1 3 2 4 (1) (2) (3) (4) (5) (6) 9 – 90 BSS Schaltwelle BSS Einschaltbereitschaftsanzeige Antriebswelle Mitnehmer (1) (2) (3) (4) (5) (6) BSS Main shaft BSS Ready-to-close indicator Operating shaft Driver Meldeschalter am Hilfsauslöser anbringen Attaching signalling switch on the auxiliary release (1) 2. Hilfsauslöser: Meldeschalter S 43 2. Auxillary release: signalling switch S 43 (2) (3) (4) (1) (2) (3) (4) (1) (2) (3) (4) Wippe Meldeschalter Führung Nut See-saw Signalling switch Guide Groove Attaching signalling switch on the protection module Meldeschalter am Schutzmodul montieren VORSICHT CAUTION Selbstschneidende Schrauben vorsichtig anziehen. Die Meldeschalter dürfen sich bei der Montage nicht verformen. Tighten self-tapping screws carefully. The signalling switches must not be deformed during installation. Überstromauslöser Systemträger in Metallausführung (silbern): Carrier of over current system, metal made (silver): Feder / spring BSS 3 1 S13 (Rückseite Rear side) S45 Pz 0 2 S24 Überstromauslöser Systemträger in Kunststoffausführung (schwarz): Carrier of over current system, plastic made (black): BSS 3 S45 1 (1) (2) S24 Pz 0 S45 Ausgelöstmeldeschalter (mit COM 15/16 - Modul) S24 Ausgelöstmeldeschalter (ohne Kommunikation) 0791 2 (1) (2) S45 Trip signalling switch (with COM15/16 - modul) S24 Trip signalling switch (without communication) 9 – 91 BSS-Modul anschließen Connecting BSS-module GEFAHR DANGER Gefährliche elektrische Spannung! Hazardous voltage! Kann Tod, schwere Personenschäden sowie Schäden an Geräten und Ausrüstung bewirken. Will cause death, serious personal injury, or equipment / property damage. Vor dem Arbeiten an diesem Gerät, Anlage unbedingt spannungs freischalten. Disconnect power before working on this equipment. Der erste -Anschluss führt an die Messerleiste X8. Der zweite -Anschluss erfolgt je nach Ausstattung des Leistungsschalters. The first connection leads to the male connector X8. The second connection is performed according to the circuit-breaker equipment. q Schaltpläne (Seite 8-1) q Circuit diagrams (page 8-1) Hinweis Note Ggf. fehlende Hilfsstromanschlüsse nachrüsten (Messerleiste, Hilfsstromstecker, Schleifkontaktmodul für Einschubrahmen). q (Seite 5-19) If necessary missing auxiliary terminals may be retrofitted (receptacle, auxiliary connectors and sliding contact module for guide frames). q (page 5-19) (1) (2) (3) 9 – 92 Abschlusswiderstand für ETU15B … 27B oder bei Leistungstrennschaltern ETU45B … 76B ohne Messfunktion ETU45B … 76B mit Messfunktion (1) (2) (3) Terminating resistor for ETU15B ... 27B or at non-automatic circuit-breakers ETU45B ... 76B without metering function ETU45B ... 76B with metering function 9.2.2.2 COM15-Modul 9.2.2.2 COM15 module Schnittstellenadapter für: Interface adapter for: - die Umsetzung der -Signale auf PROFIBUSDP-Signale und umgekehrt - bei Einschubschaltern: Erfassen der Position des Leistungsschalters im Einschubrahmen mit den Meldeschaltern S 46, S 47 und S 48 und Ausgabe entsprechender Meldungen auf den und den PROFIBUS-DP. - Bereitstellung von speziellen Funktionen über zusätzliche Ein- und Ausgänge (z. B. zur Steuerung des Leistungsschalters und zur Parametrierung) Weitere Informationen enthält das Handbuch „SENTRON 3WL/3VL Kommunikationsfähige Leistungsschalter - PROFIBUS-DP“ Hinweis - converting signals to PROFIBUS-DP signals and vice versa - on draw-out circuit-breakers: detecting the circuit-breaker position in the guide frame with the signaling switches S46, S47 and S48, and emitting the corresponding signals on the and the PROFIBUS-DP. - providing special functions trough additional inputs and outputs (e.g. to control the circuit-breaker and for parameterisation) Further Information is given in the manual "SENTRON 3WL/3VL Circuit-breakers with communication capability - PROFIBUS-DP" Note Dies ist ein Produkt für Umgebung A. In Haushaltsumgebung kann This is a product for environment A. In residential environment this dieses Gerät unerwünschte Funkstörungen verursachen; in diesem device can cause unwanted radio interferences. In this case the Fall kann der Anwender verpflichtet sein, angemessene Maßnahuser can put in charge to perform special measures. men durchzuführen . View Ansicht (1) (2) (3) (4) (5) (6) Anschlussklemmen für zusätzliche Ein- bzw. Ausgänge zur Bereitstellung spezieller Funktionen Sub-D-Stecker, 9polig, für PROFIBUS-DP-Anschluss -LED PROFIBUS-DP-LED Anschlussleitungen zum Handstecker X8 -Anschluss zum Anschließen externer Module oder des Abschlusswiderstandes Anzeigen LED PROFIBUSDP (1) (2) (3) (4) (5) (6) Connection terminals for additional inputs and outputs to provide special functions SUB-D plug, 9-pole, for PROFIBUS-DP connection LED PROFIBUS-DP-LED Connecting cables to hand plug X8 connection for connecting external modules or for the terminating resistor Indications Anzeige Bedeutung aus Keine Spannung am COM15 grün PROFIBUS-DP-Kommunikation funktioniert LED Indication Significance off PROFIBUSDP green No voltage at COM15 PROFIBUS-DP communication operating rot Busfehler oder Bus nicht ansprechbar red Bus fault or bus not responding aus Keine -Module gefunden off No -modules found grün -Kommunikation funktioniert green communication operating grün blinkend -Teilnehmer gefunden, aber die -Verbindung innerhalb des Schalters ist gestört green flashing participant found, but connection inside circuitbreaker disturbed rot -Fehler red faulty 9 – 93 COM15-Modul am Einschubrahmen montieren Fitting COM15 module on the guide frame - Ausschalten und Federspeicher entspannen q (Seite 24-3) - Schalter in Wartungsstellung ziehen q (Seite 24-4) - Leistungsschalter im Einschubrahmen in Wartungsposition bewegen q (Seite 24-4) - Switch off and discharge the spring storage q (page 24-3) - Pull the breaker into maintenance position q (page 24-4) - Move the circuit-breaker into the maintenance position in the cradle q (page 24-4) 1 2 COM15-Modul COM15 module COM15-Modul COM15 module S46, S47 und S48: S48 S47 S46 S46, S47 and S48: Meldeschalter zur Erfassung der Position des Leistungsschalters im Einschubrahmen zur Weiterleitung auf den PROFIBUS-DP und den Signalling switches for detecting the circuit-breaker position in the guide frame and transfer to PROFIBUS-DP and Betätigungsmodul mit Stößel am Einschubschalter montieren Fitting operating module with pin on the draw-out circuitbreaker Für die Betätigung der Meldeschalter S46, S47 und S48. For actuating signalling switches S46, S47 and S48. 1 2 Betätigungsmodul Operating module Blindabdeckung X7 dummy auxiliary plug X7 Nur leicht anhebeln! Lift slightly only! 9 – 94 3 federnder Stößel spring loaded pin Betätigungsmodul mit Stößel am Einschubschalter (BG II und BGIII 1000 V Bemessungsspannung) montieren: Fitting operating module with pin on the draw-out circuitbreaker (FS II and FS III 1000 V rated voltage) 3 2 1 4 2x M4x8 2x M4x8 PZ 3 Betätigungsmodul mit Stößel am Einschubschalter (BGI 1000 V oder 690V(+20%) Bemessungsspannung) montieren: Fitting operating module with pin on the draw-out circuit-breaker (FSI 1000 V or 690V(+20%) rated voltage): 2x Taptite MC6S-TT 5x12 0,9 ± 0,1 Nm Gr. / Size 4 Fitting COM15 module on the fixed-mounted breaker COM15-Modul am Festeinbauschalter montieren COM15-Modul COM15 module 3 1 Betätigungsmodul Operating module 2 PZ 2 3 x Plastite RX-PT 8-16x12 9 – 95 Leitungen anschließen Connecting wires q Schaltpläne (Seite 8-1) q Circuit diagrams (page 8-1) Hinweis Note Ggf. fehlende Hilfsstromanschlüsse nachrüsten (Messerleiste, Hilfsstromstecker, Schleifkontaktmodul für Einschubrahmen). q (Seite 5-19) If necessary missing auxiliary terminals may be retrofitted (receptacle, auxiliary connectors and sliding contact module for guide frames). q (page 5-19) (1) (2) Handstecker X8 Verbindungsleitung zum ersten externen -Modul oder Abschlusswiderstand Verbindungsleitung zum Handstecker X8 (3) (1) (2) (3) Hand plug X8 Connecting cable to first external -module or terminating resistor Connecting cable to hand plug X8 Beschriftung Belegung Klemme Designation Assignment Terminal X8-1 - X8.1 X8-1 - X8.1 X8-2 + X8.2 X8-2 + X8.2 X8-3 24 V DC + X8.3 X8-3 24 V DC + X8.3 X8-4 24 V DC Masse X8.4 X8-4 24 V DC GND X8.4 Achtung Notice Werden keine externen -Module am COM15Modul angeschlossen, ist in den -Anschluss der Abschlusswiderstand zu stecken. Anderenfalls kann es zu Fehlfunktionen der Elektronik kommen. If no external -modules are connected to the COM15-module, the terminating resistor has to be plugged into the -terminating. Otherwise there may be malfunctions in the electronic system. Anschlüsse für zusätzliche Ein- und Ausgänge Connections for additional inputs and outputs Nähere Informationen über die Verwendung dieser Ein- und Ausgänge enthält das Handbuch „SENTRON 3WL/3VL Kommunikationsfähige Leistungsschalter - PROFIBUS-DP“ Further information about the application of these inputs and outputs is given in the manual "SENTRON 3WL/3VL Circuit-breakers with communication capability - PROFIBUS-DP" 9 – 96 9.2.2.3 COM16 Modul 9.2.2.3 COM16 module Schnittstellenadapter für: Interface adapter for: - die Umsetzung der -Signale auf Modbus-Signale und umgekehrt - bei Einschubschaltern: Erfassen der Position des Leistungsschalters im Einschubrahmen mit den Meldeschaltern S46, S47 und S48 und Ausgabe entsprechender Meldungen auf den und den Modbus. - Bereitstellung von speziellen Funktionen über zusätzliche Einund Ausgänge (z. B. zur Steuerung des Leistungsschalters und zur Parametrierung) Hinweis - converting signals to Modbus signals and vice versa - on draw-out circuit-breakers: detecting the circuit-breaker position in the guide frame with the signalling switches S46, S47 and S48, and emitting the corresponding signals on the and the Modbus. - providing special functions trough additional inputs and outputs (e.g. to control the circuit-breaker and for parameterisation) Note Das Modul ist auch im Nachrüstkit 3WL9111-0AT18-0AA oder in der This modul is also part of the retrofit kit 3WL9111-0AT18-0AA or Bestellergänzung -Z12 enthalten. included in the ordering addendum -Z12 Installation und Betrieb Installation und Betrieb wird im Systemhandbuch (Dokumentbestellnummer 3ZX1012-0WL10-AB1) beschrieben. Das Systemhandbuch kann unter HYPERLINK "http://www.siemens.de/ niederspannungs-schalttechnik/handbuecher" kostenlos heruntergeladen werden. installation and operating is described at the systemhandbook (document order number 3ZX1012-0WL10-AB1) the systemhandbook can be downloaded without a charge from: HYPERLINK "http:// www.siemens.de/niederspannungs-schalttechnik/handbuecher" 9 – 97 9.2.2.4 Messfunktion PLUS 9.2.2.4 Metering function PLUS Die Überstromauslöser ETU45B … ETU76B q (Seite 9-123) Die Überstromauslöser ETU45B … ETU76B können mit einer Messfunktion ausgestattet werden. Diese erfordert jedoch das Vorhandensein von externen Spannungswandlern, die eine dreiphasige Messspannung bereitstellen. q (Seite 9-123) Trip unit ETU45B ... ETU76Bq (page 9-123) Overcurrent releases ETU45B ... ETU76B can be equipped with a metering function. This, however, requires external voltage transformers providing a three-phase metering voltage. q (page 9-123) Zusätzlich zu den Werten für die Ströme stellt die Messfunktion über den Angaben über Spannungen, Leistungen, Energiewerte, Leistungsfaktoren und über die Frequenz für die weitere Verarbeitung bereit. In addition to the values for the currents, the metering function provides data on voltages, powers, energy values, power factors and frequency for further processing via the . Diese Daten können beispielsweise auf dem Display der Überstromauslöser angezeigt, mit Hilfe des COM15-Moduls auf den PROFIBUS-DP übertragen und an die Ausgänge von externen -Modulen übergeben werden. Auf ihrer Grundlage lassen sich Aussagen über den Zustand des Energienetzes treffen. Bei Verwendung der Messfunktion ohne Kommunikation wird für die Funktionalität eine externe 24 V Hilfsspannungsversorgung benötigt. These data can be shown on the display of the overcurrent releases, transmitted to the PROFIBUS-DP via the COM15-module and transferred to the outputs of external -modules. Based on these data, conclusions can be drawn about the condition of the power system. For usage metering function without communication a external 24 V auxiliary voltage supply is required. Genauigkeit1) Accuracy1) Messgröße Measured parameter Ströme IL1, IL2, IL3, IN Currents IL1, IL2, IL3, IN ±1% Erdschlussstrom Ig (Messung mit externem GF-Wandler) Earth-fault current Ig (Measurement with external earth-fault transformer) ±5% Verkettete Spannungen UL12, UL23, UL31 Line-to-line voltage UL12, UL23, UL31 ± 1% Sternpunktspannungen UL1N, UL2N, UL3N Neutral point voltages UL1N, UL2N, UL3N ±1 % Momentaner Mittelwert der verketteten Spannungen UavgD Present average of line-to-line voltage UavgD ±1% Momentaner Mittelwert der Sternpunktspannungen UavgY Present average of neutral point voltages UavgY ±1% Scheinleistungen SL1, SL2, SL3 Apparent power SL1, SL2, SL3 ±2% Summe Scheinleistung Total apparent power ±2% Wirkleistungen PL1, PL2, PL3 Active power PL1, PL2, PL3 ± 3 % @ cosϕ > 0.6 Summe Wirkleistung Total active power ± 3 % @ cosϕ > 0.6 Blindleistungen QL1, QL2, QL3 Reactive power QL1, QL2, QL3 ± 4 % @ cosϕ > 0.6 Blindleistung Total Total reactive power ± 4 % @ cosϕ > 0.6 Leistungsfaktoren cosϕL1, cosϕL2, cosϕL3, Power factors cosϕL1, cosϕL2, cosϕL3, ± 0.04 Leistungsfaktor total cosϕavg, Power factor total cosϕavg ± 0.04 Langzeitmittelwert der Ströme in den Phase L1, L2, L3 Long-time average of currents IL1, IL2, IL3 ±1% Langzeitmittelwert Strom 3-phasig Long-time average of 3-phase current ±1% Langzeitmittelwert Wirkleistung in den Phasen L1, L2, L3 Long-time average of active power in L1, L2, L3 ± 3 % @ cosϕ > 0.6 Langzeitmittelwert Wirkleistung 3-phasig Long-time average of active power 3-phase ± 3 % @ cosϕ > 0.6 Langzeitmittelwert Scheinleistung den Phasen L1, L2, L3 Long-time average of apparent power in L1, L2, L3 ±2% Langzeitmittelwert Scheinleistung 3-phasig Long-time average of apparent power 3-phase ±2% Langzeitmittelwert Blindleistung 3-phasig Long-time average of reactive power 3-phase ± 4 % @ cosϕ > 0.6 Wirkarbeit Bezug Energy consumed ±3% Wirkarbeit Rückspeisung Energy delivered ±3% Blindarbeit Bezug Reactive energy consumed ±4% Blindarbeit Rückspeisung Reactive energy delivered ±4% Frequenz Frequency 9 – 98 ± 0.1 Hz Genauigkeit1) Accuracy1) Messgröße Measured parameter Klirrfaktoren Strom und Spannung Distortion factor of current and voltage Phasenunsymmetrie Strom und Spannung2) Phase unbalance of current and voltage2) 1) 1) 2) Genauigkeit wir folgendermaßen angegeben: ± ( x % vom Messbereichendwert + 2 LSD (Least Significant Digit) für ein Jahr nach der Kalibrierung ±3% bis 29. Harmonischen up to 29th harmonic Definition of accuracy: ± ( x % of w.r.t. opperlimit + 2 LSD (Least Significant Digit) for one year after calibration Referenzbedingung: Eingangsstrom I: In max ± 1% Eingangsspannung: Un ± 1% Frequenz f: 50 Hz Leistungsfaktor: cosϕ = 1 Kurvenform: Sinus, Klirrfaktor < 5% symmetrische Belastung Umgebungstemperatur: 35°C ± 5°C Hilfsspannung: DC 24 V nach DIN 19240 / EN 61131 Reference condition: Input current I: In max ± 1% Input voltage U: Un ± 1% Frequency f: 50 Hz Powerfactor: cosϕ = 1 Waveform: sine, harmonic distortion < 5% symmetrical load Ambient temperature : 35°C ± 5°C Auxiliary voltage: DC 24 V according DIN 19240 / EN 61131 Anwärmzeit: 2 Stunden Fremdfelder: keine Warm-up time: 2 hours External fields: no Messbereich: Strom 0.2 ... 1.2 In max Spannung 0.8 ... 1.2 Un Metering range: Current : 0.2 ... 1.2 In max Voltage : 0.8 ... 1.2 Un IEC-Definition: Verhältnis des größten Unterschiedes der Phase zur höchstbelasteten Phase. 2) ±1% IEC-Definition: Ratio of the largest difference between the phases and the most heavily loaded phase. Erweiterte Schutzfunktionen Extended protective functions Mit Hilfe der Messfunktion können erweiterte Schutzfunktionen realisiert werden, die über die Funktionalität der Überstromauslöser hinausgehen. The metering function is used to implement extended protective functions beyond the functionality of the overcurrent releases. Parameter Einstellbereich Range Verzögerung Delay Unterspannung Under voltage 100 … 1100 V 0 … 15 s Überspannung Over voltage 200 … 1200 V 0 … 15 s Wirkleistung Bezug Active power in normal direction 1 … 12000 kW 0 … 15 s Wirkleistung Einspeisung Active power in reverse direction 1 … 12000 kW 0 … 15 s Überfrequenz Over frequency 40 … 70 Hz 0 … 15 s Unterfrequenz Phasenunsymmetrie Strom Under frequency 1) Phasenunsymmetrie Spannung Phase current unbalance 1) 0 … 15 s 5 … 50 % 0 … 15 s 1) 5 … 50 % 0 … 15 s 3 … 50 % 5 … 15 s 3 … 50 % 5 … 15 s Phase voltage unbalance Drehfelderkennung Phase rotation Klirrfaktor Strom Current distortion factor Klirrfaktor Spannung Voltage distortion factor 1) 40 … 70 Hz 1) ANSI-Definition: Verhältnis des größten Unterschiedes der Phasen zum Mittelwert der Phasen. IEC-Definition: Verhältnis des größten Unterschiedes der Phase zur höchstbelasteten Phase. 1) ANSI-Definition: Ratio of the largest difference between the phases and the average of all 3 phases. IEC-Definition: Ratio of the largest difference between the phases and the most heavily loaded phase. Über- bzw. unterschreitet einer dieser Parameter den für ihn eingestellten Wert, erhält der Überstromauslöser nach der eingestellten Verzögerung über den die Aufforderung auszulösen. If one of these parameters exceeds or falls below its default settings, the overcurrent release is tripped after the adjusted delay through the . Die Einstellung der Parameter kann erfolgen über: The parameters can be adjusted through: - die Prüfbuchse mit dem BDA - den PROFIBUS-DP mit einem PC und der Software „Switch ES Power“ - das Grafikdisplay (ETU76B). - the test socket with the BDA - the PROFIBUS-DP with a PC and the software "Switch ES Power" - the graphical display (ETU76B) 9 – 99 Setpoints Setpoints Durch die Setpoint-Funktion können spezielle Ereignisse im Energienetz signalisiert bzw. aufgezeichnet werden. The setpoint function can be used to signal or record special events in the power system. Parameter Bereich Range Verzögerung Delay Überstrom Phase Phase overcurrent 30 … 10000 A 0 … 255 s Überstrom Erdstrom Ground overcurrent 30 … 1200 A 0 … 255 s Überstrom Neutralleiter Neutral conductor overcurrent 30 … 10000 A 0 … 255 s Phasenunsymmetrie Strom1) Phase current unbalance1) 5 … 50 % 0 … 255 s Langzeitmittelwert Strom Long-time average current 30 … 10000 A 0 … 255 s Unterspannung Under voltage 100 … 1100 V 0 … 255 s Phasenunsymmetrie Spannung1) Phase voltage unbalance1) 5 … 50 % 0 … 255 s Überspannung Over voltage 100 … 1100 V 0 … 255 s Wirkleistung überschritten Bezug Over power in normal direction 1 … 12000 kW 0 … 255 s Wirkleistung überschritten Rückspeisung Overpower in reverse direction 1 … 12000 kW 0 … 255 s Langzeitmittelwert Wirkleistung überschritten Long-time active power average exceeded 1 … 12000 kW 0 … 255 s Langzeitmittelwert Scheinleistung überschritten Long-time apparent power average exceeded 1 … 12000 kVA 0 … 255 s Langzeitmittelwert Blindleistung überschritten Long-time reactive power average exceeded 1 … 12000 kVar 0 … 255 s Blindleistung überschritten Bezug Reactive power exceeded in normal direction 1 … 12000 kVar 0 … 255 s Blindleistung überschritten Rückspeisung Reactive power exceeded in reverse direction 1 … 12000 kVar 0 … 255 s Scheinleistung überschritten Apparent power exceeded 1 … 12000 kVA 0 … 255 s Überfrequenz Over frequency 40 … 70 Hz 0 … 255 s Unterfrequenz Under frequency 40 … 70 Hz 0 … 255 s Leistungsfaktor unterschritten Power factor (PF) undershot -0,001 … 0,001 0 … 255 s Leistungsfaktor überschritten Power factor (PF) exceeded -0,001 … 0,001 0 … 255 s Klirrfaktor Strom überschritten Current distortion factor exceeded 3 … 50 % 0 … 255 s Klirrfaktor Spannung überschritten Voltage distortion factor exceeded 3 … 50 % 0 … 255 s Scheitelfaktor überschritten Peak factor exceeded 1 … 2.55 0 … 255 s Formfaktor überschritten Form factor exceeded 1 … 2.55 0 … 255 s 1) ANSI-Definition: Verhältnis des größten Unterschiedes der Phasen zum Mittelwert der Phasen. IEC-Definition: Verhältnis des größten Unterschiedes der Phase zur höchstbelasteten Phase. 1) ANSI-Definition: Ratio of the largest difference between the phases and the average of all 3 phases. IEC-Definition: Ratio of the largest difference between the phases and the most heavily loaded phase. Über- bzw. unterschreitet einer dieser Parameter den für ihn eingestellten Wert, wird nach Ablauf der eingestellten Verzögerung über den eine Meldung ausgegeben. If one of these parameters exceeds or falls below its default settings, the overcurrent release is tripped after the adjusted delay through the . Die Einstellung der Parameter kann erfolgen über: The parameters can be adjusted through: - die Prüfbuchse mit dem BDA - den PROFIBUS-DP mit einem PC und der Software „Switch ES Power“ - das Grafikdisplay (ETU76B). 9 – 100 - the test socket with the BDA - the PROFIBUS-DP with a PC and the software "Switch ES power" - the graphical display (ETU76B) Messfunktion PLUS Metering function PLUS Die Messfunktion Plus bietet neben den Grundfunktionen In addition to the basic functions, the metering function PLUS offers: - zwei unabhängige Kurvenformspeicher sowie - eine harmonische Analyse - two independent waveform memories - harmonic analysis Die zwei unabhängigen Kurvenformspeicher können zur Analyse der Strom- und Spannungswerte zur Zeit eines Ereignisses genutzt werden. The two independent waveform memories can be used to analyse the current and voltage values at the time of the event. Sind die Kurvenformspeicher auf „Aufzeichnung“ (Standardeinstellung) parametriert, so erfolgt eine fortwährende Aufzeichnung bis zum Eintreffen eines zuvor definierten Ereignisses. Dann wird die Aufzeichnung gestoppt und man kann über eine Visualisierung (Grafikdisplay, Laptop bzw. PC) die Kurvenverläufe des Stroms bzw. der Spannung zur Zeit des Ereignisses betrachten. Das Zeitfenster beträgt eine Sekunde. Die Auflösung beträgt 1649 Werte/Sekunde. If the waveform memories are programmed to "recording" (standard setting), continuous recording takes place until a previously defined event occurs. Then, the recording is stopped, and the current or voltage waveforms at the time of the event can be observed through a visual display (graphical LCD, laptop or PC). The time window is one second; the resolution is 1649 values/second. Werte, die jeweils für einen der Kurvenformspeicher ausgewählt werden können: The values that can be selected for one of the waveform memories are: Einstellgrößen für Kurvenformspeicher Settings for waveform buffers memory Ströme IL1, IL2, IL3, ILN, Ig Currents IL1, IL2, IL3, ILN, Ig Spannungen UL1, UL2, UL3 Voltages UL1, UL2, UL3 Die Kurvenformspeicher können auch über Kommunikationskanäle (PROFIBUS-DP, ) einzeln gestartet bzw. gestoppt werden. The waveform memories can also be started or stopped individually through the communication channels (PROFIBUS-DP, ). Die Parametrierung der Kurvenformspeicher kann erfolgen über: The waveform memories can be parameterized via: - die Prüfbuchse mit dem BDA - den PROFIBUS-DP mit einem PC und der Software „Switch ES Power“ - das Grafikdisplay (ETU76B). Nachrüsten - the test socket with the BDA - the PROFIBUS-DP with a PC and the software "Switch ES Power" - the graphical display (ETU76B) Retrofitting WARNUNG WARNING Vor dem Arbeiten an diesem Gerät, Anlage unbedingt spannungsfreischalten sowie das Gerät erden. Always de-energize and ground equipment before working on this equipment. - Ausschalten und Federspeicher entspannen q (Seite 24-3) - Einschubschalter in Wartungsstellung ziehen q (Seite 24-4) - Bedienpult abnehmen q (Seite 24-9) - Überstromauslöser ausbauen q (Seite 9-80) - Switch off and discharge the storage spring q (page 24-3) - Move draw-out circuit-breaker to maintenance position q (page 24-4) - Remove front panel q (page 24-9) - Remove overcurrent release q (page 9-80) Hinweis Note Wird die Messfunktion PLUS nachgerüstet, beträgt die Messgenauigkeit für Strom- und Spannungswerte 3%. Entsprechend ändert sich die Genauigkeit der anderen Messgrößen. Ist eine Messgenauigkeit von 1% erforderlich, muss der Überstromauslöser zusammen mit der Messfunktion PLUS zum Kalibrieren an den Hersteller eingeschickt werden. If the metering function PLUS is retrofitted, the current and voltage accuracy is 3% and the accuracy of the other measured values changes accordingly. If an accuracy of 1% is required, the overcurrent release must be submitted to the manufacturer for calibration, together with the metering function PLUS. 9 – 101 Auslösermechanik von der Elektronik abbauen Ggf. bestehende Leitungsfixierungen lösen und Anschlussstecker des Auslösemagneten abziehen. Removing tripping mechanism from electronic over current release If applicable, undo existing cable fixings and unplug connector of tripping solenoid 2 PH 1 1 Messfunktion aufstecken und verschrauben Installing metering function and screwing tight VORSICHT CAUTION Selbstschneidende Schraube vorsichtig anziehen! Tighten self-tapping screw carefully! 1 3 2 PZ 1 1 Nm 9 – 102 Mechanik anbauen und Anschlussstecker für Auslösemagneten stecken Installing mechanism and plugging connector for tripping solenoid VORSICHT CAUTION Verdrehung der Schwingmetalle vermeiden! Anziehdrehmoment beachten! Avoid distorsion of anti-vibration rubber, pay attention to tightening torque. 2 1 PH 1 3 1,2 + 0,3 Nm Vorkonfektionierte Leitungen anschließen Connecting pre-assembled cables Hinweis Note Ggf. fehlende Hilfsstromanschlüsse nachrüsten (Messerleiste, Hilfsstromstecker, Schleifkontaktmodul für Einschubrahmen). q (Seite 5-19) If necessary missing auxiliary terminals may be retrofitted (receptacle, auxiliary connectors and sliding contact module for guide frames). q (page 5-19) Anschlussvariante A: mit BSS Anschlussvariante B: ohne BSS Variant A: with BSS Variant B: without BSS A B 9 – 103 Anschlussbelegung Terminal assignment X50 externer Spannungswandler X50 External voltage transformer X27 X27 Hinweis Note Werden keine externen -Module an X8-1 und X8-2 angeschlossen, ist an diese Klemmen der Abschlusswiderstand anzuschließen. Anderenfalls kann es zu Fehlfunktionen der Elektronik kommen. If no external modules are connected to X8-1 and X8-2, this terminals must be equipped with the end resistor. Otherwise there may be malfunctions in the electronic system. Laying and fixing the cables Leitungen verlegen und fixieren (2) (1) (1) (2) 3 Bohrungen als Fixierpunkte Fixierhilfen (1) (2) 3 holes as fixing points Fixing aids Alle Leitungen wie oben gezeigt sorgfältig verlegen und mit Kabelbindern an den Fixierpunkten befestigen. Leitungen um die Fixierhilfen führen und unmittelbar links und rechts daneben mit Kabelbindern fixieren. Lay all cables carefully as shown above and fix them with cable straps at the fixing points. Lead the cables around the fixing aids and fix them directly on the left and right of the aids with cable straps. Anschließend: Then: - Überstromauslöser einbauen q (Seite 9-80) - Leitungen an X8 anschließen - Bedienpult aufsetzen q (Seite 24-22) - Install overcurrent release q (page 9-80) - Connect cables to X8 - Install front panel q (page 24-22) 9.2.2.5 Nachrüsten des PROFIBUS - Kommunikationsanschlusses 9.2.2.5 Retrofitting of the PROFIBUS - communication Der Leistungsschalter kann mit dem „PROFIBUS Nachrüstkit“ nachträglich befähigt werden, Daten über den PROFIBUS-DP auszutauschen. Additional the cicuit-breaker can be qualified with the "PROFIBUS retrofitting kit", to exchange data via PROFIBUS-DP. - Einbau des Breaker Status Sensors (BSS) q (Seite 9-90) - Einbau des COM15-Moduls q (Seite 9-94) - Austausch des Überstromauslösers ETU15B, ETU25B oder ETU27B gegen ETU45B, ETU55B oder ETU76B q (Seite 9-80) 9 – 104 - Mounting breaker status sensor (BSS) q (page 9-90) - Mounting COM15-module q (page 9-94) - Changing overcurrent release ETU15B, ETU25B or ETU27B with ETU45B, ETU55B or ETU76B q (page 9-80) 9.2.2.6 Schilder aktualisieren 9.2.2.6 Updating the options label Hinweis Note Nach dem Einbau zusätzlicher Komponenten sind folgende Angaben mit einem weißen Permanentstift bzw. mit Aufklebern aus dem beiliegenden Etikettenbogen zu aktualisieren! Davor ist es ggf. notwendig die zu korrigierenden Zeichen mit einem schwarzen Permanentstift zu füllen. After installing additional components, add the following data using a white and indelible ink pen or the appropiate label from the set of labels supplied! If necessary the signs which have to be corrected have to be filled a black permanent pen. Options label of the circuit-breaker Ausstattungsschild des Leistungsschalters 9.2.3 Bestell-Nr. Order no. Z ergänzen add Z Messfunktion PLUS (ohne Spannungswandler) Metering function PLUS (without voltage transformer) 3WL9111-0AT04-0AA0 F05 Breaker Status Sensor (BSS) 3WL9111-0AT16-0AA0 F01 Nachrüstkit „PROFIBUS-Kommunikationsanschluss“ 3WL9111-0AT12-0AA0 F02 COM15 - Modul 3WL9111-0AT15-0AA0 Externe -Module 9.2.3 External -modules 9.2.3.1 Allgemeines 9.2.3.1 General Verwendung Application Externe -Module dienen der Kommunikation des Leistungsschalters SENTRON WL mit Sekundärgeräten im Leistungsschalterfeld. Mit ihrer Hilfe lassen sich z. B. Analoganzeigen ansteuern, Auslösestatus und Auslösegrund des Leistungsschalters übertragen und zusätzliche Steuersignale einlesen. Mit Hilfe eines dieser Module kann des weiteren eine zeitverkürzte Selektivitätssteuerung für den Kurzschlussschutz realisiert werden. External -modules are used for communication between the circuit-breaker SENTRON WL and the secondary equipment in the circuit-breaker panel. They are provided to control analogue indications, transmit the circuit-breaker tripping status and reason for tripping, and to read additional control signals. Furthermore, with one of these modules it is possible to implement a zone selective interlocking for short-circuit protection. 9 – 105 (1) (2) (3) (4) (5) (6) (7) (8) Anzeige-LED Drehkodierschalter Anschluss X3: Anschluss X5: Ein- bzw. Ausgänge Anschluss X4: Ein- bzw. Ausgänge Anschluss X2: Anschluss X1: Taste „TEST“ (1) (2) (3) (4) (5) (6) (7) (8) Indication LED Rotary coding switch Connection X3: Connection X5: Inputs or outputs Connection X4: Inputs or outputs Connection X2: Connection X1: "TEST" button Montage Installation Die externen -Module werden im Schaltfeld auf eine standardmäßige 35 mm-Hutschiene aufgeschnappt. Dabei ist zu beachten, dass die Länge der Anschlussleitung des ersten Moduls zum Leistungsschalter maximal 2 m beträgt. The external -modules are snapped onto a standard 35-mm DIN-rail inside the switchgear panel. It must be ensured that the length of the connecting cable of the first module to the circuitbreaker does not exceed 2 m. Verbindungsaufbau Connection setup Für die Verbindung der -Module untereinander und zum Leistungsschalter sind ausschließlich die mitgelieferten vorkonfektionierten Leitungen zu verwenden. Über diese Leitungen erfolgt auch die Spannungsversorgung der -Module mit 24 V DC. Werden mehr als 2 -Module angeschlossen, muss die Versorgung mir 24 V DC über eine separate Leitungsverbindung von Modul zu Modul erfolgen. The modules must only be connected to each other and to the circuit-breaker using the pre-assembled cables supplied. These cables are also used for the 24 V DC voltage supply of the -modules. If more than two modules are connected, the 24 V DC voltage supply must be fed via a separate cable from module to module. Hinweis Note Ggf. fehlende Hilfsstromanschlüsse nachrüsten (Messerleiste, Hilfsstromstecker, Schleifkontaktmodul für Einschubrahmen). q (Seite 5-19) If necessary missing auxiliary terminals may be retrofitted (receptacle, auxiliary connectors and sliding contact module for guide frames). q (page 5-19) An einen Leistungsschalter ist immer nur ein -Modul direkt anzuschließen. Der Anschluss weiterer Module hat immer von Modul zu Modul zu erfolgen. Stichleitungen sind nicht zulässig! Only one -module can be connected directly to a circuitbreaker. Further modules must be connected from module to module. Spur lines are not permissible! Falls vorhanden, ist das ZSI-Modul immer das erste Modul und muss direkt an den Leistungsschalter angeschlossen werden. If provided, the ZSI-module is always the first module, and must be connected directly to the circuit-breaker. Am letzten Modul ist die -Leitung am Anschluss X3 mit einem 120 Ω-Widerstand abzuschließen. Dieser liegt jedem Modul bei. The cable must be connected to the X3 connection of the last module with a 120 Ω resistor, which is integrated in a Western plug and is supplied with each module. Die Gesamtlänge der -Leitungen darf vom Leistungsschalter, Hilfstromstecker X8, bis zum letzten -Modul 10 m nicht überschreiten. The total length of the cables must not exceed 10 m from the circuit-breaker – auxiliary current plug X8 – up to the last -module. 9 – 106 Leistungsschalter ohne COM15-Modul (1) (2) (3) (4) (5) Anschlussleitung zum 1. Modul (4adrig, Adern X8-4/X3-1 mit X8-3/X3-4 und X8-1/X3-2 mit X8-2/X3-3 jeweils verdrillt) Verbindungsleitungen zwischen den Modulen -Module Abschlusswiderstand 120 Ω 0,5 W am letzten Modul Leitungsverbindung zur Spannungsversorgung mit 24 V DC Circuit-breaker without COM15-module (1) (2) (3) (4) (5) Connecting cable to 1st module (4-core, cores X8-4/X3-1 twisted with X8-3/X3-4 and X8-1/X3-2 twisted with X8-2/X3-3 Connecting cables between modules -modules Terminating resistor 120 Ω 0.5 W Cable connection for 24 V DC voltage supply 9 – 107 Leistungsschalter mit COM15-Modul Circuit-breaker with COM15-module Nur bei mehr als 2 -Modulen: Verbindungsleitungen zwischen X8 und dem ersten -Modul zur Spannungversorgung mit 24 V DC Verbindungsleitungen zwischen den -Modulen -Module Abschlusswiderstand 120 Ω 0,5 W am letzten Modul Verbindungsleitungen zwischen den -Modulen zur Spannungsversorgung 24 V DC Verbindungsleitung zwischen COM15 und 1. -Modul (mit zwei Western-Steckern) COM15 (1) (2) (3) (4) (5) (6) (7) Einstellprinzip (1) (2) (3) (4) (5) (6) (7) Only if there are more than 2 -modules: Connecting cables between the X8 and the first module for 24 V DC voltage supply Connecting cables between -modules -modules Terminating resistor 120 Ω, 0.5 W Connecting cables between -modules for 24 V DC voltage supply Connecting cable between COM15 and the first module (with trwo western plugs) COM15 Setting principle Der Wert 0,1 ist eingestellt, wenn der Drehschalter in diesem Nummerschalterbereich steht 3 x 0,5 9 – 108 The value 0.1 is set if the rotary switch is positioned in this area of the dial. Anzeigen Indications LED DEVICE Anzeige Bedeutung grün Modul in Betrieb gelb Modul im Testmodus rot Modul gestört grün Verbindung zum besteht aus LED Indication Significance green Module in operation yellow Module in test mode red Module faulty green Connection to available keine Verbindung zum off Option not set or signal available gelb Option eingestellt bzw. Meldung vorhanden yellow aus Option nicht eingestellt bzw. keine Meldung vorhanden alle anderen LED Modultest DEVICE All other LED‘s off Option set or signal available Option not set or no signal available Module test VORSICHT CAUTION Bei der Anlagenprojektierung und Selektivitätsbetrachtung ist sicherzustellen, dass der Leistungsschalter nicht Ströme führen kann, die oberhalb der im Katalog angegebenen Schaltleistungswerte liegen. Übergeordnete Schutzgeräte sind so einzustellen, dass diese Fehlerfälle sicher abgeschaltet werden. When planning a project and considering selectivity it has to be ensured loads carried by the circuit-breaker will not exceed the breaking capacity stated in the 3WL catalogue. Upstream protection equipment has to be set in a way, that these faults are interrupted safely. Die korrekte Funktion der -Module kann im Test-Modus überprüft werden. The correct operation of the -modules can be verified in the test mode. Einmaliges Betätigen der Taste „TEST“ startet den Test-Modus. The test mode is started by pushing the "TEST" button once. Alle Ausgänge und die dazu gehörenden LEDs werden ausgeschaltet. Die Farbe der DEVICE-LED wechselt von grün auf gelb. All outputs and the associated LED’s are switched off. The colour of the DEVICE LED changes from green to yellow. Testing inputs and outputs Prüfen der Ein- und Ausgänge Betätigen der Taste „TEST“ Pressing the "TEST" Reaction Button Wirkung 2x kurz hinter einander - LED 1 ein - Ein- / Ausgang 1 ein Twice quickly - LED 1 on - Input/output 1 on Nach Pause, - LED 1 und Ein- / Ausgang 1 aus, LED 2 ein 2x kurz hinter einander - Ein- / Ausgang 2 ein After a pause, twice quickly - LED 1 and input/output 1 off, LED 2 on - Input/output 2 on Nach Pause, - LED 2 und Ein- / Ausgang 2 aus, LED 3 ein 2x kurz hinter einander - Ein- / Ausgang 3 ein After a pause, twice quickly - LED 2 and input/output 2 off, LED 3 on - Input/output 3 on ... ... ... ... Nach Pause, - LED 5 und Ein- / Ausgang 5 aus, LED 6 ein 2x kurz hinter einander - Ein- / Ausgang 6 ein After a pause, twice quickly - LED 5 and input/output 5 off, LED 6 on - Input/output 6 on Nach Pause, 1x Ein- / Ausgang 6 aus, alle LEDs ein After a pause, once Input/output 6 off, all LEDs on 1x Test-Modus beginnt von vorn, alle Ein- / Ausgänge und die dazu gehörenden LEDs sind aus Once Test mode starts again, all inputs/ouputs and the associated LED‘s are off Mehrmaliges Betätigen der Taste „TEST“ kurz hinter einander bewirkt bei eingeschalteter LED abwechselndes Ein- und Ausschalten des jeweiligen Ein- / Ausgangs. Pushing the "TEST" button several times in quick succession when an LED is on switches the respective input/output on and off alternately. 9 – 109 Prüfen nur der LEDs Testing LED’s only Bei mehrmaligem Betätigen der Taste „TEST“ mit einer Pause dazwischen werden nur die LEDs einzeln nach einander eingeschaltet. Nach der letzten LED werden alle LED eingeschaltet. Pushing the "Test" button several times with pauses in between switches the LEDs on successively. After the last LED, all LEDs are switched on. Abermaliges Betätigen der Taste „TEST“ startet den Test-Modus von vorn und alle LEDs sowie Ein- / Ausgänge werden ausgeschaltet. Repeated pushing the "TEST" button starts the test mode again, and all LEDs, inputs and outputs are switched off. Test-Modus verlassen Quitting the test mode Taste „TEST“ ca. 30 s nicht betätigen. Do not press the "TEST" button for approximately 30 seconds. Sind alle LEDs eingeschaltet, wird der Test-Modus bereits nach ca. 1 s verlassen. If all LED's are on, the test mode is already quitted after about 1 s. 9.2.3.2 ZSI-Modul 9.2.3.2 ZSI-module Funktion Function Die Kombination des Leistungsschalters mit einem ZSI-Modul (Zeitverzögerte Selektivitäts-Steuerung) erlaubt es, in Schaltanlagen mit mehreren Staffelebenen einen auftretenden Kurzschluss genau zu lokalisieren. If the circuit-breaker is combined with a ZSI-module, a short-circuit occurring in systems with several grading levels can be localised precisely. Dazu werden alle Leistungsschalter über ihr ZSI-Modul miteinander verbunden. For this purpose, all circuit-breakers are interconnected via their ZSI-modules. Im Kurz- und/oder Erdschlussfall fragt jeder vom Kurzschlussstrom durchflossene Leistungsschalter die ihm direkt nachgeordneten Leistungsschalter ab, ob der Kurz- und/oder Erdschluss auch in der nächsten untergeordneten Staffelebene auftritt. Es löst nur der, in Energieflussrichtung gesehen, nächstgelegene, dem Kurz- und/ oder Erdschluss vorgeordnete Leistungsschalter aus. When a short-circuit or earth-fault occurs, each circuit-breaker affected by the short-circuit or earth-fault current queries its downstream circuit-breaker to determine whether the short-circuit or earth-fault is present in the next downstream grading level. In the direction of the energy flow, only the circuit-breaker nearest to the short-circuit or earth-fault in the upstream direction is tripped. Eine eingestellte Verzögerungszeit tsd für die Kurzschlussauslösung wird auf 50 ms gesetzt bei Schalterstellung am ZSI-Modul „S“ oder „S+G“, wenn der Leistungsschalter im Kurzschlussfall kein Blockiersignal ZSI-IN von einem nachgeordneten Leistungsschalter erhält. Bei einem erkannten Kurzschluss wird ein Blockiersignal ZSI-OUT an die vorgeordneten Leistungsschalter ausgegeben. Die Kurzschlussauslösung erfolgt jedoch frühestens nach 50 ms, typisch sind 80 … 90 ms. A possible delay time setting for the short-circuit tripping is set to 50 ms if "S" or "S+G" is selected on the ZSI module and if in the event of short-circuit the circuit-breaker does not receive a blocking signal ZSI-IN sent from its downstream circuit-breaker. In case of a detected short-circuit a blocking signal ZSI-OUT will sent to the preceeding circuit-breakers. The trip does take place after 50 ms. It typically delays between 80 and 90 ms. Eine eingestellte Verzögerungszeit tg für die Erdschlussauslösung wird auf 100 ms gesetzt bei Schalterstellung am ZSI-Modul „G“ oder „S+G“, wenn der Leistungsschalter im Erdschlussfall kein Blockiersignal ZSI-IN von einem nachgeordneten Leistungsschalter erhält. Bei einem erkannten Erdschluss wird ein Blockiersignal ZSI-OUT an die vorgeordneten Leistungsschalter ausgegeben. Die Erschlussauslösung erfolgt jedoch frühestens nach 100 ms, typisch sind 130 ... 140 ms. Zur Sicherheit wird nach längstens 3 s ein ausgegebenes Blockiersignal ZSI-OUT beendet. A possible delay time setting for the earth-fault tripping is set to 100 ms if "S" or "S+G" is selected on the ZSI module and if in the event of earth-fault the circuit-breaker does not receive a blocking signal ZSI-IN sent from its downstream circuit-breaker. In case of a detected earth-fault a blocking signal ZSI-OUT will sent to the preceeding circuit-breakers. The trip does take place after 100 ms. It typically delays between 130 and 140 ms. For safety reason after a maximum delay time of 3 s a given blocking signal ZSI-OUT is terminated. Das ZSI-Modul des Leistungsschalters SENTRON WL ist mit dem ZSI-Modul der Leistungsschalter 3WN und 3WS sowie SENTRON VL funktionskompatibel. The ZSI-module of the circuit-breaker SENTRON WL is functioncompatible with the ZSI-module of the circuit-breakers 3WN and 3WS as well as the MCCB SENTRON VL. Montage Installation q (Seite 9-106) Anschluss q Verbindungsaufbau (Seite 9-106) Es kann pro Leistungsschalter nur ein ZSI-Modul angeschlossen werden. 9 – 110 q (page 9-106) Connection q Connection setup (page 9-106) Only one ZSI-module can be connected per circuit-breaker. Wird das ZSI-Modul zusammen mit anderen -Modulen verwendet, muss das ZSI-Modul direkt an das COM15- oder COM16-Modul bzw. den Handstecker X8 angeschlossen werden. If the ZSI-module is used together with other -modules, the ZSI-module must be connected directly to the COM15 or COM16 module or hand plug X8. Anschlussbelegung Terminal assignment Klemme Anschluss TIE BRKR Nur für spezielle Anwendungsfälle; Erlaubt die volle ZSI-Funktionalität in Schaltanlagen mit Koppel- bzw. Brückenschalter ohne Zusatzkomponenten TIE BRKR ZSI IN ZSI-Module von Leistungsschaltern der untergeordneten Ebene ZSI IN ZSI OUT ZSI-Module von Leistungsschaltern der übergeordneten Ebene ZSI OUT MV OUT Meldung an die Mittelspannungsebene MV OUT Terminal Connection Only for special applications; Allows complete ZSI-functionality in systems with buscouplers without additional components ZSI-modules of lower-level circuit-breakers ZSI-modules of higher-level circuit-breakers Signal to the medium-voltage level Beim Anschließen ist die angegebene Polarität zu beachten, Plus auf Plus und Minus auf Minus! Observe the specified polarity when connecting: plus to plus and minus to minus! Bei ZSI-Verbindungen ausschließlich zwischen WL-Schaltern sind bei Erhöhung des Leiterquerschnittes auf 2,5 mm2 auch Leitungslängen bis zu 1000 m zulässig. For ZSI connections between WL circuit-breakers only, wire lengths of up to 1000 m are permissible if the conductor diameter is increased to AWG 24. Die maximale Leitungslänge der ZSI-Verdrahtung beträgt bei einem Leitungsquerschnitt von 0.75 mm2 (2-Draht-Leitung) max. 400 m. Bei ZSI-Verbindungen ausschließlich zwischen WL-Schaltern sind bei Erhöhung des Leiterquerschnittes auf 2,5 mm2 auch Leitungslängen bis zu 1000 m zulässig. The maximum wire length of the ZSI wiring is 400 m for a wire diameter of AWG 18 (2-wire conductor). For ZSI connections between WL circuit-breakers only, wire lengths of up to 1000 m are permissible if the conductor diameter is increased to AWG 13. Die ZSI-Verbindungen sind paarweise verdrillt oder mit abgeschirmter Leitung auszuführen. The ZSI connections must consist of twisted pair cables or shielded cables. Das ZSI-Modul gestattet den Anschluss von bis zu: The ZSI-module allows connection of up to: - 8 Leistungsschaltern an den Eingang ZSI IN und - 20 Leistungsschaltern an den Ausgang ZSI OUT. - 8 circuit-breakers at the ZSI IN input and - 20 circuit-breakers at the ZSI OUT output 9 – 111 Einstellungen Settings q Einstellprinzip (Seite 9-108) q Setting principle (page 9-108) Einstellungen ZSI-Modul Settings ZSI - module OFF ZSI-Funktion deaktiviert OFF ZSI-function deactivated S ZSI-Modul wirksam nur für kurzverzögerten Kurzschluss S ZSI module effective for short-time delayed short-circuits only G ZSI-Modul wirksam nur für Erdschlussschutz G ZSI module effective for ground-fault protection only S+G ZSI-Modul wirksam für kurzverzögerten Kurzschluss und Erdschlussschutz S+G ZSI module effective for short-time delayed shortcircuits and eart-fault protection TEST Testposition zur Überprüfung der ZSI-Funktionalität TEST Test position for checking the ZSI functionality Anzeigen q (Seite 9-109) Testen q (Seite 9-109) Indications q (page 9-109) Testing q (page 9-109) 9.2.3.3 Digitales Eingangsmodul 9.2.3.3 Digital input module Funktion Function Mit dem digitalen Eingangsmodul können bis zu 6 zusätzliche binäre Signale (DC 24 V) an das System angeschlossen werden. With the digital input module, up to 6 additional binary signals (DC 24 V) can be connected to the system. Diese Eingangssignale werden über den auf den PROFIBUS-DP übertragen und können entsprechend ausgewertet werden. These input signals are transferred to the PROFIBUS-DP via the and can be evaluated accordingly. Für die Überstromauslöser ETU55B und ETU76B ist es alternativ möglich, ein solches Eingangssignal am Eingang 1 für die Umschaltung zwischen den ggf. vorgehaltenen, zwei unterschiedlichen Schutzparametersätzen zu nutzen. For the overcurrent releases ETU55B and ETU76B, it is possible as an alternative to use an input signal of this type at input 1 to switch between two different sets of protection parameters (if provided). Montage Installation q (Seite 9-106) Anschluss q Verbindungsaufbau (Seite 9-106) Es können maximal zwei digitale Eingangsmodule gleichzeitig am betrieben werden - 1 Modul mit der Einstellung „PROFIBUS-DP INPUT“ - 1 Modul mit der Einstellung „PARAMETER SWITCH“ 9 – 112 q (page 9-106) Connection q Connection setup (page 9-106) A maximum of two digital input modules can be operated on the at the same time - 1 module with the setting "PROFIBUS-DP INPUT" - 1 module with the setting "PARAMETER SWITCH" Anschlussbelegung Terminal assignment Anschlussbelegung digitales Eingangsmodul Terminal assignment of digital input module X4 Eingänge 4-6 X4 Inputs 4-6 X5 Eingänge 1-3 X5 Inputs 1-3 Settings Einstellungen q Setting principle (page 9-108) q Einstellprinzip (Seite 9-108) Einstellungen digitales Eingangsmodul Settings of digital input module PROFIBUS-DP INPUT Eingänge 1-6 sind aktiv. PROFIBUS-DP INPUT Inputs 1-6 are active. PARAMETER SWITCH PARAMETER SWITCH Bei Anliegen eines Eingangssignals wird über das COM15-Modul eine entsprechende Meldung auf den PROFIBUS-DP ausgegeben. Eingang 1 wird zur Parametersatz-Umschaltung genutzt, alle anderen Eingänge sind funktionslos. Kein Eingangssignal (LED 1 leuchtet nicht): Anforderung Parametersatz A aktiviert Eingangssignal liegt an (LED 1 leuchtet): Anforderung Parametersatz B aktiviert If there is an input signal present, a corresponding message is transmitted to the PROFIBUS-DP. Input 1 is used for parameter switchover. All other inputs have no function. No input signal (LED 1 not lights up): Parameter set A actived Input signal present (LED 1 lights up): Parameter set B actived Hinweis Note Die Anforderungen zur Parameterumschaltung kann durch eine Anforderung über die PROFIBUS-Kommunikation, den BDA oder über das Grafikdisplay überstimmt werden. Weitere Einzelheiten siehe „SENTRON Kommunikationshandbuch“ The parameter switchover query can be overruled by a query via the PROFIBUS communication, the BDA or the graphical display. For further details please refer to the "SENTRON communication handbook". Anzeigen q (Seite 9-109) Testen q (Seite 9-109) Indications q (page 9-109) Testing q (page 9-109) 9 – 113 9.2.3.4 Digitale Ausgangsmodule 9.2.3.4 Digital output modules Funktion Function Mit digitalen Ausgangsmodulen können bis zu 6 Meldungen ausgegeben werden. With digital output modules, up to 6 signals can be transmitted. Meldet der Überstromauslöser ein Ereignis, leuchtet nach Ablauf der eingestellten Verzögerungszeit die zum Ereignis gehörende LED auf und das Modul setzt ein Signal am entsprechenden Ausgang. If the overcurrent release signals an event, the corresponding LED lights up after the adjusted delay time has elapsed, and the module sets a signal at the corresponding output. Digitale Ausgangsmodule stehen in folgenden Ausführungen zur Verfügung: Digital output modules are available in the following versions: - mit Drehkodierschalter und Relaisausgängen - konfigurierbar und mit Relaisausgängen. Montage q (Seite 9-106) Anschluss q Verbindungsaufbau (Seite 9-106) Sollen digitale Ausgangsmodule mit Drehkodierschalter und konfigurierbare digitale Ausgangsmodule gemeinsam an einem Leistungsschalter angeschlossen werden, können pro Leistungsschalter angeschlossen werden: - 1 digitales Ausgangsmodul mit Drehkodierschalter und Ausgangsbelegung 1 - 1 digitales Ausgangsmodul mit Drehkodierschalter und Ausgangsbelegung 2 - 1 konfigurierbares digitales Ausgangsmodul 9 – 114 - with rotary coding switch and relay outputs - configurable and with relay outputs Installation q (page 9-106) Connection q Connection setup (page 9-106) If a combination of digital output modules with rotary coding switch and configurable digital outputs is to be connected to a circuitbreaker, the following can be connected per circuit-breaker: - 1 digital output module with rotary coding switch and output assignment 1 - 1 digital output module with rotary coding switch and output assignment 2 - 1 configurable digital output module Anschlussbelegung Terminal assignment Digitale Ausgangsmodule mit Drehkodierschalter (1) (2) (3) Ausgangsbelegung 1 Einstellung der Verzögerungszeit Ausgangsbelegung 2 Digital output modules with rotary coding switch (1) (2) (3) Konfigurierbare digitale Ausgangsmodule Output assignment 1 Delay time setting Output assignment 2 Configurable digital output modules Anschlussbelegung digitales Ausgangsmodul Terminal assignment of digital output module X4 Ausgänge 4-6 X4 Outputs 4-6 X5 Ausgänge 1-3 X5 Outputs 1-3 9 – 115 Digitale Ausgangsmodule mit Relaisausgang stellen an ihren Ausgängen Wechsler zur Verfügung. Belastbarkeit der Ausgänge AC15: 250 V AC, 6 A DC13: 24 V DC, 2 A DC13: 250 V DC, 0,2A Relaisausgang Einstellungen Digital output modules with relay output provide changeover contacts at their outputs. Current carrying capacity of the outputs AC15: 250 V AC, 6 A DC13: 24 V DC, 2 A DC13: 250 V DC, 0.2A Relay output Settings Digitale Ausgangsmodule mit Drehkodierschalter Digital output modules with rotary coding switch q Einstellprinzip (Seite 9-108) q Setting principle (page 9-108) Ausgangsbelegung 1 (TRIP) Terminal assignment 1 (TRIP) L L Signalling contact overload tripping S Signalling contact short-time delayed short-circuit tripping I Signalling contact instantaneous short-circuit tripping Meldekontakt Überlastauslösung Meldekontakt kurzverzögerte Kurzschlussauslösung S Meldekontakt unverzögerte Kurzschlussauslösung I G Meldekontakt Erdschlussauslösung G Signalling contact ground-fault tripping G ALARM Meldekontakt Erdschlussalarm G ALARM Signalling contact ground-fault alarm N Meldekontakt Neutralleiterauslösung N Signalling contact neutral conductor tripping Einstellung Verzögerungszeit Delay time setting TRIP 0…2s TRIP 0…2s ALARM 0…2s ALARM 0…2s Die Einstellung der Verzögerungszeit bestimmt, wie lange ein Signal vom Überstromauslöser anliegen muss, bevor die zur Meldung gehörende LED aufleuchtet und die Meldung an den entsprechenden Ausgang gesetzt wird. Ausgangsbelegung 2 (ALARM) The delay time setting determines how long a signal of the overcurrent release must be present until the corresponding LED lights up and the signal is set at the corresponding output. Output assignment 2 (ALARM) PRE TRIP Meldekontakt voreilende Meldung Überlastauslösung (Verzögerungszeit 0 s) PRE TRIP Signalling contact leading signal overload tripping (delay time 0 s) TU ERR Meldekontakt ETU-Fehler TU ERR Signalling contact ETU error LD SHED Meldekontakt Lastabwurf (Verzögerungszeit 0 s) LD SHED Signalling contact load shedding (delay time 0 s) LD REST Meldekontakt Lastaufnahme (Verzögerungszeit 0 s) LD REST Signalling contact load restore TEMP Meldekontakt Temperaturalarm TEMP Signalling contact temperature alarm I UNBAL Meldekontakt Phasenunsymmetrie Strom I UNBAL Signalling contact phase unbalance current Konfigurierbare digitale Ausgangsmodule Die Einstellung der konfigurierbaren digitalen Ausgangsmodule kann erfolgen über: - die Prüfbuchse des Überstromauslösers mit dem BDA - den PROFIBUS-DP mit einem PC und der Software „Switch ES Power“. - den Modbus mit PC und zusätzlicher Software 9 – 116 (delay time 0 s) Configurable digital output modules Configurable digital output modules can be adjusted through: - the test socket of the overcurrent release with the BDA - the PROFIBUS-DP with a PC and the software "Switch ES Power" - the Modbus with a PC and additional software Anzeigen q (Seite 9-109) Testen q (Seite 9-109) Indications q (page 9-109) Testing q (page 9-109) 9.2.3.5 Analoges Ausgangsmodul 9.2.3.5 Analogue output module Funktion Function Mit dem analogen Ausgangsmodul lassen sich analoge Messwerte ausgeben, die z. B. mit Hilfe von Drehspulinstrumenten an der Schaltschranktür angezeigt werden können. Es stehen insgesamt 4 Ausgänge zur Verfügung. With the analogue output module, analogue measured-values can be transmitted, which can be shown on the cubicle door by means of moving-coil instruments. A total of 4 outputs is available. Für das Ausgangssignal sind zwei unterschiedliche Formate wählbar: For the output signal, two different formats can be selected: - 4 ... 20 mA, Ausgabe über Steckerleiste X5 - 0 ... 10 V, Ausgabe über Steckerleiste X4. Montage q (Seite 9-106) Anschluss q Verbindungsaufbau (Seite 9-106) - 4 ... 20 mA, output via terminal strip X5 - 0 ... 10 V, output via terminal strip X4 Installation q (page 9-106) Connection q Connection setup (page 9-106) Es können maximal 2 analoge Ausgangsmodule angeschlossen werden, deren Drehkodierschalter jedoch unterschiedlich eingestellt sein müssen (Modul 1 bzw. Modul 2). A maximum of 2 analog output modules can be connected; the rotary coding switches of these modules must, however, have different settings module 1/module 2). Anschlussbelegung Terminal assignment Einstellungen Settings q Einstellprinzip (Seite 9-108) Mit dem Drehkodierschalter werden die auszugebenden Messgrößen bestimmt. Diese liegen immer an beiden Klemmenleisten in dem entsprechenden Format an. q Setting principle (page 9-108) The measured-values to be signalled are adjusted using the rotary coding switch. They are always present on the two terminal strips in the corresponding format. 9 – 117 An den Ausgängen stehen folgende Messgrößen zur Verfügung: The following values are available at the outputs: Ausgangsbelegung Stellung AO 1 AO 2 Output Assignment AO 3 AO 4 Position AO 1 AO 2 AO 3 AO 4 I IL1 IL2 IL3 IN I IL1 IL2 IL3 IN U UL12 UL23 UL31 UL1N U UL12 UL23 UL31 UL1N P PL1 PL2 PL3 Stotal P PL1 PL2 PL3 Stotal f f ULLavg Ptotal cos ϕavg f f ULLavg Ptotal cos ϕavg cos ϕ cos ϕL1 cos ϕL2 cos ϕL3 cos ϕ cos ϕL1 cos ϕL2 cos ϕL3 Phasenunsymmetrie Strom in % Anzeigen Phase unbalance current in % Indications q (Seite 9-109) q (page 9-109) Testen Testing q (Seite 9-109) q (page 9-109) 9.2.3.6 Bestellnummern 9.2.3.6 Order numbers Jedes -Modul wird mit einem Abschlusswiderstand 120 Ω, integriert in einen Westernstecker, und mit einem Verbindungskabel 0,2 m für den -Anschluss ausgeliefert. Each -module is supplied with a terminating resistor 120 Ω, integrated in a western plug, and with a connecting cable 0.2 m for connection to the last -module. 9 – 118 -Modul -Module Bestell-Nr. Order no. ZSI-Modul ZSI-module 3WL9111-0AT21-0AA0 Analoges Ausgangsmodul Analogue output module 3WL9111-0AT23-0AA0 Digitales Ausgangsmodul mit Relaisausgang Digital output module with relay output 3WL9111-0AT26-0AA0 Digitales Ausgangsmodul mit Relaisausgang parametrierbar Digital output module with relay output, parameterizable 3WL9111-0AT20-0AA0 Digitales Eingangsmodul Digital input module 3WL9111-0AT27-0AA0 Vorkonfektioniertes Kabel 1 m Pre-assembled cable 1 m 3WL9111-0BC02-0AA0 Vorkonfektioniertes Kabel 2 m Pre-assembled cable 2 m 3WL9111-0BC03-0AA0 Vorkonfektioniertes Kabel 0,2 m Pre-assembled cable 0.2 m 3WL9111-0BC04-0AA0 9.3 Wandler 9.3 Current transformer 9.3.1 Internen N-Wandler nachrüsten 9.3.1 Retrofitting the internal neutral CT - Ausschalten und Federspeicher entspannen q (Seite 24-3) - Festeinbauschalter ausbauen q (Seite 5-1) bzw. Schalter aus Einschubrahmen entnehmen q (Seite 24-4) - Bedienpult abnehmen q (Seite 24-9) - Überstromauslöser ausbauen q (Seite 9-80) - Switch off the breaker and discharge the storage spring q (page 24-3)) - Dismount the fixed breaker q (page 5-1) or remove the drawout breaker from its guide frame q (page 24-4) - Take off the front panel q (page 24-9) - Remove the ETU q (page 9-80) Kabelbaum vom Überstromauslöser abbauen Disconnecting the cable harness from ETU 1 3 2 1 2 3 1 2 3 Stecker von X24 abziehen Kabelfixierungen auftrennen Kabel von Klemmen 9 bis 12 der Messerleiste X8 lösen Neuen Kabelbaum am Überstromauslöser anbauen Unplug connector from X24 Remove cable binders Disconnect cables from terminals 9 to 12 on the connector X8 Connecting new cable harness to ETU 1 2 3 4 1 2 3 4 Adern X8-11 und X8-12 an Klemmen 11 und 12 der Messerleiste X8 anklemmen Stecker an X24 stecken Kabel mit Kabelbindern fixieren Stecker mit N-Wandler im Schalter verbinden 1 2 3 4 Connect cable terminals X8-11 and X8-12 to terminals 11 and 12 on the connector X8 Plug connector to X24 Use cable ties to secure the cables Connect the connector to the neutral CT in the circuitbreaker 9 – 119 Wandlerabdeckung am N-Leiteranschluss abbauen Removing rear cover of neutral CT compartment 1 Gr. / Size 5 2 1 2 1 2 Schrauben lösen Wandlerabdeckung abnehmen N-Wandler einsetzen Remove screws Take off the rear cover Inserting neutral CT *) 4 2 1 2 3 4 Gr. / Size 5 1 Stecker vom Wandleranschluss in den Kabelraum einführen Wandler einsetzen Wandlerabdeckung aufsetzen Mit Schrauben befestigen *) Selbstschneidende Schraube nur 5 Nm 3 1 2 3 4 10 Nm Push the CT terminal plug into the cable duct Insert CT Replace rear cover of CT compartment Fasten the screws *) self tapping screw 5 Nm only VORSICHT CAUTION Beim Verwenden selbstschneidender Schrauben Gewindegänge nicht zerstören! By using self tapping screws do not damage threads! Schraube wie folgt eindrehen: - Schraube ansetzen - von Hand entgegen dem Uhrzeigersinn drehen, bis sich Gewindegänge treffen - eindrehen - mit Drehmomentenschlüssel auf 5 Nm festziehen. Tight the screw as follows: - insert the screw - by hands with sligt inward pressure, rotate the screw counter clockwise until the threads match - tighten by hand till snug - finish by torquing to 5 Nm. 9 – 120 N-Wandler anschließen Connecting the neutral CT Schalter auf die rechte Seite legen Lay the breaker on its r.h.s. 2 1 1 2 1 2 Kabelkanalabdeckung abnehmen Überstromauslöser in geeigneter Weise ablegen und freien Stecker des neuen Kabelbaums in den Kabelkanal einführen Take off the cable duct cover Place the ETU suitably and push the free connector of the cable harness into the cable duct 3 4 3 4 3 Stecker des Kabelbaums mit Stecker des N-Wandlers verbinden Verbundene Stecker im Kabelkanal plazieren und Kabelkanalabdeckung aufsetzen 4 Anschlüsse am Überstromauslösser stecken Connecting the ETU Überstromauslöser fixieren und Schalter auf die Füße stellen. 1 Plug the connector of the cable harness into the connector of the neutral CT Place the connectors so-joined in the cable duct and replace the cover on the cable duct Fix the ETU and place the breaker upright. 2 3 1 2 3 Überstromauslöser vor dem Schalter ablegen Stecker an X20 und X21 stecken Kabel mit Kabelbinder fixieren 1 2 3 Place the ETU in front of the breaker as shown Plug the connectors to X20 and X21 Fasten the cables with the binders 9 – 121 Anschließend: Then: - Überstromauslöser anbauen q (Seite 9-80) - Bedienpult anbauen q (Seite 24-22) - Festeinbauschalter einbauen q (Seite 5-1) bzw. Schalter in Einschubrahmen einsetzen und in Betriebsstellung verfahren q (Seite 6-1) 9.3.2 Externer Wandler für Neutralleiter - Remount the ETU q (page 9-80) - Remount the front panel q (page 24-22) - Install the fixed breaker q (page 5-1) or place the drawout breaker in its frame guide and rack into connected position q (page 6-1) 9.3.2 External transformer for neutral conductor Hinweis Note Die Sekundäranschlussleitungen vom Neutralleiterwandler zum 3WL-Leistungsschalter sind zu verdrillen! The secondary wiring from the neutral CT to the 3WL circuitbreaker must be twisted! (1) (6) (2) (5) (3) (4) (1) (2) (3) (4) (5) (6) Ausführung für anlagenseitige Kupferschiene Montagewinkel Schraube M6 mit Scheiben und Mutter Ausführung mit Kupferanschlussstücken Anschluss P2 Anschluss P1 q Maßbilder (Seite 7-14) 9 – 122 (1) (2) (3) (4) (5) (6) Version for copper bar on switchgear side Mounting bracket Screw M6 with washers and nut Version with copper connectors Terminal P2 Terminal P1 q Dimension drawings (page 7-14) Zuordnung der Anschlüsse Terminal assignment . Hinweis Note Ggf. fehlende Hilfsstromanschlüsse nachrüsten (Messerleiste, Hilfsstromstecker, Schleifkontaktmodul für Einschubrahmen). q (Seite 5-19) If necessary missing auxiliary terminals may be retrofitted (receptacle, auxiliary connectors and sliding contact module for guide frames). q (page 5-19) (1) (2) Hauptstrombahn Externer N-Wandler (1) (2) Power circuit External sensor for neutral CT Durch diese Zuordnung wird gleiche Stromflussrichtung im Schalter und im externen N-Wandler gewährleistet. This arrangement ensures the same direction of the current flow for the circuit-breaker and the external neutral CT 9.3.3 9.3.3 Spannungswandler Voltage transformers Spannungswandler werden für die Messung der Spannungen durch die Messfunktion benötigt. Voltage transformers are required for voltage measuring by the metering function. Die Spannungswandler ab Seriennummer 980102XXXXXX haben intern primär- und sekundärseitig einen Sternpunkt und sekundär eine elektronische Sicherung. Voltage transformers from serial numbers 980102XXXXXX on upwards are connected internally in star on both primary and secondary side. They are equipped with a secondary current protection. Der Spannungswandler kann auf eine standardmäßige 35-mm-Hutschiene im Schaltfeld aufgeschnappt werden. Dabei ist eine waagerechte oder senkrechte Gebrauchslage möglich. Voltage transformer can be snapped to a standard 35-mm DIN-rail in the switchgear panel. It is possible to assemble it either horizontally or vertically. Bei vertikaler Gebrauchslage wird durch die Montage eines Endhalters (z. B. SIEMENS 8WA1 805) ein Verrutschen des Spannungswandlers auf der Schiene verhindert. The use of an end retainer (e.g. SIEMENS 8WA1 805) will prevent the voltage transformer slipping in case of vertical assembly. 9 – 123 für 1 - 3 Messfunktionen für 4 - 6 Messfunktionen Diese Angaben gelten für Umgebungstemperaturen von 30 - 50 °C und einer primärseitigen Spannung von 80 - 120% für die Dauer von einem Jahr. 78 77 76 75 74 73 72 71 68 67 66 b Die Genauigkeit der Spannungswandler ist von der Anzahl der angeschlossenen Messfunktionen pro Spannungswandler abhängig: - Klasse 0,5 - Klasse 3 65 64 63 62 61 58 57 56 55 a 54 n 53 52 Shield Wiring plan 51 Schirm Verdrahtungsplan c The accuracy of the voltage measurement depends on the number of metering functions connected per voltage transformer: - class 0,5 - class 3 for 1 - 3 metering functions for 4 - 6 metering functions This data applies to ambient temperatures from 30 to 50 °C and a primary voltage of 80 to 120% Un for one year. VORSICHT CAUTION Vor der Durchführung von Isolationsprüfungen in der Schaltanlage sind die Spannungswandler primärseitig vom Netz zu trennen. Before performing insulation tests in the panel, the voltage transformers must be disconnected from the power supply on the primary side. Spannungswandler Bestell-Nr.: 3WL9111-0BB68-0AA0 380...690 V a.c.; geprüft für 50/60 Hz Voltage Transformer order no.: 3WL9111-0BB68-0AA0 380...690 V a.c.; testet for 50/60 Hz Bezeichnung / designation Spannung (Leiter-Leiter) / Voltage (Phase-Phase) 380 … 690 V a.c. Primär / primary Klemme / terminal Sekundär / secondary Klemme / terminal Phase L1 / a 11 52 Phase L2 / b 12 62 Phase L3 / c 13 72 N/n 14 51, 61, 71 Schirm / shield Schirm des Spannungswandlers an den Erdungspunkt (PE-Potential) der Anlage anschließen (Mindestquerschnitt = 2,5 mm2) Shield of the voltage transformer must be connected to the earth point of the gear (PE potential), by a minimum cross section of 2,5 mm2. 9 – 124 S Anzahl der Messfunktionen / number of metering functions Phase L1 / a Brücken / connections Phase L2 / b Brücken / connections Phase L3 / c Brücken / connections 1 53-54 56-57 63-64 66-67 73-74 76-77 2 56-57 66-67 76-77 3-6 - - - Anschluss an SENTRON WL Connection to SENTRON WL : Phase L1/a : Phase L2/b : Phase L3/c : Phase N/n Connection examples Beschaltungsbeispiele L1 L2 L3 N L1 L2 L3 N -T.. -F.. -T.. 78 78 77 77 76 76 75 75 74 73 72 74 73 c X8.7 68 67 67 66 66 65 N 64 L3 13 63 L2 12 62 L1 11 61 65 b X8.6 N 14 64 L3 13 63 L2 12 62 L1 11 61 58 58 57 57 56 56 55 52 Shield 51 X8.6 54 a X8.5 X8.8 53 0550-1 Schirm b 55 54 53 X8.7 71 68 14 c 72 71 n Schirm 52 Shield 51 a X8.5 0550-2 -F.. X8.8 n Variante 1: primärseitig (L-L) 380 V ... 690 V AC sekundärseitig Anschaltung einer Messfunktion Variante 2: primärseitig (L-L) 380 V ... 690 V AC sekundärseitig Anschaltung zweier Messfunktionen Variant 1: primary (L-L) 380 ... 690 V a.c. one metering function connected on secondary side Variant 2: primary (L-L) 380 V ... 690 V a.c. two metering functions connected on secondary side 9 – 125 L1 L2 L3 N -F.. -T.. 78 77 76 75 74 73 72 c X8.7 71 68 67 66 65 N 14 64 L3 13 63 L2 12 62 L1 11 61 b X8.6 58 57 56 55 53 52 Shield 51 a X8.5 0550-3 54 Schirm X8.8 n Variante 3: primärseitig (L-L) 380 V ... 690 V AC sekundärseitig Anschaltung von drei bis zu sechs Messfunktionen Variant 3: primary (L-L) 380 V ... 690 V a.c. three to six metering functions connected on secondary side Parametrieren der Messfunktion PLUS Parameterizing the metering function PLUS Die Messfunktion muss anschließend parametriert werden. The metering function must be parameterized subsequently to match the voltage transformer. Die Parametrierung erfolgt über: Parameterizing can be performed using: - das Grafikdisplay (ETU76B), - die Prüfbuchse mit dem BDA oder - den PROFIBUS-DP mit einem PC und der Software „Switch ES Power“ Über PARAMETER ÄNDERN / System Konfig. / Spannungswandler sind folgende Daten des Spannungswandlers einzugeben: - Primär 400 V (Werkseinstellung) - Sekundär 100 V (Werkseinstellung) - Schaltg. Stern Y (Werkseinstellung) Über PARAMETER ÄNDERN / System Konfig. / Leistungsfluss ist einzugeben: - Oben nach Unten (Werkseinstellung) oder - Unten nach Oben Über PARAMETER ÄNDERN / System Konfig. / Phasendrehsinn ist einzugeben: - L1 - L2 - L3 (Werkseinstellung) oder - L1 - L3 - L2 - the graphical display (ETU76B), - the test socket with the BDA or - the PROFIBUS-DP with a PC and the software "Switch ES Power" By CHANGE PARAMETERS / System Config. / PT Config the following voltage transformer data must be fed: - Primary 400 V (factory adjustment) - Secondary 100 V (factory adjustment) - Wiring Ypsilon Y (factory adjustment) By CHANGE PARAMETERS / System Config. / Power Direction must be fed: - Downward (factory adjustment) or - Upward By CHANGE PARAMETERS / System Config. / Phase Rotation must be fed: - L1 - L2 - L3 (factory adjustment) or - L1 - L3 - L2 Übersetzungsverhältnis: Transmission ratio: 3WL9111 - 0BA70 - 0AA0 3WL9111 - 0BA70 - 0AA0 - Primär 230 V - Sekundär 100 V - Verhältnis: 2,3 : 1 9 – 126 - Primary 230 V - Secondary 100 V - Ratio: 2,3 : 1 3WL9111 - 0BB68 - 0AA0 3WL9111 - 0BB68 - 0AA0 - Primär 380 - 690 V - Sekundär 95 - 172,5 V - Verhältnis: 4 : 1 - Primary 380 - 690 V - Secondaryr 95 - 172,5 V - Ratio: 4 : 1 Kundenseitige Beistellung der Spannungswandler Die kundenseitige Beistellung des Spannungswandlers ist unter folgender Beachtung möglich: Customers’ own voltage transformers Customers can use their own voltage transformers, if the following data are complied with: - Bemessungsausgangsspannung 100 V ... 120 V - Ausgangsbelastung mit 100 kΩ je angeschlossener Messfunktion - Für eine Messgenauigkeit von 1% sind Wandler der Klasse 0,5 erforderlich. - rated output voltage 100 V ... 120 V - output load with 100 kΩ per metering function connected - to achieve an accuracy of 1%, class 0.5 voltage transformers are required. Die Spannungswandler sind wie in den gezeigten Beschaltungsbeispielen zu verdrahten und sowohl primärseitig als auch sekundärseitig abzusichern. The voltage transformers have to be wired according to the circuit examples above and must be fuse-protected both on the primary and the secondary side. 9.3.4 9.3.4 Externer G-Wandler Für die Gewährleitung der Schutzfunktion vor unzulässigen Erdschlussströmen kann auch ein handelsüblicher externer Stromwandler mit folgenden Eigenschaften verwendet werden: - The ground-fault protection can use an external current transformer with the following properties: Primär-Bemessungsstromstärke: 1200 A Sekundär-Bemessungsstromstärke: 1 A Klassengenauigkeit: Klasse 1 Schaltinterne Bürde: 0,11 Ohm - Beispiele External earth-fault current transformer primary current: 1200 A secondary current: 1 A ANSI: Class 1 Breaker internal burden: 0.11 Ohm Examples SENTRON WL x8:11/12 k L L1 L2 N L 2 (2) Anschließen L 3 N P E PE 3poliger Leistungsschalter mit Stromwandler im geerdeten Sternpunkt des Transformators 4poliger Leistungsschalter mit Summenstromwandler R O N W L x8:11/12 N S E 0 _ 0 1 2 5 1 NSE 00947 (1) L 1 S E N T6 L k (1) (2) 3 pole circuit-breaker with current transformers "Y" connected with the star point of the trandformer grounded 4 pole circuit-breaker summation current transformer Connection Hinweis Note Ggf. fehlende Hilfsstromanschlüsse nachrüsten (Messerleiste, Hilfsstromstecker, Schleifkontaktmodul für Einschubrahmen). q (Seite 5-19) If necessary missing auxiliary terminals may be retrofitted (receptacle, auxiliary connectors and sliding contact module for guide frames). q (page 5-19) 9 – 127 9.4 Externe Spannungsversorgung 9.4 External voltage supply Die Grundschutzfunktionen der elektronischen Überstromauslöser benötigen keine Hilfsenergie. The basic functions of the electronic overcurrent releases do not require auxiliary power supply. Sollen die zusätzlichen Funktionen der Überstromauslöser ETU45B … 76B genutzt werden, die einen Datenaustausch über den erfordern, muss eine externe 24 V DC-Spannungsversorgung angeschlossen werden. To use the extended functions of the overcurrent releases ETU45B ... 76B requiring data exchange through the , an external 24 V DC voltage supply must be connected. Anschluss Connection Variante A: Anschluss an den Handstecker X8 (Vorzugsvariante) Variante B: Anschluss an ein beliebiges -Modul Version A: Connection to hand plug X8 (preferred version) Version B: Connection to any -module X8 Anforderungen Requirements Die externe Spannungsversorgung mit 24 V DC muss mindestens den Anforderungen der DIN 19240 / EN 61131 genügen. The external voltage supply with 24 V DC must comply at least with the requirements of DIN 19240 / EN 61131. Für die Versorgung eines Leistungsschalters mit der maximal möglichen Anzahl externer -Module kann das unten aufgeführte Siemens-Netzteil verwendet werden. Soll ein zweiter Leistungsschalter versorgt werden, ist auch ein zweites Netzteil erforderlich. To supply power to a circuit-breaker equipped with the maximum number of external -modules possible, the Siemens power supply unit mentioned below can be used. If a second circuitbreaker must be fed, a second power supply unit will be necessary, too. Bei Verwendung von Spannungsversorgungen eines anderen Herstellers sollten folgende Bedingungen erfüllt werden: When using voltage supply units from other manufacturers, the following conditions must be fulfilled: - Primär getaktetes Schaltnetzteil - 24 V DC, ± 3% - Stromnennwert: 5 A pro Leistungsschalter mit der maximal möglichen Anzahl externer -Module - Primary-switched-mode power supply unit - 24 V DC, ± 3% - Current rating: 5 A per circuit-breaker with the maximum number of external -modules possible Order number Bestellnummer Bestell-Nr. Order no. Stromversorgung Eingang: AC 120/230 V, Ausgang 24 V DC / 5 A Power supply: Input: AC 120/230 V, output 24 V DC / 5A 6EP1 333-2AA00 VORSICHT CAUTION Die externe Spannungsversorgung für die elektronischen Komponenten darf nicht zur Stromversorgung des Motorantriebes verwendet werden! The externeal power supply, used for electronic components, shall not be used to supply the motor operating mechanism! 9 – 128 9.5 Breaker Data Adapter 9.5 Breaker Data Adapter 9.5.1 Verwendung 9.5.1 Application Der Breaker Data Adapter (BDA) ermöglicht es, den Leistungsschalter ohne Zusatzsoftware mit einem browserfähigen Ein-/Ausgabegerät (z. B. Laptop) zu parametrieren, zu bedienen und zu beobachten. Diese Möglichkeit besteht für Leistungsschalter mit einem elektronischen Überstromauslöser der Typen ETU45B ... 76B. Für den Überstromauslöser ETU45B ist es jedoch nicht möglich, die Grundschutzfunktionen zu parametrieren. Diese werden ausschließlich mit den Drehkodierschaltern eingestellt. The Breaker Data Adapter (BDA) makes it possible to parameterize, operate and observe the circuit-breaker without additional software by means of an input/output unit with browser features (e.g. a laptop). This is possible for circuit-breakers equipped with trip unit of the types ETU45B ... 76B. On the trip unit ETU45B, however, the basic protective functions cannot be parameterized. These are exclusively adjusted with the rotary coding switches. Die Kommunikation mit der Elektronik des Leistungsschalters erfolgt über den . Dazu kann der BDA wahlweise an die Prüfbuchse des Überstromauslösers oder für einen längerfristigen stationären Betrieb an das letzte -Modul angeschlossen und auf eine 35 mm-Hutschiene aufgeschnappt werden. Die erforderlichen Verbindungskabel werden mitgeliefert. Communications with the electronic system of the circuit-breaker takes place through the . For this purpose, the BDA can be optionally connected to the test socket of the trip unit, or – in case of longer stationary operation – to the last -module, and snapped on a 35-mm DIN-rail. The required connection cables are supplied with the unit. Der BDA steht in zwei Ausführungen zur Verfügung. Der BDA PLUS besitzt im Unterschied zur Standardausführung zusätzlich einen Ethernetanschluss. Two BDA versions are available. As against the standard version, the BDA PLUS is equipped with an additional Ethernet-connection. 9.5.2 Ansicht 9.5.2 View 9.5.3 Anzeigen 9.5.3 Indications LED DEVICE Anzeige Bedeutung grün BDA in Betrieb gelb BDA im Testmodus rot LED Indication Significance green BDA in operation yellow BDA in test mode BDA gestört red BDA faulty grün Verbindung zum besteht green Connection to available rot Schwerer Fehler auf dem ; Verbindungen und -Module überprüfen red Heavy fault on the ; check connections and -modules aus keine Verbindung zum off No connection to DEVICE 9 – 129 9.5.4 Anschlussvarianten Der Anschluss des BDA erfolgt abhängig vom jeweiligen Verwendungszweck in unterschiedlicher Art und Weise. 9.5.4 Connection versions The BDA is connected in different ways according to the corresponding application. Hinweis Note Um Fehlfunktionen zu vermeiden, die Spannungsversorgung immer zuletzt anschließen. To avoid malfunctions, connect the voltage supply at last. Offline mode Offlinemodus Alle Parameter des Leistungsschalters können eingegeben und z. B. auf einem Notebook gespeichert werden, ohne dass mit dem Leistungsschalter kommuniziert werden muss. Nachdem eine Verbindung zum Leistungsschalter hergestellt wurde, können diese Daten übertragen und der Leistungsschalter somit automatisch parametriert werden. All circuit-breaker parameters can be entered and saved e.g. on a notebook, without the need to communicate with the circuit-breaker. When the connection to the circuit-breaker is established, this data can be transmitted and the circuit-breaker can be parameterised automatically. (1) (2) (3) (4) (1) (2) (3) (4) 9 – 130 Browserfähiges Ein-/Ausgabegerät (z. B. Notebook) BDA oder BDA PLUS Spannungsversorgung 24 V DC RS232-Schnittstelle Input/output unit with browser feature (e.g. notebook) BDA or BDA PLUS Voltage supply 24 V DC RS232 interface Vorortbedienung Local operation Der Leistungsschalter wird direkt vor Ort manuell parametriert. Weiterhin können die Parametereinstellungen auf dem Notebook gespeichert und Diagnosedaten des Leistungsschalters ausgelesen werden. The circuit-breaker is parameterised directly at site. Furthermore, the parameter settings can be saved on the notebook, and the circuit-breaker diagnosis data can be read. (1) (2) (1) (2) (3) (4) (5) (6) Browserfähiges Ein-/Ausgabegerät (z. B. Notebook) Spannungsversorgung 24 V DC, sofern keine Spannungsversorgung über den BDA oder BDA PLUS Prüfbuchse des Überstromauslösers (40polig) Verbindungskabel SUB-D 15polig (BDA) auf Buchseleiste 40polig bzw. ab ETU Release 2: SUB-D 15polig (BDA) auf Stiftleiste 40polig RS232-Schnittstelle SUB-D 9polig (3) (4) (5) (6) Fernzugriff über Modem Input/output unit with browser feature (e.g. notebook) Voltage supply 24 V DC, if there is no voltage supply via the BDA or BDA PLUS Test socket of the overcurrent release (40-pole) Connection cable SUB-D, 15-pole (BDA) to socket connector, 40-pole or, with ETU release 2 and higher, SUB-D, 15-pole (BDA) to plug connector, 40-pole RS232 interface SUB-D, 9-pole Remote access via modem Der Zugriff auf die Daten des Leistungsschalters einschl. Parametrierung erfolgt von einem beliebig weit entfernten Ort. The circuit-breaker data incl. parameterisation can be accessed from any remote location. (1) (2) (3) (4) (5) (1) (2) (3) (4) (5) (6) Browserfähiges Ein-/Ausgabegerät (z. B. Notebook) Modem BDA oder BDA PLUS Externes -Modul Verbindungskabel SUB-D 15polig (BDA) auf RJ45 Westernstecker (-Anschluss) RS232-Schnittstelle SUB-D 9polig (6) Input/output unit with browser feature (e.g. notebook) Modem BDA or BDA PLUS External -module Connection cable SUB-D, 15-pole (BDA) to RJ45 western plug (-connection) RS232 interface SUB-D, 9-pole 9 – 131 Fernzugriff über Ethernet Remote access via Ethernet Der Zugriff auf die Daten des Leistungsschalters einschl. Parametrierung erfolgt über das kundenseitige Ethernet. Diese Anschlussvariante steht nur für den BDA PLUS zur Verfügung. The circuit-breaker data incl. parameterisation is accessed via the customer-side Ethernet. This connection is only possible in the BDA PLUS version. (1) (2) (3) (4) (5) (1) (2) (3) (4) (5) (6) 9.5.5 Browserfähiges Ein-/Ausgabegerät (z. B. Notebook) Ethernet-Kabel BDA PLUS Externes -Modul Verbindungskabel SUB-D 15polig (BDA) auf RJ45 Westernstecker (-Anschluss) Ethernet-Anschluss Spannungsversorgung Der BDA benötigt eine Spannungsversorgung von 24 V DC. Diese kann erfolgen über: - ein separates handelsübliches Steckernetzteil oder - den mit der externen Spannungsversorgung der Leistungsschalterelektronik. 9.5.6 Bestellnummern (6) 9.5.5 Input/output unit with browser feature (e.g. notebook) Ethernet cable BDA or BDA PLUS External -module Connection cable SUB-D, 15-pole (BDA) to RJ45 western plug (-connection) Ethernet connection Voltage supply The BDA requires a voltage supply of 24 V DC. This can be applied through: - a separate customary plug-type power supply unit or - the with the external voltage supply of the circuitbreaker electronics. 9.5.6 Order numbers Bestell-Nr. Order no. 9 – 132 BDA 3WL6111-1AB01 BDA PLUS 3WL6111-1AB02 9.6 Handprüfgerät 9.6 Test device Das Handprüfgerät dient der Überprüfung der korrekten Funktion des Überstromauslösers, der Energie- und Stromwandler, des Auslösemagneten F5 sowie der Messwertanzeige. The handheld test device is used to verify the proper operation of the trip unit, the energy transformers and current transformers as well as the tripping solenoid F5 and the data display. 9.6.1 9.6.1 (1) (2) (3) 9.6.2 Ansicht LED für die Betriebsspannungsanzeige Bedientasten 6 LED für die Anzeige der Testergebnisse Vorbereitende Arbeiten (1) (2) (3) 9.6.2 - Öffnenschalter drücken und Leistungsschalter freischalten - Einstellwerte des Überstromauslösers dokumentieren - Erdschlussschutz, wenn vorhanden, am Überstromauslöser ausschalten (Ig = OFF) - Einstellwert IR = 1.0 In - Externe Spannungsversorgung für die Elektronik, wenn vorhanden, unterbrechen - Abdeckkappe von der Prüfbuchse X25 der ETU entfernen View LED for operating voltage indication Control buttons 6 LED’s to show test results Preparations - Push open button and isolate the circuit-breaker - Note the setting values of the overload release - Switch off the earth-fault protection at the trip unit, if available (Ig = OFF) - Setting value IR = 1.0 In - Interrupt external voltage supply for the electronic system, if available - Remove the cap from the test connector X25 of the trip unit VORSICHT CAUTION Die Verwendung des Handprüfgerätes bei eingeschaltetem Leistungsschalter kann zu Fehlauslösungen und Zerstörung des Handprüfgerätes führen. Using the manual test unit with circuit-breaker closed can cause false tripping and destroy the manual test unit. 9 – 133 9.6.3 Anschließen 9.6.3 Connection 2 1 3 (1) (2) (3) (4) 9.6.4 Prüfbuchse am Überstromauslöser SUB-D 40polig (Handprüfgerät) auf Buchsenleiste 40polig bzw. ab ETU-Release 2: SUB-D 40polig (Handprüfgerät) auf Stiftleiste 40polig Spannungsversorgung Handprüfgerät Spannungsversorgung Das Handprüfgerät wird aus einem Wechselspannungsnetz 220 … 240 V oder 110 … 125 V, 50/60 Hz versorgt. Werksseitig sind 220 … 240 V eingestellt. Der Umschalter befindet sich auf der Leiterplatte im Inneren des Handprüfgerätes. 9 – 134 (1) (2) (3) (4) 9.6.4 Test socket at the overcurrent release SUB-D, 40-pole (test device) to socket connector, 40-pole or, with ETU release 2 and higher, SUB-D, 40-pole (test device) to plug connector, 40-pole Voltage supply Test device Voltage supply The test device is suplplied by an AC power system 220 ... 240 V or 110 ... 125 V, 50/60 Hz. The factory setting is 220 ... 240 V. The changeover switch is located on the printed circuit board inside the test device. Netzspannung umschalten Mains voltage reconnection 5 3 6 2 4 1 Das Handprüfgerät wird aus einem Wechselspannungsnetz 220 … 240 V oder 110 … 125 V, 50/60 Hz versorgt. Werksseitig sind 220 … 240 V eingestellt. Der Umschalter befindet sich auf der Leiterplatte im Inneren des Handprüfgerätes. The test device is supplied by an AC power system 220 ... 240 V or 110 ... 125 V, 50/60 Hz. The factory setting is 220 ... 240 V. 9.6.5 9.6.5 Bedienung Nach dem Anschluss der Spannungsversorgung startet automatisch die Statusprüfung. Dabei werden verschiedene Komponenten und Parameter des Überstromauslösers abgefragt. Verlief die Statusprüfung erfolgreich, leuchtet die LED „ETU STATUS“ mit Dauerlicht. Anderenfalls ist der Überstromauslöser oder eine seiner Komponenten (z. B. das Bemessungstrommodul) defekt oder nicht vorhanden. The changeover switch is located on the printed circuit board inside the test device. Operation The status test starts immediately after connecting the voltage supply and queries the various components and parameters of the trip unit. If the status test is successful, the "ETU STATUS" LED will light up. Otherwise, the "ETU STATUS" LED will flash. It is possible to draw conclusions about the fault cause from the way in which it flashes. Anzeige Bedeutung Indication Meaning 1 x kurz, Pause Prüfgerät defekt 1 x briefly, pause Test device defective 2 x kurz, Pause Überstromauslösers defekt 2 x briefly, pause Trip unit defective 4 x kurz, Pause - Parameter nicht korrekt eingestellt 4 x briefly, pause - Parameters not set correctly 5 x kurz, Pause - Stromwandler nicht korrekt angeschlossen - Current sensor not properly connected - falsches Bemessungsstrommodul - wrong rating plug - Bemessungsstrommodul fehlt - Missing rating plug - Auslösemagnet F5 nicht korrekt angeschlossen - Auslöser defekt Der Statustest kann jederzeit durch längeres (mehr als 3 s) Betätigen der Taste „START“ wiederholt werden. Prinzipiell ist auch die Prüfung eines bereits aktivierten, z. B. eines von einer externen Spannungsquelle versorgten Überstromauslösers möglich. Dabei ist zu beachten, dass im Ergebnis der Statusprüfung die LED „ETU STATUS“ durchaus 2 x kurz blinken kann, ohne dass ein Fehler vorliegt. Sicherheitshalber sollte der Statustest bei abgeschalteter externer Spannungsversorgung des Überstromauslösers wiederholt werden. 5 x briefly, pause - Tripping solenoid F5 not properly connected - Solenoid defective The status test can be repeated any time by pressing the "START" button for at least three seconds. It is basically also possible to test a trip unit that is already activated, e.g. supplied by an external voltage source. However, it must be taken into account that the "ETU STATUS" LED may briefly flash twice when the status test result is displayed even if there have not been any faults. As a precaution, the status test should be repeated without external voltage supply of the trip unit. 9 – 135 Der Statustest wird von den Überstromauslöser der Typen ETU25B / ETU27B / ETU15B mit einer Ident-Nr. kleiner als 253030xxxxxx / 273030xxxxxx / 150704xxxxxx nicht unterstützt. Durch Drücken der Taste „L“ für ca. 3 Sekunden beim Anlegen der Versorgungsspannung an das Prüfgerät kann der Statustest für diese Typen übersprungen werden. In diesem Fall muss die korrekte Funktion des Überstromauslösers vor dem Start weiterer Tests mit dem Prüfgerät sichergestellt werden, z. B. durch die Funktion „Aktivierung des Überstromauslösers“ und Prüfung der LEDAnzeigen am Überstromauslöser. The status test is not supported by the overcurrent releases type ETU25B / ETU27B / ETU15B with an identification number less than 253030xxxxxx / 273030xxxxxx / 150704xxxxxx. By pressing the "L" button for app. 3 seconds while switching on the test device power supply, the status test can be skipped for these types. In that case the accurate function of the overcurrent release has to be ensured before further tests will be done with the test device, e.g. by function "Activation of overcurrent release" and checking the LED on the overcurrent release. Prüfen der Wandler Testing the current transformers Hinweis Note Bei Verwendung der Option Z = F30 bzw. 3WL9111-0AK32-0AA0 („IT-Netz-Elektronik“) können die Wandler nicht mit dem Prüfgerät geprüft werden. Zum Prüfen der Strom- und Energiewandler kurz (weniger als 2 s) die Taste „START“ betätigen. If the option Z = F30 and 3WL9111-0AK32-0AA0 (electronics for IT- networks) respectively are installed a test of the current transformers is not possible. To test the current sensors and energy transformers, press the "START" button. START START Eine leuchtende LED bestätigt die korrekte Funktion des entsprechenden Wandlers. Blinkt eine LED, ist der entsprechende Wandler nicht vorhanden, nicht korrekt angeschlossen oder defekt. A lit-up LED confirms the proper operation of the corresponding transformer. If an LED flashes, the corresponding transformer/transducer is not available, not properly connected or defective. Result of neutral CT check (for ETU release 2) Ergebnis N-Wandler-Prüfung (bei ETU Release 2) Ein Blinken (1 s an, 1 s aus) signalisiert einen Fehler im Bereich des Messwandlers des Neutralleiters. Ursache dafür ist entweder ein fehlender Messwandler (z. B. kein externer Neutralleiter-Wandler angeschlossen), eine fehlerhafte Verbindung zum Messwandler oder ein defekter Messwandler. A flashing light (1 second on, 1 second off) indicates an error in the area of the transducer of the neutral conductor. The cause of this will either be a missing transducer (e.g. no external neutral CT connected), a missing connection to the transducer or a faulty transducer. Ein schnelles Blinken (0,5 s an, 0,5 s aus) signalisiert einen Fehler im Bereich des Energiewandlers für den Neutralleiter. Ursache dafür ist entweder ein fehlender Energiewandler (z. B. bei Anschluss eines externen Neutralleiter-Wandlers), eine fehlerhafte Verbindung zum Energiewandler oder ein defekter Energiewandler. A rapid flashing light (0.5 seconds on, 0.5 seconds off) indicates an error in the area of the energy transformer of the neutral conductor. The cause of this will either be a missing energy transformer (e.g. if an external neutral CT is connected), a missing connection to the energy transformer or a faulty energy transformer. Testing the tripping function Prüfen der Auslösefunktion Hinweis Note Überstromauslöser der Typen ETU25B bzw. ETU27B mit einer Ident-Nr. kleiner als 250205 xxxxxx bzw. 270206xxxxxx reagieren nur auf die Prüfung der L-Auslösung. - Charge the storage spring by hand - Close - Federspeicher per Hand spannen - Einschalten Zum Prüfen der Auslösefunktion eine der Tasten „L“, „S“, „I“, „N“ oder „G“ betätigen. L S I N G Der Leistungsschalter löst nach der eingestellten Verzögerungszeit zuzüglich 2 Sekunden aus. Der Auslösegrund kann über die Taste 9 – 136 Overcurrent releases type ETU25B resp. ETU27B with an identification number smaller than 250205 xxxxxx resp. 270206xxxxxx do only react to a test of the L-tripping function. To test the tripping function, press one of the buttons "L", "S", "I", "N" or "G". L S I N G The circuit-breaker trips after the time delay plus 2 seconds. The tripping reason can be inquired through the "QUERY" button at the „QUERY“ am Überstromauslöser abgefragt werden. Dazu muss der Überstromauslöser mindestens 10 Minuten lang aktiviert gewesen sein. Anderenfalls verfügt der Überstromauslöser nicht über die entsprechende Schutzfunktion oder ist defekt. trip unit. The trip cause storage function is available only, if the trip unit had been activated for least 10 min before tripping. Otherwise, the trip unit doesn’t have the corresponding protective function or is defective. Prüfen der Messwertanzeige Testing the display of the measured values Nach einem durchgeführten Auslösetest ist bei nicht aktivierter ETU die Funktion der Speicherfähigkeit der Auslösegründe über die Query Taste zu prüfen. Once a tripping test has been carried out, if the ETU is not activated, the storage capability of the tripping reasons must be checked using the Query button. Verfügbar ab Seriennummer des Handprüfgerätes E10403xxxxxx und E30403xxxxxx. Available at test devices with serial number E10403xxxxxx and E30403xxxxxx or higher. Zum Prüfen der Messwertanzeige im Display oder per Fernübertragung gleichzeitig die Tasten „I“ und „N“ betätigen. To check the correctness of the measured values in the display or via remote transmission press the "I" and "N" keys simultaneously. + I N Für die Dauer von 30 s wird über die Messwandler nacheinander ein Strom in L1, L2, L3, N und G simuliert. Dabei blinkt die LED des jeweiligen Wandlers. Der Test gilt als erfolgreich, wenn an entsprechender Stelle ein Strom angezeigt wird. I + N N A current is successively simulated via the measuring transformers in L1, L2, L3, N and G for 30 sec. The LED of the respective transformer will flash. The test can be considered successful if current is indicated in the corresponding position. Aktivieren des Überstromauslösers Zum Aktivieren des Überstromauslösers gleichzeitig die Tasten „N“ und „G“ betätigen. + Activation of trip unit To activate the trip unit press the "N" and "G" keys simultaneously. G N + G Der Überstromauslöser bleibt bis zum Drücken einer anderen Taste aktiviert. The trip unit is activated up to pressing another key. Mit dieser Funktion kann z. B. die Anzeige der „T.U.-Error“-LED überprüft werden, wenn der Statustest mit dem Fehler „Überstromauslöser defekt“ beendet wurde. With this function the "T.U.-Error"-LED can be checked, if the status test had finished with the error "Trip unit defective". 9.6.6 9.6.6 Nachbereitende Arbeiten - Notierte Einstellwerte wieder herstellen - Abdecklappe auf X25 setzen 9.6.7 Bestellnummern Finishing - Restore the noticed settings - Mount the Cover on X25 9.6.7 Order numbers Bestell-Nr. Order no. Handprüfgerät Test device 3WL9111-0AT32-0AA0 9 – 137 10 Wiedereinschaltsperre zurücksetzen 10 Reset reclosing lockout 10.1 Manuelle Rücksetzung 10.1 Manual reset reclosing lockout 1 Schalter schaltet aus durch Überstromauslösung Circuit-breaker is tripped by overcurrent Meldungen / Signals Zustandsanzeigen / Indications Trip AusgelöstMeldeschalter 2 Trip signalling switch Manuelle Rücksetzung / Manual reset 3 Ausgelöst-Anzeige (roter Stößel) drücken, bis sie einrastet Press tripped indicator (red pin), till it latches Reset F5 4 Ausgelöst-Anzeige zurückgesetzt Tripped indicator reseted Auslösemagnet Ausgelöst-Meldeschalter Tripping solenoid Trip signalling switch Auslösemagnet und Ausgelöst-Meldung werden zurückgesetzt. Tripping solenoid and tripped signal are reset. Zustandsanzeigen / Indications 5 Schalter ist wieder einschaltbereit, sofern Federspeicher gespannt und keine Verriegelung aktiv Circuit-breaker is ready to close again, if spring is charged and no interlock is active 10 – 1 10.2 Automatische Rücksetzung 10.2 Automatic reset Schalter schaltet aus durch Überstromauslösung Circuit-breaker is tripped by overcurrent 1 Automatische Rücksetzung / Automatic reset 2 F5 Auslösemagnet Trip solenoid Zustandsanzeigen / Indications Automatische mechanische Rücksetzeinrichtung Automatic mechanical reset Meldungen / Signals Trip AusgelöstMeldeschalter 3 Trip signalling switch Schalter ist sofort wieder einschaltbereit, sofern Federspeicher gespannt Circuit-breaker is immediately ready to close again, if spring storage is charged Rücksetzen von Ausgelöst-Anzeige und Ausgelöst-Meldung Reset tripped indicator and tripped signal Fernrücksetzung / Remote reset Manuelle Rücksetzung / Manual reset Option: Fernrücksetzen der Ausgelöst-Anzeige und der AusgelöstMeldung durch einen Fern-Rücksetzmagneten q (Seite 10-6) Option: Remote reset of the tripped indicator and the tripped signal by means of a remote reset magnet q (page 10-6) 4 Ausgelöst-Anzeige (roter Stößel) drücken, bis sie einrastet Press tripped indicator (red pin), till it latches Reset AusgelöstMeldeschalter 5 Ausgelöst-Anzeige zurückgesetzt Tripped indicator reseted Trip signalling switch Ausgelöst-Meldung zurückgesetzt Tripped signal reseted 10 – 2 10.3 Automatische Rücksetzung nachrüsten Mit der automatischen Rücksetzung der Wiedereinschaltsperre wird der Auslösemagnet sofort nach einer Auslösung des elektronischen Überstromauslösers automatisch zurückgesetzt. Der Leistungsschalter ist sofort wieder einschaltbereit. Die Ausgelöst-Anzeige und die Ausgelöst-Meldung müssen separat entweder manuell vor Ort oder mit dem Fernrücksetzmagneten zurückgesetzt werden. 10.3 Retrofitting automatic reset With the automatic reset of the closing lock-out the tripping solenoid is automatically reset after the overcurrent release has tripped. The circuit-breaker is immediately ready to close again. The tripped indication and the tripped signal must be reset either manually on the overcurrent release or by means of the remote reset magnet. WARNUNG WARNING Verletzungsgefahr! Mechanical hazard! Die Schaltmechanik kann Personenschäden verursachen, wenn das Bedienpult abgenommen ist. Vor dem Abbauen des Bedienpultes Ausschalten und Federspeicher entspannen q (Seite 24-3): - Entfernen des Handsteckers X5 - AUS-Taste betätigen - EIN-Taste betätigen - AUS-Taste nochmals betätigen. Mechanism can cause severe injury when cover is removed. Switch off and discharge the storage spring before removing cover q (page 24-3): - Remove hand plug X5 - Push OPEN button - Push CLOSE button - Push OPEN button again. WARNUNG WARNING Kann Tod oder Personenschäden verursachen. May result in death or serious injury. Vor dem Entfernen jeglicher Abdeckungen oder des Bedienpults unbedingt die Speicherfeder des Leistungsschalters entspannen (Seite 24-3) Discharge storage spring before removing barriers / covers (page 24-3). - Bedienpult abnehmen q (Seite 24-9) - Überstromauslöser ausbauen q (Seite 9-80) 10.3.1 Rücksetzmechanik einbauen - Remove front panel q (page 24-9) - Remove overcurrent release q (page 9-80) 10.3.1 Auslösemagnet F5 ausbauen Überstromauslöser Systemträger in Metallausführung (silbern): Removing tripping solenoid F5 Trip unit system carrier, made of metal (silvery colour): 1 1 2 10 – 3 Schnapphaken zurückdrücken Auslösemagnet herausnehmen Installing reset mechanism 2 1 2 Push snap-action hook back Remove tripping solenoid Überstromauslöser Systemträger in Kunststoffausführung (schwarz): Trip unit system carrier, made of plastics (black colour): 0793 2 1 1 2 Schnapphaken zurückdrücken Auslösemagnet herausnehmen 1 2 Rücksetzfeder und Bolzen einbauen open snap hook Remove tripping solenoid Installing reset spring and bolt 2 1 1 2 3 Rücksetzfeder einsetzen Bolzen einsetzen Bolzen mit zwei Sicherungsscheiben sichern Auslösemagnet F5 einbauen 3 1 2 3 3 Fit reset spring Fit bolt with lock washer Secure the bolt with two lock washers Installing tripping solenoid F5 VORSICHT CAUTION Anschlussleitungen des Auslösemagneten beim Einbau nicht einklemmen! Do not squeeze the wires of the tripping solenoid during installation! 10 – 4 Überstromauslöser Systemträger in Metallausführung (silbern): Trip unit system carrier, made of metal (silvery colour): 1 2 1 Auslösemagnet einsetzen 1 Überstromauslöser Systemträger in Kunststoffausführung (schwarz): Fit tripping solenoid Trip unit system carrier, made of plastics (black colour): 0794 click Anschließend Then - Überstromauslöser einbauen q (Seite 9-80) - Bedienpult anbauen q (Seite 24-22) 10.3.2 Schilder aktualisieren - Install overcurrent release q (page 9-80) - Install front panel q (page 24-22) 10.3.2 Updating the options label Hinweis Note Nach dem Einbau zusätzlicher Komponenten sind folgende Angaben mit einem weißen Permanentstift bzw. mit Aufklebern aus dem beiliegenden Etikettenbogen zu aktualisieren! Davor ist es ggf. notwendig die zu korrigierenden Zeichen mit einem schwarzen Permanentstift zu füllen. After installing additional components, add the following data using a white and indelible ink pen or the appropriate label from the set of labels supplied! If necessary the signs which have to be corrected have to be filled with a black permanent pen. 10 – 5 Ausstattungsschild des Leistungsschalters Options label of the circuit-breaker Bestell-Nr. Order no. 10.4 Z ergänzen Add Z Automatische Rücksetzung der Wiedereinschaltsperre für ETU-Träger in Metallausführung Automatic reset of the reclosing lock-out for trip unit system carrier, made of metal 3WL9111-0AK01-0AA0 K01 Automatische Rücksetzung der Wiedereinschaltsperre für ETU-Träger in Kunststoffausführung Automatic reset of the reclosing lock-out fortrip unit system carrier, made of plastics 3WL9111-0AK21-0AA0 K01 Fern-Rücksetzoption nachrüsten Nur für Fernrücksetzen der Ausgelöst-Anzeige und AusgelöstMeldung. 10.4 Installing the remote reset option Only for remote reseting of tripped indicator and trip signalling switch. VORSICHT CAUTION Nur bei automatischer Rücksetzung der Wiedereinschaltsperre verwendbar! Anderenfalls wird Fernrücksetzmagnet überlastet und zerstört. Can only be used with automatic reclosing lockout reset! The remote reset solenoid will otherwise be overloaded and destroyed. 10.4.1 Einbau WARNUNG 10.4.1 Mounting WARNING Verletzungsgefahr! Mechanical hazard! Die Schaltmechanik kann Personenschäden verursachen, wenn das Bedienpult abgenommen ist. Vor dem Abbauen des Bedienpultes Ausschalten und Federspeicher entspannen q (Seite 24-3): - Entfernen des Handsteckers X5 - AUS-Taste betätigen - EIN-Taste betätigen - AUS-Taste nochmals betätigen. Mechanism can cause severe injury when cover is removed. Switch off and discharge the storage spring before removing cover q (page 24-3): - Remove hand plug X5 - Push OPEN button - Push CLOSE button - Push OPEN button again. - Bedienpult abnehmen q (Seite 24-9) - Überstromauslöser ausbauen q (Seite 9-80) - Remove front panel q (page 24-9) - Remove overcurrent release q (page 9-80) Abstellschalter für Fern-Rücksetzmagneten montieren Mounting the cut-off switch for remote reset coil 10 – 6 Überstromauslöser Systemträger in Metallausführung (silbern): Trip unit system carrier, made of metal (silvery colour): VORSICHT CAUTION Selbstschneidende Schrauben vorsichtig anziehen. Die Meldeschalter dürfen sich bei der Montage nicht verformen. Tighten self-tapping screws carefully. The signalling switches must not be deformed during installation. 1 PZ 0 2 (1) Feder Für Überstromauslöser Systemträger in Kunststoffaus- (1) (2) S13 Rückseite (2) führung (schwarz) nicht erforderlich. Überstromauslöser Systemträger in Kunststoffausführung (schwarz): Spring Not necessary for trip unit system carrier, made of plastics (black colour). S13 rear side Carrier of over current system, plastic made (black colour): click 0790 (1) 10 – 7 Abstellschalter S13 (1) Cut-off switch S13 Fern-Rücksetzmagnet montieren Mounting remote reset coil F7 2 4 PZ 1 3 1 (1) Feder Für Überstromauslöser Systemträger in Kunststoffausführung (schwarz) nicht erforderlich. 10.4.2 Leitungen anschließen (1) 10.4.2 Spring Not necessary for carrier of over current system, plastic made (black colour). Connecting wires q Circuit diagrams (page 8-1) q Schaltpläne (Seite 8-1) Hinweis Note Ggf. fehlende Hilfsstromanschlüsse nachrüsten (Messerleiste, Hilfsstromstecker, Schleifkontaktmodul für Einschubrahmen). q (Seite 5-19) If necessary missing auxiliary terminals may be retrofitted (receptacle, auxiliary connectors and sliding contact module for guide frames). q (page 5-19) Klemmen / Terminals: X8.13 X8.14 3,0 x 0,6 10 – 8 10.4.3 Funktionstest 1 10.4.3 2 Function test 3 6 Anschließend Then - Überstromauslöser einbauen q (Seite 9-80) - Bedienpult anbauen q (Seite 24-22) 10.4.4 - Install overcurrent release q (page 9-80) - Install front panel q (page 24-22) Ausstattungsschild aktualisieren 10.4.4 Updating the options label Hinweis Note Nach dem Einbau zusätzlicher Komponenten sind folgende Angaben mit einem weißen Permanentstift bzw. mit Aufklebern aus dem beiliegenden Etikettenbogen zu aktualisieren! Davor ist es ggf. notwendig die zu korrigierenden Zeichen mit einem schwarzen Permanentstift zu füllen. After installing additional components, add the following data using a white and indelible ink pen or the appropriate label from the set of labels supplied! If necessary the signs which have to be corrected have to be filled with a black permanent pen. Spannung / Voltage Fern-Rücksetzmagnet / Remote reset coil 10 – 9 Bestell-Nr. / Order no. Z ergänzen / add Z 24 V DC 3WL9111-0AK03-0AA0 K 10 48 V DC 3WL9111-0AK04-0AA0 K 11 110 - 125 V AC / DC 3WL9111-0AK05-0AA0 K 12 208 - 250 V AC / DC 3WL9111-0AK06-0AA0 K 13 11 Hilfsauslöser 11 Shunt Trip / Closing Coil / Undervoltage release WARNUNG WARNING Kann Tod oder Personenschäden verursachen. May result in death or serious injury. Vor dem Entfernen jeglicher Abdeckungen oder des Bedienpults unbedingt die Speicherfeder des Leistungsschalters entspannen (Seite 24-3) Discharge storage spring before removing barriers / covers (page 24-3). 11.1 11.1 Übersicht Overview Mounting locations Einbauplätze (1) (2) (3) (4) (5) (6) (7) (1) (2) (3) (4) (5) (6) (7) Erster Spannungsauslöser F1 Meldeschalter S22 Einschaltmagnet Y1 Zweiter Spannungsauslöser F2 oder Unterspannungsauslöser (unverzögert) F3 oder Unterspannungsauslöser (verzögert) F4 Meldeschalter S23 oder S43 Abstellschalter S14 für Spannungsauslöser 5% ED (übererregt) Abstellschalter S15 für Einschaltmagnet Y1 5% ED (übererregt) Spannungsauslöser mit 100% ED können als elektrische Einschaltsperre genutzt werden. (1) (2) (3) (4) (5) (6) (7) 1st shunt trip F1 Signalling switch S22 Closing coil Y1 2nd shunt trip F2 or undervoltage release (instantaneous) F3 or undervoltage release (time-delayed) F4 Signalling switch S23 or S43 Cut-off switch S14 für shunt trip 5% ED (overexcited) Cut-off switch S15 for closing coil Y1 5% ED (overexcited) Shunt trips with 100% ED may be used as an electrical closing lockout. VORSICHT CAUTION Sicherstellen, dass der Einschaltmagnet mit 5% ED nur angesteuert werden kann, wenn sich der Leistungsschalter in einschaltbereitem Zustand befindet. Anderenfalls wird der Einschaltmagnet zerstört. Make sure that the closing coil with 5% operating time is only activated when the circuit-breaker is ready for closing. Otherwise the closing coil will be destroyed. 11 – 1 11.2 Hilfsauslöser nachrüsten 11.2 Installing auxiliary releases WARNUNG WARNING Verletzungsgefahr! Mechanical hazard! Die Schaltmechanik kann Personenschäden verursachen, wenn das Bedienpult abgenommen ist. Vor dem Abbauen des Bedienpultes Ausschalten und Federspeicher entspannen q (Seite 24-3): - Entfernen des Handsteckers X5 - AUS-Taste betätigen - EIN-Taste betätigen - AUS-Taste nochmals betätigen. Mechanism can cause severe injury when cover is removed. - Remove front panel q (page 24-9) - Bedienpult abnehmen q (Seite 24-9) 1 Switch off and discharge the storage spring before removing cover q (page 24-3): - Remove hand plug X5 - Push OPEN button - Push CLOSE button - Push OPEN button again. 2 Für besseres Montieren Messerleiste abnehmen For better mounting remove receptacle. 3 Nur leicht anhebeln! Lift slightly only! 4 Haltebügel Retaining bracket Messerleiste Receptacle 5 6 11 – 2 Haltebügel wieder aufsetzen und arretieren Replace retaining bracket and fix. 11.3 Optionale Meldeschalter am Hilfsauslöser anbringen 11.3 Meldet den Betriebszustand des Hilfsauslösers an den BSS. Installing optional signalling switches on auxiliary releases Signals the operating status of the auxiliary release to the BSS. (1) (2) (3) (4) (1) (2) (3) (4) 11.4 Wippe Meldeschalter Führung Nut Verzögerungszeiten am Unterspannungsauslöser einstellen (1) (2) (3) (4) 11.4 See-saw Signalling switch Guide Groove Setting delay times at under-voltage release Instantaneous release Unverzögerter Auslöser kurzzeitverzögert: short-time delayed: td q 200 ms unverzögert: instantaneous: td q 80 ms (Auslieferzustand/ delivery condition) J1 Time-delayed release Verzögerter Auslöser 3 x 0,5 Verzögerungszeit td / Delay time td td = (0.2 ... 1.6 s) + 1.6 s S1 td = 0.2 ... 1.6 s 11 – 3 11.5 Abstellschalter für übererregte Hilfsauslöser und Einschaltmagneten einbauen 11.5 Installing cut-off switch for overexcited shunt trip and closing coil vorverdrahtet pre-wired S14 S15 F1 / F2 11.6 Y1 S14 11.6 Elektrisch EIN nachrüsten Installing electrical ON Installing micro-switch Mikroschalter einsetzen S 10 2 1 Wippe See-saw Taster einsetzen Inserting push-button Bedienpult Front panel ausbrechen knock out entgraten! deburr! Geeignete Unterlage verwenden! Using suitable supports! Option Plombierkappe (ohne Dichtring) Option sealing cap (without gasket) Bedienpult Front panel 3 1 4 3,0 x 0,6 11 – 4 2 Option Sicherheitsschloss Option safety lock S15 11.7 Mechanische Funktionsprüfung 11.7 Mechanical function test VORSICHT CAUTION Gefahr bei gespanntem Federspeicher! Danger if storage spring is charged! Spannungsauslöser Shunt trip 1 q Federspeicher per Hand spannen (Seite 6-4) q Charge the spring storage manually (page 6-4) 2 q Einschalten (Seite 6-6) q Close circuit-breaker (page 6-6) Anker Armature Einschaltmagnet Closing coil Anker Armature 3 4 Schalter schaltet aus Circuit-breaker opens 5 Schalter schaltet ein Circuit-breaker closes q Ausschalten (Seite 6-6) q Switch off (page 6-6) 11 – 5 11.8 Leitungen anschließen 11.8 q Schaltpläne (Seite 8-4) Connecting wires q Circuit diagrams (page 8-4) Hinweis Note Ggf. fehlende Hilfsstromanschlüsse nachrüsten (Messerleiste, Hilfsstromstecker, Schleifkontaktmodul für Einschubrahmen). q (Seite 5-19) If necessary missing auxiliary terminals may be retrofitted (receptacle, auxiliary connectors and sliding contact module for guide frames). q (page 5-19) Klemmen / Terminals: 3,0 x 0,6 11.9 11.9 Abschließende Arbeiten - Bedienpult anbauen q (Seite 24-22) - Hilfsstromstecker aufsetzen q (Seite 5-18) - Leitungen an Hilfsstromstecker anschließen q (Seite 5-17) - Einschubschalter in Prüfstellung verfahren q (Seite 6-2) 11 – 6 S10 : X7.9 / X6.7 Finally - Install front panel q (page 24-22) - Fit auxiliary connectors q (page 5-18) - Connect wires to auxiliary connector q (page 5-17) - Move the draw-out circuit-breaker into the test position q (page 6-2) VORSICHT CAUTION Diese Funktionsprüfung darf nur bei aufgesetztem Bedienpult erfolgen. Der Einschubschalter darf nicht in der Betriebsstellung stehen. This function check must only be carried out with the front panel fitted. The draw-out circuit-breaker should not be in the connected position. Einschaltmagnet Closing coil 2 : X6.7 / X6.8 : X6.13 / X6.14 : X5.11 / X5.12 : X5.11 ... X5.14 11.10 Electrical function test 11.10 Elektrische Funktionsprüfung 1 Y1 F1 F2, F3 F4 Unterspannungsauslöser Undervoltage release q Federspeicher spannen (Seite 6-4) q Charge the spring storage (page 6-4) Einschaltmagnet betätigen / Actuate the closing coil operation Elektrisch EIN / Electrical ON Fernbetätigung / Remote activation 3 Hilfsspannung unterbrechen ! Interrupt auxiliary voltage ! 4 Schalter schaltet ein Circuit-breaker closes Spannungsauslöser Shunt trip 1 Unterspannungsauslöser Undervoltage release q Federspeicher spannen (Seite 6-4) / q Charge the spring storage (page 6-4) q Einschalten (Seite 6-6) / q Close circuit-breaker (page 6-6) 2 Spannungsauslöser betätigen / Actuate shunt trip Fernbetätigung / Remote activation Hilfsspannung unterbrechen ! Interrupt auxiliary voltage ! 3 4 Schalter schaltet aus Circuit-breaker opens 11 – 7 11.11 Ausstattungsschild aktualisieren 11.11 Updating the options label Hinweis Note Nach dem Einbau zusätzlicher Komponenten sind folgende Angaben mit einem weißen Permanentstift bzw. mit Aufklebern aus dem beiliegenden Etikettenbogen zu aktualisieren! Davor ist es ggf. notwendig die zu korrigierenden Zeichen mit einem schwarzen Permanentstift zu füllen. After installing additional components, add the following data using a white and indelible ink pen or the appropriate label from the set of labels supplied! If necessary the signs which have to be corrected have to be filled with a black permanent pen. Einschaltmagnet / Closing coil Meldeschalter / Signalling switches Elektrisch EIN / Electrical ON 1. Hilfsauslöser / 1st auxiliary releases ohne / without: x = A q (Seite 2-1) q (page 2-1) 2. Hilfsauslösser / 2nd auxiliary releases ohne / without: x = A Einschaltmagnet / Closing coil AC V 50/60 Hz DC V Bestell-Nr. / Order no. Z ergänzen / add Z - 24 3WL9111-0AD01-0AA0 M 21 - 30 3WL9111-0AD02-0AA0 M 22 - 48 3WL9111-0AD03-0AA0 M 23 - 60 3WL9111-0AD04-0AA0 M 24 110 110 3WL9111-0AD05-0AA0 M 25 230 220 3WL9111-0AD06-0AA0 M 26 - 24 3WL9111-0AD11-0AA0 M 31 - 48 3WL9111-0AD12-0AA0 M 33 110-127 110-125 3WL9111-0AD13-0AA0 M 35 208-240 220-250 3WL9111-0AD14-0AA0 M 36 Meldeschalter / Signalling switches Bestell-Nr. / Order no. Z ergänzen / add Z Meldeschalter am ersten Hilfsauslöser / Signalling switch for 1st auxiliary release 3WL9111-0AH02-0AA0 C 26 Meldeschalter am zweiten Hilfsauslöser / Signalling switch for 2nd auxiliary release 3WL9111-0AH02-0AA0 C 27 Elektrisch EIN / Electrical ON Bestell-Nr. / Order no. Z ergänzen / add Z Taster / Button 3WL9111-0AJ01-0AA0 C 10 Taster mit Plombierkappe / Button with sealing cap 3WL9111-0AJ02-0AA0 C 11 Taster mit Schloss CES / Key-operated button CES 3WL9111-0AJ03-0AA0 C 12 Taster mit Schloss IKON / Key-operated button IKON 3WL9111-0AJ05-0AA0 C 14 Einschaltmagnet Y1 (100% ED, geeignet für Dauerbetrieb) Closing coil Y1 (100% duty, suitable for continuous operation) Übererregter Einschaltmagnet Y1 (5% ED, nicht geeignet für Dauerbetrieb) Overexcited closing coil Y1 (5% duty, not suitable for continuous operation) Taster mit Abdeckung mit Loch Ø 6,35 mm / Button, with cover having Ø 6.35 mm access hole 11 – 8 C 15 1. Hilfsauslöser / 1st auxiliary release Spannungsauslöser F1 (100% ED, geeignet für Dauerbetrieb) Shunt trip F1 (100% duty, suitable for continuous operation) übererregter Spannungsauslöser F1 (5% ED, nicht geeignet für Dauerbetrieb) Overexcited shunt trip F1 (5% duty, not suitable for continuous operation) 2. Hilfsauslöser / 2nd auxiliary release AC V 50/60 Hz DC V Bestell-Nr. / Order no. 14. Stelle ändern in / Modify 14th position - 24 3WL9111-0AD01-0AA0 B - 30 3WL9111-0AD02-0AA0 C - 48 3WL9111-0AD03-0AA0 D - 60 3WL9111-0AD04-0AA0 E 110-127 110-125 3WL9111-0AD05-0AA0 F 208-240 220-250 3WL9111-0AD06-0AA0 G - 24 3WL9111-0AD11-0AA0 - 48 3WL9111-0AD12-0AA0 110-127 110-125 3WL9111-0AD13-0AA0 208-240 220-250 3WL9111-0AD14-0AA0 AC V 50/60 Hz DC V Bestell-Nr. / Order no. 15. Stelle ändern in / Modify 15th position - 24 3WL9111-0AD01-0AA0 B - 30 3WL9111-0AD02-0AA0 C Spannungsauslöser F2 - 48 3WL9111-0AD03-0AA0 D Shunt trip F2 - 60 3WL9111-0AD04-0AA0 E 110 110 3WL9111-0AD05-0AA0 F 230 220 3WL9111-0AD06-0AA0 G - 24 3WL9111-0AE01-0AA0 J - 30 3WL9111-0AE02-0AA0 K - 48 3WL9111-0AE03-0AA0 L - 60 3WL9111-0AE07-0AA0 U 110-127 110-125 3WL9111-0AE04-0AA0 M 208-240 220-250 3WL9111-0AE05-0AA0 N 380-415 - 3WL9111-0AE06-0AA0 P - 48 3WL9111-0AE11-0AA0 Q Unterspannungsauslöser F4 (verzögert) 110-127 110-125 3WL9111-0AE12-0AA0 R Undervoltage release F4 (time-delayed) 208-240 220-250 3WL9111-0AE13-0AA0 S 380-415 - 3WL9111-0AE14-0AA0 T Unterspannungsauslöser F3 (unverzögert) Undervoltage release F3 (instantaneous) 11 – 9 11.12 Kondensator-Speichergerät für Spannungsauslöser Das Kondensator-Speichergerät 3WL9111-0BA... ist ein Vorschaltgerät für die Spannungsauslöser. Es kann ein Auslöser mit einem dauernd anliegenden AUSKommando angesteuert werden. Es ermöglicht mit seinem Energiespeicher, nach einem Ausfall der Betriebsspannung innerhalb der Speicherzeit, ein einmaliges Ausschalten des Leistungsschalters mit dem Spannungsauslöser. Technische Daten 11.12 Capacitor Energy Storage Unit for shunt release The capacitor energy storage unit 3WL9111-0BA... is connected in series with the shunt release. For shunt releases a continuous OFFcommand is permissible. If the operating voltage fails within the storage time, it is possible by means of the energy store to initiate one tripping operation of the circuit-breaker via the shunt release. Technical data Betriebsspannung/Operating voltage (+10/-15%): Operating voltage (+10/-15%): Speicherzeit: bei Nennspannung = 5 min. Storage time: at rated voltage = 5 min. (Max. zulässige Wartezeit zwischen Spannungsausfall und Auslösung des Leistungsschalters mit dem Spannungsauslöser) Wiederaufladezeit: bei Nennspannung = 15 s (Ladezeit des Energiespeichers nach einer Auslösung) Leistungsaufnahme: max. ca. 3 VA, 3 W (ohne angeschlossenem Spannungsauslöser) (Maximum permissible waiting time between voltage failure and tripping of circuit-breaker with the shunt release) Restored energy time: at rated voltage = 15 s (Charging time of energy store after tripping) Power consumption: max. 3 VA, 3 W (without connected shunt release) Arbeitstemperaturbereich: -20 bis +70 °C Working temperature range: -20 to +70 °C Gewicht: ca. 0,5 kg Weight: approx. 0.5 kg Montage Installation Das Kondensator-Speichergerät ist getrennt vom Schalter zu befestigen: - auf einer Hutschiene DIN EN 50022-35 - oder auf ebener Fläche mit beiliegenden Schiebern und 3 Schrauben M4 (siehe Fig. 3) 11 – 10 The capacitor energy storage unit must be mounted separately from the circuit-breaker: - on a DIN EN 50022-35 rail - or on a level surface by means of the clips supplied and three 4 mm diameter bolts (see Fig. 3) Zulässige Betriebslage: - beliebig Permissible operating position: - any Anschluss: Connections: - gemäß Anschlussplan Fig. 2 - Schraubanschlüsse für max. 2 Leitungen 2,5 mm2 (flexibel mit Aderendhülsen) zweiter Spannungsauslöser / second shunt release - according to connection diagram Fig. 2 - screw terminal for maximum 2 cables 2.5 mm2 (flexible with core and sleeves) erster Spannungsauslöser / first shunt release 9 -X 5.11 -X 6.13 Kondensator-Speichergerät 3WL9111-0BA... Schalter mit Spannungsauslöser f oder fd / Capacitor energy storage unit 3WL9111-0BA... Circuit-breaker with shunt release f or fd 3 4 Aus Off -F1 -F2 10 -X 5.12 1 2 -X 6.14 AC D C + AC D C - Die Betriebsspannung des Spannungsauslösers muss in Art und Höhe der des Kondensator-Speichergerätes entsprechen. The level and the type of the operating voltage for the shunt release must be equal to the operating voltage of the capacitor-energy storage unit. Schnappbefestigung auf Hutschiene DIN EN 50022-35 oder Schraubbefestigung Snap-on mounting on DIN EN 50022-35 rail or screw fixing Bestell-Nummern Order numbers Kondensator-Speichergerät / Capacitor Energy Storage Unit Bestell-Nr. / Order no. 220-240 V AC, 50/60 Hz 220-250 V DC 3WL9111-0BA14-0AA0 110-127 V AC, 50/60 Hz 110-125 V DC 3WL9111-0BA13-0AA0 11 – 11 12 Hilfsstromschalter 12 Auxiliary and control switches 12.1 Schaltergruppe Meldung 12.1 Signalling switches (1) (2) (3) (4) (5) (6) (7) (8) (9) (1) (2) (3) (4) (5) (6) (7) (8) (9) 12.1.1 Ausgelöst-Meldeschalter S24 Meldeschalter S22 am 1. Hilfsauslöser q (Seite 11-3) Meldeschalter Einschaltbereitschaft S20 Meldeschalter Speicherzustand S21 Meldeschalter S23 am 2. Hilfsauslöser oder am Unterspannungsaulöser q (Seite 11-3) Meldeschalter Schaltstellung S1 (Standard) Meldeschalter Schaltstellung S2 (Standard) Meldeschalter Schaltstellung S4 oder S8 Meldeschalter Schaltstellung S3 oder S7 Meldeschalter nachrüsten (1) (2) (3) (4) (5) (6) (7) (8) (9) 12.1.1 Trip signalling switch S24 Signalling switch S22 for 1st shunt trip q (page 11-3) Signalling switch for ready-to-close S20 Signalling switch for storage spring charged S21 Signalling switch S23 for 2nd shunt trip or under-voltage release q (page 11-3) Contact position-driven auxiliary switch S1 (standard) Contact position-driven auxiliary switch S2 (standard) Contact position-driven auxiliary switch S4 or S8 Contact position-driven auxiliary switch S3 or S7 Mounting signalling switches WARNUNG WARNING Verletzungsgefahr! Mechanical hazard! Die Schaltmechanik kann Personenschäden verursachen, wenn das Bedienpult abgenommen ist. Vor dem Abbauen des Bedienpultes Ausschalten und Federspeicher entspannen q (Seite 24-3): - Entfernen des Handsteckers X5 - AUS-Taste betätigen - EIN-Taste betätigen - AUS-Taste nochmals betätigen. Mechanism can cause severe injury when cover is removed. - Bedienpult abnehmen q (Seite 24-9) S20 Switch off and discharge the storage spring before removing cover q (page 24-3): - Remove hand plug X5 - Push OPEN button - Push CLOSE button - Push OPEN button again. - Remove front panel q (page 24-9) S1 S2 S3 / S7 Die Anschlussleitungen des Einschaltbereitschaftsmeldeschalters sind an den Klemmblock X6 entsprechend Verdrahtungsplan q (Seite 8-3) anzuschließen. 12 – 1 S4 / S8 The connecting wires from the ready-to-close signaling switch must be connected to terminal X6 according to the wiring plan q (page 8-3) Die Anschlussleitungen der Hilfsschalter sind an die Hilfsleiterklemmblöcke X5 und X6 entsprechend dem Verdrahtungsplan q (Seite 8-2) anzuklemmen. The connecting wires from the auxiliary switches must be connected to terminals X5 and X6 according to the wiring plan q (page 8-2). S21 12.1.2 12.1.2 Meldeschalter am Überstromauslöser montieren - Remove overcurrent release q (page 9-80) - Überstromauslöser ausbauen q (Seite 9-80) Überstromauslöser Systemträger in Metallausführung (silbern): Mounting signalling switches at trip unit Trip unit system carrier, made of metal (silvery colour): VORSICHT CAUTION Selbstschneidende Schrauben vorsichtig anziehen. Die Meldeschalter dürfen sich bei der Montage nicht verformen. Tighten self-tapping screws carefully. The signalling switches must not be deformed during installation. Feder / leg spring 1 S13 (Rückseite Rear side) S24 PZ 0 2 S45 Trip unit system carrier, made of plastics (black colour): Überstromauslöser Systemträger in Kunststoffausführung (schwarz): 1 2 (1) 2 Schnappstifte 0792 (1) 2 snap pins 12 – 2 12.2 Schaltergruppe Steuerung 12.2 (1) (1) (2) (2) Abstellschalter S13 für Fern-Rücksetzung q (Seite 10-6) Abstellschalter S14 für Spannungsauslöser F1 (übererregt) q (Seite 11-4) Abstellschalter S15 für Einschaltmagnet Y1 (übererregt) q (Seite 11-4) Schalter S10 „Elektrisch EIN“ q (Seite 11-4) oder Motorabstellschalter S12 q (Seite 13-2) (3) (4) 12.3 Schaltergruppe Kommunikation (3) (1) (2) (3) (4) 12.3 q Meldeschalter für den BSS (Seite 9-89) 12.4 Leitungen anschließen Control switches (4) Cut-off switch S13 for remote-reset q (page 10-6) Cut-off switch S14 for overexcited shunt trip F1 (overexcited) q (page 11-4) Cut-off switch S15 for overexcited closing coil Y1 (overexcited) q (page 11-4) Switch S10 "Electrical ON“ q (page 11-4) or motor disconnect switch S12 q (page 13-2) Communication switches q Signalling switches for BSS (page 9-89) 12.4 q Schaltpläne (Seite 8-4) Connecting wires q Circuit diagrams (page 8-4) Hinweis Note Ggf. fehlende Hilfsstromanschlüsse nachrüsten (Messerleiste, Hilfsstromstecker, Schleifkontaktmodul für Einschubrahmen). q (Seite 5-19) If necessary missing auxiliary terminals may be retrofitted (receptacle, auxiliary connectors and sliding contact module for guide frames). q (page 5-19) 3,0 x 0,6 12 – 3 Ausstattungsschild aktualisieren Updating the options label Hinweis Note Nach dem Einbau zusätzlicher Komponenten sind folgende Angaben mit einem weißen Permanentstift bzw. mit Aufklebern aus dem beiliegenden Etikettenbogen zu aktualisieren! Davor ist es ggf. notwendig die zu korrigierenden Zeichen mit einem schwarzen Permanentstift zu füllen. After installing additional components, add the following data using a white and indelible ink pen or the appropiate label from the set of labels supplied! If necessary the signs which have to be corrected have to be filled a black permanent pen. Meldeschalter Signalling switches Meldeschalter / Signalling switches Meldeschalter Schaltstellung Contact position-driven auxiliary switch Bestell-Nr. / Order no. Z ergänzen / add Z Meldeschalter Speicherzustand S21 Signalling switch for spring charged S21 3WL9111-0AH08-0AA0 C 20 Meldeschalter Einschaltbereitschaft S20 Signalling switch for ready-to-close S20 3WL9111-0AH01-0AA0 C 22 Ausgelöst-Meldeschalter S24 (1 Wechsler) für ETU-Träger in Metallausführung Trip signalling switch S24 (1 changeover contact) for trip unit system carrier, made of metal 3WL9111-0AH04-0AA0 K 07 Ausgelöst-Meldeschalter S24 (1 Wechsler) für ETU-Träger in Kunststoffausführung Trip signalling switch S24 (1 changeover contact) for trip unit system carrier, made of plastics 3WL9111-0AH14-0AA0 K 07 Zusätzliche Meldeschalter Schaltstellung / Additional contact position-driven auxiliary switches Bestell-Nr. / Order no. 2 ändern in / Replace 2 by 2S+2Ö 2 NO + 2 NC (S3, S4) 3WL9111-0AG01-0AA0 4 2S 2 NO (S7) 3WL9111-0AG02-0AA0 7 1S+1Ö 1 NO + 1 NC (S8) 3WL9111-0AG03-0AA0 8 12 – 4 13 Motorantrieb 13 Für automatisches Spannen des Federspeichers. Wird eingeschaltet, wenn Federspeicher entspannt und Steuerspannung vorhanden. Schaltet nach dem Spannen automatisch ab. 13.1 Motor operating mechanism For charging the spring storage automatically. It is switched on if the spring storage is discharged and control voltage is applied. The motor-operated mechanism is automatically switched off after the spring storage has been fully charged. Nachrüsten des Motorantriebs 13.1 WARNUNG Retrofitting the motor operating mechanism WARNING Verletzungsgefahr! Mechanical hazard! Die Schaltmechanik kann Personenschäden verursachen, wenn das Bedienpult abgenommen ist. Vor dem Abbauen des Bedienpultes Ausschalten und Federspeicher entspannen q (Seite 24-3): - Entfernen des Handsteckers X5 - AUS-Taste betätigen - EIN-Taste betätigen - AUS-Taste nochmals betätigen. Mechanism can cause severe injury when cover is removed. Switch off and discharge the storage spring before removing cover q (page 24-3): - Remove hand plug X5 - Push OPEN button - Push CLOSE button - Push OPEN button again. - Remove front panel q (page 24-9) - Bedienpult abnehmen q (Seite 24-9) Mounting the motor on the operating shaft Motor auf Antriebswelle setzen 3 Antriebswelle des Handantriebs Operating shaft of the manual operating mechanism 13 – 1 2 1 Motorantrieb befestigen / Leitungen anschließen Fixing the motor operating mechanism / connecting wires 2 X5 3,0 x 0,6 Gr. / Size 5 6 Nm Klemmen / Terminals: X5.1 (L-) X5.2 (L+) 1 q Circuit diagrams (page 8-5) q Schaltpläne (Seite 8-5) Hinweis Note Ggf. fehlende Hilfsstromanschlüsse nachrüsten (Messerleiste, Hilfsstromstecker, Schleifkontaktmodul für Einschubrahmen). q (Seite 5-19) If necessary missing auxiliary terminals may be retrofitted (receptacle, auxiliary connectors and sliding contact module for guide frames). q (page 5-19) 13.2 Motorabstellschalter am Bedienpult Option. Zum Abschalten der Steuerspannung des Motorantriebs. Lieferung vorkonfektioniert mit einer angelöteten Leitung. 13.2 Motor disconnect switch at the front panel Option. For de-energizing the motor operating mechanism. Supplied pre-assembled with one soldered wire. Nicht möglich bei vorhandenem „Elektrisch Ein“ Not possible if "electrical ON" available 13 – 2 Installing motor disconnect switch Motorabstellschalter einsetzen S 12 Solder point Lötstelle 2 1 Wippe See-saw Connecting motor disconnect switch Motorabstellschalter anschließen - Klemme X5.1 lösen und Leitung X5-1 (vom Motorantrieb kommend) herausziehen - Leitung X5-1 vom Abstellschalter S12 an Klemme X5.1 anschließen - Leitung X5-1 vom Motorantrieb an Anschluss 4 des Abstellschalters anlöten - Open terminal X5.1 and disconnenct wire X5-1 (wire from motor operating mechanism) - Connect wire X5.1 of the disconnect switch S12 to terminal X5.1. - Solder wire X5-1 of the motor-operated mechanism to connection 4 of the disconnect switch Knebelschalter einsetzen Installing the selector knob ausbrechen knock out Bedienpult Front panel entgraten! deburr! Geeignete Unterlage verwenden! Using suitable supports! 3 Bedienpult Front panel 1 4 3,0 x 0,6 2 Hinweis Note Ggf. fehlende Hilfsstromanschlüsse nachrüsten (Messerleiste, Hilfsstromstecker, Schleifkontaktmodul für Einschubrahmen). q (Seite 5-19) If necessary missing auxiliary terminals may be retrofitted (receptacle, auxiliary connectors and sliding contact module for guide frames). q (page 5-19) 13 – 3 13.3 Ausstattungsschild aktualisieren 13.3 Updating the options label Hinweis Note Nach dem Einbau zusätzlicher Komponenten sind folgende Angaben mit einem weißen Permanentstift bzw. mit Aufklebern aus dem beiliegenden Etikettenbogen zu aktualisieren! Davor ist es ggf. notwendig die zu korrigierenden Zeichen mit einem schwarzen Permanentstift zu füllen. After installing additional components, add the following data using a white and indelible ink pen or the appropriate label from the set of labels supplied! If necessary the signs which have to be corrected have to be filled with a black permanent pen. Spannung / Voltage Motorantrieb / Motor operating mechanism Motorabstellschalter / Motor disconnect switch Leistungsaufnahme / Power consumption Bestell-Nr. / Order no. Z ergänzen / add Z 24 V DC / 30 V DC 110 W 3WL9111-0AF01-0AA0 M 01 48 V DC / 60 V DC 120 W 3WL9111-0AF02-0AA0 M 03 110-127 V AC / 110-125 V DC 150 W 3WL9111-0AF03-0AA0 M 05 208-240 V AC / 220-250 V DC 130 W 3WL9111-0AF04-0AA0 M 06 3WL9111-0AJ06-0AA0 S 25 13 – 4 14 Anzeige- und Bedienelemente Zum Nachrüsten stehen zusätzliche Anzeige- und Bedienelemente zur Verfügung. 14 Indicators and operating elements There are additional indicators and operating elements available for retrofitting. - WARNUNG WARNING Vor dem Arbeiten an diesem Gerät, Anlage unbedingt spannungsfreischalten sowie das Gerät erden. 14.1 Always de-energize and ground equipment before working on this equipment. Bei Nachrüstung: For retrofitting: - Ausschalten und Federspeicher entspannen q (Seite 24-3) - Bedienpult abnehmen q (Seite 24-9) - Switch off and discharge the storage spring q (page 24-3) - Remove front panel q (page 24-9) Verriegelungsset 14.1 Locking set Das Verriegelungsset ist erforderlich, wenn die Bedienbarkeit der Taster Mechanisch EIN und AUS durch Nachrüsten verschiedener Zubörteile an spezielle Erfordernisse des Schaltanlagenbetriebes angepasst werden soll. (z. B. Pilzdrucktaster NOT-AUS, Sicherheitsschlösser, Zugangssperren für Werkzeugbetätigung, Plombierungen) The locking set is required, if the operation of the mechanical ON and OFF buttons has to be adapted to special operational requirements of the switchgear by retrofitting several accessories. (e.g. mushroom button for EMERGENCY OFF, safety locks, access blocks for tool operation, seals) Lieferumfang: Contents of supply: (1) (1) (2) (3) (4) 14 – 1 2 Stück Zugangssperren q (Seite 17-7) 2 Stück Plombierkappen zum Verplomben oder Einhängen eines Vorhängeschlosses q (Seite 15-26) 2 Stück Schlossträger für Sicherheitsschloss zur Schlüsselbetätigung q (Seite 15-1) 1 Grundplatte (2) (3) (4) 2 access blocks q (page 17-7) 2 sealing caps q (page 15-26) 2 safety lock holders q (page 15-1) and 1 base plate 14.2 Mechanischer Schaltspielzähler 14.2 Der mechanische Schaltspielzähler kann nachgerüstet werden, wenn der Leistungsschalter mit einem Motorantrieb ausgestattet ist. Mechanical make-break operations counter The mechanical make-break operations counter can be retrofitted if the circuit-breaker is equipped with a motor operating mechanism. PZ 1 2 1 Knocking out the field on the front panel Feld am Bedienpult ausbrechen Bedienpult Front panel ausbrechen knock out entgraten! deburr! Geeignete Unterlage verwenden! Use a suitable base! 14.3 Motorabstellschalter 14.3 q (page 13-2) q (Seite 13-2) 14.4 Elektrisch EIN-Taster q (Seite 11-4) Motor cut-off switch 14.4 Electrical ON push-button q (page 11-4) 14 – 2 14.5 NOT-AUS Pilzdrucktaster 14.5 EMERGENCY OFF push-button VORSICHT CAUTION Selbstschneidende Schrauben vorsichtig anziehen! Tighten self-tapping screws carefully! Mechanisch AUS Mechanical OFF 4 PZ 1 2 3 1 ACHTUNG NOTICE NOT-AUS Pilzdrucktaster wie dargestellt einbauen (Pfeil rechts). Install the EMERGENCY OFF mushroom pushbutton as shown (arrow on the right side). 14.6 14.6 Ausstattungsschild aktualisieren Updating the options label Hinweis Note Nach dem Einbau zusätzlicher Komponenten sind folgende Angaben mit einem weißen Permanentstift bzw. mit Aufklebern aus dem beiliegenden Etikettenbogen zu aktualisieren! Davor ist es ggf. notwendig die zu korrigierenden Zeichen mit einem schwarzen Permanentstift zu füllen. After installing additional components, add the following data using a white and indelible ink pen or the appropriate label from the set of labels supplied! If necessary the signs which have to be corrected have to be filled with a black permanent pen. Bestell-Nr. / Order no. Verriegelungsset / Locking set 14 – 3 Z ergänzen / add Z 3WL911-0BA21-0AA0 S 21 Mechanischer Schaltspielzähler / Make-break operations counter 3WL9111-0AH07-0AA0 C 01 NOT-AUS / EMERGENCY OFF 3WL9111-0BA72-0AA0 S 24 15 Abschließvorrichtungen 15 Locking devices 15.1 Sicherheitsschlösser 15.1 Safety locks q Vorrichtungen für Bügelschlösser (Seite 15-21) q Padlocking provisions (page 15-21) (1) (2) (8) (3) (7) (6) (1); (5); (4) siehe Bestellhinweis, q (Seite 15-1) (5) Sicherheitsschloss Safety lock 1 2 (4) (1);(5); (4) refer to order instruction, q (page 15-1) Fabrikate Wirkung Manufacturer Effects Abschließvorrichtung in PROFALUX AUS-Stellung RONIS (Bedienpult) CES IKON CASTELL KIRK FORTRESS Mit dieser Funktion wird ein Einschalten des Leistungsschalters verhindert und die Trennerbedingung nach IEC 60 947-2 in AUS-Stellung erfüllt. Diese Abschließung wirkt nur auf diesen Schalter. Nach einem Auswechseln des Leistungsschalters ist das Einschalten nicht mehr verhindert, sofern nicht der neue Leistungsschalter auch gegen unbefugtes Einschalten gesichert ist. Zum Aktivieren der Abschließung muss der Leistungsschalter ausgeschaltet sein. Bei eingeschaltetem Leistungsschalter ist die Abschließvorrichtung blockiert. Die Sperre ist nur bei abgezogenem Schlüssel wirksam. Der Sicherheitsschlüssel ist nur in „AUS“ abziehbar. q (Seite 15-11) Locking device in OFF position (front panel) This function prevents closing of the circuit-breaker and fulfils the disconnecting condition in OFF position according to IEC 60 947-2. This lock only actuates on this circuit-breaker. After replacing the circuit-breaker, closing is not prevented anymore unless the new circuit-breaker is secured against unauthorised closing, too. To activate the locking device, the circuit-breaker must be opened. If the circuit-breaker is closed, the locking device is blocked. The block is only effective when the key is removed. The safety key can only be removed in "OFF" position. q (page 15-11) Abschließvorrichtung für Elektrisch EIN Locking device for Electrical ON CES IKON Verhindert unautorisiertes elektrisches Einschalten am Bedienpult. Mechanisches Einschalten und Ferneinschaltung bleiben möglich. Die Sperre ist nur bei abgezogenem Schlüssel wirksam. Prevents electrical closing on the front panel. Mechanical closing and remote closing are still possible. The block is only effective if the key is withdrawn. 15 – 1 Sicherheitsschloss Safety lock Fabrikate Wirkung Manufacturer Effects Schlüsselbetätigung für Mechanisch EIN 3 Key protected operation for Mechanical ON Abschließvorrichtung gegen Verfahren aus der Trennstellung 4 Locking device against moving from the disconnected position CES IKON PROFALUX RONIS CES IKON Abschließvorrichtung in AUS-Stellung (Schaltschranktür) 5 6 Locking device in OFF position (cubicle door) PROFALUX RONIS CES IKON KIRK Abschließvorrichtung für Handkurbel PROFALUX RONIS CES Locking device for rack- IKON ing handle KIRK Schlüsselbetätigung für Mechanisch AUS 7 8 Key protected operation for Mechanical OFF Abschließvorrichtung gegen Rücksetzen der Ausgelöst-Anzeige Locking device against reset trip indicator 15 – 2 CES IKON Verhindert unautorisiertes mechanisches Einschalten. Der Mechanisch-EIN-Taster kann nur bei gestecktem Schlüssel betätigt werden (Schlüsselbetätigung). Einschalten durch Taster "Elektrisch EIN" oder Ferneinschaltung bleiben möglich. Die Sperre ist nur bei abgezogenem Schlüssel wirksam. q (Seite 15-6) Prevents unauthorised mechanical closing. The mechanical ON button can only be pressed if the key is inserted (key operation). Closing via "electrical ON" button and remote closing are still possible. The block is only effective when the key is removed. q (page 15-6) Verhindert bei Einschubschaltern das Herausziehen der Kurbel in der Trennstellung. Übertragung des Sperrsignals vom Schloss zur Abschließvorrichtung durch Bowdenzug. Ein Schalteraustausch ist möglich. Die Sperre ist nur bei abgezogenem Schlüssel wirksam. q (Seite 15-7) On draw-out circuit-breakers, it prevents drawing out of the racking handle in the disconnected position. Transmission of the blocking signal from the lock to the circuit-breaker through bowden wire. Circuit-breaker replacement is possible. The block is only effective when the key is removed. q (page 15-6) Mit dieser speziellen Funktion für Einschubschalter wird schalterunabhängig ein Einschalten verhindert und die Trennerbedingung in AUS-Stellung erfüllt. Ein unbefugtes Einschalten ist auch nach dem Auswechseln des Leistungsschalters nicht möglich. Zum Aktivieren der Abschließung muss der Leistungsschalter ausgeschaltet sein. Bei eingeschaltetem Leistungsschalter ist die Abschließvorrichtung blockiert. Die Sperre ist nur bei abgezogenem Schlüssel wirksam. Der Sicherheitsschlüssel ist nur in „AUS“ abziehbar. q (Seite 15-11) This special function for draw-out circuit-breakers prevents closing and fulfils the disconnecting condition in OFF position regardless of the circuit-breaker. Unauthorised closing is not possible either after circuit-breaker replacement. To activate the lock, the circuit-breaker must be open. If the circuit-breaker is closed, the locking device is blocked. The block is only effective when the key is removed. The safety key can only be removed in "OFF" position. q (page 15-11) Verhindert das Herausziehen der Kurbel. Der Schalter ist gegen Verfahren gesichert. Die Sperre ist nur bei abgezogenem Schlüssel wirksam. q (Seite 15-13) Prevents drawing out of the racking handle. The circuit-breaker is locked against moving. The block is only effective when the key is removed. q (page 15-13) Verhindert unautorisiertes mechanisches Ausschalten am Bedienpult. Der Mechanisch-AUS-Taster kann nur bei gestecktem Schlüssel betätigt werden (Schlüsselbetätigung). Fernausschaltung bleibt möglich. Die Sperre ist nur bei abgezogenem Schlüssel wirksam. q (Seite 15-15) Prevents unauthorised mechanical tripping. The mechanical OFF button can only be pressed if the key is inserted (key operation). Remote tripping is still possible. The block is only effective when the key is removed. q (page 15-15) Eine abschließbare Abdeckung verhindert das manuelle Rücksetzen der Ausgelöst-Anzeige nach Überstromauslösung. q (Seite 15-16) A lockable cover prevents pressing the reset button after overcurrent tripping. q (page 15-16) 15.1.1 Abschließvorrichtung in AUS-Stellung 15.1.1 Locking device in OFF position Bei abgezogenem Schlüssel ist der Schalter gegen Einschalten gesichert. If the key is ground of, closing is not possible. Abschließen Locking Zum Aktivieren der Abschließung muss der Schalter ausgeschaltet sein. To activate the lock, the circuit-breaker must be open. 2 3 1 Nachrüsten - Ausschalten und Federspeicher entspannen q (Seite 24-3) - Bedienpult abnehmen q (Seite 24-9) Steuerschieber einbauen Retrofitting - Switch off and discharge the storage spring q (page 24-3) - Remove front panel q (page 24-9) Fitting control gate (bei Einschubschaltern immer vorhanden) (always available on draw-out circuit-breakers) - Überstromauslöser ausbauen q (Seite 9-80) - Remove overcurrent release q (page 9-80) 15 – 3 1 4 3 2 6 )HWWHQ *UHDVH 5 Sicherheitsschloss einbauen Für Sicherheitsschlösser der Typen: PROFALUX, RONIS, CES, IKON, KIRK 15 – 4 Installing safety lock For safety lock typs: PROFALUX, RONIS, CES, IKON, KIRK CES 2 1 RONIS PROFALUX IKON 7 Nm 5 3 3,0 x 0,6 4 6 Für Sicherheitsschlösser der Typen: For safety lock typs: CASTELL, FORTRESS 1 CASTELL, FORTRESS 5 1) 2 1) 3 4 Auf 8 ± 0,3 mm kürzen Shorten to 8 ± 0.3 mm 6 15 – 5 Felder am Bedienpult ausbrechen Knocking out the fields on the front panel ausbrechen knock out Bedienpult Front panel entgraten! deburr! Geeignete Unterlage verwenden! Use a suitable base! Then Anschließend: - Install overcurrent release q (page 9-80) - Install front panel q (page 24-22) - Überstromauslöser einbauen q (Seite 9-80) - Bedienpult anbauen q (Seite 24-22) 15.1.2 Sicherheitsschloss Elektrisch EIN nachrüsten 15.1.2 q Installing electrical ON (page 11-7) q Elektrisch EIN nachrüsten (Seite 11-7) 15.1.3 Retrofitting safety lock for electrical ON 15.1.3 Schlüsselbetätigung für Mechanisch EIN nachrüsten Einbau des Sicherheitsschlosses unter Verwendung des Verriegelungssets. q (Seite 14-1) Retrofitting key protected operation for mechanical ON Installing the safety lock using the locking set. q (page 14-1) - Switch off and discharge the storage spring q (page 24-3) - Remove front panel q (page 24-9) - Ausschalten und Federspeicher entspannen q (Seite 24-3) - Bedienpult abnehmen q (Seite 24-9) VORSICHT CAUTION Selbstschneidende Schrauben vorsichtig anziehen! Tighten self-tapping screws carefully! Then: Anschließend: 4 Mechanisch AUS Mechanical OFF 3 2 1 - Bedienpult anbauen q (Seite 24-22) 15 – 6 Mechanisch EIN Mechanical ON - Install front panel q (page 24-22) 15.1.4 Abschließvorrichtung gegen Verfahren aus der Trennstellung nachrüsten 15.1.4 Retrofitting locking device against moving from the disconnected position - Switch off and discharge the storage spring q (page 24-3) - Remove the breaker from the guide frame q (page 24-4) - Ausschalten und Federspeicher entspannen q (Seite 24-3) - Schalter aus dem Einschubrahmen entnehmen q (Seite 24-4) Only for frame size III: Changing the query plate Nur für BG III: Umsetzen des Abfragebleches 2 3 1 (1) (1) Abfrageblech 1 2 3 Query plate 1 2 3 Sicherungsscheibe entfernen Achse herausziehen Abfrageblech entnehmen Remove the lock washer Pull out the shaft Remove the query plate on the other side 5 4 4 5 6 Abfrageblech auf der anderen Seite einsetzen Achse einschieben Sicherungsscheibe montieren 6 4 5 6 Insert the query plate on the other side Pull in the shaft Assembly the lock washer 15 – 7 Baugruppe im Einschubrahmen montieren Assamble unit into guide frame VORSICHT CAUTION Selbstschneidende Schraube vorsichtig anziehen! Tighten self-tapping screw carefully! Gr. / Size 5 2 4 0291-1 1 3 (1) (2) Bodenplatte Einschubrahmen Selbstschneidende Schraube M6 (1) (2) Base of guide frame Self-tapping screw M6 Schlossbaugruppe einbauen Installing lock unit Unter Beachtung der Länge des Bowdenzuges und der Abmessungen eine geeignete Stelle für die Montage der Schlossbaugruppe am Schaltschrank auswählen. Select a suitable place for installing the lock unit taking the length of the bowden wire at the switchgear cubicle into account. 3 1 2 mm 1 2 15 – 8 Loch in Schaltschranktür bohren … 4 Schlossbaugruppe anbauen 4 1 2 Drill hole … 4 Mount lock unit Bowdenzug justieren Adjusting the bowden wire Zum Justieren Schaltschranktür schließen, da sich sonst andere Betätigungswege für den Bowdenzug ergeben! Close the cubicle door for adjustment, because the length of the bowden wire can change by opening the cubicle door! 2 0255-01 1 1 2 Schlüssel nach rechts drehen (abschließen) Bowdenzug so weit verstellen, bis Verriegelung in gezeigter Stellung senkrecht steht 1 2 Feld aus Bedienpult ausbrechen Turn key to the right to the close position Adjust the bowden wire, until the interlock surface is in an upright position Knocking out the field on the front panel 1 0044-08 2 1 2 Felder im Bedienpult ausbrechen; geeignete Unterlage verwenden Kanten entgraten Anschließend: - Bedienpult anbauen q (Seite 24-22) 1 2 Knock out the fields in the front panel using suitable supports Deburr the edges Then: - Install front panel q (page 24-22) 15 – 9 Endkontrolle Final inspection - Unlock the locking device - Insert the circuit-breaker, move the circuit-breaker into disconnect position q (page 6-1) - Check whether the lever A is free to move and nearly in the middle of the front panel cut out. If not, take the breaker out and adjust the lever. 0044-08 - Verriegelung aufschließen - Leistungsschalter in den Einschubrahmen einsetzen, Leistungsschalter in Trennstellung schieben q (Seite 6-1) - Prüfen, ob sich der Hebel A etwa in der Mitte der Aussparung am Bedienpult befindet und sich frei bewegen kann, ggf. Leistungsschalter nochmals entnehmen und Hebel richten (1) Hebel A - Schaltschranktür schließen - Leistungsschalter in Betriebsstellung verfahren Hinweis (1) Lever A - Close the cubicle door - Move the circuit-breaker into the connect position Notes Die Abschließvorrichtung gegen Verfahren aus der Trennstellung kann nur in der Trennstellung oder bei leerem Einschubrahmen aktiviert werden. The locking device against moving from the disconnected position can only be activated in disconnected position, or when the guide frame is empty Die Aktivierung erfolgt durch Drehen des Schlüssels im Uhrzeigersinn und anschließendes Abziehen. Activation is effected by turning the key clockwise and removing the key. In Test- bzw. Betriebsstellung kann der Schlüssel nicht gedreht und abgezogen werden. The key cannot be turned and removed in test or connected position. Bei aktivierter Abschließvorrichtung kann der Leistungsschalter nicht verfahren und nicht aus dem Einschubrahmen entnommen werden. Es ist auch nicht möglich, einen Leistungsschalter in den Einschubrahmen einzusetzen. When locking device is locked, the breaker can not be moved within nor can it be taken out of the guide frame. It is also not possible to insert a breaker into a locked guide frame. Zum Aufheben der Verfahrsperre den Schlüssel erst etwas nach rechts bewegen, damit sich die Blockierung im Schloss selbst löst. To open the locking device, first turn the key a little to the right, so that the block in the lock is released all by itself. 15 – 10 15.1.5 Abschließvorrichtung in AUS-Stellung (Schaltschranktür) nachrüsten WARNUNG 15.1.5 Retrofitting locking device in OFF position (cubicle door) WARNING Vor dem Arbeiten an diesem Gerät, Anlage unbedingt spannungsfreischalten sowie das Gerät erden. Always de-energize and ground equipment before working on this equipment. - Ausschalten und Federspeicher entspannen q (Seite 24-3) - Leistungsschalter im Einschubrahmen in Wartungsposition bewegen - Bedienpult abnehmen q (Seite 24-9) - Switch off and discharge the storage spring q (page 24-3) - Move the circuit-breaker into the maintenance position in the cradle - Remove front panel q (page 24-9) 15 – 11 Schlossbaugruppe einbauen Fitting locking unit 1 2 5 3 5 Nm 4 (1) (2) (3) Schlossbaugruppe Schlossschraube M5 mit Scheibe und Mutter 2 Butzen Anschließend: - Bedienpult anbauen q (Seite 24-22) 15 – 12 (1) (2) (3) Locking unit Coach screw M5 with washer and nut 2 alignment protrusions Then: - Install front panel q (page 24-22) Öffnung in Schaltschranktür bohren Drill hole into cubicle door 77,5 (1) (2) (3) (4) 15.1.6 Unterkante Türausschnitt Mitte Bedienpult Montageebene des Schalters oder Einschubrahmens Lochdurchmesser D entsprechend Schlosstyp +1 mm Sicherheitsschloss Handkurbel nachrüsten WARNUNG (1) (2) (3) (4) Lower edge of door cutout Centre of front panel Breaker or guide frame mounting surface Hole diameter D according safety lock type +1 mm 15.1.6 Retrofitting safety lock for racking handle WARNING Vor dem Arbeiten an diesem Gerät, Anlage unbedingt spannungsfreischalten sowie das Gerät erden. Always de-energize and ground equipment before working on this equipment. - Ausschalten und Federspeicher entspannen q (Seite 24-3) - Leistungsschalter im Einschubrahmen in Wartungsposition bewegen - Bedienpult abnehmen q (Seite 24-9) - Switch off and discharge the storage spring q (page 24-3) - Move the circuit-breaker into the maintenance position in the cradle - Remove front panel q (page 24-9) 15 – 13 Arranging lock assembly Einbau Installing 0767 Schlossbaugruppe vormontieren 4 3 1 2 5 6 15 – 14 Gr. / Size 4 5 Nm 8 (1) 7 (1) Innensechskantschraube M6 mit Scheibe und Mutter Feld aus Bedienpult ausbrechen Bedienpult Front panel Hexagon socket-head screw M6 with washer and nut Knocking out the field on the front panel ausbrechen knock out entgraten! deburr! Geeignete Unterlage verwenden! Use a suitable base! Anschließend: Then: - Bedienpult anbauen q (Seite 24-22) 15.1.7 Sicherheitsschloss Mechanisch AUS nachrüsten q Sicherheitsschloss Mechanisch AUS nachrüsten (Seite 15-15) - Install front panel q (page 24-22) 15.1.7 Retrofitting safety lock for mechanical OFF q Retrofitting safety lock for mechanical OFF (page 15-15) 15 – 15 15.1.8 Sicherheitsschloss Rücksetzknopf nachrüsten 15.1.8 Retrofitting safety lock for reset button WARNUNG WARNING Vor dem Arbeiten an diesem Gerät, Anlage unbedingt spannungsfreischalten sowie das Gerät erden. Always de-energize and ground equipment before working on this equipment. - Ausschalten und Federspeicher entspannen q (Seite 24-3) - Switch off and discharge the storage spring q (page 24-3) 1 Ausbrechen Nach außen hebeln, nicht hineindrücken Knock out Push outwards, not inwards! Release 2 2 3 (1) (2) (1) (2) 15 – 16 Abdeckung mit Sicherheitsschloss Überstromauslöser (1) (2) Cover with safety lock Overcurrent release (1) Abschließen Locking 1 2 Schlüssel abziehen Withdraw key Release 2 15.1.9 Schilder aktualisieren 15.1.9 Updating the labels Hinweis Note Nach dem Einbau zusätzlicher Komponenten sind folgende Angaben mit einem weißen Permanentstift bzw. mit Aufklebern aus dem beiliegenden Etikettenbogen zu aktualisieren! Davor ist es ggf. notwendig die zu korrigierenden Zeichen mit einem schwarzen Permanentstift zu füllen. After installing additional components, add the following data using a white and indelible ink pen or the appropiate label from the set of labels supplied! If necessary the signs which have to be corrected have to be filled a black permanent pen. Ausstattungsschild des Leistungsschalters Circuit-breaker options label Typschild Einschubrahmen Type label guide frame x 15 – 17 Hinweis Die folgende Abschließvorrichtung 4 Sicherheitsschloss Fabrikate Bestell-Nr. Abschließvorrichtung gegen Verfahren aus der Trennstellung PROFALUX RONIS CES IKON O.M.R. 3WL9111-0BA85-0AA0 3WL9111-0BA86-0AA0 3WL9111-0BA81-0AA0 3WL9111-0BA83-0AA0 3WL9111-0BA84-0AA0 Z - Ergänzung Schalter Einschubrahmen R 85 R 86 R 81 R 83 R 84 ist nicht gleichzeitig einsetzbar mit einer oder allen unten aufgeführten Abschließvorrichtungen / Verriegelungen. 5 1 Sicherheitsschloss Fabrikate Bestell-Nr. Abschließvorrichtung in AUS-Stellung (Schaltschranktür) PROFALUX RONIS CES IKON KIRK 3WL9111-0BA50-0AA0 3WL9111-0BA58-0AA0 3WL9111-0BA51-0AA0 3WL9111-0BA53-0AA0 3WL9111-0BA57-0AA0 Abschließvorrichtung in AUS-Stellung (Bedienpult) PROFALUX RONIS CES IKON KIRK FORTRESS / CASTELL 3WL9111-0BA35-0AA0 3WL9111-0BA33-0AA0 3WL9111-0BA36-0AA0 3WL9111-0BA38-0AA0 3WL9111-0BA34-0AA0 3WL9111-0BA31-0AA0 Abschließvorrichtung Bestell-Nr. Z - Ergänzung Schalte Einschubrahmen R 60 R 68 R 61 R 63 R 66 S 09 S 08 S 01 S 03 S 06 S 05 Z - Ergänzung Schalter Einschubrahmen 3 Sperrvorrichtung gegen Verfahren bei offener Schaltschranktür 3WL9111-0BB15-0AA0 für Einschubschalter R50 5 Türverriegelung für Einschubrahmen R30 15 – 18 3WL9111-0BB13-0AA0 Note The following locking device 4 Safety lock Makes Order no. Locking device against moving from the disconnected position PROFALUX RONIS CES IKON O.M.R. 3WL9111-0BA85-0AA0 3WL9111-0BA86-0AA0 3WL9111-0BA81-0AA0 3WL9111-0BA83-0AA0 3WL9111-0BA84-0AA0 Z - Addendum Breaker Guide frame R 85 R 86 R 81 R 83 R 84 is mutually exclusive to one or all of the below listed locking devices / interlocks. 5 1 Safety lock Makes Order no. Locking device in OFF position (cubicle door) PROFALUX RONIS CES IKON KIRK 3WL9111-0BA50-0AA0 3WL9111-0BA58-0AA0 3WL9111-0BA51-0AA0 3WL9111-0BA53-0AA0 3WL9111-0BA57-0AA0 Locking device in OFF position (front panel) PROFALUX RONIS CES IKON KIRK FORTRESS / CASTELL 3WL9111-0BA35-0AA0 3WL9111-0BA33-0AA0 3WL9111-0BA36-0AA0 3WL9111-0BA38-0AA0 3WL9111-0BA34-0AA0 3WL9111-0BA31-0AA0 Z - Addendum Breaker Guide frame R 60 R 68 R 61 R 63 R 66 S 09 S 08 S 01 S 03 S 06 S 05 Z - Addendum Locking device Order no. 3 Locking device to prevent racking with cubicle door open 3WL9111-0BB15-0AA0 R50 5 Door locking mechanism for guide frame 3WL9111-0BB13-0AA0 R30 Breaker Guide frame 15 – 19 1 Z ergänzen / Add Z Sicherheitsschloss Safety lock Fabrikate Makes Bestell-Nr. Order no. Abschließvorrichtung in AUS-Stellung (Bedienpult) PROFALUX RONIS CES IKON KIRK FORTRESS/ CASTELL 1) 3WL9111-0BA35-0AA0 3WL9111-0BA33-0AA0 3WL9111-0BA36-0AA0 3WL9111-0BA38-0AA0 3WL9111-0BA34-0AA0 3WL9111-0BA31-0AA0 S 09 S 08 S 01 S 03 S 06 S 05 Locking device in OFF position (front panel) Schalter / Breaker Einschubrahmen / Guide frame 2 Abschließvorrichtung für Elektrisch EIN Locking device for Electrical ON CES IKON 3WL9111-0AJ03-0AA0 3WL9111-0AJ05-0AA0 C 12 C 14 3 Schlüsselbetätigung für Mechanisch EIN CES (Schloss mit Verriegelungsset) IKON Key protected operation for Mechanical ON (lock with locking set) 3WL9111-0BA22-0AA0 3WL9111-0BA24-0AA0 - 4 Abschließvorrichtung gegen Verfahren aus PROFALUX RONIS der Trennstellung CES Locking device against moving from the IKON disconnected position O.M.R. 3WL9111-0BA85-0AA0 3WL9111-0BA86-0AA0 3WL9111-0BA81-0AA0 3WL9111-0BA83-0AA0 3WL9111-0BA84-0AA0 R 85 R 86 R 81 R 83 R 84 Abschließvorrichtung in AUS-Stellung (Schaltschranktür) Locking device in OFF position (cubicle door) PROFALUX RONIS CES IKON KIRK 3WL9111-0BA50-0AA0 3WL9111-0BA58-0AA0 3WL9111-0BA51-0AA0 3WL9111-0BA53-0AA0 3WL9111-0BA57-0AA0 R 60 R 68 R 61 R 63 R 66 Sicherheitsschloss Safety lock Fabrikate Makes Bestell-Nr. Order no. Abschließvorrichtung für Handkurbel PROFALUX RONIS CES IKON O.M.R. KIRK 3WL9111-0BA76-0AA0 3WL9111-0BA77-0AA0 3WL9111-0BA73-0AA0 3WL9111-0BA75-0AA0 3WL9111-0BA78-0AA0 3WL9111-0BA80-0AA0 S 75 S 76 S 71 S 73 S 77 S 74 CES IKON 3WL9111-0BA22-0AA0 3WL9111-0BA24-0AA0 - - - - 5 6 7 Locking device for racking handle Schlüsselbetätigung für Mechanisch AUS (Schloss mit Verriegelungsset) Einbausatz ohne Schloss; Schloss muss separat beim Hersteller bestellt werden. FORTRESS: Nicht mit großem T-Schlüssel (708)! 15 – 20 Schalter / Breaker Einschubrahmen / Guide frame Locking device against reset trip indicator and sealable cover of the ETU: ETU15B ... ETU55B ETU 76B 1) Z ergänzen / Add Z Key protected operation for Mechanical OFF (lock with locking set) Abschließvorrichtung gegen Rücksetzen der Ausgelöst-Anzeige und Plombierbare Abdeckung der ETU: 8 - 3WL9111-0AT45-0AA0 3WL9111-0AT46-0AA0 1) Assembly kit without lock; the lock must be ordered separately at the manufacturer’s. FORTRESS: Not to use with large T key (708)! 15.2 Vorrichtungen für Bügelschlösser 15.2 q Sicherheitsschlösser (Seite 15-1) Padlocking provisions q Safety locks (page 15-1) (1) (7) (2) (6) (3) (5) (4) Abschließvorrichtung Wirkung Locking device Effects 1 2 Verschlussbügel für „AUS“ Der Verschlussbügel für „AUS“ kann mit bis zu 4 Bügelschlössern Ø 6 mm abgeschlossen werden. Das Einschalten des Leistungsschalters ist nicht möglich und die Trennerbedingung in AUS-Stellung wird erfüllt. Locking bracket for "OFF" The locking bracket for "OFF" can be locked with up to 4 padlocks Ø 6 mm. The circuit-breaker cannot be closed and the disconnecting condition in OFF position is fulfilled. Shutter Bei entnommenem Schalter können mit Bügelschlössern verschiedene Shutterpositionen abgeschlossen werden. q (Seite 15-24) If the circuit-breaker has been taken out, the shutter can be padlocked in various positions. q (page 15-24) 3 4 5 Verfahrschienen Guide rails Handkurbel racking handle Antriebshandhebel Spring charging lever Die Verfahrschienen können mit 2 Bügelschlössern abgeschlossen werden, so dass sie nicht mehr herausgezogen werden können. Das Einsetzen eines Schalters in den Einschubrahmen ist nicht möglich. q (Seite 15-25) The guide rails can be locked with 2 padlocks so that they cannot be drawn out anymore. It is not possible to insert a circuit-breaker in the guide frame. q (page 15-25) Das Herausziehen der Kurbel kann mit bis zu 3 Bügelschlössern verhindert werden. Der Schalter ist gegen Verfahren gesichert. q (Seite 15-25) Drawing out of the racking handle can be prevented by fitting a maximum of 3 padlocks. The circuit-breaker is then locked against moving. q (page 15-25) Der Antriebshandhebel kann mit einem Bügelschloss abgeschlossen werden. Ein Spannen des Federspeichers per Hand ist nicht möglich. q (Seite 15-25) The spring charging lever can be padlocked. The storage spring then cannot be charged manually. q (page 15-25) 15 – 21 Abschließvorrichtung Wirkung Locking device Effects 6 7 Mechanisch EIN Mechanical ON Mechanisch AUS Mechanical OFF 15.2.1 Das Betätigen des Tasters Mechanisch EIN kann durch Abschließen der Plombierkappe mit bis zu 3 Bügelschlössern verhindert werden. Einschalten durch Taster "Elektrisch EIN" oder Ferneinschaltung bleiben möglich. q (Seite 15-26) Operation of the mechanical ON button can be prevented by locking the sealing cap with a maximum of 3 padlocks. Closing via "electrical ON" button and remote closing are still possible. q (page 15-26) Das Betätigen des Tasters Mechanisch AUS kann durch Abschließen der Plombierkappe mit bis zu 3 Bügelschlössern verhindert werden. Fernausschaltung bleibt möglich. Operation of the mechanical OFF button can be prevented by locking the sealing cap with a maximum of 3 padlocks. Remote tripping is still possible. 15.2.1 Verschlussbügel für „AUS“ Locking bracket for "OFF" Bei herausgezogenem Verschlussbügel und eingehängtem Bügelschloss ist der Schalter gegen Einschalten gesichert. If the locking bracket is pulled out and the padlock is fitted, the circuit-breaker is secured against closing. Abschließen Locking 2 3 1 Nachrüsten WARNUNG Retrofitting WARNING Vor dem Arbeiten an diesem Gerät, Anlage unbedingt spannungsfreischalten sowie das Gerät erden. Always de-energize and ground equipment before working on this equipment. - Ausschalten und Federspeicher entspannen q (Seite 24-3) - Leistungsschalter im Einschubrahmen in Wartungsposition bewegen - Bedienpult abnehmen q (Seite 24-9) - Steuerschieber einbauen, sofern nicht vorhanden q (Seite 15-3) - Switch off and discharge the storage spring q (page 24-3) - Move the circuit-breaker into the maintenance position in the cradle - Remove front panel q (page 24-9) - Install control gate if not available q (page 15-3) 15 – 22 Verschlussbügel anbauen Fitting locking bracket 1 2 Latching plate in control gate Blech in Steuerschieber einrasten 1 2 3 Knocking out the field on the front panel Feld aus Bedienpult ausbrechen 1 1 2 Felder im Bedienpult ausbrechen; geeignete Unterlage verwenden Kanten entgraten Anschließend: - Bedienpult anbauen q (Seite 24-22) 4,5 Nm 2 1 2 Knock out the fields in the front panel using suitable supports Deburr the edges Then: - Install front panel q (page 24-22) 15 – 23 15.2.2 Abschließvorrichtung Shutter 15.2.2 Mit Bügelschlössern lassen sich verschiedene Positionen des Shutters sichern, wie z. B.: Locking device for shutter The shutter can be padlocked in various positions, such as e.g.: Shutter komplett geschlossen Shutter totally closed 2 1 3 1 Streifenheberpaar vorziehen bis Langloch sichtbar 1 2 3 Schloss einhängen und abschließen Mit dem zweiten Streifenheberpaar ebenso verfahren 2 3 Shutter unten geöffnet Pull both strip raisers to the front until the elongated hole is visible Fit padlock and lock Proceed in the same way with the other two strip raisers Shutter below opened 1 1 4 2 3 5 VORSICHT CAUTION Vor dem Einfahren des Schalters in die Betriebsstellung die Bügelschlösser am Shutter entfernen! Remove the padlocks at the shutter before moving the circuitbreaker to the connected position! q Shutter nachrüsten (Seite 18-2) 15 – 24 q Retrofitting shutter (page 18-2) 15.2.3 Abschließvorrichtung Verfahrschienen 15.2.3 Standardmäßig vorhanden. Locking device for guide rails Available as standard. ;8mm 15.2.4 Abschließvorrichtung Handkurbel 15.2.4 Standardmäßig vorhanden. Bis zu 3 Bügelschlösser möglich. Locking device for racking handle Available as standard. Up to 3 padlocks possible. max. ; 8 mm 1 3 2 15.2.5 Abschließvorrichtung Antriebshandhebel 15.2.5 Locking device for spring charging lever 1 max. ; 8 mm 2 Nachrüsten - Ausschalten und Federspeicher entspannen q (Seite 24-3) - Leistungsschalter im Einschubrahmen in Wartungsposition bewegen - Bedienpult abnehmen q (Seite 24-9) Retrofitting - Switch off and discharge the storage spring q (page 24-3) - Move the circuit-breaker into the maintenance position in the cradle - Remove front panel q (page 24-9) 15 – 25 2 Ausbrechen Knock out 1 Anschließend: Then: - Bedienpult anbauen q (Seite 24-22) 15.2.6 Abschließvorrichtung für Taster Mechanisch AUS Plombierklappe nachrüsten - Install front panel q (page 24-22) 15.2.6 Locking device for Mechanical OFF button Retrofitting sealing cover WARNUNG WARNING Vor dem Arbeiten an diesem Gerät, Anlage unbedingt spannungsfreischalten sowie das Gerät erden. Always de-energize and ground equipment before working on this equipment. - Ausschalten und Federspeicher entspannen q (Seite 24-3) - Leistungsschalter im Einschubrahmen in Wartungsposition bewegen - Bedienpult abnehmen q (Seite 24-9) - Switch off and discharge the storage spring q (page 24-3) - Move the circuit-breaker into the maintenance position in the cradle - Remove front panel q (page 24-9) Siehe auch q Verriegelungsset (Seite 14-1) See also q Locking set (page 14-1) VORSICHT CAUTION Selbstschneidende Schrauben vorsichtig anziehen! Tighten self-tapping screws carefully! 15 – 26 Mechanisch AUS Mechanical OFF 3 2 1 Anschließend: Mechanisch EIN Mechanical ON Then: - Bedienpult anbauen q (Seite 24-22) 15.2.7 Abschließvorrichtung für Taster Mechanisch EIN PZ 1 - Install front panel q (page 24-22) 15.2.7 q Abschließvorrichtung für Taster Mechanisch AUS (Seite 15-26) Locking device for Mechanical ON button q Locking device for Mechanical OFF button (page 15-26) Hinweis Note Nach dem Einbau zusätzlicher Komponenten sind folgende Angaben mit einem weißen Permanentstift bzw. mit Aufklebern aus dem beiliegenden Etikettenbogen zu aktualisieren! Davor ist es ggf. notwendig die zu korrigierenden Zeichen mit einem schwarzen Permanentstift zu füllen. After installing additional components, add the following data using a white and indelible ink pen or the appropriate label from the set of labels supplied! If necessary the signs which have to be corrected have to be filled with a black permanent pen. 15 – 27 15.2.8 Schilder aktualisieren 6 Updating the labels Hinweis Note Nach dem Einbau zusätzlicher Komponenten sind folgende Angaben mit einem weißen Permanentstift bzw. mit Aufklebern aus dem beiliegenden Etikettenbogen zu aktualisieren! Davor ist es ggf. notwendig die zu korrigierenden Zeichen mit einem schwarzen Permanentstift zu füllen. After installing additional components, add the following data using a white and indelible ink pen or the appropiate label from the set of labels supplied! If necessary the signs which have to be corrected have to be filled a black permanent pen. Ausstattungsschild des Leistungsschalters Circuit-breaker options label Typschild Einschubrahmen Type label guide frame Abschließvorrichtung Locking device 1 15.2.8 Verschlussbügel „AUS“ (mit bis zu 4 Bügelschlössern abschließbar) Locking bracket for "OFF" (lockable with up to 4 padlocks) Abschließvorrichtung für Antriebshandhebel Locking device for spring charging lever 15 – 28 Bestell-Nr. Order no. Z ergänzen / Add Z Schalter / Breaker Einschubrahmen / Guide frame 3WL9111-0BA41-0AA0 S 07 - 3WL9111-0BA71-0AA0 S 33 - 16 (1) (2) (3) (4) Plombiervorrichtungen Plombierkappe über Taster Elektrisch EIN Plombierklappe über Taster Mechanisch EIN Plombiervorrichtung Überstromauslöser Plombierklappe über Taster Mechanisch AUS Plombierkappe Elektrisch EIN q Elektrisch EIN nachrüsten (Seite 11-4) Plombierklappen Mechanisch EIN und AUS q Plombierklappe nachrüsten (Seite 15-26) Plombiervorrichtung Überstromauslöser q Plombier- und Abschließvorrichtung (Seite 9-86) 16 (1) (2) (3) (4) Sealing facilities Sealing cap for Electrical ON button Sealing cover for Mechanical ON button Sealing facility for overcurrent release Sealing cover for Mechanical OFF button Sealing cap for Electrical ON q Installing electrical ON (page 11-4) Sealing cover for Mechanical ON and OFF q Retrofitting sealing cover (page 15-26) Sealing facility for overcurrent release q Sealing and locking device (page 9-86) 16 – 1 17 Sperrvorrichtungen 17 Interlocks 0064-06-04_nu (3) (2) 1 2 3 17 – 1 (1) siehe Bestellhinweis, q (Seite 15-1) refer to order instruction, q (page 15-1) Sperrvorrichtung Interlock Wirkung Effects Sperrvorrichtung gegen Verfahren bei offener Schaltschranktür für Einschubschalter Die Handkurbel wird bei offener Schaltschranktür blockiert und kann nicht herausgezogen werden. Ein Verfahren des Einschubschalters ist nicht möglich. Die Sperre wirkt nur auf die eingeschobene Handkurbel. q (Seite 17-2) Locking device to prevent racking with cubicle door open The racking handle is blocked if the cubicle door is open and it cannot be drawn out. Racking the draw-out circuit-breaker is not possible. The block only actuates on the inserted racking handle. q (page 17-2) Verriegelung der Schaltschranktür Schaltschranktür kann nicht geöffnet werden, wenn - der Festeinbauschalter eingeschaltet ist (Übertragung des Sperrsignals mittels Bowdenzug) bzw. - sich der Einschubschalter in der Betriebsstellung befindet. q (Seite 17-3) Cubicle door locking mechanism The cubicle door cannot be opened - if the fixed-mounted circuit-breaker is closed (signal transmission through bowden wire) or - if the draw-out circuit-breaker is in service position. q (page 17-3) Zugangssperre über Taster Mechanisch EIN und AUS (Verriegelungsset) Taster Mechanisch EIN und AUS sind jeweils mit einer Kappe abgedeckt, die eine Betätigung nur mit einem Werkzeug zulässt. q (Seite 17-7) Access block over mechanical ON and OFF button (locking set) The mechanical ON and OFF buttons are each covered in such a way that operation is only possible with a tool. q (page 17-7) 17.1 Sperrvorrichtung gegen Verfahren bei offener Schaltschranktür - Ausschalten und Federspeicher entspannen q (Seite 24-3) - Schalter aus dem Einschubrahmen entnehmen q (Seite 24-4) 17.1 Interlock to prevent racking with cubicle door open - Switch off and discharge the storage spring q (page 24-3) - Remove the breaker from the guide frame q (page 24-4) Einbau der Verriegelung 1 Fitting interlocking Feder einhängen Engage tension spring 4 Feder einhängen Engage tension spring 2 Bodenplatte Einschubrahmen base of guide frame Funktion prüfen - Schalter in Einschubrahmen einsetzen und in Trennstellung schieben q (Seite 6-1) - Herausziehen der Handkurbel darf nicht möglich sein 3 5 prüfen check Function check - Insert the circuit-breaker in the guide frame and push into disconnected position q (page 6-1) - It must not be possible to draw out the racking handle 17 – 2 17.2 Verriegelung der Schaltschranktür 17.2 Cubicle door interlock DANGER GEFAHR Gefährliche Spannung. Hazardous voltages. Kann Tod, schwere Personenschäden sowie Schäden an Geräten und Ausrüstung bewirken. Will cause death, serious personal injury, or equipment/ property damage. Vor dem Arbeiten an diesem Gerät, Anlage unbedingt spannungsfreischalten sowie das Gerät erden. Always de-energize and ground equipment before working on this equipment. Leistungsschalter ausschalten und aus dem Einschubrahmen herausnehmen. Open circuit-breaker, and remove from guide frame. 17.2.1 Riegel montieren Festeinbauschalter - Ausschalten und Federspeicher entspannen q (Seite 24-3) - Bedienpult abnehmen q (Seite 24-9) 17 – 3 17.2.1 Fit bolt Fixed-mounted breaker - Switch off and discharge the storage spring q (page 24-3) - Remove front panel q (page 24-9) VORSICHT CAUTION Selbstschneidende Schraube vorsichtig anziehen! Tighten self-tapping screws carefully! 2 PZ 3 2 5 Nm (1) (2) 3 Selbstschneidende Schraube Bowdenzug 1 (1) (2) Self-tapping screw Bowden wire 3 4 5 7 8 9 6 Einstellung des Bowdenzuges: 1 2 3 Schalter ausschalten. Den Sperrriegel mittels Bowdenzug-Stellschraube in die gerade Position einstellen. Kontermutter am Bowdenzug anziehen. Anschließend: - Bedienpult anbauen q (Seite 24-22) Adjustment of bowden wire: 1 2 3 CLOSE the breaker. Adjust latching lever to straight position by adjusting the bowden wire screw. Secure counter nut on bowden wire. Then: - Fit front panel q (page 24-22) 17 – 4 Einschubschalter Drawout circuit-breaker - Leistungsschalter ausschalten und Federspeicher entspannen q (Seite 23-2) - Einschubschalter in Wartungsstellung ziehen q (Seite 23-3) - Bedienpult abnehmen q (Seite 24-9) - Information über Anschlussklemmenverdrahtung q (Seite 8-1) 1 - OPEN the circuit-breaker and discharge the storage spring q (page 23-2) - Move circuit-breaker into maintenance position q (page 23-3) - Remove front panel q (page 24-9) - For Terminal wiring information q (page 8-1) Feder einhängen Engage tension spring 5 Feder einhängen Engage tension spring 4 2 3 Anschließend: andrücken + halten press + hold Then: - Einschubschalter in Einschubrahmen einsetzen, in Trennstellung schieben q (Seite 6-1) 17.2.2 Schaltschranktür bohren - Insert the draw-out circuit-breaker into the guide frame, push into disconnected position q (page 6-1) 17.2.2 Cubicle door interlock drill pattern 38 (1) (2) (3) (4) (5) (6) 17 – 5 Mitte Bedienpult Türausschnitt für Bedienpult Innenseite Schaltschranktür 2 Befestigungsbohrungen Ø 5,5 mm Öffnung zum Überlisten Ø 5,5 mm Montagefläche (1) (2) (3) (4) (5) (6) Centre of front panel Door cutout for front panel Inner side of cubicle door 2 mounting holes Ø 5.5 mm Hole for outwitting Ø 5.5 mm Mounting surface 17.2.3 (1) (2) (3) (4) (5) 17.2.4 Falle an Schaltschranktür montieren Klammer mit Öffnung zum Überlisten Innenseite Schaltschranktür Falle 2 Scheiben ISO7089 - 5 2 Sechskantmuttern M5 (DIN EN ISO 4032) Funktionskontrolle Festeinbauschalter: 17.2.3 (1) (2) (3) (4) (5) 17.2.4 Clip with hole for outwitting Inner side of cubicle door Catch 2 washers ISO7089 - 5 2 Hexagonal nuts M5 (DIN EN ISO 4032) Function check Fixed-mounted circuit-breaker: - Schaltschranktür schließen - Federspeicher spannen - Einschalten Einbauschalter: Installing catch on cubicle door - Close cubicle door - Charge the spring storage - Close Draw-out circuit-breaker - Schalter in Betriebsstellung verfahren - Schaltschranktür schließen - Rack the circuit-breaker into connected position - Close the cubicle door Tür muss jetzt verriegelt sein. The door must be locked now. Prüfen der „Überlistungsmöglichkeit“: Checking the outwitting function: (1) (2) (3) (1) (2) (3) Riegelstellung bei eingeschaltetem Schalter Falle in Normallage Falle im überlisteten Zustand Anschließend: - Festeinbauschalter: Federspeicher entspannen q (Seite 24-3) Lock position with circuit-breaker closed Trap in normal position Trap in bypassed position Then: - Fixed-mounted circuit-breaker: discharge the spring storage q (page 24-3) 17 – 6 17.3 Zugangssperre über Taster Mechanisch EIN und AUS nachrüsten 17.3 (Werkzeugbetätigung) Retrofitting access block over mechanical ON and OFF button (tool operation) WARNUNG WARNING Vor dem Arbeiten an diesem Gerät, Anlage unbedingt spannungsfreischalten sowie das Gerät erden. Always de-energize and ground equipment before working on this equipment. - Ausschalten und Federspeicher entspannen q (Seite 24-3) - Bedienpult abnehmen q (Seite 24-9) - Switch off and discharge the spring storage q (page 24-3) - Remove front panel q (page 24-9) VORSICHT CAUTION Selbstschneidende Schrauben vorsichtig anziehen! Tighten self-tapping screws carefully! Mechanisch AUS Mechanical OFF 3 : 6,35 mm PZ 1 2 1 Mechanisch EIN Mechanical ON Anschließend: - Bedienpult anbauen q (Seite 24-22) 17 – 7 Then: - Fit front panel q (page 24-22) 17.4 Schilder aktualisieren 17.4 Updating the labels Hinweis Note Nach dem Einbau zusätzlicher Komponenten sind folgende Angaben mit einem weißen Permanentstift bzw. mit Aufklebern aus dem beiliegenden Etikettenbogen zu aktualisieren! Davor ist es ggf. notwendig die zu korrigierenden Zeichen mit einem schwarzen Permanentstift zu füllen. After installing additional components, add the following data using a white and indelible ink pen or the appropriate label from the set of labels supplied! If necessary the signs which have to be corrected have to be filled with a black permanent pen. Ausstattungsschild des Leistungsschalters Circuit-breaker options label Typschild Einschubrahmen Type label guide frame Z ergänzen / Add Z Sperrvorrichtung / Interlock Bestell-Nr. / Order no. 1 Einschaltsperre bei offener Schaltschranktür für Festeinbauschalter Closing lockout with cubicle door open for fixedmounted breaker 3WL9111-0BB11-0AA0 S 40 - 2 Einschaltsperre bei offener Schaltschranktür für Einschubschalter Closing lockout with cubicle door open for drawout breaker 3WL9111-0BB14-0AA0 - R 40 3 Sperrvorrichtung gegen Verfahren bei offener Schaltschranktür für Einschubschalter Locking device to prevent racking with cubicle door open 3WL9111-0BB15-0AA0 - R 50 4 Türverriegelung für Festeinbauschalter Door locking mechanism for fixed-mounted breaker 3WL9111-0BB12-0AA0 S 30 - 5 Türverriegelung für Einschubrahmen Door locking mechanism for guide frame 3WL9111-0BB13-0AA0 - R 30 6 Zugangssperre über Taster Mechanisch EIN und AUS (Verriegelungsset) Access block over mechanical CLOSE and OPEN button (lokking set) 3WL9111-0BA21-0AA0 - - Schalter / Breaker Einschubrahmen / Guide frame 17 – 8 18 Zusatzausrüstungen für Einschubrahmen 18 Options for guide frame VORSICHT CAUTION Vor der Durchführung von Arbeiten an der Einschubrückwand und am Shutter ist die Schaltanlage freizuschalten. Before start working on the frame rear wall disconnect the line power supply. ACHTUNG NOTICE Vor dem Einsetzen des Leistungsschalters in den Einschubrahmen müssen die Fenster des Shutters geschlossen sein und die schwarzen Plastik-Streifenheber sich in der Mittelposition befinden, um eine Beschädigung des Shutters zu verhindern und eine sichere Funktion zu gewährleisten Before the breaker will be inserted in the guide frame, the shutter windows must be closed and the black plastic stripe lifters must be in the middle position as shown, to prevent shutter damage and to ensure proper shutter operation. 2 1 1 2 18.1 Für Servicezwecke können die Fenster des Shutters durch die schwarzen Streifenheber geöffnet und fixiert werden. Durch leichtes Betätigen (Drücken) der Streifenheber springen diese in die Grundstellung zurück und schließen die Fenster des Shutters. Shutter 1 2 18.1 The shutter windows can be opened and fixed by the black plastic stripe lifter. The black plastic stripe lifters will remove into the initial position and will close the shutter window by slight pushing on the black plastic stripe lifters as shown. Shutter Die Verschlussstreifen des Shutters verschließen die Lamellenkontakte des Einschubrahmens, sobald der Einschubschalter in die Position „TEST“ verfahren wurde. Damit wird die Trennerbedingung bereits in der Position „TEST“ erfüllt. The shutter locking straps lock the laminated contacts of the guide frame as soon as the draw-out circuit-breaker is taken in the "TEST" position. So the isolating condition is fulfilled in the "TEST" position. Mit den Streifenhebern können die Verschlussstreifen manuell geöffnet werden. The locking straps can be lifted manually with the strap lifters. Die Lage der Streifenheber lässt sich mit Bügelschlössern in verschiedenen Positionen fest fixieren und gegen unbefugtes Verändern sichern. q (Seite 15-24) The strap lifters can be fixed in several positions by means of padlocks and secured against unauthorised changes. q (page 15-24) 18 – 1 (1) (2) (3) 18.1.1 Verschlussstreifen oben 4 Streifenheber Verschlussstreifen unten (1) (2) (3) Nachrüsten Upper locking strap 4 strap lifters Lower locking strap 18.1.1 Retrofitting WARNUNG WARNING Vor dem Arbeiten an diesem Gerät, Anlage unbedingt spannungsfreischalten sowie das Gerät erden. Always de-energize and ground equipment before working on this equipment. - Ausschalten und Federspeicher entspannen q (Seite 24-3) - Einschubschalter aus Einschubrahmen entnehmen q (Seite 24-4) - Switch off and discharge the storage spring q (page 24-3) - Remove the breaker from the guide frame q (page 24-4) Betätiger zusammenbauen und mit Feder komplettieren Assembling actuator and completing with spring 3 2 1 (1) (2) Zusammenbau für rechte Seite Zusammenbau für linke Seite (1) (2) Assembly for right side Assembly for left side 18 – 2 Betätiger einsetzen Inserting actuator 3 1 2 Shutter anbauen Fitting shutter VORSICHT CAUTION Selbstschneidende Schrauben vorsichtig anziehen! Tighten self-tapping screws carefully! 1 PZ 1 2 (1) (2) 18 – 3 Selbstschneidende Schrauben (Anzahl abhängig von Schalterausführung) Shutter mit Streifenhebern und Verschlussstreifen (1) (2) Tighten self-tapping screws (number according to circuitbreaker version) Shutter with strap lifters and locking straps Nur für Baugröße III: Frame size III only: 2 PZ 1 1 1 2 Shutter schräg in die Schlitze der unteren Traverse einsetzen Shutter an die Rückwand klappen und mit 5 oder 7 Plastite Schrauben entsprechend 3- oder 4-poliger Ausführung 1 Insert shutter plate in the lower slot of sheet metal traverse 2 Turn up shutter plate against rear wall and fasten with selftapping srews, 5 screws for 3-pol version and 7 screws for 4-pol. version Hinweis Note Für den nächsten Arbeitsschritt, Shutter in Betätiger einrasten, kann es vorteilhaft sein, die unteren Schrauben erst nach dem Einrasten einzuschrauben. For the next step - latching the shutter in the actuator - it may be advantageous to fit the lower screws after latching. Shutter in Betätiger einrasten und Feder einhängen Latching shutter in actuator and fitting spring 4 1 3 2 18 – 4 Hinweis Note Sicher stellen, dass Verschlussstreifen nicht klemmen! Dazu nach dem Einbau Verschlussstreifen oben und unten einmal öffnen. Assure proper operation by moving each locking strap independently. Anschließend: Then: - Schalter in Einschubrahmen einsetzen und in Betriebsstellung verfahren q (Seite 6-1) - Insert the circuit-breaker in the guide frame and rack into connected position q (page 6-1) Zugangslöcher verschließen Closing the access holes Zugangslöcher zum Anschließen der frontseitigen Hauptstrombahnen können mit beiliegenden Klebepads verschlossen werden. Access holes can be closed after bolting the line side bars by using the enclosed adhesive tapes. 18.1.2 18.1.2 Typschild aktualisieren Updating the type label Hinweis Note Nach dem Einbau zusätzlicher Komponenten sind folgende Angaben mit einem weißen Permanentstift bzw. mit Aufklebern aus dem beiliegenden Etikettenbogen zu aktualisieren! Davor ist es ggf. notwendig die zu korrigierenden Zeichen mit einem schwarzen Permanentstift zu füllen. After installing additional components, add the following data using a white and indelible ink pen or the appropiate label from the set of labels supplied! If necessary the signs which have to be corrected have to be filled a black permanent pen. 18 – 5 Polzahl Pole number Baugröße Frame size 3 Shutter 4 Bestell-Nummer Order number I 3WL9111-0AP04-0AA0 II 3WL9111-0AP06-0AA0 III 3WL9111-0AP07-0AA0 I 3WL9111-0AP08-0AA0 II 3WL9111-0AP11-0AA0 III 3WL9111-0AP12-0AA0 Z ergänzen add Z R 21 18.2 Kodierung Schalter - Einschubrahmen 18.2 Coding between circuit-breaker and guide frame 18.2.1 Nennstromkodierung 18.2.1 Rated current coding Einschubschalter und Einschubrahmen sind standardmäßig mit einer Nennstromkodierung ausgestattet. Draw-out circuit-breakers and guide frames are equipped with a current coding as standard. Diese stellt sicher, dass in einen Einschubrahmen nur solche Schalter eingesetzt werden können, deren Kontaktmesser zu den Lamellenkontakten des Einschubrahmens passen. This coding ensures that only those circuit-breakers can be inserted in the guide frame whose contact blades fit into the laminated contacts of the guide frame. (1) (2) (3) (4) (5) (6) (7) (1) (2) (3) (4) (5) (6) (7) Einschubrahmen, linke Innenseite; rechte Innenseite analog Kodierbolzen an der Verfahrschiene im Einschubrahmen Selbstschneidende Schraube M5x12 Verfahrschiene Einschubschalter, rechte Seite; linke Seite analog; Kodierbolzen am Einschubschalter Selbstschneidende Schraube M4x16 Bei Bestellung eines Einschubschalters mit Einschubrahmen ist die Nennstromkodierung bereits werkseitig eingerichtet. Soll die Umrüstung eines Festeinbauschalters in einen Einschubschalter erfolgen, muss die Nennstromkodierung nachgerüstet werden. Guide frame, left inner side, right inner side analogous Coding bolt on the guide rail in the guide frame Self-tapping screw M5x12 Guide rail Draw-out circuit-breaker, right side; left side analogous; Coding bolt at the draw-out circuit-breaker Self-tapping screw M4x16 When a draw-out circuit-breaker is ordered with the guide frame, the rated current coding is already provided at the factory. If a fixedmounted circuit-breaker has to be converted into a draw-out circuitbreaker, the rated current coding must be retrofitted. 18 – 6 Nennstromkodierung nachrüsten Retrofitting the rated current coding Die Kodierbolzen sind an den Schalterfüßen und an den Verfahrschienen nach folgendem Schema anzubringen: Mount the coding bolts at the circuit-breaker feet and at the guide rails according to the following scheme: Kodierung / Coding Baugröße Frame size Schalter Breaker Bemessungsstrom Rating current links left 1000 A I 1600 A 2000 A H-Klasse/H-class 2000 A 2500 A II 3200 A 4000 A 4000 A III 5000 A 6300 A 18 – 7 rechts right Einschubrahmen Frame guide links left rechts right 18.2.2 Ausstattungsabhängige Kodierung 18.2.2 Option-related coding Einschubschalter und Einschubrahmen können nachträglich mit einer ausstattungsabhängigen Kodierung ausgerüstet werden. Draw-out circuit-breakers and guide frames can be retrofitted with a version-related coding. Damit lassen sich Schalter und Einschubrahmen unter Berücksichtigung unterschiedlicher Ausstattungen unverwechselbar zuordnen. Sind Schalter und Einschubrahmen unterschiedlich kodiert, ist das Einfahren des Schalters nicht möglich. In this way, the circuit-breaker and the guide frame can be assigned to each other unmistakably considering different equipment. If the circuit-breaker and the guide frame have a different coding, it will not be possible to rack in the circuit-breaker. Es gibt 36 wählbare Kodiermöglichkeiten. There are 36 selectable coding possibilities. Vor dem Einbau: Before installation: - Ausschalten und Federspeicher entspannen q (Seite 24-3) - Einschubschalter aus Einschubrahmen entnehmen q (Seite 24-4) - Switch off and discharge the storage spring q (page 24-3) - Remove the breaker from the guide frame q (page 24-4) Kodierung am Schalter anbringen Fitting coding on circuit-breaker 2 6 Nm 8 3 1 4 5 PZ 2 6 Nm (1) (2) (3) (4) Kodierstift Kodierplatte Innensechskantschraube M5 mit Spannscheibe und Mutter Senkkopfschraube M5 mit Vierkantmutter Für Baugröße III: - Kodierplatte horizontal gespiegelt montieren - Zum Befestigen werden nur die beiden Schrauben ohne Muttern und Scheibe benötigt (1) (2) (3) (4) Coding pin Coding plate Hexagon socket-head screw M5 with strain washer und nut Countersunk-head bolt M5 with square nut For frame size III: - Mount coding plate in horizontally mirrored position - For fixing, only the two bolts are required without nuts and washer 18 – 8 Kodierung am Einschubrahmen anbringen Fitting coding on guide frame Gr. / Size 5 8+1 Nm (1) Max. 4x Innensechskantschraube M6 mit Spannscheibe und Mutter als Kodierelement Anschließend: (1) Max. 4x Hexagon socket-head screw M6 with strain washer and nut as coding element Then: - Schalter in Einschubrahmen einsetzen und in Betriebsstellung verfahren q (Seite 6-1) - Insert the circuit-breaker in the guide frame and rack into connected position q (page 6-1) Bestell-Nummer Order number Bestell-Nummer Order number Ausstattungsabhängige Kodierung Option-related coding 3WL9111-0AR12-0AA0 Kodiervarianten Coding variants Verwendet für: Used for: Nr./No. % = mit Kodierelement != ohne Kodierelement 2 18 – 9 % = with coding element != without coding element Verwendet für: Used for: Nr./No. % = mit Kodierelement != ohne Kodierelement % = with coding element != without coding element 3 4 5 6 7 8 9 10 11 18 – 10 Verwendet für: Used for: Nr./No. % = mit Kodierelement != ohne Kodierelement 12 13 14 15 16 17 18 19 20 18 – 11 % = with coding element != without coding element Verwendet für: Used for: Nr./No. % = mit Kodierelement != ohne Kodierelement % = with coding element != without coding element 21 22 23 24 25 26 27 28 29 18 – 12 Verwendet für: Used for: Nr./No. % = mit Kodierelement != ohne Kodierelement 30 31 32 33 34 35 36 18 – 13 % = with coding element != without coding element 18.3 Positionsmeldeschalter für Einschubrahmen Am Einschubrahmen können Positionsmeldeschalter nachgerüstet werden. Mit deren Hilfe lässt sich die Position des Schalters im Einschubrahmen kundenseitig auswerten. 18.3 Position signalling switches for guide frame The guide frame can be retrofitted with position signaling switches. These optional accessories allow the customer to evaluate the position of the circuit-breaker in the cradle. (1) (1) Positionsmeldeschaltermodul (1) Position signaling switch module Es stehen drei Ausführungen zur Verfügung. Three versions are available. Ausführung 1: Version 1: - S30 Meldeschalter für Trennstellung - S31 Meldeschalter für Prüfstellung - S34 Meldeschalter für Betriebsstellung Ausführung 2: - S30 Meldeschalter für Trennstellung - S31 / S32 Meldeschalter für Prüfstellung - S33 / S34 / S35 Meldeschalter für Betriebsstellung Ausführung 3: - S30 / S31 / S32 / S33 / S34 / S35 Meldeschalter für Betriebsstellung Anschlüsse Eine Reihe von Zugfederklemmen für Nennquerschnitte 1x0,5 mm2 bis 1x2,5 mm2. - S30 Signaling switch for disconnected position - S31 Signaling switch for test position - S34 Signaling switch for connected position Version 2: - S30 Signaling switch for disconnected position - S31 / S32 Signaling switch for test position - S33 / S34 / S35 Signaling switch for connected position Version 3: - S30 / S31 / S32 / S33 / S34 / S35 Signaling switch for connected position Terminals One row of tension spring terminals for cross section 1xAWG 20 … 1xAWG 14. 18 – 14 Schalterposition und Kontakte Signaling switch Meldeschalter Contacts Kontakte Circuit-breaker position and contact state Schalterposition / Circuit-breaker position Disconnected position Trennstellung Test position Prüfstellung Connected position Betriebsstellung S30 S31 / S32 S33 / S34/ S35 Version 3 S30/ S31 / S32 / S33 / S34/ S35 - Kontakt geöffnet - Contact open - Kontakt geschlossen - Contact closed Montage Installation 4 1 2 6 5 18 – 15 3 8 7 Anschließend: Then: - Schalter in Einschubrahmen einsetzen und in Betriebsstelung verfahren q (Seite 6-1) - Insert the circuit-breaker in the guide frame and rack into connected position q (page 6-1) Typschild aktualisieren Updating the type label Hinweis Note Nach dem Einbau zusätzlicher Komponenten sind folgende Angaben mit einem weißen Permanentstift bzw. mit Aufklebern aus dem beiliegenden Etikettenbogen zu aktualisieren! Davor ist es ggf. notwendig die zu korrigierenden Zeichen mit einem schwarzen Permanentstift zu füllen. After installing additional components, add the following data using a white and indelible ink pen or the appropriate label from the set of labels supplied! If necessary the signs which have to be corrected have to be filled with a black permanent pen. Catalog numbers Bestell-Nummern Ausführung Version Bestell-Nr. / Order no. Z ergänzen / add Z 1 3WL9111-0AH11-0AA0 R 15 2 3WL9111-0AH12-0AA0 R 16 3 3WL9111-0AH13-0AA0 R 17 18 – 16 19 Gegenseitige mechanische Verriegelung HINWEIS 19 Mutual mechanical circuit-breaker interlocking NOTE Für die Funktion der Verriegelung sind in der Schaltanlage Mindest- For a proper function of the interlocking device, the following minimum prerequisites have to be met in the switchgear: voraussetzungen zu schaffen: 1 2 3 4 5 6 7 8 1 Bowdenzüge sind möglichst gerade, wenig gekrümmt zu verlegen. Biegeradien des Bowdenzuges müssen >500 mm ausgeführt sein. Im Bowdenzugverlauf darf die Summe aller Krümmungswinkel 540° nicht überschreiten. Bei vertikaler Anordnung zu verriegelnder Leistungsschalter sollen die Verriegelungsmechaniken fluchten. Zu verriegelnde Leistungsschalter müssen so angeordnet sein, dass 2 m oder 4,5 m lange Bowdenzüge unter Einhaltung der in den Punkten 1. - 4. genannten Bedingungen optimal verlegt werden können. Die Bowdenzugverlegung muss vor der Justage der Verriegelung fixiert werden (Kabelbinder o.ä.) Durch die Wahl der Schaltanlagenfachbreite muss die Justagefreiheit für die Verriegelung gewährleistet sein. Öffnungen und Durchbrüche in Anlagenelementen sind so zu gestalten, dass durchgeführte Bowdenzüge im Verlauf nicht richtungsorientiert oder behindert werden. 2 3 4 5 6 7 8 Bowden wires are to laid out as straight and as unbowed as possible. Bending radii of the Bowden wires must exceed > 500 mm. The total curving of the Bowden wire must not exceed 540 degrees. When stacking interlocked circuit-breakers vertically, the interlocking devices shall be in line with each other. Circuit-breakers intended to be interlocked must be positioned, so that Bowden wires of 2 m or 4.5 m length can be laid out optimally, while complying with the conditions of paragraphs 1. to 4. Before adjusting the interlocking device, the laying of Bowden wires must be fixed, e.g. using cable ties. The width of the switchgear section must be selected as wide as necessary to ensure space for an adjustment of the interlocking device. Openings have to be created in the switchgear components, so that Bowden wires are not forced in their orientation or direction and that they are not hindered in their run. Ermöglicht in der Standardausführung verschiedene Varianten der gegenseitigen Verriegelung von maximal drei Leistungsschaltern. In the standard design there are various versions for the mutual interlocking system available, comprising a maximum of three circuit-breakers. Verriegelungsbaustein Version 1 Mutual mechanical interlocking module version 1 (1) (2) (1) (2) 19 – 1 Einschubrahmen Festeinbauschalter Guide frame Fixed-mounted breaker Verriegelungsbaustein Version 2 Mutual mechanical interlocking module version 2 (1) (2) (1) (2) Einschubrahmen Festeinbauschalter (1) (2) Guide frame Fixed-mounted breaker 19.1 Konfigurationen 19.1 Configurations 19.1.1 Allgemeine Hinweise 19.1.1 General notes S1 S2 (1) Version 1 S3 Version 2 (2) (1) (2) (3) (3) (4) 0428 (6) (4) (5) (5) (6) (1) (2) Ausgang 1 Version 1: Bohrung für Plastite Schraube mit Zahnscheibe für die Konfigurierung der gegenseitigen Verriegelung Version 2: Bohrung mit Setzmutter für Zylinderkopfschraube M6 mit Scheibe für die Konfigurierung der gegenseitigen Verriegelung (1) (2) (3) (4) (5) (6) Indexbügel Eingang 1 Eingang 2 Ausgang 2 (3) (4) (5) (6) Output 1 Version 1: Holes for plastite screw with toothed lock washer for the configuration of the mutual mechanical circuit-breaker interlocking Version 2: Holes with press nut for cheese-head M6 with washer for the configuration of the mutual mechanical circuit-breaker interlocking Non-interchangeable brackets Input 1 Input 2 Output 2 19 – 2 In den nachstehenden Konfigurationsanleitungen gelten folgende Bezeichnungen: In the following configuration instructions, the following designations apply: A1 : Ausgangsinformation 1 A1 : Output information 1 E1 : Eingangsinformation 1 E1 : Input information 1 S1 : Leistungsschalter 1 S1 : Circuit-breaker 1 Um z.B. die Ausgangsinformation 1 des Leistungsschalters 1 mit der Eingangsinformation 2 des Schalters 2 zu koppeln, wird im folgenden die Abkürzung S1 A1 - S2 E2 verwendet. For example, in order to couple the output information 1 of circuitbreaker 1 with the input information 2 of circuit-breaker 2, the abbreviation S1 A1 - S2 E2 is used. Die Zustände der Schalter werden im Bedienpult wie folgt angezeigt: The states of the circuit-breaker are shown at the front panel: Schalter eingeschaltet Circuit-breaker closed Schalter ausgeschaltet und nicht einschaltbereit (verriegelt) Circuit-breaker open and not ready to close (interlocked) Schalter ausgeschaltet und einschaltbereit (nicht Circuit-breaker open and ready to close verriegelt) (not interlocked) 19 – 3 19.1.2 Zwei Schalter gegeneinander Beispiel Example 19.1.2 Two circuit-breakers against each other Mögliche Schalterzustände Possible circuit-breaker states S2 S1 S2 S1 Beschreibung: Description: Ein Schalter kann jeweils nur dann eingeschaltet werden, wenn der andere ausgeschaltet ist. A circuit-breaker can be closed only if the other is open. Benötigtes Material: Materials required: Jeder Schalter hat einen Verriegelungsbaustein sowie einen Bowdenzug. Each circuit-breaker has an interlocking module and a bowden wire. Bestell-Nr. q (Seite 19-17) Order no. q (page 19-17) Anschlüsse der Bowdenzüge: Connections of bowden wires: 1. Bowdenzug : S1 A1 - S2 E1 1st bowden wire: S1 A1 - S2 E1 2. Bowdenzug : S2 A1 - S1 E1 2nd bowden wire: S2 A1 - S1 E1 Bemerkung: Sx Ex An diesen Anschlüssen sind die Zylinderschrauben mit Spannscheiben in die Indexbügel einzuschrauben. Note: Sx Ex At these connections the cheese-head screws with tensioning washers must be screwed into the non-interchangeable bracket. 19 – 4 19.1.3 Drei Schalter untereinander Beispiel Example 19.1.3 Three circuit-breakers among each other Mögliche Schalterzustände Possible circuit-breaker states S2 S1 S3 S3 S1 S2 Beschreibung: Description: Es können immer zwei beliebige Schalter eingeschaltet werden, wobei der Dritte jeweils verriegelt wird. Any two circuit-breakers can be closed, with the third being interlocked. Benötigtes Material: Materials required: Jeder Schalter hat einen Verriegelungsbaustein sowie einen Bowdenzug. Drei weitere Bowdenzüge sind getrennt zu bestellen. Each circuit-breaker has an interlocking module and a bowden wire. Three additional bowden wires must be ordered separately. Bestell-Nr. q (Seite 19-17) Order no. q (page 19-17) Anschlüsse der Bowdenzüge: Connections of bowden wires: 1. Bowdenzug: S1 A1 - S2 E1 1st bowden wire: S1 A1 - S2 E1 2. Bowdenzug: S1 A2 - S3 E1 2nd bowden wire: S1 A2 - S3 E1 3. Bowdenzug: S2 A1 - S1 E1 3rd bowden wire: S2 A1 - S1 E1 4. Bowdenzug: S2 A2 - S3 E2 4th bowden wire: S2 A2 - S3 E2 5. Bowdenzug: S3 A1 - S1 E2 5th bowden wire: S3 A1 - S1 E2 6. Bowdenzug: S3 A2 - S2 E2 6th bowden wire: S3 A2 - S2 E2 19 – 5 19.1.4 Drei Schalter untereinander (Einer von Dreien) Beispiel Example Three circuit-breakers among each other (1 out of 3) Mögliche Schalterzustände Possible circuit-breaker states S2 S1 S1 19.1.4 S2 S3 S3 Beschreibung: Description: Wenn ein Schalter eingeschaltet ist, können die beiden Anderen nicht eingeschaltet werden. When one circuit-breaker is closed, the other two cannot be closed. Benötigtes Material: Materials required: Jeder Schalter hat einen Verriegelungsbaustein sowie einen Bowdenzug. Drei weitere Bowdenzüge sind getrennt zu bestellen. Each circuit-breaker has an interlocking module and a bowden wire. Three additional bowden wires must be ordered separately. Bestell-Nr. q (Seite 19-17) Order no. q (page 19-17) Anschlüsse der Bowdenzüge: Connections of bowden wires: 1. Bowdenzug: S1 A1 - S2 E1 1st bowden wire: S1 A1 - S2 E1 2. Bowdenzug: S1 A2 - S3 E1 2nd bowden wire: S1 A2 - S3 E1 3. Bowdenzug: S2 A1 - S1 E1 3rd bowden wire: S2 A1 - S1 E1 4. Bowdenzug: S2 A2 - S3 E2 4th bowden wire: S2 A2 - S3 E2 5. Bowdenzug: S3 A1 - S1 E2 5th bowden wire: S3 A1 - S1 E2 6. Bowdenzug: S3 A2 - S2 E2 6th bowden wire: S3 A2 - S2 E2 Bemerkung: Sx Ex An diesen Anschlüssen sind die Zylinderschrauben mit Spannscheiben in die Indexbügel einzuschrauben. Note: Sx Ex At these connections, the cheese-head screws must be screwed into the non-interchangeable brackets with strain washers. 19 – 6 19.1.5 Drei Schalter gegeneinander Beispiel Example Three circuit-breakers against each other Mögliche Schalterzustände Possible circuit-breaker states S2 S1 S1 19.1.5 S2 S3 S3 Beschreibung: Description: Es können zwei Schalter (S1, S3) unabhängig voneinander ein- und ausgeschaltet werden, wobei der Dritte (S2) nur einschaltbereit ist, wenn die beiden Anderen ausgeschaltet sind. Ist der Dritte eingeschaltet, so können die beiden anderen Schalter nicht eingeschaltet werden. Two circuit-breakers (S1, S3) can be independently opened and closed, the third (S2) being ready to close only if the other two are open. If the third is closed, the other two cannot be closed. Benötigtes Material: Materials required: Jeder Schalter hat einen Verriegelungsbaustein sowie einen Bowdenzug. Ein Bowdenzug ist getrennt zu bestellen. Each circuit-breaker has an interlocking module and a bowden wire. A bowden wire must be ordered separately. Bestell-Nr. q (Seite 19-17) Order no. q (page 19-17) Anschlüsse der Bowdenzüge Connections of bowden wires: : 1. Bowdenzug: S1 A1 - S2 E1 1st bowden wire: S1 A1 - S2 E1 2. Bowdenzug: S2 A1 - S1 E1 2nd bowden wire: S2 A1 - S1 E1 3. Bowdenzug: S2 A2 - S3 E1 3rd bowden wire: S2 A2 - S3 E1 4. Bowdenzug: S3 A1 - S2 E2 4th bowden wire: S3 A1 - S2 E2 Bemerkung: Sx Ex An diesen Anschlüssen sind die Zylinderschrauben mit Spannscheiben in die Indexbügel einzuschrauben. 19 – 7 Note: Sx Ex At these connections, the cheese-head screws must be screwed into the non-interchangeable brackets with strain washers. 19.1.6 Drei Schalter, zwei davon gegeneinander Beispiel Example 19.1.6 Three circuit-breakers, two of them against each other Mögliche Schalterzustände Possible circuit-breaker states S2 S1 S3 S3 S1 S2 Beschreibung: Description: Ein Schalter (S1) kann unabhängig von den beiden Anderen einund ausgeschaltet werden. Die beiden anderen Schalter schließen sich gegenseitig aus, d. h. einer kann nur eingeschaltet werden, wenn der Andere ausgeschaltet ist. One circuit-breaker (S1) can be opened and closed independently of the two others. The two others cancel each other out, i.e. one can only be closed if the other is open. Benötigtes Material: Materials required: Zwei von drei Schaltern (S2, S3) haben je einen Verriegelungsbaustein sowie je einen Bowdenzug. Two of the three circuit-breakers (S2, S3) each have an interlocking module and a bowden wire. Bestell-Nr. q (Seite 19-17) Order no. q (page 19-17) Anschlüsse der Bowdenzüge: Connections of bowden wires: 1. Bowdenzug: S2 A1 - S3 E1 1st bowden wire: S2 A1 - S3 E1 2. Bowdenzug: S3 A1 - S2 E1 2nd bowden wire: S3 A1 - S2 E1 Bemerkung: Sx Ex An diesen Anschlüssen sind die Zylinderschrauben mit Spannscheiben in die Indexbügel einzuschrauben. Note: Sx Ex At these connections the cheese-head screws must be screwed into the non-interchangeable brackets with strain washers. 19 – 8 19.2 Verriegelung nachrüsten 19.2 Retrofitting interlocking module WARNUNG WARNING Vor dem Arbeiten an diesem Gerät, Anlage unbedingt spannungsfreischalten sowie das Gerät erden. Always de-energize and ground equipment before working on this equipment. Vor dem Entfernen jeglicher Abdeckungen oder des Bedienpults des Leistungsschalters unbedingt Speicherfeder entspannen (Seite 23-2). Leistungsschalter im Einschubrahmen in Wartungsposition bewegen (Seite 23-3) und Bedienpult abnehmen (Seite 23-8). Discharge springs before removing barriers/covers (page 23-2). Move circuit breaker into maintenance position (page 23-3) and Removing front panel (page 23-8). Austausch des Überstromauslösers (Seite 9-43) Replacing the trip unit (page 9-43). WARNUNG Vor dem Arbeiten an diesem Gerät, Anlage unbedingt spannungsfreischalten sowie das Gerät erden. WARNING Always de-energize and ground equipment before working on this equipment. - Switch off and discharge the storage spring q (page 24-3) - Remove the breaker from the guide frame q (page 24-4) or remove the fixed-mounted breaker if necessary q (page 5-1) - Remove front panel and side cover on the right, if required q (page 24-9) - Ausschalten und Federspeicher entspannen q (Seite 24-3) - Einschubschalter aus Einschubrahmen entnehmen q (Seite 24-4) bzw. Festeinbauschalter ggf. ausbauen q (Seite 5-1) - Bedienpult und ggf. rechte seitliche Abdeckung abnehmen q (Seite 24-9) 19.2.1 Zwischenwelle und Kupplung einbauen 19.2.1 Installing intermediate shaft and coupling Verriegelungsbaustein Version 1 mutual mechanical interlooking module version 1 Verriegelungsbaustein Version 2 mutual mechanical interlooking module version 2 mit Ring with ring 19 – 9 Einbau Fitting 1 Baugröße Frame size Länge L (mm) Length L (mm) I 48 II 118 III 232 19 – 10 Für Baugrösse III, Einschubausführung: For frame size III, draw out version: Verriegelungsbaustein Version 1 mutual mechanical interlocking module version 1 Verriegelungsbaustein Version 2 mutual mechanical interlocking module version 2 mit Ring with ring 5 2 3 6 Halten! Hold! 4 8 9 7 HINWEIS NOTE Im Arbeitsschritt 9 muss die Zwischenwelle in eine Bohrung im Schalterinneren einrasten. Erst dann lässt sich im Arbeitsschritt 10 die Halterung der Zwischenwelle in die Führung der Seitenwand eingesetzen. In working step 9, the intermediate shaft must engage in a hole inside the circuit-breaker. Only then it will be possible - in working step 10 - to fit the support for the intermediate shaft in the guide of the side wall. 19 – 11 Funktionsprobe Anschließend: - Bedienpult und ggf. rechte seitliche Abdeckung wieder anbauen q (Seite 24-22) Function check Then: - Fit back front panel and side cover on the right, if it was removed q (page 24-22) 19 – 12 19.2.2 Verriegelungsbaustein anbauen 19.2.2 Fitting interlocking module Hinweis Note Bei nicht ausreichender Montagefreiheit im Schaltschrank an der rechten Schalterseite kann es vorteilhaft sein, vor dem Anbau des Verriegelungsbausteins die ausgangsseitigen Bowdenzüge vorzumontieren. q (Seite 19-15) If there isn't enough free space for installation on the right side of the circuit-breaker inside the cubicle, it may be advantageous to pre-assemble the bowden wires on the outgoing side before fitting the interlocking module. q (page 19-15) Verriegelungsbaustein Version 1 mutual mechanical interlocking module version 1 2 Gr. / Size 5 3 1 8 Nm (1) (2) (3) (4) (5) (6) 19 – 13 Einschubrahmen Festeinbauschalter 2x Innensechskantschraube M6x12 mit Spannscheibe 1x Innensechskantschraube M6x25 mit Spannscheibe und Vierkantmutter 2x Innensechskantschraube M6x35 mit Spannscheibe 2x Setzmutter; zieht sich beim Festschrauben in den Schalterfuß; ggf. Mutter festhalten (1) (2) (3) (4) (5) (6) Guide frame Fixed-mounted breaker 2x Hexagon socket-head screw M6x12 with strain washer 1x Hexagon socket-head screw M6x25 with strain washer and square nut 2x Hexagon socket-head screw M6x35 with strain washer 2x press nut; penetrates into mounting foot by tightening; if necessary, prevent press nut from rotating Verriegelungsbaustein Version 2 mutual mechanical interlocking module version 2 (2) (3) (4) (1) 3 2 1 Gr. / Size 5 8 Nm (5) (7) (3) (1) (2) (3) (4) (5) (6) (7) (6) (7) Einschubrahmen Festeinbauschalter 2x Innensechskantschraube M6x12 mit Spannscheibe 1x Innensechskantschraube M6x25 mit Spannscheibe und Vierkantmutter 2x Innensechskantschraube M6x35 mit Spannscheibe 2x Setzmutter; zieht sich beim Festschrauben in den Schalterfuß; ggf. Mutter festhalten 1x Unterlegscheibe mit großem Außendurchmesser Anschließend: - Festeinbauschalter wieder einbauen q (Seite 5-1) (1) (2) (3) (4) (5) (6) (7) Guide frame Fixed-mounted breaker 2x Hexagon socket-head screw M6x12 with strain washer 1x Hexagon socket-head screw M6x25 with strain washer and square nut 2x Hexagon socket-head screw M6x35 with strain washer 2x press nut; penetrates into mounting foot by tightening; if necessary, prevent press nut from rotating 1x washer with large outside diameter Then: - Install back the breaker q (page 5-1) 19 – 14 19.2.3 Bowdenzüge montieren 19.2.3 Bowdenzug am Ausgang einbauen Mounting the bowden wires Fitting bowden wire on output site 6 4 Fully screwed in Voll eingeschraubt 1 5 2 Bowdenzug verlegen Fixing the bowden wire 0256-2_u 3 7 R >20” (R >500 mm) Bowdenzug am Eingang des zu verriegelnden Schalters einbauen Installing the bowden wire at the entrance of the circuit-breaker to be interlocked 2 1 6 3 5 4 19 – 15 7 0945 0946 8 (1) (2) Ausführung mit Indexbügel aus Stahl Indexbügel (1) (2) Bowdenzug justieren Version with steel index clip Index clip Adjusting the bowden wire 1 2 3 4 Anschließend: Then: - Entsprechend der vorgesehenen Konfiguration der gegenseitigen Schalterverriegelung ggf. Zylinderschrauben mit Scheiben, bzw. Plastite-Schrauben mit Zahnscheiben in die entsprechenden Indexbügel einschrauben q Konfigurationen (Seite 19-2) - Einschubschalter in Einschubrahmen einsetzen, in Trennstellung schieben, ggf. Schaltschranktür schließen und in Betriebsstellung verfahren q (Seite 6-1) 19.2.4 Funktionstest - Schaltschranktüren schließen - Federspeicher der zu verriegelnden Schalter spannen q (Seite 6-4) - Nacheinander die verschiedenen Möglichkeiten der vorgesehenen Verriegelungskonfiguration testen - Ggf. Bowdenzüge nachjustieren - According to the planned configuration of the mutual circuit-breaker interlocking, screw cheese-head bolts with toothed lock washers, respectively plastite-screws with lock washers into the associated index clips if applicable q Configurations (page 19-2) - Insert the draw-out circuit-breaker into the guide frame, push into disconnected position, close the cubicle door if required and rack it into connected position q (page 6-1) 19.2.4 Function check - Close the cubicle doors - Charge storage spring of circuit-breakers to be interlocked q (page 6-4) - Test the various possibilities of the planned interlocking configuration one after the other - Re-adjust bowden wires if necessary 19 – 16 Anschließend: Then: - Leistungsschalter ausschalten und Federspeicher entspannenq (Seite 23-2) - Leistungsschalter im Einschubrahmen in Wartungsposition bewegenq (Seite 23-3) - Bedienpult abnehmenq (Seite 23-8) - Information über Anschlussklemmenverdrahtung q (Seite 8-1) HINWEIS Folgende Wartungshinweise beachten: 1 2 3 4 5 19.2.5 Die Einstellung der Bowdenzüge muss nach den ersten 100 Schaltoperationen kontrolliert und gegebenenfalls nachjustiert werden! Nach je weiteren 1000 Schaltoperationen oder min. nach jedem Jahr muss die Einstellung der Verriegelung kontrolliert und gegebenenfalls nachjustiert werden! Bei der Kontrolle sind die Bowdenzüge auf Knick- und Scheuerstellen, aufgespleißte Drähte der Stahlseele, Beschädigungen der Schlauchfassungen und der Justageeinheit (Schlauchfassung mit Einstellgewinde und Mutter) zu überprüfen und gegebenenfalls auszuwechseln. Bei erschwerten Umgebungsbedingungen, z. B. erhöhte Umgebungstemperatur oder starkes Verschmutzungspotential, müssen diese Wartungszyklen angepasst verringert werden! Bei Strombahnwartung der Leistungsschalter, spätestens nach Erreichung der maximal zulässigen elektrischen Lastwechsel der jeweiligen Baugröße, sind die Verschleißteile der Verriegelung zu wechseln. Siehe Tabelle (Seite 19-18). Schilder aktualisieren - OPEN the circuit-breaker and discharge the storage spring q (page 23-2) - Move circuit-breaker into maintenance position q (page 23-3) - Remove front panel q (page 23-8) - For Terminal wiring information q (page 8-1) Note The following maintenance advises have to be taken into account: 1 2 3 4 5 The adjustment of the bowden cables needs to be checked after the first 100 switching operations and has to be readjusted if necessary! The adjustment of the mutual interlocking device needs to be checked and if necessary readjusted every 1000 operations or at least once every year! During the inspection, the bowden cables have to be checked against kinks and grinding points, split wires of the steel soul, damages of the tube settings and the adjustment unit (tube setting with thread and nut) and have to be readjusted if necessary! In addition, the movability of movable parts of the interlocking device in their bearings needs to be examined. At aggravated environmental conditions e.g. increased environmental temperature or strong pollution potential the cycles of maintenance have to be reduced! When maintaining the pole assembly of the circuit-breaker, but not later than at the maximum number of electrical operations, the wearing parts of the interlocking device have to be replaced. See table (page 19-18). 19.2.5 Updating labels Hinweis Note Nach dem Einbau zusätzlicher Komponenten sind folgende Angaben mit einem weißen Permanentstift bzw. mit Aufklebern aus dem beiliegenden Etikettenbogen zu aktualisieren! Davor ist es ggf. notwendig die zu korrigierenden Zeichen mit einem schwarzen Permanentstift zu füllen. After installing additional components, add the following data using a white and indelible ink pen or the appropiate label from the set of labels supplied! If necessary the signs which have to be corrected have to be filled a black permanent pen. Ausstattungsschild des Leistungsschalters 19 – 17 Circuit-breaker options label Typschild des Einschubrahmens Gegenseitige mechanische Schalterverriegelung Mutual mechanical interlocking Type label guide frame Z ergänzen / add Z Bestell-Nr. Order no. für Einschubpaket 1) for draw-out package 1) 3WL9111-0BB24-0AA0 R 55 - für Einschubrahmen 1) for guide frame 1) 3WL9111-0BB22-0AA0 - R 56 für Einschubschalter for draw-out circuit-breaker 3WL9111-0BB23-0AA0 R 57 - Für Festeinbauschalter 1) for fixed-mounted circuit-breaker 1) 3WL9111-0BB21-0AA0 S 55 - für Verriegelungsbaustein Version 1 for mutual mechanical interlocking module version 1 Einschubrahmen Guide frame 3WL9111-0BB25-0AA0 - - 3WL9111-0BB26-0AA0 - - 3WL9111-0BB27-0AA0 - - für Verriegelungsbaustein Version 2 for mutual mechanical interlocking module version 2 Schalter / Breaker 3WL9111-0BB45-0AA0 - - - - - - - - Verschleißteile der Verriegelung Wearing parts of the mutual mechanical interlocking module 1 Bowdenzug 2000 mm (M5) 1 Bowden wire 2000 mm 1 Bowdenzug 3000 mm (M5) 1 Bowden wire 3000 mm (M5) 1 Bowdenzug 4500 mm (M5) 1 Bowden wire 4500 mm(M5) 1 Bowdenzug 2000 mm (M8x1) 1 Bowden wire 2000 mm (M8x1) 1 Bowdenzug 3000 mm (M8x1) 1 Bowden wire 3000 mm (M8x1) 1 Bowdenzug 4500 mm (M8x1) 1 Bowden wire 4500 mm (M8x1) 1 Kupplung am Schalter (mit Ring) 1 Coupling (with ring) 3WL9111-0BB46-0AA0 3WL9111-0BB47-0AA0 3WL9112-8AH47-0AA0 Muss ein Verriegelungsbaustein der Version 1 und der Version 2 miteinander in Funktion gebracht werden, sind die dazugehörigen Bowdenzüge (siehe Bestell-MLFB) zu verwenden. If version 1 and version 2 of locking devices should be used in combination, the corresponding bowden cables (see ordering MFLB) have to be used. 1) Mit Bowdenzug 2000 mm. 1) With bowden wire 2000 mm. 19 – 18 20 Phasentrennwände 20 Phase barriers Als Störlichtbogenbarrieren können vom Anlagenbauer Phasentrennwände aus Isoliermaterial hergestellt werden. An der Rückwand der Festeinbauschalter bzw. der Einschubrahmen sind Führungsnuten und Befestigungslöcher vorhanden. The panel manufacturer can provide phase barriers made of insulating material as a short-circuit barrier. The necessary guide slots and fixing points are provided on the rear wall of the fixed-mounted circuit-breakers and the guide frames. Verwendbares Material : Suitable material : z. B. HG-Etromax PM GPO3 der Firma Isola AG e. g. HG-Etromax PM GPO3 manufactured by Isola AG (1) (2) (1) (2) 8 Befestigungslöcher für selbstschneidende Schrauben ∅ 4,2 mm, Einschraubtiefe max. 16 mm Führungsnut 4 mm breit Vertikal / Vertical (1) (2) 8 mounting holes for self-tapping screw ∅ 4.2 mm, screw-in depth max. 16 mm Guide slot 4 mm wide Horizontal / Horizontal Festeinbau/Fixed version 20 – 1 Vertikal / Vertical Horizontal / Horizontal Einschubtechnik/Draw out version 20 – 2 21 Lichtbogenkammerabdeckungen 21 Arc chute covers Die Lichtbogenkammerabdeckung steht als optionale Zusatzausrüstung für Einschubrahmen zur Verfügung. The arc chute cover is an accessory for guide frames. Sie dient dem Schutz von Schaltanlagenteilen, die sich unmittelbar über dem Leistungsschalter befinden. The cover is provided to protect switchgear components which are located directly above the circuit-breaker. 21.1 Nachrüsten 21.1 Retrofitting DANGER GEFAHR Gefährliche Spannung. Hazardous voltages. Kann Tod, schwere Personenschäden sowie Schäden an Geräten und Ausrüstung bewirken. Will cause death, serious personal injury, or equipment/ property damage. Vor dem Arbeiten an diesem Gerät, Anlage unbedingt spannungsfreischalten sowie das Gerät erden. Always de-energize and ground equipment before working on this equipment. Leistungsschalter ausschalten und aus dem Einschubrahmen herausnehmen. Open circuit-breaker, and remove from guide frame. - Ausschalten und Federspeicher entspannen q (Seite 24-3) - Schalter aus dem Einschubrahmen entnehmen q (Seite 24-4) - Switch off and discharge the spring storage q (page 24-3) - Remove the breaker from the guide frame q (page 24-4) Baugröße I und II Frame size I and II 5 4 3 1 2 1 2 3 4 5 Je ein Befestigungsblech über rechte und linke Befestigungsbohrungen der Haube schieben Abschottblech einlegen „Haube hinten“ einsetzen „Haube oben“ hinter Befestigungslappen der Seitenwände einführen und auf den Einschubrahmen auflegen 1) Abbildung kann vom Original abweichen 21 – 1 1 1) 2 3 4 Slip one quick nut each over the right-side and left-side fixing holes of the cover Insert partition Insert "rear cover" Insert "upper cover" behind fixing strap of side walls and 5 lay on guide frame 1) Image may differ from original 1 12 Nm 2 T 30 Gr. / Size 4 1 2 „Haube oben“ befestigen: 4x M6x16 mit Kegelmutter 2x M5x12 mit Spannscheibe 1 2 3 Nm "Fixing upper cover": 4x M6x16 with cone nut 2x M5x12 with strain washer Baugröße III Frame size III 4 5 6 1 Gr. / Size 4 3 3 Nm 2 1 2 3 4 5 6 Je ein Befestigungsblech über rechte und linke Befestigungsbohrungen der Haube schieben Befestigungsbleche in Abschottblech einsetzen Abschottblech in den Querträger einlegen und befestigen: 2x M5x12 mit Spannscheibe Haube hinter Befestigungslappen der Seitenwände einführen und absenken 1 2 3 4 5 Slip one quick nut each over the right-side and left-side fixing holes of the cover Insert quick nuts in partition Lay partition into cross member and fix: 2xM5x12 with strain washer Insert cover behind fixing strap of side walls and 6 set down 21 – 2 3 12 Nm 2 4 T 30 Gr. / Size 4 3 Nm 1 1 2 3 4 21.2 1 Hintere Arretierungszungen der Haube in die Schlitze des Querträgers drücken Haube herunter drücken Haube befestigen: 6x M6x16 mit Kegelmutter 2x M5x12 mit Spannscheibe Typschild Einschubrahmen aktualisieren 2 3 4 21.2 Press rear cover retainers into the slots of the cross member Press cover down Fix cover: 6x M6x16 with cone nut 2x M5x12 with strain washer Updating the type label guide frame Hinweis Note Nach dem Einbau zusätzlicher Komponenten sind folgende Angaben mit einem weißen Permanentstift bzw. mit Aufklebern aus dem beiliegenden Etikettenbogen zu aktualisieren! Davor ist es ggf. notwendig die zu korrigierenden Zeichen mit einem schwarzen Permanentstift zu füllen. After installing additional components, add the following data using a white and indelible ink pen or the appropiate label from the set of labels supplied! If necessary the signs which have to be corrected have to be filled a black permanent pen. Polzahl No. of poles Lichtbogenkammerabdeckung für Einschubrahmen Arc chute cover for guide frame 21 – 3 3 4 Baugröße Frame size Bestell-Nummer Order number I 3WL9111-0AS32-0AA0 II 3WL9111-0AS36-0AA0 III 3WL9111-0AS38-0AA0 I 3WL9111-0AS42-0AA0 II 3WL9111-0AS44-0AA0 III 3WL9111-0AS46-0AA0 Z ergänzen add Z R 10 22 Türdichtungsrahmen IP41 22 Maßbild des Türausschnittes Door sealing frame IP41 Dimension drawing of door cutout Vorderansicht der Schaltschranktür Frontview of the cubicle door (1) (2) (3) (1) (2) (3) Montagefläche des Schalters oder Einschubrahmens Mitte Bedienpult 8 Stück Montagebohrungen für Türdichtungsrahmen Mounting surface of circuit-breaker or guide frame Centre of front panel Eight mounting holes for the door sealing frame 22 – 1 Türdichtungsrahmen einbauen Installing the sealing frame Achtung ! Notice ! 1 2 3 Bestell-Nummer Order number Türdichtungsrahmen Door sealing frame 22 – 2 3WL9111-0AP01-0AA0 23 Schutzabdeckung IP55 23 Protective cover IP55 23.1 Maßbild Türausschnitt und Befestigungsbohrungen 23.1 Dimension drawing for door cutout and mounting holes 341 295 5 5,5 340 72 72 0309-3_de 68 70 (1) (2) (3) Mitte Bedienpult 6 Stück Montagebohrungen für Scharniere Montagefläche des Schalters oder des Einschubrahmens (1) (2) (3) Center of breaker front panel 6 mounting holes for hinges Mounting surface of circuit-breaker or guide frame 23 – 1 Mounting shrouding cover Anbau der Schutzabdeckung Gr. / Size 4 4,8 Nm Gr. / Size 4 3,7 Nm (1) (2) (3) (4) (5) Schaltschranktür mit Türausschnitt Schutzabdeckung Verriegelungshebel 2x Scharnier mit Öffnungsfunktion (rechts und links) 8x Innensechskantschraube M5 mit Scheibe und Sicherungsmutter (1) (2) (3) (4) (5) Cubicle door with door cut out Shrouding cover Hinge pin 2x hinge with (right and left) with opening function 8x Hexagon socket crew M5 with washer and safety nut Anbau des Scharniers an der rechten Seite in gleicher Weise. Installation of the right side hinge in the same fashion. Handhabung: Handling: Zum Öffnen der Haube Verriegelungshebel am Scharnier rechts oder links zusammendrücken oder zum Abnehmen beide Scharniere entriegeln. Squeeze hinge pins together to open shrouding cover left (or right) or remove entirely (both). Bestell-Nummer Order number Schutzabdeckung Shrouding cover 23 – 2 3WL9111-0AP02-0AA0 Anbau der Schutzabdeckung Mounting of protective cover (1) 4,8 Nm (2) (4) (3) (1) (2) (3) (4) Schaltschranktür mit Türausschnitt Schutzabdeckung 6x Innensechskantschraube M5 mit Scheibe und Sicherungsmutter Scharnier mit Öffnungsfunktion (rechts und links) Anbau des Scharniers an der rechten Seite in gleicher Weise. Handhabung 1 (1) (2) (3) (4) Cubicle door with door cutout Protective cover 6x Hexagon socket-head screw M5 with washers and safety nuts Hinges with opening function (right and left) Installation of the right side hinge in the same fashion. Handling 0731_nu 2 Bestell-Nummer Catalog number Catalog No. Bestell-Nr. Protective cover Schutzabdeckung 3WL9111-0AP02-0AA0 23 – 3 24 Wartung GEFAHR 24 Maintenance DANGER Beim Betrieb elektrischer Geräte stehen zwangsläufig bestimmte Teile dieser Geräte unter gefährlicher Spannung. Unsachgemäßer Umgang mit diesen Geräten kann deshalb zu Tod oder schweren Körperverletzungen sowie erheblichen Sachschäden führen. Hazardous voltages are present in this electrical equipment during operation. Beachten Sie daher bei Instandhaltungsmaßnahmen an diesem Gerät alle in diesem Kapitel und auf dem Produkt selbst aufgeführten Hinweise. Die Instandhaltung darf nur durch entsprechend qualifiziertes Personal erfolgen. Vor Beginn der Arbeiten muss der spannungsfreie Zustand der Schaltanlage hergestellt und während der Arbeiten sichergestellt werden (gemäß EN 50 110-1, DIN VDE 0105-100 und BGV A2). Die fünf Sicherheitsregeln sind einzuhalten: - Freischalten - Gegen Wiedereinschalten sichern - Spannungsfreiheit feststellen - Erden und Kurzschließen - Benachbarte, unter Spannung stehende Teile abdecken oder abschranken Das Gerät ist vom Netz zu trennen. Es dürfen nur vom Hersteller zugelassene Ersatzteile verwendet werden. Die vorgeschriebenen Wartungsintervalle sowie die Anweisungen für Reparatur und Austausch sind unbedingt einzuhalten, um Schäden an Personen und Anlagen zu vermeiden. The instructions contained in this chapter and on product labels have to be followed. Failure to properly maintain the equipment can result in death, severe personal injury or substantial property damage. Maintenance shall be performed only by qualified personnel. Before beginning to work, de-energize the panel and secure the de-energized state during work (according to EN 50 110-1, DIN VDE 0105-100 and BGV A2). Observe the Five Safety Rules. - Disconnecting - Securing against reclosing - Checking safe insolation from supply - Earthing and short-circuiting - Covering or providing barriers to adjacent live parts Disconnect the equipment from the supply. Use only authorized spare parts in the repair of the equipment. The inspection intervals as well as the instructions for repair and replacement shall be duly observed, to avert damages from persons and gear. Qualifiziertes Personal Qualified Personnel im Sinne dieser Betriebsanleitung bzw. der Warnhinweise auf dem Produkt selbst sind Personen, die mit Aufstellung, Montage, Inbetriebsetzung und Betrieb des Produktes vertraut sind und über die ihrer Tätigkeit entsprechenden Qualifikationen verfügen, wie z.B.: For the purpose of this instruction manual and these product labels, a "qualified person" is one who is familiar with the installation, construction and operation of the equipment and the hazards involved. In addition, he has the following qualifications: d)Ausbildung oder Unterweisung bzw. Berechtigung, Stromkreise und Geräte/Systeme gemäß den Standards der Sicherheitstechnik ein- und auszuschalten, zu erden und zu kennzeichnen. e) Ausbildung oder Unterweisung gemäß den Standards der Sicherheitstechnik in Pflege und Gebrauch angemessener Sicherheitsausrüstung. f) Schulung in Erster Hilfe. d)Is trained and authorized to energize, de-energize, clear, ground and tag circuits and equipment in accordance with established safety practices. 24 – 1 e) Is trained in the proper care and use of protective equipment in accordance with established safety practices. f) Is trained in rendering first aid. In Abhängigkeit von den jeweiligen Betriebsbedingungen sind die Lichtbogenkammern und das Kontaktsystem zu inspizieren. Insbesondere nach erfolgter Kurzschlussabschaltung ist deren Zustand noch vor dem erneuten Einschalten zu kontrollieren. Draw-Out guide frames with arc-chute covers installed, have to be replaced after no more than three short-circuit interruptions of the circuit-breaker. Strombahnen sind je nach Zustand zu wechseln, jedoch spätestens nach Contact assemblies need to be changed according their condition, but at least after - 10.000 Schaltungen in BGI und BGII; - 5.000 Schaltungen in BGIII; - 1.000 Schaltungen in BGII und BGIII bei 1000 V Einsatz - 10.000 operations in FSI and FSII; - 5.000 operations in FSIII; - 1.000 operations in FSII and FSIII when used in 1000 V appliances Der Betreiber hat in Abhängigkeit von den Einsatzbedingungen des Schalters Inspektionsintervalle festzulegen: The switchgear operator has to be determine inspection intervals depending on the breaker application conditions: - - mindestens 1x pro Jahr nach schweren Abschaltungen nach Auslösungen durch den elektronischen Überstromauslöser nachgeschaltete Leistungstrennschalter sind ebenfalls zu überprüfen min. 1x per annum after interruption of heavy loads after trips by the overcurrent release (trip unit) down stream connected non-automatic circuit-breakers have to be inspected also Im Rahmen der Inspektionen und/oder nach 1000 Nennstromabschaltungen sind zu kontrollieren: (max. Schaltspiele entsprechend Katalogangaben) During the inspection and/or after 1000 switching operations, the following items must be examined: (max. operations see catalog) - Lichtbogenkammern und Kontaktsystem elektrische u. mechanische Funktionen des Schalter Funktion der mechanischen Ein- und Ausschaltung Haupt- und Steuerstromkreise, Funktion und Anschlüsse auf festen Sitz prüfen - Einstellungen des elektronischen Überstromauslösers sind auf Plausibilität und entsprechend den Anlagenverhältnissen zu überprüfen, ggf. zu korrigieren - Lichtbogenkammerabdeckung am Einschubrahmen sind spätestens nach drei Kurzschlussabschaltungen des Leistungsschalters auszutauschen. Nach Erreichen der Lebensdauer ist die Entsorgung des Schaltgerätes/ ausgetauschter Teile gemäß den geltenden rechtlichen Bestimmungen durch den Betreiber zu veranlassen. Draw-Out guide frames with arc-chute covers installed, have to be replaced after no more than three short-circuit interruptions of the circuit-breaker. If the breaker endurance is exhausted, then the breaker and old spare parts are to be disposed of, according to the effective legal regulations. Je nach Zustand, spätestens jedoch nach 10 000 Schaltungen sind die Lichtbogenkammern und das Kontaktsystem zu erneuern. The arc chutes and the contact system must be replaced depending upon their condition, but latest after 10,000 switching operations. Ebenso kann es abhängig von der Beanspruchung des Leistungsschalters erforderlich sein, das Antriebssystem nach 10 000 Schaltungen auszutauschen. Depending on the circuit-breaker stress it may also be necessary to replace the operating system after 10,000 switching operations. arc chutes and contact systems electrical and mechanical functionality of the breaker mechanical on- / off-functionality main and auxiliary circuits, function and connecting quality - plausibility control of trip unit settings and correction, if necessary 24 – 2 24.1 Vorbereitung von Wartungsarbeiten 24.1 Preparation for maintenance 24.1.1 Ausschalten und Federspeicher entspannen 24.1.1 Switching off and discharging the storage spring Festeinbauschalter / Fixed-mounted breaker Einschubschalter / Draw-out breaker 1 AUS/ OFF 2 Positionsanzeige Position indicator Hilfstromkreise trennen Disconnect auxiliary circuits 3 EIN/ ON 4 AUS/ OFF 5 Zustandsanzeigen Indications 24 – 3 grün green Hilfsstromkreis Auxiliary circuit 24.1.2 Schalter aus dem Einschubrahmen entnehmen 24.1.2 Schalter in Trennstellung kurbeln Removing the breaker from the guide frame Cranking the breaker into the disconnected position - Ausschalten q (Seite 6-6) - Handkurbelsperre lösen und Handkurbel herausziehen q (Seite 6-3) - Switch off q (page 6-6) - Unlock racking handle / withdraw racking handle q (page 6-3) Anschlag / Stop URW UHG Positionsanzeige Position indicatior blau blue grün green Handkurbel einschieben Push in the racking handle 2 1 3 4 VORSICHT CAUTION Handkurbel nicht über den Anschlag hinaus drehen! Anderenfalls wird der Einfahrantrieb beschädigt. Do not turn the crank handle beyond the stop! Otherwise the racking mechanism will be damaged. Schaltschranktür öffnen / Opening cubicle door Schalter in Wartungsstellung ziehen und entnehmen / Pulling circuit-breaker to maintenance position and removing 2 1 24 – 4 24.2 24.2.1 Lichtbogenkammern prüfen 24.2 Checking arc chutes WARNUNG WARNING Vor Beginn der Arbeiten muss der spannungsfreie Zustand der Schaltanlage hergestellt und während der Arbeiten sichergestellt werden (gemäß EN 50 110-1, DIN VDE 0105-100 und BGV A2). Die fünf Sicherheitsregeln sind einzuhalten: - Freischalten - Gegen Wiedereinschalten sichern - Spannungsfreiheit feststellen - Erden und Kurzschließen - Benachbarte, unter Spannung stehende Teile abdecken oder abschranken Das Gerät ist vom Netz zu trennen. Before beginning to work, de-energize the panel and secure the de-energized state during work (according to EN 50 110-1, DIN VDE 0105-100 and BGV A2). Lichtbogenkammer ausbauen Observe the Five Safety Rules: - Disconnecting - Securing against reclosing - Checking safe insolation from supply - Earthing and short-circuiting - Covering or providing barriers to adjacent live parts Disconnect the equipment from the supply. 24.2.1 - Ausschalten und Federspeicher entspannen q (Seite 24-3) - Einschubschalter in Wartungsstellung ziehen q (Seite 24-4) Removing arc chutes - Switch off and discharge the storage spring q (page 24-3) - Pull draw-out circuit-breaker to maintenance position q (page 24-4) VORSICHT CAUTION Bruchgefahr! Lichtbogenkammer nicht senkrecht auf die Isolierwände abstellen, sondern auf die Seite legen. Risk of breaking! Do not place the arc chute vertically on the insulating walls, but lay it on the side. Un w 690 V BGI / BG II, Un > 690 V 1 3 2 1 Gr. / Size 4 3 8 Nm 1 2 3 Schraube ca. 15 mm herausdrehen, nicht herausnehmen Deckel zurückschrauben Lichtbogenkammer herausnehmen (bei 1000 V-Ausführung mit Zwischenstück) 1 2 3 Gr. / Size 4 2 8 Nm Loosen screw by approx. 15 mm, do not remove it Push the cover back Take out the arc chute (in the 1000 V version, with intermediate unit) Baugröße I mit hoher Lichtbogenkammer: Vor der Entnahme der Zwischenteile sind die Messerleistenadapter abzuschrauben und abzuziehen (siehe Bild). Frame size I with high arc chute: Before removing the intermediate unit, the receptacle adapters have to be unscrewed and pulled out (see picture). 24 – 5 PH 1 BG III Un = 1000 V; BG III Schaltleistungsklasse C FS III Un = 1000 V; FS III current interrupting class C 5 Gr. / Size 4 3 2 1 2 3 4 24.2.2 1 8 Nm 4 1 2 3 4 Schraube herausdrehen Blechdeckel anheben und abnehmen; Lichtbogenkammer herausnehmen Zwischenteil nach hinten schieben und herausnehmen 24.2.2 Sichtprüfung vornehmen Unscrew the screw Lift and remove the sheet metal cover Remove the arc chute Push back and remove the intermediate unit Visual inspection Bei starkem Verschleiß (Ausbrennungen an den Löschblechen) Lichtbogenkammern erneuern. In the case of heavy wear (burnout on arc splitter plates), replace the arc chutes. 24.2.3 24.2.3 Lichtbogenkammer einbauen Leistungsschalter bis 690 V Bemessungsspannung Installing arc chutes Circuit-breakers with rated voltages up to 690 V 3 1 2 Gr. / Size 4 8 Nm 24 – 6 Leistungsschalter BG II für 1000 V Bemessungsspannung Circuit-breakers FS II for 1000 V rated voltage 5 1 2 3 4 Gr. / Size 4 8 Nm 1 2 3 4 5 6 Zwischenteil einsetzen Zwischenteil verschieben Lichtbogenkammer einsetzen, vorher Deckel zurückschieben Deckel vorschieben Schraube festziehen Wenn vorhanden, Messerleistenadapter aufsetzen und festschrauben q (Seite 24-6) Leistungsschalter BG III für 1000 V Bemessungsspannung und BG III Schaltleistungsklasse C 1 2 3 Install intermediate unit Shift intermediate unit Insert arc chute, push cover back before doing so 4 5 6 Slide the cover into place Tighten the screw If existing, put on the receptacle adapter and screw tight q (page 24-6) Circuit-breaker FS III for 1000 V rated voltage and FS III current interrupting class C 3 2 5 4 1 Gr. / Size 4 8 Nm 1 2 3 4 5 24 – 7 Zwischenteil einsetzen und nach vorn schieben Lichtbogenkammer einsetzen und Abdeckung nach vorn schieben Siebe (2x) in Lichtbogenkammerabdeckung einlegen Blechdeckel aufsetzen Schraube einsetzen und festziehen 1 2 Insert intermediate unit and move it into its place Insert the arc chute and push its cover to the front 3 4 5 Insert filters (2x) into arc chute cover Apply sheet metal top cover Insert and tighten the screw 24.2.4 Bestell-Nummern 24.2.4 Spannung Voltage Baugröße Frame size ≤ 690 V 1000 V 24.3 Order numbers Bestell-Nummer Order number I 3WL9111-0AS01-0AA0 I (H-Klasse/H-class oder/or 2000 A) 3WL9111-0AS07-0AA0 II 3WL9111-0AS02-0AA0 III 3WL9111-0AS03-0AA0 I (Einschubausf. / withdrawable version) 3WL9111-0AS08-0AA0 II (Festeinbau / fixed-mounted version) 3WL9111-0AS09-0AA0 II 3WL9111-0AS05-0AA0 III 3WL9111-0AS06-0AA0 24.3 Kontaktabbrand prüfen GEFAHR Checking contact erosion DANGER Gefährliche elektrische Spannung! Hazardous voltage! Kann Tod, schwere Personenschäden sowie Schäden an Geräten und Ausrüstung bewirken. Will cause death, serious personal injury, or equipment / property damage. Vor dem Arbeiten an diesem Gerät, Anlage unbedingt spannungs freischalten. Disconnect power before working on this equipment. WARNUNG WARNING Kann Tod oder Personenschäden verursachen. May result in death or serious injury. Vor dem Entfernen jeglicher Abdeckungen oder des Bedienpults unbedingt die Speicherfeder des Leistungsschalters entspannen (Seite 24-3) Discharge storage spring before removing barriers / covers (page 24-3). - Switch off and discharge the spring storage q (page 24-3) - Move the circuit-breaker into the maintenance position in the cradle q (page 24-4) - Charge the spring storage manually q (page 6-4) - Close q (page 6-6)) - Remove arc chutes q (page 24-5) - Ausschalten und Federspeicher entspannen q (Seite 24-3) - Einschubschalter in Wartungsstellung ziehen q (Seite 24-4) - Federspeicher per Hand spannen q (Seite 6-4) - Einschalten q (Seite 6-6) - Lichtbogenkammer ausbauen q (Seite 24-5)) (2) (1) (1) (2) (3) Anzeigestift Anzeigestift sichtbar Anzeigestift nicht mehr sichtbar (3) (1) (2) (3) Indicator pin Indicator pin is visible Indicator pin is no longer visible Ist der Anzeigestift nicht mehr sichtbar, muss das Kontaktsystem ausgetauscht werden. If the indicator pin is no longer visible, the contact system must be replaced. Für die Sichtprüfung bei Festeinbauschaltern ggf. einen Spiegel zu Hilfe nehmen. For the visual inspection of fixed-mounted circuit-breakers, use a mirror if required. 24 – 8 24.4 Strombahnen wechseln 24.4 Replacing pole assembly Nicht zulässig bei BG III Schaltleistungsklasse C! Not permitted in FS III current interrupting class C! Wartung ist nur vom Hersteller zulässig bei BGI Schaltleistungsklasse H, BGI 2000 A, BGI 1000 V und BGI 690V(+20%)! Maintenance is only permitted by manufacturer in FSI current interrupting class H, FSI 2000 A, FSI 1000 V and FSI 690V(+20%)! GEFAHR DANGER Beim Betrieb elektrischer Geräte stehen zwangsläufig bestimmte Teile dieser Geräte unter gefährlicher Spannung. Unsachgemäßer Umgang mit diesen Geräten kann deshalb zu Tod oder schweren Körperverletzungen sowie erheblichen Sachschäden führen. Hazardous voltages are present in this electrical equipment during operation. Beachten Sie daher bei Instandhaltungsmaßnahmen an diesem Gerät alle in diesem Kapitel und auf dem Produkt selbst aufgeführten Hinweise. Die Instandhaltung darf nur durch entsprechend qualifiziertes Personal erfolgen. Vor Beginn der Arbeiten muss der spannungsfreie Zustand der Schaltanlage hergestellt und während der Arbeiten sichergestellt werden (gemäß EN 50 110-1, DIN VDE 0105-100 und BGV A2). Die fünf Sicherheitsregeln sind einzuhalten: - Freischalten - Gegen Wiedereinschalten sichern - Spannungsfreiheit feststellen - Erden und Kurzschließen - Benachbarte, unter Spannung stehende Teile abdecken oder abschranken Das Gerät ist vom Netz zu trennen. Es dürfen nur vom Hersteller zugelassene Ersatzteile verwendet werden. Die vorgeschriebenen Wartungsintervalle sowie die Anweisungen für Reparatur und Austausch sind unbedingt einzuhalten, um Schäden an Personen und Anlagen zu vermeiden. The instructions contained in this chapter and on product labels have to be followed. Failure to properly maintain the equipment can result in death, severe personal injury or substantial property damage. Maintenance shall be performed only by qualified personnel. Before beginning to work, de-energize the panel and secure the de-energized state during work (according to EN 50 110-1, DIN VDE 0105-100 and BGV A2). Observe the Five Safety Rules. - Disconnecting - Securing against reclosing - Checking safe insolation from supply - Earthing and short-circuiting - Covering or providing barriers to adjacent live parts Disconnect the equipment from the supply. Use only authorized spare parts in the repair of the equipment. The inspection intervals as well as the instructions for repair and replacement shall be duly observed, to avert damages from persons and gear. - Switch off and discharge the spring storage q (page 24-3) - Remove the circuit-breaker from the guide frame q (page 24-4) - Remove fixed-mounted breaker - Ausschalten und Federspeicher entspannen q (Seite 24-3) - Schalter aus dem Einschubrahmen entnehmen q (Seite 24-4) - Festeinbauschalter ausbauen 24.4.1 24.4.1 Bedienpult abnehmen 3 PH 2 24 – 9 2 1 Removing front panel 24.4.2 Lichtbogenkammern ausbauen 24.4.2 q (Seite 24-5) 24.4.3 Remove arc chutes q (page 24-5) Strombahnen ausbauen 24.4.3 Schaltwellenhalter anbauen Removing pole assemblies Mounting main shaft retainer VORSICHT CAUTION Schaltwelle mit Schaltwellenhalter arretieren! Sonst wird Antriebssystem dejustiert und Reparatur in SiemensFachwerkstatt erforderlich. Block main shaft with main shaft retainer! Otherwise the operating system will be de-adjusted and it will be necessary to have it repaired in a Siemens workshop. 1 2 1 2 1 2 Abdeckkappe entfernen Kontakte zusammendrücken und halten Remove cover Press contacts together and hold them 4 3 5 3 4 5 Schaltwellenhalter ansetzen und befestigen PH 2 3 4 5 Mount and fix main shaft support 24 – 10 Nur für Einschubschalter: Einfahrwelle ausbauen For draw-out circuit-breaker only: Removing racking shaft 1 2 1 2 3 3 Sicherungsring entfernen Wenn vorhanden, Ausgleichsscheibe Ø 30,1 x Ø 45 x 0,5 entnehmen Kurbel abnehmen 1 2 Remove retaining ring If existing, remove spacer washer Ø 30,1 x Ø 45 x 0,5 3 Remove crank 5 4 4 5 24 – 11 Wenn vorhanden, Stützscheiben Ø 17,2 x Ø 26 x ... entnehmen Einfahrwelle herausziehen 4 If existing, remove supporting washer Ø 17,2 x Ø 26 x ... 5 Pull out racking shaft Wandler ausbauen Removing current transformers Schalter auf die Seite legen Lay circuit-breaker on the side 2 1 1 2 Kabelkanalabdeckung abnehmen Steckverbindungen trennen 1 2 Remove cover of cable duct Detach connectors 4 Gr. / Size 5 3 3 4 Wandlerabdeckungen abschrauben Wandler entnehmen 3 4 Remove current transformer covers Remove current transformers 24 – 12 Baugröße I und II: Schalterfüße lösen Frame size I and II: unfix the circuit-breaker feets Gr. / Size 4 1 1 2 2 Schalter aufrichten, Schraube entfernen Diese Schrauben nur lösen! Baugröße I: nur 1 Schraube vorhanden 1 2 Baugröße III: Schalterfüße abbauen Place circuit-breaker in upright position, remove screw Only loosen these screws! Frame size I: there is only one screw Frame size III: Remove circuit-breaker feet VORSICHT CAUTION Vor dem Entfernen der Schrauben Schalter auf geeignete Auflage stellen, so dass die Füße entlastet sind. Before remove the screwsbreaker lift of a practical support plate that circuit-breaker feets are free. 2 1 (3) (1) (2) (3) (2) (1) Freizulassender Bereich Geeignete Unterlage Schalterfüße 1 2 24 – 13 Schrauben entfernen Schalterfüße abnehmen (2) (3) (1) (2) (3) Leave blank the space Suitable support Circuit-breaker feet 1 2 Remove screws Remove circuit-breaker feet Rückwand abbauen Removing rear wall 3 Gr. / Size 6 Nur Baugröße III / Frame size III only: Gr. / Size 8 4 3 4 Schrauben oben entfernen Schrauben unten entfernen 3 4 Remove upper screws Remove lower screws 7 6 9 5 5 6 7 8 9 Schalter abstützen Rückwand vorsichtig etwas abziehen, bis Endlagenhaltefedern sichtbar Position der Endlagenhaltefedern merken Rückwand abnehmen Endlagenhaltefedern entnehmen 8 5 6 7 8 9 Support circuit-breaker Rearwall carefully draw off to appear the endposition retaining springs Note the position of the end position retaining springs Draw off rearwall Remove end position retaining springs 24 – 14 Obere Festkontakte ausbauen Removing upper fixed contacts 1 Gr. / Size 5 2 1 2 1 2 Schrauben und Muttern entfernen Festkontakt herausziehen Untere bewegliche Kontakte ausbauen Remove bolts and nuts Remove fixed contact Removing lower moving contacts 3 1 2 3 4 Anschluss-Schienen abstützen Koppelbolzen herausdrücken Koppelbolzen entnehmen Strombahnen abnehmen 4 2 1 2 3 4 Support connecting bars Push out coupling bolt Take coupling bolt out Remove pole assemblies 1 24.4.4 Strombahnen einbauen 24.4.4 Obere Festkontakte in Rückwand einbauen Installing pole assemblies Installing upper fixed contacts in rear wall 3 Gr. / Size 5 1 10 Nm 2 1 2 3 24 – 15 Nur Baugröße I: Schrauben der Leithörner lösen Kontakt einsetzen und Vierkantmutter in Ausnehmung einlegen Kontakte befestigen; Schrauben der Leithörner mit 10 Nm nachziehen; Nur Baugröße I: Leithorn andrücken und mit 15 Nm festziehen 1 2 Only frame size I: Undo screws of guide horns Mount contact and insert square nut in recess 3 Fix contacts Re-tighten screws of guide horns with 10 Nm; Only frame size I: press guide horn tight and tighten with 15 Nm Untere bewegliche Kontakte einbauen Installing lower moving contacts Lagerstellen und Koppelbolzen vor dem Zusammenbau reinigen und fetten. (Fett: Isoflex Topas NB 52, Fa. Klüber) Clean and grease bearings and coupling bolts before assembly. (Grease: Isoflex Topas NB 52, Klüber Lubrication München KG) 4 1 2 3 4 3 Anschluss-Schienen abstützen Mittlere Strombahn ansetzen Koppelbolzen einschieben Äußere Strombahnen anbauen 1 2 3 4 2 Mount supports for connecting bars Mount central pole assembly Insert coupling bolt Mount external pole assemblies 1 Beim Wechseln von Strombahnen der BG1 (3/ 4-pol) vor dem Fertigungszeitpunkt Aug./2003 ist an der Gehäusevorderwand die Ausnehmung entsprechend der Skizze zu vergrössern In order to replace the current path of the BG 1 (3/ 4-) before the production time Aug./in 2003 is the cutout on the front housing according to the outline to rework Gehäuse Alt mit kurzen Kontakthebeln Old Housing with short mains 36 Aussparung von 36 mm auf 62+2 mm nacharbeiten. Rework the cutout from 36 mm to 62+2 mm. Neues Gehäuse mit langen Kontakthebeln New housing with longer contact levers. 62+2 3+1 24 – 16 Rückwand anbauen Installing rear wall (Vorher Abstützungen der Strombahnen entfernen.) (First, remove supports for pole assemblies) ACHTUNG NOTICE Leitungen des Wandlerkabelbaumes nicht einklemmen! Do not squeeze the cables of the transformer cable harness! 5 1 2 3 4 5 Endlagenhaltefedern einsetzen Auf mittigen Sitz der Koppelbolzen achten Rückwand ansetzen Anschluss-Schienen einführen Rückwand mit Schaltergehäuse zusammenführen 1 2 1 4 3 4 5 3 2 Insert end position retaining springs Inspect to ensure that the coupling bolts are centered Attach rear wall Insert connecting bars Place rear wall and circuit-breaker housing together Baugröße I / II Frame size I / II: Oben / Upper Baugröße III / Frame size III: Unten / Lower Oben / Upper Unten / Lower 6 Gr. / Size 6 Gr. / Size 6 Gr. / Size 8 Gr. / Size 6 18 Nm 12 Nm 25 Nm 18 Nm 6 6 Erst unten verschrauben, beginnend in der Mitte; kurze Schrauben unten, lange Schrauben oben Screw tight at the bottom first, starting in the middle; short screws lower, long screws upper Funktionsprobe: Function test: Die Kontakte müssen sich vollständig zusammendrücken lassen und selbsttätig in ihre Ausgangslage zurückkehren. Anderenfalls Rückwand lösen und korrekten Sitz der Endlagenfedern überprüfen. It must be possible to press the contacts completely together, and they must return independently to their original position. If this is not the case, loosen the rear wall and check that the end position retaining springs are properly in place. Schalterfüße anbringen Attaching the circuit-breaker feet 9 Gr. / Size 4 7 8 24 – 17 10 Nm Wandler einbauen Installing current transformers *) 1 Gr. / Size 5 2 10 Nm 4 3 1 2 3 4 Schalter auf die Seite legen, Anschlussleitung einführen Wandler einsetzen Wandlerabdeckungen aufsetzen Mit Schrauben befestigen *) Selbstschneidende Schraube nur 5 Nm 1 2 3 4 Lay circuit-breaker on its side, insert connecting wire Insert current transformer Fit transformer covers Fasten the screws *) self tapping screw 5 Nm only VORSICHT CAUTION Beim Verwenden selbstschneidender Schrauben Gewindegänge nicht zerstören! When using self-tapping screws, do not damage existing threads! Schraube wie folgt eindrehen: - Schraube ansetzen - von Hand entgegen dem Uhrzeigersinn drehen, bis sich Gewindegänge treffen - eindrehen - mit Drehmomentenschlüssel auf 5 Nm festziehen Tightening of the screw: - insert screw - rotate the screw counter-clockwise by hand until the thread fits - tighten by hand till snug - tighten to a torque of 5 Nm 6 5 5 6 Steckverbindungen herstellen Kabelkanalabdeckung anbringen 5 6 Establish plug connections Mount cable duct covers VORSICHT CAUTION Die Vollständigkeit und der feste Sitz der Steckverbindungen ist zu gewährleisten! The completeness and reliable seat of plug and socket connection has to be ensure! Die ist nur bei richtigem Kontakt der Steckverbindungen gegeben. The protective function of the circuit-breaker depends on a good contact of the plug and socket connection. 24 – 18 Schaltwellenhalter abbauen Removing main shaft retainer 4 1 PH 2 2 3 1 Schalter aufrichten, Kontakte zusammendrücken und halten 1 2 3 4 Schaltwellenhalter abschrauben Schaltwellenhalter abnehmen Kupplung abnehmen 2 3 4 Place circuit-breaker in an upright position, press and hold the contacts together Unscrew the main shaft retainer Remove the main shaft retainer Remove the coupling 5 Attach the cover 5 5 24 – 19 Abdeckkappe aufstecken Nur für Einschubschalter: Einfahrwelle einbauen 2 1 2 3 For draw-out circuit-breaker only: Installing racking shaft 1 Einfahrwelle einschieben Wenn vorhanden, Ausgleichsscheibe Ø 30,1 x Ø 45 x 0,5 einsetzen Kurbel aufsetzen 3 1 2 Insert racking shaft If existing, insert spacer washer Ø 30,1 x Ø 45 x 0,5 3 Fit crank 5 4 4 5 Wenn vorhanden, Stützscheiben Ø 17,2 x Ø 26 x ... einsetzen Kurbel mit Sicherungsring DIN 471-17x1 sichern 4 If existing, insert supporting washer Ø 17,2 x Ø 26 x ... 5 Secure crank with retaining ring 24 – 20 24.4.5 Bestell-Nummern 24.4.5 Strombahn für einen Hauptkontakt: Baugröße Frame size I Max. Bemessungsnennstrom Max. circuit-breaker rated current In max (A) Order numbers Pole assembly for one main contact Ausschaltvermögen bei 440 V Rated breaking capacity at 440 V ICU (kA) Bestell-Nummer Order number 1000 / 1250 / 1600 50 / 65 3WL9111-0AM90 1 st 1 pc 2000 55 / 80 / 100 3WL9111-0AM91 1 st 1 pc 2500 / 3200 / 4000 55 / 80 / 100 3WL9111-0AM92 1 st 1 pc 4000 / 5000 / 6300 100 3WL9111-0AM93 1 st 1 pc II III PKG PS HINWEIS NOTE Ersatzstrombahnen können nur über die o.g. Bestellnummern mit Spare parts of pole assemblies will be ordered by means of the zusätzlicher Angabe der Identnummer des zu wartenden Leistungs- above mentioned order numbers (see table) in conjuction with the schalters bestellt werden! ID-No. of the circuit-breaker which needs a maintenance of pole assemblies! Die Identnummer befindet sich auf dem Typschild oben rechts am Bedienpult. The ID-No. is stated on the type label located on the right side of the front cover. Die Anzahl der benötigten Ersatzstrombahnen entspricht der Polzahl The number of spare parts required is equivalent to the number of poles. des zu wartenden Leistungsschalters. HINWEIS NOTE Für den Fall, dass Ersatzstrombahnen verwendet werden sollen, die nicht für den zu wartenden Schalter bestellt wurden, ist die Verwendbarkeit unter Angabe der Identnummer des Leistungsschalters und Bestellnummer der vorliegenden Ersatzstrombahnen über „Technical Assistance“ zu klären. If spare parts of pole assemblies are to be used which have not been ordered for the specific circuit-breaker it is required to check the suitability via "technical assistance" by indicating the ID-No. of the circuit-breaker and the order No. of the spare parts. email: [email protected] Tel.: +49 911 895 5900 email: [email protected] Tel.: +49 911 895 5900 24 – 21 24.4.6 Bedienpult aufsetzen 24.4.6 Attaching the front panel 2 PH 2 3 3 1 2,5 Nm 24.4.7 Mechanische Funktionsprüfung - 24.4.8 24.4.7 - Federspeicher per Hand spannen q (Seite 6-4) Einschalten q (Seite 6-6) Ausschalten q (Seite 6-6) Kontakabbrandanzeige erneut prüfen q (Seite 24-8) Lichtbogenkammern einbauen 24.4.8 Antriebssystem austauschen Der Austausch des Antriebssystem des Leistungsschalters ist von Siemens-Fachpersonal durchzuführen. Charge the storage spring manually q (page 6-4) Close q (page 6-6) Switch off q (page 6-6) check again the contact erosion indicator q (page 24-8) Installing the arc chutes q (page 24-6) q (Seite 24-6) 24.5 Mechanical function test 24.5 Replacing operating system The circuit-breaker operating system must be replaced by Siemens after-sales service specialists. - 24 – 22 25 Entsorgung 25 Disposal 25.1 Entsorgung von NiederspannungsLeistungsschaltern 25.1 Low-voltage circuit-breakers disposal Siemens Niederspannungs-Leistungsschalter sind umweltverträgliche Erzeugnisse, die überweigend aus recycle-fähigen Materialien bestehen. Siemens low-voltage circuit-breakers are environmentally friendly products, which predominantly constist of recyclable materials. Zur Entsorgung empfehlen wir die Demontage/Trennung in folgende Werkstoff-Fraktionen: For disposal, we recommend disassembly and separation into the following material components: - Metalle: zur Weitergabe als Misch-Schrott an den Verwerter - Kunststoffe: Entsorgung als Gewerbeabfall zur thermischen Verwertung - Elektronik, isolierte Kabel, Motore: Recycling über Elektroschrott-Entsorger - Metals: to be transferred as mixed scrap metal to the recycling company - Plastics: disposal as commercial waste for thermal recycling - Electronics, insulated cables, motors: recycling via electronics scrap disposal company Aufgrund der langen Lebensdauer der Siemens NiederspannungsLeistungsschalter sind die Entsorgungshinweise bei Außerbetriebnahme möglicherweise nicht mehr aktuell oder nationale Regelungen sehen andere Entsorgungswege vor. Caused by the long lifetime of Siemens low-voltage circuit-breakers, the disposal guidelines may be inaccurate or replaced by other national regulations when taking the breakers out of service. Die örtlichen Kundendienststellen stehen für die Beantwortung von Entsorgungsfragen jederzeit zur Verfügung. The local customer service is available at any time to answer disposal-related questions. 25 – 1 26 Abkürzungen 26 Abbreviations A Einstellwert Erdschlussschutz A Set current for ground-fault protection A 1/2 Ausgangsinformation 1/2 (Gegenseitige mechanische Schalterverriegelung) A 1/2 Output information 1/2 (Mutual mechanical interlocking) AC Wechselstrom AC Alternating current AMP AMP Incorporated, Harrisburg AMP AMP Incorporated, Harrisburg ANSI Amerikanische nationale Standardbehörde ANSI American National Standard Institute AWG Amerikanische Leiterquerschnittsgrößen AWG American Wire Gauge B Einstellwert Erdschlussschutz B Set current for ground-fault protection BDA Breaker Data Adapter BDA Breaker Data Adapter BSS Breaker Status Sensor BSS Breaker Status Sensor C Einstellwert Erdschlussschutz C Set current for ground-fault protection CC Closing coil, Einschaltmagnet CC Closing coil COM15 Kommunikationsmodul COM15 Communication interface COMM. Kommunikation COMM. Communication CONNECT Betriebsstellung CONNECT Connected position CUB - - Anschluss, - CUB - - CUB + - Anschluss, + CUB + + D Einstellwert Erdschlussschutz D Set current for ground-fault protection DC Gleichstrom DC Direct current DIN Deutsche Industrie-Norm DIN German Engineering Standard DISCON Trennstellung DISCON Disconnected position E Einstellwert Erdschluss-Schutz E Set current for ground-fault protection E 1/2 Eingangsinformation 1/2 (Gegenseitige mechanische Schalterverriegelung) E 1/2 Input information 1/2 (Mutual mechanical interlocking) ED Einschaltdauer ED Duty cycle EGB Elektrostatisch gefährdetes Bauelement ESD Electrostatic-sensitive device EN Europäische Norm EN European Standard ETU Elektronischer Überstromauslöser ETU Overcurrent release (Electronic trip unit) EXTEND. Erweiterte Schutzfunktion EXTEND. Extended (additional) protection function F1 Erster Spannungsauslöser F1 1st shunt trip F2 Zweiter Spannungsauslöser F2 2nd shunt trip F3 Unterspannungauslöser F3 Under-voltage release F4 Unterspannungauslöser mit Verzögerung F4 Under-voltage release with time delay F5 Auslösemagnet F5 Tripping solenoid F7 Fern-Rücksetzmagnet F7 Remote reset coil G-Auslösung Erdschluss-Auslösung G-alarm Ground-fault alarm G-Alarm Erdschlussalarm G-tripping Tripping on ground-fault I/O Ein- und Ausgangsmodul I/O Input / Output module 2 I t Stromabhängigkeit der Verzögerungszeit, nach einer Formel bei der das Produkt aus der Zeit und dem Quadrat des Stromes konstant ist 2 I t Delay time-current relationship based on formula I2t = constant 26 – 1 I2tg Einstellwert der stromabhängigen Verzögerungszeit der Erdschlussauslösung bei I2tg = const I2tg Delay time for ground-fault based on formula I2tg = constant I2tsd Einstellwert der stromabhängigen Verzögerungszeit der Kurzschlussauslösung bei I2tsd = const I2tsd Delay time for S tripping based on formula I2tsd = constant I4 t Stromabhängigkeit der Verzögerungszeit, nach einer Formel bei der das Produkt aus der Zeit und dem Wert des Stromes in der vierten Potenz konstant ist I4 t Delay time-current relationship based on formula I4t=constant I-Auslösung Unverzögerte Kurzschlussauslösung I-tripping Instantaneous tripping (short-circuit) Iab Ansprechwert Lastabwurf Iab Operating value for load shedding Ian Ansprechwert Lastaufnahme Ian Operating value for load restore Ics Bemessungs-Betriebskurzschlussausschaltvermögen Ics Rated service short-circuit breaking capacity Icu Bemessungs-Grenzkurzschlussausschaltvermögen Icu Rated ultimate short-circuit breaking capacity Icw Bemessungs-Kurzzeitstromfestigkeit Icw Rated short-time withstand current ID Ident-Nummer ID Identification number IEC Internationale Elektrotechnische Kommission IEC International Electrotechnical Commission Ig Ansprechwert Erdschluss-Schutz Ig Current setting value for G-tripping Ii Einstellwert der unverzögerten Kurzschlussauslösung Ii Set current for I tripping IIT Einpoliger Kurzschlussprüfstrom (IT-Systeme) IIT Single-pole short-circuit test current (IT systems) IN Einstellwert N-Leiter-Schutz IN Current setting value for N-tripping In Bemessungsstrom (Wert des Bemessungsstrommoduls) In Rated current (value of rating plug) In max maximal möglicher Bemessungsstrom In max Max. possible rated current IR Einstellwert der stromabhängig verzögerten Überlastauslösung IR Current setting value for L-tripping Isd Einstellwert der kurzzeitverzögerten Kurzschlussauslösung Isd Current setting value for S-tripping L1 Phase 1 L1 Phase 1 L2 Phase 2 L2 Phase 2 L3 Phase 3 L3 Phase 3 L-Auslösung stromabhängig verzögerte Überlastauslösung L-tripping Long-time delayed tripping (overload) LED Licht emittierende Diode LED Light emitting diode M Motor M Motor N Neutralleiter N Neutral pole N 117 Approbationszeichen Australien N 117 Approval label code for Australia N-Auslösung Auslösung wegen Überstrom im N-Leiter NC Normally closed contact Ö Öffner NO Normally open contact PIDG Crimpösen der Firma AMP N-tripping Neutral (overload) tripping PZ 3...6 Crimpzangen der Firma Weidmüller, Detmold PIDG Ring lug style (Trademark of AMP) S Schließer PZ 3...6 Crimping tool (Weidmüller GmbH) S 1/2/3 Leistungsschalter 1/2/3 (Gegenseitige mechanische Schalterverriegelung) S 1/2/3 Circuit-breaker 1/2/3 (Mutual mechanical interlocking) S1 Meldeschalter Schaltstellung S1 Contact position-driven auxiliary switch S10 Elektrisch EIN S10 Switch Electrical ON 26 – 2 S11 Motorendlagenschalter S11 Motor cut-off switch S12 Motorabstellschalter S12 Motor disconnect switch S13 Abstellschalter für Fern-Rücksetzung S13 Cut-off switch for remote-reset S14 Abstellschalter für Spannungsauslöser F1 (übererregt) S14 Cut-off switch for overexcited shunt trip F1 (fast operation) S15 Abstellschalter für Einschaltmagnet Y1 (übererregt) S15 S2 Meldeschalter Schaltstellung Cut-off switch for overexcited closing coil Y1 (fast operation) S20 Meldeschalter Einschaltbereitschaft S2 Contact position-driven auxiliary switch S21 Meldeschalter Speicherzustand S20 Signalling switch for "ready-to-close" S22 Meldeschalter am 1. Hilfsauslöser S21 Signalling switch for "storage spring charged" S23 Meldeschalter am 2. Hilfsauslöser S22 Signalling switch for 1st shunt trip S24 Ausgelöst-Meldeschalter S23 Signalling switch for 2nd shunt trip S3 Meldeschalter Schaltstellung S24 Trip signalling switch S30 Meldeschalter für Trennstellung S3 Contact position-driven auxiliary switch S31 Meldeschalter für Prüfstellung S30 Signalling switch for disconnected position S32 Meldeschalter für Prüfstellung S31 Signalling switch for test position S33 Meldeschalter für Betriebsstellung S32 Signalling switch for test position S34 Meldeschalter für Betriebsstellung S33 Signalling switch for connected position S35 Meldeschalter für Betriebsstellung S34 Signalling switch for connected position S4 Meldeschalter Schaltstellung S35 Signalling switch for connected position S40 -seitiger Meldeschalter Einschaltbereitschaft S4 Contact position-driven auxiliary switch S40 signalling switch for "ready-to-close" S41 -seitiger Meldeschalter Speicherzustand S41 signalling switch for "storage spring charged" S43 -seitiger Meldeschalter am zweiten Hilfsauslöser F2 oder F3 oder F4 S43 signalling switch for 2nd shunt trip S44 -seitiger Meldeschalter Schaltstellung Hauptkontakte (EIN / AUS) S44 signalling switch for "main contacts ON/OFF" S45 -seitiger Ausgelöst-Meldeschalter S45 tripped signaling switch S46 -seitiger Meldeschalter für Betriebsstellung S46 signalling switch for connected position S47 signalling switch for test position S47 -seitiger Meldeschalter für Prüfstellung S48 S48 -seitiger Meldeschalter für Trennstellung signalling switch for disconnected position S7 Contact position-driven auxiliary switch S7 Meldeschalter Schaltstellung S8 Contact position-driven auxiliary switch S8 Meldeschalter Schaltstellung S-tripping Short-time delayed tripping S-Auslösung kurzzeitverzögerte Kurzschlussauslösung SIGUT Siemens trademark for termination techique SIGUT Siemens Zugbügelklemme ST Shunt trip ST Spannungsauslöser T.U. ERROR Trip unit error T.U. ERROR Fehler im Überstromauslöser TEST Test position TEST Prüfstellung tg Delay time for G-tripping tg Verzögerungszeit der Erdschlussauslösung tR Delay time for L-tripping (defined at 6 x IR) tR Verzögerungszeit der Überlastauslösung (definiert bei 6 x IR) TRIP G Trip cause was ground-fault TRIP I Trip cause was short-circuit (instantaneous) TRIP G Grund der letzten Auslösung war Erdschluss TRIP L Trip cause was overload 26 – 3 TRIP I Grund der letzten Auslösung war Kurzschluss (unverzögert) TRIP L Grund der letzten Auslösung war Überlast in einem Hauptleiter TRIP N Grund der letzten Auslösung war Überstrom im N-Leiter TRIP S Grund der letzten Auslösung war Kurzschluss (verzögert) tsd Verzögerungszeit der Kurzschlussauslösung tx Verzögerungszeit Lastüberwachung Uc Bemessungsbetätigungsspannung Ue Bemessungsbetriebsspannung Ui Bemessungsisolationsspannung Uimp Bemessungs-Stossspannungsfestigkeit UVR Unterspannungsauslöser (unverzögert) UVR td Unterspannungsauslöser (verzögert) VDE Verband Deutscher Elektrotechniker VT Spannungswandler WAGO WAGO Kontakttechnik, München X Klemmenbezeichnung nach DIN Y1 Einschaltmagnet Z =... Ergänzung der Bestell-Nr. „weitere Optionen“ ZSI Zeitverkürzte Selektivitätssteuerung Iavg Momentaner Mittelwert des Stromes Iavglt Langzeitmittelwert des Stromes ITHD Klirrfaktor Strom UTHD Klirrfaktor Spannung 26 – 4 TRIP N Trip cause was neutral pole overload TRIP S Trip cause was short-circuit (short-time delayed) tsd Delay time for S-tripping tx Delay time for load monitoring Uc Rated control voltage Ue Rated operational voltage Ui Rated insulation voltage UImp Rated impulse withstand voltage UVR Undervoltage release (instantaneous) UVR td Undervoltage release (delayed) VDE German standards organisation VT Voltage transformer WAGO WAGO Kontakttechnik, München X Terminal designation according to DIN Y1 Closing coil Z =... Order number supplement "further options" ZSI Zone Selective Interlocking Iavg Present average of current Iavglt Long term average of current ITHD Distortion factor of current UTHD Distortion factor of voltage 27 Begriffe 27 Glossary Antriebshandhebel Automatic reset Durch mehrere Pumpbewegungen wird der Federspeicherantrieb gespannt. To re-establish the ready-to-close state immediately after an overcurrent tripping, an automatic mechanical reset is offered as an option. Ausgelöst-Meldeschalter Sammelmeldung von Überlast-, Kurzschluss- und Erdschlussauslösung durch Mikroschalter Auxiliary releases These are undervoltage releases and shunt trips available. Ausstattungsabhängige Kodierung BSS module Um zu vermeiden, daß innerhalb einer Schaltanlage Schalter gleicher Baugröße aber mit unterschiedlicher Ausstattung beim Einsetzen in den Einschubrahmen vertauscht werden, können Leistungsschalter und Einschubrahmen mit einer Kodiervorrichtung ausgerüstet werden. Breaker Status Sensor - for collecting circuit-breaker status information via signalling switches and transmitting these data to the . Automatische Rücksetzung Für die sofortige Herstellung der Einschaltbereitschaft nach einer Überstromauslösung wird als Option eine automatische mechanische Rücksetzeinrichtung angeboten. Closing coil Electrical activation of stored energy Coding of auxiliary connectors To prevent interchanging the auxiliary wiring connections by mistake, the auxiliary connectors are coded. Bemessungsstromkodierung COM15 Module Eine Bemessungsstromkodierung erfolgt werkseitig, d.h. jeder Leistungsschalter läßt sich nur in einen Einschubrahmen mit gleichem Bemessungsstrom einsetzen. Communications module Bemessungsstrommodul / „Rating Plug“ Dieses Modul legt z.B. den Einstellbereich des Überlastschutz fest. BSS - Modul Breaker Status Sensor - für das Sammeln von Informationen über den Zustand des Leistungsschalters mittels Meldeschalter und deren Übertragung auf den . COM15 - Modul Interface adapter for: - converting signals to PROFIBUS-DP signals and vice versa - providing three potential-free outputs for control functions (ON, OFF, 1 freely available) - one input, freely usable for control informations from the switchgear. Additional function for draw-out circuit-breakers: - detecting the circuit-breaker position in the guide frame by means of signalling switches S 46, S 47 and S 48. Kommunikationsmodul Schnittstellenadapter für: Bus system in the vicinity of the circuit-breaker and to the FieldBus (PROFIBUS-DP) - Umsetzung der -Signale auf PROFIBUS-DPSignale und umgekehrt - Bereitstellung von drei potentialfreien Ausgängen für Steuerungsfunktionen (EIN, AUS, 1x frei verfügbar) - einen Eingang, frei verwendbar für Informationen aus der Schaltanlage. Electrical closing lockout... For electrical interlocking of two or more circuit-breakers (closing interlock). The electrical closing lockout can block closing the circuit-breaker with a sustained signal. Zusatzfunktion bei Verwendung für Einschubschalter: - Erfassen der Position des Leistungsschalters im Einschubrahmen mit den Meldeschaltern S 46, S 47 und S 48. Datenbussystem im Schalternahbereich und zum Feldbus (PROFIBUS-DP) Einschaltmagnet Elektrischer Abruf der Federspeicherenergie 27 – 1 Elektrisch EIN Electrical ON Elektrischer Abruf der Speicherenergie über den Einschaltmagneten Electrical activation of the stored energy through the closing coil Elektrische Einschaltsperre Zur elektrischen Verriegelung von zwei oder mehreren Schaltern (Einschaltverriegelung). Die elektrische Einschaltsperre dient zum Sperren gegen Einschalten des Leistungsschalters mit einem Dauersignal. Energiewandler Energiequelle für Eigenversorgung des Überstromauslösers Federspeicherantrieb Baueinheit mit Feder als Energiespeicher. Die Feder wird mittels Antriebshandhebel oder Motorantrieb gespannt und durch Verklinkungen in gespanntem Zustand gehalten. Durch Freigeben dieser Verklinkungen wird die Speicherenergie auf den Schaltpol geleitet, der Schalter schaltet ein. Laminated contacts Connect the main terminals of the circuit-breaker with the main terminals of the guide frame. Mechanical reclosing lockout After tripping, the circuit-breaker cannot be reclosed until the mechanical reclosing lockout has been reset by hand. Motor operating mechanism The geared motor charges the spring storage automatically as soon as voltage is applied to the auxiliary connections. After closing, the spring storage is automatically charged for the next closing operation. Guide rail Used for placing the circuit-breaker in the guide frame. Fern-Rücksetzung Mutual mechanical interlocking Mittels des optionalen Fern-Rücksetzmagneten werden die elektrische Meldung des Ausgelöst-Meldeschalters und der rote Resetknopf zurückgesetzt. There are various versions for the mutual interlocking system available, comprising a maximum of three circuit-breakers. Gegenseitige mechanische Verriegelung Option-related coding Ermöglicht verschiedene Varianten der gegenseitigen Verriegelung von Leistungsschaltern. To prevent circuit-breakers of the same size but different equipment from being inserted in incorrect guide frames, the circuit-breakers and the guide frames can be equipped with a coding facility. Hilfsauslöser Position indication Es stehen Unterspannungsauslöser und Spannungsauslöser (= Arbeitsstromauslöser) zur Verfügung. To show the circuit-breaker position in the guide frame. Kodierung Handstecker Um ein Vertauschen der Hilfsleiteranschlüsse zu verhindern wurden die Handstecker kodierbar gestaltet. Lamellenkontakte Position signalling switch For remote signalling of the circuit-breaker position in the guide frame. Rated current coding Verbinden die Hauptanschlüsse des Leistungsschalters mit den Hauptanschlüssen des Einschubrahmens. The rated current is coded at the factory, i.e. each and every circuitbreaker can only be inserted in a guide frame with the same rated current. Mechanische Wiedereinschaltsperre Rating plug Nach einer Überstromauslösung ist der Schalter gegen Wiedereinschalten gesperrt, bis die mechanische Wiedereinschaltsperre von Hand zurückgesetzt wird. This module defines e.g. the setting range of the overload protection. Meldeschalter Schaltstellung Die Betätigung dieser Hilfsstromschalter erfolgt in Abhängigkeit vom Schaltzustand des Leistungsschalters. Motorantrieb Durch den Getriebemotor wird der Federspeicherantrieb automatisch gespannt, sobald Spannung an den Hilfsstromanschlüssen anliegt. Nach einer Einschaltung wird der Federspeicherantrieb automatisch für die nächste Einschaltung gespannt. Positionsanzeige Zur Anzeige der Schalterposition im Einschubrahmen 27 – 2 Remote reset The electrical signal of the triped signaling switch and the red reset button are reset by the optional remote reset magnet. Safe OFF This additional function prevents closing the circuit-breaker and fulfils the disconnecting condition in OFF position as per IEC 60947-2: - "Mechanical Off" button pressed main contacts open crank handle of draw-out circuit-breakers removed the various interlocking conditions are fulfilled. Positionsmeldeschalter Shunt trip Zur Fernanzeige der Schalterposition im Einschubrahmen For remote circuit-breaker tripping and locking against closing Shutter Shutter Shutter sind Isolierstoffplatten zum Abdecken spannungsführender Hauptstrombahnen im Einschubrahmen (Berührungsschutz). Shutters are insulation plates for covering live main circuits in the guide frame (shock protection). Signalling switch for switch position Sicheres AUS Mit dieser zusätzlichen Funktion wird ein Einschalten des Leistungsschalters verhindert und die Trennerbedingung in AUS-Stellung nach IEC 60947-2 erfüllt: - „Mechanisch AUS“-Taster wurde gedrückt die Hauptkontakte sind geöffnet bei Einschubschaltern ist die Kurbel eingezogen die verschiedenen Verriegelungsbedingungen sind erfüllt Spannungsauslöser Zum Fernausschalten des Leistungsschalters und Sperren gegen Einschalten These auxiliary switches operate according to the circuit-breaker switch position. Spring charging lever The spring storage is charged by several pumping operations. Spring storage Module containing a spring as an energy store. The spring is charged by means of a hand-operated lever or a motor, and is latched in its charged state. When the latches are released, the stored energy is transmitted to the pole, the circuit-breaker closes. Energy transformer Unterspannungsauslöser Power supply for the overcurrent release. Zum Fernausschalten und Verriegeln des Leistungsschalters. Einsatz des Leistungsschalters in NOT-AUS Kreisen (nach EN 60 204 Teil 1 / DIN VDE 0113 Teil 1) zusammen mit einer getrennt angeordneten NOT-AUS-Einrichtung, kurzzeitige Spannungseinbrüche sollen nicht zum Ausschalten des Leistungsschalters führen. Tool operation Unterspannungsauslöser (verzögert) Group signal for overload, short-circuit and earth-fault tripping by microswitches. Zum Fernausschalten und Verriegeln des Leistungsschalters. Spannungseinbrüche sollen nicht zum Ausschalten des Leistungsschalters führen. Verfahrschiene Dient zum Aufnehmen des Leistungsschalters im Einschubrahmen. Werkzeugbetätigung Durch eine Abdeckung mit Loch (; 6,35 mm) können Taster nur mit einem Dorn betätigt werden. A cover with a hole (Ø 6,35) means that buttons can only be pressed using a rod. Trip signalling switch Undervoltage release For remote tripping and interlocking of the circuit-breaker. Circuitbreaker application in emergency OFF circuits (as per EN 60 204 Part 1 / DIN VDE 0113 Part 1) together with an emergency OFF facility to be arranged separately. The circuit-breaker shall not be tripped by short-time voltage drops (e.g. motor start-up). Undervoltage release (time delayed) For remote tripping and interlocking of the circuit-breaker. The circuit-breaker shall not be tripped by voltage drops (e.g. system transfers). 27 – 3 28 Index A Abkürzungen Abschließvorrichtungen Anschluss-Schienen Anzeige- und Bedienelemente Aufbau Ausschalten Ausschalten durch Überstromauslösung Ausschalten und Federspeicher entspannen Automatische Rücksetzung B Baugrößen Bemessungsstrommodul Betriebsstellung Breaker Status Sensor (BSS) Bügelschlösser C COM15-Modul E Einbau an senkrechter Ebene Einbau auf waagerechter Ebene Einbaulage Einschalten Elektrisch EIN Elektronische Ausrüstung Erdschlussschutzmodule 28 25-1 15-1 5-6 14-1 1-1 6-7 6-8 6-11 10-2 7-1 9-31 6-3 9-46 15-22 9-50 5-3 5-3 5-1 6-7 11-7, 11-8 9-1 9-32 F Federspeicher Feuchtigkeitsanzeigeschild Flanschanschluss Führungszungen 6-5 4-1 5-7 5-19 G Gegenseitige mechanische Schalterverriegelung Gewicht 19-1 4-2 H Handkurbel einschieben Handkurbel herausziehen Hauptleiter Hilfsauslöser Hilfsleiteranschlüsse Hilfsstromschalter Horizontalanschluss 6-4 6-4 5-15 11-1 5-16 12-1 5-6 I Inbetriebnahme 6-1 K Kodierung Hilfsstromstecker - Messerleiste Kodierung Schalter - Einschubrahmen Kontaktabbrand 5-20 18-6 23-7 L Lagerung Leitungsverlegung am Einschubrahmen 4-1 5-21 M Manuelle Rücksetzung Maßbilder 10-1 7-1 28 – 1 Index A Abbreviations Access block Automatic reset Auxiliary and control switches Auxiliary conductors Auxiliary releases 25-1 17-7 10-2 12-1 5-16 11-1 B Breaker Status Sensor (BSS) 9-51 C Circuit diagrams Closing Closing Coil Coding auxiliary connectors Coding breaker - guide frame COM15 module Connected position Connecting bars Contact erosion Control gate Crank the breaker into connected position Crank the breaker into disconnected position Current transformers 8-1 6-7 11-1 5-20 18-6 9-55 6-3 5-6 23-7 15-3 6-4 23-3 9-78 D Design Dimension drawings Disconnected position Door locking mechanism for fixed-mounted breaker Door sealing frame 1-1 7-1 6-3 17-3 21-1 E Earth-fault protection modules Electrical ON Electronic equipment EMERGENCY OFF 9-38 11-6 9-1 14-3 F Flange connection Frame sizes G Glossary Guide tongues H Horizontal connection Humidity indicator 5-7 7-1 26-1 5-19 5-6 4-1 I Indicators and operating elements Inserting crank handle Inserting the breaker in the guide frame Installation Interlocking devices ? Interphase barriers 14-1 6-4 6-2 5-1 17-1 20-1 L Labels Lock OPEN Locking devices Locking set 2-1 15-3 15-1 14-1 Messerleiste Montage Motorabstellschalter Motorantrieb 5-17 5-1 13-3 13-1 N Normen, Bestimmungen NOT-AUS 3-1 14-3 P Phasentrennwände Plombiervorrichtungen Positionen des Schalters im Einschubrahmen Positionsmeldeschalter Prüfstellung Prüfung der Auslösefunktion Q Qualifiziertes Personal 20-1 16-1 6-3 18-13 6-3 9-41 3-1 R Ringösen-Schraubtechnik 5-19 S Schalter aus dem Einschubrahmen entnehmen Schalter in Betriebsstellung kurbeln Schalter in Einschubrahmen einsetzen Schalter in Trennstellung kurbeln Schalter in Wartungsstellung ziehen Schaltpläne Schaltspielzähler Schilder Schraublose Anschlusstechnik Schutzhaube IP55 Schutzleiter Shutter Sicheres AUS Sicherheitsschlösser SIGUT-Technik Sperrvorrichtungen Steuerschieber Störungsbeseitigung 23-3 6-4 6-2 23-3 23-3 8-1 14-2 2-1 5-19 22-1 5-23 18-1 15-3 15-1 5-19 17-1 15-3 6-12 T Transport Trennstellung Türdichtungsrahmen Türverriegelung für Festeinbauschalter 4-1 6-3 21-1 17-3 U Überseeverpackung Überstromauslöser (Funktionen) Überstromauslöser auswechseln Überstromauslöser ETU25B Überstromauslöser ETU45B Unterspannungsauslöser 4-1 9-13 9-37 9-3 9-6 11-5 V Verriegelungsset Vertikalanschluss 14-1 5-10 W Wandler Wartung Wartungsstellung Wiedereinschaltsperre und Fern-Rücksetzung 9-74 23-1 6-3 10-1 M Main conductors Maintenance Maintenance position Make-break operations counter Manual reset Motor disconnect switch Motor operating mechanism Mounting on horizontal surface Mounting on vertical surface Mounting position Mutual mechanical interlocking 5-15 23-1 6-3 14-2 10-1 13-3 13-1 5-3 5-3 5-1 19-1 O Overcurrent release ETU15B Overcurrent release ETU25B Overcurrent release ETU27B Overcurrent release ETU45B Overseas packing 9-3 9-6 9-9 9-12 4-1 P Padlocking facilities Positions of the breaker in the guide frame Protective conductor Pull the breaker into maintenance position Putting back into service after tripping Putting into service Q Qualified Person 15-22 6-3 5-23 23-3 6-9 6-1 3-1 R Rating plug Receptacle Reclosing lockout and remote reset Remove the breaker from the guide frame Replacing the electronic trip unit Ring lug system 9-37 5-17 10-1 23-3 9-43 5-19 S Safety locks Screwless terminal system Sealing caps Shrouding cover IP55 Shunt Trip Shutter SIGUT system Standard specifications Storage Storage spring Supplementary devices for guide frame Switching off Switching off and discharging the storage spring 15-1 5-19 16-1 22-1 11-1 18-1 5-19 3-1 4-1 6-5 18-1 6-7 6-11 T Test position Testing the tripping function Transport Tripping by electronic trip unit Troubleshooting 6-3 9-46 4-1 6-8 6-14 U Under-voltage release Undervoltage release 11-4 11-1 28 – 2 Wiederinbetriebmahme nach Überstromauslösung Z ZSI / ZSS-Modul Zugangssperre Zusatzausrüstungen für Einschubrahmen 28 – 3 6-9 9-65 17-7 18-1 V Vertical connection 5-10 W Weight Wiring in guide frame Withdraw crank handle 4-2 5-21 6-4 Z ZSI-module 9-69 29 Formulare 29 Forms Hinweis Note Die Formulare auf den folgenden Seiten kopieren, nicht die Seiten entfernen. Copy the forms on the following pages. Do not remove them. /HLVWXQJVVFKDOWHU:/ $XVWDXVFKRGHU(UVDW]GHU(78 0HOGXQJEHU/HLVWXQJVVFKDOWHU8PEDX 6LHPHQV$* 7HO )$; 7HFKQLFDO$VVLVWDQFH HPDLOWHFKQLFDODVVLVWDQFH#VLHPHQVFRP .XQGH /HLVWXQJVVFKDOWHU:/ ,GHQW1XPPHU 0/)% ,GHQW1XPPHUGHU(78 (UVDW]GXUFK(78 ,GHQW1XPPHUGHU(78 )XQNWLRQVSUIXQJ c d:/ e d e 3UIXQJEHVWDQGHQ-D1HLQ >3UIJHUlW0/)%:/$7$$@ :DQGOHUWHVW $XVO|VHWHVW / / / 1 * / 6 , 1 (LQVWHOOXQJ,J 2))HUIRUGHUOLFK * 1DPH *HVFKXOWDP 'DWXP (78% e 'LHQVWVWHOOH 6FKXOXQJVRUW 8QWHUVFKULIW c &LUFXLWEUHDNHU:/ &KDQJHRUUHSODFHPHQWRIWKH(78 $QQRXQFHPHQWRIFLUFXLWEUHDNHUPRGLILFDWLRQ 6LHPHQV$* 3KRQH )$; 7HFKQLFDO$VVLVWDQFH HPDLOWHFKQLFDODVVLVWDQFH#VLHPHQVFRP &XVWRPHU &LUFXLWEUHDNHU:/ ,'1R 0/)% ,'1RRIWKH(78 5HSODFHGE\(78 ,'1RRIWKH(78 )XQFWLRQWHVW c d:/ e d e 7HVWSDVVHG<HV1R >7HVWGHYLFH0/)%:/$7$$@ 7UDQVIRUPHUWHVW 7ULSRXWWHVW / / / 1 * / 6 , 1 6HWWLQJV,J 2))QHFHVVDU\ * 1DPH 'DWHRIWUDLQLQJ 'DWH (78% e 'HSDUWPHQW 3ODFHRI:/DVVHPEO\WUDLQLQJ 6LJQDWXUH c 5HOHDVH 5HOHDVH H VD HO H5 Technical Assistance: Tel: ++49 (0) 911-895-5900 (8°° - 17°° MEZ/CET) Fax: ++49 (0) 911-895-5907 Internet: www.siemens.com/low-voltage E-mail: [email protected] Technische Änderungen vorbehalten Subject to change without prior notice © Siemens AG 05.2012 Bestell-Nr. / Order No.: 3ZX1812-0WL00-0AN2 Printed in the Federal Republic of Germany Deutsch/English