1
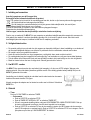
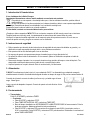
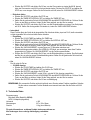
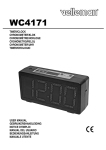
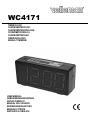
WC4171
TIMER/CLOCK
CHRONOMETER/KLOK
CHRONOMÈTRE/HORLOGE
CRONÓMETRO/RELOJ
CHRONOMETER/UHR
TIMER/OROLOGIO
ZEGAR Z TIMEREM
USER MANUAL
GEBRUIKERSHANDLEIDING
NOTICE D’EMPLOI
MANUAL DEL USUARIO
BEDIENUNGSANLEITUNG
MANUALE UTENTE
INSTRUKCJA OBSŁUGI
WC4171
2
VELLEMAN
WC4171 – TIMER/CLOCK
1. Introduction & Features
To all residents of the European Union
Important environmental information about this product
This symbol on the device or the package indicates that disposal of the device after its lifecycle could harm
the environment.
Do not dispose of the unit (or batteries) as unsorted municipal waste; it should be taken to a specialized
company for recycling.
This device should be returned to your distributor or to a local recycling service.
Respect the local environmental rules.
If in doubt, contact your local waste disposal authorities.
Thank you for buying a Velleman product! This indoor wall timer/clock is compact and user-friendly and can also be
used as a wall clock. Please read the manual thoroughly before bringing this device into service. If the device was
damaged in transit, don't install or use it and contact your dealer.
2. Safety Instructions
• Damage caused by disregard of certain guidelines in this manual is not covered by the warranty and the dealer
will not accept responsibility for any ensuing defects or problems.
• This device is for indoor use only.
• Keep this device away from high temperatures, humidity, dew, water and direct sunlight.
• Do not crimp the power cord and protect it against damage. Have an authorised dealer replace it if necessary.
• Disconnect the device from the mains to clean it or when it is not in use. Handle the power cord by the plug only.
• Clean your device using a damp cloth. Do not use alcohol or solvents.
3. Powering Your WC4171
Your WC4171 can be powered through a battery (not incl.) or through an AC/DC adapter. Plugging the adapter into
the WC4171 wall simultaneously recharge the battery. A discharged battery takes 20h to fully recharge and will
operate for 4h.
Battery connection: connect the red wire with the red terminal; connect the black wire
with the black terminal. Refer to the figure.
Next, insert the adapter plug into the input. Connect the adapter to the mains. Switch
on the WC4171.
4. Operation
• Timer
Press CLOCK/TIMER and select the TIMER mode.
o Counting Up
Press GO/STOP and select STOP.
Press TIMER SET/INTERVAL SET and select TIMER SET.
Clear any displayed time if necessary with HOURS/MINUTES or MINUTES/SECONDS. Press the
button once to increase, hold the button pressed to decrease.
Press GO/STOP and select GO. The display will now count up (up to 99:59, after which it will return to
00:00 and continue counting). Press GO/STOP and select STOP to stop. Reset the time to zero by
pressing 12HR/24HR/RESET.
WC4171
3
VELLEMAN
o Counting Down
Press GO/STOP and select STOP.
Press TIMER SET/INTERVAL SET and select TIMER SET.
Set the desired time with HOURS/MINUTES or MINUTES/SECONDS. Press the button once to
increase, hold the button pressed to decrease.
Press GO/STOP and select GO. The display will now count down and will beep at 00:00. Reset the
original time by pressing 12HR/24HR/RESET.
• Interval Timer
In this mode, the timer will count down from a preset interval time, beep at 00:00, automatically reset to the
original interval time and count down again.
o Setting the Interval Time
Press CLOCK/TIMER and select TIMER.
Press TIMER SET/INTERVAL SET and select INTERVAL SET.
Press GO/STOP and select STOP.
Set the desired interval time with HOURS/MINUTES or MINUTES/SECONDS. Press the button once to
increase, hold the button pressed to decrease.
Press 12HR/24HR/RESET to add a 15-second pause between two countdowns. The INTERVAL LED
will be flashing indicating the pause time has been activated. Press 12HR/24HR/RESET again to
deactivate this function.
Press GO/STOP and select GO. The display will now count down. You will hear 3 beeps prior the start
of the next interval. Reset the original time by pressing 12HR/24HR/RESET.
• Clock
In clock mode, the timer will display the time of day.
o 12/24h Time Display
Press CLOCK/TIMER and select CLOCK.
Press TIMER SET/INTERVAL SET and select TIMER SET.
Press GO/STOP and select STOP.
Press 12HR/24HR/RESET to select the 12-hour or the 24-hour display mode.
Set the desired time with HOURS/MINUTES or MINUTES/SECONDS. Press the button once to
increase, hold the button pressed to decrease.
Press GO/STOP and select GO to confirm.
NOTE: Selecting another mode will not deactivate a previously used mode. Therefore, deactivate the previously
used mode manually by setting all times to 00:00.
5. Technical Specifications
Power Supply
Optional Lead-Acid Battery (order code WP4-6)
9VDC/1A adapter (incl.)
Power Consumption
< 8W
Dimensions
327 x 156 x 93mm
Total Weight
1.6kg (without battery)
For more info concerning this product, please visit our website www.velleman.eu.
The information in this manual is subject to change without prior notice.
WC4171
4
VELLEMAN
WC4171 – CHRONOMETER/KLOK
1. Inleiding en kenmerken
Aan alle ingezetenen van de Europese Unie
Belangrijke milieu-informatie betreffende dit product
Dit symbool op het toestel of de verpakking geeft aan dat, als het na zijn levenscyclus wordt weggeworpen,
dit toestel schade kan toebrengen aan het milieu.
Gooi dit toestel (en eventuele batterijen) niet bij het gewone huishoudelijke afval; het moet bij een
gespecialiseerd bedrijf terechtkomen voor recyclage.
U moet dit toestel naar uw verdeler of naar een lokaal recyclagepunt brengen.
Respecteer de plaatselijke milieuwetgeving.
Hebt u vragen, contacteer dan de plaatselijke autoriteiten inzake verwijdering.
Dank u voor uw aankoop! De WC4171 is een compacte en gebruiksvriendelijke wandchronometer die eveneens als
klok gebruikt kan worden. Lees deze handleiding grondig voor u het toestel in gebruik neemt. Werd het toestel
beschadigd tijdens het transport, installeer het dan niet en raadpleeg uw dealer.
2. Veiligheidsinstructies
• De garantie geldt niet voor schade door het negeren van bepaalde richtlijnen in deze handleiding en uw dealer zal
de verantwoordelijkheid afwijzen voor defecten of problemen die hier rechtstreeks verband mee houden.
• Dit toestel is enkel voor gebruik binnenshuis.
• Houd dit toestel uit de buurt van hoge temperaturen, vochtigheid, dauw, water en direct zonlicht.
• De voedingskabel mag niet omgeplooid of beschadigd zijn. Laat uw dealer zo nodig een nieuwe kabel plaatsen.
• Trek de stekker uit het stopcontact (trek nooit aan de kabel!) voordat u het toestel reinigt en als u het niet gebruikt.
• Maak het toestel schoon met een vochtige doek. Gebruik geen alcohol of solvent.
3. Uw WC4171 voeden
Uw WC4171 kan gevoed worden door een batterij (niet meegelev.) of door een AC/DC adapter. Wanneer u de
adapter gebruikt, zal ook de batterij simultaan geladen worden. Een volledig geladen batterij laadtijd 20h) kan de
WC4171 gedurende 4h voeden.
Aansluiting van de batterij: verbind de rode kabel met de rode terminal en de zwarte
kabel met de zwarte terminal. Zie figuur.
Koppel vervolgens de adapter aan het toestel en nadien aan het lichtnet. Schakel uw
WC4171 in.
4. Gebruik
• Timer
Druk op CLOCK/TIMER en selecteer TIMER.
o Chronometer
Druk op GO/STOP en selecteer STOP.
Druk op TIMER SET/INTERVAL SET en selecteer TIMER SET.
Wis een voorgaande instelling indien nodig met HOURS/MINUTES of MINUTES/SECONDS. Druk op
de toets om de waarde te verhogen, houd de toets ingedrukt om te verlagen.
Druk op GO/STOP en selecteer GO om de chronometer te starten (tot 99:59 waarna de chronometer
naar 00:00 terugkeert en opnieuw begint). Druk op GO/STOP en selecteer STOP om te stoppen. Zet de
tijd opnieuw op nul door op 12HR/24HR/RESET te drukken.
WC4171
5
VELLEMAN
o Aftellen
Druk op GO/STOP en selecteer STOP.
Druk op TIMER SET/INTERVAL SET en selecteer TIMER SET.
Stel de gewenste tijd in met HOURS/MINUTES of MINUTES/SECONDS. Druk op de toets om de
waarde te verhogen, houd de toets ingedrukt om te verlagen.
Druk op GO/STOP en selecteer GO om het aftellen te starten. Het toestel zal piepen op 00:00. Zet de
ingestelde tijd opnieuw in door op 12HR/24HR/RESET te drukken.
• Intervaltijd
Deze functie laat het toestel aftellen vanaf een ingestelde tijd, piepen op 00:00, automatisch terugstellen op de
ingestelde tijd en opnieuw aftellen.
o Instelling
Druk op CLOCK/TIMER en selecteer TIMER.
Druk op TIMER SET/INTERVAL SET en selecteer INTERVAL SET.
Druk op GO/STOP en selecteer STOP.
Stel de gewenste tijd in met HOURS/MINUTES of MINUTES/SECONDS. Druk op de toets om de
waarde te verhogen, houd de toets ingedrukt om te verlagen.
Druk op 12HR/24HR/RESET om een pauze van 15 seconden tussen twee aftelprocedures in te lassen.
De led bij INTERVAL flitst om aan te duiden dat deze functie ingeschakeld is. Druk op
12HR/24HR/RESET om de functie uit te schakelen.
Druk op GO/STOP en selecteer GO om het aftellen te starten. Het toestel piept drie maal voor het de
nieuwe aftelprocedure begint. Zet de ingestelde tijd opnieuw in door op 12HR/24HR/RESET te drukken.
• Klok
De klok geeft het uur weer.
o 12/24h weergave
Druk op CLOCK/TIMER en selecteer CLOCK.
Druk op TIMER SET/INTERVAL SET en selecteer TIMER SET.
Druk op GO/STOP en selecteer STOP.
Druk op 12HR/24HR/RESET om de 12h- of de 24h-weergave te selecteren.
Stel de gewenste tijd in met HOURS/MINUTES of MINUTES/SECONDS. Druk op de toets om de
waarde te verhogen, houd de toets ingedrukt om te verlagen.
Druk op GO/STOP en selecteer GO om te bevestigen.
OPMERKING: De gebruikte functie wordt niet gewist wanneer u een andere functie kiest. Schakel daarom eerst
manueel de pas gebruikte functie uit door alle tijden op 00:00 te plaatsen.
5. Technische specificaties
Voeding
Optionele lood-zuurbatterij (ordercode WP4-6)
9VDC/1A adapter (meegelev.)
Verbruik
< 8W
Afmetingen
327 x 156 x 93mm
Gewicht
1.6kg (zonder batterij)
Voor meer informatie omtrent dit product, zie www.velleman.eu.
De informatie in deze handleiding kan te allen tijde worden gewijzigd zonder voorafgaande kennisgeving.
WC4171
6
VELLEMAN
WC4171 – CHRONOMÈTRE/HORLOGE
1. Introduction et caractéristiques
Aux résidents de l'Union européenne
Des informations environnementales importantes concernant ce produit
Ce symbole sur l'appareil ou l'emballage indique que l’élimination d’un appareil en fin de vie peut polluer
l'environnement.
Ne pas jeter un appareil électrique ou électronique (et des piles éventuelles) parmi les déchets municipaux
non sujets au tri sélectif ; une déchèterie traitera l’appareil en question.
Renvoyer les équipements usagés à votre fournisseur ou à un service de recyclage local.
Il convient de respecter la réglementation locale relative à la protection de l’environnement.
En cas de questions, contacter les autorités locales pour élimination.
Nous vous remercions de votre achat ! Le WC4171 est un chronomètre compact et facile à utiliser pour usage à
l’intérieur, et peut également servir d’horloge murale. Lire la présente notice attentivement avant la mise en service
de l’appareil. Si l’appareil a été endommagé pendant le transport, ne pas l’installer et consulter votre revendeur.
2. Prescriptions de sécurité
• La garantie ne s’applique pas aux dommages survenus en négligeant certaines directives de cette notice et votre
revendeur déclinera toute responsabilité pour les problèmes et les défauts qui en résultent.
• Cet appareil a été conçu pour un usage à l’intérieur uniquement.
• Tenir cet appareil à l’écart de températures extrêmes, humidité, eau et des rayons directs du soleil.
• Le câble d’alimentation ne peut pas être replissé ou endommagé. Demander à votre revendeur de renouveler le
câble d’alimentation si nécessaire.
• Débrancher l’appareil s’il n’est pas utilisé ou pour le nettoyer. Tirer la fiche pour débrancher l'appareil ; non pas le câble.
• Essuyer l’appareil avec un chiffon humide. Éviter l’usage d’alcool et de solvants.
3. Alimentation
Votre WC4171 peut être alimenté par un accu (non incl.) ou par un adaptateur CA/CC. L’alimentation par adaptateur
rechargera simultanément la pile. Un accu déchargé nécessite un temps de charge de 20h pour une autonomie de
4h.
Connexion de l’accu : connecter le câble rouge à la borne rouge et le câble noir à la
borne noir. Voir illustration.
Insérer ensuite la fiche dans la prise d’entrée. Connecter l’adaptateur au réseau
électrique. Allumer votre WC4171.
4. Emploi
• Minuterie
Enfoncer CLOCK/TIMER et sélectionner TIMER.
o Chronomètre
Enfoncer GO/STOP et sélectionner STOP.
Enfoncer TIMER SET/INTERVAL SET et sélectionner TIMER SET.
Effacer le temps affiché avec HOURS/MINUTES ou MINUTES/SECONDS si nécessaire. Enfoncer la
touche pour augmenter, maintenir la touche enfoncée pour diminuer.
Enfoncer GO/STOP et sélectionner GO pour démarrer le chronomètre (jusqu’à 99:59 ; le chronomètre
revient à 00:00 et recommence). Enfoncer GO/STOP et sélectionner STOP pour arrêter. Remettre à
zéro en enfonçant 12HR/24HR/RESET.
WC4171
7
VELLEMAN
o Compte à rebours
Enfoncer GO/STOP et sélectionner STOP.
Enfoncer TIMER SET/INTERVAL SET et sélectionner TIMER SET.
Programmer le temps désiré avec HOURS/MINUTES ou MINUTES/SECONDS si nécessaire. Enfoncer
la touche pour augmenter, maintenir la touche enfoncée pour diminuer.
Enfoncer GO/STOP et sélectionner GO. Le compte à rebours démarre, le WC4171 émet un bip sonore
lorsqu’il arrive à 00 :00. Enfoncer GO/STOP et sélectionner STOP pour arrêter. Reprogrammer le temps
en enfonçant 12HR/24HR/RESET.
• Minuterie à intervalle
Dans ce mode, le WC4171 démarre le compte à rebours, émet un bip sonore lorsqu’il arrive à 00:00,
reprogramme automatiquement le temps initial et redémarra le compte à rebours.
o Configuration
Enfoncer CLOCK/TIMER et sélectionner TIMER.
Enfoncer TIMER SET/INTERVAL SET et sélectionner INTERVAL SET.
Enfoncer GO/STOP et sélectionner STOP.
Programmer le temps désiré avec HOURS/MINUTES ou MINUTES/SECONDS si nécessaire. Enfoncer
la touche pour augmenter, maintenir la touche enfoncée pour diminuer.
Enfoncer 12HR/24HR/RESET pour insérer une pause de 15 secondes entre deux comptes à rebours.
La LED INTERVAL clignote pour indiquer que la fonction est activée. Renfoncer 12HR/24HR/RESET
pour désactiver.
Enfoncer GO/STOP et sélectionner GO. Le compte à rebours démarre. Vous entendrez 3 bips sonores
avant que le WC4171 ne passe au prochain compte à rebours. Reprogrammer le temps en enfonçant
12HR/24HR/RESET.
• Horloge
Le WC4171 affiche l’heure.
o Affichage 12/24h
Enfoncer CLOCK/TIMER et sélectionner CLOCK.
Enfoncer TIMER SET/INTERVAL SET et sélectionner TIMER SET.
Enfoncer GO/STOP et sélectionner STOP.
Enfoncer 12HR/24HR/RESET pour sélectionner le mode d’affichage 12h ou 24h.
Programmer le temps désiré avec HOURS/MINUTES ou MINUTES/SECONDS si nécessaire. Enfoncer
la touche pour augmenter, maintenir la touche enfoncée pour diminuer.
Enfoncer GO/STOP et sélectionner GO pour confirmer.
REMARQUE : La sélection d’une autre fonction ne désactivera pas une fonction utilisée. Désactiver d’abord la
fonction utilisée de manière manuelle en reprogrammant tous les temps sur 00:00.
5. Spécifications techniques
Alimentation
Accu acide-plomb (non incl. référence WP4-6)
9VCC/1A adapter (incl.)
Consommation
< 8W
Dimensions
327 x 156 x 93mm
Poids
1.6kg (sans accu)
Pour plus d’information concernant cet article, visitez notre site web www.velleman.eu.
Toutes les informations présentées dans cette notice peuvent être modifiées sans notification préalable.
WC4171
8
VELLEMAN
WC4171 – CRONÓMETRO/RELOJ
1. Introducción & Características
A los ciudadanos de la Unión Europea
Importantes informaciones sobre el medio ambiente concerniente este producto
Este símbolo en este aparato o el embalaje indica que, si tira las muestras inservibles, podrían dañar el
medio ambiente.
No tire este aparato (ni las pilas eventuales) en la basura doméstica; debe ir a una empresa especializada
en reciclaje. Devuelva este aparato a su distribuidor o a la unidad de reciclaje local.
Respete las leyes locales en relación con el medio ambiente.
Si tiene dudas, contacte con las autoridades locales para residuos.
¡Gracias por haber comprado el WC4171! Es un cronómetro compacto de fácil manejo para el uso en interiores.
También puede servir de reloj mural. Lea atentamente las instrucciones del manual antes de usarlo.
Verifique si el aparato ha sufrido algún daño en el transporte antes de la puesta en marcha. Si es el caso, no
conecte el aparato a la red y póngase en contacto con su distribuidor.
2. Instrucciones de seguridad
• Daños causados por descuido de las instrucciones de seguridad de este manual invalidarán su garantía y su
distribuidor no será responsable de ningún daño u otros problemas resultantes.
• Este aparato sólo ha sido diseñado para el uso en interiores.
• No exponga el aparato a temperaturas extremas, humedad, agua ni rayos directos del sol.
• No aplaste ni dañe el cable de alimentación. Si es necesario, pida a su distribuidor reemplazar el cable de
alimentación.
• Desconecte siempre el aparato si no va a usarlo durante un largo periodo de tiempo o antes de limpiarlo. Tire
siempre del enchufe para desconectar el cable de red, nunca del propio cable.
• Limpie el aparato con un paño húmedo. Evite el uso de alcohol y de disolventes.
3. Alimentación
El WC4171 se alimenta por batería (no incl.) o por adaptador CA/CC. La alimentación por adaptador recargará
simultáneamente la batería. Una batería descargada necesita un tiempo de carga de 20h para una autonomía de 4h.
Conexión de la batería: conecte el cable rojo al borne rojo y el cable negro al borne
negro. Véase figura.
Luego, conecte el adaptador al aparato. Conecte el aparato a la red eléctrica. Active
el WC4171.
4. Funcionamiento
• Temporizador
Pulse CLOCK/TIMER y seleccione TIMER.
o Cronómetro
Pulse GO/STOP y seleccione STOP.
Pulse TIMER SET/INTERVAL SET y seleccione TIMER SET.
Borre el tiempo visualizado con HOURS/MINUTES o MINUTES/SECONDS si fuera necesario. Pulse la
tecla para aumentar. Mantenga pulsada la tecla para disminuir.
Pulse GO/STOP y seleccione GO para activar el cronómetro (hasta 99:59; el cronómetro vuelve a
00:00 y recomienza). Pulse GO/STOP y seleccione STOP para desactivar. Reinicialice el cronómetro al
pulsar 12HR/24HR/RESET.
WC4171
9
VELLEMAN
o Cuenta atrás
Pulse GO/STOP y seleccione STOP.
Pulse TIMER SET/INTERVAL SET y seleccione TIMER SET.
Programe el tiempo deseado con HOURS/MINUTES o MINUTES/SECONDS si fuera necesario. Pulse
la tecla para aumentar. Mantenga pulsada la tecla para disminuir.
Pulse GO/STOP y seleccione GO. La cuenta atrás empieza, el WC4171 emite un bip sonoro si llega a
00:00. Pulse GO/STOP y seleccione STOP para parar. Vuelva a programar el tiempo al pulsar
12HR/24HR/RESET.
• Temporizador con intervalo
En este modo, el WC4171 empieza la cuenta atrás, emite un bip sonoro si llega a 00:00, vuelve a programar
el tiempo inicial automáticamente y empieza de nuevo la cuenta atrás.
o Ajuste
Pulse CLOCK/TIMER y seleccione TIMER.
Pulse TIMER SET/INTERVAL SET y seleccione INTERVAL SET.
Pulse GO/STOP y seleccione STOP.
Programe el tiempo deseado con HOURS/MINUTES o MINUTES/SECONDS si fuera necesario. Pulse
la tecla para aumentar. Mantenga pulsada la tecla para disminuir.
Pulse 12HR/24HR/RESET para introducir una pausa de 15 segundos entre dos cuentas atrás. El LED
INTERVAL parpadea para indicar que la función está activada. Vuelva a pulsar 12HR/24HR/RESET
para desactivar.
Pulse GO/STOP y seleccione GO. La cuenta atrás empieza. Oirá 3 bips sonoros antes de que el
WC4171 empiece con la siguiente cuenta atrás. Vuelva a programar el tiempo al pulsar
12HR/24HR/RESET.
• Reloj
El WC4171 visualiza la hora.
o Visualización 12/24h
Pulse CLOCK/TIMER y seleccione CLOCK.
Pulse TIMER SET/INTERVAL SET y seleccione TIMER SET.
Pulse GO/STOP y seleccione STOP.
Pulse 12HR/24HR/RESET para seleccionar el modo de visualización 12h o 24h.
Programe el tiempo deseado con HOURS/MINUTES o MINUTES/SECONDS si fuera necesario. Pulse
la tecla para aumentar. Mantenga pulsada la tecla para disminuir.
Pulse GO/STOP y seleccione GO para confirmar.
NOTA : La selección de otra función no desactivará una función utilizada. Por tanto, desactive primero la función
utilizada de manera manual al volver a programar todos los tiempos en 00:00.
5. Especificaciones
Alimentación
Batería de plomo-calcio (no incl. referencia WP4-6)
Adaptador de 9VCC/1A (incl.)
Consumo
< 8W
Dimensiones
327 x 156 x 93mm
Peso
1.6kg (sin batería)
Para más información sobre este producto, visite nuestra página web www.velleman.eu.
Se pueden modificar las especificaciones y el contenido de este manual sin previo aviso.
WC4171
10
VELLEMAN
WC4171 – CHRONOMETER/UHR
1. Einführung & Eigenschaften
An alle Einwohner der Europäischen Union
Wichtige Umweltinformationen über dieses Produkt
Dieses Symbol auf dem Produkt oder der Verpackung zeigt an, dass die Entsorgung dieses Produktes nach
seinem Lebenszyklus der Umwelt Schaden zufügen kann.
Entsorgen Sie die Einheit (oder die verwendeten Batterien) nicht als unsortiertes Hausmüll; die Einheit oder
die verwendeten Batterien müssen von einer spezialisierten Firma zwecks Recycling entsorgt werden.
Diese Einheit muss an den Händler oder ein örtliches Recycling-Unternehmen retourniert werden.
Respektieren Sie die örtlichen Umweltvorschriften.
Falls Zweifel bestehen, wenden Sie sich für Entsorgungsrichtlinien an Ihre örtliche Behörde.
Wir bedanken uns für den Kauf des WC4171! Das Gerät ist ein kompaktes und benutzerfreundliches
Wandchronometer, das auch als Uhr verwendet werden kann. Bitte lesen Sie diese Bedienungsanleitung vor
Inbetriebnahme sorgfältig durch. Überprüfen Sie, ob Transportschäden vorliegen. Sollte dies der Fall sein,
verwenden Sie das Gerät nicht und wenden Sie sich an Ihren Händler.
2. Sicherheitshinweise
• Bei Schäden, die durch Nichtbeachtung der Bedienungsanleitung verursacht werden, erlischt der
Garantieanspruch. Für daraus resultierende Folgeschäden übernimmt der Hersteller keine Haftung.
• Dieses Gerät eignet sich nur für Anwendung im Haus.
• Halten Sie das Gerät von hohen Temperaturen, Feuchte, Tau, Wasser und direktem Sonnenlicht fern.
• Achten Sie darauf, dass die Netzleitung nicht gequetscht oder beschädigt werden kann. Bei Beschädigungen soll
eine Fachkraft das Kabel ersetzen.
• Trennen Sie das Gerät bei Nichtbenutzung und vor jeder Reinigung vom Netz. Fassen Sie dazu den Netzstecker
an der Grifffläche an und ziehen Sie nie an der Netzleitung.
• Verwenden Sie zur Reinigung ein feuchtes Tuch. Verwenden Sie auf keinen Fall Alkohol oder irgendwelche
Lösungsmittel.
3. Stromversorgung
Das Gerät funktioniert mit einer Batterie (nicht mitgeliefert) oder mit einem AC/DC-Adapter. Wenn Sie den Adapter
verwenden, wird auch die Batterie simultan geladen werden. Mit einer völlig geladenen Batterie (Ladezeit: 20Std.)
hat das Gerät eine Autonomie von 4 Stunden.
Anschluss der Batterie: verbinden Sie das rote Kabel mit dem roten Terminal und das
schwarze Kabel mit dem schwarzen Terminal. Siehe Abbildung.
Verbinden Sie den Adapter mit dem Gerät und verbinden Sie das Gerät danach mit
dem Lichtnetz. Schalten Sie das Gerät ein.
4. Gebrauch
• Timer
Drücken Sie CLOCK/TIMER und wählen Sie TIMER aus.
o Chronometer
Drücken Sie GO/STOP und wählen Sie STOP aus.
Drücken Sie TIMER SET/INTERVAL SET und wählen Sie TIMER SET aus.
Wenn nötig, löschen Sie eine vorige Einstellung mit HOURS/MINUTES oder MINUTES/SECONDS.
Drücken Sie die Taste, um den Wert zu erhöhen. Halten Sie die Taste gedrückt, um den Wert zu
senken.
WC4171
11
VELLEMAN
Drücken Sie GO/STOP und wählen Sie GO aus, um das Chronometer zu starten (bis 99:59, danach
kehrt das Chronometer nach 00:00 zurück und startet wieder). Drücken Sie GO/STOP und wählen Sie
STOP aus, um zu stoppen. Stellen Sie die Zeit zurück auf Null, indem Sie 12HR/24HR/RESET drücken.
o Rückwärts zählen
Drücken Sie GO/STOP und wählen Sie STOP aus.
Drücken Sie TIMER SET/INTERVAL SET und wählen Sie TIMER SET aus.
Stellen Sie die gewünschte Zeit mit HOURS/MINUTES oder MINUTES/SECONDS ein. Drücken Sie die
Taste, um den Wert zu erhöhen. Halten Sie die Taste gedrückt, um den Wert zu senken.
Drücken Sie GO/STOP und wählen Sie GO aus, um das Rückwärtszählen zu starten. Das Gerät piepst
auf 00:00. Stellen Sie die eingestellte Zeit wieder ein, indem Sie 12HR/24HR/RESET drücken.
• Intervallzeit
Diese Funktion lässt das Gerät ab der eingestellten Zeit rückwärts zählen, piepst auf 00:00, stellt automatisch
auf die eingestellte Zeit zurück und zählt wieder rückwärts.
o Einstellung
Drücken Sie CLOCK/TIMER und wählen Sie TIMER aus.
Drücken Sie TIMER SET/INTERVAL SET und wählen Sie INTERVAL SET aus.
Drücken Sie GO/STOP und wählen Sie STOP aus.
Stellen Sie die gewünschte Zeit mit HOURS/MINUTES oder MINUTES/SECONDS ein. Drücken Sie die
Taste, um den Wert zu erhöhen. Halten Sie die Taste gedrückt, um den Wert zu senken.
Drücken Sie 12HR/24HR/RESET, um eine Pause von 15 Sekunden zwischen zwei
Rückwärtszählungen einzuschalten. Die INTERVAL LED blinkt, um anzuzeigen, dass diese Funktion
eingeschaltet ist. Drücken Sie 12HR/24HR/RESET, um die Funktion auszuschalten.
Drücken Sie GO/STOP und wählen Sie GO aus, um die Rückwärtszählung zu starten. Das Gerät piepst
drei Mal, ehe es mit einer neuen Rückwärtszählung startet. Stellen Sie die gewünschte Zeit wieder ein,
indem Sie 12HR/24HR/RESET drücken.
• Uhr
Die Uhr zeigt die Zeit an.
o 12/24Std.-Anzeige
Drücken Sie CLOCK/TIMER und wählen Sie CLOCK aus.
Drücken Sie TIMER SET/INTERVAL SET und wählen Sie TIMER SET aus.
Drücken Sie GO/STOP und wählen Sie STOP aus.
Drücken Sie 12HR/24HR/RESET, um die 12Std.- oder die 24 Std.-Anzeige auszuwählen.
Stellen Sie die gewünschte Zeit mit HOURS/MINUTES oder MINUTES/SECONDS ein. Drücken Sie die
Taste, um den Wert zu erhöhen. Halten Sie die Taste gedrückt, um den Wert zu senken.
Drücken Sie GO/STOP und wählen Sie GO aus zur Bestätigung.
BEMERKUNG: Die verwendete Funktion wird nicht gelöscht wenn Sie eine andere Funktion auswählen. Schalten
Sie die soeben verwendete Funktion deshalb zuerst manuell aus indem Sie alle Zeiten auf 00:00
stellen.
5. Technische Daten
Stromversorgung
Blei-säure-Akku (Bestell-Nr. WP4-6)
9VDC/1A-Adapter (mitgeliefert)
Verbrauch
Abmessungen
Gewicht
< 8W
327 x 156 x 93mm
1.6kg (ohne Batterie)
Für mehr Informationen zu diesem Produkt, siehe www.velleman.eu.
Alle Änderungen ohne vorherige Ankündigung vorbehalten.
WC4171
12
VELLEMAN
WC4171 – TIMER / OROLOGIO
1. Introduzione e descrizione
A tutti i residenti dell’Unione Europea
Importanti informazioni ambientali relative a questo prodotto
Questo simbolo riportato sul prodotto o sull’imballaggio, indica che è vietato smaltire il prodotto nell’ambiente
al termine del suo ciclo vitale in quanto può essere nocivo per l’ambiente stesso. Non smaltire il prodotto (o
le pile, se utilizzate) come rifiuto urbano indifferenziato; dovrebbe essere smaltito da un’impresa
specializzata nel riciclaggio.
Per informazioni più dettagliate circa il riciclaggio di questo prodotto, contattare l’ufficio comunale, il
servizio locale di smaltimento rifiuti oppure il negozio presso il quale è stato effettuato l’acquisto.
La ringraziamo per aver acquistato questo prodotto Velleman. Il WC4171 è un timer per ambienti interni, semplice da
utilizzare, che può anche essere impiegato come orologio da parete. Si prega di leggere attentamente le informazioni
contenute nel presente manuale prima di utilizzare il dispositivo. Assicurarsi che l’apparecchio non sia stato
danneggiato durante il trasporto; in tale evenienza, contattare il proprio fornitore.
2. Istruzioni relative alla sicurezza
• I danni derivanti dall’inosservanza delle indicazioni fornite nel presente manuale non sono coperti da garanzia; il
venditore non sarà ritenuto responsabile di eventuali danni cagionati a cose o persone.
• Il dispositivo è da utilizzare solo in ambienti interni.
• Tenere il dispositivo lontano dalla luce diretta del sole, da elevate temperature, umidità, condensa e acqua.
• Evitare che il cavo di alimentazione venga schiacciato o danneggiato. Se necessario farlo sostituire da un tecnico
qualificato.
• Scollegare il dispositivo dalla rete elettrica quando lo si deve pulire o quando non viene utilizzato.
• Pulire il dispositivo servendosi di un panno umido. Non utilizzare alcol o solventi.
3. Alimentare il WC4171
Il WC4171 può essere alimentato con una batteria ricaricabile al piombo (non inclusa) o tramite un adattatore AC/DC.
Quest’ultimo consente di ricaricare la batteria inserita nel WC4171 in 20 ore (quando completamente scarica).
L’autonomia del dispositivo, con batteria a piena carica, è di circa 4 ore.
Connessioni batteria: collegare il faston del cavetto nero al terminale negativo della
batteria e quello rosso a quello positivo (vedi figura a lato).
Successivamente inserire la spina dell’adattatore nella relativa presa DC (situata
vicino al vano batteria) quindi collegare l’adattatore ad una presa di rete.
Accendere il WC4171 agendo sull’apposito interruttore.
4. Funzionamento
• Timer
Premere il pulsante CLOCK/TIMER e selezionare la modalità TIMER.
o Conteggio incrementale (Up)
Premere START/STOP per selezionare STOP.
Premere TIMER SET/INTERVAL SET per selezionare TIMER SET.
Se necessario, cancellare l’eventuale tempo visualizzato utilizzando il pulsante HOURS/MINUTES o
MINUTES/SECONDS. Premere brevemente il pulsante per incrementare il valore; tenere premuto a
lungo per decrementarlo.
WC4171
13
VELLEMAN
Premere START/STOP e selezionare START. Il dispositivo effettuerà un conteggio incrementale (fino al
valore 99:59, raggiunto il quale ricomincerà a contare da 00:00). Premere START/STOP e selezionare
STOP per interrompere il conteggio. Per azzerare il conteggio premere il pulsante 12HR/24HR/RESET.
o Conteggio decrementale (Down)
Premere START/STOP per selezionare STOP.
Premere TIMER SET/INTERVAL SET per selezionare TIMER SET.
Impostare il tempo desiderato tramite il pulsante HOURS/MINUTES o MINUTES/SECONDS. Premere
brevemente il pulsante per incrementare il valore; tenere premuto a lungo per decrementarlo. Premere
START/STOP per selezionare START. Il dispositivo effettuerà il conto alla rovescia ed emetterà un “beep”
raggiunto il valore 00:00. Premere il pulsante 12HR/24HR/RESET per ripristinare il tempo impostato.
• Timer con ripetizione automatica
In questa modalità, il dispositivo effettuerà un conto alla rovescia partendo dal tempo impostato, terminato il
quale (00:00), emetterà un “beep” e ricomincerà a contare automaticamente dal valore di partenza.
o Impostazione dell’intervallo di tempo
Premere START/STOP per selezionare STOP.
Premere CLOCK/TIMER per selezionare TIMER.
Premere TIMER SET/INTERVAL SET per selezionare INTERVAL SET.
Impostare l’intervallo di tempo desiderato utilizzando il pulsanti HOURS/MINUTES o
MINUTES/SECONDS. Premere brevemente il pulsante per incrementare il valore; tenere premuto a
lungo per decrementarlo.
Premere 12HR/24HR/RESET per aggiungere una pausa di 15 secondi tra un conteggio e l’altro. Il LED
INTERVAL lampeggerà ad indicare che la funzione pausa è stata attivata. Premere nuovamente il
pulsante 12HR/24HR/RESET se si desidera disattivare questa funzione.
Premere START/STOP per selezionare START. Il dispositivo effettuerà il conto alla rovescia ed
emetterà 3 “beep” prima di avviare quello successivo. Premere il pulsante 12HR/24HR/RESET per
ripristinare il tempo impostato.
• Orologio
In modalità orologio, il dispositivo mostrerà l’ora locale.
o Formato visualizzazione 12/24h
Premere START/STOP per selezionare STOP.
Premere CLOCK/TIMER per selezionare CLOCK.
Premere TIMER SET/INTERVAL SET per selezionare TIMER SET.
Premere 12HR/24HR/RESET per impostare il formato di visualizzazione 12 o 24 ore.
Impostare l’ora locale utilizzando i pulsanti HOURS/MINUTES e MINUTES/SECONDS. Premere
brevemente il pulsante per incrementare il valore; tenere premuto a lungo per decrementarlo.
Premere START/STOP e selezionare START per confermare.
NOTE: la selezione di una diversa modalità non comporta modifiche alle impostazioni definite per le altre.
Le modalità devono essere azzerate manualmente impostando il valore 00:00.
5. Specifiche tecniche
Alimentazione
Batteria piombo-acido (opzionale cod. WP4-6)
Adattatore 9VDC/1A (incluso)
Assorbimento
< 8W
Dimensioni
327 x 156 x 93mm
Peso
1,6kg (senza batteria)
Per ulteriori informazioni relative a questo prodotto, vi preghiamo di visitare il nostro sito www.velleman.eu.
Le informazioni contenute in questo manuale possono essere soggette a modifiche senza alcun preavviso.
WC4171
14
VELLEMAN
WC4171 – ZEGAR Z TIMEREM
1. Wstęp i funkcje
Przeznaczona dla mieszkańców Unii Europejskiej.
Ważne informacje dotyczące środowiska.
Ten symbol umieszczony na urządzeniu bądź opakowaniu wskazuje, że wyrzucenie produktu może być
szkodliwe dla środowiska.
Nie należy utylizować urządzenia (lub baterii) do zbiorczego pojemnika na odpady komunalne. Urządzenie
należy przekazać specjalistycznej firmie zajmującej się recyklingiem.
Urządzenie można oddać dystrybutorowi lub firmie zajmującej się recyklingiem.
Postępować zgodnie z zasadami bezpieczeństwa dotyczącymi środowiska.
W razie wątpliwości należy skontaktować się z firmą zajmującą się utylizacją odpadów.
Dziękujemy za zakup produktu firmy Velleman! Zakupiony przez Państwa zegar ścienny z timerem to urządzenie
kompaktowe i proste w obsłudze. Może być również używane w charakterze zwykłego zegara ściennego. Prosimy o
dokładne zapoznanie się z instrukcją obsługi przed użyciem. Jeśli urządzenie zostało uszkodzone podczas
transportu, prosimy o nie korzystanie z niego i skontaktowanie się ze sprzedawcą.
2. Instrukcje bezpieczeństwa
• Gwarancja nie obejmuje uszkodzeń powstałych w wyniku nieprzestrzegania niniejszej instrukcji, a sprzedawca
nie ponosi odpowiedzialności za wynikłe uszkodzenia lub problemy.
• Urządzenie przeznaczone wyłącznie do użytku wewnątrz pomieszczeń.
• Chronić urządzenie przed oddziaływaniem wysokich temperatur, wilgotności, kondensacji, wody i promieni
słonecznych.
• Nie zaginać kabla zasilającego (kabli zasilających) i chronić je przed uszkodzeniami. Wymiana kabla powinna być
przeprowadzana wyłącznie przez autoryzowanego dealera.
• Urządzenie należy odłączyć od zasilania przed czyszczeniem oraz w przypadku, gdy nie jest używane. Kabel
zasilający należy trzymać tylko za wtyczkę.
• Urządzenie czyścić wilgotną szmatką. Nie stosować alkoholu ani rozpuszczalników.
3. Zasilanie urządzenia WC4171
Urządzenie WC4171 może być zasilane z akumulatora (brak w zestawie) lub za pomocą zasilacza AC/DC.
Podłączenie zasilacza WC4171 do gniazdka jednocześnie ładuje akumulator. Rozładowany akumulator ładuje się
całkowicie w ciągu 20h i pozwala na pracę urządzenia przez 4h.
Podłączanie akumulatora: podłączyć czerwony przewód do czerwonego zacisku;
podłączyć czarny przewód do czarnego zacisku; Patrz rysunek.
Następnie podłączyć końcówkę zasilacza do gniazdka wejściowego. Podłączyć
zasilacz do sieci. Włączyć urządzenie WC4171.
4. Obsługa
• Timer
Nacisnąć przycisk CLOCK/TIMER i wybrać tryb TIMER.
o Odliczanie w górę
Nacisnąć GO/STOP i wybrać STOP.
Nacisnąć TIMER SET/INTERVAL SET i wybrać TIMER SET.
W razie konieczności usunąć wyświetlany czas przyciskiem HOURS/MINUTES lub
MINUTES/SECONDS Nacisnąć przycisk raz, aby zwiększyć wartość, przytrzymać, aby zmniejszyć.
WC4171
15
VELLEMAN
Nacisnąć GO/STOP i wybrać GO. Wyświetlacz zacznie odliczanie w górę (do 99:59, po przekroczeniu
tej wartości powróci do 00:00 i będzie kontynuować odliczanie). Aby zatrzymać odliczanie, nacisnąć
GO/STOP i wybrać STOP. Czas można wyzerować, naciskając przycisk 12HR/24HR/RESET.
o Odliczanie w dół
Nacisnąć GO/STOP i wybrać STOP.
Nacisnąć TIMER SET/INTERVAL SET i wybrać TIMER SET.
Ustawić żądany czas przyciskami HOURS/MINUTES i MINUTES/SECONDS. Nacisnąć przycisk raz,
aby zwiększyć wartość, przytrzymać, aby zmniejszyć.
Nacisnąć GO/STOP i wybrać GO. Urządzenie zacznie odliczać w dół i wyemituje sygnał dźwiękowy,
gdy dojdzie do 00:00. Aby przywrócić uprzednio ustawiony czas, nacisnąć przycisk 12HR/24HR/RESET.
• Pomiar interwałowy
W tym trybie timer będzie odliczał w dół określony interwał czasu, wyemituje sygnał dźwiękowy po osiągnięciu
00:00, a następnie ponownie ustawi ten sam interwał i rozpocznie kolejne odliczanie.
o Ustawianie czasu interwału
Nacisnąć przycisk CLOCK/TIMER i wybrać tryb TIMER.
Nacisnąć TIMER SET/INTERVAL SET i wybrać INTERVAL SET.
Nacisnąć GO/STOP i wybrać STOP.
Ustawić żądany czas przyciskami HOURS/MINUTES i MINUTES/SECONDS. Nacisnąć przycisk raz,
aby zwiększyć wartość, przytrzymać, aby zmniejszyć.
Nacisnąć przycisk 12HR/24HR/RESET, aby dodać 15-sekundową przerwę pomiędzy odliczeniami.
Migająca dioda INTERVAL będzie sygnalizować rozpoczęcie przerwy w odliczaniu. Nacisnąć przycisk
12HR/24HR/RESET ponownie, aby wyłączyć tę funkcję.
Nacisnąć GO/STOP i wybrać GO. Rozpocznie się odliczanie w dół. Przed rozpoczęciem kolejnego
interwału urządzenie wyemituje 3 sygnały. Aby przywrócić uprzednio ustawiony czas, nacisnąć przycisk
12HR/24HR/RESET.
• Zegar
W trybie zegara urządzenie będzie wyświetlać bieżącą godzinę.
o Wyświetlanie w trybie 12/24-godzinnym
Nacisnąć przycisk CLOCK/TIMER i wybrać tryb CLOCK.
Nacisnąć TIMER SET/INTERVAL SET i wybrać TIMER SET.
Nacisnąć GO/STOP i wybrać STOP.
Nacisnąć przycisk 12HR/24HR/RESET, aby wybrać tryb wyświetlania 12 lub 24-godzinny.
Ustawić żądany czas przyciskami HOURS/MINUTES i MINUTES/SECONDS. Nacisnąć przycisk raz,
aby zwiększyć wartość, przytrzymać, aby zmniejszyć.
Nacisnąć GO/STOP i wybrać GO, aby zatwierdzić.
UWAGA: Wybranie innego trybu nie powoduje deaktywacji wcześniej wybranego trybu. Dlatego należy
dezaktywować wcześniej używany tryb, ustawiając wszystkie czasy na 00:00.
5. Specyfikacja techniczna
Zasilanie
Opcjonalny akumulator kwasowo-ołowiowy (kod zamówienia WP4-6)
Zasilacz 9V DC/1A (w zestawie)
Pobór mocy
< 8W
Wymiary
327 x 156 x 93 mm
Całkowita masa
1,6kg (bez akumulatora)
Aby uzyskać więcej informacji dotyczących tego produktu, należy odwiedzić naszą stronę internetową
www.velleman.eu.
Informacje zawarte w niniejszej instrukcji obsługi mogą ulec zmianie bez wcześniejszego powiadomienia.
WC4171
16
VELLEMAN