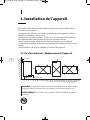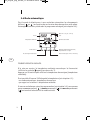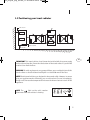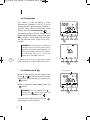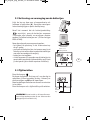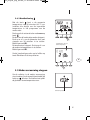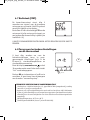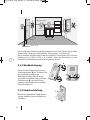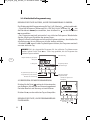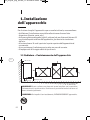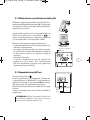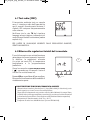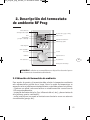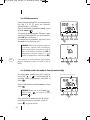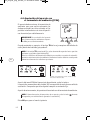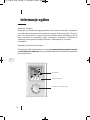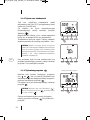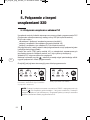
1
RF_prog:RF_prog_ACOVA_7L 22/10/2010 09:19 Page1 Z23020 NOTICE D’UTILISATION OPERATING INSTRUCTIONS GEBRUIKSAANWIJZING BEDIENUNGSANLEITUNG AVVERTANZE D’USO INSTRUCCIONES DE USO INSTRUKCJA OBSLUGI RF_prog:RF_prog_ACOVA_7L 22/10/2010 09:19 Page2 FRANÇAIS 81 ENGLISH 827 NEDERLANDS 851 DEUTSCH 875 ITALIANO 899 ESPAÑOL 123 POLSKI 147 RF_prog:RF_prog_ACOVA_7L 22/10/2010 09:19 Page1 FR 1 Installation de l’appareil 84 2 Description du thermostat d'ambiance RF Prog 88 3 Utilisation du thermostat d’ambiance RF Prog 811 FR 4 Réglages avancés du thermostat d’ambiance RF Prog 817 5 Association à d’autres dispositifs X2D 821 6 Préconisations d’usage 823 7 Conseils d’entretien 824 8 En cas de non fonctionnement 824 1 RF_prog:RF_prog_ACOVA_7L 22/10/2010 09:19 Page2 Généralités Madame, Monsieur Nous vous remercions d’avoir choisi ce radiateur ou ce sèche-serviettes. Elaboré avec le plus grand soin selon notre charte qualité, nous vous en souhaitons une entière satisfaction. Pour profiter pleinement de toutes ses possibilités, nous vous invitons à lire attentivement cette notice et à la conserver à proximité de votre appareil. Merci de votre confiance. Votre radiateur est piloté à distance par son THERMOSTAT D’AMBIANCE PROGRAMMABLE À LIAISON RADIO FRÉQUENCE qui lui permet de réguler la température souhaitée dans votre pièce. FR Écran d’affichage 4 touches de sélection Bouton sélecteur de mode 2 RF_prog:RF_prog_ACOVA_7L 22/10/2010 09:19 Page3 Cet appareil n’est pas prévu pour être utilisé par des personnes (y compris les enfants) dont les capacités physiques, sensorielles ou mentales sont réduites, ou des personnes dénuées d’expérience ou de connaissance, sauf si elles ont pu bénéficier, par l’intermédiaire d’une personne responsable de leur sécurité, d’une surveillance ou d’instructions préalables concernant l’utilisation de l’appareil. Il convient de surveiller les enfants pour s’assurer qu’ils ne jouent pas avec l’appareil. Les radiateurs et sèche-serviettes doivent être utilisés conformément à l’usage auxquels ils sont destinés et non comme console, chaise, jeu, échelle… FR MISE EN GARDE POUR L’UTILISATION DES APPAREILS CHROMÉS, INOX OU ALUMINIUM Parmi les différents états de surface du radiateur, les appareils chromés, en inox ou en aluminium sont ceux qui transmettent la plus forte sensation de chaleur au toucher. Il est conseillé de ne pas s’appuyer sur la façade de l’appareil lorsque celui-ci est en fonctionnement afin d’éviter tout risque de brûlure. 3 RF_prog:RF_prog_ACOVA_7L 22/10/2010 09:19 Page4 1. Installation de l’appareil Pour profiter pleinement de votre appareil et pour votre plus grand confort, nous vous recommandons : - de réaliser l’installation si possible à proximité des emplacements à fortes déperditions (fenêtres, portes, etc.) - de disposer tout objet (meubles, chaises, etc.) au minimum à 50 cm environ de la face avant de l’appareil pour favoriser la circulation de l’air. - de laisser au minimum 10 cm entre le haut de l’appareil et une tablette. - l’appareil de chauffage ne doit pas être placé juste en dessous d’une prise de courant. - d’utiliser des vis de fixation adaptées à la nature de votre mur. 1.1 Cas d’un radiateur - Emplacement de l’appareil 10 cm mini FR 10 cm mini Récepteur radio IMPORTANT Ce radiateur ne doit jamais être installé avec son boîtier d’alimentation en position haute. Positionner le bas du radiateur au minimum à 10 cm du sol. AVERTISSEMENT Afin d’éviter une surchauffe, NE PAS COUVRIR l’appareil de chauffage. 4 RF_prog:RF_prog_ACOVA_7L 22/10/2010 09:19 Page5 1.2 Cas d’un sèche-serviettes Emplacement de l’appareil 10 cm mini Récepteur radio 15 cm mini FR IMPORTANT Ce sèche-serviettes ne doit jamais être installé avec son boîtier d’alimentation en position haute. Positionner le bas du sèche-serviettes au minimum à 15 cm du sol. MISE EN GARDE Pour éviter tout danger pour les très jeunes enfants, il est recommandé d’installer ce sèche-serviettes de façon telle que le barreau chauffant le plus bas soit au moins à 600mm au dessus du sol. À NOTER Les radiateurs sèche-serviettes électriques sont conçus pour être recouverts sans danger. Pour garantir un fonctionnement efficace de votre appareil, il est toutefois recommandé de ne pas le couvrir entièrement. Du fait de l’élévation de température et grâce au coupe circuit interne, il peut dans ce cas interrompre son fonctionnement. REMARQUE Lorsque le voyant du boitier récepteur radio s’allume, il indique la chauffe de votre radiateur. 5 RF_prog:RF_prog_ACOVA_7L 22/10/2010 09:19 Page6 1.3 Raccordement du radiateur Les caractéristiques techniques de votre radiateur sont indiquées sur son étiquette signalétique disposée sur le côté, en partie basse. Veillez à en prendre note préalablement à son installation. IP : indice de protection de votre appareil contre les projections d’eau xxxV – xxxxW : tension et puissance à respecter lors de l’installation Référence de l’appareil Classe II : double isolation OF : numéro de fabrication Le raccordement au réseau électrique doit être effectué en respectant : _ La tension et la puissance indiquées sur cette étiquette _ Les couleurs conventionnelles (marron : Phase, bleu ou gris : Neutre). FR Le câble souple monté d’origine est destiné à être relié au réseau par l’intermédiaire d’une boîte de connexion qui devra être placée derrière l‘appareil, sans interposition d’une fiche prise de courant. Dans une cuisine ou une salle de bains, la boîte de connexion sera placée au moins à 25 cm du sol. 6 RF_prog:RF_prog_ACOVA_7L 22/10/2010 09:19 Page7 1.4 Raccordement du radiateur INSTRUCTIONS POUR LA FRANCE (EN APPLICATION DE LA NORME NFC 15.100) Au delà des règles prescrites dans cette notice, l’installation doit être conforme à la norme NFC 15.100 et aux règles de l’art. Cet appareil est de classe II. Il est protégé contre les projections d’eau et peut être installé dans les volumes 2 et 3, sous réserve que les organes de régulation électrique ne puissent être touchés par une personne utilisant la baignoire ou la douche. Il ne doit pas être raccordé à une borne de terre. Il est rappelé qu’un dispositif de coupure omnipolaire conformément à la norme NFC 15.100 est obligatoire. Dans une salle de bain ou de douche, veillez à protéger la ligne électrique par un dispositif différentiel haute sensibilité 30 mA. IMPORTANT Le radiateur ne doit pas être soumis à une humidité ambiante intensive ou permanente (douche, piscine, etc.). FR INSTRUCTIONS POUR LES AUTRES PAYS L’installation doit être conforme aux normes en vigueur et aux règles de l’art du pays dans lequel il est mis en œuvre. 7 RF_prog:RF_prog_ACOVA_7L 22/10/2010 09:19 Page8 2. Description du thermostat d'ambiance RF Prog Témoin d’usure des piles Heure Température (consigne ou ambiante) Allure en cours (ex. confort) Jours en cours Demande de chauffe Profil du programme Touches de réglage Mode automatique Economie Hors gel FR Arrêt chauffage Confort Réglage de l’heure Programmation Repère d’ouverture du capot ATTENTION Votre radiateur n’est pas compatible avec tout dispositif de commande autre que le thermostat d’ambiance fourni. 2.1 Emplacement du thermostat d’ambiance Pour réguler l’appareil, le thermostat doit mesurer la température ambiante la plus représentative possible de votre habitat. La sonde de mesure de la température étant dans le boîtier du thermostat d’ambiance, vous devez placer celui-ci : – sur un mur ou posé sur une étagère ou un meuble accessible à une hauteur de 1,50m environ, – à l’abri des sources de chaleur (lumière, influence du soleil, etc.) et des courants d’air (fenêtre, porte, ventilation). – évitez l’installation sur un mur en contact avec l'extérieur ou avec une pièce non chauffée (garage, etc.). 8 RF_prog:RF_prog_ACOVA_7L 22/10/2010 09:19 Page9 Fixé au mur Hauteur environ 1,50 m Posé sur un meuble Mini 20 cm Pour un réglage optimal de la température d'ambiance, le thermostat doit être installé dans la même pièce que le ou les appareils qu'il pilote. L'émission radio permet de traverser les obstacles (mobiliers, cloison..) de 100 à 300 mètres en champs libre, variable en fonction des conditions d'installation et de l'environnement électromagnétique. FR A 2.1.1 Fixation murale Soulevez le capot à l’aide d’un tournevis (A). Enlevez les piles livrées avec l’appareil. Fixez le thermostat à l’aide de vis et de chevilles ou sur une boîte d’encastrement (B : entraxe 60 mm). AUTO + - B PROG - + Remettez les piles en place en respectant leur polarité. 2.1.2 Fixation sur socle 1 En utilisant le support fourni, vous pouvez poser l’émetteur sur un meuble. 2 9 RF_prog:RF_prog_ACOVA_7L 22/10/2010 09:19 Page10 2.2 Activation et remplacement des piles Soulevez le capot à l’aide d’un tournevis en faisant levier (A). Puis ôtez la languette d’activation des piles et repositionnez ensuite le capot. A AUTO PROG À partir du moment où le témoin d’usure des piles apparaît, vous disposez d’environ 3 mois pour changer celles-ci (2 piles alcalines 1,5V de type LR03 ou AAA). FR Des précautions sont à prendre : – respecter les polarités +/– lors de la mise en place dans le thermostat, – ne pas jeter les piles usées n’importe où (dans un souci de respect de l’environnement, vous devez rapporter les piles usées dans un lieu de collecte), – ne pas les recharger, – vous avez environ 45 secondes pour changer les piles avant que le réglage de l’heure ne soit remis à zéro (dans ce cas, refaire le réglage de l’heure et de la date). + B PRO PROG - REMARQUE Pour que votre appareil fonctionne avec le thermostat d’ambiance, ils doivent être associés (voir chapitre 4.6). 10 + Témoin d’usure des piles 2.3 Mise à l’heure Tournez le bouton sur . Les jours clignotent. Appuyez sur + ou – pour effectuer votre choix (on peut prendre le lundi pour jour 1) puis appuyez sur OK pour valider et passer au réglage suivant. Recommencez les opérations pour régler les heures puis les minutes. Tournez le bouton pour sortir du mode de réglage. - AUTO Heure Minutes Jour RF_prog:RF_prog_ACOVA_7L 22/10/2010 09:19 Page11 3. Utilisation du thermostat RF Prog 3.1 Présentation des modes de fonctionnement ARRÊT CHAUFFAGE L’appareil est en mode arrêt chauffage. CONFORT C’est le mode à utiliser en cas d’occupation de la pièce (température par défaut : 19°C). ÉCONOMIE (ECO) C’est le mode à utiliser en cas d’inoccupation de la pièce. Il est conseillé en cas d’absence supérieure à 2 heures (température par défaut : 16°C). HORS GEL C’est le mode à utiliser en cas d’absence prolongée. Il est conseillé au-delà de 24 heures (température par défaut : 7°C). FR AUTO le thermostat pilote votre appareil selon votre programme hebdomadaire (voir chapitre 3.3) avec affichage du mode de la plage horaire en cours. 3.2 Réglage des températures de consigne Les températures de consigne sont les températures que vous souhaitez dans votre pièce selon les différents modes de fonctionnement ci-dessus. Tournez le bouton sur : pour régler la température hors-gel (de 5°C à 15°C), pour régler la température économie Température de consigne (de 10°C à 30°C), pour régler la température confort (de 10°C à 30°C), Appuyez sur + ou - pour ajuster la température par pas de 0,5°C. Puis tournez le bouton pour passer au réglage suivant. À NOTER Appuyez sur la touche i pour afficher momentanément la température ambiante. 11 RF_prog:RF_prog_ACOVA_7L 22/10/2010 09:19 Page12 3.3 Programmation La fonction programmation permet de programmer les allures ECO ( ) et CONFORT ( ) tout au long de la journée. Cette programmation peut être identique tous les jours (programmation journalière) ou différente chaque jour (programmation hebdomadaire). En cas de changement de vos habitudes, il vous est toujours possible de basculer manuellement votre appareil sur le mode désiré ( ou ou ) à l’aide du bouton. 3.3.1 Programmation par défaut POUR CONSULTER LA PROGRAMMATION, TOURNEZ LE BOUTON SUR PROG À la mise en service du thermostat programmable, le programme prédéfini est « CONFORT de 6 h à 23 h » appliqué à tous les jours de la semaine. FR Heure de début du créneau consulté Jour consulté Profil du programme du jour consulté Passage au jour suivant Profil du programme par défaut : – de 0 à 6 h : allure ECO – de 6 h à 23 h : allure CONFORT – de 23 h à 0 h : allure ECO 12 Aller au prochain changement du programme RF_prog:RF_prog_ACOVA_7L 22/10/2010 09:19 Page13 3.3.2 Programmation personnalisée POUR MODIFIER LA PROGRAMMATION, TOURNEZ LE BOUTON SUR PROG L’écran correspond à la programmation du jour 1 (par ex. lundi) : s’affiche. – Le premier créneau horaire clignote (de minuit à 1 h), appuyez sur pour le définir en allure CONFORT, ou sur pour le définir en allure ECO. – Vous passez au créneau horaire suivant automatiquement. Répétez l’opération pour régler la journée entière. – Si vous souhaitez corriger ce que vous venez de faire, parcourez toutes les plages horaires pour revenir à celle que vous souhaitez modifier. – Quand vous souhaitez valider cette journée, appuyez sur OK pour passer au jour suivant. REMARQUE Pour appliquer le même programme au jour suivant, maintenez appuyée la touche OK environ 3 secondes jusqu’à afficher le programme du jour suivant. Jour modifié Heure de début du créneau modifié FR 1er créneau horaire Profil du programme du jour modifié Programmation d’1h d’Économie Programmation d’1h de Confort Passage au jour suivant POUR VÉRIFIER VOTRE PROGRAMMATION Aller au prochain changement du programme Heure de début du créneau consulté Appuyer successivement sur la touche . pour vérifier les heures de début des périodes CONFORT et ECONOMIE que vous avez renseignées. Appuyez sur OK pour vérifier le jour suivant. TOURNEZ LE BOUTON POUR SORTIR DE LA PROGRAMMATION Vérification des différentes périodes ou . 13 RF_prog:RF_prog_ACOVA_7L 22/10/2010 09:19 Page14 3.4 Mode automatique C’est le mode à sélectionner si vous souhaitez automatiser les changements d’allure ( ou ) en fonction de vos horaires de présence dans votre pièce. Votre appareil est alors piloté selon le programme renseigné (voir chapitre 3.3). Allure en cours (ex. confort) Heure Température ambiante Mode absence Mode changement d’allure Jour Demande de chauffe Affichage température ambiante / température de consigne Mode manuel (de 30 min. à 72 heures) FR TOURNEZ LE BOUTON SUR AUTO. À la mise en service, la température ambiante mesurée par le thermostat s’affiche. Le symbole apparaît au-dessus du °C. Appuyez sur la touche i pour afficher la température de consigne (température souhaitée). Il est possible d’inverser l’affichage de la température (voir chapitre 4.2) : – en mode automatique : température de consigne – par appui sur la touche i : température ambiante Si vous ne souhaitez pas suivre la programmation (voir chapitre 3.3), vous pouvez passer en ECO permanent ( ), CONFORT permanent ( ) ou HORS-GEL permanent ( )en tournant le bouton sur le mode souhaité. 14 RF_prog:RF_prog_ACOVA_7L 22/10/2010 09:19 Page15 3.4.1 Mode absence Ce mode permet de régler une température fixe (de 5 à 15°C) pour une durée réglable (de 1 à 365 jours). À partir du mode automatique (AUTO), appuyez sur la touche VALISE ( ). Le nombre de jours clignote. Appuyez sur + ou - pour régler le nombre de jours puis appuyez sur OK pour valider. La température clignote : réglez la valeur souhaitée à l’aide des boutons + ou -. EXEMPLE Départ le 10 Janvier, retour le 19 Janvier, indiquez 9 jours. Le fonctionnement automatique reprendra le 19 Janvier à 00 h 00. Validez par OK. La température clignote. Appuyez sur + ou - pour régler la température. Validez par OK. FR Pour annuler le mode absence (exemple : retour anticipé), appuyez sur la touche C ou tournez le bouton. 3.4.2 Mode changement d’allure Mode changement d’allure en cours Vous pouvez changer l’allure en cours (de . à ou inversement) durant le mode AUTO jusqu’au prochain changement du programme en appuyant sur la touche . À partir du mode automatique AUTO, appuyez sur la touche . EXEMPLE Vous êtes en allure ECO ( )un appui sur la touche permet de passer en allure CONFORT ( ). Pour annuler le mode changement d’allure, appuyez à nouveau sur la touche ou tournez le bouton. 15 RF_prog:RF_prog_ACOVA_7L 22/10/2010 09:19 Page16 3.4.3 Mode manuel Par la touche , vous pouvez régler une température de consigne différente de celle réglée dans le programme du mode auto pour une durée déterminée de 30 minutes à 72 heures. À partir du mode automatique AUTO, appuyez sur la touche . La durée du mode manuel clignote. Appuyez sur + ou - pour régler la durée souhaitée par pas de 30 min. Validez par OK. La température clignote. Appuyez sur + ou pour régler la température souhaitée. Validez par OK. Mode manuel en cours Pour annuler le mode manuel, appuyez sur la touche C ou tournez le bouton. FR 3.5 Mode arrêt chauffage Pour mettre en arrêt chauffage le radiateur (en été, par exemple), tournez le bouton sur . . Le thermostat affiche la température ambiante mesurée. Température ambiante 16 RF_prog:RF_prog_ACOVA_7L 22/10/2010 09:19 Page17 4. Réglages avancés du thermostat d’ambiance RF Prog Tournez le bouton sur ARRÊT CHAUFFAGE et appuyez 5 secondes sur la touche de droite jusqu’à afficher H200 x:xx (numéro de version de la télécommande). Appuyez sur OK. L’écran affiche CF01. 4.1 Correction de la mesure de la température ambiante (CF01) 5 sec. À l’aide des touches + ou - , vous pouvez ajuster la température ambiante mesurée par le thermostat jusqu’à +/- 4°C en cas de décalage avec la température constatée dans la pièce. Appuyez sur + ou - pour effectuer votre choix puis sur OK pour valider et passer au menu suivant. FR 4.2 Choix de l’affichage de la température en mode AUTO (CF02) Cette fonction vous permet de visualiser au choix soit la température ambiante mesurée par votre thermostat, soit la température de consigne. Appuyez sur + ou - pour effectuer votre choix puis sur OK pour valider et passer au menu suivant. 0 : affichage permanent de la température ambiante 1 : affichage permanent de la température de consigne 17 RF_prog:RF_prog_ACOVA_7L 22/10/2010 09:19 Page18 4.3 (CF03) - NON DISPONIBLE SUR CE MODÈLE Paramétrez cette valeur à 0 en appuyant sur + ou -, puis appuyez sur OK pour valider et passer au menu suivant. 4.4 (CF04) - NON DISPONIBLE SUR CE MODÈLE Paramétrez cette valeur à 0 en appuyant sur + ou -, puis appuyez sur OK pour valider et passer au menu suivant. FR 4.5 Mode cyclique (CF05) Paramétrez cette valeur à 0 en appuyant sur + ou -, puis appuyez sur OK pour valider et passer au menu suivant. 0 : actif 1 : inactif En cas d’association à d’autres produits domotiques X2D (transmetteurs, télécommandes, centrale d’alarme ou centrale CPL, etc., sauf détecteurs d’ouverture), paramétrez cette valeur à 1. 18 RF_prog:RF_prog_ACOVA_7L 22/10/2010 09:19 Page19 4.6 Association de l’appareil avec le thermostat d’ambiance (CF06) Votre appareil doit être associé au thermostat d’ambiance pour ne recevoir que les ordres envoyés par celui-ci, évitant ainsi les interférences possibles avec d’autres dispositifs à pilotage radio fréquence. IMPORTANT l’association de votre appareil au thermostat d’ambiance est indispensable à son fonctionnement. A la mise sous tension de votre appareil, le voyant TH du boîtier récepteur radio (à l’arrière du radiateur) clignote. À NOTER si le voyant TH est fixe, appuyez pendant 60 secondes jusqu’à ce que le voyant se mette à clignoter (réinitialisation). Tous les radiateurs non associés alimentés en électricité seront associés automatiquement à ce thermostat d’ambiance. Vous pouvez à l’aide de votre tableau électrique n’alimenter que les radiateurs concernés. Le voyant clignote (radiateur non associé) Le voyant est fixe lorsque le signal d’association du thermostat est pris en compte A partir du menu CF06 du thermostat d’ambiance, appuyez sur la touche +. L’apparition momentanée du symbole X2D correspond à l’envoi d’un signal d’association. Vérifiez que le voyant du récepteur devient fixe. Votre appareil est dorénavant associé au thermostat d’ambiance. À NOTER Si vous souhaitez désassocier le thermostat de votre appareil, appuyez sur la touche pendant 60 secondes pour le réinitialiser (annulation de l’association). Appuyez sur OK pour passer au menu suivant. 19 FR RF_prog:RF_prog_ACOVA_7L 22/10/2010 09:19 Page20 4.7 Test radio (CF07) Le thermostat d’ambiance envoie un signal vers le récepteur radio de votre appareil toutes les 3 secondes. Le symbole X2D apparaît alors momentanément à l’écran. Vérifiez que le voyant TH du récepteur clignote à chaque réception indiquant la réussite de l’association (voir chapitre 4.6). POUR SORTIR À TOUT MOMENT DES RÉGLAGES AVANCÉS, TOURNEZ LE BOUTON. 4.8 Retour aux réglages initiaux du thermostat FR Vous pouvez faire une réinitialisation générale pour revenir aux paramètres réglés en usine : les réglages avancés (en grisé dans les menus CF), les températures de consigne et la programmation par défaut. Tournez le bouton sur ARRÊT CHAUFFAGE et appuyez 10 secondes sur la touche de gauche jusqu’à afficher init. Appuyez sur OK pour valider ou sur C pour annuler. Retour à l’affichage du mode arrêt chauffage. 10 sec. CARACTÉRISTIQUES TECHNIQUES DU THERMOSTAT D’AMBIANCE _ Alimentation par 2 piles alcalines 1,5, type LR03 ou AAA (fournies), autonomie supérieure à 2 ans en utilisation normale, – Dispositif de télécommande à portée radio de 100 à 300 mètres en champ libre, variable en fonction des équipements associés (portée pouvant être altérée en fonction des conditions d’installation et de l’environnement électromagnétique, _ Température de fonctionnement : 0°C à + 40°C, _ Fréquence d’émission 868 MHz, classe I (norme EN 300 220). 20 RF_prog:RF_prog_ACOVA_7L 22/10/2010 09:19 Page21 5. Association à d’autres dispositifs X2D 5.1 Association de l’appareil avec une centrale CPL Votre appareil peut être commandé à distance par une centrale de programmation CPL (Courant Porteur en Ligne) au standard X2D (non fournie). Pour cela, il est nécessaire : _ d’installer et de raccorder votre appareil (chapitre 1) _ d’associer votre appareil au thermostat d’ambiance (chapitre 4.6) _ d’associer votre appareil avec cette centrale CPL (non fournie) Pour ce faire, positionnez votre centrale de programmation en mode association (voir la notice de cette centrale). Dans les réglages avancés du thermostat d’ambiance, accédez au menu CF05 (voir chapitre 4.5). Paramétrez la valeur à 1 (mode cyclique inactif). Le voyant CPL clignote sur le récepteur de l’appareil. Appuyez alors sur la touche , le voyant devient fixe indiquant la réception du signal d’association de la centrale. Votre (vos) radiateur(s) est (sont) dorénavant associé(s) à votre centrale. Le voyant TH est fixe (le radiateur est associé au thermostat), le voyant CPL clignote, en attente de l’association avec la centrale CPL Le voyant CPL devient fixe lorsque le signal d’association de la centrale de programmation est pris en compte IMPORTANT Tournez le bouton du thermostat d’ambiance sur PROG et programmez le mode CONFORT ( ) sur toutes les heures de chacun des 7 jours (voir chapitre 3.3). Positionnez ensuite le bouton sur AUTO et votre appareil sera ainsi piloté selon les allures envoyées par la centrale CPL. 21 FR RF_prog:RF_prog_ACOVA_7L 22/10/2010 09:19 Page22 5.2 Détecteur d’ouverture Un détecteur d’ouverture au standard X2D vous permet d’arrêter le chauffage automatiquement en cas d’ouverture d’une fenêtre par exemple. Pour cela, il est nécessaire : _ d’installer et raccorder votre appareil (voir chapitre 1) _ d’associer votre appareil au thermostat d’ambiance (voir chapitre 4.6) _ d’associer votre appareil avec ce détecteur d’ouverture (non fourni) Pour ce faire, appuyer 3 secondes sur la touche du récepteur de l’appareil jusqu’à ce que le voyant AUX clignote. Appuyer sur la touche d’association de votre détecteur d’ouverture. Le voyant AUX s’éteint indiquant la réussite de l’association. Votre radiateur est dorénavant associé au détecteur d’ouverture. 3 sec FR Le voyant TH est fixe (le radiateur est associé au thermostat) Le voyant AUX s’éteint lorsque le signal d’association du détecteur d’ouverture est pris en compte À NOTER Vous pouvez associer jusqu’à 8 détecteurs sur la voie AUX. Répétez les opérations précédentes pour chaque détecteur à associer. Après l’association, le voyant AUX allumé signale une fenêtre ouverte. 5.3 Réinitialisation des associations de votre appareil Pour supprimer toutes les associations de votre appareil aux différents dispositifs X2D auxquels il est associé (y compris du thermostat d’ambiance fourni), appuyez sur la touche pendant 60 secondes. Le voyant TH se met alors à clignoter, indiquant qu’il est en attente de réception d’un nouveau signal d’association. À NOTER pour ne supprimer que les associations de la voie AUX, appuyez sur la touche pendant 10 secondes. Au bout de 3 secondes d’appui, le voyant AUX clignote puis il s’éteint à la fin des 10 secondes d’appui indiquant ainsi la réussite de la désassociation. 22 RF_prog:RF_prog_ACOVA_7L 22/10/2010 09:19 Page23 6. Préconisations d’usage Votre appareil électrique est rempli d’un fluide hydractif et est prêt à l’emploi. Il est bouchonné et rempli en usine d’une huile minérale thermique haute performance. Ce fluide ne nécessite aucun entretien particulier. Les réparations nécessitant l’ouverture des orifices ne doivent être effectuées que par le fabricant ou son service après-vente qui normalement doit être contacté en cas de fuite d’huile. Lorsque l'appareil de chauffage est mis au rebut, respecter les réglementations concernant l'élimination de l'huile. En cas de vidange, le fluide doit obligatoirement être déposé chez un collecteur d’huile usagée. Dès la mise en chauffe de l’appareil, vous constaterez des phénomènes différents de ceux générés par un chauffage électrique conventionnel : _ La résistance électrique réchauffe le fluide qui se met progressivement et de façon naturelle en circulation à l’intérieur de l’appareil. _ Les propriétés d’inertie du fluide font que la température de surface de l’appareil n’atteint un niveau optimal qu’au bout de 10mn au minimum. _ C’est cette inertie qui à l’inverse garantit la constance et la durée de la chaleur émise, même lorsque la résistance n’est plus alimentée. _ Il est normal de constater que la partie supérieure de l’appareil soit moins chaude que le reste du corps de chauffe. En effet, pour permettre la dilatation nécessaire du fluide lorsqu’il chauffe, l’appareil n’est pas totalement rempli. Le volume d’air se situant naturellement en partie haute, il est normal que certains éléments supérieurs paraissent moins chauds. _ Votre appareil est constitué d’une large surface de chauffe, ce qui permet de façon auto-régulée l’adaptation de la quantité de chaleur émise aux besoins. Il est donc normal qu’en intersaison, lors d’un fonctionnement modéré de l’appareil, les écarts de température de surface de l’appareil soient plus perceptibles. RÈGLEMENTATION ENVIRONNEMENTALE ROHS : Conforme à la directive 2002/95/CE DEEE : Conforme à la directive 2002/96/CE Traitement des appareils électriques et électroniques en fin de vie. Ce symbole indique que ce produit ne doit pas être traité avec les déchets ménagers. Il doit être remis à un point de collecte approprié qui se chargera de son recyclage. En s’assurant que ce produit est bien mis au rebus de manière appropriée, vous aiderez à prévenir les conséquences négatives potentielles pour l’environnement et la santé humaine. 23 FR RF_prog:RF_prog_ACOVA_7L 22/10/2010 09:19 Page24 7. Conseils d’entretien Avant toute opération d’entretien, prenez soin d’arrêter l’appareil en tournant le bouton sur ARRÊT CHAUFFAGE ( ) et laissez le refroidir. Le choix des meilleurs matériaux et la qualité du traitement de surface protègent votre appareil de la corrosion et des chocs. Pour garantir par un entretien simple la longévité de votre appareil, nous vous recommandons de suivre les conseils suivants : - Pour l’entretien des parois extérieures de l’appareil, ne pas utiliser de produit abrasif ou corrosif, utilisez de préférence de l’eau savonneuse tiède. - Pour le boîtier d’alimentation et le thermostat d’ambiance, utilisez un chiffon doux et sec, sans solvant. 8. En cas de non fonctionnement FR En cas de non fonctionnement de votre appareil, vous pouvez procéder vous même aux vérifications suivantes, en vous assurant que : _ votre appareil est convenablement connecté et alimenté (voir chapitre 1), _ votre thermostat d’ambiance est à portée du récepteur radio de votre appareil et qu’il est correctement alimenté par des piles (voir chapitre 2) _ le thermostat commande bien la mise en chauffe de l’appareil (voir chapitre 3). À NOTER Lorsque à l’appareil. s’affiche à l’écran, le thermostat envoie un ordre de chauffe Faites un test de chauffe en positionnant sur CONFORT ( ) le bouton du thermostat et en vérifiant que la température de consigne soit bien supérieure à la température ambiante : la flamme doit s’afficher et vous devriez alors ressentir la chauffe du radiateur au bout de quelques minutes. Si ce n’est pas le cas, vérifiez l’emplacement du thermostat d’ambiance (voir chapitre 2.1), les piles (voir chapitre 2.2) et faites un test Radio (voir chapitre 4.7). Assurez vous aussi d’avoir associé le thermostat d’ambiance à l’appareil (voir chapitre 4.6) qui est un préalable indispensable à son fonctionnement. En cas de nécessité de remplacement de thermostat d’ambiance, réinitialisez les associations de votre appareil (voir chapitre 5.3) puis associez-le au nouveau dispositif de pilotage (voir chapitre 4.6). 24 RF_prog:RF_prog_ACOVA_7L 22/10/2010 09:19 Page25 Si le câble d’alimentation est endommagé, il doit être remplacé par le fabricant, son service après-vente ou une personne de qualification similaire afin d’éviter un danger. SERVICE APRÈS VENTE En cas de non fonctionnement ou besoin de pièces détachées, contactez votre installateur ou votre revendeur. Au préalable, pour permettre la bonne compréhension et un traitement rapide du problème, assurez-vous d’avoir bien relevé : – les éléments figurant sur l’étiquette signalétique de l’appareil (voir chapitre 1.3), – la référence commerciale figurant sur votre facture d’achat datée. GARANTIE (Voir conditions générales de vente dans le pays concerné) Votre radiateur est conforme à la directive CEM 2004/108/CE relative à la limitation des perturbations radioélectriques et aux normes européennes EN 60.335.1 / 60.335. 2.30 / 60.335.2.43. CAS D’ANNULATION DE LA GARANTIE La garantie ne s’applique pas notamment dans les conditions d’installation, d’utilisation, de mise en œuvre ou d’entretien non conforme à la norme en vigueur du pays, aux règles de l’art et à la notice d’utilisation du constructeur. Pour toute autre question concernant la garantie, contactez votre installateur ou votre revendeur. 25 FR RF_prog:RF_prog_ACOVA_7L 22/10/2010 09:19 Page26 26 RF_prog:RF_prog_ACOVA_7L 22/10/2010 09:19 Page27 EN 1 Installing your appliance 830 2 The RF Prog room thermostat 833 3 Using the RF Prog room thermostat 836 EN 4 Advanced settings for the RF Prog room thermostat 842 5 Associating your appliance with other X2D devices 846 6 Recommendations for use 848 7 Taking care of your appliance 849 8 In case of fault 849 27 RF_prog:RF_prog_ACOVA_7L 22/10/2010 09:19 Page28 General Dear customer Thank you for choosing this radiator or towel radiator. This product has been manufactured in accordance with our stringent quality requirements to give you total satisfaction. To get the most out of your radiator, we advise you to read these instructions carefully and keep them to hand. Thank you for your purchase. Your radiator is remotely controlled by a PROGRAMMABLE RADIO FREQUENCY ROOM THERMOSTAT which maintains room temperature at the desired level. EN Display 4 selection buttons Mode selector dial 28 RF_prog:RF_prog_ACOVA_7L 22/10/2010 09:19 Page29 This appliance is not intended for use by persons (including children) with impaired physical, sensory or mental capacities, or by persons lacking in experience or knowledge, unless they are supervised by, or have received prior instruction in using the appliance from, a person responsible for their safety. Children must be supervised to ensure that they do not play with the appliance. Radiators and towel radiators must be used for the purpose for which they are intended and not as a table, chair, toy, ladder, etc. EN WARNING FOR USING CHROMIUM PLATED, STAINLESS STEEL OR ALUMINIUM APPLIANCES Of the various radiator surface finishes, chrome plating, stainless steel and aluminium feel hottest to the touch. To avoid any risk of burns, you are advised not to lean against the appliance when it is switched on. 29 RF_prog:RF_prog_ACOVA_7L 22/10/2010 09:19 Page30 1. Installing the appliance To get the most out of your appliance and enjoy the highest standards of comfort, we recommend that you: - install the appliance near places of high heat loss (windows, doors, etc.) wherever possible - ensure that an area of at least 50 cm or so in front of the appliance is clear of objects which might hinder air circulation (furniture, chairs, etc.) - leave at least 10 cm between the top of the appliance and any shelf - not place the heating appliance underneath a power outlet - use mounting screws suitable for your wall. 1.1 Positioning your standard (non-towel) radiator Min. 10 cm EN Min. 10 cm Radio receiver IMPORTANT This radiator should never be installed with the power supply unit positioned topside. Ensure that the bottom of the radiator is positioned at least 10 cm from the floor. CAUTION To avoid overheating, DO NOT COVER the heating appliance. 30 RF_prog:RF_prog_ACOVA_7L 22/10/2010 09:19 Page31 1.2 Positioning your towel radiator Min. 15 cm Radio receiver Min. 15 cm EN IMPORTANT This towel radiator should never be installed with the power supply unit positioned topside. Ensure that the bottom of the towel radiator is positioned at least 15 cm from the floor. WARNING To avoid any danger to very young children, you are advised to install this towel radiator so that the lowest heating bar is at least 600 mm off the floor. NOTE Electric towel radiators are designed to be covered safely. However, to ensure that your appliance works efficiently, you are advised not to cover it completely. Doing so will increase the temperature and cause the internal cutout to turn off the appliance. NOTE The light on the radio receiver illuminates when the radiator is heating. 31 RF_prog:RF_prog_ACOVA_7L 22/10/2010 09:19 Page32 1.3 Connecting the radiator The technical specifications of your radiator are shown on the nameplate, which is positioned on the side of the radiator towards the bottom. Please take note of these before installing the radiator. IP : level of protection against ingress of water xxxV – xxxxW : voltage and power required for installation Model type Classe II : double insulation OF : serial number Connection to the electrical supply must be done in accordance with: _ The voltage and power indicated on this label _ Conventional colour coding: Brown for live, Blue or Grey for neutral. EN The flexible cord suplied is designed for connection to the electrical supply via a connection box placed behind the appliance, with no need for a plug. In a kitchen or bathroom, the connection box should be placed at least 25 cm off the ground. For dual-energy radiators: You are advised to install a circuit breaker between your radiator and the electricity supply to disconnect it from the power when it is used with your central heating system. 1.4 Radiator installation restrictions This appliance must be installed in accordance with applicable standards and good practice in the country concerned. The radiator must not be exposed to intensive or on-going ambient humidity (shower, swimming pool, etc.). 32 RF_prog:RF_prog_ACOVA_7L 22/10/2010 09:19 Page33 2. The RF Prog room thermostat Low battery indicator light Time Current mode (e.g. Comfort) Current day Temperature (setpoint or measured) Heat command active Program profile Selection buttons Automatic mode Economy Comfort Frost Protection Set time No Heat Program EN Cover opening point CAUTION Your radiator is not compatible with any control unit other than the room thermostat supplied. 2.1 Positioning the room thermostat For effective control of the radiator, the thermostat must be able to measure the most representative room temperature in your home. The temperature sensor is located inside the room thermostat unit. Therefore, the room thermostat should be: – fixed to a wall or placed on a shelf or an accessible piece of furniture at a height of approximately 1.50 m – protected from sources of heat (light, sunlight, etc.) and draughts (windows, doors, fans) – and should not be placed on an exterior wall or a wall adjoining an unheated room (garage, etc.). 33 RF_prog:RF_prog_ACOVA_7L 22/10/2010 09:19 Page34 Wall mounted Approximate height 1.50 m On a piece of furniture 20 cm min EN To ensure optimum room temperature regulation, the thermostat must be installed in the same room as the appliance(s) it is controlling. The radio signals can penetrate obstacles such as furniture, partition walls, etc. over a free-field range of 100 to 300 metres. This range may vary according to the installation conditions and the electromagnetic environment. A 2.1.1 Wall mounting Remove the cover using a screwdriver (A). Remove the batteries supplied with the device. Secure the thermostat to the wall using screws and wall plugs or place in an electrical mounting bo (B : centre to centre distance 60 mm). AUTO + - Replace the batteries, ensuring the correct polarity. 1 2.1.2 Using the stand You can place the transmitter on a piece of furniture using the stand supplied. 34 - B PROG 2 + RF_prog:RF_prog_ACOVA_7L 22/10/2010 09:19 Page35 2.2 Activating and replacing the batteries Lever off the cover using a screwdriver (A). Remove the battery insulation tab and replace the cover. A AUTO PROG When the low battery indicator appears, you have approximately three months to change the batteries (2x 1.5V alkaline batteries of type LR03 or AAA). You should take the following precautions: – ensure correct +/- polarity when inserting batteries into the thermostat – take care when disposing of used batteries: protect the environment by disposing of them at an approved collection point – do not recharge the batteries – you have approximately 45 seconds to insert new batteries before your time and date settings are lost (if this happens, the time and date settings must be re-entered). + - AUTO B PRO PROG - + Low battery indicator light EN 2.3 Setting the time Turn the dial to . The days will blink. Press + or – to select the required day (Monday can be taken as day 1) then press OK to confirm and move on to the next setting. Follow the same procedure to set the hours and then the minutes. Turn the dial to exit the settings mode. Hour Minutes Day NOTE Your appliance and the room thermostat must be associated with each other before they will work together (see section 4.6). 35 RF_prog:RF_prog_ACOVA_7L 22/10/2010 09:19 Page36 3. Using the RF Prog room thermostat 3.1 The operating modes NO HEAT The appliance is in No Heat mode. COMFORT This mode should be used when the room is occupied (default temperature: 19°C). ECONOMY (ECO) This mode should be used when the room is unoccupied. It is recommended for periods of absence longer than 2 hours (default temperature: 16°C). FROST PROTECTION This mode should be used when the room is unoccupied for long periods. It is recommended for periods of absence longer than 24 hours (default temperature: 7°C). EN AUTO The thermostat operates your appliance in accordance with your chosen weekly program (see section 3.3) and displays the mode selected for the current timeslot. 3.2 Programming the setpoint temperatures The setpoint temperatures are the room temperatures you wish to apply for each of the above modes. Turn the dial to: to set the frost protection temperature (between 5°C and 15°C), to set the economy temperature (between 10°C and 30°C), to set the comfort temperature Setpoint temperature (between 10°C and 30°C), Press + or - to change the temperature in 0.5°C increments. Then turn the dial to move to the next setting. NOTE Press the i button to briefly display the current room temperature. 36 RF_prog:RF_prog_ACOVA_7L 22/10/2010 09:19 Page37 3.3 Programming the thermostat The program function is used to schedule operation of the ECO and COMFORT modes throughout the day. The thermostat can be set to operate to the same program every day (daily program) or to a different program each day (weekly program). You can also switch your appliance to any desired mode ( manually using the dial at any time if your schedule changes. or or ) 3.3.1 Default program TO VIEW THE PROGRAM, TURN THE DIAL TO PROG On first use, the programmable thermostat is set to run the program “COMFORT from 6am to 11pm” every day of the week. EN Start of timeslot displayed Day displayed Program profile for day displayed Go to next program change Move to next day Default program profile: – from midnight to 6am: ECO mode – from 6am to 11pm: COMFORT mode – from 11pm to midnight: ECO mode 37 RF_prog:RF_prog_ACOVA_7L 22/10/2010 09:19 Page38 3.3.2 Custom program TO CHANGE THE PROGRAM, TURN THE DIAL TO PROG The screen shows the program for day 1 (for example Monday). is displayed against the day being programmed. – When the first timeslot (from midnight to 1am) blinks, press to select COMFORT mode or to select ECO mode. – You will move to the next timeslot automatically. Repeat until you have entered settings for the entire day. – If you wish to make any corrections, cycle through all the timeslots until you reach the one you want to change. – When you are ready, press OK to confirm your settings for the day and move to the next day. NOTE To apply the same program for the following day, keep the OK button pressed down for approximately 3 seconds until the program for the following day is displayed. Day you are modifying Start of timeslot you are modifying EN First timeslot Program profile for the day you are modifying Select Economy for 1h Select Comfort for 1h Go to next program change Move to next day TO REVIEW YOUR PROGRAM Start of timeslot displayed Press the button repeatedly to review the start times for the COMFORT and ECONOMY periods you entered previously. Press OK to move to the next day. TURN THE DIAL TO EXIT THE PROGRAM FUNCTION. Review the various or periods. 38 RF_prog:RF_prog_ACOVA_7L 22/10/2010 09:19 Page39 3.4 Automatic mode This mode should be used if you wish to change between modes ( and ) automatically to suit your schedule. When in this mode, your appliance is operated according to the program entered previously (see section 3.3). Current setpoint (e.g. Comfort) Time Room temperature Away mode Day Heat command active Room temperature/ setpoint temperature display Mode switch Manual mode (from 30 min. to 72 hours) EN TURN THE DIAL TO AUTO On first use, the display will show the room temperature measured by the thermostat. The symbol is displayed above the °C symbol. Press the 1 button to display the setpoint (desired) temperature. It is possible to change which temperature is shown on the display (see section 4.2): – in automatic mode: setpoint temperature – press the i button: room temperature If you wish to deviate from the program (see section 3.3), you can switch to permanent ECO mode ( ), permanent COMFORT mode ( ) or permanent FROST ) by turning the dial to the desired mode. PROTECTION mode ( 39 RF_prog:RF_prog_ACOVA_7L 22/10/2010 09:19 Page40 3.4.1 Away mode This mode is used to define a fixed temperature (between 5 and 15°C) to be maintained for a preset period (between 1 and 365 days). When in automatic mode (Auto), press the SUITCASE BUTTON ( ). The number of days will blink. Press + or - to select the desired number of days then press OK to confirm. The temperature will blink: set the desired value using the + and buttons. EXAMPLE If you are leaving on 10 January and returning on 19 January, select 9 days. Automatic mode will resume at 00:00 on 19 January. Press OK to confirm. The temperature will blink. Press + or - to set the temperature. Press OK to confirm. EN To cancel away mode (e.g. if you return earlier than expected), press button C or turn the dial. 3.4.2 Mode switch When in Auto mode, you can switch mode (from to or vice-versa) until the next scheduled mode change by pressing the button. When in automatic mode (AUTO), press the button. EXAMPLE If you are in ECO mode ( ), pressing the button will switch the thermostat to COMFORT mode ( ). To cancel the mode switch, press the button again or turn the dial. 40 Mode switch active RF_prog:RF_prog_ACOVA_7L 22/10/2010 09:19 Page41 3.4.3 Manual mode By pressing the button, you can switch to a setpoint temperature different from that defined in your Auto mode program for a predetermined period of between 30 minutes and 72 hours. When in automatic mode (AUTO), press the button. The manual mode duration will blink. Press + or - to increase or decrease the desired duration in 30 minute increments. Press OK to confirm. The temperature will blink. Press + or - to set the desired temperature. Press OK to confirm. Manual mode active To cancel manual mode, press button C or turn the dial. EN 3.5 No Heat mode To put the radiator into No Heat mode (in summer, for example), turn the dial to . The thermostat will display the measured room temperature. Room temperature 41 RF_prog:RF_prog_ACOVA_7L 22/10/2010 09:19 Page42 4. Advanced settings for the RF Prog room thermostat Turn the dial to NO HEAT and press the rightmost button for 5 seconds until the screen displays H200 x:xx (remote control model number). Press OK. The screen will display CF01. 4.1 Adjusting the room temperature measurement (CF01) If the room temperature measured by the thermostat deviates from actual room temperature, the thermostat measurement can be adjusted by up to +/- 4°C by pressing the + and - buttons. Press + or - to select the desired value then press OK to confirm and move to the next menu. EN 4.2 Selecting the temperature displayed in Auto mode (CF02) Using this function you can choose to display either the room temperature measured by your thermostat or the setpoint temperature. Press + or - to select the desired value then press OK to confirm and move to the next menu. 0 : room temperature always displayed 1 : setpoint temperature always displayed 42 5 sec. RF_prog:RF_prog_ACOVA_7L 22/10/2010 09:20 Page43 4.3 (CF03) - NOT AVAILABLE ON THIS MODEL Press + or - to set this value to 0, then press OK to confirm and move to the next menu. 4.4 (CF04) - NOT AVAILABLE ON THIS MODEL Press + or - to set this value to 0, then press OK to confirm and move to the next menu. EN 4.5 Cycle mode (CF05) Press + or - to set this value to 0, then press OK to confirm and move to the next menu. 0 : enabled 1 : disabled If the device is associated with other X2D home automation products (transmitters, remote controls, alarm system, PLC unit, etc., except door/window sensors), set this value to 1. 43 RF_prog:RF_prog_ACOVA_7L 22/10/2010 09:20 Page44 4.6 Associating the appliance with the room thermostat (CF06) Your appliance must be associated with the room thermostat to ensure that it receives commands from this device only and is not subject to interference from other radio frequency control devices. IMPORTANT It is vital that the appliance is associated with the room thermostat if it is to function correctly. When you connect your device to the power supply, the TH light on the radio receiver (to the rear of the radiator) will blink. NOTE If the TH light is glowing steadily, press for 60 seconds until it starts blinking (reset). Every radiator that is powered up but not associated with a thermostat will automatically be associated with this room thermostat. You can use your distribution board to supply power only to those radiators you want to associate. EN The light is blinking (radiator not associated) The light glows steadily when the association signal from the thermostat has been received From room thermostat menu CF06, press the + button. The X2D symbol appears briefly when an association signal is transmitted. Check that the light on the receiver has stopped blinking and is glowing steadily. Your appliance is now associated with the room thermostat. NOTE To disassociate your appliance from the thermostat, press button seconds to reset it. This will cancel the association. Press OK to move to the next menu. 44 for 60 RF_prog:RF_prog_ACOVA_7L 22/10/2010 09:20 Page45 4.7 Radio signal test (CF07) The room thermostat sends a signal to the radio receiver on your appliance every 3 seconds. The X2D symbol appears briefly on the display as it does so. Check that the TH light on the receiver blinks each time a signal is received. This confirms that the association process has been successful (see section 4.6). TO EXIT THE ADVANCED SETTINGS FUNCTION AT ANY TIME, TURN THE DIAL. 4.8 Restoring the thermostat to the factory settings Restarting the thermostat will restore the following values to their factory settings: the advanced settings (shaded in the CF menus), the setpoint temperatures and the default program. Turn the dial to NO HEAT and press the leftmost button for 10 seconds until "init" is displayed. Press OK to confirm or C to cancel. The EN 10 sec. NO HEAT mode display will then reappear. TECHNICAL SPECIFICATIONS OF THE ROOM THERMOSTAT _ Powered by 2x 1.5 V alkaline batteries, type LR03 or AAA (supplied), battery life over 2 years under normal use. _ Remote control device with radio range of 100 to 300 metres free field depending on equipment associated with it (range may be reduced by the installation conditions and the electromagnetic environment). _ Operating temperature: 0°C to 40°C. _ Signal frequency 868 MHz, class I (standard EN 300 220). 45 RF_prog:RF_prog_ACOVA_7L 22/10/2010 09:20 Page46 5. Associating your appliance with other X2D devices 5.1 Associating the appliance with a PLC unit Your appliance can be controlled remotely by a PLC (Powerline Carrier) programming base unit using the X2D protocol (not supplied). To enable this, you need to: _ install and connect your appliance (section 1) _ associate your appliance with the room thermostat (section 4.6) _ associate your appliance with the PLC unit (not supplied) To do this, place your programming base unit into association mode (see the instructions supplied with the unit). Access advanced settings menu CF05 on the room thermostat (see section 4.5). Set the value to 1 (cycle mode disabled). The PLC light on the appliance receiver will blink. Then press the button. The light will stop blinking and glow steadily, indicating that the PLC unit association signal has been received. EN Your radiator(s) is (are) now associated with your base unit. The TH light is glowing steadily (the radiator is associated with the thermostat) and the PLC light is blinking, showing that it is awaiting association with the PLC unit The CPL light glows steadily when the association signal from the programming base unit has been received IMPORTANT Turn the room thermostat dial to PROG and set the mode to COMFORT ( ) for every hour of each of the 7 days (see section 3.3). Then turn the dial to AUTO. The appliance will then be controlled by the PLC unit. 46 RF_prog:RF_prog_ACOVA_7L 22/10/2010 09:20 Page47 5.2 Door/window sensor A door/window sensor using the X2D standard can be used to automatically stop the appliance heating if a window is opened, for example. To enable this, you need to: _ install and connect your appliance (see section 1) _ associate your appliance with the room thermostat (section 4.6) _ associate your appliance with the door/window sensor (not supplied) To do this, press the button on the appliance receiver for 3 seconds until the AUX light blinks. Press the association button on your opening detector. The AUX light will go out, indicating that the association was successful. The radiator is now associated with the door/window sensor. 3 sec EN The TH light is glowing steadily (the radiator is associated with the thermostat) The AUX light goes off when the association signal from the door/window sensor has been received NOTE You can associate up to 8 sensors over the AUX bus. Repeat the operations described above for each sensor you wish to associate. Once associated, the AUX light will illuminate when a window is open. 5.3 Resetting the associations on your appliance To clear all the associations between your appliance and the various X2D devices it is associated with (including the room thermostat supplied), press the button for 60 seconds. The TH light will start to blink, showing that it is waiting for a new association signal. NOTE To cancel the associations on the AUX bus only, press button for 10 seconds. The AUX light will blink after 3 seconds then go out altogether after 10 seconds, indicating that the disassociation has been successful. 47 RF_prog:RF_prog_ACOVA_7L 22/10/2010 09:20 Page48 6. Recommendations for use EN Your electrical appliance is filled with a circulating fluid and is delivered ready to use. It is plugged and filled with a high-performance thermal mineral oil before leaving the factory. This fluid requires no special maintenance. Any repair work requiring the appliance to be opened should only be carried out by the manufacturer or their after-sales service department, which should also be contacted in the event of an oil leak. When disposing of the heating appliance, comply with the regulations in force on the disposal of oil. Fluid obtained when the appliance is emptied must be taken to a specialist used-oil disposal facility. As soon as the appliance is heating, you will notice certain differences compared to a standard electrical heating system: _ The electric heating element heats the fluid, which gradually and naturally starts circulating in your appliance. _ The inertial properties of the fluid are such that it takes at least ten minutes for the appliance to reach its optimum surface temperature. _ This inertia, however, also ensures consistent and sustained heating even when the element is no longer powered. _ It is normal that the top of the appliance is less hot than the rest of the heating body. This is because the appliance is not completely filled to allow the fluid to expand when it heats up. As the air inside is naturally located at the top of the appliance, it is normal for some of the upper parts of the appliance to feel less hot. _ Your appliance has a sizeable heating surface which enables it to regulate the heat it generates according to requirements. It is therefore normal that at milder times of the year, when the appliance is turned down, variations in the radiator’s surface temperature are more noticeable. ENVIRONMENTAL REGULATIONS RoHS: Complies with Directive 2002/95/EC WEEE: Complies with Directive 2002/96/EC Disposal of end-of-life electrical and electronic appliances. This symbol indicates that this product should not be disposed of with household waste. It must be taken to a suitable collection point to be recycled. By disposing of this product correctly, you will help prevent potential negative consequences for the environment and human health. 48 RF_prog:RF_prog_ACOVA_7L 22/10/2010 09:20 Page49 7. Taking care of your appliance Before carrying out any maintenance, switch the appliance off by turning the dial to NO HEAT ( ) and allow it to cool. High-quality materials and surface treatment protect your appliance against corrosion and impacts. To maximise the service life of your appliance, we recommend you take the following precautions: - Never use abrasive or corrosive products on the outer surfaces of the appliance; use warm, soapy water. - Use a soft dry cloth (without solvent) to clean the power supply unit and the room thermostat. 8. In case of fault If your appliance stops working, check that: _ your appliance is properly connected to an appropriate power supply (see section 1), _ the radio receiver on your device is within range of the room thermostat and that the batteries are functioning correctly (see section 2) _ the thermostat is heating the appliance as it should (see section 3). NOTE When the screen displays instruction to heat. , the thermostat is sending the appliance an To test whether the radiator is heating, turn the thermostat dial to COMFORT ( ) and check that the setpoint temperature is higher than the current room temperature: the flame icon should be displayed and after a few minutes you should be able to feel the radiator heating up. If the radiator remains cold, check the position of the room thermostat (see section 2.1) and the batteries (see section 2.2) and perform a radio signal test (see section 4.7). Confirm that you have associated the appliance with the room thermostat (see section 4.6); this is essential for proper operation of your appliance. If the room thermostat needs to be replaced, reset your appliance’s associations (see section 5.3) and then associate it with the new control unit (see section 4.6). 49 EN RF_prog:RF_prog_ACOVA_7L 22/10/2010 09:20 Page50 If the power cable is damaged, for safety reasons it must be replaced by the manufacturer, the manufacturer’s after-sales service department or a similarly qualified person. AFTER-SALES SERVICE If your appliance stops working or you require spare parts, contact your installer or dealer. Prior to making contact and to ensure your problem is dealt with quickly and effectively, please make a note of: – the details shown on the appliance nameplate (see section 1.3), – the sales reference for your appliance shown on your dated purchase invoice. GUARANTEE (See general conditions of sale for your country) EN Your radiator complies with Directive 2004/108/EC on the approximation of the laws of the Member States relating to electromagnetic compatibility (EMC) and with European standards EN 60335-1 / 60335-2-30 / 60335-2-43. CANCELLATION OF THE GUARANTEE The guarantee shall not apply if the appliance is installed, used or maintained in a way that does not comply with standards in force in the relevant country, good professional practice, or the manufacturer’s instructions. For all other questions regarding the guarantee, please contact your installer or dealer-. 50 RF_prog:RF_prog_ACOVA_7L 22/10/2010 09:20 Page51 NL 1 Het toestel installeren 854 2 Beschrijving van de RF Prog kamerthermostaat 857 3 Gebruik van de RF Prog kamerthermostaat 860 NL 4 Geavanceerde instellingen van de RF Prog kamerthermostaat 866 5 Aansluiten op andere X2D-toestellen 870 6 Aanbevelingen voor gebruik 872 7 Onderhoudsinstructies 873 8 Storingen verhelpen 873 51 RF_prog:RF_prog_ACOVA_7L 22/10/2010 09:20 Page52 Algemeen Geachte mevrouw, mijnheer, Hartelijk dank dat u hebt gekozen voor deze radiator of handdoekradiator. De radiator is met de grootst mogelijke zorg ontwikkeld overeenkomstig onze kwaliteitsnormen en wij wensen u dan ook veel plezier van uw toestel. Om volledig te kunnen profiteren van alle mogelijkheden die het toestel biedt, verzoeken wij u deze instructies zorgvuldig te lezen en bij uw toestel te bewaren. Bedankt voor uw vertrouwen. Uw radiator wordt op afstand bestuurd door een PROGRAMMEERBARE KAMERTHERMOSTAAT MET RADIOFREQUENTIEVERBINDING waarmee de gewenste temperatuur in uw vertrek kan worden geregeld. NL Display 4 keuzetoetsen Functieknop 52 RF_prog:RF_prog_ACOVA_7L 22/10/2010 09:20 Page53 Dit toestel is niet bedoeld voor gebruik door personen (waaronder kinderen) met een beperkt fysiek, zintuiglijk of geestelijk vermogen, of personen zonder ervaring of kennis behalve als er toezicht wordt gehouden door een persoon die verantwoordelijk is voor hun veiligheid, of als ze voorafgaande aan het gebruik van het toestel instructies hebben gekregen. Houd toezicht op kinderen om te voorkomen er dat ze met het toestel spelen. De radiatoren en handdoekradiatoren dienen gebruikt te worden voor het doel waarvoor zij bestemd zijn en dus niet om er iets op te plaatsen of als stoel, om te spelen, als ladder, enz. NL WAARSCHUWING VOOR HET GEBRUIK VAN VERCHROOMDE, ROESTVRIJSTALEN OF ALUMINIUM APPARATEN Wat de oppervlakte van radiatoren betreft bieden verchroomde, roestvrijstalen en aluminium apparaten het hoogste gevoel van warmte bij aanraking. Om het gevaar van verbranding te vermijden adviseren wij u niet tegen de voorkant van het apparaat te leunen als deze aan is. 53 RF_prog:RF_prog_ACOVA_7L 22/10/2010 09:20 Page54 1. Het toestel installeren Om volledig te kunnen profiteren van het toestel en voor het meeste comfort raden wij het volgende aan: - installeer het toestel als mogelijk bij plaatsen waar sprake is van sterk warmteverlies (ramen, deuren, enz.); - plaats alle objecten (meubels, stoelen) minimaal 50 cm van de voorkant van het toestel om de luchtcirculatie te bevorderen. - laat een ruimte van 10 cm vrij tussen de bovenkant van het toestel en een blad op het toestel; - het verwarmingstoestel niet direct onder een stopcontact plaatsen; - gebruik montageschroeven die geschikt zijn voor de wand. 1.1 Bij een radiator – Plaats van het toestel minimaal 10 cm NL minimaal 10 cm Draadloze ontvanger BELANGRIJK Installeer deze radiator nooit met de voedingsdoos aan de bovenkant. Plaats de onderkant van de radiator minimaal 10 cm boven de vloer. WAARSCHUWING Om oververhitting te voorkomen het verwarmingstoestel NIET BEDEKKEN. 54 RF_prog:RF_prog_ACOVA_7L 22/10/2010 09:20 Page55 1.2 Bij een handdoekradiator – Plaats van het toestel minimaal 15 cm Draadloze ontvanger minimaal 15 cm NL BELANGRIJK Deze handdoekradiator nooit met voedingsdoos aan de bovenkant installeren. Plaats de onderkant van de handdoekradiator minimaal 15 cm boven de vloer. LET OP Om gevaarlijke situaties voor zeer jonge kinderen te voorkomen wordt aangeraden deze handdoekradiator zodanig te plaatsen dat de onderste verwarmingsstang minstens 600 mm boven de vloer staat. LET OP De elektrische handdoekradiatoren zijn zo ontworpen dat ze zonder gevaar kunnen worden bedekt. Om de doeltreffende werking van het toestel te garanderen wordt echter aangeraden het toestel niet volledig te bedekken. Door de stijging van temperatuur en de interne stroomblokkering kan in dat geval de werking worden onderbroken. OPMERKING Als het controlelampje van de draadloze ontvanger oplicht geeft dit aan dat de radiator warm wordt. 55 RF_prog:RF_prog_ACOVA_7L 22/10/2010 09:20 Page56 1.3 De radiator aansluiten De technische kenmerken van uw radiator worden zijn terug te vinden op het identificatieplaatje dat zich onderaan, aan de zijkant bevindt. Wij verzoeken u dit te lezen voorafgaande aan de installatie. IP : beschermklasse van uw toestel tegen spatwater xxxV – xxxxW : tijdens de installatie in acht te nemen spanning en vermogen Type Apparaat Klasse II : dubbele isolatie OF : Serienummer NL De aansluiting op het elektriciteitsnet moet worden gedaan met inachtneming van : _ De op dit kenplaatje aangegeven spanning _ De conventionele kleuren Bruin : fase, Blauw of Grijs : neutraal De in de fabriek geïnstalleerde soepele kabel is bestemd om op het net te worden aangesloten door middel van een verbindingsdoos die achter het apparaat moet worden geplaatst, zonder een stroomstekker aan te brengen. In een keuken of badkamer, moet de verbindingsdoos op minstens 25 cm van de vloer worden aangebracht. Bij een gemengde radiator: wij raden u aan uw radiator achter een zekering aan te sluiten om de elektrische voeding te kunnen uitschakelen wanneer deze in een centrale verwarming wordt gebruikt. 1.4 Regels voor het installeren van de radiator Dit apparaat valt onder klasse II. Het is beschermd tegen spattend water. De installatie moet conform de van kracht zijnde normen en de regels van de kunst van het land zijn waarin het apparaat wordt gebruikt. OPGELET : De radiator mag niet worden blootgesteld aan een intensieve of permanente vochtigheidsgraad van de omgeving (douche, zwembad, enz.). 56 RF_prog:RF_prog_ACOVA_7L 22/10/2010 09:20 Page57 2. Beschrijving van de RF Prog kamerthermostaat Batterijaanduiding Tijd Huidige functie (bijv. comfort) Dagaanduiding Temperatuur (gewenst of gemeten) Warmtevraag Programmaprofiel Insteltoetsen Modus “Automatisch” Spaarmodus Vorstvrij Verwarmingsstop Comfort Tijdinstelling NL Programmering Merkteken voor opening van de kap OPGELET Uw radiator is niet compatibel met een ander besturingsapparaat dan met de meegeleverde kamerthermostaat. 2.1 De kamerthermostaat plaatsen Om het toestel te regelen,moet de thermostaat de meest representatieve kamertemperatuur in uw woning meten. Omdat de temperatuurvoeler zich in de behuizing van de kamerthermostaat bevindt, dient u deze te plaatsen: - op een wand, een plank of een gemakkelijk toegankelijk meubelstuk op ongeveer 1,50 m hoogte, - zodat het beschermd wordt tegen warmtebronnen (licht, invloed van de zon, enz.) en tocht (ramen, deuren, ventilatie). - vermijd het installeren op een buitenwand of op de wand van een niet verwarmde ruimte (garage, enz.). 57 RF_prog:RF_prog_ACOVA_7L 22/10/2010 09:20 Page58 Aan de wand bevestigd Hoogte ongeveer 1,50 m Op een meubel geplaatst Minimaal 20 cm NL Voor optimale regeling van de kamertemperatuur moet de thermostaat in hetzelfde vertrek worden geïnstalleerd als het/de toestel(len) dat/die door de thermostaat word(en) aangestuurd. De radiogolven kunnen in een vrij veld door obstakels (meubels, scheidingswanden, enz.) van 100 tot 300 meter worden verzonden afhankelijk van de omstandigheden van de installatie en de elektromagnetische omgeving. A 2.1.1 Bevestiging aan de wand Licht de kap op met behulp van een schroevendraaier (A). Verwijder de batterijen die met het toestel zijn meegeleverd. Bevestig de thermostaat met behulp van een schroevendraaier en pluggen of plaats het op een inbouwdoos (B: 60 mm tussenruimte). Plaats de batterijen erin, let hierbij op de polen. AUTO + - 1 2.1.2 Bevestiging op een steun Door Als u de meegeleverde steun gebruikt kunt u de zender op een meubel plaatsen. 58 - B PROG 2 + RF_prog:RF_prog_ACOVA_7L 22/10/2010 09:20 Page59 2.2 Activering en vervanging van de batterijen Licht de kap op door een schroevendraaier als hefboom te gebruiken (A). Verwijder vervolgens het activeringslipje en plaats de kap terug. A AUTO PROG Vanaf het moment dat de batterijaanduiding verschijnt, gaan de batterijen ongeveer 3 maanden mee voordat ze vervangen moeten worden (2 alkaline batterijen van 1,5V van het type LR03 of AAA). + Neem de volgende voorzorgsmaatregelen: - let tijdens de plaatsing in de thermostaat op de +/– polen, - gooi gebruikte batterijen niet zomaar weg (met het oog op het milieu moet u gebruikte batterijen naar een verzamelpunt brengen), - batterijen niet opladen - u hebt ongeveer 45 seconden om de batterijen te verwisselen voordat de tijdsaanduiding op 0 staat (in dat geval tijd en datum opnieuw instellen). - AUTO B PRO PROG - + Symbool voor batterijverbruik NL 2.3 Tijd instellen Draai de knop op . De dagen knipperen. Druk op + of – om de dag te selecteren (u kunt maandag als dag 1 kiezen) en druk vervolgens op OK om te bevestigen. Deze handelingen herhalen om de uren en minuten in te stellen. Draai de knop om als u tijdinstelling wilt verlaten. Tijd Minuten Dag OPMERKING Om uw toestel op de kamerthermostaat te laten werken moeten ze aan elkaar worden gekoppeld (zie hoofdstuk 4.6). 59 RF_prog:RF_prog_ACOVA_7L 22/10/2010 09:20 Page60 3. Gebruik van de RF Prog thermostaat 3.1 Uitleg over de werkingmodi VERWARMINGSSTOP Het toestel staat in de modus Verwarmingsstop. COMFORT Deze modus dient te worden gebruikt als het vertrek gebruikt wordt (standaardtemperatuur: 19ºC). SPAARMODUS (ECO) Deze modus dient te worden gebruikt als het vertrek niet wordt gebruikt. Dit wordt aangeraden als het vertrek langer dan 2 uur niet wordt gebruikt (standaardtemperatuur: 16ºC). VORSTVRIJ Deze modus dient te worden gebruikt bij een langere afwezigheid. Dit wordt aangeraden na 24 uur afwezigheid (standaardtemperatuur: 7°C). NL AUTO de thermostaat stuurt uw toestel aan volgens uw weekprogramma (zie hoofdstuk 3.3), met weergave van het actuele tijdblok. 3.2 Gewenste temperaturen instellen De gewenste temperatuur is de temperatuur voor uw vertrek , volg daarbij de onderstaande functies:Draai de knop op: om de vorstvrijtemperatuur in te stellen (van 5ºC tot 15ºC), om de spaartemperatuur in te stellen (van 10ºC tot 30ºC), om de comforttemperatuur in te stellen Setpoint temperature (van 10ºC tot 30ºC), Druk op + of – om de temperatuur in stappen van 0,5º C aan te passen. Draai daarna de knop om naar de volgende afstelling te gaan. LET OP Druk op toets i voor een tijdelijke weergave van de kamertemperatuur. 60 RF_prog:RF_prog_ACOVA_7L 22/10/2010 09:20 Page61 3.3 Programmering Met de modus Programmering kunnen de functies ECO ( ) en COMFORT ( ) voor de hele dag worden geprogrammeerd. Deze programmering kan elke dag dezelfde zijn (dagprogrammering) of dagelijks verschillen (weekprogrammering). Als uw gewoontes veranderen kunt u uw toestel altijd handmatig instellen in de gewenste modus ( of of ), met behulp van de knop. 3.3.1 Standaardprogrammering OM DE PROGRAMMERING TE RAADPLEGEN, DE KNOP NAAR PROG DRAAIEN Bij de inbedrijfstelling van de programmeerbare thermostaat is deze voor de hele week voorgeprogrammeerd op “COMFORT van 6.00 tot 23.00 u”. NL Aanvangstijd van het geraadpleegde tijdsinterval Geraadpleegde dag Programmaprofiel van de geraadpleegde dag Naar de volgende dag Naar de volgende programmawijziging Standaard programmaprofiel: – van 0u tot 6u: ECO functie – van 6u tot 23u: COMFORT functie – van 23u tot 0u: ECO functie 61 RF_prog:RF_prog_ACOVA_7L 22/10/2010 09:20 Page62 3.3.2 Gepersonaliseerde programmering OM DE PROGRAMMERING TE WIJZIGEN, DE KNOP NAAR PROG DRAAIEN Het display toont de programmering voor dag 1 (bijvoorbeeld maandag): wordt weergegeven. – Het eerste tijdsinterval knippert (van middernacht tot 01.00u.), druk op om hiervoor de COMFORT functie in te stellen, of op voor instelling van de ECO functie. – U gaat automatisch naar het volgende tijdsinterval. Deze handeling herhalen om de hele dag in te stellen. – Als u correcties wilt aanbrengen in de zojuist ingebrachte programmering doorloopt u alle tijdblokken tot u het tijdblok bereikt dat u wilt wijzigen. – Druk op OK als u deze dag wilt bevestigen, daarna gaat u naar de volgende dag. OPMERKING Om hetzelfde programma te gebruiken voor de volgende dag ongeveer 3 seconden de OK-toets indrukken totdat het programma van de volgende dag wordt weergegeven. Gewijzigde dag Aanvangstijd van het gewijzigde tijdsinterval NL 1e tijdsinterval Prog. 1uur in de Spaar modus Prog. 1uur in de Comfort modus Programmaprofiel van de gewijzigde dag Naar de volgende programmawijziging Naar de volgende dag Tijdstip van het geraadpleegde tijdsinterval PROGRAMMERING CONTROLEREN Druk meermaals op de toets om de aanvangstijden van de COMFORT- en SPAAR tijden die u hebt ingegeven, te controleren. Druk op OK om de volgende dag te controleren. DRAAI DE KNOP OM DE PROGRAMMEERMODUS TE VERLATEN. Controle van de verschillende of periodes. 62 RF_prog:RF_prog_ACOVA_7L 22/10/2010 09:20 Page63 3.4 Modus “Automatisch” Deze modus dient te worden geselecteerd als u de wijzigingen van de functies ( of ) automatisch wilt aanpassen aan uw aanwezigheid in het vertrek. Uw toestel wordt dan volgens het ingegeven programma aangestuurd (zie hoofdstuk 3.3). Actuele gewenste functie (bijv. comfort) Tijd Kamertemperatuur Afwezigheidsmodus Modus functiewijzigin Dag Warmtevraag Weergave kamertemperatuur/ gewenste temperatuur Modus handbediening (van 30 min. tot 72 uur) NL KNOP OP AUTO DRAAIEN. Bij de inbedrijfstelling wordt de door de thermostaat gemeten kamertemperatuur weergegeven. Het symbool verschijnt onder de ºC. Druk op de toets i om de gewenste temperatuur weer te geven. Het is mogelijk de weergave van de temperatuur om te draaien (zie hoofdstuk 4.2): - in de automatische modus: gewenste temperatuur - met een druk op toets i: kamertemperatuur Als u de programmering niet wilt volgen (zie hoofdstuk 3.3) kunt u op permanent ( ), COMFORT permanent ( ) of VORSTVRIJ permanent ( overschakelen door de knop in de gewenste modus te draaien. ECO ) 63 RF_prog:RF_prog_ACOVA_7L 22/10/2010 09:20 Page64 3.4.1 Afwezigheidsmodus Met deze modus kunt u een vaste temperatuur (van 5 tot 15ºC) instellen voor de gewenste duur (1 tot 365 dagen). Druk vanuit de modus “automatisch” (AUTO) op de toets KOFFER ( ). Het aantal dagen knippert. Druk op + of – om het aantal dagen in te stellen en vervolgens op OK ter bevestiging. De temperatuur knippert: Stel de gewenste waarde in met behulp van de knoppen + of -. VOORBEELD Vertrek 10 januari, thuiskomst 19 januari, 9 dagen aangeven. De automatische werking zal op 19 januari om 00.00 u. beginnen. Bevestigen met OK. De temperatuur knippert. Druk op + of – om de temperatuur in te stellen. Bevestigen met OK. NL Om de afwezigheidsmodus op te heffen (bijvoorbeeld: vervroegde thuiskomst) op toets C drukken of de knop draaien. 3.4.2 Modus "wijziging van functie” U kunt in de Auto-modus de huidige functie wijzigen (van naar of andersom) tot de volgende programmawijziging door op toets te drukken. Vanuit de automatische modus toets drukken. AUTO op VOORBEELD If you are in ECO mode ( ), pressing the button will switch the thermostat to COMFORT mode ( ). Om de modus voor functiewijziging op te heffen nogmaals op toets drukken of de knop draaien. 64 Modus "wijziging van functie” in werking RF_prog:RF_prog_ACOVA_7L 22/10/2010 09:20 Page65 3.4.3 Handbediening Met de toets kunt u de gewenste temperatuur van 30 minuten tot 72 uur instellen die afwijkt van de ingestelde temperatuur in het programma van de modus auto. Druk vanuit de automatische mode AUTO op toets . De duur van de handmatige modus knippert. Druk op + of – om de gewenste duur met stappen van 30 minuten in te stellen. Bevestigen met OK. De temperatuur knippert. Druk op + of - om de gewenste temperatuur in te stellen. Bevestigen met OK. Handmatige modus aan Kamertemperatuur Om de handmatige modus op te heffen op toets C drukken of de knop draaien. NL 3.5 Modus verwarming stoppen Om de radiator in de modus verwarming stop te zetten (in de zomer bijvoorbeeld) de knop op draaien. De thermostaat geeft de gemeten kamertemperatuur aan. Kamertemperatuur 65 RF_prog:RF_prog_ACOVA_7L 22/10/2010 09:20 Page66 4. Geavanceerde instellingen van de RF Prog kamerthermostaat Draai de knop op VERWARMINGSSTOP en druk 5 seconden op de rechtertoets totdat H200 x:xx (nummer van de versie van de afstandsbediening) wordt weergegeven. Druk op OK. Op het display verschijnt CF01. 4.1 Meetcorrectie van de kamertemperatuur (CF01) Met behulp van de toetsen + of – kunt u de gemeten kamertemperatuur met +/- 4ºC aanpassen bij een afwijking ten opzichte van de geconstateerde temperatuur in het vertrek. Druk op + of – om te kiezen en vervolgens op OK om te bevestigen en ga naar het volgende menu. NL 4.2 Opties voor temperatuurweergave in de Automodus (CF02) Met deze functie kunt u de door de thermostaat gemeten kamertemperatuur laten weergeven of de gewenste temperatuur. Druk op + of - om uw keuze te maken en vervolgens op OK om te bevestigen en ga naar het volgende menu. 0 : permanente weergave van de kamertemperatuur 1 : permanente weergave van de gewenste temperatuur 66 5 sec. RF_prog:RF_prog_ACOVA_7L 22/10/2010 09:20 Page67 4.3 (CF03) - NIET BESCHIKBAAR OP DIT MODEL U kunt deze waarde op 0 programmeren door op + of – te drukken en vervolgens op OK om te bevestigen en door te gaan naar het volgende menu. 4.4 (CF04) - NIET BESCHIKBAAR OP DIT MODEL U kunt deze waarde op 0 programmeren door op + of – te drukken en vervolgens op OK om te bevestigen en door te gaan naar het volgende menu. NL 4.5 Cyclische modus (CF05) U kunt deze waarde op 0 programmeren door op + of - te drukken en vervolgens op OK om te bevestigen en door te gaan naar het volgende menu. 0 : actief 1 : inactief Deze waarde op 1 programmeren als er een koppeling is met andere X2D huishoudelijke producten (zenders, afstandsbedieningen, alarmcentrale of PLC-centrale, enz., behalve openingsdetectoren). 67 RF_prog:RF_prog_ACOVA_7L 22/10/2010 09:20 Page68 4.6 Aansluiting van het toestel op de kamerthermostaat (CF06) Uw toestel moet op de kamerthermostaat worden aangesloten om het alleen commando’s te laten ontvangen die daardoor worden uitgezonden. Hierdoor vermijdt u mogelijke interferentie met andere draadloos bediende apparatuur. BELANGRIJK Uw toestel dient op de kamerthermostaat te worden aangesloten om te kunnen functioneren. Als het toestel aan is knippert het controlelampje TH op de draadloze ontvanger (aan de achterkant van de radiator). LET OP als het controlelampje TH onafgebroken brandt gedurende 60 seconden het controlelampje indrukken totdat het gaat knipperen (reset). Alle niet aangesloten radiatoren gevoed met stroom zijn automatisch op deze kamerthermostaat aangesloten. Met behulp van de groepenkast kunt u slechts de benodigde radiatoren voeden. NL Het controlelampje knippert (radiator niet aangesloten) Het lampje brandt onafgebroken als het aansluitingssignaal van de thermostaat wordt waargenomen. Druk vanuit menu CF06 van de kamerthermostaat op de + toets. De tijdelijke weergave van het symbool X2D betekent dat het aansluitingssignaal wordt verzonden. Controleer of het controlelampje van de ontvanger onafgebroken gaat branden. Uw toestel is nu aangesloten op de kamerthermostaat . LET OP Als u de thermostaat wilt ontkoppelen van uw toestel, drukt u gedurende 60 seconden op toets om het te resetten (annulering van de aansluiting). Druk op OK om naar het volgende menu te gaan. 68 RF_prog:RF_prog_ACOVA_7L 22/10/2010 09:20 Page69 4.7 Radiotest (CF07) De kamerthermostaat stuurt elke 3 seconden een signaal naar de draadloze ontvanger van uw toestel. Het X2D symbool verschijnt tijdelijk op het display. Controleer of het controlelampje TH van de ontvanger bij elke ontvangst knippert om aan te geven dat de aansluiting is gelukt (zie hoofdstuk 4.6). U KUNT DE GEAVANCEERDE INSTELLINGEN ALTIJD VERLATEN DOOR DE KNOP TE DRAAIEN. 4.8 Terug naar de standaardinstellingen van de thermostaat U kunt alles resetten om naar de fabrieksinstellingen terug te gaan: geavanceerde instellingen (grijs in de CF-menu's), standaardtemperaturen en standaardprogrammering. Draai de knop op VERWARMINGSSTOP en druk 10 seconden op de meest linker toets totdat "init" wordt weergegeven. NL 10 sec. Druk op OK om te bevestigen of op C om te annuleren. U keert terug naar de weergave van de modus "verwarmingsstop". TECHNISCHE GEGEVENS VAN DE KAMERTHERMOSTAAT _ Voeding door 2 alkaline batterijen 1,5, type LR03 of AAA (meegeleverd), werking meer dan 2 jaar bij normaal gebruik, - Apparaat voor afstandsbediening met een draadloos bereik van 100 à 300 meter in een vrij veld afhankelijk van de aangesloten apparatuur (het bereik kan wisselen afhankelijk van de omstandigheden van de installatie en de elektromagnetische omgeving), _ Werkingstemperatuur: 0°C tot + 40°C, _ Zendfrequentie 868 MHz, klasse I (norm EN 300 220). 69 RF_prog:RF_prog_ACOVA_7L 22/10/2010 09:20 Page70 5. Aansluiting op andere X2D apparatuur 5.1 Aansluiting van het toestel op een PLC centrale Het toestel kan op afstand worden geregeld door een PLC programmeercentrale (Power Line Communication: datacommunicatie via de elektriciteitsdraad) volgens de X2D standaard (niet meegeleverd). Daarvoor dient _ het toestel geïnstalleerd en aangesloten te worden (hoofdstuk 1) _ het toestel op de kamerthermostaat aangesloten te worden (hoofdstuk 4.6) _ het toestel op deze PLC centrale aangesloten te worden (niet meegeleverd) Zet hiervoor u de programmeercentrale in de aansluitingsmodus (zie de gebruiksaanwijzing van deze centrale). Ga in de geavanceerde instellingen van de kamerthermostaat naar menu CF05 (zie hoofdstuk 4.5). Zet de waarde op 1 (cyclische modus inactief). Op de ontvanger van het toestel knippert het PLC controlelampje. Druk dan op de toets en het controlelampje gaat onafgebroken branden om aan te geven dat het aansluitingssignaal wordt ontvangen. NL Uw radiator(en) is (zijn) van nu af aan aangesloten op uw centrale. Het controlelampje TH brandt onafgebroken (de radiator is verbonden met de thermostaat), het controlelampje CPL knippert in afwachting van aansluiting op de PLC centrale. Het controlelampje CPL gaat onafgebroken branden als het signaal van aansluiting op de PLC centrale wordt waargenomen. BELANGRIJK Draai de knop van de kamerthermostaat op PROG en programmeer de COMFORTMODUS ( ) voor alle uren van elk van de 7 dagen (zie hoofdstuk 3.3). Plaats vervolgens de knop op AUTO en uw toestel zal worden aangestuurd volgens de functies die door de PLC centrale worden verzonden. 70 RF_prog:RF_prog_ACOVA_7L 22/10/2010 09:20 Page71 5.2 Openingsdetector Met een openingsdetector met X2D standaard kunt u de verwarming automatisch uitzetten als u bijvoorbeeld een raam opent. Daarvoor dient u _ het toestel te installeren en aan te sluiten (zie hoofdstuk 1) _ het toestel op de kamerthermostaat aan te sluiten (zie hoofdstuk 4.6) _ het toestel op de openingsdetector aan te sluiten (niet meegeleverd) Druk hiervoor 3 seconden op de toets van de ontvanger van het toestel totdat het controlelampje AUX gaat knipperen. Druk op de aansluitingstoets van uw openingsdetector. Het controlelampje AUX gaat uit om aan te geven dat de aansluiting is geslaagd. Uw radiator is nu aangesloten op de openingsdetector. 3 sec NL Het controlelampje TH brand onafgebroken (de radiator is aangesloten op de thermostaat) Het controlelampje AUX gaat uit als het aansluitingssignaal van de openingsdetector wordt waargenomen LET OP U kunt maximaal 8 detectoren op het AUX-kanaal aansluiten. Herhaal de voorgaande handelingen voor elke aan te sluiten detector. Na aansluiting duidt het oplichten van het controlelampje AUX op een openstaand raam. 5.3 De aansluitingen van uw toestel resetten Om alle aansluitingen van uw toestel met de verschillende X2D apparaten op te heffen (inclusief de meegeleverde kamerthermostaat ) toets gedurende 10 seconden ingedrukt houden. Het controlelampje TH gaat knipperen om aan te geven dat gewacht wordt op een nieuw aansluitingssignaal. LET OP om alleen de aansluitingen met het AUX-kanaal op te heffen de toets gedurende 10 seconden ingedrukt houden. Na 3 seconden indrukken gaat het controlelampje AUX knipperen, na 10 seconden indrukken gaat het controlelampje uit om aan te geven dat de ontkoppeling is geslaagd. 71 RF_prog:RF_prog_ACOVA_7L 22/10/2010 09:20 Page72 6. Aanbevelingen voor gebruik NL Het elektrische toestel is gevuld met een minerale hydraulische vloeistof en is klaar voor gebruik. Het wordt in de fabriek afgedicht en gevuld met een hoogwaardige thermische minerale olie. Deze vloeistof heeft geen speciaal onderhoud nodig. Reparaties waarvoor de openingen moeten worden geopend, mogen slechts door de fabrikant worden uitgevoerd of door zijn after-salesservice die altijd moet worden geïnformeerd bij lekkage van olie. Neem de voorschriften in acht betreffende het verwijderen van olie als het verwarmingstoestel wordt afgedankt. Bij olieverversing is het verplicht de vloeistof naar een verzamelpunt voor verbruikte olie te brengen. Vanaf het moment dat het toestel warm wordt, zult u andere verschijnselen waarnemen dan bij een conventionele elektrische verwarming: _ De elektrische weerstand verwarmt de vloeistof die geleidelijk en op natuurlijke wijze in het toestel gaat circuleren; _ De inertie-eigenschappen van de vloeistof zorgen ervoor dat de oppervlaktetemperatuur van het toestel pas na minimaal 10 min. een optimaal niveau bereikt; _ Omgekeerd wordt door deze eigenschap de constante duur van de afgegeven warmte gegarandeerd, zelfs als de weerstand niet meer wordt gevoed; _ Het is normaal dat het bovenste deel van het toestel minder warm wordt dan het overige deel van het verwarmingslichaam. Het toestel wordt namelijk niet volledig gevuld om noodzakelijke uitzetting van de vloeistof tijdens het verwarmen mogelijk te maken. Aangezien het luchtvolume zich van nature in het hoogste deel bevindt, is het normaal dat enkele elementen aan de bovenkant minder warm lijken te zijn; _ Het toestel heeft een groot verwarmingsoppervlak waardoor de hoeveelheid warmte automatisch aan de behoefte wordt aangepast. Daarom is het normaal dat in het tussenseizoen als het toestel minder wordt gebruikt de verschillen in oppervlaktetemperatuur van het toestel meer opvallen. MILIEUVOORSCHRIFTEN RoHS: conform richtlijn 2002/95/EG AEEA: conform richtlijn 2002/96/EG Behandeling van elektrische en elektronische apparatuur als ze versleten zijn. Dit symbool duidt erop dat dit product niet samen met huishoudelijk afval mag worden verwerkt. Het dient bij een geschikt recyclingverzamelpunt te worden ingeleverd. Als u zorgt u dat dit product op de juiste wijze onbruikbaar wordt gemaakt, draagt u bij tot het voorkomen van mogelijk negatieve gevolgen voor het milieu en de menselijke gezondheid. 72 RF_prog:RF_prog_ACOVA_7L 22/10/2010 09:20 Page73 7. Onderhoudsinstructies Zorg ervoor dat het toestel voor aanvang van onderhoudswerkzaamheden wordt uitgeschakeld door de knop op Verwarmingsstop te draaien en laat het toestel afkoelen. De keuze van het beste materiaal en de kwaliteit van de oppervlaktebehandeling beschermen het toestel tegen corrosie en schokken. Om de levensduur van het toestel te garanderen door eenvoudig onderhoud raden wij aan de volgende instructies te volgen: - Gebruik voor het onderhoud van de panelen aan de buitenzijde van het toestel geen schuurmiddelen of bijtende middelen, maar gebruik bij voorkeur lauwwarm water met een sopje; - Gebruik voor de voedingsdoos en de kamerthermostaat een zachte, droge doek zonder oplosmiddel. 8. Storingen verhelpen In geval van storing van het toestel kunt u zelf het volgende controleren: _ of het toestel naar behoren is aangesloten en wordt gevoed (zie hoofdstuk 1); _ of de kamerthermostaat zich binnen bereik van de draadloze ontvanger van uw toestel bevindt en of het op de juiste wijze wordt gevoed door de batterijen (zie hoofdstuk 2) _ of de thermostaat het opstarten van het verwarmen van het toestel goed regelt (zie hoofdstuk 3). LET OP Als op het display wordt weergegeven, stuurt de thermostaat een verwarmingsopdracht naar het toestel. Voer een verwarmingstest uit door de knop van de thermostaat op COMFORT te zetten en te controleren of de gewenste temperatuur hoger is dan de kamertemperatuur : de vlam moet dan verschijnen en in de loop van enkele minuten moet de warmte van de radiator voelbaar zijn. Als dat niet het geval is, controleer dan de plaatsing van de kamerthermostaat (zie hoofdstuk 2.1), de batterijen (zie hoofdstuk 2.2.) en doe een Radiotest (zie hoofdstuk 4.7). Controleer of de kamerthermostaat op het toestel is aangesloten (zie hoofdstuk 4.6), wat een noodzakelijke voorwaarde voor zijn werking is. Als het noodzakelijk is de kamerthermostaat te vervangen, moeten de aansluitingen van uw toestel worden gereset (zie hoofdstuk 5.3) en vervolgens op het nieuwe aansturingsapparaat worden aangesloten (zie hoofdstuk 4.6). 73 NL RF_prog:RF_prog_ACOVA_7L 22/10/2010 09:20 Page74 Als de stroomkabel is beschadigd, moet deze worden vervangen door de fabrikant, zijn after-sales-service of een persoon met vergelijkbare kwalificaties om gevaarlijke situaties te voorkomen. AFTER-SALES-SERVICE Neem bij een storing of voor vervangingsonderdelen contact op met uw installateur of uw dealer. Noteer van te voren het volgende om te zorgen dat het probleem goed wordt begrepen en om het snel te verhelpen: – de gegevens die op het kenplaatje van het toestel worden vermeld (zie hoofdstuk 1.3.); – de verkoopreferentie die op uw aankoopfactuur wordt vermeld. GARANTIE (Zie de algemene verkoopvoorwaarden voor het betreffende land) NL De radiator voldoet aan richtlijn EMC 2004/108/EG inzake de beperking van radiostoringen en aan de Europese normen EN 60.335.1/60.335. 2.30 / 60.335.2.43. HET VERVALLEN VAN DE GARANTIE De garantie is met name niet van toepassing bij installatie-, gebruiks-, inbedrijfname- of onderhoudsomstandigheden die niet in overeenstemming zijn met de geldende norm van het land, erkende technische regels en de gebruiksaanwijzing van de fabrikant. Neem contact op met uw installateur of dealer voor alle andere vragen over de garantie. 74 RF_prog:RF_prog_ACOVA_7L 22/10/2010 09:20 Page75 D 1 Installation 878 2 Beschreibung des Raumthermostats RF Prog 881 3 Gebrauch des Raumthermostats RF Prog 884 D 4 Fortgeschrittene Einstellungen des Raumthermostats RF Prog 890 5 Verknüpfung mit anderen X2D Systemen 894 6 Gebrauchsempfehlungen 896 7 Pflegehinweise 897 8 Kontrollen bei Betriebsstörungen 897 75 RF_prog:RF_prog_ACOVA_7L 22/10/2010 09:20 Page76 Allgemeines Herzlichen Glückwunsch! Sie haben sich für diesen Heizkörper oder Handtuchtrockner entschieden, und wir danken Ihnen für diese Wahl. Dieses Produkt wurde von uns mit größter Sorgfalt nach unserer Qualitätscharta konzipiert und hergestellt, damit es Sie voll und ganz zufrieden stellt. Um seine Funktionalitäten kennen zu lernen und bestmöglich nutzen zu können, lesen Sie bitte diese Anleitung aufmerksam durch und bewahren sie in der Nähe des Geräts auf. Wir danken Ihnen für Ihr Vertrauen. Der Heizkörper wird über seinen PROGRAMMIERBAREN RAUMTHERMOSTAT ferngeregelt, der DURCH EINE FUNKFREQUENZVERBINDUNG für die gewünschte Temperatur im Raum sorgt. D Anzeigedisplay 4 Wahltasten Betriebswahltaste 76 RF_prog:RF_prog_ACOVA_7L 22/10/2010 09:20 Page77 Das Gerät ist nicht dafür bestimmt, von Personen (inkl. Kindern) mit eingeschränkten körperlichen, sensorischen oder geistigen Fähigkeiten und auch nicht von Personen ohne entsprechende Erfahrung oder Kenntnis in Gebrauch genommen zu werden, es sei denn, sie werden von einer für ihre Sicherheit verantwortlichen Person beaufsichtigt oder wurden von derselben im Vorfeld in der Benutzung des Geräts eingewiesen. Kinder sind zu beaufsichtigen, damit sie nicht mit dem Gerät spielen. Heizkörper mit Handtuchtrockner dürfen nur für den Zweck, für den sie ausgelegt sind, in Gebrauch genommen werden und dürfen nicht als Konsole, Stuhl, Spielzeug, Leiter usw. dienen. D WARNUNG BEI EINSATZ VERCHROMTER, EDELSTAHL- ODER ALUMINIUMGERÄTE Unter den verschiedenen Oberflächenqualitäten besitzen verchromte Heizkörper sowie Edelstahl- und Aluminiumgeräte die wärmste Oberfläche beim Berühren. Es wird davon abgeraten, sich im Betrieb auf der Vorderseite des Geräts abzustützen, um Verbrennungen zu vermeiden. 77 RF_prog:RF_prog_ACOVA_7L 22/10/2010 09:20 Page78 1. Installation Damit Sie das Gerät bestmöglich nutzen und optimalen Komfort genießen können, empfehlen wir Ihnen: - das Gerät möglichst in der Nähe von Zonen mit großem Wärmeverlust (Fenster, Türen usw.) zu installieren. - Gegenstände (Möbel, Stühle usw.) mindestens ca. 50 cm von der Vorderseite des Geräts entfernt aufzustellen, damit die Luft unbehindert zirkulieren kann. - mindestens 10 cm zwischen der Oberseite des Geräts und einem Regalboden frei zulassen. - den Heizkörper nicht direkt unterhalb einer Steckdose zu montieren. - geeignete Befestigungsschrauben je nach Beschaffenheit Ihrer Wand zu verwenden. 1.1 Fallbeispiel eines Heizkörpers – Lage des Geräts Mind. 10 cm D Mind. 10 cm Funkempfänger IBITTE BEACHTEN Der Heizkörper darf in keinem Fall mit der Versorgungseinheit oben installiert werden. Darauf achten, dass die Unterseite des Heizkörpers mindestens 10 cm vom Boden liegt. WARNHINWEIS Das Heizgerät NICHT ABDECKEN, um eine Überhitzung zu vermeiden. 78 RF_prog:RF_prog_ACOVA_7L 22/10/2010 09:20 Page79 1.2 Fallbeispiel eines Handtuchtrockners – Lage des Geräts Mind. 15 cm Funkempfänger Mind. 15 cm D BITTE BEACHTEN Der Handtuchtrockner darf in keinem Fall mit der Versorgungseinheit oben installiert werden. Darauf achten, dass die Unterseite des Handtuchtrockners mindestens 15 cm vom Boden liegt. WARNUNG Um Gefahren für Kleinkinder vorzubeugen, wird empfohlen, den Handtuchtrockner so zu installieren, dass der unterste Heizstab mindestens 600 mm vom Boden liegt. BITTE BEACHTEN Die elektrischen Heizkörper mit Handtuchtrockner können gefahrlos bedeckt werden. Um einen wirksamen Betrieb des Geräts zu gewährleisten sollten Sie es aber möglichst nicht ganz bedecken. Der Betrieb könnte nämlich vom internen Sicherheitsschalter unterbrochen werden, wenn die Temperatur zu hoch ansteigt. HINWEIS Die brennende Leuchte der Funkempfängereinheit weist darauf hin, dass der Heizkörper arbeitet. 79 RF_prog:RF_prog_ACOVA_7L 22/10/2010 09:20 Page80 1.3 Anschluss des heizkörpers Die technischen Merkmale Ihres Gerätes finden Sie auf dem Geräteschild unten seitlich am Heizkörper. Bitte nehmen Sie sie vor dem Aufstellen und Anschließen des Gerätes zur Kenntnis. IP : Schutzgrad des Geräts gegen Spritzwasser xxxV – xxxxW : bei der Installation zu beachtende Spannung und Leistung Gerätetyp Schutzklasse II : Doppelisolierung OF : Serienummer D Beim Anschluss an das Stromnetz sind folgende wichtigen Punkte zu beachten : _ Die Spannung, die auf dem Geräteschild steht, und _ Die festgelegten Farben. Braun : Phase, Blau oder Grau : Nulleiter. Die Originalleitung ist für den steckerlosen Netzanschluss über eine Anschlussdose ausgelegt, die hinter dem Gerät anzubringen ist. In Küche oder Bad muss die Anschlussdose mindestens 25 cm vom Boden entfernt sein. Bei kombiniertem Heizkörper Wir empfehlen Ihnen, das Gerät hinter einem Abschalter anzuschließen, um die Stromzufuhr bei Gebrauch mit Zentralheizung zu trennen. 1.4 Einbauregel Das Gerät gehört zur Schutzklasse II. Es ist gegen Spritzwasser geschützt und kann unter der Voraussetzung, dass die Installation den gültigen Vorschriften und bewährten Praktiken des jeweiligen Landes entspricht, in Badezimmern installiert werden. wichtig : Der Heizkörper darf nicht in einer stark oder dauernd feuchten Umgebung (Dusche, Schwimmbad usw.) installiert werden. 80 RF_prog:RF_prog_ACOVA_7L 22/10/2010 09:20 Page81 2. Beschreibung des Raumthermostats RF Prog Batterien-Kontrollleuchte Uhrzeit Temperatur (Soll- oder Messwert) Aktueller Betriebsmodus (Bsp. Komfort) Aktuelle Tagesanzeige Heizanforderung Programmprofil Einstelltasten Auto-Modus Economy Komfort Frostschutz Stunden Heizung AUS D Programmierung Öffnungszeichen der Abdeckung ACHTUNG Der Heizkörper ist mit keiner anderen Steuervorrichtung als mit dem mitgelieferten Raumthermostat kompatibel. 2.1 Lage des Raumthermostats Für die Regelung des Geräts muss der Thermostat die für den Wohnraum am meisten repräsentative Temperatur messen. Der Temperaturmessfühler befindet sich im Gehäuse des Raumthermostats, weshalb Sie diesen wie folgt platzieren sollten: - auf einer Wand, auf einem Regal oder einem zugänglichen Möbelstück in ca. 1,50m Höhe - geschützt vor Wärmequellen (Licht, Sonneneinstrahlung, usw.) und Luftzug (Fenster, Tür, Belüftung). - Vermeiden Sie Stellen, die direkt an der Außenwand oder an einem unbeheizten Raum (Garage, usw.) anliegen. 81 RF_prog:RF_prog_ACOVA_7L 22/10/2010 09:20 Page82 Wandmontage Höhe ca. 1,50 m Auf einem Möbelelement Mind. 20 cm D Für eine optimale Einstellung der Raumtemperatur muss der Thermostat im selben Raum wie das Gerät bzw. wie die Geräte, die er steuert, installiert sein. Die Funkwellen durchdringen Hindernisse (Möbel, Trennwände usw.) auf einer Entfernung von 100 bis 300 m im Freifeld, wobei die Reichweite je nach Installation und elektromagnetischer Umgebung variiert. A 2.1.1 Wandbefestigung Heben Sie die Abdeckung mit einem Schraubendreher (A) an. Entfernen Sie die mitgelieferten Batterien. Befestigen Sie den Thermostat mit Schrauben und Dübeln oder auf einem Einbaukasten (B: Abstand 60 mm). Setzen Sie die Batterien mit richtiger Polarität wieder ein. 2.1.2 Sockelaufstellung AUTO + - 1 Mit dem mitgelieferten Sockel können Sie den Sender auf einem Möbelstück aufstellen. 2 82 - B PROG + RF_prog:RF_prog_ACOVA_7L 22/10/2010 09:20 Page83 2.2 Aktivierung und Batterienwechsel Hebeln Sie die Abdeckung mit einem Schraubendreher (A) aus. Entfernen Sie die Aktivierungszunge von den Batterien und setzen die Abdeckung ein. Ab dem Moment, in dem die Abnutzungsleuchte der Batterien zu sehen ist, haben Sie ungefähr 3 Monate Zeit, um die Batterien zu wechseln (2 Alkalibatterien 1,5V Typ LR03 oder AAA). Vorsichtshinweise: - Beachten Sie beim Einlegen der Batterien im Thermostat die +/- Polarität. - Aus Umweltschutzgründen sollten Sie die Altbatterien nicht wegwerfen, sondern zu einer Batteriesammelstelle bringen. - Laden Sie die Batterien nicht auf. - Sie haben ungefähr 45 Sekunden Zeit, um die Batterien zu wechseln; danach wird die Uhrzeit auf Null rückgestellt (in diesem Fall stellen Sie die Uhrzeit und das Datum neu ein). A AUTO PROG + - AUTO B PRO PROG - + Batterien-Kontrollsymbol D 2.3 Uhrzeiteinstellung Drehen Sie die Taste auf . Die Tagesanzeige blinkt. Drücken Sie wahlweise + oder – (Tag 1 kann beispielsweise für Montag stehen) und bestätigen mit OK, um zur nächsten Einstellung zu wechseln. Wiederholen Sie die Schritte für die Einstellung der Stunden und der Minuten. Drehen Sie die Taste, um den Einstellmodus zu verlassen. Uhrzeit Minuten Tag HINWEIS Damit der Heizkörper mit dem Raumthermostat arbeiten kann, müssen beide Geräte miteinander verknüpft sein (siehe Abschnitt 4.6). 83 RF_prog:RF_prog_ACOVA_7L 22/10/2010 09:20 Page84 3. Gebrauch des Thermostats RF Prog 3.1 Betriebsarten HEIZUNG AUS Das Gerät befindet sich im Abschaltmodus. KOMFORT Diese Betriebsart ist für bewohnte Räume gedacht (Standardtemperatur: 19°C). ECONOMY (ECO) Diese Betriebsart ist für unbewohnte Räume gedacht. Sie wird ab 2 Stunden Abwesenheit empfohlen (Standardtemperatur: 16°C). FROSTSCHUTZ Diese Betriebsart ist für längere Abwesenheitszeiten gedacht. Sie wird ab 24 Stunden Abwesenheit empfohlen (Standardtemperatur: 7°C). D AUTO Der Thermostat steuert den Heizkörper nach Ihrer Wochenprogrammierung (siehe Abschnitt 3.3) mit Modus-Anzeige der laufenden Zeitspanne. 3.2 Solltemperatureinstellung Die Solltemperaturwerte entsprechen einer Temperatur, die Sie je nach Betriebsart (siehe oben) für Ihren Raum wünschen. Drehen Sie die Taste auf: zum Einstellen der Frostschutz-Temperatur (zwischen 5°C und 15°C) zum Einstellen der Economy-Temperatur (zwischen 10°C und 30°C). Setpoint temperature zum Einstellen der Komfort-Temperatur (zwischen 10°C und 30°C). Drücken Sie die Taste + oder -, um die Temperatur schrittweise je 0,5°C einzustellen. Drehen Sie die Taste anschließend, um zur nächsten Einstellung zu gelangen. BITTE BEACHTEN Mit der Taste i zeigen Sie die Raumtemperatur kurz an. 84 RF_prog:RF_prog_ACOVA_7L 22/10/2010 09:20 Page85 3.3 Programmierung Mit der Programmierfunktion werden die Betriebsarten ECO ( ) und KOMFORT ( ) für einen ganzen Tag programmiert. Die Programmierung kann jeden Tag identisch sein (Tagesprogrammierung) oder jeden Tag anders sein (Wochenprogrammierung). Bei Änderung Ihrer Gewohnheiten ist es jederzeit möglich, das Gerät mit der Taste manuell in den gewünschten Modus ( oder oder ) umzuschalten. 3.3.1 Default-Programmierung DREHEN SIE DIE TASTE AUF PROG, UM DIE PROGRAMMIERUNG ABZULESEN. Bei der Inbetriebnahme des programmierbaren Thermostats wird das vorgegebene Programm “KOMFORT 6.00 bis 23.00 Uhr.” für alle Wochentage übernommen. D Beginn-Uhrzeit der abgelesenen Zeitspanne Abgelesener Tag Programmprofil des abgelesenen Tages Gehe zum nächsten Wechsel zum nächsten Tag Programmwechsel Profil des Default-Programms: - 0.00 bis 6.00 Uhr: Betriebsart ECO - 6.00 bis 23.00 Uhr: Betriebsart KOMFORT - 23.00 bis 0.00 Uhr: Betriebsart ECO 85 RF_prog:RF_prog_ACOVA_7L 22/10/2010 09:20 Page86 3.3.2 Individuelle Programmierung DREHEN SIE DIE TASTE AUF PROG, UM DIE PROGRAMMIERUNG ZU ÄNDERN. Das Display zeigt die Programmierung für Tag 1 (z.B. Montag): wird eingeblendet. – Die erste Zeitspanne (Mitternacht bis 1.00 Uhr) blinkt; drücken Sie , um die Betriebsart KOMFORT, auszuwählen, bzw. drücken Sie , um die Betriebsart ECO auszuwählen. – Das Programm wechselt automatisch zur nächsten Zeitspanne. Wiederholen Sie den Schritt zum Einstellen des ganzen Tages. - Wenn Sie Ihre Einstellungen vorher noch korrigieren möchten, durchlaufen Sie alle Zeitspannen bis zur Zeitspanne, die Sie ändern möchten. - Drücken Sie OK, wenn Sie den Tag bestätigen möchten; das Programm wechselt nun zum nächsten Tag. HINWEIS Soll das eingestellte Programm für den nächsten Tag übernommen werden, halten Sie die Taste OK ca. 3 Sek. lang gedrückt, bis das Programm des nächsten Tages erscheint. Geänderter Tag Beginn-Uhrzeit der geänderten Zeitspanne D 1. Zeitspanne Programmprofil des geänderten Tages Programmierung 1 Std. Economy Programmierung 1 Std. Komfort Wechsel zum nächsten Tag SO ÜBERPRÜFEN SIE IHRE PROGRAMMIERUNG: Gehe zum nächsten Programmwechsel Uhrzeit der abgelesenen Zeitspanne Drücken Sie die Taste mehrmals hintereinander, um die Beginn-Uhrzeit der von Ihnen eingegebenen Perioden Komfort und Economy zu kontrollieren. Drücken Sie OK, um den nächsten Tag zu überprüfen. DREHEN SIE DIE TASTE, UM DIE PROGRAMMIERUNG ZU VERLASSEN. 86 Überprüfung der einzelnen Perioden oder . RF_prog:RF_prog_ACOVA_7L 22/10/2010 09:20 Page87 3.4 Auto-Modus Diese Betriebsart ist auszuwählen, wenn Moduswechsel oder entsprechend Anwesenheitszeiten automatisch durchgeführt werden sollen. In dieser Betriebsart wird der Heizkörper nach dem vorgegebenen Programm gesteuert (Abschnitt 3.3). Aktueller Sollwert (Bsp. Komfort) Uhrzeit Raumtemperatur Modus Abwesenheit Modus Betriebsartwechsel Tag Heizanforderung Anzeige Raumtemperatur / Solltemperatur Manueller Modus (30 Min. bis 72 Std.) D DREHEN SIE DIE TASTE AUF AUTO. Bei der Inbetriebnahme wird die vom Thermometer gemessene Raumtemperatur angezeigt. Das Symbol erscheint über °C. Mit der Taste 1 zeigen Sie die Solltemperatur (gewünschte Temperatur) an. Es kann zwischen Mess- und Solltemperatur gewechselt werden (siehe Abschnitt 4.2): – Auto-Modus: Solltemperatur – Druck auf Taste 1: Raumtemperatur Möchten Sie die Programmierung aussetzen (siehe Abschnitt 3.3), können Sie in den Dauermodus ECO ( ), in den Dauermodus KOMFORT ( ) oder in den Dauermodus FROSTSCHUTZ ( ) wechseln, indem Sie die Taste auf die gewünschte Betriebsart drehen. 87 RF_prog:RF_prog_ACOVA_7L 22/10/2010 09:20 Page88 3.4.1 Modus Abwesenheit Mit dieser Betriebsart kann eine feste Temperatur (zwischen 5 und 15°C) für eine einstellbare Dauer (zwischen 1 und 365 Tagen) vorgegeben werden. Drücken Sie im Auto-Modus (Auto) die Taste KOFFER ( ). Die Tagesanzahl blinkt. Drücken Sie + oder - , um die Anzahl der Tage einzustellen, und bestätigen mit OK. Die Temperatur blinkt: Stellen Sie den gewünschten Wert mit der Taste + oder - ein. BEISPIEL Abfahrt am 10. Januar, Rückkehr am 19. Januar - geben Sie 9 Tage ein. Der Auto-Betrieb setzt sich am 19. Januar um 00.00 Uhr wieder in Gang. Bestätigen Sie mit OK. Die Temperatur blinkt. Drücken Sie die Taste + oder –, um die Temperatur einzustellen. Bestätigen Sie mit OK. D Zum Stornieren des Abwesenheitsmodus (beispielsweise bei vorzeitiger Rückkehr) drücken Sie C oder drehen die Taste. Laufender Modus Betriebsartwechsel 3.4.2 Modus Betriebsartwechsel Mit der Taste können Sie den laufenden Betrieb (von auf oder umgekehrt) im AUTO-Modus bis zum nächsten Programmwechsel ändern. Drücken Sie im AUTO-Modus die Taste . BEISPIEL In der Betriebsart ECO ( ) bewirkt der Druck auf die Taste einen Wechsel in die Betriebsart KOMFORT ( ). Zum Stornieren des Moduswechsels drücken Sie erneut oder drehen die Taste. 88 RF_prog:RF_prog_ACOVA_7L 22/10/2010 09:20 Page89 3.4.3 Manueller Modus Mit der Taste können Sie eine andere Solltemperatur als die, die im Auto-ModusProgramm definiert wurde, für eine vorgegebene Dauer zwischen 30 Minuten und 72 Stunden eingeben. Drücken Sie im Auto-Modus die Taste . Die Dauer der manuellen Betriebsart blinkt. Drücken Sie + oder -, um die gewünschte Dauer um jeweils 30 Minuten einzustellen. Bestätigen Sie mit OK. Die Temperatur blinkt. Drücken Sie die Taste + oder –, um die gewünschte Temperatur einzustellen. Bestätigen Sie mit OK. Laufender manueller Modus Zum Stornieren der manuellen Betriebsart drücken Sie C oder drehen die Taste. D 3.5 Modus Heizung AUS Zum Abschalten des Heizkörpers (beispielsweise im Sommer) drehen Sie die Taste auf . Der Thermostat zeigt den Messwert der Raumtemperatur. Raumtemperatur 89 RF_prog:RF_prog_ACOVA_7L 22/10/2010 09:20 Page90 4. Fortgeschrittene Einstellungen des Raumthermostats RF Prog Drehen Sie die Taste auf Heizung AUS und drücken die rechte Taste 5 Sek. lang, bis H200 x:xx erscheint (Versionsnummer der Fernbedienung). Drücken Sie OK. Auf dem Display erscheint CF01. 4.1 Korrektur der Raumtemperaturmessung(CF01) D Bei Feststellen einer Abweichung des Raumtemperaturwerts können Sie mit der Taste + oder – den Messwert des Thermostats bis +/- 4°C korrigieren. Drücken Sie wahlweise + oder – und bestätigen mit OK, um zum nächsten Menü zu wechseln. 4.2 Temperaturanzeige im AUTO-Modus (CF02) Mit dieser Funktion können Sie wahlweise die Messtemperatur des Thermostats oder die von Ihnen programmierte Solltemperatur anzeigen. Drücken Sie wahlweise + oder – und bestätigen mit OK, um zum nächsten Menü zu wechseln. 0 : Daueranzeige der Raumtemperatur 1 : Daueranzeige der Solltemperatur 90 5 Sek. RF_prog:RF_prog_ACOVA_7L 22/10/2010 09:20 Page91 4.3 (CF03) - FÜR DIESES MODELL NICHT VERFÜGBAR Stellen Sie diesen Wert mit der Taste + oder – auf 0 und bestätigen mit OK, um zum nächsten Menü zu wechseln. 4.4 (CF04) - FÜR DIESES MODELL NICHT VERFÜGBAR Stellen Sie diesen Wert mit der Taste + oder – auf 0 und bestätigen mit OK, um zum nächsten Menü zu wechseln. D 4.5 Zyklusmodus (CF05) Stellen Sie diesen Wert mit der Taste + oder – auf 0 und bestätigen mit OK, um zum nächsten Menü zu wechseln. 0 : aktiviert 1 : inaktiv Bei Verknüpfung mit weiteren haustechnischen X2D Ausrüstungen (Geber, Fernbedienungen, Alarmzentrale oder PLS Steuereinheit usw. – Öffnungsmelder ausgenommen) stellen Sie diesen Wert auf 1. 91 RF_prog:RF_prog_ACOVA_7L 22/10/2010 09:20 Page92 4.6 Verknüpfung Heizkörper / Raumthermostat (CF06) Das Gerät muss mit dem Raumthermostat verknüpft werden, damit es lediglich die vom letzteren übermittelten Befehle empfängt: So werden mögliche Interferenzen mit anderen Funksteuersystemen vermieden. BITTE BEACHTEN Die Verknüpfung des Geräts mit dem Raumthermostat ist für seinen Betrieb unentbehrlich. Beim Einschalten des Geräts blinkt die Leuchte TH auf der Funkempfängereinheit (auf der Rückseite des Heizkörpers). BITTE BEACHTEN Brennt die Leuchte TH stetig, drücken Sie 60 Sek. lang, bis die Leuchte blinkt (Reset). Alle nicht verknüpften, mit Strom gespeisten Heizkörper werden automatisch mit diesem Raumthermostat verknüpft. Mit Ihrer Schalttafel ist es möglich, nur die betroffenen Heizkörper zu versorgen. D Die Leuchte blinkt (Heizkörper nicht verknüpft). Die Leuchte brennt stetig, wenn das Verknüpfungssignal des Thermostats empfangen wird. Drücken Sie im Menü CF06 des Raumthermostats die Taste +. Das kurzzeitige Erscheinen des Symbols X2D bedeutet, dass ein Verknüpfungssignal gesendet wird. Kontrollieren Sie, dass die Leuchte der Empfängereinheit daraufhin stetig brennt. Der Heizkörper ist nun mit dem Raumthermostat verknüpft. BITTE BEACHTEN Wenn Sie den Thermostat vom Gerät trennen möchten, drücken Sie die Taste 5 60 Sek. lang, um das Gerät zu initialisieren (Aufheben der Verknüpfung). Drücken Sie OK, um zum nächsten Menü zu wechseln. 92 RF_prog:RF_prog_ACOVA_7L 22/10/2010 09:20 Page93 4.7 Funktest (CF07) Der Raumthermostat sendet alle 3 Sekunden ein Signal zum Funkempfänger des Geräts. Das Symbol X2D erscheint kurz am Display. Kontrollieren Sie, dass die Leuchte TH der Empfängereinheit bei jedem Empfang blinkt, was bedeutet, dass die Verknüpfung gelungen ist (siehe Abschnitt 4.6). DIE FORTGESCHRITTENE EINSTELLUNG KÖNNEN SIE JEDERZEIT DURCH DREHEN DER TASTE VERLASSEN. 4.8 Rückstellung der ursprünglichen Einstellungen des Thermostats Mit einem General-Reset kehren Sie zu den werksseitigen Einstellungen zurück: fortgeschrittene Einstellungen (in den Menüs CF grau hinterlegt), Solltemperaturwerte und Default-Programmierung. Drehen Sie die Taste auf HEIZUNG AUS und drücken die linke Taste 10 Sekunden lang, bis „init“ erscheint. Bestätigen Sie mit OK oder brechen mit C ab. Rückkehr zur Anzeige des Modus Heizung AUS. D 10 sek. TECHNISCHE MERKMALE DES RAUMTHERMOSTATS _ Versorgung über 2 Alkalibatterien 1,5, Typ LR03 oder AAA (mitgeliefert), Betriebsdauer über 2 Jahre bei normalem Gebrauch _ Fernbedienung mit Funkreichweite von 100 bis 300 Meter im Freifeld – variiert je nach verknüpfter Ausrüstung (Die Reichweite kann je nach Installation und durch elektromagnetische Umgebung beeinträchtigt werden.) _ Betriebstemperatur: 0°C bis 40°C _ Sendefrequenz 868 MHz, Klasse I (Norm EN 300 220) 93 RF_prog:RF_prog_ACOVA_7L 22/10/2010 09:20 Page94 5. Verknüpfung mit anderen X2D Systemen 5.1 Verknüpfung des Geräts mit einer PLS Steuereinheit Mit einer PLS (Prozessleitsystem) Programmiereinheit im X2D-Standard (nicht mitgeliefert) kann das Gerät aus der Ferne gesteuert werden. Hierfür muss: _ das Gerät installiert und angeschlossen werden (Abschnitt 1). _ das Gerät mit dem Raumthermostat verknüpft werden (Abschnitt 4.6). _ das Gerät mit dieser PLS Steuereinheit (nicht mitgeliefert) verknüpft werden. Zum Verknüpfen stellen Sie die Programmiereinheit in den Verknüpfungsmodus (siehe Anleitung der Programmiereinheit). In den fortgeschrittenen Einstellungen des Raumthermostats öffnen Sie das Menü CF05 (siehe Abschnitt 4.5). Stellen Sie den Wert auf 1 (Zyklusmodus inaktiv). Die Leuchte PLS blinkt auf der Empfängereinheit des Geräts. Drücken Sie die Taste , die Leuchte brennt nun stetig und weist darauf hin, dass das Verknüpfungssignal der Programmiereinheit empfangen wurde. D Ihr(e) Heizkörper ist/sind nun mit Ihrer Programmiereinheit verknüpft. Die Leuchte TH brennt stetig (Der Heizkörper ist mit dem Thermostat verknüpft), die Leuchte PLS blinkt: das System wartet auf die Verknüpfung mit der PLS Steuereinheit. Die Leuchte PLS brennt stetig, wenn das Verknüpfungssignal der Programmiereinheit empfangen wurde. BITTE BEACHTEN Drehen Sie die Taste des Raumthermostats auf PROG und programmieren den Modus KOMFORT ( ) für alle Stunden jedes der 7 Tage (siehe Abschnitt 3.3). Stellen Sie die Taste danach auf AUTO: das Gerät wird nun nach den von der PLS Steuereinheit übermittelten Betriebsarten gesteuert. 94 RF_prog:RF_prog_ACOVA_7L 22/10/2010 09:20 Page95 5.2 Öffnungsmelder Mit einem Öffnungsmelder im X2D-Standard wird die Heizung beispielsweise bei geöffnetem Fenster selbsttätig ausgeschaltet. Hierfür muss: _ das Gerät installiert und angeschlossen werden (siehe Abschnitt 1). _ das Gerät mit dem Raumthermostat verknüpft werden (siehe Abschnitt 4.6) _ das Gerät mit diesem Öffnungsmelder (nicht mitgeliefert) verknüpft werden. Zum Verknüpfen drücken Sie die Taste auf der Empfängereinheit des Geräts 3 Sek. lang, bis die Leuchte AUX blinkt. Drücken Sie die Verknüpfungstaste des Öffnungsmelders. Die Leuchte AUX schaltet sich aus und weist darauf hin, dass die Verknüpfung gelungen ist. Der Heizkörper ist nun mit dem Öffnungsmelder verknüpft. 3 Sek. Die Leuchte TH brennt stetig (Der Heizkörper ist mit dem Thermostat verknüpft). Die Leuchte AUX schaltet sich aus, wenn das Verknüpfungssignal des Öffnungsmelders empfangen wurde. BITTE BEACHTEN Sie können auf dem Kanal AUX bis zu 8 Melder verknüpfen: Wiederholen Sie die vorstehenden Schritte für jeden zu verknüpfenden Melder. Nach beendeter Verknüpfung bedeutet die brennende Leuchte AUX, dass ein Fenster geöffnet ist. 5.3 Reset der Geräteverknüpfungen Drücken Sie die Taste 60 Sek. lang, um alle Verknüpfungen des Geräts mit verschiedenen X2D-Ausrüstungen (einschließlich mit dem mitgelieferten Raumthermostat) zu löschen. Die Leuchte TH blinkt nun und weist darauf hin, dass das System auf ein neues Verknüpfungssignal wartet. BITTE BEACHTEN Sollen lediglich die Verknüpfungen des Kanals AUX gelöscht werden, drücken Sie Taste 10 Sek. lang. Nach einem 3 Sek. langen Druck blinkt die Leuchte AUX und schaltet sich nach einem 10 Sek. langen Druck aus, was bedeutet, dass die Trennung gelungen ist. 95 D RF_prog:RF_prog_ACOVA_7L 22/10/2010 09:20 Page96 6. Gebrauchsempfehlungen D Das Elektrogerät ist mit einer Wärmeträgerflüssigkeit gefüllt und wird einsatzfertig geliefert. Es wird werkseitig mit thermischem HochleistungsMineralöl gefüllt und dicht verschlossen. Das Medium braucht keine besondere Wartung. Reparaturen, bei denen die Einlässe geöffnet werden müssen, dürfen nur vom Hersteller oder von seinem Kundendienst durchgeführt werden, der normalerweise bei Auslaufen von Öl zu kontaktieren ist. Am Lebensende des Heizgeräts sind die Vorschriften zur Entsorgung des Öls einzuhalten. Bei Flüssigkeitswechsel muss das Medium unbedingt zur AltölSammelstelle gebracht werden. Sofort beim Ingangsetzen des Geräts werden Sie Unterschiede zur herkömmlichen Elektroheizung feststellen: _ Der Heizwiderstand erwärmt das Medium, das sich progressiv und auf natürliche Weise im Heizkörper in Zirkulation setzt. _ Die Trägheitseigenschaften des Mediums sorgen dafür, dass die Oberfläche des Heizkörpers erst nach mindestens 10 Minuten die optimale Temperatur erreicht. _ Diese Trägheit gewährleistet eine konstante, lang andauernde Wärmeausstrahlung, auch wenn der Heizwiderstand nicht mehr mit Strom versorgt wird. _ Es ist normal, dass der obere und der untere Teil des Heizkörpers weniger warm sind als der Rest. Der Heizkörper ist nicht ganz gefüllt, damit das Medium sich beim Warmwerden ausdehnen kann. Da die Luft sich von Natur her im oberen Teil aufhält, ist es normal, dass einige obere Elemente weniger warm sind. _ Der Heizkörper besitzt eine breite Heizfläche, mit der sichergestellt wird, dass die ausgestrahlte Wärmemenge dem Bedarf selbstregulierend angepasst wird. Damit ist es normal, dass die Unterschiede in der Oberflächentemperatur in der Zwischensaison, wenn das Gerät nur mäßig arbeitet, stärker zu spüren sind. UMWELTSCHUTZVORSCHRIFTEN RoHS: Entspricht der Richtlinie 2002/95/EG WEEE: Entspricht der Richtlinie 2002/96/EG Entsorgung von Elektro- und Elektronik-Altgeräten am Lebensende. Dieses Symbol weist darauf hin, dass das Produkt nicht zusammen mit dem Hausmüll entsorgt werden darf. Es ist zur entsprechenden Sammelstelle zu bringen, die seine Weiterverwertung sicherstellt. Mit Ihrem Beitrag zur angemessenen Entsorgung helfen Sie, die potentiellen nachteiligen Auswirkungen auf die Umwelt und die menschliche Gesundheit zu minimieren. 96 RF_prog:RF_prog_ACOVA_7L 22/10/2010 09:20 Page97 7. Pflegehinweise Schalten Sie das Gerät vor jeder Reinigung unbedingt aus, indem Sie die Taste auf HEIZUNG AUS ( ) drehen. Lassen Sie abkühlen. Mit seinen ausgewählten Werkstoffen und seiner Oberflächenbehandlung ist das Gerät stoßfest und gegen Rost geschützt. Mit einfacher Pflege Ihres Geräts können Sie seine lange Lebensdauer sicherstellen. Befolgen Sie hierzu folgende Empfehlungen: - Reinigen Sie die Außenflächen des Geräts nicht mit scheuernden oder korrosiven Reinigungsmitteln, sondern möglichst mit lauwarmem Seifenwasser. - Verwenden Sie für die Versorgungseinheit und das Raumthermostat einen weichen, trockenen Lappen ohne Lösungsmittel. 8. Kontrollen bei Betriebsstörungen Funktioniert Ihr Gerät nicht, können Sie folgende Kontrollen selbst durchführen: _ Das Gerät ist richtig angeschlossen und wird mit Strom versorgt (siehe Abschnitt 1). _ Der Raumthermostat befindet sich in Reichweite der Funkempfängereinheit des Geräts und wird über die Batterien richtig versorgt (siehe Abschnitt 2). _ Der Thermostat steuert den Ingangsetzen des Heizkörpers (siehe Abschnitt 3). BITTE BEACHTEN Erscheint an das Gerät. am Display, sendet der Thermostat einen Heizbefehl Führen Sie einen Heiztest durch, indem Sie die Thermostat-Taste auf KOMFORT stellen und kontrollieren, dass die Solltemperatur über der Raumtemperatur liegt: Normalerweise wird das Flammensymbol eingeblendet, und Sie müssten die Wärme des Heizkörpers nach wenigen Minuten spüren. Ist es nicht der Fall, überprüfen Sie die Lage des Raumthermostats (siehe Abschnitt 2.1), die Batterien (siehe Abschnitt 2.2) und führen einen Funktest durch (siehe Abschnitt 4.7). Kontrollieren Sie auch, dass der Raumthermostat mit dem Gerät verknüpft ist (siehe Abschnitt 4.6), was eine unabdingbare Voraussetzung für seinen Betrieb ist. Muss der Raumthermostat gewechselt werden, führen Sie einen Reset der Geräteverknüpfungen durch (siehe Abschnitt 5.3) und verknüpfen das Gerät mit der neuen Steuervorrichtung (siehe Abschnitt 4.6). 97 D RF_prog:RF_prog_ACOVA_7L 22/10/2010 09:20 Page98 Beschädigte Versorgungskabel müssen aus Sicherheitsgründen vom Hersteller, von seinem Kundendienst oder von einer entsprechend qualifizierten Person ausgewechselt werden. KUNDENDIENST Bei Ausfällen oder Ersatzteilbedarf wenden Sie sich an Ihren Monteur oder Händler. Für besseres Verständnis und eine schnelle Bearbeitung Ihrer Anfrage halten Sie bitte folgende Daten parat: - die Angaben des Gerätschildes (siehe Abschnitt 1.3) - die Artikelnummer des Heizkörpers, die mit dem Kaufdatum auf Ihrer datierten Rechnung steht. D GARANTIE (Beachten Sie bitte die allgemeinen Geschäftsbedingungen für das betroffene Land.) Der Heizkörper entspricht der EMV-Richtlinie 2004/108/EG betreffend die Begrenzung der Aussendung elektromagnetischer Störungen sowie den europäischen Normen EN 60.335.1 / 60.335. 2.30 / 60.335.2.43. NICHTIGKEIT DER GARANTIE Von der Garantie ausgeschlossen sind eine Installation, Inbetriebnahme, Ingebrauchnahme und Wartung, die gegen die gültige Norm im jeweiligen Einsatzland, gegen die anerkannten Fachregeln und gegen die Bedienungsanleitung des Herstellers verstoßen. Bei weiteren Fragen zur Garantie wenden Sie sich bitte an Ihren Montagefachmann oder Ihren Händler. 98 RF_prog:RF_prog_ACOVA_7L 22/10/2010 09:20 Page99 I 1 Installazione dell’apparecchio 102 2 Descrizione del termostato ambiente RF Prog 105 3 Utilizzo del termostato ambiente RF Prog 108 I 4 Regolazioni avanzate del termostato ambiente RF Prog 114 5 Associazione ad altri dispositivi X2D 118 6 Raccomandazioni d’uso 120 7 Consigli per la manutenzione 121 8 In caso di mancato funzionamento 121 99 RF_prog:RF_prog_ACOVA_7L 22/10/2010 09:20 Page100 Informazioni generali Gentile Signora, Gentile Signore La ringraziamo per aver scelto questo radiatore o scaldasalviette. Ci auguriamo che questo prodotto, progettato con la massima cura, conformemente alla nostra carta qualità, incontri la sua piena soddisfazione. Per poter sfruttare in modo completo tutte le funzionalità offerte, le consigliamo di leggere attentamente questo manuale d’istruzioni e di conservarlo vicino all’apparecchio. La ringraziamo per la fiducia. Il radiatore è comandato a distanza da un TERMOSTATO AMBIENTE PROGRAMMABILE CON COLLEGAMENTO IN RADIOFREQUENZA, che consente di regolare la temperatura da lei desiderata nella stanza. I Schermo di visualizzazione 4 tasti di selezione Manopola selezione modalità 100 RF_prog:RF_prog_ACOVA_7L 22/10/2010 09:20 Page101 Questo apparecchio non è stato progettato per essere utilizzato da persone (bambini compresi) con ridotte capacità fisiche, sensoriali o mentali o da persone completamente sprovviste di esperienza o conoscenze, a meno che queste non possano essere controllate da una persona responsabile della loro sicurezza o comunque beneficiare di istruzioni preliminari relative all’uso dell’apparecchio. Si consiglia di vigilare affinché i bambini non giochino con l’apparecchio. I radiatori e gli scaldasalviette devono essere utilizzati conformemente all’uso al quale sono destinati e non come mensole, sedie, giochi, scale… I AVVERTENZA PER L’UTILIZZO DI APPARECCHI CROMATI, IN ACCIAIO INOX O ALLUMINIO Tra i diversi tipi di superficie dei radiatori, gli apparecchi cromati, in acciaio inox o in alluminio sono quelli che trasmettono la sensazione più intensa di calore al tatto. Si consiglia di non appoggiarsi sulla superficie anteriore dell’apparecchio durante il funzionamento, per evitare qualsiasi rischio di ustione. 101 RF_prog:RF_prog_ACOVA_7L 22/10/2010 09:20 Page102 1. Installazione dell’apparecchio Per sfruttare al meglio l’apparecchio e per un comfort ottimale, raccomandiamo: - di effettuare l’installazione se possibile nelle vicinanze di zone a forte dispersione (finestre, porte, ecc.) - di disporre qualunque oggetto (mobili, poltrone) ad una distanza di almeno 50 cm circa dalla parte anteriore dell’apparecchio, per favorire la circolazione dell’aria. - di lasciare almeno 10 cm di spazio tra la parte superiore dell’apparecchio ed una mensola. - di non posizionare il radiatore proprio sotto una presa di corrente. - d’impiegare viti di fissaggio adatte al tipo di muro. 1.1 Radiatore – Posizionamento dell’apparecchio I Min. 10 cm Min. 10 cm Ricevitore radio IMPORTANTE Questo radiatore non deve mai essere installato con la centralina d’alimentazione in posizione alta. Posizionare la parte inferiore del radiatore ad almeno 10 cm dal pavimento. AVVERTENZA Per impedire il surriscaldamento, EVITARE DI COPRIRE l’apparecchio. 102 RF_prog:RF_prog_ACOVA_7L 22/10/2010 09:20 Page103 1.2 Scaldasalviette – Posizionamento dell’apparecchio Min. 15 cm Ricevitore radio Min. 15 cm IMPORTANTE Questo scaldasalviette non deve mai essere installato con la centralina d’alimentazione in posizione alta. Posizionare la parte inferiore dello scaldasalviette ad almeno 15 cm dal pavimento. AVVERTIMENTO Per evitare che i bambini in più tenera età vadano incontro ad un qualunque pericolo, si raccomanda di installare questo apparecchio in modo tale che la barra riscaldante che si trova più in basso sia ad una distanza di almeno 600 mm dal pavimento. NOTA I radiatori scaldasalviette elettrici sono progettati per essere coperti senza alcun rischio. Per garantire un funzionamento efficace dell’apparecchio, raccomandiamo tuttavia di non coprirlo integralmente. A causa del conseguente innalzamento della temperatura e grazie al fusibile interno, in questi casi il radiatore può smettere di funzionare. NOTA L’accensione della spia luminosa . della centralina di ricezione radio indica il riscaldamento del radiatore. 103 I RF_prog:RF_prog_ACOVA_7L 22/10/2010 09:20 Page104 1.3 Collegamento del radiatore Le caratteristiche tecniche del vostro radiatore sono indicate sull’etichetta segnaletica posta sul lato, in basso. Vi preghiamo di prenderne conoscenza prima di procedere all’installazione. IP : indice di protezione del vostro apparecchio contro gli schizzi d’acqua xxxV – xxxxW : tensione e potenza da rispettare durante l’installazione Tipo di apparechio Classe II : doppio isolamento OF : N° di fabricazione Il collegamento alla rete elettrica deve essere effettuato rispettando : _ La tensione indicata su questa etichetta _ I colori convenzionali Marrone : fase, Blu o Grigio : neutro. I Il cavo flessibile montato in fabbrica deve essere collegato alla rete tramite una centralina di connessione da sistemare dietro l 'apparecchio, senza interporre una presa di corrente. In una cucina o in una stanza da bagno, la centralina di connessione deve essere posta almeno a 25 cm dal pavimento. Caso di un radiatore a funzionamento misto Vi consigliamo di collegare il vostro radiatore dietro un interruttore di ci cuito per interrompere l’alimentazione elettrica in caso di utilizzo dello stesso in modalità riscaldamento centrale. 1.4 Regole d’installazione del radiatore L’apparecchio è di classe II, è protetto contro le proiezioni d’acqua e può essera installato nelle stanze da bagno, a condizione che l’installazione sia conforme alle norme in vigore e alle regole dell’arte del paese nel quale viene effettuata. IMPORTANTE: Il radiatore non deve essere sottoposto a un'umidità ambiente elevata o permanente (docce, piscine, ecc.). 104 RF_prog:RF_prog_ACOVA_7L 22/10/2010 09:20 Page105 2. Descrizione del termostato ambiente RF Prog Spia di esaurimento delle pile Ora Temperatura (programmata o misurata) Modalità di funzionamento corrente (ad es. comfort) Giorni di funzionamento Richiesta di riscaldamento Profilo del programma Tasti di regolazione Modalità automatica Economia Antigelo Riscaldamento spento Comfort Regolazione dell’ora I Programmazione Segni di riferimento per l’apertura del coperchio protettivo ATTENZIONE Il radiatore non è compatibile con dispositivi di comando diversi dal termostato ambiente in dotazione. 2.1 Posizionamento del termostato ambiente Per regolare l’apparecchio, il termostato deve misurare la temperatura ambiente che maggiormente caratterizza l’abitazione. Dato che la sonda di misura della temperatura si trova nella scatola del termostato ambiente, occorre posizionare quest’ultima: - fissata a una parete o appoggiata su uno scaffale o su di un mobile accessibile, a un’altezza di circa 1,50 m. - al riparo da fonti di calore (luce, irraggiamento solare, ecc…) e da correnti d’aria (finestra, porta, ventilazione). - evitando l’installazione su di un muro a contatto con l’esterno o con un locale non riscaldato (garage, ecc...). 105 RF_prog:RF_prog_ACOVA_7L 22/10/2010 09:20 Page106 Fissato a muro Altezza circa 1,50 m Appoggiato su un mobile Minimo 20 cm Per una regolazione ottimale della temperatura ambientale, il termostato deve essere installato nella stessa stanza che accoglie gli apparecchi comandati da quel termostato. L’emissione radio consente di oltrepassare gli ostacoli (mobilio, parete divisoria…) da 100 a 300 metri in campo libero, distanza che può variare in funzione delle condizioni di installazione e dell’ambiente elettromagnetico. I A 2.1.1 Fissaggio a muro Sollevare il coperchio protettivo con l’ausilio di un cacciavite (A). Togliere le pile fornite con l’apparecchio. Fissare il termostato per mezzo di viti e tasselli o su una scatola ad incastro (B: interasse 60 mm). AUTO + - Rimettere al loro posto le pile rispettando le polarità. 2.1.2 Fissaggio su base d’appoggio Utilizzando il supporto in dotazione, è possibile appoggiare il trasmettitore su un mobile. 106 - B PROG 1 2 + RF_prog:RF_prog_ACOVA_7L 22/10/2010 09:20 Page107 2.2 Attivazione e sostituzione delle pile Sollevare il coperchio protettivo con l’ausilio di un cacciavite utilizzandolo come leva (A). Togliere poi la linguetta di attivazione delle pile e rimettere il coperchio al suo posto. A AUTO PROG A partire dal momento in cui si accende la spia che indica che le pile sono in esaurimento , si hanno a disposizione circa 3 mesi per sostituirle (2 pile alcaline da 1,5V di tipo LR03 o AAA). Devono essere prese le seguenti precauzioni: - rispettare le polarità +/- al momento del posizionamento nel termostato. - non gettare le pile esauste in un posto qualsiasi (in un’ottica di rispetto dell’ambiente, conferire le pile esauste presso un apposito luogo di raccolta). - evitare di ricaricarle, - si hanno a disposizione circa 45 secondi per cambiare le pile prima che l’impostazione dell’ora sia azzerata (in questo caso, impostare nuovamente l’ora e la data). - AUTO + B PRO PROG - + Simbolo di esaurimento delle pile I 2.3 Impostazione dell’ora Girare la manopola su . I giorni incominciano a lampeggiare. Premere + o – per effettuare la selezione (si può prendere il lunedì come giorno 1), poi premere OK per convalidare e passare alla regolazione successiva. Ricominciare le operazioni per regolare le ore e poi i minuti. Girare la manopola per uscire dalla modalità di regolazione. Ora Minuti Giorno ATTENZIONE Affinché l’apparecchio funzioni con il termostato ambiente, i due dispositivi devono essere associati (vedere capitolo 4.6). 107 RF_prog:RF_prog_ACOVA_7L 22/10/2010 09:20 Page108 3. Utilizzo del termostato RF Prog 3.1 Presentazione delle modalità di funzionamento RISCALDAMENTO SPENTO L’apparecchio è in modalità di riscaldamento spento. COMFORT È la modalità da usare se la stanza è occupata (temperatura predefinita: 19°C). ECONOMIA (ECO) È la modalità da usare se la stanza non è occupata. Consigliata in caso di assenza dalla stanza superiore alle 2 ore (temperatura predefinita: 16°C). ANTIGELO È la modalità da usare in caso di assenza prolungata. Consigliata in caso di assenza dalla stanza superiore alle 24 ore (temperatura predefinita: 7°C). I AUTO Il termostato comanda l’apparecchio in base al programma settimanale (vedere capitolo 3.3) con la visualizzazione della modalità della fascia oraria in corso. 3.2 Regolazione delle temperature programmate Le temperature programmate sono le temperature che si desidera avere nella stanza sulla base delle diverse modalità di funzionamento sopra riportate. Girare la manopola su: per regolare la temperatura antigelo (da 5 °C a 15 °C), per regolare la temperatura economia (da 10 °C a 30 °C), Setpoint temperature per regolare la temperatura comfort (da 10 °C a 30 °C), Premere + o – per regolare la temperatura ad intervalli di 0,5 °C. Quindi girare la manopola per passare alla regolazione successiva. NOTA Premere il tasto i per visualizzare la temperatura dell’ambiente in quel momento. 108 RF_prog:RF_prog_ACOVA_7L 22/10/2010 09:20 Page109 3.3 Programmazione La funzione programmazione consente di programmare le modalità di funzionamento Eco ( ) e Comfort ( ) per tutto il corso della giornata. Questa programmazione può essere identica per tutti i giorni (programmazione giornaliera) o diversa per ogni giorno (programmazione settimanale). In caso di modifica delle abitudini, è sempre possibile, con l’ausilio della manopola, passare manualmente l’apparecchio nella modalità che si desidera ( o o ). 3.3.1 Programmazione predefinita PER CONSULTARE LA PROGRAMMAZIONE, GIRARE LA MANOPOLA SU PROG Al momento dell’attivazione del termostato programmabile, il programma predefinito è “COMFORT dalle ore 6 alle 23”, applicato a tutti i giorni della settimana. I Ora di inizio della fascia oraria consultata Giorno consultato Profilo del programma del giorno consultato Passaggio al giorno successivo Passare al prossimo cambio del programma Profilo del programma predefinito: - dalle 0 alle 6: modalità di funzionamento ECO - dalle 6 alle 23: modalità di funzionamento COMFORT - dalle 23 alle 0: modalità di funzionamento ECO 109 RF_prog:RF_prog_ACOVA_7L 22/10/2010 09:20 Page110 3.3.2 Programmazione personalizzata PER MODIFICARE LA PROGRAMMAZIONE, GIRARE LA MANOPOLA SU PROG Si visualizza la schermata corrispondente alla programmazione del giorno 1 (ad es. lunedì): . - La prima fascia oraria lampeggia (da mezzanotte all’una), premere per definirla in modalità COMFORT, o per definirla in modalità ECO. - Si passa automaticamente alla fascia oraria successiva. Ripetere l’operazione per regolare l’intera giornata. - Se invece si desidera correggere quello che è stato appena fatto, bisogna ripercorrere tutte le fasce orarie per tornare a quella da correggere. - Per convalidare questa giornata, premere OK e passare al giorno successivo. ATTENZIONE Per applicare lo stesso programma al giorno successivo, tenere premuto il tasto OK per circa 3 secondi fino a che non si visualizza il programma del giorno successivo. Giorno modificato Ora di inizio della fascia oraria modificata I Prima fascia oraria Profilo del programma del giorno modificato Programmazione di 1 ora di Economia Programmazione di 1 ora di Comfort Passaggio al giorno successivo PER VERIFICARE LA PROGRAMMAZIONE Passare al prossimo cambio del programma Ora della fascia consultata Premere in successione il tasto per verificare le ore di inizio impostate per i periodi COMFORT ed ECONOMIA. Premere OK per verificare il giorno successivo. GIRARE LA MANOPOLA PER USCIRE DALLA PROGRAMMAZIONE Verifica dei differenti periodi o . 110 RF_prog:RF_prog_ACOVA_7L 22/10/2010 09:20 Page111 3.4 Modalità automatica Bisogna selezionare questa modalità se si desidera automatizzare i cambi di modalità di funzionamento ( o ) in base agli orari di presenza nella stanza. In tal caso l’apparecchio è comandato in base al programma inserito (vedere cap. 3.3). Programma corrente (ad es. comfort) Ora Temperatura ambiente Modalità assenza Modalità cambio della modalità di funzionamento Giorno Richiesta di riscaldamento Visualizzazione temperatura ambiente / temperatura programmata Modalità manuale (da 30 min. a 72 ore) I GIRARE LA MANOPOLA SU AUTO Quando si effettua la messa in funzione, si visualizza la temperatura ambiente misurata dal termostato. Appare il simbolo sopra i °C. Premere il tasto 1 per visualizzare la temperatura programmata (temperatura desiderata). Si può invertire la visualizzazione della temperatura (vedere il capitolo 4.2): - in modalità automatica: temperatura programmata - premendo il tasto 1: temperatura ambiente Se non si desidera seguire la programmazione (vedere cap. 3.3), è possibile passare in ECO permanente ( ), COMFORT permanente ( ) o Antigelo permanente ( ) girando la manopola sulla modalità desiderata. 111 RF_prog:RF_prog_ACOVA_7L 22/10/2010 09:20 Page112 3.4.1 Modalità assenza Questa modalità consente di impostare una temperatura fissa (da 5 a 15 °C) per un periodo di tempo regolabile (da 1 a 365 giorni). A partire dalla modalità automatica (AUTO), premere il tasto VALIGIA ( ) Il numero di giorni inizia a lampeggiare. Premere + o – per regolare il numero di giorni, quindi premere OK per convalidare. La temperatura inizia a lampeggiare: regolare il valore desiderato con l’ausilio dei tasti + o -. ESEMPIO Partenza il 10 gennaio, ritorno il 19 gennaio, indicare 9 giorni. Il funzionamento automatico riprenderà il 19 gennaio alle ore 00:00. Convalidare con OK. La temperatura inizia a lampeggiare. Premere + o – per regolare la temperatura. Convalidare con OK. I Per annullare la modalità assenza (esempio: ritorno anticipato), premere il tasto C o girare la manopola. 3.4.2 Modalità cambio di funzionamento Modalità cambio di funzionamento in corso Premendo il tasto , è possibile cambiare la modalità di funzionamento corrente (da a o viceversa) durante la modalità Auto fino al prossimo cambio di programma. A partire dalla modalità automatica premere il tasto . AUTO, ESEMPIO Si è in modalità di funzionamento ECO ( ); premendo il tasto si passa in modalità comfort ( ). Per annullare la modalità di cambio della modalità di funzionamento, premere nuovamente il tasto o girare la manopola. 112 RF_prog:RF_prog_ACOVA_7L 22/10/2010 09:20 Page113 3.4.3 Modalità manuale Con il tasto è possibile regolare una temperatura programmata diversa da quella regolata nel programma della modalità auto, per una durata definita compresa tra 30 minuti e 72 ore. A partire dalla modalità automatica AUTO, premere il tasto . La durata della modalità manuale inizia a lampeggiare. Premere + o – per regolare la durata desiderata ad intervalli di 30 min. Convalidare con OK. La temperatura inizia a lampeggiare. Premere + o – per regolare la temperatura desiderata. Convalidare con OK. Modalità manuale in corso Per annullare la modalità manuale, premere il tasto C o girare la manopola. I 3.5 Modalità riscaldamento spento Per mettere il radiatore in modalità di riscaldamento spento (ad esempio in estate), girare la manopola su . Il termostato visualizza la temperatura ambiente misurata. Temperatura ambiente 113 RF_prog:RF_prog_ACOVA_7L 22/10/2010 09:20 Page114 4. Regolazioni avanzate del termostato ambiente RF Prog Girare la manopola su RISCALDAMENTO SPENTO e premere per 5 secondi il tasto destro fino a visualizzare H200 x:xx (numero di versione del telecomando). Premere OK. Sullo schermo appare CF01. 4.1 Correzione della misura della temperatura ambiente (CF01) Con i tasti + o - , è possibile regolare la temperatura ambiente misurata dal termostato fino a +/- 4 °C in caso di scostamento dalla temperatura rilevata nella stanza. Premete + o – per effettuare la selezione e poi OK per convalidare e passare al menu successivo. I 4.2 Scelta della visualizzazione della temperatura in modalità Auto (CF02) Questa funzione consente di visualizzare a scelta o la temperatura ambiente misurata dal termostato o la temperatura programmata. Premere + o – per effettuare la selezione e poi OK per convalidare e passare al menu successivo. 0 : visualizzazione permanente della temperatura ambiente 1 : visualizzazione permanente della temperatura programmata 114 5 sec. RF_prog:RF_prog_ACOVA_7L 22/10/2010 09:20 Page115 4.3 (CF03) - NON DISPONIBILE IN QUESTO MODELLO Regolare questo valore su 0 premendo + o -, poi premere OK per convalidare e passare al menu successivo. 4.4 (CF04) - NON DISPONIBILE IN QUESTO MODELLO Regolare questo valore su 0 premendo + o -, poi premere OK per convalidare e passare al menu successivo. I 4.5 Modalità ciclica (CF05) Regolare questo valore su 0 premendo + o -, poi premere OK per convalidare e passare al menu successivo. 0 : attivo 1 : inattivo In caso di associazione con altre apparecchiature domotiche X2D (trasmettitori, telecomandi, centralina di allarme o centralina CPL -Corrente Portante on line-, ecc… tranne i rilevatori di apertura), regolare questo valore su 1. 115 RF_prog:RF_prog_ACOVA_7L 22/10/2010 09:20 Page116 4.6 Associazione dell’apparecchio al termostato ambiente (CF06) L’apparecchio deve essere associato al termostato ambiente per ricevere esclusivamente i comandi che questo invia, evitando in tal modo le eventuali interferenze con altri dispositivi comandati in radiofrequenza.. IMPORTANTE L’associazione dell’apparecchio al termostato ambiente è indispensabile per il funzionamento. Alla messa in tensione del vostro apparecchio, la spia TH della centralina di ricezione radio (dietro al radiatore) inizia a lampeggiare.. NOTA Se la spia TH è fissa, premere per 60 secondi fino a quando la spia non si mette a lampeggiare (reinizializzazione). Tutti i radiatori non associati alimentati elettricamente saranno associati automaticamente a questo termostato ambiente. Utilizzando il quadro elettrico è possibile alimentare solo i radiatori interessati. I La spia lampeggia (radiatore non associato) La spia è fissa quando il segnale di associazione del termostato viene rilevato A partire dal menu CF06 del termostato ambiente, premere il tasto +. La comparsa temporanea del simbolo X2D corrisponde all’invio di un segnale di associazione. Verificare che la spia del ricevitore diventi fissa. L’apparecchio è associato a partire da questo momento al termostato ambiente. NOTA Se si desidera eliminare l’associazione del termostato all’apparecchio, premere il tasto per 60 secondi per reinizializzarlo (annullamento dell’associazione). Premere OK per passare al menu successivo. 116 RF_prog:RF_prog_ACOVA_7L 22/10/2010 09:20 Page117 4.7 Test radio (CF07) Il termostato ambiente invia un segnale verso il ricevitore radio dell’apparecchio ogni 3 secondi. Quando questo avviene, il simbolo X2D compare temporaneamente sullo schermo. Verificare che la spia TH del ricevitore lampeggi ad ogni ricezione, indicando in tal modo il buon esito dell’associazione (vedere capitolo 4.6). PER USCIRE IN QUALUNQUE MOMENTO DALLE REGOLAZIONI AVANZATE, GIRATE LA MANOPOLA. 4.8 Ritorno alle regolazioni iniziali del termostato È possibile eseguire una reinizializzazione generale per tornare ai parametri impostati in fabbrica: le regolazioni avanzate (in grigio nei menù CF), le temperature programmate e la programmazione predefinita. Girare la manopola su RISCALDAMENTO SPENTO ( ) e premere per 10 secondi il tasto di sinistra fino a visualizzare init. Premere OK per convalidare o C per annullare. Ritorno alla visualizzazione della modalità di riscaldamento spento. I 10 sec. CARATTERISTICHE TECNICHE DEL TERMOSTATO AMBIENTE _ Alimentazione tramite 2 pile alcaline 1,5, tipo LR03 o AAA (in dotazione), autonomia superiore a 2 anni in caso di normale utilizzo _ Dispositivo di telecomando con portata radio da 100 a 300 metri in campo libero, variabile in base alle apparecchiature associate (la portata può subire alterazioni in funzione delle condizioni d’installazione e dell’ambiente elettromagnetico) _ Temperatura di funzionamento: da 0 °C a + 40 °C, _ Frequenza di emissione: 868 MHz classe I (norma EN 300 220). 117 RF_prog:RF_prog_ACOVA_7L 22/10/2010 09:20 Page118 5. Associazione ad altri dispositivi X2D 5.1 Associazione dell’apparecchio ad una centralina CPL (corrente portante on line) L’apparecchio può essere comandato a distanza grazie a una centralina di programmazione CPL (corrente portante on line) che segue lo standard X2D (non fornita). Per effettuare questa associazione è necessario: _ installare e collegare l’apparecchio (capitolo 1) _ associare l’apparecchio al termostato ambiente (capitolo 4.6) _ associare l’apparecchio con la centralina CPL (non fornita) Per fare questo, impostare la centralina di programmazione in modalità associazione (vedere il manuale della centralina). Nelle regolazioni avanzate del termostato ambiente, accedere al menu CF05 (vedere capitolo 4.5). Regolare il valore su 1 (modalità ciclica inattiva). La spia CPL inizia a lampeggiare sul ricevitore dell’apparecchio. Premere a questo punto il tasto , la spia diventa fissa, indicando la ricezione del segnale di associazione della centralina. I Il(I) radiatore(i) è (sono) associato(i) a partire da questo momento alla centralina. La spia TH è fissa (il radiatore è associato al termostato), la spia CPL lampeggia, in attesa dell’associazione alla centralina CPL. La spia CPL diventa fissa quando il segnale di associazione della centralina di programmazione viene rilevato. IMPORTANTE Girare la manopola del termostato ambiente su PROG e programmare la modalità Comfort ( ) per tutte le ore di ciascuno dei 7 giorni (vedere capitolo 3.3). Posizionare successivamente la manopola su Auto e l’apparecchio sarà comandato in base alle modalità di funzionamento inviate dalla centralina CPL. 118 RF_prog:RF_prog_ACOVA_7L 22/10/2010 09:20 Page119 5.2 Rilevatore di apertura Un rilevatore di apertura, che funziona in base allo standard X2D, consente di spegnere automaticamente il riscaldamento, ad esempio quando viene aperta una finestra. Per poterlo utilizzare è necessario: _installare e collegare l’apparecchio (vedere capitolo 1) _associare l’apparecchio al termostato ambiente (vedere capitolo 4.6) _associare l’apparecchio con il rilevatore di apertura (non fornito) Per fare questo, premere per 3 secondi il tasto del ricevitore dell’apparecchio, fino a quando la spia AUX non comincia a lampeggiare. Premere adesso il tasto di associazione del rilevatore di apertura. La spia AUX si spegne, indicando il buon esito dell’associazione. Il radiatore è associato a partire da questo momento al rilevatore di apertura. 3 sec I La spia TH è fissa (il radiatore è associato al termostato) la spia AUX si spegne quando il segnale di associazione del rilevatore di apertura viene individuato NOTA È possibile associare fino a 8 rilevatori sul canale AUX. Ripetere le operazioni precedenti per ciascun rilevatore da associare. Dopo l’associazione, la spia AUX accesa segnala una finestra aperta. 5.3 Reinizializzazione delle associazioni dell’apparecchio Per eliminare tutte le associazioni dell’apparecchio ai vari dispositivi X2D ai quali è associato (compreso il termostato ambiente in dotazione), premere il tasto per 60 secondi. La spia TH inizia in questo caso a lampeggiare, indicando che è in attesa di ricevere un nuovo segnale di associazione. NOTE Per eliminare solo le associazioni del canale AUX, premere il tasto per 10 secondi. Dopo i primi 3 secondi, la spia AUX inizia a lampeggiare per poi spegnersi alla fine dei 10 secondi di pressione del tasto, indicando in tal modo il buon esito dell’eliminazione dell’associazione. 119 RF_prog:RF_prog_ACOVA_7L 22/10/2010 09:20 Page120 6. Raccomandazioni d’uso I L’apparecchio elettrico è del tipo a circolazione di fluido ed è pronto all’uso. L’apparecchio è chiuso con un tappo e riempito in fabbrica con un olio minerale termico ad elevate prestazioni. Questo fluido non necessita di nessuna manutenzione particolare. Eventuali riparazioni per le quali è necessario aprire gli orifizi devono essere effettuate esclusivamente dal fabbricante o dal suo servizio post-vendita, che è buona norma contattare in caso di perdite di olio. Quando l’apparecchio di riscaldamento viene eliminato con i rifiuti, bisogna attenersi alle normative riguardanti lo smaltimento degli oli. In caso di svuotamento, il fluido va obbligatoriamente depositato in un raccoglitore per oli esausti. Da quando l’apparecchio inizia a riscaldarsi, si possono constatare fenomeni diversi da quelli generati da un riscaldamento elettrico convenzionale: _ La resistenza elettrica riscalda il fluido, che inizia gradualmente a circolare in modo naturale all’interno dell’apparecchio. _ Le proprietà d’inerzia del fluido fanno sì che la temperatura superficiale dell’apparecchio raggiunga un livello ottimale solo una volta trascorso un minimo di 10 min. _ Proprio questa inerzia garantisce d’altra parte la costanza e la durata del calore emesso, anche quando la resistenza non è più alimentata elettricamente. _ È normale constatare che la parte superiore dell’apparecchio sia meno calda del resto del corpo riscaldante. Infatti, allo scopo di consentire la necessaria dilatazione del fluido quando scalda, l’apparecchio non viene completamente riempito. Dato che il volume d’aria si posiziona naturalmente nella parte alta, è normale che alcuni elementi riscaldanti superiori risultino meno caldi. _ L’apparecchio presenta un’ampia superficie riscaldante, il che consente in modo autoregolato l’adattamento della quantità di calore emessa a seconda delle necessità. È quindi normale che nelle stagioni intermedie, quando l’apparecchio funziona con minore potenza, le differenze di temperatura di superficie dell’apparecchio siano più percepibili. NORMATIVA AMBIENTALE ROHS: Conforme alla direttiva 2002/95/CE DEEE: Conforme alla direttiva 2002/96/CE Smaltimento degli apparecchi elettrici ed elettronici al termine del ciclo di vita. Questo simbolo indica che il prodotto non deve essere smaltito insieme ai normali rifiuti domestici. Deve essere consegnato a un centro di raccolta appropriato che si incaricherà del riciclaggio. Sincerandosi del corretto smaltimento del prodotto, si aiuta a prevenire conseguenze potenzialmente negative per l'ambiente e la salute umana. 120 RF_prog:RF_prog_ACOVA_7L 22/10/2010 09:20 Page121 7. Consigli per la manutenzione Prima di qualsiasi operazione di manutenzione, assicurarsi di aver spento l’apparecchio girando la manopola su RISCALDAMENTO SPENTO ( ) e di averlo lasciato raffreddare. La scelta dei migliori materiali e la qualità del trattamento superficiale proteggono l’apparecchio dalla corrosione e dagli urti. Per garantire all’apparecchio la massima durata di vita con una manutenzione minima, raccomandiamo di attenersi ai seguenti consigli: _ Per la manutenzione delle pareti esterne dell’apparecchio, non utilizzare prodotti abrasivi o corrosivi, ma servirsi piuttosto di acqua saponata tiepida. _ Per la centralina d’alimentazione e il termostato ambiente, impiegare un panno morbido e asciutto, senza l’uso di solventi. 8. In caso di mancato funzionamento In caso di mancato funzionamento dell’apparecchio, si può procedere personalmente ai seguenti controlli, sincerandosi che: _ l’apparecchio sia collegato e alimentato in modo appropriato (vedere capitolo 1), _ il termostato ambiente sia entro la portata del ricevitore radio dell’apparecchio e sia correttamente alimentato dalle pile (vedere capitolo 2) _ il termostato comandi correttamente il riscaldamento dell’apparecchio (vedere capitolo 3). NOTA Quando si visualizza sullo schermo, il termostato invia un comando di riscaldamento all’apparecchio. Eseguire un test di riscaldamento posizionando su COMFORT ( ) la manopola del termostato e verificando che la temperatura programmata sia nettamente superiore alla temperatura ambiente. Deve visualizzarsi la fiamma e si dovrebbe cominciare a percepire il riscaldamento del radiatore nel giro di qualche minuto. Se questo non avviene, verificare il posizionamento del termostato ambiente (vedere capitolo 2.1), le pile (vedere capitolo 2.2) ed eseguire un test radio (vedere capitolo 4.7). Accertarsi anche di avere associato il termostato ambiente all’apparecchio (vedere capitolo 4.6), che è un requisito indispensabile perché questo possa funzionare. Nel caso in cui fosse necessario sostituire il termostato ambiente, reinizializzare le associazioni dell’apparecchio (vedere capitolo 5.3) e quindi associarlo al nuovo dispositivo di comando (vedere capitolo 4.6). 121 I RF_prog:RF_prog_ACOVA_7L 22/10/2010 09:20 Page122 Se il cavo di alimentazione è danneggiato, deve essere sostituito dal fabbricante, dal suo servizio post-vendita o da una persona parimenti qualificata, allo scopo di evitare un qualsiasi pericolo. SERVIZIO POST-VENDITA In caso di mancato funzionamento o di necessità di pezzi di ricambio, la preghiamo di contattare il tecnico installatore o il rivenditore. Prima di tutto, per consentire una corretta comprensione e una rapida presa in carico del problema, assicurarsi di aver preso nota: _ degli elementi indicati sull’etichetta segnaletica dell’apparecchio (vedere capitolo 1.3), _ del codice di riferimento commerciale indicato sulla fattura d’acquisto con data. GARANZIA (Vedere le condizioni generali di vendita relative al proprio paese) I Il radiatore è conforme alla direttiva CEM 2004/108/CE relativa alla limitazione dei radiodisturbi e alle normative europee N 60.335.1 / 60.335. 2.30 / 60.335.2.43. CASI DI ANNULLAMENTO DELLA GARANZIA La garanzia non si applica in particolare se si verificano condizioni d’installazione, utilizzo, messa in funzione o manutenzione non conformi alla normativa in vigore nel paese, alle regole dell’arte e al manuale d’uso del costruttore. Per qualsiasi altra domanda riguardante la garanzia, contattare il tecnico installatore o il rivenditore. 122 RF_prog:RF_prog_ACOVA_7L 22/10/2010 09:20 Page123 ES 1 Instalación del aparato 126 2 Descripción del termostato de ambiente RF Prog 129 3 Uso del termostato de ambiente RF Prog 132 ES 4 Ajustes avanzados del termostato de ambiente RF Prog 138 5 Asociación con otros dispositivos X2D 142 6 Recomendaciones de uso 144 7 Consejos de mantenimiento 145 8 En caso de que el aparato no funcione 145 123 RF_prog:RF_prog_ACOVA_7L 22/10/2010 09:20 Page124 Aspectos generales Estimado cliente: Le damos las gracias por haber elegido este radiador o este secatoallas Este producto está fabricado con el máximo cuidado, de acuerdo con nuestra carta de calidad, y esperamos que le proporcione total satisfacción. Para disfrutar plenamente de todas sus posibilidades, le invitamos a leer atentamente estas instrucciones y a conservarlas cerca de su aparato. Gracias por su confianza. Su radiador está controlado a distancia por el TERMOSTATO DE AMBIENTE PROGRAMABLE POR RADIOFRECUENCIA que le permite regular la temperatura deseada en la estancia donde usted se encuentre. ES Pantalla 4 teclas de selección Botón selector de modo 124 RF_prog:RF_prog_ACOVA_7L 22/10/2010 09:20 Page125 Este aparato no ha sido diseñado para ser utilizado por adultos y niños cuyas capacidades físicas, sensoriales o mentales sean reducidas, o por personas carentes de experiencia o de conocimiento, salvo si éstas han contado por medio de una persona responsable de su seguridad, con una vigilancia o con instrucciones previas relativas al uso del aparato. Se recomienda vigilar a los niños para asegurarse de que no jueguen con el aparato. Los radiadores y secatoallas deben utilizarse conforme al uso previsto y no como consola, silla, juego, escalera, etc. ES ADVERTENCIA PARA EL USO DE APARATOS CROMADOS, DE ACERO INOXIDABLE O DE ALUMINIO La temperatura de la superficie del radiador varía según el material. Los aparatos cromados, de acero inoxidable o de aluminio son los que transmiten una mayor sensación de calor al tocarlos. Se recomienda no apoyarse en la fachada del aparato cuando éste se encuentre en funcionamiento para evitar cualquier riesgo de quemaduras. 125 RF_prog:RF_prog_ACOVA_7L 22/10/2010 09:20 Page126 1. Instalación del aparato Para disfrutar plenamente de su aparato y para una mayor comodidad de utilización se recomienda: - instalar el radiador cerca de puntos con pérdidas de calor elevadas (ventanas, puertas, etc.), - colocar los objetos (muebles, sillas, etc.) a una distancia mínima de 50 cm aproximadamente de la parte delantera del aparato para facilitar la circulación del aire, - dejar una distancia mínima de 10 cm entre la parte superior del aparato y una repisa, - no instalar el radiador justo debajo de un enchufe, - utilizar tornillos de fijación adecuados al tipo de pared. 1.1 Caso de un radiador - Ubicación del aparato Mín. 10 cm ES Mín. 10 cm Receptor de señales de radio IMPORTANTE Este radiador no debe instalarse nunca con su caja de alimentación en una posición alta. Colocar la parte inferior del radiador a 10 cm del suelo como mínimo. ADVERTENCIA Para evitar el sobrecalentamiento, NO CUBRIR el aparato de calefacción. 126 RF_prog:RF_prog_ACOVA_7L 22/10/2010 09:20 Page127 1.2 Caso de un secatoallas - Ubicación del aparato Mín. 15 cm Receptor de señales de radio Mín. 15 cm IMPORTANTE Este secatoallas no debe instalarse nunca con su caja de alimentación en una posición alta. Colocar la parte inferior del secatoallas a 15 cm del suelo como mínimo. ADVERTENCIA Por motivos de seguridad, se recomienda instalar el secatoallas fuera del alcance de los niños. La parte inferior del equipo debería colocarse como mínimo a 600 mm del suelo. NOTA Los radiadores secatoallas eléctricos se han diseñado para ser cubiertos sin peligro. Sin embargo, para garantizar un funcionamiento eficaz de su aparato, se recomienda no cubrirlo completamente. En caso de aumento de la temperatura, el cortacircuitos interno puede interrumpir su funcionamiento. NOTA El testigo de la caja receptora de señales de radio se enciende para indicar el calentamiento del radiador. 127 ES RF_prog:RF_prog_ACOVA_7L 22/10/2010 09:20 Page128 1.3 Conexión del radiador Las características técnicas del radiador están indicadas en su etiqueta de identificación situada en el lateral, en la parte inferior. Tome nota de ellas antes de proceder con la instalación. IP : índice de protección del aparato contra salpicaduras de agua xxxV – xxxxW : tensión y potencia que se deben respetar al realizar la instalación Tipo de aparata Clase II : doble aislamiento OF : Numero de fabricación ES La conexión a la red eléctrica se debe efectuar respetando : _ La tensión indicada en dicha etiqueta, _ Los colores convencionales Marrón : fase; azul o gris : neutro. El cable flexible montado de origen está destinado a ser conectado a la red por medio de una caja de conexión que deberá estar colocada detrás del aparato, sin que se interponga un enchufe. En una cocina o en un cuarto de baño, la caja de conexión deberá estar colocada al menos a 25 cm del suelo. Caso de un radiador mixto: Le recomendamos que conecte el radiador detrás de un cortacircuito con objeto de cortar la alimentación eléctrica en caso de utilizar este último como calefacción central. 1.4 Reglas de instalación del radiador El aparato es de clase II, está protegido contra las proyecciones de agua y puede ser instalado en los baños, siempre que la instalación sea conforme con las normas vigentes y las reglas del arte del país en el que se realice. IMPORTANTE : El radiador no deberá estar sometido a una excesiva o permanente humedad ambiente (ducha, piscina, etc.). 128 RF_prog:RF_prog_ACOVA_7L 22/10/2010 09:20 Page129 2. Descripción del termostato de ambiente RF Prog Piloto indicador de desgaste de las pilas Hora Temperatura (consigna o calculada) Modo en curso (p.ej. confort) Días en curso Demanda de calefacción Perfil del programa Teclas de ajuste Modo automático Economía Confort Antihielo Ajuste de la hora Paro calefacción ES Programación Marcas para abrir la tapa ATENCIÓN El radiador no es compatible con un dispositivo de control que no sea el termostato de ambiente suministrado. 2.1 Ubicación del termostato de ambiente Para regular el aparato, el termostato debe calcular la temperatura ambiente más representativa posible de su hogar. Como la sonda de temperatura se encuentra en la caja del termostato de ambiente, usted debe colocar esta última: – fijada en una pared, sobre una balda o un mueble accesible a una altura de 1,50 m aproximadamente, – protegida de fuentes de calor (luz, influencia del sol, etc.) y de corrientes de aire (ventana, puerta, ventilación), – evite instalarla en una pared en contacto con el exterior o con una estancia sin calefacción (garaje, etc.). 129 RF_prog:RF_prog_ACOVA_7L 22/10/2010 09:20 Page130 Fijado en la pared Altura de 1,50 m aprox. Colocado sobre un mueble Mín. 20 cm ES Para un ajuste óptimo de la temperatura ambiente, el termostato debe instalarse en la misma estancia que el o los aparatos que controla. La emisión vía radio permite atravesar los obstáculos (mobiliario, tabiques...) de 100 a 300 metros en campo libre, variable en función de las condiciones de instalación y del entorno electromagnético. A 2.1.1 Fijación en la pared Levante la tapa con un destornillador (A). Retire las pilas incluidas con el aparato. Fije el termostato con tornillos y tacos o sobre una caja de encastre (B: distancia 60 mm). AUTO + - Vuelva a colocar las pilas respetando la polaridad. 2.1.2 Fijación sobre su base 1 Utilizando el soporte incluido, puede colocar el emisor sobre un mueble. 2 130 - B PROG + RF_prog:RF_prog_ACOVA_7L 22/10/2010 09:20 Page131 2.2 Activación y sustitución de las pilas Levante la tapa con un destornillador haciendo palanca (A). A continuación, retire la lengüeta de activación de las pilas y vuelva a colocar la tapa. A AUTO PROG A partir del momento en que aparece el piloto indicador de desgaste de las pilas , dispone de aproximadamente 3 meses para sustituirlas (2 pilas alcalinas 1,5 V de tipo LR03 o AAA). Deben tomarse algunas precauciones: _ respetar la polaridad +/- al colocar las pilas en el termostato, _ no tirar las pilas usadas en cualquier lugar (para proteger el medio ambiente, debe llevar las pilas usadas a un lugar de recogida), _ no recargarlas, _ dispone de unos 45 segundos para cambiar las pilas antes de que el ajuste de la hora se reinicialice (en este caso, proceda de nuevo con el ajuste de la hora y la fecha). + - AUTO B PRO PROG - + Símbolo de desgaste de las pilas ES 2.3 Puesta en hora Gire el botón hasta . Los días parpadean. Pulse + o – para seleccionar (se puede escoger el lunes como día 1) y, a continuación, pulse OK para confirmar y pasar al ajuste siguiente. Vuelva a realizar las operaciones para ajustar las horas y los minutos. Gire el botón para salir del modo de ajuste. Hora Minutos Día NOTA Para que su aparato funcione con el termostato de ambiente, éstos deben estar asociados (ver el capítulo 4.6). 131 RF_prog:RF_prog_ACOVA_7L 22/10/2010 09:20 Page132 3. Uso del termostato RF Prog 3.1 Presentación de los modos de funcionamiento PARO CALEFACCIÓN El aparato se encuentra en modo de parada de calefacción. CONFORT Es el modo que se debe utilizar cuando la estancia está ocupada (temperatura por defecto: 19°C). ECONOMÍA (ECO) Es el modo que se debe utilizar cuando la estancia no está ocupada. Se recomienda en caso de ausencia superior a 2 horas (temperatura por defecto: 16°C). ANTIHIELO Es el modo que se debe utilizar en caso de ausencia prolongada. Se recomienda en caso de ausencia superior a 24 horas (temperatura por defecto: 7°C). ES AUTO El termostato controla el aparator según el programa semanal (ver el capítulo 3.3) con visualización del modo de la franja horaria en curso. 3.2 Ajuste de las temperaturas de consigna Las temperaturas de consigna son las temperaturas que desea en su estancia según los diferentes modos de funcionamiento anteriores. Gire el botón hacia: para ajustar la temperatura antihielo (de 5 °C a 15 °C), para ajustar la temperatura economía (de 10 °C a 30 °C), para ajustar la temperatura confort Setpoint temperature (de 10 °C a 30 °C), Pulse + o - para ajustar la temperatura por pasos de 0,5 °C. A continuación, gire el botón para pasar al ajuste siguiente. NOTA Pulse la tecla i para visualizar momentáneamente la temperatura ambiente. 132 RF_prog:RF_prog_ACOVA_7L 22/10/2010 09:20 Page133 3.3 Programación La función programación permite programar los modos ECO ( ) y CONFORT ( ) para todo el día. Esta programación puede ser la misma para todos los días (programación diaria) o diferente para cada día (programación semanal). En caso de cambio de sus hábitos, siempre podrá cambiar manualmente el aparato al modo deseado ( o o ) mediante el botón. 3.3.1 Programación por defecto PARA CONSULTAR LA PROGRAMACIÓN, GIRE EL BOTÓN HASTA PROG Al poner en servicio el termostato programable, el programa predefinido es “CONFORT de 6 h a 23 h” y se aplica a todos los días de la semana. ES Hora de inicio de la franja consultada Día consultado Perfil del programa del día consultado Pasar al día siguiente Ir al próximo cambio de programa Perfil del programa por defecto: – de 0 a 6 h: modo ECO – de 6 h a 23 h: modo CONFORT – de 23 h a 0 h: modo ECO 133 RF_prog:RF_prog_ACOVA_7L 22/10/2010 09:20 Page134 3.3.2 Programación personalizada PARA MODIFICAR LA PROGRAMACIÓN, GIRE EL BOTÓN HASTA PROG La pantalla corresponde a la programación del día 1 (p. ej. lunes): aparecerá . _ La primera franja horaria parpadea (de medianoche a 1h); pulse para definirla en modo CONFORT, o para definirla en modo ECO. _ Se pasa a la franja horaria siguiente automáticamente. Repita la operación para ajustar todo el día. _ Si desea corregir lo que acaba de hacer, debe recorrer todas las franjas horarias para volver a la que desea modificar. _ Cuando desee confirmar este día, pulse OK para pasar al día siguiente. NOTA Para aplicar el mismo programa al día siguiente, mantenga pulsada la tecla OK aproximadamente 3 segundos hasta visualizar el programa del día siguiente. Día modificado Hora de inicio de la franja modificada ES 1ª franja horaria Perfil del programa del día modificado Programación de 1 h de Economía Programación de 1 h de Confort Pasar al día siguiente PARA COMPROBAR LA PROGRAMACIÓN Ir al próximo cambio de programa Hora de la franja consultada Pulse varias veces seguidas la tecla para comprobar las horas de inicio de los períodos de CONFORT y ECONOMÍA que usted ha definido. Pulse OK para comprobar el día siguiente. GIRE EL BOTÓN PARA SALIR DE LA PROGRAMACIÓN Comprobación de los diferentes períodos o . 134 RF_prog:RF_prog_ACOVA_7L 22/10/2010 09:20 Page135 3.4 Modo automático Es el modo que se debe seleccionar si desea automatizar los cambios de modo ( o ) en función de sus horarios de presencia en una estancia. Entonces, el aparato sigue el programa definido (ver el capítulo 3.3). Consigna en curso (p.ej. confort) Hora Temperatura ambiente Día Demanda de calefacción Modo ausencia Visualización temperatura ambiente / temperatura de consigna Modo cambio de modo de funcionamiento Modo manual (de 30 min a 72 horas) ES GIRE EL BOTÓN HASTA AUTO En la puesta en servicio se muestra la temperatura ambiente calculada por el termostato. El símbolo aparece encima de °C. Pulse la tecla 1 para visualizar la temperatura de consigna (temperatura deseada). Es posible invertir la visualización de la temperatura (ver el capítulo 4.2): – en modo automático: temperatura de consigna – pulsando la tecla 1: temperatura ambiente Si no desea seguir la programación (ver el capítulo 3.3), puede pasar a los modos permanente ( ), CONFORT permanente ( ) o ANTIHIELO permanente ( ) girando el botón hasta el modo deseado. ECO 135 RF_prog:RF_prog_ACOVA_7L 22/10/2010 09:20 Page136 3.4.1 Modo ausencia Este modo permite definir una temperatura fija (de 5 a 15 °C) para una duración ajustable (de 1 a 365 días). A partir del modo automático (AUTO), pulse la tecla MALETA ( ). El número de días parpadea. Pulse + o - para ajustar el número de días y, a continuación, pulse OK para confirmar. La temperatura parpadea: ajuste el valor deseado con los botones + o -. EJEMPLO Salida el 10 de enero, regreso el 19 de enero, indique 9 días. El funcionamiento automático se reanudará el 19 de enero a las 00.00 h. Confirme con OK. La temperatura parpadea. Pulse + o – para ajustar la temperatura. Confirme con OK. ES Para cancelar el modo ausencia (por ejemplo: regreso anticipado), pulse la tecla C o gire el botón. 3.4.2 Modo cambio de modo de funcionamiento En modo AUTO, puede pasar del modo en curso (de a o inversamente) al próximo modo programado pulsando la tecla . A partir del modo automático AUTO, pulse la tecla . EJEMPLO Usted está en modo ECO ( ). Pulse la tecla para pasar al modo CONFORT ( ). Para cancelar el modo cambio de modo de funcionamiento, pulse de nuevo la tecla o gire el botón. 136 Modo cambio de modo en curso RF_prog:RF_prog_ACOVA_7L 22/10/2010 09:20 Page137 3.4.3 Modo manual Mediante la tecla , puede definir una temperatura de consigna diferente a la ajustada en el programa del modo AUTO durante un tiempo determinado de 30 minutos a 72 horas. A partir del modo automático AUTO, pulse la tecla . La duración del modo manual parpadea. Pulse + o - para ajustar la duración deseada por pasos de 30 min. Confirme con OK. La temperatura parpadea. Pulse + o - para ajustar la temperatura deseada. Confirme con OK. Modo manual en curso Para cancelar el modo manual, pulse la tecla C o gire el botón. ES 3.5 Modo paro calefacción Para detener la calefacción del radiador (por ejemplo, en verano), gire el botón hasta . El termostato muestra la temperatura ambiente calculada. Temperatura ambiente 137 RF_prog:RF_prog_ACOVA_7L 22/10/2010 09:20 Page138 4. Ajustes avanzados del termostato de ambiente RF Prog Gire el botón hasta PARO CALEFACCIÓN y pulse 5 segundos la tecla de la derecha hasta que aparezca H200 x:xx (número de versión del mando a distancia). Pulse OK. En la pantalla aparecerá CF01. 4.1 Corrección de la medida de la temperatura ambiente (CF01) Con las teclas + o -, puede ajustar la temperatura ambiente calculada por el termostato hasta +/- 4 °C en caso de desajuste con la temperatura constatada en la estancia. Pulse + o - para seleccionar y, a continuación, pulse OK para confirmar y pasar al menú siguiente. ES 4.2 Elección de la visualización de la temperatura en modo Auto (CF02) Esta función le permite visualizar o bien la temperatura ambiente calculada por el termostato, o bien la temperatura de consigna. Pulse + o - para seleccionar y, a continuación, pulse OK para confirmar y pasar al menú siguiente. 0 : visualización permanente de la temperatura ambiente 1 : visualización permanente de la temperatura de consigna 138 5s RF_prog:RF_prog_ACOVA_7L 22/10/2010 09:20 Page139 4.3 (CF03) - NO DISPONIBLE EN ESTE MODELO Configure este valor en 0 pulsando + o -; a continuación, pulse OK para confirmar y pasar al menú siguiente. 4.4 (CF04) - NO DISPONIBLE EN ESTE MODELO Configure este valor en 0 pulsando + o -; a continuación, pulse OK para confirmar y pasar al menú siguiente. ES 4.5 Cycle mode (CF05) Configure este valor en 0 pulsando + o -; a continuación, pulse OK para confirmar y pasar al menú siguiente. 0 : activo 1 : inactivo En caso de asociación con otros productos domóticos X2D (transmisores, mandos a distancia, central de alarma o central CPL, etc. salvo detectores de apertura), configure este valor en 1. 139 RF_prog:RF_prog_ACOVA_7L 22/10/2010 09:20 Page140 4.6 Asociación del aparato con el termostato de ambiente (CF06) El aparato debe asociarse al termostato de ambiente para que reciba solamente las órdenes enviadas por éste, evitando así las posibles interferencias con otros dispositivos de control por radiofrecuencia. IMPORTANTE La asociación del aparato con el termostato de ambiente es imprescindible para su funcionamiento. Cuando encienda su aparato, el testigo TH de la caja receptora de señales de radio (detrás del radiador) parpadeará. NOTA Si el testigo TH se enciende fijo, pulse durante 60 segundos hasta que éste comience a parpadear (reinicialización). Todos los radiadores de alimentación eléctrica no asociados se asociarán automáticamente a este termostato de ambiente. Mediante el cuadro eléctrico usted puede alimentar solamente los radiadores que desee. ES El testigo parpadea (radiador no asociado) El testigo se encenderá fijo cuando se reciba la señal de asociación del termostato A partir del menú CF06 del termostato de ambiente, pulse la tecla +. La aparición momentánea del símbolo X2D corresponde al envío de una señal de asociación. Compruebe que el testigo del receptor se encienda fijo. A partir de este momento, el aparato está asociado con el termostato de ambiente. NOTA Si desea desasociar el termostato de su aparato, pulse la tecla 60 segundos para reinicializarlo (cancelar la asociación). Pulse OK para pasar al menú siguiente. 140 durante RF_prog:RF_prog_ACOVA_7L 22/10/2010 09:20 Page141 4.7 Test de señales de radio (CF07) El termostato de ambiente envía una señal hacia el receptor de señales de radio del aparato cada 3 segundos. El símbolo X2D aparecerá momentáneamente en la pantalla. Compruebe que el testigo TH del receptor parpadee cada vez que recibe las señales, lo que indicará que la asociación se ha llevado a cabo con éxito (ver el capítulo 4.6). PARA SALIR EN CUALQUIER MOMENTO DE LOS AJUSTES AVANZADOS, GIRE EL BOTÓN. 4.8 Volver a los ajustes iniciales del termostato Puede llevar a cabo una reinicialización general para volver a los parámetros ajustados de fábrica: los ajustes avanzados (en gris en los menús CF), las temperaturas de consigna y la programación por defecto. Gire el botón hasta PARO CALEFACCIÓN y pulse 10 segundos la tecla de la izquierda hasta que aparezca init. Pulse OK para confirmar o C para cancelar. Volver a la pantalla del modo paro calefacción. ES 10 s CARACTERÍSTICAS TÉCNICAS DEL TERMOSTATO DE AMBIENTE _ Alimentación mediante 2 pilas alcalinas 1,5 tipo LR03 o AAA (incluidas); autonomía superior a 2 años con un uso normal. _ Dispositivo de mando a distancia con alcance radio de 100 a 300 metros en campo libre, variable en función de los equipamientos asociados (el alcance puede verse alterado por las condiciones de instalación, así como por el entorno electromagnético). _ Temperatura de funcionamiento: 0 °C a +40 °C, _ Frecuencia de emisión 868 MHz, clase I (norma EN 300 220). 141 RF_prog:RF_prog_ACOVA_7L 22/10/2010 09:20 Page142 5. Asociación con otros dispositivos X2D 5.1 Asociación del aparato con una central CPL Su aparato puede controlarse a distancia mediante una central de programación CPL (corriente portadora en línea) que funcione con el estándar X2D (no incluida). Para ello, deberá: _ instalar y conectar el aparato (capítulo 1), _ asociar el aparato con el termostato de ambiente (capítulo 4.6), _ asociar el aparato con la central CPL (no incluida). Para ello, posicione la central de programación en modo asociación (ver el manual de instrucciones de esta central). En los ajustes avanzados del termostato de ambiente, vaya al menú CF05 (ver el capítulo 4.5). Configure el valor en 1 (modo cíclico inactivo). El testigo CPL del receptor del aparato parpadeará. Pulse la tecla , el testigo se enciende fijo para indicar la recepción de la señal de asociación de la central. ES A partir de ahora su(s) radiador(es) estará(n) asociado(s) a su central. El testigo TH se enciende fijo (el radiador está asociado con el termostato), el testigo CPL parpadea para indicar que está esperando la asociación con la central CPL El testigo CPL se encenderá fijo cuando se reciba la señal de asociación de la central de programación IMPORTANT Gire el botón del termostato de ambiente hasta PROG y programe el modo CONFORT ( ) en todas las horas de cada uno de los 7 días (ver el capítulo 3.3). A continuación, posicione el botón en Auto y el aparato funcionará según los modos enviados por la central CPL. 142 RF_prog:RF_prog_ACOVA_7L 22/10/2010 09:20 Page143 5.2 Detector de apertura Un detector de apertura que funciona con el estándar X2D le permite detener la calefacción automáticamente en caso de apertura de una ventana, por ejemplo. Para ello, deberá: – instalar y conectar el aparato (ver capítulo 1), – asociar el aparato con el termostato de ambiente (ver el capítulo 4.6), – asociar el aparato con este detector de apertura (no incluido). Para ello, pulse 3 segundos la tecla del receptor del aparato hasta que el testigo AUX parpadee. Pulse la tecla de asociación de su detector de apertura. El testigo AUX se apagará para indicar que la asociación se ha llevado a cabo con éxito. A partir de este momento, el radiador está asociado con el detector de apertura. 3s ES El testigo TH está encendido fijo (el radiador está asociado al termostato) El testigo AUX se apagará cuando se reciba la señal de asociación del detector de apertura NOTA Puede asociar hasta 8 detectores a la vía AUX. Repita las operaciones anteriores para cada detector que desee asociar. Una vez realizada la asociación, el testigo AUX se encenderá para indicar que se ha detectado una ventana abierta. 5.3 Reinicialización de las asociaciones del aparato Para suprimir todas las asociaciones del aparato con los diferentes dispositivos X2D (incluyendo el termostato de ambiente suministrado), pulse la tecla . durante 60 segundos. El testigo TH comenzará a parpadear para indicar que está en espera de recepción de una nueva señal de asociación. NOTE Para suprimir solamente las asociaciones de la vía AUX, pulse la tecla . durante 10 segundos. Al cabo de 3 segundos de mantenerla pulsada, el testigo AUX parpadeará y se apagará una vez pasados los 10 segundos de pulsación para indicar que la desasociación se ha llevado a cabo con éxito. 143 RF_prog:RF_prog_ACOVA_7L 22/10/2010 09:20 Page144 6. Recomendaciones de uso ES Su aparato eléctrico contiene un fluido circulante y está listo para usar. Viene de fábrica obturado y lleno de aceite mineral térmico de alto rendimiento. Este fluido no requiere ningún cuidado particular. Las reparaciones que requieran la apertura de los orificios deberán ser realizadas exclusivamente por el fabricante o su servicio posventa, el cual deberá ser contactado en caso de pérdidas de aceite. Cuando deseche este aparato de calefacción respete las normativas sobre eliminación del aceite. En caso de cambio del fluido, deberá depositar el contenido en un punto de recogida de aceites usados. Desde el calentamiento del aparato constatará fenómenos diferentes de los producidos por la calefacción eléctrica convencional: _ La resistencia eléctrica calienta el fluido que, de manera natural y progresiva, comienza a circular por el interior del aparato. _ Las propiedades de inercia del fluido hacen que la temperatura de superficie del aparato alcance un nivel óptimo sólo al cabo de 10 minutos como mínimo. _ Por el contrario, es esta inercia la que asegura la constancia y la duración del calor emitido, incluso cuando la resistencia ha dejado de alimentarse. _ Es normal que la parte superior del aparato esté menos caliente que el resto del cuerpo de calentamiento. Para permitir la dilatación necesaria del fluido cuando se calienta, el aparato no está totalmente lleno. Teniendo en cuenta que el volumen de aire se sitúa en la parte superior, es normal que algunos elementos superiores parezcan menos calientes. _ Su aparato está constituido de una amplia superficie de calentamiento, lo que permite adaptar de manera autorregulada la cantidad de calor emitida en función de las necesidades. Así pues, es normal que en los meses de entretiempo, cuando el aparato funciona de manera moderada, las diferencias de temperatura de la superficie del aparato sean más perceptibles. NORMATIVA MEDIOAMBIENTAL` ROHS: Conforme a la directiva 2002/95/CE. DEEE: Conforme a la directiva 2002/96/CE. Tratamiento de los aparatos eléctricos y electrónicos al final de su vida útil. Este símbolo indica que el presente producto no puede ser tratado como los residuos domésticos. Debe entregarse en el correspondiente punto de recogida para su reciclaje. Asegurándose de que este producto es desechado correctamente, usted está ayudando a prevenir las consecuencias negativas potenciales para el medio ambiente y la salud humana. 144 RF_prog:RF_prog_ACOVA_7L 22/10/2010 09:20 Page145 7. Consejos de mantenimiento Antes de proceder a cualquier operación de mantenimiento, asegúrese de haber apagado el aparato posicionando el botón en PARO CALEFACCIÓN ( ) y déjelo enfriar. La selección de los mejores materiales y la calidad del tratamiento de superficie protegen su aparato de la corrosión y los golpes. Para garantizar una larga vida útil del aparato mediante un mantenimiento sencillo, le recomendamos seguir estos consejos: _ Para el mantenimiento de las superficies exteriores del aparato no utilice productos abrasivos o corrosivos. Utilice preferentemente agua templada con jabón. _ Para la caja de alimentación y el termostato de ambiente, utilice un paño suave y seco, sin disolvente. 8. En caso de que el aparato no funcione ES En caso de que el aparato no funcione, proceda usted mismo con las siguientes verificaciones asegurándose de que: _ el aparato esté debidamente conectado y alimentado (ver el capítulo 1), _ el termostato de ambiente no esté fuera del alcance del receptor de señales de radio del aparato y que esté debidamente alimentado mediante pilas (ver el capítulo 2) _ el termostato controle correctamente el calentamiento del aparato (ver el capítulo 3). NOTA Cuando aparece en la pantalla, el termostato envía una orden de calefacción al radiador. Haga una prueba de calefacción posicionando en Confort ( ) el botón del termostato y comprobando que la temperatura de consigna sea superior a la temperatura ambiente: la llama debe visualizarse y usted debería sentir la calefacción del radiador al cabo de unos minutos. De no ser así, compruebe la ubicación del termostato de ambiente (ver el capítulo 2.1), las pilas (ver el capítulo 2.2) y compruebe las señales de radio (ver el capítulo 4.7). 145 RF_prog:RF_prog_ACOVA_7L 22/10/2010 09:20 Page146 Asimismo, asegúrese de haber asociado el termostato de ambiente con el aparato (ver el capítulo 4.6), puesto que es una etapa imprescindible para su funcionamiento. En caso de que sea necesario sustituir el termostato de ambiente, reinicialice las asociaciones del aparato (ver el capítulo 5.3) y asócielo de nuevo con el dispositivo de control (ver el capítulo 4.6). Si el cable de alimentación está dañado, deberá ser reemplazado por el fabricante, por su servicio posventa o por una persona con una cualificación similar para evitar cualquier peligro. SERVICIO POSVENTA En caso de que el aparato no funcione o de que requiera piezas de repuesto, póngase en contacto con su instalador o distribuidor. Para facilitar la comprensión y agilizar el tratamiento del problema, asegúrese de haber anotado los datos siguientes: – los elementos que figuran en la etiqueta de características del aparato (ver el capítulo 1.3), – la referencia comercial que figura en la factura con la fecha de compra. ES GARANTÍA (Ver condiciones generales de venta para el país correspondiente) Este radiador cumple con la directiva CEM 2004/108/CE relativa a la limitación de las perturbaciones radioeléctricas y con las normas europeas EN 60.335.1 / 60.335. 2.30 / 60.335.2.43. CASO DE ANULACIÓN DE LA GARANTÍA La garantía no se aplicará en condiciones de instalación, uso o mantenimiento no conforme a la norma vigente del país, a las reglas del oficio y al manual de instrucciones del fabricante. Para cualquier otra consulta relativa a la garantía, póngase en contacto con su instalador o distribuidor. 146 RF_prog:RF_prog_ACOVA_7L 22/10/2010 09:20 Page147 PL 1 Instalacjaurządzenia 150 2 OpistermostatuotoczeniaRFProg 153 3 KorzystanieztermostatuotoczeniaRFProg 156 PL 4 Zaawansowaneustawieniatermostatu otoczeniaRFProg 162 5 PołączeniezinnymiurządzeniamiX2D 166 6 Zaleceniadotyczącestosowania 168 7 Poradydotyczącekonserwacji 169 8 Wprzypadkuniefunkcjonowania 169 147 RF_prog:RF_prog_ACOVA_7L 22/10/2010 09:20 Page148 Informacje ogólne Szanowni Państwo Dziękujemy za zakupienie tego grzejnika lub tej suszarki na ręczniki. Urządzenie to zostało starannie opracowane zgodnie z naszym wzorcem jakości. Życzymy więc, aby korzystanie z niego przyniosło Państwu pełną satysfakcję. Aby w pełni korzystać ze wszystkich jego możliwości, zachęcamy Państwa do uważnego przeczytania niniejszej instrukcji i zachowania jej w pobliżu urządzenia. Dziękujemy Państwu za zaufanie. Grzejnik jest zdalnie sterowany za pomocą programowalnegotermostatuotoczenia oczęstotliwościachradiowych, który umożliwia nastawienie żądanej temperatury w pomieszczeniu. PL Wyświetlacz 4 przyciski wyboru Pokrętło do wybierania trybu 148 RF_prog:RF_prog_ACOVA_7L 22/10/2010 09:20 Page149 Z urządzenia tego nie powinny korzystać osoby (w tym również dzieci), których zdolności fizyczne, czuciowe lub umysłowe są ograniczone, ani osoby, które nie posiadają doświadczenia czy wiedzy, chyba że korzystały z wcześniejszego nadzorowanego używania lub objaśnień jego dotyczących przez osobę odpowiedzialną za ich bezpieczeństwo. Należy dopilnować, aby dzieci nie bawiły się tym urządzeniem. Grzejniki oraz suszarki na ręczniki powinny być używane zgodnie z ich przeznaczeniem a nie jako konsola, krzesło, zabawka, drabina… PL OStRZEżENIEDOt.KORZyStaNIaZuRZąDZEńchROmOWaNych,ZEStaLINIERDZEWNEjLubaLumINIumWśród różnych rodzajów powierzchni grzejnika, urządzenia chromowane, aluminiowe lub ze stali nierdzewnej dają najsilniejsze wrażenie ciepła przy dotyku. Zalecane jest nie opieranie się o przód włączonego urządzenia, aby uniknąć wszelkiego ryzyka oparzenia. 149 RF_prog:RF_prog_ACOVA_7L 22/10/2010 09:20 Page150 1. Instalacja urządzenia Aby w pełni korzystać z grzejnika i dla większej wygody własnej zaleca się: - zainstalować grzejnik, jeśli to możliwe, w pobliżu miejsc o dużym rozproszeniu ciepła (okna, drzwi, itd.), - pozostawić co najmniej 50 cm wolnej przestrzeni między przedmiotami (meblami, krzesłami, itd.) a przednią powierzchnią urządzenia, aby ułatwić krążenie powietrza, - pozostawić co najmniej 10 cm wolnej przestrzeni między górną częścią urządzenia a parapetem, - nie umieszczać urządzenia grzejnego tuż pod gniazdkiem elektrycznym, - używać śrub mocujących przystosowanych do rodzaju ściany. 1.1 Grzejnik – Usytuowanie urządzenia Co najmniej 10 cm PL Odbiornik radiowy Co najmniej 10 cm Ważne Grzejnik ten nie powinien być nigdy instalowany z układem zasilającym do góry. Umieścić dół grzejnika na wysokości wynoszącej co najmniej 10 cm od podłoża. OstrzeżenIe Aby uniknąć przegrzania, nie nAleży PrZykryWAć urządzenia grzejnego. 150 RF_prog:RF_prog_ACOVA_7L 22/10/2010 09:20 Page151 1.2 suszarka na ręczniki - Usytuowanie urządzenia Co najmniej 15 cm Odbiornik radiowy Co najmniej 15 cm Ważne Ta suszarka na ręczniki nie powinna być nigdy instalowana z układem zasilającym do góry. Umieścić dół suszarki na ręczniki na wysokości wynoszącej co najmniej 15 cm od podłoża. OstrzeżenIe Aby uniknąć wszelkiego ryzyka wobec najmłodszych dzieci, zaleca się zainstalować tę suszarkę na ręczniki tak, aby najniższy pręt grzejący znajdował się co najmniej o 600mm od podłoża. należy OdnOtOWać, że elektryczne grzejniki - suszarki na ręczniki są tak zaprojektowane, żeby móc je przykrywać bez ryzyka. Jednak, aby zapewnić skuteczne działanie urządzenia zaleca się nie przykrywać ich całkowicie. W przypadku podwyższenia temperatury i dzięki wewnętrznemu bezpiecznikowi, grzejnik może się wyłączyć. UWaGa Zapalony wskaźnik odbiornika radiowego oznacza, że nagrzewanie urządzenia jest włączone. 151 PL RF_prog:RF_prog_ACOVA_7L 22/10/2010 09:20 Page152 1.3 Podłączenie grzejnika Parametry techniczne grzejnika są zaznaczone na etykietce znamionowej znajdującej się na boku, w dolnej części. Prosimy wziąć je pod uwagę przed jego zainstalowaniem. IP : wska nik ochrony urz dzenia przed ochlapaniem wod xxxV – xxxxW : napi cie oraz moc, których nale y przestrzega podczas instalacji Typ modelu Klasa II : podwójna izolacja OF : numer seryjny PL Podłączenie do prądu powinno być dokonane przy jednoczesnym przestrzeganiu: _ Napięcia oraz mocy podanych na niniejszej etykietce _ Barw umownych (Brązowy: faza, Niebieski lub Szary: punkt zerowy). Giętki kabel założony fabrycznie jest przeznaczony do podłączenia do sieci za pomocą skrzynki zaciskowej, która powinna być umieszczona z tyłu urządzenia i tak aby wtyczka do gniazdka nie zajmowała pozycji pośredniej. W kuchni lub w łazience skrzynka zaciskowa powina być umieszczona na wysokości wynoszącej co najmniej 25 cm od podłogi. W przypadku grzejnika mieszanego Zalecane jest podłączenie grzejnika za bezpiecznikiem, tak aby wyłączyć zasilanie elektryczne w przypadku korzystania z grzejnika w trybie ogrzewania centralnego. 1.4 zasady instalacji grzejnika Urządzenie to należy do klasy II. Instalacja powinna być zgodna z normami oraz zasadami rzemiosła obowiązującymi w kraju, w którym jest założona. WAŻNE : grzejnik nie powinien znajdować się w mocno wilgotnym lub stale wilgotnym otoczeniu (prysznic, basen, itd.).. 152 RF_prog:RF_prog_ACOVA_7L 22/10/2010 09:20 Page153 2. Opis termostatu otoczenia rF Prog Wskaźnik zużycia baterii Godzina Temperatura (zaprogramowana lub mierzona) Program bieżący (np. komfort) Dzień bieżący Polecenie nagrzania Profil programu Przyciski regulacji Tryb automatyczny Oszczędny Zabezpieczenie przed zamarznięciem Zatrzymanie ogrzewania komfort nastawianie godziny PL Programowanie Miejsce otwarcia osłony UWaGa Grzejnik ten jest kompatybilny jedynie z dostarczonym termostatem otoczenia i z żadnym innym urządzeniem sterowania. 2.1 Usytuowanie termostatu otoczenia Aby nastawić urządzenie, termostat powinien zmierzyć najbardziej reprezentatywną temperaturę otoczenia w mieszkaniu. Sonda mierząca temperaturę znajduje się w obudowie termostatu otoczenia, dlatego też należy go umieścić następująco: _ na ścianie lub na półce czy też na dostępnym meblu na wysokości ok. 1,50 m, _ z dala od źródła ciepła (światła, promieni słonecznych) czy przeciągów (okna, drzwi, wentylacja). _ unikać instalacji na ścianie zewnętrznej czy też na ścianie oddzielającej nieogrzewane pomieszczenie (garaż, itd.). 153 RF_prog:RF_prog_ACOVA_7L 22/10/2010 09:20 Page154 Przymocowanie do ściany Wysokość ok. 1,50 m Ustawienie na meblu Co najmniej 20 cm Aby uzyskać optymalne ustawienie temperatury otoczenia, należy zainstalować termostat w tym samym pomieszczeniu co sterowane przez nie urządzenie lub urządzenia. Fale radiowe mogą pokonać przeszkody (meble, ścianki...) w zasięgu od 100 do 300 metrów na wolnej przestrzeni, zależnie od warunków instalacji i środowiska elektromagnetycznego. PL A 2.1.1 Przymocowanie do ściany Podnieść osłonę za pomocą śrubokrętu (A). Wyjąć baterie dostarczone wraz z urządzeniem. Przymocować termostat za pomocą śrub i kołków lub na puszce instalacyjnej (B: rozstaw osi 60mm). Włożyć z powrotem baterie, uwzględniając ich biegunowość. 2.1.2 Przymocowanie na podstawce AUTO + - 1 Dzięki dostarczonej podstawce, możliwe jest ustawienie nadajnika na meblu. 2 154 - B PROG + RF_prog:RF_prog_ACOVA_7L 22/10/2010 09:20 Page155 2.2 Podłączenie i wymiana baterii Podnieść osłonę za pomocą śrubokręta, przez podważenie (A). Zdjąć następnie przegródkę aktywującą baterii i z powrotem założyć osłonę. A AUTO PROG Po pojawieniu się wskaźnika zużycia baterii , należy je wymienić w ciągu około 3 miesięcy (2 baterie alkaliczne, 1,5V typu LR03 lub AAA). Należy podjąć środki ostrożności: _ uwzględnić biegunowość +/- podczas ich zakładania w termostacie, _ nie wyrzucać zużytych baterii byle gdzie (aby chronić środowisko, należy je odstawić do miejsca zbiórki przeznaczonego do tego celu), _ nie należy ich ponownie ładować, _ należy wymienić baterie w ciągu 45 sekund, po upływie tego czasu godzina zostanie zresetowana (w takim przypadku, należy ponownie nastawić godzinę i datę). - AUTO + B PRO PROG - + Symbol zużycia baterii PL 2.3 Ustawianie godziny Przekręcić pokrętło na . Pojawiają się migoczące dni. Nacisnąć + lub – celem dokonania wyboru (można ustalić, że poniedziałek to dzień 1), a następnie nacisnąć OK, aby potwierdzić i przejść do następnego ustawienia. Należy rozpocząć tę samą czynność, aby nastawić godzinę a następnie minuty. Przekręcić pokrętło, aby wyjść z trybu ustawień. Godzina Minuty Dzień UWaGa Aby urządzenie działało wraz z termostatem otoczenia, należy je wzajemnie połączyć (patrz rozdział 4.6). 155 RF_prog:RF_prog_ACOVA_7L 22/10/2010 09:20 Page156 3. Korzystanie z termostatu rF Prog 3.1 Opis trybów działania zatrzymanIe OGrzeWanIa Urządzenie znajduje się w trybie zatrzymania ogrzewania. KOmFOrt Jest to tryb, którego należy używać podczas przebywania w pomieszczeniu (temperatura domyślna: 19°C). Oszczędny Jest to tryb, którego należy używać w przypadku, gdy nie przebywa się w pomieszczeniu. Jest on zalecany w przypadku nieobecności przekraczającej 2 godziny (temperatura domyślna: 16°C). zabezPIeczenIe Przed zamarznIęcIem Jest to tryb, którego należy używać w przypadku długiej nieobecności. Jest on zalecany w przypadku, gdy nieobecność przekracza 24 godziny (temperatura domyślna: 7°C). PL AUTOMATYCZNE termostat steruje urządzeniem zgodnie z programem tygodniowym (patrz rozdział 3.3), wyświetlając tryb bieżącego przedziału czasowego. 3.2 Ustawienie temperatur nastawnika Temperatury nastawnika to temperatury wybrane dla danego pomieszczenia zależnie od różnych trybów funkcjonowania podanych powyżej. Przekręcić pokrętło na: aby nastawić temperaturę zabezpieczającą przed zamarznięciem (od 5°C do 15°C), aby nastawić temperaturę w trybie oszczędnym (od 10°C do 30°C), aby nastawić temperaturę w trybie komfort Setpoint temperature (od 10°C do 30°C), Nacisnąć + ou – celem dostosowania temperatury stopniowo, co każde 0,5 °C. Następnie przekręcić pokrętło, aby przejść do następnego ustawienia. należy OdnOtOWać, że aby wyświetlić na chwilę temperaturę otoczenia, należy nacisnąć przycisk i. 156 RF_prog:RF_prog_ACOVA_7L 22/10/2010 09:20 Page157 3.3 Programowanie Funkcja programowania umożliwia zaprogramowanie trybów Oszczędnego ( ) oraz Komfortu ( ) na cały dzień. Zaprogramowanie to może być takie samo we wszystkie dni (oprogramowanie dzienne) lub inne każdego dnia (oprogramowanie tygodniowe). W przypadku zmiany przyzwyczajeń, zawsze możliwe jest ręczne przełączenie urządzenia na wybrany tryb ( lub lub ) za pomocą pokrętła. 3.3.1 Programowanie domyślne ABy ZOBACZyć ZAPROGRAmOWANIE, PRZEKRęCIć POKRęTłO NA PROG Przy uruchomieniu programowalnego termostatu, określony wcześniej program "Komfort od godz. 6:00 do 23:00" jest ustawiony dla wszystkich dni tygodnia. PL Godzina rozpoczęcia sprawdzanego przedziału czasowego Sprawdzany dzień Profil programu sprawdzanego dnia Przejście do następnego dnia Przejść do następnej zmiany programu Profil programu nastawionego domy lnie: - od godz. 0:00 do 6:00 : program Oszcz dny - od godz. 6:00 do 23:00 : program Komfort - od godz. 23:00 do 0:00 : program Oszcz dny 157 RF_prog:RF_prog_ACOVA_7L 22/10/2010 09:20 Page158 3.3.2 zaprogramowanie dostosowane do użytkownika ABy ZmIENIć ZAPROGRAmOWANIE, NALEŻy PRZEKRęCIć POKRęTłO NA PROG Ekran odpowiada programowi na 1 dzień (np. poniedziałek) pojawia się . _ miga pierwszy przedział czasowy (od północy do godz 1:00), nacisnąć , aby wybrać tryb Komfort, lub , aby wybrać tryb Oszczędny. _ Przejście do następnego przedziału czasowego jest automatyczne. Należy powtórzyć tę czynność, aby zaprogramować całą dobę. _ Celem dokonania korekty w dokonanym zaprogamowaniu, należy przejść przez wszystkie przedziały czasowe, aby powrócić do tego, który ma zostać poprawiony. _ Aby potwierdzić program na daną dobę, nacisnąć OK, przejście do następnego dnia jest automatyczne. UWaGa Celem ustawienia danego programu również na następny dzień, należy przytrzymać przycisk Ok w pozycji wciśniętej przez około 3 sekundy, aż pojawi się program następnej doby. Zmieniony dzień Godzina rozpoczęcia zmienionego przedziału czasowego PL 1-wszy przedział czasowy Profil programu zmienionego dnia Programowanie 1 godziny trybu Oszczędnego Programowanie 1 godziny trybu komfort Przejście do następnego dnia ABy SPRAWDZIć ZAPROGRAmOWANIE Przejść do następnej zmiany programu Godzina sprawdzanego przedziału czasowego Naciska kolejno przycisk , aby sprawdzi godziny rozpocz cia okresów Komfort oraz Oszcz dny, jakie zostały zaprogramowane. Nacisn OK, aby sprawdzi nast pny dzie . PRZEKRęCIć POKRęTłO, ABy WyJść Z TRyBU PROGRAmOWANIA Sprawdzenie różnych okresów lub . 158 RF_prog:RF_prog_ACOVA_7L 22/10/2010 09:20 Page159 3.4 tryb automatyczny Jest to tryb, który należy wybrać, aby zmiany trybów ( lub ) były automatyczne zależnie od godzin, w jakich przebywa się w pomieszczeniu. W takim przypadku urządzenie jest sterowane zgodnie z zarejestrowanym programem (patrz rozdział 3.3). Tryb bieżący (np. komfort) Godzina Temperatura pokojowa Tryb na czas nieobecności Tryb zmiany programu Dzień Polecenie nagrzania Wyświetlanie temperatury otoczenia / temperatury nastawnika Tryb ręczny (od 30 minut do 72 godzin) PL PRZEKRęCIć POKRęTłO NA TRyB AUTOmATyCZNy. Przy uruchomieniu, wyświetlona jest temperatura otoczenia zmierzona przez termostat. Pojawia się symbol nad °C. Należy nacisnąć przycisk 1, aby wyświetlić temperaturę nastawnika (temperatura wybrana). możliwa jest zmiana wyświetlania temperatury (patrz rozdział 4.2): – na tryb automatyczny: temperatura nastawnika – przez naciśnięcie przycisku 1: temperatura pokojowa Aby program nie został zastosowany (patrz rozdział 3.3), możliwe jest przejście na stałe na tryb Oszczędny ( ), na tryb Komfort ( ) lub na tryb Zabezpieczający przed zamarznięciem ( ) przekręcając pokrętło na dany tryb. 159 RF_prog:RF_prog_ACOVA_7L 22/10/2010 09:20 Page160 3.4.1 tryb na czas nieobecności Tryb ten umożliwia nastawienie stałej temperatury (od 5 do 15°C) na regulowany okres czasu (od 1 do 365 dni). Po wejściu do trybu automatycznego (Automatyczny), należy nacisnąć przycisk Walizka ( ). miga liczba dni. Nacisn + lub - celem ustawienia liczby dni, a następnie OK, aby potwierdzić. Temperatura zaczyna migać: należy nastawić wybraną wartość za pomocą przycisków + lub PrzyKład Wyjazd 10 stycznia, powrót 19 stycznia, podać 9 dni. Automatyczne działanie rozpocznie się na nowo 19 stycznia o godzinie 0:00. Potwierdzić przez naciśnięcie przycisku Ok. Temperatura zaczyna migać. nacisnąć + lub - celem nastawienia temperatury. Potwierdzić naciskając Ok. Aby anulować tryb na czas nieobecności (na przykład: wcześniejszy powrót), należy nacisnąć przycisk C lub przekręcić pokrętło. PL 3.4.2 tryb zmiany programu możliwa jest zmiana bieżącego programu (od do lub na odwrót) podczas trybu Automatycznego do następnej zmiany programu, poprzez naciśnięcie przycisku . Po wejściu do trybu Automatycznego, nacisnąć przycisk . PrzyKład Włączony jest tryb Oszczędny ( ). Jedno naciśnięcie przycisku pozwala przejść do trybu komfort ( ). Celem anulowania trybu zmiany programu, należy ponownie nacisnąć lub przekręcić pokrętło. 160 Bieżący tryb zmiany programu RF_prog:RF_prog_ACOVA_7L 22/10/2010 09:20 Page161 3.4.3 tryb ręczny Za pomocą przycisku , możliwe jest nastawienie temperatury nastawnika różniącej się od temperatury nastawionej w programie trybu automatycznego na określony czas trwający od 30 minut do 72 godzin. Po wejściu do trybu Automatycznego, nacisnąć przycisk . miga czas trwania trybu ręcznego. Nacisnąć + lub – celem nastawienia wybranego czasu trwania stopniowo co 30 min. Potwierdzić naciskając OK. Temperatura zaczyna migać. Nacisnąć + lub celem nastawienia wybranej temperatury. Potwierdzić naciskając OK. Bieżący tryb ręczny Celem anulowania ustawiania ręcznego, nacisnąć przycisk C lub przekręcić pokrętło. PL 3.5 tryb zatrzymanie ogrzewania Aby wyłączyć ogrzewanie grzejnika (na przykład w lecie), przekręcić pokrętło na . Termostat wyświetla mierzoną temperaturę otoczenia. Temperatura pokojowa 161 RF_prog:RF_prog_ACOVA_7L 22/10/2010 09:20 Page162 4. zaawansowane ustawienia termostatu otoczenia rF Prog Przekręcić pokrętło na Zatrzymanie ogrzewania i przytrzymać przez 5 sekund przycisk po prawej w pozycji wciśniętej, aż wyświetlone zostanie H200 x:xx (numet wersji pilota). Nacisnąć OK. Na ekranie pojawia się CF01. 4.1 Korekta pomiaru temperatury otoczenia (CF01) Za pomocą przycisków + lub - możliwe jest dostosowanie temperatury otoczenia mierzonej przez termostat aż do +/- 4°C w przypadku różnicy z temperaturą stwierdzoną w pomieszczeniu. Nacisnąć + lub - celem dokonania wyboru, a następnie OK, aby potwierdzić i przejść do następnego menu. PL 4.2 Wybór wyświetlania temperatury w trybie automatycznym (CF02) Funkcja ta umożliwia dowolne wyświetlenie temperatury otoczenia mierzonej przez termostat lub temperatury nastawnika. Nacisnąć + lub - celem dokonania wyboru, a następnie OK, aby potwierdzić i przejść do następnego menu. 0 : stałe wyświetlanie temperatury otoczenia 1 : stałe wyświetlanie temperatury nastawnika 162 5 sek. RF_prog:RF_prog_ACOVA_7L 22/10/2010 09:20 Page163 4.3 (CF03) - NIEDOStęPNy W tym mODELu Ustawić tę wartość na 0 naciskając + lub , a następnie OK, aby potwierdzić i przejść do następnego menu. 4.4 (CF04) - NIEDOStęPNy W tym mODELu Ustawić tę wartość na 0 naciskając + lub , a następnie OK, aby potwierdzić i przejść do następnego menu. PL 4.5 tryb cykliczny (CF05) Ustawić tę wartość na 0 naciskając + lub , a następnie OK, aby potwierdzić i przejść do następnego menu. 0 : aktywny 1 : nieaktywny W przypadku połączenia z innymi urządzeniami automatyki domowej X2D (przekaźnikami, pilotami, centralami alarmowymi lub układem programowania PLC, itd. wyjąwszy detektory otwierania), należy nastawić tę wartość na 1. 163 RF_prog:RF_prog_ACOVA_7L 22/10/2010 09:20 Page164 4.6 Połączenie urządzenia z termostatem otoczenia (CF06) Urządzenie powinno być połączone z termostatem otoczenia, aby otrzymywać wyłącznie jego polecenia. Pozwoli to na uniknięcie możliwych zakłóceń z innymi urządzeniami sterowanymi za pomocą częstotliwości radiowych. Ważne połączenie urządzenia z termostatem otoczenia jest niezbędne dla jego funkcjonowania. W momencie podłączenia urządzenia do zasilania, miga wskaźnik TH odbiornika radiowego (z tyłu grzejnika). należy OdnOtOWać, że jeśli wskaźnik th świeci nie migocząc, należy nacisnąć przez 60 sekund aż do momentu gdy zacznie on migać (zresetowanie). Wszystkie grzejniki nie połączone, zasilane elektrycznie, zostaną automatycznie połączone z tym termostatem. Za pomocą tablicy elektrycznej możliwe jest zasilanie wyłącznie wybranych grzejników. PL Wskaźnik miga (grzejnik nie jest połączony) Wskaźnik świeci nie migocząc, gdy sygnał połączenia termostatu został odebrany Po wejściu do menu CF06 termostatu otoczenia nacisnąć przycisk +. Chwilowe ukazanie się symbolu X2D oznacza wysłanie sygnału połączenia. Sprawdzić czy wskaźnik odbiornika przestał migać. Grzejnik jest obecnie połączony z termostatem otoczenia. należy OdnOtOWać, że Celem odłączenia termostatu od grzejnika, należy przytrzymać przycisk w pozycji wciśniętej przez 60 sekund, aby go zresetować (anuluje połączenie). Należy nacisnąć OK, aby przejść do następnego menu. 164 RF_prog:RF_prog_ACOVA_7L 22/10/2010 09:20 Page165 4.7 test radiowy (CF07) Co 3 sekundy termostat otoczenia przesyła sygnał do odbiornika radiowego urządzenia. Symbol X2D pojawia się wówczas przez chwilę na ekranie. Należy sprawdzić czy wskaźnik TH odbiornika miga przy każdym odbiorze potwierdzając udane połączenie (patrz rozdział 4.6). ABy W KAŻDEJ CHWILI WyJść Z ZAAWANSOWANyCH USTAWIEń, NALEŻy PRZEKRęCIć POKRęTłO. 4.8 Powrót do ustawień początkowych termostatu możliwe jest przeprowadzenie ogólnego zresetowania celem powrotu do ustawień fabrycznych: ustawienia zaawansowane (zaznaczone na szaro w menu CF), temperatury nastawnika oraz zaprogramowanie domyślne. Przekręcić pokrętło na ZATRZymANIE OGRZEWANIA i przytrzymać przycisk po lewej w pozycji wciśniętej przez 10 sekund, aż wyświetlone zostanie «init ». PL 10 sek. Nacisnąć OK, aby potwierdzić lub C, aby anulować. Powrót do wyświetlania w trybie zatrzymania ogrzewania. Parametry technIczne termOstatU OtOczenIa _ Zasilanie za pomocą 2 baterii alkalicznych 1,5, typu LR03 lub AAA (dołączone), okres trwałości ponad 2 lata w przypadku normalnego użytkowania, _ Pilot o zasięgu radiowym wynoszącym od 100 do 300 metrów na wolnej przestrzeni, zależnie od podłączonego osprzętu (zasięg może być zmniejszony w zależności od warunków instalacji i środowiska elektromagnetycznego), _ Temperatura pracy: 0°C do 40°C, _ Częstotliwość nadawania 868 mHz, klasa I (norma EN 300 220). 165 RF_prog:RF_prog_ACOVA_7L 22/10/2010 09:20 Page166 5. Połączenie z innymi urządzeniami X2d 5.1 Połączenie urządzenia z układem Plc Urządzenie może być zdalnie sterowane za pomocą układu programowania PLC (Programator mikroprocesorowy) według normy X2D (do kupienia osobno). W tym celu należy: _ zainstalować i podłączyć urządzenie grzewcze (rozdział 1) _ połączyć urządzenie z termostatem otoczenia (rozdział 4.6) _ połączyć urządzenie z tym układem PLC (do kupienia osobno) Aby tego dokonać, należy ustawić układ programowania na tryb połączenia (patrz instrukcja obsługi tego układu). Przejść do menu CF05 (patrz rozdział 4.5) w ustawieniach zaawansowanych termostatu otoczenia. Nastawić wartość na 1 (tryb cykliczny nieaktywny). Wskaźnik PLC miga na odbiorniku urządzenia. Nacisnąć wówczas przycisk , wskaźnik przestaje migać potwierdzając odbiór sygnału połączenia z układu programowania. PL Grzejnik(i) jest (są) teraz sterowany(e) przez układ programowania. Wskaźnik TH nie miga (grzejnik jest połączony z termostatem), wskaźnik PlC miga w oczekiwaniu na połączenie z układem PlC. Wska nik PLC przestaje miga kiedy sygnał poł czenia układu programowania został odebrany Ważne Przekręcić pokrętło termostatu otoczenia na PrOG i zaprogramować tryb komfort ( ) dla wszystkich godzin każdego z 7 dni (patrz rozdział 3.3). Przekręcić następnie pokrętło na tryb Automatyczny i urządzenie będzie tym samym sterowane zgodnie z poleceniami układu programowania PlC. 166 RF_prog:RF_prog_ACOVA_7L 22/10/2010 09:20 Page167 5.2 detektor otwierania Detektor otwierania zgodny z normą X2D umożliwia automatyczne zatrzymanie ogrzewania np. w przypadku otwarcia okna. W tym celu należy: _ zainstalować i podłączyć urządzenie grzewcze (patrz rozdział 1) _ połączyć urządzenie z termostatem otoczenia (patrz rozdział 4.6) _ połączyć urządzenie z tym detektorem otwierania (do kupienia osobno) Aby tego dokonać, przytrzymać przycisk odbiornika urządzenia w pozycji wciśniętej przez 3 sekundy, aż wskaźnik AUX zacznie migać. Nacisnąć na przycisk połączenia na detektorze otwierania. Wskaźnik AUX wyłącza się potwierdzając udane połączenie. Grzejnik jest teraz połączony z detektorem otwierania. 3 sek PL Wskaźnik TH nie miga (grzejnik jest połączony z termostatem) Wskaźnik AUX wyłącza się, gdy sygnał połączenia detektora otwierania został odebrany należy OdnOtOWać, że Możliwe jest połączenie do 8 detektorów na kanale AUX. należy powtórzyć powyższe operacje dla każdego detektora jaki chce się połączyć. Po połączeniu, włączony wskaźnik AUX wskazuje na otwarcie okna. 5.3 resetowanie połączeń urządzenia Aby zresetować wszystkie istniejące połączenia pomiędzy grzejnikiem a różnymi urządzeniami X2D (w tym połączenie z dostarczonym termostatem otoczenia), należy przytrzymać przycisk w pozycji wciśniętej przez 60 sekund. Wskaźnik TH zaczyna wówczas migać wskazując, że oczekuje na otrzymanie nowego sygnału połączenia. należy OdnOtOWać, że aby zresetować wyłącznie połączenia kanału AUX, należy przytrzymać przycisk w pozycji wciśniętej przez 10 sekund. Po 3 sekundach naciśnięcia, wskaźnik AUX miga, a następnie gaśnie przed upłynięciem 10-ciu sekund naciśnięcia, potwierdzając tym samym udane odłączenie. 167 RF_prog:RF_prog_ACOVA_7L 22/10/2010 09:20 Page168 6. zalecenia dotyczące stosowania PL Urządzenie elektryczne jest wypełnione płynem hydroaktywnym i jest gotowe do użycia. Zostało one fabrycznie zatkane i wypełnione termicznym olejem mineralnym o wysokiej wydajności. Płyn ten nie wymaga żadnej szczególnej konserwacji. Naprawy wymagające otwarcia otworów powinny być przeprowadzone wyłącznie przez producenta lub przez jego dział po sprzedaży, z którym należy się skontaktować w przypadku wycieku oleju. W momencie pozbywania się urządzenia grzewczego, należy przestrzegać przepisów prawnych dotyczących usuwania oleju. W przypadku wymiany oleju, płyn powinien być obowiązkowo oddany do punktu zajmującego się zużytymi olejami. Zaraz po włączeniu grzejnika można stwierdzić zjawiska, które różnią się od tych, jakie pojawiają się w przypadku zwykłego grzejnika elektrycznego: _ Opór elektryczny podgrzewa płyn, który w sposób stopniowy i naturalny zaczyna krążyć wewnątrz urządzenia. _ Własności inercyjne płynu powodują, że temperatura na powierzchni urządzenia osiąga optymalny poziom dopiero po co najmniej 10 minutach. _ Z drugiej strony inercja ta zapewnia stałość i długotrwałość emitowanego ciepła, nawet gdy opór nie jest już zasilany. _ To, że górna część urządzenia jest mniej gorąca niż pozostałe nagrzewane części jest całkowicie normalne. W celu bowiem zapewnienia odpowiedniego rozprężenia płynu podczas nagrzewania, urządzenie nie jest do końca wypełnione. Ponieważ w górnej części znajduje się pewna ilość powietrza, jest całkowicie normalne, że niektóre górne elementy wydają się mniej gorące. _ Urządzenie posiada dużą powierzchnię grzania, co pozwala w samoistny sposób na dostosowanie ilości wydzielanego ciepła zależnie od potrzeb. Tak więc większe różnice temperatur na powierzchni urządzenia podczas jego umiarkowanego funkcjonowania w okresie jesiennym lub wiosennym są całkowicie normalne. PrzePIsy śrOdOWIsKOWe ROHS (Ograniczenie użycia substancji niebezpiecznych): Zgodne z dyrektywą 2002/95/WE WEEE (Zużyty sprzęt elektryczny i elektroniczny): Zgodne z dyrektywą 2002/96/WE Obchodzenie si z zu ytym sprz tem elektrycznym i elektronicznym. Symbol ten oznacza, e produkt nie powinien by wyrzucany razem z odpadami domowymi. Powinien by odstawiony w odpowiednie miejsce zbiórki, które zajmie si jego recyklingiem. Zapewniaj c wła ciwe usuni cie produktu, pomagasz unikn potencjalnych, negatywnych konsekwencji dla rodowiska i zdrowia człowieka. 168 RF_prog:RF_prog_ACOVA_7L 22/10/2010 09:20 Page169 7. Porady dotyczące konserwacji Przed podjęciem jakichkolwiek czynności konserwacyjnych, należy wyłączyć urządzenie przekręcając pokrętło na Zatrzymanie ogrzewania i pozostawić do schłodzenia. Wybór najlepszych materiałów i jakość obróbki powierzchni chronią urządzenie przed korozją i uderzeniami. Aby za pomocą prostej konserwacji zapewnić trwałość urządzenia, zalecane jest przestrzeganie następujących porad: _ Nie używać produktów ściernych czy korodujących do konserwacji zewnętrznych ścianek urządzenia, najlepiej używać ciepłej wody z mydłem. _ W przypadku układu zasilania i termostatu otoczenia, należy używać miękkiej i suchej szmatki, bez rozpuszczalnika. 8. W przypadku niefunkcjonowania PL W przypadku gdy urządzenie nie działa, możliwe jest samodzielne dokonanie następujących kontroli, upewniając się czy: _ urządzenie jest odpowiednio podłączone i zasilane (patrz rozdział 1), _ termostat otoczenia znajduje się w zasięgu odbiornika radiowego urządzenia i jest właściwie zasilany za pomocą baterii (patrz rozdział 2) _ termostat jest ustawiony na nagrzewanie urządzenia (patrz rodział 3). należy OdnOtOWać, że kiedy na ekranie pojawia się polecenie ogrzewania. , termostat wysyła urządzeniu Należy przeprowadzić test ogrzewania nastawiając pokrętło termostatu na pozycję Komfort ( ) i sprawdzając czy temperatura nastawnika jest odpowiednio wyższa od temperatury otoczenia: na ekranie powinien pojawić się płomień i po kilku minutach można odczuć, że grzejnik się nagrzewa. Jeśli tak nie jest, należy sprawdzić usytuowanie termostatu otoczenia (patrz rozdział 2.1), baterie (patrz rozdział 2.2) i przeprowadzić test radiowy (patrz rozdział 4.7). Należy również sprawdzić połączenie pomiędzy termostatem otoczenia a urządzeniem (patrz rozdział 4.6), które jest niezbędne dla jego funkcjonowania. W razie konieczności wymiany termostatu otoczenia, należy zresetować istniejące połączenia urządzenia (patrz rozdział 5.3) a następnie na nowo dokonać połączenia z urządzeniem sterującym (patrz rozdział 4.6). 169 RF_prog:RF_prog_ACOVA_7L 22/10/2010 09:20 Page170 Jeśli kabel zasilania jest uszkodzony, powinien być wymieniony przez producenta, przez jego dział po sprzedaży lub osobę o podobnych kwalifikacjach, aby uniknąć wszelkiego ryzyka. dzIał PO sPrzedaży W przypadku, gdy urządzenie nie funkcjonuje lub konieczne są części zamienne, prosimy o skontaktowanie się z instalatorem lub sprzedawcą. Przed skontaktowaniem się, aby zapewnić właściwe zrozumienie i szybkie rozwiązanie problemu, prosimy sprawdzić czy spisali Państwo: – elementy znajdujące się na etykietce znamionowej urządzenia (patrz rozdział 1.3), – referencję handlową mieszczącą się na fakturze kupna wraz z datą. GWarancja (Patrzogólnewarunkisprzedażywdanymkraju) PL Grzejnik jest zgodny z dyrektywą EmC 2004/108/WE o kompatybilności elektromagnetycznej a także z normami europejskimi EN 60.335.1 / 60.335. 2.30 / 60.335.2.43. PrzyPadKI UnIeWażnIenIa GWarancjI Gwarancja nie ma zastosowania w przypadku instalacji, użytkowania, uruchomienia czy konserwacji niezgodnych z normami obowiązującymi w danym kraju oraz z zasadami rzemiosła i instrukcją obsługi producenta. W przypadku innych pytań dotyczących gwarancji, prosimy o skontaktowanie się z instalatorem lub sprzedawcą. 170 RF_prog:RF_prog_ACOVA_7L 22/10/2010 09:20 Page171 171 CONCEPTION GRAPHIQUE : SÉBASTIEN MOREL - IMPRESSION : AISN’IMPRIM - COUVERTURE : IMAGEFORCE RF_prog:RF_prog_ACOVA_7L 22/10/2010 09:20 Page172 172 RF_prog:RF_prog_ACOVA_7L 22/10/2010 09:20 Page173 RF_prog:RF_prog_ACOVA_7L 22/10/2010 09:20 Page174