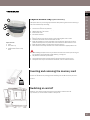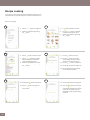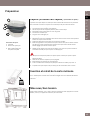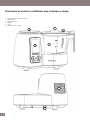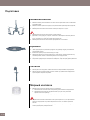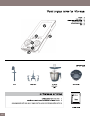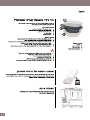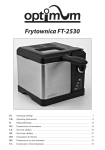
1
www.supercook.me
DE
GB
FR
ES
IT
PT
NL
RUS
AR
HE
Bedienungsanleitung SUPERCOOK
1 - 17
User manual SUPERCOOK
19 - 35
Manuel d’utilisation SUPERCOOK
37 - 53
Manual del usuario SUPERCOOK
55 - 71
Manuale dell’utente e SUPERCOOK
73 - 89
Manual do utilizador SUPERCOOK
91 - 107
Gebruikershandleiding SUPERCOOK
109 - 125
Руководство пользователя кухонного комбайна омбайна SUPERCOOK 127 - 143
145 - 161
163 - 179
Betriebsanleitung SUPERCOOK
D
Deutsch
FR
GB
ES
Inhaltsverzeichnis
Einführung
2
Einsatz-Beispiele der
SC110 Küchenmaschine
2
Produkt- und Sicherheitshinweise
2
Pflegehinweise
2
Verwendung dieser Bedienungsanleitung
3
Hinweise und Fehlermeldung
3
SC110 Übersicht Front- und Rückseite
4
Bedienmodul „Yumi“ Übersicht
5
Zubehör
5
Optional erhältliches Zubehör
5
Erste Schritte
6
Vorbereitung
7
Edelstahltopf
7
Edelstahlvielzweck-Messer
7
Kocheinsatz
7
Rühreinsatz
8
Deckel
8
Spatel
8
Messbecher
8
Vapore Dampfgaraufsatz (Optionales Zubehör) 9
Vorteile des Dampfgarens
9
Verwendung des Vapore
9
Einsetzen und entfernen der Speicherkarte
9
Ein- und Ausschalten
9
Bedienmodul zum ersten Mal einschalten
10
Menüstruktur
10
IT
PT
Einstellungen
Datum
Uhr
Standby-Timer
Bildschirmschoner
Sprache
Lautstärke
Diaschau
Promotion Modus – Fachhandel
Update Bedienmodul „Yumi“
FW Version
Rezept-Sammlung
Rezept-Kategorien
Rezepte kochen
Sicherheitseinstellungen der Küchenmaschine
in den Menüpunkten: Rezepte kochen, Favoriten
und Rezept-Favoriten
Vorprogrammierte Einstellungen
Rezept-Favoriten
Meine Rezepte
Hilfe
Hinweise zur Inbetriebnahme
Reinigung
Technische Daten
Service und Kundendienst
Urheberrecht
Entsorgung von gebrauchten
elektronischen Geräten
Konformitätserklärung
10
10
10
11
11
11
11
11
12
12
12
13
13
14
NL
RUS
AR
HE
15
15
16
16
16
16
16
17
17
17
17
17
1
Einführung
Vielen Dank für den Kauf der SUPERCOOK SC110 Küchenmaschine.
Bitte lesen Sie die Bedienungsanleitung aufmerksam durch und bewahren
Sie diese an einem sicheren Ort auf, damit Sie zu einem späteren Zeitpunkt
nachschlagen können. Wir wünschen Ihnen viel Freude mit der SC110
Küchenmaschine und jederzeit gutes Gelingen.
Einsatz-Beispiele der SC110 Küchenmaschine
• Pürieren von Gemüse, Obst, Saucen und Suppen
• Mixen von Shakes und Cocktails
• Pulverisieren von Zucker und getrockneten Chilischoten
• Mahlen von Mandeln und Haselnüssen
• Raspeln von Obst und Gemüse
• Hacken von Zwiebeln und Nüssen
• Emulgieren mit dem Rühreinsatz von Mayonnaise und Cremes
• Reiben von Hartkäse, Paniermehl und Kartoffeln
• Rühren von leichten Teigen, Eischnee und Schlagsahne
• Kneten von Hefe- und Brotteig
• Erwärmen, Anbraten und Kochen von 40° bis 130 °C
Temperatureinstellung
• Dampfgaren im Vapore oder im Kocheinsatz
Produkt- und
Sicherheitshinweise
Bitte lesen Sie die folgenden wichtigen Informationen aufmerksam durch,
bevor Sie die Küchenmaschine in Gebrauch nehmen:
1. Vor der ersten Inbetriebnahme: Packen Sie die Küchenmaschine
sowie alle im Karton befindlichen Zubehörteile aus.
2. Bitte die Küchenmaschine nicht auf feuchten oder nassen
Oberflächen in Betrieb nehmen.
3. Nur durch das Anschließen an das Stromnetz über einen genormten
Schuko-Stecker ist eine sichere Inbetriebnahme der Küchenmaschine
gewährleistet. Überprüfen Sie, ob Ihre elektrische Anlage mit den
Leistungs- und Spannungsangaben auf dem Typenschild der SC110
übereinstimmt. Bei fehlerhaftem Anschluss erlischt die Garantie.
4. Bei allen Elektrogeräten besteht eine Stromschlaggefahr, die Verletzungen hervorrufen oder sogar zum Tod führen kann. Beachten Sie
daher immer alle Sicherheitshinweise.
5. plawa bzw. der Distributor übernimmt keine Haftung für Schäden,
die aufgrund unzureichender Stromversorgung oder unsachgemäßer
Elektroinstallation im Gebäude entstehen. Wenden Sie sich im
Zweifelsfall an einen qualifizierten Elektriker.
6. Halten Sie das Verpackungsmaterial, insbesondere die Verpackungsfolien, -tüten und Styropor von Kindern fern.
7. Beim ersten Gebrauch kann es zu einer leichten Geruchsentwicklung
kommen. Diese ist nicht gesundheitsschädlich.
8. Die Küchenmaschine, das Bedienmodul und das Stromkabel dürfen
nicht ins Wasser getaucht werden.
9. Decken Sie die SC110 nie mit Geschirrtüchern, Handtüchern usw. ab.
10. Halten Sie ausreichend Abstand zu anderen Wärmequellen, wie z.B.
Herdplatten, um Geräteschäden zu vermeiden.
11. Diese Küchenmaschine ist kein Spielzeug und muss von Kindern
ferngehalten werden.
12. Verlegen Sie das Kabel so, dass es nicht gequetscht oder geknickt
wird und keinesfalls mit heißen Flächen in Berührung kommt.
13. Bei Benutzung eines Verlängerungskabels:
a. das Kabel muss über eine Erdung verfügen;
b. ergreifen Sie alle Vorsichtsmaßnahmen, um zu verhindern,
dass das Kabel zur Stolperfalle wird.
14. Lassen Sie die Zuleitung niemals herunterhängen und ziehen Sie den
Stecker nie am Kabel sondern nur am Netzstecker aus der Steckdose.
15. Bitte benutzen Sie die SC110 nicht:
a. Wenn die Zuleitung oder der Stecker beschädigt ist
b. Wenn es Fehlfunktionen gibt, die Küchenmaschine heruntergefallen ist oder sie sichtbare Schäden aufweist.
16. Die SC110 darf nicht transportiert werden, wenn sie in Betrieb ist.
2
17. Diese Küchenmaschine ist nur für den privaten Gebrauch im Haushalt
und für den Gebrauch in geschlossenen Räumen vorgesehen.
18. Versuchen Sie niemals, die Küchenmaschine eigenhändig zu
reparieren. Wechseln oder verändern Sie keine Netzkabel, sonstige
Bauteile oder das Netzteil. Wenden Sie sich stets an einen autorisierten Techniker oder an die plawa Hotline.
19. Bei Fehlfunktionen oder Schäden trennen Sie das Produkt vom
Stromnetz.
20. plawa bzw. der Distributor übernimmt keine Haftung bei Schäden, die
aufgrund unsachgemäßer oder fehlerhafter Handhabung dieser
Küchenmaschine entstehen.
21. Die SC110 ist keine Friteuse. Versuchen Sie auf keinen Fall Lebensmittel in der Küchenmaschine zu frittieren.
22. Führen Sie keine Gegenstände in die Öffnungen am
Gerätegehäuse ein.
23. Trennen Sie die SC110 vom Stromnetz:
a. während der Reinigung
b. wenn sie nicht gebraucht wird
c. bei Stromausfall
24. Personen mit eingeschränkter Erfahrung oder Kenntnis im Umgang
sowie Personen mit eingeschränktenphysischen, psychischen,
geistigen und sensorischen Fähigkeiten sowie Kinder sollten die
Küchenmaschine nur unter Beaufsichtigung oder Anweisung einer
Person bedienen, die die Verantwortung für die Sicherheit übernimmt.
Kinder müssen beaufsichtigen werden, um sicherzustellen, dass die
Küchenmaschine nicht zu Spielzwecken verwendet wird.
25. Diese Küchenmaschine ist dazu bestimmt, im Haushalt und ähnlichen
Anwendungen verwendet zu werden, wie beispielsweise
• in Küchen für Mitarbeiter in Läden, Büros und anderen
gewerblichen Bereichen
• in landwirtschaftlichen Anwesen
• von Kunden in Hotels, Motels und anderen Wohneinrichtungen
• in Frühstückspensionen
Pflegehinweise
Behandeln Sie die Küchenmaschine und das Zubehör mit Sorgfalt. Die
nachstehenden Empfehlungen helfen Ihnen, Ihre Garantie- und Gewährleistungsansprüche zu wahren.
1. Schalten Sie die Küchenmaschine aus, wenn Sie diese über einen
längeren Zeitraum nicht verwenden.
2. Die Küchenmaschine muss vor der Reinigung vollständig abgekühlt
sein.
3. Reinigen Sie alle Bau- und Zubehörteile, die mit Lebensmitteln in
Berührung kommen.
4. Reinigen Sie die Topf-Aussparung in der Küchenmaschine mit einem
leicht angefeuchteten Tuch.
5. Die Kontakte unten am Topf müssen sauber und trocken gehalten
werden.
6. Alle Zubehörteile sind spülmaschinenfest.
7. Um Keimbildung vorzubeugen, reinigen Sie die Küchenmaschine und
die Dichtungsringe nach jedem Gebrauch.
8. Verwenden Sie niemals scheuernde oder ätzende Reinigungsmittel.
9. Mögliche Kalkflecken können mit Essig entfernt werden.
10. Es ist normal, dass es beispielsweise durch Beta-Karotin in Karotten,
Tomaten oder auch bei Curry zu Verfärbungen am Kunststoffzubehör
kommt. Sie können die Verfärbungen etwas reduzieren, in dem Sie ein
Küchentuch mit Speiseöl anfeuchten und den Gegenstand abreiben.
Anschließend kurz mit warmen und anschließend mit kaltem Wasser
und etwas Spülmittel abspülen.
11. Verwenden Sie die Küchenmaschine nur so wie in dieser Bedienungsanleitung beschrieben.
Verwendung dieser
Bedienungsanleitung
D
GB
FR
Dieses Symbol zeigt Warnhinweise an, die Sie vor der
Verwendung lesen sollten.
ES
Hinweise und Fehlermeldungen
Symbol / Frage /
Fehlerbeschreibung
IT
PT
Erklärung
Lösung
Der Topf ist nicht richtig verschlossen oder der
Sicherheitsschalter funktioniert nicht.
Bitte überprüfen Sie den Verschluss
erneut.
Die SC110 hat einen Fehler im elektrischen Stromkreis.
Bitte wenden Sie sich an den lokalen
Service. Die Telefonnummer finden
Sie auf www.supercook.de oder in der
Bedienungsanleitung
Der Motor ist überlastet.
Bitte schalten Sie die SC110 ab und
warten einige Minute, bis sich der Motor
abgekühlt hat.
Die SC110 ist mit einer speziellen Regelungstechnik ausgestattet.
Die Geschwindigkeit kann variieren und die Rotation unterbricht
in 2-Sekunden-Intervallen. Die SC110 macht dabei ein zunächst
ungewohntes Geräusch. Das ist normal. Dieses Geräusch deutet darauf
hin, dass die Drehzahl des Messers angepasst wird, um den Motor vor
Überhitzung zu schützen.
Entfernen Sie einen Teil der Mischung
oder erhöhen Sie die Geschwindigkeit auf
maximal 3.
Messer arbeitet sehr mühsam
bei der Teigzubereitung.
Bitte überprüfen Sie, ob Sie die maximale Menge von 500 g Mehl
überschritten haben.
Entfernen Sie einen Teil der Mischung
aus dem Topf.
Leichter Qualm strömt aus der
Küchenmaschine.
Der Motor ist überhitzt. Überprüfen Sie die maximale Füllmenge.
Entfernen Sie einen Teil der Mischung
aus dem Topf. Lassen Sie die SC110 für
ca. 20 Minuten abkühlen.
SC110 arbeitet nicht bei der
Einstellung Temperatur und
Geschwindigkeit 5.
Die Temperatur ist nur einstellbar mit den Geschwindigkeitsstufen 1 bis 4.
Ändern Sie die Geschwindigkeitseinstellung auf 1 bis 4.
Edelstahltopf lässt sich nur
schwer einsetzen.
Das Aufsetzen des Edelstahltopfs wird im Laufe der Benutzung leichtgängiger, da sich die Silikondichtung durch die Hitze und Feuchtigkeit
verändert und dennoch dicht hält.
Reiben Sie die Silikondichtung mit etwas
Speiseöl ein oder befeuchten Sie diese.
Ist die SC110 gebraucht? Der
Topfboden weist bei Lieferung
Flecken sowie Feuchtigkeitsrückstände auf.
Jeder Küchenmaschine wird vor Auslieferung getestet. Der Edelstahltopf
wird mit Wasser gefüllt und zum Kochen gebracht. Ähnlich wie bei einer
Spülmaschine bleiben Feuchtigkeitsrückstände erhalten. Die Rückstände
führen auch zu einer leichten aber unbedenklichen Fleckenbildung am
Topfboden.
Um die Fleckenbildung zu beseitigen,
verwenden Sie bitte haushaltsüblichen
Edelstahltopfreiniger wie .z.B. Sidol von
Henkel.
Geruchsentwicklung bei erster
Inbetriebnahme und starker
Beanspruchung.
Bei der ersten Inbetriebnahme und bei starker Beanspruchung kann es zu
Geruchsentwicklungen aufgrund des erwärmten Motors kommen. Wie in
jedem Elektromotor, wie z.B. auch in Modelleisenbahnen oder Modellautobahnen sind „Kohlen“ verbaut, die erst einlaufen müssen. Die Geruchsentwicklung ist völlig unbedenklich.
Lassen Sie die SC110 nach starker
Beanspruchung, z.B. nach dem Kneten
eines festen Teigs abkühlen. Die SC110
ist nach einer kurzen Abkühlzeit wieder
voll funktionsfähig.
Signalton ertönt.
Ein akustisches Signal ertönt, sobald die Küchenmaschine die gewählte
Temperatur erreicht hat.
Das Signal weist außerdem darauf hin,
dass die voreingestellte Zeit abgelaufen
ist.
SC110 stoppt bei der
Verwendung des Rühreinsatzes.
Geschwindigkeit läuft
unregelmäßig bzw. der Motor
stockt.
NL
RUS
AR
HE
Erhöhen Sie die Drehzahl von 1 auf 2
bzw. von 2 auf 3.
3
SC110 Übersicht Front- und Rückseite
1.
2.
3.
4.
5.
6.
7.
Bedienmodul „Yumi“
Libra Küchenwaage (Optionales Zubehör)
Messbecher
Deckel
Edelstahltopf
Lüftungsschlitze
Ein-/Ausschalter
3
2
4
5
1
6
7
4
Bedienmodul „Yumi“ Übersicht
D
GB
1.
2.
3.
4.
5.
6.
FR
LCD-Display
SD-Karten Steckplatz
4 Bedientasten
Rechter und linker Drehregler
MENU Taste
Buchse
ES
IT
1
PT
NL
RUS
3
AR
2
HE
4
5
6
Zubehör
Kocheinsatz
Messbecher, Deckel,
Edelstahlvielzweck-Messer, Edelstahltopf
Rühreinsatz
Spatel
Optional erhältliches Zubehör
• Digitale Küchenwaage SUPERCOOK Libra
• Dampfgaraufsatz SUPERCOOK Vapore in Kunststoff oder Porzellan/Glas Variante
Fragen zu weiterem Zubehör beantwortet Ihnen der lokale Fachhändler oder informieren Sie sich online
unter www.supercook.de.
Speicherkarte
5
Erste Schritte
Allgemeine Symbole
6
Bedeutung
Kalender*
Einstellung von Datum und Datumsformat
Sprache*
Auswahl der gewünschten Sprache. * Nur erforderlich beim ersten Einschalten oder nach
einem Batteriewechsel durch den Service.
Bestätigen
Auswahl bestätigen
Zurück
Zurück blättern
Vor
Vor blättern
Start/ Abspielen
Steuerung der Wiedergabe
Plus
Mehr Kochzeit
Minus
Weniger Kochzeit
Nach unten
Navigation: Nach unten oder seitlich
Nach oben
Navigation: Nach oben oder seitlich
Ein-/ Ausschalten
Bedienmodul Ein-/ Ausschalten
Beenden
Kochvorgang nach Sicherheits-Programm-Abbruch endgültig verlassen
Pause
Vorgang wird angehalten, Einstellungen bleiben erhalten
Favoriten
Durch die Bestätigung dieses Symbols wird das ausgewählte Rezept in den Menüpunkt
Favoriten abgelegt
Stopp
Der Vorgang wird angehalten
Geschwindigkeit
Geschwindigkeitsstufen: 1 bis 10 sowie Turbo Funktion
Zeit
• Koch- bzw. Verarbeitungszeit: 1 Sekunde bis maximal 60 Minuten
• Bei Funktions-Start läuft die Zeit rückwärts. Die gewählte Zeit wird im Display als
Uhrsymbol in Minuten und Sekunden angezeigt.
• Die Koch- bzw. Verarbeitungszeit kann jederzeit angepasst werden.
• Um die Verarbeitung zu starten, muss die gewünschte Zeit voreingestellt sein.
Temperatur
• Die Temperatur startet bei 40 °C und kann in 5 °C-Schritten bis auf die Maximaltemperatur
von 130 °C eingestellt werden.
• Ein akustisches Signal ertönt, sobald die gewählte Temperatur erreicht ist.
• Dieses Symbol blinkt einige Sekunden lang, sobald der SC110 die voreingestellte
Temperatur erreicht hat.
• Bei der Zubereitung von Speisen über 50 °C, sollten Sie die Taste „Turbo“ möglichst nicht
verwenden.
• Temperaturen ab 100 °C sind für das Dampfgaren, Andünsten (Braten) und Kochen
ausgelegt.
Weiter kochen
Manuelles Weiterkochen nach Beendigung eines Rezept-Schrittes.
1 Schritt zurück
Innerhalb einer Rezeptabfolge (Menüpunkt Rezepte kochen) einen Schritt zurückgehen.
Neustart
Der Kochvorgang wird nach einem Sicherheits-Programm-Abbruch im nächsten Schritt wieder
gestartet.
Warnung
Warnhinweis – bitte beachten!
Vorbereitung
D
GB
Edelstahltopf
1. Der Edelstahltopf hat ein Fassungsvermögen von 2 Litern und besitzt eine praktische
Mess-Skala innen und außen am Topf.
2. Sobald das Edelstahlvielzweck-Messer ordnungsgemäß im Topf eingesetzt ist, setzen Sie
den Topf in die Aussparung der Küchenmaschine. Dann drücken Sie diesen vorsichtig nach
unten, bis der Topf in den Zahnradantrieb und Kontaktaufnahmen greift.
FR
ES
IT
PT
NL
RUS
1. Füllen Sie den Edelstahltopf nicht über den Maximalpegel von 2 Litern. Anderenfalls kann
ein sicherer Betrieb nicht gewährleistet werden und Sie müssen Qualitätseinbußen in Kauf
nehmen.
2. Achten Sie beim Herausnehmen des Topfes aus der Küchenmaschine darauf, dass kein
Inhalt verschüttet wird. Bei heißem Inhalt besteht Verbrühungsgefahr.
3. Falls der Edelstahltopf nicht sofort in die Antriebsaufnahme der Küchenmaschine greift,
drehen Sie vorsichtig am Messerkopf.
AR
HE
Edelstahlvielzweck-Messer
1. Das Edelstahlvielzweck-Messer ist bei der Geräte-Auslieferung im Edelstahltopf eingesetzt.
2. Um das Messer zu entfernen, legen Sie den Topf in eine waagerechte Position. Schieben
Sie den Hebel gegen den Uhrzeigersinn nach unten, um das Edelstahlvielzweck-Messer
freizugeben. (Siehe Abbildung 1)
3. Um das Edelstahlvielzweck-Messer einzusetzen, bringen Sie dieses in Position und
schieben den Hebel im Uhrzeigersinn nach oben. (Siehe Abbildung 2)
Abb. 1
1. Das Edelstahlvielzweck-Messer ist sehr scharf! Beim Einsetzen und Entfernen ist
besondere Vorsicht geboten.
2. Achten Sie darauf, dass der Dichtungsring richtig auf der Messerlagerung sitzt. Ist der
Dichtungsring nicht eingesetzt, kann der Topfinhalt austreten und die SC110 dadurch
beschädigen.
3. Achten Sie bei der Zugabe von Lebensmitteln darauf, dass diese das Messer nicht
blockieren.
4. Lassen Sie das Messer nach jedem Kochvorgang abkühlen, bevor Sie dieses entfernen.
5. Die maximale Verarbeitungsmenge ist 500 g Mehl bei einem festen Brotteig.
Abb. 2
Kocheinsatz
1. Der Kocheinsatz dient zum Dampfgaren von kleinen Mengen von Lebensmitteln und
wird direkt in den Edelstahltopf integriert.
2. Durch eine seitliche Vertiefung wird der Kocheinsatz mit Hilfe des Spatels einfach
entfernt.
7
Vorbereitung
Rühreinsatz
1. Der Rühreinsatz wird mit einem leichten Widerstand auf das Messer in die Messerzwischenräume gesetzt.
2. Der Rühreinsatz eignet sich hervorragend zum Herstellen beispielsweise von cremigen
Süßspeisen, Eischnee und Schlagsahne.
3. Der Rühreinsatz sollte nur mit den Geschwindigkeitsstufen 1 bis 4 verwendet werden.
1. Der Rühreinsatz darf nicht in Verbindung mit der Turbo Taste verwendet werden.
2. Achten Sie bei der Zugabe von Lebensmitteln darauf, dass diese den Rühreinsatz nicht
blockieren.
3. Der Rühreinsatz ist nicht für das Kneten von festem Teig geeignet. Für Brot- oder Pizzateig
beispielsweise, verwenden Sie zum Kneten das Edelstahlvielzweck-Messer.
4. Der Spatel darf bei der Verwendung des Rühreinsatzes nicht verwendet werden.
Deckel
1. Der Dichtungsring muss in den Deckel eingesetzt sein, um mögliches Herausspritzen zu
vermeiden.
2. Setzen Sie den Deckel schräg auf die Oberseite des Edelstahltopfes.
3. Drehen Sie den Deckel im Uhrzeigersinn, bis die vorne auf der Unterseite der Abdeckung
befindliche Nase in die entsprechende Aussparung der Küchenmaschine fasst.
4. Die SC110 lässt sich nur in Gebrauch nehmen, wenn der Deckel ordnungsgemäß
aufgesetzt ist.
5. Der Deckel ist mit einer Nachfüllöffnung für ein bequemes Beigeben von Zutaten
ausgestattet.
Spatel
1. Verwenden Sie dieses Zubehör zum Entfernen oder Unterheben von Zutaten.
2. Der Spatel ist so konzipiert, dass dieser bei der Zugabe durch die Nachfüllöffnung
nicht mit dem Messer in Berührung kommt.
Messbecher
1. Der Messbecher hat eine Kapazität von 100 ml und ist abnehmbar.
a. So können bequem weitere Zutaten beigegeben werden.
b. Die Temperatur wird gehalten, sobald sich der Messbecher auf dem Deckel
befindet.
c. Den Dampfaustritt wird regulieren.
1. Entfernen Sie den Messbecher nur bei Geschwindigkeitsstufen 1 bis 3. Anderenfalls
besteht die Gefahr, dass Zutaten herausgeschleudert werden und Sie sich
verbrühen können.
2. Bei der Verwendung einer hohen Geschwindigkeit halten Sie den Messbecher fest,
um ein Herausspritzen zu vermeiden.
8
Vorbereitung
D
GB
1
Vapore Dampfgaraufsatz (Optionales Zubehör)
Der Vapore Aufsatz dient zum schonenden und Vitamine erhaltenden Garen von Speisen. Das
Dampfgaren gehört zu den gesündesten Garmethoden.
2
3
4
Vapore Übersicht
1. Abdeckung
2. Flache Einlegeschale
3. Tiefe Einlegeschale
4. Kondensat-Auffang-Behälter:
Zum Auffangen von Flüssigkeiten
Vorteile des Dampfgarens
1. Nährstoffe und Vitamine bleiben erhalten
2. Zeitersparnis, mehrere Gerichte können gleichzeitig zubereitet werden
3. Gesunde Zubereitung, da salz- und fettarm
4. Speisen bleiben saftig
5. Keine Übertragung von Geschmacksstoffen
Verwendung des Vapore
1. Füllen Sie mindestens 700 ml Wasser oder eine andere Garflüssigkeit wie Brühe in den
Edelstahltopf.
2. Fetten Sie die Einlegeschalen ein, damit die Lebensmittel nicht festkleben.
3. Legen Sie die Zutaten auf die beiden Einlegeschalen. Achten Sie darauf, dass Lebensmittel mit einer längeren Garzeit auf die tiefe Einlegeschale platziert werden. Einige Löcher
müssen frei bleiben, damit der Dampf aufsteigen kann.
4. Setzen Sie den Vapore direkt auf den Deckel, ohne dabei den Messbecher zu integrieren.
5. Prüfen Sie, dass die Einlegeschalen aufeinander fassen und die Abdeckung richtig sitzt,
damit der Dampf nicht entweicht.
FR
ES
IT
PT
NL
RUS
AR
HE
1. Achten Sie bei der Handhabung mit dem Vapore Dampfaufsatzes darauf, dass heißer
Wasserdampf herausströmt und sich Flüssigkeit im Kondensat-Auffang-Behälter befindet.
Achtung Verbrennungsgefahr!
2. Halten Sie die Einlegeschalen nur an den Griffen fest.
3. Entfernen Sie vorsichtig den Kondensat-Auffang-Behälter.
4. Der Kondensat-Auffang-Behälter ist aus Kunststoff und ist bis ca. 90 °C hitzebeständig.
5. Der Vapore Dampfgaraufsatz ist nicht für Mikrowellen, Backöfen oder andere Kochstellen
geeignet.
Einsetzen und entfernen der Speicherkarte
Stecken Sie die im Lieferumfang enthaltene SD-Speicherkarte in den Kartenschacht im
Bedienmodul „Yumi“ ein. Achten Sie darauf, dass die Kontakte der SD-Karte nach oben zeigen.
Schieben Sie die SD-Karte vorsichtig ein, bis Sie ein Klickgeräusch hören. Um die SD-Karte zu
entfernen, drücken Sie die Karte ein, bis diese herauskommt und Sie die Karte herausziehen
können.
Ein- und Ausschalten
Setzen Sie das Bedienmodul „Yumi“ in die Aussparung an der Küchenmaschine ein. Durch
drücken der Ein-/Aus-Taste (7) ist die Küchenmaschine einsatzbereit.
9
Bedienmodul zum ersten Mal einschalten
Beim ersten Einschalten werden Sie aufgefordert, die Grundeinstellungen Datum/ Uhrzeit sowie die Anzeigesprache festzulegen.
So führen Sie Kalender- und Spracheinstellungen durch:
1.
1. Navigieren Sie mit den
Tasten
zwischen Kalender und Sprache und
ändern Sie die Werte mit dem rechten
Drehregler.
2. Bestätigen Sie die Einstellung mit der
Taste.
2.
Menüstruktur
3. Drücken oder drehen Sie einen
beliebigen Bedienschalter, außer der
MENU Taste. So kommen Sie in den
manuellen Kochmodus.
4. Mit dem linken Drehregler passen Sie
die gewünschte Temperatur an.
5. Mit dem rechten Drehregler passen
Sie die Geschwindigkeit an.
6. Mit den
Tasten passen Sie die
Zeit manuell an.
7. Mit der
Taste wird die Geschwindigkeit (Turbo) für eine kurze Zeit
angehoben.
1. Navigieren Sie mit den
Tasten
durch das Menü.
2. Der
Punkt zeigt die aktuelle
Position an.
3. Bestätigen Sie Ihre Auswahl mit
der
Taste.
4. Falls nötig, schließen Sie das Menü
mit der MENU Taste.
Drücken Sie die MENU Taste, um ins Hauptmenü zu kommen.
Einstellungen
Im Untermenü Einstellungen können Sie unterschiedliche Anpassungen durchführen:
Datum
Uhr
So ändern Sie das Datum:
So ändern Sie die Uhrzeit:
1. Im Menü Einstellungen navigieren
Sie mit den
Tasten und wählen
Datum.
2. Mit dem rechten Drehregler passen
Sie Ihre gewünschte Auswahl an. Mit
dem linken Drehregler wechseln Sie
zwischen Jahr, Monat und Tage.
3. Drücken Sie anschließend zum
Bestätigen die
Taste.
10
1. Im Menü Einstellungen navigieren
Sie mit den
Tasten und wählen
Uhr.
2. Mit dem rechten Drehregler passen
Sie Ihre gewünschte Auswahl an. Mit
dem linken Drehregler wechseln Sie
zwischen den Stunden und Minuten.
Gleichzeitig können Sie die Uhrzeit
im 12- bzw. 24-Stunden-Zeitformat
einstellen.
3. Drücken Sie anschließend zum
Bestätigen die
Taste.
Standby-Timer
Sprache
Der Standby-Timer ermöglicht Ihnen eine Zeiteinstellung, bei der die
Küchenmaschine automatisch in den Standby-Modus wechselt. Nach
beispielsweise 1 Minute im Standby-Modus schaltet sich das Display
ab, wenn kein Bildschirmschoner (s. unten) aktiviert ist.
So ändern Sie die Sprache:
D
GB
FR
1. Im Menü Einstellungen navigieren
Sie mit den
Tasten und wählen
Sprache.
2. Mit dem rechten Drehregler passen
Sie Ihre gewünschte Auswahl an.
3. Drücken Sie anschließend zum
Bestätigen die
Taste.
1. Im Menü Einstellungen navigieren
Sie mit den
Tasten und wählen
Standby-Timer.
2. Mit dem rechten Drehregler passen
Sie Ihre gewünschte Auswahl an.
3. Drücken Sie anschließend zum
Bestätigen die
Taste.
ES
IT
PT
NL
RUS
AR
HE
Lautstärke
Bildschirmschoner
Mit dieser Einstellung können Sie die Lautstärke von Signaltönen anpassen,
die beim Ein-/ Ausschalten, beim Erreichen der Temperatur oder beim
Zeitablauf ausgegeben werden.
Der Bildschirmschoner wird entsprechend der ausgewählten Zeit im
Menüpunkt Standby-Timer aktiviert. Sie können eine beliebige Anzahl
von eigenen Bildern als Bildschirmschoner verwenden. Bitte beachten
Sie, es können nur Bilder integriert werden. Speichern Sie diese im
Systemordner „995SAVER“ auf Ihre Speicherkarte. Diese müssen
Systemkonform im folgenden Format gespeichert sein:
1. Im Menü Einstellungen navigieren
Sie mit den
Tasten und wählen
Lautstärke.
2. Mit dem rechten Drehregler passen
Sie Ihre gewünschte Auswahl an.
3. Drücken Sie anschließend zum
Bestätigen die
Taste.
Beispiel: XXX00001.jpg
XXX = max. 3 Buchstaben
12345 = max. 5 Zahlen
.jpg = Dateiformat
Die Zahlenfolge der letzten Ziffern ist aufsteigend: XXX00002.
jpg, XXX00003.jpg, usw.. Die optimale Anzeigegröße entspricht der
LCD-Display Auflösung von 480 x 272 Pixel. Bei Bildern, die nicht diese
Größe besitzen, findet ein automatisch proportionaler Zuschnitt statt.
So ändern Sie den Bildschirmschoner:
Diaschau
1. Im Menü Einstellungen navigieren
Sie mit den
Tasten und wählen
Bildschirmschoner.
2. Mit dem rechten Drehregler passen
Sie Ihre gewünschte Auswahl an.
(Stopp / Abspielen)
3. Drücken Sie anschließend zum
Bestätigen die
Taste.
Mit dieser Einstellung können Sie im Bildschirmschoner Modus das
Anzeigen der abspielbaren Bilder festlegen. Die Diaschau ist in allen
Menüpunkten außer im Menü Rezepte kochen verfügbar.
So ändern Sie die Diaschau:
1. Im Menü Einstellungen navigieren
Sie mit den
Tasten und wählen
Diaschau.
2. Mit dem rechten Drehregler passen
Sie Ihre gewünschte Auswahl an.
3. Bestätigen Sie Ihre Auswahl mit der
Taste.
11
Promotion Modus - Fachhandel
FW Version
Der Promotion Modus bietet ein zusätzliches Marketing-Tool für den
Fachhandel. Dabei werden Produktinformationen auf dem LCD-Display
abgespielt, die im Systemordner „996PROMT“ abgelegt sind.
Mit dieser Einstellung können Sie sich die aktuelle Firmware-Version,
Geräte-Seriennummer sowie einen QR-Code anzeigen lassen.
Mehr Informationen zu aktuellen Firmware-Version finden Sie unter
www.supercook.de. Bei allen Service-Anfragen oder bei der Produktregistrierung auf www.supercook.de benötigen Sie die Seriennummer.
Ist der Promotion Modus ausgewählt, sind alle anderen GeräteFunktionen deaktiviert. Um den Promotion Modus zu verlassen, drücken
Sie gleichzeitig die MENU und die beiden äußeren Bedientasten für ca.
10 Sekunden.
Aus Sicherheitsgründen entfernen Sie das Edelstahlvielzweck-Messer,
wenn Sie die SC110 in Ihrem Ladengeschäft präsentieren.
So aktivieren Sie den Promotion Modus:
1. Im Menü Einstellungen navigieren
Sie mit den
Tasten und wählen
Promotion Modus.
2. Bestätigen Sie Ihre Auswahl Ein bzw.
Aus mit der
Taste.
3. Um den Promotion Modus zu
verlassen, drücken Sie gleichzeitig
die MENU und die beiden äußeren
Bedientasten für ca. 10 Sekunden.
Update Bedienmodul „Yumi“
Mit dieser Einstellung kann die Firmware des Bedienmoduls „Yumi“
aktualisiert werden. Laden Sie dazu die aktuelle SC110 Firmware von
der www.supercook.de Webseite. Kopieren Sie die Firmware auf die
Grundebene auf die Speicherkarte.
1. Stecken Sie die SD-Karte in das
Bedienmodul.
2. Im Menü Einstellungen navigieren
Sie mit den
Tasten und wählen
Update Bedienmodul.
3. Bestätigen Sie Ihre Auswahl mit der
Taste.
4. Beachten Sie die Hinweise auf dem
Display.
Nach dem Update wird die aktuelle
FW wie bei FW Version beschrieben
angezeigt.
12
Anzeige der Firmware Informationen:
1. Im Menü Einstellungen navigieren Sie
mit den
Tasten und wählen FW
Version.
2. Mit der
Taste kehren Sie in den
Menüpunkt Einstellungen zurück.
Rezept-Sammlung
Der Menüpunkt Rezept-Sammlung ist Ihr digitales Rezeptbuch und
dient als Nachschlagewerk. Hier sind alle Rezept-Kategorien, alle
Rezepte sowie die einzelnen Arbeitsschritte aufgeführt. Die Kategorien
sind so gestaltet, dass Sie die Rezepte schnell finden.
Eine SD-Karte kann unabhängig vom Speichervolumen von >1 GB
maximal 895 Rezepte speichern. Durchschnittlich benötigt ein Rezept
ca. 1 MB Speicher pro Sprache. Im Lieferumfang ist eine 1 GB SD-Karte
enthalten. Um mehrsprachige Rezepte mit der maximalen Anzahl von
895 Rezepten von www.supercook.de zu speichern, benötigen Sie eine
größere SD-Karte.
Rezept-Kategorien
D
GB
1.
Vorspeisen
2.
Suppen
3.
Hauptgerichte Fisch und Fleisch
4.
Vegetarische Hauptgerichte
IT
5.
Beilagen
PT
6.
Babynahrung
NL
7.
Saucen
RUS
8.
Dressings
AR
9.
Backen
HE
10.
Desserts
11.
Mixgetränke
12.
Tiernahrung
FR
ES
So wählen Sie ein Rezept zur Ansicht aus:
1.
2.
1. Navigieren Sie mit den
Tasten in den Menüpunkt RezeptSammlung.
2. Bestätigen Sie Ihre Auswahl mit der
Taste.
3.
3. Ein
Kreis zeigt die aktuelle
Kategorie an.
4. Navigieren Sie mit den
Tasten
und wählen Sie die gewünschte
Kategorie.
5. Bestätigen Sie Ihre KategorieAuswahl mit der
Taste.
6. Oder möchten Sie das Bedienmodul
ausschalten, dann drücken Sie die
Taste.
4.
7.
Mit der
Taste fügen Sie das
Rezept zu Ihrer Favoriten-Auswahl
hinzu.
8. Mit den
Tasten navigieren
Sie in der gewählten Kategorie und
blättern durch die unterschiedlichen
Rezepte.
9. Mit der
Taste bestätigen Sie Ihre
Auswahl.
10. Mit den
Tasten navigieren Sie
durch die Rezeptseiten.
11. Mit der
Taste schalten Sie das
Bedienmodul aus.
12. Mit der Taste MENU verlassen Sie die
Rezept-Sammlung.
13
Rezepte kochen
In diesem Menüpunkt beginnen Sie mit der Küchenmaschine zu arbeiten.
Sie können entweder den voreingestellten Verarbeitungszeiten, Geschwindigkeiten und Temperaturen folgen oder selbst manuelle Anpassungen
durchführen:
So starten Sie Ihren Kochvorgang:
1.
2.
1. Navigieren Sie mit den
Tasten
in den Menüpunkt Rezepte kochen.
2. Bestätigen Sie Ihre Auswahl mit der
Taste.
3.
6. Mit der
Taste fügen Sie dieses
Rezept zur Ihrer Favoriten-Auswahl
hinzu.
7. Mit den
Tasten navigieren
Sie in der gewählten Kategorie und
blättern durch die unterschiedlichen
Rezepte.
8. Haben Sie sich für ein Rezept
entschieden, bestätigen Sie Ihre
Auswahl mit der
Taste.
5.
4.
9. Mit der
Taste starten Sie den
Vorgang mit der voreingestellten
Einstellung.
10. Mit der
Taste kann die aktuelle
Einstellung pausiert werden.
(Erscheint nachdem der Vorgang
gestartet ist. Siehe Punkt 9).
11. Mit den
Tasten ändern Sie
manuell die voreingestellte Zeit.
12. Mit dem linken Drehregler ändern
Sie manuell die voreingestellte
Temperatur.
13. Mit dem rechten Drehregler ändern
Sie manuell die voreingestellte
Geschwindigkeit.
6.
14. Mit der
Taste wird die Geschwindigkeit (Turbo) für eine kurze Zeit
angehoben.
15. Mit der
Taste können Sie einen
Schritt zurück gehen, solange der
Kochvorgang noch nicht aktiv ist.
14
3. Der
Kreis zeigt die aktuelle
Kategorie an.
4. Navigieren Sie mit den
Tasten
und wählen Sie das gewünschte
Rezept aus.
5. Bestätigen Sie Ihre Auswahl mit der
Taste.
16. Dieser Hinweis erscheint nach
80 % der vorprogrammierten
Verarbeitungszeit.
17. Bitte drücken Sie die
Taste, um
den Schritt zu beenden und Zutaten
beizugeben. Die Heizung wird am
Ende des Schrittes automatisch
abgeschaltet. Der Motor läuft je nach
Länge des Kochschrittes weiter.
D
GB
FR
ES
IT
7.
PT
8.
18. Jetzt haben Sie die Möglichkeit, mit
der
Taste den aktuellen Schritt
manuell mit neu gewählten Kocheinstellungen zu verlängern
19. Durch Drücken der
Taste die
schrittweise Abarbeitung des
Rezeptes fortzuführen.
NL
RUS
AR
ODER
9.
20. Möchten Sie wie unter Punkt 18
beschrieben den Schritt manuell
verlängern, erscheint die linke
Abbildung. Sind die Einstellungen
abgearbeitet, geht die SC110 zurück
auf Punkt 19 und Sie können die
schrittweise Bearbeitung fortführen.
Diese Schleife wiederholt sich an
jedem Ende eines Schrittes.
Sicherheitseinstellungen der
Küchenmaschine in den
Menüpunkten: Rezepte kochen,
Favoriten und Meine Rezepte
HE
10.
21. Wenn am Ende eines Schrittes
keine Aktion ihrerseits erfolgt und
die Sicherheitszeit abgelaufen ist,
schaltet sich der Motor ab. Jetzt
erscheint die Abbildung links.
22. Drücken Sie die
Taste und kehren
Sie zum nächsten Schritt des bereits
gestarteten Rezeptes zurück.
23. Mit der
Taste verlassen Sie den
Rezept Kochmodus.
Werden nach dem Schritt keine weiteren Einstellungen von Ihnen getroffen,
schaltet sich die Heizung automatisch ab und das Rührwerk läuft abhängig
von der Rezept-Schritt-Dauer weitere 1 bis 5 Minuten. Dadurch kann
ein Anbrennen der Speisen möglichst verhindert werden. Nach dieser
Zeitspanne verlässt die Küchenmaschine automatisch das Rezept und
kehrt in die Kategorie-Übersicht zurück. Hier haben Sie die Möglichkeit, mit
der
Taste in den nächsten Schritt des Rezeptes zurückzukehren oder
den Kochvorgang vollständig mit der
Taste zu beenden.
Vorprogrammierte Einstellungen
Der Hinweise „Dieser Schritt geht zu Ende.“ erscheint nach 80% der vorprogrammierten Zeit auf dem Display (20% Restzeit). Beispielsweise weist die
SC110 bei einer Verarbeitungszeit von 5 Minuten mit einem akustischen
Signal auf die Restzeit von 1 Minute hin.
Führen Sie eine manuelle Veränderung der vorprogrammierten RezeptBearbeitungszeit durch, bei der die Sicherheitsabfrage übersteuern,
(20% Restzeit der voreingestellten Zeit) erscheint der Hinweis „Dieser
Schritt geht zu Ende.“ nicht. Weitere Sicherheitsmaßnahmen wie oben
beschrieben greifen dennoch. Die Heizung schaltet sich am Ende der
Verarbeitungszeit ab. Der Motor wird nach Ablauf einer Zeitspanne
angehalten.
15
Rezept-Favoriten
Hilfe
In diesem Menüpunkt finden Sie Ihre komplette Favoriten-Auswahl. Um
den Kochvorgang im Menü Rezept-Favoriten zu starten, folgen Sie der
Beschreibung unter Rezepte kochen.
In diesem Menüpunkt finden Sie die Erklärungen für die verwendeten
Symbole im Bedienmodul „Yumi“.
So sehen Sie Ihre Favoriten-Auswahl:
1. Navigieren Sie mit den
Tasten
in den Menüpunkt Hilfe.
2. Bestätigen Sie Ihre Auswahl mit der
Taste.
1. Navigieren Sie mit den
Tasten
in den Menüpunkt Rezept-Favoriten.
2. Bestätigen Sie Ihre Auswahl mit der
Taste.
Hinweise zur Inbetriebnahme
Meine Rezepte
Nun ist Schluss mit einer Sammlung von losen Rezeptkarten, Zeitungsausschnitten und Internet-Downloads usw.. Die SC110 wird zu Ihrem
persönlichen Rezeptbuch. Kreieren, kochen, genießen und sammeln
Sie dafür Ihre eigenen Rezepte. Wie das funktioniert, erfahren Sie
unter www.supercook.de.
Um den Kochvorgang im Menü Meine Rezepte zu starten, folgen Sie
der Beschreibung unter Rezepte kochen.
1. Navigieren Sie mit den
Tasten
in den Menüpunkt Meine Rezepte.
2. Bestätigen Sie Ihre Auswahl mit der
Taste.
3. Wählen Sie Kategorie aus und folgen
Sie den Anweisungen wie unter
Rezepte kochen beschrieben.
16
1. Verwenden Sie die Küchenmaschine immer auf einer ebenen Fläche,
die stabil und sauber ist und keine Wärme abstrahlt.
2. Entfernen Sie das komplette Verpackungsmaterial.
3. Reinigen Sie alle Zubehörteile.
4. Greifen Sie auf keinen Fall in rotierende Teile.
5. Achten Sie darauf, dass die Dichtungsringe immer sauber und ohne
Beschädigungen eingesetzt werden.
6. Die SC110 hat einen internen Sicherheitsmechanismus: Wenn der Topf
nicht richtig auf der Küchenmaschine sitzt, funktioniert sie nicht.
7. Trennen Sie die Küchenmaschine vom Stromnetz:
a. Bei Geräteschäden und Fehlfunktionen
b. Wenn die Küchenmaschine heruntergefallen ist
c. Wenn Bauteile sichtbar beschädigt sind oder das Netzteil defekt ist.
8. Lassen Sie die Küchenmaschine nie aus den Augen.
9. Verwenden Sie nur das von plawa angegebene Zubehör.
Reinigung
1. Reinigen Sie die Küchenmaschine vor der ersten Inbetriebnahme und
nach jedem Gebrauch sowie alle Bau- und Zubehörteile, die mit Lebensmitteln in Berührung kommen. Achten Sie darauf, dass die Küchenmaschine vollständig abgekühlt ist, bevor Sie mit der Reinigung beginnen.
2. Ziehen Sie vor jeder Reinigung den Netzstecker aus der Steckdose.
3. Die Kontakte unten am Behälter müssen ebenfalls sauber und trocken
gehalten werden.
4. Das Messer ist sehr scharf! Beim Einsetzen und Entfernen ist daher
besondere Vorsicht geboten.
5. Alle Zubehörteile sind spülmaschinenfest.
6. Um Keimbildung vorzubeugen, reinigen Sie die SC110 und die
Dichtungsringe nach jedem Gebrauch.
7. Reinigen Sie die Aussparung für den Behälter an der Küchenmaschine
mit einem leicht angefeuchteten Tuch und trocknen Sie diese wieder ab.
8. Verwenden Sie zum Reinigen keine ätzenden oder scheuernden
Reinigungsmittel. Diese können die Oberfläche beschädigen.
9. Es kann zu Verfärbungen am Kunststoffzubehör beispielsweise durch
Beta-Karotin in Karotten, Tomaten oder auch bei Curry kommen - das
ist normal. Sie können die Verfärbungen etwas reduzieren, in dem Sie
ein Küchentuch mit Speiseöl anfeuchten und den Gegenstand abreiben.
Kurz mit warmen und anschließend mit kaltem Wasser und etwas
Spülmittel abspülen.
Technische Daten
SUPERCOOK SC110
Betriebsleistung
Kochen
Mixen
1000 Watt
500 Watt
Füllmenge
2 Liter
Minimum Temperatur
40 °C
Maximum Temperatur
130 °C
Geschwindigkeitsstufen
10 + Turbo
Mix-Geschwindigkeit
20.000 Upm
Akustisches Signal
Ja
Netzspannung/ Frequenz
230 V~50 Hz
Bedienmodul
Anschluss
LCD-Display
5V Stecker zu Buchse
4.3 Zoll
Speicherkarte
Speichervolumen
Vapore Dampfgarfläche
(Optional)
Urheberrecht
Copyright 2013. Diese Bedienungsanleitung enthält urheberrechtlich
geschützte Informationen. Alle Rechte sind vorbehalten. Kein Teil dieser
Bedienungsanleitung darf ohne vorherige schriftliche Genehmigung
des Herstellers mit irgendwelchen Mitteln, in irgendeiner Form – ob
mechanisch, elektronisch oder anderweitig – reproduziert werden.
SUPERCOOK ist eine Marke von plawa-feinwerktechnik GmbH & Co. KG.
D
GB
FR
ES
IT
Entsorgung von gebrauchten
elektronischen Geräten
Das Symbol auf dem Produkt oder Verpackung weist darauf hin, dass
dieses Produkt nicht als normaler Haushaltsabfall zu behandeln ist,
sondern an einer Annahmestelle für das Recycling von elektrischen und
elektronischen Geräten abgegeben werden muss. Weitere Informationen
erhalten Sie über Ihre Gemeinde, die kommunalen Entsorgungsbetriebe
oder das Geschäft, in dem Sie das Produkt gekauft haben.
PT
NL
RUS
AR
HE
1 GB -> 32 GB
ca. 23.1 x 19.2 cm (fast DIN A4 Größe)
Im Rahmen unserer laufenden Weiterentwicklung behalten wir uns
das Recht vor, Produkt inklusive Zubehör, Verpackung, Anleitung und
Rezeptbuch jederzeit ohne vorherige Ankündigung zu ändern.
Service und Kundendienst
Benötigen Sie Unterstützung? Wenn Sie weitere Fragen haben, besuchen
Sie uns auf der www.supercook.de, kontaktieren Sie unsere Support Hotline
oder kontaktieren Sie den Händler, bei dem Sie Ihre Küchenmaschine
gekauft haben.
Service & Support Hotline (D)
0900 1000 042
Service & Reparatur Hotline (EU)
00800 75292 100
(1,49 Euro/Min. aus dem
deutschen Festnetz)
(Kostenlos aus dem Festnetz)
Konformitätserklärung
Hiermit bestätigen wir, dass das genannte Produkt die Übereinstimmung
der Richtlinie LVD 2009/95/EG, EMV 2004/108/EG und
RoHS 2011/65/EU einhält.
EN 60335-2-14: 2006+A1:2008+A11:2012
EN 60335-2-15: 2002+A1:2005+A2:2008+A11:2012
EN 60335-1: 2012
EM 62233: 2008
EN 55014-1/A1: 2009
EN 55014-2/A2:2008
EN 61000-3-2/A2:2009
EN 61000-3-3:2008
Online Service/ Internationaler Kontakt
Internet: www.supercook.de
Email: [email protected]
Für mögliche Produkt-Rücksendungen benötigen Sie eine RMA Nummer,
die auf dem Versandkarton gut lesbar vermerkt sein muss. Weitere
Information für eine Warenrücksendung erhalten Sie telefonisch
von unseren jeweiligen Support Hotlines oder über die SUPERCOOK
Internetseite unter dem Menüpunkt “Service & Support“.
Hersteller
plawa-feinwerktechnik GmbH & Co. KG
Bleichereistr. 18
73066 Uhingen
Deutschland
17
18
User manual SUPERCOOK
D
English
FR
GB
ES
Table of contents
Introduction
Example uses of the multifunctional
kitchen machine
Product and safety instructions
Care instructions
Use of these operating instructions
Display and error messages
Kitchen machine overview of front and
back views
Overview of „Yumi“ control module
Accessories
Optional accessories
Getting started
Preparation
Jar
Knife
Cooking basket
Whisk paddle
Lid
Spatula
Measuring cup
Vapore steam tray (optional accessory)
Benefits of steaming
Using the Vapore
Inserting and removing the memory card
Switching on and off
Switching the control module on
for the first time
Menu structure
IT
PT
20
20
20
20
21
21
22
23
23
23
24
25
25
25
25
26
26
26
26
27
27
27
27
27
28
28
Settings
Date
Time
Standby timer
Screen saver
Language
Volume
Slide show
In-store promotion mode
Updating the „Yumi“ control module
FW version
Recipe collection
Recipe categories
Recipe cooking
Kitchen machine safety settings in the
menu options: Recipe cooking, Recipe
favorites and My recipes
Pre-programmed settings
Recipe favourites
My recipes
Help
Important instructions before started
Cleaning
Technical specifications
Service and customer support
Copyright
Disposal of used electronic devices
Declaration of conformity
28
28
28
29
29
29
29
29
30
30
30
31
31
32
NL
RUS
AR
HE
33
33
34
34
34
34
34
35
35
35
35
35
19
Introduction
Thank you for purchasing the SUPERCOOK kitchen machine. Please read
the user manual carefully and keep them in a safe place so you can refer
to them at a later date. We hope you enjoy using your kitchen machine and
that it produces good results.
Example uses of the multifunctional kitchen machine
• Puréeing fruit, vegetables, sauces and soups
• Mixing shakes and cocktails
• Pulverising sugar and dried chillies
• Grinding almonds and hazelnuts
• Grating fruit and vegetables
• Chopping onions and nuts
• Using the stirrer to emulsify mayonnaise and creams
• Grating cheese, breadcrumbs and potatoes
• Mixing light doughs, meringues and whipped cream
• Kneading yeast and bread dough
• Warming, frying and cooking at temperatures of 40 ° to 130 °C.
• Steaming in the Vapore steam tray or cooking basket
Product and safety instructions
Please read the following important information through carefully before
using the multifunctional kitchen machine for the first time:
1. Before you start: Remove the kitchen machine and all the accessories
from the box.
2. Please do not operate the kitchen machine on wet or damp surfaces.
3. The only way to guarantee safe operation of the kitchen machine is
by connecting to the mains via a standard 3-pin mains socket. Check
that your electrical system complies with the power and voltage
information on the rating label of the kitchen machine. Incorrect
connections shall invalidate the guarantee.
4. With all electrical devices, there is a risk of electrocution which can
cause injury or even death. It is therefore important to comply with the
safety instructions at all times.
5. plawa or the distributor accepts no liability for damages caused as
a result of insufficient power supply or incorrect installation in the
building. If in doubt, please consult a qualified electrician.
6. Keep the packaging material, especially packaging film, bags and
polystyrene, out of the reach of children.
7. When first used, some smell may develop. This is not dangerous.
8. Do not immerse the kitchen machine, the control module or the power
cable in water.
9. Never cover the kitchen machine with tea towels, cloths, etc.
10. Keep a sufficient distance from other heat sources, such as hobs, in
order to avoid damage to the device.
11. This kitchen machine is not a toy and must be kept out of the reach
of children.
12. Lay the cable such that it does not get squashed or kinked or come
into contact with hot surfaces.
13. If using an extension cable:
a. the cable must be grounded
b. take all necessary precautions to ensure the cable does not
become a trip hazard.
14. Never allow the power cable to dangle free and never unplug it by
pulling the cable, always pull on the plug.
15. Do not use the kitchen machine:
a. if the cable or plug is damaged
b. if it malfunctions, if the kitchen machine has been dropped or
shows visible signs of damage.
16. Do not move the kitchen machine while it is running.
17. This kitchen machine is designed exclusively for domestic use and for
use indoors.
18. Never attempt to repair the kitchen machine yourself. Do not replace
or modify the power cable, power supply or other components. Always
consult an authorised technician or the hotline.
19. If the module malfunctions or gets damaged, disconnect it from
the mains.
20
20. plawa or the distributor accepts no liability for damages caused as a
result of improper or incorrect operation of the kitchen machine.
21. The kitchen machine is not a deep fat fryer. Under no circumstances
must you attempt to deep fat fry food in the kitchen machine.
22. Do not insert objects into the openings on the device casing.
23. Disconnect the kitchen machine from the mains:
a. when cleaning
b. when not in use
c. in the event of a power failure
24. Persons with limited experience or knowledge in handling such
devices and persons with limited physical, psychological, mental and
sensory capabilities and children should only operate the kitchen
machine under supervision or instruction from a person who can
accept responsibility for safety. Children must be supervised to make
sure they do not play with the kitchen machine.
25. This kitchen machine is designed to be used for household and similar
applications, for example
• in employee kitchens in shops, offices and other commercial areas
• in agricultural properties
• by customers in hotels, motels and other accommodation
• in bed and breakfasts
Care instructions
Handle the kitchen machine and accessories with care. The recommendations below will help you preserve your guarantee and ensure any
guarantee claims are valid.
1. Switch the kitchen machine off if you do not plan do use it for an
extended period.
2. Allow the kitchen machine to cool completely before cleaning.
3. Clean all components and accessories which come into contact
with food.
4. Use a soft, slight moistened cloth to clean the jar recess on the
kitchen machine.
5. The contacts under the jar must be kept clean and dry.
6. All accessories are dishwasher-safe.
7. To avoid the build-up of germs, clean the kitchen machine and sealing
rings after every use.
8. Never use abrasive or astringent detergents.
9. Any lime scale marks can be removed using vinegar.
10. It is normal for some discolouration to occur in the plastic accessories
from beta-carotin in carrots or tomatoes or spices in curry. You can
reduce the discolouration slightly by moistening a cloth with cooking
oil and rubbing the area gently. Then rinse off quickly with warm water,
then with cold water and a little washing-up liquid.
11. Only use the kitchen machine as described in these operating
instructions.
Use of these operating
instructions
D
GB
FR
This symbol indicates warnings which you must read before use:
ES
Display and error messages
Symbol / Question /
Description of error
IT
PT
Explanation
Solution
The jar is not sealed correctly or the safety switch is not working.
Please check the seal again.
The kitchen machine has an error in the electrical circuit.
Please contact your local service centre.
You can find the telephone number at
www.supercook.me or in the instructions.
The motor is overloaded.
Please switch the kitchen machine off
and wait a few minutes until the motor
has cooled down.
NL
RUS
AR
The kitchen machine stops
The kitchen machine has a special control system. The speed can vary
when the whisk paddle is used. and the rotation is interrupted in 2-second intervals. This means that the
kitchen machine starts making an unusual noise. This is normal. This
The speed is irregular or the
noise means that the speed of the knife is being adjusted to prevent the
motor is sticking.
motor overheating.
Remove part of the mixture or increase
the speed to a maximum of 3.
The knife is working very slowly
when preparing dough.
Please check whether you have exceeded the maximum of 500 g of flour.
Remove some of the mixture from the jar.
There is smoke coming from
the kitchen machine.
The motor is overheating. Check the maximum fill level.
Remove some of the mixture from the jar.
Allow the kitchen machine to cool down
for around 20 minutes.
Kitchen machine not working
with the temperature set and
speed set to 5.
The temperature can only be set for speeds 1 to 4.
Change the speed setting to 1 to 4.
Jar is difficult to fit.
Positioning the jar gets easier with use, as the silicon seal alters as a
function of the heat and humidity, while still forming a seal.
Rub a little cooking oil into the silicon seal
or moisten it.
Is the kitchen machine used?
The jar base shows marks and
residual moisture on delivery.
All kitchen machine modules are tested prior to delivery. The jar is filled
with water and brought to the boil. As with a dishwasher, residual moisture
can be left behind. These residues can result in slight but perfectly safe
marks on the base of the jar.
In order to remove the marks, please use
a conventional stainless cleaner, such as
Sidol from Henkel.
Noises when first used or
under heavy load.
When first used and under heavy load, the motor can heat up and make
strange noises. As in any electric motor, e.g. in a model railway or model
motorway, the engine uses brushes needs to be ‚run in‘ to begin with. The
noises are nothing to be concerned about.
Allow the kitchen machine to cool
down after it has been working hard,
e.g. kneading firm dough. The kitchen
machine will be fully operational again
after cooling down.
Beeping noise.
The module beeps to tell you the kitchen machine has reached the right
temperature.
The beeping also indicates that the
pre-set time has run out.
HE
Increase the speed from 1 to 2 or from
2 to 3.
21
Kitchen machine overview of front and back views
1.
2.
3.
4.
5.
6.
7.
Control module „Yumi“
Libra kitchen scale (optional accessory)
Measuring cup
Lid
Jar
Ventilation slot
On/ off button
3
2
4
5
1
6
7
22
Overview of „Yumi“ control module
D
GB
1.
2.
3.
4.
5.
6.
FR
LCD display
4 control buttons
Right and left rotary knobs
MENU button
SD card slot
Socket
ES
IT
1
PT
NL
RUS
3
AR
2
HE
4
5
6
Accessories
Cooking basket
Measuring cup, Lid, Knife, Jar
Whisk paddle
Spatula
Optional accessories
•
•
SUPERCOOK Libra digital kitchen scale
SUPERCOOK Vapore steam tray as in plastic or porcelain/ glass models
Please consult your local dealer or go to www.supercook.me if you have any questions on additional
accessories.
SD card
23
Getting started
General symbols
Meaning
Calendar *
Sets date and date format
Language *
Selects language desired. * Only required when you first switch on or after the battery is
replaced by the service department.
Confirm
Confirms selection
Back
Scrolls back
Next
Scrolls forwards
Play
Controls playback
Plus
Increases cooking time
Minus
Decreases cooking time
Down
Navigation: Down or sideways
Up
Navigation: Up or sideways
On/ Off
Switches control module on/ off
Quit
Quits cooking process for safety reasons
Pause
Process is paused, settings are kept
Favorite
Pressing this symbol saves the selected recipe in the Favorites menu.
Stop
Stops the process
Speed
Speed levels: 1 to 10 and turbo function
Time
•
•
•
•
•
Temperature
•
•
•
•
24
Cooking or processing time: 1 second to max. 60 minutes
When you start the function, the clock counts backwards with the selected time shown on
the display in minutes and seconds with a clock symbol.
The cooking or processing time can be adjusted at any time.
In order to start processing, you need to set the time.
The temperature starts at 40 °C and can be adjusted up to the maximum temperature of
130 °C in 5 °C increments.
The module beeps to tell you right temperature has been reached.
This symbol flashes for a few seconds as soon as the kitchen machine has reached the
temperature set.
If you are preparing foods at above 50 °C, you should avoid using the Turbo button.
Temperatures above 100 °C are designed for steaming, frying and boiling.
More
Keep cooking manually after a recipe stage is complete.
Previous one
Go back one recipe stage within a recipe sequence (Recipe cooking).
Re-start
Restarts the cooking process at the next stage after stopping the programme for safety
reasons.
Warning
Warning - please note!
Preparation
D
GB
Jar
1. The jar has a capacity of 2 litres and has a handy measuring scale on the inside and
outside.
2. Once the knife has been properly fitted in the jar, place the jar in the recess on the kitchen
machine. Then gently press it down until the jar engages with the gear drive and contacts.
FR
ES
IT
PT
NL
1. Do not fill the jar above the maximum level of 2 litres. Otherwise, safe operation cannot be
guaranteed and the quality of your finished dishes may be compromised.
2. When you remove the jar from the kitchen machine, make sure you do not spill any of the
contents. If the contents are hot, you could scald yourself.
3. If the jar does not engage with the drive on the kitchen machine immediately, carefully turn
the knife head.
RUS
AR
HE
Knife
1. The knife is fitted in the jar on delivery.
2. In order to remove the knife, put the jar in a vertical position. Push the lever down
anticlockwise to release the knife. (see Figure 1)
3. In order to insert the knife, move it into position and push the lever upwards clockwise.
(see Figure 2)
1. The knife is very sharp! Be very careful when fitting and removing it.
2. Make sure that the sealing ring is properly seated on the knife bearing. If the sealing ring is
not fitted, the content of the jar can leak out and damage the kitchen machine.
3. When adding food, make sure that it does not block the knife.
4. Allow the knife to cool down completely after each cooking process before removing it.
5. The maximum processing amount is 500 g flour in a firm bread dough.
Fig. 1
Fig. 2
Cooking basket
1. The cooking basket is used for steaming small quantities of food and is fitted directly
into the jar.
2. There is an inset to the side which makes it easy to remove the cooking basket with
the aid of the spatula.
25
Preparation
Whisk paddle
1. The whisk paddle is placed on the knife in the knife space with slight resistance.
2. The whisk paddle is perfect for producing, for example, creamy desserts, meringues
and whipped cream.
3. The whisk paddle can only be used at speeds 1 to 4.
1. The whisk paddle must not be used in conjunction with the turbo button.
2. When adding food, make sure that it does not block the whisk paddle.
3. The whisk paddle is not suitable for kneading firm dough. Use the knife for kneading bread
or pizza dough, for example.
4. The whisk paddle must not be used in conjunction with the spatula.
Lid
1. The sealing ring must be fitted in the lid to avoid potential spillages.
2. Place the lid diagonally on the top of the jar.
3. Turn the lid clockwise until the notch on the bottom of the front part of the lid fits into the
relevant slot in the kitchen machine.
4. The kitchen machine can only be switched on if the lid is properly in position.
5. The lid has a top-up opening to make adding extra ingredients easier.
Spatula
1. Use this accessory for removing or mixing in ingredients.
2. The spatula is designed not to come into contact with the knife when ingredients
are added through the top-up opening.
Measuring cup
1. The measuring cup has a capacity of 100 ml and is removable.
a. This makes it easy to add additional ingredients.
b. The temperature is maintained as soon as the measuring cup is on the lid.
c. This controls the steam output.
1. Only remove the measuring cup at speeds 1 to 3. Otherwise, ingredients can be
thrown out and you could get burnt.
2. If you are using a higher speed, hold the measuring cup tight to prevent spillages.
26
Preparation
D
GB
1
Vapore steam tray (optional accessory)
The Vapore steam tray is used to gently cook foods while preserving their vitamins. Steaming is
one of the healthiest ways of cooking.
2
3
4
Vapore overview
1. Cover
2. Flat steam tray
3. Deep steam tray
4. Condensation catcher to trap
fluids
Benefits of steaming
1. Vitamins and nutrients are preserved
2. Saves time as multiple dishes can be prepared at the same time
3. Healthy food, low in salt and fat
4. Food remains moist
5. No transfer of flavours
Using the Vapore
1. Fill the jar with at least 700 ml of water or other steaming fluid, such as stock.
2. Grease the inset bowls so that the food does not stick.
3. Place the ingredients on steam trays. Make sure that food that takes longer to cook is
placed in the deep steam tray. Leave some of the holes free to allow the steam to rise.
4. Place the Vapore straight on the lid without the measuring cup.
5. Check that the steam trays are fitted to one another and the lid is properly fitted so the
steam cannot escape.
FR
ES
IT
PT
NL
RUS
AR
HE
1. When handling the Vapore steam tray, remember that there is hot water vapour coming out
of it and fluid in the condensation catcher. Warning - burning risk!
2. Only hold the inset bowls by the handles.
3. Remove the condensation catcher carefully.
4. The condensation catcher is made of plastic and heat resistant to approx. 90 °C.
5. The Vapore steam tray is not suitable for microwaves, ovens or other heat sources.
Inserting and removing the memory card
Insert the supplied SD card into the card slot in the „Yumi“ control module. Make sure the
contacts on the SD card are pointing upwards. Carefully push the SD card in until you hear it
click. In order to remove the SD card, push the card in until it is ejected and you can pull the
card out.
Switching on and off
Place the „Yumi“ control module in the recess on the kitchen machine. Press the
on/ off button (7) and the kitchen machine is ready for use.
27
Switching the control module on for the first time
When you first switch on, you are prompted to set the date/ time and the screen language.
Change the calendar and language settings as follows:
1.
1. Use the
buttons to switch
between calendar and language and
use the left and right rotary knob to
adjust the settings.
2. Confirm your setting by pressing the
button.
2.
Menu structure
3. Press or turn any control button apart
from the MENU button. This takes
4. Use the left rotary knob to set the
temperature you want.
5. Use the right rotary knob to adjust the
speed.
6. Use the
buttons to adjust the
time manually.
7. Pressing the
button increases the
speed for a short time (Turbo).
1. Use the
buttons to navigate
through the menu.
2. The
dot indicates the current
position.
3. Confirm your selection by pressing the
button.
4. If necessary, close the menu by
pressing the MENU button.
Press the MENU button to enter the main menu.
Settings
You can adjust various settings in the Setup sub-menu.
Date
Time
How to change the date:
How to change the time:
1. In the Setup menu, you can navigate
with the
buttons and select
Date.
2. Use the right rotary knob to adjust the
selection. Use the left rotary knob to
switch between year, month and day.
3. Then press the
button to confirm.
28
1. In the Setup menu, you can navigate
with the
buttons and select
Time.
2. Use the right rotary knob to adjust the
selection. Use the left rotary knob to
switch between hours and minutes. At
the same time, you can set the time
format as either 12 or 24 hours.
3. Then press the
button to confirm.
Standby timer
Language
The Standby timer allows you set a time at which the kitchen machine
automatically switches to Standby mode. After, for example, 1 minute
in Standby mode, the display switches off if there is no Screen saver
activated (see Screen saver).
How to change the Standby timer:
How to change the language:
D
GB
FR
1. In the Setup menu, you can navigate
with the
buttons and select
Language.
2. Use the right rotary knob to adjust the
selection.
3. Then press the
button to confirm.
1. In the Setup menu, you can navigate
with the
buttons and select
Standby timer.
2. Use the right rotary knob to adjust the
selection.
3. Then press the
button to confirm.
ES
IT
PT
NL
RUS
AR
HE
Volume
Screen saver
Use this setting to adjust the volume of the beeps emitted when you switch
on/off, when the device reaches temperature or when time is up.
How to change the volume:
The Screen saver is activated as a function of the time selected in the
Standby timer menu item. You can use any number of custom images
as a Screen saver. Please note that only image files can be used. Save
these in the „995SAVER“ system folder on your SD card. They need to
be saved in the following format in order to work:
1. In the Setup menu, you can navigate
with the
buttons and select
Volume.
2. Use the right rotary knob to adjust the
selection.
3. Then press the
button to confirm.
Example: XXX00001.jpg
XXX = max. 3 characters
12345 = max. 5 digits
.jpg = file format
The files need to be numbered in sequential order: XXX00002.jpg,
XXX00003.jpg, etc. The image size should match the LCD display
resolution of 480 x 272 pixels. Pictures which are not this size are
automatically cropped to the correct proportions.
How to change the Screen saver:
1. In the Setup menu, you can navigate
with the
buttons and select
Screen saver.
2. Use the right rotary knob to adjust the
selection. (Stop/ Play)
3. Then press the
button to confirm.
Slide show
Use this setting to customise the display of images in Screen saver mode.
How to adjust the slide show:
1. In the Setup menu, you can navigate
with the
buttons and select
Slide show.
2. Use the right rotary knob to adjust the
selection.
3. Confirm your selection by pressing the
button.
29
In-store promotion mode
FW version
In-store promotion mode provides an additional marketing tool for
retailers. This shows product information on the LCD display which is
saved in the „996PROMT“ system folder.
This setting allows you display the current firmware version, the device
serial number or a QR code. More information on the current firmware
version can be found at www.supercook.me. You will need the serial
number for all service requests and to register the product at
www.supercook.me.
If In-store promotion mode is selected, all other device functions are
deactivated. In order to exit In-store promotion mode, press MENU and
the two outside buttons for 10 seconds at the same time.
For safety reasons, remove the knife when displaying the kitchen
machine in store.
How to activate In-store promotion mode:
1. In the Setup menu, you can navigate
with the
buttons and select
In-store promotion mode.
2. Confirm your selection on or off by
pressing the
button.
3. In order to exit In-store promotion
mode, press MENU and the two
outside buttons at the same time for
10 seconds.
Updating the „Yumi“ control
module
Use this setting to update the firmware of the „Yumi“ control module.
To do this, download the latest kitchen machine firmware from
www.supercook.me. Extract the firmware from the compressed file
and copy it to the root directory of the SD card.
1. Insert the SD card into the control
module:
2. In the Setup menu, you can navigate
with the
buttons and select
Update control module.
3. Confirm your selection by pressing the
button.
4. Follow the instructions on the screen.
Please switch the kitchen machine on
and off. After the update, the new FW
is displayed as described in the next
step.
30
Displaying the firmware information:
1. In the Setup menu, you can navigate
with the
buttons and select FW
version.
2. Use the
button to return to the
Setup menu.
Recipe collection
The Recipe collection menu item is your digital recipe book, which you
can use as a reference book. It contains all the recipe categories, all the
recipes and the individual instructions. The categories are designed to
help you find the recipes quickly.
An SD card can save a maximum of 895 recipes although the memory
is greater than 1 GB. On average, a recipe takes up around 1 MB per
language. A 1 GB SD card is supplied as standard. In order to save the
maximum number of 895 recipes from www.supercook.me in multiple
languages, you will need a higher capacity SD card.
Recipe categories
D
GB
1.
Starters
2.
Soups
3.
Fish and meat main courses
4.
Vegetarian main courses
IT
5.
Side dishes
PT
6.
Baby food
NL
7.
Sauces
RUS
8.
Dressings
AR
9.
Bakes
HE
10.
Desserts
11.
Mixed drinks
12.
Pet food
FR
ES
How to select a recipe to view:
1.
2.
1. Use the
buttons to navigate
through the Recipe collection menu.
2. Confirm your selection by pressing
the
button.
3.
3. A
circle indicates the current
category.
4. Use the
buttons to navigate
and select the category you want.
5. Confirm your category selection by
pressing the
button.
6. Or press the
button if you wish to
switch off the control module.
4.
7.
Use the
button to add the recipe
to your favorites selection.
8. Use the
buttons to navigate
within the category selected and
browse the different recipes.
9. Use the
button to confirm your
selection.
10. Use the
buttons to navigate
through the recipe pages.
11. Use the
button to switch the
control module off.
12. Use the MENU button to exit the
recipe collection.
31
Recipe cooking
In this menu, you can begin working with the kitchen machine. You can
either follow the pre-set processing times, speeds and temperatures or
adjust them manually yourself.
How to start cooking:
1.
2.
1. Use the
buttons to navigate to
the Recipe cooking menu option.
2. Confirm your selection by pressing
the
button.
3.
6. Use the
button to add this recipe
to your favorites selection.
7. Use the
buttons to navigate
within the category selected and
browse the different recipes.
8. Once you have decided on a recipe,
confirm your selection by pressing
the
button.
5.
4.
9. Use the
button to start the
process with the default settings.
10. Use the
button to pause the
current setting. (Appears once the
process has started. See step 9).
11. Use the
buttons to adjust the
preset time manually.
12. Use the left rotary knob to adjust the
preset temperature manually.
13. Use the right rotary knob to adjust
the preset speed manually.
6.
14. Pressing the
button increases the
speed for a short time (Turbo).
15. Use the
button to go back one
step providing the cooking process is
not yet active.
32
3. A
circle indicates the current
category.
4. Use the
buttons to navigate
and select the recipe you want.
5. Confirm your selection by pressing
the
button.
16. This reminder appears after 80 % of
the pre-programmed processing time.
17. Press the
button to end the step
and add ingredients. The heating
automatically switches off at the end
of the step. The motor continues,
depending on how long the cooking
process is.
D
GB
FR
ES
IT
7.
PT
8.
18. You now have the option of using
the
button to extend the current
process with the new settings you
have selected.
19. Press the
button to continue
working through the recipe.
NL
RUS
AR
HE
OR
9.
20. If you wish to extend the process
manually as described in step 18,
the image shown to the left appears.
Once you have worked through the
settings, the kitchen machine reverts
to step 19 and you can continue
working through the steps.
This loop is repeated at the end of
every step.
Kitchen machine safety settings
in the menu options:
Recipe cooking, Recipe favorites
and My recipes
Pre-programmed settings
The „This step is about to end.“ note appears on the display after 80%
of the pre-programmed time (20% time remaining). For example, if the
processing time is 5 minutes, the kitchen machine beeps when there is
1 minute left to go.
10.
21. If you do not do anything by the end
of the loop and the safety time runs
out, the motor switches off. The
image shown to the left appears.
22. Press the
button and revert back
to the next step in the recipe which
has already started.
23. Use the
button to exit the Recipe
cooking mode.
If you do not adjust any more settings after this step, the heating automatically switches off and the kitchen machine continues to run for a further
1 to 5 minutes, depending on the length of the recipe step. This prevents
the food sticking where possible. After this time, the kitchen machine
automatically exits the recipe and reverts to the category overview. You now
have the option of using the
button to revert back to the next step of the
recipe or stopping the cooking process completely using the
button.
If you adjust the pre-programmed recipe processing time manually by
overriding the safety prompt (20% of preset time remaining), then the
message ‚This step is about to end.“ does not appear. However, other safety
mechanisms as described above do kick in. The heating switches off at the
end of the processing time. The motor stops after a defined period.
33
Recipe favourites
Help
In this menu, you can find all your favourites. In order to start the
cooking process in the Recipe favorites menu, follow the description
under Recipe cooking.
This menu option provides explanations of the symbols used in the „Yumi“
control module.
This takes you to your favorites selection:
1. Use the
buttons to navigate
through the Help menu.
2. Confirm your selection by pressing the
button.
1. Use the
buttons to navigate
through the Recipe favorites menu.
2. Confirm your selection by pressing the
button.
Important instructions before
started
My recipes
No more collections of loose recipe cards, cut-outs from newspapers
and internet downloads. The kitchen machine is your personal recipe
book. You can create, cook, enjoy and collect your own recipes. Find
out how it works at www.supercook.me.
In order to start the cooking process in the My recipes menu, follow the
description under Recipe cooking.
1. Use the
buttons to navigate to
the My recipes menu option.
2. Confirm your selection by pressing the
button.
3. Select the category and follow the
instructions as described under
Recipe cooking.
1. Always use the multifunctional kitchen machine on an even surface
which is clean and stable and does not emit heat.
2. Remove all packaging.
3. Clean all accessories.
4. Never put your hand into the multifunctional kitchen machine while it is
turning.
5. Make sure that the sealing rings used are always clean and
undamaged.
6. The kitchen machine has an internal safety mechanism. If the jar is not
seated correctly on the kitchen machine, it will not work.
7. Disconnect the kitchen machine from the mains:
a. if the device is damaged or malfunctions
b. if the kitchen machine has been dropped.
c. if components are visibly damaged or the power supply is faulty.
8. Do not leave the kitchen machine unsupervised.
9. Only used accessories recommended by plawa.
Cleaning
1. Clean the kitchen machine before first use and after every use, and
clean all components and accessories which come into contact with
food. Make sure the kitchen machine is fully cooled before you start
cleaning it.
2. Remove the mains plug from the socket before cleaning.
3. The contacts on the bottom of the jar must also be kept clean and dry.
4. The knife is very sharp! So be very careful when fitting and removing it.
5. All accessories are dishwasher-safe.
6. To avoid the build-up of germs, clean the kitchen machine and sealing
rings after every use.
7. Use a soft, slight moistened cloth to clean the recess for the jar on the
kitchen machine.
8. Do not use any abrasive or astringent detergents. These can damage
the surface.
9. It is normal for some discolouration to occur in the plastic accessories
from beta-carotin in carrots or tomatoes or spices in curry. You can
reduce the discolouration slightly by moistening a cloth with cooking
oil and rubbing the area gently. Rinse off quickly with warm water, then
with cold water and a little washing-up liquid.
34
Technical specifications
SUPERCOOK kitchen machine
Power consumption
Cooking
Mixing
1000 Watts
500 Watts
Capacity
2 litres
Minimum temperature
40 °C
Maximum temperature
130 °C
Speed levels
10 + turbo
Mixing speed
20,000 rpm
Beeps
Yes
Mains voltage/Frequency
230 V~50 Hz
Control module
Connection
LCD display for control
module
5V socket to plug
Copyright
Copyright 2013 This user manual contains copyrighted information. All
rights reserved. No part of these operating instructions can be reproduced
using any means and in whatsoever form - whether mechanical, electronic
or otherwise - without prior written consent from the manufacturer.
SUPERCOOK is a brand of plawa-feinwerktechnik GmbH & Co. KG.
Disposal of used electronic
devices
This symbol on the product or packaging indicates that this product should
not be disposed of as normal domestic waste, instead it must be taken
to a disposal point for the recycling of electrical and electronic devices.
For further information, contact your local council, the community waste
disposal facilities or the shop where you bought the product.
D
GB
FR
ES
IT
PT
NL
RUS
AR
HE
4.3 inches
Memory card
Memory capacity
1 GB -> 32 GB
Vapore steam tray
(optional)
Dimensions
approx. 23.1 x 19.2 cm (almost A4 size)
As part of our ongoing further development, we reserve the right to change
the product, including accessories, packaging, instructions and recipe book
at any time without prior notice.
Service and customer support
Declaration of conformity
We hereby confirm that the specified product complies with Directives
LVD 2009/95/EC, EMC 2004/108/EC and RoHS 2011/65/EU
EN 60335-2-14: 2006+A1:2008+A11:2012
EN 60335-2-15: 2002+A1:2005+A2:2008+A11:2012
EN 60335-1: 2012
EM 62233: 2008
EN 55014-1/A1: 2009
EN 55014-2/A2:2008
EN 61000-3-2/A2:2009
EN 61000-3-3:2008
Do you need assistance? If you have further questions, please visit
www.supercook.me, contact our support hotline or consult the dealer
where you bought your multifunctional kitchen machine.
Service & Support Hotline (EU)
00800 75292 100
(Toll free number from any landline)
Online Service/ International contact
Internet: www.supercook.me
E-mail: [email protected]
For any product returns, you will need an RMA number (Return
Merchandise Authorization) which needs to be marked clearly on the
return packaging. Further information for the return of goods is available
by phone through the relevant support hotlines or via „Service & Support“
on the SUPERCOOK website.
Manufacturer
plawa-feinwerktechnik GmbH & Co. KG
Bleichereistr. 18
73066 Uhingen
Germany
35
36
Manuel d’utilisation SUPERCOOK
D
Français
FR
GB
ES
Table des matières
Introduction
Exemples d’utilisation de l’appareil de cuisine
Produit et instructions de sécurité
Instructions d’entretien
Utilisation du présent manuel d’utilisation
Affichage et messages d’erreur
Présentation des vues avant et arrière de
l’appareil de cuisine
Présentation de l’unité de contrôle « Yumi »
Accessories
Accessoires en option
Mise en route
Préparation
Bol en acier inoxydable
Couteau tout usage en acier inoxydable
Panier de cuisson
Fouet
Couvercle
Spatule
Bouchon doseur
Vapore (Plateau cuit vapeur)
(accessoire en option)
Bénéfices de la cuisson à la vapeur
Utilisation du Vapore
Insertion et retrait de la carte mémoire
Mise sous/hors tension
Première mise sous tension de l’unité de contrôle
Structure du menu
IT
PT
38
38
38
38
39
39
40
41
41
41
42
43
43
43
43
44
44
44
44
45
45
45
45
45
46
46
Réglages
Date
Horloge
Standby-Timer
Economiseur d’écran
Langue
Volume
Diaporama
Mode Promotion
Mise à jour de l’unité de contrôle « Yumi »
Version FW
Recettes : Collection
Catégories de recettes
Recettes : Cuisson
Réglages de sécurité de l’appareil de cuisine
dans les options du menu : Recettes : Cuisson,
Recettes : Favoris et Mes recettes
Réglages préprogrammés
Recettes : Favoris
Mes recettes
Aide
Instructions importantes avant de commencer
Nettoyage
Spécifications techniques
Service technique et clientèle
Copyright
Mise au rebut des appareils électriques usagés
Déclaration de conformité
46
46
46
47
47
47
47
47
48
48
48
49
49
50
NL
RUS
AR
HE
51
51
52
52
52
52
52
53
53
53
53
53
37
Introduction
Merci d’avoir acheté l’appareil de cuisine SUPERCOOK. Veuillez lire
attentivement le manuel d‘utilisation et le conserver en lieu sûr
pour pouvoir vous y référer ultérieurement. Nous espérons que vous
apprécierez l‘utilisation de votre appareil de cuisine et qu’il vous fournira
de bons résultats.
Exemples d’utilisation de l’appareil de cuisine
• Mise en purée des fruits, légumes, sauces et soupes
• Mélange des frappés et des cocktails
• Pulvérisation de sucre et de légumes déshydratés
• Concassage des amandes et des noisettes
• Râpage des fruits et des légumes
• Hachage des oignons et des noix
• Utilisation du fouet pour émulsionner la mayonnaise et les crèmes
• Râpage de fromage, chapelure et pommes de terre
• Mélange de pâtes légères, meringues et crème fouettée
• Pétrissage de levure et de pâte à pain
• Chauffage, poêlage et cuisson à des températures comprises entre
40 °C et 130 °C.
• Cuisson à la vapeur dans le plateau cuit-vapeur Vapore ou le panier de
cuisson
Produit et instructions de
sécurité
38
Veuillez lire attentivement les informations importantes suivantes avant
d’utiliser l’appareil de cuisine pour la première fois :
1. Avant d’utiliser votre appareil : Retirez du carton l’appareil de cuisine
et tous les accessoires.
2. N’utilisez pas l’appareil de cuisine sur des surfaces mouillées ou
humides.
3. La seule façon de garantir le fonctionnement sécurisé de l’appareil
de cuisine est de le brancher à une prise secteur via une prise
électrique à 3 broches standard. Vérifiez que votre système électrique
est en conformité avec les informations de puissance et de tension
indiquées sur l’étiquette des caractéristiques nominales de l’appareil
de cuisine. Des branchements incorrects invalideront la garantie.
4. Chaque appareil électrique présente un risque d’électrocution
pouvant entraîner des blessures, voire la mort. Il est donc important
de respecter systématiquement les instructions de sécurité.
5. plawa ou le distributeur ne pourra pas être tenu responsable des
dommages causés par une alimentation électrique insuffisante ou
une installation incorrecte au sein du bâtiment. En cas de doute,
veuillez consulter un électricien qualifié.
6. Conservez les emballages, en particulier le film d’emballage, les sacs
et le polystyrène, hors de portée des enfants.
7. Lors de la première utilisation, vous pourrez sentir une petite odeur.
Cela n’est pas dangereux.
8. N’immergez pas l’appareil de cuisine, l‘unité de contrôle ou le câble
d’alimentation dans l’eau.
9. Ne couvrez jamais l‘appareil de cuisine avec un torchon, des tissus ou
autres.
10. Laissez une distance suffisante entre l’appareil et les autres sources
de chaleur, comme les plaques de cuisson, afin d’éviter tout risque
d’endommager l’appareil.
11. Cet appareil de cuisine n’est pas un jouet et doit être conservé hors de
portée des enfants.
12. Placez le câble de sorte qu’il ne soit pas écrasé, tordu ou qu‘il n‘entre
pas en contact avec des surfaces chaudes.
13. Si vous utilisez une rallonge :
a. le câble doit être mis à la terre
b. prenez toutes les précautions nécessaires pour que personne ne
trébuche avec le câble.
14. Ne laissez jamais le câble d’alimentation pendre librement et ne tirez
jamais sur le câble pour le débrancher ; tirez sur la fiche.
15. N’utilisez pas l‘appareil de cuisine :
a. si le câble ou la fiche est endommagé(e)
b. s’il ne fonctionne pas correctement, si l’appareil de cuisine est
tombé ou présente des signes visibles de détérioration.
16. Ne déplacez pas l’appareil de cuisine pendant que vous l’utilisez.
17. Cet appareil de cuisine est conçu exclusivement pour un usage
domestique et en intérieur.
18. N‘essayez jamais de réparer vous-même l‘appareil de cuisine.
Ne remplacez pas ou ne modifiez pas le câble d’alimentation,
l’alimentation ni les autres composants. Consultez toujours un
technicien agréé ou l’assistance téléphonique.
19. Si l‘unité ne fonctionne pas correctement ou est endommagée,
débranchez-la de l’alimentation secteur.
20. Plawa ou le distributeur ne pourra pas être tenu responsable des
dommages causés par une mauvaise utilisation ou une utilisation
inappropriée de l’appareil de cuisine.
21. L’appareil de cuisine n’est pas une friteuse. En aucun cas vous ne
devez tenter de faire frire des aliments dans l’appareil de cuisine.
22. N’insérez pas d’objets dans les orifices situés sur le boîtier de
l’appareil.
23. Débranchez l’appareil de cuisine de l‘alimentation secteur.
a. lorsque vous la nettoyez
b. lorsqu‘elle n’est pas utilisée
c. en cas de coupure de courant
24. Les personnes ayant des connaissances et une expérience limitées
dans l’utilisation de ces appareils et les personnes ayant des
capacités physiques, psychologiques, mentales et sensorielles
limitées, ainsi que les enfants, doivent uniquement utiliser l‘appareil
de cuisine sous la supervision ou l‘instruction d’une personne
responsable en termes de sécurité. Les enfants doivent être sous
surveillance afin de s’assurer qu’ils ne jouent pas avec l’appareil de
cuisine.
25. Cet appareil de cuisine est conçu pour être utilisé pour des
applications domestiques et similaires, comme par exemple,
• dans les cuisines des employés dans les boutiques, bureaux et
autres zones commerciales
• dans les propriétés agricoles
• par les clients dans les hôtels, motels et autres hébergements
• dans les bed & breakfasts
Instructions d’entretien
Manipulez avec soin l’appareil de cuisine et ses accessoires. Les
recommandations ci-dessous vous permettront de préserver votre
garantie et de vérifier sa validité.
1. Éteignez l’appareil de cuisine si vous ne prévoyez pas de l’utiliser
pendant une période prolongée.
2. Laissez l’appareil de cuisine refroidir complètement avant de le
nettoyer.
3. Nettoyez tous les composants et accessoires qui entrent en contact
avec les aliments.
4. Utilisez un tissu doux et légèrement humide pour nettoyer la gorge du
bol en acier inoxydable sur l’appareil de cuisine.
5. Les contacts situés sous le bol en acier inoxydable doivent rester
propres et secs.
6. Tous les accessoires, excepté le bol, peuvent être lavés dans le
lave-vaisselle.
7. Afin d’éviter la formation de germes, nettoyez l’appareil de cuisine et
les joints d’étanchéité après chaque utilisation.
8. N’utilisez jamais de détergent abrasif ou astringent.
9. Chaque repère de graduation sale peut être nettoyé à l’aide de
vinaigre.
10. Il est normal de voir apparaître une décoloration dans les accessoires
en plastique, due à la bêta-carotène présente dans les carottes, les
tomates ou les épices du curry. Vous pouvez réduire légèrement le
phénomène de décoloration en humidifiant un tissu avec de l’huile de
cuisson et en frottant doucement. Rincez ensuite rapidement à l’eau
tiède, puis à l’eau froide avec un peu de liquide vaisselle.
11. Utilisez uniquement l’appareil de cuisine comme indiqué dans le
présent manuel d’utilisation.
Utilisation du présent manuel
d’utilisation
D
GB
FR
Ce symbole indique des avertissements que vous devez lire
avant utilisation :
ES
Affichage et messages d’erreur
Symbole / Question /
Description de l’erreur
IT
PT
Explication
Solution
Le bol en acier inoxydable n’est pas correctement étanche ou
l’interrupteur de sécurité ne fonctionne pas.
Veuillez vérifier à nouveau le joint.
L’appareil de cuisine indique une erreur au niveau du circuit électrique.
Veuillez contacter le centre technique
local. Vous trouverez le numéro de
téléphone sur www.supercook.fr ou dans
les instructions.
Le moteur est surchargé.
Veuillez éteindre la machine de cuisine
et patientez quelques minutes jusqu’à ce
que le chauffage ait refroidi.
L’appareil de cuisine est doté d’un système de contrôle spécial. La vitesse
peut varier et la rotation est interrompue à intervalles de 2 secondes. Cela
signifie que l’appareil de cuisine commence à faire un bruit inhabituel.
Cela est tout à fait normal. Ce bruit signifie que la vitesse du couteau est
réglée pour éviter une surchauffe du moteur.
Retirez une partie du mélange ou
augmentez la vitesse jusqu’à 3 maximum.
Le couteau tout usage en
acier inoxydable fonctionne
très lentement lors de la
préparation de la pâte.
Veuillez vérifier si vous avez dépassé la capacité maximum de 500 g de
farine.
Retirez un peu du mélange du bol en
acier inoxydable.
De la fumée s’échappe de
l’appareil de cuisine.
Le moteur est en surchauffe. Vérifiez le niveau de remplissage maximum.
Retirez un peu du mélange du bol en
acier inoxydable. Laissez l’appareil de
cuisine refroidir pendant environ 20
minutes.
L’appareil de cuisine ne
fonctionne pas avec la
température réglée et la
vitesse réglée sur 5.
La température peut uniquement être réglées pour les vitesses 1 à 4.
Modifiez le réglage de la vitesse de 1
sur 4.
Le bol en acier inoxydable est
difficile à positionner.
A l’usage, le positionnement du bol est plus facile, car le joint en silicone
s’assouplit au contact de la chaleur et de l’humidité, tout en évitant les
fuites.
Passez un peu d’huile de cuisson sur le
joint en silicone pour l’assouplir.
La base du bol montre des
marques et une humidité
résiduelle lors de la livraison.
Tous les modules de l'appareil de cuisine sont testés avant la livraison.
Le bol est rempli d’eau et celle-ci est portée à ébullition. Il peut y avoir de
l’humidité résiduelle. Ces résidus peuvent mener à des marques légères
mais sans incidence sur la base du bol.
Pour retirer les marques, utilisez un
nettoyant pour acier inoxydable.
Bruits lors de la première
utilisation ou en cas de charge
lourde.
Lors de la première utilisation et en cas de surcharge l’appareil peut
émettre des bruits de frottement notamment .
Laissez l’appareil de cuisine refroidir.
L’appareil de cuisine sera pleinement
opérationnel après avoir refroidi.
Bruit des bips.
L' unité émet un bip pour vous indiquer que l’appareil de cuisine a
atteint la bonne température.
Le bip indique aussi que la durée
préprogrammée a expiré.
L’appareil de cuisine s’arrête
lorsque le fouet est utilisé.
La vitesse est irrégulière ou le
moteur est collé.
NL
RUS
AR
HE
Augmentez la vitesse de 1 à 2 ou
de 2 à 3.
39
Présentation des vues avant et arrière de l’appareil de cuisine
1.
2.
3.
4.
5.
6.
7.
Unité de contrôle « Yumi »
Balance de cuisine Libra (accessoire en option)
Bouchon doseur
Couvercle
Bol en acier inoxydable
Fente de ventilation
Bouton Marche / Arrêt
3
2
4
5
1
6
7
40
Présentation de l’unité de contrôle « Yumi »
D
GB
1.
2.
3.
4.
5.
6.
FR
Écran LCD
4 boutons de commande
Sélecteurs rotatifs droit et gauche
Bouton de menu
Emplacement pour cartes SD
Connecteur
ES
IT
1
PT
NL
RUS
3
AR
2
HE
4
5
6
Accessories
Panier de cuisson
Bouchon doseur, Couvercle, Couteau tout usage
en acier inoxydable, Bol en acier inoxydable
Fouet
Spatule
Accessoires en option
•
•
Balance de cuisine numérique Libra de SUPERCOOK
Plateau cuit vapeur Vapore de SUPERCOOK parmi les modèles en plastique ou en porcelaine/verre
Veuillez consulter votre revendeur local ou le site Web www.supercook.fr, si vous avez des questions sur
les accessoires supplémentaires.
Carte SD
41
Mise en route
Symboles généraux
Signification
Calendrier *
Règle la date et le format de la date
Langue *
Sélectionne la langue souhaitée. *Uniquement nécessaire lors de la première mise sous
tension ou après avoir fait remplacer la batterie par le service d’assistance technique.
Confirmer
Confirme la sélection
Retour
Défile vers l’arrière
Prochain
Défile vers l’avant
Start
Contrôle la lecture
Plus
Augmente la durée de la cuisson
Moins
Diminue la durée de la cuisson
Plus bas
Navigation : Vers le bas ou latérale
Plus haut
Navigation : Vers le haut ou latérale
Marche / Arrêt
Bascule l'unité de contrôle sous/hors tension
Quit
Quitte le processus de cuisson pour des raisons de sécurité
Pause
Le processus est interrompu, les réglages sont conservés
Favoris
Appuyez sur ce symbole pour enregistrer la recette sélectionnée dans le menu Favoris.
Stop
Arrête le processus.
Vitesse
Niveaux de vitesse : 1 à 10 et fonction turbo
Temps
•
•
•
•
•
Température
•
•
•
•
42
Durée de cuisson ou de préparation : 1 seconde à 60 minutes max.
Lorsque vous lancez la fonction, l’horloge décompte en affichant la durée sélectionnée sur
l’écran, en minutes et en secondes avec le symbole du temps.
La durée de cuisson ou de préparation peut être réglée à tout moment.
Pour lancer la préparation, vous devez régler la durée.
La température démarre à 40 °C et peut être réglée jusqu’à la température maximale de
130 °C par incréments de 5 °C.
L‘ unité émet un bip pour vous indiquer que la bonne température a été atteinte.
Ce symbole clignote pendant quelques secondes dès que l’appareil de cuisine a atteint la
température réglée.
Si vous préparez des aliments au-dessus de 50 °C, vous devez éviter d’utiliser le bouton Turbo.
Les températures supérieures à 100 °C sont destinées à la cuisson à la vapeur, le poêlage
et l’ébullition.
Continuer
Poursuit la cuisson manuellement après avoir terminé une recette.
Précédent
Revenir à une étape de la recette dans une séquence (Recettes : Cuisson).
Recommencer
Recommence le processus de cuisson à l’étape suivante après avoir arrêter le programme pour
des raisons de sécurité.
Attention
Attention : à lire !
Préparation
D
GB
Bol en acier inoxydable
1. Le bol en acier inoxydable a une capacité de 2 litres et est doté d’une graduation pratique
visible à l’intérieur et à l’extérieur.
2. Une fois le couteau tout usage en acier inoxydable correctement installé dans le bol en
acier inoxydable, placez le bol dans le socle de l’appareil de cuisine. Enfoncez-le ensuite
doucement jusqu’à ce que le bol s’engage avec l’entraînement par engrenage et les
contacts.
FR
ES
IT
PT
NL
RUS
1. Ne remplissez pas le bol au-delà du niveau maximum de 2 litres. Dans le cas contraire, le
bon fonctionnement ne peut être garanti et la qualité de vos plats peut être compromise.
2. Lorsque vous retirez le bol en acier inoxydable de l’appareil de cuisine, veillez à ne pas
renverser son contenu. Si le contenu est chaud, vous risquez de vous brûler.
3. Si le bol en acier inoxydable ne s’engage pas immédiatement avec l’entraînement sur
l’appareil de cuisine, pivotez délicatement la tête du couteau.
AR
HE
Couteau tout usage en acier inoxydable
1. Le couteau tout usage en acier inoxydable est fourni et installé dans le bol en acier
inoxydable.
2. Pour retirer le couteau, placez le bol en position verticale. Poussez sur le levier vers en bas
et vers la gauche pour libérer le couteau. (voir Figure 1)
3. Pour insérer le couteau, mettez-le en position et poussez le levier vers en haut et vers la
droite. (voir Figure 2)
Fig. 1
1. Le couteau est très affûté ! Faites très attention lorsque vous le mettez en place et le
retirez.
2. Vérifiez que le joint d’étanchéité est correctement installé sur le support du couteau. Si le
joint d’étanchéité n’est pas installé, le contenu du bol peut fuire et endommager l’appareil
de cuisine.
3. Lorsque vous ajoutez des aliments, vérifiez que ceux-ci ne bloquent pas le couteau.
4. Laissez le couteau refroidir complètement après chaque processus de cuisson avant de le
retirer.
5. La quantité maximale de préparation est de 500 g de farine pour une pâte à pain ferme.
Fig. 2
Panier de cuisson
1. Le panier de cuisson est utilisé pour cuire à la vapeur de petites quantités
d’aliments et il est installé directement dans le bol en acier inoxydable.
2. Une encoche située sur le côté facilite le retrait du panier de cuisson à l’aide de la
spatule.
43
Préparation
Fouet
1. Le fouet est placé sur le couteau dans l’espace du couteau avec une légère résistance.
2. Le fouet est idéal pour préparer, par exemple, des desserts crémeux, des meringues et de
la crème fouettée.
3. Le fouet peut être utilisé uniquement aux vitesses 1 à 4.
1. Le fouet ne doit pas être utilisé en association avec le bouton Turbo.
2. Lorsque vous ajoutez des aliments, vérifiez que ceux-ci ne bloquent pas le fouet.
3. Le fouet n’est pas adapté pour pétrir une pâte ferme. Utilisez le couteau pour pétrir de la
pâte à pain ou à pizza, par exemple.
4. Le fouet ne doit pas être utilisé en association avec la spatule.
Couvercle
1. Le joint d’étanchéité doit être installé dans le couvercle pour éviter les éventuelles
éclaboussures.
2. Placez le couvercle en diagonale sur le dessus du bol en acier inoxydable.
3. Tournez le couvercle vers la droite jusqu’à ce que l’encoche située en bas de la partie
avant du couvercle s’enclenche dans l’appareil de cuisine.
4. L’appareil de cuisine s’allume uniquement si le couvercle est correctement positionné.
5. Le couvercle a une ouverture supplémentaire pour faciliter l’ajout d’ingrédients
supplémentaires.
Spatule
1. Utilisez cet accessoire pour retirer ou mélanger des ingrédients.
2. La spatule est conçue de telle manière qu’elle n’entre pas en contact avec le
couteau tout usage en acier inoxydable lorsque les ingrédients sont ajoutés par
l’ouverture supplémentaire.
Bouchon doseur
1. Le bouchon doseur a une capacité de 100 ml et est amovible.
a. Il facilite l’ajout d’ingrédients supplémentaires.
b. La température est conservée dès que le bouchon doseur est placé
sur le couvercle.
c. Cela permet de contrôler le débit de vapeur.
1. Retirez uniquement le bouchon doseur pour les vitesses 1 à 3. Dans le cas
contraire, les ingrédients peuvent être projetés et vous risquez de vous brûler.
2. Si vous utilisez une vitesse plus élevée, maintenez bien le bouchon doseur pour
éviter les éclaboussures.
44
Préparation
D
GB
1
Vapore (Plateau cuit vapeur) (accessoire en option)
Le plateau cuit vapeur Vapore est utilisé pour cuire lentement des aliments tout en préservant
leurs vitamines. La cuisson à la vapeur est l’une des façons les plus saines de cuisiner.
2
3
4
Présentation du Vapore
1. Couvercle
2. Plateau cuit vapeur plat
3. Plateau cuit vapeur creux
4. Bac à condensation pour
récupérer les liquides
Bénéfices de la cuisson à la vapeur
1. Les vitamines et les nutriments sont préservés
2. Gain de temps. Permet de préparer plusieurs plats en même temps
3. Alimentation saine, à faible teneur en sel et en graisse
4. Les aliments ne sèchent pas.
5. Les goûts ne se mélangent pas
Utilisation du Vapore
1. Remplissez le bol en acier inoxydable avec 700 ml minimum d’eau ou tout autre liquide de
cuisson à la vapeur, comme un fond.
2. Graissez les bols internes pour éviter que les aliments ne collent.
3. Placez les ingrédients sur les plateaux cuit-vapeur. Assurez-vous que les aliments mettant
plus de temps à cuire sont placés dans le plateau cuit vapeur creux. Laissez certains
orifices dégagés pour laisser monter la vapeur.
4. Placez le Vapore directement sur le couvercle sans le bouchon doseur.
5. Vérifiez que les plateaux cuit vapeur sont empilés l’un sur l’autre et que le couvercle est
correctement installé pour que la vapeur ne s’échappe pas.
FR
ES
IT
PT
NL
RUS
AR
HE
1. Lorsque vous manipulez le plateau cuit vapeur Vapore, n’oubliez pas que de la vapeur
d’eau chaude s’en évapore et qu’il y a du liquide dans le bac à condensation. Attention !
Risque de brûlure !
2. Tenez les bols internes uniquement par les poignées.
3. Faites attention en retirant le bac à condensation.
4. Le bac à condensation est fabriqué en plastique et résiste à la chaleur jusqu’à 90 °C
environ.
5. Le plateau cuit vapeur Vapore n’est pas conçu pour les micro-ondes, fours ou autres
sources de chaleur.
Insertion et retrait de la carte mémoire
Insérez la carte SD fournie dans l’emplacement prévu à cet effet dans l‘unité de contrôle «
Yumi ». Vérifiez que les contacts de la carte SD sont dirigés vers le haut. Enfoncez doucement
la carte SD jusqu’à entendre un clic. Pour retirer la carte SD, enfoncez-la pour l’éjecter et
enlevez-la.
Mise sous/hors tension
Placez l‘unité de contrôle « Yumi » dans le socle de l’appareil de cuisine. Appuyez sur le bouton
Marche / Arrêt (7) et l’appareil de cuisine est prêt à être utilisé.
45
Première mise sous tension de l’unité de contrôle
Lors de la première mise sous tension, vous êtes invité à régler la date, l’heure et la langue affichée à l’écran.
Modifiez les réglages du calendrier et de la langue en procédant comme suit :
1.
1. Utilisez les boutons
et
pour
basculer entre le calendrier et la
langue et utilisez les sélecteurs
rotatifs gauche et droit pour ajuster
les réglages.
2. Confirmez vos réglages en appuyant
sur le bouton
.
2.
Structure du menu
3. Appuyez sur ou tournez un bouton de
commande, sauf le bouton MENU.
Cette opération vous permet de
passer en mode de cuisson manuelle.
4. Utilisez le sélecteur rotatif gauche
pour régler la température souhaitée.
5. Utilisez le sélecteur rotatif droit pour
régler la vitesse.
6. Utilisez les boutons
et
pour
régler la durée manuellement.
7. Le fait d’appuyer sur le bouton
permet d’augmenter la vitesse
pendant une courte période (Turbo).
1. Utilisez les boutons
et
pour
parcourir le menu.
2. Le point
indique la position
actuelle.
3. Confirmez votre sélection en appuyant
sur le bouton
.
4. Si nécessaire, fermez le menu en
appuyant sur le bouton MENU.
Appuyez sur le bouton MENU pour accéder au menu principal.
Réglages
Vous pouvez régler divers réglages dans le sous-menu Réglages.
Date
Horloge
Comment changer la date :
Comment changer l’heure :
1. Dans le menu Réglages, naviguez
avec les boutons
et
et
sélectionnez Date (Date).
2. Utilisez le sélecteur rotatif droit pour
régler la sélection. Utilisez le sélecteur
rotatif gauche pour basculer entre
l’année, le mois et le jour.
3. Appuyez ensuite sur le bouton
pour confirmer.
46
1. Dans le menu Réglages, naviguez
avec les bouton
et
et
sélectionnez Horloge (Time).
2. Utilisez le sélecteur rotatif droit pour
régler la sélection. Utilisez le sélecteur
rotatif gauche pour basculer entre les
heures et les minutes. Dans le même
temps, vous pouvez régler l’heure au
format 12 ou 24 heures.
3. Appuyez ensuite sur le bouton
pour confirmer.
Standby-Timer
Langue
Le mode Standby-Timer vous permet de régler une heure à laquelle
l’appareil de cuisine bascule automatiquement en mode Standby (Veille).
Après 1 minute en mode Standby (Veille), par exemple, l’écran s’éteint si
l’économiseur d’écran n’est pas activé (voir Economiseur d’écran).
Comment changer le mode Standby-Timer :
Comment changer la langue :
D
GB
FR
1. Dans le menu Réglages, naviguez
avec les boutons
et
et
sélectionnez Langue (Language).
2. Utilisez le sélecteur rotatif droit pour
régler la sélection.
3. Appuyez ensuite sur le bouton
pour confirmer.
1. Dans le menu Réglages, naviguez
avec les boutons
et
et
sélectionnez Standby-Timer (Standby
timer).
2. Utilisez le sélecteur rotatif droit pour
régler la sélection.
3. Appuyez ensuite sur le bouton
pour confirmer.
ES
IT
PT
NL
RUS
AR
HE
Volume
Economiseur d’écran
L’économiseur d’écran est activé comme une fonction de l’heure
sélectionnée dans l’élément du menu Standby-Timer. Vous pouvez
utiliser autant d’images personnalisées que vous le souhaitez pour
l’économiseur d’écran. Veuillez noter que seuls des fichiers image
peuvent être utilisés. Enregistrez-les dans le dossier système «
995SAVER » sur votre carte SD. Ils doivent être enregistrés au format
suivant pour pouvoir s’afficher :
Utilisez ce réglage pour régler le volume des bips émis lors de la mise sous/
hors tension de l‘appareil, lorsque celui-ci atteint la température souhaitée
ou lorsque le temps est écoulé.
Comment changer le volume :
1. Dans le menu Réglages, naviguez
avec les boutons
et
et
sélectionnez Volume (Volume).
2. Utilisez le sélecteur rotatif droit pour
régler la sélection.
3. Appuyez ensuite sur le bouton
pour confirmer.
Exemple : XXX00001.jpg
XXX = 3 caractères max.
12345 = 5 chiffres max.
.jpg = format du fichier
Les fichiers doivent être numérotés à la suite et dans l’ordre :
XXX00002.jpg, XXX00003.jpg, etc. La taille de l’image doit correspondre à la résolution d’affichage LCD de 480 x 272 pixels. Les images
qui ne correspondent pas à cette taille sont automatiquement redimensionnées avec les proportions appropriées.
Comment changer l’économiseur d’écran :
1. Dans le menu Réglages, naviguez
avec les boutons
et
et
sélectionnez Economiseur d’écran
(Screen saver).
2. Utilisez le sélecteur rotatif droit pour
régler la sélection. (Stop/ Start)
3. Appuyez ensuite sur le bouton
pour confirmer.
Diaporama
Utilisez ce réglage pour personnaliser l’affichage des images en mode
Economiseur d’écran.
Comment régler le diaporama :
1. Dans le menu Réglages, naviguez
avec les boutons
et
et
sélectionnez Diaporama (Slide show).
2. Utilisez le sélecteur rotatif droit pour
régler la sélection.
3. Appuyez ensuite sur le bouton
pour confirmer.
47
Mode Promotion
Version FW
Le mode Promotion offre un outil de commercialisation supplémentaire
pour les revendeurs. Il permet d’afficher des informations relatives au
produit sur l’écran LCD, lesquelles sont enregistrées dans le dossier
système « 996PROMT ».
Ce réglage vous permet d’afficher la version actuelle du microprogramme, le numéro de série de l’appareil ou un code QR. Vous
trouverez plus d’informations sur la version actuelle du microprogramme sur le site Web www.supercook.fr. Vous devrez fournir le
numéro de série pour toute demande de service et pour enregistrer le
produit sur le site www.supercook.fr.
Si le mode Promotion est sélectionné, toutes les autres fonctions de
l’appareil sont désactivées. Pour quitter le mode Promotion, appuyez
simultanément pendant 10 secondes sur MENU et sur les deux boutons
externes.
Pour des raisons de sécurité, retirez le couteau tout usage en acier
inoxydable lorsque l’appareil de cuisine est exposée dans le magasin.
Comment activer le mode Promotion :
1. Dans le menu Réglages, naviguez
avec les boutons
et
et
sélectionnez Mode Promotion
(In-store promotion mode).
2. Confirmez votre sélection en appuyant
sur le bouton
.
3. Pour quitter le mode Promotion,
appuyez simultanément pendant 10
secondes sur MENU et sur les deux
boutons externes.
Mise à jour de l’unité de
contrôle « Yumi »
Utilisez ce réglage pour mettre à jour le microprogramme de l‘unité
de contrôle « Yumi ». Pour cela, téléchargez le tout dernier microprogramme de l’appareil de cuisine sur le site Web www.supercook.fr.
Extrayez le microprogramme du fichier compressé et copiez-le dans le
répertoire racine de la carte SD.
Comment changer le microprogramme :
1. Insérez la carte SD dans l‘unité de
contrôle :
2. Dans le menu Réglages, naviguez
avec les boutons
et
et
sélectionnez Mise à jour unité de
contrôle (Update control module).
3. Confirmez votre sélection en appuyant
sur le bouton
.
4. Suivez les instructions qui s‘affichent
à l‘écran.
Veuillez allumer, puis éteindre
l‘appareil de cuisine. Après la mise
à jour, le nouveau microprogramme
s’affiche comme indiqué ci-dessous.
48
Affichage des informations du microprogramme :
1. Dans le menu Réglages, naviguez
avec les boutons
et
et
sélectionnez Version FW (FW version).
2. Utilisez le bouton
pour revenir au
menu Réglages.
Recettes : Collection
L’élément de menu Recettes : Collection est votre livre de recettes
numérique, que vous pouvez utiliser comme livre de référence. Il
contient toutes les catégories de recettes, toutes les recettes et les
instructions individuelles. Les catégories sont conçues pour vous
permettre de trouver rapidement les recettes.
Une carte SD permet d’enregistrer au maximum 895 recettes, même
si la mémoire est supérieure à 1 Go. En moyenne, une recette utilise
environ 1 Mo par langue. Une carte SD d’1 Go est fournie avec
l’appareil. Pour enregistrer le nombre maximum de 895 recettes sur le
site www.supercook.fr dans plusieurs langues, il vous faudra une carte
SD d’une capacité plus élevée.
Catégories de recettes
D
GB
1.
Hors d’œuvre
2.
Soupes
3.
Plats principaux – Poissons et viandes
4.
Plats principaux végétariens
IT
5.
Accompagnement
PT
6.
Aliments pour bébés
NL
7.
Sauces chaudes
RUS
8.
Sauces froides
AR
9.
Pâtisseries
HE
10.
Desserts
11.
Boissons
12.
Aliments pour animaux
FR
ES
Comment sélectionner une recette pour la consulter :
1.
2.
1. Utilisez les boutons
et
pour parcourir le menu Recettes :
Collection (Recipe colletion).
2. Confirmez votre sélection en
appuyant sur le bouton
.
3.
3. Un cercle
indique la catégorie
actuelle.
4. Utilisez les boutons
et
pour
parcourir et sélectionner la catégorie
souhaitée.
5. Confirmez votre sélection en
appuyant sur le bouton
.
6. Ou appuyez sur le bouton
si vous
voulez éteindre l‘unité de contrôle.
4.
7.
Utilisez le bouton
pour ajouter la
recette à vos favoris.
8. Utilisez les boutons
pour
parcourir la catégorie sélectionnée et
parcourir les différentes recettes.
9. Utilisez le bouton
pour confirmer
votre sélection.
10. Utilisez les boutons
pour
parcourir les pages de recettes.
11. Utilisez le bouton
pour éteindre
l‘unité de contrôle.
12. Utilisez le bouton MENU pour quitter
le sous-menu Recettes : Collection.
49
Recettes : Cuisson
Dans ce menu, vous pouvez commencer à utiliser l’appareil de cuisine.
Vous pouvez suivre les durées de préparation, les vitesses et les
températures indiquées ou les ajuster vous-même manuellement.
Comment lancer la cuisson :
1.
2.
1. Utilisez les boutons
et
pour
parcourir jusqu’à l’option de menu
Recettes : Cuisson (Recipe cooking).
2. Confirmez votre sélection en
appuyant sur le bouton
.
3.
6. Utilisez le bouton
pour ajouter
cette recette à vos favoris.
7. Utilisez les boutons
pour
parcourir la catégorie sélectionnée et
parcourir les différentes recettes.
8. Lorsque vous avez choisi votre
recette, confirmez votre sélection en
appuyant sur le bouton
.
5.
4.
9. Utilisez le bouton
pour lancer le
processus avec les réglages par défaut.
10. Utilisez le bouton
pour interrompre
le réglage actuel. (Apparaît une fois que
le processus est lancé. Voir étape 9).
11. Utilisez les boutons
et
pour
régler la durée prédéfinie
manuellement.
12. Utilisez le sélecteur rotatif gauche
pour régler la température prédéfinie
manuellement.
13. Utilisez le sélecteur rotatif droit pour
régler la vitesse prédéfinie
manuellement.
6.
14. Le fait d’appuyer sur le bouton
permet d’augmenter la vitesse
pendant une courte période (Turbo).
15. Utilisez le bouton
pour revenir
à l’étape précédente, seulement si
le processus de cuisson n’est pas
encore activé.
50
3. Un cercle
indique la catégorie
actuelle.
4. Utilisez les boutons
et
pour
parcourir et sélectionner la recette
souhaitée.
5. Confirmez votre sélection en
appuyant sur le bouton
.
16. Ce rappel apparaît après 80 % de
la durée de préparation préprogrammée.
17. Appuyez sur le bouton
pour
mettre fin à l’étape et ajouter les
ingrédients. La chauffe s’éteint
automatiquement à la fin de l’étape.
Le moteur continue, en fonction de la
durée du processus de cuisson.
D
GB
FR
ES
IT
7.
PT
8.
18. Vous pouvez désormais choisir
d’utiliser le bouton
pour
poursuivre le processus en cours
avec les nouveaux réglages que vous
avez sélectionnés.
19. Appuyez sur le bouton
pour
continuer avec cette recette.
NL
RUS
AR
HE
OU
9.
20. Si vous voulez poursuivre le
processus manuellement, comme
décrit à l’étape 18, l’image affichée
à gauche apparaît. Une fois que vous
avez procédé aux réglages, l’appareil
de cuisine revient à l’étape 19 et
vous pouvez continuer à suivre les
étapes.
Cette boucle se répète à la fin de
chaque étape.
Réglages de sécurité de
l’appareil de cuisine dans les
options du menu :
Recettes : Cuisson, Recettes :
Favoris et Mes recettes
Réglages préprogrammés
Le message « Cette phase se termine. » s’affiche sur l’écran au bout de 80
% de la durée préprogrammée (20 % restant). Par exemple, si la durée de
préparation est 5 minutes, l’appareil de cuisine émet un bip lorsqu’il ne
reste plus qu‘une minute.
10.
21. Si vous n’intervenez pas avant la fin
de la boucle et si la durée de sécurité
expire, le moteur s’éteint. L’image
affichée à gauche apparaît.
22. Appuyez sur le bouton
et revenez
à l’étape suivante de la recette qui a
déjà commencé.
23. Utilisez le bouton
pour quitter le
mode Recettes : Cuisson.
Si après cette étape vous ne procédez à aucun autre réglage, la chauffe se
coupe automatiquement et l’appareil de cuisine continue de fonctionner
pendant 1 à 5 minutes supplémentaires, selon la longueur de l’étape de
la recette. Cela empêche les aliments d’attacher, si possible. Une fois ce
temps écoulé, l’appareil de cuisine quitte automatiquement la recette et
revient à la présentation des catégories. Vous avez désormais la possibilité
d’utiliser le bouton
pour revenir à l’étape suivante de la recette ou
d’arrêter totalement le processus de cuisson à l’aide du bouton
.
Si vous réglez manuellement la durée de préparation de la recette
préprogrammée en ignorant l’invite de sécurité (20 % restant de la durée
préprogrammée), alors le message « Cette phase se termine. » ne s’affiche
pas. Cependant, les autres mécanismes de sécurité décrits ci-dessus se
déclenchent. La chauffe se coupe à la fin de la durée de préparation. Le
moteur s’arrête au bout d’une période définie.
51
Recettes : Favoris
Aide
Dans ce menu, vous trouverez tous vos favoris. Afin de lancer le
processus de cuisson dans le menu Recettes : Favoris, suivez la
description sous Recettes : Cuisson.
Cette option du menu fournit des explications sur les symboles utilisés dans
l‘unité de contrôle « Yumi ».
Cela vous permet d’accéder à vos favoris :
1. Utilisez les boutons
et
pour
parcourir le menu Aide (Help).
2. Confirmez votre sélection en appuyant
sur le bouton .
1. Utilisez les boutons
et
pour
parcourir le menu Recettes : Favoris
(Recipe favorites).
2. Confirmez votre sélection en appuyant
sur le bouton
.
Mes recettes
Terminées les collections de recettes sur feuilles volantes, découpées
dans les journaux ou téléchargées sur Internet. L’appareil de cuisine
est votre livre de recettes personnel. Vous pouvez créer, cuisiner,
apprécier et collectionner vos propres recettes. Découvrez comment il
fonctionne sur www.supercook.fr.
Afin de lancer le processus de cuisson dans le menu Mes recettes,
suivez la description sous Recettes : Cuisson.
1. Utilisez les boutons
et
pour
parcourir jusqu’à l’option de menu
Mes recettes (My recipes).
2. Confirmez votre sélection en appuyant
sur le bouton
.
3. Sélectionnez la catégorie et suivez les
instructions décrites sous Recettes :
Cuisson (Recipe cooking).
52
Instructions importantes avant
de commencer
1. Utilisez toujours l’appareil de cuisine sur une surface plane, propre,
stable et qui n’émet pas de chaleur.
2. Retirez tout l’emballage.
3. Nettoyez tous les accessoires.
4. Ne mettez jamais votre main dans l’appareil de cuisine pendant qu’il
fonctionne.
5. Assurez-vous que les joints d’étanchéité utilisé sont toujours propres et
ne sont pas endommagés.
6. L’appareil de cuisine est doté d’un mécanisme de sécurité interne. Si le
bol en acier inoxydable n’est pas correctement installé sur l’appareil de
cuisine, il ne fonctionnera pas.
7. Débranchez l’appareil de cuisine de l‘alimentation secteur.
a. si l’appareil est endommagé ou présente un dysfonctionnement
b. si l’appareil de cuisine est tombé
c. si les composants sont visiblement endommagés ou si
l’alimentation est défectueuse.
8. Ne laissez pas l‘appareil de cuisine sans surveillance.
9. Utilisez uniquement les accessoires recommandés par plawa.
Nettoyage
1. Nettoyez l’appareil de cuisine avant la première utilisation et après
chaque utilisation, et nettoyez tous les composants et accessoires qui
entrent en contact avec les aliments. Assurez-vous que l’appareil de
cuisine a bien refroidi avant de commencer à le nettoyer.
2. Retirez la fiche secteur de la prise avant le nettoyage.
3. Les contacts situés en bas du bol en acier inoxydable doivent
également rester propres et secs.
4. Le couteau est très affûté ! Aussi, faites très attention lorsque vous le
mettez en place et le retirez.
5. Tous les accessoires peuvent être lavés dans le lave-vaisselle.
6. Afin d’éviter la formation de germes, nettoyez l’appareil de cuisine et les
joints d’étanchéité après chaque utilisation.
7. Utilisez un tissu doux et légèrement humide pour nettoyer la gorge du
bol en acier inoxydable sur l’appareil de cuisine.
8. N’utilisez pas de détergent abrasif ou astringent. Ceux-ci pourraient
endommager la surface.
9. Il est normal de voir apparaître une décoloration dans les accessoires
en plastique, due à la bêta-carotine présente dans les carottes, les
tomates ou les épices du curry. Vous pouvez réduire légèrement le
phénomène de décoloration en humidifiant un tissu avec de l’huile de
cuisson et en frottant doucement. Rincez rapidement à l’eau tiède, puis
à l’eau froide avec un peu de liquide vaisselle.
Spécifications techniques
Appareil de cuisine SUPERCOOK
Consommation électrique
Cuisson
Mélange
1000 watts
500 watts
Capacité
2 litres
Température minimale
40 °C
Température maximale
130 °C
Niveaux de vitesse
10 + turbo
Vitesse de mélange
20.000 tr/min
Bips
Oui
Tension principale/
Fréquence
230 V~50 Hz
Module de commande
Connexion
Ecran LCD pour l‘unité de
contrôle
Fiche 5 V à brancher
Copyright
Copyright 2013 Ce manuel d’utilisation contient des informations protégées
par des droits d’auteur. Tous droits réservés Aucune partie de ce manuel
d’utilisation ne peut être reproduite, quelques soient les moyens et sous
quelque forme que ce soit, manuellement, électroniquement ou autre,
sans le consentement écrit préalable du fabricant. SUPERCOOK est une
marque de plawa-feinwerktechnik GmbH & Co. KG.
Mise au rebut des appareils
électriques usagés
Ce symbole présent sur le produit ou l’emballage indique que ce produit
ne doit pas être mis au rebut avec les déchets ménagers normaux ; il doit
être déposé dans un point de collecte des déchets prévu pour le recyclage
des appareils électriques et électroniques. Pour plus d’informations,
contactez votre mairie, les centres d’élimination des déchets proches de
chez vous ou le magasin dans lequel vous avez acheté le produit.
GB
FR
ES
IT
PT
NL
RUS
AR
HE
4.3 inches
Carte mémoire
Capacité de la mémoire
Déclaration de conformité
1 Go -> 32 Go
Vapore (Plateau cuit vapeur)
(en option)
Dimensions
Environ : 23,1 x 19,2 cm (comparable au
format A4)
Nous garantissons que le produit spécifié est conforme aux directives
LVD 2009/95/CE, EMC 2004/108/CE et RoHS 2011/65/EU
EN 60335-2-14: 2006+A1:2008+A11:2012
EN 60335-2-15: 2002+A1:2005+A2:2008+A11:2012
EN 60335-1: 2012
EM 62233: 2008
EN 55014-1/A1: 2009
EN 55014-2/A2:2008
EN 61000-3-2/A2:2009
EN 61000-3-3:2008
Dans le cadre de notre développement constant, nous nous réservons le
droit de changer le produit, et notamment les accessoires, l’emballage, les
instructions et le livre de recettes, à tout moment et sans avis préalable.
D
Service technique et clientèle
Avez-vous besoin d‘aide ? Si vous avez d’autres questions, veuillez consulter
le site Web www.supercook.fr, contactez notre ligne d’assistance en ligne ou
consultez le revendeur auprès duquel vous avez acheté l‘appareil de cuisine.
Ligne tél. SAV & Réparation (UE)
00800 75292 100
(N° gratuit)
Service en ligne / Contact international
Internet : www.supercook.fr
E-mail : [email protected]
Pour les retours de produits, un numéro RMA sera nécessaire
(Autorisation de retour de marchandises) et doit être indiqué clairement
sur l’emballage de retour. D’autres informations pour le retour des
aliments sont disponibles par téléphone via les lignes d’assistance ou via
« SAV et Assistance » sur le site Web SUPERCOOK
Fabricant
plawa-feinwerktechnik GmbH & Co. KG
Bleichereistr. 18
73066 Uhingen
Germany
53
54
Manual del usuario SUPERCOOK
D
Español
FR
GB
ES
Índice
Introducción
Ejemplo de usos del robot de cocina
Instrucciones para un uso seguro del producto
Manipulación del robot de cocina
Explicación de las instrucciones de uso
Pantalla y mensajes de error
Vista delantera y posterior del robot de cocina
La unidad de control “Yumi”
Accesorios
Accesorios opcionales
Primeros pasos
Preparación
Recipiente de acero inoxidable
Cuchillas de acero inoxidable
Cesta
Paleta mezcladora
Tapa
Espátula
Tapón dosificador
Vapore (accesorio opcional)
Ventajas de la cocina al vapor
Modo de uso del Vapore
Inserción y extracción de la tarjeta de memoria
Encendido y apagado
Primer encendido de la unidad de control
Estructura de los menús
IT
PT
56
56
56
56
57
57
58
59
59
59
60
61
61
61
61
62
62
62
62
63
63
63
63
63
64
64
Configuración
Fecha
Hora
Temporizador de apagado
Protector de pantalla
Idioma
Volumen
Presentación de diapositivas
Modo promocional
Actualización de la unidad de control “Yumi”
Versión del firmware
Colección de recetas
Categorías de receta
Preparar recetas
Configuraciones de seguridad del robot de
cocina entre las opciones del menú: Preparar
recetas, Recetas favoritas y Mis recetas
Ajustes preprogramados
Recetas favoritas
Mis recetas
Ayuda
Antes de empezar: lea estas
instrucciones importantes
Limpieza
Características técnicas
Atención al cliente y servicio técnico
Copyright
Desecho de los dispositivos electrónicos usados
Declaración de conformidad
64
64
64
65
65
65
65
65
66
66
66
67
67
68
NL
RUS
AR
HE
69
69
70
70
70
70
70
71
71
71
71
71
55
Introducción
Gracias por haber adquirido el robot de cocina SUPERCOOK. Lea detenidamente el manual del usuario y guárdelo bien para poder consultarlo
en el futuro. Esperamos que disfrute con su robot de cocina y que guise
platos deliciosos.
Ejemplo de usos del robot de cocina
• Puré de frutas, verduras, sopas y salsas
• Mezclar batidos y cócteles.
• Pulverizar azúcar y guindillas
• Moler almendras y avellanas
• Rallar frutas y verduras
• Picar cebollas y frutos secos
• Emulsionar mayonesas y cremas con la paleta mezcladora
• Rallar queso, pan y patatas
• Mezclar masas ligeras, merengues y nata montada
• Amasar levadura y masa de pan
• Calentar, freír y cocinar a temperaturas de 40 °C a 130 °C.
• Cocinar al vapor en la bandejas Vapore o en la cesta
Instrucciones para un uso seguro
del producto
Antes de estrenar el robot de cocina, es muy importante que observe las
siguientes medidas de seguridad:
1. Antes de empezar: Saque de la caja el robot de cocina y todos sus
accesorios.
2. No instale el robot de cocina sobre superficies húmedas.
3. La única forma de garantizar un funcionamiento seguro del robot de
cocina es conectándolo a la toma de corriente con un enchufe normal
de 3 clavijas. Confirme que su red eléctrica tenga la potencia y el
voltaje indicados en la etiqueta del robot de cocina. Una conexión
incorrecta anularía la garantía.
4. Con todos los aparatos eléctricos, existe el riesgo de electrocutarse,
con las consiguientes lesiones o incluso la muerte. Por lo tanto, es
muy importante que siga siempre las instrucciones de seguridad.
5. plawa o su distribuidor declinan toda responsabilidad por los daños
motivados por un suministro eléctrico insuficiente o una instalación
eléctrica incorrecta en el edificio. En caso de duda, consulte a un
electricista.
6. No deje nunca al alcance de los niños el embalaje, sobre todo la
película transparente, las bolsas y el poliestireno.
7. La primera vez que lo utilice es posible que produzca un olor
particular. No es peligroso.
8. No sumerja en agua el robot de cocina, la unidad de control ni el cable
de alimentación.
9. No tape nunca el robot de cocina con paños, trapos, etc.
10. Colóquelo a una distancia suficiente de otras fuentes de calor (los
fogones, por ej.) para evitar que se estropee el aparato.
11. Este robot de cocina no es un juguete y no debe dejarse al alcance de
los niños.
12. Coloque el cable de forma que no quede aplastado o retorcido, y que
no toque superficies calientes.
13. Si utiliza un alargador:
a. el cable debe tener toma de tierra y
b. tome todas las precauciones necesarias para que nadie pueda
tropezarse con el cable.
14. No deje nunca colgando el cable de alimentación y no tire de él para
desenchufarlo, tire siempre del enchufe.
15. No utilice el robot de cocina:
a. si el cable de alimentación está dañado,
b. si no funciona bien, si el robot de cocina se ha caído o si tiene
daños visibles.
16. No mueva el robot de cocina mientras esté en funcionamiento.
17. Este robot de cocina está indicado únicamente para uso doméstico y
en interiores.
56
18. No intente nunca reparar el robot de cocina por su cuenta. No cambie
ni modifique el cable de alimentación, la fuente de alimentación ni
ninguna otra pieza. Consulte siempre a un técnico autorizado o llame
a nuestra Línea de Atención al Cliente.
19. Si la unidad no funciona bien o se avería, desenchúfela de la toma de
corriente.
20. plawa y su distribuidor declinan toda responsabilidad por los daños
debidos a un manejo incorrecto o inadecuado del robot de cocina.
21. El robot de cocina no es una freidora. Bajo ningún concepto intente
freír alimentos en el robot de cocina.
22. No inserte objetos en las aberturas de la carcasa del robot.
23. Desenchufe el robot de cocina de la red eléctrica:
a. cuando lo limpie,
b. cuando no lo utilice y
c. en caso de un corte de corriente.
24. Los niños, las personas de experiencia o conocimiento limitado del
manejo de dispositivos de este tipo y las personas con una capacidad
física, psicológica, mental y sensorial limitada solamente deben
manejar el robot de cocina bajo la supervisión de una persona que
pueda hacerse responsable de su seguridad. Se debe vigilar que los
niños no jueguen con el robot de cocina.
25. Este robot de cocina está diseñado para ser utilizado como electrodoméstico, por ejemplo:
• en las cocinas para empleados de tiendas, oficinas y otras zonas
comerciales,
• en explotaciones agrícolas,
• para ser utilizado por los clientes de hoteles, moteles, otros
alojamientos
• en pensiones y bed and breakfast.
Manipulación del robot de cocina
Maneje el robot de cocina y sus accesorios con cuidado. Las siguientes
recomendaciones le ayudarán a conservar el producto en las condiciones
adecuadas para disfrutar de los derechos de la garantía.
1. Apague el robot de cocina si no tiene previsto usarlo durante un
tiempo.
2. Antes de limpiar el robot de cocina, espere a que esté totalmente frío.
3. Limpie todas las piezas y accesorios que hayan tocado alimentos.
4. Utilice un paño suave y ligeramente humedecido para limpiar el hueco
del recipiente en el robot de cocina.
5. Mantenga siempre secos y limpios los contactos que hay debajo del
recipiente.
6. Todos los accesorios se pueden lavar en el lavavajillas.
7. Para evitar que aparezcan gérmenes, limpie el robot de cocina y los
anillos de estanquidad después de cada uso.
8. No utilice nunca detergentes abrasivos ni astringentes.
9. Las manchas de cal se pueden quitar con vinagre.
10. Es normal que los accesorios de plástico pierdan un poco el color
debido al beta-caroteno de las zanahorias y los tomates o a las
especias del curry. Para reducir un poco la decoloración, humedezca
un trapo con aceite de cocina y frote la zona con suavidad. Después,
aclárela con agua caliente, después con agua fría y con un poco de
detergente lavaplatos.
11. Utilice únicamente el robot de cocina tal y como se explica en estas
instrucciones de uso.
Explicación de las instrucciones
de uso
D
GB
FR
Este símbolo señala las advertencias que debe leer antes de
usarlo:
ES
Pantalla y mensajes de error
Símbolo / Pregunta /
Descripción del error
IT
PT
Explicación
Solución
El recipiente no está cerrado correctamente o el cierre de seguridad no
funciona.
Revise el cierre.
El robot de cocina presenta un error en el circuito eléctrico.
Póngase en contacto con el servicio
técnico. Encontrará el número de teléfono
en www.supercook.es. o en las
instrucciones
El motor se ha sobrecalentado.
Apague el robot de cocina y espere unos
minutos hasta que se enfríe el motor.
El robot de cocina tiene un sistema de control especial. La velocidad
puede variar y la rotación se interrumpe con intervalos de 2 segundos. Por
eso el robot empieza a hacer un ruido insólito. Este fenómeno es normal.
Ese ruido significa que está ajustando la velocidad de las cuchillas para
impedir que se recaliente el motor.
Saque del recipiente parte de la mezcla o
aumente la velocidad (a 3 como máximo).
Las cuchillas giran muy
despacio cuando preparo
masa.
Compruebe que no haya introducido más de 500 g de harina
(cantidad máxima permitida).
Saque del recipiente parte de la mezcla.
El robot de cocina echa humo.
El motor se ha sobrecalentado. Compruebe que no haya superado el nivel
máximo de llenado.
Saque del recipiente parte de la mezcla.
Dejar enfriar el robot unos 20 minutos.
El robot de cocina no
funciona con la temperatura
seleccionada y la velocidad
configurada en 5.
Solamente se puede utilizar temperatura entre las velocidades 1 y 4.
Cambie la configuración de la velocidad
por la de un nivel comprendido entre el
1 y el 4.
Cuesta mucho encajar el
recipiente en su sitio.
La colocación del recipiente se va haciendo más fácil con el uso, pues la
junta de silicona va moldeándose con el calor y la humedad, aunque sin
dejar de mantener su función.
Frote con un poco de aceite de cocina o
humedezca la junta de silicona.
¿Este robot de cocina ha sido
utilizado? El recipiente me ha
llegado con marcas y restos de
humedad.
Antes de entregarlos probamos todos los robots de cocina. Llenamos
el recipiente de agua y la hacemos hervir. Por eso puede quedar algo
de humedad, como ocurre con los lavavajillas. Estos residuos pueden
producir unas marcas, ligeras y totalmente seguras, en la base del
recipiente de acero inoxidable.
Para quitar las marcas, utilice un
limpiador normal para acero inoxidable.
El robot de cocina se detiene
cuando se utiliza la paleta
mezcladora.
La velocidad es irregular o el
motor se atasca.
RUS
AR
HE
Aumente la velocidad un nivel (de 1 a 2
o de 2 a 3).
La primera vez que la he usado La primera vez que se usa el robot, y cuando está muy lleno, el motor
o cuando está muy cargado
puede calentarse y emitir ruidos extraños. Como todo motor eléctrico (igual
hace ruidos insólitos.
que un tren eléctrico, por ej.), utiliza escobillas que necesitan un cierto
“rodaje”. Esos ruidos no deben en absoluto preocuparle.
Deje que se enfríe el robot de cocina
después de algún trabajo especialmente
duro (amasar una masa espesa, por ej.).
El robot estará plenamente operativo en
cuanto se haya enfriado.
Señal acústica.
La señal acústica también indica que se
ha acabado el tiempo preprogramado.
La unidad emite una señal acústica para indicarle que el robot ha
alcanzado la temperatura correcta.
NL
57
Vista delantera y posterior del robot de cocina
1.
2.
3.
4.
5.
6.
7.
Unidad de control “Yumi”
Balanza de cocina Libra (accesorio opcional)
Tapón dosificador
Tapa
Recipiente de acero inoxidable
Ranura de ventilación
Botón Conectar / Desconectar
3
2
4
5
1
6
7
58
La unidad de control “Yumi”
D
GB
1.
2.
3.
4.
5.
6.
FR
Pantalla LCD
4 pulsadores
Mando izquierdo y derecho de navegación
Pulsador MENÚ
Ranura para tarjetas SD
Toma de conexión
ES
IT
1
PT
NL
RUS
3
AR
2
HE
4
5
6
Accesorios
Cesta
Tapón dosificador, Tapa, Cuchillas de acero
inoxidable, Recipiente de acero inoxidable
Paleta mezcladora
Espátula
Accesorios opcionales
•
•
Balanza digital de cocina Libra para SUPERCOOK
Set Vapore SUPERCOOK de bandejas para cocinar al vapor para modelos de porcelana/vidrio
Si tiene alguna duda sobre otros accesorios, diríjase a su distribuidor local o vaya a www.supercook.es.
Tarjeta SD
59
Primeros pasos
Símbolos generales
Significado
Calendario*
Para configurar la fecha y su formato
Idioma*
Para seleccionar el idioma deseado. * Solo hace falta la primera vez que se enciende o
después de que el técnico haya cambiado la batería.
Confirmar
Para confirmar la selección
Anterior
Para retroceder en la pantalla
Siguiente
Para avanzar en la pantalla
Iniciar / Reproducir
Para controlar la reproducción
Más
Para aumentar el tiempo de cocinado
Menos
Para reducir el tiempo de cocinado
Hacia abajo
Desplazamiento en la pantalla: hacia abajo o hacia los lados
Hacia arriba
Desplazamiento en la pantalla: hacia arriba o hacia los lados
Conectar /
Desconectar
Enciende o apaga la unidad de control
Salir
Finaliza el proceso de cocción por motivos de seguridad
Pausa
Se para momentáneamente el proceso pero guardando la configuración
Favoritos
Al pulsar este símbolo se guarda la receta seleccionada en el menú Favoritos.
Parar
Detiene el proceso.
Velocidad
Velocidades: de 1 a 10 y función de turbo
Hora
•
•
•
•
•
•
Temperatura
•
•
•
60
Tiempo de cocción o proceso: desde 1 segundo hasta 60 minutos
Cuando inicie la función, el reloj empezará la cuenta atrás con el tiempo seleccionado
mostrado en la pantalla (en minutos y segundos) con el símbolo de un reloj.
Puede ajustar el tiempo de cocinado o procesado en cualquier momento.
Para iniciar el proceso, tiene que configurar el tiempo.
La temperatura mínima es de 40 °C y se puede ajustar hasta un máximo de 130 °C a
incrementos de 5 °C.
La unidad emite una señal acústica para indicar que ha alcanzado la temperatura
correcta.
Este símbolo se pone intermitente unos segundos en cuanto el robot de cocina ha
alcanzado la temperatura configurada.
Cuando cocine a más de 50 °C, intente no utilizar el botón Turbo.
Las temperaturas superiores a los 100 °C sirven para cocinar al vapor, freír y hervir.
Continuar cocinando
Le permite seguir cocinando manualmente al terminar una fase de la receta.
Un paso atrás
Para retroceder al paso anterior de la receta (en Preparar recetas).
Reiniciar
Después de haber detenido el proceso como medida de seguridad, vuelve a iniciarlo en el paso
siguiente a cuando se detuvo.
Advertencia
¡Observe siempre las advertencias!
Preparación
D
GB
Recipiente de acero inoxidable
1. El recipiente posee una capacidad de 2 litros y tiene una escala de medición muy práctica
por dentro y por fuera.
2. Después de instalar correctamente las cuchillas en el recipiente, coloque el recipiente en
el hueco correspondiente del robot de cocina. Empújelo hacia abajo con cuidado hasta
que el recipiente de acero inoxidable encaje en su sitio y en los contactos.
FR
ES
IT
PT
NL
RUS
1. No llene el recipiente por encima del nivel máximo (2 litros). Si lo llena más, no se puede
garantizar un funcionamiento seguro ni la calidad del guiso.
2. Cuando saque el recipiente del robot de cocina, tenga cuidado para que no se vierta nada.
Si su contenido está caliente usted podría quemarse.
3. Si el recipiente no ha encajado inmediatamente en el robot de cocina, gire despacio el
cabezal de las cuchillas.
AR
HE
Cuchillas de acero inoxidable
1. Las cuchillas vienen de fábrica instaladas en el recipiente.
2. Para quitar las cuchillas, ponga el recipiente en posición vertical. Empuje la palanca hacia
abajo y hacia la izquierda para soltar las cuchillas (véase la Figura 1).
3. Para insertar las cuchillas, póngalas en su sitio y empuje la palanca hacia arriba y hacia la
derecha (véase la Figura 2).
Fig. 1
1. ¡Las cuchillas están muy afiladas! Tenga mucho cuidado cuando las instale y desinstale.
2. Compruebe siempre que el anillo de estanquidad esté bien encajado en el soporte de las
cuchillas. Si no lo está, podría derramarse el contenido del recipiente y averiar el robot de
cocina.
3. Cuando ponga los ingredientes en el recipiente, vigile que no impidan el movimiento de las
cuchillas.
4. Cuando termine de cocinar, espere a que las cuchillas se hayan enfriado totalmente antes
de sacarlas.
5. Lo máximo que pueden procesar las cuchillas son 500 g de harina para una masa de pan
bien espesa.
Fig. 2
Cesta
1. La cesta sirve para cocinar al vapor pequeñas cantidades y se instala directamente
en el recipiente.
2. Hay un enganche en el lateral que facilita la extracción de la cesta con ayuda de la
espátula.
61
Preparación
Paleta mezcladora
1. La paleta mezcladora se introduce sobre el cabezal de las cuchillas suavemente.
2. La paleta mezcladora es idónea para hacer postres cremosos, merengues y nata
montada, por ejemplo.
3. Solamente se puede utilizar la paleta mezcladora a velocidades comprendidas entre 1 y 4.
1. La paleta mezcladora no debe utilizarse en combinación con el botón Turbo.
2. Cuando ponga los ingredientes en el recipiente, vigile que no impidan el movimiento de la
paleta.
3. La paleta mezcladora no sirve para amasar masas muy densas. Para amasar masas de
pan o de pizza, por ejemplo, use solo las cuchillas.
4. La paleta mezcladora no debe utilizarse en combinación con la espátula.
Tapa
1. El anillo de estanquidad debe estar bien encajado en la tapa para evitar derrames.
2. Ponga la tapa encima del recipiente, en diagonal.
3. Gire la tapa en sentido horario hasta que la muesca de la parte inferior delantera de la
tapa encaje en la ranura correspondiente del robot.
4. El robot de cocina solamente se puede encender cuando la tapa está correctamente
colocada.
5. La tapa tiene una abertura arriba para facilitar la introducción de más ingredientes.
Espátula
1. Use este accesorio para sacar o mezclar ingredientes.
2. La espátula está diseñada de forma que no toque nunca las cuchillas cuando se
añaden ingredientes a través de la abertura de la tapa.
Tapón dosificador
1. El tapón dosificador tiene 100 ml de capacidad y es extraíble.
a. Así es más fácil añadir ingredientes.
b. La temperatura se mantiene cuando el tapón dosificador está instalado en la tapa.
c. Así se puede controlar la salida de vapor.
1. Solamente puede quitar el tapón dosificador cuando el robot esté funcionando a una
velocidad comprendida entre 1 y 3. A mayor velocidad, existe el riesgo de quemaduras
porque los ingredientes podrían salirse del recipiente.
2. Cuando utilice una velocidad más alta, sujete bien tapón dosificador para evitar que se
derrame el contenido.
62
Preparación
D
GB
1
Vapore (accesorio opcional)
El set de bandejas Vapore sirve para cocinar suavemente los alimentos sin que pierdan sus
vitaminas. La cocina al vapor es una de las más sanas.
2
3
4
Elementos del Vapore (Set de
bandejas para cocinar al vapor)
1. Cubierta
2. Bandeja plana para cocinar al
vapor
3. Bandeja honda para cocinar al
vapor
4. Acumulador de vaho para captar
los fluidos
Ventajas de la cocina al vapor
1. Se conservan las vitaminas y los nutrientes.
2. Ahorra tiempo, pues se pueden cocinar varios platos a la vez.
3. Alimentos saludables, con bajo contenido en sal y en grasas.
4. Los alimentos conservan la humedad.
5. No se mezclan los sabores.
Modo de uso del Vapore
1. Llene el recipiente (700 ml como mínimo) de agua o de otro líquido que se evapore, como
caldo, por ej.
2. Untar la parte interior de las bandejas para que la comida no se pegue.
3. Ponga los ingredientes en las bandejas para cocinar al vapor. Coloque siempre en la
bandeja honda los alimentos que tarden más en hacerse. Deje abiertos algunos orificios
para que suba el vapor.
4. Ponga el Vapore (Set de bandejas) directamente en la tapa sin el tapón dosificador.
5. Confirme que las bandejas encajen entre ellas y que la tapa esté bien colocada para que
no pueda salirse el vapor.
FR
ES
IT
PT
NL
RUS
AR
HE
1. Cuando maneje el Vapore (Set de bandejas), recuerde siempre que de él sale vapor y que
hay líquidos en el acumulador de vaho. Advertencia: ¡Riesgo de quemaduras!
2. Sujete las bandejas solamente por las asas.
3. Tenga cuidado al sacar el acumulador de vaho.
4. El acumulador de vaho está realizado en plástico resistente al calor
(hasta un máximo de 90 °C).
5. El Vapore (Set de bandejas) no se puede utilizar en microondas, en hornos ni con otras
fuentes de calor.
Inserción y extracción de la tarjeta de
memoria
Inserte la tarjeta SD en dotación en la ranura de la unidad de control “Yumi”. Los contactos de
la tarjeta SD deben estar hacia arriba. Empuje suavemente la tarjeta SD hasta oír un clic. Para
sacarla, empuje la tarjeta SD hasta que se expulse y tire de ella.
Encendido y apagado
Coloque la unidad de control “Yumi” en su correspondiente alojamiento en el robot de cocina.
Pulse el botón Conectar / Desconectar (7) y el robot de cocina estará listo para ser utilizado.
63
Primer encendido de la unidad de control
La primera vez que la encienda, aparecerá un mensaje pidiéndole que configure la fecha/hora y el idioma de la pantalla.
Instrucciones para cambiar los ajustes del calendario y del idioma:
1.
1. Utilice los botones
para
alternar entre calendario e idioma.
Para configurar los ajustes, utilice los
mandos de navegación.
2. Para confirmar su ajuste, presione el
pulsador
.
2.
Estructura de los menús
3. Pulse o gire cualquier botón excepto
el botón MENÚ. De este modo llegará
a la modalidad de Cocina manual.
4. Para configurar la temperatura, utilice
el mando izquierdo.
5. Para ajustar la velocidad, utilice el
mando derecho.
6. Use los botones
para
configurar la hora manualmente.
7. Si pulsa el botón
aumenta la
velocidad durante unos instantes
(Turbo).
1. Utilice los botones
para
desplazarse por el menú.
2. El punto
indica la posición actual.
3. Para confirmar su selección, presione
el pulsador .
4. Si es necesario, cierre el menú
presionando el pulsador MENÚ.
Pulse el botón MENÚ para ir al menú principal.
Configuración
Puede ajustar diversas opciones en el submenú Configuración.
Fecha
Hora
Cómo cambiar la fecha:
Cómo cambiar la hora:
1. Desplácese por el menú Configuración con los pulsadores
y
seleccione Fecha (Date).
2. Para ajustar la selección, utilice el
mando derecho. Para alternar entre
año, mes y día, utilice el mando
izquierdo.
3. Después, presione el pulsador
para confirmar.
64
1. Desplácese por el menú Configuración con los pulsadores
y
seleccione Hora (Time).
2. Para ajustar la selección, utilice el
mando derecho . Para alternar entre
horas y minutos, utilice el mando
izquierdo. Puede configurar el formato
de la hora (reloj de 12 o de 24 horas)
a la vez.
3. Después, presione el pulsador
para confirmar.
Temporizador de apagado
Idioma
La opción Temporizador de apagado le permite configurar el tiempo que
esperará el robot para pasar al modo Reposo de forma automática. Si
configura 1 minuto, por ejemplo, al cabo de 1 minuto de inactividad se
apagará pantalla si no hay ningún protector de pantalla activado (véase
“Protector de pantalla”).
Cómo cambiar el idioma:
D
GB
FR
1. Desplácese por el menú Configuración con los pulsadores
y
seleccione Idioma (Language).
2. Para ajustar la selección, utilice el
mando derecho
3. Después, presione el pulsador
para confirmar.
Cómo cambiar el Temporizador de apagado:
1. Desplácese por el menú Configuración con los pulsadores
y
seleccione Temporizador de apagado
(Standby timer).
2. Para ajustar la selección, utilice el
mando derecho.
3. Después, presione el pulsador
para confirmar.
ES
IT
PT
NL
RUS
AR
HE
Volumen
Protector de pantalla
El protector de pantalla se activa en función del tiempo seleccionado
en la opción de menú Temporizador de apagado. Puede utilizar como
protector de pantalla cualquier imagen personalizada. Recuerde que
solamente se admiten archivos de imágenes. Guarde las imágenes en
la carpeta „995SAVER“ de su tarjeta SD. Para que funcionen, tiene que
guardarlas en el siguiente formato:
Ejemplo: XXX00001.jpg
“XXX” = 3 caracteres como máximo
“12345” = 5 cifras como máximo
.jpg = formato del archivo
Sirve para ajustar el volumen de las señales acústicas que emite el
dispositivo al encenderse/apagarse, cuando alcanza la temperatura deseada
o cuando ha terminado el tiempo programado.
Cómo cambiar el volumen:
1. Desplácese por el menú Configuración con los pulsadores
y
seleccione Volumen (Volume).
2. Para ajustar la selección, utilice el
mando derecho
3. Después, presione el pulsador
para confirmar.
Tiene que numerar correlativamente los archivos: XXX00002.jpg,
XXX00003.jpg, y así sucesivamente. La imagen debe tener el tamaño
adecuado para la resolución de la pantalla LCD (480 x 272 píxeles). Las
imágenes que no tengan ese tamaño se recortarán automáticamente
para obtener la proporción adecuada.
Cómo cambiar el protector de pantalla:
1. Desplácese por el menú Configuración con los pulsadores
y seleccione Protector de pantalla
(Screen saver).
2. Para ajustar la selección, utilice el
mando derecho (Parar/Reproducir).
3. Después, presione el pulsador
para confirmar.
Presentación de diapositivas
Le permite personalizar la presentación de imágenes en la modalidad
Protector de pantalla.
Cómo ajustar la presentación de diapositivas:
1. Desplácese por el menú Configuración con los pulsadores
y seleccione Presentación de
diapositivas (Slide show).
2. Para ajustar la selección, utilice el
mando derecho.
3. Para confirmar su selección, presione
el pulsador
.
65
Modo promocional
Versión del firmware
El Modo promocional es una herramienta de márketing para los puntos
de venta. Permite mostrar en la pantalla LCD las informaciones del
producto guardados en la carpeta „996PROMT“ del sistema.
Con este ajuste puede ver la versión actual del firmware, el número de
serie del dispositivo o un código QR. En www.supercook.es encontrará
más información sobre la versión actual del firmware. Necesitará
el número de serie para todas las solicitudes de reparación y para
registrar el producto en www.supercook.es.
Al seleccionar el Modo promocional se desactivan otras funciones del
dispositivo. Para salir del Modo promocional, mantenga pulsados el botón
MENÚ y los dos pulsadores exteriores a la vez durante 10 segundos.
Como medida de seguridad, saque las cuchillas cuando tenga expuesto
el robot de cocina en la tienda.
Cómo activar el Modo promocional:
1. Desplácese por el menú Configuración con los pulsadores
y seleccione Modo promocional
(In-store promotion mode).
2. Para confirmar o anular su selección,
presione el pulsador
.
3. Para salir del Modo promocional,
mantenga pulsados el botón MENÚ y
los dos pulsadores exteriores a la vez
durante 10 segundos.
Actualización de la unidad de
control “Yumi”
Utilice este ajuste para actualizar el firmware de la unidad de control
“Yumi”. Para hacerlo, descargar la última actualización del firmware
de www.supercook.es. Extraer el firmware del archivo comprimido y
copiarlo en el directorio raíz de la tarjeta SD.
Cómo cambiar el firmware:
1. Inserte la tarjeta SD en la unidad de
control.
2. Desplácese por el menú Configuración con los pulsadores
y
seleccione Actualizar la unidad de
control (Update control module).
3. Para confirmar su selección, presione
el pulsador
.
4. Siga las instrucciones que aparezcan
en la pantalla.
66
Cómo ver en pantalla los datos del firmware:
1. Desplácese por el menú Configuración con los pulsadores
y
seleccione Versión del firmware
(FW version).
2. Utilice el pulsador
para volver al
menú Configuración (Setup menu).
Colección de recetas
La opción de menú Colección de recetas es su recetario digital, que le
sirve de libro de referencia. Contiene todas las categorías de recetas,
todas las recetas y las instrucciones de todas ellas. Las categorías le
servirán para encontrar las recetas más rápido.
En una tarjeta SD caben 895 recetas si la memoria es de 1 GB y las
recetas en un solo idioma. De media, una receta ocupa alrededor de 1
MB por idioma. El robot va acompañado de una tarjeta SD de 1 GB de
serie. Para poder guardar más de 895 recetas de www.supercook.es en
varios idiomas, es necesaria una tarjeta SD de más capacidad.
Categorías de receta
D
GB
1.
Entrantes
2.
Sopas
3.
Platos de carne o pescado
4.
Platos vegetarianos
IT
5.
Guarniciones
PT
6.
Papillas
NL
7.
Salsas
RUS
8.
Aliños
AR
9.
Preparaciones para el Horno
HE
10.
Postres
11.
Bebidas
12.
Comida para animales de compañía
FR
ES
Cómo seleccionar una receta para verla:
1.
2.
1. Utilice los pulsadores
para
desplazarse por el menú Colección
de recetas (Recipe collection).
2. Para confirmar su selección, presione
el pulsador
.
3.
3. El círculo
iindica la categoría
actual.
4. Utilice los pulsadores
para desplazarse y seleccionar la
categoría deseada.
5. Para confirmar su selección de
categoría, presione el pulsador pulse
el botón
.
6. Si desea apagar la unidad de control,
presione el pulsador
.
4.
7.
Si desea añadir la receta a sus
Favoritos, utilice el pulsador
.
8. Utilice los pulsadores
para desplazarse por la categoría
seleccionada y examinar las recetas.
9. Para confirmar la selección, presione
el pulsador
.
10. Utilice los pulsadores
para
desplazarse por las páginas de la
receta.
11. Para apagar la unidad de control,
presione el pulsador
.
12. Utilice el pulsador MENÚ para salir
de la colección de recetas.
67
Preparar recetas
En este menú puede empezar a trabajar con el robot de cocina. Puede
elegir entre seguir los tiempos, velocidades y temperaturas predefinidos o
ajustarlos manualmente.
Cómo empezar a cocinar:
1.
2.
1. Utilice los pulsadores
para ir a
la opción de menú Preparar recetas
(Recipe cooking).
2. Para confirmar su selección, presione
el pulsador .
3.
6. Si desea añadir esta receta a sus
Favoritos, presione el pulsador
.
7. Utilice los pulsadores
para desplazarse por la categoría
seleccionada y examinar las recetas.
8. Cuando se haya decidido por
una receta, confirme su selección
presionando el pulsador
.
5.
4.
9. Si desea empezar a cocinar con la
configuración predeterminada, utilice el
pulsador
.
10. Para hacer una pausa en el ajuste actual,
presione el pulsador
(aparecerá en
cuanto empiece el proceso; véase el paso 9).
11. Utilice los pulsadores
para ajustar
el tiempo predefinido manualmente.
12. Para ajustar la temperatura predefinida
manualmente, utilice el mando izquierdo.
13. Para ajustar la velocidad predefinida
manualmente, utilice el mando derecho.
preimpostato.
6.
14. Si presiona el pulsador
aumentará la velocidad durante unos
instantes (Turbo).
15. Si todavía no ha empezado a
cocinar y quiere ir al paso anterior,
utilice
.
68
3. El círculo
indica la categoría
actual.
4. Utilice los pulsadores
para
desplazarse y seleccionar la receta
deseada.
5. Para confirmar su selección, presione
el pulsador
.
16. Este recordatorio aparece cuando ha
transcurrido el 80% del tiempo del
proceso predeterminado.
17. Si desea terminar la fase y añadir
ingredientes, presione
. Al final de
la fase, el robot dejará de calentar
automáticamente. El motor seguirá
en funcionamiento dependiendo de
la duración del proceso de cocción.
D
GB
FR
ES
IT
7.
PT
8.
18. En este punto es posible utilizar
el pulsador
para prolongar el
proceso de cocción con los nuevos
ajustes que haya seleccionado.
19. Presione
receta.
para seguir con la
NL
RUS
AR
HE
O bien
9.
20. Si desea prolongar el proceso
manualmente como descrito en el
punto 18, aparecerá la imagen de la
izquierda. Una vez haya configurado
los ajustes, el robot de cocina volverá
al punto 19, y es posible continuar
con las fases siguientes.
Este bucle se repite al final de cada
uno de las fases.
Configuraciones de seguridad
del robot de cocina entre las
opciones del menú:
Preparar recetas, Recetas
favoritas y Mis recetas
Ajustes preprogramados
El mensaje „Esta fase está a punto de terminar“ aparece en la pantalla
cuando ha transcurrido el 80% del tiempo previamente programado (20%
remanente). Por ejemplo, si el tiempo del proceso es de 5 minutos, el robot
de cocina emite una señal acústica cuando queda 1 minuto para terminar.
10.
21. En caso de ausencia de comandos
cuando termine el bucle y se haya
acabado el tiempo de seguridad, se
apagará el motor.
22. Aparecerá la imagen mostrada a la
izquierda.
23. Presionar
para volver atrás e ir
al paso siguiente de la receta que
había empezado. Para salir de la
modalidad Preparar recetas, utilice el
pulsador
.
Si usted no configura otros ajustes después de este paso, el robot de cocina
dejará de calentar automáticamente y seguirá en funcionamiento entre 1
y 5 minutos más, según lo que dure la fase de la receta. Así se evita, en la
medida de lo posible, que se pegue la comida al recipiente. Transcurrido
este tiempo, el robot de cocina sale automáticamente de la receta y vuelve
a la vista de categorías. Llegado este punto es posible utilizar el pulsador
para ir a la fase siguiente o de detener totalmente el proceso de cocción
presionando el pulsador
.
Si ha ajustado manualmente el tiempo de trabajo pre-programado
ignorando el aviso (20% del tiempo pre-indicado remanente) el mensaje
“Esta fase está a punto de terminar“ no aparecerá. Pero sí que se activarán
los demás mecanismos de seguridad descritos anteriormente: el robot
dejará de calentar cuando termina el tiempo de proceso de trabajo. El
motor se parará al cabo de un periodo de tiempo definido.
69
Recetas favoritas
Ayuda
En este menú encontrará todas sus recetas preferidas. Si quiere
empezar el proceso de cocción del menú Recetas favoritas, siga las
instrucciones descritas en el apartado Preparar recetas.
Esta opción de menú ofrece explicaciones de los símbolos empleados en la
unidad de control “Yumi”.
Así se abrirá su selección de recetas.
1. Utilice los pulsadores
para
desplazarse por el menú Ayuda
(Help).
2. Para confirmar su selección,
presionar el pulsador
.
1. Utilice los pulsadores
para
desplazarse por el menú Recetas
favoritas (Recipes favorites).
2. Para confirmar su selección, presione
el pulsador
.
Antes de empezar: lea estas
instrucciones importantes
Mis recetas
Se acabaron las recetas escritas en hojas de papel, recortadas de
periódicos o descargadas de Internet. Este robot de cocina es su
recetario personal. Puede crear, cocinar, disfrutar y recopilar sus
propias recetas. Descubra en www.supercook.es cómo funciona.
Si quiere empezar el proceso de cocción del menú Mis recetas, siga
las instrucciones descritas en el apartado Preparar recetas.
1. Utilice los pulsadores
para ir
a la opción de menú Mis recetas (My
recipes).
2. Para confirmar su selección,
presionar el pulsador
.
3. Seleccione la categoría y siga las
instrucciones descritas en Preparar
recetas (Recipe cooking).
1. Utilice siempre el robot de cocina sobre una superficie estable, limpia y
que no emita calor.
2. Quite todos los materiales de embalaje.
3. Limpie todos los accesorios.
4. No introducir nunca la mano en el robot de cocina cuando esté
encendido.
5. Compruebe siempre que los anillos de estanquidad estén limpios e
intactos.
6. El robot de cocina tiene un mecanismo de seguridad interno. Si el
recipiente no se instala correctamente en el robot de cocina, este no
funcionará.
7. Desconecte el robot de cocina de la red eléctrica:
a. si está averiado o no funciona bien,
b. si se ha caído,
c. si tiene piezas averiadas o ante la falta de suministro eléctrico de la
red.
8. No deje el robot de cocina funcionando sin vigilancia.
9. Utilice únicamente los accesorios recomendados por plawa.
Limpieza
70
1. Limpie siempre el robot de cocina antes de estrenarlo y después de
utilizarlo. Limpie también todas las piezas y accesorios que hayan
entrado en contacto con alimentos. Asegúrese de que el robot de
cocina se haya enfriado totalmente antes de comenzar las operaciones
para su limpieza.
2. Desconecte el robot de la toma de corriente antes de limpiarlo.
3. Los contactos presentes en el fondo del recipiente se deben mantener
limpios y secos
4. ¡Las cuchillas están muy afiladas! Tenga mucho cuidado cuando las
instale y desinstale.
5. Todos los accesorios se pueden lavar en el lavavajillas.
6. Para evitar que aparezcan gérmenes, limpie el robot de cocina y los
anillos de estanquidad después de cada uso.
7. Utilice un paño suave y ligeramente húmedo para limpiar el recipiente
de acero inoxidable del robot de cocina.
8. No utilice nunca detergentes abrasivos ni astringentes. Podrían dañar
la superficie.
9. Eventuales manchas sobre los accesorios de plástico pueden aparecer
debido al beta-caroteno de las zanahorias y los tomates o a las
especias como el curry. Se pueden eliminar las manchas frotando la
parte con un paño humedecido con aceite de cocina. Aclárela con agua
caliente, después con agua fría y un poco de detergente.
Características técnicas
Robot de cocina SUPERCOOK
Consumo
Cocinar
Mezclar
1000 vatios
500 vatios
Capacidad
2 litros
Temperatura mínima
40 °C
Temperatura máxima
130 °C
Velocidades
10 + turbo
Velocidad máxima de
mezclado
20.000 rpm
Señal acústica
Sí
Voltaje/ frecuencia
230 V~50 Hz
Unidad de control
Conexión
Pantalla LCD de la unidad
de control
5V
Copyright
Copyright 2013 Este manual del usuario contiene información protegida
por copyright. Todos los derechos reservados. Ninguna parte de estas
instrucciones de uso puede ser reproducida en sistema alguno ni
transmitida por forma ni medio electrónico, mecánico u otros, sin el
permiso escrito del fabricante. SUPERCOOK es una marca de
plawa-feinwerktechnik GmbH & Co. KG.
Desecho de los dispositivos
electrónicos usados
La presencia de este símbolo en el producto o en su paquete indica que
este producto no debe desecharse junto con la basura doméstica, sino
que debe depositarse en un punto limpio para el reciclaje de aparatos
eléctricos y electrónicos. Para más información, diríjase al servicio
municipal, al punto limpio de su comunidad o a la tienda donde
compró el producto.
GB
FR
ES
IT
PT
NL
RUS
AR
HE
4,3 pulgadas
Tarjeta de memoria
incluida
Declaración de conformidad
1 GB
Vapore (Set de bandejas
para cocinar al vapor)
(opcional)
Dimensiones
Aprox. 23,1 x 19,2 cm (aprox. el tamaño de
una hoja A4)
Por la presente, confirmamos que el producto especificado cumple las
Directivas LVD 2009/95/EC, EMC 2004/108/EC y RoHS 2011/65/EU
EN 60335-2-14: 2006+A1:2008+A11:2012
EN 60335-2-15: 2002+A1:2005+A2:2008+A11:2012
EN 60335-1: 2012
EM 62233: 2008
EN 55014-1/A1: 2009
EN 55014-2/A2:2008
EN 61000-3-2/A2:2009
EN 61000-3-3:2008
Dentro de nuestro programa de desarrollo constante, nos reservamos el
derecho de modificar el producto, incluidos sus accesorios, su embalaje, sus
instrucciones y recetario en cualquier momento y sin autorización previa.
D
Atención al cliente y servicio técnico
¿Necesita ayuda? Si tiene alguna pregunta, visite www.supercook.es, llame
a nuestra Línea directa o diríjase al distribuidor al que compró el robot de
cocina.
Línea directa del Servicio técnico y de reparaciones (UE):
00800 75292 100
(Número gratuito si se llama desde un teléfono fijo)
Servicio online / Contacto internacional
Internet: www.supercook.es
E-mail: [email protected]
Si desea hacer una devolución, tiene que facilitarnos el número de RMA
(Return Merchandise Authorization o “Autorización para la devolución de
mercancías”) y escribirlo en el paquete de la devolución. Si desea más
información sobre devoluciones, llame a las líneas directas pertinentes o
visite el apartado „Servicio técnico“ del sitio web de SUPERCOOK.
Fabricante
plawa-feinwerktechnik GmbH & Co. KG
Bleichereistr. 18
73066 Uhingen
Alemania
71
72
Manuale dell’utente SUPERCOOK
D
Italiano
FR
GB
ES
Indice
Introduzione
Esempi di impiego del robot da cucina
multifunzione
Istruzioni sul prodotto e sulla sicurezza
Istruzioni per la manutenzione
Utilizzo delle istruzioni operative
Schermo e messaggi d’errore
Panoramica del robot da cucina – visione
anteriore e posteriore
Panoramica dell’unità di controllo “Yumi”
Accessori
Accessori opzionali
Cenni preliminari
Preparazione
Recipiente in acciaio inox
Lame in acciaio inox
Cestello
Miscelatore
Coperchio
Spatola
Tappo dosatore
Vapore (accessorio opzionale)
Benefici della cottura a vapore
Utilizzo di Vapore (set di vassoi per la
cottura a vapore)
Inserimento e rimozione della scheda
di memoria
Accensione e spegnimento
Accendere l’unità di controllo per la prima volta
Struttura del menu
IT
PT
74
74
74
74
75
75
76
77
77
77
78
79
79
79
79
80
80
80
80
81
81
81
81
81
82
82
Impostazioni
Data
Ora
Timer stand-by
Salvaschermo
Lingua
Volume
Presentazione
Modalità promozione
Aggiornamento dell’unità di controllo “Yumi”
Versione del firmware
Raccolta ricette
Categorie di ricette
Cottura ricette
Impostazioni di sicurezza del robot da cucina
fra le opzioni del menu: Cottura ricette, Ricette
preferite e Le mie ricette
Impostazioni pre-programmate
Ricette preferite
Le mie ricette
Aiuto
Istruzioni importanti prima di iniziare
Pulizia
Specifiche tecniche
Assistenza e servizio clienti
Copyright
Smaltimento dei dispositivi elettronici usati
Dichiarazione di conformità
82
82
82
83
83
83
83
83
84
84
84
85
85
86
NL
RUS
AR
HE
87
87
88
88
88
88
88
89
89
89
89
89
73
Introduzione
Grazie per avere acquistato questo Robot da cucina SUPERCOOK. Leggere
attentamente il manuale dell’utente e conservarlo in un luogo sicuro per
future consultazioni. Ci auguriamo che l’impiego di questo robot risulti
piacevole e porti buoni risultati.
Esempi di impiego del robot da cucina multifunzione
• Per passati di verdure e frutta, salse e zuppe.
• Mescola frappè e cocktail.
• Polverizza lo zucchero e i peperoncini secchi.
• Tritura mandorle e nocciole.
• Grattugia frutta e verdure.
• Sminuzza cipolle e noci.
• Utilizzare le apposite fruste per emulsionare maionese e creme.
• Grattugia finemente formaggi, pangrattato e patate.
• Mescola impasti morbidi, meringhe e panna
• Impasta pasta lievitata e pasta di pane
• Riscalda, frigge e cuoce a temperature da 40 a 130 °C
• Cuoce a vapore nel Vapore (Set di vassoi per cottura al vapore) o nel
cestello
Istruzioni sul prodotto e sulla
sicurezza
Leggere attentamente queste informazioni importanti prima di utilizzare il
robot da cucina multifunzione:
1. Prima di iniziare: estrarre dalla scatola il robot da cucina e tutti gli
accessori.
2. Non mettere in funzione il dispositivo su superfici umide o bagnate.
3. Per garantire la sicurezza, collegare il robot all’alimentazione di rete
tramite una spina standard a 3 poli. Accertare la compatibilità fra
la rete elettrica e le informazioni su tensione ed elettricità presenti
sull’etichetta del robot. Collegamenti errati possono rendere nulla la
garanzia.
4. Quando si utilizzano apparecchiature elettriche sussiste sempre
il rischio di elettrocuzione, che può causare ferite o morte. Di
conseguenza, è necessario attenersi sempre alle istruzioni.
5. plawa o il distributore non possono essere ritenuti responsabili per
danni causati da una cattiva alimentazione elettrica o da un’errata
installazione. In caso di dubbi, consultare un elettricista qualificato.
6. Il materiale da imballo, soprattutto pellicole, buste e polistirolo,
devono essere tenuti fuori dalla portata dei bambini.
7. Durante il primo utilizzo potrebbe prodursi un odore particolare. Ciò
non costituisce un pericolo.
8. Non immergere il robot, l’unità di controllo o il cavo elettrico in acqua.
9. Non coprire il robot con tovaglioli, panni, ecc.
10. Mantenere una distanza sufficiente da altre fonti di calore, come
fornelli, per evitare danni al dispositivo.
11. Questo robot da cucina non è un giocattolo e, di conseguenza, deve
essere tenuto lontano dalla portata dei bambini.
12. Posizionare il cavo in modo tale che non venga schiacciato,
danneggiato o non entri in contatto con superfici calde.
13. Nel caso in cui si utilizzi una prolunga:
a. il cavo deve essere dotato di messa a terra
b. adottare tutte le precauzioni necessarie per garantire che il cavo
non ostacoli il passaggio
14. Evitare che il cavo penzoli e scollegarlo dall’alimentazione di rete
impugnando la spina e mai tirando il cavo stesso.
15. Non utilizzare il robot da cucina:
a. se il cavo o la spina di alimentazione sono danneggiati
b. in caso di malfunzionamenti, cadute o evidenti segni di
danneggiamento.
16. Non spostare il dispositivo mentre è in funzione.
17. Questo robot da cucina è stato progettato unicamente per un uso
domestico e per funzionare in luoghi chiusi.
18. Non tentare mai di riparare da soli il dispositivo. Non sostituire o
modificare il cavo, la spina o altri componenti. Rivolgersi sempre a
personale autorizzato o alla hotline.
74
19. In caso di malfunzionamenti o danni, scollegare dall‘alimentazione di
rete.
20. plawa o il distributore non possono essere ritenuti responsabili per
danni causati da un utilizzo improprio o errato del dispositivo.
21. Il robot da cucina non è una friggitrice. Non tentare mai di friggere del
cibo in esso.
22. Non inserire oggetti nei fori presenti sul dispositivo.
23. Scollegare il robot dall’alimentazione:
a. durante le operazioni di pulizia
b. quando rimane inutilizzato
c. in caso di mancanza di elettricità
24. Le persone inesperte di tali dispositivi, quelle con disabilità fisiche,
mentali, psicologiche e sensoriali e i bambini devono utilizzare questo
dispositivo sotto la supervisione di un adulto o di qualcuno responsabile per la sicurezza. Controllare che i bambini non giochino con il
robot.
25. Questo dispositivo è stato progettato per essere utilizzato come
elettrodomestico, per esempio:
• nelle cucine riservate al personale in negozi, uffici e altre aree
commerciali
• in tenute agricole
• dai clienti in hotel, alberghi, ecc.
• nei bed&breakfast
Istruzioni per la manutenzione
Maneggiare con cura il robot da cucina e gli accessori. Il rispetto delle
seguenti raccomandazioni consentirà di mantenere valida la garanzia e, di
conseguenza, la possibilità di eventuali reclami.
1. Spegnere il robot in caso di non utilizzo per lunghi periodi di tempo.
2. Prima di pulirlo, lasciar raffreddare il dispositivo.
3. In caso di contatto con gli alimenti, pulire tutti i componenti e gli
accessori.
4. Utilizzare un panno morbido e leggermente inumidito per pulire il
recipiente in acciaio inox del robot.
5. I contatti presenti sotto al recipiente in acciaio inox devono essere
mantenuti puliti e asciutti.
6. Tutti gli accessori possono essere lavati in lavastoviglie.
7. Dopo ogni utilizzo, per prevenire la presenza di germi, pulire il robot e
le guarnizioni.
8. Non utilizzare mai detergenti abrasivi o caustici.
9. Rimuovere il calcare con aceto.
10. Eventuali macchie sugli accessori di plastica conseguenti all’utilizzo
di carote, pomodori o spezie presenti nel curry sono normali. Tali
macchie possono essere eliminate strofinando la parte con un panno
imbevuto d’olio. Sciacquare quindi rapidamente con acqua calda, poi
con acqua fredda e poco detersivo.
11. Utilizzare il robot da cucina attenendosi a queste istruzioni operative.
Utilizzo delle istruzioni operative
D
GB
FR
Questo simbolo indica un avvertimento da leggere prima di
utilizzare il dispositivo:
ES
Schermo e messaggi d’errore
Simbolo / Domanda /
Descrizione dell’errore
IT
PT
Spiegazione
Soluzione
Il recipiente in acciaio inox non è chiuso correttamente o l’interruttore di
sicurezza non funziona.
Controllare nuovamente la chiusura.
Si è verificato un malfunzionamento del circuito elettrico del robot da
cucina.
Rivolgersi all’assistenza. Il numero di
telefono si trova sul sito www.supercook.it
o nelle istruzioni.
Il motore è sovraccarico.
Spegnere il robot da cucina e attendere
qualche minuto fino a quando il motore
non si è raffreddato.
Il robot da cucina è dotato di uno speciale sistema di controllo. La velocità
può variare e la rotazione viene interrotta a intervalli di 2 sec. Ciò significa
che il robot da cucina inizia a emettere un rumore insolito. È un fenomeno
normale. Questo rumore indica che la velocità delle lame in acciaio inox
viene regolata per evitare un surriscaldamento del motore.
Rimuovere parte dell’impasto o aumentare
la velocità a un massimo di 3.
Le lame in acciaio inox
girano lentamente durante la
preparazione dell’impasto.
Controllare di non aver superato la quantità massima di 500 g di farina.
Rimuovere parte dell’impasto dal
recipiente in acciaio inox.
Dal robot da cucina fuoriesce
fumo.
Il motore è surriscaldato. Controllare il livello massimo di riempimento.
Rimuovere parte dell’impasto dal
recipiente in acciaio inox. Far raffreddare
il robot da cucina per circa 20 minuti.
Il robot da cucina non funziona
alla temperatura impostata se
la velocità è impostata su 5.
La temperatura può essere impostata solo con le velocità da 1 a 4.
Cambiare l’impostazione della velocità
da 1 a 4.
Difficoltà nel corretto posizionamento del recipiente in
acciaio inox.
Con l’utilizzo questa operazione diventerà più facile, in quanto la
guarnizione di silicone si altera per il calore e l’umidità, pur mantenendo la
sua funzione.
Ungere leggermente con olio la
guarnizione o inumidirla.
Il robot da cucina viene
utilizzato? La base del
recipiente in acciaio inox
mostra segni e umidità residua
alla consegna.
Prima della consegna tutti i componenti del robot da cucina vengono
sottoposti a test. Il recipiente in acciaio inox viene riempito di acqua e
portato a ebollizione. Come avviene in lavastoviglie, su di esso possono
rimanere tracce di umidità. Tali tracce possono lasciare leggeri segni sulla
base del recipiente in acciaio inox, che non alterano la sicurezza.
Per rimuovere i segni, utilizzare un
comune pulitore per acciaio inox.
Al primo utilizzo o a pieno
carico si odono rumori.
Durante il primo utilizzo o a pieno carico il motore può surriscaldarsi ed
emettere rumori insoliti. Come nel caso di molti motori elettrici, il motore
utilizza spazzole che necessitano di un rodaggio iniziale. Tali rumori,
quindi, non devono preoccupare.
Dopo un’operazione impegnativa, per
es. un impasto consistente, lasciar
raffreddare il robot da cucina. Una volta
raffreddato, il robot da cucina ritornerà
completamente operativo.
Segnale acustico.
Al raggiungimento della corretta temperatura, l’unità emette un segnale
acustico.
Inoltre, il segnale acustico indica che il
tempo preimpostato è trascorso.
Il robot da cucina si ferma
quando si usa il miscelatore.
La velocità è irregolare o il
motore si blocca.
NL
RUS
AR
HE
Aumentare la velocità da 1 a 2 o da 2 a 3.
75
Panoramica del robot da cucina – visione anteriore e posteriore
1.
2.
3.
4.
5.
6.
7.
Unità di controllo “Yumi”
Bilancia graduata (accessorio opzionale)
Tappo dosatore
Coperchio
Recipiente in acciaio inox
Foro di ventilazione
Tasto Attivare / Spegnere
3
2
4
5
1
6
7
76
Panoramica dell’unità di controllo “Yumi”
D
GB
1.
2.
3.
4.
5.
6.
FR
Display LCD
4 pulsanti per i comandi
Manopole destra e sinistra
Pulsante MENU
Slot per scheda SD
Presa
ES
IT
1
PT
NL
RUS
3
AR
2
HE
4
5
6
Accessori
Cestello
Tappo dosatore, Coperchio, Lame in acciaio inox,
Recipiente in acciaio inox
Miscelatore
Spatola
Accessori opzionali
•
•
Bilancia digitale SUPERCOOK
Vapore (Set di vassoi per cottura al vapore) SUPERCOOK, in plastica o porcellana/vetro
Per ulteriori informazioni e accessori, rivolgersi al rivenditore di zona o visitare il sito www.supercook.it.
Scheda SD
77
Cenni preliminari
Simboli generali
Significato
Calendario *
Imposta la data e il relativo formato
Lingua *
Seleziona la lingua desiderata. * Necessario solo la prima volta che si accende il dispositivo o
dopo la sostituzione della batteria ad opera dell’assistenza.
Confermare
Conferma la scelta
Indietro
Va indietro
Avanti
Va avanti
Avvia/Riproduci
Esecuzione dei comandi
Più
Aumenta il tempo di cottura
Meno
Diminuisce il tempo di cottura
Giù
Navigazione: giù o lateralmente
Su
Navigazione: su o lateralmente
Attivare/Spegnere
Accende/spegne l’unità di controllo
Uscire
Interrompe il processo di cottura per motivi di sicurezza
Pausa
Mette in pausa il processo mantenendo le impostazioni
Preferiti
Premere questo simbolo per memorizzare le ricette preferite nel relativo menu.
Stop
Arresta il processo.
Velocità
Velocità: da 1 a 10 e funzione Turbo
Ora
•
•
•
•
•
Temperatura
•
•
•
•
78
Tempo di cottura o lavorazione: da 1 sec a 60 min massimo
Quando si avvia questa funzione, l’orologio effettua un conto alla rovescia e il tempo
selezionato viene visualizzato in min e sec sul display, insieme al simbolo dell’orologio.
Il tempo di cottura o lavorazione può essere modificato in ogni momento.
Per avviare un processo è necessario impostare il tempo.
La temperatura minima è 40 °C e può essere regolata fino a un massimo di 130 °C, con
incrementi di 5° alla volta.
Al raggiungimento della corretta temperatura, il modulo emetterà un segnale acustico.
Quando il robot raggiunge la temperatura impostata, questo simbolo lampeggia per pochi
secondi.
Durante la preparazione di cibi a temperature superiori a 50 °C, evitare l‘impiego del
pulsante Turbo.
Le temperature superiori a 100 °C sono indicate per cuocere a vapore, friggere e bollire.
Continuare la cottura
Una volta terminata la fase di una ricetta, continuare la cottura manualmente.
Un passo indietro
Nell’esecuzione in sequenza di una ricetta, torna alla fase precedente (Cottura ricette).
Riavviare
Riavvia il processo di cottura alla fase successiva, dopo che il programma è stato arrestato per
motivi di sicurezza.
Attenzione
Attenzione – prestare attenzione!
Preparazione
D
GB
Recipiente in acciaio inox
1. Il recipiente in acciaio inox ha una capacità di 2 litri ed è dotato di una scala graduata sia
all’interno sia all’esterno.
2. Dopo aver inserito correttamente le lame in acciaio inox nel recipiente in acciaio inox,
posizionare quest’ultimo nell’apposito alloggiamento sul robot. Esercitare quindi una
leggera pressione fino a quando il recipiente in acciaio inox non si aggancia ai contatti e al
meccanismo di funzionamento.
FR
ES
IT
PT
NL
RUS
1. Il cibo nel recipiente in acciaio inox non deve superare i 2 litri. In caso contrario, non è
possibile garantire la sicurezza del funzionamento e la qualità delle preparazioni potrebbe
risultare compromessa.
2. Quando si stacca il recipiente in acciaio inox dal robot da cucina accertarsi che il
contenuto non fuoriesca. In caso di alimenti caldi ciò potrebbe causare ustioni.
3. Nel caso in cui non si riuscisse ad agganciare il recipiente in acciaio inox al meccanismo
sul robot, girare delicatamente la testina delle lame in acciaio inox.
AR
HE
Lame in acciaio inox
1. Alla consegna, le lame in acciaio in inox sono inserite nel recipiente in acciaio inox.
2. Per rimuoverle, mettere il recipiente in acciaio inox in posizione verticale. Per sganciare le
lame in acciaio, spingere la leva verso il basso in senso antiorario. (vedere fig.1)
3. Per inserire le lame in acciaio inox, posizionarle correttamente nel recipiente in acciaio
inox e spingere la leva verso l’alto in senso orario. (vedere fig.2)
Fig. 1
1. Le lame in acciaio inox sono molto affilate! Prestare attenzione durante le operazioni di
montaggio e smontaggio.
2. Accertarsi che la guarnizione sia collocata in posizione corretta sul supporto delle lame
in acciaio inox. Se così non fosse, il contenuto del recipiente in acciaio inox potrebbe
fuoriuscire e danneggiare il robot.
3. Quando si aggiunge cibo, accertarsi che esso non blocchi le lame in acciaio inox.
4. Dopo ogni lavorazione, prima di rimuovere le lame in acciaio inox farle raffreddare
completamente.
5. La quantità massima lavorabile è 500 g di farina per l‘impasto del pane.
Fig. 2
Cestello
1. Il cestello viene utilizzato per cuocere a vapore piccole quantità di cibo, posizionandolo direttamente nel recipiente in acciaio inox.
2. La scanalatura laterale consente di estrarlo facilmente con l’aiuto del miscelatore.
79
Preparazione
Miscelatore
Il miscelatore si inserisce sulle lame in acciaio inox con una leggera resistenza.
Risulta perfetto per produrre dessert cremosi, meringhe e per montare la panna.
Può essere utilizzato solo con le velocità da 1 a 4.
Non utilizzare il miscelatore insieme alla funzione Turbo.
Quando si aggiunge cibo, accertarsi che esso non blocchi il miscelatore.
Il miscelatore non è adatto a impastare impasti consistenti. Per esempio, per impastare pane
o pizza si devono utilizzare le lame in acciaio inox. Non utilizzare il miscelatore insieme alla
spatola.
Coperchio
1. Inserire correttamente la guarnizione nel coperchio per evitare perdite.
2. Posizionare il coperchio diagonalmente, in cima al recipiente in acciaio inox.
3. Ruotarlo in senso orario fino a quando la tacca sul fondo della parte anteriore del
coperchio non si inserisce nel relativo alloggiamento del robot.
4. Il robot si accende solo se il coperchio si trova in posizione corretta.
5. Il coperchio è dotato di un foro superiore per facilitare l’inserimento degli ingredienti.
Spatola
1. Utilizzare questo accessorio per rimuovere o mescolare gli ingredienti.
2. La spatola non è progettata per entrare in contatto con le lame in acciaio inox
durante l’inserimento degli ingredienti tramite il foro sul coperchio.
Tappo dosatore
1. Il tappo dosatore ha la capacità di 100 ml ed è rimovibile.
a. Ciò per facilitare l’inserimento degli ingredienti.
b. Non appena il tappo dosatore viene inserito nel coperchio, la temperatura
rimane costante.
c. Ciò facilita il controllo dell’uscita del vapore.
1. Il tappo dosatore può essere rimosso solo con le velocità da 1 a 3. In caso
contrario, gli ingredienti potrebbero schizzare provocando ustioni.
2. A velocità superiori si consiglia di tenere fermo il tappo dosatore per evitare
fuoriuscite.
80
Preparazione
D
GB
1
Vapore (accessorio opzionale)
Vapore (Set di vassoi per cottura al vapore) viene utilizzato per cuocere i cibi preservando le
vitamine in essi contenute. Quello a vapore è uno dei metodi di cottura più sani.
2
3
4
Panoramica di Vapore
(Set di vassoi per cottura al vapore)
1. Coperchio
2. Vassoio piatto per la cottura a
vapore
3. Vassoio profondo per la cottura a
vapore
4. Ricevitore di condensa per la
raccolta dei fluidi
Benefici della cottura a vapore
1. Conservazione di vitamine e nutrienti.
2. Risparmio di tempo – possibilità di cuocere più cibi contemporaneamente
3. Alimentazione sana, a basso contenuto di sale e grassi
4. Conservazione della morbidezza dei cibi
5. Nessuno scambio di sapori
Utilizzo di Vapore (set di vassoi per la cottura a vapore)
1. Riempire il recipiente in acciaio inox con almeno 700 ml di acqua o di altri liquidi per la
cottura a vapore, come brodo.
2. Ungere la parte interna del recipiente affinché il cibo non si attacchi.
3. Mettere gli ingredienti sui vassoi per la cottura a vapore. Accertarsi di aver posizionato nel
vassoio più profondo gli alimenti che richiedono tempi di cottura maggiori. Lasciare liberi
alcuni dei fori per far passare il vapore.
4. Posizionare Vapore (set di vassoi per la cottura a vapore) direttamente sul coperchio,
senza il tappo dosatore.
5. Controllare che i vassoi per la cottura a vapore siano inseriti l’uno nell’altro correttamente
e che il coperchio sia chiuso saldamente, in modo che il vapore non possa fuoriuscire.
FR
ES
IT
PT
NL
RUS
AR
HE
1. Quando si utilizza Vapore (Set di vassoi per cottura al vapore), tenere sempre
a mente che da esso esce vapore bollente che si condensa nel raccoglitore.
Attenzione – rischio di scottature!
2. Impugnare i recipienti solo dai manici.
3. Prestare attenzione quando si rimuove il ricevitore di condensa.
4. Il ricevitore di condensa è di materiale plastico resistente al calore, fino a circa 90°C.
5. Vapore (Set di vassoi per cottura al vapore) non è adatto a microonde, forno o altre
fonti di calore.
Inserimento e rimozione della scheda di
memoria
Inserire la scheda SD in dotazione nel relativo alloggiamento sull’unità di controllo “Yumi”.
Accertarsi che i contatti della scheda siano rivolti verso l’alto. Spingere delicatamente la
scheda fino a quando non si ode un clic. Per rimuoverla, spingerla fino a quando non viene
espulsa ed è possibile estrarla.
Accensione e spegnimento
Posizionare l’unità di controllo “Yumi” nell’alloggiamento sul robot da cucina. Premere il
pulsante Attivare / Spegnere (7) e il robot da cucina sarà pronto per essere utilizzato.
81
Accendere l’unità di controllo per la prima volta
Quando si accende il dispositivo per la prima volta viene richiesto di impostare data/ora e la lingua dello schermo.
Modificare le impostazioni del calendario e della lingua nel seguente modo:
1.
1. Utilizzare i pulsanti
per
spostarsi fra calendario e lingua e
le manopole sinistra e destra per
regolare le impostazioni.
2. Premere il pulsante
per
confermare l’impostazione.
2.
Struttura del menu
3. Premere o girare i pulsanti di controllo
indipendentemente dal pulsante
MENU. Così facendo, si arriverà alla
modalità Cottura manuale.
4. Utilizzare la manopola sinistra per
impostare la temperatura desiderata.
5. Usare la manopola destra per
regolare la velocità.
6. Usare
e
per regolare
manualmente il tempo.
7. Premendo
la velocità aumenta per
un breve periodo di tempo (Turbo).
1. Utilizzare
per spostarsi nel
menu.
2. Il punto
indica la posizione
corrente.
3. Premere il pulsante
per
confermare la selezione.
4. Se necessario, chiudere il menu
premendo MENU.
Premere il pulsante MENU per accedere al menu principale.
Impostazioni
Nel sottomenu Impostazioni è possibile regolare diversi parametri.
Data
Ora
Per modificare la data:
Per modificare l’ora:
1. Nel menu Impostazioni, spostarsi con
i pulsanti
e selezionare Data
(Date).
2. Usare la manopola destra per
regolare la selezione. Usare la
manopola sinistra per spostarsi fra
anno, mese e giorno. Contemporaneamente è possibile impostare il
formato dell’ora su 12 o 24 ore.
3. Premere quindi il pulsante
per
confermare.
82
1. Nel menu Impostazioni, spostarsi con
i pulsanti
e selezionare Ora
(Time).
2. Usare la manopola destra per
regolare la selezione. Usare la
manopola sinistra per spostarsi fra
ore e minuti. Contemporaneamente è
possibile impostare il formato dell’ora
su 12 o 24 ore.
3. Premere quindi il pulsante
per
confermare.
Timer stand-by
Lingua
Timer stand-by consente di impostare un orario a cui il robot entrerà
automaticamente in modalità Stand-by. Per esempio, dopo un minuto in
modalità Standby, se il salvaschermo non è attivo lo schermo si spegne
(vedere Salvaschermo).
Per modificare Timer stand-by:
Per modificare la lingua:
D
GB
FR
1. Nel menu Impostazioni, spostarsi con
i pulsanti
e selezionare Lingua
(Language).
2. Usare la manopola destra per
regolare la selezione.
3. Premere quindi il pulsante
per
confermare.
1. Nel menu Impostazioni, spostarsi con
i pulsanti
e selezionare Timer
stand-by (Standby timer).
2. Usare la manopola destra per
regolare la selezione.
3. Premere quindi il pulsante
per
confermare.
ES
IT
PT
NL
RUS
AR
HE
Volume
Salvaschermo
Il Salvaschermo viene attivato come funzione dell’orario selezionato
nella voce di menu Timer stand-by. Come Salvaschermo può essere
utilizzata una qualsiasi quantità di immagini delle immagini personalizzate. Possono essere utilizzati solo file d’immagini. Salvarli nella
cartella „995SAVER“ della scheda SD. Affinché funzionino, i file
devono essere salvati nel seguente formato:
Esempio: XXX00001.jpg
XXX = massimo 3 caratteri
12345 = massimo 5 cifre
.jpg = formato del file
Utilizzare questa impostazione per regolare il volume dei segnali acustici
emessi quando si accende/si spegne il dispositivo, quando il robot raggiunge
la temperatura desiderata o quando il tempo impostato è trascorso.
Per modificare il volume:
1. Nel menu Impostazioni, spostarsi con
i pulsanti
e selezionare Volume
(Volume).
2. Usare la manopola destra per
regolare la selezione.
3. Premere quindi il pulsante
per
confermare.
I file devono essere numerati in ordine sequenziale: XXX00002.jpg,
XXX00003.jpg, ecc. Le dimensioni dell’immagine devono essere adatte
alla risoluzione dello schermo LCD (480 x 272 pixel). Le immagini con
dimensioni diverse verranno automaticamente tagliate nelle corrette
proporzioni.
Per modificare il Salvaschermo:
Presentazione
1. Nel menu Impostazioni, spostarsi
con i pulsanti
e selezionare
Salvaschermo (Screen saver).
2. Usare la manopola destra per
regolare la selezione. (Stop / Avvia/
Riproduci).
3. Premere quindi il pulsante
per
confermare.
Utilizzare questa impostazione per personalizzare la visualizzazione delle
immagini in modalità Salvaschermo.
Per modificare Presentazione:
1. Nel menu Impostazioni, spostarsi
con i pulsanti
e selezionare
Presentazione (Slide show).
2. Usare la manopola destra per
regolare la selezione.
3. Premere il pulsante
per
confermare la selezione.
83
Modalità promozione
Versione del firmware
Questa modalità fornisce un ulteriore strumento di vendita ai rivenditori.
Infatti, visualizza sullo schermo LCD le informazioni sul prodotto salvate
nella cartella „996PROMT“.
Questa impostazione consente di visualizzare la versione del firmware
in uso, il numero di serie del dispositivo o un codice QR. Maggiori
informazioni sulla versione di firmware in uso si trovano sul sito
www.supercook.it. Per tutte le richieste di assistenza e per
registrare il prodotto sul sito è necessario il numero di serie.
Selezionando questa modalità si disattivano tutte le altre funzioni del
prodotto. Per uscire dalla modalità promozione, premere contemporaneamente MENU e i due pulsanti esterni per circa 10 sec.
Per ragioni di sicurezza, quando espone il robot nel negozio rimuovere
le lame in acciaio inox.
Per attivare la modalità promozione:
1. Nel menu Impostazioni, spostarsi
con i pulsanti
e selezionare
la modalità promozione (In-store
promotion mode).
2. Premere il pulsante
per
confermare la selezione accesa/
spenta.
3. Per uscire dalla modalità promozione,
premere contemporaneamente MENU
e i due pulsanti esterni per circa 10
sec.
Aggiornamento dell’unità di
controllo “Yumi”
Utilizzare questa impostazione per aggiornare il firmware dell’unità di
controllo “Yumi”. A tal fine, scaricare il firmware aggiornato da
www.supercook.it. Estrarre il firmware dal file compresso e
copiarlo nella directory principale della scheda SD.
Per modificare il firmware:
1. Inserire la scheda SD nell’unità di
controllo:
2. Nel menu Impostazioni, spostarsi
con i pulsanti
e selezionare
Aggiornamento dell’unità di controllo
(Update control module).
3. Premere il pulsante
per
confermare la selezione.
4. Seguire le istruzioni sullo schermo.
Dopo l’aggiornamento accendere e
spegnere il robot e il nuovo firmware
apparirà come descritto di seguito.
84
Visualizzazione delle informazioni sul firmware:
1. Nel menu Impostazioni, spostarsi
con i pulsanti
e selezionare
Versione FW (FW version).
2. Utilizzare il pulsante
per tornare
alla modalità Impostazioni
(Setup menu).
Raccolta ricette
Il menu Raccolta ricette contiene il ricettario digitale, da utilizzare
come guida. Contiene tutte le categorie di ricette, tutte le ricette con le
singole istruzioni. Le categorie sono organizzate in modo da facilitare
l’individuazione di una ricetta.
Su una scheda SD possono essere memorizzate fino a 895 ricette, se la
memoria è di 1 GB e le ricette in una sola lingua. In media, una ricetta
occupa circa 1 MB per lingua. Nella dotazione standard viene fornita
una scheda SD da 1 GB. Per memorizzare la quantità massima di 895
ricette, in diverse lingue, dal sito www.supercook.it, è necessaria una
scheda SD con una capacità maggiore.
Categorie di ricette
D
GB
1.
Aperitivi
2.
Zuppe
3.
Piatti di pesce e carne
4.
Piatti vegetariani
IT
5.
Contorni
PT
6.
Pietanze per bambini
NL
7.
Salse
RUS
8.
Condimenti
AR
9.
Preparazioni al forno
HE
10.
Dessert
11.
Bevande
12.
Cibo per gli animali domestici
FR
ES
Per selezionare una ricetta da visualizzare:
1.
2.
1. Utilizzare
per spostarsi nel
menu Raccolta ricette (Recipe
collection).
2. Premere il pulsante per
confermare la selezione.
3.
3. Un cerchio
indica la categoria in
uso.
4. Utilizzare
per spostarsi e
selezionare la categoria desiderata.
5. Premere il pulsante per
confermare la selezione.
6. O premere
se si desidera
spegnere l’unità di controllo.
4.
7.
Utilizzare il pulsante
per
aggiungere la ricetta a quelle
preferite.
8. Utilizzare
per spostarsi
all’interno della categoria selezionata
e visualizzare le diverse ricette.
9. Premere il tasto
per confermare
la selezione.
10. Utilizzare
per spostarsi fra le
pagine della ricetta.
11. Utilizzare
per spegnere l’unità di
controllo.
12. Utilizzare il pulsante MENU per uscire
da Raccolta ricette.
85
Cottura ricette
In questo menu è possibile iniziare ad adoperare il robot da cucina. È
possibile sia seguire i tempi, le velocità e le temperature di lavorazione
preimpostati sia regolarli manualmente.
Per iniziare a cucinare:
1.
2.
1. Utilizzare
per spostarsi fra
le opzioni del menu Cottura ricette
(Recipe cooking).
2. Premere il pulsante per
confermare la selezione.
3.
6. Utilizzare il pulsante
per
aggiungere la ricetta a quelle
preferite.
7. Utilizzare
per spostarsi
all’interno della categoria selezionata
e visualizzare le diverse ricette.
8. Una volta scelta una ricetta,
confermare premendo .
5.
4.
9. Utilizzare
per avviare il procedimento
con le impostazioni predefinite.
10. Premere il pulsante
per mettere in
pausa le impostazioni in uso. (Apparirà
una volta avviato il procedimento.
11. Vedere il punto 9).Usare
e
per regolare manualmente il tempo
preimpostato.
12. Utilizzare la manopola sinistra per
regolare manualmente la temperatura
preimpostata.
13. Utilizzare la manopola destra per
regolare manualmente la velocità
preimpostata.
6.
14. Premendo
la velocità aumenta
per un breve periodo di tempo
(Turbo).
15. Utilizzare
per tornare al punto
precedente, ma solo quando non è
ancora avviata la cottura.
86
3. Un cerchio
indica la categoria
in uso.
4. Utilizzare
per spostarsi e
selezionare la ricetta desiderata.
5. Premere il pulsante
per
confermare la selezione.
16. Questo promemoria appare dopo
che l’80% del tempo di lavorazione
preimpostato è trascorso.
17. Premere
per terminare la fase
e aggiungere ingredienti. Alla
fine della fase il calore si spegne
automaticamente. Il motore va
avanti, a seconda della lunghezza del
processo di cottura.
D
GB
FR
ES
IT
7.
PT
8.
18. A questo punto è possibile utilizzare
il pulsante
per prolungare il
procedimento in corso con le nuove
impostazioni selezionate.
19. Utilizzare
ricetta.
per avanzare nella
NL
RUS
AR
HE
O
9.
20. Se si desidera prolungare
manualmente il procedimento,
come descritto al punto 18, apparirà
l’immagine a sinistra. Una volta
terminate le impostazioni, il robot
torna al punto 19 ed è possibile
andare avanti.
Ciò avviene alla fine di ogni fase.
Impostazioni di sicurezza del
robot da cucina fra le opzioni
del menu: Cottura ricette,
Ricette preferite e Le mie ricette
10.
21. In caso di assenza di comandi, alla
fine del giro e trascorso il tempo di
sicurezza il motore si spegne.
22. Viene visualizzata l’immagine
mostrata a sinistra.
23. Premere
e tornare indietro al
passo successivo nella ricetta già
avviata.Utilizzare il pulsante
per
uscire dalla modalità Cottura ricette.
A questo punto, in mancanza di nuove regolazioni delle impostazioni,
il calore si spegnerà e il robot continuerà a funzionare per i successivi
1-5 min, a seconda della lunghezza della fase. Ciò serve ad evitare,
ove possibile, che il cibo si attacchi al contenitore. Una volta trascorso
questo tempo, il robot uscirà automaticamente dalla ricetta e tornerà alla
panoramica delle categorie. A questo punto, è possibile utilizzare il pulsante
per tornare al passo successivo della ricetta o interrompere completamente il processo di cottura con il pulsante
.
Impostazioni pre-programmate
Quando è trascorso l’80% del tempo pre-programmato (20% rimanente),
sullo schermo appare la nota “Questa fase sta per concludere”. Per
esempio, se il tempo di lavorazione è 5 min, quando mancherà 1 min il
robot emetterà un segnale acustico.
Se si regola manualmente il tempo di lavorazione pre-programmato
ignorando l’avviso (20% del tempo preimpostato rimanente), il messaggio
“Questa fase sta per concludere” non apparirà. Tuttavia, entreranno in
funzione altri meccanismi di sicurezza, come descritto precedentemente. Il
calore si spegnerà al termine del tempo di lavorazione. Il motore si arresterà
dopo un periodo di tempo definito.
87
Ricette preferite
Aiuto
In questo menu si trovano le proprie ricette preferite. Per avviare il
processo di cottura dal menu Ricette preferite, seguire le istruzioni
contenute alla voce Cottura ricette
Questa opzione di menu fornisce spiegazioni sui simboli impiegati nell’unità
di controllo “Yumi”.
Arrivare alla selezione delle ricette preferite.
1. Utilizzare
per spostarsi nel
menu Aiuto (Help).
2. Premere il pulsante
per
confermare la selezione.
1. Utilizzare
per spostarsi nel
menu Ricette preferite (Recipe
favorites).
2. Premere il pulsante
per
confermare la selezione.
Le mie ricette
Basta raccolte di ricette su foglietti di carta, ritagliate da giornali o
scaricate da Internet. Questo robot da cucina è il vostro ricettario
personale. Consente infatti di creare, cuocere, gustare e raccogliere le
proprie ricette. Scoprite come su www.supercook.it.
Per avviare il processo di cottura dal menu Le mie ricette, seguire le
istruzioni contenute in Cottura ricette.
1. Utilizzare
per spostarsi fra le
opzioni del menu Le mie ricette
(My recipes).
2. Premere il pulsante
per
confermare la selezione.
3. Selezionare la categoria e seguire le
istruzioni, come descritto in Cottura
ricette (Recipe cooking).
88
Istruzioni importanti prima
di iniziare
1. Utilizzare sempre il robot da cucina multifunzione su una superficie
piana, pulita, stabile e che non emetta calore.
2. Rimuovere tutti i materiali d’imballaggio.
3. Pulire tutti gli accessori.
4. Non inserire mai le mani nel robot da cucina multifunzione mentre è in
funzione.
5. Accertarsi che le guarnizioni impiegate siano sempre pulite e integre.
6. Il robot da cucina è dotato di un meccanismo di sicurezza interno. Nel
caso in cui il recipiente in acciaio inox non sia chiuso correttamente, il
dispositivo non entrerà in funzione.
7. Scollegare il robot da cucina dall’alimentazione:
a. in caso di danni o malfunzionamenti del dispositivo
b. in caso di caduta del dispositivo.
c. in caso di danni visibili ai componenti o di mancanza di alimentazione di rete.
8. Non lasciare incustodito il robot da cucina.
9. Utilizzare solo gli accessori consigliati da plawa.
Pulizia
1. Pulire il robot da cucina prima di utilizzarlo per la prima volta e dopo
ogni uso, e pulire tutti i componenti e gli accessori che entrano in
contatto con gli alimenti. Accertarsi che il robot da cucina sia completamente freddo prima di iniziare le operazioni di pulizia.
2. Prima di effettuare la pulizia, scollegare la spina dalla presa
dell’alimentazione di rete.
3. I contatti presenti sotto al recipiente in acciaio inox devono essere
mantenuti puliti e asciutti.
4. Le lame in acciaio inox sono molto affilate! Prestare attenzione durante
le operazioni di montaggio e smontaggio.
5. Tutti gli accessori possono essere lavati in lavastoviglie.
6. Dopo ogni utilizzo, per prevenire la presenza di germi, pulire il robot e le
guarnizioni.
7. Utilizzare un panno morbido e leggermente inumidito per pulire il
recipiente in acciaio inox del robot da cucina.
8. Non utilizzare mai detergenti abrasivi o caustici. Potrebbero
danneggiare la superficie.
9. Eventuali macchie sugli accessori di plastica conseguenti all’utilizzo di
carote, pomodori o spezie presenti nel curry sono normali. Tali macchie
possono essere eliminate strofinando la parte con un panno imbevuto
d’olio. Sciacquare quindi rapidamente con acqua calda, poi con acqua
fredda e poco detersivo.
Specifiche tecniche
Robot da cucina SUPERCOOK
Consumo elettrico
Cottura
Mescolatura
1000 Watt
500 Watt
Capacità
2 litri
Temperatura minima
40 °C
Temperatura massima
130 °C
Velocità
10 + turbo
Velocità massima di
mescolatura
20.000 rpm
Segnali acustici
Si
Copyright
D
Copyright 2013 Questo manuale dell’utente contiene informazioni coperte
da copyright. Tutti i diritti riservati. È vietato riprodurre queste istruzioni
operative con qualsiasi mezzo e in qualsivoglia forma – meccanica,
elettronica o altro – senza il precedente consenso scritto del produttore.
SUPERCOOK è un marchio di plawa-feinwerktechnik GmbH & Co. KG.
GB
Smaltimento dei dispositivi
elettronici usati
IT
Questo simbolo sul prodotto o sull’imballaggio indica che il dispositivo non
deve essere smaltito fra i normali rifiuti domestici, ma portato a un punto
di raccolta per il riciclaggio di dispositivi elettrici ed elettronici. Per ulteriori
informazioni, contattare le autorità governative locali, gli enti preposti a tale
servizio o il negozio in cui si è acquistato il dispositivo.
FR
ES
PT
NL
RUS
AR
HE
Tensione di rete/Frequenza 230 V~50 Hz
Unità di controllo
Connessione
Schermo LCD dell’unità di
controllo
Scheda di memoria
Capacità di memoria
(inclusa)
Vapore (Set di vassoi per
cottura al vapore) (opzionale)
Dimensioni
5 V dalla presa alla spina
4.3“
1 GB -> 32 GB
circa 23,1 x 19,2 cm (circa le dimensioni di
un foglio A4)
Data la sua crescita continua, il produttore si riserva il diritto di modificare
il prodotto, inclusi gli accessori, l’imballaggio, le istruzioni e il ricettario, in
qualsiasi momento, senza autorizzazione preventiva.
Dichiarazione di conformità
Si conferma che questo specifico prodotto è conforme alle Direttive
LVD 2009/95/EC, EMC 2004/108/EC e RoHS 2011/65/EU
EN 60335-2-14: 2006+A1:2008+A11:2012
EN 60335-2-15: 2002+A1:2005+A2:2008+A11:2012
EN 60335-1: 2012
EM 62233: 2008
EN 55014-1/A1: 2009
EN 55014-2/A2:2008
EN 61000-3-2/A2:2009
EN 61000-3-3:2008
Assistenza e servizio clienti
Si necessita di assistenza? Per ulteriori questioni, visitare il sito
www.supercook.it, contattare la nostra hotline o consultare il rivenditore da
cui è stato acquistato il robot da cucina multifunzione.
Numero Verde & Riparazioni (EU):
00800 75292 100
(numero gratuito da tutte le linee fisse)
Assistenza online /Contatti internazionali:
Internet: www.supercook.it
E-mail: [email protected]
In caso di restituzione del prodotto, sarà necessario un numero RMA
(Return Merchandise Authorization), che deve essere scritto chiaramente
sulla confezione. Ulteriori informazioni sulla restituzione della merce sono
disponibili telefonicamente presso le nostre linee di assistenza o alla
voce „Service & Support“ (“Assistenza & Supporto”) sul sito SUPERCOOK.
Produttore
plawa-feinwerktechnik GmbH & Co. KG
Bleichereistr. 18
73066 Uhingen
Germany
89
90
Manual do utilizador SUPERCOOK
D
Português
FR
GB
ES
Conteúdo
Introdução
92
Exemplos de utilização da máquina de
cozinha multifuncional
92
Instruções do produto e de segurança
92
Cuidados
92
Utilização destas instruções de utilização
93
Mensagens do ecrã e de erro
93
Visão geral das vistas dianteira e traseira da
máquina de cozinha
94
Visão geral da unidade de controlo “Yumi”
95
Acessórios
95
Acessórios opcionais
95
Os primeiros passos
96
Preparação
97
Recipiente
97
Faca
97
Cesto de cozedura
97
Batedor de varas
98
Tampa
98
Espátula
98
Copo de medida
98
Tabuleiro de vapor Vapore (acessório opcional) 99
Benefícios de cozinhar a vapor
99
Utilizar o tabuleiro de vapor Vapore
99
Inserir e retirar o cartão de memória
99
Ligar e desligar
99
Ligar a unidade de controlo pela primeira vez
100
Estrutura do menu
100
IT
PT
Definições
Data
Hora
Temporizador de espera
Proteção de ecrã
Idioma
Volume
Apresentação de diapositivos
Modo de promoção
Atualizar a unidade de controlo “Yumi”
Versão do firmware
Coletânea de receitas
Categorias de receitas
Cozinhar receitas
Definições de segurança da máquina de
cozinha nas opções do menu: Cozinhar receitas,
Receitas favoritas e As minhas receitas
Definições pré-programadas
Receitas favoritas
As minhas receitas
Ajuda
Instruções importantes antes de começar
Limpeza
Especificações técnicas
Assistência e apoio ao cliente
Copyright
Descarte de dispositivos eletrónicos usados
Declaração de conformidade
100
100
100
101
101
101
101
101
102
102
102
103
103
104
NL
RUS
AR
HE
105
105
106
106
106
106
106
107
107
107
107
107
91
Introdução
Obrigado por adquirir a máquina de cozinha SUPERCOOK. Leia o manual
do utilizador cuidadosamente e guarde-o num lugar seguro de modo a
poder consultá-lo mais tarde. Esperamos que goste de utilizar a máquina
de cozinha e que ela produza bons resultados.
Exemplos de utilização da máquina de cozinha multifuncional:
• Fazer puré de fruta, legumes, molhos e sopas
• Misturar batidos e cocktails.
• Pulverizar açúcar e pimentões secos
• Moer amêndoas e avelãs
• Ralar fruta e legumes
• Picar cebolas e nozes
• Usar o agitador para emulsionar maionese e cremes
• Ralar queijo, migalhas de pão e batatas
• Misturar massas leves, merengues e chantili
• Amassar fermento e massa de pão
• Aquecer, fritar ou cozer a temperaturas de 40 a 130 °C.
• Cozinhar a vapor no tabuleiro de vapor Vapore ou no cesto de
cozedura
Instruções do produto e de
segurança
Leia as seguintes instruções importantes com cuidado antes de utilizar
pela primeira vez a máquina de cozinha multifuncional:
1. Antes de começar: Retire da caixa a máquina de cozinha e todos os
acessórios.
2. Não utilize a máquina de cozinha em superfícies molhadas ou
húmidas.
3. De modo a garantir uma utilização segura da máquina de cozinha,
deverá ligá-la à rede elétrica através de uma tomada padrão de 3
pinos. Verifique que o seu sistema elétrico está em conformidade
com a informação de energia e tensão presente na etiqueta de classificação da máquina de cozinha. Ligações incorretas fazem caducar a
garantia.
4. Com todos os dispositivos elétricos, há o risco de eletrocussão que
pode causar ferimentos ou até mesmo a morte. É portanto importante
respeitar sempre as instruções de segurança.
5. A plawa ou o distribuidor não aceitam qualquer responsabilidade por
danos causados como resultado de alimentação elétrica insuficiente
ou instalação incorreta no edifício. Se tiver qualquer dúvida, consulte
um eletricista qualificado.
6. Mantenha o material de embalagem, especialmente películas de
embalagem, sacos e poliestireno, fora do alcance das crianças.
7. Quando utilizada pela primeira vez, pode aparecer algum cheiro. Isto
não é perigoso.
8. Não mergulhe na água a máquina de cozinha, a unidade de controlo
ou o cabo de alimentação.
9. Nunca cubra a máquina de cozinha com toalhas de chá, panos, etc..
10. Mantenha o dispositivo suficientemente afastado de outras fontes de
calor, tais como placas, a fim de evitar danos no mesmo.
11. Esta máquina de cozinha não é um brinquedo e deve ser mantida fora
do alcance das crianças.
12. Coloque o cabo de tal forma que ele não fique esmagado ou dobrado
ou esteja em contacto com superfícies quentes.
13. Se estiver a utilizar uma extensão:
a. o cabo deve estar ligado à terra
b. tome todas as precauções necessárias para garantir que não se
tropece no cabo.
14. Nunca permita que o cabo de alimentação balance livremente e
nunca o desligue puxando o cabo; puxe sempre pela ficha.
15. Não utilize a máquina de cozinha:
a. se o cabo ou a ficha estiverem danificados
b. se não estiver a funcionar corretamente, se a máquina de cozinha
caiu ou mostrar sinais exteriores de danos.
16. Não mova a máquina de cozinha enquanto ela estiver a trabalhar.
92
17. Esta máquina de cozinha foi concebida exclusivamente para uso
doméstico e em interiores.
18. Nunca tente reparar a máquina de cozinha você mesmo. Não
substitua ou modifique o cabo elétrico, a fonte de alimentação ou
outros componentes. Consulte sempre um técnico autorizado ou a
linha direta.
19. Se a unidade não funcionar corretamente ou estiver danificada,
desligue-a da rede elétrica.
20. A plawa ou o distribuidor não aceitam qualquer responsabilidade por
danos causados como resultado de uso impróprio ou incorreto da
máquina de cozinha.
21. A máquina de cozinha não é uma fritadeira. Sob nenhuma
circunstância deve tentar fritar alimentos na máquina de cozinha.
22. Não insira objetos nos orifícios do dispositivo.
23. Desligue a máquina de cozinha da rede elétrica:
a. ao limpar
b. quando não está em utilização
c. no caso de uma falha de energia.
24. Pessoas com pouca experiência ou conhecimento no manuseio
destes dispositivos, pessoas com capacidades físicas, psicológicas,
mentais e sensoriais limitadas, e crianças, só devem utilizar a
máquina de cozinha sob a supervisão ou instrução de uma pessoa
que possa aceitar a responsabilidade pela segurança. As crianças
devem ser vigiadas para garantir que não brincam com a máquina de
cozinha.
25. Esta máquina de cozinha foi concebida para uso doméstico e similar
como, por exemplo:
• em cozinhas de empregados em lojas, escritórios e outras áreas
comerciais
• em propriedades agrícolas
• por clientes em hotéis, motéis e outros alojamentos
• em pensões
Cuidados
Manuseie a máquina de cozinha e acessórios com cuidado. As recomendações a seguir ajudarão a manter a sua garantia e asseguram que todas
as reivindicações sob garantia são válidas.
1. Desligue a máquina de cozinha se não tenciona utilizá-la por um
período prolongado.
2. Deixe a máquina de cozinha arrefecer completamente antes de a
limpar.
3. Limpe todos os componentes e acessórios que entraram em contacto
com os alimentos.
4. Utilize um pano macio, ligeiramente humedecido, para limpar a
cavidade do recipiente da máquina de cozinha.
5. Os contactos debaixo do recipiente devem ser mantidos limpos e
secos.
6. Todos os acessórios podem ser lavados em máquinas de lavar louça.
7. Para evitar a acumulação de germes, limpe a máquina de cozinha e os
anéis de vedação após cada utilização.
8. Nunca utilize detergentes abrasivos ou adstringentes.
9. Quaisquer marcas de calcário podem ser retiradas com vinagre.
10. É normal ocorrer alguma descoloração nos acessórios de plástico
devido ao betacaroteno das cenouras ou tomates ou especiarias com
caril. Pode reduzir ligeiramente a descoloração humedecendo um
pano com óleo de cozinha e esfregando a área com cuidado. Depois
enxague rapidamente com água quente, depois com água fria e um
pouco de detergente de lavagem líquido.
11. Utilize a máquina de cozinha apenas como descrito nestas instruções
de utilização.
Utilização destas instruções de utilização
D
GB
FR
Este símbolo indica avisos que deve ler antes da utilização.
ES
Mensagens do ecrã e de erro
Símbolo / Questão /
Descrição do erro
IT
PT
Explicação
Solução
O recipiente não está vedado corretamente ou o interruptor de segurança
não está a funcionar.
Verifique novamente a vedação.
A máquina de cozinha tem um erro no circuito elétrico.
Contacte o seu centro de assistência
local. Pode encontrar o número de
telefone em www.supercook.me ou nas
instruções.
O motor está sobrecarregado.
Desligue a máquina de cozinha e
espere alguns minutos até que o motor
arrefeça.
A máquina de cozinha tem um sistema de controlo especial. A velocidade
pode variar e a rotação é interrompida a intervalos de 2 segundos. Isto
significa que a máquina de cozinha começa a fazer um barulho invulgar.
Isto é normal. Este barulho significa que a velocidade da faca está a ser
ajustada para evitar o sobreaquecimento do motor.
Retire parte da mistura ou aumente a
velocidade até um máximo de 3.
A faca está a trabalhar muito
lentamente ao preparar
massa.
Verifique que não excedeu o máximo de 500 g de farinha.
Retire parte da mistura do recipiente.
Está a sair fumo da máquina
de cozinha.
O motor está a sobreaquecer. Verifique o nível máximo de enchimento.
Retire parte da mistura do recipiente.
Deixe a máquina de cozinha arrefecer
durante cerca de 20 minutos.
A máquina de cozinha não
funciona com a definição de
temperatura e a velocidade
definida para 5.
A temperatura apenas pode ser definida para velocidades de 1 a 4.
Mude a definição de velocidade para uma
de 1 a 4.
É difícil encaixar o recipiente.
Posicionar o recipiente fica mais fácil com o uso, uma vez que a selo de
silicone altera-se em função do calor e humidade, ao formar uma vedação.
Esfregue um pouco de óleo de cozinha no
selo de silicone ou humedeça-o.
Comprei uma máquina de
cozinha já usada? A base do
recipiente apresenta marcas e
humidade residual na entrega.
Todas as unidades da máquina de cozinha são testadas antes da
entrega. O recipiente é cheio com água e levado à ebulição. Tal como
numa máquina de lavar loiça, humidade residual pode permanecer. Estes
resíduos podem resultar em marcas ligeiras mas perfeitamente seguras
na base do recipiente.
Para retirar as marcas, utilize um
limpador inoxidável convencional, como o
Sidol da Henkel.
Faz barulho na primeira
utilização ou sob forte carga.
Na primeira utilização ou sob forte carga, o motor pode aquecer e fazer
barulhos estranhos. Tal como em qualquer motor elétrico, por exemplo,
numa via-férrea modelo ou numa autoestrada modelo, o motor utiliza
escovas que precisam de ser “estreadas” para começar. Não se preocupe
com os ruídos.
Deixe a máquina de cozinha arrefecer
depois de ter estado a trabalhar muito,
por exemplo, a amassar massa firme.
A máquina de cozinha estará de novo
completamente operacional depois de
arrefecer.
Sinal sonoro.
A unidade faz um bip para o avisar que a máquina de cozinha alcançou a
temperatura certa.
O sinal sonoro também indica que o
tempo pré-definido terminou.
A máquina de cozinha para
quando o batedor de varas é
utilizado.
A velocidade é irregular ou o
motor está a prender.
NL
RUS
AR
HE
Aumente a velocidade de 1 para 2 ou de
2 para 3.
93
Visão geral das vistas dianteira e traseira da máquina de cozinha
1.
2.
3.
4.
5.
6.
7.
Unidade de controlo “Yumi”
Balança de cozinha Libra (acessório opcional)
Copo de medida
Tampa
Recipiente
Abertura de ventilação
Botão Ligar / Desligar
3
2
4
5
1
6
7
94
Visão geral da unidade de controlo “Yumi”
D
GB
1.
2.
3.
4.
5.
6.
FR
Ecrã LCD
4 botões de controlo
Botões rotativos direito e esquerdo
Botão MENU
Ranhura para cartões SD
Encaixe
ES
IT
1
PT
NL
RUS
3
AR
2
HE
4
5
6
Acessórios
Cesto de cozedura
Copo de medida, Tampa, Faca, Recipiente
Batedor de varas
Espátula
Acessórios opcionais
•
•
Balança digital de cozinha SUPERCOOK Libra
Tabuleiro de vapor SUPERCOOK Vapore, modelos em plástico ou porcelana / vidro
Consulte o seu revendedor local ou visite www.supercook.me se tiver questões sobre acessórios
adicionais.
Cartão SD
95
Os primeiros passos
Símbolos gerais
Significado
Calendário *
Define a data e o formato da data
Idioma *
Seleciona o idioma desejado. * Só é necessário quando liga pela primeira vez ou depois da
bateria ser substituída pelo serviço de assistência.
Confirmar
Confirma a seleção
Voltar
Volta para trás
Seguinte
Anda para a frente
Reproduzir
Controla a reprodução
Mais
Aumenta o tempo de cozedura
Menos
Diminui o tempo de cozedura
Baixo
Navegação: Para baixo ou para o lado
Cima
Navegação: Para cima ou para o lado
Ligar / Desligar
Liga ou desliga a unidade de controlo
Sair
Sai do processo de cozedura por razões de segurança
Pausar
O processo é pausado, as definições são mantidas
Favoritas
Premir este símbolo guarda a receita selecionada no menu Favoritas.
Parar
Para o processo.
Velocidade
Níveis de velocidade: 1 a 10 e função turbo
Tempo
•
•
•
•
•
Temperatura
•
•
•
•
96
Tempo de cozedura ou de processo: 1 segundo até o máximo de 60 minutos
Quando inicia a função, o relógio conta para trás, com o tempo selecionado mostrado no
ecrã em minutos e segundos, com um símbolo de relógio.
O tempo de cozedura ou do processo pode ser ajustado a qualquer momento.
Para iniciar o processamento, necessita de definir o tempo.
A temperatura inicia a 40 °C e pode ser ajustada até o máximo de 130 °C, em
incrementos de 5 °C.
A unidade dá um bip para o avisar que a temperatura certa foi atingida.
Este símbolo pisca durante alguns segundos assim que a máquina de cozinha atingir a
temperatura definida.
Se está a preparar alimentos acima de 50 °C, deve evitar utilizar o botão Turbo.
Temperaturas superiores a 100 °C são apropriadas para cozinhar a vapor, fritar e ferver.
Mais
Continue a cozinhar manualmente depois de uma etapa de receitar estar completa.
Anterior
Volta atrás uma etapa de receita numa sequência de receita (Cozinhar receitas)
Reiniciar
Reinicia o processo de cozedura na próxima etapa após parar o programa, por razões de
segurança.
Aviso
Aviso - observe!
Preparação
D
GB
Recipiente
1. O recipiente tem uma capacidade de 2 litros e uma útil escala de medição no lado de
dentro e de fora.
2. Assim que a faca esteja devidamente encaixada no recipiente, coloque o recipiente na
cavidade na máquina de cozinha. De seguida, pressione o recipiente para baixo com
cuidado, até que envolva a engrenagem e os contactos.
FR
ES
IT
PT
NL
RUS
1. Não encha o recipiente acima do nível máximo de 2 litros. De outro modo, não pode ser
garantida uma utilização segura e a qualidade final dos seus pratos pode estar comprometida.
2. Quando retirar o recipiente da máquina de cozinha, certifique-se de que não derrama o
conteúdo. Se o conteúdo estiver quente, pode queimar-se.
3. Se o recipiente não se envolver imediatamente com a engrenagem da máquina de
cozinha, gire com cuidado a cabeça da faca.
AR
HE
Faca
1. Na entrega, a faca está encaixada no recipiente.
2. Para retirar a faca, coloque o recipiente numa posição vertical. Empurre a alavanca para
baixo no sentido contrário dos ponteiros do relógio para libertar a faca. (ver Figura 1)
3. Para inserir a faca, coloque-a em posição e empurre a alavanca para cima no sentido dos
ponteiros do relógio. (ver Figura 2)
Fig. 1
1. A faca é muito afiada! Tenha muito cuidado ao encaixá-la e retirá-la.
2. Assegure-se que o anel de vedação está devidamente encaixado no rolamento da faca. Se
o anel de vedação não estiver encaixado, o conteúdo do recipiente pode verter e danificar
a máquina de cozinha.
3. Ao adicionar alimentos, garanta que a faca não fica bloqueada.
4. Deixe a faca arrefecer completamente após cada processo de cozedura, antes de a retirar.
5. A quantidade máxima de processamento é de 500 g de farinha numa massa de pão firme.
Fig. 2
Cesto de cozedura
1. O cesto de cozedura é utilizado para cozinhar a vapor pequenas quantidades de
alimentos e encaixa diretamente no recipiente.
2. Existe uma reentrância no lado que faz com que seja fácil de retirar o cesto de
cozedura com a ajuda da espátula.
97
Preparação
Batedor de varas
1. O batedor de varas é colocado sobre a faca com uma ligeira resistência.
2. O batedor de varas é perfeito para fazer, por exemplo, sobremesas cremosas, merengues
e chantili.
3. O batedor de varas apenas pode utilizado nas velocidades 1 a 4.
1. O batedor de varas não deve ser utilizado em conjunção com o botão turbo.
2. Ao adicionar alimentos, garanta que o batedor de varas não fique bloqueado.
3. O batedor de varas não é apropriado para amassar massa firme. Utilize a faca para
amassar, por exemplo, massa de pão ou piza.
4. O batedor de varas não deve ser utilizado em conjunção com a espátula.
Tampa
1. O anel de vedação deve ser encaixado na tampa para evitar potenciais derrames.
2. Coloque a tampa na diagonal na parte superior do recipiente.
3. Gire a tampa no sentido dos ponteiros do relógio até que o entalhe na base da parte da
frente da tampa encaixe na devida ranhura na máquina de cozinha.
4. A máquina de cozinha apenas pode ser ligada se a tampa estiver corretamente colocada.
5. A tampa tem uma abertura superior para facilitar a adição de ingredientes extra.
Espátula
1. Utilize este acessório para retirar ou misturar ingredientes.
2. A espátula foi concebida de modo a não entrar em contacto com a faca quando se
adicionam ingredientes através da abertura superior.
Copo de medida
1. O copo de medida tem a capacidade de 100 ml e é amovível.
a. Isto torna mais fácil acrescentar ingredientes adicionais.
b. A temperatura é mantida assim que o copo de medida está sobre a tampa.
c. Isto controla a saída de vapor.
1. Retire o copo de medida apenas nas velocidades 1 a 3. De outro modo, os
ingredientes podem saltar para fora e pode queimar-se.
2. Se estiver a usar uma velocidade superior, segure firmemente o copo de medida
para evitar derrames.
98
Preparação
D
GB
1
Tabuleiro de vapor Vapore (acessório opcional)
O tabuleiro de vapor Vapore é utilizado para cozer os alimentos delicadamente, preservando
as suas vitaminas. Cozer a vapor é uma das formas mais saudáveis de cozinhar.
2
3
4
Visão geral do tabuleiro de vapor
Vapore
1. Cobertura
2. Tabuleiro de vapor plano
3. Tabuleiro de vapor profundo
4. Coletor de condensação para
recolher líquidos
Benefícios de cozinhar a vapor
1. As vitaminas e os nutrientes são preservados
2. Poupa tempo pois podem ser preparados diversos pratos ao mesmo tempo
3. Alimentos saudáveis, com pouco sal e gordura
4. Os alimentos retêm a água
5. Não há transferência de sabores
Utilizar o tabuleiro de vapor Vapore
1. Encha o recipiente com pelo menos 700 ml de água ou outro líquido fumegante, tal como
caldo.
2. Lubrifique as taças de embutir de modo a que os alimentos não fiquem colados.
3. Coloque os ingredientes nos tabuleiros de vapor. Certifique-se que os alimentos que
demoram mais a cozinhar são colocados no tabuleiro de vapor profundo. Deixe alguns dos
buracos desimpedidos de modo a permitir que o vapor suba.
4. Coloque o tabuleiro de vapor Vapore diretamente sobre a tampa sem o copo de medida.
5. Verifique que os tabuleiros de vapor estão encaixados uns nos outros e que a tampa está
devidamente encaixada de modo a que o vapor não possa fugir.
FR
ES
IT
PT
NL
RUS
AR
HE
1. Ao manusear o tabuleiro de vapor Vapore, lembre-se que há vapor de água quente a sair
dele e líquido no coletor de condensação. Aviso - risco de queimadura!
2. Segure nas taças de embutir apenas pelas asas.
3. Retire o coletor de condensação com cuidado.
4. O coletor de condensação é feito de plástico e resistente a temperaturas aproximadamente de 90 °C.
5. O tabuleiro de vapor Vapore não é apropriado para micro-ondas, fornos ou outras fontes
de calor.
Inserir e retirar o cartão de memória
Insira o cartão SD fornecido na ranhura para cartões, na unidade de controlo “Yumi”.
Certifique-se de que os contactos do cartão SD estão virados para cima. Empurre cuidadosamente o cartão SD até ouvir um clique. Para retirar o cartão SD, empurre o cartão até que
seja ejetado e o possa retirar.
Ligar e desligar
Coloque a unidade de controlo “Yumi” na cavidade na máquina de cozinha. Prima o botão
Ligar / Desligar (7) e a máquina de cozinha está pronta a utilizar.
99
Ligar a unidade de controlo pela primeira vez
Quando liga a unidade pela primeira vez, é-lhe pedido para definir a data / hora e o idioma do ecrã.
Mude as definições de calendário e idioma do seguinte modo:
1.
1. Utilize os botões
para alternar
entre calendário e idioma e os botões
rotativos esquerdo e direito para
ajustar as definições.
2. Confirme a sua definição premindo o
botão .
2.
Estrutura do menu
3. Prima ou gire qualquer botão de
controlo além do botão MENU. Isto
leva-o para o modo de cozedura
manual.
4. Utilize o botão rotativo esquerdo para
definir a temperatura que deseja.
5. Utilize o botão rotativo direito para
ajustar a velocidade.
6. Utilize os botões
e
para ajustar
o tempo manualmente.
7. Premir o botão
aumenta a
velocidade por um curto período
(Turbo).
1. Utilize os botões
para navegar
através do menu.
2. O ponto
indica a posição atual.
3. Confirme a sua seleção premindo o
botão .
4. Se necessário, feche o menu
premindo o botão MENU.
Prima o botão MENU para entrar no menu principal.
Definições
Pode ajustar várias definições no menu secundário Configuração.
Data
Hora
Como alterar a data:
Como alterar a hora:
1. No menu Configuração, pode navegar
com os botões
e selecionar
Data (Date).
2. Utilize o botão rotativo direito para
ajustar a seleção. Utilize o botão
rotativo esquerdo para alternar entre
ano, mês e dia.
3. A seguir, prima o botão
para
confirmar.
100
1. No menu Configuração, pode navegar
com os botões
e selecionar
Hora (Time).
2. Utilize o botão rotativo direito para
ajustar a seleção. Utilize o botão
rotativo esquerdo para alternar entre
horas e minutos. Ao mesmo tempo,
pode definir o formato da hora como
12 ou 24 horas.
3. A seguir, prima o botão
para
confirmar.
Temporizador de espera
Idioma
O Temporizador de Espera permite-lhe definir o tempo passado o qual
a máquina de cozinha muda automaticamente para o modo Espera.
Depois de, por exemplo, 1 minuto no modo Espera, o ecrã desliga-se se
não houver Proteção de ecrã ativa (ver Proteção de ecrã).
Como alterar o Temporizador de Espera:
Como alterar o idioma:
D
GB
FR
1. No menu Configuração, pode navegar
com os botões
e selecionar
Idioma (Language).
2. Utilize o botão rotativo direito para
ajustar a seleção.
3. A seguir, prima o botão
para
confirmar.
1. No menu Configuração, pode navegar
com os botões
e selecionar
Temporizador de Espera (Standby
timer).
2. Utilize o botão rotativo direito para
ajustar a seleção.
3. A seguir, prima o botão para
confirmar.
ES
IT
PT
NL
RUS
AR
HE
Volume
Proteção de ecrã
A Proteção de ecrã é ativada em função do tempo selecionado no item
do menu Temporizador de Espera. Pode utilizar um número qualquer
de imagens personalizadas como Proteção de ecrã. Tenha atenção
que apenas ficheiros de imagem podem ser utilizados. Guarde-as na
pasta de sistema “995SAVER” no seu cartão SD. Necessitam de ser
guardadas no seguinte formato, a fim de funcionar:
Exemplo: XXX00001.jpg
XXX = máximo de 3 caracteres
12345 = máximo de 5 dígitos
.jpg = formato de ficheiro
Utilize esta definição para ajustar o volume dos bipes emitidos quando
liga / desliga, quando o dispositivo alcança a temperatura ou quando o
tempo acabou.
Como alterar o volume:
1. No menu Configuração, pode navegar
com os botões
e selecionar
Volume.
2. Utilize o botão rotativo direito para
ajustar a seleção.
3. A seguir, prima o botão
para
confirmar.
Os ficheiros necessitam de ser numerados em ordem sequencial:
XXX00002.jpg, XXX00003.jpg, etc.. O tamanho da imagem deve
coincidir com a resolução do ecrã LCD de 480 x 272 píxeis. As imagens
que não são deste tamanho são automaticamente recortadas para as
proporções corretas.
Como alterar a Proteção de ecrã:
Apresentação de diapositivos
1. No menu Configuração, pode navegar
com os botões
e selecionar
Proteção de ecrã (Screen saver).
2. Utilize o botão rotativo direito para
ajustar a seleção. (Parar / Reproduzir)
3. A seguir, prima o botão
para
confirmar.
Utilize esta definição para personalizar a exibição de imagens no modo
Proteção de ecrã.
Como ajustar a Apresentação de diapositivos:
1. No menu Configuração, pode navegar
com os botões
e selecionar
Apresentação de diapositivos
(Slide show).
2. Utilize o botão rotativo direito para
ajustar a seleção.
3. Confirme a sua seleção premindo o
botão
.
101
Modo de promoção
Versão do firmware
O modo de promoção oferece uma ferramenta adicional de marketing
aos retalhistas. Isto mostra informações sobre o produto no ecrã LCD,
guardadas na pasta de sistema “996PROMT”.
Esta definição permite-lhe exibir a versão atual do firmware, o número
de série do dispositivo ou um código QR. Mais informações sobre a
versão atual do firmware podem ser encontradas em www.supercook.me.
Necessita do número de série para todas as solicitações de assistência
e para registar o produto em www.supercook.me.
Se o modo de promoção está selecionado, todas as outras funções
do dispositivo são desativadas. Para sair do modo de promoção,
prima simultaneamente MENU e os dois botões exteriores durante 10
segundos.
Por razões de segurança, retire a faca ao exibir a máquina de cozinha
na loja.
Como ativar o modo de promoção:
1. No menu Configuração, pode navegar
com os botões
e selecionar
Modo de promoção (In-store
promotion mode).
2. Confirme ou não a sua seleção
premindo o botão
.
3. Para sair do modo de promoção,
prima simultaneamente MENU e os
dois botões exteriores durante 10
segundos.
Atualizar a unidade de controlo
“Yumi”
Utilize esta definição para atualizar o firmware da unidade de
controlo “Yumi”. Para fazer isto, descarregue o mais recente
firmware da máquina de cozinha a partir de www.supercook.me.
Extraia o firmware do ficheiro comprimido e copie-o para o
diretório de raiz do cartão SD:
Como alterar o firmware:
1. Insira o cartão SD na unidade de
controlo:
2. No menu Configuração, pode navegar
com os botões
e selecionar
Atualizar unidade de controlo (Update
control module).
3. Confirme a sua seleção premindo o
botão
.
4. Siga as instruções no ecrã.
LIGUE e DESLIGUE a máquina de
cozinha. Depois da atualização, o
novo firmware é apresentado como
descrito em baixo.
102
Exibir a informação de firmware
1. No menu Configuração, pode navegar
com os botões
e selecionar
Versão do firmware (FW version).
2. Utilize o botão para voltar ao menu
Configuração.
Coletânea de receitas
O item do menu Coletânea de receitas é o seu livro de receitas
digital, que pode utilizar como um livro de referência. Contém todas
as categorias de receitas, todas as receitas e instruções individuais.
As categorias foram criadas para ajudá-lo a encontrar rapidamente a
receita que deseja.
Um cartão SD pode guardar um máximo de 895 receitas embora a
memória seja maior que 1 GB. Em média, uma receita ocupa cerca
de 1 MB por idioma. A máquina de cozinha vem com um cartão SD
de 1 GB. Para guardar o número máximo de 895 receitas de
www.supercook.me, em diversos idiomas, necessita de um
cartão SD de maior capacidade.
Categorias de receitas
D
GB
1.
Entradas
2.
Sopas
3.
Pratos principais de peixe e carne
4.
Pratos principais vegetarianos
IT
5.
Acompanhamentos
PT
6.
Comida para bebés
NL
7.
Molhos
RUS
8.
Molhos para salada
AR
9.
Confeitaria
HE
10.
Sobremesas
11.
Bebidas mistas
12.
Comida para animais
FR
ES
Como selecionar uma receita para ver:
1.
2.
1. Utilize os botões
para navegar
através do menu Coletânea de
receitas (Recipe collection).
2. Confirme a sua seleção premindo o
botão
.
3.
3. O círculo
indica a categoria atual.
4. Utilize os botões
para navegar
e selecionar a categoria que deseja.
5. Confirme a sua seleção de categoria
premindo o botão
.
6. Pode também premir o botão
se deseja desligar a unidade de
controlo.
4.
7.
Utilize o botão
para adicionar a
receita à sua seleção de favoritas.
8. Utilize os botões
para navegar
dentro da categoria selecionada e
percorrer as diferentes receitas.
9. Utilize o botão para confirmar a
sua seleção.
10. Utilize os botões
para navegar
através das páginas de receitas.
11. Utilize o botão
para desligar a
unidade de controlo.
12. Utilize o botão MENU para sair da
Coletânea de receitas.
103
Cozinhar receitas
Neste menu, pode começar a trabalhar com a máquina de cozinha.
Pode seguir os tempos de processamento, velocidades e temperaturas
pré-definidos ou ajustá-los manualmente você mesmo.
Como começar a cozinhar:
1.
2.
1. Utilize os botões
para navegar
para a opção do menu Cozinhar
receitas (Recipe cooking).
2. Confirme a sua seleção premindo o
botão
.
3.
6. Utilize o botão
para adicionar esta
receita à sua seleção de favoritas.
7. Utilize os botões
para navegar
dentro da categoria selecionada e
percorrer as diferentes receitas.
8. Uma vez escolhida uma receita,
confirme a sua seleção premindo o
botão
.
5.
4.
9. Utilize o botão
para começar o
processo com as definições padrão.
10. Utilize o botão
para pausar a definição
atual. (Aparece uma vez iniciado o
processo. Ver passo 9).
11. Utilize os botões
para ajustar
manualmente o tempo pré-definido.
12. Utilize o botão rotativo esquerdo para
ajustar manualmente a temperatura
pré-definida.
13. Utilize o botão rotativo direito para ajustar
manualmente a velocidade pré-definida.
6.
14. Premir o botão
aumenta a
velocidade por um curto período
(Turbo).
15. Utilize o botão
para andar para
trás um passo, desde que o processo
de cozedura não esteja ainda ativo.
104
3. Um círculo
rindica a categoria
atual.
4. Utilize os botões
para navegar
e selecionar a receita que deseja.
5. Confirme a sua seleção premindo o
botão .
16. Esta chamada de atenção aparece
depois de 80% do tempo de processamento pré-programado.
17. Prima o botão
para terminar o
passo e acrescentar ingredientes.
O aquecimento desliga automaticamente no final do passo. O motor
continua, dependendo de quão longo
o processo de cozedura é.
D
GB
FR
ES
IT
7.
PT
8.
18. Tem agora a opção de usar o
botão
para prolongar o processo
atual com as novas definições que
selecionou.
19. Prima o botão
para continuar a
percorrer a receita.
NL
RUS
AR
HE
OU
9.
20. Se deseja prolongar manualmente
o processo como descrito no passo
18, aparece a imagem mostrada à
esquerda. Uma vez percorridas as
definições, a máquina de cozinha
regressa ao passo 19 e pode
continuar a percorrer os passos.
Este ciclo é repetido no final de cada
passo.
Definições de segurança da
máquina de cozinha nas opções
do menu: Cozinhar receitas,
Receitas favoritas e As minhas
receitas
Definições pré-programadas
A nota “Este passo está prestes a terminar.” aparece no ecrã passado 80%
do tempo pré-programado (20% do tempo restante). Por exemplo, se o
tempo de processamento é de 5 minutos, a máquina de cozinha faz um bip
quando falta 1 minuto para terminar.
10.
21. Se não fizer nada no final do ciclo e
o tempo de segurança terminar, o
motor desliga-se. Aparece a imagem
mostrada à esquerda.
22. Prima o botão
e reverta para
o próximo passo na receita que já
tenha começado.
23. Utilize o botão
para sair do modo
Cozinhar receitas.
Se não ajustar mais nenhuma definição depois deste passo, o aquecimento
desliga-se automaticamente e a máquina de cozinha continua a funcionar
durante 1 a 5 minutos mais, dependendo de quão longo o passo da receita
é. Isto impede que os alimentos fiquem pegados, quando há essa possibilidade. Depois deste tempo, a máquina de cozinha sai automaticamente
da receita e reverte para a visão geral de categoria. Tem agora a opção de
utilizar o botão
para reverter para o próximo passo da receita ou parar
completamente o processo de cozedura utilizando o botão
.
Se ajustar manualmente o tempo de processamento pré-programado da
receita substituindo o aviso de segurança (20% de tempo pré-definido
restante), então a mensagem “Este passo está prestes a terminar.” não
aparece. No entanto, os outros mecanismos de segurança, descritos em
cima, estão ativos. O aquecimento desliga-se quando o tempo de processamento chegar ao fim. O motor para depois de um período definido.
105
Receitas favoritas
Ajuda
Neste menu, pode encontrar todas as suas receitas favoritas. Para
começar o processo de cozedura no menu Receitas favoritas, siga a
descrição em Cozinhar receitas.
Esta opção do menu oferece esclarecimentos sobre os símbolos utilizados
na unidade de controlo “Yumi”.
Isto leva-o para a sua seleção de favoritas.
1. Utilize os botões
para navegar
através do menu Ajuda (Help).
2. Confirme a sua seleção premindo o
botão
.
1. Utilize os botões
para navegar
através do menu Receitas favoritas
(Recipe favorites).
2. Confirme a sua seleção premindo o
botão
.
As minhas receitas
Acabaram-se as coletâneas de receitas soltas, os recortes de
jornais e as transferências da Internet. A máquina de cozinha é
o seu livro de receitas pessoal. Pode criar, cozinhar, deleitar-se
com, e colecionar as suas próprias receitas. Descubra como funciona
em www.supercook.me.
Para começar o processo de cozedura no menu As minhas receitas,
siga a descrição em Cozinhar receitas.
1. Utilize os botões
para navegar
para a opção do menu As minhas
receitas (My recipes).
2. Confirme a sua seleção premindo o
botão
.
3. Selecione a categoria e siga as
instruções tal como descrito em
Cozinhar receitas (Recipe cooking).
106
Instruções importantes antes de
começar
1. Utilize sempre a máquina de cozinha multifuncional numa superfície
plana que esteja limpa, seja estável, e não emita calor.
2. Retire todo o material de embalamento.
3. Limpe todos os acessórios.
4. Nunca coloque a sua mão na máquina de cozinha multifuncional
enquanto ela está a girar.
5. Assegure-se que os anéis de vedação utilizados estão sempre limpos e
não danificados.
6. A máquina de cozinha tem um mecanismo de segurança interno. Se o
recipiente não estiver colocado corretamente na máquina de cozinha,
ela não funcionará.
7. Desligue a máquina de cozinha da rede elétrica:
a. se o dispositivo estiver danificado ou não funcionar corretamente
b. se a máquina de cozinha caiu
c. se os componentes estiverem visivelmente danificados ou a fonte
de alimentação estiver defeituosa.
8. Não deixe a máquina de cozinha sem supervisão.
9. Apenas utilize os acessórios recomendados pela plawa.
Limpeza
1. Limpe a máquina de cozinha antes da primeira e após cada utilização,
e limpe todos os componentes e acessórios que entrem em contacto
com os alimentos. Certifique-se de que a máquina de cozinha arrefeceu
completamente antes de a começar a limpar.
2. Retire a ficha da tomada antes de limpar.
3. Os contactos no fundo do recipiente também devem ser mantidos
limpos e secos.
4. A faca é muito afiada! Como tal, tenha muito cuidado ao encaixá-la e
retirá-la.
5. Todos os acessórios podem ser lavados em máquinas de lavar louça.
6. Para evitar a acumulação de germes, limpe a máquina de cozinha e os
anéis de vedação após cada utilização.
7. Utilize um pano macio, ligeiramente humedecido, para limpar a
cavidade para o recipiente da máquina de cozinha.
8. Não utilize quaisquer detergentes abrasivos ou adstringentes. Estes
podem danificar a superfície.
9. É normal ocorrer alguma descoloração nos acessórios de plástico
devido ao betacaroteno das cenouras ou tomates ou especiarias com
caril. Pode reduzir ligeiramente a descoloração humedecendo um
pano com óleo de cozinha e esfregando a área com cuidado. Enxague
rapidamente com água quente, e depois com água fria e um pouco de
detergente de lavagem líquido.
Especificações técnicas
Máquina de cozinha SUPERCOOK
Consumo de energia:
Cozinhar
Misturar
1.000 Watts
500 Watts
Capacidade
2 litros
Temperatura mínima
40 °C
Temperatura máxima
130 °C
Níveis de velocidade
10 + turbo
Velocidade de mistura
20.000 rpm
Bipes
Sim
Tensão de rede /
Frequência
230 V~50 Hz
Unidade de controlo
Ligação
Ecrã LCD para a unidade
de controlo
Tomada de 5 V para ligar
Copyright
Copyright 2013 Este manual de utilizador contém informação de direitos
de autor. Todos os direitos reservados. Nenhuma parte destas instruções
de utilização pode ser reproduzida por qualquer meio e sob qualquer forma
– seja ela mecânica, eletrónica ou outra qualquer – sem o consentimento
prévio e por escrito do fabricante. SUPERCOOK é uma marca da plawafeinwerktechnik GmbH & Co. KG.
D
GB
FR
ES
IT
Descarte de dispositivos
eletrónicos usados
Este símbolo no produto ou na embalagem indica que não deve descartarse do produto como se de lixo doméstico normal se tratasse. Em vez disso,
deve levá-lo a um ponto de descarte para a reciclagem de dispositivos
elétricos e eletrónicos. Para mais informações, contacte o seu município,
instalações de eliminação de resíduos ou a loja onde comprou o produto.
PT
NL
RUS
AR
HE
4,3 polegadas
Cartão de memória
Capacidade de memória
1 GB -> 32 GB
Tabuleiro de vapor Vapore
(opcional)
Dimensões
Aproximadamente 23,1 cm x 19,2 cm
(quase tamanho A4)
Como parte integrante do nosso desenvolvimento adicional em curso,
reservamos o direito de alterar o produto, incluindo os acessórios, a
embalagem, as instruções e o livro de receitas, a qualquer altura, e sem
aviso prévio.
Declaração de conformidade
Confirmamos que o produto especificado está em conformidade com as
Diretivas LVD 2009/95/CE, EMC 2004/108/CE e RoHS 2011/65/EU
EN 60335-2-14: 2006+A1:2008+A11:2012
EN 60335-2-15: 2002+A1:2005+A2:2008+A11:2012
EN 60335-1: 2012
EM 62233: 2008
EN 55014-1/A1: 2009
EN 55014-2/A2:2008
EN 61000-3-2/A2:2009
EN 61000-3-3:2008
Assistência e apoio ao cliente
Necessita de assistência? Se tem questões adicionais, visite
www.supercook.me, contacte a nossa linha direta de apoio ou consulte o
revendedor onde comprou a sua máquina de cozinha multifuncional.
Linha Direta de Assistência e Reparação (UE)
00800 75292 100
(Número gratuito a partir de qualquer telefone fixo)
Assistência Online / Contacto Internacional
Internet: www.supercook.me
Correio eletrónico: [email protected]
Para qualquer retorno de produto, necessita de um número RMA
(Autorização de Retorno de Mercadoria) que precisa de estar marcada de
um modo claro na embalagem de retorno. Informações adicionais para o
retorno de mercadorias estão disponíveis por telefone através das linhas
diretas de apoio relevantes ou através de “Assistência & Apoio” no site
da SUPERCOOK.
Fabricante
plawa-feinwerktechnik GmbH & Co. KG
Bleichereistr. 18
73066 Uhingen
Germany
107
108
Gebruikershandleiding SUPERCOOK
D
Nederlands
FR
GB
ES
Inhoudsopgave
Inleiding
Voorbeelden van het gebruik van de
multifunctionele kookmachine
Product- en veiligheidsinstructies
Onderhoudsinstructies
Gebruik van deze bedieningsinstructies
Scherm- en foutberichten
Overzicht van de voor- en achterkant van
de SUPERCOOK
Overzicht van de ‚Yumi‘-bedieningseenheid
Accessoires
Optionele accessoires
Aan de slag
Voorbereiding
Roestvrijstalen mengkom
Roestvrijstalen multifunctioneel mes
Kookschaal
Vlinder
Deksel
Spatel
Maatbeker
Vapore-stoomschaal
(optioneel onderdeel)
Voordelen van stomen
De Vapore gebruiken
De geheugenkaart plaatsen en verwijderen
In- en uitschakelen
De bedieningseenheid voor het eerst
inschakelen
Menustructuur
IT
PT
110
110
110
110
111
111
112
113
113
113
114
115
115
115
115
116
116
116
116
117
117
117
117
117
118
118
Instellingen
Datum
Tijd
Stand-bytimer
Schermbeveiliging
Taal
Luidsprekervolume
Diapresentatie
Promotiemodus
De ‚Yumi‘-bedieningseenheid updaten
FW-versie
Receptenverzameling
Receptcategorieën
Koken volgens recept
Veiligheidsinstellingen van de kookmachine
bij de menuopties Koken volgens recept,
Favoriete recepten en Mijn recepten
Voorgeprogrammeerde instellingen
Favoriete recepten
Mijn recepten
Help
Belangrijke instructies voordat u aan
de slag gaat
Reiniging
Technische specificaties
Service en klantenondersteuning
Copyright
Afvalverwerking van afgedankte
elektronische apparaten
Verklaring van conformiteit
118
118
118
119
119
119
119
119
120
120
120
121
121
122
NL
RUS
AR
HE
123
123
124
124
124
124
124
125
125
125
125
125
109
Inleiding
Gefeliciteerd met de aanschaf van deze SUPERCOOK kookmachine. Lees
de gebruikshandleiding zorgvuldig en bewaar deze op een veilige plaats,
zodat u deze later kunt raadplegen. We hopen dat u veel plezier beleeft
aan uw kookmachine en dat deze goede resultaten oplevert.
Voorbeelden van het gebruik van de multifunctionele SUPERCOOK:
• Pureren: fruit, groenten, sauzen en soepen
• Mixen: shakes en cocktails
• Fijnstampen: suiker en gedroogde chilipepers
• Fijnhakken: amandelen en hazelnoten
• Raspen: fruit en groenten
• Fijnhakken: uien en noten
• Emulgeren: mayonaise en room
• Raspen: kaas, broodkruimels en aardappels
• Kloppen: licht deeg, meringues en slagroom
• Kneden: gist- en brooddeeg
• Opwarmen, aanfruiten en koken op temperaturen van 40°C tot 130°C.
• Stomen in Vapore-stoomschaal of kookschaal
Product- en veiligheidsinstructies
Lees de volgende belangrijke informatie grondig door voordat u de
multifunctionele kookmachine voor het eerst gebruikt.
1. Voordat u begint: haal de kookmachine en alle accessoires uit de
doos.
2. Gebruik de kookmachine niet op natte of vochtige oppervlakken.
3. De enige manier om ervoor te zorgen dat de kookmachine veilig
werkt, is deze op het lichtnet aan te sluiten via een standaard 2-pins
stopcontact. Controleer of het lichtnet overeenkomt met de stroomen spanningsgegevens op het etiket van de kookmachine. Bij een
onjuiste aansluiting vervalt de garantie.
4. Bij alle elektrische apparaten bestaat de kans op elektrocutie, wat
kan leiden tot letsel of zelfs tot de dood. Daarom is het belangrijk dat
u te allen tijde de veiligheidsinstructies naleeft.
5. plawa of de distributeur aanvaardt geen aansprakelijkheid voor
schade die wordt veroorzaakt door een ontoereikende stroomvoorziening of een onjuiste installatie in het gebouw. Raadpleeg bij twijfel
een bevoegd elektricien.
6. Houd het verpakkingsmateriaal, met name verpakkingsfolie, zakken
en plastic, buiten bereik van kinderen.
7. Bij het eerste gebruik kan er enige geur vrijkomen. Dit is niet
gevaarlijk.
8. Dompel de kookmachine, de bedieningseenheid of het netsnoer niet
onder in water.
9. Bedek de kookmachine nooit met theedoeken, handdoeken en
dergelijke.
10. Houd voldoende afstand tot andere warmtebronnen, zoals kookplaten,
om schade aan het apparaat te voorkomen.
11. Deze kookmachine is geen speelgoed en moet buiten bereik van
kinderen worden gehouden.
12. Leg het snoer zodanig neer dat dit niet wordt geplet of verbogen en
niet in contact komt met hete oppervlakken.
13. Bij gebruik van een verlengsnoer:
a. het snoer moet zijn geaard
b. neem alle benodigde voorzorgsmaatregelen om ervoor te zorgen
dat niemand over het snoer kan struikelen
14. Laat het netsnoer nooit loshangen en haal het nooit uit het
stopcontact door aan het snoer te trekken. Trek altijd aan de stekker.
15. Gebruik de kookmachine niet:
a. als het snoer of de stekker is beschadigd
b. als de machine niet correct werkt, als deze is gevallen of als er
zichtbare tekenen van schade zijn.
16. Verplaats de kookmachine niet terwijl deze in werking is.
17. Deze kookmachine is uitsluitend bedoeld voor huishoudelijk gebruik
en voor gebruik binnenshuis.
18. Probeer de kookmachine nooit zelf te repareren. Vervang of wijzig
nooit het netsnoer, de voeding of andere onderdelen. Neem altijd
contact op met een bevoegd technicus of de hotline.
110
19. Als de bedieningseenheid niet goed werkt of beschadigd is geraakt,
haalt u de stekker uit het stopcontact.
20. plawa of de distributeur aanvaardt geen aansprakelijkheid voor
schade die wordt veroorzaakt door een onjuist of foutieve bediening
van de kookmachine.
21. De kookmachine is geen friteuse. U mag in geen geval proberen te
frituren in de kookmachine.
22. Plaats geen voorwerpen in de openingen in de behuizing van het
apparaat.
23. Haal de stekker van de kookmachine uit het stopcontact:
a. als u de machine reinigt
b. als de machine niet in gebruik is
c. bij een stroomstoring
24. Personen met weinig ervaring met of kennis van het werken met
dergelijke apparaten, personen met beperkte fysieke, psychologische, mentale en zintuiglijke capaciteiten en kinderen mogen
de kookmachine alleen gebruiken onder toezicht of instructie van
een persoon die de verantwoordelijkheid voor de veiligheid kan
aanvaarden. Let erop dat kinderen niet spelen met de kookmachine.
25. Deze kookmachine is ontworpen voor huishoudelijk gebruik en vergelijkbaar gebruik zoals:
• in keukens voor werknemers van winkels, kantoren en andere
bedrijven
• in landbouwbedrijven
• door klanten in hotels, motels en andere accommodaties
• in bed-and-breakfasts
Onderhoudsinstructies
Ga zorgvuldig om met de kookmachine en de accessoires. Als u de
onderstaande aanbevelingen opvolt, zorgt u ervoor dat de garantie van
kracht blijft en dat garantieclaims rechtsgeldig zijn.
1. Zet de kookmachine uit als u deze gedurende langere tijd niet
gebruikt.
2. Laat de kookmachine volledig afkoelen voordat u deze reinigt.
3. Reinig alle onderdelen en accessoires die in contact komen met
voedsel.
4. Gebruik een zachte, licht bevochtigde doek om de inkeping voor de
kom in de kookmachine te reinigen.
5. De contacten op de onderkant van de kom moeten schoon en droog
blijven.
6. Alle accessoires zijn afwasmachinebestendig.
7. Om ophoping van bacteriën te voorkomen, moet u de kookmachine en
afdichtingsringen na elk gebruik reinigen.
8. Gebruik nooit schurende of bijtende schoonmaakmiddelen.
9. Kalkaanslag kan worden verwijderd met azijn.
10. Het is normaal dat er enige verkleuring optreedt in de plastic
accessoires door bètacaroteen in wortels, tomaten of kruiden in curry.
U kunt de verkleuring iets verminderen door een doek te bevochtigen
met slaolie en zachtjes over het gedeelte te wrijven. Spoel het
vervolgens snel af met warm water en daarna met koud water en een
beetje afwasmiddel.
11. Gebruik de kookmachine alleen zoals wordt beschreven in deze
bedieningsinstructies.
Gebruik van deze bedieningsinstructies
D
GB
FR
Dit symbool duidt op waarschuwingen die u moet lezen voor gebruik.
ES
Scherm- en foutberichten
Symbool/vraag/
Beschrijving van fout
IT
PT
Uitleg
Oplossing
Het deksel van de roestvrijstalen kom is niet correct gesloten of de
veiligheidsschakelaar is defect.
Controleer nogmaals de afdichting.
De elektronische schakeling van de kookmachine is defect.
Neem contact op met het lokale
servicecenter. U vindt het telefoonnummer op www.supercook.me of
in de handleiding.
De motor is oververhit.
Schakel de kookmachine uit en wacht
enkele minuten totdat de motor is
afgekoeld.
Verwijder een deel van het mengsel of
verhoog de snelheid tot maximaal 3.
De snelheid is onregelmatig of
de motor hapert.
De kookmachine heeft een speciaal aansturingssysteem. De snelheid kan
variëren en de rotatie wordt onderbroken in intervallen van 2 seconden.
Dit betekent dat de kookmachine een ongebruikelijk geluid maakt. Dit is
normaal. Dit geluid betekent dat de snelheid van het mes wordt aangepast
om te voorkomen dat de motor oververhit raakt.
Het mes werkt zeer traag bij
het bereiden van deeg.
Controleer of u de maximale hoeveelheid van 500 gram bloem niet hebt
overschreden.
Verwijder een deel van het mengsel uit
de kom.
Er komt rook uit de
kookmachine.
De motor is oververhit. Controleer het maximale vulniveau.
Verwijder een deel van het mengsel uit de
kom. Laat de kookmachine ongeveer 20
minuten afkoelen.
De kookmachine werkt niet
met de ingestelde temperatuur
bij een snelheid van 5.
De temperatuur kan alleen worden ingesteld voor de snelheden 1 tot 4.
Wijzig de snelheid in 1 tot 4.
De kom kan moeilijk worden
bevestigd.
In de loop der tijd kan de kom steeds gemakkelijker worden geplaatst
aangezien de siliconen afdichting verandert door de warmte en
vochtigheid, maar nog steeds goed afdicht.
Wrijf een beetje slaolie op de siliconen
afdichting of bevochtig deze.
Is de kookmachine gebruikt?
Bij levering bevat de onderzijde
van de kom vlekjes en vocht.
Alle kookmachines worden voor levering getest. De kom wordt gevuld met
water dat wordt gekookt. Net als bij een afwasmachine kan hierbij vocht
achterblijven. Deze resten kunnen leiden tot lichte, maar veilige vlekjes op
de onderkant van de kom.
U verwijdert de vlekjes met een
reinigingsmiddel voor roestvrij staal, zoals
Sidol van Henkel.
Geluiden bij het eerste gebruik
of bij een zwarte belasting.
Bij het eerste gebruik en bij zware belasting kan de motor warm worden
en vreemde geluiden produceren. Net als in elke elektrische motor,
zoals in een modelspoorbaan of -racebaan, moeten de borstels worden
‚ingereden‘. Deze geluiden zijn normaal.
Laat de kookmachine afkoelen nadat
deze hard heeft gewerkt, zoals bij het
kneden van stevig deeg. De kookmachine
kan weer normaal worden gebruikt nadat
deze is afgekoeld.
Pieptoon
De bedieningseenheid geeft een pieptoon weer om aan te geven dat de
kookmachine de juiste temperatuur heeft bereikt.
De pieptoon geeft ook aan dat de vooraf
ingestelde tijd is verstreken.
De kookmachine stopt terwijl
het vlinder wordt gebruikt.
NL
RUS
AR
HE
Verhoog de snelheid van 1 naar 2 of van
2 naar 3.
111
Overzicht van de voor- en achterkant van de SUPERCOOK
1.
2.
3.
4.
5.
6.
7.
‚Yumi‘-bedieningseenheid
Libra-keukenweegschaal (optioneel accessoire)
Maatbeker
Deksel
Roestvrijstalen kom
Ventilatieopening
Aan/uit-knop
3
2
4
5
1
6
7
112
Overzicht van de ‚Yumi‘-bedieningseenheid
D
GB
1.
2.
3.
4.
5.
6.
FR
LCD-scherm
4 Bedieningsknoppen
Linker- en rechterdraaiknop
MENU-knop
SD-kaartsleuf
Aansluitpunt
ES
IT
1
PT
NL
RUS
3
AR
2
HE
4
5
6
Accessoires
Kookschaal
Maatbeker, Deksel, Roestvrijstalen
multifunctioneel mes, Roestvrijstalen kom
Vlinder
Spatel
Optionele accessoires
•
•
SUPERCOOK Libra digitale keukenweegschaal
SUPERCOOK Vapore-stoomschaal in plastic of porseleinen/glazen modellen
Neem contact op met de plaatselijke leverancier of ga naar www.supercook.me voor vragen of
aanvullende accessoires.
SD-kaart
113
Aan de slag
Algemene symbolen
Betekenis
Kalender *
De datum en datumnotatie instellen
Taal *
De gewenste taal instellen. * Alleen wanneer u de machine voor het eerst inschakelt of nadat
de batterij is vervangen door de serviceafdeling.
Bevestigen
De selectie bevestigen
Vorige
Terug bladeren
Volgende
Vooruit bladeren
Starten / Afspelen
De weergave regelen
Plus
De kooktijd verlengen
Min
De kooktijd verkorten
Omlaag
Navigatie: omhoog of opzij
Omhoog
Navigatie: omlaag of opzij
Aan / Uit
De bedieningseenheid in-/uitschakelen
Beëindigen
De bereiding uit veiligheidsoverwegingen stoppen
Pauzeren
De bereiding wordt gepauzeerd, de instellingen blijven behouden
Favorieten
Menu Favorieten
Stop
De bereiding stoppen
Snelheid
Snelheidsniveau: 1 tot 10 en turbofunctie
Tijd
•
•
•
•
•
Temperatuur
•
•
•
•
114
Kook- of bereidingstijd: 1 seconde tot max. 60 minuten
Wanneer u de functie start, telt de klok terug waarbij de geselecteerde tijd op het scherm
wordt weergegeven in minuten en seconden met een kloksymbool.
De kook- of bereidingstijd kan op elk moment worden aangepast.
U start de bereiding door de tijd in te stellen.
De temperatuur begint bij 40°C en kan worden ingesteld tot de maximumtemperatuur van
130°C in stappen van 5°C.
De module piept om aan te geven dat de juiste temperatuur is bereikt.
Dit symbool knippert enkele seconden zodra de kookmachine de ingestelde temperatuur
heeft bereikt.
Als u voedsel bereidt boven de 50°C, dient u de turboknop niet te gebruiken.
Temperaturen boven de 100°C zijn bedoeld om te stomen, te bakken en te koken.
Verder koken
Handmatig verder koken nadat een fase van een recept is voltooid.
1 Stap terug
Eén fase in een recept teruggaan (Koken volgens recept).
Opnieuw starten
De bereiding wordt opnieuw gestart bij de volgende stap nadat het programma uit
veiligheidsoverwegingen is gestopt.
Waarschuwing
Waarschuwing. Let op!
Voorbereiding
D
GB
Roestvrijstalen mengkom
1. De roestvrijstalen mengkom heeft een capaciteit van 2 liter en een handige maataanduiding op de binnen- en buitenkant.
2. Nadat het mes correct in de kom is bevestigd, plaatst u de kom in de inkeping op de
kookmachine. Druk de kom voorzichtig omlaag totdat deze vastklikt in de aandrijving en
contact maakt.
FR
ES
IT
PT
NL
RUS
1. Vul de kom niet boven het maximumniveau van 2 liter. Als u dat wel doet, kan een veilige
werking niet worden gegarandeerd en komt de kwaliteit van de bereide gerechten mogelijk
in gevaar.
2. Zorg dat u de inhoud niet morst wanneer u de kom uit de kookmachine verwijdert. Als de
inhoud heet is, kunt u zich branden.
3. Als de kom niet direct vastklikt in de aandrijving van de kookmachine, draait u voorzichtig
aan de kop van het mes.
AR
HE
Roestvrijstalen multifunctioneel mes
1. Bij levering is het roestvrijstalen multifunctionele mes in de roestvrijstalen kom bevestigd.
2. U verwijdert het mes door de kom verticaal te houden. Druk de hendel linksom omlaag om
het mes los te maken (zie afbeelding 1).
3. U bevestigt het mes door dit op de juiste positie te plaatsen en de hendel rechtsom
omhoog te duwen (zie afbeelding 2).
afb. 1
1. Het mes is zeer scherp! Wees zeer voorzichtig wanneer u dit plaatst en verwijdert.
2. Zorg dat de afdichtingsring correct op de houder van het mes is bevestigd. Als de
afdichtingsring niet correct is geplaatst, kan de inhoud van de kom lekken en de
kookmachine beschadigen.
3. Wanneer u voedsel toevoegt, dient u erop te letten dat het mes niet wordt geblokkeerd.
4. Laat het mes na elk kookproces volledig afkoelen voordat u het verwijdert.
5. De maximale bereidingshoeveelheid is 500 gram bloem in een stevig brooddeeg.
afb. 2
Kookschaal
1. Het kookschaal wordt gebruikt om kleine hoeveelheden voedsel te stomen en wordt
rechtstreeks in de roestvrijstalen kom geplaatst.
2. In de zijkant bevindt zich een inkeping waardoor u het kookschaal gemakkelijk met
de spatel kunt verwijderen.
115
Voorbereiding
Vlinder
1. Het vlinder wordt op de meshouder geplaatst, waarbij u enige weerstand voelt.
2. Het vlinder is perfect om bijvoorbeeld romige desserts, meringues en slagroom te
bereiden.
3. Het vlinder kan alleen worden gebruikt op de snelheden 1 tot en met 4.
1. Het vlinder mag niet worden gebruikt in combinatie met de turboknop.
2. Wanneer u voedsel toevoegt, dient u erop te letten dat het vlinder niet wordt geblokkeerd.
3. Het vlinder is niet geschikt om stevig deeg te kneden. Gebruik het mes om bijvoorbeeld
brood- of pizzadeeg te kneden.
4. Het vlinder mag niet worden gebruikt in combinatie met de spatel.
Deksel
1. De afdichtingsring moet goed op het deksel zijn bevestigd om morsen te voorkomen.
2. Plaats het deksel diagonaal op de roestvrijstalen kom.
3. Draai het deksel rechtsom totdat de uitstulping onder op de voorkant van het deksel in de
inkeping in de kookmachine valt.
4. De kookmachine kan alleen worden ingeschakeld als het deksel correct is geplaatst.
5. Het deksel heeft een opening waardoor u gemakkelijk extra ingrediënten kunt toevoegen.
Spatel
1. Gebruik dit accessoire om ingrediënten te verwijderen of te mengen.
2. De spatel is zo ontworpen dat deze niet in contact komt met het mes wanneer
ingrediënten worden toegevoegd door de bovenste opening.
Maatbeker
1. De maatbeker heeft een inhoud van 100 ml en is afneembaar.
a. Hierdoor kunt u gemakkelijk extra ingrediënten toevoegen.
b. De temperatuur blijft gehandhaafd zolang de maatbeker op het
deksel is geplaatst.
c. Hiermee regelt u de stoomuitvoer.
1. Verwijder de maatbeker alleen op de snelheden 1 tot en met 3. Bij hogere
snelheden kunnen ingrediënten naar buiten komen en kunt u brandwonden
oplopen.
2. Als u de machine op een hogere snelheid gebruikt, houdt u de maatbeker goed
vast om morsen te voorkomen.
116
Voorbereiding
D
GB
1
Vapore-stoomschaal (optioneel onderdeel)
Het Vapore-stoomschaal wordt gebruikt om voedsel zachtjes te koken waarbij de vitamines
behouden blijven. Stomen is een van de gezondste manieren om te koken.
2
3
4
Overzicht van de Vapore
1. Deksel
2. Plat stoomschaal
3. Diep stoomschaal
4. Condensopvang om vocht
op te vangen
Voordelen van stomen
1. Vitamines en voedingsstoffen blijven behouden.
2. Bespaart tijdens aangezien meerdere gerechten tegelijk kunnen worden bereid.
3. Gezond voedsel met weinig zout en vet.
4. Het voedsel blijft vochtig.
5. Geen overdracht van smaakstoffen.
De Vapore gebruiken
1. Vul de roestvrijstalen kom met ten minste 700 ml water of andere stoomvloeistof zoals
bouillon.
2. Vet de gebruikte schalen in zodat het voedsel niet aankoekt.
3. Plaats de ingrediënten in de stoomonderdelen. Zorg dat u voedsel dat langer moet
stomen in het diepe stoomschaal plaatst. Houd enkele openingen vrij zodat de stoom kan
opstijgen.
4. Plaats de Vapore recht op het deksel zonder de maatbeker.
5. Controleer of de stoomonderdelen goed op elkaar zijn geplaatst en het deksel correct is
bevestigd, zodat de stoom niet kan ontsnappen.
FR
ES
IT
PT
NL
RUS
AR
HE
1. Wanneer u het Vapore-stoomschaal aanraakt, moet u er rekening mee houden dat er hete
waterdamp uitkomt en dat de condensopvang hete vloeistof bevat. Waarschuwing: risico
op brandwonden!
2. Houd de schalen alleen vast aan de handvaten.
3. Verwijder de condensopvang voorzichtig.
4. De condensopvang is gemaakt van plastic en hittebestendig tot circa 90°C.
5. Het Vapore-stoomschaal is niet geschikt voor magnetrons, ovens of andere
warmtebronnen.
De geheugenkaart plaatsen en verwijderen
Plaats de meegeleverde SD-kaart in de kaartsleuf in de ‚Yumi‘-bedieningseenheid. Zorg dat de
contacten op de SD-kaart omhoog wijzen. Druk zachtjes op de SD-kaart totdat deze vastklikt.
U verwijdert de SD-kaart door op de kaart te duwen totdat deze naar voren komt en u de kaart
eruit kunt trekken.
In- en uitschakelen
Plaats de ‚Yumi‘-bedieningseenheid in de uitsparing op de kookmachine. Druk op de
aan/uit-knop (7) waarna de kookmachine klaar is voor gebruik.
117
De bedieningseenheid voor het eerst inschakelen
Wanneer u de machine voor het eerst inschakelt, moet u de datum/tijd en schermtaal instellen.
U wijzigt de kalender- en taalinstellingen als volgt:
1.
1. Gebruik de knoppen
om te
schakelen tussen kalender en taal en
gebruik de linker- en rechterdraaiknop
om de instellingen aan te passen.
2. Bevestig de instelling door op de
knop
te drukken.
2.
Menustructuur
3. Druk op of draai aan een
bedieningsknop, behalve de
MENU-knop. U schakelt over naar de
handmatige kookstand.
4. Gebruik de linkerdraaiknop om de
gewenste temperatuur in te stellen.
5. Gebruik de rechterdraaiknop om de
snelheid aan te passen.
6. Gebruik de knoppen
om de tijd
handmatig in te stellen.
7. Druk op de knop
als u de snelheid
kort wilt verhogen (turbo).
1. Gebruik de knoppen
om door
het menu te navigeren.
2. De stip
geeft de huidige positie
aan.
3. Bevestig uw selectie door op de
knop
te drukken.
4. Sluit zo nodig het menu door te
drukken op de MENU-knop.
Druk op de MENU-knop om het hoofdmenu weer te geven.
Instellingen
U kunt diverse instellingen aanpassen in het submenu Instellingen.
Datum
Tijd
De datum wijzigen:
De tijd wijzigen:
1. Navigeer in het menu Instellingen
met de knoppen
en selecteer
Datum (Date).
2. Gebruik de rechterdraaiknop om de
selectie aan te passen. Gebruik de
linkerdraaiknop om te schakelen
tussen jaar, maand en dag.
3. Druk ter bevestiging op de knop .
118
1. Navigeer in het menu Instellingen met
de knoppen
en selecteer Tijd
(Time).
2. Gebruik de rechterdraaiknop om de
selectie aan te passen. Gebruik de
linkerdraaiknop om te schakelen
tussen uren en minuten. U kunt
daarbij de tijdnotatie instellen op 12
of 24 uur.
3. Druk ter bevestiging op de knop .
Stand-bytimer
Taal
Met de stand-bytimer kunt u een tijd instellen waarop de kookmachine
automatisch naar stand-by wordt gezet. Nadat de machine bijvoorbeeld
één minuut stand-by heeft gestaan, wordt het scherm uitgeschakeld als
er geen schermbeveiliging is geactiveerd (zie Schermbeveiliging).
De stand-bytimer wijzigen:
De taal wijzigen:
1. Navigeer in het menu Instellingen
met de knoppen
en selecteer
Stand-bytimer (Standby timer).
2. Gebruik de rechterdraaiknop om de
selectie aan te passen.
3. Druk ter bevestiging op de knop
.
D
GB
FR
1. Navigeer in het menu Instellingen met
de knoppen
en selecteer Taal
(Language).
2. Gebruik de rechterdraaiknop om de
selectie aan te passen.
3. Druk ter bevestiging op de knop
.
ES
IT
PT
NL
RUS
AR
HE
Luidsprekervolume
Schermbeveiliging
De schermbeveiliging (Screen saver) wordt geactiveerd op basis van
de tijd die is geselecteerd via de menuoptie Stand-bytimer. U kunt
het gewenste aantal afbeeldingen gebruiken als schermbeveiliging.
Alleen afbeeldingsbestanden kunnen worden gebruikt. Sla deze op in
de systeemmap ‚995SAVER‘ op de SD-kaart. U moet ze opslaan in de
volgende indeling om ze te kunnen gebruiken:
Voorbeeld: XXX00001.jpg
XXX = max. 3 tekens
12345 = max. 5 cijfers
.jpg = bestandsindeling
Gebruik deze instelling om het volume te bepalen van de pieptonen die
u hoort wanneer u de machine in-/uitschakelt, wanneer de ingestelde
temperatuur is bereikt of wanneer de tijd is verstreken.
Het volume wijzigen:
1. Navigeer in het menu Instellingen
met de knoppen
en selecteer
Luidsprekervolume (Volume).
2. Gebruik de rechterdraaiknop om de
selectie aan te passen.
3. Druk ter bevestiging op de knop .
De bestanden moeten oplopend worden genummerd: XXX00002.
jpg, XXX00003.jpg enz. De afbeeldingen moeten even groot zijn als
de resolutie van het LCD-scherm van 480 x 272 pixels. Afbeeldingen
met een ander formaat worden automatisch bijgesneden tot de juiste
afmetingen.
De schermbeveiliging wijzigen:
Diapresentatie
1. Navigeer in het menu Instellingen
met de knoppen
en selecteer
Schermbeveiliging (Screen saver).
2. Gebruik de rechterdraaiknop om
de selectie aan te passen (Stop of
Starten/Afspelen).
3. Druk ter bevestiging op de knop .
Gebruik deze instelling om de weergave van afbeeldingen in de modus
Schermbeveiliging aan te passen.
De diapresentatie aanpassen:
1. Navigeer in het menu Instellingen
met de knoppen
en selecteer
Diashow (Slide show).
2. Gebruik de rechterdraaiknop om de
selectie aan te passen.
3. Bevestig uw selectie door op de
knop
te drukken.
119
Promotiemodus
FW-versie
De promotiemodus vormt een extra marketinghulpmiddel voor
winkeliers. In deze modus wordt op het LCD-scherm productinformatie
weergegeven die is opgeslagen in de systeemmap ‚996PROMT‘.
Met deze instelling kunt u de huidige firmwareversie, het serienummer
van het apparaat of een QR-code weergeven. Meer informatie over
de huidige firmwareversie vindt u op www.supercook.me. U hebt het
serienummer nodig voor alle serviceaanvragen en om het product te
registreren op www.supercook.me.
Als de promotiemodus is geselecteerd, worden alle andere functies
van de machine uitgeschakeld. U sluit de promotiemodus af door
de MENU-knop en de twee buitenste knoppen 10 seconden tegelijk
ingedrukt te houden.
Uit veiligheidsoverwegingen dient u het mes te verwijderen wanneer u
de kookmachine in de winkel plaatst.
De promotiemodus activeren:
1. Navigeer in het menu Instellingen
met de knoppen
en selecteer
Promotiemodus (In-store promotion
mode).
2. Bevestig uw selectie door op de
knop
te drukken.
3. U sluit de promotiemodus af door
de MENU-knop en de twee buitenste
knoppen 10 seconden tegelijk
ingedrukt te houden.
De ‚Yumi‘-bedieningseenheid
updaten
U gebruikt deze instelling om een update uit te voeren van de firmware
van de ‚Yumi‘-bedieningseenheid. Hiervoor downloadt u eerst de
nieuwste firmware van de kookmachine van www.supercook.me. Pak
de firmware in het gecomprimeerde bestand uit en kopieer de firmware
naar de hoofddirectory van de SD-kaart.
De firmware wijzigen:
1. Plaats de SD-kaart in de bedieningseenheid.
2. Navigeer in het menu Instellingen
met de knoppen
en selecteer
Bedieningseenheid updaten (Update
control module).
3. Bevestig uw selectie door op de
knop
te drukken.
4. Volg de instructies op het scherm.
Zet de kookmachine AAN en UIT. Na
de update kunt u de nieuwe firmware
weergeven zoals hieronder wordt
beschreven.
120
De firmware-informatie weergeven:
1. Navigeer in het menu Instellingen
met de knoppen
en selecteer
FW-versie (FW version).
2. Druk op de knop
om terug te
keren naar het menu Instellingen
(Setup menu).
Receptenverzameling
De menuoptie Receptenverzameling is uw digitale kookboek dat u als
naslag kunt gebruiken. Deze verzameling bevat alle receptcategorieën,
alle recepten en de afzonderlijke instructies. De categorieën helpen u
snel recepten te vinden.
Op een SD-kaart kunnen maximaal 895 recepten worden opgeslagen,
tenzij het geheugen groter is dan 1 GB. Een recept neemt gemiddeld
1 MB per taal in beslag. Standaard wordt een SD-kaart van 1 GB
bijgeleverd. Als u het maximumaantal van 895 recepten van
www.supercook.me wilt opslaan in meerdere talen, hebt u een grotere
SD-kaart nodig.
Receptcategorieën
D
GB
1.
Voorgerechten
2.
Soepen
3.
Vis- en vleesgerechten
4.
Vegetarische hoofdgerechten
IT
5.
Bijgerechten
PT
6.
Babyvoeding
NL
7.
Sauzen
RUS
8.
Dressings
AR
9.
Gebak
HE
10.
Desserts
11.
Mixdrankjes
12.
Huisdierenvoeding
FR
ES
Een recept selecteren en weergeven
1.
2.
1. Gebruik de knoppen
om door
het menu naar Receptenverzameling
(Recipe collection) te navigeren.
2. Bevestig uw selectie door op de
knop
te drukken.
3.
3. Een
rondje geeft de huidige
categorie aan.
4. Gebruik de knoppen
om te
navigeren en de gewenste categorie
te selecteren.
5. Bevestig uw selectie door op de
knop
te drukken.
6. Druk op de knop
als u de
bedieningseenheid wilt uitschakelen.
4.
7.
Gebruik de knop
als u het recept
wilt toevoegen aan uw favorieten.
8. Gebruik de knoppen
om te
navigeren binnen de geselecteerde
categorie en tussen de verschillende
recepten.
9. Gebruik de knop
om uw selectie
te bevestigen.
10. Gebruik de knoppen
om door
de receptenpagina‘s te navigeren.
11. Gebruik de knop
om de
bedieningseenheid uit te schakelen.
12. Gebruik de MENU-knop om de
receptenverzameling te sluiten.
121
Koken volgens recept
Via dit menu kunt u de kookmachine gebruiken. U kunt de vooraf ingestelde
bereidingstijden, snelheden en temperaturen gebruiken of deze handmatig
aanpassen.
De bereiding starten:
1.
2.
1. Gebruik de knoppen
om te
navigeren naar de menuoptie Koken
volgens recept (Recipe cooking).
2. Bevestig uw selectie door op de
knop
te drukken.
3.
6. Gebruik de knop
als u het recept
wilt toevoegen aan uw favorieten.
7. Gebruik de knoppen
om te
navigeren binnen de geselecteerde
categorie en tussen de verschillende
recepten.
8. Nadat u een recept hebt gevonden,
bevestigt u uw selectie door op de
knop
te drukken.
5.
4.
9. Gebruik de knop
als u de bereiding wilt
starten met de standaardinstellingen.
10. Gebruik de knop
als u de huidige stap
wilt pauzeren. (Wordt alleen weergegeven
nadat de bereiding is gestart. Zie stap 9.)
11. Gebruik de knoppen
om de vooraf
ingestelde tijd handmatig aan te passen.
12. Gebruik de linkerdraaiknop om de vooraf
ingestelde temperatuur handmatig aan te
passen.
13. Gebruik de rechterdraaiknop om de vooraf
ingestelde snelheid handmatig aan te
passen.
6.
14. Druk op de knop
als u de snelheid
kort wilt verhogen (turbo).
15. Gebruik de knop
om één stap
terug te gaan, mits de bereiding nog
niet is gestart.
122
3. Een
rondje geeft de huidige
categorie aan.
4. Gebruik de knoppen
om te
navigeren en het gewenste recept te
selecteren.
5. Bevestig uw selectie door op de
knop
te drukken.
16. Deze herinnering wordt weergeven
nadat 80% van de voorgeprogrammeerde bereidingstijd is verstreken.
17. Druk op de knop
om de stap
te pauzeren en ingrediënten toe
te voegen. De verwarming wordt
automatisch uitgeschakeld aan het
einde van de stap. De motor blijft
draaien, afhankelijk van de duur van
de bereiding.
D
GB
FR
ES
IT
7.
PT
8.
18. U kunt nu met de knop
de
huidige bereiding verlengen met
de nieuwe instellingen die u hebt
geselecteerd.
19. Druk op de knop
vervolgen.
om het recept te
NL
RUS
AR
HE
OF
9.
20. Als u het recept handmatig wilt
verlengen zoals wordt beschreven
in stap 18, verschijnt de afbeelding
links. Nadat u de instellingen hebt
doorgewerkt, keert de kookmachine
terug naar stap 19 en kunt u de
stappen vervolgen.
Deze lus wordt aan het eind van elke
stap herhaald.
Veiligheidsinstellingen van de
kookmachine bij de menuopties
Koken volgens recept, Favoriete
recepten en Mijn recepten
Voorgeprogrammeerde instellingen
Het bericht ‚Deze stap is bijna klaar.‘ wordt op het scherm weergegeven
nadat 80% van de voorgeprogrammeerde tijd is verstreken (20% van de
tijd resteert). Als de bereidingstijd bijvoorbeeld 5 minuten is, geeft de
kookmachine een pieptoon weer wanneer er nog 1 minuut te gaan is.
10.
21. Als u niets doet aan het eind van de
lus en de tijd afloopt, wordt de motor
uitgeschakeld. De afbeelding links
wordt weergegeven.
22. Druk op de knop
om terug te
keren naar de vorige stap van het
recept die al is gestart.
23. Gebruik de knop
om de modus
Koken volgens recept af te sluiten.
Als u na deze stap geen instellingen meer aanpast, wordt de verwarming
automatisch uitgeschakeld en blijft de kookmachine nog 1 tot 5 minuten
draaien, afhankelijk van de duur van de receptstap. Hiermee wordt
voorkomen dat het voedsel aankoekt. Daarna verlaat de kookmachine
automatisch het recept en keert u terug naar het categorie-overzicht. U kunt
nu de knop
gebruiken om terug te gaan naar de vorige stap van het
recept of de bereiding stoppen met de knop
.
Als u de voorgeprogrammeerde bereidingstijd van een recept handmatig
aanpast door de waarschuwing te negeren (20% van de vooraf ingestelde
tijd resteert), wordt het bericht ‚Deze stap is bijna klaar.‘ niet weergegeven.
Andere veiligheidsmechanismen worden echter wel geactiveerd zoals
hierboven wordt beschreven. De verwarming wordt uitgeschakeld aan het
einde van de bereidingstijd. De motor stopt na een bepaalde periode.
123
Favoriete recepten
Help
In dit menu vindt u al uw favorieten. Als u een recept uit het menu
Favoriete recepten wilt bereiden, volgt u de beschrijving onder Koken
volgens recept.
Deze menuoptie geeft uitleg over de symbolen die worden gebruikt op de
‚Yumi‘-bedieningseenheid.
U gaat als volgt naar uw selectie met favoriete recepten.
1. Gebruik de knoppen
om naar
het menu Help (Help) te navigeren.
2. Bevestig uw selectie door op de
knop
te drukken.
1. Gebruik de knoppen
om in het
menu naar Favoriete recepten (Recipe
favorites) te navigeren.
2. Bevestig uw selectie door op de
knop
te drukken.
Mijn recepten
Geen losse verzamelingen receptenkaarten, uitgeknipte recepten en
gedownloade recepten meer. Deze kookmachine is uw persoonlijke
kookboek. U kunt uw eigen recepten maken, bereiden, verzamelen en
ervan genieten. Kijk hoe het werkt op www.supercook.me.
Als u een recept uit het menu Mijn recepten wilt bereiden, volgt u de
beschrijving onder Koken volgens recept.
1. Gebruik de knoppen
om te
navigeren naar de menuoptie Mijn
recepten (My recipes).
2. Bevestig uw selectie door op de
knop
te drukken.
3. Selecteer de gewenste categorie en
volg de instructies zoals beschreven
onder Koken volgens recept.
124
Belangrijke instructies voordat u
aan de slag gaat
1. Gebruik de multifunctionele kookmachine altijd op een horizontaal,
schoon en stabiel oppervlak dat geen warmte afgeeft.
2. Verwijder al het verpakkingsmateriaal.
3. Reinig alle accessoires.
4. Houd uw hand nooit in de multifunctionele kookmachine terwijl deze in
bedrijf is.
5. Zorg dat de gebruikte afdichtingsringen altijd schoon en onbeschadigd
zijn.
6. De kookmachine heeft een intern veiligheidsmechanisme. Als de
roestvrijstalen kom niet correct in de kookmachine is geplaatst, werkt
deze niet.
7. Haal de stekker van de kookmachine uit het stopcontact:
a. als het apparaat beschadigd is of niet goed werkt.
b. als de kookmachine is gevallen.
c. als onderdelen zichtbaar beschadigd zijn of als de stroomvoorziening gebrekkig is.
8. Laat de kookmachine niet onbeheerd achter.
9. Gebruik alleen accessoires die zijn aanbevolen door plawa.
Reiniging
1. Reinig de kookmachine voor het eerste gebruik en na elk gebruik,
en reinig alle onderdelen en accessoires die in contact komen met
voedsel. Zorg dat de kookmachine volledig is afgekoeld voordat u deze
gaat reinigen.
2. Haal de stekker uit het stopcontact voordat u de machine gaat reinigen.
3. De contacten op de onderkant van de roestvrijstalen kom moeten ook
schoon en droog blijven.
4. Het roestvrijstalen multifunctionele mes is zeer scherp! Wees daarom
zeer voorzichtig wanneer u dit plaatst en verwijdert.
5. Alle accessoires zijn afwasmachinebestendig.
6. Om ophoping van bacteriën te voorkomen, moet u de kookmachine en
afdichtingsringen na elk gebruik reinigen.
7. Gebruik een zachte, licht bevochtigde doek om de inkeping voor de kom
in de kookmachine te reinigen.
8. Gebruik geen schurende of bijtende schoonmaakmiddelen. Deze
kunnen het oppervlak beschadigen.
9. Het is normaal dat er enige verkleuring optreedt in de plastic
accessoires door bètacaroteen in wortels, tomaten of kruiden in curry. U
kunt de verkleuring iets verminderen door een doek te bevochtigen met
slaolie en zachtjes over het gedeelte te wrijven. Spoel het vervolgens
snel af met warm water en daarna met koud water en een beetje
afwasmiddel.
Technische specificaties
SUPERCOOK kookmachine
Stroomverbruik
Koken
Mixen
1000 Watt
500 Watt
Capaciteit
2 liter
Minimumtemperatuur
40 °C
Maximumtemperatuur
130 °C
Snelheidsniveaus
10 + turbo
Mixsnelheid
20,000 rpm
Pieptonen
Ja
Voltage/
frequentie lichtnet
230 V~50 Hz
Bedieningseenheid
Aansluiting
LCD-scherm van
bedieningseenheid
Geheugenkaart
Geheugencapaciteit
Vapore-stoomonderdeel
(optioneel)
Afmetingen
5V-aansluiting
4.3 inch
1 GB -> 32 GB
ca 23,1 x 19,2 cm (bijna A4-formaat)
Aangezien we onze producten voortdurend blijven ontwikkelen, houden we
ons het recht voor het product, inclusief accessoires, verpakking, instructies
en kookboek, op elk moment zonder voorafgaande kennisgeving te wijzigen.
Service en klantenondersteuning
Copyright
Copyright 2013 Deze gebruikershandleiding bevat auteursrechtelijk
beschermde informatie. Alle rechten voorbehouden. Geen enkel
onderdeel van deze bedieningsinstructies mag worden gereproduceerd
met welke middelen en in welke vorm dan ook, mechanisch, elektronisch
of anderszins, zonder voorafgaande schriftelijke toestemming van de
fabrikant. SUPERCOOK is een merk van plawa-feinwerktechnik GmbH & Co.
KG.
Afvalverwerking van afgedankte
elektronische apparaten
Dit symbool op het product of de verpakking geeft aan dat dit product niet
mag worden weggegooid bij het huisvuil, maar moet worden ingeleverd bij
een inzamelpunt voor recycling van elektrische en elektronische apparaten.
Neem voor meer informatie contact op met de gemeente, de afvalverwerkende instantie of de winkel waar u het product hebt gekocht.
D
GB
FR
ES
IT
PT
NL
RUS
AR
HE
Verklaring van conformiteit
Hierbij verklaren we dat dit product voldoet aan de richtlijnen
LVD 2009/95/EG, EMC 2004/108/EG en RoHS 2011/65/EU
EN 60335-2-14: 2006+A1:2008+A11:2012
EN 60335-2-15: 2002+A1:2005+A2:2008+A11:2012
EN 60335-1: 2012
EM 62233: 2008
EN 55014-1/A1: 2009
EN 55014-2/A2:2008
EN 61000-3-2/A2:2009
EN 61000-3-3:2008
Hebt u hulp nodig? Als u nog vragen hebt, gaat u naar www.supercook.me of
neemt u contact op met onze ondersteuningshotline of met de leverancier
waar u de multifunctionele kookmachine hebt gekocht.
Hotline voor service en reparatie (EU)
00800 75292 100
(Gratis nummer vanaf een vaste lijn)
Online service/ internationaal contact
Internet: www.supercook.me
E-mail: [email protected]
Als u een product wilt retourneren, hebt u een RMA-nummer (Return
Merchandise Authorization) nodig dat duidelijk moet worden vermeld op
de verpakking. Meer informatie over het retourneren van producten is
telefonisch beschikbaar via de ondersteuningshotline of via ‚Service en
ondersteuning‘ op de SUPERCOOK-website.
Fabrikant
plawa-feinwerktechnik GmbH & Co. KG
Bleichereistr. 18
73066 Uhingen
Duitsland
Importeur voor de Benelux
IT&M b.v.
Park Forum 1110
5657 HK Eindhoven
Nederland
125
126
Руководство пользователя кухонного комбайна SUPERCOOK
D
Русский
FR
GB
ES
Содержание
Введение
128
Примеры применения многофункционального
кухонного комбайна
128
Инструкции по эксплуатации и правила
безопасности
128
Инструкции по уходу
128
Работа с руководством по эксплуатации
129
Символы на дисплее и сообщения об ошибках 129
Описание кухонного комбайна: вид спереди и
сзади
130
Описание пульта управления "Yumi"
131
Принадлежности
131
Дополнительные принадлежности
131
Начало работы
132
Подготовка
133
Чаша
133
Нож
133
Корзина для приготовления на пару
133
Мешалка-венчик
134
Крышка
134
Лопатка
134
Мерный колпачок
134
Пароварка (дополнительное оборудование) 135
Преимущества приготовления пищи на пару 135
Работа в режиме пароварки
135
Установка и извлечение карты памяти
135
Включение и выключение
135
Первое включение пульта
управления
136
Структура меню
136
IT
PT
Настройки
Дата
Время
Таймер отключения
Экранная заставка
Язык
Громкость
Слайд-шоу
Демонстрационный режим
Обновление пульта управления "Yumi"
Версия микропрограммы
Коллекция рецептов
Категории рецептов
Приготовление по рецепту
Настройки параметров безопасности в
пунктах меню "Приготовление по рецепту",
"Избранные рецепты" и "Мои рецепты"
Предварительно запрограммированные
настройки
Избранные рецепты
Мои рецепты
Справка
Важные правила безопасности перед
использованием комбайна
Чистка
Технические характеристики
Техническая поддержка и обслуживание
клиентов
Заявление об авторских правах
Утилизация использованных электронных
приборов
Заявление о соответствии
136
136
136
137
137
137
137
137
138
138
138
139
139
140
NL
RUS
AR
HE
141
141
142
142
142
142
142
143
143
143
143
143
127
Введение
Благодарим за покупку кухонного комбайна SUPERCOOK. Пожалуйста,
внимательно прочитайте руководство пользователя и сохраните его
в надежном месте, чтобы при необходимости воспользоваться им.
Мы надеемся, что кухонный комбайн принесет вам удовольствие от
работы, и вы останетесь довольны результатом.
Примеры применения многофункционального кухонного комбайна
• Приготовление пюре из фруктов и овощей, а также приготовление
соусов и крем-супов
• Приготовление шейков и коктейлей
• Приготовление сахарной пудры и порошка из сухого перца
• Измельчение миндаля и фундука
• Нарезка фруктов и овощей
• Измельчение лука и орехов
• Приготовление майонеза и кремов с помощью специальной
мешалки
• Натирание на терке сыра, хлебных крошек и картофеля
• Сбивание легкого теста, смеси для меренг и сливок
• Замешивание дрожжевого теста
• Подогревание, обжаривание и приготовление при температуре от
40 ° до 130 °C.
• Приготовление в пароварке или корзине для приготовления на пару
Инструкции по эксплуатации и
правила безопасности
128
Внимательно прочитайте изложенную далее важную информацию,
прежде чем приступать к использованию многофункционального
кухонного комбайна.
1. Перед началом: извлеките из коробки кухонный комбайн и все
принадлежности.
2. Не используйте кухонный комбайн на мокрых или влажных
поверхностях.
3. Единственный способ гарантировать безопасную работу кухонного
комбайна – это подключать его к сети через стандартную
3-полюсную сетевую розетку. Убедитесь, что характеристики
электросети соответствуют номинальным значениям мощности
и напряжения, указанным на паспортной табличке кухонного
комбайна. Неправильное подключение приводит к аннулированию
всех гарантийных обязательств.
4. При использовании электроприборов всегда существует риск
поражения электротоком, что может привести к травмам или даже
смерти. Поэтому чрезвычайно важно всегда соблюдать правила
техники безопасности.
5. Компания Plawa и ее дистрибьютор не несут ответственности за
убытки, возникшие в результате использования неправильного
источника питания или неправильной установки в помещении.
В случае возникновения сомнений обратитесь за помощью к
квалифицированному электрику.
6. Храните упаковочные материалы, особенно упаковочную пленку,
пакеты и пенопласт, в недоступном для детей месте.
7. При первом использовании может выделяться необычный запах.
Это не опасно.
8. Не погружайте кухонный комбайн, пульт управления и кабель
питания в воду.
9. Никогда не накрывайте кухонный комбайн полотенцами,
скатертями и т. п.
10. Держите прибор на достаточном расстоянии от прочих источников
тепла, таких как варочные панели, чтобы предотвратить
повреждения.
11. Кухонный комбайн не является игрушкой и должен храниться в
недоступном для детей месте.
12. Размещайте кабель так, чтобы он ничем не расплющивался, не
перегибался и не касался горячих поверхностей.
13. При использовании удлинителя:
а. кабель должен быть заземлен
б. следует принять все необходимые меры предосторожности,
чтобы никто не зацепился за кабель.
14. Следите, чтобы кабель питания не свисал свободно, и не
выключайте прибор из сети, потянув за кабель питания – всегда
беритесь за вилку.
15. Не используйте кухонный комбайн:
а. если его кабель питания или вилка повреждена
б. если прибор работает неправильно, если он падал, а также если
на нем имеются явные повреждения.
16. Не перемещайте кухонный комбайн, когда он работает.
17. Этот кухонный комбайн предназначен исключительно для бытового
использования и должен использоваться только в помещении.
18. Ни в коем случае не пытайтесь самостоятельно отремонтировать
кухонный комбайн. Не заменяйте и не видоизменяйте кабель
питания, источник питания и прочие компоненты. Всегда
обращайтесь за помощью к авторизированному техническому
специалисту или в службу технической поддержки.
19. Если комбайн неправильно работает или повредился, немедленно
отключите его от сети.
20. Компания Plawa и ее дистрибьютор не несут ответственности за
убытки, возникшие в результате ненадлежащего или неправильного
применения кухонного комбайна.
21. Кухонный комбайн не выполняет функцию фритюрницы. Ни при
каких обстоятельствах не пытайтесь жарить продукты в кипящем
жире в данном кухонном комбайне.
22. Не вставляйте какие-либо предметы в отверстия на корпусе
прибора.
23. Отключайте кухонный комбайн от сети:
а. перед очисткой
б. когда он не используется
в. в случае отключения электропитания.
24. Лица с недостаточным опытом или знаниями по обращению
с подобными приборами, а также лица с ограниченными
физическими, психологическими, умственными или сенсорными
способностями и дети могут использовать кухонный комбайн
только под наблюдением или руководством лица, ответственного
за их безопасность. Необходимо следить за детьми, чтобы они не
игрались с кухонным комбайном.
25. Этот кухонный комбайн предназначен для использования в
домашних условиях или условиях подобных домашним, например,
• на кухнях для персонала в магазинах, офисах и других
коммерческих заведениях
• на фермах
• клиентами в гостиницах, мотелях и прочих жилых помещениях
• в мини-отелях
Инструкции по уходу
Бережно обращайтесь с кухонным комбайном и его
принадлежностями. Изложенные ниже рекомендации помогут вам
сохранить гарантию и позволят получить гарантийное обслуживание.
1. Выключайте кухонный комбайн, если предполагается, что он не
будет использоваться длительное время.
2. Перед очисткой дайте комбайну полностью остыть.
3. Очищайте все компоненты и принадлежности комбайна, которые
соприкасаются с пищевыми продуктами.
4. Используйте мягкую слегка влажную ткань, чтобы очистить
углубление для крепления чаши на комбайне.
5. Контакты под чашей всегда должны быть чистыми и сухими.
6. Все съемные принадлежности можно мыть в посудомоечной
машине.
7. Чтобы предотвратить образование плесени, очищайте комбайн и
уплотнительные кольца после каждого использования.
8. Никогда не используйте абразивные и едкие чистящие средства.
9. Известковый налет можно удалить с помощью уксуса.
10. Некоторые продукты, например, морковь из-за содержащегося
в ней бета-каротина, помидоры или такие специи, как карри,
могут окрашивать пластиковые детали комбайна – это абсолютно
нормальное явление. Можно немного уменьшить следы
окрашивания, если слегка протереть это место смоченной в
кулинарном масле салфеткой. Затем это место следует быстро
ополоснуть сначала теплой водой, а потом холодной с небольшим
количеством жидкости для мытья посуды.
11. Используйте кухонный комбайн только согласно инструкциям,
изложенным в настоящем руководстве.
Работа с руководством по
эксплуатации
D
GB
FR
Этот символ означает предупреждение, с которым следует
ознакомиться перед использованием комбайна:
ES
Символы на дисплее и сообщения об ошибках
Символ / Вопрос /
Описание ошибки
IT
PT
Объяснение
Решение
Чаша установлена неплотно, или не работает аварийный выключатель.
Проверьте правильность установки
чаши.
Произошла ошибка в электроцепи кухонного комбайна.
Следует обратиться в местный
сервисный центр. Номера телефонов
можно найти на сайте www.supercook.me
или в настоящем руководстве.
Произошла перегрузка мотора.
Выключите кухонный комбайн
на несколько минут, чтобы мотор
охладился.
На кухонном комбайне предусмотрена специальная система контроля.
Скорость может меняться, и вращение прерывается каждые 2 секунды.
При этом кухонный комбайн издает необычные звуки. Это нормально.
Эти звуки указывают на то, что происходит регулировка скорости ножа
для предупреждения перегрева мотора.
Извлеките часть продуктов или не
используйте скорость выше 3.
В процессе вымешивания
теста нож работает очень
медленно.
Убедитесь, что используется не больше 500 г муки.
Извлеките часть продуктов из чаши.
Из кухонного комбайна идет
дым.
Мотор перегревается. Проверьте, не превышен ли максимальный
уровень заполнения чаши.
Извлеките часть продуктов из чаши.
Оставьте кухонный комбайн остывать
приблизительно на 20 минут.
Кухонный комбайн не
работает при использовании
температурного режима и
скорости 5.
Температурный режим можно устанавливать только при скорости от 1
до 4.
Установите скорость от 1 до 4.
Чаша устанавливается с
трудом.
По мере использования чаша будет устанавливаться легче, так как
силиконовая прокладка немного деформируется под воздействием
тепла и влаги, что, тем не менее, абсолютно не влияет на ее
герметичность.
Нанесите немного кулинарного
масла на силиконовую прокладку или
увлажните ее.
Комбайн использовался?
При распаковке на
основании чаши видны следы
использования и капли воды.
Перед отправкой все модули комбайна тщательно тестируются.
Чаша наполняется водой и доводится до кипения. Как в случае с
посудомоечной машиной, на приборе может оставаться вода. После
ее высыхания на базе чаши могут оставаться следы капель, что не
представляет никакой опасности.
Чтобы удалить эти следы, воспользуйтесь
обычным средством для чистки изделий
из нержавеющей стали, например, Sidol
торговой марки Henkel.
Комбайн издает шум при
первом использовании или
при большой нагрузке.
При первом использовании и при большой нагрузке мотор может
перегреваться и издавать необычные звуки. Как в любых других
электромоторах, например, моторах игрушечной железной дороги
или игрушечной автогонки, в двигателе применяются щетки,
которые нуждаются в "обкатке" перед первым пуском. Этот шум не
свидетельствует о неисправности.
Оставьте кухонный комбайн охладиться
после сильной нагрузки, например,
после замешивания плотного теста.
После охлаждения мотора кухонный
комбайн полностью восстановит свою
работоспособность.
Комбайн издает короткие
звуковые сигналы.
Пульт подает звуковые сигналы, чтобы предупредить о том, что комбайн
нагрелся до заданной температуры.
Короткие сигналы также могут
предупреждать о том, что истекло
установленное время.
Кухонный комбайн
останавливается, когда
используется мешалкавенчик.
Неравномерная скорость, или
мотор заедает.
NL
RUS
AR
HE
Увеличьте скорость с 1 до 2 или с 2 до 3.
129
Описание кухонного комбайна: вид спереди и сзади
1. Пульт управления "Yumi"
2. Кухонные весы Libra (дополнительное
оборудование)
3. Мерный колпачок
4. Крышка
5. Чаша
6. Вентиляционная решетка
7. Кнопка включения/выключения
3
2
4
5
1
6
7
130
Описание пульта управления "Yumi"
D
GB
1.
2.
3.
4.
5.
6.
FR
ЖК-дисплей
4 кнопки управления
Правый и левый регуляторы
Кнопка меню "MENU"
Гнездо для SD-карты
Разъем
ES
IT
1
PT
NL
RUS
3
AR
2
HE
4
5
6
Принадлежности
Корзина для
приготовления на пару
Мерный колпачок, крышка, нож, чаша
Мешалка-венчик
Лопатка
Дополнительные принадлежности
•
•
Цифровые кухонные весы Libra SUPERCOOK
Пароварка Vapore SUPERCOOK из пластика или керамики/стекла в зависимости от модели
В случае возникновения вопросов по дополнительным принадлежностям обращайтесь к местному
дилеру или посетите веб-сайт www.supercook.me.
SD-карта
131
Начало работы
Основные символы
132
Описание
Календарь *
Установка даты и выбор формата даты
Язык *
Выбор языка меню. * Требуется только при первом включении, а также после замены
батареи в сервисном центре.
Ввод
Подтверждение выбора
Назад
Переход назад
Вперед
Переход вперед
Воспроизвести
Управление воспроизведением
Плюс
Увеличение времени приготовления
Минус
Уменьшение времени приготовления
Вниз
Перемещение по экрану: вниз или вправо/влево
Вверх
Перемещение по экрану: вверх или вправо/влево
Вкл./выкл.
Включение/выключение пульта управления
Выход
Прекращение приготовления по соображениям безопасности
Пауза
Приостановка приготовления, все настройки сохраняются
Избранное
При нажатии на этот символ выбранный рецепт заносится в меню "Избранные рецепты".
Стоп
Остановка приготовления
Скорость
Выбор режима скорости: от 1 до 10 и турбо-режим
Время
• Время приготовления или обработки: от 1 секунды до 60 минут
• При запуске выбранного режима часы начинают обратный отсчет, на экране
отображается выбранное время в минутах и секундах, а также символ часов.
• Время приготовления или обработки можно отрегулировать в любой момент.
• Чтобы начать процесс, следует установить время.
Температура
• При выборе температурного режима минимальная температура составляет 40 °C, ее
можно последовательно увеличивать на 5 °C до максимальной температуры 130 °C.
• Пульт подает звуковой сигнал, оповещая о том, что заданная температура достигнута.
• Этот символ мигает несколько секунд после того, как комбайн разогреется до
установленной температуры.
• Если приготовление осуществляется при температуре выше 50 °C, не следует
использовать кнопку турбо-режима.
• Температурные режимы выше 100 °C предназначены для приготовления пищи на
пару, жарки и кипячения.
Продолжить
Переход в ручной режим управления процессом приготовления после завершения
программы приготовления по рецепту.
Назад
Возврат на предыдущую стадию при приготовлении по рецепту (Приготовление).
Повторить запуск
Повторный запуск процесса приготовления со следующей стадии после остановки
программы по соображениям безопасности.
Внимание!
Предостережение - обратите внимание!
Подготовка
D
GB
Чаша
1. Емкость чаши составляет 2 литра, на внутренней и внешней поверхности чаши
нанесена удобная мерная линейка.
2. После правильной установки ножа в чашу, разместите чашу в специальном углублении
на базе кухонного комбайна. Затем слегка надавите на чашу так, чтобы она сцепилась
с зубчатым приводом и контактами.
FR
ES
IT
PT
NL
RUS
1. Наполняя чашу, не превышайте максимальный уровень, который составляет 2 литра.
Это может отрицательно повлиять на безопасность эксплуатации, а также снизить
качество приготовленных блюд.
2. Снимая чашу с комбайна, будьте внимательны, чтобы не пролить ее содержимое. Если
в чаше находятся горячие продукты, то существует риск получения ожогов.
3. Если чаша не сразу закрепляется на приводном валу комбайна, осторожно поверните
головку ножа.
AR
HE
Нож
1. Чаша поставляется с установленным в ней ножом.
2. Чтобы снять нож, держите чашу вертикально. Переведите рычажок вниз против
часовой стрелки, нож разблокируется. (См. рисунок 1)
3. Чтобы установить нож, вставьте его на место и переведите рычажок вверх по часовой
стрелке. (См. рисунок 2)
Рис. 1
1. Нож очень острый! Будьте осторожны, устанавливая и снимая его.
2. Убедитесь, что уплотняющее кольцо правильно расположено на подшипнике ножа. Если
уплотняющее кольцо не установлено, то содержимое чаши может протечь и повредить
кухонный комбайн.
3. Добавляя в чашу продукты, следите, чтобы они не блокировали нож.
4. Прежде чем снимать нож после использования, дайте ему полностью остыть.
5. Максимальное количество муки, которое может обрабатывать комбайн при
приготовлении плотного теста, составляет 500 г.
Рис. 2
Корзина для приготовления на пару
1. Корзина для приготовления на пару используется для приготовления небольшого
количества продуктов и устанавливается непосредственно на чашу.
2. Сбоку на корзине предусмотрено специальное ушко, которое позволяет легко
снять корзину с помощью лопатки.
133
Подготовка
Мешалка-венчик
1. Мешалка-венчик устанавливается на нож в области крепления ножа с небольшим
сопротивлением.
2. Мешалка-венчик идеально подходит для приготовления кремообразных десертов,
меренг и сбивания сливок.
3. Мешалку-венчик можно использовать только при скорости от 1 до 4.
1. Мешалку-венчик нельзя использовать в турбо-режиме.
2. Добавляя в чашу продукты, следите, чтобы они не блокировали мешалку-венчик.
3. Мешалка-венчик не подходит для вымешивания тяжелого теста. Для вымешивания
теста, например, для хлеба или пиццы используйте нож.
4. Мешалку-венчик нельзя использовать одновременно с лопаточкой.
Крышка
1. Чтобы предотвратить протекание продуктов, под крышку следует устанавливать
уплотняющее кольцо.
2. Разместите крышку по диагонали сверху на чашу.
3. Поверните крышку по часовой стрелке так, чтобы зубчик, предусмотренный под
носиком крышки, вошел в соответствующий паз на корпусе чаши.
4. Кухонный комбайн включится только при правильной установке крышки.
5. На крышке предусмотрено специальное отверстие, через которое удобно добавлять
ингредиенты.
Лопатка
1. Используйте этот инструмент, чтобы извлекать или перемешивать ингредиенты.
2. Нельзя допускать соприкасания лопатки с ножом при добавлении ингредиентов
через верхнее отверстие в крышке.
Мерный колпачок
1. Мерный колпачок имеет емкость 100 мл и снимается.
а. Использование колпачка облегчает добавку дополнительных ингредиентов.
б. Поддержание температуры осуществляется сразу же после установки
мерного колпачка в крышку.
в. С помощью колпачка контролируется процесс выхода пара.
1. Мерный колпачок можно извлекать только при скорости от 1 до 3. При большей
скорости ингредиенты могут быть выброшены из чаши, что может привести к
ожогам.
2. Если используется высокая скорость, придерживайте мерный колпачок рукой,
чтобы предотвратить разбрызгивание.
134
Подготовка
D
GB
1
2
3
4
Описание пароварки
1. Крышка
2. Плоский лоток
3. Глубокий лоток
4. Контейнер для конденсата для
скапливания испарившейся
жидкости
Пароварка Vapore (дополнительное оборудование)
FR
ES
Пароварка Vapore используется для щадящего приготовления продуктов с максимальным
сохранением их питательной ценности. Приготовление на пару является самым здоровым
способом приготовления пищи.
IT
Преимущества приготовления пищи на пару
1. Сохранение витаминов и питательных веществ
2. Экономия времени, так как за раз можно приготовить несколько блюд
3. Здоровая пища, низкое содержание соли и жира
4. Продукты остаются сочными
5. Запахи продуктов не перемешиваются
NL
Работа в режиме пароварки
1. Налейте в чашу минимум 700 мл воды или другой жидкости для приготовления,
например, бульона.
2. Смажьте дно корзинок маслом, чтобы продукты не прилипали.
3. Выложите продукты на лотки. Продукты, которые готовятся дольше других, размещайте
на глубокий лоток. Не закрывайте все отверстия в лотке продуктами, чтобы пар мог
подниматься.
4. Установите пароварку Vapore прямо на крышку, не устанавливая мерный колпачок.
5. Проверьте, что лотки установлены один на другой, и что крышка закрыта плотно и не
пропускает пар.
PT
RUS
AR
HE
1. Используя пароварку Vapore, помните, что из нее выходит горячий пар, а в контейнере
для конденсата скапливается горячая вода. Внимание! Опасность ожогов!
2. Держите корзинки и лотки только за ручки.
3. Осторожно извлекайте контейнер для конденсата.
4. Контейнер для конденсата изготовлен из термостойкого пластика и выдерживает
температуру до 90 °C.
5. Пароварку Vapore нельзя использовать в микроволновых печах, духовках и других
нагревательных устройствах.
Установка и извлечение карты памяти
Установите поставляемую в комплекте SD-карту в гнездо на пульте управления "Yumi".
Контакты SD-карты должны быть направлены вверх. Осторожно вставьте SD-карту до
щелчка. Чтобы извлечь SD-карту, нажмите на нее так, чтобы она вышла из гнезда, после
чего вытяните ее.
Включение и выключение
Установите пульт управления "Yumi" в предусмотренное углубление на корпусе комбайна.
Нажмите кнопку включения/выключения (7), кухонный комбайн готов к использованию.
135
Первое включение пульта управления
При первом включении пульта сразу же предлагается установить дату/время и язык меню.
Чтобы настроить календарь и язык, выполните следующие инструкции:
1.
1. С помощью кнопок
переходите с настроек календаря к
настройкам языка и корректируйте
настройки, используя левый и
правый регуляторы.
2. Подтвердите настройки, нажав
кнопку .
2.
Структура меню
3. Нажмите любую кнопку или
поверните любой регулятор
кроме кнопки "MENU". Так можно
перейти к управлению процессом
приготовления вручную.
4. Используйте левый регулятор,
чтобы установить необходимую
температуру.
5. Используйте правый регулятор,
чтобы установить скорость.
6. Используйте кнопки
, чтобы
вручную настроить время.
7. Нажатие на кнопку
увеличивает
скорость на короткое время (турборежим).
1. Используйте кнопки
, чтобы
перемещаться по пунктам меню.
2. Курсор в виде точки
указывает
на текущее положение.
3. Подтвердите выбор, нажав кнопку
.
4. Чтобы закрыть меню, нажмите
кнопку "MENU".
Нажмите кнопку "MENU", чтобы войти в главное меню.
Настройки
В подменю "Настройки" можно устанавливать различные параметры работы.
Дата
Время
Установка даты:
Установка времени:
1. В меню "Настройки" используйте
кнопки
, чтобы перейти к
пункту "Дата" (Date).
2. Используйте правый регулятор,
чтобы осуществить выбор. С
помощью левого регулятора можно
переходить между установкой года,
месяца и дня.
3. Затем нажмите кнопку , чтобы
подтвердить выбор.
136
1. В меню "Настройки" используйте
кнопки
, чтобы перейти к
пункту "Время" (Time).
2. Используйте правый регулятор,
чтобы осуществить выбор. С
помощью левого регулятора
можно переходить между часами
и минутами. Также здесь можно
выбрать формат отображения
времени – 12- или 24-часовый.
3. Затем нажмите кнопку , чтобы
подтвердить выбор.
Таймер отключения
Язык
Таймер отключения позволяет устанавливать время, по истечении
которого кухонный комбайн автоматически перейдет в режим
ожидания. По истечении, например, 1 минуты в режиме ожидания
экран выключится, если использование экранной заставки не было
задано (см. "Экранная заставка").
Изменение таймера отключения:
Выбор языка:
D
GB
FR
1. В меню "Настройки" используйте
кнопки
, чтобы перейти к
пункту "Язык" (Language).
2. Используйте правый регулятор,
чтобы осуществить выбор.
3. Затем нажмите кнопку , чтобы
подтвердить выбор.
1. В меню "Настройки" используйте
кнопки
, чтобы перейти
к пункту "Таймер отключения"
(Standby timer).
2. Используйте правый регулятор,
чтобы осуществить выбор.
3. Затем нажмите кнопку , чтобы
подтвердить выбор.
ES
IT
PT
NL
RUS
AR
HE
Громкость
Экранная заставка
Используйте эту настройку, чтобы отрегулировать громкость звуковых
сигналов, которые издаются при включении/выключении комбайна,
а также когда он разогрелся до заданной температуры, или истекло
установленное время. Настройка громкости:
Экранная заставка активируется в зависимости от времени
указанного в меню "Таймер отключения". В качестве экранной
заставки можно использовать любое изображение по своему
усмотрению. Следует отметить, что для этого можно использовать
только файлы изображений. Загрузите их в системную папку
"995SAVER" на SD-карте. Для того чтобы файлы могли использоваться
системой, их следует сохранять в следующем формате:
1. В меню "Настройки" используйте
кнопки
, чтобы перейти к
пункту "Громкость" (Volume).
2. Используйте правый регулятор,
чтобы осуществить выбор.
3. Затем нажмите кнопку , чтобы
подтвердить выбор.
Например: XXX00001.jpg
XXX = макс. 3 символа
12345 = макс. 5 цифр
.jpg = формат файла
Файлы следует нумеровать последовательно: XXX00002.jpg,
XXX00003.jpg, и т. д. Размер изображения должен соответствовать
разрешению ЖК-дисплея, которое составляет 480 x 272 пикселей.
Изображения другого размера автоматически обрезаются до
необходимых пропорций.
Изменение экранной заставки:
1. В меню "Настройки" используйте
кнопки
, чтобы перейти к
пункту "Экранная заставка" (Screen
saver).
2. Используйте правый регулятор,
чтобы осуществить выбор. (Стоп/
Воспроизвести)
3. Затем нажмите кнопку , чтобы
подтвердить выбор.
Слайд-шоу
Используйте эту настройку для управления показом изображений в
режиме экранной заставки.
Настройка показа слайд-шоу:
1. В меню "Настройки" используйте
кнопки
, чтобы перейти к
пункту "Слайд-шоу" (Slide show).
2. Используйте правый регулятор,
чтобы осуществить выбор.
3. Подтвердите выбор, нажав кнопку
.
137
Демонстрационный режим
Версия микропрограммы
Демонстрационный режим – это дополнительное маркетинговое
средство, которым могут воспользоваться розничные магазины. В
этом режиме на РК-дисплее изделия отображается информация о
нем, которая хранится в системной папке "996PROMT".
Эта настройка позволяет вывести на экран текущую версию
микропрограммы, серийный номер прибора и QR-код. Более
подробную информацию о текущей версии микропрограммы можно
найти на веб-сайте www.supercook.me. Серийный номер потребуется
при размещении заявок на техническое обслуживание, а также при
регистрации прибора на веб-сайте www.supercook.me.
При выборе демонстрационного режима все прочие функции
прибора выключаются. Чтобы выйти из демонстрационного режима,
одновременно нажмите и удерживайте в течение 10 секунд кнопку
"MENU" и две внешние кнопки.
Если кухонный комбайн выставляется на витрине магазина, в целях
безопасности снимите с него нож.
Включение демонстрационного режима:
1. В меню "Настройки" используйте
кнопки
, чтобы перейти к
пункту "Демонстрационный режим"
(In-store promotion mode).
2. Подтвердите или отмените выбор,
нажав кнопку .
3. Чтобы выйти из демонстрационного
режима, одновременно нажмите и
удерживайте в течение 10 секунд
кнопку "MENU" и две внешние
кнопки.
Обновление пульта
управления "Yumi"
Используйте эту настройку для обновление микропрограммы пульта
управления "Yumi".
Для этого загрузите последнюю версию программного обеспечения
для кухонного комбайна с веб-сайта
www.supercook.me. Извлеките микропрограмму из сжатого файла
и скопируйте ее в корневой каталог SD-карты.
1. Установите SD-карту в пульт
управления:
2. В меню "Настройки" используйте
кнопки
, чтобы перейти к
пункту "Обновить пульт управления"
(Update control module).
3. Подтвердите выбор, нажав кнопку
.
4. Следуйте экранным инструкциям.
Включите и выключите кухонный
комбайн. После обновления на
экране отобразится новая версия
микропрограммы, как описано
далее.
138
Отображение версии микропрограммы:
1. В меню "Настройки" используйте
кнопки
, чтобы перейти к
пункту "Версия микропрограммы"
(FW version).
2. Нажмите кнопку , чтобы
вернуться в меню "Настройки".
Коллекция рецептов
Меню "Коллекция рецептов" (Recipe collection) – это ваша
собственная электронная кулинарная книга, которую всегда можно
использовать в качестве справочника. В ней содержатся рецепты
по категориям и инструкции по приготовлению каждого рецепта.
Рецепты разбиты по категориям, что позволяет быстро найти
необходимый рецепт.
SD-карта емкостью 1 Гб позволяет хранить до 895 рецептов. В
среднем один рецепт на любом языке занимает приблизительно 1
Мб. В стандартной комплектации поставляется SD-карта емкостью
1 Гб. Чтобы иметь возможность сохранить больше 895 рецептов на
разных языках с веб-сайта www.supercook.me, потребуется SD-карта
большей емкости.
Категории рецептов
D
GB
1.
Закуски
2.
Супы
3.
Основные блюда из рыбы и мяса
4.
Вегетарианские основные блюда
IT
5.
Гарниры
PT
6.
Детское питание
NL
7.
Соусы
RUS
8.
Заправки
AR
9.
Выпечка
HE
10.
Десерты
11.
Коктейли
12.
Корм для домашних животных
FR
ES
Выбор рецепта для просмотра:
1.
2.
1. Используйте кнопки
, чтобы
перемещаться по пунктам меню
"Коллекция рецептов" (Recipe
collection).
2. Подтвердите выбор, нажав кнопку
.
3.
3. Курсор в виде точки указывает на
текущую категорию.
4. Используйте кнопки
, чтобы
перемещаться и выбрать желаемую
категорию.
5. Подтвердите выбор категории,
нажав кнопку .
6. Или нажмите кнопку , если
желаете выключить пульт
управления.
4.
7.
Нажмите кнопку , чтобы добавить
выбранный рецепт в список
избранных.
8. Используйте кнопки
, чтобы
перемещаться по выбранной
категории и просматривать
различные рецепты.
9. С помощью кнопки
подтвердите
выбор.
10. Используйте кнопки
, чтобы
перемещаться по страницам
рецепта.
11. Нажмите кнопку , чтобы
выключить пульт управления.
12. Нажмите кнопку "MENU", чтобы
выйти из коллекции рецептов.
139
Приготовление по рецепту
Работу с комбайном можно начать с этого меню. Можно использовать
как предварительно установленные параметры времени, скорости и
температуры, так и регулировать их вручную.
Начало приготовления:
1.
2.
1. Используйте кнопки
, чтобы
переместиться к пункту меню
"Приготовление по рецепту" (Recipe
cooking).
2. Подтвердите выбор, нажав кнопку
.
3.
6. Нажмите кнопку , чтобы добавить
выбранный рецепт в список
избранных.
7. Используйте кнопки
, чтобы
перемещаться по выбранной
категории и просматривать
различные рецепты.
8. Определившись с рецептом,
подтвердите выбор, нажав кнопку
.
5.
4.
9. Нажмите кнопку , чтобы
начать процесс с настройками,
установленными по умолчанию.
10. Нажмите кнопку , чтобы
приостановить текущую настройку.
(Появляется сразу после запуска
процесса. См. пункт 9).
11. Используйте кнопки
, чтобы вручную настроить
запрограммированное время.
12. Используйте левый регулятор,
чтобы вручную установить
запрограммированную
температуру.
13. Используйте правый регулятор,
чтобы вручную установить
запрограммированную скорость.
6.
14. Нажатие на кнопку
увеличивает
скорость на короткое время (турборежим).
15. Нажмите кнопку , чтобы
вернуться на один этап назад при
условии, что процесс приготовления
еще не начался.
140
3. Курсор в виде точки указывает на
текущую категорию.
4. Используйте кнопки
, чтобы
перемещаться и выбрать желаемый
рецепт.
5. Подтвердите выбор, нажав кнопку
.
16. Это предупреждение
появится по истечении 80 %
запрограммированного времени
обработки.
17. Нажмите кнопку , чтобы
завершить этап и добавить
ингредиенты. В конце этапа
нагревание автоматически
выключится. Мотор продолжит
работать в зависимости от
продолжительности процесса
приготовления.
D
GB
FR
ES
IT
7.
PT
8.
18. После этого вы можете продолжить
текущий процесс, нажав кнопку
, с новыми заданными вами
настройками.
19. Нажмите кнопку , чтобы
продолжить работу с рецептом.
NL
RUS
AR
HE
ИЛИ
9.
20. Если вы желаете продолжить
управление процессом вручную,
как описано в пункте 18, то
появится рисунок, приведенный
слева. После работы с настройками
кухонный комбайн вернется к
процессу, описанному в пункте
19, и вы сможете продолжить
выполнение этапов программы.
Этот цикл повторяется в конце
каждого этапа.
Настройки параметров
безопасности в пунктах меню
"Приготовление по рецепту",
"Избранные рецепты" и "Мои
рецепты".
Предварительно запрограммированные
настройки
По истечении 80% заданного времени приготовления (остается 20%)
на экране появится сообщение "Текущий этап скоро закончится".
Например, если время обработки составляет 5 минут, то кухонный
комбайн подаст звуковой сигнал за
1 минуту до завершения.
10.
21. Если ни одно действие не будет
выполнено в конце цикла, и
безопасный период истечет, то
мотор выключится. Появится
изображение, показанное слева.
22. Нажмите кнопку
и вернитесь
назад к следующему этапу в
рецепте, который был открыт.
23. Нажмите кнопку , чтобы выйти
из режима "Приготовление по
рецепту".
Если после этого не будет выполнена ни одна настройка, нагревание
автоматически выключится и комбайн продолжит работу еще 1 или
5 минут в зависимости от продолжительности этапа приготовления
рецепта. Это предотвращает прилипание продуктов. По истечении
этого времени кухонный комбайн автоматически выйдет из рецепта
и вернется к просмотру категории. Вы можете либо вернуться назад к
следующему этапу рецепта, нажав кнопку
, или полностью остановить
процесс приготовления, нажав кнопку .
Если время обработки, заранее программируемое в рецепте,
настраивается вручную до подачи предупреждающего сигнала (осталось
20% заданного времени), то сообщение "Текущий этап скоро закончится"
не будет появляться на экране. Тем не менее, другие предохранительные
механизмы, описанные выше, сработают. Нагревание выключится,
когда истечет время обработки. Мотор выключится через указанный
период времени.
141
Избранные рецепты
Справка
В этом меню можно легко найти ваши любимые рецепты.
Чтобы начать приготовление по рецепту, находящемся в меню
"Избранные рецепты", следуйте инструкциям, описанным в разделе
"Приготовление по рецепту".
В этом пункте меню можно найти объяснение символов, которые
используются на пульте управления "Yumi".
Чтобы перейти к списку избранных рецептов:
1. Используйте кнопки
, чтобы
перемещаться по пунктам меню
"Справка" (Help).
2. Подтвердите выбор, нажав кнопку
.
1. Используйте кнопки
, чтобы
перемещаться по пунктам меню
"Избранные рецепты" (Recipe
favorites).
2. Подтвердите выбор, нажав кнопку
.
Важные правила безопасности
перед использованием комбайна
Мои рецепты
Больше нет необходимости собирать неудобные карточки с
рецептами, вырезки из газет и скачивать рецепты из сети. Кухонный
комбайн станет вашей собственной кулинарной книгой. Вы можете
создавать, готовить, собирать и наслаждаться своими собственными
рецептами. Узнайте больше на веб-сайте www.supercook.me.
Чтобы начать приготовление по рецепту, находящемся в меню
"Мои рецепты", следуйте инструкциям, описанным в разделе
"Приготовление по рецепту".
1. Используйте кнопки
, чтобы
переместиться к пункту меню "Мои
рецепты" (My recipes).
2. Подтвердите выбор, нажав кнопку
.
3. Выберите категорию и следуйте
инструкциям, описанным в разделе
"Приготовление по рецепту" (Recipe
cooking).
142
1. Пользуйтесь кухонным комбайном только на ровной, чистой и
устойчивой поверхности, которая не нагревается.
2. Снимите все упаковочные материалы.
3. Помойте все принадлежности.
4. Ни в коем случае не погружайте руку в комбайн, когда он работает.
5. Убедитесь, что используемые уплотняющие кольца чистые и не
повреждены.
6. Кухонный комбайн оснащен предохранительным механизмом. Если
чаша установлена на базе кухонного комбайна неплотно, то он не
запустится.
7. Отключайте кухонный комбайн от сети:
а. если прибор поврежден или не правильно работает
б. если он падал
в. если на нем есть механические повреждения или в случае
отключения электропитания.
8. Не оставляйте кухонный комбайн без присмотра.
9. Используйте только дополнительные принадлежности, рекомендуемые Рlawa.
Чистка
1. Чистите кухонный комбайн перед первым и после каждого
использования, очищайте все компоненты и принадлежности,
которые соприкасаются с пищевыми продуктами. Прежде чем
приступать к очистке комбайна убедитесь, что он полностью остыл.
2. Перед чисткой обязательно извлеките штепсельную вилку из розетки.
3. Контакты под чашей также должны быть чистыми и сухими.
4. Нож очень острый! Поэтому будьте осторожны, устанавливая и
снимая его.
5. Все съемные принадлежности можно мыть в посудомоечной
машине.
6. Чтобы предотвратить образование плесени, очищайте комбайн и
уплотнительные кольца после каждого использования.
7. Используйте мягкую слегка влажную ткань, чтобы очистить
углубление для крепления чаши на комбайне.
8. Не используйте абразивные и едкие чистящие средства. Они могут
повредить поверхность.
9. Некоторые продукты, например, морковь из-за содержащегося
в ней бета-каротина, помидоры или такие специи, как карри,
могут окрашивать пластиковые детали комбайна – это абсолютно
нормальное явление. Можно немного уменьшить следы
окрашивания, если слегка протереть это место смоченной в
кулинарном масле салфеткой. Быстро ополосните это место сначала
теплой водой, а потом холодной с небольшим количеством жидкости
для мытья посуды.
Технические характеристики
Кухонный комбайн SUPERCOOK
Потребляемая мощность
Приготовление
Смешивание
1000 Вт
500 Вт
Емкость
2 литра
Минимальная температура
40 °C
Максимальная температура
130 °C
Режимы скорости
10 + турбо
Скорость смешивания
20 000 об./мин.
Звуковой сигнал
Есть
Сетевое напряжение/Частота
230 В~50 Гц
Пульт управления
Соединение
ЖК-дисплей пульта управления
Разъем 5 В для штепсельной
вилки
4,3 дюйма
Карта памяти
Объем памяти
1 Гб -> 32 Гб
Пароварка (дополнительно)
Размеры
прибл. 23,1 x 19,2 см (почти
формат A4)
Заявление об авторских правах
Авторское право 2013 Данное руководство содержит материалы,
охраняемые авторским правом. Все права защищены. Запрещается
полное или частичное воспроизведение настоящего руководства
пользователя в любом виде и любыми средствами, включая
механические, электронные и прочие средства копирования, без
предварительного письменного разрешения производителя. SUPERCOOK
является товарным знаком plawa-feinwerktechnik GmbH & Co. KG.
Утилизация использованных
электронных приборов
Этот символ на изделии или его коробке означает, что данное изделие
не следует выбрасывать с обычным бытовым мусором, вместо этого
его следует отнести в пункт приема отработанного электрического
и электронного оборудования на переработку. Более подробные
сведения можно получить в местных органах самоуправления, местной
организации по сбору и удалению отходов или в магазине, где был
приобретен товар.
D
GB
FR
ES
IT
PT
NL
RUS
AR
HE
В связи с постоянным развитием и усовершенствованием мы
сохраняем за собой право в любой момент и без предварительного
уведомления изменять изделие, включая принадлежности, упаковку,
инструкции по эксплуатации и кулинарную книгу.
Техническая поддержка и
обслуживание клиентов
Вам нужна помощь? Если у вас возникли дополнительные вопросы,
посетите наш веб-сайт www.supercook.me, либо обратитесь в службу
оперативной технической поддержки или к дилеру, у которого был
приобретен многофункциональный кухонный комбайн.
Заявление о соответствии
Настоящим подтверждается, что указанное изделие соответствует
Директивам LVD 2009/95/EC, EMC 2004/108/EC and RoHS 2011/65/EU
EN 60335-2-14: 2006+A1:2008+A11:2012
EN 60335-2-15: 2002+A1:2005+A2:2008+A11:2012
EN 60335-1: 2012
EM 62233: 2008
EN 55014-1/A1: 2009
EN 55014-2/A2:2008
EN 61000-3-2/A2:2009
EN 61000-3-3:2008
Служба оперативной технической поддержки (ЕС)
00800 75292 100
(Бесплатные звонки со стационарных телефонов)
Интернет-служба/Международные контакты
Интернет: www.supercook.me
Эл. почта: [email protected]
Если необходимо вернуть товар, то потребуется номер RMA (возврат
некачественных или неисправных изделий производителю), который
следует четко указать на упаковке возвращаемого изделия. Подробную
информацию о возврате товара можно получить по телефону
горячей линии или на веб-сайте SUPERCOOK в разделе "Техническая
поддержка и обслуживание клиентов".
Производитель
plawa-feinwerktechnik GmbH & Co. KG
Bleichereistr. 18
73066 Uhingen
Germany (Германия)
143
144
D
GB
FR
ES
IT
PT
154
154
154
155
155
155
155
155
156
156
156
157
157
158
159
159
160
160
160
160
160
161
161
161
161
161
146
146
146
146
147
147
148
149
149
149
150
151
151
151
151
152
152
152
152
153
153
153
153
153
NL
RUS
AR
HE
154
154
145
146
D
GB
FR
ES
IT
PT
NL
RUS
AR
HE
147
٣
٢
٤
٥
١
٦
٧
148
D
GB
FR
ES
IT
١
PT
NL
RUS
٣
٢
AR
HE
٤
٥
٦
149
150
D
GB
FR
ES
IT
PT
NL
RUS
AR
HE
151
152
D
GB
FR
١
ES
IT
٢
PT
٣
NL
٤
RUS
AR
HE
153
154
D
GB
FR
ES
IT
PT
NL
RUS
AR
HE
155
156
D
GB
FR
ES
IT
PT
NL
RUS
AR
HE
157
158
D
GB
FR
ES
IT
PT
NL
RUS
AR
HE
159
160
D
GB
FR
ES
IT
PT
NL
RUS
AR
HE
RoHS 2011/65/EU , EMC 2004/108/EC , LVD 2009/95/EC
EN 60335-2-14: 2006+A1:2008+A11:2012
EN 60335-2-15: 2002+A1:2005+A2:2008+A11:2012
EN 60335-1: 2012
EM 62233: 2008
EN 55014-1/A1: 2009
EN 55014-2/A2:2008
EN 61000-3-2/A2:2009
EN 61000-3-3:2008
161
172
172
172
173
173
173
173
173
174
174
174
175
175
176
177
177
178
178
178
178
178
179
179
179
179
179
162
163
164
164
164
164
165
165
166
167
167
167
168
169
169
169
169
170
170
170
170
171
171
171
171
171
172
172
D
GB
FR
ES
IT
PT
NL
RUS
AR
HE
162
163
165
164
D
GB
FR
ES
IT
PT
NL
RUS
AR
HE
164
165
167
166
D
GB
FR
ES
IT
PT
NL
RUS
AR
HE
166
167
169
168
D
GB
FR
ES
IT
PT
NL
RUS
AR
HE
168
169
171
170
D
GB
FR
ES
IT
PT
NL
RUS
AR
HE
170
171
173
172
D
GB
FR
ES
IT
PT
NL
RUS
AR
HE
172
173
174
175
2.
1.
4.
3.
D
GB
FR
ES
IT
PT
NL
RUS
AR
HE
174
175
176
177
8.
7.
10.
9.
D
GB
FR
ES
IT
2.
1.
PT
NL
RUS
AR
HE
4.
3.
6.
5.
176
177
RoHS 2011/65/EU , EMC 2004/108/EC , LVD 2009/95/EC
EN 60335-2-14: 2006+A1:2008+A11:2012
EN 60335-2-15: 2002+A1:2005+A2:2008+A11:2012
EN 60335-1: 2012
EM 62233: 2008
EN 55014-1/A1: 2009
EN 55014-2/A2:2008
EN 61000-3-2/A2:2009
EN 61000-3-3:2008
178
179
D
GB
FR
ES
IT
PT
NL
RUS
AR
HE
178
179
www.supercook.me
SUPERCOOK is a brand of
plawa-feinwerktechnik GmbH & Co. KG.
© Copyright 2013