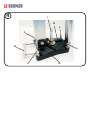
1
Mode d'emploi
Instruction manual
Talen / Langues / Languages:
de, en, fr, it
BERNER_64269.pdf
2013-05-23
IT
EN
FR
DE
MANUALE DI ISTRUZIONI ED USO
SUPPORTO PER CAROTATRICE
SAFETY AND USER MANUAL
DRILL STAND
MANUEL DE SÉCURITÉ ET D'UTILISATION POUR:
SUPPORT PER CAROTTEUSE
SICHERHEITS- UND BETRIEBSANLEITUNG FÜR:
BOHRSTÄNDER
1
X
+
Y
+
Z
2
B
C
E
D
A
G
3
F
B
Q
C
D
E
A
4
I
H
L
L
G
L
L
R
5
N
P
O
M
5/A
5/B
5/C
5/D
6
7
8
9
10
11
T
S
S
1
Italiano
Il vostro supporto per carotatrice Berner (X) è un dispositivo che deve essere usato in
combinazione con un motoriduttore idoneo (Z) e un sistema di ancoraggio (Y) idoneo,
secondo le indicazioni fornite in questo manuale. Questi tre elementi formano una
carotatrice (X+Y+Z), adatta all’esecuzione di fori su materiali lapidei (es.: mattoni, muratura,
pietra naturale), utilizzando una corona diamantata. Il supporto rispetta le normative relative
alle carotatrici quando impiegato nei limiti precisati in questo manuale.
Attenzione: assicurarsi che tutti i componenti della carotatrice siano idonei
all’esecuzione del foro che si sta per effettuare, sia in termini di diametro che di
profondità, in relazione al materiale da forare. In caso di dubbio rivolgersi al
rivenditore.
Norme di sicurezza generale
ATTENZIONE! Leggere attentamente le seguenti istruzioni
prima di utilizzare il prodotto.
CONSERVARE QUESTE ISTRUZIONI
Leggere le istruzioni di sicurezza fornite dal
produttore del motoriduttore e del sistema di
ancoraggio prima di utilizzare il vostro supporto.
a) Tenere pulita l'area di lavoro. Ambienti e banchi di
lavoro in disordine possono essere causa di incidenti.
b) Tenere lontani i bambini. Non permettere che persone
estranee tocchino l'utensile o gli accessori. Tenere i non
addetti ai lavori lontani dal posto di lavoro.
c) Usare un vestiario appropriato. Evitare l'uso di abiti
svolazzanti, catenine, ecc., in quanto potrebbero
rimanere presi nelle parti mobili dell'utensile. Lavorando
all'aperto indossare guanti di gomma e scarpe con suole
antisdrucciolo. Raccogliere i capelli se si portano lunghi.
d) Usare occhiali protettivi. Usare inoltre una maschera
antipolvere qualora si producano polvere o particelle
volatili.
e) Rumorosità eccessiva. Prendere appropriate misure a
protezione dell'udito se il livello acustico supera gli 85 dB.
f) Stare sempre attenti. Prestare attenzione a quanto si
sta facendo. Usare il proprio buon senso. Non utilizzare
l’utensile se si è stanchi.
g) Usare l'utensile adatto. L'utilizzo previsto è indicato nel
presente manuale. Non forzare utensili e accessori di
potenza limitata impiegandoli per lavori destinati ad
utensili di maggiore potenza. Attenzione: l'uso di
accessori o attrezzature diversi, o l'impiego del presente
utensile per scopi diversi da quelli raccomandati nel
manuale uso possono comportare il rischio di infortuni.
h) Rivolgersi ai Centri di Assistenza Tecnica autorizzati
BERNER per le riparazioni.
Disposizioni di sicurezza per carotatrici
Indossare
sempre
occhiali
protettivi
Indossare
guanti
protettivi
Indossare
calzature
protettive
Indossare
maschere
antipolvere
Indossare
sempre
protezioni
per l’udito
Istruzioni
Leggere attentamente i dati riportati nella scheda
Dati tecnici fornita con il prodotto.
Per le illustrazioni si faccia riferimento alle pagine iniziali di
questo manuale. Nel testo che segue le figure sono
identificate da numeri mentre i singoli particolari, all'interno
delle figure, sono identificati da lettere.
Il supporto
Il supporto è costituito dai seguenti elementi, rappresentati
nel generico supporto in figura 2 e 3.
una base (A). La base permette l’ancoraggio del
supporto alla superficie da forare. Successivamente
verranno descritte le diverse modalità di ancoraggio
in relazione al tipo di supporto;
una colonna (B). La colonna è la struttura dotata di
cremagliera che permette alla slitta (C) di scorrere;
una slitta (C). La slitta è la parte mobile del
supporto che si interfaccia con il motoriduttore. Alla
slitta viene ancorato il volantino di avanzamento (E)
per permetterne lo spostamento;
barre di rinforzo (D). Collegano la sommità del
supporto alla base per dare rigidità al sistema. Le
barre di rinforzo sono opzionali in alcune tipologie di
supporti;
manicotto di contrasto (F), previsto solo per alcune
tipologie di supporti;
cerca centro – guida corona (G). Permette di
stabilire con precisione il centro del foro e di
guidare la corona nelle fasi di inizio carotaggio.
Ancoraggio del supporto
Attenzione: per la vostra sicurezza è importante
che il supporto sia adeguatamente e saldamente
ancorato durante la foratura.
Attenzione: individuare sempre l’area di caduta
della carotatrice nel caso in cui il supporto si
distacchi dagli ancoraggi: non stare in questa
area ed evitare che chiunque possa stare in
questa area o attraversarla. Questo in particolare
nel caso si fori orizzontalmente o sottotesta.
Un corretto ancoraggio del supporto garantisce, oltre che la
sicurezza, anche alte prestazioni di foratura, alta qualità del
foro, un ridotto consumo di corone e un ridotto sforzo del
motoriduttore.
Il vostro supporto, a seconda della tipologia, può supportare
diverse modalità di ancoraggio qui di seguito illustrate.
Ancoraggio con tassello
Il supporto può essere ancorato utilizzando varie tipologie di
tassello a seconda del materiale. Questo sistema è molto
efficace ma poco rapido in quanto richiede almeno un
tassello di ancoraggio.
Attenzione: per la vostra sicurezza, assicurarsi
sempre che il materiale nel quale si posiziona il
tassello e il tassello stesso abbiano la
resistenza meccanica sufficiente per trattenere
Italiano
il sistema. A volte sono necessari due tasselli.
In ogni caso il filetto del tassello deve essere
almeno M12.
Leggere sempre le istruzioni fornite dal
produttore del tassello e verificare che il tassello
sia adatto all’uso.
Per l’ancoraggio tramite tassello seguire queste istruzioni:
dopo aver definito la posizione del foro da
effettuare, individuare la posizione del foro per il
tassello. L’ancoraggio è tanto migliore quanto più il
tassello è vicino alla colonna;
scegliere il tassello adatto all’applicazione con
filetto del tassello almeno M12;
effettuare il foro per il tassello di dimensione adatta
e fissare il tassello al materiale, quindi avvitare nel
tassello una barra filettata adatta;
posizionare il supporto inserendo la barra filettata
(figura 4 I) nell’asola della base (H). Fissare quindi il
supporto con un dado adatto, interponendo la
rondella fornita, così come rappresentato in figura
4, in modo che la rondella si impegni sulla base;
se necessario, utilizzare le quattro viti indicate nelle
figure con la lettera L per livellare la base e
assicurare la stabilità della colonna.
Tasselli ad espansione per il fissaggio dei supporti BERNER
sono disponibili come accessori.
Ancoraggio a vuoto
L’ancoraggio a vuoto è possibile se il vostro supporto è
provvisto di una base predisposta come da figura 5 oppure
con appositi accessori.
Ancorare a vuoto significa che il supporto è fissato al
materiale dal vuoto creato da una pompa a vuoto. Questo
fissaggio è rapido ed economico, ma richiede una superficie
di ancoraggio:
adeguatamente liscia, pulita e priva di detriti, per
evitare rientri di aria;
sufficientemente compatta, per evitare il distacco
dello strato esterno della superficie stessa (intonaco
male ancorato, piastrelle a parete incollate o male
fissate).
In caso di superficie compatta, ma che presenti delle
asperità o degli avvallamenti, provvedere a livellarla il più
possibile, rimovendo le asperità o applicando un leggero
strato di gesso a presa rapida sugli avvallamenti in
corrispondenza della guarnizione della base.
Attenzione: individuare sempre l’area di caduta
della carotatrice nel caso in cui il supporto si
distacchi dagli ancoraggi: non stare in questa
area ed evitare che chiunque possa stare in
questa area o attraversarla. Questo in particolare
nel caso si fori orizzontalmente o sopratesta.
Attenzione: nel caso di fori orizzontali o
sottotesta utilizzare ulteriori sistemi di sostegno
(per esempio sistemi a catena) che evitino danni
a persone o cose nel caso la base si distacchi
dalla superficie.
Si consiglia, per motivi di sicurezza, di utilizzare pompe a
vuoto dotate di serbatoio.
2 di diametro superiore a 250 mm;
con uso di motoriduttori di potenza superiore a
3500 W nel caso di motori elettrici, o potenze
equivalenti nel caso di altri tipi di motorizzazione;
con uso di motoriduttori non dotati di adeguato
sistema di limitazione della coppia in caso di
sovraccarico.
L’ancoraggio a vuoto è previsto per le basi della tipologia in
figura 5. Utilizzare solo pompe a vuoto dotate di
vacuometro. Per ancorare il supporto con la tecnica a vuoto
operare come segue con riferimento alla figura 5:
posizionare la guarnizione M nella apposita cava
situata sotto la base, come rappresentato in figura
5/A, dopo aver adeguatamente pulito la cava;
posizionare nell’asola H sulla base il tappo N,
assicurandosi che sia munito di guarnizione. Quindi
fissare il tappo avvitando la vite con piastrina O dal
fondo nella base (figura 5/B). Utilizzare la chiave
fornita;
svitare le quattro viti L di livellamento finché
rientrino completamente nella base;
connettere il tubo dalla pompa direttamente
all’innesto (P) o tramite l’innesto ad attacco rapido
(rispettivamente figure 5/D e 5/C). Assicurarsi che il
tubo sia adatto all’applicazione.
Attenzione: fissare sempre il tubo tramite una
fascetta come in figura 5/C e 5/D.
posizionare il supporto nella posizione adeguata al
foro da praticare;
mettete in funzione la pompa a vuoto;
controllare sul vuotometro della pompa che il valore
di depressione creatosi sotto la base sia tra -0,8 e 1 bar;
Attenzione: la pompa deve rimanere accesa
per mantenere la base ancorata. Non spegnere
la pompa se non a fine lavoro per rimuovere il
supporto.
Attenzione: se durante la perforazione il valore
di depressione essere nell’intervallo -0,8 e 0
bar, sospendere immediatamente il lavoro e,
dopo aver spento il motore dell'unità di
perforazione, provvedere a ricercare la causa
del calo di depressione.
Al temine della foratura, rimuovere la guarnizione per evitare
di danneggiarla.
Foratura dal basso verso l’alto
È possibile effettuare foratura dal basso verso l’alto
(sottotesta) utilizzando motoriduttori adatti e fissando la
base tenendo conto che alla spinta di perforazione si
aggiungono: il peso del sistema (supporto, motoriduttore,
corona), l’acqua contenuta nella corona e la carota al
termine dell’operazione di foratura.
Nel caso di motoriduttori elettrici è obbligatorio l’utilizzo di un
kit di raccolta acqua, disponibile come accessorio BERNER
fino a 330 mm. In tutti gli altri casi utilizzare motoriduttori
stagni (idraulici, pneumatici e trifase chiusi). Si consiglia
comunque l’uso di kit di raccolta acqua.
Volantino di avanzamento
Attenzione: si presti attenzione alle seguenti
limitazioni nel caso di fissaggio a vuoto.
Non utilizzare l’ancoraggio a vuoto per perforazioni:
Per spostare la slitta (C) lungo la colonna (B) ruotare il
volantino di avanzamento (E). Per montare il volantino di
avanzamento sull’albero della slitta (Q) si faccia riferimento
alla figura 6. È possibile applicare il volantino sia sull’albero
3
Italiano
a sinistra che sull’albero a destra della slitta a seconda della
comodità. Per alcuni modelli di supporto sono disponibili
come accessori sistemi che motorizzano il movimento della
slitta.
Meccanismo di blocco
Sulla slitta è presente un sistema di blocco che ne
impedisce il movimento sulla colonna (figura 7). Il
meccanismo di blocco deve essere inserito ogni volta venga
montato il motoriduttore, si sostituisca la corona o si sposti
il supporto o l’intera carotatrice.
Cerca centro – Guida corona
Sulla base può essere presente un dispositivo (G) con 2
funzioni: “cerca centro” e “guida corona”. Di seguito la
spiegazione delle 2 funzioni:
Cerca centro
La funzione “cerca centro” permette di stabilire con facilità il
centro del foro che si sta per praticare. Si operi come di
seguito:
si allentino i dispositivi di fermo (R);
si estragga il dispositivo “cerca centro – guida
corona” fino all’indicazione corrispondente all’asse
dall’albero del proprio motoriduttore.
Guida corona
La funzione “guida corona” permette di guidare la corona
durante la fase iniziale delle operazioni di carotaggio,
limitando il disassamento della corona.
Si operi come di seguito:
si allentino i dispositivi di fermo (R);
si estragga il dispositivo “cerca centro – guida
corona” fino ad poggiarlo sul mantello della corona;
si stringano i dispositivi di fermo (R);
si perfori per circa un centimetro;
si allentino i dispositivi di fermo e si ritragga il
dispositivo “cerca centro – guida corona” verso la
base.
Fissaggio del motoriduttore
A seconda del modello del vostro supporto il motoriduttore
può essere montato sulla slitta in modo diretto, mediante
attacco rapido o tramite collare. Si identifichi quale tipologia
di attacco prevede il vostro supporto.
dopo essersi accertati che il motoriduttore sia
disconnesso dalla rete elettrica, posizionare la
piastra sul motoriduttore, inserendo la chiavetta
della piastra nell’apposita cavità sul motoriduttore e
quindi inserire nelle sedi della piastra le apposite
viti, in numero minimo di 4 e avvitarle con
decisione;
applicare il motoriduttore con piastra sulla slitta
come in figura, assicurandosi che la piastra sia
incastrata nella sede;
bloccare la piastra serrando le due viti presenti sulla
parte laterale della slitta;
Per lo smontaggio procedere in senso inverso, prestando
attenzione a trattenere il motore quando si svitano le viti di
serraggio.
Fissaggio con collare
Il fissaggio tramite collare è previsto per alcuni supporti. Il
fissaggio con collare è adatto a fori di diametro fino a 160
mm.
Il fissaggio tramite collare è adatto al fissaggio di carotatrici
manuali. Il diametro del collare è di 60 mm.
Esistono 2 tipologie di collari BERNER:
collare con attacco a viti;
collare con attacco rapido (Rapid Lock).
Si seguano le istruzioni seguenti per il collare con attacco a
viti (figura 10):
si fissi saldamente il collare alla slitta,
analogamente a quanto descritto nel paragrafo
“Fissaggio diretto”;
si infili la carotatrice manuale nel collare;
si stringano le viti del collare in modo che la
carotatrice manuale sia saldamente unita al
supporto.
Si seguano le istruzioni seguenti per il collare con attacco
rapido (Rapid Lock) (figura 10):
applicare il collare ad attacco rapido sulla slitta
analogamente a quanto descritto nel paragrafo
“Fisssaggio diretto con sistema di attacco rapido
Rapid Lock”;
si infili la carotatrice manuale nel collare;
si stringano le viti del collare in modo che la
carotatrice manuale sia saldamente unita al
supporto.
Inclinazione della colonna (figura 11)
Procedere come segue facendo riferimento alla figura 8:
bloccare la slitta;
dopo essersi assicurati che il motoriduttore è
staccato dalla rete elettrica, posizionare la base del
motoriduttore contro la facciata della slitta, facendo
si che la chiavetta entri nell’apposita asola del
motoriduttore;
Nel caso si vogliano effettuare fori non perpendicolari alla
base, è possibile inclinare la colonna (eccetto supporti non
provvisti di barre di rinforzo). Procedere come segue:
procedere allentando le viti indicate dalle frecce e
rimuovere le viti (S) e la piastrina (T);
inclinare la colonna dell’angolo desiderato;
avvitare quindi tutte le viti alentate nei punti
precedenti.
inserire nelle sedi della slitta le viti, in numero
minimo di 4 e avvitarle con decisione nelle sedi
previste nella base del motoriduttore, utilizzando la
chiave esagonale fornita insieme al vostro
supporto.
Nel caso di fori inclinati l'avvio della perforazione deve
avvenire molto lentamente per evitare deviazioni laterali. La
corona tocca infatti il materiale solo con una minima parte
della sua superficie e può quindi essere facilmente deviata
dal suo asse.
Fissaggio diretto
Fissaggio con sistema di attacco rapido Rapid Lock
Procedere come segue facendo riferimento alla figura 9:
bloccare la slitta;
Diametro
massimo
di
foratura
caratteristiche del motoriduttore
e
Si faccia riferimento alla tabella Dati tecnici specifica per il
modello, fornita nella confezione insieme a questo manuale,
Italiano
4 per il diametro massimo di foratura e la potenza massima
del motoriduttore da montare sul supporto.
Preparazione ed uso del sistema
Prima di procedere con la preparazione del sistema
alla foratura, leggere con attenzione il manuale
fornito dal produttore del motoriduttore e di tutti gli
altri componenti del sistema (tasselli, pompa a
vuoto ecc.).
Procedere quindi come di seguito:
se disponibile, avvitare il dispositivo di contrasto F
all’estremità superiore della colonna;
ancorare il supporto sul materiale da forare
secondo quanto descritto nel paragrafo Ancoraggio
del supporto.
Attenzione: assicurarsi sempre che la modalità
di fissaggio sia adeguata e che il supporto sia
saldamente ancorato;
inclinare eventualmente la colonna come indicato
nel paragrafo Inclinazione della colonna;
montare il volantino di avanzamento (E) così come
descritto
nel
paragrafo
Meccanismo
di
avanzamento e bloccare la slitta.
montare il motoriduttore al supporto come definito
nel paragrafo Fissaggio del motoriduttore,
assicurandosi che sia adatto al supporto: si veda il
paragrafo Diametro massimo di foratura e
caratteristiche del motoriduttore.
riferirsi sempre al manuale del motoriduttore per i
limiti di utilizzo della macchina nelle condizioni
ambientali correnti;
Attenzione: prima di procedere verificare che
tutti i bulloni e le viti siano saldamente serrate.
montare la corona al motoriduttore;
accendere il motoriduttore e, agendo sul sistema di
avanzamento, avvicinare la corona in rotazione al
materiale da forare ed esercitando una pressione
leggera eseguire il primo centimetro di
perforazione.
Questa
operazione
è
molto
importante perché, se effettuata correttamente,
assicura una perfetta centratura della corona,
evitando deviazioni laterali della stessa durante la
continuazione del foro.
al termine della operazione di centraggio, aumentare
la spinta e procedere con l’esecuzione del foro.
Manutenzione - AssistenzaGaranzia
Operazioni periodiche
manutenzione
di
pulizia
e
mantenere pulito ed asciutto il supporto, in
particolare la cremagliera e la base;
per la pulizia non utilizzare solventi o altri prodotti
chimici aggressivi;
dopo l'uso riporre il supporto in un luogo asciutto,
sicuro ed inaccessibile ai bambini;
non utilizzare il supporto con parti danneggiate o
con difetti di funzionamento. In questi casi
provvedere a fare sostituire tali parti presso un
centro di assistenza autorizzato.
Assistenza
eventuali riparazioni o interventi di assistenza
devono essere effettuati esclusivamente da un
centro di assistenza autorizzato BERNER.
Rivolgersi al rivenditore per identificare il centro
assistenza autorizzato più vicino;
richiedere sempre l'uso di parti di ricambio originali
BERNER.
Garanzia da parte del costruttore
Questo prodotto è coperto da garanzia di 36 mesi della data
di acquisto contro difetti di materiale ed errori di progetto o
fabbricazione. La garanzia copre il costo della sostituzione
delle parti interessate, il costo delle operazioni di
sostituzione e il materiale di consumo se integri al momento
della riparazione.
La garanzia non comprende la sostituzione di:
parti di prodotti che hanno subito interventi da parte
di persone non autorizzate;
parti danneggiate per incuria, uso non adeguato o
sovraccarico;
parti del prodotto al quale elementi di sicurezza
siano stati rimossi o manomessi;
materiale di consumo esaurito, sostituito durante la
riparazione.
La mancanza di pulizia periodica, il danneggiamento delle
parti filettate, dei piani di appoggio o della cremagliera ecc.,
sono considerate incurie e fanno decadere il diritto
all'assistenza in garanzia.
La durata delle parti di consumo non è definibile a priori,
essendo in relazione al tempo di utilizzo del prodotto e
all'intensità di lavoro. Esempi di parti di consumo sono:
cuscinetti a rulli e a sfera non in bagno d’olio, guarnizioni per
sottovuoto, ecc.
Se durante la riparazione in garanzia vengono rilevati
deterioramenti di parti di consumo, che possono influenzare
la sicurezza o la funzionalità del prodotto, al cliente è chiesto
di accettare l'onere del pagamento delle parti non soggette
alla garanzia. Il rifiuto di ristabilire le condizioni della
sicurezza iniziale porta al rifiuto di ogni prestazione di
riparazione.
La garanzia assicura la sostituzione gratuita delle parti
riconosciute difettose, per fabbricazione o per montaggio, di
prodotti resi ad un centro autorizzato se:
è fornita una prova della data di acquisto del
prodotto. Sono ritenute prove valide i DDT
(documenti
di
trasporto)
e
le
fatture
accompagnatorie;
è stata eseguita regolarmente la pulizia e la
manutenzione;
il prodotto non è stato manomesso da personale
non adeguatamente istruito ed autorizzato da
BERNER;
il prodotto è stato sempre usato in conformità a
quanto indicato in questo manuale di istruzioni;
le indicazione di sicurezza riportate nel manuale di
istruzioni siano state osservate.
BERNER non riconoscerà la riparazione in garanzia se:
il prodotto è stato manomesso da personale non
autorizzato espressamente da BERNER;
i danni sono stati provocati da un utilizzo scorretto o
da incuria. Ammaccature dovute a cadute o colpi
ricevuti saranno considerate effetti di incuria;
i danni sono stati provocati da sovraccarico.
5
Italiano
Nel periodo di garanzia, in alcuni casi, come nel caso in cui i
tecnici autorizzati BERNER ritengano la riparazione troppo
onerosa, è prevista la sostituzione gratuita del prodotto. La
sostituzione in garanzia del prodotto viene garantita, inoltre,
dopo due tentativi infruttuosi di riparazione e dopo un
colloquio con i responsabili di un centro assistenza
BERNER. In caso di sostituzione del prodotto viene
normalmente addebitato l’ammontare corrispondente alla
normale usura delle parti del prodotto sostituito.
Elenco delle parti sostituibili dall'utente
Nessuna parte del vostro supporto BERNER è sostituibile se
non rivolgendosi ad un riparatore autorizzato BERNER.
Per l'elenco dei centri di assistenza rivolgersi al rivenditore.
Elenco dei contenuti della
confezione
Fare riferimento alla Distinta Ricambi, specifica per il vostro
modello, contenuta nella confezione insieme a questo
manuale.
Centri di assistenza BERNER - Elenco
indirizzi
ATTENZIONE:
IL COSTRUTTORE DECLINA OGNI RESPONSABILITA'
IN CASO DI DANNI A PERSONE, ANIMALI O COSE
PROVOCATI DALLA MANCATA OSSERVANZA
DELLE NORME DI SICUREZZA E D'USO SOPRA ELENCATE
Questo prodotto è stato immesso nuovo sul mercato dopo il 13 agosto 2005.
Questo manuale è soggetto a modifiche senza preavviso.
English
6 Your BERNER drill stand (X) is a device that must be used together with a suitable core
drill motor (Z) and a suitable anchoring system (Y), according to the directions given in
this user manual. These three elements (X+Y+Z) make a core drill that is suitable to drill
into stone-like materials (bricks, stone, concrete…), using a proper diamond core bit. Your
drill stand conforms with regulations related to core drills if used within the limits defined
in this user manual.
Warning! Ensure that every element of your core drill is suitable for the hole you
want to drill, in terms of drilling depth and diameter in relation with the material to
be drilled. If in doubt, consult your dealer.
General safety Rules
WARNING! Read the following safety instructions before
attempting to operate this product.
KEEP THESE INSTRUCTIONS!
Read the safety instructions provided by the
core drill motor manufacturer and by the
anchoring
system
manufacturer
before
attempting to operate this product.
a)
Keep work area clean. Cluttered areas and
benches can cause accidents.
b)
Keep children away. Do not let children come into
contact with the tool or its attachments. Keep all
people away from the work area.
c)
Dress properly. Do not wear loose clothing or
jewellery. They can be caught in moving parts.
Preferably wear rubber gloves and non-slip footwear
when working outdoors. Wear protective hair
covering to keep long hair out of the way.
d)
Wear safety goggles. Also use a face or dust mask
in case the operations produce dust or flying particles.
e)
Beware of maximum sound pressure. Take
appropriate measures for the protection of hearing if the
sound pressure of 85 dB is exceeded.
f)
Stay alert. Watch what you are doing. Use common
sense. Do not operate the tool when you are tired.
g)
Use appropriate tool. The intended use is laid down
in this instruction manual. Do not force small tools or
attachments to do the job of a heavy-duty tool. The
tool will do the job better and safer at the rate for
which fit was intended. The use of any accessory or
attachment or performance of any operation with this
tool, other than those recommended in this
instruction manual may present a risk of personal
injury.
h)
Have your Power Tool Attachment repaired by an
authorized BERNER repair agent.
Additional safety rules for diamond core drills
Always
wear
safety
gloves
Always
wear dust
mask
Always
wear safety
goggles
Always
wear safety
shoes
Always wear
ear
protection
Instructions
Read carefully the data written on the Technical
Data sheet that you will find in the package
together with your product.
In the following text, figures are identified by numbers,
details inside the figures by letters. Figures are depicted on
the first pages of this user manual.
The drill stand
Your drill stand is made up of the following parts. Refer to
figures 2 and 3.
a base (A). This part allows you to fasten the drill
stand on a surface. The following paragraph shows
different ways to fasten your drill stand;
a column (B). The column is equipped with a rack
that allows the carriage movement;
a carriage (C). The carriage is the part of the drill
stand that can move and to which you mount the
core drill motor. The feed handle (E) must be
mounted to the carriage in order to move it;
two holding bars (D). They are designed to hold the
column, decreasing its vibration. The holding bars
can be optional in some rig stand types;
system for scaffold pipe fastening (F), available only
for some rig stand types.
cerca centro – guida corona (G). Permette di
stabilire con precisione il centro del foro e di
guidare la corona nelle fasi di inizio carotaggio.
Drill stand fastening
Warning: for your safety, make always sure
that the stand is securely fastened before
stating to drill.
Warning: always determine where the core drill
can drop off in case something goes wrong
with drilling. Do not stay in this area and do not
allow anybody to stay there. This is particularly
important when you are drilling overhead
(upward) or horizontally.
A proper drill stand fastening leads to high drilling
performance and good hole quality, besides reducing
friction, increasing safety and reducing segments wearing.
7
English
Your core drill stand, depending on the model, can be
fastened in different ways.
Anchor fastening
Your stand can be fastened using different kind of anchor
depending on the material of the workpiece. This fastening
mode is effective but time-consuming since it needs an
anchor for each hole you want to perform.
Warning: for your safety, make always sure
that the material in which you install the anchor
and the anchor itself are suitable to hold the
system when drilling. Sometimes you may
need more than one anchor. In any case the
anchor’s thread must be at least M12.
Read the instructions provided by the anchor
manufacturer and make sure that the anchor is
suitable for this use.
Follow these instructions:
once decided the position of the hole, identify
the position of the anchor. The closer the
anchor is to the column, the better the fastening
is;
choose a proper anchor for the specific
application making sure that the thread is at
least M12;
make a suitable hole for the anchor and insert it
into the hole. Than, tighten a proper threaded
bar to the anchor;
position the stand over the bar inserting the bar
(figure 4 I) into the slot (H) on the base. Put the
washer (included in the package with your
stand) over the bar and tighten securely the nut
(see figure 4). Make sure that the washer is
securely engaged with the base.
if needed, turn the G screws in order to adjust
the base.
Proper anchors are available among BERNER accessories.
Vacuum fastening
Vacuum fastening is possible if your rig stand is provided
with a vacuum fastening compatible base (figure 5) or with
vacuum fastening accessories.
Vacuum fastening means that the base is kept securely in
position by the vacuum created by a vacuum pump. You
can use vacuum fastening only if the surface where you
position your base is:
flat, clean and free of debris, preventing suction
drops;
strong enough to hold the system. Make sure
the surface is compact, preventing the stand
from dropping off when drilling (for example not
well-applied plaster or tiles, glued tiles…are not
suitable for vacuum fastening).
If the surface is compact but not flat enough you can level it
removing roughness and/or applying some plaster where
the rubber seal will be placed.
Warning: always determine where the core drill
can drop off in case something goes wrong. Do
not stay in this area and do not allow anybody to
stay there, in particular in case of horizontal and
overhead (upwards) drilling.
Warning: in case of horizontal or overhead
(upwards) drilling, use further holding systems
that hold the core drill in case of drop off,
avoiding damage or injury. You can use for
example chains, an adjustable tubular prop that
fit into the F part of your stand, a scaffold or
rolling scaffold.
For your safety, we recommend to use a vacuum pump
equipped with safety vacuum tank.
Warning: follow the limitations below when
vacuum fastening.
Do NOT use vacuum fastening in the following cases:
drilling diameter exceeds 250 mm;
the power of the core drill motor exceeds 3500
W in case of electric motors, or equivalent in
case of non electric-powered motors;
the core drill is not equipped with a torque
limitation system in case of overload.
Vacuum fastening can be carried out using stands with
base in figure 5. Use only vacuum pump equipped with
vacuum gauge. For vacuum fastening proceed as follows
referring to figure 5:
fit the rubber seal M in the slot in the under side
of the base, making sure that the slot is properly
clean (5/A).
place the vacuum plug (N) over the opening (H)
in the base. Make sure that the plug has the
rubber seal on. Than tighten the screw with
washer O from the under side of the base as
shown in figure 5/B. Use the Allen key provided;
loosen the 4 leveling screws L till they are
completely inside the base;
connect the pipe from the pump to the
connector P (5/D) or to the quick-connector P
(5/C). Make sure that the pipe is suitable for the
application.
Warning: always fix the pipe using a proper
hose clamp as shown in figure 5/C and 5/D.
position the stand;
switch the vacuum pump on;
make always sure that the pressure under the
base is between -0,8 and -1 bar (green area).
You can read the pressure either on the gauge
of the pump or the one in figure 17;
Warning: the pump must be on in order to
secure the base: keep the vacuum pump on as
long as the application requires. Switch the
pump off just when you want to remove the
stand.
Warning: if the pressure under the base is
between -0,8 and 0 (red area), stop drilling,
switch the motor off and discover and remove
the cause of the suction drop.
When you finish drilling, remove the seal in order to avoid
to damage it.
Overhead upward drilling
You can perform overhead upward drilling using a proper
core drill motor. Consider that the fastening system has to
hold, besides the push, also the system (stand, drill motor,
core bit), the weight of the water inside the core bit and the
core (when finish drilling).
If you use an electric drill motor than you must use a water
collecting system. This system is available among
BERNER accessories for drilling diameters below 330 mm.
In the other cases, use liquid tight motors (hydraulic,
pneumatic, liquid tight three phase). We recommend
anyways to use a water collecting system.
English
Feed handle
Move the carriage (C) along the column (B) by turning the
feed handle (E). Figure 6 shows how to mount the handle to
the carriage shaft (Q). You can mount the handle to the left
or to the right side of the carriage. Some models can be
equipped with a feed system that powers the travel of the
carriage.
Locking the carriage
The carriage is equipped with a locking system (figure 7).
The carriage must be locked when you mount the core drill
motor, when you mount or replace the core bit or when you
transport the stand.
Cerca centro – Guida corona
The base can be provided with a device (G) with two
features: “cerca centro” e “guida corona”. Proceed as
follow:
Cerca centro
The “cerca centro” feature is used to define easily the
center of the hole you’re going to make. Proceed as follow:
unscrew the lock devices (R);
extract the “cerca centro – guida corona” device till
you reach the mark corresponding to your core drill
motor shaft’s axle.
Guida corona
The “guida corona” feature allows to guide the core bit
during the starting of the hole. It helps to avoid core bit
vibrations. Proceed as follow:
unscrew the lock devices (R);
extract the “cerca centro – guida corona” device till
it touch the core bit surface.
screw the lock devices (R);
drill for al least 1 cm;
unscrew the lock devices (R) and pull the “cerca
centro – guida corona” device towards the base.
8 position the plate square key into the slot on the
underside of the core drill motor, making sure
that the key goes into the corresponding slot.
Secure it by tightening at least 4 screws. Make
sure the core drill motor is unplugged when you
do these operations;
position the core drill motor on the carriage as;
secure the motor by tightening the two sidescrew with the multiuse feed handle.
To dismantle the plate follow backwards the steps before,
making sure that you hold the motor when you loosen the
side-screws to prevent that it drops off.
Collar mounting
For some rig stand types you can mount your core drill
motor using the collar. Collar fastening is suitable if the
drilling diameter is below 160 mm.
The diameter of the collar is 60 mm.
There are 2 BERNER collars:
screws mounting collar;
rapid lock collar.
Proceed as follows for the screws mounting collar (figure
10):
secure collar to the carriage plate as
described in paragraph “Direct mouning”;
position the hand-held core drill into the collar;
tighten the screws of the collar, making sure
that the core drill is securely fastened.
Proceed as follows for the rapid lock collar (figure 10):
secure the rapid lock collar to the carriage
plate as described in paragraph “Rapid Lock
system mounting”;
position the hand-held core drill into the collar;
tighten the screws of the collar, making sure
that the core drill is securely.
Tilting the column (figure 11)
The core drill motor can be mounted to your stand in
different ways depending on your stand model. The motor
can be mounted to the carriage with a direct mounting, with
a rapid lock system or using the collar. Identify which
mounting system has your stand.
The column can be tilted for slope drilling applications
(except drill stands without holding bars). Proceed as
follows:
Loosen the screws indicated by arrows in the
figure and remove the screws (S) and the
plate (T);
tilt the column;
tighten all the screws loosened before.
Direct mounting
When you start drilling, apply light pressure, in order to
prevent core bit shifting.
Mounting the core drill motor
Proceed as follows, referring to figure 8:
lock the carriage;
place the core drill motor on the carriage plate,
making sure that the key goes inside the slot of
the core drill motor. Make sure the drill motor is
unplugged when you do these operations;
secure the motor with the screws. Tighten them
using the Allen key provided. Use at least 4
screws.
Rapid lock system mounting
Proceed as follows, referring to figure 9:
lock the carriage;
Maximum drilling diameter and core drill
motor limitations
Refer to the table Technical Data specific for your product,
that you will find in the package, for the maximum drilling
diameter and the maximum motor power.
Instructions for use
Before starting to set you system up, read
carefully the user manual of the core drill motor
and of all the other parts of the system (pump,
anchors…).
9
English
Proceed as follows:
if available for your rig, mount the F system by
screwing it on. Make sure it is securely
tightened;
fasten the stand on the surface, as described
in the previous Drill Stand Fastening
paragraph;
Warning: always ensure that the fastening
mode is suitable for the application and that the
stand is securely fastened;
if needed, tilt the column as shown in the
paragraph Tilting the column;
mount the feed handle (E) according to the
paragraph Feed handle;
mount the core drill motor according to the
instructions of the Core drill motor mounting
paragraph. See Maximum drilling diameter
and core drill motor limitations for limitations;
refer to the user manual provided by the core
drill motor manufacturer for further instructions
and limitations;
Warning: before proceeding ensure that all
bolts and screw are securely tightened.
mount the core bit to the drill motor;
switch the motor on, applying light pressure
drill about 1 cm deep into the workpiece. This
allows core bit centring preventing core bit
side shifting;
after this, apply sufficient pressure to achieve
smooth progressive drilling.
Maintenance - Service - Warranty
Periodic maintenance
keep your drill stand clean and dry, in particular
its base and rack;
never use solvents or other harsh chemicals for
cleaning your core drill;
after use put your stand in a dry, safe and
inaccessible to children place;
do not use the stand with damaged components
or with malfunctions. In these cases, ask a
BERNER authorized service centre for
replacement.
components damaged by carelessness, not
suitable use or overloaded;
components of products from which safety
devices have been removed;
worn wearing parts replaced.
This warranty does not apply to products that have been
damaged by carelessness like lack of periodic cleaning and
maintenance, damage to the rack etc.
The life of wearing parts is variable depending on the
working time and the kind of work they are used for.
Examples of wearing parts are: ball and roller bearing not in
oil, rubber seal etc.
If during repair under warranty, a wearing part is worn and
this can affect the safety and the operation of your product,
the customer is asked to pay for the replacement of these
components not under warranty. If the customer refuses
this, no repairing operation will be carried out.
The warranty covers free replacement of components which
are defective due to wrong manufacturing or assembly, if
the product is brought to an authorized service centre and
if:
the product is together with a purchasing
document stating when the product has been
purchased. Valid purchasing documents are
invoices or delivery certificates;
cleaning and maintenance has been carried out
regularly;
no unauthorized people have serviced the
product;
the product has not been misused and it has
been used accordingly with the directions given
in this user manual;
all safety directions have been followed.
Your BERNER product is not under warranty if:
the product has been serviced by people not
authorized by BERNER.
damage is due to incorrect use and/or
carelessness. Dents due to drops or strokes will
be considered evidence of carelessness;
damage has been caused by overload;
When your product is under warranty, in some cases, like if
the BERNER authorized service personnel think the
repairing is too expensive to be carried out, the free
substitution of the product is possible. In addition, the
substitution under warranty is provided after two fruitless
reparation attempts and after the authorization of a
BERNER service manager. In case of substitution, the
customer is, usually, requested to pay for the worn wearing
parts of the product that has been replaced.
Service
any repairing operation must be carried out by
BERNER authorized service personnel only.
Ask your dealer for the list of the BERNER
authorized service centres;
use original BERNER spare parts only.
Warranty
Your product is under BERNER warranty for 36 months,
starting from the date of purchase. This warranty is against
faulty workmanship, flaws material and design problems.
The warranty covers free components replacement,
manpower needed for replacement and wearing materials if
intact before the repairing operation. The warranty doesn't
cover the replacement of:
components of the product replaced or modified
by people not authorized by BERNER;
User-replaceable components
No components of the BERNER product can be replaced
by the user. Replacement must be carried out by BERNER
authorized personnel only.
BERNER service centres - Address list
Ask your dealer for a BERNER service centres address list.
English
10 Package contents
For the list of contents refer to the Spare Parts List, specific
for your model, located in the package together with this
manual.
WARNING:
THE MANUFACTURER DECLINES ALL RESPONSABILITY
IN CASE OF NO RESPECT OF THE ABOVE WRITTEN
"SAFETY AND OPERATING INSTRUCTIONS".
th
Your product has been introduced new on the market after August 13 2005.
This manual is subject to modifications without notice.
Deutsch 11
Ihr BERNER- Bohrstativ (X) ist ein Zubehör, an dem ein geeigneter Kernbohrmotor (Z)
montiert , und das Stativ mit einem geeigneten Verankerungssystem (Y) nach dieser
Anleitung befestigt werden muß. Ein Kernbohrsystem besteht aus diesen drei Teilen
(X+Y+Z), mit dem steinähnliche Stoffe (bewehrter oder unbewehrter Beton, Ziegel, Stein,
...) mittels einer geeigneten Kernbohrkrone gebohrt werden können. Ihr BERNERBohrstativ
entspricht den Bestimmungen, wenn die Kernbohrmaschine und das Verankerungssystem
den einschlägigen Vorschriften entsprechen und die Verwendung innerhalb der in dieser
Anleitung beschriebenen Daten ausgeführt wird.
Warnung! Stellen Sie sicher, daß alle Komponenten für die Anwendung bezüglich
Leistung, Durchmesser und zu bohrendem Material geeignet sind. Ihr Händler
berät Sie gerne.
Allgemeine
Sicherheitsbestimmungen
Warnung! Lesen Sie alle Sicherheitsbestimmungen vor
Arbeitsbeginn.
Bewahren Sie alle Warnhinweise und sonstige
Anweisungen zur künftigen Bezugnahme auf.
a)
b)
c)
d)
e)
f)
g)
Lesen Sie auch die Sicherheitsbestimmungen des
Herstellers
des
Bohrmotors
und
des
Verankerungssystems.
Halten Sie Ihren Arbeitsbereich sauber und gut
ausgeleuchtet.
Unordnung
und
dunkle
Arbeitsbereiche fordern Unfälle geradezu heraus.
Halten Sie Kinder und andere Personen
während der Benutzung des Gerätes fern. Bei
Ablenkung können Sie die Kontrolle verlieren.
Tragen Sie geeignete Kleidung. Tragen Sie
keine weite Kleidung oder Schmuck. Halten Sie
Haare, Kleidung und Handschuhe fern von sich
bewegenden Teilen. Lockere Kleidung, Schmuck
oder lange Haare können von sich bewegenden
Teilen erfaßt werden.
Verwenden Sie Schutzausrüstung. Tragen Sie
stets einen Augenschutz. Schutzausrüstung wie
Staubmaske,
rutschfeste
Sicherheitsschuhe,
Schutzhelm oder Gehörschutz, je nach Art und
Einsatz des Gerätes, verringert das Risiko von
Verletzungen.
Schützen
Sie
sich
vor
zu
großer
Geräuschentwicklung.Der Schalldruck darf 85 dB
nicht überschreiten.
Seien Sie aufmerksam, achten Sie darauf, was
Sie tun, und gehen Sie vernünftig mit einem
Gerät um. Benutzen Sie das Gerät nicht, wenn
Sie müde sind oder unter dem Einfluß von
Drogen, Alkohol oder Medikamenten stehen.
Ein Moment der Unachtsamkeit beim Gebrauch
von Geräten kann zu ernsthaften Verletzungen
führen.
Verwenden Sie das Elektrowerkzeug, Zubehör
sowie Werkzeug-Bits, usw. entsprechend
diesen Anweisungen. Berücksichtigen Sie
dabei die Arbeitsbedingungen sowie die
durchzuführende Arbeit. Der Gebrauch von
Geräten für andere als die vorgesehenen
Anwendungen kann zu gefährlichen Situationen
führen.
h)
Lassen Sie Ihr Gerät nur von qualifiziertem
Fachpersonal und nur mit Original- Ersatzteilen
reparieren. Damit wird gewährleistet, daß die
Sicherheit des Geräts erhalten bleibt.
Zusätzliche Sicherheitsbestimmungen für
Diamantbohreqipment
Tragen Sie
immer eine
Schutzbrille
Tragen Sie
immer
Sicherheits
schuhe
Tragen Sie
immer
Schutzhan
dschuhe
Tragen Sie
immer eine
Staubmas
ke
Tragen Sie
immer einen
Gehörschutz
Anweisungen vor der Anwendung
Lesen Sie die Daten auf dem Datenblatt Ihres
Bohrständers und im Technischen Datenblatt,
das Sie zusammen mit Ihrem Produkt in der
Verpackung finden, sorgfältig durch.
Im folgenden Text werden Abbildungen durch Nummern
und Details in den Abbildungen durch Buchstaben
gekennzeichnet. Die Abbildungen werden auf den ersten
Seiten dieses Benutzerhandbuchs beschrieben.
Der Bohrständer
Ihr Bohrständer besteht aus folgenden Baugruppen –
siehe Abb. 2 und 3
Der Dübelfuß (A). Hiermit kann der
Bohrständer auf einer Oberfläche befestigt
werden.
Nachfolgend
Beispiele
für
verschiedene Befestigungsmöglichkeiten.
Die Säule (B). Die Säule ist mit einer
Zahnstange
versehen,
welche
die
Schlittenbewegung ermöglicht.
Der
Führungsschlitten
(C).
Der
Führungsschlitten ist der bewegliche Teil des
Bohrständers an dem der Bohrmotor befestigt
wird.
Die
Handkurbel
(E)
muß
am
Führungsschlitten befestigt werden, um diesen
zu bewegen.
Zwei Abstützstreben (D). Diese erhöhen die
Stabilität
der
Säule
und
vermindern
Vibrationen. Bei einigen Ständertypen werden
Sie als Zubehör angeboten.
Deutsch
System
für
Abstützbefestigung
von
Rundsprießen (F), nur für einige Ständertypen
verfügbar.
Anbohr- und Zentrierhilfe (G). Verwendbar als
Bohrmittelpunktanzeige beim Einrichten des
Bohrständers vor dessen Befestigung sowie
als Anbohrhilfe bei Bohrbeginn.
Bohrständer - Befestigung
Warnung: Zur eigenen Sicherheit vor jedem
Bohren
die
sichere
Befestigung
des
Bohrständers nochmals überprüfen.
Warnung:
Sperren
Sie
immer
den
Arbeitsbereich ab, in den die Bohranlage im
Falle
eines
Defektes
beim
Bohren
herunterfallen könnte. Halten Sie sich nicht in
diesem Bereich auf und erlauben Sie den
Aufenthalt keiner anderen Person in diesem
Bereich. Dies gilt vor allem bei Überkopf- und
Horizontalbohrungen.
Eine sachgerechte Bohrständer- Befestigung führt zu
einem guten Bohrergebnis, einer präzisen Bohrung, einem
geringen Reibungswiderstand an der Bohrkrone und
insgesamt zu einem werkzeugschonendem Bohrprozeß.
Ihr Bohrständer, kann je nach Ausführung auf verschiedene
Arten befestigt werden.
Dübel - Befestigung
Ihr Bohrständer kann mit verschiedenen Dübeln befestigt
werden. Wählen Sie je nach Untergrund (Material) den für
Ihre Anwendung geeigneten Dübel aus. Verwenden Sie bei
dieser Methode für jedes Loch einen neuen Dübel.
Warnung: Zu Ihrer Sicherheit müssen Sie
sicherstellen, daß der Dübel und das Material
in das der Dübel gesetzt wird, die Haltekräfte
beim Bohren aufnehmen kann. Es kann mehr
als
ein
Dübel
notwendig
sein.
Als
Dübelgewinde mindestens M12 verwenden.
Lesen Sie die Anleitungen des Dübel
Herstellers und stellen Sie sicher, daß die
Dübel für diese Anwendung geeignet sind.
Folgen Sie diesen Anleitungen:
Wenn die Position des Bohrloches festliegt, die
Position des Dübels bestimmen. Je näher der
Dübel der Säule ist, desto besser der Halt beim
Bohren.
Wählen Sie einen geeigneten Dübel für die
Anwendung – mindestens Gewinde M12.
Bohren Sie ein geeignetes Loch, setzen den
Dübel und befestigen darin eine geeignete
Gewindestange. Befolgen Sie dabei die
Anweisungen des Dübelherstellers.
Positioniern Sie Ihren Bohrständer mittels
Langloch in der Fußplatte (Abb.4-Pos.H) auf
die fest angezogene Gewindestange ( Abb.4Pos. I). Setzen Sie die Scheibe ( im
Lieferumfang Ihres Bohrständers ) auf die
Gewindespindel und ziehen diese mit der
Befestigungsmutter der Gewindespindel mit
einem Maulschlüssel fest gegen die Fußplatte
Ihres Bohrständers an. (Abb.4). Kontrollieren
Sie, daß die Scheibe gerade und sicher auf der
Fußplatte liegt.
Bei Bedarf mit Justierschrauben ( Abb.4Pos.L) den Dübelfuß ausrichten.
Vakuum Befestigung
12 Die Vakuumbefestigung setzt eine Vakuumfußplatte an
Ihrem Bohrständer oder eine seperate Vakuumplatte, die
als Zubehör bei BERNER verfügbar ist vorrausBei der Vakuum- Befestigung wird der Vakuum-Fuß des
Bohrständers durch einen mit einer Vakuumpumpe
erzeugten Unterdruck festgesaugt. Dies ist nur möglich,
wenn die Oberfläche, auf der der Vakuumfuß befestigt
werden soll, folgende Eigenschaften besitzt:
Glatt, sauber und frei von Nässe und
Verschmutzungen;
Ein für das gesamte Bohrsystem ausreichend
gesicherte Tragfähigkeit. Stellen Sie in jedem
Falle sicher, daß der Untergrund für die
Vakuumbefestigung kompakt ist, so daß ein
Lösen der Kernbohranlage beim Bohrprozeß
ausgeschlossen werden kann ( z. B. ist die
Vakuumbefestigung bei schlechtem Wandputz
oder geklebten Wandfliesen unbedingt zu
vermeiden).
Bei ausreichender Tragfähigkeit des Untergrundes aber
unzureichender Glätte, muß vor der Vakuumbefestigung
der Untergrund derart nachbearbeitet werden (z.B. durch
gezieltes Verputzen), daß dieser anschließend ausreichend
glatt und eben ist im Bereich der Vakuumbefestigung.
Achtung: Rechnen Sie jederzeit damit, daß
die gesamte Bohranlage sich lösen und
herunter b.z.w. umfallen kann. Vermeiden Sie
in jedem Falle den Aufenthalt Ihrer Eigenen
wie auch fremder Personen sich in diesem
Gefahrenbereich – dies gilt insbesondere für
Wand- und Deckenbohrungen und sperren Sie
diesen Gefahrenbereich unbedingt gegen
Personenaufenthalt ab.
Achtung: im Falle von Wand- oder
Deckenbohrungen, sichern Sie den befestigten
Bohrständer zusätzlich noch einmal gegen
Umb.z.w.
Herunterstürzen
ab
um
Verletzungen
oder
Beschädigungen
zu
vermeiden. Sie können dies mittels Ketten
oder
über
zusätzliche
Stützstreben
durchführen, die über die verstellbare
Strebenaufnahme „F“ oder der Aufnahme der
Stützstreben direkt auf der Fußplatte erfolgen
kann.
Zu Ihrer Sicherheit empfehlen wir bei Verwendung einer
Vakuumpumpe darauf zu achten, daß diese über einen
Sicherheitstank verfügt.
Achtung: Beachten Sie immer die unten
angegebenen
Grenzwerte
bei
der
Vakuumbefestigung.
Verwenden
Sie
in
folgenden
Fällen
niemals
Vakuumbefestigung:
Bohrdurchmesser ist größer als 250mm;
Die Leistung des Bohrmotors ist höher als
3500 W bei Elektrobohrmotoren, oder
vergleichbar bei nicht elektrisch betriebenen
Bohrmotoren;
Die Kernbohrmaschine ist nicht mit einer
Elektronik ausgerüstet, die die auftretenden
Drehmomente limitiert und vor Überlastung
schützt.
Vakuumbefestigung kann mittels Vakuumfuß erfolgen, wie
in Abbildung 5 dargestellt. Verwenden Sie ausschließlich
Vakuumpumpen mit eingebautem Manometer. Für die
Vakuumbefestigt befolgen Sie bitte die Vorgehensweise
entsprechend Abbildung 5:
Drücken Sie den Vakkumgummi „M“ in die
vorhandene Nut des Vakuumfußes an deren
Unterseite- achten Sie dabei, daß die Nut
komplett sauber ist (5/A).
Deutsch 13
Montieren Sie den Vakuumdichtkeil „N“ auf
dem in der Fußplatte vorhandenen Dübelschlitz
„H“. Stellen Sie dabei sicher, daß der Dichtkeil
mit einem Gummi ausgerüstet ist. Befestigen
Sie
den
Dichtkeil
nun
von
der
Fußplattenunterseite mittels Schraube und
Unterlegscheibe „O“, wie in Abbildung 5/B
dargestellt ist. Verwenden Sie dazu den
vorgesehenen Imbusschlüssel;
Lösen Sie alle 4 Justierschrauben „L“, bis diese
komplett
in
der
Schraubenaufnahme
verschwunden sind;
verbinden Sie den Vakuumschlauch der
Pumpe mit dem Ventil „P“ (5/D) oder mit dem
Schnellverschlußventil P (5/C). Stellen Sie
sicher, daß der verwendete Vakuumschlauch
für diese Anwendung geeignet ist.
Achtung: verwenden Sie bei der Montage des
Vakuumschlauches immer eine zusätzliche
Befestigung
mittels
geeigneter
Schlauchschelle- siehe Abbildung 5 „C“ und
„D“.
Richten Sie den Bohrständer ein und
positionieren Sie ihn;
Schalten Sie die Vakuumpumpe ein;
Stellen Sie sicher, daß der Unterdruck Ihrer
Fußplatte mindestens zwischen -0,8 und -1 bar
beträgt (grüner Bereich). Sie können den Druck
an der Pumpe oder am Manometer auf der
Fußplatte Ihres Bohrständers ablesen (siehe
Abbildung 17);
Achtung: die Pumpe muß während der
gesamten
Dauer
der
Kernbohrung
eingeschaltet bleiben. Schalten Sie die Pumpe
erst ab, wenn Sie den Bohrständer lösen
wollen.
Achtung: wenn der Unterdruck unter der
Fußplatte zwischen -0,8 and 0 liegt (roter
Bereich), beenden Sie den Bohrvorgang,
schalten den Bohrmotor ab und prüfen Sie an
welcher Stelle der Unterdruck entweichen kann
und beheben Sie die Undichtigkeit des
Systems.
Bei Beendigung der Kernbohrung, entfernen Sie den
Vakuumgummi um diesen vor Beschädigung zu schützen.
Überkopfbohrungen
Sie
können
Überkopfbohrungen
durchführen,
vorausgesetzt Sie verwenden einen ausreichend sicheren
und leistungsstarken Kernbohrmotor. Bedenken Sie, daß
Ihre Befestigung neben den Vorschubkräften die
kompletten Komponenten (Bohrmotor, Bohrständer,
Bohrkrone), das angesammelte Kühlwasser in der
Bohrkrone und den Bohrkern absichern muß.
Für Ihre Sicherheit empfehlen wir Ihnen daher immer zwei
Befestigungsarten vorzusehen- z. B. Dübelbefestigung und
zusätzlich die Befestigung mittels Stützstrebe.
Bei Verwendung eines elektrischen Kernbohrmotors
müssen Sie zudem ein Wassersammelringsystem
verwenden (Abbildung 24). Dieses System ist als Zubehör
bei BERNER für Bohrungen bis 250mm verfügbar. Für die
anderen Fälle sind hydraulische, pneumatische oder
gekapselte wassergekühlte Drehstrommotore verwendbar.
Wir empfehlen generell für sämtliche Bohrungen die
Verwendung eines Wassersammelringsystems.
Vorschubhandrad
Bewegen Sie den Führungsschlitten (C) entlang der
Bohrsäule (B) durch Drehen des Handrades (E). Abbildung
6 zeigt wie das Handrad auf die Vorschubachse am
Führungsschlitten montiert wird. Sie können das Handrad
sowohl rechts – und linksseitig am Führungsschlitten
befestigen. Einige Bohrständermodelle können zusätzlich
mit einem automatischem Vorschubsystem ausgerüstet
werden.
Festsetzen des Führungsschlittens
Der Führungsschlitten ist mit einem System zum
Festsetzen
ausgerüstet
(Abbildung
7).
Der
Führungsschlitten muß festgesetzt werden, bei Befestigung
von Bohrmotoren, bei Bohrkronenwechsel oder beim
Transport der Kernbohranlage.
Zentrier- und Anbohrhilfe
Ihr Bohrständer verfügt über eine Zentrier- und Anbohrhilfe
(G) mit 2 Funktionen: Bohrmittelpunktanzeige und
Zentrierführung während des Anbohrens:
Bohrmittelpunktanzeige
Mit dieser Anzeige können Sie schnell und einfach den
Bohrmittelpunkt
zwecks
Positionierung
Ihrer
Kernbohranlage definieren. Gehen Sie dabei wie folgt vor:
Lösen Sie die beiden Flügelschrauben „R“
Ziehen Sie die Zentrier- und Anbohrhilfe bis zur
Markierung auf einer der 2 Führungsstangen
heraus, die Sie entsprechend dem Spindelabstand
Ihres verwendeten Bohrmotors zuvor dort
angebracht haben.
Anbohrhilfe
Die Anbohrhilfe dient zur Führung der Bohrkrone bei
Bohrbeginn und vermeidet das Verlaufen der Bohrkrone zu
Bohrbeginn. Gehen Sie dabei wie folgt vor:
Lösen Sie die beiden Flügelschrauben „R“
Ziehen Sie die Anbohrhilfe „G“ soweit heraus, bis
Sie an der montierten Bohrkrone anliegt
Ziehen Sein die beiden Flügelschrauben „R“
wieder von Hand fest, die Bohrkrone ist jetzt
geführt und bricht nicht aus.
Nach ca. 1 bis 2 Zentimeter Bohrtiefe, schalten
Sie den Bohrmotor ab, lösen die beiden
Flügeschrauben „R“, schieben die Anbohrhilfe
komplett in Richtung Fußplatte bis zum Anschlag,
ziehen die Flügelschrauben „R“ wieder fest an und
setzen dann Ihre Bohrung fort.
Montage des Bohrmotors
Je nach Modell Ihres Bohrständers, ist die Montage des
Bohrmotors verschieden. Der Bohrmotor kann direkt auf
den
Führungsschlitten
am
Bohrständer
über
Befestigungsschrauben und Paßfeder befestigt werden,
mittels Schnellwechselsystem RAPID LOCK oder über eine
Spannhalsaufnahme befestigt werden. Prüfen Sie welches
der genannten Systeme Ihr Bohrständer hat und befestigen
Sie den Bohrmotor entsprechend. Als Zubehör können Sie
eine Spannhalsaufnahmeplatte auf Ihren Bohrständer
befestigen, um auch Freihandbohrmotore auf Ihrem
Deutsch
Bohrständer verwenden zu können (Bild 21), falls dieser
ausschließlich für Stationäbohrmotore ausgelegt war.
Direktbefestigung
Gehen Sie entsprechend Bild 8 vor:
Fixieren Sie den Führungsschlitten;
Legen Sie den Befestigungskeil in eine der
beiden Nuten am Führungsschlitten ein. Sie
können
zur
Unterstützung
einen
Gummihammer zur Hilfe nehmen. Die Breite
des Keils ist 9,5mm- verwenden Sie niemals
abweichende Keilbreiten-;
Befestigen
Sie
nun
den
Bohrmotor
entsprechend der Befestigungslöcher auf dem
Bohrständer und achten Sie darauf, daß auch
der Befestigungskeil richtig justiert in die dafür
vorgesehene Nut Ihres Bohrmotors passt.
Stellen Sie sicher, daß während des
Befestigungsprozesses der Bohrmotor vom
Stromnetz getrennt ist;
Ziehen Sie sämtliche Befestigungsschrauben
mit
dem
geeigneten
Imbusschlüssel
ausreichend fest. Verwenden Sie niemals
weniger als 4 Befestigungsschrauben.
14 Gehen Sie bei der Spannhalsaufnahme als Festanbau
gemäß Abb. 10 vor:
Befestigen
Sie
die
Spannhalsaufnahme
entsprechend der Beschreibung unter dem Kapitel
„Montage des Bohrmotors- Direktbefestigung“
Setzen Sie den Bohrmotor in den Spannhals ein
Ziehen Sie die 2 Klemmschrauben mit dem
Imbusschlüssel fest an und kontrollieren Sie
nochmals den richtigen und sicheren Sitz des
Bohrmotors im Spannhals.
Gehen Sie bei der Spannhalsaufnahme RAPID LOCK
Schnellwechselsystem gemäß Abb. 10 vor:
Befestigen
Sie
die
Spannhalsaufnahme
entsprechend der Beschreibung unter dem Kapitel
„Montage des Bohrmotors- Befestigung mit
Schnellwechselsystem RAPID LOCK“
Setzen Sie den Bohrmotor in den Spannhals ein
Ziehen Sie die 2 Klemmschrauben mit dem
Imbusschlüssel fest an und kontrollieren Sie
nochmals den richtigen und sicheren Sitz des
Bohrmotors im Spannhals.
Befestigung mit Schnellwechselsystem RAPID LOCK
Gehen Sie entsprechend Bild 9 vor:
Fixieren Sie den Führungsschlitten;
Legen Sie den Befestigungskeil in die dafür
vorgesehene Nut Ihres Bohrmotors ein.
Befestigen Sie den Motor nun mittels der 4
bzw. 6 Befestigungsschrauben auf der RAPID
LOCK Befestigungsplatte, mit Hilfe eines
Imbusschlüssels. Stellen Sie sicher, daß
während des Befestigungsprozesses der
Bohrmotor vom Stromnetz getrennt ist;
Den Bohrmotor mit montierter RAPID LOCK
Befestigungsplatte setzen Sie nun gemäß Abb.
9 auf den Führungsschlitten. Mit dem Handrad
(E) befestigen Sie den Bohrmotor nun mittels
der beiden seitlich am Führungsschlitten
angebrachten Befestigungsschrauben (Q).
Zur Demontage des Bohrmotors vom Bohrständer gehen
Sie in umgekehrter Reihenfolge der bisher beschriebenen
vor. Achten Sie bei der Demontage darauf, dass beim
Lösen der seitlichen Schrauben der Bohrmotor nicht vom
Führungsschlitten fällt- sonder sichern Sie diesen gegen
Herunterfallen stets ab.
Befestigung mittels Spannhals
Bei einigen Bohrständern kann die Befestigung des
Bohrmotors auch über eine Spannhalsaufnahme erfolgen.
Die Spannhalsaufnahme sollte nicht bei Bohrungen größer
als 160mm verwendet werden.
Der Spannhalsdurchmesser beträgt 60mm
BERNER bietet 2 Spannhalsaufnahmen an:
Spannhalsaufnahme als Festanbau
Spannhalsaufnahme RAPID LOCK
Schnellwechselsystem
Schwenken der Bohrsäule (Abb.11)
Die Bohrsäule ist für Schrägbohrungen stufenlos
schwenkbar (außer für Bohrständermodelle ohne
Schrägabstützung). Gehen Sie wie folgt vor:
Lösen Sie alle Schrauben, die in Abb. 11 mit
einem Pfeil versehen sind und entfernen Sie
die 2 Schrauben „S“ und die Kopfplatte „T“;
Schwenken Sie die Säule;
Ziehen Sie alle zuvor gelösten Schrauben
wieder fest an.
Beim Schräganbohren achten Sie darauf keinen zu hohen
Anpreßdruck speziell zu Bohrbeginn zu wählen, um ein
Verlaufen der Bohrkrone zu vermeiden.
Limitierung
für
Bohrkronendurchmesser
Motorleistung
verwendbare
und
Halten Sie sich unbedingt an die technischen
Datenangaben,
entsprechend
der
beiliegenden
Dokumentation Ihres Bohrständers. Dort finden Sie unter
anderem die Limits für max. Bohrkronendurchmesser
sowie der Maximalleistung der verwendbaren Bohrmotore.
Bedienvorschriften
Vor Inbetriebnahme Ihres Kernbohrständers lesen
Sie
sich
die
Bedienungsund
Handhabungsanleitung sorgfältig durch und
machen Sie sich mit Ihrem Kernbohrständer
vertraut. Dies gilt ebenso für alle weiteren
Produkte (Vakuumpumpe, Bohrmotor, Dübel…)
die Sie in Verbindung mit Ihrem Kernbohrständer
verwenden
Gehen Sie wie folgt vor:
Falls für Ihren Bohrständer verfügbar,
montieren Sie die Spannschraube „F“ fest auf
Ihre Bohrsäule (Abb. 3). Stellen Sie sicher,
Deutsch 15
Daß die Spannschraube sicher und fest
angezogen ist;
Befestigen Sie Ihren Bohrständer auf dem
Untergrund, wie unter dem Punkt „Bohrstativ
Befestigung“ beschrieben;
Achtung: stellen Sie sich zu jeder Zeit sicher,
daß die Befestigung Ihres Bohrständers
ausreichend sicher ist für die jeweilige
Kernbohrung;
Bei Schrägbohrungen, schwenken Sie die
Bohrsäule wie unter dem Punkt „Schwenken
der Bohrsäule „ beschrieben;
Montieren Sie das Handrad (E) entsprechend
der
unter
Punkt
„Vorschubhandrad“
beschrieben;
Befestigen Sie den Bohrmotor entsprechend
der Beschreibung unter dem Punkt „Montage
des Bohrmotors“. Beachten Sie unbedingt die
Maximalwerte für den Einsatz von Bohrkronen
hinsichtlich Maximaldurchmesser sowie bei
den
Kernbohrmotoren
hinsichtlich
Maximalleistungsangaben;
Beachten Sie weitere Vorschriften des
Bohrmotorenherstellers hinsichtlich weiterer
Limits und Einschränkungen;
Achtung: vor Arbeitsbeginn prüfen Sie
nochmals sämtliche Schrauben und Muttern
auf festen Sitz.
Montieren Sie Bohrkrone auf den Bohrmotor;
Schalten Sie den Bohrmotor ein, und
beginnen Sie den Bohrprozeß mit geringem
Anpreßdruck bis Sie 1 bis 2 Zentimeter tief ins
Material gebohrt haben. Dies dient vor allem
der Führung Ihrer Bohrkrone um Schläge,
Vibrationen oder sonstige Unrundfehler im
Laufe des weiteren Bohrprozeßes zu
vermeiden;
Anschließend erhöhen Sie den Anpreßdruck
derart,
daß
die
Segmente
Ihrer
Diamantbohrkrone zu jeder Zeit „scharf“
bleiben, ohne den Bohrmotor dabei zu
überlasten.
Wartung- Service- Gewährleistung
Wartungsintervalle
Halten Sie Ihren Bohrständer stets sauber und
trocken, speziell die Fußplatte und die
Zahnstange an der Bohrsäule und reinigen Sie
diesen regelmäßig nach jedem Einsatz;
Verwenden Sie keine Säuren oder aggressive
Chemikalien zur Reinigung Ihres Bohrständers;
Lagern Sie Ihren Bohrständer nach Arbeitsende
an einen trockenen, sicheren und für Kinder
nicht zugänglichen Lagerort;
Verwenden Sie Ihren Bohrständer niemals mit
beschädigten Teilen oder bei vorhandenen
Störungen. Tauschen Sie die defekten Teile
gegen Original Ersatzteile aus oder lassen Sie
den Bohrständer bei einer von BERNER
authorisierten Fachwerkstatt wieder instand
setzen.
Alle Reparaturen an Ihrem Bohrständer dürfen
ausschließlich
von
authorisierten
Fachwerkstätten durchgeführt werden. Fragen
Sie Ihren Händler nach der nächsten BERNER
authorisierten Reparaturwerkstatt;
Verwenden
Sie
ausschließlich BERNER
Original Ersatzteile.
Gewährleistung
BERNER gibt für seine Produkte eine Gewährleistung von
36
Monaten
gemäß
den
beiliegenden
Gewährleistungsbestimmungen.
Die
Gewährleistung
umfasst dabei produktionsbedingte Mängel, Materialfehler
sowie konstruktive Mängel. Die Gewährleistungszeit
beginnt mit dem Kaufdatum, durch den mit Händlernamen
versehenem Kaufbeleg (Rechnung oder Lieferschein) mit
aufgeführter Maschinennummer und beinhaltet:
Kostenlose Beseitigung evtl. Störungen, Kostenloser Ersatz
aller schadhaften Teile mit Neuteilen.
Die Gewährleistung wird abgelehnt:
bei Durchführung von Arbeiten am Bohrständer
durch Personen, die nicht von BERNER dazu
berechtigt wurden.
bei Beschädigungen des Bohrständers, die auf
unsachgemäßen
Umgang,
falsche
Anwendung,
Überlastung
oder
auf
Nachlässigkeit zurückzuführen sind.
bei
Ausbau
oder
Überbrückung
der
Sicherheitseinrichtungen des Bohrständers.
Bei Verschleißteilen, die bei der Reparatur
ersetzt wurden.
Bei Nichtbeachtung der vorstehenden Bedienungsanleitung
und Arbeitsschutzvorschriften lehnt der Hersteller jegliche
Verantwortung ab.
Verschleißteile
sind
von
einer
Gewährleistung
ausgeschlossen. Verschleißteile, sind die Teile, die bei
bestimmungsgemäßen Gebrauch der Maschinen einer
betriebsbedingten
Abnutzung
unterliegen.
Die
Verschleißzeit ist nicht einheitlich definierbar, sie differiert
nach der Einsatzintensität. Die Verschleißteile sind
gerätespezifisch entsprechend der Betriebsanleitung zu
warten, einzustellen und ggf. auszutauschen.
Ein
betriebsbedingter
Verschleiß
bedingt
keine
Gewährleistungsansprüche.
Verschleißteile, die von
jeglicher Gewährleistung ausgenommen sind, entnehmen
Sie der nachfolgenden Auflistung:
Kugellager, Dichtringe, Vorschubritzel, Zahnstange, Gleitund
Wälzlager,
Führungselemente
wie
Rollen,
Führungsleisten, Buchsen, Lager, Hilfs- und Betriebsstoffe.
Vorraussetzung der Anerkennung der Gewährleistung ist ,
dass Ihr Bohrständer zu einem authorisierten Servicenter
geschickt oder verbracht wird,
ein Kaufbeleg beigefügt ist (Rechnung oder
Lieferschein mit Maschinennummer),
die vom Hersteller vorgeschriebene Reinigung und
Wartung 1 mal pro Jahr,
der Bohrständer nicht von ungeschultem Personal
repariert wurde,
der Bohrständer nur in dem Bereich eingesetzt
wurde, für den er gemäß dem Datenblatt und der
Bedienungsanleitung vorgesehen ist,
die
Sicherheitshinweise
in
der
Bedienungsanleitung beachtet wurden.
Berner gewährt keine Gewährleistung:
Service
Deutsch
16 wenn der Bohrständer bereits von nicht Berner
geschulten Servicewerkstätten geöffnet wurde
bei Schäden durch äußere Einflüsse wie Wasser,
Schneidschlämme,
bei Schäden durch mechanische oder elektrische
Überlastung
bei Schäden durch mangelnde Wartung und Pflege
Austausch oder Rücknahme im Gewährleistungsfall
Ein Austausch oder eine Rücknahme wird nach 2
Reparaturversuchen und nach Rücksprache mit Berner
Motoren Handels GmbH gewährt. Weitere Ansprüche sind
ausgeschlossen.
Im Falle einer Rücknahme oder Austausch in ein Neugerät,
wird generell ein Nutzungsabzug der oben genannten
Verschleißteile von Berner in Rechnung gestellt.
Teile, die vom
werden können
Benutzer
BERNER-Servicezentrum - Adressliste
Bitten Sie Ihren Händler um eine Adressliste der BERNERServicecentren.
Verpackungsinhalt
Das Inhaltsverzeichnis finden Sie in der Ersatzteilliste, die
für Ihr Modell gilt und die sich zusammen mit diesem
Handbuch in der Verpackung befindet.
gewechselt
Es gibt keine Teile am BERNER-Produkt, die vom Benutzer
gewechselt werden können. Der Wechsel darf nur von
autorisiertem BERNER-Personal ausgeführt werden.
WARNUNG: DER HERSTELLER ÜBERNIMMT
KEINE VERANTWORTUNG, WENN DIE OBIGEN
"SICHERHEITS- UND BEDIENANWEISUNGEN"
NICHT BEACHTET WERDEN.
WARNUNG: DER HERSTELLER ÜBERNIMMT KEINE VERANTWORTUNG, WENN DIE OBIGEN "SICHERHEITS- UND
BEDIENANWEISUNGEN" NICHT BEACHTET WERDEN.
Ihr Produkt ist nach dem 01. August 2009neu auf dem Markt eingeführt worden.
Änderungen dieses Handbuchs vorbehalten.
Français 17
Votre support per carotteuse Berner (X) è un dispositif qui doit être utilisé en
combinaison avec un motoreducteur apte (Z) et un système ď ancrage (Y) adapté selon
les indications fournies par le manuel ď instruction. Ces trois éléments forment une
carotteuse (X+Y+Z) adaptée a ľ exécution de trous sur des matériaux en pierres (ex:
briques, murs, pierre naturelle), utilisant une couronne diamantée. Le support respecte les
normes relatifs aux carotteuses employées dans les circonstances précises selon les
instructions.
Attention: S’assurer que tous les composants soient aptes à l’exécution du
trous que ľ on veut effectuer, soit en termes de diamètre que de profondeur, par
rapport au matériel à percer. En cas de doute, consulter votre distributeur.
Consignes de sécurité
générales
ATTENTION! Prenez connaissance de tous les
avertissements de sécurité et de toutes les instructions.
Conservez tous les avertissements et instructions pour
référence future.
a)
b)
c)
d)
e)
f)
g)
h)
Tenir votre aire de travail propre et bien rangée.
Le désordre augmente les risques d'accident.
Tenir les enfants éloignés. Ne pas permettre que
d'autres personnes touchent l'outil ou ses
accessoires. Les tenir éloignées de votre travail.
Porter des vêtements de travail appropriés. Ne
pas porter de vêtements flottants ou de bijoux. Ils
pourraient être happés par les pièces en
mouvement. Lors de travaux à l'extérieur, il est
recommandé de porter des gants en caoutchouc et
des chaussures à semelle antidérapante. Le cas
échéant, porter une garniture convenable retenant
les cheveux longs.
Porter des lunettes de protection. Utiliser aussi
un masque si le travail exécuté produit de la
poussière ou des copeaux volants.
Attention au niveau de pression acoustique.
Prendre les mesures nécessaires pour la protection
de l'ouïe lorsque le niveau de pression acoustique
est supérieur à 85 dB(A).
Faire preuve de vigilance. Observer votre travail.
Faire preuve de bon sens. Ne pas employer l'outil
en cas de fatigue.
Utiliser l'outil adéquat. L'utilisation conforme à la
destination est décrite dans le présent manuel. Ne
pas utiliser d'outils ou d'accessoires de trop faible
puissance pour exécuter des travaux lourds. Ne
pas utiliser des outils à des fins et pour des travaux
pour lesquels ils n'ont pas été conçus. Attention!
L'utilisation d'accessoires autres que ceux
recommandés dans le présent manuel pourrait
entraîner un risque de blessure. Utiliser l'outil
conformément à sa destination.
Faire réparer votre accessoire par un service
agréé BERNER.
Consignes de sécurité
perceuses à diamant
additionnelles
pour
les
Portez
en
permanence
des lunettes
de
protection
Portez
toujours des
chaussures
de sécurité
Portez
en
permanence
des gants
de protection
Portez
toujours
une
protection
auditive
Portez
toujours un
masque anti
poussière
Instructions avant l'utilisation
Lire attentivement les données reportées dans la
fiche données fournies avec le produit.
Pour les illustrations se référer aux premières pages de ce
manuel. Dans le texte qui suit ,les images sont identifiées
par des numéros tandis que les éléments particuliers à ľ
intérieur des images sont identifiés par des lettres.
Support
Le support est constitué d éléments représentes dans le
générique support en figure 2.
une base (A). La base permet l’ancrage du
support à la superficie à forer. Successivement,
seront décrites les diverses modalités d’ancrage
par rapport au type de support.
une colonne (B). La colonne est la structure
dotée d’une crémaillère qui permet à la glissière
(C) de circuler ;
une crémaillère (C). La crémaillère est la parte
mobile du support que l’on connecte au
motoreducteur. Un volant d’avancement (E) est
ancrage à la crémaillère pour permettre son
déplacement;
les barres de renfort (D). Elles connectent le
sommet du support au socle pour donner plus de
rigidité au système. Les barres de renfort sont
optionnelles dans quelques-unes typologies;
manchon de contraste (F), décrit comme suit
(n’est pas prévus pour les supports de la
typologie en figure19).
“cerca centro – guida corona” (G), pour définir
facilement le centre du trou vous allez faire et
autorise à guider le trépan diamanté pendant le
début du trou.
Français
Ancrage du support
Attention: pour votre sécurité il est important
que le support soit adéquatement ancragé
durant le perçage.
Attention: détecter toujours la zone de chute de
la carotteuse au cas où le support se détache
des ancrages :ne rester pas dans cette zone ,et
éviter que quiconque puisse s y approchée.
Ceci particulièrement dans les cas de perçage
en horizontal ou vers le haut.
Un ancrage correcte du support vous garantit outre la
sécurité mais aussi des perçages de hautes qualités du trou,
une usure limitée de la couronne et un effort en moins du
motoreducteur.
Votre support selon sa typologie peut supporter diverses
modalités d ancrage.
Ancrage avec goujon
Le support peut être ancrager en utilisant différents types de
goujons selon le matériel. Ce système est très efficace mais
peu rapide par le fait de ľ utilisation du goujon d ancrage.
Attention: pour votre sécurité s assurer
toujours que le matériel dans le quel se
positionne le goujon et le goujon lui-même aient
la résistance mécanique suffisante pour
maintenir le système. Parfois il est nécessaire d
avoir deux goujons. Dans touts les cas le filet
du goujon doit être au moins M12.
Lire toujours les instructions fournies par le
producteur et vérifier que le goujon soit adapté
à ľ usage.
Pour l’ ancrage avec goujon suivre ces instructions :
après avoir défini la position du trou à effectuer,
individualiser la position du trou pour le goujon.
Plus le goujon est près de la colonne, mieux sera
ľ ancrage.
choisir un goujon adapté à ľ application avec un
fil et au moins M12;
effectuer un trou pour le goujon de dimension
adaptée et fixer le goujon au matériel; donc
visser le goujon à une barre filetée, adapté;
positionner le support en insérant la barre filetée
(figure 4 I) dans la rainure de la base (H). Fixer
donc le support avec un écrou adapté,en mettant
la rondelle comme illustré dans la figure 4,de
façon que la rondelle applique sur la base;
si nécessaire utiliser les quatre vis indiquées
dans la figure L pour mettre à niveau le socle et
assurer la stabilité de la colonne ;
Les goujons à expansion pour le fixage des supports
BERNER sont disponibles comme accessoires.
Ancrager à vide
Ancrager à vide est possible pour si votre support est
pourvu d'une base prédisposée pour l'ancrager à vide
comme d'illustration 5 ou d'accessoires spéciaux.
Ancrager à vide signifie que le support est fixé au matériel,
du vide crée d’une pompe à vide. Ce fixage est rapide et
économique, mais cela nécessite une superficie d’ancrage:
adéquatement lisse, propre et sans débris pour
éviter le retour de l’air;
suffisamment
compacte,
pour
éviter
le
détachement de la couche externe de la
superficie (mal enduit, carreaux mal collés au
mur).
18
En cas de superficie compacte, mais présentant des creux
essayer de la niveler le plus possible s il le faut appliquer
une légère couche de plâtre rapide sur les creux en
correspondance à la garniture de la base.
Attention: individualiser toujours la zone de chute
de la perceuse au cas ou le support se détache
des ancrages: ne rester pas dans cette zone
et éviter que quelqu’un s y approche. Ceci
en particulier en cas de trous en horizontal ou
vers le haut.
Attention: en cas de trou en horizontal ou vers le
haut haut, utiliser ultérieurs systèmes de
soutien (exemple système de chaînes) qui évitent
des dommages aux personnes et aux biens en
cas de détachement de la base de la superficie;
Il est conseillé pour des raisons de sécurités,d utiliser des
pompes à vide dotées de réservoir.
Attention: prêter attention aux limitations
suivantes en cas de fixage à vide.
Ne pas utiliser ľ ancrage à vide pour les perçages:
de diamètre supérieur à 250 mm avec
motoreducteur de puissance supérieure à 3500
W pour le cas des moteurs électriques, ou
puissances équivalentes pour les autres types de
motorisation;
motoreducteur dépourvu de système de
limitation adéquat du couple en cas de
surcharge.
Ľ ancrage à vide est prévu pour les supports de la typologie
en figure 5. Utiliser pompe à vide pourvue de vacuomètre.
Pour ancrager le support avec la technique à vide opérer en
faisant référence à la figure 5:
enfiler la garniture M dans la rainure située sous
la base comme illustré en figure 5/A après avoir
nettoyé la rainure;
positionner dans la rainure (H) au dessus de la
base le couvercle l’en s assurant qu il soit munis
de garniture. Donc fixer le couvercle en vissant
la vis avec la plaque O du fond de la base (figure
5/B). Utiliser la clés fournie;
dévisser les quatre vis L de nivellement jusqu à
ce qu il rentrent complètement dans le socle;
connecter le tuyau de la pompe directement à
l’attache (P) ou par le biais de ľ attache rapide
(respectivement figure 5/C et 5/D). S’assurer que
le tuyau soit adapté à ľ application.
Attention: fixer toujours le tuyau à ľ aide d une
bande comme en figure 13 C et D.
poser le support dans une position adéquate au
trous à effectuer;
mettre en fonction la pompe à vide;
contrôler sur le vide mètre de la pompe ou celui
en
figure 17 que la valeur de dépression qui
se crée sous le socle soit entre -0,8 et -1 bar ou
que ľ indicateur soit dans la zone verte;
Attention: la pompe doit rester allumée pour
maintenir la base ancrage. Eteindre la pompe
seulement à la fin des travaux pour déplacer le
support.
Attention: si durant le perçage la valeur de
pression doit être dans intervalle -0,8 et 0 bar,
allant dans la zone rouge du vide mètre,
suspendre immédiatement le travail, après avoir
éteint le moteur de l’unité de perçage,
rechercher la cause de la baisse de dépression.
19
Français
A la fin du perçage enlever la garniture pour éviter de
l’endommager.
rapide ou par le biais d un collier. Cela s’identifie tel qu il est
prévus par la typologie d’attache à votre support.
Perçage vers le haut
Fixage directe
Il est possible d’effectuer un perçage vers le haut en
utilisant des motoreducteurs adaptes et fixant la base en
tenant compte qu’à la poussée du perçage s’y ajoutent: le
poids du système, (support, motoreducteur, couronne), l’eau
contenue dans la couronne et le témoin à la fin de
l’opération de perçage. Pour le cas des moteurs électriques
il est obligatoire d’utiliser un kit de recueil d’eau, disponible
comme accessoire BERNER jusqu à 330 mm. Dans touts
les autres cas, utiliser motoreducteurs à étanche
(hydraulique, pneumatique et triphasé fermes), il est
conseillé l’usage de kit de recueil d’eau.
Procéder comme suit faisant référence à la figure 8:
bloquer le chariot;
après avoir débranche le motoreducteur de ľ
alimentation électrique, positionner la base du
motoreducteur contre la devanture du chariot de
telle sorte que la clés à peine montée sur le
chariot entre dans la rainure du motoreducteur.
insérer dans les sièges du chariot les vis au
minimum 4 et les visser dans les sièges prévues
dans la base du motoreducteur, utilisant la clés
hexagonale fournie avec votre support.
Volant d avancement
Pour déplacer le chariot (C) sur le long de la colonne (B)
faites tourner le volant d avancement (E). Pour monter le
volant d’avancement sur l’arbre du chariot (Q) faites
référence à la figure 6. Il est possible d appliquer le volant
sur l’arbre soit á gauche soit à droite du chariot selon votre
confort. Pour certains modèles de support il existe des
systèmes d accessoires qui motorisent le mouvement du
chariot.
Mécanisme de blocage
Sur le chariot est prévus un système de blocage qui
empêche le mouvement sur la colonne (figure 8).
mécanisme de blocage doit être insère chaque fois que ľ
monte le motoreducteur, on remplace la couronne ou
déplace le support ou la carotteuse en entier.
en
Le
on
on
Cerca centro – Guida corona
La base peut être fournie un dispositif (G) avec deux
fonctions: "cerca centro" e "guida corona". Continuez
comme suit:
Fixage avec système d attache rapide Rapid Lock
Procéder comme suit en faisant référence à la figure 9:
bloquer le chariot;
après avoir constaté que le motoreducteur est
débranché
de
ľalimentation
électrique
positionner la plaque sur le motoreducteur, en
insérant la clés de la plaque dans la rainure du
motoreducteur et donc insérer dans les siéges
de la plaque les quatre vis et bien les serrer;
monter le motoreducteur la plaque sur le chariot
comme en figure en s’assurant que la plaque se
soit bien encastrée;
bloquer la plaque en serrant les deux vis
présente sur les parties latérales du chariot.
Pour le démontage procéder en sens inverse, en prêtant
attention au maintien du moteur quand on desserre les vis
du serrage.
La "guida corona" le trait autorise à guider le trépan
diamanté pendant le début du trou. Il aide pour éviter le
trépan diamanté peu vibrations. Continuez comme suit:
La “guida corona”:
dévissez les dispositifs de la serrure (R);
extract the “cerca centro – guida corona” avant qu'il
touche le trépan diamanté superficie.
vissez les dispositifs de la serrure (R);
perforez pour au moins un centimètre
dévissez les dispositifs de la serrure (R) et insère le
"cerca centro" e "guida corona" dispositif vers la
base.
Fixage avec collier
Le fixage à travers le collier est prévus pour quelques-uns
supports. Le fixage avec collier est adapté aux trous de
diamètre jusqu à 160 mm.
Le fixage à travers le collier est adapté aux perceuses
portatives. Le diamètre du collier est de 60 mm.
Il y a 2 typologies de colliers:
collier avec fixage à vis;
collier avec Rapid Lock.
Pour le collier avec fixage à vis suivons les instructions
suivantes pour (figure 10):
fixer solidement le collier au chariot comme
décrit dans le paragraphe « Fixage directe »;
on enfile le motoreducteur portatif dans le
collier ;
on serre les vis du collier façon que la perceuse
portative soit solidement unie au support;
Pour le collier avec Rapid Lock suivons les instructions
suivantes (figure 10):
applique le Rapid lock collier a le chariot comme
décrit dans le paragraphe « Fixage avec système
d attache rapide Rapid Lock »;
on enfile le motoreducteur dans le collier;
visser les vis du collier de telle sorte que le
motoreducteur soit solidement unis au support.
Fixage du motoreducteur
Inclinaison de la colonne (figure 11)
Selon votre modèle de support le motoreducteur peut être
monté sur le chariot de façon directe à travers un attache
Si on veut effectuer des trous qui ne soient pas
perpendiculaires a la base il est possible d incliner la
Cerca centro
Le " cerca centro " le trait est utilisé pour définir facilement le
centre du trou vous allez faire. Continuez comme suit:
dévissez les dispositifs de la serrure (R);
extrait le “cerca centro – guida corona” dispositif
jusqu'à ce que vous atteigniez la marque qui
correspond à l'essieu de votre arbre du moteur de la
motoreducteur.
Guida corona
Français
20
colonne (excepte les supports sans les barres de renfort).
Procéder comme suit:
procéder en desserrant les vis indiqués par les
flèches dans le figure et enlever les vis (S) et la
plaque (T);
incliner la colonne à ľ angle dèsirè;
visser donc toutes les vis qui ont été dévissées
dans les points précédents.
En cas de trous inclinés le démarrage du perçage doit se
faire très lentement pour éviter des déviations latérales. En
fait la couronne touche une partie minimum de la superficie
du matériel donc peut facilement être déviée de ses axes.
Diamètre maximum de perçage
caractéristiques du motoreducteur
et
Faire référence au tableau données techniques spécifique
pour le modèle, fournie dans la confection avec le livre d
instructions,pour le diamètre maximum de forage et la
puissance maximum du motoreducteur à monter sur le
support.
Préparation et utilisation du système
Avant de procéder avec la préparation le système du
système de forage, lire attentivement de livre d’instruction
fournis par le producteur du motorèducteur et de touts les
autres composants du système (goujon, pompe à vide etc).
Procéder comme suit :
si y li a, visser le dispositif de contraste F à
l’extrémité supérieure de la colonne;
ancrer le support sur le matériel à forer selon la
description faite au paragraphe ancrage du
support.
Attention: assurez-vous que la modalité
fixage de soit adéquat et que le support soit
bien ancrage.
incliner éventuellement la colonne comme
indiquer dans le paragraphe (inclinaison de la
colonne);
monter le volant d avancement (E) comme
décrits dans le paragraphe mécanisme
d’avancement et bloquer le chariot.
monter le motoreducteur au support comme
défini au paragraphe fixage du motoreducteur en
s’assurant qu il soit adapté au support: renvoi au
paragraphe diamètre maximum de perçage et
caractéristiques du motoreducteur.
se référer toujours au livre d’instruction du
motoreducteur concernant ses limites d usage
par rapport aux conditions de ľ environnement.
Attention: avant de procéder, vérifier que
touts les boulons et les vis sont bien serrès.
monter la couronne au motoreducteur;
allumer le motoreducteur en agissant sur le
système d’avancement, approcher la couronne
en rotation au matériel à percer, et en exerçant
une légère pression, exécuter le premier
centimètre de perçage. Cette opération est très
importante parce que si elle est effectuée
correctement assure un parfait centrage de la
couronne, évitant des déviations latérales durant
le forage;
a la fin de l’opération de centrage, augmenter la
poussée et procéder à ľ exécution du trou.
Entretien- Service après vente Garantie
Operations périodiques de nettoyage et d
entretien
tenir le support propre et assèche, en particulier
la crémaillère, la base;
pour le nettoyage, n’utiliser pas de dissolvant ou
autres produits chimiques agressifs;
après l’usage mettre le support en un endroit sec
loin de la portée des enfants;
ne pas utiliser le support avec des parties
endommagées ou avec des défauts de
fonctionnement. Dans ces cas il convient de faire
remplacer ces éléments par un centre d
assistance autorisé.
Service après- vente
les éventuelles réparations ou interventions de
service doivent être effectuées exclusivement
par un centre d assistance autorisé BERNER.
Consulter votre distributeur pour trouver le centre
d’assistance le plus près;
demander toujours les pièces de rechanges
originales BERNER.
Garantie de la part du constructeur
Ce produit est couvert d une garantie de 36 mois de ľ achat,
concernant les défauts de matériel et erreurs de projet ou de
fabrication. La garantie couvre le cout du remplacement des
parties intéressées, le coût des opérations de remplacement
et le matériel de consommation s il est encore neuf au
moment de la réparation.
La garantie ne comprend pas ces parties:
les parties du produits qui ont subies des
interventions de la part de personnes non
agrées.
les parties endommagées par incurie, usage non
adéquat ou surcharge;
les parties du produits aux quelles les éléments
de sécurité ont subies des tentatives de
réparation;
matériel de consommation èpiusè, remplacé
durant la réparation;
Le manque de nettoyage périodique, l’endommagement des
parties filetées, des surfaces d’appui, ou de la crémaillère
etc sont considères incurie et font perdre le droit de
l’assistance de garantie.
La durée des parties consumables n’est pas définie à priori,
étant liée au temps d’utilisation du produit et à l’intensité du
travail. Exemples de parties consumables sont: roulements
à galats, ou à billes non en bain d’huile garniture sous vide,
etc.
Si durant la réparation en garantie, on repère des
détériorations des parties consumables qui peuvent
influencer la sécurité ou le fonctionnement du produit il sera
demandé au client d’accepté le paiement de ces partie non
sujettes à une garantie. Le refus de rétablir les conditions de
sécurités initiales, porte au refus de toute prestation de
service de réparations.
21
Français
La garantie assure le remplacement gratuit des parties
reconnues défectueuses, par fabrication ou par montage, de
produits rendus à un centre autorisé si:
s il est fournie la preuve de la date d achat du
pro duit. Sont retenues comme preuves valables
les DDT (documents de transport) et les factures
d’accompagnement;
si le nettoyage et l’entretien ont été fait
régulièrement;
si le produit n’a pas été réparé par un personnel
non adéquatement instruit et agrée de BERNER;
le produit a toujours été utilisé en conformité aux
indications du carnet des instructions;
si les indications de sécurité reportées dans le
carnet des instructions ont été observées;
BERNER ne reconnaitra pas les réparations en garantie si:
une personne non autorisé de BERNER ait tenté
de réparer le produit;
si les dommages ont été provoqués par ľ
utilisation incorrecte ou d incurie. Bosses dues à
une chute ou coups reçus seront considères
comme effets d incurie;
les dommages ont été provoqués par un
surcharge.
Pendant la période de garantie, au cas ou les techniciens
agrées BERNER retiennent que la réparation est très
couteuse alors le produit sera remplacé gratuitement.
Le remplacement du produit en garantie est assuré suivant
ces conditions: après deux tentatives de réparation sans
résultats, après un entretien avec les responsables d’un
centre de service après vente BERNER.
En cas de remplacement du produit ,normalement sera
débité le montant correspondant à la valeur des parties
usées du produit remplacé.
Liste des parties remplaçables par le
client
Aucune partie de votre support BERNER ne peut être
remplacé sans consulter un réparateur agrée BERNER.
Centres de service après-vente BERNERListe des adresses
Pour la liste des centres de services après-vente consulter
votre distributeur.
Liste des contenus de la
confection
Se référer au bordereau des pièces de rechanges spécifique
à votre modèle, contenu dans la confection ensemble au
livre d’instructions.
AVERTISSEMENT :
LE FABRICANT DÉCLINE TOUTE RESPONSABILITÉ
EN CAS DE NON-RESPECT DES INSTRUCTIONS
D'UTILISATION ET DE SÉCURITÉ CI-DESSUS.
Votre produit a été introduit sur le marché pour la première fois après le 13 août 2005.
Ce manuel peut faire l'objet de modifications sans préavis.