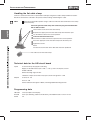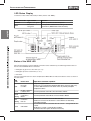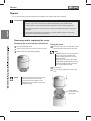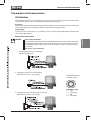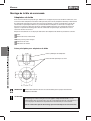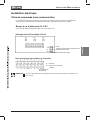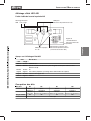
1
Operating Instructions
Bedienungsanleitung
Instructions de Service
Type 1066
Control Head
Steuerkopf
Tête de commande
Burkert Direct, 5 Caulside Drive, Antrim, Northern Ireland, BT41 2DU
www.burkertdirect.com, [email protected], Tel +44 (0) 28 9448 1809
We reserve the right to make technical changes without notice.
Technische Änderungen vorbehalten.
Sous resérve de modification techniques.
© 2002 Bürkert Werke GmbH & Co. KG
Operating Instructions 0509/04_EU-ML_00804373
CONTENTS
GENERAL INFORMATION
Symbols Used ................................................................................................................. 4
Intended use ................................................................................................................... 4
Safety instructions ........................................................................................................... 4
Scope of Delivery ............................................................................................................ 5
Guarantee conditions ...................................................................................................... 5
Transport, storage ........................................................................................................... 6
Disposal .......................................................................................................................... 6
TECHNICAL DATA
Structure and Function of the Control Head .................................................................... 8
Characteristics ................................................................................................................ 8
Operating conditions ....................................................................................................... 9
Mechanical data .............................................................................................................. 9
Pneumatic data ............................................................................................................... 10
Electrical data ................................................................................................................. 10
INSTALLATION
Installation of the control head......................................................................................... 12
Flange adaptor ........................................................................................................................ 12
Installation procedure .............................................................................................................. 13
INSTALLATION AND COMMISSIONING
Pneumatic installation ..................................................................................................... 16
Wiring connections on the control head .................................................................................. 16
Electrical installation ....................................................................................................... 17
Control heads without communication .................................................................................... 17
Control heads with communiction ........................................................................................... 19
1066 - 1
english
Contents of the
Operating Instructions for the
Control Head Type 1066 for Process Valves
CONTENTS
MAINTENANCE / CLEANING
Maintenance / Cleaning .................................................................................................. 30
REPAIRS
Repairs ........................................................................................................................... 32
Removing and/or replacing the cover ..................................................................................... 32
english
Changing the printed circuit board .......................................................................................... 33
Replacing the valve group ...................................................................................................... 33
Changing the valve on versions for 24 / 110 / 230 V UC without communication ................... 34
Changing the proximity switch/micro-switch........................................................................... 35
Spare parts ..................................................................................................................... 36
Service addresses .......................................................................................................... 36
2 - 1066
GENERAL INFORMATION
english
GENERAL
INFORMATION
Symbol used ................................................................................................................................................................................................................................................... 4
Intended use ................................................................................................................................................................................................................................................... 4
Safety instructions .................................................................................................................................................................................................................................. 4
Scope of Delivery .................................................................................................................................................................................................................................... 5
Guarantee conditions ........................................................................................................................................................................................................................ 5
Transport, storage ................................................................................................................................................................................................................................... 6
Disposal ................................................................................................................................................................................................................................................................ 6
1066 - 3
GENERAL INFORMATION
Symbols Used
The following symbols are used in these Operating Instructions:
marks a work step that must be carried out.
ATTENTION!
english
NOTE
Indicates information which, if not followed, could result in danger to your health or to
the functionality of the machine.
Indicates important additional information, tips and recommendations.
Intended use
• The control head for process valve type 1066 is used to control pneumatically-activated process
valves and record their switching statuses. Other incidents of use are deemed non-compliant.
• The Technical Data presented in these instructions, on the datasheet and on the type plate must be
checked for consistency before commissioning and complied with during operation of the control head.
• Unauthorized rebuilding or changes to the device are not allowed for safety reasons.
• Shield the control head from interventions by unauthorized persons. To this end the control head can be
secured on the boreholes present on the cover and casing by means of a lead seal and / or cutting
screw.
• The working directions given in these instructions and safety indications must be followed and
complied with at all times. If the operating instructions, safety tips, or safety information are ignored or
not followed in the proper order, the warranty shall be void.
Safety instructions
Follow the instructions of this operating manual, along with the terms of use and permitted data as
specified for process valves on the datasheets and the control head type plate, so that the device can
operate smoothly and have a long service life.
• When planning the application of the device, and during its operation, observe the general technical
rules!
• Installation and maintenance work may only be carried out by specialist staff using the correct tools!
• Use only original replacement parts for necessary repairs, and when changing these parts observe the
directions in these instructions.
• Observe the relevant accident prevention and safety regulations applicable for elekctrical equipment
while operating and maintaining the device!
• Always switch off the electrical power supply before carrying out any works on the system!
• Note that piping or valves must not be removed from a system that is under pressure!
• Take suitable measures to prevent unintentional operation or impermissible impairment.
• Following an interruption of the electrical or pneumatic supply, ensure a defined and controlled re-start
of the process!
4 - 1066
GENERAL INFORMATION
NOTE
The control head is designed in protection type IP67. This supposes that all seals
are positioned correctly and that casing and cover are mechanically intact.
• Avoid larger mechanical loads on the control head, as these may lead to mechanical impairment or
destruction of the control head. These include walking on the control head, placing heavy objects on it,
heavy impacts, falling hard objects etc.
NOTE
With regard to its mechanical resistance, the plastic casing of the control
head is designed for direct attachment of flexible hoses and conduits only.
• Avoid attaching longer and mechanically rigid attachment parts, since extensions of this type would
produce leverages through which the casing could be destroyed by hand.
NOTE
Cleaning products often contain aggressive components that may become
deposited in small grooves and cavities on the control head, and their prolonged
effect may lead to the desctruction even of high-quality plastics.
• Use only highly compatible cleaning products when cleaning the control head and rinse thoroughly with
clear water after these cleaning products have been used. The compatibility of the cleaning product
should be tested where necessary.
NOTE
A pressure-relief valve is situated on the underside of the control head casing,
serving as rupture protection in the event of an leaky component in the control
head (leakage incident).
• When assembling the control head, ensure a minimum distance of 5 mm between the pressure-relief
valve and the neighbouring component so that the pressure-relief valve can disengange without
problems in the event leaking. Otherwise, the cover could literally be "exploded" in the event of leakage
in the control head.
• If these instructions are ignored, no liability will be accepted from our side, and the guarantee on the
device and its accessories will also become invalid!
Scope of Delivery
Immediately after receiving the shipment, ensure that the contents are undamaged and correspond to the
scope of the delivery listed on the enclosed packing note. In case of any discrepancies, please contact
our Call Center:
Bürkert Fluid Control System, Call Center
Chr.-Bürkert-Str. 13-17, D-74653 Ingelfingen
Tel. 07940 - 10 111 / Fax 07940 - 10 91 448
E-Mail: [email protected]
or your local Bürkert Sales Center immediately.
Guarantee conditions
This document contains no agreement to provide a guarantee. We would refer you here to our General
Selling and Business Conditions. The precondition for the guarantee is the correct usage of the device
under compliance with the specified application conditions.
ATTENTION!
The guarantee only applies to the freedom from fault of the Head Control of the
process valves. No liability will be accepted, however, for consequential damage of any
kind that could arise from the failure or malfunctioning of the device.
1066 - 5
english
• Avoid the infiltration of moisture into the control head. When assembling in particular, make sure that all
seals are fitted according to directions and assembly screws, cable screw connections and sealing
plugs are securely tightened. Use only dried control air!
GENERAL INFORMATION
Transport, storage
ATTENTION!
Transport and store the appliance in its original packing only.
Storage in a dry room.
english
Maximum storage temperature +50 °C
Disposal
ATTENTION!
6 - 1066
When disposing of the appliance, observe the national standards for refuse disposal.
TECHNICAL DATA
english
TECHNICAL DATA
Structure and Function of the Control Head ...................................................................................................................................................
8
Characteristics .............................................................................................................................................................................................................................................
8
Operating conditions ..........................................................................................................................................................................................................................
9
Mechanical data ........................................................................................................................................................................................................................................
9
Pneumatic data .......................................................................................................................................................................................................................................... 10
Electrical data ............................................................................................................................................................................................................................................... 10
1066 - 7
TECHNICAL DATA
Structure and Function of the Control Head
The Type 1066 control head is used to control pneumatically operated process valves from various
manufacturers. Depending on the configuration, it can be fitted with up to three solenoid valves (pilot
valves) for control of the process valve and with a maximum of three height-adjustable inductive
proximity sensors for position feedback. One of these sensors can also be an external sensor
(Attachment via 3-pole screw clamp on printed circuit board).
english
NOTE
For sealed fieldbus modules, pay attention to the numbering of the proximity switch on the
circuit board / the identification on the device, since deviations from the numbering in the
drawing below are possible.
Adjustment throug
these holes
Cover plate
Adjustment of the
proximity sensor 1
Adjustment of proximity
sensor 2
Proximity sensor 2
Printed card
Column with spindle
Solenoid valve 3
Solenoid valve 2
Solenoid valve 1
Marking for
mounting the cover
Housing
Exhaust air
Electrical connection
Proximity sensor 1
Pneumatic connections
Valve 1
Valve 2
Valve 3
Valve flange
Interface to the
process valve
Compressed air
Characteristics
With the Type 1066 control head, there is a de-central solution for driving the process valves in addition to
the intended central solution for valve blocks. The advantages of this solution in the form of the compact
control head unit with the pilot valves and optionally usable field bus interfaces are:
Lower installation outlay.
Simple commissioning.
Short response times due to the short distance between the pilot valve and the
process valve.
Main areas of application:
Foodstuff industry (e.g. dairies)
Chemical industry
Pharmaceutical industry
Cosmetics industry
Breweries
8 - 1066
TECHNICAL DATA
Options
Number of pilot valves
Number of pilot valves
Single-acting actuators
1
Double-acting actuators
2
Dual-seat valves with integrated air supply to both valve seats
3
english
Operating mode / Type of application
Control heads without communication
8-pole screw terminal for 24 V DC
Multipol (8-pole round plug) for 24 V DC
2 x 6 screw terminals for 24 / 110 / 230 V UC
Control heads with communication
Actuator sensor interface (ASI)
DeviceNet
ATTENTION!
The connection to other (higher) bus systems is possible using commercially available
Gateways.
Operating conditions
Media
Compressed air, non-oiled; neutral gases
Medium temperature
-10 ... + 50 °C
Ambient temperature
-10 ... + 50 °C
Protection class
IP 67
ATTENTION!
The control head is not suitable for use outdoors!
Mechanical data
Weight
0.5 bis 0.65 kg (depending on model)
Housing material
Housing
Cover
Sealing material
NBR
PA / PPE
PSU (transparent, blue-grey)
1066 - 9
TECHNICAL DATA
Pneumatic data
Port connections
Compressed air/Exhaust air
G 1/4
Service ports tube hose connection
6/4 mm or 1/4 inch, plug-in
Pressure range
2.5 to 7 bar
Air flow, control valve
110 l/min Type 6510, 40 l/min Type 6106
english
Flow: QNn - value air (l/min)
Measurement at +20 °C, 6 bar pressure at the valve inlet and 1 bar
pressure difference
Response times
Type 6510 / Type 6106
Opening 15 / 23 ms
Closing 10 / 21 ms
Measurement at valve outlet at 6 bar and +20 °C
Opening:
pressure rise 0 to 90 %
Closing:
pressure fall 100 to 10 %
Control range
min. stroke 2mm
max. stroke 73 mm
Electrical data
Protection class
IP 67
Operating voltage
without communication
24 V DC ±10 %
24/110/230 V UC ±10 %
with communication
in accordance with the ASI and DeviceNet specification
Max. electrical power loss
5 W for 3 x Type 6510 or 1 x Type 6106
Connections
Control heads
without communication:
Multipol (8-pole round plug DIN 45326) for 24 V DC
(8-pole screw terminals) for 24 V DC
2 x 6-pole screw terminals for 24/110/230 V UC
Control heads
with communication:
ASI:
Cut-clamp connector and cable fitting
M12 plug and cable fitting
M12 flange plug, 4-pole
DeviceNet:
5-pole M12 plug connection
Solenoid valves
Nominal power
1 W Type 6510 / 3 W Type 6106
Operating mode
continuous (ED 100 %)
Proximity switches
Operating voltage
8 to 30 V DC
Output signal
max. 100 mA, short-circuit proof
Micro-switch
10 - 1066
potential-free, max. 1 A switched current
INSTALLATION
english
INSTALLATION
Installation of the control head ............................................................................................................................................................................................. 12
Flange adaptor ........................................................................................................................................................................................................................................ 12
Installation procedure ..................................................................................................................................................................................................................... 13
1066 - 11
INSTALLATION
Installation of the control head
Flange adaptor
To mount the control head type 1066 on a process valve from a different manufacturer, you need an
adapter with customized flange (flange adapter) and a customized switching knob (see also Data Sheet).
The connecting part for the control head is Bürkert-specific. The flange component must be adapted to
the shape of the process valve. The drawing below shows an application for a special process valve. The
control head can be installed in any position, but preferably with the cover at the top.
english
When making your own flange, comply exactly with the following parameters:
Dimensions
Number of sealed positions
Dimension for the O-ring
Measurement tolerance
Material data
Main dimensions for the flange adapter
Cylindrical adapter part
Custom flange part
NOTE
Please request detailed dimensional drawings if you are manufacturing your own flange
adapter.
ATTENTION!
A centring device is necessary for the installation of the flange adapter. The
maximum permissible deviation is ± 0.1 mm. If this tolerance is exceeded, there is the
danger that the proximity sensors may not function correctly.
Use a special installation sleeve to avoid exceeding this tolerance.
12 - 1066
INSTALLATION
Installation procedure
1
Fix the flange adapter to the
process valve/Fix switching knob
to piston rod (customer-specific)
2
Remove the cover from the control
head
Loosen the locking screw
ensure that it is centred
Turn the cover to the left to the stop
english
Pull the cover off upwards
3
Insert the control head onto
the flange adapter
Position the control head
(control head can be turned through 360°)
4
Fit the pneumatic connections
Refer to Pneumatic Installation,
(Installation/Commissioning chapter)
Secure the control head using the two
screws on the side
1066 - 13
INSTALLATION
5 Fit the electrical connections
7
Control heads without and
with communication
(see chapter on electrical installation)
Fit the cover
Check the seat of the cover O-ring,
or pull a new O-ring onto the collar of
the cover.
NOTE
english
Distributed across the circumference of
the casing are 4 handles that retain the
O ring when the cover is being
removed. Take care to ensure that the
newly-applied O ring is positioned
correctly under the handles and is
resting on the casing without twisting.
Fit the cover.
Turn the cover right until it reaches the
stop.
6 Adjust
the proximity sensors
Using a screwdriver, turn the adjusting
screw (spindle) until the optimal position
of the proximity switch has been set up.
The LED mounted on the proximity switch
is an adjustment aid: it lights up when
reaching the corresponding threshold value.
the limit position micro-switches
When using micro-switches, LEDs are not
provided for reasons of cost
Housing
with cover
collar and
O-ring seat
Set the position as for the proximity
switches
Using the switching sound
of the micro-switch
(very quiet) as a setting
aid or external electrical
continuity check.
LED
LED
NOTE
Secure the cover where necessary to prevent
unauthorised access by inserting a lead seal
and/or self-tapping screw in the holes in the
cover and the housing.
14 - 1066
INSTALLATION AND COMMISSIONING
english
INSTALLATION AND
COMMISSIONING
Pneumatic installation ...................................................................................................................................................................................................................... 16
Wiring connections on the control head ................................................................................................................................................................. 16
Electrical installation .......................................................................................................................................................................................................................... 17
Control heads without communication ..................................................................................................................................................................... 17
8-pole screw terminal for 24 V DC ....................................................................................................................................................................... 17
Multipol (8-pole round plug to DIN 45326) for 24 V DC ............................................................................................................. 18
2 x 6-pole screw terminals for 24 / 110 / 230 V UC ....................................................................................................................... 18
Control heads with communication .............................................................................................................................................................................. 19
AS-Interface ...................................................................................................................................................................................................................................... 19
Handling the flat cable clamp ............................................................................................................................................................................
Technical data for the ASI circuit board ...............................................................................................................................................
Programming data ...........................................................................................................................................................................................................
LED status display ASI ............................................................................................................................................................................................
Bit allocation ...........................................................................................................................................................................................................................
Number of connectable control heads and maximum length of the bus
(ASI standard case and ASI version with extended address range) ............................................................
20
20
20
21
21
22
DeviceNet ........................................................................................................................................................................................................................................... 24
Explanation of terms ....................................................................................................................................................................................................
Technical data ......................................................................................................................................................................................................................
Maximum line lengths .................................................................................................................................................................................................
Safety setting for bus failure ..............................................................................................................................................................................
Electrical connection ...................................................................................................................................................................................................
Configuration ..........................................................................................................................................................................................................................
LED Status Display ......................................................................................................................................................................................................
24
24
24
25
25
26
28
1066 - 15
INSTALLATION AND COMMISSIONING
Pneumatic installation
Wiring connections on the control head
english
G 1/4
G 1/4
Exhaust air
Compressed
air
Plug-and-socket connections
for 6/4 mm or 1/4" hose
plug-in
for valves V1, V2 and V3
ATTENTION!
• Only use calibrated hose lines with 6 mm or ¼ " external diameter.
• Only cut these using a hose cutter (danger of damaging the hose).
• Select the length of the hose so that the control head can be removed with the
screw fitting.
• Take care to ensure a tension-free hose guide well aligned with the plug connector,
since hoses that are plugged in when tensed (contorted) may lead to leakages at
the plug connection.
16 - 1066
INSTALLATION AND COMMISSIONING
Electrical installation
Control heads without communication
There are different ways of electrically connecting control heads without communication.
On the model for 24 V DC, status per valve is displayed uniformly with an LED in each case.
english
8-pole screw terminal for 24 V DC
(in interior of housing, cable duct with screw fitting for cable)
LED status display 24 V DC
Ground
Switched signal of the external
proximity switch S3
Power supply
Layout of the 8-pole screw terminal
V = valve
S = proximity switch (sensor)
NOTE
The outputs of the proximity switches are pnp-plus switching and are short-circuit proof.
1066 - 17
INSTALLATION AND COMMISSIONING
Multipol (8-pole round plug to DIN 45326) for 24 V DC
View of the sensor installed in the head, seen from the front looking at the pins, with the solder
connections below.
Outputs of the proximity switches
pnp-plus switching and are short-circuit proof
english
Proximity
switch 3
Proximity switch 2
Proximity
switch 1
24 V DC
(operating voltage for the
proximity switches)
GND
(common earth for valves)
Valve 3
Valve 1
Valve 2
NOTE
The outputs of the proximity switches are pnp-plus switching and are short-circuit proof.
2 x 6-pole screw terminals for 24 / 110 / 230 V UC
The 2 x 6-pole screw terminal model consists of:
Cable gland with screw fitting for cable
Max. 1 valve (Type 6106, DN1.2)
2 mechanical limit switches with potential-free contacts for position feedback
(No LED status display)
18 - 1066
Switch 1
Switch 2
Valve/Network
Printed circuit board with 2 x 6-pole screw terminals for 24 / 110 / 230 V UC
gn/gb
green/yellow
bl
blue
sw
black
INSTALLATION AND COMMISSIONING
Control heads with communication
AS-Interface
ASI (Actuator Sensor Interface) is a field bus system that is used for networking (mainly) binary sensors
and actuators to a master controller.
Network topology
Freely selectable within wide limits, i.e., star, tree and line networks are possible. Further details can be
found in the ASWI specification.
Bus connection variants
NOTE
Data for the round cable
The electrical values of the round cable leading directly to the control head deviate slightly
from the ASI specification. When calculating the maximum permissible line length according
to the ASI specification, the length should therefore be set longer by the factor 1.5.
ASI length = 1.5 x real length
1. Flat cable clamp on the 1 m round cable
ASI standard connection:
ASI format cable
Flat cable clamp
Conductor plug with
moulded cable
Round cable (1 m long, of
which 0.2 m in the control head)
2. 4-pole M12 plug on the 2 m round cable
ASI special connection 1: (on request)
4-pole M12 plug for
ASI connection
M12 plug
Conductor plug with
moulded cable
Round cable (1 m long, of
which 0.2 m in the control head)
3. 4-pole M12 plug on the control head, without cable
ASI special connection 2: (on request)
ASI format cable
ASI PIN configuration
1 = ASI+
2 = not used
3 = ASI4 = not used
Flat cable clamp
Conductor plug
M12 flange plug
M12 socket
Round cable (1 m long)
1066 - 19
english
Bus line
Unscreened pairs (ASI line as ASI format cable) over which both information (data) and energy (power
supplies for the sensors and actuators) are transmitted.
INSTALLATION AND COMMISSIONING
Handling the flat cable clamp
Contact is achieved in the form of a penetration technique using the flat cable clamp for ASI from cables.
Electrical connection is achieved in the process without cutting and skinning the cable.
NOTE
Close the second cable aperture using a cable seal if the flat cable terminates in the clamp
(final connection).
Connecting the flat cable clamp with conductor plug and moulded cable
with an ASI flat cable
english
Loosen both screws on the flat cable clamp.
Separate the upper part of the flat cable clamp from the lower part.
Lay the ASI flat cable in the correct position.
If the flat cable terminates here:
Insert the flat cable seal into the aperture in the correct position.
Place the upper part of the flat cable clamp onto the lower part.
Tighten the screws.
Done!
The electrical connection to the ASI cable has been produced.
Flat cable seal for flat cable clamp
Technical data for the ASI circuit board
Inputs
3 sensors S1 top S3, pnp plus-switching
Supply via the AS interface (24 V +20 % / -10 %), short-circuit proof, current
limited to 60 mA
Switch level High signal ≥ 10 V
Limitation of input current ≥ 6.5 mA, input current Low signal ≥ 1.5 mA
Outputs
3 valves V1 - V3
max. 3 x 1 W
Power reduction after approx. 100 ms, with integrated Watch-Dog function
Programming data
I/O-Code
7 hex (4 outputs and 4 inputs)
ID-Code
F hex (see following table for bit allocation); extended ID codes 1 and 2 = F hex
Profile
7.F
20 - 1066
INSTALLATION AND COMMISSIONING
LED status display ASI
Visible part of the ASI printed circuit board
Status display bus
LED green red
english
LED's for
proximity switches S1 - S3
LED's for
Valves V1 - V3
Power supply for an
external proximity switch
(from the ASI cable)
Switching signal of
an external proximity
switch
Overview of ASI LED Status display
LED
Bus status
green
red
dark
dark
POWER OFF
dark
light
No data traffic (expired watch-dog with Slave address not 0)
light
dark
ok
blinking blinking Peripheral fault (overload in sensor supply)
blinking
dark
light
Slave address equal to 0
blinking RESET
Bit allocation
Data bit
Parameter bit
D3
Output
LED yellow
Input
Not used
P3
D2
D1
Output
Output
Valve 3
Valve 2
Input
Input
Prox. switch 3
Prox. switch 2
P2
P1
Not used
D0
Output
Valve 1
Input
Prox. switch 1
P0
1066 - 21
INSTALLATION AND COMMISSIONING
Number of connectable control heads and maximum length of the
bus line
I. ASI standard case
A maximum of 31 control heads can be attached to a bus line in the standard case.
english
According to ASI specifications the bus cable may be a maximum 100 m long.
NOTE
When using other cable diameters, the maximum cable length also changes (refer to ASI
specification).
Process data
Data bits for inputs (sensor and prox. switches):
Bit No.
Sensor
Value allocation
Bit 0
S1 (sensor 1)
0 Prox. switch 1 OFF
1 Prox. switch 1 ON
Bit 1
S2 (sensor 2)
0 Prox. switch 2 OFF
1 Prox. switch 2 ON
Bit 2
S3 (terminal for add. prox. switch)
0 Prox. switch 3 OFF
1 Prox. switch 3 ON
Bit 3
Not used
always 0
Data bits for outputs (actuators and valves):
Bit No.
Valve
Value allocation
Bit 0
V1 (Valve 1)
0 Valve 1 OFF
1 Valve 1 ON
Bit 1
V2 (Valve 2)
0 Valve 2 OFF
1 Valve 2 ON
Bit 2
V3 (Valve 3)
0 Valve 3 OFF
1 Valve 3 ON
Bit 3
Not used
always 0
Parameter bits: not used
22 - 1066
INSTALLATION AND COMMISSIONING
II. ASI version with extended address range (A/B Slave)
1 Master can communicate with 62 Slaves with the ASI version with extended address range (A/B Slave).
As in the standard case, the bus cable with extended address range according to ASI specifications my be
a maximum 100 m long.
NOTE
Characteristics of the A/B Slave variant compared with the standard case
• 62 Slaves per Master
• The yellow OUT 4 LED on the ASI circuit board is no longer controllable, since the fourth output bit
used up to now is now used for the addressing.
• Limitations in power supply due to the nominal current of the inductors:
Only 2 solenoid valves can be connected at the same time; the third solenoid valve can only be
hooked up after 100 ms have passed.
ATTENTION!
If an A/B Slave device is being used as a replacement for a standard device, a
configuration error arises due to the different ID codes!
Differences in the addressing of ASI variants
Parameters
ASI Standard device
ASI device for A/B Slave addressing
Number Slaves / Master
31
62
I/O Code
7 hex
7 hex
ID Code
F hex
A hex
Extended ID1
F hex
7 hex
Extended ID2
F hex
E hex
Profile
S-7.F.F
S-7.A.E
1066 - 23
english
Maximum cable lengths also vary when other cable cross sections are used (see ASI
specifications).
INSTALLATION AND COMMISSIONING
DeviceNet
Explanation of terms
• DeviceNet is a field bus system that is based on the CAN protocol (Controller Area Network). It makes
possible the networking of actuators and sensors (slaves) with a master control unit (master).
english
• In the DeviceNet, the Type 1066 control head is a slave device according to the Predefined
Master/Slave Connection laid down in the DeviceNet specification. Polled I/O, Bit Strobed I/O and
Change of State 4 (COS) are supported as I/O connection types.
• In DeviceNet, a differentiation is made between cyclic or event-controlled transmitted process messages
of higher priority (I/O Messages) and non-cyclic management messages of lower priority (Explicit Messages).
• The protocol corresponds to DeviceNet Specification Release 2.0
NOTE
A diskette with configuration files (BUE1066.EDS and BUE1066.ICO) is always delivered
with the DeviceNet models. You can also obtain these files over the Internet.
Technical data
Baud rate
125 kBit/s, 250 kBit/s, 500 kBit/s (via DIP switch);
Factory setting: 125 kBit/s
Adresses
0 ... 63 (via DIP switch);
Factory setting: 63
Process data
2 static input assemblies
(Input: from control head 1066 to DeviceNet Master/Scanner)
1 static Output Assembly
Inputs
3 sensors (proximity switches) S1 - S3, pnp, plus-switching
Supply via the DeviceNet line (11 to 25 V DC)
Switching level High signal ≥ 5 V
Switching level Low signal ≤ 1.5 V
Files
BUE1066.EDS
BUE1066.ICO
You can also obtain these files over the Internet.
Maximum line lengths
The maximum total line lengths (sum of main and drop lines) of a network depend on the baud rate.
Total line lengths according to the DeviceNet specification
1)
Baud rate
Maximum total line length when using Thick Cables according to the
DeviceNet specification1)
125 kBaud
500 m
250 kBaud
250 m
500 kBaud
100 m
According to the DeviceNet specification. When using another cable type, lower maximum values
apply (refer to the DeviceNet specification).
24 - 1066
INSTALLATION AND COMMISSIONING
Baud rate
Maximum length of a drop line
Max. accumulated length in the network
125 kBaud
6m
156 m
250 kBaud
6m
78 m
500 kBaud
6m
39 m
Safety setting for bus failure
In case of a bus failure, the setting of the last data byte of the bus outputs will be retained as long as
power is connected.
Electrical connection
The bus line is a 4-pole cable with an additional screen that must correspond to the DeviceNet
specifications and over which both information (data) and power (power supply for the low-power actuators
and sensors) will be transmitted.
Bus connection (round plug M12, 5-pole)
CAN_H
white
Data
lines
Vblack
CAN_L
blue
Drain (screen)
not used
V+
red
Voltage supply
11 ... 25 V DC
max. power 5 W, if all
valves switched
(3 x Type 6510 with 1 W each)
Plug viewed from the front looking at the pins (not at the solder side).
The Type 1066 control head has a 5-pole Micro-style M12 round plug. The following pin configuration
corresponds to the DeviceNet specification:
Pin
1
2
3
4
5
Signal
Screen
V+
VCAN_H
CAN_L
Colour
not used
red
black
white
blue
Termination circuit for DeviceNet systems
When installing a DeviceNet system, attention must be paid to the correct termination circuit for the data
lines. This circuit prevents interference arising from signal reflection on the data lines. The main line must
therefore be terminated as both ends, as shown, with resistors of 120 Ω with 1/4 W power rating.
1066 - 25
english
Drop line lengths
INSTALLATION AND COMMISSIONING
Network topology of a DeviceNet system
english
Line with a main line (trunk line) and several drop lines.
The main line and the drop lines are made up from identical material (see sketch).
ATTENTION!
To avoid reflections, fit terminating resistors at both ends of the trunk line (120 Ω).
Configuration
DIP switch
8 DIP switches are fitted for the configuration:
• DIP switches 1 to 6 for the DeviceNet addresses
• DIP switches 7 and 8 for the baud rate
NOTE
Before the commissioning of the controller with DeviceNet, the EDS-Datei must be read
into DeviceNet Configuration Tool. The required files (BUE1066.EDS and BUE1066.ICO)
are available on diskette or over the Internet.
Setting the DeviceNet address
MAC ID – Medium Access Control Identifier:
[Example of value allocation at switch DIP1:
DIP 1=off=0 / DIP 1=on=1 / MAC ID=DIP 1*20+DIP 2*21+...+DIP 6*25]
DIP 1
[2 0 =1]
DIP 2
[2 1 =2]
DIP 3
[2 2 =4]
off
off
off
off
off
off
0
on
off
off
off
off
off
1
off
on
off
off
off
off
2
...
...
...
...
...
...
...
off
on
on
on
on
on
62
on
on
on
on
on
on
63
26 - 1066
DIP 4 DIP 5 DIP 6
[2 3 =8] [2 4 =16] [2 5 =32]
MAC
ID
INSTALLATION AND COMMISSIONING
Setting the baud rate
DIP 7
DIP 8
Baud rate
off
off
125 kBaud
on
off
250 kBaud
off
on
500 kBaud
on
on
not allowed
ATTENTION!
Any change to the settings using the DIP switches will only become effective
following a re-start of the device.
A re-start can be carried out by briefly unclamping and the re-clamping the control head
from/to the network or by sending a corresponding Reset Message. It is also possible be
switching the network power supply off and then on again.
Configuration of the Process Data
3 static inputs and 3 static output assemblies are available for the transmission of the process data via an
I/O connection. Selected attributes are gathered together in one object in these assemblies, in order to be
able to be transmitted together as process data via an I/O connection.
The process data can either be accessed cyclically in the connection variants "Polled I/O" and "Bit-strobed
I/O" with "Change of State" when the input values change, or non-cyclically via Explicit Messages.
The access path for non-cyclic access is:
class
instance
attribute
4
1
3
With the Get_Attribute_Single service, non-cyclic read access can be obtained to the input data, and noncyclic write access to the output data with Set_Attribute_Single.
1 Data Byte for inputs (sensors and/or proximity switches):
Bit
Sensor
Value allocation
Bit 0
S1 (Prox.switch 1)
0 Prox. switch 1 OFF
1 Prox. switch 1 ON
Bit 1
S2 (Prox. switch 2)
0 Prox. switch 2 OFF
1 Prox. switch 2 ON
Bit 2
S3 (Terminal for additional prox. switch)
0 Prox. switch 3 OFF
1 Prox. switch 3 ON
Bit 3 ... Bit 7
Not used
0 always
1 Data Byte for inputs (sensors and/or proximity switches):
Bit
Sensor
Value allocation
Bit 0
S1 (Valve 1)
0 Valve 1 OFF
1 Valve 1 ON
Bit 1
S2 (Valve 2)
0 Valve 2
1 Valve 2
OFF
ON
Bit 2
S3 (Valve 3)
0 Valve 3
1 Valve 3
OFF
ON
Bit 3 ... Bit 7
Not used
0 always
1066 - 27
english
Adapting the control head to the baud rate of the network.
INSTALLATION AND COMMISSIONING
LED Status Display
The device status will be indicated by 2 LEDs ("Power" and "MNS").
Type / Colour
Function
POWER
Single-colour, green
LED lit up: device has electrical power
MNS
Two-colour,
red / green
Corresponds to MNS-LED according to DeviceNet
specification (MNS Module Network Status)
english
Name of the LED
Status of the MNS LED
Once electrical power has been applied (connection of the network line), the following functional tests of
the two-coloured MNS LED are carried out:
• LED lights up green for a short time (ca. ¼ s).
• LED lights up red for a short time (ca. ¼ s).
• LED dark.
Once the functional tests have been completed, the MNS LED can indicate the device status as shown in
the table below.
LED
state
Device status
Explanation / Correction of problem
Dark
No power /
not online
- No power supply to device.
- Device has not yet finished the duplicate MAC ID Test (test lasts approx. 2s).
- Connect additional devices if the device is the only network participant.
- Replace the device.
Green
Green
blinking
On-line, connection
to Master exists
On-line, no
connection to
Master
Red
blinking
Connection
time-out
Red
Critical fault
28 - 1066
- Normal operational status with connection made to Master.
- Normal operational status without connection made to Master.
- One or more connections are in the Time-Out state.
- Make new connection via the master to ensure that the I/O data will by
transmitted cyclically.
- Another device with the same MAC ID in the network > change MAC ID and
restart.
- BUS OFF as a result of communication problems.
- Check the baud rate: replace the device if necessary.
MAINTENANCE / CLEANING
english
MAINTENANCE / CLEANING
Maintenance / Cleaning ................................................................................................................................................................................................................ 30
1066 - 29
MAINTENANCE / CLEANING
Maintenance / Cleaning
When used correctly, the Type 1066 control head works without maintenance and without problems.
Repairs may only be carried out by authorised personnel using suitable tools.
Control heads operating in facilities may become contaminated by leaking medium and other influences.
In this event the facilities must be cleaned with suitable cleaning products and finally rinsed thoroughly
with water.
english
ATTENTION!
30 - 1066
Before using cleaning materials, always check the compatibility of these agents with
the materials of the housing and the cover. ON cases of soiling, or following the use of
acidic or alkaline cleaning agents, always rinse thoroughly rinse off the control head with
clear water. In doing this, pay special attention that threaded holes and depressions are
clean and drained.
REPAIRS
english
REPAIRS
Repairs ................................................................................................................................................................................................................................................................... 32
Removing and/or replacing the cover ....................................................................................................................................................................... 32
Changing the printed circuit board ................................................................................................................................................................................. 33
Replacing the valve group ....................................................................................................................................................................................................... 33
Changing the valve on versions for 24 / 110 / 230 V UC without communication ............................................ 34
Changing the proximity switch / micro-switch ................................................................................................................................................ 35
Spare Parts ....................................................................................................................................................................................................................................................... 36
Service Addresses ................................................................................................................................................................................................................................ 36
1066 - 31
REPAIRS
Repairs
In case of the failure of certain components or modules, the control head can be repaired.
ATTENTION!
• Only use original spare parts for the repair work (refer to Spare Parts Table).
• Repairs may only be carried out by authorised specialists using suitable tools.
• Comply with the valid accident prevention regulations and the safety regulations.
english
• Ensure that the device is free of pressure and of electrical power before carrying out
any work.
• Check that the parameters of the spare parts agree with those given on the rating
plate of the control head being repaired.
Removing and/or replacing the cover
Removing the cover from the control head
Loosen the locking screw
Turn the cover to the left until it reaches the stop
Remove the cover by pulling upwards!
Fitting the cover
Check the seat of the cover O-ring, or pull
a new O-ring onto the collar of the cover.
NOTE
Distributed across the circumference
of the casing are 4 handles that
retain the O ring when the cover is
being removed.
Take care to ensure that the newlyapplied O ring is positioned correctly
under the handles and is resting on
the casing without twisting.
Fit the cover.
Turn the cover right until it reaches the
stop.
NOTE
Secure the cover where necessary to
prevent unauthorised access by
inserting a lead seal and/or a selftapping screw in the holes in the cover
and the housing.
Housing with
cover collar and
O-ring seat
32 - 1066
REPAIRS
Changing the printed circuit board
Proceed as follows:
Remove the cover.
Before disconnecting, mark the electrical connections so that it will
bepossible to reconnect them without error.
Disconnect all electrical connections from the printed circuit board
(plug and / or screw connections).
Loosen the four screws (Torx 10) with which the cover plate is secured.
Plate for
24 V DC
without communication
english
Remove the cover plate.
Remove all circuit boards (no screw fittings).
Insert the new circuit boards.
ATTENTION!
Ensure the correct fit of the printed circuit boards into
the housing projections!
Replace the cover plate.
ATTENTION!
Ensure the correct fit of the circuit board an the screw
heads in the projections and/or the cut-outs in the
cover plate!
Replacement
ASI module, moulded
Screw down the cover plate (Torx 10; tightening torque 0.7 Nm).
Reconnect the electrical connections according to the markings made
earlier.
Refit the cover.
Replacing the valve group
The valve group consists of a connection plate with 1, 2 or 3 flanged
valves of the type 6510 and the O-rings for the fluidic flange to the
housing.
NOTE
Replacement
DeviceNet, moulded
For 24 V DC without communication, ASI and
DeviceNet, only a change of the whole valve group
is permitted.
Proceed as follows:
Remove the cover.
Before disconnecting from the circuit board, mark the electrical
connections so that it will be possible to reconnect them without
error.
Disconnect all electrical connections from the printed circuit
board (screw connections).
Valve group, optionally
with 1, 2 or 3 valves
Loosen the 2 screws (Torx 20) with which the valve group is
secured.
- 24 V DC without
communication
Remove the valve group complete with its O-rings.
- ASI (24 V DC)
Fit the new valve group complete with its O-rings.
- DeviceNet (9 V DC)
Screw down the valve group (Torx 20; tightening torque 1.5 Nm).
Reconnect the electrical connections according to the markings made earlier.
Refit the cover, ensuring that the O-rings are correctly seated.
1066 - 33
REPAIRS
Changing the valve on versions for 24 / 110 / 230 V UC without
communication
For the verion for 24/110/230 V UC without communication only valve model 6106 is exchanged while
paying attention to operating voltage. The valve connection plate remains in the control head.
Proceed as follows:
Remove the cover.
Unscrew the screws on the appliance socket.
english
Pull the appliance socket from the valve.
Note the mounting position of the tag connectors and the manual
override.
Loosen the 2 fixing screws on the valve body.
Remove the coil bobbin.
Loosen the 2 fixing screws on the valve body.
Remove the valve body complete with its O-rings.
Fit the new valve body together with its O-rings on the correct side
(manual override to the left)
Retighten the screws alternately and evenly
(tightening torque 0.5 Nm).
Fit the new coil bobbin on the correct side
(long tag connector to the left).
Alternately and evenly tighten the coil screws
(tightening torque 0.15 Nm).
Mount the appliance socket on the valve.
Secure the socket with a screw
(tightening torque 1 Nm).
Refit the cover.
34 - 1066
Valve
Type 6106
REPAIRS
Changing the proximity switch / micro-switch
Proceed as follows:
Remove the cover.
Before disconnecting from the circuit board, mark the
electrical connections so that it will be possible to reconnect
them without error.
Clearance for
O ring
Loosen the four screws (Torx 10) with which the cover plate is
secured.
Remove the cover plate.
Note the positions of the proximity switch and the trigger of
the micro-switch.
Lift out the proximity switch / micro-switch with the adjusting
screw and the connecting cable.
Inductive proximity switch with
LED and moulded-on wire and
plug (the plug is not depicted in
the sketch)
Unscrew the old adjusting screws for re-use.
Screw the adjusting screws into the threaded holes on the
new proximity switch / micro-switch.
Only when there is a proximity switch:
Remove the O ring from the old proximity switch and insert it
into the clearance of the new proximity switch. (This O ring is
used to muffle vibration and prevents the proximity switch
from sliding out.)
Mount the new proximity switch with the adjusting screw in
the guide column.
ATTENTION!
Ensure the correct seating of the proximity switch / micro-switch in the guides
and depressions on the body.
Re-fit the cover plate.
ATTENTION!
Ensure the correct seating of the printed circuit
board and the screw heads in the projections
and cut-outs of the cover plate.
Firmly screw down the cover plate
(Torx 10; tightening torque 0,7 Nm).
LED
LED
Reconnect the electrical connections to the proximity switch /
micro-switch according to the note made earlier.
Adjust the position of the proximity switch / micro-switch:
- Using a screwdriver, turn the adjusting screw (spindle)
until the optimal position of the proximity switch has been
set up.
- The LED mounted on the proximity switch is an adjustment
aid: it lights up when reaching the corresponding threshold
value.
Refit the cover.
1066 - 35
english
Disconnect all electrical connections to the proximity switch /
micro-switch from the printed circuit board (plug connections).
REPAIRS
Spare Parts
english
Position Spare part
Order No.
1
ASI replacement module, sealed
799 189
2
Conductor plug straight, moulded cable, 1 m long, V 4A-M12 locking device
799 647
3
Flat cable clamp with bush, M12 outlet made of VA, gold contacts
799 646
4
Flat cable seal for clamp (if cable terminates here)
799 795
5
24 V DC board without communication
799 188
6
24 / 110 / 230 V UC board without communication
799 137
7
Inductive proximity switch (sensor)
798 546
8
Stop position microswitch complete
648 004
9
Adjusting screw for proximity switch / microswitch (1 item)
798 064
10
Shoulder screw M5 for securing the control head (10-pack)
798 074
11
Cover for control head (1 item)
798 073
12
O rings for cover (10-pack)
798 072
13
without communication, valve group with 1 valve, 24 V DC
193 375
14
without communication, valve group with 2 valves, 24 V DC
193 376
15
without communication, valve group with 3 valves, 24 V DC
193 377
16
with ASI communication, valve group with 1 valve, 24 V DC
193 375
17
with ASI communication, valve group with 2 valves, 24 V DC
193 376
18
with ASI communication, valve group with 3 valves, 24 V DC
193 377
19
with DeviceNet communication, valve group with 1 valve, 9 V DC
198 195
20
with DeviceNet communication, valve group with 2 valves, 9 V DC
198 196
21
with DeviceNet communication, valve group with 3 valves, 9 V DC
198 197
22
Single valve type 6106, 24 V UC
141 073
23
Single valve type 6106, 110 V UC
142 490
24
Single valve type 6106, 230 V UC
141 387
Positions 13 to 24 complete with O rings and fixing screws.
Service Addresses
Bürkert Werke GmbH & Co. KG
Bürkert GmbH & Co. KG
Fluid Control System
DC Dresden
Christian-Bürkert-Straße 13 - 17
Christian-Bürkert-Straße 2
74653 Ingelfingen
01900 Großröhrsdorf
Telephone: (0 79 40) 10 - 111
Telephone: (03 59 52) 36 - 300
Fax:
Fax:
36 - 1066
(0 79 40) 10 - 448
(03 59 52) 36 - 551
INHALT
Inhaltsverzeichnis
der Betriebsanleitung
Steuerkopf für Prozessventile Typ 1066
ALLGEMEINE HINWEISE
Darstellungsmittel ........................................................................................................... 40
Bestimmungsgemäße Verwendung ................................................................................ 40
Lieferumfang ................................................................................................................... 41
Garantiebestimmungen ................................................................................................... 41
Transport und Lagerung .................................................................................................. 42
Entsorgung ...................................................................................................................... 42
TECHNISCHE DATEN
Aufbau und Funktion des Steuerkopfes .......................................................................... 44
Merkmale ........................................................................................................................ 44
Betriebsbedingungen ...................................................................................................... 45
Mechanische Daten ........................................................................................................ 45
Pneumatische Daten ....................................................................................................... 46
Elektrische Daten ............................................................................................................ 46
MONTAGE
Montage des Steuerkopfes ............................................................................................. 48
Flanschadapter ....................................................................................................................... 48
Montageablauf......................................................................................................................... 49
INSTALLATION INBETRIEBNAHME
Pneumatische Installation ............................................................................................... 52
Anschlussbelegung am Steuerkopf ........................................................................................ 52
Elektrische Installation .................................................................................................... 53
Steuerköpfe ohne Kommunikation .......................................................................................... 53
Steuerköpfe mit Kommunikation ............................................................................................. 55
1066 - 37
deutsch
Sicherheitshinweise ........................................................................................................ 40
INHALT
WARTUNG / REINIGUNG
Wartung / Reinigung ....................................................................................................... 66
REPARATUR
Reparaturen .................................................................................................................... 68
Deckel abnehmen bzw. aufstecken ........................................................................................ 68
Wechsel der Leiterkarte.......................................................................................................... 69
Wechsel der Ventilgruppe ....................................................................................................... 69
Wechsel des Ventils bei Versionen für 24/110/230 V UC ohne Kommunikation ...................... 70
deutsch
Wechsel Näherungsschalter / Mikroschalter .......................................................................... 70
Ersatzteile ....................................................................................................................... 72
Serviceanschriften .......................................................................................................... 72
38 - 1066
ALLGEMEINE HINWEISE
deutsch
ALLGEMEINE
HINWEISE
Darstellungsmittel ............................................................................................................................................................................................................................... 40
Bestimmungsgemäße Verwendung .................................................................................. 40
Sicherheitshinweise ....................................................................................................................................................................................................................... 40
Lieferumfang ............................................................................................................................................................................................................................................... 41
Garantiebestimmungen ............................................................................................................................................................................................................. 41
Transport und Lagerung ............................................................................................................................................................................................................ 42
Entsorgung .................................................................................................................................................................................................................................................... 42
1066 - 39
ALLGEMEINE HINWEISE
Darstellungsmittel
In dieser Betriebsanleitung werden folgende Darstellungsmittel verwendet:
markiert einen Arbeitsschritt, den Sie ausführen müssen.
ACHTUNG!
HINWEIS
kennzeichnet Hinweise, bei deren Nichtbeachtung Ihre Gesundheit oder die Funktionsfähigkeit des Gerätes gefährdet ist.
kennzeichnet wichtige Zusatzinformationen, Tipps und Empfehlungen.
deutsch
Bestimmungsgemäße Verwendung
• Der Steuerkopf für Prozessventile Typ 1066 dient zur Ansteuerung pneumatisch betätigter Prozessventile und zur Erfassung von deren Schaltzuständen. Andere Einsatzfälle gelten als nicht
bestimmungsgemäß.
• Die in dieser Anleitung, im Datenblatt sowie auf dem Typschild aufgeführten Technischen Daten sind
vor der Inbetriebnahme auf Übereinstimmung zu prüfen und während des Betriebes des Steuerkopfes
einzuhalten.
• Eigenmächtige Umbauten und Veränderungen am Steuerkopf sind aus Sicherheitsgründen verboten.
• Schützen Sie den Steuerkopf vor Eingriffen Unbefugter. Dazu kann der Steuerkopf mit einer Plombe
und / oder einer Schneidschraube an den an Deckel und Gehäuse vorhandenen Bohrungen gesichert
werden.
• Die in dieser Anleitung gegebenen Arbeitsanweisungen und Sicherheitshinweise sind unter allen Umständen zu beachten und einzuhalten. Bei Nichtbeachtung dieser Arbeitsanweisungen und deren Reihenfolge sowie der Sicherheitshinweise oder der Sicherheitskennzeichnung erlischt der Haftungsanspruch.
Sicherheitshinweise
Beachten Sie die Hinweise dieser Betriebsanleitung sowie die Einsatzbedingungen und zulässigen Daten,
die in den Datenblättern und auf dem Typschild des Steuerkopfes für Prozessventile spezifiziert sind,
damit das Gerät einwandfrei funktioniert und lange einsatzfähig bleibt.
• Halten Sie sich bei der Einsatzplanung und dem Betrieb des Gerätes an die allgemeinen Regeln der
Technik!
• Installation und Wartungsarbeiten dürfen nur durch Fachpersonal und mit geeignetem Werkzeug erfolgen!
• Verwenden Sie für erforderliche Reparaturen nur Originalersatzteile und beachten Sie beim Wechseln
dieser Teile die Hinweise dieser Anleitung.
• Beachten Sie die geltenden Unfallverhütungs- und Sicherheitsbestimmungen während des Betriebes
und der Wartung des Gerätes!
• Schalten Sie vor Eingriffen in das System in jedem Fall die Spannung ab!
• Beachten Sie, dass in Systemen, die unter Druck stehen, Leitungen und Ventile nicht gelöst werden
dürfen!
• Treffen Sie geeignete Maßnahmen, um unbeabsichtigtes Betätigen oder unzulässige Beeinträchtigung auszuschließen!
• Gewährleisten Sie nach einer Unterbrechung der elektrischen oder pneumatischen Versorgung einen
definierten und kontrollierten Wiederanlauf des Prozesses!
40 - 1066
ALLGEMEINE HINWEISE
HINWEIS
Der Steuerkopf ist in der Schutzart IP67 ausgelegt. Das setzt einen guten Sitz aller
Dichtungen und die mechanische Unversehrtheit von Gehäuse und Deckel voraus.
• Vermeiden Sie höhere mechanische Belastungen des Steuerkopfes, die zur mechanischen Beeinträchtigung oder Zerstörung des Steuerkopfes führen können. Dazu gehören Begehen, Ablegen schwerer
Gegenstände, harte Schläge, herabfallende harte Gegenstände u.a.
• Vermeiden Sie das Eindringen von Feuchte in den Steuerkopf. Achten Sie insbesondere bei der Montage auf den ordnungsgemäßen Einbau aller Dichtungen, auf fest angezogene Montageschrauben, Kabelverschraubungen und Dichtstopfen. Verwenden Sie nur getrocknete Steuerluft!
HINWEIS
Das Kunststoffgehäuse des Steuerkopfes ist bezüglich seiner mechanischen
Festigkeit nur für den unmittelbaren Anschluss von flexiblen Schläuchen und
Leitungen ausgelegt.
HINWEIS
Reinigungsmittel enthalten oftmals aggressive Bestandteile, die sich in kleinen
Rillen und Vertiefungen am Steuerkopf absetzen können und deren Dauereinwirkung zur Zerstörung auch hochwertiger Kunststoffe führen kann.
• Verwenden Sie zur Reinigung des Steuerkopfes nur gut verträgliche Reinigungsmittel und spülen Sie
nach Einsatz dieser Reinigungsmittel gründlich mit klarem Wasser nach. Die Verträglichkeit des
Reinigungsmittels sollte gegebenenfalls getestet werden.
HINWEIS
Auf der Gehäuseunterseite des Steuerkopfes befindet sich ein Überdruckventil als
Berstschutz für den Fall eines undichten Bauelements im Steuerkopf (Leckagefall).
• Sichern Sie bei der Montage des Steuerkopfes einen Mindestabstand von 5 mm zwischen dem Überdruckventil und dem nächsten Bauteil, damit das Überdruckventil im Leckagefall problemlos auslösen
kann. Anderenfalls könnte bei Leckage im Steuerkopf der Deckel regelrecht „abgesprengt“ werden.
• Bei Nichtbeachtung dieser Hinweise und unzulässigen Eingriffen in das Gerät entfällt jegliche Haftung
unsererseits, ebenso erlischt die Garantie auf Geräte und Zubehörteile!
Lieferumfang
Überzeugen Sie sich unmittelbar nach Erhalt der Sendung, dass der Inhalt nicht beschädigt ist und mit
dem auf dem beigelegten Packzettel angegebenen Lieferumfang übereinstimmt.
Bei Unstimmigkeiten wenden Sie sich bitte umgehend an unser Call-Center:
Bürkert Fluid Control System, Call-Center
Chr.-Bürkert-Str. 13-17, D-74653 Ingelfingen
Tel. 07940 - 10 111 / Fax 07940 - 10 91 448
E-Mail: [email protected]
oder an Ihr Bürkert Vertriebs-Center.
Garantiebestimmungen
Diese Druckschrift enthält keine Garantiezusagen. Wir verweisen hierzu auf unsere allgemeinen Verkaufsund Geschäftsbedingungen. Voraussetzung für die Garantie ist der bestimmungsgemäße Gebrauch des
Gerätes unter Beachtung der spezifizierten Einsatzbedingungen.
ACHTUNG!
Die Gewährleistung erstreckt sich nur auf die Fehlerfreiheit des Steuerkopfes für
Prozessventile. Es wird jedoch keine Haftung übernommen für Folgeschäden jeglicher
Art, die durch Ausfall oder Fehlfunktion des Gerätes entstehen könnten.
1066 - 41
deutsch
• Vermeiden Sie den Anschluss längerer und mechanisch starrer Anschlussteile, da mit solch einer Verlängerung Hebelkräfte erzeugbar wären, mit denen das Gehäuse von Hand zerstört werden könnte.
ALLGEMEINE HINWEISE
Transport und Lagerung
ACHTUNG!
Transportieren und lagern Sie das Gerät nur in der Originalverpackung.
Lagerung in einem trockenen Raum.
Maximale Lagertemperatur +50 °C
deutsch
Entsorgung
ACHTUNG!
42 - 1066
Beachten Sie bei der Entsorgung des Gerätes die nationalen Abfallbeseitigungsvorschriften.
TECHNISCHE DATEN
Aufbau und Funktion des Steuerkopfes ............................................................................................................................................................... 44
Merkmale ............................................................................................................................................................................................................................................................. 44
Betriebsbedingungen ....................................................................................................................................................................................................................... 45
Mechanische Daten ............................................................................................................................................................................................................................ 45
Pneumatische Daten ......................................................................................................................................................................................................................... 46
Elektrische Daten .................................................................................................................................................................................................................................... 46
1066 - 43
deutsch
TECHNISCHE DATEN
TECHNISCHE DATEN
Aufbau und Funktion
Der Steuerkopf Typ 1066 dient zur Ansteuerung von pneumatisch betätigten Prozessventilen unterschiedlicher Hersteller. Er ist je nach Konfiguration mit bis zu drei Magnetventilen (Pilotventilen) zur Prozessventilansteuerung bestückbar und mit maximal drei höhenverstellbaren induktiven Näherungsschaltern
(Sensoren) zur Stellungsrückmeldung ausrüstbar. Einer dieser Sensoren kann auch ein externer Sensor
sein (Anschluss über 3-polige Schraubklemme auf Leiterplatte).
HINWEIS
Beachten Sie bei den vergossenen Feldbusmodulen die Nummerierung der Näherungsschalter auf der Platine bzw. die Kennzeichnung am Gerät, da Abweichungen zur Nummerierung in der untenstehenden Zeichnung möglich sind.
Justierung durch diese Bohrungen
deutsch
Abdeckplatte
Justierung Näherungsschalter 2
Näherungsschalter 2
Justierung
Näherungsschalter 1
Leiterkarte
Säule mit Spindel
Magnetventil 3
Magnetventil 2
Magnetventil 1
Markierung für
Deckelmontage
Gehäuse
Abluft
Elektr. Anschlüsse
Pneumatische Anschlüsse
Näherungsschalter 1
Ventil 1
Ventilflansch
Schnittstelle zum
Prozessventil
Ventil 2
Ventil 3
Druckluft
Merkmale
Mit dem Steuerkopf Typ 1066 existiert neben den für den eher zentralen Einsatz vorgesehenen Ventilinseln eine dezentrale Lösung zur Ansteuerung von Prozessventilen. Die Vorteile dieser Lösung in Form
der kompakten Einheit Steuerkopf mit den Pilotventilen, der Stellungsrückmeldung und optional nutzbaren
Feldbusschnittstellen sind:
Geringer Installationsaufwand.
Einfache Inbetriebnahme.
Kurze Schaltzeiten auf Grund kurzer Wege zwischen Pilotventil und Prozessventil.
Haupteinsatzgebiete:
Lebensmittelindustrie (z. B. Molkereien)
Chemische Industrie
Pharmaindustrie
Kosmetikindustrie
Brauereien
44 - 1066
TECHNISCHE DATEN
Optionen
Anzahl der Pilotventile
Wirkungsweise / Einsatzart
Anzahl d. Pilotventile
Einfach wirkende Stellantriebe
1
Doppelt wirkende Stellantriebe
2
Doppelsitzventile mit integrierter Anlüftung beider Ventilsitze
3
Steuerköpfe ohne Kommunikation
8-polige Schraubklemme für 24 V DC
deutsch
Multipol (8-poliger Rundstecker) für 24 V DC
2 x 6 Schraubklemmen für 24 / 110 / 230 V UC
Steuerköpfe mit Kommunikation
Aktor-Sensor-Interface (ASI)
DeviceNet
ACHTUNG!
Der Anschluss an andere (höhere) Bussysteme ist über handelsübliche Gateways
möglich.
Betriebsbedingungen
Medien
Druckluft, ungeölt; neutrale Gase
Mediumstemperatur
-10 ... + 50 °C
Umgebungstemperatur
-10 ... + 50 °C
Schutzart
IP 67
ACHTUNG!
Der Steuerkopf ist nicht für den Einsatz im Außenbereich geeignet!
Mechanische Daten
Masse
0,5 bis 0,65 kg (je nach Ausführung)
Gehäusematerial
Gehäuse
Deckel
Dichtungsmaterial
NBR
PA / PPE
PSU (transparent, blaugrau)
1066 - 45
TECHNISCHE DATEN
Pneumatische Daten
Leitungsanschlüsse
Druckluft/Abluft
G 1/4
Arbeitsanschlüsse Schlauchanschluss
6/4 mm oder 1/4 Zoll steckbar
Druckbereich
2,5 bis 7 bar
Luftleistung Steuerventil
110 l/min Typ 6510, 40 l/min Typ 6106
Durchfluss: QNn - Wert-Luft (l/min)
Messung bei +20 °C, 6 bar Druck am Ventileingang und 1 bar
Druckdifferenz
deutsch
Schaltzeiten
Typ 6510 / Typ 6106
Öffnen 15 / 23 ms Schließen 10 / 21 ms
Messung am Ventilausgang bei 6 bar und +20 °C
Öffnen:
Druckaufbau 0 bis 90 %
Schließen: Druckabbau 100 bis 10 %
Stellbereich
min. Hub 2 mm
max. Hub 73 mm
Elektrische Daten
Schutzart
IP 67
Betriebsspannungen
ohne Kommunikation
24 V DC ±10 %
24/110/230 V UC ±10 %
mit Kommunikation
entsprechend der ASI- und DeviceNet-Spezifikation
Max. elektrische Verlustleistung
5 W bei 3 x Typ 6510 oder bei 1 x Typ 6106
Anschlüsse
Steuerköpfe
ohne Kommunikation:
Multipol (8-poliger Rundstecker DIN 45326) für 24 V DC
8-polige Schraubklemme für 24 V DC
2 x 6-polige Schraubklemmen für 24/110/230 V UC
Steuerköpfe
mit Kommunikation:
ASI:
Schneid-Klemm-Verbinder und Kabel-Verschraubung
M12-Stecker und Kabelverschraubung
M12-Flanschstecker, 4-polig
DeviceNet:
5-poliger Steckverbinder M12
Magnetventile
Nennleistung
1 W Typ 6510 / 3 W Typ 6106
Betriebsart
Dauerbetrieb (ED 100 %)
Näherungsschalter
Betriebsspannung
8 bis 30 V DC
Ausgangssignal
max. 100 mA, kurzschlussfest
Mikroschalter
46 - 1066
potentialfrei, max. 1 A Schaltstrom
MONTAGE
Montage des Steuerkopfes ....................................................................................................................................................................................................... 48
Flanschadapter ...................................................................................................................................................................................................................................... 48
Montageablauf ......................................................................................................................................................................................................................................... 49
1066 - 47
deutsch
MONTAGE
MONTAGE
Montage des Steuerkopfes
Flanschadapter
Zur Montage des Steuerkopfes Typ 1066 an einem Prozessventil verschiedener Hersteller benötigen Sie
einen Adapter mit kundenspezifischem Flansch (Flanschadapter) und einen kundenspezifischen Schaltknopf (siehe auch Datenblatt). Das Anschlussteil für den Steuerkopf ist bürkertspezifisch. Das Flanschteil
muss der Bauform des Prozessventiles angepasst werden. Die untenstehende Zeichnung stellt ein
Applikationsbeispiel für ein spezielles Prozessventil dar. Die Einbaulage des Steuerkopfes ist beliebig,
vorzugsweise mit Deckel nach oben.
Halten Sie bei Eigenfertigung des Flanschadapters folgende Parameter exakt ein
Abmessungen
Anzahl der Dichtstellen
deutsch
Abmessungen für die O-Ringe
Maßtoleranzen
Materialangaben
Hauptabmessungen für Flanschadapter
Zylinderförmiges Adapterteil
Kundenspezifisches Flanschteil
HINWEIS
Bitte fordern Sie zur Eigenfertigung des Flanschadapters detaillierte Maßzeichnungen an!
ACHTUNG!
Zur Montage des Flanschadapters ist eine Zentrierung notwendig. Die maximal
zulässige Achsabweichung beträgt ±0,1 mm. Bei Überschreiten dieser Toleranz besteht
die Gefahr, dass die Näherungsschalter nicht ordnungsgemäß funktionieren.
Verwenden Sie eine spezielle Montagehülse zur Vermeidung dieser Toleranzüberschreitung.
48 - 1066
MONTAGE
Montageablauf
1
Flanschadapter auf das
Prozessventil montieren/
Schaltknopf auf Kolbenstange
befestigen (kundenspezifisch)
2
Deckel vom Steuerkopf abnehmen
Lösen Sie die Sicherheitsschrauben
Drehen Sie den Deckel bis zum Anschlag
nach links
Zentrierung beachten
deutsch
Ziehen Sie den Deckel nach oben ab
3
Steuerkopf auf den
Flanschadapter aufstecken
Positionieren Sie den Steuerkopf
(Steuerkopf ist um 360° frei drehbar)
4
Installation der pneumatischen
Anschlüsse
Siehe Pneumatische Installation,
(Kapitel Installation Inbetriebnahme)
Sichern Sie den Steuerkopf mittels der
zwei seitlich angeordneten Schrauben
1066 - 49
MONTAGE
5
Installation der elektrischen
Anschlüsse
7
Deckel aufsetzen
Prüfen Sie den Sitz des
Deckel-O-Rings bzw. ziehen sie einen
neuen O-Ring auf den Deckelbund
Steuerköpfe ohne und
mit Kommunikation
(siehe Kapitel elektrische Installation)
HINWEIS
deutsch
Am Gehäuse existieren über den
Umfang verteilt 4 Nasen, die den
O-Ring beim Abziehen des Deckels
zurückhalten.
Achten Sie darauf, dass sich der neu
eingesetzte O-Ring korrekt unter den
Nasen befindet und durchgängig
unverdrillt am Gehäuse anliegt.
Stecken Sie den Deckel auf
Drehen Sie den Deckel bis zum
Anschlag nach rechts
6
Justieren
der Näherungsschalter
Drehen Sie mit einem Schraubendreher an der
Justierschraube (Spindel) bis die optimale Lage
der Näherungsschalter eingestellt ist.
Als Justierhilfe dient die am Näherungsschalter
angebrachte LED, sie leuchtet beim Erreichen
des betreffenden Schwellwertes auf.
Gehäuse mit
Deckelbund
und O-Ring-Sitz
der Endlagen-Mikroschalter
Bei dem Einsatz von Mikroschaltern wird aus
Kostengründen auf LEDs verzichtet.
Lageeinstellung wie bei den Näherungsschaltern
Nutzen Sie als Justierhilfe das
Schaltgeräusch des
Mikroschalters (sehr leise)
oder eine externe elektrische
Durchgangsprüfung
LED
LED
HINWEIS
Sichern Sie den Deckel gegebenenfalls
gegen Fremdeingriffe durch Einführen
einer Plombe und / oder einer Schneidschraube in die an Deckel und Gehäuse
vorhandenen Bohrungen.
50 - 1066
INSTALLATION INBETRIEBNAHME
deutsch
INSTALLATION
INBETRIEBNAHME
Pneumatische Installation .......................................................................................................................................................................................................... 52
Anschlussbelegung am Steuerkopf ............................................................................................................................................................................. 52
Elektrische Installation .................................................................................................................................................................................................................... 53
Steuerköpfe ohne Kommunikation .................................................................................................................................................................................
8-polige Schraubklemme für 24 V DC .............................................................................................................................................................
Multipol (8-poliger Rundstecker nach DIN 45326) für 24 V DC .....................................................................................
2 x 6-polige Schraubklemme für 24 / 110 / 230 V UC .................................................................................................................
53
53
54
54
Steuerköpfe mit Kommunikation .......................................................................................................................................................................................
AS-Interface ......................................................................................................................................................................................................................................
Handhabung der Flachkabelklemme ........................................................................................................................................................
Technische Daten für ASI-Leiterplatten ................................................................................................................................................
Programmierdaten ............................................................................................................................................................................................................
LED-Zustandanzeige ASI .......................................................................................................................................................................................
Bitbelegung ................................................................................................................................................................................................................................
Anzahl anschließbarer Steuerköpfe und maximale Länge der Busleitung
(ASI-Standardfall und ASI-Version mit erweitertem Adressbereich) ..............................................................
55
55
56
56
56
57
57
DeviceNet ...........................................................................................................................................................................................................................................
Begriffserklärung ................................................................................................................................................................................................................
Technische Daten .............................................................................................................................................................................................................
Maximale Leitungslängen ........................................................................................................................................................................................
Sicherheitseinstellung bei Ausfall des Busses ............................................................................................................................
Elektrischer Anschluss ..............................................................................................................................................................................................
Konfigurieren ............................................................................................................................................................................................................................
LED-Zustandsanzeige ................................................................................................................................................................................................
60
60
60
60
61
61
62
64
57
1066 - 51
INSTALLATION INBETRIEBNAHME
Pneumatische Installation
Anschlussbelegung am Steuerkopf
deutsch
G 1/4
G 1/4
Druckluft
Abluft
Steckanschlüsse
für Schlauch 6/4 mm oder 1/4"
steckbar
für Ventile V1, V2 und V3
ACHTUNG!
• Verwenden Sie nur kalibrierte Schlauchleitungen mit 6 mm oder ¼ " Außendurchmesser.
• Schneiden Sie diese nur mit einem Schlauchschneider ab (Beschädigungsgefahr)
• Dimensionieren Sie die Schlauchlänge so, dass der Steuerkopf mit der Verschraubung
abgenommen werden kann.
• Achten Sie auf eine spannungsfreie, zum Steckverbinder gut fluchtende Schlauchführung, da verspannt (schräg) eingesteckte Schläuche zu Undichtigkeiten am Steckanschluss führen können.
52 - 1066
INSTALLATION INBETRIEBNAHME
Elektrische Installation
Steuerköpfe ohne Kommunikation
Der elektrische Anschluss von Steuerköpfen ohne Kommunikation erfolgt in verschiedenen Varianten.
Bei der Ausführung für 24 V DC wird der Zustand je Ventil einheitlich mit je einer LED angezeigt.
8-polige Schraubklemme für 24 V DC
(im Gehäuseinneren, Kabeldurchführung mit Kabelverschraubung )
deutsch
LED Zustandsanzeige 24 V DC
Ground
Schaltsignal des externen Näherungsschalters S3
Stromversorgung
Belegungsplan für die 8-polige Schraubklemme
V = Ventil
S = Näherungsschalter (Sensor)
für Näherungsschalter
HINWEIS
Die Ausgänge der Näherungsschalter sind pnp-plusschaltend und kurzschlussfest.
1066 - 53
INSTALLATION INBETRIEBNAHME
Multipol (8-poliger Rundstecker nach DIN 45326) für 24 V DC
Blick auf den im Kopf eingebauten Stecker, von vorn auf die Stifte gesehen, die Lötanschlüsse liegen
dahinter.
Ausgänge der Näherungsschalter
pnp-plusschaltend, kurzschlussfest
deutsch
Näherungsschalter 3
Näherungsschalter 2
Näherungsschalter 1
24 V DC
(Betriebsspannung für Näherungsschalter)
GND
(gemeinsame Masse für Ventile)
Ventil 3
Ventil 1
Ventil 2
HINWEIS
Die Ausgänge der Näherungsschalter sind pnp-plusschaltend und kurzschlussfest.
2 x 6-polige Schraubklemme für 24 / 110 / 230 V UC
Die Ausführung 2 x 6-polige Schraubklemme umfasst:
Kabeldurchführung mit Kabelverschraubung
Max. 1 Ventil (Typ 6106, DN1,2)
2 mechan. Mikro-Endschalter mit potentialfreien Kontakten zur Stellungsrückmeldung
(Keine LED-Zustandsanzeige)
Leiterkarte mit 2 x 6-poligen Schraubklemmen für 24 / 110 / 230 V UC
54 - 1066
INSTALLATION INBETRIEBNAHME
Steuerköpfe mit Kommunikation
AS-Interface
ASI (Aktor-Sensor-Interface) ist ein Feldbussystem, das zur Vernetzung von hauptsächlich binären Sensoren und Aktoren (Slaves) mit einer übergeordneten Steuerung (Master) dient.
Busleitung
Ungeschirmte Zweidrahtleitung (ASI-Leitung als ASI-Formkabel), auf der sowohl Informationen (Daten) als
auch Energie (Spannungsversorgung der Aktoren und Sensoren) übertragen werden.
Netztopologie
In breiten Grenzen frei wählbar, d. h. es sind Stern,- Baum- und Liniennetze möglich. Weitere Details finden
sie in der ASI Spezifikation.
HINWEIS
Daten für das Rundkabel
Das unmittelbar zum Steuerkopf führende Rundkabel weicht in seinen elektrischen Werten
geringfügig vom ASI-Standard ab. Bei der Berechnung der max. zulässigen Leitungslänge
nach ASI-Spezifikation sollte es deshalb um den Faktor 1,5 länger als tatsächlich angesetzt werden.
ASI-Länge = 1,5 x reale Länge
1. Flachkabelklemme am 1 m Rundkabel
ASI-Standardanschluss:
2. 4-poliger M12-Stecker am 2 m Rundkabel
ASI-Sonderanschluss 1: (auf Anfrage)
4-poliger M12-Stecker
für ASI-Anschluss
3. 4-poliger M12-Stecker am Steuerkopf, ohne Kabel
ASI-Sonderanschluss 2: (auf Anfrage)
PIN-Belegung ASI
1 = ASI+
2 = nicht belegt
3 = ASI4 = nicht belegt
1066 - 55
deutsch
Busanschlussvarianten
INSTALLATION INBETRIEBNAHME
Handhabung der Flachkabelklemme
Mit der Flachkabelklemme für ASI-Formkabel wird die Kontaktierung in Form einer Durchdringungtechnik
realisiert. Der elektrische Anschluss erfolgt dabei ohne Schneiden und ohne Abisolieren des Kabels.
HINWEIS
Verschließen Sie die zweite Kabelöffnung mit einer Kabeldichtung, wenn das Flachkabel in
der Klemme endet (letzter Anschluss).
Verbindung der Flachkabelklemme mit Leitungsstecker und angespritztem Kabel mit einem ASI-Flachkabel
Lösen Sie die beiden Schrauben der Flachkabelklemme.
Trennen Sie das Oberteil der Flachkabelklemme vom Unterteil.
Legen Sie das ASI-Flachkabel lagegerecht ein.
deutsch
Falls das Flachkabel hier endet:
Setzen Sie die Flachkabeldichtung lagegerecht in die Öffnung ein.
Plazieren Sie das Oberteil der Flachkabelklemme auf das Unterteil.
Ziehen Sie die Schrauben fest an.
Fertig!
Der elektrische Anschluss zum ASI-Kabel ist hergestellt.
Flachkabeldichtung für Flachkabelklemme
Technische Daten für ASI-Leiterplatten
Eingänge
3 Sensoren S1 - S3, pnp plusschaltend
Versorgung über AS-Interface (24 V +20 % / -10 %), kurzschlussfest,
strombegrenzt auf 60 mA
Schaltpegel High-Signal ≥ 10 V
Begrenzung Eingangsstrom ≤ 6,5 mA, Eingangsstrom Low-Signal ≤ 1,5 mA
Ausgänge
3 Ventile V1 - V3
max. 3 x 1 W
Leistungsreduzierung nach ca. 100 ms, mit integrierter Watch-Dog-Funktion
Programmierdaten
I/O-Code
7 hex (4 Ausgänge und 4 Eingänge)
ID-Code
F hex (Bitbelegung siehe nachstehende Tabelle); erweiterte ID-Codes 1 und 2 = F hex
Profil
7.F
56 - 1066
INSTALLATION INBETRIEBNAHME
LED-Zustandsanzeige ASI
SichtbarerTeil der ASI-Leiterkarte
Statusanzeige Bus
LED grün rot
LEDs für Ventile
V1 - V3
Spannungsversorgung
eines externen Näherungsschalters (aus dem ASIStrang)
Schaltsignal eines
externen Näherungsschalters
Übersicht LED-Zustandsanzeige ASI
LED
grün
dunkel
Bus Status
rot
dunkel POWER OFF
dunkel
hell
kein Datenverkehr (abgelaufener Watchdog bei Slaveadresse ungleich 0)
hell
dunkel
ok
blinkt
blinkt
Peripheriefehler (Überlast in Sensorversorgung)
blinkt
hell
dunkel
blinkt
Slaveadresse gleich 0
RESET
Bitbelegung
Datenbit
Parameterbit
D3
Ausgang
LED gelb
Eingang
nicht belegt
P3
D2
D1
D0
Ausgang
Ausgang
Ausgang
Ventil 3
Ventil 2
Ventil 1
Eingang
Eingang
Eingang
Näherungsschalter 3 Näherungsschalter 2 Näherungsschalter 1
P2
P1
P0
nicht belegt
1066 - 57
deutsch
LEDs für Näherungsschalter S1 - S3
INSTALLATION INBETRIEBNAHME
Anzahl anschließbarer Steuerköpfe und maximale Länge der
Busleitung
I. ASI-Standardfall
deutsch
Im Standardfall können maximal 31 Steuerköpfe an eine Busleitung angeschlossen werden.
Das Buskabel darf nach ASI-Spezifikation maximal 100 m lang sein.
HINWEIS
Bei Einsatz anderer Kabelquerschnitte verändern sich auch die maximalen Kabellängen
(siehe ASI-Spezifikation).
Prozessdaten
Datenbits für Eingänge (Sensoren bzw. Näherungsschalter):
Bit-Nr. Sensor
Wertezuordnung
Bit 0
S1 (Sensor 1)
0 Näherungsschalter 1 OFF
1 Näherungsschalter 1 ON
Bit 1
S2 (Sensor 2)
0 Näherungsschalter 2 OFF
1 Näherungsschalter 2 ON
Bit 2
S3 (Anschlussklemme für zusätzlichen Näherungsschalter)
0 Näherungsschalter 3 OFF
1 Näherungsschalter 3 ON
Bit 3
nicht benutzt
immer 0
Datenbits für Ausgänge (Aktoren bzw. Ventile):
Bit-Nr. Ventil
Wertezuordnung
Bit 0
V1 (Ventil 1)
0 Ventil 1 OFF
1 Ventil 1 ON
Bit 1
V2 (Ventil 2)
0 Ventil 2 OFF
1 Ventil 2 ON
Bit 2
V3 (Ventil 3)
0 Ventil 3 OFF
1 Ventil 3 ON
Bit 3
nicht benutzt
immer 0
Parameterbits: nicht belegt
58 - 1066
INSTALLATION INBETRIEBNAHME
II. ASI-Version mit erweitertem Adressbereich (A/B-Slave)
Bei der ASI-Version mit erweitertem Adressbereich (A/B-Slave) kann 1 Master mit 62 Slaves kommunizieren.
Das Buskabel darf mit erweitertem Adressbereich nach ASI-Spezifikation wie im Standardfall max. 100 m
lang sein.
HINWEIS
Bei Einsatz anderer Kabelquerschnitte verändern sich auch die maximalen Kabellängen
(siehe ASI-Spezifikation).
Besonderheiten der Variante A/B-Slave gegenüber dem Standardfall
• 62 Slaves je Master
• Einschränkungen bei der Stromversorgung wegen des Nennstroms der Induktivitäten:
Gleichzeitig können nur 2 Magnetventile geschaltet werden; das dritte Magnetventil kann erst nach
Ablauf von 100 ms zugeschaltet werden.
ACHTUNG!
Wird ein A/B-Slave-Gerät als Ersatz für ein Standardgerät verwendet, kommt es wegen
der unterschiedlichen ID-Codes zu einem Konfigurationsfehler!
Unterschiede in der Adressierung der ASI-Varianten
Parameter
ASI-Standard-Gerät
ASI-Gerät für A/B-Slave-Adressierung
Anzahl Slaves je Master
31
62
I/O-Code
7 hex
7 hex
ID-Code
F hex
A hex
Erweitert ID1
F hex
7 hex
Erweitert ID2
F hex
E hex
Profil
S-7.F.F
S-7.A.E
1066 - 59
deutsch
• Die gelbe LED OUT 4 auf der ASI-Leiterkarte ist nicht mehr ansteuerbar, da das bislang benutzte vierte Ausgangsbit jetzt für die Adressierung benutzt wird.
INSTALLATION INBETRIEBNAHME
DeviceNet
Begriffserklärung
• DeviceNet ist ein Feldbussystem, das auf dem CAN-Protokoll (Controller Area Network) basiert. Es
ermöglicht die Vernetzung von Aktoren und Sensoren (Slaves) mit übergeordneten Steuereinrichtungen
(Master).
• Im DeviceNet ist der Steuerkopf Typ 1066 ein Slave-Gerät nach dem in der DeviceNet-Spezifikation
festgelegten Predefined Master/Slave Connection Set. Als I/O-Verbindungsvarianten werden
Polled I/O, Bit Strobed I/O und Change of State (COS) unterstützt.
deutsch
• Beim DeviceNet unterscheidet man zwischen zyklisch oder ereignisgesteuert übertragenen Prozessnachrichten hoher Priorität (I/O Messages) und azyklischen Managementnachrichten niederer Priorität
(Explicit Messages).
• Der Protokollablauf entspricht der DeviceNet-Spezifikation Release 2.0
HINWEIS
Bei der DeviceNet-Ausführung wird eine Diskette mit Konfigurationsdateien mitgeliefert (BUE1066.EDS und BUE1066.ICO). Diese Dateien können Sie auch über
das Internet beziehen.
Technische Daten
Baudrate
125 kBit/s, 250 kBit/s, 500 kBit/s (über DIP-Schalter);
Werkseinstellung: 125 kBit/s
Adresse
0 ... 63 (über DIP-Schalter);
Werkseinstellung: 63
Prozessdaten
1 statisches Input-Assembly
(Input: vom Steuerkopf 1066 zum DeviceNet-Master/Scanner)
1 statisches Output-Assembly
Eingänge
3 Sensoren (Näherungsschalter ) S1 - S3, pnp-plusschaltend,
Versorgung über DeviceNet-Strang (11 bis 25 V DC)
Schaltpegel High-Signal ≥ 5 V
Schaltpegel Low-Signal ≤ 1,5 V
Dateien
BUE1066.EDS
BUE1066.ICO
Diese Dateien können Sie auch aus dem Internet beziehen.
Maximale Leitungslängen
Maximale Gesamtleitungslänge (Summe von Haupt- und Stichleitungen) eines Netzwerks in Abhängigkeit
von der Baudrate:
Gesamtleitungslänge nach DeviceNet-Spezifikation
Baudrate
1)
Maximale Gesamtleitungslänge bei Verwendung des Thick Cables
nach DeviceNet-Spezifikation 1)
125 kBaud
500 m
250 kBaud
250 m
500 kBaud
100 m
Nach DeviceNet-Spezifikation. Bei Verwendung eines anderen Kabeltyps gelten geringere
Maximalwerte (s. DeviceNet-Spezifikation)
60 - 1066
INSTALLATION INBETRIEBNAHME
Stichleitungslänge (Drop Lines)
Baudrate
Maximallänge einer Stichleitung
Max. kumulierte Länge im Netzwerk
125 kBaud
6m
156 m
250 kBaud
6m
78 m
500 kBaud
6m
39 m
Sicherheitseinstellung bei Ausfall des Busses
Elektrischer Anschluss
Die Busleitung ist ein 4-adriges Kabel mit zusätzlichem Schirm, das der DeviceNet-Spezifikation entsprechen muss und über das sowohl Informationen (Daten) als auch Energie (Spannungsversorgung für
leistungsarme Aktoren und Sensoren) übertragen werden.
Bus-Anschluss (Rundstecker M12, 5polig)
Stecker von vorn auf die Stifte gesehen (nicht auf die Lötanschlüsse)!
Der Steuerkopf Typ 1066 besitzt einen 5-poligen Micro-style-Rundstecker M12.
Die nachstehende Belegung entspricht der DeviceNet-Spezifikation.
Pin
1
2
3
4
5
Signal
Schirm
V+
VCAN_H
CAN_L
Farbe
nicht belegt
rot
schwarz
weiß
blau
Abschlussbeschaltung für DeviceNet – Systeme
Bei der Installation eines DeviceNet–Systems ist auf die korrekte Abschlussbeschaltung der Datenleitungen zu achten. Diese Beschaltung vermeidet die Entstehung von Störungen durch Signalreflexionen
auf den Datenleitungen. Die Hauptleitung ist dazu an beiden Enden, wie gezeigt, mit Widerständen von je
120 Ω und ¼ W Verlustleistung abzuschließen.
1066 - 61
deutsch
Bei Busausfall wird die Stellung vom letzten Datenbyte der Busausgänge beibehalten, solange Spannung
anliegt.
INSTALLATION INBETRIEBNAHME
Netztopologie eines DeviceNet-Systems
deutsch
Linie mit einer Hauptleitung (Trunk Line) und mehreren Stichleitungen (Drop Lines).
Haupt- und Stichleitungen bestehen aus identischem Material (siehe Skizze).
ACHTUNG!
Versehen Sie zur Vermeidung von Reflexionen die Hauptleitung an beiden Enden mit
Abschlusswiderständen (120 Ω).
Konfigurieren
DIP-Schalter
Zur Konfigurierung sind 8 DIP-Schalter vorhanden:
• DIP-Schalter 1 bis 6 für die DeviceNet-Adresse.
• DIP-Schalter 7 und 8 für die Baudrate.
HINWEIS
Vor der Inbetriebnahme der Steuerung mit DeviceNet muss die EDS-Datei in das
DeviceNet-Konfigurationstool eingelesen werden. Die erforderlichen Dateien
(BUE1066.EDS und BUE1066.ICO) werden per Diskette oder über Internet bereitgestellt.
Einstellungen der DeviceNet-Adresse
MAC ID – Medium Access Control Identifier:
[Beispiel für Wertezuordnung am Schalter DIP1:
DIP 1=off=0 / DIP 1=on=1 / MAC ID=DIP 1*20+DIP 2*21+...+DIP 6*25]
DIP 1
[2 0 =1]
DIP 2
[2 1 =2]
DIP 3
[2 2 =4]
off
off
off
off
off
off
0
on
off
off
off
off
off
1
off
on
off
off
off
off
2
...
...
...
...
...
...
...
off
on
on
on
on
on
62
on
on
on
on
on
on
63
62 - 1066
DIP 4 DIP 5 DIP 6
[2 3 =8] [2 4 =16] [2 5 =32]
MAC
ID
INSTALLATION INBETRIEBNAHME
Einstellen der Baudrate
Anpassen des Steuerkopfes an die Baudrate des Netzwerkes.
DIP 7
DIP 8
Baudrate
off
off
125 kBaud
on
off
250 kBaud
off
on
500 kBaud
on
on
nicht erlaubt
Eine Änderung von Einstellungen durch Betätigen der DIP-Schalter wird erst nach
einem Neustart des Gerätes wirksam.
Ein Neustart kann durch kurzzeitiges Ab- und anschließendes Anklemmen des Steuerkopfes vom bzw. an das Netz oder durch das Senden einer entsprechenden Reset
Message erfolgen. Möglich ist auch das Aus-/Anschalten der Netzwerkversorgung.
Konfiguration der Prozessdaten
Zur Übertragung von Prozessdaten über eine I/O-Verbindung stehen 1 statisches Input- und 1 statisches
Output-Assembly zur Auswahl. In diesen Assemblies sind jeweils die Bitwerte der Ein- bzw. Ausgänge in einem Objekt zusammengefasst, um als Prozessdaten gemeinsam über eine I/O-Verbindung übertragen werden zu können.
Auf die Prozessdaten kann entweder zyklisch in den Verbindungsvarianten „Polled I/O“ und „Bitstrobed I/O“,
mit „Change of state“, wenn sich Eingangswerte ändern, oder azyklisch über Explicit Messages zugegriffen
werden.
Der Zugriffspfad für den azyklischen Zugriff ist:
class
instance
attribute
4
1
3
Mit dem Dienst Get_Attribute_Single kann azyklisch lesend auf die Eingangsdaten und mit dem Dienst
Set_Attribute_Single azyklisch schreibend auf die Ausgangsdaten zugegriffen werden.
1 Datenbyte für Eingänge (Sensoren bzw. Näherungsschalter):
Bit
Sensor
Wertezuordnung
Bit 0
S1 Näherungsschalter 1)
0 Näherungsschalter 1 OFF
1 Näherungsschalter 1 ON
Bit 1
S2 (Näherungsschalter 2)
0 Näherungsschalter 2 OFF
1 Näherungsschalter 2 ON
Bit 2
S3 (Anschlussklemme für zusätzlichen Näherungsschalter)
0 Näherungsschalter 3 OFF
1 Näherungsschalter 3 ON
Bit 3 ... Bit 7 nicht benutzt
0 immer
1 Datenbyte für Ausgänge (Aktoren bzw. Ventile):
Bit
Ventil
Wertezuordnung
Bit 0
V1 (Ventil 1)
0 Ventil 1 OFF
1 Ventil 1 ON
Bit 1
V2 (Ventil 2)
0 Ventil 2 OFF
1 Ventil 2 ON
Bit 2
V3 ( Ventil 3)
0 Ventil 3 OFF
1 Ventil 3 ON
Bit 3 ... Bit 7 nicht benutzt
0 immer
1066 - 63
deutsch
ACHTUNG!
INSTALLATION INBETRIEBNAHME
LED-Zustandsanzeige
Der Gerätezustand wird von 2 LEDs ("Power" und "MNS") angezeigt.
Art / Farbe
Funktion
POWER
einfarbig grün
LED leuchtet: Gerät ist mit Spannung versorgt
MNS
zweifarbig
rot / grün
Entspricht MNS-LED laut DeviceNet Spezifikation
(MNS-Module Network Status)
deutsch
Name der LED
Zustände der MNS-LED
Nach dem Anlegen von Spannung (Anschluss der Netzwerkleitung) wird folgender Funktionstest der
zweifarbigen MNS-LED ausgeführt:
• LED leuchtet kurzzeitig grün (ca. ¼ s).
• LED leuchtet kurzzeitig rot (ca. ¼ s).
• LED dunkel.
Nach Abschluss des Funktionstestes können durch die MNS-LED die in der folgenden Tabelle beschriebenen Gerätezustände angezeigt werden.
LEDGerätezustand
Zustand
Dunkel
Keine Spannung /
nicht online
Erläuterung / Problembeseitigung
- Gerät ist nicht mit Spannung versorgt.
- Gerät hat Duplicate MAC-ID Test noch nicht beendet (Test dauert ca. 2 s).
- Weitere Geräte anschließen, falls Gerät einziger Netzwerkteilnehmer ist.
- Austausch des Gerätes.
Online, Verbindung
- Normaler Betriebszustand mit aufgebauter Verbindung zum Master.
zum Master existiert
Grün
Online, keine Ver- Normaler Betriebszustand ohne aufgebaute Verbindung zum Master.
blinkend bindung zum Master
- Eine oder mehrere I/O-Verbindungen befinden sich im Time-Out-Zustand.
Rot
Verbindungs- Neuer Verbindungsaufbau durch Master, um sicherzustellen, dass I/Oblinkend Time-Out
Daten zyklisch übertragen werden.
- Anderes Gerät mit derselben MAC-ID im Netzwerk > MAC-ID ändern und
neu starten.
Rot
Kritischer Fehler
- BUS OFF infolge von Kommunikationsproblemen.
- Baudrate überprüfen; Austausch des Gerätes, falls nicht erfolgreich.
Grün
64 - 1066
WARTUNG REINIGUNG
Wartung / Reinigung ........................................................................................................................................................................................................................... 66
1066 - 65
deutsch
WARTUNG / REINIGUNG
WARTUNG / REINIGUNG
Wartung /Reinigung
Der Steuerkopf Typ 1066 arbeitet bei sachgemäßem Einsatz wartungs- und störungsfrei. Eine Reparatur
darf nur von autorisiertem Personal mit geeignetem Werkzeug vorgenommen werden.
Die in Anlagen betriebenen Steuerköpfe können durch austretendes Medium und andere Einflüsse verschmutzt werden. In diesem Fall müssen die Anlagen mit geeigneten Reinigungsmitteln gesäubert und
anschließend gründlich mit Wasser gespült werden.
deutsch
ACHTUNG!
66 - 1066
Vor der Verwendung von Reinigungsmitteln sollten Sie unbedingt die Verträglichkeit
von Gehäuse- und Deckelwerkstoff mit diesen Mitteln prüfen. Spülen Sie bei Verschmutzung oder nach Anwendung von säure- oder laugenhaltigen Reinigungsmitteln den
Steuerkopf bitte gründlich mit klarem Wasser ab. Achten Sie dabei besonders auf saubere, entleerte Bohrungen und Vertiefungen.
REPARATUR
deutsch
REPARATUR
Reparaturen .................................................................................................................................................................................................................................................... 68
Deckel abnehmen bzw. aufstecken ............................................................................................................................................................................. 68
Wechsel der Leiterkarte ............................................................................................................................................................................................................. 69
Wechsel der Ventilgruppe ......................................................................................................................................................................................................... 69
Wechsel des Ventils bei Versionen für 24/110/230 V UC ohne Kommunikation ................................................. 70
Wechsel Näherungsschalter / Mikroschalter .................................................................................................................................................. 71
Ersatzteile ........................................................................................................................................................................................................................................................... 72
Serviceanschriften ................................................................................................................................................................................................................................. 72
1066 - 67
REPARATUR
Reparaturen
Bei Ausfall bestimmter Bauelemente oder Baugruppen kann der Steuerkopf repariert werden.
ACHTUNG!
• Verwenden Sie zur Reparatur bitte nur Originalersatzteile (siehe Ersatzteiltabelle).
• Reparaturen dürfen nur von autorisiertem Fachpersonal mit geeignetem Werkzeug vorgenommen werden.
• Beachten Sie die geltenden Unfallverhütungs- und Sicherheitsbestimmungen.
• Schalten Sie das Gerät vor Eingriffen spannungsfrei und drucklos.
deutsch
• Prüfen Sie die Parameter der Ersatzteile auf ihre Übereinstimmung mit dem Typschild
des zu reparierenden Steuerkopfes.
Deckel abnehmen bzw. aufstecken
Deckel vom Steuerkopf abnehmen
Lösen Sie die Sicherheitsschrauben
Drehen Sie den Deckel bis zum Anschlag
nach links
Ziehen Sie den Deckel nach oben ab
Deckel aufsetzen
Prüfen Sie den Sitz des Deckel-O-Rings
bzw. ziehen Sie einen neuen O-Ring auf
den Deckelbund
HINWEIS
Am Gehäuse existieren über den
Umfang verteilt 4 Nasen, die den
O-Ring beim Abziehen des Deckels
zurückhalten.
Achten Sie darauf, dass sich der neu
eingesetzte O-Ring korrekt unter den
Nasen befindet und durchgängig
unverdrillt am Gehäuse anliegt.
Stecken Sie den Deckel auf
Drehen Sie den Deckel bis zum Anschlag
nach rechts
HINWEIS
Sichern Sie den Deckel gegebenenfalls gegen Fremdeingriffe durch Einführen einer Plombe und/oder einer
Schneidschraube in die an Deckel und
Gehäuse vorhandenen Bohrungen.
Gehäuse mit
Deckelbund und
O-Ring-Sitz
68 - 1066
REPARATUR
Wechsel der Leiterkarte
Gehen Sie wie folgt vor
Deckel abnehmen.
Elektrischen Anschlüsse markieren, damit nach dem Lösen
eine fehlerfreie Zuordnung möglich ist.
Alle elektrischen Anschlüsse auf der Leiterkarte lösen
(Steck- und/oder Schraubverbindungen).
4 Schrauben lösen (Torx 10), mit welchen die Deckplatte befestigt ist.
Platine
für 24 V DC
ohne Kommunikation
Deckplatte abnehmen.
Alte Leiterkarte herausnehmen (keine Verschraubung).
ACHTUNG!
Beachten Sie den richtigen Sitz der Karte in den
Gehäusenasen!
Deckplatte aufsetzen.
ACHTUNG!
deutsch
Neue Leiterkarte einsetzen.
Ersatzmodul
ASI, vergossen
Achten Sie auf den richtigen Sitz der Leiterkarte und
Schraubenköpfe in den Nasen bzw. den Aussparungen
der Deckplatte!
Deckplatte festschrauben (Torx 10; Drehmoment 0,7 Nm).
Elektrische Anschlüsse gemäß den vorgenommenen Markierungen
wieder herstellen.
Deckel montiern.
Ersatzmodul
DeviceNet, vergossen
Wechsel der Ventilgruppe
Die Ventilgruppe besteht aus einer Anschlussplatte mit 1, 2 oder 3
aufgeflanschten Ventilen vom Typ 6510 und den O-Ringen für den
Fluidik-Flansch zum Gehäuse.
HINWEIS
Bei den Versionen 24 V DC ohne Kommunikation,
ASI und DeviceNet ist nur der Wechsel der gesamten Ventilgruppe zulässig.
Gehen Sie wie folgt vor
Deckel abnehmen.
Elektrischen Anschlüsse markieren, damit nach dem Lösen
von der Leiterkarte eine fehlerfreie Zuordnung möglich ist.
Alle elektrischen Anschlüsse der Ventile lösen
(Steckverbindungen).
2 Schrauben lösen (Torx 20), mit welchen die Ventilgruppe
befestigt ist.
Ventilgruppe inkl. O-Ringen herausnehmen.
Einsetzen der neue Ventilgruppe inkl. O-Ringen .
Ventilgruppe festschrauben (Torx 20; Drehmoment 1,5 Nm).
Elektrische Anschlüsse gemäß den vorgenommenen Markierungen
wieder herstellen.
Deckel montieren, dabei auf den richtigen Sitz des O-Rings achten.
Ventilgruppe, wahlweise
mit 1, 2 oder 3 Ventilen
- 24 V DC ohne Kommunikaton
- ASI (24 V DC)
- DeviceNet (9 V DC)
1066 - 69
REPARATUR
Wechsel des Ventils bei Versionen für 24 / 110 / 230 V UC ohne
Kommunikation
Bei der Version für 24/110/230 V UC ohne Kommunikation wird unter Beachtung der Betriebsspannung nur
das Ventil Typ 6106 ausgetauscht. Die Ventilanschlussplatte verbleibt im Steuerkopf.
Gehen Sie wie folgt vor:
Deckel abnehmen.
Schraube an der Gerätesteckdose lösen.
Gerätesteckdose vom Ventil abziehen.
Einbaulage der Steckerfahnen und der Handbetätigung notieren.
2 Befestigungsschrauben am Ventil lösen.
deutsch
Spulenkörper abnehmen.
2 Befestigungsschrauben am Ventilgehäuse lösen.
Ventilgehäuse inkl. O-Ringen abnehmen.
Neues Ventilgehäuse inkl. O-Ringen seitenrichtig aufsetzen
(Handbetätigung nach links).
Schrauben abwechselnd, gleichmäßig anziehen
(Drehmoment 0,5 Nm).
Neuen Spulenkörper seitenrichtig aufsetzen
(lange Steckerfahne nach links).
Spulenschrauben abwechselnd, gleichmäßig anziehen
(Drehmoment 0,15 Nm).
Gerätesteckdose mit Flachdichtung auf das Ventil stecken.
Steckdose mit einer Schraube sichern
(Drehmoment 1 Nm).
Deckel montieren.
70 - 1066
Ventil
Typ 6106
REPARATUR
Wechsel Näherungsschalter / Mikroschalter
Gehen Sie wie folgt vor
Deckel abnehmen.
Elektrischen Anschlüsse markieren, damit nach dem Lösen
von der Leiterkarte eine fehlerfreie Zuordnung möglich ist.
Aussparung
für O-Ring
Elektrische Anschlüsse Näherungsschalter/Mikroschalter auf
der Leiterkarte lösen (Steckverbindungen).
4 Schrauben lösen (Torx 10), mit welchen die Deckplatte
befestigt ist.
Position von Näherungsschalter und Auslöser des
Mikroschalters notieren.
Näherungsschalter/Mikroschalter mit Justierschraube und
Anschlusskabel nach oben herausnehmen.
Alte Justierschraube zur Wiederverwendung herausdrehen.
Induktiver Näherungsschalter mit
LED und eingegossenen Litzen
mit Stecker
(der Stecker ist in der Skizze
nicht dargestellt)
Justierschraube in die Gewindebohrung am neuen
Näherungsschalter/Mikroschalter einschrauben.
Nur bei Näherungsschalter:
O-Ring aus dem alten Näherungsschalter ausbauen und in die
Aussparung des neuen Näherungsschalters einsetzen.
(Dieser O-Ring dient zur Schwingungsdämpfung und
verhindert das Auswandern des Näherungsschalters.)
Neuen Näherungsschalter/Mikroschalter mit Justierschraube
in die Führungssäulen einsetzen.
ACHTUNG!
Achten Sie auf den richtigen Sitz von Näherungsschalter/Mikroschalter/Justierschraube in den Führungen und Vertiefungen des Gehäuses.
Deckplatte aufsetzen.
ACHTUNG!
Beachten Sie den richtigen Sitz der
Leiterkarte und der Schraubenköpfe in den
Nasen und Aussparungen der Deckplatte.
Deckplatte festschrauben (Torx 10; Drehmoment 0,7 Nm).
Elektrische Anschlüsse unter Beachtung der Zuordnung
Näherungsschalter/Mikroschalter verbinden.
LED
LED
Position Näherungsschalter/Mikroschalter justieren:
- Drehen Sie mit einem Schraubendreher an der
Justierschraube (Spindel) bis die optimale Lage
der Näherungsschalter eingestellt ist.
- Als Justierhilfe dient die am Näherungsschalter
angebrachte LED, sie leuchtet beim Erreichen des
betreffenden Schwellwertes auf.
Deckel montieren.
1066 - 71
deutsch
Deckplatte abnehmen.
REPARATUR
Ersatzteile
deutsch
Position Ersatzteil
Bestell-Nr.
1
Ersatzmodul ASI, vergossen
799 189
2
Leitungsstecker gerade, angespritztes Kabel, 1 m lang, V4A-M12-Verriegelung
799 647
3
Flachkabelklemme mit Buchse, M12-Abgang aus VA, Goldkontakte
799 646
4
Flachkabeldichtung für Klemme (falls Kabel hier endet)
799 795
5
Platine 24 V DC ohne Kommunikation
799 188
6
Platine 24/110/230 V UC ohne Kommunikation
799 137
7
Induktiver Näherungsschalter (Sensor)
798 546
8
Endlagen-Mikroschalter komplett
648 004
9
Stellschraube für Näherungsschalter / Mikroschalter (1 Stück)
798 064
10
Ansatzschraube M5 zur Befestigung des Steuerkopfes (10er Pack)
798 074
11
Deckel für Steuerkopf (1 Stück)
798 073
12
O-Ringe für Deckel (10er Pack)
798 072
13
ohne Kommunikation, Ventilgruppe mit 1 Ventil, 24 V DC
193 375
14
ohne Kommunikation, Ventilgruppe mit 2 Ventilen, 24 V DC
193 376
15
ohne Kommunikation, Ventilgruppe mit 3 Ventilen, 24 V DC
193 377
16
mit ASI-Kommunikation, Ventilgruppe mit 1 Ventil, 24 V DC
193 375
17
mit ASI-Kommunikation, Ventilgruppe mit 2 Ventilen, 24 V DC
193 376
18
mit ASI-Kommunikation, Ventilgruppe mit 3 Ventilen, 24 V DC
193 377
19
mit DeviceNet-Kommunikation, Ventilgruppe mit 1 Ventil, 9 V DC
198 195
20
mit DeviceNet-Kommunikation, Ventilgruppe mit 2 Ventilen, 9 V DC
198 196
21
mit DeviceNet-Kommunikation, Ventilgruppe mit 3 Ventilen, 9 V DC
198 197
22
Einzelventil Typ 6106, 24 V UC
141 073
23
Einzelventil Typ 6106, 110 V UC
142 490
24
Einzelventil Typ 6106, 230 V UC
141 387
Positionen 13 bis 24 komplett mit O-Ringen und Befestigungsschrauben.
Serviceanschriften
Bürkert Werke GmbH & Co. KG
Bürkert GmbH & Co. KG
Steuer- und Regeltechnik
DC Dresden
Christian-Bürkert-Straße 13 - 17
Christian-Bürkert-Straße 2
74653 Ingelfingen
01900 Großröhrsdorf
Telefon (0 79 40) 10 - 111
Telefon (03 59 52) 36 - 300
Telefax (0 79 40) 10 - 448
Telefax (03 59 52) 36 - 551
72 - 1066
TABLE DES MATIÈRES
Table des matières
des instructions de service
Tête de commande pour soupapes de
processus type 1066
REMARQUES GENERALES
Représentation ................................................................................................................ 76
Utilisation conforme à la destination ............................................................................... 76
Consignes générales de sécurité .................................................................................... 76
Fourniture ........................................................................................................................ 77
Transport et stockage ...................................................................................................... 78
Réglementation concernant les déchets ......................................................................... 78
CARACTERISTIQUES TECHNIQUES
Structure et fonction de la tête de commande ................................................................. 80
Particularités ................................................................................................................... 80
Conditions de service ..................................................................................................... 81
Caractéristiques mécaniques .......................................................................................... 81
Caractéristiques pneumatiques ...................................................................................... 82
Caractéristiques électriques ............................................................................................ 82
MONTAGE
Montage de la tête de commande ................................................................................... 84
Adaptateur de bride ................................................................................................................. 84
Déroulement du montage ........................................................................................................ 85
INSTALLATION - MISE EN SERVICE
Installation pneumatique ................................................................................................. 88
Occupation des raccords sur la tête de commande ............................................................... 88
Installation électrique ...................................................................................................... 89
Têtes de commande sans communication ............................................................................. 89
Têtes de commande avec communication ............................................................................. 91
1066 - 73
français
Clauses de garantie ........................................................................................................ 77
TABLE DES MATIÈRES
MAINTENANCE / NETTOYAGE
Maintenance / Nettoyage ................................................................................................102
REPARATION
Réparations ....................................................................................................................104
Enlever ou remettre en place le couvercle ............................................................................. 104
Changement de la carte imprimée .......................................................................................... 105
Changement du groupe de soupapes ..................................................................................... 105
Changement de la soupape pour les versions 24 / 110 / 230 V UC sans communication ..... 106
Changement du détecteur de proximité / microcontacteur ..................................................... 107
Pièces de rechange ........................................................................................................108
français
Adresses de service ........................................................................................................108
74 - 1066
REMARQUES GÉNÉRALES
REMARQUES
Réprésentation ....................................................................................................................................................................................................................................... 76
Utilisation conforme à la destination ...................................................................................................................................................................... 76
Consignes générales de sécurité ............................................................................................................................................................................... 76
Fourniture ........................................................................................................................................................................................................................................................ 77
Clauses de garantie ........................................................................................................................................................................................................................ 77
Transport et stockage .................................................................................................................................................................................................................... 78
Réglementation concernant les déchets ......................................................................................................................................................... 78
1066 - 75
français
GENERALES
REMARQUES GÉNÉRALES
Symboles de représentation
Les symboles de représentation suivants sont utilisés dans cette notice de service:
marque une étape de travail devant être exécutée
ATTENTION!
REMARQUE
caractérise des instructions dont l'inobservation entraîne des risques pour votre santé
ou met en cause la fonctionnalité de l'appareil.
caractérise des informations supplémentaires importantes, des conseils et des
recommandations.
Utilisation conforme à la destination
français
• La tête de commande pour soupapes de processus type 1066 sert à la commande de soupapes de
processus à commande pneumatique et à la saisie de leurs états de commutation. D'autres utilisations
sont considérées comme non conformes à la destination.
• La conformité des caractérisitques techniques figurant das ces instructions, sur la fiche technique et
sur la plaquette signalétique doit être vérifiée avant la mise en service; ces caractéristiques doivent
être respectées pendant le fonctionnement de la tête de commande.
• Et transformations et modifications sur la tête de commande à l'initiative de l'utilisateur sont interdites
pour des raisons de sécurité.
• Assurer la tête de commande contre les interventions de personnes non autorisées. A cet effet, la tête
de commande peut être protégée en introduisant un plomb et/ou une vis auto taraudeuse das les
perçages existants sur le couvercle ou le boîtier.
• Les instructions de travail et les consignes de sécurité données das cette notice doivent être
respectées dans tous les cas. La garantie est supprimée en cas de non-respect de ces instructions de
travail et de leur ordre ainsi que des consignes de sécurité.
Consignes de sécurité
Respecter les consignes de cette notice, les conditions d'utilisation et les caractérisitques admises
spécifiées sur les fiches techniques et la plaquette signalétique de la tête de commande, afin que
l'appareil fonctionne parfaitement et demeure longtemps fonctionnel.
• S’en tenir aux règles techniques généralement reconnues lors du projet de mise en œuvre et du
service de l’appareil!
• L’installation et les interventions nécessitées par la maintenance ne doivent être effectuées que par un
personnel qualifié équipé des outils adéquats.
• Utiliser uniquement des pièces d'origine pour les réparations nécessaires et respecter les instructions
de cette notice lors du remplacement de ces pièces.
• Respecter les dispositions en vigueur de prévention des accidents pendant le service et la
maintenance de l’appareil.
• Couper le contact électrique avant toute intervention dans le système!
• Veiller dans les systèmes sous pression à ce que les conduites et soupapes ne soient pas desserrées!
• Prendre les mesures qui s’imposent pour éviter un actionnement par inadvertance de l’appareil ou une
mise en cause inadmissible de son fonctionnement.
• Assurer un redémarrage défini et contrôlé du processus après une interruption de l’alimentation
électrique ou pneumatique.
76 - 1066
REMARQUES GÉNÉRALES
REMARQUE
La tête de commande est conçue en protection IP67. Celle-ci suppose une bonne
assise de tous les joints et l'absence d'usure mécanique du boîtier et du couvercle.
• Éviter des contraintes mécaniques élevées de la tête de commande qui pourraient entraîner sa
détérioration ou sa destruction. Ces contraintes englobent la marche, le dépôt d'objets lourds, des
chocs violents, la chute d'objets durs etc.
• Éviter la pénétration d'humidité dans la tête de commande. Veiller notamment lors du montage au
positionnement correct de tous les joints, au blocage des vis de montage, des raccords de câbles et
des bouchons d'étanchéité. Utiliser exclusivement de l'air de commande séché!
REMARQUE
Au niveau de sa résistance mécanique, le boîtier en matière plastique de la tête de
commande est exclusivement conçu pour le raccordement direct de tuyaux et de
conduites flexibles.
• Éviter de raccorder des pièces de raccordement longues et mécaniquement rigides car elles pourraient
générer des forces de levier qui permettraient de détruire le boîtier à la main.
Les détergents contiennent souvent des composants agressifs qui peuvent se
déposer dans de petits rainures ou cavités et dont d'action durable peut détériorer
même des matières plastiques de qualité.
• Utiliser exclusivement pour le nettoyage de la tête de commande un détergent bien compatible et
rincer à l'eau claire après l'utilisation de ce produit. Il convient également de tester la compatibilité du
détergent.
REMARQUE
Sur la face inférieure du boîtier de la tête de commande se trouve une soupape de
surpression servant de protection contre l'éclatement si un élément de construction
n'est pas étanche dans la tête de commande (cas de fuite).
• Respecter, lors du montage de la tête de commande, une distance d'au moins 5 mm entre la soupape
de surpression et l'élément suivant, de sorte que la soupape puisse se déclencher sans problème en
cas de fuite. Le couvercle pourrait sinon être littéralement "éjecté" en cas de fuite dans la tête de
commande.
• En cas d’inobservation de ces consignes et d’interventions non autorisées dans l’appareil, nous
déclinons toute responsabilité de même qu’elles entraînent l’annulation de la garantie sur l’appareil et
les pièces accessoires!
Fourniture
Contrôler dès réception de l’envoi que le contenu n’a subi aucun dommage et qu’il correspond bien à la
fourniture figurant sur le bordereau d’envoi. En cas de désaccord, veuillez contacter au plus vite notre
centre d'appels:
Bürkert Fluid Control Systems, Centre d'appel
Chr.-Bürkert-Str. 13-17, D-74653 Ingelfingen
Tel. 07940 - 10 111 / Fax 07940 - 10 91 448
E-Mail: [email protected]
ou votre revendeur Bürkert.
Clauses de garantie
Ce document ne constitue aucun assentiment de garantie. Nous vous renvoyons à cet effet à nos
conditions générales de vente et commerciales. La condition préalable au consentement de la garantie
est l’utilisation conforme de l’appareil à l’usage auquel il est destiné, compte tenu de l’observation des
conditions d’emploi spécifiées.
ATTENTION!
Les prestations de garantie ne s’étendent qu’à l’absence de défaut de la tête de
commande pour soupapes de processus. Nous déclinons, par contre, toute
responsabilité pour des dégâts consécutifs de toute nature susceptibles de survenir par
suite de défaillance ou défaut de fonctionnement de l’appareil.
1066 - 77
français
REMARQUE
REMARQUES GÉNÉRALES
Transport et stockage
ATTENTION!
Le tranport et le stockage sont autorisés uniquement en emballage d'origine.
Stockage dans un local sec.
Température de stockage maximale +50 °C
Réglementation concernant les déchets
français
ATTENTION!
78 - 1066
Respectez les réglementations nationales en matière d'élimination des déchets.
CARACTERISTIQUES TECHNIQUES
CARACTERISTIQUES
TECHNIQUES
Particularités ................................................................................................................................................................................................................................................... 80
Conditions de service ....................................................................................................................................................................................................................... 81
Caractéristiques mécaniques ............................................................................................................................................................................................... 81
Caractéristiques pneumatiques ........................................................................................................................................................................................ 82
Caractéristiques électriques ................................................................................................................................................................................................... 82
1066 - 79
français
Structure et fonction de la tête de commande .............................................................................................................................................. 80
CARACTERISITQUES TECHNIQUES
Structure et fonction
La tête de commande type 1066 sert à exciter des soupapes de processus à actionnement pneumatique
de divers fabricants. Suivant la configuration, elle peut être équipée de jusqu’à trois soupapes
magnétiques (soupapes pilotes) servant à commander des soupapes de processus et de trois détecteurs
de proximité inductifs au maximum servant à rétrosignaler la position. Un de ces détecteurs peut être
aussi un capteur externe (connexion avec une borne à vis à 3 pôles sur la carte imprimée).
REMARQUE
Sur les modules à bus de champ scellés, tenir compte de la numérotation des détecteurs
de proximité sur la carte ou l'identification sur l'appareil, car des différences de
numérotation sont possibles avec le dessin ci-après.
Ajustage à travers ces
trous
Plaque de recouvrement
Ajustage détecteur de
proximité 2
français
Ajustage détecteur de
proximité 1
Détecteur de
proximité 2
Carte imprimée
Colonne avec broche
Soupape magnétique 3
Soupape magnétique 2
Soupape magnétique 1
Marquage pour
montage du
couvercle
Boîtier
Air d'échappement
Raccords électriques
Détecteur de
proximité 1
Bride de
soupape
Raccords pneumatiques
Soupape 1 Soupape 2 Soupape 3
Interface avec soupape
Air comprimé
de processus
Particularités
Avec la tête de commande de type 1066 existe une solution décentralisée pour exciter les soupapes de
processus en dehors des îles de soupapes prévues plutôt pour une mise en œuvre centralisée. Les
avantages de cette solution sous la forme d'une unité compacte avec les soupapes pilotes, la
rétrosignalistation de position et les interfaces utilisables en option, se présentent comme suit:
Déploiement plus faible pour installation.
Mise en service simple.
Temps de commutation couts en raison de trajets courts entre la soupape pilote et
celle de processus.
Domaines principaux d'application:
Industrie des produits alimentaires (p.ex. laiteries)
Industrie chimique
Industrie pharmaceutique
Industrie des cosmétiques
Brasseries
80 - 1066
CARACTERISTIQUES TECHNIQUES
Options
Nombre de soupapes pilotes
Mode d'action / mode de fonctionnement
Nombre de soupapes pilotes
Action simple vérins
1
Action double vérins
2
Soupapes à double siège avec ventilation des deux sièges
3
Têtes de commande sans communication
Bornes à vis 8 pôles pour 24 V DC
Multipôle (Connecteur rond 8 pôles) pour 24 V DC
Bornes à vis 2 x 6 pôles pour 24 / 110 / 230 V UC
français
Têtes de commande avec communication
Interface capteur-acteur (ASI)
DeviceNet
ATTENTION!
Le raccordement à d'autres systèmes de bus (plus élevés) est possible avec des
passerelles usuelles du commerce.
Conditions de service
Fluides
Air comprimé, sans huile, gaz neutres
Température du fluide
-10 ... + 50 °C
Température ambiante
-10 ... + 50 °C
Protection
IP 67
ATTENTION!
La tête de commande ne convient pas à un emploi à l'extérieur!
Caractéristiques mécaniques
Masse
0,5 à 0,65 kg (suivant la version)
Matière du boîtier
Boîtier en
Couvercle
Matière des joints
NBR
PA / PPE
PSU (transparent, bleu gris)
1066 - 81
CARACTERISITQUES TECHNIQUES
Caractéristiques pneumatiques
Raccords des conduites
Air comprimé
G 1/4
Raccords de travail, raccord de tuyau souple
6/4 mm ou 1/4 de pouce enfichable
Plage de pression
2,5 à 7 bar
Débit d'air soupape pilote
110 l/min type 6510, 40 l/min type 6106
Circulation valeur air: QNn (l/min)
Mesure à +20 °C, 6 bars de pression à l'entrée de la soupape et 1
bar de différence de pression
Temps de commutation
Type 6510 / type 6106
Ouverture 15 / 23 ms,fermeture 10 / 21 ms
Mesure à la sortie de la soupape à 6 bars et +20 °C
Ouverture: montée de la pression de 0 à 90 %
Fermeture: descente de la pression de 100 à 10 %
Plage de réglage
Course min. 2 mm
Course max. 73 mm
français
Caractéristiques électriques
Protection
IP 67
Tension de service
sans communication
24 V DC ±10 %
24/110/230 V UC ±10 %
avec communication
conformément à la spécification ASI et DeviceNet
Puissance électrique max. dissipée
5 W avec 3 x type 6510 ou 1 x type 6106
Raccords
têtes de commande
sans communication:
Multipôle (connecteur rond 8 pôles DIN 45326) pour 24 V DC
borne à vis 8 pôles pour 24 V DC
borne à vis 2x6 pôles pour 24/110/230 V UC
têtes de commande
avec communication:
ASI:
Raccord par déplacement d'isolation et passe câble à vis
Connecteur M12 et passe câble à vis
Raccord à bride M12, 4 pôles
DeviceNet:
Connecteur à fiche M12, 5 pôles
Soupapes magnétiques
Puissance nominale
1 W type 6510 / 3 W type 6106
Mode de service
service permanent (ED 100 %)
Détecteurs de proximité
Tension de service
8 à 30 V DC
Signal de sortie
max. 100 mA, résistant aux courts-circuits
Microcontacteur
82 - 1066
sans potentiel, max. 1 A courant de commutation.
MONTAGE
MONTAGE
Adaptateur de bride .......................................................................................................................................................................................................................... 84
Déroulement du montage .......................................................................................................................................................................................................... 85
1066 - 83
français
Montage de la tête de commande .................................................................................................................................................................................. 84
MONTAGE
Montage de la tête de commande
Adaptateur de bride
Pour monter la tête de soupape de type 1066 sur une soupape de processus de divers fabricants, vous
avez besoin d'un adaptateur muni d'une bride spéciale pour le client (adaptateur de bride) et d'un bouton
de commande spécial pour le client (voir aussi fiche technique). La partie raccordement à la tête de
commande est spécifique à Bürkert. La partie bride doit être adaptée à la forme de la soupape de
processus. Le dessin ci-dessous montre un exemple d’application pour une soupape de processus
spéciale. La position de montage de la tête de commande est quelconque, de préférence avec le
couvercle orienté vers le haut.
Respecter exactement en cas de propre fabrication de l’adaptateur de bride les paramètres suivants:
Cotes
Nombre de zones d'étanchéité
Cotes pour les joints toriques
Tolérances de cotes
français
Indications de matière
Cotes principales pour adaptateur de bride
Partie cylindrique de l'adaptateur
Partie de bride spécifique au client
REMARQUE
Veuillez demander des dessins de cotes détaillés pour la propre fabrication de
l'adaptateur de bride!
ATTENTION!
Un centrage est nécessaire pour le montage de l'adaptateur de bride. L'écart
maximal toléré de l'axe est de ± 0,1 mm. En cas de dépassement de cette tolérance, il
y a le risque que les détecteurs de proximité ne fonctionnent pas correctement.
Utiliser une douille spéciale de montage pour éviter de dépasser cette tolérance.
84 - 1066
MONTAGE
Déroulement du montage
1
Fixer l'adaptateur de bride sur la
soupape de processus/Fixer le
bouton de commande sur la tige
du piston (spécial pour le client)
Veiller au centrage
2 Enlever le couvercle de la tête
de commande
Dévisser les vis de sécurité
Tourner le couvercle à fond vers la
gauche
français
Tirer le couvercle vers le haut
3
Mettre la tête de commande en place
sur l'adaptateur de bride
Positionner la tête de commande
(la tête de commande peut tourner sur 360°)
4 Installation des raccords
pneumatiques
Voir installation pneumatique,
(chapitre Installation/mise en service)
Bloquer la tête de commande à l'aide des
deux vis placées latéralement
1066 - 85
MONTAGE
5
Installation des raccords
électriques
7 Remettre le couvercle en place
Contrôler le siège du joint torique du
couvercle ou tirer un nouveau joint
torique sur le collet du couvercle.
Têtes de commande sans et avec
communication
(voir chapitre Installation électrique)
REMARQUE
Le boîtier comporte 4 tenons répartis
sur la circonférence, qui retiennent le
joint torique lors de l'extraction du
couvercle.
Veiller à ce que le nouveau joint
torique se trouve correctement sous
les tenons et soit appliqué en continu,
sans torsion, contre le boîtier.
Mettre le couvercle en place
français
Tourner à fond le couvercle vers la
droite
6 Ajustage des détecteurs de proximité
Tourner la vis de réglage (broche) à l'aide d'un
tournevis jusqu'à ce que la position optimale
des détecteurs de proximité soit atteinte.
La LED placée sur le détecteur de proximité
sert d'aide ajuster. Elle s'allume lorsque la
valeur de seuil concernée est atteinte.
Boîtier avec
collet de
couvercle et
siège du joint
torique
Le microcontacteur de fin de course
Lors de l'emploi de microcontacteurs on renonce
aux LED pour des raisons de coûts.
Réglage de position comme pour les
détecteurs de proximité.
Utiliser comme aide à l'ajustage le bruit de
commutation du microcontacteur (très faible)
ou un contrôle de passage électrique externe.
REMARQUE
LED
86 - 1066
LED
Assurer le couvercle le cas échéant
contre toute intervention étrangère en
introduisant un plomb et / ou une vis
auto taraudeuse dans les perçages
existants sur le couvercle et le boîtier.
INSTALLATION / MISE EN SERVICE
INSTALLATION
Installation pneumatique .............................................................................................................................................................................................................. 88
Occupation des raccords sur la tête de commande .............................................................................................................................. 88
Installation électrique ........................................................................................................................................................................................................................ 89
Têtes de commande sans communication ........................................................................................................................................................
Borne à vis 8 pôles pour 24 V DC .......................................................................................................................................................................
Multipôle (Connecteur rond 8 pôles selon DIN 45326) pour 24 V DC ..................................................................
Borne à bis 2 x 6 pôles pour 24 / 110 / 230 V UC ...........................................................................................................................
89
89
90
90
Têtes de commande avec communication ........................................................................................................................................................ 91
Interface AS .....................................................................................................................................................................................................................................
Manipulation de la borne à câble plat .....................................................................................................................................................
Caractéristiques techniques pour cartes imprimées ASI ............................................................................................
Données de programmation ..............................................................................................................................................................................
Affichage LED d'état ASI .......................................................................................................................................................................................
Occupation des bits .....................................................................................................................................................................................................
Nombre de têtes de commande pouvant être raccordées et longueur maximale
de la ligne de bus
(cas ASI standard et version ASI avec une zone d'adresses étendue) ..................................................
91
92
92
92
93
93
94
DeviceNet ........................................................................................................................................................................................................................................... 96
Signification du terme ................................................................................................................................................................................................. 96
Caractéristiques techniques ............................................................................................................................................................................. 96
Longueurs maximales de ligne ....................................................................................................................................................................... 96
Réglage de sécurité en cas de défaillance du bus ............................................................................................................... 97
Raccordement électrique ...................................................................................................................................................................................... 97
Configuration ......................................................................................................................................................................................................................... 98
Affichage LED d'état .................................................................................................................................................................................................... 100
1066 - 87
français
MISE EN SERVICE
INSTALLATION / MISE EN SERVICE
Installation pneumatique
Occupation des raccords sur la tête de commande
G 1/4
G 1/4
Air
comprimé
Air
d'échappement
Raccords enfichables
pour conduites souples 6/4 mm ou 1/4"
français
enfichables
pour soupapes V1, V2 et V3
ATTENTION!
• Utiliser uniquement que des conduites souples calibrées ayant un diamètre extérieur
de 6 mm ou ¼ "
• Ne couper ces dernière qu'avec un coupe-flexible (risque de détérioration)
• Dimensionner la longueur des conduites de manière à ce que la tête de commande
puisse être enlevée avec le raccord à vis.
• Veiller à ce que la conduite souple soit sans tension et bien alignée avec le
connecteur enfichable, car les conduites souples enfichées avec une torsion (en
biais) peuvent entraîner des fuites au raccord enfichable.
88 - 1066
INSTALLATION / MISE EN SERVICE
Installation électrique
Têtes de commande sans communication
Le raccordement électrique de têtes de commande sans communication s'effecture selon différentes
variantes. Dans l'exécution pour 24 V DC, l'état de chaque soupape est signalé par une DEL.
Bornes à vis 8 pôles pour 24 V DC
(à l'intérieur du boîtier, passage de câble avec passe câble à vis)
Affichage d'état LED multipôle 24 V DC
Signal de commutation du détecteur de
proximité externe S3
Alimentation électrique
Plan d'occupation pour la borne à vis 8 pôles
V = soupape
S = détecteur de proximité
(capteur)
pour détecteurs
de proximité
REMARQUE
Les sorties des détecteurs de proximité sont à commutation plus pnp et résistantes aux
cours-circuits.
1066 - 89
français
Terre
INSTALLATION / MISE EN SERVICE
Multipôle (Connecteur rond 8 pôles selon DIN 45326) pour 24 V DC
Coup d'œil du connecteur incorporé dans la tête vu de devant sur les broches, les connexions soudées se
trouvent derrière.
Sorties des détecteurs de proximité
à commutation plus pnp, résistantes aux courts-circuits
Détecteur de
proximité 2
Détecteur de
proximité 3
GND
(masse commune pour
soupapes)
Détecteur de
proximité 1
24 V DC
(tension de service pour les
détecteurs de proximité)
Soupape 1
Soupape 3
français
Soupape 2
REMARQUE
Les sorties des détecteurs de proximité sont à commutation plus pnp et résitantes aux
courts-circuits.
Borne à vis 2 x 6 pôles pour 24 / 110 / 230 V UC
La version à borne à vis 2 x 6 pôles comprend
Passage de câble par passe câble à vis
Max. 1 soupape (type 5106, DN1,2)
2 microcontacteurs de fin de course à contacts sans potentiel pour rétrosignaler la position
(pas d'affichage d'état LED)
Carte imprimée avec bornes à vis 2 x 6 pôles pour 24 / 110 / 230 V UC
90 - 1066
gn/gb
vert/jaune
bl
bleu
sw
noir
INSTALLATION / MISE EN SERVICE
Têtes de commande avec communication
Interface AS
ASI (Actor Sensor Interface) est un système de bus de champ qui sert essentiellement à mettre en
réseau des capteurs et acteurs binaires (slaves) avec une commande de rang supérieur (master).
Ligne de bus
Ligne non blindée à deux fils (ligne ASI comme câble profilé) sur laquelle sont transmis aussi bien des
informations (données) que de l’énergie (alimentation en tension des acteurs et capteurs).
Topologie de réseau
Choix libre dans une large mesure, c.-à-d. des réseaux en étoile, arborescents et linéaires sont possibles.
Vous trouverez d’autres détails dans les spécifications ASI.
Variantes de raccordement au bus
REMARQUE
Données pour le câble rond
Les valeurs électriques du câble rond conduisant immédiatement à la tête de commande
s’écartent très peu du standard ASI. Lors du calcul de la longueur de ligne maximale
tolérée selon les spécifications ASI, il devrait être, en conséquence, plus long d’un facteur
1,5 que fixé effectivement.
français
Longueur ASI = 1,5 x longueur réelle
1. Borne de câble plat au câble rond de 1 m
Raccord standard ASI:
Câble profilé ASI
Borne de câble plat
Connecteur de conduite avec câble
injecté
Câble rond (longueur 1 m, dont
0,2 m dans la tête de commande)
2. Connecteur M12 4 pôles au câble rond de 2 m,
Raccord spécial ASI 1: (sur demande)
Connecteur M12 à 4
pôles pour raccord
ASI
Connecteur M12
Connecteur de conduite avec câble injecté
Câble rond (longueur 2 m, dont
0,2 m dans la tête de commande)
3. Connecteur M12 4 pôles sur la tête de commande, sans câble
Raccord spécial ASI 2: (sur demande)
Câble profilé ASI
Borne de câble plat
Connecteur de conduite
Connecteur
à bride M12
Douille M12
Occupation des
broches ASI
1 = ASI+
2 = pas occupé
3 = ASI4 = pas occupé
Câble rond (longueur 1 m)
1066 - 91
INSTALLATION / MISE EN SERVICE
Manipulation de la borne de câble plat
La borne de câble plat pour câbles ASI réalise le contact sous forme d'une technique de pénétration. Le
raccordement électrique s'établit sans couper, ni dénuder le câble.
REMARQUE
Fermer la deuxième ouverture de câble avec un joint à câble lorsque le câble plat s'arrête
dans la borne (dernier raccord).
Raccordement de la borne de câble plat à connecteur de conduite et câble
injecté avec un câble plat ASI
Dévisser les deux vis de la borne de câble plat.
Séparer la partie supérieure de la borne de câble plat de la partie
inférieure.
Insérer le câble plat ASI en position correcte.
Si le câble s'arrête ici:
Insérer le joint de câble plat en position correcte dans l'ouverture.
Disposer la partie supérieure de la borne de câble plat sr la partie
inférieure.
français
Bloquer les vis.
Terminé!
Le raccordement électrique au câble ASI est établi.
Joint de câble plat pour borne de câble plat.
Caractéristiques techniques des cartes imprimées ASI
Entrées
3 capteurs S1 - S3, pnp à commutation positive
Alimentation par interface AS (24 V +20 % / -10 %) résistant aux courts-circuits, à
courant limité à 60 mA
Niveau de commande High-Signal ≥ 10 V
Limitation du courant d’entrée ≥ 6,5 mA, courant d’entrée Low signal ≤ 1,5 mA
Sorties
3 soupapes V1 - V3
max. 3 x 1 W
Réduction de puissance après env. 100 ms par fonction der chien de garde intégrée
Données de programmation
92 - 1066
Code I/O
7 hex (4 sorties et 4 entrées)
Code ID
F hex (occupation des bits voir la table ci-après) codes ID étendus 1 et 2 = F hex
Profil
7F
INSTALLATION / MISE EN SERVICE
Affichage d'état LED ASI
Partie visible de la carte imprimée ASI
Affichage d'état bus
LED verte rouge
LEDs pour
détecteurs de proximité S1 - S3
Signal de
commutation d'un
détecteur externe de
proximité
Alimentation en tension d'un
détecteur de proximité externe
(venant de la branche ASI)
français
LEDs pour soupapes
V1 - V3
Aperçu sur l'affichage d'état ASI
LED
État du bus
vert
rouge
éteinte
éteinte
éteinte
allumée pas de circulation de données (chien de garde écoulé pour l'adresse slave
différente de 0)
allumée
éteinte
ok
clignote
clignote
erreur dans périphérie (surcharge dans l'alimentation du capteur)
clignote
allumée
adresse slave égale à 0
éteinte
clignote RESET
POWER OFF
Occupation des bits
Bit utile
Bit paramètre
D3
D2
D1
D0
Sortie
Sortie
Sortie
Sortie
LED jaune
soupape 3
soupape 2
soupape 1
Entrée
Entrée
Entrée
Entrée
inoccupé détecteur de proximité 3 détecteur de proximité 2 détecteur de proximité 1
P3
P2
P1
P0
inoccupé
1066 - 93
INSTALLATION / MISE EN SERVICE
Nombre de têtes de commandes raccordables et longueur
maximale de la ligne de bus
I. Cas ASI standard
français
Dans le cas standard, 31 têtes de commande au maximum peuvent être raccordées à une ligne de bus.
Le câble de bus ne doit pas dépasser 100 m conformément à la spécification ASI.
REMARQUE
Lors de l’emploi d’autres sections de câble, les longueurs de câble changent également
(voir spécifications ASI).
Données de processus
Bits utiles pour les entrées (capteurs ou détecteurs de proximité):
N° bit Capteur
Assignation de valeur
Bit 0
S1 (capteur 1)
0 détecteur de proximité 1 OFF
1 détecteur de proximité 1 ON
Bit 1
S2 (capteur 2)
0 détecteur de proximité 2 OFF
1 détecteur de proximité 2 ON
Bit 2
S3 (borne de branchement pour autres détecteurs)
0 détecteur de proximité 3 OFF
1 détecteur de proximité 3 ON
Bit 3
inutilisé
toujours 0
Bits utiles pour les sorties (acteurs ou soupapes):
N° bit
soupape
Assignation de valeur
Bit 0
V1 (soupape 1)
0 soupape 1 OFF
1 soupape 1 ON
Bit 1
V2 (soupape 2)
0 soupape 2 OFF
1 soupape 2 ON
Bit 2
V3 (soupape 3)
0 soupape 3 OFF
1 soupape 3 ON
Bit 3
inutilisé
toujours 0
Bits de paramétre inoccupé
94 - 1066
INSTALLATION / MISE EN SERVICE
II. Version ASI avec zone d'adresse étendue (A / D-esclave)
Dans la version ASI à zone d'adressage étendue (esclave A / B), 1 maître peut communiquer avec 62
esclaves.
Avec une zone d'adressage étendue selon la spécification ASI, le câble de bus ne doit pas dépasser une
longueur de 100 m comme dans le cas standard.
REMARQUE
En cas d'utilisation d'autres sections de câbles, les longueurs de câbles se modifient
également (voir la spécification ASI).
Particularités de l'esclave A / B par rapport au cas standard
• 62 esclaves par maître
• La LED OUT 4 sur la carte imprimée ASI ne peut plus être excitée car le quatrième bit de sortie utilisé
auparavant est désormais utilisé pour l'adressage.
ATTENTION!
Si un appareil esclave A / B est utilisé en remplacement d'un appareil standard, il se
produit une erreur de configuration en raison du code ID différent!
Différences dans l'adressage des variantes ASI
Paramètre
Appareil ASI standard
Appareil ASI pour adressage
esclave A / B
Nombre d'esclaves par maître
31
62
Code I/O
7 hex
7 hex
Code ID
F hex
A hex
ID1 étendu
F hex
7 hex
ID2 étendu
F hex
E hex
Profil
S-7.F.F
S-7.A.E
1066 - 95
français
• Restrictions de l'alimentation électrique en raison du courant nominal des inductances:
seuls 2 électrovannes peuvent être commandées simultanément; la troisième électrovanne peut
uniquement être mise en circuit après 100 ms.
INSTALLATION / MISE EN SERVICE
DeviceNet
Signification du terme
• DeviceNet est un système de bus basé sur le protocole CAN (Controller Area Network) . Il permet la
mise en réseau d’acteurs et de capteurs (slaves) avec des équipements de commande de rang
supérieur (master).
• Dans le DeviceNet, la tête de commande type 1066 est un appareil slave selon le set de connexions
Master/Slave prédéfini dans les spécifications du DeviceNet. En tant que variantes de connexion I/O,
polled I/O, bit strobed I/O et change of state I/O (COS) sont supportés.
• On distingue chez DeviceNet entre messages de processus transmis de manière cyclique ou
commandés par événement de plus haute priorité (I/O messages) et les messages de gestion
acycliques de moindre priorité (explicit messages).
• Le déroulement du protocole correspond aux spécifications DeviceNet, version 2.0
français
REMARQUE
Dans la version avec DeviceNet, une disquette est livrée comportant des fichiers de
configuration (BUE1066, EDS et BUE1066.ICO). Ces fichiers peuvent être également
obtenus sur Internet.
Caractéristiques techniques
Vitesse de transmission 125 kBit/s, 250 kBit/s, 500 kBit/s (par contacteurs DIP);
Réglage usine: 125 kBit/s
Adresse
0 ... 63 (par contacteurs DIP);
Réglage usine: 63
Données de processus
1 assemblages statiques input
(input de la tête de commande 1066 au master DeviceNet (scanner)
1 assemblage statique output
Entrées
3 capteurs (détecteurs de proximité) S1 - S3 à commutation plus pnp,
Alimentation par la branche du DeviceNet (11 à 25 V DC)
Niveau de commande High Signal ≥ 5 V
Niveau de commande Low Signal ≤ 1,5 V
Fichiers
BUE1066.EDS
BUE1066.ICO
Ces fichiers peuvent également être obtenus sur Internet.
Longueurs maximales de ligne
Longueur totale maximale de ligne (somme des lignes principales et des tronçons de ligne) d’un réseau
en fonction de la vitesse de transmission:
Longueur totale de ligne d'après les spécifications DeviceNet
Vitesse de
transmission
1)
Longueur totale maximale en utilisant des câbles Thick selon les
spécifications DeviceNet 1)
125 kBaud
500 m
250 kBaud
250 m
500 kBaud
100 m
Selon les spécifications DeviceNet , lors de l’utilisation d’un autre type de câble, des valeurs maxima
les inférieures sont applicables (v. Spécifications DeviceNet)
96 - 1066
INSTALLATION / MISE EN SERVICE
Longueur des tronçons de ligne (drop lines)
Vitesse de
Longueur maximale d'un tronçon Longueur max. cumulée dans le réseau
transmission
125 kBaud
6m
156 m
250 kBaud
6m
78 m
500 kBaud
6m
39 m
Réglage de sécurité en cas de défaillance du bus
En cas de défaillance du bus, la position du dernier octet de données des sorties du bus est conservée
tant que la tension est présente.
La ligne de bus est un câble à 4 conducteurs avec un blindage supplémentaire qui doit correspondre aux
spécifications DeviceNet et par lequel aussi bien des informations (données) que de l’énergie
(alimentation en tension pour les acteurs et capteurs de faible puissance) sont transmises.
Raccordement du bus (connecteur rond M12, 5 pôles)
CAN_H
blanc
Lignes de
données
Vnoir
Alimentation en tension
11 ... 25 V DC
CAN_L
bleu
Drain (blindage)
(inoccupé)
V+
rouge
Puissance max. 5 W, si toutes
les soupapes commutées
(3 x type 6610 avec chacune 1 W)
Connecteur vu de devant sur les broches (pas sur les connexions soudées)!
La tête de commande type 1066 possède un connecteur rond M12 micro-style 5 pôles.
L'occupation ci-après correspond aux spécifications DeviceNet.
Broche
1
2
3
4
5
Signal
Blindage
V+
VCAN_H
CAN_L
Couleur
inoccupé
rouge
noir
blanc
bleu
Montage de fermeture pour systèmes DeviceNet
Lors de l’installation d’un système DeviceNet, il faut veiller au montage de fermeture correct des lignes de
données. Ce montage évite la génération de perturbations dues à des réflexions de signaux sur les lignes
de données. La ligne principale doit être fermée aux deux extrémités, comme montré, par des résistances
de chacune 120 Ω et ¼ W de puissance dissipée.
1066 - 97
français
Raccordement électrique
INSTALLATION / MISE EN SERVICE
Topologie de réseau d'un système DeviceNet
français
Ligne avec une ligne principale (trunk line) et plusieurs tronçons (drop lines).
Ligne principale et tronçons de ligne sont en matière identique (voir dessin).
ATTENTION!
Munir les deux extrémités de la ligne principale de résistances de fermeture 120 Ω pour
éviter des réflexions.
Configuration
Contacteurs DIP
8 contacteurs DIP existent pour configurer:
• Contacteur DIP 1 à 6 pour l'adresse du DeviceNet.
• Contacteur DIP 7 et 8 pour la vitesse de transmission.
REMARQUE
Avant la mise en service de la commande avec DeviceNet, le fichier EDS doit être
enregistré dans l’outil de configuration du DeviceNet. Les fichiers nécessaires
(BUE1066.EDS et BUE1066.ICO) seront mis à disposition par disquette ou Internet.
Réglages de l'adresse DeviceNet
MAC ID – Medium Access Control Identifier:
[Exemple d'affectation de valeurs au contacteur DIP1:
DIP 1=off=0 / DIP 1=on=1 / MAC ID=DIP 1*20+DIP 2*21+...+DIP 6*25]
DIP 1
[2 0 =1]
DIP 2
[2 1 =2]
DIP 3
[2 2 =4]
off
off
off
off
off
off
0
on
off
off
off
off
off
1
off
on
off
off
off
off
2
...
...
...
...
...
...
...
off
on
on
on
on
on
62
on
on
on
on
on
on
63
98 - 1066
DIP 4 DIP 5 DIP 6
[2 3 =8] [2 4 =16] [2 5 =32]
MAC
ID
INSTALLATION / MISE EN SERVICE
Réglage de la vitesse de transmission
Adapter la tête de commande à la vitesse de transmission du réseau.
DIP 7
DIP 8
Vitesse de transmission
off
off
125 kBaud
on
off
250 kBaud
off
on
500 kBaud
on
on
non autorisé
ATTENTION!
Un changement des réglages en actionnant les contacteurs DIP n’a d’effet
qu’après un redémarrage de l’appareil.
Un nouveau démarrage peut avoir lieu en débranchant et rebranchant rapidement la tête
de commande du ou au réseau ou en envoyant un message de reset correspondant. Il
est également possible de déconnecter et reconnecter l’alimentation du réseau.
Pour transmettre les données de processus par une liaison I/O, 3 assemblages statiques Input et 3
assemblages statiques Output sont disponibles au choix. Dans ces assemblages se trouvent des attributs
sélectionnés groupés dans un objet pour pouvoir être transmis ensemble comme données de processus
par une liaison I/O.
On peut accéder aux données de processus, soit de manière cyclique dans les variantes de liaison
„Polled I/O“ et „Bit strobed I/O“ avec „Change of state“ si les valeurs d’entrée se modifient, ou bien de
manière acyclique par Explicit Messages.
Le chemin d'accès acyclique est:
class
instance
attribute
4
1
3
Avec le service Get_Attribute_Single, on peut accéder de manière cyclique en lecture aux données d'entrée
et avec le service Set_Attribute_Single de manière acyclique en écriture aux données de sortie.
1 octet de données pour entrées (capteurs ou détecteurs de proximité):
Bit
Capteur
Assignation de valeur
Bit 0
S1 (détecteur de proximité 1)
0 détecteur de proximité 1 OFF
1 détecteur de proximité 1 ON
Bit 1
S2 (détecteur de proximité 2)
0 détecteur de proximité 2 OFF
1 détecteur de proximité 2 ON
Bit 2
S3 (borne de branchement pour détecteur
de proximité supplémentaire)
0 détecteur de proximité 3 OFF
1 détecteur de proximité 3 ON
Bit 3 ... Bit 7
inutilisé
0 toujours
1 octet de données pour sorties (acteurs ou soupapes):
Bit
Capteur
Assignation de valeur
Bit 0
V1 (soupape 1)
0 soupape 1
1 soupape 1
OFF
ON
Bit 1
V2 (soupape 2)
0 soupape 2
1 soupape 2
OFF
ON
Bit 2
V3 (soupape 3)
0 soupape 3
1 soupape 3
OFF
ON
Bit 3 ... Bit 7
inutilisé
0 toujours
1066 - 99
français
Configuration des données de processus
INSTALLATION / MISE EN SERVICE
Affichage LED d'état
d’état des appareils est affiché par 2 LED („Power“ et „MNS“)
Fonction
POWER
unicolore vert
LED s'allume: appareil est sous tension
MNS
bicolore
rouge / vert
correspond à LED-MNS selon spécifications
DeviceNet (module MNS Network Status)
français
Nom de la LED Genre / couleur
Etats des LED-MNS
Après la mise sous tension (raccordement de la ligne de réseau) le test fonctionnel des LED MNS
bicolores est exécuté:
• LED s'allume brièvement (env. ¼ s).
• LED s'allume brièvement rouge (env ¼ s).
• LED éteinte.
Le test fonctionnel une fois terminé, les états des appareils décrits dans le tableau suivant peuvent être
affichés par les LED MNS.
État LED État appareil
éteinte
pas de tension /
pas en ligne
Explication / élimination du problème
- Appareil n'est pas alimenté en tension.
- Appareil n'a pas encore terminé le test Dublicate ID MAC (durée de test env. 2 s.)
- Brancher d'autres appareils si l'appareil est le seul terminal du réseau.
- Échanger l'appareil.
en ligne, liaison avec
- État de service normal avec liaison établie vers le master.
le master existe
en ligne, pas de
vert
liaison avec le
- État de service normal sans liaison établie vers le master.
clignotant
master
- une ou plusieurs liaisons I/O se trouvent en état de time out.
rouge
time-out liaision
- établir une nouvelle liaison par le master pour assurer que les données I/O sont
clignotant
transmises de manière cyclique.
- Autre appareil avec le même ID MAC dans le réseau > changer ID MAC
et redémarrer.
rouge
erreur critique
- BUS OFF par suite de problèmes de communication.
- Vérifier la vitesse de transmission: échanger l'appareil si sans succès.
vert
100 - 1066
MAINTENANCE / NETTOYAGE
MAINTENANCE / NETTOYAGE
français
Maintenance / Nettoyage .............................................................................................................................................................................................. 102
1066 - 101
MAINTENANCE / NETTOYAGE
Maintenance / Nettoyage
La tête de commande type 1066 travaille dans des conditions normales d'emploi sans entretien et
pannes. Une réparation ne doit être entreprise que par un personnel autorisé et muni des outils adéquats.
Les têtes de commande utilisées dans des installations peuvent être polluées par du fluide qui s'écoule
ou par d'autres influences. Das ce cas, il faut nettoyer les installations avec des détergents appropriés,
puis les rincer abondamment à l'eau.
français
ATTENTION!
102 - 1066
Avant d'utiliser des agents de nettoyage, absolument vérifier leur compatibilité avec
la matière du boîtier et du couvercle. Veuillez rincer à fond à l'eau propre la tête de
commande en cas de souillure ou après l'emploi de détergents contenant de l'acide ou
des alcalins. Veiller, ce faisant, à avoir des perçages et évidements bien dégagés.
REPARATION
Réparations ..................................................................................................................................................................................................................................................... 104
Enlever ou remettre en place le couvercle ......................................................................................................................................................... 104
Changement de la carte imprimée ................................................................................................................................................................................ 105
Changement du groupe de soupapes ....................................................................................................................................................................... 105
Changement de la soupape sur les versions pour 24/110/230 V UC sans communication .............. 106
Changement du détecteur de proximité / microcontacteur ............................................................................................................ 107
Pièces de rechange ............................................................................................................................................................................................................................ 108
Adresses de service ........................................................................................................................................................................................................................... 108
1066 - 103
français
REPARATION
REPARATION
Réparations
En cas de défaillance de certains éléments de construction ou de sous-groupes, la tête de commande
peut être réparée.
ATTENTION!
• Veuillez n'utiliser que des pièces d'origine pour les réparations (voir table des pièces
de rechange).
• Les réparations ne doivent être exécutées que par un personnel qualifié autorisé
équipé des outils adéquats.
• Respecter les consignes de sécurité et prévention des accidents en vigueur.
• Mettre l'appareil hors circuit et pression avant toute intervention.
• Vérifier si les paramètres des pièces de rechange concordent bien avec ceux
indiqués sur la plaque signalétique de la tête de commande à réparer.
Enlever ou remettre en place le couvercle
français
Enlever le couvercle de la tête de
commande
Desserrer les vis de sûreté
Tourner le couvercle à fond vers la gauche
Tirer le couvercle vers le haut
Remettre le couvercle en place
Contrôler le siège du joint torique du
couvercle ou tirer un nouveau joint torique
sur le collet du couvercle.
REMARQUE
Le boîtier comporte 4 tenons répartis
sur la circonférence, qui retiennent le
joint torique lors de l'extraction du
couvercle.
Veiller à ce que le nouveau joint
torique se trouve correctement sous
les tenons et soit appliqué en continu
sans torsion contre le boîtier.
Mettre le couvercle en place.
Tourner à fond le couvercle vers la droite.
REMARQUE
Assurer le couvercle le cas échéant
contre toute intervention étrangère en
introduisant un plomb et / ou une vis
auto taraudeuse dans les perçages
existants sur le couvercle et le boîtier.
Boîtier avec
collet de
couvercle et
siège du joint
torique
104 - 1066
REPARATION
Changement de la carte imprimée
Mode opératoire:
Enlever le couvercle.
Marquer les raccords électriques afin au'après desserrage, une
affectation sans erreur soit possible.
Desserrer tous les raccords électriques de la carte (raccords par fiche
et/ou à vis).
Platine
pour 24 V DC
sans communication
Desserrer les 4 vis (torr 10) qui retiennent la plaque de recouvrement
Enlever la plaque de recouvrement.
Extraire l'acienne carte imprimée (pas de raccord à vis).
Mettre en place la nouvelle carte.
ATTENTION!
Veiller à ce que la carte soit bien assise dans les
tenons du boîtier!
Module de
remplacement ASI, scellé
ATTENTION!
Veiller à ce que la carte soit bien assise et à ce que les
tête de vis soient bien dans les tenons et les
évidements de la plaque de recouvrement!
Resserrer à fond les vis de la plaque de recouvrement (torr 10, couple
0,7 Nm).
Remettre en place les raccords électriques conformément au marquage
fait précédemment.
Monter couvercle.
Changement du groupe de soupapes
Le groupe de soupapes se compose d’une platine de raccordement
comportant 1, 3 ou 3 soupapes fixées par bride du type 6510 et de joint
toriques pour la bride du fluide avec le boîtier.
REMARQUE
Module
de remplacement
DeviceNet, scellé
Sur les versions 24 V DC sans communication, ASI et
DeviceNet, seul le remplacement de l'ensemble du
groupe de soupapes est autorisé.
Mode opératoire:
Enlever le couvercle.
Marquer les raccords électriques afin qu'après desserrage, une
affectation sans erreur soit possible.
Desserrer tous les raccords électriques de la carte
(raccords par fiche).
Desserrer les 2 vis (torr 20) qui retiennent le groupe de soupapes.
Extraire le groupe de soupapes ainsi que les joints toriques.
Mettre en place le nouveau groupe de soupapes avec les joints
toriques.
Groupe de soupapes, au choix
avec 1, 2 ou 3 soupapes
- 24 V DC sans communication
- ASI (24 V DC)
- DeviceNet (9 V DC)
Resserrer à fond les vis (torr 20, couple 1,5 Nm) du groupe
de soupapes.
Remettre en place les raccords électriques conformément au marquage fait précédement.
Monter le couvercle en veillant à ce que les joints toriques soient bien assis.
1066 - 105
français
Remettre la plaque de recouvrement en place.
REPARATION
Changement de la soupape sur les versions 24 / 110 / 230 V UC
sans communication
Sur la version pour 24/110/230 V UC sans communication, seule la soupape type 6106 est remplacée en
tenant compte de la tension de service. La plaque de raccordement de la soupape reste dans la tête de
commande.
Mode opératoire:
Enlever le couvercle.
Desserer les vis de la prise de l'appareil.
Retirer de la soupape la prise de l'appareil.
Noter la position de montage des queues du connecteur et de
l'actionnement manuel.
Desserrer les 2 vis de fixation de la soupape.
Retirer l'armature de bobine.
Desserrer 2 vis de fixation sur le boîtier de la soupape.
français
Enlever le boîtier de la soupape avec les joints toriques.
Mettre en place le nouveau boîtier avec les joints toriques du bon côté
(actionnement manuel vers la gauche).
Serrer uniformément les vis alternativement
(couple 0,5 Nm).
Mettre en place la nouvelle armature de bobine du bon côte
(longue queue du connecteur vers la gauche).
Serrer uniformément les vis de la bobine alternativement
(couple 0,15 Nm).
Enficher la prise de l'appareil sur la soupape.
Bloquer la prise avec une vis
(couple 1 Nm).
Monter le couvercle.
106 - 1066
Soupape
type 6106
REPARATION
Changement du détecteur de proximité / microcontacteur
Mode opératoire:
Enlever le couvercle.
Évidement pour
joint torique
Marquer les raccords électriques afin qu'après desserage, une
affectation sans erreur soit possible.
Desserrer les raccords électriques du détecteur de proximité/microcontacteur sur la carte imprimée (connexions par fiches).
Desserrer les 4 vis (torr 10) qui retiennent la plaque de recouvrement.
Enlever la plaque de recouvrement.
Noter la position du détecteur et du déclencheur du microcontacteur.
Dévisser l'ancienne vis d'ajustage pour réutilisation.
Visser la vis d'ajustage dans le perçage taraudé du nouveau
détecteur / microcontacteur.
Détecteur de proximité inductif
à DEL et torons scellés avec
connecteur (le connecteur
n'est pas représenté sur le
croquis).
français
Extraire vers le haut le détecteur / microcontacteur avec la vis
d'ajustage et le câble de raccordement.
Uniquement avec un détecteur de proximité:
Sortir le joint torique de l'ancien détecteur de proximité et
le nouveau détecteur de proximité.
(Ce joint torique sert à amortir les vibrations et empêche la dérive
du détecteur de proximité).
Introduire le nouveau détecteur de proximité avec la vis d'ajustage
dans les colonnes de guidage.
ATTENTION!
Veiller à la bonne assise des détecteur de proximité / microcontacteur / vis
d'ajustage dans les guidages et cavités du boîtier.
Remettre en place la plaque de recouvrement.
ATTENTION!
Veiller à ce que la carte imprimée soit bien assise et
à ce que les tête de vis soient bien dans les tensons
et les évidements de la plaque de recouvrement!
Visser la plaque de recouvrement à fond (torr 10, couple 0,7 Nm).
Connecter les raccords électriques en tenant compte de
l'affectation du détecteur de proximité / microcontacteur.
LED
LED
Ajuster la position du détecteur / microcontacteur.
- Tourner la vis de réglage (broche) à l'aide d'un tournevis
jusqu'à ce que la position optimale des détecteurs de
proximité soit atteinte.
- La LED placée sur le détecteur de proximité sert d'aide
ajuster. Elle s'allume lorsque la valeur de seuil concernée
est atteinte.
Monter le couvercle.
1066 - 107
REPARATION
Pièces de rechange
N° de
commande
français
Position Pièce
1
Module ASI de remplacement, scellé
799 189
2
Connecteur de conduite droit, câble injecté, longueur 1 m,
verrouillage V4A-M12
799 647
3
Borne de câble plat avec douille, sortie M12 en VA, contacts dorés
799 646
4
Joint de câble plat pour borne (si le câble s'arrête là)
799 795
5
Carte 24 V DC sans communication
799 188
6
Carte 24/110/230 V UC sans communication
799 137
7
Détecteur de proximité inductif (sonde)
798 546
8
Microrupteur de fin de course complet
648 004
9
Vis d'ajustage pour détecteur de proximité
798 064
10
Vis à embase M5 pour la fixation de la tête de commande (paquet de 10)
798 074
11
Couvercle de tête de commande (1 pièce)
798 073
12
Joints toriques pour tête de commande (paquet de 10)
798 072
13
sans communication, groupe de soupapes avec 1 soupape, 24 V DC
193 375
14
sans communication, groupe de soupapes avec 2 soupapes, 24 V DC
193 376
15
sans communication, groupe de soupapes avec 3 soupapes, 24 V DC
193 377
16
avec communication ASI, groupe de soupapes avec 1 soupape, 24 V DC
193 375
17
avec communication ASI, groupe de soupapes avec 2 soupapes, 24 V DC
193 376
18
avec communication ASI, groupe de soupapes avec 3 soupapes, 24 V DC
193 377
19
avec communication DeviceNet, groupe de soupapes avec 1 soupape, 9 V DC
198 195
20
avec communication DeviceNet, groupe de soupapes avec 2 soupapes,
9 V DC
198 196
21
avec communication DeviceNet, groupe de soupapes avec 3 soupapes,
9 V DC
198 197
22
Soupape individuelle type 6106, 24 V UC
141 073
23
Soupape individuelle type 6106, 110 V UC
142 490
24
Soupape individuelle type 6106, 230 V UC
141 387
* Groupes de construction et soupapes complets avec joints toriques et vis de fixation.
Adresses de service
Bürkert Werke GmbH & Co. KG
Bürkert GmbH & Co. KG
Steuer- und Regeltechnik
DC Dresden
Christian-Bürkert-Straße 13 - 17
Christian-Bürkert-Straße 2
74653 Ingelfingen
01900 Großröhrsdorf
Téléphone
(0 79 40) 10 - 91 111
Téléphone (03 59 52) 36 - 300
Téléfax
(0 79 40) 10 - 91 448
Téléfax
108 - 1066
(03 59 52) 36 - 551
Contact addresses / Kontaktadressen
Germany / Deutschland / Allemange
Bürkert Fluid Control System
Sales Centre
Chr.-Bürkert-Str. 13-17
D-74653 Ingelfingen
Tel. + 49 (0) 7940 - 10 91 111
Fax + 49 (0) 7940 - 10 91 448
E-mail: [email protected]
International
Contact addresses can be found on the internet at:
Die Kontaktadressen finden Sie im Internet unter:
Les adresses se trouvent sur internet sous :
www.burkert.com
Bürkert
Company
Locations
The smart choice
of Fluid Control Systems
www.buerkert.com