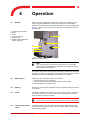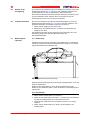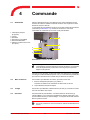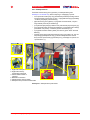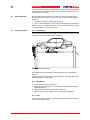
1
Hydraulische hefbrug
Hydraulic vehicle lift
Hydraulische Hebebühne
Pont élévateur hydraulique
Elevador hidráulico de vehículos
Hydrauliczny Podnośnik samochodowy
Hydraulisk billyft
ST 4032 / ST 4040
Gebruiksaanwijzing
Operating instructions
Bedienungsanleitung
Mode d’emploi
Instrucciones para el uso
Instrukcja użycia
Bruksanvisning
© 2010 Stertil B.V.
43508000-B
Gebruiksaanwijzing voor de 3,2 en 4 tons Stertil-Koni hydraulische
hefbrug
Operating instructions for the 3.2 and 4 ton Stertil-Koni hydraulic vehicle
lift
Bedienungsanleitung für die hydraulische 3,2 und 4-tonnen Hebebühne
von Stertil-Koni
Mode d’emploi pour les ponts élévateurs hydrauliques Stertil-Koni de 3,2
et 4 tonnes
Instrucciones para el uso para los elevadores hidráulicos Stertil-Koni de
3,2 y 4 toneladas
Instrukcja użycia dla 3,2- i 4-tonowego hydraulicznego podnośnika
samochodowego Stertil-Koni
Handledning för Stertil-Koni 3,2 och 4 ton hydrauliska billyft
ST 4032 / ST 4040
2
ST 4032 / ST 4040
Nederlands
Inhoud
1
Algemeen - - - - - - - - - - - - - - - - - - - - - - - - - - - - -6
1.1
1.2
1.3
1.4
1.5
1.6
1.7
1.8
1.9
2
Copyright - - - - - - - - - - - - - - - Afbakening van het document - - - - - Voor wie is deze handleiding bedoeld? - Bereik van deze handleiding - - - - - - Aanduidingen in de tekst- - - - - - - - Gegevens fabrikant - - - - - - - - - - Garantie en aansprakelijkheid - - - - - Milieu aspecten - - - - - - - - - - - - 1.8.1
Informatie betreffende REACH
Afvoer van de hefbrug - - - - - - - - - -
-
-
-
-
-
-
-
-
-
-
-
-
-
-
-
-
-
6
6
6
6
7
7
7
7
7
7
Veiligheid - - - - - - - - - - - - - - - - - - - - - - - - - - - - -8
2.1
2.2
2.3
2.4
3
Inleiding - - - - - - - - Veiligheids-aanduidingen
Persoonlijke veiligheid - Veiligheids-maatregelen 2.4.1
Noodstop - - 2.4.2
Beveiligingen -
-
-
-
-
-
-
-
-
-
-
-
-
-
-
-
-
-
-
-
-
-
-
-
-
- 8
- 8
- 8
- 9
- 9
-10
Technische gegevens - - - - - - - - - - - - - - - - - - - - - - 11
3.1
3.2
3.3
3.4
4
Algemeen - - - - - - - - Hefvermogen - - - - - - 3.2.1
ST 4032 - - - 3.2.2
ST 4040 - - - Hefsysteem - - - - - - - Wielvrijsysteem (optioneel)
3.4.1
Hefvermogen - 3.4.2
Hefsysteem - - -
-
-
-
-
-
-
-
-
-
-
-
-
-
-
-
-
-
-
-
-
-
-
-
-11
-12
-12
-12
-12
-12
-12
-12
Bediening - - - - - - - - - - - - - - - - - - - - - - - - - - - - 13
4.1
4.2
4.3
4.4
4.5
4.6
4.7
4.8
5
Algemeen - - - - - - - - Inschakelen - - - - - - - Stijgen - - - - - - - - - Dalen - - - - - - - - - - Dalen in de vergrendeling Langzaam dalen- - - - - Wielvrijsysteem (optioneel)
4.7.1
Bediening- - - 4.7.2
Inschakelen- - 4.7.3
Stijgen - - - - 4.7.4
Dalen - - - - - Verlichting (optioneel) - - -
-
-
-
-
-
-
-
-
-
-
-
-
-
-
-
-
-
-
-
-
-
-
-
-13
-13
-13
-13
-14
-14
-14
-14
-14
-15
-15
-15
Inspectie en onderhoud - - - - - - - - - - - - - - - - - - - - - 16
5.1
Gebruiksaanwijzing (Versie B)
Algemeen - - - - - - - - - - - - - - - - - - - - - - - - - - - - - - - - -16
3
ST 4032 / ST 4040
5.2
5.3
6
Onderhoudsschema - - - - - - - - - - - - - - - - 5.2.1
Dagelijkse controle door de gebruiker - - 5.2.2
Maandelijks onderhoud door de gebruiker 5.2.3
Jaarlijks onderhoud - - - - - - - - - - - Onderhouds-procedures - - - - - - - - - - - - - - 5.3.1
Smeervoorschrift - - - - - - - - - - - - 5.3.2
Hydraulische olie - - - - - - - - - - - - 5.3.3
Verlichtingsarmaturen (optie) - - - - - - -
-
-
-
-
-
-
-
-
-
-
-16
-16
-16
-16
-17
-17
-17
-18
Storingen - - - - - - - - - - - - - - - - - - - - - - - - - - - - 19
6.1
6.2
6.3
Algemeen - - - - - - - - - - - - - - - - - - - - - - - - - - - - - - - - -19
Storingsdiagnose - - - - - - - - - - - - - - - - - - - - - - - - - - - - -19
Nooddaalvoorziening - - - - - - - - - - - - - - - - - - - - - - - - - - -20
Index - - - - - - - - - - - - - - - - - - - - - - - - - - - - - - - 21
Gebruiksaanwijzing (Versie B)
4
ST 4032 / ST 4040
Verklaring van
overeenstemming
CE 0123
Verklaring van overeenstemming met de Europese machinerichtlijn (06/42/EG).
Fabrikant:
Stertil B.V.
Postbus 23
9288 ZG Kootstertille
Nederland
Machine:
Hydraulische hefbrug met 4 kolommen voor
personenwagens en lichte bestelwagens.
Merk:
STERTIL - KONI
Serienummer:
.................
Datum
ingebruikname:
.................
Model
ST 4032 - 3200 kg
ST 4040 - 4000 kg
Versie
Vierkoloms hefbrug met rijbanen
Vierkoloms hefbrug met rijbanen
Varianten
-F Rijbanen met wielvrijsysteem
-F Rijbanen met wielvrijsysteem
-S Hefbrug 25 cm verkort
-N Hefbrug 30 cm versmald
-V Hefbrug 30 cm verbreed
-L Hefbrug 45 cm verlengd
-M Hefbrug verbrede rijbanen
-MOT Hefbrug 20 cm verlengd
-S Hefbrug 25 cm verkort
Opties
Diverse mogelijkheden
Diverse mogelijkheden
Ondergetekende, U. Bijlsma, directeur, voor dit doel gemachtigd door Stertil
B.V., verklaart hiermee dat de hefbrug zoals hiervoor omschreven, voldoet aan
de fundamentele veiligheidseisen zoals vastgesteld in:
•
2006/42/EC Machinerichtlijn
EN 61508 (SIL1), EN 1493, EN 418, EN 954-1, EN 60204-1
•
2004/108/EC
•
2006/95/EC Laagspanningsrichtlijn
EN60950-1, IEC60335-2-29
Stertil B.V. Kootstertille
U. Bijlsma
Directeur
Handtekening:
Datum: 01-01-2010
De hefbrug heeft een EC type keuring ondergaan. Deze EC keuring is
uitgevoerd door:
RWTÜV - Institut für Produkterprobung und Werkstofftechnik - Zentralabteilung
Prüflaboratorien
ST 4032:
ST 4032F:
ST 4040:
ST 4040F:
Gebruiksaanwijzing (Versie B)
04 205 - 2461/03
04 205 - 2473/03
04 205 - 2472/03
04 205 - 2474/03
5
ST 4032 / ST 4040
1
1
1.1
Copyright
Algemeen
Copyright 2010 Stertil B.V.
Alle rechten wereldwijd voorbehouden. Niets uit deze uitgave, inclusief
tekeningen en diagrammen, mag worden verveelvoudigd en/of openbaar
gemaakt hetzij door afdrukken, fotokopie, microfilm of enig andere wijze, zonder
voorafgaande schriftelijke toestemming van Stertil B.V.
1.2
Afbakening van het
document
Deze handleiding is de originele Nedelandstalige versie.
Stertil B.V. behoudt zich het recht voor om de constructie en/of configuratie van
haar producten op elk moment te wijzigen zonder de verplichting eerder
geleverde producten aan te passen. De gegevens in deze handleiding hebben
betrekking op de meest recente informatie. Ze kunnen op een later tijdstip
gewijzigd worden zonder voorafgaande waarschuwing. Neem voor informatie
over afstellingen, onderhoudswerkzaamheden of reparatiewerkzaamheden die
niet beschreven staan in dit document, contact op met de Klantenservice van
Stertil B.V.
De informatie in deze handleiding is toegespitst op het bedoelde gebruik van het
product. Indien de producten, onderdelen van de producten of procedures op
een andere wijze worden gebruikt dan in deze handleiding beschreven, dan
dient een bevestiging te worden verkregen van de juistheid en geschiktheid van
dit gebruik.
Noch aan deze handleiding, noch aan de documentatie die tezamen met de
producten wordt geleverd, kunnen rechten ontleend worden. Uitsluitend de
orderbevestiging is bindend.
Deze handleiding bevat nuttige en belangrijke informatie over het correct
functioneren en het juiste onderhoud van het product. Daarnaast bevat de
handleiding belangrijke instructies ter voorkoming van mogelijke ongelukken en
ernstige schade tijdens het bedrijf van de machine. Wij hebben ons uiterste best
gedaan deze handleiding zo juist en compleet mogelijk te maken. Indien u
fouten vindt of informatie mist, brengt u dit dan onder de aandacht van onze
servicemanager, opdat wij dit aan kunnen passen. Op deze manier kunnen wij
onze documentatie verbeteren.
1.3
Voor wie is deze
handleiding
bedoeld?
Deze handleiding is bedoeld voor gebruikers van de hefbrug type ST 4032 / ST
4040.
Personen die niet bekend zijn met de bediening van de hefbrug type ST 4032 /
ST 4040 wordt geadviseerd de volgende hoofdstukken volledig te lezen en de
instructies nauwkeurig op te volgen.
Personen die wel bekend zijn met de bediening van de hefbrug type ST 4032 /
ST 4040 kunnen deze handleiding als naslagwerk gebruiken. De
inhoudsopgave en de index kunnen worden gebruikt om de benodigde
informatie op te zoeken.
1.4
Bereik van deze
handleiding
Deze handleiding bevat belangrijke informatie over de bediening van de
hefbrug type ST 4032 / ST 4040.
Voor informatie over de installatie en service van deze hefbrug, zie het ST 4032
/ ST 4040 Installatie & Service Voorschrift (43508001).
Gebruiksaanwijzing (Versie B)
6
ST 4032 / ST 4040
Aanduidingen in de tekst
1.5
Aanduidingen in de
tekst
In deze handleiding worden de volgende notatiewijzen toegepast. Iedere
manier heeft zijn eigen betekenis.
Vetgedrukte tekst is bedoeld om ergens de nadruk op te leggen.
n
c
w
Opmerking
Wijst op een belangrijk deel van de tekst. Lees de tekst aandachtig.
Let op
Staat bij procedures die gevolgd moeten worden, anders kan de
machine of het materiaal beschadigen. Volg de procedure nauwgezet.
Waarschuwing
Wijst op een procedure of handeling die, wanneer niet correct verricht,
persoonlijk letsel of schade kan veroorzaken of wijst op een verboden
handeling. Het negeren van het verbod kan leiden tot ongelukken,
persoonlijk letsel, of ernstige schade aan de machine.
Notaties tussen <>, zoals bijvoorbeeld <dalen> geven bedieningsknoppen van
de hefbrug aan.
1.6
Gegevens fabrikant
Stertil B.V.
P.O. Box 23
9288 ZG Kootstertille
Telefoon
+31(0)512 334 444
Telefax
+31(0)512 334 430
E-mail:
[email protected]
Website:
www.stertil.nl
1.7
Garantie en aansprakelijkheid
Zie de leveringsvoorwaarden en de orderbevestiging.
1.8
Milieu aspecten
De eigenaar en/of gebruiker van de hefbrug is verantwoordelijk voor de afvoer
van afvalmaterialen (olie, etc.) volgens de ter plaatse geldende wetten of
verordeningen.
1.8.1 Informatie betreffende REACH
Op 1 juni 2007 werd de nieuwe Europese REACH verordening van kracht. Met
het oog op mens en milieu is het doel binnen de EU veilige chemische stoffen
te produceren en te gebruiken.
Stertil produceert volgens de definities van REACH "voorwerpen" en is
"downstream gebruiker" van chemische stoffen.
Stertil houdt zich aan de regelgeving van REACH en onderzoekt met betrekking
tot alle gebruikte materialen en stoffen, of zijn toeleveranciers voldoen aan de
regelgeving van REACH.
Op verzoek zal uw lokale dealer relevante informatie zoals
veiligheidsinformatiebladen (MSDS) verstrekken.
1.9
Afvoer van de
hefbrug
Gebruiksaanwijzing (Versie B)
Aan het eind van de levensduur van de hefbrug is de eigenaar en/of gebruiker
verantwoordelijk voor een veilige demontage van de hefbrug en voor afvoer van
de onderdelen, overeenkomstig de ter plaatse geldende wetten of
verordeningen.
7
ST 4032 / ST 4040
2
2
2.1
Inleiding
Veiligheid
Onze veiligheidseisen mogen onder geen beding in tegenspraak zijn met de
wettelijke voorwaarden en regels die van toepassing zijn op de veiligheid van
de hefbrug. Als één van de waarschuwingen of veiligheidseisen in tegenspraak
is met de bestaande plaatselijke wetgeving, dan heeft de strengste regel
voorrang. Onze hefbruggen type ST 4032 / ST 4040 zijn beveiligd volgens de
regelgeving voor dit soort apparaten.
Het is zonder onze schriftelijke toestemming niet toegestaan wijzigingen aan te
brengen aan de hefbrug. Als ten gevolge van het niet opvolgen van deze eis
schade aan personen of eigendommen ontstaat, wijst Stertil B.V. iedere
aansprakelijkheid af.
De leidinggevende of verantwoordelijke persoon van de werkplaats
respectievelijk de instelling, dient ervoor te zorgen dat veiligheidsvoorschriften
die binnen het bedrijf gelden nauwkeurig opgevolgd worden.
w
Waarschuwing
Het niet opvolgen van de veiligheidsvoorschriften kan lichamelijk letsel
en schade aan machine en voertuig tot gevolg hebben.
Zorg dat u vertrouwd raakt met de werking en bediening van de machine. Volg
de instructies nauwkeurig op.
2.2
Veiligheidsaanduidingen
Dit document bevat een aantal speciale symbolen en afspraken die de
gebruiker moet begrijpen. Zie voor de aanduidingen in de tekst § 1.5 op
pagina 7.
2.3
Persoonlijke
veiligheid
Voor een gebruiker wordt aanbevolen persoonlijke beschermingsmiddelen te
gebruiken:
•
beschermende kleding,
•
veiligheidsschoenen.
w
Gebruiksaanwijzing (Versie B)
Waarschuwing
Draag geen loszittende kleding of sieraden.
8
ST 4032 / ST 4040
Veiligheids-maatregelen
2.4
Veiligheidsmaatregelen
Voor veilige bediening van de hefbrug, moeten de volgende
veiligheidsmaatregelen in acht worden genomen:
•
gebruik deze hefbrug alleen voor het heffen van voertuigen en niet voor
andere toepassingen,
•
installeer de hefbrug zodanig dat er een veilige werkplek verkregen wordt,
en houd daarbij ook rekening met vluchtwegen voor noodsituaties (minimaal
600 mm vrije doorgang),
•
laat alleen daartoe bevoegde personen de hefbrug bedienen;
deze personen hebben zich in elk geval op de hoogte gesteld van de
gebruiksaanwijzing van de hefbrug,
•
controleer bij het bedienen van de hefbrug of er geen personen of
voorwerpen in het werkgebied van de hefbrug (inclusief voertuig) aanwezig
zijn,
•
let goed op het voertuig tijdens het stijgen of dalen van de hefbrug,
w
w
Waarschuwing
Door obstakels (bokken etc.) onder het voertuig kunnen er tijdens het
dalen gevaarlijke situaties ontstaan.
Waarschuwing
Door plaatsing van een te hoog voertuig op de hefbrug kunnen
gevaarlijke situaties ontstaan.
•
ga nooit op of onder het voertuig (met last) wanneer de hefbrug wordt
bediend,
•
laat de hefbrug altijd in de vergrendeling zakken wanneer men onder het
voertuig aan het werk is,
•
klim nooit op de hefbrug of op het voertuig wanneer deze geheven zijn,
•
zet bij storing of na beëindiging van de werkzaamheden de hefbrug altijd in
de laagste stand en schakel de spanning met de hoofdschakelaar uit; draai
hiervoor de hoofdschakelaar naar de 0-positie en vergrendel deze met een
hangslot,
•
zorg bij laswerkzaamheden aan de hefbrug voor een deugdelijke aarding; er
kan anders schade ontstaan aan de hydraulische cilinder, bekabeling etc.
w
Waarschuwing
Foutieve bediening of gebrekkig onderhoud kan leiden tot persoonlijk
letstel of schade aan voorwerpen.
2.4.1 Noodstop
De hoofdschakelaar, rechts in de bedieningskast, dient tevens als
noodstopschakelaar. Stop bij calamiteiten de hefbrug met deze schakelaar.
Indien de noodstop is gebruikt, ga na:
Gebruiksaanwijzing (Versie B)
•
of iemand moet worden bevrijd,
•
of de hefbrug is beschadigd.
9
ST 4032 / ST 4040
Veiligheids-maatregelen
2.4.2 Beveiligingen
De hefbrug is voorzien van beveiligingen (zie Figuur 2.1 op pagina 10) die er
voor zorgen dat:
•
de daalbeweging stopt indien er door obstakels hoogteverschillen tussen de
rijbanen ontstaan, waarna, in het geval van slappe kabel(s), alleen nog
stijgen mogelijk is (5),
•
de stuurstroom wordt uitgeschakeld in het geval van kabelbreuk zodat
bedienen niet meer mogelijk is (6),
•
bij het bereiken van de hoogste stand, de stijgbeweging wordt
onderbroken (2),
•
de daalbeweging mechanisch wordt geblokkeerd indien de hefbrug niet
wordt bediend en bij uitval van de stuurspanning (4),
•
bij slangbreuk de cilinder wordt afgesloten door het slangbreukventiel (3),
•
tijdens het dalen de brug stopt op een hoogte van ca. 140 mm boven de
vloer (voetbeveiliging); na controle op veiligheid kan het dalen worden
voortgezet (akoestisch signaal) door nogmaals op <dalen> te drukken (1).
4
5
6
6
1. Voetbeveiligingsschakelaar
2. Eindschakelaar hoogste stand
3. Slangbreukventiel in cilinder
4. Mechanische blokkering
5. Slappe kabel beveiliging
6. Kabelbreuk beveiliging
3
2
1
Figuur 2.1 Beveiligingen van de hefbrug
Gebruiksaanwijzing (Versie B)
10
ST 4032 / ST 4040
3
3
3.1
Algemeen
Technische gegevens
Zie voor de algemene technische gegevens ook het typeplaatje op de hefbrug.
Tabel 3.1 Technische gegevens
Model
ST 4032
ST 4040
Hefvermogen
3200 kg
4000 kg
Overdrukventiel
260 bar (af fabriek verzegeld met
kunststof dop)
260 bar (af fabriek verzegeld met
kunststof dop)
Slag cilinder
1870 mm
1745 mm (S-versie)
1870 mm
1745 mm (S-versie)
Elektrisch vermogen
3,6 kW
3,6 kW
380/415 V, 50 Hz
3 x fase, 1 x aarde, 1 x nul
3 x fase, 1 x aarde, 1 x nul
220/240 V, 50 Hz
3 x fase, 1 x aarde
3 x fase, 1 x aarde
220/240 V, 50 Hz enkel fase
1 x fase, 1 x nul, 1 x aarde
1 x fase, 1 x nul, 1 x aarde
380/415 V, 50 Hz
3 x 16 A (traag)
3 x 16 A (traag)
220/240 V, 50 Hz
3 x 16 A (traag)
3 x 16 A (traag)
220/240 V, 50 Hz enkel fase
1 x 16 A (traag)
1 x 16 A (traag)
Stuurspanning
24 V gelijkspanning
24 V gelijkspanning
Afstelling slangbreukventiel
28 l/min (1,25 mm)
28 l/min (1,25 mm)
Hef- en daaltijd - 3 fasen
24 / 23 s
29 / 29 s
Hef- en daaltijd - 1 fase
47 / 23 s
59 / 29 s
Geluidsniveau
max. 74 dB(A)
max. 74 dB(A)
Opstelling
Binnen
Binnen
Eigengewicht
900 kg
910 kg
Bedrijfstemperatuur
-15 -> +50 D.C.
-15 -> +50 D.C.
Netaansluiting
Netzekering
Gebruiksaanwijzing (Versie B)
11
ST 4032 / ST 4040
Hefvermogen
3.2
Hefvermogen
Zie Tabel 3.1 op pagina 11 voor de opgave van het maximale hefvermogen. De
overdrukbeveiliging van de hydraulische unit staat zodanig ingesteld, dat er
nooit meer dan het opgegeven gewicht +10% geheven kan worden.
3.2.1 ST 4032
Het ontwerp is berekend voor een maximum last op één rijbaan van 1600 kg en
een lastverdeling tussen de assen van het voertuig in de verhouding van 40% 60% bij een wielbasis van minimaal 3000 mm en een spoorbreedte van
minimaal 1600 mm.
3.2.2 ST 4040
Het ontwerp is berekend voor een maximum last op één rijbaan van 2000 kg en
een lastverdeling tussen de assen van het voertuig in de verhouding van 33% 66% bij een wielbasis van minimaal 3000 mm en een spoorbreedte van
minimaal 1700 mm.
3.3
Hefsysteem
Deze hydraulische 4-koloms hefbrug is voorzien van één hydraulische unit. De
unit drijft een cilinder aan die is gemonteerd in de "vaste" rijbaan. De cilinder
trekt vier kabels aan, die via kabelschijven door de rijbaan en dwarsbalken
lopen en bevestigd zijn in de pilaren.
3.4
Wielvrijsysteem
(optioneel)
Optioneel kan een wielvrijsysteem worden geinstalleerd.
Tabel 3.2 Technische gegevens wielvrijsysteem
Model
ST 4032F
ST 4040F
Hefvermogen
3200 kg
4000 kg
Slag cilinder
207 mm
207 mm
Hefhoogte
450 mm
450 mm
Hef- en daaltijd - 3 fasen
8/8s
8/8s
Hef- en daaltijd - 1 fase
16 / 8 s
16 / 8 s
3.4.1 Hefvermogen
Het ontwerp is berekend op voor een maximum last op één opneemplaat van
1600 kg (ST 4032) of 2000 kg (ST 4040) en een lastverdeling van 33% - 66%.
w
Waarschuwing
Indien deze lastverdeling niet in acht wordt genomen dan kan er schade
ontstaan aan het wielvrijsysteem.
3.4.2 Hefsysteem
Het wielvrijsysteem is voorzien van een zogenaamd dubbel master- slave
systeem. Op deze manier wordt de gelijkloop van de beide opneemplaten
gegarandeerd.
Gebruiksaanwijzing (Versie B)
12
ST 4032 / ST 4040
4
4
4.1
Algemeen
Bediening
Plaats het voertuig recht op de hefbrug, met de banden volledig op de rijbanen.
Zet het voertuig op de handrem en plaats stopblokken voor de wielen van het
voertuig.
Bediening van de hefbrug geschiedt d.m.v. de knoppen op de bedieningskast
(zie Figuur 4.1) welke is gemonteerd op pilaar III. Zie ook de bedieningssticker
op de hefbrug.
1. (Nood)hoofdschakelaar
2. Stijgen
3. Dalen
4. Dalen in de vergrendeling
5. Langzaam dalen
6. Keuzeschakelaar
Wielvrijsysteem (optioneel)
6
1
2
5
3
4
Figuur 4.1 Bedieningspaneel
n
Opmerking
Bedien het paneel alleen d.m.v. de vingertoppen. Bediening door
scherpe voorwerpen (zoals schroevendraaiers) kan schade en storing
tot gevolg hebben.
De knoppen voor stijgen, gewoon dalen en dalen in de vergrendeling zijn van
het dodemanstype (hold to run). De bediening is mogelijk zolang de
bedieningsknop blijft ingedrukt en stopt meteen als de knop wordt losgelaten.
4.2
Inschakelen
Het inschakelen van de hefbrug gaat als volgt:
1. Draai de hoofdschakelaar (1) naar positie 1.
Hierdoor wordt de net- en stuurspanning ingeschakeld.
2. De hefbrug is gereed voor gebruik.
4.3
Stijgen
Bedien voor het stijgen van de hefbrug de bovenste knop (2). Naast deze knop
staat een naar boven gerichte pijl.
4.4
Dalen
Bedien voor het dalen van de hefbrug de knoppen (4) <ontgrendelen> en
(3) <dalen> tegelijk. Tijdens het dalen kan de knop (4) <ontgrendelen> worden
los gelaten. De veiligheidspallen zullen in de geopende stand blijven staan.
w
Gebruiksaanwijzing (Versie B)
Waarschuwing
Indien er tijdens het dalen probleemsituaties ontstaan, laat dan de knop
direct los.
13
ST 4032 / ST 4040
Dalen in de vergrendeling
4.5
Dalen in de
vergrendeling
Voor dalen in de vergrendeling wordt alleen knop (4) rechtsonder ingedrukt (zie
Figuur 4.1 op pagina 13). De hefbrug zal dan max. 60 mm dalen, totdat de
grendelpallen in de grendelprofielen inhaken.
w
Waarschuwing
Laat de hefbrug altijd in de vergrendeling dalen voordat er
werkzaamheden onder het voertuig worden verricht.
Om nu verder te dalen moet de hefbrug eerst weer iets stijgen (ontlasten
vergrendeling) voordat de hefbrug verder kan dalen. De onderste 400 mm van
de hefbeweging is niet voorzien van een vergrendeling.
4.6
Langzaam dalen
Men kan de hefbrug langzaam laten dalen m.b.v. kraan (5) rechts van het
bedieningspaneel (zie Figuur 4.1 op pagina 13). Om de brug langzaam te laten
dalen, ga dan als volgt te werk:
1. Draai de kraan (5) helemaal dicht (rechtsom).
2. Druk de daalknop (3) in en draai tegelijk de kraan (5) open (linksom).
De brug zal nu langzaam dalen. Door de kraan een volledige slag open te
draaien, daalt de brug weer op de normale snelheid.
4.7
Wielvrijsysteem
(optioneel)
4.7.1 Bediening
Plaats het voertuig recht boven het wielvrijsysteem en zet de opnameblokken
onder de opnamepunten van het voertuig. Verschuif zonodig het verstelbare
deel.
Figuur 4.2 Plaatsing van het voertuig
Bedien het wielvrijsysteem d.m.v. de knoppen op de bedieningskast welke is
gemonteerd op pilaar III.
Kies m.b.v. de keuzeschakelaar (6) op de zijkant van het bedieningspaneel voor
de bediening van de hefbrug (stand 1) of voor de bediening van het
wielvrijsysteem (stand 2).
4.7.2 Inschakelen
1. Draai de hoofdschakelaar (1) naar positie 1.
2. Zet de keuzeschakelaar (6) in stand 1 en breng de hefbrug op de gewenste
hoogte d.m.v. de stijgknop (2).
3. Laat de hefbrug in de vergrendeling dalen d.m.v. knop (4).
4. Draai de keuzeschakelaar (6) naar stand 2 voor de bediening van het
wielvrijsysteem.
Gebruiksaanwijzing (Versie B)
14
ST 4032 / ST 4040
Verlichting (optioneel)
4.7.3 Stijgen
Bedien voor het stijgen van het wielvrijsysteem de bovenste knop (2). Naast
deze knop staat een naar boven gerichte pijl.
4.7.4 Dalen
Bedien voor het dalen van het wielvrijsysteem de daalknop (3) met een naar
beneden gerichte pijl. Het wielvrijsysteem zal ongeveer 10 cm boven de rijbaan
stoppen. Door nu nogeens op de daalknop (3) te drukken, zal het
wielvrijsysteem verder dalen met een akoestisch signaal.
De knop ‘dalen in de vergrendeling’ (4) heeft hier geen functie.
n
4.8
Verlichting
(optioneel)
De kraan (5) voor langzaam dalen werkt alleen voor de hefbrug en niet
voor het wielvrijsysteem.
De verlichting kan worden bediend met de schakelaar onder de bedieningskast.
n
Gebruiksaanwijzing (Versie B)
Opmerking
Opmerking
Raadpleeg bij storingen de storingsdiagnose (zie 6.2 ’Storingsdiagnose’
op pagina 19).
15
ST 4032 / ST 4040
5
5
5.1
Algemeen
Inspectie en
onderhoud
Zet tijdens inspectie en onderhoud de hefbrug altijd in de laagste stand en
schakel de hoofdschakelaar uit (positie 0). Vergrendel de schakelaar met een
hangslot.
Alleen indien bepaalde afstellingen en controles dat vereisen, kan de spanning
tijdelijk worden ingeschakeld en kan de brug in een hogere stand worden gezet.
w
Waarschuwing
Laat bij een hogere stand de hefbrug altijd in de vergrendeling zakken.
Eenmaal per jaar moet de brug aan een grondige controle onderworpen
worden. Door een onderhoudsabonnement kan de hefbrug op deskundige wijze
door monteurs van Stertil B.V. worden gecontroleerd.
5.2
Onderhoudsschema
5.2.1 Dagelijkse controle door de gebruiker
1. Controleer de hefbrug op zichtbare schade.
2. Controleer of er olielekkage heeft plaatsgevonden van de hydraulische unit,
de slangen of de cilinder.
5.2.2 Maandelijks onderhoud door de gebruiker
1. Controleer de werking van de vergrendelpallen door de hefbrug te heffen en
deze vervolgens in de pallen te laten zakken.
n
Opmerking
Indien dit niet goed functioneert, raadpleeg dan de servicedienst.
2. Voer de maandelijkse smeeracties uit zoals vermeld in Tabel 5.1 op
pagina 17.
5.2.3 Jaarlijks onderhoud
De gebruiker dient eenmaal per jaar de hefbrug te laten inspecteren door
getraind service- of onderhoudspersoneel (verder genoemd de servicedienst).
Voor deze jaarlijkse inspectie kan een onderhoudsabonnement met de
servicedienst worden afgesloten. Indien geen onderhoudsabonnement wordt
afgesloten, dient de gebruiker zelf jaarlijks een afspraak te maken voor deze
inspectie en onderhoudsbeurt.
Deze inspectie wordt afgetekend op de inspectiecontrolelijst.
n
Gebruiksaanwijzing (Versie B)
Opmerking
‘Getraind service- of onderhoudspersoneel’ betekent personeel van de
Stertil-Koni servicedienst of een andere door Stertil-Koni erkende
servicedienst. De gevolgen van reparaties welke niet door de Stertil-Koni
servicedienst of een door Stertil-Koni erkende servicedienst worden
uitgevoerd, zijn volledig voor risico van de gebruiker.
16
ST 4032 / ST 4040
Onderhouds-procedures
5.3
Onderhoudsprocedures
5.3.1 Smeervoorschrift
De hefbrug moet regelmatig een onderhoudsbeurt krijgen volgens het
smeervoorschrift in Tabel 5.1.
Tabel 5.1 Smeervoorschrift
Onderhoudswerkzaamheden
Omschrijving
Per
maand
Per jaar
Cilinder
Droge zuigerstang oliën
Controleren van olieniveau in tank
Bijvullen (alleen met
hefbrug in hoogste stand)
x
Pallen en bedieningsstangen
Draaipunten oliën
x
Slappe-kabel en kabelbreuk
beveiliging
Draaipunten oliën
x
Grendelbalk en geleidedelen in de
pilaren
Smeren
x
Diverse draaipunten
Smeren
x
Kabelschijven
Smeren (Molycote PG54)
x
Hydraulische olie in de tank
Vervangen
Per
2 jaar
x
x
5.3.2 Hydraulische olie
Vervang ongeveer 1 maal per 2 jaar de hydraulische olie in de tank (zie
Tabel 5.2).
n
Gebruiksaanwijzing (Versie B)
Opmerking
Ook wanneer de hefbrug niet voortdurend gebruikt wordt moet deze
olieverversing plaatsvinden.
17
ST 4032 / ST 4040
Onderhouds-procedures
Volg voor het verversen van de hydraulische olie de volgende procedure:
1. Zet de hefbrug in de laagste stand en tap de olie af.
2. Vul de tank met hydraulische olie HYDRAN 46 (46 cSt / 40°C), afgefilterd op
4 micron max.
Tabel 5.2 Hydraulische olie
Model
ST 4032 / ST 4040
Inhoud
8l
w
w
Waarschuwing
Gebruik alleen goedgekeurde olie in de tank. Andere olie kan schade of
zelfs totale vernieling van de afdichtingen van de hydraulische cilinders,
pomp en ventielen tot gevolg hebben. Dit kan een ernstig
veiligheidsprobleem veroorzaken.
Waarschuwing
Controleer nooit het oliepeil of vul nooit olie bij indien de hefbrug in
geheven toestand staat. Overstroming van olie kan dan het gevolg zijn.
Er kan nodeloze schade aan de componenten van de hefbrug ontstaan.
5.3.3 Verlichtingsarmaturen (optie)
c
Gebruiksaanwijzing (Versie B)
Let op
Reinig de verlichtingsarmaturen uitsluitend met een niet agressief
reinigingsmiddel.
18
ST 4032 / ST 4040
6
6
6.1
Algemeen
Storingen
Storingen in de hefbrug kunnen door een eenvoudige fout worden veroorzaakt.
Controleer de installatie op de aangegeven oorzaken.
Als de storing bij controle van de genoemde oorzaken niet kan worden
opgeheven, dient u contact op te nemen met de servicedienst.
n
n
Opmerking
Alle verrichte reparaties aan de hefbrug en de gevolgen hiervan, die niet
zijn uitgevoerd door de servicedienst, zijn volledig voor het risico van de
gebruiker.
Opmerking
Onder servicedienst wordt verstaan, de servicedienst van Stertil of een
door Stertil erkende servicedienst.
De volgende storingsdiagnose kan gebruikt worden bij het lokaliseren van
defecten. Neem bij twijfel contact op met de servicedienst.
6.2
Storingsdiagnose
Het volgende overzicht van storingen verwijst naar de betreffende tabel:
Tabel 6.1 ’Motor draait niet’ op pagina 19,
Tabel 6.2 ’Hefbrug stijgt niet’ op pagina 19,
Tabel 6.3 ’Hefbrug daalt niet’ op pagina 20.
Tabel 6.1 Motor draait niet
Mogelijke oorzaak
Oplossing
Hoofdschakelaar niet ingeschakeld
Hoofdschakelaar inschakelen
Netzekering defect
Vervang de netzekering
Zekering in de bedieningskast defect
Waarschuw de servicedienst
Tabel 6.2 Hefbrug stijgt niet
Mogelijke oorzaak
Oplossing
Onderbroken circuit hoogste stand: elektrische
storing of brug staat in de hoogste stand
Hefbrug laten dalen; bij elektrische storing
servicedienst raadplegen
Onderbroken circuit kabelbreukschakelaar:
elektrische storing of kabelbreuk
Raadpleeg de servicedienst
Gebruiksaanwijzing (Versie B)
19
ST 4032 / ST 4040
Nooddaalvoorziening
Tabel 6.3 Hefbrug daalt niet
Mogelijke oorzaak
Oplossing
Pallen worden niet uit de vergrendeling getrokken
Laat de hefbrug eerst 50 mm stijgen
Het elektrisch bediende daalventiel van de
hydraulische unit gaat niet open
Geen stuurspanning magneetspoel, of daalventiel is
defect; door servicedienst laten herstellen
Onderbroken circuit slappe kabel: elektrische storing
of slappe kabel
Laat de hefbrug stijgen en verwijder eventuele
obstakels onder de rijbanen. In overige gevallen
raadpleeg de servicedienst
Beveiliging tegen slangbreuk is gesloten
Bij slangbreuk deze laten vervangen door
servicedienst; controle van de vergrendelingen op
beschadigingen
n
6.3
Nooddaalvoorziening
Bij storingen anders dan hierboven genoemd, altijd de servicedienst
raadplegen.
Als de stroom is uitgevallen, kunt u de brug niet meer laten dalen met de
bedieningsknoppen. Als dit het geval is dan kan de brug handmatig dalen.
Neem hiervoor contact op met de servicedienst.
w
Gebruiksaanwijzing (Versie B)
Opmerking
Waarschuwing
De nooddaalprocedure mag alleen door personen worden uitgevoerd
die over deze procedure zijn geïnstrueerd.
20
ST 4032 / ST 4040
Index
A
M
Aansprakelijkheid - - - - - - - - - - - - - 7
Maandelijks onderhoud - - - - - - - - - - 16
B
N
Bediening - - - - - - - dalen - - - - - - - dalen in vergrendeling
inschakelen - - - - langzaam dalen - - stijgen - - - - - - - Beveiligingen - - - - - -
-
-
-
-
-
-
-
-
-13
-13
-14
-13
-14
-13
-10
Nooddaalvoorziening - - - - - - - - - - - 20
Noodstop - - - - - - - - - - - - - - - - - 9
O
Onderhoud - - - - dagelijks- - - - hydraulische oliejaarlijks - - - - maandelijks - - procedures - - smeervoorschrift-
C
Copyright - - - - - - - - - - - - - - - - - 6
D
-
-
-
-
-
-
-
-
-
-
- 16
- 16
- 17
- 16
- 16
- 17
- 17
R
Dagelijks onderhoud- - - - - - - - - - - -16
Dalen
in vergrendeling - - - - - - - - - - - -14
langzaam - - - - - - - - - - - - - - -14
REACH informatie- - - - - - - - - - - - - 7
S
Service
storingsdiagnose
Smeervoorschrift - Specificaties - - - Storingen - - - - - Storingsdiagnose - -
F
Fabrikantgegevens - - - - - - - - - - - - 7
G
-
-
-
-
-
-
-
-
-
-
- 19
- 17
- 11
- 19
- 19
Garantie- - - - - - - - - - - - - - - - - - 7
T
Technische gegevens - - - - - - - - - - - 11
wielvrijsysteem - - - - - - - - - - - - 12
H
Hefsysteem - - - - - - - - - - - - - - - -12
Hefvermogen - - - - - - - - - - - - - - -12
Hydraulische olie - - - - - - - - - - - - -17
V
Veiligheid - - - - - - - - - - - aanduidingen - - - - - - - beveiligingen - - - - - - - maatregelen - - - - - - - - noodstop - - - - - - - - - persoonlijk- - - - - - - - - Verklaring van overeenstemming
Verlichting
bediening - - - - - - - - - -
I
Inschakelen - - - - - - - - - - - - - - - -13
Inspectie - - - - - - - - - - - - - - - - -16
J
Jaarlijks onderhoud - - - - - - - - - - - -16
L
-
-
-
- 8
- 8
- 10
- 9
- 9
- 8
- 5
- - - - - 15
W
Langzaam dalen- - - - - - - - - - - - - -14
Gebruiksaanwijzing (Versie B)
-
Wielvrijsysteem
bediening - - - - - - - - - - - - - - - 14
technische gegevens - - - - - - - - - 12
21
ST 4032 / ST 4040
English
Contents
1
General - - - - - - - - - - - - - - - - - - - - - - - - - - - - - 25
1.1
1.2
1.3
1.4
1.5
1.6
1.7
1.8
1.9
2
Copyright - - - - - - - - - - - - - Document definition - - - - - - - - Who is this manual intended for?- - Scope of this manual - - - - - - - Indications in the text - - - - - - - Manufacturer’s data - - - - - - - - Guarantee and liability - - - - - - - Environmental aspects- - - - - - - 1.8.1
Information about REACHRemoval of the vehicle lift - - - - - -
-
-
-
-
-
-
-
-
-
-
-
-
-
-
-
-
-
-
-25
-25
-25
-25
-26
-26
-26
-26
-26
-26
Safety - - - - - - - - - - - - - - - - - - - - - - - - - - - - - - 27
2.1
2.2
2.3
2.4
3
Introduction - - - - - - - Safety indications - - - - Personal safety - - - - - Safety measures - - - - 2.4.1
Emergency stop
2.4.2
Protection- - - -
-
-
-
-
-
-
-
-
-
-
-
-
-
-
-
-
-
-
-
-
-
-
-
-27
-27
-27
-28
-28
-29
Technical data - - - - - - - - - - - - - - - - - - - - - - - - - - 30
3.1
3.2
3.3
3.4
4
General - - - - - - - - - - Lift capacity - - - - - - - - 3.2.1
ST 4032 - - - - 3.2.2
ST 4040 - - - - Lift system- - - - - - - - - Wheel free system (optional)3.4.1
Lift capacity - - - 3.4.2
Lift system - - - -
-
-
-
-
-
-
-
-
-
-
-
-
-
-
-
-
-
-
-
-
-
-
-30
-31
-31
-31
-31
-31
-31
-31
Operation - - - - - - - - - - - - - - - - - - - - - - - - - - - - 32
4.1
4.2
4.3
4.4
4.5
4.6
4.7
4.8
5
General - - - - - - - - - - Switching-on - - - - - - - Raising - - - - - - - - - - Lower - - - - - - - - - - - Lowering into safety catch - Slowly lower - - - - - - - - Wheel free system (optional)4.7.1
Operation - - - - 4.7.2
Switching on - - 4.7.3
Raising - - - - - 4.7.4
Lower- - - - - - Lighting (option) - - - - - - -
-
-
-
-
-
-
-
-
-
-
-
-
-
-
-
-
-
-
-
-
-
-
-32
-32
-32
-32
-32
-33
-33
-33
-33
-33
-34
-34
Inspection and maintenance - - - - - - - - - - - - - - - - - - 35
5.1
General - - - - - - - - - - - - - - - - - - - - - - - - - - - - - - - - - -35
Operating instructions (Version B)
22
ST 4032 / ST 4040
5.2
5.3
6
Maintenance schedule - - - - - - - - - - 5.2.1
Daily maintenance by the user 5.2.2
Monthly maintenance by the user
5.2.3
Annual maintenance - - - - - Maintenance procedures- - - - - - - - - 5.3.1
Lubrication instructions - - - - 5.3.2
Hydraulic oil - - - - - - - - - 5.3.3
Lighting armatures (option) - - -
-
-
-
-
-
-
-
-
-
-
-
-
-
-
-
-35
-35
-35
-35
-36
-36
-36
-37
Faults - - - - - - - - - - - - - - - - - - - - - - - - - - - - - - 38
6.1
6.2
6.3
General - - - - - - - - - - - - - - - - - - - - - - - - - - - - - - - - - -38
Fault diagnosis - - - - - - - - - - - - - - - - - - - - - - - - - - - - - -39
Emergency lowering provision - - - - - - - - - - - - - - - - - - - - - - -40
Index - - - - - - - - - - - - - - - - - - - - - - - - - - - - - - - 41
Operating instructions (Version B)
23
ST 4032 / ST 4040
Statement of conformity
CE 0123
Statement of conformity with the European machine guideline (06/42/EG).
Manufacturer:
Stertil B.V.
Postbus 23
9288 ZG Kootstertille
Nederland
Machine:
Hydraulic vehicle lift with 4 posts for cars and light
vans.
Brand:
STERTIL - KONI
Serial Number:
.................
Date first used:
.................
Model
ST 4032: 3200 kg
ST 4040: 4000 kg
Version
4-post vehicle lift with tracks
4-post vehicle lift with tracks
Variants
-F Tracks with wheel free system
-F Tracks with wheel free system
-S Vehicle lift 25 cm shortened
-N Vehicle lift 30 cm narrowed
-V Vehicle lift 30 cm widened
-L Vehicle lift 45 cm lengthened
-M Vehicle lift widened tracks
-MOT Vehicle lift 20 cm lengthened
-S Vehicle lift 25 cm shortened
Options
Various possibilities
Various possibilities
The undersigned, U. Bijlsma, director, authorised for this purpose by Stertil B.V.,
declares that the vehicle lift is in accordance with the ’machine guideline’
06/42/EG and the EN1493. The vehicle lift complies with the basic safety
requirements as stipulated in:
•
2006/42/EC Machinery Directive
EN 61508 (SIL1), EN 1493, EN 418, EN 954-1, EN 60204-1
•
2004/108/EC
•
2006/95/EC Low Voltage Directive
EN60950-1, IEC60335-2-29
Stertil B.V. Kootstertille
U. Bijlsma
Director
Signature:
Date: 01-01-2010
The model has undergone an EC type testing. This EC testing was carried out
by:
RWTÜV - Institut für Produkterprobung und Werkstofftechnik - Zentralabteilung
Prüflaboratorien
ST 4032:
ST 4032F:
ST 4040:
ST 4040F:
Operating instructions (Version B)
04 205 - 2461/03
04 205 - 2473/03
04 205 - 2472/03
04 205 - 2474/03
24
ST 4032 / ST 4040
1
1
1.1
Copyright
General
Copyright 2010 Stertil B.V.
All rights reserved worldwide. Nothing from this publication, including drawings
and diagrams, may be reproduced and/or made public either by printing,
microfilm or by any other means without the prior written permission of Stertil
B.V.
1.2
Document definition
This manual is a translation of the original Dutch version.
Stertil B.V. reserves the right to change the construction and/or configuration of
its products at any time without being obliged to make such changes to products
that have already been supplied. The data in this manual refers to the most
recent information. The data can be changed at any time without prior warning.
For information about any installation, maintenance or repair activities not
described in this manual, contact the service department of Stertil B.V.
The information in this manual is designed specifically for the intended user of
the product. If the product, product parts or procedures are used in any other
way than that prescribed in this manual, then approval should be obtained as to
the appropriateness and suitability of such usage.
No rights may be derived from either this manual or the documentation which is
supplied together with the products. The order confirmation is exclusively
binding.
This manual contains useful and important information about the correct
operation and maintenance of the product. This manual also contains important
instructions for the prevention of possible accidents and serious damage during
machine operation. We have done our utmost to ensure that this manual is
correct and complete. Should you find any errors or missing information, please
bring this to the attention of our service manager so that we can amend the
manual. This helps us to improve our documentation.
1.3
Who is this manual
intended for?
This manual is intended for users of the vehicle lift type ST 4032 / ST 4040.
Anyone who is not familiar with the operation of the vehicle lift type ST 4032 /
ST 4040 is advised to fully read the following chapters and to follow the
instructions exactly.
Personnel that are familiar with the operation of the vehicle lift type ST 4032 /
ST 4040 can use this manual for reference. The table of contents and the index
can be used to locate specific information.
1.4
Scope of this manual
This manual contains important information about the operation of the vehicle
lift type ST 4032 / ST 4040.
For information on the installation and service of this vehicle lift, refer to the ST
4032 / ST 4040 Installation and Service Instructions (43508001).
Operating instructions (Version B)
25
ST 4032 / ST 4040
Indications in the text
1.5
Indications in the
text
The following instructions are used in this manual. Each notation has its own
meaning.
Bold type is used to highlight.
n
c
w
Note
Important parts of the text. Read the text carefully.
Caution
Marks procedures that have to be adhered to, otherwise damage may
occur to the machine or the material. Follow the procedure meticulously.
Warning
Highlights any procedure or operation that, if carried out incorrectly, can
cause physical injury or damage, or highlights any prohibited operations.
Disregarding a prohibited operation can lead to accidents, physical injury
or serious damage to the machine.
Notations between <>, such as for example <lower>, indicate vehicle lift
operating buttons.
1.6
Manufacturer’s data
Stertil B.V.
P.O. Box 23
9288 ZG Kootstertille
Telephone
+31(0)512 334 444
Fax
+31(0)512 334 430
E-mail:
[email protected]
Website:
www.stertil.nl
1.7
Guarantee and
liability
See the terms of delivery and the order confirmation.
1.8
Environmental
aspects
The owner and/or user of the vehicle lift is responsible for the removal of waste
materials (oil, etc.) in accordance with the statutory legislation or regulations
that are in force.
1.8.1 Information about REACH
The REACH regulation entered into force on 1st June 2007. Regarding human
health and environment, the target is to manufacture and to use only safe
chemical substances inside the EU.
Considering the terms of the regulation, Stertil manufactures "articles" and is
"downstream-user" of chemical substances.
Stertil has the intention to fully comply to REACH regulation and checked his
suppliers to make sure they comply to REACH requirements for all materials
and substances used in our products.
Your local dealer will provide relevant information e.g. Material Safety Data
Sheet (MSDS) on request.
1.9
Removal of the
vehicle lift
At the end of the operational life of the vehicle lift, the owner and/or user is
responsible for the safe disassembly of the vehicle lift and for the removal of the
parts, in accordance with the statutory legislation or regulations that are in force.
Operating instructions (Version B)
26
ST 4032 / ST 4040
2
2
2.1
Introduction
Safety
Our safety requirements may under no condition conflict with the statutory
requirements and rules that apply to the safety of the vehicle lift. Whenever one
of the warnings or safety requirements conflicts with existing local legislation,
the most stringent rule will always take precedence. Our vehicle lifts type ST
4032 / ST 4040 are protected in accordance with the rules for this type of
equipment.
It is not permissible to carry out any changes to the vehicle lift without our written
consent. If any damage to persons or property is caused as a consequence of
not complying with this requirement, Stertil B.V. will accept no liability for such
damage.
The manager of the workshop or business should ensure that all safety
instructions that apply within the business are strictly observed.
w
Warning
Physical injury and damage to the machine can result by not following
the safety instructions.
Ensure that you become familiar with the operation and control of the machine.
Follow the instructions exactly.
2.2
Safety indications
This document contains a number of special symbols and arrangements that
the user needs to understand. For the indications in the text, see 1.5 on
page 26.
2.3
Personal safety
For a user it is recommended to wear appropriate personal protection:
• protective clothing,
• safety shoes.
w
Operating instructions (Version B)
Warning
Do not wear loose-fitting clothing or jewellery.
27
ST 4032 / ST 4040
Safety measures
2.4
Safety measures
For safe operation of the vehicle lift, the following safety measures must be
complied with:
• only use this vehicle lift for the raising of vehicles and not for any other
purpose,
• install the vehicle lift so that a safe working area is obtained and also make
adequate provision for emergency escape routes (minimum 600 mm free
passage),
• only allow competent persons to operate the vehicle lift;
these persons shall in every case be familiar with the vehicle lift operating
instructions,
• when operating the vehicle lift, always ensure that there are no persons or
objects in the work area of the vehicle lift (including the vehicle),
• closely monitor the vehicle during vehicle lift raising and lowering operations,
w
w
Warning
Dangerous situations can arise because of obstacles (axle stands,
transmission jacks, etc.) under the vehicle during lowering.
Warning
Dangerous situations can arise through lifting a too high vehicle too high
with the vehicle lift.
• never go on top of or underneath the vehicle lift (with load) when the vehicle
lift is in operation,
• never climb on to the vehicle lift or on the vehicle when it is being raised,
• on the occurrence of a fault or after completion of activities, always set the
vehicle lift to the lowest position and disconnect the mains power supply by
the main switch; turn the main switch to the 0 position and interlock it with a
padlock,
• when carrying out welding activities on the vehicle lift, ensure there is good
earthing; otherwise damage can be caused to the hydraulic cylinder, cabling
etc.
w
Warning
Incorrect operation or poor maintenance can lead to personal injury or
damage to objects.
2.4.1 Emergency stop
The main switch, on the right in the control panel, should also be used as an
emergency stop switch. In the event of a dangerous situation, stop the vehicle
lift by using this switch.
After the emergency stop has been used, check:
• if anybody needs to be freed,
• if the vehicle lift is damaged.
Operating instructions (Version B)
28
ST 4032 / ST 4040
2
Safety
2.4.2 Protection
The vehicle lift is provided with protection (see Figure 2.1 on page 29) which
ensures that:
• the lowering operations will stop if differences in height between the tracks
exist through the presence of obstacles, after which, in the case of slack
cable(s), it will only be possible to carry out raising operations (5),
• the control current will be disconnected in the event of cable breakage so that
operation is no longer possible (6),
• on reaching the highest position, the raising movement is stopped (2),
• the lowering movement is mechanically blocked when the vehicle lift is not in
operation and on failure of the control voltage (4),
• on hose breakage the cylinder will be shut off by the hose break valve (3),
• during lowering, the vehicle lift will stop at a height of about 140 mm above
the floor (foot protection); after carrying out safety checks, the lowering can
be continued (acoustic signal) by pressing <lower> once again (1).
4
5
6
6
1. Foot protection switch
2. Limit switch highest position
3. Hose break valve in cylinder
4. Mechanical blocking
5. Slack cable protection
6. Cable break protection
3
2
1
Figure 2.1 Vehicle lift protection
Operating instructions (Version B)
29
ST 4032 / ST 4040
3
3
3.1
General
Technical data
For general technical data also refer to the type plate on the vehicle lift.
Table 3.1 Technical data
Model
ST 4032
ST 4040
Lift capacity
3200 kg
4000 kg
Pressure relief valve
260 bar (factory sealed with plastic
cap)
260 bar (factory sealed with plastic
cap)
Stroke cylinder
1870 mm
1745 mm (S-version)
1870 mm
1745 mm (S-version)
Electrical power
3,6 kW
3,6 kW
380/415 V, 50 Hz
3 x phase, 1 x earth, 1 x neutral
3 x phase, 1 x earth, 1 x neutral
220/240 V, 50 Hz
3 x phase, 1 x earth
3 x phase, 1 x earth
220/240 V, 50 Hz single phase
1 x phase, 1 x neutral, 1 x earth
1 x phase, 1 x neutral, 1 x earth
380/415 V, 50 Hz
3 x 16 A (slow-acting)
3 x 16 A (slow-acting)
220/240 V, 50 Hz
3 x 16 A (slow-acting)
3 x 16 A (slow-acting)
220/240 V, 50 Hz single phase
1 x 16 A (slow-acting)
1 x 16 A (slow-acting)
Control voltage
24 V direct current
24 V direct current
Hose break valve adjustment
28 l/min (1,25 mm)
28 l/min (1,25 mm)
24 / 23 s
29 / 29 s
47 / 23 s
59 / 29 s
Noise level
max. 74 dB(A)
max. 74 dB(A)
Setting up
Indoor
Indoor
Dead weight
900 kg
910 kg
Operating temperature
-15 -> +50 D.C.
-15 -> +50 D.C.
Mains power supply
Mains fuse
Raising and lowering time
3 phases
Raising and lowering time
1phase
Operating instructions (Version B)
30
ST 4032 / ST 4040
3
3.2
Technical data
Lift capacity
See Table 3.1 on page 30 for the specification of the maximum lift capacity. The
overpressure protection for the hydraulic unit is adjusted so that no more than
the set weight +10% can ever be raised.
3.2.1 ST 4032
The design is calculated for a maximum load on one track of 1600 kg and a load
distribution between the vehicle axles in the ratio of 40% - 60% with a minimum
wheel base of 3000 mm and a minimum track width of 1600 mm.
3.2.2 ST 4040
The design is calculated for a maximum load on one track of 2000 kg and a load
distribution between the vehicle axles in the ratio of 33% - 66% with a minimum
wheel base of 3000 mm and a minimum track width of 1700 mm.
3.3
Lift system
This hydraulic 4-post vehicle lift is provided with a hydraulic unit. The hydraulic
unit drives a cylinder which is mounted in the "fixed" track. The cylinder drives
four cable ends which via cable pulleys run through the track and cross beams,
and are attached to the posts.
3.4
Wheel free system
(optional)
A wheel free system can be installed as an option.
Table 3.2 Technical data for wheel free system
Model
ST 4032F
ST 4040F
Lift capacity
3200 kg
4000 kg
Stroke cylinder
207 mm
207 mm
Lift height
450 mm
450 mm
Raising and lowering time - 3
phases
8/8s
8/8s
Raising and lowering time - 1
phase
16 / 8 s
16 / 8 s
3.4.1 Lift capacity
The design is calculated for a maximum load on one bearing plate of 1600 kg
(ST 4032) or 2000 kg (ST 4040) and a load distribution between the vehicle
axles of 33% - 66%.
w
Warning
Failure to observe this load distribution could result in damage to the
wheel free system.
3.4.2 Lift system
The wheel free system has fitted a so-called double master- slave system. This
guarantees that the two bearing plates work in parallel.
Operating instructions (Version B)
31
ST 4032 / ST 4040
4
4
4.1
General
Operation
Place the vehicle straight on the vehicle lift, with the tyres completely on the
tracks. Apply the handbrake and place stop blocks in front of the wheels.
Operation of the vehicle lift is effected through buttons on the control panel (see
Figure 4.1) which is mounted on post III. Also refer to the operation sticker on
the vehicle lift.
1. (Emergency)main switch
2. Raise
3. Lower
4. Lower by interlock
5. Slowly lower
6. Selector switch wheel free
system (optional)
6
1
2
5
3
4
Figure 4.1 Control panel
n
Note
Only use finger tips to operate the control panel. Do not use sharp
objects (such as screwdrivers) to operate the control panel as this can
cause damage and breakdown.
The buttons used to raise, lower normally and lower by interlock are of the dead
man type (i.e. hold to run). Operation is only possible while such buttons remain
depressed and will stop immediately when the button is released.
4.2
Switching-on
Switching-on the vehicle lift is carried out as follows:
1. Turn the main switch (1) to position 1.
This connects the mains power supply and the control voltage.
2. The vehicle lift is now ready for use.
4.3
Raising
Press button (2) to raise the vehicle lift. There is an upward pointing arrow next
to this button.
4.4
Lower
To lower the vehicle lift, use buttons (4) <unlock> and (3) <lower> at the same
time. During lowering, the <unlock> button (4) can be released. The safety
pawls will remain in the open position.
w
4.5
Lowering into safety
catch
Warning
If there is any problem during lowering, release the button immediately.
To lower into safety catch, only press the button (4) at the bottom right. The
vehicle lift will then lower by a max. of 60 mm until the safety catches engage
with the locking profiles.
Operating instructions (Version B)
32
ST 4032 / ST 4040
4
Operation
To lower the vehicle lift still further, it must first be raised a bit (to disengage the
interlock). The lowest 400 mm of the lift travel is not fitted with an interlock.
4.6
Slowly lower
The vehicle lift can be slowly lowered using the valve (5) on the right of the
control panel (see Figure 4.1 on page 32). To lower the vehicle lift slowly, carry
out the following:
1. Shut the valve (5) completely (turn it to the right).
2. Press the lower button (3) and, at the same time, open the valve (5) (turn it
to the left).
The vehicle lift will now slowly lower. By turning the valve a complete turn, the
vehicle lift will lower at normal speed.
4.7
Wheel free system
(optional)
4.7.1 Operation
Position the vehicle directly above the wheel free system and locate the bearing
blocks beneath the vehicle’s jacking points. Move the adjustable section if
necessary.
Figure 4.2 Placing the vehicle
Operate the wheel free system using the buttons on the control box mounted on
pillar III.
Using the selector switch (6) on the side of the control panel, select vehicle lift
operation (position 1) or operation of the wheel free system (position 2).
4.7.2 Switching on
1. Turn the main switch (1) to position 1.
2. Set the selector switch (6) to position 1 and use the ’raise’ button (2) to raise
the vehicle lift to the desired height.
3. Use the button (4) to lower the vehicle lift to the interlock.
4. Turn the selector switch (6) to position 2 to operate the wheel free system.
4.7.3 Raising
The wheel free system is raised using the top button (2). There is an upwards
pointing arrow next to this button.
Operating instructions (Version B)
33
ST 4032 / ST 4040
Lighting (option)
4.7.4 Lower
To lower the wheel free system, use the ’lower’ button (3), marked with a down
arrow. The wheel free system will stop approximately 10 cm above the track.
Pressing the ’lower’ button (3) one more time causes the wheel free system to
lower further with an acoustic signal.
In this position the ’lowering by interlock’ button (4) has no function.
n
4.8
Lighting (option)
Note
The ’slowly lower’ control (5) only works for the vehicle lift and not for the
wheel free system.
The lighting can be controlled using the switch under the control panel.
n
Operating instructions (Version B)
Note
For faults, refer to the fault diagnosis (see 6.2 ’Fault diagnosis’ on
page 39).
34
ST 4032 / ST 4040
5
5
5.1
General
Inspection and
maintenance
When carrying out inspection and maintenance, always set the vehicle lift to the
lowest position and switch off the mains power supply switch (position 0).
Interlock the switch with a padlock.
The mains power supply can be temporarily disconnected and the vehicle lift set
to a higher position only when prescribed settings and checks necessitate such
action.
w
Warning
When the vehicle lift is in a higher position, always lower it by interlock.
The vehicle lift must be subjected to a thorough check annually. The vehicle lift
can be competently checked by mechanics from Stertil B.V. through a
maintenance contract.
5.2
Maintenance
schedule
5.2.1 Daily maintenance by the user
1. Check the vehicle lift for visible damage.
2. Check for signs of oil leakage from the hydraulic unit, the hoses or the
cylinder.
5.2.2 Monthly maintenance by the user
1. Check the operation of the interlock pawls by raising the vehicle lift and then
lowering it onto the pawls.
n
Note
If the interlock pawls are not functioning correctly, refer to the service
department.
2. Carry out monthly lubrication activities as specified in Table 5.1 on page 36.
5.2.3 Annual maintenance
The user should have the vehicle lift inspected annually by trained lift service
personnel (hereafter referred to as the service department). A maintenance
contract can be arranged with the service department for this annual inspection.
If no maintenance contract is arranged, the user should arrange for an annual
inspection and maintenance service himself.
This inspection is recorded in the inspection check list.
n
Operating instructions (Version B)
Note
‘Trained lift service personnel’ refers to personnel of the Stertil-Koni
service department or another servicing agency recognized by StertilKoni, both also designated as ‘service department’. The consequences
of all repairs carried out on the car lift by non-trained lift service
personnel, are entirely at the user's risk.
35
ST 4032 / ST 4040
Maintenance procedures
5.3
Maintenance
procedures
5.3.1 Lubrication instructions
The vehicle lift must be maintained regularly in accordance with the lubrication
instructions Table 5.1 on page 36.
Table 5.1 Lubrication instructions
Per
month
Per
year
Maintenance activities
Description
Cylinder
Oil dry piston rod
Check the oil level in the tank
Replenish (only with vehicle
lift in the highest position)
x
Pawls and control racks
Oil fulcrum pin
x
Slack cable safety
Oil fulcrum pin
x
Locking bar and guide parts in the
posts
Lubricate
x
Various fulcrum pins
Lubricate
x
Cable pulleys
Lubricate with Molycote
PG54
x
Hydraulic oil in the tank
Replace
Every
2 years
x
x
5.3.2 Hydraulic oil
Replace the hydraulic oil in the tank about once every 2 years.
n
Operating instructions (Version B)
Note
When the vehicle lift is not in constant use, this oil change must also be
carried out.
36
ST 4032 / ST 4040
5
Inspection and maintenance
To change the hydraulic oil, carry out the following procedure:
1. Set the vehicle lift to the lowest position and drain off the oil.
2. Fill the tank with hydraulic oil HYDRAN 46 (46 cSt / 40°C), filtered at 4
micron max.
Table 5.2 Hydraulic oil
Model
ST 4032 / ST 4040
Capacity
8l
w
w
Warning
Use only approved oil in the reservoir. An incompatible oil may damage
or totally destroy the seals of the hydraulic cylinders, pump, and valves.
This could cause a serious safety hazard.
Warning
Do not check or add oil when the lift is in the raised position. An overflow
condition may the result. Needless damage could occur to the lift
components.
5.3.3 Lighting armatures (option)
n
Operating instructions (Version B)
Note
Clean the lighting armatures only with a non aggressive cleaning agent.
37
ST 4032 / ST 4040
6
6
6.1
General
Faults
Faults in the vehicle lift can be caused by a single fault. Check the installation
for the causes indicated.
If the fault cannot be cleared by referring to the indicated causes, you should
contact the service department.
n
n
Note
Any repairs to the vehicle lift and the resultant consequences are
completely at the users own risk where such repairs have not been
carried out by the service department.
Note
It is understood that service department means the Stertil service
department or a Stertil approved service department.
The fault diagnosis can be used for locating defects. If in any doubt, contact the
service department.
Operating instructions (Version B)
38
ST 4032 / ST 4040
6
6.2
Faults
Fault diagnosis
The following overview of faults refers to the relevant table:
Table 6.1 ’Motor does not turn’ on page 39,
Table 6.2 ’Vehicle lift does not raise’ on page 39,
Table 6.3 ’Vehicle lift does not lower’ on page 39.
Table 6.1 Motor does not turn
Possible cause
Solution
Main switch not connected
Connect main switch
Mains fuse defective
Replace mains fuse
Control panel fuse defective
Notify the service department
Table 6.2 Vehicle lift does not raise
Possible cause
Solution
Broken circuit highest position: electrical fault or
vehicle lift stays in highest position
Lower the vehicle lift; for electrical faults refer to the
service department
Broken circuit cable break switch: electrical fault or
cable break
Refer to the service department
Table 6.3 Vehicle lift does not lower
Possible cause
Solution
Pawls are not disengaged from the interlock
First raise the vehicle lift 50 mm
The electrically-actuated lowering valve for the
hydraulic unit does not open
No control voltage on magnetising coil, or lowering
valve is defective; to be repaired by the service
department
Broken circuit slack cable: electrical fault or slack
cable
Raise the vehicle lift and remove any obstacles from
under the tracks. Refer all other cases to the service
department
Protection against hose breakage not functioning
The service department should replace any hoses;
check the interlocks for damage
n
Operating instructions (Version B)
Note
Refer all other defects (other than those specified above) to the service
department.
39
ST 4032 / ST 4040
Emergency lowering provision
6.3
Emergency lowering
provision
If there is a power supply failure, you will no longer be able to lower the vehicle
lift using the control buttons. Where this is the case, the vehicle lift can be
lowered manually. Contact the service department to carry out this operation.
w
Operating instructions (Version B)
Warning
The emergency lowering procedure may only be carried out by
competent personnel who are familiar with the procedure.
40
ST 4032 / ST 4040
Index
A
M
Annual maintenance- - - - - - - - - - - -35
C
Copyright - - - - - - - - - - - - - - - - -25
D
Maintenance - - - - - - annual- - - - - - - - daily- - - - - - - - - hydraulic oil - - - - - lubrication instructions monthly - - - - - - - Maintenance procedures Manufacturer’s data - - - Monthly maintenance - - -
-
-
-
-
-
-
-
- 35
- 35
- 35
- 36
- 36
- 35
- 36
- 26
- 35
Operation - - - - - lower - - - - - lower by interlock
raise - - - - - slowly lower - - switching on - - -
-
-
-
-
-
-
-
- 32
- 32
- 32
- 32
- 33
- 32
Daily maintenance- - - - - - - - - - - - -35
O
E
Emergency lowering provision - - - - - - -40
Emergency stop - - - - - - - - - - - - - -28
F
-
-
-
Fault diagnosis - - - - - - - - - - - - - -39
Faults - - - - - - - - - - - - - - - - - - -38
P
Protection - - - - - - - - - - - - - - - - - 29
G
Guarantee- - - - - - - - - - - - - - - - -26
R
REACH regulation- - - - - - - - - - - - - 26
H
Hydraulic oil - - - - - - - - - - - - - - - -36
S
Safety- - - - - - - - - emergency stop - - measures - - - - - personal- - - - - - protection - - - - - Safety indications - - - Service
fault diagnosis - - - Slowly lower - - - - - Specifications - - - - - Statement of conformity Switching on - - - - - -
I
Inspection - - - - - - - - - - - - - - - - -35
L
Liability - - - - - - - Lift capacity - - - - - Lift system - - - - - Lighting
operation - - - - Lower
by interlock - - - slowly - - - - - - Lubrication instructions
- - - - - - - - - -26
- - - - - - - - - -31
- - - - - - - - - -31
- - - - - - - - - -34
- - - - - - - - - -32
- - - - - - - - - -33
- - - - - - - - - -36
-
-
-
-
-
-
-
-
- 27
- 28
- 28
- 27
- 29
- 27
-
-
-
-
-
-
-
-
- 39
- 33
- 30
- 24
- 32
T
Technical data - - - - - - - - - - - - - - 30
wheel free system - - - - - - - - - - - 31
W
Wheel free system
operation - - - - - - - - - - - - - - - 33
technical data - - - - - - - - - - - - - 31
Operating instructions (Version B)
41
ST 4032 / ST 4040
Deutsch
Inhalt
1
Allgemeines - - - - - - - - - - - - - - - - - - - - - - - - - - - 45
1.1
1.2
1.3
1.4
1.5
1.6
1.7
1.8
1.9
2
Copyright - - - - - - - - - - - - - - - - - Abgrenzung des Dokuments - - - - - - - - An wen richtet sich diese Betriebsanleitung? Umfang dieser Betriebsanleitung- - - - - - Hinweise im Text - - - - - - - - - - - - - Daten des Herstellers - - - - - - - - - - - Garantie und Haftung - - - - - - - - - - - Umweltaspekte - - - - - - - - - - - - - - 1.8.1
Informationen zu REACH - - - - Entsorgung der Hebebühne - - - - - - - - -
-
-
-
-
-
-
-
-
-
-
-
-
-
-
-45
-45
-45
-45
-46
-46
-46
-46
-46
-46
Sicherheit - - - - - - - - - - - - - - - - - - - - - - - - - - - - 47
2.1
2.2
2.3
2.4
3
Einführung - - - - - - - - Sicherheits-hervorhebungen Persönliche Sicherheit - - - Sicherheitsmaßnahmen - - 2.4.1
Notstopp - - - - 2.4.2
Sicherungen - - -
-
-
-
-
-
-
-
-
-
-
-
-
-
-
-
-
-
-
-
-
-
-
-47
-47
-47
-48
-48
-49
Technische Daten - - - - - - - - - - - - - - - - - - - - - - - - 50
3.1
3.2
3.3
3.4
4
Allgemeines - - - - - - Höchstlast - - - - - - - 3.2.1
ST 4032 - - 3.2.2
ST 4040 - - Hebesystem - - - - - - Radfreisystem (optional) 3.4.1
Höchstlast - 3.4.2
Hebesystem -
-
-
-
-
-
-
-
-
-
-
-
-
-
-
-
-
-
-
-
-
-
-
-
-
-50
-51
-51
-51
-51
-51
-51
-51
Bedienung - - - - - - - - - - - - - - - - - - - - - - - - - - - - 52
4.1
4.2
4.3
4.4
4.5
4.6
4.7
4.8
5
Allgemeines - - - - - - - Einschalten - - - - - - - Heben- - - - - - - - - - Senken - - - - - - - - - Senken in die Verriegelung
Langsam absenken - - - Radfreisystem (optional) - 4.7.1
Bedienung - - 4.7.2
Einschalten - - 4.7.3
Heben - - - - 4.7.4
Senken - - - - Beleuchtung (optional) - - -
-
-
-
-
-
-
-
-
-
-
-
-
-
-
-
-
-
-
-
-
-
-
-
-52
-52
-52
-52
-53
-53
-53
-53
-53
-54
-54
-54
Inspektion und Wartung - - - - - - - - - - - - - - - - - - - - - 55
5.1
Allgemeines - - - - - - - - - - - - - - - - - - - - - - - - - - - - - - - -55
Bedienungsanleitung (Version B)
42
ST 4032 / ST 4040
5.2
5.3
6
Wartungsplan - - - - - - - - - - - - - - - - - - 5.2.1
Tägliche Wartung durch den Benutzer - 5.2.2
Monatliche Wartung durch den Benutzer
5.2.3
Jährliche Wartung- - - - - - - - - - - Wartungsverfahren - - - - - - - - - - - - - - - 5.3.1
Schmieranleitung - - - - - - - - - - - 5.3.2
Hydrauliköl - - - - - - - - - - - - - - 5.3.3
Beleuchtungsarmaturen (option)- - - - -
-
-
-
-
-
-
-
-
-
-
-
-55
-55
-55
-55
-56
-56
-56
-56
Störungen - - - - - - - - - - - - - - - - - - - - - - - - - - - - 57
6.1
6.2
6.3
Allgemeines - - - - - - - - - - - - - - - - - - - - - - - - - - - - - - - -57
Störungsdiagnose - - - - - - - - - - - - - - - - - - - - - - - - - - - - -57
Notsenkvorrichtung - - - - - - - - - - - - - - - - - - - - - - - - - - - -58
Index - - - - - - - - - - - - - - - - - - - - - - - - - - - - - - - 59
Bedienungsanleitung (Version B)
43
ST 4032 / ST 4040
ÜbereinstimmungsErklärung
CE 0123
Übereinstimmungserklärung unter Anwendung der europäischen
Maschinenrichtlinie (06/42/EG).
Hersteller:
Stertil B.V.
Postbus 23
9288 ZG Kootstertille
Nederland
Maschine:
Hydraulische Hebebühne mit 4 Säulen für PKW und
leichte Lieferwagen.
Marke:
STERTIL - KONI
Seriennummer:
.................
Datum
Inbetriebnahme:
.................
Modell
ST 4032
ST 4040
Version
Vier-Säulen-Hebebühne mit Fahrbahnen
Vier-Säulen-Hebebühne mit Fahrbahnen
Varianten
-F-Fahrbahnen mit Radfreisystem
-F-Fahrbahnen mit Radfreisystem
-S Hebebühne 25 cm verkürzt
-N-Hebebühne 30 cm verschmälert
-V Hebebühne 30 cm verbreitert
-L Hebebühne 45 cm länger
-M Hebebühne verbreiterte Fahrbahnen
-MOT Hebebühne 20 cm länger
-S Hebebühne 25 cm kürzer
Optionen
Verschiedene Möglichkeiten
Verschiedene Möglichkeiten
Der Unterzeichner, U. Bijlsma, entsprechend ermächtigter Geschäftsführer,
Stertil B.V., erklärt hiermit, dass die Hebebühne den grundsätzlichen
Sicherheitsanforderungen entspricht:
•
2006/42/EC Maschinenrichtlinie
EN 61508 (SIL1), EN 1493, EN 418, EN 954-1, EN 60204-1
•
2004/108/EC
•
2006/95/EC Niederspannungsrichtlinie
EN60950-1, IEC60335-2-29
Stertil B.V. Kootstertille
U. Bijlsma
Geschäftsführer
Unterschrift:
Datum: 01-01-2010
Die zuvor beschriebene Hebebühne wurde einer EU-Typenprüfung unter
Anweisung der Maschinenrichtlinie unterzogen. Diese EU-Typenprüfung wurde
ausgeführt von:
RWTÜV - Institut für Produkterprobung und Werkstofftechnik - Zentralabteilung
Prüflaboratorien
ST 4032:
ST 4032F:
ST 4040:
ST 4040F:
Bedienungsanleitung (Version B)
04 205 - 2461/03
04 205 - 2473/03
04 205 - 2472/03
04 205 - 2474/03
44
ST 4032 / ST 4040
1
1
1.1
Copyright
Allgemeines
Copyright 2010 Stertil B.V.
Alle Rechte weltweit vorbehalten. Eine Vervielfältigung dieser Ausgabe
einschließlich Zeichnungen und Diagramme - auch auszugsweise - ist ohne die
vorherige schriftliche Genehmigung von Stertil B.V. nicht gestattet, sei es in
gedruckter Form, als Fotokopie, auf Mikrofilm oder in welcher anderen Weise
auch immer.
1.2
Abgrenzung des
Dokuments
Diese Anleitung ist eine Übersetzung der niederländischen Originalversion.
Stertil B.V. behält sich das Recht vor, die Konstruktion bzw. Konfiguration seiner
Produkte jederzeit zu ändern, ohne dabei die Verpflichtung einzugehen, zuvor
gelieferte Produkte umzurüsten. Die Daten in dieser Betriebsanleitung beruhen
auf den neuesten verfügbaren Informationen. Sie können zu späterem
Zeitpunkt ohne vorherige Warnung geändert werden. Informationen zu
Einstellungen, Wartungsarbeiten oder Reparaturarbeiten, die nicht in diesem
Dokument beschrieben sind, erhalten Sie beim Kundendienst von Stertil B.V.
Die Informationen in dieser Betriebsanleitung basieren auf der zweckgerechten
Nutzung des Produktes. Wenn die Produkte, Produkteinzelteile oder Verfahren
in einer anderen Weise benutzt werden als in dieser Betriebsanleitung
beschrieben ist, muss zunächst eine Bestätigung eingeholt werden, die die
Richtigkeit und Eignung dieser Nutzung bescheinigt.
Weder aus dieser Betriebsanleitung noch aus der Dokumentation, die zu den
Produkten mitgeliefert wird, können irgendwelche Rechte abgeleitet werden.
Lediglich die Auftragsbestätigung ist verbindlich.
Diese Betriebsanleitung enthält nützliche und wichtige Informationen zur
ordnungsgemäßen Funktion und der richtigen Wartung des Produktes. Zudem
enthält die Betriebsanleitung wichtige Anweisungen zur Verhinderung
möglicher Unfälle und ernsthafter Schäden während des Betriebs der
Maschine. Diese Betriebsanleitung ist nach bestem Wissen korrekt und
vollständig. Sollten Sie Fehler finden oder Informationen vermissen, weisen Sie
bitte unseren Kundendienstmanager darauf hin, damit wir dies angleichen
können. Auf diese Weise können wir unsere Dokumentation verbessern.
1.3
An wen richtet sich
diese
Betriebsanleitung?
Diese Betriebsanleitung richtet sich an Benutzer der Hebebühne Typ ST 4032 /
ST 4040.
Personen, die mit der Bedienung der Hebebühne Typ ST 4032 / ST 4040 nicht
vertraut sind, wird empfohlen, die folgenden Kapitel aufmerksam durchzulesen
und die darin enthaltenen Anweisungen genau zu befolgen.
Personen, die mit der Bedienung der Hebebühne Typ ST 4032 / ST 4040
vertraut sind, können diese Betriebsanleitung als Nachschlagewerk
verwenden. Das Inhaltsverzeichnis und der Index können zum Nachschlagen
der benötigten Informationen verwendet werden.
1.4
Umfang dieser
Betriebsanleitung
Diese Betriebsanleitung enthält wichtige Informationen zur Bedienung der
Hebebühne Typ ST 4032 / ST 4040.
Informationen zur Installation und Service der Hebebühne finden Sie in der
Installations- und Kundendienstanleitung (43508001) zur ST 4032 / ST 4040.
Bedienungsanleitung (Version B)
45
ST 4032 / ST 4040
Hinweise im Text
1.5
Hinweise im Text
In dieser Betriebsanleitung werden die folgenden Hervorhebungen verwendet.
Jeder Hervorhebung hat ihre eigene Bedeutung.
Fettgedruckter Text gilt als zusätzliche Betonung.
n
c
w
Anmerkung
Weist auf einen wichtigen Teil des Textes hin. Lesen Sie den Text
aufmerksam durch.
Achtung
Zu finden bei Verfahren, die unbedingt befolgt werden müssen, da die
Maschine oder das Material ansonsten beschädigt werden könnte.
Halten Sie die Verfahren genau ein.
Warnung
Weist auf ein Verfahren oder eine Handlung hin, die bei nicht korrekter
Durchführung zu persönlichen Verletzungen oder Beschädigungen
führen kann, bzw. weist auf eine verbotene Handlung hin. Das
Ignorieren des Verbots kann zu Unfällen, persönlichen Verletzungen
oder ernsthaften Beschädigungen an der Maschine führen.
Texte in <>, (z. B. <Senken>) weisen auf Bedienungsknöpfe der Hebebühne
hin.
1.6
Daten des
Herstellers
Stertil B.V.
P.O. Box 23
9288 ZG Kootstertille
Telefon
+31(0)512 334 444
Telefax
+31(0)512 334 430
E-Mail:
[email protected]
Informationen im Internet:
www.stertil.nl
1.7
Garantie und
Haftung
Siehe Lieferbedingungen und Auftragsbestätigung.
1.8
Umweltaspekte
Der Eigentümer bzw. Benutzer der Hebebühne ist für die Entsorgung von
Abfallmaterialien (Altöl etc.) gemäß den vor Ort geltenden Gesetzen bzw.
Verordnungen verantwortlich.
1.8.1 Informationen zu REACH
Am 1. Juni 2007 trat die neue EU-Chemikalienverordnung REACH in Kraft. Ziel
im Hinblick auf Mensch und Umwelt ist es, innerhalb der EU nur noch sichere
chemische Stoffe herzustellen und zu verwenden.
Stertil produziert gemäß den Definitionen von REACH "Artikel" und ist ein
"Downstream User" von chemischen Stoffen.
Stertil hält die Anforderungen der Chemikalienverordnung ein und überprüft im
Hinblick auf alle verwendeten Materialien und Stoffe, ob seine Zulieferer die
Anforderungen der REACH-Verordnung einhalten.
Auf Wunsch kann Ihnen Ihr örtlicher Händler gerne entsprechende
Informationen wie z.B. Materialsicherheitsdatenblätter (MSDB) zur Verfügung
stellen.
1.9
Entsorgung der
Hebebühne
Am Ende der Lebensdauer der Hebebühne ist der Eigentümer bzw. Benutzer
für eine sichere Demontage der Hebebühne und für eine Entsorgung der
Einzelteile nach den örtlich geltenden Gesetzen und Verordnungen
verantwortlich.
Bedienungsanleitung (Version B)
46
ST 4032 / ST 4040
2
2
2.1
Einführung
Sicherheit
Unsere Sicherheitsanforderungen dürfen keinesfalls im Widerspruch zu den
gesetzlichen Bedingungen und Regelungen stehen, die in Punkto Sicherheit
der Hebebühne gelten. Wenn eine der Warnungen oder
Sicherheitsanforderungen im Gegensatz zu existierenden örtlichen Gesetz
stehen, so hat die strengste Regelung den Vorzug. Unsere Hebebühnen vom
Typ ST 4032 / ST 4040 sind gemäß den Gesetzen und Richtlinien, die für solche
Geräte gelten, gesichert.
Ohne unsere vorherige schriftliche Genehmigung ist es nicht zulässig,
Änderungen an der Hebebühne vorzunehmen. Im Falle von Personen- oder
Sachschaden infolge einer Nichtbefolgung dieser Anforderung übernimmt
Stertil B.V. keinerlei Haftung.
Der Betriebsleiter der Werkstatt bzw. des Unternehmens hat dafür zu sorgen,
dass die Sicherheitsvorschriften, die in diesem Unternehmen gelten, genau
befolgt werden.
w
Warnung
Eine Nichtbefolgung der Sicherheitsvorschriften kann zu Personen- oder
Maschinenschäden führen.
Machen Sie sich mit der Funktion und der Bedienung der Maschine vertraut.
Befolgen Sie die Anweisungen genau.
2.2
Sicherheitshervorhebungen
Dieses Dokument enthält einige spezielle Symbole und Absprachen, mit denen
sich der Benutzer vertraut machen muss. Hinweise im Text siehe 1.5 auf
Seite 46.
2.3
Persönliche
Sicherheit
Einem Benutzer wird empfohlen, persönliche Schutzmittel zu verwenden:
•
Schutzkleidung,
•
Sicherheitsschuhwerk.
w
Bedienungsanleitung (Version B)
Warnung
Tragen Sie keine weite Kleidung oder Schmuck.
47
ST 4032 / ST 4040
Sicherheitsmaßnahmen
2.4
Sicherheitsmaßnahmen
Im Interesse einer sicheren Bedienung der Hebebühne müssen die folgenden
Sicherheitsmaßnahmen beachtet werden:
•
Nutzen Sie diese Hebebühne ausschließlich zum Heben von Fahrzeugen
und nicht zu anderen Zwecken.
•
Installieren Sie die Hebebühne so, dass ein sicherer Arbeitsplatz geschaffen
wird. Beachten Sie dabei ebenfalls die Fluchtwege für Notfälle (mindestens
600 mm freier Durchgang).
•
Lassen Sie die Hebebühne nur von entsprechend qualifizierten Personen
bedienen;
Diese Personen müssen in jedem Fall die Betriebsanleitung der Hebebühne
zur Kenntnis genommen haben.
•
Kontrollieren Sie beim Bedienen der Hebebühne, ob sich keine Personen
oder Gegenstände im Arbeitsgebiet der Hebebühne (inklusive Fahrzeug)
befinden.
•
Achten Sie während des Hebens oder des Senkens der Hebebühne genau
auf das Fahrzeug.
w
w
Warnung
Wenn Hindernisse (Böcke etc.) unter dem Fahrzeug liegen, können
beim Senken Gefahrensituationen entstehen.
Warnung
Wenn ein zu hohes Fahrzeug auf die Hebebühne gesetzt wird, können
Gefahrensituationen entstehen.
•
Begeben Sie sich während der Bedienung der Hebebrücke nicht auf oder
unter das Fahrzeug (mit Last).
•
Besteigen Sie die Hebebühne oder das Fahrzeug nicht, wenn die
Hebebühne hochgefahren wurde.
•
Fahren Sie die Hebebühne bei Störungen oder nach Beendigung der
Arbeiten immer in die niedrigste Position und schalten Sie die Spannung mit
dem Hauptschalter aus. Stellen Sie hierzu den Hauptschalter auf 0 und
sichern Sie ihn mit einem Vorhängeschloss.
•
Tragen Sie bei Schweißarbeiten an der Hebebühne für eine entsprechende
Erdung Sorge. Ansonsten könnten Beschädigungen am Hydraulikzylinder
bzw. an der Verkabelung etc. auftreten.
w
Warnung
Fehlerhafte Bedienung oder eine mangelhafte Wartung kann zu
Personen- oder Sachschäden führen.
2.4.1 Notstopp
Der Hauptschalter rechts im Bedienungsschrank dient ebenfalls als
Notstoppschalter. Stoppen Sie die Hebebühne bei Zwischenfällen mit diesem
Schalter.
Wenn der Notstopp verwendet wurde, überprüfen Sie:
•
ob jemand befreit werden muss,
•
ob die Hebebühne beschädigt ist.
Bedienungsanleitung (Version B)
48
ST 4032 / ST 4040
2
Sicherheit
2.4.2 Sicherungen
Die Hebebühne ist mit Sicherungen (siehe Abbildung 2.1 auf Seite 49)
ausgestattet, die bewirken, dass:
•
die Absenkbewegung stoppt, wenn durch Hindernisse Höhenunterschiede
zwischen den Fahrbahnen entstehen, woraufhin im Falle eines bzw.
mehreren schlaffen Seilen nur noch Heben möglich ist (5),
•
der Steuerstrom im Falle eines Kabelbruchs ausgeschaltet wird, so dass
eine Bedienung nicht mehr möglich ist (6),
•
bei Erreichen des Höchststandes die Hebebewegung unterbrochen wird (2),
•
die Absenkbewegung mechanisch blockiert wird, wenn die Hebebühne
nicht bedient wird bzw. bei Ausfall der Steuerspannung (4),
•
der Zylinder bei Schlauchbruch durch das Schlauchbruchventil (3)
verschlossen wird.
•
die Hebebühne während des Senkens in einer Höhe von ca. 140 mm über
dem Boden (Fußsicherung) stoppt; der Absenkvorgang nach
Sicherheitskontrolle durch nochmalige Betätigung des Knopfes <Senken>
fortgesetzt werden kann (1).
4
5
6
6
1. Fußsicherungsschalter
2. Endschalter Höchststand
3. Schlauchbruchventil in Zylinder
4. Mechanische Blockierung
5. Schlaffseilsicherung
6. Kabelbruchsicherung
3
2
1
Abbildung 2.1 Sicherungen der Hebebühne
Bedienungsanleitung (Version B)
49
ST 4032 / ST 4040
3
3
3.1
Allgemeines
Technische Daten
Allgemeine technische Daten finden Sie ebenfalls auf dem Typenschild auf der
Hebebühne.
Tabelle 3.1 Technische Daten
Modell
ST 4032
ST 4040
Höchstlast
3200 kg
4000 kg
Überdruckventil
260 bar (werksseitig mit
Kunststoffkappe versiegelt)
260 bar (werksseitig mit
Kunststoffkappe versiegelt)
Zylinderhub
1870 mm
1745 mm (S-Version)
1870 mm
1745 mm (S-Version)
Elektrische Leistung
3,6 kW
3,6 kW
380/415 50V, 50Hz
3 x Phase, 1 x Erde, 1 x Null
3 x Phase, 1 x Erde, 1 x Null
220/240 50V, 50Hz
3 x Phase, 1 x Erde
3 x Phase, 1 x Erde
220/240 230V, 50Hz
einphasig
1 x Phase, 1 x Null, 1 x Erde
1 x Phase, 1 x Null, 1 x Erde
380/415 50V, 50Hz
3 x 16 A (träge)
3 x 16 A (träge)
220/240 50V, 50Hz
3 x 16 A (träge)
3 x 16 A (träge)
220/240 230V, 50Hz
einphasig
1 x 16 A (träge)
1 x 16 A (träge)
Steuerspannung
24 V Gleichspannung
24 V Gleichspannung
Einstellung
Schlauchbruchventil
28 l/min (1,25 mm)
28 l/min (1,25 mm)
Hebe- und Senkzeit (3 x Ph.)
Hebe- und Senkzeit (1 x Ph.)
24 / 23 s
47 / 23 s
29 / 29 s
59 / 29 s
Geräuschpegel
max. 74 dB(A)
max. 74 dB(A)
Aufstellung
Innen
Innen
Eigengewicht
900 kg
910 kg
Betriebstemperatur
-15 -> +50 D.C.
-15 -> +50 D.C.
Netzanschluss
Netzsicherung
Bedienungsanleitung (Version B)
50
ST 4032 / ST 4040
3
3.2
Technische Daten
Höchstlast
Höchstlast siehe Tabelle 3.1 auf Seite 50. Die Überdrucksicherung des
Hydraulikaggregats ist so eingestellt, dass auf keinen Fall mehr als das
angegebene Gewicht + 10% gehoben werden kann.
3.2.1 ST 4032
Die Hebebühne ist für eine Höchstlast von 1600 kg auf einer Fahrbahn und
einer Lastenverteilung zwischen den Achsen des Fahrzeugs im Verhältnis von
40% - 60% bei einem Radabstand von mindestens 3000 mm und einer
Spurbreite von mindestens 1600 mm ausgelegt.
3.2.2 ST 4040
Die Hebebühne ist für eine Höchstlast von 2000 kg auf einer Fahrbahn und
einer Lastenverteilung zwischen den Achsen des Fahrzeugs im Verhältnis von
33% - 66% bei einem Radabstand von mindestens 3000 mm und einer
Spurbreite von mindestens 1700 mm ausgelegt.
3.3
Hebesystem
Diese hydraulische 4-Säulen-Hebebühne ist mit einem Hydraulikaggregat
ausgestattet. Dieses Aggregat treibt einen Zylinder an, der in der "festen"
Fahrbahn montiert ist. Der Zylinder treibt vier Seilenden an, die über
Seilscheiben durch die Fahrbahn und die Querbalken verlaufen und in den
Säulen befestigt sind.
3.4
Radfreisystem
(optional)
Optional kann ein Radfreisystem installiert werden.
Tabelle 3.2 Technische Daten Radfreisystem
Modell
ST 4032F
ST 4040F
Höchstlast
3200 kg
4000 kg
Zylinderhub
207 mm
207 mm
Hebehöhe
450 mm
450 mm
Hebe- und Senkzeit - 3 Phasen
8/8s
8/8s
Hebe- und Senkzeit - 1 Phase
16 / 8 s
16 / 8 s
3.4.1 Höchstlast
Der Entwurf ist für eine maximale Last auf einer Aufnahmeplatte von 1600 kg
(ST 4032) bzw. 2000 kg (ST 4040) und einer Lastverteilung von 33 % - 66 %
berechnet.
w
Warnung
Wird diese Lastverteilung nicht berücksichtigt, besteht die Gefahr, das
Radfreisystem zu beschädigen.
3.4.2 Hebesystem
Das Radfreisystem ist mit einem so genannten doppelten Master-Slave-System
ausgerüstet. Auf diese Weise wird der Gleichlauf beider Aufnahmeplatten
sichergestellt.
Bedienungsanleitung (Version B)
51
ST 4032 / ST 4040
4
4
4.1
Allgemeines
Bedienung
Fahren Sie das Fahrzeug gerade auf die Hebebühne, wobei die Reifen komplett
auf den Fahrbahnen stehen müssen. Ziehen Sie die Handbremse des
Fahrzeugs an und setzen Sie Keile vor die Räder des Fahrzeugs.
Die Bedienung der Hebebühne erfolgt mit Hilfe von Druckschaltern, die in der
Steuereinheit (siehe Abbildung 4.1), an der Säule III montiert sind. Siehe auch
Bedienungsaufkleber auf der Hebebühne.
1. (Not-)Hauptschalter
2. Hochziehen
3. Senken
4. Senken in die Verriegelung
5. Langsam absenken
6. Wahlschalter
Radfreisystem (optional)
6
1
2
5
3
4
Abbildung 4.1 Steuereinheit
n
Anmerkung
Bedienen Sie die Steuereinheit ausschließlich mit den Fingern. Die
Bedienung mit scharfen Gegenständen (z. B. Schraubenzieher) kann zu
Beschädigungen und Störungen führen.
Die Knöpfe zum Heben, Senken und Entriegeln sind vom Totmannsknopftyp
(hold to run). Die Steuerung funktioniert nur solange wie der Schaltknopf
eingedrückt wird und wird sofort unterbrochen, wenn der Schalter losgelassen
wird.
4.2
Einschalten
Die Hebebühne wird wie folgt eingeschaltet:
1. Drehen Sie den Hauptschalter (1) in Position 1.
Dadurch wird die Netz- und Steuerspannung eingeschaltet.
2. Die Hebebühne ist betriebsbereit.
4.3
Heben
Betätigen Sie für die Hebefunktion der Hebebühne den oberen Schaltknopf (2).
Neben diesem Schaltknopf befindet sich ein nach oben gerichteter Pfeil.
4.4
Senken
Betätigen Sie zum Senken der Hebebühne gleichzeitig die Tasten (4)
<Entriegeln> und (3) <Senken>. Während des Senkens kann die Taste (4)
<Entriegeln> losgelassen werden. Die Sicherheitsklinken bleiben in geöffneter
Position stehen.
w
Bedienungsanleitung (Version B)
Warnung
Wenn beim Senken Probleme auftreten, lassen Sie den Knopf sofort los.
52
ST 4032 / ST 4040
4
4.5
Bedienung
Senken in die
Verriegelung
Zum Senken in die Verriegelung wird ausschließlich der Knopf (4) rechts unten
betätigt (siehe Abbildung 4.1 auf Seite 52). Die Hebebühne wird dann max.
60 mm abgesenkt, bis sich die Sperrklinken in das Profil einhaken.
Man muss die Hebebühne erst wieder anheben (Entlastung der Sperre), bevor
man die Hebebühne weiter absenken kann. Die untersten 80 mm der
Hubbewegung sind nicht mit einer Sperre ausgestattet.
4.6
Langsam absenken
Man kann die Hebebühne mit Hilfe des Softsenkdrehreglers (5) rechts vom
Bedienungspult (siehe Abbildung 4.1 auf Seite 52) langsam absenken. Zum
langsamen Absenken der Hebebühne gehen Sie wie folgt vor:
1. Drehen Sie den Regler (5) völlig nach rechts.
2. Betätigen Sie den Absenkknopf (3) in und drehen Sie gleichzeitig den
Regler (5) nach links.
Die Hebebühne wird jetzt langsam abgesenkt. Wenn der Regler eine volle
Umdrehung geöffnet wird, läuft die Hebebühne wieder auf
Normalgeschwindigkeit.
4.7
Radfreisystem
(optional)
4.7.1 Bedienung
Platzieren Sie das Fahrzeug gerade über das Radfreisystem, und stellen Sie
die Aufnahmeblöcke unter die Aufnahmepunkte des Fahrzeugs. Verschieben
Sie gegebenenfalls den verstellbaren Teil.
Abbildung 4.2 Platzierung des Fahrzeugs
Bedienen Sie das Radfreisystem über die Knöpfe am Bedienkasten, der an der
Säule III angebracht ist.
Stellen Sie den Wahlschalter (6) an der Seite der Steuereinheit für die
Bedienung der Hebebühne (Stand 1) oder die Bedienung des Radfreisystems
(Stand 2) ein.
4.7.2 Einschalten
1. Drehen Sie den Hauptschalter (1) in Position 1.
2. Stellen Sie den Wahlschalter (6) in Stand 1, und fahren Sie die Hebebühne
mit Hilfe des Anstiegknopfes (2) auf die gewünschte Höhe.
3. Lassen Sie die Hebebühne in der Verriegelung mit Hilfe von Knopf (4)
absenken.
4. Drehen Sie den Wahlschalter (6) in Stand 2 für die Bedienung des
Radfreisystems.
Bedienungsanleitung (Version B)
53
ST 4032 / ST 4040
Beleuchtung (optional)
4.7.3 Heben
Betätigen Sie zum Heben des Radfreisystems den oberen Knopf (2). Neben
diesem Schaltknopf befindet sich ein nach oben gerichteter Pfeil.
4.7.4 Senken
Betätigen Sie zum Senken des Radfreisystems den Absenkknopf (3) mit einem
abwärts weisenden Pfeil. Das Radfreisystem stoppt ca. 10 cm über der
Fahrbahn. Wenn Sie nun nochmals auf den Absenkknopf (3) drücken, sinkt das
Radfreisystem weiter ab, begleitet von einem akustischen Signal.
Der Knopf ’Senken in die Verriegelung’ (4) hat hier keine Funktion.
n
4.8
Beleuchtung
(optional)
Anmerkung
Der Hahn (5) für Langsam absenken funktioniert nur für die Hebebühne,
nicht für das Radfreisystem.
Die Beleuchtung wird mit Hilfe des Schalters mit dem Beleuchtungssymbol einund ausgeschaltet.
n
Bedienungsanleitung (Version B)
Anmerkung
Schlagen Sie bei Störungen in der Störungsdiagnose nach (siehe
§ 6.2 ’Störungsdiagnose’ auf Seite 57).
54
ST 4032 / ST 4040
5
5
5.1
Allgemeines
Inspektion und
Wartung
Senken Sie bei Inspektion und Wartung die Hebebühne immer in die niedrigste
Position ab und schalten Sie den Hauptschalter aus (Position 0). Verriegeln Sie
den Schalter mit einem Vorhängeschloss.
Nur wenn bestimmte Einstellungen und Kontrollen es erfordern, kann die
Spannung vorübergehend eingeschaltet werden, um die Hebebühne auf eine
höhere Position hochzufahren.
w
Warnung
Senken Sie die Hebebühne bei einer höheren Position immer in die
Verriegelung ab.
Einmal pro Jahr muss die Hebebühne einer gründlichen Kontrolle unterzogen
werden. Im Rahmen eines Wartungsvertrages kann die Hebebühne von
kompetenten Stertil B.V.-Monteuren kontrolliert werden.
5.2
Wartungsplan
5.2.1 Tägliche Wartung durch den Benutzer
1. Überprüfen Sie die Hebebühne auf sichtbare Schäden hin.
2. Kontrollieren Sie, ob Öl aus Hydraulik, Schläuchen oder Zylinder austritt.
5.2.2 Monatliche Wartung durch den Benutzer
1. Überprüfen Sie die Funktion der Sperrklinken, indem Sie die Hebebühne
heben lassen und anschließend in die Klinken einrasten lassen.
n
Anmerkung
Sollte dies nicht ordnungsgemäß funktionieren, wenden Sie sich bitte an
den Kundendienst.
2. Führen Sie die monatlichen Schmierungen wie in Tabelle 5.1 auf Seite 56
angegeben durch.
5.2.3 Jährliche Wartung
Der Benutzer ist verpflichtet, die Hebebühne einmal pro Jahr von geschultem
Kundendienst- oder Wartungspersonal (nachstehend Kundendienst genannt)
inspizieren zu lassen. Für diese jährliche Inspektion kann ein Wartungsvertrag
mit dem Kundendienst abgeschlossen werden. Wird kein Wartungsvertrag
abgeschlossen, muss der Benutzer selbst jährlich einen Termin für diese
Inspektion und Wartung vereinbaren.
Diese Inspektion wird in der Inspektions-Kontrollliste gegengezeichnet.
n
Bedienungsanleitung (Version B)
Anmerkung
Bei "Geschultem Kundendienst- oder Wartungspersonal" handelt es
sich um Kundendienstpersonal vom Stertil-Koni oder einem anderen,
von Stertil-Koni anerkannten Kundendienst. Werden Reparaturen nicht
vom Stertil-Koni Kundendienst oder einem von Stertil-Koni anerkannten
Kundendienst durchgeführt, trägt der Benutzer das volle Risiko für die
Folgen.
55
ST 4032 / ST 4040
Wartungsverfahren
5.3
Wartungsverfahren
5.3.1 Schmieranleitung
Die Hebebühne muss regelmäßig gemäß der Schmieranleitung in Tabelle 5.1
gewartet werden.
Tabelle 5.1 Schmieranleitung
Wartungsarbeiten
Beschreibung
Pro
Monat
Pro
Jahr
Zylinder
Trockene Kolbenstange ölen
Ölstand im Tank kontrollieren
Nachfüllen (nur bei Hebebühne
in oberster Position)
x
Klinken und Führungsstangen
Drehpunkte ölen
x
Schlaffseilsicherung
Drehpunkte ölen
x
Verriegelungsprofil und
Führungsteile in den Säulen
Schmieren
x
Verschiedene Drehpunkte
Schmieren
x
Seilscheiben
Einfetten mit Molycote PG54
x
Hydrauliköl im Tank
Wechseln
Alle
2 Jahre
x
x
5.3.2 Hydrauliköl
Wechseln Sie ungefähr einmal alle 2 Jahre das Hydrauliköl im Tank (siehe
Tabelle 5.2).
n
Anmerkung
Auch wenn die Hebebühne nicht andauernd verwendet wird, muss
dieser Ölwechsel stattfinden.
Halten Sie beim Wechsel des Hydrauliköls folgendes Verfahren ein:
1. Senken Sie die Hebebühne ab und lassen Sie das Öl ab.
2. Füllen Sie den Tank mit Hydrauliköl HYDRAN 46 (46 cSt / 40°C) , abgefiltert
mit 4 Mikron max.
Tabelle 5.2 Hydrauliköl
Modell
ST 4032 / ST 4040
Inhalt
8l
5.3.3 Beleuchtungsarmaturen (option)
c
Bedienungsanleitung (Version B)
Achtung
Reinigen Sie die Beleuchtungsarmaturen nur mit einem nicht
aggressiven Reinigungsmittel.
56
ST 4032 / ST 4040
6
6
6.1
Allgemeines
Störungen
Störungen an der Hebebühne können an einem einfachen Fehler liegen.
Überprüfen Sie, ob die angegebenen Ursachen in der Anlage vorliegen.
Wenn die Störung bei einer Kontrolle der angegebenen Ursachen nicht beseitigt
werden kann, wenden Sie sich bitte an den Kundendienst.
n
n
Anmerkung
Alle durchgeführten Reparaturen an der Hebebühne mit den
entsprechenden Folgen gehen auf Risiko des Benutzers, insofern diese
Reparaturen nicht vom Kundendienst durchgeführt wurden.
Anmerkung
Als Kundendienst gilt der Kundendienst von Stertil oder ein von Stertil
anerkannter Kundendienst.
Die folgende Störungsdiagnose kann zur Auffindung von Fehlern verwendet
werden. Wenden Sie sich in Zweifelsfällen an den Kundendienst.
6.2
Störungsdiagnose
Die folgende Störungsübersicht verweist auf die betreffende Tabelle:
Tabelle 6.1 ’Motor läuft nicht.’ auf Seite 57,
Tabelle 6.2 ’Hebebühne hebt nicht’ auf Seite 57,
Tabelle 6.3 ’Hebebühne senkt nicht’ auf Seite 58.
Tabelle 6.1 Motor läuft nicht.
Mögliche Ursache
Lösung
Hauptschalter nicht eingeschaltet
Hauptschalter einschalten
Netzsicherung defekt
Netzsicherung austauschen
Sicherung in Steuereinheit defekt
Kundendienst verständigen
Tabelle 6.2 Hebebühne hebt nicht
Mögliche Ursache
Lösung
Stromkreis in der höchsten Position unterbrochen:
elektrischen Störung oder Hebebühne befindet sich
in der höchsten Position
Hebebühne absenken; bei elektrischer Störung
Kundendienst verständigen
Stromkreis des Kabelbruchschalters unterbrochen
Elektrische Störung oder Kabelbruch
Kundendienst verständigen
Bedienungsanleitung (Version B)
57
ST 4032 / ST 4040
Notsenkvorrichtung
Tabelle 6.3 Hebebühne senkt nicht
Mögliche Ursache
Lösung
Sperrklinken werden nicht aus der Verriegelung
gezogen
Lassen Sie die Hebebühne erst ca. 50 mm steigen
Das elektrisch bediente Senkventil am
Hydraulikaggregat öffnet sich nicht.
Keine Steuerspannung auf der Magnetspule oder
Senkventil defekt. Vom Kundendienst beheben
lassen
Unterbrochener Stromkreis schlaffes Seil:
Elektrische Störung oder schlaffes Seil
Die Hebebühne steigen lassen und eventuelle
Hindernisse unter den Fahrbahnen entfernen; in
sonstigen Fällen Kundendienst verständigen
Schlauchbruchsicherung ist geschlossen
Bei Schlauchbruch vom Kundendienst ersetzen
lassen; Kontrolle der Verriegelungen auf
Beschädigungen
n
6.3
Notsenkvorrichtung
Anmerkung
Bei anderen als den oben genannten Störungen immer den
Kundendienst verständigen.
Wenn der Strom ausgefallen ist, können Sie die Hebebühne nicht über die
Steuerknöpfe absenken. Wenn dies der Fall ist, kann die Hebebühne von Hand
abgesenkt werden. Wenden Sie sich in diesem Fall an den Kundendienst.
w
Bedienungsanleitung (Version B)
Warnung
Das Notabsenkverfahren darf nur von Personen durchgeführt werden,
die eingehend in dieses Verfahren eingewiesen sind.
58
ST 4032 / ST 4040
Index
Notstopp - - - - - - - - - - - - - - - - - 48
B
Bedienung - - - - - - - - - Einschalten - - - - - - - Heben - - - - - - - - - - Langsam absenken - - - Senken - - - - - - - - - Senken in die VerriegelungBeleuchtung
Bedienung - - - - - - - - -
-
-
-
-
-
-52
-52
-52
-53
-52
-53
P
Pflege- - - - - - - - - - - - - - - - - - - 55
R
Radfreisystem
Bedienung- - - - - - - - - - - - - - - 53
Technische Daten - - - - - - - - - - - 51
Reach Informationen - - - - - - - - - - - 46
- - - - - -54
C
Copyright - - - - - - - - - - - - - - - - -45
S
Schmieranleitung - - Senken
In die Verriegelung
Langsam absenken
Service
Störungsdiagnose Sicherheit - - - - - - Hervorhebungen- Maßnahmen- - - Notstopp - - - - Persönlich - - - - Sicherungen- - - Sicherungen - - - - Spezifikationen - - - Störungen- - - - - - Störungsdiagnose - - -
E
Einschalten - - - - - - - - - - - - - - - -52
G
Garantie- - - - - - - - - - - - - - - - - -46
H
Haftung - - - Hebesystem- Herstellerdaten
Höchstlast- - Hydrauliköl - -
-
-
-
-
-
-
-
-
-
-
-
-
-
-46
-51
-46
-51
-56
I
- - - - - - - - - - 56
- - - - - - - - - - 53
- - - - - - - - - - 53
-
-
-
-
-
-
-
-
-
- 57
- 47
- 47
- 48
- 48
- 47
- 49
- 49
- 50
- 57
- 57
T
Inspektion - - - - - - - - - - - - - - - - -55
Tägliche Wartung - - - - - - - - - - - - - 55
Technische Daten - - - - - - - - - - - - - 50
Radfreisystem - - - - - - - - - - - - - 51
J
jährlich - - - - - - - - - - - - - - - - - -55
Jährliche Wartung - - - - - - - - - - - - -55
U
Übereinstimmungserklärung - - - - - - - - 44
L
Langsam absenken - - - - - - - - - - - -53
W
Wartung - - - - - Hydrauliköl - - Monatlich - - - Schmieranleitung
Täglich - - - - Verfahren - - - -
M
Monatliche Wartung - - - - - - - - - - - -55
-
-
-
-
-
-
-
-
-
-
- 55
- 56
- 55
- 56
- 55
- 56
N
Notsenkvorrichtung - - - - - - - - - - - -58
Bedienungsanleitung (Version B)
59
ST 4032 / ST 4040
Français
Sommaire
1
Généralités - - - - - - - - - - - - - - - - - - - - - - - - - - - 63
1.1
1.2
1.3
1.4
1.5
1.6
1.7
1.8
1.9
2
Copyright - - - - - - - - - - - - - - - - Délimitation du document - - - - - - - - A qui ce manuel est-il destiné ? - - - - - Portée de ce manuel- - - - - - - - - - - Indications dans le texte - - - - - - - - - Coordonnées du fabricant - - - - - - - - Garantie et responsabilité - - - - - - - - Aspects relatifs à l’environnement - - - - 1.8.1
Informations à propos du REACH
Elimination du pont élévateur - - - - - - -
-
-
-
-
-
-
-
-
-
-
-
-
-
-
-
-63
-63
-63
-63
-64
-64
-64
-64
-64
-64
Sécurité - - - - - - - - - - - - - - - - - - - - - - - - - - - - - 65
2.1
2.2
2.3
2.4
3
Introduction - - - - - - - - - - - Indications de sécurité - - - - - - Sécurité personnelle - - - - - - - Mesures de sécurité - - - - - - - 2.4.1
Bouton d’arrêt d’urgence
2.4.2
Protections - - - - - - -
-
-
-
-
-
-
-
-
-
-
-
-
-
-
-
-
-
-
-
-65
-65
-65
-66
-66
-67
Spécifications techniques - - - - - - - - - - - - - - - - - - - - 68
3.1
3.2
3.3
3.4
4
Généralités - - - - - - - - - Capacité de levage - - - - - 3.2.1
ST 4032 - - - - - 3.2.2
ST 4040 - - - - - Système de levage - - - - - Système Sans Roues (optionel)
3.4.1
Capacité de levage 3.4.2
Système de levage -
-
-
-
-
-
-
-
-
-
-
-
-
-
-
-
-
-
-
-
-
-
-68
-69
-69
-69
-69
-69
-69
-69
Commande - - - - - - - - - - - - - - - - - - - - - - - - - - - 70
4.1
4.2
4.3
4.4
4.5
4.6
4.7
4.8
5
Généralités - - - - - - - - - Mise en marche - - - - - - - Levage - - - - - - - - - - - Descente - - - - - - - - - - Descente en verrouillage - - Descendre lentement - - - - Système Sans Roues (optionel)
4.7.1
Commande - - - - 4.7.2
Mise en marche- - 4.7.3
Levage - - - - - - 4.7.4
Descente - - - - - Éclairage (en option)- - - - - -
-
-
-
-
-
-
-
-
-
-
-
-
-
-
-
-
-
-
-
-
-
-70
-70
-70
-70
-71
-71
-71
-71
-71
-72
-72
-72
Inspection et entretien- - - - - - - - - - - - - - - - - - - - - - 73
5.1
Mode d’emploi (Version B)
Généralités - - - - - - - - - - - - - - - - - - - - - - - - - - - - - - - -73
60
ST 4032 / ST 4040
5.2
5.3
6
Schéma d’entretien - - - - - - - - - - - - 5.2.1
Entretien quotidien par l’utilisateur 5.2.2
Entretien mensuel par l’utilisateur 5.2.3
Entretien annuel - - - - - - - - Procédures d’entretien- - - - - - - - - - - 5.3.1
Instructions de lubrification - - - 5.3.2
Huile hydraulique - - - - - - - - 5.3.3
Luminaires (facultatif) - - - - - - -
-
-
-
-
-
-
-
-
-
-
-
-
-
-
-73
-73
-73
-73
-74
-74
-74
-74
Pannes- - - - - - - - - - - - - - - - - - - - - - - - - - - - - - 75
6.1
6.2
6.3
Généralités - - - - - - - - - - - - - - - - - - - - - - - - - - - - - - - -75
Diagnostic des pannes- - - - - - - - - - - - - - - - - - - - - - - - - - -75
Dispositif de descente d’urgence - - - - - - - - - - - - - - - - - - - - - -76
Index - - - - - - - - - - - - - - - - - - - - - - - - - - - - - - - 77
Mode d’emploi (Version B)
61
ST 4032 / ST 4040
Déclaration de conformité
CE 0123
Déclaration de conformité à la Directive européenne sur les machines
(06/42/EG).
Fabricant:
Stertil B.V.
Postbus 23
9288 ZG Kootstertille
Nederland
Machine:
Pont élévateur hydraulique à 4 colonnes pour
voitures et fourgonnettes légères.
Marque:
STERTIL - KONI
Numéro de série:
.................
Date de mise en
service:
.................
Modèle
ST 4032 - 3200 kg
ST 4040 - 4000 kg
Version
Pont élévateur à quatre colonnes avec
chemins de roulement
Pont élévateur à quatre colonnes avec
chemins de roulement
Variantes
-F Chemins de roulement avec système
de libération des roues
-F Chemins de roulement avec système
de libération des roues
-S Pont élévateur raccourci de 25 cm
-N Pont élévateur rétréci de 30 cm
-V Pont élévateur élargi de 30 cm
-L Pont élévateur prolongé de 45 cm
-M Pont élévateur chemins de roulement
élargis
-MOT Pont élévateur prolongé de 20 cm
-S Pont élévateur raccourci de 25 cm
Options
Diverses possibilités
Diverses possibilités
Le soussigné, U. Bijlsma, directeur, habilité à cette fin par Stertil B.V., déclare
par la présente que le pont élévateur tel que décrit ci-avant, est comparable au
modèle qui a été soumis à une certification CE en ce qui concerne l’application
de la:
•
2006/42/EC Directive de la machine
EN 61508 (SIL1), EN 1493, EN 418, EN 954-1, EN 60204-1
•
2004/108/EC
•
2006/95/EC Directive basse tension
EN60950-1, IEC60335-2-29
Stertil B.V. Kootstertille
U. Bijlsma
Directeur
Signature:
Date: 01-01-2010
Le pont élévateur satisfait aux exigences de sécurité fondamentales. Cette
certification CE a été exécutée par:
RWTÜV - Institut für Produkterprobung und Werkstofftechnik - Zentralabteilung
Prüflaboratorien
ST 4032:
ST 4032F:
ST 4040:
ST 4040F:
Mode d’emploi (Version B)
04 205 - 2461/03
04 205 - 2473/03
04 205 - 2472/03
04 205 - 2474/03
62
ST 4032 / ST 4040
1
1
1.1
Copyright
Généralités
Copyright 2010 Stertil B.V.
Tous droits mondialement réservés. Aucun élément de cette publication, y
compris les plans et diagrammes, ne peut être reproduit et/ou publié que ce soit
par impression, photocopie, microfilm ou tout autre mode, sans l’accord
préalable écrit de Stertil B.V.
1.2
Délimitation du
document
Ce manuel est une traduction de la version originale en néerlandais.
Stertil B.V. se réserve le droit de modifier la construction et/ou la configuration
de ses produits à tout moment sans obligation d’adapter les produits fournis
antérieurement. Les données figurant dans ce manuel se rapportent aux
informations les plus récentes. Elles peuvent être modifiées par la suite sans
avis préalable. Pour toute information sur les réglages, opérations d’entretien
ou de réparation qui ne sont pas décrites dans ce document, contactez le
service après-vente de Stertil B.V.
Les informations de ce manuel sont axées sur l’usage visé du produit. Si les
produits, éléments de produits ou procédures sont utilisés d’une autre façon
que décrit dans ce manuel, il convient d’obtenir la confirmation d’exactitude et
d’aptitude de cette utilisation.
Aucun droit ne peut être déduit ni de ce manuel, ni de la documentation fournie
avec le produit. Seule la confirmation de commande constitue un engagement.
Ce manuel contient des informations utiles et importantes sur le bon
fonctionnement et l’entretien approprié du produit. En outre, le manuel contient
des instructions importantes en vue d’éviter le risque d’accident et de dommage
important pendant le fonctionnement de la machine. Nous avons mis tout en
oeuvre pour que ce manuel soit aussi correct et complet que possible. Si vous
trouvez des erreurs ou si des informations font défaut, signalez-le à notre
directeur de service pour qu’on puisse faire les adaptations nécessaires. Nous
pourrons ainsi apporter des améliorations à notre documentation.
1.3
A qui ce manuel estil destiné ?
Ce manuel est destiné aux utilisateurs du pont élévateur de type ST 4032 / ST
4040.
Pour les personnes qui ne connaissent pas le fonctionnement du pont élévateur
de type ST 4032 / ST 4040, nous recommandons de lire entièrement les
chapitres suivants et de suivre scrupuleusement les instructions.
Les personnes qui connaissent le fonctionnement du pont élévateur de type ST
4032 / ST 4040 peuvent utiliser ce manuel comme ouvrage de référence. Le
sommaire et l’index peuvent être utilisés pour rechercher les informations
souhaitées.
1.4
Portée de ce manuel
Ce manuel contient des informations importantes sur la commande du pont
élévateur de type ST 4032 / ST 4040.
Pour plus d'informations sur d'installation et d'entretien de ce pont élévateur,
voir ST 4032 / ST 4040 Prescriptions d'installation et d'entretien (43508001).
Mode d’emploi (Version B)
63
ST 4032 / ST 4040
Indications dans le texte
1.5
Indications dans le
texte
Dans ce manuel, les modes de notation suivants sont utilisés. Chaque mode a
sa propre signification.
Le texte en gras est destiné à mettre une mention en évidence.
n
c
w
Remarque
Indique une partie importante du texte. Lisez le texte attentivement.
Attention !
Se trouve à côté des procédures qui doivent être suivies sinon vous
risquez d’endommager la machine ou le matériel. Suivez
scrupuleusement la procédure.
Avertissement
Indique une procédure ou une action qui, si elle est incorrecte, peut
provoquer des dommages corporels ou matériels ou indique une action
interdite. Le non-respect de l’interdiction peut entraîner des accidents,
des dommages corporels ou un endommagement grave de la machine.
Les notes entre <>, telles que par exemple <descente> désignent les boutons
de commande du pont élévateur.
1.6
Coordonnées du
fabricant
Stertil B.V.
P.O. Box 23
9288 ZG Kootstertille
Téléphone
+31(0)512 334 444
Télécopie
+31(0)512 334 430
E-mail:
[email protected]
Site internet:
www.stertil.nl
1.7
Garantie et
responsabilité
Voir les conditions de livraison et la confirmation de commande.
1.8
Aspects relatifs à
l’environnement
Le propriétaire et/ou utilisateur du pont élévateur est responsable de
l’évacuation des déchets (huile, etc.) selon les lois ou règlements locaux en
vigueur.
1.8.1 Informations à propos du REACH
La nouvelle ordonnance européenne REACH est entrée en vigueur le 1er juin
2007. Elle cherche à assurer la production et l’emploi de substances chimiques
sûres au sein de l’UE, afin de protéger l’homme et son environnement.
Stertil a adopté une production conforme aux définitions des sujets de REACH,
et l’entreprise est une utilisatrice de substances chimique en aval.
Stertil respecte les régulations du REACH et examine également la conformité
avec les dispositions REACH de ses fournisseurs dans le domaine des
matériaux et substances utilisés.
Votre concessionnaire pourra vous fournir les informations pertinentes comme
les fiches d’informations de sécurité (MSDS) sur demande.
1.9
Elimination du pont
élévateur
Mode d’emploi (Version B)
A la fin de la durée de vie du pont élévateur, le propriétaire et/ou utilisateur est
responsable du démontage en sécurité du pont élévateur et de l’élimination des
pièces, conformément aux lois ou règlements locaux en vigueur.
64
ST 4032 / ST 4040
2
2
2.1
Introduction
Sécurité
Nos normes de sécurité ne peuvent en aucun cas être en conflit avec les
conditions et règlements légaux en vigueur en ce qui concerne la sécurité du
pont élévateur. Si l’un des avertissements ou l’une des normes de sécurité est
en conflit avec la législation locale en vigueur, la règle la plus sévère prime. Nos
ponts élévateurs de type ST 4032 / ST 4040 sont protégés selon la
réglementation relative à ce type d’appareils.
Sans notre autorisation écrite, il est interdit d’apporter des modifications au pont
élévateur. En cas de dommages corporels ou matériels résultant du nonrespect de cette consigne, Stertil B.V. décline toute responsabilité.
Le chef d’entreprise de l’atelier ou, respectivement, l’institution doit veiller à ce
que les consignes de sécurité en vigueur dans l’entreprise soient
scrupuleusement respectées.
w
Avertissement
Le non-respect des consignes de sécurité peut entraîner des dommages
corporels ou des dommages à la machine.
Veillez à vous familiariser avec le fonctionnement et la commande de la
machine. Suivez scrupuleusement les instructions.
2.2
Indications de
sécurité
Ce document contient un certain nombre de symboles spéciaux et indications
que l’utilisateur doit comprendre. Voir les indications dans le texte § 1.5 en
page 64.
2.3
Sécurité personnelle
Pour l’utilisateur , il est recommandé d’utiliser les moyens de protection
personnelle suivants:
•
vêtements de protection,
•
chaussures de sécurité.
w
Mode d’emploi (Version B)
Avertissement
Evitez de porter des vêtements lâches ou des bijoux.
65
ST 4032 / ST 4040
Mesures de sécurité
2.4
Mesures de sécurité
Pour assurer unecommande en toute sécurité du pont élévateur, les mesures
de sécurité suivantes doivent être respectées:
•
utilisez ce pont élévateur uniquement pour le levage des véhicules et non
dans d’autres applications,
•
installez le pont élévateur de façon à obtenir un lieu de travail sûr en tenant
compte d’issues de secours en cas d’urgence (laisser au minimum 600 mm
de passage libre),
•
réservez l’utilisation du pont élévateur aux personnes compétentes;
ces personnes doivent, quoi qu’il en soit, connaître le mode d’emploi du pont
élévateur,
•
lors de l’utilisation du pont élévateur, vérifiez si personne ou aucun objet ne
se trouve sur le terrain du pont élévateur (y compris le véhicule),
•
lors du levage ou de la descente, il est nécessaire de veiller au véhicule,
w
w
Avertissement
En cas d’obstacles (bigues, etc.) sous le véhicule, des situations
dangereuses peuvent se produire lors de la descente.
Avertissement
Il en va de même si un véhicule trop haut est placé sur le pont élévateur.
•
ne vous placez jamais sur ou sous le véhicule (chargé) au moment où le
pont élévateur est commandé,
•
ne grimpez jamais sur le pont élévateur ou sur le véhicule si ceux-ci sont
relevés,
•
en cas de panne ou une fois le travail terminé, le pont élévateur doit toujours
être mis en position inférieure et l’interrupteur principal hors tension; pour ce
faire, il suffit de mettre l’interrupteur principal en position 0 et de le verrouiller
avec un cadenas,
•
en cas de travaux de soudure sur le pont élévateur, veillez à une mise à la
terre de bonne qualité; sinon, vous risquez d’endommager le cylindre
hydraulique, le câblage, etc.
w
Avertissement
Une mauvaise commande ou un entretien inadéquat peut provoquer des
dommages corporels ou matériels.
2.4.1 Bouton d’arrêt d’urgence
L’interrupteur principal, à droite dans l’armoire de commande, sert également
d’interrupteur d’arrêt d’urgence. En cas de catastrophe, éteignez le pont
élévateur à l’aide de cet interrupteur.
En cas d’actionnement du bouton d’arrêt d’urgence, vérifiez:
Mode d’emploi (Version B)
•
s’il ne faut pas libérer quelqu’un,
•
si le pont élévateur n’est pas endommagé.
66
ST 4032 / ST 4040
2
Sécurité
2.4.2 Protections
Le pont élévateur est doté de protections (voir Illustration 2.1 en page 67) qui
veillent à ce que:
•
Le mouvement de descente s’arrête si des obstacles créent des différences
de hauteur entre les chemins de roulement si bien que, dans le cas de(s)
câble(s) souple(s), seul le levage est encore possible (5),
•
le courant de commande est éteint en cas de rupture de câble si bien que la
commande n’est plus possible (6),
•
lorsque le niveau supérieur est atteint, le mouvement de levage est
interrompu (2),
•
le mouvement de descente est mécaniquement bloqué si le pont élévateur
n’est pas actionné et en cas de chute de tension de commande (4),
•
en cas de rupture de tuyau, le cylindre est obturé par la soupape de rupture
du tuyau (3),
•
pendant la descente, le pont s’arrête à une hauteur d’environ 140 mm audessus du sol (protection des pieds); après contrôle de la sécurité, la
descente peut être poursuivie (signal sonore) en appuyant une fois encore
sur <descente> (1).
4
5
6
6
3
2
1. Interrupteur de protection des pieds
2. Interrupteur d’extrémité position supérieure
3. Soupape de rupture de tuyau dans le cylindre
4. Blocage mécanique
5. Protection de câble souple
6. Protection de rupture de câble
1
Illustration 2.1 Protections du pont élévateur
Mode d’emploi (Version B)
67
ST 4032 / ST 4040
3
3
3.1
Généralités
Spécifications
techniques
Pour les spécifications techniques générales, consulter aussi la plaque
d’identification qui se trouve sur le pont élévateur.
Tableau 3.1 Spécifications techniques
Modèle
ST 4032
ST 4040
Capacité de levage
3200 kg
4000 kg
Soupape de surpression
260 bar (scellée en usine avec un
bouchon synthétique)
260 bar (scellée en usine avec un
bouchon synthétique)
Course du cylindre
1870 mm, 1745 mm (S-version)
1870 mm, 1745 mm (S-version)
Alimentation électrique
3,6 kW
3,6 kW
380/415 V, 50 Hz
3 x phase, 1 x terre, 1 x neutre
3 x phase, 1 x terre, 1 x neutre
220/240 V, 50 Hz
3 x phase, 1 x terre
3 x phase, 1 x terre
220/240 V, 50 Hz monophasé
1 x phase, 1 x neutre, 1 x terre
1 x phase, 1 x neutre, 1 x terre
380/415 V, 50 Hz
3 x 16 A (lent)
3 x 16 A (lent)
220/240 V, 50 Hz
3 x 16 A (lent)
3 x 16 A (lent)
220/240 V, 50 Hz monophasé
1 x 16 A (lent)
1 x 16 A (lent)
Tension de commande
24 V courant continu
24 V courant continu
Réglage de soupape de
rupture de tuyau
28 l/min (1,25 mm)
28 l/min (1,25 mm)
24 / 23 s
29 / 29 s
47 / 23 s
59 / 29 s
Niveau sonore
max. 74 dB(A)
max. 74 dB(A)
Disposition
intérieur
intérieur
Poids propre
900 kg
910 kg
Température de
fonctionnement
-15 -> +50 D.C.
-15 -> +50 D.C.
Connexion au réseau
Fusible de réseau
Durée de levage et de
descente (3 x ph.)
Durée de levage et de
descente (1 x ph.)
Mode d’emploi (Version B)
68
ST 4032 / ST 4040
3
3.2
Spécifications techniques
Capacité de levage
Voir Tableau 3.1 en page 68 pour connaître la capacité de levage maximale. Le
dispositif de sécurité de surcharge de l’unité hydraulique est réglé de façon telle
qu’il n’est jamais possible de soulever un poids 10% supérieur à la valeur
indiquée.
3.2.1 ST 4032
Le modèle a été conçu de façon à recevoir sur un chemin de roulement une
charge maximale de 1600 kg et une répartition de la charge entre les essieux
du véhicule de 40% - 60% pour un empattement minimum de 3000 mm et une
largeur de chemin de minimum 1600 mm.
3.2.2 ST 4040
Le modèle a été conçu de façon à recevoir sur un chemin de roulement une
charge maximale de 2000 kg et une répartition de la charge entre les essieux
du véhicule de 33% - 66% pour un empattement minimum de 3000 mm et une
largeur du chemin de minimum 1700 mm.
3.3
Système de levage
Ce pont élévateur hydraulique avec 4 colonnes est pourvu d’une unité
hydraulique. L’unité actionne un cylindre monté au chemin de roulement "fixe".
Le cylindre actionne quatre câbles qui, par le biais des poulies de câble,
passent par le chemin de roulement et les traverses et sont fixés aux colonnes.
3.4
Système Sans
Roues (optionel)
Un système sans roues peut être installé en option.
Tableau 3.2 Spécifications techniques système sans roues
Modèle
ST 4032F
ST 4040F
Capacité de levage
3200 kg
4000 kg
Course du cylindre
207 mm
207 mm
Hauteur de levage
450 mm
450 mm
Durée de levage et de
descente - 3 phases
8/8s
8/8s
Durée de levage et de
descente - 1 phase
16 / 8 s
16 / 8 s
3.4.1 Capacité de levage
Le modèle a été conçu de façon à recevoir sur un seul support une charge
maximale de 1600 kg (ST 4032) ou 2000 kg (ST 4040) et une répartition de la
charge de 33% - 66%.
w
Avertissement
Si cette répartition de la charge n’est pas respectée, le système sans
roues risque d’être endommagé.
3.4.2 Système de levage
Le système sans roues est équipé d’un double système dit maître-esclave. De
cette manière, l’exactitude des deux supports est garantie.
Mode d’emploi (Version B)
69
ST 4032 / ST 4040
4
4
4.1
Généralités
Commande
Placez le véhicule droit sur le pont élévateur, les pneus entièrement sur les
chemins de roulement. Mettez le véhicule au frein à main et placez les cales
devant les roues du véhicule.
La commande du pont élévateur se fait au moyen des boutons de l’armoire de
commande (voir Illustration 4.1) montée sur la colonne III. Voir aussi
l’autocollant de commande qui se trouve sur le pont élévateur.
1. Interrupteur principal
(d’urgence)
2. Levage
3. Descente
4. Descente en verrouillage
5. Descendre lentement
6. Sélecteur système sans roues
(en option)
6
1
2
5
3
4
Illustration 4.1 Panneau de commande
n
Remarque
Commandez le panneau uniquement du bout des doigts. La commande
avec des objets acérés (comme des tournevis) peut provoquer des
dégâts ou des pannes.
Les boutons pour le levage, la descente simple et la descente en verrouillage
sont de type à veille automatique (hold to run). La commande est possible tant
que le bouton reste enfoncé et s’arrête dès que le bouton est relâché.
4.2
Mise en marche
Pour mettre le pont élévateur en marche, procédez comme suit:
1. Tournez l’interrupteur principal (1) en position 1.
La tension du réseau et de commande est alors mise en service.
2. Le pont élévateur est prêt à l’emploi.
4.3
Levage
Pour lever le pont élévateur, utilisez le bouton du haut (2). A côté de ce bouton
se trouve une flèche vers le haut.
4.4
Descente
Pour descendre le pont élévateur, vous devez actionner les boutons (4)
<déverrouillage> et (3) <descente> simultanément. Durant la descente, vous
pouvez relacher bouton (4) <déverroullage>. Les taquets de sécurité resteront
alors en position ouverte.
w
Mode d’emploi (Version B)
Avertissement
En cas de problème en cours de descente, relâchez immédiatement le
bouton.
70
ST 4032 / ST 4040
4
4.5
Commande
Descente en
verrouillage
Pour la descente en verrouillage, on enfonce uniquement le bouton (4) en bas
à droite (voir Illustration 4.1 en page 70). Le pont élévateur descendra alors de
max. 60 mm, jusqu’à ce que les cames de verrouillage s’accrochent dans les
profils.
Pour pouvoir continuer à descendre, le pont élévateur doit d’abord être un peu
relevé (décrochage du verrouillage) avant de pouvoir poursuivre sa descente.
Les derniers 400 mm du mouvement de levage ne sont pas dotés d’un
verrouillage.
4.6
Descendre
lentement
Il est possible de faire descendre lentement le pont élévateur au moyen de la
vanne (5) à droite du panneau de commande (voir Illustration 4.1 en page 70).
Pour faire descendre lentement le pont, procédez comme suit:
1. Fermez complètement la vanne (5) (vers la droite).
2. Enfoncez le bouton de descente (3) et ouvrez en même temps la vanne (5)
(vers la gauche).
Le pont va descendre lentement. En ouvrant totalement d’un seul coup la
vanne, le pont descend à nouveau à vitesse normale.
4.7
Système Sans
Roues (optionel)
4.7.1 Commande
Placez le véhicule directement au-dessus du système sans roues et réglez les
blocs de prise sous les points de prise du véhicule. Déplacez la partie réglable
si nécessaire.
Illustration 4.2 Positionnement du véhicule
La commande du système sans roues se fait au moyen des boutons de
l’armoire de commande montée sur la colonne III.
À l’aide du sélecteur (6) placé sur le côté du panneau de commande, choisissez
la commande du pont élévateur (niveau 1) ou la commande du système sans
roues (niveau 2).
4.7.2 Mise en marche
1. Tournez l’interrupteur principal (1) en position 1.
2. Placez le sélecteur (6) dans la position 1 et mettez le pont élévateur à la
hauteur voulue au moyen du bouton de montée (2).
3. Installez le pont élévateur dans la descente de verrouillage avec le bouton
(4).
4. Tournez le sélecteur (6) en position 2 pour la commande du système sans
roues.
Mode d’emploi (Version B)
71
ST 4032 / ST 4040
Éclairage (en option)
4.7.3 Levage
Commande de levage du système sans roues le bouton supérieur (2). A côté
de ce bouton se trouve une flèche vers le haut.
4.7.4 Descente
Commande de descente du système sans roues le bouton de descente (3) avec
une flèche orientée vers le bas. Le système sans roues s’arrête à environ 10 cm
au-dessus du chemin de roulement. Enfin, en appuyant encore une fois sur le
bouton de descente (3), le système sans roues continue à descendre en
émettant un signal acoustique.
Le bouton ’descente en verrouillage’ (4) n’a aucune fonction dans ce cas.
n
4.8
Éclairage (en option)
La vanne (5) permettant une descente lente fonctionne seulement pour
le pont élévateur et pas pour le système sans roues.
L'éclairage est actionné à l'aide du commutateur avec le symbole d'éclairage.
n
Mode d’emploi (Version B)
Remarque
Remarque
En cas de panne, consultez le diagnostic des pannes (voir
§ 6.2 ’Diagnostic des pannes’ en page 75).
72
ST 4032 / ST 4040
5
5
5.1
Généralités
Inspection et
entretien
Pendant l’inspection et l’entretien, mettez toujours le pont élévateur en position
inférieure et éteignez l’interrupteur principal (position 0). Verrouillez
l’interrupteur avec un cadenas.
Uniquement si certains réglages et contrôles l’exigent, le courant peut être
temporairement allumé et le pont mis en position supérieure.
w
Avertissement
En position supérieure, laissez toujours reposer le pont élévateur sur le
verrouillage.
Une fois par an, il faut soumettre le pont à un contrôle approfondi. Un
abonnement d’entretien permet de faire contrôler professionnellement le pont
élévateur par les mécaniciens de Stertil B.V.
5.2
Schéma d’entretien
5.2.1 Entretien quotidien par l’utilisateur
1. Vérifiez si le pont élévateur ne présente pas de dommages visibles.
2. Vérifiez s’il n’y a pas eu de fuite d’huile au niveau de l’unité hydraulique, des
tuyaux ou du cylindre.
5.2.2 Entretien mensuel par l’utilisateur
1. Contrôlez le fonctionnement des cames de verrouillage en levant le pont
élévateur et en le laissant ensuite descendre dans les cames.
n
Remarque
En cas de mauvais fonctionnement, consultez le service après-vente.
2. Effectuez la lubrification mensuelle telle que mentionnée à Tableau 5.1 en
page 74.
5.2.3 Entretien annuel
L'utilisateur doit faire contrôler le pont élévateur une fois par an par le personnel
de service ou d'entretien compétent et formé (appelé ci-après le service
d'entretien). Pour cette inspection annuelle, on peut souscrire à un
abonnement d’entretien avec le service après-vente. A défaut d’abonnement
d’entretien, l’utilisateur doit lui-même convenir d’un rendez-vous pour
l’inspection et l’entretien.
Cette inspection est indiquée sur la liste de contrôle d’inspection.
n
Mode d’emploi (Version B)
Remarque
Le ‘personnel de service ou d'entretien compétent et formé’ signifie le
personnel du service d'entretien de Stertil-Koni ou d'un autre service
d'entretien agréé par Stertil-Koni. Les conséquences de réparations
exécutées par un autre service d'entretien que celui de Stertil-Koni, resp,
par un service non agréé par Stertil-Koni sont la responsabilité exclusive
de l'utilisateur.
73
ST 4032 / ST 4040
Procédures d’entretien
5.3
Procédures
d’entretien
5.3.1 Instructions de lubrification
Le pont élévateur doit être entretenu régulièrement conformément aux
instructions de lubrification de Tableau 5.1 en page 74.
Tableau 5.1 Instructions de lubrification
Opérations d’entretien
Description
Cylindre
Huilez la tige de piston
sèche
Remplir (uniquement quand
le pont élévateur est en
position supérieure)
Huiler les points de rotation
Huiler les points de rotation
Contrôler le niveau d’huile dans le
réservoir
Cames et tiges de commande
Dispositif de sécurité du câble
souple
Bloc de verrouillage et guidages
dans les colonnes
Différents points de rotation
Rondelles de câble
Huile hydraulique dans le réservoir
Par
mois
Par an
Tous
les
2 ans
x
x
x
x
Lubrifier
x
Lubrifier
Graisser au Molycote PG54
Renouvellement
x
x
x
5.3.2 Huile hydraulique
Au moins 1 fois tous les 2 ans, renouvelez l’huile hydraulique dans le réservoir
(voir Tableau 5.2).
n
Remarque
Même si le pont élévateur n’est pas utilisé en continu, il faut effectuer ce
renouvellement.
Pour renouveler l’huile hydraulique, suivez la procédure suivante:
1. Mettez le pont élévateur en position inférieure et purgez l’huile.
2. Remplissez le réservoir d’huile hydraulique HYDRAN 46 (46 cSt / 40°C),
filtrée à 4 microns max.
Tableau 5.2 Huile hydraulique
Modèle
ST 4032 / ST 4040
Contenu
8l
5.3.3 Luminaires (facultatif)
c
Mode d’emploi (Version B)
Attention !
Nettoyez les luminaires avec un nettoyant non agressif.
74
ST 4032 / ST 4040
6
6
6.1
Généralités
Pannes
Les pannes du pont élévateur peuvent être provoquées par un simple défaut.
Contrôlez si l’installation ne présente pas les causes mentionnées.
Si, malgré le contrôle des causes mentionnées, vous ne pouvez pas résoudre
la panne, vous devez prendre contact avec le service après-vente.
n
n
Remarque
Si elles n’ont pas été effectuées par le service après-vente, toutes les
réparations au pont élévateur et les conséquences qui en découlent sont
entièrement à charge de l’utilisateur.
Remarque
Par service après-vente, on entend le service après-vente de Stertil ou
un service reconnu par Stertil.
Le diagnostic des pannes suivant peut être utilisé pour localiser les problèmes.
En cas de doute, contactez le service après-vente.
6.2
Diagnostic des
pannes
Le tableau des pannes suivant fait référence au tableau correspondant:
Tableau 6.1 ’Le moteur ne tourne pas’ en page 75,
Tableau 6.2 ’Le pont élévateur ne monte pas’ en page 75,
Tableau 6.3 ’Le pont élévateur ne descend pas’ en page 76.
Tableau 6.1 Le moteur ne tourne pas
Cause possible
Solution
L’interrupteur principal n’est pas allumé
Allumer l’interrupteur principal
Fusible de réseau défectueux
Remplacer le fusible de réseau
Fusible de l’armoire de commande défectueux
Avertissez le service après-vente
Tableau 6.2 Le pont élévateur ne monte pas
Cause possible
Solution
Circuit de position supérieure interrompu: panne
électrique ou le pont est en position supérieure
Faire descendre le pont élévateur; en cas de panne
électrique, consulter le service après-vente
Circuit de l’interrupteur de rupture de câble
interrompu: panne électrique ou rupture de câble
Consultez le service après-vente
Mode d’emploi (Version B)
75
ST 4032 / ST 4040
Dispositif de descente d’urgence
Tableau 6.3 Le pont élévateur ne descend pas
Cause possible
Solution
Les cames ne sont pas tirées du verrouillage
Laissez d’abord monter le pont élévateur d’environ
50 mm
La soupape de descente à commande électrique de
l’unité hydraulique ne s’ouvre pas
Pas de tension de commande sur la bobine électroaimant ou la soupape de descente est défectueuse;
faire réparer par le service après-vente
Circuit du câble souple interrompu: panne électrique
ou câble souple
Lever le pont élévateur et enlever éventuellement les
obstacles sous les chemins de roulement. Dans
d’autres cas, consulter le service après-vente
La protection contre la rupture de tuyau est fermée
En cas de rupture de tuyau, le faire remplacer par le
service après-vente; vérifiez si les verrouillages ne
sont pas endommagés
n
6.3
Dispositif de
descente d’urgence
En cas de pannes autre que celles citées ci-dessus, consultez toujours
le service après-vente.
En cas de coupure de courant, vous ne pouvez plus faire descendre le pont
avec les boutons de commande. Dans ce cas, il est possible de descendre le
pont manuellement. A cet effet, contactez le service après-vente.
w
Mode d’emploi (Version B)
Remarque
Avertissement
La procédure de descente d’urgence ne peut être effectuée que par des
personnes qualifiées.
76
ST 4032 / ST 4040
Index
B
G
Bouton d’arrêt d’urgence- - - - - - - - - -66
Garantie - - - - - - - - - - - - - - - - - 64
C
H
Capacité de levage - - - - Commande - - - - - - - - descendre lentement- - descente- - - - - - - - descente en verrouillage levage - - - - - - - - - mise en marche - - - - Coordonnées du fabricant - Copyright - - - - - - - - - -
-
-
-
-
-
-
-69
-70
-71
-70
-71
-70
-70
-64
-63
Huile hydraulique - - - - - - - - - - - - - 74
I
Inspection- - - - - - - - - - - - - - - - - 73
Instructions de lubrification - - - - - - - - 74
M
Mise en marche - - - - - - - - - - - - - - 70
D
Déclaration de conformité - - - Descendre
lentement - - - - - - - - - Descendre lentement - - - - - Descente
en verrouillage - - - - - - - Diagnostic des pannes - - - - Dispositif de descente d’urgence-
- - - - -62
P
Pannes - - - - - - - - - - - - - - - - - - 75
Protections - - - - - - - - - - - - - - - - 67
- - - - -71
- - - - -71
- - - - -71
- - - - -75
- - - - -76
R
- - - - - -64
S
Reach information- - - - - - - - - - - - - 64
Responsabilité - - - - - - - - - - - - - - 64
E
EACH - - - - - - - - - - - - Éclairage
commande- - - - - - - - Entretien - - - - - - - - - - annuel - - - - - - - - - - huile hydraulique- - - - - instructions de lubrification mensuel - - - - - - - - - procédures - - - - - - - quotidien- - - - - - - - - Entretien annuel - - - - - - - Entretien mensuel - - - - - - Entretien quotidien - - - - - -
Mode d’emploi (Version B)
-
-
-
-
-
Sécurité- - - - - - - - - - bouton d’arrêt d’urgence indications- - - - - - - mesures- - - - - - - - personnelle - - - - - - protections - - - - - - Service
diagnostic des pannes - Spécifications - - - - - - - Spécifications techniques - système sans roues - - Système de levage - - - - Système sans roues
commande - - - - - - spécifications techniques
-72
-73
-73
-74
-74
-73
-74
-73
-73
-73
-73
77
-
-
-
-
-
-
- 65
- 66
- 65
- 66
- 65
- 67
-
-
-
-
-
-
- 75
- 68
- 68
- 69
- 69
- - - - - - - 71
- - - - - - - 69
ST 4032 / ST 4040
Español
Tabla de contenido
1
General - - - - - - - - - - - - - - - - - - - - - - - - - - - - - 81
1.1
1.2
1.3
1.4
1.5
1.6
1.7
1.8
1.9
2
Copyright - - - - - - - - - - - - - - - - Delimitación del documento - - - - - - - Objetivo del manual - - - - - - - - - - - Alcance de este manual - - - - - - - - - Símbolos utilizados en el manual - - - - Información acerca del fabricante - - - - Garantía y responsabilidad - - - - - - - Aspectos medioambientales - - - - - - - 1.8.1
Información referente a REACH Eliminación del elevador hidráulico- - - - -
-
-
-
-
-
-
-
-
-
-
-
-
-
-
-
-81
-81
-81
-81
-82
-82
-82
-82
-82
-82
Seguridad - - - - - - - - - - - - - - - - - - - - - - - - - - - - 83
2.1
2.2
2.3
2.4
3
Introducción - - - - - - - - - - Indicaciones de seguridad - - - Seguridad del personal - - - - Medidas de seguridad - - - - - 2.4.1
Parada de emergencia
2.4.2
Protecciones - - - - -
-
-
-
-
-
-
-
-
-
-
-
-
-
-
-
-
-
-
-
-
-83
-83
-83
-84
-84
-85
Información técnica - - - - - - - - - - - - - - - - - - - - - - - 86
3.1
3.2
3.3
3.4
4
General - - - - - - - - - - - - - Capacidad elevadora - - - - - - 3.2.1
ST 4032 - - - - - - - 3.2.2
ST 4040 - - - - - - - Sistema elevador - - - - - - - - Sistema de ruedas libres (opcional)
3.4.1
Capacidad elevadora - 3.4.2
Sistema elevador - - - -
-
-
-
-
-
-
-
-
-
-
-
-
-
-
-
-
-
-
-
-86
-87
-87
-87
-87
-87
-87
-87
Mando - - - - - - - - - - - - - - - - - - - - - - - - - - - - - - 88
4.1
4.2
4.3
4.4
4.5
4.6
4.7
4.8
5
General - - - - - - - - - - - - - Activar - - - - - - - - - - - - - Subir - - - - - - - - - - - - - - Bajar - - - - - - - - - - - - - - Bajar con enclavamiento- - - - - Bajar lentamente - - - - - - - - Sistema de ruedas libres (opcional)
4.7.1
Mando - - - - - - - - 4.7.2
Activar - - - - - - - - 4.7.3
Subir - - - - - - - - - 4.7.4
Bajar - - - - - - - - - Iluminación (opcional) - - - - - - -
-
-
-
-
-
-
-
-
-
-
-
-
-
-
-
-
-
-
-
-88
-88
-88
-88
-89
-89
-89
-89
-89
-90
-90
-90
Inspección y mantenimiento - - - - - - - - - - - - - - - - - - 91
5.1
General - - - - - - - - - - - - - - - - - - - - - - - - - - - - - - - - - -91
Instrucciones para el uso (Versión B)
78
ST 4032 / ST 4040
5.2
5.3
6
Programa de mantenimiento - - - - - - - - - - 5.2.1
Mantenimiento diario por el usuario - 5.2.2
Mantenimiento mensual por el usuario5.2.3
Mantenimientofanual - - - - - - - - Procedimientos de mantenimiento - - - - - - - 5.3.1
Instrucciones para el engrase - - - - 5.3.2
Aceite hidráulico - - - - - - - - - - 5.3.3
Armazones de la ilustración (opcional)-
-
-
-
-
-
-
-
-
-
-
-
-
-91
-91
-91
-91
-92
-92
-92
-92
Fallos técnicos - - - - - - - - - - - - - - - - - - - - - - - - - 93
6.1
6.2
6.3
General - - - - - - - - - - - - - - - - - - - - - - - - - - - - - - - - - -93
Diagnóstico de fallos técnicos - - - - - - - - - - - - - - - - - - - - - - -93
Dispositivo de descenso de emergencia - - - - - - - - - - - - - - - - - -94
Índice - - - - - - - - - - - - - - - - - - - - - - - - - - - - - - 95
Instrucciones para el uso (Versión B)
79
ST 4032 / ST 4040
Declaración de
conformidad
CE 0123
Declaración de conformidad con la directiva del Parlamento Europeo relativa a
las legislaciones sobre máquinas (06/42/EG).
Fabricante:
Stertil B.V.
Postbus 23
9288 ZG Kootstertille
Nederland
Máquina:
Elevador hidráulico de 4 columnas de vehículos para
automóviles de turismo y furgonetas de reparto
ligeras.
Marca:
STERTIL - KONI
Número de serie:
.................
Fecha pvesta en
marcha:
.................
Modelo
ST 4032 - 3200 kg
ST 4040 - 4000 kg
Versión
Elevador hidráulico de cuatro columnas con
rampas de acceso y carriles
Elevador hidráulico de cuatro columnas con
rampas de acceso y carriles
Modelos
-F: Rampas de acceso y carriles con
sistema de ruedas libres
-F: Rampas de acceso y carriles con
sistema de ruedas libres
-S: Elevador hidráulico 25 cm más corto
-N: Elevador hidráulico 30 cm más estrecho
-V: Elevador hidráulico 30 cm más ancho
-L: Elevador hidráulico 45 cm más largo
-M: Elevador hidráulico con rampas de
acceso y carriles más anchos
-MOT: Elevador hidráulico para la
Inspección Técnica de Vehículos (ITV)
20 cm más largo
-S: Elevador hidráulico 25 cm más corto
Opciones
Varias opciones
Varias opciones
La persona que firma abajo, U. Bijlsma, director, autorizado por Stertil B.V.,
declara que el elevador hidráulico descrito anteriormente es comparable al
modelo que ha sido sometido a la inspección del tipo EC relacionado a la:
•
2006/42/EC Directiva de máquinas
EN 61508 (SIL1), EN 1493, EN 418, EN 954-1, EN 60204-1
•
2004/108/EC
•
2006/95/EC Directiva “Baja tensión”
EN60950-1, IEC60335-2-29
Stertil B.V. Kootstertille
U. Bijlsma
Director
Firma:
Fecha: 01-01-2010
El elevador hidráulico ha cumplido con los requisitos de seguridad
fundamentales. La inspección ha sido ejecutada por la entidad inspectora:
RWTÜV - Institut für Produkterprobung und Werkstofftechnik - Zentralabteilung
Prüflaboratorien
ST 4032:
ST 4032F:
ST 4040:
ST 4040F:
Instrucciones para el uso (Versión B)
04 205 - 2461/03
04 205 - 2473/03
04 205 - 2472/03
04 205 - 2474/03
80
ST 4032 / ST 4040
1
1
1.1
Copyright
General
Copyright 2010 Stertil B.V.
Se reservan todos los derechos en todo el mundo. Se prohíbe la reproducción
total o parcial así como la distribución de este documento, inclusive los dibujos
y diagramas, ya sea por medio de impresión, fotocopia, microfilm o cualquier
otra forma, sin el permiso previo y por escrito de Stertil B.V.
1.2
Delimitación del
documento
Este manual es una traducción de la versión original neerlandesa.
Stertil B.V. se reserva el derecho de modificar la construcción y configuración
de los productos en cualquier momento sin tener la obligación de modificar
aquellos productos suministrados previamente. Los datos en este manual
están basados en la información más actual. Estos datos pueden ser
modificados posteriormente y sin previo aviso. Póngase en contacto con el
servicio de reclamaciones de Stertil B.V. para obtener información acerca de
obras de mantenimiento o reparaciones que no han sido descritas en este
documento.
La información en este manual se concentra en el uso para el que se ha
diseñado el producto. Si los productos, piezas de los productos o
procedimientos son utilizados o aplicados de una forma que no se ajusta a los
usos descritos en este manual, obtenga confirmación de que este uso es un
uso correcto y adecuado.
Ni el presente manual ni la documentación suministrada con los productos
otorga derecho alguno. Sólo es vinculante la confirmación de pedido.
Este manual contiene información útil e importante acerca del funcionamiento
y mantenimiento correctos del producto. Este manual también contiene
instrucciones importantes para evitar posibles accidentes y daños graves
cuando la máquina está en funcionamiento. Hemos hecho todo lo posible para
que este manual sea lo más completo posible. Si encuentra algún error o si es
de la opinión que falta cierta información, póngase en contacto con nuestro
director de servicio al cliente para que se pueda corregir la información y se
pueda garantizar que la próxima versión de este manual sea más completa. De
esta manera usted nos puede ayudar a mejorar la documentación de nuestros
productos.
1.3
Objetivo del manual
Este manual ha sido escrito para los usuarios del elevador hidráulico de
vehículos tipo ST 4032 / ST 4040.
Se recomienda que las personas que no se han familiarizado con el
funcionamiento del elevador hidráulico tipo ST 4032 / ST 4040 lean
cuidadosamente los siguientes capítulos y sigan las instrucciones al pie de la
letra.
Las personas que se han familiarizado con el funcionamiento del elevador
hidráulico tipo ST 4032 / ST 4040 pueden utilizar el presente manual como un
libro de consulta. La tabla de contenido y el índice pueden ser utilizados para
encontrar la información necesaria.
1.4
Alcance de este
manual
Este manual contiene información importante acerca del funcionamiento
correcto del elevador hidráulico tipo ST 4032 / ST 4040.
Para más información acerca de Instalación & Servicios del elevador hidráulico,
véase las ST 4032 / ST 4040 Istrucciones de Instalación & Servicios
(43508001).
Instrucciones para el uso (Versión B)
81
ST 4032 / ST 4040
Símbolos utilizados en el manual
1.5
Símbolos utilizados
en el manual
En este manual se utilizan los siguientes símbolos e indicaciones. Cada tipo de
indicación tiene su propio significado.
Se emplea el texto en negrita para dar énfasis a la información.
n
c
w
Observación
Este símbolo indica que la información suministrada es de especial
importancia. Se le recomienda leer el texto atentamente.
Caution
Este símbolo indica procedimientos que deben ser seguidos para evitar
daños a la máquina o al material. Siga el procedimiento al pie de la letra.
Advertencia
Este símbolo indica un procedimiento o actividad que debe ser
ejecutado correctamente para evitar lesiones o daños graves o indica
una actividad prohibida. Si se ignora la prohibición pueden ocurrir
accidentes, lesiones o daños graves a la máquina.
El texto entre <>, tal como, por ejemplo, <Bajar>, indica lo que debe llevar a
cabo el elevador hidráulico y es un botón de mando.
1.6
Información acerca
del fabricante
Stertil B.V.
P.O. Box 23
9288 ZG Kootstertille
Teléfono
+31(0)512 334 444
Telefax
+31(0)512 334 430
Correo electrónico:
[email protected]
Sitio web:
www.stertil.nl
1.7
Garantía y
responsabilidad
Véase las condiciones de entrega y la confirmación de pedido.
1.8
Aspectos
medioambientales
El propietario o el usuario del elevador hidráulico es el responsable del desecho
de los residuos (aceite, etc.) lo que debe ser llevado a cabo de acuerdo con las
normas y leyes locales.
1.8.1 Información referente a REACH
El 1 de junio de 2007 entró en vigor el ordenamiento europeo REACH. A fin de
proteger a las personas y el medio ambiente, el objetivo dentro de la UE es
producir y utilizar sustancias químicas seguras.
De acuerdo a las definiciones de REACH, Stertil produce "objetos" y es "usuario
de la cadena" de sustancias químicas.
Stertil cumple la normativa de REACH y comprueba que todos los materiales y
sustancias que recibe de sus proveedores también la cumplen.
Bajo petición, su distribuidor local le facilitará toda la información pertinente,
como por ejemplo fichas de datos de seguridad (FDS).
1.9
Eliminación del
elevador hidráulico
Cuando el elevador hidráulico ha llegado al fin de su vida útil el propietario o el
usuario (o ambos) es el responsable de desmontar el elevador hidráulico y de
eliminar las piezas de acuerdo con las leyes y normas locales.
Instrucciones para el uso (Versión B)
82
ST 4032 / ST 4040
2
2
2.1
Introducción
Seguridad
Los requisitos de seguridad de este manual no deben contradecir las normas y
leyes relacionadas a la seguridad del elevador hidráulico de vehículos. En el
caso de que una de las advertencias o uno de los requisitos de seguridad
contradigan una ley local, la regla más estricta será la aplicable. Nuestros
elevadores hidráulicos tipo ST 4032 / ST 4040 han sido protegidos de acuerdo
con las normas para este tipo de máquina.
Está prohibido modificar el elevador hidráulico de vehículos sin previa
autorización por escrito de Stertil B.V. Stertil B.V. no es responsable de ningún
daño o lesión que resulte de una modificación que no ha sido previamente
autorizada por escrito.
El gerente del taller u organización es responsable de que las reglas de
seguridad para la empresa sean seguidas al pie de la letra.
w
Advertencia
Cuando las reglas de seguridad no son implementadas pueden ocurrir
lesiones o daños graves a la máquina.
Asegúrese de que usted esté familiarizado con el funcionamiento de la
máquina antes de ponerla en marcha. Siga las instrucciones al pie de la letra.
2.2
Indicaciones de
seguridad
Este documento contiene algunos símbolos y acuerdos especiales los que
deben ser entendidos por el usuario. Véase § 1.5 en la página 82 para obtener
más información acerca de los símbolos e indicaciones utilizados en el manual.
2.3
Seguridad del
personal
Se recomienda que el usuario utilice medidas de protección individual:
•
Ropa protectora.
•
Zapatos de seguridad.
w
Instrucciones para el uso (Versión B)
Advertencia
No lleve ropa suelta ni alhajas.
83
ST 4032 / ST 4040
Medidas de seguridad
2.4
Medidas de
seguridad
Para poder utilizar el elevador hidráulico de vehículos de manera segura, se
deben respetar las siguientes medidas de seguridad:
•
Únicamente utilice el elevador hidráulico de vehículos para elevar vehículos
y no para otras aplicaciones.
•
Instale el elevador hidráulico de vehículos de tal manera que el lugar de
trabajo sea un lugar seguro. Tenga en cuenta que deben haber salidas de
emergencia (por lo menos 600 milímetros de paso libre).
•
Solamente personas autorizadas deben utilizar el elevador hidráulico de
vehículos.
Estas personas deben, como mínimo, haberse familiarizado con las
instrucciones para el uso.
•
Verifique que no se encuentren personas u objetos en la zona de
funcionamiento del elevador hidráulico de vehículos (incluyendo en el
vehículo mismo).
•
Durante la subida y bajada del elevador hidráulico de vehículos el operario
debe observar el vehículo en todo momento.
w
w
Advertencia
Pueden surgir situaciones peligrosas si hay obstáculos (bloques, etc.)
debajo del vehículo cuando el elevador baja.
Advertencia
Pueden surgir situaciones peligrosas si se posiciona un vehículo
demasiado alto en el elevador hidráulico.
•
Nunca debe posicionarse encima o debajo del elevador hidráulico de
vehículos durante su funcionamiento (con carga).
•
Nunca debe subirse al elevador hidráulico de vehículos o al vehículo mismo
cuando este esté elevado.
•
Siempre se debe posicionar el elevador hidráulico de vehículos en la
posición más baja y se debe desconectar el suministro de energía mediante
el interruptor principal en caso de fallo técnico o al finalizar el uso del
elevador hidráulico de vehículos. Posicione el interruptor principal en la
posición 0 y bloquee esta posición mediante un candado.
•
Asegúrese de que haya un contacto a tierra apropiado cuando se deben
llevar a cabo obras de soldadura en el elevador hidráulico. Si el contacto a
tierra no es correcto, pueden surgir daños al cilindro hidráulico, al cableado,
etc.
w
Advertencia
Un funcionamiento incorrecto o un mantenimiento insuficiente puede
causar lesiones o daños al material.
2.4.1 Parada de emergencia
El interruptor principal, a la derecha en el panel de mando, también funciona
como interruptor de parada de emergencia. En caso de una catástrofe, se debe
detener el elevador hidráulico de vehículos con este botón.
Si se ha presionado el botón de parada de emergencia, verifique si:
•
Alguien debe ser liberado.
•
El elevador hidráulico tiene alguna averia.
Instrucciones para el uso (Versión B)
84
ST 4032 / ST 4040
2
Seguridad
2.4.2 Protecciones
El elevador hidráulico ha sido provisto de protecciones (véase Figura 2.1 en la
página 85). Estas protecciones tienen como objetivo lo siguiente:
•
El descenso se detiene si existen diferencias de altura causadas por
obstáculos entre los carriles. En el caso de que haya cables sueltos solo se
podrá subir (5) el elevador hidráulico.
•
La tensión de control será desactivada en caso de rotura de cable para que
el elevador no pueda ser puesto en funcionamiento (6).
•
Cuando el elevador haya llegado a la posición más alta se interrumpe el
ascenso (2).
•
El descenso es detenido mecánicamente cuando el elevador hidráulico no
es accionado por un operadio y cuando se ha cortado la tensión de control
(4).
•
En caso de ruptura de un tubo el cilindro será cerrado por la válvula de
segvridad del tubo (3).
•
Durante el descenso el elevador hidráulico será detenido a una altura de
aproximadamente 140 milímetros sobre el suelo (protección de los pies).
Una vez que se haya controlado la actividad de la seguridad, se puede
continuar el descenso (señal acústica) presionando otra vez el botón
<Bajar>.
4
5
6
6
1. Interruptor de seguridad de los
pies
2. Final de carrera de seguridad en
la posición más alta
3. Válvula de ruptura del tubo en el
cilindro
4. Bloqueo mecánico
5. Protección contra cables sueltos
6. Protección contra cables sueltos
3
2
1
Figura 2.1 Protecciones del elevador hidráulico
Instrucciones para el uso (Versión B)
85
ST 4032 / ST 4040
3
3
3.1
General
Información técnica
Véase la placa de identificación en el elevador hidráulico de vehículos para
obtener información técnica general.
Tabla 3.1 Información técnica
Modelo
ST 4032
ST 4040
Capacidad de elevacion
3200 kg
4000 kg
Válvula de seguridad
260 bar (ha sido sellado en fábrica
con un tapón sintético)
260 bar (ha sido sellado en fábrica
con un tapón sintético)
Cilindro de accionamiento
1870 mm
1745 mm (versión S)
1870 mm
1745 mm (versión S)
Potencia
3,6 kW
3,6 kW
380/415 V, 50 Hz
3 x fase, 1 x tierra, 1 x neutro
3 x fase, 1 x tierra, 1 x neutro
220/240 V, 50 Hz
3 x fase, 1 x tierra
3 x fase, 1 x tierra
220/240 V, 50 Hz fase única
1 x fase, 1 x neutro, 1 x tierra
1 x fase, 1 x neutro, 1 x tierra
380/415 V, 50 Hz
3 x 16 A (lento)
3 x 16 A (lento)
220/240 V, 50 Hz
3 x 16 A (lento)
3 x 16 A (lento)
220/240 V, 50 Hz fase única
1 x 16 A (lento)
1 x 16 A (lento)
Tensión de control
24 V tensión continua
24 V tensión continua
Ajuste de la válvula de ruptura
del tubo
28 l/min (1,25 mm)
28 l/min (1,25 mm)
24 / 23 s
29 / 29 s
47 / 23 s
59 / 29 s
Nivel de ruido
máx. 74 dB(A)
máx. 74 dB(A)
Montaje
Interior
Interior
Peso propio
900 kg
910 kg
Temperatura de
funcionamiento
-15 -> +50 D.C.
-15 -> +50 D.C.
Conexión a la red
Fusible de red
Tiempo de elevación y de
descenso (3 ph.)
Tiempo de elevación y de
descenso (1 ph.)
Instrucciones para el uso (Versión B)
86
ST 4032 / ST 4040
3
3.2
Información técnica
Capacidad elevadora
Véase Tabla 3.1 en la página 86 para obtener los datos sobre la capacidad
elevadora máxima. La protección contra la sobrepresión de la unidad hidráulica
ha sido configurada de tal manera que nunca se puede elevar más que el peso
indicado más 10%.
3.2.1 ST 4032
El cálculo del diseño es para una carga máxima de un único carril de 1600 kg
y la distribución de la carga entre los ejes del vehículo se encuentra entre 40%
- 60% para una distancia entre los ejes de 3000 mm y un espacio entre carriles
mínimo de 1600 mm.
3.2.2 ST 4040
El cálculo del diseño es para una carga máxima de un único carril de 2000 kg
y la distribución de la carga entre los ejes del vehículo se encuentra entre 33%
- 66% para una distancia entre los ejes de 3000 mm y un espacio entre carriles
mínimo de 1700 mm.
3.3
Sistema elevador
Este elevador hidráulico de 4 columnas ha sido provisto de una unidad
hidráulica. La unidad impulsa un cilindro que ha sido montado en el carril ’fijo’.
El cilindro impulsa los cuatro extremos de los cables. Estos extremos corren a
través del carril y las barras de acoplamiento y están fijados en las columnas.
3.4
Sistema de ruedas
libres (opcional)
Se puede instalar un sistema de ruedas libres opcionalmente.
Tabla 3.2 Información técnica acerca del sistema de ruedas libres
Modelo
ST 4032F
ST 4040F
Capacidad elevadora
3200 kg
4000 kg
Cilindro de accionamiento
207 mm
207 mm
Altura de elevación
450 mm
450 mm
Tiempo de elevación y de
descenso - 3 fases
8/8s
8/8s
Tiempo de elevación y de
descenso - 1 fase
16 / 8 s
16 / 8 s
3.4.1 Capacidad elevadora
El diseño puede soportar una carga máxima de 1600 kg (ST 4032) o 2000 kg
(ST 4040) y una distribución de la carga de entre 33% - 66% sobre una única
plancha elevadora.
w
Advertencia
Si se ignora esta distribución de la carga el sistema de ruedas libres
puede sufrir daños.
3.4.2 Sistema elevador
El sistema de ruedas libres ha sido provisto de un sistema doble maestroesclavo. Así se puede garantizar que ambas planchas elevadoras estén en
servicio paralelo.
Instrucciones para el uso (Versión B)
87
ST 4032 / ST 4040
4
4
4.1
General
Mando
Coloque el vehículo de forma recta sobre el elevador hidráulico, con las ruedas
completamente sobre las rampas. Aplique el freno de mano del vehículo y
ponga los topes enfrente de las ruedas del vehículo.
El elevador hidráulico es puesto en marcha mediante los botones del panel de
mando (véase Figura 4.1) que se encuentra montado en la columna III. Véase
también la etiqueta de mando sobre el elevador hidráulico.
1. Interruptor principal
(de emergencia)
2. Subir
3. Bajar
4. Bajar con enclavamiento
5. Bajar lentamente
6. Interruptor selector del sistema
de ruedas libres (opcional)
6
1
2
5
3
4
Figura 4.1 Panel de mando
n
Observación
Únicamente accione el panelcon los dedos. Si se presionan los botones
con objetos punzantes (como ser un destornillador) puede causar daños
o fallos.
Los botones para subir, bajar y bajar con enclavamiento son botones del tipo
dispositivo de hombre muerto (es decir, con interrupción automática; deben ser
presionados continuamente para ser activados). El botón únicamente es
activado mientras el botón sea presionado y es desactivado cuando se suelta
el botón.
4.2
Activar
Para activar el elevador hidráulico debe hacerse lo siguiente:
1. Gire el interruptor principal (1) a la posición 1.
Esto activa la tensión de suministro de red y la tensión de control.
2. El elevador hidráulico está listo para ser utilizado.
4.3
Subir
Para que el elevador hidráulico suba, se debe activar el botón superior (2). Una
flecha hacia arriba se observa al lado de este botón.
4.4
Bajar
Para el descenso del elevador hidráulico, pulsar los botones (4) <desbloquear>
y (3) <bajar> al mismo tiempo. Durante el descenso, puede soltarse el botón (4)
<desbloquear>. Los trinquetes de seguridad permanecen en posición abierta.
w
Instrucciones para el uso (Versión B)
Advertencia
Si se presentan problemas cuando el elevador baja, suelte el botón de
inmediato.
88
ST 4032 / ST 4040
4
4.5
Mando
Bajar con
enclavamiento
Para que el elevador hidráulico baje con enclavamiento, se debe presionar
únicamente el botón inferior a la derecha (4) (véase Figura 4.1 en la página 88).
El elevador hidráulico bajará 60 milímetros cómo máximo. Al haber bajado 60
milímetros los trinquetes de enclavamiento se habrán conectado con los
perfiles de bloqueo.
Para poder seguir bajando se debe subir el elevador hidráulico un poco
(desbloqvear) para que el elevador hidráulico pueda seguir bajando. Los
últimos 400 milímetros del movimiento de elevación no han sido provistos de
enclavamiento.
4.6
Bajar lentamente
Se puede bajar el elevador hidráulico lentamente con la ayuda de la llave (5) a
la derecha del panel de mando(véase Figura 4.1 en la página 88). Para bajar el
elevador hidráulico lentamente siga los siguientes pasos:
1. Cierre la llave (5) completamente girando de ella (hacia la derecha).
2. Presione el botón Bajar (3) y abra al mismo tiempo la llave (5) (hacia la
izquierda).
El elevador hidráulico comenzará a bajar lentamente. Si se abre la llave una
vuelta entera el elevador hidráulico bajará otra vez a la velocidad normal.
4.7
Sistema de ruedas
libres (opcional)
4.7.1 Mando
Coloque el vehículo rectamente sobre el sistema de ruedas libres y coloque los
bloques de registro debajo de los puntos de registro del vehículo. Si es
necesario desplace la parte regulable.
Figura 4.2 Colocación del vehículo
El sistema de ruedas libres es controlado mediante los botones del panel de
mando que se encuentra montado en la columna III.
Utilice el interruptor selector (6) que se encuentra en la parte lateral del panel
de mando para controlar el funcionamiento del elevador (posición 1) o el
funcionamiento del sistema de ruedas libres (posición 2).
4.7.2 Activar
1. Gire el interruptor principal (1) a la posición 1.
2. Ponga el interruptor selector (6) en la posición 1 y eleve el elevador a la
altura deseada utilizando el botón para subir (2).
3. Utilice el botón (4) para bajar con enclavamiento al elevador hidráulico.
4. Ponga el interruptor selector (6) en la posición 2 para controlar el sistema
de ruedas libres.
Instrucciones para el uso (Versión B)
89
ST 4032 / ST 4040
Iluminación (opcional)
4.7.3 Subir
Para que el sistema de ruedas libres suba, se debe activar el botón superior (2).
Una flecha hacia arriba se observa al lado de este botón.
4.7.4 Bajar
Para que el sistema de ruedas libres baje, se debe activar el botón Bajar que
muestra una flecha hacia abajo (3). El sistema de ruedas sueltas se detendrá
aproximadamente 10 cm sobre el carril. Si ahora se pulsa otra vez el botón
Bajar (3), el sistema de ruedas libres bajará más y se oirá una señal acústica.
El botón (4) para bajar con enclavamiento no es pertinente en esta posición.
n
4.8
Iluminación
(opcional)
Observación
La llave (5) para bajar lentamente el elevador hidráulico no funciona con
el sistema de ruedas libres sino únicamente con el elevador.
La iluminación puede ser activada y desactivada con el interruptor con el
símbolo de iluminación.
n
Instrucciones para el uso (Versión B)
Observación
Consulte el diagnóstico de fallos técnicos (véase § 6.2 ’Diagnóstico de
fallos técnicos’ en la página 93) cuando se presenten fallos.
90
ST 4032 / ST 4040
5
5
5.1
General
Inspección y
mantenimiento
Posicione el elevador hidráulico en la posición inferior y desactive el interruptor
principal (posición 0). Bloquee el interruptor principal con un candado.
Únicamente active el interruptor principal y ponga el elevador hidráulico en una
posición más alta cuando es necesario para ciertos ajustes o controles.
w
Advertencia
Siempre baje el elevador hidráulico desde una posición superior
mediante el botón Bajar con enclavamiento.
Ejecute una revisión completa una vez al año. Mecánicos especializados de
Stertil B.V. pueden llevar a cabo la inspección cuando se ha firmado un contrato
de servicio para el elevador hidráulico.
5.2
Programa de
mantenimiento
5.2.1 Mantenimiento diario por el usuario
1. Inspeccione visualmente el elevador hidráulico por si presenta daños.
2. Verifique si hay una fuga de aceite en la unidad hidráulica, en las tubos o en
el cilindro.
5.2.2 Mantenimiento mensual por el usuario
1. Verifique el funcionamiento de los trinquetes de enclavamiento. Esto se
puede llevar a cabo si se sube el elevador hidráulico y, a continuación, se lo
baja hasta que quede enclavado en los trinquetes.
n
Observación
Póngase en contacto con nuestro servicio técnico si no funciona
correctamente.
2. Ejecute los engrases mensuales como se indica en Tabla 5.1 en la
página 92.
5.2.3 Mantenimientofanual
El usuario debe encargar la inspección del elevador hidráulico una vez al año
a un taller profesional o a personal de mantenimientol (más adelante llamado
el servicio técnico). Para esta inspección anual se puede firmar un contrato
de mantenimiento con el servicio técnico. Si no se firma dicho contrato, el
mismo usuario deberá acordar anualmente una fecha para esta revisión y para
el mantenimiento.
La inspección es registrada en la lista de control de inspecciones.
n
Instrucciones para el uso (Versión B)
Observación
‘Personal técnico o de mantenimiento calificado’ significa personal del
servicio técnico Stertil-Koni o de otro servicio técnico reconocido por
Stertil-Koni. Las consecuencias derivadas de reparaciones que no sean
realizadas por el servicio técnico de Stertil-Koni o un servicio no
reconocido por Stertil-Koni son responsabilidad absoluta del usuario.
91
ST 4032 / ST 4040
Procedimientos de mantenimiento
5.3
Procedimientos de
mantenimiento
5.3.1 Instrucciones para el engrase
Se debe someter con regularidad el elevador hidráulico a revisiones de acuerdo
con las instrucciones para el engrase incluidas en Tabla 5.1 en la página 92.
Tabla 5.1 Instrucciones para el engrase
Obras de mantenimiento
Descripción
Cilindro
Engrasar el vástago del
pistón seco
Rellenar (únicamente con
el elevador hidráulico en
la posición superior).
Engrasar los puntos de
apoyo.
Engrasar los puntos de
apoyo.
Engrasar
Verificar el nivel del aceite en el
depósito.
Trinquetes y vástagos de mando
Protección contra cables sueltos.
Barra de enganche y piezas guía
en las columnas
Varios puntos de apoyo
Poleas de cable
Mensual
Anual
x
x
x
x
x
Engrasar
Lubricar con Molycote
PG54
Sustituir.
Aceite hidráulico en el depósito
Cada
2 años
x
x
x
5.3.2 Aceite hidráulico
Sustituya aproximadamente una vez cada dos años el aceite hidráulico en el
tanque (véase Tabla 5.2).
n
Observación
Este cambio de aceite debe ser ejecutado aún cuando el elevador
hidráulico no es utilizado de manera continua.
Siga el siguiente procedimiento para cambiar el aceite hidráulico:
1. Posicione el elevador hidráulico en la posición más baja y vacíe el aceite
que se encuentra en el depósito.
2. Llene el depósito con aceite hidráulico HYDRAN 46 (46 cSt / 40°C), filtrado
a 4 micrones como máximo.
Tabla 5.2 Aceite hidráulico
Modelo
ST 4032 / ST 4040
Contenido
8l
5.3.3 Armazones de la ilustración (opcional)
c
Instrucciones para el uso (Versión B)
Caution
Limpie los armazones de la ilustración exclusivamente con un
detergente no agresivo.
92
ST 4032 / ST 4040
6
6
6.1
General
Fallos técnicos
Los fallos técnicos de un elevador hidráulico pueden ser causados por fallos
simples. Verifique la instalación por señales de las causas indicadas.
Póngase en contacto con el servicio técnico si el fallo técnico no puede ser
resuelto con la verificación de las causas indicadas.
n
n
Observación
Todas las reparaciones del elevador hidráulico y las consecuencias de
estas son responsabilidad del usuario si estas no han sido ejecutadas
por el servicio técnico.
Observación
Con el término ’servicio técnico’ se debe entender el servicio técnico de
Stertil o un servicio técnico autorizado por Stertil.
El siguiente diagnóstico de fallos técnicos puede ser utilizado para ubicar el
defecto. Póngase en contacto con el servicio técnico en caso de duda.
6.2
Diagnóstico de fallos
técnicos
La siguiente lista de fallos técnicos indica la tabla respectiva.
Tabla 6.1 ’El motor no se pone en marcha.’ en la página 93,
Tabla 6.2 ’El elevador hidráulico no sube.’ en la página 93,
Tabla 6.3 ’El elevador hidráulico no baja.’ en la página 94.
Tabla 6.1 El motor no se pone en marcha.
Posible causa
Solución
El interruptor principal no ha sido activado
Activar el interruptor principal
Fallo del fusible de la alimentación de red
Sustituir el fusible de la alimentación de red
Fallo del fusible del panel de mando
Póngase en contacto con el servicio técnico
Tabla 6.2 El elevador hidráulico no sube.
Posible causa
Solución
El circuito de la posición más alta ha sido
interrumpido. Fallo eléctrico o el elevador hidráulico
se encuentra en la posición más alta
Bajar el elevador hidráulico: póngase en contacto
con el servicio técnico en caso de un fallo eléctrico
El circuito del interruptor de corte de cable ha sido
interrumpido. Fallo eléctrico o corte de cable
Póngase en contacto con el servicio técnico
Instrucciones para el uso (Versión B)
93
ST 4032 / ST 4040
Dispositivo de descenso de emergencia
Tabla 6.3 El elevador hidráulico no baja.
Posible causa
Solución
Los trinquetes no son quitados del enclavamiento
Deje primero que el elevador hidráulico suba 50
milímetros
La válvula de descenso de control eléctrico de la
unidad hidráulica no se abre
No hay tensión de control en el electroimán o la
válvula de descenso es defectuosa; el servicio
técnico debe llevar a cabo esta reparación
El circuito de cable suelto ha sido interrumpido: fallo
eléctrico o cable suelto
Suba el elevador hidráulico y quite toda obstrucción
que se encuentre debajo de las rampas y los carriles;
póngase en contacto con el servicio técnico en todo
otro caso
La protección contra la ruptura de los tubos se ha
errado
Si un tubo se rompe este debe ser sustituido por el
servicio técnico; verifique los enclavamientos por si
presentan daños
n
6.3
Dispositivo de
descenso de
emergencia
Observación
Póngase en contacto con el servicio técnico en caso de fallos técnicos
no mencionados aquí arriba.
El elevador hidráulico no puede ser bajado mediante los botones en el panel de
mando si se ha cortado la corriente. En este caso se puede bajar el elevador
hidráulico manualmente. Póngase en contacto con el servicio técnico si este es
el caso.
w
Instrucciones para el uso (Versión B)
Advertencia
El procedimiento de descenso de emergencia únicamente debe ser
llevado a cabo por personas que han recibido la formación debida.
94
ST 4032 / ST 4040
Índice
A
L
Aceite hidráulico- - - - - - - - - - - - - -92
Activar - - - - - - - - - - - - - - - - - -88
Lentamente
bajar - - - - - - - - - - - - - - - - - 89
B
M
Bajar
con enclavamiento - - - - - - - - - - -89
lentamente- - - - - - - - - - - - - - -89
Mando - - - - - - - - - - - - activar- - - - - - - - - - - bajar - - - - - - - - - - - bajar con enclavamiento - - bajar lentamente- - - - - - subir - - - - - - - - - - - Mantenimiento - - - - - - - - aceite hidráulico - - - - - - anual - - - - - - - - - - - diario - - - - - - - - - - - instrucciones para el engrase
mensual - - - - - - - - - - Mantenimiento anual - - - - - -
C
Capacidad elevadora - - - - - - - - - - -87
Copyright - - - - - - - - - - - - - - - - -81
D
Declaración de conformidad - - - - - - - -80
Diagnóstico de fallos técnicos - - - - - - -93
Dispositivo de descenso de emergencia - -94
-
-
-
-
- 88
- 88
- 88
- 89
- 89
- 88
- 91
- 92
- 91
- 91
- 92
- 91
- 91
P
Parada de emergencia - - - - - - - - - - 84
Procedimientos
mantenimiento- - - - - - - - - - - - - 92
Protecciones - - - - - - - - - - - - - - - 85
E
Engrase
instrucciones- - - - - - - - - - - - - -92
F
R
Fallos técnicos - - - - - - - - - - - - - -93
Reach - - - - - - - - - - - - - - - - - - 82
Responsabilidad - - - - - - - - - - - - - 82
Revisión
diagnóstico de fallos técnicos - - - - - 93
G
Garantía - - - - - - - - - - - - - - - - -82
S
Seguridad- - - - - - - - del personal - - - - - indicaciones - - - - - medidas - - - - - - - parada de emergencia protecciones- - - - - Sistema de ruedas libres
información técnica - mando - - - - - - - Sistema elevador - - - - -
I
Iluminación
mando - - - - - - - - - - - Información acerca del fabricante
Información técnica
especificaciones - - - - - - sistema de ruedas libres - - Inspección - - - - - - - - - - -
- - - - -90
- - - - -82
- - - - -86
- - - - -87
- - - - -91
Instrucciones para el uso (Versión B)
95
-
-
-
-
-
-
-
- 83
- 83
- 83
- 84
- 84
- 85
- - - - - - - - 87
- - - - - - - - 89
- - - - - - - - 87
ST 4032 / ST 4040
Polska
Spis treści
1
Informacje ogólne - - - - - - - - - - - - - - - - - - - - - - - - 99
1.1
1.2
1.3
1.4
1.5
1.6
1.7
1.8
1.9
2
Copyright - - - - - - - - - - - - - - - - - - - Oznaczenie dokumentu - - - - - - - - - - - - Dla kogo przeznaczona jest niniejsza instrukcja? Zakres niniejszej instrukcji obsługi - - - - - - - Oznaczenia w tekście - - - - - - - - - - - - - Dane producenta - - - - - - - - - - - - - - - Gwarancja i odpowiedzialność cywilna - - - - - Aspekty środowiska naturalnego - - - - - - - - 1.8.1
Informacje dotyczące systemu REACH
Wywóz podnośnika - - - - - - - - - - - - - - -
-
-
-
-
-
-
-
-
-
-
-
-
-99
-99
-99
-99
100
100
100
100
100
100
Bezpieczeństwo - - - - - - - - - - - - - - - - - - - - - - - - 101
2.1
2.2
2.3
2.4
3
Wstęp - - - - - - - - - - - - - - - - - - Oznaczenia bezpieczeństwa - - - - - - - Bezpieczeństwo osobiste - - - - - - - - Środki bezpieczeństwa - - - - - - - - - 2.4.1
Przycisk zatrzymania awaryjnego
2.4.2
Zabezpieczenia - - - - - - - - -
-
-
-
-
-
-
-
-
-
-
-
-
-
-
-
101
101
101
102
102
103
Dane techniczne - - - - - - - - - - - - - - - - - - - - - - - - 104
3.1
3.2
3.3
3.4
4
Informacje ogólne - - - - - - - - - Udźwig - - - - - - - - - - - - - - 3.2.1
ST 4032 - - - - - - - - 3.2.2
ST 4040 - - - - - - - - System podnoszenia - - - - - - - Podnośnik podprogowy (opcjonalny) 3.4.1
Udźwig - - - - - - - - - 3.4.2
System podnoszenia - - -
-
-
-
-
-
-
-
-
-
-
-
-
-
-
-
-
-
-
104
105
105
105
105
105
105
105
Obsługa - - - - - - - - - - - - - - - - - - - - - - - - - - - - 106
4.1
4.2
4.3
4.4
4.5
4.6
4.7
4.8
5
Informacje ogólne - - - - - - - - - Włączanie - - - - - - - - - - - - - Podnoszenie - - - - - - - - - - - Opuszczanie - - - - - - - - - - - Opuszczanie z blokadą - - - - - - Opuszczanie powolne - - - - - - - Podnośnik podprogowy (opcjonalny) 4.7.1
Obsługa - - - - - - - - 4.7.2
Włączanie - - - - - - - 4.7.3
Podnoszenie - - - - - - 4.7.4
Opuszczanie - - - - - - Oświetlenie (opcjonalnie) - - - - - -
-
-
-
-
-
-
-
-
-
-
-
-
-
-
-
-
-
-
106
106
106
106
106
107
107
107
107
107
108
108
Przegląd i konserwacja - - - - - - - - - - - - - - - - - - - - 109
5.1
Instrukcja obsługi (Wersja B)
Informacje ogólne - - - - - - - - - - - - - - - - - - - - - - - - - - - - 109
96
ST 4032 / ST 4040
5.2
5.3
6
Schemat konserwacji - - - - - - - - - - - - - - - 5.2.1
Codzienna konserwacja przez użytkownika
5.2.2
Miesięczna konserwacja przez użytkownika
5.2.3
Roczna konserwacja - - - - - - - - - - Procedury dot. konserwacji - - - - - - - - - - - - 5.3.1
Instrukcja smarowania - - - - - - - - - 5.3.2
Olej hydrauliczny - - - - - - - - - - - - 5.3.3
Armatury oświetleniowe (do wyboru) - - -
-
-
-
-
-
-
-
-
-
-
109
109
109
109
110
110
110
110
Zakłócenia - - - - - - - - - - - - - - - - - - - - - - - - - - - 111
6.1
6.2
6.3
Informacje ogólne - - - - - - - - - - - - - - - - - - - - - - - - - - - - 111
Diagnoza zakłóceń - - - - - - - - - - - - - - - - - - - - - - - - - - - 111
Mechanizm opuszczania awaryjnego- - - - - - - - - - - - - - - - - - - 112
Indeks - - - - - - - - - - - - - - - - - - - - - - - - - - - - - 113
Instrukcja obsługi (Wersja B)
97
ST 4032 / ST 4040
Certyfikat zgodności
CE 0123
Certyfikat zgodności z dyrektywą UE o maszynach (06/42/EG).
Producent:
Stertil B.V.
Postbus 23
9288 ZG Kootstertille
Nederland
Maszyna:
Hydrauliczny podnośnik z 4 kolumnami dla
samochodów osobowych i dostawczych.
Marka:
STERTIL - KONI
Numeru fabrycznego: . . . . . . . . . . . . . . . . .
Data uruchomienia:
.................
Model
ST 4032 - 3200 kg
ST 4040 - 4000 kg
Wersja
4-kolumnowy podnośnik z pomostami
4-kolumnowy podnośnik z pomostami
Warianty
-F Pomosty z systemem odciążającym
układ jezdny
-F Pomosty z systemem odciążającym
układ jezdny
-S podnośnik skrócony o 25 cm
-N podnośnik zwężony o 30 cm
-V podnośnik poszerzony o 30 cm
-L podnośnik wydłużony o 45 cm
-M podnośnik poszerzone pomosty
-MOT podnośnik wydłużony o 20 cm
-S podnośnik skrócony o 25 cm
Opcje
Różne możliwości
Różne możliwości
Niżej podpisany, U. Bijlsma, dyrektor, upoważniony w tym celu przez Stertil B.V.,
oświadcza niniejszym, że podnośnik, jak opisano powyżej, jest porównywalny z
modelem, który przeszedł próbę typu EC:
•
2006/42/EC Dyrektywa maszynowa
EN 61508 (SIL1), EN 1493, EN 418, EN 954-1, EN 60204-1
•
2004/108/EC
•
2006/95/EC Dyrektywa niskonapięciowa
EN60950-1, IEC60335-2-29
Stertil B.V. Kootstertille
U. Bijlsma
Dyrektor
Podpis:
Data: 01-01-2010
Podnośnik spełniał podstawowe wymogi bezpieczeństwa opisane w tej
dyrektywie. Niniejsza próba EC została przeprowadzona przez: RWTÜV Institut für Produkterprobung und Werkstofftechnik - Zentralabteilung
Prüflaboratorien
[niem. jednostka certyfikująca]
ST 4032:
ST 4032F:
ST 4040:
ST 4040F:
Instrukcja obsługi (Wersja B)
04 205 - 2461/03
04 205 - 2473/03
04 205 - 2472/03
04 205 - 2474/03
98
ST 4032 / ST 4040
1
1
1.1
Copyright
Informacje ogólne
Copyright 2010 Stertil B.V.
Wszelkie prawa na całym świecie zastrzeżone. Żadna część niniejszej
publikacji, włącznie z rysunkami i wykresami, nie może być reprodukowana i/lub
rozpowszechniana – w formie druku, fotokopii, mikrofilmu lub w jakikolwiek inny
sposób – bez wcześniejszej pisemnej zgody Stertil B.V.
1.2
Oznaczenie
dokumentu
Niniejsza instrukcja obsługi jest tłumaczeniem oryginalnej wersji w języku
niderlandzkim.
Stertil B.V. zastrzega sobie prawo dokonywania w każdej chwili zmian
konstrukcji i/lub konfiguracji swoich produktów, bez obowiązku adaptowania
wcześniej dostarczonych produktów. Dane w niniejszej instrukcji obsługi
odnoszą się do najnowszych informacji. Mogą one zostać w późniejszym czasie
zmienione bez uprzedzenia. W celu zasięgnięcia informacji na temat ustawień,
konserwacji czy robót naprawczych, które nie zostały opisane w niniejszym
dokumencie, skontaktuj się z Działem serwisu Stertil B.V.
Informacje zawarte w niniejszej instrukcji dotyczą zastosowania opisywanego
produktu. Jeśli produkty, podzespoły produktów lub procedury są stosowane w
inny sposób niż to opisano w niniejszej instrukcji, należy uzyskać
potwierdzenie, czy takie zastosowanie jest prawidłowe i odpowiednie.
Ani niniejsza instrukcja, ani z dokumentacja dostarczana wraz z produktami nie
daje podstaw do wnoszenia jakichkolwiek roszczeń. Wyłącznie potwierdzenie
zamówienia jest wiążące.
Niniejsza instrukcja zawiera przydatne i ważne informacje na temat
prawidłowego działania oraz właściwej konserwacji produktu. Instrukcja
zawiera ponadto ważne zasady postępowania, mające na celu zapobieżenie
potencjalnym wypadkom oraz poważnym uszkodzeniom w trakcie pracy
maszyny. Dołożyliśmy wszelkich starań, by uczynić niniejszą instrukcję
kompletną i wolną od błędów. Gdyby zauważyli Państwo jakieś błędy lub nie
mogli znaleźć jakiejś informacji, prosimy zwrócić się z tym do naszego
menedżera serwisu, byśmy mogli dokonać stosownej zmiany. W ten sposób
będziemy w stanie ulepszać naszą dokumentację.
1.3
Dla kogo
przeznaczona jest
niniejsza instrukcja?
Niniejsza instrukcja jest przeznaczona dla użytkowników podnośnika model ST
4032 / ST 4040.
Osobom nie znającym obsługi podnośnika model ST 4032 / ST 4040 zaleca się
przeczytanie w całości następujących rozdziałów oraz ścisłe przestrzeganie
instrukcji.
Osoby znające obsługę podnośnika model ST 4032 / ST 4040 mogą traktować
niniejszą instrukcję jako poradnik. Aby znaleźć potrzebną informacją, można
skorzystać ze spisu treści oraz indeksu.
1.4
Zakres niniejszej
instrukcji obsługi
Niniejsza instrukcja zawiera ważne informacje na temat obsługi podnośnika
model ST 4032 / ST 4040.
Informacje na temat obsługi tego instalacji i serwisu, patrz ST 4032 / ST 4040
Zalecenia instalacji i serwisu (43508001).
Instrukcja obsługi (Wersja B)
99
ST 4032 / ST 4040
Oznaczenia w tekście
1.5
Oznaczenia w
tekście
W niniejszej instrukcji zastosowano następujące sposoby zapisu. Każdy
sposób ma swe własne znaczenie.
Zadaniem tekstu wytłuszczonego jest podkreślenie czegoś.
n
c
w
Uwaga
Wskazuje na ważną część tekstu. Przeczytaj tekst uważnie.
Uwaga!
Podano przy procedurach, których trzeba przestrzegać, w przeciwnym
razie może dojść do uszkodzenia maszyny lub materiału. Przestrzegaj
ściśle procedury.
Ostrzeżenie
Wskazuje na jakąś procedurę lub czynność, które – jeśli nie są właściwie
wykonywane – mogą spowodować uszczerbek na zdrowiu lub
uszkodzenie maszyny, może też wskazywać na jakąś niedozwoloną
czynność. Ignorowanie zakazu może prowadzić do wypadków,
uszczerbku na zdrowiu lub poważnych uszkodzeń maszyny.
Zapisy oznaczone <>, jak na przykład <opuszczanie>, przedstawiają przyciski
funkcyjne podnośnika.
1.6
Dane producenta
Stertil B.V.
P.O. Box 23
9288 ZG Kootstertille
Tel.
+31(0)512 334 444
Telefaks
+31(0)512 334 430
E-mail:
[email protected]
Strona internetowa: www.stertil.nl
1.7
Gwarancja i
odpowiedzialność
cywilna
Patrz warunki dostawy i potwierdzenie zamówienia.
1.8
Aspekty środowiska
naturalnego
Właściciel oraz/lub użytkownik podnośnika samochodowego odpowiedzialny
jest za wywóz materiałów odpadowych (olej, etc.) zgodnie z obowiązującymi na
miejscu przepisami lub rozporządzeniami.
1.8.1 Informacje dotyczące systemu REACH
1 czerwca 2007 roku weszło w życie nowe unijne rozporządzenie REACH. Aby
zapewnić bezpieczeństwo ludziom i środowisku naturalnemu, Unia Europejska
obrała sobie za cel wytwarzanie i używanie bezpiecznych substancji
chemicznych.
Zgodnie z definicjami rozporządzenia REACH firma Stertil produkuje „wyroby” i
jest „dalszym użytkownikiem” substancji chemicznych.
Firma Stertil stosuje się do postanowień REACH oraz sprawdza wszystkich
dostawców materiałów i substancji pod kątem wymagań stawianych przez
rozporządzenie.
Na Państwa prośbę lokalny sprzedawca przedstawi Państwu odpowiednie
informacje dotyczące produktów, np. na podstawie karty charakterystyki
substancji niebezpiecznej (MSDS).
1.9
Wywóz podnośnika
Instrukcja obsługi (Wersja B)
Po upływie okresu użytkowania podnośnika właściciel i/lub jego użytkownik są
odpowiedzialni za bezpieczny demontaż podnośnika oraz za wywóz jego
podzespołów zgodnie z lokalnie obowiązującymi ustawami lub
rozporządzeniami.
100
ST 4032 / ST 4040
2
2
2.1
Wstęp
Bezpieczeństwo
Nasze wymogi bezpieczeństwa pod żadnym warunkiem nie mogą być
sprzeczne z ustawowymi warunkami i zasadami, które mają zastosowanie do
bezpieczeństwa podnośnika samochodowego. Jeśli jedno z ostrzeżeń lub
wymogów bezpieczeństwa jest sprzeczne z obowiązującymi przepisami
lokalnymi, wówczas najsurowsza zasada ma pierwszeństwo. Nasze podnośniki
samochodowe model ST 4032 / ST 4040 są zabezpieczone zgodnie z
przepisami dla tego rodzaju urządzeń.
Zabrania się dokonywania zmian w podnośniku bez naszej pisemnej zgody.
Jeśli wskutek nieprzestrzegania tego wymogu powstanie szkoda dot. osób lub
przedmiotów, Stertil B.V. odrzuca jakąkolwiek odpowiedzialność.
Kierownik warsztatu względnie instytucji winien zadbać o to, by obowiązujące
w zakładzie przepisy bezpieczeństwa były ściśle przestrzegane.
w
Ostrzeżenie
Nieprzestrzeganie przepisów bezpieczeństwa może spowodować
uszczerbek na zdrowiu i uszkodzenie maszyny.
Prosimy zapoznać się z działaniem i obsługą maszyny. Przestrzegaj ściśle
instrukcji.
2.2
Oznaczenia
bezpieczeństwa
Niniejszy dokument zawiera kilka specjalnych symboli i ustaleń, które
użytkownik musi rozumieć. Oznaczenia w tekście – patrz § 1.5 na stronie 100.
2.3
Bezpieczeństwo
osobiste
Dla użytkownika zaleca się stosowanie środków ochrony osobistej:
•
odzież ochronna,
•
obuwie ochronne.
w
Instrukcja obsługi (Wersja B)
Ostrzeżenie
Nie noś żadnej luźnej odzieży lub biżuterii.
101
ST 4032 / ST 4040
Środki bezpieczeństwa
2.4
Środki
bezpieczeństwa
W celu zapewnienia bezpiecznej obsługi podnośnika samochodowego należy
przestrzegać następujących środków bezpieczeństwa:
•
używaj podnośnika wyłącznie do podnoszenia pojazdów, a nie do żadnych
innych celów,
•
zamontuj podnośnik w taki sposób, by zostało stworzone bezpieczne
stanowisko pracy, weź przy tym też pod uwagę drogi ewakuacyjne w
nagłych przypadkach (minimum 600 mm wolnego przejścia),
•
obsługę podnośnika powierz wyłącznie osobom do tego upoważnionym;
osoby te w każdym przypadku zostały poinformowane o instrukcji użycia
podnośnika,
•
przy obsłudze podnośnika sprawdź czy w zasięgu jego pracy (włącznie z
pojazdem) nie znajdują się jakieś osoby lub przedmioty,
•
uważaj bardzo na pojazd w trakcie podnoszenia lub opuszczania
podnośnika,
w
w
Ostrzeżenie
Z powodu przeszkód (klinów, itp.)
Ostrzeżenie
Umieszczenie zbyt wysokiego pojazdu na podnośniku może
doprowadzić do powstania niebezpiecznych sytuacji.
•
w trakcie obsługi podnośnika nie wchodź nigdy na lub pod pojazd (z
ładunkiem),
•
nie wspinaj się nigdy na podnośniklub na pojazd, gdy są one podnoszone,
•
w przypadku zakłóceń lub po zakończeniu pracy ustawiaj podnośnik zawsze
w najniższym położeniu i wyłącz napięcie wyłącznikiem głównym; przekręć
w tym celu wyłącznik główny do pozycji 0 i zablokuj go kłódką,
•
w trakcie prac spawalniczych przy podnośniku zadbaj o dobre uziemienie;
w przeciwnym razie może nastąpić uszkodzenie cylindra hydraulicznego,
okablowania, itp.
w
Ostrzeżenie
Nieprawidłowa obsługa lub wadliwa konserwacja mogą spowodować
uszczerbek na zdrowiu lub uszkodzenia przedmiotów.
2.4.1 Przycisk zatrzymania awaryjnego
Główny wyłącznik, z prawej strony w skrzynce sterowniczej, służy zarazem jako
wyłącznik zatrzymywania awaryjnego. W nagłym przypadku podnośnik tym
wyłącznikiem.
Jeśli użyto przycisku zatrzymania awaryjnego, sprawdź:
Instrukcja obsługi (Wersja B)
•
czy nie trzeba kogoś uwolnić,
•
czy podnośnik nie jest uszkodzony.
102
ST 4032 / ST 4040
2
Bezpieczeństwo
2.4.2 Zabezpieczenia
Podnośnik samochodowy jest wyposażony w zabezpieczenia (patrz
Ilustracja 2.1 na stronie 103), które funkcjonują w następujący sposób:
•
ruch opuszczania zatrzymuje się, jeśli wskutek przeszkód powstają różnice
wysokości między pomostami, po czym – w przypadku luźnego(ych) kabla(i)
– możliwe jest jedynie podnoszenie (5),
•
prąd sterowniczy jest wyłączany w przypadku zerwania kabla, w wyniku
czego dalsza praca nie jest możliwa (6),
•
po uzyskaniu najwyższego położenia ruch podnoszenia jest przerywany (2),
•
ruch opuszczania jest mechanicznie blokowany w przypadku braku obsługi
podnośnika oraz przerwy w zasilaniu prądem sterowniczym (4),
•
w przypadku zerwania kabla cylinder jest odcinany przez zawór zerwania
kabla (3),
•
podczas opuszczania podnośnik zatrzymuje się na wysokości ok. 140 mm
nad podłogą (zabezpiecznie stóp); po kontroli bezpieczeństwa można
kontynuować opuszczanie (sygnał akustyczny), naciskając raz jeszcze na
<opuszczanie> (1).
4
5
6
6
1. Wyłącznik zabezpieczenia stóp
2. Wyłącznik krańcowy
najwyższego położenia
3. Zawór zerwania kabla w
cylindrze
4. Blokada mechaniczna
5. Zabezpieczenie luźnego kabla
6. Zabezpieczenie przed zerwaniem kabla
3
2
1
Ilustracja 2.1 Zabezpieczenia podnośnika
Instrukcja obsługi (Wersja B)
103
ST 4032 / ST 4040
3
3
3.1
Informacje ogólne
Dane techniczne
Ogólne dane techniczne – patrz też tabliczka znamionowa na podnośniku.
Tabela 3.1 Dane techniczne
Model
ST 4032
ST 4040
Udźwig
3200 kg
4000 kg
Zawór nadciśnieniowy
260 bar (od fabryki zamknięty
pokrywą z tworzywa sztucznego)
260 bar (od fabryki zamknięty
pokrywą z tworzywa sztucznego)
Skok cylindra
1870 mm, 1745 mm (wersja S)
1870 mm, 1745 mm (wersja S)
Moc elektryczna
3,6 kW
3,6 kW
380/415 V, 50 Hz
3 x faza, 1 x uziemienie, 1 x zero
3 x faza, 1 x uziemienie, 1 x zero
220/240 V, 50 Hz
3 x faza, 1 x uziemienie
3 x faza, 1 x uziemienie
220/240 V, 50 Hz pojedyncza
faza
1 x faza, 1 x zero, 1 x uziemienie
1 x faza, 1 x zero, 1 x uziemienie
380/415 V, 50 Hz
3 x 16 A (powolny)
3 x 16 A (powolny)
220/240 V, 50 Hz
3 x 16 A (powolny)
3 x 16 A (powolny)
220/240 V, 50 Hz pojedyncza
faza
1 x 16 A (powolny)
1 x 16 A (powolny)
Napięcie sterownicze
24 V napięcie stałe
24 V napięcie stałe
Ustawienie zaworu pęknięcia
węża
28 l/min (1,25 mm)
28 l/min (1,25 mm)
24 / 23 s
29 / 29 s
47 / 23 s
59 / 29 s
Poziom hałasu
max. 74 dB(A)
max. 74 dB(A)
Instalacja
wewnątrz
wewnątrz
Masa własna
900 kg
910 kg
Temperatura pracy
-15 -> +50 D.C.
-15 -> +50 D.C.
Napięcie sieci
Bezpiecznik sieciowy
Czas podnoszenia i
opuszczania (3 x faza)
Czas podnoszenia i
opuszczania (1 x faza)
Instrukcja obsługi (Wersja B)
104
ST 4032 / ST 4040
3
3.2
Dane techniczne
Udźwig
Informacja o maksymalnym udźwigu – patrz Tabela 3.1 na stronie 104
Zabezpieczenie nadciśnieniowe zespołu hydraulicznego jest jako takie
włączone, tak że nigdy nie można podnosić więcej niż podana masa +10%.
3.2.1 ST 4032
Projekt został obliczony dla maksymalnego ciężaru na jednym pomoście o
1600 kg oraz rozkładzie obciążenia między osiami pojazdu w stosunku 40% 60% przy rozstawie osi minimum 3000 mm i rozstawie kół minimum 1600 mm.
3.2.2 ST 4040
Projekt został obliczony dla maksymalnego ciężaru na jednym pomoście o
2000 kg oraz rozkładzie obciążenia między osiami pojazdu w stosunku 33% 66% przy rozstawie osi minimum 3000 mm i rozstawie kół minimum 1700 mm.
3.3
System podnoszenia
Ten hydrauliczny 4-kolumnowy podnośnik samochodowy jest wyposażony w
jeden zespół hydrauliczny. Zespół napędza cylinder zamontowany w "stałym"
pomoście. Cylinder napędza cztery końcówki kablowe, które biegną poprzez
krążki linowe przez pomost i belki poprzeczne oraz są umocowane w
kolumnach.
3.4
Podnośnik
podprogowy
(opcjonalny)
Opcjonalnie podnośnik może zostać wyposażony w dodatkowy moduł
podnośnika podprogowego.
Tabela 3.2 Dane techniczne podnośnika podprogowego
Model
ST 4032F
ST 4040F
Udźwig
3200 kg
4000 kg
Skok cylindra
207 mm
207 mm
Wysokość podnoszenia
450 mm
450 mm
Czas podnoszenia i
opuszczania - 3 faza
8/8s
8/8s
Czas podnoszenia i
opuszczania - 1 faza
16 / 8 s
16 / 8 s
3.4.1 Udźwig
Urządzenie jest obliczone na maksymalne obciążenie 1600 kg (ST 4032) lub
2000 kg (ST 4040) na jedną płytę nośną i rozłożenie obciążenia 33% - 66%.
w
Ostrzeżenie
Nieprzestrzeganie takiego rozłożenia obciążenia może prowadzić do
uszkodzenia podnośnika podprogowego.
3.4.2 System podnoszenia
Podnośnik podprogowy jest wyposażony w tzw. podwójny system master –
slave (element nadrzędny i podległy). W ten sposób zagwarantowany jest
równy przebieg obu płyt nośnych.
Instrukcja obsługi (Wersja B)
105
ST 4032 / ST 4040
4
4
4.1
Informacje ogólne
Obsługa
Ustaw pojazd prosto na podnośniku, kołami w całości na pomostach. Zaciągnij
w pojeździe hamulec ręczny i ułóż przed kołami pojazdu kliny zabezpieczające.
Obsługa podnośnika odbywa się przy użyciu przycisków na szafie sterowniczej
(patrz Ilustracja 4.1), zamontowanej na filarze III. Patrz też etykieta obsługi na
podnośniku samochodowym.
1. Wyłącznik główny (awaryjny)
2. Podnoszenie
3. Opuszczanie
4. Opuszczanie z blokadą
5. Opuszczanie powolne
6. Przełącznik programowy
podnośnika podprogowego
(opcjonalny)
6
1
2
5
3
4
Ilustracja 4.1 Tablica sterownicza
n
Uwaga
Obsługuj tablicę jedynie czubkami palców. Obsługa ostrymi
przedmiotami (np. wkrętakami) może być przyczyną uszkodzenia i
zakłóceń.
Przyciski podnoszenia, opuszczania zwykłego oraz opuszczania z blokadą to
urządzenia czuwakowe (hold to run). Obsługa jest możliwa, dopóki przycisk
funkcyjny jest wciśnięty i zatrzymuje się natychmiast po jego zwolnieniu.
4.2
Włączanie
Włączanie podnośnika następuje jak poniżej:
1. Ustaw wyłącznik główny (1) w pozycji 1.
Dzięki temu zostanie włączone napięcie sieci i sterownicze.
2. Podnośnik jest gotowy do pracy.
4.3
Podnoszenie
Do podnoszenia podnośnika używaj przycisku (2) na samej górze. Obok tego
przycisku znajduje się skierowana w górę strzałka.
4.4
Opuszczanie
Aby opuścić podnośnik samochodowy, należy jednocześnie wcisnąć przyciski
(4) <zwolnienie blokady> oraz (3) <opuszczanie>. Podczas opuszczania
można zwolnić przycisk (4) <zwolnienie blokady>. Zatrzaski bezpieczeństwa
pozostaną w pozycji otwartej.
w
4.5
Opuszczanie z
blokadą
Instrukcja obsługi (Wersja B)
Ostrzeżenie
Gdyby w trakcie opuszczania pojawiły się jakieś trudności, wówczas
natychmiast zwolnij przycisk.
Do opuszczania z blokadą przyciska się jedynie przycisk (4) na dole po prawej
(patrz Ilustracja 4.1 na stronie 106). Podnośnik będzie się o max. 60 mm.
106
ST 4032 / ST 4040
4
Obsługa
Aby móc teraz dalej opuszczać, podnośnik trzeba najpierw znowu trochę
podnieść (odciążyć blokadę), zanim podnośnik będzie się mógł dalej
opuszczać. Najniższe 400 mm ruchu podnoszenia nie jest wyposażone w
blokadę.
4.6
Opuszczanie
powolne
Podnośnik można opuszczać powoli przy użyciu kurka (5) na prawo od tablicy
sterowniczej (patrz Ilustracja 4.1 na stronie 106). Aby opuścić powoli most,
postępuj, jak poniżej:
1. Zakręć całkiem kurek (5) (w prawo).
2. Przyciśnij przycisk opuszczania (3) i otwórz jednocześnie kurek (5) (w lewo).
Most zacznie się teraz powoli opuszczać. Otwierając kurek po zrobieniu
pełnego obrotu most ponownie obniża się do swej normalnej prędkości.
4.7
Podnośnik
podprogowy
(opcjonalny)
4.7.1 Obsługa
Ustaw pojazd dokładnie nad podnośnikiem podprogowym i umieść bloki
podnoszące pod punktami nośnymi pojazdu. W razie potrzeby przesuń
regulowaną część podnośnika.
Ilustracja 4.2 Umieszczanie pojazdu
Podnośnik podprogowy jest obsługiwany za pomocą przycisków na szafce
sterowniczej, która zamontowana jest na kolumnie III.
Przełącznik programowy (6) na bocznej stronie tablicy sterowniczej umożliwia
wybór pomiędzy obsługą głównego podnośnika (pozycja 1) lub obsługą
podnośnika podprogowego (pozycja 2).
4.7.2 Włączanie
1. Ustaw wyłącznik główny (1) w pozycji 1.
2. Ustaw przełącznik programowy (6) na pozycję 1 i przesuń główny podnośnik
na wymaganą wysokość, naciskając przycisk podnoszenia (2).
3. Naciskając przycisk (4), opuść podnośnik na blokadę.
4. Przekręć przełącznik programowy (6) na pozycję 2 w celu obsługi
podnośnika podprogowego.
4.7.3 Podnoszenie
Do podnoszenia podnośnika podprogowego służy przycisk na samej górze (2).
Obok tego przycisku znajduje się skierowana w górę strzałka.
Instrukcja obsługi (Wersja B)
107
ST 4032 / ST 4040
Oświetlenie (opcjonalnie)
4.7.4 Opuszczanie
Do opuszczania podnośnika podprogowego służy przycisk (3), oznaczony
strzałką skierowaną w dół. Podnośnik podprogowy zatrzyma się około 10 cm
nad pomostem. Po ponownym naciśnięciu przycisku opuszczania (3)
podnośnik podprogowy zostanie opuszczony do końca, czemu towarzyszy
sygnał akustyczny.
Przycisk ‘Opuszczanie z blokadą’ (4) nie działa przy tym ustawieniu.
n
4.8
Oświetlenie
(opcjonalnie)
Pokrętło (5) opuszczania powolnego działa jedynie w odniesieniu do
głównego podnośnika, a nie podnośnika podprogowego.
Oświetleniem steruje przełącznik z symbolem oświetlenia.
n
Instrukcja obsługi (Wersja B)
Uwaga
Uwaga
W przypadku zakłóceń sięgnij po diagnozę zakłóceń (patrz § 6.2
’Diagnoza zakłóceń’ na stronie 111).
108
ST 4032 / ST 4040
5
5
5.1
Informacje ogólne
Przegląd i
konserwacja
W trakcie przeglądu i konserwacji ustawiaj podnośnik samochodowy zawsze w
najniższym położeniu i wyłączaj wyłącznik główny (pozycja 0). Zablokuj
wyłącznik na kłódkę.
Jedynie wówczas, gdy wymagają tego określone ustawienia i kontrole, można
tymczasowo włączyć napięcie i ustawić podnośnik w wyższym położeniu.
w
Ostrzeżenie
Przy wyższym położeniu opuszczaj podnośnik samochodowy zawsze z
blokadą.
Raz w roku trzeba przeprowadzić dokładny przegląd podnośnika. Dzięki stałej
opłacie konserwacyjnej serwisanci Stertil B.V. w profesjonalny sposób mogą
sprawdzać podnośnik.
5.2
Schemat
konserwacji
5.2.1 Codzienna konserwacja przez użytkownika
1. Sprawdź podnośnik pod kątem widocznych uszkodzeń.
2. Sprawdź, czy nie nastąpił wyciek oleju z zespołu hydraulicznego, węży lub
cylindra.
5.2.2 Miesięczna konserwacja przez użytkownika
1. Sprawdź działanie pali ryglowych, podnosząc podnośnik, a następnie go
opuszczając.
n
Uwaga
Jeśli nie działa to dobrze, skontaktuj się z serwisem.
2. Wykonuj miesięczne smarowanie wymienione w Tabela 5.1 na stronie 110.
5.2.3 Roczna konserwacja
Raz w roku, użytkownik ma obowiązek zlecić przeprowadzenie przeglądu
podnośnika przez odpowiednio wyszkolony personel zajmujący się serwisem
lub konserwacjąl (zwany dalej serwisem). Na przeglądy roczne można wykupić
w serwisie abonament konserwacyjny. Jeśli użytkownik nie korzysta z
abonamentu, zobowiązany jest do samodzielnego uzgodnienia terminu
przeglądu i konserwacji podnośnika.
Przegląd ten jest wpisywany na liście kontrolnej przeglądów.
n
Instrukcja obsługi (Wersja B)
Uwaga
„Odpowiednio wyszkolony personel zajmujący się serwisem lub
konserwacją” oznacza pracowników serwisu firmy Stertil-Koni lub inny
serwis, autoryzowany przez firmę Stertil-Koni. Za skutki napraw
przeprowadzonych przez serwisy inne niż wyżej wymienione odpowiada
wyłącznie użytkownik.
109
ST 4032 / ST 4040
Procedury dot. konserwacji
5.3
Procedury dot.
konserwacji
5.3.1 Instrukcja smarowania
Podnośnik samochodowy musi być regularnie poddawany przeglądom zgodnie
z instrukcją smarowania w Tabela 5.1 na stronie 110.
Tabela 5.1 Instrukcja smarowania
Na
miesiąc
Roboty konserwacyjne
Opis
Na rok
Cylinder
Naoliwić suche tłoczysko
Sprawdzenie poziomu oleju w
zbiorniku
Uzupełnienie (gdy
podnośnika znajduje się w
najwyższym położeniu)
x
Pale i drążki sterujące
Naoliwić punkty obrotu
x
Na
2 lata
x
Osłona luźnego kabla
Naoliwić punkty obrotu
x
Belka ryglowa i elementy
prowadzące w kolumnach
Smarowanie
x
Różne punkty obrotu
Smarowanie
x
Krążki kablowe
Smarowanie Molycotem
PG54
x
Olej hydrauliczny w zbiorniku
Wymiana
x
5.3.2 Olej hydrauliczny
Wymień ok. raz na 2 lata olej hydrauliczny w zbiorniku (patrz Tabela 5.2).
n
Uwaga
Również wówczas, gdy podnośnik nie jest ciągle używany, trzeba
wymienić olej.
W celu wymiany oleju przestrzegaj następującej procedury:
1. Ustaw podnośnik w najniższym położeniu i spuść olej.
2. Napełnij zbiornik olejem hydraulicznym HYDRAN 46 (46 cSt / 40°C),
odfiltrowanym na 4 mikrometry max.
Tabela 5.2 Olej hydrauliczny
Model
ST 4032 / ST 4040
Zawartość
8l
5.3.3 Armatury oświetleniowe (do wyboru)
c
Instrukcja obsługi (Wersja B)
Uwaga!
Wyczyść oprawkę lampy delikatnym środkiem czyszczącym.
110
ST 4032 / ST 4040
6
6
6.1
Informacje ogólne
Zakłócenia
Zakłócenia w pracy podnośnika mogą być spowodowane jakimś prostym
błędem. Sprawdź instalację pod kątem podanych przyczyn.
Jeśli w trakcie kontroli wymienionych przyczyn nie da się usunąć zakłócenia,
powinni się Państwo skontaktować z serwisem.
n
n
Uwaga
Za wszelkie wykonane przez inne jednostki niż serwis naprawy
podnośnika oraz ich skutki pełną odpowiedzialność ponosi użytkownik.
Uwaga
Pod pojęciem serwisu rozumiany jest serwis firmy Stertil lub
autoryzowany przez Stertil serwis.
Do zlokalizowania uszkodzeń można wykorzystać następującą diagnozę
zakłóceń. W razie wątpliwości skontaktuj się z serwisem.
6.2
Diagnoza zakłóceń
Następujące zastawienie zakłóceń odsyła do danej tabeli:
Tabela 6.1 ’Silnik nie pracuje’ na stronie 111,
Tabela 6.2 ’Podnośnik nie podnosi się’ na stronie 111,
Tabela 6.3 ’Podnośnik nie obniża się’ na stronie 112.
Tabela 6.1 Silnik nie pracuje
Możliwa przyczyna
Rozwiązanie
Wyłączony główny włącznik
Włączyć główny włącznik
Bezpiecznik sieciowy uszkodzony
Wymień bezpiecznik sieciowy
Bezpiecznik w szafie sterowniczej uszkodzony
Zawiadom serwis
Tabela 6.2 Podnośnik nie podnosi się
Możliwa przyczyna
Rozwiązanie
Przerwany obwód w najwyższym położeniu:
zakłócenia elektryczne lub podnośnik jest ustawiony
w najwyższym położeniu
Opuścić podnośnik; w przypadku zakłóceń
elektrycznych skontaktować się z serwisem
Przerwany obwód wyłącznika zerwania kabla:
zakłócenia elektryczne lub zerwanie kabla
Skontaktuj się z serwisem
Instrukcja obsługi (Wersja B)
111
ST 4032 / ST 4040
Mechanizm opuszczania awaryjnego
Tabela 6.3 Podnośnik nie obniża się
Możliwa przyczyna
Rozwiązanie
Pale nie są wyciągane z blokady
Podnieś podnośnik najpierw o 50 mm
Elektrycznie obsługiwany zawór opuszczania
zespołu hydraulicznego nie otwiera się
Brak napięcia sterowniczego cewki elektromagnesu
lub zawór opuszczania jest uszkodzony; oddać do
naprawy do serwisu
Przerwany obwód luźnego kabla: zakłócenia
elektryczne lub luźny kabel
Podnieś podnośnik i usuń ewentualne przeszkody
pod pomostami. W innych przypadkach skontaktuj
się z serwisem
Zabezpieczenie węża (przeciwko pęknięciu) jest
zamknięte
W razie pęknięcia węża zlecić jego wymianę
serwisowi; kontrola blokad pod kątem uszkodzeń
n
6.3
Mechanizm
opuszczania
awaryjnego
W razie przerwy w zasilaniu prądem nie mogą Państwo opuszczać podnośnika
przy użyciu przycisków funkcyjnych. Jeśli ma to miejsce, można opuścić
podnośnik ręcznie. Skontaktuj się w tej sprawie z serwisem.
w
Instrukcja obsługi (Wersja B)
Uwaga
Gdyby wystąpiły zakłócenia inne niż wyżej wymienione, zawsze
kontaktować się z serwisem.
Ostrzeżenie
Procedurę opuszczania awaryjnego mogą przeprowadzać wyłącznie
osoby, które przeszły szkolenie na jej temat.
112
ST 4032 / ST 4040
Indeks
B
O
Bezpieczeństwo - - - - - - - - - - środki - - - - - - - - - - - - - osobiste - - - - - - - - - - - - przycisk zatrzymania awaryjnegozabezpieczenia - - - - - - - - -
-
-
101
102
101
102
103
Obsługa- - - - - - - - - - opuszczanie - - - - - - opuszczanie powolne - opuszczanie z blokadą- podnoszenie- - - - - - włączanie - - - - - - - Odpowiedzialność cywilna- Olej hydrauliczny - - - - - Oświetlenie
obsługa - - - - - - - - Opuszczanie
powolne - - - - - - - - z blokadą - - - - - - - Opuszczanie powolne - - - Oznaczenia bezpieczeństwa
C
Certyfikat zgodności - - - - - - - - - - - -98
Codzienna konserwacja - - - - - - - - - 109
Copyright - - - - - - - - - - - - - - - - -99
D
Dane producenta - - - - Dane techniczne - - - - podnośnik podprogowyDiagnoza zakłóceń - - - -
-
-
-
-
-
-
-
100
104
105
111
-
-
-
-
-
-
106
106
107
106
106
106
100
110
- - - - - - 108
-
-
-
-
-
-
107
106
107
101
Podnośnik podprogowy
dane techniczne - - - - - - obsługa - - - - - - - - - - Przegląd - - - - - - - - - - - Przycisk zatrzymania awaryjnego
-
-
-
-
105
107
109
102
P
G
Gwarancja - - - - - - - - - - - - - - - 100
I
R
Instrukcja smarowania - - - - - - - - - - 110
REACH Informacje - - - - - - - - - - - 100
Roczna konserwacja - - - - - - - - - - 109
K
Konserwacja - - - - - co miesiąc - - - - - co roku - - - - - - codziennie - - - - - instrukcja smarowania
olej hydrauliczny - - procedury - - - - - -
-
-
-
-
-
-
-
-
S
109
109
109
109
110
110
110
Serwis
diagnoza zakłóceń- - - - - - - - - - 111
Specyfikacje - - - - - - - - - - - - - - 104
System podnoszenia - - - - - - - - - - 105
U
Udźwig - - - - - - - - - - - - - - - - - 105
M
Mechanizm opuszczania awaryjnego - - 112
Miesięczna konserwacja - - - - - - - - - 109
W
Włączanie- - - - - - - - - - - - - - - - 106
Z
Zabez-pieczenia - - - - - - - - - - - - 103
Zakłócenia - - - - - - - - - - - - - - - 111
Instrukcja obsługi (Wersja B)
113
ST 4032 / ST 4040
Svenska
Innehåll
1
Allmänt - - - - - - - - - - - - - - - - - - - - - - - - - - - - 117
1.1
1.2
1.3
1.4
1.5
1.6
1.7
1.8
1.9
2
3
-
-
-
-
-
-
-
-
-
-
-
-
-
-
-
117
117
117
117
118
118
118
118
118
118
Inledning - - - - - Säkerhetssymboler Personlig säkerhet- Säkerhetsåtgärder - 2.4.1
Nödstopp 2.4.2
Skydd - -
-
-
-
-
-
-
-
-
-
-
-
-
-
-
-
-
-
-
-
-
-
-
-
-
-
-
119
119
119
120
120
121
Tekniska data - - - - - - - - - - - - - - - - - - - - - - - - - 122
3.1
3.2
3.3
3.4
4
Allmänt - - - - - - - - - - Höjningskapacitet - - - - - 3.2.1
ST 4032 - - - - 3.2.2
ST 4040 - - - - Höjningssystem - - - - - - Frihjulslyft (valfri) - - - - - 3.4.1
Höjningskapacitet 3.4.2
Höjningssystem - -
-
-
-
-
-
-
-
-
-
-
-
-
-
-
-
-
-
-
-
-
-
-
122
123
123
123
123
123
123
123
Användning - - - - - - - - - - - - - - - - - - - - - - - - - - 124
4.1
4.2
4.3
4.4
4.5
4.6
4.7
4.8
Handledning (Version B)
-
Säkerhet - - - - - - - - - - - - - - - - - - - - - - - - - - - - 119
2.1
2.2
2.3
2.4
5
Copyright - - - - - - - - - - - - - - - Avgränsning av dokumentet - - - - - - För vem är denna handledning avsedd? Vad denna handledning omfattar- - - - Symboler och markeringar i texten - - - Uppgifter om tillverkaren - - - - - - - - Garanti och ansvarsskyldighet - - - - - Miljöaspekter - - - - - - - - - - - - - 1.8.1
Information angående REACH
Bortforsling av billyften- - - - - - - - - -
Allmänt - - - - - - - Påkoppling - - - - - Höja- - - - - - - - - Sänka - - - - - - - - Sänka till spärrat läge Sänka långsamt - - - Frihjulslyft (valfri) - - 4.7.1
Användning 4.7.2
Påkoppling 4.7.3
Höja - - - 4.7.4
Sänka - - Belysning (valfri)- - - -
-
-
-
-
-
-
-
-
-
-
-
-
-
-
-
-
-
-
-
-
-
-
-
-
-
124
124
124
124
124
125
125
125
125
125
126
126
Inspektion och
114
ST 4032 / ST 4040
underhåll- - - - - - - - - - - - - - - - - - - - - - - - - - - - 127
5.1
5.2
5.3
6
Allmänt - - - - - - - - - - - - - - - - - - Underhållsschema- - - - - - - - - - - - - 5.2.1
Dagligt underhåll av användaren 5.2.2
Månatligt underhåll av användaren
5.2.3
Årligt underhåll - - - - - - - - - Underhållsprocedurer - - - - - - - - - - - 5.3.1
Smörjningsanvisning - - - - - - 5.3.2
Hydraulisk olja - - - - - - - - - 5.3.3
Lampfästena (valfritt) - - - - - - -
-
-
-
-
-
-
-
-
-
-
-
-
-
-
127
127
127
127
127
128
128
128
128
Störningar - - - - - - - - - - - - - - - - - - - - - - - - - - - 129
6.1
6.2
6.3
Allmänt - - - - - - - - - - - - - - - - - - - - - - - - - - - - - - - - - 129
Störningsdiagnos - - - - - - - - - - - - - - - - - - - - - - - - - - - - 129
Nödsänknings-anordning - - - - - - - - - - - - - - - - - - - - - - - - 130
Index - - - - - - - - - - - - - - - - - - - - - - - - - - - - - - 131
Handledning (Version B)
115
ST 4032 / ST 4040
Enlighetsdeklaration
CE 0123
Enlighetsdeklaration gällande det europeiska maskindirektivet (06/42/EG).
Tillverkare:
Stertil B.V.
Postbus 23
9288 ZG Kootstertille
Nederland
Maskin:
Hydraulisk billyft med 4 pelare för personbilar och
lätta skåpbilar.
Märke:
STERTIL - KONI
Serienummer:
.................
Datum när
reparationsbryggan
tas i bruk:
.................
Modell
ST 4032
ST 4040
Version
Billyft med fyra pelare och körbanor
Billyft med fyra pelare och körbanor
Varianter
-F Körbanor med fritthjul-system
-F Körbanor med fritthjul-system
-S Billyft 25 cm förkortad
-N Billyft 30 cm smalare
-V Billyft 30 cm bredare
-L Billyft 45 cm längre
-M Billyft breddade körbanor
-MOT Billyft 20 cm förlängd
-S Billyft 25 cm förkortad
Valmöjligheter
Diverse möjligheter
Diverse möjligheter
Undertecknad, U. Bijlsma, direktör, för detta ändamål bemyndigad av Stertil
B.V., förklarar härmed att billyften såsom ovan beskriven, är jämförbar med den
modell som har undergått en besiktning av:
•
2006/42/EC Maskindirektiv
EN 61508 (SIL1), EN 1493, EN 418, EN 954-1, EN 60204-1
•
2004/108/EC
•
2006/95/EC Lågspänningsdirektiv
EN60950-1, IEC60335-2-29
Stertil B.V. Kootstertille
U. Bijlsma
Direktör
Namnteckning:
Datum: 01-01-2010
Billyften uppfyllde de grundläggande säkerhetskrav som är fastställda i detta
direktiv.
RWTÜV - Institut für Produkterprobung und Werkstofftechnik - Zentralabteilung
Prüflaboratorien
ST 4032:
ST 4032F:
ST 4040:
ST 4040F:
Handledning (Version B)
04 205 - 2461/03
04 205 - 2473/03
04 205 - 2472/03
04 205 - 2474/03
116
ST 4032 / ST 4040
1
1
1.1
Copyright
Allmänt
Copyright 2010 Stertil B.V.
Med världsomfattande ensamrätt. Inget ur denna utgåva, inklusive ritningar och
diagram, får mångfaldigas och/eller offentliggöras medelst tryckning, kopiering,
mikrofilm eller på annat sätt utan föregående skriftligt medgivande av Stertil B.V.
1.2
Avgränsning av
dokumentet
Denna handbok är en översättning från originalutgåvan på nederländska.
Stertil B.V. förbehåller sig rätten att när som helst ändra produktens konstruktion
och/eller konfiguration utan skyldighet att anpassa tidigare levererade
produkter. Uppgifterna i denna handledning bygger på senast möjliga rön. De
kan vid ett senare tillfälle ändras utan föregående varning. För information om
inställningar, underhållsarbete eller reparationsarbete som inte beskrivs i detta
dokument, ta kontakt med Kundservicen på Stertil B.V.
Informationen i denna handledning gäller den åsyftade användningen av
produkten. I de fall produkter, delar av produkter eller procedurer används på
annat sätt än som beskrivs i denna handledning, måste en bekräftelse erhållas
om denna användnings riktighet och lämplighet.
Inga rättigheter kan förskaffas varken från denna handledning eller den
dokumentation som levereras tillsammans med produkterna. Endast
orderbekräftelsen är bindande.
Denna handledning innehåller nyttig och viktig information om korrekt
tillämpning och underhåll av produkten. Dessutom innehåller handledningen
viktiga instruktioner för att förebygga olyckstillbud och allvarliga skador när
maskinen är i drift. Vi har bemödat oss om att göra denna handledning så
fullständig som möjligt. Om du hittar felaktigheter eller saknar information, var
vänlig informera vår servicemanager om det så att vi kan anpassa
handledningen. På detta sätt kan vi förbättra vår dokumentation.
1.3
För vem är denna
handledning
avsedd?
Denna handledning är avsedd för användare av billyft typ ST 4032 / ST 4040.
Personer som inte är förtrogna med användningen av billyft typ ST 4032 / ST
4040 rekommenderar vi att läsa följande kapitel fullständigt och att noggrant
följa instruktionerna.
Personer som är förtrogna med användningen av billyft typ ST 4032 / ST 4040
kan använda denna handledning som uppslagsverk. Innehållsförteckning och
index kan användas för att söka upp nödvändig information.
1.4
Vad denna
handledning
omfattar
Handledning (Version B)
Denna handledning innehåller viktig information om användningen av billyft typ
ST 4032 / ST 4040.
För information om denna billyfts installation- och service, se ST 4032 / ST 4040
Installations- och serviceföreskriften (43508001).
117
ST 4032 / ST 4040
Symboler och markeringar i texten
1.5
Symboler och
markeringar i texten
I denna handledning används följande symboler. Varje symbol har en egen
betydelse.
Text i fetstil används för att betona något.
n
c
w
Märk
Syftar på en viktig del i texten. Läs texten uppmärksamt.
Obs!
Står vid procedurer som måste följas, annars kan maskinen eller
materialet skadas. Följ proceduren noggrant.
Varning
Syftar på en procedur eller handling som, om den ej utförs korrekt, kan
förorsaka kroppslig skada eller åverkan, eller syftar på en förbjuden
handling. Att ignorera förbudet kan leda till olyckstillbud, kroppslig skada
eller allvarlig skada på maskinen.
Notationer mellan <>, såsom till exempel <sänk> återger billyftens
manöverknappar.
1.6
Uppgifter om
tillverkaren
Stertil B.V.
P.O. Box 23
9288 ZG Kootstertille
Telefon
+31(0)512 334 444
Telefax
+31(0)512 334 430
E-post:
[email protected]
Webbplats:
www.stertil.nl
1.7
Garanti och
ansvarsskyldighet
Se leveransvillkor och orderbekräftelse.
1.8
Miljöaspekter
Ägaren och/eller användaren av billyften bär ansvar för bortforsling av
avfallsmaterial (olja etc.).
1.8.1 Information angående REACH
Den 1 juni 2007 trädde den nya europeiska Reachförordningen i kraft. Med
hänsyn till människa och miljö är syftet att producera och använda säkra
kemikalier inom EU.
Enligt definitionen i REACH producerar Stertil "varor" och är företaget en
"downstream-användare" av kemikalier.
Stertil följer bestämmelserna i Reachförordningen och undersöker i samband
med alla material och ämnen som används att dess underleverantörer uppfyller
bestämmelserna i Reachförordningen.
På begäran kan du få aktuell information såsom säkerhetsdatablad (MSDS)
från din lokala återförsäljare.
1.9
Bortforsling av
billyften
Handledning (Version B)
Vid slutet av billyftens livslängd är ägaren och/eller användaren ansvarig för en
säker nedmontering av billyften samt för bortforsling av delarna i enlighet med
de lagar och förordningar som gäller på plats.
118
ST 4032 / ST 4040
2
2
2.1
Inledning
Säkerhet
Våra säkerhetskrav får under inga omständigheter bestrida de
lagbestämmelser och regler som är tillämpliga på billyftens säkerhet. Om en av
varningarna eller säkerhetskraven bestrider befintliga lokala lagbestämmelser,
gäller den regel som är strängast. Våra reparationsbryggor typ ST 4032 / ST
4040 är skyddade enligt reglerna för den här sortens apparater.
Det är inte tillåtet att utan skriftligt tillstånd utföra ändringar på billyften. Om
personskador eller skador på egendomar uppstår på grund av att detta krav inte
uppföljs, avvisar Stertil B.V. allt ansvar.
Företagsledaren på arbetsplatsen respektive inrättningen, ska se till att
säkerhetsföreskrifterna som gäller inom företaget följs noggrant.
w
Varning
Om säkerhetsföreskrifterna inte efterföljs kan kroppsskada och
maskinskada uppstå.
Se till att bli van med maskinens funktion och användning. Följ instruktionerna
noggrant.
2.2
Säkerhetssymboler
Detta dokument innehåller ett antal speciella symboler och överenskommelser
som användaren måste känna till. Se för symboler i texten § 1.5 på sid 118.
2.3
Personlig säkerhet
Vi rekommenderar att en användare använder personliga skyddsattribut:
•
skyddskläder,
•
säkerhetsskor.
w
Handledning (Version B)
Varning
Bär inga löst sittande kläder eller smycken.
119
ST 4032 / ST 4040
Säkerhetsåtgärder
2.4
Säkerhetsåtgärder
För en säker användning av billyften måste följande säkerhetsåtgärder
observeras:
•
använd denna billyft endast för att lyfta fordon och inte för några andra
tillämpningar,
•
installera billyften så att en säker arbetsplats skapas, och ta hänsyn till
flyktvägar och nödsituationer (minst 600 mm fritt utrymme),
•
låt endast personer som är befogade till det använda billyften;
dessa personer är insatta i billyftens bruksanvisning,
•
när billyften ska användas, kontrollera att det inte finns några personer eller
föremål i billyftens arbetsområde (inklusive fordon),
•
observera fordonet noga när det höjs och sänks med billyften,
w
w
Varning
Genom att placera föremål (bockar etc.) under fordonet kan farliga
situationer uppstå när bryggan sänks.
Varning
Genom att placera ett för högt fordon på billyften kan farliga situationer
uppstå.
•
gå aldrig på eller under fordonet (med last) när billyften används,
•
klättra aldrig på billyften eller på fordonet när detta är i upphöjt läge,
•
vid störningar eller vid avslutade verksamheter ska billyften alltid sänkas till
det lägsta läget och strömmen slås av med hjälp av huvudströmbrytaren;
vrid då huvudströmbrytaren till läge 0 och lås den med ett hänglås,
•
när svetsverksamheter på billyften utförs se till att jordningen är korrekt;
annars kan den hydrauliska cylindern, kablingen etc. skadas.
w
Varning
Felaktiv användning eller bristfälligt underhåll kan leda till personskador
eller materiella skador.
2.4.1 Nödstopp
Huvudströmbrytaren, till höger på instrumentpanelen, fungerar även som
nödstoppsbrytare. Vid kalamiteter stoppas billyften med denna strömbrytare.
Om nödstoppen har använts, kontrollera:
Handledning (Version B)
•
om någon måste befrias,
•
om billyften är skadad.
120
ST 4032 / ST 4040
2
Säkerhet
2.4.2 Skydd
Billyften är utrustad med skydd (se Figur 2.1 på sid 121) som ser till att:
•
sänkningsrörelsen stannar om det uppstår höjdskillnader mellan körbanorna
på grund av föremål i vägen, därefter är det, med lösa kablar, endast möjligt
att höja bryggan (5),
•
styrströmmen stängs av vid kabelbrott så att billyften inte längre kan
betjänas (6),
•
när den högsta höjden har uppnåtts, höjningsrörelsen avbryts (2),
•
sänkningsrörelsen blockeras mekaniskt om billyften inte betjänas och om
styrspänningen har gått (4),
•
cylindern vid slangbrott stängs av med hjälp av en slangbrottsventil (3),
•
billyften under sänkningen stannar på en höjd av ca. 140 mm ovanför golvet
(fotskydd); efter kontroll av säkerheten kan sänkningen fortsätta (akustisk
signal) genom att man trycker en gång till på <sänka> (1).
4
5
6
6
1. Fotskyddsströmbrytare
2. Gränsströmställare högsta läge
3. Slangbrottsventil i cylinder
4. Mekanisk blockering
5. Lös kabelskydd
6. Kabelbrottsskydd
3
2
1
Figur 2.1 Skydd av billyften
Handledning (Version B)
121
ST 4032 / ST 4040
3
3
3.1
Allmänt
Tekniska data
För allmänna tekniska data se också billyftens typskylt.
Tabell 3.1 Tekniska data
Modell
ST 4032
ST 4040
Höjningskapacitet
3200 kg
4000 kg
Övertrycksventil
260 bar (i fabriken förseglat med
plastpropp)
260 bar (i fabriken förseglat med
plastpropp)
Varv cylinder
1870 mm
1745 mm (S-version)
1870 mm
1745 mm (S-version)
Elektrisk förmåga
3,6 kW
3,6 kW
380/415 V, 50 Hz
3 x fas, 1 x jord, 1 x noll
3 x fas, 1 x jord, 1 x noll
220/240 V, 50 Hz
3 x fas, 1 x jord
3 x fas, 1 x jord
220/240 V, 50 Hz enfas
1 x fas, 1 x noll, 1 x jord
1 x fas, 1 x noll, 1 x jord
380/415 V, 50 Hz
3 x 16 A (trög)
3 x 16 A (trög)
220/240 V, 50 Hz
3 x 16 A (trög)
3 x 16 A (trög)
220/240 V, 50 Hz enfas
1 x 16 A (trög)
1 x 16 A (trög)
Styrspänning
24 V likspänning
24 V likspänning
Justering slangbrottsventil
28 l/min (1,25 mm)
28 l/min (1,25 mm)
24 / 23 s
29 / 29 s
47 / 23 s
59 / 29 s
Ljudnivå
max. 74 dB(A)
max. 74 dB(A)
Placering
Inomhus
Inomhus
Egen vikt
900 kg
910 kg
Drifttemperatur
-15 -> +50 D.C.
-15 -> +50 D.C.
Nätanslutning
Nätsäkring
Höjnings- och sänkningstid
(3 x fas)
Höjnings- och sänkningstid
(1 x fas)
Handledning (Version B)
122
ST 4032 / ST 4040
3
3.2
Tekniska data
Höjningskapacitet
Se Tabell 3.1 på sid 122 för uppgifter om den maximala höjningskapaciteten.
Den hydrauliska enhetens övertrycksskydd är inställt så att man aldrig kan lyfta
mer än den angivna vikten +10%.
3.2.1 ST 4032
Modellen är beräknad för en maximal last på en körbana på 1600 kg och en
fördelning av lasten mellan fordonets axlar med proportionen 40% - 60% vid en
hjulbas på minst 3000 mm och en spårbredd på minst 1600 mm.
3.2.2 ST 4040
Modellen är beräknad för en maximal last på en körbana på 2000 kg och en
fördelning av lasten mellan fordonets axlar med proportionen 33% - 66% vid en
hjulbas på minst 3000 mm och en spårbredd på minst 1700 mm.
3.3
Höjningssystem
Denna hydrauliska billyft med 4 pelare är utrustad med en hydraulisk enhet.
Enheten driver en cylinder som är monterad i den "fasta" körbanan . Cylindern
driver fyra kabeländor, som går via kabelskivor genom körbanorna och
tvärbalkarna och är fästa i pelarna.
3.4
Frihjulslyft (valfri)
Alternativt kan en frihjulslyft installeras.
Tabell 3.2 Tekniska data frihjulslyft
Modell
ST 4032F
ST 4040F
Höjningskapacitet
3200 kg
4000 kg
Varv cylinder
207 mm
207 mm
Lyfthöjd
450 mm
450 mm
Höjnings- och sänkningstid - 3
faser
8/8s
8/8s
Höjnings- och sänkningstid - 1
fas
16 / 8 s
16 / 8 s
3.4.1 Höjningskapacitet
Exemplet är beräknat på en maximal belastning på en lyftplatta på 1600 kg (ST
4032) eller 2000 kg (ST 4040) och en lastfördelning på 33% - 66%.
w
Varning
Om denna lastfördelning inte tillämpas kan det medföra skada på
frihjulslyften.
3.4.2 Höjningssystem
Frihjulslyften är försedd med ett så kallat dubbelt master-slave-system. På så
vis garanteras att de båda lyftplattorna rör sig parallellt.
Handledning (Version B)
123
ST 4032 / ST 4040
4
4
4.1
Allmänt
Användning
Fordonet måste stå rakt på billyften, med hela hjulen på körbanorna. Dra åt
handbromsen och placera stoppklossar under fordonets hjul.
Billyften betjänas med hjälp av knapparna på instrumentpanelen (se Figur 4.1)
som finns monterad på pelare III. Se även betjäningsdekalen på billyften.
1. (Nöd)huvudströmbrytare
2. Höja
3. Sänka
4. Sänka till spärrat läge
5. Sänka långsamt
6. Vridbrytare frihjulslyft (valfri)
6
1
2
5
3
4
Figur 4.1 Instrumentpanel
n
Märk
Berör panelen endast med fingertopparna. Om vassa föremål (t.ex.
skruvmejslar) används kan det förorsaka skada och störningar.
Knapparna för stigning, vanlig sänkning och spärrat läge är av säkerhetstyp
(hold to run). Betjäningen är möjlig så länge knappen hålls intryckt och stannar
genast om knappen släpps.
4.2
Påkoppling
Påkopplingen av billyften görs på följande sätt:
1. Vrid huvudströmbrytaren (1) till läge 1.
Nät- och styrspänningen kopplas då på.
2. Billyften är nu klar för användning.
4.3
Höja
För att höja billyften använd den övre knappen (2). Bredvid denna knapp finns
en pil som pekar uppåt.
4.4
Sänka
Använd knapparna (4) <frigöring> och (3) <sänkning> samtidigt för att sänka
billyften. Under sänkning kan knappen (4) <frigöring> släppas. Spärrhakarna
står kvar i öppet läge.
w
4.5
Sänka till spärrat
läge
Handledning (Version B)
Varning
Om problem uppstår under sänkningen, släpp genast knappen.
För att sänka till spärrat läge trycker man bara in knapp (4) nedan till höger (se
Figur 4.1 på sid 124). Billyften kommer då att sjunka högst 60 mm, tills
spärrhakarna får grepp i spärrprofilerna.
124
ST 4032 / ST 4040
4
Användning
För att kunna sänka billyften mer måste den först höjas något (så att låsspärren
avlastas) innan den kan sänkas vidare. Höjningsrörelsens understa 400 mm. är
inte utrustade med en spärr.
4.6
Sänka långsamt
Man kan sänka billyften långsamt med hjälp av kranen (5) på höger sida av
instrumentpanelen (se Figur 4.1 på sid 124). Gör så här för att sänka billyften
långsamt:
1. Vrid kranen (5) tills den är helt stängd (åt höger).
2. Tryck in sänkningsknappen (3) och öppna samtidigt kranen (5) (åt vänster).
Billyften kommer nu att sänkas långsamt. Genom att vrida upp kranen ett helt
varv sänks billyften i normal hastighet igen.
4.7
Frihjulslyft (valfri)
4.7.1 Användning
Placera fordonet rakt ovanför frihjulslyften och sätt lyftklossarna under fordonets
lyftpunkter. Justera den ställbara delen efter behov.
Figur 4.2 Fordonets placering
Styr frihjulslyften med knapparna på manöverpanelen som är monterad på
pelare III.
Välj med vridbrytaren (6) på sidan av manöverpanelen om billyften (läge 1) eller
frihjulslyften (läge 2) ska användas.
4.7.2 Påkoppling
1. Vrid huvudströmbrytaren (1) till läge 1.
2. Ställ vridbrytaren (6) till läge 1 och höj billyften till önskat läge med hjälp av
höjningsknappen (2).
3. Sänk billyften till spärrat läge med hjälp av knapp (4).
4. Ställ om vridbrytaren (6) till läge 2 innan du använder frihjulslyften.
4.7.3 Höja
Använd den översta knappen (2) för att lyfta frihjulslyften. Bredvid denna knapp
finns en pil som pekar uppåt.
Handledning (Version B)
125
ST 4032 / ST 4040
Belysning (valfri)
4.7.4 Sänka
Använd sänkknappen (3) märkt med en nedåtriktad pil för att sänka
frihjulslyften. Frihjulslyften stannar ungefär 10 cm över körbanan. Om du trycker
på sänkknappen (3) en gång till sänks frihjulslyften ytterligare med en akustisk
signal.
Knappen ’sänka till spärrat läge’ (4) kan då inte användas.
n
4.8
Belysning (valfri)
Kranen (5) för att sänka långsamt fungerar endast med billyften och inte
med frihjulslyften.
Belysningen manövreras genom strömbrytaren med lampsymbolen.
n
Handledning (Version B)
Märk
Märk
Vid störningar se störningsdiagnosen (se § 6.2 ’Störningsdiagnos’ på
sid 129).
126
ST 4032 / ST 4040
5
5
5.1
Allmänt
Inspektion och
underhåll
Under inspektion och underhåll ska billyften stå i det understa läget och
huvudströmbrytaren ska vara avstängd (läge 0). Lås strömbrytaren med ett
hänglås.
Endast om vissa justeringar eller kontroller kräver det, får strömmen tillfälligt
sättas på och kan billyften höjas till ett högre läge.
w
Varning
Vid ett högre läge måste billyften alltid sänkas ned i spärrläget.
En gång om året måste billyften utsättas för en noggrann genomgång- Genom
ett underhållsabonnemang kan billyften kontrolleras på ett fackkunnigt sätt av
montörer från Stertil B.V.
5.2
Underhållsschema
5.2.1 Dagligt underhåll av användaren
1. Kontrollera om billyften har någon synlig skada.
2. Kontrollera om det har förekommit oljeläckage från den hydrauliska
enheten, slangarna eller cylindern.
5.2.2 Månatligt underhåll av användaren
1. Kontrollera spärrhakarnas funktion genom att höja billyften och sedan sänka
den ner i hakarna.
n
Märk
Om detta inte fungerar korrekt, ta kontakt med servicetjänsten.
2. Utför varje månad den smörjning som beskrivs i Tabell 5.1 på sid 128.
5.2.3 Årligt underhåll
Användaren ska låta billyften inspekteras av utbildad service- eller
underhållspersonal (nedan kallad servicetjänsten) en gång per år. För denna
årliga inspektion kan man teckna ett serviceavtal med servicetjänsten. Om inget
serviceavtal tecknas måste användaren själv bestämma tid för denna
inspektion och underhållsgenomgång.
Denna inspektion registreras på listan för inspektionskontroller.
n
Handledning (Version B)
Märk
"Utbildad service- eller underhållspersonal" betyder personal från StertilKoni servicetjänst eller en annan av Stertil-Koni godkänd servicetjänst.
Reparationer som inte utförs av Stertil-Koni servicetjänst eller av en
annan av Stertil-Koni godkänd servicetjänst sker helt på användarens
egen risk.
127
ST 4032 / ST 4040
Underhållsprocedurer
5.3
Underhållsprocedurer
5.3.1 Smörjningsanvisning
Billyften måste regelbundet få en serviceomgång enligt smörjningsanvisningen
i Tabell 5.1 på sid 128.
Tabell 5.1 Smörjningsanvisning
Per
månad
Underhållsverksamheter
Beskrivning
Per år
Cylinder
Olja den torra kolvstången
Kontrollera oljenivån i tanken
Fyll på (endast när billyften
står i det översta läget)
x
Hakar och betjäningsstänger
Olja vridpunkter
x
Lös-kabelskydd
Olja vridpunkter
x
Spärrbalken och gejddelarna i
pelarna
Smörj
x
Diverse vridpunkter
Smörj
x
Hydraulisk olja i tanken
Byt ut
Per
2 år
x
x
5.3.2 Hydraulisk olja
Byt ut den hydrauliska oljan i tanken ungefär vartannat år (se Tabell 5.2).
n
Märk
Även om billyften inte ständigt används måste oljan bytas ut.
När den hydrauliska oljan ska bytas ut, följ denna procedur:
1. Ställ billyften i det lägsta läget och tappa av oljan.
2. Fyll tanken med hydraulisk olja HYDRAN 46 (46 cSt / 40°C), filtrerat på max.
4 mikron.
Tabell 5.2 Hydraulisk olja
Modell
ST 4032 / ST 4040
Innehåll
8l
5.3.3 Lampfästena (valfritt)
c
Handledning (Version B)
Obs!
Rengör lampfästena med ett icke-aggressivt rengörningsmedel.
128
ST 4032 / ST 4040
6
6
6.1
Allmänt
Störningar
Störningar på billyften kan förorsakas av ett enkelt fel. Kontrollera installationen
efter de angivna orsakerna.
Als de storing bij controle van de genoemde oorzaken niet kan worden
opgeheven, dient u contact op te nemen met de servicedienst.
n
n
Märk
Alla reparationer på billyften som inte utförts av servicetjänsten och
deras eventuella konsekvenser, utförs på användarens egen risk.
Märk
Med servicetjänst förstås Stertils egen servicetjänst eller en av Stertil
erkänd servicetjänst.
Följande störningsdiagnos kan användas för att lokalisera defekter. I
tveksamma fall, kontakta servicetjänsten.
6.2
Störningsdiagnos
Följande översikt av störningar hänvisar till beträffande tabell:
Tabell 6.1 ’Motorn går inte’ på sid 129,
Tabell 6.2 ’Billyften höjs inte’ på sid 129,
Tabell 6.3 ’Billyften sänks inte’ på sid 130.
Tabell 6.1 Motorn går inte
Möjlig orsak
Lösning
Huvudströmbrytaren är inte påslagen
Sätt på huvudströmbrytaren
Nätsäkring defekt
Byt ut nätsäkringen
Säkringen i instrumentpanelen är defekt
Kontakta servicetjänsten
Tabell 6.2 Billyften höjs inte
Möjlig orsak
Lösning
Bruten strömkrets högsta läge: elektrisk störning eller
billyften befinner sig i det högsta läget
Sänk billyften; kontakta servicetjänsten vid elektrisk
störning
Bruten strömkrets kabelbrottsbrytare: elektrisk
störning eller kabelbrott
Kontakta servicetjänsten
Handledning (Version B)
129
ST 4032 / ST 4040
Nödsänknings-anordning
Tabell 6.3 Billyften sänks inte
Möjlig orsak
Lösning
Spärrhakarna dras inte upp ur spärrarna
Höj först billyften 50 mm
Den hydrauliska enhetens elektriskt styrda sänkventil
öppnas inte
Ingen styrspänning på magnetspolen, eller
sänkventilen är defekt; låt servicetjänsten reparera
Bruten strömkrets lös kabel: elektrisk störning eller
lös kabel
Höj billyften och ta bort eventuella föremål under
körbanorna. I övriga fall kontakta servicetjänsten
Skyddet mot slangbrott är stängt
Vid slangbrott, låt servicetjänsten byta ut slangen;
kontrollera att låsspärrarna inte är skadade
n
6.3
Nödsänkningsanordning
Vid andra störningar än de som nämnts ovan, kontakta alltid
servicetjänsten.
Vid strömavbrott kan man inte sänka billyften med hjälp av manöverknapparna.
Om så är fallet kan man sänka billyften för hand. Ta då kontakt med
servicetjänsten.
w
Handledning (Version B)
Märk
Varning
Nödsänkningsproceduren får endast utföras av personer som har fått
instruktion om denna procedur.
130
ST 4032 / ST 4040
Index
A
N
Ansvarsskyldighet Användning - - - påkoppling - - Årligt underhåll - -
-
-
-
-
-
-
-
-
-
-
-
118
124
124
127
Nödsänkningsanordning- - - - - - - - - 130
Nödstopp - - - - - - - - - - - - - - - - 120
P
Påkoppling - - - - - - - - - - - - - - - 124
B
Belysning
betjäning- - - - - - Betjäning
höja - - - - - - - - sänka - - - - - - - sänka långsamt - - sänka till spärrat läge
- - - - - - - - 126
-
-
-
-
-
-
-
-
R
REACH information - - - - - - - - - - - 118
124
124
125
124
S
Säkerhet - - - - - nödstopp - - - personlig - - - skydd - - - - - Säkerhetsåtgärder Säkerhetssymboler Sänka
långsamt - - - till spärrat läge- Sänka långsamt - - Service
störningsdiagnos
Skydd- - - - - - - Smörjningsanvisning
Specifikationer - - Störningar- - - - - Störningsdiagnos - -
C
Copyright - - - - - - - - - - - - - - - - 117
D
Dagligt underhåll - - - - - - - - - - - - 127
E
Enlighetsdeklaration - - - - - - - - - - - 116
F
Frihjulslyft
användning - - - - - - - - - - - - - 125
tekniska data - - - - - - - - - - - - 123
-
-
-
-
-
-
-
-
-
-
119
120
119
121
120
119
- - - - - - - - - - 125
- - - - - - - - - - 124
- - - - - - - - - - 125
-
-
-
-
-
-
-
-
-
-
129
121
128
122
129
129
T
Tekniska data - - - - - - - - - - - - - - 122
frihjulslyft - - - - - - - - - - - - - - 123
G
Garanti - - - - - - - - - - - - - - - - - 118
U
Underhåll - - - - - - - årligt - - - - - - - dagligt- - - - - - - hydraulisk olja - - - månatligt - - - - - procedurer - - - - smörjningsanvisning Underhåll månatligt - - Uppgifter om tillverkaren-
H
Höjningskapacitet - - - - - - - - - - - - 123
Höjningssystem - - - - - - - - - - - - - 123
Hydraulisk olja- - - - - - - - - - - - - - 128
I
Inspektion - - - - - - - - - - - - - - - - 127
Handledning (Version B)
131
-
-
-
-
-
-
-
-
127
127
127
128
127
128
128
127
118
ST 4032 / ST 4040
A
A
Inspection check list
Annual inspection as described in the installation and service manual.
Date
Remarks
Operation (Version B)
Name of mechanic
132
Initials of mechanic pass
ST 4032 / ST 4040
Date
Remarks
Operation (Version B)
Name of mechanic
133
Initials of mechanic pass
ST 4032 / ST 4040