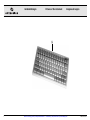
1
Artisan Technology Group is your source for quality
new and certified-used/pre-owned equipment
• FAST SHIPPING AND
DELIVERY
• TENS OF THOUSANDS OF
IN-STOCK ITEMS
• EQUIPMENT DEMOS
• HUNDREDS OF
MANUFACTURERS
SUPPORTED
• LEASING/MONTHLY
RENTALS
• ITAR CERTIFIED
SECURE ASSET SOLUTIONS
SERVICE CENTER REPAIRS
Experienced engineers and technicians on staff
at our full-service, in-house repair center
WE BUY USED EQUIPMENT
Sell your excess, underutilized, and idle used equipment
We also offer credit for buy-backs and trade-ins
www.artisantg.com/WeBuyEquipment
InstraView REMOTE INSPECTION
LOOKING FOR MORE INFORMATION?
Visit us on the web at www.artisantg.com for more
information on price quotations, drivers, technical
specifications, manuals, and documentation
SM
Remotely inspect equipment before purchasing with
our interactive website at www.instraview.com
Contact us: (888) 88-SOURCE | [email protected] | www.artisantg.com
1
Gebrauchsanweisung
Instruction
manual
Manual de
instrucciones
DEI-750 CE
Modell S60671/S60670
PAL/NTSC
DEI-750 CE
Model S60671/S60670
PAL/NTSC
DEI-750 CE
Modelo S60671/S60670
PAL/NTSC
CE: Richtlinie für medizinische Geräte,
Niederspannung und EMV-Richtlinien,
UL-544
CE: Medical Device Directive, low
voltage and EMC directives,
UL-544
CE: Directiva de aparatos médicos, bajo
voltaje y directivas EMC,
UL-544
Artisan Technology Group - Quality Instrumentation ... Guaranteed | (888) 88-SOURCE | www.artisantg.com
IM-60-670-01B
Wichtiger Hinweis für die
Benutzer von OPTRONICS
Geräten und Instrumenten
Important information
for users of OPTRONICS
instruments
Indicaciones importantes para
usarios de equipos e instrumentos de OPTRONICS
Vielen Dank für ihr Vertrauen in den Namen
OPTRONICS. Auch in diesem Produkt steckt
unsere ganze Erfahrung und Sorgfalt. Sie und Ihr
Haus haben sich damit für ein modernes und
hochwertiges Gerät der Firma OPTRONICS
entschieden.
Thank you for your expression of confidence in the
OPTRONICS brand name. Like all of our other
products, this product is the result of years of
experience and great care in manufacture. You and
your organization have decided in favor of a
modern, high quality, item of equipment from
OPTRONICS.
Agradecemos la confianza que han depositado en
la marca OPTRONICS. Este producto, como todos
los demás, es el resultado de nuestra amplia
experiencia y esmero. Por ello, al decidirse por
OPTRONICS se han decidido, tanto Ud. como su
empresa, por un producto de precisión moderno y
de alta calidad.
This instruction manual is intended to serve as an
aid in the proper setup, installation, and operation
of the DEI-750 CE. All essential details of the
equipment and all actions required on your part
are clearly presented and explained. We ask that
you read this manual carefully before proceeding
to work with the equipment. Keep it available for
ready reference in a convenient and conspicuous
location near the equipment.
El manual de instrucciones le ayudará a montar,
poner en marcha utilizar correctamente la cámara
DEI-750 CE. Para ello, contiene todas las
explicaciones necesarias sobre las particularidades y detalles de su manejo. Recomendamos la
lectura detenida de este manual y su colocación
cerca del aparato, en un lugar visible, debidamente protegido en la funda de plástico que se
adjunta. Mantenga estas instrucciones a mano
como referencia inmediata en un lugar
conveniente y accesible, cerca del equipo.
Die vorliegende Gebrauchsanweisung soll helfen,
die DEI-750 CE richtig aufzustellen, anzuschließen und zu bedienen. Alle notwendigen Einzelheiten und Handgriffe werden anschaulich erklärt.
Bitte lesen Sie deshalb diese Anleitung sorgfältig
durch; bewahren Sie zum etwaigen Nachlesen in
der mitgelieferten Schutzhülle an gut sichtbarer
Stelle beim Gerät auf. Zum schnellen
Nachschlagen an einer praktischen und gut
sichtbaren Stelle in der Nähe des Geräts
aufbewahren.
Caution: Federal (USA) law restricts this device to
sale by or on the order of a physician. Sale
restrictions apply to medical device applications
only.
2
Artisan Technology Group - Quality Instrumentation ... Guaranteed | (888) 88-SOURCE | www.artisantg.com
IM-60-670-01B
Warnungen und
Vorsichtshinweise
Warnings and cautions
Advertencias y precauciones
Bitte lesen Sie dieses Handbuch durch, und
beachten Sie genau die Anleitungen. Die Bezeichnungen WARNUNG, VORSICHT und HINWEIS
haben spezielle Bedeutungen. Wo immer sie in
diesem Handbuch verwendet werden, sollten sie
genau gelesen werden, um einen sicheren und
effizienten Betrieb dieses Gerätes zu gewährleisten.
Please read this manual and follow its instructions
carefully. The words WARNING, CAUTION, and
NOTE convey special meanings. When they are
used throughout this manual, they should be
carefully reviewed to ensure the safe and effective
operation of this product.
Lea este manual y siga las instrucciones cuidadosamente. Los términos CUIDADO, ADVERTENCIA y NOTA tienen significados muy especiales.
Cuan-do aparezcan en alguna parte de este
manual, revise esa sección cuidadosamente para
asegurar la operación innocua y eficaz de este
producto.
WARNUNG Eine WARNUNG bedeutet, daß es
um die persönliche Sicherheit der Bedienungsperson geht. Die Nichtbeachtung einer
WARNUNG kann zu Verletzungen der
Bedienungsperson führen.
WARNING A WARNING indicates that the
personal safety of the user may be involved.
Disregarding a WARNING could result in injury to
the user.
¡CUIDADO! Una CUIDADO significa que la
seguridad personal del usuario puede verse
comprometida. El usuario puede lesionarse si
hace caso omiso de una CUIDADO.
VORSICHT VORSICHT macht darauf aufmerksam, daß bestimmte Wartungs- oder Sicherheitsmaßnahmen zu treffen sind, um eine Beschädigung des Gerätes zu vermeiden .
CAUTION A CAUTION indicates that particular
service procedures or precautions must be
followed to avoid possible damage to the product.
ADVERTENCIA ADVERTENCIA indica que hay
que seguir ciertos procedimientos de servicio o
precauciones para evitar un daño posible al
producto.
HINWEIS HINWEIS enthalten spezielle Informationen zur leichteren Wartung des Gerätes oder
sie erklären wichtige Informationen.
NOTE A NOTE indicates special information to
improve the ease of maintaining the product, or to
clarify important information.
NOTA NOTA es información especial que sirve
para facilitar la mantención del producto o para
aclarar información importante.
machen.
The symbol of an exclamation mark
within a triangle is intended to alert
the user to the presence of important
operating and maintenance instructions
in the product’s accompanying documents.
El símbolo de un triángulo que enmarca un signo de exclamación sirve para
avisar al usuario que hay instrucciones
de operación y mantenimiento importantes en los documentos adjuntos del producto.
WARNUNG Lesen Sie diese Gebrauchsanleitung
genau durch, bevor Sie das Gerät in Betrieb
nehmen. Lesen Sie das ganze Handbuch, bevor
Sie die Kamera zusammenbauen und anschließen.
WARNING Read this instruction manual
thoroughly and be familiar with its contents prior to
using this equipment. Read the entire instruction
manual before assembling or hooking up the
camera system.
¡CUIDADO! Lea todo este manual de instrucciones y conozca bien todo lo que dice antes de
usar el equipo. Lea el manual de instrucciones
entero antes de ensamblar o conectar el sistema
de la cámara.
WARNUNG Die elektrische Anlage am
Aufstellungsort muß den jeweiligen IEC-, CECund NEC-Bestimmungen entsprechen.
WARNING The electrical installation of the
relevant location must comply with the applicable
IEC, CEC, and NEC requirements.
¡CUIDADO! La instalación eléctrica del lugar en
donde se utilice el equipo debe satisfacer
completamente los requisitos aplicables
establecidos por los organismos IEC, CEC y NEC.
VORSICHT Zur Verhütung eines Elektroschocks
die Abdeckung nicht vom Gerät abnehmen. Nur
von qualifiziertem Personal warten lassen. Die
Entfernung der Abdeckung durch unbefugte
Personen macht die Garantie nichtig.
CAUTION To reduce the risk of electrical shock,
do not remove cover of equipment. Refer servicing
to qualified personnel. Removal of covers by
unauthorized personnel will void the equipment’s
warranty.
ADVERTENCIA Para reducir el riesgo de un
choque eléctrico, no saque la tapa del instrumento. El servicio técnico debe hacerse por personal
calificado. Si personas no autorizadas sacan las
tapas del instrumento, queda anulada la garantía
del equipo.
!
3
Ein Ausrufezeichen in einem Dreieck
soll den Benutzer auf wichtige
Betriebs- oder Wartungshinweise in
den Geräteunterlagen aufmerksam
!
!
Artisan Technology Group - Quality Instrumentation ... Guaranteed | (888) 88-SOURCE | www.artisantg.com
IM-60-670-01B
4
Warnungen und
Vorsichtshinweise
Warnings and cautions
Advertencias y precauciones
WARNUNG Das Gerät ist nur dann zuverlässig
geerdet, wenn es an einer “KrankenhausSteckdose” oder einer entsprechenden (d.h. zum
Gebrauch im Operationssaal zugelassenen)
Steckdose angeschlossen wird. Stecker und Kabel
routinemäßig überprüfen und bei Beschädigung
nicht verwenden.
WARNING Grounding reliability can only be
achieved when the equipment is connected to
“Hospital Only” or “Hospital Grade” receptacle (i.e.,
approved for use in an operating room environment). Routinely inspect electrical plug and cord.
Do not use if inspection reveals damage.
¡CUIDADO! Una conexión a tierra confiable solamente se puede lograr si el equipo está
conectado a un enchufe “Hospital solamente” O
“Clasifica-ción para hospital” (es decir, aprobado
para uso en un ambiente de sala de
operaciones). Revise el cordón eléctrico y
tomacorrientes con regularidad. No los use si su
inspección revela algún daño.
WARNUNG Von Patienten fernhalten.
WARNING Keep out of reach of patients.
¡CUIDADO! Mantenga lejos del alcance de los
pacientes.
VORSICHT Die Reinigungsanleitung in der
Betriebsanleitung lesen. Dieses Gerät nicht
sterilisieren.
CAUTION Refer to Instruction Manual for proper
cleaning instructions. Do not sterilize this product.
ADVERTENCIA Consulte el Manual de
Instrucciones para las instrucciones de limpieza
apropiadas. No esterilice este producto.
VORSICHT Keine Flüssigkeit über dem Gerät
lagern.
CAUTION Do not store liquids above unit.
ADVERTENCIA No almacene líquidos encima
de la unidad.
VORSICHT Dieses Gerät darf aufgrund der
amerikanischen Bundesgesetze nur durch bzw.
auf Verordnung eines Arztes verkauft werden.
Einschränkungen bzgl. des Verkaufs beziehen sich
nur auf die Verwendung als medizinisches Gerät.
CAUTION Federal law restricts this device to sale
by or on the order of a physician. Sale restrictions
apply to medical device applications only.
ADVERTENCIA Las leyes federales de los
Estados Unidos limitan la venta de este
dispositivo a un médico o bajo las órdenes de un
médico. Las restricciones de venta se refieren
únicamente a las aplicaciones de dispositivos
médicos.
HINWEIS Bezüglich der Entsorgung oder des
Recycling von Komponenten sind die jeweils
geltenden Bestimmungen einzuhalten.
NOTE Follow local governing ordinances and
recycling plans regarding disposal or recycling of
device components.
NOTA Siga las ordenanzas del gobierno local y
los planes de reciclaje referentes al desechado o
reciclado de componentes.
VORSICHT Zusatzgeräte, die an die analogen
und digitalen Schnittstellen (Signaleingänge und ausgänge) angeschlossen sind, müssen gemäß
den jeweiligen IEC/EN-Normen zertifiziert sein
(d.h. IEC 950/EN60950 für Datenverarbeitungsgeräte und IEC 601-1 (EN60601-1)/EN60601-1 für
medizinische Geräte). Außerdem müssen alle
Konfigurationen der Systemnorm IEC 601-1
(EN60601-1)-1 entsprechen. Jeder, der zusätzliche
Geräte an den Signaleingängen oder -ausgängen
anschließt, konfiguriert ein medizinisches System
und ist deshalb verantwortlich dafür, daß das
System den Anforderungen der Systemnorm IEC
601-1 (EN60601-1)-1 entspricht. Im Zweifelsfall bei
der zuständigen technischen Abteilung oder der
zuständigen Vertretung nachfragen.
WARNING Accessory equipment connected to
the analog and digital interfaces (signal inputs and
signal outputs) must be certified according to the
respective IEC/EN standards (i.e. IEC 950/
EN60950 for data processing equipment and IEC
601-1 (EN60601-1)/EN60601-1 for medical
equipment). Furthermore all configurations shall
comply with the system standard IEC 601-1
(EN60601-1)-1. Everybody who connects
additional equipment to the signal input parts or
signal output parts configures a medical system,
and is therefore responsible that the system
complies with the requimrenets of the system
standard IEC 601-1 (EN60601-1)-1. If in doubt,
consult the technical service department or your
local representative.
ADVERTENCIA Los equipos auxiliares
conectados a las interfaces digitales y analógicas
(entradas y salidas de señales) deben estar
certificados bajo las normas IEC/EN
correspondientes (es decir, IEC 950/EN60950
para equipos de procesamiento de datos e IEC
601-1 (EN60601-1)/EN60601-1 para aparatos
médicos). Además, todas las configuraciones
deben cumplir con la norma de sistema IEC 601-1
(EN60601-1)-1. Cualquier conexión de equipos
adicionales a las piezas de entrada o salida de
señales constituye una configuración de sistema
médico, y por tal motivo la persona que la haga
será responsable del cumplimiento de dicho
sistema con los requisitos de la norma IEC 601-1
(EN60601-1)-1. En caso de dudas, comun’quese
con el departamento de servicio técnico o con el
representante local.
Artisan Technology Group - Quality Instrumentation ... Guaranteed | (888) 88-SOURCE | www.artisantg.com
IM-60-670-01B
Geräteabbildungen
Pictures of the instrument
Imágenes del equipo
햻
햲
5
햳
햴
햵
햶 햷
Artisan Technology Group - Quality Instrumentation ... Guaranteed | (888) 88-SOURCE | www.artisantg.com
햸
햺
햹
IM-60-670-01B
Geräteabbildungen
Pictures of the instrument
Imágenes del equipo
헀
햽
햾
헁
햿
6
Artisan Technology Group - Quality Instrumentation ... Guaranteed | (888) 88-SOURCE | www.artisantg.com
IM-60-670-01B
Geräteabbildungen
Pictures of the instrument
Imágenes del equipo
헂
7
Artisan Technology Group - Quality Instrumentation ... Guaranteed | (888) 88-SOURCE | www.artisantg.com
IM-60-670-01B
8
Bedienungselemente,
Anzeigen, Anschlüsse
und ihre Funktion
Operating elements,
displays, connections
and their uses
Elementos de mando,
indicadores, conexiones y
sus funciones
햲 Netzschalter
햳 Folientastatur mit:
Farbbalken
Weißabgleich
Gewichtung
Belichtung
Auto/Manuell
Cursortasten
햴 Kamera-Anschluß
햵 Video-Ausgangsbuchsen RGB-Sync
햶 BNC-Videoausgangsstecker (Comp.-Video, SVideo)
햷 Video-Ausgangsbuchsen Y/C
햸 Anschlußbuchse für Keyboard
햹 Netzsicherungen
햺 Netzgerätestecker
햻 Potentialausgleichsanschluß
햽 hinterer Brenweitenadapter
햾 DEI-750 Kamera
햿 Gekühlter Kamerakopf DEI-750T
헀 Relaislinse (1.0x)
헁 Verkleinerungslinse (0.5x)
헂 Tastatur (wahlweise)
햲 Power switch
햳 Membrane panel with:
Color bars
White balance
Weighting
Exposure
Auto/manual
Down/up arrows
햴 Camera cable receptacle
햵 RGB-Sync color video output connectors
햶 BNC video output connectors (comp. video,
B/W video)
햷 Y/C video output connectors
햸 Keyboard receptacle
햹 Power fuses
햺 Power supply cord receptacle
햻 Potential equalization connector, per DIN
42801
햽 Back focus adaptor
햾 DEI-750 camera head
햿 DEI-750T cooled camera head
헀 Relay lens (1.0x)
헁 Reduction lens (0.5x)
헂 Keyboard (optional)
햲 Interruptor de la red
햳 Panel de membrana con:
Barras de color
Balance del blanco
Balance de exposición
Exposición
Auto/manual
Flechas para arriba/abajo
햴 Conexión de la cámara
햵 Conexiones de salida de vídeo para las
señales RGB-Sync
햶 Conectadores de salida de vídeo BNC (comp.
vídeo, vídeo B/N)
햷 Conexiones de salida de vídeo para señales Y/C
햸 Conector para el teclado
햹 Fusibles de la red
햺 Enchufe de conexión a la red
햻 Conexión para el regulador de potencial
햽 Adaptador de profundidad de foco
햾 DEI-750 cámara
햿 Cabezal de cámara enfriado con sistema de
enfriamiento DEI-750T
헀 Lente relevador (de relé) (1.0x)
헁 Lente de reducción (0.5x)
헂 Teclado (opcional)
Artisan Technology Group - Quality Instrumentation ... Guaranteed | (888) 88-SOURCE | www.artisantg.com
IM-60-670-01B
Symbolerläuterungen
~
F2.0A 250V
IEC 127 Sheet II
9
Symbols employed
Explicación de símbolos
Lesen Sie vor Inbetriebnahme des Gerätes bitte die Anleitungen genau durch
Read the instructions carefully before
operating the equipment
Lea las instrucciones cuidadosamente
antes de hacer funcionar el equipo
Strom ein
Power on
Encendido
Strom aus
Power off
Apagado
Potentialausgleich
Equipotentiality
Equipotencialidad
ACHTUNG: Bei Gebrauch in der Gegenwart von entflammbaren Anästhetika besteht Explosionsgefahr.
DANGER: Risk of explosion if used in
the presence of flammable anesthetics.
PELIGRO: Riesgo de explosión si se
usa en presencia de anestésicos
inflamables.
VORSICHT: Um einen Elektroschlag
zu vermeiden, die Abdeckung nicht
entfernen. Wartung nur durch
qualifizierte Techniker.
CAUTION: To reduce the risk of
electrical shock, do not remove cover.
Refer servicing to qualified service
personnel.
ADVERTENCIA: Para reducir el riesgo
del choque eléctrico, no saque la
tapa. El servicio técnico debe hacerse
por personal calificado.
Erdungsschutz
Protective earth (ground)
Conexión a tierra (protección)
Wechselstrom
Sicherung durch F2.0A, 250 V,
5 x 20 mm Sicherung ersetzen, IEC 127
~
F2.0A 250V
IEC 127 Sheet II
Alternating current
~
Replace fuse with F2.0A, 250V,
5 x 20mm fuse, IEC 127
F2.0A 250V
IEC 127 Sheet II
Corriente alterna
Reemplace el fusible con un fusible
F2.0A, 250V 5 x 20 mm, IEC 127
Weißausgleich
White balance
Balance del blanco
Kamerakabelanschluß
Receptacle for camera head cable
connector
Conexión para el cable de la cámara
Belichtungsmodus
Exposure mode
Modo de exposición
Automatischer Steuermodus
Automatic control mode
Modo de control automático
Manueller Steuermodus
Manual control mode
Modo de control manual
Gewichtung
Weighting
Balance de exposición
Farbbalken
Color bars
Barras de color
Artisan Technology Group - Quality Instrumentation ... Guaranteed | (888) 88-SOURCE | www.artisantg.com
IM-60-670-01B
10
Artisan Technology Group - Quality Instrumentation ... Guaranteed | (888) 88-SOURCE | www.artisantg.com
IM-60-670-01B
Inhalt
Contents
Contenido del manual
Warnungen und Vorsichtshinweise (3)
Geräteabbildungen (5)
Bedienungselemente, Anzeigen, Anschlüsse und
ihre Funktionen (8)
Symbolerläuterungen (9)
Warnings and cautions (3)
Pictures of the instrument (5)
Operating elements, displays, connectors and
their uses (8)
Symbols employed (9)
Advertencias y precauciones (3)
Imágenes del equipo (5)
Elementos de mando, indicadores, conexiones y
sus funciones (8)
Explicación de símbolos (9)
Sicherheitshinweise
Safety instructions
Instrucciones de seguridad
Verwendungszweck (11)
Intended use (12)
Uso previsto (11)
Aufstellen und
Bedienungshinweise
Installation and
operating instructions
Montaje e
instrucciones operativas
Auspacken (15)
Grundausstattung (15)
Inbetriebnahme der DEI-750 CE (16)
Inbetriebnahme (16)
Weißabgleichsfunktionen (19)
Belichtungsregelungs-Funktionen (21)
Farbschattierungskorrektur (24)
Standbild (24)
Verstärkungsfunktionen (25)
Titel-Funktionen (28)
Farbbalken (30)
Kamerarückstellung (30)
Funktionsausgang (31)
Bedienelemente an der Frontplatte (31)
Farbeinstellung (32)
Zusammenfassung der Alt-Befehle (33)
Systemkonfigurations (34)
Unpacking the equipment (15)
Basic equipment (15)
Installing the DEI-750 CE (16)
Operation (16)
White balance functions (19)
Exposure control functions (21)
Color shading correction feature (24)
Freeze frame (24)
Enhancement functions (25)
Titling functions (28)
Color bars (30)
Camera reset (30)
Function exit (31)
Front panel controls (31)
Color adjustment (32)
Summary of ALT commands (33)
System configurations (34)
Desembalaje (15)
Equipo básico (15)
Puesta en marcha de la DEI-750 CE (16)
Puesta en marcha (16)
Balance del blanco (29)
Funciones del control de exposición (21)
Característica de corrección del sombreado del
color (24)
Congelamiento de cuadro (24)
Funciones para mejorar la imagen (25)
Funciones para títulos (28)
Barras de colores (30)
Reinicialización de la cámara (30)
Salida de función (31)
Controles del panel delanterofrontal (31)
Ajuste del color (32)
Resumen de mandos ALT (33)
Configuraciones del sistema (34)
Gerätebeschreibung
Reinigung und Lagerung (41)
Kundendienst (43)
Garantie (43)
Technische Beschreibung
Fehlersuche (44)
Abschluß des Videosignals (48)
Technische Daten (50)
11
Description of the instrument
Cleaning and storage after use (41)
Service (43)
Warranty (43)
Technical description
Troubleshooting (44)
Video signal termination (48)
Technical data (50)
Descripción del equipo
Limpieza y almacenaje (41)
Servicio (43)
Garantía (43)
Descripciones técnicas
Diagnóstico de fallas (44)
Terminación de la señal de vídeo (48)
Ficha técnica (50)
Artisan Technology Group - Quality Instrumentation ... Guaranteed | (888) 88-SOURCE | www.artisantg.com
IM-60-670-01B
12
Sicherheitshinweise
Safety Instructions
Instrucciones de seguridad
Bitte lesen Sie diese Sicherheitshinweise vor der
Benutzung des Gerätes aufmerksam durch.
Please read these safety instructions carefully
before using the instrument.
Le rogamos leer con la mayor atención estas
instrucciones de seguridad antes de emplear el
equipo.
Verwendungszweck
Intended use
Uso previsto
Das Modell DEI-750 CE ist eine Videokamera zum
Anschluß an industrielle, wissenschaftliche oder
medizinische/chirurgische Mikroskope. Die
Verwendung des Geräts für in anderen als die den
oben angegebenen Zwecke Gebieten ist aus
Sicherheitsgründen nicht gestattet.
The DEI-750 CE is a video camera for attaching to
industrial, scientific, or medical/surgical microscopes. Use of the instrument in fields other than
that indicated above is not allowed for safety
reasons.
El producto DEI-750 CE es una cámara de video
diseñada para acoplarse a microscopios
industriales, cient’ficos o médico-quirúrgicos. Por
razones de seguridad, no se permite el uso de
este instrumento en ningún otro campo, fuera del
anteriormente señalado.
Das Modell DEI-750 CE darf nur mit Zubehör und
Komponenten verwendet werden, die von
Optronics genehmigt wurden oder deren
Verwendung nachweislich sicher ist.
The DEI-750 CE may only be used with accessories and items which have been designated by
Optronics as suitable for the instrument or the safe
use of which is proven.
La cámara DEI-750 CE solamente puede usarse
con los accesorios y partes disegnados por
Optronics como adecuados para el instrumento o
con los que se ha comprobado que pueden
usarse sin riesgo.
Eigenmächtige Umbauten oder Veränderungen
des Gerätes sind aus Sicherheitsgründen
untersagt.
Unauthorized conversions or modifications to the
instrument are not allowed for safety reasons.
Por razones de seguridad, está prohibido efectuar
reformas o cambios arbitrarios en los equipos.
Artisan Technology Group - Quality Instrumentation ... Guaranteed | (888) 88-SOURCE | www.artisantg.com
IM-60-670-01B
Sicherheitshinweise
Safety Instructions
Instrucciones de seguridad
Zum Beweis, daß ein Optronics-System den
Niederspannungs- und EMV-Richtlinien entspricht,
müssen sowohl Kamerakopf als auch KameraKontrolleinheit (CCU) die CE-Kennzeichnung
aufweisen. Wenn bei einer oder mehrerer
Komponenten diese CE-Kennzeichnung fehlt,
entspricht die Kombination der Komponenten nicht
den Niederspannungs- und EMV-Richtlinien.
For an Optronics system to meet the requirements
of the Low Voltage, EMC Directives, or Medical
Device Directive, both the camera head and CCU
must be marked with the CE mark. If any one or
more components are not marked with the CE
marking, then the combination of components do
not meet the Low Voltage, EMC Directives, or
Medical Device Directive.
Para que un sistema Optronics llene los requisitos
de las Directivas de Bajo Voltaje y EMC, tanto el
cabezal de la cámara como la UCC deben tener la
marca CE. Si alguno de los componentes no tiene
la marca CE, la combinación de componentes no
llena los requisitos de las Directivas de Bajo
Voltaje y EMC.
Sicherheitsmaßnahmen für die
Installation medizinischer
Geräte
Safety precautions at the site of
medical installations
Precauciones de seguridad en
el sitio de instalaciones
médicas
Dieses Gerät darf nur von Ärzten oder
medizinischen Assistenten verwendet werden, die
über die nötige fachliche Ausbildung verfügen und
in der Bedienung des Geräts geschult sind.
60°
Es ist nicht für den Betrieb in explosionsgefährdeten Bereichen bestimmt. Dies bedeutet u. a.:
Bei Verwendung von leicht brennbaren und
explosionsfähigen Inhalations-Anästhesiemitteln
und deren Gemischen darf das Gerät nicht in der
dargestellten Gefahrenzone betrieben werden.
Solche Mittel sind zum Beispiel Ether pro narcosi
(Diethyläther, Cyclopropan) sowie brennbare,
leicht Verdampfer Hautreinigungs- und Hautdesinfektionsmittel, die eine explosionsfähige
Atmosphäre bilden können (z. B. Waschether,
Ether petrolei).
Das Gerät ist mit einer Steckvorrichtung für den
Potentialausgleich ausgerüstet. Diese sollte den
national gültigen Normen entsprechend angeschlossen werden.
13
The unit may only be used by physicians and
medical assistants who have a corresponding
specialized qualification and who have been
instructed in the use of the equipment.
The unit may be used in medical rooms installed
according to national standards.
It is not intended for use in hazardous zones. This
means, for example, that when using easily
combustible and explosive inhalation anesthetics
or mixtures thereof, the instruments must not be
operated inside the demarcated hazard zone.
Examples of such substances are: anesthetic
ether (diethyl ether, cyclopropane) as well as
combustible, volatile skin cleansers and skin
disinfectants which may create an explosive
atmosphere (e.g. detergent ether, petroleum
ether).
The instrument is equipped with a connector for
attaching a ground line. It should be connected
according to national standards.
Este equipo debe ser manejado únicamente por
médicos y asistentes médicos cualificados y
capacitados para su uso.
El equipo no está previsto para ser utilizado en
áreas expuestas a posibles explosiones. Esto
significa entre otras cosas:
Si se emplean productos anestésicos para
inhalación fácilmente inflamables y explosivos o
sus mezclas, no podrá utilizarse el equipo en las
zonas calificadas como peligrosas por este motivo.
Algunos de estos productos son, por ejemplo, éter
para narcosis (éter dietílico, ciclopropano), así
como productos de limpieza y desinfección de la
piel inflamables, fácilmente volátiles que pueden
crear una atmósfera explosiva (por ejemplo, éter
de lavado, éter de petróleo). El equipo está
provisto de una conexión equipotencial. La
conexión debe efectuarse de acuerdo con las
indicaciones de la norma nacional vigente.
Artisan Technology Group - Quality Instrumentation ... Guaranteed | (888) 88-SOURCE | www.artisantg.com
IM-60-670-01B
Sicherheitshinweise
Safety Instructions
Instrucciones de seguridad
Sicherheitsmaßnahmen
beim Einsatz des Gerätes
Safety precautions
when operating the instrument
Medidas de seguridad durante
el empleo del equipo
Vor der Anwendung des Gerätes hat sich der
Anwender von der Funktionssicherheit und dem
ordnungsgemäßen Zustand des Gerätes zu
überzeugen.
It is the user’s responsibility to make sure the
instrument is safe and operates properly before
using the instrument.
El usuario debe asegurarse de la seguridad de
funcionamiento y el buen estado del aparato antes
de cada aplicación.
During treatment with the DEI-750 CE the patient
must be treated and kept under observation with
the usual medical care. This includes keeping a
check on the progress of treatment, as well as
monitoring sterile application conditions where
required by the type of intervention.
Durante el procedimiento con la DEI-750 CE, el
paciente debe ser tratado y observado con los
cuidados médicos habituales.
This equipment has been tested and found to
comply with the limits for the EMC Directive 89/
336/EEC with amendments 92/31/EEC and 93/68/
EEC. These limits are designed to provide
reasonable protection against harmful interference
in a typical medical installation. The equipment
generates, uses and can radiate radio frequency
energy and, if not installed and used in accordance with the instructions, may cause harmful
interference to other devices in the vicinity.
However, there is no guarantee that interference
will not occur in a particular installation. If this
equipment does cause harmful interference with
other devices, which can be determined by turning
the equipment off and on, the user is encouraged
to try to correct the interference by one or more of
the following measures:
– Reorient or relocate the receiving device
– Increase the separation between the
equipment
– Connect the equipment into an outlet on a
circuit different from that to which the other
device(s) is connected
– Consult the manufacturer or field service
technician for help.
Este equipo se ha examinado y encontrado que
cumple con los límites para la Directiva EMC 89/
336/EEC con las enmiendas 92/31/EEC y 93/68/
EEC. Estas especificaciones han sido diseñadas
para proveer protección razonable contra
interferencia perjudicial en una instalación médica
típica. El equipo genera, usa y puede radiar
energía de radiofrecuencia y si no se instala y usa
de acuerdo a las instrucciones, puede causar
interferencia perjudicial a otros aparatos
instalados en la vecindad. Sin embargo, no existe
garantía de que la interferencia no ocurrirá en una
instalación particular. Si este equipo causa
interferencia perjudicial a otros equipos, lo cual
puede determinarse encendiendo y apagando el
equipo, recomendamos al usuario a que trate de
corregir esta situación aplicando una o varias de
las siguientes medidas:
– Reoriente o reubique el aparato receptor
– Aumente la separación de los equipos
– Conecte el equipo a un tomacorriente de un
circuito eléctrico diferente al que está
conectado el otro equipo (equipos)
– Consulte con el fabricante o el técnico de
servicio de campo para obtener ayuda.
WARNING: This is a Class A product.
In a domestic environment this product
may cause radio interference in which
case the user may be required to take
adequate measures.
¡CUIDADO! Este es un producto
clasificado por la FCC (Estados
Unidos) como perteneciente a la Clase
A. En zonas residenciales puede
causar radiointerferencia. En tal caso, el usuario
deberá tomar las medidas correctivas adecuadas
si se le requiere hacerlo.
Während der Behandlung unter Verwendung der
DEI-750 CE muß der Patient mit der üblichen
medizinischen Sorgfalt behandelt und beobachtet
werden. Dazu gehört insbesondere die Sorge um
sterile Applikationsbedienungen, sofern die Art des
Eingriffs dies erfordert.
Dieses Gerät wurde geprüft und entspricht den
EMV-Grenzwerten gemäß 89/336/EEC und den
Ergänzungen 92/31/EEC sowie 93/68/EEC. Diese
Grenzwerte dienen zum Schutz vor schädlichen
Störungen beim typischen medizinischen Einsatz.
Dieses Gerät erzeugt, verwendet und strahlt
eventuell Hochfrequenzenergie ab und kann
schädliche Störungen anderer, in der Nähe
verwendeter Geräte verursachen, falls es nicht
gemäß den Anleitungen installiert und verwendet
wird. Es besteht jedoch keine Garantie, daß bei
einer bestimmten Anwendung keine Störungen
auftreten. Wenn dieses Gerät schädliche
Störungen anderer Geräte verursacht, was durch
Aus- und Einschalten des Geräts festgestellt
werden kann, so sollte versucht werden, die
Störung durch eine oder mehrere der folgenden
Maßnahmen zu beseitigen:
– Das Empfangsgerät neu ausrichten oder
aufstellen
– Den Abstand zwischen den Geräten
vergrößern
– Das Gerät an der Steckdose eines anderen
Strommkreises als die übrigen Geräte
anschließen
– Den Hersteller oder Kundendiensttechniker
um Rat fragen.
WARNUNG: Dies ist ein Gerät der
Klasse A. Bei Verwendung im
Haushalt kann dieses Gerät
Funkstörungen verursachen. In
diesem Fall sind entsprechende Maßnahmen zu
ergreifen.
!
14
!
Esto incluye los controles del desarrollo del
proceso de tratamiento y la vigilancia de los
valores vitales y anestésicos.
Artisan Technology Group - Quality Instrumentation ... Guaranteed | (888) 88-SOURCE | www.artisantg.com
!
IM-60-670-01B
Aufstellen und
Bedienungshinweise
Installation and
operating instructions
Montaje e
instrucciones operativas
Auspacken
Unpacking the instrument
Desembalaje
Entnehmen Sie die DEI-750 CE und das Zubehör
vorsichtig der Verpackung.
Überprüfen Sie die Lieferung auf Vollständigkeit
und auf eventuelle Beschädigungen.
Sollte die Lieferung Anlaß zur Reklamation geben,
so wenden Sie sich bitte umgehend an den
Hersteller oder Lieferanten.
Wenn möglich, bewahren Sie die Originalverpackung auf, sie kann bei einem Transport des
Gerätes nützlich sein.
Carefully unpack the DEI-750 CE and remove the
unit and its accessories from their packaging.
Check for missing items and evidence of shipping
damage.
File any complaints with the manufacturer or
supplier immediately.
If possible, retain the original packing materials for
later use; these can come in handy when the unit
must be transported.
Extraer cuidadosamente la cámara y sus
accesorios de la caja.
Revisar si el envio está completo y comprobar
posibles averías de transporte.
En caso de reclamaciones, dirigirse immediatamente a fábrica o a la empresa suministradora.
Es recomendable guardar el embalaje original
para volver a utilizarlo en un posible transporte
posterior del equipo.
Grundausstattung
Basic equipment
Equipo básico
1 Kamera
1 Linse/Adapter
1 Kamera-Kontroll-Einheit (CCU)
1 Satz RGB Verbindungskabel
1 Y/C-Verbindungskabel
1 BNC-Verbindungskabel
1 Netzkabel
1 Gebrauchsanweisungen
1 Tastatur
1 Camera head
1 Lens/adaptor
1 Camera control unit (CCU)
1 Set of RGB connecting cables
1 Y/C connecting cable
1 BNC connecting cable
1 Power cord
1 Instruction manual
1 Keyboard
1 Cámara
1 Lente/adaptador
1 Unidad de control de la cámara (CCU)
1 Set de cables de conexión RGB
1 Cable de conexión Y/C
1 Cable de conexión BNC
1 Cable de alimentación
1 Manual de instruccion
1 Teclado
Das Gerät verfügt über einen Stecker der Klasse
햻 zum Anschließen einer Erdleitung.
The equipment is equipped with a connector 햻 for
attaching a ground line.
El equipo está provisto de un conector 햻 que se
acopla a la línea a tierra.
Die Erdleitung sollte von einem Elektriker installiert
werden.
The ground line should be installed by a qualified
electrician.
La línea a tierra debe ser instalada por un
electricista calificado.
Installation medizinischer
Geräte
Medical installations
Instalaciones médicas
Note: The DEI-750 CE may be used only in
medical facilities having electrical installations
conforming to applicable national, state, and local
electrical codes.
This instrument is not intended for use in
hazardous zones. Do not operate the instrument
within demarcated hazard zones while explosive
anesthetic gases are in use.
Nota: La DEI-750 CE sólo podrá usarse en
espacios médicos cuyas instalaciones cumplan
las normas locales que fuesen aplicables.
El equipo no está previsto para ser utilizado en
áreas expuestas a posibles explosiones. Si se
usan gases anestésicos explosivos, el aparato no
deberá emplearse en las zonas señaladas como
peligrosas.
Hinweis: Die DEI-750 CE darf in medizinisch
genutzten Räumen nur benutzt werden, wenn
diese nach den national gültigen Vorschriften
installiert sind.
Sie ist nicht für den Betrieb in explosionsgefährdeten Bereichen bestimmt. Bei Verwendung
von explosiven Narkosegasen dürfen die Geräte
nicht in der dargestellten Gefahrenzone betrieben
werden.
15
Artisan Technology Group - Quality Instrumentation ... Guaranteed | (888) 88-SOURCE | www.artisantg.com
IM-60-670-01B
Aufstellen und
Bedienungshinweise
Installation and
operating instructions
Montaje e
instrucciones operativas
Inbetriebnahme der DEI-750 CE
Installing the DEI-750 CE
Kamera-Kontrolleinheit (CCU) auf ebene Fläche
stellen.
Set the CCU on a flat surface.
Puesta en marcha de la
DEI-750 CE
Es ist darauf zu achten, daß nach allen Seiten
genügend Abstand zu anderen Geräten und
Gegenständen besteht.
Vor dem Anschließen des Geräts feststellen, ob
die auf dem Typenschild angegebene Spannung
der des örtlichen Stromnetzes entspricht.
!
WARNUNG: Die Videokamera vor
Gebrauch stets testen. Vor jedem
Verfahren sicherstellen, daß das
richtige Videobild auf allen Videomonitoren erscheint.
Netzkabel anschließen, Netzkabel bis zum
Anschlag in CCU-Buchse 햺 einschieben.
!
WARNUNG: Für den Einsatz als
medizinisches Gerät ein für
Krankenhäuser zugelassenes
Stromkabel verwenden.
Kamerakopf-Anschlußstecker in Buchse 햴
einstecken.
16
Make sure there is sufficient distance on all sides
from other equipment and objects.
Before plugging in the equipment, make sure that
the voltage on the nameplate corresponds to the
voltage of the local power line.
!
Asegúrese de que exista suficiente distancia entre
el equipo y otros equipos y objetos.
Antes de conectar el equipo, asegúrese de que el
voltaje impreso en la placa de especificaciones
corresponda al voltaje de la red eléctrica local.
WARNING: Test the video camera
before each procedure. Ensure that the
proper video image appears on all
video monitors before beginning each
procedure.
Connect power cord. Insert power cord into power
cord receptacle 햺 as far as it will go.
!
Colocar el CCU sobre una superficie plana.
!
Conectar el cable de alimentación, introduciendo
el enchufe hasta el tope en el receptáculo del
cable de alimentación 햺.
WARNING: For medical applications
always use hospital grade power cord
with this camera.
Plug camera head connector into receptacle 햴.
¡CUIDADO!: Pruebe la cámara de
video antes de cada intervención.
Asegúrese de que aparece la imagen
de video apropiada en cada monitor de
video antes de comenzar la
intervención.
!
¡CUIDADO!: Para aplicaciones
médicas utilice siempre cables
conectores de potencia de grado
hospitalario con esta cámara.
Introducir el enchufe del cabezal de la cámara en
el receptáculo 햴.
Artisan Technology Group - Quality Instrumentation ... Guaranteed | (888) 88-SOURCE | www.artisantg.com
IM-60-670-01B
Aufstellen und
Bedienungshinweise
Installation and
operating instructions
Montaje e
instrucciones operativas
Kamera-Kontrolleinheit mit Monitor verbinden.
Connect the camera control unit to the video
monitor to be used. Depending upon the types of
video input connectors provided on the video
monitor, this connection can be generated using
either the CCU’s
— RGB/Sync output connectors 햵
— Y/C output connector 햷, or its
— BNC video output connector 햶.
Conectar la unidad de control de la cámara con el
monitor.
Je nach Anschlußmöglichkeit Ihres Monitors
können Sie die Verbindung herstellen über
— RGB-Sync-Anschluß (Buchse 햵)
— Y/C-Anschluß (Buchse 햷)
— BNC-Anschluß (Buchse 햶).
Hinweis: Die bestmögliche Bildqualität erhalten
Sie bei Anschluß über den RGB-Sync-Anschluß.
Nota: Obtendrá la mejor calidad de imagen si
utiliza la conexión RGB-Sync.
Gegebenenfalls Keyboard-Anschlußkabel in
Buchse 햸 einstecken.
If using the optional keyboard, plug keyboard
connecting cable into socket 햸.
Para emplear el teclado opcional introducir el
cable de conexión en el conectar 햸.
Hinweis: Beim Anschließen des Keyboard muß
sich der Netzschalter der CCU immer in AUSStellung befinden, da sonst die KeyboardSoftware nicht initialisiert wird.
Eine ausführliche Beschreibung der
Tastaturfunktionen befindet sich im Abschnitt
“Zusammenfassung der ALT-Steuerbefehle” auf
Seite 32.
Note: When connecting the keyboard, the power
switch on the CCU must always be in the OFF
position or else the keyboard software will not be
initialized.
For full details of keyboard functions and operations please refer to the section “Summary of ALT
commands” on page 32.
Nota: Al conectar el teclado, el interruptor principal
de la CCU debe hallarse en la posición «AUS»
(desconectado), ya que en caso contrario no se
inicializará el software del teclado.
Para detalles completos sobre las funciones y
operaciones del teclado, por favor consulte la
sección “Resumen de comandos ALT” en la
página 32.
Deras mitgelieferte BrennpunktHinterfokaladapter
mit C-FassungKlemme am Kamerakopf
befestigen und mit der Hand im Uhrzeigersinn
festschrauben.
Attach the included c-mount backfocus adaptor to
the camera head, threading clockwise until handtight.
Conecte el adaptador de retrofoco de montura en
C al cabezal de la cámara. Apriete con la mano
enroscándolo en el sentido de las manecillas del
reloj.
Bei Verwendung des gekühlten Kamerakopfes die
Relais- bzw. Verkleinerungslinse am Kamerakopf
befestigen und mit der Hand im Uhrzeigersinn
festschrauben.
Kamerakopf im Uhrzeigersinn mit der Hand auf
das Mikroskop aufschrauben.
17
Note: Best picture quality will be obtained using
the CCU’s RGB/Sync connectors.
Según la posibilidad de conexión de su monitor,
ésta puede realizarse mediante uno de los
siguientes CCU’s:
— Conexión RGB-Sync (conectar 햵)
— Conexión Y/C (conectar 햷)
— Conexión BNC (conectar 햶)
When using the cooled camera head, attach the
relay or reduction lens to the camera head,
threading clockwise until hand-tight.
Attach the camera head to the microscope,
threading clockwise until hand-tight.
Cuando use el cabezal de cámara con sistema de
enfriamiento, conecte el lente de relé o de
reducción al cabezal de la cámara. Apriete con la
mano enroscándolo en el sentido de las
manecillas del reloj hasta que esté manualmente
apretado.
Conecte el cabezal de la cámara al microscopio,
enroscándolo en el sentido de las manecillas del
reloj hasta que quede apretado con la mano.
Artisan Technology Group - Quality Instrumentation ... Guaranteed | (888) 88-SOURCE | www.artisantg.com
IM-60-670-01B
Aufstellen und
Bedienungshinweise
Installation and
operating instructions
Montaje e
instrucciones operativas
Kamera-Kontrolleinheit und Monitor einschalten.
Switch on the camera control unit and the video
monitor.
Encender la unidad de control de la cámara y el
monitor.
Nach jedem Einschalten erscheint auf dem
Monitor ein Farbtestbild. Wenn der Kamerakopf
nach Einschalten noch nicht mit der CCU
verbunden ist, verbleiben die
Sämtliche Kamerafunktionen werden über die
Tastatur gesteuert. Nur der Weißabgleich kann
auch von der Frontplatte aus gesteuert werden.
Die meisten Tastaturfunktionen sind auf dem
Aufkleber über der obersten Tastenreihe
angegebenbeschrieben. Im allgemeinen wird
durch Drücken einer dieser Tasten ein bestimmter
Kamera-Modus eingestellt. Die aktuelle Funktion
mit den entsprechenden Einstellungen erscheint in
einer Textzeile am unteren Bildrand des Monitors.
Zu vielen dieser Funktionen gehören Parameter
oder Einstellungen, die mit den Pfeiltasten in der
rechten unteren Ecke der Tastatur ([앖], [앗]) oder
den Pfeiltasten an der Frontplatte ders Kameraprozessors geändert werden können. Zum
Verlassen einer Funktion diesselbe Funktionstaste
erneut drücken bzw., [Alt][SPACE] oder eine
andere Funktionstaste drücken.
Die Funktionstasten der Tastatur sind in dieser
Anleitung in eckigen Klammern angegeben, z.B.
[EXPOSURE].
Each time the CCU is switched on, a color testpattern will appear on the video monitor screen. If
the camera head is not connected to the CCU
upon power up, the color bars will remain on until
the head is plugged in.
All camera functions are controlled from the
keyboard. Only the white balance function can be
controlled from the camera controller front panel.
Most of the keyboard functions can be found on
the label above the top row of keys. In general,
pressing one of these keys will enter the camera
into the corresponding mode. The current function
and its corresponding setting will be displayed on
the monitor as a line of text along the bottom.
Many of the functions have associated parameters
or selections which can be changed using the up
and down arrow keys in the lower right corner of
the keyboard ([앖], [앗]), or the arrow keys on the
camera processor front panel. To exit a function,
press the same function key again, press [Alt]
[SPACE], or press another function key.
Keyboard function keys are indicated in this
document within brackets, such as: [EXPOSURE].
Cada vez que se conecte el CCU aparecerá un
test de color en el monitor. Si no se conecte el
cabezal al CCU al encender el equipo, el test de
Todas las funciones de la cámara se controlan
desde el teclado. Solamente la función de balance
del blanco puede controlarse también desde el
control del panel frontal de la cámara. La mayoría
de las funciones del teclado pueden encontrarse
en la etiqueta que está por encima de la fila
superior de teclas. En general, si presiona una de
esas teclas, la cámara inicia la función
correspondiente. La función actual y sus
características correspondientes aparecen en la
pantalla del monitor en forma de línea de texto en
el borde inferior de la pantalla. Muchas de las
funciones tienen selecciones o parámetros
asociados que pueden cambiarse con las teclas
de dirección “hacia arriba” y “hacia abajo” situadas
en la esquina inferior derecha del teclado ([앖],
[앗]), o las teclas de dirección en el panel frontal
de control de la cámara. Para salir de una función,
presione nuevamente la tecla de la función
correspondiente, las teclas [Alt][SPACE], o alguna
otra tecla de función.
Las teclas de función del teclado se indican en
este documento dentro de paréntesis cuadrados,
como por ejemplo: [EXPOSURE].
18
Artisan Technology Group - Quality Instrumentation ... Guaranteed | (888) 88-SOURCE | www.artisantg.com
IM-60-670-01B
Aufstellen und
Bedienungshinweise
Installation and
operating instructions
Montaje e
instrucciones operativas
Weißabgleichsfunktionen
White balance functions
Vor Verwendung der Kamera muß ein Weißabgleich vorgenommen werden, um eine genaue
Farbwiedergabe zu erzielen. Jede Komponente
eines Kamera- oder Mikroskopsystems kann
einen bedeutenden Einfluß auf den Weißabgleich
haben. Aus diesem Grund wird empfohlen, daß
das gesamte optische und Illuminatorsystem vor
Durchführung montiert wird, bevor mit der Kamera
ein Weißabgleich durchgeführt wird. Es ist darauf
zu achten, daß sich vor dem Durchführen des
Weißabgleichs keine anderen Filter als mit
Ausnahme von Graufiltern im optischen Pfad des
Mikroskops befinden.
Prior to using the camera, it is important to perform
a white balance operation to ensure accurate color
reproduction. Each component of a camera/
microscope system can have a significant effect
on the white balance. For this reason, it is
recommended that the entire optical and
illumination system be assembled before white
balancing the camera. Be certain that no filters
other than neutral density filters are in the optical
path of the microscope prior to white balancing.
Funciones de balance del color
blanco (balance del blanco)
Weißabgleich
White balance setting
Balance del blanco
[WHITE BALANCE]
[WHITE BALANCE]
[WHITE BALANCE]
Durch Betätigen der Taste WHITE BALANCE
kann der derzeit gültige WeißabgleichsEinstellmodus abgerufen werden. Mit den
Pfeiltasten kann einer der fünf nachfolgend
erläuterten Modi gewählt werden.
The WHITE BALANCE key displays the current
mode for setting white balance. The arrow keys
are used to select from 5 modes described below.
La tecla BALANCE DEL BLANCO (WHITE
BALANCE) sirve para indicar la modalidad actual
para del fijarajuste del el balance del blanco. Se
usan las teclas de flechas para seleccionar entre
las 5 modalidades descritaos a continuación.
AWB
Modus für den Weißabgleich der Kamera anhand
eines weißen Objekts. In den meisten Fällen das
zuverlässigste Weißabgleichsverfahren für
Weißlicht-Illumination.
AWB
This mode allows the camera to be white balanced
to a white object. This is generally the most
accurate method for white balancing when using a
white light illumination.
Anschließend die Eingabetaste (Enter) drücken.
Before starting a white balance, set exposure
mode to “Auto” (do not use Auto+ or Auto-) and
arrange a white, non-shiny object to fill most of the
camera’s field of view. This can be a blank place
on a slide, a piece of white paper, etc. Next press
the enter button. During the cycle the message
AWB
Esta modalidad permite a la cámara lograr un
balance del blanco con un objeto blanco. Este
método generalmente es el más exacto para
lograr el balance del blanco cuando se usa una
iluminación con luz blanca.
Vor dem Weißabgleich den Belichtungsmodus auf
Auto stellen (nicht Auto+ oder Auto- wählen) und
einen weißen, nicht glänzenden Gegenstand so
aufstellen, daß er den Blickwinkel der Kamera fast
ganz ausfüllt. Dabei kann es sich um eine leere
Stelle auf einem Diarahmen oder um ein weißes
Blatt Papier handeln. Anschließend die Taste für
den Eintreten drücken. Während der Weißabgleich abläuft, erscheint die Anzeige “White
Balancing...”. Wenn der Weißabgleich erfolgreich
abgeschlossen wurde, erscheint die Anzeige
“White Balance OK”.
Wenn kein Weißabgleich durchgeführt werden
konnte, erscheint eine der folgenden Anzeigen:
“White Balancing...” will be displayed. If the white
balance is successful, the message will change to
“White Balance OK.”
If the white balance cycle fails, one of these
messages will appear:
Antes de usar la cámara es importante efectuar
una operación de balance del blanco para
garantizar una fiel reproducción de los colores.
Cada componente de un sistema cámara/
microscopio puede tener efecto significativo en el
balance del blanco. Por tal razón se recomienda
que los sistemas óptico y de iluminación se
ensamblen antes de efectuar el balance del
blanco en la cámara. Antes de efectuar el balance
del blanco, asegúrese de que solamente haya
filtros neutros en el trayecto óptico del microscopio.
Luego Seguidamente, pulse el botón de entrada
(Enter).
Antes de comenzar un balance del blanco, ajuste
la modalidad de exposición a “Auto” (no use Auto
+ ni Auto -) y coloque un objeto blanco sin brillo
para que ocupe la mayor parte del campo de
visión de la cámara. El objeto blanco puede ser un
espacio vacío en un portaobjetos, un trozo de
papel blanco, etc. En seguida, presione el botón
de entrar. Durante el ciclo, aparece el mensaje
“White balancing...“ (“Balance del blanco...“) en la
pantalla. Si el balance del blanco se realiza con
éxito el mensaje cambia a “White Balance OK”
(“Balance del blanco correcto”).
Si el ciclo de balance del blanco falla, aparecerá
uno de los siguientes mensajes:
19
Artisan Technology Group - Quality Instrumentation ... Guaranteed | (888) 88-SOURCE | www.artisantg.com
IM-60-670-01B
Aufstellen und
Bedienungshinweise
Installation and
operating instructions
Montaje e
instrucciones operativas
White Bal Fail – Color
Diesas bedeutet, daß die Farbtemperatur des
Lichts außerhalb des 2000 bis 6000 K-Bereichs
der Kamera liegt. Versuchen, die Beleuchtung
stärker einzustellen und auf Farbfilter im optischen
Pfad prüfen.
White Bal Fail – Color
This means that the color temperature of the light
is out of the 2000K to 6000K range of the camera.
Try turning up the illumination and check for
colored filters in the optical path.
White Bal Fail – Color
Esto significa que la temperatura de color de la luz
está fuera del margen de 2000K a 6000K de la
cámara. Intente aumentar la intensidad de la
iluminación y revise si hay filtros coloreados en el
trayecto óptico.
White Bal Fail – Dark
Dieas bedeutet, daß das Bild ist für einen genauen
Weißabgleich zu dunkel ist. Versuchen Sie, die
Beleuchtung stärker einzustellen, die Belichtungszeit zu erhöhen, eine Irisblende zu öffnen oder
Filter aus dem im optischen Pfad zu entfernen.
White Bal Fail – Bright
Dieas bedeutet, daß das Bild ist für einen genauen
Weißabgleich zu hell ist. Versuchen, Sie, die
Beleuchtung schwächer einzustellen, die Belichtungszeit zu verringern, eine Irisblende zu schließen oder Graufilter in den optischen Pfad
einzufügen.
Die Weißabgleichseinstellung wird imn einem
nicht-flüchtigen Speicher in der Kamera-KontrollSteuer-Kontrolleineheit (CCU) gespeichert.
Dadurch ist kein erneuter Weißabgleich beim
Wiedereinschalten der Kamera erforderlich, es sei
denn, es wurden Änderungen am System
vorgenommen (Lichtquelle, Mikroskop usw.).
Es ist zu beachten, daß es sich bei den meisten
Illuminatorreglern um elektrische Dimmer handelt,
und daß eine Einstellungsänderung eine starke
Auswirkung auf die Farbtemperatur der
Beleuchtung hat. Außerdem ist die
Farbgenauigkeit der Kamera dann am besten,
wenn die Farbtemperatur der Beleuchtung hoch
ist. Es ist daher zu empfehlen, den Illuminator
ständig auf seinen Höchstwert einzustell-en. Wenn
die Illuminatoreinstellung geändert wurde, ist es
ratsam, erneut einen Weißabgleich durchzuführen.
Hinweis: Wenn die Weißabgleichsfunktion aktiviert
wird und die Kamera auf eine lange Belichtungszeit (1/4 Sekunde oder länger) eingestellt ist, kann
es ziemlich lange dauern, bis der Zyklus abgeschlossen ist. Falls erforderlich kann der Zyklus durch
Aus- und Einschalten der Kamera abgebrochen
werden.
20
White Bal Fail – Dark
This means that the image is too dark for an
accurate white balance. Try turning up the
illumination, increasing the camera exposure time,
opening an iris, or removing filters in the optical
path.
White Bal Fail – Bright
This means that the image is too bright for an
accurate white balance. Try turning down the
illumination, decreasing the camera exposure time,
closing an iris, or adding neutral density filters to
the optical path.
The white balance setting is stored in nonvolatile
memory in the camera control unit. This means
that the camera should not need to be re-white
balanced when the camera is turned back on,
provided nothing in the system has changed (light
source, microscope, etc.).
Please note that most illuminator controls are
electrical “dimmers,” and changing their settings
has a significant effect on the illumination color
temperature. Also, camera color accuracy is best
when the illuminator color temperature is high.
Therefore, it is recommended that the illuminator
be set to maximum at all times. If the illuminator
setting is changed, a new white balance operation
is recommended.
Note: If the white balance function is activated
when the camera is set for a long exposure time
(1/4 second or more), a considerable amount of
time may elapse before the cycle is complete. If
necessary, the cycle can be aborted by turning the
camera off, then on again.
White Bal Fail – Dark
Esto significa que la imagen es demasiado oscura
para poder hacer correctamente un balance del
blanco. Intente aumentar la intensidad de la
iluminación, el tiempo de exposición de la cámara,
la apertura de algún iris (diafragma) o retirar filtros
del trayecto óptico.
White Bal Fail – Bright
Esto significa que la imagen es demasiado
brillante para realizar correctamente un balance
del blanco. Intente disminuir la iluminación, el
tiempo de exposición de la cámara, la apertura de
algún iris (diafragma), o agregar filtros de densidad
neutra en el trayecto óptico.
El ajuste de balance del blanco se almacena en
memoria no volátil (permanente) en la unidad de
control de la cámara. Esto significa que no es
necesario rebalancear el blanco en la cámara al
apagarla y volverla a encenderla, siempre que no
se hayan producido cambios en el sistema (fuente
de iluminación, microscopio, etc.).
Sírvase observar que la mayoría de los controles
de iluminación son reóstatos o potenciómetros
eléctri-cos, y que la modificación de sus ajustes
tiene un efecto significativo en la temperatura de
color de la iluminación. Además, la exactitud de la
cámara con respecto al color es mayor cuando la
temperatura del color de la iluminación es elevada.
Por tanto, se recomienda que la fuente de iluminación
se ajuste al máximo en todo momento. Si cambia
el ajuste de la fuente luminosa, se recomienda
efectuar otra operación de balance del blanco.
Nota: Si la función de balance del blanco se activa
cuando la cámara está ajustada para un tiempo de
exposición prolongado (1/4 de segundo o más),
puede transcurrir bastante tiempo antes de que el
ciclo se complete. De ser necesario, puede
abortarse el ciclo apagando la cámara y
volviéndola a encender.
Artisan Technology Group - Quality Instrumentation ... Guaranteed | (888) 88-SOURCE | www.artisantg.com
IM-60-670-01B
Aufstellen und
Bedienungshinweise
Installation and
operating instructions
Montaje e
instrucciones operativas
2800K
Weißabgleichsmodus für die meisten
gewöhnlichen Glühlampen-Lichtquellen wie z.B.
Haushaltsglühbirnen. Eignet sich auch für
gedimmte Hochintensitätslampen wie z.B.
Mikroskopilluminatoren.
2800K
This mode sets the camera white balance for most
normal incandescent lighting such as household
light bulbs. This setting is also appropriate for high
intensity bulbs, which are being dimmed, such as
microscope illuminators.
3200K
Weißabgleichsmodus für hochintensive
Glühlampen wie z.B. Quaz-Halogen-Lampen und
die meisten auf maximale Helligkeit eingestellten
Mikroskopilluminatoren.
3200K
This mode sets the camera white balance for high
intensity incandescent lighting such as quartz
halogen bulbs, and most microscope illuminators
at maximum brightness.
5600K/fluorescence
Weißabgleichsmodus für die Tageslichtillumination,
ferner für die optimale Farbwiedergabe von
fluoreszenten Subjekten.
5600K/fluorescence
This mode sets the camera white balance for
daylight illumination. It is also the setting for use
with fluorescent subjects for best color rendition.
Manual white balance
Modus, in dem der Benutzer den Weißabgleich
der Kamera manuell mit Hilfe der Rot- (Alt-RED)
und Blauverstärkung (Alt-BLUE) vornehmen
kann. Siehe Abschnitt “Wahl der Rot- bzw.
Blauverstärkung” auf Seite 26.
Manual white balance
This mode allows the user to manually change the
white balance of the camera by using the red gain
(Alt-red) and blue gain (Alt-blue) adjustments. See
“Set red, blue, gains” section on page 26.
2800K
Esta modalidad fijaajusta el balance del blanco de
la cámara para la mayoría de la iluminación
incandescente normal, como por ejemplo con los
focos de luz caseros. Esta calibración también es
apropiada para focos de alta intensidad, que se
atenúan, como es el caso de los iluminadores de
microscopio.
3200K
Esta modalidad fijaajusta el balance del blanco de
la cámara para la iluminación incandescente de
elevada gran intensidad, como los focos de
halógeno de cuarzo, y la mayoría de los
iluminadores de microscopio con iluminacióna
brillantez máxima.
5600K/fluorescencia
Esta modalidad fijaajusta el balance del blanco de
la cámara para la luz natural de día. También es el
ajuste apropiado para objetos fluorescentes, para
una mejor obtención (rendición) del color.
Balance manual del blanco manual
Esta modalidad permite al usuario cambiar
manualmente el balance del blanco de la cámara
mediante el ajuste de la ganancia del rojo [Alt-rojo
(Alt-red)] y la ganancia del azul [Alt-azul (Alt-blue)].
Vea la sección “FijarAjuste de las ganancias del
rojo y o del azul” en la página 26.
BelichtungsregelungsFunktionen
Exposure control functions
Die Belichtungsfunktion der Kamera bestimmt,
wieviel Licht von der CCD aufgezeichnet wird,
sowie die Höhe der Signalverstärkung, die zur
Darstellung des Signals erforderlich ist. Die
Belichtungsfunktion der Kamera wird auf zwei
verschiedene Weisen Arten eingestellt. Im manuellen Betriebsmodus stellt die Bedienungsperson die Verschlußzeit manuell ein. Die
Verstärkung ist auf einen festenbestimmten Wert
voreingestellt. Im automatischen Betriebsmodus
analysiert die Kamera das Bild und findet automatisch die beste Kombination von Verschlußzeit
und Verstärkung. Im automatischen Betriebsmodus überwacht die Kamera ständig den Inhalt
der Aufnahmeszene und paßt sich schnell
Beleuchtungsänderungen der Szene an wie z.B.
beim Wechseln vom Dunkel- zum Hellfeld.
21
The camera exposure functions determine how
much light is recorded by the CCD, as well as the
amount of gain that is applied to the signal before
it is displayed. There are two basic ways in which
the camera exposure is set. In manual mode, the
user manually sets the shutter speed. The gain is
preset to a fixed level. In automatic mode, the
camera analyzes the image and automatically
finds the “best” combination of shutter speed and
gain. In automatic mode, the camera is constantly
monitoring the scene content, and will quickly
accommodate changes in scene illumination such
as when switching from darkfield to brightfield.
Funciones del control de
exposición
Las funciones de exposición de la cámara
determinan la cantidad de luz que registra el CCD,
al igual que la cantidad de ganancia que se aplica
a la señal antes de que pueda verse en la
pantalla. Hay dos maneras básicas en que puede
establecerse el valor de exposición en la cámara.
En la modalidad manual, el usuario establece
manualmente la velocidad del obturador. El valor
de ganancia está preestablecido a un nivel fijo. En
la modalidad automática, la cámara analiza la
imagen y automáticamente encuentra la “mejor”
combinación de velocidad de obturación y
ganancia. En la modalidad automática, la cámara
continuamente está analizando el contenido de la
escena y podrá, por lo tanto, acomodarse
rápidamente a los cambios de su iluminación,
tales como cuando se pasa de un objeto poco
iluminado a uno con iluminación brillante.
Artisan Technology Group - Quality Instrumentation ... Guaranteed | (888) 88-SOURCE | www.artisantg.com
IM-60-670-01B
Aufstellen und
Bedienungshinweise
Installation and
operating instructions
Montaje e
instrucciones operativas
Einstellen der Belichtung
Set exposure
Establecer el valor de exposición
[EXPOSURE]
Mit der EXPOSURE-Taste wird der jeweilige
Belichtungsmodus eingestellt. Auf dem Monitor
wird der aktuelle Belichtungsmodus (auto oder
manuell) sowie die Verschlußzeit angezeigt. Je
nachdem, ob sich die Kamera im automatischen
oder manuellen Belichtungsmodus befindet, haben
die Pfeiltasten zwei verschiedene Funktionen. Im
automatischen Betriebsmodus verringert oder
erhöhent sie man die Belichtung um eine Stufe,
wodurch das Bild heller oder dunkler wird. Die 5
automatischen Einstellungen werden auf dem
Monitor wie folgt angezeigt: Auto, Auto -, Auto +,
Auto - - und Auto ++. Im manuellen Betriebsmodus
kann die Bedienungsperson mit den Pfeiltasten
eine beliebige Verschlußzeit wählen. Die
Pfeiltasten wiederholt drücken, bis die gewünschte
Verschlußzeit eingestellt ist gewählt wurde.
[EXPOSURE]
La tecla de exposición [EXPOSURE] coloca a la
cámara en la modalidad de ajuste del valor de
exposición. En la pantalla aparece la modalidad de
exposición actual (automática o manual) junto con
la velocidad de obturación actual. Las teclas de
dirección (teclas de flechas) tienen dos efectos,
según si la cámara está en la modalidad de
exposición automática o manual. En la modalidad
automática, las teclas de dirección aumentan o
disminuyen el valor de exposición en una unidad
focal (f/stop), para aumentar o disminuir la
iluminación de la imagen. Los cinco ajustes
automáticos se indican en el monitor como “Auto”,
“Auto -”, “Auto +”, “Auto - -” y “Auto ++”. En la
modalidad manual, las teclas de dirección
permiten al usuario seleccionar cualquiera de las
posibles velocidades de obturación. Presione
repetidamente las teclas de dirección hasta que
seleccione la velocidad de obturación deseada.
Umschalten zwischen manueller und
automatische Belichtung [AUTO/MANUAL]
Select auto/manual exposure
Mit der Taste AUTO/MANUAL schaltet man
zwischen der automatischen und manuellen
Belichtung hin und her. Nach dem Drücken der
Taste werden der aktuelle Belichtungsmodus und
die Verschlußzeit angezeigt. Die Belichtung kann
dann mit den Pfeiltasten geändert werden.
The AUTO/MANUAL key toggles the exposure
mode between auto and manual. After pressing
the key, the current exposure mode and shutter
speed will be displayed. The arrow keys can then
be used to change the exposure.
La tecla AUTO/MANUAL permite alternar la
modalidad de exposición entre automática y
manual. Después de presionar la tecla se muestra
la modalidad de exposición y la velocidad de
obturación en uso al momento. Las teclas de
dirección pueden usarse para cambiar el valor de
exposición.
Einstellen der Verschlußzeitgrenze
Set shutter speed limit
[ALT] [L]
The Alt-L key combination enters the camera into
the set shutter speed limit mode. This mode allows
the user to change the longest allowed shutter
speed when the camera is in auto exposure mode.
While in this mode, the monitor will display the
current limit, which can then be changed with the
arrow keys.
Seleccionar el límite de la velocidad de
obturación [Alt] [L]
Mit der Tastenkombination Alt-L wird der Betriebsmodus zum Einstellen der Verschlußzeitgrenze
gewählt. In diesem Betriebsmodus kann die längst
mögliche Verschlußzeit geändert werden, wenn
die Kamera auf die automatische Belichtungsart
eingestellt ist. Während sich die Kamera in diesem
Betriebsmodus befindet, wird auf dem Monitor die
gegenwärtige Grenze angezeigt, die dann mit den
Pfeiltasten geändert werden kann.
22
[EXPOSURE]
The EXPOSURE key will enter the camera into the
set exposure mode. The monitor will display the
current exposure mode (auto or manual) along
with the current shutter speed. The arrow keys
have two effects, depending on whether the
camera is in auto or manual exposure mode. In
auto mode, the arrow keys will increase or
decrease the exposure by one stop, resulting in a
brightening or darkening of the image. The 5 auto
settings are indicated on the monitor with “Auto,”
“Auto - ,” “Auto +,” “Auto - -,” and “Auto ++.” In
manual mode, the arrow keys allow the user to
select from any of the available shutter speeds.
Press the arrow keys repeatedly until the desired
shutter speed is selected.
[AUTO/MANUAL]
[Alt] [L]
Seleccionar la exposición automática/
manual [AUTO/MANUAL]
Al combinar las teclas Alt-L, la cámara se coloca
en la modalidad de selección del límite de la
velocidad de obturación. Esta modalidad permite
al usuario cambiar la velocidad de obturación más
lenta (larga) cuando la cámara está en la
modalidad de exposición automática. En esta
modalidad, la pantalla del monitor muestra la
velocidad de obturación actual, que luego puede
modificarse con las teclas de dirección.
Artisan Technology Group - Quality Instrumentation ... Guaranteed | (888) 88-SOURCE | www.artisantg.com
IM-60-670-01B
Aufstellen und
Bedienungshinweise
Wahl der automatischen
Belichtungsbewertung [Alt] [W]
Mit der Tastenkombination Alt-W wird die
Wahlfunktion für automatische Belichtungsbewertung der Kamera eingeschaltet. In dieser
Betriebsart kann der Benutzer das Verfahren
ändern, anhand dessen die Kamera im
automatischen Belichtungsmodus die günstigste
Belichtung ermittelt. Auf dem Monitor wird das
jeweils angewendete Verfahren angezeigt; es
kann mit Hilfe der Pfeiltasten geändert werden.
– FULL SCREEN der Mittelwert für den gesamten
Bildschirminhalt wird zugrunde gelegt. Dies ist
die Option für den Normalfall.
– WINDOW (FENSTER) verwendet das Mittel des
zentralen Bildschirmbereichs. Nützlich, wenn
der äußere Umkreis nicht wichtig oder durch
das optische System verdeckt ist.
– PEAK das hellste Objekt innerhalb des
gesamten Gesichtsfelds wird zugrunde gelegt.
Empfohlen für die Abbildung kleiner, heller
Details, z.B. fluoreszierendenter Strukturen
oder reflektierender Metallflächen.
Wahl der Gammakurve
[Alt] [G]
Mit der Tastenkombination Alt-G wird die
Betriebsart Gammamodusenwahl-Betriebsart
aktiviert, in der der Benutzer die vom
Kameraprozessor verwendete Gammakurve
ändern kann. Der jeweils gültige Gammawert wird
auf dem Monitor angezeigt und kann mit Hilfe der
Pfeiltasten geändert werden. Bei einem
Gammawert von 1,.0 ist das Reaktionsverhalten
der Kamera linear; diese Einstellung eignet sich
vor allem für die quantitative Analyse. Bei einem
Gammawert von 0,.7 entsteht eine nichtlineare
Ansprechkurve der Kamera, um die der
Nichtlinearität des Monitors zu kompensierenentspricht. Dieser Wert ist für die Mehrzahl der
visuellen und qualitätsorientierten Arbeiten zu
empfehlen.
23
Installation and
operating instructions
Set auto exposure weighting
Montaje e
instrucciones operativas
[Alt] [W]
The Alt-W key combination enters the camera into
the set auto exposure weighting mode. This mode
allows the user to change the method the camera
uses to determine the best exposure in auto
exposure mode. While in this mode, the monitor
will display the current method, which can then be
changed with the arrow keys.
– FULL SCREEN uses the average of the total
screen content. This is best for general use.
– WINDOW uses the average of a central area of
the screen. This is useful if the outer boundary is
either unimportant or obscured by the optical
system.
– PEAK uses the brightest feature within the
entire scene. This is useful when imaging small
bright features such as fluorescent structures or
reflective metal surfaces.
Set gamma
[Alt] [G]
The Alt-G key combination enters the camera into
the set gamma mode. This mode allows the user
to change the gamma curve used in the camera
processor. While in this mode, the monitor will
display the current gamma, which can then be
changed with the arrow keys. A gamma of 1.0 gives
the camera a linear response, which is useful for
quantitative analysis. A gamma of 0.7 gives the
camera the proper nonlinear response to correct for
the non-linearity of the monitor. The 0.7 gamma
should be used for most visual and qualitative work.
FijeAjuste de la compensación de
autoexposición [Alt][W]
La combinación de teclas Alt-W coloca a la cámara
en la modalidad de fijarajuste de la compensación
de autoexposición. Esta modalidad permite al
usuario cambiar el método usado por la cámara
para determinar la mejor exposición en la
modalidad de autoexposición. Cuando la cámara
está en esta modalidad, el monitor muestra el
método actual, el que luego se puede cambiar con
las teclas de flechas.
– PANTALLA COMPLETA ENTERA (FULL
SCREEN) usa el promedio del contenido total de
la pantalla. Esto es lo mejor para el uso general.
– La función WINDOW (VENTANA) utiliza el
promedio de una parte central de la pantalla.
Esto es útil si los límites exteriores no son
importantes o han sido oscurecidos por el
sistema óptico.
– PICO (PEAK) usa el elemento más brillante
dentro de todo el campo. Esto resulta útil
cuando se toman imágenes de elementos
pequeños y brillantes, tales como estructuras
fluorescentes o superficies metálicas
reflexivasreflectantes.
FijarAjuste de valor gamma
[Alt][G]
La combinación de teclas Alt-G coloca a la cámara
en la modalidad de fijarajuste de valor gamma.
Esta modalidad permite al usuario cambiar la
curva de gamma usada en el procesador de la
cámara. Cuando la cámara está en esta
modalidad, el monitor muestra la curva de gamma
actual, la que luego se puede cambiar con las
teclas de flechas. Con una un valor gamma de 1.0,
la respuesta de la cámara es lineal, lo que es útil
para los análisis cuantitativos. Con una un valor
gamma de 0.7, la cámara adquiere la respuesta
no lineal adecuada para corregir la no linearidad
del monitor. La El valor gamma de 0.7 debe usarse
para la mayoría del trabajo visual y cualitativo.
Artisan Technology Group - Quality Instrumentation ... Guaranteed | (888) 88-SOURCE | www.artisantg.com
IM-60-670-01B
Aufstellen und
Bedienungshinweise
Installation and
operating instructions
Montaje e
instrucciones operativas
Farbschattierungskorrektur
Color shading correction
feature
Característica de corrección del
sombreado del color
The color shading feature corrects pink to green
background shading on low contrast subjects. This
allows the camera to be used with any reduction
lens video adaptor without compromising color
accuracy.
La característica de corrección del sombreado del
color corrige el sombreado de fondo del rosado al
verde cuando el material tiene poco contraste.
Esto permite usar la cámara con cualquier
adaptador de vídeo con lente de reducción sin
alterar la exactitud del color.
Color shading correction
Corrección del sombreado del color
Durch die Farbschattierungskorrektur wird die
Hintergrundschattierung von rosa bis grün bei
kontrastarmen Subjekten korrigiert, so daß mit der
Kamera ein beliebiges VerkleinerungslinsenVideoadapter ohne Einbußen bei der
Farbgenauigkeit verwendet werden kann.
Farbschattierungskorrektur
[Alt] [C]
[Alt] [C]
Weißabgleich der Kamera durchführen. Auf der
Tastatur die Tasten Alt-C drücken. Auf dem
Monitor erscheint eine Meldung, die die aktuelle
Farbkorrektur als Wert zwischen -100 und +100
wiedergibt. Mit den Pfeiltasten der Tastatur kann
dieser Wert erhöht bzw. verringert werden. Ist der
gewünschte Wert eingestellt, kann die Meldung
mit den Tasten Alt-C ausgeblendet werden.
Erneuten Weißabgleich durchführen.
White balance the camera. Press Alt-C on the
keyboard. A color correction message with a value
between -100 and +100 will appear on the
monitor. To increase or decrease the value, use
the arrow keys on the keyboard. Once the desired
value is achieved, turn off the monitor message by
pressing Alt-C. White balance the camera again.
Standbild
Freeze frame
Congelamiento de cuadro
Die Standbildfunktion eignet sich zur Erfassung
vorübergehender Ereignisse oder zur Reduzierung
des Bleicheffekts um da Bleichen fluoreszenter
Objekte zu reduzieren. Standbilder können anschließend mit einer der folgenden Verstärkungsfunktionen modifiziert werden: Kontrast, Helligkeit,
Schärfe, Blau- und Rotausgleich.
Freeze frame can be used to capture transient
events, or to minimize bleaching of fluorescent
subjects. Frozen images can be subsequently
modified with any of the enhancement functions:
contrast, brightness, sharpness, red offset, blue
offset.
El congelamiento de cuadro (freeze frame) puede
usarse para captar eventos transitorios o para
minimizar el blanqueo de objetos fluorescentes.
Las imágenes congeladas pueden modificarse
posteriormente con cualquiera de las funciones
para mejorar la imagen: contraste, brillantez,
nitidez, compensación del rojo, compensación del
azul.
Hinweis: Bei Verwendung der Standbildfunktion
muß das Objekt stationär sein, um stabile und
flimmerfreie Bilder zu erhalten.
Standbild Ein/Aus
[FREEZE FRAME]
Mit dieser Taste kann das auf dem Monitor
dargestellt Bild eingefroren“ werden. Durch
erneutes Drücken dieser Taste wird das Standbild
wieder zur direkten Videodarstellung. Wenn
Freeze Frame aktiviert ist, werden bei
eingeschalteter Belichtungsfunktion die
Buchstaben FF zusammen mit dem aktuellen
Belichtungswert angezeigt.
24
[Alt] [C]
Note: When using freeze frame, the subject must
be stationary in order to obtain stable, flicker-free
images.
Freeze frame on/off
[FREEZE FRAME]
Pressing this button allows the user to “freeze” the
displayed image on the monitor. Pressing the
button again will restore the display to “live” video.
When freeze frame is on, the letters “FF” will
appear along with the current exposure when the
Exposure function is turned on.
Haga el balance del blanco de la cámara. Oprima
Alt-C en el teclado. Aparecerá un mensaje de
corrección del color en el monitor, con un valor
entre -100 y +100. Para aumentar o disminuir el
valor, use las teclas de flechas en el teclado.
Cuando alcance el valor deseado, oprima Alt-C
para que desaparezca el mensaje en el monitor.
Vuelva a hacer el balance del blanco de la
cámara.
Nota: Cuando se use el congelamiento de cuadro,
el objeto debe estar inmóvil para obtener
imágenes estables y sin parpadeo.
Congelamiento de cuadro activado/
desactivado [FREEZE FRAME]
Si el usuario presiona este botón, puede
“congelar” la imagen que aparece en la pantalla.
Si vuelve a presionar el botón, regresa a la
imagen en la condición de vídeo “en vivo”.
Cuando el congelamiento de cuadro está
activado, las letras “FF” aparecen junto con el
valor de exposición actual cuando está activada la
función de exposición (Exposure).
Artisan Technology Group - Quality Instrumentation ... Guaranteed | (888) 88-SOURCE | www.artisantg.com
IM-60-670-01B
Aufstellen und
Bedienungshinweise
Installation and
operating instructions
Montaje e
instrucciones operativas
Verstärkungsfunktionen
Enhancement functions
Die Verstärkungsfunktionen dienen zur
Verbesserung der Klarheit von vorhandenen
Bildern. Es handelt sich dabei um digitale
Bildverarbeitungsfunktionen für Direktbilder oder
Standbilder.
The enhancement functions are used to provide
additional clarity to existing images. They are all
digital processing functions, and can be applied to
either live or frozen images.
Funciones para mejorar la
imagen
Einstellen des Kontrasts
Set contrast
[CONTRAST]
Ajuste del contraste
[CONTRAST]
Mit dieser Taste wird der Kontrastmodus
eingestellt. In diesem Modus kann das
Kontrastgefälle eingestellt werden. Wenn sich die
Kamera in diesem Modus befindet, zeigt der
Monitor die aktuelle Kontrasteinstellung an, die
dann mit den Pfeiltasten geändert werden kann.
Die normale Kontrasteinstellung ist 0. Der Kontrast
läßt sich stufenweise bis auf +16 erhöhen oder bis
auf -16 verringern. Eine höhere Kontrasteinstellung ist hilfreich für die bessere Darstellung von
Details und Konturen. Eine geringere Kontrasteinstellung eignet sich für die Darstellung von
Objekten mit einem zu hohen Kontrast oder zur
Hervorhebung von um Farbunterschieden anstelle
von Helligkeitsunterschieden hervorzuheben. Im
allgemeinen muß die Kontrastfunktion zusammen
mit der Helligkeitsfunktion verwendet werden, um
ein optimales Bild zu erzielen (siehe unten).
This key enters the camera into the set contrast
mode. This mode allows the user to change the
contrast slope of the image. While in this mode,
the monitor will display the current contrast setting,
which can then be changed with the arrow keys.
The normal contrast setting is 0. The contrast can
be increased in steps up to a setting of +16 or
decreased to a setting of -16. Increased contrast is
useful for improving visibility of details or contours.
Decreased contrast is useful for subjects with
excessive contrast, or as a means to accentuate
color differences rather than brightness differences. In general, the contrast function will need to
be used in conjunction with the brightness function
to achieve the optimal image (see below).
Esta tecla coloca a la cámara en la modalidad de
ajuste del contraste. Esta modalidad permite al
usuario cambiar la curva de contraste de la
imagen. Cuando esta modalidad está activada, la
pantalla muestra el ajuste del contraste actual,
que luego puede cambiarse con las teclas de
dirección. El ajuste normal para el contraste es 0.
El contraste puede aumentarse en incrementos
hasta un ajuste máximo de +16, ó disminuirse
hasta un ajuste de -16. El incremento del contraste
es útil para aumentar la visibilidad de detalles o
contornos. La disminución del contraste es útil
para la observación de objetos con contraste
excesivo, o para acentuar las diferencias de color
más que las diferencias de brillantez. En general,
hay que usar la función de contraste junta con la
función de brillantez para lograr la imagen óptima
(ver más abajo).
Einstellen der Helligkeit
Set brightness
Ajuste de la brillantez
[BRIGHTNESS]
Mit dieser Taste wird der Helligkeitsmodus
eingestellt. In diesem Modus kann die allgemeine
Bildhelligkeit eingestellt werden. Wenn sich die
Kamera in diesem Modus befindet, zeigt der
Monitor die aktuelle Helligkeitseinstellung an , die
dann mit den Pfeiltasten geändert werden kann.
Die normale Helligkeitseinstellung ist 0. Die
Helligkeit läßt sich stufenweise bis auf +32
erhöhen oder bis auf -32 verringern. Eine höhere
Helligkeitseinstellung ist hilfreich für die bessere
Darstellung von Details in dunklen Bereichen. Eine
geringere Helligkeitseinstellung eignet sich für die
Unterdrückung unwichtiger Details in dunklen
Bildbereichen. Im allgemeinen muß die Helligkeitsfunktion zusammen mit der Kontrastfunktion
verwendet werden, um ein optimales Bild zu
erzielen (siehe oben).
25
[CONTRAST]
Las funciones para mejorar la imagen se utilizan
para aumentar la claridad de las imágenes
existentes. Todas son funciones de procesamiento
totalmente digitales y pueden aplicarse a
imágenes vivas o congeladas.
[BRIGHTNESS]
This key enters the camera into the set brightness
mode. This mode allows the user to change the
overall brightness of the image. While in this
mode, the monitor will display the current
brightness setting, which can then be changed
with the arrow keys. The normal contrast setting is
0. The brightness can be increased in steps up to
a setting of +32 or decreased to a setting of -32.
Increased brightness is useful for improving
visibility of features in dark areas. Decreased
brightness is useful for suppressing unimportant
features in dark areas of the image. In general, the
brightness function will need to be used in
conjunction with the contrast function to achieve
the optimal image (see above).
[BRIGHTNESS]
Esta tecla coloca a la cámara en la modalidad de
ajuste de la brillantez. Esta modalidad permite al
usuario cambiar la brillantez general de la imagen.
Cuando esta modalidad está activada, la pantalla
muestra el ajuste de la brillantez actual, que luego
puede cambiarse con las teclas de dirección. El
ajuste normal de la brillantez es 0. La brillantez
puede aumentarse en incrementos hasta un
ajuste máximo de +32, ó disminuirse hasta un
ajuste de -32. El aumento de la brillantez es útil
para mejorar la visibilidad de las características en
áreas oscuras de la imagen. La disminución de la
brillantez es útil para suprimir características sin
importancia en áreas oscuras de la imagen. En
general, la función de brillantez debe usarse junto
con la función de contraste para lograr la imagen
óptima (ver más arriba).
Artisan Technology Group - Quality Instrumentation ... Guaranteed | (888) 88-SOURCE | www.artisantg.com
IM-60-670-01B
Aufstellen und
Bedienungshinweise
Installation and
operating instructions
Montaje e
instrucciones operativas
Einstellen der Schärfe
Set sharpness
Ajuste de la nitidez
[SHARPNESS]
[SHARPNESS]
This key enters the camera into the set sharpness
mode. This mode allows the user to change the
overall detail enhancement of the image. While in
this mode, the monitor will display the current
sharpness setting, which can then be changed
with the arrow keys. The normal sharpness setting
is 0. The sharpness can be increased in steps up
to a setting of +20. Increased sharpness is useful
for improving visibility of fine details and contours
in the image.
Esta tecla coloca a la cámara en la modalidad de
ajuste de la nitidez. Esta modalidad permite al
usuario cambiar el realce general del detalle de la
imagen. Cuando esta modalidad está activada, la
pantalla muestra el ajuste de nitidez actual, que
luego puede cambiarse con las teclas de
dirección. El ajuste normal de la nitidez es 0. La
nitidez puede aumentarse en incrementos hasta
un ajuste máximo de +20. El aumento de la nitidez
es útil para mejorar la visibilidad de detalles finos y
contornos finos en la imagen.
Wahl der Rot- bzw. Blauverschiebung
Set red, blue offsets
[RED], [BLUE]
These keys enter the camera into the set red or
blue offset modes. These modes allow the user to
change the overall color bias of the image. While
in these modes, the monitor will display the current
setting, which can then be changed with the arrow
keys. The normal setting is 0. The selected color
can be increased in steps up to a setting of +32 or
decreased to a setting of -32. Positive red settings
will make the image appear more red, while
negative red settings will make the image appear
more green. Positive blue settings will make the
image appear more blue, while negative blue
settings will make the image appear more yellow.
FijarAjuste de compensación los offsets
del rojo y o del azul [RED], [BLUE]
Mit diesen Tasten wird die Kamera in den Rotbzw. Blauverschiebungs-Einstellmodus versetzt.
In diesem Modus kann die allgemeine
Farbabstufung eingestellt werden. Wenn sich die
Kamera in diesem Modus befindet, zeigt der
Monitor die aktuelle Einstellung an , die dann mit
den Pfeiltasten geändert werden kann. Die
normale Einstellung ist 0. Die gewählte Farbe läßt
sich stufenweise bis auf +32 erhöhen oder bis auf
-32 verringern. Positive Roteinstellun-gen lassen
das Bild rötlicher erscheinen, während negative
Roteinstellungen das Bild grüner erscheinen
lassen. Positive Blaueinstellungen lassen das Bild
bläulicher erscheinen, während negative
Blaueinstellungen das Bild gelblicher erscheinen
lassen.
26
[SHARPNESS]
Mit dieser Taste wird der Schärfemodus
eingestellt. In diesem Modus kann die allgemeine
Detailver-stärkung des Bilds eingestellt werden.
Wenn sich die Kamera in diesem Modus befindet,
zeigt der Monitor die aktuelle Schärfeeinstellung
an , die dann mit den Pfeiltasten geändert werden
kann. Die normale Schärfeeinstellung ist 0. Die
Schärfe läßt sich stufenweise bis auf +20 erhöhen.
Eine höhere Schärfeeinstellung ist hilfreich für die
bessere Darstellung feiner Details und Konturen
im Bild.
[RED], [BLUE]
Estas teclas colocan a la cámara en laos
modalidades de fijarajuste de los
offsetcompensación del rojo o del azul. Estas
modalidades permiten al usuario cambiar la
desviación del color general de la imagen. Cuando
estas modalidades están activadas, la pantalla
muestra el ajuste actual, que luego puede
cambiarse con las teclas de dirección. El ajuste
normal es 0. El color seleccionado puede
aumentarse en incrementos hasta un ajuste
máximo de +32, ó disminuirse hasta un ajuste de
-32. Los ajustes positivos del rojo harán que la
imagen se torne más rojiza, mientras que los
ajustes negativos harán que la imagen se torne
más verde. Los ajustes positivos del azul harán
que la imagen se torne más azul, mientras que los
ajustes negativos harán que la imagen se torne
más amarilla.
Artisan Technology Group - Quality Instrumentation ... Guaranteed | (888) 88-SOURCE | www.artisantg.com
IM-60-670-01B
Aufstellen und
Bedienungshinweise
Installation and
operating instructions
Montaje e
instrucciones operativas
Wahl der Rot- bzw. Blauverstärkung
Set red, blue gains
[Alt] [RED], [Alt] [BLUE]
[Alt] [BLUE]
FijarAjuste de las ganancias del rojo y o
del azul
[Alt] [RED], [Alt] [BLUE]
Mit diesen Taste wird die Kamera in den Rotbzw. Blauverstärkungs-Einstellmodus versetzt.
Diese beiden Modi bieten dem Benutzer die
Möglichkeit, den Weißabgleich der Kamera
manuell zu verändern, was besonders dann von
Vorteil ist, wenn kein automatischer Weißabgleich
durchgeführt werden kann oder der Benutzer die
Farbwiedergabe der Kamera zur Erhöhung der
Aussagekraft der Abbildung manipulieren möchte
(Hinweise zum Weißabgleich siehe Abschnitt
“Weißabgleich” Seite 20). In diesen beiden Modi
wird die aktuelle Einstellung auf dem Monitor
angezeigt und kann mit den Pfeiltasten verändert
werden. Der Einstellbereich reicht von 0
(Minimum) bis 255 (Maximum).
These keys enter the camera into the set red or
blue gain modes. These modes allow the user to
change the white balance of the camera manually.
This is useful in situations where the camera
cannot be automatically white balanced or where
the user would like to modify the color rendition of
the camera to improve the appearance of the
image. (See “White balance setting” section on
page 20 for information about white balance).
While in these modes the monitor will display the
current setting, which can be changed with the
arrow keys. The values range from 0 (minimum) to
255 (maximum).
Estas teclas colocan a la cámara en las
modalidades de fijarajuste de la ganancia del rojo
o del azul o rojo. Estas modalidades permiten al
usuario cambiar el balance del blanco de la
cámara en forma manual. Esto es útil cuando no
puede hacerse el balance del blanco
automáticamente en la cámara o cuando el
usuario desea modificar el la rendición del color
obtenido con la cámara para mejorar el aspecto
de la imagen. (Vea la sección “FijarAjuste del el
balance del blanco” en la página 20 para
información sobre el balance del blanco). Cuando
la cámara está en estaos modalidades, el monitor
muestra el ajuste actual, que el cuál puede
cambiarse con las teclas de flechas. Los valores
varían entre 0 (mínimo) y 255 (máximo).
Farbverstärkung [Alt] [WHITE BALANCE]
Set color enhancement
FijarAjuste del el realce del color
Mit dieser Tastenkombination wird die Kamera in
den Farbverstärkungs-Wahlmodus versetzt. Bei
aktivierter Farbverstärkung erscheinen farbige
Objekte brillanter und satter, während Objekte in
ungesättigten Farben (Weiß- und Grautöne)
dunkler abgebildet werden. Dies ist dann von
Nutzen, wenn Merkmale durch Einfärbung
hervorgehoben werden, beispielsweise
eingefärbte Zellen oder mit verschiedenen
Fluoreszenzfarben markierte Subjekte. Mit den
Pfeiltasten kann die Farbverstärkung ein- bzw.
ausgeschaltet werden.
[Alt] [WHITE BALANCE]
[Alt] [WHITE BALANCE]
This key combination enters the camera into the
set color enhancement mode. When color
enhancement is on, colored objects will appear
brighter and more vivid (saturated) while unsaturated objects (whites and grays) will appear darker.
This is useful when the subject matter uses color
as a means of differentiating features, such as
stained cells and multi-dyed fluorescence
subjects. Use the arrow keys to turn color
enhancement on and off.
Esta combinación de teclas coloca a la cámara en
la modalidad de fijarajuste del el realce del color.
Cuando está encendidose activa el realce del
color, los objetos coloreados se ven más brillantes
y más intensos vívidos (saturados), y mientras
que los objetos no saturados (blancos y grises) se
ven más oscuros. Esto es útil cuando se usa el
color para diferenciar las características del
material examinado, tal como es en el caso con
de preparaciones de células teñidas y el de
material teñido con múltiples tintes fluorescentes.
Use las teclas con flechas para encender activar y
apagar desactivar el realce del color.
Rückstellen der Verstärkung
Enhancement reset
Inicialización de las funciones para
mejorar la imagen [RESET]
[RESET]
Mit dieser Taste werden Kontrast, Helligkeit,
Schärfe, Rot- und Blauausgleich auf ihre
Ausgangswerte rückeingestellt (0). Durch das
erneute Drücken dieser Taste werden die
vorherigen Einstellungen wieder aufgerufen. Mit
dieser Funktion kann man schnell zwischen der
verstärkten und normalen Darstellung hin- und
herschalten, um die Auswirkungen der
Verstärkung besser bewerten zu können.
27
[Alt] [RED],
[RESET]
This key sets the contrast, brightness, sharpness,
red offset, and blue offset to their default settings
(0). Pressing the key a second time will restore the
settings to their prior values. This function enables
the user to quickly toggle between enhanced and
unenhanced operation in order to better evaluate
the effects of the enhancements.
Esta tecla fija las funciones de contraste,
brillantez, nitidez, ajuste del rojo y ajuste del azul
en sus valores automáticos (0). Al presionar esta
tecla nuevamente los ajustes vuelven a sus
valores previos. Esta función le permite al usuario
alternar rápidamente entre la operación mejorada
y la no mejorada, para poder evaluar mejor el
efecto de las mejoras.
Artisan Technology Group - Quality Instrumentation ... Guaranteed | (888) 88-SOURCE | www.artisantg.com
IM-60-670-01B
Aufstellen und
Bedienungshinweise
Installation and
operating instructions
Montaje e
instrucciones operativas
Titel-Funktionen
Titling functions
Funciones para títulos
Der Kameraprozessor verfügt über eine integrierte
Titelfunktion, mit der Bilder mit einem alphanumerischen Text versehen werden können. Wenn der
Titelmodus aktiviert ist, dient die Tastatur zum
Eingeben des gewünschten Textes. Es sind fünf
Textseiten vorgesehen vorhanden, die
beschrieben und angezeigt dargestellt werden
können. Auf jede Seite passen 10 Textzeilen zu je
24 Zeichen pro Zeile.
The camera processor has a built-in titling
generator, which allows the user to annotate
images with alphanumeric text. When in the title
edit mode, the keyboard is used as a typewriter to
enter desired text. There are five “pages” of text
which can be written to and displayed. Each page
can hold 10 lines of text, 24 characters per line.
El procesador de la cámara tiene un generador de
títulos integrado, que permite al usuario hacer
anotaciones sobre las imágenes, con texto
alfanumérico. Cuando está en la modalidad de
redacción de títulos, el teclado sirve como
máquina de escribir para introducir el texto
deseado. Hay cinco “páginas” de texto en las que
puede escribirse y que aparecen en la pantalla.
Cada página puede contener hasta 10 líneas de
texto, con 24 caracteres por línea.
Titel bearbeiten editieren/Titel anzeigen/
Titel ausschalten [TITEL]
Title edit/title display/title off
Redacción de títulos/Visualización de
títulos/Desactivación de títulos [TITLE]
Durch Drücken der Taste TITLE wird der
Titelbearbeitungsmodus editier-Modus aktiviert, in
dem man Text in die angezeigte Titelseite eingeben kann. Wenn der Titelbearbeitungsmodus
editier-Modus aktiviert ist, erscheint die Anzeige
Title Edit sowie die jeweilige Seitenzahl am
unteren Bildschirmrand. Im Textbereich erscheint
ein blinkender Cursor und zeigt an, wo der Text
beginnen soll. Der gewünschte Ttext wird über die
Tastatur eingegeben.
Durch das erneute Drücken der Taste TITLE
wechselt die Kamera in den Titelanzeige-Modus,
in dem nur der jeweilige Text dargestellt wird, ohne
daß ein Ändern des Texts möglich ist.
[TITLE]
Pressing the TITLE key causes the camera to
enter title edit mode, which allows the user to enter
text into the current title page. When in title edit
mode, the message “Title Edit” will appear at the
bottom of the monitor along with the current page
number. A flashing cursor will appear in the text
area, indicating where the text will be placed. To
enter text, simply type the desired message from
the keyboard.
Pressing the TITLE key again switches the
camera into title display mode, which only displays
the current text and does not allow the text to be
changed.
Pressing the TITLE key a third time turns the title
display off.
Wenn die Taste TITLE ein drittes Mal gedrückt
wird, erliöscht die Titelanzeige.
Cursor-Bewegung
[앗], [앖], [씯], [씮]
Im Titelbearbeitungsmodus editier-Modus kann
der Cursor mit den vier Pfeiltasten in der unteren
rechten Ecke der Tastatur an eine beliebige
Textstelle bewegt werden.
28
Al presionar la tecla TITLE la cámara inicia la
modalidad de redacción de títulos, que permite al
usuario la introducción de texto en la página de
títulos actual. Cuando la cámara está en la
modalidad de redacción de títulos, aparece el
mensaje “Title Edit” (“Redacción de títulos”) en el
borde inferior de la pantalla junto con el número
de la página actual. Un cursor intermitente
aparece en el área de texto, indicando el lugar
donde se colocará el texto. Para introducir texto,
simplemente teclee el mensaje deseado.
Si vuelve a presionar la tecla TITLE, la cámara
cambia a la modalidad de visualización de títulos,
que solamente permite la observación del texto
actual, sin permitir su modificación.
Si presiona la tecla TITLE por tercera vez, se
desactiva la función de visualización de títulos.
Cursor movement
[앗], [앖], [씯], [씮]
In title edit mode, the four arrow keys in the lower
right corner of the keyboard can be used to
position the cursor anywhere in the text area.
Movimiento del cursor
[앗], [앖], [씯], [씮]
En la modalidad de redacción de títulos, las cuatro
teclas de dirección (con flechas) que están en la
esquina inferior derecha del teclado, pueden
utilizarse para colocar el cursor en cualquier
posición en el área de texto.
Artisan Technology Group - Quality Instrumentation ... Guaranteed | (888) 88-SOURCE | www.artisantg.com
IM-60-670-01B
Aufstellen und
Bedienungshinweise
Installation and
operating instructions
Montaje e
instrucciones operativas
Seite nach oben/Seite nach unten
Page up/page down
Página superior/Página inferior
[Fn] [PgUp], [Fn] [PgDn]
[Fn] [PgUp], [Fn] [PgDn]
[Fn][PgUp], [Fn][PgDn]
Durch die Tastenkombinationen Fn-PgUp und FnPgDn läßt sich die jeweilige Seitennummer im
Titeleditier- oder Titelanzeige-Modus erhöhen bzw.
oder verringern. Es sind insgesamt fünf Seiten
vorhanden.
The Fn-PgUp and Fn-PgDn key combinations
increment or decrement the current page number
when in title edit or title display mode. There are a
total of five pages.
Las combinaciones de las teclas Fn-PgUp y FnPgDn incrementan o disminuyen el numero de la
página actual cuando se está en las modalidades
de redacción de títulos o de visualización de
títulos. Hay un número total de cinco páginas.
Hinweis: Die Taste Fn befindet sich in der linken
unteren Ecke der Tastatur und die Tasten PgUp
und PgDn sind gleichzeitig die nach oben und
unten weisenden Pfeiltasten in der rechten
unteren Ecke der Tastatur.
Überschreibe-/Einfügemodus
[INSERT]
Mit der Einfügetaste kann man im Texteditor
zwischen dem Überschreibe- und Einfügemodus
hin- und herwechseln, wenn sich die Kamera im
Titeleditier-Modus befindet. Im Überschreibemodus erscheint der Cursor als blinkendes weißes
Quadrat, und das eingegebene Zeichen ersetzt
lediglich das unter dem Cursor befindliche Zeichen
durch ein neues. Im Einfügemodus erscheint der
Cursor als blinkender Unterstrich, und das
eingegebene Zeichen wird inmittelbar links neben
dem Cursor eingefügt; die anderen Zeichen
werden von der Cursorposition aus nach rechts
verschoben.
Zeichen an der Cursorposition löschen
[DELETE]
Replacement mode/insert mode
[INSERT]
Nota: La tecla Fn está en la esquina inferior
izquierda del teclado; las teclas PgUp y PgDn son
también las teclas de dirección hacia arriba y
hacia abajo, respectivamente, y están en la
esquina inferior derecha del teclado.
Modalidad de sustitución/Modalidad de
inserción [INSERT]
The Insert key toggles the text editor between
replacement mode and insert mode when the
camera is in title edit mode. In replacement mode,
the cursor appears as a flashing white square, and
typing a character simply replaces the character
under the cursor with the new one. In insert mode,
the cursor appears as a flashing underscore, and
typing a character inserts the new character
immediately to the left of the cursor and shifts the
characters to the right of the insertion point.
La tecla Insert alterna el control de texto entre la
modalidad de sustitución de texto y la de inserción
de texto cuando la cámara está en la modalidad
de redacción de títulos. En la modalidad de
sustitución de texto, el cursor aparece como un
cuadrado blanco parpadeante y la introducción de
un carácter simplemente reemplaza el carácter
cubierto por el cursor con el carácter introducido.
En la modalidad de inserción, el cursor aparece
como un subrayado parpadeante y la introducción
de un carácter inserta este inmediatamente a la
izquierda del cursor y mueve los caracteres hacia
la derecha del punto de inserción.
Delete current character
Borrado del carácter actual
[DELETE]
[DELETE]
The Delete key causes the character underneath
the cursor to be deleted when in title edit mode.
La tecla Delete borra el carácter que se encuentra
cubierto por el cursor cuando se está en la
modalidad de redacción de títulos.
Zeichen vor der Cursorposition löschen
Delete previous character
Borrado del carácter previo
[BACKSPACE]
The Backspace key causes the character to the
left of the cursor to be deleted when in title edit
mode.
[BACKSPACE]
Clear current page
Borrado de la página actual [Alt] [DELETE]
Mit der Taste Delete wird das unter dem Cursor
befindliche Zeichen im Titeleditier-Modus gelöscht.
Mit der Taste Backspace“ wird im Titelbearbeitungsmodus editier-Modus das links vom Cursor
befindliche Zeichen gelöscht.
Seite löschen
[Alt] [DELETE]
Mit der Tastenkombination Alt-Delete wird im
Titeleditier-Modus der gesamte Text auf der Seite
gelöscht.
29
Note: The Fn key is in the lower left corner of the
keyboard, and the PgUp and PgDn keys are also
the up and down arrow keys in the lower right
corner of the keyboard.
[BACKSPACE]
[Alt] [DELETE]
The Alt-Delete key combination causes all text in
the current page to be deleted when in title edit
mode.
La tecla Backspace borra el carácter a la izquierda
del cursor cuando se está en la modalidad de
redacción de títulos.
La combinación de las teclas Alt-Delete borra el
texto en la página actual cuando se está en la
modalidad de redacción de títulos.
Artisan Technology Group - Quality Instrumentation ... Guaranteed | (888) 88-SOURCE | www.artisantg.com
IM-60-670-01B
Aufstellen und
Bedienungshinweise
Installation and
operating instructions
Montaje e
instrucciones operativas
Alle Seiten löschen
Clear all pages
Borrado de todas las páginas
[Ctrl] [DELETE]
The Ctrl-Delete key combination causes all text in
all pages to be deleted when in title edit mode.
[Ctrl] [DELETE]
Farbbalken
Color bars
Barras de colores
Die Kamera-SteuerKontrolleinheit (CCU) verfügt
über einen integrierten Farbbalken-Generator.
Diese Funktion hilft beim Einstellen des Monitors
(siehe Abschnitt “Einstellen des Farbmonitors“ in
dieser Anleitung), beim Erstellen eines Vorspanns
für die Videoaufzeichnung oder bei der für die
Fehlersuche bei in einem Videosystem. Beim
verwendeten Muster handelt es sich um das
SMPTE-Farbbalkenmuster, das Balken in allen
jeder Primär- und Sekundärfarben sowie ein
Pluge-Signal enthält, das zur Helligkeitseinstellung
des Monitors dient verwendet wird.
The camera control unit has a built in color bar
generator. This is useful for adjusting the monitor
(see “Adjusting Color Monitor” section in this
manual), providing a leader for videotape
recording, or for troubleshooting a video system.
The pattern used is the SMPTE color bar pattern
which includes bars of each primary and
secondary color and a pluge signal, which is used
to set the brightness level of the monitor.
La unidad de control de la cámara tiene un
generador de barras de color integrado. Esto es
útil para el ajuste del monitor (véase la sección
“Ajustando el monitor a colores” en este manual),
para proveer una señal de inicio para la grabación
de una cinta de vídeo, o para el diagnóstico de
fallas en un sistema de vídeo. El patrón de barras
usado es el patrón de barras a colores SMPTE, el
cuál incluye barras de cada color primario y
secundario, además de una señal de inyección
que se utiliza para ajustar el nivel de brillantez del
monitor.
Farbbalken Ein/Aus
Color bars on/off
Barras de colores activado/desactivado
[COLOR BARS]
[COLOR BARS]
La combinación de las teclas Ctrl-Delete borra el
texto en todas las páginas cuando se está en la
modalidad de redacción de títulos.
Mit dieser Taste wird das Farbbalken-Testmuster
ein- oder ausgeschaltet. Wenn die Farbbalken
aktiviert sind, können außer der Titelfunktion keine
der übrigen Kamerafunktionen aufgerufen werden.
This key toggles the color bar test pattern on and
off. When color bars are on, all camera functions
are disabled except for titling.
[COLOR BARS]
Kamerarückstellung
Camera reset
Reinicialización de la cámara
Mit der Rückstellfunktion werden sämtliche
Kameraparameter auf einen ihren Ausgangswert
zurückgestellt. Dadurch kann eine bekannte
Kameraeinstellung erzielthalten werden, wenn
man die Einstellungen nicht kennt.
The camera reset function sets all camera
parameters to default states. This is a convenient
way to put the camera into a known state if the
settings are unknown.
La función de inicialización de la cámara fija todos
los parámetros de la cámara en sus valores
automáticos. Esta es una manera conveniente de
ajustar la cámara a valores conocidos si se
desconocen sus ajustes actuales.
Standard-Rückstellung
Standard reset
Inicialización normal
[Alt] [RESET]
Mit der Tastenkombination Alt-RESET wird eine
Standard-Rückstellung aktiviert. Sämtliche
Verstärkungsfunktionen werden ausgeschaltet, die
Kamera wird in den automatischen
Belichtungsmodus versetzt, die Gewichtung wird
auf den vollen Bildschirm eingestellt und der
Weißabgleich auf 2800 K eingestellt, die
Farbbalken, die Standbildfunktion und die
Titelfunktion werden ausgeschaltet.
30
[Ctrl] [DELETE]
Mit der Tastenkombination Ctrl-Delete wird im
Titeleditier-Modus der gesamte Text auf allen
Seiten gelöscht.
[Alt] [RESET]
The Alt-RESET key combination initiates a
standard reset. All enhancements are turned off,
the camera is placed in auto exposure mode, the
weighting is set to full screen, the white balance is
set to 2800K, the color bars are turned off, freeze
frame is turned off, and titling is turned off.
Esta tecla alterna la prueba del patrón de barras
de colores entre activada y desactivada. Cuando
las barras de colores están activadas, todas las
funciones de la cámara se inactivan excepto la
función de títulos.
[Alt] [RESET]
La combinación de las teclas Alt-RESET produce
la inicialización. Se inactivan todas las funciones
para mejorar la imagen, la cámara se coloca en la
modalidad de exposición automática, la imagen se
procesa en pantalla completa, el balance del
blanco se ajusta a 2800K, las barras de colores se
inactivan, el congelamiento de cuadro se inactiva
y también se inactiva la redacción de títulos.
Artisan Technology Group - Quality Instrumentation ... Guaranteed | (888) 88-SOURCE | www.artisantg.com
IM-60-670-01B
Aufstellen und
Bedienungshinweise
Installation and
operating instructions
Montaje e
instrucciones operativas
Funktionsausgang
Function exit
Salida de función
Eine aktivierte Funktion wird in der Zeile am
unteren Rand des Monitors angezeigt (EXPOSURE, AUTO usw.). Eine Funktion kann durch das
erneute Drücken der jeweiligen Funktionstaste
oder mit Hilfe der allgemeinen BeendigungsFunktion beendet ausgeschaltet werden.
A currently active function will be indicated along
the bottom line of the monitor (“EXPOSURE,”
“AUTO,” etc.). A function can be exited by pressing
its function key again, pressing another function
key, or by using the general exit function.
La función que está activa aparece en la parte
inferior de la pantalla (“EXPOSURE,” “AUTO,”
etc.). Para salir de una función, presione
nuevamente la tecla correspondiente, presione la
tecla para otra función, o utilice la función de
salida general.
Allgemein beenden
General exit
Salida general
[Alt] [SPACE]
[Alt] [SPACE]
The Alt-SPACE key combination allows the user to
quickly exit any function, and simultaneously clear
the text at the bottom of the screen ([SPACE] is the
spacebar at the bottom of the keyboard).
La combinación de las teclas Alt-SPACE le
permite al usuario salir de cualquier función,
borrando simultáneamente el texto en la parte
inferior de la pantalla ([SPACE] es la barra
espaciadora en la parte inferior del teclado).
Standard-Belichtungsmodus
Default exposure mode
Wenn am unteren Bildschirmrand kein Text
erscheint, befindet sich die Kamera wieder im
Standard-Belichtungsmodus. Durch Drücken der
Pfeiltasten wird die Belichtung entsprechend
geändert.
If no text appears on the bottom of the monitor
image, the camera defaults to exposure set mode.
Pressing the up or down keys on the keyboard will
change the exposure accordingly.
Modalidad de exposición
automática
Bedienelemente an der
Frontplatte
Front panel controls
Auf der Frontplatte des Kameraprozessors
befinden sich Knöpfe für die Farbbalken, den
Weißabgleich, die GewichtungBewertung, die
Belichtung, Automatik- bzw. manuellen Betrieb
sowie die Aufwärts- und die Abwärtspfeiltaste, die
funktionell den Auf- und Abwärtspfeiltasten der
Tastatur entsprechen. Sie können verwendet
werden, wenn die Tastatur defekt ist oder keine
Tastatur zur Verfügung steht. Wenn eine der
Funktionen “Belichtung” und “Bewertung” aktiviert
ist, können die Werte mit den Pfeiltasten an der
Frontplatte verändert werden. Drückt man beide
Pfeiltasten gleichzeitig, wird die Kamera auf die
Standardwerte zurückgestellt.
31
[Alt] [SPACE]
Mit der Tastenkombination Alt-SPACE können
beliebige Funktionen schnell beendet werden;
dabei wird gleichzeitig der Text am unteren
Bildschirmrand gelöscht ([SPACE] ist die Leertaste
im unteren Bereich unten an der Tastatur).
The camera processor front panel has buttons for
Color Bars, White Balance, Weighting, Exposure,
Auto/Manual, Up Arrow, and Down Arrow which
are functionally identical to their counterparts on
the keyboard. These controls can be used if the
keyboard is malfunctioning or missing. If the
Exposure or Weighting functions are enabled, use
the up and down arrow buttons on the front panel
to change the settings. Press the up and down
arrow buttons simultaneously to initiate a standard
reset of the camera.
Si no aparece texto en la parte inferior de la
imagen en el monitor, la cámara automáticamente
se coloca en la modalidad de ajuste de
exposición. Si presiona las teclas de dirección
arriba y dirección abajo, puede cambiar el valor de
exposición.
Controles del panel
delanterofrontal
El panel delantero frontal del procesador de la
cámara tiene botones para las Barras de colores,
Balance del blanco, Compensación, Exposición,
Automático/Manual, Flecha hacia arriba, Flecha
hacia abajo, los que funcionalmente son
funcionalmente idénticoas a su las teclas
equivalentes en el teclado. Estos controles
pueden usarse si el teclado está funcionando mal
o si no hay teclado. Si se activan las funciones
Exposición y Compensación, se usan los botones
de flecha hacia arriba y hacia abajo para cambiar
los ajustes. Oprima los botones de flecha hacia
arriba y hacia abajo simultáneamente para lograr
una reinicialización estándar dereinicializar la
cámara de manera estándar.
Artisan Technology Group - Quality Instrumentation ... Guaranteed | (888) 88-SOURCE | www.artisantg.com
IM-60-670-01B
Aufstellen und
Bedienungshinweise
Installation and
operating instructions
Farbeinstellung mit den
SMPTE-Farbbalken
Color adjustment using SMPTE- Ajuste del color mediante las
type color bars
barras de colores tipo SMPTE
HINWEIS: Die unten beschriebenen Einstellungen
gelten nur für Composite- oder Y/C-Videosignale.
Bei den meisten RGB-Monitoren ist die Farbe ab
Werk eingestellt, und Farbintensität oder
Farbtonabstufung können nicht manuell eingestellt
werden. Im RGB-Modus können lediglich
BRIGHTNESS (HELLIGKEIT) und CONTRAST
(KONTRAST) eingestellt werden.
NOTE: The adjustments below are for composite
or Y/C video only. Most monitors in RGB mode
have preset color by the manufacturer, and color
intensity or hue cannot be manually adjusted.
Only the BRIGHTNESS and CONTRAST
adjustment can be performed in RGB mode.
1) Den SMPTE-Farbbalken-Generator durch
Drücken der Taste COLOR BARS aktivieren.
2) Contrast adjustment
Set contrast for brightest possible image without
blooming or distortion.
2) Kontrasteinstellung
Den Kontrast auf auf die höchste Bildhelligkeit
einstellen, ohne daß es dabei zu Überstrahlen
oder Verzerrungen kommt.
3) Einstellen der Helligkeit
Die Helligkeitsregelung des Monitors so
einstellen, daß bis der rechte Pluge -Balken wie
abgebildet gerade sichtbar ist.
4) Für die beiden folgenden Einstellungen
(Farbstärke und Phase) die Blau-Taste des
Monitors - falls vorhanden - drücken.
Andernfalls durch einen blauen Wratten 47BFilter auf den Monitor blicken.
5) Einstellen der Farbstärke
Die Farbstärkeregelung am Monitor einstellen,
bis die Intensität der angezeigten Balken
übereinstimmt (nur blau eingeschaltet oder
durch einen blauen Wratten 47B-Filter
betrachtet).
6) Einstellung der Phase (Farbton, Nuance)
Die Phasenregulierung am Monitor einstellen,
bis die Intensität der angezeigten Balken
übereinstimmt (nur blau eingeschaltet oder
durch einen blauen Wratten 47B-Filter
betrachtet).
7) Wenn eine korrekte Einstellung erzielt wurde,
die Blau-Taste erneut drücken (oder den Filter
zur Seite legen). Die farben müßten jetzt korrekt
sein.
8) Die taste COLOR BARS erneut drücken, um
zur normalen Kamerafunktion zurückzukehren.
32
1) Activate the SMPTE-type color bar generator by
pressing the COLOR BARS key.
3) Brightness adjustment
Set the brightness control on the monitor until
the right hand “pluge” bar is just visible, as
shown.
4) For the next two adjustments (chroma and
phase), press the blue only button on the
monitor, if so equipped. Otherwise, view the
monitor through a blue Wratten 47B filter.
5) Chroma (color) adjustment
Adjust the chroma (or color) control on the
monitor until the indicated bars match in
intensity (blue only on, or viewed through blue
47B filter).
6) Phase (hue, tint) adjustment
Adjust the phase (or hue, tint) control on the
monitor until the indicated bars match in
intensity (blue only on, or viewed through blue
47B filter).
7) When the correct results have been achieved,
press the blue only button again (or set aside
the blue filter). The colors should now be
accurate.
8) Press the COLOR BARS key again to return to
normal camera operation.
Montaje e
instrucciones operativas
NOTA: Los ajustes que siguen son solamente
para vídeo compuesto o Y/C (amarillo/cian). La
mayoría de los monitores en la modalidad de RGB
(rojo, verde, azul) tienen colores prefijados por el
fabricante; por consiguiente, la intensidad del color
y el tinte no pueden ajustarse manualmente. En
la modalidad RGB sólo puede ajustarse la
brillantez ([BRIGHTNESS]) y el contraste
([CONTRAST]).
1) Para activar el generador de barras de colores
tipo SMPTE, presione la tecla COLOR BARS.
2) Ajuste del contraste
Ajuste el contraste para la máxima brillantez
posible de la imagen sin que se produzcan
zonas opacas o distorsión.
3) Ajuste de brillantez
Ajuste el control de la brillantez en el monitor
hasta que la barra de la señal de inyección, a la
derecha, apenas pueda verse, como se indica.
4) Para los próximos dos ajustes (cromático y
fase), presione el botón solamente-azul en el
monitor, si está presente. Si no existe este
botón, observe la pantalla a través de un filtro
azul Wratten N° 47B.
5) Ajuste cromático
Ajuste el control del color (croma) de la pantalla
hasta que las barras indicadas tengan igual
intensidad (solamente-azul activado, o vistas a
través del filtro azul N° 47B).
6) Ajuste de fase (tinte o tonalidad)
Ajuste el control de fase (tinte o tonalidad) de la
pantalla hasta que las barras indicadas tengan
igual intensidad (solamente-azul activado, o
vistas a través del filtro azul N° 47B).
7) Cuando obtenga los resultados correctos,
presione nuevamente el botón solamente-azul
(o retire el filtro azul). En este momento los
colores deben verse con exactitud.
8) Presione nuevamente la tecla COLOR BARS
para volver a la operación normal de la cámara.
Artisan Technology Group - Quality Instrumentation ... Guaranteed | (888) 88-SOURCE | www.artisantg.com
IM-60-670-01B
Aufstellen und
Bedienungshinweise
Installation and
operating instructions
Montaje e
instrucciones operativas
Zusammenfassung der
ALT-Befehle
Summary of ALT commands
Resumen de mandos ALT
[Alt] [W]
Set auto exposure weighting
[Alt] [W]
FijarAjusta la compensación de la autoexposición
[Alt] [L]
Set auto exposure shutter speed limit
[Alt] [L]
FijarAjusta el límite de velocidad del obturador en
autoexposición
[Alt] [W]
Wahl der automatischen Belichtungsbewertung
[Alt] [L]
Wahl der Verschlußzeitbegrenzung für
automatische Belichtung
[Alt] [G]
Wahl der Gammakurve
[Alt] [WHITE BALANCE]
Set color enhancement on/off
[Alt] [WHITE BALANCE]
Farbverstärkung ein/aus
[Alt] [RED]
Set red gain
[Alt] [RED]
Rotverstärkung
[Alt] [BLUE]
Set blue gain
[Alt] [BLUE]
Blauverstärkung
[Alt] [DELETE]
Clear all text in current title page
[Alt] [DELETE]
Sämtlichen Text auf dieser Titelseite löschen
[Ctrl] [DELETE]
Clear all text in all title pages
[Ctrl] [DELETE]
Sämtlichen Text auf allen Titelseiten löschen
[Alt] [RESET]
Initiate standard reset of camera
[Alt] [RESET]
Die Standard-Rückstellung der Kamera aktivieren
[Alt] [SPACE]
Exit current function
[Alt] [SPACE]
Die gegenwärtig aktivierte Funktion beenden
[Ctrl] [Alt] [F]
Single field mode on/off
[Ctrl] [Alt] [F]
Einzelfeldmodus ein/aus
[Alt] [C]
Color shading correction
[Alt] [C]
Farbschattierungskorrektion
33
[Alt] [G]
Set gamma
[Alt] [G]
FijarAjusta el valor gamma
[Alt] [WHITE BALANCE]
FijarActiva/Desactiva el ajuste el de realce de
colores en encendido/apagado
[Alt] [RED]
FijarAjusta la ganancia del rojo
[Alt] [BLUE]
FijarAjusta la ganancia del azul
[Alt] [DELETE]
Borra el texto en la página de títulos actual
[Ctrl] [DELETE]
Borra el texto en todas las páginas de títulos
[Alt] [RESET]
Inicializa la cámara a sus valores normales
[Alt] [SPACE]
Salida de la función actual
[Ctrl] [Alt] [F]
FijarActiva/Desactiva el ajuste de la modalidad de
campo único en encendido/apagado
[Alt] [C]
Corrección de sombra de color
Artisan Technology Group - Quality Instrumentation ... Guaranteed | (888) 88-SOURCE | www.artisantg.com
IM-60-670-01B
Aufstellen und
Bedienungshinweise
Installation and
operating instructions
Montaje e
instrucciones operativas
Systemkonfiguration 1
System configuration 1
Configuración del sistema 1
Videosystem
Tastatur
Y/C Recorder
Composite-Videomonitor
Video system
Keyboard
Y/C recorder
Composite video monitor
Sistema de vídeo
Teclado
Grabadora Y/C
Monitor de vídeo compuesto
Y/C out
Y/C-Ausgang
Salida de Y/C
Processor/camera
Prozessor/Kamera
Procesador/cámara
CAMERA HEAD
COLOR
BARS
WHITE
BALANCE
WEIGHTING
EXPOSURE
AUTO/
MANUAL
RED
GREEN
BLUE
SYNC
COMP
VIDEO
B/W
Y/C
KEYBOARD
IN
F 2.0A 250V
Replace Fuse as Marked
Keyboard in
Tastatur-Eingang
Entrada del teclado
Keyboard
Tastatur
Teclado
Y/C recorder
Y/C Recorder
Grabadora Y/C
Y/C in
Y/C-Eingang
Entraded de Y/C
Y/C out
Y/C-Ausgang
Salida de Y/C
Composite video monitor
Composite-Videomonitor
Monitor de vídeo compuesto
COLOR TEMP
9300
6500
Y/C in
Y/C-Eingang
Entraded de Y/C
34
COMPO
RGB
SONY 1300 SERIES
SWITCH SETTINGS
Artisan Technology Group - Quality Instrumentation ... Guaranteed | (888) 88-SOURCE | www.artisantg.com
IM-60-670-01B
Aufstellen und
Bedienungshinweise
Installation and
operating instructions
Montaje e
instrucciones operativas
Systemkonfiguration 2
System configuration 2
Configuración del sistema 2
Videosystem
Tastatur
RGB Videomonitor
Video system
Keyboard
RGB video monitor
Sistema de vídeo
Teclado
Monitor de vídeo RGB
RGB out
RGB-Ausgang
Salida de RGB
Processor/camera
Prozessor/Kamera
Procesador/cámara
CAMERA HEAD
COLOR
BARS
WHITE
BALANCE
WEIGHTING
EXPOSURE
AUTO/
MANUAL
RED
GREEN
BLUE
SYNC
COMP
VIDEO
B/W
Y/C
KEYBOARD
IN
F 2.0A 250V
Replace Fuse as Marked
Keyboard in
Tastatur-Eingang
Entrada del teclado
Keyboard
Tastatur
Teclado
RGB video monitor
RGB Videomonitor
Monitor de vídeo RGB
COLOR TEMP
9300
6500
COMPO
RGB
RGB in
RGB-Eingang
Entrada de RGB
35
Artisan Technology Group - Quality Instrumentation ... Guaranteed | (888) 88-SOURCE | www.artisantg.com
SONY 1300 SERIES
SWITCH SETTINGS
IM-60-670-01B
Aufstellen und
Bedienungshinweise
Installation and
operating instructions
Montaje e
instrucciones operativas
Systemkonfiguration 3
System configuration 3
Configuración del sistema 3
Videosystem
Tastatur
Videorecorder
Composite-Videomonitor
Video system
Keyboard
Video cassette recorder
Composite video monitor
Sistema de vídeo
Teclado
Grabadora de videocasetes
Monitor de vídeo compuesto
Composite video out
Composite-Videoausgang
Salida de vídeo compuesto
Processor/camera
Prozessor/Kamera
Procesador/cámara
CAMERA HEAD
COLOR
BARS
WHITE
BALANCE
WEIGHTING
EXPOSURE
AUTO/
MANUAL
RED
GREEN
BLUE
SYNC
COMP
VIDEO
B/W
Y/C
KEYBOARD
IN
F 2.0A 250V
Replace Fuse as Marked
Keyboard in
Tastatur-Eingang
Entrada del teclado
Keyboard
Tastatur
Teclado
Video in
Video-Eingang
Entrada de vídeo
Video cassette recorder
Videorecorder
Grabadora de videocasetes
Video out
Video-Ausgang
Salida de vídeo
RGB video monitor
RGB Videomonitor
Monitor de vídeo RGB
COLOR TEMP
9300
6500
Composite video in
Composite-Videoeingang
Entrada de vídeo compuesto
COMPO
RGB
SONY 1300 SERIES
SWITCH SETTINGS
36
Artisan Technology Group - Quality Instrumentation ... Guaranteed | (888) 88-SOURCE | www.artisantg.com
IM-60-670-01B
Aufstellen und
Bedienungshinweise
Installation and
operating instructions
Montaje e
instrucciones operativas
Systemkonfiguration 4
System configuration 4
Configuración del sistema 4
Videosystem
Tastatur
Videorecorder
Bilddrucker oder Plattenaufzeichnung
Composite-Videomonitor
Video system
Keyboard
Video cassette recorder
Video printer or disk recorder
Composite video monitor
Sistema de vídeo
Teclado
Grabadora de videocasetes
Impresora de vídeo o grabadora de disco
Monitor de vídeo compuesto
Composite video out
Composite-Videoausgang
Salida de vídeo compuesto
Processor/camera
Prozessor/Kamera
Procesador/cámara
CAMERA HEAD
COLOR
BARS
WHITE
BALANCE
WEIGHTING
EXPOSURE
AUTO/
MANUAL
RED
GREEN
BLUE
SYNC
COMP
VIDEO
B/W
Y/C
KEYBOARD
IN
F 2.0A 250V
Replace Fuse as Marked
Keyboard in
Tastatur-Eingang
Entrada del teclado
Keyboard
Tastatur
Teclado
Video in
Video-Eingang
Entrada de vídeo
Video cassette recorder
Videorecorder
Grabadora de videocasetes
Video out
Video-Ausgang
Salida de vídeo
Video in
Video-Eingang
Entrada de vídeo
Electronic video printer
or disk recorder
Bilddrucker oder
Plattenaufzeichnung
Impresora de vídeo o
grabadora de disco
Video out
Video-Ausgang
Salida de vídeo
RGB video monitor
RGB Videomonitor
Monitor de vídeo RGB
COLOR TEMP
9300
6500
Composite video in
Composite-Videoeingang
Entrada de vídeo compuesto
37
COMPO
RGB
SONY 1300 SERIES
SWITCH SETTINGS
Artisan Technology Group - Quality Instrumentation ... Guaranteed | (888) 88-SOURCE | www.artisantg.com
IM-60-670-01B
Aufstellen und
Bedienungshinweise
Installation and
operating instructions
Montaje e
instrucciones operativas
Systemkonfiguration 5
System configuration 5
Configuración del sistema 5
Videosystem
Tastatur
Composite-Videomonitor
Zusätzlicher Videomonitor
Video system
Keyboard
Composite video monitor
Additional video monitor
Sistema de vídeo
Teclado
Monitor de vídeo compuesto
Monitor de vídeo adicional
Y/C out
Y/C-Ausgang
Salida de Y/C
Processor/camera
Prozessor/Kamera
Procesador/cámara
CAMERA HEAD
COLOR
BARS
WHITE
BALANCE
WEIGHTING
EXPOSURE
AUTO/
MANUAL
RED
GREEN
BLUE
SYNC
COMP
VIDEO
B/W
Y/C
KEYBOARD
IN
F 2.0A 250V
Replace Fuse as Marked
Keyboard in
Tastatur-Eingang
Entrada del teclado
Keyboard
Tastatur
Teclado
Composite video monitor
Composite-Videomonitor
Monitor de vídeo compuesto
Y/C in
Y/C-Eingang
Entraded de Y/C
Y/C out
Y/C-Ausgang
Salida de Y/C
Additional video monitor
Zusätzlicher Videomonitor
Monitor de vídeo adicional
COLOR TEMP
9300
6500
Y/C in
Y/C-Eingang
Entraded de Y/C
COMPO
RGB
SONY 1300 SERIES
SWITCH SETTINGS
38
Artisan Technology Group - Quality Instrumentation ... Guaranteed | (888) 88-SOURCE | www.artisantg.com
IM-60-670-01B
Aufstellen und
Bedienungshinweise
Installation and
operating instructions
Montaje e
instrucciones operativas
Systemkonfiguration 1
System configuration 6
Configuración del sistema 6
Videosystem
Tastatur
Sony UP5000 Bilddrucker
RGB Videomonitor
Video system
Keyboard
Sony UP5000 video printer
RGB video monitor
Sistema de vídeo
Teclado
Impresora de vídeo Sony UP5000
Monitor de vídeo RGB
RGB out
RGB-Ausgang
Salida de RGB
Processor/camera
Prozessor/Kamera
Procesador/cámara
CAMERA HEAD
COLOR
BARS
WHITE
BALANCE
WEIGHTING
EXPOSURE
AUTO/
MANUAL
RED
GREEN
BLUE
SYNC
COMP
VIDEO
B/W
Y/C
KEYBOARD
IN
F 2.0A 250V
Replace Fuse as Marked
Keyboard in
Tastatur-Eingang
Entrada del teclado
Keyboard
Tastatur
Teclado
RGB in
RGB-Eingang
Entrada de RGB
Sony UP5000 video printer
Sony UP5000 Bilddrucker
Impresora de vídeo Sony
UP5000
RGB video monitor
RGB Videomonitor
Monitor de vídeo RGB
RGB out
RGB-Ausgang
Salida de RGB
COLOR TEMP
9300
6500
COMPO
RGB
SONY 1300 SERIES
SWITCH SETTINGS
RGB in
RGB-Eingang
Entrada de RGB
39
Artisan Technology Group - Quality Instrumentation ... Guaranteed | (888) 88-SOURCE | www.artisantg.com
IM-60-670-01B
Gerätebeschreibung
Description of the
instrument
Descripción del equipo
Sicherungswechsel
Fuse replacement
Cambio de fusibles
Gerät ausschalten und Netzverbindung lösen.
Switch off the instrument and remove the power
plug from the electrical outlet.
Desconectar el equipo y desenchufar la conexión
a la red.
!
VORSICHT: Nur Sicherungen gem. IEC
127, Blatt II, Typ F verwenden.
!
CAUTION: Use only fuses approved to
IEC 127 Sheet II, Type F for replacement.
Netzsicherungshalter 햹 mit einem Werkzeug
lösen.
Remove the power fuse holder 햹 with a screwdriver or other tool.
Desprender la abrazadera de seguridad del
portafusibles 햹 con la ayuda de un destornillador.
Neue Sicherungen einsetzen.
Insert new fuses of the appropriate rating.
Colocar fusibles nuevos.
Vorsicht: Nur die angegebenen Sicherungswerte
verwenden.
Caution: Only use fuses of the correct rating.
Advertencia: Colocar solamente los fusibles con
los valores recomendados!
100–240 VAC
Netzsicherungen
2 x F2.0A
Sicherungschalter 햹 wieder einsetzen.
Netzverbindung wieder herstellen.
Funktionsprüfung durchführen.
40
!
ADVERTENCIA: Utilice solamente
fusibles aprobados en la IEC 127 hoja II,
Tipo F.
100–240 VAC
Power fuses
2 x F2.0A
Replace and tighten the caps of the fuse
holder 햹.
Reconnect the power cord.
Test the instrument for proper operation.
100–240 VAC
Fusibles de la red 2 x F2.0A
Recolocar el portafusibles 햹.
Volver a conectar a la red.
Controlar el funcionamiento.
Artisan Technology Group - Quality Instrumentation ... Guaranteed | (888) 88-SOURCE | www.artisantg.com
IM-60-670-01B
Gerätebeschreibung
Description of the
instrument
Descripción del equipo
Reinigung und Lagerung
Cleaning and storage after use
Limpieza y almacenaje
Kamerakopf
1. Falls die Kamerakopf gereinigt werden muß,
kann sie mit einem feuchten Tuch oder
Schwamm abewischt werden.
2. Mit einem weichen Tuch gründlich abtrocknen.
3. Die Kamerakopf in ihrer Schutzhülle
aufbewahren. Das Kamerakopfkabel bei der
Lagerung nicht zu eng aufwicheln und nicth
knicken.
Camera head
1. Clean the camera head with a damp cloth.
2. Dry thoroughly with a soft towel.
3. Replace the camera head into its box. Do not
coil the camera cable tightly.
Cámara
1. Si la cámara necesita una limpieza, frótela con
un paño o una esponja humedecidos. Seque
bien con una toalla suave o una gasa
quirúrgica.
2. Seque bien con una toalla suave.
3. Almacene la cámara en su estuche protector.
No forme un rollo apretado con el cable del
cabezal ni permita que el cable qude pinzado o
torcido cuando lo esté guardando.
Kamerakontrolleinheit
1. Falls die Kamerakontrolleinheit gereinigt werden
muß, kann sie mit einem feuchten Tuch oder
Schwamm abewischt werden.
2. Mit einem weichen Tuch gründlich abtrocknen.
3. Die Kamerakontrolleinheit in ihrer Schutzhülle
aufbewahren.
!
!
41
VORSICHT: Die Kamera nicht
außerhalb der Schutzhülle, im direkten
Sonnenlicht oder in einer extrem
heißen Umgebung aufbewahren.
Camera processor
1. Clean the processor cover with a damp cloth.
2. Dry thoroughly with a soft towel.
3. Replace the camera processor into its box.
!
!
CAUTION: Do not store the camera in
direct sunlight or excessive heat.
WARNING: Do not disinfect or sterilize
the camera head or processor.
Control de la cámara
1. Si la unidad de control de la cámara necesita
una limpieza, frótela con un paño o una esponja
humedecidos. Seque bien con una toalla suave
o una gasa quirúrgica.
2. Seque bien con una toalla suave.
3. Almacene la unidad de control de la cámara en
su estuche protector.
WARNUNG: Kamerakopf oder
Prozessor nicht desinfizieren oder
sterilisieren.
Artisan Technology Group - Quality Instrumentation ... Guaranteed | (888) 88-SOURCE | www.artisantg.com
!
ADVERTENCIA: No almacene la
cámara a la luz directa del sol o en un
ambiente muy caluroso, esté o no
dentro de su estuche protector.
!
¡CUIDADO! No desinfecte ni esterilice
el cabezal de la cámara ni el
procesador.
IM-60-670-01B
Gerätebeschreibung
Description of the
instrument
Descripción del equipo
Wartung
Maintenance operations
Mantenimiento
Eine vorbeugende Wartung ist nicht zwingend
erforderlich. Regalmäßige Wartungen können
aber dazu beitragen, eventuelle Störungen
frühzeitig zu erkennen und so die Sicherheit und
Lebensdauer des Gerätes zu erhöhen. Wartungsdienste können bei ihrer zuständigen Gebietsvertretung oder beim Hersteller erfragt werden.
Performance of preventive maintenance is not
essential. Regular maintenance can, however,
contribute to identifying potential problems before they
become serious, thus enhancing the instrument’s
reliability and extending its useful operating life.
Maintenance services can be obtained from your local
representative or from the manufacturer.
El equipo no precisa forzosamente de mantenimiento preventivo. Sin embargo, un mantenimiento periódico puede contribuir a reconocer a tiempo
posibles averías y así aumentar la seguridad y la
duración del aparato. El servicio de mantenimiento
es ofrecido por el concesionario o por la central.
Wartungsinformationen können vom Hersteller
angefordert werden.
Information on maintenance can be obtained from the
manufacturer.
!
WARNUNG: Für einen sicheren Betrieb der Videokamera alle 12 Monate
folgende Überprüfungen vornehmen:
1. Prüfung des Leckstroms vom Chassis < 100µA.
2. Prüfung der Erdimpedanz < 0.1 Ohm.
3. Prüfung des Stromverbrauchs ≤ Nennleistung.
42
!
Las instrucciones para el mantenimiento pueden
conseguirse a través del fabricante.
WARNING: To ensure safe operation of
the video camera, you should perform the
following procedures every 12 months:
1. Check leakage current from chassis < 100µA.
2. Check ground impedance < 0.1 ohms.
3. Check power consumption ≤ rated power.
!
¡CUIDADO!: Para asegurar el
funcionamiento seguro de la cámara de
video, efectúe los siguientes procedimientos cada 12 meses:
1. Revise el chasis para verificar que la pérdida
de corriente < 100 µA.
2. Revise la impedancia de tierra para verificar
que < 0.1 ohmios.
3. Revise la alimentación de electricidad y el
consumo de energía.
Artisan Technology Group - Quality Instrumentation ... Guaranteed | (888) 88-SOURCE | www.artisantg.com
IM-60-670-01B
Gerätebeschreibung
Description of the
instrument
Descripción del equipo
Kundendienst
Service
Servicio
Sämtliche Wartungs- und Einstellungsarbeiten
sind von qualifiziertem Kundendienstpersonal
auszuführen. Kamerakopf oder Prozessorgehäuse
NICHT ÖFFNEN - dies führt zur Entstehung von
Schäden und zum ERLÖSCHEN DER GARANTIE.
Refer all servicing and adjustments to qualified
service personnel. DO NOT open camera head or
processor chassis as this will result in damage and
VOIDING OF WARRANTY.
Refiera todo el servicio y reparaciones a personal
calificado de servicio. NO ABRA el cabezal de la
cámara ni el chasis del procesador, ya que esto
puede dañar el equipo y ANULAR LA GARANTÍA.
Garantie
Warranty
Garantía
Die Kameras unterliegen einer zweijährigen
Garantie, gültig ab Kaufdatum, auf Material- und
Herstellungsdefekte oder Störungen, die beim
ordnungsgemäßen Gebrauch auftreten. Diese
Garantie gilt nicht für Geräte, die unsachgemäß
verwendet, behandelt, installiert oder betrieben
wurden oder die von nicht autorisiertem
Wartungspersonal verändert, eingestellt oder
repariert wurden.
The cameras are covered by a one year warranty
applicable from the date of sale against defects in
materials and workmanship or malfunctions under
normal use and service. This warranty does not
apply to any unit which has been subject to
misuse, abuse, neglect, improper installation or
operation or that has been altered, adjusted, or
tampered with by any person other than
authorized service personnel.
Bei Auftreten von Funktionsstörungen muß das
Gerät an Optronics oder einen autorisierten
Vertreter eingesandt werden. Vor Rücksendungen
ist von Optronics eine
Rücksendegenehmigungsnummer (Return
Materials Authorization) einzuholen. Optronics
wird das Gerät reparieren und an den Kunden
zurücksenden.
Should a malfunction occur, the unit must be
returned to Optronics or to its authorized
representative. Before returning the unit, the
customer must first call Optronics to obtain a
"Return Materials Authorization" number.
Optronics will repair the unit and return it to the
customer.
Las cámaras tienen una cobertura garantizada de
un año en efecto a partir de la fecha de compra,
contra defectos de materiales y mano de obra o
funcionamiento defectuoso durante uso normal y
servicio normal. Esta garantía no se aplica a las
unidades que han sido sujetas a uso incorrecto,
abuso, negligencia, instalación u operación
inapropiadas o que se hayan alterado, ajustado o
modificado por alguien que no forme parte del
personal de servicio autorizado.
Wenn nach Überprüfung durch das
Kundendienstpersonal festgestellt wird, daß die
Funktionsstörung auf unsachgemäße oder falsche
Behandlung zurückzuführen ist, so treffen die
Garantiebestimmungen nicht zu. Vor Wartungsoder Reparaturarbeiten am Gerät erhält der Kunde
einen Kostenvoranschlag für die Reparatur.
Optronics ist nur dann für die Sicherheit,
Zuverlässigkeit und Leistung des Geräts
verantwortlich, wenn es von autorisiertem
Personal gewartet und entsprechend der
Bedienungsanleitung verwendet wird.
Wenn das Gerät auf eineArt und Weise verwendet
wird, die nicht von Optronics spezifiziert wurde,
kann die Schutzfunktion des Geräts beeinträchtigt
werden.
43
If, upon examination by authorized service
personnel, it is determined that the malfunction is
due to misuse or abuse, warranty provisions will
not apply. An estimate of the cost of repair work
will be given to the customer prior to servicing and
repairing the unit.
Optronics is responsible for the effects on safety,
reliability and performance of the equipment only if
it is serviced by authorized personnel and used in
accordance with the Operating Manual
Instructions.
If the equipment is used in a manner not specified
by Optronics, the protection provided by the
equipment may be impaired.
Si hay funcionamiento defectuoso, la unidad debe
devolverse a Optronics o a su representante
autorizado. Para devolver la unidad, el cliente
debe llamar primero a Optronics para conseguir
obtener un número de “Autorización de devolución
de materiales”. Optronics reparará la unidad y la
enviará de nuevo al cliente.
Una vez que el personal autorizado haga un
examen del equipo, si se determina que el
funcionamiento defectuoso se debe a uso
incorrecto o abuso, no se aplicarán las
disposiciones de la garantía. Se hará un estimado
del costo de la reparación, que se entrega al
cliente antes de proceder a reparar la unidad.
Optronics se hace responsable de la seguridad,
confiabilidad y funcionamiento solamente si el
personal autorizado hace las reparaciones y
servicio y el equipo se utiliza de acuerdo con las
Instrucciones del Manual de Operaciones.
Si el equipo se utiliza en una manera no
especificada por Optronics, puede dañarse la
protección provista por el equipo.
Artisan Technology Group - Quality Instrumentation ... Guaranteed | (888) 88-SOURCE | www.artisantg.com
IM-60-670-01B
Technische
Beschreibung
Technical
description
Descripciones
técnicas
Fehlersuche
Troubleshooting
Diagnóstico de fallas
Symptom:
Symptom:
Signo:
Kein Video - Netzanzeige nicht erleuchtet
No video – power light off.
Mögliche Ursachen:
Possible causes:
No hay señal de vídeo – la luz de encendido está
apagada.
Netzkabel ist nicht richtig angeschlossen.
Kameraprozessor ist nicht eingesteckt.
Fehlerhafte Sicherung.
Power cord is not properly connected to power
cord connector.
Camera processor not plugged in.
Defective power fuse.
Abhilfe:
44
Causas posibles:
El cable de alimentación no está bien conectado a
su conector.
El procesador de la cámara no está enchufado.
El fusible eléctrico tiene un defecto.
Netzkabel fest in den Netzanschluß stecken.
Prüfen, ob die Wandsteckdose unter Strom steht.
Prüfen, ob der Prozessorschalter eingeschaltet ist.
Sicherungen austauschen.
Remedy:
Push power cord firmly into power cord connector.
Check that there is electricity to the wall outlet.
Check that processor switch is turned on.
Exchange fuses.
Solución:
Symptom:
Symptom:
Signo:
Kein Video - Netzanzeige leuchtet.
No video – power light on.
Mögliche Ursachen/Abhilfe:
Possible causes/remedy:
No hay señal de vídeo – la luz de encendido está
iluminada.
Prüfen, ob der Monitor angeschlossen und
eingeschaltet ist.
Monitor anschließen und einschalten.
Prüfen, ob das Videokabel (Comp, Y/C, RGB) vom
Kameraprozessor zum Monitor eingesteckt ist.
Prüfen, ob der Kamerakopf angeschlossen ist.
Prüfen, ob die Schalterinstellungen des Monitors
korrekt sind (korrektes Video im Kanal oder TV/
Leitungsschalter auf Leitung geschaltet ).
Prüfen, ob alles Zubehör (VCR, Bilddrucker usw,)
eingeschaltet und auf Leitung geschaltet sind.
Prüfen, ob die VCR-Aufzeichnungstaste
eingeschaltet ist. Bei einigen Videorecordern muß
die Record-Taste gedrücktsein, damit sie
funktionieren.
Bei Verwendung eines Fernsehempfängers prüfen,
ob das Videokabel vom Prozessor an die Video Eingänge angeschlossen ist (nicht die AntennenEingänge).
Die Videokabel durch die Zusatzgeräte verfolgen,
d.h. Video-Ausgang zu Video-Eingang, VideoAusgang zu Video-Eingang usw.
Check that monitor is plugged in and turned on.
Plug in monitor and turn on.
Check that video (comp, Y/C, RGB) cable from
camera processor to monitor is connected.
Check that camera head is plugged in.
Check that monitor is appropriately switched
(correct video in channel or TV/line switch turned
to “line”).
Check that all accessories (VCR, video printer,
etc.) are turned on and switched to “line?”
Check that VCR record button is on. Some VCRs
require the record button to be depressed to
operate.
If using a TV receiver, check that the video cable
from processor is connected to “video” inputs (not
antenna inputs).
Trace video cables through accessories, i.e., video
out to video in, video out to video in, etc.
Empuje firmemente el cable de alimentación en su
conector.
Compruebe que exista electricidad en la toma de
la pared.
Compruebe que el interruptor del procesador esté
en posición de encendido.
Cambie los fusibles.
Causas y soluciones posibles:
Compruebe que el monitor esté enchufado y el
interruptor esté en posición de encendido.
Enchufe y encienda el monitor.
Compruebe que el cable de vídeo (comp, Y/C,
RGB) que conecta el procesador de la cámara
con el monitor esté enchufado.
Compruebe que el cabezal de la cámara esté
ensamblado.
Compruebe que el monitor tenga la selección
correcta (vídeo correcto en el canal o el selector
de TV/línea en selección “línea”).
Compruebe que todos los accesorios periféricos
(grabadora de vídeo, impresora de vídeo, etc.)
estén encendidos y estén en selección “línea?”.
Compruebe que el botón de grabación de la
grabadora de vídeo (VCR) esté activado. Algunas
grabadoras de vídeo exigen que el botón de
grabación esté oprimido antes de poder funcionar.
Si se está utilizando un receptor de TV,
compruebe que el cable de vídeo que viene del
procesador esté conectado a las entradas de
“vídeo” (no a las entradas de antena).
Revise el recorrido de los cables de vídeo por los
accesorios periféricos, p.ej.: salida de vídeo a
entrada de vídeo, salida de vídeo a entrada de
vídeo, etc.
Artisan Technology Group - Quality Instrumentation ... Guaranteed | (888) 88-SOURCE | www.artisantg.com
IM-60-670-01B
45
Technische
Beschreibung
Technical
description
Descripciones
técnicas
Symptom:
Symptom:
Signo:
Unterbrochenes Video.
Intermittent video.
Vídeo intermitente.
Mögliche Ursache/Abhilfe:
Possible causes/remedy:
Causas y soluciones posibles:
Alle Anschlüsse prüfen: Kamerakopf-Kabel zu
Prozessor und Videokabel zu und von allen
Zubehörkomponenten.
Das Kamerakopf-Kabel am Prozessor und am
Kamerakopf hin- und herbewegen – wenn das Bild
flackert in den Kundendienst- und GarantieInformationen nachsehen, wie ein defektes Gerät
zurückgesandt werden kann.
Prüfen, ob die Videokabel defekt sind.
Prüfen, ob das Problem mit einer anderen
Videoquelle weiterbesteht (z.B. die Kamera vom
System abnehmen und das Videoband mit einem
Videorecorder und Monitor abspielen).
Das Problem zu isolieren versuchen, indem nach
einer funktionierenden Komponente gesucht wird,
mit der alle anderen Komponenten geprüft werden.
Check all connections: camera head cable to
processor and video cables to and from all
accessory components.
Wiggle camera head cable at processor and
camera head – if picture flashes, refer to Service
and Warranty for information on how to return a
malfunctioning unit.
Check video cables to determine if bad.
See if problem exists with another video source
(for example, remove camera from system and
play back tape on VCR and monitor).
Try to isolate problem by finding one component
that works and testing all other components with it.
Revise todas las conexiones: el cable del cabezal
de la cámara al procesador y los cables de vídeo
que van y vienen de todos los accesorios periféricos.
Mueva el cable que va del cabezal de la cámara al
procesador: si la imagen parpadea, consulte la
sección de Servicio y garantía para obtener
información sobre la devolución de una unidad
que funciona mal.
Revise los cables de vídeo para determinar si
están dañados.
Vea si existe el mismo problema con otra fuente
de vídeo (por ejemplo, desconecte la cámara del
sistema y haga funcionar la videocasetera para
observar en el monitor un videocasete grabado).
Trate de aislar el problema: busque un
componente que funcione y úselo para hacer
pruebas con los demás componentes.
Symptom:
Symptom:
Signo:
Schlechte Farbqualität.
Bad color.
Mal color.
Mögliche Ursache/Abhilfe:
Possible causes/remedy:
Causas y soluciones posibles:
Den Weißabgleich bei korrekter Beleuchtung und
vollständig angeschlossenem System
wiederholen, wobei die Kamera auf einen weißen
Gegenstand gerichtet ist.
Den Monitor einstellen, wobei die Bedienungselemente in der Arretier- oder mittleren Position sind.
Den Monitor abschließen, wenn er die letzte
Systemkomponente ist. Ist er jedoch nicht die
letzte Komponente, stattdessen die letzte
Komponente abschließen (siehe Abschnitt
Abschließen des Videosignals).
Prüfen, ob sich der Prozessor an einem kühlen,
gut belüfteten Ort befindet.
Wenn keine Farbe erscheint, die Farbregelung am
Monitor stärker einstellen.
Wenn zuviel Farbe erscheint (oder die Farbintensität
zu groß ist), die Farbregelung am Monitor
schwächer einstellen.
Der Sony UP5000 Bilddrucker kann zu Farbverlagerungen im System führen. Siehe Systemkonfiguration 6, um die Kamera von druckerbedingten
Problemen zu isolieren.
Die Schaltereinstellungen an der Rückseite von
Monitoren der Reihe SONY 1300 prüfen. Die
Schalter sollten auf RGB und 6500 stehen.
Repeat the white balance procedure with correct
illumination, with complete system hooked up,
pointing the camera at a white object.
Adjust monitor, starting with controls in detent or
center position.
Terminate monitor if it is the last component in the
system. If it is not the last component, leave the
monitor unterminated and terminate the last
component in line (refer to section Video Signal
Termination).
Check that processor is in a cool, well-ventilated
area.
If no color, turn up color on monitor.
If too much color (or color too intense), turn down
color on monitor.
The Sony UP5000 video printer can introduce
color shifts to the system.
See System Configuration 6 to isolate the camera
from printer-related problems.
Check rear panel switch settings on SONY 1300
series monitors. Switches should be set to RGB
and 6500.
Repita el balance del blanco con la iluminación
correcta, con todo el sistema conectado y dirigiendo el lente de la cámara hacia un objeto blanco.
Ajuste el monitor comenzando con los controles
en la posición en que normalmente se detienen o
centrados, según corresponda.
Termine eléctricamente el monitor si es el último
componente del sistema. Si no es el último, deje el
monitor sin terminarlo eléctricamente y termine el
último accesorio periférico en línea (consulte la
sección Terminación de la señal de vídeo).
Compruebe que el procesador se encuentre en un
lugar fresco y bien ventilado.
Si no hay color, aumente el nivel de color en el
monitor.
Si el color es excesivo (o muy intenso), disminuya
el nivel de color en el monitor.
La videoimpresora Sony UP5000 puede causar
cambios de los colores en el sistema. Vea la
sección Configuración del Sistema 6 para
determinar cómo aislar la cámara de problemas
con la impresora.
Revise el ajuste de los interruptores en el panel
posterior de los monitores Sony Serie 1300. Los
interruptores deben estar ajustados a RGB y 6500.
Artisan Technology Group - Quality Instrumentation ... Guaranteed | (888) 88-SOURCE | www.artisantg.com
IM-60-670-01B
46
Technische
Beschreibung
Technical
description
Descripciones
técnicas
Symptom:
Symptom:
Signo:
Bild rollt.
Rolling picture.
Deslizamiento de la imagen.
Mögliche Ursache/Abhilfe:
Possible causes/Remedy:
Causas y soluciones posibles:
Vertikalablenkung und Zeilenfrequenzregelung am
Monitor einstellen.
Adjust vertical or horizontal hold on the monitor.
Ajuste el control horizontal o vertical de detención
de imagen, según corresponda.
Symptom:
Symptom:
Signo:
Video unterbrochen.
Occasional video.
Vídeo ocasional.
Mögliche Ursache/Abhilfe:
Possible causes/Remedy:
Causas y soluciones posibles:
Prüfen, ob der Kabelstecker des Kamerakopfs
ganz in die Prozessorbuchse gesteckt ist.
Check that camera head cable connector is
inserted completely into processor receptacle.
Compruebe que el conector del cable del cabezal
de la cámara esté completamente insertado en el
correspondiente enchufe del procesador.
Symptom:
Symptom:
Signo:
Störungen
Disturbance or interference.
Alteración o interferencia.
Mögliche Ursache/Abhilfe:
Possible causes/Remedy:
Causas y soluciones posibles:
Prüfen, ob sich die Störungen ändern, wenn das
Kabel des Kamerakopfs hin- und herbewegt wird.
Falls das zutrifft, ist in den Kundendienst- und
Garantie-Informationen nachsehen, wie ein
defektes Gerät zurückgesandt werden kann.
Eine andere Steckdose versuchen, an der nach
Möglichkeit kein anderes elektrisches Gerät
angeschlossen ist.
Der Bilddrucker UP5000 von Sony kann Störungen
im System verursachen. Siehe Systemkonfiguration
6, um die Kamera von druckerbedingten
Problemen zu isolieren.
Check if interference changes when the camera
head cable is wiggled. If so, refer to Service and
Warranty for information on how to return a
malfunctioning unit.
Try a different electrical outlet, preferably with no
other equipment plugged into it.
The Sony UP5000 video printer can introduce
interference to the system. See System
Configuration 6 to isolate the camera from printerrelated problems.
Compruebe si la interferencia cambia al mover el
cable del cabezal de la cámara. Si es así, consulte
la sección Servicio y garantía para información
sobre la devolución de una unidad que funciona
mal. Intente con otra toma eléctrica, que
preferentemente no tenga ningún otro equipo
enchufado. La impresora de vídeo Sony UP5000
puede causar interferencia en el sistema. Vea la
sección Configuración del Sistema 6 para
determinar cómo aislar la cámara de problemas
con la impresora.
Symptom:
Symptom:
Signo:
Körniges poder rauschendes Bild.
Grainy or noisy image.
Imagen granulosa o con ruido electrónico.
Mögliche Ursache/Abhilfe:
Possible causes/Remedy:
Causas y soluciones posibles:
Intensität der Lichtquelle erhöhen.
Monitor einstellen, wobei sich die
Bedienungselemente zunächst in der Arretieroder mittleren Position befinden.
Increase intensity of light source.
Adjust monitor, starting with controls in detent or
center position.
Aumente la intensidad de la fuente luminosa.
Ajuste el monitor, comenzando con los controles
en la posición en que normalmente se detienen o
centrados, según corresponda.
Symptom:
Symptom:
Signo:
Flecken im Bild.
Spots on image.
Manchas en la imagen.
Mögliche Ursache/Abhilfe:
Possible causes/Remedy:
Causas y soluciones posibles:
Optische Flächen des Kamerakopfs, der Linse
oder des Adapters reinigen.
Clean optical surfaces of camera head and lens or
adaptor.
Limpie las superficies ópticas del cabezal de la
cámara y del lente o adaptador.
Artisan Technology Group - Quality Instrumentation ... Guaranteed | (888) 88-SOURCE | www.artisantg.com
IM-60-670-01B
47
Technische
Beschreibung
Technical
description
Descripciones
técnicas
Symptom:
Symptom:
Signos:
Bild zu dunkel oder zu hell.
Picture too dark or too bright.
Imagen muy oscura o muy brillante.
Mögliche Ursache/Abhilfe:
Possible causes/Remedy:
Causas y soluciones posibles:
Die Stärke der Lichtquelle einstellen.
Die Helligkeit des Monitors einstellen.
Die Bedienungselemente für Kontrast, Bild oder
Schärfe am Monitor einstellen, dabei mit der
Arretier- oder mittleren Position beginnen.
Auf Wunsch kann das automatische
Belichtungssystem übersteuert werden, indem die
Taste für die manuelle Blendeneinstellung
gedrückt und die verschiedenen Verschlußzeiten
durchlaufen werden, bis die gewünschte
Belichtung erreicht wurde.
Der Bilddrucker UP5000 von Sony kann
Störungen im System verursachen. Siehe
Systemkonfiguration 6, um die Kamera von
druckerbedingten Problemen zu isolieren.
Adjust level of light source.
Adjust monitor brightness.
Adjust contrast, picture, or sharpness controls on
monitor, starting with detent or center position.
If desired, the automatic exposure system may be
overridden by pressing the manual shutter key,
and shuttering through the various speeds until
desired exposure is achieved.
The Sony UP5000 video printer can introduce
interference to the system. See System
Configuration 6 to isolate the camera from printerrelated problems.
Ajuste el nivel de la fuente luminosa.
Ajuste la brillantez del monitor.
Ajuste los controles de contraste, de imagen o de
nitidez en el monitor, comenzando con los
controles en posición de detención o centrados,
según corresponda.
Si se desea, el sistema de control automático de
exposición puede desactivarse presionando la
tecla de obturador manual y haciendo funcionar el
obturador por las diferentes velocidades de
obturación hasta que se alcance la exposición
deseada.
La impresora de vídeo Sony UP5000 puede
causar interferencia en el sistema. Vea la sección
Configuración del Sistema 6 para determinar
cómo aislar la cámara de problemas con la
impresora.
Symptom:
Symptom:
Signo:
Allgemein
General.
Problemas generales.
Mögliche Ursache/Abhilfe:
Possible causes/Remedy:
Causas y soluciones posibles:
Versuchen, das fehlerhafte Gerät (Monitor,
Kamera, Viderecorder usw.) zu identifizieren,
bevor die Kamera wegen einer Bildstörung
(Geräusch, Störung, Farbfehler usw.) zurückgesandt wird. Falls die Kamera Ursache des Problems
ist, in den Kundendienst- und GarantieInformationen nachsehen, wie ein defektes Gerät
zurückgesandt werden kann. Das Problem mit
Video aufzeichnen und das Videoband mit dem
Gerät einschicken. Nicht versuchen, das Gerät
selbst zu reparieren. Es befinden sich keine
vomAnwender zu wartenden Teile in dieser
Kamera.
Try to isolate problem equipment (monitor,
camera, VCR, etc.) before returning camera for
abnormal image (noise, interference, bad color,
etc.). If the camera does seem to be the problem,
refer to Service and Warranty for information on
how to return a malfunctioning unit.
Video tape the problem and include the tape when
returning the equipment for repair. Do not attempt
to repair equipment. There are no userserviceable parts inside the camera.
Intente aislar el equipo que está dando problema
(monitor, cámara, videocasetera, etc.) antes de
devolver la cámara debido a imagen anómala
(ruido electrónico, interferencia, mal color, etc.). Si
es la cámara la que parece causar el problema,
consulte la sección Servicio y garantía para
obtener información sobre la devolución de una
unidad que está funcionando mal. Grabe el
problema en una cinta de vídeo e inclúyala
cuando devuelva el equipo para su reparación.
No intente reparar el equipo. La cámara no
contiene partes que pueda reparar el usuario.
Artisan Technology Group - Quality Instrumentation ... Guaranteed | (888) 88-SOURCE | www.artisantg.com
IM-60-670-01B
Technische
Beschreibung
Technical
description
Descripciones
técnicas
Abschluß des Videosignals
Video signal termination
Bei einem Videosystem wird ein Signal erzeugt
und durch mehrere elektronische Geräte geleitet.
Diese Signal wird immer durch ein Übertragungskabel (Video-Koaxialkabel) mit einer charakteristischen Impedanz von 75 Ohm geleitet.
In a video system, a signal is generated and
transmitted through various electronic devices.
This signal is always carried on a transmission
wire (video coaxial cable) having a characteristic
impedance of 75 ohms.
Terminación de la señal de
vídeo
Der Endpunkt des übertragenen Videosignals muß
abgeschlossen werden, da sonst Reflektionen
auftreten, die auf dem Monitorbild zu einer
inkorrekten Helligkeitseinstellung und/oder
Geisterbildern führen. Der Abschluß erfolgt mit
Hilfe eines Abschlußwiderstands von 75 Ohm am
Endpunkt des Signals.
The end point of the transmitted video signal must
be terminated, otherwise signal reflections may
occur, causing incorrect brightness and/or
ghosting effects to appear on the monitor image.
Termination is accomplished by applying a 75 ohm
resistance to the signal at its end point.
Der Monitor empfängt und erzeugt (passiv) ein
Videosignal. Dieses wird nur abgeschlossen, wenn
der Monitor als letztes Gerät in einem
Videosystem das Signal empfängt. Viele Geräte
wie z.B. Videorecorder und Bilddrucker empfangen
und regenerieren (aktiv) Videosignale.
Der Abschluß erfolgt automatisch über den
internen Stromkreis des Geräts oder indem an der
Rückseite des Geräts ein Schalter manuell auf die
Position Term oder 75 Ohm gestellt wird.
Um festzustellen, ob ein Gerät des Videosystems
manuell abgeschlossen werden muß, ist aus der
Rückseite des Geräts zu ersehen. Ist ein
Abschlußschalter vorhanden, so ist der manuelle
Abschluß ratsam und eine entsprechende
Entscheidung muß getroffen werden. Ist kein
Schalter vorhanden, erfolgt der Abschluß nach
Bedarf automatisch durch das Gerät.
48
The monitor receives and passively generates a
video signal. It is terminated only when the monitor
is the last device hooked up consecutively in a
video system receiving the signal. Many devices
such as VCRs and video printers receive as well
as actively regenerate video signals.
Termination is accomplished automatically through
the device’s internal circuitry or manually by the
operator flipping a rear switch on the device to the
Term or 75 ohm position.
To determine if a device in your video system
requires manual termination, check the rear of the
unit. If a termination switch exists, manual
termination is indicated and a decision whether or
not to terminate must be made. If a switch is not
found, the device will automatically apply
termination as needed.
En un sistema de vídeo una señal se genera y
transmite a través de diversos componentes
electrónicos. Esta señal siempre va por un cable
de transmisión (cable coaxial de vídeo) que tiene
una impedancia característica de 75 ohmios.
El punto final de la señal de vídeo transmitida
debe terminarse; de otra manera puede
producirse la reflexión de señales, que causan
brillantez incorrecta de la imagen y/o efectos de
imagen fantasma en la pantalla. La terminación se
logra aplicando a la señal una resistencia de 75
ohmios en su punto final.
El monitor recibe y genera pasivamente una señal
de vídeo. Es necesario terminar el monitor
únicamente cuando es el último accesorio
periférico conectado en el sistema de vídeo que
recibe la señal. Muchos componentes, tales como
videocaseteras e impresoras de vídeo reciben y a
la vez generan señales activas de vídeo.
La terminación se logra automáticamente por
medio de los circuitos internos del accesorio
periférico o manualmente cuando el operador del
equipo coloca un interruptor en el panel posterior
de dicho periférico en la posición Term o 75 ohm.
Para determinar si un accesorio periférico en su
sistema de vídeo requiere terminación manual,
revise la parte posterior de la unidad. Si existe un
interruptor de terminación, está indicada la
terminación manual y debe decidirse si el equipo
se termina o no. Si no se encuentra ese
interruptor, el equipo se termina automáticamente
si es necesario.
Artisan Technology Group - Quality Instrumentation ... Guaranteed | (888) 88-SOURCE | www.artisantg.com
IM-60-670-01B
Technische
Beschreibung
Technical
description
Descripciones
técnicas
Monitore
Monitors
Monitores
Manche Monitore verfügen über einen
automatischen Abschluß, andere nicht. Auf der
Rückseite des Monitors sicherheitshalber nach
einem Abschlußschalter suchen. Ist ein Schalter
vorhanden und der Monitor ist das letze Gerät, das
an das System angeschlossen ist, muß der
Schalter auf Abschluß eingestellt werden. Ist der
Monitor nicht das letzte Gerät, so wird das Signal
passiv weitergeleitet und kein Abschluß ist
erforderlich. Den Schalter in die nicht abgeschlossene Stellung bringen. Hinweis: Bei Monitoren mit
automatischem Abschluß befindet sich der
Schalter in den Video-Eingangsbuchsen und wird
aktiviert, wenn ein Koaxialkabelstecker eingesteckt
wird. Auf ähnliche Weise de-aktivieren die VideoAusgangsbuchsen den Abschluß, wenn ein
Stecker eingesteckt wird. Falls ein Abschluß
gewünscht wird, ist darauf zu achten, daß das
verbindende Koaxialkabel in die VideoEingangsbuchse und nicht in die Ausgangsbuchse
gesteckt wird.
Some monitors are automatically terminating,
others are not. Check the rear of the monitor for a
termination switch to verify. If a switch exists and
the monitor is the last device hooked up to the
system, set the switch to terminate. If the monitor
is not last, the signal is being passively looped
through and termination is not required. Set the
switch to the unterminated position. Note: on
automatically terminating monitors, the termination
switch is located in the video input receptacles and
activated when a coaxial cable plug is inserted.
Alternatively, the video output receptacles
deactivate termination when a plug is inserted. If
termination is required, ensure that the connecting
coaxial cable is plugged into the video in
receptacle and not the video out receptacle.
Algunos monitores se terminan automáticamente;
otros, no. Revise la parte posterior del monitor
para ver si hay un interruptor de terminación. Si
hay un interruptor y el monitor es el último
accesorio periférico conectado al sistema, coloque
el interruptor en la posición de terminación. Si el
monitor no es el último, la señal hace el recorrido
pasivamente y no será necesaria la terminación.
Ajuste el interruptor a la posición de no
terminación. Nota: en los monitores que se
terminan automáticamente, el interruptor de
terminación está en los receptáculos de entrada
de vídeo y se activa al insertar en dicho receptáculo
el conector de un cable coaxial. Asimismo, los
receptáculos de las salidas de vídeo inactivan la
terminación cuando se les inserta un conector. Si
se requiere la terminación, asegúrese de que el
cable coaxial se conecte al receptáculo de entrada
de vídeo y no al de salida de vídeo.
Videorecorder/Drucker
Manche Videorecorder oder Drucker verfügen
über einen automatischen Abschluß, andere nicht.
Auf der Rückseite des Monitors sicherheitshalber
nach einem Abschlußschalter suchen. Ist ein
Schalter vorhanden, diesen auf Abschluß
einstellen, unabhängig davon, ob der
Videorecorder oder Drucker als letztes Gerät an
das System angeschlossen ist. Die einzige
Ausnahme liegt dann vor, wenn T-Anschlußstücke
verwendet werden, um das Signal an ein
nachfolgendes Gerät weiterzuleiten. In diesem Fall
wird das Signal passiv erzeugt oder weitergeleitet
und kein Abschluß ist erforderlich. Den Schalter in
die nicht abgeschlossene Stellung bringen.
49
Video cassette recorders/printers
Some video cassette recorders/printers are
automatically terminating, others are not. Check
the rear of the device for a termination switch to
verify. If one exists, set the switch to terminate
regardless of whether or not the VCR or printer is
the last device hooked up to the system. The only
exception is if T-connectors are used to loop the
signal through to a successive device. In this case,
the signal is being passively generated or looped
through and termination is not required. Set the
switch to the unterminated position.
Grabadoras e impresoras de
videocasetes
Algunas grabadoras e impresoras de
videocasetes se terminan automáticamente, pero
otras no. Revise la parte posterior del equipo para
ver si hay un interruptor de terminación. Si ese
interruptor está presente, colóquelo en la posición
de terminación independientemente de si la
grabadora o la impresora sean el último accesorio
periférico conectado al sistema. Se hace una
única excepción cuando se usan conectores en T
para derivar la señal a través de un equipo
sucesivo. En este caso, la señal se está
generando o derivando pasivamente y no se
requiere la terminación. Coloque el interruptor en
la posición de no terminado.
Artisan Technology Group - Quality Instrumentation ... Guaranteed | (888) 88-SOURCE | www.artisantg.com
IM-60-670-01B
50
Technische
Beschreibung
Technical
description
Descripciones
técnicas
Technische Daten
Technical data
Ficha técnica
DEI-750 CE
Bildsensor: 3 x 1/2" CCD-Chip, je einer pro
Farbkanal
Bildformat: 6.4 x 4.8 mm
Bildpunkte (PAL):
752 x 582 Pixel je Chip, 1,312,992 gesamt
Bildpunkte (NTSC):
768 x 494 Pixel je Chip, 1,138,176 gesamt
Automatische Lichtwerregelung:
Mikroprozessorgesteuert, Proprietary Continuous
Ratchet Algorithm, abschaltbar
Weißabgleich: 2280° K — 4420° K, automatisch
Objektiv: F 1.4, mit Primärfarbentrennung (RGB)
Instrumentenkupplung: “C”-mount
Video-Ausgang (PAL):
PAL 4.43-Signal an BNC-Buchse
Y/C-Signal an S-VHS-Buchse
RGB-Signal an BNC-Buchsen
Video-Ausgang (NTSC): NTSC 3.58-Signal an
BNC-Buchse
Y/C-Signal an S-VHS-Buchse
RGB-Signal an BNC-Buchsen
Eingang: 5-poliger DIN-Stecker an KeyboardBuchse
Netzsicherungen: 2 x F2.0A, 250V
Stromversorgung: 100 – 240V~, 50/60 Hz, 0.5A,
100 VA
Kamerakopf: 37.5 x 47.5 x 60.0 mm (B x H x T)
Gewicht: 0.37 kg
Gekühlter Kamerakopf: 114 x 173 x 106 mm
(B x H x T)
Gewicht: 2,5 kg einschließlich Kabel
Kamera-Kontrolle-Einheit:
305 x 89 x 322 mm (B x H x T)
Gewicht: 3.8 kg
Lagerung:
Umgebungstemperatur: -10° bis +60° C
(-14° bis +140° F)
Feuchtigkeit: 0 bis 80% (nicht kondensierend)
Luftdruck: 50 kPa bis 106 kPa
Betriebsbedingungen:
Maximale Höhe bei Verwendung in Innenräumen:
2.000 m
Temperaturbereich: +5° bis +35° C (41° bis 95° F)
Feuchtigkeit: 0 bis 80% (ohne Kondensation)
Netzspannungsschwankung ± 10%
Installations-Überspannung Kategorie II
Verschmutzungsgrad: 2
DEI-750 CE
Image sensor: 3 x 1/2" CCD-chip, one per color
channel
Picture format: 6.4 mm x 4.8 mm
Picture elements (PAL):
752 x 582 pixels per chip, 1,312,992 in total
Picture elements (NTSC):
768 x 494 pixels per chip, 1,138,176 in total
Auto exposure: Microprocessor controlled,
Proprietary Continuous Ratchet Algorithm
Auto white balance: 2280° K — 4420° K
Internal lens: f 1.4, primary color (RGB) separation prism
Instrument coupling: “C”-mount
Video output (PAL): PAL 4.43 signal to BNC
socket, Y/C signal to S-VHS socket, RGB signal to
BNC sockets
Video output (NTSC): NTSC 3.58 signal to BNC
socket, Y/C signal to S-VHS socket, RGB signal to
BNC sockets
Input: 5-pole DIN connector to keyboard socket
Fuse: 2 x F2.0 A, 250V
Power requirements: 100 – 240V~, 50/60 Hz,
0.5A, 100 VA
Camera head: 37.5 x 47.5 x 60.0 mm (w x h x d)
Weight: 0.37 kg (13.1 oz)
Cooled camera head: 114 x 173 x 106 mm
(w x h x d)
Weight: 2.5 kg (5.5 lb) with cable
Camera control unit (CCU):
305 x 89 x 322 mm (w x h x d)
Weight: 3.8 kg (8.4 lb)
Storage conditions:
Ambient temperature: -10° to +60° C (14° to +140° F)
Humidity: 0 to 80% (non-condensing)
Atmospheric pressure: 50 kPa to 106 kPa
Operating conditions:
Indoor use maximum altitude: 2,000 m
Temperature range: +5° to +35° C (41° to 95° F)
Humidity: 0 to 80% (non-condensing)
Mains supply voltage fluctuation ± 10%
Installation overvoltage category II
Pollution degree: 2
DEI-750 CE
Sencor de video: 3 x chips CCD 1/2", uno para
cada color primario
Formato de imagen: 6.4 mm x 4.8 mm
Puntos de imagen (PAL):
752 x 582 pixels por cada chip, 1,312,992 en total
Picture elements (NTSC):
768 x 494 pixels por cada chip, 1,138,176 en total
Regulación automática del valor de exposición: Controlado por microprocesador, Proprietary
Continuous Ratchet Algorithm
Balance del blanco: 2280° K — 4420° K
Objetivo: f 1.4, con separación de los colores
primarios (RGB)
Conexión para equipos: “C”-mount
Salida de video (PAL): Señal PAL 4.43 mediante
conectar BNC, señal Y/C mediante conexión SVHS, señales RGB mediante conexiones BNC
Video output (NTSC): Señal NTSC 3.58
mediante conexión BNC, señal Y/C mediante
conexión S-VHS, señales RGB mediante
conexiones BNC
Entrada: Teclado: por medio de un enchufe de 5
polos DIN
Fusibles de la red: 2 x F2.0A, 250V
Requerimientos de energía: 100 – 240V~, 50/60
Hz, 0.5A, 100 VA
Cabezal de la cámara: 37.5 x 47.5 x 60.0 mm
(ancho x alto x profundidad)
Peso: 0.37 kg
Cabezal de cámara enfriadocon sistema de
enfriamiento: 114 x 173 x 106 mm (a x a x p)
Peso: 2.5 kg (5.5 lb) con cable
CCU: 305 x 89 x 322 mm (a x a x p)
Peso: 3.8 kg
Condiciones de almacenamiento:
Temperatura ambiente: -10° a +60° C
(-14° a +140° F)
Humedad: 0 a 80% (non condensación)
Presión Atmosférica: 50 kPa a 180 kPa
Condiciones de funcionamiento:
Altitud máxima para uso en interiores: 2,000 m
Rango de temperatura: +5° a +35° C (41° a 95° F)
Humedad: 0 a 80% (sin condensación)
Fluctuación promedio del voltaje suministrado: ± 10%
Instalación de sobrevoltaje categoría II
Grado de contaminación: 2
Artisan Technology Group - Quality Instrumentation ... Guaranteed | (888) 88-SOURCE | www.artisantg.com
IM-60-670-01B
Technische
Beschreibung
Technical
description
Descripciones
técnicas
Allgemeine Klassifizierung
General classification
Clasificación general
Art des Feuchtigkeitsschutzes:
Normal
Type of protection against moisture:
Ordinary
Tipo de protección contra humedad:
Común
Art des Schutzes gegen elektr. Schlag:
Schutzklasse 1
Type of protection against electric shocks:
Protection Class 1
Tipo de protección contra choque eléctrico:
Categoría de protección 1
Betriebsart:
Kontinuierlich
Mode of operation:
Continuous
Modo de operación:
Continua
Labor-Klassifizierung
Laboratory classification
Clasificación de laboratorio
Netzspannungsschwankung ± 10%
Installations-Überspannung Kategorie II
Verschmutzungsgrad: 2
Mains supply voltage fluctuation: ± 10%
Installation overvoltage category II
Pollution degree: 2
Fluctuación promedio del voltaje suministrado: ± 10%
Instalación de sobrevoltaje categoría II
Grado de contaminación: 2
Geräte-Prüfbescheinigungen
Equipment test certificates
Certificados de pruebas de equipo
Geräte gemäß UL-544, EN60601-1 (IEC 601-1)
hergestellt.
Instruments are manufactured in accordance with
UL-544, EN60601-1 (IEC 601-1).
Los instrumentos se fabrican de acuerdo a la
norma UL-544, EN60601-1 (IEC 601-1).
Geräte-Prüfberichte
Equipment test reports
Informes de pruebas de equipos
Geräte gemäß EN61010-1 konstruiert (nicht
amtlich geprüft).
Instruments are designed in accordance with
EN61010-1 (not agency certified).
Los instrumentos se han diseñado de acuerdo a
las normas EN61010-1 (no están certificados por
la agencia).
Technische Unterlagen
Technical documentation
Documentación técnica
Auf Anfrage stellt der Hersteller ihm verfügbare
Schaltpläne, ausführliche Ersatzteillisten,
Beschreibungen, Einstallanweisungen und andere
Unterlagen bereit, die dem entsprechend
qualifizierten und vom Hersteller autorisierten
Personal des Anwenders beim Reparieren von
Geräteteilen, die vom Hersteller als reparierbar
bezeichnet werden, von Nutzen sind.
On request, the manufacturer will provide those
circuit diagrams, itemized parts listings, descriptions, sets of adjustment instructions, and other
items of available documentation to suitably
qualified user personnel duly authorized by the
manufacturer for their use in repairing those
components of the instrument that have been
designated by their respective manufacturers as
repairable.
El personal calificado del usuario que haya sido
debidamente autorizado por el fabricante para
reparar los componentes del equipo, que por el
fabricante sean calificados de reparables, podrá
pedir al fabricante los esquemas de distribución,
listas completas de piezas de repuesto, descripciones, instrucciones de ajuste y demás documentación útil para ese propósito.
Das Verfügen über technische Unterlagen zum
Gerät stellt auch für technisch geschultes
Personal keine Autorisierung durch den Hersteller
zum Öffnen oder Reparieren des Gerätes dar.
Ausgenommen sind im Text der vorliegenden
Gebrauchsanweisung beschriebene Eingriffe.
51
Supply of such technical documentation relating to
the instrument shall not be construed as constituting manufacturer’s authorization of user’s
personnel, regardless of their levels of technical
training, to open or repair the instrument. Explicitly
exempted herefrom are those maintenance and
repair operations described in this manual.
La posesión de documentación técnica sobre el
aparato no significa tener la autorización del
fabricante para abrir o reparar del equipo, ni
siquiera tratándose de personal técnico especializado. Se excluyen las intervenciones descritas en
el texto de este manual de instrucciones.
Artisan Technology Group - Quality Instrumentation ... Guaranteed | (888) 88-SOURCE | www.artisantg.com
IM-60-670-01B
52
Artisan Technology Group - Quality Instrumentation ... Guaranteed | (888) 88-SOURCE | www.artisantg.com
IM-60-670-01B
Autorisierter Beauftragter für EU-Verordnungen bei Optronics:
KARL STORZ GmbH & Co.
Mittelstrasse 8, D-78532 Tuttlingen
Postfach 230, D-78503 Tuttlingen, Germany
Verordnungsabteilung
Fax: +49/7461/708 304
The authorized EU Regulatory Representative for Optronics is:
KARL STORZ GmbH & Co.
Mittelstrasse 8, D-78532 Tuttlingen
Postfach 230, D-78503 Tuttlingen, Germany
Regulatory Department
Fax: +49/7461/708 304
El representante reglamentario de la Unión Europea autorizado
para Optronics es el siguiente:
KARL STORZ GmbH & Co.
Mittelstrasse 8, D-78532 Tuttlingen
Postfach 230, D-78503 Tuttlingen, Germany
Departamento de Reglamentación
Fax: +49/7461/708 304
OPTRONICS
175 Cremona Drive
Goleta, CA 93117
Tel: (805) 968-3568
FAX: (805) 968-0933
Artisan Technology Group - Quality Instrumentation ... Guaranteed | (888) 88-SOURCE | www.artisantg.com
Artisan Technology Group is your source for quality
new and certified-used/pre-owned equipment
• FAST SHIPPING AND
DELIVERY
• TENS OF THOUSANDS OF
IN-STOCK ITEMS
• EQUIPMENT DEMOS
• HUNDREDS OF
MANUFACTURERS
SUPPORTED
• LEASING/MONTHLY
RENTALS
• ITAR CERTIFIED
SECURE ASSET SOLUTIONS
SERVICE CENTER REPAIRS
Experienced engineers and technicians on staff
at our full-service, in-house repair center
WE BUY USED EQUIPMENT
Sell your excess, underutilized, and idle used equipment
We also offer credit for buy-backs and trade-ins
www.artisantg.com/WeBuyEquipment
InstraView REMOTE INSPECTION
LOOKING FOR MORE INFORMATION?
Visit us on the web at www.artisantg.com for more
information on price quotations, drivers, technical
specifications, manuals, and documentation
SM
Remotely inspect equipment before purchasing with
our interactive website at www.instraview.com
Contact us: (888) 88-SOURCE | [email protected] | www.artisantg.com