1
㻝㻌㻛㻌㻢㻣㻢
Important Safety Instructions
Installation
Power Supply
Handling
Maintenance and Inspections
Consumables
Setting Up the Machine
Checking Supplied Accessories
Removing Packing Materials
Preparing Toner Cartridges
Loading Paper
Installing the Handset (Optional) (MF8580Cdw / MF8550Cdn / MF8280Cw Only)
Connecting the Power Cord
Turning ON the Power and Configuring Initial Settings
Connecting to a Computer
Connecting via Wireless LAN (MF8580Cdw / MF8280Cw Only)
Connecting via Wired LAN
Connecting via USB
Configuring Initial Settings for Fax Functions (MF8580Cdw / MF8550Cdn / MF8280Cw Only)
Deciding Which Fax Receive Mode to Use
Registering the Fax Number and Unit Name
Selecting the Receive Mode
Connecting the Telephone Line
Basic Operations
Parts and Their Functions
Front Side
Back Side
Interior
Manual Feed Slot
Paper Drawer
Operation Panel
Shortcut Keys
Display
Logging on to the Machine
Placing Documents
Loading Paper
Loading Paper in the Paper Drawer
Loading Paper in the Manual Feed Slot
Loading Envelopes
Loading Preprinted Paper
Specifying Paper Size and Type
Specifying Paper Size and Type in the Paper Drawer
Specifying Paper Size and Type in the Manual Feed Slot
Registering Default Paper Settings for the Manual Feed Slot
Registering a Custom Paper Size
Using the Operation Panel
Entering Text
Registering in the Address Book (MF8580Cdw / MF8550Cdn / MF8540Cdn / MF8280Cw Only)
Registering Destinations in the Address Book
㻞㻌㻛㻌㻢㻣㻢
9
10
12
13
15
16
18
20
23
26
28
30
32
33
36
38
40
42
43
44
45
47
49
51
53
54
56
57
58
59
60
63
64
67
68
71
74
77
80
82
84
85
86
88
90
93
95
97
98
Registering Destinations for Favorites
Registering Multiple Destinations for Group Dial
Adjusting the Volume
Entering Sleep Mode
Setting Auto Shutdown Time (MF8540Cdn / MF8230Cn Only)
Copying
Basic Copy Operations
Selecting Copy Paper
Canceling Copies
Various Copy Settings
Enlarging or Reducing
Selecting Document Type
Adjusting Density
Adjusting Color Balance
Adjusting Sharpness
2-Sided Copying (MF8580Cdw / MF8550Cdn / MF8540Cdn Only)
Copying Multiple Documents onto One Sheet (2 on 1/4 on 1)
Using the [Paper Save Copy] Key
Copying Both Sides of an ID Card onto One Page
Erasing Dark Borders and Frame Lines (Erase Frame)
Collating Copies by Page
Configuring Copy Settings to Your Needs
Changing Default Settings
Registering Frequently Used Copy Settings
Faxing
Sending Faxes
Canceling Sending Faxes
Various Fax Settings
Adjusting Resolution
Adjusting Density
Adjusting Sharpness
Scanning 2-Sided Documents (MF8580Cdw / MF8550Cdn / MF8540Cdn Only)
Specifying Destinations for Faxes
Specifying with Numeric Keys (Fax)
Specifying from Address Book (Fax)
Specifying Previously Used Destinations (Fax)
Specifying Destinations in an LDAP Server (Fax)
Changing Default Settings
Receiving Faxes
Sending and Receiving Faxes According to Your Purposes
Making a Call before Sending Faxes (Manual Sending)
Sending Faxes to Multiple Destinations Simultaneously (Sequential Broadcast)
Storing Received Faxes into Memory (Memory Reception)
Forwarding Received Faxes
Selecting a Document to Forward
Forwarding All the Received Documents Automatically
Receiving Fax Information Services
Checking Status and Log for Sent and Received Documents
Sending Faxes from Your Computer (PC Fax)
㻟㻌㻛㻌㻢㻣㻢
100
102
104
105
107
108
109
111
112
114
115
116
117
119
120
121
123
124
125
126
127
128
129
130
131
133
136
137
138
139
140
141
142
143
145
149
150
153
154
157
158
159
160
163
164
165
168
170
172
Sending PC Faxes
Attaching Cover Sheets to PC Faxes
Using Address Book
Registering Destinations
Using Registered Destinations
Importing/Exporting Address Book Data
Using the Machine as a Printer
Printing from a Computer
Printing a Document
Canceling Prints
Checking the Printing Status and Log
Various Print Settings
Enlarging or Reducing
Switching 1-Sided and 2-Sided Printing (MF8580Cdw / MF8550Cdn / MF8540Cdn Only)
Collating Printouts by Page
Printing Multiple Pages onto One Sheet
Printing Posters
Printing Booklet (MF8580Cdw / MF8550Cdn / MF8540Cdn Only)
Printing Borders
Printing Dates and Page Numbers
Printing Watermarks
Setting Color Mode
Specifying Paper Source
Selecting Document Type
Saving Toner
Combining and Printing Multiple Documents
Configuring Printer Settings on the Machine
Printing a Document Secured by a PIN (Secure Print) (MF8580Cdw / MF8550Cdn / MF8540Cdn
Only)
Preparing for Using Secure Print
Printing via Secure Print
Configuring Print Settings to Your Needs
Registering Combinations of Frequently Used Print Settings
Changing Default Settings
Printing from USB Memory (USB Print)
Changing Default USB Print Settings
Using Google Cloud Print
Preparing for Using Google Cloud Print
Printing with Google Cloud Print
Using AirPrint
Using the Machine as a Scanner
Preparing to Use the Machine as a Scanner
Scanning from the Machine
Scanning Using the [Scan > PC] Key
Scanning from a Computer
Scanning Using MF Toolbox
Configuring Scan Settings in MF Toolbox
Scanning Using an Application
Configuring Scan Settings in ScanGear MF
㻠㻌㻛㻌㻢㻣㻢
173
175
178
179
182
184
189
190
191
193
195
197
198
200
202
203
204
205
207
208
209
211
213
215
216
217
220
221
222
223
227
228
230
231
238
239
240
243
244
249
250
251
254
257
258
263
268
270
Configuring Scan Settings in Simple Mode
Configuring Scan Settings in Advanced Mode
Convenient Scanning with a Machine-Based Operation
Scanning Documents Directly to USB Memory
Sending Documents as E-mails Directly from the Machine (MF8580Cdw / MF8550Cdn / MF8540Cdn
Only)
Saving Documents Directly to a Shared Folder (MF8580Cdw / MF8550Cdn / MF8540Cdn Only)
Canceling Sending Documents (E-mail/Shared Folder) (MF8580Cdw / MF8550Cdn / MF8540Cdn
Only)
Specifying Detailed Settings
Specifying a Scanning Size
Selecting a File Format
Adjusting Density
Specifying Orientation of Your Document
Selecting Document Type
Scanning 2-Sided Documents (MF8580Cdw / MF8550Cdn / MF8540Cdn Only)
Adjusting Sharpness
Adjusting Balance between File Size and Image Quality
Setting Gamma Values
Specifying Destinations (E-mail/Shared Folder) (MF8580Cdw / MF8550Cdn / MF8540Cdn Only)
Specifying with Numeric Keys (E-mail)
Specifying from Address Book
Specifying Previously Used Destinations
Specifying Destinations in an LDAP Server (E-mail)
Changing Default Settings
Checking Log for Sent Documents (E-mail/Shared Folder) (MF8580Cdw / MF8550Cdn / MF8540Cdn
Only)
Network
Connecting to a Network
Selecting Wired LAN or Wireless LAN (MF8580Cdw / MF8280Cw Only)
Connecting to a Wired LAN
Connecting to a Wireless LAN (MF8580Cdw / MF8280Cw Only)
Setting Up Connection Using WPS Push Button Mode
Setting Up Connection Using WPS PIN Code Mode
Setting Up Connection by Selecting a Wireless Router
Setting Up Connection by Specifying Detailed Settings
Checking the SSID and Network Key
Setting IP Addresses
Setting IPv4 Address
Setting IPv6 Addresses
Viewing Network Settings
Configuring the Machine for Printing or Faxing from a Computer
Configuring Printing Protocols and WSD Functions
Configuring Printer Ports
Setting Up Print Server
Configuring the Machine for Scanning to E-mail or Shared Folders (MF8580Cdw / MF8550Cdn /
MF8540Cdn Only)
Configuring the Machine for Scanning to E-mail
Configuring Basic E-mail Settings
Configuring Advanced E-mail Settings
㻡㻌㻛㻌㻢㻣㻢
271
273
284
285
288
292
294
295
296
297
299
300
301
302
303
304
305
306
307
308
312
313
316
318
319
320
322
323
324
326
328
330
333
336
338
339
342
345
347
348
351
354
357
358
359
362
Configuring the Machine for Scanning to Shared Folders
Setting a Shared Folder as a Save Location
Configuring the Machine for Your Network Environment
Configuring Ethernet Settings
Changing the Maximum Transmission Unit
Setting a Wait Time for Connecting to a Network
Configuring DNS
Configuring SMB
Configuring WINS
Registering LDAP Servers (MF8580Cdw / MF8550Cdn / MF8540Cdn / MF8280Cw Only)
Configuring SNTP
Monitoring and Controlling the Machine with SNMP
Configuring SLP Communication with imageWARE
Security
Protecting the Machine from Unauthorized Access
Setting Access Privileges
Setting the System Manager ID
Setting the Department ID Management
Restricting Communication by Using Firewalls
Specifying IP Addresses for Firewall Rules
Specifying MAC Addresses for Firewall Rules
Changing Port Numbers
Setting a Proxy
Restricting the Machine's Functions
Restricting Access to Address Book and Sending Functions (MF8580Cdw / MF8550Cdn /
MF8540Cdn / MF8280Cw Only)
Setting a PIN for Address Book
Limiting Available Destinations
Prohibiting PC Faxing (MF8580Cdw / MF8550Cdn / MF8280Cw Only)
Disabling Use of Previously Used Destinations
Checking Destinations before Sending Documents
Prohibiting Sequential Broadcasting (MF8580Cdw / MF8550Cdn / MF8280Cw Only)
Restricting USB Functions
Disabling HTTP Communication
Disabling Remote UI
Implementing Robust Security Features
Enabling SSL Encrypted Communication for the Remote UI
Configuring IPSec Settings
Configuring IEEE 802.1X Authentication
Configuring Settings for Key Pairs and Digital Certificates
Generating Key Pairs
Using CA-issued Key Pairs and Digital Certificates
Verifying Key Pairs and Digital Certificates
Using Remote UI
Starting Remote UI
Remote UI Screens
Managing Documents and Checking the Machine Status
Setting Up Menu Options from Remote UI
Saving/Loading Registered Data
㻢㻌㻛㻌㻢㻣㻢
365
366
370
371
373
374
375
379
381
383
386
388
393
396
397
398
399
401
407
408
411
414
415
417
418
419
420
421
422
423
425
426
428
429
430
431
434
441
445
446
448
451
453
454
456
459
462
464
Saving/Loading Address Book (MF8580Cdw / MF8550Cdn / MF8540Cdn / MF8280Cw Only)
Saving/Loading Settings
Registering Address Book from Remote UI (MF8580Cdw / MF8550Cdn / MF8540Cdn / MF8280Cw
Only)
Setting Menu List
Network Settings
Preferences
Timer Settings
Common Settings
Copy Settings
Fax Settings (MF8580Cdw / MF8550Cdn / MF8280Cw Only)
Scan Settings
Memory Media Print Settings
Printer Settings
Adjustment/Maintenance
System Management Settings
Initialize Menu
Troubleshooting
Clearing Jams
When an Error Message Appears
When an Error Code Appears
Common Problems
Installation/Settings Problems
Copying Problems
Printing Problems
Faxing/Telephone Problems (MF8580Cdw / MF8550Cdn / MF8280Cw Only)
When You Cannot Print Properly
Printing Results Are Not Satisfactory
Paper Creases or Curls
Paper Is Fed Incorrectly
When a Problem Cannot Be Solved
Maintenance
Cleaning the Machine
Exterior
Platen Glass
Feeder
Fixing Unit
Transfer Belt
Replacing Toner Cartridges
How to Replace Toner Cartridges
About Replacement Toner Cartridges
Relocating the Machine
Maintaining and Improving Print Quality
Correcting the Gradation
Correcting "Print Color Mismatch"
Adjusting Values for Text Color Reproducibility in Color Documents
Printing Reports and Lists
TX Result Report (MF8580Cdw / MF8550Cdn / MF8540Cdn / MF8280Cw Only)
Communication Management Report (MF8580Cdw / MF8550Cdn / MF8540Cdn / MF8280Cw Only)
㻣㻌㻛㻌㻢㻣㻢
465
468
472
474
475
482
487
491
494
496
503
507
510
528
532
542
543
544
552
564
571
572
575
576
577
578
579
582
583
584
585
586
587
588
589
590
591
592
594
596
597
599
600
604
605
606
607
609
RX Result Report (MF8580Cdw / MF8550Cdn / MF8280Cw Only)
Department ID Management Report
Address Book List (MF8580Cdw / MF8550Cdn / MF8540Cdn / MF8280Cw Only)
User Data List/System Manager Data List
IPSec Policy List
PCL Font List (MF8580Cdw / MF8550Cdn / MF8540Cdn Only)
Viewing the Counter Value
Initializing Settings
Initializing Menu
Initializing Key and Certificate
Initializing Address Book (MF8580Cdw / MF8550Cdn / MF8540Cdn / MF8280Cw Only)
Initializing System Management Settings
Appendix
Feature Highlights
Going Green and Saving Money
Improving Efficiency
Going Digital
So Much More
Specifications
Machine Specifications
Paper Drawer Specifications (Optional)(MF8580Cdw / MF8550Cdn / MF8540Cdn Only)
Wireless LAN Specifications (MF8580Cdw / MF8280Cw Only)
Document Type
Scan Area
Paper
Copy Specifications
Fax Specifications (MF8580Cdw / MF8550Cdn / MF8280Cw Only)
Scanner Specifications
Printer Specifications
Specifications for E-mail Sending (MF8580Cdw / MF8550Cdn / MF8540Cdn Only)
Specifications for Scanning to Shared Folders (MF8580Cdw / MF8550Cdn / MF8540Cdn Only)
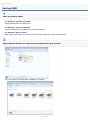
Using e-Manual
Installing e-Manual
Uninstalling e-Manual
Screen Layout of e-Manual
Viewing e-Manual
Others
Basic Windows Operations
Notice
Contact Us
㻤㻌㻛㻌㻢㻣㻢
610
611
612
613
614
615
616
617
618
619
620
621
622
623
624
626
628
630
632
633
635
636
637
638
639
642
643
644
645
646
647
648
649
654
657
662
664
665
670
676
0ALJ-000
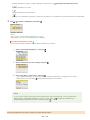
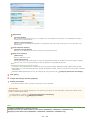
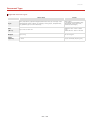
Important Safety Instructions
The content described in this chapter is for the prevention of damage to property and injury to users of the machine and others. Before
using this machine, read this chapter and follow the instructions to properly use this machine. Do not perform any operations not
described in this manual. Canon will not be responsible for any damages resulting from use not described in this manual, improper use,
or repair/changes not performed by Canon or a third party authorized by Canon.
㻥㻌㻛㻌㻢㻣㻢
0ALJ-001
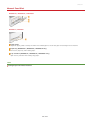
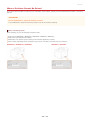
Installation
To use this machine safely and comfortably, carefully read the following precautions and install the machine in an appropriate location.
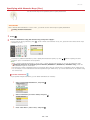
Do not install in a location that may result in a fire or electrical shock
A location where the ventilation slots are blocked
(too close to walls, beds, rugs, or similar objects)
A damp or dusty location
A location exposed to direct sunlight or outdoors
A location subject to high temperatures
A location exposed to open flames
Near alcohol, paint thinners or other flammable substances
Other warnings
Do not connect unapproved cables to this machine. Doing so may result in a fire or electrical shock.
Do not place necklaces and other metal objects or containers filled with liquid on the machine. If foreign substances come in
contact with electrical parts inside the machine, it may result in a fire or electrical shock.
When installing and removing the optional accessories, be sure to turn OFF the power, unplug the power plug, and then
disconnect all the interface cables and power cord from the machine. Otherwise, the power cord or interface cables may be
damaged, resulting in a fire or electrical shock.
Do not use near any medical equipment. Radiowaves emitted from this machine may interfere with medical equipment, which
may cause a malfunction and result in serious accidents.
If any foreign substance falls into this machine, unplug the power plug from the AC power outlet and contact your local
authorized Canon dealer.
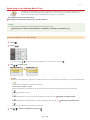
Do not install in the following locations
The machine may drop or fall, resulting in injury.
Unstable location
Location exposed to vibrations
Other cautions
When carrying this machine, follow the instructions in this manual. If carried improperly, it may fall, resulting in injury.
When installing this machine, be careful not to get your hands caught between the machine and the floor or walls, or between
the paper drawers. Doing so may result in injury.
IMPORTANT
Do not install in the following locations that may result in damage
A location subject to dramatic changes in temperature or humidity
A location near equipment that generates magnetic or electromagnetic waves
A laboratory or location where chemical reactions occur
A location exposed to corrosive or toxic gases
A location that may warp from the weight of the machine or where the machine is
liable to sink (a carpet, etc.)
Avoid poorly ventilated locations
㻝㻜㻌㻛㻌㻢㻣㻢
This machine generates a slight amount of ozone, etc. during normal use. Although sensitivity to ozone, etc. may vary, this
amount is not harmful. Ozone, etc. may be more noticeable during extended use or long production runs, especially in poorly
ventilated rooms. It is recommended that the room where the machine operates be appropriately ventilated to maintain a
comfortable working environment.
Do not install in a location where condensation occurs
In the following cases, water droplets (condensation) may form inside this machine which may result in paper jams and poor print
quality, or damage. Let the machine adjust to the ambient temperature and humidity for at least two hours before use.
When the room where the machine is installed is heated rapidly
When the machine is moved from a cool or dry location to a hot or humid location
When using wireless LAN (MF8580Cdw / MF8280Cw only)
Set the machine at a distance of 50 m or less from the wireless LAN router.
Do not set machine in a location where any object blocks communication. The signal may be degraded when passing through
walls or floors.
Keep the machine as far as possible from digital cordless phones, microwave ovens, or other equipment that emit radio waves.
In altitudes of 3,000 m or above sea level
Machines with a hard disk may not operate properly when used at high altitudes of about 3,000 meters above sea level, or
higher.
㻝㻝㻌㻛㻌㻢㻣㻢
0ALJ-002
Power Supply
This machine is compatible with voltages of 220 to 240 V, and electrical frequency of 50/60 Hz.
Use only a power supply that meets the specified voltage requirements. Failure to do so may result in a fire or electrical shock.
Do not use power cords other than the one provided, as this may result in a fire or electrical shock.
Do not modify, pull, forcibly bend, or perform any other act that may damage the power cord. Do not place heavy objects on
the power cord. Damaging the power cord may result in a fire or electrical shock.
Do not plug in or unplug the power plug with wet hands, as this may result in an electrical shock.
Do not use extension cords or multi-plug power strips with the machine. Doing so may result in a fire or electrical shock.
Do not wrap the power cord or tie it in a knot, as this may result in a fire or electrical shock.
Insert the power plug completely into the AC power outlet. Failure to do so may result in a fire or electrical shock.
Remove the power plug completely from the AC power outlet during a thunder storm. Failure to do so may result in a fire,
electrical shock, or damage to the machine.
Do not obstruct the power outlet where this machine is connected, so that you can unplug the power cord easily in an emergency.
IMPORTANT
When connecting power
Do not connect the machine to an uninterruptible power source.
If plugging this machine into an AC power outlet with multiple sockets, do not use the remaining sockets to connect other
devices.
Do not connect the power cord into the auxiliary outlet on a computer.
Other precautions
Electrical noise may cause this machine to malfunction or lose data.
㻝㻞㻌㻛㻌㻢㻣㻢
0ALJ-003
Handling
Immediately unplug the power plug from the AC power outlet and contact an authorized
Canon dealer if the machine makes an unusual noise, emits an unusual smell, or emits
smoke or excessive heat. Continued use may result in a fire or electrical shock.
Do not disassemble or modify this machine. There are high-voltage and hightemperature components inside the machine which may result in a fire or electrical
shock.
Place the machine where children will not come in contact with the power cord and other cables or internal and electrical
parts. Failure to do so may result in unexpected accidents.
Do not use flammable sprays near this machine. If flammable substances come into contact with electrical parts inside this
machine, it may result in a fire or electrical shock.
When moving this machine, be sure to turn OFF the power of this machine and your computer, and then unplug the power
plug and interface cables. Failure to do so may damage the power cord or interface cables, resulting in a fire or electrical
shock.
When plugging or unplugging a USB cable when the power plug is plugged into an AC power outlet, do not touch the metal
part of the connector, as this may result in an electrical shock.
If you are using a cardiac pacemaker
This machine generates a low level magnetic flux. If you use a cardiac pacemaker and feel abnormalities, please move away from
this machine and consult your physician immediately.
Do not place heavy objects on this machine as they may fall, resulting in injury.
For your safety, please unplug the power cord if the machine will not be used for a long period of time.
Use caution when opening and closing covers to avoid injury to your hands.
Keep hands and clothing away from the rollers in the output area. If the rollers catch your hands or clothing, this may result
in personal injury.
The inside of the machine and the output slot are very hot during and immediately after use. Avoid contact with these areas to
prevent burns. Also, printed paper may be hot immediately after being output, so use caution when handling it. Failure to do
so may result in burns.
MF8580Cdw / MF8550Cdn / MF8540Cdn
MF8280Cw / MF8230Cn
When copying with a thick book placed on the platen glass, do not press the feeder forcefully. Doing so may damage the
platen glass and result in injury.
Be careful not to drop a heavy object, such as a dictionary, on the platen glass. Doing so may damage the platen glass and
result in injury.
Do not carry the machine with the paper drawers or the optional paper drawer
installed. Otherwise, the paper drawer may fall and result in injury.
Laser beam
㻝㻟㻌㻛㻌㻢㻣㻢
This machine is classified as a Class 1 Laser Product under IEC 60825-1: 2007, EN60825-1: 2007. The laser beam can be harmful
to the human body. The laser beam is confined in the laser scanner unit by a cover, so there is no danger of the laser beam
escaping during normal machine operation. Read the following remarks and instructions for safety.
Never open covers other than those indicated in this manual.
Do not remove the caution label attached to the cover of the laser scanner unit.
If you operate the machine in manners other than the control, adjustment, and operating
procedures prescribed in this manual, this may result in hazardous radiation exposure.
If the laser beam should escape and enter your eyes, exposure may cause damage to
your eyes.
IMPORTANT
When transporting the machine
To prevent damage to the machine during transport, perform the following.
Remove the toner cartridges.
Securely pack the machine in the original box with packing materials.
Other precautions
Follow the instructions in the caution label attached to this machine.
Avoid shaking or applying shock to this machine.
Do not forcibly open and close doors, covers, and other parts. Doing so may result in damage to the machine.
Do not touch the toner cartridge contacts (
). Doing so may result in damage to the machine.
To prevent a paper jam, do not turn OFF the power, open/close the operation panel area or covers, and load/unload the paper
when printing.
Use a telephone cable with a length of 3 m or less.
㻝㻠㻌㻛㻌㻢㻣㻢
0ALJ-004
Maintenance and Inspections
Clean this machine periodically. If dust accumulates, the machine may not operate properly. When cleaning, be sure to observe the
Troubleshooting. If the problem cannot be resolved or you feel the machine
following. If a problem occurs during operation, see
When a Problem Cannot Be Solved.
requires an inspection, see
Before cleaning, turn OFF the power and unplug the power plug from the AC power outlet. Failure to do so may result in a fire
or electrical shock.
Unplug the power plug periodically and clean with a dry cloth to remove dust and grime. Accumulated dust may absorb
humidity in the air and may result in a fire if it comes into contact with electricity.
Use a damp, well wrung-out cloth to clean the machine. Dampen cleaning cloths with water only. Do not use alcohol,
benzenes, paint thinners, or other flammable substances. Do not use tissue paper or paper towels. If these substances come
into contact with electrical parts inside the machine, they may generate static electricity or result in a fire or electrical shock.
Check the power cord and plug periodically for damage. Check the machine for rust, dents, scratches, cracks, or excessive
heat generation. Use of poorly-maintained equipment may result in a fire or electrical shock.
The inside of the machine has high-temperature and high-voltage components. Touching these components may result in
burns. Do not touch any part of the machine that is not indicated in the manual.
When loading paper or removing jammed documents or paper, be careful not to cut your hands with the edges of the paper.
IMPORTANT
When removing jammed paper or replacing toner cartridges, be careful not to get any toner on your hands or clothing. If toner
gets on your hands or clothing, wash them immediately with cold water.
㻝㻡㻌㻛㻌㻢㻣㻢
0ALJ-005
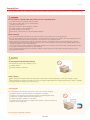
Consumables
Do not dispose of used toner cartridges in open flames. Also, do not store toner cartridges or paper in a location exposed to
open flames. This may cause the toner to ignite, and result in burns or fire.
If you accidentally spill or scatter toner, carefully wipe up the loose toner with a damp, soft cloth and avoid inhaling any toner
dust. Do not use a vacuum cleaner that is not equipped with safety measures to prevent dust explosions to clean up loose
toner. Doing so may cause damage to the vacuum cleaner or result in a dust explosion due to static discharge.
Use caution not to inhale any toner. If you should inhale toner, consult a physician immediately.
Use caution so that toner does not get into your eyes or mouth. If toner should get into your eyes or mouth, immediately
wash with cold water and consult a physician.
Use caution so that toner does not come into contact with your skin. If it should, wash with soap and cold water. If there is
any irritation on your skin, consult a physician immediately.
Keep the toner cartridges and other consumables out of the reach of small children. If toner is ingested, consult a physician or
poison control center immediately.
Do not disassemble or modify the toner cartridge. Doing so may cause the toner to scatter.
Remove the sealing tape of the toner cartridge completely without using excessive force. Doing otherwise may cause the toner
to scatter.
IMPORTANT
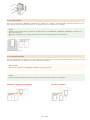
Handling the toner cartridge
Be sure to hold the toner cartridge using the handle and do not touch the drum surface. (
Do not touch the toner cartridge memory (
Do not scratch the drum surface (
) or the electrical contacts (
).
).
) or expose it to light.
Do not remove the toner cartridge from this machine or from the protective bag unnecessarily.
Storing the toner cartridge
㻝㻢㻌㻛㻌㻢㻣㻢
Store in the following environment to ensure safe and satisfactory use.
Storage temperature range: 0 to 35°C
Storage humidity range: 35 to 85% RH (relative humidity/no condensation) *
Store without opening until the toner cartridge is to be used.
When removing the toner cartridge from this machine for storage, attach the protective cover for the drum, and then place
the removed toner cartridge into the original protective bag or wrap it with a thick cloth.
When storing the toner cartridge, do not store it upright or upside down. The toner will solidify and may not return to its
original condition even if it is shaken.
* Even within the storable humidity range, water droplets (condensation) may develop inside the toner cartridge if there is a difference of temperature
inside and outside the toner cartridge. Condensation will adversely affect the print quality of toner cartridges.
Do not store the toner cartridge in the following locations
Locations exposed to open flames
Locations exposed to direct sunlight or bright light for five minutes or more
Locations exposed to excessive salty air
Locations where there are corrosive gases (i.e. aerosol sprays and ammonia)
Locations subject to high temperature and high humidity
Locations subject to dramatic changes in temperature and humidity where condensation may easily occur
Locations with a large amount of dust
Locations within the reach of children
Be careful of counterfeit toner cartridges
Please be aware that there are counterfeit Canon toner cartridges in the marketplace. Use of counterfeit toner cartridge may
result in poor print quality or machine performance. Canon is not responsible for any malfunction, accident or damage caused by
the use of counterfeit toner cartridge.
For more information, see http://www.canon.com/counterfeit.
Availability period of repairing parts and toner cartridges
The repairing parts and toner cartridges for the machine will be available for at least seven (7) years after production of this
machine model has been discontinued.
Toner cartridge packing materials
Save the protective bag for the toner cartridge and protective cover for the drum. They are required when transporting this
machine.
The packing materials may be changed in form or placement, or may be added or removed without notice.
Dispose of the removed sealing tape according to local regulations.
When disposing of a used toner cartridge
Attach the protective cover for the drum, place the toner container into its protective bag to prevent the toner from scattering,
and then dispose of the toner cartridge according to local regulations.
㻝㻣㻌㻛㻌㻢㻣㻢
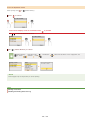
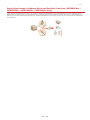
0ALJ-006
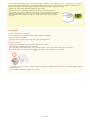
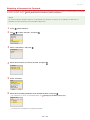
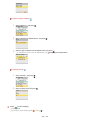
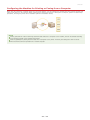
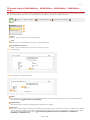
Setting Up the Machine
Follow steps 1 to 9 described below to set up the machine. For more information about a particular step, click on the link to go to the
corresponding section.
Step 1
Checking Supplied Accessories
Step 2
Removing Packing Materials
Step 3
Preparing Toner Cartridges
Step 4
Loading Paper
Step 5
Installing the Handset (Optional) (MF8580Cdw / MF8550Cdn / MF8280Cw Only)
Step 6
Connecting the Power Cord
Step 7
Turning ON the Power and Configuring Initial Settings
Step 8
Connecting to a Computer
㻝㻤㻌㻛㻌㻢㻣㻢
Step 9
Configuring Initial Settings for Fax Functions (MF8580Cdw / MF8550Cdn / MF8280Cw Only)
㻝㻥㻌㻛㻌㻢㻣㻢
0ALJ-007
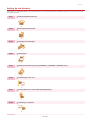
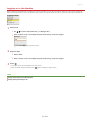
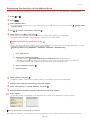
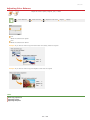
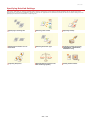
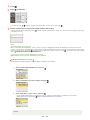
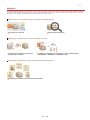
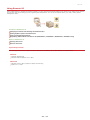
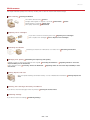
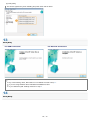
Checking Supplied Accessories
If an item is missing or damaged, contact our Canon Authorized Service Facilities or the Canon Customer Care Center.
The machine
Toner cartridge(s)
Getting Started
Shortcut key label
MF8580Cdw / MF8550Cdn / MF8540Cdn Only
User Software CD-ROM
Multi-lingual User Manual CD
MF8580Cdw / MF8550Cdn / MF8280Cw Only
Telephone cable
Handset cable clamps
MF8580Cdw / MF8280Cw Only
Wireless LAN Setting Guide
MF8280Cw / MF8230Cn Only
㻞㻜㻌㻛㻌㻢㻣㻢
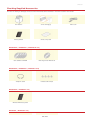
Power cord
User Software CD-ROM
Multi-lingual User Manual CD
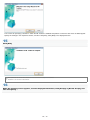
NOTE
The included items may vary depending on your country or region.
The machine does not come with a USB cable, LAN cable, or router. Have them ready as necessary.
Make sure that the USB cable you use has the following mark.
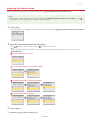
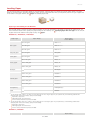
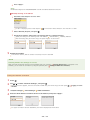
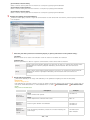
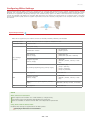
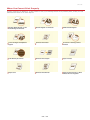
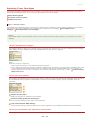
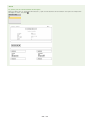
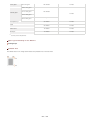
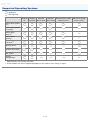
Supplied Toner Cartridges
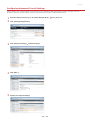
The average yields of the toner cartridges that come with the machine are shown in the table below.
* The average yield is based on "ISO/IEC 19798" (the global standard related to "Method for the determination of toner cartridge yield for
color printers and multi-function devices that contain printer components" issued by ISO [International Organization for Standardization])
when printing A4 size paper with the default print density setting.
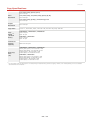
MF8580Cdw / MF8550Cdn / MF8540Cdn
Average yield of toner cartridge *
Canon Genuine Toner Cartridge
Canon Cartridge 718 Black Starter
1,200 sheets
Canon Cartridge 718 Yellow Starter
Canon Cartridge 718 Magenta Starter
Composite Y (Yellow), M (Magenta), and C (Cyan): 1,400 sheets
Canon Cartridge 718 Cyan Starter
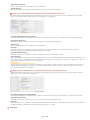
MF8280Cw / MF8230Cn
Average yield of toner cartridge *
Canon Genuine Toner Cartridge
Canon Cartridge 731 Black Starter
800 sheets
Canon Cartridge 731 Yellow Starter
Canon Cartridge 731 Magenta Starter
Composite Y (Yellow), M (Magenta), and C (Cyan): 800 sheets
Canon Cartridge 731 Cyan Starter
NOTE
Use the table of average yields above as a guide for replacing toner cartridges. However, depending on the
installation environment or printing paper size or type, you may need to replace a toner cartridge before the
end of the estimated lifetime.
Replacement toner cartridges are different from the supplied toner cartridges, so the yield may also differ.
About Replacement Toner Cartridges
Specifying an auto shutdown time shorter than the default setting (4 hours) may shorten the life of the toner
cartridges.
㻞㻝㻌㻛㻌㻢㻣㻢
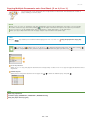
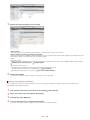
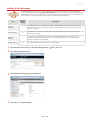
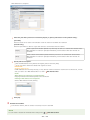
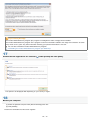
About the User Software CD-ROM
The User Software CD-ROM includes various drivers, tools and other useful software. Install the items as necessary.
MF Drivers
Includes the printer drivers, fax driver (MF8580Cdw / MF8550Cdn / MF8280Cw only) and scanner
driver, as well as the MF Network Scan Utility, which is used when scanning documents over a
network.
MF Toolbox
Enables you to use scanned images with applications, attach them to e-mail messages, or save
them to a hard disk.
Presto!
PageManager
You can handle scanned images in many ways by using this software. Install this software by
selecting [Custom Installation] on the setup screen.
NOTE
Depending on the operating system you are using, some functions may not be usable. The newest software is
posted on the Canon web site. Please verify the operating environment etc. and download the appropriate
software if required.
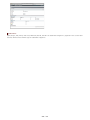
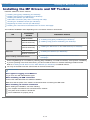
Manuals Included with the Machine
The manuals listed below are included with the machine. Refer to them as necessary.
»
Getting Started
Read this manual first. It describes basic setup procedures, from removing
the packing materials to setting up the machine.
Wireless LAN
Setting
Guide (MF8580Cdw
/ MF8280Cw Only)
This manual describes the procedure for connecting the machine to a
wireless LAN router, it also contains information for troubleshooting when
configuring the settings. Read this manual with Getting Started.
e-Manual (This
Manual)
This manual describes all the functions of the machine in a manual that is
viewed using a Web browser. You can browse information by category or
Using e-Manual
enter a keyword to search for pages on a specific topic.
MF Driver
Installation Guide
This manual describes how to install the MF Drivers, MF Toolbox, and
software included on the User Software CD-ROM.
Send Setting
Guide (MF8580Cdw
/ MF8550Cdn /
MF8540Cdn Only)
This manual describes how to configure settings and prepare for sending
scanned images by e-mail and saving scanned images to shared folders.
Continue to
Removing Packing Materials
㻞㻞㻌㻛㻌㻢㻣㻢
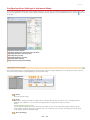
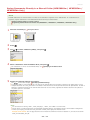
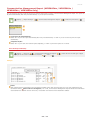
0ALJ-008
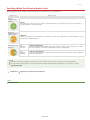
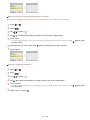
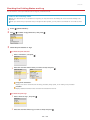
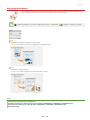
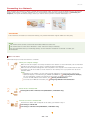
Removing Packing Materials
Read the precautions in
Installation and
Handling, and then carry the machine to the installation site and remove all of the
orange tape and packing materials. The shape and location of the packing materials described here may differ from those used for your
machine, as the packing materials may have been changed, added or removed without notice.
NOTE
Save the packing materials
The box and packing materials included at the time of purchase will be needed when transporting the machine for relocation or
maintenance.
When installing the optional paper drawer (MF8580Cdw / MF8550Cdn / MF8540Cdn only)
Install the optional paper drawer (Drawer 2) before moving the machine. For details on how to install the paper drawer, see the
installation manual included with the optional paper drawer.
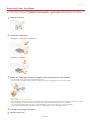
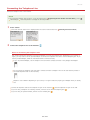
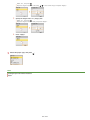
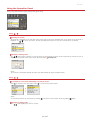
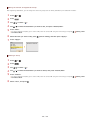
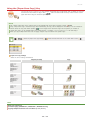
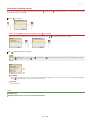
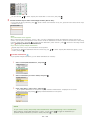
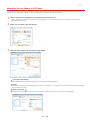
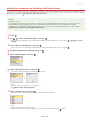
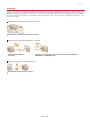
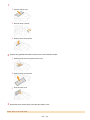
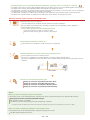
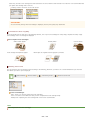
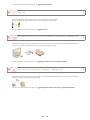
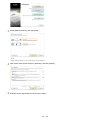
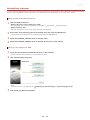
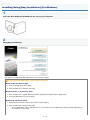
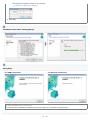
1
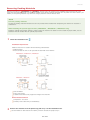
Check the installation site.
Installation Requirements
Install the machine in a location with the following characteristics:
Sufficient space
Ensure at least 100 mm on the right side and back side of the machine.
MF8580Cdw / MF8550Cdn / MF8540Cdn
MF8280Cw / MF8230Cn
Good ventilation
A flat, even surface
A stable surface able to fully support the weight of the machine
Environmental Conditions
Temperature: 10 to 30°C
Humidity: 20% to 80% RH (no condensation)
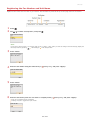
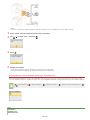
2
Remove the machine from the plastic bag and carry it to the installation site.
Use the handles on both sides of the machine, and have at least two people carry it.
㻞㻟㻌㻛㻌㻢㻣㻢
MF8580Cdw / MF8550Cdn / MF8540Cdn
MF8280Cw / MF8230Cn
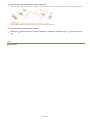
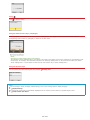
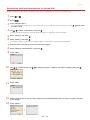
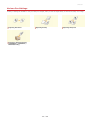
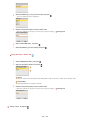
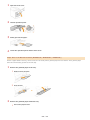
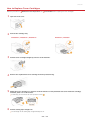
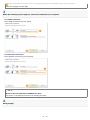
3
Fully open the rear cover.
MF8580Cdw / MF8550Cdn / MF8540Cdn
MF8280Cw / MF8230Cn
4
Remove the tape and packing materials.
MF8580Cdw / MF8550Cdn / MF8540Cdn
MF8280Cw / MF8230Cn
㻞㻠㻌㻛㻌㻢㻣㻢
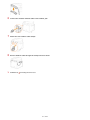
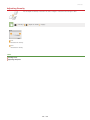
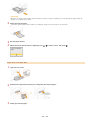
5
6
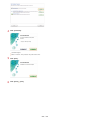
Close the rear cover.
Open the feeder.
7
Remove the tape and packing materials.
8
Gently close the feeder.
NOTE
Make sure that all the packing materials have been removed from the machine.
MF8280Cw / MF8230Cn
MF8580Cdw / MF8550Cdn / MF8540Cdn
»
Continue to
Preparing Toner Cartridges
㻞㻡㻌㻛㻌㻢㻣㻢
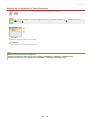
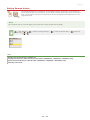
0ALJ-009
Preparing Toner Cartridges
The machine comes with toner cartridges installed at the time of purchase. You must remove the sealing tape from the cartridges to use
Maintenance and Inspections and
Consumables before preparing the toner cartridges.
the machine. Read the precautions in
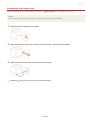
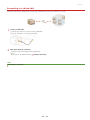
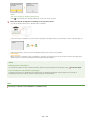
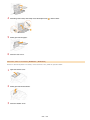
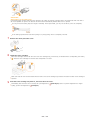
1
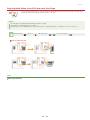
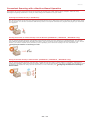
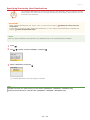
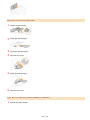
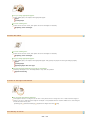
Open the front cover.
2
Pull out the cartridge tray.
MF8580Cdw / MF8550Cdn / MF8540Cdn
MF8280Cw / MF8230Cn
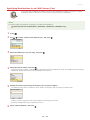
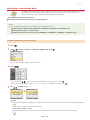
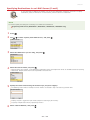
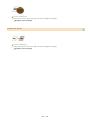
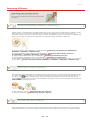
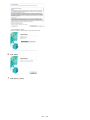
3
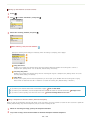
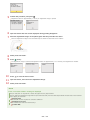
Remove the sealing tape by pulling it straight up while holding down the toner cartridge.
The full length of the sealing tape is approximately 50 cm.
There is a toner cartridge for each of the four colors. Remove the sealing tape from each toner cartridge.
IMPORTANT:
When pulling out the sealing tape
If the sealing tape remains inside the toner cartridge, the quality of printouts, including faxes, may deteriorate. Also note that it
will not be possible to reprint a fax because the fax function automatically deletes data once it is printed.
Do not pull the sealing tape at an angle. If the tape breaks, you may not be able to pull it out completely.
If the sealing tape becomes stuck when pulling it out, keep pulling until it is completely removed.
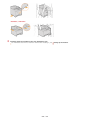
4
5
Push the toner cartridge tray back in.
Close the front cover.
㻞㻢㻌㻛㻌㻢㻣㻢
NOTE
Make sure that all four strips of sealing tape have been removed from the machine.
»
Continue to
Loading Paper
㻞㻣㻌㻛㻌㻢㻣㻢
0ALJ-00A
Loading Paper
This section describes how to load A4 size paper into the paper drawer. Read the precautions in
Inspections before loading paper.
Maintenance and
IMPORTANT
When loading paper other than A4 size paper
The initial setting screen is displayed the first time you turn ON the machine. Follow the on-screen instructions to load the paper.
Note that only A4 size paper can be loaded in the machine at this time. If you want to load a different size paper, complete the
initial settings first, and then change the paper size and type.
Loading Paper in the Paper Drawer
Specifying Paper Size and Type
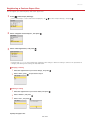
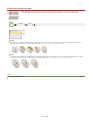
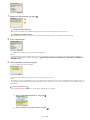
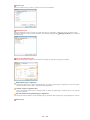
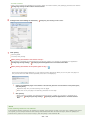
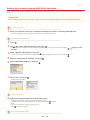
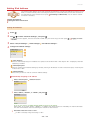
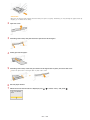
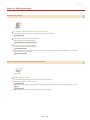
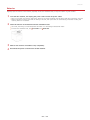
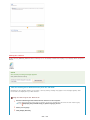
1
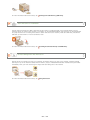
Pull out the paper drawer.
IMPORTANT:
Make sure to hold the paper drawer with both hands, and pull it out gently. Otherwise, you may damage the paper drawer by
dropping it, if it slides out too easily.
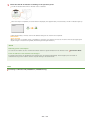
2
Slide the paper guides apart.
Press the lock release lever to slide the paper guides outward. On the MF8280Cw / MF8230Cn, there is no lock release lever for
the side paper guides.
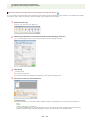
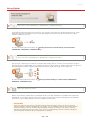
3
Load the paper so that the edge of the paper stack is aligned against the rear side of the paper drawer.
Fan the paper stack well, and tap it on a flat surface to align the edges.
IMPORTANT:
Do not exceed the load limit line when loading paper
Make sure that the paper stack does not exceed the load limit line (
㻞㻤㻌㻛㻌㻢㻣㻢
). Loading too much paper can cause paper jams.
4
Align the paper guides against the edges of the paper.
Press the lock release lever and slide the paper guides inward until they are aligned securely against the edges of the paper.
IMPORTANT:
Align the paper guides securely against the edges of the paper
Paper guides that are too loose or too tight can cause misfeeds or paper jams.
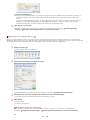
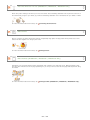
5
»
Insert the paper drawer into the machine.
Continue to
Installing the Handset (Optional) (MF8580Cdw / MF8550Cdn / MF8280Cw Only) or
Cord
LINKS
Loading Paper
㻞㻥㻌㻛㻌㻢㻣㻢
Connecting the Power
0ALJ-00C
Installing the Handset (Optional) (MF8580Cdw / MF8550Cdn / MF8280Cw
Only)
Install the optional handset on the machine. Have all of the included parts ready before you start installing.
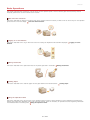
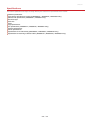
1
Remove the two covers.
2
Insert the plugs with pins into the holes on the handset cradle.
NOTE:
Do not fully insert the pins into the plugs at this point.
3
Insert the plugs (with the cradle) into the holes on the machine.
4
Carefully push the pins into the plugs as far as they will go.
5
Place the handset on the cradle.
㻟㻜㻌㻛㻌㻢㻣㻢
6
Connect the modular handset cable to the handset jack.
7
Attach the four handset cable clamps.
8
Run the handset cable through the clamps and close them.
»
Continue to
Connecting the Power Cord
㻟㻝㻌㻛㻌㻢㻣㻢
0ALJ-00E
Connecting the Power Cord
Connect the power cord to the machine. Read the precautions in
Power Supply before connecting the power cord.
NOTE
Do not connect the USB cable yet. Wait until you install the software to connect the USB cable.
1
Make sure that the machine is turned OFF.
2
Plug the female end of the power cord into the power socket on the back of the machine.
3
Plug the male end of the power cord into an AC power outlet.
»
Continue to
Turning ON the Power and Configuring Initial Settings
㻟㻞㻌㻛㻌㻢㻣㻢
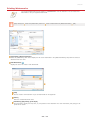
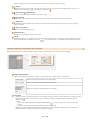
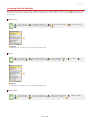
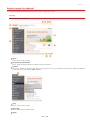
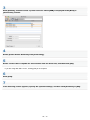
0ALJ-00F
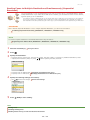
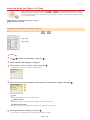
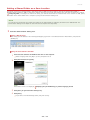
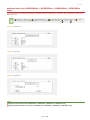
Turning ON the Power and Configuring Initial Settings
Turn ON the machine, and follow the on-screen instructions to configure the initial settings.
1
Turn ON the machine.
2
Use
/
to select the display language, and press
3
Use
/
to select your country or region, and press
4
Read the reminder messages that are displayed, and press <Next> to continue.
.
.
NOTE:
If the <Open the back cover, then remove the protective sheet.> message is shown on the display, remove the packing materials
under the rear cover.
Removing Packing Materials
5
Use
/
to select your UTC time zone, and press
.
NOTE:
UTC
Coordinated Universal Time (UTC) is the primary time standard by which the world regulates clocks and time. The correct UTC
time zone setting is required for Internet communications.
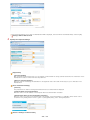
6
Enter the date and time, and press <Apply>.
Use
/
to change the numbers and switch between <AM> and <PM>.
Use
/
to move the cursor.
㻟㻟㻌㻛㻌㻢㻣㻢
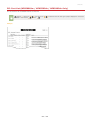
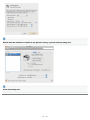
7
Use
/
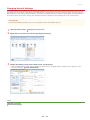
to select whether or not to perform color correction, and press
.
When color correction is performed, you can make copies and prints that more closely reproduce the colors and density of the
original document. The time it takes to apply color correction is approximately 2 to 4 minutes. Color correction can be performed
later.
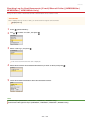
Performing color correction
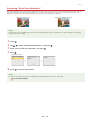
1
Check that the size and type of paper displayed on the screen is loaded in the machine, and press
2
Confirm the procedure, and press
.
.
An adjustment image is printed.
3
Open the feeder after the screen displayed during printing disappears.
4
Place the adjustment image on the platen glass with the print side face down.
Place the adjustment image so that the black stripe is toward the back side of the machine.
5
Gently close the feeder.
6
Press
(Color).
The machine starts scanning the adjustment image.
7
Open the feeder and remove the adjustment image.
8
Gently close the feeder.
NOTE
If the <Correction failed.> message is displayed
Did you load plain or recycled A4 or Letter size paper into the drawer?
Did you place the adjustment image with the print side face down, with the black stripe toward the back side of
㻟㻠㻌㻛㻌㻢㻣㻢
the machine?
Has a paper jam occurred?
Clearing Jams
If you want to perform color correction again
Follow the on-screen instructions until the screen shown on the right in step 8 is displayed, and then perform
color correction again.
Adjust Copy Image
8
»
»
Confirm that one of the screens shown here is displayed.
If you want to connect the machine to a computer, continue to
Connecting to a Computer
If you do not want to connect the machine to a computer and are using MF8540Cdn / MF8230Cn, the initial
settings are complete. If you are using MF8580Cdw / MF8550Cdn / MF8280Cw, use
/
to select <No>
Configuring Initial Settings for Fax Functions (MF8580Cdw / MF8550Cdn /
and press
, and then proceed to
MF8280Cw Only)
㻟㻡㻌㻛㻌㻢㻣㻢
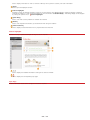
0ALJ-00H
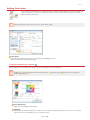
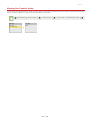
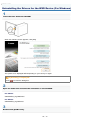
Connecting to a Computer
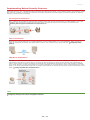
When connecting the machine to a computer, you can select whether to connect via wireless LAN, wired LAN, or USB. Select the
connection method that best suits your environment and devices.
Connecting via Wireless LAN (MF8580Cdw / MF8280Cw Only)
A LAN cable is not required because wireless communications (radio waves) are
used to connect the machine and the router.
/
to select <Yes>, and press
, and then proceed to
If you want to connect the machine to a computer via wireless LAN now, use
Connecting via Wireless LAN (MF8580Cdw / MF8280Cw Only). If you want to connect via wireless LAN later, use
/
to select
, and then proceed to
Configuring Initial Settings for Fax Functions (MF8580Cdw / MF8550Cdn /
<No>, and press
MF8280Cw Only) to configure the fax settings.
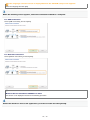
Connecting via Wired LAN
Use a LAN cable to connect the machine to the router.
If the screen shown below is displayed, use
/
If the screen shown below is displayed, proceed to
to select <No>, and press
, and then proceed to
Connecting via Wired LAN.
Connecting via Wired LAN.
Connecting via USB
The machine and computer are connected via a USB cable.
If the screen shown below is displayed, use
/
to select <No>, and press
㻟㻢㻌㻛㻌㻢㻣㻢
, and then proceed to
Connecting via USB.
If the screen shown below is displayed, proceed to
Connecting via USB.
NOTE
The machine does not come with a LAN cable or router. Have them ready as necessary.
If you are not sure whether the router you are using supports wireless LAN or wired LAN, see the instruction manual provided
with the router, or contact your manufacturer.
The operating systems listed below are compatible with the included software, such as the drivers, which are used for
connecting the machine to a computer. For information about the latest supported operating systems and Service Packs, see
the Canon Web site (http://www.canon.com/).
Windows XP/Vista/7/8/Server 2003 * /Server 2008 * /Server 2012 *
* These operating systems can be used only with network connection. The scan function is not supported.
㻟㻣㻌㻛㻌㻢㻣㻢
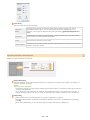
0ALJ-00J
Connecting via Wireless LAN (MF8580Cdw / MF8280Cw Only)
The machine and computer are connected via a wireless LAN router. A LAN cable is not required because wireless communications (radio
waves) are used to connect the machine and the router.
NOTE
The machine does not come with a wireless LAN router. Have it ready as necessary.
The wireless router must conform to IEEE 802.11b/g/n and be able to communicate in 2.4 GHz bandwidth. For more
information, see the instruction manual provided with the router, or contact your manufacturer.
The machine cannot connect to both wired and wireless LANs at the same time. When using a wireless LAN connection, do not
connect a LAN cable to the machine. Doing so may cause a malfunction.
If using the machine in your office, consult your Network Administrator.
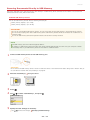
1
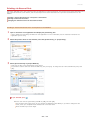
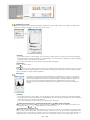
Check the device and network settings.
Have the computer and the router been connected properly? For more information, see the
instruction manuals included with the devices you are using, or contact the device
manufacturers.
Have the network settings been completed on the computer? If the network has not been
set up properly, you will not be able to use the machine on the wireless LAN network, even
if you perform the rest of the procedure below.
2
Check the router.
Check your router for a WPS button. The procedure will vary depending on whether or not the router has a WPS button.
3
Configure the wireless LAN settings.
See Wireless LAN Setting Guide or
wireless LAN settings.
Connecting to a Wireless LAN (MF8580Cdw / MF8280Cw Only) to configure the
NOTE:
If this screen is not displayed, press
4
<Network Settings>
<Wireless LAN Settings> to display it.
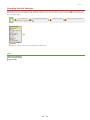
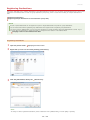
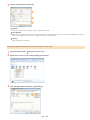
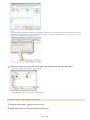
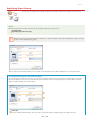
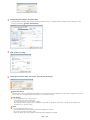
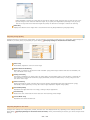
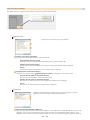
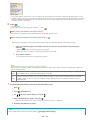
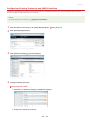
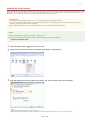
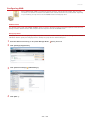
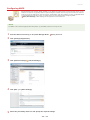
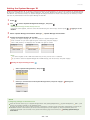
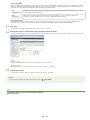
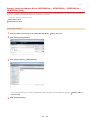
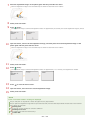
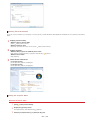
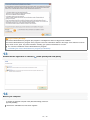
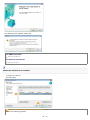
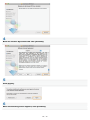
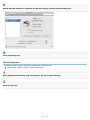
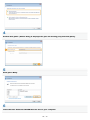
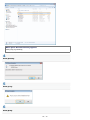
Check that the settings have been completed properly.
1
Check the IP address.
Viewing Network Settings
Write down the IP address that is displayed.
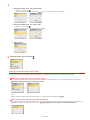
2
Open a Web browser on the computer.
3
Enter "http://(the IP address of the machine)/" in the address field, and press the [ENTER] key.
If a Remote UI screen like the one shown here is displayed, a proper connection has been established.
㻟㻤㻌㻛㻌㻢㻣㻢
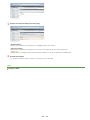
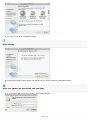
NOTE:
If the Remote UI screen is not displayed
Make sure that the machine is properly connected to the computer via a wireless LAN.
Problems
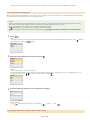
5
Installation/Settings
Install the software.
Install the MF Drivers, MF Toolbox, and the other included software. For more information, see MF Driver Installation Guide.
»
After installing the software, continue to
Configuring Initial Settings for Fax Functions (MF8580Cdw / MF8550Cdn /
MF8280Cw Only)
㻟㻥㻌㻛㻌㻢㻣㻢
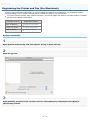
0ALJ-00K
Connecting via Wired LAN
The machine and computer are connected via a wired LAN router. Use a LAN cable to connect the machine to the router.
NOTE
The machine does not come with a LAN cable or router. Have them ready as necessary. Use a Category 5 or higher twisted
pair cable for the LAN.
Make sure that there are ports available on the router to connect the machine and the computer.
The machine supports 10BASE-T and 100BASE-TX connections. If you want to connect the machine to a 100BASE-TX Ethernet
network, all the devices connected to the LAN (router, LAN cable, and network board for computer) must support 100BASE-TX.
The machine cannot connect to both wired and wireless LANs at the same time. If you are switching from wireless LAN to
wired LAN, change the connection method to <Wired LAN> beforehand.
Selecting Wired LAN or Wireless
LAN (MF8580Cdw / MF8280Cw Only)
If using the machine in your office, consult your Network Administrator.
1
Check the device and network settings.
Has the LAN cable been properly connected to the computer and router? For more
information, see the instruction manuals included with the devices you are using, or contact
the device manufacturers.
Have the network settings been completed on the computer? If the network has not been
set up properly, you will not be able to use the machine on the wired LAN network, even if
you perform the rest of the procedure below.
2
Connect a LAN cable.
Connect the machine to a router by using a LAN cable.
Push the connector in until it clicks into place.
3
Wait approximately 2 minutes.
While you wait, the IP address is set automatically.
NOTE:
You can set the IP address manually.
4
Setting IP Addresses
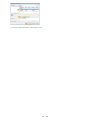
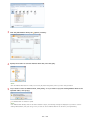
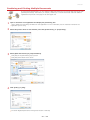
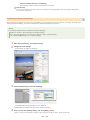
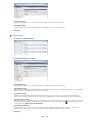
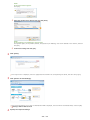
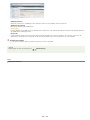
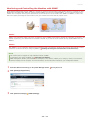
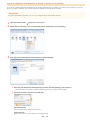
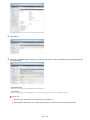
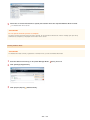
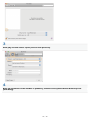
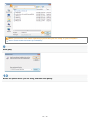
Check that the settings have been completed properly.
1
Check the IP address.
Viewing Network Settings
Write down the IP address that is displayed.
2
Open a Web browser on the computer.
3
Enter "http://(the IP address of the machine)/" in the address field, and press the [ENTER] key.
If a Remote UI screen like the one shown here is displayed, a proper connection has been established.
㻠㻜㻌㻛㻌㻢㻣㻢
NOTE:
If the Remote UI screen is not displayed
Make sure that the machine, computer, and router are connected properly via LAN cables, and the IP address is
Installation/Settings Problems
set correctly.
5
Install the software.
Install the MF Drivers, MF Toolbox, and the other included software. For more information, see MF Driver Installation Guide.
»
»
If you are using MF8580Cdw / MF8550Cdn / MF8280Cw, continue to
Configuring Initial Settings for Fax
Functions (MF8580Cdw / MF8550Cdn / MF8280Cw Only) after installing the software.
If you are using MF8540Cdn / MF8230Cn, the settings for connecting to a computer are complete.
㻠㻝㻌㻛㻌㻢㻣㻢
0ALJ-00L
Connecting via USB
Install the software, and then use a USB cable to connect the machine to the computer. The machine does not come with a USB cable.
Have a cable ready as necessary.
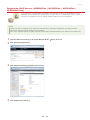
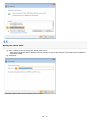
1
Install the software.
Install the MF Drivers, MF Toolbox, and the other included software. For more information, see MF Driver Installation Guide.
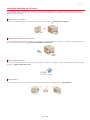
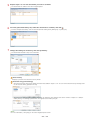
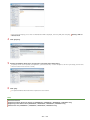
2
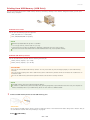
Remove the cap that covers the USB port on the back side of the machine.
Pull the string to remove the cap.
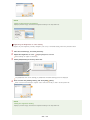
3
Connect the USB cable.
Connect the flat end (
) to the USB port on the computer.
Connect the square end (
) to the USB port on the machine.
NOTE:
If the dialog box prompting you to install the software is displayed, disconnect the USB cable from the computer, click [Cancel],
and then start from step 1 again.
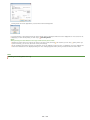
»
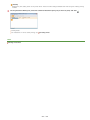
If you are using MF8580Cdw / MF8550Cdn / MF8280Cw, continue to
»
If you are using MF8540Cdn / MF8230Cn, the settings for connecting to a computer are complete.
Configuring Initial Settings for Fax
Functions (MF8580Cdw / MF8550Cdn / MF8280Cw Only)
㻠㻞㻌㻛㻌㻢㻣㻢
0ALJ-00R
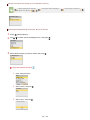
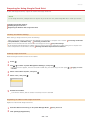
Configuring Initial Settings for Fax Functions (MF8580Cdw / MF8550Cdn /
MF8280Cw Only)
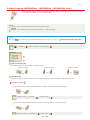
Follow steps 1 to 4 described below to configure the fax settings. First, determine which receive mode best suits your intended use, and
then follow the on-screen instructions to configure the settings. For more information about a particular step, click on the link to go to
the corresponding section.
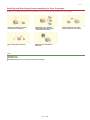
Step 1
Deciding Which Fax Receive Mode to Use
Step 2
Registering the Fax Number and Unit Name
Step 3
Selecting the Receive Mode
Step 4
Connecting the Telephone Line
㻠㻟㻌㻛㻌㻢㻣㻢
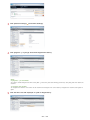
0ALJ-00S
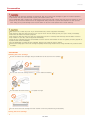
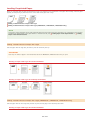
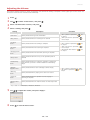
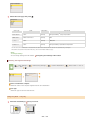
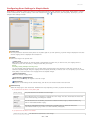
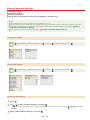
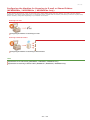
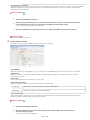
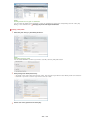
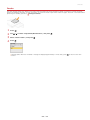
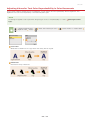
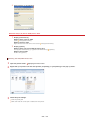
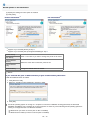
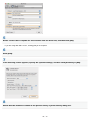
Deciding Which Fax Receive Mode to Use
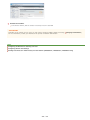
Before configuring the fax settings, determine which receive mode best suits your intended use.
Intended use
Receive mode
Use fax
only/Never use
telephone
<Auto>
This setting is for when you want to use the machine exclusively for receiving faxes, and you do not want to
use the telephone or optional handset.
Mostly use
telephone/Almost
never use fax
<Manual>
Connect your telephone to the machine. This setting is for when you mostly want to use the telephone. You can
receive incoming faxes manually.
Use both fax and
telephone
Use
answering
machine
<Answering Machine>
Connect your answering machine. Callers can record a message if they call while you are away
from the telephone. The machine automatically receives incoming faxes.
Use
standard
telephone
<Fax/Tel Auto Switch>
Connect your telephone. The machine automatically receives incoming faxes, and the telephone
rings for incoming calls.
NOTE
Depending on the type of telephone connected to it, the machine may not be able to send or receive faxes properly.
You may be able to manually set a receive mode other than those described above, depending on your country or region.
Receiving Faxes
»
Continue to
Registering the Fax Number and Unit Name
LINKS
Receiving Faxes
㻠㻠㻌㻛㻌㻢㻣㻢
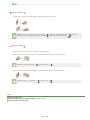
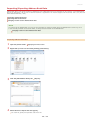
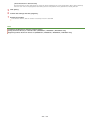
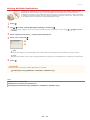
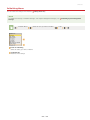
0ALJ-00U
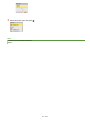
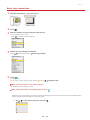
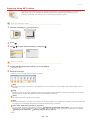
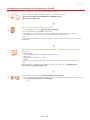
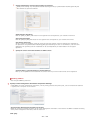
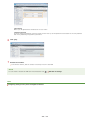
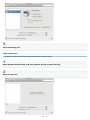
Registering the Fax Number and Unit Name
Register the fax number and unit name of your machine. This information is printed at the top of each page sent from the machine.
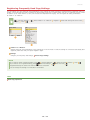
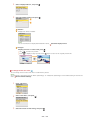
1
2
Press
Use
.
/
to select <Set Up Now>, and press
.
NOTE:
If you select <Set Up Later>, the receive mode is set to <Auto>. Later, when you want to configure the fax settings, display the
fax setup screen by pressing
<Fax Settings>
<Fax Setup Guide>.
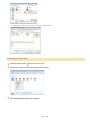
3
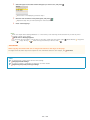
Press <Next>.
4
Enter the fax number using the numeric keys (
5
Press <Next>.
6
Enter the unit name (such as a user name or company name) (
Entering Text ), and press <Apply>.
Enter up to 24 alphanumeric characters.
Pressing <A/a/12> toggles the input modes.
㻠㻡㻌㻛㻌㻢㻣㻢
Entering Text ), and press <Apply>.
»
Continue to
Selecting the Receive Mode
LINKS
Sending Faxes
㻠㻢㻌㻛㻌㻢㻣㻢
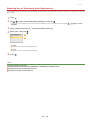
0ALJ-00W
Selecting the Receive Mode
Select the receive mode that suits your intended use beforehand (
Deciding Which Fax Receive Mode to Use).
NOTE
If you previously selected <Set Up Later> on the fax setup screen ( Registering the Fax Number and Unit Name), press
<Fax Settings> <Fax Setup Guide> to display the fax setup screen.
1
Press <Next>.
The screen shown here is displayed after the unit name has been registered (
2
Registering the Fax Number and Unit Name).
Select the receive mode that suits your intended use.
Use
/
to select <Yes> or <No>, and press
to select the receive mode.
NOTE:
You may be able to manually set a receive mode other than those described below, depending on your country or region.
Receiving Faxes
To set the receive mode to <Auto>
To set the receive mode to <Fax/Tel Auto Switch>
To set the receive mode to <Answering Machine>
To set the receive mode to <Manual>
3
»
Press <Apply>.
Continue to
Connecting the Telephone Line
㻠㻣㻌㻛㻌㻢㻣㻢
LINKS
Receiving Faxes
㻠㻤㻌㻛㻌㻢㻣㻢
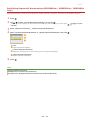
0ALJ-00X
Connecting the Telephone Line
Connect the telephone line to the machine.
NOTE
If you previously selected <Set Up Later> on the fax setup screen ( Registering the Fax Number and Unit Name), press
<Fax Settings> <Fax Setup Guide> to display the fax setup screen.
1
Press <Next>.
One of the screens shown here is displayed after the receive mode has been set (
2
Selecting the Receive Mode).
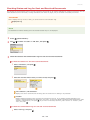
Connect the telephone line to the machine.
Notice for Connecting the Telephone Line
This product includes the Telephone Line Cord and Adapter to connect the telephone line. Depending on your country or
region, you may need to use the provided Adapter to connect the Telephone Line Cord to the wall telephone jack. If you
use the provided Adapter, follow the instructions below to connect correctly.
If you use provided Adapter, use the Telephone Line Cord with 6 contacts connector in the package with Adapter.
Do not connect the Telephone Line Cord with 2 contacts connector to Adapter. There is the case that this product or
connected telephone does not work correctly.
Adapter to use is different depending on your country or a region. Select the proper type of Adapter which you usually
use.
Connect the telephone cable to the telephone line jack on the machine (
) and the telephone line jack on the wall.
If you are using a telephone or answering machine, connect it to the external telephone jack (
If you are using an optional handset, connect it to the handset jack (
㻠㻥㻌㻛㻌㻢㻣㻢
).
).
NOTE:
If you are connecting an external telephone with fax functions, set up the telephone to receive faxes manually.
3
4
Press <Next> after the telephone line has been connected.
Use
/
to select <Yes>, and press
5
Press
6
Restart the machine.
.
.
Turn OFF the machine, wait for at least 10 seconds, and turn it back ON.
When the machine is restarted, the telephone line type is automatically set.
If the machine does not automatically set the type of telephone line
Follow the procedure below to set the type of telephone line. If you are not sure of the type of phone line you are using, contact
your local telephone company. <Select Line Type> may not be available depending on the country where you are using the machine.
<Fax Settings>
<Basic Settings>
<Select Line Type>
LINKS
Installation
Sending Faxes
Receiving Faxes
㻡㻜㻌㻛㻌㻢㻣㻢
Select the type of telephone line
0ALJ-00Y
Basic Operations
This chapter describes basic operations, such as how to use the operation panel or how to load the paper and documents, that are
frequently performed to use the functions of the machine.
Parts and Their Functions
This section describes the exterior and interior parts of the machine and their functions, as well as how to use the keys on the operation
Parts and Their Functions
panel and how to view the display.
Logging on to the Machine
This section describes how to log on when the screen for entering the Department ID and PIN is displayed.
Machine
Logging on to the
Placing Documents
This section describes how to place documents on the platen glass and in the feeder.
Placing Documents
Loading Paper
This section describes how to load the paper into the paper drawer and manual feed slot.
Loading Paper
Using the Operation Panel
This section describes how to use the keys on the operation panel to perform various operations, such as adjusting and checking the
settings. This section also describes how to enter text and numbers, which are necessary for operations such as registering information
Using the Operation Panel
in the Address Book and sending faxes.
㻡㻝㻌㻛㻌㻢㻣㻢
Registering in the Address Book
This section describes how to register destinations for sending faxes or scanned documents.
Book (MF8580Cdw / MF8550Cdn / MF8540Cdn / MF8280Cw Only)
Registering in the Address
Adjusting the Volume
This section describes how to adjust the volume of various machine sounds, such as those produced when fax sending is complete or
Adjusting the Volume
when an error occurs.
Entering Sleep Mode
This section describes how to set the sleep mode.
Entering Sleep Mode
Setting Auto Shutdown Time
This section describes how to enable the <Auto Shutdown Time> setting.
Only)
㻡㻞㻌㻛㻌㻢㻣㻢
Setting Auto Shutdown Time (MF8540Cdn / MF8230Cn
0ALJ-010
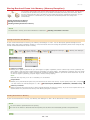
Parts and Their Functions
This section describes the parts of the machine (exterior, front and back side, and interior) and how they function. In addition to
describing the parts of the machine used for such basic operations as placing documents, loading paper, and replacing the toner
cartridges, this section also describes the keys on the operation panel and display. Read this section for tips on how to use the machine
properly.
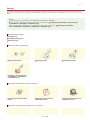
Front Side
Back Side
Interior
Manual Feed Slot
Paper Drawer
Operation Panel
Shortcut Keys
Display
㻡㻟㻌㻛㻌㻢㻣㻢
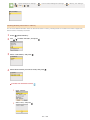
0ALJ-011
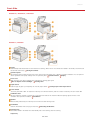
Front Side
MF8580Cdw / MF8550Cdn / MF8540Cdn
MF8280Cw / MF8230Cn
Feeder
Automatically feeds documents into the machine for scanning. When two or more sheets are loaded in the feeder, documents can
be scanned continuously.
Placing Documents
Operation panel
The operation panel consists of keys such as the numeric keys and [Start] key, a display, and status indicators. You can perform
all the operations and specify settings from the operation panel.
Operation Panel
Display
Front cover
Open the front cover when replacing toner cartridges or clearing paper jams.
How to Replace Toner Cartridges
Clearing Jams
Paper drawer
Load the type of paper you frequently use into the paper drawer.
Loading Paper in the Paper Drawer
Power switch
Turns the power ON or OFF. To restart the machine, turn OFF the machine, wait for at least 10 seconds, and turn it back ON.
Ventilation slots
Air from inside the machine is vented out to cool down the inside of the machine. Note that placing objects in front of the
ventilation slots prevents ventilation.
Installation
Speaker
Emits sounds produced by the machine, such as fax tones and warning tones.
Lift handles
Hold the lift handles when carrying the machine.
Relocating the Machine
Scanning area
Documents loaded in the feeder are automatically fed to the scanning area for scanning.
Output tray
㻡㻠㻌㻛㻌㻢㻣㻢
Printed paper is output to the output tray.
Manual feed transport guide
Lower the manual feed transport guide when paper is jammed in the manual feed slot to remove the jammed paper.
Jams
Clearing
Platen glass
Place documents to scan on the platen glass. Also, use the platen glass to place thick or bound documents such as books when
they cannot be loaded in the feeder.
Placing Documents
USB memory port
You can connect a USB memory device to the machine and directly print the data from the USB memory device. Documents
scanned by using the machine can also be saved directly to the USB memory device.
Printing from USB Memory (USB
Scanning Documents Directly to USB Memory
Print)
Manual feed slot
Load the paper into the manual feed slot when you want to temporarily use a type of paper different from that which is loaded in
the paper drawer.
Loading Paper in the Manual Feed Slot
㻡㻡㻌㻛㻌㻢㻣㻢
0ALJ-012
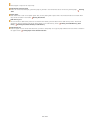
Back Side
MF8580Cdw / MF8550Cdn / MF8540Cdn
MF8280Cw / MF8230Cn
Handset Jack (MF8580Cdw / MF8550Cdn / MF8280Cw only)
Connect the optional handset.
Installing the Handset (Optional) (MF8580Cdw / MF8550Cdn / MF8280Cw Only)
USB port
Connect a USB cable when connecting the machine and a computer.
Connecting via USB
LAN port
Connect a LAN cable when connecting the machine to a wired LAN router, etc.
Connecting via Wired LAN
Telephone line jack (MF8580Cdw / MF8550Cdn / MF8280Cw only)
Connect a telephone cable when connecting the machine to a telephone line.
Connecting the Telephone Line
External telephone jack (MF8580Cdw / MF8550Cdn / MF8280Cw only)
Connect your telephone or answering machine.
Connecting the Telephone Line
Rear cover
Open the rear cover when clearing paper jams.
Clearing Jams
Rating label
The label shows the serial number, which is needed when making inquiries about the machine.
Solved
When a Problem Cannot Be
Ventilation slots
Air from inside the machine is vented out to cool down the inside of the machine. Note that placing objects in front of the
ventilation slots prevents ventilation.
Installation
Power socket
Connect the power cord.
Connecting the Power Cord
㻡㻢㻌㻛㻌㻢㻣㻢
0ALJ-013
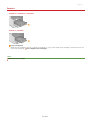
Interior
MF8580Cdw / MF8550Cdn / MF8540Cdn
MF8280Cw / MF8230Cn
Toner cartridge tray
Install the toner cartridges. Load the Y (yellow), M (magenta), C (cyan), and K (black) toner cartridges in the slots from the rear
to the front respectively.
How to Replace Toner Cartridges
LINKS
Replacing Toner Cartridges
㻡㻣㻌㻛㻌㻢㻣㻢
0ALJ-014
Manual Feed Slot
MF8580Cdw / MF8550Cdn / MF8540Cdn
MF8280Cw / MF8230Cn
Paper guides
Adjust the paper guides to exactly the width of the loaded paper to ensure that paper is fed straight into the machine.
Paper tray (MF8580Cdw / MF8550Cdn / MF8540Cdn only)
Pull out the paper tray when loading paper.
Tray extension (MF8580Cdw / MF8550Cdn / MF8540Cdn only)
Open the tray extension when loading large paper.
LINKS
Loading Paper in the Manual Feed Slot
㻡㻤㻌㻛㻌㻢㻣㻢
0ALJ-015
Paper Drawer
MF8580Cdw / MF8550Cdn / MF8540Cdn
MF8280Cw / MF8230Cn
Paper guides
Adjust the paper guides to exactly the size of the loaded paper to ensure that paper is fed straight into the machine. Press the
lock release levers that are marked with arrows in the illustrations to release the locks and slide the paper guides.
Lock release lever (for extending the paper drawer)
When loading Legal size paper, the paper drawer needs to be extended. Press this lever to release the lock and extend the length
of the paper drawer.
NOTE
When Legal size paper is loaded
The front side of the paper drawer is not flush with the machine when the extended paper drawer is inserted.
LINKS
Loading Paper in the Paper Drawer
㻡㻥㻌㻛㻌㻢㻣㻢
0ALJ-016
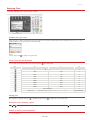
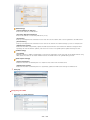
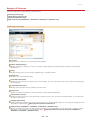
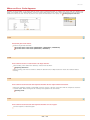
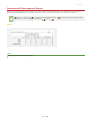
Operation Panel
NOTE
The operation panel shown above is for the MF8580Cdw. The available keys or functions vary depending on the model.
Function selection keys
Press to activate the copy, fax, scan, or USB Print functions. The fax function is available only on the MF8580Cdw / MF8550Cdn /
MF8280Cw.
Display
[Reset] key
Press to cancel the settings and restore the previously specified settings.
[Address Book] key (MF8580Cdw / MF8550Cdn / MF8540Cdn / MF8280Cw only)
Press to display a list of destinations registered in the Address Book, or to register or edit destinations in the Address Book.
Registering in the Address Book (MF8580Cdw / MF8550Cdn / MF8540Cdn / MF8280Cw Only)
[Coded Dial] key (MF8580Cdw / MF8550Cdn / MF8540Cdn / MF8280Cw only)
Press to use coded dial numbers. After pressing the key, enter a three-digit number to display the destination registered for that
number.
[
] key
When specifying settings, press to return to the previous screen.
When entering text, press to move the cursor to the left.
Press to decrease the sound volume or a setting value such as density for scanning, copying, etc.
[
] key
When specifying settings, press to select the item above the currently selected item.
When changing setting values, press to increase a value.
[
] key
㻢㻜㻌㻛㻌㻢㻣㻢
When specifying settings, press to proceed to the next screen.
When entering text, press to move the cursor to the right.
Press to increase the sound volume or a setting value such as density for scanning, copying, etc.
[
] key
When specifying settings, press to select the item below the currently selected item.
When changing setting values, press to decrease a value.
[Select Paper/Settings] key
Press to select the paper you want to use, or to set the size and type of paper loaded in the paper source.
Size and Type
Specifying Paper
[OK] key
Press to apply settings or specified details.
[Back] key
Press to return to the previous screen. If you press this key when specifying settings, for example, the settings are not applied
and the display returns to the previous screen.
Multi-function keys (left/right)
When an item such as <Hook> or <Register> is displayed at the bottom of the display, press the key under the displayed item to
select or apply the item or to proceed to further operations.
Using the Operation Panel
[Error] indicator
Blinks or lights up when an error such as a paper jam occurs.
Wi-Fi indicator (MF8580Cdw / MF8280Cw only)
Lights up when the machine is connected to wireless LAN.
[Processing/Data] indicator
Blinks while operations such as sending or printing are being performed. Lights up when there are documents waiting to be
processed.
Display
Displays the operation and status screens for copying, faxing, and other functions, as well as the status of the machine and error
information. Also, view the screen when specifying the settings of the machine.
Display
[Menu] key
Press to start specifying many of the settings for the machine, such as <Timer Settings> or <Preferences>.
Setting Menu List
[Report] key
Press to print a report or list, or to specify the settings for printing reports.
Printing Reports and Lists
[Status Monitor] key
Press to check the status of printing or faxing, to view the usage history, or to view the network settings such as the IP address
of the machine. You can also check the status of the machine, such as the remaining amounts of paper and toner, or whether any
Display
errors occurred.
[Energy Saver] key
Press to put the machine into sleep mode. The key lights up yellow green when the machine is in sleep mode. Press the key again
to exit sleep mode.
Entering Sleep Mode
[ID] key
Press after entering the ID and PIN to log on when Department ID Management is enabled. After you finish using the machine,
press this key again to log off.
Logging on to the Machine
Shortcut keys
Shortcut keys make it easier to send scanned documents to a computer and save paper when making copies.
Shortcut Keys
[Secure Print] key (MF8580Cdw / MF8550Cdn / MF8540Cdn only)
Press when you start printing secured documents. To print a secured document, press the key, select the secured document to
print and enter the PIN that has been set on the computer.
Printing a Document Secured by a PIN (Secure Print)
(MF8580Cdw / MF8550Cdn / MF8540Cdn Only)
[Clear] key
Press to delete the entered numbers and text.
[Stop] key
Press to cancel copying, faxing, and other operations.
[#] key
Press to enter symbols such as "@" or "/".
[Start] (Color) key
㻢㻝㻌㻛㻌㻢㻣㻢
Press to scan or copy documents in color. In addition, if you press this key when you start printing images from a USB memory
device, printouts are printed in color.
[Start] (B&W) key
Press to scan or copy documents in black and white. In addition, if you press this key when you start printing images from a USB
memory device, printouts are printed in black and white.
[*] key
Press to switch the type of text that is entered.
Press to use tone dialing such as when receiving fax information services.
Numeric keys ([0]-[9] keys)
Press to enter numbers and text.
Entering Text
LINKS
Using the Operation Panel
㻢㻞㻌㻛㻌㻢㻣㻢
Receiving Fax Information Services
0ALJ-017
Shortcut Keys
Shortcut keys located on the right side of the operation panel enable you to perform the operations with greater ease and efficiency. By
using the shortcut keys, you can save scanned images to a computer or reduce the amount of paper you consume when you make
copies.
[Scan > PC1]/[Scan > PC2] key
Using these keys is the easiest way to use the scan function. First, register settings for each key, such as the computer where you
want to save the scanned data, or whether to scan the document as a color PDF or as a JPEG. Then, place the document and
or
to start scanning. The scanned document is stored in the computer in the specified file format.
simply press
Scanning Using the [Scan > PC] Key
[Paper Save Copy] key
For the
key, settings are pre-registered that enable you to save paper by copying two (or four) sheets of documents onto
one side of a page. On the MF8580Cdw / MF8550Cdn / MF8540Cdn, you can also select 2-sided copy settings to save even more
Using the [Paper Save Copy] Key
paper.
LINKS
Operation Panel
㻢㻟㻌㻛㻌㻢㻣㻢
0ALJ-018
Display
The display shows the screens for copying, scanning, and other functions, as well as the screens for specifying
settings for these functions. You can also check information such as error messages and communication status
on the display.
Main Screen
When you press
as an example.
,
,
, or
, the main screen for the selected function is displayed. The copy main screen is shown below
Basic Copy Operations
Sending Faxes
Using the Machine as a Scanner
Printing from USB Memory (USB Print)
Address Book Screen (MF8580Cdw / MF8550Cdn / MF8540Cdn / MF8280Cw Only)
When you press
, the Address Book screen is displayed. Use this key when you want to specify a destination for a fax or scan.
You can also register and edit destinations from this screen.
Registering in the Address Book (MF8580Cdw / MF8550Cdn / MF8540Cdn / MF8280Cw Only)
<Select Paper> Screen
When you press
(Select Paper/Settings) to select the paper to copy or print on, the <Select Paper> screen is displayed. Select
the paper on the screen. Also, for example, you can press this key to change the paper settings when you load a paper size that is
different from the previously loaded paper size. Note that the paper setting must be correctly specified so that the paper is fed
properly.
Selecting paper
Use to select the paper you want to print on.
<Paper Settings>
Use to specify the size and type of the paper loaded in the paper drawer. You can also register the paper settings for the paper
that you frequently load into the manual feed slot.
Specifying Paper Size and Type
<Menu> Screen
When you press
, the <Menu> screen is displayed. On this screen, you can start specifying general machine settings such as
<Common Settings> or <Timer Settings>, as well as many of the settings for each function, such as fax and scan.
㻢㻠㻌㻛㻌㻢㻣㻢
Setting Menu List
<Output Report> Screen
When you press
(Report), the <Output Report> screen is displayed. From this screen, you can print reports such as the sending
and receiving results for faxes, or the Address Book List. You can also specify whether to print reports automatically.
Printing Reports and Lists
<Status Monitor> Screen
When you press
(Status Monitor), a screen is displayed that enables you to check the status of documents that are being printed,
sent, or received, as well as the status of the machine such as the toner levels or the network setting information such as the IP
address of the machine.
<Error Information>
Displays the details of any errors that occurred.
When an Error Message Appears
<Device Status>
Displays the status of the machine, such as the amount of paper or toner remaining.
<Paper Information>
Displays whether paper is loaded in each paper source.
<Remaining Toner>
Displays the amount of toner remaining.
<Remove Memory Media>
Use to safely remove a USB memory device.
to USB Memory
Printing from USB Memory (USB Print)
<Check Counter>
Displays the separate totals for black and white and color printouts.
Scanning Documents Directly
Viewing the Counter Value
<Secure Print Memory Usage> (MF8580Cdw / MF8550Cdn / MF8540Cdn only)
Printing a Document Secured by a PIN
Displays the amount of memory currently used for storing secured document data.
(Secure Print) (MF8580Cdw / MF8550Cdn / MF8540Cdn Only)
Status of copy/print/send/receive jobs
Displays the current status of the selected item. The <Copy/Print Job Status> screen is shown below as an example.
㻢㻡㻌㻛㻌㻢㻣㻢
<Network Information>
Displays the network settings such as the IP address of the machine and status such as the condition of wireless LAN
communications.
Viewing Network Settings
When a Message Is Displayed
Messages are displayed at the top of the screen in situations such as when paper runs out or the toner level is low. The display
alternates between showing the normal screen and the message.
When an Error Message Appears
When an Error Occurs
In some cases when an error occurs, instructions on how to respond to the error are displayed. Follow the on-screen instructions to
solve the problem. The screen displayed when a paper jam occurs is shown below as an example ( When an Error Message
Appears).
LINKS
Using the Operation Panel
㻢㻢㻌㻛㻌㻢㻣㻢
0ALJ-019
Logging on to the Machine
When Department ID Management is enabled, you must log on before you can use the machine. When the logon screen is displayed,
follow the procedure below to enter the Department ID and PIN. The logon process may also be required for the System Manager ID.
1
Enter an ID.
1
Use
2
Enter a number of up to seven digits using the numeric keys, and press <Apply>.
/
to select <Department ID> (or <Manager ID>).
If no PIN is registered, proceed to step 3.
2
3
Enter the PIN.
1
Select <PIN>.
2
Enter a number of up to seven digits using the numeric keys, and press <Apply>.
Press
.
The logon screen will be changed to the main screen.
After you finish using the machine, press
again to display the logon screen.
LINKS
Setting the Department ID Management
Setting the System Manager ID
㻢㻣㻌㻛㻌㻢㻣㻢
0ALJ-01A
Placing Documents
Place documents on the platen glass or in the feeder. Use the platen glass when scanning thick or bound documents such as books. You
can load two or more sheets of documents in the feeder so that they can be scanned continuously. For information about the types of
documents that can be placed on the platen glass or in the feeder, and information about the scannable area of a document, see
Document Type or
Scan Area.
Placing Documents on the Platen Glass
Placing Documents in the Feeder
IMPORTANT
Use documents that are completely dry
When placing documents, make sure that any glue, ink, or correction fluid on the documents has completely dried.
To avoid paper jams
Do not place the following types of documents in the feeder as this may cause paper jams:
Wrinkled or creased paper
Carbon paper or carbon-backed paper
Curled or rolled paper
Coated paper
Torn paper
Onion skin or thin paper
Stapled or clipped documents
Paper printed by a thermal transfer printer
Transparencies
NOTE
To scan documents more accurately
Documents placed in the feeder are scanned while being fed into the machine. On the other hand, documents placed on the
platen glass remain in a fixed position while they are scanned. To ensure more accurate scanning results, placing documents on
the platen glass is recommended.
To scan tracing paper or transparencies
To scan transparent documents (for example, tracing paper or transparencies), place them on the platen glass.
Placing Documents on the Platen Glass
1
Open the feeder.
㻢㻤㻌㻛㻌㻢㻣㻢
2
Place the document face down on the platen glass.
Align the corner of the document with the top-left corner of the platen glass.
NOTE:
To scan transparent documents (for example, tracing paper or transparencies), cover them with plain white paper.
3
Gently close the feeder.
The machine is ready to scan the document.
When scanning is complete, remove the document from the platen glass.
Placing Documents in the Feeder
1
Spread the document guides apart.
Slide the document guides outward until they are slightly farther apart than the actual document width.
Pull out the tray extension when loading large documents to prevent them from drooping over the edge of the feeder.
2
Fan the document stack and align the edges.
Fan the document stack in small batches, and align the edges by lightly tapping the stack on a flat surface a few times.
3
Place the document(s) face up in the feeder.
Make sure that the document stack does not exceed the load limit lines (
).
IMPORTANT:
Do not load documents of various sizes at the same time.
Up to 50 sheets can be loaded at a time. If 51 or more sheets are loaded, scanning may stop or a paper jam may occur.
㻢㻥㻌㻛㻌㻢㻣㻢
4
Align the document guides against the edges of the document.
Slide the document guides inward until they are aligned securely against the edges of the document.
The machine is ready to scan the document.
IMPORTANT:
Align the document guides securely against the edges of the document
Document guides that are too loose or too tight can cause misfeeds or paper jam.
While documents are being scanned
Do not add or remove documents.
When scanning is complete
Remove the scanned documents from beneath the feeder to prevent paper jams.
㻣㻜㻌㻛㻌㻢㻣㻢
0ALJ-01C
Loading Paper
You can load the paper into the paper drawer or manual feed slot. Load the paper you usually use into the paper drawer. The paper
drawer is convenient when using large amounts of paper. Use the manual feed slot when you temporarily use size or type of paper that
Paper for available paper sizes.
is not loaded in the paper drawer. See
Paper Type and Setting for the Machine
See the table below to specify the paper settings according to the type and weight of the paper to load into the paper source. For
Specifying Paper Size and Type. For the amount
more information about how to specify the paper settings on the machine, see
Paper.
of paper that can be loaded in each paper source, see
MF8580Cdw / MF8550Cdn / MF8540Cdn
Paper Type
Paper Setting
on the Machine
Paper Weight
60 to 74 g/m²
<Plain 1>*1
70 to 84 g/m²
<Plain 2>*1
75 to 90 g/m²
<Plain 3>*2
Recycled paper
60 to 74 g/m²
<Recycled>
Color paper
60 to 74 g/m²
<Color>
86 to 119 g/m²
<Heavy 1>
120 to 128 g/m²
<Heavy 2>
129 to 163 g/m²
<Heavy 3>
Plain paper
Heavy paper
*2
<Envelope>
Envelope
100 to 110 g/m²
<Coated 1>
120 to 130 g/m²
<Coated 2>
155 to 165 g/m²
<Coated 3>
210 to 220 g/m²
<Coated 4>
Coated paper
Transparency
<Transparency>
Label
<Labels>
*1 You can specify either <Plain 1> or <Plain 2> as the paper type for 70 to 74 g/m² paper. If you experience any of the following problems after
specifying either of these two settings, specify the other setting.
Paper that is output curls.
Afterimages appear on the blank area.
Toner is not fully fixed and the printouts are faded.
*2 You can specify either <Plain 2> or <Plain 3> as the paper type for 75 to 84 g/m² paper. If you experience any of the following problems after
specifying either of these two settings, specify the other setting.
Paper that is output curls.
Afterimages appear on the blank area.
Toner is not fully fixed and the printouts are faded.
MF8280Cw / MF8230Cn
Paper Setting
㻣㻝㻌㻛㻌㻢㻣㻢
Paper Type
Paper Weight
on the Machine
60 to 74 g/m²
<Plain 1>*1
70 to 84 g/m²
<Plain 2>*1
75 to 90 g/m²
<Plain 3>*2
Recycled paper
60 to 74 g/m²
<Recycled>
Color paper
60 to 74 g/m²
<Color>
85 to 120 g/m²
<Heavy 1>
121 to 163 g/m²
<Heavy 2>
Plain paper
*2
Heavy paper
<Envelope>
Envelope
100 to 110 g/m²
<Coated 1>
111 to 130 g/m²
<Coated 2>
131 to 160 g/m²
<Coated 3>
161 to 220 g/m²
<Coated 4>
Coated paper
Transparency
<Transparency>
Label
<Labels>
Index card
<Heavy 2>*3
Thin paper
60 g/m²
<Thin>
*1 You can specify either <Plain 1> or <Plain 2> as the paper type for 70 to 74 g/m² paper. If you experience any of the following problems after
specifying either of these two settings, specify the other setting.
Paper that is output curls.
Afterimages appear on the blank area.
Toner is not fully fixed and the printouts are faded.
*2 You can specify either <Plain 2> or <Plain 3> as the paper type for 75 to 84 g/m² paper. If you experience any of the following problems after
specifying either of these two settings, specify the other setting.
Paper that is output curls.
Afterimages appear on the blank area.
Toner is not fully fixed and the printouts are faded.
*3 You can also specify <Plain 1>, <Plain 2>, <Plain 3>, <Recycled>, <Color>, <Heavy 1>, <Envelope>, or <Thin> as the paper type for index cards.
IMPORTANT
Do not use the following types of paper:
Wrinkled or creased paper
Curled or rolled paper
Torn paper
Damp paper
Very thin paper
Paper printed by a thermal transfer printer
Highly textured paper
Glossy paper
Paper handling and storage
Store the paper on a flat surface.
Keep the paper wrapped in its original package to protect the paper from moisture or dryness.
Do not store the paper in such a way that may cause it to curl or fold.
Do not store the paper vertically or stack too much paper.
Do not store the paper in direct sunlight, or in a place subject to high humidity, dryness, or drastic changes in temperature
or humidity.
㻣㻞㻌㻛㻌㻢㻣㻢
NOTE
When printing on paper that has absorbed moisture
Steam may emit from the paper output area, or water droplets may form on the back side of the operation panel or around
the paper output area. There is nothing unusual about any of these occurrences, which occur when the heat generated from
fixing toner on the paper causes moisture in the paper to evaporate (most likely to occur at low room temperatures).
LINKS
Registering a Custom Paper Size
㻣㻟㻌㻛㻌㻢㻣㻢
0ALJ-01E
Loading Paper in the Paper Drawer
Load the paper that you usually use in the paper drawer. When you want to print on paper that is not loaded in the paper drawer, load
Loading Paper in the Manual Feed Slot
the paper in the manual feed slot.
IMPORTANT
Make sure to load paper in portrait orientation
Paper cannot be loaded in landscape orientation. Make sure to load the paper in portrait orientation.
NOTE
Follow the procedure below when loading paper into the optional paper drawer (MF8580Cdw / MF8550Cdn / MF8540Cdn only).
1
Pull out the paper drawer.
IMPORTANT:
Make sure to hold the paper drawer with both hands, and pull it out gently. Otherwise, you may damage the paper drawer by
dropping it, if it slides out too easily.
2
Slide the paper guides apart.
Press the lock release lever to slide the paper guides outward. On the MF8280Cw / MF8230Cn, there is no lock release lever for
the side paper guides.
NOTE:
When loading Legal size paper
Press the lock release lever, and extend the paper drawer.
MF8580Cdw / MF8550Cdn / MF8540Cdn
MF8280Cw / MF8230Cn
Size abbreviations on the paper guides
The abbreviations on the paper guides in the paper drawer indicate paper sizes as follows:
LGL: Legal
LTR: Letter
EXEC: Executive
㻣㻠㻌㻛㻌㻢㻣㻢
3
Load the paper so that the edge of the paper stack is aligned against the rear side of the paper drawer.
Fan the paper stack well, and tap it on a flat surface to align the edges.
IMPORTANT:
Do not exceed the load limit line when loading paper
Make sure that the paper stack does not exceed the load limit line (
). Loading too much paper can cause paper jams.
NOTE:
When loading envelopes or paper with a logo, see
4
Loading Envelopes or
Loading Preprinted Paper.
Align the paper guides against the edges of the paper.
Press the lock release lever and slide the paper guides inward until they are aligned securely against the edges of the paper.
IMPORTANT:
Align the paper guides securely against the edges of the paper
Paper guides that are too loose or too tight can cause misfeeds or paper jams.
5
Insert the paper drawer into the machine.
NOTE:
When Legal size paper is loaded
The front side of the paper drawer is not flush with the machine when the extended paper drawer is inserted.
»
Continue to
Specifying Paper Size and Type in the Paper Drawer
IMPORTANT:
When changing the paper size or type
The factory default settings for paper size and type are <A4> and <Plain 2>, respectively. If you load a different size or type of
paper into the machine, make sure to change the settings. If you do not change the settings, the machine cannot print properly.
Printing on the Back Side of Printed Paper (Manual 2-Sided Printing)
You can print on the back side of printed paper. Flatten any curls on the printed paper and insert it into the paper drawer or
manual feed slot ( Loading Paper in the Manual Feed Slot), with the side to print face up (previously printed side face
down).
When using the manual feed slot, load one sheet of paper each time you print.
You can use only the paper printed with this machine.
You cannot print on the side that has previously been printed on.
If the printouts look faded, select <On> for <Drawer 1>, <Drawer 2>, or <Multi-Purpose Tray>, depending on the paper
source you are using, in <Manual Back Side Settings (for 2-Sided Only)>.
Special Processing
If you are using A5 paper, the reverse side may not be printed correctly.
LINKS
㻣㻡㻌㻛㻌㻢㻣㻢
Paper
㻣㻢㻌㻛㻌㻢㻣㻢
0ALJ-01F
Loading Paper in the Manual Feed Slot
When you want to print on paper that is not loaded in the paper drawer, load the paper in the manual feed slot. Load the paper that
Loading Paper in the Paper Drawer
you usually use in the paper drawer.
For the MF8580Cdw / MF8550Cdn / MF8540Cdn
For the MF8280Cw / MF8230Cn
IMPORTANT
Make sure to load paper in portrait orientation
Paper cannot be loaded in landscape orientation. Make sure to load the paper in portrait orientation, as shown in the illustrations
below.
MF8580Cdw / MF8550Cdn / MF8540Cdn
MF8280Cw / MF8230Cn
For the MF8580Cdw / MF8550Cdn / MF8540Cdn
IMPORTANT
Make sure to insert the paper drawer
The machine only prints when the paper drawer is inserted, even if paper is loaded in the manual feed slot. An error message is
displayed if you attempt to print without inserting the paper drawer.
1
Open the cover.
Hold the top center of the cover to open it.
2
Pull out the paper tray and the tray extension.
Pull out the tray extension when loading large paper.
3
Spread the paper guides apart.
Slide the paper guides outward.
㻣㻣㻌㻛㻌㻢㻣㻢
4
Insert the paper into the manual feed slot until the paper stops.
Load the paper in portrait orientation (with the short edge toward the machine), with the print side face up. Paper cannot be
loaded in landscape orientation.
Fan the paper stack well, and tap it on a flat surface to align the edges.
IMPORTANT:
Do not exceed the load limit line when loading paper
Make sure that the paper stack does not exceed the load limit line (
). Loading too much paper can cause paper jams.
NOTE:
When loading envelopes or paper with a logo, see
5
Loading Envelopes or
Loading Preprinted Paper.
Align the paper guides against the edges of the paper.
Slide the paper guides inward until they are aligned securely against the edges of the paper.
IMPORTANT:
Align the paper guides securely against the edges of the paper
Paper guides that are too loose or too tight can cause misfeeds or paper jams.
»
Continue to
Specifying Paper Size and Type in the Manual Feed Slot
For the MF8280Cw / MF8230Cn
IMPORTANT
Make sure to insert the paper drawer
The machine only prints when the paper drawer is inserted, even if paper is loaded in the manual feed slot. An error message is
displayed if you attempt to print without inserting the paper drawer.
Load only one sheet of paper at a time
Only one sheet of paper can be loaded each time you print.
1
Spread the paper guides apart.
Slide the paper guides outward.
㻣㻤㻌㻛㻌㻢㻣㻢
2
Insert the paper and align the paper guides against the width of the paper.
Load the paper in portrait orientation (with the short edge toward the feed slot), with the print side face up. Paper cannot be
loaded in landscape orientation.
Insert the paper 10 to 20 mm into the manual feed slot, and then slide the paper guides inward until they are aligned securely
against the edges of the paper.
IMPORTANT:
Align the paper guides securely against the edges of the paper
Paper guides that are too loose or too tight can cause misfeeds or paper jams.
3
Insert the paper slowly into the rear of the manual feed slot.
The paper is pulled slightly into the machine when inserted into the slot.
NOTE:
When loading envelopes or paper with a logo, see
»
Continue to
Loading Envelopes or
Specifying Paper Size and Type in the Manual Feed Slot
LINKS
Paper
㻣㻥㻌㻛㻌㻢㻣㻢
Loading Preprinted Paper.
0ALJ-01H
Loading Envelopes
Make sure to flatten any curls on envelopes before loading them. Also pay attention to the orientation of envelopes and which side is
face up.
Before Loading Envelopes
In the Paper Drawer
In the Manual Feed Slot
NOTE
This section describes how to load envelopes in the orientation you want, as well as procedures that you need to complete before
loading envelopes. For a description of the general procedure for loading envelopes in the paper drawer or manual feed slot, see
Loading Paper in the Paper Drawer or
Loading Paper in the Manual Feed Slot.
Before Loading Envelopes
Follow the procedure below to prepare the envelopes before loading.
NOTE
On the MF8280Cw / MF8230Cn, only one envelope at a time can be loaded in the manual feed slot. Follow steps 1 to 3 in the
procedure below to prepare the envelope for loading.
1
Close the flap of each envelope.
2
Flatten them to release any remaining air, and make sure that the edges are pressed tightly.
3
Loosen any stiff corners of the envelopes and flatten any curls.
4
Align the edges of the envelope on a flat surface.
㻤㻜㻌㻛㻌㻢㻣㻢
In the Paper Drawer
Load the envelopes Monarch (MF8280Cw / MF8230Cn only), COM10, DL, or ISO-C5 in portrait orientation (with the long edges on either
side), with the non-glued side (front side) face up. You cannot print on the reverse side of envelopes.
NOTE
Monarch size envelopes cannot be loaded in the paper drawer on the MF8580Cdw / MF8550Cdn / MF8540Cdn. Load them into
the manual feed slot.
Load the envelopes so that the edge with the flap is toward the left side as shown in the illustration.
In the Manual Feed Slot
Load the envelopes Monarch, COM10, DL, or ISO-C5 in portrait orientation (with the short edge toward the machine), with the non-glued
side (front side) face up. You cannot print on the reverse side of envelopes.
IMPORTANT
Load only one envelope for the MF8280Cw / MF8230Cn each time you print.
NOTE
Load the envelopes so that the edge with the flap is toward the left side as shown in the illustration.
MF8580Cdw / MF8550Cdn / MF8540Cdn
MF8280Cw / MF8230Cn
㻤㻝㻌㻛㻌㻢㻣㻢
0ALJ-01J
Loading Preprinted Paper
When you use paper that has been preprinted with a logo, pay attention to the orientation of the paper when loading. Load the paper
properly so that printing is performed on the correct side of the paper with a logo.
Making 1-Sided Printouts on Paper with Logos
Making 2-Sided Printouts on Paper with Logos (MF8580Cdw / MF8550Cdn / MF8540Cdn Only)
NOTE
This section mainly describes how to load preprinted paper with the proper facing and orientation. For a description of the general
Loading Paper in the Paper Drawer or
Loading
procedure for loading paper in the paper drawer or manual feed slot, see
Paper in the Manual Feed Slot.
Making 1-Sided Printouts on Paper with Logos
Load the paper with the logo side (the side to print the document) face up.
IMPORTANT
Load only one sheet of paper in the manual feed slot of the MF8280Cw / MF8230Cn each time you print.
Printing on Paper with Logos in Portrait Orientation
Printing on Paper with Logos in Landscape Orientation
Making 2-Sided Printouts on Paper with Logos (MF8580Cdw / MF8550Cdn / MF8540Cdn Only)
Load the paper with the front logo side (the side to print the first page of the document) face down.
Printing on Paper with Logos in Portrait Orientation
㻤㻞㻌㻛㻌㻢㻣㻢
Printing on Paper with Logos in Landscape Orientation
NOTE
The <Switch Paper Feed Method> setting (MF8580Cdw / MF8550Cdn / MF8540Cdn only)
When you print on preprinted paper, you need to change the facing of the paper to load each time you perform 1-sided and 2sided printing. However, if <Switch Paper Feed Method> is set to <Print Side Priority>, the facing that you use for loading
preprinted paper for 2-sided printing (logo side face down) can also be used for 1-sided printing. This setting is especially useful
Switch Paper Feed Method
if you frequently perform both 1-sided and 2-sided printing.
㻤㻟㻌㻛㻌㻢㻣㻢
0ALJ-01K
Specifying Paper Size and Type
You must specify the paper size and type settings to match the paper that is loaded. Make sure to change the paper settings when you
load the paper that is different from the previously loaded paper.
IMPORTANT
If the setting does not match the size and type of loaded paper, a paper jam or printing error may occur.
㻤㻠㻌㻛㻌㻢㻣㻢
0ALJ-01L
Specifying Paper Size and Type in the Paper Drawer
1
Press
(Select Paper/Settings).
If the <Select Paper> screen shown below is displayed, use
2
Select <Drawer 1> or <Drawer 2>, and press
/
to select <Paper Settings>, and press
.
.
<Drawer 2> is displayed only when the optional paper drawer (drawer 2) is installed (MF8580Cdw / MF8550Cdn / MF8540Cdn
only).
3
Select the paper size, and press
.
4
Select the paper type, and press
.
LINKS
Loading Paper in the Paper Drawer
Paper
㻤㻡㻌㻛㻌㻢㻣㻢
0ALJ-01R
Specifying Paper Size and Type in the Manual Feed Slot
The screen shown here is displayed when paper is loaded in the manual feed slot. Follow the on-screen instructions to specify settings
that match the size and type of the loaded paper.
NOTE
If the screen shown above is not displayed when paper is loaded
If you always load the same paper in the manual feed slot, you can skip the paper setting operations by registering the paper
size and type as the default setting. When the default setting is registered, however, the screen shown above is not displayed. To
display the screen, select <Off> for <Register Default Settings> ( Registering Default Paper Settings for the Manual Feed
Slot).
1
Select the paper size.
Use
/
to select the paper size, and press
.
When loading custom size paper
1
Select <Custom>, and press
2
Specify the length of the <X> (shorter) side.
Select <X>, and press
.
.
Input the length of the <X> side using
3
/
or the numeric keys, and press <Apply>.
Specify the length of the <Y> (longer) side.
Select <Y>, and press
.
Input the length of the <Y> side, and press <Apply>.
4
Press <Apply>.
㻤㻢㻌㻛㻌㻢㻣㻢
2
Select the paper type, and press
.
LINKS
Loading Paper in the Manual Feed Slot
Paper
㻤㻣㻌㻛㻌㻢㻣㻢
0ALJ-01S
Registering Default Paper Settings for the Manual Feed Slot
You can register default paper settings for the manual feed slot. Registering default settings can save yourself the effort of having to
specify the settings each time you load the same paper into the manual feed slot.
NOTE
After the default paper setting is registered, the paper setting screen is not displayed when paper is loaded, and the same setting
is always used. If you load a different paper size or type without changing the paper settings, the machine may not print
properly. To avoid this problem, disable the default setting by selecting <Off> in step 3, and then load the paper.
1
Press
(Select Paper/Settings).
If the <Select Paper> screen shown below is displayed, use
2
Select <Multi-Purpose Tray>, and press
3
Select <Set Details>, and press
Select the paper size, and press
to select <Paper Settings>, and press
.
.
If <Set Details> cannot be selected, select <On>, press
4
/
, and then perform steps 1 and 2 again.
.
Registering a custom paper size
1
Select <Custom>, and press
2
Specify the length of the <X> (shorter) side.
.
㻤㻤㻌㻛㻌㻢㻣㻢
.
Select <X>, and press
.
Input the length of the <X> side using
3
/
or the numeric keys, and press <Apply>.
Specify the length of the <Y> (longer) side.
Select <Y>, and press
.
Input the length of the <Y> side, and press <Apply>.
4
5
Press <Apply>.
Select the paper type, and press
.
LINKS
Loading Paper in the Manual Feed Slot
Paper
㻤㻥㻌㻛㻌㻢㻣㻢
0ALJ-01U
Registering a Custom Paper Size
You can register up to three frequently used custom paper sizes.
1
Press
(Select Paper/Settings).
If the <Select Paper> screen shown below is displayed, use
2
Select <Register Custom Paper>, and press
3
Select <Not Registered>, and press
/
to select <Paper Settings>, and press
.
.
.
If paper sizes <1> to <3> have already been registered, either change or delete the setting to continue. The procedures for
changing and deleting these settings are described below.
Changing a setting
1
Select the registered size you want to change, and press
2
Select <Edit>, press
.
, and proceed to step 4.
Deleting a setting
1
Select the registered size you want to delete, and press
2
Select <Delete>, and press
3
Select <Yes>, and press
.
.
Specify the paper size.
㻥㻜㻌㻛㻌㻢㻣㻢
.
4
1
Specify the length of the <X> (shorter) side.
Select <X>, and press
.
Input the length of the <X> side using
2
/
or the numeric keys, and press <Apply>.
Specify the length of the <Y> (longer) side.
Select <Y>, and press
.
Input the length of the <Y> side, and press <Apply>.
3
5
Press <Apply>.
Select the paper type, and press
.
Selecting a Registered Custom Paper Setting
The paper sizes that are registered in the procedure above are displayed on the screen for selecting the paper size.
When selecting the paper size for the paper drawer
On the screen to specify the size of the paper that is loaded in the paper drawers, the registered paper sizes are displayed.
Specifying Paper Size and Type in the Paper Drawer
NOTE:
Only the registered paper sizes that can be loaded in the paper drawer are displayed.
Paper
When selecting the paper size for the manual feed slot
When paper is loaded in the manual feed slot, the screen for selecting the paper size for the manual feed slot is displayed. The
Specifying Paper Size and Type in the Manual Feed Slot
registered paper sizes are displayed on this screen.
㻥㻝㻌㻛㻌㻢㻣㻢
NOTE:
The registered paper sizes are displayed when you set the default paper settings for the manual feed slot. From the screen, you
can select one of the displayed sizes as the default paper size for the manual feed slot.
Registering Default Paper Settings
for the Manual Feed Slot
LINKS
Loading Paper in the Paper Drawer
Loading Paper in the Manual Feed Slot
㻥㻞㻌㻛㻌㻢㻣㻢
0ALJ-01W
Using the Operation Panel
Use the keys shown below to specify settings and adjust values.
Using
/
Scrolling the screen
The scroll bar is displayed on the right side of the screen when not all of the information fits on one screen. If the scroll bar is
/
to scroll up or down. The text and background colors of an item are inverted when it is selected.
displayed, use
Changing a setting value
Use
/
when entering numbers. You can also enter the value directly using the numeric keys when the numeric key icon is
Entering Text
displayed in the top-left corner of the screen, as shown below.
NOTE:
The numbers in parentheses beneath the value input field indicate the range of possible values.
Using
/
Proceeding to next screen/Returning to previous screen
Press
to proceed to the next screen. Press
to return to the previous screen.
NOTE:
You can also proceed to the next screen by pressing
, and return to the previous screen by pressing
Adjusting a setting value
Use
/
when adjusting the value on a scale.
㻥㻟㻌㻛㻌㻢㻣㻢
(Back).
Using
Press
to apply a setting.
Using the Multi-function Keys (Left/Right)
Items may appear at the bottom of the screen, such as <Background> and <Apply> shown on the screen below. Press the
corresponding multi-function key (left/right) to select one of these items.
NOTE:
Reference to multi-function keys in the Manual
The instructions in the e-Manual refer to the names of the items at the bottom of the screen instead of the corresponding multifunction keys. For example, when describing instructions for selecting <Background> on the screen shown above, the phrase
"Press <Background>" is used instead of "Press the left multi-function key to select <Background>."
Using the Numeric Keys
Use the numeric keys when entering text and numbers.
Entering Text
TIPS
You can change a variety of display-related settings, such as the scrolling speed or display language:
Display Settings
To change the screen that is automatically displayed when the machine remains idle for a specified length of time:
Function After Auto Reset
㻥㻠㻌㻛㻌㻢㻣㻢
0ALJ-01X
Entering Text
This section describes how to enter text and numbers.
Switching the Type of Text
Press <A/a/12> to switch the type of text that is entered. The currently selected type of text is indicated by the "A", "a", or "12"
displayed above and to the right of the text input field.
NOTE:
You can also press
to switch the type of text.
Types of Text That Can Be Entered
The text that can be entered using the numeric keys and
Key
are listed below.
A
a
12
@. -_ /
1
ABC
abc
2
DEF
def
3
GHI
ghi
4
JKL
jkl
5
MNO
mno
6
PQRS
pqrs
7
TUV
tuv
8
WXYZ
wxyz
9
(Not available)
0
(space) @ . / - _ ! ? & $ % # ( ) [ ] { } < > * + = " , ; : ' ^ ` | \ ~
(Not available)
Deleting Text
One character is deleted each time
is pressed. Press and hold
to delete all of the entered text.
Moving the Cursor (Entering a Space)
Use
or
to move the cursor. To enter a space, move the cursor to the end of the text, and press
Example of Entering Text and Numbers
Example: "Canon-1"
㻥㻡㻌㻛㻌㻢㻣㻢
.
1
Press <A/a/12> (or
2
Press
3
Press <A/a/12> (or
4
Press
repeatedly until the letter "a" is selected.
5
Press
repeatedly until the letter "n" is selected.
6
Press
repeatedly until the letter "o" is selected.
7
Press
repeatedly until the letter "n" is selected.
8
Press
repeatedly until the symbol "-" is selected.
9
Press <A/a/12> (or
) repeatedly until <A> is selected.
repeatedly until the letter "C" is selected.
10
Press
11
Press <Apply>.
) repeatedly until <a> is selected.
) repeatedly until <12> is selected.
.
㻥㻢㻌㻛㻌㻢㻣㻢
0ALJ-01Y
Registering in the Address Book (MF8580Cdw / MF8550Cdn / MF8540Cdn /
MF8280Cw Only)
You can register frequently used destinations in the Address Book and easily select them when needed. You
can register up to 200 destinations in the Address Book. Destinations can be searched alphabetically, from
lists in the Address Book, or by entering three-digit numbers (coded dial numbers). You can also specify
destinations more quickly by using the following features.
Favorites
Registering a lot of addresses in the Address Book makes it difficult to find the destination you need. To avoid this situation, register
> tab in the
frequently used destinations as Favorites. Destinations registered in Favorites can be searched from the Favorites list (<
Registering Destinations for Favorites
Address Book). You can register up to 19 destinations as Favorites.
Group Dial
You can select multiple destinations that have already been registered and register them together as a group. You can send faxes or emails to multiple destinations at the same time. You can register up to 199 destinations (100 destinations for e-mails) for a group.
Registering Multiple Destinations for Group Dial
Groups can also be registered in Favorites.
NOTE
Use the Send Function Setting Tool or the Remote UI when registering a shared folder as the destination for scans.
Setting a Shared Folder as a Save Location
Registering Address Book from Remote UI (MF8580Cdw / MF8550Cdn / MF8540Cdn / MF8280Cw Only)
You can save the Address Book as a file on your computer (although you cannot use the computer to edit the Address Book).
Saving/Loading Registered Data
You can also import a saved Address Book from the computer to the machine.
You can print a list of destinations registered in the Address Book.
Address Book List (MF8580Cdw / MF8550Cdn / MF8540Cdn / MF8280Cw Only)
If your office has an LDAP server installed, you can register destinations searched from the server in the Address Book. You
Registering LDAP Servers (MF8580Cdw /
need to specify the settings for connecting to an LDAP server beforehand.
MF8550Cdn / MF8540Cdn / MF8280Cw Only)
㻥㻣㻌㻛㻌㻢㻣㻢
0ALJ-021
Registering Destinations in the Address Book
Destinations can be edited or deleted after they have been registered. You can register up to 200 destinations in the Address Book.
1
2
3
Press
or
Press
.
.
Press <Register Dest.>.
If a screen appears prompting you to enter a PIN, enter the correct PIN using the numeric keys, and press
for Address Book
4
5
Use
/
to select <Coded Dial>, and press
Select <Fax> or <E-Mail>, and press
.
Setting a PIN
.
.
Press <Fax> when registering a fax number, and press <E-Mail> when registering an e-mail address.
The types of destinations that can be selected vary depending on the machine model.
Registering destinations with the LDAP server
NOTE:
If your office has an LDAP server installed, you can register destinations searched from the server in the Address Book. You need
to specify the settings for connecting to an LDAP server beforehand.
Registering LDAP Servers (MF8580Cdw / MF8550Cdn / MF8540Cdn / MF8280Cw Only)
1
Press <LDAP Server>.
2
Search for the destination to register.
See steps 3 to 8 on
Specifying Destinations in an LDAP Server (Fax) for the procedure.
According to the content registered in the LDAP server, the user name and the fax number/e-mail address of
the specified destination that is registered on the LDAP server will be automatically input.
6
3
Select a destination, and press
4
Proceed to step 10.
Select <Name>, and press
.
.
Registering <Name> is optional. If you register <Name>, the destination can be searched alphabetically.
7
8
9
10
Enter the name using the numeric keys, and press <Apply>.
Select <Fax Number> or <E-Mail Address>, and press
.
Enter the number or address using the numeric keys, and press <Apply>.
Press <Apply>.
A three-digit number is automatically set to destinations. The number can be edited after it has been registered.
Editing the Content of Registered Destinations
After registering destinations, you can change the content of destinations such as numbers, names, types, and coded dial numbers.
㻥㻤㻌㻛㻌㻢㻣㻢
1
2
3
4
5
Press
or
Press
.
.
Use
/
to select the tab containing the destination you want to edit.
Use
/
to select the destination you want to edit, and press <Details/Edit>.
Press <Edit>.
If a screen appears prompting you to enter a PIN, enter the correct PIN using the numeric keys, and press
for Address Book
6
7
Select the item you want to edit, press
.
Setting a PIN
.
Setting a PIN
, perform editing, and then press <Apply>.
Press <Apply>.
Deleting a Registered Destination
1
2
3
4
5
Press
or
Press
.
.
Use
/
to select the tab containing the destination you want to delete.
Use
/
to select the destination you want to delete, and press <Details/Edit>.
Press <Delete>.
If a screen appears prompting you to enter a PIN, enter the correct PIN using the numeric keys, and press
for Address Book
6
Select <Yes>, and press
.
㻥㻥㻌㻛㻌㻢㻣㻢
0ALJ-020
Registering Destinations for Favorites
You can register frequently used destinations as Favorites in the Address Book. Destinations can be edited or deleted after they have
been registered. You can register up to 19 destinations in Favorites.
NOTE
Three-digit numbers are not assigned to Favorites.
1
2
3
Press
or
Press
.
.
Press <Register Dest.>.
If a screen appears prompting you to enter a PIN, enter the correct PIN using the numeric keys, and press
for Address Book
4
5
Use
/
to select <Favorites>, and press
Select <Fax> or <E-Mail>, and press
.
Setting a PIN
.
.
Press <Fax> when registering a fax number, and press <E-Mail> when registering an e-mail address.
The types of destinations that can be selected vary depending on the machine model.
Registering destinations with the LDAP server
NOTE:
If your office has an LDAP server installed, you can register destinations searched from the server in the Address Book. You need
to specify the settings for connecting to an LDAP server beforehand.
Registering LDAP Servers (MF8580Cdw / MF8550Cdn / MF8540Cdn / MF8280Cw Only)
1
Press <LDAP Server>.
2
Search for the destination to register.
See steps 3 to 8 on
Specifying Destinations in an LDAP Server (Fax) for the procedure.
According to the content registered in the LDAP server, the user name and the fax number/e-mail address of
the specified destination that is registered on the LDAP server will be automatically input.
6
3
Select a destination, and press
4
Proceed to step 10.
Select <Name>, and press
.
.
Registering <Name> is optional. If you register <Name>, the destination can be searched alphabetically.
7
8
9
10
Enter the name using the numeric keys, and press <Apply>.
Select <Fax Number> or <E-Mail Address>, and press
.
Enter the number or address using the numeric keys, and press <Apply>.
Press <Apply>.
㻝㻜㻜㻌㻛㻌㻢㻣㻢
Editing the Content of Registered Destinations in Favorites
After registering destinations, you can change the content of destinations such as numbers, names, and types.
1
2
3
4
5
Press
or
Press
.
.
Use
/
to select <
>.
Use
/
to select the destination you want to edit, and press <Details/Edit>.
Press <Edit>.
If a screen appears prompting you to enter a PIN, enter the correct PIN using the numeric keys, and press
for Address Book
6
7
Select the item you want to edit, press
.
Setting a PIN
.
Setting a PIN
, perform editing, and then press <Apply>.
Press <Apply>.
Deleting a Registered Destination
1
2
3
4
5
Press
or
Press
.
.
Use
/
to select <
>.
Use
/
to select the destination you want to delete, and press <Details/Edit>.
Press <Delete>.
If a screen appears prompting you to enter a PIN, enter the correct PIN using the numeric keys, and press
for Address Book
6
Select <Yes>, and press
.
㻝㻜㻝㻌㻛㻌㻢㻣㻢
0ALJ-022
Registering Multiple Destinations for Group Dial
Multiple destinations can be combined into groups. After a group is registered, you can add or delete destinations.
1
2
3
Press
or
Press
.
.
Press <Register Dest.>.
If a screen appears prompting you to enter a PIN, enter the correct PIN using the numeric keys, and press
for Address Book
4
Use
/
to select <Coded Dial>, and press
.
Setting a PIN
.
Groups can also be registered in Favorites. Select <Favorites> to register the group as Favorites.
5
6
Select <Group>, and press
.
Select <Name>, and press
.
Registering <Name> is optional. If you register <Name>, the destination can be searched alphabetically.
7
8
9
Enter the name using the numeric keys, and press <Apply>.
Select <Number of Destinations>, and press
Press <Add>.
10
Use
11
Press <Add>.
12
13
.
/
to select the tab and
/
to select the number or address you want to register, and press
.
Repeat steps 10 and 11 until you have registered all of the destinations that you want to register, and then
press <Apply>.
Press <Apply>.
㻝㻜㻞㻌㻛㻌㻢㻣㻢
Editing the Content of Registered Groups
After registering destinations, you can change the content of groups such as names, destinations, and coded dial numbers.
1
2
3
4
5
Press
or
Press
.
.
Use
/
to select <
>.
Use
/
to select the destination you want to edit, and press <Details/Edit>.
Press <Edit>.
If a screen appears prompting you to enter a PIN, enter the correct PIN using the numeric keys, and press
for Address Book
6
7
Select the item you want to edit, press
.
Setting a PIN
.
Setting a PIN
, perform editing, and then press <Apply>.
Press <Apply>.
Deleting a Group
1
2
3
4
5
Press
or
Press
.
.
Use
/
to select <
>.
Use
/
to select the destination you want to delete, and press <Details/Edit>.
Press <Delete>.
If a screen appears prompting you to enter a PIN, enter the correct PIN using the numeric keys, and press
for Address Book
6
Select <Yes>, and press
.
㻝㻜㻟㻌㻛㻌㻢㻣㻢
0ALJ-023
Adjusting the Volume
The machine produces sounds in a variety of situations, such as when fax sending is complete or when a paper jam or error occurs. You
can set the volume of each of these sounds individually.
1
2
3
4
Press
Use
.
/
to select <Preferences>, and press
Select <Sound Volume Control>, and press
Select a setting, and press
.
.
.
Setting
Description
Procedure
<Fax Tone> *
Sound produced during a fax transmission
<On> (Sound is produced)
to step 5
<Ring Tone> *
Sound produced when an incoming fax is received
<Off> (No sound is produced)
Go to step 6
<TX Done
Tone> *
Sound produced when fax sending is complete
<RX Done
Tone> *
Sound produced when fax receiving is complete
<Scanning Done
Tone> *
Sound produced when fax document scanning is complete
<Entry Tone>
Sound produced each time a key on the operation panel is
pressed
<Invalid Entry
Tone>
Sound produced when an invalid key operation is performed,
such as when you enter a number outside the valid setting
range
<Restock
Supplies Tone>
Sound produced when a toner cartridge is almost empty
<Warning
Tone>
Sound produced when a paper jam or other error occurs
<Job Done
Tone>
Sound produced when an operation such as copying or
scanning is complete
<Energy Saver
Alert>
Sound produced when the machine enters or exits sleep mode
Use
6
Press
/
to adjust the volume, and press <Apply>.
to close the menu screen.
㻝㻜㻠㻌㻛㻌㻢㻣㻢
Go
<Off> (No sound is produced)
Go to step 6
<Only When Error Occurs>
to step 5
* Only available for the MF8580Cdw / MF8550Cdn / MF8280Cw.
5
<On> (Sound is produced)
to step 5
Go
Go
<On> (Sound is produced) or <Off>
Go to
(No sound is produced)
step 6
0ALJ-024
Entering Sleep Mode
The sleep mode function reduces the amount of power consumed by the machine by disabling power flow to the operation panel. If no
on
operations will be performed on the machine for a while, such as during a lunch break, you can save power simply by pressing
the operation panel. You can also use the Auto Sleep Time setting to automatically put the machine into sleep mode if it remains idle for
a specified length of time.
NOTE
When in sleep mode
When the machine enters sleep mode,
lights up yellow green.
Situations in which the machine does not enter sleep mode
When the machine is in operation
When the [Processing/Data] indicator is lit up or blinking
When the machine is performing an operation such as adjustment or cleaning
When a paper jam occurs
When the receiver of the optional handset or an external telephone is off the hook
When the menu screen is displayed
When a job is waiting to be scanned to a USB memory device or to a computer
When an error message is displayed on the screen (There are some exceptions. The machine sometimes enters sleep mode
when error messages are displayed.)
When You Want to Set the Auto Sleep Timer
The factory default settings for the amount of time that elapses before the machine enters auto sleep mode are listed below. We
recommend using the factory default settings to save the most power. If you want to change the amount of time that elapses before
the machine enters auto sleep mode, follow the procedure below.
MF8580Cdw / MF8550Cdn / MF8540Cdn: 10 minutes (setting range is 10 to 60 minutes)
MF8280Cw / MF8230Cn: 20 minutes (setting range is 20 to 60 minutes)
<Timer Settings>
<Auto Sleep Time>
<Apply>
automatically enters sleep mode
Set the amount of time that elapses before the machine
Exiting Sleep Mode
Press
to exit sleep mode.
NOTE
If the optional handset or an external telephone is connected, the machine exits sleep mode when you take the receiver off
㻝㻜㻡㻌㻛㻌㻢㻣㻢
the hook.
㻝㻜㻢㻌㻛㻌㻢㻣㻢
0ALJ-025
Setting Auto Shutdown Time (MF8540Cdn / MF8230Cn Only)
By enabling this setting, you can set the machine to automatically shut down. The machine automatically turns OFF after the specified
period of idle time has elapsed since entering the sleep mode. You can cut electric power consumption at night and on holidays if you
forget to turn OFF the machine.
<Timer Settings>
<Auto Shutdown Time>
Set the time period
<Apply>
IMPORTANT
Before setting <Auto Shutdown Time>
When the <Auto Shutdown Time> setting is enabled, the machine may automatically shut down even if you are operating the
machine from the Remote UI or from the Send Function Setting Tool. A malfunction may occur, particularly if the machine
shuts down while data is being imported. When you import data using the Remote UI or use the Send Function Setting Tool,
set <Auto Shutdown Time> to <0> (Off) in advance.
NOTE
The default setting is 4 hours.
If any setting of the [Timer Settings] is changed from the Remote UI while the machine is in the sleep mode, the timer for
the <Auto Shutdown Time> setting is reset to the beginning. The machine automatically shuts down after the specified
period of idle time has elapsed since the timer was reset.
㻝㻜㻣㻌㻛㻌㻢㻣㻢
0ALJ-026
Copying
This chapter describes basic copy operations and various other useful functions, such as 2-sided copying and copying both sides of an ID
card onto one page.
Using Basic Operations
Basic Copy Operations
Canceling Copies
Selecting Copy Paper
Using Copy Settings to Suit Your Needs
Enlarging or Reducing
Erasing Dark Borders and Frame
Lines (Erase Frame)
Collating Copies by Page
Selecting Document Type
Adjusting Density
Adjusting Color Balance
Adjusting Sharpness
2-Sided Copying (MF8580Cdw /
MF8550Cdn / MF8540Cdn Only)
Copying Multiple Documents onto
One Sheet (2 on 1/4 on 1)
Using the [Paper Save Copy] Key
Copying Both Sides of an ID Card
onto One Page
Simplifying Your Frequent Copy Operations
Changing Default Settings
Registering Frequently Used Copy Settings
㻝㻜㻤㻌㻛㻌㻢㻣㻢
0ALJ-027
Basic Copy Operations
1
2
3
Place the document(s).
Press
Placing Documents
.
Enter the number of copies using the numeric keys.
Enter a quantity from 1 to 99.
Press
4
Specify the copy settings as necessary.
Use
5
to cancel the entered quantity.
Press
/
to select the settings.
Various Copy Settings
.
Copying starts.
If you want to cancel copying, press <Cancel>
<Yes>
.
Canceling Copies
When placing documents in the feeder in step 1
The document is automatically scanned.
When placing documents on the platen glass in step 1
Depending on the copy settings you made, the screen for selecting the document size and paper source is displayed when
copying multiple documents. Follow the procedure below.
1
Use
/
to select the document size, and press
.
㻝㻜㻥㻌㻛㻌㻢㻣㻢
2
Select the paper source that contains the paper you want to use, and press
.
If the screen is not displayed, proceed to step 3.
3
Place the next document on the platen glass, and press
.
Repeat this step until you finish scanning the entire document.
4
Press <Start Copying>.
NOTE:
When the <Paper Size & Settings Mismatch> or <The memory is full. Scanning will be canceled. Do you want to print?>
message is shown in the display.
When an Error Message Appears
You can check the copy history, such as when or how many copies have been made. Press
<Copy Job Log>
Select the copy document you want to check
.
Job>
(Status Monitor)
IMPORTANT
When copying documents with text or images that extend to the edges of the page
The edges of the document might not be copied. For more information about the scan margins, see
TIPS
If you always want to make copies with the same settings:
Changing Default Settings
If you want to register a combination of settings to use when needed:
Registering Frequently Used Copy Settings
㻝㻝㻜㻌㻛㻌㻢㻣㻢
Scan Area.
<Copy/Print
0ALJ-028
Selecting Copy Paper
Specify the paper source that contains the paper to use for printing out copies.
NOTE
You must first specify the size and type of paper that is loaded in the paper source.
Specifying Paper Size and Type
Loading Paper
<Paper>
Select the paper source (
,
,
)
MF8580Cdw / MF8550Cdn / MF8540Cdn
MF8280Cw / MF8230Cn
<
>
Selects the paper loaded in the manual feed slot.
<
>
Selects the paper loaded in the drawer.
<
> (MF8580Cdw / MF8550Cdn / MF8540Cdn only)
Selects the paper loaded in the optional drawer.
LINKS
Basic Copy Operations
㻝㻝㻝㻌㻛㻌㻢㻣㻢
0ALJ-029
Canceling Copies
If you want to cancel copying immediately after pressing
can also cancel copying after checking the copy status.
, select <Cancel> on the screen or press
on the operation panel. You
Press <Cancel> on the screen that is displayed while copying
Press
to cancel
If the screen displays a list of documents when
is pressed
Documents have been scanned and are waiting to be printed. Use
Use
/
to select the copy document to cancel.
(Status Monitor) to cancel
(Status Monitor)
Status> screen
<Copy/Print Job>
<Cancel>
<Yes>
<Job Status>
Select the copy document on the <Copy/Print Job
Copy details
The number of copies, settings, and other details are displayed. If you only want to check the details without canceling copying,
press
(Status Monitor) to return to the copy main screen.
<Cancel>
Cancels copying.
㻝㻝㻞㻌㻛㻌㻢㻣㻢
LINKS
Basic Copy Operations
㻝㻝㻟㻌㻛㻌㻢㻣㻢
0ALJ-02A
Various Copy Settings
A variety of settings are available to suit your needs, such as when you want to save paper or make your documents easier to read.
Enlarging or Reducing
Selecting Document Type
Adjusting Density
Adjusting Color Balance
Adjusting Sharpness
2-Sided Copying (MF8580Cdw /
MF8550Cdn / MF8540Cdn Only)
Copying Multiple Documents onto
One Sheet (2 on 1/4 on 1)
Using the [Paper Save Copy] Key
Copying Both Sides of an ID Card
onto One Page
Erasing Dark Borders and Frame
Lines (Erase Frame)
Collating Copies by Page
㻝㻝㻠㻌㻛㻌㻢㻣㻢
0ALJ-02C
Enlarging or Reducing
You can enlarge or reduce copies by using a preset copy ratio such as <A5->A4>, or by setting a custom
copy ratio in increments of 1%.
<Copy Ratio>
Select the copy ratio
<Custom Ratio>
Use
/
or the numeric keys to enter the copy ratio, and press <Apply>. You can set any copy ratio from 25% to 400% in 1%
increments.
Preset copy ratio
Use
/
to select a copy ratio.
LINKS
Basic Copy Operations
㻝㻝㻡㻌㻛㻌㻢㻣㻢
0ALJ-02E
Selecting Document Type
You can select the optical image quality for the copy depending on the document type, such as text-only
documents, documents with charts and graphs, or magazine photos.
<Original Type>
Select the document type
<Text/Photo/Map>
Suitable when copying documents that contain both text and photos, or documents that include detailed lines, such as maps. You
can also select whether to give priority to copy speed or image quality.
<Text/Photo/Map (Speed)>
Priority is given to speed over image quality. This setting is effective only when selected for color copying.
<Text/Photo/Map (Quality)>
This setting gives priority to image quality over speed. You can also adjust the level of priority given to the quality of
/
to adjust the setting, and press <Apply>.
the text or photos. Use
<Printed Image>
Suitable when copying documents that contain printed photos, such as magazines or pamphlets.
<Text>
Suitable when copying documents that only contain text.
LINKS
Basic Copy Operations
㻝㻝㻢㻌㻛㻌㻢㻣㻢
0ALJ-02F
Adjusting Density
You can adjust the density of the copy if the text or images in a document are too light or dark. You can also
adjust the background to remove the background color when document pages are lightly colored or yellowing.
NOTE
Adjust both the density and background when copying a document printed on thin paper, such as a newspaper, so that the text
and images on the opposite side of the page are not visible in the copy.
<Density>
Adjust the density
<Apply>
<–>
Decreases the density.
<+>
Increases the density.
Adjusting the background color
<Density>
<Background>
<Adjust (Manual)>
Adjust the background color
<–>
Makes the background color lighter.
<+>
Makes the background color darker.
<Adj. by Color>
Adjust each color in the background.
<Adj. by Color>
Select the color
Adjust the density
㻝㻝㻣㻌㻛㻌㻢㻣㻢
<Apply>
<Apply>
<Apply>
<Apply>
<Apply>
LINKS
Basic Copy Operations
Adjusting Color Balance
Adjusting Sharpness
㻝㻝㻤㻌㻛㻌㻢㻣㻢
0ALJ-02H
Adjusting Color Balance
Adjust the levels of yellow, magenta, cyan, or black.
<Color Balance>
Select the color
Adjust the color level
<–>
Makes the selected color lighter.
<+>
Makes the selected color darker.
Example: If you want to make a copy with colors that more closely match the original
Example: If you want to make a copy with brighter colors than the original
LINKS
Basic Copy Operations
Adjusting Density
Adjusting Sharpness
㻝㻝㻥㻌㻛㻌㻢㻣㻢
<Apply>
<Apply>
0ALJ-02J
Adjusting Sharpness
You can adjust sharpness of the copied image. Increase the sharpness to sharpen blurred text and lines, or
decrease the sharpness to improve the appearance of magazine photos.
<Sharpness>
Adjust the sharpness
<Apply>
<–>
Decreases the sharpness, resulting in a softer image.
Example: If you want to improve the appearance of magazine photos
<+>
Increases the image sharpness.
Example: If you want to sharpen text and lines written in pencil
LINKS
Basic Copy Operations
Adjusting Density
Adjusting Color Balance
㻝㻞㻜㻌㻛㻌㻢㻣㻢
0ALJ-02L
2-Sided Copying (MF8580Cdw / MF8550Cdn / MF8540Cdn Only)
You can copy two pages of a document on both sides of the paper. You can also copy a two-sided document
on both sides of the paper, or on two separate pages.
NOTE
<2-Sided> may not be available with some sizes and types of paper.
Paper
<2-Sided> is not available when using <Paper Save Copy> or <ID Card Copy>.
TIPS
Using the
key enables you to combine 2-sided copying and <2 on 1>/<4 on 1>:
<2-Sided>
Using the [Paper Save Copy] Key
Select the type of 2-sided copying
Types of 2-sided copying
The illustration below shows the types of 2-sided copying.
1-Sided->2-Sided
2-Sided->2-Sided
2-Sided->1-Sided
<Orig/Fin. Type>
Specify if you want to change the binding, such as when copying book-type documents in calendar-type format.
1-Sided->2-Sided
If you want to copy portrait-oriented documents in calendar-type format (short-edge binding)
<Orig/Fin. Type>
<Portrait>
<Calendar Type>
If you want to copy landscape-oriented documents in book-type format (short-edge binding)
<Orig/Fin. Type>
<Landscape>
<Book Type>
㻝㻞㻝㻌㻛㻌㻢㻣㻢
2-Sided->2-Sided
If you want to create copies with a different binding type than the original
<Orig/Fin. Type>
Select the original orientation
Select the original binding type
binding type for the finished copy, which is different from that of the original document
2-Sided->1-Sided
This setting enables you to align the direction of the output paper.
When a 2-sided document is in portrait-oriented calendar-type format (short-edge binding)
<Orig/Fin. Type>
<Portrait>
<Calendar Type>
When a 2-sided document is in landscape-oriented book-type format (short-edge binding)
<Orig/Fin. Type>
<Landscape>
<Book Type>
LINKS
Basic Copy Operations
Copying Multiple Documents onto One Sheet (2 on 1/4 on 1)
Using the [Paper Save Copy] Key
㻝㻞㻞㻌㻛㻌㻢㻣㻢
Select the
0ALJ-02R
Copying Multiple Documents onto One Sheet (2 on 1/4 on 1)
You can copy two or four documents onto a single sheet at a reduced size. This decreases the number of
pages, enabling you to save paper.
NOTE
Using <2 on 1>/<4 on 1> reduces the copy ratio automatically (the copy ratio is displayed on the screen). You can increase
, but the edges of the document might not be copied if you increase it.
or further reduce the copy ratio before pressing
<2 on 1>/<4 on 1> is not available when using <Erase Frame>, <Paper Save Copy>, or <ID Card Copy>.
When you copy multiple documents onto one page, margins may be created in the copied image.
TIPS
Using the
key enables you to combine 2-sided copying and <2 on 1>/<4 on 1>:
Using the [Paper Save Copy] Key
<N on 1>
Select <2 on 1> or <4 on 1>
Select the document size on the <Scan Size> screen
On the <Output Size> screen, select the paper source that contains the paper you want to use
<2 on 1>/<4 on 1>
Select <2 on 1> to copy two pages of documents onto a single sheet, or select <4 on 1> to copy four pages of documents onto a
single sheet.
<Select Layout>
Specify how to arrange the documents on the page. Use
/
to select the desired layout, and press
LINKS
Basic Copy Operations
2-Sided Copying (MF8580Cdw / MF8550Cdn / MF8540Cdn Only)
Using the [Paper Save Copy] Key
㻝㻞㻟㻌㻛㻌㻢㻣㻢
.
0ALJ-02K
Using the [Paper Save Copy] Key
You can use <2 on 1>/<4 on 1> to copy multiple documents onto a single sheet, and <2-Sided> to copy the
, which combines these functions, makes it easier to save
document onto both sides of a page. Using
paper than when using the functions separately.
NOTE
The 2-sided <Paper Save Copy> settings may not be available with some sizes and types of paper.
Paper
Using <Paper Save Copy> reduces the copy ratio automatically (the copy ratio is displayed on the screen). You can increase or
further reduce the copy ratio before pressing
, but the edges of the document might not be copied if you increase it.
<Paper Save Copy> is not available when using <Erase Frame>, <2-Sided>, <2 on 1>/<4 on 1>, or <ID Card Copy>.
When you copy multiple documents onto one page, margins may be created in the copied image.
Select the paper save copy setting
Select the document size on the <Scan Size> screen
Paper save copy settings
Select one of four setting combinations.
Original (Portrait)
<2 on 1 1Sided->2Sided>
(MF8580Cdw /
MF8550Cdn /
MF8540Cdn
Only)
<4 on 1 1Sided->2Sided>
(MF8580Cdw /
MF8550Cdn /
MF8540Cdn
Only)
<2 on 1 1Sided->1Sided>
<4 on 1 1Sided->1Sided>
LINKS
Basic Copy Operations
2-Sided Copying (MF8580Cdw / MF8550Cdn / MF8540Cdn Only)
Copying Multiple Documents onto One Sheet (2 on 1/4 on 1)
㻝㻞㻠㻌㻛㻌㻢㻣㻢
Copy
0ALJ-02S
Copying Both Sides of an ID Card onto One Page
You can use <ID Card Copy> to copy the front and back sides of a card onto the same side of a page. This
function is useful when copying a driver's license or ID card.
NOTE
<ID Card Copy> is available with A4/Letter size paper or larger.
<Copy Ratio> is automatically set to <100%>.
<ID Card Copy> is not available when using <Erase Frame>, <Paper Save Copy>, <2-Sided>, or <2 on 1>/<4 on 1>.
Place the card
<N on 1>
<ID Card Copy>
How to place the card
LINKS
Basic Copy Operations
㻝㻞㻡㻌㻛㻌㻢㻣㻢
Turn the card over
0ALJ-02U
Erasing Dark Borders and Frame Lines (Erase Frame)
When copying documents that are smaller than the output paper size, frame lines may appear around the
edges in the copied image. When copying facing pages from thick book, dark borders may appear. <Erase
Frame> enables you to erase these frame lines and dark borders.
NOTE
The width of the frame to erase is increased or decreased relative to the <Copy Ratio> setting.
<Erase Frame> is not available when using <Paper Save Copy>, <2 on 1>/<4 on 1>, or <ID Card Copy>.
<Erase Frame>
<On>
size on the <Scan Size> screen
Specify the width of the frame to erase
Frame Width
Use
/
or the numeric keys to enter the frame width (1 to 50 mm), and press <Apply>.
Example: If you want to erase the dark borders and frame lines
LINKS
Basic Copy Operations
㻝㻞㻢㻌㻛㻌㻢㻣㻢
<Apply>
Select the document
0ALJ-02W
Collating Copies by Page
When preparing multiple copies of multi-page documents, set <Collate> to <On> to collate copies in
sequential page order. This function is useful when preparing handouts for meetings or presentations.
<Collate>
<On>
<Off>
The copies are grouped by page and not collated. For example, if you are making three copies of a five-page document, the
printouts will be arranged in the following page order: 1, 1, 1, 2, 2, 2, 3, 3, 3, 4, 4, 4, 5, 5, 5.
<On>
The copies are grouped into complete sets in sequential page order. For example, if you are making three copies of a five-page
document, the printouts will be arranged in the following page order: 1, 2, 3, 4, 5, 1, 2, 3, 4, 5, 1, 2, 3, 4, 5.
LINKS
Basic Copy Operations
㻝㻞㻣㻌㻛㻌㻢㻣㻢
0ALJ-02X
Configuring Copy Settings to Your Needs
The default settings are the settings that are displayed whenever you turn ON the machine, or when you press
. If you register your
frequently used settings as default settings, you can eliminate the need to configure the same settings every time you make copies. In
addition, you can also register combinations of multiple copy settings and use them whenever you need them.
NOTE
The machine comes pre-configured with factory default settings (
settings according to your needs.
Setting Menu List). You can change and register the default
Change the copy ratio to 95% and register it as the default setting. From now on, you
Changing Default Settings
can make copies without changing the copy ratio.
Go to <Favorite Settings> and register the combination of <2-Sided> and <Collate>
turned <On>. You can then easily use this setting combination whenever you need it.
Registering Frequently Used Copy Settings
㻝㻞㻤㻌㻛㻌㻢㻣㻢
0ALJ-02Y
Changing Default Settings
The default settings are the settings that are displayed whenever you turn ON the machine, or when you press
. If you change these
default settings to match the operations that you perform frequently, you can eliminate the need to configure the same settings every
time you make copies.
<Copy Settings>
<Apply>
the selected item
<Change Default Settings>
Settings
Select the item you want to set, and change the default value.
LINKS
Basic Copy Operations
Various Copy Settings
Copy Settings
㻝㻞㻥㻌㻛㻌㻢㻣㻢
Select the setting
Change the default value of
0ALJ-030
Registering Frequently Used Copy Settings
You can register up to four frequently used combinations of copy settings. By simply selecting a registered setting combination when it is
needed, you can eliminate the need to configure the same settings every time you make copies, such as if you frequently set the number
of copies to 5, set <Erase Frame> to <On>, and increase the sharpness when copying. You can register the setting combinations
as <Mode 1> to <Mode 4>.
<Favorite Settings>
<Apply> <Yes>
Select <Mode 1> to <Mode 4>
<Register>
Select each setting and set the value
<Mode 1> to <Mode 4>
Register frequently used combinations of copy settings as one of the modes. To edit the settings for a mode that has already been
registered, select that mode, and press <Register> again.
Settings
Configure your frequently used settings.
Various Copy Settings
NOTE
If you want to delete a registered setting, press
If you want to use a registered setting, press
<Favorite Settings>
<Favorite Settings>
Registered settings are saved even when the machine is turned OFF.
You can change the settings of a mode after it is activated.
LINKS
Basic Copy Operations
㻝㻟㻜㻌㻛㻌㻢㻣㻢
select the mode
select the mode
<Delete>
.
<Yes>
.
0ALJ-031
Faxing
This chapter describes basic fax operations and various other useful functions to suit your needs, such as PC Fax to send documents
directly from computers, Address Book to specify destinations easily, and Forwarding to receive faxes even when you are out of the
office.
NOTE
Fax functions are only available for the MF8580Cdw / MF8550Cdn / MF8280Cw.
You need to complete some procedures before using fax functions.
(MF8580Cdw / MF8550Cdn / MF8280Cw Only)
Configuring Initial Settings for Fax Functions
You need to register destinations in the Address Book before using this feature.
Book (MF8580Cdw / MF8550Cdn / MF8540Cdn / MF8280Cw Only)
Registering in the Address
Using Basic Operations
Sending Faxes
Canceling Sending Faxes
Receiving Faxes
Specifying Scanning Settings
Adjusting Resolution
Adjusting Density
Adjusting Sharpness
Scanning 2-Sided Documents
(MF8580Cdw / MF8550Cdn /
MF8540Cdn Only)
Specifying Destinations Simply and Quickly
Specifying from Address Book
(Fax)
Specifying Previously Used
Destinations (Fax)
Sending and Receiving According to Your Purposes
㻝㻟㻝㻌㻛㻌㻢㻣㻢
Specifying Destinations in an
LDAP Server (Fax)
Making a Call before Sending
Faxes (Manual Sending)
Sending Faxes to Multiple
Destinations Simultaneously
(Sequential Broadcast)
Forwarding Received Faxes
Receiving Fax Information
Services
Sending Faxes Directly from Your Computer
Sending Faxes from Your
Computer (PC Fax)
㻝㻟㻞㻌㻛㻌㻢㻣㻢
Storing Received Faxes into
Memory (Memory Reception)
0ALJ-032
Sending Faxes
NOTE
You need to complete some procedures before using fax functions.
(MF8580Cdw / MF8550Cdn / MF8280Cw Only)
1
2
3
Place the document(s).
Press
Configuring Initial Settings for Fax Functions
Placing Documents
.
Enter the destination using the numeric keys, and press <Apply>.
If your machine is connected to a PBX (Private Branch Exchange), use
/
to select <R> and press
R-Key Setting
destination. If <R> is not available, you need to register the R-key settings.
If you enter the wrong characters, press
characters at once.)
before entering the
. (Press to delete each character one by one; press and hold to delete all the input
To make it easier to specify destinations by using other methods, such as the Address Book, see
Faxes.
Specifying Destinations for
NOTE:
When <Confirm Entered Fax Number> is set to <On>, a screen appears that prompts you to enter the destination again
( Checking Destinations before Sending Documents). Enter the same destination again for confirmation.
To send overseas
Enter the international access code, the country code, the area code, and the fax number to specify the destination.
1
Enter the international access code.
2
Use
/
to select <Pause>, and press
.
<p> (pause) is inserted between numbers. In this case, 012 will be dialed first, then two seconds later, the
next number will be dialed.
NOTE:
Inputting pauses is optional; however, consecutive numbers that are input without pauses may not be
recognized correctly.
Pauses can be inserted continuously.
One pause inserts 4 seconds of waiting time. This time can be changed as necessary.
㻝㻟㻟㻌㻛㻌㻢㻣㻢
Set Pause Time
3
Enter the country code, the area code, and the fax number.
4
Select <Pause> to insert a pause at the end of the fax number as necessary, and press
The waiting time inserted here is fixed to 10 seconds. This time cannot be changed.
5
4
Specify the scanning settings as necessary.
Use
5
Press <Apply>.
Press
/
to select the settings.
Various Fax Settings
(B&W) to start sending.
Scanning starts.
If you want to cancel sending, press
<Yes>
.
When placing documents in the feeder in step 1
When scanning is complete, the faxes are sent.
When placing documents on the platen glass in step 1
Follow the procedures below.
1
Use
/
to select the document size, and press
.
When there is only one page to be scanned, proceed to step 3.
2
Place the next document on the platen glass, and press
Repeat this step until you finish scanning all of the pages.
3
Press <Start Sending>.
The faxes are sent.
㻝㻟㻠㻌㻛㻌㻢㻣㻢
(B&W).
.
TIPS
If you always want to send faxes with the same settings:
Changing Default Settings
If you want to sound an alarm when the handset is off the hook:
Off-Hook Alarm
If you want to check the dial tone before sending to avoid sending to wrong destinations:
Check Dial Tone Before Sending
LINKS
Canceling Sending Faxes
Sending and Receiving Faxes According to Your Purposes
Checking Status and Log for Sent and Received Documents
㻝㻟㻡㻌㻛㻌㻢㻣㻢
0ALJ-033
Canceling Sending Faxes
If you want to cancel sending faxes immediately after pressing
faxes after checking the fax status.
Press
(B&W), press
to cancel
If the screen displays a list of documents when
is pressed
Documents have been scanned and are waiting to be processed. Use
Use
on the operation panel. You can also cancel sending
/
to select the document to cancel.
(Status Monitor) to cancel
(Status Monitor)
<TX Job>
<Cancel>
<Yes>
.
<Job Status>
Select the fax document on the <TX Job Status/Log> screen
Fax details
The number of sending document, settings, and other details are displayed. If you only want to check the details without sending,
press
(Status Monitor) to return to the fax main screen.
<Cancel>
Cancels sending.
LINKS
Sending Faxes
Checking Status and Log for Sent and Received Documents
㻝㻟㻢㻌㻛㻌㻢㻣㻢
0ALJ-034
Various Fax Settings
A variety of settings are available to suit your needs, for example, when you want to adjust density or enhance the clarity of an image.
Adjusting Resolution
Adjusting Density
Scanning 2-Sided Documents
(MF8580Cdw / MF8550Cdn /
MF8540Cdn Only)
㻝㻟㻣㻌㻛㻌㻢㻣㻢
Adjusting Sharpness
0ALJ-035
Adjusting Resolution
You can select the resolution suitable for your document type. The higher the resolution is, the clearer the
image becomes, but the longer it takes to send.
<Resolution>
Select the resolution
<200 x 100 dpi (Normal)>
Suitable for documents that contain text only.
<200 x 200 dpi (Fine)>
Suitable for documents that contain fine text.
<200 x 200 dpi (Photo)>
Suitable for documents that contain photographs.
<200 x 400 dpi (Superfine)>
Achieves an even finer resolution than Fine.
<400 x 400 dpi (Ultrafine)>
Achieves an even finer resolution than Superfine.
LINKS
Sending Faxes
㻝㻟㻤㻌㻛㻌㻢㻣㻢
0ALJ-036
Adjusting Density
You can adjust the density of the fax if the text or images in a document are too light or dark.
<Density>
Adjust the density
<Apply>
<–>
Decreases the density.
<+>
Increases the density.
LINKS
Sending Faxes
Adjusting Sharpness
㻝㻟㻥㻌㻛㻌㻢㻣㻢
0ALJ-037
Adjusting Sharpness
You can adjust sharpness of the image before sending. Increase the sharpness to sharpen blurred text and
lines, or decrease the sharpness to improve the appearance of magazine photos.
<Sharpness>
Adjust the sharpness
<Apply>
<–>
Decreases the sharpness, resulting in a softer image.
Example: If you want to improve the appearance of magazine photos
<+>
Increases the image sharpness.
Example: If you want to sharpen text and lines written in pencil
LINKS
Sending Faxes
Adjusting Density
㻝㻠㻜㻌㻛㻌㻢㻣㻢
0ALJ-038
Scanning 2-Sided Documents (MF8580Cdw / MF8550Cdn / MF8540Cdn Only)
The machine can automatically scan the front and back sides of documents in the feeder.
IMPORTANT
Place the documents in the feeder; the machine cannot scan both sides of documents automatically when the documents are
placed on the platen glass or when the machine is set to Manual Sending.
<2-Sided Original>
Select <Book Type> or <Calendar Type>
<Book Type>
Select for documents whose images on the front and back sides face the same direction.
<Calendar Type>
Select for documents whose images on the front and back sides face in opposite directions.
LINKS
Sending Faxes
Making a Call before Sending Faxes (Manual Sending)
㻝㻠㻝㻌㻛㻌㻢㻣㻢
0ALJ-039
Specifying Destinations for Faxes
You can specify destinations by selecting them from the Address Book, as well as by using the numeric keys. To use the Address Book,
you need to register destinations in the Address Book beforehand. You can also specify previously used destinations. If your office has an
LDAP server installed, you can also specify destinations in the server.
Specifying with Numeric Keys
(Fax)
Specifying from Address Book
(Fax)
Specifying Previously Used
Destinations (Fax)
Specifying Destinations in an
LDAP Server (Fax)
TIPS for Enhancing Security
If you want to limit available destinations to ones from the Address Book, ones in an LDAP server, or previously specified
ones:
Limiting Available Destinations
If you want to disable specifying previously used destinations:
Disabling Use of Previously Used Destinations
LINKS
Sending Faxes
Registering in the Address Book (MF8580Cdw / MF8550Cdn / MF8540Cdn / MF8280Cw Only)
Registering LDAP Servers (MF8580Cdw / MF8550Cdn / MF8540Cdn / MF8280Cw Only)
㻝㻠㻞㻌㻛㻌㻢㻣㻢
0ALJ-03A
Specifying with Numeric Keys (Fax)
Use the numeric keys on the operation panel to specify destinations.
IMPORTANT
When <Restrict New Destinations> is set to <On>, you cannot use the numeric keys to specify destinations.
Limiting Available Destinations
1
2
Press
.
Enter the destination using the numeric keys, and press <Apply>.
If you enter the wrong characters, press
characters at once.)
. (Press to delete each character one by one; press and hold to delete all the input
To specify any additional destinations, select <Specify Next Destination (New)> by using
procedure. Up to 10 destinations can be specified.
/
before repeating the same
NOTE:
When <Confirm Entered Fax Number> is set to <On>, a screen appears that prompts you to enter the destination again
( Displaying the Screen for Confirming the Fax Number (MF8580Cdw / MF8550Cdn / MF8280Cw Only)). Enter the
same destination again for confirmation.
The maximum number of destinations that you can specify when using the numeric keys in combination with an LDAP server is
10. For example, if seven destinations have been specified using an LDAP server, up to three destinations can be specified using
the numeric keys.
To delete destinations
If you specified multiple destinations, you can delete destinations as necessary.
1
Select <Confirm/Edit Destination>, and press
2
Select a destination you want to delete, and press
3
Press <Clear Dest.>, select <Yes>, and press
.
.
㻝㻠㻟㻌㻛㻌㻢㻣㻢
.
NOTE
If you want to easily and quickly delete destinations without displaying a list of destinations
Before selecting <Confirm/Edit Destination> in step 1, you can press
.
specified. Display a destination you want to delete, and press
/
LINKS
Sending Faxes
Sending Faxes to Multiple Destinations Simultaneously (Sequential Broadcast)
㻝㻠㻠㻌㻛㻌㻢㻣㻢
to toggle the destinations you
0ALJ-03C
Specifying from Address Book (Fax)
The Address Book enables you to specify a destination by selecting from a list of registered destinations or by
searching by name for destinations with recipient names. You can also directly specify a destination by
entering a three-digit number (coded dial number) assigned to a destination.
Selecting Destinations from Address Book
Selecting Destinations Directly by Entering Coded Dial Numbers
NOTE
You need to register destinations in the Address Book before using this feature.
Registering in the Address Book (MF8580Cdw / MF8550Cdn / MF8540Cdn / MF8280Cw Only)
Selecting Destinations from Address Book
1
2
Press
.
Press
.
You can also use
3
Use
/
/
to select <Specify from Address Book> on the screen, and press
.
to select a tab.
<All>
Displays all the destinations registered in the Address Book. For the marks beside the destinations, see the explanations below.
<
>
Displays a list of destinations registered in Favorites.
<A-Z>/<0-9>/<ABC> to <YZ>
Displays destinations with recipient names whose first characters correspond to the characters of the selected tab.
<
>
Displays destinations for faxes.
>
<
Displays destinations for e-mails. To specify destinations using this tab, see
<
Specifying from Address Book.
>
Displays destinations for shared folders. To specify destinations using this tab, see
<
>
Displays a list of destinations registered in Group Dial.
4
Use
/
to select a destination, and press
.
㻝㻠㻡㻌㻛㻌㻢㻣㻢
Specifying from Address Book.
NOTE:
If you want to specify multiple destinations
Repeat steps 2 to 4. Up to 200 destinations can be specified.
To specify any additional destinations with the numeric keys, use
.
screen, and press
/
to select <Specify Next Destination (New)> on the
To delete destinations
If you specified multiple destinations, you can delete destinations as necessary.
1
Select <Confirm/Edit Destination>, and press
2
Select a destination you want to delete, and press
3
Press <Clear Dest.>, select <Yes>, and press
.
.
.
If you specified destinations in Group Dial in step 2, <Number of Destinations> is displayed on the screen.
Selecting this item and pressing
displays detailed destinations in Group Dial.
NOTE
If you want to easily and quickly delete destinations without displaying a list of destinations
Before selecting <Confirm/Edit Destination> in step 1, you can press
.
specified. Display a destination you want to delete, and press
Selecting Destinations Directly by Entering Coded Dial Numbers
1
2
Press
.
Press
(Coded Dial).
㻝㻠㻢㻌㻛㻌㻢㻣㻢
/
to toggle the destinations you
You can also use
3
/
to select <Specify from Coded Dial> on the screen, and press
.
Use the numeric keys to enter a three-digit number (001 to 181).
If you enter the wrong characters, press
characters at once.)
. (Press to delete each character one by one; press and hold to delete all the input
NOTE:
If a confirmation screen appears
When <Coded Dial TX Confirmation> is set to <On>, a screen is displayed that shows the destination and the name for the
number. (For Group Dial, the destination name and the number of destinations are shown.) Check the contents and if everything
. To specify another destination, select <Cancel>, press
, and enter a three-digit number
is correct, select <OK>, and press
Displaying Destinations in Address Book
again.
If you want to specify multiple destinations
Repeat steps 2 and 3. Up to 181 destinations can be specified.
To specify any additional destinations with the numeric keys, use
.
screen, and press
/
to select <Specify Next Destination (New)> on the
To delete destinations
If you specified multiple destinations, you can delete destinations as necessary.
1
Select <Confirm/Edit Destination>, and press
2
Select a destination you want to delete, and press
3
Press <Clear Dest.>, select <Yes>, and press
.
.
.
If you specified destinations in Group Dial in step 2, <Number of Destinations> is displayed on the screen.
Selecting this item and pressing
displays detailed destinations in Group Dial.
NOTE
If you want to easily and quickly delete destinations without displaying a list of destinations
Before selecting <Confirm/Edit Destination> in step 1, you can press
.
specified. Display a destination you want to delete, and press
㻝㻠㻣㻌㻛㻌㻢㻣㻢
/
to toggle the destinations you
LINKS
Sending Faxes
Sending Faxes to Multiple Destinations Simultaneously (Sequential Broadcast)
㻝㻠㻤㻌㻛㻌㻢㻣㻢
0ALJ-03E
Specifying Previously Used Destinations (Fax)
You can select a destination from among the past three destinations. When you specify a previously used
destination, the machine also sets the same fax settings such as density you used the last time you sent
documents to that destination.
IMPORTANT
When <Restrict Resending from Log> is set to <On>, you cannot use this feature.
Destinations
Disabling Use of Previously Used
Turning OFF the machine or setting <Restrict New Destinations> to <On> deletes the past destinations, and disables this
Limiting Available Destinations
feature.
The destinations in Manual Sending are not available for this feature.
Making a Call before Sending Faxes (Manual Sending)
NOTE
When you specify a destination using this feature, any destinations that you have already specified are deleted.
1
2
3
Press
Use
.
/
to select <Previous Settings>, and press
Select a destination, and press
.
.
For Sequential Broadcast, the screen displays only the first destination you specified, but the fax will be sent to all the
Sending Faxes to Multiple Destinations Simultaneously (Sequential Broadcast)
destinations that you specified.
The selected destination and its fax settings are specified.
LINKS
Sending Faxes
㻝㻠㻥㻌㻛㻌㻢㻣㻢
0ALJ-03F
Specifying Destinations in an LDAP Server (Fax)
If your office has an LDAP server installed, you can use the destinations registered in the server. To specify
destinations, access an LDAP server via the machine, and then search for a destination.
NOTE
You need to specify the settings for connecting to an LDAP server beforehand.
Registering LDAP Servers (MF8580Cdw / MF8550Cdn / MF8540Cdn / MF8280Cw Only)
1
2
Press
Use
.
/
to select <Specify from LDAP Server>, and press
3
Select the LDAP server you are using, and press
4
Select the search criteria, and press
.
.
.
Personal names, fax numbers, e-mail addresses, organization names, and department names are available criteria for searching
destinations. Multiple search criteria can be specified at the same time.
5
Specify the search criteria using the numeric keys, and press <Apply>.
The following screen shows an example for when <Name> is selected in step 4 to search by personal name.
Pressing <A/a/12> toggles the input modes (except for searching by fax number).
To specify multiple search criteria, repeat steps 4 and 5.
6
Select <Search Method>, and press
.
㻝㻡㻜㻌㻛㻌㻢㻣㻢
7
Specify the search method, and press
.
<Using All Conditions Below>
Searches and displays the destinations that meet all the search criteria specified in steps 4 and 5.
<Using Some Conditions Below>
All destinations meeting any of the search criteria specified in steps 4 and 5 are displayed as search results.
8
Press <Start Search>.
The destinations meeting your search criteria are displayed.
NOTE:
If the authentication screen appears when you press <Start Search>, enter the user name of the machine and the password
registered in the LDAP server, and press <Apply>.
Registering LDAP Servers (MF8580Cdw / MF8550Cdn / MF8540Cdn /
MF8280Cw Only)
9
Select a destination, and press <Apply>.
Up to 10 destinations can be specified.
To search for a destination using other search criteria, repeat steps 2 to 9.
NOTE:
The maximum number of destinations that you can specify when using the numeric keys in combination with an LDAP server is 10.
For example, if seven destinations have been specified using the numeric keys, up to three destinations can be specified using an
LDAP server.
To delete destinations
If you specified multiple destinations, you can delete destinations as necessary.
1
Select <Confirm/Edit Destination>, and press
2
Select a destination you want to delete, and press
.
㻝㻡㻝㻌㻛㻌㻢㻣㻢
.
3
Press <Clear Dest.>, select <Yes>, and press
.
NOTE
If you want to easily and quickly delete destinations without displaying a list of destinations
Before selecting <Confirm/Edit Destination> in step 1, you can press
.
specified. Display a destination you want to delete, and press
/
LINKS
Sending Faxes
Sending Faxes to Multiple Destinations Simultaneously (Sequential Broadcast)
㻝㻡㻞㻌㻛㻌㻢㻣㻢
to toggle the destinations you
0ALJ-03H
Changing Default Settings
The default settings are the settings that are displayed whenever you turn ON the machine, or when you press
. If you change these
default settings to match the operations that you perform frequently, you can eliminate the need to configure the same settings every
time you send faxes.
<Fax Settings>
<TX Function Settings>
Change the default value of the selected item
<Apply>
Settings
Select the item you want to set, and change the default value.
LINKS
Sending Faxes
Various Fax Settings
Fax Settings (MF8580Cdw / MF8550Cdn / MF8280Cw Only)
㻝㻡㻟㻌㻛㻌㻢㻣㻢
<Change Default Settings>
Select the setting
0ALJ-03J
Receiving Faxes
This section describes the methods for receiving faxes and how to set up the machine to receive faxes. You need to complete some
Configuring Initial Settings for Fax Functions
procedures for using fax functions before specifying the receiving settings.
(MF8580Cdw / MF8550Cdn / MF8280Cw Only)
NOTE
The machine can print received fax documents on A4 or Letter size paper. If received fax documents are printed on other paper
sizes, a portion of the page may not be printed or a page may be printed on two separate sheets of paper.
Methods for Receiving Faxes
The machine provides the following receiving methods. Select the method that best suits your needs and then set it up by following the
Setting Up the Machine to Receive Faxes.
procedures in
<Auto>
Dedicated to receiving faxes
The machine receives faxes automatically. Even if someone makes a call to you, you cannot talk to the caller.
<Fax/Tel
Auto Switch>
<Answering
Machine>
When the call is a fax
The machine receives the fax automatically.
When the call is a telephone call
An incoming call rings. Pick up the handset to answer the call.
NOTE:
You need to connect your telephone or the optional handset to the machine beforehand.
When the call is a fax
After an incoming call rings, the machine receives the fax automatically.
When the call is a telephone call
The answering machine activates, enabling the caller to leave a message. If you pick up the handset before the
answering machine starts recording a message, you can talk with the caller.
NOTE:
You need to connect your answering machine to the machine beforehand.
Set the answering machine to answer after a few rings.
We recommend that you add approximately 4 seconds of silence at the beginning of the message or set the
maximum recording time to 20 seconds.
When the call is a fax
An incoming call rings. Pick up the handset. If you hear a beep, press
to receive faxes.
, select <Start Receiving>, and press
<Manual>
When the call is a telephone call
An incoming call rings. Pick up the handset. If you do not hear a beep, start your conversation.
NOTE:
You need to connect your telephone or the optional handset to the machine beforehand.
You can set the machine to automatically receive faxes when an incoming call rings within a specified
timeframe.
Switch to Auto RX
<Net
Switch>
The machine distinguishes between fax and telephone calls. This mode is only available for certain countries and
requires subscription to a network switch service.
NOTE:
You need to connect your telephone or the optional handset to the machine beforehand.
NOTE
Depending on the type of telephone connected to it, the machine may not be able to send or receive faxes properly.
If you are connecting an external telephone with fax functions, set the telephone to not receive faxes automatically.
If you pick up the telephone handset and hear a beep, the call is a fax. You can receive the fax just by using the telephone to
enter a specific ID number.
Using a Telephone to Receive Faxes (Remote Reception)
㻝㻡㻠㻌㻛㻌㻢㻣㻢
Setting Up the Machine to Receive Faxes
1
2
3
Press
Use
.
/
to select <RX Mode>, and press
Select the receiving method, and press
.
.
When selecting <Fax/Tel Auto Switch>
Specify the following three settings as necessary. When the setting is complete, press <Apply>.
<Ring Start Time>
Enables you to specify the duration during which the machine determines whether an incoming call is a fax or a
telephone call. (Setting values: 5 to 30 seconds; default setting: 8 seconds)
<Incoming Ring Time>
Enables you to specify the duration during which an incoming call rings for a telephone call. (Setting values: 15 to 300
seconds; default setting: 22 seconds)
<After Ring>
Enables you to specify how the machine operates if you do not pick up the handset while an incoming call is ringing.
Select <End> to disconnect the call or <Receive> to receive an incoming fax. (Default setting: <Receive>)
TIPS
If you want to print received documents on both sides of paper:
Print on Both Sides
If you want to print information, such as reception date and time, at the bottom of received documents:
If you want to continue printing even when the toner is low:
RX Page Footer
Continue Printing When Toner Is Low
Using a Telephone to Receive Faxes (Remote Reception)
When you pick up the telephone and get a fax signal, you do not need to go to the machine to receive the fax. Just enter a specific ID
number (default setting: 25) with the telephone, and you can start receiving the fax.
1
2
When an incoming call rings, pick up the telephone handset.
If you hear a beep, enter the ID number for Remote Reception with the telephone.
㻝㻡㻡㻌㻛㻌㻢㻣㻢
The ID number is set to 25 by default. You can change this number as necessary.
3
Hang up the handset.
LINKS
Sending and Receiving Faxes According to Your Purposes
Checking Status and Log for Sent and Received Documents
㻝㻡㻢㻌㻛㻌㻢㻣㻢
Remote RX
0ALJ-03K
Sending and Receiving Faxes According to Your Purposes
In addition to the basic sending and receiving methods, there are a variety of other methods to suit your purposes.
Making a Call before Sending
Faxes (Manual Sending)
Sending Faxes to Multiple
Destinations Simultaneously
(Sequential Broadcast)
Forwarding Received Faxes
Receiving Fax Information
Services
LINKS
Sending Faxes
Receiving Faxes
Checking Status and Log for Sent and Received Documents
㻝㻡㻣㻌㻛㻌㻢㻣㻢
Storing Received Faxes into
Memory (Memory Reception)
0ALJ-03L
Making a Call before Sending Faxes (Manual Sending)
You can send faxes manually at the end of a phone conversation. When you hear a beep over the phone, it
(B&W) to send your faxes.
means the recipient is trying to receive your faxes. Press
NOTE
You need to connect your telephone or the optional handset to the machine beforehand.
1
Place the document(s).
Placing Documents
The machine cannot automatically scan both sides of the documents in Manual Sending.
When the document is placed on the platen glass, only one page can be sent.
2
3
4
5
Press
.
Specify the scanning settings as necessary.
Various Fax Settings
Dial the recipient’s fax number.
Ask the recipient to set their fax machine to receive your faxes.
If you hear a beep, proceed to step 6.
6
Press
(B&W), and hang up the handset.
LINKS
Sending Faxes
Canceling Sending Faxes
Checking Status and Log for Sent and Received Documents
㻝㻡㻤㻌㻛㻌㻢㻣㻢
0ALJ-03R
Sending Faxes to Multiple Destinations Simultaneously (Sequential
Broadcast)
You can send faxes to up to 210 destinations at once. Use the numeric keys* or the Address Book to specify
multiple destinations. If your office has an LDAP server * installed, you can access the server via the machine,
and then specify up to 10 destinations.
* The maximum number of destinations that you can specify when using an LDAP server or the numeric keys is 10 respectively.
If you use the numeric keys in combination with an LDAP server, a total of 10 destinations can be specified. For example, if
seven destinations have been specified using the numeric keys, up to three destinations can be specified using an LDAP server.
IMPORTANT
When <Restrict Sequential Broadcast> is set to <Reject Sequential Broadcast>, you cannot use this feature.
Prohibiting Sequential Broadcasting (MF8580Cdw / MF8550Cdn / MF8280Cw Only)
NOTE
You need to register destinations in the Address Book before using this feature.
Registering in the Address Book (MF8580Cdw / MF8550Cdn / MF8540Cdn / MF8280Cw Only)
1
2
3
Place the document(s).
Press
Placing Documents
.
Specify the destination.
To specify with the numeric keys, enter the fax number, and press <Apply>. To specify any additional destinations, select
/
before repeating the same procedure.
<Specify Next Destination (New)> by using
To specify from the Address Book
To specify from an LDAP server
4
Specify the scanning settings as necessary.
Use
5
Specifying from Address Book (Fax)
Specifying Destinations in an LDAP Server (Fax)
Press
/
to select the settings.
Various Fax Settings
(B&W) to start sending.
LINKS
Sending Faxes
Canceling Sending Faxes
Checking Status and Log for Sent and Received Documents
㻝㻡㻥㻌㻛㻌㻢㻣㻢
0ALJ-03S
Storing Received Faxes into Memory (Memory Reception)
You can store received faxes into memory without printing them as soon as you receive them. The documents
in memory can be printed at any time, so you can delete unnecessary documents, like direct mails, before
they are printed and save paper. This feature is also helpful when printing confidential documents; you can
print them whenever it is convenient for you and prevent unauthorized persons from seeing them
unintentionally.
Storing Documents into Memory
Printing Documents in Memory
Checking/Deleting Documents in Memory
NOTE
The documents in memory can be also forwarded to a destination.
Selecting a Document to Forward
Storing Documents into Memory
To store received documents into memory, set <Memory Lock Settings> to <On>. You can also specify optional settings such as a
security setting that makes a password necessary to unlock the feature and a time setting that specifies a period of time during the day
in which received documents are stored in memory.
<System Management Settings>
<On>
Specify each setting
<Communication Management Settings>
<Apply>
<Memory Lock Settings>
<Memory Lock PIN>
Enables you to register a password of up to seven digits. To register a password, use the numeric keys to enter a password, and
press <Apply>. Enter the same numbers again for confirmation, and press <Apply>. This password is necessary when you change
the memory reception settings or when you deactivate the Memory Reception feature to print all the stored documents. If you do
not want to register a password, just press <Apply> without entering anything.
NOTE:
Passwords with only zeros, as in "00" or "0000000", are not allowed.
<Report Print>
Enables you to print RX Result reports every time documents are stored into memory. To print reports, select <On>, and press
. You also need to set <RX Result Report> to <On>.
RX Result Report (MF8580Cdw / MF8550Cdn / MF8280Cw Only)
<Memory Lock Time>
Specify a period of time during the day in which received documents are stored in memory. If you do not set a period of time, the
machine stores every document into memory when Memory Reception is turned on.
Printing Documents in Memory
To print received documents in memory, set <Memory Lock Settings> to <Off>. All the documents in memory are printed.
NOTE
You cannot select a specific document for printing.
If a time for the feature to deactivate has been specified, the documents are automatically printed at the specified time.
㻝㻢㻜㻌㻛㻌㻢㻣㻢
<System Management Settings>
<Off>
<Communication Management Settings>
<Memory Lock Settings>
Checking/Deleting Documents in Memory
You can check detailed information about the documents stored in memory, including sender fax numbers and number of pages sent,
and then delete unnecessary documents.
1
2
Press
Use
(Status Monitor).
/
to select <RX Job>, and press
.
3
Select <Job Status>, and press
4
Select the document you want to check, and press
.
.
To delete the checked document
1
Press <Delete>.
2
Select <Yes>, and press
.
㻝㻢㻝㻌㻛㻌㻢㻣㻢
LINKS
Receiving Faxes
Checking Status and Log for Sent and Received Documents
㻝㻢㻞㻌㻛㻌㻢㻣㻢
0ALJ-03U
Forwarding Received Faxes
You can forward received documents to other destinations. You can select a document from among all the
documents received in memory for forwarding, or set the machine to automatically forward every received
document to specified destinations. Fax numbers as well as e-mail addresses and shared folders in computers
can be specified as forwarding destinations. Documents are converted into PDF files when the destinations that
are specified for forwarding are e-mail addresses or shared folders.
NOTE
Available destinations for forwarding are limited to the destinations registered in the Address Book. If no destinations are
registered, register destinations in the Address Book before using this feature.
Registering in the Address Book (MF8580Cdw / MF8550Cdn / MF8540Cdn / MF8280Cw Only)
Specifying e-mail addresses and shared folders as forwarding destinations is only available for the MF8580Cdw / MF8550Cdn /
MF8540Cdn.
㻝㻢㻟㻌㻛㻌㻢㻣㻢
0ALJ-03W
Selecting a Document to Forward
The machine forwards the document that you select from among all the documents received in memory. To use this feature, first activate
Storing Received Faxes into Memory (Memory Reception)
the Memory Reception feature.
NOTE
As long as the Memory Reception feature is not deactivated, the documents in memory are not deleted even after they are
forwarded; the same documents can be forwarded multiple times.
1
2
Press
Use
(Status Monitor).
/
to select <RX Job>, and press
.
3
Select <Job Status>, and press
4
Select the document you want to forward, and press
5
Press <Forward>.
6
Select the forwarding destination from the Address Book, and press
.
For instructions on how to use the Address Book, see
.
.
Specifying from Address Book (Fax).
The document is forwarded to the specified destination.
㻝㻢㻠㻌㻛㻌㻢㻣㻢
0ALJ-03X
Forwarding All the Received Documents Automatically
The machine can forward all the received documents to specified destinations. Even if you are out of the office, you can receive fax
information anytime, anywhere.
Specifying Settings for Documents to be Forwarded Automatically
Printing Documents to be Forwarded
Printing/Resending/Deleting Documents that Failed to be Forwarded
Specifying Settings for Documents to be Forwarded Automatically
While the Forwarding feature is activated, all the documents to be received are automatically forwarded.
<System Management Settings>
destination from the Address Book
<Forwarding Settings>
<On>
Select the forwarding
NOTE
For instructions on how to use the Address Book, see
Specifying from Address Book (Fax).
Printing Documents to be Forwarded
If you want to check the documents to be forwarded for yourself, you can set the machine to print the documents whenever they are
forwarded, or to print only the documents that failed to be forwarded.
<System Management Settings>
<On> or <Only When Error Occurs>
<Store/Print When Forwarding>
<Print Images>
<On>
Prints all the documents to be forwarded.
<Only When Error Occurs>
Prints only the documents that failed to be forwarded.
Printing/Resending/Deleting Documents that Failed to be Forwarded
You can store documents that failed to be forwarded in memory, and print, resend, or delete them later.
㻝㻢㻡㻌㻛㻌㻢㻣㻢
Select
Storing Documents that Failed to be Forwarded in Memory
<System Management Settings>
<Only When Error Occurs>
<Store/Print When Forwarding>
Printing/Resending/Deleting Documents Stored in Memory
1
2
3
Press
Use
(Status Monitor).
/
to select <Fax Forwarding Errors>, and press
Select the document you want to check, and press
.
To print the checked document
1
Press <Print/Forward>.
2
Select <Print>, and press
3
Select <Yes>, and press
.
.
㻝㻢㻢㻌㻛㻌㻢㻣㻢
.
<Store Images in Memory>
To resend the checked document
1
Press <Print/Forward>.
2
Select <Forward>, and press
3
Select the forwarding destination from the Address Book, and press
.
For instructions on how to use the Address Book, see
To delete the checked document
1
Press <Delete>.
2
Select <Yes>, and press
.
LINKS
Receiving Faxes
Checking Status and Log for Sent and Received Documents
㻝㻢㻣㻌㻛㻌㻢㻣㻢
.
Specifying from Address Book (Fax).
0ALJ-03Y
Receiving Fax Information Services
Through fax information services, you can easily get a variety of helpful lifestyle and work information from
companies and organizations. This section describes a typical procedure for receiving these services.
NOTE
Depending on the service, actual procedures may differ from the ones described below. Follow the procedures for the service you
are using.
1
2
Press
.
Press <Hook>.
If an external telephone or the optional handset is connected to the machine, you can pick up the handset instead of pressing
<Hook>.
3
When you hear a dial tone, dial the information service.
4
When the recorded message of the information service answers, press
.
This step is unnecessary if the machine is using a tone-dialing line.
5
Use the numeric keys to enter the service number assigned for the information you want to receive.
You can also use the keypad on the telephone to enter the information service number.
6
Use
/
to select <Start Receiving>, and press
to start receiving faxes.
If you have picked up the handset, hang it up.
㻝㻢㻤㻌㻛㻌㻢㻣㻢
LINKS
Receiving Faxes
㻝㻢㻥㻌㻛㻌㻢㻣㻢
0ALJ-040
Checking Status and Log for Sent and Received Documents
The statuses and communication logs for sent and received fax documents can be checked separately for sending and receiving. You can
check detailed document information, including destinations and number of pages, and you can delete unnecessary documents.
IMPORTANT
When <Display Job Log> is set to <Off>, you cannot check the communication logs.
Display Job Log
NOTE
The destinations in Manual Sending cannot be checked because they are not displayed.
1
2
3
Press
Use
(Status Monitor).
/
to select <TX Job> or <RX Job>, and press
.
Check the statuses and communication logs for sent and received documents.
To check the statuses for sent and received documents
1
Select <Job Status>, and press
2
Select the document whose status you want to check, and press
.
.
<TX Job Status>/<RX Job Status>
Displays a list of the documents that are being sent and received or are waiting to be processed.
<Details>
Displays detailed information about the document selected from the list. If you specified multiple destinations, the
number of specified destinations is displayed on the screen. To check the details of specified multiple destinations, select
. If you find an unnecessary document, press <Cancel> or <Delete>, select
<Number of Destinations>, and press
.
<Yes>, and press
To check the communication logs for sent and received documents
1
Select <Job Log>, and press
.
㻝㻣㻜㻌㻛㻌㻢㻣㻢
2
Select the document whose log you want to check, and press
.
<TX Job Log>/<RX Job Log>
Displays a list of the documents that were sent and received. <OK> is displayed when a document was sent or received
successfully, and <Error> is displayed when a document failed to be sent or received because it was canceled or there
was some error.
<Details>
Displays detailed information about the document selected from the list.
NOTE:
If the <Result> column shows a three-digit number
This number represents an error code.
When an Error Code Appears
LINKS
TX Result Report (MF8580Cdw / MF8550Cdn / MF8540Cdn / MF8280Cw Only)
Communication Management Report (MF8580Cdw / MF8550Cdn / MF8540Cdn / MF8280Cw Only)
RX Result Report (MF8580Cdw / MF8550Cdn / MF8280Cw Only)
㻝㻣㻝㻌㻛㻌㻢㻣㻢
0ALJ-041
Sending Faxes from Your Computer (PC Fax)
You can send fax documents created on your computer application directly from your computer. This feature eliminates the need to print
documents for faxing and saves paper. You need to complete some procedures, such as specifying the basic fax settings ( Configuring
Initial Settings for Fax Functions (MF8580Cdw / MF8550Cdn / MF8280Cw Only)) and installing the fax driver on your computer
(MF Driver Installation Guide), before using this feature.
About the Fax Driver Help
Clicking [Help] on the fax driver screen displays the Help screen. On this screen you can see information that is not in the eManual, including information about driver features such as registering frequently used settings and how to set up those features.
NOTE
Depending on the operating system and the version of the fax driver you are using, the fax driver screens in this manual may
differ from your screens.
㻝㻣㻞㻌㻛㻌㻢㻣㻢
0ALJ-042
Sending PC Faxes
IMPORTANT
When <Allow Fax Driver TX> is set to <Off>, you cannot send faxes from computers.
Prohibiting PC Faxing (MF8580Cdw / MF8550Cdn / MF8280Cw Only)
You need to enable Department ID Management on the fax driver you are using if Department ID Management is enabled on
Setting the Department ID Management
the machine. For more information, click [Help] on the fax driver screen.
1
Open a document in an application and display the print dialog box.
How to display the print dialog box differs for each application. For more information, see the instruction manual for the
application you are using.
2
Select your fax driver, and click [Print].
NOTE:
In Windows 8/Server 2012, if you want to send a fax from the Windows Store app, display the charm bar to the right of the
screen, and tap [Devices]
the machine you are using [Print]. When you send a fax in this way, you can only set some of the
fax functions. If the message [The printer requires your attention. Go to the desktop to take care of it.] is displayed, move to the
desktop and proceed to step 3.
3
From the [Sending Settings] tab, enter [Destination Name] and [Fax Number], and click [Add to Destination
List].
If you need to specify a number to dial an outside line, select [Specify Outside Dialing Prefix] and enter the number in [Outside
Dialing Prefix]. The specified number is added to the beginning of the fax number when the machine dials.
To make it easier to specify destinations using the Address Book, see
Using Registered Destinations.
Selecting [Store Sent Fax Information and Image] enables you to store the logs for sending documents and check detailed
information of a sent document along with its image, including destinations and number of pages. For more information, click
[Help] on the fax driver screen.
NOTE:
If you have selected [Reenter Fax Number before adding Destination to [Destination List]] in the dialog box that is displayed when
[Security Settings] of the [Special] tab is clicked, a dialog box for entering the fax number again is displayed when you click [Add
to Destination List]. For more information, click [Help] on the fax driver screen.
㻝㻣㻟㻌㻛㻌㻢㻣㻢
4
5
Attach a cover sheet to the document as necessary.
Attaching Cover Sheets to PC Faxes
Click [OK] to send the document.
㻝㻣㻠㻌㻛㻌㻢㻣㻢
0ALJ-043
Attaching Cover Sheets to PC Faxes
You can attach a cover sheet to the document you are sending. Select a cover sheet from three preset cover sheets in the fax driver, or
create your own custom cover sheets. For more information, click [Help] on the fax driver screen.
1
Open a document in an application and display the print dialog box.
How to display the print dialog box differs for each application. For more information, see the instruction manual for the
application you are using.
2
Select your fax driver, and click [Print].
3
Click the [Cover Sheet] tab and specify each setting.
[Cover Sheet Attachment]
Select [Different Sheet to Each Destination] or [Same Sheet to All Destinations].
[Style]
Select a cover sheet from the three preset cover sheets (Template 1 to 3). The layout of the selected cover sheet is displayed
in the image on the left.
[Items to Include]
Displays items that are to be included on a cover sheet. To change the items to be included, click [Settings].
㻝㻣㻡㻌㻛㻌㻢㻣㻢
[Sender] tab
Select the sender items you want to include and enter the information.
[Destination] tab
Select the destination items you want to include and enter the information. Destination names, company names,
department names, and fax numbers specified in the [Sending Settings] tab ( Sending PC Faxes) are included on
the cover sheet.
[Logo] tab/[Signature] tab
Specify each setting. The following screen shows an example for when the [Logo] tab is selected.
With/without logos or signatures
Select [Print with Logo] or [Print with Signature] if you want to include logos or signatures on the cover sheet.
Have the bitmap files for logos or signatures ready beforehand.
Location of logos or signature files
Specify the location where logos or signatures files are saved. Click [Browse] to locate the file you are using for
logos or signatures.
Size and position of the specified logos or signatures
Adjust the size and position of the specified logos or signatures while checking the image displayed on the left.
[Details] tab
㻝㻣㻢㻌㻛㻌㻢㻣㻢
[Include Number of Sheets to Send]
Select this check box if you want to include the number of sheets that you are going to send in the cover sheet
and specify the number of sheets in [Number of Sheets to Send]. The number of sheets to send is not counted
automatically. The value specified here is included in the cover sheet.
[Include Title]
Select this check box if you want to add a title to the cover sheet and enter the title in [Title].
4
If you want to insert an attention note, select [Insert Attention Note] and select a note from the [Attention
Note] drop-down list.
Attention notes such as "Urgent" and "Confidential" are available. You can also enter characters directly in [Attention Note]
instead of selecting a note from the list.
You can also add comments in [Comment to Include].
5
Click [Preview] to check the contents of the cover sheet, and if everything is correct, click [OK].
To modify the contents, perform the steps from 3 again.
The specified cover sheet is attached to the fax when the fax is sent.
㻝㻣㻣㻌㻛㻌㻢㻣㻢
0ALJ-044
Using Address Book
Once you register frequently used destinations for PC faxes in the Address Book, you can easily specify
destinations whenever you send PC faxes. Also, Address Book data in CSV format created on applications such
as Microsoft Excel can be imported into the machine, or the Address Book data can be exported to a file for
use on other fax machines or applications.
NOTE
You cannot use the Address Book if you do not have permission to access the folder where the Address Book is saved. Log on as
a user who has permission to access the folder, or change the save location of the Address Book.
Changing Location to Save Address Book Data
㻝㻣㻤㻌㻛㻌㻢㻣㻢
0ALJ-045
Registering Destinations
This section describes how to register destinations in the Address Book for PC faxes. You can select single destinations from among those
registered in the Address Book to make one group destination (Group Dial), which is useful when sending to multiple destinations at
once.
Registering Destinations
Registering Multiple Destinations as One Destination (Group Dial)
NOTE
A total of 6,000 destinations can be registered: 3,000 for single destinations and 3,000 for group destinations.
You can select and combine registered group destinations and register them as separate group destinations.
You cannot use the Address Book if you do not have permission to access the folder where the Address Book is saved. Log on
as a user who has permission to access the folder, or change the save location of the Address Book.
Changing Location to Save Address Book Data
Registering Destinations
1
2
3
Open the printer folder.
Displaying the Printer Folder
Right-click your fax icon and click [Printing preferences].
Click the [Edit Address Book] tab
[Add Person].
NOTE:
To change or delete registered destinations, select a destination from [Address Book], and click [Edit] or [Delete].
㻝㻣㻥㻌㻛㻌㻢㻣㻢
4
Specify each setting and click [OK].
Address
Enter the recipient name, company name, and department name.
[Fax Number]
Enter the fax number(s). Hyphens can be inserted between numbers as necessary. If you want to add explanations of the uses
for the fax numbers, such as "Home" or "Office", enter them in [Description].
[Notes]
Enter comments as necessary.
Registering Multiple Destinations as One Destination (Group Dial)
1
2
3
Open the printer folder.
Displaying the Printer Folder
Right-click your fax icon and click [Printing preferences].
Click the [Edit Address Book] tab
[Add Group].
㻝㻤㻜㻌㻛㻌㻢㻣㻢
NOTE:
To change or delete registered destinations, select a destination from [Address Book], and click [Edit] or [Delete].
4
Specify each setting and click [OK].
[Group Name]
Enter a group name such as "Sales Department 1."
[Show]
Select the type of the destinations to display in [Available Destinations], from which you can select the destinations to register
in Group Dial.
[Person]
Displays single destinations.
[Group]
Displays group destinations.
[All]
Displays all the destinations registered in the Address Book.
[Available Destinations]
Select the destinations to register in Group Dial, and click [Add]. The selected destinations are displayed in [Current Group
Members].
NOTE:
To select multiple destinations, click the destinations while holding down [SHIFT] key or [CTRL] key.
To delete a destination from [Current Group Members], select a destination and click [Delete].
[Notes]
Enter comments as necessary.
㻝㻤㻝㻌㻛㻌㻢㻣㻢
0ALJ-046
Using Registered Destinations
This section describes how to specify destinations registered in the Address Book.
Registering Destinations
NOTE
You cannot use the Address Book if you do not have permission to access the folder where the Address Book is saved. Log on as
a user who has permission to access the folder, or change the save location of the Address Book.
Changing Location to Save Address Book Data
1
Open a document in an application and display the print dialog box.
How to display the print dialog box differs for each application. For more information, see the instruction manual for the
application you are using.
2
Select your fax driver, and click [Print].
3
Click the [Sending Settings] tab
4
Select a destination and click [Add to List]
[Address Book].
[OK].
㻝㻤㻞㻌㻛㻌㻢㻣㻢
To specify multiple destinations, repeat steps 3 and 4.
㻝㻤㻟㻌㻛㻌㻢㻣㻢
0ALJ-047
Importing/Exporting Address Book Data
Address Book data in CSV format created on applications such as Microsoft Excel can be imported into the machine, or the Address Book
data can be exported to a file for use on other fax machines or applications. The machine supports two file formats: CSV (*.csv) files and
Canon Address Book files (*.abk).
Importing Address Book Data
Exporting Address Book Data
Changing Location to Save Address Book Data
NOTE
You cannot use the Address Book if you do not have permission to access the folder where the Address Book is saved. Log on as
a user who has permission to access the folder, or change the save location of the Address Book.
Changing Location to Save Address Book Data
Importing Address Book Data
1
2
Open the printer folder.
Displaying the Printer Folder
Right-click your fax icon and click [Printing preferences].
3
Click the [Edit Address Book] tab
4
Select the file to import and click [Open].
[Import].
For a CSV file, specify the separators used in the file.
㻝㻤㻠㻌㻛㻌㻢㻣㻢
The destinations imported from the file are displayed in [Address Book].
Exporting Address Book Data
1
2
3
Open the printer folder.
Displaying the Printer Folder
Right-click your fax icon and click [Printing preferences].
Click the [Edit Address Book] tab
[Export].
㻝㻤㻡㻌㻛㻌㻢㻣㻢
NOTE:
If you have selected [Protect with Password when Exporting Address List] in the dialog box that is displayed when [Security
Settings] of the [Special] tab is clicked, a dialog box for entering a password is displayed when you click [Export]. For more
information, click [Help] on the fax driver screen.
4
Specify the location to save the file, the file name, and the file format, and then click [Save].
For a CSV file, specify the separators used in the file.
The Address Book data is exported to the specified location.
Changing Location to Save Address Book Data
1
2
Open the printer folder.
Displaying the Printer Folder
Right-click your fax icon and click [Printing preferences].
㻝㻤㻢㻌㻛㻌㻢㻣㻢
3
Click the [Edit Address Book] tab
4
Specify the location to save the Address Book data, and click [OK].
[Specify a Folder].
NOTE:
Save the Address Book data in a folder, such as the [My Documents] folder, where you have write permission.
5
If you want to create an Address Book, click [New], or if you want to copy the existing Address Book to the
specified folder, click [Copy].
The Address Book is created or copied.
NOTE:
If an Address Book already exists in the folder selected in step 4, the following message is displayed. If you want to use the
existing Address Book, click [Use as-is], and if you want to use the Address Book of the fax driver, click [Overwrite].
㻝㻤㻣㻌㻛㻌㻢㻣㻢
㻝㻤㻤㻌㻛㻌㻢㻣㻢
0ALJ-048
Using the Machine as a Printer
There are many ways to use the machine as a printer. You can print documents on your computer by using the printer driver, print
image files from a USB memory device, or print from portable devices using Google Cloud Print™ or AirPrint. Make full use of the print
functions to suit your needs.
Printing from a Computer
You can print a document made on your computer by using the printer driver.
Printing from a Computer
Printing from USB Memory (USB Print)
You can print JPEG and TIFF image files stored in a USB memory device by connecting it directly to the machine. Using this function, you
Printing from USB Memory (USB Print)
can print without using a computer.
Using Google Cloud Print
You can print without using a printer driver by using applications or services on computers or other portable devices that support Google
Using Google Cloud Print
Cloud Print.
Using AirPrint
You can print without using a printer driver by sending print data wirelessly from Apple devices.
㻝㻤㻥㻌㻛㻌㻢㻣㻢
Using AirPrint
0ALJ-049
Printing from a Computer
You can print a document made with an application on your computer by using the printer driver. There are useful settings on the printer
driver, such as enlarging/reducing and 2-sided printing, that enable you to print your documents in various ways. Before you can use this
function, you need to complete some procedures, such as installing the printer driver on your computer. For more information, see MF
Driver Installation Guide.
About the Printer Driver Help
Clicking [Help] on the printer driver screen displays the Help screen. On this screen, you can see the detailed descriptions that
are not in the e-Manual.
NOTE
Depending on the operating system and the type or version of the printer driver you are using, the printer driver screens in
this manual may differ from your screens.
If you are using the MF8580Cdw / MF8550Cdn / MF8540Cdn, you can use the PCL5c and PCL6 printer driver as well as the
UFRII LT printer driver. The available print settings vary depending on the printer driver. For more information, click [Help] on
each printer driver screen.
To Use the Optional Paper Drawer (MF8580Cdw / MF8550Cdn / MF8540Cdn Only)
If the optional paper drawer (drawer 2) is attached to the machine, perform the following operation on the printer driver.
IMPORTANT
To perform the following procedure, log on to your computer with an administrator account.
Open the printer folder ( Displaying the Printer Folder) Right-click your printer icon
Select the [250 Sheet Drawer] check box [OK]
[Properties]) [Device Settings] tab
㻝㻥㻜㻌㻛㻌㻢㻣㻢
[Printer Properties] (or
0ALJ-04C
Printing a Document
This section describes how to print a document on your computer by using the printer driver.
1
Open a document in an application and display the print dialog box.
How to display the print dialog box differs for each application. For more information, see the instruction manual for the
application you are using.
2
Select the printer driver for the machine, and click [Preferences] (or [Properties]).
The screen that is displayed differs depending on the application you are using.
3
Specify the print settings such as the number of copies and print orientation, and click [OK].
Tabs
Click each tab to display the print setting screens and specify the print settings as necessary.
Various Print Settings
NOTE:
For the MF8580Cdw / MF8550Cdn / MF8540Cdn, the default setting is for 2-sided printing. Change the setting as necessary.
Switching 1-Sided and 2-Sided Printing (MF8580Cdw / MF8550Cdn / MF8540Cdn Only)
[Copies]
Specify the number of copies.
[Orientation]
Specify the print orientation ([Portrait] or [Landscape]). The orientation setting for the document that is specified on the
application is usually reflected on the printer driver.
NOTE:
You can register the settings you specified in this step as a "profile" and use the profile whenever you print. You can eliminate the
need to specify the same settings every time you print.
Registering Combinations of Frequently Used Print Settings
4
Click [Print] (or [OK]).
㻝㻥㻝㻌㻛㻌㻢㻣㻢
Printing starts. On some applications, a screen like shown below appears.
To cancel printing, click [Cancel] when the screen shown above is displayed. After the screen disappears or if the screen is not
Canceling Prints
displayed, you can cancel printing in other ways.
NOTE:
When printing from the Windows Store app in Windows 8/Server 2012
Display the charm bar to the right of the screen, and tap or click [Devices]
print in this way, you can only use some of the print settings.
the machine you are using
[Print]. When you
If the message [The printer requires your attention. Go to the desktop to take care of it.] is displayed, go to the desktop and
follow the instructions in the displayed dialog box. This message appears when printing via Secure Print and other cases.
LINKS
Checking the Printing Status and Log
㻝㻥㻞㻌㻛㻌㻢㻣㻢
0ALJ-04E
Canceling Prints
You can cancel printing from your computer or on the operation panel of the machine.
From a Computer
From the Operation Panel
From a Computer
You can cancel printing from the printer icon displayed on the system tray on the desktop.
1
Double-click the printer icon.
NOTE:
When the printer icon is not displayed
Open the printer folder ( Displaying the Printer Folder), right-click your printer icon, and click [See what's printing] (or
double-click the icon of the printer driver for the machine).
2
Select the document you want to cancel, and click [Document]
3
Click [Yes].
[Cancel].
Printing of the selected document is canceled.
NOTE
Several pages may be output after you cancel printing.
TIPS
Canceling from the Remote UI
You can cancel printing from the [Job Status] page on the Remote UI:
Checking Current Status of Print Documents
Canceling from an application
On some applications, a screen like shown below appears. You can cancel printing by clicking [Cancel].
㻝㻥㻟㻌㻛㻌㻢㻣㻢
From the Operation Panel
Cancel printing using
Press
or
(Status Monitor).
to cancel
If the screen displays a list of documents when
Use
Use
/
is pressed
to select the document to cancel.
(Status Monitor) to cancel
(Status Monitor)
Status> screen
<Copy/Print Job>
<Cancel>
<Yes>
<Job Status>
NOTE
Several pages may be output after you cancel printing.
LINKS
Printing a Document
Checking the Printing Status and Log
㻝㻥㻠㻌㻛㻌㻢㻣㻢
Select the document on the <Copy/Print Job
0ALJ-04F
Checking the Printing Status and Log
You can check the current print statuses and the logs for printed documents.
Useful in the Following Cases
When your documents are not printed for a long time, you may want to see the waiting list of the documents waiting to be
printed.
When you cannot find your printouts that you thought had been printed, you may want to see whether an error has occurred.
1
2
3
Press
Use
(Status Monitor).
/
to select <Copy/Print Job>, and press
.
Check the print statuses or logs.
To check the print statuses
1
Select <Job Status>, and press
2
Select the document whose status you want to check, and press
.
.
<Copy/Print Job Status>
Displays a list of the documents that are being processed, being copied, or are waiting to be processed.
<Details>
Displays detailed information about the document selected from the list.
To check the print logs
1
Select <Print Job Log>, and press
2
Select the document whose log you want to check, and press
.
㻝㻥㻡㻌㻛㻌㻢㻣㻢
.
<Print Job Log>
Displays a list of the documents that were printed. <OK> is displayed when a document was printed successfully, and
<Error> is displayed when a document failed to be printed because it was canceled or there was some error.
<Details>
Displays detailed information about the document selected from the list. The displayed document name or user name
may not reflect the actual document or user name.
NOTE:
If the <Result> column shows a three-digit number
This number represents an error code.
When an Error Code Appears
LINKS
Printing a Document
Canceling Prints
㻝㻥㻢㻌㻛㻌㻢㻣㻢
0ALJ-04H
Various Print Settings
There are a variety of settings to suit your needs, such as Enlarged/Reduced and 2-sided Printing.
Enlarging or Reducing
Switching 1-Sided and 2-Sided
Printing (MF8580Cdw /
MF8550Cdn / MF8540Cdn Only)
Collating Printouts by Page
Printing Multiple Pages onto One
Sheet
Printing Posters
Printing Booklet (MF8580Cdw /
MF8550Cdn / MF8540Cdn Only)
Printing Borders
Printing Dates and Page Numbers
Printing Watermarks
Setting Color Mode
Specifying Paper Source
Selecting Document Type
Saving Toner
Combining and Printing Multiple
Documents
㻝㻥㻣㻌㻛㻌㻢㻣㻢
0ALJ-04J
Enlarging or Reducing
You can make enlarged or reduced printouts by using a preset print ratio, such as A5 to A4, or a custom print
ratio that you set in increments of 1%.
Setting Print Ratio by Specifying the Original Document and Paper Size (Preset Ratio)
The print ratio is automatically set based on the document and paper size you have specified.
[Basic Settings] tab
Select the document size in [Page Size]
Select the paper size in [Output Size]
[OK]
Specifying Print Ratio in Increments of 1%
[Basic Settings] tab
Select the [Manual Scaling] check box
Enter the print ratio in [Scaling]
[OK]
NOTE
Depending on the selected paper size, you may not be able to set the optimum enlarging/reducing ratio. For example, there
may be large blank spaces on your printout, or portions of the document that are missing.
The enlarging/reducing settings on some applications have priority over those on the printer driver.
㻝㻥㻤㻌㻛㻌㻢㻣㻢
LINKS
Printing a Document
㻝㻥㻥㻌㻛㻌㻢㻣㻢
0ALJ-04K
Switching 1-Sided and 2-Sided Printing (MF8580Cdw / MF8550Cdn /
MF8540Cdn Only)
If you are using the MF8580Cdw / MF8550Cdn / MF8540Cdn, you can make both 1-sided and 2-sided
printouts. The default setting is [2-sided Printing]. Change the setting as necessary.
NOTE
2-sided printing may not be available with some sizes and types of paper.
Paper
Select [1-sided Printing] or [2-sided Printing] in [1-sided/2-sided/Booklet Printing]
[Basic Settings] tab
[OK]
position to bind in [Binding Location]
Select the
[1-sided/2-sided/Booklet Printing]
Select [1-sided Printing] or [2-sided Printing].
NOTE:
For [Booklet Printing], see
Printing Booklet (MF8580Cdw / MF8550Cdn / MF8540Cdn Only).
[Binding Location]
Specify the position to bind the printouts with a binding tool such as a stapler. Printing orientation will be changed depending on
the specified binding position. To specify the margin width for the binding position, click [Gutter].
[Long Edge [Left]]
Prints images in such a way that the printed pages are opened horizontally when bound.
[Short Edge [Top]]
Prints images in such a way that the printed pages are opened vertically when bound.
[Gutter]
Specify a binding margin.
㻞㻜㻜㻌㻛㻌㻢㻣㻢
LINKS
Printing a Document
Printing Multiple Pages onto One Sheet
Printing Booklet (MF8580Cdw / MF8550Cdn / MF8540Cdn Only)
㻞㻜㻝㻌㻛㻌㻢㻣㻢
0ALJ-04L
Collating Printouts by Page
When printing copies of multi-page documents, select [Collate] to print complete sets in sequential page
order. This function is useful when preparing handouts for meetings or presentations.
[Basic Settings] tab
Select [Collate] or [Group] in [Finishing]
[OK]
[Finishing]
Specify the sorting method of the printouts when printing multiple-page documents.
[Collate]
The printouts are grouped into complete sets in sequential page order. For example, if you are printing three copies of a fivepage document, the printouts will be arranged in the following page order: 1, 2, 3, 4, 5, 1, 2, 3, 4, 5, 1, 2, 3, 4, 5.
[Group]
The printouts are not collated. For example, if you are printing three copies of a five-page document, the printouts will be
arranged in the following page order: 1, 1, 1, 2, 2, 2, 3, 3, 3, 4, 4, 4, 5, 5, 5.
NOTE:
If you select [Off], whether the printouts are collated or not depends on the setting made on the application.
LINKS
Printing a Document
㻞㻜㻞㻌㻛㻌㻢㻣㻢
0ALJ-04R
Printing Multiple Pages onto One Sheet
You can print multiple pages onto a single sheet. For example, you can print four or nine pages onto a single
sheet by using [4 on 1] or [9 on 1]. Use this function if you want to save paper or to view your document in
thumbnails.
NOTE
To save more paper, combine this setting with 2-sided printing.
Switching 1-Sided and 2-Sided Printing (MF8580Cdw / MF8550Cdn / MF8540Cdn Only)
In [Page Layout], select the number of pages to print onto a single sheet
[Basic Settings] tab
[OK]
the page distribution layout
In [Page Order], select
[Page Layout]
Select the number of pages to print onto a single sheet from [1 on 1] to [16 on 1]. For example, to print 16 pages onto a single
sheet, select [16 on 1].
NOTE:
For options such as [Poster [2 x 2]], see
Printing Posters.
Printing may not be performed properly if you combine this setting with an application setting for collating printouts.
[Page Order]
Select a page distribution layout. For example, if you select [Across from Left], the first page is printed on the top left, and then
the rest of the pages are arranged rightward.
LINKS
Printing a Document
Switching 1-Sided and 2-Sided Printing (MF8580Cdw / MF8550Cdn / MF8540Cdn Only)
㻞㻜㻟㻌㻛㻌㻢㻣㻢
0ALJ-04S
Printing Posters
You can print one page of a document onto multiple pages. For example, if you make a one-page A4-size
document nine times larger, you will have a poster 3x3 A4 size sheets large after you print the document and
paste it together.
[Basic Settings] tab
In [Page Layout], select the dimensions of your poster (for example, [Poster [2 x 2]])
[OK]
There are four size settings:[Poster [1 x 2]], [Poster [2 x 2]], [Poster [3 x 3]], and [Poster [4 x 4]].
NOTE:
Poster size settings cannot be selected when 2-sided printing is enabled. Select [1-sided Printing] in [1-sided/2-sided/Booklet
Printing], and then select a poster size setting.
Select the [Print Border] check box to add borders on your printouts. The borders are helpful if you want to paste the printouts
together or cut off the margins.
LINKS
Printing a Document
Enlarging or Reducing
㻞㻜㻠㻌㻛㻌㻢㻣㻢
0ALJ-04U
Printing Booklet (MF8580Cdw / MF8550Cdn / MF8540Cdn Only)
You can print two pages of a document on both sides of paper and then fold your printed pages in half to
make a booklet. The printer driver controls the print order in such a way that the page numbers are correctly
arranged.
NOTE
Booklet printing may not be available with some sizes and types of paper. The paper that is available for 2-sided printing is also
Paper.
available for booklet printing. See
[Basic Settings] tab
Select [Booklet Printing] in [1-sided/2-sided/Booklet Printing]
[OK]
[OK]
settings as necessary
Click [Booklet] to specify detailed
[1-sided/2-sided/Booklet Printing]
Select [Booklet Printing].
NOTE:
For [1-sided Printing] and [2-sided Printing], see
MF8540Cdn Only).
Switching 1-Sided and 2-Sided Printing (MF8580Cdw / MF8550Cdn /
[Booklet]
The screen below is displayed.
[Booklet Printing Method]
[All Pages at Once]: Prints all of the pages at once as a single bundle so that you can make a booklet just by folding the
printed pages in half.
[Divide into Sets]: Prints as multiple bundles divided by the number of the pages specified on [Sheets per Set]. Bind each
bundle, and then combine them as one booklet. Select this option when the document has so many pages that you cannot
bind them all into a single booklet.
[Specify Booklet Gutter]
If you are using a stapler or other binding tools, specify the margin width for binding your booklet. Select the [Specify Booklet
㻞㻜㻡㻌㻛㻌㻢㻣㻢
Gutter] check box and specify the margin width in [Booklet Gutter].
LINKS
Printing a Document
㻞㻜㻢㻌㻛㻌㻢㻣㻢
0ALJ-04W
Printing Borders
You can add borders, such as broken lines or double lines, in the margins of printouts.
[Page Setup] tab
Click [Page Options]
Select the border type in [Edging]
[Edging]
Select the border type.
Preview
Displays a preview with the selected border.
LINKS
Printing a Document
Printing Dates and Page Numbers
Printing Watermarks
㻞㻜㻣㻌㻛㻌㻢㻣㻢
[OK]
[OK]
0ALJ-04X
Printing Dates and Page Numbers
You can print the information such as dates or page numbers, and you can specify where to print this
information on the document (upper-left, lower-right, etc.).
[Page Setup] tab
[OK]
Click [Page Options]
Select the print position of the print date, user name or page number
[OK]
[Print Date]
Specify the position to print the print date.
[Print User Name]
Specify the position to print the user name (logon name) for the computer used to print the document.
[Print Page Number]
Specify the position to print the page number.
Changing the Print Format of Dates and Page Numbers
You can change formatting details such as font and font size when printing dates, logon names, or page numbers. Click [Format
Settings] on the Page Options screen shown above to specify the details.
LINKS
Printing a Document
Printing Borders
Printing Watermarks
㻞㻜㻤㻌㻛㻌㻢㻣㻢
0ALJ-04Y
Printing Watermarks
You can print watermarks such as "COPY" or "CONFIDENTIAL" over the document. You can create new
watermarks or use pre-registered watermarks.
[Page Setup] tab
Select the [Watermark] check box
Select a watermark from [Watermark Name]
[OK]
[Watermark]/[Watermark Name]
Select the [Watermark] check box to display the list of the watermarks in the [Watermark Name] drop-down list. Select a
watermark from the menu.
[Edit Watermark]
Displays the screen to create or edit watermarks.
[Add]
Click to create a new watermark. Up to 50 watermarks can be registered.
[Name]
Enter the created watermark name.
[Attributes]/[Alignment]/[Print Style]
Click each tab to specify the text, color, or print position of the watermark. For more information, click [Help] on the
printer driver screen.
㻞㻜㻥㻌㻛㻌㻢㻣㻢
LINKS
Printing a Document
Printing Borders
Printing Dates and Page Numbers
㻞㻝㻜㻌㻛㻌㻢㻣㻢
0ALJ-050
Setting Color Mode
You can select a color mode (color or black and white). If a document has pages in both color and black and
white, by specifying auto mode, color pages are printed in color, and black and white pages are printed in
black and white automatically.
[Basic Settings] tab
Select the color mode in [Color Mode]
[OK]
[Color Mode]
Select [Black and White] or [Color]. If you select [Auto [Color/B&W]], the color
mode is automatically switched page by page.
To Specify the Detailed Color Settings
You can also specify the detailed color settings such as color adjustment and color matching.
[Quality] tab
Select the [Manual Color Settings] check box
[OK]
[OK].
necessary
Click [Color Settings]
Specify the color settings as
[Color Adjustment]
Adjust the tone, brightness, and contrast.
[Matching]
Specify the color matching settings (for example, you can adjust the settings so that the color tones on your printouts
will match the color tones displayed on your computer screen).
㻞㻝㻝㻌㻛㻌㻢㻣㻢
NOTE
For more information, click [Help] on the printer driver screen.
LINKS
Printing a Document
㻞㻝㻞㻌㻛㻌㻢㻣㻢
0ALJ-051
Specifying Paper Source
To print onto the specific paper, specify the paper source that is loaded with the paper you want to use.
NOTE
Before printing, specify the paper size and type for the paper loaded in the paper source.
Loading Paper
Specifying Paper Size and Type
Select [Paper Source] in [Select by]
[Paper Source] tab
to print on from [Paper Source] [OK]
Select the paper source that is loaded with the paper you want
When a paper source has been selected, it turns purple on the illustration of the machine displayed on your computer screen.
Printing Specific Pages onto Different Paper
You can print specific pages of a document, such as when you want to print the cover of a booklet on colored paper. In this case,
load colored paper for the cover in the manual feed slot and load plain paper for the body pages in the paper drawer, and then
specify the paper settings on the printer driver.
[Select by]
As in the example described above, when you want to use specific paper for specific pages, select [Paper Source].
㻞㻝㻟㻌㻛㻌㻢㻣㻢
[Paper Selection]
Select how to specify paper, such as [Different for Cover and Others] * or [Different for First, Others, and Last]. Also, specify
which paper should be used for the cover and the body pages.
* You can select this option when you select [Booklet Printing] in [1-sided/2-sided/Booklet Printing] in the [Basic Settings] tab.
Booklet (MF8580Cdw / MF8550Cdn / MF8540Cdn Only)
LINKS
Printing a Document
㻞㻝㻠㻌㻛㻌㻢㻣㻢
Printing
0ALJ-052
Selecting Document Type
You can specify the document type to ensure optimal image quality. There are different settings for photo
documents, documents that have charts or graphs, and documents that have design drawings with fine lines.
[Quality] tab
Select the document type in [Objective]
[OK]
[Objective]
Select an option that suits the document type or purpose of printing. For example, select [General] for general use, or select
[Vivid Photo] when you want to print photo images in optimal print quality.
[General]
A versatile option that is suitable when printing most documents.
[Publications]
Suitable when printing documents that have a mix of photo images, charts, and graphs.
[Graphics]
Suitable when printing documents that have charts or graphs.
[Vivid Photo]
Suitable when printing photo images.
[Designs [CAD]]
Suitable when printing design drawings that have many fine lines.
[High Definition Text]
Suitable when printing documents that have small characters.
NOTE:
To specify detailed settings for each item selected on [Objective], click [Advanced Settings]. For more information, click [Help] on
the printer driver screen.
LINKS
Printing a Document
㻞㻝㻡㻌㻛㻌㻢㻣㻢
0ALJ-053
Saving Toner
You can set the printer driver to print documents using less toner.
IMPORTANT
When the toner save setting is enabled, fine lines and portions with lighter print density may become blurred.
[Quality] tab
Select the document type in [Objective]
Click [Advanced Settings]
[OK]
[OK]
[Advanced Settings] screen Select [On] from the drop-down list
[Objective]
Select [Toner Save] in the
Selecting Document Type
Select the document type for which you want to enable the toner save setting.
[Advanced Settings]
A screen with settings is displayed. Click [Toner Save] and select [On] from the drop-down list on the bottom of the screen.
NOTE:
You can specify whether to enable the toner save setting for each document type. Specify the toner save setting for each
document type listed in [Objective].
In the [Advanced Settings] screen, you can specify various print settings other than toner save settings. For more information,
click [Help] on the printer driver screen.
LINKS
Printing a Document
㻞㻝㻢㻌㻛㻌㻢㻣㻢
0ALJ-054
Combining and Printing Multiple Documents
By using Canon PageComposer, you can combine multiple documents into one print job and print the job with
specified print settings. This function, for example, enables you to combine documents made with different
applications and print all of the pages in the same paper size.
1
Open a document in an application and display the print dialog box.
How to display the print dialog box differs for each application. For more information, see the instruction manual for the
application you are using.
2
Select the printer driver for the machine, and click [Preferences] (or [Properties]).
3
Select [Edit and Preview] in [Output Method].
Click [OK] on the [Information] pop-up screen.
Click [OK] at the bottom of the screen.
4
Click [Print] (or [OK]).
The Canon PageComposer starts. Printing does not start in this step.
㻞㻝㻣㻌㻛㻌㻢㻣㻢
5
Repeat steps 1 to 4 for the documents you want to combine.
The documents are added to the Canon PageComposer.
6
From the [Document Name] list, select the documents to combine, and click
.
To select multiple documents, click the documents while holding down [SHIFT] key or [CTRL] key.
7
Change the settings as necessary, and click [Combine].
The documents selected in step 6 are combined.
[Print Preview]
Displays a preview of the document to be printed.
[Document List]/[Print Settings]
Click the [Document List] tab to display the documents added in steps 1 to 4. You can remove documents by selecting them
in the list and clicking [Delete from List].
Click the [Print Settings] tab to display the screen for specifying print settings such as the number of copies or 1-sided/2sided printing. The settings specified here are applied to the whole print job.
NOTE:
For more information, click [Help] on the Canon PageComposer screen.
㻞㻝㻤㻌㻛㻌㻢㻣㻢
[Details]
Displays the print setting screen of the printer driver. There are fewer settings available than when using the ordinary printing
method.
8
On the [Document Name] list, select the combined-document print job you want to print, and click
Printing starts.
For instructions on how to cancel printing, see
Canceling Prints.
LINKS
Printing a Document
㻞㻝㻥㻌㻛㻌㻢㻣㻢
.
0ALJ-055
Configuring Printer Settings on the Machine
When you print a document from a computer, you can specify many print settings, such as the number of copies or color mode, in the
application you used to make the document or on the printer driver. However, the <Paper Size Override> setting described below can
only be specified on the machine.
<Paper Size Override>
Select whether to switch between printing on A4 and Letter size paper if one of these paper sizes is loaded but the other is not. For
example, if you are printing a Letter size document but only A4 paper is loaded in the machine, the machine will print your document on
A4 paper.
<Printer Settings>
<Paper Size Override>
Select <Off> or <On>
<Off>
Does not perform paper size substitution. Printing stops and an error message is displayed when the machine runs out of the
paper that has been specified.
<On>
Performs paper size substitution. However, if no paper to substitute is loaded in any paper sources, the substitution cannot be
performed.
Other Printer Settings (MF8580Cdw / MF8550Cdn / MF8540Cdn Only)
There are other printer settings you can specify on the operation panel of the machine. These settings are applied only for PCL printing.
Printer Settings
NOTE
Priority of settings
When a particular setting can be specified either on the machine, or in an application or on the printer driver, the settings made
in the application or on the printer driver will override those specified on the machine.
LINKS
Printing a Document
Various Print Settings
㻞㻞㻜㻌㻛㻌㻢㻣㻢
0ALJ-056
Printing a Document Secured by a PIN (Secure Print) (MF8580Cdw /
MF8550Cdn / MF8540Cdn Only)
By setting a PIN to a document when printing from a computer, the document is held in the memory of the machine, and is not printed
until the correct PIN is entered on the operation panel of the machine. This function is called "Secure Print," and the document that is
protected by a PIN is called a "secured document." Using Secure Print keeps printouts of confidential documents from being left
Preparing for Using Secure Print
unattended. Before you can use this function, you need to complete some procedures.
㻞㻞㻝㻌㻛㻌㻢㻣㻢
0ALJ-057
Preparing for Using Secure Print
Make sure that Secure Print is enabled on the printer driver.
IMPORTANT
To perform the following procedure, log on to the computer with an administrator account.
1
2
3
Open the printer folder.
Displaying the Printer Folder
Right-click your printer icon and click [Printer properties] (or [Properties]).
Click the [Device Settings] tab and make sure that the [Allow Use of Secured Print] check box is selected.
If the check box is selected, Secure Print is enabled.
If the check box is not selected, select it and click [OK].
LINKS
Printing via Secure Print
㻞㻞㻞㻌㻛㻌㻢㻣㻢
0ALJ-058
Printing via Secure Print
This section describes how to print a document from an application as a secured document. The first part of this section describes how to
send a secured document to the machine, and the second part of this section describes how to print the secured document on the
machine.
Sending a Secured Document from a Computer to the Machine
Printing Out Secured Documents
Changing the Valid Time Period for Secured Documents
Sending a Secured Document from a Computer to the Machine
1
Open a document in an application and display the print dialog box.
How to display the print dialog box differs for each application. For more information, see the instruction manual for the
application you are using.
2
Select the printer driver for the machine, and click [Preferences] (or [Properties]).
3
Select [Secured Print] in [Output Method].
Click [Yes] or [No] on the [Information] pop-up screen.
If you want to use the same user name and PIN every time, click [Yes]. To change the user name and PIN every time, click
[No].
If you selected [Yes]
Enter the user name for [User Name] and PIN for [PIN], and click [OK].
The computer name (logon name) of your computer is displayed in [User Name]. if you want to change the user
name, enter up to 32 alphanumeric characters for a new user name.
Enter the PIN of up to seven digits.
㻞㻞㻟㻌㻛㻌㻢㻣㻢
4
Specify the print settings, and click [OK].
Click the [Basic Settings], [Page Setup], [Finishing], [Paper Source], or [Quality] tabs to specify the print settings on each
Various Print Settings
screen as necessary.
5
Click [Print] (or [OK]).
6
Check the document name, user name, and PIN and click [OK].
[Document Name]
The document name is automatically set based on the information from the application. If you want to change the document
name, enter up to 32 alphanumeric characters for a new document name.
[User Name]
If you specified the user name in step 3
The specified user name is displayed.
If you did not specify the user name in step 3
The computer name or logon name is displayed. If you want to change the user name, enter up to 32 alphanumeric
characters for a new user name.
[PIN]
If you specified the PIN in step 3
The specified PIN is already entered. The PIN is displayed in symbols.
If you did not specify the PIN in step 3
Enter the PIN of up to seven digits. The entered PIN is displayed in symbols.
㻞㻞㻠㻌㻛㻌㻢㻣㻢
After the secured document is sent to the machine, it is held in the memory of the machine waiting to be printed.
Printing Out Secured Documents
After you send the secured document to the machine, print it out within 30 minutes. After that, the secured document will be deleted
from the memory of the machine and can no longer be printed.
NOTE
If secured documents are left unprinted, they occupy the memory and may prevent the machine from printing even ordinary
(not secured) documents. Make sure that you print your secured documents as soon as you can.
You can check how much memory is being used for secured documents.
(Status Monitor) <Device Status> <Secure Print Memory Usage>
You can change the valid time period for secured documents.
1
Press
Changing the Valid Time Period for Secured Documents
.
NOTE:
You cannot proceed to the next step if the <Remote Scanner> screen shown below is displayed. In this case, press
again.
close the screen, and press
2
Select the secured document to print, and press
(Back) to
.
NOTE:
If the <Select User> screen is displayed
If secured documents from two or more users are being held in memory, the <Select User> screen is displayed prior to the
/
to select your user name, and press
.
<Select File> screen. Use
3
Enter the PIN using numeric keys, and then press <Apply>.
Printing starts.
Use
/
to select the document to cancel printing
<Cancel>
Changing the Valid Time Period for Secured Documents
㻞㻞㻡㻌㻛㻌㻢㻣㻢
<Yes>
.
The machine at purchase is set to delete secured documents 30 minutes after receiving them unless they are printed, but you can
change this setting.
1
2
Press
Use
.
/
to select <System Management Settings>, and press
.
If the logon screen appears, enter the correct ID and PIN using numeric keys, and then press
Machine
3
4
Select <Secure Print Settings>, and press
Select <On>, and press
Logging on to the
.
.
NOTE:
Disabling Secure Print
Select <Off>, press
5
.
, and restart the machine.
Specify how long the machine holds secured documents, and press <Apply>.
Use
/
or the numeric keys to enter the time.
The secured document is erased from the memory of the machine when the time specified here elapses.
6
Restart the machine.
Turn OFF the machine, wait for at least 10 seconds, and turn it back ON.
LINKS
Preparing for Using Secure Print
Checking the Printing Status and Log
㻞㻞㻢㻌㻛㻌㻢㻣㻢
0ALJ-059
Configuring Print Settings to Your Needs
You can register combinations of settings as "Profiles" to suit your different printing needs. Also, you can register the settings that you
frequently use as the default setting. Once the default setting is set, the registered settings are automatically displayed on the printer
driver screen, and you can skip the operations to specify the print settings and print immediately.
Register the combination of the [2 on 1] and [2-sided Printing] settings as a "Profile",
Registering Combinations of
and select this profile whenever you need it.
Frequently Used Print Settings
On the printer driver, set black and white printing as the default setting. From now on,
Changing Default
you will not have to change the color mode when printing.
Settings
㻞㻞㻣㻌㻛㻌㻢㻣㻢
0ALJ-05A
Registering Combinations of Frequently Used Print Settings
Specifying combinations of settings such as "1-sided landscape orientation on A4 size paper" every time you print may be time
consuming. If you register these frequently used combinations of print settings as "profiles," you can specify printing settings simply by
selecting one of these profiles from the list. This section describes how to register profiles and how to print using them.
Registering a Profile
Selecting a Profile
Registering a Profile
1
Change the settings that you want to register as a profile, and click [Add].
Click the [Basic Settings], [Page Setup], [Finishing], [Paper Source], or [Quality] tabs to specify the print settings on each
Various Print Settings
screen as necessary.
2
Enter a profile name in [Name], select an icon, and then click [OK].
Enter comments on the profile in [Comment] as necessary.
Click [View Settings] to see the settings to register.
NOTE
Editing a profile
By clicking [Edit] on the right side of [Add] on the screen shown in step 1, you can change the name, icon, or comment of the
profiles you have previously registered. You cannot edit the pre-registered profiles.
Selecting a Profile
Select the profile that suits your needs, and click [OK].
㻞㻞㻤㻌㻛㻌㻢㻣㻢
NOTE
Changing the settings of the selected profile
You can change the settings of a selected profile. In addition, the changed settings can be registered as another profile.
LINKS
Printing a Document
㻞㻞㻥㻌㻛㻌㻢㻣㻢
0ALJ-05C
Changing Default Settings
The default settings are the settings that are first displayed whenever you open the print settings screen of the printer driver, but you
can change them. For example, if you want to print all documents, including color documents, in black and white, you can change the
default setting for color mode to [Black and White]. By changing the default settings, the setting is always [Black and White] whenever
you open the printer driver screen, and you can eliminate the need to configure the same settings every time you make prints.
IMPORTANT
To perform the following procedure, log on to your computer with an administrator account.
1
2
3
Open the printer folder.
Displaying the Printer Folder
Right-click your printer icon and click [Printing preferences].
Change the settings on the print setting screen, and click [OK].
Click the [Basic Settings], [Page Setup], [Finishing], [Paper Source], or [Quality] tabs to specify the print settings on each
Various Print Settings
screen as necessary.
LINKS
Printing a Document
Various Print Settings
㻞㻟㻜㻌㻛㻌㻢㻣㻢
0ALJ-05E
Printing from USB Memory (USB Print)
You can print image files stored in a USB memory device by connecting it directly to the machine. Using this function, you can print
without using a computer.
Available File Formats
You can print the following types of image files.
JPEG (DCF/Exif 2.21 or earlier/JFIF)
TIFF (JPEG/MH/MR/MMR compression)
NOTE
Maximum printable data size per file *1 is 50 MB*2.
*1 For multi-page TIFF files, maximum data size is per page.
*2 Maximum data size is 20 MB for the MF8580Cdw / MF8550Cdn / MF8540Cdn when Secure Print is enabled.
Note that even some files smaller than the size described above may not be printed correctly.
Available USB Memory Devices
You can use USB memory devices with the following format styles.
FAT16 (memory capacity: up to 2 GB)
FAT32 (memory capacity: up to 32 GB)
IMPORTANT
Do not use non-standard USB memory devices. You may not be able to print the images properly in some USB memory
devices.
Do not connect anything other than a USB memory device. USB memory devices cannot be connected via a USB hub or an
extension cable.
Do not use USB memory devices with special functions such as built-in security functions.
NOTE
The USB memory port of the machine supports USB 2.0.
If a folder in a USB memory device has many files, scanning image files to print will take more time. Use your computer to
delete unnecessary files on your USB memory device or move them to a different folder.
1
Connect a USB memory device to the USB memory port.
IMPORTANT:
Do not remove the USB memory device or shock or shake the device or the machine when data is being read or written. Also, do
not turn OFF the machine while the processing is in progress.
Press
(USB PRINT).
㻞㻟㻝㻌㻛㻌㻢㻣㻢
2
3
Use
/
to select <Select File and Print>, and press
.
NOTE:
Index Print
You can print thumbnails of the image files (JPEG only) stored in a USB memory device. To print the images in thumbnails, select
<Index Print> on the screen, and proceed to the next step.
4
Select the file to print, and press
.
You can select multiple files.
To clear a selection, select the file you have selected (marked as
To display the contents of a folder, select a folder, and press
(Back) or
.
), and press
or
.
. To return to the folder in the upper level, press
NOTE:
Folders and files lower than the third directory are not displayed.
When you move to another folder, the previous file selections will be cleared.
To select all files
1
Press <All Items>.
2
Select <Select All>, and press
.
All the displayed files are selected.
To clear all selections, select <Clear All>, and press
.
To display previews
You can change the display method from <Details> (for file names and modification dates) to <Images> (for previews). By
previewing images, you can check the file content before you select a file to print.
NOTE:
You can specify either <Details> or <Images> as the default display method.
1
Press <All Items>.
㻞㻟㻞㻌㻛㻌㻢㻣㻢
Default Display Settings
2
Select <Display Method>, and press
3
Select the display method, and press
.
.
<Details>
Displays file names and dates.
NOTE:
You can set whether to display abbreviated file names.
File Name Display Format
<Images>
.
Displays previews. To select a file, press
Use
Press
/
to switch the preview.
to display a larger preview. Press
again to return to the original preview size.
To change the file sort order
You can change the sort order of the files in a USB memory device.
NOTE:
You can specify a sort setting such as <Name (Ascending)> or <Date/Time (Ascending)> as the default setting for the file sort
File Sort Default Settings
order.
1
Press <All Items>.
2
Select <Sort Files>, and press
3
Select the criteria for file sorting, and press
.
.
㻞㻟㻟㻌㻛㻌㻢㻣㻢
NOTE:
When you select <Date/Time (Ascending)> or <Date/Time (Descending)>, files are sorted based on the
modification dates and time of the files.
5
Press <Apply>.
6
Specify the print settings as necessary.
Use
/
to select the settings, press
and specify each setting.
<Number of Copies>
Specify the number of copies from 1 to 99. Use
/
or the numeric keys to enter a quantity, and press <Apply>.
<Paper>
Select the paper to print on. Use
/
to select the paper, and press
.
<N on 1>
You can print two or four images onto a single sheet. Use
/
㻞㻟㻠㻌㻛㻌㻢㻣㻢
to select <2 on 1> or <4 on 1>, and press
.
<2 on 1>
Prints two images onto a single sheet.
<4 on 1>
Prints four images onto a single sheet.
NOTE:
<N on 1> is not available for printing TIFF files.
<2-Sided> (MF8580Cdw / MF8550Cdn / MF8540Cdn Only)
You can make 2-sided printouts. Use
/
to select the binding position, and press
.
<Book Type>
Prints images in such a way that the printed pages are opened horizontally when bound.
<Calendar Type>
Prints images in such a way that the printed pages are opened vertically when bound.
NOTE:
<2-Sided> may not be available with some sizes or types of paper.
Paper
<Print Date>
You can print the modification date of the file below each image. Use
/
to select <On>, and press
.
NOTE:
Although <Print Date> is not available for Index Print, the modification date of the file is automatically printed below each
image.
<Print File Name>
You can print the file name below each image. Use
/
to select <On>, and press
㻞㻟㻡㻌㻛㻌㻢㻣㻢
.
NOTE:
Although <Print File Name> is not available for Index Print, the file name is automatically printed below each image.
<Original Type>
You can select the type of original depending on the image to print. Use
.
Priority>, and press
/
to select <Photo Priority> or <Text
<Photo Priority>
Gives priority to printing photo images smoothly.
<Text Priority>
Gives priority to printing text clearly.
<Brightness>
You can adjust the brightness of printouts. Use
/
to adjust the brightness, and press <Apply>.
<–>
Prints images darker.
<+>
Prints images brighter.
NOTE:
You can adjust the brightness of TIFF files only when they are JPEG-compressed.
<Halftones>
You can select the printing method to reproduce halftones (the intermediate range between the lighter and darker areas of
/
to select <Gradation> or <Error Diffusion>, and press
.
an image) for optimal image quality. Use
<Gradation>
Prints images with fine gradation, such as digital camera images, with a smooth finish.
<Error Diffusion>
㻞㻟㻢㻌㻛㻌㻢㻣㻢
Prints images with small text or fine lines with a clear finish.
7
Press
.
Printing starts.
If you want to cancel printing, press <Cancel>
8
<Yes>
.
Disconnect the USB memory device from the USB memory port.
1
Press
2
Press
3
Use
4
Select <Remove Memory Media>, and press
.
(Status Monitor).
/
to select <Device Status>, and press
.
.
Wait until the message <The memory media can be safely removed.> is displayed.
5
Disconnect the USB memory device.
TIPS
If you always want to print with the same settings:
Changing Default USB Print Settings
LINKS
Memory Media Print Settings
㻞㻟㻣㻌㻛㻌㻢㻣㻢
0ALJ-05F
Changing Default USB Print Settings
The default settings are the settings that are displayed whenever you turn ON the machine, or when you press
. If you change these
default settings to match the operations that you perform frequently, you can eliminate the need to specify the same settings every time
you make prints.
<Memory Media Print Settings>
<Apply>
default value of the selected item
<Change Default Settings>
Settings
Select the item you want to set, and change the default value.
LINKS
Printing from USB Memory (USB Print)
Memory Media Print Settings
㻞㻟㻤㻌㻛㻌㻢㻣㻢
Select the setting
Change the
0ALJ-05H
Using Google Cloud Print
Google Cloud Print is a service that enables a user who has a Google account to print from applications such as Google Docs™ or Gmail™
via a smartphone, tablet, or computer connected to the Internet. Unlike conventional printing from a computer, Google Cloud Print is a
new technology that enables you to print by connecting a printer directly to the Web. For example, if you want to print an e-mail or files
that are attached to an e-mail, you can print just by using Gmail for mobile. You will find your printouts when you go to the machine.
IMPORTANT
When registering the machine or when using Google Cloud Print to print documents, you must be able to connect the machine
to the Internet. You are also responsible for paying all Internet connection fees.
You may not be able to use this function in some countries or regions.
㻞㻟㻥㻌㻛㻌㻢㻣㻢
0ALJ-05J
Preparing for Using Google Cloud Print
To print with Google Cloud Print, register the machine with Google Cloud Print.
NOTE
To use Google Cloud Print, a Google account is required. If you do not have one, access Google Web site to create your account.
Checking the Machine Settings
Enabling Google Cloud Print
Registering the Machine with Google Cloud Print
Checking the Machine Settings
Before setting up Google Cloud Print, check the following:
Make sure that the machine is assigned an IPv4 address and connected to a computer over a network.
Connecting via Wired LAN
LAN (MF8580Cdw / MF8280Cw Only)
Make sure that the date and time and the time zone settings are correct.
Connecting via Wireless
Date/Time Settings
If the Department ID Management is enabled, make sure that the machine is configured to enable printing from a computer even
when no Department ID and PIN are entered.
Blocking Jobs When Department ID Is Unknown
Enabling Google Cloud Print
Enable the Google Cloud Print function of the machine.
1
2
Press
Use
.
/
to select <System Management Settings>, and press
.
If the logon screen appears, enter the correct ID and PIN using the numeric keys, and then press
Machine
3
4
5
Select <Cloud Print On/Off>, and press
Select <On>, and press
.
.
Restart the machine.
Turn OFF the machine, wait for at least 10 seconds, and turn it back ON.
Registering the Machine with Google Cloud Print
Register the machine with Google Cloud Print.
1
2
Start the Remote UI and log on in System Manager Mode.
Click [Settings/Registration].
㻞㻠㻜㻌㻛㻌㻢㻣㻢
Starting Remote UI
.
Logging on to the
3
Click [Network Settings]
4
Click [Register...] in [Google Cloud Print Registration Status].
[Cloud Print Settings].
NOTE:
If [Register...] is unavailable
You need to enable Google Cloud Print. Click [Edit...], select the [Use Cloud Printing] check box, click [OK], and then restart the
machine.
To reregister the machine
To reregister the machine if the owner of the machine has changed or for other reasons, unregister the machine and register it
again.
5
Click the link of the URL displayed for [URL for Registration].
㻞㻠㻝㻌㻛㻌㻢㻣㻢
6
Follow the on-screen instructions to register the machine.
LINKS
Printing with Google Cloud Print
㻞㻠㻞㻌㻛㻌㻢㻣㻢
0ALJ-05K
Printing with Google Cloud Print
When you send print data from your computer or smartphone by using Google Cloud Print, the machine receives the print data and
prints it automatically.
1
2
Make sure that the machine is turned ON.
Display the print screen from an application on your computer or smartphone.
Display the print screen from applications such as Google Chrome™, Gmail, or Google Docs that support Google Cloud Print on a
computer or mobile devices such as a smartphone. The screens shown below are examples when you print a document from
Google Chrome on a computer. The print screen differs for each application.
NOTE:
Access the Google Cloud Print Web site for information about the latest applications that support Google Cloud Print.
3
Specify the print settings as necessary.
Copies: Specify the number of copies to print.
Page orientation: Select the print orientation (portrait or landscape).
Color mode: Select the color mode to print in color or in black and white.
2-sided (MF8580Cdw / MF8550Cdn / MF8540Cdn only): Specify whether to make 1-sided or 2-sided printouts.
Binding Location: Specify the position to bind the printouts (opening horizontally or vertically) with a binding tool such as a
stapler.
NOTE:
The procedures to specify print settings, available settings, and the names of the settings differ depending on the application
that you are using.
The paper size for printing is automatically selected from either A4 or Letter. Make sure that either of these sizes of paper is
loaded in the paper source of the machine.
Loading Paper
4
Send the print data.
Tap or click [Print], depending on the device or application you are using.
Printing starts when the machine receives the print data.
For instructions on how to cancel printing from the machine, see
Canceling Prints.
For instructions on how to cancel printing from your computer or smartphone, see the instruction manual for the device or
application you are using.
IMPORTANT:
Depending on the communication traffic, the machine may take a long time to print. The machine may also be unable to receive
print data.
LINKS
Preparing for Using Google Cloud Print
㻞㻠㻟㻌㻛㻌㻢㻣㻢
0ALJ-05L
Using AirPrint
You do not necessarily need to use a computer for printing photos, e-mails, Web pages, and other documents. AirPrint enables you to
wirelessly print from Apple devices such as iPad, iPhone, iPod touch, and Macintosh without using the printer driver.
Printing from iPad, iPhone, or iPod touch
Printing from Macintosh
Canceling AirPrint Printing
Troubleshooting for AirPrint
Changing AirPrint Settings
System Requirements
To use AirPrint, you need one of the following devices with the latest version of iOS:
iPad (all models)
iPhone (3GS or later)
iPod touch (3rd generation or later)
If you use Macintosh, OS X v10.7 or later is required.
Network Environment
Apple devices (iPad/iPhone/iPod touch/Macintosh) and the machine must be connected to the same wireless LAN.
Printing from iPad, iPhone, or iPod touch
1
2
3
4
Make sure that the machine is turned ON and is connected to the local wireless LAN.
Viewing Wireless LAN
Settings and Information (MF8580Cdw / MF8280Cw Only)
From the application on your Apple device, tap
to display the menu options.
From the drop-down list, tap [Print].
Select this machine from [Printer] in [Printer Options].
The printers connected to the network are displayed. Select this machine in this step.
IMPORTANT:
[Printer Options] is not displayed on applications that do not support AirPrint. You cannot print by using those applications.
5
Specify the print settings as necessary.
Number of copies
Tap [+] or [-] on the right side of [1 Copy] to set the number of copies.
[Double-sided] (MF8580Cdw / MF8550Cdn / MF8540Cdn only)
Tap [ON] on the right side of [Double-sided] to specify 2-sided printing.
[Range]
Tap [Range] and [All Pages] or specify the range of the pages to print when printing a document with multiple pages.
NOTE:
The available settings on [Printer Options] differ depending on the application you are using.
Available paper sizes differ depending on the application you are using.
㻞㻠㻠㻌㻛㻌㻢㻣㻢
6
Tap [Print].
Printing starts.
To cancel printing
Canceling AirPrint Printing
NOTE:
Checking the print status
During the printing process, the [Print Center] icon is displayed in the list of recently used applications on the Apple device, and
you can use it to check the print status. To display the list of recently used applications, press the [Home] button twice.
Printing from Macintosh
Before printing by following the procedure below, add your printer to your Macintosh from [System Preferences]
[Print & Scan].
1
Make sure that the machine is turned ON and that it is connected to the local wireless LAN.
2
Open a document in an application and display the print dialog box.
Viewing Wireless
LAN Settings and Information (MF8580Cdw / MF8280Cw Only)
How to display the print dialog box differs for each application. For more information, see the instruction manual for the
application you are using.
3
Select this machine in the print dialog box.
The printers connected to your Macintosh are displayed. Select this machine in this step.
4
Specify the print settings as necessary.
[Presets]
Specify the print settings by selecting a preset setting from the drop-down list.
[Copies]
Specify the number of copies.
[Two-Sided] (MF8580Cdw / MF8550Cdn / MF8540Cdn only)
Select the check box to make 2-sided printouts.
[Pages]
Specify the range of the pages to print when printing a document with multiple pages.
NOTE:
The available settings differ depending on the application you are using.
5
Click [Print].
Printing starts.
To cancel printing
Canceling AirPrint Printing
Canceling AirPrint Printing
You have two options to cancel printing. You can cancel printing from the operation panel of the machine (
an Apple device with the following procedure.
Canceling from iPad, iPhone, or iPod touch
1
2
3
Press the [Home] button twice.
Tap [Print Center] to display the list of the documents to be printed.
Tap the document you want to cancel, and tap [Cancel Printing].
Canceling from Macintosh
1
Click the printer icon that is displayed in the Dock on the desktop.
㻞㻠㻡㻌㻛㻌㻢㻣㻢
Canceling Prints), or from
2
3
Click the document you want to cancel.
Click [Delete].
Troubleshooting for AirPrint
You cannot print using AirPrint.
Make sure that the machine is turned ON. If the machine is turned ON, restart the machine and see if the problem is solved.
Make sure that the paper is loaded in the machine and the machine has enough toner.
Cartridges
Loading Paper
Replacing Toner
Make sure that no error messages are displayed on the machine.
Make sure that Apple devices (iPad/iPhone/iPod touch/Macintosh) and the machine are connected to the same wireless LAN. If
the machine is turned ON, it may take several minutes before the machine is ready for wireless communication.
Make sure that Bonjour on Apple devices is enabled.
Make sure that the machine is configured to enable printing from a computer even when no department ID and password are
entered.
Blocking Jobs When Department ID Is Unknown
Changing AirPrint Settings
You can register information, including the name of the machine and installation location, that is used for identifying the machine. You
can also disable the AirPrint function of the machine. Use the Remote UI to change these settings.
1
Start the Remote UI and log on in System Manager Mode.
Starting Remote UI
NOTE:
Depending on your Web browser, the procedure to start the Remote UI may be different. See the instruction manuals for the Web
browser you are using.
2
Click [Settings/Registration].
If you are using a mobile device, such as iPad, iPhone, or iPod touch, read "click" as "tap" in this section.
3
Click [Network Settings]
4
Click [Edit...].
[AirPrint Settings].
㻞㻠㻢㻌㻛㻌㻢㻣㻢
5
Specify the required settings, and click [OK].
[Use AirPrint]
Select the check box to enable printing with AirPrint. To disable AirPrint, clear the check box.
[Printer Name]/[Location]/[Latitude]/[Longitude]
Enter the name and the installation location information to help you identify this machine when operating your Apple device. This
information is useful if you have more than one AirPrint printer.
NOTE:
Enabling AirPrint
Enabling AirPrint by selecting the [Use AirPrint] check box also enables the <Use HTTP> and <mDNS Settings> (IPv4) settings.
Disabling HTTP Communication
Configuring DNS
Printer name and location
[Printer Name] and [Location] are reflected in the following settings respectively:
[Printer Name] can also be set in <mDNS Name> (
[Location] can also be set in <Location> (
6
IPv4 Settings).
Device Information Settings ).
Restart the machine.
Turn OFF the machine, wait for at least 10 seconds, and turn it back ON.
Checking Consumables on Macintosh
You can display the screen for AirPrint, on which you can not only access the AirPrint Settings but also view information about
consumables, such as paper and toner.
1
2
3
4
Click [System Preferences] in the Dock on the desktop
[Print & Scan].
Select your printer and click [Options & Supplies].
Click [Show Printer Webpage].
Log on to the Remote UI in System Manager Mode.
To check the machine status or supplies, you can also log on in End-User Mode.
㻞㻠㻣㻌㻛㻌㻢㻣㻢
Trademarks
Apple, Bonjour, iPad, iPhone, iPod touch, Macintosh, Mac OS, and OS X are trademarks of Apple Inc., registered in the U.S. and other
countries. AirPrint and the AirPrint logo are trademarks of Apple Inc.
㻞㻠㻤㻌㻛㻌㻢㻣㻢
0ALJ-05S
Using the Machine as a Scanner
You can scan original documents by using the operation panel of the machine or an application on a computer. Whichever way you use,
the scanned documents are converted into electronic file formats such as PDFs. Use the scan function to convert large-volume paper
documents into files so that you can organize them easily.
NOTE
To use this machine as a scanner, you must complete preparations in advance, including installation of software to a computer.
Preparing to Use the Machine as a Scanner
Depending on the operating system and the version of the scanner driver or applications you are using, the screens in this
manual may differ from your screens.
Scanning from the Machine
You can scan and save documents to your computer by using the operation panel of the machine. You can also save documents to a
Scanning from the Machine
Convenient Scanning with a MachineUSB memory device or send them as e-mail attachments.
Based Operation
Scanning from a Computer
You can scan documents placed on the machine from a computer. The scanned documents are saved to the computer. You can scan
using MF Toolbox (included with the machine), or with other applications such as an image-processing or word-processing application.
Scanning from a Computer
㻞㻠㻥㻌㻛㻌㻢㻣㻢
0ALJ-05U
Preparing to Use the Machine as a Scanner
Make sure that the machine and your computer are connected and all software is installed ( Connecting to a Computer). To connect
via a wireless or wired LAN, you must register this machine in MF Network Scan Utility. Register by following the procedure below. This
procedure is not required if the machine and your computer are connected via USB.
IMPORTANT
The scan function is not available if the machine and your computer are connected in an IPv6 environment. Use IPv4 or a USB
connection.
1
Click
2
Select the check box for the machine, and click [OK].
in the system tray.
Up to ten scanners on a network can be registered on a computer.
㻞㻡㻜㻌㻛㻌㻢㻣㻢
0ALJ-05Y
Scanning from the Machine
The sequence of "scanning a document and saving it to a computer" can only be done when scanning from
the machine. Scan while specifying what computer documents will be saved to; whether to scan documents in
color or black and white; whether to save documents as PDFs or JPEGs; and other settings.
1
2
3
4
Place the document(s).
Press
Use
Placing Documents
.
/
to select <Computer>, and press
Select the destination computer, and press
.
.
This screen is not displayed if only a computer is connected to the machine via USB.
5
Select the scan type.
Scan type
Color
Resolution
File format
<Color Scan>
Color
300 dpi
PDF (searchable)*1/ High compression
<B&W Scan>
Black and white *2
300 dpi
TIFF
<Custom 1>
Color
300 dpi
JPEG/Exif
<Custom 2>
Color
300 dpi
PDF (searchable)*1/ Standard compression
*1 A PDF format where characters on the document are scanned as text data and the text can be searched using a computer.
*2 Documents are scanned in black and white only, with no intermediate shades of gray.
NOTE:
To change settings
㻞㻡㻝㻌㻛㻌㻢㻣㻢
You can change settings from MF Toolbox.
6
Press
Configuring Scan Settings in MF Toolbox
.
Scanning starts.
To cancel, press <Cancel>
<Yes>
.
IMPORTANT:
You cannot scan while the MF Toolbox setup screen is displayed. Close the screen
before scanning.
When placing documents in the feeder in step 1
When scanning is complete, the save destination folder is displayed on the computer.
When placing documents on the platen glass in step 1
When scanning is complete, follow the procedure below.
1
If there are additional pages of documents to be scanned, place the next document on the platen glass,
.
select <Scan Next Original>, and press
Repeat this step until you finish scanning all of the pages.
When there is only one page to be scanned, proceed to the next step.
2
Press <Store & Finish>.
The save destination folder is displayed on the computer.
NOTE
About the save destination folder
By default, the scanned data is saved to the [Pictures] or [My Pictures] folder. A subfolder named with the scanning date is
created, and the data is saved to that folder.
To change the save destination, see
Configuring Storing Settings.
TIPS
Scan from the machine more easily
If you have regularly used preferences, such as scanning in color or black and white, or a pre-determined computer where
scanned documents will be saved, specifying these settings each time you scan can be troublesome. Register these settings in a
and
. You can
[Scan > PC] key so that you can scan with one press of a key. There are two [Scan > PC] keys:
Scanning Using the [Scan > PC] Key
register your settings in either of these keys.
Other useful scanning functions
㻞㻡㻞㻌㻛㻌㻢㻣㻢
You can save scanned documents to a USB memory device or send them as e-mail attachments. The documents can also be
saved to shared folders. You can accomplish these functions directly from the machine.
Scanning Documents Directly to USB Memory
Sending Documents as E-mails Directly from the Machine (MF8580Cdw / MF8550Cdn / MF8540Cdn Only)
Saving Documents Directly to a Shared Folder (MF8580Cdw / MF8550Cdn / MF8540Cdn Only)
㻞㻡㻟㻌㻛㻌㻢㻣㻢
0ALJ-061
Scanning Using the [Scan > PC] Key
Place a document on the machine, and press
or
, and scanning starts immediately. The type of
scan (color or black and white), the save destination for the document, and other settings can be registered
to a key, and documents can be scanned using those settings. This section describes how to register settings
in a key and scan with it.
Registering Your Settings in the [Scan > PC] Key
Using the [Scan > PC] Key
Registering Your Settings in the [Scan > PC] Key
Register the save destination computer and type of scan in
1
2
3
4
Press
Use
or
.
.
/
to select <Scan Settings>, and press
.
Select <Shortcut Key Settings> <Register>.
Select <Scan -> PC1> or <Scan -> PC2>, and press
.
Select the key to which you want to register settings.
5
Select the type of connection that is used between the machine and computer, and press
<Off>
Select this setting to erase registered settings.
<USB Connection>
Select this setting if the machine and computer are connected via USB.
<Network Connection>
Select this setting if the machine and computer are connected via a network.
6
Select the destination computer, and press
.
This screen is not displayed if you select <USB Connection> in step 5.
㻞㻡㻠㻌㻛㻌㻢㻣㻢
.
7
Select the scan type, and press
Scan type
.
Color
Resolution
File format
<Color Scan>
Color
300 dpi
PDF (searchable)*1/High compression
<B&W Scan>
Black and white *2
300 dpi
TIFF
<Custom 1>
Color
300 dpi
JPEG/Exif
<Custom 2>
Color
300 dpi
PDF (searchable)*1/Standard compression
*1 A PDF format where characters on the document are scanned as text data and the text can be searched using a computer.
*2 Documents are scanned in black and white only, with no intermediate shades of gray.
NOTE:
To change settings
You can change settings from MF Toolbox.
Configuring Scan Settings in MF Toolbox
Checking the Registered Settings
<Scan Settings>
<Scan -> PC2>
<Shortcut Key Settings>
Name of destination computer
Shows the name of the computer registered as the save destination.
Scan type
Shows the type of scan that has been set.
Using the [Scan > PC] Key
1
Place the document(s).
Placing Documents
㻞㻡㻡㻌㻛㻌㻢㻣㻢
<Confirm Destination>
Select <Scan -> PC1> or
2
Press
or
.
To check the settings registered in the key, see
Checking the Registered Settings.
Scanning starts.
To cancel, press <Cancel>
<Yes>
.
IMPORTANT:
You cannot scan while the MF Toolbox setup screen is displayed. Close the screen
before scanning.
When placing documents in the feeder in step 1
When scanning is complete, the save destination folder is displayed on the computer.
When placing documents on the platen glass in step 1
When scanning is complete, follow the procedure below.
1
If there are additional pages of documents to be scanned, place the next document on the platen glass,
.
select <Scan Next Original>, and press
Repeat this step until you finish scanning all of the pages.
When there is only one page to be scanned, proceed to the next step.
2
Press <Store & Finish>.
The save destination folder is displayed on the computer.
NOTE
About the save destination folder
By default, the scanned data is saved to the [Pictures] or [My Pictures] folder. A subfolder named with the scanning date is
created, and the data is saved to that folder.
To change the save destination, see
Configuring Storing Settings.
LINKS
Scanning from the Machine
㻞㻡㻢㻌㻛㻌㻢㻣㻢
0ALJ-0HW
Scanning from a Computer
There are two ways to scan from a computer: using MF Toolbox and using an application such as an image-processing or wordprocessing application.
Scanning Using MF Toolbox
MF Toolbox is an application included with the machine that enables you to scan documents or images to
a computer. You can forward the scanned data to a specified application, or attach it to an e-mail
message.
Scanning Using an Application
You can scan images by using an application such as a word-processing or image-processing application,
and load the images directly into the application. You do not need to start another application to scan.
㻞㻡㻣㻌㻛㻌㻢㻣㻢
0ALJ-063
Scanning Using MF Toolbox
You can save scanned documents to a computer, forward them to a specified application to edit them, or
attach them to an e-mail message. MF Toolbox features preset settings for each purpose, including
conversion to PDF and color scanning. You can scan easily by selecting a preset.
From the Operation Panel
1
2
3
Place the document(s).
Press
Use
Placing Documents
.
/
to select <Remote Scanner>, and press
.
From a Computer
4
Double-click the [Canon MF Toolbox] icon on the desktop.
MF Toolbox starts.
5
Select the scan type.
Click the icon for the type of scan you want to perform.
[Mail]
The scanned document is sent as an e-mail attachment. You can also save it to the computer and manually attach it to an email later.
[OCR]
Characters in the document are extracted as text data through OCR (optical character recognition) processing. You can edit the
extracted data by using an OCR software. Specify the OCR software in advance.
[Save]
The scanned document is saved to the computer.
[PDF]
The scanned document is converted into a PDF file. You can also forward it to an application. By default, the scanned document
is converted into a searchable PDF file where text can be searched using a computer.
[Color Scan]/[B&W Scan]/[Custom 1]/[Custom 2]
You can register frequently used settings in advance ( Configuring Scan Settings in MF Toolbox). You can also specify an
application as a forwarding destination. When you scan by using the operation panel, the settings registered here are applied
Scanning Using the [Scan > PC] Key).
( Scanning from the Machine
NOTE:
㻞㻡㻤㻌㻛㻌㻢㻣㻢
To switch a scanner
If two or more machines are installed and you want to switch to another machine, click [Settings], and select the machine.
Configuring Settings for MF Toolbox and the Scanner
6
Configure the scan settings as necessary.
7
Click [Start].
Configuring Scan Settings in MF Toolbox
Scanning starts.
To cancel, click [Cancel].
When placing documents in the feeder in step 1
When scanning is complete, the scanned document is saved to a folder on a computer or forwarded to an application.
Configuring Storing Settings
Specifying External Applications to Forward Scanned Data
When placing documents on the platen glass in step 1
If the screen shown below is displayed, you can continue scanning documents (When you can only scan one page at a
time, such as when the JPEG format is specified, this screen is not displayed.)
1
If there are additional pages of documents to be scanned, place the next document on the platen glass,
and click [Next].
Repeat this step until you finish scanning all of the pages.
When there is only one page to be scanned, proceed to the next step.
2
Click [Finish].
When scanning is complete, the scanned document is saved to a folder on a computer or forwarded to an
application.
Configuring Storing Settings
Specifying External Applications to Forward Scanned
Data
NOTE
If the scanning results are not achieved
If the expected scanning results are not achieved, for example, if the image is too dark or the color tone is different from that in
the original, you can configure advanced scan settings with ScanGear MF. Place the document again, select the [Display the
Scanner Driver] check box on the screen in step 6, and click [Start] to start ScanGear MF.
㻞㻡㻥㻌㻛㻌㻢㻣㻢
Configuring Scan Settings in Simple Mode
Configuring Scan Settings in Advanced Mode
Previewing Scanned Images Before Specifying File Format and Saving
You can preview the scanned images before specifying the file format and save destination. This procedure is not available when [OCR]
is selected in step 5. Place the document, start MF Toolbox, and proceed with this procedure.
1
Select the scan type.
Click an icon other than the [OCR] icon.
2
Select the [Confirmation of the Scanned Image and Exif Settings] check box.
If you selected [PDF] in step 1, select the [Confirm the Scanned Image] check box.
3
Click [Start].
Scanning starts.
To cancel, click [Cancel].
The scanned images are displayed as thumbnails on the [Scanned Image] screen.
4
Set the file format and save destination.
[Save as Type]
Select a file format, such as PDF or JPEG. Available formats vary depending on the type of scan you selected in
step 1.
NOTE:
Adding comments to a JPEG file
If you select [JPEG/Exif], you can add information such as the date or comments to JPEG files when saving them.
Select the scanned image, click [Exif Settings], and enter your comments on the displayed screen.
㻞㻢㻜㻌㻛㻌㻢㻣㻢
[Save Scanned Image to]
Specify a save destination folder. If you select the [Save Pictures to a Subfolder with Current Date] check box, a
subfolder named with the scanning date is created in the specified folder, and the data is saved to that folder.
NOTE:
If you select [PDF (Add Page)] for [Save as Type] ( ), [Save Scanned Image to] is switched to [Create PDF File
Based On]. In this case, click [Browse], and specify an existing PDF file to which you want to add the newly
scanned document data. The data is added to the existing file as additional pages.
5
Click [Save] or [Forward].
The scanned data is saved to a folder on a computer or forwarded to an application.
Specifying External Applications to Forward Scanned Data
Settings
Configuring Storing
Adding Pages to an Existing PDF file
Specify an existing PDF file to which you want to add the newly scanned document data. The data is added to the existing file as
additional pages. Place the document, start MF Toolbox, and proceed with this procedure. The PDF file you select must be created with
MF Toolbox. Newly scanned document data cannot be added to PDF files created with other applications.
1
Select the scan type.
Click the [Mail], [Save], or [PDF] icon.
2
Select [PDF (Add Page)] for [Save as Type].
Click [PDF Settings], and configure the scan settings as necessary.
3
Configuring Storing Settings
Click [Browse], and select the PDF file to which you want to add the pages.
The newly scanned document data is added to the PDF file you select.
4
Click [Start].
Scanning starts.
To cancel, click [Cancel].
When placing documents in the feeder
When scanning is complete, the scanned document is saved to a folder on the computer or forwarded to an
Configuring Storing Settings
Specifying External Applications to Forward Scanned Data
application.
㻞㻢㻝㻌㻛㻌㻢㻣㻢
When placing documents on the platen glass
The screen shown below is displayed.
1
If there are additional pages of documents to be scanned, place the next document on the platen glass,
and click [Next].
Repeat this step until you finish scanning all of the pages.
When there is only one page to be scanned, proceed to the next step.
2
Click [Finish].
When scanning is complete, the scanned document is saved to a folder on the computer or forwarded to an
application.
Configuring Storing Settings
Specifying External Applications to Forward Scanned
Data
Configuring Settings for MF Toolbox and the Scanner
You can switch to another scanner by using the [Settings] button. You can also configure settings such as the name of the computer to
save documents.
[Select Scanner]
Select the scanner (machine) to use with MF Toolbox.
[Computer Name]
When scanning by using the operation panel of the machine, there is a procedure to specify a destination to save the scanned
document ( Scanning from the Machine). You can edit the computer name that appears on the display of the machine during
this procedure.
[Comment]
You can enter a comment for each type of scan. Edit the comment as necessary.
[Close Toolbox after Finishing Scanning when Started from Device]
When you scan by using the operation panel of the machine, MF Toolbox starts. You can specify whether you want to
automatically close the MF Toolbox screen when you finish scanning.
LINKS
Configuring Scan Settings in MF Toolbox
㻞㻢㻞㻌㻛㻌㻢㻣㻢
0ALJ-064
Configuring Scan Settings in MF Toolbox
You can change the preset settings, such as the type of scan (color or black and white), file format, and resolution, to suit your intended
use. You can also specify a destination to save the scanned document, an application as a forward destination, and other settings.
Configuring Scan Settings
Configuring Storing Settings
Specifying External Applications to Forward Scanned Data
Configuring Scan Settings
Configure the scan settings such as the original document size, color mode, and resolution.
[Select Source]
Select a setting based on whether you place your documents on the platen glass or in the feeder.
[Platen Glass]
Select when placing documents on the platen glass.
[ADF]
Select when placing documents in the feeder.
[Auto Mode]
When documents are placed in the feeder, they are scanned. When nothing is placed in the feeder,
documents placed on the platen glass are scanned.
㻞㻢㻟㻌㻛㻌㻢㻣㻢
[Input Method] (MF8580Cdw / MF8550Cdn / MF8540Cdn only)
Select whether you want to scan a 1-sided or 2-sided document placed in the feeder.
[Paper Size]
Select the document size. If you select an option for a custom size, the [Paper Size Settings] screen opens. You can then enter a
custom size.
[Orientation]
If documents are placed in the feeder, set the orientation of the documents. You can also set [Binding Location] if 2-sided
documents are placed in the feeder.
[Scan Mode]
Select the image type to scan documents. Available items vary depending on the type of scan, such as [Mail] or [PDF].
[Black and
White]
The document is scanned as a black and white image (in black and white only, with no intermediate
shades of gray).
[Black and
White (OCR)]
The document is scanned as a black and white image optimized for processing by OCR (optical character
recognition) software.
[Grayscale]
The document is scanned as a grayscale image (in black and white with intermediate shades of gray,
similar to a black and white photograph).
[Color]
The document is scanned as a color image.
[Color
(Magazine)]
The document is scanned as a color image. The color unevenness and moire that occurs when scanning
print material is reduced. It takes more time to scan when using this setting than when using [Color].
[Upper Limit of Attached File:]
This item is displayed when [Mail] is selected for the type of scan ( Scanning Using MF Toolbox). The quality of the scanned
image is automatically adjusted so that the file size does not exceed the maximum limit that you specify here.
[Image Quality]
Select the resolution of the scanned image that suits your intended use.
NOTE:
Available resolutions vary on whether the document is placed in the feeder or on the platen glass, and whether the file format
is PDF or JPEG.
A resolution of 75 dpi is a rough guide for displaying the scanned image on a computer, and 300 dpi for printing or creating a
searchable PDF.
If you double the output resolution, the image file size increases by a factor of 4. If the file size is too large, a memory
shortage or other error may occur. Set the resolution to the minimum required for your intended use.
[Correct Black Text]
Emphasizes the outlines of black text.
[Display the Scanner Driver]
Select this check box to enable you to configure advanced scan settings with ScanGear MF. To start ScanGear MF, click [Start]
( Configuring Scan Settings in ScanGear MF).This item is not displayed when [OCR] is selected for the type of scan.
Configuring Storing Settings
㻞㻢㻠㻌㻛㻌㻢㻣㻢
Specify settings for the scanned data, such as the file name, file format (PDF, JPEG, etc.) and save destination.
[File Name]
Enter the name for the scanned data file.
NOTE:
If a file with the same name already exists in the save destination, a unique sequential four-digit number (for example, "0001") is
appended to the new file name.
[Save as Type]
Select the file format.
[BMP]
The scanned document is converted into a bitmap image.
[JPEG/Exif]
The scanned document is converted into a JPEG/Exif image. This setting is available when [Grayscale],
[Color], or [Color (Magazine)] is selected for [Scan Mode] ( Configuring Scan Settings).
[TIFF]
The scanned document is converted into a TIFF image.
[PDF]
A PDF file is created. If you scan a multi-page document, these pages are merged into one PDF file.
[PDF (Single
Page)]
A one-page PDF file is created for each page of the scanned document. For example, if you scan a threepage document, three separate one-page PDF files are created.
[PDF (Multiple
Pages)]
One PDF file is created from multiple documents. For example, if you scan a three-page document, one
three-page PDF file is created.
[PDF (Add Page)]
Newly scanned document data is added as additional pages to an existing PDF file that you specify.
Adding Pages to an Existing PDF file
NOTE:
Available file formats for each scan type
PDF (Single Page)
Scan type
BMP
JPEG/Exif
TIFF
PDF
PDF (Multiple Pages)
PDF (Add Page)
[Mail]
*
[OCR]
*
[Save]
*
[PDF]
[Color Scan]
[B&W Scan]
[Custom 1]
*
㻞㻢㻡㻌㻛㻌㻢㻣㻢
[Custom 2]
*
* Not available if [Scan Mode] is set to [Black and White] or [Black and White (OCR)].
Configuring Scan Settings
If a message indicating the image size is too large is displayed
Lower the [Image Quality] value.
Configuring Scan Settings
[PDF Settings]
If you select [PDF], [PDF (Single Page)], [PDF (Multiple Pages)], or [PDF (Add Page)] for [Save as Type] (
advanced settings for PDF files.
), you can configure
[Create Searchable PDF]
Specify whether you want to convert the scanned document into a searchable PDF. Characters in the scanned document are
converted into text data and the text can be searched using a computer. Text can also be edited with a word-processing
application. To create a searchable PDF, select [300 dpi] for [Image Quality] ( Configuring Scan Settings).
[Text Language]
Select the language that matches the document.
[PDF Compression]
Select the level of the data compression. If you select [High], the data size of images such as photographs or illustrations are
reduced more than if you select [Standard]. However, the image quality may degrade depending on the document type.
[Save Scanned Image to]
Click [Browse], and specify the save destination for the scanned data. If you select [PDF (Add Page)] for [Save as Type] ( ),
[Save Scanned Image to] is switched to [Create PDF File Based On]. In this case, specify an existing PDF file to which you want to
add the newly scanned document data. The data is added to the existing file as additional pages ( Adding Pages to an Existing
PDF file).
[Save Pictures to a Subfolder with Current Date]
If you select the [Save Pictures to a Subfolder with Current Date] check box, a subfolder named with the scanning date is created
in the folder specified in [Save Scanned Image to] ( ), and the data is saved to that folder.
Specifying External Applications to Forward Scanned Data
If you specify an application to which you want to forward the scanned data, the specified application automatically starts when scanning
is complete. For example, you can specify Adobe Photoshop or other image-processing application. If you select [Mail] for the type of
scan and specify an e-mail application, the scanned data is automatically attached to a new e-mail message. To scan with [OCR]
selected, you must specify an OCR software.
[Delete]
If you do not want to forward the scanned document to an application, such as when you want to save it, click this button.
[Set]
㻞㻢㻢㻌㻛㻌㻢㻣㻢
Click this button, and select an application. Alternatively, you can specify an application by dragging its icon here if it is not an email application.
NOTE:
Supported e-mail applications
Microsoft Outlook Express
Microsoft Outlook
Microsoft Exchange
EUDORA
Netscape Messenger
Windows Mail
Becky! Ver.2
Mozilla Thunderbird
LINKS
Scanning Using MF Toolbox
㻞㻢㻣㻌㻛㻌㻢㻣㻢
0ALJ-062
Scanning Using an Application
Scan the document by using an application. You can use Adobe Photoshop, Microsoft Office Word, or other
image-processing and word-processing applications. The scanned image is directly loaded in the application,
allowing you to edit or process the image immediately. The following procedure varies depending on the
application.
IMPORTANT
The application must be compatible with TWAIN or WIA * . For more information, see the instruction manual for your application.
* TWAIN is a standard for connecting image input devices, such as scanners, with computers. WIA is a function that is an integrated standard in
Windows.
From the Operation Panel
1
Place the document(s).
Placing Documents
IMPORTANT:
The second or subsequent documents may not be scanned, or an error message may be displayed depending on the application.
In such a case, place and scan one document at a time.
2
3
Press
Use
.
/
to select <Remote Scanner>, and press
.
From a Computer
4
From the application, select the start scan command.
The procedure for selecting the start scan command varies depending on the application. For more information, see the
instruction manual for your application.
5
Select the scanner driver for the machine.
Select ScanGear MF or WIA. If you select ScanGear MF, you can configure advanced scan settings.
6
Configure the scan settings as necessary.
For more information about ScanGear MF scan settings, see
Scan Settings in Advanced Mode.
7
Configuring Scan Settings in Simple Mode or
Click [Scan].
Scanning starts.
When scanning is complete, the scanned image is forwarded to an application.
LINKS
㻞㻢㻤㻌㻛㻌㻢㻣㻢
Configuring
Configuring Scan Settings in ScanGear MF
㻞㻢㻥㻌㻛㻌㻢㻣㻢
0ALJ-065
Configuring Scan Settings in ScanGear MF
ScanGear MF is a scanner driver included with the machine. You can use ScanGear MF as follows.
Starting from MF Toolbox
When scanning from MF Toolbox, you can call ScanGear MF, and configure advanced scan settings. Select the [Display the Scanner
Scanning Using MF Toolbox
Driver] check box and click [Start] in MF Toolbox to start ScanGear MF.
Starting from an application
You can use ScanGear MF to load the scanned image into Adobe Photoshop, Microsoft Office Word, or other image-processing and
Scanning Using an Application
word-processing applications. Select ScanGear MF from the scan commands.
TIPS
You can do the following by using ScanGear MF:
Previewing the image before scanning
Specifying the scanning area
Adjusting the detailed image quality
Configuring Scan Settings in Simple Mode
Configuring Scan Settings in Advanced Mode
㻞㻣㻜㻌㻛㻌㻢㻣㻢
0ALJ-0HX
Configuring Scan Settings in Simple Mode
Simple Mode is a collection of basic scan settings in ScanGear MF designed for easy operation. In other words, Simple Mode is a digest
to
on the screen, and click [Scan]. By doing so, you can
version of ScanGear MF. Configure settings in the order indicated from
configure basic settings and scan.
Preview area
You can preview the document that is placed on the platen glass. If you click [Preview], a preview image is displayed in this area
and the cropping frame is displayed with a dotted line.
Toolbar
Control the image in the preview area.
(Auto Crop)
The cropping frame that fits the scanned image is automatically set. Each time you click the icon, the cropping frame is
reduced. You can move the frame, or change its size with your mouse.
NOTE:
Manually setting multiple scanning areas
You can manually add cropping frames. You can also specify cropping areas in the document so that each of them can be
scanned as separate images. Drag the cropping frames to specify the areas you want to scan. You can specify up to ten areas.
Click [Scan] to scan the areas in the cropping frames as separate images.
(Clear Crop Frame)
Clears the selected cropping frame.
(Left Rotate)/ (Right Rotate)
Rotates the preview image 90 degrees to the left or right.
(Information)
Displays the current settings of the scanned image, such as the color mode and size of the scan area.
[Select Source]
Select the image type to scan documents. Available items vary depending on where you placed the document.
If you placed the document on the platen glass
[Photo (Color)]
The photo document is scanned as a color image.
[Magazine
(Color)]
Print material, such as a magazine, is scanned as a color image. The color unevenness and moire that
occurs when scanning print images is reduced.
[Newspaper
(B&W)]
The text document or line drawing is scanned as a black and white image (in black and white only,
with no intermediate shades of gray).
[Document
(Grayscale)]
The text or photograph document is scanned as a grayscale image (in black and white with
intermediate shades of gray, similar to a black and white photograph).
If you placed the document in the feeder
[Document (Color) ADF]
The document is scanned as a color image.
㻞㻣㻝㻌㻛㻌㻢㻣㻢
[Document (Grayscale)
ADF]
The document is scanned as a grayscale image.
[Select Purpose]
Select a setting based on your intended use of the scanned image.
[Print (300dpi)]
Select when printing the scanned image.
[Image Display (150dpi)]
Select when displaying the scanned image on a computer.
[OCR (300dpi)]
Select when using the scanned image with OCR (optical character recognition) software.
[Output Size]
Select the size of the scanned image when it is printed or displayed on a computer. For example, if you want to output an
image that is appropriate for printing on A4 paper, select [A4], and [Print (300dpi)] for [Select Purpose] ( ).
Click
to switch between the portrait and landscape orientation. This button is not available when [Flexible] is selected.
If you select [Add/Delete], you can add new output size settings and delete the added sizes.
Select [Flexible] to change the ratio of width to height. Drag the area you want to scan on the preview image.
[Image Correction]
Select the [Fading Correction] check box to correct faded colors on an old photograph or other images into vivid colors. This
setting is available when a preview image is displayed and you select [Photo (Color)] or [Magazine (Color)] for [Select Source] (
).
LINKS
Configuring Scan Settings in Advanced Mode
Scanning Using MF Toolbox
Scanning Using an Application
㻞㻣㻞㻌㻛㻌㻢㻣㻢
0ALJ-0HY
Configuring Scan Settings in Advanced Mode
If you click the [Advanced Mode] tab on the ScanGear MF screen, you can make more advanced adjustments in the image quality than
icon next
you can in Simple Mode. You can also register adjusted settings as Favorite Settings. For more detailed information, click the
to the topic.
Operating Preview Images
Specifying Settings for Documents and Color Mode
Specifying Resolution and Image Size
Adjusting Image Quality
Adjusting Brightness and Color
Specifying Other Settings
Registering Frequently Used Settings
Operating Preview Images
If you place the document on the platen glass and click [Preview], a preview image is displayed. You can specify the area you want to
scan, and check the effects of image adjustments on the preview image.
(Clear)
Clears the preview image.
(Crop)
Specifies the cropping area with the cropping frame. Click and drag the area you want to crop. The cropping area is
indicated with a dotted line. You can move the cropping frame or change its size with your mouse.
NOTE:
Setting multiple scanning areas
You can specify cropping areas in the document so that each of them can be scanned as separate images. Drag the
cropping frame to specify the areas you want to scan. You can specify up to ten areas. Click [Scan] to scan the areas
in the cropping frames as separate images.
(Move the Image)
㻞㻣㻟㻌㻛㻌㻢㻣㻢
Drags the image to move the visible part of the image when a preview image is enlarged.
(Zoom)
Enlarges the entire preview image. Left-click the image to zoom in. Right-click the enlarged image to zoom out. To
enlarge a part of the image to check the details, use [Zoom] ( ).
(Left Rotate)/
(Right Rotate)
Rotates the preview image 90 degrees to the left or right.
(Information)
Displays the current settings of the scanned image, such as the color mode and size of the scan area.
(Auto Crop)
Automatically sets the cropping frame that fits the scanned document. Each time you click the icon, the cropping
frame is reduced.
(Clear Crop Frame)
Clears the selected cropping frame.
[Select All Crops]
Selects all of the cropping frames on the image.
[Zoom]
Enlarges the image in the cropping frame. The smaller the cropping frame, the larger the image is displayed. You can
check the details that are difficult to see with
( ). To return the image to its original size, click this button again.
Specifying Settings for Documents and Color Mode
Specify the document input method (the platen glass or feeder), document size, color mode, and other settings.
[Original Input Method]
Select a setting based on whether you place your documents on the platen glass or in the feeder.
[Platen Glass]
Select when placing documents on the platen glass.
[ADF (1-sided)]
Select when placing 1-sided documents in the feeder.
[ADF (2-sided)]
(MF8580Cdw /
MF8550Cdn /
MF8540Cdn
only)
Select when placing 2-sided documents in the feeder.
[Input Size]
Specify the size of the scanning area. For normal cases, select the same size as the document. To specify the size
with values, select a unit, and enter the values for width and height. To lock the width to height ratio of the
.
image, click
NOTE:
If you select [ADF (2-sided)] for [Original Input Method] (
values.
), you cannot specify the size by entering the
The image size that can be scanned is limited on some applications.
If documents are placed in the feeder, set the orientation of the documents in [Orientation]. You can also set
[Binding Location] if 2-sided documents are placed in the feeder.
㻞㻣㻠㻌㻛㻌㻢㻣㻢
[Color Mode]
Select the image type to scan documents.
[Black and
White]
The document is scanned as a black and white image (in black and white only, with no
intermediate shades of gray). You can change the threshold that separates text in the
document or the image into black and white with [Threshold] ( Adjusting Brightness and
Color).
[Grayscale]
The document is scanned as a grayscale image (in black and white with intermediate shades
of gray, similar to a black and white photograph).
[Color]
The document is scanned as a color image.
[Text Enhanced]
The document is scanned as a black and white image optimized for processing by OCR (optical
character recognition) software.
Specifying Resolution and Image Size
Specify the output resolution and output size.
[Output Resolution]
Select the resolution of the scanned image that suits your intended use. If documents are placed in the feeder, the
maximum resolution is 300 dpi.
NOTE:
About the output resolution
A resolution of 75 dpi is a rough guide for displaying the scanned image on a computer, and 300 dpi for printing or
creating a searchable PDF.
If you double the output resolution, the image file size increases by a factor of 4. If the file size is too large, a
memory shortage or other error may occur. Set the resolution to the minimum required for your intended use.
[Output Size]
Select the size of the scanned image when it is printed or displayed on a computer.
Click
to switch between the portrait and landscape orientation. This button is not available when [Flexible] is
selected.
If you select [Add/Delete], you can add new output size settings and delete the added sizes.
㻞㻣㻡㻌㻛㻌㻢㻣㻢
Select [Flexible] to change the output size and the ratio of width to height. Drag the area you want to scan on the
preview image or enter values for width and height. If you specify the magnification percentage in the [%] entry
field on the right side of the width and height entry fields, the document is enlarged or reduced for scanning.
[Data Size]
Displays the data size of the image when it is scanned with the set [Output Resolution] and [Output Size].
Adjusting Image Quality
Configure settings for improving the image quality, such as correction of scratches or faded colors on a photograph. These settings are
available if you select [Color] or [Grayscale] for [Color Mode] ( Specifying Settings for Documents and Color Mode).
[Auto Tone]
Automatically adjusts the color tone of the image.
[Reduce Dust and Scratches]
Makes dust or scratches on the document less noticeable. [High] makes large scratches and dust less noticeable, but
may ruin details on the image.
[Fading Correction]
The setting is available if you select [Color] for [Color Mode]. Corrects faded colors on the document or enhances the
color saturation of dull-colored documents. [High] dramatically corrects the faded colors, but may change the color
tone of the entire image.
[Grain Correction]
Reduces graininess to create a smooth color tone when scanning photographs taken with high-speed film. [High]
dramatically reduces graininess, but may also reduce image sharpness or degrade image quality.
[Use Unsharp Mask]
Emphasizes the edges and lines in the image, creating a sharper appearance.
[Use Descreen]
Reduces the color unevenness and moire that occur when scanning printed images.
[Correct Black Text]
Emphasizes the outlines of black text.
Adjusting Brightness and Color
Configure color settings such as brightness, contrast, and color tone. The displayed items vary depending on the settings selected for
[Color Mode] ( Specifying Settings for Documents and Color Mode). When [Text Enhanced] is selected, you cannot configure these
settings.
㻞㻣㻢㻌㻛㻌㻢㻣㻢
(Brightness/Contrast)
Adjusts the brightness and contrast (the difference between the light and dark parts) of the image. To adjust while
checking on a graph, click
on the upper-right of the screen.
[Channel]
If you select [Color] for [Color Mode], you can adjust the [Red], [Green] and [Blue] color channels separately.
To adjust all three colors at the same time, select [Master]. You can combine the adjustments made in [Master]
and those made in the individual color channels.
If you select [Grayscale] for [Color Mode], only [Grayscale] is displayed.
[Brightness]
or enter a value.
Slide
[Contrast]
or enter a value. When contrast is reduced, the difference between the light and dark parts of the image
Slide
is reduced to create a softer appearance. When contrast is increased, the difference between the light and dark
parts is increased to create a bolder appearance.
(Histogram)
A histogram is a graph that shows the distribution of brightness in an image. You can adjust
the image while checking the preview image and histogram. Specify the part of the image you
want to make brightest (or darkest) in the preview image, so that the brightness balance of
the original image is automatically adjusted with the specified part being the average.
Likewise, you can also adjust the balance with the brightness of the medium tone being the
average.
[Channel]
If you select [Color] for [Color Mode], you can adjust the [Red], [Green] and [Blue] color channels separately.
To adjust all three colors at the same time, select [Master]. You can combine the adjustments made in [Master]
and those made in the individual color channels.
If you select [Grayscale] for [Color Mode], only [Grayscale] is displayed.
(Black-point Eyedropper)/
(Mid-point Eyedropper)/
(White-point Eyedropper)
Click the parts on the preview image (or cropping frame) you want to specify as the darkest, the medium, and
,
, or
. Alternatively, you can enter a value.
the brightest. Slide
(Gray Balance Eyedropper Tool)
Click a part on the preview image (or cropping frame) you want to render as an achromatic color, which is black,
grey, or white, each of which does not have color depth. Color tone on the rest of the image is adjusted with the
clicked part being the average. For example, if snow on a photograph image is bluish, click this part because you
essentially want to render this part as white. When you click this part, the snow is no longer bluish, and the
㻞㻣㻣㻌㻛㻌㻢㻣㻢
entire image is adjusted so that it comes closer to natural colors. Click different parts little by little while checking
the preview image to produce the optimum color tone.
(Tone Curve Settings)
The tone curve is a curved line that indicates the brightness and contrast levels of the image
before and after adjustment. Select a registered tone curve to adjust the brightness and
contrast levels of the image.
[Channel]
If you select [Color] for [Color Mode], you can adjust the [Red], [Green] and [Blue] color channels separately.
To adjust all three colors at the same time, select [Master]. You can combine the adjustments made in [Master]
and those made in the individual color channels.
If you select [Grayscale] for [Color Mode], only [Grayscale] is displayed.
[Select Tone Curve]
Select from the items listed below.
[No Correction]
Performs no correction.
[Over Exposure]
Lightens the entire image.
[Under
Exposure]
Darkens the entire image.
[High Contrast]
Emphasizes the difference between the light and dark parts of the image.
[Invert the
Negative/Positive
Image]
Inverts the light and dark parts of the image.
(Final Review)
The results of all adjustments made to the brightness, contrast ( ), histogram ( ), and tone
curve settings ( ) are displayed in a tone curve and as numerical values. Perform a final
check of the color settings.
(Threshold)
Adjust the threshold value * for black and white images. You can enhance the appearance of
text or reduce the visibility of text or images printed on the reverse side of a semi-transparent
document, such as a newspaper. The setting is available if you select [Black and White] for
[Color Mode].
* The threshold value is the boundary that separates whether a color is rendered as black or white. Colors
below a certain density level are rendered as white, and colors above a certain density level are rendered as
black.
[Threshold Level]
or enter a value. To render more parts as black, slide
Slide
to the right or enter a larger value.
Registering or Calling Settings
Call registered brightness or color settings for
to
and
㻞㻣㻤㻌㻛㻌㻢㻣㻢
.
Registering Frequently Used Settings
Specifying Other Settings
Click [Preferences] to configure various settings, including the operation when scanning.
[Preview] Tab
Configure the preview and auto crop operations.
[Preview at the Start of ScanGear]
Select the preview operation when you start ScanGear MF.
[Automatically Execute Preview]
Scanning of the preview image starts automatically when you start ScanGear MF.
[Display Saved Preview Image]
Preview does not start automatically, and the most recently saved preview image is displayed.
[None]
Preview does not start automatically, and no preview image is displayed.
[Cropping Frame on Previewed Images]
Select how the cropping frame (
Operating Preview Images) is displayed on the preview image.
[Execute Auto Cropping on Previewed Images]
Auto Crop is performed based on the scanned document.
[Display the Last Frame on Previewed Images]
Auto Crop is not performed, and the most recently set cropping frame is displayed.
[None]
Auto Crop is not performed, and no cropping frame is displayed.
[Scan] Tab
Configure the settings that are applied when you scan a document by using an
application, and the settings for ScanGear MF operations.
[Scan without Using ScanGear's Window]
When you scan the document by using an OCR software or other application, the ScanGear MF screen may not be
displayed. In such a case, the document is scanned with the setting of the application applied. However, if the
application does not have the following settings, enable them here so that these settings are applied for scanning.
㻞㻣㻥㻌㻛㻌㻢㻣㻢
[Color Mode (Text and Table)]
If the application settings are specified to scan documents in color, those settings are replaced and
documents are scanned with the ScanGear MF color mode set to [Color Mode (Text and Table)].
[Text Enhanced]
If the application settings are specified to scan documents in black and white, those settings are replaced
and documents are scanned with the ScanGear MF color mode set to [Text Enhanced].
[Automatically Quit ScanGear after Scanning]
The [ScanGear MF] screen automatically closes after scanning is complete. The screen may automatically close
with some applications regardless of this setting.
[Color Settings] Tab
Configure advanced color and brightness settings, such as color matching and
gamma correction.
[Color Correction]
Select the color correction method.
[Recommended]
Color tone is vividly reproduced on a computer display. This setting is recommended for most color
corrections.
[Color Matching]
Color is adjusted so that the color tone on the display comes closer to that on the printed result. This
setting is available if you select [Color] for [Color Mode] ( Specifying Settings for Documents and Color
Mode).
NOTE:
If [Color Matching] is enabled, the [Fading Correction] ( Adjusting Image Quality) setting and the buttons for
brightness and color settings ( Adjusting Brightness and Color) are disabled.
[Always Execute the Auto Tone]
Color tone is automatically adjusted. The setting is available if you select [Color] or [Grayscale] for [Color Mode].
[Monitor Gamma]
You can display the document at the proper brightness level by specifying the gamma value of the computer
display that displays the scanned image. The setting is applied if you select [Color] or [Grayscale] for [Color
Mode].
[Scanner] Tab
Configure the temporary save destination of files, the playing of audio files, and
other settings.
[Select Folder Where Temporary Files are Saved]
Click [Browse] to change the folder to which an image is temporarily saved.
[Sound Settings]
You can specify the music or sounds that are played while the machine is scanning or when scanning is complete.
Click [Browse] to specify a file to be played. The following file formats (extensions) are supported:
MIDI files (.mid/.rmi/.midi)
Audio files (.wav/.aif/.aiff)
MP3 files (.mp3)
[Play Music During Scanning]
The specified sound file is played while scanning is being performed.
㻞㻤㻜㻌㻛㻌㻢㻣㻢
[Play Sound When Scanning is Completed]
The specified sound file is played when scanning is complete.
[Test Scanner]
You can check whether the scan function of the machine is working properly. When the [Scanner Diagnostics]
screen opens, click [Start].
Registering Frequently Used Settings
It is troublesome to configure the color mode, image quality, or other settings each time you scan. If you register frequently used
settings as Favorite Settings, you can scan simply call the registered settings when scanning.
NOTE
The following settings cannot be registered in [Favorite Settings].
Widths and heights in [Input Settings] and [Output Settings]
On or off of the
button (to lock the ratio of width to height) in [Input Settings]
The magnification percentage (%) in [Output Settings]
1
2
Place the document(s), and click [Preview].
Change the scan settings.
Select settings to register as necessary.
3
Select [Add/Delete] in [Favorite Settings].
The [Add/Delete Favorite Settings] screen is displayed.
[Add/Delete] is available when the preview image is displayed.
4
Enter a name into [Setting Name], and click [Add]
[Save].
Enter a name for the settings to register. Use a name that is easy to find in the drop-down list.
㻞㻤㻝㻌㻛㻌㻢㻣㻢
NOTE
Calling registered Favorite Settings
Display a preview image, and select the registered setting in the drop-down list.
Registering the Brightness or Color Setting
To register only the brightness, contrast, histogram, tone curve, or threshold setting, follow the procedure below.
1
2
Place the document(s), and click [Preview].
Adjust the brightness or color.
Adjusting Brightness and Color
Select settings to register as necessary.
3
Select [Add/Delete] in the drop-down list.
The [Add/Delete Tone Curve Settings] or [Add/Delete Threshold Settings] screen is displayed.
4
Enter a name into [Setting Name], and click [Add] [Save].
Enter a name for the settings to register. Use a name that is easy to find in the drop-down list.
NOTE
Calling the registered setting
Display a preview image, and select the registered setting in the drop-down list.
㻞㻤㻞㻌㻛㻌㻢㻣㻢
LINKS
Configuring Scan Settings in Simple Mode
Scanning Using MF Toolbox
Scanning Using an Application
㻞㻤㻟㻌㻛㻌㻢㻣㻢
0ALJ-0J0
Convenient Scanning with a Machine-Based Operation
The machine can convert original documents into electronic file formats such as PDF without using a computer. There are many
advantages to digitizing documents. A variety of useful settings are available to suit your needs.
Scanning Documents Directly to USB Memory
One way this function can be used is by scanning documents directly onto a USB memory device and taking the USB memory device
to your meeting. You can then connect the USB memory device to a computer connected to a projector and project your documents
on a projector.
Sending Documents as E-mails Directly from the Machine (MF8580Cdw / MF8550Cdn / MF8540Cdn Only)
You can convert scanned documents into PDF files and send them directly from the machine as e-mail attachments. You can work
more efficiently because this feature eliminates the need to use your computer to send scanned documents. Before you can use this
function, you need to complete some procedures, such as specifying the e-mail server settings. For more information, see
Configuring the Machine for Scanning to E-mail.
Saving Documents Directly in Shared Folder (MF8580Cdw / MF8550Cdn / MF8540Cdn Only)
You can convert scanned documents into PDF, TIFF, or JPEG files and store them in shared folders on computers. This feature is
helpful when digitalizing paper documents for sharing. Before you can use this function, you need to complete some procedures, such
Configuring the Machine for Scanning to
as specifying the location for saving scanned documents. For more information, see
Shared Folders.
㻞㻤㻠㻌㻛㻌㻢㻣㻢
0ALJ-067
Scanning Documents Directly to USB Memory
This section describes how to scan documents to save directly in a USB memory device connected to the machine. You can save the
scanned documents in PDF, JPEG or TIFF format.
Available USB Memory Devices
You can use USB memory devices with the following format styles.
FAT16 (memory capacity: up to 2 GB)
FAT32 (memory capacity: up to 32 GB)
IMPORTANT
Do not use non-standard USB memory devices. You may not be able to save data properly in some USB memory devices.
Do not connect anything other than a USB memory device. USB memory devices cannot be connected via a USB hub or an
extension cable.
Do not use USB memory devices with special functions such as built-in security functions.
NOTE
The USB memory port of the machine supports USB 2.0.
If a folder in a USB memory device has many files, saving scanned data will take more time. Use your computer to delete
unnecessary files on your USB memory device or move them to a different folder.
1
Connect a USB memory device to the USB memory port.
IMPORTANT:
Do not remove the USB memory device or shock or shake the device or the machine when data is being read or written. Also, do
not turn OFF the machine while the processing is in progress.
2
3
4
5
Place the document(s).
Press
Use
Placing Documents
.
/
to select <USB Memory>, and press
.
Specify the scan settings as necessary.
Use
/
to select the settings.
Specifying Detailed Settings
㻞㻤㻡㻌㻛㻌㻢㻣㻢
If you select JPEG in <File Format>, only one page can be scanned when the document is placed on the platen glass. To scan
multiple documents at a time, place them in the feeder. These documents will be scanned and saved as separate files. For PDF or
TIFF files, multiple documents can be scanned and saved into one set of files, regardless of whether documents are placed on
the platen glass or in the feeder.
6
Press
.
Scanning starts.
If you want to cancel scanning, press <Cancel>
<Yes>
.
When placing documents in the feeder in step 2
When scanning is complete, the scanned data is saved in the USB memory device.
When placing documents on the platen glass in step 2
When scanning is complete, follow the procedures below (except if you selected JPEG as a file format in step 5).
1
If there are additional pages of documents to be scanned, place the next document on the platen glass,
.
and press
Repeat this step until you finish scanning all of the pages.
When there is only one page to be scanned, proceed to the next step.
2
Press <Store & Finish>.
The scanned data is saved in the USB memory device.
NOTE:
How the folders to save scanned data and files are named
When scanning is complete, a folder is automatically created in the USB memory device to save the scanned data. Folders and
files are named as follows.
7
Folder
Name
The "SCAN_00" folder is created and up to 100 files are saved in the folder. The folders "SCAN_01" to "SCAN_99" are
then created when the current folder becomes full of 100 files.
File
Name
File names from "SCAN0000.XXX" to "SCAN9999.XXX" are given to the scanned data files ("XXX" is the extension for
the file format such as "JPG"). For the first two numerical digits, the same number is allotted as that of the folder
number in which the files are saved. For example, The fifth JPEG file stored in the "SCAN_01" folder is named
"SCAN0105.JPG".
Disconnect the USB memory device from the USB memory port.
1
Press
2
Press
3
Use
4
Select <Remove Memory Media>, and press
.
(Status Monitor).
/
to select <Device Status>, and press
.
.
Wait until the message <The memory media can be safely removed.> is displayed.
5
Disconnect the USB memory device.
TIPS
If you always want to scan with the same settings:
Changing Default Settings
㻞㻤㻢㻌㻛㻌㻢㻣㻢
㻞㻤㻣㻌㻛㻌㻢㻣㻢
0ALJ-06E
Sending Documents as E-mails Directly from the Machine (MF8580Cdw /
MF8550Cdn / MF8540Cdn Only)
You can specify multiple destinations, including Cc/Bcc destinations, just like you can when sending normal e-mails.
1
2
3
4
Place the document(s).
Press
Use
Placing Documents
.
/
to select <E-Mail>, and press
.
Enter the destination using the numeric keys, and press <Apply>.
Pressing <A/a/12> toggles the input modes.
If you enter the wrong characters, press
characters at once.)
. (Press to delete each character one by one; press and hold to delete all the input
To make it easier to specify destinations by using other methods, such as the Address Book, see
mail/Shared Folder) (MF8580Cdw / MF8550Cdn / MF8540Cdn Only).
5
Specifying Destinations (E-
Specify multiple destinations, including Cc/Bcc destinations, as necessary.
First, select from <To>, <Cc>, or <Bcc> as a destination type, and press
, and then specify destinations. Use the Address
Book or an LDAP server for <To> destinations. To specify destinations for <Cc> and <Bcc>, you need to use the Address Book.
6
Specify the scanning settings as necessary.
Use
/
to select the settings.
Specifying Detailed Settings
NOTE:
㻞㻤㻤㻌㻛㻌㻢㻣㻢
You can select either <PDF> or <PDF (Compact)> as a file format.
The file name of a scanned document is automatically assigned based on the following format: communication management
number (four digits)_sent date and time_document number (three digits).pdf.
Example of file names: If a one-page document is converted into a PDF file and sent on October 17, 2013 at 07:00:05 P.M.
0045_131017190005_001.pdf
You cannot specify file names yourself.
7
Specify the subject, body, reply-to address, and priority for the e-mail as necessary.
The subject and the priority are set to "Attached Image" and "Standard" respectively by default.
The body is not set by default. Enter it as necessary. Without the body text, only scanned documents are sent.
The reply-to address is not set by default. If you want to display the reply-to address differently from that of the machine,
specify the address from among those registered in the Address Book. If no destination is registered in the Address Book,
see
Registering in the Address Book (MF8580Cdw / MF8550Cdn / MF8540Cdn / MF8280Cw Only).
To specify subject/body
1
Select <Subject/Message>, and press
2
Select <Subject>, and press
3
Enter the subject using the numeric keys, and press <Apply>.
.
.
Pressing <A/a/12> toggles the input modes.
4
Select <Message>, and press
5
Enter the body using the numeric keys, and press <Apply>.
.
Pressing <A/a/12> toggles the input modes.
6
Press <Apply>.
㻞㻤㻥㻌㻛㻌㻢㻣㻢
To specify reply-to address
1
Select <Reply To>, and press
2
Select <Specify from Address Book>, and press
3
Select a reply-to address from the Address Book, and press
.
.
For instructions on how to use the Address Book, see
To specify priority
8
1
Select <Priority>, and press
2
Select a priority level, and press
Press
.
.
to start sending.
Scanning starts.
If you want to cancel sending, press
<Yes>
.
㻞㻥㻜㻌㻛㻌㻢㻣㻢
.
Specifying from Address Book.
When placing documents in the feeder in step 1
When scanning is complete, the e-mail is sent.
When placing documents on the platen glass in step 1
When scanning is complete, follow the procedures below.
1
If there are additional pages of documents to be scanned, place the next document on the platen glass,
.
and press
Repeat this step until you finish scanning all of the pages.
When there is only one page to be scanned, proceed to the next step.
2
Press <Start Sending>.
The e-mail is sent.
TIPS
If you always want to scan with the same settings:
Changing Default Settings
If you want to specify the e-mail sender name:
Register Unit Name (E-Mail)
LINKS
Canceling Sending Documents (E-mail/Shared Folder) (MF8580Cdw / MF8550Cdn / MF8540Cdn Only)
Checking Log for Sent Documents (E-mail/Shared Folder) (MF8580Cdw / MF8550Cdn / MF8540Cdn Only)
㻞㻥㻝㻌㻛㻌㻢㻣㻢
0ALJ-079
Saving Documents Directly to a Shared Folder (MF8580Cdw / MF8550Cdn /
MF8540Cdn Only)
NOTE
Available destinations for shared folders are limited to the destinations registered in the Address Book. If no destinations are
registered, register destinations in the Address Book before scanning to shared folders.
Setting a Shared Folder as a Save Location
Registering Address Book from Remote UI (MF8580Cdw / MF8550Cdn / MF8540Cdn / MF8280Cw Only)
1
2
3
4
Place the document(s).
Press
Use
Placing Documents
.
/
to select <Windows (SMB)>, and press
Select a destination from the Address Book, and press
For instructions on how to use the Address Book, see
5
.
.
Specifying from Address Book.
Specify the scanning settings as necessary.
Use
/
to select the settings.
Specifying Detailed Settings
If you select JPEG in <File Format>, only one page can be scanned when the document is placed on the platen glass. To scan
multiple documents at a time, place them in the feeder. These documents will be scanned and saved as separate files. For PDF or
TIFF files, multiple documents can be scanned and saved into one set of files, regardless of whether documents are placed on
the platen glass or in the feeder.
NOTE:
You can select from among <PDF>, <PDF (Compact)>, <TIFF>, and <JPEG> as a file format.
The file name of a scanned document is automatically assigned based on the following format: communication management
number (four digits)_sent date and time_document number (three digits).file extension name.
Example of file names: If a one-page document is converted into a PDF file and sent on October 17, 2013 at 07:00:05 P.M.
0045_131017190005_001.pdf
㻞㻥㻞㻌㻛㻌㻢㻣㻢
You cannot specify file names yourself.
6
Press
to start scanning.
Scanning starts.
If you want to cancel scanning, press
<Yes>
.
When placing documents in the feeder in step 1
When scanning is complete, the documents are scanned to the shared folder.
When placing documents on the platen glass in step 1
When scanning is complete, follow the procedures below (except if you selected JPEG as a file format in step 5).
1
If there are additional pages of documents to be scanned, place the next document on the platen glass,
.
and press
Repeat this step until you finish scanning all of the pages.
When there is only one page to be scanned, proceed to the next step.
2
Press <Start Sending>.
The documents are scanned to the shared folder.
TIPS
If you always want to scan with the same settings:
Changing Default Settings
LINKS
Canceling Sending Documents (E-mail/Shared Folder) (MF8580Cdw / MF8550Cdn / MF8540Cdn Only)
Checking Log for Sent Documents (E-mail/Shared Folder) (MF8580Cdw / MF8550Cdn / MF8540Cdn Only)
㻞㻥㻟㻌㻛㻌㻢㻣㻢
0ALJ-06F
Canceling Sending Documents (E-mail/Shared Folder) (MF8580Cdw /
MF8550Cdn / MF8540Cdn Only)
If you want to cancel sending immediately after pressing
If the screen displays a list of documents when
, press
on the operation panel.
is pressed
Documents have been scanned and are waiting to be processed. Use
/
to select the document to cancel.
LINKS
Sending Documents as E-mails Directly from the Machine (MF8580Cdw / MF8550Cdn / MF8540Cdn Only)
Saving Documents Directly to a Shared Folder (MF8580Cdw / MF8550Cdn / MF8540Cdn Only)
㻞㻥㻠㻌㻛㻌㻢㻣㻢
0ALJ-06H
Specifying Detailed Settings
This section describes the settings available when scanning documents. These settings include specifying the file format into which
documents are converted and adjusting density to improve the appearance of scanned documents as well as the basic settings such as
specifying the document orientation or scanning size.
Specifying a Scanning Size
Selecting a File Format
Adjusting Density
Specifying Orientation of Your
Document
Selecting Document Type
Scanning 2-Sided Documents
(MF8580Cdw / MF8550Cdn /
MF8540Cdn Only)
Adjusting Sharpness
Adjusting Balance between File
Size and Image Quality
Setting Gamma Values
㻞㻥㻡㻌㻛㻌㻢㻣㻢
0ALJ-06J
Specifying a Scanning Size
You can specify the scanning size of your documents.
Specify destinations or connect the USB memory device
<Scan Size>
Select the document size
LINKS
Scanning Documents Directly to USB Memory
Sending Documents as E-mails Directly from the Machine (MF8580Cdw / MF8550Cdn / MF8540Cdn Only)
Saving Documents Directly to a Shared Folder (MF8580Cdw / MF8550Cdn / MF8540Cdn Only)
㻞㻥㻢㻌㻛㻌㻢㻣㻢
0ALJ-06K
Selecting a File Format
You can select from four file formats into which documents are converted: <PDF>, <PDF (Compact)>,
<TIFF>* , and <JPEG> * . Scanned documents are converted into the file format specified here, and then sent
to the specified destination.
* Not available when sending e-mails
Specify destinations or connect the USB memory device
<File Format>
Select a file format
NOTE
<PDF (Compact)> compresses photos and illustrations on documents more than <PDF>. The file will be smaller, but the image
quality of some documents or the number of documents that can be scanned at once may be lower. If you select <PDF
(Compact)>, you can specify the compression level.
For the resolutions of each file format, see
MF8540Cdn Only).
Specifications for Scanning to Shared Folders (MF8580Cdw / MF8550Cdn /
Detailed Settings for <PDF (Compact)>
<Scan Settings>
<Output File Image Settings>
Select the type of your documents
Specify the settings
<PDF (Compact) Image Quality Level>
<Image Level in Text/Photo Mode or Photo Mode>
Select when scanning documents that contain photos.
<Image Level in Text Mode>
Select when scanning documents that only contain text.
<Data Size Priority>
The data size is highly compressed and reduced, but the image quality is low.
<Normal>
The compression ratio and the image quality are adjusted to an intermediate setting between <Data Size Priority> and
<Image Quality Priority>.
<Image Quality Priority>
The image quality improves, but the data compression ratio decreases and data size is large.
㻞㻥㻣㻌㻛㻌㻢㻣㻢
LINKS
Scanning Documents Directly to USB Memory
Sending Documents as E-mails Directly from the Machine (MF8580Cdw / MF8550Cdn / MF8540Cdn Only)
Saving Documents Directly to a Shared Folder (MF8580Cdw / MF8550Cdn / MF8540Cdn Only)
㻞㻥㻤㻌㻛㻌㻢㻣㻢
0ALJ-06L
Adjusting Density
You can adjust the density of the scan if the text or images in a document are too light or dark.
Specify destinations or connect the USB memory device
<Density>
Adjust the density
<–>
Decreases the density.
<+>
Increases the density.
LINKS
Scanning Documents Directly to USB Memory
Sending Documents as E-mails Directly from the Machine (MF8580Cdw / MF8550Cdn / MF8540Cdn Only)
Saving Documents Directly to a Shared Folder (MF8580Cdw / MF8550Cdn / MF8540Cdn Only)
Adjusting Sharpness
㻞㻥㻥㻌㻛㻌㻢㻣㻢
<Apply>
0ALJ-06R
Specifying Orientation of Your Document
You can specify portrait or landscape orientation.
Specify destinations or connect the USB memory device
orientation
<Original Orientation>
Select the document
<Portrait>
Select for documents with portrait orientation.
<Landscape>
Select for documents with landscape orientation.
LINKS
Scanning Documents Directly to USB Memory
Sending Documents as E-mails Directly from the Machine (MF8580Cdw / MF8550Cdn / MF8540Cdn Only)
Saving Documents Directly to a Shared Folder (MF8580Cdw / MF8550Cdn / MF8540Cdn Only)
㻟㻜㻜㻌㻛㻌㻢㻣㻢
0ALJ-06S
Selecting Document Type
You can select the image quality for the scan depending on the document type, such as text-only documents,
documents with charts and graphs, or magazine photos.
Specify destinations or connect the USB memory device
<Original Type>
Select the document type
<Text>
Suitable when scanning documents that only contain text.
<Text/Photo>
Suitable when scanning documents that contain both text and photos.
<Photo>
Suitable when scanning documents that contain printed photos, such as magazines or pamphlets.
LINKS
Scanning Documents Directly to USB Memory
Sending Documents as E-mails Directly from the Machine (MF8580Cdw / MF8550Cdn / MF8540Cdn Only)
Saving Documents Directly to a Shared Folder (MF8580Cdw / MF8550Cdn / MF8540Cdn Only)
㻟㻜㻝㻌㻛㻌㻢㻣㻢
0ALJ-06U
Scanning 2-Sided Documents (MF8580Cdw / MF8550Cdn / MF8540Cdn Only)
The machine can automatically scan the front and back sides of documents in the feeder.
IMPORTANT
The machine cannot scan both sides of documents automatically when the documents are placed on the platen glass.
Specify destinations or connect the USB memory device
<Calendar Type>
<2-Sided Original>
Select <Book Type> or
<Book Type>
Select for documents whose images on the front and back sides face the same direction.
<Calendar Type>
Select for documents whose images on the front and back sides face in opposite directions.
LINKS
Scanning Documents Directly to USB Memory
Sending Documents as E-mails Directly from the Machine (MF8580Cdw / MF8550Cdn / MF8540Cdn Only)
Saving Documents Directly to a Shared Folder (MF8580Cdw / MF8550Cdn / MF8540Cdn Only)
㻟㻜㻞㻌㻛㻌㻢㻣㻢
0ALJ-06W
Adjusting Sharpness
You can adjust sharpness of the image before sending. Increase the sharpness to sharpen blurred text and
lines, or decrease the sharpness to improve the appearance of magazine photos.
Specify destinations or connect the USB memory device
<Sharpness>
Adjust the sharpness
<–>
Decreases the sharpness, resulting in a softer image.
Example: If you want to improve the appearance of magazine photos
<+>
Increases the image sharpness.
Example: If you want to sharpen text and lines written in pencil
LINKS
Scanning Documents Directly to USB Memory
Sending Documents as E-mails Directly from the Machine (MF8580Cdw / MF8550Cdn / MF8540Cdn Only)
Saving Documents Directly to a Shared Folder (MF8580Cdw / MF8550Cdn / MF8540Cdn Only)
Adjusting Density
㻟㻜㻟㻌㻛㻌㻢㻣㻢
<Apply>
0ALJ-06X
Adjusting Balance between File Size and Image Quality
The scanned documents are converted into the specified file formats. At that time, you can specify the file
compression ratio. <Small: Memory Priority> makes the compression ratio higher than normal to create
smaller files with lower image quality. On the other hand, <Large: Image Quality Priority> makes the
compression ratio lower than normal larger files with higher image quality.
Specify destinations or connect the USB memory device
<Data Size>
Specify the setting
<Small: Memory Priority>
The data size is highly compressed and reduced, but the image quality becomes low.
<Standard>
The compression ratio and the image quality are adjusted to an intermediate setting between <Small: Memory Priority> and
<Large: Image Quality Priority>.
<Large: Image Quality Priority>
The image quality improves, but the data compression ratio decreased and data size becomes large.
LINKS
Scanning Documents Directly to USB Memory
Sending Documents as E-mails Directly from the Machine (MF8580Cdw / MF8550Cdn / MF8540Cdn Only)
Saving Documents Directly to a Shared Folder (MF8580Cdw / MF8550Cdn / MF8540Cdn Only)
Selecting a File Format
㻟㻜㻠㻌㻛㻌㻢㻣㻢
0ALJ-06Y
Setting Gamma Values
The scanned documents are converted into the specified file formats. At that time, you can specify the
gamma values to apply to the documents. You can specify the same gamma value as that of the monitor
which is to be used for viewing the converted files so the files are displayed with brightness true to the
original documents.
NOTE
For the gamma value of a monitor display, see the instruction manual included with the display.
<Scan Settings>
gamma value
<Output File Image Settings>
<YCbCr TX Gamma Value>
LINKS
Scanning Documents Directly to USB Memory
Sending Documents as E-mails Directly from the Machine (MF8580Cdw / MF8550Cdn / MF8540Cdn Only)
Saving Documents Directly to a Shared Folder (MF8580Cdw / MF8550Cdn / MF8540Cdn Only)
Selecting a File Format
㻟㻜㻡㻌㻛㻌㻢㻣㻢
Select the
0ALJ-070
Specifying Destinations (E-mail/Shared Folder) (MF8580Cdw / MF8550Cdn /
MF8540Cdn Only)
You can specify destinations by selecting from the Address Book as well as by using the numeric keys. To use the Address Book, you
need to register destinations in the Address Book beforehand. You can also specify previously used destinations. If your office has an
LDAP server installed, you can also specify destinations in the server.
Specifying with Numeric Keys (Email)
Specifying from Address Book
Specifying Previously Used
Destinations
Specifying Destinations in an
LDAP Server (E-mail)
NOTE
When specifying destinations for e-mails
You can specify multiple destinations, including Cc/Bcc destinations, just like you can when sending normal e-mails. These
destinations can be specified using the Address Book or an LDAP server. To specify destinations as Cc or Bcc addresses, you need
to use the Address Book.
When specifying destinations for shared folders
You cannot specify destinations using the numeric keys or an LDAP server. Furthermore, only one destinations can be specified at
a time.
TIPS for Enhancing Security
If you want to limit available destinations to ones from the Address Book, ones in an LDAP server, or previously specified
ones:
Limiting Available Destinations
If you want to disable specifying previously used destinations:
Disabling Use of Previously Used Destinations
LINKS
Sending Documents as E-mails Directly from the Machine (MF8580Cdw / MF8550Cdn / MF8540Cdn Only)
Saving Documents Directly to a Shared Folder (MF8580Cdw / MF8550Cdn / MF8540Cdn Only)
Registering in the Address Book (MF8580Cdw / MF8550Cdn / MF8540Cdn / MF8280Cw Only)
Registering LDAP Servers (MF8580Cdw / MF8550Cdn / MF8540Cdn / MF8280Cw Only)
㻟㻜㻢㻌㻛㻌㻢㻣㻢
0ALJ-071
Specifying with Numeric Keys (E-mail)
Use the numeric keys on the operation panel to specify destinations.
IMPORTANT
When <Restrict New Destinations> is set to <On>, you cannot use the numeric keys to specify destinations.
Limiting Available Destinations
NOTE
You can use the numeric keys only when specifying the first destination. If you want to specify any additional destinations, use
the Address Book or an LDAP server. To specify destinations as Cc or Bcc addresses, you need to use the Address Book.
Specifying from Address Book
Specifying Destinations in an LDAP Server (E-mail)
1
2
3
Press
Use
.
/
to select <E-Mail>, and press
.
Enter the destination using the numeric keys, and press <Apply>.
Pressing <A/a/12> toggles the input modes.
If you enter the wrong characters, press
characters at once.)
. (Press to delete each character one by one; press and hold to delete all the input
LINKS
Sending Documents as E-mails Directly from the Machine (MF8580Cdw / MF8550Cdn / MF8540Cdn Only)
㻟㻜㻣㻌㻛㻌㻢㻣㻢
0ALJ-072
Specifying from Address Book
The Address Book enables you to specify a destination by selecting from a list of registered destinations or by
searching by name for destinations with recipient names. You can also directly specify a destination by
entering a three-digit number (coded dial number) assigned to a destination.
Selecting Destinations from Address Book
Selecting Destinations Directly by Entering Coded Dial Numbers
NOTE
You need to register destinations in the Address Book before using this feature.
Registering in the Address Book (MF8580Cdw / MF8550Cdn / MF8540Cdn / MF8280Cw Only)
Setting a Shared Folder as a Save Location
Registering Address Book from Remote UI (MF8580Cdw / MF8550Cdn / MF8540Cdn / MF8280Cw Only)
Selecting Destinations from Address Book
1
2
Press
Use
.
/
to select <E-Mail> or <Windows (SMB)>, and press
.
If you select <Windows (SMB)>, proceed to step 4.
3
Press
.
You can also use
/
to select <Specify from Address Book> on the screen, and press
.
If the <Type> screen appears, select <To>, <Cc>, or <Bcc> as a destination type, and press
4
Use
/
.
to select a tab.
<All>
Displays all the destinations registered in the Address Book. For the marks beside the destinations, see the explanations below.
<
>
Displays a list of destinations registered in Favorites.
<A-Z>/<0-9>/<ABC> to <YZ>
Displays destinations with recipient names whose first characters correspond to the characters of the selected tab.
<
>
㻟㻜㻤㻌㻛㻌㻢㻣㻢
Displays destinations for faxes. To specify destinations using this tab, see
Specifying from Address Book (Fax).
>
<
Displays destinations for e-mails.
>
<
Displays destinations for shared folders.
>
<
Displays a list of destinations registered in Group Dial. This feature is not available when scanning documents to shared folders.
5
Use
/
to select a destination, and press
.
NOTE:
If you want to specify multiple destinations (e-mail)
Repeat steps 3 to 5. Up to 100 destinations can be specified.
To delete destinations (e-mail)
If you specified multiple destinations, you can delete destinations as necessary.
1
Select <Confirm/Edit Destination>, and press
2
Select a destination you want to delete, and press
3
Press <Clear Dest.>, select <Yes>, and press
.
.
.
If you specified destinations in Group Dial in step 2, <Number of Destinations> is displayed on the screen.
Selecting this item and pressing
displays detailed destinations in Group Dial.
NOTE
If you want to easily and quickly delete destinations without displaying a list of destinations
Before selecting <Confirm/Edit Destination> in step 1, you can press
.
specified. Display a destination you want to delete, and press
Selecting Destinations Directly by Entering Coded Dial Numbers
㻟㻜㻥㻌㻛㻌㻢㻣㻢
/
to toggle the destinations you
1
2
Press
.
Press
(Coded Dial).
You can also use
3
/
to select <Specify from Coded Dial> on the screen, and press
.
Use the numeric keys to enter a three-digit number (001 to 181).
If you enter the wrong characters, press
characters at once.)
. (Press to delete each character one by one; press and hold to delete all the input
NOTE:
If a confirmation screen appears
When <Coded Dial TX Confirmation> is set to <On>, a screen is displayed that shows the destination and the name for the
number. (For Group Dial, the destination name and the number of destinations are shown.) Check the contents and if everything
. To specify another destination, select <Cancel>, press
, and enter a three-digit number
is correct, select <OK>, and press
Displaying Destinations in Address Book
again.
If you want to specify multiple destinations (e-mail)
Repeat steps 2 and 3. Up to 100 destinations can be specified.
To delete destinations (e-mail)
If you specified multiple destinations, you can delete destinations as necessary.
1
Select <Confirm/Edit Destination>, and press
2
Select a destination you want to delete, and press
3
Press <Clear Dest.>, select <Yes>, and press
.
.
.
If you specified destinations in Group Dial in step 2, <Number of Destinations> is displayed on the screen.
Selecting this item and pressing
displays detailed destinations in Group Dial.
NOTE
㻟㻝㻜㻌㻛㻌㻢㻣㻢
If you want to easily and quickly delete destinations without displaying a list of destinations
Before selecting <Confirm/Edit Destination> in step 1, you can press
.
specified. Display a destination you want to delete, and press
/
to toggle the destinations you
LINKS
Sending Documents as E-mails Directly from the Machine (MF8580Cdw / MF8550Cdn / MF8540Cdn Only)
Saving Documents Directly to a Shared Folder (MF8580Cdw / MF8550Cdn / MF8540Cdn Only)
㻟㻝㻝㻌㻛㻌㻢㻣㻢
0ALJ-073
Specifying Previously Used Destinations
You can select a destination from the three most previously used destinations. When you specify a previously
used destination, the machine also sets the same scan settings, such as density, used the last time you sent
documents to that destination.
IMPORTANT
When <Restrict Resending from Log> is set to <On>, you cannot use this feature.
Destinations
Disabling Use of Previously Used
Turning OFF the machine or setting <Restrict New Destinations> to <On> deletes the past destinations, and disables this
Limiting Available Destinations
feature.
NOTE
When you specify a destination using this feature, any destinations that you have already specified are deleted.
1
2
3
Press
Use
.
/
to select <Previous Settings>, and press
Select a destination, and press
.
.
The selected destination and its scan settings are specified.
LINKS
Sending Documents as E-mails Directly from the Machine (MF8580Cdw / MF8550Cdn / MF8540Cdn Only)
Saving Documents Directly to a Shared Folder (MF8580Cdw / MF8550Cdn / MF8540Cdn Only)
㻟㻝㻞㻌㻛㻌㻢㻣㻢
0ALJ-074
Specifying Destinations in an LDAP Server (E-mail)
If your office has an LDAP server installed, you can use the destinations registered in the server. To specify
destinations, access an LDAP server via the machine, and then search for a destination.
NOTE
You need to specify the settings for connecting to an LDAP server beforehand.
Registering LDAP Servers (MF8580Cdw / MF8550Cdn / MF8540Cdn / MF8280Cw Only)
1
2
Press
Use
.
/
to select <Specify from LDAP Server>, and press
3
Select the LDAP server you are using, and press
4
Select the search criteria, and press
.
.
.
Personal names, fax numbers, e-mail addresses, organization names, and department names are available criteria for searching
destinations. Multiple search criteria can be specified at the same time.
5
Specify the search criteria using the numeric keys, and press <Apply>.
The following screen shows an example for when <Name> is selected in step 4 to search by personal name.
Pressing <A/a/12> toggles the input modes (except for searching by fax number).
To specify multiple search criteria, repeat steps 4 and 5.
6
Select <Search Method>, and press
.
㻟㻝㻟㻌㻛㻌㻢㻣㻢
7
Specify the search method, and press
.
<Using All Conditions Below>
Searches and displays the destinations that meet all the search criteria specified in steps 4 and 5.
<Using Some Conditions Below>
All destinations meeting any of the search criteria specified in steps 4 and 5 are displayed as search results.
8
Press <Start Search>.
The destinations meeting your search criteria are displayed.
NOTE:
If the authentication screen appears when you press <Start Search>, enter the user name of the machine and the password
registered in the LDAP server, and press <Apply>.
Registering LDAP Servers (MF8580Cdw / MF8550Cdn / MF8540Cdn /
MF8280Cw Only)
9
Select a destination, and press <Apply>.
Up to 10 destinations can be specified.
To search for a destination using other search criteria, repeat steps 2 to 9.
NOTE:
If you have already specified a destination using the numeric keys, up to nine destinations can be specified using an LDAP
server.
You cannot specify the selected destinations as Cc or Bcc addresses.
To delete destinations
If you specified multiple destinations, you can delete destinations as necessary.
1
Select <Confirm/Edit Destination>, and press
2
Select a destination you want to delete, and press
.
㻟㻝㻠㻌㻛㻌㻢㻣㻢
.
3
Press <Clear Dest.>, select <Yes>, and press
.
NOTE
If you want to easily and quickly delete destinations without displaying a list of destinations
Before selecting <Confirm/Edit Destination> in step 1, you can press
.
specified. Display a destination you want to delete, and press
/
to toggle the destinations you
LINKS
Sending Documents as E-mails Directly from the Machine (MF8580Cdw / MF8550Cdn / MF8540Cdn Only)
㻟㻝㻡㻌㻛㻌㻢㻣㻢
0ALJ-069
Changing Default Settings
The default settings are the settings that are displayed whenever you turn ON the machine, or when you press
. If you change these
default settings to match the operations that you perform frequently, you can eliminate the need to configure the same settings every
time you scan.
USB memory
<Scan Settings>
<USB Memory Settings>
Change the default value of the selected item
<Apply>
<Change Default Settings>
Select the setting
Settings
Select the item you want to set, and change the default value.
E-mail
<Scan Settings>
Select the setting
<TX Function Settings>
<Change Default Settings>
Change the default value of the selected item
<Apply>
<E-Mail>
Settings
Select the item you want to set, and change the default value.
Shared folder
<Scan Settings>
Select the setting
<TX Function Settings>
<Change Default Settings>
Change the default value of the selected item
<Apply>
㻟㻝㻢㻌㻛㻌㻢㻣㻢
<Windows (SMB)>
Settings
Select the item you want to set, and change the default value.
LINKS
Scanning Documents Directly to USB Memory
Sending Documents as E-mails Directly from the Machine (MF8580Cdw / MF8550Cdn / MF8540Cdn Only)
Saving Documents Directly to a Shared Folder (MF8580Cdw / MF8550Cdn / MF8540Cdn Only)
Specifying Detailed Settings
Scan Settings
㻟㻝㻣㻌㻛㻌㻢㻣㻢
0ALJ-076
Checking Log for Sent Documents (E-mail/Shared Folder) (MF8580Cdw /
MF8550Cdn / MF8540Cdn Only)
The logs for sent e-mails or documents scanned to shared folders can be checked in a list.
IMPORTANT
When <Display Job Log> is set to <Off>, you cannot check the logs for sent documents.
Display Job Log
1
2
3
Press
Use
(Status Monitor).
/
to select <TX Job>, and press
Select <Job Log>, and press
.
.
A list of the documents that were sent is displayed.
4
Select the document whose detailed information you want to check, and press
5
Check the detailed information about the selected document.
.
LINKS
TX Result Report (MF8580Cdw / MF8550Cdn / MF8540Cdn / MF8280Cw Only)
Communication Management Report (MF8580Cdw / MF8550Cdn / MF8540Cdn / MF8280Cw Only)
㻟㻝㻤㻌㻛㻌㻢㻣㻢
0ALJ-07L
Network
The machine has been designed for flexibility of use across a variety of environments, and it includes advanced technologies in addition
to basic network features. Do not worry if you are not a network expert, because the machine has also been designed for convenience
and ease of use. Relax and proceed with the network setup one step at a time.
Connecting to a Computer/Viewing the Machine's Network Settings
Connecting to a Network
Viewing Network Settings
Configuring or Preparing for Print/PC Fax/Scan Functions
Configuring the Machine for Printing or
Faxing from a Computer
Configuring the Machine for Scanning to E-mail or Shared Folders
(MF8580Cdw / MF8550Cdn / MF8540Cdn Only)
Customizing the Machine for More Convenient Network Experience
Configuring the Machine for Your Network Environment
㻟㻝㻥㻌㻛㻌㻢㻣㻢
0ALJ-07R
Connecting to a Network
When connecting the machine to a wired or wireless local area network (LAN), you need to set an IP address unique to the selected
network. Select "wired" or "wireless" depending on your communication environment and networking devices ( Connecting to a
Computer). For specific IP address settings, contact your Internet service provider or Network Administrator.
IMPORTANT
If the machine is connected to an unsecured network, your personal information might be leaked to a third party.
NOTE
The machine cannot connect to both wired and wireless LANs at the same time.
The machine does not come with a LAN cable or router. Have them ready as necessary.
For more information about your networking devices, see the instruction manuals for the devices or contact your
manufacturer.
Before You Start
Follow these steps to connect the machine to a network.
Check your computer settings.
Make sure that the computer is correctly connected to the network. For more information, see the instruction
manuals for the devices you are using, or contact the device manufacturers.
Make sure that the network settings have been completed on the computer. If the network has not been set
up properly, you will not be able to use the machine on the network, even if you perform the rest of the
procedure below.
NOTE:
Depending on the network, you may need to change settings for the communication method (halfduplex/full-duplex) or the Ethernet type (10BASE-T/100BASE-TX) ( Configuring Ethernet Settings).
For more information, contact your Internet service provider or Network Administrator.
To check the MAC address of the machine, see
To connect to an IEEE 802.1X network, see
Viewing the MAC Address.
Configuring IEEE 802.1X Authentication.
Select wired or wireless LAN.
Selecting Wired LAN or Wireless LAN (MF8580Cdw / MF8280Cw Only)
Connect to a wired or wireless LAN.
Proceed to the section that corresponds to the setting you selected in step 2.
Connecting to a Wired LAN
Connecting to a Wireless LAN (MF8580Cdw / MF8280Cw Only)
㻟㻞㻜㻌㻛㻌㻢㻣㻢
Set the IP address as necessary.
This step is required when you want to assign a specific IP address to the machine or change the dynamic IP
addressing protocol from the default DHCP.
Setting IP Addresses
㻟㻞㻝㻌㻛㻌㻢㻣㻢
0ALJ-07S
Selecting Wired LAN or Wireless LAN (MF8580Cdw / MF8280Cw Only)
After you decide on wired or wireless LAN to connect the machine to the computer ( Connecting to a Computer), select wired LAN or
wireless LAN using the operation panel. Note that if you change the setting from <Wired LAN> to <Wireless LAN> or vice versa, you will
need to uninstall MF Drivers installed on your computer and then reinstall them (MF Driver Installation Guide).
1
2
Press
Use
.
/
to select <Network Settings>, and press
.
If the logon screen appears, enter the correct ID and PIN using the numeric keys, and then press
Machine
3
4
5
Select <Select Wired/Wireless LAN>, and press
.
Select <Wired LAN> or <Wireless LAN>, and press
Press
.
.
LINKS
Connecting to a Network
Connecting to a Wired LAN
Connecting to a Wireless LAN (MF8580Cdw / MF8280Cw Only)
㻟㻞㻞㻌㻛㻌㻢㻣㻢
.
Logging on to the
0ALJ-07U
Connecting to a Wired LAN
Connect the machine to a computer via a router. Use a LAN cable to connect the machine to the router.
1
Connect a LAN cable.
Connect the machine to a router by using a LAN cable.
Push the connector in until it clicks into place.
2
Wait approximately 2 minutes.
While you wait, the IP address is set automatically.
NOTE:
You can set the IP address manually.
Setting IP Addresses
LINKS
Connecting to a Network
㻟㻞㻟㻌㻛㻌㻢㻣㻢
0ALJ-07W
Connecting to a Wireless LAN (MF8580Cdw / MF8280Cw Only)
Wireless routers (or access points) connect the machine to a computer via radio waves. If your wireless router is equipped with Wi-Fi
Protected Setup (WPS), configuring your network is automatic and easy. If your networking devices do not support automatic
configuration, or if you want to specify authentication and encryption settings in detail, you need to manually set up the connection.
Make sure that your computer is correctly connected to the network.
Setting Up Connection Using WPS
Manually Setting Up Connection
IMPORTANT
Risk of information leak
Use wireless LAN connection at your own discretion and at your own risk. If the machine is connected to an unsecured network,
your personal information might be leaked to a third party because radio waves used in wireless communication can go anywhere
nearby, even beyond walls.
Wireless LAN security
The wireless LAN security that is supported by the machine is listed below. For the wireless security compatibility of your wireless
router, see the instruction manuals for your networking devices or contact your manufacturer.
128 (104)/64 (40) bit WEP
WPA-PSK (TKIP/AES-CCMP)
WPA2-PSK (TKIP/AES-CCMP)
NOTE
Required devices for wireless LAN connection
The machine does not come with a wireless router. Have the router ready as necessary.
The wireless router must conform to IEEE 802.11b/g/n and be able to communicate in 2.4 GHz bandwidth. For more
information, see the instruction manuals for your networking devices or contact your manufacturer.
Setting Up Connection Using WPS
When using WPS, two modes are available: push button mode and PIN code mode.
Push Button Mode
Find the WPS mark shown below on the package of your wireless router. Also make sure that there is a WPS button on your networking
Setting Up Connection Using WPS Push Button Mode
device.
PIN Code Mode
Some WPS routers do not support the push button mode. If WPS PIN code mode is mentioned on the package or in the instruction
Setting Up Connection Using WPS PIN Code
manuals of your networking device, set up the connection by entering the PIN code.
Mode
㻟㻞㻠㻌㻛㻌㻢㻣㻢
NOTE
If the wireless router is set to use WEP authentication, you may not be able to set up connection using WPS.
Manually Setting Up Connection
When manually setting up a wireless connection, you can either select a wireless router or manually enter the required information.
Regardless of the method, make sure that you have the required setup information, including the SSID and network key ( Checking
the SSID and Network Key).
Selecting a Wireless Router
Select this setup option if you need to manually set up the connection but want to complete the setup as easily as possible.
Up Connection by Selecting a Wireless Router
Setting
Manually Entering the Setup Information
If you want to specify security settings in detail, such as authentication and encryption settings, manually enter the SSID and network
Setting Up Connection by Specifying Detailed Settings
key to set up the connection.
LINKS
Connecting to a Network
Selecting Wired LAN or Wireless LAN (MF8580Cdw / MF8280Cw Only)
㻟㻞㻡㻌㻛㻌㻢㻣㻢
0ALJ-07X
Setting Up Connection Using WPS Push Button Mode
If your wireless router supports WPS push button mode, you can easily set up a connection with a WPS button.
IMPORTANT
How to operate the wireless router may vary on each device. See the instruction manuals for your networking device for help.
1
2
Press
Use
.
/
to select <Network Settings>, and press
.
If the logon screen appears, enter the correct ID and PIN using the numeric keys, and then press
Machine
3
Select <Wireless LAN Settings>, and press
Read the message that is displayed, and press
Select <WPS Push Button Mode>, and press
Logging on to the
.
If the <Do you want to enable the wireless LAN?> message is displayed, select <Yes>, and press
4
5
.
.
.
.
6
Select <Yes>, and press
7
Press and hold the WPS button on the wireless router.
.
The button must be pressed within 2 minutes after pressing
in step 6.
Depending on the networking device, you may need to press and hold the button for 2 seconds or longer. See the instruction
manuals for your networking device for help.
NOTE:
If an error message is displayed during setup
and return to step 5.
Press
8
Check that the Wi-Fi indicator is blinking on the operation panel.
The Wi-Fi indicator blinks when a wireless router is detected.
㻟㻞㻢㻌㻛㻌㻢㻣㻢
When the setup is completed, the screen below is displayed, and approximately 2 seconds later, the Wi-Fi indicator lights up.
Wait approximately 2 minutes until the IP address settings of the machine are completed.
IMPORTANT:
Signal strength
When more than one wireless router is available for connection, the machine connects to the device with the strongest signal.
Signal strength is measured using RSSI (Received Signal Strength Indication).
NOTE
Reducing power consumption
You can set the machine to enter <Power Save Mode> based on signals emitted from the wireless router.
Power Save Mode
If the IP address of the machine has changed
In a DHCP environment, the IP address of the machine may be changed automatically. If this happens, the connection is
maintained as long as the machine and the computer belong to the same subnet.
LINKS
Connecting to a Wireless LAN (MF8580Cdw / MF8280Cw Only)
㻟㻞㻣㻌㻛㻌㻢㻣㻢
0ALJ-07Y
Setting Up Connection Using WPS PIN Code Mode
If your wireless router supports WPS PIN code mode, generate a PIN code with the machine and register the code to the networking
device.
IMPORTANT
How to operate the wireless router may vary on each device. See the instruction manuals for your networking device for help.
From a Computer
1
Access your wireless router from a computer and display the screen for entering a WPS PIN code.
For more information, see the instruction manuals for your networking device.
From the Operation Panel
2
3
Press
Use
.
/
to select <Network Settings>, and press
.
If the logon screen appears, enter the correct ID and PIN using the numeric keys, and then press
Machine
4
Select <Wireless LAN Settings>, and press
.
If the <Do you want to enable the wireless LAN?> message is displayed, select <Yes>, and press
5
6
7
Read the message that is displayed, and press
Select <WPS PIN Code Mode>, and press
Select <Yes>, and press
.
.
.
A PIN code is generated.
From a Computer
8
Register the generated PIN code to the wireless router.
Register the PIN code on the setup screen displayed in step 1.
The PIN code must be registered within 10 minutes after pressing
NOTE:
If an error message is displayed during setup
Press
.
and return to step 6.
From the Operation Panel
㻟㻞㻤㻌㻛㻌㻢㻣㻢
in step 7.
.
Logging on to the
9
Check that the Wi-Fi indicator is blinking on the operation panel.
The Wi-Fi indicator blinks when a wireless router is detected.
When the setup is completed, the screen below is displayed, and approximately 2 seconds later, the Wi-Fi indicator lights up.
Wait approximately 2 minutes until the IP address settings of the machine are completed.
IMPORTANT:
Signal strength
When more than one wireless router is available for connection, the machine connects to the device with the strongest signal.
Signal strength is measured using RSSI (Received Signal Strength Indication).
NOTE
Reducing power consumption
You can set the machine to enter <Power Save Mode> based on signals emitted from the wireless router.
Power Save Mode
If the IP address of the machine has changed
In a DHCP environment, the IP address of the machine may be changed automatically. If this happens, the connection is
maintained as long as the machine and the computer belong to the same subnet.
LINKS
Connecting to a Wireless LAN (MF8580Cdw / MF8280Cw Only)
㻟㻞㻥㻌㻛㻌㻢㻣㻢
0ALJ-080
Setting Up Connection by Selecting a Wireless Router
You can search the wireless routers (or access points) available for connection and select one from the display of the machine. For the
network key, enter a WEP key or TKIP. Before selecting a wireless router, check and write down the required setup information, including
the SSID and network key ( Checking the SSID and Network Key).
NOTE
Security settings
If the wireless connection is set up by selecting a wireless router, the WEP authentication method is set to <Open System> or
the WPA/WPA2 encryption method is set to <Auto> (AES-CCMP or TKIP). If you want to select <Shared Key> for WEP
authentication or <AES-CCMP> for WPA/WPA2 encryption, you need to set up the connection using the manual entry method
( Setting Up Connection by Specifying Detailed Settings).
1
2
Press
Use
.
/
to select <Network Settings>, and press
.
If the logon screen appears, enter the correct ID and PIN using the numeric keys, and then press
Machine
3
Select <Wireless LAN Settings>, and press
.
If the <Do you want to enable the wireless LAN?> message is displayed, select <Yes>, and press
4
5
6
Read the message that is displayed, and press
Select <SSID Settings>, and press
.
.
Select <Select Access Point>, and press
.
The machine starts searching for available wireless routers.
NOTE:
If <Cannot find the access point.> is displayed
See
7
When an Error Message Appears.
Select a wireless router, and press
.
.
Select the router whose SSID matches the one that you have written down.
NOTE:
Viewing the details of security settings
Select a wireless router, and press <Details>. To return to the previous screen, press
㻟㻟㻜㻌㻛㻌㻢㻣㻢
(Back).
.
Logging on to the
If your wireless router is not found
Check whether the machine is properly installed and ready to connect to the network.
8
Installation/Settings Problems
Enter the network key that you have written down.
Enter the network key using the numeric keys, and press <Apply>.
Entering Text
WPA-PSK or WPA2-PSK
WEP
9
Select <Yes>, and press
.
NOTE:
If an error message is displayed during setup
Press
10
, check whether the network key is correct, and return to step 5.
Check that the Wi-Fi indicator is blinking on the operation panel.
The Wi-Fi indicator blinks when a wireless router is detected.
When the setup is completed, the screen below is displayed, and approximately 2 seconds later, the Wi-Fi indicator lights up.
Wait approximately 2 minutes until the IP address settings of the machine are completed.
IMPORTANT:
Signal strength
When more than one wireless router is available for connection, the machine connects to the device with the strongest signal.
Signal strength is measured using RSSI (Received Signal Strength Indication).
NOTE
Reducing power consumption
You can set the machine to enter <Power Save Mode> based on signals emitted from the wireless router.
Power Save Mode
If the IP address of the machine has changed
In a DHCP environment, the IP address of the machine may be changed automatically. If this happens, the connection is
maintained as long as the machine and the computer belong to the same subnet.
㻟㻟㻝㻌㻛㻌㻢㻣㻢
LINKS
Connecting to a Wireless LAN (MF8580Cdw / MF8280Cw Only)
㻟㻟㻞㻌㻛㻌㻢㻣㻢
0ALJ-081
Setting Up Connection by Specifying Detailed Settings
If you want to specify the security settings in detail or cannot establish the wireless connection using the other procedures, manually
enter all the required information for the wireless LAN connection. Before specifying detailed settings, check and write down the required
information, including the SSID, network key, and wireless security protocols ( Checking the SSID and Network Key).
1
2
Press
Use
.
/
to select <Network Settings>, and press
.
If the logon screen appears, enter the correct ID and PIN using the numeric keys, and then press
Machine
3
Select <Wireless LAN Settings>, and press
7
Read the message that is displayed, and press
Select <SSID Settings>
Logging on to the
.
If the <Do you want to enable the wireless LAN?> message is displayed, select <Yes>, and press
4
5
6
.
.
.
<Enter Manually>.
Enter the SSID that you have written down, and press <Apply>.
Entering Text
Specify the security settings based on the information that you have written down.
If you do not need to specify the security settings, select <None>, and press
.
Using WEP
1
Select <WEP>, and press
2
Select an authentication method, and press
.
.
<Open System>
Sets open system authentication, which is also called "open authentication."
<Shared Key>
Uses the WEP key as a password.
NOTE:
When <Open System> is selected
When connecting to a wireless LAN, the machine experiences an authentication error if the shared key
authentication is set on the wireless router. If this happens, the machine automatically changes the setting to
<Shared Key> and retries the connection.
3
Select <Edit WEP Key>, and press
.
㻟㻟㻟㻌㻛㻌㻢㻣㻢
4
Select the WEP key(1 to 4) you want to edit, and press
.
Up to four WEP keys can be registered.
5
Enter the network key that you have written down.
Enter the network key using the numeric keys, and press <Apply>.
6
Select <Select WEP Key>, and press
7
Select the WEP key you have edited, and press
Entering Text
.
.
Using WPA-PSK or WPA2-PSK
1
Select <WPA/WPA2-PSK>, and press
2
Select an encryption method, and press
.
.
<Auto>
Sets the machine to automatically select AES-CCMP or TKIP to match the setting of the wireless router.
<AES-CCMP>
Sets AES-CCMP as the encryption method.
3
Enter the network key that you have written down.
Enter the network key using the numeric keys, and press <Apply>.
8
Select <Yes>, and press
.
㻟㻟㻠㻌㻛㻌㻢㻣㻢
Entering Text
NOTE:
If an error message is displayed during setup
Press
9
, check whether the specified settings are correct, and return to step 5.
Check that the Wi-Fi indicator is blinking on the operation panel.
The Wi-Fi indicator blinks when a wireless router is detected.
When the setup is completed, the screen below is displayed, and approximately 2 seconds later, the Wi-Fi indicator lights up.
Wait approximately 2 minutes until the IP address settings of the machine are completed.
IMPORTANT:
Signal strength
When more than one wireless router is available for connection, the machine connects to the device with the strongest signal.
Signal strength is measured using RSSI (Received Signal Strength Indication).
NOTE
Reducing power consumption
You can set the machine to enter <Power Save Mode> based on signals emitted from the wireless router.
Power Save Mode
If the IP address of the machine has changed
In a DHCP environment, the IP address of the machine may be changed automatically. If this happens, the connection is
maintained as long as the machine and the computer belong to the same subnet.
LINKS
Connecting to a Wireless LAN (MF8580Cdw / MF8280Cw Only)
㻟㻟㻡㻌㻛㻌㻢㻣㻢
0ALJ-082
Checking the SSID and Network Key
When manually setting up a wireless connection, you need to specify the SSID and network key of your wireless router. The SSID and
network key may be indicated on these networking devices. Check your devices and write down the necessary information before setting
up the connection. For more information, see the instruction manuals for your networking devices or contact your manufacturer.
SSID
A name given for identifying a specific wireless LAN. Some other terms used for SSID include "access
point name" and "network name."
Network Key
A keyword or password used for encrypting data or authenticating a network. Some other terms used
for network key include "encryption key," "WEP key," "WPA/WPA2 passphrase," and "preshared key
(PSK)."
When manually setting up a wireless connection by specifying detailed settings, you need to specify
security settings. Check the following information:
Wireless Security Protocols
(Authentication/Encryption)
Security types (WEP/WPA-PSK/WPA2-PSK)
Authentication method (Open System/Shared Key)
Encryption method (TKIP/AES-CCMP)
Checking the SSID and Network Key from a Computer
The SSID or the network key may have been changed. If you do not know the SSID or the network key, you can check them by using
the Canon MF/LBP Wireless Setup Assistant included with the User Software CD-ROM. The Canon MF/LBP Wireless Setup Assistant can be
used on a computer connected to a wireless LAN.
1
Insert the User Software CD-ROM into the drive on the computer.
Select a language and click [OK] if you are prompted to do so.
2
Click [Start Software Programs].
NOTE:
If the above screen is not displayed
3
Displaying the [CD-ROM Setup] or [Select language] Screen
Click [Start] for [Canon MF/LBP Wireless Setup Assistant].
㻟㻟㻢㻌㻛㻌㻢㻣㻢
4
Read the License Agreement and click [Yes] to agree.
5
Check the information displayed for the wireless router.
Write down the necessary information. If you do not know what information is necessary, write down all the information that is
displayed.
NOTE:
If wireless routers are not found
Click [Refresh]. If nothing happens, check that the settings are correctly configured on the computer and the wireless router.
LINKS
Connecting to a Wireless LAN (MF8580Cdw / MF8280Cw Only)
Setting Up Connection by Selecting a Wireless Router
Setting Up Connection by Specifying Detailed Settings
㻟㻟㻣㻌㻛㻌㻢㻣㻢
0ALJ-083
Setting IP Addresses
Connecting the machine to a network requires a unique network IP address. Two versions of IP addresses are available: IPv4 and IPv6.
Configure these settings depending on the network environment. To use IPv6 addresses, you need to properly configure the IPv4 address
settings.
㻟㻟㻤㻌㻛㻌㻢㻣㻢
0ALJ-084
Setting IPv4 Address
The machine's IPv4 address can be either assigned automatically by a dynamic IP addressing protocol, such as
DHCP, or entered manually. When connecting the machine to a wired LAN, make sure that the connectors of
the LAN cable are firmly inserted into the ports ( Connecting to a Wired LAN). You can test the network
connection if necessary.
Setting IPv4 Address
Testing the Network Connection
Setting IPv4 Address
1
2
Press
Use
.
/
to select <Network Settings>, and press
.
If the logon screen appears, enter the correct ID and PIN using the numeric keys, and then press
Machine
3
4
Select <TCP/IP Settings>
<IPv4 Settings>
.
Logging on to the
<IP Address Settings>.
Configure IP address settings.
<Auto Acquire>
Select to automatically assign an IP address via a protocol such as DHCP. When <Auto Acquire: On> is displayed, automatic
addressing is enabled.
<Manually Acquire>
Select to configure the IP address settings by manually entering an IP address. In order to select this option, <Auto Acquire>
must be set to <Off>.
<Check Settings>
Select when you want to view the current IP address settings.
Automatically assigning an IP address
1
Select <Auto Acquire>
2
Select <DHCP>, <BOOTP>, or <RARP>, and press
<Select Protocol>.
.
NOTE:
If you do not want to use DHCP/BOOTP/RARP to assign an IP address
Select <Off>. If you select <DHCP>, <BOOTP>, or <RARP> when these services are unavailable, the machine will waste
time and communications resources searching the network for these services.
3
Check that <Auto IP> is set to <On>.
If <Off> is selected, change the setting to <On>.
㻟㻟㻥㻌㻛㻌㻢㻣㻢
4
Press <Apply>.
NOTE:
IP addresses assigned via DHCP/BOOTP/RARP override the address obtained via Auto IP.
Manually entering an IP address
1
Check that <Auto Acquire> is set to <Off>.
If <On> is displayed, select <Auto Acquire>
, and set both <Select Protocol> and <Auto IP> to <Off>.
2
Select <Manually Acquire>, and press
3
Specify the IP address, subnet mask, and gateway address (or default gateway).
.
Specify the settings in the following order: <IP Address>
<Subnet Mask>
<Gateway Address>.
Enter the setting using the numeric keys, and press <Apply> on each screen.
5
Restart the machine.
Turn OFF the machine, wait for at least 10 seconds, and turn it back ON.
NOTE
Checking whether the settings are correct
Make sure that the Remote UI screen can be displayed with your computer. ( Starting Remote UI) If a computer is not
available, you can check the connection by using the operation panel ( Testing the Network Connection).
Testing the Network Connection
1
2
Press
Use
.
/
to select <Network Settings>, and press
.
If the logon screen appears, enter the correct ID and PIN using the numeric keys, and then press
Machine
3
4
<TCP/IP Settings>
<IPv4 Settings>
<PING Command>.
Enter the IPv4 address of another device on the network, and press <Apply>.
If a proper connection has been established, the result is displayed as shown above.
㻟㻠㻜㻌㻛㻌㻢㻣㻢
.
Logging on to the
LINKS
Setting IPv6 Addresses
Viewing Network Settings
Configuring WINS
㻟㻠㻝㻌㻛㻌㻢㻣㻢
0ALJ-085
Setting IPv6 Addresses
The IPv6 addresses of the machine can be configured via the Remote UI. Before setting IPv6 addresses,
check the IPv4 address settings ( Viewing IPv4 Settings). You need to set the correct IPv4 settings to use
IPv6 addresses. Note that the scan function that uses the scanner driver or MF Toolbox is not available in an
IPv6 environment. The machine can use up to nine of the following IPv6 addresses:
Type
Maximum
number
available
Description
Link-local
address
1
An address that is only valid within a subnet or link and cannot be used to communicate with
devices beyond a router. A link-local address is automatically set when the IPv6 function of the
machine is enabled.
Manual address
1
An address that is entered manually. When using this address, specify the prefix length and
default router address.
Stateless
address
6
An address that is generated automatically using the MAC address of the machine and the
network prefix that is advertised by the router. Stateless addresses are discarded when the
machine is restarted (or turned ON).
Stateful address
1
An address obtained from a DHCP server using DHCPv6.
1
2
Start the Remote UI and log on in System Manager Mode.
Click [Settings/Registration].
3
Click [Network Settings]
4
Click [Edit...] in [IPv6 Settings].
[TCP/IP Settings].
㻟㻠㻞㻌㻛㻌㻢㻣㻢
Starting Remote UI
5
Select the [Use IPv6] check box and configure the required settings.
[Use IPv6]
Select the check box to enable IPv6 on the machine. When not using IPv6, clear the check box.
[Stateless Address]
Select the check box when using a stateless address. When not using a stateless address, clear the check box.
[Use Manual Address]
When you want to manually enter an IPv6 address, select the check box and enter the IP address, prefix length, and default
router address in the corresponding text boxes.
[IP Address]
Enter an IPv6 address. Addresses that start with "ff" (or multicast address) cannot be entered.
[Prefix Length]
Enter a number that indicates how many bits are available for the network address.
[Default Router Address]
Specify the IPv6 address of the default router as necessary. Addresses that start with "ff" (or multicast address) cannot be
entered.
[Use DHCPv6]
Select the check box when using a stateful address. When not using DHCPv6, clear the check box.
6
Click [OK].
7
Restart the machine.
Turn OFF the machine, wait for at least 10 seconds, and turn it back ON.
㻟㻠㻟㻌㻛㻌㻢㻣㻢
NOTE
Checking whether the settings are correct
Make sure that the Remote UI screen can be displayed with your computer by using the IPv6 address of the machine.
Remote UI
Using the operation panel
IPv6 settings can also be accessed from
.
IPv6 Settings
LINKS
Setting IPv4 Address
Viewing Network Settings
㻟㻠㻠㻌㻛㻌㻢㻣㻢
Starting
0ALJ-086
Viewing Network Settings
Viewing IPv4 Settings
Viewing IPv6 Settings
Viewing the MAC Address
Viewing Wireless LAN Settings and Information (MF8580Cdw / MF8280Cw Only)
NOTE
The IP address is not correctly configured if it is displayed as "0.0.0.0".
Connecting the machine to a switching hub or bridge may result in a connection failure even when the IP address is correctly
configured. This problem can be solved by setting a certain interval before the machine starts communicating.
Setting a
Wait Time for Connecting to a Network
You can print a list of the current network settings.
User Data List/System Manager Data List
Viewing IPv4 Settings
(Status Monitor)
<Network Information>
<IPv4>
Select the setting to view
<Network Information>
<IPv6>
Select the setting to view
Viewing IPv6 Settings
(Status Monitor)
Viewing the MAC Address
1
2
Press
Use
.
/
to select <Network Settings>, and press
.
If the logon screen appears, enter the correct ID and PIN using the numeric keys, and then press
Machine
3
Select <Ethernet Driver Settings>, and press
.
㻟㻠㻡㻌㻛㻌㻢㻣㻢
.
Logging on to the
Viewing Wireless LAN Settings and Information (MF8580Cdw / MF8280Cw Only)
1
2
Press
.
Use
/
to select <Network Settings>, and press
.
If the logon screen appears, enter the correct ID and PIN using the numeric keys, and then press
Machine
3
Select <Wireless LAN Settings>, and press
Read the message that is displayed, and press
.
Select <Wireless LAN Information>, and press
.
Select the setting to view, and press
Logging on to the
.
If the <Do you want to enable the wireless LAN?> message is displayed, select <Yes>, and press
4
5
6
.
.
.
Viewing WEP and WPA/WPA2-PSK information
1
Select <Security Settings>, and press
2
View the current security settings, and press
.
.
If the security settings are not configured, <None> is displayed.
3
Select the setting to view, and press
WEP
.
WPA/WPA2-PSK
NOTE:
<Wireless LAN Status> and <Latest Error Information> can be viewed from
(Status Monitor). Press
<Network Information> <Wireless LAN Information> and select the setting to view.
LINKS
Connecting to a Wireless LAN (MF8580Cdw / MF8280Cw Only)
Setting IPv4 Address
Setting IPv6 Addresses
Configuring DNS
㻟㻠㻢㻌㻛㻌㻢㻣㻢
(Status Monitor)
0ALJ-087
Configuring the Machine for Printing or Faxing from a Computer
When using the machine as a network printer or a PC-to-fax machine, you can configure the protocols and ports used for printing and
create a print server for the machine. Before configuring the machine for printing or faxing from a computer, perform the basic setup
procedures, including the printer driver installation (MF Driver Installation Guide).
NOTE
Printing protocols are rules for delivering document data created on a computer to the machine, and can be selected according
to the printing purpose or the network environment.
Ports are gateways for passing document data from a computer to the printer. Incorrect port settings are often the cause
when documents cannot be printed from a network computer.
㻟㻠㻣㻌㻛㻌㻢㻣㻢
0ALJ-088
Configuring Printing Protocols and WSD Functions
Configure the protocols that are used for printing documents from a networked computer. The protocols supported by the machine
include LPD, RAW, and WSD (Web Services on Devices).
NOTE
To change protocols' port numbers, see
1
2
Changing Port Numbers.
Start the Remote UI and log on in System Manager Mode.
Starting Remote UI
Click [Settings/Registration].
3
Click [Network Settings]
4
Configure printing protocols.
[TCP/IP Settings].
Configuring LPD or RAW
1
Click [Edit...] in [LPD Print Settings] or [RAW Print Settings].
2
Configure the settings as necessary.
㻟㻠㻤㻌㻛㻌㻢㻣㻢
[Use LPD Printing]
Select the check box to print via LPD. When not using LPD printing, clear the check box.
[Use RAW Printing]
Select the check box to print via RAW. When not using RAW printing, clear the check box.
3
Click [OK].
Configuring WSD
1
Click [Edit...] in [WSD Settings].
2
Configure the settings as necessary.
[Use WSD Printing]
Select the check box to print via WSD. When not using WSD printing, clear the check box.
[Use WSD Browsing]
Select the check box to obtain information about the machine from a computer via WSD. This check box is automatically
selected when the [Use WSD Printing] check box is selected.
[Use WSD Scanning]
Available for Windows Vista/7/8, WSD scanning enables you to scan documents to a computer without installing the
scanner driver. Select the check box to scan documents via WSD. When not using WSD scanning, clear the check box.
[Use Computer Scanning]
Select the check box to use WSD scanning by operating the machine with the operation panel. This check box can only be
and specify a computer as
selected when the [Use WSD Scanning] check box is selected. To perform scanning, press
a scan destination ( Scanning from the Machine).
[Use Multicast Discovery]
Select the check box to set the machine to reply to multicast discovery messages. If the check box is cleared, the
machine stays in sleep mode even when multicast discovery messages are flowing on the network.
3
Click [OK].
㻟㻠㻥㻌㻛㻌㻢㻣㻢
5
Restart the machine.
Turn OFF the machine, wait for at least 10 seconds, and turn it back ON.
NOTE
Using the operation panel
LPD, RAW, and WSD settings can also be accessed from
.
LPD Print Settings
RAW Print Settings
WSD Settings
Setting up WSD network devices on Windows Vista/7/8
The WSD printer and scanner can be added from the printer folder. Open the printer folder ( Displaying the Printer Folder)
click [Add a device] or [Add a printer] and follow the on-screen instructions. For more information about how to install MF
Drivers for the WSD network printer, see MF Driver Installation Guide.
LINKS
Configuring Printer Ports
㻟㻡㻜㻌㻛㻌㻢㻣㻢
0ALJ-089
Configuring Printer Ports
Printing errors can occur when the IP address of the machine has been changed, or when a printer has been added via the Windows
printer folder. These errors are typically caused by incorrect printer port settings. For example, an incorrect port number or port type
may have been specified. In such situations, your attempt to print fails because the document data cannot reach the machine. To fix this
type of problem, configure the printer port settings on the computer.
IMPORTANT
To perform the following procedure, log on to your computer with an administrator account.
1
2
3
Open the printer folder.
Displaying the Printer Folder
Right-click your printer icon and click [Printer properties] (or [Properties]).
Click the [Ports] tab and configure the required settings.
Adding a port
If the IP address of the machine has been changed, add a new port. Adding a port is also an effective solution when an incorrect
port type was selected in the Windows printer folder during the printer driver installation.
1
Click [Add Port].
2
Select [Canon MFNP Port] in [Available port types] and click [New Port].
㻟㻡㻝㻌㻛㻌㻢㻣㻢
3
Click [Auto Detect], select the machine when it is detected, and click [Next].
NOTE:
If the machine is not detected
Click [Refresh]. If the problem persists, click [IP address] or [MAC address], enter the IP address or MAC address
Viewing Network Settings, and then click [Next].
of the machine
4
Click [Add]
5
Click [Close].
[Finish].
Changing the port type or number
If the printing protocols ( Configuring Printing Protocols and WSD Functions) or port numbers ( Changing Port Numbers)
have been changed on the machine, the corresponding settings on the computer must also be configured. This change is only
available for LPR or RAW ports.
4
1
Click [Configure Port].
2
Click the [LPR] or [RAW] radio button in [Protocol Type], change the number in the [Port Number] text
box as necessary, and then click [OK].
Click [Close].
㻟㻡㻞㻌㻛㻌㻢㻣㻢
LINKS
Setting Up Print Server
㻟㻡㻟㻌㻛㻌㻢㻣㻢
0ALJ-08A
Setting Up Print Server
With a print server, you can reduce the load on the computer that you print from. The print server also enables each computer to install
MF Drivers over the network, which saves you the trouble of installing the drivers on each computer by using the CD-ROM. To set up a
computer on the network as a print server, configure the settings for sharing the printer.
IMPORTANT
To perform the following procedure, log on to your computer with an administrator account.
You may be unable to install drivers over the network depending on the operating system and the bit architecture (32-bit or
64-bit) of the print server and client computers.
When implementing a print server in a domain environment, consult your Network Administrator.
NOTE
Using Department ID Management with a print server
Canon Driver Information Assist Service must be added during the printer driver installation.
MF Driver Installation Guide
1
2
3
Open the printer folder.
Displaying the Printer Folder
Right-click your printer icon and click [Printer properties] (or [Properties]).
Click the [Sharing] tab, select [Share this printer], and enter the share name of the machine.
NOTE:
When [Change Sharing Options] is displayed
Click [Change Sharing Options]. If the [User Account Control] dialog box appears, click [Yes] (or [Continue]).
㻟㻡㻠㻌㻛㻌㻢㻣㻢
4
Install additional drivers as necessary.
This operation is required if you want to install MF Drivers in other computers running a different bit architecture via the print
server.
1
Click [Additional Drivers].
2
Select the check box for the bit architecture that other computers are running, and click [OK].
Select additional drivers from the following, according to the operating system of the print server.
Print server
32-bit operating
systems
Select the check box for
[x86]
Windows XP/Server 2003
64-bit operating
systems
[Windows 2000, Windows XP and Windows Server 2003] under [Version]
Windows Vista/7/8/Server 2008/Server 2012
[x64] under [Processor]
NOTE:
If you do not know whether your Windows Vista/7/8/Server 2008/Server 2012 is a 32-bit or 64-bit operating
system, see
Checking the Bit Architecture.
3
4
5
Insert the User Software CD-ROM into the drive on the computer, click [Browse] to specify the folder
that contains MF Drivers, and then click [OK].
If the print server runs a 32-bit operating system, select [DRIVERS]
CD-ROM.
[32bit]
If the print server runs a 64-bit operating system, select [DRIVERS]
CD-ROM.
[x64]
[Driver] folders on the provided
[Driver] folders on the provided
Follow the on-screen instructions to install the drivers.
Click [OK].
Installing MF Drivers on a Computer via the Print Server
1
Locate the shared printer in the print server.
Displaying Shared Printers in the Print Server
㻟㻡㻡㻌㻛㻌㻢㻣㻢
2
3
Double-click the shared printer.
Follow the on-screen instructions to install the drivers.
LINKS
Printing from a Computer
㻟㻡㻢㻌㻛㻌㻢㻣㻢
0ALJ-08C
Configuring the Machine for Scanning to E-mail or Shared Folders
(MF8580Cdw / MF8550Cdn / MF8540Cdn Only)
To send scanned documents by e-mail or store them into a shared folder directly from the machine, you need to set the machine
configuration. The Send Function Setting Tool, an application that is included with the machine, will assist you with the required setup.
Set the necessary configuration depending on your network environment.
Scanning to E-mail
Configuring the Machine for Scanning to E-mail
Scanning to Shared Folders
Configuring the Machine for Scanning to Shared Folders
LINKS
Specifications for E-mail Sending (MF8580Cdw / MF8550Cdn / MF8540Cdn Only)
Specifications for Scanning to Shared Folders (MF8580Cdw / MF8550Cdn / MF8540Cdn Only)
㻟㻡㻣㻌㻛㻌㻢㻣㻢
0ALJ-08E
Configuring the Machine for Scanning to E-mail
Before configuring the machine for scanning to e-mail, check the setup flow shown below.
Make sure that the machine and the computer are correctly connected.
Connecting via Wireless LAN (MF8580Cdw / MF8280Cw Only)
Connecting via Wired LAN
Make sure that you have the following information:
The IP address of the machine
Viewing Network Settings
An e-mail address to be registered as a destination
Information about the e-mail server, including the SMTP server name, port numbers, whether
authentication is required, and the user name and password for authentication.
NOTE:
For more information about the e-mail server settings, contact your Internet service provider or Network
Administrator.
Make sure that the computer meets the following system requirements for the Send Function
Setting Tool:
Operating system
Windows XP/Vista/7/8/Server 2003/Server 2008/Server 2012
Web browser
Microsoft Internet Explorer 7.0 or later
Display
SVGA monitor (with at least 800 x 600 pixel screen resolution) that supports at least 256 colors
NOTE:
Also make sure that <Use HTTP> and <Remote UI On/Off> are set to <On>.
Disabling Remote UI
Communication
Set the machine configuration.
Disabling HTTP
Configuring Basic E-mail Settings
You can also configure detailed e-mail settings, such as authentication and encryption depending on your
Configuring Advanced E-mail Settings
needs.
㻟㻡㻤㻌㻛㻌㻢㻣㻢
0ALJ-08F
Configuring Basic E-mail Settings
The Send Function Setting Tool helps you configure the e-mail settings. With this tool, you can also register e-mail addresses to the
Address Book.
NOTE
More detailed settings can be specified by using the Remote UI instead of the Send Function Setting Tool ( Configuring
Advanced E-mail Settings). The Send Function Setting Tool is helpful for users who want to complete the setup easily.
1
Start the Send Function Setting Tool.
Using a Web browser
Enter "http://(the IP address of the machine)/sendsupport_login.html" in the address field of a Web browser, and press the
[ENTER] key.
Using the User Software CD-ROM
1
Insert the User Software CD-ROM into the drive on the computer.
Select a language and click [OK] if you are prompted to do so.
2
Click [Start Software Programs].
NOTE:
If the above screen is not displayed, see
Displaying the [CD-ROM Setup] or [Select language] Screen.
3
Click [Start] for [Send Function Setting Tool].
4
Click [Next].
If you want to view Send Setting Guide, click [How to Set].
㻟㻡㻥㻌㻛㻌㻢㻣㻢
NOTE:
If the screen below appears
Click [Yes].
5
Select the machine from [Device List] and click [Next].
NOTE:
If the machine is not displayed in [Device List]
Click [Search Again]. If the problem persists, click [Search by IP Address], enter the IP address of the machine, and then
click [OK].
6
2
Confirm the settings and click [OK].
Click [Start].
If the logon screen is displayed, enter the appropriate ID and PIN in the corresponding text boxes, and then click [Logon].
3
Click [Send to E-mail Settings].
If the screen prompting you to enter the Address Book PIN is displayed, enter the PIN for the Address Book, and click [OK].
Setting a PIN for Address Book
4
Specify the required settings.
㻟㻢㻜㻌㻛㻌㻢㻣㻢
[Registration]
[Favorites Number]
With the Send Function Setting Tool, you can register an e-mail address into <Favorites> in the Address Book. Select a
number from the drop-down list.
[Name for Favorites Number]
Enter the name for identifying the destination to be registered. Set a name that will be easy for you to find later in the
Address Book.
[Send Destination Settings]
[Destination E-mail Address]
Enter the e-mail address that you want to send your scanned documents to.
[SMTP Server Settings]
[SMTP Server]
Enter the SMTP server name.
[SMTP Authentication]
Click the [Not Set] or [Set] radio button to match the authentication settings of the SMTP server. When [Set] is selected,
enter the user name in the [User Name] text box and password in the [Password] text box.
NOTE:
Authentication methods for sending e-mails
To prevent e-mail transmissions by unauthorized users, the machine supports SMTP authentication (SMTP AUTH) and POP
before SMTP. For more information about the required authentication method, contact your Internet service provider or Network
Administrator.
POP before SMTP authentication can only be configured by using the Remote UI.
5
6
7
Configuring Advanced E-mail Settings
Click [Next].
Confirm the settings and click [Register].
Restart the machine.
Turn OFF the machine, wait for at least 10 seconds, and turn it back ON.
IMPORTANT
Additional settings may be required depending on the network you are using. For more information, contact your Internet service
provider or Network Administrator.
To enable SSL for e-mailing, see
To change port numbers, see
Configuring Advanced E-mail Settings.
Changing Port Numbers.
LINKS
Configuring the Machine for Scanning to E-mail
Sending Documents as E-mails Directly from the Machine (MF8580Cdw / MF8550Cdn / MF8540Cdn Only)
Registering in the Address Book (MF8580Cdw / MF8550Cdn / MF8540Cdn / MF8280Cw Only)
㻟㻢㻝㻌㻛㻌㻢㻣㻢
0ALJ-08H
Configuring Advanced E-mail Settings
Use the Remote UI to configure detailed e-mail settings, such as POP before SMTP authentication and SSL encryption. For more
information about the required settings, contact your Internet service provider or Network Administrator.
1
2
Start the Remote UI and log on in System Manager Mode.
Click [Settings/Registration].
3
Click [Network Settings]
4
Click [Edit...].
5
Specify the required settings.
[E-Mail Settings].
㻟㻢㻞㻌㻛㻌㻢㻣㻢
Starting Remote UI
[SMTP Server Address]
Enter up to 48 characters for the SMTP server name/address.
[E-Mail Address]
Enter up to 120 characters for the e-mail address that you want to use for the machine.
Setting up POP before SMTP and encrypted communication with the POP server
POP before SMTP authentication prevents unauthorized users from using e-mail by performing user authentication on the POP
server. Communication with the POP server can be encrypted if it supports SSL.
[Use POP Authentication Before Sending]
To enable authentication on the POP3 server, select the check box and enter up to 64 characters in the [User Name] text box.
[Set/Change Password]
To specify or change the password, enter up to 32 characters in the [Password] text box.
[POP Server]
Enter up to 48 characters for the POP3 server name/address.
[Use SSL]
Select the check box to use SSL for encrypting communication with the POP3 server. Select the check box for [Confirm
Certificate] or [Add CN to Verification Items] depending on your needs.
[Use APOP Authentication]
Select the check box to use APOP to encrypt the password during the authentication process.
[Clear Mail Box]
When a transmission error occurs, an error notification may be sent to the address specified in [E-Mail Address]. Depending on the
e-mail service you are using, these error notifications may eventually fill your mail box in the server to its capacity if you do not
delete them. Select the check box to clear the mail box.
IMPORTANT:
Selecting the [Clear Mail Box] check box
All the e-mails in the inbox on the server are deleted as soon as [OK] is clicked in step 6. If an e-mail address for everyday use
is specified in [E-Mail Address], be careful not to delete unread e-mails. To lessen the risk of deleting unread e-mails, use an email account exclusively for the machine.
Setting up SMTP authentication or encrypted communication with the SMTP server
SMTP authentication (SMTP AUTH) uses a user name and password to authorize users to send e-mails. Communication with the
SMTP server can be encrypted if it supports SSL.
[Use SMTP Authentication (SMTP AUTH)]
To enable authentication on the SMTP server, select the check box and enter up to 64 characters in the [User Name] text box.
[Set/Change Password]
To specify or change the password, enter up to 32 characters in the [Password] text box.
[Use SSL]
Select the check box to use SSL for encrypting communication with the SMTP server. Select the check box for [Confirm Certificate
for SMTP Sending] or [Add CN to Verification Items] depending on your needs.
6
Click [OK].
㻟㻢㻟㻌㻛㻌㻢㻣㻢
7
Restart the machine.
Turn OFF the machine, wait for at least 10 seconds, and turn it back ON.
IMPORTANT
Depending on the network you are using, you may need to change the SMTP or POP3 port setting (
For more information, contact your Internet service provider or Network Administrator.
Changing Port Numbers).
LINKS
Configuring the Machine for Scanning to E-mail
Configuring Basic E-mail Settings
Sending Documents as E-mails Directly from the Machine (MF8580Cdw / MF8550Cdn / MF8540Cdn Only)
㻟㻢㻠㻌㻛㻌㻢㻣㻢
0ALJ-08J
Configuring the Machine for Scanning to Shared Folders
Before configuring the machine for scanning to shared folders, check the setup flow shown below.
Make sure that the machine and the computer are correctly connected.
Connecting via Wireless LAN (MF8580Cdw / MF8280Cw Only)
Connecting via Wired LAN
Make sure that you have the following information:
The IP address of the machine
Viewing Network Settings
The name of the computer where the shared folder is located
Viewing the Computer Name
Path to and the name of the shared folder (If access restrictions are set to the folder, the user name and
password information is also needed)
NOTE:
For instructions on how to create a new shared folder, see Send Setting Guide (included with the User
Software CD-ROM).
Make sure that the computer meets the following system requirements for the Send Function
Setting Tool:
Operating system
Windows XP/Vista/7/8/Server 2003/Server 2008/Server 2012
Web browser
Microsoft Internet Explorer 7.0 or later
Display
SVGA monitor (with at least 800 x 600 pixel screen resolution) that supports at least 256 colors
NOTE:
Also make sure that <Use HTTP> and <Remote UI On/Off> are set to <On>.
Disabling Remote UI
Communication
Set the machine configuration.
Disabling HTTP
Setting a Shared Folder as a Save Location
㻟㻢㻡㻌㻛㻌㻢㻣㻢
0ALJ-08L
Setting a Shared Folder as a Save Location
The feature of scanning to shared folders is also called "Scan to SMB" because the feature uses Server Message Block (SMB), a
Windows-specific technology. SMB is a protocol for sharing resources, such as files and printers, with more than one device in a network
( Configuring SMB). To configure the machine for saving your scanned documents into a shared folder in the network via SMB, specify
the location of the shared folder from a computer by using the Send Function Setting Tool.
NOTE
You can also use the Remote UI to specify the location of the shared folder by registering the folder to the Address Book. The
Send Function Setting Tool is helpful for users who want to complete the setup easily.
1
Start the Send Function Setting Tool.
Using a Web browser
Enter "http://(the IP address of the machine)/sendsupport_login.html" in the address field of a Web browser, and press the
[ENTER] key.
Using the User Software CD-ROM
1
Insert the User Software CD-ROM into the drive on the computer.
Select a language and click [OK] if you are prompted to do so.
2
Click [Start Software Programs].
NOTE:
If the above screen is not displayed
Displaying the [CD-ROM Setup] or [Select language] Screen
3
Click [Start] for [Send Function Setting Tool].
4
Click [Next].
If you want to view Send Setting Guide, click [How to Set].
㻟㻢㻢㻌㻛㻌㻢㻣㻢
NOTE:
If the screen below appears
Click [Yes].
5
Select the machine from [Device List] and click [Next].
NOTE:
If the machine is not displayed in [Device List]
Click [Search Again]. If the problem persists, click [Search by IP Address], enter the IP address of the machine, and then
click [OK].
6
2
Confirm the settings and click [OK].
Click [Start].
If the logon screen is displayed, enter the appropriate ID and PIN in the corresponding text boxes, and then click [Logon].
3
Click [Store to Shared Folder Settings].
㻟㻢㻣㻌㻛㻌㻢㻣㻢
If the screen prompting you to enter the Address Book PIN is displayed, enter the PIN for the Address Book, and click [OK].
Setting a PIN for Address Book
4
Specify the required settings.
[Registration]
[Favorites Number]
With the Send Function Setting Tool, you can register a shared folder for saving scanned documents into <Favorites> in the
Address Book. Select a number from the drop-down list.
[Name for Favorites Number]
Enter the name for identifying the destination to be registered. Set a name that will be easy for you to find later in the
Address Book.
[Store Destination Settings]
[Protocol]
The protocol that is used for sending scanned documents to a shared folder is displayed.
[Computer Name of Store Destination]
Enter the name or the IP address of the computer where the shared folder is located.
[Shared Folder Name on Store Destination Computer]
Enter the name of (or path to) the shared folder. For example, if the shared folder is a subfolder named "share" and is
contained in the [Public] folder in drive C (path: C:\users\public\share), enter "users\public\share."
[Status of Settings for Shared Folder]
㻟㻢㻤㻌㻛㻌㻢㻣㻢
[Access Restriction to Shared Folder]
Click the [Not Set] or [Set] radio button to match the access restrictions set to the shared folder. When [Set] is selected,
enter the user name in the [Registered User Name] text box and password in the [Password to Access] text box.
5
6
7
Click [Next].
Confirm the settings and click [Register].
Restart the machine.
Turn OFF the machine, wait for at least 10 seconds, and turn it back ON.
LINKS
Configuring the Machine for Scanning to Shared Folders
Saving Documents Directly to a Shared Folder (MF8580Cdw / MF8550Cdn / MF8540Cdn Only)
Registering Address Book from Remote UI (MF8580Cdw / MF8550Cdn / MF8540Cdn / MF8280Cw Only)
㻟㻢㻥㻌㻛㻌㻢㻣㻢
0ALJ-08R
Configuring the Machine for Your Network Environment
The configuration of a network varies depending on the purpose of the network. The machine has been designed to be compatible with as
many network configurations as possible, and it is equipped with a variety of technologies. Consult your Network Administrator and set a
configuration to suit your network environment.
㻟㻣㻜㻌㻛㻌㻢㻣㻢
0ALJ-08S
Configuring Ethernet Settings
Ethernet is a standard for communicating data in a local area network (LAN). You can set the communication
mode (half-duplex/full-duplex) and the Ethernet type (10BASE-T/100BASE-TX). In general, the machine can
be used without changing the defaults ( Ethernet Driver Settings), but you can change these settings to
suit your network environment.
1
2
Press
Use
.
/
to select <Network Settings>, and press
.
If the logon screen appears, enter the correct ID and PIN using the numeric keys, and then press
Machine
3
4
Select <Ethernet Driver Settings>
.
Logging on to the
<Auto Detect>.
Select whether to configure Ethernet settings automatically or manually.
Configuring Ethernet settings automatically
Select <On>, and press
be used.
. The machine detects and automatically sets the communication mode and the Ethernet type that can
Configuring Ethernet settings manually
1
Select <Off>, and press
2
Select the communication mode.
.
Select <Communication Mode>
select <Half Duplex> or <Full Duplex>
.
<Half Duplex>
Alternately sends and receives communication data. Select when the machine is connected to a networking device using
half duplex.
<Full Duplex>
Simultaneously sends and receives communication data. Use this setting for most environments.
3
Select the Ethernet type.
Select <Ethernet Type>
4
5
select <10BASE-T> or <100BASE-TX>
Press <Apply>.
Restart the machine.
Turn OFF the machine, wait for at least 10 seconds, and turn it back ON.
㻟㻣㻝㻌㻛㻌㻢㻣㻢
.
LINKS
Changing the Maximum Transmission Unit
Setting a Wait Time for Connecting to a Network
㻟㻣㻞㻌㻛㻌㻢㻣㻢
0ALJ-08U
Changing the Maximum Transmission Unit
In most Ethernet networks, the maximum size of a packet that can be sent is 1500 bytes. A packet refers to a chunk of data into which
the original data is divided before being sent. The maximum transmission unit (MTU) may vary on each network. Change the settings of
the machine as necessary. For more information, contact your Network Administrator.
1
2
Press
Use
.
/
to select <Network Settings>, and press
.
If the logon screen appears, enter the correct ID and PIN using the numeric keys, and then press
Machine
3
4
5
Select <TCP/IP Settings>
Select the MTU, and press
<MTU Size>.
.
Restart the machine.
Turn OFF the machine, wait for at least 10 seconds, and turn it back ON.
LINKS
Configuring Ethernet Settings
Setting a Wait Time for Connecting to a Network
㻟㻣㻟㻌㻛㻌㻢㻣㻢
.
Logging on to the
0ALJ-08W
Setting a Wait Time for Connecting to a Network
When a network is designed to enjoy redundant connectivity with multiple switching hubs or bridges, it must have a mechanism to
prevent packets from looping. One effective solution is to define the role of each switch port. However, communication may still be
disrupted for several tens of seconds immediately after you change the way that network devices are connected, or if you add a new
device. If this type of problem occurs, set a wait time for connecting to the network.
1
2
Press
Use
.
/
to select <Network Settings>, and press
.
If the logon screen appears, enter the correct ID and PIN using the numeric keys, and then press
Machine
3
4
Select <Waiting Time for Connection at Startup>, and press
Enter the wait time in second, and press <Apply>.
Use
5
Press
/
or the numeric keys to enter the time.
.
LINKS
Configuring Ethernet Settings
Changing the Maximum Transmission Unit
㻟㻣㻠㻌㻛㻌㻢㻣㻢
.
.
Logging on to the
0ALJ-08X
Configuring DNS
DNS (Domain Name System) provides a service for name resolution that associates a host (or domain) name with an IP address.
Configure the DNS, mDNS, or DHCP option settings as necessary. Note that the procedures for configuring DNS are different for IPv4
and IPv6.
1
2
Start the Remote UI and log on in System Manager Mode.
Click [Settings/Registration].
3
Click [Network Settings]
4
Configure DNS settings.
[TCP/IP Settings].
Configuring IPv4 DNS
1
Click [Edit...] in [IPv4 Settings].
2
Configure IPv4 DNS settings.
㻟㻣㻡㻌㻛㻌㻢㻣㻢
Starting Remote UI
[DNS Settings]
[Primary DNS Server Address]
Enter the IP address of a DNS server.
[Secondary DNS Server Address]
Enter the IP address of a secondary DNS server, if any.
[Host Name]
Enter up to 47 alphanumeric characters for the host name of the machine that is to be registered to the DNS server.
[Domain Name]
Enter up to 47 alphanumeric characters for the name of the domain the machine belongs to, such as "example.com."
[DNS Dynamic Update]
Select the check box to dynamically update the DNS records whenever the machine’s IP address is changed. When
specifying the interval between updates, enter the time in hours in the [DNS Dynamic Update Interval] text box.
[mDNS Settings]
[Use mDNS]
Adopted by Bonjour, mDNS (multicast DNS) is a protocol for associating a host name with an IP address without using
DNS. Select the check box to enable mDNS and enter the mDNS name in the [mDNS Name] text box.
[DHCP Option Settings]
[Acquire Host Name]
Select the check box to enable Option 12 to obtain the host name from the DHCP server.
[DNS Dynamic Update]
Select the check box to enable Option 81 to dynamically update the DNS records through the DHCP server.
3
Click [OK].
Configuring IPv6 DNS
1
Click [Edit...] in [IPv6 Settings].
㻟㻣㻢㻌㻛㻌㻢㻣㻢
2
Configure IPv6 DNS settings.
The [Use IPv6] check box must be selected to configure the settings.
Setting IPv6 Addresses
[DNS Settings]
[Primary DNS Server Address]
Enter the IP address of a DNS server. Addresses that start with "ff" (or multicast address) cannot be entered.
[Secondary DNS Server Address]
Enter the IP address of a secondary DNS server, if any. Addresses that start with "ff" (or multicast address) cannot be
entered.
[Use Same Host Name/Domain Name as IPv4]
Select the check box to use the same host and domain names as in IPv4.
[Host Name]
Enter up to 47 alphanumeric characters for the host name of the machine that is to be registered to the DNS server.
[Domain Name]
Enter up to 47 alphanumeric characters for the name of the domain the machine belongs to, such as "example.com."
[DNS Dynamic Update]
Select the check box to dynamically update the DNS records whenever the machine’s IP address is changed. To specify
the type(s) of addresses you want to register to the DNS server, select the check box for [Register Manual Address],
[Register Stateful Address], or [Register Stateless Address]. To specify the interval between updates, enter the time in
hours in the [DNS Dynamic Update Interval] text box.
[mDNS Settings]
[Use mDNS]
Adopted by Bonjour, mDNS (multicast DNS) is a protocol for associating a host name with an IP address without using
DNS. Select the check box to enable mDNS.
[Use Same mDNS Name as IPv4]
Select the check box to use the same mDNS name as in IPv4. To set a different name, clear the check box and enter
the mDNS name in the [mDNS Name] text box.
3
5
Click [OK].
Restart the machine.
Turn OFF the machine, wait for at least 10 seconds, and turn it back ON.
NOTE
DNS settings can also be accessed from
.
IPv4 Settings
IPv6 Settings
㻟㻣㻣㻌㻛㻌㻢㻣㻢
LINKS
Setting IPv4 Address
Setting IPv6 Addresses
Viewing Network Settings
㻟㻣㻤㻌㻛㻌㻢㻣㻢
0ALJ-08Y
Configuring SMB
Server Message Block (SMB) is a protocol for sharing resources, such as files and printers, with more than
one device in a network. The machine uses SMB to store scanned documents into a shared folder. Depending
on your network, you may have to set the NetBIOS name and workgroup name.
NetBIOS Name
In a Windows network that uses NetBIOS, NetBIOS names are used for identifying network-connected computers as well as for file
sharing and other network services. Most computers use the computer name as the NetBIOS name.
Workgroup Name
Workgroup name is a name for grouping multiple computers so that basic network functions, such as file sharing, become available in
a Windows network. Specify the workgroup name to identify the group that the machine belongs to.
1
2
Start the Remote UI and log on in System Manager Mode.
Click [Settings/Registration].
3
Click [Network Settings]
4
Click [Edit...].
[SMB Settings].
㻟㻣㻥㻌㻛㻌㻢㻣㻢
Starting Remote UI
5
Specify the required settings and click [OK].
[NetBIOS Name]
Enter up to 15 alphanumeric characters for the NetBIOS name of the machine.
[Workgroup Name]
Enter up to 15 alphanumeric characters for the name of the workgroup that the machine belongs to.
IMPORTANT:
NetBIOS names or workgroup names that start with an asterisk (*) cannot be registered to a WINS server.
6
Restart the machine.
Turn OFF the machine, wait for at least 10 seconds, and turn it back ON.
LINKS
Configuring WINS
㻟㻤㻜㻌㻛㻌㻢㻣㻢
0ALJ-090
Configuring WINS
Windows Internet Name Service (WINS) is a name resolution service that associates a NetBIOS name (a computer or printer name in an
SMB network) with an IP address. To enable WINS, the WINS server must be specified.
IMPORTANT
In order to specify WINS server settings, NetBIOS name and workgroup name are required to be set.
The function is not available in an IPv6 network.
1
2
Start the Remote UI and log on in System Manager Mode.
Starting Remote UI
Click [Settings/Registration].
3
Click [Network Settings]
4
Click [Edit...] in [WINS Settings].
5
Select the [WINS Resolution] check box, specify the required settings, and click [OK].
[TCP/IP Settings].
㻟㻤㻝㻌㻛㻌㻢㻣㻢
Configuring SMB
[WINS Resolution]
Select the check box to use WINS for name resolution. When not using WINS, clear the check box.
[WINS Server Address]
Enter the IP address of the WINS server.
IMPORTANT:
If the IP address of the WINS server is obtained from a DHCP server, the obtained IP address overrides the IP address entered in
the [WINS Server Address] text box.
[Scope ID]
If the network is divided into several groups with scope IDs (identifiers for groups of devices in the network), enter up to 63
alphanumeric characters for the scope ID. Leave the text box blank if there is no scope ID set for your computer.
6
Restart the machine.
Turn OFF the machine, wait for at least 10 seconds, and turn it back ON.
NOTE
WINS settings can also be accessed from
.
WINS Settings
LINKS
Setting IPv4 Address
㻟㻤㻞㻌㻛㻌㻢㻣㻢
0ALJ-091
Registering LDAP Servers (MF8580Cdw / MF8550Cdn / MF8540Cdn /
MF8280Cw Only)
If an LDAP server is implemented in the network, you can search the server for fax numbers or e-mail
addresses, and then specify them as destinations or register them in the Address Book. You can register a
maximum of five LDAP servers to the machine. Register LDAP servers via the Remote UI.
NOTE
LDAP servers that are supported by the machine are Windows Server 2003/Server 2008/Server 2012 Active Directory.
The machine communicates with LDAP servers using LDAPv3.
UTF-8 is the supported character encoding used when the text data is transmitted between the machine and an LDAP server.
1
2
Start the Remote UI and log on in System Manager Mode.
Click [Settings/Registration].
3
Click [Network Settings]
4
Click [Register New Server...].
[Register LDAP Server].
㻟㻤㻟㻌㻛㻌㻢㻣㻢
Starting Remote UI
NOTE:
To edit registered server information
Click a text link under [Server Name] for the edit screen.
To delete registered server information
Click [Delete] on the right of the server name you want to delete
5
click [OK].
Specify the required settings.
[Server Name]
Enter up to 24 alphanumeric characters for identifying the LDAP server.
[Server Address]
Enter the IP address of the LDAP server or enter up to 47 alphanumeric characters for the host name of the server (example:
ldap.example.com).
IMPORTANT:
[Server Address] and DNS
To prevent errors from occurring when searching for destinations, make sure to check the following:
If the host name is entered for [Server Address], make sure that a DNS server is available in the network.
If the IP address is entered for [Server Address], check whether the DNS server supports only forward lookup. If the server
supports only forward lookup, select [Do Not Use] or [Use] for [Login Information]. If you select [Use (Security
Authentication)], make sure that the DNS server supports reverse lookup.
[Position to Start Search]
Specify the node in the directory information tree (DIT) that you want to start search from. Leaving the text box blank sets the
machine to start search from an arbitrary node selected automatically.
Depending on the type of characters used, up to 120 characters can be entered.
When specifying the node, enter "DC=", followed by a host name (a dot-delimited character string in the Active Directory
domain name), and separate each of the entries with a comma. If the domain name is "john.example.com", for example, enter
"DC=john,DC=example,DC=com."
[Port Number]
Enter the port number used for communicating with the LDAP server.
[Search Timeout]
Specify how long the machine searches. Enter between 30 and 300 seconds.
[Login Information]
Select [Do Not Use], [Use], or [Use (Security Authentication)] depending on the type of authentication implemented by the LDAP
㻟㻤㻠㻌㻛㻌㻢㻣㻢
server. When [Use] or [Use (Security Authentication)] is selected, the user name and password must be specified.
[Do Not Use]
Select not to authenticate the machine using the login information.
[Use]
Select to authenticate the machine using the login information.
[Use (Security
Authentication)]
Select to use data obtained by Kerberos, a network authentication protocol, for the authentication
password. If this setting is selected, the clock of the machine needs to be synchronized with that of the
LDAP server.
[User Name]
Enter the user name of the machine that was registered to the LDAP server. Depending on the type of characters used, up to 120
characters can be entered.
When [Use] is selected for [Login Information], enter the user name in the form "(domain name)\(user name)" (example:
domain1\user1).
When [Use (Security Authentication)] is selected, enter the user name only (example: user1).
[Set/Change Password]
To specify or change the password, select the check box and enter up to 24 characters in the [Password] text box.
[Domain Name]
When [Use (Security Authentication)] is selected for [Login Information], enter up to 120 alphanumeric characters for the
directory tree name in Active Directory (example: example.com).
[Display Authentication Screen When Searching]
Select the check box to require the user to enter the user name and password when a search is requested. If the check box is
cleared, entries in the [User Name] and the [Password] text boxes are used for authentication.
6
Click [OK].
LINKS
Specifying Destinations in an LDAP Server (Fax)
Specifying Destinations in an LDAP Server (E-mail)
Configuring SNTP
㻟㻤㻡㻌㻛㻌㻢㻣㻢
0ALJ-092
Configuring SNTP
Simple Network Time Protocol (SNTP) enables you to adjust the system clock by using the time server on the
network. The protocol is typically used for synchronizing the machine and a server, such as when the machine
needs to access an LDAP server with the security authentication that was enabled. The time is adjusted based
on Coordinated Universal Time (UTC), so specify the time zone setting before configuring SNTP
( Date/Time Settings). SNTP settings can be specified via the Remote UI.
NOTE
The SNTP of the machine supports both NTP (version 3) and SNTP (versions 3 and 4) servers.
1
2
Start the Remote UI and log on in System Manager Mode.
Starting Remote UI
Click [Settings/Registration].
3
Click [Network Settings]
4
Click [Edit...] in [SNTP Settings].
5
Select the [Use SNTP] check box and specify the required settings.
[TCP/IP Settings].
㻟㻤㻢㻌㻛㻌㻢㻣㻢
[Use SNTP]
Select the check box to use SNTP for synchronization. If you do not want to use SNTP, clear the check box.
[NTP Server Name]
Enter the IP address of the NTP or the SNTP server. If DNS is available on the network, you can enter a host name (or FQDN) of
up to 255 alphanumeric characters instead (example: ntp.example.com).
[Polling Interval]
Specify the interval between one synchronization and the next. Specify an interval from 1 to 48 hours.
6
Click [OK].
7
Restart the machine.
Turn OFF the machine, wait for at least 10 seconds, and turn it back ON.
NOTE
Testing communication with the NTP/SNTP server
You can test whether the machine is communicating with the registered time server via SNTP. Go to [Settings/Registration]
[Network Settings] [TCP/IP Settings] and click [Check NTP Server] in [SNTP Settings]. If a proper connection has been
established, the result is displayed as shown below. Note that this operation does not adjust the system clock.
LINKS
Registering LDAP Servers (MF8580Cdw / MF8550Cdn / MF8540Cdn / MF8280Cw Only)
㻟㻤㻣㻌㻛㻌㻢㻣㻢
0ALJ-093
Monitoring and Controlling the Machine with SNMP
Simple Network Management Protocol (SNMP) is a protocol for monitoring and controlling communication devices in a network by using
Management Information Base (MIB). The machine supports SNMPv1 and security-enhanced SNMPv3. You can check the status of the
machine from a computer when you print documents or use the Remote UI. You can enable either SNMPv1 or SNMPv3, or both at the
same time. Specify the settings for each version to suit your network environment and the purpose of use.
SNMPv1
SNMPv1 uses information called "community" to define the scope of SNMP communication. Because this information is exposed to the
network in plain text, your network will be vulnerable to attacks. If you want to ensure network security, disable SNMPv1 and use
SNMPv3.
SNMPv3
With SNMPv3, you can implement network device management that is protected by robust security features. Note that SSL must be
enabled for the Remote UI before configuring SNMPv3 ( Enabling SSL Encrypted Communication for the Remote UI).
NOTE
The machine does not support the trap notification feature of SNMP.
To change the port number of SNMP, see
Changing Port Numbers.
SNMP management software, when installed on a computer on the network, enables you to configure, monitor, and control the
machine remotely from the computer. For more information, see the instruction manuals for your management software.
1
2
3
Start the Remote UI and log on in System Manager mode.
Click [Settings/Registration].
Click [Network Settings]
[SNMP Settings].
㻟㻤㻤㻌㻛㻌㻢㻣㻢
Starting Remote UI
4
Click [Edit...].
5
Specify SNMPv1 settings.
If you do not need to change SNMPv1 settings, proceed to the next step.
[Use SNMPv1]
Select the check box to enable SNMPv1. You can specify the rest of SNMPv1 settings only when this check box is selected.
[Use Community Name 1]/[Use Community Name 2]
Select the check box to specify a community name. If you do not need to specify a community name, clear the check box.
[Community Name]
Enter up to 32 alphanumeric characters for the name of the community.
[MIB Access Permission]
For each community, select [Read/Write] or [Read Only] for the access privileges to MIB objects.
[Read/Write]
Permits both viewing and changing the values of MIB objects.
[Read Only]
Permits only viewing the values of MIB objects.
㻟㻤㻥㻌㻛㻌㻢㻣㻢
[Use Dedicated Community]
Dedicated Community is a preset community, intended exclusively for Administrators using Canon software, such as imageWARE
Enterprise Management Console. Select the check box to use Dedicated Community. If you do not need to use Dedicated
Community, clear the check box.
Enabling SNMPv1
1
Select the [Use SNMPv1] check box.
2
Select the [Use Community Name 1] or [Use Community Name 2] check box, enter the community name
in the [Community Name] text box, and specify the [MIB Access Permission] setting.
Up to two community names can be registered.
3
Select the [Use Dedicated Community] check box and specify the [MIB Access Permission] setting.
Disabling SNMPv1
Clear the [Use SNMPv1] check box.
6
Specify SNMPv3 settings.
If you do not need to change SNMPv3 settings, proceed to the next step.
[Use SNMPv3]
Select the check box to enable SNMPv3. You can specify the rest of SNMPv3 settings only when this check box is selected.
[Enable User]
Select the check box to enable [User Settings 1]/[User Settings 2]/[User Settings 3]. To disable user settings, clear the
corresponding check box.
[User Name]
Enter up to 32 alphanumeric characters for the user name.
[MIB Access Permission]
Select [Read/Write] or [Read Only] for the access privileges to MIB objects.
[Read/Write]
Permits both viewing and changing the values of MIB objects.
[Read Only]
Permits only viewing the values of MIB objects.
[Security Settings]
Select [Authentication On/Encryption On], [Authentication On/Encryption Off], or [Authentication Off/Encryption Off] for the
desired combination of authentication and encryption settings.
Enabling SNMPv3
1
Select the [Use SNMPv3] check box.
2
Select the [Enable User] check box and specify the [User Name], [MIB Access Permission], and
[Security Settings] settings.
Up to three users can be registered.
㻟㻥㻜㻌㻛㻌㻢㻣㻢
3
Specify authentication and encryption settings as necessary.
Specify these settings only when [Authentication On/Encryption On] or [Authentication On/Encryption Off] has
been selected for [Security Settings].
[Authentication Algorithm]
Click the [MD5] or [SHA1] radio button for the algorithm that corresponds to your network environment.
[Encryption Algorithm]
Click the [DES] or [AES] radio button for the algorithm that corresponds to your network environment.
[Set/Change Password]
To set or change the password, select the check box and enter between 6 and 16 alphanumeric characters for
the password in the [Authentication Password]/[Encryption Password] text box. For confirmation, enter the same
password in the [Confirm] text box. Passwords can be set independently for authentication and encryption
algorithms.
4
Specify the context name that identifies an SNMP context.
[Context Name 1]/[Context Name 2]/[Context Name 3]
Enter up to 32 alphanumeric characters for the context name. Up to three context names can be registered.
Disabling SNMPv3
Clear the [Use SNMPv3] check box.
7
Specify Printer Management Information Acquisition Settings.
With SNMP, the printer management information, such as printing protocols and printer ports, can be monitored and obtained
regularly from a computer on the network.
[Acquire Printer Management Information from Host]
Select the check box to enable monitoring of the printer management information of the machine via SNMP. To disable monitoring
of the printer management information, clear the check box.
Click [OK].
㻟㻥㻝㻌㻛㻌㻢㻣㻢
8
9
Restart the machine.
Turn OFF the machine, wait for at least 10 seconds, and turn it back ON.
NOTE
Disabling both SNMPv1 and SNMPv3
If both versions of SNMP are disabled, some of the functions of the machine become unavailable, such as obtaining machine
information via the printer driver.
Using the operation panel
You can enable or disable the SNMP settings from
.
SNMP Settings
Enabling Both SNMPv1 and SNMPv3
If both versions of SNMP are enabled, it is recommended that MIB access permission in SNMPv1 be set to [Read Only]. MIB
access permission can be set independently in SNMPv1 and SNMPv3 (and for each user in SNMPv3). Selecting [Read/Write] (full
access permission) in SNMPv1 negates the robust security features that characterize SNMPv3 because most of the machine
settings can then be controlled with SNMPv1.
LINKS
Enabling SSL Encrypted Communication for the Remote UI
㻟㻥㻞㻌㻛㻌㻢㻣㻢
0ALJ-094
Configuring SLP Communication with imageWARE
You can facilitate the collection and management of various information about networked devices by implementing device management
software, such as imageWARE Enterprise Management Console * , into the network. Information such as device settings, Address Books,
and error logs is retrieved and distributed via the server computer. If the machine is connected to such a network, imageWARE searches
the network for the machine by using protocols such as Service Location Protocol (SLP) to gather information from the machine, including
the power status. SLP settings can be specified via the Remote UI.
* For more information about imageWARE, contact your local authorized Canon dealer.
1
2
Start the Remote UI and log on in System Manager Mode.
Click [Settings/Registration].
3
Click [Network Settings]
4
Specify SLP settings.
[TCP/IP Settings].
Specifying multicast device discovery
1
Click [Edit...] in [Multicast Discovery Settings].
㻟㻥㻟㻌㻛㻌㻢㻣㻢
Starting Remote UI
2
Select the [Respond to Discovery] check box and specify the required settings.
[Respond to Discovery]
Select the check box to set the machine to respond to imageWARE multicast discovery packets and enable
monitoring by imageWARE.
[Scope Name]
To include the machine into a specific scope, enter up to 32 characters for the scope name.
3
Click [OK].
NOTE:
To change the port number for multicast discovery, see
Changing Port Numbers.
Notifying imageWARE of the power status of the machine
1
Click [Edit...] in [Sleep Mode Notification Settings].
2
Select the [Notify] check box and specify the required settings.
㻟㻥㻠㻌㻛㻌㻢㻣㻢
[Notify]
Select the check box to notify imageWARE of the power status of the machine. When [Notify] is selected, you can
expect the machine to avoid unnecessary communication during sleep mode and reduce the total power
consumption.
[Port Number]
Change the port number for this function according to the network environment.
[Number of Routers to Traverse]
Specify how many routers the notification packets can pass. Enter a number from 0 to 254.
[Notification Interval]
Specify how often the machine notifies imageWARE of its power status. Enter a number in seconds from 60 to
65535.
3
5
Click [OK].
Restart the machine.
Turn OFF the machine, wait for at least 10 seconds, and turn it back ON.
LINKS
Entering Sleep Mode
㻟㻥㻡㻌㻛㻌㻢㻣㻢
0ALJ-095
Security
Confidential information is handled by information devices everywhere, including computers and printers, and any of these devices may
become a target for malicious third parties at anytime. Attackers may directly gain unauthorized access to your devices, or indirectly take
advantage of negligence or improper use. Either way, you may incur unanticipated losses when your confidential information is leaked.
To counter these risks, the machine is equipped with a variety of security functions. Set the necessary configuration depending on your
network environment.
Establishing the Basics of Information Security
Protecting the Machine from Unauthorized Access
Preparing for Risks from Negligence or Misuse
Restricting the Machine's
Functions
Printing a Document Secured by a PIN (Secure Print) (MF8580Cdw /
MF8550Cdn / MF8540Cdn Only)
Implementing Robust Security Features
Implementing Robust Security Features
㻟㻥㻢㻌㻛㻌㻢㻣㻢
0ALJ-096
Protecting the Machine from Unauthorized Access
Prevent unauthorized third parties from accessing and using the machine. You can implement multiple security measures, such as
managing user access privileges, using firewalls, and changing port numbers.
㻟㻥㻣㻌㻛㻌㻢㻣㻢
0ALJ-097
Setting Access Privileges
Protect the machine from unauthorized access by only allowing users with access privileges to use the machine. Access privileges are set
separately for each account, or "ID." A PIN can be set for each ID. If a user tries to operate the machine when IDs are enabled, a logon
screen is displayed, and the user must enter a correct ID and PIN to use the machine.
IDs are divided into two types: System Manager ID, which is intended exclusively for Administrators, and Department ID for general
users. System Manager ID is an account with full access privileges. With System Manager ID, you can restrict the use of functions, such
as color copying and faxing, for each ID. If these two types of IDs are used at the same time, two different privilege levels are set,
which makes it possible to flexibly manage the machine and enhance security.
System Manager ID
System Manager ID is an account with full access privileges. If you specify a System Manager ID, you need to log on to the machine
using the System Manager ID information in order to access <Network Settings> or <System Management Settings>. Set the System
Manager ID when you need different access privilege levels for Administrators and general users. Only one System Manager ID can
be registered.
Setting the System Manager ID
Department ID (Department ID Management)
You can specify access privileges for a user (or group of users) by registering a Department ID. You can register multiple Department
IDs. If a user tries to operate the machine when Department IDs are enabled, a logon screen is displayed, and the user must enter
their own Department ID and PIN to use the machine. Information for each Department ID can be viewed, such as how many pages
have been copied, printed, or scanned in black and white or color.
Setting the Department ID Management
㻟㻥㻤㻌㻛㻌㻢㻣㻢
0ALJ-098
Setting the System Manager ID
Register the System Manager ID, an ID that is intended exclusively for Administrators. You can also set a PIN for the System Manager
ID. If this ID is enabled, you can access <Network Settings> and <System Management Settings> only when the System Manager ID
and PIN have been entered correctly. The System Manager ID settings information is critical to the security of the machine, so make
sure that only Administrators know the System Manager ID and PIN.
1
2
Press
Use
.
/
to select <System Management Settings>, and press
.
NOTE:
If the System Manager ID has already been set
If the logon screen appears, enter the correct ID and PIN using the numeric keys, and then press
Machine
3
4
Select <System Manager Information Settings>
.
Logging on to the
<System Manager ID and PIN>.
Specify the System Manager ID and PIN.
Specify the <System Manager ID>, and then specify the <System Manager PIN>.
Enter a number of up to seven digits using the numeric keys, and press <Apply>.
When <PIN (Confirm)> is displayed, enter the PIN once again to confirm.
NOTE:
You cannot register an ID or PIN that consists only of zeros, such as "00" or "0000000".
If you want to cancel the System Manager ID and PIN settings, clear the text box, and press <Apply>.
Setting the System Manager Name
1
Select <System Manager Name>, and press
2
Enter up to 32 characters for the System Manager Name, and press <Apply>.
.
Entering Text
NOTE
Configuring settings via the Remote UI
Start the Remote UI and log on in System Manager Mode. Click [Settings/Registration]
specify the necessary settings on the displayed screen.
[System Management]
[Edit...] and
By using the Remote UI, you can register a variety of information, including contact information, Administrator comments, the
installation location of the machine, as well as to the settings that you can register by using the operation panel. The
Checking System Manager
registered information can be viewed on the [Device Information] page of the Remote UI.
Information
㻟㻥㻥㻌㻛㻌㻢㻣㻢
Logging on to the machine
If you try to access <Network Settings> or <System Management Settings> when only the System
Manager ID is enabled, the following logon screen is displayed:
LINKS
Setting Access Privileges
Setting the Department ID Management
㻠㻜㻜㻌㻛㻌㻢㻣㻢
0ALJ-099
Setting the Department ID Management
You can control access to the machine by using multiple IDs for multiple users or groups. If a user tries to operate the machine when
Department ID Management is enabled, a logon screen is displayed, and the user must enter their own Department ID and PIN to use
the machine. When Department ID Management is enabled, usage of functions, such as color copying and black and white scanning, is
recorded for each Department ID. To configure Department ID Management, register department IDs as necessary and then enable
Department ID Management function. Additional settings are required if you want to enable Department ID Management for operations
from a computer, such as printing and PC faxing.
Registering/Editing Department ID and PIN
Enabling the Department ID Management
Setting the Department ID Management for Printing or Faxing from the Computer
Blocking Jobs When Department ID Is Unknown
Registering/Editing Department ID and PIN
Register a Department ID and set a PIN for it. You can also disable functions, such as black and white copying and color printing, for
each Department ID. Up to 300 Department IDs can be registered.
1
2
3
Start the Remote UI and log on in System Manager Mode.
Starting Remote UI
Click [Settings/Registration].
Click [Department ID Management] and register (or edit) Department IDs.
Registering a Department ID
1
Click [Register New Department].
Specify the required settings and click [OK].
㻠㻜㻝㻌㻛㻌㻢㻣㻢
2
[Department ID]
Enter a number of up to seven digits for the Department ID.
[Set PIN]
To set a PIN, select the check box and enter a number of up to seven digits both in the [PIN] and [Confirm] text boxes.
[Restrict Functions]
Select the check box for the function that you want to disable for the Department ID.
NOTE:
If the [Scan] check box is selected, scanning documents to USB memory devices, e-mails, and shared folders is disabled.
You can also disable scanning documents to computers via <Computer> and <Remote Scanner>. However, you can only
disable scanning documents to computers for all users ( Blocking Jobs When Department ID Is Unknown).
Editing the settings of the registered Department ID
1
Click the corresponding text link under [Department ID] to edit.
2
Change the settings as necessary and click [OK].
NOTE:
Deleting a Department ID
Click [Delete] on the right of the Department ID you want to delete
click [OK].
NOTE
[Department ID Page Total]
You can check the total numbers of pages copied, printed, scanned, or faxed for each Department ID.
If you want to return the counts to zero, click the corresponding text link under [Department ID] and click [Clear Count]
[OK]. If you want to return the counts of all Department IDs to zero, click [Clear All Counts] [OK].
Enabling the Department ID Management
After you register as many Department IDs as necessary, enable Department ID Management.
1
2
Start the Remote UI and log on in System Manager Mode.
Click [Settings/Registration].
㻠㻜㻞㻌㻛㻌㻢㻣㻢
Starting Remote UI
3
Click [Department ID Management]
4
Select the [Department ID Management] check box and click [OK].
[Edit...].
[Department ID Management]
Select the check box to enable Department ID Management. If you do not want to use Department ID Management, clear the
check box.
NOTE:
For information on the [Allow Print Jobs with Unknown IDs]/[Allow Scan Jobs with Unknown IDs]/[Allow Black & White Copy Jobs]
check boxes, see
Blocking Jobs When Department ID Is Unknown.
NOTE
Using the operation panel
If you only want to enable or disable the settings, you can use
On/Off
on the operation panel.
Department ID Management
Logging on to the machine
When you try to operate the machine when Department ID Management is enabled, the following logon
screen is displayed:
㻠㻜㻟㻌㻛㻌㻢㻣㻢
Setting the Department ID Management for Printing or Faxing from the Computer
If you want to enable Department ID Management for printing and faxing from a computer, you need to specify settings by using the
drivers you already installed on the computer. Specify the Department ID and PIN as necessary.
IMPORTANT
To perform the following procedure, log on to your computer with an administrator account.
1
2
3
Open the printer folder.
Displaying the Printer Folder
Right-click your printer or fax icon and click [Printer properties] (or [Properties]).
Click the [Device Settings] tab and specify the required settings.
1
Select the [Use Department ID Management] check box and click [Settings] on the right of it.
For the fax driver, also select the [Allow PIN Setting] check box to enable the PIN setting.
2
Specify the settings as necessary and click [OK].
[Allow PIN Setting]
Select the check box to enable the PIN setting.
[Department ID]
Enter a number of up to seven digits for the Department ID.
㻠㻜㻠㻌㻛㻌㻢㻣㻢
[PIN]
Enter a number of up to seven digits for the PIN if it is set for the Department ID.
[Verify]
Click to verify that the correct ID and PIN are entered. This function is not available if the machine and the computer are
connected via a USB or WSD (Web Services on Devices) port.
[Confirm Department ID/PIN When Printing]/[Confirm Department ID/PIN when Sending Fax]
Select the check box to display the [Confirm Department ID/PIN] pop-up screen each time you print or fax from a
computer.
[Authenticate Department ID/PIN at Device]
Select the check box if the machine and the computer are connected via a USB or WSD port.
3
Click [OK].
NOTE
Logging on to the machine
When you try to print or fax from a computer when Department ID Management is enabled,
the following pop-up screen is displayed (unless the [Confirm Department ID/PIN When
Printing]/[Confirm Department ID/PIN when Sending Fax] check box is cleared):
Blocking Jobs When Department ID Is Unknown
If you do not change the default settings, any user can print from a computer, scan (via <Computer> and <Remote Scanner>), or make
black and white copies without entering an ID and PIN even when Department ID Management is enabled for the machine. You can
change the default settings so that the machine cannot be used for these functions without a correct ID and PIN.
1
2
3
Start the Remote UI and log on in System Manager Mode.
Click [Settings/Registration].
Click [Department ID Management]
[Edit...].
㻠㻜㻡㻌㻛㻌㻢㻣㻢
Starting Remote UI
4
Clear the check boxes as necessary and click [OK].
[Allow Print Jobs with Unknown IDs]
In order to print from a computer when Department ID Management is enabled, you need to enter the correct ID and PIN on the
printer driver ( Setting the Department ID Management for Printing or Faxing from the Computer). However if the check
box is selected for this setting, you can print from a computer without entering the ID and PIN. Clear the check box to require
entering an ID and PIN.
[Allow Scan Jobs with Unknown IDs]
If the check box is selected, you can select <Computer> or <Remote Scanner> on the main screen and scan documents into a
/
. Clear the check box to disable the selection of <Computer>, <Remote Scanner>, and
computer anytime using
/
when Department ID Management is enabled.
[Allow Black & White Copy Jobs]
If the check box is selected when Department ID Management is enabled, you can copy in black and white without entering the
correct ID and PIN. Clear the check box to require entering an ID and PIN.
LINKS
Setting Access Privileges
Setting the System Manager ID
㻠㻜㻢㻌㻛㻌㻢㻣㻢
0ALJ-09A
Restricting Communication by Using Firewalls
Without proper security, unauthorized third parties can access computers and other communication devices that are connected to a
network. To prevent this unauthorized access, specify the settings for packet filter, a feature that restricts communication to devices with
specified IP addresses or MAC addresses.
㻠㻜㻣㻌㻛㻌㻢㻣㻢
0ALJ-09C
Specifying IP Addresses for Firewall Rules
You can either limit communication to only devices with specified IP addresses, or block devices with specified IP addresses but permit
other communications. You can specify a single IP address or a range of IP addresses.
NOTE
Up to 16 IP addresses (or ranges of IP addresses) can be specified for both IPv4 and IPv6.
The packet filters described in this section control communications over TCP, UDP, and ICMP.
1
2
Start the Remote UI and log on in System Manager Mode.
Starting Remote UI
Click [Settings/Registration].
3
Click [Security Settings]
4
Click [Edit...] for the filter type that you want to use.
[IP Address Filter].
[IPv4 Address: Outbound Filter]
Select to restrict sending data from the machine to a computer by specifying IPv4 addresses.
㻠㻜㻤㻌㻛㻌㻢㻣㻢
[IPv4 Address: Inbound Filter]
Select to restrict receiving data from the machine to a computer by specifying IPv4 addresses.
[IPv6 Address: Outbound Filter]
Select to restrict sending data from the machine to a computer by specifying IPv6 addresses.
[IPv6 Address: Inbound Filter]
Select to restrict receiving data from the machine to a computer by specifying IPv6 addresses.
5
Specify the settings for packet filtering.
Select the default policy to allow or reject the communication of other devices with the machine, and then specify IP addresses
for exceptions.
1
Select the [Use Filter] check box and click the [Reject] or [Allow] radio button for the [Default Policy].
[Use Filter]
Select the check box to restrict communication. Clear the check box to disable the restriction.
[Default Policy]
Select the precondition to allow or reject the communication of other devices with the machine.
2
[Reject]
Select to pass communication packets only when they are sent to or received from devices whose
IP addresses are entered in [Exception Addresses]. Communications with other devices are
prohibited.
[Allow]
Select to block communication packets when they are sent to or received from devices whose IP
addresses are entered in [Exception Addresses]. Communications with other devices are
permitted.
Specify address exceptions.
Enter the IP address (or the range of IP addresses) in the [Address to Register] text box and click [Add].
IMPORTANT:
Check for entry errors
If IP addresses are incorrectly entered, you may be unable to access the machine from the Remote UI, in which case you
need to set <IPv4 Address Filter> or <IPv6 Address Filter> to <Off>.
IPv4 Address Filter
IPv6 Address Filter
NOTE:
Entry form for IP addresses
Description
Example
IPv4:
Delimit numbers with periods.
192.168.0.10
IPv6:
Delimit alphanumeric characters with colons.
fe80::10
Specifying a
range of
addresses
Insert a hyphen between the addresses.
192.168.0.10192.168.0.20
Specifying a
range of
addresses with
a prefix
Enter the address, followed by a slash and a number indicating the
prefix length.
Entering a
single address
㻠㻜㻥㻌㻛㻌㻢㻣㻢
192.168.0.32/27
fe80::1234/64
When [Reject] is selected for an outbound filter
Outgoing multicast and broadcast packets cannot be filtered.
Deleting an IP address from exceptions
Select an IP address and click [Delete].
3
6
Click [OK].
Restart the machine.
Turn OFF the machine, wait for at least 10 seconds, and turn it back ON.
NOTE
You can enable or disable the IP Address Filter settings from
.
IPv4 Address Filter
LINKS
Specifying MAC Addresses for Firewall Rules
㻠㻝㻜㻌㻛㻌㻢㻣㻢
IPv6 Address Filter
0ALJ-09E
Specifying MAC Addresses for Firewall Rules
You can limit communication to only devices with specified MAC addresses, or block devices with specified MAC addresses but permit
other communications. Up to 32 MAC addresses can be specified.
IMPORTANT
This function is unavailable when the machine is connected to a wireless LAN.
1
2
Start the Remote UI and log on in System Manager Mode.
Starting Remote UI
Click [Settings/Registration].
3
Click [Security Settings]
4
Click [Edit...] for a filter type.
[MAC Address Filter].
[Outbound Filter]
Select to restrict sending data from the machine to a computer by specifying MAC addresses.
[Inbound Filter]
Select to restrict receiving data from the machine to a computer by specifying MAC addresses.
5
Specify the settings for packet filtering.
Select the precondition (default policy) to allow or reject the communication of other devices with the machine, and then specify
㻠㻝㻝㻌㻛㻌㻢㻣㻢
MAC addresses for exceptions.
1
Select the [Use Filter] check box and click the [Reject] or [Allow] radio button for the [Default Policy].
[Use Filter]
Select the check box to restrict communication. Clear the check box to disable the restriction.
[Default Policy]
Select the precondition to allow or reject other devices to communicate with the machine.
2
[Reject]
Select to pass communication packets only when they are sent to or received from devices whose
MAC addresses are entered in [Exception Addresses]. Communications with other devices are
prohibited.
[Allow]
Select to block communication packets when they are sent to or received from devices whose
MAC addresses are entered in [Exception Addresses]. Communications with other devices are
permitted.
Specify address exceptions.
Enter the MAC address in the [Address to Register] text box and click [Add].
You do not need to delimit the address with hyphens or colons.
IMPORTANT:
Check for entry errors
If MAC addresses are incorrectly entered, you may become unable to access the machine from the Remote UI, in which
case you need to set <MAC Address Filter> to <Off>.
MAC Address Filter
NOTE:
When [Reject] is selected for an outbound filter
Outgoing multicast and broadcast packets cannot be filtered.
Deleting a MAC address from exceptions
Select a MAC address and click [Delete].
3
6
Click [OK].
Restart the machine.
Turn OFF the machine, wait for at least 10 seconds, and turn it back ON.
NOTE
You can enable or disable the IP Address Filter settings from
.
MAC Address Filter
㻠㻝㻞㻌㻛㻌㻢㻣㻢
LINKS
Specifying IP Addresses for Firewall Rules
㻠㻝㻟㻌㻛㻌㻢㻣㻢
0ALJ-09F
Changing Port Numbers
Ports serve as endpoints for communicating with other devices. Typically, conventional port numbers are used for major protocols, but
devices that use these port numbers are vulnerable to attacks because these port numbers are well-known. To enhance security, your
Network Administrator may change the port numbers. When a port number has been changed, the new number must be shared with the
communicating devices, such as computers and servers. Specify the port number settings depending on the network environment.
NOTE
1
2
To change the port number for proxy server, see
Setting a Proxy.
To change the port number for LDAP server, see
MF8280Cw Only).
Registering LDAP Servers (MF8580Cdw / MF8550Cdn / MF8540Cdn /
Press
Use
.
/
to select <Network Settings>, and press
.
If the logon screen appears, enter the correct ID and PIN using the numeric keys, and then press
Machine
3
4
Select <TCP/IP Settings>
Select a port, and press
.
Logging on to the
<Port Number Settings>.
.
NOTE:
Learning more about the ports
<LPD>/<RAW>/<WSD Search>
<HTTP>
Configuring Printing Protocols and WSD Functions
Disabling HTTP Communication
<POP3>/<SMTP> (MF8580Cdw / MF8550Cdn / MF8540Cdn only)
<SNMP>
Configuring Advanced E-mail Settings
Monitoring and Controlling the Machine with SNMP
<Multicast Discovery>
Configuring SLP Communication with imageWARE
5
Enter the port number using the numeric keys, and press <Apply>.
6
Restart the machine.
Turn OFF the machine, wait for at least 10 seconds, and turn it back ON.
LINKS
Configuring Printer Ports
㻠㻝㻠㻌㻛㻌㻢㻣㻢
0ALJ-09H
Setting a Proxy
A proxy (or HTTP proxy server) refers to a computer or software that carries out HTTP communication for other devices, especially when
communicating with resources outside the network, such as when browsing Web sites. The client devices connect to the outside network
through the proxy server, and do not communicate directly to the resources outside. Setting a proxy not only facilitates management of
traffic between in-house and outside networks but also blocks unauthorized access and consolidates anti-virus protection for enhanced
security. When you use Google Cloud Print to print over the Internet, you can enhance security by setting a proxy. When setting a proxy,
make sure that you have the necessary proxy information, including the IP address, port number, and a user name and password for
authentication.
1
2
Start the Remote UI and log on in System Manager Mode.
Starting Remote UI
Click [Settings/Registration].
3
Click [Network Settings]
4
Click [Edit...] in [Proxy Settings].
5
Select the [Use Proxy] check box and specify the required settings.
[TCP/IP Settings].
㻠㻝㻡㻌㻛㻌㻢㻣㻢
[Use Proxy]
Select the check box to use the specified proxy server when communicating with an HTTP server.
[HTTP Proxy Server Address]
Enter the address of the proxy server. Specify the IP address or host name depending on the environment.
[HTTP Proxy Server Port Number]
Change the port number as necessary. Enter a number between 1 and 65535.
[Use Proxy Authentication]
To enable authentication by the proxy server, select the check box and enter up to 24 alphanumeric characters for the user name
in the [User Name] text box.
[Set/Change Password]
To set or change the password for the proxy authentication, when it is enabled, select the check box and enter up to 24
alphanumeric characters for the new password in the [Password] text box.
6
Click [OK].
7
Restart the machine.
Turn OFF the machine, wait for at least 10 seconds, and turn it back ON.
LINKS
Using Google Cloud Print
㻠㻝㻢㻌㻛㻌㻢㻣㻢
0ALJ-09J
Restricting the Machine's Functions
Some of the functions of the machine may rarely be used or provide opportunities for misuse. For security purposes, the machine can be
set to limit its capabilities by partially or completely disabling these functions.
Restricting Access to Address Book and Sending Functions
Restricting Access to Address Book and Sending Functions (MF8580Cdw / MF8550Cdn / MF8540Cdn / MF8280Cw Only)
Restricting USB Functions
Restricting USB Functions
Disabling HTTP Communication and Remote Management
Disabling HTTP Communication
Disabling Remote UI
㻠㻝㻣㻌㻛㻌㻢㻣㻢
0ALJ-09K
Restricting Access to Address Book and Sending Functions (MF8580Cdw /
MF8550Cdn / MF8540Cdn / MF8280Cw Only)
Some cases of information leakage can be prevented by limiting the available fax and e-mail destinations to those registered in the
Address Book or LDAP servers, or by setting a PIN for the Address Book so that unauthorized users cannot add or edit Address Book
entries. You can also avoid sending documents to unintended recipients if the machine is set to ask you to enter the fax number twice
for confirmation.
㻠㻝㻤㻌㻛㻌㻢㻣㻢
0ALJ-09L
Setting a PIN for Address Book
The Address Book can be set to require users to enter a PIN in order to add new entries to the Address Book
or edit existing entries. Setting a PIN to the Address Book can reduce the risk of documents being sent to
unintended recipients because changes to the Address Book can only be made by users who know the PIN.
1
2
Press
Use
.
/
to select <System Management Settings>, and press
.
If the logon screen appears, enter the correct ID and PIN using the numeric keys, and then press
Machine
3
4
Select <Restrict TX Function>
.
Logging on to the
<Address Book PIN>.
Set the PIN for editing the Address Book.
Enter a number of up to seven digits using numeric keys, and press <Apply>.
When <PIN (Confirm)> is displayed, enter the PIN once again to confirm.
NOTE:
You cannot set a PIN that consists only of zeros, such as "00" or "0000000".
To disable the PIN, press
5
Press
to erase the PIN (leave the text box blank), and press <Apply>.
.
NOTE
In addition to setting the Address Book PIN, you can further enhance security by performing the following operations:
Restricting the addition of new destinations
Disabling the PC fax function
Limiting Available Destinations
Prohibiting PC Faxing (MF8580Cdw / MF8550Cdn / MF8280Cw Only)
LINKS
Registering in the Address Book (MF8580Cdw / MF8550Cdn / MF8540Cdn / MF8280Cw Only)
Registering Address Book from Remote UI (MF8580Cdw / MF8550Cdn / MF8540Cdn / MF8280Cw Only)
Configuring Basic E-mail Settings
Setting a Shared Folder as a Save Location
㻠㻝㻥㻌㻛㻌㻢㻣㻢
0ALJ-09R
Limiting Available Destinations
By limiting fax numbers that can be specified when sending documents to those already registered in the
Address Book, those previously used, or those searchable from the LDAP servers, you can reduce the
possibility of specifying incorrect destinations and prevent users from leaking information. When this function
is enabled, the machine prohibits users from entering destinations using the numeric keys, adding new entries
to the Address Book, and editing the existing Address Book entries.
1
2
Press
Use
.
/
to select <System Management Settings>, and press
.
If the logon screen appears, enter the correct ID and PIN using the numeric keys, and then press
Machine
3
4
Select <Restrict TX Function>
Select <On>, and press
.
Logging on to the
<Restrict New Destinations>.
.
<Off>
Cancels the restriction on new destinations. Fax numbers and e-mail addresses can be specified by using any method.
<On>
Enables the restriction. Users need to specify destinations by selecting from the Address Book or searching the LDAP servers.
5
Press
.
IMPORTANT
This function does not limit the available destinations for PC faxing.
Prohibiting PC Faxing (MF8580Cdw / MF8550Cdn / MF8280Cw Only)
LINKS
Setting a PIN for Address Book
Disabling Use of Previously Used Destinations
Prohibiting Sequential Broadcasting (MF8580Cdw / MF8550Cdn / MF8280Cw Only)
㻠㻞㻜㻌㻛㻌㻢㻣㻢
0ALJ-09S
Prohibiting PC Faxing (MF8580Cdw / MF8550Cdn / MF8280Cw Only)
You can prohibit users from PC faxing (faxing from a computer).
1
2
Press
Use
.
/
to select <System Management Settings>, and press
.
If the logon screen appears, enter the correct ID and PIN using the numeric keys, and then press
Machine
3
4
Select <Restrict TX Function>
Select <Off>, and press
<Allow Fax Driver TX>.
.
<Off>
Disables PC faxing.
<On>
Enables PC faxing.
5
Press
.
LINKS
Sending Faxes from Your Computer (PC Fax)
Setting the Department ID Management for Printing or Faxing from the Computer
Setting a PIN for Address Book
Limiting Available Destinations
㻠㻞㻝㻌㻛㻌㻢㻣㻢
.
Logging on to the
0ALJ-09U
Disabling Use of Previously Used Destinations
You can disable selecting previously used destinations and settings from the transmission records for faxing or for scanning to e-mail or a
shared folder.
1
2
Press
Use
.
/
to select <System Management Settings>, and press
.
If the logon screen appears, enter the correct ID and PIN using the numeric keys, and then press
Machine
3
4
Select <Restrict TX Function>
Select <On>, and press
<Restrict Resending from Log>.
.
<Off>
Enables use of previously used destinations.
<On>
Disables use of previously used destinations.
5
Press
.
LINKS
Limiting Available Destinations
Prohibiting Sequential Broadcasting (MF8580Cdw / MF8550Cdn / MF8280Cw Only)
Specifying Previously Used Destinations (Fax)
Specifying Previously Used Destinations
㻠㻞㻞㻌㻛㻌㻢㻣㻢
.
Logging on to the
0ALJ-09W
Checking Destinations before Sending Documents
By entering the fax number twice, you can reduce the risk of faxing to the wrong number due to input mistakes. Use features described
in this section if you send confidential documents.
Displaying the Screen for Confirming the Fax Number (MF8580Cdw / MF8550Cdn / MF8280Cw Only)
Displaying Destinations in Address Book
Displaying the Screen for Confirming the Fax Number (MF8580Cdw / MF8550Cdn / MF8280Cw Only)
You can set the machine to ask users to enter the fax number twice when it is entered by using the numeric keys. This way, you can
reduce the risk of faxing to the wrong number due to input mistakes.
1
2
Press
Use
.
/
to select <System Management Settings>, and press
.
If the logon screen appears, enter the correct ID and PIN using the numeric keys, and then press
Machine
3
4
Select <Restrict TX Function>
Select <On>, and press
.
Logging on to the
<Confirm Entered Fax Number>.
.
<Off>
Does not display the screen for confirming the fax number.
<On>
Displays the screen for confirming the fax number.
5
Press
.
Displaying Destinations in Address Book
When using coded dial numbers to specify destinations, you need to remember whose destination (or what group) is registered in what
coded dial number. If you do not remember all these numbers perfectly, you may send your documents to unintended destinations. You
can avoid sending data to unintended recipients by configuring the machine to display the details of the coded dial number you selected
as a sending destination before you send documents to that destination.
1
2
Press
Use
.
/
to select <System Management Settings>, and press
.
If the logon screen appears, enter the correct ID and PIN using the numeric keys, and then press
Machine
3
4
Select <Restrict TX Function>
Select <On>, and press
<Coded Dial TX Confirmation>.
.
㻠㻞㻟㻌㻛㻌㻢㻣㻢
.
Logging on to the
<Off>
Does not display the details of the entered coded dial number.
<On>
Displays the details of the entered coded dial number.
5
Press
.
LINKS
Registering Destinations
Specifying from Address Book (Fax)
Specifying from Address Book
Registering Address Book from Remote UI (MF8580Cdw / MF8550Cdn / MF8540Cdn / MF8280Cw Only)
㻠㻞㻠㻌㻛㻌㻢㻣㻢
0ALJ-09X
Prohibiting Sequential Broadcasting (MF8580Cdw / MF8550Cdn / MF8280Cw
Only)
Sequential broadcasting is a feature that sends faxes to multiple recipients in succession. This feature can be disabled if preferred.
1
2
Press
Use
.
/
to select <System Management Settings>, and press
.
If the logon screen appears, enter the correct ID and PIN using the numeric keys, and then press
Machine
3
4
Select <Restrict TX Function>
<Restrict Sequential Broadcast>.
Select <Confirm Sequential Broadcast> or <Reject Sequential Broadcast>, and press
<Off>
Enables sequential broadcasting.
<Confirm Sequential Broadcast>
Displays the confirmation screen when sending a fax via sequential broadcasting.
<Reject Sequential Broadcast>
Disables sequential broadcasting.
5
Press
.
.
LINKS
Limiting Available Destinations
Disabling Use of Previously Used Destinations
Sending Faxes to Multiple Destinations Simultaneously (Sequential Broadcast)
㻠㻞㻡㻌㻛㻌㻢㻣㻢
.
Logging on to the
0ALJ-09Y
Restricting USB Functions
USB is a convenient way of connecting peripheral devices and storing or relocating data, but USB can also be a source of information
leakage if it is not properly managed. Be especially careful when handling USB memory devices. This section describes how to restrict
connection via the USB port of the machine and how to prohibit use of USB memory devices.
Restricting the USB Connection with a Computer
Restricting the Scan to USB Function
Restricting the USB Print Function
Restricting the USB Connection with a Computer
You can disable the USB port located on the back side of the machine. If this port is disabled, the machine cannot communicate with a
computer via USB ( Connecting to a Computer). This setting does not affect the front USB port, which is for attaching USB memory
devices.
1
2
Press
Use
.
/
to select <System Management Settings>, and press
.
If the logon screen appears, enter the correct ID and PIN using the numeric keys, and then press
Machine
3
4
Select <USB Device On/Off>, and press
Select <Off>, and press
.
Logging on to the
.
.
<Off>
Disables the USB port located on the back side of the machine.
<On>
Enables the USB port located on the back side of the machine.
5
Restart the machine.
Turn OFF the machine, wait for at least 10 seconds, and turn it back ON.
Restricting the Scan to USB Function
You can disable storing data into a USB memory device. If this function is enabled, scanned data cannot be stored into a USB memory
device. USB memory devices are connected into the USB port on the front side of the machine.
1
2
Press
Use
.
/
to select <System Management Settings>, and press
.
If the logon screen appears, enter the correct ID and PIN using the numeric keys, and then press
Machine
㻠㻞㻢㻌㻛㻌㻢㻣㻢
.
Logging on to the
3
4
Select <Store to USB Memory>, and press
Select <Off>, and press
.
.
<Off>
Prohibits data from being stored into a USB memory device. Scanned data cannot be stored into the USB memory device.
<On>
Permits data being stored into a USB memory device.
5
Restart the machine.
Turn OFF the machine, wait for at least 10 seconds, and turn it back ON.
Restricting the USB Print Function
You can disable printing data from a USB memory device. The data in the USB memory device cannot be printed.
1
2
Press
Use
.
/
to select <System Management Settings>, and press
.
If the logon screen appears, enter the correct ID and PIN using the numeric keys, and then press
Machine
3
4
Select <Memory Media Print On/Off>, and press
Select <Off>, and press
.
Logging on to the
.
.
<Off>
Disables the function to read the data from a USB memory device. The data in the USB memory device cannot be printed.
<On>
Enables the function to print the data stored in a USB memory device.
5
Restart the machine.
Turn OFF the machine, wait for at least 10 seconds, and turn it back ON.
LINKS
Scanning Documents Directly to USB Memory
Printing from USB Memory (USB Print)
㻠㻞㻣㻌㻛㻌㻢㻣㻢
0ALJ-0A0
Disabling HTTP Communication
HTTP is used for communications over the network, such as when you access the machine via the Remote UI. If you are using a USB
connection or are otherwise not using HTTP, you can disable HTTP to block malicious third-party intrusions via the unused HTTP port.
IMPORTANT
Disabling HTTP disables some of the network capabilities, such as the Remote UI, WSD printing, and printing with Google Cloud
Print.
1
2
Press
Use
.
/
to select <Network Settings>, and press
.
If the logon screen appears, enter the correct ID and PIN using the numeric keys, and then press
Machine
3
4
Select <TCP/IP Settings>
Select <Off>, and press
<Use HTTP>.
.
<Off>
Disables HTTP communication.
<On>
Enables HTTP communication.
5
Restart the machine.
Turn OFF the machine, wait for at least 10 seconds, and turn it back ON.
LINKS
Using Remote UI
Changing Port Numbers
Configuring Printing Protocols and WSD Functions
Using Google Cloud Print
㻠㻞㻤㻌㻛㻌㻢㻣㻢
.
Logging on to the
0ALJ-0A1
Disabling Remote UI
The Remote UI is useful because the machine settings can be specified by using a Web browser on a computer. To use the Remote UI,
the machine must be connected to a computer over the network. If the machine is connected to a computer via USB, or if you do not
need to use the Remote UI, you might want to disable the Remote UI to reduce the risk of having your machine controlled remotely over
the network by malicious third parties.
1
2
Press
Use
.
/
to select <System Management Settings>, and press
.
If the logon screen appears, enter the correct ID and PIN using the numeric keys, and then press
Machine
3
4
Select <Remote UI On/Off>, and press
Select <Off>, and press
.
.
<Off>
Disables the Remote UI.
<On>
Enables the Remote UI.
5
Restart the machine.
Turn OFF the machine, wait for at least 10 seconds, and turn it back ON.
LINKS
Using Remote UI
Disabling HTTP Communication
㻠㻞㻥㻌㻛㻌㻢㻣㻢
.
Logging on to the
0ALJ-0A3
Implementing Robust Security Features
Authorized users may incur unanticipated losses from attacks by malicious third parties, such as sniffing, spoofing, and tampering of data
as it flows over a network. To protect your important and valuable information from these attacks, the machine supports the following
features to enhance security and secrecy.
SSL Encrypted Communication
SSL is a protocol for encryption for data sent over a network and is often used for communication via a Web browser or an e-mail
application. SSL enables secure network communication when you access the machine from a computer via the Remote UI.
Enabling SSL Encrypted Communication for the Remote UI
IPSec Communication
While SSL only encrypts data used on a specific application, such as a Web browser or an e-mail application, IPSec encrypts the
Configuring IPSec
whole (or payloads of) IP packets. This enables IPSec to offer a more versatile security system than SSL.
Settings
IEEE 802.1X Authentication
IEEE 802.1X is a standard and mechanism for blocking unauthorized access to the network by collectively managing user
authentication information. If a device tries to connect to the 802.1X network, the device must go through user authentication in
order to prove that the connection is made by an authorized user. Authentication information is sent to and checked by a RADIUS
server, which permits or rejects communication to the network depending on the authentication result. If authentication fails, a LAN
switch (or an access point) blocks access from the outside of the network. The machine can connect to an 802.1X network as a client
Configuring IEEE 802.1X Authentication
device.
LINKS
Configuring Settings for Key Pairs and Digital Certificates
㻠㻟㻜㻌㻛㻌㻢㻣㻢
0ALJ-0A4
Enabling SSL Encrypted Communication for the Remote UI
You can encrypt communication between the machine and a Web browser on the computer by using Secure Sockets Layer (SSL). SSL is
a mechanism for encrypting data sent or received over the network. SSL must be enabled when the Remote UI is used for specifying
settings for IPSec (Pre-Shared Key Method), IEEE 802.1X authentication (TTLS/PEAP), or SNMPv3. To use SSL for the Remote UI, you
need to set a key pair and enable the SSL function. Generate or install the key pair for SSL before enabling SSL ( Configuring
Settings for Key Pairs and Digital Certificates).
1
Start the Remote UI and log on in System Manager Mode.
2
Click [Settings/Registration].
3
Click [Network Settings]
4
Click [Key and Certificate...] in [SSL Settings].
5
Click [Register Default Key] on the right of the key pair you want to use.
Starting Remote UI
[TCP/IP Settings].
㻠㻟㻝㻌㻛㻌㻢㻣㻢
NOTE:
Viewing details of a certificate
You can check the details of the certificate or verify the certificate by clicking the corresponding text link under [Key Name], or
Verifying Key Pairs and Digital Certificates
the certificate icon.
6
7
Enable SSL for the Remote UI.
1
Click [Security Settings]
2
Click [Edit...].
3
Select the [Use SSL] check box and click [OK].
[Remote UI Settings].
Restart the machine.
Turn OFF the machine, wait for at least 10 seconds, and turn it back ON.
NOTE
Using the operation panel
You can enable or disable the SSL encrypted communication from
㻠㻟㻞㻌㻛㻌㻢㻣㻢
.
Use SSL
Starting the Remote UI with SSL
If you try to start the Remote UI when SSL is enabled, a security alert may be displayed regarding the security certificate. In this
Starting
case, check that the correct URL is entered in the address field, and then proceed to display the Remote UI screen.
Remote UI
Enabling SSL for e-mailing (MF8580Cdw / MF8550Cdn / MF8540Cdn only)
If the SMTP server and the POP3 server support SSL, you can enable SSL for communication with these servers ( Configuring
Advanced E-mail Settings). For more information about the SMTP server and the POP3 server, contact your Internet service
provider or Network Administrator.
LINKS
Generating Key Pairs
Using CA-issued Key Pairs and Digital Certificates
Configuring IPSec Settings
Configuring IEEE 802.1X Authentication
Monitoring and Controlling the Machine with SNMP
㻠㻟㻟㻌㻛㻌㻢㻣㻢
0ALJ-0A5
Configuring IPSec Settings
Internet Protocol Security (IPSec or IPsec) is a protocol suite for encrypting data transported over a network, including Internet networks.
While SSL only encrypts data used on a specific application, such as a Web browser or an e-mail application, IPSec encrypts either whole
IP packets or the payloads of IP packets, offering a more versatile security system. The IPSec of the machine works in transport mode,
in which the payloads of IP packets are encrypted. With this feature, the machine can connect directly to a computer that is in the same
virtual private network (VPN). Check the system requirements and set the necessary configuration on the computer before you configure
the machine.
System Requirements
IPSec that is supported by the machine conforms to RFC2401, RFC2402, RFC2406, and RFC4305.
Operating system
Windows XP/Vista/7/8/Server 2003/Server 2008/Server 2012
Connection mode
Transport mode
IKEv1 (main mode)
Pre-shared key
Authentication method
Digital signature
HMAC-SHA1-96
Hash algorithm
(and key length)
Key exchange
protocol
HMAC-SHA2 (256 bits or 384 bits)
3DES-CBC
Encryption algorithm
(and key length)
AES-CBC (128 bits, 192 bits, or 256
bits)
Diffie-Hellman (DH)
Group 1 (768 bits)
Key exchange algorithm/group (and key length)
Group 2 (1024 bits)
Group 14 (2048 bits)
Hash algorithm
ESP
AH
HMAC-SHA1-96
3DES-CBC
Encryption algorithm
(and key length)
AES-CBC (128 bits, 192 bits, or 256
bits)
Hash algorithm/encryption algorithm (and key
length)
AES-GCM (128 bits, 192 bits, or 256 bits)
Hash algorithm
HMAC-SHA1-96
NOTE
IPSec functional restrictions
IPSec supports communication to a unicast address (or a single device).
The machine cannot use both IPSec and DHCPv6 at the same time.
IPSec is unavailable in networks in which NAT or IP masquerade is implemented.
Using IPSec with IP address filter
IP address filter settings are applied before the IPSec policies.
Specifying IP Addresses for Firewall Rules
㻠㻟㻠㻌㻛㻌㻢㻣㻢
Configuring IPSec Settings
Before using IPSec for encrypted communication, you need to register security policies (SP). A security policy consists of the groups of
settings described below. Up to 10 policies can be registered. After registering policies, specify the order in which they are applied.
Selector
Selector defines conditions for IP packets to apply IPSec communication. Selectable conditions include IP addresses and port
numbers of the machine and the devices to communicate with.
IKE
IKE configures the IKEv1 that is used for key exchange protocol. Note that instructions vary depending on the authentication method
selected.
[Pre-Shared Key Method]
A key of up to 24 alphanumeric characters can be shared with the other devices. Enable SSL for the Remote UI before specifying this
authentication method ( Enabling SSL Encrypted Communication for the Remote UI).
[Digital Signature Method]
The machine and the other devices authenticate each other by mutually verifying their digital signatures. Generate or install the key
pair beforehand ( Configuring Settings for Key Pairs and Digital Certificates).
AH/ESP
Specify the settings for AH/ESP, which is added to packets during IPSec communication. AH and ESP can be used at the same time.
You can also select whether or not to enable PFS for tighter security.
1
2
Start the Remote UI and log on in System Manager Mode.
Click [Settings/Registration].
3
Click [Security Settings]
4
Click [Edit...].
[IPSec Settings].
㻠㻟㻡㻌㻛㻌㻢㻣㻢
Starting Remote UI
5
Select the [Use IPSec] check box and click [OK].
If you want the machine to only receive packets that match one of the security policies that you define in the steps below, clear
the [Receive Non-Policy Packets] check box.
6
Click [Register New Policy...].
7
Specify the Policy Settings.
8
1
In the [Policy Name] text box, enter up to 24 alphanumeric characters for a name that is used for identifying
the policy.
2
Select the [Enable Policy] check box.
Specify the Selector Settings.
㻠㻟㻢㻌㻛㻌㻢㻣㻢
[Local Address]
Click the radio button for the type of IP address of the machine to apply the policy.
[All IP
Addresses]
Select to use IPSec for all IP packets.
[IPv4 Address]
Select to use IPSec for all IP packets that are sent to or from the IPv4 address of the machine.
[IPv6 Address]
Select to use IPSec for all IP packets that are sent to or from an IPv6 address of the machine.
[Remote Address]
Click the radio button for the type of IP address of the other devices to apply the policy.
[All IP
Addresses]
Select to use IPSec for all IP packets.
[All IPv4
Addresses]
Select to use IPSec for all IP packets that are sent to or from IPv4 addresses of the other devices.
[All IPv6
Addresses]
Select to use IPSec for all IP packets that are sent to or from IPv6 addresses of the other devices.
[IPv4 Manual
Settings]
Select to specify a single IPv4 address or a range of IPv4 addresses to apply IPSec. Enter the IPv4
address (or the range) in the [Addresses to Set Manually] text box.
[IPv6 Manual
Settings]
Select to specify a single IPv6 address or a range of IPv6 addresses to apply IPSec. Enter the IPv6
address (or the range) in the [Addresses to Set Manually] text box.
[Addresses to Set Manually]
If [IPv4 Manual Settings] or [IPv6 Manual Settings] is selected for [Remote Address], enter the IP address to apply the policy.
You can also enter a range of addresses by inserting a hyphen between the addresses.
NOTE:
Entering IP addresses
Description
Example
IPv4:
Delimit numbers with periods.
192.168.0.10
IPv6:
Delimit alphanumeric characters with colons.
fe80::10
Insert a hyphen between the addresses.
192.168.0.10192.168.0.20
Entering a
single address
Specifying a
range of
addresses
Specifying a
㻠㻟㻣㻌㻛㻌㻢㻣㻢
range of
addresses with
a prefix (IPv6
only)
Enter the address, followed by a slash and a number indicating the prefix
length.
fe80::1234/64
[Subnet Settings]
When manually specifying IPv4 address, you can express the range by using the subnet mask. Enter the subnet mask using
periods to delimit numbers (example:"255.255.255.240").
[Local Port]/[Remote Port]
If you want to create separate policies for each protocol, such as HTTP or SMTP, enter the appropriate port number for the
protocol to determine whether to use IPSec.
IMPORTANT:
IPSec is not applied to the following packets
Loopback, multicast, and broadcast packets
IKE packets (using UDP on port 500)
ICMPv6 neighbor solicitation and neighbor advertisement packets
9
Specify the IKE Settings.
[IKE Mode]
The mode used for the key exchange protocol is displayed. The machine supports the main mode, not the aggressive mode.
[Authentication Method]
Select [Pre-Shared Key Method] or [Digital Signature Method] for the method used when authenticating the machine. You need to
enable SSL for the Remote UI before selecting [Pre-Shared Key Method] ( Enabling SSL Encrypted Communication for the
Remote UI). You need to generate or install a key pair before selecting [Digital Signature Method] ( Configuring Settings for
Key Pairs and Digital Certificates).
[Valid for]
Specify how long a session lasts for IKE SA (ISAKMP SA). Enter the time in minutes.
[Authentication]/[Encryption]/[DH Group]
Select an algorithm from the drop-down list. Each algorithm is used in the key exchange.
[Authentication]
Select the hash algorithm.
[Encryption]
Select the encryption algorithm.
[DH Group]
Select the Diffie-Hellman group, which determines the key strength.
Using a pre-shared key for authentication
1
Click the [Pre-Shared Key Method] radio button for [Authentication Method] and then click [Shared Key
Settings...].
2
Enter up to 24 alphanumeric characters for the pre-shared key and click [OK].
㻠㻟㻤㻌㻛㻌㻢㻣㻢
3
Specify the [Valid for] and [Authentication]/[Encryption]/[DH Group] settings.
Using a key pair and preinstalled CA certificates for authentication
1
Click the [Digital Signature Method] radio button for [Authentication Method] and then click [Key and
Certificate...].
2
Click [Register Default Key] on the right of a key pair you want to use.
NOTE:
Viewing details of a key pair or certificate
You can check the details of the certificate or verify the certificate by clicking the corresponding text link under [Key
Verifying Key Pairs and Digital Certificates
Name], or the certificate icon.
3
10
Specify the [Valid for] and [Authentication]/[Encryption]/[DH Group] settings.
Specify the IPSec Network Settings.
[Use PFS]
Select the check box to enable Perfect Forward Secrecy (PFS) for IPSec session keys. Enabling PFS enhances the security while
increasing the load on the communication. Make sure that PFS is also enabled for the other devices.
[Specify by Time]/[Specify by Size]
Set the conditions for terminating a session for IPSec SA. IPSec SA is used as a communication tunnel. Select either or both of the
check boxes as necessary. If both check boxes are selected, the IPSec SA session is terminated when either of the conditions has
been satisfied.
[Specify by
Time]
Enter a time in minutes to specify how long a session lasts.
[Specify by
Size]
Enter a size in megabytes to specify how much data can be transported in a session.
㻠㻟㻥㻌㻛㻌㻢㻣㻢
[Select Algorithm]
Select the [ESP], [ESP (AES-GCM)], or [AH (SHA1)] check box(es) depending on the IPSec header and the algorithm used. AESGCM is an algorithm for both authentication and encryption. If [ESP] is selected, also select algorithms for authentication and
encryption from the [ESP Authentication] and [ESP Encryption] drop-down lists.
[ESP
Authentication]
To enable the ESP authentication, select [SHA1] for the hash algorithm. Select [Do Not Use] if you want
to disable the ESP authentication.
[ESP
Encryption]
Select the encryption algorithm for ESP. You can select [NULL] if you do not want to specify the
algorithm, or select [Do Not Use] if you want to disable the ESP encryption.
[Connection Mode]
The connection mode of IPSec is displayed. The machine supports transport mode, in which the payloads of IP packets are
encrypted. Tunnel mode, in which whole IP packets (headers and payloads) are encapsulated is not available.
11
Click [OK].
If you need to register an additional security policy, return to step 6.
12
Arrange the order of policies listed under [Registered IPSec Policies].
Policies are applied from one at the highest position to the lowest. Click [Up] or [Down] to move a policy up or down the order.
NOTE:
Editing a policy
Click the corresponding text link under [Policy Name] for the edit screen.
Deleting a policy
Click [Delete] on the right of the policy name you want to delete
13
click [OK].
Restart the machine.
Turn OFF the machine, wait for at least 10 seconds, and turn it back ON.
NOTE
You can enable or disable the IPSec communication from
.
Use IPSec
LINKS
Configuring Settings for Key Pairs and Digital Certificates
IPSec Policy List
㻠㻠㻜㻌㻛㻌㻢㻣㻢
0ALJ-0A6
Configuring IEEE 802.1X Authentication
The machine can connect to an 802.1X network as a client device. A typical 802.1X network consists of a RADIUS server (authentication
server), LAN switch (authenticator), and client devices with authentication software (supplicants). If a device tries to connect to the
802.1X network, the device must go through user authentication in order to prove that the connection is made by an authorized user.
Authentication information is sent to and checked by a RADIUS server, which permits or rejects communication to the network depending
on the authentication result. If authentication fails, a LAN switch (or an access point) blocks access from the outside of the network.
Select the authentication method from the options below. If necessary, install or register a key pair or CA certificate before configuring
IEEE 802.1X authentication ( Using CA-issued Key Pairs and Digital Certificates).
TLS
The machine and the authentication server authenticate each other by mutually verifying their certificates. A key pair issued by a
certification authority (CA) is required for the client authentication (when authenticating the machine). For the server authentication,
a CA certificate installed via the Remote UI can be used in addition to a CA certificate preinstalled in the machine. The TLS method
cannot be used with TTLS or PEAP at the same time.
TTLS
This authentication method uses a user name and password for the client authentication and a CA certificate for the server
authentication. MSCHAPv2 or PAP can be selected as the internal protocol. TTLS can be used with PEAP at the same time. Enable SSL
for the Remote UI before configuring this authentication method ( Enabling SSL Encrypted Communication for the Remote UI).
PEAP
The required settings are almost the same as those of TTLS. MS-CHAPv2 is used as the internal protocol. Enable SSL for the Remote
UI before configuring this authentication method ( Enabling SSL Encrypted Communication for the Remote UI).
1
2
3
Start the Remote UI and log on in System Manager Mode.
Click [Settings/Registration].
Click [Network Settings]
[IEEE 802.1X Settings].
㻠㻠㻝㻌㻛㻌㻢㻣㻢
Starting Remote UI
4
5
Click [Edit...].
Select the [Use IEEE 802.1X] check box, enter the login name in the [Login Name] text box, and specify the
required settings.
[Use IEEE 802.1X]
Select the check box to enable IEEE 802.1X authentication.
[Login Name]
Enter up to 24 alphanumeric characters for a name (EAP identity) that is used for identifying the user.
Setting TLS
1
Select the [Use TLS] check box and click [Key and Certificate...].
2
Click [Register Default Key] on the right of the key pair you want to use for the client authentication.
㻠㻠㻞㻌㻛㻌㻢㻣㻢
NOTE:
Viewing details of a key pair or certificate
You can check the details of the certificate or verify the certificate by clicking the corresponding text link under [Key
Verifying Key Pairs and Digital Certificates
Name], or the certificate icon.
Setting TTLS/PEAP
1
Select the [Use TTLS] or [Use PEAP] check box.
NOTE:
Internal protocol for TTLS
You can select MSCHAPv2 or PAP. If you want to use PAP, click the [PAP] radio button.
2
Click [Change User Name/Password].
To specify a user name other than the login name, clear the [Use Login Name as User Name] check box. Select the
check box if you want to use the login name as the user name.
3
Set the user name/password and click [OK].
㻠㻠㻟㻌㻛㻌㻢㻣㻢
[User Name]
Enter up to 24 alphanumeric characters for the user name.
[Change Password]
To set or change the password, select the check box and enter up to 24 alphanumeric characters for the new password
both in the [Password] and [Confirm] text boxes.
6
Click [OK].
7
Restart the machine.
Turn OFF the machine, wait for at least 10 seconds, and turn it back ON.
NOTE
You can enable or disable the IEEE 802.1X authentication from
.
LINKS
Configuring Settings for Key Pairs and Digital Certificates
㻠㻠㻠㻌㻛㻌㻢㻣㻢
IEEE 802.1X Settings
0ALJ-0A7
Configuring Settings for Key Pairs and Digital Certificates
In order to encrypt communication with a remote device, an encryption key must be sent and received over an unsecured network
beforehand. This problem is solved by public-key cryptography. Public-key cryptography ensures secure communication by protecting
important and valuable information from attacks, such as sniffing, spoofing, and tampering of data as it flows over a network.
Key Pair
A key pair consists of a public key and a secret key, both of which are required for encrypting or decrypting data.
Because data that has been encrypted with one of the key pair cannot be returned to its original data form without
the other, public-key cryptography ensures secure communication of data over the network. Up to five key pairs can
be registered ( Using CA-issued Key Pairs and Digital Certificates). For SSL encrypted communication, a key
pair can be generated for the machine ( Generating Key Pairs).
CA Certificate
Digital certificates including CA certificates are similar to other forms of identification, such as driver's licenses. A
digital certificate contains a digital signature, which enables the machine to detect any spoofing or tampering of data.
It is extremely difficult for third parties to abuse digital certificates. A digital certificate that contains a public key of a
certification authority (CA) is referred to as a CA certificate. CA certificates are used for verifying the device the
machine is communicating with for features such as printing with Google Cloud Print or IEEE 802.1X authentication.
Up to 10 CA certificates can be registered, including the five certificates that are preinstalled in the machine ( Using
CA-issued Key Pairs and Digital Certificates).
Key and Certificate Requirements
The certificate contained in a key pair generated with the machine conforms to X.509v3. If you install a key pair or a CA certificate from
a computer, make sure that they meet the following requirements:
Format
File extension
Key pair: PKCS#12*1
CA certificate: X.509v1 or X.509v3, DER (encoded binary)
Key pair: ".p12" or ".pfx"
CA certificate: ".cer"
Public key algorithm
(and key length)
RSA (512 bits, 1024 bits, 2048 bits, or 4096 bits)
Certificate signature algorithm
SHA1-RSA, SHA256-RSA, SHA384-RSA*2, SHA512-RSA*2, MD5-RSA, or MD2-RSA
Certificate thumbprint algorithm
SHA1
*1 Requirements for the certificate contained in a key pair are pursuant to CA certificates.
*2 SHA384-RSA and SHA512-RSA are available only when the RSA key length is 1024 bits or more.
NOTE
The machine does not support use of a certificate revocation list (CRL).
㻠㻠㻡㻌㻛㻌㻢㻣㻢
0ALJ-0A8
Generating Key Pairs
A key pair can be generated with the machine when it is required for encrypted communication via Secure Sockets Layer (SSL). You can
use SSL when accessing the machine via the Remote UI. Up to five key pairs can be registered to the machine.
1
2
Start the Remote UI and log on in System Manager Mode.
Starting Remote UI
Click [Settings/Registration].
3
Click [Security Settings]
4
Click [Generate Key...].
[Key and Certificate Settings].
NOTE:
Deleting a registered key pair
Click [Delete] on the right of the key pair you want to delete
click [OK].
A key pair cannot be deleted if it is currently used for some purpose, such as when "SSL" or "IEEE 802.1X", is displayed under
[Key Usage]. In this case, disable the function or replace the key pair before deleting it.
5
Specify settings for the key and certificate.
㻠㻠㻢㻌㻛㻌㻢㻣㻢
[Key Settings]
[Key Name]
Enter up to 24 alphanumeric characters for naming the key pair. Set a name that will be easy for you to find later in a list.
[Signature Algorithm]
Select the signature algorithm from the drop-down list.
[Key Algorithm]
RSA is used for generating a key pair. Select the key length from the drop-down list. The larger the number for the key
length, the slower the communication. However, the security is tighter.
NOTE:
[512bit] cannot be selected for the key length, if [SHA384] or [SHA512] is selected for [Signature Algorithm].
[Certificate Settings]
[Validity Start Date (YYYY/MM/DD)]
Enter the date from which the certificate is valid between 01/01/2000 and 31/12/2037.
[Validity End Date (YYYY/MM/DD)]
Enter the date to which the certificate is valid between 01/01/2000 and 31/12/2037. A date earlier than [Validity Start Date
(YYYY/MM/DD)] cannot be set.
[Country/Region]
Click the [Select Country/Region] radio button and select the country/region from the drop-down list. You can also click the
[Enter Internet Country Code] radio button and enter a country code, such as "US" for the United States.
[State]/[City]
Enter up to 24 alphanumeric characters for the location as necessary.
[Organization]/[Organization Unit]
Enter up to 24 alphanumeric characters for the organization name as necessary.
[Common Name]
Enter up to 48 alphanumeric characters for the common name of the certificate as necessary. "Common Name" is often
abbreviated as "CN."
6
Click [OK].
A key pair may take approximately 10 to 15 minutes to generate.
After a key pair is generated, it is automatically registered to the machine.
LINKS
Using CA-issued Key Pairs and Digital Certificates
Verifying Key Pairs and Digital Certificates
Enabling SSL Encrypted Communication for the Remote UI
Configuring IPSec Settings
㻠㻠㻣㻌㻛㻌㻢㻣㻢
0ALJ-0A9
Using CA-issued Key Pairs and Digital Certificates
Key pairs and digital certificates can be obtained from a certification authority (CA) for use with the machine. You can store and then
register these files by using the Remote UI. Make sure that the key pair and the certificate satisfy the requirements of the machine
( Key and Certificate Requirements). Up to five key pairs and 10 CA certificates (including the five preinstalled certificates) can be
registered.
1
2
3
4
Start the Remote UI and log on in System Manager Mode.
Starting Remote UI
Click [Settings/Registration].
Click [Security Settings]
certificates).
[Key and Certificate Settings] (for key pairs) or [CA Certificate Settings] (for CA
Click [Register Key and Certificate] or [Register CA Certificate].
NOTE:
Deleting a registered key pair or CA certificate
Click [Delete] on the right of the key pair or CA certificate you want to delete
CA certificates.
click [OK]. You cannot delete the preinstalled
A key pair cannot be deleted if it is currently used for some purpose, such as when "[SSL]" or "[IEEE 802.1X]" is displayed
under [Key Usage]. In this case, disable the function or replace the key pair before deleting it. The preinstalled CA certificate
cannot be deleted.
㻠㻠㻤㻌㻛㻌㻢㻣㻢
Disabling or enabling the preinstalled CA certificates
Click [Disable] on the right of the preinstalled CA certificate you want to disable. To enable the certificate again, click [Enable] on
the right of the certificate.
5
Click [Install...].
NOTE:
Deleting a key pair or CA certificate
Click [Delete] on the right of the file you want to delete, and then click [OK].
6
Click [Browse...], specify the file to install, and click [Start Installation].
The key pair or CA certificate is installed in the machine.
7
Register the key pair or CA certificate.
Registering a key pair
1
Click [Register] on the right of the key pair you want to register.
2
Enter the name of the key pair and password, and then click [OK].
[Key Name]
Enter up to 24 alphanumeric characters for the name of the key pair to be registered.
[Password]
Enter up to 24 alphanumeric characters for the password of the private key set for the file to be registered.
Registering a CA certificate
Click [Register] on the right of the CA certificate you want to register.
㻠㻠㻥㻌㻛㻌㻢㻣㻢
LINKS
Generating Key Pairs
Verifying Key Pairs and Digital Certificates
Enabling SSL Encrypted Communication for the Remote UI
Configuring IPSec Settings
Configuring IEEE 802.1X Authentication
㻠㻡㻜㻌㻛㻌㻢㻣㻢
0ALJ-0AA
Verifying Key Pairs and Digital Certificates
Once key pairs and CA certificates are registered, you can view their detailed information or verify them for validity and signature.
1
2
3
4
Start the Remote UI and log on in System Manager Mode.
Click [Settings/Registration].
Click [Security Settings]
certificates).
[Key and Certificate Settings] (for key pairs) or [CA Certificate Settings] (for CA
Click the icon for the key pair or certificate that you want to verify.
Certificate details can be viewed on this screen.
5
Starting Remote UI
Click [Certificate Verification].
㻠㻡㻝㻌㻛㻌㻢㻣㻢
The result from verifying the certificate is displayed as shown below.
LINKS
Generating Key Pairs
Using CA-issued Key Pairs and Digital Certificates
㻠㻡㻞㻌㻛㻌㻢㻣㻢
0ALJ-0AC
Using Remote UI
Using a Web browser to operate the machine remotely, you can check the documents waiting to be printed or the status of the machine.
You can also make some settings such as registering the Address Book. You can do this without leaving your desk, making system
management easier.
Functions of the Remote UI
Managing Documents and Checking the Machine Status
Setting Up Menu Options from Remote UI
Saving/Loading Registered Data
Registering Address Book from Remote UI (MF8580Cdw / MF8550Cdn / MF8540Cdn / MF8280Cw Only)
Basics of the Remote UI
Starting Remote UI
Remote UI Screens
System Requirements
The following environment is required to use the Remote UI. In addition, set the Web browser to enable Cookies.
Windows
Windows XP/Vista/7/8
Microsoft Internet Explorer 7.0 or later
Macintosh
Mac OS 10.4.9 or later (except for Classic environment)
Safari 3.2.1 or later
㻠㻡㻟㻌㻛㻌㻢㻣㻢
0ALJ-0AE
Starting Remote UI
To operate remotely, you need to input the IP address of the machine into a Web browser and start the Remote UI. Check the IP
address set to the machine in advance ( Viewing Network Settings). If you have any questions, ask your Network Administrator.
1
2
Start the Web browser.
Enter "http://(the IP address of the machine)/" in the address field, and press the [ENTER] key.
If you want to use an IPv6 address, enclose the IPv6 address with brackets (example: http://[fe80::2e9e:fcff:fe4e:dbce]/).
NOTE:
If a security alert is displayed
A security alert may be displayed when the Remote UI communication is encrypted ( Enabling SSL Encrypted Communication
for the Remote UI). When certificate settings or SSL settings have no errors, continue browsing the Web site.
3
Log on to the Remote UI.
When the Department ID Management is disabled
Select [System Manager Mode] or [End-User Mode].
[System Manager Mode]
You can perform all the Remote UI operations and settings. Enter the appropriate ID in [System Manager ID] and PIN in
[System Manager PIN] ( Setting the System Manager ID). If [System Manager ID] is not set (factory default settings), you
do not need to input anything.
[End-User Mode]
You can check the status of documents or the machine, and you can also change some of the settings. If you wish to delete
your print documents, enter the user name of the documents in [User Name]. The user name is automatically set to print
documents based on information such as your computer name or computer logon name.
When the Department ID Management is enabled
Enter the appropriate ID in [Department ID] and PIN in [PIN] (
4
Setting the Department ID Management).
Click [Log In].
Portal Page (main page) will be displayed.
Remote UI Screens
㻠㻡㻠㻌㻛㻌㻢㻣㻢
㻠㻡㻡㻌㻛㻌㻢㻣㻢
0ALJ-0AF
Remote UI Screens
This section describes the typical screens of the Remote UI.
Portal Page (main page)
[Status Monitor/Cancel] Page
[Settings/Registration] Page
[Address Book] Page (MF8580Cdw / MF8550Cdn / MF8540Cdn / MF8280Cw Only)
Portal Page (main page)
[Log Out]
Logs off from the Remote UI. The Login page will be displayed.
[Mail to System Manager]
Displays a window for creating an e-mail to the system manager specified in [System Manager Information] under [System
Management].
[Help]
Displays the Help screen for the currently displayed page in a separate window.
Refresh Icon
Refreshes the currently displayed page.
Device Basic Information
Displays the current status of the machine and error information. If an error has occurred, the link to the Error Information page
will be displayed.
Consumables Information
Displays paper information and the remaining amount of toner.
Support Link
Displays the support link specified in [Device Information] under [System Management].
[Status Monitor/Cancel]
Displays the status of the current print documents and history of print, copy, send, and received documents. You can also check
the status of the machine.
[Settings/Registration]
Displays [Settings/Registration] page. When you have logged on in System Manager Mode, you can change the settings items and
save/load the registered data.
Setting Up Menu Options from Remote UI
[Address Book] (MF8580Cdw / MF8550Cdn / MF8540Cdn / MF8280Cw only)
Displays the coded dial numbers and the Favorites list registered in the Address Book. You can also register or edit the Address
Book when you have logged on in System Manager Mode.
Registering Address Book from Remote UI (MF8580Cdw /
MF8550Cdn / MF8540Cdn / MF8280Cw Only)
㻠㻡㻢㻌㻛㻌㻢㻣㻢
[Status Monitor/Cancel] Page
[To Portal]
Returns to Portal Page (main page).
Menu
Click an item, and the content is displayed in the right page.
Managing Documents and Checking the Machine Status
Breadcrumb Trail
Indicates the series of pages you opened to display the currently displayed page. You can check what page is currently displayed.
Refresh Icon
Refreshes the currently displayed page.
Top Icon
Moves the scroll box up to the top of the page when the page is scrolled down.
[Settings/Registration] Page
[To Portal]
Returns to Portal Page (main page).
Menu
Click an item, the content is displayed in the right page.
Setting Up Menu Options from Remote UI
Breadcrumb Trail
Indicates the series of pages you opened to display the currently displayed page. You can check what page is currently displayed.
Top Icon
Moves the scroll box up to the top of the page when the page is scrolled down.
NOTE
System Management Settings
You can only set [System Management Settings] when you have logged on in System Manager Mode.
㻠㻡㻣㻌㻛㻌㻢㻣㻢
When you have logged on in End-User Mode, only [System Management] will be displayed.
[Address Book] Page (MF8580Cdw / MF8550Cdn / MF8540Cdn / MF8280Cw Only)
[To Portal]
Displays Portal Page (main page).
[Favorites]
Displays the list of the Favorites.
Only)
Registering in the Address Book (MF8580Cdw / MF8550Cdn / MF8540Cdn / MF8280Cw
[Coded Dial]
Displays the list of the coded dial numbers.
MF8280Cw Only)
Registering in the Address Book (MF8580Cdw / MF8550Cdn / MF8540Cdn /
Breadcrumb Trail
Indicates the series of pages you opened to display the currently displayed page. You can check what page is currently displayed.
List Number
Specifies the range of coded dial numbers displayed on the page. You cannot display List Number in Favorites.
Top Icon
Moves the scroll box up to the top of the page when the page is scrolled down.
NOTE
Registering/Editing the Address Book
You can register or edit the Address Book when you have logged on in System Manager Mode.
㻠㻡㻤㻌㻛㻌㻢㻣㻢
0ALJ-0AH
Managing Documents and Checking the Machine Status
Checking Current Status of Print Documents
Checking History of Documents
Checking Error Information
Checking Device Specifications
Checking System Manager Information
Checking Print Total Counter
NOTE
The document file name displays only 32 characters. The printed application name may be added to the file name.
Checking Current Status of Print Documents
The list of the documents currently printing or waiting to be printed is displayed.
Log on to the Remote UI (
Starting Remote UI)
[Status Monitor/Cancel]
[Job Status]
You can delete a document job by clicking [Cancel].
NOTE
Regardless of the Department ID Management setting, all the print documents currently printing and waiting to be printed
will be listed.
If you entered your user name when you logged on in End-User Mode, your user name will only be displayed on the
documents that you printed.
Click [Job Number] on the paused documents and secure documents to display detailed information. You can check the
user name and the page count of the printed document.
Checking History of Documents
The history of print, copy, sending faxes/e-mails (TX), or receiving faxes (RX) is displayed up to 128 jobs.
Log on to the Remote UI (
Starting Remote UI)
[Status Monitor/Cancel]
㻠㻡㻥㻌㻛㻌㻢㻣㻢
[Job Log]
Checking Error Information
When an error occurs, this page will be displayed by clicking the message displayed under [Error Information] on Portal Page (main
Portal Page (main page)
page).
Log on to the Remote UI (
Starting Remote UI)
[Status Monitor/Cancel]
[Error Information]
Checking Device Specifications
The maximum print speed and the Secure Print memory capacity are displayed.
Log on to the Remote UI (
Starting Remote UI)
[Status Monitor/Cancel]
[Device Features]
Checking System Manager Information
Information about the machine and the system manager is displayed. This information is set in [System Management] on the
System Management Settings
[Settings/Registration] page.
㻠㻢㻜㻌㻛㻌㻢㻣㻢
Log on to the Remote UI (
Starting Remote UI)
[Status Monitor/Cancel]
[Device Information]
Checking Print Total Counter
The total number of pages that have been printed by the copy, print, and fax functions is displayed.
Log on to the Remote UI (
Starting Remote UI)
[Status Monitor/Cancel]
LINKS
Remote UI Screens
㻠㻢㻝㻌㻛㻌㻢㻣㻢
[Check Counter]
0ALJ-0AR
Setting Up Menu Options from Remote UI
You can change the various machine settings by using the Remote UI. Most of the settings can be set also on the machine, but some
settings can only be set using the Remote UI.
NOTE
You can change the settings under the [System Management Settings] only when you have logged on in System Manager Mode.
1
2
3
Start the Remote UI.
Starting Remote UI
Click [Settings/Registration].
Click the menu item you want to set.
For more information about the settings menu, see each item below
Menu items
Referents
Preferences
Paper Settings
Specifying Paper Size and Type
Sound Volume
Control/Display
Settings
Preferences
Timer Settings
Timer Settings
Function Settings
Common Settings
Common Settings
Copy Settings
Copy Settings
Fax Settings
Fax Settings (MF8580Cdw / MF8550Cdn / MF8280Cw Only)
Scan Settings
Scan Settings
Memory Media Print
㻠㻢㻞㻌㻛㻌㻢㻣㻢
Settings
Memory Media Print Settings
Printer Settings
Printer Settings
Report Settings
Printing Reports and Lists
System Management Settings
System
Management
System Management Settings
Department ID
Management
Setting the Department ID Management
Network Settings
Network
Security Settings
Security
Communication
Management
Settings/Forwarding
Settings
System Management Settings
Import/Export
Saving/Loading Registered Data
Initialize Setting
Information
Initialize Menu
LINKS
Remote UI Screens
㻠㻢㻟㻌㻛㻌㻢㻣㻢
0ALJ-0AJ
Saving/Loading Registered Data
Address Book or menu options data that has been registered in the machine can be saved in your computer (export). Data that is saved
on your computer can also be registered in the machine (import). You can easily copy the destinations in the Address Book to multiple
machines. * To use these features, it is required that you have logged on in System Manager Mode.
* Depending on the model, you cannot import the Address Book that exported from the machine. If using the same model, you can import/export menu
options and other data except the Address Book.
Saving/Loading Address Book (MF8580Cdw / MF8550Cdn / MF8540Cdn / MF8280Cw Only)
Saving/Loading Settings
IMPORTANT
Do not turn OFF the machine until the import or export process is complete
It may take a few minutes to complete the process. If the machine is turned OFF during the process, it may result in damage to
data or the machine.
Do not operate the machine during the export/import process
Before exporting/importing, check that no operation such as printing documents is currently processing.
㻠㻢㻠㻌㻛㻌㻢㻣㻢
0ALJ-0AK
Saving/Loading Address Book (MF8580Cdw / MF8550Cdn / MF8540Cdn /
MF8280Cw Only)
You can save registered Address Book data in your computer, or register saved Address Book data in the machine. Other machines can
import the registration contents exported from this machine and vice versa * .
* It may not be available depending on the model.
Saving Address Book
Loading Address Book
Saving Address Book
1
2
3
Start the Remote UI and log on in System Manager Mode.
Starting Remote UI
Click [Settings/Registration].
Click [Import/Export]
[Address Book].
If the screen prompting you to enter the Address Book PIN is displayed, enter the [PIN] and click [OK].
Address Book
4
Click [Start Exporting].
㻠㻢㻡㻌㻛㻌㻢㻣㻢
Setting a PIN for
5
Follow the on-screen instructions to specify the location where the exported Address Book is saved.
The Address Book will be saved.
IMPORTANT
Do not operate until the process is complete.
The screen remains the same during the export process. Do not operate the Remote UI until the message [The (file name)
download has completed.] is displayed at the bottom of the screen.
Loading Address Book
IMPORTANT
The Address Book data currently registered is overwritten when you load the Address Book data.
1
2
3
Start the Remote UI and log on in System Manager Mode.
Click [Settings/Registration].
Click [Import/Export]
[Address Book].
㻠㻢㻢㻌㻛㻌㻢㻣㻢
Starting Remote UI
If the screen prompting you to enter the Address Book PIN is displayed, enter the [PIN] and click [OK].
Address Book
4
Click [Import].
5
Specify the Address Book file to be imported, and click [Start Importing].
Setting a PIN for
To specify the file to be imported, click [Browse...] and select the file, or enter the path to the file in [File Path] (the file name
with the location where the file is saved).
6
Click [OK].
The specified Address Book data will be imported into the machine.
LINKS
Remote UI Screens
Registering Address Book from Remote UI (MF8580Cdw / MF8550Cdn / MF8540Cdn / MF8280Cw Only)
Registering in the Address Book (MF8580Cdw / MF8550Cdn / MF8540Cdn / MF8280Cw Only)
Address Book List (MF8580Cdw / MF8550Cdn / MF8540Cdn / MF8280Cw Only)
㻠㻢㻣㻌㻛㻌㻢㻣㻢
0ALJ-0AL
Saving/Loading Settings
You can save the setting data of the menu options in your computer, or register the saved data in the machine. The exported data can
be imported. If using same model, other machines can import the data exported from this machine and vice versa. These operations can
be performed only when you have logged on in System Manager Mode.
Saving Settings
Loading Settings
NOTE
Settings that cannot be imported/exported
Settings
Location
<Current
Date/Time
Settings>
<Timer Settings>
<Fax Setup
Guide>
<Fax Settings>
<Shortcut Key
Settings>
<Scan Settings>
[Cloud Print
Settings]
[Settings/Registration]
[Network Settings]
[Settings/Registration]
[Network Settings]
[Settings/Registration]
[Department ID Management]
[Settings/Registration]
[Security Settings]
[User Settings
1]/[User
Settings
2]/[User
Settings 3]
<Date/Time Settings>
[SNMP Settings]
[SNMPv3 Settings]
[Context
Settings]
[Department ID
Page Total]
[Key and
Certificate
Settings]
[CA Certificate
Settings]
<Select
Country/Region>
<Forwarding
Settings>
<System Management Settings>
<Remote UI
On/Off>
Saving Settings
1
2
Start the Remote UI and log on in System Manager Mode.
Click [Settings/Registration].
㻠㻢㻤㻌㻛㻌㻢㻣㻢
Starting Remote UI
3
Click [Import/Export]
4
Click [Start Exporting].
5
Follow the on-screen instructions to specify the location where the exported setting data is saved.
[Menu].
The setting data will be saved.
IMPORTANT
Do not operate until the process is complete.
The screen remains the same during the export process. Do not operate the Remote UI until the message [The (file name)
download has completed.] is displayed at the bottom of the screen.
Loading Settings
1
2
Start the Remote UI and log on in System Manager Mode.
Click [Settings/Registration].
㻠㻢㻥㻌㻛㻌㻢㻣㻢
Starting Remote UI
3
Click [Import/Export]
4
Click [Import].
5
Specify the setting file to be imported, and click [Start Importing].
[Menu].
To specify the file to be imported, click [Browse...] and select the file, or enter the path to the file in [File Path] (the file name
with the location where the file is saved).
6
Click [OK].
The specified setting data will be imported into the machine.
7
Restart the Machine.
㻠㻣㻜㻌㻛㻌㻢㻣㻢
Turn OFF the machine, wait for at least 10 seconds, and turn it back on.
LINKS
Remote UI Screens
Setting Menu List
㻠㻣㻝㻌㻛㻌㻢㻣㻢
0ALJ-0AS
Registering Address Book from Remote UI (MF8580Cdw / MF8550Cdn /
MF8540Cdn / MF8280Cw Only)
You can register or edit the Address Book of the machine by using the computer.
NOTE
You can change the settings only when you have logged on in System Manager Mode.
1
2
Start the Remote UI.
Starting Remote UI
Click [Address Book].
NOTE:
If the enter PIN page is displayed
The Address Book is protected by a PIN. Enter the [PIN] and click [OK].
3
Click [Coded Dial].
You can also register destinations in Favorites. In this case, click [Favorites] instead of [Coded Dial].
Address Book (MF8580Cdw / MF8550Cdn / MF8540Cdn / MF8280Cw Only)
4
Registering in the
Click the text link under [Number], [Type], or [Name] for an item named "Not Registered."
NOTE:
You can edit a registered item by clicking the corresponding text link under [Number], [Type] or [Name].
㻠㻣㻞㻌㻛㻌㻢㻣㻢
You can delete a registered item by clicking the corresponding [Delete] button.
5
Select [Destination Type to Register] and click [OK].
6
Specify required settings and click [OK].
LINKS
Remote UI Screens
Saving/Loading Address Book (MF8580Cdw / MF8550Cdn / MF8540Cdn / MF8280Cw Only)
Address Book List (MF8580Cdw / MF8550Cdn / MF8540Cdn / MF8280Cw Only)
㻠㻣㻟㻌㻛㻌㻢㻣㻢
0ALJ-0AU
Setting Menu List
There are various settings in this machine. You can adjust each of the settings in detail. Access these settings by pressing
TIPS
You can print the setting menu in list form to check the current settings:
User Data List/System Manager Data List
㻠㻣㻠㻌㻛㻌㻢㻣㻢
.
0ALJ-0AW
Network Settings
All the settings about the network are listed with short descriptions. Default settings are marked with a dagger
( ).
NOTE
Asterisks (* )
Settings marked with "*1" are only available for the MF8580Cdw / MF8280Cw.
Settings marked with "*2" are only available for the MF8580Cdw / MF8550Cdn / MF8540Cdn.
Select Wired/Wireless LAN
Wireless LAN Settings
TCP/IP Settings
SNMP Settings
Dedicated Port Settings
Waiting Time for Connection at Startup
Ethernet Driver Settings
IEEE 802.1X Settings
Initialize Network Settings
Select Wired/Wireless LAN *1
When switching the machine from Wireless LAN to Wired LAN, you need to specify the setting. Conversely, when switching the machine
from Wired LAN to Wireless LAN, you do not need to specify this setting (You can switch using the following <Wireless LAN Settings>).
Selecting Wired LAN or Wireless LAN (MF8580Cdw / MF8280Cw Only)
Wired LAN
Wireless LAN
Wireless LAN Settings *1
Specify settings for connecting the machine to a wireless LAN. You can also view the current settings or specify the setting for saving
power consumption.
WPS Push Button Mode
Select to automatically configure a wireless connection by using the button on a WPS wireless router.
Using WPS Push Button Mode
Setting Up Connection
WPS PIN Code Mode
Select to configure a wireless connection by entering a PIN code for a WPS wireless router.
PIN Code Mode
Setting Up Connection Using WPS
SSID Settings
Select to configure a wireless connection by specifying information including an SSID or a network key by inputting manually from
the operation panel.
Select Access Point
Wireless LAN routers that can access the machine are automatically located, so you can select from the list. You must manually
Setting Up Connection by Selecting a Wireless Router
enter a network key, such as a WEP key or a PSK.
㻠㻣㻡㻌㻛㻌㻢㻣㻢
Enter Manually
Select to configure a wireless connection by manually entering an SSID. By using this method, you can specify authentication and
Setting Up Connection by Specifying Detailed Settings
encryption settings in detail.
Security Settings
None
WEP
Open System
Select WEP Key: 1/2/3/4
Edit WEP Key
Shared Key
Select WEP Key: 1/2/3/4
Edit WEP Key
WPA/WPA2-PSK
Auto
AES-CCMP
Power Save Mode
Select whether or not the machine enters Power Save Mode based on signals emitted from the wireless router.
Off
On
<Network Settings>
<Power Save Mode>
<Wireless LAN Settings>
Select <Off> or <On>
Read the displayed message
Wireless LAN Information
Select to view the current wireless LAN settings.
Viewing Network Settings
MAC Address
Wireless LAN Status
Latest Error Information
Channel
SSID Settings
Security Settings
Power Save Mode
TCP/IP Settings
Specify settings for using the machine in a TCP/IP network, such as IP address settings.
IPv4 Settings
Specify settings for using the machine in an IPv4 network.
IP Address Settings
Configure the IP address, which is used for identifying devices, such as computers and printers, on a TCP/IP network.
IPv4 Address
Auto Acquire
Select Protocol
Off
DHCP
BOOTP
RARP
Auto IP
Off
On
Manually Acquire
IP Address: 0.0.0.0
Subnet Mask: 0.0.0.0
㻠㻣㻢㻌㻛㻌㻢㻣㻢
Setting
Gateway Address: 0.0.0.0
Check Settings
Auto Acquire
IP Address
Subnet Mask
Gateway Address
PING Command
Select to check that the machine is connected to a computer over a network.
Testing the Network Connection
DNS Settings
Specify settings for Domain Name System (DNS), which provides a host name for IP address resolutions.
Configuring DNS
DNS Server Settings
Primary DNS Server: 0.0.0.0
Secondary DNS Server: 0.0.0.0
DNS Host Name/Domain Name Settings
Host Name
Domain Name
DNS Dynamic Update Settings
Off
On
DNS Dynamic Update Interval
0 to 24 to 48 (hr.)
mDNS Settings
Specify settings for using DNS functions without DNS servers.
Configuring DNS
Off
On
mDNS Name
DHCP Option Settings
Select whether to acquire the host name and whether to use the dynamic update function via the DHCP options when DHCP is
Configuring DNS
enabled.
Acquire Host Name
Off
On
DNS Dynamic Update
Off
On
IPv6 Settings
Specify settings for using the machine in an IPv6 network.
Use IPv6
Enable or disable IPv6 in the machine. You can also view the current settings.
Setting IPv6 Addresses
Off
On
Check Settings
Stateless Address Settings
Enable or disable stateless addresses.
Setting IPv6 Addresses
Off
On
Check Settings
Use DHCPv6
Enable or disable the stateful address that is acquired via DHCPv6.
Off
On
Check Settings
Stateful Address
㻠㻣㻣㻌㻛㻌㻢㻣㻢
Setting IPv6 Addresses
Prefix Length
DNS Settings
Specify settings for Domain Name System (DNS), which provides a host name for IP address resolutions.
Configuring DNS
DNS Host Name/Domain Name Settings
Use IPv4 Host/Domain
Off
Host Name
Domain Name
On
DNS Dynamic Update Settings
Off
On
Register Manual Address
Off
On
Register Stateful Address
Off
On
Register Stateless Address
Off
On
DNS Dynamic Update Interval
0 to 24 to 48 (hr.)
mDNS Settings
Specify settings for using DNS functions without DNS servers.
Configuring DNS
Off
On
Use Same mDNS Name as IPv4
Off
mDNS Name
On
WINS Settings
Specify settings for Windows Internet Name Service (WINS), which provides a NetBIOS name for IP address resolutions in a mixed
Configuring WINS
network environment of NetBIOS and TCP/IP.
WINS Resolution
Off
On
WINS Server Address: 0.0.0.0
Scope ID
LPD Print Settings
Enable or disable LPD, a printing protocol that can be used on any hardware platform or operating system.
Protocols and WSD Functions
Configuring Printing
Off
On
RAW Print Settings
Enable or disable RAW, a Windows specific printing protocol.
Configuring Printing Protocols and WSD Functions
Off
On
WSD Settings
Enable or disable automatic browsing and acquiring information for the printer or scanner by using the WSD protocol that is available
Configuring Printing Protocols and WSD Functions
on Windows Vista/7/8/Server 2008/Server 2012.
WSD Print Settings
Use WSD Print
Off
㻠㻣㻤㻌㻛㻌㻢㻣㻢
On
Use WSD Browsing
Off
On
WSD Scan Settings
Use WSD Scan
Off
On
Use Computer Scan
Off
On
Use Multicast Discovery
Off
On
Use HTTP
Enable or disable HTTP, which is required for communications with a computer, such as when using the Remote UI, WSD printing, or
Disabling HTTP Communication
printing with Google Cloud Print.
Off
On
Port Number Settings
Change port numbers for protocols according to the network environment.
LPD
1 to 515
to 65535
RAW
1 to 9100
HTTP
1 to 80
to 65535
to 65535
POP3 *2
1 to 110
SMTP*2
1 to 25
Changing Port Numbers
to 65535
to 65535
SNMP
1 to 161
to 65535
WSD Search
1 to 3702 to 65535
Multicast Discovery
1 to 427 to 65535
MTU Size
Select the maximum size of packets the machine sends or receives.
Changing the Maximum Transmission Unit
1300
1400
1500
SNMP Settings
Specify the settings for monitoring and controlling the machine from a computer running SNMP-compatible software.
Controlling the Machine with SNMP
Monitoring and
SNMPv1 Settings
Enable or disable SNMPv1. When enabling SNMPv1, specify a community name and access privileges to Management Information
Base(MIB) objects.
Off
㻠㻣㻥㻌㻛㻌㻢㻣㻢
On
<On>
<Network Settings>
<SNMP Settings>
Restart the machine
<SNMPv1 Settings>
Select <Off> or
SNMPv3 Settings
Enable or disable SNMPv3. Use the Remote UI to specify detailed settings that are applied when SNMPv3 is enabled.
Off
On
<Network Settings>
Restart the machine
<SNMP Settings>
<SNMPv3 Settings>
Select <Off> or <On>
Acquire Printer Management Information from Host
Enable or disable the monitoring of printer management information from a networked computer running SNMP-compatible software.
Off
On
Host>
<Network Settings>
<SNMP Settings>
<Acquire Printer Management Information from
Select <Off> or <On>
Restart the machine
Dedicated Port Settings
Enable or disable the dedicated port. The dedicated port is used when printing, faxing, or scanning uses MF Toolbox and when browsing
or specifying the machine settings over the network.
Off
On
<Network Settings>
the machine
<Dedicated Port Settings>
㻠㻤㻜㻌㻛㻌㻢㻣㻢
Select <Off> or <On>
Restart
Waiting Time for Connection at Startup
Specify a wait time for connecting to a network. Select the setting depending on the network environment.
Connecting to a Network
Setting a Wait Time for
0 to 300 (sec.)
Ethernet Driver Settings
Select the communication mode of Ethernet (half-duplex/full-duplex) and the Ethernet type (10BASE-T/100BASE-TX). You can also view
the MAC address of the machine.
Auto Detect
Select whether to automatically detect or manually select the communication mode and the Ethernet type.
Settings
Configuring Ethernet
Off
Communication Mode
Half Duplex
Full Duplex
Ethernet Type
10BASE-T
100BASE-TX
On
MAC Address
Check the MAC address of the machine, which is a number unique to each communication device.
Viewing the MAC Address
IEEE 802.1X Settings
Enable or disable IEEE 802.1X authentication.
Configuring IEEE 802.1X Authentication
Off
On
<Network Settings>
machine
<IEEE 802.1X Settings>
Select <Off> or <On>
Initialize Network Settings
Select to return the Network Settings to the factory defaults.
Initialize System Management Settings
㻠㻤㻝㻌㻛㻌㻢㻣㻢
Restart the
0ALJ-0AX
Preferences
All the settings about the sound volume and display are listed with short descriptions. Default settings are
marked with a dagger ( ).
NOTE
Asterisks (* )
Settings marked with "*1" are only available for the MF8580Cdw / MF8550Cdn / MF8280Cw.
Settings marked with "*2" have different defaults depending on the country or region of purchase.
Sound Volume Control
Display Settings
Sound Volume Control
Adjust volume at which the machine beeps when a key is pressed on the operation panel or when a paper jam occurs.
Volume
Fax Tone *1
Select whether to make a dial tone while a fax is being sent. You can also adjust the volume.
Off
On
Three Levels
Ring Tone *1
Select whether the machine beeps when a fax is received. You can also adjust the volume.
Off
On
Three Levels
TX Done Tone *1
Select whether the machine beeps when a fax is sent. You can also adjust the volume.
Off
On
Three Levels
Only When Error Occurs
Three Levels
RX Done Tone *1
Select whether the machine beeps when a fax is received. You can also adjust the volume.
Off
On
Three Levels
㻠㻤㻞㻌㻛㻌㻢㻣㻢
Adjusting the
Only When Error Occurs
Three Levels
Scanning Done Tone *1
Select whether the machine beeps when scanning fax documents is complete. You can also adjust the volume.
Off
On
Three Levels
Only When Error Occurs
Three Levels
Entry Tone
Select whether the machine beeps when a key is pressed on the operation panel.
Off
On
Invalid Entry Tone
Select whether the machine beeps when an invalid settings value is entered, such as when a user is trying to enter a number
unavailable for a setting.
Off
On
Restock Supplies Tone
Select whether the machine beeps when one of the toner cartridges is almost empty.
Off
On
Warning Tone
Select whether the machine beeps when problem such as a paper jam or an operation mistake occurs.
Off
On
Job Done Tone
Select whether the machine beeps when copying or scanning is complete.
Off
On
Energy Saver Alert
Select whether the machine beeps when the machine enters or wakes from sleep mode.
Off
On
Display Settings
Default Screen after Startup/Restoration
㻠㻤㻟㻌㻛㻌㻢㻣㻢
By default, the main copy screen is displayed immediately after the machine is turned ON or when the Auto Reset function is
performed. Specify the setting to change the default screen and display the main screen of a different function.
Copy
Fax*1
Scan
Memory Media Print
<Preferences>
<Display Settings>
Select a function to display the desired screen
<Default Screen after Startup/Restoration>
Brightness
Adjust the brightness of the display to suit the installation location of the machine.
Five Levels
<Preferences>
<Apply>
brightness
<Display Settings>
<Brightness>
Use
/
to adjust the
Invert Screen Colors
Select <On> to invert the display colors. Select <On> if the display is hard to view even after the brightness was adjusted in
<Brightness>.
Off
On
<Preferences>
<Display Settings>
<Invert Screen Colors>
<Display Settings>
<Millimeter/Inch Entry Switch>
Select <On> or
<Off>
Millimeter/Inch Entry Switch
Select the unit of measurement.
Millimeter
Inch
<Preferences>
<Millimeter> or <Inch>
㻠㻤㻠㻌㻛㻌㻢㻣㻢
Select
Message Display Time
Specify the interval in seconds at which two different messages are alternately displayed.
1 to 2 to 5 (sec.)
<Preferences>
<Apply>
the interval
<Display Settings>
<Message Display Time>
Enter a number for
Scrolling Speed
Adjust the speed for scrolling the screen by selecting from three levels.
Slow
Standard
Fast
<Preferences>
<Display Settings>
<Scrolling Speed>
Select the speed
Cursor Movement
Configure how the cursor moves after a character is entered on the screen. Select <Auto> to automatically move the cursor to the
right of the entered character after approximately 1 second. Select <Manual> to manually move the cursor to the right of the
entered character.
Auto
Manual
<Preferences>
<Manual>
<Display Settings>
<Cursor Movement>
Select <Auto> or
Language *2
Select the display language used for the display, reports, and lists.
English , French, Spanish, German, Italian, Dutch, Finnish, Portuguese, Norwegian, Swedish, Danish, Slovene, Czech, Hungarian,
Russian, Turkish, Greek, Estonian, Romanian, Slovak, Croatian, Bulgarian, Catalan, Polish, Latvian, Lithuanian
<Preferences>
<Display Settings>
㻠㻤㻡㻌㻛㻌㻢㻣㻢
<Language>
Select a language
Remote UI Language *2
Select the display language used for the Remote UI screens.
English , French, Spanish, German, Italian, Dutch, Finnish, Portuguese, Norwegian, Swedish, Danish, Czech, Hungarian, Russian,
Turkish, Polish
<Preferences>
<Display Settings>
㻠㻤㻢㻌㻛㻌㻢㻣㻢
<Remote UI Language>
Select a language
0ALJ-0AY
Timer Settings
All the settings about the timer are listed with short descriptions. Default settings are marked with a dagger (
).
NOTE
Asterisks (* )
Settings marked with "*1" cannot be imported or exported via the Remote UI.
Settings marked with "*2" may be unavailable or have different defaults depending on the country or region of purchase.
Settings marked with "*3" are only available for the MF8540Cdn / MF8230Cn.
Date/Time Settings
Auto Reset Time
Function After Auto Reset
Auto Sleep Time
Auto Offline Time
Date/Time Settings
Specify date and time settings, including the date format and the 12- or 24-hour clock display setting. The date and time that are
printed on each fax document, report, and list are determined by these settings.
Date Format *2
Select the date format (order of year, month, and day).
YYYY MM/DD
MM/DD/YYYY
DD/MM YYYY
<Timer Settings>
<Date/Time Settings>
<Date Format>
Select the date format
<Date/Time Settings>
<Time Format>
Select the display
Time Format
Select the 12- or 24-hour clock display setting.
12 Hour (AM/PM)
24 Hour
<Timer Settings>
setting
㻠㻤㻣㻌㻛㻌㻢㻣㻢
Current Date/Time Settings *1
Set the current date and time. Use
<AM>/<PM>.
/
to move the cursor, and
/
to specify the date and time or switch between
IMPORTANT
Set <Time Zone> before setting the current date and time. If the <Time Zone> setting is changed, the current date and time
are also changed accordingly.
<Timer Settings>
<Apply>
date and time
<Date/Time Settings>
<Current Date/Time Settings>
Set the
NOTE
The current date and time cannot be changed for 1 hour after daylight saving time is in effect.
Time Zone
Select the time zone. If the time zone setting is changed, the values set in <Current Date/Time Settings> are also changed
accordingly.
UTC-12:00 to UTC 0:00 to UTC+12:00
NOTE
UTC
Coordinated Universal Time (UTC) is the primary time standard by which the world regulates clocks and time. The correct UTC
time zone setting is required for Internet communications.
<Timer Settings>
<Date/Time Settings>
<Time Zone>
Select a time zone
Daylight Saving Time Settings *2
Enable or disable daylight saving time. If daylight saving time is enabled, specify the dates from which and to which daylight saving
time is in effect.
Off
On
㻠㻤㻤㻌㻛㻌㻢㻣㻢
Start: Month, Week, Day
End: Month, Week, Day
<Timer Settings>
a month and day <Apply>
<Date/Time Settings>
<Daylight Saving Time Settings>
Select
Auto Reset Time
If a key is not pressed for a specified period of time, the screen and the settings are initialized to display the default screen (Auto
Reset). Specify the interval at which the Auto Reset is performed. Select <0> to disable the Auto Reset function. The Auto Reset is not
performed in the following cases:
The setting menu is displayed.
The machine is processing data, such as when printing documents or sending or receiving faxes.
An error message is displayed and the error indicator is blinking (However, Auto Reset is performed when the error does not prevent
the user from continuing to use a function.)
0 (Auto Reset is disabled.)
1 to 2 to 9 (min.)
<Timer Settings>
<Auto Reset Time>
Set the Auto Reset time
<Apply>
NOTE
The screen displayed after the Auto Reset is performed can be selected in <Function After Auto Reset>.
Function After Auto Reset
Select whether to return the display to the default screen after the Auto Reset is performed. If <Default Function> is selected, the main
screen of the function selected in <Default Screen after Startup/Restoration> is displayed ( Default Screen after
Startup/Restoration). If <Selected Function> is selected, the display returns to the main screen of the function that was selected.
Default Function
Selected Function
<Timer Settings>
<Auto Reset Time>
Select <Default Function> or <Selected Function>
Auto Sleep Time
If the machine has not been operated or has had no data to process for a specified period of time, the machine enters sleep mode to
save energy consumption (Auto Sleep). Specify the period of time after which auto sleep is performed. Auto Sleep is not performed when
㻠㻤㻥㻌㻛㻌㻢㻣㻢
the setting menu is displayed. We recommend using the factory default settings to save the most power.
Entering Sleep Mode
MF8580Cdw / MF8550Cdn / MF8540Cdn
10 to 60 (min.)
MF8280Cw / MF8230Cn
20 to 60 (min.)
Auto Offline Time
If a key has not been pressed for a specified period of time after the screen below is displayed (the machine is set online for scanning),
the machine automatically becomes offline. Specify the time period at which the machine becomes offline. You can also set the machine
to remain online.
0 (The machine remains online.)
1 to 5 to 60 (min.)
<Timer Settings>
<Auto Offline Time>
Set the time period
<Apply>
Auto Shutdown Time *3
Set a timer to automatically shut down the machine after the specified period of idle time has elapsed since the machine entered the
sleep mode.
Setting Auto Shutdown Time (MF8540Cdn / MF8230Cn Only)
0 (Auto Shutdown is disabled.)
1 to 4 to 8 (hr.)
㻠㻥㻜㻌㻛㻌㻢㻣㻢
0ALJ-0C0
Common Settings
All the settings about the operation of the paper drawer and the paper feed method are listed with short
descriptions. Default settings are marked with a dagger ( ).
NOTE
Asterisks (* )
Settings marked with "*1" are only available when the optional paper drawer (drawer 2) is attached.
Settings marked with "*2" are only available for the MF8580Cdw / MF8550Cdn / MF8280Cw.
Settings marked with "*3" are only available for the MF8580Cdw / MF8550Cdn / MF8540Cdn.
Drawer Auto Selection On/Off
Switch Paper Feed Method
Drawer Auto Selection On/Off
Enable or disable the automatic drawer selection feature for the paper sources. If automatic drawer selection is set to <On> when
printing documents, the machine automatically selects a paper source that is loaded with the appropriate paper size. Also, when the
paper runs out, this setting enables continuous printing by switching from one paper source to another that is loaded with the same
paper size. You can select a function, such as copy or print, to enable this feature.
Copy
Multi-Purpose Tray
Off
On
Drawer 1
Off
On
Drawer 2 *1
Off
On
Printer
Drawer 1
Off
On
Drawer 2 *1
Off
On
Fax*2
Multi-Purpose Tray
Off
On
Drawer 1
Off
On
Drawer 2 *1
Off
On
Other
Multi-Purpose Tray
Off
On
Drawer 1
Off
On
Drawer 2 *1
Off
On
㻠㻥㻝㻌㻛㻌㻢㻣㻢
<Common Settings>
<Drawer Auto Selection On/Off>
Select <Off> or <On>
<Apply>
the paper source
Select the function
Select
Functions
Select the function for which you want to configure automatic drawer selection.
NOTE:
Select <Other> for functions such as printing reports and lists and printing images from a USB memory device.
Paper Sources
Select the paper source for which you want to enable.
NOTE:
<Multi-Purpose Tray> is not displayed if <Printer> was selected on the previous screen (
selection is always enabled for printing on paper fed from the manual feed slot.
). Automatic drawer
Switch of the settings
Select <On> to enable automatic drawer selection for the paper source you selected on the previous screen (
).
NOTE:
Make sure to select <On> for <Drawer 1> or <Drawer 2>. If <Off> is selected for both drawers, you cannot finish
the configuration.
Switch Paper Feed Method *3
Specify this setting when you print a document on paper with logos. To print on paper with logos, you need to change how the paper
loaded in the paper source is facing depending on whether you are performing 1- or 2-sided printing. However, if you change the setting
Loading
to <Print Side Priority>, you can just load the paper face down for both 1- and 2-sided printing. For more information, see
Preprinted Paper.
Multi-Purpose Tray
Speed Priority
Print Side Priority
Drawer 1
Speed Priority
Print Side Priority
Drawer 2 *1
Speed Priority
Print Side Priority
<Common Settings>
<Switch Paper Feed Method>
<Speed Priority> or <Print Side Priority>
Paper Sources
Select the paper source that you want to change the setting for.
<Speed Priority>
㻠㻥㻞㻌㻛㻌㻢㻣㻢
Select the paper source
Select
When using paper that has been preprinted with a logo, you need to change how it is facing when you perform 1sided and 2-sided printing.
NOTE:
We recommend selecting <Speed Priority> if you do not need to consider which side to print on.
<Print Side Priority>
To print on a specific side of paper, you do not need to flip over paper in the paper source whether 1- or 2-sided
printing is selected.
NOTE:
If <Print Side Priority> is set for a paper source that is loaded with paper you cannot use for 2-sided printing
( Paper), <Speed Priority> is applied to the paper source instead. In this case, you need to load the paper in
the same way as when <Speed Priority> is selected ( Loading Preprinted Paper).
1-sided printing speed may be slower when <Print Side Priority> is selected.
㻠㻥㻟㻌㻛㻌㻢㻣㻢
0ALJ-0C1
Copy Settings
All the settings about the copy are listed with short descriptions. Default settings are marked with a dagger (
).
NOTE
Asterisks (* )
Settings marked with "*1" are only available for the MF8580Cdw / MF8550Cdn / MF8540Cdn.
Settings marked with "*2" are only available when the optional paper drawer (drawer 2) is attached.
Change Default Settings
You can change the factory default settings about copy. The selected settings are used as the default settings of the copy function.
Changing Default Settings
Number of Copies
1 to 99
Density
Nine Levels
Original Type
Text/Photo/Map (Speed)
Text/Photo/Map
Text/Photo/Map (Quality)
Printed Image
Text
2-Sided *1
Off
1-Sided->2-Sided
2-Sided->2-Sided
2-Sided->1-Sided
Copy Ratio
Custom Ratio
100% (1:1)
400% (Max)
200%
141% A5->A4
70% A4->A5
50%
25% (Min)
Paper
Multi-Purpose Tray
Drawer 1
Drawer 2 *2
N on 1
Off
2 on 1
4 on 1
ID Card Copy
Collate
Off
On
Erase Frame
Off
On
Sharpness
Seven Levels
Color Balance
㻠㻥㻠㻌㻛㻌㻢㻣㻢
Yellow: 17 Levels
Magenta: 17 Levels
Cyan: 17 Levels
Black: 17 Levels
㻠㻥㻡㻌㻛㻌㻢㻣㻢
0ALJ-0C2
Fax Settings (MF8580Cdw / MF8550Cdn / MF8280Cw Only)
All the settings about the fax are listed with short descriptions. Default settings are marked with a dagger ( ).
NOTE
Asterisks (* )
Settings marked with "*1" may be unavailable or vary or have the different default depending on the country where you are
using the machine.
Settings marked with "*2" are only available for the MF8580Cdw / MF8550Cdn / MF8540Cdn.
Settings marked with "*3" cannot be imported or exported via the Remote UI.
Basic Settings
TX Function Settings
RX Function Settings
RX Print Settings
Fax Setup Guide
Basic Settings
Specify the basic settings for using the machine as a fax device.
Register Unit Telephone Number
Register the fax number for the machine.
Registering the Fax Number and Unit Name
Select Line Type *1
Select the telephone line type used for fax transmission.
Connecting the Telephone Line
Pulse
Tone
Off-Hook Alarm
Select whether the machine makes an alert sound when the handset of a telephone or the optional handset connected to the machine
is not properly set on the cradle. You can also adjust the volume of the alert sound.
Off
On
Three Levels
<Fax Settings>
volume of the alert sound
<Basic Settings>
<Apply>
㻠㻥㻢㻌㻛㻌㻢㻣㻢
<Off-Hook Alarm>
<On>
Select the
TX Function Settings
Specify settings for sending faxes.
Change Default Settings
Specify settings used for sending faxes. The selected settings are used as the default settings when scanning documents.
Changing Default Settings
Resolution
200 x 100
200 x 200
200 x 200
200 x 400
400 x 400
dpi
dpi
dpi
dpi
dpi
(Normal)
(Fine)
(Photo)
(Superfine)
(Ultrafine)
Density
Nine Levels
2-Sided Original*2
Off
Book Type
Calendar Type
Sharpness
Seven Levels
Register Unit Name (Fax)
Register the name of a company or person.
Registering the Fax Number and Unit Name
The registered name is sent as sender information to the destination.
TX Terminal ID
ECM TX
Enable or disable error correction mode (ECM). ECM checks for fax data errors and corrects them. To reduce errors on received
ECM RX.
faxes, see
Off
On
NOTE
ECM must be enabled on both the machine and the other fax device because error checks are performed on both the
sending and receiving devices.
Even when ECM is enabled, errors may occur due to telephone line conditions.
It may take a longer time than usual to process data when ECM is enabled because the error checks and corrections are
performed while the data is transmitted.
<Fax Settings>
<TX Function Settings>
<ECM TX>
<On>
Set Pause Time *1
For example, when you make calls by dialing "0 - (pause) - (telephone number)", 0 is dialed first and then a few seconds later, the
telephone number. When sending faxes overseas, you need to specify destinations by dialing "(international access code) - (country
code) - (area code) - (fax number)" but consecutive numbers that are input without pauses may not be recognized correctly. In this
case, try adding a pause after the international access code or the fax number. If the code or the number is still not recognized
Sending Faxes.
correctly, change the duration of the pause. For instructions on how to enter a pause, see step 3 on
1 to 4 to 15 (sec.)
㻠㻥㻣㻌㻛㻌㻢㻣㻢
<Fax Settings>
of pause <Apply>
<TX Function Settings>
<Set Pause Time>
Specify the duration
Auto Redial *1
Specify settings for Auto Redial, a function that automatically redials the fax number after several minutes if the first attempt fails
because the line is busy. You can specify how many times the machine redials and the interval between redials.
Off
On
Redial Times
1 to 2 to 10 (times)
Redial Interval
2 to 99 (min.)
Redial When Error Occurs
Off
On
<Fax Settings>
<Apply>
settings
<TX Function Settings>
<Auto Redial>
<On>
Specify the
<Redial Times>
Specifies how many times the machine redials. Use
<Apply>.
/
or the numeric keys to enter a number, and press
<Redial Interval>
Specifies the interval between redials. Use
<Apply>.
/
or the numeric keys to enter a number for the interval, and press
<Redial When Error Occurs>
Specifies whether to redial when a transmission error occurs. Use
<Apply>.
/
to select <Off> or <On>, and press
TX Terminal ID
Specify settings for adding the sender information, including the fax number and the name of the machine, to the fax header. The
recipient can check who sent the fax by looking at the added information.
Off
On
Print Position
Inside Image Area
Outside Image Area
Mark Number as
FAX
TEL
<Fax Settings>
<Apply>
the settings
<TX Function Settings>
㻠㻥㻤㻌㻛㻌㻢㻣㻢
<TX Terminal ID>
<On>
Specify
<Print Position>
Specifies the position to print the terminal ID information in the sent fax. Select <Inside Image Area> to print the
information inside the image area, or <Outside Image Area> to print the information outside the image area.
<Mark Number as>
Adds the "FAX" or "TEL" mark in front of the fax number registered for the machine ( Registering the Fax Number
and Unit Name). Select <TEL> to indicate that the notified number is a telephone number.
Check Dial Tone Before Sending *1
Select whether to check the dial tone before a fax number is dialed.
Off
On
<Fax Settings>
<TX Function Settings>
<Check Dial Tone Before Sending>
<On>
RX Function Settings
Specify settings for receiving faxes.
ECM RX
Enable or disable error correction mode (ECM). ECM checks for fax data errors and corrects them. To reduce errors on sent faxes,
ECM TX.
see
Off
On
NOTE
ECM must be enabled on both the machine and the other fax device because error check is performed on both the sending
and receiving devices.
Even when ECM is enabled, errors may occur due to telephone line conditions.
It may take a longer time than usual to process data when ECM is enabled because the error check and corrections are
performed while the data is transmitted.
<Fax Settings>
<RX Function Settings>
Incoming Ring *1
㻠㻥㻥㻌㻛㻌㻢㻣㻢
<ECM RX>
<On>
Specify settings for sounding a ring to notify you of incoming faxes. This feature is only available when <Auto> or <Fax/Tel Auto
Switch> is selected for the receive mode. Specify how many times the incoming call rings when the machine receives a fax call. You
can also disable the settings to prevent the incoming call from ringing.
Off
On
1 to 2
to 99 (times)
NOTE
If you use this feature in the <Auto> mode, you need to connect your telephone to the machine beforehand.
<Fax Settings>
<RX Function Settings>
<Apply>
how many times the incoming call rings
<Incoming Ring>
<On>
Specify
Remote RX *1
Specify settings for receiving a fax by operating a telephone that is connected to the machine (Remote Reception). When a fax is
sent to the machine, you can receive it just by picking up the handset of the telephone and entering a specific ID number by using
the telephone. This feature can save you the trouble of going all the way to the machine. For instructions on how to use Remote
Using a Telephone to Receive Faxes (Remote Reception).
Reception, see
Off
On
00 to 25
to 99
<Fax Settings>
<RX Function Settings>
<Apply>
ID number for receiving a fax
<Remote RX>
<On>
Specify the
Switch to Auto RX
Specify settings for automatically receiving a fax after the machine has rung for a specified time period. This feature is only available
when <Manual> is selected for the receive mode. By using this feature, faxes can be received even when no one is available to pick
up the handset.
Off
On
1 to 15
to 99 (sec.)
<Fax Settings>
<RX Function Settings>
Specify how long the incoming call rings
<Apply>
RX Print Settings
㻡㻜㻜㻌㻛㻌㻢㻣㻢
<Switch to Auto RX>
<On>
Specify settings for printing received faxes.
Print on Both Sides *2
Specify settings for printing received faxes on both sides of paper.
Off
On
<Fax Settings>
<RX Print Settings>
<Print on Both Sides>
<On>
Reduce RX Size
Specify settings for reducing the image size of a received document. You can select an automatic reduction ratio that reduces the
received document to size of the loaded paper. You can also select a ratio from a list.
Off
On
Ratio
Auto
97%
95%
90%
75%
Direction
Vertical/Horizontal
Vertical Only
<Fax Settings>
<Apply>
the settings
<RX Print Settings>
<Reduce RX Size>
<On>
Specify
<Ratio>
<Auto> reduces the image by a ratio that is based on the size of the loaded paper. <97%>, <95%>, <90%>, or
<75%> reduce the image by the corresponding ratio.
<Direction>
Select <Vertical/Horizontal> to reduce the image both vertically and horizontally. Select <Vertical Only> to reduce
only vertically.
RX Page Footer
Select whether to print information, including date and time of reception and page numbers, on the bottom of received faxes.
Off
On
㻡㻜㻝㻌㻛㻌㻢㻣㻢
<Fax Settings>
<RX Print Settings>
<RX Page Footer>
<On>
Continue Printing When Toner Is Low
If receiving faxes when toner is nearly empty, the machine holds them in memory instead of printing. However, if this function is
enabled, the machine continues printing.
Off
On
IMPORTANT
When this function is enabled, faxes may fade or blur. Because received documents are not stored in memory, you need to
ask the sender to resend the document.
<Fax Settings>
<RX Print Settings>
<Continue Printing When Toner Is Low>
<On>
Fax Setup Guide *3
Select to display on-screen instructions for specifying settings, including the fax number and the telephone line type.
Initial Settings for Fax Functions (MF8580Cdw / MF8550Cdn / MF8280Cw Only)
㻡㻜㻞㻌㻛㻌㻢㻣㻢
Configuring
0ALJ-0C3
Scan Settings
All the settings about the scan are listed with short descriptions. Default settings are marked with a dagger (
).
NOTE
Asterisks (* )
Settings marked with "*1" are only available for the MF8580Cdw / MF8550Cdn / MF8540Cdn.
Settings marked with "*2" cannot be imported or exported via the Remote UI.
TX Function Settings
USB Memory Settings
Output File Image Settings
Shortcut Key Settings
TX Function Settings *1
Specify settings used for scanning documents to send as e-mails or storing scanned documents in a shared folder. You can register the
sender name for e-mails.
Change Default Settings
Specify settings used for scanning documents to send as e-mails or storing scanned documents in a shared folder. The selected
Changing Default Settings
settings are used as the default settings when scanning documents.
E-Mail
Scan Size
A4
A5
File Format
PDF (Compact)
PDF
Density
Nine Levels
Original Orientation
Portrait
Landscape
Original Type
Text
Text/Photo
Photo
2-Sided Original
Off
Book Type
Calendar Type
Sharpness
Seven Levels
Data Size
Small: Memory Priority
Standard
Large: Image Quality Priority
Subject/Message
Subject
Attached Image
Message
㻡㻜㻟㻌㻛㻌㻢㻣㻢
Reply To
None
Specify from Address Book
Priority
Low
Standard
High
Windows (SMB)
Scan Size
A4
A5
File Format
PDF (Compact)
PDF
JPEG
TIFF
Density
Nine Levels
Original Orientation
Portrait
Landscape
Original Type
Text
Text/Photo
Photo
2-Sided Original
Off
Book Type
Calendar Type
Sharpness
Seven Levels
Data Size
Small: Memory Priority
Standard
Large: Image Quality Priority
Register Unit Name (E-Mail)
Register the sender name for e-mails. The registered name is displayed in e-mails, along with the e-mail address. If the sender
name is not registered, only the e-mail address is displayed.
<Scan Settings>
<Apply>
the sender name
<TX Function Settings>
<Register Unit Name (E-Mail)>
Enter
USB Memory Settings
Specify settings used for saving scanned documents to a USB memory device. The selected settings are used as the default settings
Changing Default Settings
when scanning documents.
Change Default Settings
Scan Size
A4
A5
File Format
PDF (Compact)
㻡㻜㻠㻌㻛㻌㻢㻣㻢
PDF
JPEG
TIFF
Density
Nine Levels
Original Orientation
Portrait
Landscape
Original Type
Text
Text/Photo
Photo
2-Sided Original*1
Off
Book Type
Calendar Type
Sharpness
Seven Levels
Data Size
Small: Memory Priority
Standard
Large: Image Quality Priority
Output File Image Settings
Specify settings for the gamma value and file compression ratio for converting scanned documents into files.
YCbCr TX Gamma Value
Select the gamma value used when converting scanned color documents into the specified file format. You can specify the same
gamma value as that of the monitor which is to be used for viewing the converted files. The files are displayed with brightness that
Setting Gamma Values
is true to the original documents.
Gamma
Gamma
Gamma
Gamma
1.0
1.4
1.8
2.2
PDF (Compact) Image Quality Level
Adjust the balance between data size and image quality to suit the type of document you are scanning when converting scanned
documents into PDF (Compact) files. <Data Size Priority> makes the compression ratio higher than normal to create smaller files with
lower image quality. On the other hand, <Image Quality Priority> makes the compression ratio lower than normal to create larger
Selecting a File Format
files with higher image quality.
Image Level in Text/Photo Mode or Photo Mode
Data Size Priority
Normal
Image Quality Priority
Image Level in Text Mode
Data Size Priority
Normal
Image Quality Priority
Shortcut Key Settings *2
and
keys. The settings include the computer that scanned images are saved in, the type of
Register scan settings for the
scan (color or black and white), and the file format (PDF or JPEG). Registering these settings enables you to scan documents into a
Scanning Using
specified computer just by pressing a key. You can view the registered settings by selecting <Confirm Destination>.
the [Scan > PC] Key
Register
Scan -> PC1
Off
USB Connection
㻡㻜㻡㻌㻛㻌㻢㻣㻢
Color Scan
B&W Scan
Custom 1
Custom 2
Network Connection
Color Scan
B&W Scan
Custom 1
Custom 2
Scan -> PC2
Off
USB Connection
Color Scan
B&W Scan
Custom 1
Custom 2
Network Connection
Color Scan
B&W Scan
Custom 1
Custom 2
Confirm Destination
Scan -> PC1
Scan -> PC2
㻡㻜㻢㻌㻛㻌㻢㻣㻢
0ALJ-0C4
Memory Media Print Settings
All the settings are about the memory media print listed with short descriptions. Default settings are marked
with a dagger ( ).
NOTE
Asterisks (* )
Settings marked with "*1" are only available when the optional paper drawer (drawer 2) is attached.
Settings marked with "*2" are only available for the MF8580Cdw / MF8550Cdn / MF8540Cdn.
Change Default Settings
Default Display Settings
File Sort Default Settings
File Name Display Format
Change Default Settings
Specify the USB Print settings. The selected settings are used as the default settings of the USB Print function.
USB Print Settings
Changing Default
Number of Copies
1 to 99
Paper
Multi-Purpose Tray
Drawer 1
Drawer 2 *1
N on 1
Off
2 on 1
4 on 1
2-Sided *2
Off
Book Type
Calendar Type
Print Date
Off
On
Print File Name
Off
On
Original Type
Photo Priority
Text Priority
Brightness
Five Levels
Halftones
Gradation
Error Diffusion
Default Display Settings
Select whether to display a list of file names or thumbnails for previewing when accessing files in a USB memory device.
㻡㻜㻣㻌㻛㻌㻢㻣㻢
Details
Images
<Memory Media Print Settings>
<Images>
<Default Display Settings>
Select <Details> or
<Details>
Displays file names and dates in list form.
<Images>
Displays thumbnails for previewing.
File Sort Default Settings
Select whether to display files in a USB memory device in ascending or descending order of file name or date.
Name (Ascending)
Name (Descending)
Date/Time (Ascending)
Date/Time (Descending)
<Memory Media Print Settings>
are displayed
<File Sort Default Settings>
Select the order of files that
File Name Display Format
Select whether to display short or long text for file names that are stored in a USB memory device.
Short File Name
Long File Name
<Memory Media Print Settings>
or <Long File Name>
<File Name Display Format>
㻡㻜㻤㻌㻛㻌㻢㻣㻢
Select <Short File Name>
<Short File Name>
Shortens a file name to as few as eight characters. To distinguish files that have similar names, numbers such as "~ 1"
or "~ 2" are added at the end of the file names.
<Long File Name>
Displays a file name up to 20 characters.
NOTE
The number of characters described above does not include the characters in file extensions, such as ".jpg".
㻡㻜㻥㻌㻛㻌㻢㻣㻢
0ALJ-0C5
Printer Settings
All the settings about the printer are listed with short descriptions. Default settings are marked with a dagger (
).
NOTE
Asterisks (* )
Settings marked with an asterisk (* ) are only available for the MF8580Cdw / MF8550Cdn / MF8540Cdn.
Priority of settings
Settings that are specified in an application or on the printer driver will override those specified on the machine. The settings
described in this section are especially useful if you are printing on an operating system such as UNIX on which the printer
drivers for the machine are not available.
Availability of settings
All the printer settings described in this section, except for <Paper Size Override> ( Paper Size Override), are only available
for PCL printing. Specifying these settings is unnecessary, for example, when you print using the UFRII LT printer driver.
Copies
2-Sided Printing
Default Paper
Paper Size Override
Print Quality
Layout
Auto Error Skip
Timeout
Color Mode
Gradation Settings
Compressed Image Output
PCL
Copies *
Set the number of copies to print.
1 to 99 (Copies)
<Printer Settings>
<Copies>
Set the number of copies to print
2-Sided Printing *
Select whether to make 2-sided printouts.
Off
On
㻡㻝㻜㻌㻛㻌㻢㻣㻢
<Apply>
<Printer Settings>
<2-Sided Printing>
Select <Off> or <On>
Default Paper *
Select the default setting for the size and type of the paper to print on.
NOTE
<Default Paper Size> and <Default Paper Type> cannot be specified separately. Specify the paper size in the <Default Paper
Size> screen, and then specify the paper type in the <Default Paper Type> screen.
Default Paper Size
Select the default setting for the size of the paper to print on.
A4
A5
B5
LTR
LGL
STMT
EXEC
No. 10 (COM10)
Monarch
DL
ISO-C5
Default Paper Type
Select the default setting for the type of the paper to print on.
Plain 1 (60-74 g/m²)
Plain 2 (70-84 g/m²)
Plain 3 (75-90 g/m²)
Recycled
Color
Heavy 1 (86-119 g/m²)
Heavy 2 (120-128 g/m²)
Heavy 3 (129-163 g/m²)
Coated 1 (100-110 g/m²)
Coated 2 (120-130 g/m²)
Coated 3 (155-165 g/m²)
Coated 4 (210-220 g/m²)
Transparency
Labels
Envelope
NOTE
If you select an envelope (<No. 10 (COM10)>, <Monarch>, <DL>, or <ISO-C5>) as the paper size in <Default Paper Size>,
only <Envelope> is available as a paper type.
<Printer Settings>
<Default Paper>
㻡㻝㻝㻌㻛㻌㻢㻣㻢
Select the paper size
Select the paper type
Paper Size Override
Select whether to switch between printing on A4 and LTR size paper if one of these paper sizes is loaded but the other is not.
Configuring Printer Settings on the Machine
Off
On
Print Quality *
Specify the print quality such as toner density and image data processing methods.
Density
Specify the print density for each toner color. As the value gets bigger, the density becomes darker.
Yellow
17 Levels
Magenta
17 Levels
Cyan
17 Levels
Black
17 Levels
<Printer Settings>
Specify the toner density
<Print Quality>
<Apply> <Apply>
<Density>
Select the toner color
Toner Density (Fine Adjust)
Adjust the toner density for each toner color. You can adjust the density separately for darker areas (<High>), medium areas
(<Medium>), and lighter areas (<Low>).
Yellow
High
17 Levels
Medium
17 Levels
Low
17 Levels
Magenta
High
17 Levels
Medium
17 Levels
Low
17 Levels
Cyan
High
17 Levels
Medium
17 Levels
Low
17 Levels
Black
High
17 Levels
Medium
㻡㻝㻞㻌㻛㻌㻢㻣㻢
17 Levels
Low
17 Levels
NOTE
The settings specified for <Toner Density (Fine Adjust)> are disabled when <Toner Save> is enabled.
<Printer Settings>
<Print Quality>
<Density>
Select the toner color
Select <High>, <Medium>, or <Low>
<Apply> repeatedly until <Settings applied.> is displayed.
<Toner Density (Fine Adjust)>
Specify the toner density
Press
Toner Save
Select whether to reduce toner consumption.
Off
On
IMPORTANT
When this setting is enabled, fine lines and portions with lighter print density may become blurred.
<Printer Settings>
<Print Quality>
<Toner Save>
Select <Off> or <On>
Gradation
Select the data processing method to reproduce gradations. Select <High 2> if you want to print in better quality than when selecting
<High 1>.
High 1
High 2
<Printer Settings>
<Print Quality>
<Gradation>
Select <High 1> or <High 2>
Special Smoothing Mode
Select a smoothing mode to print documents with a smooth finish. If you are not satisfied with the printing results of <Mode 1>
(default), you can try printing again by using another.
Mode 1
Mode 2
㻡㻝㻟㻌㻛㻌㻢㻣㻢
Mode
Mode
Mode
Mode
3
4
5
6
<Printer Settings>
smoothing mode
<Print Quality>
<Special Smoothing Mode>
Select the
<Mode 1>
Prints the edges of dark colored text, lines, and graphics smoothly. This setting is recommended for most types of
printing.
<Mode 2>
Prints both edges and interior halftones of graphics smoothly.
<Mode 3>
Prints dark colored text and lines on halftone backgrounds smoothly.
<Mode 4>
Prints the edges of objects (text, lines, graphics and photographic images) smoothly.
<Mode 5>
Prints images and halftones evenly.
<Mode 6>
Prints entire objects smoothly.
NOTE
When <Error Diffusion> is enabled for <Halftones> ( Halftones), <Mode 1>, <Mode 2>, <Mode 3>, and
<Mode 4> apply the same effect on printouts as <Mode 6> does.
Line Control
Select the data processing method to reproduce lines. If <Resolution Priority> is selected, lines are processed to print as clearly as
text. If <Gradation Priority> is selected, lines are processed as graphics and printed in similar tones and gradations to those of
graphics.
Resolution Priority
Gradation Priority
<Printer Settings>
<Gradation Priority>
<Print Quality>
Layout *
㻡㻝㻠㻌㻛㻌㻢㻣㻢
<Line Control>
Select <Resolution Priority> or
Specify the page layout settings such as binding position and margin values.
Binding Location
Select the binding position of the paper (along the long edge or the short edge). For 2-sided printing, image orientation is
in the illustrations below represent margins.
automatically arranged to produce the correct layout.
When the binding position is on the long edge of the paper:
When the binding position is on the short edge of the paper:
Long Edge
Short Edge
NOTE
You cannot create a binding margin with this setting alone. Use this setting in combination with the <Gutter> setting to set
the binding margin for the selected binding position.
<Printer Settings>
<Layout>
<Binding Location>
Select <Long Edge> or <Short
Edge>
Gutter
Specify the binding margin to apply to the binding position selected in the <Binding Location> setting.
-50.0 to ±0 to +50.0 (mm)
IMPORTANT
If this setting moves any of the print data outside the printable area, the portion outside the printable area will not be
printed.
<Printer Settings>
<Layout>
<Gutter>
Specify the binding margin
<Apply>
Offset Short Edge (Front)
Specify the print position by setting the offset value for the short edge on the front side of the paper. Increasing the value moves
㻡㻝㻡㻌㻛㻌㻢㻣㻢
the print position to the right. Decreasing the value moves the print position to the left.
-50.0 to ±0 to +50.0 (mm)
IMPORTANT
If this setting moves any of the print data outside the printable area, the portion outside the printable area will not be
printed.
NOTE
You can specify this setting in combination with the <Offset Long Edge (Front)>, <Offset Short Edge (Back)>, and <Offset
Long Edge (Back)>. By specifying all four settings, for example, the print position is shifted as shown in the illustration
below.
If the offset settings are specified in combination with the <Gutter> setting, the specified values are added together.
value
<Printer Settings>
<Apply>
<Layout>
<Offset Short Edge (Front)>
Specify the offset
Offset Long Edge (Front)
Specify the print position by setting the offset value for the long edge on the front side of the paper. Increasing the value moves the
print position downward. Decreasing the value moves the print position upward.
-50.0 to ±0 to +50.0 (mm)
IMPORTANT
If this setting moves any of the print data outside the printable area, the portion outside the printable area will not be
printed.
<Printer Settings>
<Apply>
<Layout>
<Offset Long Edge (Front)>
Specify the offset value
Offset Short Edge (Back)
Specify the print position by setting the offset value for the short edge on the back side of the paper. Increasing the value moves
the print position to the right. Decreasing the value moves the print position to the left.
-50.0 to ±0 to +50.0 (mm)
IMPORTANT
㻡㻝㻢㻌㻛㻌㻢㻣㻢
If this setting moves any of the print data outside the printable area, the portion outside the printable area will not be
printed.
value
<Printer Settings>
<Apply>
<Layout>
<Offset Short Edge (Back)>
Specify the offset
Offset Long Edge (Back)
Specify the print position by setting the offset value for the long edge on the back side of the paper. Increasing the value moves the
print position downward. Decreasing the value moves the print position upward.
-50.0 to ±0 to +50.0 (mm)
IMPORTANT
If this setting moves any of the print data outside the printable area, the portion outside the printable area will not be
printed.
<Printer Settings>
<Apply>
<Layout>
<Offset Long Edge (Back)>
Specify the offset value
Auto Error Skip *
Select whether to automatically perform error skip to bypass errors and continue printing when an error occurs with the print data. If
<Off> is selected, you can perform error skip by using the operation panel.
Off
On
NOTE
Error skip bypasses errors in print data, so the document may not be printed correctly.
You can manually perform error skip.
(Status Monitor) <Copy/Print Job>
<Printer Settings>
<Job Status>
Select the document containing errors
<Auto Error Skip>
Timeout *
㻡㻝㻣㻌㻛㻌㻢㻣㻢
Select <Off> or <On>
<Skip Error>
Set the time period after which the machine deletes incomplete print data from memory. The machine deletes incomplete print data
because it may have some errors and prevent the machine from printing the next document.
5 to 15 to 300 (sec.)
NOTE
Provide the machine with enough time to receive all the print data from the computer, especially when printing large amounts
of data. If you specify a time period that is too short, the machine may not receive all the print data in time for printing.
<Printer Settings>
<Timeout>
Set the time period
<Apply>
Color Mode *
Select whether to print in color or in black and white. If <Auto (Color/B&W)> is selected, the machine automatically switches the color
mode, printing color pages in color, and black and white pages in black and white.
Auto (Color/B&W)
Color
Black and White
<Printer Settings>
<Color Mode>
Select the color mode
Gradation Settings *
Specify this setting to improve the smoothness of the gradations of graphics and photographic images. Select <Smooth 1> to improve
the smoothness moderately. Select <Smooth 2> to apply a stronger smoothing effect than <Smooth 1>. You can specify this setting
separately for graphics and images.
Gradation
Off
Smooth 1
Smooth 2
Apply to Graphics
Off
On
Apply to Images
Off
On
<Printer Settings>
<Gradation Settings>
㻡㻝㻤㻌㻛㻌㻢㻣㻢
Specify the gradation settings
Compressed Image Output *
Specify how print data should be treated when it is too large to be held in the memory of the machine. The machine can either print the
data in lower image quality (<Output>) or cancel printing and display an error message (<Display Error>).
Output
Display Error
<Printer Settings>
<Compressed Image Output>
Select <Output> or <Display Error>
PCL *
Specify the PCL printing settings such as page layout and print quality.
Paper Save
Select whether to save paper by not outputting blank pages in documents. By selecting <On>, the machine will not output blank
pages. To output all your document data when printing, including any blank pages that you have inserted in your document, select
<Off>.
Off
On
<Printer Settings>
<PCL>
<Paper Save>
Select <Off> or <On>
Orientation
Select <Portrait> (vertical orientation) or <Landscape> (horizontal orientation) for the page orientation.
Portrait
Landscape
<Printer Settings>
<PCL>
<Orientation>
Select <Portrait> or <Landscape>
Font Number
Specify the font to use by selecting a corresponding font ID number from 0 to 54. You can print the PCL font list with font samples
PCL Font List (MF8580Cdw / MF8550Cdn / MF8540Cdn Only)
from the operation panel.
0 to 54
㻡㻝㻥㻌㻛㻌㻢㻣㻢
<Printer Settings>
<PCL>
<Font Number>
Select the font number
<Apply>
Point Size
Set the font size in points, adjustable in 0.25 increments. You can specify this setting only when a proportionally-spaced scalable font
is selected in <Font Number>.
4.00 to 12.00 to 999.75 (point)
<Printer Settings>
<PCL>
<Point Size>
Specify the point size
<Apply>
Pitch
Set the font pitch, or cpi (characters per inch), adjustable in 0.01 increments. You can specify this setting only when a fixed-pitch
scalable font or a bitmap font is selected in <Font Number>.
0.44 to 10.00 to 99.99 (cpi)
<Printer Settings>
<PCL>
<Pitch>
Specify the pitch value
<Apply>
Form Lines
Set the number of lines printed on one page from 5 to 128. This setting is automatically changed according to the settings specified
in <Default Paper Size> and <Orientation>.
5 to 64 to 128 (lines)
<Printer Settings>
<PCL>
<Form Lines>
Specify the number of lines
<Apply>
Character Code
Select the character code that is most suited for the computer you send print data from. The specified setting is ignored when the
character code is controlled by the font specified in <Font Number>.
DESKTOP
ISO11
ISO15
ISO17
ISO21
PC775
PC8
PC850
PC852
PC8DN
㻡㻞㻜㻌㻛㻌㻢㻣㻢
ISO4
ISO6
ISO60
ISO69
ISOL1
ISOL2
ISOL5
ISOL6
LEGAL
MATH8
MCTEXT
MSPUBL
PC1004
PC8TK
PIFONT
PSMATH
PSTEXT
ROMAN8
VNINTL
VNMATH
VNUS
WIN30
WINBALT
WINL1
WINL2
WINL5
<Printer Settings>
<PCL>
<Character Code>
Select the character code
Custom Paper
Select whether to set a custom paper size. Select <On> to set the dimensions of the paper in <X dimension> and <Y dimension>.
Off
On
<Printer Settings>
<PCL>
<Custom Paper>
Select <Off> or <On>
Unit of Measure
Select the unit of measurement to use to set a custom paper size.
Millimeters
Inches
<Printer Settings>
<PCL>
<Unit of Measure>
Select <Millimeters> or <Inches>
X dimension
Specify the horizontal dimension (short edge) of the custom paper.
77 to 215 (mm)
<Printer Settings>
<PCL>
<X dimension>
㻡㻞㻝㻌㻛㻌㻢㻣㻢
Specify the dimension
<Apply>
Y dimension
Specify the vertical dimension (long edge) of the custom paper.
127 to 355 (mm)
<Printer Settings>
<PCL>
<Y dimension>
Specify the dimension
<Apply>
Append CR to LF
Select whether to append a carriage return (CR) when the machine receives a line feed code (LF). If <Yes> is selected, the print
position moves to the beginning of the next line when the machine receives an LF code. If <No> is selected, the print position moves
to the next line, just under the received LF code.
Yes
No
<Printer Settings>
<PCL>
<Append CR to LF>
Select <Yes> or <No>
Enlarge A4 Print Width
Select whether to expand the width of the printable area of A4 size paper in portrait orientation to that of LTR size.
Off
On
<Printer Settings>
<PCL>
<Enlarge A4 Print Width>
Select <Off> or <On>
Halftones
Specify the data processing method to reproduce halftones. You can select whether to use <Error Diffusion>, and you can also select
㻡㻞㻞㻌㻛㻌㻢㻣㻢
<Resolution> or <Gradation> separately for text, graphics, and images.
Error Diffusion
Off
On
Resolution/Gradation
Text
Resolution
Gradation
Graphics
Resolution
Gradation
Image
Resolution
Gradation
<Printer Settings>
<PCL>
<Halftones>
Specify the halftones settings
<Error Diffusion>
Prints small text and fine lines with a clear finish. If this setting is set to <On>, <Resolution> and <Gradation>
settings that are specified for <Text>, <Graphics>, and <Image> are disabled.
<Resolution>/<Gradation>
<Resolution>
Prints text and thin lines with clear edges.
<Gradation>
Prints gradations such as those in graphics or photographic images with a smooth finish.
RGB Source Profile
Select the source profile for color matching to print RGB data, according to the monitor you are using. If you are using an sRGBcompatible computer display, and select <sRGB>, the tone of printouts will be close to how they appear on your computer display.
Select <Gamma 1.5>, <Gamma 1.8>, or <Gamma 2.4> to adjust the gamma value as necessary. As the value gets bigger, the
printout becomes darker. You can specify the setting separately for text, graphics, and images.
Text
sRGB
Gamma 1.5
Gamma 1.8
Gamma 2.4
Graphics
sRGB
Gamma 1.5
Gamma 1.8
Gamma 2.4
Image
sRGB
Gamma 1.5
Gamma 1.8
Gamma 2.4
NOTE
This setting is enabled only when <CMS> is selected in <CMS (Matching)/Gamma>.
㻡㻞㻟㻌㻛㻌㻢㻣㻢
<Printer Settings>
<PCL>
Select the source profile
<Image>
<RGB Source Profile>
Select <Text>, <Graphics>, or
Output Profile
Select the output profile for color matching. It is recommended that you use the default <Normal> setting for printing text or graphic
data, and the <Photo> setting for printing photographic images.
Text
Normal
Photo
Graphics
Normal
Photo
Image
Normal
Photo
NOTE
This setting is enabled only when <CMS> is selected in <CMS (Matching)/Gamma>.
<Printer Settings>
<PCL>
Select <Normal> or <Photo>
<Image>
<Output Profile>
Select <Text>, <Graphics>, or
Matching Method
Select the color matching method to match the color of the printouts to that displayed on the computer display. You can specify the
setting separately for text, graphics, and images.
Text
Perceptual
Saturation
Colorimetric
Graphics
Perceptual
Saturation
Colorimetric
Image
Perceptual
Saturation
Colorimetric
NOTE
This setting is enabled only when <CMS> is selected in <CMS (Matching)/Gamma>.
<Printer Settings>
<PCL>
Select the matching method
<Image>
<Matching Method>
㻡㻞㻠㻌㻛㻌㻢㻣㻢
Select <Text>, <Graphics>, or
<Perceptual>
Performs color matching suitable for printing photographic images when <Photo> for the <Output Profile> setting has
also been selected.
<Saturation>
Performs color matching for printing vivid graphics such as illustrations and diagrams.
<Colorimetric>
Performs color matching to minimize the differences in color between originals such as color samples or logos and
printouts.
Gray Compensation
Select whether to print gray (black and white) data using only the black toner. You can specify the setting separately for text,
graphics, and images.
Text
Off
On
Graphics
Off
On
Image
Off
On
<Printer Settings>
<PCL>
Select <Off> or <On>
<Image>
<Gray Compensation>
Select <Text>, <Graphics>, or
<Off>
Prints gray (black and white) data by using the yellow, magenta, cyan, and black toner. Gradation reproducibility of
dark areas improves in comparison to <On>.
<On>
Prints gray (black and white) data by using only the black toner and reduces toner bleeding.
CMS (Matching) Selection
㻡㻞㻡㻌㻛㻌㻢㻣㻢
You can set the machine or a computer (printer driver) to perform color matching. If <Printer> is selected, the machine performs
color matching, and if <Host> is selected, the computer or printer driver performs it.
Printer
Host
<Printer Settings>
<Host>
<PCL>
<CMS (Matching) Selection>
Select <Printer> or
CMS (Matching)/Gamma
Select the processing method for print data. You can select to perform color matching or to perform gamma correction. You can
specify the setting separately for text, graphics, and images.
Text
Gamma
CMS
Graphics
Gamma
CMS
Image
Gamma
CMS
<Printer Settings>
<Graphics>, or <Image>
<PCL>
<CMS (Matching)/Gamma>
Select <Gamma> or <CMS>
Select <Text>,
Gamma Correction
Set the gamma correction value to match the brightness of the printouts to that of the original data. If the printout looks darker or
brighter than original, change the gamma correction value. As the value gets bigger, the printout becomes darker. You can apply the
setting separately for text, graphics, and images.
Text
1.0
1.4
1.8
2.2
Graphics
1.0
1.4
1.8
2.2
Image
1.0
1.4
1.8
2.2
NOTE
This setting is enabled only when <Gamma> is selected in <CMS (Matching)/Gamma>.
㻡㻞㻢㻌㻛㻌㻢㻣㻢
<Printer Settings>
<PCL>
Set the gamma value
<Image>
<Gamma Correction>
Select <Text>, <Graphics>, or
Advanced Smoothing
Select how jagged outlines of text and graphics are smoothed. <Smooth 2> applies a stronger smoothing effect than <Smooth 1>.
You can apply the setting separately for text and graphics.
Advanced Smoothing
Off
Smooth 1
Smooth 2
Apply to Graphics
Off
On
Apply to Text
Off
On
<Printer Settings>
<PCL>
<Advanced Smoothing>
㻡㻞㻣㻌㻛㻌㻢㻣㻢
Specify the smoothing setting
0ALJ-0C6
Adjustment/Maintenance
All the settings about adjustment and maintenance are listed with short descriptions. Default settings are
marked with a dagger ( ).
NOTE
Asterisks (* )
Settings marked with an asterisk (* ) are only available when the optional paper drawer (drawer 2) is attached.
Auto Adjust Gradation
Auto Correction Settings
Correct Print Color Mismatch
Black Text Processing for Color
Special Processing
Clean Fixing Unit
Clean ITB
Clean Feeder
Auto Adjust Gradation
Adjust the gradation, density, and color in copies or printouts.
Correcting the Gradation
Full Adjust
Quick Adjust
Adjust Copy Image
Auto Correction Settings
Select whether to automatically perform a quick gradation adjustment or color shift correction after the machine is turned ON.
Auto Adjust Image Regularly
Select when to make an automatic quick gradation adjustment. If <On> is selected, quick adjustment is automatically made after the
machine is turned ON. If <Off> is selected, a quick adjustment is made when the first printing is completed after the machine is
turned ON. You can also perform this adjustment manually ( Quick Adjust).
Off
On
<Adjustment/Maintenance>
Select <On> or <Off>
<Auto Correction Settings>
<Auto Adjust Image Regularly>
Correct Print Color Mismatch When Main Power is ON
Select whether to automatically perform the Correct Print Color Mismatch function after the machine is turned ON. You can also
perform this adjustment manually ( Correcting "Print Color Mismatch").
㻡㻞㻤㻌㻛㻌㻢㻣㻢
Off
On
<Adjustment/Maintenance>
<Auto Correction Settings>
Select <On> or <Off>
When Main Power is ON>
<Correct Print Color Mismatch
Correct Print Color Mismatch
Use this function if color shift has blurred the image.
Correcting "Print Color Mismatch"
Black Text Processing for Color
Adjust the threshold value to determine whether to print black text in color documents by using only black toner or by using a mixture of
black and color toners. You can set values for the feeder and the platen glass separately.
Adjusting Values for Text Color
Reproducibility in Color Documents
Feeder
Seven Levels
Platen Glass
Seven Levels
Special Processing
If the print results on special types of paper are not satisfactory, the following settings may improve the quality of the printouts.
Special Paper Processing
When printing on the back side of printed paper, rough paper, or envelopes, the print results may be improved by adjusting the
following settings.
Manual Back Side Settings (for 2-Sided Only)
If printouts on the back side of printed paper are too light, select <On>. You can specify this setting separately for each paper
source.
Multi-Purpose Tray
Off
On
Drawer 1
Off
On
Drawer 2 *
Off
On
<Adjustment/Maintenance>
<Special Processing>
<Special Paper Processing>
<Manual Back Side Settings (for 2-Sided Only)>
Select the paper source
<On>
㻡㻞㻥㻌㻛㻌㻢㻣㻢
Rough Paper Settings
When printing on rough paper, especially when color images are printed too light, select <On>. You can specify the settings
separately for each paper source.
Multi-Purpose Tray
Off
On
Drawer 1
Off
On
Drawer 2 *
Off
On
<Adjustment/Maintenance>
<Special Processing>
<Rough Paper Settings>
Select the paper source
<Special Paper Processing>
<On>
Envelope Cling Prevention
If envelope flaps cling to the envelope bodies when printing, select <On>.
Off
On
<Adjustment/Maintenance>
<Envelope Cling Prevention>
<Special Processing>
<On>
<Special Paper Processing>
Envelope Switch
Adjust this setting if envelope printouts are light, or envelopes do not feed smoothly.
Envelope 1
Envelope 2
㻡㻟㻜㻌㻛㻌㻢㻣㻢
<Adjustment/Maintenance>
<Special Processing>
<Envelope Switch>
Select <Envelope 1> or <Envelope 2>
<Special Paper Processing>
<Envelope 1>
Prints on envelopes with normal fixing power.
<Envelope 2>
Prints on envelopes with fixing power stronger than <Envelope 1>.
Special Mode P
If the printed paper curls, select <On>.
Off
On
<Adjustment/Maintenance>
<Special Processing>
<Special Mode P>
Clean Fixing Unit
Clean the fixing unit after a toner cartridge is replaced or if black streaks appear on printouts.
Fixing Unit
Clean ITB
Clean the transfer belt inside the machine to prevent the print quality from deteriorating.
Transfer Belt
Clean Feeder
Clean the feeder rollers if documents become dirty after being fed through the feeder.
㻡㻟㻝㻌㻛㻌㻢㻣㻢
Feeder
<On>
0ALJ-0C7
System Management Settings
All the settings about System Management Settings are listed with short descriptions. Default settings are
marked with a dagger ( ).
NOTE
Asterisks (* )
Settings marked with "*1" are only available for the MF8580Cdw / MF8550Cdn / MF8280Cw.
Settings marked with "*2" have different defaults depending on the country or region of purchase.
Settings marked with "*3" cannot be imported or exported via the Remote UI.
Settings marked with "*4" are only available for the MF8580Cdw / MF8550Cdn / MF8540Cdn / MF8280Cw.
Settings marked with "*5" are only available for the MF8580Cdw / MF8550Cdn / MF8540Cdn.
Network Settings
System Manager Information Settings
Device Information Settings
Department ID Management On/Off
Security Settings
Communication Management Settings
Select Country/Region
Forwarding Settings
Store/Print When Forwarding
Remote UI On/Off
Restrict TX Function
Display Job Log
USB Device On/Off
Store to USB Memory
Memory Media Print On/Off
Product Extended Survey Program On/Off
Cloud Print On/Off
Secure Print Settings
PDL Selection (Plug and Play)
Update Firmware
Initialize Key and Certificate
Initialize Address Book
Initialize System Management Settings
Network Settings
See
Network Settings.
System Manager Information Settings
Specify the ID or PIN exclusively for Administrators who have access privileges to <Network Settings> and <System Management
Settings>. ID is <System Manager ID> and PIN is <System Manager PIN>. You can also register the name of an Administrator.
Setting the System Manager ID
System Manager ID and PIN
Enter a number of up to seven digits for the System Manager ID and PIN.
System Manager ID
System Manager PIN
㻡㻟㻞㻌㻛㻌㻢㻣㻢
System Manager Name
Enter up to 32 alphanumeric characters for the name of an Administrator.
Device Information Settings
Enter up to 32 alphanumeric characters for the name and the installation location to identify the machine.
Device Name
Location
<System Management Settings>
<Device Information Settings>
Enter <Device Name> or <Location> ( Entering Text)
or <Location>
Select <Device Name>
<Apply>
Department ID Management On/Off
Select whether to use the Department ID Management, a feature that uses IDs as user accounts to specify access privileges and
Setting the Department ID Management
maintain information on how the machine is used.
Off
On
<System Management Settings>
<Department ID Management On/Off>
Select <Off> or
<On>
Security Settings
Enable or disable settings for encrypted communication via SSL or IPSec, as well as settings for IP address or MAC address packet
filtering.
Use SSL
Select whether to use SSL encrypted communication.
Enabling SSL Encrypted Communication for the Remote UI
Off
On
<System Management Settings>
<Security Settings>
㻡㻟㻟㻌㻛㻌㻢㻣㻢
<Use SSL>
Select <Off> or
<On>
Restart the machine
Use IPSec
Select whether to perform encrypted communication by establishing a virtual private network (VPN) via IPSec.
Settings
Configuring IPSec
Off
On
<System Management Settings>
Restart the machine
or <On>
<Security Settings>
<Use IPSec>
Select <Off>
IPv4 Address Filter
Enable or disable settings for filtering packets sent to or received from devices with specified IPv4 addresses.
Addresses for Firewall Rules
Specifying IP
Outbound Filter
Off
On
Inbound Filter
Off
On
<System Management Settings>
Select <Outbound Filter> or <Inbound Filter>
<Security Settings>
<IPv4 Address Filter>
Select <Off> or <On>
Restart the machine
IPv6 Address Filter
Enable or disable settings for filtering packets sent to or received from devices with specified IPv6 addresses.
Addresses for Firewall Rules
Specifying IP
Outbound Filter
Off
On
Inbound Filter
Off
On
<System Management Settings>
Select <Outbound Filter> or <Inbound Filter>
<Security Settings>
<IPv6 Address Filter>
Select <Off> or <On>
Restart the machine
㻡㻟㻠㻌㻛㻌㻢㻣㻢
MAC Address Filter
Enable or disable settings for filtering packets sent to or received from devices with specified MAC addresses.
Addresses for Firewall Rules
Specifying MAC
Outbound Filter
Off
On
Inbound Filter
Off
On
<System Management Settings>
Select <Outbound Filter> or <Inbound Filter>
<Security Settings>
<MAC Address Filter>
Select <Off> or <On>
Restart the machine
Communication Management Settings *1
Specify settings for sending or receiving faxes.
Fax Settings
Specify the communication start speed settings and the R-key settings.
TX Start Speed
Adjust the communication start speed. This adjustment should be made when it takes a long time to start sending a fax due to a
poor telephone line connection.
33600 bps
14400 bps
9600 bps
7200 bps
4800 bps
2400 bps
<System Management Settings>
Select <TX Start Speed>
Settings>
<Communication Management Settings>
Select a communication start speed
<Fax
RX Start Speed
Adjust the communication start speed. This adjustment should be made when it takes a long time to start receiving a fax due to a
poor telephone line connection.
33600 bps
14400 bps
9600 bps
7200 bps
4800 bps
2400 bps
<System Management Settings>
Select <RX Start Speed>
Settings>
<Communication Management Settings>
Select a communication start speed
㻡㻟㻡㻌㻛㻌㻢㻣㻢
<Fax
R-Key Setting
If your machine is connected through a PBX (Private Branch Exchange), it is necessary to set the access method. You can set the
PBX type to <Prefix> or <Hooking>. If you register the outside line access number to the R-key, you can easily access the
outside line.
PSTN
PBX
Prefix
Hooking
*2
<System Management Settings>
<Communication Management Settings>
Select <R-Key Setting>
<PBX>
Select <Prefix> or <Hooking>
Settings>
<Apply>
outside line access number if you select <Prefix>
<Fax
Enter the
<PBX>
Select the type of PBX you are using. If you select <Prefix>, register the prefix code on the next screen.
<Code>
Enter the prefix code using the numeric keys, select <Pause>, press
a pause, the prefix code is not registered.
, and then press <Apply>. If you do not insert
Memory Lock Settings
Select whether to store received faxes without immediately printing them. Stored fax documents can be printed at any time by
Storing Received Faxes into Memory (Memory Reception)
changing the setting to <Off>.
Off
On
Memory Lock PIN
Report Print
Off
On
Memory Lock Time
Off
On
Memory Lock Start Time
Memory Lock End Time
Select Country/Region *3
Specify the country or region where the machine is used. The default setting may vary depending on the setting selected at initial powerTurning ON the Power and Configuring Initial Settings
on.
Austria (AT)
Belarus (BY)
Belgium (BE)
Czech Republic (CZ)
Denmark (DK)
Egypt (EG)
Finland (FI)
France (FR)
Germany (DE)
Greece (GR)
Hungary (HU)
Netherlands (NL)
Norway (NO)
Poland (PL)
Portugal (PT)
Russia (RU)
Saudi Arabia (SA)
Slovenia (SI)
South Africa (ZA)
Spain (ES)
Sweden (SE)
Switzerland (CH)
㻡㻟㻢㻌㻛㻌㻢㻣㻢
Ireland (IE)
Italy (IT)
Jordan (JO)
Luxembourg (LU)
Ukraine (UA)
Great Britain (GB)
Other
<System Management Settings>
<Select Country/Region>
Select a country or region
Forwarding Settings *1 *3
Select whether to forward all the received fax documents to a specified destination. In addition to a fax number, you can also specify an
e-mail address or a shared folder in a computer as the forwarding destination.
Forwarding All the Received Documents
Automatically
Off
On
Store/Print When Forwarding *1
When <Forwarding Settings> is set to <On>, specify settings for printing or storing forwarded fax documents in memory.
Print Images
Select whether to print forwarded fax documents. You can set the machine to print forwarded documents only when an error occurs.
Printing Documents to be Forwarded
Off
On
Only When Error Occurs
Store Images in Memory
Select whether to store fax documents in memory when they are not successfully forwarded. You can resend or print the documents
Printing/Resending/Deleting Documents that Failed to be Forwarded
later as necessary.
Off
Only When Error Occurs
Remote UI On/Off *3
Select whether to use the Remote UI, a feature that enables you to specify the machine settings by using a Web browser.
Remote UI
Off
On
Restrict TX Function *4
Specify settings for restricting access to sending functions for selected destinations.
Address Book PIN
㻡㻟㻣㻌㻛㻌㻢㻣㻢
Disabling
Specify a PIN and require entering it to add new entries to or edit existing entries in the Address Book.
Address Book
Setting a PIN for
Restrict New Destinations
Select whether to limit the fax numbers and e-mail addresses that can be specified as destinations to those already registered in the
Limiting Available Destinations
Address Book.
Off
On
Allow Fax Driver TX *1
Enable or disable PC faxing (sending faxes from a computer).
Only)
Prohibiting PC Faxing (MF8580Cdw / MF8550Cdn / MF8280Cw
Off
On
Restrict Resending from Log
Select whether to prevent a destination from being selected from the sent job logs.
Destinations
Disabling Use of Previously Used
Off
On
Confirm Entered Fax Number *1
Select whether to require users to enter the fax number twice when it is entered by using the numeric keys.
Screen for Confirming the Fax Number (MF8580Cdw / MF8550Cdn / MF8280Cw Only)
Displaying the
Off
On
Coded Dial TX Confirmation
Select whether to display the details of an entered coded dial number when it is selected as a destination.
Destinations in Address Book
Displaying
Off
On
Restrict Sequential Broadcast *1
Select whether to prohibit sequential broadcasting, a feature that sends faxes to multiple destinations in succession.
Sequential Broadcasting (MF8580Cdw / MF8550Cdn / MF8280Cw Only)
Prohibiting
Off
Confirm Sequential Broadcast
Reject Sequential Broadcast
Display Job Log
Select whether to display the copying, printing, faxing, and scanning logs on the display of the machine and in the Communication
Management Report.
Off
On
<System Management Settings>
<Display Job Log>
㻡㻟㻤㻌㻛㻌㻢㻣㻢
Select <Off> or <On>
Restart the machine
USB Device On/Off
Enable or disable the USB port that is used for connecting the machine to a computer.
Computer
Restricting the USB Connection with a
Off
On
Store to USB Memory
Select whether to permit storing scanned documents into a USB memory device.
Restricting the Scan to USB Function
Off
On
Memory Media Print On/Off
Select whether to permit printing data from a USB memory device when it is attached to the machine.
Function
Restricting the USB Print
Off
On
Product Extended Survey Program On/Off
Enable or disable the Product Extended Survey Program (a program for the machine usage survey).
Off
On
<System Management Settings>
Restart the machine
<Off> or <On>
<Product Extended Survey Program On/Off>
Cloud Print On/Off
Enable or disable Google Cloud Print.
Preparing for Using Google Cloud Print
Off
On
㻡㻟㻥㻌㻛㻌㻢㻣㻢
Select
Secure Print Settings *5
Enable or disable Secure Print.
Printing via Secure Print
Off
On
Secure Print Deletion Time
10 to 30 to 240 (min.)
PDL Selection (Plug and Play)
Select a page description language so that the machine is detected as a printer that is compatible with that language when it is
connected to a computer by using Plug and Play. MF Driver Installation Guide
Network
Select a page description language so that the machine is detected as a printer that is compatible with that language when it is
detected over the network.
FAX *1
UFRII LT
UFRII LT (XPS)
PCL5 *5
PCL6 *5
USB
Select a page description language so that the machine is detected as a printer that is compatible with that language when it is
connected to a computer via USB.
UFRII LT
UFRII LT (XPS)
PCL5 *5
PCL6 *5
<System Management Settings>
<PDL Selection (Plug and Play)>
Select a page description language
Restart the machine
<USB>
Select <Network> or
<FAX>
Detects and connects the machine as a fax device.
<UFRII LT>
Detects and connects the machine as a UFRII LT printer.
<UFRII LT (XPS)>
Detects and connects the machine as a UFRII LT printer that is compatible with XML Paper Specification (XPS).
<PCL5>
Detects and connects the machine as a PCL5 printer.
<PCL6>
Detects and connects the machine as a PCL6 printer.
㻡㻠㻜㻌㻛㻌㻢㻣㻢
Update Firmware *3
Select how to install the firmware update according to the environment of the machine.
<Via PC>
Select to manually install the firmware update available on the Canon Web site yourself. For instructions on how to install the
update, see the instruction manual available on the Web site. When the machine uses a wireless LAN, update with <Via PC>
below or use a USB cable to connect.
<Via Internet>
Select to automatically install the firmware update without using a computer. Follow the on-screen instructions to perform the
update. The machine must be connected to the Internet.
Via PC
Via Internet
Initialize Key and Certificate *3
Select to restore [Key and Certificate Settings] and [CA Certificate Settings] to the factory defaults.
Initializing Key and Certificate
Initialize Address Book *3 *4
Select to restore the Address Book settings to the factory defaults.
MF8540Cdn / MF8280Cw Only)
Initializing Address Book (MF8580Cdw / MF8550Cdn /
Initialize System Management Settings *3
Select to restore the System Management Settings to the factory defaults. You can restore all the System Management Settings at once.
Initializing System Management Settings
Network Settings
System Manager Information Settings
Device Information Settings
Department ID Management On/Off
Security Settings
Communication Management Settings *1
Forwarding Settings *1
Store/Print When Forwarding*1
Remote UI On/Off
Restrict TX Function *4
Register LDAP Server *4
Display Job Log
USB Device On/Off
Store to USB Memory
Memory Media Print On/Off
Product Extended Survey Program On/Off
Cloud Print Settings
Secure Print Settings *5
PDL Selection (Plug and Play)
Initialize All
㻡㻠㻝㻌㻛㻌㻢㻣㻢
0ALJ-0C8
Initialize Menu
Select to restore the settings listed below to the factory defaults. You can restore all the settings listed below
Initializing Menu
at once, or you can restore individual settings separately.
NOTE
Asterisks (* )
Settings marked with an asterisk (* ) are only available for the MF8580Cdw / MF8550Cdn / MF8280Cw.
Preferences
Timer Settings
Common Settings
Copy Settings
Fax Settings *
Scan Settings
Memory Media Print Settings
Printer Settings
Initialize All
㻡㻠㻞㻌㻛㻌㻢㻣㻢
0ALJ-0C9
Troubleshooting
When a problem occurs, check this chapter to find out solutions before contacting Canon.
Paper Jams
If a document or paper jams, see
Clearing Jams to remove the jammed paper.
A Message or Error Code Appears
If the screen displays a message or error code (three digits), see the following sections.
When an Error Message Appears
When an Error Code Appears
Common Problems
If you suspect that the machine is malfunctioning, see the following sections before contacting Canon.
Common Problems
Installation/Settings Problems
Copying Problems
Printing Problems
Faxing/Telephone Problems (MF8580Cdw / MF8550Cdn / MF8280Cw Only)
Printing Results are Not Satisfactory
If printing results are not satisfactory, see
When You Cannot Print Properly.
When a Problem Cannot Be Solved
If a problem persists, see
When a Problem Cannot Be Solved to find out where to contact.
㻡㻠㻟㻌㻛㻌㻢㻣㻢
0ALJ-0CA
Clearing Jams
If a paper jams, <Paper jammed.> is displayed on the screen. Press <Next> to display simple solutions. If it is difficult to understand
the procedures on the display, see the following sections to clear jams.
MF8580Cdw / MF8550Cdn / MF8540Cdn
<Remove original from feeder.>
Document Jams in the Feeder (MF8580Cdw / MF8550Cdn / MF8540Cdn)
<Open the front cover.>
Paper Jams in the Front Side
<Remove the paper from the tray.>
Paper Jams in the Manual Feed Slot (MF8580Cdw / MF8550Cdn / MF8540Cdn)
<Pull out Drawer 1.>
<Pull out Drawer 2.>
Paper Jams in the Paper Drawer
<Open the back cover.>
Paper Jams in the Back Side
MF8280Cw / MF8230Cn
<Remove original from feeder.>
Document Jams in the Feeder (MF8280Cw / MF8230Cn)
<Lift the control panel.>
Paper Jams in the Front and Back Sides
<Pull out the drawer.> <Open the paper cover.>
Paper Jams in the Manual Feed Slot (MF8280Cw / MF8230Cn)
<Pull out the drawer.> <Remove the jammed paper.>
Paper Jams in the Paper Drawer
IMPORTANT
When removing the jammed paper, do not turn OFF the machine
Turning OFF the machine deletes the data that is being printed. Be especially careful when receiving fax documents.
If paper tears
Remove all the paper fragments to prevent them from becoming jammed.
If paper jams repeatedly
Tap the paper stack on a flat surface to even the edges of the paper before loading it into the machine.
Check that the paper is appropriate for the machine.
Paper
Check that no jammed paper fragments remain in the machine.
Do not forcibly remove the jammed document or paper from the machine
Forcibly removing the paper may damage parts. If you are not able to remove the paper, contact your local authorized Canon
dealer or the Canon help line.
When a Problem Cannot Be Solved
Document Jams in the Feeder (MF8580Cdw / MF8550Cdn / MF8540Cdn)
If there are documents placed in the feeder, remove them first. Then, follow the procedure below.
Remove the jammed document from the feeder cover.
㻡㻠㻠㻌㻛㻌㻢㻣㻢
1
2
3
1
Open the feeder cover.
2
Move the lever to unlock.
3
Gently pull out the document.
Remove the jammed document from the inner cover inside the feeder.
1
Hold the green knob, and open the inner cover.
2
Gently pull out the document.
3
Close the inner cover.
Return the lever back in place, and close the feeder cover.
Paper Jams in the Front Side
㻡㻠㻡㻌㻛㻌㻢㻣㻢
1
Open the front cover.
2
Lift the operation panel.
3
Gently pull out the paper.
4
Lower the operation panel and the front cover.
Paper Jams in the Manual Feed Slot (MF8580Cdw / MF8550Cdn / MF8540Cdn)
If there is paper loaded in the tray, remove it first. Do not forcibly remove jammed paper from the machine. If the jammed paper
cannot be removed easily, proceed to the next step.
1
2
Remove the jammed paper in the tray.
1
Gently pull out the paper.
2
Close the tray.
Remove the jammed paper inside the tray.
1
Pull out the paper drawer.
㻡㻠㻢㻌㻛㻌㻢㻣㻢
IMPORTANT:
Make sure to hold the paper drawer with both hands, and pull it out gently. Otherwise, you may damage the paper
drawer by dropping it, if it slides out too easily.
2
Hold the green knobs, and push down the part shown in the figure.
3
Gently pull out the paper.
IMPORTANT:
Do not touch the rubber pad
Touching it may deteriorate print quality.
3
Hold the green knobs, and return the part shown in the figure back in place.
Return the part shown in the figure back in place until it clicks.
4
5
Set the paper drawer.
When the screen shown below is displayed, use
/
to select <Yes>, and press
Paper Jams in the Paper Drawer
1
Pull out the paper drawer.
㻡㻠㻣㻌㻛㻌㻢㻣㻢
.
IMPORTANT:
Make sure to hold the paper drawer with both hands, and pull it out gently. Otherwise, you may damage the paper drawer by
dropping it, if it slides out too easily.
2
Gently pull out the paper.
When the optional paper drawer (drawer 2) is attached, gently pull out the paper in the same way.
3
4
Set the paper drawer.
When the screen shown below is displayed, use
/
to select <Yes>, and press
Paper Jams in the Back Side
1
Open the rear cover.
2
Pull down the green knob toward you, and gently pull out the paper.
3
Gently pull out the paper.
㻡㻠㻤㻌㻛㻌㻢㻣㻢
.
4
Hold the green knobs, and firmly close the duplex unit (
5
Gently pull out the paper.
6
Close the rear cover.
) until it clicks.
Document Jams in the Feeder (MF8280Cw / MF8230Cn)
If there are documents placed in the feeder, remove them first. Then, follow the procedure below.
1
Open the feeder cover.
2
Gently pull out the document.
3
Close the feeder cover.
㻡㻠㻥㻌㻛㻌㻢㻣㻢
Paper Jams in the Front and Back Sides
1
Lift the operation panel.
2
Gently pull out the paper.
3
4
Lower the operation panel.
Open the rear cover.
5
Gently pull out the paper.
6
Close the rear cover.
Paper Jams in the Manual Feed Slot (MF8280Cw / MF8230Cn)
1
Pull out the paper drawer.
㻡㻡㻜㻌㻛㻌㻢㻣㻢
IMPORTANT:
Make sure to hold the paper drawer with both hands, and pull it out gently. Otherwise, you may damage the paper drawer by
dropping it, if it slides out too easily.
2
Open the cover.
3
Hold the green knobs, and push down the part shown in the figure.
4
Gently pull out the paper.
5
Hold the green knobs, return the part shown in the figure back in place, and close the cover.
Return the part shown in the figure back in place until it clicks.
6
7
Set the paper drawer.
When the screen shown below is displayed, use
/
to select <Yes>, and press
㻡㻡㻝㻌㻛㻌㻢㻣㻢
.
0ALJ-0CC
When an Error Message Appears
If you cannot send a fax or the memory is full, or you encounter operation problems, a message appears on the display. Find out more
information about messages in the following list.
Black & White copying is restricted. Do you want to log in?
Black and white copying is disabled in the Department ID Management.
Select <Yes> and log on with a Department ID for which black and white copying is not disabled. For the Department
ID and PIN, contact your Administrator.
Setting the Department ID Management
Black & White printing is restricted. Do you want to log in?
Black and white printing is disabled in the Department ID Management.
Select <Yes> and log on with a Department ID for which black and white printing is not disabled. For the Department
ID and PIN, contact your Administrator.
Setting the Department ID Management
Cannot change the destination type of destinations registered to a group.
A selected destination could not be edited because it was registered to Group Dial.
To change the type of destination that is registered to Group Dial, first delete the registered destination from Group
Dial. Next, change the destination type, and then register the destination to Group Dial again.
Cannot find the access point.
When automatic setting with WPS was attempted, a wireless router could not be detected within a specific
period of time.
Connect again paying attention to the time limit.
Setting Up Connection Using WPS Push Button Mode
Setting Up Connection Using WPS PIN Code Mode
An SSID or network key of a wireless router was entered manually, but the entry was incorrect.
Check the SSID and network key, and enter the correct ones again.
Checking the SSID and Network Key
Setting Up Connection by Specifying Detailed Settings
A wireless router could not be detected due to setting problems of the network to be connected.
Check whether the machine is properly installed and ready to connect to the network.
Installation/Settings Problems
If the problem persists, check the security settings of the wireless router.
㻡㻡㻞㻌㻛㻌㻢㻣㻢
Cannot print RX data.
A received document cannot be printed due to the following:
Replacement period of the toner cartridge is near.
A cover is opened.
A toner cartridge is not set.
Paper is not set.
A document or paper jams.
An abnormality occurs.
Check whether the problems above are occurring. If messages including causes and solutions appear on the display,
check the contents.
Cannot receive the fax. Make sure the fax was sent correctly by the sender.
The recipient's machine did not respond within 35 seconds.
Ask the sender to send the fax again. If you hear a beep, select <Start Receiving>, and press
to receive the fax.
Receiving Faxes
Cannot send because more than one destination is specified.
Sending a fax to multiple destinations is disabled.
To specify multiple destinations, you need to set <Restrict Sequential Broadcast> to <Off> or <Confirm Sequential
Broadcast>. For more information, contact your Administrator.
Prohibiting Sequential Broadcasting (MF8580Cdw / MF8550Cdn / MF8280Cw Only)
Cannot specify a group.
Group Dial was specified as a destination after pressing <Hook>.
Once you press <Hook>, you cannot specify destinations in Group Dial. Press <End> on the <Specify the destination.>
screen, and specify destinations to send fax documents without pressing <Hook>.
Cannot use Cloud printing. (Server authentication failed.)
Cloud Print is unavailable due to server authentication failure.
Check whether the date and time settings are correctly specified.
Date/Time Settings
Check whether the validity period for the CA certificate has expired. If it has expired, log on to the Remote UI in
System Manager Mode and install a CA certificate.
Verifying Key Pairs and Digital Certificates
Using CA-issued Key Pairs and Digital Certificates
Cannot use Cloud printing. (Server communication error.)
㻡㻡㻟㻌㻛㻌㻢㻣㻢
Cloud Print is unavailable due to an error.
Check whether the machine is correctly connected to a wireless LAN or wired LAN.
Connecting via Wireless LAN (MF8580Cdw / MF8280Cw Only)
Connecting via Wired LAN
A port that is used for Cloud Print may be blocked by a firewall or other protection. Check whether the 5222 port is
available with your computer.
If a proxy server is used on the network, check whether the proxy settings on the machine and the server are correct.
For details, contact your Network Administrator.
Setting a Proxy
Cannot use Cloud printing. Check settings from Remote UI.
Cloud Print is unavailable due to an error.
Check whether you are using a valid Google account.
Check whether the machine is properly registered to Google Cloud Print from Remote UI.
Registering the Machine with Google Cloud Print
Cleaning failed.
Paper jammed during cleaning.
Remove the jammed paper, set paper correctly, and perform cleaning again.
Clearing Jams
Feeder
Fixing Unit
The amount of toner required for cleaning the fixing unit is insufficient.
Cleaning requires toner. Replace the toner cartridge, and perform the cleaning again.
Replacing Toner Cartridges
Color copying is restricted. Do you want to log in?
Color copying is disabled in the Department ID Management.
Select <Yes> and log on with a Department ID for which color copying is not disabled. For the Department ID and PIN,
contact your Administrator.
Setting the Department ID Management
Color printing is restricted. Do you want to log in?
Color printing is disabled in the Department ID Management.
Select <Yes> and log on with a Department ID for which color printing is not disabled. For the Department ID and PIN,
contact your Administrator.
Setting the Department ID Management
㻡㻡㻠㻌㻛㻌㻢㻣㻢
Connection failed. Check the PSK settings.
The network key (PSK) of a wireless router to be connected is not set to the machine correctly.
Check the network key (PSK) of the wireless router, and set it to the machine again.
Checking the SSID and Network Key
Setting Up Connection by Selecting a Wireless Router
Setting Up Connection by Specifying Detailed Settings
If the problem persists even after checking the network key, check whether the machine is properly installed and ready
to connect to the network.
Installation/Settings Problems
Copying is restricted. Do you want to log in?
Copying is disabled in the Department ID Management.
Select <Yes> and log on with a Department ID for which copying is not disabled. For the Department ID and PIN,
contact your Administrator.
Setting the Department ID Management
Correction failed.
Appropriate paper that is required for correction is not loaded in a paper drawer.
Load plain or recycled A4 or Letter size paper into the paper drawer.
Full Adjust
Adjust Copy Image
An adjustment image that is required for correction is not placed on the platen glass correctly.
Place the adjustment image on the platen glass with the print side face down and the black stripe toward the back side
of the machine.
Full Adjust
Adjust Copy Image
Paper jammed during correction.
Remove the jammed paper, and perform correction again.
Clearing Jams
The amount of toner required for correction is insufficient.
Corrections require toner. Replace the toner cartridge, and perform correction again.
Replacing Toner Cartridges
The transfer belt inside the machine is dirty.
Perform automatic cleaning of the transfer belt.
Transfer Belt
Could not connect using the wireless LAN. Turn the main power OFF and ON, then configure the settings
again.
A connection failed due to an error while setting wireless LAN connection.
Restart the machine and set again.
If the problem persists even after restarting the machine, check whether the machine is properly installed and ready to
㻡㻡㻡㻌㻛㻌㻢㻣㻢
connect to the network.
Installation/Settings Problems
If the problem persists even after checking the wireless LAN connection, check the security settings of the wireless
router.
Could not connect using WPS. Wait a moment, then configure the settings again.
When automatic setting with WPS was attempted, the connection failed due to an error.
Wait for a while, and set again. If the problem persists, check whether the wireless router supports WPS.
If WPS is supported:
Check whether the machine is properly installed and ready to connect to the network.
Installation/Settings Problems
If WPS is not supported:
Set using another connecting method.
Connecting to a Wireless LAN (MF8580Cdw / MF8280Cw Only)
End of cart. parts lifetime. Cart. replacement recommended.
A toner cartridge may be set that cannot guarantee print quality because it has reached the end of its lifetime or
for other reasons.
Replacement of the toner cartridge is recommended. You can continue printing, but the print quality may deteriorate.
How to Replace Toner Cartridges
End of Toner Cart. Lifetime
The toner cartridge has reached the end of its lifetime.
Select one of the settings on the display.
NOTE
To display the replacement method, select <Display Recovery Steps> on the screen.
If you select <Continue Printing (Quality Not Guaranteed)>, you can continue printing, but the machine may
malfunction.
If the yellow, magenta, or cyan toner cartridge has reached the end of its lifetime and you select <Only
Continue Black & White Printing>, you can continue black and white printing only.
Faxing is restricted. Do you want to log in?
Faxing is disabled in the Department ID Management.
Select <Yes> and log on with a Department ID for which faxing is not disabled. For the Department ID and PIN,
contact your Administrator.
Setting the Department ID Management
㻡㻡㻢㻌㻛㻌㻢㻣㻢
No Paper
Paper is not loaded in the paper drawer or the manual feed slot.
Load the paper.
Loading Paper
Paper on which reports or lists can be printed is not loaded.
Reports or lists can be printed on A4 or Letter size paper. Load A4 or Letter size paper and set its size. Also, set the
paper type to <Plain 1>, <Plain 2>, <Plain 3>, <Recycled>, <Color>, or <Thin> depending on the loaded paper.
Loading Paper
Specifying Paper Size and Type
Paper on which received documents can be printed is not loaded.
Received documents can be printed on A4 or Letter size paper. Load A4 or Letter size paper and set its size. Also, set
the paper type to <Plain 1>, <Plain 2>, <Plain 3>, <Recycled>, <Color>, or <Thin> depending on the loaded paper.
Loading Paper
Specifying Paper Size and Type
NOTE:
If you print received documents on paper other than A4 or LTR size, some portions of the image may be missing or
the image may be divided and printed onto several sheets.
No response from the host.
The machine is not connected to a network correctly.
Check the machine and network settings, and connect again.
Connecting to a Network
Open System authentication failed. Check the WEP settings.
The authentication method of the machine is set to <Open System>, but that of a wireless router is set to
"Shared Key."
Connect again by manually changing the WEP authentication method to <Shared Key>.
Setting Up Connection by Specifying Detailed Settings
The MAC address of the machine is rejected because the MAC address filter is set at a wireless router.
Set the wireless router to permit the MAC address of the machine and your computer. For more information about how
to set, see the instruction manuals for your networking devices or contact your manufacturer. To check the MAC
<Network Settings> <Ethernet Driver Settings>.
address of the machine, press
Viewing the MAC Address
Paper jammed.
Paper jams.
Remove the jammed paper or document, and print again (Printing may resume automatically).
Clearing Jams
A document cannot be printed by using the manual feed slot because the paper drawer is not set correctly.
Set the paper drawer correctly, and push it in firmly. To resume printing, follow the procedure on the display, and then
when the screen displays the message <Is all of the jammed paper removed?>.
press
㻡㻡㻣㻌㻛㻌㻢㻣㻢
Paper Size & Settings Mismatch
The paper size setting on the operation panel does not match the loaded paper size.
Match the paper size setting specified in <Paper Settings> and the size of the paper that is actually loaded.
To use the loaded paper
Change the setting of <Paper Settings> to match the loaded paper size.
Specifying Paper Size and Type
NOTE:
If printing from a computer, check whether the paper size setting in the printer driver matches the loaded paper size.
To load paper without changing the settings
Load the paper with the size that is set to <Paper Settings>.
Loading Paper
Prepare the black toner cartridge.
Toner is running low.
Have a new toner cartridge ready.
About Replacement Toner Cartridges
NOTE
When copying or printing, you can continue printing.
If the machine is receiving a fax, or automatic report output is set, received faxes and reports will be stored in
the machine so that they do not appear faded after they are printed. To continue printing even if the toner is
running low, set <Continue Printing When Toner Is Low> to <On>.
Continue Printing When Toner Is Low
Prepare the cyan toner cartridge.
Toner is running low.
Have a new toner cartridge ready.
About Replacement Toner Cartridges
Prepare the magenta toner cartridge.
Toner is running low.
Have a new toner cartridge ready.
About Replacement Toner Cartridges
Prepare the yellow toner cartridge.
㻡㻡㻤㻌㻛㻌㻢㻣㻢
Toner is running low.
Have a new toner cartridge ready.
About Replacement Toner Cartridges
Printer Memory Full: Press Status Monitor
The memory became full of print data that could not be printed due to errors.
Cancel printing of the documents with errors or print the documents by selecting <Skip Error>.
Canceling Prints
Printing is restricted. Do you want to log in?
Printing is disabled in the Department ID Management.
Select <Yes> and log on with a Department ID for which printing is not disabled. For the Department ID and PIN,
contact your Administrator.
Setting the Department ID Management
Remote scanning is restricted.
Scanning that is operated by using a computer is disabled in the Department ID Management.
Log on to the Remote UI in System Manager Mode, display the edit screen of the corresponding Department ID, and
select the [Allow Scan Jobs with Unknown IDs] check box.
Blocking Jobs When Department ID Is Unknown
Remove tabs/pieces of tape from the toner cartridge.
The sealing tape on the toner cartridges is still attached.
Remove the sealing tape.
Preparing Toner Cartridges
How to Replace Toner Cartridges
Scanning is restricted. Do you want to log in?
Scanning is disabled in the Department ID Management.
Select <Yes> and log on with a Department ID for which scanning is not disabled. For the Department ID and PIN,
contact your Administrator.
Setting the Department ID Management
㻡㻡㻥㻌㻛㻌㻢㻣㻢
Shared Key authentication failed. Check the WEP settings.
The network key (the WEP key) of a wireless router to be connected is not set to the machine correctly.
Check the network key (the WEP key) of the wireless router, and set it to the machine again.
Checking the SSID and Network Key
Setting Up Connection by Specifying Detailed Settings
Connect again by selecting a wireless router or by manually changing the WEP authentication method to <Open
System>.
Setting Up Connection by Selecting a Wireless Router
Setting Up Connection by Specifying Detailed Settings
The authentication method of the machine is set to <Shared Key>, but that of the wireless router is set to
"Open System."
Change the WEP authentication method to "Shared Key" at the wireless router, and connect again. For more
information about how to change, see the instruction manuals for your networking devices or contact your
manufacturer.
Specifying and registering new destinations is restricted.
Only destinations that are registered in the Address Book can be specified to send a fax or e-mail.
To enter a new destination with the operation panel, or add or edit it in the Address Book, you need to set <Restrict
New Destinations> to <Off>. For more information, contact your Administrator.
Limiting Available Destinations
The black toner cartridge has reached the end of its lifetime
The toner cartridge has reached the end of its lifetime.
Replacement of the toner cartridge is recommended.
How to Replace Toner Cartridges
The computer is restricted.
Scanning that is operated on the operation panel is disabled in the Department ID Management.
Log on to the Remote UI in System Manager Mode, display the edit screen of the corresponding Department ID, and
select the [Allow Scan Jobs with Unknown IDs] check box.
Blocking Jobs When Department ID Is Unknown
The cyan toner cartridge has reached the end of its lifetime
The toner cartridge has reached the end of its lifetime.
Replacement of the toner cartridge is recommended.
How to Replace Toner Cartridges
㻡㻢㻜㻌㻛㻌㻢㻣㻢
The image cannot be recognized.
The image you selected could not be previewed when you were selecting files to print in a USB memory device.
Images with the "?" icon cannot be previewed. JPEG or TIFF images can be previewed, but some of the images may
not be able to be displayed.
Printing from USB Memory (USB Print)
The magenta toner cartridge has reached the end of its lifetime
The toner cartridge has reached the end of its lifetime.
Replacement of the toner cartridge is recommended.
How to Replace Toner Cartridges
The memory is full.
A fax could not be sent or received, or a document could not be scanned due to insufficient memory space.
If a sending or printing job is queued, wait until the job is completed.
If a received document is stored to memory, print or delete it.
Storing Received Faxes into Memory (Memory Reception)
If sending a document with many pages, divide it into multiple sections.
If sending a fax, reduce the resolution to scan the document.
Adjusting Resolution
If scanning, change the file format to reduce its file size.
Selecting a File Format
A scanned document could not be stored to a USB memory device due to insufficient memory space.
Delete unnecessary data to free space in the USB memory device, or connect a different USB memory device.
Scanning Documents Directly to USB Memory
The memory is full. Enter the original type settings again.
A document could not be scanned because memory became full during copying.
Set <Original Type> to <Original Type: Text/Photo/Map (Speed)>, and copy.
Selecting Document Type
The memory is full. Process secure print jobs.
Memory became full of secured documents that were not printed.
Print the secured documents that are stored in memory.
Printing via Secure Print
㻡㻢㻝㻌㻛㻌㻢㻣㻢
The memory is full. Scanning will be canceled. Do you want to print?
A document could not be scanned due to insufficient memory space.
Select whether to print up to the scanned pages or to cancel the scanning. If you cancel, divide the document into
multiple sections and scan them, or change the scanning settings.
The memory media is restricted.
The function that prints files in a USB memory device is disabled.
Set <Memory Media Print On/Off> to <On>.
Restricting the USB Print Function
The number of entered characters is incorrect or invalid characters are used.
The network key (the WPA/WPA2-PSK or WEP key) of a wireless router is not entered correctly.
Check the network key (the WPA/WPA2-PSK or WEP key) of the wireless router, and set it to the machine again. For
more information about how to check the network key, see the instruction manuals for your networking devices or
contact your manufacturer.
Checking the SSID and Network Key
Setting Up Connection by Selecting a Wireless Router
Setting Up Connection by Specifying Detailed Settings
The USB memory is restricted.
The function that stores a scanned document to a USB memory device is disabled.
Set <Store to USB Memory> to <On>.
Restricting the Scan to USB Function
The WEP key is not set correctly. Check the WEP settings.
The network key (the WEP key) of a wireless router to be connected is not set to the machine correctly.
Check the network key (the WEP key) of the wireless router, and set it to the machine again.
Checking the SSID and Network Key
Setting Up Connection by Selecting a Wireless Router
Setting Up Connection by Specifying Detailed Settings
The authentication method of the machine is set to <Shared Key>, but that of the wireless router is set to
"Open System."
Connect again by selecting a wireless router or by manually changing the WEP authentication method to <Open
System>.
Setting Up Connection by Selecting a Wireless Router
Setting Up Connection by Specifying Detailed Settings
Change the WEP authentication method to "Shared Key" at the wireless router, and connect again. For more
information about how to change, see the instruction manuals for your networking devices or contact your
manufacturer.
㻡㻢㻞㻌㻛㻌㻢㻣㻢
The yellow toner cartridge has reached the end of its lifetime
The toner cartridge has reached the end of its lifetime.
Replacement of the toner cartridge is recommended.
How to Replace Toner Cartridges
Toner Cartridge Error Re-insert or replace the toner cartridge.
The toner cartridge is not set in the cartridge tray correctly, or the toner cartridge may be faulty.
Set the toner cartridge of the color displayed again. If the message still appears, the toner cartridge may be faulty.
Contact your local authorized Canon dealer or the Canon help line.
How to Replace Toner Cartridges
Use Remote UI to set the information necessary for authentication.
The IEEE 802.1X settings are incorrect.
Check whether [Login Name] is set correctly.
Check whether the [Use TLS], [Use TTLS], or [Use PEAP] check box is selected.
If using TLS, check whether a key pair is registered.
If using TTLS or PEAP, check whether a user name and password are set correctly.
Configuring IEEE 802.1X Authentication
㻡㻢㻟㻌㻛㻌㻢㻣㻢
0ALJ-0CE
When an Error Code Appears
If printing is not successful or you cannot send or receive a fax or scanned document, or another error occurs, that error appears on a
report or a message on the <Status Monitor> screen as a three-digit number (error code). Check the following to find out causes and
Printing Reports and Lists.
solutions for each error code. For how to print an error report and information in the report, see
#001
A document jams in the feeder.
Remove the jammed document.
Document Jams in the Feeder (MF8580Cdw / MF8550Cdn / MF8540Cdn)
Document Jams in the Feeder (MF8280Cw / MF8230Cn)
#003
A fax could not be sent or received due to its large data size.
When sending a fax: Reduce the resolution, and scan the document.
Adjusting Resolution
When receiving a fax: Ask the sender to divide the document into multiple sections or reduce the resolution before
sending.
#005
A fax could not be sent because the recipient's machine did not respond within 35 seconds.
When the recipient's machine is turned OFF or the line is busy, a fax may not be sent. Ask the recipient to check the
machine status. When sending the fax overseas, insert pauses in the fax number.
Sending Faxes
#012
A fax could not be sent because the recipient's machine ran out of paper.
Ask the recipient to reload the paper.
㻡㻢㻠㻌㻛㻌㻢㻣㻢
#018
A fax could not be sent since the recipient's machine did not respond because the line was busy or for other
reasons.
When the recipient's machine is turned OFF or the line is busy, a fax may not be sent. Ask the recipient to check the
machine status. When sending the fax overseas, insert pauses in the fax number.
Sending Faxes
#022
Sending of a fax from a computer is disabled.
To send a fax from a computer, you need to set <Allow Fax Driver TX> to <On>. For more information, contact your
Administrator.
Prohibiting PC Faxing (MF8580Cdw / MF8550Cdn / MF8280Cw Only)
A fax could not be forwarded because the specified destination was deleted from the Address Book.
Register the forwarding destination again. If the documents that failed to be forwarded remain in memory, you can
forward it again.
Registering in the Address Book (MF8580Cdw / MF8550Cdn / MF8540Cdn / MF8280Cw Only)
Printing/Resending/Deleting Documents that Failed to be Forwarded
#037
Memory is full.
If a sending or printing job is queued, wait until the job is completed.
If a received document is stored to memory, print or delete it.
Storing Received Faxes into Memory (Memory Reception)
If sending a document with many pages, divide it into multiple sections.
If sending a fax, reduce the resolution to scan the document.
Adjusting Resolution
#099
Printing, sending, or receiving was canceled.
When you cancel an operation, this error code is displayed, but this is not abnormal. Print, send, or receive documents
again as necessary.
#401
A scanned document could not be stored to a USB memory device due to insufficient memory space.
Delete unnecessary data to free space in the USB memory device or connect a different USB memory device.
Scanning Documents Directly to USB Memory
㻡㻢㻡㻌㻛㻌㻢㻣㻢
#406
A scanned document could not be stored to a USB memory device due to an error.
Remove the USB memory device, and insert it again.
Scanning Documents Directly to USB Memory
Reduce the number of documents to scan.
#701
Authentication failed because an incorrect Department ID or PIN was entered when the Department ID
Management was activated.
Enter the correct Department ID and PIN.
Continuing operating without entering a Department ID was attempted even though unknown-ID jobs
(functions that permit operations without a Department ID and PIN) were disabled in the Department ID
Management.
Enable unknown-ID jobs in System Manager Mode in Remote UI.
Blocking Jobs When Department ID Is Unknown
#703
Data could not be written because the memory space that was allocated for images was full when sending an email or storing to a shared folder.
If another sending document is queued, wait for a while until it is completed, and send again.
Divide the document into multiple sections before sending.
Delete the documents that are stored in memory.
Turn OFF the machine, wait for at least 10 seconds, and turn it back ON.
#752
An e-mail could not be sent because an incorrect SMTP server name was set.
Check the SMTP server name, and correct the setting.
Configuring Basic E-mail Settings
Configuring Advanced E-mail Settings
An e-mail could not be sent because an incorrect domain name was set.
Check the domain name, and correct the setting.
Configuring DNS
An e-mail could not be sent because the machine was not connected to a network correctly.
Check whether the machine is properly installed and correctly connected to the network.
Installation/Settings Problems
#753
㻡㻢㻢㻌㻛㻌㻢㻣㻢
Scanned data could not be e-mailed or stored to the shared folder because the LAN cable is disconnected.
Check whether the LAN cable is connected correctly.
Connecting to a Wired LAN
#755
Scanned data could not be e-mailed or stored to the shared folder because TCP/IP was not working correctly.
Check <TCP/IP Settings>, and set correctly.
Network Settings
An IP address is not set.
Set the IP address correctly.
Setting IP Addresses
The machine cannot communicate with devices on a network immediately after the machine starts up because
the waiting time for the start of the communication is set.
The machine cannot start communicating immediately after it is turned ON. Wait until the set time for <Waiting Time
for Connection at Startup> passes after turning ON the machine, and send again.
Setting a Wait Time for Connecting to a Network
#801
When communicating with an SMTP server to send an e-mail, a timeout error occurred from the server.
Check whether SMTP is running on the network correctly.
Check whether the machine is properly installed and correctly connected to the network.
Installation/Settings Problems
When communicating with the SMTP server, an error returned from the server.
Check whether the SMTP server is set correctly.
A destination is not set correctly.
Check whether the destination is set correctly.
When storing a scanned document into the shared folder, an error occurred from the folder.
Check whether the shared folder and the computer that has the shared folder are running correctly.
#802
The SMTP server name is not set correctly.
Set the SMTP server name correctly.
Configuring Basic E-mail Settings
Configuring Advanced E-mail Settings
#804
No access privileges to access the shared folder are granted.
㻡㻢㻣㻌㻛㻌㻢㻣㻢
Check whether the user name and password that are registered to the destination are consistent with the user account
(user name and password) that is registered to the shared folder. For more information about shared folders, see Send
Setting Guide (included with the User Software CD-ROM). For more information about how to register destinations, see
Setting a Shared Folder as a Save Location or
Registering Address Book from Remote UI (MF8580Cdw /
MF8550Cdn / MF8540Cdn / MF8280Cw Only).
#806
When storing data to a shared folder, an incorrect user name or password was specified.
Register the user account (the same user name and password) that is registered to a computer to the destination of
the Address Book.
Setting a Shared Folder as a Save Location
Registering Address Book from Remote UI (MF8580Cdw / MF8550Cdn / MF8540Cdn / MF8280Cw Only)
When sending an e-mail, an incorrect destination was specified.
Enter the correct e-mail address, and send the message again. If the destination that was registered in the Address
Book was used, check whether the e-mail address is correct.
Registering in the Address Book (MF8580Cdw / MF8550Cdn / MF8540Cdn / MF8280Cw Only)
#810
When communicating with the POP server to send an e-mail, an error returned from the server.
Check whether the POP server is set correctly.
Check whether your mail server and network are running correctly. For more information, contact your Network
Administrator.
#812
The password that is used for POP authentication is not set correctly.
Enter the password that is used for POP authentication correctly. If you are unsure of the POP password, check the
documents about the settings that are provided by your Internet service provider, or contact your Network
Administrator.
#813
The logon name that is used for POP authentication is not set correctly.
Enter the logon name that is used for POP authentication correctly.
#822
An image file in a USB memory device could not be printed because the format of the image file is not
supported.
Store the image in a supported file format, so that you may be able to print it.
㻡㻢㻤㻌㻛㻌㻢㻣㻢
Printing from USB Memory (USB Print)
#839
A user name and password that are used for SMTP authentication are not set correctly.
Set the user name and password correctly.
Configuring Basic E-mail Settings
Configuring Advanced E-mail Settings
#841
When sending an e-mail, an encryption algorithm that is common to the mail server is not present.
Clear the [Use SSL] check box for both SMTP and POP servers.
Configuring Advanced E-mail Settings
Add the common encryption algorithm to the mail server settings.
#844
SSL encrypted communication to a POP server failed when sending an e-mail with POP before SMTP.
Check the SSL encrypted communication settings in the POP server.
Clear the [Use SSL] check box for the POP server. If the problem persists, clear the [Use POP before SMTP] check box,
and set the communication setting to a setting other than POP before SMTP.
Configuring Advanced E-mail Settings
When verifying an SSL server certificate to communicate to the POP server, a verification error occurred.
Check that the CA certificate that signed the SSL server certificate on the POP server side is registered to the machine
by using the Remote UI.
Verifying Key Pairs and Digital Certificates
Check that the SSL server certificate on the POP server side is valid.
Check that the SSL server certificate is not a self-signed certificate.
#846
An e-mail could not be sent due to a POP authentication failure.
Check the setting, and try again.
Configuring Advanced E-mail Settings
#852
The machine turns OFF for some reason.
Check whether the power plug is inserted into an outlet firmly.
㻡㻢㻥㻌㻛㻌㻢㻣㻢
#853
A document could not be printed because its data size exceeded the machine's upper processing capability.
The machine may not be able to print documents with many pages. Reduce the number of pages per printing, or print
when no print job is queued or no document is being printed. If you are still unable to print, check the document data
for any defects.
Printing was canceled from the computer.
If you cancel an operation when the print data is being sent to the machine from a computer, this error code is
displayed, but this is not abnormal. Print again as necessary.
A secured document that was left unprinted was deleted.
If the secured document is not printed within a specific period of time (30 minutes by default), it is deleted from
memory. Send the secured document again, and print it within the period.
Printing via Secure Print
Printing using Secure Print was attempted when Secure Print was restricted.
When <Secure Print Settings> is set to <Off>, you cannot use Secure Print. Set the setting to <On> and print again.
Printing via Secure Print
Print without using Secure Print.
Printing a Document
#861
A document could not be printed because a printer driver that was not intended for this machine was used.
Print again by using the printer driver for this machine.
Printing a Document
A document could not be printed due to a defect in its data.
Check the document data for any defects.
#863
An error occurred when printing from a computer.
Turn OFF the machine, wait for at least 10 seconds, and turn it back ON. After the restart is complete, try printing
again.
#995
A document waiting to be sent was canceled.
Send the document again as necessary.
㻡㻣㻜㻌㻛㻌㻢㻣㻢
0ALJ-0CF
Common Problems
If you encounter problems when using the machine, check the items in this section before contacting us. If the problems persist, contact
your local authorized Canon dealer or the Canon help line.
Check the Following
Is the machine turned ON? Is the power cord connected?
If the machine is turned ON but does not respond, turn it OFF, check whether the power cord is connected correctly, and turn it
back ON.
Connecting the Power Cord
Are the phone cord, LAN cable and USB cable connected correctly?
Check whether these cables are connected correctly. Use care not to mistake the phone cord's port for the other cables' ports.
Connecting the Telephone Line
Parts and Their Functions
Is sleep mode activated?
If you leave the machine unattended for a specific period of time, it enters sleep mode for power conservation, not allowing you
to operate it.
.
To cancel sleep mode, press
Is any message displayed on the display?
If a problem occurs, a message is displayed.
When an Error Message Appears
If a problem persists even after checking
Click the link that corresponds to the problem.
Installation/Settings Problems
Copying Problems
Printing Problems
Faxing/Telephone Problems (MF8580Cdw / MF8550Cdn / MF8280Cw Only)
㻡㻣㻝㻌㻛㻌㻢㻣㻢
0ALJ-0CH
Installation/Settings Problems
See
Common Problems also.
NOTE
Icons in the description
Problem with the wireless LAN connection
Problem with the wired LAN connection
Problem with the USB connection
The machine cannot be connected to a computer via a wireless LAN, a wired LAN and a USB cable at the same time.
All three connection types cannot be used at the same time. The following can be used at the same time: a USB cable and a
wired LAN, or a USB cable and a wireless LAN.
Remote UI is not displayed.
Are <Use HTTP> and <Remote UI On/Off> set to <On>?
Disabling HTTP Communication
Disabling Remote UI
If the machine is connected to a wired LAN, check that the cable is connected firmly and the IP address is set correctly, and
then start the Remote UI again.
Connecting via Wired LAN
Viewing Network Settings
If the machine is connected to a wireless LAN, check that the settings are specified correctly, and then start the Remote UI
again.
Connecting via Wireless LAN (MF8580Cdw / MF8280Cw Only)
A connection to a network cannot be established.
The IP address may not be set correctly. Set the IP address again.
Setting IP Addresses
When you connect the machine to a computer via wireless LAN, check whether the machine is properly installed and ready to
connect to the network.
When the machine cannot connect to the wireless LAN
You are unsure of the set IP address.
Viewing Network Settings
The connection method cannot be switched between a wired LAN and a wireless LAN.
Did you select a wired LAN or a wireless LAN on the operation panel on the machine as well? This selection is required to have
the machine switch to your selection.
Selecting Wired LAN or Wireless LAN (MF8580Cdw / MF8280Cw Only)
A fax cannot be sent or received on an optical fiber line.
The machine is compliant with use on analog lines. When using an optical fiber line or IP phone line, the machine may not work
correctly depending on the connection environment or connected devices. In such a case, contact the provider of the optical fiber
line or IP phone.
You are unsure of the SSID or the network key of the wireless router to be connected. The SSID is not displayed on the
screen.
Check whether the SSID can be found on the wireless router or package box.
Check the SSID or the network key of the wireless router by using Canon MF/LBP Wireless Setup Assistant.
Checking the SSID and Network Key
The SSID of the wireless router to be connected is not displayed in the access point list.
Check whether the SSID is correct.
Checking the SSID and Network Key
If the SSID of the wireless router is hidden (using a stealth mode * ), set the SSID to be visible on the wireless router.
* A mode that disables the SSID auto-detection of other devices.
Check whether the machine is properly installed and ready to connect to the network.
When the machine cannot connect to the wireless LAN
㻡㻣㻞㻌㻛㻌㻢㻣㻢
The machine dials up to an unintended connection destination (if a dialup router is connected to a network).
If a dialup router does not need to pass broadcast packets, set the dialup router so that the broadcast packets will not pass. If
the dialup router needs to pass broadcast packets, check whether the settings are correct.
If a DNS server is located in an external network, set the IP address to be connected, not the host name, even if connecting to
the devices that are on the network that is connected to the machine.
If a DNS server is located on a network that is connected to the machine and the information about the devices that are
connected to an external network is registered to the DNS server, check whether the settings are correct.
When the machine cannot connect to the wireless LAN
Check the status of your computer.
Have the settings of the computer and the wireless router been completed?
Are the cables of the wireless router (including the power cord and LAN cable) correctly plugged in?
Is the wireless router turned on?
If the problem persists even after checking the above:
Turn off the devices, and then turn them on again.
Wait for a while, and try again to connect to the network.
Check whether the machine is turned ON.
If the machine is turned ON, turn it OFF, and then turn it back ON.
Check the installation site of the machine and the wireless router.
Is the machine too far from the wireless router?
Are there any obstacles such as walls between the machine and the wireless router?
Are there any appliances such as microwave ovens or digital cordless phones that emit radio waves near the
machine?
Perform one of the following settings again.
Setting Up Connection Using WPS Push Button Mode
Setting Up Connection Using WPS PIN Code Mode
Setting Up Connection by Selecting a Wireless Router
Setting Up Connection by Specifying Detailed Settings
NOTE
When you need to manually set up the connection
If the wireless router is set as described below, manually enter all the required information for the wireless LAN connection
( Setting Up Connection by Specifying Detailed Settings).
ANY connection refusal * is activated.
The WEP key that was automatically generated (hexadecimal) is selected.
* A function in which the wireless router refuses the connection if the SSID on the device to be connected is set to "ANY" or is blank.
When you need to change the settings of the wireless router
If the wireless router is set as described below, change the settings of the router.
The MAC address packet filtering is set.
㻡㻣㻟㻌㻛㻌㻢㻣㻢
When only IEEE 802.11n is used for the wireless communication, WEP is selected or the WPA/WPA2 encryption method is set
to TKIP.
The stealth mode is activated.
㻡㻣㻠㻌㻛㻌㻢㻣㻢
0ALJ-0CJ
Copying Problems
See
Common Problems also.
Printing results are not satisfactory. Paper creases or curls.
When You Cannot Print Properly
㻡㻣㻡㻌㻛㻌㻢㻣㻢
0ALJ-0CK
Printing Problems
See
Common Problems also.
Printing results are not satisfactory. Paper creases or curls.
When You Cannot Print Properly
You cannot print.
Is a printer driver installed to your computer correctly?
MF Driver Installation Guide
Printing seems to be slow. *
Print or delete data in memory.
Printing Documents in Memory
Checking/Deleting Documents in Memory
Disabling Secure Print is recommended if you are not using it.
Changing the Valid Time Period for Secured Documents
* When the free space in memory is running low, the processing speed of the machine becomes slow, just as a computer does. There is nothing
abnormal.
You cannot print with Google Cloud Print.
Using Google Cloud Print
㻡㻣㻢㻌㻛㻌㻢㻣㻢
0ALJ-0CL
Faxing/Telephone Problems (MF8580Cdw / MF8550Cdn / MF8280Cw Only)
See
Common Problems also.
Sending Problems
A fax cannot be sent.
Is an external phone line busy? Wait until the line becomes free.
Has an error occurred? Print and check a Communication Management Report.
Communication Management Report (MF8580Cdw / MF8550Cdn / MF8540Cdn / MF8280Cw Only)
Is a telephone line set correctly?
Connecting the Telephone Line
When sending the fax overseas, insert pauses in the fax number.
Sending Faxes
A fax cannot be sent with a destination in the history specified.
Did you turn OFF the machine? If so, the stored history was deleted.
Did you set <Restrict New Destinations> to <On>? If so, the history before you set was deleted.
Did you set <Restrict Resending from Log> to <On>? If so, the destinations in the history cannot be specified.
A fax cannot be sent on an optical fiber line.
The machine is compliant with use on analog lines. When using an optical fiber line or IP phone line, the machine may not work
correctly depending on the connection environment or connected devices. In such a case, contact the provider of the optical fiber
line or IP phone.
The results of a sent fax are not satisfactory.
Clean the platen glass or feeder. If cleaning does not improve the results, the recipient's fax machine may be a cause.
Platen Glass
Feeder
Receiving Problems
The results of received fax are not satisfactory. Paper creases or curls.
When You Cannot Print Properly
Telephone and fax cannot be switched automatically.
Check that the receive mode is set to <Fax/Tel Auto Switch>, <Answering Machine>, or <Net Switch>.
Selecting the Receive Mode
Free space in memory may be running low. Print or delete data in memory.
Checking/Deleting Documents in Memory
Printing Documents in Memory
A fax cannot be received automatically.
Check that the receive mode is set to <Fax/Tel Auto Switch>, <Auto>, <Answering Machine>, or <Net Switch>.
Selecting the Receive Mode
Free space in memory may be running low. Print or delete data in memory.
Checking/Deleting Documents in Memory
Printing Documents in Memory
A fax cannot be received on an optical fiber line.
The machine is compliant with use on analog lines. When using an optical fiber line or IP phone line, the machine may not work
correctly depending on the connection environment or connected devices. In such a case, contact the provider of the optical fiber
line or IP phone.
㻡㻣㻣㻌㻛㻌㻢㻣㻢
0ALJ-0CR
When You Cannot Print Properly
If printing results are not satisfactory, or paper creases or curls, try the following solutions. If the problems persist, contact your local
authorized Canon dealer or the Canon help line.
Smudge Marks Appear on the
Bottom Edge of Printouts
Streaks Appear on Printouts
White Streaks Appear
Toner Smudges and Splatters
Appear
Printouts Are Faded
A Portion of the Page Is Not
Printed
Print Density Is Uneven
Printouts Are Grayish
Paper Creases
Paper Curls
Printouts Are Skewed
Paper Is Not Fed/Two or More
Sheets Are Fed Together
㻡㻣㻤㻌㻛㻌㻢㻣㻢
0ALJ-0CS
Printing Results Are Not Satisfactory
Dirt inside the machine may affect printing results. Perform care and cleaning to the machine first.
Cleaning the Machine
Smudge Marks Appear on the Bottom Edge of Printouts
Do you print data without margins?
This symptom occurs if a margin is set to none in the printer driver. A margin of 5 mm or less around the edge of
paper or 10 mm or less around the edge of envelopes is not printable with the machine. Make sure to have margins
around the document to print.
[Finishing] tab
[Advanced Settings]
[Expand Print Region and Print]
[Off]
Streaks Appear on Printouts
Are you using appropriate paper?
Check usable paper, and replace with appropriate paper.
Paper
Loading Paper
White Streaks Appear
Is toner running low?
Check how much toner is left, and replace the toner cartridges as necessary.
Replacing Toner Cartridges
Toner Smudges and Splatters Appear
㻡㻣㻥㻌㻛㻌㻢㻣㻢
Are you using appropriate paper?
Check usable paper, and replace with appropriate paper.
Paper
Loading Paper
Is toner running low?
Check how much toner is left, and replace the toner cartridges as necessary.
Replacing Toner Cartridges
Printouts Are Faded
Is toner running low?
Check how much toner is left, and replace the toner cartridges as necessary.
Replacing Toner Cartridges
Are you using appropriate paper?
Check usable paper, and replace with appropriate paper. Also, specify the paper size and type settings properly.
Paper
Loading Paper
Specifying Paper Size and Type
Are the printouts faded when you print on envelopes?
Selecting <Envelope 2> for <Envelope Switch> may solve the problem.
Special Processing
A Portion of the Page Is Not Printed
Do you print data without margins?
This symptom occurs if a margin is set to none in the printer driver. A margin of 5 mm or less around the edge of
paper or 10 mm or less around the edge of envelopes is not printable with the machine. Make sure to have margins
around the document to print.
[Finishing] tab
[Advanced Settings]
[Expand Print Region and Print]
Print Density Is Uneven
㻡㻤㻜㻌㻛㻌㻢㻣㻢
[Off]
Is toner running low?
Check how much toner is left, and replace the toner cartridges as necessary.
Replacing Toner Cartridges
Printouts Are Grayish
Is toner running low?
Check how much toner is left, and replace the toner cartridges as necessary.
Replacing Toner Cartridges
㻡㻤㻝㻌㻛㻌㻢㻣㻢
0ALJ-0CU
Paper Creases or Curls
Paper Creases
Is paper loaded correctly?
If paper is not loaded below the load limit line or is loaded obliquely, it may crease.
Loading Paper
Are you using paper that has absorbed moisture?
Replace with appropriate paper.
Loading Paper
Are you using appropriate paper?
Check usable paper, and replace with appropriate paper.
Paper
Paper Curls
Are you using appropriate paper?
Check usable paper, and replace with appropriate paper. Also, specify the paper size and type settings properly.
Paper
Loading Paper
Specifying Paper Size and Type
If the use of the appropriate paper does not solve the problem, set <Special Mode P> to <On>.
Special Processing
㻡㻤㻞㻌㻛㻌㻢㻣㻢
0ALJ-0CW
Paper Is Fed Incorrectly
Printouts Are Skewed
Do the paper guides align with the edges of the paper?
If the paper guides are too loose or too tight, the printouts are skewed.
Loading Paper
Is the paper source the manual feed slot?
Load the paper into the paper drawer.
Loading Paper in the Paper Drawer
Are you printing on curled envelopes?
Uncurl the envelopes, and print again.
Loading Envelopes
If the envelopes are not fed properly even after you have uncurled them, selecting <Envelope 2> for <Envelope
Switch> may solve the problem.
Special Processing
Paper Is Not Fed/Two or More Sheets Are Fed Together
Is paper loaded correctly?
Fan the paper stack thoroughly so that paper is not stuck together.
Check whether paper is loaded correctly.
Loading Paper
Check whether the number of sheets of paper loaded is appropriate and whether the appropriate paper is used.
Paper
Loading Paper
Check whether mixed sizes and types of paper are loaded together.
㻡㻤㻟㻌㻛㻌㻢㻣㻢
0ALJ-0CX
When a Problem Cannot Be Solved
If you cannot solve a problem by referring to the information in this chapter, contact your local authorized Canon dealer or the Canon
help line.
IMPORTANT
Do not disassemble or repair the machine yourself
If you disassemble or repair the machine yourself, it may not be covered by warranty.
When Contacting Canon
When contacting us, have the following information ready:
Product name (MF8580Cdw / MF8550Cdn / MF8540Cdn / MF8280Cw / MF8230Cn)
Dealer where you purchased the machine
Details about your problem (such as what you did and what happened as a result)
Serial number (eight alphanumeric characters long, found on the label on the back side of the machine)
MF8580Cdw / MF8550Cdn / MF8540Cdn
MF8280Cw / MF8230Cn
㻡㻤㻠㻌㻛㻌㻢㻣㻢
0ALJ-0CY
Maintenance
This chapter describes upkeep of the machine, including how to clean the machine and initialize settings.
Basic Cleaning
Cleaning the Machine
The machine becomes dirty
Exterior
Smudge marks appear on originals or printouts
Streaks appear on printouts
Print quality deteriorates
Platen Glass
Feeder
Fixing Unit
Transfer Belt
Replacing Toner Cartridges
If you want to check the remaining toner level
How to replace toner cartridges
Replacing Toner Cartridges
How to Replace Toner Cartridges
Relocating the Machine
Relocating the machine for maintenance or an office move
Managing Print Quality
Maintaining and Improving Print Quality
Shades of colors on printouts are different from originals
Reproducibility in Color Documents
Color mismatch occurs
Documents
Relocating the Machine
Correcting the Gradation
Correcting "Print Color Mismatch"
Adjusting Values for Text Color
Adjusting Values for Text Color Reproducibility in Color
Printing Reports and Lists
Print out reports describing transmission results, or a list of Address Book information
Lists
Checking the Total Pages Printed by the Machine
If you want to check the total page number of printouts
Viewing the Counter Value
Initializing Settings
If you want to restore the settings
Initializing Settings
㻡㻤㻡㻌㻛㻌㻢㻣㻢
Printing Reports and
0ALJ-0E0
Cleaning the Machine
Regularly clean the machine to prevent deterioration in printing quality and to ensure that you use it safely and easily. Carefully read the
Maintenance and Inspections
safety instructions before you start cleaning.
Where to Clean
Exterior of the machine and ventilation slots
Exterior
Rollers inside the feeder
Feeder
Internal fixing unit and transfer belt
Fixing Unit
Transfer Belt
Platen glass and the underside of the feeder
Platen Glass
㻡㻤㻢㻌㻛㻌㻢㻣㻢
0ALJ-0E1
Exterior
Regularly wipe the exterior of the machine, especially around the ventilation slots, to keep the machine in good condition.
1
Turn OFF the machine, and unplug the power cord from the AC power outlet.
When you turn OFF the machine, data that is waiting to be printed is deleted. Fax documents that were received by using the
Memory Reception function, faxes that are waiting to be sent, and reports that are automatically printed after sending and
receiving faxes are not deleted.
2
Clean the exterior of the machine and the ventilation slots.
Use a soft, well-wrung-out cloth dampened with water or a mild detergent diluted with water.
To locate the ventilation slots, see
3
4
Front Side and
Back Side.
Wait for the exterior of machine to dry completely.
Reconnect the power cord and turn ON the machine.
㻡㻤㻣㻌㻛㻌㻢㻣㻢
0ALJ-0E2
Platen Glass
Regularly wipe off the dust from the platen glass and the underside of the feeder to prevent smudges to be printed on documents or
printouts.
1
Turn OFF the machine, and unplug the power cord from the AC power outlet.
When you turn OFF the machine, data that is waiting to be printed is deleted. Fax documents that were received by using the
Memory Reception function, faxes that are waiting to be sent, and reports that are automatically printed after sending and
receiving faxes are not deleted.
2
Open the feeder.
3
Clean the platen glass and the underside of the feeder.
Clean the areas with a cloth dampened with water. Then, wipe the area with a soft, dry cloth.
In addition to the platen glass and underside of the feeder, make sure to clean and wipe the white strip of plate (
transparent plastic area ( ) too.
4
5
6
Wait for the cleaned area to dry completely.
Gently close the feeder.
Reconnect the power cord and turn ON the machine.
㻡㻤㻤㻌㻛㻌㻢㻣㻢
) and the
0ALJ-0E3
Feeder
Dust and graphite powder may adhere to the roller inside the feeder and cause smudges to appear on printouts. To clean the feeder,
perform the following procedure. To clean the feeder, you need ten sheets of plain A4 or Letter size paper. Set them in the feeder before
Placing Documents
performing the following procedure.
1
2
3
4
Press
Use
.
/
to select <Adjustment/Maintenance>, and press
Select <Clean Feeder>, and press
Press
.
.
.
Cleaning starts. When the <Finished.> message is displayed approximately 1 minute later, press
screen.
㻡㻤㻥㻌㻛㻌㻢㻣㻢
to return to the main
0ALJ-0E4
Fixing Unit
Dirt may adhere to the fixing units inside the machine and cause black streaks to appear on printouts. To clean the fixing unit, perform
the following procedure. Note that you cannot clean the fixing unit when the machine has documents waiting to be printed. To clean the
fixing unit, you need plain A4 or Letter size paper. Set the paper in the paper drawer or manual feed slot ( Loading Paper in the
Loading Paper in the Manual Feed Slot) before performing the following procedure.
Paper Drawer
NOTE
Cleaning requires toner. Make sure that there is sufficient toner remaining beforehand.
Checking Toner Level
1
2
3
4
Press
Use
.
/
to select <Adjustment/Maintenance>, and press
Select <Clean Fixing Unit>, and press
Press
.
.
.
Cleaning starts. When the <Finished.> message is displayed approximately 1 minute later, press
screen.
㻡㻥㻜㻌㻛㻌㻢㻣㻢
to return to the main
0ALJ-0E5
Transfer Belt
Dirt may adhere to the transfer belt inside the machine and cause the print quality to deteriorate. To clean the transfer belt, perform the
following procedure. Note that you cannot clean the transfer belt when the machine has documents waiting to be printed.
1
2
3
4
Press
Use
.
/
to select <Adjustment/Maintenance>, and press
Select <Clean ITB>, and press
Press
.
.
.
Cleaning starts. When the <Finished.> message is displayed approximately 1 to 2 minutes later, press
screen.
㻡㻥㻝㻌㻛㻌㻢㻣㻢
to return to the main
0ALJ-0E6
Replacing Toner Cartridges
The machine will display a message when a toner cartridge is nearly empty. Note that the print quality becomes poor if you continue
printing without taking any action. You can check the remaining toner level on the display.
When a Message Appear
If Printouts are Poor in Quality
Checking Toner Level
When a Message Appear
The message that is displayed depends on the amount of remaining toner. Depending on which message is displayed, you will need to
How to Replace Toner
make sure that you have a replacement toner cartridge ready or replace the toner cartridge.
About Replacement Toner Cartridges
Cartridges
NOTE
Where "XXXX" appears in the descriptions below, the toner cartridge colors black, yellow, magenta, or cyan appear in the actual
messages.
<Prepare the XXXX toner cartridge.>
This message notifies you that a toner cartridge needs to be replaced soon. Make sure that you have a replacement toner cartridge
ready. Replace the toner cartridge if you see this message before you start to print a large job.
NOTE:
When this message is displayed
When copying or printing, you can continue printing the document.
If the <Prepare the black toner cartridge.> message is displayed when the machine is receiving a fax or automatic report output
is set, received faxes and reports will be stored in the machine so that they do not appear faded after they are printed. To
Continue Printing
continue printing even if the toner is running low, set <Continue Printing When Toner Is Low> to <On>.
When Toner Is Low
<End of Toner Cart. Lifetime>
This message, which appears with the toner cartridge color(s), notifies you that a toner cartridge has reached the end of its lifetime.
It is recommended that you replace the cartridge with a new one. You can continue printing, but the print quality cannot be
guaranteed.
<Display Recovery Steps>
Displays the procedure for replacing a toner cartridge.
<Continue Printing (Quality Not Guaranteed)>
You can continue printing, but the machine may malfunction.
<Only Continue Black & White Printing>
You can continue printing in black and white even if a yellow, magenta, or cyan cartridge has reached the end of its lifetime.
<End of cart. parts lifetime. Cart. replacement recommended.>
This message, which appears with the toner cartridge color(s), notifies you that the machine may not print in optimum quality. The
㻡㻥㻞㻌㻛㻌㻢㻣㻢
reason may be that a toner cartridge that has reached the end of its lifetime is still inserted in the machine. It is recommended that
you replace this cartridge with a new one.
Pressing <Close> will return to the main screen.
IMPORTANT
You can continue printing when this message is displayed, but the print quality may deteriorate.
If Printouts are Poor in Quality
If your printouts begin to show any of the following features, one of your toner cartridges is nearly empty. Replace the nearly empty
toner cartridge even if no message is displayed.
How to Replace Toner Cartridges
White streaks appear
Partially faded
Toner smudges and splatters appear
Uneven density
Blank space of originals becomes grayish in printouts
Checking Toner Level
You can check the level of remaining toner according to the following, whenever you want to. It is recommended that you check the
level before you start to print a large job.
(Status Monitor)
<Device Status>
<Remaining Toner>
Check the toner level
Toner Level Messages
<OK>: There is no need to replace the toner cartridges.
<Low>: The toner is low. Make sure that you have a replacement toner cartridge ready.
<Nearly Out>: Replacing the toner cartridge with a new one is recommended.
LINKS
About Replacement Toner Cartridges
㻡㻥㻟㻌㻛㻌㻢㻣㻢
0ALJ-0E7
How to Replace Toner Cartridges
Read the precautions in
Maintenance and Inspections and
1
Open the front cover.
2
Pull out the cartridge tray.
Consumables before replacing the toner cartridges.
MF8580Cdw / MF8550Cdn / MF8540Cdn
MF8280Cw / MF8230Cn
3
Pull the toner cartridge straight up and out of the machine.
4
Remove the replacement toner cartridge from the protective bag.
5
Shake the toner cartridge 5 or 6 times as shown below to evenly distribute the toner inside the cartridge,
and then place it on a flat surface.
In this step, do not remove the drum protective cover (
6
).
Pull the sealing tape straight out.
The full length of the sealing tape is approximately 50 cm.
㻡㻥㻠㻌㻛㻌㻢㻣㻢
IMPORTANT:
When pulling out the sealing tape
If the sealing tape remains inside the toner cartridge, the quality of printouts, including faxes, may deteriorate. Also note that it
will not be possible to reprint a fax because the fax function automatically deletes data once it is printed.
Do not pull out the sealing tape at an angle or sideways. If the tape breaks, you may not be able to pull it out completely.
If the sealing tape becomes stuck when pulling it out, keep pulling until it is completely removed.
7
Remove the drum protective cover.
8
Install the toner cartridge.
Each toner cartridge color has its own slot in the toner cartridge tray, and this tray is indicated with a corresponding color label (
). Place the toner cartridge into the slot that corresponds to its color.
Make sure that the drum avoids contact with the frame of the toner cartridge tray because the bottom surface of the cartridge is
exposed.
9
Push the toner cartridge tray back in, and close the front cover.
Immediately after the front cover is closed, the quick adjustment (
quality, perform full adjustment ( Full Adjust).
㻡㻥㻡㻌㻛㻌㻢㻣㻢
Quick Adjust) starts. To perform adjustment for higher
0ALJ-0E8
About Replacement Toner Cartridges
The average yields of the toner cartridges are shown in the table below. Purchase the toner cartridges at your local authorized Canon
dealer. For optimum print quality, using Canon genuine toner cartridges is recommended. To find a dealer near you, contact the Canon
help line. Follow the precautions when handling and storing toner cartridges ( Consumables).
* The average yield is based on "ISO/IEC 19798" (the global standard related to "Method for the determination of toner cartridge yield for color printers and
multi-function devices that contain printer components" issued by ISO [International Organization for Standardization]) when printing A4 size paper with the
default print density setting.
MF8580Cdw / MF8550Cdn / MF8540Cdn
Average yield of toner cartridge *
Canon Genuine Toner Cartridge
Canon Cartridge 718 Black
3,400 sheets
Canon Cartridge 718 Yellow
Canon Cartridge 718 Magenta
Canon Cartridge 718 Cyan
Composite Y (Yellow), M (Magenta), and C (Cyan): 2,900 sheets
MF8280Cw / MF8230Cn
Average yield of toner cartridge *
Canon Genuine Toner Cartridge
Canon Cartridge 731 Black
Canon Cartridge 731 H Black
1,400 sheets
2,400 sheets
Canon Cartridge 731 Yellow
Canon Cartridge 731 Magenta
Canon Cartridge 731 Cyan
Composite Y (Yellow), M (Magenta), and C (Cyan): 1,500 sheets
NOTE
Use the table of average yields above as a guide for replacing toner cartridges. However, depending on the installation
environment or printing paper size or type, you may need to replace a toner cartridge before the end of the estimated
lifetime.
Specifying an auto shutdown time shorter than the default setting (4hours) may shorten the life of the toner cartridges.
㻡㻥㻢㻌㻛㻌㻢㻣㻢
0ALJ-0E9
Relocating the Machine
The machine is heavy. Make sure to follow the procedures below when moving the machine to avoid injury, and also make sure to read
Important Safety Instructions
the safety precautions before you begin.
1
Turn OFF the machine and computer.
When you turn OFF the machine, data that is waiting to be printed is deleted. Fax documents that were received by using the
Memory Reception function, faxes that are waiting to be sent, and reports that are automatically printed after sending and
receiving faxes are not deleted.
2
Disconnect the cables and cord from the machine in numerical order as in the illustration below.
Whether the cables with "*" are connected depends on your environment.
MF8580Cdw / MF8550Cdn / MF8540Cdn
Power plug
Power cord
USB cable*
LAN cable*
Telephone cable*
External telephone cable*
Handset cable*
MF8280Cw / MF8230Cn
3
When transporting the machine across a long distance, remove the toner cartridges.
4
Pull out the paper drawer.
How to Replace Toner
Cartridges
IMPORTANT:
Make sure to hold the paper drawer with both hands, and pull it out gently. Otherwise, you may damage the paper drawer by
dropping it, if it slides out too easily.
5
Close all the open covers, and move the machine to a new location.
The machine is heavy (
Machine Specifications). Make sure to move the machine with two or more people.
Hold the lift handles, and lift up the machine. If you are using the MF8580Cdw / MF8550Cdn / MF8540Cdn and you have
attached the optional drawer, leave the optional drawer on the floor and move it after moving the main unit of the machine.
MF8580Cdw / MF8550Cdn / MF8540Cdn
㻡㻥㻣㻌㻛㻌㻢㻣㻢
MF8280Cw / MF8230Cn
6
Carefully place the machine at the new installation site.
For information about how to install the machine after relocating it, see
㻡㻥㻤㻌㻛㻌㻢㻣㻢
Setting Up the Machine.
0ALJ-0EA
Maintaining and Improving Print Quality
If the printing results are not satisfactory such as low image quality, poor reproducibility, or print color mismatch, try the adjustments
below.
Auto Adjust Gradation
If the density or brightness of colors in printouts and originals are different, perform <Auto Adjust Gradation> to improve color
Correcting the
reproducibility. There are three types of adjustments: <Full Adjust>, <Quick Adjust>, and <Adjust Copy Image>.
Gradation
Correct Print Color Mismatch
If the colors in printouts become blurry, perform <Correct Print Color Mismatch>. This problem may be caused by a color mismatch.
Correcting "Print Color Mismatch"
Black Text Processing for Color
You can specify which cartridges to use to print black text in color printouts.
Color Documents
㻡㻥㻥㻌㻛㻌㻢㻣㻢
Adjusting Values for Text Color Reproducibility in
0ALJ-0EC
Correcting the Gradation
Gradation refers to the dark to light continuum of shades of a color. The more shades in the gradations of colors that are printed, the
more natural printouts seem. If color reproducibility becomes poor and the density and brightness of printouts differs markedly from the
originals, perform the appropriate auto adjustment. Before adjusting the gradation, check the remaining toner level. Gradation
Full Adjust,
Quick Adjust,
adjustments require significant toner ( Checking Toner Level). There are three types of adjustments:
Adjust Copy Image.
and
Fewer shades in the gradations
More shades in the gradations
NOTE
Adjustments may not be performed effectively if there is not sufficient toner.
Full Adjust
This adjustment optimizes reproducibility for color printing. When the machine performs full adjustment, it obtains information to
optimize color reproducibility. The machine maintains this information until the next time you perform full adjustment. For making full
adjustment, an adjustment image will be printed twice and scanned twice. Note that you cannot perform this adjustment while
performing some functions, including, scanning, and printing.
NOTE
This adjustment is not available when <Only Continue Black & White Printing> is selected on the screen displaying the message
<End of Toner Cart. Lifetime>.
1
2
3
4
5
Press
Use
.
/
to select <Adjustment/Maintenance>, and press
Select <Auto Adjust Gradation>
.
<Full Adjust>.
Check that the size and type of paper displayed on the screen is loaded in the machine, and press
Confirm the procedure, and press
.
Adjustment starts. In approximately 1 to 2 minutes, an adjustment image is printed.
6
Open the feeder after the screen displayed during printing disappears.
㻢㻜㻜㻌㻛㻌㻢㻣㻢
.
7
Place the adjustment image on the platen glass with the print side face down.
Place the adjustment image so that the black stripe is toward the back side of the machine.
8
9
Gently close the feeder.
Press
(Color).
The adjustment image is scanned and adjustment starts. In approximately 30 seconds, the second adjustment image is printed.
10
Open the feeder, remove the first adjustment image, and then place the second adjustment image on the
platen glass with the print side face down.
Place the adjustment image so that the black stripe is toward the back side of the machine.
11
12
Gently close the feeder.
Press
(Color).
The adjustment image is scanned and adjustment starts. In approximately 1 to 2 minutes, the adjustment is finished.
13
14
15
Press
to close the menu screen.
Open the feeder, and remove the second adjustment image.
Gently close the feeder.
NOTE
If the <Correction failed.> message is displayed
Did you load plain or recycled A4 or Letter size paper into the paper drawer?
Did you place the adjustment image with the print side face down, with the black stripe toward the back side of the machine?
Has a paper jam occurred?
Clearing Jams
Is the amount of toner required for correction sufficient?
Checking Toner Level
Is the transfer belt inside the machine dirty?
Transfer Belt
㻢㻜㻝㻌㻛㻌㻢㻣㻢
Quick Adjust
This adjustment maintains the optimized status that was acquired by <Full Adjust>. Note that you cannot perform this adjustment while
performing some functions, including, scanning, and printing. If the result of this adjustment is not satisfactory, perform <Full Adjust>.
This adjustment may be automatically performed after you replace a toner cartridge.
NOTE
This adjustment is not available when <Only Continue Black & White Printing> is selected on the screen displaying the message
<End of Toner Cart. Lifetime>.
1
2
3
4
Press
Use
.
/
to select <Adjustment/Maintenance>, and press
Select <Auto Adjust Gradation>
Press
.
<Quick Adjust>.
.
Adjustment starts. In approximately 1 to 2 minutes, the adjustment is finished.
5
Press
to close the menu screen.
NOTE
You can set the machine to perform this adjustment automatically after the power is turned ON.
Auto Correction Settings
Adjust Copy Image
This adjustment improves the result of copies and printing from a USB memory device. For correcting copy images, an adjustment image
will be printed and scanned. Note that you cannot perform this adjustment while performing some functions, including, scanning, and
printing.
NOTE
This adjustment is not available when <Only Continue Black & White Printing> is selected on the screen displaying the message
<End of Toner Cart. Lifetime>.
1
2
3
4
Press
Use
.
/
to select <Adjustment/Maintenance>, and press
Select <Auto Adjust Gradation>
.
<Adjust Copy Image>.
Check that the size and type of paper displayed on the screen is loaded in the machine, and press
㻢㻜㻞㻌㻛㻌㻢㻣㻢
.
5
Confirm the procedure, and press
.
Adjustment starts. In approximately 1 minute, an adjustment image is printed.
6
7
Open the feeder after the screen displayed during printing disappears.
Place the adjustment image on the platen glass with the print side face down.
Place the adjustment image so that the black stripe is toward the back side of the machine.
8
9
Gently close the feeder.
Press
(Color).
The adjustment image is scanned and adjustment starts. In approximately 1 to 2 minutes, the adjustment is finished.
10
11
12
Press
to close the menu screen.
Open the feeder, and remove the adjustment image.
Gently close the feeder.
NOTE
If the <Correction failed.> message is displayed
Did you load plain or recycled A4 or Letter size paper into the paper drawer?
Did you place the adjustment image with the print side face down, with the black stripe toward the back side of the machine?
Has a paper jam occurred?
Clearing Jams
Is the amount of toner required for correction sufficient?
Checking Toner Level
Is the transfer belt inside the machine dirty?
Transfer Belt
㻢㻜㻟㻌㻛㻌㻢㻣㻢
0ALJ-0EF
Correcting "Print Color Mismatch"
Print color mismatch refers to a shift in the positions of colors that may occur when printing one image with multiple toner cartridges.
Print color mismatch can cause printouts to appear blurry. If print color mismatch occurs, perform the following procedure. This
adjustment is sometimes performed automatically, such as when toner cartridges are replaced.
When color shifts occur
When color shifts do not occur
NOTE
This adjustment is not available when <Only Continue Black & White Printing> is selected on the screen displaying the message
<End of Toner Cart. Lifetime>.
1
2
3
4
Press
Use
.
/
to select <Adjustment/Maintenance>, and press
Select <Correct Print Color Mismatch>, and press
Press
.
.
.
Adjustment starts.
5
Press
to close the menu screen.
NOTE
You can set the machine to perform this adjustment automatically after the power is turned ON.
Auto Correction Settings
㻢㻜㻠㻌㻛㻌㻢㻣㻢
0ALJ-0EH
Adjusting Values for Text Color Reproducibility in Color Documents
If copy results of black or blackish text are not satisfactory, you can improve the color reproducibility with this adjustment. This
adjustment value can be set independently in the feeder and platen glass.
NOTE
The settings are applied to color copies when <Original Type> is set to <Text/Photo/Map> or <Text> (
Type).
<Adjustment/Maintenance>
Adjust the value
<Apply>
<Black Text Processing for Color>
<Color Text>
Makes black or blackish text in a copy match more closely with the original.
<Black Text>
Enhances the clarity of black text.
㻢㻜㻡㻌㻛㻌㻢㻣㻢
Selecting Document
Select <Feeder> or <Platen Glass>
0ALJ-0EJ
Printing Reports and Lists
You can check fax results and the machine settings by printing reports and lists.
TX Result Report
You can check the logs of sent documents.
TX Result Report (MF8580Cdw / MF8550Cdn / MF8540Cdn / MF8280Cw Only)
Communication Management Report
You can check the logs of sent and received documents.
MF8540Cdn / MF8280Cw Only)
Communication Management Report (MF8580Cdw / MF8550Cdn /
RX Result Report
You can check the logs of received fax documents.
RX Result Report (MF8580Cdw / MF8550Cdn / MF8280Cw Only)
Department ID Management Report
You can check the total volume of printouts for each <Department ID>.
Department ID Management Report
Address Book List
You can check the list of destinations registered in the Address Book.
MF8540Cdn / MF8280Cw Only)
Address Book List (MF8580Cdw / MF8550Cdn /
User Data List/System Manager Data List
You can check the list of the settings ( Setting Menu List) as well as the content that has been registered in the machine.
Data List/System Manager Data List
User
IPSec Policy List
You can check the list of policy names and the content of the IPSec settings that are registered in the machine.
IPSec Policy List
PCL Font List
You can check the list of available fonts for the machine.
PCL Font List (MF8580Cdw / MF8550Cdn / MF8540Cdn Only)
㻢㻜㻢㻌㻛㻌㻢㻣㻢
0ALJ-0EK
TX Result Report (MF8580Cdw / MF8550Cdn / MF8540Cdn / MF8280Cw
Only)
You can check the fax or e-mail logs of sent documents as well as documents scanned to a shared folder by printing a TX Result Report.
The report can be printed either every time a transmission is completed or only when a sending error occurs.
(Report)
<Report Settings>
<TX Result Report>
Select the print setting
<Off>
Select if you do not want to print TX Result Reports.
<On>
Select to print a TX Result Report every time you send a document.
<Only When Error Occurs>
Select to print a TX Result Report only when a sending error occurs.
Example: Fax sending
Example: Scanning to e-mail/shared folder
Result
"OK" indicates that the transmission was completed successfully while "NG" and three digits (an error code) indicates that the
transmission failed ( When an Error Code Appears).
Department ID
The Department ID is shown when Department ID Management is enabled.
Sent/Error
For e-mail, TX Result Reports indicate the transmission result between the machine and the mail server, not between the machine
and the destination address. Even if the transmission fails, a three-digit error code will not be printed. To check the error code,
print a Communication Management Report ( Communication Management Report (MF8580Cdw / MF8550Cdn /
MF8540Cdn / MF8280Cw Only)).
㻢㻜㻣㻌㻛㻌㻢㻣㻢
NOTE
To print a part of a fax document on the report
When you select <On> or <Only When Error Occurs>, a part of a fax document can be included in the report. Set <Report with
.
TX Image> to <On>, and press
㻢㻜㻤㻌㻛㻌㻢㻣㻢
0ALJ-0EL
Communication Management Report (MF8580Cdw / MF8550Cdn /
MF8540Cdn / MF8280Cw Only)
You can check the fax and e-mail logs of sent and received documents by printing a Communication Management Report. The report can
be printed automatically after every 40 transmissions, or you can print it manually.
(Report)
<Report Settings>
<Communication Management Report>
Select the print setting
<Auto Print (40 Transmissions)>
Select <On> to print the report automatically after every 40 transmissions, or <Off> if you do not want to print the report
automatically.
<Separate TX/RX>
Select <On> to print sent and received reports separately, or <Off> to print both reports on one sheet.
Print the Report Manually
(Report)
<Print List>
<Communication Management Report>
<Yes>
displayed on the screen is loaded in the machine
Check that the size and type of paper
Example:
Result
"OK" indicates that the transmission was completed successfully while "NG" and three digits (an error code) indicates that the
transmission failed ( When an Error Code Appears). For e-mail, Communication Management Reports indicate the transmission
result between the machine and the mail server, not between the machine and the destination address.
㻢㻜㻥㻌㻛㻌㻢㻣㻢
0ALJ-0ER
RX Result Report (MF8580Cdw / MF8550Cdn / MF8280Cw Only)
You can check the logs of received fax documents by printing an RX Result Report. The report can be printed either every time a
transmission is completed or only when a receiving error occurs.
(Report)
<Report Settings>
<RX Result Report>
Select the print setting
<Off>
Select if you do not want to print RX Result Reports.
<On>
Select to print an RX Result Report every time you receive a document.
<Only When Error Occurs>
Select to print an RX Result Report only when a receiving error occurs.
Example:
Result
"OK" indicates that the transmission was completed successfully while "NG" and three digits (an error code) indicates that the
transmission failed ( When an Error Code Appears).
㻢㻝㻜㻌㻛㻌㻢㻣㻢
0ALJ-0ES
Department ID Management Report
When Department ID Management is enabled, you can check the total volume of printouts for each <Department ID> by printing a
Department ID Management Report. By checking the printout totals, you can better manage your paper and toner supplies.
(Report)
<Print List>
<Department ID Management Report>
<Yes>
displayed on the screen is loaded in the machine
Example:
LINKS
Setting the Department ID Management
㻢㻝㻝㻌㻛㻌㻢㻣㻢
Check that the size and type of paper
0ALJ-0EU
Address Book List (MF8580Cdw / MF8550Cdn / MF8540Cdn / MF8280Cw
Only)
You can check the list of destinations registered in the Address Book as <Coded Dial>, <Favorites>, and <Group Dial> by printing an
Address Book List.
(Report)
<Print List>
<Address Book List>
Select the setting you want to print out
<Yes>
that the size and type of paper displayed on the screen is loaded in the machine
Example: <Coded Dial>
Example: <Favorites>
Example: <Group Dial>
LINKS
Registering in the Address Book (MF8580Cdw / MF8550Cdn / MF8540Cdn / MF8280Cw Only)
Registering Address Book from Remote UI (MF8580Cdw / MF8550Cdn / MF8540Cdn / MF8280Cw Only)
㻢㻝㻞㻌㻛㻌㻢㻣㻢
Check
0ALJ-0EW
User Data List/System Manager Data List
You can check the list of the settings ( Setting Menu List) as well as the content that has been registered in the machine by printing a
User Data List or a System Manager Data List. Both lists include the paper size and type registered in the machine, the print settings of
<TX Result Report>, <Communication Management Report>, and <RX Result Report>.
(Report)
<Print List>
<User Data List> or <System Manager Data List>
<Yes>
type of paper displayed on the screen is loaded in the machine
Check that the size and
Example:
NOTE
The <User Data List> does not include the setting lists of <Network Settings> and <System Management Settings>. To check all
the settings items, including <Network Settings> and <System Management Settings>, print the <System Manager Data List>.
LINKS
TX Result Report (MF8580Cdw / MF8550Cdn / MF8540Cdn / MF8280Cw Only)
Communication Management Report (MF8580Cdw / MF8550Cdn / MF8540Cdn / MF8280Cw Only)
RX Result Report (MF8580Cdw / MF8550Cdn / MF8280Cw Only)
Loading Paper
㻢㻝㻟㻌㻛㻌㻢㻣㻢
0ALJ-0EY
IPSec Policy List
You can check the list of policy names and the IPSec settings registered in the machine by printing an IPSec Policy List.
(Report)
<Print List>
screen is loaded in the machine
<IPSec Policy List>
<Yes>
Example:
LINKS
Configuring IPSec Settings
㻢㻝㻠㻌㻛㻌㻢㻣㻢
Check that the size and type of paper displayed on the
0ALJ-0F0
PCL Font List (MF8580Cdw / MF8550Cdn / MF8540Cdn Only)
You can check the list of available fonts for the machine.
(Report)
<Print List>
is loaded in the machine
<PCL Font List>
<Yes>
Example:
㻢㻝㻡㻌㻛㻌㻢㻣㻢
Check that the size and type of paper displayed on the screen
0ALJ-0F1
Viewing the Counter Value
You can check separate totals for the number of pages used for color printouts and black and white printouts. These totals include faxes,
reports, and lists, in addition to copies and printouts of data from computers.
(Status Monitor)
<Device Status>
<Check Counter>
㻢㻝㻢㻌㻛㻌㻢㻣㻢
<Color Total> or <Black & White Total>
0ALJ-0F2
Initializing Settings
You can restore the following settings:
Initializing Menu
Initializing Key and Certificate
Initializing Address Book (MF8580Cdw / MF8550Cdn / MF8540Cdn / MF8280Cw Only)
Initializing System Management Settings
㻢㻝㻣㻌㻛㻌㻢㻣㻢
0ALJ-0F3
Initializing Menu
You can restore the settings of the machine (
Setting Menu List).
NOTE
To initialize the settings of <Network Settings> and <System Management Settings>, see
Settings.
<Initialize Menu>
Select the item you want to initialize
Items for initializing
Select the setting you want to initialize.
<Initialize All>
Initializes all the settings.
㻢㻝㻤㻌㻛㻌㻢㻣㻢
Initializing System Management
<Yes>
0ALJ-0F4
Initializing Key and Certificate
You can restore the settings of the key pairs and digital certificates. Note that all the key pairs that you registered in the machine and
certificates (except the preinstalled digital certificates) will be deleted after initializing.
NOTE
After initializing, functions that require key pairs such as SSL encrypted communication and TLS of the IEEE 802.1X
authentication are not available. To use these functions, configure the settings for the key pairs and activate the functions again.
<System Management Settings>
<Initialize Key and Certificate>
LINKS
Configuring Settings for Key Pairs and Digital Certificates
㻢㻝㻥㻌㻛㻌㻢㻣㻢
<Yes>
0ALJ-0F5
Initializing Address Book (MF8580Cdw / MF8550Cdn / MF8540Cdn /
MF8280Cw Only)
You can restore the settings of the Address Book. Note that all the information registered in the Address Book will be deleted after
initializing.
<System Management Settings>
<Initialize Address Book>
<Yes>
LINKS
Registering in the Address Book (MF8580Cdw / MF8550Cdn / MF8540Cdn / MF8280Cw Only)
Registering Address Book from Remote UI (MF8580Cdw / MF8550Cdn / MF8540Cdn / MF8280Cw Only)
㻢㻞㻜㻌㻛㻌㻢㻣㻢
0ALJ-0F6
Initializing System Management Settings
You can restore the settings of the machine (
Setting Menu List). Some settings require restarting the machine to be initialized.
<System Management Settings>
<Yes>
want to initialize
<Initialize System Management Settings>
Restart the machine if necessary.
Select the item that you
Items for initializing
Select the setting you want to initialize.
<Initialize All>
Initializes all the settings.
NOTE
To initialize the settings in <Network Settings>, you can also press
<Yes> and restart the machine.
㻢㻞㻝㻌㻛㻌㻢㻣㻢
<Network Settings>
<Initialize Network Settings>
0ALJ-0FX
Appendix
This chapter contains technical specifications of this machine, instructions on how to use the e-Manual, disclaimers, copyright information,
and other important information for customers.
㻢㻞㻞㻌㻛㻌㻢㻣㻢
0ALJ-0FY
Feature Highlights
Give the features that are described in this section a try. The features are grouped under four headings: "Going Green and Saving
Money," "Improving Efficiency," "Going Digital," and "So Much More."
㻢㻞㻟㻌㻛㻌㻢㻣㻢
0ALJ-0H0
Going Green and Saving Money
2-Sided Printing (MF8580Cdw / MF8550Cdn / MF8540Cdn Only)
You can use 2-sided printing for copies, print jobs sent from your computer, and even incoming faxes. Because you'll only
key enables you to save
be using half the paper you would otherwise, you can cut your paper costs in half. The
even more paper by allowing you to simultaneously select the settings for 2-sided copying and for copying multiple pages
onto one sheet.
To make 2-sided copies:
2-Sided Copying (MF8580Cdw / MF8550Cdn / MF8540Cdn Only)
Using the [Paper Save Copy] Key
To save paper when you copy:
Switching 1-Sided and 2-Sided Printing (MF8580Cdw /
To print 2-sided documents from your computer:
MF8550Cdn / MF8540Cdn Only)
Print on Both Sides
To print 2-Sided incoming faxes:
Print Multiple Pages on a Single Sheet
To really start saving paper, shrink multiple pages onto a single sheet - 2 or 4 pages for copies, and up to 16 pages for
key enables you
print jobs sent from your computer. If you are using a machine capable of 2-sided printing, the
to save even more paper by allowing you to simultaneously select the settings for 2-sided copying and for copying
multiple pages onto one sheet.
To copy multiple pages of a document onto one sheet:
Copying Multiple Documents onto One Sheet (2 on 1/4 on
1)
Using the [Paper Save Copy] Key
To save paper when you copy:
Printing Multiple Pages onto One Sheet
To print multiple pages of a document onto one sheet:
Sleep Mode
For saving energy and money, a sleep mode that powers down a machine when nobody is using it has become an
essential feature. This machine will enter sleep mode automatically, and can also be put to sleep whenever you want.
once to put the machine to sleep. Press it again to instantly wake the machine back into action.
Press
㻢㻞㻠㻌㻛㻌㻢㻣㻢
For more information about this function, see
Entering Sleep Mode.
Save Toner
Got multi-page documents or drafts that don't need presentation-quality printing?
There's a setting that uses less toner. Give it a try and save toner and money.
For more information about this function, see
Saving Toner.
Send Faxes Directly From Your Computer (MF8580Cdw / MF8550Cdn / MF8280Cw Only)
Fax documents directly from your computer. Why bother printing and then faxing? It just wastes paper and costs you
money. You can save yourself this trouble and cut costs with paperless faxing.
For more information about this function, see
Sending Faxes from Your Computer (PC Fax).
Screen Your Faxes (MF8580Cdw / MF8550Cdn / MF8280Cw Only)
You can have incoming faxes held in memory and then check them yourself before they're printed. Just print what you
need and delete the rest, saving paper and toner.
For more information about this function, see
Storing Received Faxes into Memory (Memory Reception).
㻢㻞㻡㻌㻛㻌㻢㻣㻢
0ALJ-0H1
Improving Efficiency
Address Book (MF8580Cdw / MF8550Cdn / MF8280Cw Only)
Entering fax and e-mail addresses in the Address Book saves you the inconvenience of entering them number-by-number,
letter-by-letter every time you have something to send. Display the addresses you use most frequently with the
<Favorites> feature to quickly and easily send what you need to the people who need it. You can save your Address Book
data on your computer and feel secure knowing that your important contact information is backed up.
To use the machine to enter addresses in the Address Book:
Registering in the Address Book (MF8580Cdw /
MF8550Cdn / MF8540Cdn / MF8280Cw Only)
Registering Address Book from Remote
To use your computer to enter addresses in the Address Book:
UI (MF8580Cdw / MF8550Cdn / MF8540Cdn / MF8280Cw Only)
Specifying from Address Book (Fax)
To select an Address Book address as a fax destination:
Specifying from Address Book
To select an Address Book address as an e-mail destination:
To save Address Book addresses on your computer or to export Address Book addresses that are saved on your computer
Saving/Loading Address Book (MF8580Cdw / MF8550Cdn / MF8540Cdn / MF8280Cw Only)
to the machine:
Shortcut Keys for Copying and Scanning
Take advantage of the shortcut keys on the operation panel so you don't have to reconfigure the same settings over and
key enables you to save paper by allowing you to copy two or four pages onto one sheet. If you
over again. The
are using a machine capable of 2-sided printing, you can also copy on both sides of the sheet. For scanning, use the
/
keys to preset your favorite save destinations, scan types, and file formats. Just place your document and
touch one of these shortcut keys to scan.
To save paper when you copy:
Using the [Paper Save Copy] Key
Scanning Using the [Scan > PC] Key
To easily scan documents:
Print Images Right Off Your USB Stick
Insert your USB stick directly into the machine and print JPEG and TIFF images right then and there. You can preview
images before printing, or print a list of images. Simple and convenient printing, no connection to a computer necessary.
㻢㻞㻢㻌㻛㻌㻢㻣㻢
For more information about this function, see
Printing from USB Memory (USB Print).
Scan and Save to a USB Stick
Convert paper documents into JPEG or PDF files and save them on a USB stick that you've inserted directly into the
machine. There's no need to save the files to a computer or use specialized software. Just found out you need image files
of a paper document for a meeting that's about to start? Head over to the machine, make some PDF files, and take the
USB stick you stored them on into the conference room.
For more information about this function, see
Scanning Documents Directly to USB Memory.
Remote Management with Remote UI
Remote UI lets you manage a lot from your computer, all without having to go over to the machine. Configure settings
and keep an eye on the machine's status with an intuitive, easy-to-understand Web browser interface that you'll master
immediately. Save your time and energy for things other than taking care of the machine.
For more information about this function, see
Using Remote UI.
㻢㻞㻣㻌㻛㻌㻢㻣㻢
0ALJ-0H2
Going Digital
Scan and E-mail (MF8580Cdw / MF8550Cdn / MF8540Cdn Only)
E-mail scanned documents without even turning on your computer. Just convert your scanned document into an e-mail
attachment right from the machine. If you're one of those people who'd rather send a fax than mess around with a
computer, this feature is for you.
For more information about this function, see
Sending Documents as E-mails Directly from the Machine
(MF8580Cdw / MF8550Cdn / MF8540Cdn Only).
Scan and Share (MF8580Cdw / MF8550Cdn / MF8540Cdn Only)
Say you've got a paper copy of a report for a company-wide meeting. Scan it, convert it, and now everyone can see it.
It's saved directly in a shared folder on your network, so there's no need to print out copies and pass them out. Once you
start talking about hundreds of pages of documents that everyone needs, there's just no other way to go.
For more information about this function, see
MF8550Cdn / MF8540Cdn Only).
Saving Documents Directly to a Shared Folder (MF8580Cdw /
Scan Only What You Need
What if you're scanning a whole page of a newspaper but all you're really interested in is a headline and a photo? Use
ScanGear MF. You can select what you want from a preview, and then have the scanner disregard the rest. Otherwise
you'll have to use an editing program to crop out everything you don't need.
IMPORTANT
Using your product to scan, print or otherwise reproduce certain documents, and the use of such images as
scanned, printed or otherwise reproduced by your product, may be prohibited by law and may result in criminal
and/or civil liability. If you are uncertain about the legality of using your product to scan, print or otherwise
reproduce any particular document, and/or of the use of the images scanned, printed or otherwise reproduced,
you should consult in advance with your legal advisor for guidance.
㻢㻞㻤㻌㻛㻌㻢㻣㻢
For more information about this function, see
Configuring Scan Settings in ScanGear MF.
Searchable PDFs
You can convert scanned documents to regular PDF files, or you can go a step further and make the text in that scanned
document searchable. There's a lot more you can do with a PDF file when you make it text-searchable. To do this, just
select "PDF" as the scan type when you scan with MF Toolbox.
For more information about this function, see
Scanning Using MF Toolbox.
Convert Text in Scanned Documents
Text normally gets scanned as an image, but you can convert it into text that can also be edited. Select "OCR" as the scan
type when you scan with MF Toolbox. The software that comes with this machine will convert any text in the scanned
image into text data that you can then edit with a text editor.
For more information about this function, see
Scanning Using MF Toolbox.
Add Images to a Work in Progress
Some applications work with the machine to let you easily import scanned images directly into documents you're working
on. This way you can skip the steps of opening a separate application just for receiving the scanned images and then
exporting them to the application you're really using.
For more information about this function, see
Scanning Using an Application.
㻢㻞㻥㻌㻛㻌㻢㻣㻢
0ALJ-0H3
So Much More
Easy Printing with Google Cloud Print
Hook up to Google Cloud Print with your laptop or cell phone, send your data, and out come your printed documents.
With this machine, Google Cloud Print, and your mobile device, print whenever you want from wherever you want.
For more information about this function, see
Using Google Cloud Print.
Keep Your Printouts Private (MF8580Cdw / MF8550Cdn / MF8540Cdn Only)
Normally, when you print something from your computer, it comes out of the printer right away. However, if you have
sensitive documents, this may not be what you want. Just use secure printing and no one will be able to print your
documents without entering your password on the machine's operation panel. Don't let your confidential documents lie
exposed on the tray for everyone to see.
For more information about this function, see
/ MF8550Cdn / MF8540Cdn Only).
Printing a Document Secured by a PIN (Secure Print) (MF8580Cdw
Go Wireless (MF8580Cdw / MF8280Cw Only)
No cables, easy installation, simple maintenance. If you've got a WPS wireless LAN router, bypass the settings process
altogether and be ready to go before you know it. Enjoy the kind of clutter-free and easy to use document system that
you can only get from wireless. Compatible with IEEE 802.11b/g/n for stress-free wireless, and also supports WEP and
WPA/WPA2-PSK (TKIP/AES-CCMP) for tighter security.
For more information about this function, see
Connecting to a Wireless LAN (MF8580Cdw / MF8280Cw Only).
㻢㻟㻜㻌㻛㻌㻢㻣㻢
Get Faxes Wherever You Go (MF8580Cdw / MF8550Cdn / MF8280Cw Only)
Never worry about missing a fax when you're out of the office. Set a forwarding destination and any fax that comes in on
the machine will go right to you. Better yet, make the forwarding destination the e-mail address for your tablet or mobile.
For more information about this function, see
Forwarding Received Faxes.
Make Posters
Blow up a regular one-sheet printout and make an exceptionally large poster. A large poster will be printed out on nine
sheets. Put them together in a 3x3 grid, and voila!
For more information about this function, see
Printing Posters.
Make Booklets (MF8580Cdw / MF8550Cdn / MF8540Cdn Only)
Sometimes your documents deserve better presentation than a staple in the upper-left corner. Making booklets is easy.
The print driver will take care of the page positioning for you. All you have to do is fold the pages and staple them along
the middle.
For more information about this function, see
Printing Booklet (MF8580Cdw / MF8550Cdn / MF8540Cdn Only).
㻢㻟㻝㻌㻛㻌㻢㻣㻢
0ALJ-0F7
Specifications
The machine specifications are subject to change without prior notice due to improvements of the machine.
Machine Specifications
Paper Drawer Specifications (Optional)(MF8580Cdw / MF8550Cdn / MF8540Cdn Only)
Wireless LAN Specifications (MF8580Cdw / MF8280Cw Only)
Document Type
Scan Area
Paper
Copy Specifications
Fax Specifications (MF8580Cdw / MF8550Cdn / MF8280Cw Only)
Scanner Specifications
Printer Specifications
Specifications for E-mail Sending (MF8580Cdw / MF8550Cdn / MF8540Cdn Only)
Specifications for Scanning to Shared Folders (MF8580Cdw / MF8550Cdn / MF8540Cdn Only)
㻢㻟㻞㻌㻛㻌㻢㻣㻢
0ALJ-0F8
Machine Specifications
MF8580Cdw / MF8550Cdn / MF8540Cdn
Type
Personal Desktop
Power
Supply *1
220 to 240 V, 50/60 Hz
(Power requirements differ depending on the country in which you purchased the product.)
Maximum
1,200 W or less
Average consumption during standby mode
Approx. 25 W
Power
Consumption
Average consumption during sleep mode
Approx. 1 W
Average consumption during sleep mode (by Wireless Connections)
Approx. 2 W
When the power switch is turned OFF
0.5 W or less
Warm-up
Time *2
23 seconds or less
Weight *3
Approx. 31 kg
In the normal state
430 x 484 x 479 mm
Dimensions
(W x L x H)
When the optional Cassette Feeding Unit-V1 is installed
430 x 484 x 579 mm
When the optional handset is installed
510 x 484 x 479 mm
Environmental
Conditions
Temperature: 10 to 30°C
Humidity: 20% to 80% RH (no condensation)
Color
Compatibility
Full Color
Gradation
256 gradations
Acceptable
Documents
Supported Document Types
Acceptable
Paper Stock
Paper
Printable
Range
Printable Area
Scan Range
Scan Area
*1 The current value displayed on the rating label indicates average current consumption.
*2 Warm-up time is an interval between when the machine is turned ON and when the main screen appears on the display. Warm-up time may vary depending
on the use conditions and environment of the machine.
*3 The value indicates the mass of the main unit including toner cartridges.
MF8280Cw / MF8230Cn
Type
Personal Desktop
Power
Supply *1
220 to 240 V, 50/60 Hz
(Power requirements differ depending on the country in which you purchased the product.)
Maximum
㻢㻟㻟㻌㻛㻌㻢㻣㻢
900 W or less
Average consumption during standby mode
Approx. 20 W
Power
Consumption
Average consumption during sleep mode
Approx. 1 W
Average consumption during sleep mode (by Wireless Connections)
Approx. 2 W
When the power switch is turned OFF
0.5 W or less
Warm-up
Time *2
23 seconds or less
Weight *3
Approx. 26 kg
Dimensions
(W x L x H)
In the normal state
430 x 484 x 429 mm
When the optional handset is installed
510 x 484 x 429 mm
Environmental
Conditions
Temperature: 10 to 30°C
Humidity: 20% to 80% RH (no condensation)
Color
Compatibility
Full Color
Gradation
256 gradations
Acceptable
Documents
Supported Document Types
Acceptable
Paper Stock
Paper
Printable
Range
Printable Area
Scan Range
Scan Area
*1 The current value displayed on the rating label indicates average current consumption.
*2 Warm-up time is an interval between when the machine is turned ON and when the main screen appears on the display. Warm-up time may vary depending
on the use conditions and environment of the machine.
*3 The value indicates the mass of the main unit including toner cartridges.
㻢㻟㻠㻌㻛㻌㻢㻣㻢
0ALJ-0F9
Paper Drawer Specifications (Optional)
(MF8580Cdw / MF8550Cdn / MF8540Cdn Only)
Cassette Feeding Unit-V1
Paper
Capacity
Available
Paper
250 sheets (60 to 90 g/m²)
Paper
Power Supply
From main unit
Dimensions
(W x L x H)
430 x 454 x 102 mm
Weight
Approx. 4 kg
㻢㻟㻡㻌㻛㻌㻢㻣㻢
0ALJ-0FC
Wireless LAN Specifications (MF8580Cdw / MF8280Cw Only)
Standard
IEEE 802.11g, IEEE 802.11b, IEEE 802.11n
Transmission
Scheme
DS-SS System, OFDM System
Frequency
Range
2,412 to 2,472 MHz
IEEE 802.11g
6/9/12/18/24/36/48/54 Mbps
Data
Transmission
Rate
IEEE 802.11b
1/2/5.5/11 Mbps
IEEE 802.11n
SGI Invalidated 20 MHz: 6.5/13/19.5/26/39/52/58.5/65 Mbps
SGI Validated 20 MHz: 7.2/14.4/21.7/28.9/43.3/57.8/72.2 Mbps
SGI Invalidated 40 MHz: 13.5/27/40.5/81/108/121.5/135 Mbps
SGI Validated 40 MHz: 15/30/45/60/90/120/150 Mbps
Communication
Mode
Infrastructure Mode
Security
WEP, WPA-PSK (TKIP/AES-CCMP), WPA2-PSK (TKIP/AES-CCMP)
Connection
Method
WPS (Wi-Fi Protected Setup), Manual setup
㻢㻟㻢㻌㻛㻌㻢㻣㻢
0ALJ-0FE
Document Type
Supported Document Types
Platen Glass
Feeder
Type
Plain paper/Heavy paper/Photograph/Small documents (for example, index
cards)/Special types of paper (for example, tracing paper, transparencies,
etc.)/Booklet (Up to 20 mm thickness)
Plain paper
(one-page document/Multi-page
documents of the same size,
thickness and weight)
Size
(W x L)
Up to 215.9 x 297 mm
Maximum size: 215.9 x 355.6
mm
Minimum size: 139.7 x 128 mm
Weight
Up to 2 kg
50 to 105 g/m²
Paper
Capacity
1 sheet
Up to 50 sheets (A4, 80 g/m²)
㻢㻟㻣㻌㻛㻌㻢㻣㻢
0ALJ-0FF
Scan Area
The shaded areas in the table below indicate the scan area of the document. Make sure that text and images in your documents fit
within the shaded area. The scan area varies depending on the function used and where documents are placed (in the feeder or on the
platen glass).
Platen Glass
Feeder
Copy
NOTE:
NOTE:
The scan area for copying may differ from the
Printable Area
printable area.
The scan area for copying may differ from the
Printable Area
printable area.
Fax
Saving in a Computer
Saving in a Computer
The whole document can be scanned.
Scan
Saving in a USB Memory/Sending by Email/Sending to a File Server
Saving in a USB Memory/Sending by Email/Sending to a File Server
The whole document can be scanned.
㻢㻟㻤㻌㻛㻌㻢㻣㻢
0ALJ-0FH
Paper
Supported Paper Sizes
Paper sizes that can be loaded in the paper drawer, the manual feed slot, and optional paper drawers are listed below.
MF8580Cdw / MF8550Cdn / MF8540Cdn
A4 (210.0 x 297.0 mm) *1
*2
B5 (182.0 x 257.0 mm) *1
A5 (148.0 x 210.0 mm)
Legal (215.9 x 355.6 mm) *1
Letter (215.9 x 279.4 mm) *1
*2
Statement (139.7 x 215.9 mm)
Executive (184.0 x 266.7 mm) *1
Officio (215.9 x 317.5 mm)
B-officio (215.9 x 355 mm)
M-officio (215.9 x 341 mm)
Government - Letter (203.2 x 266.7 mm)
Government - Legal (203.2 x 330.2 mm)
Foolscap (215.9 x 330.2 mm) *1
Envelope COM10 (104.7 x 241.3 mm)
Envelope Monarch (98.4 x 190.5 mm) *3
Envelope C5 (162 x 229 mm)
Envelope DL (110 x 220 mm)
Custom Paper Size *4
*1 Automatic 2-sided printing is available without replacing paper.
*2 The machine can print received fax documents.
*3 You can load Envelope Monarch only in the manual feed slot.
*4 Custom paper size of 100 to 215.9 mm in width and 148 to 355.6 mm in length can be loaded in the paper drawer. Custom paper size of 76.2 to 215.9
mm in width and 127 to 355.6 mm in length can be loaded in the manual feed slot.
MF8280Cw / MF8230Cn
A4 (210.0 x 297.0 mm) *1
B5 (182.0 x 257.0 mm)
A5 (148.0 x 210.0 mm)
Legal (215.9 x 355.6 mm)
Letter (215.9 x 279.4 mm) *1
Statement (139.7 x 215.9 mm)
Executive (184.0 x 266.7 mm)
Officio (215.9 x 317.5 mm)
B-officio (215.9 x 355 mm)
M-officio (215.9 x 341 mm)
Government - Letter (203.2 x 266.7 mm)
Government - Legal (203.2 x 330.2 mm)
Foolscap (215.9 x 330.2 mm)
Envelope COM10 (104.7 x 241.3 mm)
㻢㻟㻥㻌㻛㻌㻢㻣㻢
Envelope Monarch (98.4 x 190.5 mm)
Envelope C5 (162 x 229 mm)
Envelope DL (110 x 220 mm)
Custom Paper Size *2
*1 The machine can print received fax documents.
*2 Custom paper size of 83 to 215.9 mm in width and 127 to 355.6 mm in length can be loaded in the paper drawer or the manual feed slot.
NOTE
The default paper size of the machine is set to Letter. Change the paper size setting when using a different size of paper.
Specifying Paper Size and Type in the Paper Drawer
Paper Type and Paper Source Capacity
Chlorine-free paper can be used with this machine.
MF8580Cdw / MF8550Cdn / MF8540Cdn
Paper Type
Plain paper *1
Paper Capacity for Paper Drawer
Paper Capacity for Manual Feed Slot
60 to 90 g/m²
250 sheets
50 sheets
86 to 119 g/m²
200 sheets
30 sheets
120 to 163 g/m²
150 sheets
20 sheets
Recycled
paper *1
60 to 74 g/m²
250 sheets
50 sheets
Color paper *1
60 to 74 g/m²
250 sheets
50 sheets
Heavy paper *1
100 to 110 g/m²*2
50 sheets
120 to 130 g/m²*2
20 sheets
Coated paper
155 to 165 g/m²*2
210 to 220 g/m²
Transparency *3
20 sheets
Label
50 sheets
20 sheets
Envelope
10 sheets
5 sheets
*1 Automatic 2-sided printing is available without replacing paper.
*2 Auto 2-sided printing is available on A4 or Letter size paper.
*3 Use laser printer transparencies.
MF8280Cw / MF8230Cn
Paper Type
Plain paper
Paper Capacity for Paper Drawer
Paper Capacity for Manual Feed Slot
60 to 90 g/m²
150 sheets
1 sheet
85 to 120 g/m²
120 sheets
1 sheet
121 to 163 g/m²
100 sheets
1 sheet
60 to 74 g/m²
150 sheets
1 sheet
Heavy paper
Recycled paper
㻢㻠㻜㻌㻛㻌㻢㻣㻢
Color paper
60 to 74 g/m²
150 sheets
1 sheet
100 to 110 g/m²
111 to 130 g/m²
100 sheets
Coated paper
1 sheet
131 to 160 g/m²
161 to 220 g/m²
-
Transparency *1
50 sheets
1 sheet
Label
50 sheets
1 sheet
Index Card
15 sheets
1 sheet
Envelope
10 sheets
1 sheet
*1 Use laser printer transparencies.
Paper Type and Setting for the Machine
Loading Paper
Printable Area
The shaded areas in the image below indicate the printable area of the document.
㻢㻠㻝㻌㻛㻌㻢㻣㻢
0ALJ-0FK
Copy Specifications
Text/Photo/Map (Speed) (Color)
300 x 300 dpi
Scan
Resolution
Text/Photo/Map, Text/Photo/Map (Speed) (B/W)
300 x 600 dpi
Text/Photo/Map (Quality), Printed Image, Text
600 x 600 dpi
Output
Resolution
600 x 600 dpi
Copy Ratio
100% 1:1, 400% Max, 200%, 141% A5->A4, 70% A4->A5, 50%, 25% Min
Copy
Speed *1
MF8580Cdw / MF8550Cdn / MF8540Cdn
Color: 20 cpm
B/W: 20 cpm
(A4 Plain
Direct)
Continuous
Copying
Capacity
First Copy
Time
(A4)
MF8280Cw / MF8230Cn
Color: 14 cpm
B/W: 14 cpm
Maximum 99 copies
MF8580Cdw / MF8550Cdn / MF8540Cdn
Platen glass (Color): 16.2 seconds or less
Platen glass (B/W): 15.5 seconds or less
Feeder (Color): 16.7 seconds or less
Feeder (B/W): 16.4 seconds or less
MF8280Cw / MF8230Cn
Platen glass (Color): 19 seconds or less
Platen glass (B/W): 19 seconds or less
Feeder (Color): 19 seconds or less
Feeder (B/W): 19 seconds or less
*1 The copy speed on A4 size plain paper on one-side printing is measured during continuous copying. However, this varies depending on the use conditions
and environment of the machine.
㻢㻠㻞㻌㻛㻌㻢㻣㻢
0ALJ-0FL
Fax Specifications (MF8580Cdw / MF8550Cdn / MF8280Cw Only)
Line Used
Public Switched Telephone Network (PSTN) *1
Communication
Mode
Super G3, G3
Compression
Method
MH, MR, MMR, JBIG
Modem Speed
Super G3: 33.6 Kbps, G3: 14.4 Kbps
Automatic Fallback
Transmission
Speed
Approx. 3 seconds per page*2
(ECM-JBIG, transmitting from the memory at 33.6 Kbps)
Sending from
Memory/Receiving
in Memory
Maximum approx. 512 pages *2 (Total pages of transmission/reception)
(Maximum number of fax jobs that can be sent from the memory: 10 jobs/Maximum number of fax jobs
that can be received into the memory: 90 jobs)
Fax Resolution
Normal: 200 x 100 dpi
Fine: 200 x 200 dpi
Photo: 200 x 200 dpi
Superfine: 200 x 400 dpi
Ultrafine: 400 x 400 dpi
Dialing
Favorites (19 destinations)
Coded dialing (181 destinations)
Group dialing (199 destinations)
Address Book dialing
Regular dialing (with numeric keys)
Automatic redialing
Manual redialing
Sequential broadcast (210 destinations)
Receiving
Automatic reception
Manual reception
Remote reception by telephone (Default ID: 25)
Reports
Send Results
Transmission management report
(By default, auto output every 40 destinations)
RX Results
Telephone Type
Handset (optional)/External telephone/External telephone with the built-in answer function/Data modem
*1 Depending on your locale or your telephone connection, you may be unable to perform data communication. In this case, contact your local authorized
Canon dealer or the Canon help line.
*2 Based on ITU-T (ITU Telecommunication Standardization Sector) Standard Chart No. 1, JBIG standard mode.
㻢㻠㻟㻌㻛㻌㻢㻣㻢
0ALJ-0FR
Scanner Specifications
Type
Color scanner
Maximum
Scan Size
Platen glass: up to 216 x 297 mm
Feeder: up to 216 x 356 mm
Scan
Resolution
Scan Speed *1
(A4, 300 x 600
dpi)
Optical resolution
Platen glass: up to 600 x 600 dpi
Feeder: up to 300 x 300 dpi
Software interpolation resolution
9,600 x 9,600 dpi
Color: 10 sheets/minute
Black and White: 20 sheets/minute
Host
Interface
100BASE-TX
10BASE-T
Hi-Speed USB
USB
IEEE 802.11b/g/n (Infrastructure mode) *2
Operating
System
Windows XP/Vista/7/8
Driver
TWAIN
WIA 1.0 (Windows XP)
WIA 2.0 (Windows Vista/7/8)
*1 The communication time is not included.
*2 For MF8580Cdw / MF8280Cw only.
㻢㻠㻠㻌㻛㻌㻢㻣㻢
0ALJ-0FS
Printer Specifications
Printing
Method
Paper
Capacity
Indirect electrostatic system (On-demand fixing)
MF8580Cdw / MF8550Cdn / MF8540Cdn
Manual feed slot: Approx. 50 sheets (60 to 90 g/m²)
Paper drawer: Approx. 250 sheets (60 to 90 g/m²)
Cassette Feeding Unit-V1(optional): Approx. 250 sheets (60 to 90 g/m²)
MF8280Cw / MF8230Cn
Manual feed slot: 1 sheet
Paper drawer: Approx 150 sheets (60 to 90 g/m²)
Output Tray
Capacity *1
(a fresh stack
of A4 size
paper)
Print
Speed *2
(A4 Plain
Direct)
Approx. 125 sheets (60 to 90 g/m²)
MF8580Cdw / MF8550Cdn / MF8540Cdn (1-sided printing)
Color: 20 ppm
B/W: 20 ppm
MF8580Cdw / MF8550Cdn / MF8540Cdn (2-sided printing)
Color: up to 10 ppm (pages per minute), 5 spm (sheets per minute)
B/W: up to 10 ppm (pages per minute), 5 spm (sheets per minute)
MF8280Cw / MF8230Cn
Color: 14 ppm
B/W: 14 ppm
First Print
Time *3
(A4)
MF8580Cdw / MF8550Cdn / MF8540Cdn
Color: 14.5 seconds or less
B/W: 14.5 seconds or less
MF8280Cw / MF8230Cn
Color:18 seconds or less
B/W: 18 seconds or less
Output
Resolution
600 x 600 dpi
Gradation
256 gradations
Toner
Cartridges
About Replacement Toner Cartridges
*1 May varies depending on the installation environment and paper type used.
*2 The print speed on A4 size plain paper is measured during continuous printing. However, this varies depending on the use conditions and environment of the
machine.
*3 May vary depending on the output environment.
㻢㻠㻡㻌㻛㻌㻢㻣㻢
0ALJ-0FU
Specifications for E-mail Sending (MF8580Cdw / MF8550Cdn / MF8540Cdn
Only)
Communication
Protocol *1
SMTP
Data Format
PDF (Compact), PDF
Black and White
PDF: 300 dpi (MMR Compression)
PDF (Compact): Text 300 dpi, Background 150 dpi
Resolution
Color
PDF: 200 dpi (JPEG Compression)
PDF (Compact): Text 300 dpi, Background 150 dpi
System
Environment
Windows XP/Vista/7/8/Server 2003/Server 2008/Server 2012
Solaris Version 2.6 or later (with Samba 2.2 or later)
Mac OS X
Red Hat Linux 7.2 or later (with Samba 2.2 or later)
Interface
100BASE-TX, 10BASE-T
Color Mode
Color, Black/White
Inputted
Image
Text, Text/Photo, Photo
Paper Size
A4, A5
*1 POP3 is available to use only when authenticating before sending.
㻢㻠㻢㻌㻛㻌㻢㻣㻢
0ALJ-0FW
Specifications for Scanning to Shared Folders (MF8580Cdw / MF8550Cdn /
MF8540Cdn Only)
Communication
Protocol
SMB (TCP/IP)
Data Format
PDF (Compact), PDF, JPEG, TIFF
Black and White
JPEG: 300 dpi
TIFF: 300 dpi (MMR Compression)
PDF: 300 dpi (MMR Compression)
PDF (Compact): Text 300 dpi, Background 150 dpi
Resolution
Color
JPEG: 300 dpi
TIFF: 300 dpi (JPEG Compression)
PDF: 200 dpi (JPEG Compression)
PDF (Compact): Text 300 dpi, Background 150 dpi
System
Environment
Windows XP/Vista/7/8/Server 2003/Server 2008/Server 2012
Solaris Version 2.6 or later (with Samba 2.2 or later)
Mac OS X (Mac OS X 10.7 and 10.8 is not supported.)
Red Hat Linux 7.2 or later (with Samba 2.2 or later)
Interface
100BASE-TX, 10BASE-T
Color Mode
Color, Black/White
Inputted
Image
Text, Text/Photo, Photo
Paper Size
A4, A5
㻢㻠㻣㻌㻛㻌㻢㻣㻢
0ALJ-0H4
Using e-Manual
The e-Manual is a manual that can be viewed on your computer that describes all of the functions of the machine. You can search from
your intended use or enter a keyword to quickly find the page you are looking for. You can use the e-Manual by installing it on your
Installing e-Manual
computer, or start the e-Manual directly from the CD-ROM.
How to find the topic you are looking for
You can find the page you are looking for using the following 3 methods.
Search the contents
You can find the page you are looking for by selecting the topic from the [Contents] tab on the left side of the screen, and selecting
the [Chapter icon] next to the topic.
Top Page
Topic Page
Search by keyword
Perform a search by entering a keyword, such as "fax" or "wireless LAN", and the pages containing the keyword are displayed. You
can find the page you are looking for from those results. You can also enter phrases such as "connecting to a network." The keyword
search also supports the AND Boolean to search for multiple keywords.
Search Tab
Search the site map
Click [Site Map] on the top part of the screen, and a list of all the e-Manual topics is displayed. From there you can find the topic
you are looking for.
Site Map
NOTE
System Requirements
To use the e-Manual, the following Web browsers are required. The content of the e-Manual may not display correctly if a
browser not listed below is used.
Windows: Internet Explorer 7.0/8.0/9.0/10.0, Firefox 10.0.x. ESR/16
Mac OS: Safari 3.x/4.x/5.0/5.1/6.0, Firefox 10.0.x. ESR/16
About the latest e-Manual
For the latest e-Manual, see the Canon Web site.
㻢㻠㻤㻌㻛㻌㻢㻣㻢
0ALJ-0H7
Installing e-Manual
Install the e-Manual on your computer by using the CD-ROM that comes with the machine. The label of the CD-ROM that contains
manuals may vary depending on the country/region or the model of the machine.
Using the Multi-lingual User Manual CD
1
Insert the Multi-lingual User Manual CD into the drive on the computer.
If the [Select language] screen does not appear, remove the CD-ROM from the drive and then insert it again, or see
Displaying the [CD-ROM Setup] or [Select language] Screen.
2
Select your language, and click [Install].
3
Read the License Agreement and click [Yes] to agree.
NOTE:
The installation begins.
Click [Exit] when the following screen appears. (It may take a long time to install the e-Manual.)
Using the User Software CD-ROM
1
Insert the User Software CD-ROM into the drive on the computer.
Select a language and click [OK] if you are prompted to do so.
If the [CD-ROM Setup] screen does not appear, remove the CD-ROM from the drive and then insert it again, or see
Displaying the [CD-ROM Setup] or [Select language] Screen.
2
Click [Custom Installation].
㻢㻠㻥㻌㻛㻌㻢㻣㻢
3
Select [USB Connection], and click [Next].
NOTE:
Select [USB Connection], even if connected using a network.
4
Clear all the check boxes except for [Manuals], and click [Install].
5
Read the License Agreement and click [Yes] to agree.
㻢㻡㻜㻌㻛㻌㻢㻣㻢
The installation begins.
Wait a moment. This process may take some time.
6
Click [Exit].
7
Click [Next]
[Exit].
㻢㻡㻝㻌㻛㻌㻢㻣㻢
Viewing the e-Manual
Double-click the [MF8500C_MF8200C Series e-Manual] icon on the desktop. Enable Java scripting in your browser before using the eManual.
NOTE
If a security warning message appears
Click [Allow blocked content].
TIPS for Viewing the e-Manual Directly from the CD-ROM
Depending on the operating system you are using, a security warning message may appear. If the message appears, allow
the content to be displayed in your Web browser.
Using the Multi-lingual User Manual CD
1
Insert the Multi-lingual User Manual CD into the drive on the computer.
If the [Select language] screen does not appear, remove the CD-ROM from the drive and then insert it again,
or see
Displaying the [CD-ROM Setup] or [Select language] Screen.
2
Select your language.
3
Click [Display Manuals].
㻢㻡㻞㻌㻛㻌㻢㻣㻢
Using the User Software CD-ROM
1
Insert the User Software CD-ROM into the drive on the computer.
Select a language and click [OK] if you are prompted to do so.
If the [CD-ROM Setup] screen does not appear, remove the CD-ROM from the drive and then insert it again,
or see
Displaying the [CD-ROM Setup] or [Select language] Screen.
2
Click [Manuals].
3
Click [e-Manual].
㻢㻡㻟㻌㻛㻌㻢㻣㻢
0ALJ-0H8
Uninstalling e-Manual
You can remove the e-Manual from the computer to restore the computer to the same state it was in before the e-Manual was installed.
The label of the CD-ROM that contains manuals may vary depending on the country/region or the model of the machine.
Using the Multi-lingual User Manual CD
1
Open the Windows Explorer.
Windows XP/Vista/7/Server 2003/Server 2008
From the [Start] menu, select [All Programs] (or [Programs])
[Accessories]
[Windows Explorer].
Windows 8/Server 2012
Right-click the lower-left corner of the screen and select [File Explorer].
2
Enter either of the following paths in the address field, and press the [ENTER] key:
C:\Documents and Settings\(the user name)\My Documents\Canon\MFP\Manuals
3
4
Delete the [MF8500C_MF8200C Series e-Manual] folder.
Delete the [MF8500C_MF8200C Series e-Manual] shortcut icon on the desktop.
Using the User Software CD-ROM
1
Insert the User Software CD-ROM into the drive on the computer.
Select a language and click [OK] if you are prompted to do so.
2
Click [Start Software Programs].
NOTE:
If the above screen is not displayed, see
3
Displaying the [CD-ROM Setup] or [Select language] Screen.
Click [Start] for [Manual Uninstaller].
㻢㻡㻠㻌㻛㻌㻢㻣㻢
4
Click [Uninstall].
Uninstall begins.
Wait a moment. This process may take some time.
5
Click [Exit].
6
Click [Back]
[Exit].
㻢㻡㻡㻌㻛㻌㻢㻣㻢
㻢㻡㻢㻌㻛㻌㻢㻣㻢
0ALJ-0H9
Screen Layout of e-Manual
The e-Manual is divided into different screens, and the content of each screen varies.
Top Page
Appears when e-Manual is started.
Canon
Click to return to the top page.
[Contents] tab/[Search] tab
Click to toggle the display between the table of contents and search.
Contents
The titles of chapters are displayed ( ). Place the mouse pointer over one of the titles, and topics of the chapter are displayed
on the right. Click a topic and its page is displayed.
[Top]
Click to return to the top page.
[Site map]
Click to display all the e-Manual topics.
[Help]
㻢㻡㻣㻌㻛㻌㻢㻣㻢
Click to display information on how to view the e-Manual, how to perform a search, and other information.
[Print]
Click to print the displayed content.
Feature Highlights
Provides a variety of practical examples of ways to use the machine. Click
/
/ /
to toggle the display of practical
examples by category, or click the sliding display for more information about each category. The sliding display can be stopped
Feature Highlights
by moving the pointer onto it.
[Quick Help]
Click to view how to solve problems or maintain the machine.
[Notice]
Click to view important information you should know when using the machine.
[Office Locations]
Click to display contact information for any inquiries about the machine.
Feature Highlights
Provides a variety of practical examples of ways to use the machine.
/
Click to display the detailed information. Click again to close the window.
Click to display the corresponding topic page.
Topic Page
Contains information about how to configure and use the machine.
㻢㻡㻤㻌㻛㻌㻢㻣㻢
[Contents]
The chapter icons and titles are displayed.
/
The [Contents] tab can be widened and narrowed.
[Expand all]/[Collapse all]
Click [Expand all] to display all of the subsections of all topics. Click [Collapse all] to close all of the subsections of all the
topics.
Chapter icons
Click a chapter icon to navigate to the top of the corresponding chapter.
Topic page
Displays the topics of the selected chapter. If "+" is displayed on the topic, clicking it displays the subsections of that topic.
Click "-" to close the expanded topic.
[Print all]
All pages of the selected chapter are opened in a separate window. The chapter can be printed if necessary.
Navigation
See what chapter topic you are currently viewing.
Click to return to the page top.
/
Click to display the previous or following topic.
Click to jump to the corresponding page. To return to the previous page, click "Back" on your Web browser.
Click to display the hidden detailed descriptions. Click again to close the detailed descriptions.
Search Tab
Contains a text box to perform a search and find the page you are looking for.
㻢㻡㻥㻌㻛㻌㻢㻣㻢
[Enter keyword(s) here]
Enter a keyword or keywords and click
to display the search results in the search dialog box (
).
[Search options]
Click to specify search conditions such as scope of search and fuzzy match conditions. To display the conditions, click this
button when it is gray. To close the display, click the button when it is orange.
Search scope selector
Specifies the search scope. You can efficiently search for topics by narrowing the search scope. The search scope selector is
especially useful when you can predict the general location of the topic that you are looking for.
Search options selector
Select the check box to make your search case-sensitive.
[Search with these conditions]
Click to display the search results with the conditions specified with
and
.
Search result dialog box
Displays the search results of the pages that contain the specified keywords. From the results, locate the page you are looking
for and click the topic title of the page. If the results cannot be displayed on one page, click
/
or a page number to
display the results on the corresponding page.
Site Map
Displays the table of contents for the e-Manual.
Chapter icons
㻢㻢㻜㻌㻛㻌㻢㻣㻢
Click to jump to the topic of the selected chapter.
Title (Topic)
Displays titles and topics. Click a title or topic to jump to the page.
Click to return to the page top.
/
Click to go to the previous or next chapter.
㻢㻢㻝㻌㻛㻌㻢㻣㻢
0ALJ-0HJ
Viewing e-Manual
Marks
Cautions regarding safety, restrictions and cautions regarding the handling of the machine, useful tips, and other information are
indicated using the marks below.
Indicates a warning concerning operations that may lead to death or injury to persons if not performed
correctly. To use the machine safely, always pay attention to these warnings.
Indicates a caution concerning operations that may lead to injury to persons if not performed correctly. To
use the machine safely, always pay attention to these cautions.
Indicates an operation that must not be performed. Read these items carefully, and make sure not to
perform the described operations.
IMPORTANT
Indicates operational requirements and restrictions. Be sure to read these items carefully to operate the
machine correctly, and avoid damage to the machine or property.
NOTE
Indicates a clarification of an operation, or contains additional explanations for a procedure.
TIPS
Indicates useful functions or tips for using the machine.
Keys and buttons used in this manual
Keys on the operation panel and buttons on the computer display appear in the following notation:
Type
Example
Keys on the
operation panel
(Color)
Settings
displayed on
the operation
panel
<Timer Settings>
<Specify the destination.>
Buttons and
other text
interfaces
displayed on
the computer
display
/
[Preferences]
used in this manual
The
/
keys are used to select a desired setting. They are only described at the first applicable occurrence of their use in a page
/
keys appear in Step 2, but are omitted in Step 3.
and omitted from the second time onward. For example, the
Example:
1
Press
2
Use
3
Select <TCP/IP Settings>
.
/
to select <Network Settings>, and press
<IPv4 Settings>
.
<IP Address Settings>.
Computer screens used in this manual
Unless otherwise noted, displays used in the e-Manual are those for the MF8580Cdw. Depending on the operating system you are
using, the appearance of the displays used in this manual may slightly differ from the actual displays. Also, the appearance of drivers
and software may differ depending on their version.
Illustrations used in this manual
㻢㻢㻞㻌㻛㻌㻢㻣㻢
Unless otherwise noted, illustrations used in the e-Manual are those for the MF8580Cdw. When differences are significant, multiple
illustrations are used with the model names, such as "MFXXXX / MFXXXX."
Abbreviations used in this manual
The following are the abbreviations for product names used in the e-Manual.
Microsoft Windows XP operating system -> Windows XP
Microsoft Windows Vista operating system -> Windows Vista
Microsoft Windows 7 operating system -> Windows 7
Microsoft Windows 8 operating system -> Windows 8
Microsoft Windows Server 2003 operating system -> Windows Server 2003
Microsoft Windows Server 2008 operating system -> Windows Server 2008
Microsoft Windows Server 2008 R2 operating system -> Windows Server 2008 R2
Microsoft Windows Server 2012 operating system -> Windows Server 2012
Microsoft Windows operating system -> Windows
㻢㻢㻟㻌㻛㻌㻢㻣㻢
0ALJ-0HK
Others
This section describes basic Windows operations and includes disclaimers, copyright information, and other information.
㻢㻢㻠㻌㻛㻌㻢㻣㻢
0ALJ-0HL
Basic Windows Operations
Displaying [Computer] or [My Computer]
Windows XP Professional/Server 2003
[Start] select [My Computer].
Windows Vista/7/Server 2008 R2
[Start] select [Computer].
Windows 8/Server 2012
Right-click the lower-left corner of the screen
select [File Explorer]
[Computer].
Displaying the Printer Folder
Windows XP Professional/Server 2003
[Start] select [Printers and Faxes].
Windows XP Home Edition
[Start] select [Control Panel]
[Printers and Other Hardware]
Windows Vista
[Start] select [Control Panel]
[Printer].
[Printers and Faxes].
Windows 7/Server 2008 R2
[Start] select [Devices and Printers].
Windows Server 2008
[Start] select [Control Panel]
double-click [Printers].
Windows 8/Server 2012
Right-click the lower-left corner of the screen
select [Control Panel]
[View devices and printers].
Displaying Shared Printers in the Print Server
1
Open Windows Explorer.
Windows XP/Vista/7/Server 2003/Server 2008
select [All Programs] (or [Programs]) [Accessories]
[Start]
Windows 8/Server 2012
Right-click the lower-left corner of the screen
2
[Windows Explorer].
select [File Explorer].
Select [Network] or [My Network Places] and double-click the computer set up as a print server.
To view computers on the network, you may need to turn on network discovery or search the network for computers.
Check if your shared printer is displayed.
Displaying the [CD-ROM Setup] or [Select language] Screen
If your computer does not display the [CD-ROM Setup] or [Select language] screen after inserting the CD-ROM, follow the procedure
below. The CD-ROM drive name is indicated as "D:" in this manual. The CD-ROM drive name may differ depending on the computer you
are using.
㻢㻢㻡㻌㻛㻌㻢㻣㻢
Windows XP/Server 2003
1
[Start]
2
Enter "D:\Minst.exe" (for the User Software CD-ROM) or "D:\Maninst.exe" (for the Multi-lingual User Manual
CD), and then click [OK].
select [Run].
Windows Vista/7/Server 2008
1
Enter "D:\Minst.exe" (for the User Software CD-ROM) or "D:\Maninst.exe" (for the Multi-lingual User Manual
CD) in [Search programs and files] (or [Start Search]) under the [Start] menu.
2
Press the [ENTER] key.
Windows 8/Server 2012
1
Right-click the lower-left corner of the screen
2
Enter "D:\Minst.exe" (for the User Software CD-ROM) or "D:\Maninst.exe" (for the Multi-lingual User Manual
CD), and then click [OK].
select [Run].
Printing a Test Page in Windows
You can check whether the printer driver is operational by printing a test page in Windows.
1
2
3
4
Load A4 size paper in the manual feed slot.
Open the printer folder.
Loading Paper in the Manual Feed Slot
Displaying the Printer Folder
Right-click your printer icon and click [Printer properties] (or [Properties]) in the pop-up menu.
Print a test page.
Click the [General] tab.
Click [Print Test Page] to print a test page.
㻢㻢㻢㻌㻛㻌㻢㻣㻢
Checking the Bit Architecture
If you are not sure whether your computer is running 32-bit or 64-bit Windows Vista/7/8/Server 2008/Server 2012, follow the procedure
below.
1
Display [Control Panel].
Windows Vista/7/Server 2008
select [Control Panel].
[Start]
Windows 8/Server 2012
Right-click the lower-left corner of the screen
2
select [Control Panel].
Display [System].
Windows Vista/7/8/Server 2008 R2/Server 2012
Click [System and Maintenance] or [System and Security]
[System].
Windows Server 2008
Click [System].
3
Check the bit architecture.
For 32-bit versions
[32-bit Operating System] is displayed.
For 64-bit versions
[64-bit Operating System] is displayed.
Viewing the Computer Name
Windows XP/Server 2003
1
[Start]
2
Display the [System] screen.
select [Control Panel].
Click [Performance and Maintenance]
3
[System].
Click the [Computer Name] (or [Network ID]) tab.
㻢㻢㻣㻌㻛㻌㻢㻣㻢
4
Click [Change] (or [Properties]).
Windows Vista/7/8/Server 2008/Server 2012
1
Display [Control Panel].
Windows Vista/7/Server 2008
[Start] select [Control Panel].
Windows 8/Server 2012
Right-click the lower-left corner of the screen
2
select [Control Panel].
Display [System].
Windows Vista/7/8/Server 2008 R2/Server 2012
Click [System and Security] (or [System and Maintenance])
[System].
Windows Server 2008
Double-click [System].
Checking the LPR/RAW Printer Port
1
2
3
Open the printer folder.
Displaying the Printer Folder
Right-click your printer icon and click [Printer properties] (or [Properties]) in the pop-up menu.
Check the port settings.
Click the [Ports] tab.
Make sure that the correct port is selected for the printer.
㻢㻢㻤㻌㻛㻌㻢㻣㻢
㻢㻢㻥㻌㻛㻌㻢㻣㻢
0ALJ-0HS
Notice
Model Names
MF8580Cdw (F164802)
MF8550Cdn (F164802)
MF8540Cdn (F164800)
MF8280Cw (F164702)
MF8230Cn (F164700)
Third Party Services and Software
Third Party Software
R & TTE Directive
This equipment (F164802/F164702) conforms with the essential requirements of EC Directive 1999/5/EC and is usable in EU.
(Only for models with facsimile functionality.)
(For Europe only)
Canon Inc. / Canon Europa N.V.
EMC requirements of EC Directive
This equipment conforms with the essential EMC requirements of EC Directive. We declare that this product conforms with the EMC
requirements of EC Directive at nominal mains input 230 V, 50 Hz although the rated input of the product is 220 to 240 V, 50/60 Hz.
Use of shielded cable is necessary to comply with the technical EMC requirements of EC Directive.
Laser Safety Information
Laser radiation could be hazardous to the human body. For this reason, laser radiation emitted inside this equipment is hermetically
sealed within the protective housing and external cover. No radiation can leak from the machine in the normal operation of the product
by the user.
This machine is classified as a Class 1 Laser Product under IEC 60825-1: 2007, EN60825-1: 2007.
220 to 240 V Model
The label shown below is attached to the laser scan unit on the machine.
This machine has been classified under IEC 60825-1: 2007, EN60825-1: 2007 and conforms to the following classes:
CLASS 1 LASER PRODUCT
LASER KLASSE 1
APPAREIL À LASER DE CLASSE 1
APPARECCHIO LASER DI CLASSE 1
PRODUCTO LÁSER DE CLASE 1
APARELHO A LASER DE CLASSE 1
LUOKAN 1 LASER-TUOTE
㻢㻣㻜㻌㻛㻌㻢㻣㻢
LASERPRODUKT KLASS 1
Use of controls, adjustments, or performance of procedures other than those specified in the manuals for the machine may result
in hazardous radiation exposure.
WEEE Directive
Only for European Union and EEA (Norway, Iceland and Liechtenstein)
These symbols indicate that this product is not to be disposed of with your household waste, according to the WEEE Directive
(2012/19/EU), the Battery Directive (2006/66/EC) and/or national legislation implementing those Directives.
If a chemical symbol is printed beneath the symbol shown above, in accordance with the Battery Directive, this indicates that a heavy
metal (Hg = Mercury, Cd = Cadmium, Pb = Lead) is present in this battery or accumulator at a concentration above an applicable
threshold specified in the Battery Directive.
This product should be handed over to a designated collection point, e.g., on an authorized one-for-one basis when you buy a new
similar product or to an authorized collection site for recycling waste electrical and electronic equipment (EEE) and batteries and
accumulators. Improper handling of this type of waste could have a possible impact on the environment and human health due to
potentially hazardous substances that are generally associated with EEE. Your cooperation in the correct disposal of this product will
contribute to the effective usage of natural resources.
For more information about the recycling of this product, please contact your local city office, waste authority, approved scheme or your
household waste disposal service or visit www.canon-europe.com/weee, or www.canon-europe.com/battery.
International ENERGY STAR Program
As an ENERGY STAR® Partner, Canon Inc. has determined that this product meets the ENERGY STAR Program for
energy efficiency.
The International ENERGY STAR Office Equipment Program is an international program that promotes energy saving
through the use of computers and other office equipment.
The program backs the development and dissemination of products with functions that effectively reduce energy
consumption. It is an open system in which business proprietors can participate voluntarily.
The targeted products are office equipment, such as computers, displays, printers, facsimiles, and copiers. The
standards and logos are uniform among participating nations.
IPv6 Ready Logo
The protocol stack included in this machine has obtained the IPv6 Ready Logo Phase-1 established by the IPv6 Forum.
Wireless LAN Regulatory Information (MF8580Cdw / MF8280Cw only)
MF8580Cdw / MF8280Cw includes approved Wireless LAN Module (Model name: FM48944).
Regulatory information
Users in the European Union and other European countries
R&TTE Declaration of Conformity (Wireless LAN Module)
Dansk
Undertegnede CANON INC. erklærer herved, at FM48944 overholder de væsentlige krav og øvrige relevante krav
㻢㻣㻝㻌㻛㻌㻢㻣㻢
[Danish]
i direktiv 1999/5/EF.
Deutsch
[German]
Hiermit erklärt CANON INC., dass sich das Gerät FM48944 in Übereinstimmung mit den grundlegenden
Anforderungen und den übrigen einschlägigen Bestimmungen der Richtlinie 1999/5/EG befindet.
Eesti
[Estonian]
Käesolevaga kinnitab CANON INC. seadme FM48944 vastavust direktiivi 1999/5/EÜ olulistele nõuetele ja
muudele asjakohastele sätetele.
English
Hereby, CANON INC., declares that FM48944 is in compliance with the essential requirements and other relevant
provisions of Directive 1999/5/EC.
Español
[Spanish]
Por medio de la presente CANON INC. declara que el FM48944 cumple con los requisitos esenciales y
cualesquiera otras disposiciones aplicables o exigibles de la Directiva 1999/5/CE.
[Greek]
¡¢£¤¥¦¡§¡¨¡
£©§§¡ ª¥ ¡««¡©£¥¤«£«
«¡¨«£¬¨«¤¯««³¤´µ«¶
Français
[French]
Par la présente, CANON INC. déclare que l’appareil FM48944 est conforme aux exigences essentielles et aux
autres dispositions pertinentes de la directive 1999/5/CE.
Italiano
[Italian]
Con la presente CANON INC. dichiara che FM48944 è conforme ai requisiti essenziali ed alle altre disposizioni
pertinenti stabilite dalla direttiva 1999/5/CE.
Latviski
[Latvian]
·
¸¹º¼¸½¾º¸¾
º
¿Â
[Lithuanian]
øÄÅÆ
ǹÈÄ
reikalavimus ir kitas josnuostatas.
Nederlands
[Dutch]
Hierbij verklaart CANON INC. dat FM48944 in overeenstemming is met de essentiële eisen en de andere
relevante bepalingen van richtlijn 1999/5/EG.
Malti
[Maltese]
ÉÊË
ÌËÍÎ
ÏÐ
Í˹¼
Magyar
[Hungarian]
Ç
ÇÌ
ÑÒÓÔÔ
ÇÔ¸Ò
Polski [Polish]
ÕÊ
Ð
Ç
ÊÇ
Ö
stosownymi postanowieniami Dyrektywy 1999/5/EC.
Português
[Portuguese]
Por este documento, a CANON INC. declara que o FM48944 está em conformidade com os requisitos essenciais e
outras disposições relevantes da Diretiva 1999/5/CE.
[Slovenian]
Družba CANON INC. izjavlja, da je tiskalnik FM48944 skladni z bistvenimi zahtevami in ostalimi relevantnimi
Slovensky
[Slovak]
ØÙ
ÔÔ
1999/5/ES.
Suomi
[Finnish]
CANON INC. vakuuttaa täten, että FM48944 -laite on direktiivin 1999/5/ EY oleellisten vaatimusten ja sitä
koskevien direktiivin muiden ehtojen mukainen.
Svenska
[Swedish]
Härmed intygar CANON INC. att denna FM48944 står i överensstämmelse med de väsentliga egenskapskrav och
övriga relevanta bestämmelser som framgår av direktiv 1999/5/EG.
ÚÛÝ
[Romanian]
Þ
ÝÌÝ
ßÌààâ
alte prevederi relevante incluse în Directiva 1999/5/CE.
ãìíïðòóô÷
ùú÷ô
[Bulgarian]
ûýðóþÿùÿùôíðò÷òðù
ÿþïÿðòýðóìùóþùý÷þù÷ú÷óôðý÷÷òï÷þù
ò÷íÿ÷
÷÷ú÷óôðý÷ýð÷òùôþ÷ðû
Íslenska
[Icelandic]
Hér með lýsir CANON INC. því yfir að FM48944 sé í samræmi við grunnkröfur og aðrar kröfur, sem gerðar eru í
tilskipun 1999/5/EC.
Norsk
[Norwegian]
CANON INC. erklærer herved at utstyret FM48944 er i samsvar med de grunnleggende krav og øvrige relevante
krav i direktiv 1999/5/EF.
Gaeilge [Irish]
Dearbhaíonn CANON INC. leis seo go gcloíonn FM48944 le ceanglais riachtanacha agus le forálacha ábhartha eile
na Treorach 1999/5/CE.
㻢㻣㻞㻌㻛㻌㻢㻣㻢
[Czech]
¸
ÈÈɹ¹¼ÚÈÚÉ
IS, IT, LI, LT, LU, LV, MT, NL, NO, PL, PT, RO, SE, SI, SK.* Poznámky týkající se použití tohoto produktu.Francie:
Ô
Dansk
[Danish]
* Dette produkt må anvendes i AT, BE, BG, CH, CY, CZ, DE, DK, EE, ES, FI, FR, GB, GR, HU, IE, IS, IT, LI, LT,
LU, LV, MT, NL, NO, PL, PT, RO, SE, SI, SK.* Bemærkninger for anvendelse af dette produkt.Frankrig: Dette
produkt kan ikke anvendes udendøre.
Deutsch
[German]
* Dieses Gerät darf in folgenden Ländern betrieben werden AT, BE, BG, CH, CY, CZ, DE, DK, EE, ES, FI, FR, GB,
GR, HU, IE, IS, IT, LI, LT, LU, LV, MT, NL, NO, PL, PT, RO, SE, SI, SK.* Hinweise zur Verwendung dieses
Produkts.Frankreich: Dieses Produkt darf nicht im Freien verwendet werden.
Eesti
[Estonian]
* Seda seadet võib kasutada AT, BE, BG, CH, CY, CZ, DE, DK, EE, ES, FI, FR, GB, GR, HU, IE, IS, IT, LI, LT, LU,
LV, MT, NL, NO, PL, PT, RO, SE, SI, SK.* Teadaanne selle toote kasutamise kohta.Prantsusmaa: seda toodet saab
kasutada vaid siseruumides.
English
* This equipment may be operated in AT, BE, BG, CH, CY, CZ, DE, DK, EE, ES, FI, FR, GB, GR, HU, IE, IS, IT, LI,
LT, LU, LV, MT, NL, NO, PL, PT, RO, SE, SI, SK.* Notice for use of this product.France : This product cannot be
used outdoors.
Español
[Spanish]
* Este equipo puede ser utilizado en AT, BE, BG, CH, CY, CZ, DE, DK, EE, ES, FI, FR, GB, GR, HU, IE, IS, IT, LI,
LT, LU, LV, MT, NL, NO, PL, PT, RO, SE, SI, SK.* Aviso relativo al uso de este producto.Francia: este producto no
puede utilizarse en exteriores.
Français
[French]
* Cet équipement peut être utilisable en AT, BE, BG, CH, CY, CZ, DE, DK, EE, ES, FI, FR, GB, GR, HU, IE, IS, IT,
LI, LT, LU, LV, MT, NL, NO, PL, PT, RO, SE, SI, SK.* Avis concernant l’utilisation de ce produit.France : Ce produit
ne peut pas être utilisé à l’extérieur.
Italiano
[Italian]
* Questo dispositivo può essere utilizzato in AT, BE, BG, CH, CY, CZ, DE, DK, EE, ES, FI, FR, GB, GR, HU, IE, IS,
IT, LI, LT, LU, LV, MT, NL, NO, PL, PT, RO, SE, SI, SK.* Nota per l’uso del prodotto.Francia: il prodotto non può
essere utilizzato all’aperto.
Latviski
[Latvian]
úºÈÈɹ¹¼ÚÈÚÉ¿¿¿
¿¿Þ¿ÞÚ¼Þ
ºº
¾¾
¾¾º
¾¾
¿Â
[Lithuanian]
ÃÇÇÈÈɹ¹¼ÚÈÚÉ¿¿
¿¿¿Þ¿ÞÚ¼Þ¸Þ½
negalima naudoti lauke.
Nederlands
[Dutch]
* Deze apparatuur kan worden gebruikt in de volgende landen AT, BE, BG, CH, CY, CZ, DE, DK, EE, ES, FI, FR,
GB, GR, HU, IE, IS, IT, LI, LT, LU, LV, MT, NL, NO, PL, PT, RO, SE, SI, SK.* Kennisgeving voor gebruik van dit
product.Frankrijk: dit product kan niet buiten worden gebruikt.
㻢㻣㻟㻌㻛㻌㻢㻣㻢
Suomi
[Finnish]
* Laitetta voidaan käyttää seuraavassa maassa AT, BE, BG, CH, CY, CZ, DE, DK, EE, ES, FI, FR, GB, GR, HU, IE,
IS, IT, LI, LT, LU, LV, MT, NL, NO, PL, PT, RO, SE, SI, SK.* Huomautuksia tämän tuotteen käytöstä.Ranska:
Tuotetta ei saa käyttää ulkoilmassa.
Malti
[Maltese]
* Dan l-apparat jista’ jintuza f’ AT, BE, BG, CH, CY, CZ, DE, DK, EE, ES, FI, FR, GB, GR, HU, IE, IS, IT, LI, LT,
¿¿¿Þ¿ÞÚ¼ÐÇÍËÐÏË
¹Ë
Ð̸
Magyar
[Hungarian]
* Ez a készülék AT, BE, BG, CH, CY, CZ, DE, DK, EE, ES, FI, FR, GB, GR, HU, IE, IS, IT, LI, LT, LU, LV, MT, NL,
Þ¿ÞÚ¼
ÒÇÇ
ÔÔ
ÇÔ
beltérben használható.
Polski
[Polish]
иÊÊÈÈɹ¹¼ÚÈÚÉ
¿¿¿¿¿Þ¿ÞÚ¼ÊÇ
ÐÊ
ÐÐÊ
Ê
Português
[Portuguese]
* Este equipamento pode ser utilizado em AT, BE, BG, CH, CY, CZ, DE, DK, EE, ES, FI, FR, GB, GR, HU, IE, IS, IT,
LI, LT, LU, LV, MT, NL, NO, PL, PT, RO, SE, SI, SK.* Aviso referente ao uso deste produto.França: Este produto
não pode ser usado em áreas externas.
[Slovenian]
* To opremo je dovoljeno uporabljati v AT, BE, BG, CH, CY, CZ, DE, DK, EE, ES, FI, FR, GB, GR, HU, IE, IS, IT,
LI, LT, LU, LV, MT, NL, NO, PL, PT, RO, SE, SI, SK.* Obvestilo glede uporabe tega izdelka.Francija: Tega izdelka ni
Ǹ
Slovensky
[Slovak]
¸Ô
ÈÈɹ¹¼ÚÈÚÉ
IS, IT, LI, LT, LU, LV, MT, NL, NO, PL, PT, RO, SE, SI, SK.* Upozornenie k používaniu tohto výrobku.Francúzsko:
¸
[Greek]
¡ ¦ ¡ ¦§¡ µ¬ £§¡¡!µ£ÈÈɹ¹¼ÚÈÚÉ
¿¿¿¿¿Þ¿ÞÚ¼"§µ#£´¬ £©¡¢¡©
¡ ¦¡«$µ%©¦¡ ¡ ¦¤§¡ µ¬ £§¡¡!µ£¯# ¡¢«¬¥ ¡©«
Svenska
[Swedish]
* Den här utrustningen kanske fungerar i AT, BE, BG, CH, CY, CZ, DE, DK, EE, ES, FI, FR, GB, GR, HU, IE, IS, IT,
LI, LT, LU, LV, MT, NL, NO, PL, PT, RO, SE, SI, SK.* Meddelande för användning av denna produkt.Frankrike:
Denna produkt får inte användas utomhus.
ÚÛÝ
[Romanian]
* Acest echipament poate fi operat in AT, BE, BG, CH, CY, CZ, DE, DK, EE, ES, FI, FR, GB, GR, HU, IE, IS, IT, LI,
¿¿¿¿Þ¿ÞÚ¼Ý
à
va utiliza în exterior.
ãìíïðòóô÷
ùú÷ô
[Bulgarian]
&ÿðÿ'ÿòðýù
ÿùðóù÷úÿíúðÈÈɹ¹¼ÚÈÚÉ
¿¿¿¿¿Þ¿ÞÚ¼(ð'ùíùôðÿ÷úÿíúðýùþÿýðþÿú÷òÿôþ)òðý*÷
&ÿú÷òÿôþýù
ÿùðóù÷úÿíúð÷úìýþùò÷þÿò÷þðýð+÷ò
ðþð
Íslenska
[Icelandic]
* Viðgerð á þessu tæki má annast á AT, BE, BG, CH, CY, CZ, DE, DK, EE, ES, FI, FR, GB, GR, HU, IE, IS, IT, LI,
LT, LU, LV, MT, NL, NO, PL, PT, RO, SE, SI, SK.* Tilkynning vegna notkunar vörunnar.Frakkland : Þessa vöru má
ekki nota utan dyra.
Norsk
[Norwegian]
* Dette produktet må anvendes i AT, BE, BG, CH, CY, CZ, DE, DK, EE, ES, FI, FR, GB, GR, HU, IE, IS, IT, LI, LT,
LU, LV, MT, NL, NO, PL, PT, RO, SE, SI, SK.
* Merknad for bruk av dette produktet.Frankrike: Produktet kan ikke brukes utendørs.
Gaeilge
[Irish]
* Féadfar an trealamh seo a fheidhmiú in AT, BE, BG, CH, CY, CZ, DE, DK, EE, ES, FI, FR, GB, GR, HU, IE, IS, IT,
LI, LT, LU, LV, MT, NL, NO, PL, PT, RO, SE, SI, SK.
* Fógra maidir le húsáid an táirge seo.An Fhrainc : Ní féidir an táirge seo a úsáid amuigh faoin aer.
Regulatory information for users in Jordan
Contains Wireless LAN Module approved by TRC/SS/2011/32
Regulatory information for users in UAE
TRA REGISTERD No: ER0058948/11
DEALER No: DA0058934/11
Disclaimers
The information in this document is subject to change without notice.
CANON INC. MAKES NO WARRANTY OF ANY KIND WITH REGARD TO THIS MATERIAL, EITHER EXPRESS OR IMPLIED, EXCEPT AS
PROVIDED HEREIN, INCLUDING WITHOUT LIMITATION, THEREOF, WARRANTIES AS TO MARKETABILITY, MERCHANTABILITY, FITNESS
FOR A PARTICULAR PURPOSE OF USE OR NON-INFRINGEMENT. CANON INC. SHALL NOT BE LIABLE FOR ANY DIRECT, INCIDENTAL, OR
CONSEQUENTIAL DAMAGES OF ANY NATURE, OR LOSSES OR EXPENSES RESULTING FROM THE USE OF THIS MATERIAL.
Copyright
Copyright CANON INC. 2014
㻢㻣㻠㻌㻛㻌㻢㻣㻢
No part of this publication may be reproduced, transmitted, transcribed, stored in a retrieval system, or translated into any language or
computer language in any form or by any means, electronic, mechanical, magnetic, optical, chemical, manual, or otherwise, without the
prior written permission of Canon Inc.
Trademarks
Canon and the Canon logo are registered trademarks of Canon Inc. in the United States and may also be trademarks or registered
trademarks in other countries.
Adobe, Acrobat, Reader, and Photoshop are registered trademarks of Adobe Systems Incorporated in the United States and/or other
countries.
Apple, Bonjour, Mac OS, Macintosh, and OS X are trademarks or registered trademarks of Apple Inc. in the U.S. and/or other countries.
Microsoft, Windows, Windows Vista, Windows Server, Internet Explorer, Word, Excel and Power Point are either registered trademarks or
trademarks of Microsoft Corporation in the United States and/or other countries.
This product contains the Universal Font Scaling Technology or UFST® under license from Monotype Imaging, Inc. UFST® is a trademark
of Monotype Imaging, Inc. registered in the United States Patent and Trademark Office and may be registered in certain jurisdictions.
UFST: Copyright © 1989 - 1996, 1997, 2003, 2004, 2008, all rights reserved, by Monotype Imaging Inc.
All other product and brand names are registered trademarks, trademarks or service marks of their respective owners.
㻢㻣㻡㻌㻛㻌㻢㻣㻢
0ALJ-0J1
Contact Us
CANON INC.
30-2, Shimomaruko 3-chome, Ohta-ku, Tokyo 146-8501, Japan
CANON MARKETING JAPAN INC.
16-6, Konan 2-chome, Minato-ku, Tokyo 108-8011, Japan
CANON U.S.A., INC.
One Canon Park, Melville, NY 11747, U.S.A.
CANON EUROPA N.V.
Bovenkerkerweg 59, 1185 XB Amstelveen, The Netherlands
CANON CHINA CO. LTD.
15F Jinbao Building No.89, Jinbao Street, Dongcheng District, Beijing 100005, PRC
CANON SINGAPORE PTE LTD
1 HarbourFront Avenue, #04-01 Keppel Bay Tower, Singapore 098632
CANON AUSTRALIA PTY LTD
1 Thomas Holt Drive, North Ryde, Sydney NSW 2113, Australia
CANON GLOBAL WORLDWIDE SITES
http://www.canon.com/
㻢㻣㻢㻌㻛㻌㻢㻣㻢
㻝㻌㻛㻌㻣㻠
Before Using the Driver
3
About the Drivers and Software
4
Supported Operating Systems
5
Selecting the Driver to Be Installed
6
Installing the MF Drivers and MF Toolbox
8
Installing Using [Easy Installation] (For Windows)
9
Installing Using [Custom Installation] (For Windows)
17
Installing the Software (For Macintosh)
28
USB Cable Connection (Only when Connecting with USB)
32
Checking the Installation Results (For Windows)
33
Registering the Printer and Fax (For Macintosh)
34
Installing the Latest Drivers Downloaded from the Canon Homepage 42
Installing the MF Drivers on the WSD Network (For Windows)
43
Installing the MF Drivers
44
Setting WSD
51
Uninstalling the Software
53
Uninstalling the Printer/Fax/Scanner Driver (For Windows)
54
Uninstalling the MF Toolbox (For Windows)
56
Uninstalling the Drivers for the WSD Device (For Windows)
58
Uninstalling the Product Extended Survey Program (For Windows) 61
Uninstalling the Software (For Macintosh)
62
Troubleshooting
64
How to Use the Online Help
66
Confirming IP Address Settings
68
How to Check the Bit Architecture (For Windows)
71
Disclaimers
72
Copyright
73
Trademarks
74
㻞㻌㻛㻌㻣㻠
0AWU-000
Before Using the Driver
Before Using the Driver
Read this chapter before installing the software such as the MF Drivers.
"About the Drivers and Software"
"Supported Operating Systems"
"Selecting the Driver to Be Installed"
㻟㻌㻛㻌㻣㻠
0AWU-001
About the Drivers and Software
MF Drivers
Printer driver
You can print from an application to the machine once you have the printer driver installed on
your computer.
Fax driver *1
If you install the fax driver on your computer, you can select "Print" from an application, select
the Canon fax driver as a printer, and specify the output destination and options. The fax driver
converts the data into an image that conforms to standard fax protocols so that the data can be
printed or saved using the recipient's fax machine.
Scanner driver
You can use the machine as a scanner once you have the scanner driver installed on your
computer.
Network Scan
Utility
You need this utility software to use the machine as a network scanner. It is automatically
installed along with the scanner driver.
MF Toolbox *2
The MF Toolbox provides a group of commands for you to open a scanned image in an
application, send it as an e-mail attachment file, store it on the hard disk, etc.
Additional Software Program
Presto!
PageManager
*1
You can handle scanned images in many ways using this software.
Fax driver may not be supplied depending on the model you are using.
*2 Some features of the MF Toolbox for Macintosh may differ from those of the MF Toolbox for Windows. For details, see the Canon
Scanner Driver Guide.
NOTE
Depending on the operating system you are using, some functions of the driver software included in the CD-ROM may
not be usable. The newest software is posted on the Canon web site. Please verify the operating environment etc. and
download the appropriate software if required.
㻠㻌㻛㻌㻣㻠
0AWU-002
Supported Operating Systems
: Supported
: Not supported
Windows
XP
Windows
Vista/7/8
Printer driver (UFRII
LT)
Windows
Windows
Server 2003 Server 2008
*1
Printer driver (UFRII
LT (XPS))
*1
Windows Server 2008
R2/Server 2012
*1
*1
Printer driver
(PCL5) *2
*1
*1
*1
Printer driver
(PCL6) *2
*1
*1
*1
Fax driver *2
*1
*1
*1
Scanner driver
Network Scan Utility
*1
*1
MF Toolbox
Presto!
PageManager
*1
Supported only over network connection.
*2
These software may not be supplied depending on your model or your country or region.
㻡㻌㻛㻌㻣㻠
Mac OS X (version
10.5.8 or later)*2
0AWU-003
Selecting the Driver to Be Installed
After selecting the connection method between the machine and a computer, select the driver to be installed.
1
Press
.
2
Press [
] or [
] to highlight <System Management Settings>, and then press
.
] or [
] to highlight <PDL Selection (Plug and Play)>, and then press
.
] or [
] to highlight <Network> or <USB>, and then press
] or [
] to highlight the printer driver you are using, and then press
3
Press [
4
Press [
.
5
Press [
㻢㻌㻛㻌㻣㻠
.
Selectable page description language
Network
Fax
UFRII LT
UFRII LT (XPS)
PCL5
PCL6
USB
UFRII LT
UFRII LT (XPS)
PCL5
PCL6
6
Restart the machine.
It is necessary to restart the machine for the settings to take effect.
Turn OFF the machine and wait for at least 10 seconds before turning it back ON.
㻣㻌㻛㻌㻣㻠
0AWU-005
Installing the MF Drivers and MF Toolbox
Installing the MF Drivers and MF Toolbox
Install the software to use the machine.
"Installing Using [Easy Installation] (For Windows)"
"Installing Using [Custom Installation] (For Windows)"
"Installing the Software (For Macintosh)"
"USB Cable Connection (Only when Connecting with USB)"
"Checking the Installation Results (For Windows)"
"Registering the Printer and Fax (For Macintosh)"
"Installing the Latest Drivers Downloaded from the Canon Homepage"
The method of installation varies depending on the connection method or environment.
OS
Connection
method
USB connection
Windows
Network connection
(IPv4 environment)
Network connection
(IPv6 environment)*
Macintosh
USB connection
Installation method
"Installing Using [Easy Installation] (For Windows)"*
"Installing Using [Custom Installation] (For Windows)"
"Installing the MF Drivers on the WSD Network (For Windows)"
"Installing the Software (For Macintosh)"
Network connection
When installing downloaded drivers
"Installing the Latest Drivers Downloaded from the Canon
Homepage"
Presto! PageManager is not installed by selecting [Easy Installation]. To install the software, select [Custom Installation].
If you are operating in the IPv6 environment, you cannot install the drivers or software following procedures below.
Refer to "Installing the MF Drivers on the WSD Network (For Windows)" to install MF Drivers.
You may not be able to use the scan function in the IPv6 environment.
IMPORTANT
User rights for logging on to Windows
Log on as a user with administrative rights.
When installing via USB connection
Connect the USB cable after the software installation.
Make sure that the power of the machine is turned ON when connecting the USB cable.
When installing via network connection
Before starting the installation, check the following.
The computer and machine are connected via the network.
The power of the machine is turned ON.
The IP addresses are properly set up.
㻤㻌㻛㻌㻣㻠
0AWU-006
Installing Using [Easy Installation] (For Windows)
1
Insert the User Software CD-ROM into the slot on your computer.
2
Click [Easy Installation].
The options to be displayed differ depending on your country or region.
If the above CD-ROM Setup screen does not appear:
Windows XP and Server 2003
1. From the [Start] menu, select [Run].
2. Enter "D:\MInst.exe", and then click [OK].
Windows Vista, 7, and Server 2008
1. Enter "D:\MInst.exe" in [Start Search] or [Search programs and files] under the [Start] menu.
2. Press the [ENTER] key on the keyboard.
Windows 8 and Server 2012
1. Right-click the lower-left corner of the screen and select [Run].
2. Enter "D:\MInst.exe", and then click [OK].
* The CD-ROM drive name is indicated as "D:" in this manual. The CD-ROM drive name may differ depending on
the computer you are using.
㻥㻌㻛㻌㻣㻠
If the language selection screen is displayed before the CD-ROM setup screen appears:
Select the language and click [OK].
3
When the following screen appears, select the connection to a computer.
For USB Connection:
Select [USB Connection], and click [Next].
For Network Connection:
Select [Network Connection], and click [Next].
NOTE
Windows Server 2003/Server 2008/Server 2012
This screen is not displayed. Proceed to the following procedure.
4
Click [Install].
㻝㻜㻌㻛㻌㻣㻠
5
Read the License Agreement and click [Yes].
6
Click [Next].
㻝㻝㻌㻛㻌㻣㻠
The following screen appears. Click [Yes].
For USB Connection:
Proceed to step 9.
For Network Connection:
Proceed to step 7.
7
Select the machine to be installed.
(1) Select the machine.
(2) Click [Next].
If no machines are displayed in [Device List]:
Perform the following procedure.
1. Check the following.
The computer and machine are connected via the network.
The machine is turned on.
The IP address is set correctly.
The computer and machine are on the same subnet.
Security software has been exited.
2. Click [Update Device List].
If any machines are not displayed by performing the above procedure, perform the following procedure.
1. Click [Search by IP Address].
2. Enter the IP address of the machine to be installed.
"Confirming IP Address Settings"
If the IP address of the machine is between "169.254.1.0 and 169.254.254.255", the IP address is the one
assigned by the AutoIP function.
If an IP address other than link-local addresses is set for the computer, set an IP address in the same subnet
as the computer (other than link-local addresses) also for this machine manually.
㻝㻞㻌㻛㻌㻣㻠
This enables the installer to search for this machine.
e-Manual -> "Setting IPv4 Address"
3. Click [OK].
8
Installation starts when clicking [Starts].
9
Click [Exit].
For Network Connection:
For USB Connection:
Next, installation of MF Toolbox starts.
In Windows Server 2003/Server 2008/Server 2012, MF Toolbox is not installed. Proceed to step 13.
㻝㻟㻌㻛㻌㻣㻠
10
Click [Start].
11
Click [Exit].
12
When the following screen appears, read the displayed information, click [Accept] or [Do Not Accept], and
then click [Next].
㻝㻠㻌㻛㻌㻣㻠
If you select [Accept]:
The Product Extended Survey Program (the program to investigate the state of usage) will be installed.
The Product Extended Survey Program is the program to send the information related to the usage of this machine to Canon
every month for ten years. Any other information including your personal information is not sent.
You can also uninstall the Product Extended Survey Program.
"Uninstalling the Product Extended Survey Program (For Windows)"
13
Confirm that the application is selected [
] under [Install] and click [Next].
14
Restart your computer.
(1) Select the [Restart Computer Now (Recommended)] check box.
(2) Click [Restart].
Remove the CD-ROM once this screen appears.
㻝㻡㻌㻛㻌㻣㻠
In the case of USB connection, wait until your computer is restarted.
"USB Cable Connection (Only when Connecting with USB)"
In the case of network connection, check the installation results.
"Checking the Installation Results (For Windows)"
㻝㻢㻌㻛㻌㻣㻠
0AWU-007
Installing Using [Custom Installation] (For Windows)
1
Insert the User Software CD-ROM into the slot on your computer.
2
Click [Custom Installation].
The options to be displayed differ depending on your country or region.
If the above CD-ROM Setup screen does not appear:
Windows XP and Server 2003
1. From the [Start] menu, select [Run].
2. Enter "D:\MInst.exe", and then click [OK].
Windows Vista, 7, and Server 2008
1. Enter "D:\MInst.exe" in [Start Search] or [Search programs and files] under the [Start] menu.
2. Press the [ENTER] key on the keyboard.
Windows 8 and Server 2012
1. Right-click the lower-left corner of the screen and select [Run].
2. Enter "D:\MInst.exe", and then click [OK].
* The CD-ROM drive name is indicated as "D:" in this manual. The CD-ROM drive name may differ depending on
the computer you are using.
㻝㻣㻌㻛㻌㻣㻠
If the language selection screen is displayed before the CD-ROM setup screen appears:
Select the language and click [OK].
3
When the following screen appears, select the connection method to a computer.
For USB Connection:
Select [USB Connection], and click [Next].
For Network Connection:
Select [Network Connection], and click [Next].
NOTE
Windows Server 2003/Server 2008/Server 2012:
This screen is not displayed. Proceed to the following procedure.
4
Select the check box next to the application you want to install and click [Install].
㻝㻤㻌㻛㻌㻣㻠
The options to be displayed differ depending on your country or region.
5
Read the License Agreement and click [Yes].
6
Click [Next].
㻝㻥㻌㻛㻌㻣㻠
The following screen appears. Click [Yes].
For USB Connection:
Proceed to step 13.
For Network Connection:
Proceed to step 7.
7
Select the machine to be installed.
(1) Select the machine.
(2) Click [Next].
If no machines are displayed in [Device List]:
Perform the following procedure.
㻞㻜㻌㻛㻌㻣㻠
1. Check the following.
The computer and machine are connected via the network.
The machine is turned on.
The IP address is set correctly.
The computer and machine are on the same subnet.
Security software has been exited.
2. Click [Update Device List].
If any machines are not displayed by performing the above procedure, perform the following procedure.
1. Click [Search by IP Address].
2. Enter the IP address of the machine to be installed.
"Confirming IP Address Settings"
If the IP address of the machine is between "169.254.1.0 and 169.254.254.255", the IP address is the one
assigned by the AutoIP function.
If an IP address other than link-local addresses is set for the computer, set an IP address in the same subnet
as the computer (other than link-local addresses) also for this machine manually.
This enables the installer to search for this machine.
e-Manual -> "Setting IPv4 Address"
3. Click [OK].
8
Select the function you want to use.
(1) Select the function you want to use (driver to be installed).
(2) Click [Next].
[Printer]
Select when using the print function.
[Fax (for Supported
Models)]
Select when using the PC fax function. (This function sends documents or images that were created
on a computer directly as a fax transmission.)
[Scanner]
Select when using the scan function.
If another Select Driver screen is displayed, repeat this step until the Confirm Settings screen is displayed.
㻞㻝㻌㻛㻌㻣㻠
9
Set the printer or fax information.
(1) Specify the settings for each option as needed.
(2) Click [Next].
Printer information *1
Fax information*2
*1
Appears if you selected [Printer] in step 8.
*2
Appears if you selected [Fax (for Supported Models)] in step 8.
[Printer Name]
Enter a new name if you want to change the printer or fax name.
[Fax Name]
[Use as Shared
Printer]
Select the check box to share the printer or fax.
[Use as Shared
Fax]
[Shared Name]
Change the shared name as needed.
NOTE
If you selected the [Use as Shared Printer] or [Use as Shared Fax] check box:
Install the additional driver as follows.
1. Click [Drivers to Add].
2. Select the operating system displayed in [Drivers to Add].
3. Click [OK].
If a 64-bit operating system is running on a computer on which the installation is being performed, the download
installation (installation from a network) for a client computer on which any of the following 32-bit operating systems is
running is not supported due to a Windows restriction.
Windows XP (on which no service pack or SP1 is installed)
Windows Server 2003 (on which no service pack is installed)
㻞㻞㻌㻛㻌㻣㻠
If you download and install the software on any of the above 32-bit operating systems, you may fail to install the software
and may not be able to open the printing preferences dialog box.
If any of the following 32-bit operating systems is running on a computer on which the installation is being performed, the
additional driver for a 64-bit operating system cannot be installed.
Windows XP (on which no service pack or SP1 is installed)
Windows Server 2003 (on which no service pack is installed)
10
Click [Start] to start installation.
11
Select the machine you would like to make your default printer.
(1) Select the machine you would like to make your default printer.
(2) Click [Next].
This screen appears only when installing the printer driver and fax driver.
12
Select to print a test page.
(1) Select the check box to print a test page.
㻞㻟㻌㻛㻌㻣㻠
(2) Click [Next].
This screen appears only when installing the printer driver and fax driver.
13
Click [Exit].
For Network Connection:
For USB Connection:
Next, installation of MF Toolbox starts.
In any of the following cases, MF Toolbox is not installed. Proceed to step 17.
If you are using Windows Server 2003/Server 2008/Server 2012
If you cleared the [MF Toolbox] check box in step 4
14
Click [Next].
㻞㻠㻌㻛㻌㻣㻠
The screens for specifying a location in which the MF Toolbox is installed and position to which the start menu is added appear.
Specify the settings in the respective screens, and then click [Next]. Click [Start] in the displayed screen.
15
Click [Exit].
The software for which the check box was selected in step 4 is installed.
Follow the on-screen instructions.
16
When the following screen appears, read the displayed information, click [Accept] or [Do Not Accept], and
then click [Next].
㻞㻡㻌㻛㻌㻣㻠
If you select [Accept]:
The Product Extended Survey Program (the program to investigate the state of usage) will be installed.
The Product Extended Survey Program is the program to send the information related to the usage of this machine to Canon
every month for ten years. Any other information including your personal information is not sent.
You can also uninstall the Product Extended Survey Program.
"Uninstalling the Product Extended Survey Program (For Windows)"
17
Confirm that the applications are selected [
] under [Install] and click [Next].
The options to be displayed differ depending on your country or region.
18
Restart your computer.
(1) Select the [Restart Computer Now (Recommended)] check box.
(2) Click [Restart].
Remove the CD-ROM once this screen appears.
㻞㻢㻌㻛㻌㻣㻠
In the case of USB connection, wait until your computer is restarted.
"USB Cable Connection (Only when Connecting with USB)"
In the case of network connection, check the installation results.
"Checking the Installation Results (For Windows)"
㻞㻣㻌㻛㻌㻣㻠
0AWU-00X
Installing the Software (For Macintosh)
To connect with USB, connect the USB cable after installing the software.
After completing the procedures described in this section, proceed to the procedures in "Registering the Printer and Fax
(For Macintosh)."
The installation screen varies depending on the version of Mac OS X.
Be sure to close all applications that are running.
1
Insert the User Software CD-ROM into the slot on your computer.
2
Double-click the CD-ROM icon, and then double-click the [Canon_MF_Driver.pkg] icon.
3
Click [Continue].
㻞㻤㻌㻛㻌㻣㻠
4
Read the License Agreement and click [Continue].
5
Click [Agree].
6
When the following screen appears, click [Continue].
㻞㻥㻌㻛㻌㻣㻠
You cannot change the installation location.
7
Click [Install].
The [Change Install Location] button may appear, but you cannot change the installation location.
8
Enter your [Name] and [Password], and click [OK].
If you are using Mac OS X 10.7.x or later, click [Install Software].
㻟㻜㻌㻛㻌㻣㻠
9
When the following screen appears, click [Close].
In the case of USB connection, proceed to "USB Cable Connection (Only when Connecting with USB)."
In the case of network connection, proceed to "Registering the Printer and Fax (For Macintosh)."
㻟㻝㻌㻛㻌㻣㻠
0AWU-008
USB Cable Connection (Only when Connecting with USB)
1
Remove the cap that covers the USB port on the back side of the machine.
Pull the string forward to remove the cap, as shown below.
2
Connect the USB cable.
Connect the flat end (a) to the USB port on the computer.
Connect the square end (b) to the USB port on the machine.
If a dialog box is displayed:
Follow the on-screen instructions and complete installation.
In the case of Windows, check the installation results.
"Checking the Installation Results (For Windows)"
In the case of Macintosh, registering the machine is required.
"Registering the Printer and Fax (For Macintosh)"
㻟㻞㻌㻛㻌㻣㻠
0AWU-009
Checking the Installation Results (For Windows)
Check if the MF drivers, MF Toolbox, and e-Manual are installed correctly.
Check if the following icons are displayed for the installed applications.
NOTE
About Icons That Are Displayed:
Icons for each driver may be displayed separately or only representative icon may be displayed depending on the
operating system.
Software
Location
Printer driver
[Printers and Faxes], [Printers], or [Devices and Printers] folder
Fax driver
[Printers and Faxes], [Printers], or [Devices and Printers] folder
Icon
For network
connection
Scanner driver
[Scanners and Cameras] or [Scanners and Cameras Properties]
folder
For USB connection
MF Toolbox
Desktop
Network Scan Utility
Taskbar
e-Manual
Desktop
㻟㻟㻌㻛㻌㻣㻠
0AWU-013
Registering the Printer and Fax (For Macintosh)
To print or send faxes from a Macintosh, you need to register this machine in the Macintosh. The registration method
varies depending on the connection method. Select a method according to your environment.
To use the scanning function via a network connection, you need to register the scanner to the MF Toolbox. For details,
see the Canon Scanner Driver Guide.
Connection method
Registration method
Auto IP (Bonjour)
"Bonjour Connection"
TCP/IP connection
"TCP/IP Connection"
USB connection
"USB Connection"
Bonjour Connection
1
Open [System Preferences], and click [Printer & Fax] or [Print & Scan].
2
Click the [+] icon.
3
Click [Default], and then select a printer name for which [Bonjour] is displayed in the [Kind] or
[Connection] column.
㻟㻠㻌㻛㻌㻣㻠
4
Select [Select Printer Software] from [Print Using].
5
Select a driver that is capable for this machine from the driver list, and then click [OK].
If you are using Mac OS X 10.5.x, clicking [OK] is not required.
6
Click [Add].
7
If the following screen appears, specify the optional settings, and then click [Continue] or [OK].
㻟㻡㻌㻛㻌㻣㻠
8
Check that this machine is added to the [Printer & Fax] or [Print & Scan] dialog box.
9
Close the dialog box.
TCP/IP Connection
Register the printer and fax respectively following the procedure below.
The fax driver cannot be used in an IPv6 environment.
1
Open [System Preferences], and click [Printer & Fax] or [Print & Scan].
2
Click the [+] icon.
㻟㻢㻌㻛㻌㻣㻠
3
Click [IP], and then select a print protocol from [Protocol].
4
Enter the IP address of the machine to [Address], and then select [Select Printer Software] from
[Print Using].
㻟㻣㻌㻛㻌㻣㻠
5
Select a driver that is capable for this machine from the driver list, and then click [OK].
If you are using Mac OS X 10.5.x, clicking [OK] is not required.
6
Click [Add].
7
If the following screen appears, specify the optional settings, and then click [Continue] or [OK].
8
Check that this machine is added to the [Printer & Fax] or [Print & Scan] dialog box.
㻟㻤㻌㻛㻌㻣㻠
9
Close the dialog box.
USB Connection
Register the printer and fax respectively following the procedure below.
1
Open [System Preferences], and click [Printer & Fax] or [Print & Scan].
2
Click the [+] icon.
㻟㻥㻌㻛㻌㻣㻠
3
Click [Default], and then select a printer name for which [USB] is displayed in the [Kind] or
[Connection] column.
4
Select [Select Printer Software] from [Print Using].
5
Select a driver that is capable for this machine from the driver list, and then click [OK].
If you are using Mac OS X 10.5.x, clicking [OK] is not required.
6
Click [Add].
7
If the following screen appears, specify the optional settings, and then click [Continue] or [OK].
㻠㻜㻌㻛㻌㻣㻠
8
Check that this machine is added to the [Printer & Fax] or [Print & Scan] dialog box.
9
Close the dialog box.
㻠㻝㻌㻛㻌㻣㻠
0AWU-00Y
Installing the Latest Drivers Downloaded from the Canon Homepage
This section describes the outline of the procedure to install the drivers/software downloaded from the Canon homepage.
For the procedure to download drivers/software, refer to the download site of the Canon homepage.
1
Decompress the downloaded file.
2
Open the [DRIVERS] folder, and then double-click [Setup] or [Setup.exe]
If the [User Account Control] screen appears, click [Yes] or [Continue].
3
Follow the on-screen instructions.
After the installation completes, perform the following procedure.
In the case of Windows:
"USB Cable Connection (Only when Connecting with USB)"
"Checking the Installation Results (For Windows)"
In the case of Macintosh:
"Registering the Printer and Fax (For Macintosh)"
㻠㻞㻌㻛㻌㻣㻠
0AWU-00A
Installing the MF Drivers on the WSD Network (For Windows)
Installing the MF Drivers on the WSD Network (For
Windows)
You can print from a Windows Vista/7/8/Server 2008/Server 2012 computer using the WSD (Web Services on Devices)
protocol.
To use WSD, follow the procedures in both "Installing the MF Drivers" and "Setting WSD"
IMPORTANT
To enable or disable WSD:
Use the operation panel on the machine.
e-Manual -> "Configuring Printing Protocols and WSD Functions"
㻠㻟㻌㻛㻌㻣㻠
0AWU-00C
Installing the MF Drivers
1
Open the printer folder.
For Windows Vista:
From the [Start] menu, select [Control Panel], and then click [Printer].
For Windows 7/Server 2008
From the [Start] menu, select [Devices and Printers].
For Windows 8/Server 2012
Right-click the lower-left corner of the screen, select [Control Panel], and then click [View devices and printers].
2
Click [Add a printer].
3
Click [Add a local printer].
㻠㻠㻌㻛㻌㻣㻠
4
Confirm that [LPT1: (Printer Port)] is displayed for [Use an existing port] and click [Next].
5
Click [Have Disk].
6
Insert the User Software CD-ROM into the slot on your computer.
㻠㻡㻌㻛㻌㻣㻠
When the following screen appears, click [Exit].
The options to be displayed differ depending on your country or region.
When [AutoPlay] is displayed:
Click [
] to close the dialog box.
7
Click [Browse].
8
Open the folder where the printer driver files are stored.
For 32-bit versions:
Open [DRIVERS] -> [us_eng] -> [32bit] -> [Driver] on the CD-ROM and click [Open].
For 64-bit versions:
Open [DRIVERS] -> [us_eng] -> [x64] -> [Driver] on the CD-ROM and click [Open].
㻠㻢㻌㻛㻌㻣㻠
When you are not sure which operating system that you are using on your computer:
"How to Check the Bit Architecture (For Windows)"
9
Click [OK].
10
Select the printer driver you are using, and then click [Next].
㻠㻣㻌㻛㻌㻣㻠
11
Specify the printer name.
(1) Enter a different name to change the default printer name.
When [Set as default printer] is displayed, specify whether to choose the machine as the default printer (Windows
Vista/Server 2008).
(2) Click [Next].
Installation begins. Wait until the following screen closes.
㻠㻤㻌㻛㻌㻣㻠
When [User Account Control] appears:
Click [Yes] or [Continue].
12
Select [Do not share this printer] and click [Next].
To set the machine as a shared printer, configure the related settings after you have performed the procedure provided in
"Setting WSD."
13
Click [Finish].
When [Set as the default printer] is displayed, specify whether to choose the machine as the default printer (Windows
7/8/Server 2008 R2/Server 2012).
Eject the CD-ROM when the following screen appears.
㻠㻥㻌㻛㻌㻣㻠
The icon is added to the printer folder.
㻡㻜㻌㻛㻌㻣㻠
0AWU-00E
Setting WSD
1
Open the network folder.
For Windows Vista/Server 2008:
Select [Network] from the [Start] menu.
For Windows 7/Server 2008 R2:
Select [Computer] from the [Start] menu and click [Network].
For Windows 8/Server 2012
Right-click the lower-left corner of the screen, select [File Explore], and then click [Network].
2
Right-click the machine icon and select [Install] from the pop-up menu.
The icon is add to the printer folder. Installation is complete.
㻡㻝㻌㻛㻌㻣㻠
When [User Account Control] appears:
Click [Yes] or [Continue].
Follow the steps in the procedure below to delete the icon added in step 13 of "Installing the MF Drivers," if you do not
need it.
(1) Right-click the icon and select [Remove device] or [Delete] from the pop-up menu.
(2) Click [Yes].
(3) When [User Account Control] appears, click [Yes] or [Continue].
㻡㻞㻌㻛㻌㻣㻠
0AWU-00F
Uninstalling the Software
Uninstalling the Software
If you do not need the drivers or applications, you can uninstall them with the following procedure.
"Uninstalling
"Uninstalling
"Uninstalling
"Uninstalling
"Uninstalling
the
the
the
the
the
Printer/Fax/Scanner Driver (For Windows)"
MF Toolbox (For Windows)"
Drivers for the WSD Device (For Windows)"
Product Extended Survey Program (For Windows)"
Software (For Macintosh)"
IMPORTANT
Confirm the following before uninstalling the software:
You must have administrative privileges on the computer.
You should have the installation software (in case you want to re-install the drivers).
You have closed all applications on your computer desktop.
㻡㻟㻌㻛㻌㻣㻠
0AWU-00H
Uninstalling the Printer/Fax/Scanner Driver (For Windows)
1
Open [Programs and Features].
For Windows XP:
From the [Start] menu, select [Control Panel], and then double-click [Add or Remove Programs].
For Windows Vista/7/Server 2003/Server 2008:
1. From the [Start] menu, select [Control Panel].
2. Click [Uninstall a Program] or double-click [Programs and Features].
For Windows 8/Server 1012:
Right-click the lower-left corner of the screen and select [Programs and Features].
2
Select [Canon MF8500C Series] (or [Canon MF8200C Series]), and then click [Uninstall].
3
Click [Delete].
4
Click [Yes] to confirm the uninstallation.
5
Click [Exit] (or [Restart]).
㻡㻠㻌㻛㻌㻣㻠
㻡㻡㻌㻛㻌㻣㻠
0AWU-00J
Uninstalling the MF Toolbox (For Windows)
1
Open [Programs and Features].
For Windows XP:
From the [Start] menu, select [Control Panel], and then double-click [Add or Remove Programs].
For Windows Vista/7/Server 2003/Server 2008:
1. From the [Start] menu, select [Control Panel].
2. Click [Uninstall a Program] or double-click [Programs and Features].
For Windows 8/Server 1012:
Right-click the lower-left corner of the screen and select [Programs and Features].
2
Select [Canon MF Toolbox 4.9], and then click [Uninstall].
3
Click [Remove].
4
Click [Exit].
㻡㻢㻌㻛㻌㻣㻠
㻡㻣㻌㻛㻌㻣㻠
0AWU-010
Uninstalling the Drivers for the WSD Device (For Windows)
1
Insert the User Software CD-ROM.
When the following screen appears, click [Exit].
The options to be displayed differ depending on your country or region.
If [AutoPlay] is displayed:
click [
] to close the dialog box.
2
Open the folder that contains the uninstaller on the CD-ROM.
For 32-bit:
\DRIVERS\us_eng\32bit\misc\
For 64-bit:
\DRIVERS\us_eng\x64\misc\
3
Double-click [DelDrv.exe].
㻡㻤㻌㻛㻌㻣㻠
When [User Account Control] appears
Click [Yes] or [Continue].
4
Click [Delete].
5
Click [Yes].
6
Click [Exit].
㻡㻥㻌㻛㻌㻣㻠
7
Open the Explorer, and click [Network].
8
Right-click the machine icon and select [Uninstall] from the pop-up menu.
When [User Account Control] appears
Click [Yes] or [Continue].
The machine icon is deleted from the printer folder, and uninstall is completed.
㻢㻜㻌㻛㻌㻣㻠
0AWU-014
Uninstalling the Product Extended Survey Program (For Windows)
1
Open [Programs and Features].
For Windows XP:
From the [Start] menu, select [Control Panel], and then double-click [Add or Remove Programs].
For Windows Vista/7:
1. From the [Start] menu, select [Control Panel].
2. Click [Uninstall a program] or double-click [Programs and Features].
For Windows 8:
Right-click the lower-left corner of the screen and select [Programs and Features].
2
Select [Canon Laser Printer/Scanner/Fax Extended Survey Program], and then click [Uninstall].
3
Follow the on-screen instructions.
㻢㻝㻌㻛㻌㻣㻠
0AWU-011
Uninstalling the Software (For Macintosh)
1
If the machine is connected to a computer with a USB cable, disconnect the USB cable.
If you want to delete the scanner driver or MF Toolbox, proceed to Step 4.
2
Open [System Preferences], and click [Printer & Fax] or [Print & Scan].
3
Select the machine, and click the [-] icon.
4
From the menu bar, click [Go] -> [Go to Folder].
5
Delete the files or folders below that correspond to the driver you want to uninstall.
Drag files or folders to [Trash] icon on the Dock to delete.
If [Authenticate] dialog box appears, enter the administrator’s name and password, and then click [OK].
Software
Location of the folder to enter
/Library/Printers/Canon/
Name of the file or folder to delete
CUPS_MF_Printer
Printer driver
/Library/Printers/PPDs/Contents/Resources/
㻢㻞㻌㻛㻌㻣㻠
CNPZBxxxZB.ppd.gz
(xxx may differ depending on the model.)
/Library/Printers/Canon/
CUPSFAX
/Library/Printers/PPDs/Contents/Resources/
CNMCxxxFB.ppd.gz
(xxx may differ depending on the model.)
/Applications/
Canon MF Utilities
/Library/Application Support/Canon/
ScanGear MF
/Library/Application Support/Canon/
WMCLibrary.framework
/Library/Application Support/Canon/
WMCReb.plist
/Library/Image Capture/Devices/*
Canon MFScannerxxx.app*
(xxx may differ depending on the model.)
/Library/Image Capture/TWAIN Data Sources/
Canon xxx.ds
Canon xxx USB.ds
(xxx may differ depending on the model.)
/Library/Printers/Canon/
MFScanner
Fax driver
Scanner driver/MF
Toolbox
* Max OS X 10.6 or later.
6
Close all windows open.
7
Restart the computer.
㻢㻟㻌㻛㻌㻣㻠
0AWU-012
Troubleshooting
See the following sections:
"Cannot Install the Software."
"Applications Installed from the User Software CD-ROM Supplied with the Machine Are Not Properly Registered in the
MF Toolbox."
"It Takes Too Long to Uninstall the Drivers (Windows XP)."
"The [Canon] Folder Remains in the Start Menu After the Software Has Been Uninstalled."
"Cannot Use the Software After Upgrading the Operating System."
Cannot Install the Software.
When you are in an IPv6 environment, the CD-ROM setup screen may not appear, and you cannot install the MF
drivers. Install the drivers using the WSD port.
"Installing the MF Drivers on the WSD Network (For Windows)"
You may not be able to use the scan function over an IPv6 connection.
Follow the on-screen instructions to install the software. If an error occurs during the installation, uninstall the software,
restart your computer, and install it again.
"Uninstalling the Software"
"Installing the MF Drivers and MF Toolbox"
Quit all running applications and install the software again.
Applications Installed from the User Software CD-ROM Supplied with the Machine Are Not
Properly Registered in the MF Toolbox.
Applications are automatically registered to the MF Toolbox once they have been installed. They are not, however, if
installed while the MF Toolbox is open. To access these applications from the toolbox, you need to manually register
them to the toolbox.
"Using the MF Toolbox"
It Takes Too Long to Uninstall the Drivers (Windows XP).
Quit all running applications (including anti-virus applications) before uninstalling the software.
The [Canon] Folder Remains in the Start Menu After the Software Has Been Uninstalled.
Uninstall the MF Toolbox first before uninstalling the MF drivers. If you uninstall the MF drivers first, the [Canon] folder may
remain after the MF Toolbox has been uninstalled.
Follow the steps in the procedure below to remove the folder.
For Windows XP
Right-click the [Start] menu and open Windows Explorer. From [All Users], select [Start Menu] -> [Programs] and delete
the [Canon] folder.
For Windows Vista
Right-click the [Start] menu and select [Explore All Users]. From [Programs] in [Start Menu], delete the [Canon] folder.
For Windows 7
Delete the [Canon] folder in [All Programs] under the [Start] menu.
Cannot Use the Software After Upgrading the Operating System.
㻢㻠㻌㻛㻌㻣㻠
Uninstall the software for this machine before upgrading the operating system on your computer. Once the upgrade has
been complete, reinstall the software.
"Uninstalling the Software"
"Installing the MF Drivers and MF Toolbox"
"Installing the MF Drivers on the WSD Network (For Windows)"
㻢㻡㻌㻛㻌㻣㻠
0AWU-00K
How to Use the Online Help
In the Online Help, all the functions of the driver software and information about options are included. If you want to know
descriptions of the functions and settings immediately when using the driver software, make use of the Online Help.
For Windows:
(1) Select [File] -> [Print] from the menu bar in the application.
(2) Select the printer in [Select Printer] or [Name] in the [Print] dialog box.
(3) Click [Preferences] or [Properties].
(4) Click [Help].
How to display the
Help screen
Click [Contents] in the Help screen, and then double-click the desired title to display the
information.
Searching from
Contents
For Macintosh:
(1) Select [File] -> [Print] from the menu bar in the application.
(2) Select the printer in [Printer].
(3) Change the content displayed in lower pane of the dialog to [Finishing], [Quality],
㻢㻢㻌㻛㻌㻣㻠
[Special Features], etc.
(4) Click
.
How to display the
Help screen
You can search a content by entering a keyword.
Searching contents
㻢㻣㻌㻛㻌㻣㻠
0AWU-00L
Confirming IP Address Settings
NOTE
If the machine is not connected to the network properly:
The IP address is displayed as "0.0.0.0".
When the startup time setting is specified:
The IP address, subnet mask, and gateway address will be displayed when the specified time has elapsed.
e-Manual -> "Setting a Wait Time for Connecting to a Network"
When the machine is connected to a switching hub:
The machine may not be able to connect to a network even if your network settings are appropriate. In this case, the
startup time of the machine needs to be set to a waiting state.
e-Manual -> "Setting a Wait Time for Connecting to a Network"
Confirming IPv4 address settings
1
Press
or
(Status Monitor).
2
Press [
] or [
] to highlight <Network Information>, and then press
.
] or [
] to highlight <IPv4>, and then press
] or [
] to highlight the option you want to confirm, and then press
3
Press [
.
4
Press [
㻢㻤㻌㻛㻌㻣㻠
.
5
View the information.
6
Press
or
(Status Monitor) to close the screen.
Confirming IPv6 address settings
1
Press
or
(Status Monitor).
2
Press [
] or [
] to highlight <Network Information>, and then press
] or [
] to highlight <IPv6>, and then press
3
Press [
㻢㻥㻌㻛㻌㻣㻠
.
.
4
Press [
] or [
] to highlight the option you want to confirm, and then press
5
View the information.
6
Press
or
(Status Monitor) to close the screen.
㻣㻜㻌㻛㻌㻣㻠
.
0AWU-00R
How to Check the Bit Architecture (For Windows)
1
Open [Control Panel].
Windows Vista/7/Server 2008:
Select [Control Panel] from [Start] menu.
Windows 8/Server 2012:
Right-click the lower-left corner of the screen and select [Control Panel].
2
Display [System].
Windows Vista/7/8/Server 2008 R2/Server 2012:
Click [System and Maintenance] or [System and Security], and then click [System].
Windows Server 2008:
Click [System].
3
Check the bit architecture.
For 32-bit versions:
[32-bit Operating System] is displayed.
For 64-bit versions:
[64-bit Operating System] is displayed.
㻣㻝㻌㻛㻌㻣㻠
0AWU-00S
Disclaimers
The information in this document is subject to change without notice.
CANON INC. MAKES NO WARRANTY OF ANY KIND WITH REGARD TO THIS MATERIAL, EITHER EXPRESS OR
IMPLIED, EXCEPT AS PROVIDED HEREIN, INCLUDING WITHOUT LIMITATION, THEREOF, WARRANTIES AS TO
MARKETABILITY, MERCHANTABILITY, FITNESS FOR A PARTICULAR PURPOSE OF USE OR NON-INFRINGEMENT.
CANON INC. SHALL NOT BE LIABLE FOR ANY DIRECT, INCIDENTAL, OR CONSEQUENTIAL DAMAGES OF ANY
NATURE, OR LOSSES OR EXPENSES RESULTING FROM THE USE OF THIS MATERIAL.
㻣㻞㻌㻛㻌㻣㻠
0AWU-00U
Copyright
Copyright Canon Inc. 2013 All Rights Reserved
No part of this publication may be reproduced, transmitted, transcribed, stored in a retrieval system, or translated into any
language or computer language in any form or by any means, electronic, mechanical, magnetic, optical, chemical, manual,
or otherwise, without the prior written permission of Canon Inc.
㻣㻟㻌㻛㻌㻣㻠
0AWU-00W
Trademarks
Canon and the Canon logo are registered trademarks of Canon Inc. in the United States and may also be trademarks or
registered trademarks in other countries.
Windows, Windows Vista, and Windows Server are either registered trademarks or trademarks of Microsoft Corporation in
the United States and/or other countries.
Bonjour, Finder, Macintosh, Mac OS, and OS X are trademarks or registered trademarks of Apple Inc. in the U.S. and/or
other countries.
This product contains the Universal Font Scaling Technology or UFST® under license from Monotype Imaging, Inc. UFST®
is a trademark of Monotype Imaging, Inc. registered in the United States Patent and Trademark Office and may be
registered in certain jurisdictions.
Copyright © 1989 - 1996, 1997, 2003, 2004, 2008, all rights reserved, by Monotype Imaging Inc.
All other product and brand names are registered trademarks, trademarks or service marks of their respective owners.
㻣㻠㻌㻛㻌㻣㻠