1
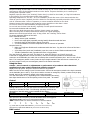
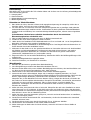
ES-400 RGY, ES-300 RGBV
Manual
Read carefully before using this device!
Bedienungsanleitung
Bitte lesen Sie diese Bedienungsanleitung, bevor Sie das Gerät in Betrieb nehmen!
Manual ................................................................................................................ 1
Safety instructions ................................................................................................ 2
Installation safety ................................................................................................. 2
INSTALLATION/OPERATION ................................................................................. 2
Using the laser ..................................................................................................... 3
Control ................................................................................................................ 3
DMX control ......................................................................................................... 3
Maintenance / cleaning ......................................................................................... 4
Troubleshooting ................................................................................................... 4
Technical specifications ........................................................................................ 4
Please note .......................................................................................................... 4
Hinweise zur Inbetriebnahme:............................................................................... 5
Warnhinweise ...................................................................................................... 5
Inbetriebnahme ................................................................................................... 6
Betriebsmodi/Steuerung ....................................................................................... 6
DMX Steuerung .................................................................................................... 6
Reinigung ............................................................................................................ 7
Fehlerbehebung ................................................................................................... 7
Technische Daten ................................................................................................. 7
Abschliessende Erklärung...................................................................................... 7
Checking Parts
Please make sure the following parts are included:
1 x Laser projector
1 x Remote lock connector
1 x key
1 x Power cable
1 x User manual
Safety instructions
If the device has been exposed to great temperature changes,
do not switch it on immediately. Condensation water may
damage your device. Leave the device switched off until it has
reached room temperature.
The laser must only be used for shows. Any operation has to be attended and supervised by a skilled and
well-trained operator.
Never leave this device running unattended and keep it away from children and unauthorized persons.
Keep away from heaters and other heat sources. In order to safeguard sufficient ventilation, leave 50 cm of
free space around the device.
Never direct the laser beam to people or animals.
CAUTION LASER DIODE: If you open the device for cleaning, always disconnect from mains!
HEALTH HAZARD! Never look directly into the light source, as sensitive persons may suffer an
epileptic shock!
These lasers are considered a definite eye hazard, particularly at the higher power levels, which WILL cause
eye damage. So these laser series models supplied with a key switch to prevent unauthorized use, warning
labels and aperture labels affixed to the laser.
Installation safety
Prior to installation and operation of the laser, the paths of the beams and effects should be considered,
particularly with respect to how they will reach the audience. If direct audience scanning is desired, then
the laser energy in the effects needs to be considered to decide if the effects are safe for direct viewing.
Always ensure, that the maximum permissible exposure (MPE) is not exceeded in the area accesible to the
public. So install the laser in such a way, that minimum distances and heights ensure the MPE is never
exceeded in the public area. When audience scanning is performed, an operator has to be present. An
easily accessible emergency switch has to be installed. When setting up the laser, make sure the laser is
affixed firmly, to avoid vibrations.
Warning labels on the device
Laser radiation
Read manual
before use
Operation by qualified
personal only
Never direct laser
Beam at people
Never look directly
into beam
Avoid exposure
To the beam
Laser class 3b
Caution of radiation
If cover is removed
Indoor use only
At front opening:
Avoid exposure – laser radiation is emitted.
INSTALLATION/OPERATION
Don’t remove the warranty/serial number label - removal voids warranty
The operator has to make sure that laser radiation – for laser class 4 also reflected laser radiation – higher
than the maximum permissible level is avoided by technical or organisational measures. (Especially with
respect to the MPE, see above.)
Make sure to use the correct voltage. Use a power socket with earth/ground. Don’t use dimmer, RC, or
other electronically switched sockets. Whenever possible, don’t use the laser together with large
appliances, especially fog machines, on the same mains!
If the device is used in a flying installation, the mounting brackets and an appropriate safety-rope must be
afixed.
In some countries, the operator must notify the accidence insurance and the authority for industrial safety,
before operating a laser. For more information, contact the relevant authorities.
Please consider that unauthorized modifications on the device are strictly forbidden due to safety reasons!
If this device will be operated in any way differently than described in this manual, the product may suffer
damages and the guarantee becomes void. Furthermore, any other operation may lead to dangers like
short-circuit, burns, electric shock, etc.
Manual / Bedienungsanleitung: ES-400 RGY, ES-300 RGBV
Page / Seite 3 of / von 8
Keep surrounding dry and clean. This unit should be keep dry, do not use in the rain or damp and dusty
environment, don’t put liquid filled containers on the device. Projector should be put in a water-proof
housing when operated outside.
Regularly open the device (see “cleaning” further down) to check for dust inside, or if fog fluid condenses
in the housing (if so rearrange hazer and/or laser position).
Operating temperature is 10~35°C . In a new installation, check after some 15-30 minutes whether the
outlet air gets too warm. Regularly check the inside for dust deposits, especially around the fans. Let laser
cool off 10minutes after 2 hours of operation, to ensure maximum lifetime for the diode.
Distance between laser aperture and projection screen should be not less than 1 meter.
Do not turn device on and immediately off again frequently.
Do not look into the laser beam directly, especially not with optical instruments.
Do not touch the device with wet hands.
When the laser diode becomes dim or broken, please contact your dealer.
When returning laser to dealer/manufacturer always use original packaging.
Maintenance should be performed every 15-day period. See “cleaning” further down.
To ensure maximum lifetime of the laser:
Don’t overheat the laser:
• Always ensure good ventilation
• Don’t have stage lights (especially moving heads) directed towards the laser
• Regularly clean the fans and the interior from dust
• In a new installation check the temperature after 30 minutes of operation
Keep the laser dry
• Make sure fog/hazer fluid doesn’t condensate inside the laser - fog has to be in front of the laser –
not inside
• A few days after (each new) installation, open the cover to check if fluids condensate inside
• If fluids condensate inside, reposition the laser or fogger/hazer
Turn the device off, when not used. The diode is on, when the device is on. Even if it is not lit.
If the laser is equipped with a remote connector, connect an emergency switch to the Remote lock
connector on the backside, the switch has to interrupt the connection between pins 1 and 2 to turn off the
laser. If no emergency switch is used, insert the 9 pin dongle instead. If the laser has no remote lock, or
the 9 pin dongle is used, use an emergency switch in the mains connection.
Using the laser
Caution – use of controls or adjustments or performance of procedures other than those
specified herein may result in hazardous radiation exposure.
Rigidly mount projector. Projector can be mounted in any position.
Make sure the correct voltage is used. Connect mains. Connect an emergency switch to the 9-pin connector
on the backside (pins 1 and 2). If you do not wish to connect an emergency switch, connect the 9-pin plug
instead. And use an emergency switch in the mains connection.
Turn the main switch to “1”, depending on the mode selected (see below),
laser light should come out of the opening on the front panel – be careful.
Control
1
2
Mains connector
Main switch
3
4
Remote lock
DIP switch (see below)
5
DMX in/out
Setting Switch 10 to „on“ puts the device into DMX mode. Connect a DMX
controller to operate the laser. The following operating modes can be
selected from the DIP switch on the backside of the device:
Dip switch
Mode
1,0,0,0,0,0,0,0,0,1
Automatic mode
0,0,0,0,0,0,0,0,0,1
Music active
x,x,x,x,x,x,x,x,x,0
DMX
“Music activ”: patterns are changed/animated to the beat of the music. Sensitivity can be adjusted on the front panel
(blue pot next to the microphone), the red LED flashes when music triggered.
“Automatic mode”: patterns are changed automatically
“DMX“: DMX512 Mode. Use the first 9 switches to select the address:
x
x
x
x
x
x
x
x
x
1
2
4
8
16
32
64
128
256
e.g. 1000 0000 01, DMX mode address 1 (1+0+0+0+0+0+0+0+0+0)
0010 0100 01, DMX mode address 36 (0+0+4+0+0+32+0+0+0)
DMX control
Channel
Function
Version / Stand: January 11
Manual / Bedienungsanleitung: ES-400 RGY, ES-300 RGBV
1
2
3
4
5
6
7
8
9
10
11
12
Page / Seite 4 of / von 8
mode: 0-69 Laser off; 70-139 sound mode; 140-209 automatic mode,
210-255 DMX mode
patterns / animations
strobe (with increasing speed)
Pointspeed
horizontal movement*
vertical movement*
zoom / size*, 0..10 no effect, 11..92 increasing size, 93..146 automatic
small to large, 147..200 dto large to small, 201..255 small to large to
small…
Colour: 0..19, 20..39, etc. single colours (3 for RGY, more for RGBV),
above Patterns
Reset: above 200 (shortly)
Rotation X (width), 0..150 static rotation, 151..255 automatic rot.
Rotation Y (height), analogue to ch 9
Rotation Z, 0..180 static rotation, 181..217 automatic rotation clockwise,
218..255 automatic rotation counterclockwise
*: not for all patterns.
Maintenance / cleaning
Always disconnect from the mains when the device is not in use or before cleaning it.
Open the device by removing the 4 screws of the top cover (2 upper screws at back/frontpanel). Remove
any deposits of dust, especially at the fan. Check for condensed fog fluid inside, if so, clean and rearrange
the position of laser and or hazer. Mirrors need cleaning, when a “halo” is noticeable around the beam, or
an unusual high amount of diffuse light can be seen inside the device.Clean the mirrors with window
cleaner and a paper towel. Never look directly into the light source. Always disconnect from the
mains when the device is not in use or before cleaning it.
Troubleshooting
Problem
No function / fan not working
Effects don’t change to the beat of the music
Problems with DMX control
Device not working, but fan working
Possible cause
Check mains connection
Adjust sensitivity with the dial on the front.
Check if device isn’t in DMX or autom. mode
Check DMX address selection
Turn device off for ca. 1 Minute.
Technical specifications
•
•
•
•
•
•
Power supply: AC 85-250V,
Ambient temperature: +10°C … +35°C
Power consumption: 40 W
Operation modes: DMX 512, automatic, music mode
Lasersources: aircooled DPSS laser (green), laser diode (red and blue/violet)
Optical power (at the laser):
ES-400 RGY: min. 300mW, max. 400mW, >80mW 532nm green, >220mW 655nm red
ES-300 RGBV: min. 220mW, max. 300mW, >40mW 532nm green, >110mW 655nm red, >70mW
405nm blue/violet
• Beam: ca. 3mm/1mrad
• Laser class: 3b
• Scanning system: fast stepping motors 3-8kpps
• Weight: 4.5 kg
• Dimensions: 23 x 27 x 16 cm (W x D x H)
• Loudness: <70db
Please note
This device has left our premises in absolutely perfect condition. In order to maintain this condition and to
ensure a safe operation, it is absolutely necessary for the user to follow the safety instructions and warning
notes written in this user manual. Laserworld cannot be made liable for damages caused by incorrect
installations and unskilled operation! This manual is subject to change without notifice. Contact your local
dealer for an update, or check our website www.laserworld.com. Errors and omissions expected.
For service contact your dealer, or Laserworld. Only use Laserworld spare parts.
Version / Stand: January 11
Manual / Bedienungsanleitung: ES-400 RGY, ES-300 RGBV
Page / Seite 5 of / von 8
Lieferumfang
Bitte prüfen Sie, ob Sie wirklich alle Teile erhalten haben und ob diese von der Lieferung unbeschädigt sind.
Zum Lieferumfang gehören:
1 x Laserprojektor
1 x Interlock Stecker
1 x Kaltgerätekabel zur Stromversorgung
1 x Bedienungsanleitung
Hinweise zur Inbetriebnahme:
1. Bitte stellen Sie sicher, dass die auf dem Gerät angegebene Spannung der entspricht, mit der Sie es
betreiben wollen, bevor Sie den Laser in Betrieb nehmen.
2. Der Laser darf nur von technisch versiertem Fachpersonal gemäss den im jeweiligen Land geltenden
Sicherheitsbestimmungen installiert werden. Insbesondere die darin geforderten Sicherheitsabstände
zwischen Gerät und Publikum, bzw. maximal zulässige Bestrahlungswerte, müssen immer eingehalten
werden.
In bestimmten Ländern kann zusätzlich eine Abnahme durch ein technisches
Überwachungsinstitut erforderlich sein!
3. Falls im Publikumsbereich gescannt wird muss ein Bediener anwesend sein.
4. Installieren Sie einen leicht zugänglichen Notaus Schalter.
5. Halten Sie bei der Installation einen Mindestabstand von 15 cm zur Wand und 1 m zu feuergefährlichen
Materialien, Dekoration oder sonstigen Installationen ein.
6. Bringen Sie zur sicheren Installation ein Sicherheitsfangseil an. Das Fangseil sollte mindestens dem 10fachen Gewicht des Geräts standhalten können.
7. Schliessen Sie das Gerät nur an eine geerdete Steckdose an! Verwenden Sie immer ein Anschlusskabel
mit Erdleiter und Schutzkontaktstecker! Schliessen Sie das Gerät nicht an Dimmer- oder andere
elektronisch gesteuerten Steckdosen an. Vermeiden Sie den Betrieb mit grossen Verbrauchern
(Scheinwerfer, Nebelmaschinen etc.) an derselben Leitung.
8. Sorgen Sie immer für eine ausreichende Belüftung. Insbesondere dürfen die Belüftungsöffnungen nicht
verdeckt sein.
9. Netzstecker/Kaltgerätebuchse zugänglich halten.
10. Gerät fest montieren, um Vibrationen zu vermeiden.
Warnhinweise
1. Betreiben Sie das Gerät nur gemäss dieser Betriebsanleitung
2. Die Lüftungsöffnungen müssen beim Betrieb des Gehäuses frei sein
3. Benutzen Sie das Gerät nicht, wenn sichtbare Beschädigungen am Gehäuse, den Anschlussfeldern und
vor allem an den Stromversorgungsbuchsen oder -kabel vorliegen.
4. Niemals direkt in den Strahl des austretenden Lasers blicken. Erblindungsgefahr!
5. Gerät nicht bei hoher Luftfeuchtigkeit, Regen oder in staubiger Umgebung betreiben. Vor Tropf/Spritzwasser schützen, keine mit Flüssigkeit gefüllten Gefässe auf dem Gerät abstellen. Öffnen Sie das
Gerät in regelmässigen Abständen, insbesondere nach Installation an einem neuen Platz, und
überprüfen Sie, ob sich Nebelfluid im Inneren absetzt. Falls ja, reinigen Sie das Gerät, und ändern Sie
die Position von Gerät und/oder Nebelmaschine. Überprüfen Sie ebenfalls, ob sich Staub, insbesondere
im Bereich der Laser und Lüfter ansammelt. Falls ja, Gerät reinigen, sonst droht Gefahr des
Überhitzens. Feuchtigkeit und Hitze können die Lebensdauer stark verkürzen, und führen zum
Erlöschen der Garantie!
6. Stellen Sie sicher, dass das Gerät nicht zu heiss wird. Überprüfen Sie nach einer Installation an einem
neuen Platz nach ca. 15-30 Minuten, ob die Abluft sehr warm wird. Stellen Sie sicher, dass das Gerät
nicht dem Strahl von Scheinwerfern ausgesetzt werden (insbesondere bei beweglichen Scheinwerfern!),
diese können in kurzer Zeit zur Überhitzung führen.
7. Stellen Sie sicher, dass der Netzstecker gezogen ist, wenn Sie am Gerät hantieren bzw. es installieren,
oder es (zum Reinigen) öffnen.
8. Das Gerät nicht schnell hintereinander Ein- und Ausstecken, da dies die Lebensdauer der Laserdiode
erheblich verkürzen kann!
9. Das Gerät sollte sich nach einer Stunde Dauerbetrieb für ca. 15 Minuten abkühlen.
10. Das Gerät bzw. das Stromkabel nie mit nassen Händen anfassen!
11. Sollten Störungen am Gerät oder der Diode auftreten, setzen Sie sich bitte mit Ihrem Händler in
Verbindung
Version / Stand: January 11
Manual / Bedienungsanleitung: ES-400 RGY, ES-300 RGBV
Page / Seite 6 of / von 8
Warnhinweise am Gerät:
Laser Strahlung
Vor Benutzung
Anleitung durchlesen
Nicht dem Strahl
aussetzen
Betrieb nur durch
qualifiziertes Personal
Laserklasse 3b
Laserstrahl nie
auf Menschen richten
Laserstrahlung bei
geöffnetem Gehäuse
Nie in den
Laserstrahl schauen
Nur in geschlossenen Räumen betreiben
Am Strahlaustritt:
Bestrahlung vermeiden - Austritt von Laserstrahlung.
Inbetriebnahme
Gerät sicher stellen/befestigen. Gerät kann in jeder Lage betrieben werden. Verbinden Sie das Gerät mit
dem Stromnetz, schliessen Sie einen Not Aus Schalter an den remote lock Anschluss auf der Rückseite an
(der Schalter muss die Verbindung zwischen Pin 1 und 2 trenne, um den
Laser abzuschalten), falls kein Not Aus am remote lock angeschlossen wird,
mit beigefügtem Blindstecker kurzschliessen und Not Aus in der
Netzspannungszufuhr anbringen. Stellen Sie den Netzschalter auf „.1“ Der
Laserstrahl tritt nun aus der vorderen Öffnung - Vorsicht.
Betriebsmodi/Steuerung
1
2
Netzanschluss
Hauptschalter
3
4
Remote lock
DIP Schalter (s.U.)
5
DMX in/out
Am DIP Schalter an der Gehäuserückseite können Sie folgende
Betriebsmodi eistellen:
Dip switch
Modus
1,0,0,0,0,0,0,0,0,1
Automatisch
0,0,0,0,0,0,0,0,0,1
Musiksteuerung
x,x,x,x,x,x,x,x,x,0
DMX
“Musiksteuerung”: Muster werde im Rhythmus geädert/animiert. Empfindlichkeit kann an der Vorderseite (blaues
Poti) eingestellt werden, die rote Kontrol LED zeigt an, wenn die Steuerung anspricht.
“Automatisch”: Muster werden automatisch durchgewechselt.
“DMX“: DMX512 Modus-. Adresseinstellung über die ersten 9 Schalter:
x
x
x
x
x
x
x
x
x
1
2
4
8
16
32
64
128
256
Z.B. 1000 0000 01, DMX Modus Adresse 1 (1+0+0+0+0+0+0+0+0+0)
0010 0100 01, DMX Modus Adresse 36 (0+0+4+0+0+32+0+0+0)
DMX Steuerung
Kanal
1
2
3
4
5
6
7
8
9
10
11
12
Funktion
Modus: 0-69 Laser aus; 70-139, Musik Modus 140-209 Automatik Modus;
210-255 DMX Modus
Muster
Strobe/Blinken (mit zunehmender Geschwindigkeit)
Teilweises Zeichnen
Horizontale Bewegung*
Vetikale Bewegung*
Grösse/Zoom, 0..10 kein Effekt, 11..92 zunehmende Grösse, 93..146
automatischer Wechsel klein nach gross, 147..200 dto. gross nach klein,
201..255 dto. gross/klein/gross*
Farbe: 0..19, 20..39 Einzelfarben (3 für RGY, mehr bei RGBV). Danach
Farbmuster
Reset: kurz über 200 gehen
Rotation X (Breite), 0..150 statisch, 151..255 automatisch (zunehmende
Geschwindigkeit)
Rotation Y (Höhe), analog zu Kanal 9
Rotation Z, 0..180 statisch, 181..217 automatisch im Uhzeigersinn,
218..255 automatisch entgegen
* nicht bei allen Mustern
Version / Stand: January 11
Manual / Bedienungsanleitung: ES-400 RGY, ES-300 RGBV
Page / Seite 7 of / von 8
Reinigung
Reinigen Sie das Gerät regelmässig, um seine lange Lebensdauer zu erhalten. Trennen Sie dazu das Gerät
unbedingt zuvor vom Netz (Netzstecker ziehen)! Schauen Sie niemals direkt in den Laserstrahl!
Zum öffnen entfernen Sie 4 Schrauben des Deckels (je 2 Front-/Rückplatte oben). Entfernen Sie eventuelle
Staubansammlungen, insbesondere im Bereich der Lüfter und Laser. Sollten sich Spuren von Nebelfluid
absetzen, Gerät reinigen und Position von Gerät und/oder Nebelmaschine ändern. Verwenden Sie zur
Reinigung klares Leitungswasser, oder Alkohol und ein weiches Tuch. Für eine optimale Lichtausbeute
sollten die Spiegel sauber und ohne Kratzer sein. Bereits kleinste Kratzer können die Geräteleistung
erheblich beeinträchtigen! Sie sollten die Spiegel reinigen, wenn ein deutlicher „Halo“ um den Laserstrahl zu
erkennen ist, oder ungewöhnlich viel Streulicht im Gerät zu sehen ist. Spiegel Idealerweise mit Aceton und
Linsenpapier, sonst mit Fensterreiniger und Papierwischtuch, reinigen. Immer in eine Richtung wischen um
die Auswirkung möglicher Kratzer zu minimieren.
Fehlerbehebung
Fehlfunktion
Behebung / Ursache
Keine Funktion / kein Lüftergeräusch
Die Lasereffekte wechseln nicht in Abhängigkeit
von der Musik
Stromversorgung/Sicherung überprüfen
Erhöhen Sie die Lautstärke der Musik oder die
Empfindlichkeit mit Hilfe des Reglers an der
Rückseite des Lasers
Überprüfen Sie, dass sich das Gerät nicht im
DMX- oder Automatikmodus befindet
Überprüfen Sie die korrekte Einstellung der
Adressen
Gerät ausschalten und nach ca. 1 Minute wieder
einschalten
Es treten Probleme bei der DMX-Steuerung auf
Keine Funktion aber Lüftergeräusch vorhanden
Technische Daten
•
•
•
•
•
•
•
•
•
•
•
•
Laserquellen: luftgekühlter DPSS Laser (grün), Diodenlaser (rot, blau/violett)
Leistung (am Laser):
ES-400 RGY: min. 300mW, max. 400mW, >80mW 532nm grün, >220mW 655nm rot
ES-300 RGBV: min. 220mW, max. 300mW, >40mW 532nm grün, >110mW 655nm rot, >70mW
405nm blau/violett
Laserklasse: 3b
Betriebsmodi: DMX 512, Automatik Modus, Musik Modus
Scannersystem: schnelle Schrittmotoren 3-8 kPPS
DMX 512: 12 Kanäle
Strahldaten: ca. 3mm/1mrad
Stromversorgung: 85~250V AC
Stromaufnahme: 40W
Abmessungen: 230 x 270 x 160 mm (B x T x H)
Gewicht: 4,5 kg
Betriebstemperatur: 10°-35°C
Lautstärke: <70db
Technische Änderungen vorbehalten!
Abschliessende Erklärung
Sowohl Produkt als auch Verpackung sind beim Verlassen der Fabrik einwandfrei.
Der Benutzer des Geräts muss die lokalen Sicherheitsbestimmungen und die Warnhinweise in der
Betriebsanleitung beachten. Schäden, die durch unsachgemässe Handhabung entstehen, unterliegen nicht
dem Einflussbereich der Herstellers und Händlers. Somit wird keine Haftung bzw. Gewährleistung
übernommen. Sollten Änderungen an dieser Bedienungsanleitung vorgenommen werden, können wir Sie
darüber nicht in Kenntnis setzen. Bitte kontaktieren Sie für Fragen Ihren Händler.
Für Service wenden Sie sich bitte an Ihren Händler oder an Laserworld. Verwenden Sie nur Laserworld
Ersatzteile
Änderungen vorbehalten! Aufgrund der Datenmenge sind Fehler nicht auszuschliessen
Version / Stand: January 11
Manual / Bedienungsanleitung: ES-400 RGY, ES-300 RGBV
Page / Seite 8 of / von 8
Laserworld (Switzerland) AG
Kreuzlingerstrasse 5
8574 Lengwil-Oberhofen
SWITZERLAND
Authorized person:
Supervisory board Mr Martin Werner
place of business: 8574 Lengwil / SWITZERLAND
company number: CH-440.3.020.548-6
Commercial Registry Kanton Thurgau
www.laserworld.com
[email protected]
representative according to EMVG:
Cleantech Europe GmbH
Managing Director: Thomas Schulze
Fürkhofstr. 5
81927 München / DE
Version / Stand: January 11