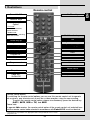
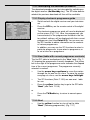
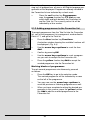
1
DIGIT MF4-K CC
DE
Mit integriertem Cryptoworks Entschlüsselungssystem und PCMCIA-Schnittstelle zur Aufnahme
eines CI-Moduls.
Zum Empfang von freien und verschlüsselten
Kabel-Programmen.
EN
With integrated decoding system and PCMCIA
interface for insertion of a CI module.
For reception of unencrypted and encrypted
cable channels.
FR
Avec système de décodage intégré et interface
PCMCIA pour insertion d'un module CI.
Pour recevoir les chaînes en clair et cryptées
du câble.
1 Inhaltsverzeichnis
1
Inhaltsverzeichnis . . . . . . . . . . . . . .2
2
Abbildungen . . . . . . . . . . . . . . . . . . .5
3
Bitte zuerst lesen . . . . . . . . . . . . . .8
Wichtige Hinweise zur Bedienung . . . . . . . .8
Entsorgungshinweis . . . . . . . . . . . . . . . . . . .9
Sicherheitshinweise . . . . . . . . . . . . . . . . . . .9
Betriebspausen . . . . . . . . . . . . . . . . . . . . . .9
4
4.1
4.2
4.3
4.4
4.4.1
4.4.2
4.5
4.6
Anschluss . . . . . . . . . . . . . . . . . . .11
Anschluss an das Kabelnetz . . . . . . . . . . .11
Anschluss an ein Fernsehgerät . . . . . . . . .11
Videokassettenrekorder (VCR) . . . . . . . . .11
HiFi-Verstärker . . . . . . . . . . . . . . . . . . . . . .11
Analog . . . . . . . . . . . . . . . . . . . . . . . . . . . .11
Digital . . . . . . . . . . . . . . . . . . . . . . . . . . . . .12
Serielle Schnittstelle (RS 232) . . . . . . . . . .12
Netzanschluss . . . . . . . . . . . . . . . . . . . . . .12
5
Erstinstallation . . . . . . . . . . . . . . .12
6
6.1
6.2
6.2.1
6.2.2
6.2.3
6.2.4
6.3
6.3.1
6.3.2
6.3.3
6.3.4
6.3.5
6.3.6
Einstellungen . . . . . . . . . . . . . . . . .15
Bediensprache . . . . . . . . . . . . . . . . . . . . . .15
Grundeinstellungen . . . . . . . . . . . . . . . . . .15
Zeitdifferenz GMT (Std.) . . . . . . . . . . . . . .16
Land . . . . . . . . . . . . . . . . . . . . . . . . . . . . . .16
Fernbediencode . . . . . . . . . . . . . . . . . . . . .16
Standby-Uhr . . . . . . . . . . . . . . . . . . . . . . . .16
Audio/Videoeinstellungen . . . . . . . . . . . . .16
Bildformat . . . . . . . . . . . . . . . . . . . . . . . . . .17
Sprache (Audiosignal) . . . . . . . . . . . . . . . .17
Sprache (Untertitel) . . . . . . . . . . . . . . . . . .17
TV SCART-Modus . . . . . . . . . . . . . . . . . . .17
VCR SCART-Modus . . . . . . . . . . . . . . . . .17
Dolby Digital (AC3) . . . . . . . . . . . . . . . . . .18
7
7.1
7.2
7.2.1
7.2.2
7.2.3
7.2.3.1
7.2.4
7.2.5
7.3
7.3.1
7.3.1.1
7.3.1.2
Bedienung . . . . . . . . . . . . . . . . . . .18
Ein- und Ausschalten . . . . . . . . . . . . . . . . .18
Programmwahl . . . . . . . . . . . . . . . . . . . . . .18
Mit Hilfe der Programm auf/ab-Tasten . . . .18
Mit Hilfe der Zehnertastatur . . . . . . . . . . . .19
Mit Hilfe des Navigators (Programmliste) .19
Liste auswählen . . . . . . . . . . . . . . . . . . . . .19
Aufrufen gesperrter Programme . . . . . . . .20
Infobox . . . . . . . . . . . . . . . . . . . . . . . . . . . .20
Empfang von verschlüsselten Progr. . . . . .20
Sonderfunktionen . . . . . . . . . . . . . . . . . . . .21
Multifeed-Optionen . . . . . . . . . . . . . . . . . . .21
Startzeitauswahl/Bildauswahl . . . . . . . . . .21
2
7.6.1
7.7
7.8
7.9
7.10
7.11
7.12
7.13
7.14
7.15
7.15.1
7.15.2
7.15.3
7.15.4
7.15.5
7.15.6
7.15.7
7.15.7.1
7.15.7.2
7.15.7.3
7.15.7.4
7.15.8
7.16
8
8.1
8.1.1
8.1.2
8.1.3
8.1.3.1
8.1.3.2
8.1.4
8.2
8.2.1
8.2.2
8.2.3
8.2.4
8.2.5
8.3
8.3.1
8.3.2
8.3.3
Cryptoworks PIN-Code . . . . . . . . . . . . . . .22
Lautstärkeregelung . . . . . . . . . . . . . . . . . .22
TV/Radioumschaltung . . . . . . . . . . . . . . . .23
Auswahl einer anderen Sprache
(TV-Betrieb) bzw. Senders (Radiobetrieb) .23
Dolby Digital (AC3-Betrieb) . . . . . . . . . . . .23
Rückkehr zum zuletzt eingestellten Progr. 24
Uhr und Programminfo anzeigen . . . . . . . .24
Weitere Programminformationen . . . . . . . .24
Standbild . . . . . . . . . . . . . . . . . . . . . . . . . .24
Sleep-Timer . . . . . . . . . . . . . . . . . . . . . . . .25
Kanal-Info . . . . . . . . . . . . . . . . . . . . . . . . . .25
Videotext . . . . . . . . . . . . . . . . . . . . . . . . . .25
Untertitel . . . . . . . . . . . . . . . . . . . . . . . . . .26
Elektronische Programmzeitschrift SFI . . .27
Einlesen der SFI-Daten . . . . . . . . . . . . . . .27
Einlesevorgang unterbrechen . . . . . . . . . .28
Elektronische Programmzeitschrift aufrufen28
Jetzt . . . . . . . . . . . . . . . . . . . . . . . . . . . . .28
Danach . . . . . . . . . . . . . . . . . . . . . . . . . . .28
Mehr . . . . . . . . . . . . . . . . . . . . . . . . . . . . . .29
SFI-Funktionen . . . . . . . . . . . . . . . . . . . . .29
SFI-Info . . . . . . . . . . . . . . . . . . . . . . . . . . .30
SFI-Timerprogrammierung . . . . . . . . . . . .30
SFI-Programmübersicht . . . . . . . . . . . . . . .31
SFI-Übersicht nach Programmart (Genre) .32
SFI beenden . . . . . . . . . . . . . . . . . . . . . . .32
Timer-Aufnahmen . . . . . . . . . . . . . . . . . . .32
Grundprogrammierung ändern . . .36
Favoritenliste konfigurieren . . . . . . . . . . . .36
Programmlistenverwaltung aufrufen . . . . .37
Programme zur Favoritenliste hinzufügen .38
Programme löschen . . . . . . . . . . . . . . . . . .39
Entfernen (löschen) aus der Favoritenliste 39
Löschen aus der Gesamtliste . . . . . . . . . .39
Programme sortieren . . . . . . . . . . . . . . . . .40
Programmierung der elektronischen
Programmzeitschrift . . . . . . . . . . . . . . . . . .41
Sender auswählen . . . . . . . . . . . . . . . . . . .41
Startkategorie . . . . . . . . . . . . . . . . . . . . . . .42
Aktualisierungszeit . . . . . . . . . . . . . . . . . . .43
Aktualisierung . . . . . . . . . . . . . . . . . . . . . .43
SFI-Kanal . . . . . . . . . . . . . . . . . . . . . . . . . .43
Jugendschutz . . . . . . . . . . . . . . . . . . . . . . .43
Sender auswählen . . . . . . . . . . . . . . . . . . .44
Geräte-PIN ändern . . . . . . . . . . . . . . . . . . .45
Modus . . . . . . . . . . . . . . . . . . . . . . . . . . . .45
3
DE
7.3.2
7.4
7.5
7.6
8.4
8.4.1
8.4.3
8.4.4
8.5
8.5.1
8.5.2
8.5.3
8.5.4
8.6
8.7
Programmsuche . . . . . . . . . . . . . . . . . . . . .45
Automatische Suche . . . . . . . . . . . . . . . . .46
Manuelle Suche . . . . . . . . . . . . . . . . . . . . .48
Nach dem Suchlauf . . . . . . . . . . . . . . . . . .49
Service-Einstellungen . . . . . . . . . . . . . . . .50
Werkseinstellung aktivieren . . . . . . . . . . . .50
Alle Programme löschen . . . . . . . . . . . . . .50
Software aktualisieren . . . . . . . . . . . . . . . .51
Einstellungen kopieren . . . . . . . . . . . . . . . .52
Systemkonfiguration . . . . . . . . . . . . . . . . .52
Verschlüsselungssystem . . . . . . . . . . . . . .52
9
Technische Begriffe . . . . . . . . . . .53
10
Technische Daten . . . . . . . . . . . . .54
11
Fehlersuchhilfen . . . . . . . . . . . . . .57
Für den täglichen Gebrauch . . . . .58
Ihr Gerät trägt das CE-Zeichen und erfüllt alle erforderlichen EU-Normen.
Änderungen und Druckfehler vorbehalten. Stand 11/04
TechniSat und DIGIT MF4-K CC sind eingetragene Warenzeichen der
TechniSat Digital GmbH
Postfach 560
54541 Daun
www.technisat.de
Technische Hotline
0180/5005-910*
*0,12 EUR/Min. über das Netz der Deutschen Telekom AG
Achtung !
Bitte verwenden Sie für eine evtentuell erforderliche Einsendung Ihres Gerätes
ausschließlich folgende Anschrift:
TechniSat Teledigital AG
Service-Center
Löderburger Str. 94
39418 Staßfurt
4
DE
2 Abbildungen
Fernbedienung
Ein/Stand-by
Ton Ein/Aus
Zehnertastatur
Option*
im TV-Betrieb:
Ton-/Untertitelauswahl,
Sonderfunktionen
im Radio-Betrieb:
Senderauswahl durch
Umschaltung der Tonunterträger
Multifunktionstasten
Pfeiltaste auf
Programm +
OK
Programmliste Ein/Aus
Pfeiltaste links
Lautstärke -
Pfeiltaste rechts
Lautstärke +
Pfeiltaste ab
Programm -
Zurück
Info
SFI
TV/Radio
Programm +/-
Lautstärke +/Menü Ein/Aus
Sleep-Timer
EXTERN
Videotext*
Ein/Mix/Aus
Stop/Standbild
Fernbedienoption:
Durch Umschalten der Fernbedienoption können mit dieser Fernbedienung zwei Receiver,
ein Fernsehgerät sowie ein Videorekorder mit gleicher Codierung bedient werden.
>
Zur Umstellung der Fernbedienoption drücken Sie gleichzeitig die gewünschte
Taste (SAT1, SAT2, VCR oder TV) und OK!!!
Beachten Sie:
Zur Bedienung dieses Receivers, müssen die hier gewählte Fernbedienoption der
Fernbedienung und der nach Punkt 6.2.3 eingestellte Fernbediencode übereinstimmen.
* Diese Funktion ist nur dann verfügbar, wenn auf dem eingestellten Programmplatz die
entsprechenden Daten ausgestrahlt werden.
5
LED Anzeige
(Abbildung ähnlich)
Programmwahl
auf/ab
Ein/Standby
Kartenleser für imagin-Smartcard:
> Schieben Sie die imagin-Smartcard (goldener Chip nach unten
und in Einschubrichtung ausgerichtet) vorsichtig bis zum Anschlag
in den Kartenleser ein.
KabelEingang
Netzbuchse
KabelAusgang
SCART-Buchse
VCR
SCART-Buchse Audioausgang
TV
digital (optisch)
Audioausgänge
Audioausgang
analog
digital (elektrisch)
Einlegen des CI-Moduls:
> Beachten Sie die Anleitungen des Herstellers von CI-Modul
und Karte.
> Schieben Sie die gewünschte Smartcard in das entsprechende CI-Modul.
> Schieben Sie nun das CI-Modul vorsichtig in den
Steckplatz ein.
RS 232
Schnittstelle
6
herzlichen Glückwunsch, dass Sie sich für den DigitalReceiver DIGIT MF4-K CC entschieden haben.
Die vorliegende Betriebsanleitung soll Ihnen helfen, die
umfangreichen Funktionen Ihres neuen Digital-Receivers optimal zu nutzen.
Wir haben die Bedienungshinweise so verständlich wie möglich verfasst und so knapp wie nötig gehalten.
Der Funktionsumfang Ihres Gerätes wird durch SoftwareUpdates stetig erweitert. Dadurch kommen gegebenenfalls
einige Bedienschritte hinzu, die in dieser Bedienungsanleitung
nicht erklärt sind, bzw. es kann sich die Bedienung schon vorhandener Funktionen verändern. Aus diesem Grund sollten
Sie von Zeit zu Zeit die TechniSat Homepage besuchen, um
sich die jeweils aktuelle Bedienungsanleitung herunterzuladen.
Wir wünschen Ihnen viel Freude mit Ihrem TechniSat
DIGIT MF4-K CC!
Ihr
TechniSat Team
7
DE
Sehr geehrte Kundin, sehr geehrter Kunde,
3 Bitte zuerst lesen
>
>
>
>
>
>
>
>
>
Bevor Sie mit der Inbetriebnahme des Gerätes
beginnen, überprüfen Sie zunächst die Lieferung auf
Vollständigkeit. Im Lieferumfang sind enthalten:
1 Digital-Receiver, 1 Netzanschlusskabel,
1 Fernbedienung, 1 Bedienungsanleitung,
1 Garantiekarte, 2 Batterien (1,5V Microzelle)
1 SCART-Kabel.
Legen Sie die beiliegenden Batterien unter
Berücksichtigung der eingeprägten Polarität in das
Batteriefach der Fernbedienung ein.
Bevor Sie den Digital-Receiver anschließen, lesen Sie
bitte zunächst die Sicherheitshinweise in Kapitel 3.
Die Kapitel 4, 5 und 6 beschreiben den Anschluss
und die Anpassung des Digital-Receivers an das
Fernsehgerät, VCR, usw. Diese Einstellungen sind
einmalig und müssen nur ergänzt werden, wenn
zusätzliche Geräte angeschlossen werden.
Kapitel 7 beschreibt alle Funktionen, die für den täglichen Gebrauch wichtig sind, wie z.B. Programmwahl.
In Kapitel 8 finden Sie Informationen darüber, wie
Sie neue Programme einstellen oder die
Programmreihenfolge ändern.
In der Bedienungsanleitung verwendete technische
Begriffe sind in Kapitel 9 erläutert.
Die technischen Daten finden Sie in Kapitel 10.
Hilfestellung beim Suchen und Beheben von Fehlern
finden Sie in Kapitel 11.
Wichtige Hinweise zur Bedienung
Durch die Verwendung eines sogenannten "On Screen
Display" (Bildschirmeinblendungen) wird die Bedienung des
Digital-Receivers vereinfacht und die Anzahl der Fernbedienungstasten verringert. Alle Funktionen werden auf dem
Bildschirm angezeigt und können mit wenigen Tasten
gesteuert werden. Zusammengehörende Funktionen sind als
"MENÜ" zusammengefasst. Die angewählte Funktion wird
farblich hervorgehoben. In der unteren Zeile sind durch
Farbbalken die “Funktionstasten” rot, gelb, grün und blau
dargestellt. Diese Farbbalken stellen in den einzelnen Menüs
unterschiedliche Funktionen dar, die durch Drücken der
entsprechend gefärbten Taste (“Multifunktionstaste”) auf der
Fernbedienung ausgelöst werden. Die “Funktionstasten” sind
nur aktiv, wenn eine Kurzbezeichnung in dem
entsprechenden Feld angegeben ist.
8
Entsorgungshinweis
Die Verpackung Ihres Gerätes besteht ausschließlich aus
wiederverwertbaren Materialien. Bitte führen Sie diese
entsprechend sortiert wieder dem “Dualen System” zu.
Achten Sie darauf, dass die leeren Batterien der
Fernbedienung sowie Elektronikschrott nicht in den
Hausmüll gelangen, sondern sachgerecht entsorgt werden
(Rücknahme durch den Fachhandel, Sondermüll).
Sicherheitshinweise
Zu Ihrem Schutz sollten Sie die Sicherheitsvorkehrungen
sorgfältig durchlesen, bevor Sie Ihr neues Gerät in Betrieb
nehmen.
Der Hersteller übernimmt keine Haftung für Schäden, die
durch unsachgemäße Handhabung und durch
Nichteinhaltung der Sicherheitsvorkehrungen entstanden
sind.
>
Um eine ausreichende Belüftung zu gewährleisten,
stellen Sie das Gerät auf einen glatten, ebenen
Untergrund und legen keine Gegenstände auf den
Deckel des Gerätes. Hier befinden sich
Lüftungsschlitze, durch die Wärme aus dem Inneren
entweicht.
>
Stellen Sie keine brennenden Gegenstände, z.B.
brennende Kerzen, auf das Gerät.
>
Setzen Sie das Gerät nicht Tropf- oder Spritzwasser
aus und stellen Sie keine mit Flüssigkeit gefüllten
Gegenstände, z.B. Vasen, darauf.
>
Das Gerät darf nur in gemäßigtem Klima betrieben
werden.
>
Öffnen Sie niemals das Gerät! Es besteht die Gefahr
eines Elektroschocks. Ein eventuell notwendiger
Eingriff sollte nur von geschultem Personal
vorgenommen werden.
In folgenden Fällen sollten Sie das Gerät vom Netz
trennen und einen Fachmann um Hilfe bitten:
>
das Stromkabel bzw. der Netzstecker ist beschädigt
>
das Gerät war Feuchtigkeit ausgesetzt bzw.
Flüssigkeit ist eingedrungen
>
bei erheblichen Fehlfunktionen
>
bei starken äußeren Beschädigungen
Betriebspausen
Das Gerät sollte während eines Gewitters oder bei längeren
Betriebspausen (z.B. Urlaub) vom Netz getrennt werden.
9
DE
Tastenbezeichnungen und Begriffe, die im OSD-Menü
erscheinen, sind in dieser Bedienungsanleitung fett gedruckt.
Hilfe:
Sofern vorhanden, kann in den Menüs durch Drücken der
blauen Funktionstaste ein Hilfetext ein- bzw. ausgeblendet
werden.
Anschluss des DVB-Receivers
an den Kabel-Anschluss
a. Verbindung des Kabel-Eingangs des DVB-Receivers
mit der Antennensteckdose des Kabelnetzes.
b. Scartverbindung des DVB-Receivers mit dem
Fernsehgerät.
c. Scartverbindung eines Videogerätes mit der VCRScartbuchse des DVB-Receivers.
d. Verbindung des Kabel-Ausgangs mit dem Antenneneingang des Fernsehgerätes.
e. Verbindung der Audioausgänge mit einer HiFi-Anlage.
f. Netzverbindung
d
b
a
f
e
c
VCR
10
Die im folgenden erscheinenden Verweise a b c usw.
beziehen sich auf die Zeichnung auf Seite 10.
4.1 Anschluss an das Kabelnetz
a
Verbinden Sie den Kabel-Eingang des Receivers
durch ein geeignetes Koaxialkabel mit der
Anschlussdose des Kabelanschlusses.
4.2 Anschluss an ein Fernsehgerät
b
Verbinden Sie Receiver (SCART-Buchse TV) und
Fernsehgerät (SCART-Buchse) durch ein SCARTKabel. Sollte Ihr Fernsehgerät entsprechend ausgerüstet sein, wird dieses beim Einschalten des
Digital-Receivers automatisch auf AV und somit auf
Kabel-Betrieb umgeschaltet.
d
Verbinden Sie den Receiver (Kabel-Ausgang)
durch ein geeignetes TV-Anschlusskabel mit dem
Antenneneingang des Fernsehgerätes.
Um die digitalen Kabel-Programme auf Ihrem Fernsehgerät
darzustellen, schalten Sie dieses auf den externen ScartEingang (AV). Die analogen Kabel-Programme stellen Sie
nun weiterhin auf den Programmplätzen Ihres
Fernsehgerätes ein.
4.3 Videokassettenrekorder (VCR)
c
Schließen Sie den Videorekorder an der SCARTBuchse VCR an. Der Videorekorder liefert bei
Wiedergabe ein Schaltsignal an den Digital-Receiver.
Dadurch gelangt das Videorekorder-Signal
automatisch an das TV-Gerät.
Liefert Ihr Videorekorder keine Schaltspannung,
schalten Sie Ihren Digital-Receiver mit Hilfe der Taste
EXTERN auf den externen Eingang AV. Durch
erneutes Drücken dieser Taste kehren Sie wieder in
den Normalbetrieb zurück.
4.4 HiFi-Verstärker
4.4.1 Analog
e
Um die bestmögliche Tonqualität zu erreichen, können
Sie den Digital-Receiver an einen HiFi-Verstärker
anschließen. Verbinden Sie dazu die Cinch-Buchsen
Audio R und Audio L des Digital-Receivers durch
ein geeignetes Kabel mit einem Eingang Ihres HiFiVerstärkers (z. B. CD oder AUX; Achtung, der
Phonoeingang ist nicht geeignet!).
11
DE
4 Anschluss
4.4.2 Digital
e
Sollte Ihr Verstärker über einen entsprechenden
elektrischen oder optischen Eingang verfügen, so
verbinden Sie die Buchse AUDIO OUT DIGITAL
elektrisch bzw. AUDIO OUT DIGITAL optisch
mit dem elektrischen bzw. optischen Eingang Ihres
Verstärkers.
Es stehen abhängig vom jeweiligen Sender, die Abtastraten
von 32, 44,1 und 48 kHz zur Verfügung. Ebenso steht an diesem Ausgang, falls gesendet, das Dolby Digital-Signal (AC3)
zur Verfügung.
4.5 Serielle Schnittstelle (RS 232)
Die RS 232-Schnittstelle dient zum Update der
Betriebssoftware und der Vorprogrammierung mittels PC.
4.6 Netzanschluss
Der Digital-Receiver sollte erst dann an das Stromnetz
angeschlossen werden, wenn das Gerät komplett mit den
zugehörigen Komponenten verkabelt ist. Dadurch werden
Zerstörungen des Digital-Receivers oder anderer
Komponenten ausgeschlossen.
f
Nachdem Sie alle Verbindungen hergestellt haben,
verbinden Sie den Receiver durch das beiliegende
Netzkabel mit einer Steckdose 230 V/50-60 Hz.
5 Erstinstallation
(Bild 5-1)
Nachdem Sie die Sicherheitshinweise durchgelesen haben,
und das Gerät wie in Kapitel 4 beschrieben angeschlossen
haben, schalten Sie nun wie in Kapitel 7 beschrieben das
Gerät ein. Bei der ersten Inbetriebnahme des Gerätes
erscheint das Startfenster des Installationsassistenten
AutoInstall. (Bild 5-1) Mit Hilfe des Installationsassistenten
können Sie auf einfache Art und Weise die wichtigsten
Einstellungen des Digital-Receivers vornehmen.
Um die Einstellungen im jeweiligen Installationsschritt
vornehmen zu können, sind die Tasten der Fernbedienung,
die dazu benötigt werden, markiert.
Sie können die Erstinstallation jederzeit durch Drücken der
roten Funktionstaste abbrechen. Mit Hilfe der grünen
Funktionstaste gelangen Sie zum jeweils vorherigen
Installationsschritt. Dadurch können Sie Fehleingaben
jederzeit korrigieren. Wird die Erstinstallation nicht ausgeführt
bzw. abgebrochen, startet Ihr Gerät mit einer StandardVorprogrammierung.
12
DE
Der hier gezeigte Ablauf der Erstinstallation dient nur als
Beispiel. Der genaue Ablauf der Erstinstallation hängt von
den von Ihnen vorgenommenen Einstellungen ab.
Folgen Sie daher bitte genau den Anweisungen auf dem
Bildschirm.
Bediensprache:
>
Durch Betätigen der Taste OK gelangen Sie zum
Auswahlfenster für die Bediensprache. (Bild 5-2)
>
Markieren Sie mit den Pfeiltasten auf/ab die
gewünschte Bediensprache.
>
Bestätigen Sie mit OK.
(Bild 5-2)
Audio-Sprache
>
>
Wählen Sie mit den Pfeiltasten auf/ab die
bevorzugte Audiosprache aus. (Bild 5-3)
Entsprechend dieser Auswahl wird nach dem
Beenden des Installationsassistenten die Sortierung
der Favoritenliste vorgenommen.
(Bild 5-3)
Bestätigen Sie mit OK, um die Auswahl zu
übernehmen.
Ländereinstellung
>
>
Wählen Sie mit den Pfeiltasten auf/ab die
Zeitzone aus, die Ihrem Land entspricht. (Bild 5-4)
Entsprechend Ihrer Auswahl wird die automatische
Einstellung der Uhrzeit vorgenommen.
(Bild 5-4)
Bestätigen Sie mit OK, um die Auswahl zu übernehmen und zur Sendersuche zu gelangen.
Sendersuche
>
>
Markieren Sie mit den Pfeiltasten auf/ab das Feld
Alle Sender, wenn Sie frei empfangbare und verschlüsselte Programme suchen möchten, oder Alle
unverschlüsselten Sender, wenn Sie nur freie
Programme suchen möchten. (Bild 5-5)
Indem Sie die Suche mit der Taste OK bestätigen,
wird ein automatischer Sendersuchlauf durchgeführt.
Bei dieser Suche wird automatisch der gesamte
Empfangsbereich des Receivers nach digitalen
Programmen abgesucht. Die gefundenen Programme
werden automatisch in der Favoritenliste abgespeichert. Dieser Vorgang kann einige Minuten dauern.
Beachten Sie bitte weitere Bildschirmeinblendungen.
13
(Bild 5-5)
Software-Aktualisierung
Nachdem Sie die Sendersuche durchgeführt haben, überprüft
der Digital-Receiver, ob über Kabel eine neue Software für
das Gerät zur Verfügung steht. Falls eine neue Software verfügbar ist, können Sie automatisch ein Software-Update
durchführen.
>
(Bild 5-6)
Wählen Sie mit den Pfeiltasten rechts/links das
Feld Aktualisieren und bestätigen Sie mit OK.
(Bild 5-6) Nun wird die neue Software für Ihr Gerät
heruntergeladen. Dieser Vorgang kann einige Minuten
dauern.
Beenden des Installationsassistenten
>
Bestätigen Sie den abschließenden Hinweis
(Bild 5-7) des Installationsassistenten mit OK, um
zum Normalbetrieb zu gelangen.
(Bild 5-7)
14
DE
6 Einstellungen
Nachdem Sie nun Ihren neuen Digital-Receiver angeschlossen und in Betrieb genommen haben, können Sie, falls
erforderlich, den Digital-Receiver für Ihre Anwendung
optimieren.
6.1 Bediensprache
Unter diesem Menüpunkt haben Sie die Möglichkeit, die
Menüsprache entsprechend Ihren Wünschen einzustellen.
Zum Verändern der Bediensprache gehen Sie wie folgt vor:
>
Rufen Sie mit der Taste Menü das Hauptmenü auf.
(Bild 6-1)
>
Wählen Sie nun die Menüzeile Bediensprache,
indem Sie diese mit Hilfe der Pfeiltasten auf/ab
markieren.
>
Bestätigen Sie mit OK.
Es erscheint das Untermenü Bediensprache.
>
Markieren Sie mit Hilfe der Pfeiltasten auf/ab die
gewünschte Sprache.
>
Speichern Sie die Eingabe durch Drücken der Taste
OK.
>
Durch Drücken der Taste Zurück kehren Sie zum
Hauptmenü zurück.
(Bild 6-1)
6.2 Grundeinstellungen
Um Ihren DVB-Receiver optimal nutzen zu können, müssen
Sie diesen noch auf Ihre individuelle Anwendung einstellen.
>
Rufen Sie mit der Taste Menü das Hauptmenü auf.
>
Markieren Sie die Zeile Einstellungen mit Hilfe der
Pfeiltasten auf/ab.
>
Bestätigen Sie durch Drücken der Taste OK. Es
erscheint das Untermenü Einstellungen. (Bild 6-2)
>
Markieren Sie nun die Zeile Grundeinstellungen
mit Hilfe der Pfeiltasten auf/ab.
>
Bestätigen Sie mit OK. Es erscheint das Menü
Grundeinstellungen. (Bild 6-3)
>
Mit den Pfeiltasten auf/ab können Sie den Marker
innerhalb des Menüs bewegen und wie angegeben
die einzelnen Positionen verändern. Beachten Sie bei
der Auswahl eines Menüpunktes ggf. auch die
Bildschirmeinblendungen. Es können folgende
Einstellungen vorgenommen werden:
15
(Bild 6-2)
(Bild 6-3)
6.2.1 Zeitdifferenz GMT (Std.)
Ihr Gerät ist mit einer Uhr ausgestattet. Diese wird über den
Kabelempfang auf Greenwich Mean Time synchronisiert.
Sofern unter Land (Punkt 6.2.2) die Einstellung Keiner
gemacht wurde, müssen Sie lediglich die Uhrzeit mit Hilfe der
Pfeiltasten rechts/links entsprechend Ihrer Ortszeit
korrigieren. Für Deutschland beträgt diese Differenz
+1 Stunde, in der Sommerzeit +2 Stunden.
6.2.2 Land
Durch diese Funktion erfolgt automatisch die Umstellung für
die Sommer- und Winterzeit.
>
Geben Sie in der Zeile Land mit Hilfe der
Pfeiltasten links/rechts Ihr Heimatland ein.
6.2.3 Fernbediencode
Mit der Fernbedienung Ihres Receivers können Sie bis zu vier
verschiedene Geräte, die den gleichen Fernbediencode verwenden, bedienen. Werden zwei Receiver im gleichen Raum
betrieben, kann es zu unbeabsichtigten Fehlbedienungen
kommen. Um diese Fehlbedienungen zu vermeiden, stellen
Sie bei beiden Receivern unterschiedliche Fernbedienoptionen ein.
>
Betätigen Sie dazu die Taste SAT1 bzw. SAT2 und
die OK Taste gleichzeitig.
6.2.4 Standby-Uhr
In dieser Zeile entscheiden Sie, ob im Standby-Betrieb im
Display die Uhrzeit angezeigt wird.
>
In dieser Zeile können Sie mit den Pfeiltasten
rechts/links den Modus der Standby-Uhr auf an
oder aus einstellen.
>
Durch Drücken der Taste Zurück kehren Sie zum
Menü Einstellungen oder durch Drücken der Taste
Menü in den Normalbetrieb zurück. Die Einstellungen
werden automatisch gespeichert.
6.3 Audio/Videoeinstellungen
Um Ihren Digital-Receiver auf Ihr Fernsehgerät zu
optimieren, können Sie weitere Einstellungen im Menü
Audio /Video Einstellungen vornehmen.
>
Rufen Sie mit der Taste Menü das Hauptmenü auf.
>
Markieren Sie die Zeile Einstellungen mit Hilfe der
Pfeiltasten auf/ab.
16
Bestätigen Sie durch Drücken der Taste OK.
Es erscheint das Untermenü Einstellungen.
(Bild 6-4)
>
Markieren Sie nun die Zeile Audio/Video
Einstellungen mit Hilfe der Pfeiltasten auf/ab.
>
Bestätigen Sie mit OK. Es erscheint das Menü
Audio/Video Einstellungen. (Bild 6-5)
>
Mit den Pfeiltasten auf/ab können Sie den Marker
innerhalb des Menüs bewegen und wie im Folgenden
angegeben die einzelnen Positionen verändern.
Beachten Sie bei der Auswahl eines Menüpunktes
ggf. auch die Bildschirmeinblendungen. Es können folgende Einstellungen vorgenommen werden:
DE
>
(Bild 6-4)
6.3.1 Bildformat
>
Stellen Sie mit Hilfe der Pfeiltasten links/rechts
entsprechend des Bildformates Ihres TV-Gerätes 4:3
oder 16:9 ein. Durch diese Funktion wird automatisch
das Bildformat an Ihr Fernsehgerät angepasst.
6.3.2 Sprache (Audiosignal)
>
Stellen Sie in dieser Zeile mit Hilfe der Pfeiltasten
links/rechts Ihre Vorzugssprache ein. Durch diese
Funktion wird, sofern gesendet, nach einem Suchlauf
automatisch diese Sprache eingestellt.
6.3.3 Sprache (Untertitel)
Sie können mit Ihrem DVB-Receiver Untertitel darstellen.
Diese werden, sofern die Funktion Untertitel eingeschaltet ist
und die festgelegte Sprache gesendet wird, automatisch
eingeblendet.
Ist die Funktion nicht eingeschaltet, können Untertitel manuell
einschaltet werden. Vorhandene Untertitel werden durch die
Einblendung Untertitelauswahl signalisiert. Beachten Sie
auch Punkt 7.13 der Bedienungsanleitung.
6.3.4 TV SCART-Modus
Stellen Sie in dieser Zeile mit Hilfe der Pfeiltasten
links/rechts entsprechend Ihres TV-Gerätes FBAS, RGB
oder S-Video ein. Für Standard-Geräte stellen Sie FBAS
ein.
6.3.5 VCR SCART-Modus
Stellen Sie in dieser Zeile mit Hilfe der Pfeiltasten
links/rechts entsprechend Ihres TV-Gerätes FBAS oder
S-Video ein. Für Standard-Geräte stellen Sie FBAS ein.
17
(Bild 6-5)
6.3.6 Dolby Digital (AC3)
Diverse Filme werden im Dolby Digital Format ausgestrahlt.
Dieses wird durch das Dolby-Zeichen
im Infofenster nach
dem Einstellen eines Programms angezeigt.
Sollten Sie über einen Dolby Digital 5.1-Kanal-Verstärker
verfügen, können Sie, falls gesendet, entsprechende Filme in
5.1-Kanal-Dolby-Digital-Sound hören. Voraussetzung hierfür
ist lediglich die Verbindung des digitalen Ausgangs Audio Out
Digital (siehe Punkt 4.5.2) Ihres DVB-Receivers mit dem
digitalen Eingang Ihres Dolby Digital 5.1-Kanal-Verstärkers.
Wird eine Sendung im Dolby Digital Sound ausgestrahlt, wird
dieses beim Einschalten der Sendung im Infofenster durch
das Dolby-Zeichen angezeigt. Sofern die Funktion Dolby
Digital (AC3) eingeschaltet (an) ist, werden diese Sendungen
automatisch im Dolby Digital-Format wiedergegeben.
Ist die Funktion nicht eingeschaltet (aus) , kann der Dolby
Digital Sound manuell eingeschaltet werden. Beachten Sie
dazu auch Punkt 7.6.1 der Bedienungsanleitung.
7 Bedienung
7.1 Ein- und Ausschalten
>
Schalten Sie den Digital-Receiver durch Drücken der
Taste Ein/Standby am Gerät oder auf der
Fernbedienung ein.
>
Durch nochmaliges Drücken dieser Taste am Gerät
oder auf der Fernbedienung schalten Sie das Gerät
wieder aus.
>
Das Gerät ist nun im Bereitschaftsbetrieb (Standby),
dabei wird (sofern in Punkt 6.2.4 aktiviert) im Display
des Gerätes die Uhrzeit eingeblendet.
Sollte die Uhrzeit nicht angezeigt werden, muss diese
vom Gerät noch eingelesen werden. Schalten Sie
dazu das Gerät ein und empfangen Sie für ca. 30
Sekunden z.B. ZDF, um die Uhrzeit automatisch
einzulesen.
7.2 Programmwahl
7.2.1 Mit Hilfe der Programm auf/ab-Tasten
>
Schalten Sie die Programme mit Hilfe der
Programmtasten auf/ab am Receiver oder auf
der Fernbedienung jeweils um einen Programmplatz
auf oder ab.
18
DE
7.2.2 Mit Hilfe der Zehnertastatur
>
Geben Sie mit Hilfe der Zehnertastatur die
gewünschte Programmnummer ein.
Zum Beispiel:
1
für Programmplatz 1
1,
dann 4
für Programmplatz 14
2,
dann 3,
dann 4 für Programmplatz 234
Bei der Eingabe von mehrstelligen Programmnummern
haben Sie jeweils nach dem Drücken einer Taste ca. 3
Sekunden Zeit, um die Eingabe zu vervollständigen.
Wollen Sie nur eine einstellige beziehungsweise zweistellige
Zahl eingeben, so können Sie den Umschaltvorgang durch
längeres Gedrückthalten der letzten Ziffer beschleunigen.
7.2.3 Mit Hilfe des Navigators (Programmliste)
>
Drücken Sie die Taste OK.
Es erscheint nun der Programmlisten-Navigator. Im
TV-Betrieb erscheinen nur TV- und im Radiobetrieb
nur Radioprogramme. Das momentan eingestellte
Programm ist markiert. (Bild 7-1)
>
Nun können Sie mit den Pfeiltasten auf/ab das
gewünschte Programm markieren.
>
Durch Drücken der Taste OK wird das markierte
Programm eingestellt.
>
Mit den Pfeiltasten auf/ab bewegen Sie den
Marker jeweils um eine Zeile in der Liste.
>
Mit den Pfeiltasten links/rechts wird die Liste
seitenweise aufwärts bzw. abwärts geblättert.
(Bild 7-1)
7.2.3.1 Liste auswählen
Um das Auffinden von Programmen zu erleichtern, verfügt Ihr
Gerät über verschiedene Programmlisten. Sie können Ihre
Favoritenliste (siehe Punkt 8.1) auswählen oder sich die
Programme in der alphabetisch sortierten Gesamtliste
oder nach Anbietern sortiert anzeigen lassen.
>
Drücken Sie die Taste OK. Es erscheint die aktive
Programmliste.
>
Mit Hilfe der roten Funktionstaste Kategorie öffnet
sich ein Fenster mit den Programmlistentypen (Favoritenliste, Anbieterlisten und Gesamtliste).
Der aktive Progammlistentyp ist markiert. (Bild 7-2)
>
Wählen Sie mit Hilfe der Pfeiltasten auf/ab z.B.
den Programmlistentyp Gesamtliste aus.
19
(Bild 7-2)
(Bild 7-3)
(Bild 7-4)
>
Bestätigen Sie mit OK.
Es erscheint die alphabetisch sortierte Gesamtliste, in
der alle Programme enthalten sind. (Bild 7-3)
>
Markieren Sie mit den Pfeiltasten auf/ab das
Programm, das Sie sehen möchten.
>
Bestätigen Sie mit OK.
7.2.4 Aufrufen gesperrter Programme
Wird ein Programm eingestellt, das durch die Kindersicherung gesperrt ist, erscheint die Meldung Geräte PIN
auf dem Bildschirm. (Bild 7-4)
>
Geben Sie mit Hilfe der Zehnertastatur Ihren PINCode ein. Das gewünschte Programm wird eingestellt.
oder
>
Schalten Sie auf ein nicht gesperrtes Programm.
Haben Sie unter Punkt 8.3.2 die Einstellung an gewählt, wird
der PIN-Code beim Einschalten eines gesperrten Programms
immer abgefragt. Um den Bedienkomfort zu erhöhen, müssen
Sie den PIN-Code in einer Betriebsphase jedoch nur einmal
eingeben.
Beachten Sie bei Verwendung einer imaginSmartcard Punkt 7.3.2.
7.2.5 Infobox
(Bild 7-5)
Nach jedem Programmwechsel erscheint kurzzeitig eine
Infobox (Bild 7-5) mit dem Programmplatz und dem
Programmnamen des eingestellten Programms. Zusätzlich
werden weitere Programmeigenschaften angezeigt, wie zum
Beispiel
für Videotext,
für 16/9 Sendung,
für
verschlüsselte Programme. Außerdem wird sofern gesendet
das EPG-Genres und die FSK-Altersangabe (Freiwillige
Selbstkontrolle der Filmwirtschaft) angezeigt.
7.3 Empfang von verschlüsselten Programmen
Ihr Gerät ist mit einem integrierten Cryptoworks Entschlüsselungssystem sowie einem “Common Interface” ausgestattet.
Damit können Sie verschlüsselte Programme empfangen.
Dazu müssen Sie zunächst entweder eine imagin-Smartcard
in den integrierten Kartenleser einstecken oder ein CI-Modul
mit einer gültigen Smartcard in den dafür vorgesehenen
Steckplatz einführen:
>
Stecken Sie die imagin-Smartcard in den
Kartenschlitz des integrierten Kartenlesers
(goldfarbener Chip nach unten).
oder
>
Stecken Sie ein CI-Modul in den Steckplatz ein.
20
Stecken Sie die Smartcard in den Kartenschlitz des
CI-Moduls. Achten Sie darauf, dass sich der goldfarbene Chip der Smartcard auf der Oberseite in
Einschubrichtung befindet.
>
Wird nun ein verschlüsseltes Programm eingestellt,
überprüft Ihr Digital-Receiver automatisch den
Kartenleser sowie den Steckplatz und stellt das
Programm unverschlüsselt dar, sofern für dieses
Programm eine gültige Smartcard bzw. ein entsprechendes CI-Modul mit einer gültigen Smartcard enthalten ist.
DE
>
7.3.1 Sonderfunktionen
Auf einigen Programmplätzen werden Ihnen bestimmte
Sonderfunktionen angeboten. Auf Multifeed-Kanälen können
Sie beispielsweise bei einigen Sportübertragungen unterschiedliche Spielbegegnungen (z.B. Fußball-Bundesliga) auswählen, Tonkanäle verändern (z.B. Stadion/Kommentar) oder
Kameraperspektiven auswählen (Formel 1).
Außerdem können Sie bei einigen Programmanbietern die
gewünschte Startzeit für Ihre Filmbestellung auswählen.
7.3.1.1 Multifeed-Optionen
Einige Programme bieten die Möglichkeit der MultifeedOption. Diese Funktion erlaubt es Ihnen, z.B. bei einer
Sportübertragung aus verschiedenen Kameraperspektiven
frei zu wählen (Formel 1) oder zu unterschiedlichen
Sportaustragungsorten zu wechseln (Fußball-Bundesliga).
Verfügt ein Programm über Multifeed-Optionen, so wird dies
durch einen Hinweis (Bild 7-6) angezeigt.
>
Um eine der möglichen Optionen auszuwählen, betätigen Sie die Taste Option.
Es erscheint ein Auswahlfenster mit den zur
Verfügung stehenden Optionen. (Bild 7-7)
>
Wählen Sie mit den Pfeiltasten auf/ab die
gewünschte Option aus.
>
Bestätigen Sie mit OK.
Ihr Digital-Receiver stellt nun die gewählte Option ein.
(Bild 7-6)
(Bild 7-7)
7.3.1.2 Startzeitauswahl/Bildauswahl
Auf einigen Kanälen haben Sie die Möglichkeit einzelne
Filme zu unterschiedlichen Startzeiten auszuwählen. Damit
sind diese Filme rund um die Uhr zu unterschiedlichen
Anfangszeiten abrufbar.
Verfügt ein Kanal über die Startzeitauswahl/Bildauswahl, wird
dies durch einen Hinweis (Bild 7-8) angezeigt.
21
(Bild 7-8)
>
Um eine der möglichen Startzeiten auszuwählen, betätigen Sie die Taste Option.Es erscheint ein Auswahlfenster mit den angebotenen Startzeiten. (Bild 7-9)
>
Wählen Sie mit den Pfeiltasten auf/ab die
gewünschte Startzeit aus und bestätigen Sie mit OK.
Sofern die Sendung für die eingestellte Startzeit freigeschaltet ist, können Sie diese zur gewünschten Zeit
sehen.
(Bild 7-9)
7.3.2 Cryptoworks PIN-Code
Ihr Digital-Receiver verfügt über eine Kindersicherung, mit der
einzelne Programme gesperrt sind (siehe Punkt 8.3). Darüber
hinaus können bei Cryptoworks-verschlüsselten Programmen
Sendungen, die für Kinder ungeeignet sind, durch eine
Jugendschutzkennung vorgesperrt werden. Um die jeweilige
Sendung freizugeben, ist die Eingabe des Cryptoworks
PIN-Codes erforderlich. Dieser PIN-Code ist auf der
Smartcard gespeichert. Sie erhalten diesen zusammen mit
der Karte. Der Cryptoworks PIN-Code ist daher nicht
mit dem Geräte-PIN-Code des Digital-Receivers
(Punkt 8.3) zu verwechseln.
Schalten Sie ein Programm ein, auf dem gerade eine vorgesperrte Sendung ausgestrahlt wird, erscheint eine Meldung.
>
Um die Sendung freizugeben, geben Sie mit Hilfe der
Zehnertastatur den 4-stelligen Cryptoworks
PIN-Code ein.
>
Sobald die korrekte Eingabe erfolgt ist, wird die
Sendung freigegeben.
Bei fehlerhafter Eingabe können Sie den PIN-Code
erneut eingeben oder durch Drücken der Taste
Zurück das Menü verlassen.
7.4 Lautstärkeregelung
Sie haben die Möglichkeit, die Lautstärke Ihres DigitalReceivers zu regeln. Dieses erleichtert den Umgang mit dem
Receiver, da Sie somit alle wichtigen Funktionen auf einer
Fernbedienung haben und selten auf die Fernbedienung
Ihres Fernsehgerätes zurückgreifen müssen.
Nach dem Einschalten des Digital-Receivers wird der Ton mit
der zuletzt eingestellten Lautstärke wiedergegeben.
>
Regeln Sie die Lautstärke Ihres Digital-Receivers mit
Hilfe der Taste Lautstärke + lauter und mit Hilfe der
Taste Lautstärke - leiser.
>
Durch Drücken der Taste Ton ein/aus wird der Ton
aus- bzw. durch erneutes Drücken dieser Taste wieder
eingeschaltet.
22
DE
7.5 TV/Radioumschaltung
Die Vorprogrammierung des Receivers enthält neben den
Fernsehprogrammen auch Radioprogramme.
>
Schalten Sie mit der Taste TV/Radio den DigitalReceiver in den Radiobetrieb. Der Receiver schaltet
nun auf das zuletzt gehörte Radioprogramm um.
>
Durch erneutes Drücken der Taste TV/Radio wird
wieder das zuletzt gesehene Fernsehprogramm
eingestellt.
7.6 Auswahl einer anderen Sprache (TVBetrieb) bzw. Senders (Radiobetrieb)
Wird eine TV-Sendung in mehreren Sprachen oder mit
mehreren Tonkanälen ausgestrahlt bzw. sind auf einem
Radioprogrammplatz mehrere Radioprogramme verfügbar,
wird dies durch eine Einblendung (Bild 7-10) angezeigt. Dann
können Sie wie folgt eine andere Sprache oder einen anderen Tonkanal einstellen:
>
Drücken Sie die Taste Option. Es erscheint nun eine
Liste (Bild 7-11) der zur Zeit ausgestrahlten Sprachen
bzw. Radioprogrammen auf dem Bildschirm.
>
Markieren Sie mit Hilfe der Pfeiltasten auf/ab die
gewünschte Sprache bzw. das gewünschte
Radioprogramm und bestätigen Sie mit OK.
Nun können Sie den Beitrag in der eingestellten
Sprache hören. Mit Ihrem Digital-Receiver ist auch der
Empfang von Monosendungen möglich.
>
Mit den Pfeiltasten rechts/links können Sie
zwischen Mono-Kanal 1 (
), Mono-Kanal 2 (
)und
Stereo (
) wählen.
7.6.1 Dolby Digital (AC3-Betrieb)
Wird eine Sendung im Dolby Digital Sound ausgestrahlt, wird
dieses beim Einschalten der Sendung durch das DolbyZeichen in der Infobox angezeigt. Sofern Sie die Funktion
Dolby Digital (AC3) nach Punkt 6.3.6 eingeschaltet haben,
wird diese Sendung automatisch in diesem Format wiedergegeben.
Ist die Funktion Dolby Digital (AC3) nicht eingeschaltet,
stellen Sie Ihr Gerät wie folgt manuell auf AC3-Betrieb um:
>
Drücken Sie die Taste Option. Sofern
ausgestrahlt, erscheint nun eine Liste der zur Zeit
ausgestrahlten Sprachen und Dolby Digital (AC 3)
auf dem Bildschirm.
>
Markieren Sie mit Hilfe der Pfeiltasten auf/ab die
Zeile Dolby Digital.
23
(Bild 7-10)
(Bild 7-11)
>
Bestätigen Sie mit OK.
Nun können Sie den Beitrag in Dolby-Digital-Sound hören.
Möchten Sie, dass Ihr Gerät Sendungen automatisch in Dolby
Digital wiedergibt, so stellen Sie Ihr Gerät wie in Punkt 6.3.6
beschrieben auf automatische AC3 Wiedergabe ein.
7.7 Rückkehr zum zuletzt eingestellten
Programm
>
>
Durch Drücken der Taste Zurück auf der
Fernbedienung wird das zuletzt eingestellte Programm
wieder eingestellt.
Drücken Sie die Taste erneut, wird wieder das zuvor
gesehene Programm eingestellt.
7.8 Uhr und Programminfo anzeigen
(Bild 7-12)
Mit dieser Funktion wird es ermöglicht, Programminformationen des eingeschalteten Programms anzusehen.
>
Drücken Sie die Taste Info, um die Informationen des
eingestellten Programms anzuzeigen (Bild 7-12).
Nun erscheint in der unteren Bildhälfte eine Einblendung mit
der aktuellen Uhrzeit, dem Namen des eingestellten
Programms und der aktuellen Sendung mit der Anfangs- und
Stoppzeit, sofern die erforderlichen Daten von der
Sendeanstalt gesendet werden.
7.9 Weitere Programminformationen
Sofern gesendet, können Sie durch die Funktion
Programminfo weitere Programminformationen zu dem
eingeschalteten Programm erhalten.
(Bild 7-13)
>
Durch zweimaliges Drücken der Taste Info wird ein
weiteres Infofenster (Bild 7-13) geöffnet. Es werden
erweiterte Informationen für das derzeitige Programm
dargestellt.
>
Längere Infotexte können mit den Pfeiltasten
rechts/links zeilenweise verschoben werden.
>
Sofern gesendet, wird durch erneutes Drücken der
Taste Info die nachfolgende Sendung angezeigt.
>
Durch erneutes Drücken der Taste Info wird die
Einblendung wieder abgeschaltet.
7.10 Standbild
>
Durch Drücken der Taste Stop/Standbild wird das
aktuelle Fernsehbild als Standbild wiedergegeben.
>
Durch nochmaliges Drücken dieser Taste kehren Sie
zum Normalbetrieb zurück.
24
>
DE
7.11 Sleep-Timer
Stellen Sie durch mehrmaliges Drücken der Taste
Sleep-Timer die Abschaltzeit des Receivers von
15 Minuten bis 2 Stunden ein.
Nach Ablauf der eingestellten Zeit schaltet der
Receiver automatisch in Standby.
7.12 Kanal-Info
>
Durch Drücken der grünen Funktionstaste (KanalInfo), werden die Daten des eingestellten Kanals
(Bild 7-14) angezeigt.
>
Mit den farbigen Funktionstasten können Sie sich
zusätzlich Audio/Video-Informationen, Programminformationen und gegebenenfalls Informationen über
das verwendete Verschlüsselungssystem (CA)
anzeigen lassen.
>
(Bild 7-14)
Verlassen Sie die Info mit der Taste Menü.
7.13 Videotext
7.13.1 Benutzung des Videotextdecoders Ihres
Fernsehgerätes
Sofern gesendet, wird der Videotext an Ihr Fernsehgerät
weitergegeben. Benutzen Sie zur Bedienung des Videotextes
die Fernbedienung Ihres Fernsehgerätes. Sollte es bei Ihrem
Fernsehgerät zu Störungen kommen, wie zum Beispiel
Überlagerung von Videotext und Bildinhalt, sollten Sie Ihren
Digital-Receiver auf FBAS-Betrieb (Punkt 6.3.4) einstellen.
7.13.2 Benutzung des internen Videotextdecoders
Alternativ dazu können Sie den integrierten TOP-VideotextDecoder nutzen, um sich die Informationen anzeigen zu
lassen. Beim TOP-Videotext werden alle Textseiten
thematisch in Gruppen und Blöcke unterteilt, wodurch der
Videotext übersichtlicher wird.
>
Schalten Sie das Programm ein, von dem Sie sich
Videotext-Informationen ansehen möchten.
>
Durch Drücken der Taste Videotext schalten Sie
den Videotext ein. (Bild 7-15)
>
Geben Sie mit Hilfe der Zehnertastatur die
gewünschte Videotextseite ein. Ihre Eingabe wird in
der oberen, linken Bildschirmecke angezeigt.
Für alle Videotextbetreiber stellt die Seite 100 die
Inhaltsangabe dar.
25
(Bild 7-15)
VT-Gruppe
VT-Block
Nachdem Sie die gewünschte Videotextseite eingegeben haben, sucht Ihr Gerät die gewünschte Seite.
Da die Videotextseiten nicht alle gleichzeitig
übertragen werden können, kann es einige Sekunden
dauern, bis Ihr Gerät die Seite gefunden hat und auf
Ihrem Fernsehbildschirm anzeigt.
>
Benutzen Sie die rote bzw. grüne Taste, um eine
Seite vor- bzw. zurückzublättern.
>
Mit Hilfe der gelben Funktionstaste wird die im
gelben Feld angezeigte Videotext-Gruppe aufgerufen.
>
Mit Hilfe der blauen Funktionstaste wird der im
blauen Feld angezeigte Videotext-Block aufgerufen.
Mixbetrieb
>
Durch erneutes Drücken der Taste Videotext
schalten Sie den Mixbetrieb (gleichzeitige Darstellung
der Videotext-Informationen und des TV-Bildes) ein.
>
Durch nochmaliges Drücken dieser Taste schalten Sie
zurück in den Normalbetrieb.
Stoppbetrieb
>
Durch Drücken der Taste Stop/Standbild erscheint
in der oberen linken Ecke des Videotextfensters der
Schriftzug “Stop”. Dadurch wird das automatische
Weiterblättern der Videotextunterseiten verhindert.
Durch nochmaliges Drücken der Taste
Stop/Standbild schalten Sie den Stoppbetrieb wieder aus.
>
Durch Drücken der Taste Zurück kehren Sie in den
Normalbetrieb zurück.
7.14 Untertitel
Werden Untertitel gesendet, wird dieses durch die
Einblendung Untertitelauswahl angezeigt. Sofern Sie die
Funktion Untertitel (nach Punkt 6.3) eingeschaltet haben,
werden diese automatisch dargestellt, vorausgesetzt, dass
diese in der ausgewählten Sprache gesendet werden.
Werden Untertitel nur in anderen Sprachen gesendet oder
über Videotext ausgestrahlt, können Sie diese wie folgt
manuell einschalten.
>
Drücken Sie die Taste Option (evtl. mehrmals), bis
unter dem Eintrag Untertitel eine Auswahltafel mit
den gesendeten Untertitel-Sprachen und/oder den
Videotextseiten, über die Untertitel ausgestrahlt werden, erscheint.
>
Markieren Sie die gewünschte Sprache/Videotextseite
mit Hilfe der Pfeiltasten auf ab.
26
Bestätigen Sie mit OK. Nun werden die Untertitel
angezeigt.
Beachten Sie, dass diese Funktionen nur vorhanden sind,
wenn tatsächlich Untertitel gesendet werden und dass diese
Einstellung nach einem Umschaltvorgang nicht erhalten
bleibt.
7.15 Elektronische Programmzeitschrift SFI
S iehF
F ern I nfo)
(S
Ihr Digital-Receiver verfügt über eine elektronische
Programmzeitschrift. Dadurch können Sie die
Programminformationen einzelner oder mehrerer Programme
auf dem Bildschirm darstellen.
Sie können sich sehr schnell einen Überblick über die gerade
laufenden Sendungen oder über die Sendungen des Tages
bzw. der folgenden Tage verschaffen.
Die SFI-Funktionen erlauben Ihnen:
Informationen über Programminhalte auf dem
Bildschirm darzustellen
Das Vormerken von Sendungen, die dann zum
Sendebeginn automatisch eingeschaltet werden
Das Programmieren von Timern
Sendungen anhand der Programmart (Genre) zu
suchen und einzustellen.
7.15.1 Einlesen der SFI-Daten
Die Programminformationen werden von Ihrem Gerät zu der
in Punkt 8.2 (SFI-Kanal) eingestellten Aktualisierungszeit
aktualisiert. Voraussetzung dafür ist, dass sich das Gerät im
Standbybetrieb befindet.
Der Einlesevorgang wird durch die Anzeige der bereits eingelesenen SFI-Daten (z.B. 038P für 38%) im Display angezeigt.
Ist Ihr Gerät zu dieser Zeit in Betrieb, wird diese Funktion
nicht ausgeführt.
Ebenso können Sie unmittelbar nach dem Ausschalten
(während das Display “oooo” anzeigt) durch Drücken der
Taste SFI den Einlesevorgang manuell starten. Während des
Einlesevorgangs erscheint die Anzeige der bereits eingelesenen SFI-Daten (z.B. 038P).
Die Dauer des Einlesevorgangs ist von der Anzahl der
einzulesenden Programme abhängig. Es können maximal
sieben Tage im Voraus angezeigt werden. Aufgrund der
Datenmenge reduziert sich dieser Zeitraum mit steigender
Programmanzahl in der elektronischen Programmzeitschrift.
Sie selbst können entscheiden, welche Programme in der
"elektronischen Programmzeitschrift" aufgeführt werden
sollen. Diese können dann, wie in Punkt 8.1.5 beschrieben,
aufgenommen werden.
27
DE
>
7.15.2 Einlesevorgang unterbrechen
Der Einlesevorgang kann durch das Einschalten (Taste
Ein/Standby) des Digital-Receivers unterbrochen werden.
Es stehen dann die SFI-Daten der letzten Aktualisierung zur
Verfügung.
7.15.3 Elektronische Programmzeitschrift aufrufen
>
Schalten Sie den Digital-Receiver und Ihr
Fernsehgerät ein.
>
Drücken Sie die Taste SFI auf der Fernbedienung des
Digital-Receivers.
Es erscheint nun die elektronische Programmzeitschrift auf dem Bildschirm (Bild 7-16). Hier werden
die von Ihnen bzw. die in der Werksprogrammierung
festgelegten Programme mit ihren derzeitigen
Sendungen dargestellt (siehe dazu auch Punkt 8.2).
Nun können Sie sich mit Hilfe der SFI-Funktion über
die Inhalte diverser Sendungen informieren.
Außerdem stehen Ihnen die SFI-Funktionen zur
Verfügung, um die gewünschte Sendung einstellen,
vorzumerken oder in die Timerprogrammierung
aufzunehmen.
(Bild 7-16)
7.15.4 Jetzt (Tafel mit aktuellen Programminhalten)
Zunächst wird die SFI-Tafel “Jetzt” (Bild 7-16) mit den
derzeitig ausgestrahlten Sendungen dargestellt. Der gelbe
Balken rechts neben dem Programmnamen zeigt die
vergangene Sendezeit der aktuellen Sendung an. Das
momentan eingestellte Programm ist markiert.
>
Durch Betätigen der Pfeiltasten auf/ab können Sie
die Markierung zeilenweise verschieben. Um die
Markierung seitenweise zu verschieben (blättern),
betätigen Sie die Pfeiltasten rechts/links.
>
Nun stehen Ihnen die SFI-Funktionen (Punkt 7.15.3)
zur Verfügung.
>
Durch Drücken der gelben Funktionstaste, gelangen
Sie zur SFI-Tafel “Danach” (Siehe Punkt 7.15.5)
oder
>
durch Drücken der Taste TV/Radio in den
Normalbetrieb zurück.
7.15.5 Danach
>
Mit Hilfe der gelben Funktionstaste können Sie die
Tafel "Danach" (anschließende Sendungen)
aufrufen. (Bild 7-17)
28
Es stehen die SFI-Funktionen (Punkt 7.15.3) zur
Verfügung.
>
Durch Drücken der gelben Funktionstaste gelangen
Sie zur SFI-Tafel “Mehr” (Punkt 7.15.6)
DE
>
oder
>
durch Drücken der grünen Funktionstaste bzw. der
Taste Zurück zu der vorangegangenen SFI-Tafel
“Jetzt”
(Bild 7-17)
oder
>
durch Drücken der Taste TV/Radio in den
Normalbetrieb zurück.
7.15.6 Mehr
>
Durch erneutes Drücken der gelben Funktionstaste
bei eingeschalteter SFI-Tafel “Danach” erscheint die
SFI-Tafel “Mehr”. (Bild 7-18)
Auf dieser Tafel erscheint ein zusätzliches Zeitfenster
in der Titelzeile. In diesem Zeitfenster wird die Uhrzeit
der angezeigten SFI-Tafel angezeigt.
>
Durch Drücken der gelben Funktionstaste wird um
die im gelben Farbfeld angezeigte Zeit weitergeblättert.
>
Durch Festhalten der gelben Funktionstaste wird
durchgehend weitergeblättert. Zur besseren Übersicht
wird dabei eine Uhr eingeblendet.
Durch Drücken der grünen Funktionstaste können
Sie die Tafeln entsprechend wieder zurückblättern.
Am unteren Bildrand sind die einzelnen Wochentage
dargestellt. Stehen für die folgenden Tage
Informationen zur Verfügung, sind die entsprechenden
Felder markiert.
>
Um eine Vorschau über einen gewünschten Tag zu
erhalten, drücken Sie die dem Wochentag entsprechende Zifferntaste der Zehnertastatur.
oder
Durch Drücken der Taste Zurück kehren Sie wieder
zur Tafel “Danach” zurück.
7.15.7 SFI-Funktionen
Um die folgenden SFI-Funktionen ausführen zu können,
rufen Sie wie in Punkt 7.15.3 beschrieben den SFI auf.
29
(Bild 7-18)
7.15.7.1 SFI-Info
Mit Hilfe der SFI-Info können Sie eine kurze Info über das
markierte Programm bzw. die markierte Sendung anzeigen.
Eine vorhandene SFI-Info ist durch
neben dem entsprechenden Programm gekennzeichnet.
>
Markieren Sie das gewünschte Programm mit Hilfe der
Pfeiltasten bzw. Funktionstasten.
>
Drücken Sie die Taste SFI, um die Info anzuzeigen.
Längere Infotexte können mit Hilfe der Pfeiltasten
verschoben bzw. geblättert werden.
>
Durch Drücken der Taste Zurück kehren Sie wieder
auf die vorausgegangene Tafel zurück.
7.15.7.2 SFI-Timerprogrammierung
Mit Hilfe der elektronischen Programmzeitschrift SFI können
Sie auf einfache Weise die Programmierung von TimerEreignissen vornehmen.
>
Markieren Sie die gewünschte Sendung mit Hilfe der
Pfeiltasten bzw. mit den Funktionstasten.
>
Drücken Sie die rote Funktionstaste Timer, um ein
Auswahlfenster zu öffnen.
>
Markieren Sie mit den Pfeiltasten auf/ab den
gewünschten Timer-Typ (siehe Punkt 7.15).
>
Bestätigen Sie mit OK. Zu Kontrollzwecken erscheint
das Menü Timer verwalten mit den Daten der
ausgewählten Sendung. In diesem können Sie, falls
erforderlich, Änderungen vornehmen (siehe 7.15).
>
Durch Drücken der Taste Zurück kehren Sie wieder
auf die vorausgegangene Tafel zurück.
Die entsprechende Zeile ist markiert. Ihr Gerät wird
nun je nach Timer-Typ zum Beginn der ausgewählten
Sendung eingeschaltet. Wurde das Gerät durch den
Videorekorder-Timer eingeschaltet, wird dieses durch
“rEc” im Display angezeigt. Die Funktionen der
Fernbedienung sind überwiegend außer Betrieb, um
einen versehentlichen Abbruch der Aufnahme zu
vermeiden.
Im Standby-Betrieb wird der aktive Timer durch das
Blinken der Doppelpunkte in der Uhrzeit bzw. der LED
angezeigt.
Löschen des SFI-Timer-Ereignisses
>
Wollen Sie ein mittels SFI programmiertes
Timerereignis stornieren, verfahren Sie wie oben
beschrieben, um die entsprechende Sendung zu
markieren.
30
Drücken Sie die rote Funktionstaste Timer, um ein
Auswahlfenster zu öffnen.
>
Markieren Sie mit den Pfeiltasten auf/ab die Zeile
Timer löschen.
>
Bestätigen Sie mit OK.
>
Um einen aktiven Timer abzubrechen, schalten Sie
den Digital-Receiver mit der Taste Ein/Standby aus.
>
Anschließend können Sie durch erneutes Drücken
dieser Taste den Receiver wieder in Betrieb nehmen
und uneingeschränkt bedienen.
DE
>
7.15.7.3 SFI-Programmübersicht
Mit Hilfe der SFI-Programmübersicht können Sie eine Tafel
mit dem Tagesprogramm eines einzelnen Programms
darstellen. Gehen Sie dazu wie folgt vor:
>
Drücken Sie die Taste SFI.
Es erscheint die SFI-Tafel “Jetzt”.
>
Drücken Sie die blaue Funktionstaste SFI Menü,
um ein Auswahlfenster zu öffnen.
>
Markieren Sie mit den Pfeiltasten auf/ab die Zeile
Programme.
>
Bestätigen Sie mit OK. Nun erscheint die Tagesübersicht des eingestellten Programms. (Bild 7-19)
>
Mit Hilfe der Pfeiltasten können Sie nun den
Marker auf die gewünschte Sendung bzw. Uhrzeit
verschieben.
Am unteren Bildrand sind die einzelnen Wochentage
dargestellt.
Stehen für die folgenden Tage Informationen zur
Verfügung, sind die entsprechenden Felder markiert.
>
Um den Programminhalt eines gewünschten Tages
darzustellen, drücken Sie die dem Wochentag
entsprechende Zifferntaste der Zehnertastatur.
SFI-Übersicht anderer Programme darstellen
>
Drücken Sie die grüne Funktionstaste
Programme.
Es erscheint eine Liste mit den SFI-Programmen.
(Bild 7-20)
>
Nun können Sie mit Hilfe der Pfeiltasten das
gewünschte Programm markieren.
>
Durch Drücken der Taste OK wird die SFI-Übersicht
des markierten Programms dargestellt.
31
(Bild 7-19)
(Bild 7-20)
7.15.7.4 SFI-Übersicht nach Programmart (Genre)
Wenn Sie sich für bestimmte Programmarten interessieren,
können Sie sich die Programminformationen nach bestimmten Genres z.B. Film, Nachrichten, usw. anzeigen lassen.
(Bild 7-21)
>
Drücken Sie die Taste SFI. Es erscheint die SFI-Tafel
“Jetzt”.
>
Drücken Sie die blaue Funktionstaste SFI Menü,
um ein Auswahlfenster zu öffnen.
>
Markieren Sie mit den Pfeiltasten auf/ab die Zeile
Genres.
>
Bestätigen Sie mit OK.
>
Mit der grünen Funktionstaste Genres öffnen Sie
ein Fenster mit den zur Verfügung stehenden
Programmarten. (Bild 7-21)
>
Wählen Sie mit den Pfeiltasten die gewünschte
Programmart aus und bestätigen Sie mit OK.
Nun erscheint eine Tagesübersicht ausschließlich mit
Sendungen der gewählten Programmart. (Bild 7-22)
>
Mit Hilfe der Pfeiltasten auf/ab können Sie den
Marker auf die gewünschte Sendung verschieben.
>
Mit den Pfeiltasten rechts/links können Sie
seitenweise umblättern.
Am unteren Bildrand sind die einzelnen Wochentage
dargestellt. Stehen für die folgenden Tage
Informationen zur Verfügung, sind die entsprechenden
Felder markiert.
>
Um den Programminhalt eines gewünschten Tages
darzustellen, drücken Sie die dem Wochentag
entsprechende Zifferntaste der Zehnertastatur.
(Bild 7-22)
7.15.8 SFI beenden
>
Durch Drücken der Taste Menü bzw. TV/Radio
kehren Sie in den Normalbetrieb zurück.
7.16 Timer-Aufnahmen
Ihr Receiver verfügt über Videorekorder-Timer und
Senderwechsel-Timer. Hinsichtlich der Programmierung
unterscheiden sich diese Timer-Arten nur durch die Angabe
des entsprechenden Timer-Typs.
Sie können die Timer entweder wie in diesem Kapitel
beschrieben manuell oder wie in Punkt 7.15.7.2 erläutert mit
Hilfe der SFI-Funktion programmieren.
32
DE
1. Videorekorder-Timer
Durch einen Videorekorder-Timer wird Ihr Digital-Receiver für
die ausgewählte Sendung ein- bzw. ausgeschaltet, um diese
in Ihrer Abwesenheit mit einem externen Aufzeichnungsgerät
z.B. einem Videorekorder aufzuzeichnen. Beachten Sie, dass
Sie zur Aufnahme der Sendung Ihren Videorekorder
programmieren müssen.
Wurde das Gerät durch den Videorekorder-Timer eingeschaltet, wird dieses durch “rEc” im Display angezeigt. Die
Funktionen der Fernbedienung sind überwiegend außer
Betrieb, um einen versehentlichen Abbruch der Aufnahme zu
vermeiden. Im Standby-Betrieb wird der aktive Timer durch
das Blinken der Doppelpunkte in der Uhrzeit bzw. der LED
angezeigt.
2. Senderwechsel-Timer
Befindet sich Ihr Gerät im Normalbetrieb, stellt es beim
Erreichen der eingestellten Zeit den programmierten Programmplatz ein. Im Gegensatz zur Einstellung Videorekorder-Timer bleibt das Gerät uneingeschränkt bedienbar
und wird nach Ablauf der Sendung nicht abgeschaltet.
7.16.1 Timer manuell programmieren
>
Rufen Sie mit der Taste Menü das Hauptmenü auf.
>
Markieren Sie die Zeile Timer verwalten mit Hilfe
der Pfeiltasten auf/ab.
>
Bestätigen Sie durch Drücken der Taste OK.
Es erscheint das Untermenü Timer verwalten.
(Bild 7-23)
>
Wählen Sie mit den Pfeiltasten auf/ab den TimerTyp aus, den Sie programmieren möchten.
>
Durch Drücken der Taste OK gelangen Sie in das
Eingabefenster zur Programmierung eines neuen
Timer-Ereignisses. (Bild 7-24)
(Bild 7-23)
Zur Programmierung gehen Sie wie folgt vor:
Quelle
>
Markieren Sie mit Hilfe der Pfeiltasten die Spalte
Quelle.
>
Drücken Sie die Taste OK.
>
Wählen Sie in dem nun geöffneten Auswahlfenster mit
den Pfeiltasten auf/ab die gewünschte Quelle
(TV oder Radio) aus.
>
Bestätigen Sie mit OK.
Nun wird, je nach vorheriger Einstellung, die TV- bzw.
die Radio-Programmliste dargestellt.
(Bild 7-24)
33
>
Markieren Sie nun mit den Pfeiltasten das
gewünschte Programm.
>
Mit den Pfeiltasten auf/ab bewegen Sie den
Marker jeweils um eine Zeile in der Liste.
>
Mit den Pfeiltasten links/rechts wird die Liste um
eine Seite aufwärts bzw. abwärts geblättert.
>
Durch Drücken der Taste OK wird dieses in den Timer
aufgenommen.
Datum
>
Markieren Sie mit Hilfe der Pfeiltasten die Spalte
Datum.
>
Geben Sie mit Hilfe der Zehnertastatur das Datum
(4-stellig) ein, an dem das Timer-Ereignis stattfinden
soll.
Start
>
Markieren Sie mit Hilfe den Pfeiltasten die Spalte
Start.
>
Geben Sie in dieser Zeile mit Hilfe der
Zehnertastatur die Startzeit für den Timer ein.
Stopp
>
Wiederholen Sie die Schritte wie in “Start”
beschrieben, um die Stoppzeit einzugeben (außer
Senderwechsel-Timer).
Wiederholung
>
Markieren Sie mit den Pfeiltasten die Spalte Wdh.
>
Drücken Sie die Taste OK.
Es erscheint ein Auswahlfenster mit verschiedenen
Wiederholungsvorschlägen.
1x
Timer einmal ein
T
Tägliche Wiederholung
1W
Wiederholung einmal wöchentlich
1-5
Wiederholung nur an Werktagen
6-7
Wiederholung nur an Wochenenden
>
Wählen Sie mit Hilfe der Pfeiltasten auf/ab die
gewünschte Funktion aus.
>
Durch Drücken der Taste OK wird die Einstellung
übernommen.
Daten in den Speicher übernehmen
>
Nachdem Sie die Programmierung beendet haben,
drücken Sie die gelbe Funktionstaste Übernehmen, um die Daten in den Speicher zu übernehmen.
34
>
Kehren Sie durch Drücken der Taste TV/Radio in
den Normalbetrieb zurück.
7.16.2 Timerübersicht
Durch die Timerübersicht erhalten Sie einen Überblick über
alle bereits programmierten Timer-Ereignisse.
>
Um in das Menü Timerübersicht zu gelangen,
rufen Sie wie oben beschrieben das Menü Timer
verwalten auf.
>
Markieren Sie mit den Pfeiltasten auf/ab die Zeile
Timerübersicht.
>
Bestätigen Sie mit OK.
Sollten sich Timerereignisse überschneiden, sind diese
Überschneidungen rot gekennzeichnet.
7.16.3 Timerprogrammierung ändern
>
Um eine bestehende Timereinstellung zu verändern,
markieren Sie mit Hilfe der Pfeiltasten auf/ab das
Timer-Ereignis, das Sie ändern möchten.
>
Durch Drücken der gelben Funktionstaste Ändern
gelangen Sie zu den Einstellungen des markierten
Timers. Bearbeiten Sie diesen nun entsprechend
Punkt 7.16.1.
>
Nachdem Sie die Programmierung beendet haben,
drücken Sie die gelbe Funktionstaste
Übernehmen, um die Daten in den Speicher zu
übernehmen.
7.16.4 Timerprogrammierung löschen
>
Um eine bestehende Timereinstellung zu löschen,
markieren Sie diese mit Hilfe der Pfeiltasten
auf/ab.
>
Drücken Sie die grüne Funktionstaste Löschen.
Es erscheint die Meldung “Diesen Timer wirklich
löschen ?”
>
Markieren Sie mit den Pfeiltasten links/rechts
Ja.
>
Zum Löschen des Timereintrages bestätigen Sie mit
OK.
35
DE
Haben Sie unter Sender ein nach Punkt 8.3
gesperrtes Programm gewählt, müssen Sie erst den
PIN-Code eingeben, bevor die Daten in den Speicher
übernommen werden.
7.16.5 Neues Timer-Ereignis programmieren
>
Um ein neues Timer-Ereignis zu programmieren,
markieren Sie mit den Pfeiltasten auf/ab eine freie
Zeile im Menü Timerübersicht.
>
Durch Drücken der gelben Funktionstaste Neu
gelangen Sie in das Eingabefenster zur
Programmierung eines neuen Timer-Ereignisses.
Bearbeiten Sie dieses nun entsprechend Punkt 7.16.1.
>
Markieren Sie mit den Pfeiltasten auf/ab das
zusätzlich erscheinende Feld Typ.
>
Bestätigen Sie mit OK. Es öffnet sich ein Fenster mit
den zur Verfügung stehenden Timer-Typen.
>
Wählen Sie mit den Pfeiltasten auf/ab den
gewünschten Timer-Typ aus.
>
Um den Timer-Typ zu übernehmen, bestätigen Sie mit
OK.
>
Nachdem Sie die Programmierung beendet haben,
drücken Sie die gelbe Funktionstaste
Übernehmen, um die Daten in den Speicher zu
übernehmen.
Achtung!!!
Achten Sie darauf, dass das Gerät die Uhrzeit eingelesen
hat. Diese wird im Standbybetrieb im Display angezeit. Sollte
dieses nicht der Fall sein, lassen Sie Ihr Gerät ca. 30
Sekunden auf z. B. ZDF eingeschaltet, damit die Uhrzeit
eingelesen werden kann.
Nun sollte im Standbybetrieb (sofern in Punkt 6.2.4 aktiviert)
die Uhrzeit angezeigt werden.
8 Grundprogrammierung ändern
8.1 Favoritenliste konfigurieren
Dieses Kapitel beschreibt, wie Sie die Vorprogrammierung
Ihres Digital-Receivers und die Favoritenprogrammliste
entsprechend Ihren Wünschen ändern können. Ebenso wird
diese Funktion benötigt, um nach einem Suchlauf neu
gefundene Programme in die Liste einzusortieren.
Hierzu sollten Sie folgendes wissen: Ihr Gerät verfügt über
zwei Programmlisten, die Favoritenliste und die
Gesamtliste. Die Favoritenprogrammliste enthält alle
Programme, die Sie wie im folgenden beschrieben
aufgenommen haben. In der Gesamtliste befinden sich alle
Programme.
36
DE
Ebenso beschreibt dieses Kapitel, wie Sie Programme
löschen, durch eine Kindersicherung verriegeln oder in den
EPG aufnehmen können. Beim Aufrufen der Programmliste
durch die Taste OK wird die Favoritenprogrammliste
angezeigt.
8.1.1 Programmlistenverwaltung aufrufen
Um die Favoritenliste zu bearbeiten, gehen Sie
folgendermaßen vor:
>
Rufen Sie mit der Taste Menü das Hauptmenü auf.
(Bild 8-1)
>
Markieren Sie mit Hilfe der Pfeiltasten auf/ab die
Zeile TV-Listen verwalten, um die TV-Liste zu
bearbeiten oder Radiolisten verwalten, um die
Radioliste zu bearbeiten.
>
Bestätigen Sie mit OK. Es erscheint die
Programmlistenverwaltung zum Bearbeiten der jeweiligen Favoritenliste (TV- oder Radioliste). (Bild 8-2)
In der rechten Bildhälfte wird die Favoritenliste
dargestellt. Diese ist nun aktiv, da das momentan
eingestellte Programm markiert ist. In der linken
Bildhälfte sehen Sie die alphabetisch sortierte
Gesamtliste.
In dieser Gesamtliste befinden sich alle verfügbaren
Programme.
>
Durch Drücken der roten Funktionstaste wechselt
die Markierung zur Gesamtliste. Diese ist nun aktiv.
>
Durch nochmaliges Drücken der roten Funktionstaste erscheint ein Auswahlfenster. Sie haben hier die
Möglichkeit, die Gesamtliste nach verschiedenen
Auswahlkriterien (z.B. alle Sender, alle freien, alle
neuen, alle gefundenen, alle englischen, usw.) sortiert
oder nach Anbietern sortiert anzuzeigen.
>
Wählen Sie mit Hilfe der Pfeiltasten auf/ab die
gewünschte Programmauflistung aus
(z.B. Gesamtliste).
>
Bestätigen Sie mit OK. Nun erscheint ein weiteres
Auswahlfenster. (Bild 8-3)
>
Markieren Sie nun mit Hilfe der Pfeiltasten auf/ab,
das Auswahlkriterium aus, nach dem die Gesamtliste
sortiert werden soll. Wählen Sie z.B. Alle Sender,
um alle verfügbaren Programme in der Gesamtliste
anzuzeigen oder Alle neuen, um nur die beim
letzten Suchlauf neu gefundenen Programme anzuzeigen oder Alle englischen, um nur die englischsprachigen Sender anzuzeigen.
>
Bestätigen Sie mit OK.
37
(Bild 8-1)
(Bild 8-2)
(Bild 8-3)
Nun wird, je nach Auswahl, eine Programmliste mit z. B.
allen, allen neuen oder allen englischsprachigen Programmen
angezeigt. Programme, die sich bereits in der Favoritenliste
befinden, sind mit einem Häkchen
gekennzeichnet.
>
Durch Drücken der roten Funktionstaste
Programme bzw. der grünen Funktionstaste
TV-Liste kann zwischen der Favoritenliste und der
Gesamtliste umgeschaltet werden. Die jeweils aktive
Liste ist durch die blaue Markierung gekennzeichnet.
8.1.2 Programme zur Favoritenliste hinzufügen
Um Programme aus der Gesamtliste in die Favoritenliste
aufzunehmen, rufen Sie wie in Punkt 8.1.1 beschrieben die
Programmlistenverwaltung auf und wechseln zur Gesamtliste.
>
Betätigen Sie die blaue Funktionstaste Funktionen.
Es erscheint ein Auswahlfenster mit den zur Verfügung
stehenden Funktionen. (Bild 8-4)
>
Markieren Sie mit den Pfeiltasten auf/ab die Zeile
Hinzufügen.
>
Bestätigen Sie mit OK.
>
Markieren Sie mit den Pfeiltasten auf/ab ein
Programm, das Sie in die Liste aufnehmen möchten.
>
Durch Drücken der gelben Funktionstaste
Hinzufügen wird das markierte Programm in die
Favoritenliste aufgenommen.
(Bild 8-4)
Blockweises Markieren
Um mehrere Programme gleichzeitig zu markieren gehen Sie
wie folgt vor:
>
Durch Drücken der Taste OK gelangen Sie nun in den
Auswahlmodus.
Das markierte Programm wird mit einem Kreuz auf der
linken Seite markiert.
>
Mit Hilfe der Pfeiltasten auf/ab können nun die
folgenden/vorhergehenden Programme ebenfalls
markiert werden.
>
Nachdem Sie auf diese Weise die gewünschten
Programme markiert haben, drücken Sie die gelbe
Funktionstaste Hinzufügen, um die markierten
Programme in die Favoritenliste aufzunehmen.
38
DE
8.1.3 Programme löschen
8.1.3.1 Entfernen (löschen) aus der Favoritenliste
Um Programme aus der Favoritenliste zu entfernen, rufen
Sie wie in Punkt 8.1.1 beschrieben die Programmlistenverwaltung auf. Sie befinden sich in der Favoritenliste.
>
Betätigen Sie die blaue Funktionstaste
Funktionen.
Es erscheint ein Auswahlfenster mit den zur
Verfügung stehenden Funktionen. (Bild 8-5)
>
Markieren Sie mit den Pfeiltasten auf/ab die Zeile
Entfernen.
>
Bestätigen Sie mit OK.
>
Markieren Sie mit den Pfeiltasten auf/ab ein
Programm, das Sie aus der Liste entfernen möchten.
>
Drücken Sie die gelbe Funktionstaste Entfernen.
Es erscheint die Meldung “Programm(e) aus der Liste
entfernen?”.
>
Markieren Sie mit den Pfeiltasten links/rechts
Ja oder Nein.
>
Bestätigen Sie die Eingabe mit OK.
>
Um mehrere Programme gleichzeitig zu entfernen,
markieren Sie diese wie in 8.1.2 (Blockweises
Markieren) beschrieben.
>
Nachdem Sie auf diese Weise die gewünschten
Programme markiert haben, drücken Sie die gelbe
Funktionstaste Entfernen.
Es erscheint die Meldung “Programm(e) wirklich
löschen?”.
>
Markieren Sie mit den Pfeiltasten links/rechts
Ja oder Nein.
>
Bestätigen Sie die Eingabe mit OK.
Die auf diese Weise gelöschten Programme bleiben jedoch
in der Gesamtliste erhalten und können jederzeit wieder in
die Favoritenliste aufgenommen werden.
8.1.3.2 Löschen aus der Gesamtliste
Um Programme aus der Gesamtliste zu entfernen, verfahren
Sie wie in Punkt 8.1.3.1 beschrieben. Wechseln Sie nach
dem Aufruf der Programmlistenverwaltung jedoch durch
Betätigen der roten Funktionstaste Programme erst zur
Gesamtliste und wählen anschließend die Funktion
Löschen.
39
(Bild 8-5)
8.1.4 Programme sortieren
Um die Programmreihenfolge der Favoritenliste Ihren
Wünschen entsprechend zu sortieren, rufen Sie wie in Punkt
8.1.1 beschrieben die Programmlistenverwaltung auf. Sie
befinden sich in der Favoritenliste.
(Bild 8-6)
>
Betätigen Sie die blaue Funktionstaste Funktionen.
Es erscheint ein Fenster mit den zur Verfügung stehenden Funktionen. (Bild 8-6)
>
Markieren Sie mit den Pfeiltasten auf/ab die Zeile
sortieren.
>
Bestätigen Sie mit OK.
>
Markieren Sie nun mit Hilfe der Pfeiltasten auf/ab
das Programm, das Sie an einer anderen Stelle in der
Liste platzieren möchten.
>
Drücken Sie nun die gelbe Funktionstaste
Sortieren. Es erscheint ein Doppelpfeil neben dem
angewählten Programm.
>
Nun können Sie das markierte Programm mit Hilfe der
Pfeiltasten auf/ab und / oder der
Zehnertastatur an die Stelle in der Programmliste
bewegen, an der Sie es platzieren möchten.
>
Durch Drücken der gelben Funktionstaste
Sortieren wird das Programm an der neuen Position
gespeichert.
>
Um mehrere Programme gleichzeitig zu sortieren,
markieren Sie diese wie in 8.1.2 (Blockweises
Markieren) beschrieben.
>
Drücken Sie nun die gelbe Funktionstaste
Sortieren. Es erscheint ein Doppelpfeil neben dem
angewählten Programmblock.
>
Nun können Sie den markierten Programmblock mit
Hilfe der Pfeiltasten auf/ab und / oder der
Zehnertastatur an die Stelle in der Programmliste
bewegen, an der Sie ihn platzieren möchten.
>
Durch Drücken der gelben Funktionstaste
Sortieren wird der Programmblock an der neuen
Position gespeichert.
>
Nachdem Sie auf diese Weise die Programmliste Ihren
Wünschen entsprechend konfiguriert haben, kehren
Sie durch Drücken der Taste Menü in den
Normalbetrieb zurück.
40
DE
8.2 Programmierung der elektronischen
Programmzeitschrift
Ihr Gerät hat die Möglichkeit, über Kabel einen Datenkanal
mit zusätzlichen SFI-Daten zu empfangen. Diese ermöglichen die SFI-Vorschau bis zu einer Woche.
>
Rufen Sie mit der Taste Menü das Hauptmenü auf.
>
Markieren Sie die Zeile Einstellungen mit Hilfe der
Pfeiltasten auf/ab.
>
Bestätigen Sie durch Drücken der Taste OK.
Es erscheint das Untermenü Einstellungen.
>
Markieren Sie die Zeile Programmzeitschrift mit
Hilfe der Pfeiltasten auf/ab.
>
Bestätigen Sie durch Drücken der Taste OK. Es erscheint das Menü Programmzeitschrift. (Bild 8-7)
>
Mit den Pfeiltasten auf/ab können Sie den Marker
innerhalb des Menüs bewegen und wie angegeben
die einzelnen Positionen verändern. Beachten Sie bei
der Auswahl eines Menüpunktes ggf. auch die
Bildschirmeinblendungen.
(Bild 8-7)
8.2.1 Sender auswählen
Um einen besseren Überblick zu erhalten, können Sie die
elektronische Programmzeitschrift SFI so programmieren,
dass diese nur Ihre favorisierten Programme enthält.
Beachten Sie:
Je mehr Programme in der elektronischen Programmzeitschrift aufgenommen werden, desto länger dauert der
Einlesevorgang der SFI-Daten!
Ebenso kann die maximale Vorausschau von 7 Tagen mit
zunehmender Programmanzahl in der elektronischen
Programmzeitschrift nicht erreicht werden.
>
Drücken Sie die Taste OK. Es erscheint die
Favoritenliste des angewählten Bereichs (Radio oder
TV). Das momentan eingestellte Programm ist
markiert. (Bild 8-8)
>
Durch Drücken der grünen Funktionstaste schalten
Sie zwischen der TV- und Radioliste um.
>
Durch Drücken der roten Funktionstaste erscheint
ein Auswahlfenster. Sie haben hier die Möglichkeit,
den gewünschten Programmlistentyp zu wählen.
>
Wählen Sie mit Hilfe der Pfeiltasten auf/ab den
gewünschten Programmlistentyp aus
(z.B. Favoritenliste).
>
Bestätigen Sie mit OK. Es erscheint die gewählte
Programmliste.
41
(Bild 8-8)
>
Markieren Sie mit den Pfeiltasten ein Programm,
das Sie in die elektronische Programmzeitschrift
aufnehmen möchten.
>
Durch Drücken der gelben Funktionstaste SFI wird
das markierte Programm in die elektronische
Programmzeitschrift aufgenommen.
>
Um mehrere Programme gleichzeitig in die
elektronische Programmzeitschrift aufzunehmen,
markieren Sie diese wie in 8.1.2 (Blockweises
Markieren) beschrieben.
>
Nachdem Sie auf diese Weise die gewünschten
Programme markiert haben, drücken Sie die gelbe
Funktionstaste SFI, um die markierten Programme in
die elektronische Programmzeitschrift aufzunehmen.
>
Durch Drücken der Taste Menü kehren Sie in den
Normalbetrieb zurück.
Nun können Sie den Einlesevorgang manuell starten:
>
Schalten Sie das Gerät mit Hilfe der Taste
Ein/Standby aus (Standby).
>
>
Drücken Sie nun, während im Display “oooo”
erscheint, die Taste SFI.
Das Gerät führt nun den Einlesevorgang aus. Dieses
wird durch die Meldung SFLd gefolgt von der Anzeige
der bereits eingelesenen SFI-Daten im Display
angezeigt.
Der Einlesevorgang kann durch das Einschalten
(Taste Ein/Standby) des Digital-Receivers
unterbrochen werden.
8.2.2 Startkategorie
Die elektronische Programmzeitschrift verfügt über
verschiedene Darstellungsarten (Kategorien).
Überblick
Diese Darstellungsart bietet Ihnen einen raschen Überblick
über alle in die elektronische Programmzeitschrift
aufgenommenen Programme.
Programme
Bei dieser Darstellungsart wird eine Tafel mit dem
Tagesprogramm eines einzelnen Programms angezeigt.
Genres
Wenn Sie sich für bestimmte Programmarten interessieren,
können Sie sich die Programminformationen nach
bestimmten Genres z.B. Film, Nachrichten, usw. anzeigen
lassen.
Zuletzt genutzte
Bei dieser Einstellung wird beim Aufruf des SFI immer die
zuletzt genutzte Darstellungsart eingestellt.
42
Stellen Sie in dieser Zeile mit den Pfeiltasten
rechts/links die Darstellungsart ein, die beim Aufruf
der elektronischen Programmzeitschrift erscheinen
soll.
>
Wenn Sie Genres wählen, können Sie mit den
Pfeiltasten zusätzlich das bevorzugte Genre
(z.B. Film, Nachrichten, Show, etc.) auswählen.
DE
>
8.2.3 Aktualisierungszeit
>
Stellen Sie in der Zeile Aktualisierungszeit mit
Hilfe der Zehnertastatur die Zeit ein, zu der der
automatische Download der SFI-Daten erfolgen soll.
8.2.4 Aktualisierung
>
Um den Datenkanal zu empfangen, markieren Sie die
Zeile Aktualisierung.
>
Stellen Sie durch Drücken von OK an ein.
Sollten Sie den Empfang der zusätzlichen Daten nicht
wünschen bzw. standortbedingt nicht empfangen können,
kann der Datenempfang abgeschaltet werden:
>
Stellen Sie die Aktualisierung auf aus, um den
Datenempfang auszuschalten.
8.2.5 SFI-Kanal
>
Drücken Sie die Taste OK, um das Untermenü SFI
Kanal (Bild 8-9) aufzurufen.
>
Um die Aktualisierung der SFI-Daten manuell zu starten, betätigen Sie die rote Funktionstaste Jetzt
starten.
Sollten sich die Parameter des Datenkanals zum Laden der
SFI-Liste geändert haben, können Sie diese in diesem Menü
korrigieren. Die aktuellen Transponderdaten können Sie beim
Fachhandel erfahren. Im Normalfall sollten Sie in diesem
Menü keine Umstellung vornehmen.
8.3 Jugendschutz
Ihr Gerät ist mit einer Kindersicherung ausgestattet. Dadurch
können wichtige Funktionen (z.B der Aufruf des Hauptmenüs)
vor unbefugter Benutzung gesichert werden. Weiterhin
können Programme und Aufnahmen, die Sie gesperrt haben,
nur noch durch die Eingabe eines vierstelligen PIN-Codes
(Geräte-PIN) eingestellt werden.
Zum Bearbeiten des Menüs Jugendschutz gehen sie wie
folgt vor:
>
Rufen Sie mit der Taste Menü das Hauptmenü auf.
>
Markieren Sie die Zeile Einstellungen mit Hilfe der
Pfeiltasten auf/ab.
43
(Bild 8-9)
>
Bestätigen Sie durch Drücken der Taste OK.
Es erscheint das Untermenü Einstellungen.
>
Markieren Sie die Zeile Jugendschutz mit Hilfe der
Pfeiltasten auf/ab.
>
Bestätigen Sie durch Drücken der Taste OK.
Es erscheint das Menü Jugendschutz. (Bild 8-10)
>
Mit den Pfeiltasten auf/ab können Sie den Marker
innerhalb des Menüs bewegen und wie angegeben
die einzelnen Positionen verändern. Beachten Sie bei
der Auswahl eines Menüpunktes ggf. auch die
Bildschirmeinblendungen.
(Bild 8-10)
8.3.1 Sender auswählen
(Bild 8-11)
>
Drücken Sie die Taste OK. Es erscheint die
Favoritenliste des angewählten Bereichs (Radio oder
TV). Das momentan eingestellte Programm ist
markiert. (Bild 8-11)
>
Durch Drücken der grünen Funktionstaste schalten
Sie zwischen der TV- und Radioliste um.
>
Durch Drücken der roten Funktionstaste erscheint
ein Auswahlfenster. Sie haben hier die Möglichkeit,
den gewünschten Programmlistentyp zu wählen.
>
Wählen Sie mit Hilfe der Pfeiltasten auf/ab den
gewünschten Programmlistentyp aus
(z.B. Favoritenliste).
>
Bestätigen Sie mit OK. Es erscheint die gewählte
Programmliste.
>
Markieren Sie nun mit Hilfe der Pfeiltasten das
Programm, das Sie sperren möchten.
>
Durch Drücken der gelben Funktionstaste sperren
Sie das Programm. Es erscheint das Kindersicherungssymbol
neben dem angewählten Programm.
>
Um mehrere Programme gleichzeitig zu sperren,
markieren Sie diese wie in 8.1.2 (Blockweises
Markieren) beschrieben und sperren diese durch
Drücken der gelben Funktionstaste.
>
Nachdem Sie auf diese Weise die Programmliste
Ihren Wünschen entsprechend konfiguriert haben,
kehren Sie durch Drücken der Taste Menü in den
Normalbetrieb zurück.
>
Um die Sperre einzelner Programme aufzuheben,
verfahren Sie wie oben beschrieben. Markieren Sie
das entsprechende Programm und entfernen Sie das
Kindersicherungssymbol durch Drücken der gelben
Funktionstaste.
44
DE
8.3.2 Geräte-PIN ändern
Der Geräte PIN-Code ist ab Werk auf 0000 eingestellt.
>
Drücken Sie die Taste OK. Es erscheint das Menü
zum Ändern des Geräte-PIN-Codes. (Bild 8-12)
>
Geben Sie nun mittels Zehnertastatur den
aktuellen Geräte PIN-Code ein.
(Werkseinstellung 0000)
>
Geben Sie den gewünschten neuen Geräte PIN-Code
mit der Zehnertastatur ein.
>
Wiederholen Sie die Eingabe.
>
Nachdem Sie auf diese Weise den Geräte PIN-Code
geändert haben, gelangen Sie automatisch zurück
zum Menü Jugendschutz.
Achtung!
Sie dürfen den Geräte PIN-Code nicht vergessen. Ist dieses
doch einmal der Fall, wenden Sie sich bitte an Ihren
Fachhändler!
8.3.3 Modus
>
Schalten Sie die Kindersicherung in dieser Zeile mit
Hilfe der Pfeiltasten rechts/links an oder aus.
8.4 Programmsuche
Beachten Sie bitte:
Welche digitalen Programme Sie mit Ihrem Receiver empfangen können, hängt davon ab in welchem Kabelnetz der
Receiver betrieben wird. Informationen dazu stellt Ihnen Ihr
Kabelnetzbetreiber zur Verfügung.
Damit Ihr Receiver die in Ihrem Kabelnetz vorhandenen digitalen Programme wiedergeben kann, müssen Sie einen
Programmsuchlauf durchführen. Dazu haben Sie folgende
Möglichkeiten:
1. Automatische Suche
Wählen Sie diesen Suchlauf, um den gesamten
Empfangsfrequenzbereich des Receivers nach Programmen
abzusuchen.
2. Erweiterte Suche
Wählen Sie diesen Suchlauf, um einen bestimmten
Frequenz- bzw. Kanalbereich nach Programmen abzusuchen
oder um eine Netzwerksuche durchzuführen.
3. Manuelle Suche
Wählen Sie diesen Suchlauf, um gezielt eine bestimmte
Frequenz nach Programmen abzusuchen.
45
(Bild 8-12)
Nach dem Suchlauf erscheint eine Meldung auf dem
Bildschirm mit der Angabe, wie viele Programme Ihr Receiver
gefunden hat, wie viele davon neu hinzugekommen sind und
wie viele verschlüsselt sind. Neue Programme werden in der
Gesamtliste gespeichert und können dann nach Punkt 8.1 in
die Favoritenliste aufgenommen werden.
(Bild 8-13)
(Bild 8-14)
>
Rufen Sie zur Programmsuche zunächst das
Hauptmenü auf. (Bild 8-13)
>
Markieren Sie mit Hilfe der Pfeiltasten auf/ab die
Zeile Sender suchen.
>
Bestätigen Sie mit OK.
Es erscheint das Untermenü Sender Suchen.
(Bild 8-14)
>
Markieren Sie nun mit Hilfe der Pfeiltasten auf/ab
die Suchlaufmethode, die Sie ausführen möchten und
bestätigen Sie mit OK.
8.4.1 Automatische Suche
Bei diesem Suchlauf wird automatisch der gesamte
Empfangsfrequenzbereich des Receivers nach Programmen
abgesucht. Hierbei können Sie entscheiden, ob Sie alle (freie
und verschlüsselte) Sender oder nur freie Sender suchen
möchten. (Bild 8-15)
>
Entscheiden Sie durch Drücken der Taste OK, ob Sie
nur frei empfangbare Programme (Freie Sender)
oder auch verschlüsselte Programme (Alle Sender)
suchen wollen.
>
Bestätigen Sie durch Drücken der roten
Funktionstaste Suche Starten.
Der Suchlauf kann über 15 Minuten in Anspruch nehmen. Beachten Sie auch die Bildschirmeinblendungen.
(Bild 8-15)
8.4.2 Erweiterte Suche/Bereichssuche
Bei der Erweiterten Suche/Bereichssuche haben Sie zwei
Möglichkeiten eine Programmsuche durchzuführen.
1. Frequenzsuche
Bei der Frequenzsuche wird ein vom Benutzer festgelegter
Frequenzbereich nach Programmen abgesucht.
(Bild 8-16)
2. Kanalsuche
Bei der Kanalsuche (Bild 8-16) wird ein durch den Benutzer
festgelegter Kanalbereich nach Programmen abgesucht. Die
Kanalsuche ist schneller als die Frequenzsuche.
>
Drücken Sie die Taste OK, um eine Auswahltafel mit
den zur Verfügung stehenden Suchlaufmöglichkeiten
zu öffnen.
46
Markieren Sie mit Hilfe der Pfeiltasten auf/ab die
Suchlaufmethode, die Sie durchführen möchten.
>
Bestätigen Sie mit OK.
>
Markieren Sie mit den Pfeiltasten auf/ab das Feld
Startkanal bzw. Startfrequenz (nur bei
Frequenz- oder Kanalsuche). Beachten Sie, dass der
Startkanal bzw. die Startfrequenz niedriger sein muss,
als der Stoppkanal bzw. die Stoppfrequenz.
>
Wählen Sie mit den Pfeiltasten rechts/links den
Startkanal bzw. geben Sie mit den Zifferntasten
die Startfrequenz ein (nur bei Frequenz- oder
Kanalsuche).
>
Markieren Sie mit den Pfeiltasten auf/ab das Feld
Stoppkanal bzw. Stoppfrequenz und verfahren
Sie wie zuvor beschrieben um den Stoppkanal bzw.
die Stoppfrequenz einzugeben (nur bei Frequenzoder Kanalsuche).
Unterhalb der Zeile Symbolraten sehen Sie eine Liste der
Symbolraten, die bei einem Suchlauf berücksichtigt werden.
Um bei einem Suchlauf zusätzliche Symbolraten zu berücksichtigen, können Sie diese Liste wie folgt bearbeiten:
>
Um neue Symbolraten hinzuzufügen, wählen Sie mit
den Pfeiltasten auf/ab die Zeile Symbolraten
Neu und bestätigen Sie mit OK (nur bei Frequenzoder Kanalsuche).
>
Geben Sie nun mit den Zifferntasten eine neue
Symbolrate ein und bestätigen Sie mit OK (nur bei
Frequenz- oder Kanalsuche).
Die neu eingegebene Symbolrate wird am Ende der
Liste eingefügt.
>
Um die an letzter Stelle der Liste stehende
Symbolrate aus der Liste zu löschen, wählen Sie mit
den Pfeiltasten auf/ab die Zeile löschen und drücken
anschließend die Taste OK (nur bei Frequenz- oder
Kanalsuche).
In der Zeile Suchmodus können Sie entscheiden,
ob Sie nur frei empfangbare Programme oder auch
verschlüsselte Programme suchen wollen
>
Markieren Sie dazu mit den Pfeiltasten auf/ab die
Zeile Suchmodus und entscheiden Sie durch Drücken
der Taste OK, ob Sie nur frei empfangbare
Programme (Nur Freie) oder auch verschlüsselte
Programme (Alle) suchen wollen.
>
Betätigen Sie die rote Funktionstaste Suche
Starten um den Suchlauf zu starten.
Der Suchlauf wird gestartet. Beachten Sie bitte weitere Meldungen auf dem Bildschirm.
47
DE
>
>
Durch Drücken der roten Funktionstaste können Sie
den Suchlauf abbrechen.
Der Suchlauf kann über 15 Minuten in Anspruch nehmen.
Beachten Sie auch die Bildschirmeinblendungen.
8.4.3 Manuelle Suche
Sie können gezielt eine Frequenz (siehe Punkt 9 Technische
Begriffe) nach Programmen absuchen (Bild 8-17). Dazu ist es
erforderlich, folgende Daten einzugeben:
Kanalfrequenz
Geben Sie in dieser Zeile die Frequenz ein, auf der sich die
gewünschten Programme befinden.
>
Markieren Sie dazu die Zeile Kanalfrequenz mit
Hilfe der Pfeiltasten auf/ab.
>
Geben Sie mit Hilfe der Zehnertastatur die
gewünschte Frequenz ein.
(Bild 8-17)
Symbolrate
Geben Sie in dieser Zeile ein, mit welcher Symbolrate die
Programme gesendet werden.
>
Markieren Sie mit Hilfe der Pfeiltasten auf/ab die
Zeile Symbolrate.
>
Geben Sie in dieser Zeile mit Hilfe der Zehnertastatur die gewünschte Symbolrate ein.
Modulation
In dieser Zeile geben Sie das verwendete
Modulationsverfahren ein.
>
Markieren Sie mit Hilfe der Pfeiltasten auf/ab die
Zeile Modulation.
>
Betätigen Sie (evtl. mehrmals) die Taste OK um das
verwendete Modulationsverfahren einzugeben.
>
Bestätigen Sie durch Drücken der roten
Funktionstaste Suche starten. Der Suchlauf wird
gestartet. Beachten Sie bitte weitere Meldungen auf
dem Bildschirm.
>
Durch erneutes Drücken der roten Funktionstaste
können Sie den Suchlauf abbrechen.
Um gezielt ein Programm zu suchen, steht Ihnen die PIDSuche zur Verfügung.
>
Drücken Sie die grüne Funktionstaste PID-Suche.
>
Markieren Sie anschließend die Zeilen PCR-PID,
Audio-PID und Video-PID mit Hilfe der
Pfeiltasten auf/ab und geben Sie mit Hilfe der
Zehnertastatur die entsprechenden Nummern ein.
>
Starten Sie die Suche durch Drücken der roten
Funktionstaste Suche starten.
48
Schon während des Suchlaufs kann das Absuchen der
Transponder auf dem Bildschirm mit verfolgt werden. Nach
Beendigung des Suchlaufs wird die Anzahl der gefundenen
Transponder, der gefundenen Programme und der gefundenen neuen Programme angezeigt. Zusätzlich erscheint der
Hinweis (Bild 8-18), ob Sie die gefundenen Programme
automatisch in die TV- oder Radioliste übernehmen möchten.
Wenn Sie die Programme automatisch übernehmen wollen,
können Sie entscheiden, ob diese sortiert oder unsortiert in die Favoritenliste übernommen werden sollen.
Sortiert
Die gefundenen Programme werden anhand einer vorprogrammierten Liste in die Favoritenliste einsortiert. Dabei richtet sich die Reihenfolge der Programme nach der in Punkt
6.3.2 eingestellten Audiosprache bzw. des in Punkt 6.2.2 eingestellten Landes.
Unsortiert
Die neu gefundenen Programme werden unsortiert an das
Ende der Favoritenliste angehängt.
Nein
Die neu gefundenen Programme werden nicht in die
Favoritenliste übernommen, sondern nur in die Gesamtliste.
>
Wählen Sie mit den Pfeiltasten rechts/links aus,
ob Sie die Programme sortiert oder unsortiert
übernehmen möchten.
>
Bestätigen Sie mit OK.
Beachten Sie dabei weitere Bildschirmeinblendungen.
>
Durch Drücken der Taste Menü kehren Sie zum
Normalbetrieb zurück.
>
Unabhängig davon, ob Sie die gefundenen
Programme automatisch in die Favoritenliste übernommen haben, können diese weiterhin, wie in
Kapitel 8.1 beschrieben, manuell in die Favoritenlistenliste aufgenommen werden.
>
Durch Drücken der Taste Menü kehren Sie zum
Normalbetrieb zurück.
49
DE
8.4.4 Nach dem Suchlauf
(Bild 8-18)
8.5 Service-Einstellungen
(Bild 8-19)
(Bild 8-20)
Sie können jederzeit wieder auf die werkseitigen
Einstellungen zurückgreifen. Ebenso können Sie, falls die
Programmliste durch Änderungen der Programmanbieter
veraltet ist, diese komplett löschen, um dann einen neuen
Suchlauf auszuführen. Beachten Sie, dass Sie nach der
Ausführung der Löschfunktion zunächst einen Suchlauf
starten und anschließend die gewünschten Programme aus
der Gesamtliste in die Favoritenliste kopieren müssen.
>
Rufen Sie mit der Taste Menü das Hauptmenü auf.
(Bild 8-19)
>
Wählen Sie nun die Menüzeile Einstellungen,
indem Sie diese mit Hilfe der Pfeiltasten auf/ab
markieren.
>
Bestätigen Sie mit OK.
Es erscheint das Untermenü Einstellungen.
(Bild 8-20)
>
Markieren Sie nun die Menüzeile ServiceEinstellungen mit Hilfe der Pfeiltasten auf/ab.
>
Bestätigen Sie mit OK.
Es erscheint das Untermenü ServiceEinstellungen. (Bild 8-21)
8.5.1 Werkseinstellung aktivieren
Nach Aufruf dieser Funktion wird wieder die werkseitige
Programmierung eingestellt, eigene Einstellungen werden
gelöscht und der Installationsassistent AutoInstall wird
gestartet.
>
Markieren Sie mit Hilfe der Pfeiltasten auf/ab die
Zeile Werkseinstellung aktivieren.
>
Drücken Sie dieTaste OK.
Es erscheint die Meldung “Werkseinstellung wirklich
aktivieren?”.
>
Markieren Sie mit den Pfeiltasten links/rechts Ja
oder Abbrechen.
>
Bestätigen Sie die Eingabe mit OK.
(Bild 8-21)
8.5.2 Alle Programme löschen
Durch diese Funktion werden die Programmspeicher
komplett gelöscht.
>
Markieren Sie mit Hilfe der Pfeiltasten auf/ab die
Zeile Alle Programme löschen.
>
Drücken Sie die Taste OK. Es erscheint die Meldung
“Wirklich alle Programme löschen?”.
50
Markieren Sie mit den Pfeiltasten links/rechts
Ja oder Abbrechen.
>
Bestätigen Sie die Eingabe mit OK.
DE
>
8.5.3 Software aktualisieren
Desweiteren haben Sie die Möglichkeit die Betriebssoftware
Ihres Digital-Receivers über Kabel zu aktualisieren (Update).
>
Durch Drücken der Taste OK gelangen Sie in das
Untermenü Software aktualisieren (Bild 8-22).
Um ein Software-Update durchzuführen, markieren
Sie die Zeile Aktualisierung.
>
Stellen Sie die Software-Aktualisierung mit der Taste
OK auf an.
>
Stellen Sie in der Zeile Aktualisierungszeit mit
Hilfe der Zehnertastatur die Zeit ein, zu der die
Software-Aktualisierung erfolgen soll.
>
Um die Aktualisierung der Betriebssoftware manuell
zu starten, betätigen Sie die rote Funktionstaste
Testen.
Durch Drücken der Taste Menü kehren Sie zum
Normalbetrieb zurück.
Sollten sich die Parameter des Datenkanals zum
Downloaden des Software-Updates geändert haben, können
Sie diese in diesem Menü wie unter Punkt 8.4.3 (manuelle
Programmsuche) korrigieren. Die aktuellen Kanaldaten können Sie beim Fachhandel erfahren. Im Normalfall sollten Sie
in diesem Menü keine Umstellung vornehmen.
Achtung:
Damit die neue Software automatisch geladen
werden kann, muss sich der Digital-Receiver im
Standby-Betrieb befinden. Der Ladevorgang wird
durch die Anzeige “CAbL” bzw. “CAb0” bis “CAb9”
angezeigt. Dieser Vorgang darf nicht z.B. durch
Ein- oder Ausschalten des Gerätes gestört werden.
Unabhängig davon, ob Sie die automatische SoftwareAktualisierung ein- oder ausgeschaltet haben, wird beim
Einschalten des Gerätes automatisch überprüft, ob eine neue
Betriebssoftware für Ihren Digital-Receiver zur Verfügung
steht. Ist eine neue Betriebssoftware verfügbar, wird dies
durch eine Meldung (Bild 8-23) auf dem Bildschirm
angezeigt.
Um die Aktualisierung der Software (Update) zu starten,
befolgen Sie die Anweisungen auf dem Bildschirm.
(Bild 8-22)
>
51
(Bild 8-23)
8.5.4 Einstellungen kopieren
Sie haben die Möglichkeit sämtliche Einstellungen wie die
Programmliste usw. Ihres Digital-Receivers (Sender) auf
einen anderen Digital-Receiver (Empfänger) gleichen Typs
und gleichem Stand der Betriebssoftware zu kopieren.
(Bild 8-24)
(Bild 8-24)
>
Verbinden Sie dazu die beiden Geräte mit einem
Nullmodemkabel.
>
Schalten Sie den (Empfänger-) Receiver ein.
>
Betätigen Sie zum Kopieren der Einstellungen eine
Gerätetaste des (Sende-) Receivers.
Die Einstellungen des Sendereceivers werden nun
zum Empfangsreceiver übertragen. Beachten Sie
dabei bitte die Bildschirmeinblendungen.
8.6 Systemkonfiguration
Unter diesem Menüpunkt können Sie die spezifischen
Gerätedaten (wie z.B. aktuelle Software Version) ersehen.
>
Markieren Sie diese Zeile im Untermenü
Einstellungen mit Hilfe der Pfeiltasten auf/ab.
>
Bestätigen Sie mit OK.
>
Durch Drücken der Taste Menü kehren Sie zum
Normalbetrieb zurück.
8.7 Verschlüsselungssystem
Unter diesem Menüpunkt gelangen Sie in die Untermenüs der
eingelegten imagin-Smartcard und des CI-Moduls. Indem Sie
die Smartcard oder den CI-Steckplatz mit den Pfeiltasten
anwählen und mit OK bestätigen, können Sie Informationen
über die verwendete Smartcard oder das verwendete CIModul abrufen.
Manuelle Initialisierung des CI-Moduls
>
Durch Drücken der roten Funktionstaste CI Reset
können Sie das CI-Modul manuell initialisieren.
52
Antennenkabel:
Verbindungskabel zwischen dem Modulator des Receivers
und Antenneneingang des Fernsehers, als Alternative, falls
keine SCART-Buchse vorhanden ist
AV: siehe SCART
CATV:
Abkürzung für Community Antenna Television. Empfang von
Rundfunk- und Fernsehprogrammen über eine
Gemeinschaftsantenne. Bei Kabelfernsehnetzen international
angewandt als cable television oder Breitbandkabelnetze.
Datenkompression/MPEG1/MPEG2:
Zur Übertragung des heutigen Fernsehstandards (625 Zeilen
und 50 Hz Bildwiederholfrequenz), ergibt sich eine digitale
Datenmenge von 216 MBit/s. Dieses würde Bandbreiten
erfordern, die weder terrestrisch noch bei Kabel zur
Verfügung stehen. Daher wird eine Reduzierung der
Datenmenge durch Datenreduktion vorgenommen. Für
Europa ist MPEG-2 als weltweiter Standard für
Datenkompression festgelegt worden. MPEG2 ist eine
Erweiterung von MPEG1
DVB:
Digital Video Broadcasting: Eine digitale, universale Übertragungstechnik, für Bild, Grafik, Ton und Text, also für Daten in
jeder denkbaren Form und in jeder möglichen, jeweils angemessenen Qualität.
Frequenz:
Physikalische Größe, gibt die Anzahl der Schwingungen pro
Sekunde an, Einheit ist das Hertz (Hz)
Kanal:
Teil eines Frequenzbandes, der nach einem bestimmten
Aufteilungsverfahren zugestellt wird. Ein TV-Kanal besteht
aus zwei Frequenzen, eine für den visuellen und eine für den
auditiven Inhalt. Jeder Kanal wird mit einem numerischen
Kürzel gekennzeichnet (ausgenommen die europäischen
Fernsehkanäle, die auf dem Frequenzband 40-230 MHz
abgestrahlt werden, und die mit Buchstaben gekennzeichnet
sind).
Koaxialkabel:
Verbindungskabel zwischen Antennensteckdose und
Kabelreceiver, zur Übertragung der empfangenen Signale.
Kabelreceiver:
Die digitalen Signale des Kabelnetzes können vom
Fernseher nicht verarbeitet werden. Sie werden im
Kabelreceiver so aufbereitet, dass an seinen Ausgängen
Audio- und Videosignale (AV) zur Verfügung stehen, die an
den Fernseher weitergegeben werden.
53
DE
9 Technische Begriffe
QAM:
Quadratur-Amplituden-Modulation: Modulationsverfahren mit
Phasenumtastung zur Übertragung digitaler Signale in
Kabelnetzen.
Signal:
Allgemeine Bezeichnung für Daten, für eine Information einen
Ton oder ein Bild, dessen Inhalt elektrisch verändert wird um
über Entfernungen übertragen werden zu können, oder um
verschiedene Apparate miteinander verbinden zu können.
SCART:
Steckverbinder an Fernsehern, Videorecordern, Receivern
und anderen Geräten der Unterhaltungselektronik zur Übertragung von Audio-(Ton) und Video-(Bild) Signalen (AV).
Software-Update:
Beim digitalen Fernsehen handelt es sich um ein neues
Medium, welches neben einer verbesserten Bild- und
Tonqualität auch die Möglichkeit bietet interaktive Dienste
bereitzustellen. Diese neuen Dienste werden von den
Programmanbietern ständig weiterentwickelt und verbessert.
Um diese Dienste nutzen zu können, kann es daher erforderlich sein, die Software des Receivers zu aktualisieren.
Verschlüsselung:
Durch die Verschlüsselung von Programmen wird mit Hilfe
eines techni-schen Verfahrens erreicht, dass diese nur einem
begrenzten Zuschauer- bzw. Zuhörer- kreis zugänglich sind.
Hierfür kommen verschiedene Systeme zum Einsatz, darunter Irdeto, Cryptoworks, Seca, Viaccess etc..
10 Technische Daten
Kabel-Tuner:
Eingangsfrequenzbereich
Eingangspegelbereich
Tuner Eingang
Eingangsimpedanz
Tuner-Ausgang
Demodulation
Symbolrate
FEC
Kartenleser:
Typ
Common Interface:
Typ
Stromverbrauch
Demultiplexing:
54
51 .... 858 MHz
47 dBµV ... 70 dBµV
IEC-Stecker (weiblich)
75 Ohm
IEC-Stecker (männlich)
16/32/64/128/256 QAM
1 ... 7 Mbaud/s
Reed-Solomon
1 Slot Kartenleser für integriertes
CA-System
1 Common Interface Steckplatz für
CI-Module
max. 0,3A/5V
gemäß ISO 13818-1
Videostandard
Aktive Bildfläche
Bildformat
Bildmaterial 16:9
Audiodekodierung:
Audiokompression
Audio Mode
Abtastfrequenzen
Audio-Parameter:
Ausgang analog:
Ausgangspegel L/R
Ausgangsimpedanz
THD
S/N
Übersprechen
Eingang analog:
Eingangspegel l/r
Eingangsimpedanz
Einschaltlautstärke
Ausgang digital:
SP/DIF-Ausgang
Video-Parameter:
Ausgang:
Ausgangspegel FBAS
Ausgangspegel Y
Ausgangspegel C
Ausgangspegel ROT
Ausgangspegel GRÜN
Ausgangspegel BLAU
S/N bewertet
Videotext:
Teletext Filterung
Eintastung Teletextdaten
Soft-Videotext
TV-SCART:
Ausgang:
MPEG-2 und MPEG-1 kompatibel
Bis zu MP@ML
(main profile @ main level)
PAL / 25 Hz
720 Pixel x 576 Zeilen
4 : 3 / 16 : 9
Automatische Anpassung für 16:9
TV-Geräte (über SCART)
Letterbox Filterung für 4:3 TVGeräte
MPEG-1 & MPEG-2 Layer I und II
Dual (main/sub), Stereo
32 kHz, 44.1 kHz, 48 kHz
0,5 V r.m.s. (nominal)
600 Ohm
> 60 dB ( 1 kHz )
> 60 dB
< -65 dB
0,5 V r.m.s. (nominal)
> 40 kOhm
Automatische Übernahme der
zuvor eingestellten Lautstärke
elektrisch, Cinch-Buchse
optisch, Toslink
Dolby Digital AC3
1 Vs-s +/- 0.3 dB an
1 Vs-s +/- 0.3 dB an
1 Vs-s +/- 0.3 dB an
0,7 Vs-s +/- 0.1Vp-p
0,7 Vs-s +/- 0.1Vp-p
0,7 Vs-s +/- 0.1Vp-p
> 60 dB
75
75
75
an
an
an
Ohm
Ohm
Ohm
75 Ohm
75 Ohm
75 Ohm
entsprechend ETS 300 472
Standard
(FBAS) entsprechend ITU-R
BT.653-2 Zeilen: 6-22 und 320335
800 Seiten Speicher
FBAS, RGB oder S-Video
55
DE
Videodekodierung:
Videokompression
VCR-SCART:
Eingang:
Ausgang:
Display:
LED
Serielle Schnittstelle
Typ
Bitrate
Steckverbinder
Funktion
FBAS; RGB oder S-Video
FBAS oder S-Video
4 stellige 7-Segment-Anzeige
RS 232:
RS 232, bidirectional
115,2 kBit/s max.
D-SUB-Buchse, 9 polig
Update f. Betriebssoftware u.
Vorprogrammierung
Programmspeicher:
Programm-Anzahl Favoritenliste TV:
999 TV-Programme
Programm-Anzahl Favoritenliste Radio:
999 RADIO-Programme
Programm-Anzahl:
Gesamtliste TV/Radio:
Insgesamt 5000 Programme in
Gesamtliste möglich
SFI-Daten:
SFI Vorschau:
maximal 7 Tage im Voraus
Timer:
Ereignisse:
maximal 30 Ereignisse, ein Jahr im
Voraus
Fernbedien-System: RC-5
Subsystemadresse
8 (SAT 1), 10 (SAT 2)
Modulationsfrequenz
36 kHz
Infrarot Wellenlänge
950 nm
Stromversorgung:
Schaltnetzteil:
Leistungsaufnahme:
3,0 W
in Standby-Mode (Uhr aus)
3,4 W
in Standby-Mode (Uhr an)
10 W
in Betrieb
Nennspannung:
230 V / 50 Hz Wechselspannung
Eingangsspannung:
180 V.... 250 V / 50 Hz Wechselspannung
Allgemeines:
Abmessungen (BxTxH): 285 mm x 133 mm x 40 ... 43 mm
Gewicht:
ca. 490 g
56
Fehler
DE
11 Fehlersuchhilfen
Mögliche Ursache
Abhilfe
Div. Programme werden in der
Programmliste nicht angezeigt
Falsche Programmliste angewählt
Andere Programmliste anwählen
(siehe Punkt 7.2.3.1)
Ton OK, kein TV- Bild
Radiobetrieb eingeschaltet
Auf TV-Betrieb umstellen
Gerät lässt sich nicht bedienen
Defekter Datenstrom-->Gerät blockiert
Netzstecker für ca. 5 Sekunden ziehen, anschließend Gerät wieder einschalten
Fernbedienung funktioniert nicht
Batterien sind leer
Batterien austauschen
Falsche Fernbedienoption eingestellt
Fernbedienoption ändern (siehe
Punkt 2 und 6.2.3)
Im Standby-Betrieb wird die Uhrzeit
nicht angezeigt
Uhrzeit nicht eingelesen
ca. 30 Sek. auf z.B. ZDF laufen lassen
Kein Bild, kein Ton,
Display leuchtet nicht
Keine Netzspannung
Netzkabel und Stecker prüfen
Kein Empfang bei Programmen, die
vorher in Ordnung waren
Programm wird auf einem anderen
Kanal übertragen
Suchlauf vornehmen (siehe Punkt
8.4)
Programm wird nicht mehr übertragen
keine
Gerät blockiert
Flash-Reset durchführen: Achtung!
Dabei gehen alle persönlichen
Einstellungen verloren.
>
Netzstecker ziehen.
>
Programm auf-und Programm
ab-Taste am Gerät gleichzeitig
drücken und gedrückt halten.
>
bei gedrückter Programm aufund Programm ab-Taste Netzstecker wieder einstecken.
>
Tasten ca. 5 Sek. gedrückhalten bis die Anzeige* “FLAS”
erscheint.
Gerät lässt sich nicht einschalten
bzw. nicht bedienen
57
Für den täglichen Gebrauch
Ein- und Ausschalten
>
>
Schalten Sie den Digital-Receiver durch Drücken der
Taste Ein/Standby auf der Fernbedienung oder am
Gerät ein.
Durch nochmaliges Drücken dieser Taste schalten Sie
das Gerät wieder aus.
Programmwahl
Mit Hilfe der Programm auf/ab-Tasten
>
Schalten Sie die Programme mit Hilfe der
Programmtasten auf/ab auf der Fernbedienung
oder am Gerät jeweils um einen Programmplatz auf
oder ab.
Mit Hilfe der Zehnertastatur
>
Geben Sie mit Hilfe der Zehnertastatur die
gewünschte Programmnummer ein. Zum Beispiel:
1
für Programmplatz 1
1,
dann 4
für Programmplatz 14
2,
dann 3,
dann 4
für Programmplatz 234
Bei der Eingabe von mehrstelligen Programmnummern haben
Sie jeweils nach dem Drücken einer Taste ca. 3 Sekunden
Zeit, um die Eingabe zu vervollständigen.
Wollen Sie nur eine einstellige beziehungsweise zweistellige
Zahl eingeben, so können Sie den Umschaltvorgang durch
längeres Gedrückthalten der letzten Ziffer beschleunigen.
Mit Hilfe der Programmliste
>
Drücken Sie die Taste OK.
>
Nun können Sie mit den Pfeiltasten auf/ab das
gewünschte Programm markieren.
>
Durch Drücken der Taste OK wird das markierte
Programm eingestellt.
>
Mit den Pfeiltasten auf/ab bewegen Sie den
Marker jeweils um eine Zeile in der Liste.
>
Mit den Pfeiltasten links/rechts wird die Liste
komplett umgeblättert.
Lautstärkeregelung
>
>
Regeln Sie die Lautstärke Ihres Digital-Receivers mit
Hilfe der Taste Lautstärke + lauter und mit Hilfe der
Taste Lautstärke - leiser.
Durch Drücken der Taste Ton ein/aus wird der Ton
aus- bzw. eingeschaltet.
TV/Radio-Umschaltung
>
Durch Drücken der Taste TV/Radio schalten Sie zwischen TV- und Radio-Betrieb um.
58
EN
DIGIT MF4-K CC
With integrated decoding system and PCMCIA
interface for insertion of a CI module.
For reception of unencrypted and encrypted
cable channels.
1 Contents
1
Contents . . . . . . . . . . . . . . . . . . . . .2
2
Illustrations . . . . . . . . . . . . . . . . . . .5
3
Please read this first . . . . . . . . . . .8
Important notes on operation . . . . . . . . . . . .8
Disposal advice . . . . . . . . . . . . . . . . . . . . . .9
Safety advice . . . . . . . . . . . . . . . . . . . . . . . .9
Breaks in operation . . . . . . . . . . . . . . . . . . .9
4
4.1
4.2
4.3
4.4
4.4.1
4.4.2
4.5
4.6
Connections . . . . . . . . . . . . . . . . .11
Connection to the cable network . . . . . . . .11
Connection to a television set . . . . . . . . . .11
Video cassette recorder (VCR) . . . . . . . . .11
Hi-fi amplifier . . . . . . . . . . . . . . . . . . . . . . .11
Analogue . . . . . . . . . . . . . . . . . . . . . . . . . .11
Digital . . . . . . . . . . . . . . . . . . . . . . . . . . . . .12
Serial interface (RS 232) . . . . . . . . . . . . . .12
Mains power connection . . . . . . . . . . . . . .12
5
Initial installation . . . . . . . . . . . . .12
6
6.1
6.2
6.2.1
6.2.2
6.2.3
6.2.4
6.3
6.3.1
6.3.2
6.3.3
6.3.4
6.3.5
6.3.6
Settings . . . . . . . . . . . . . . . . . . . . .15
Operating language . . . . . . . . . . . . . . . . . .15
Basic settings . . . . . . . . . . . . . . . . . . . . . . .15
Time difference GMT (hours) . . . . . . . . . . .16
Country . . . . . . . . . . . . . . . . . . . . . . . . . . .16
Remote control code . . . . . . . . . . . . . . . . .16
Stand-by clock . . . . . . . . . . . . . . . . . . . . . .16
Audio/Video settings . . . . . . . . . . . . . . . . .16
Picture format . . . . . . . . . . . . . . . . . . . . . . .17
Language (Audio signal) . . . . . . . . . . . . . .17
Language (Sub-titles) . . . . . . . . . . . . . . . . .17
TV SCART mode . . . . . . . . . . . . . . . . . . . .17
VCR SCART mode . . . . . . . . . . . . . . . . . .17
Dolby Digital (AC3) . . . . . . . . . . . . . . . . . .18
7
7.1
7.2
7.2.1
7.2.2
7.2.3
7.2.3.1
7.2.4
7.2.5
7.3
7.3.1
7.3.1.1
7.3.1.2
Operation . . . . . . . . . . . . . . . . . . . .18
Switching on and off . . . . . . . . . . . . . . . . .18
Programme selection . . . . . . . . . . . . . . . . .18
Using the programme up/down keys . . . . .18
Using the numeric keys . . . . . . . . . . . . . . .19
Using the Navigator (Programme list) . . . .19
Selecting a list . . . . . . . . . . . . . . . . . . . . . .19
Calling up blocked programmes . . . . . . . .20
Information box . . . . . . . . . . . . . . . . . . . . .20
Receiving encrypted programmes . . . . . . .20
Special functions . . . . . . . . . . . . . . . . . . . .21
Multifeed options . . . . . . . . . . . . . . . . . . . .21
Select starting time/picture . . . . . . . . . . . .21
60
7.6.1
7.7
7.8
7.9
7.10
7.11
7.12
7.13
7.14
7.15
7.15.1
7.15.2
7.15.3
7.15.4
7.15.5
7.15.6
7.15.7
7.15.7.1
7.15.7.2
7.15.7.3
7.15.7.4
7.15.8
7.16
8
8.1
8.1.1
8.1.2
8.1.3
8.1.3.1
8.1.3.2
8.1.4
8.2
8.2.1
8.2.2
8.2.3
8.2.4
8.2.5
8.3
8.3.1
8.3.2
Encryption PIN-Code . . . . . . . . . . . . . . . . .22
Volume control . . . . . . . . . . . . . . . . . . . . . .22
TV/Radio switching . . . . . . . . . . . . . . . . . .23
Selecting a different language
(TV mode) resp. station (Radio mode) . . .23
Dolby Digital (AC3 mode) . . . . . . . . . . . . .23
Return to last programme selected . . . . . .24
Display clock and programme info . . . . . .24
Additional programme information . . . . . . .24
Freeze-frame . . . . . . . . . . . . . . . . . . . . . . .24
Sleep timer . . . . . . . . . . . . . . . . . . . . . . . . .25
Channel information . . . . . . . . . . . . . . . . . .25
Video text . . . . . . . . . . . . . . . . . . . . . . . . . .25
Sub-titles . . . . . . . . . . . . . . . . . . . . . . . . . .26
Electronic Programme Guide SFI . . . . . . .27
Downloadin SFI data . . . . . . . . . . . . . . . . .27
Interrupting download procedure . . . . . . . .28
Calling up Electronic Programme Guide . .28
Now . . . . . . . . . . . . . . . . . . . . . . . . . . . . . .28
Next . . . . . . . . . . . . . . . . . . . . . . . . . . . . . .28
More . . . . . . . . . . . . . . . . . . . . . . . . . . . . . .29
SFI functions . . . . . . . . . . . . . . . . . . . . . . .29
SFI information . . . . . . . . . . . . . . . . . . . . . .30
SFI timer programming . . . . . . . . . . . . . . .30
SFI programme overview . . . . . . . . . . . . . .31
SFI overview by programme type (Genre) 32
Terminating SFI . . . . . . . . . . . . . . . . . . . . .32
Timer recordings . . . . . . . . . . . . . . . . . . . .32
Changing basic settings . . . . . . . .36
Configuring Favourites list . . . . . . . . . . . . .36
Calling up programme list management . .37
Adding programmes to Favourites list . . . .38
Deleting programmes . . . . . . . . . . . . . . . . .39
Removing (deleting)
from the Favourites list . . . . . . . . . . . . . . .39
Deleting from Total list . . . . . . . . . . . . . . . .39
Sorting programmes . . . . . . . . . . . . . . . . .40
Programming the electronic
programme guide . . . . . . . . . . . . . . . . . . . .41
Selecting channels/stations . . . . . . . . . . . .41
Start category . . . . . . . . . . . . . . . . . . . . . . .42
Updating time . . . . . . . . . . . . . . . . . . . . . . .43
Updating . . . . . . . . . . . . . . . . . . . . . . . . . . .43
SFI channel . . . . . . . . . . . . . . . . . . . . . . . .43
Parental control . . . . . . . . . . . . . . . . . . . . .43
Selecting channels . . . . . . . . . . . . . . . . . . .44
Changing unit PIN . . . . . . . . . . . . . . . . . . .45
61
EN
7.3.2
7.4
7.5
7.6
8.3.3
8.4
8.4.1
8.4.3
8.4.4
8.5
8.5.1
8.5.2
8.5.3
8.5.4
8.6
8.7
Mode . . . . . . . . . . . . . . . . . . . . . . . . . . . . .45
Programme scan . . . . . . . . . . . . . . . . . . . .45
Automatic scan . . . . . . . . . . . . . . . . . . . . .46
Manual scan . . . . . . . . . . . . . . . . . . . . . . . .48
After the scan . . . . . . . . . . . . . . . . . . . . . . .49
Service settings . . . . . . . . . . . . . . . . . . . . .50
Activating default settings . . . . . . . . . . . . .50
Delete all programmes . . . . . . . . . . . . . . . .50
Update software . . . . . . . . . . . . . . . . . . . . .51
Copy settings . . . . . . . . . . . . . . . . . . . . . . .52
System configuration . . . . . . . . . . . . . . . . .52
Encryption/decoding system . . . . . . . . . . .52
9
Technical terms . . . . . . . . . . . . . .53
10
Technical data . . . . . . . . . . . . . . . .54
11
Trouble-shooting guide . . . . . . . . .57
For daily use . . . . . . . . . . . . . . . . .58
Your unit carries the CE logo, and complies with all relevant EU standards.
Subject to change without notice, subject to printing errors.Correct as at 11/04
TechniSat and DIGIT MF4-K CC are registered trademarks of
TechniSat Digital GmbH
Postfach 560
D-54541 Daun, Germany
www.technisat.de
Technical Hotline
(049) 0180/5005-910*
*0,12 EUR/Min. via the Deutsche Telekom AG network
Note !
If you should ever have to send in your unit, please use only the following
address:
TechniSat Teledigital AG
Service-Center
Löderburger Str. 94
D-39418 Stassfurt, Germany
62
2 Illustrations
On/Stand-by
Sound On/Off
Numeric keys
Option*
in TV mode:
Select sound/sub-titles,
special functions
in Radio mode:
Select stations by switching
sound sub-carriers
Multi-function keys
Arrow key up
Programme +
OK
Programme list On/Off
Arrow key left
Volume -
Arrow key right
Volume +
Arrow key down
Programme -
Back
Info
SFI
TV/Radio
Programm +/-
Volume +/Meno On/Off
Sleep timer
EXTERNAL
Video text*
On/Mix/Off
Stop/Freeze-frame
Remote control option:
By switching the remote control options you can use this remote control unit to operate
two receivers, one television set as well as a video recorder, using the same coding.
>
To switch the remote control option, please simultaneously press the desired key
(SAT1, SAT2, VCR or TV) and OK!!!
Please note:
To operate this receiver, the remote control option of the remote control unit selected here
and the remote control code selected in accordance with Point 6.2.3 must be identical.
* This function is only available if the appropriate data is being broadcast on the selected
programme slot.
63
EN
Remote control
LED display
Programme select
up/down
On/Stand-by
Card reader for Smartcard:
> Insert the Smartcard (gold-coloured chip at the bottom, and in the
direction of insertion) carefully into the card reader as far as it will go.
Cable
input
Mains power
socket
Cable
output
Audio output
digital (electrical)
SCART socket
VCR
SCART socket Audioausgang
TV
digital (optisch)
Audio outputs
analogue
Inserting the CI module:
> Please follow the instructions of the manufacturer of the CI
module and card.
> Insert the desired Smartcard in the appropriate CI module.
> Now insert the CI module carefully in the slot provided.
RS 232
interface
64
congratulations on your decision to purchase the TechniSat
DIGIT MF4-K CC digital receiver.
The operating manual you are reading is designed to help you
gain optimum use and enjoyment from the comprehensive
functions of your new digital receiver.
We have designed the operating manual to be as comprehensive as necessary, and as simple as possible.
The range of functions of your receiver is constantly being
expanded, and software updates are available for this. This
may occasionally mean that operating steps are added which
are not described in this manual, or there may be changes to
functions already included. We therefore recommend that you
occasionally visit the TechniSat homepage in the Internet,
from where you can download the current version of the operating manual.
We wish you many years of listening and viewing pleasure
with your TechniSat DIGIT MF4-K CC!
Your
TechniSat Team
65
EN
Dear customer,
3 Please read this first
>
>
>
>
>
>
>
>
>
Before you begin operating your receiver, please first
check whether the package contains all the components that should be included. The following are supplied:
1 digital receiver, 1 mains power cable,
1 remote control, 1 operating manual,
1 guarantee card, 2 batteries (1,5V micro-cell)
1 SCART cable.
Insert the batteries provided in the battery compartment of the remote control, observing the polarity indicated.
Before connecting your digital receiver, please first
read the safety notes in Chapter 3.
Chapters 4, 5 and 6 describe how to connect the
digital receiver to the television set, VCR, etc., and
how to make the appropriate settings. These settings
need be made only once, and will only need to be
adapted if your external unit changes, or if additional
appliances are connected.
Chapter 7 describes all the functions necessary for
daily operation of the receiver, e.g. programme selection.
In Chapter 8 you will find information on how to set
new programmes, or how to change the order of programmes.
Technical terms used in the operating manual are
explained in Chapter 9.
Technical data and specifications can be found in
Chapter 10.
A trouble-shooting guide to help you overcome problems can be found in Chapter 11.
Important operating instructions
Operation of the digital receiver is simplified by the use of socalled "On Screen Displays", this also serves to reduce the
number of keys required on the remote control unit. All functions are displayed on the screen, and can be operated with a
few keys. Related functions are combined in a "MENU". The
function selected is highlighted in colour. The “function keys”
red, yellow, green and blue are displayed along the bottom of
the screen in the shape of coloured bars. These coloured
bars represent different functions in the individual menues,
which can be implemented by pressing the
appropriate coloured key (“multi-function key”) on the remote
control. The “function keys” are only active when a brief description is displayed in the appropriate field.
Key descriptions and terms that appear on the OSD menu
are printed bold in this operating manual.
66
EN
Help:
Where available in the menues, pressing the blue function
key will cause a help text to be displayed, pressing again will
remove the text from the screen.
Disposal advice
The packaging for your unit consists entirely of recyclable
material. Please sort the items appropriately, and sort them
for disposal via your local waste disposal system.
Please note that spent batteries (from the remote control) as
well as electronic components should not be disposed of in
your household refuse, but should be disposed of in accordance with your local regulations (special waste, hand back
to outlet where purchased).
Safety advice
For your own protection, please read the safety instructions
carefully before commencing operation of your new unit.
The manufacturer accepts no responsibility for damage caused by inappropriate operation, or by non-compliance with
safety precautions.
>
To ensure adequate ventilation, place the unit on a
smooth horizontal surface, and do not place any
objects on the upper surface of the unit. This surface
has ventilation slots that ensure heat can escape from
the interior of the unit.
>
Do not place any burning objects, such as burning
candles, on top of the unit.
>
Do not subject the unit to water spray or droplets, and
do not place any objects filled with liquuid, e.g. vases,
on top of the unit.
>
The unit may only be operated in a temperate climate.
>
Never open the unit housing! You are in danger of
receiving an electric shock. Any necessary repairs
should be carried out only by qualified service personnel.
In the following cases, you should disconnect the unit
from the mains power supply, and consult a qualified
technician:
>
the mains cable or the mains plug are damaged
>
the unit was exposed to liquid, or liquid has run into
the unit
>
in case of significant malfunction
>
in case of severe external damage
When not in operation
During an electrical storm, or when the unit will not be used
for a lengthy period of time (e.g. while you are on holiday),
disconnect the unit from the mains power supply.
67
Connecting the DVB receiver to the cable
socket
a. Connect the Cable input of the DVB receiver to the
antenna socket of the cable network.
b. Scart connection of the DVB receiver with the television
set.
c. Scart connection of a video player with the VCR Scart
socket of the DVB receiver.
d. Connection of the Cable output with the antenna input
of the television set.
e. Connections of audio outputs with a Hi-Fi amplifier.
f. Mains power connection
d
b
a
f
e
c
VCR
68
4 Connections
4.1 Connecting to the cable network
a
Use a suitable co-axial cable to connect the Cable
input of the receiver with the connecting socket of
the cable connection.
4.2 Connection to a television set
b
Use a SCART cable to connect the receiver (SCART
socket TV) with the television set (SCART socket).
If your television set is appropriately equipped, it will
switch automatically to AV, and thus to cable reception, when the digital receiver is switched on.
d
Use a suitable TV connection cable to connect the
receiver (Cable output) with the antenna input of
the television set.
To view digital cable programmes on your television set,
sweitch this to the external Scart input (AV). Analogue cable
programmes can continue to be selected via the programme
slots of your television set.
4.3 Video cassette recorder (VCR)
c
Connect the video recorder to the SCART socket marked VCR. In Playback mode, the video recorder will
supply a switching signal to the digital receiver, thus
supplying the video recorder signal automatically to
the television set.
If your video recorder does not supply a switching signal, use the EXTERN key to switch your digital receiver to the external input AV. Pressing this key again
will return you to normal viewing operation.
4.4 Hi-Fi amplifier
4.4.1 Analogue
e
To achieve the best possible sound quality, you may
connect the digital receiver to a Hi-Fi amplifier. Use a
suitable cable to connect the cinch sockets Audio R
and Audio L of the digital receiver with an input of
your Hi-Fi amplifier (e.g. CD or AUX - note that the
Phono input is not suitable).
69
EN
The references mentioned below, i.e. a b c etc.
refer to the illustration on page 10.
4.4.2 Digital
d
If your amplifier is equipped with a suitable electrical or
optical input, connect the socket AUDIO OUT DIGITAL electrical resp. AUDIO OUT DIGITAL
optical with the electrical resp. optical input of your
amplifier.
Depending on the station selected, sampling rates of 32,
44.1 and 48 kHz are available.
In addition, if broadcast, the Dolby Digital signal (AC3) is
available at this output.
4.5 Serial interface (RS 232)
The RS 232 interface is used for operating system updates
as well as for pre-programming via a personal computer PC.
4.6 Mains power connection
The digital receiver should only be connected to the mains
power supply once the unit has been completely connected to
all other components in the system. This helps to avoid
damage to the digital receiver or other components.
f
When you have made all the connections, use the
mains power cable supplied to connect the receiver
with the mains power socket (230 V/50-60 Hz).
5 Initial installation
(Fig. 5-1)
When you have read through the safety instructions, and
have connected the receiver as described in Chapter4, switch
on the unit as described in Chapter 7. When switching on the
unit for the first time, a start window will be displayed, with the
installation assistant AutoInstall. (Fig. 5-1). Use the installation assistant to quickly and simply make the most important
settings on your digital receiver.
To make the settings in each step of the installation, the
remote control keys required are highlighted.
You can abort the initial installation at any time simply by
pressing the red function key. Press the green function key
to go back to the previous step in the installation procedure.
Thus any entries made in error can be quickly corrected.
If you do not implement the initial installation, or if it is not
completed, the receiver will commence operation with a standard pre-programmed configuration.
70
EN
The initial installation procedure described here serves merely as an example. The exact initial installation procedure will
depend on the settings you select. Please therefore follow
the instructions displayed on screen closely.
Operating language
>
Press the OK key to open the display window for the
Operating language. (Fig. 5-2)
>
Use the up/down arrow keys to select the desired
operating language.
>
Confirm by pressing OK.
(Fig. 5-2)
Audio language
>
Use the up/down arrow keys to select the preferred audio language. (Fig. 5-3)
Once the installation assistant has been completed,
the sorting of programmes in the Favourites list will be
made in accordance with your selection.
>
(Fig. 5-3)
To accept the selection, confirm by pressing OK.
Country selection
>
Use the arrow keys up/down to select the time
zone corresponding to your country of residence.
(Fig. 5-4) The time will be set automatically depending
on your selection.
>
Confirm by pressing OK, to accept your selection,
and proceed to channel selection.
(Fig. 5-4)
Scanning for programmes
>
Use the arrow keys up/down to mark the field All
channels, if you wish to scan for both encrypted and
unencrypted programmes, or mark All unencrypted channels, if you wish to scan only for unencrypted programmes. (Fig. 5-5)
>
When you confirm the scan by pressing OK, an automatic programme scan will be performed. This type of
scan entails automatically scanning the entire reception range of the receiverfor digital programmes. The
programmes found will be automatically stored in the
Favourites list. This procedure may take several minutes. Please note any additional messages displayed
on screen.
71
(Fig. 5-5)
Updating Software
When you have completed the programme scan, the digital
receiver will check whether a new version of the operating
software is available via cable. In case new software is available, you can perform an automatic software update.
>
(Fig. 5-6)
Use the arrow keys left/right to select the field
Update, and confirm by pressing OK.
(Fig. 5-6) The new software for your unit will now be
downloaded. This procedure may take several minutes.
Terminating the installation assistant
>
Confirm the final message (Fig. 5-7) of the installation
assistant by pressing OK, this will return you to normal operation.
(Fig. 5-7)
72
6 Settings
EN
You have now made all the necessary connections and commenced operation of your new digital receiver. If necessary,
you can now proceed to optimise the settings of the digital
receiver according to your preferences.
6.1 Operating language
This menu item gives you the opportunity to set the menu
language according to your personal preference.
To change the operating language, proceed as follows:
>
Press the Menu key to call up the Main Menu.
(Fig. 6-1)
>
Use the arrow keys up/down to mark the menu
line Operating language.
>
Confirm by pressing OK.
The sub-menu Operating language will be
displayed.
>
Use the arrow keys up/down to mark the
desired language.
>
Store this selection in memory by pressing OK.
>
Press the Back key to return to the Main Menu.
(Fig. 6-1)
6.2 Basic settings
To ensure optimum enjoyment from your DVB receiver, you
should still make the necessary settings according to your
personal preferences.
>
Use the Menu key to display the Main Menu.
>
Use the arrow keys up/down to mark the line
Settings.
>
Confirm by pressing OK. The sub-menu Settings
will be displayed (Fig. 6-2)
>
Now use the arrow keys up/down to mark the line
Basic Settings.
>
Confirm by pressing OK. The menu Basic Settings
will be displayed. (Fig. 6-3)
>
Use the arrow keys up/down to move the marker
within the menu, and to change the individual positions as shown. When selecting a menu item please
also note any messages displayed on screen.
The following settings may be made:
(Fig. 6-2)
(Fig. 6-3)
73
6.2.1 Time difference to GMT (hours)
Your unit is equipped with a clock. This is synchronised via
satellite with Greenwich Mean Time.
If in the category Country (Point 6.2.2) you have selected
the setting None, then you must simply correct the clock
time corresponding to your local time using the arrow keys
left/right. In the case of Germany, the difference is
+1 hour in winter, +2 hours in summer.
6.2.2 Country
This function enables the automatic change from standard to
daylight savings (summer/winter) time.
>
Use the arrow keys left/right to enter your location in the line Country.
6.2.3 Remote control code
You may control up to four different appliances, all using the
same remote control code, via the remote control unit of your
receiver. If two receivers are operated in the same room,
there may be unintended operating problems. To avoid this
problem,you must set different remote control options for the
two receivers.
>
To do this, press down the OK key as well as either
the SAT1 or SAT2 key simultaneously.
6.2.4 Standby clock
In this line you must decide whether the time should be
displayed on the receiver while it is in stand-by mode.
>
In this line, use the arrow keys left/right to set the
mode of the standby clock to on or off.
>
Press the Back key to return to the menu Settings,
or press the Menu key to return to normal operation.
The settings will be saved to memory automatically.
6.3 Audio/Video settings
To optimise your digital receiver for use with your television
set, you may make further settings in the menu Audio
/Video settings.
>
Press the Menu key to display the Main Menu.
>
Use the arrow keys up/down to mark the line
Settings.
74
Confirm by pressing OK.
The sub-menu Settings will be displayed. (Fig. 6-4)
>
Now use the arrow keys up/down to mark the line
Audio/Video Settings.
>
Confirm by pressing OK. The menu Audio/Video
Settings will be displayed. (Fig. 6-5)
>
Use the arrow keys up/down to move the marker
within the menu, and to change the individual items as
indicated. When selecting a menu item, please note
any messages displayed on screen. The following settings may be made:
EN
>
(Fig. 6-4)
6.3.1 Picture format
>
Use the arrow keys left/right to set the picture
format appropriate for your TV set: 4:3 or 16:9. This
function provides the automatic adjustment of the picture format for your television set.
(Fig. 6-5)
6.3.2 Language (Audio signal)
>
Use the arrow keys left/right to select your preferred language in this line. This function will automatically select the preferred language, where available,
following a scan.
6.3.3 Language (Sub-titles)
Your DVB receiver is equipped to display sub-titles. If the
sub-title function is activated, and the language selected is
being broadcast, these will be displayed automatically.
If the function is not activated, sub-titles can be switched on
manually. The availability of sub-titles is indicated by display
of the message Sub-title selection. Please also note
Point 7.13 of the operating manual.
6.3.4 TV SCART mode
In this line, use the arrow keys left/right to set the parameter according to your TV set, to FBAS, RGB or S-Video.
For standard sets, select FBAS.
6.3.5 VCR SCART mode
In this line, use the arrow keys left/right to select the
parameter according to your TV set: FBAS or
S-Video. For standard sets, select FBAS.
75
6.3.6 Dolby Digital (AC3)
Various movies are broadcast in Dolby Digital format. This is
indicated by display of the Dolby logo
in the information
window, once the programme has been selected.
If you have a Digital 5.1 channel amplifier, you can, where
available, enjoy 5.1 channel Dolby Digital sound with specific
movies. The only requirement is that the digital output Audio
Out Digital (see Point 4.5.2) of your DVB receiver must be
connected with the digital input of your Dolby Digital 5.1 channel amplifier.
If a programme is being broadcast in Dolby Digital sound, this
will be indicated by display of the Dolby logo in the information box when you switch to the programme. If the Dolby
Digital function (AC3) is activated (on), these programmes
will automatically be reproduced in Dolby Digital format.
If the function is not activated (off) , Dolby Digital sound can
also be switched on manually. Please also note Point 7.6.1 of
the operating manual.
7 Operation
7.1 Switching on and off
>
>
>
Switch the digital receiver on by pressing the
On/Standby key, either on the receiver or on the
remote control.
Press the same key again, either on the receiver or on
the remote control, to switch it off again.
The receiver is now in stand-by mode, and the time
will be shown in the display of the receiver (if activated
as per Point 6.2.4).
If the current time is not displayed, this must still be
acquired by the receiver. To do this, switch the unit on,
and set it to receive a major channel such as ZDF for
about 30 seconds, during which time the clock setting
will be automatically acquired.
7.2 Selecting a programme
7.2.1 Using the Programme up/down keys
>
You may use the programme keys up/down either on the receiver or on the remote control to switch
up or down one programme slot at a time.
76
7.2.2 Using the numeric keys
You may use the numeric keys to enter the desired
programme number.
EN
>
For example:
1
for programme slot 1
1,
then 4
for programme slot 14
2,
then 3, then 4
for programme slot 234
When entering prtogramme numbers consisting of several
digits, you have approximately 3 seconds after pressing a
key to complete the entry.
If you wish to enter a programme number consisting of only
one or two digits, you can speed up the switching procedure
by holding down the key a little longer on the last digit.
7.2.3 Using the Navigator (Programme list)
>
Press OK.
The programme list navigator will be displayed. In TV
mode, only TV programmes will be shown, and only
radio programmes when in Radio mode. The programme currently selected is marked. (Fig. 7-1)
>
Now use the arrow keys up/down to mark the
desired programme.
>
Press the OK key to display the marked programme.
>
Use the arrow keys up/down to move the market
in the list by one line at a time.
>
Use the arrow keys left/right to move back and
forth in the list one page at a time.
(Fig. 7-1)
7.2.3.1 Selecting a list
You receiver is equipped with several programme lists, designed to make it easier for you to find a programme. You may
select your Favourites list (see Point 8.1), or view the
alphabetically sorted Total List, or view a list sorted by
Providers.
>
Press the OK key. The active programme list will be
displayed.
>
Use the red function key Category to open a window showing the types of programme lists
(Favourites list, Provider lists and Total list).
The active type of programme list is marked. (Fig. 7-2)
>
Use the arrow keys up/down to select a type of
programme list, e.g. Total list.
77
(Fig. 7-2)
>
Confirm by pressing OK.
The alphabetically sorted Total list will be displayed,
containing all programmes. (Fig. 7-3)
>
Use the arrow keys up/down to mark the programme you wish to view.
>
Confirm by pressing OK.
7.2.4 Calling up blocked programmes
(Fig. 7-3)
(Fig. 7-4)
If a programme is selected that has been blocked b y the
parental control function, the message Unit PIN will be
displayed on screen. (Fig. 7-4)
>
Use the numeric keys to enter your PIN code. The
desired programme can now be viewed.
or
>
Switch to a programme that is not blocked.
If you have selected the setting on under Point 8.3.2, the
request for the PIN code will be displayed every time you
select a blocked programme. However, to make operation
more convenient for you, the PIN code must be entered only
once during an operating phase.
If you are using a Smartcard, please note Point
7.3.2.
7.2.5 Information box
(Fig. 7-5)
Every time you switch programmes, an information box will be
displayed briefly (Fig. 7-5) showing the programme slot as
well as the name of the programme selected. In addition,
other programme characteristics will be indicated, for example
for video text,
for a 16/9 format programme,
for
encrypted programmes. Also, where broadcast, the EPG
genre will be displayed, plus any age restriction (FSK =
Freiwillige Selbstkontrolle der Filmwirtschaft in Germany).
7.3 Receiving encrypted programmes
Your receiver is equipped with an integrated decoding system
as well as with a Common Interface. This allows you to receive encrypted programmes. To do this, you must first insert either a Smartcard into the integrated card reader, or insert a CI
module including a valid Smartcard in the slot provided:
>
Insert the Smartcard in the card slot of the integrated
card reader (gold-coloured chip on the bottom).
or
>
Insert a CI module into the slot.
>
Insert the Smartcard in the card slot of the CI module.
Ensure that the gold-coloured chip of the Smartcard is
78
located uppermost on the card in the direction of
insertion.
If an encrypted programme is now selected, your digital receiver will automatically check the card reader as
well as the interface, and will display the programme
in unencrypted form provided the appropriate valid
Smartcard or an appropriate CI module containing a
valid Smartcard for this programme has been inserted.
EN
>
7.3.1 Special functions
On some programme slots you will be advised of the availability of specific special functions. For instance, on multi-feed
channels, in the case of some sports broadcasts, you can
sometimes choose different games (e.g. National League
soccer), select different sound tracks (e.g. stadium/commentary) or select different camera angles (Formula 1).
In addition, some programme providers allow you to select
the desired starting time for a movie you have selected.
7.3.1.1 Multi-feed options
Some programmes provide a multi-feed option. This function
allows you, for example, in the case of sports boradcasts to
select freely the camera angle you prefer (Formula 1 racing),
or to switch to various games being played at different locations (e.g. National League soccer).
Where a programme provides multi-feed options, this will be
indicated on screen (Fig. 7-6).
>
(Fig. 7-6)
To select one of the available options, press the
Option key.
A selection window will be opened, displaying the
options available. (Fig. 7-7)
>
Use the up/down arrow keys to select the desired
option.
>
Confirm by pressing OK.
(Fig. 7-7)
Your digital receiver will now switch to the selected
option.
7.3.1.2 Select starting time/picture
Some channels provide the option of selecting specific
movies to be shown at varying starting times. These movies
are available around the clock, and at various selectable starting times.
Where a channel provides a selection of starting time/picture,
this will be indicated on screen by a message (Fig. 7-8).
79
(Fig. 7-8)
>
To select one of the starting times available, press the
Option key. A selection window will open, displaying
the available starting times. (Fig. 7-9)
>
Use the arrow keys up/down to select the desired
starting time, and confirm by pressing OK.
Provided the programme has been validated for the
starting time selected, you can view it at the desired
time.
(Fig. 7-9)
7.3.2 Encryption PIN-Code
Your digital receiver is equipped with a parental control feature, which blocks access to specific selected programmes (see
Point 8.3). In addition, in the case of encrypted broadcasts,
individual programmes not suitable for viewing by children
can be given a prior block by means of a parental control
code. In order to decode the specific programme for viewing,
the PIN code must be entered. This PIN code is stored on
the Smartcard. You will be advised of the code when you
receive the card. The PIN code must therefore not be confused with the Unit PIN code of the digital receiver (Point
8.3).
If you switch to a channel that is currently broadcasting a preblocked programme, a message will be displayed.
>
To view the programme, use the numeric keys to
enter the 4-digit PIN code.
>
As soon as the code has been correctly entered, the
programme can be viewed normally.
If the code has been entered incorrectly, you can enter
the PIN code again, or press Back to exit from the
menu.
7.4 Volume control
Your digital receiver is equipped for volume control. This
makes operation of the receiver more convenient, as you thus
have all important functions combined on the remote control
of the receiver, and will only rarely have to use the remote
control of your television set. When the digital receiver is switched on, sound volume will be set at the level last used.
>
Adjust the volume of your digital receiver using the
Volume + key to increase the volume, and Volume
- to decrease the volume.
>
Press the Sound on/off key to mute the sound,
press the key again to switch sound back on again.
80
7.5 TV/Radio switching
>
Press the TV/Radio key to switch the digital receiver
to radio mode. The receiver will now switch to the
radio programme last selected.
>
Press the TV/Radio key again to revert to the TV
programme last selected.
EN
The pre-programmed settings include both radio and TV programmes.
7.6 Selecting a different language (TV mode)
resp. station (Radio mode)
If a programme is broadcast in several languages, or with
multi-channel sound, or if several radio programmes are
available on a specific radio slot, this information will be
displayed (Fig. 7-10) on screen. You may then proceed as
follows to select a different language or a different sound
channel:
>
>
Press the Option key. A list will now be displayed
(Fig. 7-11) on screen, indicating the languages resp.
radio programmes currently available.
Use the arrow keys up/down to mark the desired
language, resp. the desired radio programme, and
confirm by pressing OK.
You may now listen to the programme in the
language selected. Your digital receiver is also
equipped to receive monaural programmes.
>
Use the arrow keys left/right to choose between
Mono channel 1 ( ), Mono channel 2 (
) and
Stereo (
).
7.6.1 Dolby Digital (AC3 mode)
Where a programme is broadcast with Dolby Digital sound,
this will be indicated by the Dolby logo in the information box
when you switch to the programme. If you have switched on
the Dolby Digital (AC3) function in accordance with Point
6.3.6, this programme will then automatically be reproduced
in this format.
If you have not enabled the Dolby Digital (AC3) function,
you can switch to AC3 mode manually as follows:
>
Press the Option key. Where available, a list of the
currently available languages and Dolby Digital
(AC 3) will be displayed on screen.
>
Use the arrow keys up/down to mark the line
Dolby Digital.
81
(Fig. 7-10)
(Fig. 7-11)
>
Confirm by pressing OK.
You can now enjoy Dolby Digital sound for this programme. If
you would like your receiver to reproduce Dolby Digital broadcasts automatically, proceed to make the settings as described in Point 6.3.6 for automatic AC3 reproduction.
7.7 Return to last programme selected
>
>
Pressing the Back key on the remote control will take
you back to the last programme previously selected.
Press the key again to return to the programme previously selected.
7.8 Display time and programme information
This function allows you to see programme information related to the programme currently selected.
(Fig. 7-12)
>
Press the Info key to display information on the programme currently selected (Fig. 7-12).
The bottom half of the screen will now show the current time,
the name of the channel selected, the name of the current
programme being shown, as well as the starting and ending
times of this programme, in as far as this data is broadcast by
the provider.
7.9 Additional programme information
Where available, the programme information function can
also provide further information on the currently selected programme.
(Fig. 7-13)
>
Press the Info key twice to open an additional information window (Fig. 7-13) . Additional information on
the current programme will be displayed.
>
You can scroll through lengthy information text one line
at a time using the arrow keys left/right.
>
Where this information is broadcast, pressing the Info
key once more will display information on the next (following) programme.
>
Pressing the Info key once more will switch off the
information display.
7.10 Freeze frame
>
Press the Freeze Frame key to view the current
image as a still picture.
>
Press the same key again to return to normal
operation.
82
7.11 Sleep timer
Press the Sleep Timer key repeatedly to set the
switch-off time of the receiver in the range of
15 minutes to 2 hours.
When the selected time has elapsed, the receiver will
switch automatically to Stand-by mode.
EN
>
7.12 Channel information
>
Press the green function key (Channel information)
to display data relating to the channel selected (Fig. 714).
>
In addition, you can use the coloured function keys to
obtain and display additional Audio/Video information, Programme information and, where applicable,
information on the encryption system (CA) used.
>
Press the Menu key to exit from the information function.
(Fig. 7-14)
7.13 Video text
7.13.1 Using the video text decoder of your television set
Wherever it is broadcast, video text will be supplied to your
television set. To operate the video text display, use the
remote control of your television set. If you experience problems with your television set, such as overlapping of video
text and picture content, you should set your digital receiver
to FBAS mode (Point 6.3.4).
7.13.2 Using the internal video text decoder
As an alternative, you may use the integrated TOP video text
decoder to display the information. With TOP video text all
text pages are automatically divided into groups and blocks,
which makes the video text more readable.
>
Switch to the programme on which you wish to
view video text information.
>
Press the Videotext key to switch on the video text
display. (Fig. 7-15)
>
Use the numeric keys to enter the video text page
you wish to view. Your entry will be displayed in the
top left hand corner of the screen.
All video text providers use page 100 to show the
index or contents.
83
(Fig. 7-15)
VT Group
VT Block
Once you have entered the desired video text page,
the receiver will search for the desired page automatically.
As not all video text pages can be transmitted simultaneously, it may take a few seconds for your receiver to
find the correct page, and to display it on the television
screen.
>
Use the red resp. green keys to page forward or
backward one page at a time.
>
Use the yellow function key to display the video text
group shown in the yellow field.
>
Use the blue function key to display the video text
block shown in the blue field.
Mixed operation
>
Pressing the Videotext key again will switch to
mixed operation, i.e. both video text and TV picture will
be shown simultaneously on the screen.
>
Press this key again to return to normal operation.
Stop paging
>
Press the Stop/Freeze frame key,and the upper left
corner of the video text window will display the message “Stop”. This stops the continued automatic paging
through the video text sub-pages. Press the
Stop/Freeze frame key again to disable the Stop
operation.
>
Press the Back key to return to normal operation.
7.14 Sub-titles
Where sub-titles are broadcast, this is indicated by displaying
the message Select Sub-title. If you have enabled the
Sub-title function in accordance with Point 6.3, these will be
automatically displayed, with the provision that they are being
broadcast in the language selected.
If the sub-titles are only being broadcast in other languages,
or are only available via video text, you can switch the display
on manually as follows.
>
Press the Option key, if necessary several times,
until the entry Sub-titles is displayed, showing a
selection table of sub-title languages and/or video text
pages carrying sub-titles broadcast.
>
Use the arrow keys up/down to mark the desired
language/video text page.
84
Confirm by pressing OK. The sub-titles will now be
displayed.
Please note that these functions are only available when subtitles are actually being transmitted. This setting will not be
retained after switching programmes.
7.15 Electronic Programme Guide SFI
S iehF
F ern I nfo)
(S
Your digital receiver is equipped with an electronic programme guide. This means that you can display information relating to one or more programmes on your screen.
This enables you to obtain a very quick overview of programmes currently running, or of the day’s programmes, or those
of the next day or few days.
The SFI functions allow you to:
-
display information on programme contents on your
screen
-
pre-select programmes, which will be selected automatically when the programme/show starts
-
programme timer functions
-
search for and select programmes according to type
(genre).
7.15.1 Downloading SFI data
The programme information will be updated by your receiver
at the update time set in accordance with Point 8.2 (SFI
channel). The pre-requisite for this is that your receiver must
be in stand-by mode at this time.
The download procedure will be indicated by a display of the
SFI data already downloaded (e.g. 038P for 38%). If your
receiver is switched on and in operation at this time, the function will not be executed.
You may also start the dowload procedure manually immediately after switching off the receiver (while the display reads
“oooo”), simply by pressing the SFI key). While the download
procedure is in progress, the message Load SFI will appear
in the display, followed by a record of the volume of SFI data
already downloaded (e.g. 038P).
The duration of the downloading procedure will depend.
on the number of programmes included. Programmes can be
shown a maximum of seven days in advance. Based on the
volume of data involved, the more programmes are included,
the shorter is the period for which preview information can be
included in the electronic programme guide.
You can decide for yourself which programmes are to be
included in the electronic programme guide. These can then
be added to the list as described in Point 8.1.5.
85
EN
>
7.15.2 Interrupting the download procedure
The download procedure may be interrupted by switching on
the digital receiver (On/Standby key). The SFI data downloaded at the previous download will then still be available.
7.15.3 Display electronic programme guide
>
Switch on both the digital receiver and your television
set.
>
Press the SFI key on the remote control of the digital
receiver.
The electronic programme guide will now be displayed
on the screen (Fig. 7-16). Here, the programmes you
have selected, or the programmes included in the factory default settings, will be displayed with their current
programmes (see also Point 8.2). You can now use
the SFI function to obtain information on the contents
of various programmes.
(Fig. 7-16)
In addition, you may use the SFI functions to select a
particular programme, to pre-select a programme, or
to set a timer for a programme.
7.15.4 Now (table with current programme contents)
The first SFI table to be displayed is the “Now” table (Fig. 716) showing the programmes currently broadcast. The yellow
bar to the right of the programme name indicates the elapsed
time of the current programme. The programme currently
selected is marked.
>
Use the arrow keys up/down to move the marker
through the list one line at a time. To move the marker
one page at a time, use the arrow keys left/right.
>
The SFI functions (Point 7.15.3) are now avai- lable
for use.
>
Press the yellow function key to go to the SFI table
“Next” (see Point 7.15.5)
or
>
Press the TV/Radio key to return to normal operation.
7.15.5 Next
>
Use the yellow function key to call up the table
"Next" (following programmes). (Fig. 7-17)
86
>
All the SFI function s are available (Point 7.15.3).
>
Press the yellow function key to go to the SFI table
“More” (Point 7.15.6)
>
EN
or
Press either the green function key or the Back key
to return to the previous SFI table “Now”
or
(Fig. 7-17)
>
Press the TV/Radio key to return to normal operation.
7.15.6 More
>
Pressing the yellow function key again while the SFI
table “Next” is displayed will take you to the SFI table
“More”. (Fig. 7-18)
In this table, an additional time window is shown in the
title line. The time of the SFI table is displayed in this
window.
>
Press the yellow function key to page forward by the
time period shown in the yellow coloured field.
>
Hold down the yellow function key to page forward
continuously. A clock is displayed to give you a better
overview.
Press the green function key in the same way to
page backward through the tables.
The individual days of the week are displayed along
the bottom of the screen. If information relating to the
following days is available, the appropriate fields will
be marked.
>
To obtain a preview for a specific day, either press the
numeric key corresponding to the day of the week,
or
Press the Back key to return to the table “Next”.
7.15.7 SFI functions
To execute the following SFI functions, call up the SFI as
described in Point 7.15.3.
87
(Fig. 7-18)
7.15.7.1 SFI Information
Use the SFI Info to obtain brief information on the marked
channel or programme. If SFI information is available, this is
indicated by a
next to the appropriate programme.
>
Use either the arrow keys or the function keys to
mark the desired programme.
>
Press the SFI key to display the information.
You can scroll or page through lengthy information text
using the arrow keys.
>
Press the Back key to return to the previous table.
7.15.7.2 SFI timer programming
The electronic programme guide SFI allows you to programme timer events with particular ease.
>
Use the arrow keys or the function keys to mark
the desired programme.
>
Press the red function key Timer to open a selection
window.
>
Use the arrow keys up/down to mark the required
Timer type (see Point 7.15).
>
Confirm by pressing OK. The menu Manage timer
showing the data relating to the programme selected
will be displayed, so that you can check on the correctness. If required, you can make changes in this
menu (see 7.15).
>
Press the Back key to return to the previous table.
The relevant line is marked. Depending on the timer
type in use, the receiver will now be switched on at the
commencement of the selected programme. If the
receiver was switched on by means of the video recorder timer, this will be indicated by the message “rEc”
shown in the display.Most of the functions of the remote control are disabled at this stage, to avoid accidental interruption of the recording.
In stand-by mode, an active timer is indicated by the
colon in the time display blinking, or by the LED.
Deleting a SFI timer event
>
If you would like to cancel a timer event programmed
via the SFI, proceed as described above, to mark the
appropriate programme.
88
Press the red function key Timer to open a selection
window.
>
Use the arrow keys up/down to mark the line
Delete Timer.
>
Confirm by pressing OK.
>
To abort an active timer, switch off the digital receiver
using the On/Standby key.
>
Press the same key again to switch the receiver on
again, and full functionality will be restored.
EN
>
7.15.7.3 SFI programme overview
Use the SFI programme overview to display a table with the
day’s programmes of a single channel. To do this, proceed as
follows:
>
Press the SFI key.
The SFI table “Now” will be displayed.
>
Press the blue function key SFI Menu to open a
selection window.
>
Use the arrow keys up/down to mark the line
Programmes.
>
Confirm by pressing OK. The day’s overview of the
programme selected will be displayed. (Fig. 7-19)
>
Use the arrow keys to move the marker to the desired programme or time.
The individual days of the week will be shown along
the lower edge of the screen.
If information is available for the following days, the
appropriate fields will be marked.
>
To display the programme contents for a specific day,
use the numeric keys to enter the number for the
appropriate day.
Display SFI overview for other programmes
>
Press the green function key Programmes.
A list of SFI programmes will be displayed.
(Fig. 7-20)
>
You can now use the arrow keys to mark the desired programme.
>
Press the OK key to display the SFI overview of the
programme selected.
89
(Fig. 7-19)
(Fig. 7-20)
7.15.7.4 SFI overview by programme type (genre)
If you are interested in specific types of programmes, you can
view programme information sorted by specific categories, or
genres, e.g. movies, news, etc..
>
Press the SFI key. The SFI table “Now” will be
displayed.
>
Press the blue function key SFI Menu to open a
selection window.
>
Use the arrow keys up/down to mark the line
Genres.
>
Confirm by pressing OK.
>
Use the green function key Genres to open a window showing the programme types available.
(Fig. 7-21)
>
Use the arrow keys to select the desired programme type, and confirm by pressing OK.
(Fig. 7-21)
(Fig. 7-22)
An overview for the day will be displayed showing only
programmes of the type selected. (Fig. 7-22)
>
Use the arrow keys up/down to move the marker
to the desired programme.
>
Use the arrow keys left/right to page through the
list a page at a time.
The individual days of the week are displayed along
the bottom of the screen. If information for the following days is available, the appropriate fields will be
marked.
>
To display the programme contents of a specific day,
use the numeric keys to enter the number corresponding to the day of the week.
7.15.8 Terminating SFI
>
Press either the Menu or the TV/Radio
key to return to normal operation.
7.16 Timer recordings
Your receiver is equipped with video recorder timers as well
as with programme switching timers. In terms of their programming, these timers differ only in that the relevant type of
timer is specified.
You may programme the timers manually as described in this
chapter, or by means of the SFI function as described in Point
7.15.7.2.
90
1. Video recorder timer
EN
When you use a video recorder timer, your digital receiver
will be switched on resp. off for the programme selected, so
that it may be recorded on an external recording devicer, e.g.
on a video recorder, in your absence. Please note that you
must programme your video recorder appropriately to record
the programme.
If the receiver was switched on by a video recorder timer,
this will be indicated by the message “rec” in the display. In
this mode, most of the functions of the remote control are
disabled, to avoid an accidental interruption of the recording.
In stand-by mode, an active timer will be indicated by a blinking of the colon in the time display resp. in the LED.
2. Programme change time
If your receiver is in normal operating mode,it will switch to
the programmed programme slot at the time selected. In contrast to the setting for a video recorder timer, the controls
remain fully functional, and the receiver will not be switched
off at the end of the programme.
7.16.1 Manual programming of timers
>
Press the Menu key to display the Main Menu.
>
Use the arrow keys up/down to mark the item
Manage timer.
>
Confirm by pressing OK.
The sub-menu Manage timer will be displayed.
(Fig..7-23)
>
Use the arrow keys up/down to select the type of
timer you wish to programme.
>
Press the OK key to go to the entry window in order
to programme a new timer event. (Fig. 7-24)
(Fig. 7-23)
To programme an event, proceed as follows:
Source
>
Use the arrow keys to mark the column Source.
>
Confirm by pressing OK.
>
In the selection window that will now be displayed,
use the arrow keys up/down to select the desired
source (TV or Radio).
>
Confirm by pressing OK.
Depending on the previous setting, either the TV or
the radio programme list will now be displayed.
91
(Fig. 7-24)
>
Now use the arrow keys to mark the desired programme.
>
Use the arrow keys up/down to move the marker
around the list one line at a time.
>
Use the arrow keys left/right to move around the
list one page at a time.
>
Press the OK key to accept a programme into the
timer memory.
Date
>
Use the arrow keys to mark the column Date.
>
Use the numeric keys to enter the date (in 4-digit
format) on which the timer event is to take place.
Start
>
Use the arrow keys to mark the column Start.
>
In this line, use the numeric keys to enter the starting time for the timer.
Stop
>
Repeat the steps as for “Start”in order to enter the
stopping, or ending time (except in the case of programme change timers).
Repeat
>
Use the arrow keys to mark the column Rep.
>
Confirm by pressing OK.
A selection window will be displayed, presenting
various repeat options.
1x
Timer active once
T
Daily repeat
1W
Repeat once per week
1-5
Repeat only on weekdays
6-7
Repeat only on weekends
>
Use the arrow keys up/down to select the desired
function.
>
Press OK to accept the setting into memory.
Accepting data into memory
>
When you have completed the programming, press
the yellow function key Accept, to accept the data
into memory.
92
>
Press the TV/Radio key to return to normal operation.
7.16.2 Timer overview
The timer overview function gives you an overview of all
timer events already programmed.
>
To go to the menu Timer overview, call up the
menu Manage timer as described above.
>
Use the arrow keys up/down to mark the line
Timer overview.
>
Confirm by pressing OK.
If there are overlapping timer events, these overlaps will
be marked in red.
7.16.3 Change timer programming
>
To change an existing timer setting, use the arrow
keys up/down to mark the timer event you wish to
change.
>
Press the yellow function key Change to go to the
settings of the marked timer. Make the changes as
described in Point 7.16.1.
>
When you have completed the programming, press
the yellow function key Accept to accept the data
into memory.
7.16.4 Delete timer programming
>
To delete an existing timer setting, use the arrow
keys up/down to mark the setting.
>
Press the green function key Delete.
A message will be displayed: “Do you really want to
delete this timer?”
>
Use the arrow keys left/right to select Yes.
>
To delete the timer setting, confirm by pressing OK.
93
EN
If under the heading Programme you have selected
a programme that is blocked in terms of Point 8.3, you
will first have to enter the PIN code before the data
can be transferred to memory.
7.16.5 Programming a new timer event
>
To programme a new timer event, use the arrow
keys up/down to mark a blank line in the menu
Timer overview.
>
Press the yellow function key New to go to the entry
window allowing you to programme a new timer event.
Complete this in accordance with Point 7.16.1.
>
Use the arrow keys up/down to mark the additional window displayed: Type.
>
Confirm by pressing OK. A window showing the timer
types available will be displayed.
>
Use the arrow keys up/down to select the desired
timer type.
>
To accept the timer type, confirm by pressing OK.
>
When you have completed the programming, press
the yellow function key Accept to accept the data
into memory.
Please note!!!
Please ensure that the receiver has acquired the time. This
will be shown in the display while the unit is in stand-by
mode. If this is not the case, leave the receiver switched on to
a major programme such as ZDF for approximately 30
seconds, so that the receiver can acquire the current time.
Now the time should be shown in the display while the receiver is in stand-by mode (provided this was activated in Point
6.2.4).
8 Changing the basic programming
8.1 Configuring the Favourites list
This chapter describes how you can change the pre-programming of your digital receiver as well as the Favourites programme list in accordance with your own preferences. This
function is also required to sort newly found programmes into
the programme list
after a programme scan has been performed.
In this regard you should know the following: your receiver is
equipped with two programme lists, the Favourites list
and the Total list. The Favourites programme list includes
all the programmes you have accepted into the list according
to the procedure described below. The Total list includes all
programmes.
94
EN
In addition, this chapter describes how you can delete programmes, block access to programmes via the parental control function, or accept programmes into the EPG. When calling up the programme list via the OK key, the Favourites
programme list will be displayed.
8.1.1 Calling up programme list management
To customise the Favourites list, proceed as follows:
>
Press the Menu key to call up the Main Menu.
(Fig. 8-1)
>
Use the arrow keys up/down to mark the line
Manage TV lists, in order to work on the TV list, or
Manage Radio lists, in order to work on the radio
list.
>
Confirm by pressing OK.
The programme list management required to work on
the respective Favourites list (TV or Radio list) will be
displayed. (Fig. 8-2) The Favourites list will be displayed on the right half of the screen. This is now active,
with the currently selected programme being marked.
The alphabetically sorted Total list will be displayed on
the left half of the screen.
The Total list includes all available programmes.
>
Press the red function key to move the marker to the
Total list. This is now active.
>
Press the red function key again to display a selection window. Here you have the option of sorting the
Total list according to various selection criteria (e.g. all
programmes, all unencrypted, all new programmes, all
programmes found, all English programmes, etc.) or
sorted by Provider.
>
Use the arrow keys up/down to select the desired
programme list (e.g. Total list).
>
Confirm by pressing OK.
An additional selection window will now be displayed.
(Fig. 8-3)
>
Now use the arrow keys up/down to specify the
criterion according to which the Total list is to be sorted. For instance, select All programmes, to
display all available programmes in the Total list, or
All new, to display only programmes newly found by
the most recent scan, or All English, to display only
English-language programmes.
>
Confirm by pressing OK.
95
(Fig. 8-1)
(Fig. 8-2)
(Fig. 8-3)
Now, depending on your selection, a programme list containing e.g. all programmes, all new or all English-language programmes will be displayed. Programmes already included in
the Favourites list are indicated by a check-mark.
>
Press the red function key Programmes
resp. the green function key TV List you can
switch back and forth between the Favourites list
and the Total list. The currently active list will be
indicated by a blue marker.
8.1.2 Adding programmes to the Favourites list
To accept programmes from the Total list into the Favourites
list, call up the programme list management as described in
Point 8.1.1, and go to the Total list.
>
Press the blue function key Functions.
A selection window showing the available functions will
be displayed. (Fig. 8-4)
>
Use the arrow keys up/down to mark the item
Add.
>
Confirm by pressing OK.
>
Use the arrow keys up/down to mark a programme you wish to accept into the Favourites list.
>
Press the yellow function key Add to accept the
marked programme into the Favourites list.
(Fig. 8-4)
Marking blocks of programmes
To mark several programmes simultaneously, proceed
as follows:
>
Press the OK key to go to the selection mode.
The marked programme will be indicated by a cross
on the left of the programme.
>
You may now use the arrow keys up/down to
mark the previous or following programmes as well.
>
When you have completed marking the desired programmes in this manner, press the yellow function
key Add to add the marked programmes to the
Favourites list.
96
8.1.3 Deleting programmes
8.1.3.1 Removing (deleting) from the Favourites list
>
EN
To remove programmes from the Favourites list, call up the
programme list management as described in Point 8.1.1.
The Favourites list will be displayed and active.
Press the blue function key Functions.
A selection window showing the available functions
will be displayed. (Fig. 8-5)
>
Use the arrow keys up/down to mark the line
Delete.
>
Confirm by pressing OK.
>
Use the arrow keys up/down to mark a programme you wish to delete from the list.
>
Press the yellow function key Delete.
The message will be displayed: “Do you really want to
delete the programme(s) from the list?”.
>
Use the arrow keys left/right to select Yes or
No.
>
Confirm by pressing OK.
>
To remove several programmes simultaneously, mark
these as described in 8.1.2 (Marking blocks of
programmes).
>
When you have completed marking the desired programmes in this manner, press the yellow function
key Delete. The message will be displayed:“Do you
really want to delete the programme(s)?”.
>
Use the arrow keys left/right to select Yes or
No.
>
Confirm by pressing OK.
The programmes deleted in this manner will, however,
remain in the Total list, and can be added to the Favourites
list again at any time.
8.1.3.2 Deleting from the Total list
To remove programmes from the Total list, proceed as described in Point 8.1.3.1. However, after calling up the programme
list management, press the red function key Programmes
to first switch to the Total list, then select the function
Delete.
97
(Fig. 8-5)
8.1.4 Sorting programmes
To sort the order of programmes in the Favourites list according to your preferences, call up the programme list management as described in Point 8.1.1. The Favourites list will be
displayed and active.
(Fig. 8-6)
>
Press the blue function key Functions. A win dow
showing the available functions will be displayed.
(Fig. 8-6)
>
Use the arrow keys up/down to mark the line
Sort.
>
Confirm by pressing OK.
>
Now use the arrow keys up/down to mark the programme you wish to place at a different position in the
list.
>
Now press the yellow function key Sort. A double
arrow will appear next to the programme selected.
>
Now use either the arrow keys up/down or the
numeric keys to place the programme at the position in the programme list where you would like to
place it.
>
Press the yellow function key Sort to enter the new
position of the programme into memory.
>
To sort several programmes simultaneously, mark
these as described in 8.1.2 (Marking blocks of
programmes).
>
Now press the yellow function key Sort. A double
arrow will appear next to the block of programmes
selected.
>
Now use either the arrow keys up/down and/or
the numeric keys to place the programme block at
the position in the programme list where you would
like to place it.
>
Press the yellow function key Sort to enter the new
position of the programme block into memory.
>
When you have completed configuring the programme
list according to your preferences in this manner, press
the Menu key to return to normal operation.
98
8.2 Programming the electronic
programme guide
>
Press the Menu key to call up the Main Menu.
>
Use the arrow keys up/down to mark the line
Settings.
>
Confirm by pressing OK.
The sub-menu Settings will be displayed.
>
Use the arrow keys up/down to mark the line
Programme guide.
>
Confirm by pressing OK. The menu Programme
guide will be displayed. (Fig. 8-7)
>
Use the arrow keys up/down to move the marker
within the menu, and to change the various positions
as shown. When selecting a menu item, please also
note any messages displayed on screen.
EN
Your receiver is equipped with the facility of receiving a data
channel with additional SFI data via cable. This gives you a
preview of SFI data of up to a week in advance.
(Fig. 8-7)
8.2.1 Selecting a channel
To obtain a better overview, you can programme the electronic programme guide SFI so that this contains only your
favourite programmes.
Please note:
The larger the number of programmes included in the electronic guide, the longer it will take to download the SFI data!
In addition, the maximum preview period of 7 days in advance may not be possible if too many programmes are included
in the electronic programme guide.
>
Press the OK key. The Favourites list of the category
selected (Radio or TV) will be displayed. The programme currently selected will be marked. (Fig. 8-8)
>
Switch between the TV and radio lists by pressing the
green function key.
>
Press the red function key to display a selection window. Here you have the option of selecting the desired
type of programme list.
>
Use the arrow keys up/down to select the desired
type of programme list
(e.g. Favourites list).
>
Confirm by pressing OK.
The programme list selected will be displayed.
99
(Fig. 8-8)
>
Use the arrow keys to mark a programme you wish
to include in the electronic programme guide.
>
Press the yellow function key SFI to include the
marked programme in the electronic programme
guide.
>
To include several programmes in the electronic programme guide simultaneously, proceed as described
in 8.1.2 (Marking blocks of programmes).
>
When you have completed marking the desired programmes in this manner, press the yellow function
key SFI to include the marked programmes in the
electronic programme guide.
>
Press the Menu key to return to normal operation.
You may now start the downloading procedure manually:
>
Use the On/Standby key to switch the receiver off
(Standby).
>
Now, while “oooo” is shown in the display, press the
SFI key.
The receiver will now carry out the downloading procedure. This will be indicated by the message SFLd
shown in the display, followed by the percentage of
SFI data already downloaded.
>
The downloading procedure can be interrupted by
switching on the digital receiver (On/Stand-by key).
8.2.2 Start category
The electronic programme guide provides various types of
presentation (categories).
Overview
This form of presentation provides a quick overview of all programmes included in the electronic programme guide.
Programmes
In this form of presentation, a table showing the day’s programmes for a single channel is displayed.
Genres
If you are interested in specific types of programmes, such as
movies, news, etc., you can have the programmes displayed
by type, or genre.
Last used
When using this setting, each time you call up the SFI the
presentation form last used will be displayed.
100
In this line, use the arrow keys left/right to select
the form of presentation to be used whenever the
electronic programme guide is called up.
>
If you select Genres,you can then proceed to use the
arrow keys to select your preferred genre (e.g.
movies, news, shows, sport, etc.).
EN
>
8.2.3 Updating time
>
In the line Updating time use the numeric keys
to set the time at which the automatic download of SFI
data is to be carried out.
8.2.4 Updating
>
To receive the data channel, mark the line Update.
>
Set this to On by pressing OK.
If you do not wish to receive the additional data, or if you are
unable to receive the data because of your location, you can
switch off the data reception function:
>
Set the line Update to Off in order to switch off the
data reception function.
8.2.5 SFI channel
>
Press the OK key to display the sub-menu SFI
Channel (Fig. 8-9).
>
To start the updating of SFI data manually, press the
red function key Start now.
If the parameters applicable to the data channel used to
download the SFI list have changed, you can use this menu
to correct the parameters. The current transponder data is
available from specialist retailers. Generally, though, you
should not make any changes in this menu.
8.3 Parental control
Your receiver is equipped with a parental control function.
This allows you to protect important functions (e.g. calling up
the main menu) from unauthorised access. In addition, programmes and recordings that you have blocked can in future
only be selected by first entering a four-digit PIN code (unit
PIN).
To work on the Parental control menu, proceed as follows:
>
Press the Menu key to call up the Main Menu.
>
Use the arrow keys up/down to mark the line
Settings.
101
(Fig. 8-9)
(Fig. 8-10)
>
Confirm by pressing OK.
The sub-menu Settings will be displayed.
>
Use the arrow keys up/down to mark the line
Parental control.
>
Confirm by pressing OK.
The menu Parental control will be displayed.
(Fig. 8-10)
>
Use the arrow keys up/down to move the marker
around within the menu, and to change the individual
positions as indicated. Please note any messages
displayed on screen when you select a menu item.
8.3.1 Selecting channels
>
Press the OK key. The Favourites list of the category
currently selected (Radio or TV) will be displayed. The
programme currently selected is marked. (Fig. 8-11)
>
You can switch back and forth between the TV and the
Radio list using the green function key.
>
Press the red function key to open a selection window. Here you have the option of selecting the desired
type of programme list.
>
Use the arrow keys up/down to select the desired
type of programme list (e.g. Favourites list).
>
Confirm by pressing OK. The programme list selected
will be displayed.
>
Now use the arrow keys to mark the programme to
which you wish to block access.
>
Use the yellow function key to block access to the
(Fig. 8-11)
programme. The parental control symbol
displayed next to the programme selected.
will be
>
To block access to several programmes simultaneously, proceed as described in 8.1.2 (Marking blocks
of programmes), and block access by pressing the
yellow function key.
>
When you have completed configuring the programme
list according to your preferences in this manner,
press the Menu key to return to normal operation.
>
To remove the blocking of individual programmes, proceed as described above. Mark the appropriate programme, and remove the parental control symbol by
pressing the yellow function key.
102
8.3.2 Changing the unit PIN
>
Press the OK key. The menu used for changing the
unit PIN code will be displayed. (Fig. 8-12)
>
Now use the numeric keys to enter the current unit
PIN code. (Default setting 0000)
>
Use the numeric keys to enter the new unit PIN
code.
>
Repeat the entry.
>
When you have completed changing the unit PIN
code in this manner, you will automatically be taken
back to the parental control menu.
Note!
Do not forget your unit PIN code. If you do forget it at som
point, please consult your retail specialist!
8.3.3 Mode
>
In this line, use the arrow keys left/right to switch
the parental control On or Off
8.4 Programme scan (search)
Please note:
The cable network within which your receiver is operating will
determine which programmes can be received. Your cable
network operator will provide information on the programmes
available.
For your receiver to receive and reproduce the digital programmes available in the cable network, u will have to perform a programme scan (search). There are various options
for performing a programme scan.
1. Automatic scan
Select this type of scan in order to search the entire frequency range of the receiver for programmes.
2. Expanded scan
Select this type of scan in order to search a specific frequency or channel range for programmes, or in order to perform a
network scan.
3. Manual scan
Select this typer of scan to search a specific frequency for
programmes.
103
EN
The unit PIN is set to a default setting of 0000 at the factory.
(Fig. 8-12)
When the scan has been completed, a message will be
displayed on your TV screen, indicating the number of programmes your digital receiver has found, how many of these
are ne, and how many of them are encrypted programmes.
New programmes are stored in the Total list,and can then be
included in the Favourites list in accordance with Point
8.1.
>
In order to scan for programmes, first call up the
Main Menu. (Fig. 8-13)
>
Use the arrow keys up/down to mark the line
Scan.
>
Confirm by pressing OK.
The sub-menu Scan will be displayed. (Fig. 8-14)
>
Now use the arrow keys up/down to select the
type of scan you would like to perform, and confirm by
pressing OK.
(Fig. 8-13)
(Fig. 8-14)
8.4.1 Automatic scan
When this typer of scan is selected, the entire range of frequencies received by the receiver will be scanned for programmes. You may decinde whether you wish to scan for all
(encrypted and unencrypted) programmes or only for unencrypted programmes. (Fig. 8-15)
>
Decide by pressing the OK key whether you wish to
scan only for unencrypted programmes (Free
Programmes) or whether you wish to include
encrypted programmes too (All Programmes).
>
To confirm, press the red function key Start scan.
This scanning procedure may take more than 15 minutes. Please also note any messages displayed on
screen.
(Fig. 8-15)
8.4.2 Expanded scan/Range scan
The Expanded scan/Range scan gives you two options for
performing a programme scan.
1. Frequency scan
In the case of a frequency scan, a specified range of frequencies, determined by the user, is scanned for programmes.
2. Channel scan
(Fig. 8-16)
In the case of a channel scan(Fig. 8-16), a specified range of
channels, determined by the user, is scanned for programmes. A channel scan is quicker than a frequency scan.
>
Press OK to display a selection table showing the
various scan options available.
104
Use the arrow keys up/down to select the type of
scan youi wish to perform.
>
Confirm by pressing OK.
>
Use the arrow keys up/down to mark the fields
Start channel resp. Start frequency (only in the
case of a frequency or channel scan). Please note
that the figure given for the start channel resp. the
start frequency must be lower than that for the stop
channel resp. stop frequency.
>
Use the arrow keys left/right to select the start
channel, or use the numeric keys to enter the start
frequency (only in the case of a frequency or channel
scan).
>
Use the arrow keys up/down to mark the field
Stop channel resp. Stop frequency and proceed
as described above to enter the stop channel resp.
the stop frequency (only in the case of a frequency or
channel scan).
Below the line Symbol rates you will see a list of the symbol rates which are covered when a scan is carried out. In
order to include additional symbol rates in a scan, you can
adjust the list as follows:
>
To add new symbol rates, use the arrow keys
up/down to select the line Symbol rates New
and confirm by pressing OK (only in the case of a frequency or channel scan).
>
Now use the numeric keys to enter a new symbolrate, and confirm this by pressing OK (only in the
case of a frequency or channel scan).
The new symbol rate entered will be added at the end
of the list.
>
To delete the symbol rate shown at the end of the list,
use the arrow keys up/down to select the line
Delete then press OK (only in the case of a frequency or channel scan).
In the line Scan mode you can decide whether you
wish to scan only for unencrypted programmes, or
whether you want to include encrypted programmes
as well.
>
To do this, use the arrow keys up/down to mark
the line Scan mode, then press OK to decide whether you wish to scan only for unencrypted programmes (Only free) or whether you also wish to scan for
encrypted programmes (All).
>
Press the red function key Start scan to start the
programme scan. The scan will commence. Please
note any additional messages displayed on the screen.
105
EN
>
>
You can abort the scan by pressing the red function
key.
The scan may take more than 15 minutes. Please also note
any messages displayed on the screen.
8.4.3 Manual scan
You may choose to scan a specific frequency (see Point 9,
Technical terms) for programmes (Fig. 8-17). To do this, you
will have to enter the following data:
Channel frequency
In this line you must enter the frequency at which the desired
programmes are broadcast.
(Fig. 8-17)
>
Use the arrow keys up/down to mark the line
Channel frequency.
>
Use the numeric keys to enter the desired
frequency.
Symbol rate
In this line you must enter the symbol rate at which the programmes are broadcast.
>
Use the arrow keys up/down to mark the line
Symbol rate.
>
In this line, use the numeric keys to enter the desired symbol rate.
Modulation
Use this line to enter the modulation type used.
>
Use the arrow keys up/down to mark the line
Modulation.
>
Press the OK key, repeatedly if necessary, to enter
the modulation type used.
>
Now press the red function key Start scan. The
scan will commence. Please note any additional messages displayed on the screen.
>
If you wish to abort the scan procedure, press the red
function key again.
To search very specifically for a particular programme, you
may also use the PID scan.
>
Press the green function key PID scan.
>
Then use the arrow keys up/down to mark the
lines PCR PID, Audio PID and Video PID and
use the numeric keys to enter the appropriate numbers.
>
Start the scan by pressing the red function key Start
scan.
106
While the scan is still in progress, you can follow the transponder scan on your screen. When the scan is completed,
the number of transponders found, the number of programmes and of new programmes found will be displayed. In
addition a prompt will be displayed, (Fig. 8-18), asking whether you wish to accept the programmes found automatically
into the TV or Radio list. If you decide to accept the programmes automatically, you can also still decide whether these
should be added to the Favourites list in sorted or unsorted order.
Sorted
The programmes found will be sorted into the Favourites list
in accordance with a pre-programmed list. The order of listing
the programmes will be determined by the audio language
set in Point 6.3.2 resp. by the country selected in Point 6.2.2.
Unsorted
The newly found programmes are added to the end of the
Favourites list in an unsorted order.
No
The newly found programmes are not included in the
Favourites list, but remain only in the Total list.
>
Use the arrow keys left/right to decide whether
you wish to accept the programmes in sorted or
unsorted order.
>
Confirm by pressing OK.
Please note any messages displayed on screen.
>
Independently of whether you have accepted the
newly found programmes into the Favourites list automatically, these can be added to the Favourites list
manually at any time as described in Chapter8.1.
>
Press the Menu key to return to normal operation.
107
EN
8.4.4 After the scan
(Fig. 8-18)
8.5 Service settings
You can revert to the original default settings pre-programmed
at the factory at any stage. In addition, if you find that the programme list is outdated because of changes made by the
programme providers, you may delete the programme list
completely, and then perform a new programme scan. Please
note that
(Fig. 8-19)
(Fig. 8-20)
after you have deleted the list, you must then start a programme scan, and must then copy the desired programmes from
the Total list to the Favourites list.
>
Press the Menu key to call up the Main Menu.
(Fig. 8-19)
>
Now use the arrow keys up/down to mark the
menu line Settings.
>
Confirm by pressing OK.
The sub-menu Settings will be displayed. (Fig. 8-20)
>
Use the arrow keys up/down to mark the menu
line Service settings.
>
Confirm by pressing OK.
The sub-menu Service settings will be displayed
(Fig. 8-21)
8.5.1 Activate default setting
After this function is called up, the default factory programming will be implemented again, all own settings will be deleted, and the installation assistant AutoInstall will be started.
>
Use the arrow keys up/down to mark the line
Activate default setting.
>
Confirm by pressing OK.
The message will be displayed: “Do you really want to
activate the default setting?”.
>
Use the arrow keys left/right to mark either Yes
or Abort.
>
Confirm by pressing OK.
(Fig. 8-21)
8.5.2 Delete all programmes
This function serves to delete the entire programme memory.
>
Use the arrow keys up/down to mark the line
Delete all programmes.
>
Confirm by pressing OK.
The message will be displayed:“Do you really want to
delete all programmes?”.
108
>
>
Use the arrow keys left/right to select either Yes
or Abort.
Confirm by pressing OK.
EN
8.5.3 Update software
In addition, your digital receiver is equipped to receive updates of its operating software via cable.
>
Press OK to go to the sub-menu Update software
(Fig. 8-22). To perform a software update, mark the
line Update.
>
Switch the Update software function to On by pressing OK.
>
In the line Update time use the numeric keys to
enter the time at which the software update is to be
carried out.
>
To start the update of the operating software manually,
press the red function key Test.
>
Press the Menu key to return to normal operation.
Should the parameters of the data channel for downloading
the software updates have changed, you can correct these
manually in this menu, as described under Point 8.4.3 (manual programme scan).Current channel data can be obtained
from your specialist retailer. In general you should not make
any changes in this menu.
Note:
The new software can be downloaded automatically only when the digital receiver is in stand-by
mode. The downloading procedure is indicated by
the display “CAbL” resp. “CAb0” to “CAb9”. Do
not interrupt this procedure by switching the
receiver on or off.
Independently of whether you have switched the automatic
software updating function on or off, the system will automatically check for the availability of a new operating software
version for your digital receiver each time you switch on the
receiver. If a new version is available, a corresponding message will be displayed on screen (Fig. 8-23).
To start the software update, follow the instructions displayed
on screen.
109
(Fig. 8-22)
(Fig. 8-23)
8.5.4 Copying the settings
You have the facility to copy all the settings, such as programme list, antenna settings, etc. of your digital receiver
(sender) to another digital receiver (receiver) of the same
type, and using the same version of the operating software.
(Fig. 8-24)
(Fig. 8-24)
>
To do this, connect the two receivers by means of a
null modem cable.
>
Switch on the (destination, receiving) receiver.
>
To copy the settings, press any operating key on the
(source, sending) receiver.
The settings of the source receiver will now by transmitted to the destination receiver. Please note any
messages displayed on screen.
8.6 System configuration
Use this menu item to view the specific receiver data
(e.g. current software version).
>
Use the arrow keys up/down to mark this line in
the sub-menu Settings.
>
Confirm by pressing OK.
>
Press the Menu key to return to normal operation.
8.7 Encryption/decoding system
This menu point takes you to the sub-menues for the
Smartcard used, and for the CI module. You can view information related to the Smartcard or the CI module used by
selecting the Smartcard or the CI interface, by pressing the
arrow keys, then confirm by pressing OK.
Manual Initialisation of the CI module
>
You can initialise the CI module manually by pressing
the red function key CI Reset.
110
Antenna cable:
Connecting cable between the modulator of the cable receiver and the antenna input of the television set, used as an
alternative if no SCART socket is available.
AV: see SCART
Cable receiver:
The television set cannot process the digital signals received
via the cable network. The cable receiver processes the signal in such a way that Audio and Video signals (AV) are provided at the receiver outputs in a form that can be processed
by the television set.
CATV:
Abbreviation for Community Antenna Television. Reception
of radio and television programmes via a community antenna. In the case of cable television networks, this is used internationally in the form of cable television or broadband cable
networks.
Channel:
Part of a frequency band that is delivered in accordance with
a specified allocation procedure. A TV channel consists of
two frequencies, one for the vidual and one for the audio content. Each channel is designated with a specific number (with
the exception of television channels in Europe broadcast on
the 40-230 MHz frequency band, these are designated by letters).
Co-axial cable:
Connection cable between antenna socket and cable receiver,used to transmit the signals received.
Data compression/MPEG1/MPEG2:
The volume of data involved in transmitting the current television standard (625 lines, and a picture frequency of 50 Hz
results in a figure of 216 MBit/s of digital data. This would
require bandwidths that can currently not be provided, whether by cable or by terrestrial systems. For this reason, the
total volume of data transmitted is reduced by means of a
compression algorithm. For Europe, MPEG-2 has been
accepted as the international standard for data compression.
MPEG-2 is an expanded version of MPEG-1.
DVB:
Digital Video Broadcasting: A universal digital transmission
technology used for pictures, graphics, sound and text, i.e.
for data in any shape or form, and in any possible, always
appropriate quality.
111
EN
9 Technical terms
Encryption:
Encryption of programmes is a technical procedure that ensures only a limited audience of listeners or viewers has access
to these programmes. Various systems are used to achieve
this, including Irdeto, Cryptoworks, Seca, Viaccess etc..
Frequency:
Physical measurement, indicates the number of cycles or
oscillations per second, the unit of measurement is the Hertz
(Hz).
QAM:
Quadratic Amplitude Modulation: Modulation procedure with
phase scanning used to transmit digital signals in cable networks.
SCART:
Connector standard used for television sets, video recorders,
receivers and other home electronics equipment to transmit
Audio (sound) and Video (Picture) signals (AV).
Signal:
General term used to describe data, for information, a sound
or an image that is altered electrically in order to be transmitted over a distance, or to connect various appliances with
each other.
Software update:
Digital television is a new medium, providing not only improved sound and picture quality, but also the option of providing
interactive services. These new services are constantly being
developed and improved by providers. To utilise these services, it may be necessary to occasionally update the software
of the digital receiver.
10 Technical data
Cable tuner:
Input frequency range
Input level range
Tuner input
Input impedance
Tuner output
Demodulation
Symbol rate
FEC
Card reader:
Type
Common Interface:
Type
Power consumption
Demultiplexing:
112
51 .... 858 MHz
47 dBµV ... 70 dBµV
IEC connector (female)
75 Ohm
IEC connector (male)
16/32/64/128/256 QAM
1 ... 7 Mbaud/s
Reed-Solomon
1 Slot card reader for integrated
CA system
1 Common Interface slot
for CA modules
max. 0,3A/5V
in accord. with ISO 13818-1
Video standard
Active picture area
Picture format
Picture material 16:9
Audio decoding:
Audio compression
Audio mode
Sampling frequencies
MPEG-2 and MPEG-1 compatible
Up to MP@ML
(main profile @ main level)
PAL / 25 Hz
720 pixels x 576 lines
4 : 3 / 16 : 9
Automatic adaptation for 16:9 TV
sets (via SCART)
Letterbox filtering for 4:3 TV sets
MPEG-1 & MPEG-2 Layer I and II
Dual (main/sub), Stereo
32 kHz, 44.1 kHz, 48 kHz
Audio parameters:
Output analogue:
Output level L/R
Output impedance
THD
S/N
Cross-talk
Input analogue:
Input level l/r
Input impedance
Volume at switching on
Output digital:
SP/DIF output
0,5 V r.m.s. (nominal)
600 Ohms
> 60 dB ( 1 kHz )
> 60 dB
< -65 dB
0,5 V r.m.s. (nominal)
> 40 kOhms
Automatically set to previous
volume selected
electrical, cinch socket
optical, Toslink
Dolby Digital AC3
Video parameters:
Output:
Output level FBAS
Output level Y
Output level C
Output level RED
Output level GREEN
Output level BLUE
S/N weighted
Video text:
Teletext filtering
Scanning teletext data
1 Vs-s +/- 0.3 dB to 75
1 Vs-s +/- 0.3 dB to 75
1 Vs-s +/- 0.3 dB to 75
0,7 Vs-s +/- 0.1Vp-p to
0,7 Vs-s +/- 0.1Vp-p to
0,7 Vs-s +/- 0.1Vp-p to
> 60 dB
Ohms
Ohms
Ohms
75 Ohms
75 Ohms
75 Ohms
Soft video text
corresp. to ETS 300 472Standard
(FBAS) corresponding to ITU-R
BT.653-2 lines: 6-22 and 320-335
800 pages memory
TV SCART:
Output:
FBAS, RGB or S-Video
113
EN
Video decoding:
Video compression
VCR SCART:
Input:
Output:
FBAS; RGB or S-Video
FBAS or S-Video
Display:
LED
4-digit, 7-segment display
Serial interface RS 232:
Type
RS 232, bidirectional
Bit rate
115,2 kBit/s max.
Connector
D-SUB socket, 9 pin
Function
Update f. operating software and
pre-programming
Programme memory:
No. of programmes
Favourites list TV:
999 TV programmes
No. of programmes
Favourites list Radio:
999 RADIO programmes
Number of programmes:
Total list TV/Radio:
Total of 5000 programmes
possible in Total list
SFI data:
SFI preview:
maximum 7 days in advance
Timer:
Events:
maximum 30 events, one year in
advance
Remote control
system:
Subsystem address
Modulation frequency
Infra-red wavelength
RC-5
8 (SAT 1), 10 (SAT 2)
36 kHz
950 nm
Power supply:
Mains power adapter:
Power requirement:
3,0 W
3,4 W
10 W
in stand-by mode (clock off)
in stand-by mode (clock on)
in operation
Nominal voltage:
230 V / 50 Hz AC
Input voltage:
180 V.... 250 V / 50 Hz AC
General:
Dimensions (WxDxH):
Weight:
285 mm x 133 mm x 40 ... 43 mm
ca. 490 g
114
Problem
Possible cause
Solution
Various programmes not shown in
programme list
Incorrect programme list selected
Select another programme list
(see Point 7.2.3.1)
Sound OK, no TV picture
Radio mode selected
Switch to TV mode
Receiver cannot be operated
Defective data stream -->receiver
blocked
Disconnect mains plug for approx.
5 secs., then reconnect receiver
Remote control not working
Batteries are spent
Change batteries
Incorrect remote control option
selected
Change remote control option
(see Point 2 and 6.2.3)
Time not downloaded
Switch to e.g. ZDF for 30 seconds
Time not displayed in stand-by
mode
No picture, no sound, display not on No mains power
Check mains cable and plug
No reception of programmes previo- Programme now transmitted on
usly received
another channel
Perform scan (see Point 8.4)
Receiver cannot be switched on or
cannot be operated
Programme no longer being transmitted
None
Receiver blocked
Perform Flash Reset: Note!
All personal settings will be lost.
>
Disconnect mains plug.
>
Simultaneously press programme up/down key on receiver
and keep pressed down.
>
While programme up/down key
is pressed, reconnect mains
plug.
>
Keep keys pressed down for
approx. 5 secs. until message
* “FLAS” appears.
115
EN
11 Troubleshooting guide
For daily use
Switching on and off
>
>
Switch the digital receiver on by pressing the
On/Standby key, either on the unit or on the remote
control.
Press this key again to switch the receiver off again.
Programme selection
Using the programme up/down keys
>
Use the Programme keys up/down either on the
unit or on the remote control to move up or down one
programme slot at a time.
Using the numeric keys
>
Use the numeric keys to enter the desired programme number. For example:
1
for programme slot 1
1,
then 4
for programme slot 14
2,
then 3,
then 4
for programme slot 234
When entering programme numbers consisting of sevral
digits, you have approx. 3 seconds time after pressing a key
to complete the entry.
If you wish to enter a number consisting of only one or two
digits, you can speed up the selection process by keeping the
key pressed down a little longer on the last digit.
Using the programme list
>
>
>
>
>
Press OK.
Now use the arrow keys up/down to mark the
desired programme.
Press the OK key to display the marked programme.
Use the arrow keys up/down to move up or down
the list one line at a time.
Use the arrow keys left/right to move through the
list one page at a time.
Volume control
>
>
Adjust the volume of your digital receiver by pressing
the Volume + key to increase the volume, and the
Volume - key to decrease the volume.
Press the Sound on/off key to switch the sound on
or off (mute).
TV/Radio switching
>
Press the TV/Radio key to switch between TV and
radio mode.
116
Avec système de décodage intégré et interface
PCMCIA pour insertion d'un module CI..
Pour recevoir les chaînes en clair et cryptées
du câble.
FR
DIGIT MF4-K CC
1 Table des matières
1
Table des matières . . . . . . . . . . . . .2
2
Illustrations . . . . . . . . . . . . . . . . . . .5
3
A lire en priorité . . . . . . . . . . . . . . .8
Remarque importante sur le fonctionnement .8
Conseils concernant la mise au rebut . . . . .9
Consignes de sécurité . . . . . . . . . . . . . . . . .9
Interruptions d'utilisation . . . . . . . . . . . . . . .9
4
4.1
4.2
4.3
4.4
4.4.1
4.4.2
4.5
4.6
Raccordements11 . . . . . . . . . . . . .11
Raccordement au réseau câblé . . . . . . . . .11
Raccordement à un téléviseur . . . . . . . . . .11
Magnétoscope (VCR) . . . . . . . . . . . . . . . . .11
Ampli Hi-Fi . . . . . . . . . . . . . . . . . . . . . . . . .11
Analogique . . . . . . . . . . . . . . . . . . . . . . . . .11
Numérique . . . . . . . . . . . . . . . . . . . . . . . . .12
Interface série (RS-232) . . . . . . . . . . . . . .12
Raccordement secteur . . . . . . . . . . . . . . . .12
5
Première installation . . . . . . . . . . .12
6
6.1
6.2
6.2.1
6.2.2
6.2.3
6.2.4
6.3
6.3.1
6.3.2
6.3.3
6.3.4
6.3.5
6.3.6
Paramétrage . . . . . . . . . . . . . . . . .15
Langue d'interface . . . . . . . . . . . . . . . . . . .15
Paramétrage de base . . . . . . . . . . . . . . . .15
Décalage horaire GMT (heures) . . . . . . . .16
Pays . . . . . . . . . . . . . . . . . . . . . . . . . . . . . .16
Code de la télécommande . . . . . . . . . . . . .16
Horloge en mode veille . . . . . . . . . . . . . . .16
Paramétrage Audio/Vidéo . . . . . . . . . . . . .16
Format de l'image . . . . . . . . . . . . . . . . . . .17
Langue (signal Audio) . . . . . . . . . . . . . . . .17
Langue (sous-titres) . . . . . . . . . . . . . . . . . .17
Mode PERITEL TV . . . . . . . . . . . . . . . . . .17
Mode PERITEL VCR . . . . . . . . . . . . . . . . .17
Dolby Digital (AC3) . . . . . . . . . . . . . . . . . .18
7
7.1
7.2
7.2.1
Fonctionnement . . . . . . . . . . . . . .18
Mise en marche/Arrêt . . . . . . . . . . . . . . . .18
Sélection des chaînes . . . . . . . . . . . . . . . .18
A l'aide des touches de changement
de chaînes (haut/bas) . . . . . . . . . . . . . . . .18
A l'aide du pavé numérique . . . . . . . . . . . .19
A l'aide du navigateur (Liste des chaînes) .19
Sélectionner une liste . . . . . . . . . . . . . . . .19
Accéder aux chaînes bloquées . . . . . . . . .20
Fenêtre d'informations . . . . . . . . . . . . . . . .20
Réception des chaînes cryptées . . . . . . . .20
Fonctions particulières . . . . . . . . . . . . . . . .21
Options multi-sources . . . . . . . . . . . . . . . .21
Choisir l'heure de démarrage/film . . . . . . .21
118
7.2.2
7.2.3
7.2.3.1
7.2.4
7.2.5
7.3
7.3.1
7.3.1.1
7.3.1.2
7.6.1
7.7
7.8
7.9
7.10
7.11
7.12
7.13
7.14
7.15
7.15.1
7.15.2
7.15.3
7.15.4
7.15.5
7.15.6
7.15.7
7.15.7.1
7.15.7.2
7.15.7.3
7.15.7.4
7.15.8
7.16
8
8.1
8.1.1
8.1.2
8.1.3
8.1.3.1
8.1.3.2
8.1.4
8.2
8.2.1
8.2.2
8.2.3
8.2.4
Code PIN cryptage . . . . . . . . . . . . . . . . . .22
Réglage du volume . . . . . . . . . . . . . . . . . .22
Sélection TV/Radio . . . . . . . . . . . . . . . . . .23
Sélectionner une autre langue (mode TV )
ou station (mode Radio) . . . . . . . . . . . . . .23
Dolby Digital (mode AC3) . . . . . . . . . . . . .23
Revenir à la dernière chaîne régardée . . .24
Affichage de l'horloge et des informations
sur le programme . . . . . . . . . . . . . . . . . . . .24
Autres informations sur le programme . . .24
Arrêt sur image . . . . . . . . . . . . . . . . . . . . .24
Minuterie de mise en veille . . . . . . . . . . . .25
Information sur la chaîne . . . . . . . . . . . . . .25
Teletext . . . . . . . . . . . . . . . . . . . . . . . . . . . .25
Sous-titres . . . . . . . . . . . . . . . . . . . . . . . . .26
Guide Electronique des Programmes SFI .27
Téléchargement des données SFI . . . . . . .27
Interrompre le téléchargement . . . . . . . . . .28
Accès au Guide Electronique des
Programmes . . . . . . . . . . . . . . . . . . . . . . .28
Now "Maintenant" . . . . . . . . . . . . . . . . . . .28
Next "Suivant" . . . . . . . . . . . . . . . . . . . . . .28
More "Plus" . . . . . . . . . . . . . . . . . . . . . . . .29
Fonctions SFI . . . . . . . . . . . . . . . . . . . . . . .29
Informations SFI . . . . . . . . . . . . . . . . . . . . .30
Programmation SFI . . . . . . . . . . . . . . . . . .30
Vue d'ensemble des programmes SFI . . .31
Vue d'ensemble SFI par type de
programmes (Genre) . . . . . . . . . . . . . . . . .32
Quitter le mode SFI . . . . . . . . . . . . . . . . . .32
Enregistrements avec minuterie . . . . . . . .32
Modifier les paramètres de base .36
Configurer la liste Favoris . . . . . . . . . . . . .36
Accéder au gestionnaire de la liste de
chaînes . . . . . . . . . . . . . . . . . . . . . . . . . . .37
Ajouter des chaînes à la liste Favoris . . . .38
Supprimer des chaînes . . . . . . . . . . . . . . .39
Supprimer des chaînes de la liste des
favoris . . . . . . . . . . . . . . . . . . . . . . . . . . . .39
Supprimer de la liste Complète . . . . . . . . .39
Trier les chaînes . . . . . . . . . . . . . . . . . . . .40
Programmer le guide électronique des
programmes . . . . . . . . . . . . . . . . . . . . . . . .41
Sélectionner des chaînes/stations . . . . . . .41
Catégorie de démarrage . . . . . . . . . . . . . .42
Heure de mise à jour . . . . . . . . . . . . . . . . .43
Mise à jour . . . . . . . . . . . . . . . . . . . . . . . . .43
119
FR
7.3.2
7.4
7.5
7.6
8.2.5
8.3
8.3.1
8.3.2
8.3.3
8.4
8.4.1
8.4.3
8.4.4
8.5
8.5.1
8.5.2
8.5.3
8.5.4
8.6
8.7
Chaîne SFI . . . . . . . . . . . . . . . . . . . . . . . . .43
Contrôle parental . . . . . . . . . . . . . . . . . . . .43
Sélectionner les chaînes . . . . . . . . . . . . . .44
Modifier le code PIN de l'appareil . . . . . . .45
Mode . . . . . . . . . . . . . . . . . . . . . . . . . . . . .45
Recherche/Balayage des chaînes . . . . . . .45
Balayage automatique . . . . . . . . . . . . . . . .46
Balayage manuel . . . . . . . . . . . . . . . . . . . .48
Après la recherche . . . . . . . . . . . . . . . . . . .49
Paramètres d'usine . . . . . . . . . . . . . . . . . .50
Activer les paramètres par défaut . . . . . . .50
Supprimer toutes les chaînes . . . . . . . . . .50
Mise à jour logicielle . . . . . . . . . . . . . . . . .51
Copier les paramètres . . . . . . . . . . . . . . . .52
Configuration système . . . . . . . . . . . . . . . .52
Système de cryptage/de décodage . . . . . .52
9
Termes techniques . . . . . . . . . . . .53
10
Caractéristiques techniques . . . .54
11
Guide de dépannage . . . . . . . . . . .57
Pour une utilisation journalière . .58
Votre appareil porte le logo CE. Il est conforme à toutes les normes
européennes applicables.
Sujet à modification sans avis préalable, peut contenir des erreurs
d'impression. Revu en 11/04. TechniSat et DIGIT MF4-K CC sont des marques
déposées de
TechniSat Digital GmbH
Postfach 560
D-54541 Daun, Allemagne
www.technisat.de
Hotline Technical
(0049) 0180/5005-910*
*0,12 EUR/min. par le réseau Deutsche Telekom AG
Note!
Pour renvoyer votre appareil, utilisez l'adresse suivante:
TechniSat Teledigital AG
Service-Center
Löderburger Str. 94
D-39418 Stassfurt, Allemagne
120
2 Illustrations
Télécommande
Marche/Veille
Son on/off
Pavé numérique
FR
Option*
En mode TV:
Permet de sélectionner
son/sous-titres et les
fonctions spéciales
En mode Radio:
Permet de sélectionner les
stations en changeant
d'onde sous-porteuse
Touches multifonctions
Flèche Haut
Chaîne +
OK
Liste des chaînes on/off
Flèche Gauche
Volume –
Flèche Droite
Volume +
Flèche Bas
Chaîne -
Retour
Info
SFI
TV/Radio
Chaîne +/-
Volume +/Menu On/Off
Minuterie veille
EXTERNE
Teletext*
On/Mix/Off
Stop/Arrêt sur image
Option de la télécommande :
En changeant d'options sur la télécommande, vous pouvez utiliser cette dernière pour faire fonctionner
deux récepteurs TechniSat, un téléviseur ainsi qu'un enregistreur vidéo en utilisant le même codage.
>
Pour changer d'option sur la télécommande, appuyez simultanément sur la touche concernée (SAT1, SAT2, VCR ou TV) et OK!!!
A noter:
Pour pouvoir faire fonctionner ce récepteur, l'option de la télécommande de l'appareil à commander à
distance et le code de la télécommande paramétré comme indiqué au Point 6.2.3 doivent être les
mêmes.
* Cette fonction n'est disponible que si les données correspondantes sont retransmises
pour la chaîne sélectionnée.
121
Voyant DEL
Sélection des
chaînes haut/bas
Marche/Veille
Lecteur de carte à puce:
> Insérez doucement la carte à puce (la puce dorée vers le bas et
dans le bon sens d'insertion) dans le lecteur de carte aussi loin que
possible.
Entrée
Câble
Prise secteur
Prise PERITEL
VCR
Sortie
Câble
Sortie audio numérique (électrique)
Prise PERITEL Sortie Audio numéTV
rique (optique)
Sorties audio
analogiques
Insertion du module CI:
> Veuillez suivre les instructions du fabricant du module CI et
de la carte.
> Insérez la carte à puce dans le module CI correspondant.
> Insérez ensuite le module CI doucement dans la fente.
Interface
RS 232
122
Nous vous félicitons d'avoir acheté le récepteur numérique
TechniSat DIGIT MF4-K CC.
Le manuel d'utilisation que vous êtes en train de lire a été
conçu pour vous aider à optimiser du mieux possible l'utilisation de votre nouveau récepteur numérique et le plaisir qu'il
vous apportera grâce aux fonctionnalités complètes dont il
dispose.
Nous avons élaboré ce manuel d'utilisation pour qu'il soit le
plus complet et le plus simple possible.
L'étendue des fonctions de votre récepteur est en constante
évolution et des mises à jour sont disponibles. Ceci signifie
parfois que des étapes de fonctionnement qui ne figurent pas
dans ce manuel ont été ajoutées ou que certaines fonctions
existantes ont pu être modifiées. C'est la raison pour laquelle
nous vous recommandons de visiter la page d'accueil
Internet de TechniSat, à partir de laquelle vous pourrez télécharger la version à jour de ce manuel.
Nous vous souhaitons de nombreuses années de
divertissement visuel et sonore avec votre
TechniSat DIGIT MF4-K CC!
Votre
équipe TechniSat
123
FR
Cher client,
3 A lire en priorité
>
>
>
>
>
>
>
>
>
Avant de mettre votre récepteur en fonction, veuillez
tout d'abord vérifier que l'emballage contient bien tous
les composants qu'il devrait. Les éléments suivant doivent être inclus: 1 récepteur numérique, 1 câble secteur, 1 télécommande, 1 manuel d'utilisation, 1 carte de
garantie, 2 piles (1,5V micro-cell), 1 câble PERITEL.
Insérez les piles dans le compartiment à piles de la
télécommande en prenant garde à respecter la polarité indiquée.
Avant de raccorder votre récepteur numérique, veuillez
tout d'abord lire les consignes de sécurité du
Chapitre 3.
Les Chaptitres 4, 5 et 6 décrivent la façon de raccorder le récepteur numérique à un téléviseur, un
enregistreur vidéo (VCR), etc ... ainsi que la façon
d'effectuer les paramétrages appropriés. Le paramétrage ne doit être réalisé qu'une seule fois et doit
ensuite n'être ajusté que si votre installation extérieure
change ou si vous ajoutez des équipements supplémentaires.
Le Chapitre 7 décrit toutes les fonctions nécessaires
pour une utlisation quotidienne du récepteur comme
par exemple la façon de sélectionner une chaîne.
Dans le Chapitre 8 vous trouverez des informations
sur la façon de paramétrer de nouvelles chaînes ou de
modifier l'ordre des chaînes.
Les termes techniques utilisés dans ce manuel sont
expliqués dans le Chapitre 9.
Les caractéristiques techniques se trouvent dans les
Chapitre 10.
Un guide de dépannage a été ajouté au Chapitre 11
pour vous aider à résoudre certains problèmes.
Instructions d'utilisation importantes
Le fonctionnement du récepteur numérique est simplifié grâce
à l'utilisation des affichages à l'écran appelés "OSD", qui permettent également de réduire le nombre de touches sur la
télécommande. Toutes les fonctions sont affichées à l'écran
et peuvent être utilisées grâce à quelques touches. Les fonctions ayant un rapport entre elles sont rassemblées dans un
"MENU". La fonction sélectionnée est mise en surbrillance
d'une certaine couleur. Les "touches de fonction” rouge,
jaune, verte et bleue sont représentées au bas de l'écran
sous forme de bandeaux colorés. Ces bandeaux colorés
représentent différentes fonctions à l'intérieur des différents
menus qui peuvent être activées en appuyant sur la touche
colorée correspondante (touches multifonctions) de la télécommande. Les "touches de fonction" ne sont actives que
124
FR
lorsqu'un descriptif bref apparaît dans le champ correspondant. Le descriptif et la désignation des touches qui apparaissent dans le menu OSD sont écrits en gras dans ce manuel.
Aide:
En appuyant sur la touche de fonction bleue, vous pouvez
faire apparaître le texte d'aide quand il est accessible à partir
du menu. En réappuyant sur cette touche, vous effacez le
texte à l'écran.
Conseils concernant la mise au rebut
L'emballage de votre appareil est entièrement recyclable.
Veuillez trier tous les éléments correctement et les jeter en
fonction des dispositions locales en vigueur en matière de
gestion des déchets. Veuillez noter que les piles usagées (de
la télécommande) ainsi que tous les composants électroniques ne doivent pas être jetés avec vos ordures ménagères mais que vous devez vous en débarrasser conformément
à la réglementation locale en vigueur (déchets spéciaux,
retour au revendeur).
Consignes de sécurité
Pour votre propre sécurité, vous devez lire les consignes de
sécurité avec attention avant d'utiliser votre nouvel appareil.
Le fabricant n'accepte aucune responsabilité en cas de dommages provoqués par une utilisation inappropriée ou en cas
de non-respect des consignes de sécurité.
>
Pour garantir la bonne ventilation de l'appareil, placez
ce dernier sur une surface lisse horizontale et ne placez jamais aucun objet sur le dessus. Cette surface
dispose de fente d'aération qui permettent à la chaleur
accumulée de s'échapper.
>
Ne placez aucun objet enflammé, tel que des bougies
allumées, sur le dessus de l'appareil.
>
Ne laissez aucune aspersion d'eau ou goutte d'eau
atteindre l'appareil et ne placez aucun objet rempli de
liquide, tels que des vases, sur le dessus.
>
L'appareil ne doit être utilisé quand dans des environnements aux températures tempérées.
>
N'ouvrez jamais le boîtier de l'appareil ! Vous risqueriez de subir des chocs électriques. Les réparations
nécessaires ne doivent être entreprises que par du
personnel technique agréé.
L'appareil doit être débranché du secteur et vous devez
faire appel à un réparateur agréé dans les cas suivants:
>
Le câble d'alimentation principal ou la prise secteur
sont endommagés.
>
L'appareil a été exposé à des liquides ou du liquide a
pénétré à l'intérieur
>
En cas de panne importante
>
En cas de détérioration externe grave
125
Raccorder le récepteur DVB à la prise du
câble
a. Raccordement de l'entrée Câble du récepteur DVB à la
prise d'antenne du réseau câblé.
b. Raccordement péritel du récepteur DVB au téléviseur.
c. Raccordement péritel d'un magnétoscope à la prise Péritel
VCR du récepteur DVB.
d. Raccordement de la sortie Câble à l'entrée Antenne du
téléviseur.
e. Raccordements des sorties Audio à un ampli Hi-Fi.
f. Raccordement secteur
d
b
a
f
e
c
VCR
126
Quand l'appareil n'est pas utilisé
En cas d'orage ou si vous n'utilisez pas l'appareil pour une
période prolongée (vancances par exemple), débranchez-le
du secteur.
Les références mentionnées ci-dessous telles que a b c etc.
correspondent aux illustrations de la page 10.
4.1 Raccordement au réseau câblé
a
Utilisez un câble coaxial approprié pour raccorder
l'entrée Câble du récepteur numérique à la prise
de raccordement pour la connexion du câble.
4.2 Raccordement à un téléviseur
b
Utilisez un câble PERITEL pour raccorder le récepteur
(Prise PERITEL TV) au téléviseur (Prise PERITEL).
Si votre téléviseur est correctement équipé, il passe
automatiquement en mode AV, et donc en mode de
réception du câble, dès que le récepteur numérique
est allumé.
d
Utilisez un câble de raccordement TV approprié pour
raccorder le récepteur (sortie Câble) à la prise
d'entrée antenne du téléviseur.
Pour pouvoir regarder les chaînes numériques câblées sur
votre téléviseur, faites passer ce dernier en mode entrée
Péritel externe (AV). Les chaînes câblées analogiques peuvent continuer à être sélectionnées à partir des numéros de
chaînes de votre téléviseur.
4.3 Magnétoscope (VCR)
c
Raccordez votre magnétoscope à la prise PERITEL
marquée VCR. En mode Lecture, le magnétoscope
envoie un signal de commutation au récepteur numérique qui envoie alors ce signal automatiquement au
téléviseur.
Si votre magnétoscope n'envoie de signal de commutation automatiquement, utilisez la touche EXTERNE
pour commuter votre récepteur numérique à l'entrée
externe AV. En appuyant à nouveau sur cette touche,
vous revenez en mode normal de fonctionnement.
4.4 Ampli Hi-Fi
4.4.1 Analogique
e
Il vous est possible de raccorder votre récepteur
127
FR
4 Raccordements
numérique à un ampli Hi-Fi afin d'obtenir la meilleure
qualité sonore possible. Utilisez un câble approprié
pour raccorder les prises cinch Audio R et Audio L
du récepteur numérique à l'une des entrées de votre
ampli Hi-Fi (ex : CD ou AUX. L'entrée Mono n'est pas
compatible).
4.4.2 Numérique
d
Si votre anpli est équipé d'une entrée électrique ou
optique appropriée, raccordez la prise SORTIE
AUDIO NUMERIQUE électrique ou SORTIE
AUDIO NUMERIQUE optique à l'entrée électrique
ou optique correspondante de votre ampli.
En fonction de la station diffusée, les fréquences d'échantillonnage 32, 44.1 et 48 KHz sont disponibles.
De plus, s'il existe, le signal Dolby Digital (AC3) est également disponible à partir de cette sortie.
4.5 Interface série (RS 232)
L'interface RS 232 est utilisée pour les mises à jour du système d'exploitation et pour la préprogrammation avec un PC.
4.6 Raccordement secteur
Le récepteur numérique ne doit être raccordé au secteur
qu'après que tous les autres équipements du système aient
été complètement raccordés. Ceci afin d'éviter la détérioration
possible du récepteur numérique ou des autres composants.
f
Après avoir effectué tous les autres raccordements,
utilisez le cordon d'alimentation principale fourni pour
raccorder le récepteur à une prise de courant (230
V/50-60 Hz).
5 Première installation
(Fig. 5-1)
Après avoir entièrement lu les consignes de sécurité et après
avoir raccordé le récepteur comme décrit dans le chapitre 4,
vous pouvez allumer l'appareil comme indiqué au chapitre 7.
Quand vous allumez l'appareil pour la première fois, une
fenêtre de démarrage contenant l'assistant d'installation
AutoInstall apparaît. (Fig. 5-1) Utilisez cet assistant d'installation pour effectuer, rapidement et simplement, les paramétrages les plus importants de votre récepteur numérique.
Les touches de la télécommande nécessaires au paramétrage sont mises en surbrillance à chaque étape de l'installation.
Vous pouvez abandonner l'installation initiale à tout moment
en appuyant sur la touche de fonction rouge. Appuyez sur la
touche de fonction verte pour revenir à l'étape précédente
de la procédure d'installation. De cette façon vous pouvez
rapidement corriger toute erreur éventuelle.
128
La procédure de première installation décrite ici, n'est principalement présentée qu'à titre d'exemple. Le procédure d'installation exacte dépend des paramètres que vous sélectionnez.
C'est la raison pour laquelle nous vous demandons de suivre
attentivement les instructions qui apparaissent à l'écran.
(Fig. 5-2)
Langue d'interface
>
Appuyez sur la touche OK pour ouvrir la fenêtre d'affichage Operating language "Langue d'Interface".
(Fig. 5-2)
>
Utilisez les flèches haut/bas pour sélectionner la
langue d'interface voulue.
>
Confirmez en appuyant sur OK.
(Fig. 5-3)
Langue Audio
>
Utilisez les flèches haut/bas pour sélectionner la
langue audio voulue. (Fig. 5-3)
Une fois l'assistant d'installation terminé, le tri des
chaînes de la liste Favoris est réalisé en fonction de
vos choix.
>
Pour valider la sélection, confirmez en appuyant sur OK.
(Fig. 5-4)
Choix du pays
>
Utilisez les flèches haut/bas pour sélectionner le
fuseau horaire correspondant à votre pays de résidence. (Fig. 5-4) L'heure est automatiquement paramétrée en fonction de votre choix.
>
Confirmez en appuyant sur OK, pour valider votre
choix et être dirigé vers la sélection des chaînes
Recherche\Balayage des chaînes
>
Utilisez les flèches haut/bas pour marquer le champ
All channels "Toutes les chaînes", si vous souhaitez rechercher l'ensemble des chaînes à la fois cryptées et en clair, ou All unencrypted channels
"Toutes les chaînes en clair", si vous ne souhaitez rechercher que les chaînes en clair. (Fig. 5-5)
>
Après avoir confirmé la demande de balayage en
appuyant sur OK, un balayage automatique à la
recherche de chaînes est réalisé. Ce type de balayage implique le balayage complet de toute la bande de
réception du récepteur à la recherche de chaînes
129
(Fig. 5-5)
FR
Si vous n'effectuez pas l'installation initiale ou si celle-ci est
abandonnée, le récepteur fonctionne avec la configuration
standard préprogrammée.
numériques. Les chaînes trouvées sont automatiquement ajoutées à la liste Favoris. Cette procédure peut
prendre plusieurs minutes. Observez également toutes les indications des messages affichés à l'écran.
Mise à jour logicielle
Une fois le balayage de recherche de chaînes terminé, le
récepteur numérique vérifie s'il existe une nouvelle version de
son logiciel d'exploitation. Le cas échéant, vous pouvez effectuer une mise à jour automatique du logiciel.
>
(Fig. 5-6)
Utilisez les flèches gauche/droite pour sélectionner le champ Update "Mise à jour" et confirmez
en appuyant sur OK.
(Fig. 5-6) Le nouveau logiciel de votre appareil est
alors téléchargé. Cette procédure peut prendre plusieurs minutes.
Quitter l'assistant d'installation
>
(Fig. 5-7)
Confirmez le dernier message (Fig. 5-7) de l'assistant
d'installation en appuyant sur OK pour revenir en
mode normal de fonctionnement.
130
6 Paramétrage
Vous venez de réaliser tous les raccordements nécessaires et
avez commencé à utiliser votre nouveau récepteur numérique.
Si nécessaire, vous pouvez maintenant optimiser le paramétrage du récepteur numérique en fonction de vos préférences.
FR
6.1 Langue d'interface
Dans ce menu, vous avez la possibilité de paramétrer la langue d'interface en fonction de votre préférence.
Pour modifier la langue d'interface, procédez comme suit:
>
Appuyez sur Menu pour accéder au Menu
Principal. (Fig. 6-1)
>
Utilisez les flèches haut/bas pour marquer la ligne
de menu Operating Language "Langue
d'Interface".
>
Confirmez en appuyant sur OK.
Le sous-menu Operating Language "Langue
d'Interface" apparaît alors à l'écran.
>
Utilisez les flèches haut/bas pour choisir la langue
voulue.
>
Sauvegardez votre choix en mémoire en appuyant sur
OK.
>
Appuyez sur la touche Retour pour revenir au Menu
Principal.
(Fig. 6-1)
6.2 Paramétrage de base
Pour vous garantir un divertissement optimum avec votre
récepteur DVB, nous vous conseillons de réaliser les paramétrages nécessaires en fonction de vos préférences.
>
Utilisez la touche Menu pour accéder au Menu
Principal.
>
Utilisez les flèches haut/bas pour marquer la ligne
Settings "Paramétrage"
>
Confirmez en appuyant sur OK. Le sous-menu
Settings "Paramétrage" apparaît alors. (Fig.6-2)
>
Utilisez ensuite les flèches haut/bas pour marquer
la ligne Basic Settings "Paramètres de Base".
>
Confirmez en appuyant sur OK. Le menu Basic
Settings "Paramètres de base" apparaît. (Fig. 6-3)
>
Utilisez les flèches haut/bas pour déplacer le curseur à l'intérieur du menu et pour modifier les différentes positions individuelles comme indiqué. Quand
vous sélectionnez un élément du menu, observez les
messages affichés à l'écran.
Vous pouvez réaliser les paramétrages suivants :
131
(Fig. 6-2)
(Fig. 6-3)
6.2.1 Décalage horaire GMT (heures)
Votre appareil est équipé d'une horloge . Cette dernière est
synchronisée avec l'heure GMT par satellite.
Si dans la fenêtre Country "Pays" (Point 6.2.2) vous avez
sélectionné None "Aucun", vous n'avez alors qu'à modifier
l'heure en fonction de votre heure locale, en utilisant les
flèches gauche/droite. Pour la France, la différence est
de +1 heure en hiver, +2 heures en été.
6.2.2 Pays
Cette fonction permet l'ajustement automatique de l'heure
d'été, heure d'hiver.
>
Utilisez les flèches gauche/droite pour choisir
votre localité sur la ligne Country "Pays".
6.2.3 Code de la télécommande
Grâce à la télécommande, vous pouvez commander jusqu'à
quatre appareils utilisant le même code de commande à distance. Si deux récepteurs sont commander dans la même
pièce, certains problèmes de fonctionnement accidentels peuvent être rencontrés. Afin d'éviter ce genre de problèmes,
vous devez paramétrer différentes options de télécommande
pour les deux appareils.
>
Pour ce faire, appuyez sur OK et simultanément sur
SAT1 ou SAT2.
6.2.4 Horloge en mode veille
Sur cette ligne vous devez décider si vous souhaitez que
l'horloge soit affichée ou non quand le récepteur est en veille.
>
>
Utilisez les flèches gauche/droite pour paramétrer
l'horloge en mode veille sur On ou Off.
Appuyez sur Retour pour revenir au menu Settings
"Paramétrage", ou apppuyez sur Menu pour revenir en mode normal de fonctionnement.
Les paramètres sont automatiquement sauvegardés
en mémoire.
6.3 Paramétrage Audio/Vidéo
Pour une utilisation optimale de votre récepteur numérique
avec votre téléviseur, vous pouvez modifier d'autres paramètres dans le menu Audio/Video settings "Paramètres
Audio/Vidéo".
>
Appuyez sur Menu pour accéder au Menu Principal.
>
Utilisez les flèches haut/bas pour marquer la ligne
Settings "Paramétrage"
132
Confirmez en appuyant sur OK.
Le sous-menu Settings "Paramétrage" apparaît à
l'écran. (Fig. 6-4)
>
Utilisez ensuite les flèches haut/bas pour marquer
la ligne Audio/Video settings "Paramètres
Audio/Vidéo"
>
Confirmez en appuyant sur OK. Le menu Audio/
Video Settings "Paramètres Audio/Vidéo"
apparaît. (Fig. 6-5)
>
(Fig. 6-4)
Utilisez les flèches haut/bas pour déplacer le curseur à l'intérieur du menu et pour modifier les différents éléments. Lorsque vous sélectionnez un élément du menu, observez également toujours les indications des messages affichés à l'écran. Vous pouvez
réaliser les paramétrages suivants:
6.3.1 Format de l'image
>
Utilisez les flèches haut/bas pour paramétrer le
bon format d'image de votre téléviseur: 4:3 ou 16:9.
Cette fonction permet le réglage automatique du format de l'image sur votre téléviseur.
6.3.2 Langue (signal Audio)
>
Utilisez les flèches gauche/droite pour sélectionner votre langue préférée sur cette ligne. Cette fonction sélectionne automatiquement votre langue préférée si elle est disponible.
6.3.3 Langue (sous-titres)
Votre récepteur DVB est équipé pour afficher des sous-titres.
Si la fonction Sub-titles "Sous-titres" est activée et que
la langue sélectionnée est proposée, les sous-titres sont
automatiquement affichés dans cette langue.
Si la fonction n'est pas activée, vous pouvez également faire
apparaître les sous-titres manuellement. La disponibilité des
sous-titres est indiquée par le message Sub-titles selection "Sélection Sous-titres". Référez-vous également
au point 7.13 de ce manuel.
6.3.4 Mode TV PERITEL
Sur cette ligne, utilisez les flèches gauche/droite pour
paramétrer les options FBAS, RGB ou S-Vidéo en fonction de votre téléviseur.
Pour un paramétrage standard utilisez FBAS.
6.3.5 Mode VCR PERITEL
Sur cette ligne, utilisez les flèches gauche/droite pour
133
(Fig. 6-5)
FR
>
sélectionner le paramètre en fonction de votre téléviseur:
FBAS ou S-Video. Pour un paramétrage standard utilisez
FBAS.
6.3.6 Dolby Digital (AC3)
De nombreux films sont diffusés au format Dolby Digital.
Dans ce cas l'affichage du logo Dolby
dans la fenêtre
d'informations qui apparaît au moment où vous accéder à la
chaîne vous l'indique.
Si vous possédez un ampli Dolby Digital 5.1, vous pourrez
apprécier vos films en son Dolby Digital 5.1 s'ils sont diffusés
dans ce format. Pour cela il suffit juste que la sortie audio
numérique (voir Point 4.5.2) de votre récepteur DVB soit raccordée à l'entrée numérique de votre ampli Dolby Digital 5.1.
Lorsqu'un programme est diffusé en Dolby Digital, le logo
Dolby apparaît dans la fenêtre d'informations au moment où
vous accédez à ce programme. Si la fonction Dolby Digital
(AC3) est activée (on), les programmes concernés sont automatiquement diffusés au format Dolby Digital.
Si la fonction n'est pas activée (off), vous pouvez activer le
son Dolby Digital manuellement. Référez-vous également au
point 7.6.1 de ce manuel.
7 Fonctionnement
7.1 Mise en marche/Arrêt
>
>
>
Allumez le récepteur numérique en appuyant sur la
touche Marche/Veille du récepteur ou de la télécommande.
Appuyez à nouveau sur la même touche, sur le récepteur ou sur la télécommande, pour éteindre le récepteur.
Le récepteur est alors en veille et l'heure est diffusée
sur le bandeau d'affichage du récepteur (si l'option a
été activée comme décrit au Point 6.2.4).
Si l'heure ne s'affiche pas, c'est qu'elle n'a pas encore
été reçue par le récepteur. Pour y remédier, allumez
l'appareil et accédez à une chaîne nationale importante pendant environ 30 secondes, l'heure est alors
automatiquement synchronisée.
7.2 Sélectionner une chaîne
7.2.1 A l'aide des touches de changement de
chaînes haut/bas
>
Vous pouvez utiliser les touches de changement de
chaînes haut/bas du récepteur ou de la télécommande passer d'une chaîne à l'autre de haut en bas.
134
7.2.2 A l'aide du pavé numérique
>
Vous pouvez utiliser le pavé numérique pour saisir
le numéro de chaîne voulu.
Par exemple:
pour la chaîne 1
1,
puis 4
pour la chaîne 14
2,
puis 3, puis 4
pour la chaîne 234
FR
1
Quand vous saisissez un numéro de chaîne à plusieurs chiffres, vous disposez d'environ 3 secondes pour achever la saisie.
Si vous souhaitez saisir un numéro de chaîne ne comportant
qu'un ou deux chiffres, vous pouvez accélérer le processus
en maintenant la dernière touche enfoncée un peu plus longtemps.
7.2.3 A l'aide du navigateur (Liste des chaînes)
>
Appuyez sur OK.
Le navigateur des listes de chaînes apparaît. En
mode TV, seules les chaînes TV sont affichées, et en
mode Radio seules les stations de radio sont affichées. La chaîne actuellement sélectionnée est marquée. (Fig. 7-1)
>
Utilisez ensuite les flèches haut/bas pour marquer
la chaîne voulue.
>
Appuyez sur OK pour afficher la chaîne marquée.
>
Utilisez les flèches haut/bas pour déplacer le curseur à l'intérieur de la liste, ligne par ligne.
>
Utilisez les flèches gauche/droite pour vous déplacer d'avant en arrière dans la liste, page par page.
(Fig. 7-1)
7.2.3.1 Sélectionner une liste
Votre récepteur dispose de plusieurs listes de chaînes,
conçues pour vous faciliter la recherche de chaînes. Vous
pouvez sélectionner votre Liste de Favoris (voir Point 8.1)
ou visualiser une Liste Complète triée par ordre alphabétique ou afficher une liste triée par Fournisseurs.
>
Appuyez sur la touche OK. La liste active de chaînes
apparaît.
>
Utilisez la touche de fonction rouge Category
"Catégorie" pour ouvrir une fenêtre contenant les différents types de listes de chaînes (Liste Favoris, Liste
Fournisseurs et Liste Complète).
Le type de liste de chaînes actif est indiqué. (Fig. 7-2)
135
(Fig. 7-2)
>
Utilisez les flèches haut/bas pour sélectionner un
type de liste de chaînes, Total List "Liste complète" par exemple.
>
Confirmez en appuyant sur OK.
La liste complète classée par ordre alphabétique et
contenant toutes les chaînes apparaît alors. (Fig. 7-3)
>
Utilisez les flèches haut/bas pour marquer la chaîne que vous voulez regarder.
>
Confirmez en appuyant sur OK.
(Fig. 7-3)
(Fig. 7-4)
7.2.4 Accéder aux chaînes bloquées
Si la chaîne sélectionnée a été bloquée par le contrôle parental, le message Unit PIN "PIN appareil" apparaît à l'écran. (Fig. 7-4)
>
Utilisez le pavé numérique pour saisir le code PIN.
La chaîne voulue peut maintenant être regardée.
ou
>
Passez sur une chaîne qui n'est pas bloquée.
Si vous avez sélectionné le paramètre on au Point 8.3.2, la
demande de code PIN apparaît chaque fois que vous sélectionnez une chaîne bloquée. Cependant, pour vous rendre les
choses plus pratiques, le code PIN ne doit être saisi qu'une
seule fois par phase opérationnelle.
Si vous utilisez une carte à puce, référez-vous au
Point 7.3.2.
(Fig. 7-5)
7.2.5 Fenêtre d'informations
Chaque fois que vous changez de chaîne, une fenêtre d'informations (Fig. 7-5) apparaît brièvement à l'écran. Elle indique
le numéro et le nom de la chaîne sélectionnée. De plus, vous
obtenez d'autres caractéristiques concernant le programme
en cours, tels que
pour le Teletext,
pour le format
16:9,
pour les chaînes cryptées. Quand il est diffusé, le
genre EPG est également indiqué, ainsi que les éventuelles
restrictions d'âge. (Signalétique Jeunesse imposée par le
CSA en France).
7.3 Receiving encrypted programmes
Votre récepteur est équipé du système de décodage intégré
ainsi que d'une interface commune. Ces éléments vous permettent de recevoir les chaînes cryptées. Pour ce faire, vous
devez d'abord insérer soit une carte dans le lecteur de carte
intégré, soit insérer un module CI contenant une carte valide
dans la fente prévue à cet effet:
>
Insérez la carte à puce dans la fente du lecteur de
carte intégré (puce dorée vers le bas).
136
>
Insérez un module CI dans la fente.
>
Insérez une carte à puce dans la fente du module CI.
Assurez-vous que la puce dorée soit dirigée vers le
haut et dans le bon sens d'insertion.
>
Si vous accédez alors à une chaîne cryptée, votre
récepteur numérique lit automatiquement la carte et
l'interface et diffuse le chaîne de façon décryptée, à
condition que la carte ou le module CI insérés soit
valables pour cette chaîne.
FR
ou
7.3.1 Fonctions particulières
Sur certaines chaînes, l'existence de certaines fonctions particulières vous est indiquée. Par exemple, sur les canaux
multi-sources, en cas de retransmissions sportives, vous
pouvez parfois choisir entre différents matchs (Ligue
Nationale de Football), choisir différentes pistes son (ex:
stade/commentateur) ou choisir différents angles de caméra
(Formule 1). Certains fournisseurs permettent également de
choisir l'heure de démarrage d'un film que vous avez choisi.
7.3.1.1 Options multi-sources
Certaines chaînes disposent d'une option multi-sources. Cette
fonction vous permet, par exemple en cas de retransmissions
sportives, de choisir librement l'angle de la caméra que vous
préférez (courses de Formule 1) ou de zapper entre plusieurs
matchs qui se jouent à des endroits différents (Ligue
Nationale de Football). Si une chaîne propose des options
mulit-sources, cela vous est indiqué à l'écran (Fig. 7-6).
>
Pour sélectionner l'une des options disponibles,
appuyez sur la touche Option.
(Fig. 7-6)
(Fig. 7-7)
Une fenêtre de sélection affichant les sources disponibles apparaît. (Fig. 7-7)
>
Utilisez les flèches haut/bas pour sélectionner l'option voulue.
>
Confirmez en appuyant sur OK.
Votre récepteur numérique active alors l'option choisie.
7.3.1.2 Choisir l'heure de démarrage/film
Certaines chaînes propose l'option de choisir certains films
particuliers et de les diffuser à différents horaires. Ces films
sont disponibles H24 et différentes heures de début peuvent
être choisies.
Si une chaîne propose cette option de choisir l'heure de
démarrage d'un film, cela vous est indiqué par un message à
l'écran (Fig. 7-8).
137
(Fig. 7-8)
>
Pour sélectionner l'un des horaires de démarrage
disponibles, appuyez sur la touche Option. Une fenêtre de sélection affichant les heures de démarrage
disponibles apparaît. (Fig. 7-9)
>
Utilisez les flèches haut/bas pour sélectionner
l'heure voulue et confirmez en appuyant sur OK.
(Fig. 7-9)
Vous pouvez alors regarder le programme à l'heure
choisie à la condition que cette heure soit validée pour
le programme choisi.
7.3.2 Code PIN cryptage
Votre récepteur numérique est équipé d'une fonction de
contrôle parental qui permet de bloquer l'accès à certaines
chaînes spécifiques désignées (voir Point 8.3). De plus, dans
le cas d'émissions cryptées, les programmes individuels spécifiques déconseillés aux enfants peuvent être bloqués en
priorité grâce au code de contrôle parental. Afin de décoder
une chaîne spécifique pour pouvoir la regarder, vous devez
saisir le Code PIN. Ce code PIN est stocké sur la carte à
puce. Il vous est donné quand vous recevez la carte. Ce
Code PIN ne doit pas être confondu avec le Code PIN
Appareil du récepteur numérique (Point 8.3).
Si vous accédez à une chaîne dont le progamme en cours
est bloqué, un message apparaît à l'écran.
>
Pour pouvoir regarder le programme, utilisez le pavé
numérique pour saisir les 4 chiffres du code PIN.
>
Une fois le code entré correctement, vous pouvez
regarder le programme normalement.
Si vous entrez un code incorrect, vous pouvez soit
resaisir le code PIN, soit appuyer sur Retour pour
quitter le menu.
7.4 Réglage du volume
Votre récepteur numérique est équipé d'un contrôleur de
volume. Ceci facilite l'utilisation du récepteur puisque toutes
les fonctions importantes sont regroupées sur sa télécommande et que vous n'avez pratiquement jamais à vous servir
de la télécommande de votre téléviseur. A l'allumage du
récepteur, le volume est le même que celui défini lors de la
dernière utilisation.
>
Réglez le volume de votre récepteur numérique en utilisant la touche Volume + pour l'augmenter et la touche Volume - pour le réduire.
>
Appuyez sur la touche Son on/off pour couper le
son. Réappuyez sur cette touche pour réactiver le son.
138
7.5 Sélection TV/Radio
>
Appuyez sur la touche TV/Radio pour faire passer
votre récepteur en mode Radio. La station émise alors
par le récepteur est celle de la dernière utilisation.
>
Appuyez de nouveau sur la touche TV/Radio pour
revenir à la dernière chaîne TV regardée.
FR
Les paramètres préprogrammés incluent à la fois les chaînes
TV et les stations de Radio.
7.6 Sélectionner une autre langue (mode TV)
ou station (mode Radio)
Si un programme est diffusé en plusieurs langues ou
avec un son multi-sources ou si plusieurs programmes Radio sont disponibles à partir d'une station radio spécifique, ces informations vous sont indiquées à l'écran (Fig.
7-10). Vous pouvez alors procéder comme suit pour sélectionner une langue ou un canal son différents:
>
>
Appuyez sur la touche Option. Une liste apparaît à
l'écran (Fig. 7-11), indiquant les langues ou les programmes radio actuellement disponibles.
Utilisez les flèches haut/bas pour marquer la langue ou le programme radio voulu, puis confirmez en
appuyant sur OK.
Vous pouvez maintenant écouter votre programme
dans la langue choisie. Votre récepteur numérique est
également conçu pour recevoir les émissions en Mono.
>
Utilisez les flèches gauche/droite pour choisir
entre Mono canal 1 ( ), Mono canal 2 (
) ou
Stéréo (
).
7.6.1 Dolby Digital (mode AC3)
Lorsqu'un programme est diffusé en son Dolby Digital, le logo
Dolby apparaît dans la fenêtre d'informations au moment où
vous accédez à ce programme. Le programme est alors
automatiquement diffusé en son Dolby Digital (AC3) à condition que vous ayez activé cette option comme le décrit le
point 6.3.6. Si vous n'avez pas activé la fonction automatique
Dolby Digital (AC3), vous pouvez passer en mode AC3
manuellement comme suit :
>
Appuyez sur la touche Option. Si elle existe, une
liste des langues disponibles ainsi que l'option Dolby
Digital (AC 3) apparaît à l'ecran.
>
Utilisez les flèches haut/bas pour marquer la ligne
Dolby Digital.
>
Confirmez en appuyant sur OK.
139
(Fig. 7-10)
(Fig. 7-11)
Vous pouvez maintenant profiter de votre émission en son
Dolby Digital. Si vous souhaitez que votre récepteur diffuse
automatiquement les progammes en son Dolby Digital, paramétrez la diffusion AC3 automatiquement comme décrit au
point 6.3.6.
7.7 Revenir à la dernière chaîne regardée
>
>
En appuyant sur la touche Retour de la télécommande vous revenez à la dernière chaîne regardée.
Appuyez de nouveau sur cette touche pour revenir sur
la chaîne précédente.
7.8 Affichage de l'horaire et des informations
sur le programme
Cette fonction vous permet de visualiser les informations
concernant le programme en cours.
(Fig. 7-12)
>
Appuyez sur la touche Info pour afficher les informations du programme en cours (Fig. 7-12).
La moitié basse de l'écran affiche l'heure, le nom de la chaîne
regardée, le nom du programme en cours ainsi que les heures de début et de fin de ce programme, à condition que ces
informations soient retransmises par le fournisseur.
7.9 Autres informations sur le programme
La fonction d'information sur les programmes peut également
fournir d'autres informations sur le programme en cours si
elles existent.
>
Appuyez deux fois sur la touche Info pour ouvrir la
seconde fenêtre d'informations (Fig. 7-13). Des informations supplémentaires sur le programme en cours
apparaissent alors.
>
Vous pouvez parcourir les passages de texte plus
longs, ligne par ligne, à l'aide des flèches
droite/gauche.
>
Si ces informations existent, en appuyant une fois de
plus sur la touche Info, vous obtenez les informations
concernant le programme suivant.
>
Appuyez une fois encore sur la touche Info pour quitter la fenêtre Info.
(Fig. 7-13)
7.10 Arrêt sur image
>
Appuyez sur Arrêt sur Image pour figer l'image TV en
cours.
>
Appuyez à nouveau sur la même touche pour revenir
en mode normal de fonctionnement.
140
7.11 Minuterie de mise en veille
Appuyez sur la touche Minuterie Veille plusieurs
fois pour sélectionner le délai de mise en veille du
récepteur dans un intervalle compris entre 15 minutes
et 2 heures.
Quand le délai choisi expire, le récepteur passe automatiquement en mode veille.
FR
>
7.12 Information sur la chaîne
>
Appuyez sur la touche de fonction verte (Info Canal)
pour afficher les données correspondant au canal
sélectionné (Fig. 714).
>
Vous pouvez en plus utiliser les touches de fonction
de couleur pour obtenir et afficher les informations
Audio/Vidéo, les informations relatives au
Programme, et, lorsqu'elles sont disponibles, les
informations relatives au système d'encodage
(CA) utilisé.
>
(Fig. 7-14)
Appuyez sur la touche Menu pour quitter le mode
Information.
7.13 Teletext
7.13.1 A l'aide du décodeur Teletext de votre
téléviseur
Si le Teletext est disponible, il sera retransmis sur votre téléviseur. Pour utiliser cet affichage Teletext, utilisez la télécommande de votre téléviseur. Si vous rencontrez des problèmes
avec votre téléviseur comme des superpositions entre l'image et le contenu Teletext, vous devez paramétrer votre récepteur numérique sur le mode FBAS (Point 6.3.4).
7.13.2 A l'aide du transpondeur télétexte interne
De façon différente, vous pouvez utiliser le décodeur Teletext
TOP intégré pour afficher les informations. Avec le Teletext
TOP, toutes les pages texte sont automatiquement divisées
en groupes et en blocs, ce qui rent le Teletext plus lisible.
>
Allumez la chaîne pour laquelle vous souhaitez voir
les informations Teletext.
>
Appuyez sur "Teletext" pour accéder au Teletext.
(Fig. 7-15)
>
Utilisez le pavé numérique pour saisir le numéro
de la page Teletext que vous souhaitez voir. Le numéro de page que vous avez sélectionné est affiché
dans le coin supérieur gauche de l'écran.
141
(Fig. 7-15)
VT Group
VT Block
Tous les fournisseurs Teletext utilisent la page 100
pour leur index et leur table des matières.
Une fois que vous avez saisi la page Teletext voulue,
le récepteur recherche automatiquement cette page.
Il est impossible de transmettre toutes les pages
Teletext simultanément. De ce fait, votre récepteur
peut avoir besoin de plusieurs secondes pour retrouver la bonne page et l'afficher à l'écran.
>
Utilisez la touche rouge ou verte respectivement
pour naviguer d'avant en arrière de page en page.
>
Utilisez la touche de fonction jaune pour afficher le
groupe Teletext indiqué dans le champ jaune.
>
Utilisez la touche de fonction bleue pour afficher le
bloc Teletext indiqué dans le champ bleu.
Utilisation mixte
>
En appuyant une nouvelle fois sur la touche Teletext
vous passez en mode mixte, le Teletext et l'image TV
sont affichés en même temps à l'écran.
>
Appuyez de nouveau sur cette touche pour revenir en
mode de fonctionnement normal.
Arrêt du défilement des pages
>
Appuyez sur la touche Stop/Arrêt sur Image pour
afficher le message "Stop“ en haut à gauche dans la
fenêtre Teletext. Cette action arrête le défilement continu automatique des sous-pages Teletext. Appuyez de
nouveau sur la touche Stop/Arrêt sur Image pour
quitter le mode Arrêt.
>
Appuyez sur la touche Retour pour revenir en mode
normal de fonctionnement.
7.14 Sous-titres
Si des sous-titres sont disponibles, l'information est indiquée
grâce au message Select Sub-title "Choisir sous-titres" Si vous avez activé la fonction Sub-Titles "SousTitres" comme indiqué au Point 6.3, les sous-titres sont
automatiquement affichés, à condition qu'ils soient retransmis
dans la langue choisie.
Si les sous-titres ne sont disponibles que d'en d'autres langues ou uniquement sous la forme Teletext, vous pouvez les
activer manuellement comme suit :
>
Appuyez sur la touche Option, plusieurs fois si
nécessaire, jusqu'à ce que vous voyez apparaître l'entrée Sub-titles "Sous-titres" avec le tableau de
sélection des différentes langues de sous-titres et/ou
le numéro des pages Teletext diffusant les sous-titres.
142
Utilisez les flèches haut/bas pour choisir la langue
ou la page Teletext voulue.
>
Confirmez en appuyant sur OK. Les sous-titres apparaissent alors.
Il est à noter que ces fonctions ne sont actives que quand
des sous-titres sont effectivement retransmis pour les programmes. Le paramétrage ne reste pas actif si vous changez
de chaîne.
7.15 Guide Electronique des Programmes SFI
(SiehFern Info)
Votre récepteur numérique dispose d'un guide électronique
des programmes. Ce dernier vous permet d'afficher à l'écran
les informations concernant une ou plusieurs chaînes.
Vous pouvez ainsi très rapidement obtenir un aperçu des
programmes en cours ou des progammes du jour ou de ceux
du lendemain ou des quelques jours à venir.
Les fonctions SFI vous permettent :
-
d'afficher à l'écran les informations relatives aux programmes
-
de présélectionner des programmes auxquels vous
accédez directement dès qu'ils commencent
-
de programmer des événements par minuterie
-
de rechercher et choisir des programmes en fonction
de leur genre.
7.15.1 Téléchargement des données SFI
Les informations sur les chaînes sont mises à jour par votre
récepteur à l'heure de mise à jour que vous avez paramétrée
comme indiqué au Point 8.2 (Chaîne SFI). La condiition étant
que votre récepteur soit en veille à ce moment précis.
La procédure de téléchargement est indiquée par l'affichage
du pourcentage de données SFI déjà téléchargées (ex .
038P pour 38%). Si votre récepteur est en marche à ce
moment précis, la fonction n'est pas exécutée.
Vous pouvez également démarrer la procédure de téléchargement manuellement, immédiatement après avoir éteint le
récepteur (alors que l'affichage indique “oooo”), en appuyant
simplement sur la touche SFI). Pendant la durée de la procédure de téléchargement, le message Load SFI apparaît
sur le bandeau d'affichage, suivi par le volume des données
SFI déjà téléchargées (ex 038P).
La durée du téléchargement dépend du nombre de chaînes
inclus. La prévision des programmes peut aller jusqu'à sept
jours maximum. En fonction du volume de données concerné, plus le nombre de chaînes est important, plus la période
de prévision pouvant être incluse dans le Guide Electronique
des Programmes est réduite.
143
FR
>
Vous pouvez vous même décider quelles chaînes doivent
être incluses dans le Guide Electronique des Programmes.
Ces chaînes peuvent ensuite être ajoutées à la liste comme
décrit au Point 8.1.5.
7.15.2 Interrompre le téléchargement
La procédure de téléchargement peut être interrompue en
allumant le récepteur numérique (Marche/Veille). Ce sont
alors les données SFI de la mise à jour précédente qui resteront disponibles.
7.15.3 Afficher le Guide Electronique des
Programmes
>
Allumez à la fois le récepteur et votre téléviseur.
>
Appuyez sur la touche SFI de la télécommande du
récepteur numérique.
(Fig. 7-16)
Le guide électronique des programmes apparaît alors
à l'écran (Fig. 7-16).Les chaînes que vous avez sélectionnées ou celles paramétrées en usine apparaissent
avec leurs programmes respectifs. (Voir également le
Point 8.2). Vous pouvez maintenant utiliser la fonction SFI pour obtenir les informations concernant le
contenu des différentes chaînes.
De plus, vous pouvez utiliser les fonctions SFI pour
sélectionner une chaîne particulière, pour préprogrammer une chaîne ou pour paramétrer une minuterie
pour un certain programme.
7.15.4 Now "Maintenant" (Grille des programmes
en cours)
La première grille SFI à apparaître est la grille “Now”
"Maintenant" (Fig. 7-16). Elle montre les programmes en
cours de diffusion. La barre jaune à droite du nom du programme indique le temps écoulé depuis le début du programme. Le programme actuellement régardé est marqué.
>
Utilisez les flèches haut/bas pour déplacer le curseur à l'intérieur de la liste, ligne par ligne. Utilisez les
flèches gauche/droite pour déplacer le curseur,
page par page.
>
Les fonctions SFI (Point 7.15.3) peuvent alors être utilisées.
>
Appuyez sur la touche de fonction jaune pour accéder
à la grille SFI "Next" "Suivante" (Voir Point 7.15.5)
ou
>
Appuyez sur la touche TV/Radio pour revenir en
mode normal de fonctionnement.
144
>
Utilisez la touche de fonction jaune pour afficher la
grille "Next" "Suivante" (programmes à suivre).
(Fig. 7-17)
>
Toutes les fonctions SFI sont alors disponibles (Point
7.15.3).
>
Appuyez sur la touche de fonction jaune pour accéder à la grille SFI More "Plus" (Point 7.15.6)
(Fig. 7-17)
ou
>
Appuyez sur la touche de fonction verte ou sur la
touche Retour pour revenir à la grille SFI précédente
"Now" "Maintenant"
ou
>
Appuyez sur la touche TV/Radio pour revenir en
mode normal de fonctionnement.
7.15.6 More "Plus"
>
Si vous appuyez à nouveau sur la touche de fonction
jaune alors que la grille SFI Next est à l'écran, vous
accédez à la grille SFI "More" "Plus". (Fig. 7-18)
Dans cette grille, une fenêtre horloge supplémentaire
apparaît dans la ligne de titre. Cette fenêtre indique le
créneau horaire de la grille SFI affichée.
>
Appuyez sur la touche de fonction jaune pour avancer, page par page, en fonction des créneaux horaires
indiqués dans le champ en jaune.
>
Maintenez la touche de fonction jaune enfoncée pour
avancer de page en page de façon continue. Une horloge apparaît pour faciliter l'aperçu.
Appuyez sur la touche de fonction verte pour parcourir les grilles, page par page, dans le sens inverse.
Les jours de la semaine apparaissent au bas de l'écran. S'il existe des informations pour les jours à venir,
les champs correspondants sont mentionnés.
>
Pour obtenir l'aperçu d'un jour en particulier, utilisez le
pavé numérique pour saisir le numéro du jour de
la semaine correspondant,
ou
Appuyez sur la touche Retour pour revenir à la grille Next.
7.15.7 Fonctions SFI
Pour utiliser les fonctions SFI qui suivent, accédez au mode
SFI comme décrit au Point 7.15.3
145
(Fig. 7-18)
FR
7.15.5 Next "Suivant"
7.15.7.1 Informations SFI
Utilisez les Infos SFI pour obtenir de brèves informations
sur le programme ou la chaîne sélectionnés. S'il existe des
Infos SFI pour un certain programme, le symbole
apparaît
à côté du programme en question.
>
Utilisez les flèches ou les touches de fonction
pour marquer le programme voulu.
>
Appuyez sur SFI pour afficher les informations.
Vous pouvez parcourir les textes d'information plus
longs en utilisant les flèches.
>
Appuyez sur la touche Retour pour revenir à la fenêtre précédente.
7.15.7.2 Programmation SFI
Le Guide Electronique des Programmes SFI vous permet de
programmer des événements très facilement.
>
Utilisez les flèches ou les touches de fonction
pour marquer le programme voulu.
>
Appuyez sur la touche de fonction rouge Timer
"Minuterie" pour ouvrir la fenêtre de sélection.
>
Utilisez les flèches haut/bas pour marquer le
Timer type "Type de Minuterie" voulu (voir
Point 7.15)
>
Confirmez en appuyant sur OK. Le menu Manage
timer "Gestion Minuterie" indiquant les données
relatives au progamme choisi apparaît alors pour que
vous puissiez vérifier l'exactitude des informations.
Vous pouvez effectuer les modifications nécessaires
dans ce menu (voir 7.15).
>
Appuyez sur la touche Retour pour revenir à la fenêtre précédente.
La ligne correspondante est marquée. En fonction du
type de minuterie choisie, votre récepteur s'allumera à
l'heure de commencement du programme. Si le récepteur a été allumé grâce à une minuterie d'enregistrement vidéo, le message "rec" apparaît sur le bandeau
d'affichage. La plupart des fonctions de la télécommande sont alors inactives afin d'éviter une interruption accidentelle de l'enregistrement.
En mode Veille, une minuterie en cours est indiquée
par le clignotement des deux points de l'horloge ou
par un voyant.
Supprimer une programmation SFI
>
Si vous souhaitez annuler un événement programmé par
minuterie au moyen du SFI, procédez comme indiqué
146
Appuyez sur la touche de fonction rouge Timer
"Minuterie" pour ouvrir la fenêtre de sélection.
>
Utilisez les flèches haut/bas pour marquer la ligne
Delete Timer "Supprimer Minuterie".
>
Confirmez en appuyant sur OK.
>
Pour annuler une minuterie en cours, éteignez le
récepteur numérique en utilisant la touche
Marche/Veille.
>
Appuyez à nouveau sur cette même touche pour rallumer le récepteur et retrouver l'intégralité des fonctions
de l'appareil.
FR
ci-dessus pour sélectionner le programme approprié.
>
7.15.7.3 Vue d'ensemble des programmes SFI
Utilisez la vue d'ensemble des programmes SFI pour afficher
une grille contenant les programmes de la journée pour une
chaîne donnée. Pour ce faire, procédez comme suit:
>
Appuyez sur la touche SFI.
La grille SFI Now "Maintenant" apparaît alors.
>
Appuyez sur la touche de fonction bleue Menu SFI
pour ouvrir la fenêtre de sélection.
>
Utilisez les flèches haut/bas pour marquer la ligne
Programmes.
>
Confirmez en appuyant sur OK. Une vue d'ensemble
de la chaîne sélectionnée apparaît alors. (Fig. 7-19)
>
Utilisez les flèches pour déplacer le curseur vers le
programme ou l'horaire voulu.
Les jours de la semaine sont indiqués sur la bande
tout en bas de l'écran.
S'il existe des informations pour les jours à venir, les
champs correspondants sont mentionnés.
>
Pour afficher le contenu de la chaîne pour un jour en
particulier, utilisez le pavé numérique pour saisir le
numéro de jour correspondant.
Afficher la vue d'ensemble SFI pour d'autres
chaînes
>
Appuyez sur la touche de fonction verte
Programmes.
La liste des chaînes SFI apparaît alors. (Fig. 7-20)
>
Vous pouvez ensuite utiliser les flèches pour marquer la chaîne voulue.
>
Appuyez sur OK pour afficher l'aperçu SFI de la chaîne sélectionnée.
147
(Fig. 7-19)
(Fig. 7-20)
7.15.7.4 Vue d'ensemble par type de programmes
SFI (genre)
Si un certain type de programmes vous intéresse, vous pouvez visualiser les informations sur les programmes triés en
fonction de certaines catégorie ou genres, ex: films, actualités, etc...
(Fig. 7-21)
(Fig. 7-22)
>
Appuyez sur la touche SFI. La grille SFI Now
"Maintenant" apparaît alors.
>
Appuyez sur la touche de fonction bleue Menu SFI
pour ouvrir la fenêtre de sélection.
>
Utilisez les flèches haut/bas pour marquer la ligne
Genres.
>
Confirmez en appuyant sur OK.
>
Utilisez la touche de fonction verte Genres pour
ouvrir la fenêtre contenant les genres de programmes
disponibles. (Fig. 7-21)
>
Utilisez les flèches pour sélectionner le type de programme voulu et confirmez en appuyant sur OK.
Une vue d'ensemble des programmes de la journée
apparaît. Cette vue ne comporte que les programmes
correspondant au genre sélectionné. (Fig. 7-22)
>
Utilisez les flèches haut/bas pour déplacer le curseur vers le programme voulu.
>
Utilisez les flèches gauche/droite pour vous
déplacer dans la liste, page par page.
Les jours de la semaine apparaissent au bas de l'écran. S'il existe des informations pour les jours à venir,
les champs correspondants sont mentionnés.
>
Pour afficher le contenu des programmes pour un jour
spécifique, utilisez le pavé numérique pour saisir le
numéro correspondant au jour de la semaine voulu.
7.15.8 Quitter le mode SFI
>
Appuyez sur la touche Menu ou TV/Radio pour
revenir en mode normal de fonctionnement.
7.16 Enregistrements avec minuterie
Votre récepteur est équipé d'une minuterie d'enregistrement
vidéo et d'une minuterie de changement de chaîne. La seule
différence dans la programmation de ces deux minuterie réside dans la sélection du type de minuterie.
Vous pouvez programmer la minuterie manuellement comme
décrit dans ce chapitre ou grâce à la fonction SFI comme
décrit au Point 7.15.7.2.
148
1. Minuterie d'enregistrement vidéo
FR
Quand vous utilisez une minuterie d'enregistrement vidéo,
votre récepteur numérique s'allume et s'éteint en fonction du
programme choisi pour que ce dernier puisse être enregistré
par un équipement d'enregistrement externe (magnétoscope
par exemple) en votre absence. Notez qu'il est nécessaire de
programmer votre enregistreur vidéo en conséquence pour
pouvoir enregistrer.
Si le récepteur est allumé grâce à la minuterie d'enregistrement vidéo, le message "rec" apparaît sur le bandeau d'affichage. Dans ce mode, la plupart des fonctions de la télécommande sont alors inactives afin d'éviter une interruption accidentelle de l'enregistrement. En mode Veille, une minuterie
active est indiquée par le clignotement des points de l'horloge ou par un voyant.
2. Minuterie de changement de chaîne
Si votre récepteur est en mode normal de fonctionnement, il
accède à la chaîne programmée à heure dite. A la différence
de la minuterie d'enregistrement vidéo, toutes les fonctions
de la télécommande restent actives et le récepteur n'est pas
éteint à la fin du programme.
7.16.1 Programmation manuelle des minuterie
>
Appuyez sur Menu pour accéder au Menu
Principal.
>
Utilisez les flèches haut/bas pour marquer l'élément "Gestion Minuterie".
>
Confirmez en appuyant sur OK.
Le sous-menu Manage Timer "Gestion
Minuterie" apparaît. (Fig.7-23)
>
Utilisez les flèches haut/bas pour sélectionner le
type de minuterie que vous souhaitez programmer.
>
Appuyez sur la touche OK pour accéder à la fenêtre
permettant de programmer un nouvel événement.
(Fig. 7-24)
(Fig. 7-23)
Pour programmer un événement, procédez comme suit:
Source
(Fig. 7-24)
>
Utilisez les flèches pour marquer la colonne Source.
>
Confirmez en appuyant sur OK.
>
Dans la fenêtre de sélection qui apparaît, utilisez les
flèches haut/bas pour sélectionner la source voulue (TV ou Radio).
>
Confirmez en appuyant sur OK.
En fonction de votre choix précédent, la liste TV ou
Radio apparaît alors.
149
>
Utilisez ensuite les flèches pour marquer la chaîne
voulue.
>
Utilisez les flèches haut/bas pour déplacer le curseur à l'intérieur de la liste, ligne par ligne.
>
Utilisez les flèches gauche/droite pour vous
déplacer dans la liste, page par page.
>
Appuyez sur OK pour transférer les informations de la
chaîne dans la mémoire de la minuterie.
Date
>
Utilisez les flèches pour marquer la colonne Date.
>
Utilisez le pavé numérique pour saisir la date (format à
quatre chiffres) à laquelle l'événement doit avoir lieu.
Début
>
Utilisez les flèches pour marquer la colonne Start
"Début"
>
Sur cette ligne, utilisez le pavé numérique pour saisir l'heure de démarrage de la minuterie.
Fin
>
Répétez les étapes du paragraphe "Début" pour saisir
l'heure de fin (sauf en cas de minuterie de changement de chaîne).
Répétition
>
Utilisez les flèches pour marquer la colonne Rep.
>
Confirmez en appuyant sur OK.
Une fenêtre de sélection présentant toutes les options
de répétitions apparaît.
1x
Minuterie unique
T
Répeter tous les jours
1W
Répéter une fois par semaine
1-5
Répéter les jours de semaine
6-7
Répéter les jours de week-end
>
Utilisez les flèches haut/bas pour sélectionner la
fonction voulue.
>
Appuyez sur OK pour sauvegarder les paramètres.
Valider les données en mémoire
>
Une fois la programmation terminée, appuyez sur la
touche de fonction jaune Accept "Accepter" pour
valider les données en mémoire.
150
Si sous l'entête Programme vous avez sélectionné
une chaîne bloquée comme indiqué au Point 8.3,
vous devez tout d'abord saisir le code PIN avant que
les données puissent être transférées en mémoire.
>
Appuyez sur la touche TV/Radio pour revenir en
mode normal de fonctionnement.
Le fonction de vue d'ensemble de la minuterie vous donne un
aperçu général des événements déjà programmés.
>
Pour accéder au menu Timer Overview "Vue
d'ensemble Minuterie", accédez d'abord au
menu Manage Timer "Gestion Minuterie"
comme indiqué ci-dessus.
>
Utilisez les flèches haut/bas pour marquer la ligne
Timer Overview "Vue d'ensemble Minuterie"
>
Confirmez en appuyant sur OK.
Si plusieurs événements se chevauchent, ils sont indiqués en rouge.
7.16.3 Modifier une programmation
>
Pour modifier un élément programmé par minuterie,
utilisez les flèches haut/bas pour marquer l'événement que vous souhaitez modifier.
>
Appuyez sur la touche de fonction jaune Change
"Modifier" pour accéder aux paramètres de l'événement choisi. Effectuez vos changements comme décrit
au Point 7.16.1.
>
Une fois la programmation terminée, appuyez sur la
touche de fonction jaune Accept "Accepter"
pour valider les données en mémoire.
7.16.4 Supprimer la programmation d'une minuterie
>
Pour supprimer un élément programmé par minuterie,
utilisez les flèches haut/bas pour marquer l'événement.
>
Appuyez sur la touche de fonction verte Delete
"Supprimer".
Le message suivant apparaît : “Etes-vous sûr de vouloir supprimer cette programmation ?”
>
Utilisez les flèches gauche/droite pour sélectionner Yes "Oui".
>
Pour supprimer la programmation, confirmez en
appuyant sur OK.
151
FR
7.16.2 Vue d'ensemble Minuterie
7.16.5 Programmer un nouvel événement
>
Pour programmer un nouvel événement, utilisez les
flèches haut/bas pour marquer une ligne vide dans
le menu Timer overview "Vue d'ensemble
Minuterie".
>
Appuyez sur la touche de fonction jaune New
"Nouveau" pour accéder à la fenêtre de saisie qui
permet de programmer un nouvel événement.
Effectuez votre programmation comme indiqué au
Point 7.16.1.
>
Utilisez les flèches haut/bas pour marquer la fenêtre supplémentaire Type qui apparaît.
>
Confirmez en appuyant sur OK. Une fenêtre indiquant
tous les types de minuteries disponibles apparaît.
>
Utilisez les flèches haut/bas pour sélectionner le
type de minuterie voulu.
>
Pour valider le type de minuterie, confirmez en
appuyant sur OK.
>
Une fois la programmation terminée, appuyez sur la
touche de fonction jaune Accept "Accepter" pour
valider les données en mémoire.
A noter !!!
Assurez-vous que le récepteur est à la bonne heure. L'heure
est indiquée sur le bandeau d'affichage de l'appareil quand il
est en veille. Si ce n'est pas le cas, laissez le récepteur allumé pendant environ 30 secondes sur une grande chaîne
nationale afin qu'il puisse y obtenir l'heure.
L'heure doit maintenant apparaître sur le bandeau d'affichage
du récepteur en veille (si l'option a été activée comme décrit
au Point 6.2.4).
8 Modification de la programmation de
base
8.1 Configurer une liste de favoris
Ce chapitre décrit la façon de modifier les programmations
prédéfinies de votre récepteur numérique ainsi que la liste de
vos favoris en fonction de vos préférences. Cette fonction est
également nécessaire pour trier les nouvelles chaînes trouvées à l'intérieur de la liste de chaînes après une recherche
de chaînes.
Pour ce faire, il est important de savoir que votre récepteur
dispose de deux listes de chaînes, la Favourites list
152
FR
"Liste de Favoris" et la Total list "Liste Complète".
La liste de Favoris contient toutes les chaînes que vous
aurez acceptées en fonction de la procédure qui suit. La
Liste Complète contient toutes les chaînes.
Ce chapitre décrit également la façon de supprimer des chaînes, d'en bloquer l'accès grâce au contrôle parental ou d'en
ajouter au GEP. Lorsque vous accédez à une liste de chaînes en appuyant sur OK, c'est la liste des Favoris qui est
affichée.
8.1.1 Accéder au gestionnaire de la liste de chaînes
Pour personnaliser votre liste de Favoris, procédez comme
suit:
>
Appuyez sur Menu pour accéder au Menu
Principal (Fig. 8-1)
>
Utilisez les flèches haut/bas pour marquer la ligne
Manage TV lists "Gérer listes TV" pour pouvoir manipuler les listes TV ou Manage Radio lists
"Gérer listes Radio" pour manipuler les listes de
stations de radio.
>
Confirmez en appuyant sur OK.
Le gestionnaire de liste de chaînes nécessaire à la
manipulation de la liste de Favoris concernée (TV ou
Radio) apparaît. (Fig. 8-2) La liste des Favoris apparaît sur la moitié droite de l'écran. Cette liste est alors
active, la chaîne en cours est indiquée.
(Fig. 8-1)
(Fig. 8-2)
La liste complète triée dans l'ordre alphabétique apparaît sur la moitié gauche de l'écran.
La liste complète regroupe toutes les chaînes disponibles.
>
Appuyez sur la touche de fonction rouge pour déplacer le curseur vers la Liste Complète. Cette dernière
est maintenance active.
>
Appuyez sur la touche de fonction rouge à nouveau
pour ouvrir la fenêtre de sélection. Vous avez là, la
possibilité de trier la liste complète en fonction de plusieurs critères (ex : toutes les chaînes, toutes les
chaînes en clair, toutes les chaînes nouvellement trouvées, toutes les chaînes de langue anglaise, etc...) ou
en fonction des différents fournisseurs.
>
Utilisez les flèches haut/bas pour sélectionner la
liste de chaînes voulues (ex: Liste complète)
>
Confirmez en appuyant sur OK.
Une nouvelle fenêtre de sélection apparaît alors.
(Fig. 8-3)
153
(Fig. 8-3)
>
Utilisez ensuite les flèches haut/bas pour spécifier
le critère de sélection en fonction duquel vous souhaitez trier la liste complète. Par exemple, sélectionnez
All programmes "Toutes les chaînes" pour
afficher l'ensemble des chaînes disponibles dans la
liste complète ou All new "Toutes les nouvelles" pour n'afficher que les chaînes récemment trouvées au cours de la dernière recherche/balayage de
chaînes, ou All English "Tout Anglais" pour n'afficher que les chaînes de langue anglaise.
>
Confirmez en appuyant sur OK.
Selon votre sélection, une liste de chaînes contenant toutes
les chaînes, toutes les nouvelles chaînes ou toutes les chaînes en langue anglaise apparaît. Les chaînes qui figurent
déjà dans la liste de Favoris sont cochées.
>
(Fig. 8-4)
Vous pouvez passer de la liste complète à la liste de
favoris et inversement en appuyant sur la touche de
fonction rouge Programmes ou sur la touche de
fonction verte liste TV. La liste active est indiquée par le marqueur bleu.
8.1.2 Ajouter des chaînes à la liste des favoris
Pour insérer des chaînes de la liste complète dans la liste de
favoris, accédez au gestionnaire de liste de chaînes comme
décrit au Point 8.1.1 et entrer dans la liste Complète.
>
Appuyez sur la touche de fonction bleue Functions
"Fonctions"
Une fenêtre de sélection indiquant toutes les fonctions
disponibles apparaît. (Fig. 8-4)
>
Utilisez les flèches haut/bas pour marquer l'élément Add "Ajouter".
>
Confirmez en appuyant sur OK.
>
Utilisez les flèches haut/bas pour marquer la chaîne que vous souhaitez ajouter à la liste de Favoris.
>
Appuyez sur la touche de fonction jaune Add
"Ajouter" pour ajouter la chaîne sélectionnée à la
liste de vos Favoris.
Marquer des blocs de chaînes
Pour sélectionner plusieurs chaînes simultanément, procédez
comme suit:
>
Appuyez sur la touche OK pour accéder au mode
Sélection.
La chaîne marquée est indiquée par une croix sur la
gauche.
154
>
Utilisez les flèches haut/bas pour également marquer les chaînes précédentes et/ou suivantes.
>
Après avoir fini votre sélection de chaînes de cette
manière, appuyez sur la touche de fonction jaune
Add "Ajouter" pour les ajouter à la liste de vos
Favoris.
FR
8.1.3 Supprimer des chaînes
8.1.3.1 Supprimer des chaînes de la liste des favoris
Pour supprimer des chaînes de la liste de vos Favoris, accédez au gestionnaire de listes de chaînes comme décrit au
point 8.1.1. La liste de vos Favoris apparaît. Elle est alors
active.
>
Appuyez sur la touche de fonction bleue Functions
"Fonctions"
Une fenêtre de sélection indiquant toutes les fonctions
disponibles apparaît. (Fig. 8-5)
>
Utilisez les flèches haut/bas pour marquer la ligne
Delete "Supprimer".
>
Confirmez en appuyant sur OK.
>
Utilisez les flèches haut/bas pour marquer la chaîne que vous souhaitez supprimer de la liste.
>
Appuyez sur la touche de fonction jaune Delete
"Supprimer".
Le message suivant apparaît : “Souhaitez vous réellement supprimer la (les) chaîne(s) de la liste ?”.
>
Utilisez les flèches gauche/droite pour sélectionner Yes "Oui" ou No "Non".
>
Confirmez en appuyant sur OK.
>
Pour supprimer plusieurs chaînes à la fois, marquezles comme décrit au Point 8.1.2 (Marquer des
blocs de chaînes)
>
Une fois toutes les chaînes marquées de cette manière, appuyez sur la touche de fonction jaune Delete
"Supprimer". Le message suivant apparaît :
“Souhaitez vous réellement supprimer la (les) chaîne(s) ?”.
>
Utilisez les flèches gauche/droite pour sélectionner Yes "Oui" ou No "Non".
>
Confirmez en appuyant sur OK.
Les chaînes supprimées de cette manière existent cependant
toujours dans la liste complète et peuvent à nouveau être
ajoutées à la liste de Favoris à tout moment.
155
(Fig. 8-5)
8.1.3.2 Supprimer de la liste complète
Pour supprimer des chaînes de la liste complète, procédez
comme décrit au point 8.1.3.1. Après avoir accédé au gestionnaire des listes de chaînes, appuyez sur la touche de
fonction rouge Programmes pour passer à la liste complète puis sélectionnez la fonction Delete "Supprimer".
8.1.4 Sorting programmes
(Fig. 8-6)
Pour trier l'ordre d'apparition des chaînes dans votre liste de
Favoris en fonction de vos préférences, accédez au gestionnaire des listes de chaînes comme décrit au point 8.1.1. La
liste de vos Favoris apparaît. Elle est alors active.
>
Appuyez sur la touche de fonction bleue Functions
"Fonctions" Une fenêtre de sélection indiquant toutes les fonctions disponibles apparaît. (Fig. 8-6)
>
Utilisez les flèches haut/bas pour marquer la ligne
Sort "Trier".
>
Confirmez en appuyant sur OK.
>
Utilisez ensuite les flèches haut/bas pour marquer
la chaîne que vous souhaitez déplacer dans la liste.
>
Appuyez ensuite sur la touche de fonction jaune
Sort "Trier". Une flèche double apparaît à côté de la
chaîne choisie.
>
Vous pouvez ensuite utiliser soit les flèches haut/
bas, soit le pavé numérique pour déplacer la chaîne dans la liste là où vous voulez qu'elle apparaisse.
>
Appuyez sur la touche de fonction jaune Sort
"Trier" pour transférer la nouvelle position de la chaîne en mémoire.
>
Pour trier plusieurs chaînes à la fois, marquez-les
comme décrit au Point 8.1.2 (Marquer des blocs
de chaînes)
>
Appuyez ensuite sur la touche de fonction jaune
Sort "Trier". Une flèche double apparaît à côté du
bloc de chaînes sélectionnées.
>
Vous pouvez ensuite utiliser les flèches haut/bas
et/ou le pavé numérique pour déplacer le bloc de
chaînes dans la liste là où vous voulez qu'il
apparaisse.
>
Appuyez sur la touche de fonction jaune Sort
"Trier" pour transférer la nouvelle position du bloc de
chaînes en mémoire.
>
Une fois que vous avez fini d'organiser de cette
manière la liste des chaînes suivant vos préférences,
156
appuyez sur la touche Menu pour revenir en mode
normal de fonctionnement.
8.2 Programmer le guide électronique des
programmes
>
Appuyez sur Menu pour accéder au Menu
Principal.
>
Utilisez les flèches haut/bas pour marquer la ligne
Settings "Paramétrage"
>
Confirmez en appuyant sur OK.
Le sous-menu Settings "Paramétrage" apparaît
à l'écran.
>
Utilisez les flèches haut/bas pour marquer la ligne
Programme guide.
>
Confirmez en appuyant sur OK. Le menu
Programme guide apparaît. (Fig. 8-7)
>
Utilisez les flèches haut/bas pour déplacer le curseur à l'intérieur du menu et pour modifier les différents éléments comme indiqué. Lorsque vous sélectionnez un élément du menu, observez toujours les
indications des messages affichés à l'écran.
FR
Votre récepteur est capable de recevoir par le câble une
chaîne de données contenant des informations SFI supplémentaires. Ces informations vous permettent d'obtenir un
aperçu des données SFI avec une semaine d'avance.
(Fig. 8-7)
8.2.1 Sélectionner une chaîne
Pour obtenir une meilleure vue d'ensemble, vous pouvez programmer le guide électronique des programmes SFI pour
qu'il ne contienne que vos chaînes préférées.
(Fig. 8-8)
A noter:
Plus le nombre de chaînes incluses au guide électronique est
élevé, plus les données SFI sont longues à télécharger!
De plus, la période maximale de 7 jours peut ne plus être
accessible si le Guide Electronique des Programmes contient
trop de chaînes.
>
Appuyez sur la touche OK. La liste de Favoris de la
catégorie choisie (Radio ou TV) apparaît. La chaîne
en cours est indiquée. (Fig. 8-8)
>
Appuyez sur la touche de fonction verte pour naviguer entre la liste TV et la liste Radio.
>
Appuyez sur la touche de fonction rouge pour afficher la fenêtre de sélection. Vous pouvez choisir ici le
type de liste de chaînes voulu.
157
>
Utilisez les flèches haut/bas pour sélectionner le
type de liste de chaînes voulu, (ex : liste de Favoris).
>
Confirmez en appuyant sur OK.
La liste de chaînes sélectionnée apparaît.
>
Utilisez les flèches pour marquer la chaîne que vous
souhaitez inclure au guide électronique des programmes.
>
Appuyez sur la touche de fonction jaune SFI pour
insérer la chaîne marquée au GEP.
>
Pour ajouter plusieurs chaînes à la fois au guide
électronique des programmes, marquez-les comme
décrit au Point 8.1.2 (Marquer des blocs de
chaînes).
>
Une fois le marquage des chaînes terminé de cette
manière, appuyez sur la touche de fonction jaune
SFI pour intégrer les chaînes marquées au guide
électronique des programmes.
>
Appuyez sur la touche Menu pour revenir en mode
normal de fonctionnement.
Vous pouvez maintenant démarrer la procédure manuelle de
téléchargement:
>
Utilisez la touche Marche/Veille pour éteindre le
récepteur (Veille).
>
Ensuite, alors que l'indication „oooo" apparaît sur le
bandeau d'affichage, appuyez sur la touche SFI.
Le récepteur effectue la procédure de téléchargement.
Cela vous est indiqué par le message SFLd sur le
bandeau d'affichage, suivi du pourcentage de données
SFI déjà téléchargées.
>
La procédure de téléchargement peut être interrompue
en rallumant le récepteur numérique (touche
Marche/Veille).
8.2.2 Catégorie de démarrage
Le Guide Electronique des Programmes vous propose plusieurs types de présentations (catégories).
Aperçu
Cette forme de présentation fournit un aperçu rapide de toutes les chaînes contenues dans le guide électronique des
programmes.
Programmes
Cette forme de présentation affiche une grille des programmes du jour pour une chaîne donnée.
158
Genres
Si un certain type de programmes vous intéresse, comme les
films, les actualités, etc..., vous pouvez voir affichés les programmes en fonction de leur genre.
Dernier choix sélectionné
>
Sur cette ligne, utilisez les flèches gauche/droite
pour sélectionner le mode de présentation que vous
souhaitez utiliser quand vous accédez au GEP.
>
Si vous sélectionnez Genres, vous pouvez utiliser
les flèches pour définir votre genre préféré (ex:
films, actualités, divertissements, sports, etc...).
FR
En choisissant ce paramètre, chaque fois que vous accédez
au SFI, c'est la dernière présentation utilisée qui vous est
proposée.
8.2.3 Heure de mise à jour
>
Utilisez le pavé numérique sur la ligne Updating
"Mise à jour" pour paramétrer l'heure à laquelle le
téléchargement automatique des données SFI doit
avoir lieu.
8.2.4 Mise à jour
>
Pour recevoir la chaîne de données, marquez la ligne
Updating "Mise à jour".
>
Paramétrez-la sur On en appuyant sur OK.
Si vous ne souhaitez pas recevoir ces données supplémentaires, ou si vous ne pouvez pas les recevoir du fait de votre
localisation, vous pouvez désactiver cette fonction.
>
Paramétrez la ligne Update "Mise à jour" sur Off
afin de désactiver la fonction de réception des données.
8.2.5 Chaîne SFI
>
Appuyez sur la touche OK pour afficher le sous-menu
SFI Channel "Chaîne SFI" (Fig. 8-9).
>
Pour démarrer la mise à jour des données SFI
manuellement, appuyez sur la touche rouge Start
now "Démarrer maintenant".
Si les paramètres applicables à la chaîne de données utilisée
pour télécharger la liste SFI ont changé, vous pouvez utiliser
ce menu pour les corriger. Vous pouvez obtenir les données
à jour du transpondeur auprès de votre revendeur. En règle
générale, il n'est pas cenpendant pas nécessaire de procéder
à des modifications dans ce menu.
159
(Fig. 8-9)
8.3 Contrôle parental
Votre récepteur est équipé d'une fonction de contrôle parental.
Cette option vous permet de protéger certaines fonctions
importantes (ex : ouverture du menu principal) pour en interdire l'accès. De plus, les chaînes et les enregistrements que
vous bloquez ne sont accessibles qu'après la saisie d'un
code PIN à 4 chiffres (unit PIN/Code PIN Appareil).
(Fig. 8-10)
(Fig. 8-11)
Pour utiliser le menu Parental Control "Contrôle
Parental", procédez comme suit :
>
Appuyez sur Menu pour accéder au Menu
Principal.
>
Utilisez les flèches haut/bas pour marquer la ligne
Settings "Paramétrage"
>
Confirmez en appuyant sur OK.
Le sous-menu Settings "Paramétrage" apparaît
à l'écran.
>
Utilisez les flèches haut/bas pour marquer la ligne
Parental Control "Contrôle Parental".
>
Confirmez en appuyant sur OK. (Fig. 8-10)
>
Utilisez les flèches haut/bas pour déplacer le curseur à l'intérieur du menu et pour modifier les sélections individuelles comme indiqué. Lorsque vous sélectionnez un élément du menu, observez également toujours les indications des messages affichés à l'écran.
8.3.1 Sélectionner les chaînes
>
Appuyez sur la touche OK. La liste de Favoris de la
catégorie choisie (Radio ou TV) apparaît. La chaîne
actuellement sélectionnée est marquée. (Fig. 8-11)
>
Vous pouvez naviguer entre la liste TV et la liste
Radio en utilisant la touche de fonction verte.
>
Appuyez sur la touche de fonction rouge pour ouvrir
la fenêtre de sélection. Vous pouvez choisir ici le type
de liste de chaînes voulu.
>
Utilisez les flèches haut/bas pour sélectionner le
type de liste de chaînes voulu, (ex : liste de Favoris).
>
Confirmez en appuyant sur OK. La liste de chaînes
sélectionnée apparaît.
>
Utilisez alors les flèches pour marquer la chaîne
dont vous souhaitez bloquer l'accès.
>
Utilisez la touche de fonction jaune pour bloquer l'accès de la chaîne. Le symbole de contrôle parental
apparaît à côté de la chaîne sélectionnée.
160
Pour bloquer l'accès à plusieurs chaînes à la fois, procédez comme indiqué au Point 8.1.2 (Marquer des
blocs de chaînes) puis bloquez leur accès en
appuyant sur la touche de fonction jaune.
>
Une fois que vous avez fini d'organiser de cette
manière la liste des chaînes suivant vos préférences,
appuyez sur la touche Menu pour revenir en mode
normal de fonctionnement.
>
Pour supprimer le blocage individuel des chaînes, procédez comme décrit ci-dessus. Marquez la chaîne
voulue puis appuyez sur la touche de fonction jaune
pour supprimer le symbole de contrôle parental.
8.3.2 Modification du code PIN de l'appareil
Le code PIN de l'appareil est paramétré par défaut en usine
à 0000.
>
Appuyez sur la touche OK. Le menu utilisé pour
modifier le code PIN de l'appareil apparaît. (Fig. 8-12)
>
Utilisez alors le pavé numérique pour saisir le code
PIN actuel. (Par défaut 0000)
>
Utilisez le pavé numérique pour saisir le nouveau
code PIN.
>
Répétez la saisie.
>
Après avoir terminé la modification du code PIN de
l'appareil, vous revenez automatiquement au menu
Parental control "Contrôle Parental".
Note!
Ne perdez pas le code PIN Appareil. Si cela devait vous arriver, contactez alors votre revendeur spécialisé!
8.3.3 Mode
>
Sur cette ligne, utilisez les flèches gauche/droite
pour activer ou non le contrôle parental on ou off.
8.4 Balayage de chaînes (recherche)
A noter :
Le réseau câblé sur lequel votre récepteur fonctionne détermine les chaînes que vous pouvez recevoir. Votre founisseur
de réseau câblé doit vous fournir les informations relatives
aux chaînes disponibles.
Pour que votre récepteur puisse recevoir et diffuser les programmes numériques disponibles du réseau câblé, vous
devez effectuer un balayage de chaînes (recherche). Il existe
plusieurs façon de réaliser ce balayage.
161
(Fig. 8-12)
FR
>
1. Balayage automatique
Sélectionnez ce type de balayage pour rechercher des chaînes sur l'ensemble de la bande de fréquences du récepteur.
2. Balayage avancé
Sélectionnez ce type de balayage pour n'effectuer la recherche que sur une gamme de fréquences ou un intervalle de
canaux particuliers ou pour réaliser un balayage de réseau.
(Fig. 8-13)
3. Balayage manuel
Sélectionnez ce type de balayage pour n'effectuer la recherche de chaînes que sur une fréquence particulière.
(Fig. 8-14)
Une fois le balayage terminé, un message apparaît à l'écran
pour vous indiquer le nombre de chaînes trouvées par le
récepteur numérique, combien de ces chaînes sont nouvelles
et combien d'entre elles sont des chaînes cryptées. Les nouvelles chaînes sont sauvegardées dans la liste complète
des chaînes, et peuvent ensuite être incluses dans votre
liste de Favoris comme indiqué au Point 8.1.
>
Pour démarrer le balayage de recherche de chaînes,
accédez tout d'abord au Menu Principal. (Fig. 8-13)
>
Utilisez les flèches haut/bas pour marquer la ligne
Scan "Balayage".
>
Confirmez en appuyant sur OK.
Le sous-menu Scan "Balayage" apparaît à l'écran.
(Fig. 8-14)
(Fig. 8-15)
>
Utilisez ensuite les flèches haut/bas pour sélectionner le type de balayage que vous souhaitez réaliser et confirmez en appuyant sur OK.
8.4.1 Balayage automatique
Si vous choisissez ce type de balayage, l'ensemble de la
gamme de fréquences reçue par le récepteur est balayé à la
recherche de chaînes. Vous pouvez décider de rechercher
toutes les chaînes (cryptées et en clair) ou seulement les
chaînes en clair. (Fig. 8-15)
>
Utilisez la touche OK pour décider de ne rechercher
que les chaînes en clair (Free Channels "Chaînes
gratuites") ou pour inclure également la recherche
des chaînes cryptées (All channels "Toutes les
chaînes").
>
Pour confirmer, appuyez sur la touche de fonction
rouge Start scan "Démarrer Balayage". Cette
procédure de balayage peut prendre plus de 15 minutes. Observez également toutes les indications des
messages affichés à l'écran.
(Fig. 8-16)
162
8.4.2 Balayage avancé/Balayage d'intervalles
La fonction Balayage Avancé/Balayage d'intervalles vous
fournit deux possiblités pour réaliser un balayage.
Dans le cas d'un balayage de fréquences, le balayage à la
recherche de chaînes est effectué sur une gamme de fréquences spécifique, désignée par l'utilisateur.
2. Balayage Canal
Dans le cas d'un balayage de canaux (Fig. 8-16), le balayage
à la recherche de chaînes est effectué sur un intervalle de
canaux spécifique, désigné par l'utilisateur. Un balayage de
canaux est plus rapide qu'un balayage de fréquences.
>
Utilisez les flèches haut/bas pour sélectionner le
type de balayage que vous souhaitez réaliser.
>
Confirmez en appuyant sur OK.
>
Utilisez les flèches haut/bas pour marquer le
champ Start channel "Canal de Début" ou
Start frequency "Fréquence de début" (uniquement pour les cas de balayage de fréquences ou
de canaux). Sachez que le chiffre donné en tant que
canal ou fréquence de démararge doit être inférieur
au chiffre donné en canal ou fréquence de fin.
>
Utilisez les flèches gauche/droite pour sélectionner le canal de début ou utilisez le pavé numérique
pour saisir la fréquence de début (uniquement pour
les cas de balayage de fréquences ou de canaux).
>
Utilisez les flèches haut/bas pour marquer le champ
Stop channel "Canal de Fin" ou Stop frequency "Fréquence de Fin" et procédez comme
décrit plus haut pour indiquer le canal ou la fréquence
de fin (uniquement pour les cas de balayage de fréquences ou de canaux).
Sous la ligne Symbol rates "Débit de symboles" vous
trouvez une liste des débits de symboles couverts lors d'un
balayage. Pour inclure des débits de symboles supplémentaires, vous devez d'abord paramétrer la liste comme suit:
>
Pour ajouter de nouveaux débits de symboles, utilisez
les flèches haut/bas pour sélectionner la ligne
Symbol rates New "Nouveau Débit de
Symbole" et confirmez en appuyant sur OK (uniquement pour les cas de balayage de fréquences ou de
canaux).
>
Utilisez ensuite le pavé numérique pour saisir le
nouveau débit de symboles et confirmez en appuyant
sur OK (uniquement pour les cas de balayage de fré163
FR
1. Balayage de Fréquences
quences ou de canaux). Le nouveau débit de symboles est ajouté à la fin de la liste.
>
Pour supprimer le débit de symboles de la fin de la
liste, utilisez les flèches haut/bas pour sélectionner
la ligne Delete "Supprimer" puis appuyez sur OK
(uniquement pour les cas de balayage de fréquences
ou de canaux).
Sur la ligne Scan Mode "Mode de Balayage",
vous pouvez décider de ne rechercher que les chaînes en clair ou l'ensemble des chaînes avec les chaînes cryptées.
>
Pour ce faire, utilisez les flèches haut/bas pour marquer la ligne Scan mode "Mode de balayage",
puis appuyez sur OK pour choisir si vous souhaitez
ne rechercher que les chaînes en clair (Only free
"Gratuites seulement") ou également les chaînes
cryptées (All "Toutes").
>
Appuyez sur la touche de fonction rouge Start
Scan "Démarrer Balayage" pour démarrer la
recherche de chaînes. La recherche commence.
Observez également toutes les indications des messages affichés à l'écran.
(Fig. 8-17)
>
Vous pouvez interrompre le balayage en appuyant sur
la touche de fonction rouge.
Le balayage peut prendre plus de 15 minutes. Observez également tous les messages qui s'affichent à l'écran.
8.4.3 Balayage manuel
Vous pouvez choisir de balayer une certaine fréquence spécifique (voir Point 9, Termes techniques) à la recherche de
chaînes (Fig. 8-17). Pour ce faire, il faut faudra renseigner les
données suivantes:
Fréquence du canal
Sur cette ligne vous devez saisir la fréquence à laquelle les
chaînes recherchées sont retransmises.
>
Utilisez les flèches haut/bas pour marquer la ligne
Channel frequency "Fréquence Canal".
>
Utilisez le pavé numérique pour saisir la fréquence
voulue.
Débit de symboles
Sur cette ligne vous devez saisir le débit de symboles auquel
les chaînes recherchées sont retransmises.
>
Utilisez les flèches haut/bas pour marquer la ligne
Symbol rate "Débit de Symboles".
>
Sur cette ligne, utilisez le pavé numérique pour saisir le débit de symbole voulu.
164
>
Utilisez les flèches haut/bas pour marquer la ligne
Modulation.
>
Appuyez sur la touche OK, plusieurs fois si nécessaire, pour renseigner le type de modulation utilisé.
>
Appuyez ensuite sur la touche de fonction rouge
Start scan "Démarrer Balayage". La recherche
commence. Observez également toutes les indications des messages affichés à l'écran.
>
Si vous souhaitez abandonner la procédure de
balayage, appuyez à nouveau sur la touche de fonction rouge.
Pour rechercher spécifiquement une chaîne en particulier,
vous pouvez aussi utiliser le balayage par code PID.
>
Appuyez sur la touche de fonction verte PID scan
"Balayage PID".
>
Utilisez ensuite les flèches haut/bas pour marquer
les lignes PCR PID, Audio PID et Video PID et
utilisez le pavé numérique pour saisir les valeurs
appropriées.
>
Démarrez le balayage en appuyant sur la touche de
fonction rouge Start Scan "Démarrer
Balayage".
8.4.4 Après la recherche
Vous pouvez suivre la progression du balayage du transpondeur à l'écran pendant qu'elle a lieu. Une fois le balayage terminé, le nombre de transpondeurs ainsi que le nombre des
chaînes total et de nouvelles chaînes trouvées sont affichés.
De plus, un autre message apparaît (Fig. 8-18) demandant si
vous souhaitez ajouter automatiquement les chaînes trouvées à votre liste TV ou Radio. Si vous décidez d'accepter
les chaînes de façon automatique, vous pouvez ensuite décider si elles doivent être ajoutées à la liste de Favoris sous
forme triée "sorted" ou non triée "unsorted".
Triées
Les chaînes trouvées sont triées dans la liste de Favoris en
fonction de la liste prédéfinie. L'ordre des chaînes dépend de
la langue audio sélectionnée au point 6.3.2 ou du pays
sélectionné au point 6.2.2.
Non triées
Les nouvelles chaînes trouvées sont ajoutées à la fin de la
liste de vos Favoris sans être triées.
Non
Les nouvelles chaînes trouvées ne sont pas ajoutées à la
165
(Fig. 8-18)
FR
Modulation
Utilisez cette ligne pour saisir le type de modulation utilisé.
liste de vos Favoris mais elles figurent tout de même dans la
liste complète.
>
Utilisez les flèches gauche/droite pour indiquer si
vous souhaitez accepter les chaînes de façon
"triées" sorted ou "non triées" unsorted.
>
Confirmez en appuyant sur OK.
Observez les indications de tous les messages
affichés à l'écran.
(Fig. 8-19)
>
Indépendamment du choix que vous avez fait d'ajouter
ou non les chaînes nouvellement trouvées automatiquement à la liste de Favoris, vous pouvez les y
ajouter manuellement comme décrit au Chapitre 8.1.
>
Appuyez sur la touche Menu pour revenir en mode
normal de fonctionnement.
8.5 Paramètres d'usine
(Fig. 8-20)
Vous pouvez, à tout moment, réinitialiser les paramètres d'origine par défaut préprogrammés en usine. De plus, si vous
vous apercevez que la liste de chaînes est obsolete du fait de
modifications réalisées par les fournisseurs de chaînes, vous
pouvez supprimer complètement la liste de chaînes avant
d'effectuer un nouveau balayage à la recherche de chaînes.
Notez qu'après avoir supprimé la liste, vous devez ensuite
lancer un balayage et copier les chaînes voulues de la liste
complète vers votre liste de Favoris.
>
Appuyez sur Menu pour accéder au Menu
Principal. (Fig. 8-19)
>
Utilisez ensuite les flèches haut/bas pour marquer
la ligne de menu Settings "Paramétrage".
>
Confirmez en appuyant sur OK.
Le sous-menu Settings "Paramétrage" apparaît
à l'écran. (Fig. 8-20)
>
Utilisez les flèches haut/bas pour marquer la ligne
de menu Service Settings "Paramétrage
Usine".
>
Confirmez en appuyant sur OK.
Le sous-menu Service Settings "Paramétrage
Usine" apparaît alors. (Fig.8-21)
(Fig. 8-21)
8.5.1 Activer les paramètres par défaut
Après avoir fait appel à cette fonction, la programmation d'usine par défaut est réinitialisée, tous vos paramètres personnels sont supprimés et l'assistant d'installation AutoInstall
est lancé.
>
Utilisez les flèches haut/bas pour marquer la ligne
166
Activate default setting "Activer paramètres par défaut".
>
Confirmez en appuyant sur OK.
Le message: “Etes-vous sûr de vouloir réinitialiser les
paramètres d'usine ?” apparaît.
Utilisez les flèches gauche/droite pour sélectionner Yes "Oui" ou Abort "Abandonner".
>
Confirmez en appuyant sur OK.
FR
>
8.5.2 Supprimer toutes les chaînes
Cette fonction permet de supprimer l'ensemble de la mémoire des chaînes.
>
Utilisez les flèches haut/bas pour marquer la ligne
Delete All Programmes "Supprimer toutes
les chaînes".
>
Confirmez en appuyant sur OK.
Le message : "Souhaitez-vous réellement supprimer
toutes les chaînes?" s'affiche alors.
>
Utilisez les flèches gauche/droite pour sélectionner Yes "Oui" ou Abort "Annuler".
>
Confirmez en appuyant sur OK.
(Fig. 8-22)
(Fig. 8-23)
8.5.3 Mise à jour logicielle
Votre récepteur numérique est également équipé pour recevoir les mises à jour de son logiciel d'exploitation par le câble.
>
Appuyez sur OK pour accéder au sous-menu
Update software "Mise à jour logiciel"
(Fig. 8-22). Pour effectuer la mise à jour logicielle,
sélectionnez la ligne Update "Mise à jour".
>
Paramétrez la mise à jour logicielle sur "On" en
appuyant sur OK.
>
Sur la ligne Update time "Heure Mise à jour",
utilisez le pavé numérique pour saisir l'heure à
laquelle la mise à jour du logiciel doit avoir lieu.
>
Pour lancer manuellement la mise à jour du logiciel
d'exploitation, appuyez sur la touche de fonction
rouge Test.
>
Appuyez sur la touche Menu pour revenir en mode
normal de fonctionnement.
Si les paramètres de la chaîne de données nécessaire au
téléchargement des mises à jour logicielles ont changé, vous
pouvez les corriger manuellement à partir de ce menu,
comme décrit au Point 8.4.3 (Balayage manuel).Vous pouvez
obtenir les données à jour de la chaîne auprès de votre
167
revendeur spécialisé. En règle générale, il n'est pas nécessaire de procéder à des modifications dans ce menu.
Note :
Le nouveau logiciel ne peut être téléchargé automatiquement que si le récepteur numérique est
veille. La procédure de téléchargement est indiquée par la présence de “CAbL” ou “CAb0” à
“CAb9” sur le bandeau d'affichage.N'interrompez
pas cette opération en allumant votre récepteur.
(Fig. 8-24)
Indépendamment du fait que vous ayez opté ou non pour une
mise à jour automatique, le système vérifie automatiquement,
à chaque fois que le récepteur est allumé, l'existence d'une
nouvelle version du logiciel d'exploitation de ce dernier. La
présence d'une nouvelle version disponible vous est indiquée
par un message à l'écran (Fig. 8-23). Pour démarrer la mise
à jour du logiciel, suivez les instructions qui apparaissent à
l'écran.
8.5.4 Copier les paramètres
Vous avez la possibilité de copier tous les paramètres de
votre récepteur numérique (source) (paramètres des listes de
chaînes, paramètres antenne, etc.) vers un autre récepteur
du même type (cible) qui utilise la même version logicielle.
(Fig. 8-24)
>
Pour ce faire, raccordez les deux récepteurs à l'aide
d'un câble null-modem.
>
Allumez le récepteur cible.
>
Pour copier les paramètres, appuyez sur n'importe
quelle touche de fonction du récepteur source.
Les paramètres du récepteur source sont alors transmises au récepteur cible. Observez les indications de
tous les messages affichés à l'écran.
8.6 Configuration système
Utilisez cet élément du menu pour visualiser les données particulières du récepteur (ex: version actuelle du logiciel).
>
Utilisez les flèches haut/bas pour marquer cette
ligne dans le sous-menu Settings "Paramétrage".
>
Confirmez en appuyant sur OK.
>
Appuyez sur la touche Menu pour revenir en mode
normal de fonctionnement.
8.7 Système de cryptage/de décodage
Ce menu vous conduit aux sous-menus utilisés par la carte à
puce et le module CI. Vous pouvez y obtenir les informations
concernant la carte ou le module CI utilisés en sélectionnant
168
l'élément voulu grâce aux flèches puis en confirmant en
appuyant sur OK.
Initialisation manuelle du module CI
Vous pouvez initialiser manuellement un module CI en
appuyant sur la touche de fonction rouge CI Reset
"Réinitialisation CI".
9 Termes techniques
Câble antenne:
Câble de raccordement entre le modulateur du récepteur de
réseau câblé et l'entrée antenne du téléviseur, utilisé comme
solution alternative en cas d'absence de prise Péritel.
AV: voir PERITEL
Récepteur de réseau câblé:
Le téléviseur ne peut pas accéder aux signaux numérique
reçus par le réseau câblé. Le récepteur de réseau câblé traite les signaux Audio et Vidéo (AV) de façon qu'ils soient
transmis aux sorties du récepteur sous une forme pouvant
être prise en charge par le téléviseur.
CATV:
Abréviation de Community Antenna Television. Réception de
chaînes TV et de stations de Radio grâce à une antenne collective. Dans le cas des réseaux télévisés câblés, ce système
est utilisé de façon internationale sous la forme de réseaux
de télévision câblés ou de réseaux câblés à larges bandes.
Canal:
Partie d'une bande de fréquences allouée en fonction d'une
procédure définie. Un canal TV est composé de deux fréquences, une pour le contenu visuel et l'autre pour le contenu sonore. Chaque canal possède un numéro spécifique (à
l'exception des canaux TV d'Europe retransmis sur la bande
fréquence 40-230 MHz et qui sont désignés par des lettres).
Câble co-axial:
Câble de raccordement entre la prise antenne et le récepteur
de réseau câblé, utilisé pour retransmettre les signaux reçus.
Compression des données/MPEG1/MPEG2:
Le volume des données nécessaire à la retransmission des
standards télévisuels (625 lignes) et d'une fréquence d'image
de 50 Hz nécessite 216 Mo/s de données numériques. Cela
suppose des largeurs de bandes qui ne sont pas encore
disponibles que ce soit par les sytèmes câblés ou les systèmes terrestres. C'est la raison pour laquelle le volume total
de données transmises est réduit au moyen d'un algorithme
de compression. En Europe, c'est le format MPEG-2 qui a
été choisi comme format standard international de compression de données.
MPEG-2 est une version plus avancée du MPEG-1.
169
FR
>
DVB:
Digital Video Broadcasting " Retransmission Vidéo
Numérique": Une technologie de transmission numérique universelle utilisée pour les images, les graphiques, le son, le
texte, pour des données sous n'importe quelle forme et de
toute qualité appropriée possible.
Cryptage:
Le cryptage des chaînes est une procédure technique qui
permet de garantir qu'un nombre de téléspectateurs ou d'auditeurs limités a accès à ces chaînes. De nombreux systèmes
sont utilisés pour y parvenir, dont Irdeto, Cryptoworks, Seca,
Viaccess etc.
Fréquence:
Mesure physique qui indique le nombre de cycles ou d'oscillations par seconde. L'unité de mesure d'une fréquence est
l'Hertz (Hz).
QAM:
Quadratic Amplitude Modulation "Modulation d'Amplitude en
Quadrature" : Procédure de modulation avec balayage de
phases, utilisée pour transmettre les signaux numériques aux
réseaux câblés.
PERITEL:
Connecteur standard utilisé pour les téléviseurs, les magnétoscopes, les récepteurs et autres équipements électroniques
pour la transmission des signaux Audio (son) et Vidéo
(image).
Signal:
Terme général utilisé pour décrire des données, des informations, un son ou une image modifiés électriquement pour
pouvoir être transmis à distance ou pour connecter différents
appareils entre eux.
Mise à jour logicielle:
La télévision numérique est un nouveau support qui fournit
non seulement une qualité d'image et de son améliorées
mais aussi la possibilité d'acquérir des services interactifs.
Ces nouveaux services sont en constante évolution et sont
sans cesse améliorés par les fournisseurs. Pour pouvoir utiliser ces services, il est nécessaire, de temps en temps, de
mettre à jour le logiciel du récepteur numérique.
10 Caractéristiques techniques
Tuner câble:
Entrée bande de fréquence
Intervalle de niveau d'entrée
Entrée tuner
Impédance d'entrée
Sortie tuner
170
51 .... 858 MHz
47 dBµV ... 70 dBµV
Prise IEC (femelle)
75 Ohm
Prise IEC (mâle)
Démodulation
Débit de symboles
FEC
16/32/64/128/256 QAM
1 ... 7 Mbaud/s
Reed-Solomon
(Forward Error Correction /
Correction d'erreur sans voie de retour)
Lecteur de carte 1 fente pour
système CA intégré
Interface commune:
Logement d'interface commune de type 1 pour modules CA
Consommation électrique max. 0,3A/5V
Démultiplexage:
Conforme à la norme ISO 13818-1
Décodage vidéo:
Compression vidéo
Standard vidéo
Zone de l'image active
Format de l'image
Image 16:9
Décodage Audio:
Compression Audio
Mode Audio
Taux d'échantillonnage
Compatible MPEG-2 et MPEG-1
Jusqu'à MP@ML
(main profile @ main level)
PAL / 25 Hz
720 pixels x 576 lignes
4: 3 / 16: 9
Adaptation automatique pour téléviseur 16:9 (par PERITEL)
Filtrage effet boîte au lettre pour
les téléviseurs 4:3
MPEG-1 & MPEG-2 Couche I et II
Jumelé (Principal/Intermédiaire),
Stéréo
32 kHz, 44.1 kHz, 48 kHz
Paramètres Audio:
Sortie analogique:
Niveau de sortie G/D
Impédance de sortie
DHT
S/N
Diaphonie
Entrée analogique:
Niveau d'entrée G/D
Impédance d'entrée
Volume à l'allumage
Sortie numérique:
Sortie SPDIF
0,5 V r.m.s. (nominal)
600 Ohms
> 60 dB ( 1 kHz )
> 60 dB
< - -65 dB
0,5 V r.m.s. (nominal)
> 40 kOhms
Volume de la dernière utilisation
défini automatiquement
électrique, prise optique, Toslink
Dolby Digital AC3
Paramètres vidéo:
Sortie:
Niveau de sortie FBAS
Niveau de sortie Y
Niveau de sortie C
1 Vs-s +/- 0.3 dB à 75 Ohms
1 Vs-s +/- 0.3 dB à 75 Ohms
1 Vs-s +/- 0.3 dB à 75 Ohms
171
FR
Lecteur de carte:
Type
Niveau de sortie ROUGE 0,7 Vs-s +/- 0.1 Vp-p à 75 Ohms
Niveau de sortie VERT
0,7 Vs-s +/- 0.1 Vp-p à 75 Ohms
Niveau de sortie BLEU
0,7 Vs-s +/- 0.1 Vp-p à 75 Ohms
S/N équilibré
> 60 dB
Teletext:
Filtrage Teletext
Balayage des données
Teletext
Teletext Soft 800
PERITEL TV:
Sortie:
PERITEL VCR:
Entrée:
Sortie:
Affichage:
DEL
Norme ETS 300 472
(FBAS) correspondant à ITU-R
BT.653-2 lignes : 6-22 et 320-335
pages en mémoire
FBAS, RGB ou S-Video
FBAS; RGB ou S-Video
FBAS ou S-Video
Affichage 4 caractères,
7 segments
Interface série RS-232:
Type
RS 232, bidirectionnelle
Débit binaire
115,2 ko/s max.
Prise
Prise D-SUB, 9 broches
Fonction
Mise à jour du logiciel
d'exploitation et préprogrammation
Mémoire de chaînes:
Nombre de chaînes
Liste Favoris TV:
999 Chaînes TV
Nombre de chaînes
Liste Favoris Radio:
999 stations de radio
Nombre total:
Liste complète TV/Radio: Un total de 5000 chaînes possible
dans la liste complète
Données SFI:
Prévisions SFI:
Minuterie:
Evénements :
Télécommande
Système :
maximum 7 jours à l'avance
maximum 30 événements, un an à
l'avance
RC-5
Adresse sous-système
8 (SAT 1), 10 (SAT 2)
Fréquence de modulation 36 kHz
Longueur d'onde infrarouge 950 nm
Alimentation électrique:
Adaptateur secteur:
Puissance requise:
3,0 W
En mode Veille (sans horloge)
3,4 W
En mode Veille (avec horloge)
10 W
en marche
172
230 V / 50 Hz AC
Tension d'entrée:
180 V.... 250 V / 50 Hz AC
Caractéristiques
générales:
Dimensions (WxDxH):
Poids:
285 mm x 133 mm x 40 ... 43 mm
env. 490 g
FR
Tension nominale:
11 Guide de dépannage
Problème
Cause possible
Solution
Plusieurs chaînes n'apparaissent
pas dans la liste des chaînes
Sélection de la mauvaise liste de
chaînes
Sélectionnez une autre liste de
chaînes (voir Point 7.2.3.1)
Le son fonctionne mais il n'y a pas
d'image
Mode Radio sélectionné
Passez en mode TV
Le récepteur de fonctionne pas
Flux de données défectueux ->récepteur bloqué
Débanchez la prise secteur,
patientez 5 secondes et rebranchez
le récepteur.
La télécommande ne fonctionne pas Piles vides
Changez les piles.
Mauvaise option de la
télécommande
Changez l'option de la télécommande
(voir Points 2 et 6.2.3)
L'heure ne s'affiche pas en mode
veille
L'heure n'a pas été synchronisée
Allumez une chaîne nationale importante pendant env. 30 secondes
Pas d'image, pas de son, bandeau
d'affichage éteint
Pas de courant
Vérifiez le câble d'alimentation
secteur et la prise
Vous ne recevez plus une chaîne
que vous receviez auparavant
La chaîne doit maintenant être
retransmise sur un autre canal
Effectuez un balayage
(voir Point 8.4)
La chaîne n'existe plus
Aucune
Impossible d'allumer le récepteur ou Récepteur bloqué
de le faire fonctionner
Effectuez une réinitialisation flash.
Note! Tous vos paramètres personnels seront perdus.
> Débranchez la prise secteur.
> Appuyez et maintenez enfoncées
les touches de changement de
chaînes sur le récepteur.
> Rebranchez le récepteur tout en
maintenant les touches enfoncées.
> Gardez les touches enfoncées
pendant env. 5 secondes jusqu'à
ce que le message * “FLAS” apparaisse.
173
Pour une utilisation journalière
Mise en marche/Arrêt
>
>
Allumez le récepteur numérique en appuyant sur la
touche Marche/Veille du récepteur ou de la télécommande.
Appuyez de nouveau sur cette touche pour éteindre le
récepteur.
Sélection des chaînes
A l'aide des touches de changement de chaînes
(haut/bas)
>
Utilisez les touches de changement de chaînes
haut/bas du récepteur ou de la télécommande pour
passer d'une chaîne à l'autre de haut en bas.
A l'aide du pavé numérique
>
Utilisez le pavé numérique pour saisir le numéro de
chaîne voulu. Par exemple :
1
pour la chaîne 1
1,
puis 4
pour la chaîne 14
2,
puis 3,
puis 4
pour la chaîne 234
Quand vous saisissez un numéro de chaîne à plusieurs chiffres, vous disposez d'environ 3 secondes pour achever la saisie. Si vous souhaitez saisir un nombre ne comportant qu'un
ou deux chiffres, vous pouvez accélérer le processus en maintenant la dernière touche enfoncée un peu plus longtemps.
En utilisant la liste des chaînes
>
>
>
>
>
Appuyez sur OK.
Utilisez ensuite les flèches haut/bas pour marquer
la chaîne voulue.
Appuyez sur OK pour afficher la chaîne marquée.
Utilisez les flèches haut/bas pour vous déplacer
dans la liste, de haut en bas, ligne par ligne.
Utilisez les flèches gauche/droite pour vous
déplacer dans la liste, page par page.
Réglage du volume
>
>
Réglez le volume de votre récepteur numérique en utilisant la touche Volume + pour l'augmenter et la touche Volume - pour le réduire.
Appuyez sur la touche Son on/off pour couper le son
puis le réactiver (muet).
Sélection TV/Radio
>
Appuyez sur la touche TV/Radio pour naviguer entre
le mode TV et le mode Radio.
174
175
2233450008600
280706