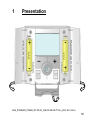
1
BT-DP-RF MuB_#10025808_P04880_BT-DP-RF_(GB-FR-DE-ES-PT-NL)_2012-06-21.docx 2 USER GUIDE RF Digital programmable Thermostat GB 3-44 GUIDE D’UTILISATION RF Digital programmable Thermostat F 46-92 Bedienungsanleitung D Programmierbarer digitaler Funkthermostat 94-141 GUÍA DE USUARIO Termostato digital programable RF ES 142-186 GUIA DO UTILIZADOR Termostato programável digital de RF PT 188-233 HANDLEIDING NL RF Digitale programmeerbare Thermostaat234-275 MuB_#10025808_P04880_BT-DP-RF_(GB-FR-DE-ES-PT-NL)_2012-06-21.docx 3 IMPORTANT! Before starting work the installer should carefully read this Installation & Operation Manual, and make sure all instructions contained therein are understood and observed. - The thermostat should be mounted, operated and maintained by specially trained personnel only. Personnel in the course of training are only allowed to handle the product under the supervision of an experienced fitter. Subject to observation of the above terms, the manufacture shall assume the liability for the equipment as provided by legal stipulations. - All instructions in this Installation & Operation manual should be observed when working with the controller. Any other application shall not comply with the regulations. The manufacturer shall not be liable in case of incompetent use of the control. Any modifications and amendments are not allowed for safety reasons. The maintenance may be performed by service shops approved by the manufacturer only. - The functionality of the controller depends on the model and equipment. This installation leaflet is part of the product and has to be obtained. MuB_#10025808_P04880_BT-DP-RF_(GB-FR-DE-ES-PT-NL)_2012-06-21.docx 4 APPLICATION - The thermostats of the “BT” series are developed to control and manage all type of heating installations. - The controllers have been designed for use in residential rooms, office spaces and industrial facilities. Verify that the installation complies with existing regulations before operation to ensure proper use of the installation. SAFETY INSTRUCTIONS Before starting work disconnect power supply! - All installation and wiring work related to the thermostat must be carried out only when de-energized. The appliance should be connected and commissioned by qualified personnel only. Make sure to adhere to valid safety regulations. - The thermostats are neither splash- nor drip-proof. Therefore, they must be mounted at a dry place. - Do not interchange the connections of the sensors and the 230V connections under any circumstances! Interchanging these connections may result in life endangering electrical hazards or the destruction of the appliance and the connected sensors and other appliances. MuB_#10025808_P04880_BT-DP-RF_(GB-FR-DE-ES-PT-NL)_2012-06-21.docx 5 Table of content 1 1.1 1.2 2 2.1 2.2 2.3 2.4 3 3.1 3.2 3.3 3.4 3.5 3.6 3.7 4 4.1 4.2 5 6 7 Presentation ..................................................... 7 Keyboard.......................................................... 9 Display & LED ................................................ 10 First Installation .............................................. 12 Batteries installation ....................................... 12 Time and Date adjustment ............................. 13 RF installation ................................................ 14 Starting........................................................... 17 Working mode definition................................. 19 Manual mode Comfort .................................. 20 Manual mode, Reduced ................................ 20 OFF mode ..................................................... 20 Automatic mode ............................................. 21 Program mode .............................................. 22 Holiday mode ................................................. 33 Timer mode ................................................... 34 Special function.............................................. 35 Keyboards lock Function ............................... 35 Information ..................................................... 35 Parameter’s menu .......................................... 37 Technical characteristics ................................ 41 Troubleshooting & Solution ............................ 43 MuB_#10025808_P04880_BT-DP-RF_(GB-FR-DE-ES-PT-NL)_2012-06-21.docx 6 1 Presentation + - - + Electronic programmable thermostat with LCD display specially designed to control different type of heating systems. MuB_#10025808_P04880_BT-DP-RF_(GB-FR-DE-ES-PT-NL)_2012-06-21.docx 7 It will be your best partner to optimize your energy consumption and increase your comfort. - Modern design with soft touch material. Wiring & Installation simplified. “Easy program creation” function. Weekly programmable by step of 30min. Temporary override function. Anti freeze function. Holiday or Reception function. EEPROM non volatile memory. 2 AAA batteries for 2 years operating life. 2 Wires output for a maximum possibility of use. 2 parameter menus, (User and Installer) In option - External sensor with several possibilities of regulation. (Floor, combined…) MuB_#10025808_P04880_BT-DP-RF_(GB-FR-DE-ES-PT-NL)_2012-06-21.docx 8 1.1 Keyboard Minus Key (-) Plus Key (+) Validation Key (OK) Status LED Left Navigation key (◄) Right navigation key (►) Escape key ( ) Edition key ( ) MuB_#10025808_P04880_BT-DP-RF_(GB-FR-DE-ES-PT-NL)_2012-06-21.docx 9 1.2 Display & LED Red Fix (when backlight is lit up): Heating demand Green flash: your validation is required Red flash: Error on sensor or batteries 1 2 3 4 5 6 7 8 9 15 14 13 12 11 10 MuB_#10025808_P04880_BT-DP-RF_(GB-FR-DE-ES-PT-NL)_2012-06-21.docx 10 1. 2. 3. 4. 5. 6. Current day of the week Operating mode menu (active mode is framed). Program number or parameter number if “4” is displayed. Installation Parameter menu. RF transmission logo. Type of sensor used and temperature displayed. Regulation => Internal or external ambient sensor. Regulation => Floor sensor. Regulation => Internal sensor with Floor limitation. View of the outside temperature 7. 8. 9. 10. Heating demand indication. Low batteries indicator. °C or °F unit indicator Setting or measured temperature if “5” is displayed. Parameter value if “4” is displayed. MuB_#10025808_P04880_BT-DP-RF_(GB-FR-DE-ES-PT-NL)_2012-06-21.docx 11 11. Temporary override function activated, or “ITCS” function if blinking. 12. Time or parameter title if “4” is displayed. 13. Program of the current day (the current time bar blinks) 14. Pictogram for program creation, program state in normal operating mode. 15. Key lock indicator 2 First Installation This section will guide you to set up your thermostat for the first time. 2.1 Batteries installation - Open the two side’s covers and Insert the 2 AAA Alkaline supplied batteries (or remove the small protection sticker if the batteries are already installed in the compartment) - Close the two side’s covers. MuB_#10025808_P04880_BT-DP-RF_(GB-FR-DE-ES-PT-NL)_2012-06-21.docx 12 - Now your thermostat will propose you to adjust the current time and date. 2.2 Time and Date adjustment Each time a value blinks, you can adjust it with the (-) and (+) keys, once the value is chosen, validate it with the (OK) key. The thermostat will jump automatically to the next value. Note: you can always come back to the previous value by pressing the escape key ( ). List order of the time and date adjustments: Time and day: Adjustment of the hours, Adjustment of the minutes Adjustment of the day (1 = Monday) Date: Adjustment of the day number Adjustment of the month number (01 to 12) Adjustment of the year (Century) Adjustment of the year MuB_#10025808_P04880_BT-DP-RF_(GB-FR-DE-ES-PT-NL)_2012-06-21.docx 13 Then the message “Save” and blinking green LED appears, press (OK) to validate the adjusted time and date. You can always reach the time and date adjustments, by pressing and maintaining the edition ( ) key during 2 seconds in normal operating modes. 2.3 RF installation - First of all to configure your thermostat with the receiver, you must put your receiver in « RF init ». mode. (please refer to the receiver leaflet for this, only the RF receiver of the same range are compatibles) - Now on the thermostat press and maintain the edition key ( ) during 10s, then the parameter « ini » must be display. MuB_#10025808_P04880_BT-DP-RF_(GB-FR-DE-ES-PT-NL)_2012-06-21.docx 14 The thermostat will send now the radio configuration signal to the receiver. - On the receiver check the good reception (generally showed by a green LED blinking). Once the configuration between the receiver and the thermostat made, press on the escape key ( ) to come back to the main screen. - Now you can check the RF distance, go to the room which must be regulated. Put your thermostat on the final position (On the wall or table...), then put the thermostat in Comfort mode (setting temperature position 37°C). Close the door and go to the receiver to check if the new status of the MuB_#10025808_P04880_BT-DP-RF_(GB-FR-DE-ES-PT-NL)_2012-06-21.docx 15 thermostat has received. (The heating is generally showed by a Red LED). - Now return to the thermostat and switch off it. Check on the receiver again if it’s also switched off (The red LED must be turned off) o o If the RF signals were received correctly, adjust your setting temperature as you want. If the RF signals weren’t received correctly, check the installation (Receiver position, distance...) * To make the installation easier it will be better to have the thermostat near to the receiver during the configuration mode. (A minimal distance of > 1meter must be respected) MuB_#10025808_P04880_BT-DP-RF_(GB-FR-DE-ES-PT-NL)_2012-06-21.docx 16 2.4 Starting The thermostat is now ready to works. The default working mode will be automatic with a standard built-in program “P1”. Monday to Friday 20°C 18°C 07:00 09:00 17:00 23:00 Saturday & Sunday 20°C 18°C 08:00 23:00 MuB_#10025808_P04880_BT-DP-RF_(GB-FR-DE-ES-PT-NL)_2012-06-21.docx 17 Note: You can customise your program as you want, See the next part “Working mode definition” chapter “Program” for more explanation. Program followed Curent stage of the program Curent time At any time, when the backlight is extinct, press the (OK) key to lit-up the backlight, and then press another time the (OK) key to show the current setting temperature. MuB_#10025808_P04880_BT-DP-RF_(GB-FR-DE-ES-PT-NL)_2012-06-21.docx 18 3 Working mode definition How to change the working mode? - Open the small center cover to have access to the navigation keys (◄) or (►). - You can now press theses keys to display the working mode line. Move the frame cursor on the desired working mode and press (OK) to enter in the operating mode you have chosen. MuB_#10025808_P04880_BT-DP-RF_(GB-FR-DE-ES-PT-NL)_2012-06-21.docx 19 3.1 Manual mode Comfort Manual working mode, the comfort setting temperature will be followed all the time. By pressing (-) or (+) keys, the comfort setting temperature starts to blink and can be adjusted. 3.2 Manual mode, Reduced Manual working mode, the reduced setting temperature will be followed all the time. By pressing (-) or (+) keys, the reduced setting temperature starts to blink and can be adjusted. 3.3 OFF mode Use this mode if you need to switch off your installation. Be Careful: In this mode your installation can freeze. MuB_#10025808_P04880_BT-DP-RF_(GB-FR-DE-ES-PT-NL)_2012-06-21.docx 20 - At any time, when display is off, press on the (Ok) key to display a few seconds the current temperature and time. - To restart your installation, use the navigation keys (◄) or (►). 3.4 Automatic mode In this mode the thermostat will follow the chosen program (Built-in or customized) according to the actual time and the Comfort and Reduced setting temperatures. You can easily override, until next program step, the current program temperature by changing the value with (-) or (+). Setting temperature will blink. The small hand logo will be displayed when override function is active. If hand logo blinks then ITCS is ongoing. MuB_#10025808_P04880_BT-DP-RF_(GB-FR-DE-ES-PT-NL)_2012-06-21.docx 21 3.5 Program mode Current day Program followed Program of the day When you enter in the Program mode, the first operation is to chose the program number with (-) or (+) keys. You can choose between a built-in program P1 to P9 or a user program U1 to U4. MuB_#10025808_P04880_BT-DP-RF_(GB-FR-DE-ES-PT-NL)_2012-06-21.docx 22 If you chose a Built-in program P1 to P9, You can only see and chose the program. P1: P2: P3: P4: P5: P6: P7: P8: P9: Morning, Evening & Weekend Morning, Midday, Evening & Weekend Day & Weekend Evening & Weekend Morning, Evening (Bathroom) Morning, afternoon & Weekend 7H – 19H (Office) 8H – 19H & Saturday (Shop) Weekend (Secondary house) (See the Annexe parts to view a complete description of the Built-in program) - Use the navigation keys (◄) or (►) to change the program day displayed. - Press the (OK) key to confirm your choice and come back to the main screen (in AUTO mode) MuB_#10025808_P04880_BT-DP-RF_(GB-FR-DE-ES-PT-NL)_2012-06-21.docx 23 If you chose a user program U1 to U4, As above you can choose the program, see it, but you can also customise it. Default setting: U1, U2, U3, U4 = Comfort all week - Press on the edition key ( ) to customise a user program. Symbols and explanation for program creation: First step of the day ( Comfort temp.) The wakeup hour need to be adjusted. Middle step of the day ( Reduced temp.) The leaving hour need to be adjusted MuB_#10025808_P04880_BT-DP-RF_(GB-FR-DE-ES-PT-NL)_2012-06-21.docx 24 Middle step of the day ( Comfort temp.) The comeback hour will need to be adjusted Last step of the day ( Reduced temp.) The sleeping hour need to be adjusted - The program step is 30 minutes - Each time a value or icon blinks you are invited to make a choice with (-) or (+) keys, once the choice is made press the (OK) key to jump to the following step. - The program creation will always start with the day 1 (Monday). Once you have pressed the ( ) key, the following display will appear: MuB_#10025808_P04880_BT-DP-RF_(GB-FR-DE-ES-PT-NL)_2012-06-21.docx 25 Now you are invited to adjust the hour of the first step of the program with (-) or (+), Press (OK) to validate and go to the following step. MuB_#10025808_P04880_BT-DP-RF_(GB-FR-DE-ES-PT-NL)_2012-06-21.docx 26 Now you are invited to choose the type of the next step of the program (blinking icons), 2 choices will be possible: - 1st choice is to choose the sleep icon. (End of the day) - 2nd choice is to choose the leaving icon, to add one step to the program during the day. When the choice is made, press (OK) to validate. Then you can adjust the step hour with (-) or (+), MuB_#10025808_P04880_BT-DP-RF_(GB-FR-DE-ES-PT-NL)_2012-06-21.docx 27 When step hour is set press (OK) to jump to the next step. You will be directly invited to adjust with (-) or (+) the hour of the comeback step. Press (OK) to validate and go to the following step. MuB_#10025808_P04880_BT-DP-RF_(GB-FR-DE-ES-PT-NL)_2012-06-21.docx 28 You are again invited to choose the type of the next step of the program (blinking icons), 2 choices will be possible: - 1st choice is to choose the sleep icons. (End of the day) - 2nd choice is to choose the leaving icons, to add another step to the program during the day. When the choice is made, press (OK) to valid and you can adjust the hour of this step with (-) or (+), MuB_#10025808_P04880_BT-DP-RF_(GB-FR-DE-ES-PT-NL)_2012-06-21.docx 29 Press (OK) to validate and finish the edition of the first day. Now you can choose to copy the program day just created to subsequent days. Change the choice “Yes” or “no” with (-) or (+) and validate your choice with (OK). - If you select “no”, you will be invited to create a program for Tuesday (repeat the previous method to built it.) - If you select “Yes”, you will have the possibility to copy the program to the following day (on Tuesday MuB_#10025808_P04880_BT-DP-RF_(GB-FR-DE-ES-PT-NL)_2012-06-21.docx 30 on Wednesday... up to the last day of the week (7 Sunday). When you press (OK) on the last day (7 Sunday) you will be invited to “SAVE” your program. Then the message “Save” and blinking green LED appears: Press (OK) key to save your program and return to AUTO operating mode following your user program. Press the escape key ( ) to erase your user program changes and come back to operating mode. MuB_#10025808_P04880_BT-DP-RF_(GB-FR-DE-ES-PT-NL)_2012-06-21.docx 31 MuB_#10025808_P04880_BT-DP-RF_(GB-FR-DE-ES-PT-NL)_2012-06-21.docx 32 3.6 Holiday mode The Holiday mode allows you to set the anti-freeze temperature for a selected number of days - You can adjust, the duration in day “d” with (-) or (+), press (OK) to start. (Adjustable 1 to 99 days) - The anti-freeze setting temperature is fixed and can be adjusted in the parameter menu number 06 ‘HG’, see chapter 6. (Default value 10°C) The logo will blink and the number of days left is displayed until the end of the period. If you want to stop the Holiday function before the end, set the duration period to “no” with (-) key. MuB_#10025808_P04880_BT-DP-RF_(GB-FR-DE-ES-PT-NL)_2012-06-21.docx 33 3.7 Timer mode The Timer mode allows you to adjust, the temperature and the duration for a special time. This function can be used when you stay at home for several days, or if you want to override the program for some time (reception...) - You can first adjust, the duration in hours “H” if below 24H, then in day “d” with (-) or (+), press (OK) to validate. (Adjustable 1 Hour to 99 days) - In a second time, you can adjust the desired setting temperature with (-) or (+), press (OK) to start the function. (Default value 22°C) The logo will be blinks and the number of hours /days left is displayed until the end of the period. If you want to stop the Timer function before the end, set the duration period to “no” with (-) key. MuB_#10025808_P04880_BT-DP-RF_(GB-FR-DE-ES-PT-NL)_2012-06-21.docx 34 4 4.1 Special function Keyboards lock Function Use this function to prevent all change of your settings (In a child room, public area…) - To activate the Key lock function, first press maintain the escape key ( ) and then press simultaneously on the edition key ( ). - The “ ” logo will be displayed on the screen. - Repeat the same procedure to unlock the key board. 4.2 Information With this function You can quickly view all currents temperatures of the probe sensors connected to your thermostat (Floor, external or outside sensor) by several presses on the escape key ( ).This “Scroll function” is only available in the main screen. MuB_#10025808_P04880_BT-DP-RF_(GB-FR-DE-ES-PT-NL)_2012-06-21.docx 35 You can view: - The current setting temperature followed by the thermostat. - The ambient temperature - If external sensor is connected: The Floor temperature if it is used as floor sensor. The outside temperature if it used as outside sensor. If Parameter “SenS” is set on “Air”, the external sensor will be used as an outside temperature sensor MuB_#10025808_P04880_BT-DP-RF_(GB-FR-DE-ES-PT-NL)_2012-06-21.docx 36 5 Parameter’s menu Your thermostat has a parameter’s menu, in order to enter in this menu, press and maintain the edition key ( ) during 5sec. Then parameter menu will appear and first parameter screen will be displayed: Now you can select a parameter which must be adjusted with the navigation keys (◄) or (►), once the parameter chosen, toggle the value with the (OK) key, modify it with (-) or (+) and confirm your adjustment with (OK). To leave the parameter menu, choose the parameter « End » and press (OK). MuB_#10025808_P04880_BT-DP-RF_(GB-FR-DE-ES-PT-NL)_2012-06-21.docx 37 N° Default value & other possibilities 00 RF INI: Radio configuration Sends the radio link signal in order to assign this RF Thermostat with it’s RF receiver. You also need to set simultaneously the receiver in radio configuration mode (On a simple receiver press and maintain button until the green light lit’s up, see receiver leaflet) dEG: Unit of the temperatures displayed °C Celsius °F Fahrenheit __:__ Selection of the Time clock unit 24H (24:00) 12H (12:00 AM /PM) dst: Daylight Summer time change Summer<->Winter YES automatic change according to date. no no daylight summer time automatic change. AirC: Calibration of the internal probe The calibration must be done after 1 day working with the same setting temperature in accordance with the following description: Put a thermometer in the room at 1.5M distance from 01 02 03 04 MuB_#10025808_P04880_BT-DP-RF_(GB-FR-DE-ES-PT-NL)_2012-06-21.docx 38 05 06 the floor (like the thermostat) and check the real temperature in the room after 1 hour. When you enter on the calibration parameter “no” is displayed on the right to indicate no calibration has made. To enter the value shown on the thermometer, use the (-) or (+) keys to enter the real value. Then, press (Ok) to confirm. The message “Yes” should be displayed; the value will be stored in the internal memory. If you need to erase a calibration press on the escape key ( ). The old value will be erased and the message “no” will be displayed. * Pay attention: Only the heating element driven by the thermostat must be used during the complete step of the calibration. OutC , AMbC , FlrC: Calibration of the external wired probe Same calibration method as described in parameter “04 AirC” above. HG: Anti-freeze temperature used in Holiday mode Default value 10°C. Use the (-) or (+) keys to change the anti-freeze setting MuB_#10025808_P04880_BT-DP-RF_(GB-FR-DE-ES-PT-NL)_2012-06-21.docx 39 07 08 temperature. Then press (Ok) to confirm. ITCS: YES, no The Intelligent Temperature Control System will activate your installation in advance (2 hours maximum) to assure the desired temperature at the hour programmed following your weekly program. This automatic control system works in the following way: When you start your thermostat for the first time, it will measure the time taken by your installation to reach the set temperature. The thermostat will re-measure this time at each program change to compensate external temperature change & influence. You can now program your thermostat without the need to adjust the temperature in advance because your thermostat does it automatically for you. Clr ALL: Reset to Factory setting Press and maintain (Ok) key during 10s to reset Set points temperatures and user parameters in this menu to factory default settings. User programs will also be resetted. Pay attention: Ensure you that you have all necessary elements to resetup your installation before to use this function. MuB_#10025808_P04880_BT-DP-RF_(GB-FR-DE-ES-PT-NL)_2012-06-21.docx 40 09 10 6 Software version VErS ___ End: Exit the parameter’s menu Press (OK) key to exit installation parameter menu and return to normal operation. Technical characteristics Environmental: Operating temperature: Shipping and storage temperature: Electrical Protection Installation Category Pollution Degree Measured temperature precision Setting temperature range Comfort, Reduced Holiday (Antifreeze) Timer 0°C - 40°C -10°C to +50°C IP30 Class II 2 0.1°C 5°C to 35°C by 0,5°C step 10°C (adjustable) 5°C to 35°C MuB_#10025808_P04880_BT-DP-RF_(GB-FR-DE-ES-PT-NL)_2012-06-21.docx 41 Regulation characteristics Power Supply Operating life Sensing elements: Internal & External (option) Radio Frequency Software version Norms and homologation: Your thermostat has been designed in conformity with the following standards or other normative documents: Proportional Band (PWM 2°C for 10min cycle) or Hysteresis of 0.5°C 2 AAA LR03 1.5V Alkaline ~2 years NTC 10k at 25°C 868 MHz, <10mW. Showed in the parameter menu. Vers xxx EN 60730-1 : 2003 EN 61000-6-1 : 2002 EN 61000-6-3 : 2004 EN 61000-4-2 : 2001 EN300220-1/2 EN301489-1/3 R&TTE 1999/5/EC Low voltage 2006/95/CE EMC 2004/108/CE MuB_#10025808_P04880_BT-DP-RF_(GB-FR-DE-ES-PT-NL)_2012-06-21.docx 42 7 Troubleshooting & Solution My BT DP-01 doesn’t start Batteries Problem - Check if the protection sticker on the batteries is removed. - Check the batteries orientation. - Check the capacity of the batteries My BT DP-01 Led, blinks in Red The logo blinks (ambient sensor) - Contact your installer or seller. Problem on sensors The logo blinks (Floor sensor) - Check the connection of the sensor. - Disconnect the sensor, and check it with an ohmmeter (the value must be around 10kohms) MuB_#10025808_P04880_BT-DP-RF_(GB-FR-DE-ES-PT-NL)_2012-06-21.docx 43 Batteries level is too less The logo blinks (Batteries) - Replace the batteries. My BT DP-01 seems work correctly but the heating doesn’t work correctly On the receiver: - check the good reception of RF signal Output - Check the connections. - Check the power supply of the heating element. - Contact your installer. - Check the following points : - The receiver must be put at a minimum distance of 50cm of all RF others electrical or wireless communication materials (GSM, Wi-Fi..) - The receiver shouldn’t be fixed on a metallic part or too close of hydraulic pipes… (Copper…) MuB_#10025808_P04880_BT-DP-RF_(GB-FR-DE-ES-PT-NL)_2012-06-21.docx 44 My BT DP-01 seems work correctly but the temperature in the room was never in accordance with the program. - Check the Clock. -The difference between Comfort & Reduced temperature is too high? - The step in the program is too Program short? - Contact your installer, to check & adjust the regulation parameters with your heating system. MuB_#10025808_P04880_BT-DP-RF_(GB-FR-DE-ES-PT-NL)_2012-06-21.docx 45 MuB_#10025808_P04880_BT-DP-RF_(GB-FR-DE-ES-PT-NL)_2012-06-21.docx 46 IMPORTANT! - Avant de commencer les travaux, le monteur doit lire, comprendre et observer les présentes instructions de montage et de service. - Seul un spécialiste en la matière est autorisé à effectuer le montage, le réglage et la maintenance du thermostat. Un monteur en formation ne peut réaliser de travaux sur l'appareil que sous la surveillance d'un expert. La responsabilité du fabricant conformément aux dispositions légales s'applique uniquement dans le cas du respect des conditions précitées. - Veuillez observer l'ensemble des instructions de montage et de service lors de l'utilisation du thermostat. Toute utilisation autre n'est pas conforme. Le fabricant ne répond pas des dommages occasionnés par une utilisation abusive du thermostat. Pour des raisons de sécurité, aucune transformation ou modification n'est admise. Seuls les ateliers de réparation désignés par le fabricant sont habilités à réparer le matériel. - Le contenu de la livraison de l'appareil varie selon le modèle et l'équipement. Sous réserve de modifications techniques ! Il est recommandé que l’installateur et l’utilisateur prennent connaissance de l’intégralité de la notice, avant de procéder à l’installation du matériel. MuB_#10025808_P04880_BT-DP-RF_(GB-FR-DE-ES-PT-NL)_2012-06-21.docx 47 APPLICATION - Grace à leur menu d’installation et de paramétrage les thermostats de la gamme « BT » vous permettront de réguler une grande partie de vos installations de chauffage. - Les thermostats de la gamme « BT » ont été étudiés pour un fonctionnement dans un environnement résidentiel, bureaux ou en équipement industriel. INSTRUCTION DE SECURITE Veillez toujours à déconnecter l’alimentation avant le montage ou la manipulation! Toute installation ou raccordement électrique sur le thermostat doit être réalisé dans des conditions de sécurité. Le thermostat devra être raccordé et manipulé par du personnel qualifié. Veuillez respecter les législations de sécurité en vigueur, en particulier NF C15-100 (Normes d’installation ≤ 1000 VAC). Les thermostats de la gamme « BT » ne sont pas étanches ils doivent donc être montés dans un endroit sec. Prêtez une attention particulière lors du câblage, n’inter-changez jamais les connexions d’alimentation ou de sortie avec les connexions optionnelles type « sondes » ceci pourrait provoquer des dommages électriques voire la destruction du thermostat. MuB_#10025808_P04880_BT-DP-RF_(GB-FR-DE-ES-PT-NL)_2012-06-21.docx 48 1 1.1 1.2 2 2.1 2.2 2.3 2.4 3 3.1 3.2 3.3 3.4 3.5 3.6 3.7 4 4.1 4.2 5 6 7 Presentation ................................................... 50 Clavier ............................................................ 53 Affichage et voyant ........................................ 54 Première mise en service............................... 57 Installation des batteries ................................ 57 Réglage de l’heure et de la date .................... 58 Initialisation RF .............................................. 59 Démarrage ..................................................... 61 Mode de fonctionnement................................ 63 Mode manuel Confort ................................... 64 Mode manuel ECO ....................................... 65 Mode Arrêt .................................................... 65 Mode Automatique ......................................... 66 Mode Programme ......................................... 68 Mode Vacances ........................................... 79 Mode Timer ................................................... 81 Fonctions spéciales ....................................... 82 Verrouillage clavier ....................................... 82 Visualisation ................................................... 83 Menu paramètre Utilisateur ............................ 84 Caractéristiques techniques ........................... 89 Problèmes et solutions ................................... 91 MuB_#10025808_P04880_BT-DP-RF_(GB-FR-DE-ES-PT-NL)_2012-06-21.docx 49 1 Presentation + - - + MuB_#10025808_P04880_BT-DP-RF_(GB-FR-DE-ES-PT-NL)_2012-06-21.docx 50 Le thermostat RF électronique programmable associé à son récepteur a été conçu pour la régulation de la plupart des installations de chauffage. Grace à sa solution Radio fréquence (868Mhz) il s’intégrera facilement dans toutes les circonstances (Rénovation, neuf…) Il sera votre meilleur allié pour optimiser vos consommations d’énergie tout en augmentant votre confort. - Design modern avec sensation “soft touch”. - Création de programme maitrisée grâce à ses icônes d’aide à la création. - Programme hebdomadaire par pas de 30min. - Changement d’heure Eté / Hiver automatique (activable ou non) - Fonction de dérogation temporaire. - Fonction Hors Gel. - Fonction vacances ou réception. - Mémoire de type EEPROM (imperdable). MuB_#10025808_P04880_BT-DP-RF_(GB-FR-DE-ES-PT-NL)_2012-06-21.docx 51 - Alimentation par 2 Piles Alcalines type AAA LR03 pour une autonomie allant jusqu’à 2 ans (témoin de piles faible). - 2 menus de paramétrage, (Utilisateur et installateur) En option - Sonde Externe avec différentes possibilités d’utilisation (Sonde de sol, ambiance déportée…) MuB_#10025808_P04880_BT-DP-RF_(GB-FR-DE-ES-PT-NL)_2012-06-21.docx 52 1.1 Clavier Touche moins (-) Touche plus (+) Voyant d’état Touche validation (OK) Touche de navigation Gauche (◄) Touche de navigation Droite (►) Touche Retour ( ) Touche d’édition ( ) MuB_#10025808_P04880_BT-DP-RF_(GB-FR-DE-ES-PT-NL)_2012-06-21.docx 53 1.2 Affichage et voyant Rouge: Indicateur de chauffe. Vert Clignotant: Votre validation est requise. Rouge clignotant: Défaut piles ou sondes. 1 2 3 4 5 6 7 8 9 15 14 13 12 11 10 MuB_#10025808_P04880_BT-DP-RF_(GB-FR-DE-ES-PT-NL)_2012-06-21.docx 54 1. 2. 3. 4. 5. Jours courant. Mode de fonctionnement (mode actif encadré). Numéro de programme ou du paramètre si “4” est affiché. Menu de paramétrage. Type de sonde utilisée pour la régulation ou température affichée. Régulation => Interne ou ambiance déportée. Régulation => Sonde de sol (capteur de dalle). Régulation => Interne avec sonde de sol en limitation de dalle. Visualisation de la température extérieure. 6. 7. 8. 9. Indicateur RF Indicateur de chauffe. Piles faibles. Type de degré utilisé °C ou °F. MuB_#10025808_P04880_BT-DP-RF_(GB-FR-DE-ES-PT-NL)_2012-06-21.docx 55 10. Consigne et température mesurées par les différentes sondes si “5” est affiché, Donne la valeur d’un paramètre si “4” est affiché. 11. Fonction de dérogation temporaire activée, ou “ITCS” si clignotant. 12. Heure ou titre d’un paramètre si “4” est affiché. 13. Programme du jour (la barre correspondante à l’heure courante clignote) 14. Pictogramme d’aide à la création des programmes ou état du programme en mode normal. 15. Blocage du clavier activé. MuB_#10025808_P04880_BT-DP-RF_(GB-FR-DE-ES-PT-NL)_2012-06-21.docx 56 2 Première mise en service Cette section vous guidera pour la première mise en service de votre thermostat. 2.1 Installation des batteries - Ouvrez les deux trappes latérales et insérez les piles (attention au sens) ou retirez les films de protection si les piles sont déjà fournies et insérées. (Dans ce cas là il se peut que les piles aient une autonomie réduite due à la durée de stockage de votre thermostat). - Fermez les trappes. - Votre thermostat devrait maintenant vous proposer les ajustements suivants. MuB_#10025808_P04880_BT-DP-RF_(GB-FR-DE-ES-PT-NL)_2012-06-21.docx 57 2.2 Réglage de l’heure et de la date A chaque fois qu’une valeur clignote à l’affichage vous serez invité à l’ajuster à l’aide des touches (-) et (+), une fois la valeur ajustée vous pourrez la valider à l’aide de la touche (OK), à ce moment votre thermostat vous proposera automatiquement d’ajuster la valeur suivante. Note: En cas d’erreur de réglage vous pourrez à tout moment revenir sur la valeur à l’aide de la touche ( ). Séquence de réglage de l’heure et la date: Heure et jour: Ajustement des heures, Ajustement des minutes Ajustement du jour (1 = Lundi) MuB_#10025808_P04880_BT-DP-RF_(GB-FR-DE-ES-PT-NL)_2012-06-21.docx 58 Date: Ajustement du numéro de jour. Ajustement du mois (01 = Janvier). Ajustement du siècle. Ajustement de l’année. A cette étape le message “Save” ainsi que la LED verte clignotante devrait vous inviter à valider vos réglages par un appui sur la touche (OK). Vous pourrez à tout moment revenir au réglage de l’heure et de la date par un appui de 2 secondes sur la touche édition ( ). 2.3 Initialisation RF - Pour configurer le thermostat RF avec le récepteur, il faut que ce dernier soit en mode « RF init ». (Se reporter à la notice d’installation fournie avec votre récepteur RF, seul les récepteurs de la même gamme sont compatible). MuB_#10025808_P04880_BT-DP-RF_(GB-FR-DE-ES-PT-NL)_2012-06-21.docx 59 - Ensuite sur le thermostat appuyez sur la touche Edition ( ) durant 10 secondes. Le paramètre « Rf ini » apparaît sur l’afficheur. Le thermostat envoie alors les trames de configuration au récepteur. - Vérifiez la bonne réception sur le récepteur (généralement, Led verte clignotante). Une fois le récepteur configuré, appuyez sur la touche ( ) pour revenir au mode utilisateur. - Vous pouvez maintenant faire un test de portée pour être sure de l’installation. Dans la pièce ou doit se trouver le thermostat, placez le à l’endroit ou il sera positionner plus tard (sur un meuble ou fixé au mur). Régler la consigne courante sur la position Maxi (35°C), Fermez les portes et allez vérifier la bonne réception (le récepteur doit être en chauffe Led Rouge à 1). Retournez au thermostat et mettez-le maintenant en position arrêt, vérifiez que le récepteur soit aussi passé en arrêt (Led rouge à 0) MuB_#10025808_P04880_BT-DP-RF_(GB-FR-DE-ES-PT-NL)_2012-06-21.docx 60 - Si la réception des signaux thermostats ne ce fait pas correctement, essayez de rapprocher le thermostat du récepteur, vérifier l’installation du récepteur (reportez vous à la partie Problèmes et solution) * Pour une initialisation RF maîtrisée il est préférable d’avoir le récepteur à portée de vue lors de l’initialisation (distance minimale > 1Mètre) 2.4 Démarrage Votre thermostat est maintenant prêt à fonctionner. Le mode de fonctionnement par défaut est le mode Automatique avec le programme usine “P1”, voir le détail du programme “P1” ci-dessous. Lundi à Vendredi 20°C 18°C 07:00 09:00 17:00 23:00 MuB_#10025808_P04880_BT-DP-RF_(GB-FR-DE-ES-PT-NL)_2012-06-21.docx 61 Samedi et Dimanche 20°C 18°C 08:00 23:00 Note: Vous pourrez customiser votre programme à souhait, pour cela reportez vous à la partie suivante « Mode de fonctionnement » chapitre « Programme ». Programme suivi Etat du programme Heure courante MuB_#10025808_P04880_BT-DP-RF_(GB-FR-DE-ES-PT-NL)_2012-06-21.docx 62 A tout moment si le rétro-éclairage de votre thermostat est éteint, vous pourrez le rallumer par un bref appui sur la touche (OK). Le rétro-éclairage sera désactivé en cas de piles faible. 3 Mode de fonctionnement Comment changer le mode de fonctionnement de votre thermostat? - Ouvrez la trappe frontale de votre thermostat afin d’accéder aux touches de navigation (◄) ou (►). - Vous pouvez maintenant appuyer sur une des touches afin de faire apparaître la barre de menu des modes de fonctionnement. Déplacez le cadre de sélection sur le menu souhaité et validez votre MuB_#10025808_P04880_BT-DP-RF_(GB-FR-DE-ES-PT-NL)_2012-06-21.docx 63 choix avec la touche (OK), le thermostat reviendra à l’écran principal pour les modes de fonctionnement manuel ou vous invitera à faire vos réglages dans le cas des modes type programmes, vacances… 3.1 Mode manuel Confort Le mode manuel confort vous permet de régler un point de consigne qui sera suivi tout au long de la journée. L’ajustement du point de consigne se fera à l’aide des touches (-) ou (+). MuB_#10025808_P04880_BT-DP-RF_(GB-FR-DE-ES-PT-NL)_2012-06-21.docx 64 3.2 Mode manuel ECO Le mode manuel ECO vous permet de la même façon que le mode Confort de régler un point de consigne qui sera suivi tout au long de la journée. Ce deuxième mode Manuel vous permet de basculer très rapidement d’une température de confort à économique. L’ajustement du point de consigne se fera à l’aide des touches (-) ou (+). 3.3 Mode Arrêt Utilisez ce mode uniquement si vous désirez arrêter votre installation de chauffage. Attention: Votre installation ne sera pas protégée contre le gel avec ce mode de fonctionnement. MuB_#10025808_P04880_BT-DP-RF_(GB-FR-DE-ES-PT-NL)_2012-06-21.docx 65 - Une fois votre thermostat à l’arrêt, un appui bref sur la touche (Ok) vous permettra de visualiser un court instant la température ambiante. - Pour redémarrer votre installation utilisez les touches de navigation (◄) or (►) pour changer de mode de fonctionnement. 3.4 Mode Automatique Ce mode de fonctionnement est normalement le mode idéal pour vous permettre de faire des économies d’énergie tout en respectant votre confort. Votre thermostat suivra en accordance avec l’heure courante le programme que vous avez choisi, dans le cas de programmes préétablis usine (P1 à P9) ou bien créés, dans le cas d’un programme utilisateur (U1 à U4). Vous pourrez très facilement modifier temporairement la température d’un palier de votre programme à l’aide de la fonction dérogation. MuB_#10025808_P04880_BT-DP-RF_(GB-FR-DE-ES-PT-NL)_2012-06-21.docx 66 Il vous suffira de modifier la consigne courante du programme en utilisant simplement les touches (-) ou (+). La consigne clignotera et vous pourrez alors l’ajuster. Le pictogramme de dérogation manuelle du programme apparaîtra alors. Le programme reprendra automatiquement sa cadence au prochain palier. Pour stopper une dérogation avant le prochain palier il vous suffit d’appuyer sur la touche ( ). Le pictogramme dérogation clignotant vous signalera la mise en route de la fonction “ITCS”. (Voir menu paramètre pour plus d’information sur la fonction ITCS) MuB_#10025808_P04880_BT-DP-RF_(GB-FR-DE-ES-PT-NL)_2012-06-21.docx 67 3.5 Mode Programme Jour courant Numéro du programme en cours Programme du jour Lorsque vous entrez dans le mode programme, la première opération à réaliser est de choisir le numéro de programme avec les touches (-) ou (+). Vous aurez le choix entre 9 programmes préétablis usine “P1 à P9”, ou 4 programmes utilisateur de “U1 à U4”. Note: Un programme permet de passer d’une température de confort (jour) à une température réduite (nuit) automatiquement. Les fonctions MuB_#10025808_P04880_BT-DP-RF_(GB-FR-DE-ES-PT-NL)_2012-06-21.docx 68 disponibles seront différentes suivant le choix du programme, usine ou utilisateur. Programme préétablis usine: - Vous pourrez uniquement consulter ou choisir un programme usine. P1: P2: P3: P4: P5: P6: P7: P8: P9: Matin, Soir & Weekend Matin, Midi, Soir & Weekend Semaine & Weekend Soir & Weekend Matin, Soir (Salle de Bain) Matin, Après midi & Weekend 7H – 19H (Bureau) 8H – 19H & Samedi (Magasin) Weekend (Maison secondaire) (Reportez vous à la partie “Annexes“ pour plus de détails sur les heures de commutations des programmes usine) MuB_#10025808_P04880_BT-DP-RF_(GB-FR-DE-ES-PT-NL)_2012-06-21.docx 69 - Utilisez les touches de navigations (◄) ou (►) pour vous déplacer dans les jours de la semaine. - Appuyez sur la touche (OK) pour valider votre choix et retourner au menu principal (Mode AUTO). Programme utilisateur: Dans le cas d’un programme usine, vous pourrez de la même façon le choisir, le visualiser ou le personnaliser à vos souhaits de la manière suivante: * Par défaut les programmes utilisateurs sont réglés sur confort toute la journée. - Pour accéder à la personnalisation d’un programme utilisateur, appuyez sur la touche édition ( ). Description des pictogrammes utilisés pour la personnalisation d’un programme: MuB_#10025808_P04880_BT-DP-RF_(GB-FR-DE-ES-PT-NL)_2012-06-21.docx 70 Première étape de la journée, l’heure de réveil devra être ajustée. (Température de confort ) Etape de journée, l’heure de départ devra être ajustée. (Température ECO ) Etape de journée, l’heure de retour devra être ajustée. (Température de confort ) Dernière étape de la journée, l’heure du coucher devra être ajustée. (Température ECO ) MuB_#10025808_P04880_BT-DP-RF_(GB-FR-DE-ES-PT-NL)_2012-06-21.docx 71 - La programmation se fera par pas de 30 minutes. (1 palier =>1 période = ). - Durant la programmation si un symbole ou une valeur clignote, vous serez appelé à la changer avec (-) ou (+) et la valider avec (Ok) pour passer à l’étape suivante du programme. - La personnalisation d’un programme commencera toujours par le 1er jour de la semaine (1 = Lundi). L’écran suivant devrait apparaître après l’appui sur la touche édition ( ). MuB_#10025808_P04880_BT-DP-RF_(GB-FR-DE-ES-PT-NL)_2012-06-21.docx 72 Vous êtes maintenant invité à régler l’heure de votre premier palier, l’heure à laquelle vous voulez une température de confort. Régler l’heure avec les touches (-) ou (+), Validez avec (OK) pour passer à l’étape suivante. MuB_#10025808_P04880_BT-DP-RF_(GB-FR-DE-ES-PT-NL)_2012-06-21.docx 73 Vous devez maintenant choisir le type du prochain palier. Changer le symbole de programmation, deux choix vous seront proposés : - 1er choix, symbole de fin de journée, l’heure du coucher. ème -2 choix, symbole de départ, un palier sera ajouté dans la journée. Une fois votre symbole choisi appuyez sur la touche (OK) pour valider et passer à la phase suivante. Vous devez maintenant pour notre exemple régler l’heure de votre départ avec (-) ou (+), validez avec (OK) pour poursuivre la programmation. MuB_#10025808_P04880_BT-DP-RF_(GB-FR-DE-ES-PT-NL)_2012-06-21.docx 74 Si un symbole de départ à été choisi à l’étape précédente, vous serez directement invité à régler l’heure de retour (le symbole de retour est automatiquement choisi). Réglez l’heure avec les touches (-) ou (+), Validez avec (OK) pour passer à l’étape suivante. MuB_#10025808_P04880_BT-DP-RF_(GB-FR-DE-ES-PT-NL)_2012-06-21.docx 75 Vous serez de nouveau invité à choisir le type du prochain palier, vous aurez de la même manière deux choix possibles : - 1er choix, symbole de fin de journée. - 2ème choix, symbole de départ, un autre palier sera rajouté dans la journée. Une fois votre symbole choisi appuyez sur la touche (OK) pour valider et passer à la phase suivante. MuB_#10025808_P04880_BT-DP-RF_(GB-FR-DE-ES-PT-NL)_2012-06-21.docx 76 Vous devez maintenant pour notre exemple régler l’heure de votre coucher avec (-) ou (+), validez avec (OK) pour finir le programme de la journée. Vous aurez alors la possibilité de copier ou non la journée créée sur la ou les journées suivantes. Passer de “Yes” (Oui) à “no” (non) à l’aide des touches (-) ou (+) et valider votre choix (OK). - Si vous choisissez “no”, vous devrez maintenant créer le programme du Mardi (répéter les étapes précédemment décrites pour le Lundi). MuB_#10025808_P04880_BT-DP-RF_(GB-FR-DE-ES-PT-NL)_2012-06-21.docx 77 - Si vous choisissez “Yes”, en appuyant sur la touche (OK) le programme du Lundi (1) sera alors copié sur le Mardi (2). Vous aurez de nouveau le choix de copier le programme du Mardi (2) sur le Mercredi (3), ainsi de suite jusqu’au Dimanche (7). Vous serez alors invitez à sauvegarder “SAVE” votre programme en cliquant sur (OK) au jour 7 (Dimanche). L’écran suivant accompagné de La LED verte clignotante devra alors apparaitre : MuB_#10025808_P04880_BT-DP-RF_(GB-FR-DE-ES-PT-NL)_2012-06-21.docx 78 Appuyez sur (OK) pour sauvegarder votre programme et revenir au menu principal mode AUTO. Appuyez plusieurs fois sur la touche échappe ( ) pour stopper la programmation en cours et revenir au menu principal. 3.6 Mode Vacances Le mode vacances vous permettra de mettre votre installation de chauffage en mode Hors Gel pendant le nombre de jours que vous souhaitez. - Ajustez le nombre de jours “d” à l’aide des touches (-) ou (+). La période de vacances commencera dès la validation avec la touche (OK). (Ajustable 1 à 44 jours) * Note : Une période vacances est définie en jours pleins. (Si elle commence à 08H20 elle finira à 09H00 à la fin du nombre de jours choisis) MuB_#10025808_P04880_BT-DP-RF_(GB-FR-DE-ES-PT-NL)_2012-06-21.docx 79 - La consigne de température Hors Gel pourra elle être ajustée depuis le menu utilisateur, paramètre 06 ‘HG’, Voir chapitre 6. (Valeur usine 10°C) - Le logo vacances clignotera et le nombre de jours décomptera jusqu’à la fin de la période. En cas de retour prématuré vous pourrez stopper à tout moment la période vacances en ajustant de nouveau la durée sur la valeur “no” à l’aide de la touche (-). Vous pourrez alors revenir à un mode de fonctionnement standard à l’aide des touches de navigation (◄) ou (►). MuB_#10025808_P04880_BT-DP-RF_(GB-FR-DE-ES-PT-NL)_2012-06-21.docx 80 3.7 Mode Timer Le mode Timer vous permettra de régler une température pour une durée souhaitée. (Vous pourrez l’utiliser en cas de congés à la maison, une réception…) - Tout d’abord vous devrez régler la température désirée à l’aide des touches (-) ou (+), et valider avec (OK). (Valeur usine 22°C). - Réglez ensuite la durée à l’aide des touches (-) ou (+), en heure “H” jusqu’à 24H et en jours “d” au delà. La période de vacances commencera dès la validation avec la touche (OK). - Le logo Timer clignotera et le nombre d’heure / jours décomptera jusqu’à la fin de la période. En cas de besoin vous pourrez stopper à tout moment la période Timer en ajustant de nouveau la durée sur la valeur “no” à l’aide de la touche (-). MuB_#10025808_P04880_BT-DP-RF_(GB-FR-DE-ES-PT-NL)_2012-06-21.docx 81 4 4.1 Fonctions spéciales Verrouillage clavier Utilisez cette fonction afin d’éviter tout changement des réglages du thermostat (Chambre d’enfant, lieu public…) - Pour bloquer le clavier de votre thermostat, appuyez et maintenez tout d’abord la touche échappe ( ) enfoncée, puis appuyez sur la touche édition ( ). - Le symbole de verrouillage “ ” doit alors apparaître. - Répétez la même procédure pour débloquer le clavier. MuB_#10025808_P04880_BT-DP-RF_(GB-FR-DE-ES-PT-NL)_2012-06-21.docx 82 4.2 Visualisation A l’aide de cette fonction vous pourrez visualiser très rapidement la consigne courante ainsi que les températures des différentes sondes connectées sur votre thermostat. Pour ce, depuis l’écran principal, appuyez plusieurs fois sur la touche ( ). Vous visualiserez dans l’ordre à chaque appui: 1/ La consigne courante suivie par le thermostat. 2 / La température ambiante. 3/ Si la sonde externe est connectée, la température extérieure. D’autres possibilités seront disponibles en connectant une sonde extérieure sur votre thermostat. Contactez votre revendeur ou installateur pour plus d’information concernant ces possibilités. MuB_#10025808_P04880_BT-DP-RF_(GB-FR-DE-ES-PT-NL)_2012-06-21.docx 83 5 Menu paramètre Utilisateur Votre thermostat possède un menu de paramétrage pour vous permettre de modifier en fonction de vos exigences différents réglages, comme le format de l’heure (12H ou 24H), le changement été / Hiver… Pour accéder à ce menu, depuis l’écran principal maintenez la touche édition ( ) enfoncée jusqu’à ce que l’afficheur affiche le premier paramètre (environ 5sec). - Vous pouvez maintenant sélectionner un paramètre à ajuster à l’aide des touches (◄) ou (►). Une fois sur le paramètre, appuyez sur (OK) pour accéder au réglage (valeur clignotante), modifiez la valeur à l’aide de (-) ou (+). Appuyez de MuB_#10025808_P04880_BT-DP-RF_(GB-FR-DE-ES-PT-NL)_2012-06-21.docx 84 nouveau sur la touche (OK) pour valider votre réglage. - Pour sortir du menu utilisateur et revenir au menu principal déplacez vous sur le paramètre “End ” et appuyez sur (OK). N° Valeur usine & autres possibilités 00 RF INI: Configuration radio Mode configuration radio (voir la section correspondante chapitre 2). Appuyer sur la touche échappe ( ) pour sortir de ce paramètre et revenir à l’affichage principal. dEG: Type de degrés à l’affichage °C Celsius °F Fahrenheit __:__ Sélection du format horaire 24H (24:00) 12H (12:00 AM /PM) dst: Changement d’heure EtéHiver automatique YES L’heure changera automatiquement. no L’heure devra être changée manuellement. AirC: Etalonnage de la sonde d’ambiance 01 02 03 04 MuB_#10025808_P04880_BT-DP-RF_(GB-FR-DE-ES-PT-NL)_2012-06-21.docx 85 05 L’étalonnage doit être fait après 1 journée de fonctionnement à la même consigne. Placez un thermomètre au milieu de la pièce à une hauteur d’environ 1,5M du sol, relevez la température mesurée au bout d’1H. Quand vous entrez dans le paramètre de calibration pour la première fois l’afficheur indique “no” pour vous indiquer qu’aucune calibration n’est faite. Saisissez alors la valeur lue sur votre thermomètre à l’aide des touches (-) or (+), validez ensuite votre réglage avec (OK). Le message “YES” devrait alors être maintenant affiché pour vous indiquer qu’une calibration a été faite (La valeur est maintenant mise en mémoire). En cas de besoin, effacer une calibration à l’aide de la touche échappe ( ). La mémoire sera effacée et le message « no » sera de nouveau affiché. * Remarque importante: - Seul l’élément chauffant géré par le thermostat devra être en service pendant toute la phase de calibration. - Un écart de température trop important peut signifier aussi une mauvaise installation de votre thermostat. OutC , AMbC , FlrC: Etalonnage de la sonde externe MuB_#10025808_P04880_BT-DP-RF_(GB-FR-DE-ES-PT-NL)_2012-06-21.docx 86 06 07 L’étalonnage de la sonde externe doit être fait de la même façon que celle décrite ci-dessus, à la différence près du placement du thermomètre. A poser sur le sol dans le cas d’une utilisation de la sonde externe comme sonde de sol ou à proximité de la sonde si celle-ci est utilisée comme sonde d’ambiance déportée ou sonde extérieure. * La calibration de la sonde extérieure «OutC» doit être faite autour des 20°C. HG: Consigne de température hors gel pour le mode vacances. Valeur usine 10 °C. Utilisez les touches (-) ou (+) pour changer la valeur et validez votre réglage avec (Ok). ITCS: Optimisation de la température en mode programme. Votre thermostat possède un système de contrôle intelligent de la température pour mettre en route votre chauffage en avance afin d’assurer la température désirée à l’heure programmée en suivant votre programme hebdomadaire. Ce système d’optimisation fonctionne de la manière suivante : Lorsque vous démarrez le Thermostat pour la première MuB_#10025808_P04880_BT-DP-RF_(GB-FR-DE-ES-PT-NL)_2012-06-21.docx 87 08 09 10 fois, celui-ci mesure le temps mis par votre installation pour atteindre la température de consigne. Le Thermostat remesurera aussi ce temps à chaque changement de programme afin de compenser l’évolution de la température extérieure. Maintenant vous pouvez programmer votre Thermostat sans avoir à penser à quelle heure mettre en route votre thermostat pour avoir la bonne température quand vous arrivez chez vous puisque votre thermostat le fera automatiquement pour vous. Clr ALL: Configuration usine Permet de réinitialiser votre thermostat à la configuration usine. (l’heure, les programmes....) Appuyez pendant 10sec sur la touche (Ok) * Pay attention: Assurez-vous d’avoir tous les éléments nécessaires en votre possession pour la remise en service de votre thermostat avant d’utiliser cette fonction. Version logiciel VErS ___ End: Sortie du menu utilisateur Appuyez sur la touche (OK) pour sortir du menu et revenir à l’écran principal. MuB_#10025808_P04880_BT-DP-RF_(GB-FR-DE-ES-PT-NL)_2012-06-21.docx 88 6 Caractéristiques techniques Environnent. (Températures) Fonctionnement: Transport et stockage : 0°C - 40°C -10°C to +50°C Protection électrique Class II - IP30 Précision de mesure 0.1°C Plage de réglage consignes Confort et ECO Vacance (Hors Gel) Timer Caractéristiques régulation Bande proportionnelle Temps minimum de marche et d’arrêt. Alimentation & autonomie 5°C - 35°C par 0,5°C 0,5 - 10°C 5°C - 35°C 2°C pour un cycle de 10min (paramétrable) ou Hystérésis de 0.5°C. 2 Minutes ON et OFF (paramétrable) 2 AAA LR03 1.5V Alcaline ~2 ans. * L’autonomie peut varier suivant la qualité des piles. Eléments sensibles: Interne & Externe (en option) CTN 10k ohms at 25°C Radio fréquence 868 MHz, <10mW. Version Logiciel Normes et homologation: Votre thermostat a été conçu pour répondre aux normes et directives européennes suivantes: Accessible depuis le menu utilisateur EN 60730-1 : 2003 EN 61000-6-1 : 2002 EN 61000-6-3 : 2004 EN 61000-4-2 : 2001 EN300220-1/2 EN301489-1/3 R&TTE 1999/5/EC Basse tension 2006/95/CE CEM 2004/108/CE MuB_#10025808_P04880_BT-DP-RF_(GB-FR-DE-ES-PT-NL)_2012-06-21.docx 90 7 Problèmes et solutions Mon BT DPRF-01 ne s’allume pas - Vérifiez que le film de protection des Problème de piles est bien enlevé. piles - Vérifiez le sens des piles. - Vérifiez la capacité des piles La Led de mon BT DP-01 clignote en rouge Problème de sonde Piles faibles Le logo clignote (sonde ambiante) - Contactez votre installateur ou votre vendeur. Le logo clignote (sonde externe) - Vérifiez le branchement de la sonde. - Déconnectez la sonde et vérifiez la avec un ohmmètre (la valeur doit se situer autour de 10kohms) Le logo clignote - Remplacer les piles MuB_#10025808_P04880_BT-DP-RF_(GB-FR-DE-ES-PT-NL)_2012-06-21.docx 91 Mon BT DPRF-01 semble fonctionner correctement mais le chauffage ne fonctionne pas correctement - vérifiez les branchements du récepteur. Sortie - Vérifier l’alimentation de l’élément chauffant. - Contactez votre installateur - Vérifiez les points suivants : - Le récepteur doit être placé à une distance minimal de 50cm de tout appareils électrique ou de Communication communication sans fil (GSM, Wi-Fi..) radio - Le récepteur ne doit pas être fixé sur une partie métallique ou trop proche de canalisation hydraulique (cuivre…). MuB_#10025808_P04880_BT-DP-RF_(GB-FR-DE-ES-PT-NL)_2012-06-21.docx 92 Mon BT DPRF-01 semble fonctionner correctement mais la température dans la pièce n’est jamais en accord avec le programme. Programme ou calibration - Vérifiez l’horloge -La différence entre la consigne de température confort et ECO est trop importante? - Les paliers du programme sont trop courts? - Essayez de calibrer votre thermostat (voir menu utilisateur paramètre 04) - Contactez votre installateur pour vérifier et ajuster les paramètres de régulation avec votre système de chauffage. MuB_#10025808_P04880_BT-DP-RF_(GB-FR-DE-ES-PT-NL)_2012-06-21.docx 93 MuB_#10025808_P04880_BT-DP-RF_(GB-FR-DE-ES-PT-NL)_2012-06-21.docx 94 ACHTUNG! Die installierende Person sollte vor Inbetriebnahme des Geräts diese Installations- und Bedienungsanleitung sorgfältig durchlesen und sich mit den darin enthaltenen Anweisungen vertraut machen. - Der Thermostat darf nur von speziell ausgebildetem Personal montiert, bedient und gewartet werden. Personen, die sich noch in der Ausbildung befinden, dürfen das Gerät nur unter Aufsicht eines erfahrenen Technikers bedienen. Bei Beachtung der obigen Bedingungen übernimmt der Hersteller die Haftung für das Gerät gemäß den gesetzlichen Bestimmungen. - Bei Arbeiten mit dem Regler sind alle Anweisungen in dieser Installations- und Bedienungsanleitung einzuhalten. Jegliche anderweitige Verwendung ist nicht vorschriftsgemäß. Der Hersteller haftet nicht im Falle einer unsachgemäßen Handhabung des Reglers. Jegliche Änderungen und Erweiterungen sind aus Sicherheitsgründen untersagt. Wartungsarbeiten dürfen nur von Kundendienst-Technikern mit Hersteller-Autorisierung durchgeführt werden. - Der Funktionsumfang des Reglers hängt vom Modell und der Anlage ab. Diese Installationsanleitung gehört zum Produkt und ist Teil des Lieferumfangs. MuB_#10025808_P04880_BT-DP-RF_(GB-FR-DE-ES-PT-NL)_2012-06-21.docx 95 ANWENDUNGSBEREICH - Die Thermostate der Baureihe „BT“ wurden für die Überwachung und Regelung aller Arten von Heizungsinstallationen entwickelt. - Die Regler sind für den Einsatz in Wohnräumen, Büros und Industrieanlagen ausgelegt. Stellen Sie vor der Inbetriebnahme sicher, dass die Anlage den geltenden Vorschriften entspricht, um eine ordnungsgemäße Funktion zu gewährleisten. SICHERHEITSHINWEISE Nehmen Sie die Anlage vor Beginn der Arbeit vom Netz! - Sämtliche Installationsarbeiten und die Verkabelung am Thermostat dürfen nur im abgeschalteten Zustand durchgeführt werden. Das Gerät darf nur von qualifiziertem Personal angeschlossen und in Betrieb genommen werden. Die geltenden Sicherheitsvorschriften sind unbedingt einzuhalten. - Die Thermostate sind weder spritzwasser- noch tropfwassergeschützt und dürfen daher nur an trockener Stelle montiert werden. - Vertauschen Sie auf keinen Fall die Anschlüsse für die Sensoren und die Relais Ausgänge! Ein Vertauschen der Anschlüsse kann zu lebensgefährlichen Elektroschocks oder zur Zerstörung des Geräts sowie der angeschlossenen Sensoren und weiteren Geräte führen. MuB_#10025808_P04880_BT-DP-RF_(GB-FR-DE-ES-PT-NL)_2012-06-21.docx 96 Inhaltsverzeichnis 1 1.1 1.2 2 2.1 2.2 2.3 2.4 3 3.1 3.2 3.3 3.4 3.5 3.6 3.7 4 4.1 4.2 5 6 7 Beschreibung des Geräts............................... 98 Tastenfeld .................................................... 100 Anzeige und LED ......................................... 101 Erstinstallation.............................................. 103 Batterien einlegen ........................................ 104 Uhrzeit und Datum einstellen ....................... 104 Funkverbindung einrichten ........................... 106 Einschalten .................................................. 109 Festlegen der Betriebsart ............................. 111 Manuelle Betriebsart „Komfort“ ................... 112 Manuelle Betriebsart „Absenkung“ .............. 112 Betriebsart AUS .......................................... 113 Automatischer Betrieb (AUTO) .................... 114 Programmiermodus .................................... 115 Betriebsart „Urlaub“ ...................................... 126 Betriebsart „Timer“ ...................................... 127 Spezialfunktionen:........................................ 129 Tastensperre-Funktion ................................ 129 Informationsfunktion ..................................... 129 Parametermenü ........................................... 131 Technische Daten ........................................ 136 Fehlersuche und -behebung ........................ 138 MuB_#10025808_P04880_BT-DP-RF_(GB-FR-DE-ES-PT-NL)_2012-06-21.docx 97 1 Beschreibung des Geräts + - - + Elektronisch programmierbarer Thermostat mit LCD-Anzeige für die Regelung verschiedener Arten von Heizungssystemen. MuB_#10025808_P04880_BT-DP-RF_(GB-FR-DE-ES-PT-NL)_2012-06-21.docx 98 Dieses Gerät hilft Ihnen, den Energieverbrauch zu optimieren und erhöht den Komfort. - Modernes Design mit Soft-Touch-Material Einfache Verkabelung und Installation Funktion für einfache Programmerstellung Wochenweise in Schritten von 30 min programmierbar - Vorübergehende manuelle Programmänderung möglich - Frostschutzfunktion - Ferien- oder Party-Funktion - Nichtflüchtiger Speicher EEPROM - 2 AAA-Batterien, ausreichend für 2 Jahre Betrieb - Vielseitige Anwendungsmöglichkeiten dank 2 Ausgangsklemmen - 2 Parametermenüs (für Benutzer und installierenden Techniker) Optional - Externer Sensor mit verschiedenen Regelmöglichkeiten (Fußboden, kombiniert …). MuB_#10025808_P04880_BT-DP-RF_(GB-FR-DE-ES-PT-NL)_2012-06-21.docx 99 1.1 Tastenfeld Minus-Taste (-) Plus-Taste (+) Bestätigung (OK) Status-LED Navigationstaste nach links (◄) Navigationstaste nach rechts (►) Escape-Taste ( ) Bearbeitungstaste ( ) MuB_#10025808_P04880_BT-DP-RF_(GB-FR-DE-ES-PT-NL)_2012-06-21.docx 100 1.2 Anzeige und LED Rotes Dauerlicht (bei eingeschalteter Hintergrundbeleuchtung): Heizbedarf Grünes Blinken: Bestätigung erforderlich Rotes Blinken: Sensor- oder Batteriefehler 1 2 3 4 5 6 7 8 9 15 14 13 12 11 10 MuB_#10025808_P04880_BT-DP-RF_(GB-FR-DE-ES-PT-NL)_2012-06-21.docx 101 1. 2. 3. 4. 5. 6. Aktueller Wochentag Betriebsarten-Menü (Die aktive Betriebsart ist eingerahmt.) Programmnummer bzw. Parameternummer, falls „4“ angezeigt wird Menü der Einrichtungsparameter Symbol für Funkübertragung Anzeige des verwendeten Sensortyps und der Temperatur Regelung => interner oder externer Umgebungssensor Regelung => Fußbodensensor Regelung => interner Sensor mit Bodensensor zur Temperaturbegrenzung Anzeige der Außentemperatur 7. 8. 9. Anzeige Heizbedarf Anzeige für niedrige Batteriespannung Einheitenanzeige °C/°F MuB_#10025808_P04880_BT-DP-RF_(GB-FR-DE-ES-PT-NL)_2012-06-21.docx 102 10. Eingestellte Solltemperatur bzw. gemessene Temperatur, falls „5“ angezeigt wird. Parameterwert, falls „4“ angezeigt wird. 11. Programm wurde vorübergehend manuell geändert (bzw. bei blinkender Anzeige Funktion „ITCS“ aktiviert). 12. Uhrzeit oder Parameterbezeichnung, falls „4“ angezeigt wird. 13. Programm für den aktuellen Tag (Die aktuelle Zeitleiste blinkt.) 14. Piktogramm für Programmierung, zeigt im normalen Betrieb den Programmstatus an. 15. Anzeige für Tastensperre 2 Erstinstallation Dieser Abschnitt führt Sie durch die Erstinstallation Ihres Thermostats. MuB_#10025808_P04880_BT-DP-RF_(GB-FR-DE-ES-PT-NL)_2012-06-21.docx 103 2.1 Batterien einlegen - Öffnen Sie die beiden seitlichen Abdeckungen und legen Sie die 2 mitgelieferten alkalischen MicroBatterien (AAA) ein. (Falls sich die Batterien bereits im Batteriefach befinden, entfernen Sie den kleinen Schutzaufkleber. - Schließen Sie die beiden Seitenabdeckungen. - Der Thermostat zeigt nun an, dass Sie das aktuelle Datum und die aktuelle Uhrzeit einstellen können. 2.2 Uhrzeit und Datum einstellen Solange ein Wert blinkt, können Sie ihn mit den Tasten (-) und (+) einstellen und dann mit der Taste (OK) bestätigen. Die Thermostatanzeige wechselt daraufhin automatisch zum nächsten Wert. Hinweis: Um zum vorangegangenen Wert zurückzugelangen, drücken Sie die Escape-Taste ( ). Reihenfolge der Einstellung von Uhrzeit- und Datumsangaben: MuB_#10025808_P04880_BT-DP-RF_(GB-FR-DE-ES-PT-NL)_2012-06-21.docx 104 Uhrzeit und Wochentag: Einstellung der Stunden Einstellung der Minuten Einstellung des Wochentags (1 = Montag) Datum: Einstellung des Tags im Monat Einstellung der Zahl für den Monat (01 bis 12) Einstellung des Jahres (Jahrhundert) Einstellung des Jahres Anschließend erscheint die Meldung „Save“, und die LED blinkt grün. Bestätigen Sie die Einstellungen für Uhrzeit und Datum mit (OK). Sie können in den normalen Betriebsarten jederzeit auf die Einstellungen für Uhrzeit und Datum zugreifen, indem Sie die Bearbeitungstaste ( ) 2 Sekunden lang gedrückt halten. MuB_#10025808_P04880_BT-DP-RF_(GB-FR-DE-ES-PT-NL)_2012-06-21.docx 105 2.3 Funkverbindung einrichten - Um die Verbindung zwischen Thermostat und Empfänger zu konfigurieren, müssen Sie zunächst Ihren Empfänger in den Modus RF init für die Funkinitialisierung versetzen. (Sehen Sie hierzu bitte in den Unterlagen zum Funkempfänger nach. Nur Funkempfänger gleicher Reichweite sind kompatibel.) - Halten Sie nun die Bearbeitungstaste des Thermostats ( ) 10 Sekunden lang gedrückt. Daraufhin muss der Parameter « ini » angezeigt werden. Der Thermostat sendet nun das Funkkonfigurationssignal an den Empfänger. - Überprüfen Sie die Empfangsqualität am Empfänger (wird in der Regel durch eine grün MuB_#10025808_P04880_BT-DP-RF_(GB-FR-DE-ES-PT-NL)_2012-06-21.docx 106 blinkende LED angezeigt). Nachdem die Verbindung zwischen Empfänger und Thermostat konfiguriert ist, drücken Sie die Escape-Taste ( ), um wieder zur Hauptanzeige zurückzugelangen. - Sie können nun die Funkdistanz prüfen, indem Sie in den Raum gehen, dessen Temperatur reguliert werden soll. Bringen Sie den Thermostat in seine endgültige Position (an der Wand oder auf einem Tisch ...), und stellen Sie am Thermostat die Betriebsart „Komfort“ (Temperatur von 37°C) ein. Schließen Sie die Tür, und überprüfen Sie am Empfänger, ob dieser den neuen Status des Thermostats empfangen hat (Der Heizvorgang wird in der Regel durch eine rot leuchtende LED angezeigt). - Gehen Sie nun wieder zum Thermostat, und schalten Sie ihn aus. Überprüfen Sie wieder am Empfänger, ob dieser ebenfalls abgeschaltet hat. (Die rote LED muss aus sein.) MuB_#10025808_P04880_BT-DP-RF_(GB-FR-DE-ES-PT-NL)_2012-06-21.docx 107 o o Wenn die Funksignale korrekt empfangen werden, legen Sie die Einstelltemperatur nach Ihren Wünschen fest. Wenn die Funksignale nicht korrekt empfangen wurden, überprüfen Sie die Installation (Position des Empfängers, Distanz ...) * Zur Erleichterung der Installation sollte sich der Thermostat, solange er im Konfigurationsmodus ist, nahe am Receiver befinden. (Dabei ist ein Mindestabstand von > 1 Meter einzuhalten.) MuB_#10025808_P04880_BT-DP-RF_(GB-FR-DE-ES-PT-NL)_2012-06-21.docx 108 2.4 Einschalten Der Thermostat ist nun betriebsbereit. Standardbetriebsart ist der automatische Betrieb mit dem integrierten Standardprogramm „P1“. Montag bis Freitag 20°C 18°C 07:00 09:00 17:00 23:00 Samstag und Sonntag 20°C 18°C 08:00 23:00 MuB_#10025808_P04880_BT-DP-RF_(GB-FR-DE-ES-PT-NL)_2012-06-21.docx 109 Hinweis: Sie können Ihr Programm nach Wunsch individuell anpassen. Im nachfolgenden Kapitel „Festlegen der Betriebsart“, Abschnitt „Programmiermodus“ finden Sie hierzu eine genauere Erläuterung. Aktives Programm Aktuelle Programm -position Aktuelle Zeit Wenn die Hintergrundbeleuchtung ausgeschaltet ist, können Sie sie jederzeit durch Drücken der Taste (OK) einschalten. Drücken Sie anschließend nochmals (OK), um die aktuell eingestellte Temperatur anzuzeigen. MuB_#10025808_P04880_BT-DP-RF_(GB-FR-DE-ES-PT-NL)_2012-06-21.docx 110 3 Festlegen der Betriebsart Gehen Sie folgendermaßen vor, um die Betriebsart zu ändern: - Öffnen Sie die kleine Abdeckung in der Mitte, um auf die Navigationstasten nach links (◄) und nach rechts (►) zuzugreifen. - Mit Hilfe dieser Tasten können Sie nun auf die Betriebsarten-Zeile zugreifen. Bewegen Sie den Markierungsrahmen auf die gewünschte Betriebsart, und drücken Sie (OK), um die gewählte Betriebsart zu aktivieren. 3.1 Manuelle Betriebsart „Komfort“ Manuelle Betriebsart, die permanent auf die eingestellte Komforttemperatur regelt. Wenn Sie eine der Tasten (-) und (+) drücken, beginnt der Sollwert für die Komforttemperatur zu blinken und kann mit Hilfe dieser Tasten geändert werden. 3.2 Manuelle Betriebsart „Absenkung“ Manuelle Betriebsart, die permanent auf die eingestellte Absenktemperatur regelt. Wenn Sie eine der Tasten (-) und (+) drücken, beginnt der Sollwert für die Absenktemperatur zu blinken und kann mit Hilfe dieser Tasten geändert werden. MuB_#10025808_P04880_BT-DP-RF_(GB-FR-DE-ES-PT-NL)_2012-06-21.docx 112 3.3 Betriebsart AUS Verwenden Sie diese Betriebsart, um die Anlage auszuschalten. Achtung: In dieser Betriebsart kann die Anlage einfrieren. - Bei ausgeschalteter Anzeige können Sie sich jederzeit durch Drücken der Taste (OK) einige Sekunden lang die aktuelle Temperatur und die aktuelle Uhrzeit anzeigen lassen. - Um die Anlage wieder einzuschalten, verwenden Sie die Navigationstaste nach links (◄) oder nach rechts (►). MuB_#10025808_P04880_BT-DP-RF_(GB-FR-DE-ES-PT-NL)_2012-06-21.docx 113 3.4 Automatischer Betrieb (AUTO) In dieser Betriebsart verfolgt der Thermostat das ausgewählte (Standard- oder benutzerdefinierte) Programm entsprechend der jeweiligen Uhrzeit und den eingestellten Sollwerten für die Komfort- und die Absenktemperatur. Um die Solltemperatur bis zum nächsten Programmschritt kurzfristig manuell zu ändern, erhöhen oder verringern Sie den Wert einfach mit Hilfe der Tasten (-) und (+). Die eingestellte Temperatur blinkt. Solange die manuell geänderte Temperatureinstellung aktiv ist, wird das kleine Handsymbol angezeigt. Wenn das Handsymbol blinkt, ist die Funktion „ITCS“ aktiv. MuB_#10025808_P04880_BT-DP-RF_(GB-FR-DE-ES-PT-NL)_2012-06-21.docx 114 3.5 Programmiermodus Aktueller Tag Aktuelles Programm TagesProgramm Nach dem Aufruf des Programmiermodus wählen Sie zunächst mit Hilfe der Tasten (-) und (+) eine Programmnummer. Sie können entweder eines der Standardprogramme P1 bis P9 oder ein benutzerdefiniertes Programm (U1 bis U4) wählen. MuB_#10025808_P04880_BT-DP-RF_(GB-FR-DE-ES-PT-NL)_2012-06-21.docx 115 Wenn Sie eines der Standardprogramme P1 bis P9 wählen, haben Sie nur die Möglichkeit, das Programm anzuzeigen und auszuwählen. P1: Morgen, Abend und Wochenende P2: Morgen, Mittag, Abend und Wochenende P3: Tag und Wochenende P4: Abend und Wochenende P5: Morgen, Abend (Badezimmer) P6: Morgen, Nachmittag und Wochenende P7: 7 Uhr–19 Uhr (Büro) P8: 8 Uhr–19 Uhr und Samstag (Ladengeschäft) P9: Wochenende (Zweitwohnung) (Eine ausführliche Beschreibung der Standardprogramme finden Sie im Anhang.) - Mit den Navigationstasten (◄) und (►) können Sie den angezeigten Programmtag ändern. MuB_#10025808_P04880_BT-DP-RF_(GB-FR-DE-ES-PT-NL)_2012-06-21.docx 116 - Drücken Sie (OK), um Ihre Auswahl zu bestätigen und zur Hauptanzeige (im automatischen Betrieb) zurückzukehren. Wenn Sie eines der benutzerdefinierten Programme U1 bis U4 wählen, können Sie das Programm nicht nur auswählen und anzeigen, sondern auch individuell anpassen. Voreinstellung: U1, U2, U3, U4 = Komforttemperatur an allen Tagen der Woche - Drücken Sie die Bearbeitungstaste ( ), um ein benutzerdefiniertes Programm anzupassen. Symbole und Erläuterungen zur Programmerstellung: Erster Schritt des Tages ( Komforttemperatur) Die Aufstehzeit muss eingestellt werden. MuB_#10025808_P04880_BT-DP-RF_(GB-FR-DE-ES-PT-NL)_2012-06-21.docx 117 Mittlerer Schritt des Tages ( Absenktemperatur) Die Uhrzeit für das Verlassen der Räumlichkeit muss eingestellt werden. Mittlerer Schritt des Tages ( Komforttemperatur) Die Uhrzeit für die Rückkehr muss eingestellt werden. Letzter Schritt des Tages ( Absenktemperatur) Die Zubettgehzeit muss eingestellt werden. - Die Zeiten können in Schritten von 30 Minuten programmiert werden. - Immer, wenn ein Wert oder ein Symbol blinkt, MuB_#10025808_P04880_BT-DP-RF_(GB-FR-DE-ES-PT-NL)_2012-06-21.docx 118 können Sie mit den Tasten (-) und (+) eine Einstellung oder Auswahl vornehmen und dann mit der Taste (OK) zum nächsten Schritt wechseln. - Die Programmerstellung beginnt immer mit Tag 1 (Montag). Nachdem Sie die Taste ( ) gedrückt haben, erscheint folgende Anzeige: Sie können nun mit Hilfe der Tasten (-) und (+)die Uhrzeit für den ersten Schritt des Programms einstellen. MuB_#10025808_P04880_BT-DP-RF_(GB-FR-DE-ES-PT-NL)_2012-06-21.docx 119 Drücken Sie zur Bestätigung (OK), und fahren Sie mit dem nächsten Schritt fort. Sie können nun wählen, welcher Art der nächste Schritt des Programms sein soll (blinkende Symbole). Es stehen 2 Optionen zur Auswahl: MuB_#10025808_P04880_BT-DP-RF_(GB-FR-DE-ES-PT-NL)_2012-06-21.docx 120 - 1. Option: Auswahl des Schlafsymbols (Abschluss des Tages) - 2. Option: Auswahl des Symbols für das Verlassen der Räumlichkeiten. Damit wird dem Programm für den betreffenden Tag ein weiterer Schritt hinzugefügt. Wenn Sie Ihre Wahl getroffen haben, drücken Sie zur Bestätigung (OK). Anschließend können Sie die Uhrzeit für diesen Schritt mit Hilfe der Tasten (-) und (+) anpassen. Wenn Sie die Uhrzeit für diesen Schritt festgelegt haben, drücken Sie (OK), um zum nächsten Schritt zu wechseln. MuB_#10025808_P04880_BT-DP-RF_(GB-FR-DE-ES-PT-NL)_2012-06-21.docx 121 Sie können nun gleich mit Hilfe der Tasten (-) und (+) die Uhrzeit für den nächsten Schritt – die Rückkehr – einstellen. Drücken Sie zur Bestätigung (OK), und fahren Sie mit dem nächsten Schritt fort. MuB_#10025808_P04880_BT-DP-RF_(GB-FR-DE-ES-PT-NL)_2012-06-21.docx 122 Sie können wieder wählen, welcher Art der nächste Schritt des Programms sein soll (blinkende Symbole). Es stehen 2 Optionen zur Auswahl: - 1. Option: Auswahl des Schlafsymbols (Abschluss des Tages) - 2. Option: Auswahl des Symbols für das Verlassen der Räumlichkeiten. Damit wird dem Programm für den betreffenden Tag ein weiterer Schritt hinzugefügt. Wenn Sie Ihre Wahl getroffen haben, drücken Sie zur Bestätigung (OK). Anschließend können Sie die Uhrzeit für diesen Schritt mit Hilfe der Tasten (-) und (+) anpassen. MuB_#10025808_P04880_BT-DP-RF_(GB-FR-DE-ES-PT-NL)_2012-06-21.docx 123 Drücken Sie zur Bestätigung (OK), und schließen Sie die Bearbeitung des ersten Tages ab. Wenn Sie möchten, können Sie das soeben für diesen Tag erstellte Programm nun für die darauffolgenden Tage kopieren. Wählen Sie mit Hilfe der Tasten (-) oder (+) die Option YES oder die Option no aus, und bestätigen Sie Ihre Auswahl mit (OK). MuB_#10025808_P04880_BT-DP-RF_(GB-FR-DE-ES-PT-NL)_2012-06-21.docx 124 - Wenn Sie „no“ gewählt haben, können Sie nun ein Programm für den Dienstag erstellen. (Gehen Sie dazu ebenso vor wie beim ersten Tag.) - Wenn Sie „YES“ gewählt haben, können Sie das Programm nun für den folgenden Tag kopieren (für Dienstag, Mittwoch, ... bis zum letzten Tag der Woche, also Tag 7 – Sonntag). Nachdem Sie für den letzten Tag (Tag 7, Sonntag) (OK) gedrückt haben, können Sie Ihr Programm mit „SAVE“ speichern. Daraufhin erscheint die Meldung „Save“ und die LED blinkt grün: MuB_#10025808_P04880_BT-DP-RF_(GB-FR-DE-ES-PT-NL)_2012-06-21.docx 125 Drücken Sie (OK), um Ihr Programm zu speichern und in den automatischen Betrieb (AUTO) zurückzukehren, der nun Ihrem benutzerdefinierten Programm folgt. Um Ihr Programm zu löschen und in den Betriebsmodus zurückzukehren, drücken Sie die Escape-Taste ( ). 3.6 Betriebsart „Urlaub“ In der Betriebsart „Urlaub“ können Sie die Frostschutztemperatur für eine bestimmte Zahl von Tagen einstellen. - Stellen Sie die Dauer in Tagen „d“ mit den Tasten (-) und (+) ein, und drücken Sie zum Aktivieren die Taste (OK). (Sie können eine Dauer von 1 bis 99 Tagen eingeben.) MuB_#10025808_P04880_BT-DP-RF_(GB-FR-DE-ES-PT-NL)_2012-06-21.docx 126 - Die eingestellte Frostschutztemperatur ist ein Festwert, der im Parametermenü als Parameter Nummer 06, „HG“, angepasst werden kann – siehe Kapitel 6. (Vorgegeben ist ein Wert von 10 °C.) Daraufhin beginnt das Symbol zu blinken, und die Zahl der verbleibenden Tage wird bis zum Ende des Zeitraums angezeigt. Wenn Sie die Urlaubsfunktion vor Ablauf des Zeitraums beenden möchten, setzen Sie den Wert für die Dauer mit Hilfe der Taste (-) auf „no“. 3.7 Betriebsart „Timer“ In der Betriebsart „Timer“ können Sie die Temperatur für einen speziellen Zeitraum und die Dauer dieses Zeitraums einstellen. Diese Funktion können Sie verwenden, wenn Sie einige Tage zu Hause bleiben oder die MuB_#10025808_P04880_BT-DP-RF_(GB-FR-DE-ES-PT-NL)_2012-06-21.docx 127 Programmierung eine Zeitlang (für eine Party, ...) außer Kraft setzen möchten. - Legen Sie zunächst mit den Tasten (-) und (+) eine Dauer von unter 24 Stunden in Stunden „H“ oder eine Dauer in Tagen „d“ fest. Drücken Sie zum Bestätigen (OK). (Sie können eine Dauer von 1 Stunde bis 99 Tagen eingeben.) - Anschließend können Sie mit den Tasten (-) und (+) die gewünschte Solltemperatur festlegen. Drücken Sie (OK), um die Funktion zu aktivieren. (Vorgegeben ist ein Wert von 22 °C.) Daraufhin beginnt das Symbol zu blinken, und die Zahl der verbleibenden Stunden/Tage wird bis zum Ende des Zeitraums angezeigt. Wenn Sie die Timer-Funktion vor Ablauf des Zeitraums beenden möchten, setzen Sie den Wert für die Dauer mit Hilfe der Taste (-) auf „no“. MuB_#10025808_P04880_BT-DP-RF_(GB-FR-DE-ES-PT-NL)_2012-06-21.docx 128 4 Spezialfunktionen: 4.1 Tastensperre-Funktion Verwenden Sie diese Funktion, um jegliche Änderungen an Ihren Einstellungen zu verhindern (im Kinderzimmer, in einem öffentlich zugänglichen Raum, ...). - Zum Einschalten der Tastensperre halten Sie die Escape-Taste ( ) gedrückt, und drücken Sie gleichzeitig die Bearbeitungstaste ( ). - Auf der Anzeige wird daraufhin das Symbol „ “ eingeblendet. - Zum Entsperren der Tastatur gehen Sie genauso vor. 4.2 Informationsfunktion Mit dieser Funktion können Sie alle aktuellen Temperaturen der am Thermostat angeschlossenen MuB_#10025808_P04880_BT-DP-RF_(GB-FR-DE-ES-PT-NL)_2012-06-21.docx 129 Messfühler (Fußbodensensor, externer Sensor oder Außensensor) schnell ablesen, indem Sie mehrmals die Escape-Taste () drücken. Diese Möglichkeit zum „Durchblättern“ steht nur auf der Hauptanzeige zur Verfügung. Sie können folgende Werte ablesen: - die aktuell vom Thermostat angestrebte Solltemperatur; - die Umgebungstemperatur; - bei Anschluss eines externen Sensors: die Fußbodentemperatur – sofern ein Fußbodensensor verwendet wird; die Außentemperatur – sofern ein Außensensor verwendet wird. Wenn der Parameter „SenS“ auf „Air“ eingestellt ist, wird der externe Sensor als Außentemperatursensor verwendet. MuB_#10025808_P04880_BT-DP-RF_(GB-FR-DE-ES-PT-NL)_2012-06-21.docx 130 5 Parametermenü Ihr Thermostat verfügt über ein Parametermenü, das Sie aufrufen können, indem Sie die Bearbeitungstaste ( ) 5 Sekunden lang gedrückt halten. Das Parametermenü wird geöffnet und zeigt den ersten Parameter: Sie können nun mit den Navigationstasten (◄) und (►) zum einzustellenden Parameter wechseln. Rufen Sie den Parameter mit (OK) auf, ändern Sie ihn mit (-) oder (+), und bestätigen Sie anschließend Ihre Änderung mit (OK). MuB_#10025808_P04880_BT-DP-RF_(GB-FR-DE-ES-PT-NL)_2012-06-21.docx 131 Um das Parametermenü zu schließen, wählen Sie den Parameter « End » aus, und drücken Sie (OK). Nr. 00 01 02 03 Vorgabewert und weitere Möglichkeiten RF INI: Konfiguration der Funkverbindung Sendet das Funkverbindungssignal für die Zuordnung des Funkthermostats zum Funkempfänger. Zusätzlich müssen Sie auch den Empfänger gleichzeitig in den Funkkonfigurationsmodus versetzen. (Bei einem einfachen Empfänger halten Sie einfach die Taste gedrückt, bis das grüne Licht leuchtet – siehe Unterlagen zum Funkempfänger.) dEG: Einheit der Temperaturanzeige °C Celsius °F Fahrenheit __:__ Auswahl des Uhrzeitformats 24H (24:00) 12H (12:00 AM/PM) dst: Sommerzeitumstellung YES automatischer Wechsel in Abhängigkeit vom Datum. no keine automatische Sommerzeitumstellung. MuB_#10025808_P04880_BT-DP-RF_(GB-FR-DE-ES-PT-NL)_2012-06-21.docx 132 04 AirC: Kalibrierung des internen Sensors Die Kalibrierung ist nach 1 Tag Betrieb mit unveränderter Solltemperatur folgendermaßen durchzuführen: Platzieren Sie im Raum ein Thermometer in 1,5 m Abstand zum Fußboden (selber Abstand wie beim Thermostat), und kontrollieren Sie nach 1 Stunde die tatsächliche Raumtemperatur. Bei Aufruf des Parameters „Kalibrierung“ wird auf der rechten Seite „no“ angezeigt. Das bedeutet, es wurde keine Kalibrierung durchgeführt. Geben Sie mit Hilfe der Tasten (-) und (+) den vom Thermometer angezeigten Istwert ein. Drücken Sie anschließend zur Bestätigung (OK). Daraufhin sollte „YES“ angezeigt werden; der Wert wird im internen Speicher abgelegt. Um einen Kalibrierungswert zu löschen, drücken Sie die Escape-Taste ( ). Der alte Wert wird gelöscht, und es wird „no“ angezeigt. * Achtung: Während der gesamten Kalibrierung darf nur das über den Thermostat gesteuerte Heizelement verwendet werden. MuB_#10025808_P04880_BT-DP-RF_(GB-FR-DE-ES-PT-NL)_2012-06-21.docx 133 05 06 07 OutC , AMbC , FlrC: Kalibrierung des angeschlossenen externen Sensors Die Kalibrierungsmethode entspricht der Beschreibung zum Parameter „04 AirC“ weiter oben. HG: Frostschutztemperatur in der Betriebsart „Urlaub“ Vorgegebener Wert 10 °C. Mit den Tasten (-) und (+) können Sie die Einstellung für die Frostschutztemperatur ändern. Drücken Sie anschließend zur Bestätigung (OK). ITCS: YES, no Das intelligente Temperaturkontrollsystem aktiviert Ihre Anlage im Voraus (maximal 2 Stunden), um sicherzustellen, dass die gewünschte Temperatur zu dem in Ihrem Wochenprogramm vorgegebenen Zeitpunkt bereits erreicht wird. Diese automatische System zur Temperaturregulierung funktioniert folgendermaßen: Wenn Sie Ihren Thermostat zum ersten Mal einschalten, misst er, wie lange Ihre Anlage braucht, bis die Solltemperatur erreicht ist. Der Thermostat misst diese Zeit bei jeder programmierten Änderung der Solltemperatur erneut, um den Einfluss der sich verändernden Außentemperatur auszugleichen. Sie MuB_#10025808_P04880_BT-DP-RF_(GB-FR-DE-ES-PT-NL)_2012-06-21.docx 134 08 09 10 können nun Ihren Thermostat programmieren, ohne die Temperatur im Voraus anpassen zu müssen, weil der Thermostat den Zeitversatz automatisch berücksichtigt. Clr ALL: Wiederherstellen der Werkseinstellungen Halten Sie die Taste (OK) 10 Sekunden lang gedrückt, um die Solltemperaturen und die Benutzerparameter im Parametermenü auf die ab Werk vorgegebenen Einstellungen zurückzusetzen. Auch die benutzerdefinierten Programme werden zurückgesetzt. * Achtung: Vergewissern Sie sich, dass Sie alles haben, was Sie für die Neueinrichtung Ihrer Anlage brauchen, bevor Sie diese Funktion benutzen. Software-Version VErS ___ End: Parametermenü schließen Drücken Sie (OK), um das Menü der Einrichtungsparameter zu schließen und zum normalen Betrieb zurückzukehren. MuB_#10025808_P04880_BT-DP-RF_(GB-FR-DE-ES-PT-NL)_2012-06-21.docx 135 6 Technische Daten Umgebungsbedingungen: Betriebstemperatur: Transport- und Lagertemperatur: Elektrische Schutzart Installationsklasse Verschmutzungsgrad Temperaturmessgenauigkeit Temperatureinstellbereich Komfort-, Absenktemperatur Urlaub (Frostschutz) Timer Regelcharakteristik Stromversorgung Lebensdauer 0 bis 40 °C -10 bis +50 °C IP30 KLASSE II 2 0.1°C 5 bis 35 °C in Schritten von 0,5 °C 10 °C (einstellbar) 5 bis 35 °C Proportionalbereich (PWM 2 °C bei 10-min-Zyklus) oder Hysterese von 0,5 °C 2 Alkalibatterien LR03 1,5 V, Typ AAA (Micro) ~2 Jahre Sensorelemente: Intern und extern (optional) Funkfrequenz Software-Version Normen und Konformität: Dieser Thermostat wurde in Übereinstimmung mit den folgenden Normen und Normdokumenten konstruiert: NTC 10k bei 25 °C 868 MHz (< 10 mW) Wird im Parametermenü angezeigt: Vers xxx EN 60730-1: 2003 EN 61000-6-1: 2002 EN 61000-6-3: 2004 EN 61000-4-2: 2001 EN300220-1/2 EN301489-1/3 R&TTE 1999/5/EG Niederspannung 2006/95/CE EMV 2004/108/CE MuB_#10025808_P04880_BT-DP-RF_(GB-FR-DE-ES-PT-NL)_2012-06-21.docx 137 7 Fehlersuche und -behebung Der BT DP-01 lässt sich nicht einschalten. Batterieproblem - Überprüfen Sie, ob der Schutzaufkleber auf den Batterien entfernt wurde. - Überprüfen Sie, ob die Batterien in der richtigen Richtung eingelegt sind. - Überprüfen Sie die Batteriekapazität. Die LED des BT DP-01 blinkt rot. Sensorproblem Das Symbol blinkt (Umgebungssensor). - Wenden Sie sich an den Installationsbetrieb oder den Verkäufer. Das Symbol blinkt MuB_#10025808_P04880_BT-DP-RF_(GB-FR-DE-ES-PT-NL)_2012-06-21.docx 138 (Fußbodensensor). - Überprüfen Sie die Verbindung zum Sensor. - Trennen Sie den Sensor ab, und überprüfen Sie ihn mit einem Ohmmeter. (Der Messwert muss ca. 10 kOhm betragen.) Batteriespannung ist zu niedrig. Das Symbol blinkt (Batterien). - Ersetzen Sie die Batterien. Der BT DP-01 scheint korrekt zu funktionieren, aber die Heizung arbeitet nicht richtig. Am Empfänger: - Überprüfen Sie die Empfangsqualität des Funksignals. - Überprüfen Sie die Verbindungen. Ausgänge - Überprüfen Sie die Stromversorgung der Heizelements. - Wenden Sie sich an den Installationsbetrieb. Funk- Überprüfen Sie folgende Punkte: Kommunikation - Der Empfänger muss in einem MuB_#10025808_P04880_BT-DP-RF_(GB-FR-DE-ES-PT-NL)_2012-06-21.docx 139 Mindestabstand von 50 cm zu allen anderen elektrischen Geräten oder Funkelementen (GSM, Wi-Fi, ...) platziert sein. - Der Empfänger darf nicht an einem metallischen Teil oder beispielsweise zu nahe an einer Wasserleitung (Kupfer, …) platziert sein. Der BT DP-01 scheint korrekt zu funktionieren, aber Raumtemperatur stimmt nie mit dem Programm überein. - Überprüfen Sie Uhr. - Ist vielleicht der Unterschied zwischen Komfort- und Absenktemperatur zu groß? Programm - Ist der Programmschritt zu kurz? - Wenden Sie sich an den Installationsbetrieb, damit dieser die Regelparameter überprüft und auf Ihr Heizungssystem abstimmt. 1 ¡IMPORTANTE! MuB_#10025808_P04880_BT-DP-RF_(GB-FR-DE-ES-PT-NL)_2012-06-21.docx 140 Antes de empezar a trabajar, el instalador debe leer detenidamente este manual de instalación y funcionamiento y asegurarse de comprender y cumplir todas las instrucciones contenidas en él. - El termostato debe ser montado, operado y mantenido únicamente por personal especialmente instruido. El personal en el curso de formación sólo puede manejar el producto bajo la supervisión de un instalador con experiencia. Con sujeción a las condiciones anteriores, el fabricante asumirá la responsabilidad por el equipo según lo determinado por las disposiciones legales. - Todas las instrucciones en este manual de instalación y operación deben observarse cuando se trabaja con el controlador. Toda otra aplicación se considera no conforme a las disposiciones. El fabricante no responderá en caso de uso inapropiado del control. Por motivos de seguridad, no se permiten modificaciones o transformaciones. El mantenimiento sólo puede ser realizado por talleres de servicio aprobados por el fabricante. - La funcionalidad del controlador depende del modelo y el equipo. Este folleto de instalación es parte del producto y debe observarse. MuB_#10025808_P04880_BT-DP-RF_(GB-FR-DE-ES-PT-NL)_2012-06-21.docx 141 APLICACIÓN - Los termostatos de la serie "BT” están desarrollados para controlar y gestionar todo tipo de instalaciones de calefacción. - Los controladores se han diseñado para su utilización en espacios residenciales, salas de oficinas y centros industriales. Verifique que la instalación satisfaga las normas existentes antes del funcionamiento para garantizar un uso correcto de la instalación. INSTRUCCIONES DE SEGURIDAD Antes de comenzar a trabajar, desconecte el suministro eléctrico. - Todo el trabajo de instalación y cableado relativo al termostato debe realizarse sólo en estado desenergizado. El dispositivo debe ser conectado y puesto en servicio únicamente por personal competente. Asegúrese de cumplir las normas de seguridad vigentes. - Los termostatos no son a prueba de salpicaduras ni inmersión. Por tanto, deben montarse en un lugar seco. - No intercambie las conexiones de los sensores y las conexiones de 230V bajo ninguna circunstancia. El intercambio de esas conexiones podría entrañar un peligro para la vida por descarga eléctrica o la destrucción del dispositivo y los sensores conectados y otros aparatos. MuB_#10025808_P04880_BT-DP-RF_(GB-FR-DE-ES-PT-NL)_2012-06-21.docx 142 Índice 1 1.1 1.2 2 2.1 2.2 2.3 2.4 3 3.1 3.2 3.3 3.4 3.5 3.6 3.7 4 4.1 4.2 5 6 7 Presentación ................................................ 144 Teclado ........................................................ 146 Pantalla y LED ............................................. 147 Primera instalación ...................................... 150 Instalación de las pilas ................................. 150 Ajuste de la hora y la fecha .......................... 150 Instalación RF .............................................. 152 Inicio ............................................................ 154 Definición del modo de funcionamiento ....... 158 Modo manual Confort ................................. 159 Modo manual, Reducido ............................. 159 Modo de DESCONEXIÓN ........................... 159 Modo automático ......................................... 160 Modo de programa ...................................... 161 Modo Vacaciones ........................................ 171 Modo Temporizador .................................... 172 Función especial .......................................... 174 Función Bloqueo de teclado ........................ 174 Información .................................................. 174 Menú de parámetros .................................... 176 Características técnicas ............................... 181 Resolución de problemas............................. 183 MuB_#10025808_P04880_BT-DP-RF_(GB-FR-DE-ES-PT-NL)_2012-06-21.docx 143 1 Presentación + - - + Termostato electrónico programable con pantalla LCD especialmente diseñado para controlar diferentes tipos de sistemas de calefacción. MuB_#10025808_P04880_BT-DP-RF_(GB-FR-DE-ES-PT-NL)_2012-06-21.docx 144 Será su mejor aliado para optimizar su consumo de energía y aumentar su comodidad. - Diseño moderno con material suave al tacto. Cableado e instalación sencillos. “Función sencilla de creación de” programas. Programable semanalmente en intervalos de 30 minutos. Función de neutralización de control temporal. Función anticongelante. Función de vacaciones o recepción. Memoria EEPROM no volátil. 2 pilas AAA para 2 años de funcionamiento. Salida de 2 cables para una posibilidad máxima de uso. 2 menús de parámetros (Usuario e Instalador) Opcional - Sensor externo con varias posibilidades de regulación. (Suelo, combinado…) MuB_#10025808_P04880_BT-DP-RF_(GB-FR-DE-ES-PT-NL)_2012-06-21.docx 145 1.1 Teclado Tecla Menos (-) Tecla Más (+) Tecla de validación (OK) LED de estado Tecla de navegación izquierda (◄) Tecla de navegación derecha (►) Tecla Escape ( ) Tecla de edición ( ) MuB_#10025808_P04880_BT-DP-RF_(GB-FR-DE-ES-PT-NL)_2012-06-21.docx 146 1.2 Pantalla y LED Color rojo permanente (cuando la retroiluminación está encendida): Demanda de calefacción Color verde parpadeante: se requiere su validación Color rojo parpadeante: Error en sensor o pilas 1 2 3 4 5 6 7 8 9 15 14 13 12 11 10 MuB_#10025808_P04880_BT-DP-RF_(GB-FR-DE-ES-PT-NL)_2012-06-21.docx 147 1. 2. 3. 4. 5. 6. Día actual de la semana Menú del modo de funcionamiento (el modo activo se muestra en un recuadro). Número de programa o número de parámetro si se muestra “4”. Menú de parámetros de instalación. Logotipo de transmisión RF Tipo de sensor utilizado y temperatura mostrada. Regulación => Sensor ambiental interno o externo. Regulación => Sensor de suelo. Regulación => Sensor interno con limitación de suelo. Vista de la temperatura exterior 7. 8. 9. Indicación de demanda de calefacción. Indicador de nivel bajo de pilas. Indicador de unidades °C o °F MuB_#10025808_P04880_BT-DP-RF_(GB-FR-DE-ES-PT-NL)_2012-06-21.docx 148 10. Temperatura de ajuste o medida si se muestra “5”. Valor de parámetro si se muestra “4”. 11. Función de neutralización de control activada o función "ITCS" si parpadea. 12. Tiempo o nombre del parámetro si se muestra “4”. 13. Programa del día actual (la barra de tiempo actual parpadea) 14. Pictograma para creación de programa, estado del programa en modo de funcionamiento normal. 15. Indicador de candado MuB_#10025808_P04880_BT-DP-RF_(GB-FR-DE-ES-PT-NL)_2012-06-21.docx 149 2 Primera instalación Esta sección le guiará para ajustar su termostato por primera vez. 2.1 Instalación de las pilas - Abra las dos cubiertas laterales e introduzca las 2 pilas alcalinas AAA suministradas (o retire la pequeña tira adhesiva de protección si las pilas ya se encuentran en el compartimento) - Cierre las dos cubiertas laterales. - Ahora su termostato le propondrá ajustar la hora y la fecha actuales. 2.2 Ajuste de la hora y la fecha Cada vez que un valor parpadea, puede ajustarlo con las teclas (-) y (+), una vez elegido el valor, valídelo con la tecla (OK). El termostato pasará automáticamente al siguiente valor. Nota: puede regresar siempre al valor anterior pulsando la tecla Escape ( ). MuB_#10025808_P04880_BT-DP-RF_(GB-FR-DE-ES-PT-NL)_2012-06-21.docx 150 Orden en forma de lista de los ajustes de hora y fecha: Hora y día: Ajuste de las horas, Ajuste de los minutos Ajuste del día (1 = lunes) Fecha: Ajuste del número de día Ajuste del número de mes (01 a 12) Ajuste del año (siglo) Ajuste del año A continuación, aparece el mensaje “Guardar” y el LED verde parpadeante, pulse (OK) para validar la hora y la fecha ajustadas. Siempre puede acceder a los ajustes de hora y fecha manteniendo pulsado la tecla de ( ) edición durante 2 segundos en los modos de funcionamiento normales. MuB_#10025808_P04880_BT-DP-RF_(GB-FR-DE-ES-PT-NL)_2012-06-21.docx 151 2.3 Instalación RF - En primer lugar, para configurar su termostato con el receptor, debe fijar su receptor en modo « RF init ». (consulte el folleto del receptor para ello, sólo son compatibles los receptores RF del mismo rango) - Ahora, en el termostato mantenga pulsada la tecla de edición ( ) durante 10 s, a continuación debe mostrarse el parámetro « ini ». El termostato enviará ahora la señal de configuración de radio al receptor. - En el receptor, compruebe la buena recepción (normalmente se muestra por una LED verde parpadeante). Una vez realizada la configuración MuB_#10025808_P04880_BT-DP-RF_(GB-FR-DE-ES-PT-NL)_2012-06-21.docx 152 entre el receptor y el termostato, pulse la tecla Escape ( ) para regresar a la pantalla principal. - Ahora puede comprobar la distancia RF, vaya a la sala que debe regularse. Coloque su termostato en la posición final (en la pared o mesa...), luego fije el termostato en el modo Confort (posición de temperatura de ajuste 37° C). Cierre la puerta y vaya al receptor para comprobar si se ha recibido el nuevo estado del termostato. (El calentamiento se indica normalmente con un LED rojo). - Ahora vuelva al termostato y apáguelo. Compruebe nuevamente el receptor para ver si también se ha apagado (el LED rojo debe estar apagado) o Si las señales RF se recibieron correctamente, ajuste como desee su temperatura de ajuste. o Si las señales RF no se recibieron correctamente, compruebe la instalación (posición del receptor, distancia...) MuB_#10025808_P04880_BT-DP-RF_(GB-FR-DE-ES-PT-NL)_2012-06-21.docx 153 * Para simplificar la instalación será mejor tener el termostato cerca del receptor durante el modo de configuración. (Debe respetarse una distancia mínima de > 1 metro) 2.4 Inicio El termostato está ahora preparado para funcionar. El modo de funcionamiento predeterminado será automático con un programa estándar incorporado “P1”. Lunes a Viernes 20° C 18° C 07:00 09:00 17:00 23:00 MuB_#10025808_P04880_BT-DP-RF_(GB-FR-DE-ES-PT-NL)_2012-06-21.docx 154 MuB_#10025808_P04880_BT-DP-RF_(GB-FR-DE-ES-PT-NL)_2012-06-21.docx 155 Sábado y Domingo 20° C 18° C 08:00 23:00 Nota: Puede personalizar su programa como desee, véase la siguiente parte “Definición del modo de funcionamiento” capítulo “Programa” para más información. Program a seguido Fase actual del programa Hora actual MuB_#10025808_P04880_BT-DP-RF_(GB-FR-DE-ES-PT-NL)_2012-06-21.docx 156 En cualquier momento, cuando la retroiluminación esté apagada, pulse la tecla (OK) para encender la retroiluminación, y luego pulse nuevamente la tecla (OK) para mostrar la temperatura de ajuste actual. MuB_#10025808_P04880_BT-DP-RF_(GB-FR-DE-ES-PT-NL)_2012-06-21.docx 157 3 Definición del modo de funcionamiento ¿Cómo modificar el modo de funcionamiento? - Abra la pequeña cubierta central para acceder a las teclas de navegación (◄) o (►). - Ahora puede pulsar estas teclas para mostrar la línea del modo de funcionamiento. Mueva el cursor de recuadro sobre el modo de trabajo deseado y pulse (OK) para acceder al modo de funcionamiento elegido. MuB_#10025808_P04880_BT-DP-RF_(GB-FR-DE-ES-PT-NL)_2012-06-21.docx 158 3.1 Modo manual Confort Modo de funcionamiento manual, la temperatura de ajuste confort se seguirá todo el tiempo. Al pulsar las teclas (-) o (+), la temperatura de ajuste confort comienza a parpadear y puede ajustarse. 3.2 Modo manual, Reducido Modo de funcionamiento manual, la temperatura de ajuste reducida se seguirá todo el tiempo. Al pulsar las teclas (-) o (+), la temperatura de ajuste reducida comienza a parpadear y puede ajustarse. 3.3 Modo de DESCONEXIÓN Utilice este modo si necesita desactivar su instalación. Tenga cuidado: En este modo su instalación puede congelarse. MuB_#10025808_P04880_BT-DP-RF_(GB-FR-DE-ES-PT-NL)_2012-06-21.docx 159 - En cualquier momento, cuando la pantalla está apagada, pulse la tecla (Ok) para mostrar durante unos segundos la temperatura y la hora actuales. - Para reiniciar su instalación, utilice las teclas de navegación (◄) o (►). 3.4 Modo automático En este modo, el termostato seguirá el programa elegido (integrado o personalizado) según la hora real y las temperaturas de ajuste Confort o Reducida. Se puede cancelar fácilmente, hasta el siguiente paso del programa, la temperatura actual del programa modificando el valor con (-) o (+). La temperatura de ajuste parpadeará. El pequeño logotipo de la mano se mostrará cuando la función de neutralización de control está MuB_#10025808_P04880_BT-DP-RF_(GB-FR-DE-ES-PT-NL)_2012-06-21.docx 160 activa. Si el logotipo de la mano ITCS está en marcha. 3.5 parpadea, entonces Modo de programa Día actual Program a seguido Programa del día Cuando se accede al modo de programa, la primera acción es elegir el número de programa con las teclas (-) o (+). Puede elegir entre un programa incorporado P1 a P9 o un programa de usuario U1 a U4. MuB_#10025808_P04880_BT-DP-RF_(GB-FR-DE-ES-PT-NL)_2012-06-21.docx 161 Si elige un programa incorporado P1 a P9, sólo puede ver y elegir el programa. P1: Mañana, Tarde y Fin de semana P2: Mañana, Mediodía, Tarde y Fin de semana P3: Día y Fin de semana P4: Tarde y Fin de semana P5: Mañana, Tarde (Baño) P6: Mañana, primeras horas de la tarde y Fin de semana P7: 7H – 19H (Oficina) P8: 8H – 19H & Sábado (Tienda) P9: Fin de semana (Segunda casa) (Consulte las partes del anexo para ver una descripción completa del programa incorporado) - Utilice las teclas de navegación (◄) o (►) para cambiar el día del programa mostrado. MuB_#10025808_P04880_BT-DP-RF_(GB-FR-DE-ES-PT-NL)_2012-06-21.docx 162 - Pulse la tecla (OK) para confirmar su elección y regresar a la pantalla principal (en modo AUTO) Si elige uno de los programas de usuario U1 a U4, anteriores puede elegir el programa, verlo, pero también puede personalizarlo. Ajuste predeterminado: U1, U2, U3, U4 = Confort toda la semana - Pulse la tecla de edición ( ) para personalizar un programa de usuario. Símbolos y explicación para creación de programas: Primer paso del día ( Temp. Confort) MuB_#10025808_P04880_BT-DP-RF_(GB-FR-DE-ES-PT-NL)_2012-06-21.docx 163 La hora de activación debe ajustarse. Paso intermedio del día ( La hora de salida debe ajustarse Temp. reducida) Paso intermedio del día ( Temp. Confort) La hora de regreso debe ajustarse Último paso del día ( Temp. reducida) La hora de desactivación debe ajustarse - El paso del programa es 30 minutos - Cada vez que parpadea un valor o un icono, se le invita a realizar una selección con las teclas (-) o (+), una vez realizada la selección, pulse la tecla (OK) para ir al siguiente paso. MuB_#10025808_P04880_BT-DP-RF_(GB-FR-DE-ES-PT-NL)_2012-06-21.docx 164 - La creación de programas comenzará siempre con el día 1 (Lunes). Una vez pulsada la tecla ( ), aparecerá la siguiente pantalla: Ahora se le invita a ajustar la hora del primer paso del programa con (-) o (+), MuB_#10025808_P04880_BT-DP-RF_(GB-FR-DE-ES-PT-NL)_2012-06-21.docx 165 Pulse (OK) para validar e ir al siguiente paso. Ahora se le invita a elegir el tipo del paso siguiente del programa (iconos parpadeantes), pueden realizarse 2 selecciones: - La 1ª selección es elegir el icono de desactivación. (Final del día) - La 2ª selección es elegir el icono de salida, para añadir un paso al programa durante el día. Una vez realizada la selección, pulse (OK) para validar. A continuación, puede ajustar la hora del paso con (-) o (+), MuB_#10025808_P04880_BT-DP-RF_(GB-FR-DE-ES-PT-NL)_2012-06-21.docx 166 Cuando la hora del paso está ajustada, pulse (OK) para ir al siguiente paso. Se le invitará directamente a ajustar con (-) o (+) la hora del paso de regreso. MuB_#10025808_P04880_BT-DP-RF_(GB-FR-DE-ES-PT-NL)_2012-06-21.docx 167 Pulse (OK) para validar e ir al siguiente paso. Una vez más, se le invita a elegir el tipo del paso siguiente del programa (iconos parpadeantes), Pueden realizarse 2 selecciones: - La 1ª selección es elegir los iconos de desactivación. (Final del día) - La 2ª selección es elegir los iconos de salida para añadir otro paso al programa durante el día. Una vez realizada la selección, pulse (OK) para validar y puede ajustar la hora de este paso con (-) o (+), MuB_#10025808_P04880_BT-DP-RF_(GB-FR-DE-ES-PT-NL)_2012-06-21.docx 168 Pulse (OK) para validar y finalizar la edición del primer día. Ahora puede elegir copiar el programa recién creado para días sucesivos. Modifique la selección “Sí” o “no” con (-) o (+) y valide su selección con (OK). MuB_#10025808_P04880_BT-DP-RF_(GB-FR-DE-ES-PT-NL)_2012-06-21.docx 169 - Si selecciona “no”, se le invitará a crear un programa para Martes (repita el método anterior para crearlo). - Si selecciona “Sí”, tendrá la posibilidad de copiar el programa para el día siguiente (el martes, el miércoles... hasta el último día de la semana (7 domingo). Si pulsa (OK) en el último día (7 domingo) se le invitará a “GUARDAR” su programa. A continuación, aparece el mensaje “Guardar” y el LED verde parpadeante: Pulse la tecla (OK) para guardar su programa y volver al modo de funcionamiento AUTOMÁTICO siguiendo su programa de usuario. MuB_#10025808_P04880_BT-DP-RF_(GB-FR-DE-ES-PT-NL)_2012-06-21.docx 170 Pulse la tecla Escape ( ) para borrar los cambios de su programa de usuario y volver al modo de funcionamiento. 3.6 Modo Vacaciones El modo Vacaciones le permite fijar la temperatura anticongelante para un número determinado de días - Puede ajustar la duración en día “d” con (-) o (+), pulse (OK) para comenzar. (Ajustable de 1 a 99 días) - La temperatura de ajuste anticongelante es fija y puede ajustarse en el menú de parámetros número 06 ‘HG’, véase el capítulo 6. (Valor predeterminado 10° C) El logotipo parpadeará y el número de días restantes se muestra hasta el final del periodo. MuB_#10025808_P04880_BT-DP-RF_(GB-FR-DE-ES-PT-NL)_2012-06-21.docx 171 Si desea detener la función Vacaciones antes del fin, fije el periodo de duración en “no” con la tecla (-). 3.7 Modo Temporizador El modo Temporizador le permite ajustar la temperatura y la duración para un momento especial. Esta función puede utilizarse cuando usted permanece en casa varios días o si desea cancelar el programa durante un cierto tiempo (recepción...) - Primero puede ajustar la duración en horas "H" si ésta es inferior a 24H, luego en día “d” con (-) o (+), pulse (OK) para validar. (Ajustable de 1 hora a 99 días) MuB_#10025808_P04880_BT-DP-RF_(GB-FR-DE-ES-PT-NL)_2012-06-21.docx 172 - En un segundo momento, puede ajustar la temperatura de ajuste deseada con (-) o (+), pulse (OK) para iniciar la función. (Valor predeterminado 22° C) El logotipo parpadeará y el número de horas / días restantes se muestra hasta el final del periodo. Si desea detener la función de temporizador antes del final, fije el periodo de duración en “no” con la tecla (-). MuB_#10025808_P04880_BT-DP-RF_(GB-FR-DE-ES-PT-NL)_2012-06-21.docx 173 4 Función especial 4.1 Función Bloqueo de teclado Utilice esta función para impedir cambios en sus ajustes (en una sala infantil, zona pública…) - Para activar la función de bloqueo de teclas, mantenga pulsada primero la tecla Escape ( ) y a continuación pulse simultáneamente la tecla de edición ( ). - El logotipo “ ” se mostrará en la pantalla. - Repita el mismo procedimiento para desbloquear el teclado. 4.2 Información Con esta función puede ver rápidamente todas las temperaturas actuales de los sensores de sonda conectados a su termostato (sensor de suelo, externo o exterior) mediante varias pulsaciones de MuB_#10025808_P04880_BT-DP-RF_(GB-FR-DE-ES-PT-NL)_2012-06-21.docx 174 la tecla Escape ( ).Esta "Función de desplazamiento" sólo está disponible en la pantalla principal. Puede ver: - La temperatura de ajuste actual seguida por el termostato. - La temperatura ambiental - Si hay conectado un sensor externo: La temperatura del suelo si se utiliza como sensor de suelo. La temperatura externa si se utiliza como sensor externo. Si el parámetro “SenS” está fijado en “Aire”, el sensor exterior se utilizará como un sensor de temperatura externo MuB_#10025808_P04880_BT-DP-RF_(GB-FR-DE-ES-PT-NL)_2012-06-21.docx 175 5 Menú de parámetros Su termostato tiene un menú de parámetros; para acceder a este menú, mantenga pulsada la tecla de edición ( ) durante 5 segundos. El menú de parámetros aparecerá y se mostrará la primera pantalla de parámetros: Ahora puede seleccionar un parámetro que debe ajustarse con las teclas de navegación (◄) o (►), una vez elegido el parámetro, seleccione el valor con la tecla (OK), modifíquelo con (-) o (+) y confirme su ajuste con (OK). Para salir del menú de parámetros, seleccione el parámetro « End » (Fin) y pulse (OK). MuB_#10025808_P04880_BT-DP-RF_(GB-FR-DE-ES-PT-NL)_2012-06-21.docx 176 N° 00 01 02 03 04 Valor predeterminado y otras posibilidades RF INI: Configuración de radio Envía la señal de enlace radiofónico para asignar este termostato RF a su receptor RF. También deberá ajustar simultáneamente el receptor en modo de comunicación por radio (en un receptor simple, mantenga pulsado el botón hasta que la luz verde se encienda, véase el folleto del receptor) dEG: Unidad de las temperaturas mostradas °C Celsius °F Fahrenheit __:__ Selección de la unidad del reloj 24H (24:00) 12H (12:00 AM /PM) dst: Cambio de horario de verano - Verano <-> Invierno SÍ cambio automático según la fecha. sin cambio automático del horario de verano. AirC: Calibración de la sonda interna La calibración debe realizarse después de 1 día de trabajo con la misma temperatura de ajuste según se MuB_#10025808_P04880_BT-DP-RF_(GB-FR-DE-ES-PT-NL)_2012-06-21.docx 177 describe a continuación: Coloque un termómetro en la sala a 1,5 metros de distancia del suelo (como el termostato) y compruebe la temperatura real en la sala después de 1 hora. Cuando acceda al parámetro de calibración, se mostrará “no” a la derecha para indicar que no se ha realizado una calibración. Para introducir el valor mostrado en el termómetro, utilice las teclas (-) o (+) para introducir el valor real. A continuación, pulse (Ok) para confirmar. Debería mostrarse el mensaje “Sí”; el valor se guardará en la memoria interna. Si necesita borrar una calibración, pulse la tecla Escape ( ). El valor antiguo se borrará y el aparecerá el mensaje “no”. 05 * Preste atención: Durante el paso completo de la calibración sólo debe emplearse el elemento calefactor accionado por el termostato. OutC , AMbC , FlrC: Calibración de la sonda cableada externa Mismo método de calibración que el descrito en el MuB_#10025808_P04880_BT-DP-RF_(GB-FR-DE-ES-PT-NL)_2012-06-21.docx 178 06 07 parámetro “04 AirC” anterior. HG: Temperatura anticongelante utilizada en el modo Vacaciones Valor predeterminado 10° C. Utilice las teclas (-) o (+) para cambiar la temperatura de ajuste anticongelante. A continuación, pulse (Ok) para confirmar. ITCS: SÍ, no El Sistema Inteligente de Control de Temperatura (Intelligent Temperature Control System) activará su instalación con antelación (2 horas como máximo) para garantizar la temperatura deseada a la hora programada siguiendo su programa semanal. Este sistema de control automático funciona de la siguiente forma: Cuando inicia su termostato por primera vez, éste medirá el tiempo empleado por su instalación para alcanzar la temperatura fijada. El termostato volverá a medir ese tiempo en cada cambio de programa para compensar el cambio y la influencia de la temperatura externa. Ahora puede programar su termostato sin necesidad de ajustar la temperatura con antelación, ya que su termostato lo hace automáticamente por usted. MuB_#10025808_P04880_BT-DP-RF_(GB-FR-DE-ES-PT-NL)_2012-06-21.docx 179 08 09 10 Clr ALL: Reposición al ajuste de fábrica Mantenga pulsada la tecla (Ok) durante 10 segundos para reponer las temperaturas de puntos de ajuste y los parámetros de usuario en este menú con los ajustes predeterminados de fábrica. Los programas de usuario también se repondrán. * Preste atención: Asegúrese de tener todos los elementos necesarios para reconfigurar su instalación antes de utilizar esta función. Versión de software VErS ___ End: Salir del menú de parámetros Pulse la tecla (OK) para salir del menú de parámetros de instalación y volver al funcionamiento normal. MuB_#10025808_P04880_BT-DP-RF_(GB-FR-DE-ES-PT-NL)_2012-06-21.docx 180 6 Características técnicas Ambiental: Temperatura de funcionamiento: Temperatura de envío y almacenamiento: Protección eléctrica Categoría de instalación Grado de contaminación Precisión de temperatura medida Rango de temperatura de ajuste Confort, Reducida Vacaciones (Anticongelante) Temporizador Características de regulación 0° C - 40° C -10° C a +50° C IP30 Clase II 2 0,1° C 5° C a 35° C en pasos de 0,5° C 10° C (ajustable) 5° C a 35° C Banda proporcional (PWM 2° C para ciclo de 10 minutos) o histéresis de 0,5° C Alimentación eléctrica Tiempo de funcionamiento Elementos sensores: Interno y Externo (opcional) Frecuencia de radio Versión de software Normas y homologación: Su termostato ha sido diseñado para responder a las siguientes normas u otros documentos normativos: 2 pilas alcalinas AAA LR03 de 1.5V ~2 años NTC 10k a 25° C 868 MHz, <10mW. Se muestra en el menú de parámetros. Vers xxx EN 60730-1 : 2003 EN 61000-6-1 : 2002 EN 61000-6-3 : 2004 EN 61000-4-2 : 2001 EN300220-1/2 EN301489-1/3 R&TTE 1999/5/CE Baja tensión 2006/95/CE CEM 2004/108/CE MuB_#10025808_P04880_BT-DP-RF_(GB-FR-DE-ES-PT-NL)_2012-06-21.docx 182 7 Resolución de problemas Mi BT DP-01 no se pone en funcionamiento - Compruebe si la tira adhesiva de protección en las pilas está retirada. - Compruebe la orientación de las Problema de pilas pilas. - Compruebe la capacidad de las pilas El LED de mi BT DP-01 parpadea en rojo Problema en sensores El logotipo parpadea (sensor ambiental) - Contacte con su instalador o vendedor. El logotipo parpadea (sensor de suelo) - Compruebe la conexión del sensor. - Desconecte el sensor y compruébelo con un ohmímetro (el valor debe ser de unos 10kohms) MuB_#10025808_P04880_BT-DP-RF_(GB-FR-DE-ES-PT-NL)_2012-06-21.docx 183 El nivel de carga de las pilas es muy El logotipo parpadea (pilas) bajo - Sustituya las pilas. Mi BT DP-01 parece funcionar correctamente, pero la calefacción no En el receptor: - compruebe la buena recepción de la señal RF Salida - Compruebe las conexiones. - Compruebe la alimentación eléctrica del elemento calefactor. - Contacte con su instalador. - Compruebe los siguientes puntos: - El receptor debe colocarse a una distancia mínima de 50 cm Comunicación respecto a todos los demás RF materiales eléctricos o inalámbricos (GSM, Wi-Fi..) - El receptor no debe fijarse en una pieza metálica o demasiado cerca de tubos hidráulicos... (Cobre…) MuB_#10025808_P04880_BT-DP-RF_(GB-FR-DE-ES-PT-NL)_2012-06-21.docx 184 Mi BT DP-01 parece funcionar correctamente, pero la temperatura en la sala nunca fue acorde al programa. - Compruebe el reloj. -¿La diferencia entre temperatura Confort y Reducida es demasiado alta? - ¿El paso en el programa es Programa demasiado corto? - Contacte con su instalador para comprobar y ajustar los parámetros de regulación con su sistema de calefacción. MuB_#10025808_P04880_BT-DP-RF_(GB-FR-DE-ES-PT-NL)_2012-06-21.docx 185 MuB_#10025808_P04880_BT-DP-RF_(GB-FR-DE-ES-PT-NL)_2012-06-21.docx 186 IMPORTANTE! Antes de iniciar os trabalhos, o instalador deve ler cuidadosamente este Manual de Instalação e Funcionamento, e certificar-se de que todas as instruções contidas no mesmo são compreendidas e observadas. - O termostato apenas deve ser montado, controlado e mantido por pessoal devidamente formado. Durante a formação de pessoal, o mesmo apenas deve ter autorização para manipular o produto sob supervisão de um instalador experimentado. Em conformidade com a observação dos termos indicados acima, o fabricante assumirá a responsabilidade pelo equipamento como de acordo com as estipulações legais. - Todas as instruções indicadas no Manual de Instalação e Funcionamento devem ser observadas ao trabalhar com o controlador. Qualquer outra aplicação não será considerada em conformidade com as regulamentações. O fabricante não será responsável no caso de utilização incompetente do controlador. Por motivos de segurança, não são permitidas quaisquer modificações ou alterações. No caso da manutenção ser efectuada por terceiros, estes têm sempre que estar aprovados pelo fabricante. - A funcionalidade do controlador depende do modelo e do equipamento. Este folheto de instalação é parte integrante do produto e tem que ser obtido. MuB_#10025808_P04880_BT-DP-RF_(GB-FR-DE-ES-PT-NL)_2012-06-21.docx 187 APLICAÇÃO - Os termostatos da série “BT” forem desenvolvidos para controlar e gerir todo o tipo de instalações. - Os controladores foram concebidos para utilização em espaços residenciais e de escritório, assim como instalações industriais. Antes da instalação, verifique que a instalação está em conformidade com as regulamentações existentes, de modo a assegurar a devida utilização da mesma. INSTRUÇÕES DE SEGURANÇA Antes de iniciar os trabalhos, desligue a fonte de alimentação! - Todos os trabalhos de instalação e de ligação de cablagem relacionados com o termostato têm que ser efectuados com a fonte de alimentação desligada. O dispositivo apenas deve ser ligado e colocado em funcionamento por pessoal qualificado. Certifique-se de observar as regulamentações de segurança em vigor. - Os termostatos não resistem a salpicos nem podem ser molhados. Consequentemente, têm que ser montados num local seco. - Nunca troque as ligações dos sensores nem as de 230 V! A troca das referidas ligações pode provocar perigos eléctricos vitais ou a destruição do dispositivo, dos sensores ou de outros dispositivos. MuB_#10025808_P04880_BT-DP-RF_(GB-FR-DE-ES-PT-NL)_2012-06-21.docx 188 Índice 1 1.1 1.2 2 2.1 2.2 2.3 2.4 3 3.1 3.2 3.3 3.4 3.5 3.6 3.7 4 4.1 4.2 5 6 7 Apresentação ............................................... 190 Teclado ........................................................ 192 Ecrã e LED................................................... 193 Primeira Instalação ...................................... 196 Instalação das pilhas ................................... 196 Ajuste das Horas e do Dia ........................... 196 Instalação de RF .......................................... 198 Iniciar ........................................................... 201 Definição do modo de funcionamento .......... 203 Modo manual, Conforto ............................... 204 Modo manual, Reduzida ............................. 204 Modo DESLIGAR ........................................ 205 Modo automático ......................................... 206 Modo de programa ...................................... 207 Modo de Férias ............................................ 217 Modo de Temporizador ............................... 218 Função especial ........................................... 220 Função de bloqueio do teclado ................... 220 Informação ................................................... 220 Menu de parâmetros .................................... 222 Características técnicas ............................... 227 Resolução de Problemas ............................. 229 MuB_#10025808_P04880_BT-DP-RF_(GB-FR-DE-ES-PT-NL)_2012-06-21.docx 189 1 Apresentação + - - + MuB_#10025808_P04880_BT-DP-RF_(GB-FR-DE-ES-PT-NL)_2012-06-21.docx 190 Termostato programável electrónico com ecrã LCD, especialmente concebido para controlar diferentes tipos de sistemas de aquecimento. Será o seu melhor parceiro para optimizar o seu consumo de energia e aumentar o seu conforto. - Concepção moderna com material de toque suave. - Simplicidade de ligações e instalação. - Função de “criação fácil de programas”. - Programável semanalmente em passos de 30 min. - Função de anulação temporária. - Função anti-congelação. - Função de Férias ou Recepção. - Memória EEPROM não volátil. - 2 pilhas AAA para dois anos de funcionamento. - Saída com dois cabos para a máxima possibilidade de utilização. - Dois menus de parâmetros (Utilizador e Instalador) Opção de entrada - Sensor externo com várias possibilidades de regulação. (Chão, combinado…) MuB_#10025808_P04880_BT-DP-RF_(GB-FR-DE-ES-PT-NL)_2012-06-21.docx 191 1.1 Teclado Tecla Mais (+) Tecla Menos (-) Tecla de Validação (OK) LED de estado Tecla de Navegação para a Esquerda (◄) Tecla de Navegação para a Direita (►) Tecla Escape ( ) Tecla de edição ( ) MuB_#10025808_P04880_BT-DP-RF_(GB-FR-DE-ES-PT-NL)_2012-06-21.docx 192 1.2 Ecrã e LED Vermelho Fixo (quando a retroiluminação está activa): Solicitação de aquecimento Flash verde: tem que ser validado pelo utilizador Flash vermelho: Erro no sensor ou nas pilhas 1 2 3 4 5 6 7 8 9 15 14 13 12 11 10 MuB_#10025808_P04880_BT-DP-RF_(GB-FR-DE-ES-PT-NL)_2012-06-21.docx 193 1. 2. 3. 4. 5. 6. Dia actual da semana Menu de modo de funcionamento (o modo activo fica enquadrado). Número de programa ou número de parâmetro, se for apresentado “4”. Menu de Parâmetro de Instalação. Logótipo de transmissão de RF. São apresentados o tipo de sensor utilizado e a temperatura. Regulação => Sensor ambiente interno ou externo. Regulação => Sensor de chão. Regulação => Sensor interno com limitação de chão. Vista da temperatura exterior 7. 8. 9. Indicação de solicitação de aquecimento. Indicador de pouca carga nas pilhas. Indicador de unidades °C ou °F MuB_#10025808_P04880_BT-DP-RF_(GB-FR-DE-ES-PT-NL)_2012-06-21.docx 194 10. Definição ou medição de temperatura, se for apresentado “5”. Valor de parâmetro, se for apresentado “4”. 11. Função de anulação temporária activada ou função “ITCS” se estiver a piscar. 12. Horas ou título de parâmetro, se for apresentado “4”. 13. Programa do dia actual (a barra das horas actuais pisca) 14. Pictograma para criação de programa, estado de programa no modo de funcionamento normal. 15. Indicador de bloqueio de teclas MuB_#10025808_P04880_BT-DP-RF_(GB-FR-DE-ES-PT-NL)_2012-06-21.docx 195 2 Primeira Instalação Esta secção proporciona indicações para configurar o termostato pela primeira vez. 2.1 Instalação das pilhas - Abra as tampas dos dois lados e insira as duas pilhas alcalinas AAA fornecidas (ou retire o pequeno autocolante de protecção se as pilhas já estiverem instaladas no compartimento) - Feche as tampas dos dois lados. - Em seguida, o termostato solicitará o ajuste das horas e do dia. 2.2 Ajuste das Horas e do Dia Cada vez que um valor piscar, poderá ajustá-lo com as teclas (-) e (+); após o valor ser escolhido, valide-o com a tecla (OK). O termostato passará automaticamente para o valor seguinte. Nota: pode sempre regressar ao valor anterior premindo a tecla Escape ( ). MuB_#10025808_P04880_BT-DP-RF_(GB-FR-DE-ES-PT-NL)_2012-06-21.docx 196 Ordem de apresentação dos ajustes de horas e data: Horas e dia: Ajuste das horas, Ajuste dos minutos, Ajuste do dia (1 = Segunda-feira) Data: Ajuste do número do dia Ajuste do número do mês (01 a 12) Ajuste do ano (Século) Ajuste do ano Em seguida aparece a mensagem “Save” (guardar) e o LED verde pisca; prima (OK) para validar as horas e o dia ajustados. Pode sempre aceder aos ajustes de horas e dia, premindo e mantendo premida a tecla de edição ( ) durante 2 segundos, nos modos de funcionamento normal. MuB_#10025808_P04880_BT-DP-RF_(GB-FR-DE-ES-PT-NL)_2012-06-21.docx 197 2.3 Instalação de RF - Primeiro, configure o termostato com o receptor; o receptor tem que estar no modo « RF init ». (Consulte o folheto do receptor para efectuar o receptor; apenas são compatíveis os receptores de RF da mesma gama) - Agora, no termostato, prima e mantenha premida a tecla de edição ( ) durante 10 s; em seguida, é apresentado o parâmetro « ini ». Nesse momento, o termostato enviará o sinal de configuração de rádio para o receptor. - No receptor, verifique se as condições de recepção são boas (de forma geral, indicado por MuB_#10025808_P04880_BT-DP-RF_(GB-FR-DE-ES-PT-NL)_2012-06-21.docx 198 um LED verde a piscar). Após efectuar a configuração entre o receptor e o termostato, prima a tecla Escape ( ) para regressar ao ecrã principal. - Agora, pode verificar a distância de RF; vá para o espaço interior onde pretende que a temperatura seja regulada. Coloque o termostato na posição final (numa parede ou mesa...), seleccione o modo de Conforto no termostato (ajustando a posição de temperatura em 37 °C). Feche a porta e dirija-se ao receptor para verificar se o novo estado do termostato foi recebido. (Geralmente, o aquecimento é indicado por um LED vermelho). - Em seguida, dirija-se ao termostato e desligue-o. Verifique novamente o receptor para ver se também está desligado (o LED vermelho deverá estar apagado) MuB_#10025808_P04880_BT-DP-RF_(GB-FR-DE-ES-PT-NL)_2012-06-21.docx 199 o o Se os sinais de RF tiverem sido recebidos correctamente, ajuste a definição de temperatura como quiser. Se os sinais de RF não tiverem sido recebidos correctamente, verifique a instalação (Posição e distância do receptor...) * Para simplificar a instalação, é melhor colocar termostato perto do receptor durante o modo de configuração. (Tem que ser respeitada uma distância mínima > 1 metro) MuB_#10025808_P04880_BT-DP-RF_(GB-FR-DE-ES-PT-NL)_2012-06-21.docx 200 2.4 Iniciar Agora, o termostato está pronto a ser utilizado. O modo de funcionamento predefinido será automático, standard “P1”. com um programa incorporado Segunda-feira até Sexta-feira 20 °C 18 °C 07:00 09:00 17:00 23:00 Sábado e Domingo 20 °C 18 °C 08:00 23:00 MuB_#10025808_P04880_BT-DP-RF_(GB-FR-DE-ES-PT-NL)_2012-06-21.docx 201 Nota: Pode personalizar o seu programa como desejar; consulte “Programa” no próximo capítulo, “Definição do modo de funcionamento” para mais explicações. Program a de controlo Fase actual do programa Horas actuais Em qualquer momento, quando a retro-iluminação não estiver activa, prima a tecla (OK) para activar a retro-iluminação e, em seguida, prima novamente a tecla (OK) para mostrar a definição de temperatura actual. MuB_#10025808_P04880_BT-DP-RF_(GB-FR-DE-ES-PT-NL)_2012-06-21.docx 202 3 Definição do modo de funcionamento Alterar o modo de funcionamento - Abra a tampa central pequena para aceder às teclas de navegação, (◄) e (►). - Agora, pode premir estas teclas para apresentar a linha do modo de funcionamento. Mova o cursor de enquadramento para o modo de funcionamento desejado e, em seguida, prima (OK) para seleccionar o modo de funcionamento que escolheu. 3.1 Modo manual, Conforto Modo de funcionamento manual; a definição de temperatura de conforto será constantemente utilizada para o controlo. Premindo a tecla (-) ou (+) , a definição de temperatura de conforto começa a piscar e pode ser ajustada. 3.2 Modo manual, Reduzida Modo de funcionamento manual; a definição de temperatura reduzida será constantemente utilizada para o controlo. Premindo a tecla (-) ou (+) , a definição de temperatura reduzida começa a piscar e pode ser ajustada. MuB_#10025808_P04880_BT-DP-RF_(GB-FR-DE-ES-PT-NL)_2012-06-21.docx 204 3.3 Modo DESLIGAR Utilize este modo se necessitar de desligar a instalação. Tome cuidado: Neste modo, a instalação pode congelar. - Em qualquer momento, quando o ecrã estiver desligado, prima a tecla (Ok) para apresentar durante alguns segundos a temperatura e as horas actuais. - Para reiniciar a instalação, utilize as teclas de navegação, (◄) e (►). MuB_#10025808_P04880_BT-DP-RF_(GB-FR-DE-ES-PT-NL)_2012-06-21.docx 205 3.4 Modo automático Neste modo, o termostato será controlado pelo programa escolhido (incorporado ou personalizado), de acordo com as horas actuais e as definições de temperaturas de Conforto e Reduzida. Pode facilmente anular a temperatura do programa actual, até ao próximo passo do programa, alterando o valor com (-) ou (+). A indicação de definição de temperatura piscará. Será apresentado o logótipo com a mão pequena quando a função de anulação estiver activa. Se o logótipo com a mão pequena piscar, então a função ITCS está activa. MuB_#10025808_P04880_BT-DP-RF_(GB-FR-DE-ES-PT-NL)_2012-06-21.docx 206 3.5 Modo de programa Dia actual Program a de controlo Programa do dia Ao aceder ao modo Programa, a primeira operação é escolher o número de programa com a tecla (-) ou (+). Pode escolher entre um programa incorporado, P1 até P9, ou um programa de utilizador U1 até U4. MuB_#10025808_P04880_BT-DP-RF_(GB-FR-DE-ES-PT-NL)_2012-06-21.docx 207 Se escolher um programa incorporado, P1 até P9, Apenas poderá visualizar e escolher o programa. P1 P2 P3: P4: P5: P6: P7: P8: P9: Manhã, Noite e Fim-de-semana Manhã, Meio-dia, Noite e Fim-de-semana Dia e Fim-de-semana Noite e Fim-de-semana Manhã e Noite (Quarto de Banho) Manhã, Tarde e Fim-de-semana 7H – 19H (Escritório) 8H – 19H e Sábado (Oficina) Fim-de-semana (Casa secundária) (Consulte o Anexo para ver uma descrição completa do programa incorporado) - Utilize as teclas de navegação, (◄) ou (►), para alterar o dia de programa apresentado. MuB_#10025808_P04880_BT-DP-RF_(GB-FR-DE-ES-PT-NL)_2012-06-21.docx 208 - Prima a tecla (OK) para confirmar a sua escolha e regressar ao ecrã principal (no modo AUTO) Se escolher um programa de utilizador, U1 até U4, Como acima, pode escolher o programa, visualizálo, mas também personalizá-lo. Predefinição: U1, U2, U3, U4 = Conforto durante toda a semana - Prima a tecla de edição ( ) para personalizar o programa de utilizador. Símbolos e explicação da criação de programas: Primeiro passo do dia ( temp. de Conforto) É necessário ajustar a hora de despertar. MuB_#10025808_P04880_BT-DP-RF_(GB-FR-DE-ES-PT-NL)_2012-06-21.docx 209 Passo intermédio do dia ( temp. Reduzida) É necessário ajustar a hora de saída Passo intermédio do dia ( temp. de Conforto) É necessário ajustar a hora de regresso Último passo do dia ( temp. Reduzida) É necessário ajustar a hora de dormir - O passo do programa é 30 minutos - Sempre que um valor ou um ícone pisca, ser-lhe-á solicitado que faça uma escolha com as teclas (-) e (+); , MuB_#10025808_P04880_BT-DP-RF_(GB-FR-DE-ES-PT-NL)_2012-06-21.docx 210 após a escolha ser efectuada, prima a tecla (OK) para passar ao passo seguinte. - A criação de programas será sempre iniciada no dia 1 1 (Segunda-feira). Após premir a tecla ( ) , aparecerá o seguinte ecrã: Agora, é solicitado o ajuste das horas do primeiro passo do programa com (-) ou (+), MuB_#10025808_P04880_BT-DP-RF_(GB-FR-DE-ES-PT-NL)_2012-06-21.docx 211 Prima (OK) para validar e passar ao passo seguinte. Agora, é solicitada a escolha do tipo do passo seguinte do programa (ícones a piscar); estão disponíveis duas opções: - A primeira escolha é o ícone de dormir. (Fim do dia) - A segunda escolha é o ícone de saída, para adicionar um passo ao programa durante o dia. MuB_#10025808_P04880_BT-DP-RF_(GB-FR-DE-ES-PT-NL)_2012-06-21.docx 212 Após efectuar a escolha, prima (OK) para validar. Em seguida, pode ajustar a hora do passo com (-) ou (+), Quando a hora do passo estiver definida, prima (OK) para passar ao passo seguinte. Será directamente solicitado o ajuste das horas, com (-) ou (+) , do passo de regresso. MuB_#10025808_P04880_BT-DP-RF_(GB-FR-DE-ES-PT-NL)_2012-06-21.docx 213 Prima (OK) para validar e passar ao passo seguinte. Será novamente solicitada a escolha do tipo do passo seguinte do programa (ícones a piscar); estão disponíveis duas opções: - A primeira escolha são os ícones de dormir. (Fim do dia) - A segunda escolha são os ícones de saída, para adicionar outro passo ao programa durante o dia. MuB_#10025808_P04880_BT-DP-RF_(GB-FR-DE-ES-PT-NL)_2012-06-21.docx 214 Após efectuar a escolha, prima (OK) para validar. Em seguida, pode ajustar a hora deste passo com (-) ou (+). Prima (OK) para validar e terminar a edição do primeiro dia. Agora, pode optar por copiar o dia de programa que acabou de criar para os dias subsequentes. MuB_#10025808_P04880_BT-DP-RF_(GB-FR-DE-ES-PT-NL)_2012-06-21.docx 215 Altere a escolha, “Yes” (sim) ou “no” (não), com (-) ou (+) e valide a sua escolha com (OK). - Se seleccionar “no”, ser-lhe-á solicitado que crie um programa para Terça-feira (repita o método descrito anteriormente para o construir.) - Se seleccionar “Yes, terá a possibilidade de copiar o programa para o dia seguinte (para Terçafeira, Quarta-feira... até ao último dia da semana (7, Domingo). Ao premir (OK) no último dia (7, Domingo), ser-lheá solicitado que “SAVE” (guarde) o seu programa. Em seguida, aparece a mensagem “Save” e o LED verde pisca: MuB_#10025808_P04880_BT-DP-RF_(GB-FR-DE-ES-PT-NL)_2012-06-21.docx 216 Prima a tecla (OK) para guardar o seu programa e regressar ao modo de funcionamento AUTO, controlado pelo seu programa de utilizador. Prima a tecla Escape ( ) para apagar as alterações do seu programa de utilizador e regressar ao modo de funcionamento. 3.6 Modo de Férias O modo de Férias permite definir a temperatura de anti-congelamento para um número seleccionado de dias - Pode ajustar a duração no dia “d” com (-) ou (+); prima (OK) para iniciar. MuB_#10025808_P04880_BT-DP-RF_(GB-FR-DE-ES-PT-NL)_2012-06-21.docx 217 (Ajustável entre 1 até 99 dias) - A definição de temperatura de anti-congelamento é fixa e pode ser ajustada no menu de parâmetros número 06 ‘HG’; consulte o capítulo 6. (Valor predefinido 10 °C) O logótipo piscará e o número de dias restantes é apresentado até ao fim do período. Se quiser parar a função de Férias antes do fim, defina o período de duração em “no” com a tecla (-) 3.7 Modo de Temporizador O modo de Temporizador permite ajustar a temperatura e a duração para um período especial. MuB_#10025808_P04880_BT-DP-RF_(GB-FR-DE-ES-PT-NL)_2012-06-21.docx 218 Esta função pode ser utilizada se pretender ficar em casa durante vários ou quando quiser anular o programa durante algum tempo (recepção...) - Primeiro, pode ajustar a duração em horas “H” se for inferior a 24H e, em seguida, o dia “d” com (-) ou (+); prima (OK) para validar. (Ajustável entre 1 Hora até 99 dias) - Seguidamente, pode ajustar a definição de temperatura desejada com (-) ou (+); prima (OK) para iniciar a função. (Valor predefinido 22 °C) O logótipo piscará e o número de horas/dias restantes é apresentado até ao fim do período. Se quiser parar a função de Temporizador antes do fim, defina o período de duração em “no” com a tecla (-). MuB_#10025808_P04880_BT-DP-RF_(GB-FR-DE-ES-PT-NL)_2012-06-21.docx 219 4 Função especial 4.1 Função de bloqueio do teclado Utilize esta função para evitar qualquer alteração das suas definições (Num quarto de criança, numa área pública…) - Para activar a função de bloqueio do teclado, primeiro prima e mantenha premida a tecla Escape ( ) e, em seguida, prima simultaneamente a tecla de edição ( ). - O logótipo “ ” será apresentado no ecrã. - Repita o mesmo procedimento para desbloquear o teclado. 4.2 Informação Com esta função pode visualizar rapidamente todas as temperaturas actuais nos sensores ligados ao termostato (sensor de chão, externo ou exterior), MuB_#10025808_P04880_BT-DP-RF_(GB-FR-DE-ES-PT-NL)_2012-06-21.docx 220 premindo várias vezes a tecla Escape ( ).Esta “função de Deslocamento” apenas está disponível no ecrã principal. Pode visualizar: - A definição de temperatura actual para controlo do termostato. - A temperatura ambiente - Se estiver ligado um sensor externo: A temperatura do chão, se for utilizado como um sensor de chão. A temperatura exterior, se for utilizado como um sensor exterior. Se o parâmetro “SenS” estiver definido em “Air”, o sensor externo será utilizado como um sensor de temperatura exterior MuB_#10025808_P04880_BT-DP-RF_(GB-FR-DE-ES-PT-NL)_2012-06-21.docx 221 5 Menu de parâmetros O termostato tem um menu de parâmetros; para permite aceder a este menu, prima e mantenha premida a tecla de edição ( ) durante 5 s. Em seguida, aparecerá o menu de parâmetros, sendo apresentado o ecrã do primeiro parâmetro: Agora, pode seleccionar um parâmetro para ajuste com as teclas de navegação, (◄) ou (►), comutar o valor com a tecla (OK), modificá-lo com (-) ou (+) e confirmar o seu ajuste com (OK). Para sair do menu de parâmetros, escolha o parâmetro « End » (fim) e prima (OK). MuB_#10025808_P04880_BT-DP-RF_(GB-FR-DE-ES-PT-NL)_2012-06-21.docx 222 N.° Valor predefinido e outras possibilidades 00 RF INI: Configuração de rádio Envia o sinal de ligação de rádio para atribuir este Termostato de RF ao respectivo receptor de RF. Simultaneamente, também é necessário seleccionar o modo de configuração de rádio no receptor (num receptor simples, prima e mantenha premido o botão até que a luz verde fique acesa; consulte o folheto do receptor) dEG: Unidades das temperaturas apresentadas °C Celsius °F Fahrenheit __:__ Selecção das unidades do Relógio 24H (24:00) 12H (12:00) dst: Mudança de hora de Verão<->Inverno YES (sim), alteração automática de acordo com a data. no (não), sem mudança automática da hora de Verão. AirC: Calibragem do sensor interno A calibragem tem que ser efectuada após um dia de funcionamento com a mesma definição de 01 02 03 04 MuB_#10025808_P04880_BT-DP-RF_(GB-FR-DE-ES-PT-NL)_2012-06-21.docx 223 05 temperatura e de acordo com a seguinte descrição: Coloque um termómetro no espaço interior a 1,5 m de distância do chão (como o termostato) e verifique a temperatura real do espaço interior após uma hora. Quando aceder ao parâmetro de calibragem, será apresentado “no” à direita para indicar que não foi efectuada qualquer calibragem. Para introduzir o valor apresentado no termómetro, utilize as teclas (-) e (+) para introduzir o valor real. Em seguida, prima (Ok) para confirmar. Deverá aparecer a mensagem “Yes” (sim); o valor será armazenado na memória interna. Se necessitar de apagar uma calibragem, prima a tecla Escape ( ). O valor antigo será apagado, sendo apresentada a mensagem “no” (não). * Preste atenção: Apenas deve ser utilizado o elemento controlado pelo termostato para efectuar a calibragem. OutC , AMbC , FlrC: Calibragem do sensor externo com fios O mesmo método de calibragem que foi descrito no parâmetro “04 AirC” acima. MuB_#10025808_P04880_BT-DP-RF_(GB-FR-DE-ES-PT-NL)_2012-06-21.docx 224 06 HG: Temperatura de anti-congelação utilizada no modo Férias Valor predefinido 10 °C. Utilize as teclas (-) e (+) para alterar a definição de temperatura de anti-congelação. Em seguida, prima (Ok) para confirmar. 07 ITCS: YES (sim), no (não) O Sistema Inteligente de Controlo de Temperatura activará antecipadamente a instalação (duas horas no máximo), de modo a assegurar a temperatura desejada na hora programada conforme o programa semanal. Este sistema de controlo automático funciona da seguinte forma: Ao iniciar o termostato pela primeira vez, o mesmo medirá o tempo necessário para que a instalação atinja a temperatura definida. O termostato voltará a medir este tempo cada vez que o programa for alterado para compensar a alteração e a influência da variação de temperatura externa. Agora, pode programar o termostato sem necessidade de ajustar antecipadamente a temperatura porque o termostato faz isto automaticamente. MuB_#10025808_P04880_BT-DP-RF_(GB-FR-DE-ES-PT-NL)_2012-06-21.docx 225 08 09 10 Clr ALL: Repor definições de fábrica Prima e mantenha premida a tecla (Ok) durante 10 s para repor as definições de temperaturas e de parâmetros do utilizador neste menu com os valores predefinidos de fábrica. Os programas do utilizador também serão repostos. * Preste atenção: Certifique-se de que possui todos os elementos necessários para voltar a configurar a sua instalação antes de utilizar esta função. Versão de software VErS ___ End (fim): Sair do menu de parâmetros Prima (OK) para sair do menu de parâmetros da instalação e regressar ao funcionamento normal. MuB_#10025808_P04880_BT-DP-RF_(GB-FR-DE-ES-PT-NL)_2012-06-21.docx 226 6 Características técnicas Ambientais: Temperatura de funcionamento: Temperatura de transporte e de armazenamento: Protecção Eléctrica Categoria de Instalação Nível de Poluição Precisão de temperatura medida Intervalo de definição de temperaturas Conforto, Reduzida Férias (Anti-congelação) Temporizador Características de regulação Fonte de Alimentação Vida útil 0 até 40 °C -10 até +50 °C IP30 Classe II 2 0,1 °C 5 até 35 °C, em passos de 0,5 °C 10 °C (ajustável) 5 até 35 °C Banda Proporcional (PWM 2 °C para um ciclo de 10 min) ou Histerese de 0,5 °C 2 AAA LR03 1,5 V Alcalinas ~2 anos Elementos sensores: Interno e Externo (opção) Frequência de Rádio Versão de software Normas e homologação: O termostato foi concebido em conformidade com as seguintes normas e outros documentos normativos: NTC 10k a 25 °C 868 MHz, <10 mW. Apresentado no menu de parâmetros. Vers xxx EN 60730-1: 2003 EN 61000-6-1: 2002 EN 61000-6-3: 2004 EN 61000-4-2: 2001 EN300220-1/2 EN301489-1/3 R&TTE 1999/5/EC Baixa tensão 2006/95/CE EMC 2004/108/CE MuB_#10025808_P04880_BT-DP-RF_(GB-FR-DE-ES-PT-NL)_2012-06-21.docx 228 7 Resolução de Problemas O BT DP-01 não começa a funcionar - Verifique se o autocolante de protecção das pilhas foi removido. Problema de pilhas - Verifique a orientação das pilhas. - Verifique a capacidade das pilhas O LED do BT DP-01 está a piscar a vermelho O logótipo pisca (sensor ambiente) - Contacte o seu instalador ou vendedor. Problema nos sensores O logótipo pisca (sensor de chão) - Verifique a ligação do sensor. - Desligue o sensor e verifique a resistência com um multímetro (o valor deve ser próximo de 10 kohms) MuB_#10025808_P04880_BT-DP-RF_(GB-FR-DE-ES-PT-NL)_2012-06-21.docx 229 As pilhas estão fracas O logótipo pisca (Pilhas) - Substitua as pilhas. O BT DP-01 parece funcionar correctamente, mas o aquecimento não funciona correctamente No receptor: - verifique se a recepção do sinal de RF é boa Saída - Verifique as ligações. - Verifique a fonte de alimentação do elemento de aquecimento. - Contacte o seu instalador. - Verifique os seguintes pontos: - O receptor deve ser colocado a uma distância mínima de 50 cm em relação a quaisquer outros RF equipamentos eléctricos ou sem comunicação fios (GSM, Wi-Fi…) - O receptor não deve ser fixo a uma peça metálica nem demasiado perto de tubos hidráulicos… (Cobre…) MuB_#10025808_P04880_BT-DP-RF_(GB-FR-DE-ES-PT-NL)_2012-06-21.docx 230 O BT DP-01 parece funcionar correctamente, mas a temperatura no espaço anterior não está acordo com o valor do programa. - Verifique o relógio. - A diferença entre a temperatura de Conforto e a Reduzida é demasiado elevada? - O passo no programa é Programa demasiado pequeno? - Contacte o seu instalador para verificar e ajustar os parâmetros de regulação do seu sistema de aquecimento. MuB_#10025808_P04880_BT-DP-RF_(GB-FR-DE-ES-PT-NL)_2012-06-21.docx 231 Belangrijk! Alvorens met de montage begonnen wordt, dient men de handleiding goed te lezen en te begrijpen. Dit om een goed functioneren van het product te garanderen - De thermostaat dient gemonteerd te worden door een gekwalificeerd persoon. Indien het bovenstaande in acht genomen wordt, kan de fabrikant de geldende garantiebepalingen waarborgen. - Alle instructies in dit document dienen gevolgd te worden bij de installatie en het gebruik van de thermostaat. Bij afwijken hiervan of bij onoordeelkundig gebruik, zal de fabrikant iedere aansprakelijkheid afwijzen. Voor uw eigen veiligheid is het belangrijk om geen aanpassingen aan het product te doen . - De functionaliteit van het product is afhankelijk van het type en de toepassing in de installatie. Dit document is onderdeel van het product en dient als zodanig bewaard te worden. MuB_#10025808_P04880_BT-DP-RF_(GB-FR-DE-ES-PT-NL)_2012-06-21.docx 232 TOEPASSING - De “BT” serie thermostaten is ontwikkeld om ieder type verwarmingssysteem te kunnen regelen. - De regelaars zijn ontwikkeld om toe te passen in een woonhuis, kantoor of voor industrieel gebruik. Controleer of de installatie voldoet aan de geldende regelgeving om uzelf te verzekeren van een goede werking. VOOR UW VEILIGHEID Voordat u met de montage begint, verzeker u ervan dat de installatie spanningsloos is. - Alle werkzaamheden die uitgevoerd worden mbt de montage van de thermostaat, moeten worden uitgevoerd met de verwarming uitgeschakeld. Alleen gekwalificeerd personeel mag de installatie uitvoeren. Volg de geldende veiligheidsvoorschriften. - Montage van de thermostaat dient in een droge ruimte te gebeuren. De thermostaat is niet (spat)waterdicht. - Let op de correcte aansluiting van de 230V voeding en de evt externe sensor; verwissel deze niet! Schade aan de installatie of personen kan het gevolg zijn. MuB_#10025808_P04880_BT-DP-RF_(GB-FR-DE-ES-PT-NL)_2012-06-21.docx 233 Inhoudsopgave 1 1.1 1.2 2 2.1 2.2 2.3 2.4 3 3.1 3.2 3.3 3.4 3.5 3.6 3.7 4 4.1 4.2 5 6 7 Introductie .................................................... 235 Toetsen ........................................................ 237 Display & LED .............................................. 238 Eerste montage ............................................ 241 Plaatsen van de batterijen............................ 241 Instellen Tijd en Datum ................................ 241 RF initialisatie............................................... 243 Start ............................................................. 245 Omschrijving menu’s .................................... 247 Handbediening Comfort .............................. 248 Handbediening, verlaagd ............................ 248 UIT modus .................................................. 248 Automatische modus ................................... 249 Programma modus ..................................... 250 Vakantie modus ........................................... 261 Timer modus ............................................... 262 Speciale functie............................................ 263 Toetsen vergrendeling ................................ 263 Informatie ..................................................... 263 Parameters menu ........................................ 265 Technische specificaties .............................. 269 Probleem & Oplossing ................................. 271 MuB_#10025808_P04880_BT-DP-RF_(GB-FR-DE-ES-PT-NL)_2012-06-21.docx 234 1 Introductie + - - + Electronische programmeerbare thermostaat met LCD display. MuB_#10025808_P04880_BT-DP-RF_(GB-FR-DE-ES-PT-NL)_2012-06-21.docx 235 De beste keus als het gaat om energiebesparen en optimaal comfort genieten. - Modern design met soft touch materiaal. Eenvoudige aansluiting en montage. “Easy program creation” functie. Week programma per 30min in te geven. Handmatige onderbreking van programma mogelijk. Anti vries functie. Vakantie programmering mogelijk. EEPROM geheugen (batterij onafhankelijk). 2 AAA batterijen (ca 2 jaar levensduur). 2 draads uitgang voor een universele toepasbaarheid. 2 parameter menu’s (gebruiker en installateur). Optioneel - Externe sensor voor een uitbreiding van de regelmogelijkheden (vloer, gecombineerd…). MuB_#10025808_P04880_BT-DP-RF_(GB-FR-DE-ES-PT-NL)_2012-06-21.docx 236 1.1 Toetsen Min toets (-) Plus toets (+) Bevestigen toets(OK) Status LED Links toets (◄) Rechts toets (►) Escape toets ( ) Edit toets ( ) MuB_#10025808_P04880_BT-DP-RF_(GB-FR-DE-ES-PT-NL)_2012-06-21.docx 237 1.2 15 14 Display & LED Rood Continu (bij verlicht display): Warmte vraag Green knipperend: Uw bevestiging wordt gevraagd Rood knipperend : Fout in sensor of batterijen leeg 1 2 3 4 5 6 7 8 9 13 12 11 10 MuB_#10025808_P04880_BT-DP-RF_(GB-FR-DE-ES-PT-NL)_2012-06-21.docx 238 1. 2. 3. Dag van de week Aanduiding menu (actieve menu omkaderd). Programma nummer of parameter nummer als “4” wordt weergegeven. Installatie Parameter menu. RF signaal verstuurd Type sensor en weergegeven temperatuur. 4. 5. 6. Regeling => Interne of externe ruimte sensor. Regeling => Vloer sensor. Regeling => Interne sensor met limitering Vloer. Buiten temperatuur 7. 8. 9. 10. Indicator warmte vraag. Indicator batterijen leeg °C of °F indicator Gevraagde of gemeten temperatuur als “5” is weergegeven. Parameter waarde als “4” is weergegeven. MuB_#10025808_P04880_BT-DP-RF_(GB-FR-DE-ES-PT-NL)_2012-06-21.docx 239 11. Handmatige onderbreking van programma ingeschakeld , of “ITCS* ” in functie indien knipperend. 12. Tijd of parameter titel als “4” is weergegeven. 13. Programma van vandaag (de corresponderende tijd knippert) 14. Pictogram voor het aanmaken van een programma. Programma status (tijdstip) in normaal bedrijf. 15. Toets vergrendeling indicator * Voor meer uitleg: zie pag. 228 MuB_#10025808_P04880_BT-DP-RF_(GB-FR-DE-ES-PT-NL)_2012-06-21.docx 240 2 Eerste montage Dit hoofdstuk helpt u bij het in gebruik nemen van de thermostaat. 2.1 Plaatsen van de batterijen - Open de klepjes aan beide zijkanten en plaats de meegeleverde 2 AAA Alkaline batterijen (of verwijder de plastic strip indien de batterijen al geplaatst zijn in de fabriek) - Sluit de klepjes. - De thermostaat vraagt u om de datum en tijd in te stellen. 2.2 Instellen Tijd en Datum Wanneer een waarde knippert, kan deze ingesteld worden met de (-) en (+) toetsen. Indien de waarde gekozen is, bevestigt u deze met de (OK) toets. De thermostaat zal automatisch naar de volgende waarde verspringen. MuB_#10025808_P04880_BT-DP-RF_(GB-FR-DE-ES-PT-NL)_2012-06-21.docx 241 Noot: u kunt altijd terug naar de vorige waarde door op ( ) te drukken. Volgorde van instelling: Tijd en dag: Instellen uren Instellen minuten Instellen dag (1 = Maandag) Datum: Instellen dag nummer Instellen maand nummer (01 to 12) Instellen eeuw Instellen jaar Hierna geeft de display “Save” en de groene LED knippert, druk (OK) om de ingegeven waarden te bevestigen. U kunt de instellingen van dag en tijd altijd aanpassen door de ( ) toets 2 seconden ingedrukt te houden. MuB_#10025808_P04880_BT-DP-RF_(GB-FR-DE-ES-PT-NL)_2012-06-21.docx 242 2.3 RF initialisatie - Om de thermpostaat te kunnen initialiseren (inlezen) op de ontvanger, dient de ontvanger op « RF init » gezet te worden(zie de handleiding van de ontvanger) - Hierna houdt u de Edit toets ( ) van de thermostaat ca 10s ingedrukt. In de display ziet u De thermostaat stuurt vervolgens het radiosignaal naar de ontvanger. - Bij een correcte ontvangst zal een groen knipperende LED op de ontvanger te zien zijn. Nu drukt u ( ) om terug te gaan naar het normale scherm. MuB_#10025808_P04880_BT-DP-RF_(GB-FR-DE-ES-PT-NL)_2012-06-21.docx 243 - U kunt nu het bereik testen door de thermostaat naar de ruimte te brengen die geregeld moet worden. Zet met de pijltjestoets het vierkante kader om het zonnetje en stel vervolgens de temperatuur in op 37°C). Doe de tussendeur(en) dicht en ga naar de ontvanger. Deze moet op verwarmen staan (rood brandende LED). - Ga terug naar de thermostaat en zet deze uit (vierkantje om het aan/uit symbool). Controleer of de rode LED op de ontvanger uit is. o o Indien dit allemaal werkt, zet u de thermostaat aan en stelt u de gewenste temperatuur in. Indien eea niet correct werkt, controleer dan of de afstand wellicht te groot is * Het is aan te bevelen om het inlezen van de thermostaat dicht bij de ontvanger te doen (afstand minimaal 1meter) MuB_#10025808_P04880_BT-DP-RF_(GB-FR-DE-ES-PT-NL)_2012-06-21.docx 244 2.4 Start De thermostaat is nu klaar voor gebruik. De af fabriek instelling is programma “P1”. met een standaard Maandag tot Vrijdag 20°C 18°C 07:00 09:00 17:00 23:00 Zaterdag & Zondag 20°C 18°C 08:00 23:00 MuB_#10025808_P04880_BT-DP-RF_(GB-FR-DE-ES-PT-NL)_2012-06-21.docx 245 Noot: U kunt uw programma naar eigen keuze aanpassen. Zie het volgende hoofdstuk “Omschrijving menu’s” paragraaf “Programma” voor meer uitleg. Actuele Programma Stadium in het programma Actuele Tijdstip Door op (OK) te drukken, zal het display oplichten. Door nogmaals op (OK) te drukken, zal de ingestelde temperatuur weergegeven worden. MuB_#10025808_P04880_BT-DP-RF_(GB-FR-DE-ES-PT-NL)_2012-06-21.docx 246 3 Omschrijving menu’s Hoe kunt u het menu kiezen? - Open het vierkante deksel onder de OK toets (leg uw vinger op de “puntjes” en beweeg omlaag). U kunt nu bij de toetsen (◄) en (►). - Door op deze toetsen te drukken kunt u de menubalk bovenin het display oproepen. Ga met de (◄) en (►) naar de gewenste modus en druk (OK) om deze te selecteren. MuB_#10025808_P04880_BT-DP-RF_(GB-FR-DE-ES-PT-NL)_2012-06-21.docx 247 3.1 Handbediening Comfort De thermostaat handhaaft de door u ingestelde temperatuur. Door op (-) of (+) te drukken, zal de ingestelde waarde knipperen en kunt u deze aanpassen. 3.2 Handbediening, verlaagd De thermostaat handhaaft de door u ingestelde verlaagde temperatuur. Door op (-) of (+) te drukken, zal de ingestelde waarde knipperen en kunt u deze aanpassen. 3.3 UIT modus Hiermee schakelt u de installatie uit. Pas op: Uw installatie kan bevriezen. MuB_#10025808_P04880_BT-DP-RF_(GB-FR-DE-ES-PT-NL)_2012-06-21.docx 248 - Door op (Ok) te drukken, zal ook bij uitgeschakeld display enkele seconden de actuele tijd en temperatuur weergegeven worden. - Om de thermostaat (en daarmee de installatie) weer aan te zetten, drukt u (◄) of (►). 3.4 Automatische modus In deze modus zal de thermostaat het geselecteerde programma (standaard of door u aangemaakt) volgen als functie van dag en tijd. U kunt het programma handmatig onderbreken (tot het volgende schakelmoment) door (-) of (+) te drukken. De ingestelde temperatuur knippert dan. Het logo zal oplichten om aan te geven dat het programma is onderbroken. Indien logo knippert, gaat ITCS* door. * Voor meer uitleg: zie pag. 228 MuB_#10025808_P04880_BT-DP-RF_(GB-FR-DE-ES-PT-NL)_2012-06-21.docx 249 3.5 Programma modus Programma Huidige dag Programma van de dag In de Programma modus kiest u eerst het te volgen programma nummer met (-) of (+). U kunt kiezen uit af-fabriek programma’s P1 tot P9 of een aan te maken programma U1 tot U4. MuB_#10025808_P04880_BT-DP-RF_(GB-FR-DE-ES-PT-NL)_2012-06-21.docx 250 Af fabriek programma P1 tot P9, . P1: P2: P3: P4: P5: P6: P7: P8: P9: ochtend,avond en weekend ochtend, middag, avond en weekend overdag & weekend avond & weekend ochtend, avond (Badkamer) ochtend, middag & weekend 7H – 19H (Kantoor) 8H – 19H & zaterdag (Winkel) Weekend (2e huis) Zie het hoofdstuk Annexes (achter de Franse beschrijving) om een complete weergave van de P programma’s te zien. - Met de (◄) of (►) kunt u de dagen van het programma doorlopen. - Druk (OK) om uw keuze te bevestigen en terug te gaan naar het hoofd menu (in AUTO modus) MuB_#10025808_P04880_BT-DP-RF_(GB-FR-DE-ES-PT-NL)_2012-06-21.docx 251 Indien u kiest voor U1 tot U4, Zoals hiervoor beschreven, kunt u een programma kiezen en bekijken. U kunt de U programma’s ook naar eigen wens aanpassen. Af fabriek instelling: U1, U2, U3, U4 = Comfort de hele week - Druk ( ) om een programma aan te maken. Symbolen en uitleg : Begin van de dag ( Comfort temp.) Het tijdstip van opstaan dient ingesteld te worden. Midden deel van de dag ( Verlaagde temp.) Tijdstip van weggaan dient ingesteld te worden. MuB_#10025808_P04880_BT-DP-RF_(GB-FR-DE-ES-PT-NL)_2012-06-21.docx 252 Midden deel van de dag ( Comfort temp.) Tijdstip van terugkomst dient ingesteld te worden. Laatste dagdeel ( Verlaagde temp.) Tijd van naar bed gaan dient ingesteld te worden. - Programmeren kan per 30 minuten - Indien een waarde of icoon knippert, kunt u een keuze maken met (-) of (+) U bevestigd uw keuze met (OK) en gaat naar de volgende stap. - Het aanmaken van een programma begint altijd met dag 1 (Maandag). Nadat u ( ) heeft gedrukt, verschijnt het volgende display: MuB_#10025808_P04880_BT-DP-RF_(GB-FR-DE-ES-PT-NL)_2012-06-21.docx 253 Nu kunt u het eerste tijdstip van uw programma instellen met (-) of (+), Druk (OK) om te bevestigen en naar de volgende stap te gaan. MuB_#10025808_P04880_BT-DP-RF_(GB-FR-DE-ES-PT-NL)_2012-06-21.docx 254 Nu kunt u kiezen wat de volgende stap in het programma moet worden(knipperend icoon), U heeft 2 mogelijkheden: - 1e is het slapen icoon. (Eind van de dag) - 2e is het weggaan icoon, om een extra stap in het dagprogramma te maken. Bevestig uw keus met (OK). Nu kunt u het tijdstip van de gekozen stap aanpassen met (-) of (+), MuB_#10025808_P04880_BT-DP-RF_(GB-FR-DE-ES-PT-NL)_2012-06-21.docx 255 Bevestig het tijdstip met (OK) om naar de volgende stap te gaan. U wordt nu gevraagd om het tijdstip van terugkeer aan te geven met (-) of (+) . Druk (OK) ter bevestiging en ga naar de volgende stap. MuB_#10025808_P04880_BT-DP-RF_(GB-FR-DE-ES-PT-NL)_2012-06-21.docx 256 U wordt nu weer gevraagd om een keuze te maken in het type van de volgende stap (knipperend icoon), U heeft 2 mogelijkheden: - 1e is het slapen icoon. (Eind van de dag) - 2e is het weggaan icoon, om een extra stap in het dagprogramma te maken. Bevestig uw keus met (OK). Nu kunt u het tijdstip van de gekozen stap aanpassen met (-) of (+). MuB_#10025808_P04880_BT-DP-RF_(GB-FR-DE-ES-PT-NL)_2012-06-21.docx 257 Druk (OK) ter bevestiging en om de aanpassing van de 1e dag af te sluiten. U heeft nu de keuze om evt de 1e dag te kopiëren naar de volgende dagen. Verander “Yes” of “no” met (-) of (+) en bevestig met (OK). MuB_#10025808_P04880_BT-DP-RF_(GB-FR-DE-ES-PT-NL)_2012-06-21.docx 258 - Indien u “no” kiest, wordt u gevraagd om een programma voor Dinsdag te maken(herhaal de stappen hiervoor beschreven) - Indien u “Yes” kiest, kunt u het aangemaakte programma kopieren naar de volgende dag ( Dinsdag naar Woensdag... naar de laatste dag van de week 7= Zondag). Wanneer u (OK) drukt op Zondag, krijgt u de vraag om uw programma op te slaan. “Save” en een groen knipperende LED verschijnen: Druk (OK) om uw programma op te slaan en naar AUTO modus te gaan. Uw aangemaakte programma zal nu gevolgd worden. MuB_#10025808_P04880_BT-DP-RF_(GB-FR-DE-ES-PT-NL)_2012-06-21.docx 259 Druk ( ) als u uw aanpassingen wilt wissen. U komt hierna weer terug in het hoofdmenu. MuB_#10025808_P04880_BT-DP-RF_(GB-FR-DE-ES-PT-NL)_2012-06-21.docx 260 3.6 Vakantie modus In dit menu kunt u de Vorstbeveiliging temperatuur instellen voor een aantal (in te geven) dagen. - U kunt de duur van afwezigheid instellen per dag “d” met (-) of (+). Bevestig uw keuze met (OK) om dit programma te starten. (Instelbaar 1 tot 99 dagen) - De Vorstbeveiliging temperatuur is af fabriek 10°C. U kunt dit aanpassen in het parameter menu nummer 06 ‘HG’ (zie hoofdstuk 6). Het logo zal oplichten en het resterende aantal dagen zal aangegeven worden. Indien u het vakantie programma eerder wilt beëindigen, stelt u met de (-) toets het resterend aantal dagen naar “no”. MuB_#10025808_P04880_BT-DP-RF_(GB-FR-DE-ES-PT-NL)_2012-06-21.docx 261 3.7 Timer modus De Timer modus biedt de mogelijkheid om de temperatuur voor een bepaalde tijd vast te zetten U kunt hiervan gebruik maken indien u een aantal dagen thuis bent of juist weg bent. (afwijkend van het eventuele programma). - U kunt hier een aantal uren “H” (indien korter dan 24), of dagen “d” instellen met (-) of (+). Met (OK) bevestigd u uw keuze (instelbaar van 1 uur tot 99 dagen). - Daarna stelt u de gewenste temperatuur in met (-) of (+) (Af fabriek 22°C). Door (OK) te drukken zal de timer functie starten. Het logo zal verschijnen en het resterende aantal uren/dagen zal aangegeven worden. Indien u voortijdig de timer functie wilt stoppen, stelt u met (-) de tijdsduur naar “no”. MuB_#10025808_P04880_BT-DP-RF_(GB-FR-DE-ES-PT-NL)_2012-06-21.docx 262 4 Speciale functie 4.1 Toetsen vergrendeling Met deze functie voorkomt u wijzigingen aan uw instellingen door anderen. - Om deze functie te activeren houdt u ( ) ingedrukt en drukt u gelijktijdig op ( ). - Het “ ” logo zal verschijnen. - Op dezelfde wijze beëindigt u de toetsblokkering weer. 4.2 Informatie Met deze functie kunt u alle gemeten temperaturen uitlezen. Ook van de aan uw thermostaat verbonden sensoren (optioneel). Met de ( ) toets kunt u langs de verschillende temperaturen “scrollen”. MuB_#10025808_P04880_BT-DP-RF_(GB-FR-DE-ES-PT-NL)_2012-06-21.docx 263 U kunt de onderstaande waarden bekijken: - Ingestelde temperatuur. - Ruimte temperatuur - Indien een externe sensor is gemonteerd : De vloertemperatuur (indien als zodanig gebruikt). De buitentemperatuur (indien als zodanig gebruikt). Indien de parameter “SenS” is ingesteld als “Air”, zal de externe sensor de buitentemperatuur kunnen weergeven. MuB_#10025808_P04880_BT-DP-RF_(GB-FR-DE-ES-PT-NL)_2012-06-21.docx 264 5 Parameters menu In dit menu kunt u specifiek voor uw installatie/wensen instellingen aanpassen. Door ( ) 5sec ingedrukt te houden komt u in dit menu. De eerste parameter verschijnt: Met (◄) of (►) gaat u naar de in te stellen parameter. Door (OK) te drukken kunt u met (-) of (+) de parameter aanpassen. Met (OK) bevestigt u de aanpassing. Om het parameter menu te verlaten gaat u met (◄) of (►) naar « End » en drukt u (OK). MuB_#10025808_P04880_BT-DP-RF_(GB-FR-DE-ES-PT-NL)_2012-06-21.docx 265 N° Af fabriek instelling & alternatieven 00 RF INI: Radio configuratie In dit menu kunt u de thermostaat inlezen op de bijbehorende ontvanger. Zie ook de handleiding van de ontvanger dEG: Eenheid van de temperatuur °C Celsius °F Fahrenheit __:__ Tijds aanduiding 24H (24:00) 12H (12:00 AM /PM) dst: Automatische aanpassing zomertijd YES thermostaat past zich vanzelf aan. no omschakeling dient handmatig te gebeuren. AirC: Calibreren interne sensor U kunt de sensor calibreren nadat de thermostaat minimaal 1dag op dezelfde temperatuur ingesteld is geweest. Plaats een thermometer op 1.5M boven de vloer (net als de thermostaat) en controleer na 1 uur de waarde. Af fabriek staat de waarde op “no” . Met (-) of (+) kunt u de waarde die de thermometer 01 02 03 04 MuB_#10025808_P04880_BT-DP-RF_(GB-FR-DE-ES-PT-NL)_2012-06-21.docx 266 05 06 07 aangeeft in de thermostaat invoeren. Met (OK) legt u deze waarde vast. Nu verschijnt “Yes” om aan te geven dat uw aanpassing is opgeslagen. Om de opgeslagen waarde te wissen, drukt u ( ). Als bevestiging van het wissen verschijnt “no” op de display. * Attentie: Tijdens het calibreren mag alleen het toestel wat aangestuurd wordt door de thermostaat als warmtebron ingeschakeld zijn. OutC , AMbC , FlrC: Calibreren van de externe sensor Zie de beschrijving hiervoor. Igv van de vloersensor, legt u de thermometer op de grond. HG: Vorstbeveiliging temperatuur die aangehouden wordt in de vakantie modus. Af fabriek 10°C. Met (-) of (+)kunt u de temperatuur aanpassen. Met (OK) bevestigd u uw keuze. ITCS: YES, no Het Intelligent Temperature Control System zal uw installatie opstarten om de door u ingestelde temperatuur op het door u geprogrammeerde tijdstip te bereiken (max. 2 uur van tevoren). MuB_#10025808_P04880_BT-DP-RF_(GB-FR-DE-ES-PT-NL)_2012-06-21.docx 267 08 09 10 ITCS werkt als volgt: Wanneer u uw thermostaat voor het eerst opstart, zal de tijd gemeten worden die nodig is om de ingestelde temperatuur te realiseren. Iedere wijziging in het programma zal deze tijd gemeten worden om externe invloeden te compenseren. Hierdoor kunt u bij het programmeren de werkelijke tijden van temperatuurwisselingen programmeren. De thermostaat berekent zelf hoe lang hij hiervoor nodig heeft en zal tijdig aangaan om uw comfort te waarborgen. Clr ALL: Reset naar fabrieksinstellingen Houd (OK) 10s ingedrukt om alle parameters terug te zetten naar de fabrieksinstellingen (onderstreept in de tabel). Evt aangemaakte programma’s worden ook verwijderd! * Attentie: Verzeker u ervan dat u wel de nodige informatie hebt om de thermostaat weer correct op te starten alvorens deze reset uit te voeren. Software versie VErS ___ End: Druk (OK) om het parameter menu te verlaten en terug te gaan naar normaal bedrijf. MuB_#10025808_P04880_BT-DP-RF_(GB-FR-DE-ES-PT-NL)_2012-06-21.docx 268 6 Technische specificaties Nauwkeurigheid gemeten temperatuur Omgeving: Werktemperatuur: Temperatuur tijdens transport en opslag: Instelbare temperatuur Comfort, Verlaagd Vakantie (Vorstbeveiliging) Timer Regel karakteristiek 0.1°C 0°C - 40°C -10°C to +50°C 5°C tot 35°C per 0,5°C 10°C (instelbaar) 5°C tot 35°C Proportionele Band (PWM 2°C voor 10min cyclus) of Hysteresis van 0.5°C Elektrische Bescherming Klasse II - IP30 Voeding Levensduur Radio Frequentie 2 AAA LR03 1.5V Alkaline ca. 2 jaar 868 MHz, <10mW. MuB_#10025808_P04880_BT-DP-RF_(GB-FR-DE-ES-PT-NL)_2012-06-21.docx 269 Optionele Externe sensor Software versie Normen en homologaties: Dit product is ontworpen conform de volgende standaards en normatieve documenten: 10k ohm bij 25°C Weergegeven in het parametermenu bij 09. EN 60730-1 : 2003 EN 61000-6-1 : 2002 EN 61000-6-3 : 2004 EN 61000-4-2 : 2001 EN300220-1/2 EN301489-1/3 R&TTE 1999/5/EC Laag spanning 2006/95/CE EMC 2004/108/CE MuB_#10025808_P04880_BT-DP-RF_(GB-FR-DE-ES-PT-NL)_2012-06-21.docx 270 7 Probleem & Oplossing Het display is” leeg” Batterij Probleem - Controleer of de isoleerstrip tussen batterij en thermostaat is verwijderd . - Controleer de positie van + en – van de batterij (juiste plaatsing). - Meet de batterij capaciteit De Led knippert rood logo knippert (interne sensor) - Neem contact op met de installateur. Sensor Probleem Batterijen zijn bijna leeg logo knippert (Vloer sensor) - Controleer de aansluitingen . - Meet de sensor door met een ohmmeter (waarde dient ca 10kohms te zijn) knippert - Vervang de batterijen. MuB_#10025808_P04880_BT-DP-RF_(GB-FR-DE-ES-PT-NL)_2012-06-21.docx 271 Thermostaat lijkt te werken, maar het wordt niet warm Uitgang RF communicatie Op de ontvanger: - controleer of het RF signaal aankomt - Controleer de aansluiting naar de ketel. - Controleer de voeding van de ketel. - Neem contact op met de installateur. - Controleer : - De ontvanger moet minstens 50 cm van andere draadloze apparatuur geplaatst worden om storingen te voorkomen. - De ontvanger mag niet op een metalen ondergrond gemonteerd worden of in de buurt van metalen leidingen. MuB_#10025808_P04880_BT-DP-RF_(GB-FR-DE-ES-PT-NL)_2012-06-21.docx 272 Thermostaat lijkt te werken maar de temperatuur klopt niet met het ingegeven programma. - Controleer de instelling van de klok. - Is het verschil tussen Comfort & Verlaagde temperatuur te groot? - Zijn de stappen in het programma te Programma kort na elkaar? - Neem contact op met de installateur om de parameters en hun instellingen te laten afstemmen op uw verwarmingssysteem. MuB_#10025808_P04880_BT-DP-RF_(GB-FR-DE-ES-PT-NL)_2012-06-21.docx 273 Annexes (Built-in Program description) P1: 1 0 1 2 3 4 5 6 7 8 9 10 111213141516 17 1819 20212223 2 0 1 2 3 4 5 6 7 8 9 10 111213141516 17 1819 20212223 3 0 1 2 3 4 5 6 7 8 9 10 111213141516 17 1819 20212223 4 0 1 2 3 4 5 6 7 8 9 10 111213141516 17 1819 20212223 5 0 1 2 3 4 5 6 7 8 9 10 111213141516 17 1819 20212223 6 0 1 2 3 4 5 6 7 8 9 10 111213141516 17 1819 20212223 7 0 1 2 3 4 5 6 7 8 9 10 111213141516 17 1819 20212223 MuB_#10025808_P04880_BT-DP-RF_(GB-FR-DE-ES-PT-NL)_2012-06-21.docx 274 P2: 1 0 1 2 3 4 5 6 7 8 9 10 111213141516 17 1819 20212223 2 0 1 2 3 4 5 6 7 8 9 10 111213141516 17 1819 20212223 3 0 1 2 3 4 5 6 7 8 9 10 111213141516 17 1819 20212223 4 0 1 2 3 4 5 6 7 8 9 10 111213141516 17 1819 20212223 5 0 1 2 3 4 5 6 7 8 9 10 111213141516 17 1819 20212223 6 0 1 2 3 4 5 6 7 8 9 10 111213141516 17 1819 20212223 7 0 1 2 3 4 5 6 7 8 9 10 111213141516 17 1819 20212223 MuB_#10025808_P04880_BT-DP-RF_(GB-FR-DE-ES-PT-NL)_2012-06-21.docx 275 P3: 1 0 1 2 3 4 5 6 7 8 9 10 111213141516 17 1819 20212223 2 0 1 2 3 4 5 6 7 8 9 10 111213141516 17 1819 20212223 3 0 1 2 3 4 5 6 7 8 9 10 111213141516 17 1819 20212223 4 0 1 2 3 4 5 6 7 8 9 10 111213141516 17 1819 20212223 5 0 1 2 3 4 5 6 7 8 9 10 111213141516 17 1819 20212223 6 0 1 2 3 4 5 6 7 8 9 10 111213141516 17 1819 20212223 7 0 1 2 3 4 5 6 7 8 9 10 111213141516 17 1819 20212223 MuB_#10025808_P04880_BT-DP-RF_(GB-FR-DE-ES-PT-NL)_2012-06-21.docx 276 P4: 1 0 1 2 3 4 5 6 7 8 9 10 111213141516 17 1819 20212223 2 0 1 2 3 4 5 6 7 8 9 10 111213141516 17 1819 20212223 3 0 1 2 3 4 5 6 7 8 9 10 111213141516 17 1819 20212223 4 0 1 2 3 4 5 6 7 8 9 10 111213141516 17 1819 20212223 5 0 1 2 3 4 5 6 7 8 9 10 111213141516 17 1819 20212223 6 0 1 2 3 4 5 6 7 8 9 10 111213141516 17 1819 20212223 7 0 1 2 3 4 5 6 7 8 9 10 111213141516 17 1819 20212223 MuB_#10025808_P04880_BT-DP-RF_(GB-FR-DE-ES-PT-NL)_2012-06-21.docx 277 P5: 1 0 1 2 3 4 5 6 7 8 9 10 111213141516 17 1819 20212223 2 0 1 2 3 4 5 6 7 8 9 10 111213141516 17 1819 20212223 3 0 1 2 3 4 5 6 7 8 9 10 111213141516 17 1819 20212223 4 0 1 2 3 4 5 6 7 8 9 10 111213141516 17 1819 20212223 5 0 1 2 3 4 5 6 7 8 9 10 111213141516 17 1819 20212223 6 0 1 2 3 4 5 6 7 8 9 10 111213141516 17 1819 20212223 7 0 1 2 3 4 5 6 7 8 9 10 111213141516 17 1819 20212223 MuB_#10025808_P04880_BT-DP-RF_(GB-FR-DE-ES-PT-NL)_2012-06-21.docx 278 P6: 1 0 1 2 3 4 5 6 7 8 9 10 111213141516 17 1819 20212223 2 0 1 2 3 4 5 6 7 8 9 10 111213141516 17 1819 20212223 3 0 1 2 3 4 5 6 7 8 9 10 111213141516 17 1819 20212223 4 0 1 2 3 4 5 6 7 8 9 10 111213141516 17 1819 20212223 5 0 1 2 3 4 5 6 7 8 9 10 111213141516 17 1819 20212223 6 0 1 2 3 4 5 6 7 8 9 10 111213141516 17 1819 20212223 7 0 1 2 3 4 5 6 7 8 9 10 111213141516 17 1819 20212223 MuB_#10025808_P04880_BT-DP-RF_(GB-FR-DE-ES-PT-NL)_2012-06-21.docx 279 P7: 1 0 1 2 3 4 5 6 7 8 9 10 111213141516 17 1819 20212223 2 0 1 2 3 4 5 6 7 8 9 10 111213141516 17 1819 20212223 3 0 1 2 3 4 5 6 7 8 9 10 111213141516 17 1819 20212223 4 0 1 2 3 4 5 6 7 8 9 10 111213141516 17 1819 20212223 5 0 1 2 3 4 5 6 7 8 9 10 111213141516 17 1819 20212223 6 0 1 2 3 4 5 6 7 8 9 10 111213141516 17 1819 20212223 7 0 1 2 3 4 5 6 7 8 9 10 111213141516 17 1819 20212223 MuB_#10025808_P04880_BT-DP-RF_(GB-FR-DE-ES-PT-NL)_2012-06-21.docx 280 P8: 1 0 1 2 3 4 5 6 7 8 9 10 111213141516 17 1819 20212223 2 0 1 2 3 4 5 6 7 8 9 10 111213141516 17 1819 20212223 3 0 1 2 3 4 5 6 7 8 9 10 111213141516 17 1819 20212223 4 0 1 2 3 4 5 6 7 8 9 10 111213141516 17 1819 20212223 5 0 1 2 3 4 5 6 7 8 9 10 111213141516 17 1819 20212223 6 0 1 2 3 4 5 6 7 8 9 10 111213141516 17 1819 20212223 7 0 1 2 3 4 5 6 7 8 9 10 111213141516 17 1819 20212223 MuB_#10025808_P04880_BT-DP-RF_(GB-FR-DE-ES-PT-NL)_2012-06-21.docx 281 P9 1 0 1 2 3 4 5 6 7 8 9 10 111213141516 17 1819 20212223 2 0 1 2 3 4 5 6 7 8 9 10 111213141516 17 1819 20212223 3 0 1 2 3 4 5 6 7 8 9 10 111213141516 17 1819 20212223 4 0 1 2 3 4 5 6 7 8 9 10 111213141516 17 1819 20212223 5 0 1 2 3 4 5 6 7 8 9 10 111213141516 17 1819 20212223 6 0 1 2 3 4 5 6 7 8 9 10 111213141516 17 1819 20212223 7 0 1 2 3 4 5 6 7 8 9 10 111213141516 17 1819 20212223 MuB_#10025808_P04880_BT-DP-RF_(GB-FR-DE-ES-PT-NL)_2012-06-21.docx 282 PPLIMP12374 Ab rev : 5/01/2012 MuB_#10025808_P04880_BT-DP-RF_(GB-FR-DE-ES-PT-NL)_2012-06-21.docx 283