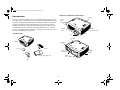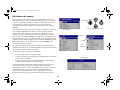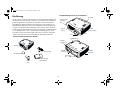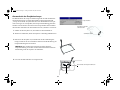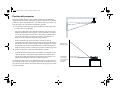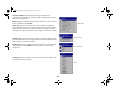
1
5914MT8_Cover.lynx 10/30/02 2:37 PM Page 1
TDP-MT8
TDP-MT8
For assistance with your Toshiba projector in the
United States, please visit www.toshiba.com/tacp
or contact by phone at 800-346-6672.
For assistance with your Toshiba projector in
Europe, please visit www.toshiba-europe.com
or contact your local Toshiba dealer.
TDP-MT8
For assistance with your Toshiba projector in
Asia/Japan, please contact your local Toshiba dealer.
Digital Projector
010-0402-00
USER’S GUIDE
MT8 User's Guide.fm Page 1 Friday, November 22, 2002 9:09 AM
Declaration of Conformity
FCC Warning
,
:#
5$%-9;7$
%$
7:$:$
#
7<#%$
#76:
%#
$:$
#$
;%$7
6#:%7
:#
%7
8(27
!"
#$%
&%!'())*(&&+')(*!(&&
&
&,--.//
&,--./0
&,*...)/
&,*...))
1#2$%3)(/)(&&+')(*!(&&
&,*.'-.
/...
4/../
Trademarks
+ #5$+
6765$65
67 # #$
7$1$ $$
8679"1
$9"7
$8%%
=:7
Canada
5$#6&..)7
>:5?,5..)7
Safety Certifications
@1@1A2,46;+B4C+
1
MT8 User's Guide.fm Page 2 Friday, November 22, 2002 9:09 AM
Table of Contents
Introduction
3
Positioning the projector
5
Video connections
6
Connecting a video device
7
Displaying a video image
8
Connecting a computer
10
Shutting down the projector
11
Important Operating Considerations
"%$
%72$$"
#"7 %
$76%$
$$
$"7
Do not place objects in the areas along the side and in the front of the projector
2 ft (.6m)
Troubleshooting your setup
11
Using the keypad buttons
Using the remote control
Optimizing video images
Customizing the projector
18
19
20
20
Using the menus
Picture menu
Settings menu
21
22
28
Maintenance
Cleaning the lens
Replacing the projection lamp
30
30
31
Appendix
Specifications
Accessories
Red LED behavior and projector errors
Projected image size
Source compatibility
Projector dimensions for ceiling mount installations
RS-232 terminal specifications
33
33
33
34
34
35
36
37
2 ft (.6m)
2 ft (.6m)
2
MT8 User's Guide.fm Page 3 Friday, November 22, 2002 9:09 AM
Introduction
Projector components and features
keypad
D# !"$
7"$$
$<$/!.83/.$
1 E$#%$9"E7
*-$"
#7#$
%<$$%$
#"$$:7
remote
control
receiver (IR)
IR
air intake
vent
Included items
elevator foot release
focus
zoom
heat vent
projector
I/O panel
lens cap
remote
remote control
receiver (IR)
leveling
foot
user’s guide, safety card
power
cable
3
IR
exhaust
MT8 User's Guide.fm Page 4 Friday, November 22, 2002 9:09 AM
Connector Panel
"%$%
F
#;+
F
#%
F
;+
F
+G<26H
F
2&+G<<H
F
IR input
video/computer
1&2
s-video
1
Y
M1-DA 1
IR in
vesa 2
Pr
3
component
power
connector
#)7-"$$%/%7$$%
#"76"
$$#"#%
#J#"#$
7$$/%0
)$$70
)
+;Resize/%$
#%7@$$#0
)
7#*
'
%7
2
Pb
serial control
6",I6;
;/)/716
G16H+8$
$ )37
D5
video video
serial
connector
4
5
s-video
remote control
receiver (IR)
12v triggers
Y
Pb
7
video
Pr
D5 8
trigger 1
trigger 2
6
component
component
video
lock
screen trigger connection
+12v
ground
3.5mm mono plug
9$ )-7
to screen relay (see screen manufacturer
for details)
4
MT8 User's Guide.fm Page 5 Friday, November 22, 2002 9:09 AM
Positioning the projector
#$#
"$K
##"
:7<$$7
1
"$$7
"#.G)H#7
:"*
G.7-H#"7 "-7*
G73H"7
6"$$
#$L7
$#$ /!7@%$7
$L7
2
10’ high
image
"7
"K
$%K"$7
9"$K$ )07
$8"$%$7$*M7
%$.N$$#
7*N%7
bottom of image
1.6’ above lens
5
lens center
MT8 User's Guide.fm Page 6 Friday, November 22, 2002 9:09 AM
Video connections
M1-DA
D2;2$%
$<2%2"7GD
8
J$$7&8
$82;$%2
875%$7H
+%#"
76$
:726%;B5G<-H%
:#%%7
VESA
1
Y
M1-DA 1
IR in
vesa 2
serial control
video
s-video
2
Pb
Pr
3
component
4
5
s-video
Y
Pb
7
video
Pr
D5 8
trigger 1
trigger 2
6
component
component
video
Table 1: Video connections
9$ )-+87
Input signal
Connector
Connector label
on projector
52G
<2H%$
22
%
%
%
)*
%023
<2
%
2&+
26
)*
2&+/
+
2
%
%
%
)*
%023
2;
%
%
%
23
%0)*
2
%
%
23
%0-
2B
2&+
%
%
%
2&+/
23
%0)*
6
MT8 User's Guide.fm Page 7 Friday, November 22, 2002 9:09 AM
Connecting a video device
connect component cable
1
Y
6%%$:
726%:#%%
%7
IR in
M1-DA 1
vesa 2
1
Y
M1-DA 1
IR in
vesa 2
serial control
Pb
Pr
3
component
6%%$N$
$%%
$GOYPH"7 $
N
%%GOPbPH
"7 $N
%%
GOPrPH"74
-7
6%%$%$
%%%%Svideo"7
6%%#%$
%N#%
%%7 $##Video
"7
2
Pr
4
5
s-video
3
component
Y
Pb
Pr
7
video
D5 8
Y
2
Pb
serial control
Pb
trigger 1
D5 8
7
video
trigger 2
Pr
4
5
s-video
6
component
trigger 1
trigger 2
6
component
connect S-video cable
1
Y
M1-DA 1
IR in
vesa 2
Y
2
Pb
Pr
serial control
3
component
trigger 1
D5 8
7
video
Pb
trigger 2
Pr
4
5
s-video
6
component
connect composite video cable
1
Y
IR in
M1-DA 1
vesa 2
Pr
5
s-video
1
Y
IR in
M1-DA 1
vesa 2
Pr
3
component
7
video
D5 8
Pb
7
video
D5 8
6
component
6%%26$%
%%7 $M1-DA
"7
6%%2&+$2&+
%%%7 $
VESA"7
connect VESA cable
IR in
vesa 2
serial control
Connecting the power cable
1
Y
M1-DA 1
IR in
vesa 2
serial control
connect power cable
NOTE
+###"7
7
2
Pb
Pr
3
component
4
5
s-video
Y
Pb
Pr
6
component
7
video
D5 8
trigger 1
trigger 2
2
Pb
Pr
3
component
#"
7 #1&$7
1
Y
M1-DA 1
4
5
s-video
Y
Pb
Pr
6
component
7
video
trigger 1
trigger 2
Pr
4
5
s-video
trigger 1
trigger 2
Pr
6
component
Y
2
Pb
serial control
Pb
4
3
component
connect M1-D cable
Y
2
Pb
serial control
D5 8
trigger 1
trigger 2
MT8 User's Guide.fm Page 8 Friday, November 22, 2002 9:09 AM
Displaying a video image
remove lens cap
;%7
press Power
Power"7
"G$ /'H71&
$7
1&$76
$%$7
? No startup screen?B$ 7
turn on video device
$%%7
+$%%"76
NSource7
adjust height
+"$"$8
%7;%$7
elevator
foot
adjust distance
"'.$
$7$ )0$"$
K7
8
rotate
leveling
foot
MT8 User's Guide.fm Page 9 Friday, November 22, 2002 9:09 AM
+"K$$$K
7
adjust zoom and focus
zoom
focus
6$:"$
7 Keystone #
$#Keystone #
#7
adjust keystone
ContrastBrightnessColorTint*-
"$ 7
adjust Picture menu
$ /#7
9
MT8 User's Guide.fm Page 10 Friday, November 22, 2002 9:09 AM
Connecting a computer
connect computer cable
1
Y
IR in
M1-DA 1
vesa 2
Y
2
Pb
Pr
serial control
7
video
Pb
D5 8
5
s-video
trigger 1
trigger 2
Pr
4
3
component
6
component
2&+
"7%76
$
N%7
1
Y
M1-DA 1
IR in
vesa 2
Pr
3
component
Y
2
Pb
serial control
Pb
7
video
D5 8
trigger 1
trigger 2
Pr
4
5
s-video
6
component
#"
7
1
Y
connect power cable
#1&"N$7
M1-DA 1
IR in
vesa 2
serial control
Pr
3
component
Y
2
Pb
Pb
7
video
D5 8
5
s-video
trigger 1
trigger 2
Pr
4
6
component
NOTE
+###"7
"7
D"1
$;/)/"NSerial7
;/)/$ )!7
connect RS-232 cable
1
Y
M1-DA 1
IR in
vesa 2
serial control
10
2
Pb
Pr
3
component
4
5
s-video
Y
Pb
Pr
6
component
7
video
D5 8
trigger 1
trigger 2
MT8 User's Guide.fm Page 11 Friday, November 22, 2002 9:09 AM
Shutting down the projector
Troubleshooting your setup
Power Save
6$8
G$ 'H767
" #%
$/.7+.
#$"##76%
$%"##$7
DPower$).%
7
1&"N"
7
Table 2: LED behavior and meaning
Turning off the projector
"Power%#
"$#$#)7
1&$#
71&
$$7@$##
"7
LED color/behavior
Meaning
solid green
The projector is plugged in, or the projector has been turned on and the software
has initialized. The projector has been
turned off and the fans have stopped.
blinking green
The Power button has been pressed and
the software is initializing, or the projector is powering down and the fans are
running to cool the lamp.
blinking red
The projector will not start up if the LED
is blinking red. You must correct the problem, disconnect and reconnect the power
cable, then power on the projector.
A fan (blinks 4 times) or lamp (blinks 3
times) failure has occurred. Turn off the
projector and wait one minute, then turn
the projector on again. Also check for a
blocked vent or a stopped fan (blinks 5
times).
See page 34 for more information on
blinking red LEDs.
solid red
An unidentifiable error: please contact
Technical Support.
#$#76
%7
7%
7
11
MT8 User's Guide.fm Page 12 Friday, November 22, 2002 9:09 AM
Problem
Solution
Result
No startup screen
Plug power cable in and remove lens cap
press Power button
Correct image
Startu
p
Image not centered on screen
Move projector, adjust zoom, adjust height
zoom
Adjust horizontal or vertical position in
Picture>Advanced menu
12
Correct image
MT8 User's Guide.fm Page 13 Friday, November 22, 2002 9:09 AM
Image not square
Adjust keystone on keypad
Square image
Image does not fit 16:9 screen
Change aspect ratio to 16:9 in
Picture>Aspect ratio menu
Correct image
Turn Overscan on in the Picture>Advanced
menu
Edges of image distorted
Correct image
AB
AB
13
MT8 User's Guide.fm Page 14 Friday, November 22, 2002 9:09 AM
1. Projected colors don’t match source
2. Colors are washed out or too deep
3. Image from component source appears greenish
1. Adjust color, tint, color temperature,
brightness, or contrast in the menus.
2. Pick another gamma setting
3. Pick another color space
COLOR
COLOR
Turn off Ceiling in Settings>System menu
Image upside down
BA
Image reversed left to right
Correct image
Correct image
AB
Turn off Rear in Settings>System menu
A
Correct image
AB
14
MT8 User's Guide.fm Page 15 Friday, November 22, 2002 9:09 AM
Video image “torn” and fragmented
Change Video Standard in
Picture>Advanced menu
AB
Lamp won’t turn on, LED blinking red (page 11)
Correct image
AB
Make sure vents aren’t blocked; allow
projector to cool for one minute
Unplug projector; wait one minute; plug in
projector and turn it on: lamp lights
Startu
p
blinks
red
15
MT8 User's Guide.fm Page 16 Friday, November 22, 2002 9:09 AM
Computer-specific troubleshooting
Press the Source button
Activate laptop’s external port
Only startup screen appears
A
Startu
p
No computer image, just the words “Signal out of
range”
A
Computer image projected
A
A
or restart
lapto
Adjust computer refresh rate in Control
Panel>Display>Settings>Advanced>
Adapter (location varies by operating
system)
Signa
l
rang out of
e
16
Computer image projected
A
A
MT8 User's Guide.fm Page 17 Friday, November 22, 2002 9:09 AM
Image fuzzy or cropped
AA
A
Set your computer’s display resolution to
the native resolution of the projector
(Start>Settings>Control
Panel>Display>Settings tab, select
1280x720)
For a laptop,
disable laptop
monitor
or turn-on dualdisplay mode
Still having problems?
67
17
Image clear and not cropped
A
MT8 User's Guide.fm Page 18 Friday, November 22, 2002 9:09 AM
Using the keypad buttons
%
%#
PowerQ"G$ !HG$ !H7
MenuQG$ /H7
SelectQG$ /H7
Up/down arrowsQ%$"$G$ /H7
menu navigation buttons
Auto imageQ"7
PresetsQ$)%$G$ /0H7
KeystoneQ":$G$ H7
BrightnessQ"$G$ //H7
ResizeQ$G$ //H7
SourceQ$%G$ /!H7
18
MT8 User's Guide.fm Page 19 Friday, November 22, 2002 9:09 AM
Using the remote control
backlight button
#G/H%+++7
$%N$$R
$$%7
navigation buttons
""G
%%H7$.
).G'70H7
NMenu"N7@
#%$Select
"%7$ /7
F
Power"G$ #H
F
$$N
F
BrightnessContrast"$
F
Blank$G
$$ /'H
F
Source#$G$
$ /!H$$
F
Resize$+;G$ //H
F
Auto Image"
F
Preset$G$ /0H
F
Overscan%%$G$ /3H
Troubleshooting the remote
F
7
F
N$"
%%#$
).G'70H7
19
MT8 User's Guide.fm Page 20 Friday, November 22, 2002 9:09 AM
Optimizing video images
Customizing the projector
+%%$
K$$79$
$$ /7
DK"7
$ /!$ ).7
F
$+7+$#
$$727))
#0
)7<2
273!
*
'7
Resize
$7$ //7
F
9";Settings>System7
F
9$"$Settings>System7
F
"N$#7
F
#%$7
F
+"L5$ 7$ //7
F
$7
7
F
"
$$7$ /*7
F
$$7
F
B7$ /*7
F
27+
$%77
$ /*7
F
%%%$7
$ /37
F
9$1E"7
$ /-7
F
<$ #8K$7$ /!7
F
2*
'%72
NN$7
20
MT8 User's Guide.fm Page 21 Friday, November 22, 2002 9:09 AM
Using the menus
7G
*.7H
7@#%#$
$Select7
Menu
button
$$$$Select
##"%$
$87 Select
$7@#%$$7
"%$&8Select$
%JMenu7
Picture
menu
7N
%$$GHGH7
Dots
$$
F
%$"7
F
$%"
$7
F
+%
"7
Keypad navigation
buttons
Main menu
Settings
menu
7
98%,%#
#%74$
#%7985$$
$%7
About menu
21
MT8 User's Guide.fm Page 22 Friday, November 22, 2002 9:09 AM
Picture menu
"#$%$$$$Select
##"%
$7+$$ )!7
increasing keystone
Keystone
"$%:$7D
"7
Contrast
$#$
$#
$7
Brightness
$$7D"$
7
Color
G%H"%$#
7
Tint
G,%H"$
$7
Aspect Ratio
+$#$$7
27))
#0
)7<22
73!
*
'7D,%0
)*
'18,7
*
'7$##
%$#$7%"
/!.83/.7@,%0
),0
)J
,%*
'18*
'7 $Resize
$7
Aspect ratio
Native
$$
#K$7
%/!.83/.08)%$
8*0.80!.08)$##
#7$./083*!
#76*8'%
/!.8./0$%##
/!.83/.7
22
decreasing keystone
MT8 User's Guide.fm Page 23 Friday, November 22, 2002 9:09 AM
16:9 image
16:9 image input
16:9
aspect ratio
9
9
16
16
4:3
K$$%0
)
76%0
)*
'$
*
'$7
4:3 aspect ratio
4:3 image on 16:9 screen
3
9
16
4
Letterbox: %*
'76%*
'
$768
$87
black bars
4:3 image input
black bars
16:9:16:9 # %*
'
$#&27
letterbox image input
16:9 image fills 16:9 screen
black bars
letterbox
aspect ratio
9
3
black bars
4
16
4:3 image input
Natural Wide
0
)$*
'
7#$$J$
$7
natural wide
aspect ratio
3
9
4
23
4:3 image fills 16:9 screen
16
MT8 User's Guide.fm Page 24 Friday, November 22, 2002 9:09 AM
Presets
#K$%$
7$9;
Settings>Service7
Presets
"$Save Settings
%@/)7D
$$7
Save User Presets
24
MT8 User's Guide.fm Page 25 Friday, November 22, 2002 9:09 AM
Advanced settings
TrueLife
9"N1$$7
+%$G%
H$7&8<$
$%$
7D1$$
"#$/
Chroma Detail
"7
Advanced
Luma Detail
"7
Noise Reduction
"$74%
+%#
"1%7
5%$$
76$#
$7+%#+7
Noise reduction
CCS
GH$%
$764
$4$
%$7
NTSC 2:2 Pulldown
,$
#).(G
/0(H7
2:2/3:2 Off
7%
GH$7
25
MT8 User's Guide.fm Page 26 Friday, November 22, 2002 9:09 AM
Color Space
<2G#N
%H76#
%7+
"7
$+;B5
;&3.'.!.3/.;&*.
0!.-3*7
Color Space
Color Temperature
$7
%7
Color Temperature
Color Control
#%"$G%#
HGH
$7
Gamma
B$K
7D$
%5$; 7G9
$%J%
$%2#$
%7H
Color Control
NOTE
D%#$%7$$
7
Gamma
Video Standard
+"
%$%7G
%%$$#7H
6"
$$O7P6
%$, +1&+2
7
Video Standard
26
MT8 User's Guide.fm Page 27 Friday, November 22, 2002 9:09 AM
Overscan
G%H%%$7
#$0<27
Phase
"%$N$%7
Tracking
":%$N$%7
Horizontal/Vertical Position
"7
27
MT8 User's Guide.fm Page 28 Friday, November 22, 2002 9:09 AM
Settings menu
Sources
#$
+7+
"76
7+"
#76$"
##7
Settings menu
Sources
D&
##758
7@N87
System
+$$#7
Source Enable
Source 1
Rear: %$"
7
Ceiling
$#$"7
NOTE
6$"$
#G8/.H7
Auto Power
+ #"
$"%#7#
$"####7
System menu
Display Messages
$GO$PH
#7
High Power
$7
7
28
MT8 User's Guide.fm Page 29 Friday, November 22, 2002 9:09 AM
Translucent OSD
7%$
$%#$$
"7
Chime
#Power7
System menu
Power Save
#4$
/.7+.#$
"##76%$%"
##$#7
Startup logo
Startup Logo: #55
#7
Blank Screen
##Blank
#%7
Blank Screen
Language
#$$
$7
Language
29
MT8 User's Guide.fm Page 30 Friday, November 22, 2002 9:09 AM
Service
$$Select7
Factory Reset
$G81<$;H
$$87
Service menu
Test Pattern
#Blank
7(##
7
Service Code
K%7
Maintenance
Cleaning the lens
1 +%7
clean the lens
with a soft dry cloth
and non-abrasive
cleaner
+%$8%N
7+%%
$7
2 1$#$%76
N"7
30
MT8 User's Guide.fm Page 31 Friday, November 22, 2002 9:09 AM
Replacing the projection lamp
+
7+'!.$O$P
7%
#$$/...$
$7D#7O+
P$ ))7
Lamp hours used
turn off and unplug
the projector
1 "$#7
2 *.#"$7
wait 60 minutes
3 "#%%$
##$7
CAUTION
,%"#%7
#"%.
4 1%#7
loosen the screw on lamp module
bail wire
31
MT8 User's Guide.fm Page 32 Friday, November 22, 2002 9:09 AM
WARNINGS
F
%#"*.
.
F
7$".
F
$79$"
7
F
58#%$76
%$$$7
$$
#%$7
5 %$$$
#7%7
6 6#$7
7 $$#7
8 ;$$
$##7
9
$#Power"
7
10 ;7
Resetting the lamp timer
$$##Brightness
"N.7
1
Y
M1-DA 1
Using the security lock
IR in
vesa 2
serial control
"# B1
7O+P$ ))$7;
##7
2
Pb
Pr
3
component
4
5
s-video
Y
Pb
Pr
7
video
D5 8
trigger 1
trigger 2
6
component
security lock
32
MT8 User's Guide.fm Page 33 Friday, November 22, 2002 9:09 AM
Appendix
Accessories
Specifications
Standard Accessories
(ship with the projector)
Shipping Box (with packaging)
Temperature Operating
50 to 95° F (10 to 35° C) at 0 - 10,000 feet
Power Cable (country-dependent)
Non-operating
-4 to 158° F (-20 to 70° C) at 0 -20,000 feet
Director Remote
Altitude Operating
Non-operating
Projection Lamp Module (included
in projector)
0 to 10,000 feet (3,048 meters)
0 to 20,000 feet (6,096 meters)
Lens Cap
User’s Guide
Humidity Operating
Non-operating
10% to 95% relative humidity, non-condensing
10% to 90% relative humidity, non-condensing
Dimensions
13.8 x 12.8 x 4.3” (351W x 325L x 110H mm)
Weight
9.3 lbs. (4.24 kg) unpacked
Optics Focus Range
5 - 32.8 feet (1.5 - 10 meters)
Lamp Type
UHP lamp (dual watt: 200 and 250 watt)
Safety Card
Optional Accessories
Cable Cover
Replacement Lamp Module
NOTE
@%7
Input Power Requirements 100V-120V 4A, 50/60 Hz
200V-240V 2A 50 Hz
Ceiling Mount UL tested/listed ceiling mount with minimum capacity of
46 lbs (20.87 kg)
33
MT8 User's Guide.fm Page 34 Friday, November 22, 2002 9:09 AM
Red LED behavior and projector errors
Projected image size
6"$1&$
Table 37#
#$7
Table 4:
Range of projection distances for a given screen size
Projection Distance
16:9 Screen
dimensions
(inches/m)
27x48
.69x1.22
34x60
.9x1.5
40.5x72
1.0/1.8
45x80
1.1x2.0
49x87
1.2/2.2
52X92
1.3X2.3
54X96
1.4X2.4
58X104
1.5X2.6
65X116
1.7X3
Table 3: Red LEDs
Red LED Behavior
Explanation
One (1) blink
The lamp won't strike after five (5)
attempts. Check the lamp and lamp door
installations for loose connections.
Three (3) blinks
Four (4) blinks
Five (5) blinks
The projector has shut down the lamp.
Turn off the projector, wait one minute,
then turn it back on. Replace the lamp.
Contact Technical Support for repair if
replacing the lamp does not solve the
problem..
The fan has failed. Replace the lamp (the
lamp module contains a fan). Contact
Technical Support for repair if replacing
the fan does not solve the problem.
The projector is overheating. Check for a
blocked air vent. Contact Technical Support for repair if clearing the air vents
does not solve the problem.
34
Screen
diagonal
(inches/m)
55.1/1.4
Maximum
zoom
(feet/m)
6.0/1.82
Minimum
zoom
(feet/m)
8.3/2.54
68.8/1.75
7.5/2.3
10.4/3.2
82.6/2.1
9.0/2.7
12.5/3.8
91.8/2.3
10.0/3.0
13.9/4.2
99.8/2.5
10.8/3.3
15.1/4.6
105.6/2.7
11.4/3.5
16.0/4.9
110.1/2.8
11.9/3.6
16.7/5.1
119.3/3.0
12.9/3.9
18.1/5.5
133.1/3.4
14.4/4.4
20.1/6.1
MT8 User's Guide.fm Page 35 Friday, November 22, 2002 9:09 AM
Source compatibility
Table 5:
Source Compability
Video
Table 6:
Projector Inputs and Outputs
Component and RGB HDTV (720p, 1035i, 1080p, 1080p-24Hz)
DVI/HDCP for digital video and encrypted digital video
Component EDTV (480p, 576p progressive scan),
SECAM: M, Component, Composite and S-Video standard
video (480i, 576i, 576i RGB SCART with adapter,
NTSC, NTSC M 4.43,
PAL: B, H, I, M, N)
2-Component
(Gold RCA)
HDTV, EDTV, and Standard TV component
1-Component
(D5)
HDTV, EDTV, Standard TV, RGB SCART with adapter
2-S-Video
Standard Video
Computer
Digital and analog PC, Macintosh, 1280x1024 resolution
1-Composite
(RCA)
Standard Video
Communication
USB and RS-232
35
1-M1-DA VESA
HDTV RGB, HDTV component, DVI, computer, and USB
1-HD15 VESA
HDTV RGB, HDTV component, computer
1-9-pin Dsub
male
RS-232
1-3.5 mm mini
jack
IR Repeater (Niles/Xantech compatible)
2-3.5 mm mini
jack
1-12v screen drop, 1-12v 4:3 aspect “curtains”
MT8 User's Guide.fm Page 36 Friday, November 22, 2002 9:09 AM
Projector dimensions for ceiling mount installations
2.1”
53.7mm
2.3”
57.8mm
8.7”
221.4mm
11.3”
288.1mm
2.6”
64.9mm
4.3”
109.5mm
0.14”
3.6mm
12.3”
312.7mm
dimensions of optional cable cover: 12.4 x 3.9 x 3.2” (315 x 100 x 82mm)
total length with optional cable cover: 16.2” 411.5mm)
36
8.5”
216mm
MT8 User's Guide.fm Page 37 Friday, November 22, 2002 9:09 AM
+$$8
RS-232 terminal specifications
Communication configuration
"1;/)/
"N
$$
Setting
Value
Bits per second
19,200
Data bits
8
Parity
None
Stop bits
1
Flow control
None
Emulation
VT100
Function
Command
Response
Brightness
(BRT?)
(0-22, 10)
Lamp hours
(LMP?)
(0-9999, 421)
+#:8
G+++TTTTH#
G
+++
TTTT
%#
G$KH
H
%$#76
$8$%
876%
OSP7$O.P''''7
8 ##.7
Command format
+)#:
7::G
OSPH#:G0+66$H7
+:
G+++SH#
Function
Command
Response
G
Brightness
(BRT10)
Sets the brightness to 10
+++
Power
(PWR0)
Turns power off
S
:
Power
(PWR1)
Turns power on
H
Power
(PWR9999)
?
37
MT8 User's Guide.fm Page 38 Friday, November 22, 2002 9:09 AM
Supported commands
Function
Command
Range
Default
Aspect Ratio
ARZ
0-4
0 = Native
1 = 16:9
2 = 4:3
3 = Letterbox
4 = Natural Wide
1
Color Temp
TMP
0-2
0 = 9300
1 = 8200
2 = 6500
2
Contrast
CON
8-252
128
CCS
CCS
0-1
0
Display Messages
DMG
0-1
1
Factory Reset (Write only)
RST
0-1
n/a
Gamma Table
GTB
0-4
0 = PC
1 = Video
2 = Film
3 = Bright Room 1
4 = Bright Room 1
2
Green Color Offset
GCO
1-63
32
Green Gain
GCG
1-63
32
High Power Enable
HPE
0-1
0
HPS
n/a
n/a
Auto Chime Enable
ACE
0-1
1
Auto Power
APO
0-1
0
Auto Source
ASC
0-1
1
Blank
BLK
0-1
0
Blank Screen
BSC
0-2
0 = black
1 = blue
2 = white
0
1-63
32
Horizontal Position
Blue Color Offest
BCO
Blue Gain
BCG
1-63
32
Keystone
DKC
2-254
128
Brightness
BRT
8-252
128
Lamp Hours (Read only)
LMP
0-32767
0
Ceiling
CEL
0-1
0
Lamp Reset
LMR
0-32767
0
Chroma Detail
CDE
8-248
128
Luma Detail
LDE
8-248
128
Color
CLR
8-252
128
Menu
MNU
0-1
0
Color Space
CSM
0-7
0 = RGB
3 = REC601
2 = REC709
7 = Auto
7
Menu Navigation
NAV
0-4
0 = up
1 = down
4 = select
n/a
38
MT8 User's Guide.fm Page 39 Friday, November 22, 2002 9:09 AM
Language
LAN
0-11
0 = English
1 = French
2 = German
3 = Spanish
4 = Chinese Traditional
5 = Japanese
6 = Korean
7 = Portuguese
8 = Russian
9 = Norwegian
10 = Chinese Simplified
11 = Italian
0
NTSC 2:2 Pulldown Enable
NPE
0-1
0
Noise Reduction Enable
NRE
0-2
0 = Off
1 = Auto
4 = Manual
8
Noise Reduction Level
NRL
8-248
8
Overscan
OVS
0-1
0
Phase
MSS
0-31
n/a
Power
PWR
0-1
0
Power Save
PSV
0-1
0
Presets
PST
0-2
0 = User 1
1 = User 2
2 = User 3
0
Rear Project
REA
0-1
0
Red Color Offset
RCO
1-63
32
Red Gain
RCG
1-63
32
39
Skintone Bypass Enable
SBE
0-1
1
Source
SRC
0-4
0 = Video 1, M1
1 = Video 2, VESA
2 = Video 3, Component 1
3 = Video 4,
S-Video 1
4 = Video 5,
S-Video 2
5 = Video 6,
Component 2
6 = Video 7,
Composite
7 = Video 8, D5
(same designations
as Default Source)
2
Startup Logo
DSU
0-1
1
Tint
TNT
8-252
128
Tracking
MTS
2148-2248
n/a
Translucent OSD
TOE
0-1
1
TrueLife Enable
TLE
0-1
1
Vertical Position
VPS
n/a
n/a
Video Standard
VSU
0-3
0 = Auto
1 = NTSC
2 = PAL
3 = SECAM
0
MT8 User's Guide.fm Page 40 Friday, November 22, 2002 9:09 AM
connecting
computer 10
power cable 7
video device 7
connector panel 4
Numerics
12v triggers 4, 35
16x9 4, 13, 20, 22, 23
4x3 23
4x3 aspect trigger 4
D
D65 colors 9
dimensions of projector 36
Display Messages 28
DVI connector 7
A
adjusting image 9, 22
Advanced menu 25
altitude limits 33
Aspect Ratio 22
Auto Power 28
Autosource 28
E
error codes 34
B
Blank Screen 29
blinking green 11
blinking red 11
F
Factory Reset 30
Faroudja video proecessing 25
focus 9
fuzzy image 17
C
cable box 6
cables, optional 33
CCS 25
Ceiling 28
Chime 29
Chroma Detail 25
cleaning the lens 30
CLI commands 38
Color Space 26
color suppression 25
colors are incorrect 14
command line interface commands 38
component cable connector 7
composite video connector 7
computer, connecting 10
H
HDTV 6, 20, 22, 35
HDTV sources 26, 27
height, adjusting 8
High Power 28
Horizontal Position 27
40
MT8 User's Guide.fm Page 41 Friday, November 22, 2002 9:09 AM
N
Native 22
Natural Wide 23
no computer image 16
no startup screen 12
Noise Reduction 25
NTSC Pulldown 25
I
image
display video 8
focussing 9
size 5
zooming 9
inputs 35
IR repeater 4
O
offset 5
only startup screen appears 16
optional accessories 33
Overscan 27
K
keystone 9, 22
L
lamp replacement 31
lamp timer, resetting 32
lamp won’t turn on 15
Language 29
LED
blinking green 11
blinking red 15
solid green 11
LED behavior 11, 34
Lens cleaning 30
Letterbox 23
Luma Detail 25
P
Phase 27
Picture menu 22
Power button 8
power cable 7, 10
Power Save 11, 29
Presets 24
projection distance 5, 34
projector
adjusting height 8
cleaing the lens 30
compatible sources 35
connecting a video device 7
connector panel 4
controlling projection screen 4
customizing 20
dimensions 36
displaying a video image 8
image sizes 34
included items 3
inputs and outputs 35
LED behavior 11
M
Main menu 21
Maintenance 30
menus 21
changing the language 29
making translucent 29
41
MT8 User's Guide.fm Page 42 Friday, November 22, 2002 9:09 AM
shutting down the projector 11
Skintone Bypass 25
solid green 11
solid red 11
source compatibility 35
Source troubleshooting 12, 16
Sources 28
specifications 33
standard accessories 33
Startup Logo 29
S-video connector 7
System menu 28
maintaining 30
menus 21
optimizing images 20
optional accessories 33
overview 3
positioning 5, 8
remote control 19
replacing the lamp 31
resetting lamp timer 32
saving settings 24
security lock 32
setting up 5
shutting down 11
specifications 33
standard accessories 33
troubleshooting 11
T
temperature limits 33
Test Pattern 30
Tracking 27
Translucent OSD 29
triggers 4
Troubleshooting 11, 12, 16
TrueLife settings 25
TV tuner 6
R
Rear 28
remote control 19
replacing the lamp 31
resetting the lamp timer 32
Resize button 22
resolution 3
RS-232
connecting 4, 10
RS232
specifications 37
V
Vertical Position 27
VESA connector 7
video connections 6
video images, optimizing 20
video processing 25
S
security lock 32
Serial connection 10
serial connection 4, 37
Service Code 30
Service menu 30
Settings menu 28
W
warranty 17
website 2
Z
zoom 9
42
MT8 french.fm Page 1 Friday, November 22, 2002 8:32 AM
Déclaration de conformité
Avertissement FCC
!"#$
%&''
; %%&%
5'6-<
8=%6
%8 ><?% >>
%&%'
8>&< >
>%@8 %?' AA
> ><?>
6BC'
>D
<> D
> ?%%
D
'*' %
>8
"'($)*++,*(()+*,$*((
(
(--.//
(--./0
(,...+/
(,...++
"'1+*/+*(()+*,$*((
(,.)-.
/...
2/../
Marques commerciales
3#45 637875#*/ 67578%#4#94
%8":# &78
Canada
5%?7(..+8
5%?5..+8
Homologations de sécurité
E:E:FG27;3H2I3
1
MT8 french.fm Page 2 Friday, November 22, 2002 8:32 AM
Table des matières
Introduction
3
Positionnement du projecteur
5
Connexions vidéo
6
Raccordement d'un appareil vidéo
7
Affichage d'une image vidéo
8
Raccordement d'un ordinateur
10
Arrêt du projecteur
11
Dépannage de l'installation
11
Utilisation des boutons du clavier
Utilisation de la télécommande
Optimisation des images vidéo
Personnalisation du projecteur
18
19
20
20
Utilisation des menus
menu Image
menu Paramètres
21
22
28
Entretien
Nettoyage des objectifs
Changement de la lampe de projection
30
30
31
Annexe
Spécifications
Accessoires
Comportement du voyant rouge et erreurs de projecteur
Taille de l'image projetée
Compatibilité de source
Dimensions de projecteur pour les montages au plafond
Spécifications de terminal RS-232
33
33
33
34
34
35
36
37
Considérations de fonctionnement importantes
J!'A '8:'K<
6?6'!8 #<%J
&'@<'8"
6J
J<6' K
6'!8
Ne placez pas d'objets sur les côtés ou à l'avant du projecteur
0,6 m (2 pieds)
0,6 m (2 pieds)
0,6 m
(2 pieds)
2
MT8 french.fm Page 3 Friday, November 22, 2002 8:32 AM
Introduction
Composants et fonctions du projecteur
clavier
récepteur de
télécommande (IR)
6'!6<
6 &8:'!
"#$=
8:!%<
?%' /$.&1/.?
%@<":#L'
6<'""!L8
=<",-!
''<8GJ <'%%%'?
%!&'8
IR
entrée d’air
bouton de déverrouillage
du pied élévateur
mise au point
zoom
évent thermique
Articlesinclus
panneau d'E/S
projecteur
IR
récepteur de
télécommande (IR)
télécommande
pied de mise à niveau
capuchon d'objectif
câble d’alimentation
mode d'emploi,
fiche de sécurité
3
sortie de ventilation
MT8 french.fm Page 4 Friday, November 22, 2002 8:32 AM
Panneau de connexion
:!'
M
&;3
M
&'
M
;3
M
"3BN""G7C
M
G(3BN"N"C
M
vidéo D5
récepteur
circuits
de télécommande
vidéo
déclencheurs
s-vidéo
12 v
entrée IR
vidéo/ordinateur 1 et 2
1
Y
M1-DA 1
IR in
vesa 2
serial control
Pb
Pr
3
component
"-
7@<
7;O;/+/
8:%6%<<
B:7C >&?< +18
prise d’alimentation
"&?+-%
/'8:
%!8'J6
!66 'J
!'< '<J
!8:/%0
+8
I0
+>?
Redimensionner</'
'@ 8EJ
&%0
+8:&6' ''J%,
)'%68
2
4
5
s-video
Y
Pb
7
video
D5 8
Pr
trigger 1
trigger 2
6
component
composant vidéo
connecteur
série
verrou
connexion du circuit déclencheur d’écran
+ 12 v
terre
fiche mono-voie
de 3,5 mm
#%%
'< +-8
vers le relais d’écran (voir le fabricant de l’écran
pour plus de détails)
4
MT8 french.fm Page 5 Friday, November 22, 2002 8:32 AM
Positionnement du projecteur
#%'A>
!%>
!8
G <<?'8
1 #J!%
?68
:!A?+B.C
68#@ &PJ
!?.-@B,C>
6!8#J!?1@
B-, C6!8
'J!%J'<
6''Q<%
6%?!8#'6<'< /$8
66<%<8:
Q<%''< ++8
image de 3 mètres
de haut
2 #J!??68
:6!%!?6@<<J
%'6<!8#
%6<!'< +08
bas de l’image
à 0,58 mètre
au-dessus
de l’objectif
:6<!?<8<6<
,R83'<%[email protected]
6<?.0$@B,C6!%8
5
centre de l’objectif
MT8 french.fm Page 6 Friday, November 22, 2002 8:32 AM
Connexions vidéo
M1-DA
G'J<"G"
!&'
N"GG!8BG'J
P& SP
'<>
8"&S<
<' S
%%'82%% <S8:A
'!@
8
J %% 8:
'"G7;H5BN"-C '
''8
Signal d’entrée
Connecteur
%%BN"GC
PP '
'
'
'
G
+,
'0G1
N"G
'
G(3
"G7
+,
G(3/
"3
"G"
'
'
G
+,
'0G1
<
G
'
'
G1
'0+,
'
G
'
G1
'0-
'
G(3
G
'
'
G(3/
G1
'0+,
1
IR in
vesa 2
serial control
vidéo
s-vidéo
Y
M1-DA 1
2
Pb
Pr
3
component
4
5
s-video
Y
Pb
7
video
Pr
D5 8
trigger 1
trigger 2
6
component
composant
vidéo
#@J'?< +-
6&8
Tableau 1: Connexions vidéo
Etiquette de
connexion sur le
projecteur
VESA
6
MT8 french.fm Page 7 Friday, November 22, 2002 8:32 AM
Raccordement d'un appareil vidéo
branchez le câble de composant
6'J %%
8:'"G7 '
'''8
1
Y
IR in
M1-DA 1
vesa 2
Pr
branchez le câble S-vidéo
IR in
vesa 2
Pr
6
component
1
IR in
vesa 2
Pr
3
component
Y
2
Pb
serial control
branchez le câble M1-D
6'"G7JP"
'6'85J6
M1-DA!8
trigger 2
Pr
5
s-video
Y
M1-DA 1
trigger 1
D5 8
7
video
Pb
4
3
component
branchez le câble
vidéo composite
Y
2
Pb
serial control
trigger 2
Pr
6
component
1
Y
M1-DA 1
trigger 1
D5 8
7
video
Pb
4
5
s-video
3
component
6'PJ
'P'
6''B
TY UC!85JP
6'
BTPbUC!8
5J<P
<6'<
BTPrUC!8
6''? JP''6'
S-vidéo!8
6''!J
!P''
6'85J6!
Video!!8
Y
2
Pb
serial control
D5
7
video
Pb
trigger 2
6
component
vesa 2
Pr
3
component
branchez le câble VESA
IR in
vesa 2
serial control
Branchement du câble d'alimentation
1
Y
M1-DA 1
IR in
vesa 2
serial control
REMARQUE EJ!P6 <
!8
branchez le câble d'alimentation
7
2
Pb
Pr
3
component
4
5
s-video
Y
Pb
Pr
6
component
7
video
D5 8
trigger 1
trigger 2
2
Pb
Pr
3
component
5JP6?6@
!8:'6'
6'8
1
Y
M1-DA 1
4
5
s-video
Y
2
Pb
serial control
6'G(3JPG(3
'6'85J6
VESA!8
1
Y
IR in
M1-DA 1
trigger 1
8
Pr
4
5
s-video
Pb
7
video
D5 8
6
component
Y
Pb
Pr
6
component
7
video
trigger 1
trigger 2
Pr
4
5
s-video
D5 8
trigger 1
trigger 2
MT8 french.fm Page 8 Friday, November 22, 2002 8:32 AM
Affichage d'une image vidéo
retirez le capuchon de l'objectif
;J6!%8
3JPower!8
appuyez sur le bouton Power
:!%%'B< /)C8
:'&?<''
?8I66<
6%%'&'87%'
6<<8
? Aucun écran de démarrage ? ;J'?6< 8
mettez en marche l'appareil vidéo
5JJ''8
:6<'6''S6
!86JSource'
!8
réglez la
hauteur
;<J!
'<<'8'
?'8
pied élévateur
#J!?6<).
<?68G< +0 6<!6?68
réglez la distance
8
faites pivoter
le pied de mise
à niveau
MT8 french.fm Page 9 Friday, November 22, 2002 8:32 AM
;<J<J%! 6?
'J8
réglez le zoom et la mise au point
zoom
mise au point
6<66 <JJV
'83JDistorsion
trapézoïdale <6<
% Distorsion trapézoïdale <
%8
réglez la distorsion trapézoïdale
:contraste luminositécouleurteinte?
",-D''J!@7<6
8
réglez le menu Image
G< /68
9
MT8 french.fm Page 10 Friday, November 22, 2002 8:32 AM
Raccordement d'un ordinateur
raccordez le câble de l'ordinateur
1
Y
IR in
M1-DA 1
vesa 2
Y
2
Pb
Pr
serial control
7
video
Pb
D5 8
5
s-video
trigger 1
trigger 2
Pr
4
3
component
6
component
5JPG(3
!8;J6&'68
'J''JP
'68
1
Y
M1-DA 1
IR in
vesa 2
Pr
3
component
Y
2
Pb
serial control
Pb
7
video
D5 8
trigger 1
trigger 2
Pr
4
5
s-video
6
component
5JP6?6@
!8
1
Y
branchez le câble d'alimentation
:'6'!6'8
M1-DA 1
IR in
vesa 2
serial control
Pr
3
component
Y
2
Pb
Pb
7
video
D5 8
5
s-video
trigger 1
trigger 2
Pr
4
6
component
REMARQUE EJ!P6 <
!8
3J!68
raccordez le câble RS-232
G'J!?6?
%%<:">P;/+/
Serial!8
1
Y
M1-DA 1
IR in
vesa 2
serial control
10
2
Pb
Pr
3
component
4
5
s-video
Y
Pb
Pr
6
component
7
video
D5 8
trigger 1
trigger 2
MT8 french.fm Page 11 Friday, November 22, 2002 8:32 AM
Arrêt du projecteur
Dépannage de l'installation
Économie d'énergie
><S?6J?'
B< )C86J<
68
:!6%W8W<@
<6
/.83@.<!
68<%=' !6<
6<>%%8G'J6Power
%%<@+.6'8
:'&'! 6
!''''8
Tableau 2: Comportement du voyant lumineux
et signification associée
Arrêt du projecteur
Couleur et comportement du
voyant lumineux
#!JPower8:6
'&<' '%8E
%%'&6'
'6A8"JP6
@!8
Signification
vert continu
Le projecteur est branché ou a été mis sous
tension et le logiciel a été initialisé. Le projecteur est éteint et les ventilateurs sont
arrêtés.
vert clignotant
L'utilisateur a appuyé sur le bouton d'alimentation Power et le logiciel initialise le
projecteur, ou le projecteur est en cours de
mise hors tension et les ventilateurs tournent pour refroidir la lampe.
rouge clignotant
Le projecteur ne démarre pas si le voyant
rouge clignote. Vous devez corriger le
problème, débrancher et rebrancher le
câble d'alimentation, puis mettre le
projecteur sous tension.
Une panne de ventilateur (clignote 4 fois) ou
de lampe (clignote 3 fois) s'est produite.
Arrêtez le projecteur et attendez une
minute avant de le remettre en route. Vérifiez également qu'aucun évent n'est bouché
ou qu'aucun ventilateur n'est arrêté (clignote 5 fois).
Voir page 34 pour plus d'informations sur
les voyants rouges clignotants.
rouge continu
Erreur inconnue : veuillez vous adresser à
l'assistance technique.
:'%%@8"
8(J
6X'8E%@'
'J<8
11
MT8 french.fm Page 12 Friday, November 22, 2002 8:32 AM
Problème
Solution
Résultat
Aucun écran de démarrage
Branchez le câble d'alimentation et retirez
le capuchon de l'objectif
appuyez sur le bouton d'alimentation
Image correcte
Startu
p
Image non centrée sur l'écran
Déplacez le projecteur, réglez le zoom,
réglez la hauteur
zoom
Réglez la position horizontale ou verticale da
le menu Image >Avancé
12
Image correcte
MT8 french.fm Page 13 Friday, November 22, 2002 8:32 AM
L'image n'est pas d'équerre
Réglez la correction trapézoïdale sur le
clavier
Image d'équerre
L'image ne cadre pas dans l'écran 16:9
Changez la taille de l'écran à 16:9 dans le
menu Image>Taille de l'écran
Image correcte
Bords d'image déformés
Activez Surbalayage dans le menu Image >
Avancé
Image correcte
AB
AB
13
MT8 french.fm Page 14 Friday, November 22, 2002 8:32 AM
1. Les couleurs projetées ne correspondent pas à
celles de la source
2. Les couleurs sont délavées ou trop foncées
3. L'image de la source composant paraît verdâtre
1. Réglez la couleur, la teinte, la
température des couleurs, la luminosité, le
contraste dans les menus
2. Choisissez un autre paramètre gamma
3. Choisissez un autre espace
colorimétrique
COLOR
Image à l'envers
COLOR
Désactivez Montage Plafond dans le menu
Paramètres > Système
BA
Image inversée de gauche à droite
Image correcte
Image correcte
AB
Désactivez Arrière dans le menu
Paramètres > Système
A
Image correcte
AB
14
MT8 french.fm Page 15 Friday, November 22, 2002 8:32 AM
Image vidéo « déchirée » et fragmentée
Changez Standard Vidéo dans le menu
Image>Avancé
AB
La lampe ne s'allume pas, le voyant lumineux
clignote en rouge (page 11)
Image correcte
AB
Vérifiez que les évents ne sont pas bouchés,
laissez le projecteur refroidir pendant une
minute
Débranchez le projecteur ; patientez une
minute, branchez le projecteur et mettezle sous tension : la lampe s'allume
Startu
p
clignote
rouge
15
MT8 french.fm Page 16 Friday, November 22, 2002 8:32 AM
Dépannage des problèmes liés à l'ordinateur
Appuyez sur le bouton « source »
Activez le port externe de l'ordinateur
portable
Seul l'écran de démarrage apparaît
A
L'image en provenance de l'ordinateur est
projetée sur l'écran
A
A
Startu
p
ou redémarrez
le portable
Aucune image ne provient de l'ordinateur,
uniquement les mots « Signal hors de l'intervalle »
A
Réglez la fréquence de rafraîchissement de
l'ordinateur dans Panneau de configuration
> Affichage > Paramètres > Avancés >
Adaptateur (l'emplacement varie suivant le
système d'exploitation)
Signa
l
rang out of
e
16
L'image en provenance de l'ordinateur est
projetée sur l'écran
A
A
MT8 french.fm Page 17 Friday, November 22, 2002 8:32 AM
Image floue ou tronquée
AA
A
Alignez la résolution d'affichage de
l'ordinateur sur la résolution normale du
projecteur (Démarrer > Paramètres >
Panneau de configuration > Affichage >
onglet Paramètres, sélectionnez 1280x720)
Pour un ordinateur
portable, désactivez
le moniteur du
portable ou passez
en mode double
affichage
Les problèmes persistent ?
''J>J8
17
Image nette et non tronquée
A
MT8 french.fm Page 18 Friday, November 22, 2002 8:32 AM
Utilisation des boutons du clavier
:68G
=%
AlimentationY!B< $C
B< $C8
MenuY'%%>B< /C8
SélectionY%&%%B< /C8
boutons de navigation dans les menus
Flèches haut/basY'<%
@B< /C8
Image autoY!?8
Param. Prédéf.Y%%+@%
B< /0C8
Correction trapézoïdaleY@<6< 66 B< C8
LuminositéY@<66<B< //C8
RedimensionnerY<6B< //C8
SourceY<'B< /$C8
18
MT8 french.fm Page 19 Friday, November 22, 2002 8:32 AM
Utilisation de la télécommande
Dépannage de la télécommande
:/333%8(%?
%%%<'
><ZY<
'8
M
3J' 6<8
M
#J!>
'6'6J
B)0@C8
#6J6!
!B'6'6C8:
?)0@B+.C8
flèches de navigation
3JMenu'@
!8EJ%'<
sélection%<'
8G< /6%8
:@<'
M
Alimentation!
B'< 6AC
M
<
M
LuminositéContraste<6<
M
Vide%%'6<B
<6'< /)C
M
Source6?6B%%?
% '< /$C
M
Redimensionner<6B'< //C
M
Image auto!?
M
Paramètres Prédéf.@B'
< /0C
M
Surbalayage6<'B'
< /1C
19
touche de rétroéclairage
MT8 french.fm Page 20 Friday, November 22, 2002 8:32 AM
Optimisation des images vidéo
Personnalisation du projecteur
E%6'6<%%
6''J6<?6%%?68
#%><6'
< /8
G'J!?'?'
% G< /$?< +.%8
M
#!@'J3@
Paramètres>Système8
M
M
#!%'J<%
Paramètres>Système8
M
3'J'J<
<8
M
3'J%66<8
M
%J<<6'8
;J8
M
%J<8
<J>8:>%
<6<8:'
<8++
<%0
+8N"G
"G"%81$
,
)8J
6&?6J
Redimensionner%%
8G< //8
M
;<JJV
7<8G< //8
M
J%%J
K<<<<
'8G< /,8
M
J '<
% 8G< /,8
M
J'%%83
<'8J%%
>8G< /,8
M
3'J<6<
'8G< /18
M
(%%J?6
<<:%L8G< /-8
M
JN<8G
< /$8
M
G%J '"G"<%'
,
)8J6'"G"
8
20
MT8 french.fm Page 21 Friday, November 22, 2002 8:32 AM
Utilisation des menus
#'J'
8B:% 6',.8C:#S8EJ
%''
J
sélection8
bouton Menu
boutons de navigation à partir du clavier
menu principal
#<@JJ
sélection!J'?6
%J
6'J'J%?6?8
3Jsélection%'<8E
J%@?@8E%!
J?IJsélection
8G'JMenu?
%8
menu Image
points
menu
Paramètres
"'8:
''BC
@B C8
:<68
M
:7<<<6<8
M
:#@>?>!
%8
M
:[%%6%?%
!6<8
menu À propos
'A >
@>8#&66
'% 6'8"6
< 8#&
6:S< ><>'8
21
MT8 french.fm Page 22 Friday, November 22, 2002 8:32 AM
! 68:<6
./0&1,$%<
68',&)>
/$.&./0'%%&
/$.&1/.<?6!8
Menu Image
#< @J@
JsélectionJ%@
<'J
%<8%%<
=< +18
Distorsion trapézoïdale !6<' 6
6 8G'J<<JV?
'8
augmentation de
distorsion trapézoïdale
Contraste
K%%
%6<< 6<8
Luminosité
<66<8G'J<<
?'8
Couleur B' C@<6<'
?@8
Teinte
B' C@<6 <'
6<8
Taille de l'écran
>%<
6<8:'<
8++
<%0
+8N"G"G"
81$
%,
)8:%
0
+,
)(&<:<8:%%,
)8
:>!%6%%<?6
'<8:!
/$.&1/.8EJ%0
+:<
60
+DJ%,
)(&<,
)8
3JRedimensionner %
%8
taille de l'écran
Natif <?6%%6<
8
'/$.&1/. <'
%0&+6',0.&0$.<0&+
22
réduction de
distorsion trapézoïdale
MT8 french.fm Page 23 Friday, November 22, 2002 8:32 AM
image 16:9
entrée d'image 16:9
16:9
taille de l'écran
9
9
16
16
taille de l'écran 4:3
image 4:3 sur écran 16:9
3
9
16
4
entrée d'image extra-large
Extra-large : '6%,
)8'
J,
)><>8
'%&<6<6<
68
barres noires
entrée d'image 4:3
4:3 '6<6?
6%0
+8'%%J0
+
,
)6<>,
) K6<8
barres noires
16:9 :'%16:9 '6
%,
)@
'?<8
l'image 16:9 remplit l'écran 16:9
barres noires
extra-large
taille de l'écran
9
3
barres noires
4
Largeur naturelle <0
+
6%,
)8:&&6<
<6<8
entrée d'image 4:3
largeur naturelle
taille de l'écran
3
l'image 4:3 remplit l'écran 16:9
9
4
23
16
16
MT8 french.fm Page 24 Friday, November 22, 2002 8:32 AM
Param. Prédéf.
#@6<
@?8#@
%J;<<EParamètres>Service8
paramètres prédéfinis
#%<<%'<J6<
JEnregistrer Param.#8#%8J
(<8E8/+8G'J@
@%<68
paramètres prédéfinis
enregistrés par l'utilisateur
24
MT8 french.fm Page 25 Friday, November 22, 2002 8:32 AM
Paramètres avancés
TrueLife '6<:%!8
<&'?%B'
C8#%
?<<'N"G("G
8G'J':%
<&</
'
Détails Chroma !8
Avancé
Détails Luma !8
Réduction de bruit !<8J
7%6'3
<'
!'A'8
7<A6 ?!<8:'
'8" 63
8
Réduction de bruit
CCS :BC
<%
<8('<&
'<&A''
<&'8
Menu déroulant NTSC 2:2 3'J%%%
<& ?+.<*B
/0<*C8
2:2/3:2 Inactif
J%?A
%.
25
MT8 french.fm Page 26 Friday, November 22, 2002 8:32 AM
Espace colorimétrique 6 &
N"GB6S'C8(
'
'8I63!
?8#'
'J3J;H5D;(1.)
.$.1/.;(,.
0$.-1,8
Espace colorimétrique
Température des couleurs <68J
6'8
Température
des couleurs
Contrôle des couleurs <<B
'C<!B C<'8
Gamma :<%<6
%68G'J
< '6#8B:%
?>
D'?>
''%'8C
Contrôle des couleurs
Gamma
REMARQUE G%'''8
%<J '&8
Standards vidéo <3!
'%<6
6=8B:'''<
<< X'''J8C!'?
6%%
6<TU8
J'#3:
(3G8
Standards vidéo
26
MT8 french.fm Page 27 Friday, November 22, 2002 8:32 AM
Surbalayage B' C6<
'8
:0'&N"G
8
Phase @<' <'8
Suivi @<% ' <'8
Position horizontale/verticale @<8
27
MT8 french.fm Page 28 Friday, November 22, 2002 8:32 AM
Menu Paramètres
Sources 6%%@?
''38I
36! @
86''6%%8
I36!<
@ 8>><
!&! 6? 6'! 6?
8
Menu
Paramètres
G'J%G
%68#%?
8J6''
68
Valider
Source
Source 1
Système
'A''8
Arrière : '6<!@
8
Montage Plafond '6<!<
%8
REMARQUE 76%%%
6<<%%%%<6
@B'/.C8
Menu Système
Alim. Auto 383!
<@8
K!%'
68
Afficher les messages %%<6B8&8T;UC
%<68
Haute puissance 'J<
8('<
'8
28
Sources
MT8 french.fm Page 29 Friday, November 22, 2002 8:32 AM
Affichage translucide 8'?6<
6A@'
6<8
Carillon 'J% Power'8
Menu Système
Écon. Énergie ' <6/.83@.
<!68<%='
!6<6<>%%8
Logo Démarrage : 6%%'
6%< 68
Logo Démarrage
Coul. écran vide >%% sans
légende' 66
'8
Écran Vide
Langues <6%%<
<68
Langues
29
MT8 french.fm Page 30 Friday, November 22, 2002 8:32 AM
Service %JJ
sélection8
Réglage usine @B?6&@
N<%3@C?'%
@%8
Menu Service
Mire %% sans légende'
8#<%J%@*
'8
Code du service ''8
Entretien
nettoyez l'objectif
avec un chiffon doux et sec
et un produit de nettoyage
non abrasif
Nettoyage des objectifs
1 3 J<%>!%
%%&8
6J6 J
6!%8:<%'
6!%8
2 #J%%<6!%
'8!A
J6!%8
30
MT8 french.fm Page 31 Friday, November 22, 2002 8:32 AM
Changement de la lampe de projection
:[
6683@)$.6
<T<U6%%@'? <8
#%'
</...'6 %8G'J'&@
'8GT3U< ++8
heures d’utilisation de la lampe
éteignez et débranchez
le projecteur
1 W<J!JP68
patientez 60 minutes
2 #J,.!%@8
3 ;'J!J'
'&'%< '
'8
ATTENTION %!%! '8<A
6S%%!.
4 "J'@8
desserrez la vis sur le module de lampe
poignée métallique
31
MT8 french.fm Page 32 Friday, November 22, 2002 8:32 AM
AVERTISSEMENTS M
#'\J!%,.
'.
M
J8:'
' .
M
J6'8:<
'!8
M
J@8"
6
'8A'
%<J'6&8
5 J'<
8J<
'?6'8
6 7J%'%8
7 J' 8
8 ;J'%<
'&'8
9 5JP6JPower
!8
10 ;J?J68
Remise à zéro du compteur de la lampe
#6J
&Luminosité'!.
8
1
Y
M1-DA 1
IR in
vesa 2
serial control
Pr
3
component
Utilisation du verrou de sécurité
:!'@
'<P#H:8J%
<'68
2
Pb
4
5
s-video
Y
Pb
Pr
7
video
D5 8
trigger 1
trigger 2
6
component
verrou de sécurité
32
MT8 french.fm Page 33 Friday, November 22, 2002 8:32 AM
Annexe
Accessoires
Spécifications
Température de
fonctionnement
Stockage
Accessoires standard
(expédiés avec le projecteur)
10 à 35° C (50 à 95° F) entre 0 et 3 000 mètres
Caisse d'expédition (avec matériaux
d'emballage)
-20 à 70° C (-4 à 158° F) entre 0 et 6 000 mètres
Câble d'alimentation (varie selon le pays)
Télécommande de régie
Module de lampe de projection (inclus dans
le projecteur)
Altitude de fonctionnement 0 à 3 000 mètres (0 à 10 000 pieds)
Stockage
0 à 6 000 mètres (0 à 20 000 pieds)
Humidité de
fonctionnement
Stockage
Capuchon d'objectif
Mode d'emploi
10 % à 95 % d'humidité relative, sans
condensation
10 % à 90% d'humidité relative, sans
condensation
Fiche de sécurité
Accessoires en option
Dimensions
351P x 325L x 110H mm (13,8 x12,8 x 4,3
pouces)
Poids
4,24 kg . (9,3 lb) hors emballage
Portée de mise au point
optique
1,5 à 10 mètres (5 à 32,8 pieds)
Type de lampe
Lampe UHP (puissance double : 200 et 250 watts)
Couvercle de câbles
Module de lampe de rechange
REMARQUE 6J '8
Puissance nécessaire absorbée100 V-120 V 4A, 50/60 Hz
200 V-240 V 2A 50 Hz
Montage plafond Montage testé/homologué UL d’une capacité minimum de
20,87 kg (46 lb).
33
MT8 french.fm Page 34 Friday, November 22, 2002 8:32 AM
Comportement du voyant rouge et erreurs de
projecteur
Taille de l'image projetée
!%'<<D
J'tableau 28E
& <
'8
Tableau 4:
Distances de projection pour une taille d'écran donnée
Distance de projection
Tableau 3: Voyants rouges
Comportement des
voyants rouges
Un (1) clignotement
Trois (3) clignotements
Quatre (4) clignotements
Cinq (5) clignotements
Taille d'écran
16:9 (mètres/
pouces)
27x48
0,69x1,22
34x60
0,9x1,5
40,5x72
1,0/1,8
45x80
1,1x2,0
45x80
1,2/2,2
52X92
1,3x2,3
52X92
1,4x2,4
58x104
1,5x2,6
65x116
1,7x3
Explication
La lampe ne s’allume pas après cinq (5)
tentatives. Vérifiez les connexions sur
l’installation de la lampe et de son volet.
Le projecteur a arrêté la lampe. Arrêtez le
projecteur et attendez une minute avant de
le remettre en route. Remplacez la lampe.
Contactez l’assistance technique pour faire
réparer la lampe si ce remplacement ne
règle pas le problème.
Panne du ventilateur. Remplacez la lampe
(le module de lampe contient un
ventilateur). Contactez l’assistance
technique pour faire réparer le ventilateur
si ce remplacement ne règle pas le
problème.
Le projecteur est en surchauffe. Vérifiez
l’absence d’obstacle devant les évents
d’aération. Contactez l’assistance
technique pour une réparation si le
problème persiste alors que les évents
d’aération ont été dégagés.
34
Diagonale
d'écran
(mètres/
pouces)
55,1/1,4
Agrandissement maximum
(mètres/
pieds)
6,0/1,82
Agrandissement minimum
(mètres/
pieds)
8,3/2,54
68,8/1,75
7,5/2,3
10,4/3,2
82,6/2,1
9,0/2,7
12,5/3,8
91,8/2,3
10,0/3,0
13,9/4,2
99,8/2,5
10,8/3,3
15,1/4,6
105,6/2,7
11,4/3,5
16,0/4,9
110,1/2,8
11,9/3,6
16,7/5,1
119,3/3,0
12,9/3,9
18,1/5,5
133,1/3,4
14,4/4,4
20,1/6,1
MT8 french.fm Page 35 Friday, November 22, 2002 8:32 AM
Compatibilité de source
Tableau 5:
Compatibilité des sources
vidéo
Tableau 6:
Entrées et sorties de projecteur
Composant et RGB HDTV (720p, 1035i, 1080p, 1080p-24Hz)
DVI/HDCP pour la vidéo numérique et la vidéo numérique
codée
Composant EDTV (480p, balayage progressif 576p),
SECAM : Vidéo standard M, composant, composite et S-vidéo
(480i, 576i, 576i RGB SCART avec adaptateur,
NTSC, NTSC M 4.43,
PAL : B, H, I, M, N)
Ordinateur
PC analogique et numérique, Macintosh, résolution 1280x1024
Communication
USB et RS-232
2 - Composant
(Gold RCA)
HDTV, EDTV et composant TV standard
1 - Composant
(D5)
HDTV, EDTV, TV standard, RGB SCAR avec adaptateur
2 - S-vidéo
Vidéo standard
1 - Composite
(RCA)
Vidéo standard
1 - M1-DA
VESA
35
HDTV, RGB, composant HDTV, DVI, ordinateur et USB
1 - HD15 VESA
HDTV, RGB, composant HDTV, ordinateur
1 - mâle Dsub à
9 broches
RS-232
1 - mini-prise de
3,5 mm
Répéteur IR (compatible Niles/Xantech)
2 - mini-prise de
3,5 mm
abaissement d'écran à 1-12v, « rideaux » au format
4:3 à 1-12v
MT8 french.fm Page 36 Friday, November 22, 2002 8:32 AM
Dimensions de projecteur pour les montages au
plafond
2,1 pouces
53,7 mm
2,3 pouces
57,8 mm
11,3 pouces
288,1 mm
8,7 pouces
221,4 mm
4,3 pouces
109,5 mm
2,6 pouces
64,9 mm
0,14 pouce
3,6 mm
8,5 pouces
216 mm
12,3 pouces
312,7 mm
dimensions du couvercle optionnel des câbles : 315 x 100 x 82mm
(12,4 x 3,9 x 3,2 pouces)
longueur totale du couvercle optionnel des câbles : 411,5 mm (16,2 pieds)
36
MT8 french.fm Page 37 Friday, November 22, 2002 8:32 AM
E'<@
&
Spécifications du Terminal RS232
Configuration de communication
#K!>JP;/+/
%J@ >?&
%<
Fonction
Commande
Response
Brightness
(BRT?)
(0-22, 10)
Lamp hours
(LMP?)
(0-9999, 421)
Paramètre
Valeur
Bits par seconde
19,200
Bits de données
8
B
Parité
Sans
333
Bits d’arrêt
1
Contrôle du flux
Sans
````
'?
BJ<
Émulation
VT100
C
E A>&
B333````C
C
Format de commande
< >
'8&<
%&
%8=>]^_'8
3'@]._ ')))) >'8:&>B#4C
. >A8
@ '> A@8: AA
AB ]^_C A>
B ? %%377C8
:%> A
B333^C B
333
^
A
C
37
MT8 french.fm Page 38 Friday, November 22, 2002 8:32 AM
Commandes prises en charge
Fonction
Commande
Plage
Défaut
Aspect Ratio
ARZ
0-4
0 = Native
1 = 16:9
2 = 4:3
3 = Letterbox
4 = Natural Wide
1
0-1
1
Auto Chime Enable
ACE
Color Temp
TMP
0-2
0 = 9300
1 = 8200
2 = 6500
2
Contrast
CON
8-252
128
CCS
CCS
0-1
0
Display Messages
DMG
0-1
1
Factory Reset (Write only)
RST
0-1
n/a
Gamma Table
GTB
0-4
0 = PC
1 = Video
2 = Film
3 = Bright Room 1
4 = Bright Room 2
2
Green Color Offset
GCO
1-63
32
Green Gain
GCG
1-63
32
High Power Enable
HPE
0-1
0
Auto Power
APO
0-1
0
Auto Source
ASC
0-1
1
Blank
BLK
0-1
0
Blank Screen
BSC
0-2
0 = black
1 = blue
2 = white
0
32
Horizontal Position
HPS
n/a
n/a
Blue Color Offest
BCO
1-63
Blue Gain
BCG
1-63
32
Keystone
DKC
2-254
128
Brightness
BRT
8-252
128
Lamp Hours (Read only)
LMP
0-32767
0
Ceiling
CEL
0-1
0
Lamp Reset
LMR
0-32767
0
Chroma Detail
CDE
8-248
128
Luma Detail
LDE
8-248
128
Color
CLR
8-252
128
Menu
MNU
0-1
0
Color Space
CSM
0-7
0 = RGB
3 = REC601
2 = REC709
7 = Auto
7
Menu Navigation
NAV
0-4
0 = up
1 = down
4 = select
n/a
38
MT8 french.fm Page 39 Friday, November 22, 2002 8:32 AM
Language
LAN
0-11
0 = English
1 = French
2 = German
3 = Spanish
4 = Chinese Traditional
5 = Japanese
6 = Korean
7 = Portuguese
8 = Russian
9 = Norwegian
10 = Chinese Simplified
11 = Italian
0
Skintone Bypass Enable
SBE
0-1
1
Source
SRC
0-7
0 = Video 1, M1
1 = Video 2, VESA
2 = Video 3, Component 1
3 = Video 4,
S-Video 1
4 = Video 5,
S-Video 2
5 = Video 6,
Component 2
6 = Video 7,
Composite
7 = Video 8, D5
2
NTSC 2:2 Pulldown Enable
NPE
0-1
0
Startup Logo
DSU
0-1
1
Noise Reduction Enable
NRE
0-2
0 = Off
1 = Auto
3 = Manual
8
Tint
TNT
8-252
128
Tracking
MTS
2148-2248
n/a
Translucent OSD
TOE
0-1
1
Noise Reduction Level
NRL
8-248
8
TrueLife Enable
TLE
0-1
1
Overscan
OVS
0-1
0
Vertical Position
VPS
n/a
n/a
Phase
MSS
0-31
n/a
Video Standard
VSU
PWR
0-1
0
Power Save
PSV
0-1
0
Presets
PST
0-2
0 = User 1
1 = User 2
2 = User 3
0
0-3
0 = Auto
1 = NTSC
2 = PAL
3 = SECAM
0
Power
Rear Project
REA
0-1
0
Red Color Offset
RCO
1-63
32
Red Gain
RCG
1-63
32
39
MT8 french.fm Page 40 Friday, November 22, 2002 8:32 AM
40
MT8 german.fm Page 1 Friday, November 22, 2002 9:06 AM
Übereinstimmungserklärung
FCC-Warnung
! "
#
$%&
#''%
()
$#'*$
)7'$)$=$
>/)#'$>?8$@1AB0
#:>/)$00/%
00C$
9
7'$
$:7'$/$
%)B
#D/$C$0):
0=$7$)%0
C$0)C$AB
:*"
0
>9
C$%0:A
7'$C$B
A#$%0)0
7*07'$''#)
%0
)C$##
$
/
&0
&#*#$:
*C*#$/)07'$*#$:
707'$0
%
*#$
%):
9E)##?
#
#B
,
(0:
*%!+,--.,***$/0+-,.!,**
**&11233
*&11234
*&.222-3
*&.222-&$%5-,3-,***$/0+-,.!,**
0*&.2+123222
6
3223
Warenzeichen
70
)8
/0
$$
/0%
7
90:98 ,3/0
$$/0%
9
8090:0
#
) )/0
$$/0
0
#
:; /0
$$/0
%
<9:
Kanada
$>?809*22-':
FD080
#
G
&822-:
Sicherheitszertifizierungen
H;H;=(&69B7>6I7
1
MT8 german.fm Page 2 Friday, November 22, 2002 9:06 AM
Inhaltsverzeichnis
Einführung
3
Aufstellen des Projektors
5
Videoverbindungen
6
Anschließen eines Videogerätes
7
Anzeigen eines Videobildes
8
Anschließen eines Computers
10
Abschalten des Projektors
11
Fehlerbehebung für die Einrichtung
11
Verwenden des Tastenfeldes
Verwenden der Fernbedienung
Optimieren von Videobildern
Benutzerdefinierte Anpassung des Projektors
18
19
20
20
Verwenden der Menüs
Bildmenü
Einstellungsmenü
21
22
28
Wartung
Reinigen der Linse
Auswechseln der Projektionslampe
30
30
31
Anhang
Spezifikationen
Zubehör
Rote LED-Anzeige und Projektorfehler
Projizierte Bildgröße
Quellenkompatibilität
Projektorabmessungen für Deckenbefestigungen
Spezifikationen der RS-232 Schnittstelle
33
33
33
34
34
35
36
37
Wichtige Betriebsinformationen
"
0#00
)070$#;#C##$%0:
;#C##$#00 "
)(
: ()$$
0#$$:9)00A;
/0)#H##0;)$
80%
"
$'0:
Platzieren Sie keine Objekte neben oder vor dem Projektor.
0,6 m
0,6 m
0,6 m
2
MT8 german.fm Page 3 Friday, November 22, 2002 9:06 AM
Einführung
Projektorkomponenten und -funktionen
Tastenfeld
$/9%
$$8
"
$:9 "
!%
/#'
*/
%
$: !/#'
0#$ #
%#'$'7#C$%
3!2<532J$#
K()$; L0
$
)(
%$%
A
"L: !
#.1A
/A*/
)B$0%
$:H$$%
A
A$
(
C8D$@:
Fernbedienungsempfänger
(IR)
IR
Lüftungsöffnung
Fußentriegelung
Fokus
Zoom
Im Lieferumfang enthaltene Artikel
Heißluftöffnung
Eingabe-/
Ausgabefeld
Projektor
Fernbedienungsempfänger (IR)
Fernbedienung
Linsenabdeckung
Ausrichtungsfuß
Netzkabel
Benutzeranleitung,
Sicherheitskarte
3
IR
Entlüftung
MT8 german.fm Page 4 Friday, November 22, 2002 9:06 AM
Anschlussfeld
"
%#'$'0%0(
0'
M
3?
B7
M
3(
M
B7
M
7J(9
K
M
(*7J?
K
M
D5Video
IR-Eingang
Video/Computer
1&2
S-Video
1
Y
M1-DA 1
IR in
vesa 2
Pb
Pr
serial control
3
component
?
1
7@0#'&
N0
9B
(
)B3-370#'$
%
:;9/#
)8#)7$
# -5#$#':
Stromanschluss
E)-1$$00'#$
%
3(:$$#
7$$$
$
"
$0: "
)$$
%
"
)70 "
070 "
)
;$$/'0:$$3C$0H0#4-
8#
:'O7P6
4-)
Resize#A$$)0
(/C$$%
#'#3($$:()
0#' "
) "
#0
(
$#'4-8#
0:A
.+/'00)(
$/'0$/
$$
"
#00/0:
2
Serieller
anschluss
4
5
s-video
Fernbedienungsempfänger (IR)
12 V Trigger
Video
Y
Pb
7
video
Pr
D5 8
trigger 1
trigger 2
6
component
Komponentvideo
Verriegelung
Leinwandtriggerverbindung
+12 V
Erde
3,5 mm Monostecker
zum Leinwandrelais (für Einzelheiten siehe Informationen
des Leinwandherstellers)
*/'"70/$C$*$
## -1:
4
MT8 german.fm Page 5 Friday, November 22, 2002 9:06 AM
Aufstellen des Projektors
87# "
B%
A
/0::
A
>C@;) &/0
)
*#$/)0 "
B7$:
$$B0
1 "
#A00/
;)#:
"
0%
-%
D
#:HE$###?/$)
"
21%
6"
##$): "
5
%
"
)##:
A "
0#$0
0#$$$#9
$:H
8/# 3!0:
#
()$
0#$$:
0#$$0J --K:
3 m hohes
Bild
2 "
$)'0*#$%
;):
7%
"
/;)
E
$(
#
>C@
"/8:9#
'>C@
"/8## -4:
unterer Rand
des Bildes
49 cm über
der Linse
8)%
"
$:
86##$.Q:@8C%
-#0
B84+0';:
5
Linsenmitte
MT8 german.fm Page 6 Friday, November 22, 2002 9:06 AM
Videoverbindungen
M1-DA
C(
( (
$?
(
(*#$A#$ "
0@:J*0C$0?
<?
#/0@:$0$#'
):7
)?(
$
(
A#$A$: 0
">(?)0:KA'
'
9$;0%) "
$
7
$/:A7$$/(#'
$$%)7$$C0I:(9
?
(
B>8J1KI$#
$
%
(
(
:
Anschluss
serial control
?
-.
(
41
(
5
(
?
(
(*7
(9
?
-.
(*73
7
(
?
(
(
(
?
-.
(
41
(
5
(
(
(
?
(
(
5
(
41
?
-.
(
(
(
(
5
(
41
(
(*7
(
(
?
(
(*73
(
5
(
41
?
-.
2
Pb
Pr
3
component
4
5
s-video
Y
Pb
7
video
Pr
D5 8
trigger 1
trigger 2
6
component
KomponentVideo
*%
$;
I#7$#
-1:
Anschlussbezeichnung am Projektor
&
A$J0 ?
(
(K'?
%
$0( (
1
IR in
vesa 2
Video
S-Video
Y
M1-DA 1
Tabelle 1: Videoverbindungen
Eingangssignal
VESA
6
MT8 german.fm Page 7 Friday, November 22, 2002 9:06 AM
Anschließen eines Videogerätes
Komponentkabel anschließen
A9(
$7$$#)%)
7$$C0I:(9(
I
$#
$%
?
(
(
(
:
1
Y
IR in
M1-DA 1
vesa 2
Pr
S-Videokabel anschließen
IR in
vesa 2
Pr
trigger 2
Pr
5
s-video
6
component
1
Y
M1-DA 1
trigger 1
D5 8
7
video
Pb
4
3
component
Composite-Videokabel
anschließen
Y
2
Pb
serial control
trigger 2
Pr
6
component
1
Y
M1-DA 1
trigger 1
D5 8
7
video
Pb
4
5
s-video
3
component
A(
$?
?0%)0@
$'?0$'
70
(
$$'?
0JOYP/0
K "
:0@?0
70(
$?
0JOPbP/0K "
:0@
?0
70
(
$
?
0JOPrP/0K
"
:
A(
$(
0%#%)
0@
(
(
0(
$
S-Videoanschluss "
:
A(
$$
(
0%)
0@$0
(
(
70(
$:0$
0Videoanschluss "
:
Y
2
Pb
serial control
IR in
vesa 2
Pr
3
component
M1-D-Kabel anschließen
Y
2
Pb
serial control
D5
7
video
Pb
trigger 2
6
component
1
Y
IR in
M1-DA 1
trigger 1
8
Pr
4
5
s-video
vesa 2
Pr
3
component
Y
2
Pb
serial control
Pb
7
video
D5 8
6
component
A(
$(90%)0@
?(
70(
$:0
0M1-DA-70 "
:
VESA-Kabel anschließen
IR in
vesa 2
serial control
Anschließen des Netzkabels
1
Y
M1-DA 1
HINWEIS() "
$#&/:
IR in
vesa 2
serial control
Netzkabel anschließen
7
2
Pb
Pr
3
component
4
5
s-video
Y
Pb
Pr
6
component
7
video
D5 8
trigger 1
trigger 2
2
Pb
Pr
3
component
0@&/70B'0
"
0
:
;*##
0$'#:
1
Y
M1-DA 1
A(
$(*70%)0@
(*7?(
70(
$:0
0VESA-70 "
:
4
5
s-video
Y
Pb
Pr
6
component
7
video
trigger 1
trigger 2
Pr
4
5
s-video
D5 8
trigger 1
trigger 2
MT8 german.fm Page 8 Friday, November 22, 2002 9:06 AM
Anzeigen eines Videobildes
Linsenabdeckung entfernen
*#;0$:
'0Netztaste
"
:
Netztaste drücken
"
$
#A
%
J 3+K:;*7/$$'(
#:
;#0)0$
;*0$'#:*8
%
$0:
Kein Startbildschirm?## :
0@(
$0:
Videogerät einschalten
8(
$
# "
)0:
A0A'0Source##:
C "
#*$
'0#@/#:$$#:
70$#@:
Höhe
einstellen
Hebefuß
"
$)'0*#$
%
+2>/;)#:* "
$C@
*#$/;)## -4:
Entfernung einstellen
8
Ausrichtungsfuß drehen
MT8 german.fm Page 9 Friday, November 22, 2002 9:06 AM
E
A
$
$)'0>C@0#0:
Zoom und Fokus einstellen
Zoom
Fokus
A80D0%)#
#/?
*$:'0#
Keystone
8
80///):#
Keystone880/
/:
Keystone einstellen
KontrastHelligkeitFarbeFarbton)$#.1A
:A$)'0C*$
8'%:
Bildmenü einstellen
#/'## 3:
9
MT8 german.fm Page 10 Friday, November 22, 2002 9:06 AM
Anschließen eines Computers
Computerkabel anschließen
1
Y
IR in
M1-DA 1
vesa 2
Pr
vesa 2
1
Pr
0@&/70B'0
"
0
:
1
Y
Netzkabel anschließen
;*## "
0$'#:
M1-DA 1
IR in
vesa 2
serial control
Pr
3
component
Pb
7
video
D5 8
7
video
D5 8
trigger 1
trigger 2
Pr
6
component
trigger 1
trigger 2
Pr
4
5
s-video
Pb
4
5
s-video
Y
2
Pb
Y
2
Pb
3
component
trigger 1
trigger 2
6
component
IR in
serial control
D5 8
Pr
5
s-video
Y
M1-DA 1
7
video
Pb
4
3
component
0@)(*7
?0
"
0:0@*?
(
0
:
%)'/
%
(
0
:
Y
2
Pb
serial control
6
component
HINWEIS() "
$#&/:
0 "
:
RS-232-Kabel anschließen
C "
%
;?
#
%
B3-3?seriellen70
"
%:
1
Y
M1-DA 1
IR in
vesa 2
serial control
10
2
Pb
Pr
3
component
4
5
s-video
Y
Pb
Pr
6
component
7
video
D5 8
trigger 1
trigger 2
MT8 german.fm Page 11 Friday, November 22, 2002 9:06 AM
Abschalten des Projektors
Fehlerbehebung für die Einrichtung
Strom sparen
A80$#8000
70)J +K:7#'*0$
$:
"
%#'$'
#
')0
;
00)#'32$
#$):&0/)
$00
"
:A%
70 "
%$
#
$)8$/$:'Netztaste'0
07#%
'-28//$:
;*7/$
## "
/$
"
A$0:
Tabelle 2: Verhalten der LED und Bedeutung
Ausschalten des Projektors
'0Netztaste "
/0:;
)$0;*$#$$'
)(
/?'$)#:;
$'0;*$'#(
:
E&/%
$ "
/0:
LED – Farbe/Verhalten
Bedeutung
Beständig grün
Der Projektor ist an die Stromversorgung
angeschlossen; oder der Projektor wurde
angeschaltet und die Software initialisiert.
Der Projektor wurde ausgeschaltet, und die
Ventilatoren haben angehalten.
Blinkend grün
Die Netztaste wurde gedrückt und die
Software initialisiert; oder der Projektor
wurde abgeschaltet, und die Ventilatoren
laufen noch, um die Lampe zu kühlen.
Blinkend rot
Der Projektor startet nicht, wenn die LED
rot blinkt. Sie müssen das Problem beheben,
das Netzkabel trennen und erneut
anschließen und den Projektor dann
einschalten.
Versagen des Ventilators (4x Blinken) oder
der Lampe (3x Blinken). Schalten Sie den
Projektor aus, warten Sie eine Minute, und
schalten Sie ihn wieder ein. Überprüfen Sie
das Gerät außerdem auf blockierte
Luftöffnungen oder einen stehen
gebliebenen Ventilator (5x Blinken).
Weitere Informationen über blinkende rote
LEDs finden Sie auf Seite 34.
Beständig rot
Ein nicht identifizierbarer Fehler: Bitte
wenden Sie sich an den technischen
Kundendienst.
#
$/$$
:9$A
C$0;C$$$:(0;C$
#$#'B#
$: $CC
'$;C$$
:
11
MT8 german.fm Page 12 Friday, November 22, 2002 9:06 AM
Problem
Lösung
Ergebnis
Kein Startbildschirm
Netzkabel anschließen und
Linsenabdeckung entfernen
Netztaste drücken
Richtiges Bild
Startu
p
Das Bild ist nicht auf der Leinwand zentriert.
Verschieben Sie den Projektor; stellen Sie
Zoom und Höhe ein.
Zoom
Stellen Sie die horizontale oder vertikale
Position im Menü „Bild > Erweitert“ ein.
12
Richtiges Bild
MT8 german.fm Page 13 Friday, November 22, 2002 9:06 AM
Bild ist nicht quadratisch
Stellen Sie Keystone auf dem Tastenfeld ein.
Quadratisches Bild
Bild passt nicht auf 16:9 Leinwand
Ändern Sie die Aspektrate im Menü „Bild >
Aspektrate“ auf 16:9.
Richtiges Bild
Verzerrter Bildrand
Aktivieren Sie die Funktion „Overscan“ im
Menü „Bild > Erweitert“.
Richtiges Bild
AB
AB
13
MT8 german.fm Page 14 Friday, November 22, 2002 9:06 AM
1. Die projizierten Farben stimmen nicht mit der
Quelle überein.
2. Die Farben sind verwaschen oder zu kräftig.
3. Das Bild von einer Komponent-Quelle hat einen
Grünstich.
1. Stellen Sie Farbe, Farbton,
Farbtemperatur, Helligkeit und Kontrast in
den entsprechenden Menüs ein.
2. Wählen Sie eine andere
Gammaeinstellung.
3. Wählen Sie einen anderen Farbraum.
COLOR
Das Bild steht auf dem Kopf
Richtiges Bild
COLOR
Deaktivieren Sie die Option „Deckenmontage“
im Menü „Einstellungen > System“.
Richtiges Bild
AB
BA
Das Bild ist spiegelverkehrt
Deaktivieren Sie die Option „Hinten“ im
Menü „Einstellungen>System“.
Richtiges Bild
AB
A
14
MT8 german.fm Page 15 Friday, November 22, 2002 9:06 AM
Das Videobild ist verzerrt und fragmentiert
Ändern Sie den Videostadard im Menü
„Bild > Erweitert“.
AB
Die Lampe leuchtet nicht auf, die LED-Anzeige
blinkt rot (Seite 11).
Richtiges Bild
AB
Vergewissern Sie sich, dass die
Luftöffnungen nicht blockiert sind. Lassen
Sie den Projektor eine Minute lang
auskühlen.
Ziehen Sie den Netzstecker ab, warten Sie
eine Minute, stecken Sie den Projektor
wieder ein und schalten Sie ihn ein: Die
Lampe leuchtet auf.
Startu
p
blinkt
rot
15
MT8 german.fm Page 16 Friday, November 22, 2002 9:06 AM
Fehlerbehebung des Computers
Source-Taste drücken
Externen Anschluss des Laptops aktivieren
Nur der Startbildschirm erscheint
A
Kein Computerbild, nur der Text „Signal außerhalb
der Reichweite“
A
A
A
Startu
p
Projiziertes Computerbild
Oder Laptop
erneut
starten
Stellen Sie die Bildwiederholungsrate unter
„Systemsteuerung > Anzeige > Einstellungen > Erweitert > Adapter“ ein (genaue
Position hängt vom Betriebssystem ab).
Projiziertes Computerbild
A
Signa
l
rang out of
e
16
A
MT8 german.fm Page 17 Friday, November 22, 2002 9:06 AM
Bild unscharf oder abgeschnitten
AA
A
Stellen Sie die Anzeigeauflösung des
Computers auf die Auflösung des
Projektors ein (Start > Einstellungen >
Systemsteuerung > Anzeige >
Registerkarte „Einstellungen“. Wählen Sie
1024x768.
Auf einem Laptop
den LaptopMonitor ausschalten
oder Dual-Anzeige
aktivieren
Treten immer noch Probleme auf?
A#C$#9
:
17
Bild ist scharf und nicht abgeschnitten
A
MT8 german.fm Page 18 Friday, November 22, 2002 9:06 AM
Verwenden des Tastenfeldes
)700:
*#
$/A
'0
NetztasteR0 "
J !KJ !K:
MenuRS##80'J 3K:
SelectR8$')J 3K:
Menü-Navigationstasten
PfeiltastenR&%$
0'(
%
*$J 3K:
Auto-BildR/ "
#I/'0:
VoreinstellungenR0#%#'$
8/%
$J 34K:
KeystoneR8#
J K:
HelligkeitR8J 33K:
GrößenänderungRT7J 33K:
QuelleRT%IJ 3!K:
18
MT8 german.fm Page 19 Friday, November 22, 2002 9:06 AM
Verwenden der Fernbedienung
Fehlerbehebung für die Fernbedienung
A$%)/)J3K;##$777
8:C#0$/):*#/
70$A$0 80 /:8$
70$):
HA$/%)0#
"
)
# "
J0#(
$
K:
8#$$2+4:
'0Menu#A$'
"
/C##:C# #%$
AuswahltasteJ0K'0A
/)
'$/:9#
''
## 3:
A$A
$
M
M
M
M
M
M
M
M
M
M
($)080$$$0
:
M
($)0A$# "
;)0#(
$
$0080)%
+4
#:
Taste für Hintergrundbele
Navigationstasten
NetztasteJ )K/*70 "
J9#
/70## K:
#'$0$/70
A$:
Helligkeits-J8$KKontrasttasteJ
K/8$
LeerJ8K/7/$80
8J/780# 3+K
QuellentastenJ
0K/7)IJ/E)$
II 3!K
I0:
GrößenänderungstasteJB/K/T$7J
33K
Auto-Bild-TasteJ7
9$K/E'0/ "
#
I:
VoreinstellungstasteJ K/$0
*$J 34K
Overscan
%,890/8$%
C$(
J
35K
19
MT8 german.fm Page 20 Friday, November 22, 2002 9:06 AM
Optimieren von Videobildern
Benutzerdefinierte Anpassung des Projektors
(
$0$$0
8#
80$/$)C8#
80'
:7$9#
/()$
'## 3:
C "
9/7#
$:
*/'A
## 3! -2:
M
M
7%
OP'OEinstellungen > SystemP
#''0)$ "
:
M
7%
O0#$$P'
OEinstellungen > SystemP#'0#$$:
M
*
707/$$
)
"
:
M
0
#
:
M
7)A#'80;
$
:
H0'#00$:
M
7)'0:
T7:7(%
8/8C:A0%)B$
A
--04-$:((
%)5!J.+K:'6
#'
9*$$D$$
'0
Größenänderungstaste#A$6
/
0#: 33:
M
?
?
$A
A
8': 33:
M
A
%)
A$96###'AB
>'
8/: 3.:
M
A
>$:
3.:
M
(
:6
O7
P%0
$(
$/:
$$#:: 3.:
M
7%A
O6%0PC$
(
/#: 35:
M
&#;#LA
A$
?
*$$%
: 31:
M
O
;$P;0$/<:
3!:
M
($)0( #.+A$
$:7)$#
8/$( :
20
MT8 german.fm Page 21 Friday, November 22, 2002 9:06 AM
Verwenden der Menüs
'0OP##
#A
$'/C##:J')0.2
0$0
)0#
$:K'
)$/$:() #$)'0H
'/)'0#Select:
Menütaste
H'$/)'0
#Select:# #)
6
'6
0A
()$?
0
:'0#Select
T$/$:() #/
*$/%$:*$
#$%$/6
O8P'0
AuswahltasteJ0K/%
$'/'0/:
C"/#Menu'0'/0@:
Navigationstasten auf
dem Tastenfeld
Hauptmenü
Bildmenü
Punkte
(
') $/$:7/ )#'0%
J'K%
J#H'K:
Einstellungsmenü
'0&/$$
M
8'A
/8$:
M
*$'C$0T$%
*$
0#$%):
M
'O9#
P/$0$0'/9#
'
"
I:
Infomenü
*$'%#'$)I
$0
:8)OA
P#'&(
D
%#'$00)I%:7
'
C$0)$)0%#'$
:8)6
O$P$8
%:
21
MT8 german.fm Page 22 Friday, November 22, 2002 9:06 AM
80/:.<+(
D
D7#C$%
3!2<234
C0
)07/$/3!2 <532E%
*$#:
Bildmenü
H#
$#'#*$/%)
*$'0#Select:T#
#'0#O0PT$/
':7'$)#
-5#$#':
Keystone(8$U08D0:
C?
0'#:
Keystone erhöhen
Kontrast?
H0/)0
80$%
0)/@8:
HelligkeitT8:C$0'
#:
FarbeJ(
DKT8%
0)/)@/
%
$$$A:
FarbtonJ&(
DKTB
>'>0$)0
8:
Aspektrate7(%
8/8C:
A0$)C0--04-:(
(5!
.+:6
O&%P4-.+O;
<P
O&P:
$.+:E<$80/
8)$(%
8/C:#C$
"
3!2<532:()O&%P4-
O&
P#'4-*$$DO&%P.+
O;
<P#'.+
*$: $Größenänderungstaste#A$
0#6
:
Aspektrate
Native
$
$/$
8
"$0>C@$:#C$
J&%K3!2<532$4<-(
$#.42<4!2%
)(
7/$
);)$/$:
7#C$%
234<5.!
)$)##
22
Keystone verringern
MT8 german.fm Page 23 Friday, November 22, 2002 9:06 AM
16:9 Bild
16:9 Bildeingang
16:9
Aspektrate
9
9
16
16
4:3 Bildeingang
4:3 Aspektrate
4:3 Bild auf 16:9 Leinwand
3
9
16
4
Letterbox: *$)7%
.+:A
I80A
.+%)#'8
$;):IO;
<P%))
8%$C@;)$:
Schwarze
Streifen
4:3*$%6$%
8
;)7%
4-:A
4-I.+;)%))8
80A
.+/
0)/##
;)#:
Schwarze
Streifen
16:9:$16:9: *$)
7%
.+/()$#'8)
(#$%
$:
Letterbox-Bildeingang
16:9 Bild füllt 16:9 Leinwand aus
Schwarze Streifen
Letterbox
Aspektrate
9
3
Schwarze Streifen
4
4:3 Bildeingang
Natural WideJ&'08K*$/8%
A
4-8$.+;)#':
/)8%U
B0)$0:
Natürliche Breite
Aspektrate
3
4:3 Bild füllt 16:9 Leinwand aus
9
4
23
16
16
MT8 german.fm Page 24 Friday, November 22, 2002 9:06 AM
VoreinstellungenC*$/#
):H)$$
)/)O$P'
Einstellungen > Service:
Voreinstellungen
Benutzer-Voreinstellungen
speichern
H(
$#'I/
/8:Einstellungen speichern'
O(
$P)O8/:3
-:P:C
*$)0
(
$):
24
MT8 german.fm Page 25 Friday, November 22, 2002 9:06 AM
Erweiterte Einstellungen
TrueLife6
/0#A
"VO;#P($
8:7%
$J
(
?
K)0 /
$#':A')
)
$
%?
D"
00A:C
;#A
%0$0 /
#':0C#
$/)6
Chroma DetailA
A0#:
Erweitert
Luma DetailA
0#:
Störungsminderung$C$/$:
O7PC$$/%:6
O7
P
'*$
#):OP
*$%
/:
O
8P%($C$$#'
C:8%
($#$:
A
%#'$)O7
P
OP$):
Störungsminderung
CCSJ
K($#
A#
;7:A
#'
$%#'?
$%
#'(
$
$0):
NTSC 2:2 Pulldown7%A
/0$7/$
%
&$-28,/$)J
348,K:
2:2/3:2 Aus*$0#/)$
A
#$$:
25
MT8 german.fm Page 26 Friday, November 22, 2002 9:06 AM
Farbraum6
#'
(I$'$J
00'#'(
DK:7)
A(
$$/$):
6
O7
P$) "
0
#:H*$/)%A
O7
P)OB>8P#'
DOB*52+P#'
?
2!2
532I
OB*.2P#'?
4!2
15.I:
Farbraum
FarbtemperaturT9A:
#$#':
Farbtemperatur
Farbeinstellung6
*$%
9
J%AK6##J0)/AK#'
$'A:
Gamma>%
$#'
*$$D
9
#$
:C
/#'A(
*$$
)B$
>):JA'$0%
A)/:8:?
#:(
%
(
/:8:A
)
$:K
Farbeinstellung
HINWEIS8/%
/$70$:
0#>
)*$
9/$:
Gamma
Videostandard6
O7
P$)%0
"
(
$%
#$
*$$$
0/:J(
6
C$0)00$$%
)0
0#:K "
0$0
#AC$0)00$
8%/:AA(
'O(
P6
O&PO 7;P
O*7P):
Videostandard
26
MT8 german.fm Page 27 Friday, November 22, 2002 9:06 AM
OverscanJ(
DK*#C$(
:
#
$%6
#'
(I
%#'$
Phase6
#'$?
%$
(
$:
Gleichlauf6
AD/#'$?
%$
(
$:
Horizontale/Vertikale Position6
I:
27
MT8 german.fm Page 28 Friday, November 22, 2002 9:06 AM
Einstellungsmenü
Quellen*E)$*$$
A$%/):%A
O7
IP:A
O7
IP0%
/ "
@$//%)I:A
I$#))80$/$:
O7
IP%''# "
/
//%)I:A$%
''#
"IB0I$#
"
$0):
Einstellungsmenü
CA
OI%P%)
I0/'$:0#0
:@$6
#'I%:%
?0#'I0/0@:
Quelle
aktivieren
Quelle 1
System
76
')%
%:
Hinten: ?8
%
#
)
"/):
Deckenbefestigung8#?
#
%
0#$ "
"/):
HINWEIS*)#
$'$8$
0
%
/)>%
$
#$)J0$#32K:
Systemmenü
Auto-StromA
O7
P%$
"
0*0
0':7#
C0#$ "
0
):
Meldungen anz.E$$J/:8:O0PK
*080:
Hohe Leistung7%A
9;
/C:%'/;;C
>0$(
:
28
Quellen
MT8 german.fm Page 29 Friday, November 22, 2002 9:06 AM
Durchsichtige AnzeigeH0'#00$:
A
%8(
%
*$
%
$%
'%0):
SignaltonA
%C$
)
Netztaste$'0):
Systemmenü
Strom sparenA
%);
0$0)32$$%
:&0/)
$00 "
:
A%
70 "
%$#
$)
8$/$:
Start-Logo: *C$07/$0)/)@
800)
I):
Start-Logo
Leerer Bildschirm;$#)0A$/$))
Leer#A$'0
I%:
Leerer Bildschirm
Sprache*C$07)0#''
$:
Sprache
29
MT8 german.fm Page 30 Friday, November 22, 2002 9:06 AM
ServiceHA
//)
'0#Auswahltaste:
Werkseinstellungen/*$J7%
;/O0POPK#)/'0
/
$#/8$$:
Servicemenü
TestmusterA
/$)Leer
#A$$'0):() ##
A$
#/7):
Service Code&/()$0
$
:
Wartung
Die Linse mit einem weichen,
trockenen Tuch und einem nicht
scheuernden Reinigungsmittel
reinigen
Reinigen der Linse
1 ()00B$$#'
?)0
00:
(()$%
'@$%B$$
$B$$0#;#:
0;C$
C
;//:
2 0;B$$0#C$
8)$$%
0$:00$ "
#
/%)$;0$):
30
MT8 german.fm Page 31 Friday, November 22, 2002 9:06 AM
Auswechseln der Projektionslampe
8;9#
'$7/8
#';:&0+!20&00
O;)0P"/#80:A'
;$/#;$$3222
/)0:C;
A0
/:9#
/#OECP# --:
Lampenstunden
Projektor ausschalten
und ausstecken
1 0 "
/&/:
2 .2 "
%
$':
60 Minuten warten
3 "
#70$
;/)0#$
;0$0:
VORSICHT "
##A#
;0$%)):0);#
0$ "
)'/.
4 ;C0;
:
Die Schraube am Lampenmodul lösen
Draht
31
MT8 german.fm Page 32 Friday, November 22, 2002 9:06 AM
WARNUNGEN
M
M
M
M
H($/% "
.2$'%
;/.
;;
0#:>C/0
/(/$#'.
8'00;:A$'0C
0# "
0$:
*#;
%
0$:9
)00A;/0C
>:
)
#
90@*#%
0$:
5 &;
%
0$
$#C/:*
$;
80$/##H)%
0#:
6 9;
%$)0
0$$$:
7 E/0#:
8 8$70$)0$
//)0:
9 0&/'0Netztaste
"
)/0:
10 /8/;/'0:
Zurücksetzen des Lampenzählers
H;/'0//Helligkeitstasten
## "
$0/$/$
$'0:
1
Y
M1-DA 1
IR in
vesa 2
serial control
Pr
3
component
Verwenden der Sicherheitssperre
"
%#'$'0/*/ >?:8#
#
OECP# --:8$)$#
$#9#
:
2
Pb
4
5
s-video
Y
Pb
Pr
7
video
D5 8
trigger 1
trigger 2
6
component
Sicherheitssperre
32
MT8 german.fm Page 33 Friday, November 22, 2002 9:06 AM
Anhang
Zubehör
Standard-Zubehör
(im Lieferumfang des
Projektors enthalten)
Spezifikationen
Versandkarton (mit Verpackung)
Temperatur Betrieb
Nicht in Betrieb
10 bis 35 °C auf einer Höhe von 0 - 3000 m
-20 bis 70 °C auf einer Höhe von 0 - 6000 m
Höhenlage Betrieb
Nicht in Betrieb
0 bis 3000 m
0 bis 6000 m
Netzkabel (abhängig vom Land)
Fernbedienung
Projektionslampenmodul (im
Projektor)
Linsenabdeckung
Benutzeranleitung
Luftfeuchtigkeit Betrieb
Nicht in Betrieb
10% bis 95% relative Feuchtigkeit, nicht
kondensierend
10% bis 90% relative Feuchtigkeit, nicht
kondensierend
Sicherheitskarte
Optionales Zubehör
Abmessungen
Kabelabdeckung
351B x 325L x 110H mm
Ersatz-Lampenmodul
Gewicht
4,24 kg ohne Verpackung
Optischer Fokusbereich
1,5 - 10 m
Lampentyp
UHP-Lampe (Dualleistung: 200 und 250 Watt)
HINWEIS()$$EC:
Anforderungen für Eingangsleistung 100 V - 120 V 4A, 50/60 Hz
200V-240V 2A 50 Hz
Deckenbefestigung UL-getestete/aufgeführte Deckenbefestigung mit einer
Mindestkapazität von 20,87 kg
33
MT8 german.fm Page 34 Friday, November 22, 2002 9:06 AM
Rote LED-Anzeige und Projektorfehler
Projizierte Bildgröße
A "
00$#
;*0
Tabelle 30C$0H0:E)08/$
")/)$ :
Tabelle 4:
Projektionsentfernungsbereich für eine gegebene Leinwandgröße
Projektionsentfernung
16:9 Leinwandgröße
(m)
Tabelle 3: Rote LEDs
Rote LED-Anzeige
Erklärung
Blinkt einmal (1)
Die Lampe geht nach fünf (5) Versuchen
nicht an. Überprüfen Sie die Lampe und die
Abdeckung auf lose Verbindungen.
Blinkt dreimal (3)
Blinkt viermal (4)
Blinkt fünfmal (5)
Der Projektor hat die Lampe ausgeschaltet.
Schalten Sie den Projektor aus, warten Sie
eine Minute, und schalten Sie ihn wieder
ein. Wechseln Sie die Lampe aus. Falls sich
das Problem durch ein Auswechseln der
Lampe nicht lösen lässt, wenden Sie sich
wegen einer Reparatur an den technischen
Kundendienst.
Der Ventilator hat versagt. Ersetzen Sie die
Lampe. (Das Lampenmodul enthält einen
Ventilator.) Falls sich das Problem durch ein
Auswechseln des Ventilators nicht lösen
lässt, wenden Sie sich wegen einer
Reparatur an den technischen
Kundendienst.
Der Projektor ist überhitzt. Überprüfen Sie
das Gerät auf eine blockierte
Lüftungsöffnung. Falls sich das Problem
durch Freimachen der Lüftungsöffnungen
nicht lösen lässt, wenden Sie sich wegen
einer Reparatur an den technischen
Kundendienst.
34
Diagonaler
Leinwanddurchmesser (m)
MaximalZoom (m)
MinimalZoom (m)
0,69 x 1,22
1,4
1,82
2,54
0,9 x 1,5
1,75
2,3
3,2
1,0 x 1,8
2,1
2,7
3,8
1.1 x 2,0
2,3
3,0
4,2
1,2 x 2,2
2,5
3,3
4,6
1,3 x 2,3
2,7
3,5
4,9
1,4 x 2,4
2,8
3,6
5,1
1,5 x 2,6
3,0
3,9
5,5
1,7 x 3,0
3,4
4,4
6,1
MT8 german.fm Page 35 Friday, November 22, 2002 9:06 AM
Quellenkompatibilität
Tabelle 5:
Quellenkompatibilität
Video
Tabelle 6:
Projektorein- und ausgänge
Komponent und RGB HDTV (720p, 1035i, 1080p, 1080p-24Hz)
DVI/HDCP für Digitalvideo und verschlüsselte digitale
Videosignale
Komponent-EDTV (480p, 576p Progressivscan),
SECAM: M, Komponent-, Composite- und S-VideoStandardvideo (480i, 576i, 576i RGB SCART mit Adapter,
NTSC, NTSC M 4.43,
PAL: B, H, I, M, N)
Computer
Digital- und Analogsignal von PC, Macintosh, Auflösung 1280 x
1024
Kommunikation
USB und RS-232
35
2 Komponent
(Gold RCA)
HDTV-, EDTV-, and Standard-TV-Komponent
1 Komponent
(D5)
HDTV, EDTV, Standard-TV, RGB SCART mit Adapter
2 S-Video
Standardvideo
1 Composite
(RCA)
Standardvideo
1-M1-DA VESA
HDTV RGB, HDTV-Komponent, DVI, Computer und USB
1 HD15 VESA
HDTV RGB, HDTV-Komponent, Computer
1 9-pin Dsub,
männlich
RS-232
1 3,5 mm
Ministecker
IR-Repeater (Niles/Xantech-kompatibel)
2 3,5 mm
Ministecker
1 12 V Leinwandaktivierung, 1 12 V 4:3 „Aspektvorhang“
MT8 german.fm Page 36 Friday, November 22, 2002 9:06 AM
Projektorabmessungen für Deckenbefestigungen
53,7 mm
57,8 mm
221,4 mm
288,1 mm
64,9 mm
109,5 mm
3,6 mm
216 mm
312,7 mm
Abmessungen der optionalen Kabelabdeckung: 315 x 100 x 82 mm
Gesamtlänge mit optionaler Kabelabdeckung: 411,5 mm
36
MT8 german.fm Page 37 Friday, November 22, 2002 9:06 AM
*;#$80*$/:8
J777YYYYK
RS232-Anschlußdaten
Kommunikationskonfiguration
E$ "
'
B3-3?
0@70@
0@
?
#$
'
Einstellung
Wert
Bits pro Sekunde
19,200
Datenbits
8
Parität
Keiner
Stoppbits
1
Fl@regelung
Keiner
Emulation
VT100
*;#
$#
J777WK)
8##$
777
8#
W
;#
$
K
8#
*;#$80*$/:8:
Funktion
Befehlsformat
Bereich
Brightness
(BRT?)
(0-22, 10)
Lamp hours
(LMP?)
(0-9999, 421)
8##$
777
;#
$
YYYY
/0/0
J#'&0#
0K
K
8#
*$8#808#
*$:
$C@<80#$))
0#<#'A
$:
8##$0%))PWX$$:8
*$P2XZ%++++Z%:
/$78#P )X2Z%
++++Z%:
Befehlsformat
78#7/00@
7#
$?$/:7#
$
;JPWXK
0#
$J4799E0K:
J
J
37
MT8 german.fm Page 38 Friday, November 22, 2002 9:06 AM
Unterstützte Befehle
Funktion
Befehle
Bereich
Standard
Aspect Ratio
ARZ
0-4
0 = Native
1 = 16:9
2 = 4:3
3 = Letterbox
4 = Natural Wide
1
0-1
1
Auto Chime Enable
ACE
Color Temp
TMP
0-2
0 = 9300
1 = 8200
2 = 6500
2
Contrast
CON
8-252
128
CCS
CCS
0-1
0
Display Messages
DMG
0-1
1
Factory Reset (Write only)
RST
0-1
n/a
Gamma Table
GTB
0-4
0 = PC
1 = Video
2 = Film
3 = Bright Room 1
4 = Bright Room 2
2
Green Color Offset
GCO
1-63
32
Green Gain
GCG
1-63
32
High Power Enable
HPE
0-1
0
Auto Power
APO
0-1
0
Auto Source
ASC
0-1
1
Blank
BLK
0-1
0
Blank Screen
BSC
0-2
0 = black
1 = blue
2 = white
0
32
Horizontal Position
HPS
n/a
n/a
Blue Color Offest
BCO
1-63
Blue Gain
BCG
1-63
32
Keystone
DKC
2-254
128
Brightness
BRT
8-252
128
Lamp Hours (Read only)
LMP
0-32767
0
Ceiling
CEL
0-1
0
Lamp Reset
LMR
0-32767
0
Chroma Detail
CDE
8-248
128
Luma Detail
LDE
8-248
128
Color
CLR
8-252
128
Menu
MNU
0-1
0
Color Space
CSM
0-7
0 = RGB
3 = REC601
2 = REC709
7 = Auto
7
Menu Navigation
NAV
0-4
0 = up
1 = down
4 = select
n/a
38
MT8 german.fm Page 39 Friday, November 22, 2002 9:06 AM
Language
LAN
0-11
0 = English
1 = French
2 = German
3 = Spanish
4 = Chinese Traditional
5 = Japanese
6 = Korean
7 = Portuguese
8 = Russian
9 = Norwegian
10 = Chinese Simplified
11 = Italian
0
Skintone Bypass Enable
SBE
0-1
1
Source
SRC
0-7
0 = Video 1, M1
1 = Video 2, VESA
2 = Video 3, Component 1
3 = Video 4,
S-Video 1
4 = Video 5,
S-Video 2
5 = Video 6,
Component 2
6 = Video 7,
Composite
7 = Video 8, D5
2
NTSC 2:2 Pulldown Enable
NPE
0-1
0
Startup Logo
DSU
0-1
1
Noise Reduction Enable
NRE
0-2
0 = Off
1 = Auto
3 = Manual
8
Tint
TNT
8-252
128
Tracking
MTS
2148-2248
n/a
Translucent OSD
TOE
0-1
1
Noise Reduction Level
NRL
8-248
8
TrueLife Enable
TLE
0-1
1
Overscan
OVS
0-1
0
Vertical Position
VPS
n/a
n/a
Phase
MSS
0-31
n/a
Video Standard
VSU
PWR
0-1
0
Power Save
PSV
0-1
0
Presets
PST
0-2
0 = User 1
1 = User 2
2 = User 3
0
0-3
0 = Auto
1 = NTSC
2 = PAL
3 = SECAM
0
Power
Rear Project
REA
0-1
0
Red Color Offset
RCO
1-63
32
Red Gain
RCG
1-63
32
39
MT8 german.fm Page 40 Friday, November 22, 2002 9:06 AM
40
MT8 spanish.fm Page 1 Friday, November 22, 2002 8:59 AM
Declaración de conformidad
Advertencia de la Comisión Federal de Comunicaciones
(Federal Communications Commision, FCC)
!"#
$ %
.
(! ? % $
8$ / . :(?@
A 3B;
3 :(!$B $? ;B %; :
$$? !&3:
!; 3 %3
$ !
$ ; @ $ C% $ 3:
63!:
!;!& !@
:
&> %3
:
% $&'()#*+,,-+(( *,+-#+((
$&
(.//011
(.//012
(.-000,1
(.-000,,
% 34,+1,+(( *,+-#+((
$ (.-0*/0
1000
5 1001
Marcas comerciales
6"78$ 69:98"+1$ 989:;"7"< 7
$ ;:$=$"$
$ >9: =;$ :
Canadá
( $ 89(00, :
&! 8;D.800, :
Certificaciones de seguridad
E=E=FC.59G6H5I6
1
MT8 spanish.fm Page 2 Friday, November 22, 2002 8:59 AM
Contenido
Introducción
3
Posición del proyector
5
Conexiones de video
6
Cómo conectar a un dispositivo de video
7
Visualización de una imagen de video
8
Conexión a una computadora
10
Cómo parar el proyector
11
Cómo solucionar problemas de configuración
11
Uso de los botones del teclado numérico
Uso del control remoto
Optimización de imágenes de video
Personalización del proyector
18
19
20
20
Uso de losmenús
Menú Imagen
Menú Configuración
21
22
28
Mantenimiento
Limpieza del lente
Reemplazo de la lámpara de proyección
30
30
31
Apéndice
Especificaciones
Accesorios
Comportamiento del LED rojo y errores del proyector
Tamaño de laimagen proyectada
Compatibilidad de las fuentes
Dimensiones del proyector para instalaciones de montaje al techo
Especificaciones del terminal RS-232
33
33
33
34
34
35
36
37
Consideraciones importantes sobre la operación
.! !
! %3:=@$ B! ?%& ; :
.!& :(
!@; !
B@$ ; :
No coloque objetos en las áreas laterales o en el frente del proyector.
0,6 m (2 pies)
0,6 m (2 pies)
0,6 m
(2 pies)
2
MT8 spanish.fm Page 3 Friday, November 22, 2002 8:59 AM
Introducción
Componentes y características del proyector
teclado numérico
$>3 % $ 3 @$ :%"#
@?; A $:(@ ;3 $ ;33 1#0>410 ;3% B @ $?="J% % J: $@ -/ B 3:!&% ? ;3$ %$ % ;@ $:
receptor
del control
remoto (IR)
IR
ventilación de
toma de aire
desenganche del
pie elevador
foco
Elementos incluidos
aumento de lente
ventilación de calor
panel de E/S
proyector
IR
receptor del
control remoto (IR)
control remoto
tapa del lente
pie
nivelador
cable de
alimentación
manual de uso,
tarjeta de seguridad
3
escape
MT8 spanish.fm Page 4 Friday, November 22, 2002 8:59 AM
Panel de conectadores
( % K
K
K
% G6
% % G6
K
6'LC9 )
K
C(6'L% L )
K
receptor del
video
control remoto (IR)
D5
disparadores
video
s-video
de 12 V
entrada IR
video/computadora
1y2
1
Y
M1-DA 1
IR in
vesa 2
Pb
Pr
serial control
3
component
% /
&; ;.M G1,1
:=; 9;B ?
'=9)@6& @$ ,4:
conectador de
alimentación
,/ 1
%:( @ : 3 @ $
%%@3 :( 1
2
,:62
,6
G'69$)3Resize (Cambiar el tamaño)
%@A 1C & /$ :E 2
,:6%%;-
*
%:
2
4
5
s-video
Y
Pb
7
video
Pr
D5 8
trigger 1
trigger 2
6
component
video de
conectador componente
serie
traba
conexión del disparador de pantalla
+12 V
puesta a tierra
enchufe unipolar
de 3,5 mm
"@ @$ ,/:
hacia el relé de la pantalla (consulte al fabricante
de la pantalla para obtener más detalles)
4
MT8 spanish.fm Page 5 Friday, November 22, 2002 8:59 AM
Posición del proyector
L ;! 3 A; 3 ;& !:L!?$$:
1 !; !;
@$:
( @> ,'0) ; 3:"$ ! 0/'-$:) :" 4'/-) 3:
@ $? 3!%$ @
;3:" %$@$ 1#:
3 B :(
$ % N@$ ,,:
imagen de 3 m
(10 pies) de alto
2 " :
= ;$3 ; % A $ :"@;3
A $ @$ ,2:
parte inferior
de la imagen
75 cm (1,6 pies)
por encima
del lente
=$ @$:=3
$ -O:($;!$ ,'0
) ; @4/'-)
:
5
centro del lente
MT8 spanish.fm Page 6 Friday, November 22, 2002 8:59 AM
Conexiones de video
" $ % 'CG) % $'C)% @@ $$ % %3 ;3'LC)B C
:'. >!
A? A B :( B $
$ % 'CG)$ % $ %3:8@! %! B :( %! :@ :(% C9GH8'L/)
$ % % :
M1-DA
serial control
Conectador
,% 2/
C 4
%3 ;3
'LC)
C C(6
C9
,C(61
6
C
C % C ,% 2/
C 4
H % 'CG)
C % C C 4
% 2/
,-
C @
C % C 4
% 2/
$ % C(6
C % C C(61
C 4
% 2/
,-
2
Pb
Pr
3
component
4
5
s-video
Y
Pb
7
video
Pr
D5 8
trigger 1
trigger 2
6
component
video de
componente
" ;
@$ ,/ 6& :
Etiqueta del
conectador en el
proyector
(3 %3@ C '%3 ;3) % $%3 C C
1
IR in
vesa 2
video
s-video
Y
M1-DA 1
Tabla 1: Conexiones de video
Señal de entrada
VESA
6
MT8 spanish.fm Page 7 Friday, November 22, 2002 8:59 AM
Cómo conectar a un dispositivo de video
% % @ :(% C9 $ % % % :
% % B ; % % % % % '! PYQ) :(; B B % % B '! PPbQ)
:(; % % '! PPrQ) :
% % B % ; % % % % S-video :
% % B % ; % % % % :(;
Video :
conecte el cable de componente
1
Y
IR in
M1-DA 1
vesa 2
Pr
IR in
vesa 2
Pr
trigger 2
Pr
5
s-video
6
component
1
Y
M1-DA 1
IR in
vesa 2
Pr
3
component
conecte el cable M1-D
Y
2
Pb
serial control
D5
7
video
Pb
trigger 2
6
component
vesa 2
Pr
3
component
conecte el cable VESA
IR in
vesa 2
serial control
Conexión del cable de alimentación
1
Y
M1-DA 1
IR in
vesa 2
serial control
conecte el cable de alimentación
7
2
Pb
Pr
3
component
4
5
s-video
Y
Pb
Pr
6
component
7
video
D5 8
trigger 1
trigger 2
2
Pb
Pr
3
component
3 :(=( &% :
1
Y
M1-DA 1
4
5
s-video
Y
2
Pb
serial control
% % B C(6;
C(6 % % % :(;
conectador'$ :
1
Y
IR in
M1-DA 1
trigger 1
8
Pr
4
5
s-video
% % B C9;
% % % :(;
conectador
:
NOTA
3 :
trigger 1
D5 8
7
video
Pb
4
3
component
conecte el cable de video
compuesto
Y
2
Pb
serial control
trigger 2
Pr
6
component
1
Y
M1-DA 1
trigger 1
D5 8
7
video
Pb
4
5
s-video
3
component
conecte el cable de S-video
Y
2
Pb
serial control
Pb
7
video
D5 8
6
component
Y
Pb
Pr
6
component
7
video
trigger 1
trigger 2
Pr
4
5
s-video
D5 8
trigger 1
trigger 2
MT8 spanish.fm Page 8 Friday, November 22, 2002 8:59 AM
Visualización de una imagen de video
retire la tapa del lente
G :
presione Power
"3Power'( )!
:
(% ?!
'@$ 1*):(=( % % :
@ =(! % :" > !$$:
encienda el dispositivo de video
¿No aparece la pantalla de inicio? 5$ @$ :
% % :
=$ 3:
3Source ') &:
ajuste la
altura
6 3 $
> % :% :
pie
elevador
" @$ *0$ :@$ ,2
A @$ :
ajuste la distancia
8
gire
el pie
nivelador
MT8 spanish.fm Page 9 Friday, November 22, 2002 8:59 AM
6 ;@ A $ B :
ajuste el aumento de lente y el foco
aumento de lente
foco
$ 3B B &:"3Keystone'3
B ) $:"3Keystone; ;:
ajuste la corrección trapezoidal
(ContrasteBrilloColorTinte% ;@
$@ -/ ;$":
ajuste el menú Picture
@$ 1 :
9
MT8 spanish.fm Page 10 Friday, November 22, 2002 8:59 AM
Conexión a una computadora
conecte el cable de la computadora
1
Y
IR in
M1-DA 1
vesa 2
Y
2
Pb
Pr
serial control
7
video
Pb
D5 8
5
s-video
trigger 1
trigger 2
Pr
4
3
component
6
component
C(6 :
> % :@
B % :
1
Y
M1-DA 1
IR in
vesa 2
Pr
3
component
Y
2
Pb
serial control
Pb
7
video
D5 8
trigger 1
trigger 2
Pr
4
5
s-video
6
component
3 :
1
Y
conecte el cable de alimentación
(=( & % :
M1-DA 1
IR in
vesa 2
serial control
Pr
3
component
Y
2
Pb
Pb
7
video
D5 8
5
s-video
trigger 1
trigger 2
Pr
4
6
component
NOTA
3 :
( $ :
conecte el cable RS-232
1
Y
M1-DA 1
" =
G1,1 Serial') :
IR in
vesa 2
serial control
10
2
Pb
Pr
3
component
4
5
s-video
Y
Pb
Pr
6
component
7
video
D5 8
trigger 1
trigger 2
MT8 spanish.fm Page 11 Friday, November 22, 2002 8:59 AM
Cómo parar el proyector
Cómo solucionar problemas de configuración
Ahorro de energía
$$3
'@$ *): ;$3:
(;3"7%'6$?)
')!$@@ $A 10:& 0A
$:A% !
$@$:"%B$%B
,0 3Power:
(=( & :
Tabla 2: Comportamiento y significado del LED
Color y comportamiento del LED Significado
Cómo apagar el proyector
"$3Power:=
@$=( B% % ; @: @; =( % % $: 3$
:
verde constante
El proyector está conectado o bien ha sido
encendido y se ha inicializado el software.
El proyector ha sido apagado y los
ventiladores se han detenido.
verde intermitente
El botón Power ha sido presionado y se
está inicializando el software o bien el
proyector se está apagando y los
ventiladores funcionan para enfriar la
lámpara.
rojo intermitente
El proyector no se encenderá si el LED
destella de color rojo. Debe corregir el
problema. Desconecte y vuelva a conectar
el cable de alimentación, luego encienda el
proyector.
Ha ocurrido una falla en el ventilador
(destella 4 veces) o en la lámpara (destella 3
veces). Apague el proyector y espere un
minuto, luego enciéndalo nuevamente.
Además, verifique que no haya ninguna
ventilación bloqueada o ventilador parado
(destella 5 veces).
Consulte la página 34 para obtener más
información sobre los LED rojos
intermitentes.
rojo constante
Error no identificable: sírvase comunicarse
con el Servicio Técnico.
=$$ :(
$@ 3:"
!: %
@:
11
MT8 spanish.fm Page 12 Friday, November 22, 2002 8:59 AM
Problema
Solución
Resultado
No aparece la pantalla de inicio
Enchufe el cable de alimentación y retire la
tapa del lente.
Presione el botón de encendido.
Imagen correcta
Startu
p
La imagen no está centrada en la pantalla
Mueva el proyector, ajuste el aumento de
lente, ajuste la altura
aumento
de lente
Ajuste la posición horizontal o vertical en el
menú Imagen > Avanzado
12
Imagen correcta
MT8 spanish.fm Page 13 Friday, November 22, 2002 8:59 AM
La imagen no es cuadrada
Ajuste la corrección trapezoidal en el
teclado numérico
Imagen cuadrada
La imagen no cabe en una pantalla 16:9
Cambie el aspecto imagen a 16:9 en el
menú Picture > Aspect ratio (Imagen >
Aspecto imagen)
Imagen correcta
Los bordes de la imagen están distorsionados
Encienda Overscan (Sobrescaneo) en el
menú Imagen > Avanzado
Imagen correcta
AB
AB
13
MT8 spanish.fm Page 14 Friday, November 22, 2002 8:59 AM
1. Los colores proyectados no coinciden con la
fuente
2. Los colores están desteñidos o son demasiado
intensos.
3. La imagen de la fuente de componente aparece
de color verdoso
1. Ajuste el color, el tinte, la temperatura del
color, el brillo o el contraste en los menús
2. Seleccione otra configuración de gama
3. Seleccione otro espacio de color
COLOR
COLOR
Apague Ceiling (Montaje al techo) en el
menú Configuración > Sistema
La imagen está al revés
BA
La imagen aparece invertida de izquierda a derecha
Imagen correcta
Imagen correcta
AB
Apague Rear (Posterior) en el menú
Configuración > Sistema
A
Imagen correcta
AB
14
MT8 spanish.fm Page 15 Friday, November 22, 2002 8:59 AM
La imagen de video aparece “rota” y fragmentada
Cambie Video Standard (Estándar de
video) en el menú Imagen > Avanzado
AB
La lámpara no se enciende, el LED destella de color
rojo (página 11)
Imagen correcta
AB
Asegúrese de que las ventilaciones no estén
bloqueadas; deje enfriar el proyector
durante un minuto
Desenchufe el proyector, espere un minuto;
enchufe el proyector y enciéndalo: la
lámpara se enciende
Startu
p
destella
de color
rojo
15
MT8 spanish.fm Page 16 Friday, November 22, 2002 8:59 AM
Solución de problemas específicos de la computadora
Presione el botón Source (Fuente)
Active el puerto externo de la
computadora portátil
Sólo aparece la pantalla de inicio
A
No aparece la imagen de la computadora, sólo las
palabras “Señal fuera de rango”)
A
A
A
Startu
p
Se proyecta la imagen de la computadora
o reinicie la
computadora
portátil
Ajuste la velocidad de regeneración de la
computadora en Panel de control > Pantalla
> Configuración > Avanzada > Adaptador (la
ubicación varía según el sistema operativo)
Signa
l
rang out of
e
16
Se proyecta la imagen de la computadora
A
A
MT8 spanish.fm Page 17 Friday, November 22, 2002 8:59 AM
Imagen borrosa o cortada
AA
A
Configure la resolución de pantalla de la
computadora en la resolución real del
proyector (Inicio > Configuración > Panel
de control > Pantalla > ficha Configuración,
seleccione 1080x720)
En una computadora
portátil, desactive el
monitor o encienda
el modo de
visualización doble
¿Todavía tiene problemas?
% :
17
Imagen clara y no cortada
A
MT8 spanish.fm Page 18 Friday, November 22, 2002 8:59 AM
Uso de los botones del teclado numérico
=? $3 3$ ;
Power
'@$ #)$'@$ #):
Menu
'@$ 1):
Select
;'@$ 1):
botones de navegación del menú
Flechas hacia arriba/abajo
B%$
;$'@$ 1):
Auto Image
;:
Presets
;$ % '@$ 12):
Keystone
$ $'@$ ):
Brightness
$'@$ 11):
Resize
$'@$ 11):
Source
;%'@$ 1#):
18
MT8 spanish.fm Page 19 Friday, November 22, 2002 8:59 AM
Uso del control remoto
Cómo solucionar problemas del control remoto
(B '1)?666 :=
;@ B >RS ?@ $%% :
K
6$ !?& 3
&$ :
K
6$ % % $ *2',0) :
" 3
' % % ):($ 33 0*2',0):
botones de navegación
"3Menu :E;%$3Select
?%:
@$ 1@;3:
(&
K
83Power $'
@$ ;3 )
K
(3 B ; K
8Brightness'8)Contrast')
$
K
83Blank '()%B; %B $' @$ 1*)
K
8Source;'$;
3 ;@$ 1#)
;
K
83Resize6$'@$ 11)
K
Auto Image B;:
K
83Preset'C )
;$ '@$ 12)
K
83Overscan $ % '@$ 14)
19
botón de luz de fondo
MT8 spanish.fm Page 20 Friday, November 22, 2002 8:59 AM
Optimización de imágenes de video
Personalización del proyector
E%B! % % & $ B B $
B :";3$
3B@$ 1:
" B ;$
?;:@$@$ 1#@$ ,0 ?:
K
6$:($3 $:H
%3 :,,
& 2
,:=
%3 ;3'LC)? % $'C):4#
3-
*:(3! ; 3Resize
:@$ 11:
K
"3 G
Configuración > Sistema:
K
"3 $
Configuración > Sistema:
K
( $ ! :
K
( ? $?:
K
63B 8
":@$ 11:
K
(;! ; $ :
L$! :
K
; $3 % B:@$ 1-:
K
(;! :
K
( H?;:
@$ 1-:
K
(@ % ;:6'6@)
@ % :
@ ;:@$ 1-:
K
( $ % :@$ 14:
K
6 B =;J:
@$ 1/:
K
L$"7'6)>B B:
@$ 1#:
K
6$ ! % $'C)&
;$ %3-
*: % $:
20
MT8 spanish.fm Page 21 Friday, November 22, 2002 8:59 AM
Uso de los menús
"3 &
:'=@ & -0
$ $3:)6'"):
E ; B
$3Select:
Botón
Menú
";$3 3Select
;%
3B $
?B %;3:"Select
;:E;%$
;$3:E%B!;B %$(>
')Select%N3Menu
!:
Botones de navegación
del teclado numérico
Menú Principal
Puntos
6 := % !%? '")'
@ ):
=@$ K
(" $:
K
($ ;$3!
;:
K
(6'6 );3 3
;:
Menú
Configuración
Menú
Imagen
!
;:"3@ ; % .@%;:= @ @ :"
8% !%$:
Menú Acerca de
21
MT8 spanish.fm Page 22 Friday, November 22, 2002 8:59 AM
:=@$ 012>4-#&
@ :%B; % ->*;1#0>012; @$ %@1#0?>410? :
Menú Imagen
"$;$
;$3Select
%;:
% @$ ,4:
aumento de
corrección trapezoidal
Keystone
$%$@ :
& 3B &:
Contrast
$ ;@@
$ $ &:
Brigthness
$:& &:
Color
'; % )$ % $ :
Tint
'; % .) % $:
Aspec Ratio
($3 $
:= %3:,,
&
2
,:=%3 ;3'LC)? % $'C):4#
3-
*:" $.%
'G)2
,-
*=>' ).< '6
):(% -
*:(%
% 3 :=3 1#0>410:E.%2
,.< ; 2
,
.%-
*=> -
*:"3Resize
:
Aspecto imagen
Native
% $$ A:"!3
1#0>410@$ % 2>,-20>2#0> @$2>,@@!A!@
22
disminución de
corrección trapezoidal
MT8 spanish.fm Page 23 Friday, November 22, 2002 8:59 AM
imagen 16:9
entrada de imagen 16:9
16:9
aspecto imagen
9
9
16
16
aspecto imagen 4:3
3
9
16
4
Letterbox
$-
*:;
-
*$:;@ $> :
barras negras
imagen 4:3 en pantalla 16:9
entrada de imagen 4:3
4:3
$ %3$
A $ @ 2
,:;2
,2
*$
-
*!$ $:
barras negras
16:9
% 16:9 ! $
-
*@ A B % :
la imagen 16:9 llena la
pantalla 16:9
entrada de imagen enmarcada
barras negras
aspecto imagen
enmarcado
9
3
barras negras
4
Natural Wide
$2
,
-
*:= $
N $:
entrada de imagen 4:3
aspecto imagen
ancho natural
3
la imagen 4:3 llena la pantalla 16:9
9
4
23
16
16
MT8 spanish.fm Page 24 Friday, November 22, 2002 8:59 AM
Presets
(;3B;$$ @ :"%
;@G'G ;@)Configuración > Servicio:
Valores preestablecidos
Guardar Valores
preestablecidos del usuario
";$% ;
$Save Settings'H ;$)
"%E.T13,'H E.T):" %%
B;$; %
:
24
MT8 spanish.fm Page 25 Friday, November 22, 2002 8:59 AM
Configuración avanzada
TrueLife
(3;=; $: A % B ;@ '% ) :=; $%> ;3%& ;
:" =;!A
$1$
Chroma Detail' )
6 B :
Avanzado
Luma Detail' )
6 B:
Noise Reduction'G 3 )
6 3 A:" 5;;'6$ )N!
;7 6
%=%:
8'53 ) ! 3 ! :"$
@$ %:(
;3@ 6:
Reducción de ruidos
CCS'3 ?)
"A!
;3 3 A:(@
A$ A $ A % :
NTSC 2:2 Pulldown '.1
1)
( ?
%BA.!,0 +
$ '%B @ 12 +$ ):
2:2/3:2 Apagado
&%? %
$ 3 ?:
25
MT8 spanish.fm Page 26 Friday, November 22, 2002 8:59 AM
Color Space'( )
(3; %3 ;3'LC)'@
; % ):= ! B ?; % :6
6 @@ :"
$;$3 ;$6GH8
; G(40*; % 0#0410G(-0; % 2#0/4-:
Espacio del color
Color Temperature' )
:% :
Temperatura
del color
Color Control' )
= % $' B% )3' $
) % B:
Gamma'H)
= H;$ B ;:" $! ?;B ?% ":'= ?$ @ ?N % $ @ % $ %3%
%:)
Control del color
Gama
NOTA
;%B3 %:G
$!@$:
Video Standard (@ % )
;$6
@ % @$
A !:'= @ % %?
$$3:)$ @ %@$@PQ: @ % $ ."6=
(6 C :
Estándar de video
26
MT8 spanish.fm Page 27 Friday, November 22, 2002 8:59 AM
Overscan
' % )( $ % :
=$23; %3 ;3'LC):
Phase')
6; %3 $ A % :
Tracking'G)
6; %3 $ A
% :
Horizontal/Vertical Position'"3B+%)
6
3 ;:
27
MT8 spanish.fm Page 28 Friday, November 22, 2002 8:59 AM
Menú Configuración
Sources')
=$ ;?;% %6
'6@): 6@ ;!B3%B:
$;; : 6@ %;;!
B3%B:$A%;
; $:
Menú
Configuración
" B?('6%)
; ! ?:" ;%;
;:% ;
! :
Activar
fuente
Fuente 1
Sistema
% %:
Rear
9%$! @ :
Ceiling
%$3 :
NOTA
!; $ $%B! '10> ):
Menú Sistema
Auto Power'"@)
"@@
@ &! :( :
Display Messages' )
'P$Q)@$;B! :
High Power'6")
( ;3 B @:& % % :
28
Fuentes
MT8 spanish.fm Page 29 Friday, November 22, 2002 8:59 AM
Translucent OSD'5 )
L!
:( !$
& :
Chime'G!)
( ;3 33Power:
Menú Sistema
Power Save'6 $?) @ @
$@ $A 10:
& 0A$:
A% !$@$:
Logotipo de inicio
Startup Logo '=$ )
=; B$$ B; ;:
Blank Screen' )
!&%@
3Blank ;%:
Fondo de pantalla
Language'9 )
= %B3
:
Idioma
29
MT8 spanish.fm Page 30 Friday, November 22, 2002 8:59 AM
Service'%)
"B;3
Select:
Factory Reset'G ;@)
G ;$'>L @
")% & @$ ;3:
Menú Servicio
Test Pattern' )
3Blank:"
;
&:
Service Code'3 $ %)
">% B :
limpie el lente con un
paño suave y seco y
limpiador no abrasivo
Mantenimiento
Limpieza del lente
1 6! @%A%
:
(%B >% !
:= %
%!? :
2 "A%%:
%B %%
:
30
MT8 spanish.fm Page 31 Friday, November 22, 2002 8:59 AM
Reemplazo de la lámpara de proyección
( @6
!@ :& *#0
P$Q'P@Q)%
:" 3 % @ & 1000
:" %3 @
:P6Q@$ ,,@
;3:
Horas de uso de la lámpara
apague y desenchufe
el proyector
1 6$ ; 3:
espere 60 minutos
2 (-0!;?:
3 &% @> B $U @;
,:
PRECAUCIÓN
. @:
(; !.
4 6; 3 @:
afloje el tornillo del módulo de la lámpara
alambre
31
MT8 spanish.fm Page 32 Friday, November 22, 2002 8:59 AM
ADVERTENCIAS
K
"%! !;? -0 B@.
K . 3 @:(% %.
K .! @ := $
; B 3:
K $ !3 @:(
!@ $
;$!A :(3 @@ A ? ;$$ :
5 (>$ 3 @$ % :@ %$:
6 9%3 @$@ !&
:
7 6:
8 C% @ B $U
:
9 (; 33Power
%:
10 GB @:
Cómo restablecer el contador de horas de la lámpara
"$U @@
Brightness & 0 $ :
1
Y
M1-DA 1
IR in
vesa 2
serial control
Uso de la traba de seguridad
Pr
3
component
( $ B ! "H :G?;3 !3B:
2
Pb
4
5
s-video
Y
Pb
Pr
7
video
D5 8
trigger 1
trigger 2
6
component
traba de seguridad
32
MT8 spanish.fm Page 33 Friday, November 22, 2002 8:59 AM
Apéndice
Accesorios
Especificaciones
Temperatura Operativa
No operativa
Altitud Operativa
No operativa
Accesorios estándar
(vienen con el proyector)
10 a 35° C (50 a 95° F) a 0 –3.048 m (10.000
pies)
-20 a 70°C (-4 a 158° F) a 0 -6.096 m (20.000
pies)
Caja de envío (con embalaje)
Cable de alimentación (según el país)
Control remoto director
Módulo de lámpara de proyección
(incluido en el proyector)
0 a 3.048 metros (10.000 pies)
0 a 6.096 metros (20.000 pies)
Tapa del lente
Manual de uso
Humedad Operativa
No operativa
10% a 95% de humedad relativa, sin
condensación
10% a 90% de humedad relativa, sin
condensación
Tarjeta de seguridad
Accesorios opcionales
Dimensiones
351 mm An. x 325 mm L. x 110 mm Al. (13,8 x
12,8 x 4,3 pulg.)
Peso
4.24 kg. (9.3 lb) sin embalar
Óptica Rango del foco
1,5 - 10 metros (5 – 32,8 pies)
Tipo de lámpara
Lámpara UHP (vatios dobles: 200 y 250 vatios)
Cubierta del cable
Módulo de lámpara de reemplazo
NOTA
E3 :
Requisitos de alimentación 100V-120V 4A, 50/60 Hz
200V-240V 2A 50 Hz
Montaje al techo Probado/listado por UL con una capacidad mínima de
20,87 kg (46 lb).
33
MT8 spanish.fm Page 34 Friday, November 22, 2002 8:59 AM
Comportamiento del LED rojo y errores del
proyector
Tamaño de la imagen proyectada
Tabla 4:
Rango de distancias de proyección para un tamaño
determinado de pantalla
@; =( Tabla 2 :L $ :
Dimensiones
de pantalla
16:9
(pulgadas/
metros)
27x48
0,69x1,22
34x60
0,9x1,5
40,5x72
1,0/1,8
45x80
1,1x2,0
49x87
1,2/2,2
52X92
1,3X2,3
54X96
1,4X2,4
58X104
1,5X2,6
65X116
1,7X3
Tabla 3: LED de color rojo
Comportamiento del LED
rojo
Un (1) destello
Tres (3) destellos
Cuatro (4) destellos
Cinco (5) destellos
Explicación
La lámpara no se enciende después de
cinco (5) intentos. Verifique que no haya
conexiones sueltas en la instalación de la
lámpara y en la puerta de la lámpara.
El proyector ha apagado la lámpara.
Apague el proyector y espere un minuto,
luego enciéndalo nuevamente. Reemplace
la lámpara. Comuníquese con el Servicio
Técnico para reparar el proyector si el
problema no se soluciona al reemplazar la
lámpara.
El ventilador ha fallado. Reemplace la
lámpara (el módulo de la lámpara contiene
un ventilador). Comuníquese con eel
Servicio Técnico para reparar el proyector
si el problema no se soluciona al
reemplazar el ventilador.
El proyector se sobrecalentó. Verifique que
las ventilaciones no estén bloqueadas.
Comuníquese con el Servicio Técnico para
reparar el proyector si el problema no se
soluciona al liberar las ventilaciones.
34
Distancia de proyección
Diagonal de
la pantalla
(pulgadas/
metros)
55,1/1,4
Aumento
máximo del
lente (pies/
metros)
6,0/1,82
Aumento
mínimo del
lente (pies/
metros)
8,3/2,54
68,8/1,75
7,5/2,3
10,4/3,2
82,6/2,1
9,0/2.7
12,5/3,.8
91,8/2,3
10,0/3,0
13,9/4,2
99,8/2,5
10,8/3,3
15,1/4,6
105,6/2,7
11,4/3,5
16,0/4,9
110,1/2,8
11,9/3,6
16,7/5,1
119,3/3,0
12,9/3,9
18,1/5,5
133,1/3,4
14,4/4,4
20,1/6,1
MT8 spanish.fm Page 35 Friday, November 22, 2002 8:59 AM
Compatibilidad de las fuentes
Tabla 5:
Compatibilidad de las fuentes
Video
Computadora
Comunicación
Tabla 6:
Entradas y salidas del proyector
Televisión de alta definición (HDTV) de componente y RGB
(720p, 10035i, 1080p-24Hz)
DVI/HDCP para video digital y video digital codificado
Componente EDTV (480p, exploración progresiva 576p),
SECAM: Video M, de componente, compuesto y S-video (480i,
576i, 576i RGB SCART con adaptador,
NTSC, NTSC M 4.43,
PAL: B, H, I, M, N)
De 2
componentes
(Gold RCA)
HDTV, EDTV, y componente de TV estándar
De 1
componente
(D5)
HDTV, EDTV, TV estándar, RGB SCART con adaptador
S-Video-2
Video estándar
De 1
componente
(RCA)
Video estándar
PC digital y analógica, Macintosh, resolución 1280x1024
USB y RS-232
1-M1-DA VESA
1-HD15 VESA
1-9-patillas
Dsub macho
35
HDTV RGB, componente HDTV, DVI, computadora, y
USB
HDTV RGB, componente HDTV, computadora
RS-232
1-3,5 mm
hembra en
miniatura
Repetidor IR (compatible con Niles/Xantech)
2-3,5 mm
hembra en
miniatura
Caída de pantalla de 1-12 V, “cortinas” de aspecto 4:3 de
12 V
MT8 spanish.fm Page 36 Friday, November 22, 2002 8:59 AM
Dimensiones del proyector para instalaciones de
montaje al techo
2.1”
53,7 mm
2,3"
57,8 mm
11,3"
288,1 mm
8,7"
221,4 mm
4,3"
109,5 mm
2,6"
64,9 mm
0,14"
3,6 mm
12,3"
312,7 mm
dimensiones de la cubierta opcional del cable: 315 x 100 x 82 mm (12,4 x 3,9 x 3,2")
longitud total con la cubierta opcional del cable: 411,5 mm (16,2")
36
8,5"
216 mm
MT8 spanish.fm Page 37 Friday, November 22, 2002 8:59 AM
E3 %%$%:"
Especificaciones para Terminal RS232
Configuración de comunicación
" G1,1
;$% ;!
$;$3 3
Configuración
Valor
Bits por segundo
19,200
Bits de datos
8
Paridad
Ninguno
Bits de parada
1
Control de flujo
Ninguno
Emulación
VT100
(; 3 '666V) 666
V
3 )
;B Rango
Brightness
(BRT?)
(0-22, 10)
Lamp hours
(LMP?)
(0-9999, 421)
'
666
WWWW
%!@
'
)
)
;B 6$ $!:
!> $
@@> $ ;3:
%%@PVQ:%
P0Q %**** %:=
>3 "7%0 %
%:
$ 3 &:=3 3 ' $ $3'PVQ)3 ' ?$699):
Comando
(; 3 '666WWWW) Formato de comandos
'
Función
37
MT8 spanish.fm Page 38 Friday, November 22, 2002 8:59 AM
Comandos reconocidos
Predete
rminado
Función
Comando
Rango
Aspect Ratio
ARZ
0-4
0 = Native
1 = 16:9
2 = 4:3
3 = Letterbox
4 = Natural Wide
1
Auto Chime Enable
ACE
0-1
1
Auto Power
APO
0-1
0
Auto Source
ASC
0-1
1
Blank
BLK
0-1
0
Blank Screen
BSC
0-2
0 = black
1 = blue
2 = white
0
Color Temp
TMP
0-2
0 = 9300
1 = 8200
2 = 6500
2
Contrast
CON
8-252
128
CCS
CCS
0-1
0
Display Messages
DMG
0-1
1
Factory Reset (Write only)
RST
0-1
n/a
Gamma Table
GTB
0-4
0 = PC
1 = Video
2 = Film
3 = Bright Room 1
4 = Bright Room 2
2
Green Color Offset
GCO
1-63
32
Green Gain
GCG
1-63
32
High Power Enable
HPE
0-1
0
Horizontal Position
HPS
n/a
n/a
Blue Color Offest
BCO
1-63
32
Keystone
DKC
2-254
128
Blue Gain
BCG
1-63
32
Lamp Hours (Read only)
LMP
0-32767
0
Brightness
BRT
8-252
128
Lamp Reset
LMR
0-32767
0
Ceiling
CEL
0-1
0
Luma Detail
LDE
8-248
128
Chroma Detail
CDE
8-248
128
Menu
MNU
0-1
0
Color
CLR
8-252
128
Menu Navigation
NAV
n/a
Color Space
CSM
0-7
0 = RGB
3 = REC601
2 = REC709
7 = Auto
7
0-4
0 = up
1 = down
4 = select
38
MT8 spanish.fm Page 39 Friday, November 22, 2002 8:59 AM
Language
LAN
0-11
0 = English
1 = French
2 = German
3 = Spanish
4 = Chinese Traditional
5 = Japanese
6 = Korean
7 = Portuguese
8 = Russian
9 = Norwegian
10 = Chinese Simplified
11 = Italian
0
Skintone Bypass Enable
SBE
0-1
1
Source
SRC
0-7
0 = Video 1, M1
1 = Video 2, VESA
2 = Video 3, Component 1
3 = Video 4,
S-Video 1
4 = Video 5,
S-Video 2
5 = Video 6,
Component 2
6 = Video 7,
Composite
7 = Video 8, D5
2
NTSC 2:2 Pulldown Enable
NPE
0-1
0
Startup Logo
DSU
0-1
1
Noise Reduction Enable
NRE
0-2
0 = Off
1 = Auto
3 = Manual
8
Tint
TNT
8-252
128
Tracking
MTS
2148-2248
n/a
Translucent OSD
TOE
0-1
1
Noise Reduction Level
NRL
8-248
8
TrueLife Enable
TLE
0-1
1
Overscan
OVS
0-1
0
Vertical Position
VPS
n/a
n/a
Phase
MSS
0-31
n/a
Video Standard
VSU
PWR
0-1
0
Power Save
PSV
0-1
0
Presets
PST
0-2
0 = User 1
1 = User 2
2 = User 3
0
0-3
0 = Auto
1 = NTSC
2 = PAL
3 = SECAM
0
Power
Rear Project
REA
0-1
0
Red Color Offset
RCO
1-63
32
Red Gain
RCG
1-63
32
39
MT8 spanish.fm Page 40 Friday, November 22, 2002 8:59 AM
40