1
USER INSTRUCTIONS ● BEDIENUNGSANLEITUNG ● HANDLEITUNG ● USER INSTRUCTIONS
1
3
2
4
MAST INSTALLATION INSTRUCTIONS ● INSTALLATIONSANLEITUNG ● INSTALLATIEHANDLEIDING ● INSTRUCTONS D’INSTALLATION
1
2
4
3
2
secs
2 secs
2 secs
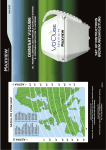
Dish alignment
Turn on the TV and receiver. On the
receiver tune into one of the channels
being transmitted from the desired
satellite (see receiver instructions for
channel numbers). Look at the map
sticker to read off the zone elevation
angle for where you are. Press the dish
up button for at least 2 seconds. When
display shows the elevation angle
required, stop the dish by momentarily
pressing the dish down button. Rotate
the mast until a picture appears. Lock
using the plastic mast spanner. Fine
tuning is possible by pressing the up or
down button momentarily until the best
picture is obtained.
If the chosen elevation is often repeated
it can be saved by pressing the AUTO
button (for at least 2 seconds). The
display flashes once when the setting
has been saved. To repeat this setting
from another elevation momentarily
press the AUTO button - the dish will
automatically seek the position and stop
when reached.
Spiegel ausrichten
TV-Gerät und Receiver einschalten.
Anhand der Frequenzliste die
Kanalnummer des gewünschten
Programms heraus lesen und am
Receiver einstellen (siehe Receiver
Anleitung). Vom Landkarten-Aufkleber
die Elevation des Standortes ablesen.
Knopf ‘Dish Up’ mindestens 2 Sekunden
drücken. Der Spiegel klappt auf.
Erscheint im Display die abgelesene
Elevation. Knopf ‘Dish Down’ kurz
drücken. Mast nun drehen bis das Bild
erscheint. Zur Bildoptimierung mittels
der Knöpfe ‘Dish Up’ und ‘Dish Down’
die Feinausrichtung durchführen und
Mastklemm-Mutter festziehen.
Bleibt man am gleichen Standort, wird
mittels des AUTO-Knopfes die
Einstellung gespeichert (MemoryFunktion). Zur Bestätlgung blinkt das
Display kurz auf. Bei Aufklappen des
Spiegels mittels des Knopfes ‘AUTO’
öffnet sich der Spiegels dann
automatisch auf die abgespeicherte
Neigung.
Uitlijnen Van De Schotel
Zet de TV en de ontvanger aan. Stel de
ontvanger in op een van de kanalen die
door de gewenste satelliet worden
uitgezonden (zie ontvangerinstructies
voor kanaalnummers). Zoek op de
kaartsticker de zone elevatiehoek voor
de plaats waar u bent. Druk de
‘schotel op’ knop minstens 2 seconden
in. Wanneer de display de gewenste
elevatiehoek toont dient u de schotel te
stoppen door even op de ‘schotel neer’
knop te drukken. Roteer de mast tot
een beeld op het scherm komt.
Vergrendel met de plastic mastsleutel.
Fijninstelling is mogelijk door indrukken
van de ‘op’ of ‘neer’ knoppen tot het
beste beeld wordt verkregen.
Indien de gekozen elevatie vaak wordt
herhaald kan deze worden vastgelegd
door de AUTO knop minstens 2
seconden in te drukken. De display zal
eenmaal flitsen na vastleggen van de
instelling. Om deze instelling op een
andere plaats te herhalen dient u even
op de AUTO knop te drukken - de
schotel zal de positie automatisch
zoeken en stoppen wanneer deze is
bereikt.
Comment orienter le réflecteur
Allumer le télèviseur et le
démodulateur. A l’aide de la liste des
fréquences, sélectionner le canal du
programme désiré et accorder le
démodulateur (voir mode d’emploi du
démodulateur). Regarder l’angle
d’élévation du lieu sur l’autocollant
géographique. Appuyer et maintenir
appuyé le bouton “dish up” au moins 2
secondes. Le réflecteur s’ouvre. Quand
l’angle d’élèvation apparaît sur
l’indicateur, appuyer rapidement sur le
bouton “dish down”. Puis, faire pivoter
le mât jusqu’à ce que l’image
apparaisse sur l’écran. Pour optimiser la
qualité de l’image, activer les
boutons “dish up” et “dish down”.
Bloquer le mât en serrant l’écrou.
Si on reste au même endroit,
mémoriser l’orientation du réflecteur en
appuyant sur le bouton AUTO (fonction
mémoire). La mémorisation est
confirmée sur l’indicateur qui clignote
un instant. Pour ouvrir le réflecteur,
appuyer sur le bouton AUTO et le
réflecteur reprend automatiquement sa
position mémorisée.
N.B. Auto seek will not function when
the down or up limit symbol is displayed
- wait until the standby LED illuminates.
Should you forget to press the down
button to stop the upward drive of the
dish, it will automatically stop at its
highest position when the top limit
switch is triggered. The display will
show the top limit symbol (shown
above). Press the dish down button
(for at least 2 seconds) until the dish
starts to drive. Momentarily press the
dish up button to stop the dish at the
required elevation angle.
Before travelling, turn the mast until
the black arrow stickers line up with
each other to ensure the ski rests on
the ski guide. Lower the dish by
pressing the dish down button for at
least 2 seconds. The dish will drive
down and automatically stop at its
lowest position when the down limit
switch is triggered and the down limit
symbol is displayed. Fasten the mast
into position using the plastic spanner.
N.B. Het automatisch opzoeken zal niet
functioneren als de ‘op-limiet’ of
‘neer-limiet’ symbolen worden getoond
- wacht tot de standby LED brandt.
Attention: Cette fonction mémoire
fonctionne seulement en mode
veilleuse. Attendre jusqu’à ce que le
lampe DEL s’allume.
The inside wall of a wardrobe is the
ideal location for fixing the Omnimast.
If the chosen wall is weak, first secure
a wood panel.
Tape template to roof inside the wardrobe.
Leave enough distance from the centre of
the location hole to the adjacent corner
wall to allow easy use of the plastic spanner.
Berücksichtigen Sie bei der Entscheidung, wo die Sat-Antenne montiert werden soll, sowohl
Hindernisse auf dem Dach, als auch im Inneren des Fahrzeugs. Für die Montage des
Mastens im Inneren des Fahrzeugs empfiehlt sich der Kleiderschrank oder ein großer
Hängeschrank. Die Sat-Antenne muß mit Ausrichtung nach hinten, d.h. zur Rückseite des
Fahrzeugs hin, montiert werden. Achten Sie bei der Montage darauf, daß der Spiegel der
Sat-Antenne im abgeklappten Zustand nicht über die Fahrzeugkanten hinausragt.
Eine zu schwache Schrankwand muß
verstärkt werden.
Bohrschablone der Anleitung
entnehmen und mit Klebeband an der
Kleiderschrank-Decke befestigen.
Een te zwakke kastwand moet versterkt
worden.
Het boorsjabloon van de
gebruiksaanwijzing met plakband aan
het plafond van de kleerkast bevestigen.
Si la paroi du placard n’est pas assez
solide, il faut la renforcer.
Prendre le gabarit de perçage joint aux
instructions de montage. Le piacer
contre la paroi du plafond du placard
et le coller avec du ruban adhésif.
Bepaal waar u uw satellietsysteem wilt installeren, let daarbij op mogelijke belemmeringen op het dak en in het voertuig. Een vrije ruimte in een kast is de meest veilige,
praktische en onopvallende plaats. Denk er echter aan dat u deze niet te dicht bij de
rand van het dak monteert, aangezien de schotel kan uitsteken. Het systeem MOET naar
de achterzijde van het voertuig wijzen.
Auto elevation position will be lost when
power supply is disconnected.
Achtung: Dieses Memory-Funktion geht
nur im Standby-Modus. Warten bis die
LED-Anzeige leuchtet.
Decide where you wish to mount your satellite system, taking into account obstacles
both on the roof and inside the vehicle. A cupboard space is ideally the safest, most
practical, and most discrete location we recommend. Although take into account that
you do not mount too close to the edge of the vehicle roof, as there could be overhang
from the dish. The system MUST BE mounted pointing towards the rear of the vehicle.
Solte beim Aufklapp-Vorgang das
Drücken der Taste ‘Dish Down’ bei
Erreichen der Elevation unterblieben
sein, klappt der Spiegel bis zur
Endposition auf. Im Display erscheint
dann das abgeblidete EndstellungSymbol. Zum Abklappen des Spiegels
auf die gewünschte Elevation den Knopf
‘Dish Down’ mindestens 2 Sekunden
drücken und bei Erreichen dieser den
Vorgang durch Drücken des Knopfes
‘Dish Up’ stoppen.
Indien u vergeet de ‘neer’ knop in te
drukken om het verhogen van de
schotel te stoppen zal deze na
aanzetten van de toplimietschakelaar
automatisch in de hoogste positie
stoppen. De display zal het hoger
afgebeeld toplimiet symbool tonen.
Druk minstens 2 seconden op de
‘schotel neer’ knop tot de schotel in
beweging komt. Druk even op de
‘schotel op’ knop om de schotel in de
gewenste elevatiehoek te stoppen.
Si on n’interromp pas l’ouverture avec
le bouton “dish up”, le réflecteur
continue à s’ouvrir jusqu’à ouverture
maximale. Le symbole “ouverture
maximale” apparaît sur l’indicateur.
Pour rabattre le réflecteur dans la
position désirée, appuyer sur le bouton
“dish down” et le maintenir appuyé au
moins 2 secondes. Une fois l’angle
d’élévation obtenu, stopper la
manoeuvre en appuyant sur le bouton
“dish up”.
Vor der Weiterfahrt Mastklemm-Mutter
lösen und Spiegel antgegen die
Fahrtrichtung stellen. Den Knopf ‘Dish
Down’ 2 Sekunden drücken. Der
Spiegel klappt automatisch ganz ab und
das abgebildete Symbol erscheint im
Display. Mastklemm-Mutter anziehen.
Draai vóór het rijden de mast tot de
zwarte pijl stickers met elkaar uitgelijnd
zijn om te garanderen dat het wiel op
de wielgeleider rust. Verlaag de schotel
door minstens 2 seconden op de
‘schotel neer’ knop te drukken. De
schotel zal zakken en automatisch in de
laagste positie stoppen wanneer het
neer-limiet symbool wordt getoond na
gebruik van de neer-limiet schakelaar.
Avant de reprendre la route, desserrer
l’écrou qui bloque le mât et positionner
le réflecteur à l’envers de la marche du
véhicule. Appuyer sur le bouton “dish
down” et le maintenir appuyé au moins
2 secondes. Le réflecteur se rabat
complètement automatiquement. Le
symbole correspondant apparaît sur
l’indicateur. Bloquer le mât en serrant
l’écrou.
5
6
8
7
Drill a small pilot hole through the
roof from inside the vehicle. This will
clearly mark the hole centre position
on the outside of the vehicle roof.
Entsprechend der Markierung auf der
Bohrschablone ein 3-4mm großes Loch
durch die Decke bohren.
Volgens de markering op het
boorsjabloon een 3-4mm gat in het
plafond boren.
Percer un avant-trou au centre du
cercle dessiné.
9
On the roof of the vehicle, drill a large
hole through the roof using a 38-40mm
hole saw OR drill a series of small holes
and file out to 38-40mm diameter.
From outside the vehicle, push the
longer part of the plastic sleeve through
the hole in the roof.
Inside the vehicle, loosely screw the
plastic retaining nut onto the sleeve.
From the roof, push the mast through
the sleeve.
Inside the vehicle, slide the plastic
spanner and clamp body onto the
mast.
Vorbohrung mit einer Lochsäge auf
38-40mm erweitern. Falls keine Lochsäge
vorhanden ist, einen 37mm Kreis um die
Vorbohrung anzeichnen und mit einem
3-4mm Bohrer perforieren. Anschließend
Loch mittels Raspel/Feile auf 38-40mm
erweitern.
Mast von oben einführen.
Rändelmutter von unten aufschrauben.
Von oben Dachdurchführung mittig
einsetzen.
Erst Kunststoffschlüssel und dann den
Klemmhalter auf das Rohr schieben.
Het voorgeboorde gat tot 38-40mm
vergroten. Indien u geen speciaal gereedschap hiervoor heeft, maak dan een cirkel
van 37mm om het gat van het boorsjabloon. Boor daarna met een koortje van
3-4mm deze cirkel rond. U kunt het gat
daarna met een vijf groter maken.
De mast van bovenaf naar beneden
doorvoeren.
De schroefmoer van de onderkant
vastschroeven.
Van boven de dakdoorvoer plaatsen.
Eerst de kunststof ‘vastzethandel’ en
daarna de klemhouder om de mast
schuiven.
De l’extérieur, percer le trou définitif de
38-40mm de diamètre à l’aide d’un
coupe-cercle. Si vous n’avez pas de
coupe-cercle, dessiner un cercle de
37mm autour de l’avant-trou. Perforer
le cercle de petits trous avec un petit
foret. Limer le bord obtenir un cercle de
38-40mm.
De l’extérieur, enfiler le mât.
De l’intérieur, bloquer avec l’écrou en
plastique.
Placer le passe-toit.
De l’intérieur, enfiler par-dessus le mât
la clé en plastique, puis le système de
blocage.
10
11
13
12
200mm
300mm
6
Slide the spanner and clamp body up
the mast until approximately 200mm
below the ceiling. Use a spirit level to
ensure that the mast is vertical to the
ground (and vehicle wall). Make sure
the vehicle is standing truly level.
Mark the screw hole positions with a
bradawl then drill the marked screw
hole positions. Drill appropriate large
sized holes if you need to use cavity
fixing plugs.
Screw clamp body into position with the
screws provided.
Loosen the plastic retaining nut on the
bottom of the sleeve. From the roof,
adjust the mast height to approximately
300mm above the roof of the vehicle.
Remove the sleeve.
De schroefmoer aan de onderkant van
de dakdoorvoer weer losschroeven en
de dakdoorvoer weer verwijderen.
De mast nu tot 300mm boven het
dakinschuiven.
Klemmhalter bis 200mm unter die
Decke schieben.
Schrauben-Löcher vorstechen.
Klemmhalter festschrauben.
De klemhouder naar wens, maar tot maximaal 200mm onder het dak schuiven.
In de klemhouder de schroefgaten
markeren c.q. met een priem indrukken.
De klemnouder vastschroeven.
Rändelmutter abschrauben und
Dachdurchführung wieder entfernen.
Mast 300m über Dach schieben.
Vérifier que le mât soit bien
perpendiculaire au trou de passage.
Maintenir le système de blocage à
env.200mm du plafond.
Marquer l’emplacement de ce système
de blocage.
Visser le système de blocage.
Toujours de l’intérieur, dévisser l’écrou
en plastique bloquant le passe-toit. De
l’extérieur, retirer le capuchon
d’étanchéité du passe-toit. Dévisser les
6 vis devenues alors visibles et faire
sortir du toit le passe-toit en le tirant.
3