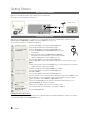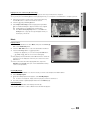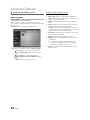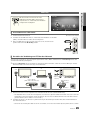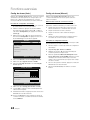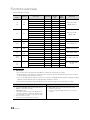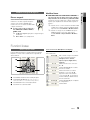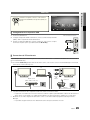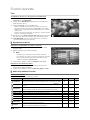
1
Country ArMeNIA AUSTrIA AzerbAIjAN belArUS belGIUM CzeCH DeNMArK ESTONIA FINlAND FrANCe GerMANY GEORGIA HUNGArY eIre ITAlIA KAzAKHSTAN KYrGYzSTAN lATVIA lITHUANIA lUXeMbUrG MOlDOVA NeTHerlANDS NORWAY POlAND PORTUGAl rUSSIA SlOVAKIA SPAIN SWEDEN SWITZERlAND TADjIKISTAN U.K UKrAINe UzbeKISTAN Customer Care Centre 0-800-05-555 0810 - SAMSUNG (7267864, € 0.07/min) 088-55-55-555 810-800-500-55-500 Web Site www.samsung.com/at www.samsung.com/be (Dutch) 02-201-24-18 www.samsung.com/be_fr (French) 800 - SAMSUNG (800-726786) www.samsung.com/cz Samsung Zrt., česká organizační složka, Oasis Florenc, Sokolovská394/17, 180 00, Praha 8 70 70 19 70 www.samsung.com/dk 800-7267 www.samsung.com 030 - 6227 5 15 www.samsung.com/i 01 48 63 00 00 www.samsung.com/fr 01805 - SAMSUNG(726-7864 € 0,14/Min) www.samsung.com/de 8-800-555-555 06-80-SAMSUNG(726-7864) www.samsung.com/hu 0818 717100 www.samsung.com/ie 800-SAMSUNG(726-7864) www.samsung.com/it 8-10-800-500-55-500 00-800-500-55-500 www.samsung.com 8000-7267 www.samsung.com 8-800-77777 www.samsung.com 261 03 710 www.samsung.com/lu 00-800-500-55-500 0900-SAMSUNG (0900-7267864) (€ 0,10/Min) www.samsung.com/nl 815-56 480 www.samsung.com/no 0 801 1SAMSUNG(172678) www.samsung.com/pl 022-607-93-33 80820-SAMSUNG(726-7864) www.samsung.com/pt 8-800-555-55-55 www.samsung.com 0800-SAMSUNG(726-7864) www.samsung.com/sk 902 - 1 - SAMSUNG (902 172 678) www.samsung.com/es 0771 726 7864 (SAMSUNG) www.samsung.com/se www.samsung.com/ch 0848 - SAMSUNG(7267864, CHF 0.08/min) www.samsung.com/ch_fr/(French) 8-10-800-500-55-500 www.samsung.com 0845 SAMSUNG (7267864) www.samsung.com/uk www.samsung.ua 0-800-502-000 www.samsung.com/ua_ru 8-10-800-500-55-500 www.samsung.com LCD TV user manual Contact SAMSUNG WORLDWIDE If you have any questions or comments relating to Samsung products, please contact the SAMSUNG customer care centre. LCD TV user manual imagine the possibilities Thank you for purchasing this Samsung product. To receive more complete service, please register your product at www.samsung.com/register Model _____________ Serial No. _____________ © 2010 Samsung electronics Co., ltd. All rights reserved. bN68-02558b-00 2010-02-22 8:00:06 Figures and illustrations in this User Manual are provided for reference only and may differ from actual product appearance. Product design and specifications may be changed without notice. Digital TV notice 1. 2. 3. 4. 5. 6. ✎ Functionalities related to Digital TV (DVB) are only available in countries/areas where DVB-T (MPEG2 and MPEG4 AVC) digital terrestrial signals are broadcasted or where you are able to access to a compatible DVB-C (MPEG2 and MPEG4 AAC) cable-TV service. Please check with your local dealer the possibility to receive DVB-T or DVB-C signal. DVB-T is the DVB European consortium standard for the broadcast transmission of digital terrestrial television and DVB-C is that for the broadcast transmission of digital TV over cable. However, some differentiated features like EPG (Electric Programme Guide), VOD (Video On Demand) and so on, are not included in this specification. So, they cannot be workable at this moment. Although this TV set meets the latest DVB-T and DVB-C standards, as of [August, 2008], the compatibility with future DVB-T digital terrestrial and DVB-C digital cable broadcasts cannot be guaranteed. Depending on the countries/areas where this TV set is used some cable-TV providers may charge an additional fee for such a service and you may be required to agree to terms and conditions of their business. Some Digital TV functions might be unavailable in some countries or regions and DVB-C might not work correctly with some cable service providers. For more information, please contact your local Samsung customer care centre. The reception quality of TV may be affected due to differences in broadcasting method between the countries. Please check the TV performance in the local SAMSUNG Authorized Dealer, or the Samsung Call Centre whether it can be improved by reconfiguring TV setting or not. Still image warning Avoid displaying still images (like jpeg picture files) or still image element (like TV programme logo, panorama or 4:3 image format, stock or news bar at screen bottom etc.) on the screen. Constant displaying of still picture can cause uneven wear of screen phosphor, which will affect image quality. To reduce risk of this effect, please follow below recommendations: • Avoid displaying the same TV channel for long periods. • Always try do display any image on full screen, use TV set picture format menu for best possible match. • Reduce brightness and contrast values to minimum required to achieve desired picture quality, exceeded values may speed up the burnout process. • Frequently use all TV features designed to reduce image retention and screen burnout, refer to proper user manual section for details. Securing the Installation Space Keep the required distances between the product and other objects (e.g. walls) to ensure proper ventilation. Failing to do so may result in fire or a problem with the product due to an increase in the internal temperature of the product. ✎ ✎ When using a stand or wall-mount, use parts provided by Samsung Electronics only. x If you use parts provided by another manufacturer, it may result in a problem with the product or an injury due to the product falling. The appearance may differ depending on the product. Installation with a stand. Installation with a wall-mount. 10 cm 10 cm 10 cm 10 cm 10 cm 10 cm 10 cm Correct Disposal of This Product (Waste Electrical & Electronic Equipment) (Applicable in the European Union and other European countries with separate collection systems) This marking on the product, accessories or literature indicates that the product and its electronic accessories (e.g. charger, headset, USB cable) should not be disposed of with other household waste at the end of their working life. To prevent possible harm to the environment or human health from uncontrolled waste disposal, please separate these items from other types of waste and recycle them responsibly to promote the sustainable reuse of material resources. Household users should contact either the retailer where they purchased this product, or their local government office, for details of where and how they can take these items for environmentally safe recycling. Business users should contact their supplier and check the terms and conditions of the purchase contract. This product and its electronic accessories should not be mixed with other commercial wastes for disposal. Correct disposal of batteries in this product (Applicable in the European Union and other European countries with separate battery return systems) This marking on the battery, manual or packaging indicates that the batteries in this product should not be disposed of with other household waste at the end of their working life. Where marked, the chemical symbols Hg, Cd or Pb indicate that the battery contains mercury, cadmium or lead above the reference levels in EC Directive 2006/66. If batteries are not properly disposed of, these substances can cause harm to human health or the environment. To protect natural resources and to promote material reuse, please separate batteries from other types of waste and recycle them through your local, free battery return system. 2 English 2010-02-22 8:00:09 Contents 4 4 5 6 6 Accessories Viewing the Control Panel Viewing the Remote Control Connecting to an Antenna Plug & Play (Initial Setup) 7 8 9 Connecting to an AV Device Connecting to an Audio Device Changing the Input Source Basic Features 9 10 10 12 13 16 18 20 How to Navigate Menus Using the INFO button (Now & Next guide) Planning Your Viewing Channel Menu Picture Menu Sound Menu Setup Menu Support Menu Advanced Features 22 23 29 36 39 44 Connecting to a PC Network Connection Media Play Anynet+ Internet@TV AllShare 46 47 48 49 49 50 53 54 Analogue Channel Teletext Feature Installing the Wall Mount Assembling the Cables Anti-Theft Kensington Lock Securing the TV to the Wall Troubleshooting Specifications Index Getting Started 4 Connections 7 9 22 Other Information 46 Check the Symbol! O t This function can be used by pressing the TOOLS button on the remote control. Note One-Touch Button English 3 2010-02-22 8:00:10 Getting Started Accessories ✎ Please make sure the following items are included with your LCD TV. If any items are missing, contact your dealer. ✎ The items’ colours and shapes may vary depending on the models. y Remote Control & Batteries (AAA x 2) y Owner’s Instructions y Warranty Card / Safety Guide (Not available in some locations) y Cleaning Cloth y Power Cord (46 ~ 55 inch TVs) y Blanking Bracket y Cable tie y Holder-Ring (4ea) See separate guide for installing the stand. or y Stand (1EA) y Guide Stand (1EA) (M4 X L12) y Screws (9EA) (32 inch model only: 8EA) Viewing the Control Panel ✎ The product colour and shape may vary depending on the model. Remote control sensor Power Indicator Speakers P (Power) Turns the TV on or off. Power Indicator SOURCEE Blinks and turns off when the power is on and lights up in standby mode. Toggles between all the available input sources. In the on-screen menu, use this button as you would use the ENTERE button on the remote control. Displays an on-screen menu, the OSD (on screen display), of your TV’s features. Adjusts the volume. In the OSD, use the Y buttons as you would use the ◄ and ► buttons on the remote control. Changes the channels. In the OSD, use the z buttons as you would use the ▼ and ▲ buttons on the remote control. Aim the remote control towards this spot on the TV. MENU Y z Remote control sensor Standby mode Do not leave your TV in standby mode for long periods of time (when you are away on a holiday, for example). A small amount of electric power is still consumed even when the power button is turned off. It is best to unplug the power code. 4 English 2010-02-22 8:00:11 ✎ This is a special remote control for the visually impaired persons and has Braille points on the Power, Channel, and Volume buttons. Turns the TV on and off. (P. 6) When the ON/OFF light button is set to ON and a certain button is pressed, the remote control buttons will be lit for a moment. (Using the remote control with this button set to On will reduce the battery usage time.) Displays and selects the available video sources. (P. 9) 01 Getting Started Viewing the Remote Control Press to directly access to channels. Returns to the previous channel. Alternately selects Teletext, Double or MiX. Cuts off the sound temporarily. Adjusts the volume. Changes channels. Displays the main on-screen menu. (P. 9) Displays channel list on the screen. (P. 13) Displays the Content View, which includes Guide, Internet@TV, Media Play, and AllShare. Displays the EPG (Electronic Programme Guide). (P. 10) Quickly selects frequently used functions. Displays information on the TV screen. (P. 10) Selects on-screen menu items and change menu values. Exits the menu. Returns to the previous menu. Buttons in the Channel Manager, Internet@ TV, Media Play menu, etc. A B C D MEDIA.P: Views the Media play. (P. 29) INTERNET: Links to various internet services. (P. 39) DUAL I-II: Selects sound mode. (P. 17) AD: Audio Description selection. (Not available in some locations) (P. 17) P.SIZE: Choose the picture size. (P. 15) SUBT.: Digital subtitle display (P. 19) Use these buttons in the Media Play and Anynet+ modes. (P. 29, 36) (�: controls recording on Samsung recorders with the Anynet+ feature) Installing batteries (Battery size: AAA) ✎ NOTE x x Use the remote control within 23 feet from the TV. x The colour and shape may vary depending on the model. Bright light may affect the performance of the remote control. Avoid using nearby special fluorescent light or neon signs. English 5 2010-02-22 8:00:12 Getting Started Connecting to an Antenna When the TV is initially powered on, basic settings proceed automatically. ✎ Preset: Connecting the mains and antenna. VHF/UHF Antenna Cable or ANT OUT Y Power Input Plug & Play (Initial Setup) When the TV is initially powered on, a sequence of on-screen prompts will assist in configuring basic settings. Press the POWERP button. Plug & Play is available only when the Input source is set to TV. ✎ To return to the previous step, press the red button. 1 2 Selecting a language 3 Selecting a country Selecting Store Demo or Home Use Press the ▲ or ▼ button, then press the ENTERE button. Select the desired OSD (On Screen Display) language. Press the ◄ or ► button, then press the ENTERE button. y Select the Home Use mode. Store Demo Mode is for retail environments. y Return the unit’s settings from Store Demo to Home Use (standard): Press the volume button on the TV. When the OSD volume is displayed, press and hold MENU for 5 sec. Press the ▲ or ▼ button, then press the ENTERE button. Select the appropriate country. If the desired country does not exist on the menu, select Others. ✎ After selecting the country in the Country menu, some models may proceed with an additional option to setup the pin number. ✎ 4 5 Selecting an antenna 6 7 8 Setting the Clock Mode Selecting a channel When you input the PIN number, 0-0-0-0 is not available. Press the ▲ or ▼ button, then press the ENTERE button. Select Air or Cable. Press the ▲ or ▼ button, then press the ENTERE button. Select the channel source to memorise. When setting the antenna source to Cable, a step appears allowing you to assign numerical values (channel frequencies) to the channels. For more information, refer to Channel → Auto Store (P. 12). ✎ Viewing the HD Connection Guide. Enjoy your TV. Press the ENTERE button at any time to interrupt the memorization process. Set the Clock Mode automatically or manually. ✎ If you select the Auto, select the time zone which you live. The connection method for the best HD screen quality is displayed. Press the ENTERE button. If You Want to Reset This Feature... Select Setup - Plug & Play (Initial Setup). Enter your 4 digit PIN number. The default PIN number is “0-0-0-0.” If you want to change the PIN number, use the Change PIN function. 6 English 2010-02-22 8:00:13 Connections Using an HDMI / DVI Cable: HD connection (up to 1080p) Available devices: DVD, Blu-ray player, HD cable box, HD STB (Set-Top-Box) satellite receiver, cable box, satellite receiver (STB) DVD W Y W r 02 Connections Connecting to an AV Device W HDMI OUT Red White AUDIO OUT W r-AUDIO-l R DVI OUT ✎ HDMI IN 1(DVI), 2, 3, 4 / PC/DVI AUDIO IN x x x x When using an HDMI/DVI cable connection, you must use the HDMI IN 1(DVI) jack. For the DVI cable connection, use a DVI to HDMI cable or DVI-HDMI (DVI to HDMI) adapter for video connection and the DVI AUDIO IN jacks for audio. If an external device such as a DVD / Blu-ray player / cable box / STB satellite receiver supporting a HDMI versions older than 1.3 is connected, the TV may operate abnormally (e.g. no screen display / no sound / annoying flicker / abnormal colour). If there is no sound after connecting an HDMI cable, check the HDMI version of the external device. If you suspect the version is older than 1.3, contact the provider of the device to confirm the HDMI version and request an upgrade. It is recommended you purchase an HDMI-certified cable. Otherwise, the screen may appear blank or a connection error may occur. Using a Component (up to 1080p) or Audio / Video (480i only) Cable and Using a Scart Cable Available devices: VCR, DVD, Blu-ray player, cable box, STB satellite receiver R B W W R r-AUDIO-l Y AUDIO OUT VIDEO OUT R VCR G r Blu-ray player W Yellow Red White R AUDIO OUT r-AUDIO-l R W W G W r R Y B W Y W COMPONENT OUT Pr Pb r Red b G Blue Green DVD EXT Y ✎ In Ext. mode, DTV Out supports MPEG SD Video and Audio only. ✎ To obtain the best picture quality, the Component connection is recommended over the A/V connection. English BN68-02558A.indb 7 7 2010-02-22 8:00:19 Connections Connecting to an Audio Device Using an Optical or Audio Cable Connection Available devices: digital audio system, amplifier, DVD home theatre OPTICAL Digital Audio System Headphone ✎ DIGITAL AUDIO OUT (OPTICAL) x x x When a digital audio system is connected to the DIGITAL AUDIO OUT (OPTICAL) jack, decrease the volume of both the TV and the system. 5.1 CH (channel) audio is available when the TV is connected to an external device supporting 5.1 CH. When the receiver (home theatre) is set to on, you can hear sound output from the TV’s optical jack. When the TV is receiving a DTV signal, the TV will send 5.1 CH sound to the home theatre receiver. When the source is a digital component such as a DVD / Blu-ray player / cable box / STB (Set-Top-Box) satellite receiver and is connected to the TV via HDMI, only 2 CH audio will be heard from the home theatre receiver. If you want to hear 5.1 CH audio, connect the digital audio out jack from your DVD / Blu-ray player / cable box / STB satellite receiver directly to an amplifier or home theatre. ✎ Headphones H: You can connect your headphones to the headphones output on your set. While the headphones are connected, the sound from the built-in speakers will be disabled. x x Sound function may be restricted when connecting headphones to the TV. Headphone volume and TV volume are adjusted separately. CONNECTIONS COMMON INTERFACE Slot To watch paid channels, the “CI or CI+ CARD” must be inserted. y If you don’t insert the “CI or CI+ CARD,” some channels will display the message “Scrambled Signal”. y The pairing information containing a telephone number, the “CI or CI+ CARD” ID the Host ID and other information will be displayed in about 2~3 minutes. If an error message is displayed, please contact your service provider. y When the configuration of channel information has finished, the message “Updating Completed” is displayed, indicating the channel list is updated. ✎ NOTE x x x x x x 8 You must obtain a “CI or CI+ CARD” from a local cable service provider. When removing the “CI or CI+ CARD”, carefully pull it out with your hands since dropping the “CI or CI+ CARD” may cause damage to it. Insert the “CI or CI+ CARD” in the direction marked on the card. The location of the COMMON INTERFACE slot may be different depending on the model. “CI or CI+ CARD” is not supported in some countries and regions; check with your authorized dealer. If you have any problems, please contact a service provider. English 2010-02-22 8:00:21 ■ Source List VCR / DVD / Cable STB / Satellite STB / PVR STB / AV Receiver / Game / Camcorder / PC / DVI PC / DVI Devices / TV / IPTV / Blu-ray / HD DVD / DMA: Name the device connected to the input jacks to make your input source selection easier. Use to select TV or other external input sources such as DVD / Blu-ray players / cable box / STB satellite receiver connected to the TV. ✎ TV / Ext.1 / Ext.2 / AV / Component / PC / HDMI1/DVI / HDMI2 / HDMI3 / HDMI4 / USB When a PC with a resolution of 1920 x 1080 @ 60Hz is connected to the HDMI IN 1(DVI) port, you should set to DVI PC mode under Edit Name. ✎ When connecting an HDMI/DVI cable to the HDMI IN 1(DVI) port, you should set to DVI PC or DVI Devices mode under Edit Name. ■ ✎ In the Source List, connected inputs will be highlighted. ✎ Ext.1 and Ext.2 always stay activated. 02 Connections Edit Name Changing the Input Source Basic Features How to Operate the OSD (On Screen Display) How to Navigate Menus Before using the TV, follow the steps below to learn how to navigate the menu and select and adjust different functions. The access step may differ depending on the selected menu. 1 MENU m 2 3 4 5 ▲/▼ 1 2 4 3 A B C D 1 MENU button: Displays the main on-screen menu. 2 ENTERE / Direction button: Move the cursor and select an item. Confirm the setting. 3 RETURN button: Returns to the previous menu. 4 EXIT button: Exits the on-screen menu. 6 7 ENTERE ▲/▼ ◄/► ENTERE EXIT e The main menu options appears on the screen: Picture, Sound, Channel, Setup, Input, Application, Support. Select an icon with the ▲ or ▼ button. Press ENTERE to access the submenu. Select the desired submenu with the ▲ or ▼ button. Adjust the value of an item with the ◄ or ► button. The adjustment in the OSD may differ depending on the selected menu. Press ENTERE to complete the configuration. Press EXIT. English BN68-02558A.indb 9 9 2010-02-22 8:00:22 Basic Features Using the INFO button (Now & Next guide) The display identifies the current channel and the status of certain audio-video settings. The Now & Next guide shows daily TV programme information for each channel according to the broadcasting time. y Scroll ◄, ► to view information for a desired programme while watching the current channel. y Scroll ▲, ▼ to view information for other channels. If you want to move to the currently selected channel, press the ENTERE button. abc1 Using Scheduled View Guide Family Affairs 18:00 - 18:30 Drama 15 18:00 ~ 6:00 Scheduled View 18:30 19:15 ' Information 800 800 five five Information E Cancel 1 4 6 Red (View Mode): View the list of programmes that are playing now or coming up. Yellow (+24 hours): Viewing the list of programmes to be broadcasted after 24 hours. 3 Blue (Ch.Mode): Select the type of channels you want to display on the Channel View window. Guide 4 5 – The Ch. Mode differs according to the antenna source. (Information): Displays details of the selected programme. (Page): Moves to the previous / next page. 6 ENTERE button – When selecting the current programme, you can watch the selected programme. – When selecting the future programme, you can reserve to watch the selected programme. To cancel the schedule, press the ENTERE button again and select Cancel Schedules. Using Channel View Guide )Family Affairs )Dark Angel 2 Planning Your Viewing The EPG (Electronic Programme Guide) information is provided by broadcasters. Using programme schedules provided by broadcasters, you can specify programmes you want to watch in advance so that the channel automatically changes to the selected programme channel at the specified time. Programme entries may appear blank or out of date depending on a channel status. Today Today View Mode 1 EWatch Unclassified No Detaild Information Tanya confesses all to a stunned Babs. Conrad is anxious to hear... 800 five 18:11 Thu 6 jan life On Venus Avenue DTV Air 2:10 Tue 1 jun DTV Air 800 five 2:10 Tue 1 jun DTV Air 800 five Home and Away 18:00 - 18:30 Drama Dani is devastated when scott makes clear his views on marriage... 800 five Channel View - TV Today 27 Discovery 28 DiscoveryH&L 800 five 24 price-drop.tv 16 QVC 6 R4DTT View Mode 1 10 18:00 - 19:00 American Chopper Programmes resume at 06:00 Home and... )Family Affairs No Information QVC Selection No Information +24 Hours 2 Ch. Mode 3 19:00 - 20:00 Tine Team Fiv... )Dark Angel Information k Page E Watch 4 5 6 English 2010-02-22 8:00:24 ¦ Using Favourite Channels Delete or set favourites channels and use the programme guide for digital broadcasts. Select a channel in the Channels, My Channels or Scheduled screen. * My Channels c1 c2 Channels All (in Channel Manager) Shows all favourite channels. 1futech * 24ore.tv ■ Air TV 15 Radio Data/Other Analogue 3 23 33 32 5 4 27 Antena B zoom abc1 r BBC World bid-up.tv Boonerang Cartoon Nwk Class News \ Coming Soon Discovery ■ * My Channels: Shows the group of the channel. ■ Scheduled: Shows all the currently reserved programmes. ✎ Using the colour buttons with the Channel Manager x x be set as a my channel. 1. Select a channel and press the TOOLS button. 2. Add or delete a channel in the my channel groups you want among 1, 2, 3 and 4. x One or more groups can be selected. 3. After you have changed the settings, the channel list for each group can be viewed in My Channels. c1 c2 All Channels Channels: Shows the channel list according to channel type. x ✎ The “*” symbol will be displayed and the channel will Select k Page T Tools ■ x x Edit My Channels t : You can set the selected channels to desired my channels group. Red (Antenna): Toggle among Air or Cable. 15 Radio Data/Other Analogue 3 23 33 32 5 4 27 Antena Select k Page T Tools Green (Zoom): Enlarges or shrinks a channel number. Air 1futech * 24ore.tv TV B Yellow (Select): Select desired channels and press the Yellow button to set all the selected channels at the same time. The c mark appears to the left of the selected channels. 03 Basic Features Channel Manager B zoom abc1 edit My Channels lock Delete BBC World Deselectbid-up.tv All Select AllBoonerang r d Cartoon Nwk Class News \ Coming Soon Discovery (Page): Move to next or previous page. T (Tools): Displays the Channel Manager option menu. (The Options menus may differ depending on the situation.) Channel Status Display Icons Icons A c * ( \ ) Operations An Analogue channel. A channel selected. A channel set as a Favourite. A programme currently being broadcast. A locked channel. A reserved programme. English 11 2010-02-22 8:00:25 Basic Features Channel Menu Manual Store Scans for a channel manually and stores in the TV. ¦ Retuning channels ✎ If a channel is locked using the Child Lock function, Antenna (Air / Cable) t ■ Before your television can begin memorizing the available channels, you must specify the type of signal source that is connected to the TV (i.e. an Air or a Cable system). ✎ When selecting Antenna → Air: Channel, Frequency, the PIN input window appears. Country Bandwidth. ✎ When selecting Antenna → Cable: Frequency, Modulation, Symbol Rate. ■ The PIN input screen appears. Enter your 4 digit PIN number. ■ Digital Channel: Change the country for digital channels. ■ Analogue Channel: Change the country for analogue channels. Digital Channel: When scanning has finished, channels are updated in the channel list. Analogue Channel (Programme, Colour System, Sound System, Channel, Search, Store): If there is abnormal sound or no sound, reselect the sound standard required. ✎ Channel mode x Auto Store x Scans for a channel automatically and stores in the TV. ✎ Automatically allocated programme numbers may not correspond to actual or desired programme numbers. If a channel is locked using the Child Lock function, the PIN input window appears. P (programme mode): When tuning is complete, the broadcasting stations in your area have been assigned to position numbers from P0 to P99. You can select a channel by entering the position number in this mode. C (aerial channel mode) / S (cable channel mode): These two modes allow you to select a channel by entering the assigned number for each aerial broadcasting station or cable channel. ■ Antenna Source (Air / Cable): Select the antenna source to memorise. ¦ Editing channels ■ Channel Source (Digital & Analogue / Digital / Analogue): Select the channel source to memorise. Channel Manager Option Menu When selecting Cable → Digital & Analogue or Digital: Provide a value to scan for cable channels. (in Channel Manager) 1. Select a channel and press the TOOLS button. Search Mode (Full / Network / Quick): Scans for all channels with active broadcast stations and stores them in the TV. 2. Edit the channel name or number using the Edit Channel Name or Edit Channel Number menu. ✎ If you set Quick, you can set up Network, Network ID, Frequency, Modulation, Symbol Rate manually by press the button on the remote control. Network (Auto / Manual): Selects the Network ID setting mode among Auto or Manual. Network ID: When Network is Manual, you can set up Network ID using the numeric buttons. Frequency: Displays the frequency for the channel. (differs in each country) ■ Edit Channel Name (analogue channels only): Assign your own channel name. ■ Edit Channel Number (digital channels only): Edit the number by pressing the number buttons desired. ¦ Other Features Cable Search Option Modulation: Displays available modulation values. (depending on the country) Sets additional search options such as the frequency and symbol rate for a cable network search. Symbol Rate: Displays available symbol rates. ■ 12 Freq.Start / Freq.Stop: Set the start or stop frequency (differs in each country) ■ Modulation: Displays available modulation values. ■ Symbol Rate: Displays available symbol rates. English 2010-02-22 8:00:26 (in Channel Manager) Set each channel using the Channel Manager menu options (Lock / Unlock, Timer Viewing, Sort, Delete, Select All / Deselect All). Option menu items may differ depending on the channel status. 1. Select a channel and press the TOOLS button. 2. Select a function and change its settings. ■ Lock / Unlock: Lock a channel so that the channel cannot be selected and viewed. ✎ NOTE x x ■ This function is available only when the Child Lock is set to On. The PIN input screen appears. Enter your 4-digit PIN, the default of which is “0-0-0-0”. Change the PIN using the Change PIN option. ■ ■ When a digital channel is selected, press the ► button to view the digital Programme. Sort (analogue channels only): This operation allows you to change the programme numbers of the stored channels. This operation may be necessary after using the auto store. Delete: You can delete a channel to display the channels you want. Select All / Deselect All: Select all the channels or deselect all the selected channels in the channel manager. Scheduled (in Channel Manager) You can view, modify or delete a a show you have reserved to watch. ■ Change Info: Change a a show you have reserved to watch. ■ Cancel Schedules: Cancel a show you have reserved to watch. ■ Information: Display a show you have reserved to watch. (You can also change the reservation information.) ■ Imports or exports the channel map. You should connect a USB storage to use this function. The PIN number input screen appears. Enter your 4 digit PIN number. ✎ ✎ The default PIN number of a new TV set is ‘0-0-0-0’. ■ Import from USB: Import channel list from USB. ■ Export to USB: Export channel list to USB. Fine Tune (analogue channels only) If the signal is weak or distorted, fine tune the channel manually. Fine tuned channels are marked with an asterisk “*”. ✎ ✎ To reset the fine-tuning, select Reset. Timer Viewing: You can set a desired channel to be displayed automatically at the intended time. Set the current time first to use this function. ✎ ■ Channel List Transfer Select All / Deselect All: Select or deselect all reserved programmes. Channel List You can see all the channels searched. 03 Basic Features Channel Manager Option Menu Picture Menu ¦ Changing the Preset Picture Mode Mode t Select your preferred picture type. ■ Dynamic: Suitable for a bright room. ■ Standard: Suitable for a normal environment. ■ Natural: Suitable for reducing eye strain. ✎ ■ Natural is not available in PC mode. Movie: Suitable for watching movies in a dark room. ¦ Adjusting picture settings Backlight / Contrast / Brightness / Sharpness / Colour / Tint (G/R) Your television has several setting options for picture quality control. ✎ NOTE x x x x In analogue TV, Ext., AV modes of the PAL system, the Tint (G/R) function is not available. In PC mode, you can only make changes to Backlight, Contrast and Brightness. Settings can be adjusted and stored for each external device connected to the TV. Lowering picture brightness reduces power consumption. English 13 2010-02-22 8:00:26 Basic Features ¦ Economical Solutions ■ ECO Solution ■ ■ Energy Saving (Off / Low / Medium / High / Picture Off / Auto) t : Adjust the brightness of the TV in order to reduce power consumption. If you select Picture Off, the screen is turned off, but the sound remains on. Press any button except volume button to turn on the screen. ECO Sensor (Off / On): To enhance your power savings; the picture settings will automatically adapt to the light in the room. If you adjust the Backlight, the Eco Sensor will be set to Off. ✎ Min Backlight: When ECO sensor is On, the minimum screen brightness can be adjusted manually. If Eco Sensor is On, the display brightness may change (become slightly darker or brighter) depending on the surrounding light intensity. ✎ ■ ✎ ✎ Only enabled in DTV, Component and HDMI modes. ■ RGB Only Mode (Off / Red / Green / Blue): You can adjust Colour or Tint of Red, Green or Blue for the picture from an external device (DVD player, home theatre, etc.). ■ Colour Space (Auto / Native / Custom): Adjust the range of colours available to create the image. To adjust Colour, Red, Green, Blue and Reset, set Colour Space to Custom. ■ White Balance: Adjust the colour temperature for a more natural picture. R-Offset / G-Offset / B-Offset: Adjust each colour’s (red, green, blue) darkness. No Signal Power Off (Off / 15 min / 30 min / 60 min): Activates the Stand-by mode, in the case of “No Signal” or “Check Signal Cable” status for a certain period of time defined by the user. Disabled when the PC is in power saving mode. R-Gain/G-Gain/B-Gain: Adjust each colour’s (red, green, blue) brightness. ✎ Reset: Resets the White Balance to it’s default settings. ■ ¦ Changing the Picture Options Expert Pattern (Off / Pattern 1 / Pattern 2): By running the Expert Pattern function, the picture can be calibrated without a generator or filter. If the OSD menu disappears or a menu other than the Picture menu is opened, the calibration is saved and the Expert Pattern window disappears. While the Expert Pattern is running, sound is not outputted. 10p White Balance (Off / On): Controls the white balance in 10 point interval by adjusting the red, green, and blue brightness. ✎ (available in Standard / Movie mode) You can adjust the detailed setting for the screen including colour and contrast. Available when the picture mode is set to Movie and when the external input is set to HDMI or Component. ✎ Some external devices may not support this function. ✎ In PC mode, you can only make changes to Dynamic Interval: Select interval to adjust. Advanced Settings Contrast, Gamma and White Balance. Red: Adjust the red level. Advanced Settings Black Tone : Off Dynamic Contrast : Medium Shadow Detail :0 Gamma :0 Green: Adjust the green level. ► Reset: Resets the 10p White Balance to its default settings. Expert Pattern : Off ■ Flesh Tone: Emphasize pink “Flesh Tone.” RGB Only Mode : Off ■ Colour Space : Native Edge Enhancement (Off / On): Emphasize object boundaries. ■ xvYCC (Off / On): Setting the xvYCC mode on increases detail and colour space when watching movies from an external device (e.g. DVD player) connected to the HDMI or Component IN jacks. ▼ U Move E enter R return ■ Black Tone (Off / Dark / Darker / Darkest): Select the black level to adjust the screen depth. ■ Dynamic Contrast (Off / Low / Medium / High): Adjust the screen contrast. ■ Shadow Detail (-2~+2): Increase the brightness of dark images. Disabled under PC mode. ✎ ■ Blue: Adjust the blue level. ✎ Available when the picture mode is set to Movie and when the external input is set to HDMI or Component. ✎ Some external devices may not support this function. Gamma: Adjust the primary colour intensity. 14 English 2010-02-22 8:00:27 ✎ In PC mode, you can only make changes to the Colour Tone, Size, Digital Noise Filter and Auto Protection Time. Picture Options Colour Tone : Normal Size : Auto Wide Screen Mode : 16:9 Digital Noise Filter : Auto MPEG Nosie Filter : Auto HDMI Black level Film Mode : Normal : Off ► ■ ▼ U Move E enter R return ■ Colour Tone (Cool / Normal / Warm1 / Warm2) Warm1 or Warm2 will be deactivated when the picture mode is Dynamic. Settings can be adjusted and stored for each external device connected to an input on the TV. ✎ ✎ ■ ✎ ■ Size: Your cable box/satellite receiver may have its own set of screen sizes as well. However, we highly recommend you use 16:9 mode most of the time. Auto Wide: Automatically adjusts the picture size to the 16:9 aspect ratio. 16:9 : Adjusts the picture size to 16:9 for DVDs or wide broadcasting. Wide Zoom: Magnifies the picture size more than 4:3. Adjusts the Position by using ▲, ▼ buttons. ✎ ✎ ■ ✎ ■ HDMI Black Level (Normal / Low): Selects the black level on the screen to adjust the screen depth. Available only in HDMI mode (RGB signals). Film Mode (Off / Auto1 / Auto2): Sets the TV to automatically sense and process film signals from all sources and adjust the picture for optimum quality. Available in TV, AV, COMPONENT (480i / 1080i) and HDMI (480i / 1080i). ✎ ■ 100Hz Motion Plus (Off / Clear / Standard / Smooth / Custom / Demo) : Removes drag from fast scenes with a lot of movement to provide a clearer picture. If you enable 100Hz Motion Plus, noise may appear on the screen. If this occurs, set 100Hz Motion Plus to Off. ✎ Blur Reduction: Adjusts the blur reduction level from video sources. ✎ NOTE After selecting Screen Fit in HDMI (1080i / 1080p) or Component (1080i / 1080p) mode, you may need to center the picture: 1. Press the ◄ or ► button to select Position. 2. Press the ENTERE button. 3. Press the ▲, ▼, ◄ or ► button to move the picture. MPEG Noise Filter (Off / Low / Medium / High / Auto): Reduces MPEG noise to provide an improved picture quality. Disabled under PC mode. ✎ ■ Screen Fit: Displays the full image without any cut-off when HDMI (720p / 1080i / 1080p) or Component (1080i / 1080p) signals are inputted. x When bar is green, you are receiving the best possible signal. ✎ ✎ 4:3 : The default setting for a movie or normal broadcasting. Do not watch in 4:3 format for a long time. Traces of borders displayed on the left, right and centre of the screen may cause image retention(screen burn) which are not covered by the warranty. Digital Noise Filter (Off / Low / Medium / High / Auto / Auto Visualisation): When the broadcast signal is weak, some static and ghosting may appear. Select one of the options until the best picture is displayed. Auto Visualisation: When changing analogue channels, displays signal strength. Only available for analogue channels. ✎ Zoom: Magnifies the 16:9 wide pictures vertically to fit the screen size. Adjusts the Position or Size by using ▲, ▼ button. Depending on the input source, the picture size options may vary. x The available items may differ depending on the selected mode. x In PC mode, only 16:9 and 4:3 modes can be adjusted. x Settings can be adjusted and stored for each external device connected to an input of the TV. x If you use the Screen Fit function with HDMI 720p input, 1 line will be cut at the top, bottom, left and right as in the overscan function. Screen Mode (16:9 / Wide Zoom / Zoom / 4:3): Available only when picture size is set to Auto Wide. You can determine the desired picture size at the 4:3 WSS (Wide Screen Service) size or the original size. Each European country requires different picture size. Not available in PC, Component or HDMI mode. 03 Basic Features x Picture Options Judder Reduction: Adjusts the judder reduction level from video sources when playing films. Reset: Reset the custom settings. ■ Auto Protection Time (2 hours/4 hours/8 hours/10 hours/ Off) : If the same image remains on the screen, Auto Screen Burn Protector will work. Picture Reset (OK / Cancel) Resets your current picture mode to its default settings. English 15 2010-02-22 8:00:28 Basic Features ¦ Setting up the TV with Your PC ¦ Adjusting sound settings Set the input source to PC. Auto Adjustment t Equalizer Adjusts the sound mode. Adjust frequency values/positions and fine tune the settings automatically. ■ Balance L/R: Adjusts the balance between the right and left speaker. ✎ Not available when connecting through HDMI/DVI ■ 100Hz / 300Hz / 1kHz / 3kHz / 10kHz (Bandwidth Adjustment): Adjusts the level of specific bandwidth frequencies. ■ Reset: Resets the equalizer to its default settings. cable. Screen ■ Coarse / Fine: Removes or reduces picture noise. If the noise is not removed by Fine-tuning alone, then adjust the frequency as best as possible (Coarse) and Finetune again. After the noise has been reduced, readjust the picture so that it is aligned to the centre of screen. ■ Position: Adjust the PC screen position with direction button (▲ / ▼ / ◄ / ►). ■ Image Reset: Resets the image to default settings. ¦ Sound Systems, Etc. SRS TruSurround HD (Off / On) t (standard sound mode only) This function provides a virtual 5.1 channel surround sound experience through a pair of speakers or headphones using HRTF (Head Related Transfer Function) technology. Using Your TV as a Computer (PC) Display Setting Up Your PC Software (Based on Windows XP) Depending on the version of Windows and the video card, the actual screens on your PC may differ in which case the same basic set-up information will almost always be applied. (If not, contact your computer manufacturer or Samsung Dealer.) 1. Click on “Control Panel” on the Windows start menu. SRS TruDialog (Off / On) 2. Click on “Appearance and Themes” in the “Control Panel” window and a display dialog-box will appear. Audio Language 3. Click on “Display” and a display dialog box will appear. 4. Navigate to the “Settings” tab on the display dialog-box. y The correct size setting (resolution) [Optimum: 1920 X 1080 pixels] y If a vertical-frequency option exists on your display settings dialog box, the correct value is “60” or “60 Hz”. Otherwise, just click “OK” and exit the dialog box. Sound Menu ¦ Changing the Preset Sound Mode SRS TheaterSound t ■ Standard: Selects the normal sound mode. ■ Music: Emphasizes music over voices. ■ Movie: Provides the best sound for movies. ■ Clear Voice: Emphasizes voices over other sounds. ■ Amplify: Increase the intensity of high-frequency sound to allow a better listening experience for the hearing impaired. 16 (standard sound mode only) This function allows you to increase the intensity of a voice over background music or sound effects so that dialog can be heard more clearly when viewing a show. (digital channels only) Change the default value for audio languages. ✎ The available language may differ depending on the broadcast. Audio Format (MPEG / Dolby Digital 5.1) (digital channels only) When sound is emitted from both the main speaker and the audio receiver, a sound echo may occur due to the decoding speed difference between the main speaker and the audio receiver. In this case, use the TV Speaker function. ✎ Audio Format option may differ depending on the broadcast. 5.1ch Dolby digital sound is only available when connecting an external speaker through an optical cable. English 2010-02-22 8:00:28 ■ (not available in all locations) (digital channels only) This function handles the Audio Stream for the AD (Audio Description) which is sent along with the Main audio from the broadcaster. ■ Audio Description (Off / On): Turn the audio description function on or off. ■ Volume: Adjust the audio description volume. Audio Format: During the reception of a digital TV broadcast, you can select the Digital Audio output (SPDIF) format from the options PCM or Dolby Digital. ✎ ■ Night: This mode provides an improved sound experience compared to Normal mode, making almost no noise. It is useful at night. Speaker Select (External speaker / TV speaker) A sound echo may occur due to a difference in decoding speed between the main speaker and the audio receiver. In this case, set the TV to External Speaker. ✎ When Speaker Select is set to External Speaker, the volume and MUTE buttons will not operate and the sound settings will be limited. ✎ When Speaker Select is set to External Speaker, you should use these settings. x TV Speaker: Off , External Speaker: On ✎ When Speaker Select is set to TV Speaker, you By connecting to 5.1ch speakers in a Dolby Digital setup, maximize your interactive 3D sound experience. Audio Delay: Correct audio-video mismatch, when watching TV or video, and listening to digital audio output using an external device such as an AV receiver. Auto Volume (Off / Normal / Night) To equalize the volume level on each channel, set to Normal. SPDIF Output: SPDIF (Sony Philips Digital InterFace) is used to provide digital sound, reducing interference going to speakers and various digital devices such as a DVD player. 03 Basic Features Audio Description ■ Dolby Digital Comp (Line / RF): This function minimizes signal disparity between a dolby digital signal and a voice signal (i.e. MPEG Audio, HE-AAC, ATV Sound). ✎ Select Line to obtain dynamic sound, and RF to reduce the difference between loud and soft sounds at night time. Line: Set the output level for signals greater or less than -31dB (reference) to either -20dB or -31dB. RF: Set the output level for signals greater or less than -20dB (reference) to either -10dB or -20dB. Sound Reset (OK / Cancel) Reset all sound settings to the factory defaults. ¦ Selecting the Sound Mode When you set to Dual l-ll, the current sound mode is displayed on the screen. should use these settings. x TV Speaker: On , External Speaker: On ✎ If there is no video signal, both speakers will be mute. Additional Setting (digital channels only) ■ DTV Audio Level (MPEG / HE-AAC): This function allows you to reduce the disparity of a voice signal (which is one of the signals received during a digital TV broadcast) to a desired level. ✎ According to the type of broadcast signal, MPEG / HE-AAC can be adjusted between -10dB and 0dB. ✎ To increase or decrease the volume, adjust between the range 0 and -10 respectively. A2 Stereo NICAM Stereo Audio Type Mono Stereo Dual Mono Stereo Dual Dual I-II Default Mono Stereo ↔ Mono Dual I ↔ Dual II Mono Mono ↔ Stereo Mono → Dual I Dual II Automatic change Dual I Automatic change Dual I ✎ If the stereo signal is weak and an automatic switching, occurs, then switch to the mono. ✎ Only activated in stereo sound signal. ✎ Only available when the Input source is set to TV. English BN68-02558A.indb 17 17 2010-02-22 8:00:28 Basic Features On Time / Off Time: Set the hour, minute, and activate / inactivate. (To activate timer with the setting you’ve chosen, set to Activate.) Setup Menu ¦ Setting the Time Volume: Set the desired volume level. Source: Select TV or USB content to be played when the TV is turned on automatically. (USB can be selected only when a USB device is connected to the TV) Time ■ Clock: Setting the clock is for using various timer features of the TV. O The current time will appear every time you press the INFO button. ✎ If you disconnect the power cord, you have to set the clock again. Antenna (when the Source is set to TV): Select ATV or DTV. Channel (when the Source is set to TV): Select the desired channel. Contents (when the Source is set to USB): Select a folder in the USB device containing music or photo files to be played when the TV is turned on automatically. Clock Mode (Auto / Manual) ✎ Depending on the broadcast station and signal, the auto time set up may not be correct. In this case, set the time manually. ✎ The antenna must be connected in order to set the time automatically. Clock Set: Set the Day, Month, Year, Hour and Minute manually. ✎ Available only when Clock Mode is set to Manual. ✎ If there is no music file on the USB device or the folder containing a music file is not selected, the Timer function does not operate correctly. ✎ When there is only one photo file in the USB device, the Slide Show will not play. ✎ If a folder name is too long, the folder cannot be selected. ✎ Each USB you use is assigned its own folder. When using more than one of the same type of USB, make sure the folders assigned to each USB have different names. Time Zone: You can select your time zone. ✎ This function is only available when Clock Mode is set to Auto. ✎ Depending on the broadcast station and signal, the auto time may not be set correctly. If this occurs, set the time manually. Sleep Timer t : Automatically shuts off the TV after a preset period of time. (30, 60, 90, 120, 150 and 180 minutes). ✎ by Timer): The TV will be automatically turned off after 3 hours of being left idle to prevent overheating. ¦ Locking Programs Security Timer 1 / Timer 2 / Timer 3: Three different on / off timer settings can be made. You must set the clock first. Timer 1 ✎ The PIN input screen appears before the setup screen. ✎ Enter your 4-digit PIN, the default of which is “0-0-0-0”. Change the PIN using the Change PIN option. ■ On Time ▲ Inactivate ▼ 00 00 00 00 ▲ Inactivate ▼ Volume Source 10 Antenna TV Sun Mon Tue ■ Channel ATV repeat Once Child Lock (Off / On): Lock channels in Channel Manager, to prevent unauthorized users, such as children, from watching unsuitable programme. ✎ Off Time Wed L Move U Adjust 18 The c mark indicates the day is selected. To cancel Sleep Timer, select Off. ¦ Setting the On / Off Timer ■ ✎ ✎ Auto Power Off (available only when the TV is turned on ¦ Using the Sleep Timer ■ Repeat: Select Once, Everyday, Mon~Fri, Mon~Sat, Sat~Sun or Manual to set at you convenience. If you select Manual, you can set up the day you want to activate the timer. 0 Thu Fri Sat E enter R return Available only when the Input source is set to TV. Parental Lock (Parental Rating): Prevent unauthorized users, such as children, from watching unsuitable programme with a user-defined 4-digit PIN code. Allow All: Unlock all TV ratings. ✎ The items of Parental Lock differs depending on the country. English 2010-02-22 8:00:29 Change PIN: Change your personal ID number required to set up the TV. General ✎ ■ If you forget the PIN code, press the remote control buttons in the following sequence, which resets the PIN to “0-0-0-0”: POWER (off) → MUTE → 8 → 2 → 4 → POWER (on). ¦ Other Features Game Mode (Off / On): When connecting to a game console such as PlayStation™ or Xbox™, you can enjoy a more realistic gaming experience by selecting game mode. ✎ NOTE x Language ■ Menu Language: Set the menu language. ■ Teletext Language: Set a desired language for teletext. ✎ ■ x x English is the default in cases where the selected language is unavailable in the broadcast. Preference (Primary Audio Language / Secondary Audio Language / Primary Subtitle Language / Secondary Subtitle Language / Primary Teletext Language / Secondary Teletext Language): Select a language, which will be the default language when a channel is selected. x ■ ✎ The subtitle feature doesn’t work in Component or HDMI modes. Game Mode is not available in TV and TV mode. After connecting the game console, set Game Mode to On to prevent poor picture quality. If Game Mode is On: Picture mode is set to Standard and Sound mode is set to Custom. BD Wise (Off / On): Provides the optimal picture quality for Samsung DVD, Blu-ray and Home Theatre products which support BD Wise. When BD Wise is turned On, the picture mode is automatically changed to the optimal resolution. ✎ Subtitle Use this menu to set the Subtitle mode. Precautions and limitations for game mode – To disconnect the game console and connect another external device, set Game Mode to Off in the setup menu. – If you display the TV menu in Game Mode, the screen shakes slightly. Available when connecting Samsung products that support BD Wise through a HDMI cable. ■ Menu Transparency (Bright / Dark): Se t the Transparency of the menu. ■ Melody (Off / Low / Medium / High): Set so that a melody plays when the TV is turned on or off. ■ Subtitle (Off / On): Switches subtitles on or off. ■ Mode (Normal / Hearing Impaired): Sets the subtitle mode. Common Interface ■ Subtitle Language: Sets the subtitle language. ■ CI Menu: This enables the user to select from the CAMprovided menu. Select the CI Menu based on the menu PC Card. ■ Application Info.: View information on the CAM inserted into the CI slot and on the “CI or CI+ CARD” which is inserted into the CAM. You can install the CAM anytime whether the TV is on or off. ✎ ✎ If the programme you are watching does not support the Hearing Impaired function, Normal automatically activates even if the Hearing Impaired mode is selected. English is the default in cases where the selected language is unavailable in the broadcast. Digital Text (Disable / Enable) (UK only) If the programme broadcasts with digital text, this feature is enabled. Network (Network Type / Network Setup / Network Test / Samsung Wireless Link / SWL connect) For details on setting up options, refer to the “Network Connection” instructions. (P. 23) 03 Basic Features ■ 1. Purchase a CI CAM module at your nearest dealer or by phone. 2. Firmly insert the “CI or CI+ CARD” into the CAM in the direction of the arrow. 3. Insert the CAM with the “CI or CI+ CARD” into the common interface slot, in the direction of the arrow so that it aligns parallel with the slot. 4. Check if you can see a picture on a scrambled signal channel. Wireless Remote Control (On / Off) Turn wireless remote controls on or off or give permission to wireless remote controls. English BN68-02558A.indb 19 19 2010-02-22 8:00:29 Basic Features ¦ Picture In Picture (PIP) PIP t Watches simultaneously the TV tuner and one external video source. PIP (Picture-in-Picture) does not function in the same mode. ■ Signal Information: (digital channels only) HDTV channel’s reception quality is either perfect or the channels are unavailable. Adjust your antenna to increase signal strength. ■ Troubleshooting: If the TV seems to have a problem, refer to this description. ✎ ✎ NOTE x x x x If you turn the TV off while watching in PIP mode, the PIP window will disappear. Software Upgrade You may notice that the picture in the PIP window becomes slightly unnatural when you use the main screen to view a game or karaoke. Software Upgrade can be performed via a broadcasting signal or by downloading the latest firmware from samsung. com to a USB memory device. Current Version the software already installed in the TV. While Internet@TV is in operation, the PIP function cannot be used. ✎ Software is represented as “Year/Month/Day_Version”. PIP settings Main picture Component, HDMI1/DVI, HDMI2, HDMI3, HDMI4, PC Software Upgrade Sub picture Current Version 2010/01/18_000001 TV ■ PIP (Off / On): Activate or deactivate the PIP function. ■ Channel: Select the channel for the sub-screen. ■ Size (Õ / Ã): Select a size for the sub-picture. ■ Position (à / – / — / œ): Select a position for the sub-picture. ■ Sound Select (Main / Sub): You can choose the desired sound (Main / Sub) in PIP mode. Support Menu Self Diagnosis ■ Picture Test (Yes / No): Use to check for picture problems and if the problem continues to occur check the colour pattern. ■ Sound Test (Yes / No): Use the built-in melody sound to check for sound problems. ✎ If you hear no sound from the TV’s speakers, before performing the sound test, make sure Speaker Select is set to TV speaker in the Sound menu. ✎ The melody will be heard during the test even if Speaker Select is set to External Speaker or the sound is muted by pressing the MUTE button. 20 If none of these troubleshooting tips apply, contact the Samsung customer service centre. By USB By Online by Channel Standby Mode Upgrade : 2 hours later Alternative Software ----/--/--/--_------ ► U Move E enter R return Installing the Latsted Version ■ By USB: Insert a USB drive TV Side Panel containing the firmware upgrade file, downloaded from www.samsung.com, into the TV. Please be careful or not to disconnect the power or remove the USB drive until upgrades are complete. The TV will be turned off USB Drive and on automatically after completing the firmware upgrade. When software is upgraded, video and audio settings you have made will return to their default settings. We advise you to to write down your settings so that you can easily reset them after the upgrade. English 2010-02-22 8:00:30 ■ By Online: Upgrade the software using the Internet. ✎ First, configure your network. For detailed procedures on using the Network Setup, refer to the “Network Connection” instructions. ✎ If the internet connection doesn’t operate properly, the connection may be broken. Please retry downloading. If the problem persists, download by USB and upgrade. By Channel: Upgrade the software using the broadcasting signal. ✎ ✎ ■ If the function is selected during the software transmission period, software will be automatically searched and downloaded. The time required to download the software is determined by the signal status. ■ Alternative Software (backup): Displays the Software version downloaded through By Online. During the software upgrading, When the Upgrade will discontinue from last step, this function be activated. HD Connection Guide Refer to this information when connecting external devices to the TV. 03 Basic Features ■ Contact Samsung View this information when your TV does not work properly or when you want to upgrade the software. You can find information regarding our call centres, and how to download products and software. Standby Mode Upgrade: A manual upgrade will be automatically performed at selected time. Since the power of the unit is turned on internally, the screen may be turned on slightly for the LCD product. This phenomenon may continue for more than 1 hour until the software upgrade is complete. English 21 2010-02-22 8:00:30 Advanced Features Connecting to a PC Using an HDMI/DVI Cable / a D-sub Cable DVI OUT AUDIO OUT AUDIO OUT PC OUT Display Modes (D-Sub and HDMI/DVI Input) Optimal resolution is 1920 X 1080 @ 60 Hz Mode IBM MAC VESA CVT VESA DMT VESA GTF VESA DMT / DTV CEA Resolution 640 x 350 720 x 400 640 x 480 832 x 624 1152 x 870 720 x 576 1152 x 864 1280 x 720 1280 x 960 640 x 480 640 x 480 640 x 480 800 x 600 800 x 600 800 x 600 1024 x 768 1024 x 768 1024 x 768 1152 x 864 1280 x 1024 1280 x 1024 1280 x 800 1280 x 800 1280 x 960 1280 x 720 1360 x 768 1440 x 900 1440 x 900 1600 x 1200 1680 x 1050 1280 x 720 1280 x 1024 1920 x 1080p Horizontal Frequency (KHz) 31.469 31.469 35.000 49.726 68.681 35.910 53.783 56.456 75.231 31.469 37.861 37.500 37.879 48.077 46.875 48.363 56.476 60.023 67.500 63.981 79.976 49.702 62.795 60.000 45.000 47.712 55.935 70.635 75.000 65.290 52.500 74.620 67.500 Vertical Frequency (Hz) Pixel Clock Frequency (MHz) Sync Polarity (H / V) 70.086 70.087 66.667 74.551 75.062 59.950 59.959 74.777 74.857 59.940 72.809 75.000 60.317 72.188 75.000 60.004 70.069 75.029 75.000 60.020 75.025 59.810 74.934 60.000 60.000 60.015 59.887 74.984 60.000 59.954 70.000 70.000 60.000 25.175 28.322 30.240 57.284 100.000 32.750 81.750 95.750 130.000 25.175 31.500 31.500 40.000 50.000 49.500 65.000 75.000 78.750 108.000 108.000 135.000 83.500 106.500 108.000 74.250 85.500 106.500 136.750 162.000 146.250 89.040 128.943 148.500 +/-/+ -/-/-/-/+ -/+ -/+ -/+ -/-/-/+/+ +/+ +/+ -/-/+/+ +/+ +/+ +/+ -/+ -/+ +/+ +/+ +/+ -/+ -/+ +/+ -/+ -/+ -/+/+ ✎ NOTE x x x x 22 For HDMI/DVI cable connection, you must use the HDMI IN 1(DVI) jack. The interlace mode is not supported. The set might operate abnormally if a non-standard video format is selected. Separate and Composite modes are supported. SOG(Sync On Green) is not supported. English 2010-02-22 8:00:32 You can set up your TV so that it can access the Internet through your local area network (LAN) using a wired or wireless connection. ¦ Connecting to a Wired Network You can attach your TV to your LAN using cable in three ways: y You can attach your TV to your LAN by connecting the LAN port on the back of your TV to an external modem using a Cat 5 cable. See the diagram below. The Modem Port on the Wall TV Rear Panel External Modem (ADSL / VDSL / Cable TV) Modem Cable 04 Advanced Features Network Connection LAN Cable y You can attach your TV to your LAN by connecting the LAN port on the back of your TV to a IP Sharer which is connected to an external modem. Use Cat 5 cable for the connection. See the diagram below. The Modem Port on the Wall Modem Cable External Modem (ADSL / VDSL / Cable TV) LAN Cable IP Sharer (having DHCP server) TV Rear Panel LAN Cable y Depending on how your network is configured, you may be able to attach your TV to your LAN by connecting the LAN port on the back of your TV directly to a network wall outlet using a Cat 5 cable. See the diagram below. Note that the wall outlet is attached to a modem or router elsewhere in your house. The Modem Port on the Wall TV Rear Panel LAN Cable If you have a Dynamic Network, you should use an ADSL modem or router that supports Dynamic Host Configuration Protocol (DHCP). Modems and routers that support DHCP automatically provide the IP address, subnet mask, gateway, and DNS values your TV needs to access the Internet so you don’t have to enter them manually. Most home networks are Dynamic Networks. Some networks require a Static IP address. If your network requires a Static IP address, you must enter the IP address, subnet mask, gateway, and DNS values manually on your TV’s Cable Setup Screen when you set up the network connection. To get the IP address, subnet mask, gateway, and DNS values, contact your Internet Service Provider (ISP). If you have a Windows computer, you can also get these values through your computer. ✎ You can use ADSL modems that support DHCP if your network requires a Static IP address. ADSL modems that support DHCP also let you use Static IP addresses. English 23 2010-02-22 8:00:34 Advanced Features Network Setup (Auto) Network Setup (Manual) Use the Automatic Network Setup when connecting your TV to a network that supports DHCP. To set up your TV’s cable network connection automatically, follow these steps: Use the Manual Network Setup when connecting your TV to a network that requires a Static IP address. How to set up automatically To get the Network connection values on most Windows computers, follow these steps: 1. Right click the Network icon on the bottom right of the screen. 1. Connect your TV to your LAN as described in the previous section. 2. Turn on your TV, press the MENU button on your remote, use the ▲or▼ button to select Setup, and then press the ENTERE button. 3. Use the ▲or▼ button to select Network in the Setup menu, and then press the ENTERE button. The Network screen appears. : Wired ► Network Setup Network test SWl(Samsung Wireless link) 2. In the pop-up menu that appears, click Status. 3. On the dialog that appears, click the Support tab. 4. On the Support Tab, click the Details button. The Network connection values are displayed. How to set up manually Network Network Type Getting the Network Connection Values : Off To set up your TV’s cable network connection manually, follow these steps: 1. Follow Steps 1 through 6 in the “How to set up automatically” procedure. 2. Set Internet Protocol Setup to Manual. 3. Press the ▼ button on your remote to go to the first entry field. SWl connect U Move E enter R return 4. On the Network screen, select Network Type. 4. Enter the IP Address, Subnet Mask, Gateway, and DNS Server values. Use the number buttons on your remote to enter numbers and the arrow buttons to move from one entry field to another. 5. Set Network Type to Wired. 5. When done, press the RETURN button on your remote. 6. Select Network Setup. The Network Setup screen appears. 6. Select Network Test to check the Internet connectivity. Network Setup Internet Protocol Setup : Auto IP Address : Subnet Mask : Gateway : DNS : Auto DNS Server : ► U Move E enter R return 7. Set Internet Protocol Setup to Auto. 8. Auto acquires and enters the needed Internet values automatically. 9. Wait two minutes, and then press the RETURN button on your remote. 10. If the Network Function has not acquired the network connection values, go to the directions for Manual. 24 English 2010-02-22 8:00:35 To connect your TV to your network wirelessly, you need a wireless router or modem and a Samsung Wireless LAN Adapter (WIS09ABGN), which you connect to your TV’s back or side panel USB jack. See the illustration below. ✎ To use the SWL(Samsung Wireless Link) function, connect to the USB 1 (HDD) port. TV Side Panel The LAN Port on the Wall Wireless IP sharer Samsung Wireless LAN Adapter 04 Advanced Features ¦ Connecting Wireless Network or LAN Cable Samsung’s Wireless LAN adapter is sold separately and is offered by select retailers, Ecommerce sites and Samsungparts. com. Samsung’s Wireless LAN adapter supports the IEEE 802.11A/B/G and N communication protocols. Samsung recommends using IEEE 802.11N. When you play video over a IEEE 802.11B/G connection, the video may not play smoothly. ✎ NOTE x x x x x x x x x x x You must use the “Samsung Wireless LAN Adapter” (WIS09ABGN) to use a wireless network. Samsung’s Wireless LAN adapter is sold separately. The WIS09ABGN Wireless LAN adapter is offered by select retailers, Ecommerce sites and Samsungparts.com. To use a wireless network, your TV must be connected to a wireless IP sharer. If the wireless IP sharer supports DHCP, your TV can use a DHCP or static IP address to connect to the wireless network. Select a channel for the wireless IP sharer that is not currently being used. If the channel set for the wireless IP sharer is currently being used by another device nearby, this will result in interference and communication failure. If you apply a security system other than the systems listed blow, it will not work with the TV. If Pure High-throughput (Greenfield) 802.11n mode is selected and the Encryption type is set to WEP, TKIP or TKIPAES (WPS2Mixed) for your AP, Samsung TVs will not support a connection in compliance with new Wi-Fi certification specifications. If your AP supports WPS (Wi-Fi Protected Setup), you can connect to the network via PBC (Push Button Configuration) or PIN (Personal Identification Number). WPS will automatically configure the SSID and WPA key in either mode. Keep the Samsung Wireless LAN Adaptor at a distance from the TV. If you watch the TV with the adaptor connected nearby, images may appear corrupted for some channels. If your router, modem, or device isn’t, it may not connect to the TV via the “Samsung Wireless LAN Adapter.” Connection Methods: You can setup the wireless network connection six ways. – Samsung Auto Configuration – PBC (WPS) – Auto Setup (Using the Auto Network Search function) – Manual Setup – SWL (Samsung Wireless Link) – Ad-Hoc All of Samsung Wireless LAN Adapter shoud be connected directly to the TV's USB port. USB HUB are not supported. English 25 2010-02-22 8:00:36 Advanced Features Network Setup (Samsung Auto Configuration) Network Setup (PBC (WPS)) This function is available in APs (Access Points) that support Samsung Auto Configuration. If there is no such AP, you can connect through PBC (WPS) or manually. If your router has a PBC (WPS) button, follow these steps: 1. Connect your TV to your LAN as described in the previous section. ✎ This function is available when SWL(Samsung Wireless Link) set to Off. ✎ You can check for equipment that supports Samsung Auto Configuration on www.samsung.com. How to set up using Samsung Auto Configuration 1. Place the AP and TV next to each other and turn them on. ✎ Because the booting times of applications differ, you may have to wait for approximately 2 minutes. ✎ If the LAN cable connected the WAN port of AP during Samsung Auto Configuration, you are able to complete until internet connection test. If you do not connect, Samsung Auto configuration will check only device connecting of AP (Not check internet). How to set up using PBC (WPS) 2. Turn on your TV, press the MENU button on your remote, use the ▲or▼ button to select Setup, and then press the ENTERE button. 3. Use the ▲or▼ button to select Network in the Setup menu, and then press the ENTERE button. 4. On the Network screen, select Network Type. 5. Set Network Type to Wireless. 6. Select Network Setup. The Network Setup screen appears. Network Setup Select a network Internet Protocol Setup : Not Selected : Auto IP Address : 2. After 2 minutes, connect the Samsung Wireless LAN Adaptor to the TV. When the Samsung Wireless LAN Adaptor is established, the pop-up window appears. Subnet Mask : Gateway : 3. As soon as a connection is established, place the AP in parallel with the Samsung Wireless LAN Adaptor giving a gap no larger than 25cm. DNS DNS Server : Auto : 4. Wait until the connection is automatically established. ✎ If the connection fails, reset the AP and then try again. ✎ If Samsung Auto Configuration does not connect your TV to your AP, a pop-up window appears on the screen notifying you of the failure. Reset the AP, and then try again. If the connection fails again, choose one of the other connection setup methods, PBC (WPS), auto, or manual. 5. After the connection is established, locate the sharer at the desired location. ✎ If the AP settings have been changed or it is the first time you use the new AP after purchase, you need to set up again beginning from Step 1. ► U Move E enter R return 7. Press the Red button on your remote. 8. Press the PBC (WPS) button on your router within 2 minutes. Your TV player automatically acquires all the network setting values it needs and connects to your network. 9. After the network connection is set up, press the RETURN button to exit the Network Setup screen. Network Setup (Auto) Most wireless networks have an optional security system that requires devices that access the network to transmit an encrypted security code called an Access or Security Key. The Security Key is based on a Pass Phrase, typically a word or a series of letters and numbers of a specified length you were asked to enter when you set up security for your wireless network. If you use this method of setting up the network connection, and have a Security Key for your wireless network, you will have to enter the Pass Phrase during the setup process. How to set up automatically To set up the wireless connection automatically, follow these steps: 1. Follow Steps 1 through 6 in the “How to set up PBC (WPS)” above. 2. Press the ▼ button to select Internet Protocol Setup, and then press the ENTERE button. Press the ▲ or ▼ button to select Auto, and then press the ENTERE button. 26 English 2010-02-22 8:00:37 4. In the list of networks, press the ▲ or ▼ button to select a network, and then press the ENTERE button. ✎ If the AP is set to Hidden (Invisible), you have to select Add Network and enter the correct Network Na me (SSID) and Security Key to establish the connection. 5. If the Security/PIN pop-up appears, go to Step 6. If the Network Connecting Screen appears, go to Step 10. 6. Press the ▲ or ▼ button to select Security or PIN. For most home networks, you would select Security (for Security Key). The Security Screen appears. Network Setup Network Setup (Ad-Hoc) You can connect to a mobile device without an access point through the “Samsung Wireless LAN Adapter” by using a peer to peer network. ✎ This function is available when SWL(Samsung Wireless Link) is set to Off. How to connect to new Ad-hoc 1. Follow Steps 1 through 6 in the “How to set up using PBC (WPS)”. (P. 26) 2. Choose Select a network. A list of devices/networks appears. 3. While in the device list, press the Blue button on the remote. ✎ Security Key 0 entered A b C D e F G H I j K l M N O P Q r S T U V W X Y z 0~9 Number lower case B C Delete Space n Move E enter R return 7. On the Security screen, enter your network’s Pass Phrase. ✎ You should be able to find the Pass Phrase on one of the set up screens you used to set up your router or modem. 8. To enter the Pass Phrase, follow these general directions: – Press the number buttons on your remote to enter numbers. – Use the direction buttons on your remote to move from button to button on the Security Key screen. – Press the Red button to change case or display symbols/characters. – To a enter letter or symbol, move to the letter or symbol, and then press the ENTERE button. – To delete the last letter or number you entered, press the Green button on your remote. 9. When done, press the Blue button on your remote. The Network Connecting screen appears. 10. Wait until the connection confirmation message is displayed, and then press the ENTERE button. The Network Setup screen re-appears. 11. To test the connection, press the RETURN button to select Network Test, and then press the ENTERE button. The message Ad-hoc is a direct WI-Fi connection with cellphone or PC. The existing network system may have limited functionality. Do you want to change the network connection? is displayed. 4. Input the generated Network Name (SSID) and Security Key into the device you want to connect. How to connect an existing Ad-hoc device 1. Follow Steps 1 through 6 in the “How to set up using PBC (WPS)”. (P. 26) 2. Choose Select a network. Then, the device list will be displayed. 3. Select the device you want in the Device list. 4. If security key was applied, input the security key. ✎ If network doesn’t operate normally, check the Network Name (SSID) and Security Key again. An incorrect Security Key may cause a malfunction. Network Setup (Manual) If the other methods do not work, you need to enter the Network setting values manually. Getting the Network Connection Values To get the Network setting values on most Windows computers, follow these steps: 1. Right click the Network icon on the bottom right of the screen. 2. In the pop-up menu, click Status. 3. On the dialog that appears, click the Support tab. 4. On the Support tab, click the Details button. The Network settings are displayed. English BN68-02558A.indb 27 04 Advanced Features 3. Press the ▲ button to go to Select a Network, and then press the ENTERE button. The Network function searches for available wireless networks. When done, it displays a list of the available networks. 27 2010-02-22 8:00:37 Advanced Features How to set up manually How to connect Samsung Wireless link To enter the Network settings into your TV, follow these steps: 1. Follow Steps 1 through 6 in the “How to set up using PBC (WPS)”. (P. 26) For the procedures to establish a connection, refer to the following: 1. Follow Steps 1 through 5 in the “How to set up using PBC (WPS)”. (P. 26) 2. Press the ▼ button to select Internet Protocol Setup, and then press ENTERE button. Press the ▲ or ▼ button to select Manual, and then press ENTERE button. 2. Select Samsung Wireless Link by using the ▼ button and press the ENTERE button to turn it On. 3. Press the ▼ button to go to the first entry field (IP Address). 4. If the “Press the PBC button on the device which supports PBC button to connect within 120 seconds” message appears, press the PBC button on the device to connect. 4. Use the number buttons to enter numbers. 5. When done with each field, use the ► button to move successively to the next field. You can also use the other arrow buttons to move up, down, and back. 6. Enter the IP Address, Subnet Mask, and Gateway values. 7. Press the ▲ or ▼ button to go to DNS. 8. Press the ▼ button to go to the first DNS entry field. Enter the numbers as above. 9. When done, press the ▲ button to go to Select a Network. Select your network, and then press ENTERE button. 10. Go to Step 4 in the "How to set up automatically" (P. 26), and follow the directions from that point on. Network Setup (SWL (Samsung Wireless Link)) This function lets you connect a Samsung device that supports the PBC (WPS) to your TV. You can connect devices to the TV even if a sharer is not connected to the TV. ✎ To use the Internet@TV, the AP (access point) must be connected to the wireless network. ✎ If a Samsung Wireless Lan Adapter is connected to the USB 2 port, the network may not operate normally. We recommend to connect to USB 1 (HDD) port. ✎ Only sharers using the 2.4 Ghz band are supported. Sharers using the 5 Ghz band are not supported. SWL connect 3. Select SWL connect by using the ▼ button and press the ENTERE button. ✎ For more information, refer to the wireless network setup manual of the device to be connected. 5. If the device is connected properly to the TV after starting count on message box then message box will be disappeared automatically. ✎ If the connection fails, please retry after 2 minutes. If Your TV Fails to Connect to the Internet Your TV may not be able to connect to the Internet because your ISP has permanently registered the MAC address (a unique identifying number) of your PC or modem, which it then authenticates each time you connect to the Internet as a way of preventing unauthorized access. As your TV has a different MAC address, your ISP can not authenticate its MAC address, and your TV can not connect. To resolve this problem, ask your ISP about the procedures required to connect devices other than a PC (such as your TV) to the Internet. If your Internet service provider requires an ID or assword to connect to the Internet, your TV may not be able to connect to the Internet. If this is the case, you must enter your ID or password when connecting to the Internet. The internet connection may fail because of a firewall problem. If this is the case, contact your Internet service provider. If you cannot connect to the Internet even after you have followed the procedures of your Internet service provider, please contact Samsung Electronics at 1-800-SAMSUNG. You can directly connect a device that supports the PBC (WPS) to the TV. ✎ This function is available when SWL(Samsung Wireless Link) is set to On. 28 English 2010-02-22 8:00:37 Enjoy photos, music and/or movie files saved on a USB Mass Storage Class (MSC) device and/or your PC. 04 Advanced Features Media Play MediaPlay Videos Change Device SUM View Devices E enter R return ¦ Connecting a USB Device 1. Turn on your TV. TV Side Panel 2. Connect a USB device containing photo, music and/or movie files to the USB 1 (HDD) or USB 2 jack on the side of the TV. 3. When USB is connected to the TV, popup window appears. Then you can select Media Play. or USB Drive ¦ Connecting to the PC through network You can play pictures, music and videos saved on your PC or on your TV through a network connection in the Media Play mode. ✎ If you use Media Play through saved file on your PC, you should download “PC Share Manager” and users manual from “www.samsung.com.” TV Side Panel PC LAN or External Modem (ADSL/VDSL/Cable TV) Samsung Wireless LAN Adapter Wireless IP sharer LAN Cable 1. For more information on how to configure your network, refer to ‘Network Connection’. – You are recommended to locate both TV and PC in same subnet. The first 3 parts of the subnet address of the TV and the PC IP addresses should be the same and only the last part (the host address) should be changed. (e.g. IP Address: 123.456.789.**) 2. Using a LAN cable, connect between the external modem and the PC onto which the Samsung PC Share Manager program will be installed. – You can connect the TV to the PC directly without connecting it through a Sharer (Router). English BN68-02558A.indb 29 29 2010-02-22 8:00:40 Advanced Features ✎ Functions that are not supported when connecting to a PC through a network: x x x The Background Music and Background Music Setting functions. Sorting files by preference in the Photo, Music, and Movie folders. The � (REW) or µ (FF) button while a movie is playing. ✎ The Divx DRM, Multi-audio, embedded caption does not supported. ✎ Samsung PC Share manager should be permitted by the firewall program on your PC. ✎ When you use Media Play mode through a network connection, According to functions of the provided server: x x x x The sorting method may vary. The scene search function may not be supported. The Play Continuously function, which resumes playing of a video, may not be supported. – The Play Continuously function does not support multiple users. (It will have only memorized the point where the most recent user stopped playing.) The � (REW), µ (FF) or � (Pause) buttons may not work depending on the content information. ✎ If you experience any file stuttering issue while playing a video over a wireless network, we recommend using a wired network. ✎ It might not work properly with unlicensed multimedia files. ✎ Need-to-Know List before using Media Play x x x x x x x x x x x x x x x x x x x x x 30 MTP (Media Transfer Protocol) is not supported. The file system supports FAT16, FAT32 and NTFS. Certain types of USB Digital camera and audio devices may not be compatible with this TV. Media Play only supports USB Mass Storage Class (MSC) devices. MSC is a Mass Storage Class Bulk-Only Transport device. Examples of MSC are Thumb drives, Flash Card Readers and USB HDD (USB HUB are not supported). Devices should be connected directly to the TV’s USB port. Before connecting your device to the TV, please back up your files to prevent them from damage or loss of data. SAMSUNG is not responsible for any data file damage or data loss. Connect a USB HDD to the dedicated port, USB1 (HDD) port. Do not disconnect the USB device while it is loading. MSC supports MP3 and JPEG files, while a PTP device supports JPEG files only. The higher the resolution of the image, the longer it takes to display on the screen. The maximum supported JPEG resolution is 15360X8640 pixels. For unsupported or corrupted files, the “Not Supported File Format” message is displayed. If the files are sorted by Basic View, up to 1000 files can be displayed in each folder. MP3 files with DRM that have been downloaded from a non-free site cannot be played. Digital Rights Management (DRM) is a technology that supports the creation of content, the distribution and management of the content in an integrated and comprehensive way, including the protection of the rights and interests of the content providers, the prevention of the illegal copying of contents, as well as managing billings and settlements. If more than 2 PTP devices are connected, you can only use one at a time. If more than two MSC devices are connected, some of them may not be recognized. A USB device that requires high power (more than 500mA or 5V) may not be supported. If an over-power warning message is displayed while you are connecting or using a USB device, the device may not be recognized or may malfunction. If the TV has been no input during time set in Auto Protection Time, the Screensaver will run. The power-saving mode of some external hard disk drives may be released automatically when connected to the TV. If a USB extension cable is used, the USB device may not be recognized or the files on the device may not be read. If a USB device connected to the TV is not recognized, the list of files on the device is corrupted or a file in the list is not played, connect the USB device to the PC, format the device and check the connection. If a file deleted from the PC is still found when Media Play is run, use the “Empty the Recycle Bin” function on the PC to permanently delete the file. English 2010-02-22 8:00:40 Move to the file you desired using the up/down/right/left buttons and then press the ENTERE or � (Play) button. The file is played. ✎ Supports the Device Mode and Contents Mode in Media Play homepage. Information : You can ascertain the selected file name and the number of files and page. Videos 1/1 Page /Movie 01.avi Movie 01.avi Movie 02.avi Jan.10.2010 Movie 03.avi Jan.10.2010 Movie 04.avi Jan.10.2010 Movie 05.avi Jan.10.2010 Movie 06.avi Jan.10.2010 Sort List Section : Displays sorting standard. ✎ Sorting standard is different depending on the contents. Movie 07.avi Jan.10.2010 Movie 08.avi Jan.10.2010 Movie 09.avi File List Section : You can confirm the files and groups that is sorted by each category. Jan.10.2010 Movie 10.avi Jan.10.2010 SUM A 04 Advanced Features ¦ Screen Display Jan.10.2010 Select Change Device Sorting T Tools Operation Buttons Red (Change Device): Selects a connected device. B Green (Preference): Sets the file preference. (not supported in Basic view) Yellow (Select): Selects multiple files from file list. Selected files are marked with a symbol. Blue (Sorting): Selects the sort list. T Tools: Displays the option menu. ✎ Using the � or µ button, file list can move to next or previous page. Videos Playing a Video 1. Press the ◄ or ► button to select Videos, then press the ENTERE button in the Media Play menu. 2. Press the ◄/►/▲/▼ button to select the desired video in the file list. 3. Press the ENTERE button or � (Play) button. – The selected file is displayed on the top with its playing time. – If video time information is unknown, play time and pregress bar are not displayed. – During video playback, you can search using ◄ and ► button. ✎ In this mode, you can enjoy movie clips contained on a Game, but you cannot play the Game itself. 00:04:03 / 00:07:38 1/1 Movie 01.avi y Supported Subtitle Formats Name File extension MPEG-4 time-based text .ttxt Format XML SAMI .smi HTML SubRip .srt string-based SubViewer .sub string-based Micro DVD .sub or .txt string-based SUM E Pause L jump T Tools R return English 31 2010-02-22 8:00:42 Advanced Features y Supported Video Formats File Extention *.avi *.mkv *.asf Container AVI MKV ASF *.wmv ASF *.mp4 MP4 *.3gp 3GPP *.vro VRO VOB *.mpg *.mpeg Video Codec Resolution Frame rate (fps) Bit rate (Mbsp) Divx 3.11 / 4.x / 5.1 / 6.0 1920 x 1080 6 ~ 30 8 XviD 1920 x 1080 6 ~ 30 8 H.264 BP / MP / HP 1920 x 1080 6 ~ 30 25 MPEG4 SP / ASP 1920 x 1080 6 ~ 30 8 Motion JPEG 800 x 600 6 ~ 30 8 Divx 3.11 / 4.x / 5.1 / 6.0 1920 x 1080 6 ~ 30 8 XviD 1920 x 1080 6 ~ 30 8 H.264 BP / MP / HP 1920 x 1080 6 ~ 30 25 MPEG4 SP / ASP 1920 x 1080 6 ~ 30 8 Motion JPEG 800 x 600 6 ~ 30 8 Window Media Video v9 1920 x 1080 6 ~ 30 25 25 H.264 BP / MP / HP 1920 x 1080 6 ~ 30 MPEG4 SP / ASP 1920 x 1080 6 ~ 30 8 XVID 1920 x 1080 6 ~ 30 8 H.264 BP / MP / HP 1920 x 1080 6 ~ 30 25 MPEG4 SP / ASP 1920 x 1080 6 ~ 30 8 MPEG1 1920 x 1080 24 / 25 / 30 30 MPEG2 1920 x 1080 24 / 25 / 30 30 MPEG1 1920 x 1080 24 / 25 / 30 30 MPEG2 1920 x 1080 24 / 25 / 30 30 H.264 1920 x 1080 6 ~ 30 25 MPEG2 1920 x 1080 24 / 25 / 30 30 H.264 1920 x 1080 6 ~ 30 25 VC1 1920 x 1080 6 ~ 30 25 PS *.ts *.tp *.trp TS Audio Codec MP3 / AC3 / LPCM / ADPCM /DTS Core MP3 / AC3 / LPCM / ADPCM / WMA WMA MP3 / ADPCM / AAC ADPCM / AAC / HE-AAC AC3 / MPEG / LPCM AC3 / MPEG / LPCM / AAC AC3 / AAC / MP3 / DD+ / HE-AAC Other Restrictions ✎ NOTE x x x x If there are problems with the contents of a codec, the codec will not be supported. If the information for a Container is incorrect and the file is in error, the Container will not be able to play correctly. Sound or video may not work if the contents have a standard bitrate/frame rate above the compatible Fram/sec listed in the table above. If the Index Table is in error, the Seek (Jump) function is not supported. Video Decoder Audio Decoder • Supports up to H.264, Level 4.1 • H.264 FMO / ASO / RS, VC1 SP / MP / AP L4 and AVCHD are not supported. • XVID, MPEG4 SP, ASP : • Supports up to WMA 7, 8, 9, STD • WMA 9 PRO does not support 2 channel excess multi channel or lossless audio. • WMA sampling rate 22050Hz mono is not supported. – Below 1280 x 720: 60 frame max – Above 1280 x 720: 30 frame max • GMC 2 over is not support. • H.263 is not supported. • Only Samsung Techwin MJEPG is supported. 32 English 2010-02-22 8:00:43 If you exit the playing Videos function, it can be played later from the point where it was stopped. ✎ If you will press the ENTERE button during playing the file, you can explore scene divided into 5 chapters you want. 1. Select the movie file you want to play continuously by pressing the ◄ or ► button to select it from the file list section. 2. Press the � (Play) / ENTERE button. 00:04:03 / 00:07:38 1/1 Movie 01.avi 3. Select Play Continuously (Resume Play) by pressing the Blue button. The Movie will begin to play from where it was stopped. ✎ ✎ The Blue button is available when resuming play. If the Cont. movie play help function is set to On in the Settings menu, a pop-up message will appear when you resume play a movie file. 04 Advanced Features Playing movie file continuously (Resume Play) Play continuously resumes playing from the last viewed scene. SUM Play continuously E Chaptering L Jump T Tools R Return Music Playing a Music 1. Press the ◄ or ► button to select Music, then press the ENTERE button in the Media Play menu. Playlist 2. Press the ◄/►/▲/▼ button to select the desired file in the file list. 3. Press the ENTERE button or � (Play) button. – During music playback, you can search using ◄ and► button. – π (REW) and µ buttons do not function during play. I Love You Jhon I Love you Jhon 1st Album Pop 2010 4.2MB No Singer Music 1 Music 2 No Singer Music 3 No Singer ✎ Only displays the files with MP3 and PCM file extension. Other file 01:10 / 04:02 Music 4 No Singer Music 5 extensions are not displayed, even if they are saved on the same USB device. ✎ If the sound is abnormal when playing MP3 files, adjust the 3/15 No Singer SUM E Pause L jump T Tools R return Equalizer in the Sound menu. (An over-modulated MP3 file may cause a sound problem.) Creating My Playlist 1. Press the ◄/►/▲/▼ button to select the tracks you want to add and press the TOOLS button. 2. Select Add My Playlist. 3. When the Add My Playlist menu appears, select New My Playlist. ✎ To add to an old play list, simply select the play list you want to add music to. 4. The newly created or updated playlist will be in the main Music page. Playing MyPlaylist Select the My Playlist folder and it will play automatically. Press the ▲ or ▼ button to select a different music file within the play list. English 33 2010-02-22 8:00:44 Advanced Features Photos Viewing a Photo (or Slide Show) 1. Press the ◄ or ► button to select Photos, then press the ENTERE button in the Media Play menu. 2. Press the ◄/►/▲/▼ button to select the desired photo in the file list. 3. Press the ENTERE button or � (Play) button. Image1024.jpg Normal 1024x768 2010/2/1 3/15 – While a photo list is displayed, press the � (Play) / ENTERE button on the remote control to start slide show. – All files in the file list section will be displayed in the slide show. – During the slide show, files are displayed in order from currently being shown. ✎ Music files can be automatically played during the Slide Show if the Background Music is set to On. E Pause L Previous/Next T Tools R return SUM ✎ The BGM Mode cannot be changed until the BGM has finished loading. ¦ Playing the multiple files Playing the selected video / music / photo files 1. Press the Yellow button in the file list to select the desired file. 2. Repeat the above operation to select multiple files. NOTE x The (c) mark appears to the left of the selected files. x To cancel a selection, press the yellow button again. x To deselect all selected files, press the TOOLS button and select Deselect All. 3. Press the TOOLS button and select Play Selected Contents. Videos ✎ Playing the video / music / photo file group 1. While a file list is displayed, move to the any file in desired group. 2. Press the TOOLS button and select Play Current Group. 2 iles selected /Movie 01.avi Movie 01.avi Movie 02.avi Jan.10.2010 Jan.10.2010 Movie 03.avi Movie 04.avi Jan.10.2010 Jan.10.2010 Movie 05.avi Movie 06.avi Jan.10.2010 Jan.10.2010 Movie 07.avi Movie 08.avi Jan.10.2010 Jan.10.2010 Movie 09.avi Movie 10.avi Jan.10.2010 SUM 1/1 Page Jan.10.2010 Change Device Select Sorting T Tools ¦ Media Play Additional Function Sorting the file list Press the blue button in the file list to sort the files. Category Operations Videos Music Photos Basic View It shows whole folder. You can view the photo by selecting the folder. ✓ ✓ ✓ Title It sorts and displays the file title in Symbol/Number/Alphabet/Special order. ✓ ✓ ✓ Preference It sorts and displays the file by preference. You can change the file preference in the file list section using the green button ✓ ✓ ✓ Latest Date It sorts and shows files by latest date. Earliest Date It sorts and shows files by earliest date. ✓ ✓ ✓ ✓ Artist It sorts the music file by artist in alphabetical ✓ Album It sorts the music file by album in alphabetical order. ✓ Genre It sorts music files by the genre. ✓ Mood It sorts music files by the mood. You can change the music mood information. ✓ Monthly It sorts and shows photo files by month. It sorts only by month (from January to December) regardless of year. 34 ✓ English 2010-02-22 8:00:47 During playing a file, press the TOOLS button. Option menu Operations Videos Music You can play movie and music files repeatedly. ✓ ✓ You can adjust the picture size for preference. ✓ Title You can move the other file directly. Repeat Mode Picture Size (Mode1 / Mode2 / Original) Picture Setting Sound Setting You can adjust the sound setting. (P. 16, 17) You can play the video file with Subtitle. This function only works if the subtitles are the same file name as the video file. You can enjoy video in one of supported language as required. The function is only enabled when steam-type files which support multiple audio formats are played. Subtitle Setting Audio You can adjust the picture setting. (P. 13, 14, 15, 16) ✓ ✓ ✓ Photos ✓ ✓ ✓ ✓ ✓ ✓ Stop Slide Show / Start You can start or stop a Slide Show. Slide Show Slide Show Speed You can select the slide show speed during the slide show. Slide Show Effect Zoom You can set variously the slide show effect. You can set and select background music when watching a Slide Show. You can zoom into images in full screen mode. Rotate You can rotate images in full screen mode. Background Music Home Background You can move the file to the Media Play desktop. Information You can see detailed information about the played file. 04 Advanced Features Videos / Music / Photos Play Option menu ✓ ✓ ✓ ✓ ✓ ✓ ✓ ✓ ✓ Settings Using the Setup Menu ■ Background Setting: Select to display the background you want. ■ Cont. movie play help (resume play) Help (On / Off): Select to display the help pop-up message for continuous movie playback. ■ Get the DivX® VOD registration code: Shows the registration code authorized for the TV. If you connect to the DivX web site and register the registration code with a personal account, you can download VOD registration file. If you play the VOD registration using Media Play, the registration is completed. ✎ For more information on DivX® VOD, visit www.DivX.com. ■ Get the DivX® VOD deactivation code: When DivX® VOD is not registered, the registration deactivation code is displayed. If you execute this function when DivX® VOD is registered, the current DivX® VOD registration is deactivated. ■ Information: Select to view information about the connected device. English 35 2010-02-22 8:00:47 Advanced Features Anynet+ What is Anynet+? t Anynet+ is a function that enables you to control all connected Samsung devices that support Anynet+ with your Samsung TV’s remote. The Anynet+ system can be used only with Samsung devices that have the Anynet+ feature. To be sure your Samsung device has this feature, check if there is an Anynet+ logo on it. To connect to Home Theatre TV Home Theatre Anynet+ Device 1 Anynet+ Device 2, 3, 4 HDMI 1.3 Cable Optical Cable HDMI 1.3 Cable 1. Connect the HDMI IN (1(DVI), 2, 3 or 4) jack on the TV and the HDMI OUT jack of the corresponding Anynet+ device using an HDMI cable. 2. Connect the HDMI IN jack of the home theatre and the HDMI OUT jack of the corresponding Anynet+ device using an HDMI cable. ✎ NOTE x x x x x x Connect the Optical cable between the DIGITAL AUDIO OUT (OPTICAL) jack on your TV and the Digital Audio Input on the Home Theatre. When following the connection above, the Optical jack only outputs 2 channel audio. You will only hear sound from the Home Theatre’s Front Left and Right speakers and the subwoofer. If you want to hear 5.1 channel audio, connect the DIGITAL AUDIO OUT (OPTICAL) jack on the DVD / satellite box (i.e. Anynet Device 1 or 2) directly to the Amplifier or Home Theatre, not the TV. Connect only one Home Theatre. You can connect an Anynet+ device using the HDMI cable. Some HDMI cables may not support Anynet+ functions. Anynet+ works when the AV device supporting Anynet+ is in the standby or on status. Anynet+ supports up to 12 AV devices in total. Note that you can connect up to 3 devices of the same type. Anynet+ Menu The Anynet+ menu changes depending on the type and status of the Anynet+ devices connected to the TV. Anynet+ Menu View TV Device List Recording: (*recorder) (device_name) MENU (device_name) INFO Stop Recording: (*recorder) Receiver Description Changes Anynet+ mode to TV broadcast mode. Shows the Anynet+ device list. Starts recording immediately using the recorder. (This is only available for devices that support the recording function.) Shows the connected device menus. E.g. If a DVD recorder is connected, the disc menu of the DVD recorder will appear. Shows the play menu of the connected device. E.g. If a DVD recorder is connected, the play menu of the DVD recorder will appear. Stops recording. Sound is played through the receiver. If more than one recording device is connected, they are displayed as (*recorder) and if only one recording device is connected, it will be represented as (*device_name). 36 English 2010-02-22 8:00:48 ■ 04 Advanced Features ¦ Setting Up Anynet+ Setup Anynet+ (HDMI-CEC) (Off / On): To use the Anynet+ Function, Anynet+ (HDMI-CEC) must be set to On. When the Anynet+ (HDMI-CEC) function is disabled, all the Anynet+ related operations are deactivated. ✎ Auto Turn Off (No / Yes): Setting an Anynet+ Device to turn off automatically when the TV is turned off. The active source on the TV must be set to TV to use the Anynet+ function. ✎ ✎ Even if an external device is still recording, it may turn off. ¦ Switching between Anynet+ Devices 1. Anynet+ devices connected to the TV are listed. ✎ If you cannot find a device you want, press the red button to refresh the list. 2. Select a device and press the ENTERE button. You can switch to the selected device. ✎ x x Only when you set Anynet+ (HDMI-CEC) to On in the Application menu, the Device List menu appears. Switching to the selected device may take up to 2 minutes. You cannot cancel the operation during the switching operation. If you have selected external input mode by pressing the SOURCE button, you cannot use the Anynet+ function. Make sure to switch to an Anynet+ device by using the Device List. ¦ Recording You can make a recording of a TV programme using a Samsung recorder. 1. Select Recording. ✎ ✎ When there are more than two recording devices x When multiple recording devices are connected, the recording devices are listed. Select one recording device in the Device List. When the recording device is not displayed, select Device List and press the Red button to search devices. 2. Press the EXIT button to exit. ✎ ✎ ✎ You can record the source streams by selecting Recording: (device_name). Pressing the � (REC) button will record whatever you are currently watching. If you are watching video from another device, the video from the device is recorded. Before recording, check whether the antenna jack is properly connected to the recording device. To properly connect an antenna to a recording device, refer to the recording device’s users manual. English BN68-02558A.indb 37 37 2010-02-22 8:00:50 Advanced Features ¦ Listening through a Receiver You can listen to sound through a receiver (i.e Home Theatre) instead of the TV speaker. 1. Select Receiver and set to On. 2. Press the EXIT button to exit. ✎ ✎ ✎ If your receiver supports audio only, it may not appear in the device list. The receiver will work when you have properly connected the optical in jack of the receiver to the DIGITAL AUDIO OUT (OPTICAL) jack of the TV. When the receiver (i.e Home Theatre) is set to On, you can hear sound output from the TV’s Optical jack. When the TV is displaying a DTV (aerial) signal, the TV will send out 5.1 channel sound to the receiver. When the source is a digital component such as a DVD and is connected to the TV via HDMI, only 2 channel sound will be heard from the receiver. ✎ NOTE x x x You can only control Anynet+ devices using the TV remote control, not the buttons on the TV. The TV remote control may not work under certain conditions. If this occurs, reselect the Anynet+ device. The Anynet+ functions do not operate with other manufacturers’ products. ¦ Troubleshooting for Anynet+ Problem Possible Solution Anynet+ does not work. • • • • • • • • I want to start Anynet+. • Check if the Anynet+ device is properly connected to the TV and check if the Anynet+ (HDMI-CEC) is set to On in the Anynet+ Setup menu. • Presshe TOOLS button to display the Anynet+ menu and select a menu you want. I want to exit Anynet+. • Select View TV in the Anynet+ menu. • Press the SOURCE button on the TV remote control and select a device other than Anynet+ devices. • Press P >/<, PRE-CH, and FAV.CH to change the TV mode. (Note that the channel button operates only when a tuner-embedded Anynet+ device is not connected.) The message “Connecting to Anynet+ device...” appears on the screen. • You cannot use the remote control when you are configuring Anynet+ or switching to a view mode. • Use the remote control when the Anynet+ setting or switching to view mode is complete. The Anynet+ device does not play. • You cannot use the play function when Plug & Play (Initial setup) is in progress. The connected device is not displayed. • • • • • The TV programme cannot be recorded. • Check whether the antenna jack on the recording device is properly connected. The TV sound is not output through the receiver. • Connect the optical cable between TV and the receiver. 38 Check if the device is an Anynet+ device. The Anynet+ system supports Anynet+ devices only. Connect only one receiver (home theatre). Check if the Anynet+ device power cord is properly connected. Check the Anynet+ device’s Video/Audio/HDMI Cable connections. Check whether Anynet+ (HDMI-CEC) is set to On in the Anynet+ setup menu. Check whether the TV remote control is in TV mode. Check whether it is Anynet+ exclusive remote control. Anynet+ doesn’t work in certain situations. (Searching channels, operating Media Play or Plug & Play (Initial setup), etc.) • When connecting or removing the HDMI cable, please make sure to search devices again or turn your TV off and on again. • Check if the Anynet+ Function of Anynet+ device is set on. Check whether or not the device supports Anynet+ functions. Check whether or not the HDMI Cable is properly connected. Check whether Anynet+ (HDMI-CEC) is set to On in the Anynet+ setup menu. Search Anynet+ devices again. You can connect an Anynet+ device using the HDMI Cable only. Some HDMI cables may not support Anynet+ functions. • If it is terminated by an abnormal situation such as disconnecting the HDMI cable or power cord or a power failure, please repeat the device scan. English 2010-02-22 8:00:51 ¦ Getting Started with Internet@TV recommended Internet@TV brings useful and entertaining contents and services directly from the web to your TV. My Applications Samsung Apps by Date 1/1 04 Advanced Features Internet@TV Settings A login B Mark as Favorite D Sort by R return ✎ NOTE x x x x x x x x Configure the network settings before using Internet@TV. For more information, refer to “Network Connection” (P. 23). Unsupported fonts within the provider’s content will not display normally. Slow responses and/or interruptions may occur, depending on your network conditions. English may be only supported in application service depending on region. This feature is not available in all locations If you experience a problem using a application, please contact the content provider. According to circumstances of the contents provider, an application’s updates or the application it self may be discontinued. Depending on your country’s regulations, some application may have limited service or not be supported. Screen Display TV Screen: Displays the current channel. recommended Recommended Applications: Displays the recommended service by Samsung. You are not able to add or delete a service in this list. by Date 1/1 My Applications Information: Displays notices, new applications, and advertisemevnts brought to you by Samsung product introductions. Application service: You can experience various service by provided samsung. Downloaded Applications: Displays the downloaded applications through the Samsung Apps. Samsung Apps Settings A login Internet@TV Settings: Edit and configure application and Internet@TV settings. B Mark as Favorite D Sort by R return Controls : • Red (Login): To log in to to Internet@TV. • B Green (Mark as Favorite): To mark the application as a favorite. • Blue (Sort by): To sort the application. • R Return: To return to the previous menu. ✎ The Color buttons may work differently depending on the application. English BN68-02558A.indb 39 39 2010-02-22 8:00:52 Advanced Features Account Login ■ adgjm ✎ Password : A Reset: Resets Internet@TV settings to factory default settings. Change the Service Lock password The default password set is "0-0-0-0." Move [0~9] Enter PIN R Cancel ✎ ✎ ✎ For a more enjoyable application experience, register and log in to your account. ✎ For instructions on creating an account, refer to Setting up Internet@TV → Internet@TV ID → Create. 1. Press the Red button in Internet@TV home page. 2. Select desired User account, then press the ENTERE button. ✎ If you want create account, press Red button then create account OSD window appear. 3. Enter the Password. ✎ Ticker Autorun may not be supported depending on country. Ticker Autorun (Off / On): Enable/disable ticker autorun upon powering on the TV. Channel Bound Service (Off / On): Some channels support application as an Internet data service, allowing you to access the Internet service while watching TV. Only available if supported by the broadcaster. Login User account : System Setup ✎ For a application with multiple categories, use ◄ and ► to access the different categories. When login succeeds, User account will be displayed on the screen. ¦ Setting up Internet@TV ■ If you forget the password, press the following sequence of remote control buttons to reset the password to “0-0-0-0”: POWER (off) → MUTE → 9 → 2 → 8 → POWER (on). Internet@TV ID You can use this menu when creating, deleting the account. You can control your account including contents site’s account information. Account is only for internet@TV. ✎ Create: Create an account and link it with desired service application. NOTE ✎ x x Account will be made less than 10. Maximum number of characters is 10. Settings Create IDs and configure Internet@TV settings from this screen. Highlight Settings using ▲ and ▼ buttons and press the ENTERE button. Settings ▪ System setup ▪ Internet@TV ID ▪ Ticker Autorun : Off ▪ Channel Bound Service : Off ▪ Service Manager ▪ Change the Service lock password ▪ Properties ▪ reset R return 40 English 2010-02-22 8:00:53 Before create User account, you should download the application first on the Samsung Apps. 1. Using the ▲/▼/◄/► button, select Settings. Then press the ENTERE button. 7. Select Register of the Service Site you want, then press the ENTERE button. 2. Press the ▼ button to select Internet@TV ID, then press the ENTERE or ► button. 8. Using number buttons, enter your application site ID and password. Then press the ENTERE button. 3. Select Create. The Keypad screen will appear. 4. The keypad OSD will be displayed on the screen. 9. Registered successfully. If you add another service site, select Yes. then press the ENTERE button, go to step 5. Using the Keypad Pressing the – button on the remote while you are using the Screen Keypad enables you to change the text fields to lower case, upper case, numbers and icons. You can use this Screen Keypad in a several Internet@ TV applications. Here is how to input characters. 4-1. For example, suppose that you want to input “105Chang”. 10. When completed, select OK. Then press the ENTERE button. Manager – Service Site: Register login information for service sites such as YouTube. – Change Password: Change account password. – Delete: Delete the account. If you forget the password, press the following sequence of remote control buttons to reset the password to “0-0-0-0”: POWER (off) → MUTE → 9 → 2 → 8 → POWER (on). ✎ 4-2. Press the – button on the remote twice to change the input mode from lower case to numbers. 4-3. Press the 1, 0 and 5 button in numerical order. ■ 4-4. Press the – button on the remote 3 times to change the input mode from numbers to upper case. 4-5. Press the 2 button on the remote 3 times to input C. 4-6. Press the – button on the remote 3 times to change the input mode from upper case to lower case. 04 Advanced Features 6. Account created. You can use the services provided by all users of your Samsung TV with a single login by linking the users’ account to the TV ID. If you want to register a service site ID, select Yes. Service Site list will appear on the screen. How to create Internet@TV ID Service Manager: Delete and lock application installed to Internet@TV. Lock : Lock the application Accessing a locked widget requires the password. ✎ Delete : Delete the application ■ Properties: Display information about Internet@TV. Use the Check the speed of your internet connection option to test your network connection. 4-7. Press buttons on the remote to input the rest of “Chang”. When done, press the ENTERE button. 5. Using the number buttons, enter the User account and Password. x x x x Password must be numbers only. Using the – button, you can change the text fields to lower case, upper case, numbers and icons. You can delete the entered character using the PRE-CH button. Using the π (REW) or µ (FF) button, you can select icon you want to enter in icon keypad screen. English 41 2010-02-22 8:00:54 Advanced Features ¦ Using the Internet@TV service Using the Samsung Apps by category Samsung Apps Samsung Apps is a store for downloading applications to be used on Samsung TV/AV equipment. Users can enjoy a variety of contents like videos, music, photos, games, useful information etc. using the downloaded applications. Additional applications will be available hereafter. Samsung AppS What’s New! Featured Video Most downloaded Most recent Travel Name Free Games Sports Lifestyle Information ✎ Other My Page Help A login B Thumbnail View D Sort by R return ✎ Using the colour buttons with the Samsung Apps. x x x x 42 The following categories are available: y What’s New: Displays newly registered applications. y Video: Displays various video media such as movies, TV shows and short length videos. y Games: Displays various games such as sudoku and chess. y Sports: Displays various sports media such as match information, images and short length video. y Lifestyle: Includes various lifestyle media services such as music, personal photo management tools and social networking such as Facebook and Twitter. y Information: Includes various information services such as news, stocks and weather. y Others: Includes other miscellaneous services. y My Page: Displays the application list and your cyber cash balance. Starting in the middle of 2010 (US and Korea only), you can purchase cyber-cash for buying applications through tv.samsung.com. y Help: If you have questions about Internet@TV, check this section first. Red (Login): To log in to the internet service. Green (Thumbnail View): To change the view mode. Blue (Sort By): To sort the application by Featured, Most Downloaded, Most Recent or Name. B R Return: Moves to previous menu. English 2010-02-22 8:00:54 Problem Possible Solution Some application contents only have English. How can I change the language? The application content language may be different from widget user interface language. It depends on service provider. Some application services do not work. Check with that service provider. Refer to help website for widget service provider information. When a network error occurred, I can’t use other menus except setting menu. If network connection doesn’t work, your service might be limited. Because all of function except setting menu are needed to connect internet. Is there any possibility to show adult movies on YouTube? Basically, at the list on the menu it is filtered out. But by using search function, It can be shown. In this case, using the Widget Gallery lock the widget service. 04 Advanced Features ¦ Troubleshooting for internet@TV ¦ Help Website ✎ Approaching step may be changed later on. ✎ It can be different links for special countries. Country Austria Belgium Czech Denmark Finland France Germany Greece Hungary Ireland Italy Netherlands Norway Poland Portugal Slovakia Spain Sweden Switzerland United Kingdom Turkey Estonia Latvia Lithuania Russia Ukraine Website www.samsung.com → Produkte → Fernseher → Internet@TV www.samsung.com → Producten → televisies → Internet@TV www.samsung.com → Produits → téléviseurs → Internet@TV www.samsung.com → Produkty → televizory → Internet@TV www.samsung.com → Produkter → stue & soveværelse → Internet@TV www.samsung.com → Tuotteet → kodinelektroniikka → Internet@TV www.samsung.com → Produits → télévisions → Internet@TV www.samsung.com → Privatkunden → Fernseher → Internet@TV www.samsung.com → Προϊόντα → τηλεοράσεις → Internet@TV www.samsung.com → Termékek → televíziók → Internet@TV www.samsung.com → Products → Television → Internet@TV www.samsung.com → Prodotti → TV → Internet@TV www.samsung.com → Producten → televisies → Internet@TV www.samsung.com → Produkter → hverdagsrom & soverom → Internet@TV www.samsung.com → Produkty → telewizory → Internet@TV www.samsung.com → Produtos para Consumidores → televisores → Internet@TV www.samsung.com → Produkty → televízory → Internet@TV www.samsung.com → Productos → televisores → Internet@TV www.samsung.com → Produkter → vardagsrum & sovrum → Internet@TV www.samsung.com → Produits → télévisions → Internet@TV www.samsung.com → Produkte → Fernseher → Internet@TV www.samsung.com → Products → Television → Internet@TV www.samsung.com → Tüketici Ürünleri → televizyon → Internet@TV www.samsung.com → Klientidele → Televiisorid → Internet@TV www.samsung.com → Klientiem → Televizori → Internet@TV www.samsung.com → Namams → Televizoriai → Internet@TV www.samsung.com → Продукты → Телевизоры → Internet@TV www.samsung.com → Потребительские продукты → телевизоры → Internet@TV English 43 2010-02-22 8:00:55 Advanced Features Message / Media / ScreenShare AllShare ¦ About AllShare AllShare connects your TV and compatible Samsung mobile phones / devices through a network. On your TV, you can view call arrivals, SMS messages and schedules set on your mobile phones. In addition, you can play media contents including videos, photos and music saved on your mobile phones or the other devices (such as your PC) by controlling them on the TV via the network. Additionally, you can use your TV for browsing web pages in your mobile phones. Shows a list of mobile phones or connected devices which have been set up with this TV for using the Message, Media, or ScreenShare function. ✎ The Media function is available in all mobile devices which support AllShare. ■ ■ Allowed / Denied: Allows/Blocks the mobile phone. Delete: Deletes the mobile phone from the list. ✎ ✎ For more information, visit “www.samsung.com” or contact the Samsung call center. Mobile devices may need additional software installation. For details, refer to each user’s guide. ¦ Setting Up the AllShare Using the Message Function Using this function, you view call arrivals, SMS messages and schedules set on the mobile phone through the alarm window while watching TV. ✎ NOTE x Setup x ■ Message (On / Off): Enables or disables the message function (for call arrivals SMS messages and schedules set on your mobile phones). ■ Media (On / Off): Enables or disables the media function. When the media function is on, it plays videos, photos and music from a mobile phone or other device that supports ScreenShare. x ■ ScreenShare (On / Off): Enables or disables ScreenShare accesses various contents from mobile phones or other ScreenShare supporting devices. x ■ TV name: Sets the TV name so you can find it easily on a mobile device. ✎ This function only deletes the name of the mobile from the list. If the deleted mobile device is turned on or trieds to connect to the TV, it may appear on the list again. If you select User Input, you can type on the TV using the OSK (On Screen Keyboard). AllShare 3/7 Setup Message : On Message Media : On Media ScreenShare : On ScreenShare TV name : Home TV To disable the alarm window, set Message to Off in Setup of AllShare. If OK is selected, or if OK is not selected after the message has appeared three times, the message will be deleted. The message is not deleted from the mobile phone. The alarm window can be displayed while using some applications such as Media Play etc. To view the contents of a message, switch to TV viewing mode. When a message from an unknown mobile phone is displayed, select the mobile phone on the message menu in AllShare and select Denied to block the phone. Message View If a new SMS message arrives while you are watching TV, the alarm window appears. If you click the OK button, the contents of the message are displayed. You can configure the viewing settings for SMS messages on your mobile phones. For the procedures, refer to the mobile phone manual. ✎ ✎ Some types of characters may be displayed as blank or broken characters. E Select R return e exit ' Setup R return 44 English 2010-02-22 8:00:56 Using ScreenShare Function If a call arrives while you are watching TV, the alarm window appears. Using ScreenShare, you can browse various web contents provided by the mobile phone. For example, the image below displays an access page for contents on a mobile. You can read the mobile’s files and view the phone book and calendar on the TV. Also, in the phone book, you can make a call to another person, or send to SMS. Schedule Alarm While you are watching TV, the alarm window appears to display the registered event. You can configure viewing settings for schedule contents on your mobile phones. For the procedures, refer to the mobile phone manual. ✎ ✎ Some special characters may be displayed as blank or broken characters. Using the Media Function An alarm window appears informing the user that the media contents (videos, photos, music) sent from a mobile phone will be displayed on your TV. The contents are played automatically 3 seconds after the alarm window appears. If you press the RETURN or EXIT button when the alarm window appears, the media contents are not played. ✎ NOTE x x x You must have ScreenShare installed on your Samsung Mobile phone/device to use this feature. 04 Advanced Features Call Arrival Alarm Doc Viewer can read files in doc format, but cannot modify them. The screen display may differ depending on the connected device. My Mobile ✎ NOTE x If the media function executes for the first time, the warning popup window appears. Press Allow button, then you can use Media function on that device. Contacts Calendar Doc viewer E Select C return Using your Samsung Phone to Operate Your TV "Unknown Device 0" is requesting that the media file be allowed to play. If you wish to allow the media file to be played at your device, please press "Allow", otherwise press "Deny". You can also change the setting (or resetting) of this feature at "AllShare Setup". Warning: Please note that if your device is connected to unsecured or unfamiliar network, unwanted or inappropriate contents might be played. If you are not sure about the network's identity or content's appropriateness, we strongly recommend that you do not "Allow" the request to play. Allow x x x x x Before you can use this feature, you must connect to a Samsung mobile phone that supports ScreenShare functions. When operating the TV with your mobile phone, only the POWER, y, z and MUTE buttons are supported. ✎ Even if you keep pressing down on a control button (channel or volume) on the mobile phone the value will only go up or down by one unit. Deny To turn off the media contents transmission from the mobile phone, set Media to Off in the AllShare setup. Contents may not be played on your TV depending on their resolution and format. The ENTERE and ◄ / ► buttons may not work depending on the type of media content. Using the mobile device, you can control the media playing. For details, refer to each mobile’s user’s guide. When you want to play media contents from your PC, select the PC icon on the main display of AllShare. Then the TV’s Media Play menu automatically changes. For more detail information, refer to “Media Play”. English 45 2010-02-22 8:00:56 Other Information Analogue Channel Teletext Feature The index page of the Teletext service gives you information on how to use the service. For Teletext information to be displayed correctly, channel reception must be stable. Otherwise, information may be missing or some pages may not be displayed. ✎ You can change Teletext pages by pressing the numeric buttons on the remote control. 1 / (Teletext on/mix): Activate the Teletext mode after selecting the channel providing the Teletext service. Press it twice to overlap the Teletext mode with the current broadcasting screen. 2 4 5 9 (hold): Hold the display on a given page if the selected page is linked with several secondary pages which follow on automatically. To resume, press it again 6 8 previous Teletext page. 6 (index): Display the index 9 (contents) page at any time while you are viewing Teletext. 5 (reveal): Display the hidden 0 7 (cancel): Display the current ! text (answers to quiz games, for example). To display the normal screen, press it again. 6 1 7 broadcast when searching for a page. 2 8 9 3 0 4 ! 0 (mode): Select the Teletext mode (LIST/ FLOF). If you press this button in the LIST mode, the mode is switched into the List save mode. In the List save mode, you can save a Teletext page into list using the 8(store) button. 3 (page down): Display the 5 8 (store): Store the Teletext 4 (size): Display the doublesize letters on the upper half of the screen. For the lower half of the screen, press it again. To display the normal screen, press it once again. 7 Teletext page. pages. 3 2 (page up): Display the next A B C D @ Colour buttons (red/green/ @ yellow/blue): If the FASTEXT system is used by a broadcasting company, the different topics covered on a Teletext page are colour-coded and can be selected by pressing the coloured buttons. Press one of them corresponding to the required. The page is displayed with other coloured information that can be selected in the same way. To display the previous or next page, press the corresponding coloured button. 1 (sub-page): Display the available sub-page. The Teletext pages are organized according to six categories: Part Contents Part Contents A Selected page number. D Date and time. B Broadcasting channel identity. E Text. C Current page number or search indications. F Status information. FASTEXT information. 46 English 2010-02-22 8:00:57 05 Other Information Installing the Wall Mount ¦ Assembling the Blanking Bracket When installing the TV onto a wall, attach the Blanking Bracket into the part that connects to the stand as shown in the picture. Blanking bracket ¦ Preparing before installing Wall-Mount (46 ~ 55 inch TVs) To install a wall-mount from another manufacturer, use the Holder-Ring. ¦ Installing the Wall Mount Kit Wall mount items (sold separately) allow you to mount the TV on the wall. For detailed information on installing the wall mount, see the instructions provided with the Wall Mount items. Contact a technician for assistance when installing the wall mount bracket. Samsung Electronics is not responsible for any damage to the product or injury to yourself or others if you elect to install the TV on your own. English BN68-02558A.indb 47 47 2010-02-22 8:00:57 Other Information ¦ Wall Mount Kit Specifications (VESA) ✎ Wall mount kit is not supplied but sold separately. Install your wall mount on a solid wall perpendicular to the floor. When attaching to other building materials, please contact your nearest dealer. If installed on a ceiling or slanted wall, it may fall and result in severe personal injury. ✎ NOTE x x x x x x x x x Samsung is not liable for product damage or personal injury when a non-VESA or non-specified wall mount is used or the consumer fails to follow the product installation instructions. Standard dimensions for wall mount kits are shown in the table below. When purchasing our wall mount kit, a detailed installation manual and all parts necessary for assembly are provided. Do not use screws longer than the standard dimension, as they may cause damage to the inside of the TV set. For wall mounts that do not comply with the VESA standard screw specifications, the length of the screws may differ depending on their specifications. Do not use screws that do not comply with the VESA standard screw specifications. Do not fasten the screws too strongly, this may damage the product or cause the product to fall, leading to personal injury. Samsung is not liable for these kinds of accidents. Samsung is not liable for product damage or personal injury when a non-VESA or non-specified wall mount is used or the consumer fails to follow the product installation instructions. Do not exceed 15 degrees tilt when mounting this TV. Product Family inches 19~22 LCD-TV 23~29 30~40 46~55 57~65 70~80 80~ VESA Spec. (A * B) 75 X 75 100 X 100 200 X 100 200 X 200 400 X 400 600 X 400 800 X 400 1400 X 800 Standard Screw Quantity M4 M6 4 M8 Do not install your Wall Mount Kit while your TV is turned on. It may result in personal injury due to electric shock. Assembling the Cables Enclose the cables in the Cable tie so that the cables are not visible through the transparent stand. Cable tie 48 English 2010-02-22 8:00:58 The Kensington Lock is a device used to physically fix the system when using it in a public place. The appearance and locking method may differ from the illustration depending on the manufacturer. Refer to the manual provided with the Kensington Lock for proper use. 1 2 ✎ Please find a “K” icon on the rear of the TV. A kensington slot is beside the “K” icon. 1. Insert the locking device into the Kensington slot on the LCD TV 1 and turn it in the locking direction 2. 3 05 Other Information Anti-Theft Kensington Lock <Optional> 2. Connect the Kensington Lock cable 3. 3. Fix the Kensington Lock to a desk or a heavy stationary object. ✎ The locking device has to be purchased separately. ✎ The location of the Kensington Lock may be different depending on its model. Securing the TV to the Wall Caution: Pulling, pushing, or climbing onto the TV may cause the TV to fall. In particular, ensure that your children do not hang over or destabilize the TV; doing so may cause the TV to tip over, resulting in serious injuries or death. Follow all safety precautions provided on the included Safety Flyer. For added stability, install the anti-fall device for safety purposes, as follows. ¦ To avoid the TV from falling ✎ Since the necessary clamps, screws, and string are not supplied, please purchase these additionally. 1. Drive the screws into the clamps and firmly fasten them onto the wall. Make sure the screws are firmly fixed into the wall. ✎ Screw Specifications x x For a 32 ~ 40 Inch LCD TV: M6 For a 46 ~ 55 Inch LCD TV: M8 2. Remove the screws from the centre back of the TV, put the screws into the clamps, and then fasten the screws onto the TV again. 3. Connect the clamps fixed onto the TV and the clamps fixed onto the wall with a strong string and then tie the string tightly. ✎ Verify all connections are properly secured. Periodically check Wall connections for any sign of fatigue for failure. If you have any doubt about the security of your connections, contact a professional installer. ✎ Install the TV near to the wall so that it does not fall backwards. ✎ It is safe to connect the string so that the clamps fixed on the wall are equal to or lower than the clamps fixed on the TV. ✎ Untie the string before moving the TV. English BN68-02558A.indb 49 49 2010-02-22 8:01:00 Other Information Troubleshooting If you have any questions about the TV, first refer to this list. If none of these troubleshooting tips apply, please visit “www.samsung.com,” then click on Support, or contact the call centre listed on the back-cover of this manual. Issues Solutions and Explanations Picture Quality First of all, please perform the Picture Test and confirm that your TV is properly displaying test image. (go to MENU - Support - Self Diagnosis - Picture Test) (P. 20) If the test image is properly displayed, the poor picture may caused by the source or signal. The TV image does not look as good as it did in the store. • If you have an analogue cable/set top box, upgrade to a digital set top box. Use HDMI or Component cables to deliver HD (high definition) picture quality. • Cable/Satellite subscribers: Try HD stations from the channel line up. • Antenna connection: Try HD stations after performing Auto programme. ✎ Many HD channels are upscaled from SD(Standard Definition) contents. • Adjust the Cable/Set top box video output resolution to 1080i or 720p. • Make sure you are watching the TV at the minimum recommended distance based on the size and definition of the signal. The picture is distorted: macroblock error, small block, dots, pixelization • Compression of video contents may cause picture distortion especially in fast moving pictures such as sports and action movies. • Low signal level or bad quality can cause picture distortion. This is not a TV issue. Colour is wrong or missing. • If you’re using a component connection, make sure the component cables are connected to the correct jacks. Incorrect or loose connections may cause colour problems or a blank screen. There is poor colour or brightness. • Adjust the Picture options in the TV menu. (go to Picture mode / Colour / Brightness / Sharpness) • Adjust Energy Saving option in the TV menu. (go to MENU - Picture - ECO solution - Energy Saving) (P.14) • Try resetting the picture to view the default picture settings. (go to MENU - Picture - Picture Reset) There is a dotted line on the edge of the screen. • If the picture size is set to Screen Fit, change it to 16:9. (P. 15) • Change cable/set top box resolution. The picture is black and white. • If you are using an AV composite input, connect the video cable (yellow) to the Green jack of component input 1 on the TV. When changing channels, the picture freezes or is distorted or delayed. • If connected with a cable box, please try to reset the cable box. Reconnect the AC cord and wait until the cable box reboots. It may take up to 20 minutes. • Set the output resolution of the cable box to 1080i or 720p. Sound Quality First of all, please perform the Sound Test to confirm that your TV audio is properly operating. (go to MENU - Support - Self Diagnosis - Sound Test) (P. 20) If the audio is OK, the sound problem may caused by the source or signal. There is no sound or the sound is too low at maximum volume. • Please check the volume the of external device connected to your TV. The picture is good but there is no sound. • Set the Speaker Select option to TV speaker in the sound menu. (P. 17) • If you are using an external device, make sure the audio cables are connected to the correct audio input jacks on the TV. • If you are using an external device, check the device’s audio output option (ex. you may need to change your cable box’s audio option to HDMI when you have a HDMI connected to your TV). • If you are using a DVI to HDMI cable, a separate audio cable is required. • If your TV has a headphone jack, make sure there is nothing plugged into it. The speakers are making an inappropriate noise. • Check the cable connections. Make sure a video cable is not connected to an audio input. • For antenna or cable connections, check the signal strength. Low signal level may cause sound distortion. 50 English 2010-02-22 8:01:00 Solutions and Explanations No Picture, No Video The TV won’t turn on. • Make sure the AC power cord is securely plugged in to the wall outlet and the TV. • Make sure the wall outlet is working. • Try pressing the POWER button on the TV to make sure the problem is not the remote. If the TV turns on, refer to “The remote control does not work” below. The TV turns off automatically. • • • • There is picture/Video. • Check cable connections (remove and reconnect all cables connected to the TV and external devices). • Set your external devices’ (Cable/Set top Box, DVD, Blu-ray etc) video outputs to match the connections to the TV input. For example, if an external device’s output is HDMI, it should be connect to an HDMI input on the TV. • Make sure your connected devices are powered on. • Be sure to select the TV’s correct source by pressing the SOURCE button on the TV remote. Ensure the Sleep Timer is set to Off in the Setup menu. (P. 18) If your PC is connected to the TV, check your PC power settings. Make sure the AC power cord is plugged in securely to the wall outlet and the TV. When watching TV from an antenna or cable connection, the TV will turn off after 10 ~ 15 minutes if there is no signal. 05 Other Information Issues RF(Cable/Antenna) Connection The TV is not receiving all channels. • Make sure the Antenna cable is connected securely. • Please try Plug & Play (Initial setup) to add available channels to the channel list. Go to MENU Setup - Plug & Play (Initial setup) and wait for all available channels to be stored. • Verify the Antenna is positioned correctly. The picture is distorted: macroblock error small block, dots, pixelization • Compression of video contents may cause picture distortion, especially with fast moving pictures such as sports and action movies. • A low signal can cause picture distortion. This is not a TV issue. PC Connection A “Not Supported Mode” message appears. • Set your PC’s output resolution and frequency so they matche the resolutions supported by the TV. (P. 20) “PC” is always shown on the source list, even if a PC is not connected. • This is normal; “PC” is always shown on the source list, regardless of whether a PC is connected. The video is OK but there is no audio. • If you are using a HDMI connection, check the audio output setting on your PC. Network Connection (Depending on Models) Wireless network connection failed. • Samsung Wireless USB dongle is required to use a wireless network. • Make sure the Network Connection is set to Wireless. • Make sure the TV is be connected to a wireless IP sharer (router). Others The picture won’t display in full screen. • HD channels will have black bars on either side of the screen when displaying upscaled SD (4:3) contents. • Black bars on the top and bottom will appear during movies that have aspect ratios different from your TV. • Adjust the picture size options on your external device or TV to full screen. The remote control does not work. • Replace the remote control batteries with the poles (+/–) in the right direction. • Clean the sensor’s transmission window on the remote. • Try pointing the remote directly at the TV from 5~6 feet away. The cable/set top box remote control doesn’t turn the TV on or off, or adjust the volume. • Programme the Cable/Set top box remote control to operate the TV. Refer to the Cable/Set user manual for the SAMSUNG TV code. A “Not Supported Mode” message appears. • Check the supported resolution of the TV, and adjust the external device’s output resolution accordingly. Refer to the resolution settings on page 20 of this manual. There is a plastic smell from the TV. • This smell is normal and will dissipate over time. The TV Signal Information is unavailable in the Self Diagnosis Test menu. • This function is only available with digital channels from an Antenna / RF/Coax connection. (P. 20) The TV is tilted to the side. • Remove the base stand from the TV and reassemble it. There are difficulties assembling the stand base. • Make sure the TV is placed on a flat surface. If you can not remove the screws from the TV, please use a magnetized screw driver. The channel menu is greyed out. (unavailable) • The Channel menu is only available when the TV source is selected. English 51 2010-02-22 8:01:00 Other Information Issues Solutions and Explanations Your settings are lost after 30 minutes or every time the TV is turned off. • If the TV is in the Store Demo mode, it will reset audio and picture settings every 30 minutes. Change the settings from Store Demo mode to Home Use mode in the Plug & Play (Initial setup) procedure. Press the SOURCE button to select TV mode, and go to MENU → Setup → Plug & Play (Initial setup) → ENTERE. You have intermittent loss of audio or video. • Check the cable connections and reconnect them. • Loss of audio or video can be caused by using overly rigid or thick cables. Make sure the cables are flexible enough for long term use. If mounting the TV to the wall, we recommend using cables with 90 degree connectors. You see small particles when you look closely at the edge of the frame of the TV. • This is part of the product’s design and is not a defect. The PIP menu is not available. • PIP functionality is only available when you are using a HDMI, PC or components source. The message “Scramble signal” or “Weak Signal/No Signal” appears. • If you are using a CAM CARD (CI/CI+), check that it is installed into the common interface slot. • If there is still a problem, pull the CAM CARD out of the TV and insert it into the slot again. You turned the TV off 45 minutes ago, and it turned on again. • It is normal. The TV operates the OTA (Over The Aerial) function itself to upgrade firmware downloaded whilst your watching TV. There are recurrent picture/sound issues. • Check and change the signal/source. A reaction may occur between the rubber cushion pads on the base stand and the top finish of some furniture. • To prevent this, use felt pads on any surface of the TV that comes in direct contact with furniture. ✎ This TFT LCD panel uses a panel consisting of sub pixels which require sophisticated technology to produce. However, there may be a few bright or dark pixels on the screen. These pixels will have no impact on the performance of the product. ¦ Licence Manufactured under licence from Dolby Laboratories. Dolby and the double-D symbol are trademarks of Dolby Laboratories. Manufactured under license under U.S. Patent #’s: 5,451,942; 5,956,674; 5,974,380; 5,978,762; 6,487,535 & other U.S. and worldwide patents issued & pending. DTS and the Symbol are registered trademarks. & DTS 2.0+ Digital Out and the DTS logos are trademarks of DTS, Inc. Product Includes software. © DTS, Inc. All Rights Reserved. DivX Certified to play DivX video up to HD 1080p, including premium content. ABOUT DIVX VIDEO: DivX® is a digital video format created by DivX,Inc. This is an official DivX Certified device that plays DivX video. Visit www.divx.com for more information and software tools to convert your files into DivX video. ABOUT DIVX VIDEO-ON-DEMAND: This DivX Certified® device must be registered in order to play DivX Video-onDemand (VOD) content. To generate the registration code, locate the DivX VOD section in the device setup menu. Go to vod.divx.com with this code to complete the registration process and learn more about DivX VOD. Pat. 7,295,673;7,460,688; 7,519,274 TheaterSound, SRS and the symbol are trademarks of SRS Labs, Inc. TheaterSound technology is incorporated under license form SRS Lab, Inc. 52 English 2010-02-22 8:01:01 Panel native Environmental Considerations Operating Temperature Operating Humidity Storage Temperature Storage Humidity TV System 1920 x 1080 @ 60 Hz 10°C to 40°C (50°F to 104°F) 10% to 80%, non-condensing -20°C to 45°C (-4°F to 113°F) 5% to 95%, non-condensing Analogue : Depending on your country selection Digital : DVB-T/DVB-C Analogue: PAL, SECAM, NTSC-4.43, NTSC-3.58, PAL60 Digital: MPEG-2 MP@ML, MPEG-4, H.264/AVC MP@L3, [email protected], [email protected] BG. OK NICAM. MPEGl Video : 1080/24p, 1080p, 1080i, 720p, 576p, 576i, 480p, 480i Audio : Two Channel Linear PCM 32/44.1/48 kHz, 16/20/24bits Analogue audio input (HDMI IN1 only) PC Input Colour/video system Sound System HDMI IN 1 ~ 4 Stand Swivel (Left / Right) Model Name Screen Size (Diagonal) Sound Output Dimensions (WxDxH) Body With stand Weight Body With Stand Model Name Screen Size (Diagonal) Sound Output Dimensions (WxDxH) Body With stand Weight Body With Stand 05 Other Information Specifications -20˚ ~ 20˚ LE32C650 LE32C652 32 inch LE37C650 LE40C650 LE40C652 LE46C650 LE46C652 LE55B650 37 inch 40 inch 46 inch 55 inch 10W X 2 15W X 2 789.2 X 77.8 X 509.9 mm 907.6 X 78.5 X 574.4 mm 976.2 X 80.4 X 614.9 mm 1108.6 X 80.3 X 689.7 mm 1301.6 X 85.3 X 801.2 mm 789.2 X 240 X 555.9 mm 907.6 X 255 X 621.2 mm 976.2 X 255 X 659.3 mm 1108.6 X 275 X 734.5 mm 1301.6 X 305 X 845.3 mm 9.1 kg 11.8 kg 11.6 kg 15 kg 14.3 kg 17.7 kg 18.1 kg 21.9 kg 28.1 kg 32.7 kg LE32C653 LE32C654 LE40C653 LE40C654 LE46C653 LE46C654 32 inch 40 inch 46 inch 10W X 2 794.5 X 77.8 X 495.4 mm 794.5 X 240 X 558.6 mm 981.5 X 80.4 X 598.5 mm 981.5 X 255 X 661.9 mm 1113.9 X 80.3 X 674.1 mm 1113.9 X 275 X 737.1 mm 9.3 kg 12 kg 13.5 kg 16.9 kg 18.1 kg 21.9 kg ✎ Design and specifications are subject to change without prior notice. ✎ For the power supply and power consumption, refer to the label attached to the product. English 53 2010-02-22 8:01:02 Other Information Index A F AllShare Amplify Antenna Anynet+ Audio Out Auto Adjustment Auto Volume 44 16 12 36 8, 36 16 17 B Background Music Balance L/R Basic View Batteries Black Tone Blanking Bracket Brightness 35 16 34 5 14 47 13 C Cable Tie 48 Change PIN 6, 19 Channel Manager 11 Clock 18 Colour Tone 15 Component 7 Connecting to a PC 22 Connecting to an Audio Device 8 D R 11 15 13 14 12 H HDMI Headphones Home Theatre 7, 36 8 8, 36 I Installation Space Internet@TV 2 39 L Language Licence Lock 19 52 13 M Media Play Melody Menu Transparency Music 29 19 19 33 N Digital Audio Out DivX® VOD D-sub Dynamic Dynamic Contrast 8, 36 35 22 13 14 Navigate Network Connection Network Setup Now & Next guide Eco Sensor Edit Name Editing Channels Energy Saving Equalizer External Speaker EPG 14 9 12 14 16 17 10 ON/OFF button Optimal resolution Select All Self Diagnosis Sharpness Signal Information Sleep Timer Slide Show Software Upgrade Source List Speaker Select Specifications Standby mode Subtitle Symbol 13 20 13 20 18 34 20 9 17 53 4 19 3 T Timer Title Tools Troubleshooting TV Speaker 5 22 V 40 34 15, 35 20 6 4 38 37 5 35 14 35 S U P Password Photos Picture Size PIP (Picture in Picture) Plug & Play Power Indicator Receiver Recording Remote Control Repeat Mode RGB Only Mode Rotate 9 23 24, 26 10 O E 54 Favourites Channel Film Mode Fine Tune Flesh Tone Frequency 18 34 3 50 17 USB 20, 29 Using Channel View 10 Using Scheduled View 10 Using the Favourite Channels 11 VCR Video Formats Videos Volume 9 32 31 4, 5, 17 W Wall Mount Warm White Balance 47 15 14 English 2010-02-22 8:01:02 This page is intentionally left blank. 2010-02-22 8:01:02 Die Abbildungen und Illustrationen in diesem Handbuch dienen nur zur Information und können vom tatsächlichen Aussehen des Geräts abweichen. Änderungen an Ausführung und technischen Daten vorbehalten. Hinweis zu Digitalfernsehen 1. 2. 3. 4. 5. 6. ✎ Die Funktionalitäten für Digitalfernsehen (DVB) stehen nur in Ländern/Regionen zur Verfügung, in denen digitale terrestrische DVB-T-Signale (MPEG2 und MPEG4 AVC) gesendet werden oder in denen Sie Zugang zu einem kompatiblen Kabelfernsehdienst mit DVB-C (MPEG2 und MPEG4 AAC) haben können. Fragen Sie Ihren örtlichen Händler, wenn Sie Informationen über die Verfügbarkeit von DVB-T oder DVB-C in Ihrer Gegend benötigen. DVB-T ist der Standard des europäischen DVB-Konsortiums für die terrestrische Versorgung mit digitalem terrestrischem Fernsehen, und DVB-C ist das Konsortium für die Versorgung mit digitalem Kabelfernsehen. Allerdings werden manche Unterscheidungsmerkmale wie EPG (elektrische Programmzeitschrift), VOD (Video on Demand) usw. in dieser Spezifikation nicht berücksichtigt. Deshalb können sie zum jetzigen Zeitpunkt noch nicht eingesetzt werden. Zwar hält dieses Fernsehgerät die aktuellen Standards der DVB-T- und DVB-C-Spezifikationen [Version August 2008] ein, aber es kann nicht garantiert werden, dass die Kompatibilität mit zukünftigen digitalen terrestrischen DVB-T und DBV-C-Signalen gewahrt bleibt. In Abhängigkeit von den Ländern/Regionen, in denen dieses Fernsehgerät eingesetzt wird, verlangen manche Kabelfernsehanbieter zusätzliche Gebühren für solch einen Dienst, und möglicherweise wird verlangt, dass Sie den Vertragsbedingungen des Unternehmens zustimmen. Manche Digitalfernsehfunktionen sind in einigen Ländern oder Regionen möglicherweise nicht verfügbar, und DVB-C-Signale kann das Gerät bei manchen Kabelfernsehanbietern möglicherweise nicht fehlerfrei verarbeiten. Für weitere Informationen setzen Sie sich bitte mit dem Samsung-Kundendienstzentrum in Verbindung. Die Empfangsqualität des Fernsehgeräts kann durch Unterschiede bei den Sendeverfahren in verschiedenen Ländern beeinträchtigt werden. Kontrollieren Sie die Leistung des Fernsehgeräts bei Ihrem örtlichen SAMSUNG-Händler oder wenden Sie sich an das Samsung-Callcenter um festzustellen, ob sich die Empfangsqualität durch Ändern der Fernseheinstellungen verbessern lässt. Warnung bei Standbildern Vermeiden Sie die Anzeige von Standbildern (wie z. B. JPEG-Bilddateien) oder Standbildelementen (wie z. B. Senderlogos, Panorama- oder 4:3-Bilder, Aktienoder Laufschriften mit Nachrichten am unteren Bildschirmrand usw.) auf dem Bildschirm. Durch lang anhaltende Anzeige von Standbildern kann es zu einem ungleichmäßigen Verbrauch des Phosphors im Bildschirm kommen, wodurch die Bildqualität beeinträchtigt wird. Um die Gefahr dieses Effekts zu vermindern, befolgen Sie bitte die nachfolgenden Empfehlungen: • Vermeiden Sie es, für lange Zeit denselben Fernsehsender anzuzeigen. • Versuchen Sie immer, Abbildung als Vollbild anzuzeigen. Verwenden Sie das Bildformatmenü des Fernsehgeräts um die beste Anzeigemöglichkeit zu finden. • Reduzieren Sie die Helligkeits- und Kontrastwerte soweit wie möglich, um immer noch die gewünschte Bildqualität zu erreichen. Zu hohe Werte können das Ausbrennen beschleunigen. • Verwenden Sie häufiger alle Funktionen Ihres Fernsehgeräts, die dazu dienen, das Einbrennen von Bildern und das Ausbrennen des Bildschirms zu reduzieren. Weitere Informationen hierzu finden Sie in den entsprechenden Abschnitten des Benutzerhandbuchs. Absichern des Aufstellbereichs Halten Sie die erforderlichen Abstände zwischen dem Gerät und anderen Objekten (z.B. Wänden) ein, um ausreichende Lüftung sicherzustellen. Wenn Sie dies nicht tun, besteht die Gefahr, dass aufgrund eines Anstiegs der Temperatur im Innern des Geräts ein Brand ausbricht oder andere Probleme mit dem Gerät auftreten. ✎ ✎ Wenn Sie einen Standfuß oder eine Wandhalterung einsetzen, verwenden Sie ausschließlich Teile von Samsung Electronics. x Wenn Sie Teile eines anderen Herstellers verwenden, kann es zu Problemen mit dem Gerät oder zu Verletzungen kommen, weil das Gerät herunterfällt. Das Aussehen kann sich je nach Gerät unterscheiden. Aufstellen des Geräts mit dem Standfuß Installation des Geräts mit der Wandhalterung 10 cm 10 cm 10 cm 10 cm 10 cm 10 cm 10 cm Ordnungsgemäße Entsorgung dieses Geräts (Elektro- und Elektronik-Altgeräte) (Anzuwenden in den Ländern der Europäischen Union und anderen europäischen Ländern mit einem separaten Sammelsystem) Diese Kennzeichnung auf dem Gerät, dem Zubehör oder der Dokumentation bedeutet, dass das Gerät sowie das elektronische Zubehör (z. B. Ladegerät, Headset, USB-Kabel) am Ende ihrer Lebensdauer nicht im normalen Hausmüll entsorgt werden dürfen. Entsorgen Sie diese Geräte bitte getrennt von anderen Abfällen, um der Umwelt bzw. der menschlichen Gesundheit nicht durch unkontrollierte Müllbeseitigung zu schaden. Recyceln Sie das Gerät, um die nachhaltige Wiederverwertung von stofflichen Ressourcen zu fördern. Private Nutzer sollten den Händler, bei dem das Produkt gekauft wurde, oder die zuständigen Behörden kontaktieren, um in Erfahrung zu bringen, wie sie das Gerät auf umweltfreundliche Weise recyceln können. Gewerbliche Benutzer wenden sich an ihren Lieferanten und überprüfen die Konditionen Ihres Kaufvertrags. Dieses Gerät und seine elektronischen Zubehörteile dürfen nicht zusammen mit anderem Gewerbemüll entsorgt werden. Ordnungsgemäße Entsorgung der Batterien dieses Produkts (Anwendbar in der Europäischen Union und anderen europäischen Staaten mit Systemen zur getrennten Sammlung von Batterien.) Diese Kennzeichnung auf der Batterie, dem Handbuch oder der Verpackung bedeutet, dass die Batterie am Ende ihrer Lebensdauer nicht im normalen Hausmüll entsorgt werden darf. Die Kennzeichnung mit den chemischen Symbolen für Hg, Cd oder Pb bedeutet, dass die Batterie Quecksilber, Cadmium oder Blei in Mengen enthält, die die Grenzwerte der EU-Direktive 2006/66 übersteigen. Wenn Batterien nicht ordnungsgemäß entsorgt werden, können diese Substanzen die Gesundheit von Menschen oder die Umwelt gefährden. Zum Schutz der natürlichen Ressourcen und zur Förderung der Wiederverwertung von Materialien trennen Sie die Batterien von anderem Müll und führen Sie sie Ihrem örtlichen Recyclingsystem zu. 2 Deutsch Inhalt Erste Schritte 4 Anschlüsse 7 9 Grundfunktionen Erweiterte Funktionen 22 Weitere Informationen 46 4 4 5 6 6 Zubehör Bedienfeld Fernbedienung Verbinden mit einer Antenne Plug & Play (Anfangseinstellung) 7 8 9 Anschließen an ein AV-Gerät Anschließen an ein Audiogerät Signalquellen wählen 9 Navigieren in den Menüs 10 Verwenden der INFO-Taste (Elektronische Programmzeitschrift) 10 Fernsehplanung 12 Kanalmenü 13 Bildmenü 16 Tonmenü 18 Einstellungsmenü 20 Unterstützungsmenü 22 23 29 36 39 44 Anschließen an einen PC Netzwerkverbindung Media Play Anynet+ Internet@TV AllShare 46 47 48 49 49 50 53 54 Teletext für Analogkanäle Anbringen der Wandhalterung Verlegen der Kabel Kensington-Schloss als Diebstahlsicherung Befestigen des Fernsehgeräts an der Wand Fehlerbehebung Technische Daten Index Achten Sie auf das Symbol! t Diese Funktion können Sie durch Drücken der Taste TOOLS auf der Fernbedienung aufrufen. Hinweis Schrittweise Darstellung der Vorgehensweisen Deutsch 3 Erste Schritte Zubehör ✎ Überprüfen Sie die Verpackung Ihres LCD-Fernsehgeräts auf Vollständigkeit. Falls Komponenten fehlen sollten, setzen Sie sich bitte mit Ihrem Händler in Verbindung. ✎ Die Farbe und die Form der Teile können sich je nach Modell unterscheiden. y Fernbedienung und 2 Batterien (Typ AAA) y Bedienungsanleitung y Garantiekarte / Sicherheitshinweise (nicht überall verfügbar) y Reinigungstuch y Netzkabel (46 ~ 55 Zoll TVs) y Montagehalterung y Kabelbinder y Haltering (4 Stück) Weitere Informationen finden Sie im Installationshandbuch für den Standfuß. des (M4 X L12) y Standfuß (1 Stck) y Leitschiene (1 Stck) y Schrauben (9 Stk.) (Nur 32-Zoll-Modell: 8 Stk.) Bedienfeld ✎ Form und Farbe des Geräts können sich je nach Modell unterscheiden. Fernbedienungssensor Netzanzeige Lautsprecher P (Netz) Ein- und Ausschalten des Fernsehgeräts. Netzanzeige Beim Einschalten des Fernsehgeräts blinkt die Netzleuchte kurz und erlischt anschließend. Im Standbymodus leuchtet die Anzeige permanent. Schaltet zwischen allen verfügbaren Signalquellen um. Im Bildschirmmenü können Sie diese Taste wie die ENTERE auf der Fernbedienung verwenden. Drücken Sie diese Taste, um die Funktionen des Fernsehgeräts in einem Bildschirmmenü anzuzeigen. Hiermit stellen Sie die Lautstärke ein. Im Bildschirmmenü können Sie die Y-Schaltflächen wie die Tasten ◄ und ► auf der Fernbedienung verwenden. Wechseln des Kanals. Im Bildschirmmenü können Sie die z-Schaltflächen wie die Tasten ▼ und ▲ auf der Fernbedienung verwenden. Richten Sie die Fernbedienung auf diesen Sensor am Fernsehgerät. SOURCEE MENU Y z Fernbedienungssensor Standby-Modus Der Standby-Modus ist nicht für längere Phasen der Abwesenheit gedacht (z. B. wenn Sie verreist sind). Eine kleine Menge Strom wird auch dann noch verbraucht, wenn das Gerät mit dem Netzschalter ausgeschaltet wurde. Es ist am besten, das Netzkabel aus der Steckdose zu ziehen. 4 Deutsch ✎ Dies ist eine spezielle Fernbedienung für Personen mit eingeschränktem Sehvermögen. Die Netztaste sowie die Tasten zum Einstellen des Senders und der Lautstärke sind in Braille beschriftet. Ein- und Ausschalten des Fernsehgeräts. (Seite 6) Anzeigen und Auswählen aller verfügbaren Videosignalquellen. (Seite 9) Wenn die Beleuchtungstaste ON/OFF angeschaltet ist und Sie drücken eine Taste, leuchten alle Tasten auf der Fernbedienung für einen kurzen Moment auf. (Wenn Sie die Fernbedienung mit angeschalteter Hintergrundbeleuchtung verwenden, verkürzt dies die Lebensdauer der Batterie.) Hiermit wechseln Sie direkt zu einem Kanal. Zurück zum vorherigen Kanal. Abwechselnde Auswahl von „Teletext“, „Doppel“ oder „Mix“. Drücken Sie diese Taste, um den Ton vorübergehend auszuschalten. Lautstärke einstellen Wechseln des Kanals Bildschirmmenü anzeigen. (Seite 9) Anzeigen von Inhalte anzeigen mit Kanal-Manager, Internet@TV, Media Play und AllShare. Anzeige der Senderliste auf dem Bildschirm. (Seite 13) Anzeigen des elektronischen Programmführers (Seite 10) Hiermit können Sie häufig verwendete Funktionen schnell auswählen. Anzeigen von Informationen auf dem Bildschirm (Seite 10) Auswählen von Optionen im Bildschirmmenü und Ändern von Menüwerten. Schließen des Menüs (Seite 10) Zurück zum vorherigen Menü. Tasten in den Menüs Kanal-Manager, Internet@TV, Media Play usw. A B C D MEDIA.P: Anzeigen von Media Play. (Seite 29) INTERNET: Verbindung zu verschiedenen Internetdiensten. (Seite 39) DUAL I-II: Wählen Sie den Tonmodus DUAL. (Seite 17) AD: Auswahl der Audio-Beschreibung. (nicht überall verfügbar) (Seite 17) P.SIZE: Wählen des Bildformats. (Seite 15) SUBT.: Anzeigen der digitalen Untertitel (Seite 19) Verwenden Sie diese Tasten im Media Playund Anynet+-Modus. (Seite 29, 36) (�: Steuern von Aufnahmen auf SamsungRekordern, die mit der Anynet+-Funktion ausgerüstet sind.) Einlegen von Batterien (Batteriegröße: AAA) ✎ HINWEIS x x x Setzen Sie die Fernbedienung bis zu einer Entfernung von maximal 7 m ein. Helles Licht kann die Leistung der Fernbedienung verschlechtern. Vermeiden Sie Leuchtstoffröhren oder ein Neonschild in der Nähe der Fernbedienung. Form und Farbe können sich je nach Modell unterscheiden. ✎ Batterien und Akkus gehören nicht in den Hausmüll. Als Verbraucher sind Sie verpflichtet, alte Batterien und Akkus zur umweltschonenden Entsorgung zurückzugeben. Sie können alte Batterien und Akkus bei den öffentlichen Sammelstellen in Ihrer Gemeinde oder überall dort abgeben, wo Batterien und Akkus der betreffenden Art verkauft werden. Deutsch 5 01 Erste Schritte Fernbedienung Erste Schritte Verbinden mit einer Antenne Wenn das Fernsehgerät zum ersten Mal eingeschaltet wird, werden automatisch die Grundeinstellungen vorgenommen. ✎ Voreinstellung: Anschließen ans Stromnetz und an die Fernsehantenne. VHF/UHF-Antenne Kabel oder ANT OUT Y Netzanschluss Plug & Play (Anfangseinstellung) Wenn das Fernsehgerät erstmals eingeschaltet wird, helfen eine Reihe aufeinanderfolgender Abfragen beim Durchführen der Grundeinstellungen. Drücken Sie die POWERP. Plug & Play ist nur verfügbar, wenn die Eingangsquelle auf TV eingestellt ist. ✎ Um zum vorherigen Schritt zurückzukehren, drücken Sie die rote Taste. 1 2 3 Auswählen der Sprache Drücken Sie die Taste ▲ oder ▼, und drücken Sie dann auf die ENTERE. Auswählen von Drücken Sie die Taste ◄ oder ►, und drücken Sie dann auf die Shop-Demo oder ENTERE. Privatgebrauch y Wählen Sie den Modus Privatgebrauch. Der Modus Shop-Demo ist für den Betrieb in Einzelhandelsgeschäften bestimmt. y Zurückstellen des Geräts von Shop-Demo auf Privatgebrauch (Standard): Drücken Sie die Lautstärketaste am Fernsehgerät. Wenn das Menü Lautstärke angezeigt wird, halten Sie die Taste MENU 5 Sekunden lang gedrückt. Wählen eines Landes Drücken Sie die Taste ▲ oder ▼, und drücken Sie dann auf die ENTERE. Wählen Sie das gewünschte Land. Wenn es das gewünschte Land im Menü nicht gibt, wählen Sie Sonstiges. ✎ Nachdem Sie im Menü Land das Land eingestellt haben, werden Sie bei manchen Modellen anschließend aufgefordert, die PIN-Nummer einzurichten. 4 5 ✎ Auswählen einer Antenne Auswählen eines Senders Die Ziffernkombination 0-0-0-0 dürfen Sie als PIN-Nummer nicht eingeben. Drücken Sie die Taste ▲ oder ▼, und drücken Sie dann auf die ENTERE. Wählen Sie Terrestrisch oder Kabel. Drücken Sie die Taste ▲ oder ▼, und drücken Sie dann auf die ENTERE. Wählen Sie den Sendertyp zum Speichern aus. Wenn Sie den Sendertyp auf Kabel einstellen, können Sie den Sendern im nächsten Schritt einen Zahlenwert (Senderfrequenzen) zuweisen. Weitere Informationen hierzu finden Sie unter Kanal → Autom. Senderspeich. (Seite 12) ✎ Zum Unterbrechen des Speichervorgangs zu einem beliebigen Zeitpunkt drücken Sie 6 7 8 Einstellen des Uhr-Modus Anzeigen des HDAnschlussplans. Gute Fernsehunterhaltung! die ENTERE. Stellen Sie den Uhr-Modus automatisch oder manuell ein. ✎ Wenn Sie Auto wählen, müssen Sie Ihre Zeitzone auswählen. Die Verbindungsmethode für optimale HD-Bildqualität wird angezeigt. Drücken Sie die Taste ENTERE . So setzen Sie diese Funktion zurück... Wählen Sie Einstell. - Plug & Play (Anfangseinstellung). Geben Sie nun Ihre vierstellige PIN ein. Die Standard-PIN lautet „0-0-0-0“. Wenn Sie die PIN ändern möchten, verwenden Sie die Funktion PIN ändern. 6 Deutsch Anschlüsse 02 Anschlüsse Anschließen an ein AV-Gerät Mit Hilfe eines HDMI/DVI-Kabels: HD-Anschluss (max. 1080p) Verfügbare Geräte: DVD, Blu-ray-Player, HD-Kabelreceiver, HD-Satellitenreceiver, Kabelreceiver, Satellitenreceiver DVD W Y W r W HDMI OUT Red White AUDIO OUT W r-AUDIO-l R DVI OUT ✎ HDMI IN 1(DVI), 2, 3, 4 / PC/DVI AUDIO IN x x x x Eine Verbindung über HDMI/DVI-Kabel kann nur über HDMI IN 1(DVI) erfolgen. Verwenden Sie ein DVI/ HDMI-Kabel oder einen DVI/HDMI-Adapter (DVI auf HDMI) für den DVI-Kabelanschluss und die DVI AUDIO IN-Anschlüsse für die Audioverbindung. Wenn ein externes Gerät wie ein DVD-/Blu-Ray-Player/Kabelreceiver/Satellitenreceiver mit Untertsützung für HDMI-Versionen älter als 1.3 angeschlossen wird, funktioniert das Fernsehgerät möglicherweise nicht wie erwartet (z. B. kein Bild/kein Ton/störendes Flackern/falsche Farben). Wenn es nach dem Anschließen eines HDMI-Kabels keinen Ton gibt, überprüfen Sie die HDMI-Version des externen Geräts. Wenn Sie vermuten, dass die Version älter als 1.3 ist, wenden Sie sich an den Lieferanten des Geräts, um die HDMI-Version zu bestätigen und ein Upgrade anzufordern. Es wird empfohlen ein zertifiziertes HDMI-Kabel zu erwerben. Andernfalls kann es passieren, dass der Bildschirm leer bleibt oder ein Verbindungsfehler auftritt. Mit Hilfe eines Komponentenkabels (bix 1080p) oder eines Audio/Video-Kabels (nur 480i) und eines Scartkabels Verfügbare Geräte: Videorekorder, DVD-Player, Blu-ray-Player, Kabelreceiver, Satellitenreceiver R B W W R r-AUDIO-l Y AUDIO OUT VIDEO OUT R Videorekorder G r Blu-ray-Player W Yellow Red White R AUDIO OUT r-AUDIO-l R W W G W r R Y B W Y W COMPONENT OUT Pr Pb r Red b G Blue Green DVD EXT Y ✎ Im Ext.-Modus unterstützt DTV Out nur MPEG SD-Video und -Audio. ✎ Um die beste Bildqualität zu erhalten, wird eine Komponentenverbindung über den A/V-Anschluss empfohlen. Deutsch 7 Anschlüsse Anschließen an ein Audiogerät Mit Hilfe eines Glasfaserkabels oder eines Audiokabels Verfügbare Geräte: Digital-Audiosystem, Verstärker, DVD-Heimkino OPTICAL DigitalAudiosystem Kopfhörer ✎ DIGITAL AUDIO OUT (OPTICAL) x x x Wenn ein Digital Audio-System mit dem DIGITAL AUDIO OUT (OPTICAL)-Anschluss verbunden ist, reduzieren Sie die Lautstärke von Fernsehgerät und System. 5.1-Kanalton ist möglich, wenn das Fernsehgerät an ein externes Gerät angeschlossen ist, das 5.1-Kanalton unterstützt. Wenn der Receiver (Heimkinosystem) angeschaltet ist, können Sie den Ton hören, der vom optischen Ausgang der Fernsehgeräts zur Verfügung gestellt wird. Wenn das Fernsehgerät ein (terrestrisches) DTV-Signal empfängt, überträgt das Fernsehgerät 5.1-Kanalton an den Receiver des Heimkinosystems. Wenn es sich bei der Signalquelle um eine digitale Komponente wie beispielsweise einen DVD-Player/Blu-Ray-Player/Kabel- / Satellitenreceiver (Set-TopBox) handelt, der über HDMI an das Fernsehgerät angeschlossen ist, kann der Receiver des Heimkinosystems nur Zweikanalton wiedergeben. Wenn Sie 5.1-Kanalton wünschen, müssen Sie den digitalen Ausdioausgang am DVD-/BluRay-Player / Kabel- / Satellitenreceiver (Set-Top-Box) direkt an einen Verstärker oder ein Heimkinosystem anschließen. ✎ Kopfhörer H: Sie können Ihre Kopfhörer an den Kopfhörer-Ausgang Ihres Fernsehgeräts anschließen. Wenn Kopfhörer angeschlossen sind, ist die Tonwiedergabe über die eingebauten Lautsprecher abgeschaltet. x Wenn Sie Kopfhörer an das Fernsehgerät anschließen, ist die Tonfunktion eingeschränkt. x Die Lautstärke der Kopfhörer und des Fernsehgeräts werden getrennt geregelt. ANSCHLÜSSE COMMON INTERFACE-STECKPLATZ Um Bezahlsender zu sehen, müssen Sie eine „CI“ oder „CI+“-Karte einsetzen. y Wenn Sie keine „CI“ oder „CI+“-Karte einsetzen, wird bei einigen Kanäle die Meldung „Gestörtes Signal“ angezeigt. y Die Verbindungsinformationen mit Telefonnummer, Kennung der „CI“ oder „CI+“-Karte, Hostkennung und anderen Angaben wird nach ungefähr 2 bis 3 Minuten angezeigt. Wenn eine Fehlermeldung angezeigt wird, wenden Sie sich bitte an Ihren Dienstanbieter. y Wenn das Konfigurieren der Kanalinformationen abgeschlossen ist, wird die Meldung „Aktualisierung abgeschlossen“ angezeigt. Dies bedeutet, dass die Kanalliste aktualisiert ist. ✎ HINWEIS x x x x x 8 x Sie können die „CI“ oder „CI+“-Karte bei einem der örtlichen Kabelnetzbetreiber erwerben. Ziehen Sie die „CI“ oder „CI+“-Karte vorsichtig mit den Händen heraus. Sie könnte beim Herunterfallen ansonsten beschädigt werden. Die Richtung, in der Sie die „CI“ oder „CI+“-Karte einsetzen müssen, ist auf der Karte markiert. Die Position des COMMON INTERFACE-Steckplatzes ist modellabhängig. „CI“ oder „CI+“-Karten werden in einigen Ländern und Regionen nicht unterstützt. Fragen Sie diesbezüglich Ihren offiziellen Händler. Bei Problemen wenden Sie sich an den Dienstanbieter. Deutsch ■ Quellen Hiermit wählen Sie, ob das Fernsehgerät mit einem Fernsehsignal versorgt wird oder an andere externe Signaleingänge wie z. B. DVD- / Blu-Ray-Player / Kabelreceiver / Satellitenreceiver (Set-Top Box) angeschlossen ist. ■ TV / Ext.1 / Ext.2 / AV / Komponenten / PC / HDMI1/DVI / HDMI2 / HDMI3 / HDMI4 / USB ✎ Bei Liste der Signalquellen werden die angeschlossenen Signalquellen hervorgehoben. ✎ Ext.1, und Ext.2 bleiben immer aktiviert. Videorekorder / DVD / Kabelreceiver / Satellitenreceiver / PVR-Receiver / AV-Receiver / Spiel / Camcorder / PC / DVI PC / DVI-Geräte / TV / IPTV / Blu-Ray / HD DVD / DMA: Vergeben Sie Namen für die an die Eingangsbuchsen angeschlossenen Geräte, um die Auswahl der Signalquelle zu vereinfachen. ✎ Wenn ein PC mit einer Auflösung von 1920 x 1080 bei 60 Hz mit dem HDMI IN 1(DVI)-Anschluss verbunden wird, stellen Sie den Anschluss unter Name bearb. auf den DIV PC-Modus ein. ✎ Wenn Sie ein HDMI/DVI-Kabel mit dem HDMI IN 1(DVI)-Anschluss verbinden, stellen Sie den Anschluss unter Name bearb. auf den Modus DVI PC oder DVI-Geräte ein. Grundfunktionen Bedienung des Bildschirmmenüs (OSD) Navigieren in den Menüs Vor dem ersten Einsatz des Fernsehgeräts führen Sie die folgenden Schritte aus, um zu erfahren, wie Sie im Menü navigieren und verschiedene Funktionen auswählen und einstellen. Die Zugriffsmethoden können in Abhängigkeit vom jeweiligen Menü variieren. 1 MENU m 2 3 ▲/▼ 1 2 4 3 A B C D 1 Taste MENU: Erste Ebene des Bildschirmmenüs anzeigen. ENTERE 4 ▲/▼ 5 ◄/► 6 7 ENTERE 2 Taste ENTERE/ Navigationstasten: Cursor bewegen und Elemente auswählen. Einstellungen bestätigen. 3 Taste RETURN: Zurück zum vorherigen Menü. 4 Taste EXIT: Bildschirmmenü schließen. EXIT e Das Hauptmenü mit seinen Optionen wird auf dem Bildschirm angezeigt: Bild, Ton, Kanal, Einstell., Eingang, Anwendung, Unterstützung Wählen Sie durch Drücken der Tasten ▲ oder ▼ ein Symbol. Drücken Sie die Taste ENTERE, um das Untermenü zu einem Symbol anzuzeigen. Wählen Sie durch Drücken der Tasten ▲ oder ▼ das gewünschte Untermenü. Wählen Sie durch Drücken der Tasten ◄ oder ► den Wert für ein bestimmtes Element. Die Methoden zum Anpassen der Werte im Bildschirmmenü können in Abhängigkeit vom jeweiligen Menü variieren. Drücken Sie die Taste ENTERE, um die Konfiguraton abzuschließen. Drücken Sie die Taste EXIT zum Beenden. Deutsch 9 02 Anschlüsse Name bearbeiten Signalquellen wählen Grundfunktionen Verwenden der INFO-Taste (Elektronische Programmzeitschrift) Auf dem Bildschirm werden der aktuelle Kanal und bestimmte Audio/Video-Einstellungen angezeigt. Die elektronische Programmführer zeigt entsprechend der Sendezeit für jeden Kanal tagesaktuelle Fernsehprogramminformation an. y Blättern Sie mit ◄, ►, um Informationen zu einem gewünschten Programm anzuzeigen, während Sie einen anderen Sender anzeigen. y Blättern Sie mit ▲, ▼, um Informationen für andere Kanäle anzuzeigen. Wenn Sie zum ausgewählten Sender wechseln möchten, drücken Sie auf die ENTERE. abc1 18:11 Thu 6 jan life On Venus Avenue DTV Air 15 E Watch ' Informationen Fernsehplanung Programmführer Die Informationen des elektronischen Programmführers werden von den Sendern zur Verfügung gestellt. Mit Hilfe der von den Sendern zur Verfügung gestellten Programmpläne können Sie im Voraus Programme angeben, die Sie sehen möchten, so dass das Fernsehgerät zur angegebenen Zeit automatisch zum Kanal des gewählten Programms wechselt. Je nach Aktualität der Senderinformationen können Programmplätze leer oder veraltet sein. Verwenden der Kanalansicht TV-Programm 2:10 Tue 1 jun DTV Air 800 five Home and Away 18:00 - 18:30 Drama Dani is devastated when scott makes clear his views on marriage... Kanalansicht - TV Today 27 Discovery 28 DiscoveryH&L 800 five 24 price-drop.tv 16 QVC 6 R4DTT Ansichts. 1 10 Deutsch 18:00 - 19:00 American Chopper Programmes resume at 06:00 Home and... )Family Affairs No Information QVC Selection No Information +24 Std. 2 CH-Modus 3 19:00 - 20:00 Tine Team Fiv... )Dark Angel Informationen k Seite E Ansehen 4 TV-Programm 5 6 2:10 Tue 1 jun DTV Air 800 five Family Affairs 18:00 - 18:30 Drama Tanya confesses all to a stunned Babs. Conrad is anxious to hear... 800 five Programmieransicht 18:30 19:15 Today Today 800 800 )Family Affairs )Dark Angel Ansichts. 1 five five Informationen E Abbrechen 4 6 1 Rot (Ansichts.): Anzeigen der Programme, die gerade laufen oder demnächst anfangen. 2 Gelb (+24 Std.): Anzeigen der Programme, die nach 24 Stunden gesendet werden. 3 Blau (CH-Modus): Wählen Sie die Art der Kanäle aus, die Sie im Fenster Kanalansicht anzeigen möchten. 18:00 ~ 6:00 Unclassified No Detaild Information 800 five Verwenden der Programmieransicht – Der Kanalmodus unterscheidet sich je nach Antennensignal. (Informationen): Anzeigen von Details zum 4 ausgewählten Programm. 5 (Seite): Wechseln zur vorherigen/nächsten Seite. 6 Taste ENTERE – Wenn Sie ein laufendes Programm auswählen, können Sie es ansehen. – Wenn Sie ein zukünftiges Programm auswählen, können Sie es vormerken. Um die Programmierung abzubrechen, drücken Sie erneut auf die ENTERE und wählen Sie Programmierung abbrechen. ¦ Verwenden von Favoriten Mit diesem Menü können Sie Favoriten löschen oder einstellen und den Programmführer für digitale Sendungen verwenden. Wählen Sie im Fenster Sender, Eigene Kanäle oder Vorgemerkt einen Sender. * Eigene Kanäle c1 c2 Sender All Terrestrisch 1futech * 24ore.tv TV 15 Radio Data/Other Analogue 3 23 33 32 5 4 27 TV-empfang B zoom abc1 (im Kanal-Manager) Hiermit zeigen Sie alle Favoritenkanäle an. ■ r BBC World bid-up.tv Boonerang Cartoon Nwk Class News \ Coming Soon Discovery Auswählen k Seite T extras ■ Sender: Anzeigen der Senderliste anhand des Sendertyps. ■ * Eigene Kanäle: Anzeigen der Gruppe des Senders. Eigene Kanäle bearbeiten t : Sie können die gewählten Sender zu der gewünschten Gruppe eigener Sender hinzufügen. ✎ Das Symbol „*“ wird angezeigt, und der Sender wird als eigener Kanal festgelegt. 1. Wählen Sie einen Kanal und drücken Sie die Taste TOOLS. 2. Sie können einen Kanal der Gruppen 1, 2, 3 und 4 der eigenen Kanäle hinzufügen oder löschen. x Sie können eine oder mehrere Gruppen auswählen. 3. Nachdem Sie die Einstellungen geändert haben, kann die Senderliste für jede Gruppe in Eigene Kanäle angezeigt werden. Vorgemerkt: Anzeigen aller vorgemerkten Programme. ■ Kanal-Manager x x x x x Rot (TV-Empfang): Wählen Sie abwechselnd Terrestrisch oder Kabel. Sender ✎ Verwenden der Farbtasten in Verbindung mit dem B Grün (Zoom): Hiermit vergrößern oder verkleinern Sie die Sendernummer. Gelb (Auswählen): Markieren Sie die gewünschten Kanäle und drücken Sie die gelbe Taste, um alle markierten Kanäle zugleich einzustellen. Links neben dem Namen der gewählten Kanäle wird das Zeichen c angezeigt. Terrestrisch c1 c2 All 1futech * 24ore.tv TV 15 Radio Data/Other Analogue 3 23 33 32 5 4 27 TV-empfang Auswählen Seite T extras B zoom abc1 r eigene Kanäle bearbeiten Sperren BBC World entfernenbid-up.tv Alle abwählen Boonerang Alle wählen Cartoon Nwk ClassdNews \ Coming Soon Discovery (Seite): Weiter zur nächsten oder vorherigen Seite. T (Extras): Hiermit zeigen Sie das Optionsmenü Kanal-Manager an. (Der Inhalt des Menüs „Optionen“ hängt von der jeweiligen Situation ab.) Symbole zur Anzeige des Kanalstatus Symbole A c * ( \ ) Vorgang Ein analoger Kanal. Ein ausgewählter Sender. Ein Kanal, der als Favorit eingestellt ist. Ein Programm, das gerade gesendet wird. Ein gesperrter Kanal. Ein vorgemerktes Programm. Deutsch 11 03 Grundfunktionen Kanal-Manager Grundfunktionen Kanalmenü ¦ Kanäle neu einstellen Antennentyp (Terrestrisch / Kabel) t Ehe Ihr Fernseher beginnen kann, die verfügbaren Kanäle zu speichern, müssen Sie die Art der Signalquelle angeben, die an das Fernsehgerät angeschlossen ist (z. B.: Terrestrisch oder Kabel). Sender manuell speichern Manuelle Suche nach einem Kanal und Speichern im Fernsehgerät. ✎ Wenn ein Kanal mit der Kindersicherung gesperrt wurde, wird das Eingabefenster für die PIN geöffnet. ■ Digitaler Sender : Nach Abschluss des Suchlaufs werden die Kanäle in der Kanalliste aktualisiert. ✎ Bei Auswahl von TV-Empfang → Terrestrisch Kanal, Frequenz, Bandbreite ✎ Bei Auswahl von TV-Empfang → Kabel: Frequenz, Modulation, Symbolrate Land ■ Der Eingabefenster für die PIN wird geöffnet. Geben Sie nun Ihre vierstellige PIN ein. ■ Digitaler Sender: Sie können das Land für die digitalen Sender ändern. ■ Analogsender: Sie können das Land für die analogen Sender ändern. ✎ Kanalmodus x Automatisch speichern x Automatisches Suchen nach einem Kanal und Speichern im Fernsehgerät. ✎ Die automatisch zugewiesenen Programmplätze entsprechen unter Umständen nicht den gewünschten Programmplätzen. Wenn ein Kanal mit der Kindersicherung gesperrt wurde, wird das Eingabefenster für die PIN geöffnet. ■ Antennentyp (Terrestrisch/Kabel): Wählen Sie einen Antennentyp zum Speichern aus. ■ Sendertyp (Digital und Analog / Digital / Analog): Wählen Sie den Sendertyp zum Speichern aus. Bei Auswahl von Kabel → Digital und Analog oder Digital: Wert für die Suche nach Kabelkanälen eingeben. Suchlaufmodus (Voll / Netzwerk / Schnell): Das Fernsehgerät durchsucht automatisch alle Kanäle mit aktiven Sendern und speichert sie im Fernsehgerät. ✎ Wenn Sie Schnell wählen, können Sie Netzwerk, Netzwerk-ID, Frequenz, Modulation, Symbolrate durch Drücken der Taste auf der auf der Fernbedienung manuell einstellen. Netzwerk (Auto / Manuell): Auswählen der Einstellmethode für die Netzwerk-ID zwischen Auto oder Manuell. Netzwerk-ID: Wenn das Netzwerk auf Manuell eingestellt ist, können Sie die Netzwerk-ID mit den Zifferntasten eingeben. Analoger Sender (Programm, Fernsehnorm, Tonsystem, Kanal, Suchen, Speichern): Falls kein oder nur schlechter Ton zu hören sein sollte, wählen Sie einen anderen Audiostandard aus. P (Programm-Modus): Nach Abschluss der Einstellungen sind die Sender lhrer Region auf den Programmplätzen P0 bis maximal P99 gespeichert. In diesem Modus können Sie Sender durch Eingabe des Programmplatzes auswählen. C (Terrestrische Kanäle) / S (Kabelkanäle): In diesen beiden Modi können Sie Sender durch Eingabe der Nummer anwählen, die dem terrestischen Sender oder dem Kabelkanal zugeordnet ist. ¦ Bearbeiten von Sendern Optionsmenü Kanal-Manager (im Kanal-Manager) 1. Wählen Sie einen Kanal und drücken Sie die Taste TOOLS. 2. Bearbeiten Sie den Namen oder die Nummer des Kanals mit den Menübefehlen Kanalnamen bearbeiten oder Kanalnr. bearbeiten. ■ Kanalnamen bearbeiten (nur Analogkanäle): Weisen Sie einen Kanalnamen nach Ihrer Wahl zu. ■ Kanalnr. bearbeiten(nur Digitalkanäle): Bearbeiten Sie die Nummer durch Drücken der gewünschten Zifferntasten. ¦ Weitere Funktionen Kabelsuchoption (je nach Land) Einstellen weiterer Suchoptionen für die Kanalsuche im Kabelnetz (z. B. Frequenz oder Symbolrate). Frequenz: Hiermit zeigen Sie die Frequenz des Kanals an. (Je nach Land unterschiedlich) ■ Modulation: Hiermit zeigen Sie die verfügbaren Modulationswerte an. Startfrequenz/Stoppfrequenz: Einstellen der Start- und Stoppfrequenz (je nach Land unterschiedlich) ■ Symbolrate: Hiermit zeigen Sie die verfügbaren Symbolraten an. Modulation: Hiermit zeigen Sie die verfügbaren Modulationswerte an. ■ Symbolrate: Hiermit zeigen Sie die verfügbaren Symbolraten an. 12 Deutsch ■ Sperren / Freigabe: Sie können einen Kanal sperren, sodass er nicht ausgewählt und angezeigt werden kann. ✎ HINWEIS x ■ Diese Funktion ist nur verfügbar, wenn die Kindersicherung aktiviert ist Ein. x Der Eingabefenster für die PIN wird geöffnet. Geben Sie die vierstellige Standard-PIN ein: „0-0-0-0“. Ändern Sie die PIN mit der Option PIN ändern. Timer-Wiedergabe: Sie können einen Kanal einstellen, der bei Erreichen einer bestimmten Zeit automatisch angezeigt wird. Um diese Funktion verwenden zu können, müssen Sie zuerst die aktuelle Uhrzeit einstellen. Wenn Sie einen digitalen Kanal gewählt haben und die Taste ► drücken, wird das digitale Programm angezeigt. Senderliste übertragen Importieren oder Exportieren der Kanaltabelle. Schließen Sie einen USB-Speicher an, um diese Funktion zu verwenden. Der Eingabebildschirm für die PIN wird geöffnet. Geben Sie nun Ihre vierstellige PIN ein. ✎ ✎ Der Standard-PIN-Code eines neuen Fernsehgeräts lautet “0-0-0-0”. ■ Von USB importieren: Importieren der Kanalliste vom USB-Speicher. ■ Auf USB exportieren: Exportieren der Kanalliste auf den USB-Speicher Feinabstimmung (nur analoge Kanäle) Wenn das Signal schwach oder gestört ist, können Sie die Feinabstimmung manuell vornehmen. Fein abgestimmte Kanäle sind mit einem Sternchen markiert “*”. ✎ ✎ Wählen Zurückset., wenn Sie die Feinabstimmung zurücksetzen möchten. ✎ ■ Sortieren (nur Analogkanäle): Mit diesem Vorgang können Sie die Programmnummern gespeicherter Sender ändern. Das ist möglicherweise nach dem automatischen Speichern von Sendern erforderlich. Bildmenü ¦ Ändern des voreingestellten Bildmodus Modus t Wählen Sie Ihren bevorzugten Bildtyp aus. ■ Entfernen: Sie können Kanäle löschen, damit nur die gewünschten Kanäle angezeigt werden. ■ ■ Alle wählen / Alle abwählen: Wählen Sie alle Kanäle aus oder deaktivieren Sie alle im Kanal-Manager ausgewählten Kanäle. ■ Standard: Für normale Umgebungen geeignet. ■ Natürlich: Für geringe Augenbelastung geeignet. Vorgemerkt ■ (im Kanal-Manager) Mit dieser Menüoption können Sie eine vorgemerkte Sendung anzeigen, ändern oder löschen. ■ Info ändern: Mit dieser Menüoption können Sie eine vorgemerkte Sendung ändern. ■ Programmierung abbrechen: Mit dieser Menüoption können Sie die Vormerkrung einer Sendung stornieren. ■ Informationen: Anzeigen einer vorgemerkten Sendung. (Sie können auch die Vormerkinformationen auswählen). ■ Alle wählen / Alle abwählen: Wählen oder Abwählen aller vorgemerkten Programme. Senderliste Sie können alle gesuchten Kanäle anzeigen. Dynamisch: Für helle Zimmer geeignet. ✎ Natürlich ist im PC-Modus nicht verfügbar. Film: Geeignet für das Anzeigen von Filmen in einem abgedunkelten Zimmer. ¦ Anpassen der Bildeinstellungen Hintergrundbeleuchtung / Kontrast / Helligkeit / Schärfe / Farbe / Farbton (G/R) Das Gerät verfügt über mehrere Einstellmöglichkeiten für die Bildqualität. ✎ HINWEIS x x x x Im Modus TV, Ext., AV des PAL-Systems steht die Funktion Farbton (G/R) nicht zur Verfügung. Im PC-Modus können Sie nur Hintergrundbel., Kontrast und Helligkeit einstellen. Sie können die Einstellungen für jedes an das Fernsehgerät angeschlossene externe Gerät festlegen und speichern. Durch geringere Bildhelligkeit reduzieren Sie den Stromverbrauch. Deutsch 13 03 Grundfunktionen Optionsmenü Kanal-Manager (im Kanal-Manager) Stellen Sie den Kanal mit den Menübefehlen im KanalManager ein (Sperren / Freigabe / Timer-Wiedergabe / Sortieren, Entfernen / Alle wählen / Alle abwählen). Der Inhalt des Optionsmenüs hängt vom jeweiligen Kanalstatus ab. 1. Wählen Sie einen Kanal und drücken Sie die Taste TOOLS. 2. Wählen Sie eine Funktion aus, und ändern Sie deren Einstellungen. Grundfunktionen ¦ Möglichkeiten zum Sparen ■ Gamma: Einstellen der Intensität der Primärfarbe. ■ Expertenmuster (Aus, Muster 1, Muster 2): Durch Ausführen der Funktion Expertenmuster kann das Bild ohne einen Generator oder Filter kalibriert werden. Wenn das Bildschirmmenü verschwindet oder ein anderes Menü als Menü Bild geöffnet wird, ist die Kalibrierung gespeichert und das Fenster Expertenmuster wird geschlossen. Öko-Lösung ■ ■ Energiesparmod. (Aus / Gering / Mittel / Hoch / Bild aus / Auto) t: Mit dieser Funktion stellen Sie die Helligkeit des Fernsehgeräts ein, um den Stromverbrauch zu senken. Wenn Sie Bild aus wählen, wird der Bildschirm abgeschaltet, aber der Ton bleibt an. Drücken Sie eine beliebige Taste außer der Lautstärketaste, um den Bildschirm wieder anzuschalten. Öko-Sensor (Aus / Ein): Um noch mehr Energie zu sparen; werden die Bildeinstellungen automatisch an die Lichtverhältnisse im Zimmer angepasst. ✎ Wenn Sie die Hintergrundbeleuchtung einstellen, wird der Öko-Sensor deaktiviert. ✎ ✎ ■ Nur RGB-Modus (Aus / Rot / Grün / Blau): Sie können die Farbe oder den Farbton der Bildanteile Rot, Grün oder Blau von einem externen Gerät (DVD-Player, Heimkinosystem usw.) einstellen. ■ Farbraum (Auto / Nativ / Benutzerdefiniert): Stellen Sie den Bereich der Farben ein, aus denen das Bild erstellt wird. Wenn Sie Farbe, Rot, Grün, Blau und Zurückset. anpassen möchten, stellen Sie Farbraum auf Benutzerdefiniert ein. ■ Weißabgleich: Einstellen der Farbtemperatur für ein natürlicheres Bild. Minimale Hintergrundbeleuchtung: Wenn der ÖkoSensor aktiviert (Ein) ist, können Sie die minimale Bildhelligkeit manuell einstellen. ✎ ■ Wenn Öko-Sensor aktiviert ist Ein, kann sich die Helligkeit der Anzeige je nach Helligkeit der Umgebung ändern (etwas heller oder dunkler werden). R-Offset / G-Offset / B-Offset: Sie können die Dunkelheit jeder Farbe (Rot, Grün und Blau) einstellen. Kein Signal Standby (Aus / 15 min / 30 min / 60 min): Löst den Standbymodus aus, wenn für einen gewissen, benutzerdefinierten Zeitraum der Status „Kein Signal“ oder „Signalkabel prüfen“ ansteht. ✎ R-Gain/G-Gain/B-Gain: Sie können die Helligkeit jeder Farbe (Rot, Grün und Blau) einstellen. Zurücksetzen: Hiermit setzen Sie den Weißabgleich auf die Standardwerte zurück. Deaktiviert, wenn der PC im Stromsparmodus läuft. ■ ¦ Ändern der Bildoptionen Erweiterte Einstellungen (verfügbar nur im Modus Standard / Film) Sie können verschiedene Detaileinstellungen für Ihren Fernseher vornehmen, unter anderem für Farbe und Kontrast. ✎ An Im PC-Modus können Sie nur Optimalkontrast., Gamma und Weißabgleich einstellen. : Aus ✎ Diese Funktion ist verfügbar, wenn der Bildmodus auf Film und der externe Eingang auf HDMI oder Komponente eingestellt ist. ✎ Manche USB-Geräte unterstützen diese Funktion möglicherweise nicht. Rot: Einstellen des Rotpegels. Grün: Einstellen des Grünpegels. ► Optimalkontrast : Mittel Blau: Einstellen des Blaupegels. Schattendurchzei. :0 Gamma :0 Zurücksetzen: Zurücksetzen von 10 P Weißabgleich auf die Standardwerte. expertenmuster : Aus ■ Hautton: Betonen des Rosaanteils im „Hautton“. Nur rGb-Modus : Aus ■ Farbraum : Nativ Kantenglättung (Aus / Ein): Hervorheben von Objektbegrenzungen. xvYCC (Aus / Ein): Durch Aktivieren des xvYCC-Modus vergrößern Sie die Detailtreue und den Farbraum beim Abspielen von Filmen auf einem externen Gerät (z. B. DVD-Player), das an den HDMI- oder Component INEingang angeschlossen ist. ▼ U Verschieben E eingabe R zurück ■ Schwarzton (Aus / Dunkel / Dunkler / Max. dunkel): Wählen Sie den Schwarzwert aus, um die Bildschirmtiefe einzustellen. ■ Optimalkontrast (Aus / Gering / Mittel / Hoch): Stellen Sie den Bildkontrast ein. ■ Detailtreue bei Schatten (-2~+2): Erhöhen Sie die Helligkeit dunkler Bilder. ✎ 14 10 P Weißabgleich (Aus / Ein): Steuern des Weißabgleichs in 10-Punkt-Schritten durch Einstellen der Helligkeit des roten, grünen und blauen Signals. Intervall: Wählen Sie das Intervall zum Einstellen. Erweiterte Einstellungen Schwarzton Solange Expertenmuster ausgeführt wird, erfolgt keine Tonausgabe. Nur verfügbar im Modus DTV, Component und HDMI. Im PC-Modus deaktiviert. Deutsch ■ ✎ Diese Funktion ist verfügbar, wenn der Bildmodus auf Film und der externe Eingang auf HDMI oder Komponente eingestellt ist. ✎ Manche USB-Geräte unterstützen diese Funktion möglicherweise nicht. ✎ Im PC-Modus können Sie nur Farbtemp., Größe und Aktivierung, Digit. Rauschfilter des Einbrennschutzes nach einstellen. Bildoptionen Farbtemp. : Normal Größe : Autom. breit bildschirmmodus : 16:9 Digit. Rauschilter : Auto MPEG-Rauschilter : Auto HDMI-Schwarzp. : Normal Filmmodus : Aus ► ■ ▼ ✎ U Verschieben E eingabe R zurück ■ Farbtemperatur (Kalt / Normal / Warm1 / Warm2) Warm1 oder Warm2 werden nur aktiviert, wenn der Bildmodus auf Dynamisch eingestellt ist. Sie können die Einstellungen für jedes externe Gerät einstellen und speichern, das Sie an das Fernsehgerät angeschlossen haben. ✎ ■ ✎ ■ Größe: Möglicherweise verfügt auch Ihr Kabel-/Satellitenreceiver über eigene Bildschirmformate. Allerdings empfehlen wir dringend, dass Sie die meiste Zeit den 16:9-Modus verwenden. ✎ ✎ ■ Automatische Breite: Mit dieser Option stellen Sie das Bildformat automatisch auf das Seitenverhältnis 16:9 ein. 16:9 : Wählen Sie diese Option aus, um als Bildformat das Seitenverhältnis 16:9 für DVDs oder Breitbildsendungen einzustellen. Breitenzoom: Diese Option vergrößert das Bild auf mehr als 4:3. Einstellen der Position mit den Tasten ▲, ▼. ✎ HDMI-Schwarzpegel (Normal / Gering): Sie können den Schwarzwert direkt auf dem Bildschirm auswählen, um die Bildschirmtiefe anzupassen. Nur im HDMI-Modus (RGB-Signale) verfügbar. Filmmodus (Aus / Auto1 / Auto2): Sie können das Fernsehgerät so einstellen, dass eine Filmsignal aus allen Quellen automatisch empfangen und verarbeitet und das Bild auf die optimale Qualität eingestellt werden kann. Verfügbar bei TV, AV, COMPONENT (480i / 1080i) und HDMI (480i / 1080i). ✎ ■ ✎ 100Hz Motion Plus (Aus / Klar / Standard / Glätten / Benutzerdefiniert / Demo): Beseitigt das Verschwimmen schneller Szenen mit viel Bewegung und sorgt für ein klareres Bild. Wenn Sie 100Hz Motion Plus wählen, kann es zu Bildrauschen auf dem Bildschirm kommen. In diesem Fall sollten Sie 100Hz Motion Plus deaktivieren (Aus). Unschärfeminderung: Hiermit passen Sie die Unschärfeminderung bei Videosignalen an. Judder-Minderung: Hiermit passen Sie die Minderung stockender Bewegungen beim Abspielen von Filmen an. Zurücksetzen: Hiermit setzen Sie die benutzerdefinierten Einstellungen zurück. Aktivierung des Einbrennschutzes nach (2 Std. / 4 Std. / 8 Std. / 10 Std. / Aus) Wenn längere Zeit das gleiche Bild angezeigt wird, greift der Einbrennschutz. ✎ Bildanpassung: Mit dieser Funktion wird das ganze Bild auch bei Versorgung mit HDMI- (720p / 1080i / 1080p) oder Komponentensignalen (1080i / 1080p) vollständig und ohne Beschneidung angezeigt. ✎ HINWEIS Nach Auswahl von Bildschirmanpassung im Modus HDMI (1080i / 1080p) oder Component (1080i / 1080p): 1. Drücken Sie die Taste ◄ oder ►, um die Option Position auszuwählen. 2. Drücken Sie die ENTERE. 3. Positionieren Sie das Bild mit den Tasten ▲, ▼, ◄ oder ►. MPEG-Rauschfilter (Aus / Gering / Mittel / Hoch / Auto): Reduziert das MPEG-Rauschen, um besserte Bildqualität zu ermöglichen. Im PC-Modus deaktiviert. ✎ ■ ✎ x Wenn die Säule grün ist, empfangen Sie das bestmögliche Signal. ✎ ■ Zoom: Wählen Sie diese Option aus, um das 16:9-Breitbild auf die volle Bildschirmhöhe zu vergrößern. Einstellen der Position oder Größe mit den Tasten ▲, ▼. 4:3 : Dies ist die Standardeinstellung zum Anzeigen von Filmen und herkömmlichen Fernsehsendungen. Verwenden Sie nicht über längere Zeit hinweg das 4:3-Format. Spuren der links, rechts und in der Mitte angezeigten Rahmen können zum Einbrennen von Bildern (Einbrennen) führen, was nicht von der Garantie abgedeckt ist. Je nach Signalquelle können die Bildgrößenoptionen variieren. x Die verfügbaren Elemente können in Abhängigkeit vom ausgewählten Modus variieren. x Im PC-Modus können nur die Modi 16:9 und 4:3 eingestellt werden. x Sie können die Einstellungen für jedes externe Gerät einstellen und speichern, das Sie an einen Eingang des Fernsehgeräts angeschlossen haben. x Wenn Sie die Funktion Bildschirmanpassung zusammen mit einem HDMI 720p-Signal verwenden, wird eine Zeile wie bei Overscan oben, unten, links und rechts abgeschnitten. Bildschirmmodus (16:9 / Breitenzoom / Zoom / 4:3): Verfügbar nur, wenn die Bildgröße auf Autom. Breit eingestellt ist. Sie können die gewünschte Bildgröße beim 4:3-Breitbilddienst oder der Originalgröße bestimmen. Für jedes Europäische Land ist eine andere Bildgröße erforderlich. Diese Funktion ist im PC-, Komponenten- oder HDMIModus nicht verfügbar. Digit. Rauschfilter (Aus / Gering / Mittel / Hoch / Auto / Auto-Anzeige): Wenn das Sendesignal schwach ist, können statisches Rauschen und Geisterbilder erscheinen. Wählen Sie diejenige der Optionen, bei der das beste Bild angezeigt wird. Auto-Anzeige: Anzeige der Signalstärke beim Wechseln zwischen Analogkanälen. Nur für Analogkanäle verfügbar. ■ Bild zurücksetzen (OK / Abbrechen) Zurücksetzeb Ihres aktuellen Bildmodus auf ihre Standardeinstellungen. Deutsch 15 03 Grundfunktionen x Bildoptionen Grundfunktionen ¦ Einstellen des Fernsehgeräts mithilfe Ihres PCs ■ Stellen Sie die Signalquelle auf PC ein. Verstärken: Erhöht die Lautstärke hochfrequenter Töne, damit hörgeschädigte Personen den Ton besser verstehen können. Autom. Einstellung t ¦ Anpassen der Toneinstellungen Stellen Sie die Frequenzen/Positionen ein und lassen Sie die Feinstellung automatisch durchführen. Equalizer ✎ Nicht verfügbar bei Anschluss mit einem HDMI/DVI-Kabel. Bildschirm ■ Grob / Fein: Entferneb oder Reduzieren von Bildrauschen. Falls sich das Bildrauschen durch die Feinabstimmung allein nicht beheben lässt, stellen Sie zunächst die Frequenz möglichst genau ein Grob. Führen Sie dann erneut eine Feinabstimmung durch. Nachdem Sie das Bildrauschen durch die Grob- und Feinabstimmung des Bildes verringert haben, stellen Sie die Position des Bildes so ein, dass es auf dem Bildschirm zentriert ist. ■ Position: Einstellen der Position des PC-Fensters mit den Richtungstasten (▲ / ▼ / ◄ / ►). ■ Bild zurücksetzen: Zurücksetzen des Bilds auf die Standardwerte. Verwenden Ihres Computers als Computerbildschirm (PC) Konfigurieren Ihrer PC-Software (unter Windows XP) Je nach der Version von Windows und der Grafikkarte können die tatsäch angezeigten Dialogfelder auf Ihrem PC abweichen. In fast jedem Fall aber werden die gleichen grundlegenden Einstellungen vorgenommen. (Wenden Sie sich andernfalls an den Computerhersteller oder Samsung-Händler.) 1. Klicken Sie im Startmenü von Windows auf „Systemsteuerung”. 2. Wenn das Fenster der Systemsteuerung angezeigt wird, klicken Sie auf „Darstellung und Designs”. Ein Dialogfeld wird geöffnet. 3. Klicken Sie auf „Anzeige“. Anschließend wird ein Dialogfeld angezeigt. 4. Klicken Sie im Dialogfeld Anzeige auf die Registerkarte „Einstellungen”. y Stellen Sie die richtige Größe (Bildschirmauflösung) ein [Optimal: 1920 x 1080 Pixel] y Wenn das Dialogfeld eine Option für die Bildschirmfrequenz enthält, muss als Einstellung “60” oder “60 Hz” ausgewählt werden. Andernfalls klicken Sie einfach auf OK, um das Dialogfeld zu schließen. Tonmenü ¦ Ändern des Tonmodus SRS TheaterSound t ■ ■ ■ ■ Standard: Auswahl des normalen Tonmodus. Musik: Betont die Musik im Verhältnis zu Stimmen. Film: Ermöglicht optimale Tonwiedergabe für Filme. Klare Stimme: Betont Stimmen im Verhältnis zu anderen Geräuschen. 16 Deutsch Anpassen des Tonmodus ■ Balance L/R: Anpassen der Balance zwischen dem linken und dem rechten Lautsprecher. ■ 100Hz / 300Hz / 1kHz / 3kHz / 10kHz (Einstellung der Frequenzbänder): Einstellen der Lautstärke für die unterschiedlichen Frequenzbänder. ■ Zurücksetzen: Zurücksetzen der Equalizereinstellungen auf die Standardwerte. ¦ Tonsystem, usw. SRS TheaterSound (Aus / Ein) t (nur im Standardtonmodus) Diese Funktion ermöglicht durch HRTF-Technologie (Head Related Trasfer Function) virtuellen 5.1 Kanalton bei einem einzigen Lautsprecherpaar oder Kopfhörer. SRS TruDialog (Aus / Ein) (nur im Standardtonmodus) Mitr dieser Funktion können SIe die Lautstärke einer Stimme gegenüber der Hintergrundmusik oder den Toneffekten erhöhen, so dass Dialoge während einer Show besser zu verstehen sind. Wiedergabesprache (nur digitale Sender) Sie können die Standardsprache für Audio ändern. ✎ Welche Sprache verfügbar ist, hängt von der jeweiligen Sendung ab. Audioformat (MPEG / Dolby Digital 5.1) (nur digitale Sender) Wenn Sie für die Tonausgabe sowohl den Hauptlautsprecher als auch den Audioreceiver verwenden, kann es aufgrund der Geschwindigkeitsunterschiede beim Dekodieren durch die beiden Systeme zu einem Echoeffekt kommen. Verwenden Sie in diesen Fall die TV-Lautsprecher. Die Audioformat- Option richtet sich nach der jeweiligen Sendung. Dolby Digital-5.1-Kanalton steht nur zur Verfügung, wenn Sie einen externer Lautsprecher über ein optisches Kabel anschließen. ✎ ■ (nicht überall verfügbar) (nur Digitalkanäle) Diese Funktion verarbeitet den Audiostream für den Audiokommentar (Audio für Sehgeschädigte), der vom Sender zusammen mit dem Vordergrundton übertragen wird. ■ ■ Audioformat: Während des Empfangs einer digitalen Fernsehsendung können Sie bei den Optionen PCM oder Dolby Digital das digitale Audioausgabeformat (SPDIF) auswählen. Audio für Sehgeschädigte (Aus / Ein): Hiermit wird der Audiokommentar für Sehbehinderte ein- und ausgeschaltet. ✎ Lautstärke: Hiermit regeln Sie die Lautstärke des Audiokommentars für Sehgeschädigte. ■ Nacht: Dieser Modus ermöglicht besseren Ton als im Modus Normal, denn er ist fast rauschfrei. Das ist beispielsweise bei Nacht nützlich. ■ Dolby Digital-Komp. (Line / RF): Diese Funktion minimiert die Lautstärkeunterschiede zwischen einem Dolby Digital-Signal und einem Sprachsignal (d.h. MPEG-Audio, HE-AAC, ATV-Ton). ✎ Lautsprecherauswahl (Ext. Lautsprecher / Lautsprecher auswählen) Es kann aufgrund unterschiedlicher Decodierungsgeschwindigkeiten des Hauptlautsprechers und des Audioreceivers zu Echoeffekten kommen. Stellen Sie das Fernsehgerät in diesem Fall auf Ext. Lautsprecher ein. ✎ Wenn Lautsprecher auswählen auf Ext. Lautsprecher eingestellt ist, funktionieren die Lautstärketasten und die Stummschaltung (MUTE-Taste) nicht und die Einstellmöglichkeiten für den Ton sind beschränkt. ✎ Prüfen Sie, ob Lautsprecher auswählen auf Ext. Lautsprecher eingestellt ist. x TV-Lautsprecher: Aus, Ext. Lautsprecher: Ein ✎ Wenn Lautsprecher auswählen auf Ext. Lautsprecher eingestellt ist, verwenden Sie die folgenden Einstellungen. x TV-Lautsprecher: Ein, Ext. Lautsprecher: Ein ✎ Ohne Videosignal werden beide Lautsprecher Durch Anschließen von 5.1-Kanallautsprechern in einer Dolby Digital-Konfiguration maximieren Sie Ihre interaktive 3D-Raumerfahrung. Audioverzögerung: Korrektur von Audio/VideoFehlsynchronisierungen, wenn Sie Fernsehsendungen oder Videos ansehen und die digitalen Audiosignale mit einem externen Gerät (z, B. einem AV-Receiver) ausgeben. Automatische Lautstärke (Aus / Normal / Nacht) Wählen Sie Normal, um die verschiedenen Kanäle auf die gleiche Lautstärke einzustellen. SPDIF-Ausgabe: SPDIF (Sony Philips Digital InterFace) ermöglicht digitalen Ton und reduziert die an Lautsprecher und verschiedene andere digitale Geräte (z. B. DVD-Player) übertragenen Störungen. Wählen Sie Line, um Ton mit großer Dynamik zu erzielen, und RF, um beispielsweise bei Nacht die Lautstärkeunterschiede zwischen lauten und leisen Tönen zu reduzieren. Line: Hiermit stellen Sie die Lautstärke von Signalen mit mehr oder weniger als -31 dB (Bezugswert) auf entweder -20 dB oder -31 dB ein. RF: Hiermit stellen Sie die Lautstärke von Signalen mit mehr oder weniger als -20 dB (Bezugswert) auf entweder -10 dB oder -20 dB ein. Ton zurücksetzen Hiermit setzen Sie alle Toneinstellungen auf die Standardwerte zurück. ¦ Tonmodus auswählen (OK / Peruuta) Wenn Sie Dual I-II einstellen, wird der aktuelle Tonwiedergabemodus auf dem Bildschirm angezeigt. stummgeschaltet. Zusätzliche Einstellung (nur digitale Sender) ■ DTV-Audiolautstärke (MPEG / HE-AAC): Mit dieser Funktion können Sie die Ungleichheit eines Stimmensignals (dies ist eines der bei einer digitalen Fernsehsendung empfangenen Signale) auf die gewünschte Höhe reduzieren. ✎ Entsprechend dem Typ des Sendesignals kann MPEG / HE-AAC im Bereich von -10 dB bis 0 dB eingestellt werden. ✎ Um die Lautstärke zu erhöhen oder zu vermindern, stellen Sie den Bereich zwischen 0 bzw. -10 ein. Audiosystem Mono Stereo Dual Mono Stereo NICAM Stereo Dual A2Stereo Dual I-II Mono Stereo ↔ Mono Dual II ↔ Dual I Mono Mono ↔ Stereo Mono → Dual II Dual II Standard Automatischer Wechsel Dual-I Automatischer Wechsel Dual-I ✎ Falls das Stereosignal schwach ist und automatisch umgeschaltet wird, sollten Sie zu mono wechseln. ✎ Diese Funktion ist nur bei einem Stereosignal aktiviert. ✎ Nur verfügbar, wenn die Eingang squelle auf TV eingestellt ist. Deutsch 17 03 Grundfunktionen Audio für Sehgeschädigte Grundfunktionen Anschaltzeit / Ausschaltzeit:Stellen Sie Stunde und Minute ein und aktivieren bzw. deaktivieren Sie die Funktion. (Wenn Sie mit den Einstellungen fertig sind, aktivieren Sie den Timer mit Aktivieren. Lautstärke: Stellen Sie die gewünschte Lautstärke ein. Source: Sie können den TV oder USB-Inhalt einstellen, der beim automatischen Einschalten des Fernsehers wiedergegeben wird. (USB kann nur dann ausgewählt werden, wenn ein USB-Gerät an den Fernseher angeschlossen ist) TV-Empfang (wenn die Quelle auf TV eingestellt ist): Wählen Sie ATV oder DTV. Kanal (wenn die Quelle auf TV eingestellt ist): Wählen Sie den gewünschten Kanal. Inhalt (wenn die Quelle auf USB eingestellt ist): Wählen Sie auf dem USB-Gerät einen Ordner mit Musik- oder Fotodateien, die beim automatischen Anschalten des Fernsehgeräts angezeigt werden. Die Timerfunktion arbeitet nicht fehlerfrei, wenn es auf dem USB-Gerät keine Musikdatei gibt oder der Ordner mit der Musikdatei nicht markiert ist. Wenn auf dem USB-Gerät nur eine Fotodatei gespeichert ist, wird keine Diashow gestartet. Wenn der Ordnername zu lang ist, kann der Ordner nicht ausgewählt werden. Jedem USB-Gerät, das Sie verwenden, wird ein eigener Ordner zugewiesen. Wenn Sie mehr als eine SUB-Gerät den selben Typs verwenden, vergewissern Sie sich, dass die den einzelnen USB-Geräten zugewiesenen Ordner unterschiedliche Namen tragen. Wiederholen: Wählen Sie Einmal, Täglich, Mo - Fr, Mo Sa, Sa - So, oder Manuell, um den Wert Ihren Wünschen entsprechend einzustellen. Wenn Sie Manuell wählen, können Sie den Tag einstellen, an dem der Timer aktiviert werden soll. Das Symbol c zeigt an, dass der Tag gewählt ist. Einstellungsmenü ¦ Einstellen der Uhrzeit Zeit ■ Uhr: Die Uhr muss eingestellt werden, damit Sie die verschiedenen Timerfunktionen des Fernsehgeräts verwenden können. O ✎ Jedes Mal, wenn Sie die Taste INFO drücken, wird die aktuelle Zeit angezeigt. Wenn Sie das Netzkabel ziehen, müssen Sie die Uhr erneut einstellen. Uhr-Modus (Auto / Manuell) ✎ Je nach Sendestation und Signal ist die automatisch eingestellte Zeit möglicherweise nicht korrekt. In diesem Fall müssen Sie die Zeit manuell einstellen. ✎ Die Antenne muss angeschlossen sein, damit die Zeit automatisch eingestellt werden kann. ✎ ✎ ✎ ✎ Uhrzeit einstellen: Manuelles Einstellen von Tag, Monat, Jahr, Stunde und Minute. ✎ Verfügbar nur, wenn der Uhr-Modus auf Manuell eingestellt ist. Zeitzone: Sie können Ihre Zeitzone auswählen. ✎ ✎ Diese Funktion ist nur verfügbar, wenn Sie Uhrmodus auf Auto eingestellt haben. Je nach Sendestation und Signal erfolgt die automatische Zeiteinstellung möglicherweise nicht korrekt. In diesem Fall müssen Sie die Zeit manuell einstellen. ■ Sleep-Timer t: Mit dieser Funktion wird das Fernsehgerät nach Ablauf einer vorher eingestellten Zeit automatisch abgeschaltet. (30, 60, 90, 120, 150 und 180 Minuten). ✎ Um den Sleep-Timer abzubrechen, wählen Sie Aus. das Fernsehgerät von Timer eingeschaltet wurde): Um eine eventuelle Überhitzung zu verhindern, wird das Fernsehgerät nach 3 Stunden im Leerlauf automatisch ausgeschaltet. ¦ Sperren von Programmen Sicherheit ✎ Der Eingabefenster für die PIN wird angezeigt, ehe das ¦ Einstellen des Ein-/Ausschalttimers ■ ✎ ✎ Automatische Ausschaltung (nur dann verfügbar, wenn ¦ Verwenden des Sleep-Timers Einstellungsfenster geöffnet wird. Timer 1 / Timer 2 / Timer 3: Sie können drei verschiedene Einstellungen für den Ein-/Ausschalttimer vornehmen. Voraussetzung dafür ist, dass Sie die Uhr gestellt haben. ✎ Geben Sie die vierstellige Standard-PIN ein: „0-0-0-0“. Ändern ■ Timer 1 Anschaltzeit ✎ ▲ 00 Deaktiv. ▼ 00 Ausschaltzeit ■ ▲ 00 Deaktiv. ▼ Quelle lautstärke 10 00 TV-empfang TV Kanal ATV 0 Wiederh. So Mo. Di. Mi. Do. Fr. Sa einmal L Verschieben U einstellen 18 Deutsch Sie die PIN mit der Option PIN ändern. Kindersicherung (Aus / Ein): Sie können Kanäle im KanalManager sperren, damit unberechtigte Benutzer, z. B. Kinder, für sie nicht geeignete Sendungen sehen. Nur verfügbar, wenn die Eingang squelle auf TV eingestellt ist. E eingabe R zurück Sicherungsstufe (Alterseinstellung): Mit einem benutzerdefinierten 4-stelligen PIN-Code verhindern Sie, dass unbefugte Benutzer (z. B. Kinder), ungeeignete Sendungen sehen. Alle zulassen: Hiermit können Sie alle Altersbeschränkungen aufheben. Die Optionen für die Sicherungsstufe können in Abhängigkeit vom jeweiligen Land variieren. ✎ PIN ändern: Sie können Ihre zum Einrichten des Fernsehgeräts benötigte persönliche Kennnummer ändern. ✎ Wenn Sie den PIN-Code vergessen haben, drücken Sie die Fernbedienungstasten in der angegebenen Reihenfolge, um die PIN auf „0-0-00“ zurückzusetzen: Netztaste (Aus) → MUTE → 8 → 2 → 4 → Netztaste (Ein). Allgemein ■ ✎ HINWEIS x ¦ Weitere Funktionen Sprache ■ Menüsprache: Stellen Sie die Menüsprache ein. ■ Teletextsprache: Einstellen der gewünschten Teletextsprache. Englisch ist der Standardwert in Fällen, wo die ausgewählte Sprache für die Sendung nicht verfügbar ist. ✎ ■ Voreinstellung (Primäre Wiedergabesprache / Sekundäre Wiedergabesprache / Primäre Untertitelsprache / Sekundäre Untertitelsprache / Primäre Teletextsprache / Sekundäre Teletextsprache): Wählen Sie eine Sprache aus, die als Standardsprache verwendet wird, wenn Sie einen Kanal auswählen. ■ Untertitel verwendet werden, wenn sich die Quelle im Modus Component oder HDMI befindet. ■ Untertitel (Aus / Ein): Untertitel aktivieren oder deaktivieren. ■ Modus (Normal / Schwerhörig): Hiermit können Sie den Modus der Untertitelfunktion einstellen. ■ Untertitelsprache: Hiermit können Sie die Untertitelsprache festlegen. ■ Menütransparenz (Hell / Dunkel): Stellen Sie die Transparenz des Menüs ein. ■ Melodie (Aus / Gering / Mittel / Hoch): Verwenden Sie diese Funktion, wenn Sie möchten, dass beim Ein- oder Ausschalten des Fernsehgeräts eine Melodie abgespielt wird. Common Interface ■ ✎ Wenn das Programm, das Sie gerade sehen, die Funktion Schwerhörig nicht unterstützt, wird selbst bei der Einstellung Normal automatisch die Einstellung Scshwerhörig aktiviert. ■ ✎ Englisch ist der Standardwert in Fällen, wo die ausgewählte Sprache für die Sendung nicht verfügbar ist. 1. Digitaltext (Deaktivieren / Aktivieren) (nur Großbritannien) Wenn das Programm mit Digitaltext gesendet wird, ist diese Funktion aktiviert. Netzwerk (Netzwerktyp / Netzwerk einrichten / Netzwerktest / SWL (Samsung Wireless Link) / SWL verbinden) Genaue Beschreibungen zum Einstellen der Optionen finden Sie bei den Anweisungen zum „Netzwerkanschluss“. (Seite 23) Vorsichtsmaßnahmen und Einschränkungen im Spielemodus – Wenn Sie die Spielekonsole wieder vom Gerät trennen und ein anderes externes Gerät anschließen möchten, deaktivieren (Aus) Sie den Spielemodus mit Hilfe des Einrichtmenüs. – Wenn Sie im Spielemodus das TV-Menü anzeigen, zittert das Bild leicht. x Spielemodus ist im TV und PC nicht verfügbar. x Nach dem Anschließen der Spielekonsole aktivieren (Ein) Sie den Spielemodus, um schlechte Bildqualität zu verhindern. x Bei aktiviertem (Ein) Spielemodus: Der Bildmodus ist eingestellt auf Standard und der Tonmodus auf Benutzerdefiniert. BD Wise (Aus / Ein): Ermöglicht optimale Bildqualität für Samsung DVD, Blu-Ray und Heimkinoprodukte, die BD Wise unterstützen. Wenn BD Wise aktiviert (Ein) ist, wird der Bildmodus automatisch auf die optimale Auflösung eingestellt. Verfügbar nur, wenn Sie über ein HDMI-Kabel Geräte von Samsung anschließen, die über BD Wise verfügen. ✎ Mit diesem Menü legen Sie den Untertitel modus fest. ✎ Die Untertitelfunktion kann nicht Spielemodus (Aus / Ein): Wenn Sie eine Spielekonsole wie PlayStation™ oder Xbox™ anschließen, können Sie durch Auswählen des Spielemodus ein realitätsnaheres Spielerlebnis genießen. 2. 3. 4. CI-Menü: Hiermit kann der Benutzer seine Auswahl in dem vom CAM-Modul bereitgestellten Menü treffen. Wählen Sie das CI-Menü ausgehend vom Menü „PC Card“ (PC-Karte). Anwendungsinformationen: Anzeigen von Informationen zu dem in den CI Steckplatz eingesetzen CAM und zur „CI“ oder „CI+“-Karte, die in das CAM eingesetzt wurde. Sie können das CAM-Modul unabhängig davon anschließen, ob das Fernsehgerät angeschaltet ist oder nicht. Sie können das CI-CAM-Modul bei Ihrem nächsten Händler oder durch telefonische Bestellung erwerben. Schieben Sie die „CI“ oder „CI+“-Karte in Richtung des Pfeils in das CAM-Modul ein, bis sie fest sitzt. Setzen Sie das CAM mit der „CI“ oder „CI+“-Karte in Richtung des Pfeils so in den Common Interface-Steckplatz ein, dass es parallel zum Steckplatz ausgerichtet ist. Kontrollieren Sie, ob Sie ein Bild sehen oder ein gestörtes Signal. Drahtlose Fernbedienung (Ein / Aus) Schalten Sie die drahtlose Fernbedienung ein oder aus, bzw. lassen Sie drahtlose Fernbedienungen zu. Deutsch 19 03 Grundfunktionen ■ Grundfunktionen ¦ Bild-im-Bild (PIP) PIP t Gleichzeitige Anzeige des Fernsehbilds und des Bilds von einer externen Videoquelle. PIP (Bild-im-Bild) funktioniert nicht, für zwei gleiche Signalquellen. ■ Signalinformation: (Nur digitale Kanäle nur) Die Empfangsqualität des HDTV-Kanals ist entweder perfekt, oder die Kanäle sind nicht verfügbar. Stellen Sie Ihre Antenne so ein, dass die Signalstärke zunimmt. ■ Fehlerbehebung: Wenn das Fernsehgerät scheinbar ein Problem hat, schlagen Sie zuerst bei diesen Beschreibungen nach. ✎ ✎ HINWEIS x x x x Wenn Sie das Fernsehgerät im PIP-Modus ausschalten und wieder einschalten, wird das PIPFenster nicht mehr angezeigt. Möglicherweise wirkt das Bild im PIP-Fenster leicht unnatürlich, wenn Sie den Hauptbildschirm zum Anzeigen von Spielen oder für Karaoke verwenden. Solange Sie Internet@TV einsetzen, können Sie die PIP-Funktion nicht verwenden. PIP-Einstellungen Hauptbild Komponenten, HDMI1/ DVI, HDMI2, HDMI3, HDMI4, PC ■ Nebenbild Software-Update Das Software-Update kann über das Fernsehsignal durchgeführt werden, oder durch Herunterladen der neuesten Firmware von samsung.com auf ein USBSpeichergerät. Aktuelle Version gibt die Version der Software an, die bereits im Fernsehgerät installiert ist. ✎ Die Software wird angegeben als „Jahr/Monat/Tag_ Version“. TV Software-Update PIP (Aus / Ein): Aktivieren oder deaktivieren Sie die PIP-Funktion. ■ Kanal: Hiermit wählen Sie den Kanal für das Teilbild. ■ Größe (Õ / Ã): Wählen Sie eine Position für das PIP-Bild. ■ Position (à / – / — / œ): Wählen Sie eine Position für das PIP-Bild. ■ Ton wählen (Erster Tuner / Zweiter Tuner) : Sie können die gewünschte Tonquelle (Erster Tuner / Zweiter Tuner) für den PIP-Modus auswählen. Unterstützungsmenü Eigendiagnose ■ Bildtest (Ja / Nein): Verwenden Sie diese Funktion, um Bildprobleme zu analysieren, und kontrollieren Sie das Farbmuster, wenn das Problem fortbesteht. ■ Audiotest (Ja / Nein): Verwenden Sie die integrierte Melodie, um Tonprobleme zu ermitteln. ✎ Wenn die Fernsehlautsprecher keinen Ton ausgeben, müssen Sie vor dem Audiotest sicherstellen, dass Lautsprecher auswählen im Tonmenü auf TV-Lautsprecher eingestellt ist. ✎ Die Melodie ist im Test auch dann zu hören, wenn Lautsprecher auswählen auf Ext. Lautsprecher eingestellt ist, oder wenn der Ton mit der Taste MUTE stumm geschaltet wurde. 20 Deutsch Wenn keiner dieser Tipps zur Fehlerbehebung hilft, wenden Sie sich an das SamsungKundendienstzentrum. Aktuelle Version 2010/01/18_000001 PER USB Online Per Channel Update im Standby Alternative Software ► : 2 St. später ----/--/--/--_------ U Verschieben E eingabe R zurück Installieren der aktuellsten Version ■ Seitenverkleidung des Über USB: Legen Sie ein Fernsehgeräts USB-Laufwerk mit der Datei des gespeicherten Firmwareupgrades (heruntergeladen von www.samsung.com,) in oder das Fernsehgerät ein. Achten Sie beim Einspielen des Updates darauf, die Stromversorgung nicht USB-Laufwerk zu unterbrechen und das USB-Laufwerk nicht zu entfernen, bis das Update abgeschlossen ist. Das Fernsehgerät wird automatisch ab- und wieder angeschaltet, wenn das Firmwareupdate abgeschlossen ist. Nachdem die Software aktualisiert wurde, sind die Video- und Audioeinstellungen wieder auf die Standardwerte zurückgesetzt. Wir empfehlen, Ihre Einstellungen aufzuschreiben, damit Sie sie nach dem Update einfach wieder einstellen können. Online: Aktualisierung der Software über das Internet. Konfigurieren Sie zuerst Ihr Netzwerk. Detaillierte Verfahrensbeschreibungen zum Einrichten des Netzwerks finden Sie unter „Netzwerkverbindung“. Wenn die Internetverbindung nicht richtig funktioniert, kann es sein, dass die Verbindung unterbrochen ist. Wiederholen Sie den Download-Versuch. Wenn das Problem fortbesteht, laden Sie per USB herunter und aktuilisieren Sie dann. ✎ ✎ ■ Über Sendesignal: Aktualisierung der Software über das Sendesignal. Wenn Sie diese Funktion während des Übertragungszeitraums für Software wählen, sucht die Funktion automatisch nach neuer Software und lädt sie herunter. Die zum Herunterladen der Software erforderliche Zeit hängt vom Signalstatus ab. ✎ ■ Alternative Software (Backup): Anzeigen der Softwareversion, die mit Online heruntergeladen wurde. Wenn das Update im letzten Schritt unterbrochen wird, wird diese Funktion aktiviert. HD-Anschlussplan Beachten Sie diese Informationen, wenn Sie externe Geräte an den Fernseher anschließen. Samsung kontaktieren Zeigen Sie diese Informationen an, wenn Ihr Fernseher nicht ordnungsgemäß arbeitet oder wenn Sie die Software aktualisieren möchten. Sie können Informationen zu unseren Callcentern und zum Herunterladen von Produkten und Software finden. ✎ ■ Update im Standby: Zur gewählten Zeit erfolgt das manuelle Update automatisch. Da die Stromversorgung des Geräts intern eingeschaltet wird, kann der LCD-Bildschirm ein wenig beleuchtet sein. Dieser Zustand kann etwas mehr als eine Stunde andauern, bis die Softwareaktualisierung abgeschlossen ist. Deutsch 21 03 Grundfunktionen ■ Erweiterte Funktionen Anschließen an einen PC Mit Hilfe eines HDMI/DVI-Kabels oder eines D-Sub-Kabels DVI OUT AUDIO OUT AUDIO OUT PC OUT Anzeigemodi (D-Sub- und HDMI/DVI-Eingang) Die optimale Auflösung beträgt 1920 X 1080 bei 60 Hz. Modus IBM MAC VESA CVT VESA DMT VESA GTF VESA DMT / DTV CEA Auflösung Horizontalfrequenz (kHz) Vertikalfrequenz (Hz) Pixeltakt (MHz) 640 x 350 720 x 400 640 x 480 832 x 624 1152 x 870 720 x 576 1152 x 864 1280 x 720 1280 x 960 640 x 480 640 x 480 640 x 480 800 x 600 800 x 600 800 x 600 1024 x 768 1024 x 768 1024 x 768 1152 x 864 1280 x 1024 1280 x 1024 1280 x 800 1280 x 800 1280 x 960 1280 x 720 1360 x 768 1440 x 900 1440 x 900 1600 X 1200 1680 x 1050 1280 x 720 1280 x 1024 1920 x 1080p 31.469 31.469 35.000 49.726 68.681 35.910 53.783 56.456 75.231 31.469 37.861 37.500 37.879 48.077 46.875 48.363 56.476 60.023 67.500 63.981 79.976 49.702 62.795 60.000 45.000 47.712 55.935 70.635 75.000 65.290 52.500 74.620 67.500 70.086 70.087 66.667 74.551 75.062 59.950 59.959 74.777 74.857 59.940 72.809 75.000 60.317 72.188 75.000 60.004 70.069 75.029 75.000 60.020 75.025 59.810 74.934 60.000 60.000 60.015 59.887 74.984 60.000 59.954 70.000 70.000 60.000 25.175 28.322 30.240 57.284 100.000 32.750 81.750 95.750 130.000 25.175 31.500 31.500 40.000 50.000 49.500 65.000 75.000 78.750 108.000 108.000 135.000 83.500 106.500 108.000 74.250 85.500 106.500 136.750 162.000 146.250 89.040 128.943 148.500 Synchronisationspolarität (H/V) +/-/+ -/-/-/-/+ -/+ -/+ -/+ -/-/-/+/+ +/+ +/+ -/-/+/+ +/+ +/+ +/+ -/+ -/+ +/+ +/+ +/+ -/+ -/+ +/+ -/+ -/+ -/+/+ ✎✎HINWEIS x x x x 22 Bei einem Anschluss über HDMI/DVI-Kabel müssen Sie den HDMI IN 1(DVI)-Anschluss verwenden. Das Zeilensprungverfahren wird nicht unterstützt. Das Fernsehgerät funktioniert möglicherweise nicht ordnungsgemäß, wenn kein Standardmodus ausgewählt wird. Separate- und Composite-Modus werden unterstützt. SOG (Sync On Green) wird nicht unterstützt. Deutsch Sie können Ihr Fernsehgerät so einrichten, dass es über Ihr lokales Netzwerk (LAN) und eine Kabel- oder WLAN-Verbindung auf das Internet zugreifen kann. ¦ Verbindung mit einem Kabelnetzwerk herstellen Sie können Ihr Fernsehgerät auf dreierlei Weise an Ihr LAN anschließen: y Sie können Ihr Fernsehgerät über den LAN-Anschluss auf der Rückseite des Geräts direkt über ein CAT5-Kabel an ein externes Modem und Ihr LAN anschließen. Siehe nachfolgende Abbildung. Modemanschluss an der Wand Rückseite des Fernsehgeräts Externes Modem (ADSL / VDSL / Kabelfernsehen) Modem-Kabel LAN-Kabel y Sie können Ihr Fernsehgerät über den LAN-Anschluss auf der Rückseite des Geräts mit einem IP-Sharer verbinden, der an ein externes Modem angeschlossen ist, und so die Verbindung zum LAN herstellen. Verwenden Sie ein CAT5-Kabel für den Anschluss. Siehe nachfolgende Abbildung. Modemanschluss an der Wand Externes Modem (ADSL / VDSL / Kabelfernsehen) Modem-Kabel LAN-Kabel IP-Sharer (mit DHCP-Server) Rückseite des Fernsehgeräts LAN-Kabel y Je nachdem, wie Ihr Netzwerk aufgebaut ist, können Sie Ihr Fernsehgerät möglicherweise auch an Ihr LAN anschließen, indem Sie den LAN-Anschluss auf der Rückseite des Geräts direkt über ein CAT5-Kabel mit einer Netzwerkdose verbinden. Siehe nachfolgende Abbildung. Beachten Sie, dass die Netzwerkdose mit einem Modem oder Router irgendwo in Ihrem Haus verbunden sein muss. Modemanschluss an der Wand Rückseite des Fernsehgeräts LAN-Kabel Wenn Sie ein dynamisches Netzwerk verwenden, sollten Sie ein ADSL-Modem oder einen Router verwenden, der DHCP (Dynamic Host Configuration Protocol) unterstützt. Modems und Router, die DHCP unterstützen, stellen für IP-Adresse, Teilnetzmaske, Gateway und DNS automatisch die Werte zur Verfügung, die Ihr Fernsehgerät benötigt, um auf das Internet zuzugreifen. Sie brauchen sie also nicht mehr manuell einzugeben. Die meisten Privatnetzwerk nutzen DHCP. Manche Netzwerk erfordern jedoch eine statische IP-Adresse. Wenn Ihr Netzwerk eine statische IP-Adresse benötigt, müssen Sie die Werte für IP-Adresse, Teilnetzmaske, Gateway und DNS manuell über das Konfigurationsfenster Ihres Fernsehgeräts eingeben, wenn Sie die Netzwerkverbindung einrichten. Um die Werte für IP-Adresse, Teilnetzmaske, Gateway und DNS zu erhalten, wenden Sie sich an Ihren Internet Service Provider (ISP). Wenn Sie einen WindowsComputer einsetzen, können Sie diese Werte über Ihren Computer beziehen. ✎ Sie können ADSL-Modems verwenden, die DHCP unterstützen, wenn Ihr Netzwerk eine statische IP-Adresse benötigt. Auch ADSL-Modems, die DHCP unterstützen, ermöglichen die Verwendung von statischen IP-Adressen. Deutsch 23 04 Erweiterte Funktionen Netzwerkverbindung Erweiterte Funktionen Netzwerkkonfiguration (Auto) Netzwerk einrichten (Manuell) Verwenden Sie Eingang einrichten - automatisch, wenn Sie Ihr Fernsehgerät an ein Netzwerk anschließen, das DHCP unterstützt. Um die Kabelnetzwerkverbindung Ihres Fernsehgeräts automatisch einzurichten, gehen Sie folgendermaßen vor: Verwenden Sie Eingang einrichten - manuell, wenn Sie Ihr Fernsehgerät an ein Netzwerk anschließen, das eine statische IP-Adresse erfordert. So konfigurieren Sie automatisch 1. Schließen Sie Ihr Fernsehgerät wie im vorherigen Abschnitt beschrieben an Ihr LAN an. 2. Schalten Sie das Fernsehgerät ein, drücken Sie die MENU-Taste auf Ihrer Fernbedienung und dann ▲ oder ▼, um Einstell. zu wählen. Drücken Sie dann auf die ENTERE. 3. Verwenden Sie die Tasten ▲ oder ▼, um Netzwerk im Menü Einstell. auszuwählen, und drücken Sie dann die ENTERE. Das Fenster Netzwerk wird geöffnet. Netzwerk Netzwerktyp : Kabel ► Netzwerktest : Aus SWl connect 4. Wählen Sie im Fenster Netzwerk den Netzwerktyp. 5. Stellen Sie Netzwerktyp auf Kabel ein. 6. Wählen Sie Eingang einrichten. Das Fenster Eingang einrichten wird geöffnet. Eingang einrichten IP-Koniguration : Auto IP-Adresse : Teilnetzmaske : Gateway : DNS : Auto DNS Server : ► U Verschieben E eingabe R zurück 7. Stellen Sie IP-Konfiguration auf Auto. 8. Mit Auto werden die erforderlichen Internetparameter automatisch bezogen und eingegeben. 9. Warten Sie zwei Minuten und drücken Sie dann die Taste RETURN auf der Fernbedienung. 10. Wenn die Funktion Netzwerk die Parameter für die Netzwerkverbindung nicht beziehen konnte, fahren Sie mit den Anweisungen für Manuell fort. Deutsch 2. Klicken Sie im angezeigten Kontextmenü auf Status. 3. Klicken Sie im angezeigten Dialogfeld auf die Registerkarte Unterstützung. 4. Klicken Sie auf der Registerkarte Unterstützung auf Details. Die Paremeter der Netzwerkverbindung werden angezeigt. Manuelle Konfiguration 2. Stellen Sie IP-Konfiguration auf Manuell. U Verschieben E eingabe R zurück 24 Um die Werte für die Netzwerkverbindung der meisten Windows-Computer abzurufen, gehen Sie folgendermaßen vor: 1. Klicken Sie mit der rechten Maustaste auf das Netzwerksymbol in der unteren rechte Ecke des Bildschirms. Um die Kabelnetzwerkverbindung Ihres Fernsehgeräts manuell einzurichten, gehen Sie folgendermaßen vor: 1. Befolgen Sie die Anweisungen der Schritte 1 bis 6 im Abschnitt „So konfigurieren Sie automatisch“. eingang einrichten SWl(Samsung Wireless link) Beziehen der Werte für die Netzwerkverbindung 3. Drücken Sie die Taste ▼ Ihrer Fernbedienung, um in das erste Eingabefeld zu wechseln. 4. Geben Sie die Werte für IP-Adresse, Teilnetzmaske, Gateway und DNS-Server ein. Verwenden Sie die Zifferntasten auf Ihrer Fernbedienung, um Zahlen einzugeben, und die Pfeiltasten, um von einem Eingabefeld zum nächsten zu wechseln. 5. Wenn Sie fertig sind, drücken Sie auf der Fernbedienung die Taste RETURN. 6. Wählen Sie Netzwerktest, um die Internetverbindung zu überprüfen. Um Ihr Fernsehgerät drahtlos an Ihr Netzwerk anzuschließen, benötigen Sie einen Funkrouter oder ein Funkmodem sowie einen Samsung WLAN-Adapter (WIS09ABGN), den Sie mit dem hinteren oder seitlichen USB-Anschluss verbinden. Siehe nachfolgende Abbildung. ✎ Um die SWL-Funktion (Samsung Wireless Link) verwenden zu können, müssen Sie den Anschluss über den Anschluss USB 1 (HDD) herstellen. LAN-Anschluss an der Wand Seitenverkleidung des Fernsehgeräts Drahtloser IP-Sharer WLAN-Adapter von Samsung oder LAN-Kabel Der Samsung WLAN-Adapter wird bei ausgewählten Einzelhändlern, E-Commerce-Sites und unter samsungparts.com angeboten. Der Samsung WLAN-Adapter unterstützt die Kommunikationsprotokolle IEEE 802.11 A/B/G und N. Samsung empfiehlt, IEEE 802.11 N zu verwenden. Wenn Sie Video über die IEEE 802.11B/G-Verbindung anzeigen, wird das Videobild möglicherweise nicht ohne Unterbrechungen angezeigt. ✎ HINWEIS x x x x x x x x x x x Sie müssen den „Samsung Wireless LAN Adapter“ (WIS09ABGN) verwenden, wenn Sie mit einem Drahtlosnetzwerk arbeiten möchten. Der WLAN-Adapter von Samsung ist gesondert erhältlich. Der WLAN-Adapter WIS09ABGN wird bei Spezialanbietern, Internetshops und bei Samsungparts.com angeboten. Wenn Sie mit einem Drahtlosnetzwerk arbeiten möchten, müssen Sie Ihr Fernsehgerät an einen drahtlosen IP-Sharer anschließen. Wenn der drahtlose IP-Sharer DHCP unterstützt, kann Ihr Fernsehgerät über DHCP oder über eine statische IP-Adresse mit dem Drahtlosnetzwerk verbunden werden. Wählen Sie einen zurzeit unbenutzten Kanal für den drahtlosen IP-Sharer. Wenn der für den drahtlosen IP-Sharer eingestellte Kanal von einem anderen Gerät in der Nähe belegt ist, führt dies zu Störungen und die Datenübertragung scheitert. Wenn Sie ein anderes Sicherheitssystem als die nachfolgend angeführten verwenden, so kann es zusammen mit dem Fernsehgerät nicht eingesetzt werden. Wenn Sie im 802.11n-Modus Pure High-throughput (Greenfield) wählen und als Verschlüsselungstyp ist für Ihren Zugangspunkt WEP, TKIP oder TKIPAES (WPS2Mixed) eingestellt, so unterstützt das Samsung-Fernsehgerät eine Verbindung gemäß der Spezifikation für die neue Wi-Fi-Zertifizierung nicht. Wenn Ihr Zugangspunkt WPS (Wi-Fi Protected Setup) unterstützt, können Sie die Netzwerkverbindung mittels PBC (Push Button Configuration) oder PIN (Persönliche IdentifikationsNummer) herstellen. WPS konfiguriert den SSIDund WPA-Schlüssel in jedem Modus automatisch. Stellen Sie den Samsung WLAN Adapter in gewisser Entfernung vom Fernsehgerät auf. Wenn Sie fernsehen, während der Adapter in der Nähe angeschlossen ist, werden die Bilder auf manchen Kanälen möglicherweise gestört. Wenn Ihr Router, Modem oder Gerät nicht zertifiziert ist, kann es die Verbindung zum Fernseher möglicherweise nicht über den „Samsung WLAN Adapter“ herstellen. Verbindungsmethoden Sie können die WLAN-Verbindung auf sechs Arten einrichten. – Samsung Auto-Konfiguration – PBC (WPS) – Automatisches Setup (mit der automatischen Netzwerksuche) – Manuelles Setup – Samsung Wireless – Ad-hoc Alle Samsung WLAN-Adapter müssen direkt mit dem USB-Anschluss des Fernsehers verbunden werden. USB-Hubs werden nicht unterstützt. Deutsch 25 04 Erweiterte Funktionen ¦ Anschließen des WLAN Erweiterte Funktionen Netzwerkkonfiguration (Samsung Auto-Konfiguration) Diese Funktion steht für Zugangspunkte zur Verfügung, die Samsung Auto Configuration unterstützen. Wenn es einen solchen Zugangspunkt nicht gibt, können Sie die Verbindung über PBC (WPS) oder manuell herstellen. ✎ Diese Funktion ist verfügbar, wenn SWL(Samsung Wireless Link) deaktiviert ist (Aus). ✎ Sie können unter www.samsung.com nach Geräten suchen, die Samsung Auto Configuration unterstützen. Konfigurieren mit Samsung Auto Configuration 1. Stellen Sie den Zugangspunkt und das Fernsehgerät neben einander und schalten Sie sie ein. Da sich die Startzeiten der jeweiligen Anwendungen unterscheiden, kann es sein, dass Sie etwa 2 Minuten warten müssen. Wenn das LAN-Kabel bei SamsungAutokonfiguration an den WAN-Anschluss des Zugangspunkts angeschlossen wird, können Sie den Vorgang bis zum Internetverbindungstest durchführen. Wenn Sie es nicht anschließen, überprüft Samsung-Autokonfiguration nur den Anschluss des Geräts an den Zugangspunkt (nicht aber die Internetverbindung) . Schließen Sie den Samsung WLAN-Adapter nach 2 Minuten an das Fernsehgerät an. Wenn der Samsung WLAN-Adapter eingerichtet ist, wird ein Popup-Fenster geöffnet. Sobald die Verbindung hergestellt ist, stellen Sie den Zugangspunkt parallel in einem Abstand von maximal 25 cm neben den Samsung WLAN-Adapter. Warten Sie, bis die Verbindung automatisch hergestellt wurde. Wenn der Verbindungsversuch fehlschlägt, setzen Sie den Zugangspunkt zurück und wiederholen Sie den Versuch. Wenn Sie Ihr Fernsehgerät über SamsungAutokonfiguration nicht mit Ihrem Zugangspunkt verbinden können, wird ein Popupfenster geöffent, mit dem Sie über den Fehlschlag informiert werden. Setzen Sie den Zugangspunkt zurück, und wiederholen Sie den Versuch. Wenn die Verbindung wieder nicht aufgebaut wird, wählen Sie eine der anderen Verbindungsmethoden (PBC (WPS), Auto oder Manuell). Nachdem die Verbindung steht, stellen Sie den Sharer am gewünschten Standort auf. Wenn sich die Einstellungen des Zugangspunkts geändert haben oder wenn Sie den neuen Zugangspunkt nach dem Kauf erstmals verwenden, müssen Sie den Vorgang ab dem ersten Schritt wiederholen. ✎ Netzwerkkonfiguration PBC (WPS) Einrichten mit PBC (WPS) Wenn Ihr Router eine PBC (WPS)-Taste aufweist, gehen Sie folgendermaßen vor: 1. Schließen Sie Ihr Fernsehgerät wie im vorherigen Abschnitt beschrieben an Ihr LAN an. 2. Schalten Sie das Fernsehgerät ein, drücken Sie die MENU-Taste auf Ihrer Fernbedienung und dann ▲ oder ▼, um Einstell. zu wählen. Drücken Sie dann auf die ENTERE. 3. Verwenden Sie die Tasten ▲ oder ▼, um Netzwerk im Menü Einstell. auszuwählen, und drücken Sie dann die ENTERE. 4. Wählen Sie im Fenster Netzwerk den Netzwerktyp. 5. Stellen Sie Netzwerktyp auf Drahtlos. 6. Wählen Sie Eingang einrichten. Das Fenster Eingang einrichten wird geöffnet. ✎ 2. 3. 4. ✎ ✎ 5. ✎ 26 Deutsch Eingang einrichten Wählen Sie ein Netzwerk IP-Koniguration : Nicht gewählt : Auto IP-Adresse : Teilnetzmaske : Gateway : DNS DNS Server : Auto : ► U Verschieben E eingabe R zurück 7. 8. 9. Drücken Sie die rote Taste Ihrer Fernbedienung . Drücken Sie innerhalb von 2 Minuten die PBC (WPS)Taste am Router. Ihr Fernsehgerät bezieht automatisch alle benötigten Netzwerkeinstellungen und stellt die Verbindung zu Ihrem Netzwerk her. Nachdem die Netzwerkverbindung eingerichtet ist, drücken Sie auf die RETURN-Taste, um das Fenster Eingang einrichten zu schließen. Netzwerkkonfiguration (Auto) Die meisten Funknetzwerke verfügen über ein optionales Sicherheitssystem, mit dem alle Geräte, die auf das Netzwerk zugreifen wollen, einen verschlüsselten Sicherheitscode (den so genannten Zugriffs- oder Sicherheitsschlüssel) übertragen müssen. Als Sicherheitsschlüssel dient ein Kennwort (normalerweise ein Wort bestimmmter Länge oder einer definierte Anzahl von Buchstaben und Zahlen), das Sie eingeben mussten, als Sie die Sicherheitsmerkmale Ihres Funknetzwerks konfigurierten. Wenn Sie diese Methode verwenden, um die Netzwerkverbindung einzurichten und Sie verwenden einen Sicherheitsschlüssel für Ihr Funknetzwerk, müssen Sie bei der Konfiguration das Kennwort eingeben. So konfigurieren Sie automatisch Um die Funknetzwerkverbindung automatisch einzurichten, gehen Sie folgendermaßen vor: 1. Befolgen Sie die Anweisungen der Schritte 1 bis 6 im Abschnitt „Einrichten mit PBC (WPS)“. 2. Wählen Sie durch Drücken der Taste ▼ die Option IPKonfiguration, und drücken Sie dann die ENTERE. Wählen Sie durch Drücken der Tasten ▲ oder▼ die Option Auto, und drücken Sie dann die ENTERE. 4. Wählen Sie Wählen Sie ein Netzwerk durch Drücken der Taste ▲, und drücken Sie dann die ENTERE. Die Netzwerk funktion sucht nach verfügbaren Funknetzwerken. Nach Abschluss der Suche wird eine Liste der verfügbaren Netzwerke angezeigt. Markieren Sie durch Drücken der Tasten ▲ oder ▼ ein Netzwerk in der Netzwerkliste, und drücken Sie dann die ENTERE. Wenn der Zugangspunkt ausgeblendet (versteckt) ist, müssen Sie Netzwerk hinzufügen wählen und den Netzwerknamen (SSID) sowie den Sicherheitsschlüssel richtig eingeben, um die Verbindung aufzubauen. Wenn das Sicherheitsfenster zur Eingabe der PIN geöffnet wird, fahren Sie mit Schritt 6 fort. Wenn das Fenster für die Netzwerkverbindung geöffnet wird, fahren Sie mit Schritt 10 fort. Wählen Sie mit den Tasten ▲ oder ▼ die Option Sicherheit oder PIN. In den meisten Privatnetzwerken verwenden Sie Sicherheit (für Sicherheitsschlüssel). Das Fenster Sicherheit wird geöffnet. ✎ 5. 6. Eingang einrichten Security Key 0 entered A b C D e F G H I j K l M N O P Q r S T U V W X Y z 0~9 Number lower case B C Delete Space n Verschieben E eingabe R zurück 7. Geben Sie im Fenster Sicherheit das Kennwort Ihres Netzwerks ein. Sie können das Kennwort wahrscheinlich in einem der Konfigurationsfenster finden, die Sie beim Einrichten des Routers oder Modems verwendet hatten. 8. Bei der Eingabe des Kennworts beachten Sie diese allgemeinen Hinweise: – Drücken Sie auf die Zifferntasten Ihrer Fernbedienung, um Zahlen einzugeben. – Verwenden Sie die Navigationstasten Ihrer auf der Fernbedienung, um im Fenster Sicherheitsschlüssel zwischen den Schaltflächen zu wechseln. – Drücken Sie die rote Taste, um zwischen Groß- und Kleinschreibung umzuschalten oder um Zeichen/Symbole anzuzeigen. – Wenn Sie einen Buchstaben oder ein Symbol eingeben möchten, navigieren Sie zu dem Buchstaben oder Symbol und drücken Sie dann die ENTERE. – Um den letzten Buchstaben oder die letzte Zahl zu löschen, drücken Sie auf die grüne Taste Ihrer Fernbedienung. 9. Wenn Sie fertig sind, drücken Sie die blaue Taste Ihrer Fernbedienung. Das Fenster Netzwerkverbindung wird geöffnet. 10. Warten Sie, bis die Verbindungsbestätigung angezeigt wird, und drücken Sie dann die ENTERE. Das Fenster Netzwerk einrichten wird wieder angezeigt. 11. Um die Verbindung zu testen, drücken Sie die Taste RETURN, um Netzwerktest zu wählen, und drücken Sie dann die ENTERE. ✎ Netzwerk einrichten (Ad-Hoc) Mit dem „Samsung Wireless LAN Adapter“ können Sie die Verbindung zu einem Mobilgerät mit Hilfe eines Peer-to-PeerNetzwerks auch ohne Zugriffspunkt herstellen. ✎ Diese Funktion ist verfügbar, wenn SWL(Samsung Wireless Link) deaktiviert ist (Aus). So stellen Sie eine Verbindung mit einem neuen Ad-hocNetzwerk her: 1. Befolgen Sie die Anweisungen der Schritte 1 bis 6 im Abschnitt „Einrichten mit PBC (WPS)“. (Seite 26) 2. Wählen Sie Wählen Sie ein Netzwerk. Eine Liste der Geräte / Netzwerke wird angezeigt. 3. In der Geräteliste drücken Sie die blaue Taste auf der Fernbedienung. Die Meldung Ein Ad-hoc-Netzwerk ist eine direkte WI-Fi-Verbindung zu einem Mobiltelefon oder PC. Möglicherweise ist das vorhandene Netzwerk funktional eingeschränkt. Möchten Sie die Netzwerkverbindung wechseln? wird angezeigt. 4. Geben Sie den generierten Namen des Netzwerks (SSID) und den Sicherheitsschlüssel in das Gerät ein, mit dem Sie sich verbinden möchten. ✎ So stellen Sie eine Verbindung mit einem vorhandenen Adhoc-Gerät her: 1. Befolgen Sie die Anweisungen der Schritte 1 bis 6 im Abschnitt „Einrichten mit PBC (WPS)“. (Seite 26) 2. Wählen Sie Wählen Sie ein Netzwerk. Anschließend wird die Geräteliste angezeigt. 3. Wählen Sie ein Gerät aus der Geräteliste. 4. Wenn ein Sicherheitsschlüssel erforderlich ist, geben Sie diesen ein. Wenn das Netzwerk nicht fehlerfrei arbeitet, kontrollieren Sie noch einmal Name des Netzwerks (SSID) und den Sicherheitsschlüssel. Ein falscher Sicherheitsschlüssel kann Störungen verursachen. ✎ Netzwerk einrichten (Manuell) Wenn keine andere Methode funktioniert, müssen Sie die Werte für die Netzwerkkonfiguration manuell eingeben. Beziehen der Werte für die Netzwerkverbindung Um die Werte für die Netzwerkeinstellungen der meisten Windows-Computer abzurufen, gehen Sie folgendermaßen vor: 1. Klicken Sie mit der rechten Maustaste auf das Netzwerksymbol in der unteren rechte Ecke des Bildschirms. 2. Klicken Sie im angezeigten Kontextmenü auf Status. 3. Klicken Sie im angezeigten Dialogfeld auf die Registerkarte Unterstützung. 4. Klicken Sie auf der Registerkarte Unterstützung auf Details. Die Netzwerkeinstellungen werden angezeigt. Deutsch 27 04 Erweiterte Funktionen 3. Erweiterte Funktionen Manuelle Konfiguration Verbinden mit Samsung Wireless Link Um die Netzwerkeinstellungen in Ihr Fernsehgerät einzugeben, gehen Sie folgendermaßen vor: 1. Befolgen Sie die Anweisungen der Schritte 1 bis 6 im Abschnitt „Einrichten mit PBC (WPS)“. (Seite 26) Das Verfahren zum Aufbauen einer Verbindung ist nachfolgend beschrieben. 1. Befolgen Sie die Anweisungen der Schritte 1 bis 5 im Abschnitt „Einrichten mit PBC (WPS)“. (Seite 26) 2. Wählen Sie durch Drücken der Taste ▼ die Option IP-Konfiguration, und drücken Sie dann die ENTERE. Wählen Sie Manuell durch Drücken der Tasten ▲ oder ▼, und drücken Sie dann die ENTERE. 2. Wählen Sie Samsung Wireless Link mit der ▼-Taste, und drücken Sie die ENTERE, um die Funktion zu aktivieren. 3. Drücken Sie die Taste ▼, um in das erste Eingabefeld (für die IP-Adresse) zu wechseln. 4. Geben Sie Zahlen mit den Zifferntasten ein. 5. Wenn Sie die Eingabe in einem Feld abgeschlossen haben, wecheln Sie mit der Taste ► zum jeweils nächsten Feld. Sie können auch die anderen Pfeiltasten verwenden, um sich nach oben, unten oder zurück zu navigieren. 3. Wählen Sie SWL connect mit der ▼-Taste, und drücken Sie die ENTERE. 4. Wenn die Meldung „Press the PBC button on the device which supports PBC button to connect within 120 seconds (Press the SWL button on the Samsung Wireless Link supported device to connect within 120 seconds“ angezeigt wird, drücken Sie die PBCTaste, um die Verbindung herzustellen. ✎ 6. Geben Sie die Werte für IP-Adresse, Teilnetzmaske und Gateway ein. 7. Wechseln Sie mit der Taste ▲ oder ▼ nach DNS. 8. Drücken Sie die ▼-Taste, um zum ersten Feld für die DNS-Eingabe zu wechseln. Geben Sie die Ziffern wie oben beschrieben ein. 9. Wenn Sie damit fertig sind, drücken Sie die ▲-Taste, um zu Wählen Sie ein Netzwerk zu wechseln. Wählen Sie Ihr Netzwerk und drücken Sie die ENTERE . 10. Fahren Sie nun mit Schritt 4 der Beschreibung unter „So konfigurieren Sie automatisch“ (Seite 26) und befolgen Sie die Anweisungen ab diesem Punkt. Netzwerk einrichten (DWL (Samsung Wireless Link (SWL)) Mit dieser Funktion können Sie ein Samsung-Gerät anschließen, dass PBC (WPS) mit Ihrem Fernsehgerät unterstützt. Sie können auch dann Geräte an Ihren Fernseher anschließen, wenn kein Sharer an das Fernsehgerät angeschlossen ist. ✎ Um das Internet mit Ihrem Fernsehgerät zu verwenden, muss der Zugriffspunkt mit dem Funknetzwerk verbunden sein. ✎ Wenn der Samsung WLAN-Adapter an USB 2 angeschlossen ist, funktioniert das Netzwerk möglicherweise nicht richtig. Wir empfehlen, diesen an USB 1 (HDD) anzuschließen. ✎ Nur Sharer im 2,4 Ghz-Band werden unterstützt. Sharer im 5 Ghz-Band werden nicht unterstützt. SWL connect (SWL verbinden) Sie können Geräte, die PBC (WPS) unterstützen, direkt an Ihren Fernseher anschließen. ✎ Diese Funktion ist verfügbar, wenn SWL(Samsung Wireless Link) aktiviert ist (Ein). 28 Deutsch Weitere Informationen erhalten Sie im Handbuch zur WLAN-Konfiguration des Geräts, das Sie anschließen möchten. 5. Wenn das Gerät nach Beginn mit Zählung im Meldungsfenster richtig mit dem Fernsehgerät verbunden wird, wird das Meldungsfenster automatisch geschlossen. ✎ Wenn die Verbindung fehlschlägt, wiederholen Sie den Versuch nach 2 Minuten. Ihr Fernsehgerät bekommt keine Verbindung mit dem Internet Es kann sein, dass Ihr Fernseher keine Internetverbindung aufbauen kann, weil Ihr ISP die MAC-Adresse (eine eindeutige Kennnummer) Ihres PCs oder Modems registriert hat, und anhand dieser die Authentifizierung vornimmt, wenn Sie sich mit dem Internet verbinden. Auf diese Weise soll unbefugter Zugriff verhindert werden. Da Ihr Fernsehgerät eine andere Mac-Adresse besitzt, kann Ihr ISP diese Adresse bei der Authentifizierung nicht verifizieren und Ihr Fernsehgerät kann sich nicht mit dem Internet verbinden. Fragen Sie in diesem Fall Ihren Internetprovider, auf welche Weise die Verbindung durch andere Geräte als Ihren PC (z. B. Ihr Fernsehgerät) hergestellt werden kann. Wenn Ihr Internet-Provider eine Kennung oder ein Kennwort erfordert, um die Verbindung zum Internet herzustellen, kann Ihr Fernsehgerät möglicherweise keine Internetverbindung aufbauen. Wenn dies der Fall ist, müssen Sie Ihre ID oder Ihr Kennwort eingeben, wenn Sie eine Internetverbindung herstellen möchten. Die Internetverbindung kann auch aufgrund von Problemen mit der Firewall fehlschlagen. Setzen Sie sich in diesem Fall mit Ihrem Internetprovider in Verbindung. Wenn Sie selbst dann noch keine Internetverbindung aufbauen können, nachdem Sie die Anweisungen Ihres Internet-Providers eingehalten haben, setzen Sie sich unter 1-800-SAMSUNG mit Samsung Electronics in Verbindung. Mit dieser Funktion können Sie auf einem USB-Speichermedium (MSC) oder Ihrem PC gespeicherte Foto-, Musik und/oder Filmdateien anzeigen bzw. wiedergeben. MediaPlay Videos SUM Geräte anzeigen E eingabe R zurück Gerät wechseln ¦ Anschließen eines USB-Geräts 1. Schalten Sie den Fernseher ein. Rückseite des Fernsehgeräts 2. Schließen Sie ein USB-Gerät mit Foto-, Musik und/oder Filmdateien an die USB 1 (HDD)- oder USB 2-Buchse seitlich am Fernsehgerät an. 3. Wenn ein USB-Gerät an den Fernseher angeschlossen ist, wird ein Fenster geöffnet. Nun können Sie Media Play wählen. oder USB-Laufwerk ¦ Herstellen der Verbindung zum PC über das Netzwerk Sie können die auf Ihrem PC oder Fernsehgerät gespeicherten Videos, Bilder und Musikstücke im Media Play-Modus über eine Netzwerkverbindung wiedergeben. ✎ Wenn Sie Media Play für eine auf Ihrem PC gespeicherte Datei verwenden, sollten Sie „PC Share Manager“ und das Benutzerhandbuch von www.samsung.com herunterladen. Rückseite des Fernsehgeräts PC LAN oder Externes Modem (ADSL / VDSL / Kabelfernsehen) WLANAdapter von Samsung Drahtloser IP-Sharer LAN-Kabel 1. Weitere Informationen zum Konfigurieren Ihres Netzwerks finden Sie unter „Netzwerkverbindung“. – Wir empfehlen Ihnen, sowohl das Fernsehgerät als auch den PC in gleichem Teilnetz anzuordnen. Die ersten 3 Teile der Teilnetzadresse des Fernsehgeräts und der IP-Adressen des PCs müssen übereinstimmen und nur der letzte Teil darf geändert werden. (z.B.: IP-Adresse: 123.456.789.**) 2. Schließen Sie den PC, auf dem das Programm Samsung PC Share Manager installiert wird, über ein Netzwerkkabel an das externe Modem an. – Sie können das Fernsehgerät direkt an den PC anschließen, ohne vorher einen Sharer (Router) dazwischen zu schalten. Deutsch 29 04 Erweiterte Funktionen Media Play Erweiterte Funktionen ✎ Die folgenden Funktionen werden beim Anschluss an einen PC über das Netzwerk nicht unterstützt: x x x Die Funktionen für die Hintergrundmusik und die Einstellungen für Hintergrundmusik. Benutzerdefinierte Sortierung von Dateien in den Ordnern Foto, Musik und Film. Die Tasten � (REW) oder µ (FF), während ein Film abgespielt wird. ✎ Divx DRM, Multi-Audio und eingebettete Beschriftung werden nicht unterstützt. ✎ Sie müssen Samsung PC Share Manager in der Firewall Ihres PCs freigeben. ✎ Bei Verwendung von Media Play über eine Netzwerkverbindung, wirken die folgenden Funktionen entsprechend der Konfiguration des Servers: x Die Sortiermethode kann variieren. x Möglicherweise wird die Funktion zur Suche von Szenen nicht unterstützt. x Möglicherweise wird die Funktion Ununterbrochen abspielen nicht unterstützt, mit der die Widergabe eines Videos foertgesetzt wird. – Die Funktion Ununterbrochen abspielen unterstützt maximal einen Benutzer. (Gespeichert wird nur die Stelle, an der der letzte Benutzer die Wiedergabe unterbrochen hat.) x Die Tasten � (REW), µ (FF) und ∑ (Pause) stehen je nach Inhalt möglicherweise nicht zur Verfügung. ✎ Wenn Sie bei der Wiedergabe eines Videos über WLAN Bildunterbrechungen bemerken, sollten Sie besser auf das Kabelnetzwerk zurückgreifen. ✎ Möglicherweise treten bei lizenzfreien Multimediadateien weniger Probleme auf. ✎ Das sollten Sie vor dem Einsatz von Media Play unbedingt wissen x x x x x x x x x x x x x x x x x x x x x 30 MTP (Media Transfer Protocol) wird nicht unterstützt. Als Dateisystem wird ausschließlich FAT16, FAT32 und NTFS unterstützt. Einige Typen von USB-Digitalkameras und -Audiogeräten sind eventuell nicht mit diesem Fernseher kompatibel. Media Play unterstützt ausschließlich USB-Massenspeichergeräte vom Typ MSC (Mass Storage Class). MSC-Geräte sind Massenspeicher zur Übertragung von Daten. Beispiele für MSC sind Thumb-Laufwerke und Flash CardLesegeräte sowie USB HDD (USB-HUB wird nicht unterstützt). Die Geräte müssen direkt mit dem USB-Anschluss des Fernsehers verbunden werden. Ehe Sie Ihr Gerät an das Fernsehgerät anschließen, sichern Sie Ihre Dateien, um eventuellem Datenverlust vorzubeugen. SAMSUNG haftet nicht für Verlust und Beschädigung von Daten. Schließen Sie eine USB-Festplatte an den dafür reservierten USB 1 (HDD)-Anschluss an. Trennen Sie das USB-Gerät nicht, solange Daten geladen werden. MSC unterstützt MP3- und JPEG-Dateien, wogegen PTP-Geräte nur JPEG-Dateien unterstützen. Je höher die Auflösung des Bilds, desto länger dauert es, um es auf dem Bildschirm anzuzeigen. Die maximal unterstützte JPEG-Auflösung beträgt 15360x8640 Pixel. Bei nicht unterstützten oder beschädigten Dateien wird die Meldung „Dateiformat wird nicht unterstützt“ angezeigt. Wenn der Sortierschlüssel auf Basisansicht eingestellt ist, können bis zu 1000 Dateien in einem Ordner angezeigt werden. MP3-Dateien mit DRM, die von einer nicht-lizenzfreien Site heruntergeladen worden sind, können nicht abgespielt werden. Digital Rights Management (DRM) ist eine Technologie, die das Erstellen von Inhalten und die Distribution und das Management der Inhalte integriert und umfassend unterstützt. Dies beinhaltet den Schutz der Rechte und der Interessen der Content-Provider, die Verhütung von unerlaubtem Kopieren der Inhalte sowie das Management von Abrechnung und Bezahlung. Wenn mehr als 2 PTP Geräte angeschlossen sind, können Sie nur jeweils eines verwenden. Wenn mehr als zwei MSC-Geräte angeschlossen sind, werden einige davon möglicherweise nicht anerkannt. Ein USB-Gerät, das hohe elektrische Leistung (mehr als 500 mA oder 5 V) abfordert, wird möglicherweise nicht unterstützt. Wenn eine Überstrom-Warnung angezeigt wird, während Sie ein USB-Gerät anschließen oder verwenden, wird das Gerät möglicherweise nicht erkannt oder weist eine Störung auf. Wenn während der in Autom. Schutzzeit eingestellten Zeit kein Fernsehsignal ansteht, wird der Bildschirmschoner aktiviert. Der Stromsparmodus mancher externer Festplattenlaufwerke kann automatisch ausgelöst werden, wenn sie an das Fernsehgerät angeschlossen sind. Bei Verwendung eines USB-Verlängerungskabels wird das USB-Gerät möglicherweise nicht erkannt, oder die auf dem Gerät gespeicherten Dateien können nicht gelesen werden. Wenn das an das Fernsehgerät angeschlossene USB-Gerät nicht erkannt wird, die Liste der Dateien auf dem Gerät beschädigt aussieht oder eine Datei in der Liste nicht abgespielt wird, schließen Sie das USB-Gerät an den PC an, formatieren Sie das Gerät und überprüfen Sie die Verbindung. Wenn eine mit dem PC gelöschte Datei unter Media Play weiterhin gefunden wird, verwenden Sie die Funktion „Papierkorb leeren“ des PCs, um die Datei dauerhaft zu löschen. Deutsch Navigieren Sie mit den Pfeiltasten (Auf / Ab / Rechts / Links) zu der gewünschten Datei und drücken Sie dann die ENTERE oder die Taste � (Wiedergabe). Die Datei wird wiedergegeben. ✎ Unterstützt den Gerätemodus und den Inhaltsmodus auf der Startseite von Media Play. Informationen : Hier können Sie den Namen der gewählten Datei sowie die Anzahl der Dateien und Seiten überprüfen. Videos 1/1 Page /Movie 01.avi Movie 01.avi Movie 02.avi Jan.10.2010 Movie 03.avi Jan.10.2010 Jan.10.2010 Movie 05.avi Jan.10.2010 Movie 06.avi Jan.10.2010 Movie 07.avi ✎ Jan.10.2010 Movie 08.avi Jan.10.2010 Abschnitt mit der Sortierliste: Anzeige der Sortierreihenfolge. Movie 09.avi Jan.10.2010 Movie 10.avi Jan.10.2010 Die Sortierreihenfolge unterscheidet sich je nach Inhalt. SUM A Abschnitt mit der Dateiliste : Sie können die nach den verschiedenen Kategorien sortierten Dateien und Gruppen bestätigen. Movie 04.avi Jan.10.2010 Sortieren T extras Auswählen Gerät wechseln Bedienung A Rote (Gerät wechseln) : Dient zur Auswahl eines angeschlossenen Geräts. B Grüne (Voreinstellungen) : Festlegen der Voreinstellungen für Dateien (in der Basisansicht nicht unterstützt) C Gelbe (Auswählen): Auswählen mehrerer Dateien aus der Dateiliste. Die ausgewählten Dateien werden mit einem Symbol gekennzeichnet. D Blaue (Sortieren): Auswählen der Sortierliste T Schaltfläche Extras Anzeigen des Optionsmenüs. ✎ Mit Hilfe der Tasten � oder µ können Sie in der Dateiliste zur vorigen oder nächsten Seite wechseln. Videos Wiedergeben von Videos 1. Wählen Sie durch Drücken der Tasten ◄ oder ► die Option Videos, und drücken Sie dann im Media Play-Menü auf die ENTERE. 2. Wählen Sie das gewünschte Video mit den Tasten ◄/►/▲/▼ aus der Dateiliste aus. 3. Drücken Sie die ENTERE oder die Taste � (Wiedergabetaste). – Die ausgewählte Datei wird zusammen mit der Abspieldauer oben angezeigt. – Wenn die Zeitinformationen für das Video nicht vorhanden sind, werden Wiedergabezeit und Fortschrittsbalken nicht angezeigt. – Bei der Wiedergabe eines Videos können Sie mit den Tasten ◄ und ► suchen. ✎ In diesem Modus können Sie zwar die Filme aus einem Spiel wiedergeben, nicht aber das eigentliche Spiel spielen. 00:04:03 / 00:07:38 1/1 Movie 01.avi y Unterstützte Formate für Untertitel Name Dateinamenserweiterung MPEG-4 Text mit Zeitverlauf .ttxt Format XML SAMI .smi HTML SubRip .srt Stringbasiert SubViewer .sub Stringbasiert Micro DVD .sub oder .txt Stringbasiert SUM EPause L Wechseln T extras R zurück Deutsch 31 04 Erweiterte Funktionen ¦ Bildschirmanzeige Erweiterte Funktionen y Unterstützte Videoformate Dateinamenserweiterung *.avi *.mkv *.asf Container AVI MKV ASF *.wmv ASF *.mp4 MP4 *.3gp 3GPP *.vro VRO VOB *.mpg *.mpeg *.ts *.tp *.trp Video-Codec Auflösung Framerate (f/s) Bitrate (Mbit/s) Divx 3.11 / 4.x / 5.1 / 6.0 1920 x 1080 6 ~ 30 8 XviD 1920 x 1080 6 ~ 30 8 H.264 BP / MP / HP 1920 x 1080 6 ~ 30 25 MPEG4 SP / ASP 1920 x 1080 6 ~ 30 8 Motion JPEG 800 x 600 6 ~ 30 8 Divx 3.11 / 4.x / 5.1 / 6.0 1920 x 1080 6 ~ 30 8 XviD 1920 x 1080 6 ~ 30 8 H.264 BP / MP / HP 1920 x 1080 6 ~ 30 25 MPEG4 SP / ASP 1920 x 1080 6 ~ 30 8 Motion JPEG 800 x 600 6 ~ 30 8 Window Media Video v9 1920 x 1080 6 ~ 30 25 H.264 BP / MP / HP 1920 x 1080 6 ~ 30 25 MPEG4 SP / ASP 1920 x 1080 6 ~ 30 8 XVID 1920 x 1080 6 ~ 30 8 H.264 BP / MP / HP 1920 x 1080 6 ~ 30 25 MPEG4 SP / ASP 1920 x 1080 6 ~ 30 8 MPEG1 1920 x 1080 24 / 25 / 30 30 MPEG2 1920 x 1080 24 / 25 / 30 30 MPEG1 1920 x 1080 24 / 25 / 30 30 MPEG2 1920 x 1080 24 / 25 / 30 30 H.264 1920 x 1080 6 ~ 30 25 MPEG2 1920 x 1080 24 / 25 / 30 30 H.264 1920 x 1080 6 ~ 30 25 VC1 1920 x 1080 6 ~ 30 25 PS TS Audio-Codec MP3 / AC3 / LPCM / ADPCM /DTS Core MP3 / AC3 / LPCM / ADPCM / WMA WMA MP3 / ADPCM / AAC ADPCM / AAC / HE-AAC AC3 / MPEG / LPCM AC3 / MPEG / LPCM / AAC AC3 / AAC / MP3 / DD+ / HE-AAC Weitere Einschränkungen ✎ HINWEIS x Wenn es Probleme mit dem Inhalt eines Codecs gibt, wird der Codec nicht unterstützt. x Wenn die Informationen für einen Container falsch sind und die Datei einen Fehler aufweist, wird der Container nicht korrekt abgespielt. x Ton oder Bild stehen möglicherweise nicht zur Verfügung, wenn der Inhalt ein Standardbitrate/Framerate aufweist, die über dem in der obigen Tabelle aufgeführten Wert der kompatiblen Framerate (Frames/Sekunde) liegt. x Wenn die Indextabelle einen Fehler aufweist, wird die Suchfunktion (Sprungfunktion) nicht unterstützt. Videodecoder • Unterstützt max. H.264, Level 4.1 • H.264 FMO / ASO / RS, VC1 SP / MP / AP L4 und AVCHD werden nicht unterstützt. • XVID, MPEG4 SP, ASP : – weniger als *1280 x 720max. 60 Frames – mehr als *1280 x 720 max. 30 Frames • mehr als GMC 2 wird nicht unterstützt. • H.263 nicht unterstützt. • Nur Samsung Techwin-MJEPG wird unterstützt. 32 Deutsch Audiodecoder • Unterstützung bis WMA 7, 8, 9, STD • WMA 9 PRO unterstützt nicht mehr als 2 Kanäle bzw. Mehrkanalton oder verlustfreies Audio. • Die WMA-Sampling-Raten beträgt 22.050 Hz und Monobetrieb wird nicht unterstützt. Wenn Sie die Filmwiedergabefunktion verlassen, kann der Film später von dem Punkt an abgespielt werden, an dem Sie unterbrochen haben. ✎ Wenn Sie die ENTERE bei der Wiedergabe einer Datei drücken, können Sie eine Vorschau der Szene in 5 Kapiteln anzeigen. 1. 2. 3. Wählen Sie die Filmdatei, deren Wiedergabe Sie fortsetzen möchten. Drücken Sie dazu in der Dateiliste auf ▲ oder ▼. Drücken Sie auf �(Wiedergabetaste) / ENTERE. Wählen Sie mit der blauen Taste die Funktion für Wiedergabe fortsetzen (Wiedergabe fortsetzen). Die Filmwiedergabe wird dort fortgesetzt, wo Sie sie angehalten hatten. Die blaue Taste ist verfügbar, wenn Sie die Wiedergabe fortsetzen. Wenn Hilfe zu Schleifenbetrieb im Menü Einstell. aktiviert wurde Ein, wird eine Meldung angezeigt, wenn Sie die Wiedergabe einer Filmdatei fortsetzen. 00:04:03 / 00:07:38 1/1 Movie 01.avi ✎ Ununterbrochen abspielen Weiter ab letzter Szene ✎ SUM Ununterbrochen abspielen E Kap. festl. L Wechseln T Extras R Zurück Musik Wiedergeben von Musik 1. 2. 3. Wählen Sie durch Drücken der Tasten ◄ oder ► die Option Musik, und drücken Sie dann im Media Play-Menü auf die ENTERE. Wählen Sie die gewünschte Musik mit den Tasten ◄/►/▲/▼ aus der Dateiliste aus. Drücken Sie die ENTERE oder die Taste � (Wiedergabetaste). W.-liste – Bei der Wiedergabe eines music können Sie mit den Tasten ◄ und ► suchen. – Die Tasten � (Rücklauf) und µ (Vorlauf) sind bei der Wiedergabe funktionslos. ✎ Angezeigt werden nur Dateien mit der Dateinamenserweiterung MP3. I Love You Jhon I Love you Jhon 1st Album Pop 2010 4.2MB No Singer 3/15 Music 1 Music 2 No Singer Music 3 No Singer Music 4 01:10 / 04:02 No Singer Music 5 No Singer SUM Dateien mit anderer Dateinamenserweiterung werden nicht angezeigt, auch wenn sie auf dem gleichen USB-Gerät gespeichert sind. E Pause L Wechseln T extras R zurück ✎ Wenn der Ton beim Abspielen von MP3-Dateien „schräg“ klingt, stellen Sie im Menü Ton den Equalizer ein. (Bei übermodulierten MP3-Dateien kann es zu Tonproblemen kommen.) Erstellen einer Wiedergabeliste 1. Drücken Sie die Taste ◄/►/▲/▼ um die Titel auszuwählen, die Sie hinzufügen möchten, und drücken Sie dann die Taste TOOLS. 2. Wählen Sie Eig. W.-Liste hinzuf.. 3. Wenn das Menü Eig. W.-Liste hinzuf. angezeigt wird, wählen Sie Neue eigene Wdg.-Liste. ✎ Wenn Sie Titel zu einer vorhandenen Wiedergabeliste hinzufügen möchten, wählen Sie einfach die Wiedergabeliste, zu der Sie den Musiktitel hinzufügen möchten. 4. Die neu erstellte oder aktualisierte Wiedergabeliste wird auf der Hauptseite für Musik angezeigt. Abspielen der eigenen Wiedergabeliste Nachdem Sie den Ordner Eig. Wdg.-Liste ausgewählt haben, beginnt die Wiedergabe automatisch. Wählen Sie mit den Tasten ◄ oder ► eine andere Musikdatei aus der Wiedergabeliste aus. Deutsch 33 04 Erweiterte Funktionen Filmwiedergabe fortsetzen (Wiedergabe fortsetzen) Erweiterte Funktionen Fotos Anzeigen eines Fotos (oder einer Diashow) 1. 2. 3. ✎ Wählen Sie durch Drücken der Tasten ◄ oder ► die Option Foto, und drücken Sie dann im Media Play-Menü auf die ENTERE. Wählen Sie das gewünschte Foto mit den Tasten ◄ / ► / ▲ / ▼ aus der Dateiliste aus. Drücken Sie die ENTERE oder die Taste � (Wiedergabetaste). – Drücken Sie auf der Fernbedienung die Taste � (Wiedergabe) / ENTERE, während die Fotoliste angezeigtwird, um die Diashow zu starten. – Alle Dateien in der Dateiliste werden für in der Diashow angezeigt. – Die Bilder werden nacheinander, beginnend mit der aktuell angezeigten Datei angezeigt. Musikdateien können während der Diashow automatisch abgespielt werden, wenn die Hintergrundmusik aktiviert (Ein) ist. Normal Image1024.jpg 1024x768 2010/2/1 3/15 E Pause L zurück/Weiter T extras R zurück SUM ✎ Der HGM-Modus kann erst gewechselt werden, wenn die Hintergrundmusik vollständig geladen ist. ¦ Wiedergabe mehrerer Dateien Abspielen ausgewählter Video / Musik / Fotodateien 1. Drücken Sie die gelbe Taste in der Dateiliste, um die gewünschte Datei auszuwählen. 2. Wiederholen Sie den obigen Vorgang, um mehrere Dateien auszuwählen. HINWEIS x Links neben dem Namen der gewähten Datei wird das Symbol (c) angezeigt. x Drücken Sie die gelbe Taste noch einmal, um die Auswahl einer Datei zu stornieren. x Um die Auswahl sämtlicher Dateien aufzuheben, drücken Sie die Taste TOOLS und wählen Sie dann Alle abwählen. 3. Drücken Sie die Taste TOOLS und wählen Sie Ausgew. Inhalte wiederg.. Abspielen einer Video / Musik / Fotodateigruppe Videos Movie 01.avi ✎ 1. 2. 2-Dat. ausgew. 1/1 Page /Movie 01.avi Movie 02.avi Jan.10.2010 Jan.10.2010 Movie 03.avi Movie 04.avi Jan.10.2010 Jan.10.2010 Movie 05.avi Movie 06.avi Jan.10.2010 Jan.10.2010 Movie 07.avi Movie 08.avi Jan.10.2010 Jan.10.2010 Movie 09.avi Movie 10.avi Jan.10.2010 SUM Jan.10.2010 Change Device Sortieren T extras Auswählen Während eine Dateiliste angezeigt wird, navigieren Sie zu einer Datei aus der gewünschten Gruppe. Drücken Sie die Taste TOOLS und wählen Sie Aktuelle Gruppe abspielen. ¦ Media Play-Zusatzfunktionen Sortieren der Dateiliste Drücken Sie in der Dateiliste die blaue Taste, um die Dateien zu sortieren. Kategorie Basisansicht Titel Voreinstellung Datum absteigend Datum aufsteigend Vorgang Anzeige des gesamten Ordners. Sie können das Foto durch Auswählen des Ordners abspielen. Sortieren der Filmtitel nach Symbol/Nummer/Anfangsbuchstabe/Spezial. ✓ ✓ ✓ ✓ ✓ Genre Sortierung der Musikdateien nach dem Genre. Sortierung der Musikdateien nach der Stimmung. Sie können die Informationen zur Stimmung der Musik ändern. Sortieren und Anzeigen der Fotos nach dem Monat. Die Sortierung erfolgt nach Monaten (Januar bis Dezember) und ohne Beachtung des Jahres. ✓ ✓ ✓ Album Deutsch ✓ Sortieren und Anzeigen der Filme aufsteigend nach dem Datum. Sortieren der Musikdateien in alphabetischer Reihenfolge nach dem Namen des Albums. 34 Fotos ✓ ✓ Interpret Monatlich Musik ✓ Sortiert die Kanäle und zeigt sie in der Reihenfolge der Voreinstellung an. Sie können die Dateivoreinstellung in der Dateiliste mit Hilfe der grünen Taste ändern. Sortieren und Anzeigen der Filme absteigend nach dem Datum. Sortieren der Musikdateien in alphabetischer Reihenfolge nach dem Namen des Interpreten. Stimmung Videos ✓ ✓ ✓ ✓ ✓ ✓ Drücken Sie während der Wiedergabe die Taste TOOLS. Kategorie Vorgang Videos Musik ✓ ✓ ✓ Fotos Titel Sie können die andere Datei direkt verschieben. Wiederholungsmodus Sie können Film- und Musikdateien wiederholt abspielen. Bildformat (Modus1 / Modus2 / Original) Sie können Bildformat entsprechend Ihren Wünschen anpassen. Bildeinstellungen Sie können die Bildeinstellungen festlegen. (S. 13, 14, 15, 16) Toneinstellungen Sie können die Toneinstellungen festlegen. (S. 16, 17) UntertitelEinstellungen Sie können die Videodatei mit Untertiteln abspielen. Diese Funktion steht nur zur Verfügung, wenn die Untertitel denselben Dateinamen wie die Videodatei haben. ✓ Audio Sie können Videos nach Bedarf in einer der unterstützten Sprachen ausgeben. Diese Funktion ist nur aktiviert, wenn Sie Streamingdateien abspielen, die mehrere Audioformate unterstützen. ✓ Diashow anhalten / Diashow starten Sie können eine Diashow starten und anhalten. ✓ Geschwindigkeit der Diashow Sie können die Geschwindigkeit der Diashow während der Diashow auswählen. ✓ Diashow-Effekt Sie können verschiedene Diashoweffekte einstellen. Hintergrundmusik Sie können die Hintergrundmusik auswählen und einstellen, während Sie eine Diashow anzeigen. Zoom Sie können Bilder im Vollbildmodus vergrößern. Drehen Sie können Bilder im Vollbildmodus drehen. Hintergrundbild Sie können die andere Datei zum Desktop von Media Play verschieben. Informationen Sie können detaillierte Informationen zur abgespielten Datei anzeigen. ✓ ✓ ✓ ✓ ✓ ✓ ✓ ✓ ✓ ✓ ✓ ✓ ✓ ✓ Einstellungen Verwenden des Menüs Einstellungen ■ Hintergrundeinstellung: Wählen Sie den gewünschten Hintergrund aus. ■ Hilfe zu Schleifenbetrieb (Wiedergabe fortsetzen) (Ein / Aus): Hiermit öffnen Sie das Popupfenster mit Informationen zum Schleifenbetrieb. ■ Divx® VOD-Registrierungscode abrufen: Hiermit zeigen Sie den Registrierungscode für den Fernseher an. Wenn Sie eine Verbindung zur DivX-Website herstellen, und den Registrierungscode für ein Privatkonto registrieren, können Sie VOD-Registrierungsdatei herunterladen. Wenn Sie die VOD-Registrierung mit Media Play abspielen, wird die Registrierung abgeschlossen. ✎ Weitere Informationen zu DivX® VOD finden Sie unter www.DivX.com. ■ Divx VOD-Deaktivierungscode abrufen: Wenn DivX® VOD nicht registriert ist, wird der Deaktivierungscode für die Registrierung angezeigt. Wenn Sie diese Funktion ausführen, wenn DivX® VOD registriert ist, wird die aktuelle DivX® VODRegistrierung deaktiviert. ■ Informationen: Hiermit zeigen Sie die Informationen zum angeschlossenen Gerät an. ® Deutsch 35 04 Erweiterte Funktionen Optionsmenü für die Video / Musik / Fotowiedergabe Erweiterte Funktionen Anynet+ Was ist Anynet+?t Bei Anynet+ handelt es sich um eine Funktion, mit der Sie alle angeschlossenen Samsung-Geräte, die Anynet+ unterstützen, mit der Fernbedienung für Ihr Samsung-Fernsehgerät steuern können. Das Anynet+-System unterstützt nur Anynet+-fähige Samsung-Geräte. Wenn Sie wissen möchten, ob Ihr Samsung-Gerät diese Funktion unterstützt, suchen Sie das Anynet+-Logo auf Ihrem Gerät. Anschluss an das Heimkinosystem TV Heimkino Anynet+-Gerät 1 Anynet+-Gerät 2, 3 und 4 HDMI 1.3-Kabel Glasfaserkabel HDMI 1.3-Kabel 1. Verbinden Sie einen der Anschlüsse HDMI IN (1(DVI), 2, 3 oder 4) am Fernsehgerät mit dem HDMI OUT-Anschluss am entsprechenden Anynet+-Gerät. Verwenden Sie hierfür ein HDMI-Kabel. 2. Verbinden Sie den HDMI IN-Anschluss des Heimkinosystems mit dem HDMI OUT-Anschluss des entsprechenden Anynet+Geräts. Verwenden Sie hierfür das HDMI-Kabel. ✎ HINWEIS x Verbinden Sie DIGITAL AUDIO OUT (OPTICAL)-Anschluss am Fernsehgerät und den Digital Audio-Eingang des Heimkinosystems mit Hilfe des Glasfaserkabels. Bei obiger Vorgehensweise überträgt der optische Anschluss nur 2-Kanalaudio. Die Tonausgabe erfolgt also nur über den linken und rechten Frontlautsprecher sowie den Subwoofer des Heimkinosystems. Wenn Sie 5.1-Kanalton wünschen, müssen Sie den DIGITAL AUDIO OUT (OPTICAL)-Ausgang des DVD-Players oder des Satellitenreceivers (also AnynetGerät 1 oder 2) direkt an einen Verstärker oder ein Heimkinosystem und nicht an das Fernsehgerät anschließen. Schließen Sie nur ein Heimkinosystem an. Sie können Anynet+-Geräte mithilfe eines HDMI-Kabels verbinden. Manche HDMI-Kabel unterstützen möglicherweise keine Anynet+-Funktionen. Anynet+ arbeitet, wenn das AV-Gerät, das Anynet+ unterstützt, im Standby-Modus oder angeschaltet ist. Anynet+ unterstützt maximal 12 AV-Geräte. Beachten Sie, dass Sie maximal 3 Geräte des gleichen Typs anschließen können. x x x x x Anynet+ Menu Der Inhalt des Anynet+-Menüs hängt vom Typ und Status der an das Fernsehgerät angeschlossenen Anynet+-Geräte ab. Anynet+-Menü Fernsehen Geräteliste Aufnehmen: (*Aufnahmegerät) (geräte_name) MENU (geräte_name).INFO Beschreibung Wechsel vom Anynet+-Modus zum Fernsehmodus. Anzeige der Anynet+-Geräteliste. Sofortiges Starten einer Aufnahme mit dem Rekorder. (Diese Funktion ist nur für Geräte mit Aufnahmefunktion verfügbar.) Hiermit öffnen Sie die Menüs der angeschlossenen Geräte. Wenn z. B. ein DVD-Recorder angeschlossen ist, wird das DVD-Menü des DVD-Recorders angezeigt. Zeigt das Wiedergabemenü des angeschlossenen Geräts an. Wenn z. B. ein DVD-Recorder angeschlossen ist, wird das Wiedergabemenü des DVD-Recorders angezeigt. Beenden der Aufnahme. Aufnahme beenden: (*Aufnahmegerät) Empfänger Die Tonausgabe erfolgt über den Receiver. Bei Anschluss von mehr als einem Aufnahmegerät werden sie als (*Aufnahmegerät) angezeigt, bei Anschluss eines einzigen Aufnahmegeräts erfolgt die Anzeige als (*Geräte_Name). 36 Deutsch ■ Setup Anynet+ (HDMI-CEC) (Aus / Ein): Damit Sie die Funktionen von Anynet+ nutzen können, muss Anynet+ (HDMI-CEC) aktiviert Ein sein. Wenn die Funktion “Anynet+ (HDMI-CEC)” deaktiviert wird, sind auch alle Vorgänge in Verbindung mit Anynet+ deaktiviert. ✎ Autom. Ausschalten (Nein / Ja): Automatisches Abschalten von Anynet+-Geräten durch Abschalten des Fernsehgeräts. Damit Sie Anynet+ verwenden können, muss die Geräteauswahl der Fernbedienung auf TV eingestellt sein. ✎ ✎ Selbst wenn das externe Gerät noch aufnimmt, wird es möglicherweise abgeschaltet. ¦ Wechseln zwischen Anynet+-Geräten 1. Nun werden die an das Fernsehgerät angeschlossenen Anynet+-Geräte aufgelistet. ✎ Wenn Sie das gewünschte Gerät nicht finden, drücken Sie die rote Taste, um die Liste zu aktualisieren. 2. Wählen Sie ein Gerät und drücken Sie die ENTERE. Sie können zum ausgewählten Gerät wechseln. ✎ x x Nur wenn Sie Anynet+ (HDMI-CEC) im Menü Anwendung aktivieren Ein, wird die Geräteliste angezeigt. Das Umschalten zum ausgewählten Gerät kann bis zu 2 Minuten dauern. Sie können diesen Vorgang während des Umschaltens nicht abbrechen. Wenn Sie mit der Taste SOURCE eine externe Signalquelle eingestellt haben, können Sie die Anynet+-Funktion nicht verwenden. Achten Sie darauf, immer nur mit der Geräteliste zu einem Anynet+-Gerät zu wechseln. ¦ Aufnahme Sie können Fernsehprogramme mit einem Samsung-Recorder aufnehmen. 1. Wählen Sie Aufnahme. ✎ ✎ Mehr als zwei Aufnahmegerät angeschlossen x Wenn mehrere Aufnahmegeräte angeschlossen sind, werden diese in einer Liste angezeigt. Wählen Sie eine Gerät aus der Geräteliste. Wenn das Aufnahmegerät nicht angezeigt wird, wählen Sie Geräteliste und drücken Sie die rote Taste, um nach Geräten zu suchen. 2. Zum Beenden drücken Sie die Taste EXIT. ✎ ✎ ✎ Sie können das Signal der jeweiligen Quelle aufnehmen. Wählen Sie hierzu Aufnahme. (geräte_name). Durch Drücken von � (REC) wird die laufende Sendung aufgenommen. Wenn Sie Bilder aus einer anderen Signalquelle anzeigen, wird das Videosignal aus dieser Quelle aufgenommen. Überprüfen Sie vor der Aufnahme, ob der Antennenstecker ordnungsgemäß am Aufnahmegerät angeschlossen ist. Informationen zur richtigen Antennenverbindung mit dem Aufnahmegerät finden Sie im Benutzerhandbuch des Aufnahmegeräts. Deutsch 37 04 Erweiterte Funktionen ¦ Einrichten von Anynet+ Erweiterte Funktionen ¦ Tonwiedergabe mit einem Receiver Sie können die Tonwiedergabe über einen Receiver (d. h. Heimkinosystem) anstelle des TV-Lautsprechers laufen lassen. 1. Wählen Sie Receiver und aktivieren Sie ihn (Ein). 2. Zum Beenden drücken Sie die Taste EXIT. Wenn Ihr Receiver nur Audiosignale unterstützt, wird er in der Geräteliste möglicherweise nicht angezeigt. Der Receiver kann eingesetzt werden, wenn Sie den optischen Eingang des Receivers mit dem optischen Ausgang des Fernsehgeräts DIGITAL AUDIO OUT (OPTICAL) verbunden haben. Wenn der Receiver (d. h. Heimkinosystem) angeschaltet ist, können Sie den Ton so hören, wie er vom optischen Ausgang der Fernsehgeräts zur Verfügung gestellt wird. Wenn das Fernsehgerät ein (terrestrisches) DTV-Signal anzeigt, überträgt das Fernsehgerät 5.1-Kanalton an den Receiver. Wenn es sich bei der Signalquelle um eine digitale Komponente wie beispielsweise einen DVD-Player handelt, der über HDMI an das Fernsehgerät angeschlossen ist, kann der Receiver nur 2-Kanalton wiedergeben. ✎ ✎ ✎ ✎ HINWEIS x x x Sie können Anynet+-Geräte nur mit der TV-Fernbedienung nicht aber mit den Tasten am Fernsehgerät steuern. Die TV-Fernbedienung funktioniert unter bestimmten Umständen nicht. Wählen Sie in diesem Fall erneut das Anynet+-Gerät. Die Anynet+-Funktionen sind für Geräte anderer Hersteller nicht verfügbar. ¦ Fehlerbehebung für Anynet+ Problem Anynet+ funktioniert nicht. Ich möchte Anynet+ starten. Ich möchte Anynet+ beenden. Die Meldung Verbinden mit Anynet+-Gerät wird angezeigt. Keine Wiedergabe mit dem Anynet+-Gerät. Das angeschlossene Gerät wird nicht angezeigt. Das Fernsehprogramm kann nicht aufgezeichnet werden. Die Ausgabe des Fernsehtons erfolgt über den Receiver. 38 Deutsch Mögliche Lösung • Prüfen Sie, ob es sich um ein Anynet+-Gerät handelt. Das Anynet+-System unterstützt nur Anynet+-fähige Geräte. • Schließen Sie nur einen Heimkinosystem an. • Prüfen Sie, ob das Netzkabel des Anynet+-Geräts richtig angeschlossen ist. • Prüfen Sie die Video/Audio/HDMI-Kabelverbindungen des Anynet+-Geräts. • Prüfen Sie, ob Anynet+ (HDMI-CEC) im Menü Einstellungen von Anynet+ aktiviert (An) ist. • Überprüfen Sie, ob die Fernbedienung im TV-Modus arbeitet. • Prüfen Sie, ob es sich um eine ausschließlich für Anynet+ geeignete Fernbedienung handelt. • Anynet+ funktioniert unter bestimmten Umständen nicht. (Kanalsuche, Bedienung von Media Play oder Plug & Play (Erstmaliges Einrichten) usw.) • Stellen Sie nach dem Anschließen oder Entfernen des HDMI-Kabels sicher, dass die Geräte wieder gesucht werden, oder schalten Sie das TV-Gerät aus und wieder ein. • Überprüfen Sie, ob die Anynet+-Funktion des Anynet+-Geräts aktiviert ist. • Prüfen Sie, ob das Anynet+-Gerät ordnungsgemäß an das Fernsehgerät angeschlossen ist, und kontrollieren Sie zudem, ob Anynet+ (HDMI-CEC) im Menü Einstellungen für Anynet+ aktiviert ist. • Drücken Sie die TOOLS-Taste, um das Anynet+-Menü anzuzeigen und die gewünschte Menüoption auszuwählen. • Wählen Sie im Anynet+-Menü die Option Fernsehen. • Drücken Sie die Taste SOURCE auf der TV-Fernbedienung, und wählen Sie ein Gerät, bei dem es sich nicht um ein Anynet+-Gerät handelt. • Drücken Sie auf P >/<, PRE-CH und FAV.CH, um den Fernsehmodus zu wechseln. (Beachten Sie, dass die Kanaltaste nur funktioniert, wenn kein Anynet+-Gerät mit integriertem Tuner angeschlossen ist.) • Sie können die Fernbedienung nicht verwenden, während Sie Anynet+ konfigurieren, oder in einen anderen Anzeigemodus wechseln. • Verwenden Sie die Fernbedienung, wenn das Konfigurieren von Anynet+ oder das Ändern des Anzeigemodus abgeschlossen ist. • Die Wiedergabefunktion kann nicht verwendet werden, wenn der Plug & Play-Vorgang (Erstmaliges Einrichten) läuft. • • • • • Prüfen Sie, ob das Gerät die Anynet+-Funktionen unterstützt. Vergewissern Sie sich, dass das HDMI-Kabel ordungsgemäß angeschlossen wurde. Prüfen Sie, ob Anynet+ (HDMI-CEC) im Einstellungen von Anynet+ aktiviert (An) ist. Suchen Sie nochmal nach Anynet+-Geräten. Sie können Anynet+-Geräte nur mit Hilfe eines HDMI-Kabels anschließen. Manche HDMI-Kabel unterstützen möglicherweise keine Anynet+-Funktionen. • Wenn es durch eine Störung (z. B. Trennen des HDMI-Kabels, des Netzkabels oder Stromausfall) zu einer Beendigung kommt, wiederholen Sie die Gerätesuche. • Prüfen Sie, ob der Antennenstecker des Aufnahmegeräts ordnungsgemäß angeschlossen ist. • Schließen Sie das Glasfaserkabel an das Fernsehgerät und den Receiver an. ¦ Erste Schritte mit Internet@TV recommended Internet@TV bringt nützliche und unterhaltende Inhalte und Dienste direkt aus dem Internet auf Ihr Fernsehgerät. by Date 1/1 My Applications Samsung Apps Settings A login B Mark as Favorite D Sort by R return ✎ HINWEIS x x x x x x x x Konfigurieren Sie die Netzwerkeinstellungen, bevor Sie Internet@TV verwenden. Weitere Informationen finden Sie unter „Netzwerkverbindung“. (Seite 23) Nicht unterstützte Schriftarten im Inhalt des Providers werden nicht normal angezeigt. Je nach den vorliegenden Bedingungen im Netzwerk sind langsame Reaktionszeiten und/oder Unterbrechungen möglich. Je nach Region wird möglicherweise nur Englisch als Sprache der Anwendung unterstützt. Diese Funktion ist nicht überall verfügbar. Bei Problemen mit einem Anwendungsdienst wenden Sie sich an den Anbieter der Inhalte. Entsprechend den Vorgaben des Inhaltsanbieters können die Aktualisierungen einer Anwendung oder die Anwendung selbst eingestellt werden. Manche Anwendungen werden, je nach den gesetzlichen Bestimmungen Ihres Landes, möglicherweise nicht unterstützt oder stehen nur eingeschränkt zur Verfügung. Screen Anzeige Fernshbildschirm: Anzeige des aktuellen Kanals. recommended Empfohlene Anwendungen: Anzeigen des von Samsung empfohlenen Diestes. Sie können keinen Dienst zu dieser Liste by Date 1/1 My Applications Information: Anzeige von Hinweisen, neuen Anwendungen und Werbung, die Samsung Ihnen mit Produkteinführungen anbietet. Anwendungsdienst: Sie können verschiedene von Samsung zur Verfügung gestellte Anwendungen verwenden. Heruntergeladene Anwendungen: Anzeigen der heruntergeladenen Anwendungen über die SamsungSamsung Apps Settings A login Internet@TV-Einstellungen: Bearbeiten und konfi gurieren Sie die Anwendungen und Einstellungen für Internet@ TV.. B Mark as Favorite D Sort by R return Controls : • Rot (Login): Anmelden bei Internet@TV. • B Grün (Mark as Favorite): Markieren der Anwendung als Favorit. • Blau (Sort by): Sortieren der Anwendungen. • R Return: Zurück zum vorherigen Menü. ✎ Das Farbtasten arbeiten je nach Anwendung möglicherweise unterschiedlich. Deutsch 39 04 Erweiterte Funktionen Internet@TV Erweiterte Funktionen Anmeldung beim Konto Bei einer Anwendung mit mehreren Konten verwenden Sie ◄ und ► für den Zugriff auf die verschiedenen Konten. ■ adgjm ✎ Password : A Reset: Zurücksetzen von Internet@TV auf die werkseitigen Standardeinstellungen. Change the Service Lock password In der Standardeinstellung lautet das Kennwort „0-0-0-0“. Move [0~9] enter PIN R Cancel ✎ ✎ Mehr Spaß mit Anwendungen ist möglich, wenn Sie sich bei Ihrem Konto anmelden. ✎ ✎ Informationen zum Anlegen eines Kontos erhalten Sie unter 1. 2. Setting up Internet@TV → Internet@TV ID → Create. Drücken Sie auf der Starteite von Internet@TV auf die rote Taste. Wählen Sie das gewünschte User account und drücken Sie dann die ENTERE-Taste. Wenn Sie ein Konto erstellen möchten, drücken Sie die rote Taste, und legen Sie das Konto mit Hilfe des dann angezeigten Bildschirmfensters an. Geben Sie das Password ein. Nach erfolgreicher Anmeldung wird das Benutzerkonto auf dem Bildschirm angezeigt. ✎ 3. ✎ ¦ Konfigurieren von Internet@TV Settings Erstellen von IDs und Konfigurieren von Internet@TV von diesem Fenster aus. Markieren Sie Einstellungen mit den Tasten ▲ und ▼, und drücken Sie die ENTERE. Einstell. ▪ System setup ▪ Internet@TV ID ▪ Ticker Autorun : Off ▪ Channel bound Service : Off ▪ Service Manager ▪ Change the Service lock password ▪ Properties ▪ Reset R return 40 Deutsch Ticker Autorun wird je nach Land möglicherweise nicht unterstützt. Ticker Autorun (Off / On): Ticker beim Einschalten des Fernsehers aktiviert/deaktiviert. Channel Bound Service (Off / On): Einige Kanäle unterstützen Anwendungen als Internet-Datendienst, sodass Sie beim Fernsehen auf das Internet zugreifen können. Nur verfügbar, wenn es vom Sender unterstützt wird. Login User account : System Setup ✎ ■ Wenn Sie das Kennwort vergessen haben, drücken Sie die Fernbedienungstasten in der folgenden Reihenfolge, um das Kennwort auf „0-0-0-0“ zurückzusetzen: POWER (aus) → MUTE → 9 → 2 → 8 → POWER (ein). Internet@TV ID Sie können dieses Menü verwenden, wenn Sie ein Konto erstellen oder löschen. Sie können Ihr Konto zusammen mit den Kontoinformationen für die Inhaltssite steuern. Das Konto gilt nur für internet@TV. ✎ Create: Erstellen Sie ein Konto und verbinden Sie es mit den gewünschten Anwendungen. HINWEIS ✎ x x Sie können maximal 10 Konten erstellen. Die maximale Zeichenzahl beträgt 10.. Ehe Sie ein User account anlegen, laden Sie die zuerst die Anwendung von Samsung Apps herunter. 1. Wählen Sie mit Hilfe der Taste ▲/▼/◄/► die Option Settings. Drücken Sie dann die Taste ENTERE. 2. Wählen Sie durch Drücken der Taste ▼ Internet@TV ID, und drücken Sie dann die Taste ENTERE oder ►. 7. Wählen Sie das gewünschte Register der Service Site und drücken Sie die Taste ENTERE. 8. Geben Sie die Kennung für die Anwendungssite und das Kennwort ein. Drücken Sie dann die Taste ENTERE 3. Wählen Sie Create. Das Tastaturfenster wird angezeigt. 4. Das Bildschirmmenü für die Tastatur wird auf dem Bildschirm angezeigt. 9. Registrierung abgeschlossen. Wenn Sie eine weitere Dienst-Site hinzufügen, wählen Sie Yes und drücken Sie dann auf die Taste ENTERE. Fahren Sie dann mit Schritt 5 fort. Verwenden der Tastatur Wenn Sie die Taste – auf der Fernbedienung drücken, während Sie mit der Bildschirmtastatur arbeiten, können Sie bei der Eingabe von Zeichen zwischen Groß- und Kleinschreibung, Zifferneingabe und Symbolen wählen. Sie können diese Bildschirmtastatur in verschiedenen Anwendungen für Internet@TV verwenden. So geben Sie Zeichen ein. 4-1. Angenommen, Sie möchten „105Chang“ eingeben. 10. Wählen Sie OK, wenn Sie fertig sind. Drücken Sie dann die Taste ENTERE. Manager – Service Site: Registrieren Sie die Anmeldeinformationen für Dienstwebsites wie YouTube. – Change Password: Ändern des Kennworts. – Delete: Löschen Sie das Konto. Wenn Sie das Kennwort vergessen haben, drücken Sie die Fernbedienungstasten in der folgenden Reihenfolge, um das Kennwort auf „0-0-0-0“ zurückzusetzen: POWER (aus) → MUTE → 9 → 2 → 8 → POWER (ein). ✎ 4-2. Drücken Sie zweimal auf die Taste – der Fernbedienung, um zum Eingabemodus für Zahlen zu wechseln. 4-3. Drücken Sie nacheinander die Tasten 1, 0 und 5. 4-4. Drücken Sie dreimal auf die Taste – der Fernbedienung, um zum Eingabemodus für Großbuchstaben zu wechseln. ■ Lock: Sperren des Anwendung. Für den Zugriff auf ein gesperrtes Widget müssen Sie das Kennwort eingeben. ✎ 4-5. Drücken Sie dreimal die Taste 2 auf der Fernbedienung, um den Buchstaben C einzugeben. 4-6. Drücken Sie dreimal auf die Taste – der Fernbedienung, um zum Eingabemodus für Kleinbuchstaben zu wechseln. 4-7. Drücken Sie die entsprechenden Tasten auf der Fernbedienung, um den Rest von Chang einzugeben. Drücken Sie die Taste ENTERE. Service Manager: Löschen und Sperren von Anwendung, die unter Internet@TV installiert sind. Delete: Löschen des Anwendung. ■ Properties: Anzeigen von Informationen zu Internet@ TV. Verwenden Sie die Option Check the speed of your internet connection, um Ihre Netzwerkverbindung zu testen. 5. Geben Sie mit den Zifferntasten das User account and Password ein. x x x x Das Kennwort darf nur Ziffern enthalten. Mit der Taste – können Sie die Textfelder auf Kleinbuchstaben, Großbuchstaben, Zahlen und Symbole umschalten. Sie können die eingegebenen Zeichen mit der Taste PRE-CH löschen. Mit den Tasten π (REW) oder µ (FF) können Sie das Symbol wählen, das Sie in das Symbolfenster des Tastatur eingeben möchten Deutsch 41 04 Erweiterte Funktionen 6. Konto erstellt. Sie können die Dienste aller Partner auf einem Samsung-Fernseher nutzen, indem Sie die Konten der Dienste-Partner mit der Fernsehkennung verbinden. Möchten Sie die Kennung der Site für einen Dienst registrieren? Die Liste der Service Site wird angezeigt. So erstellen Sie eine create Internet@TV ID Erweiterte Funktionen ¦ Verwenden des Internet@TV-Dienstes Samsung Apps Samsung Apps ist ein Speicher, aus dem Sie Anwendungen herunterladen können, die auf Ihren Samsung TV/AV-Geräten verwendet werden können. Mit Hilfe der heruntergeladenen Anwendungen können die Benutzer eine Vielzahl von Inhalten (z. B. Videos, Musik, Fotos, Spiele, nützliche Informationen usw.) nutzen. Zusätzlichen Anwendungen später dazukommen. Samsung AppS What’s New! Featured Video Most downloaded Most recent Travel Name Free Games Sports Information Other y Help Wenn Sie Fragen zu Internet@TV haben, schauen Sie zuerst in diesem Abschnitt nach. My Page Help A login B Thumbnail View D Sort by R return ✎ Verwenden der Farbtasten in Verbindung mit den Samsung Apps. x x 42 Grün (Login): Anmeldung zum Internetdienst. Grün (Thumbnail View): Ändern des Anzeigemodus. B Blau (Sort by): Sortieren der Anwendungen nach Featured, Most downloaded, Most recent oder Name. R Return: Zurück ins vorherige Menü. Deutsch Folgende Kategorien sind verfügbar: y What’s New: Anzeigen neu registrierter Anwendungen. y Video: Anzeigen verschiedener Videomedien wie Filme, Fernsehshows und Kurzvideos. y Games: Anzeigen verschiedener Spiele wie Sudoku oder Schach. y Sports: Anzeigen verschiedener Sportmedien wie Spielinformationen, Bilder und Kurzvideos. y Lifestyle: Bietet verschiedene Lifestyle-Medien wie Musikangebote, Verwaltungstools für private Fotos und soziale Netzwerke wie Facebook und Zwitter. y Information: Bietet verschiedene Informationsdienste wie Nachrichten, Aktienkurse und Wetter. y Others: Beinhaltet verschiedene andere Dienste. y My Page: Anzeigen der Anwendungsliste und Ihren Cyber-Kassenbestand. Ab Mitte 2010 (nur USA und Korea) können Sie Cyber-Geld kaufen, um Anwendungen über tv.samsung.com zu erwerben. ✎ Lifestyle x x Verwenden der Samsung Apps nach Kategorie Problem Die Inhalte mancher Anwendungen liegen nur in englischer Sprache vor. Wie kann ich die Sprache ändern? Einige Anwendungsdienste funktionieren nicht. Nach einem Netzwerkfehler kann ich keine Menüs außer "Einstellungen" verwenden. Besteht die Möglichkeit, dass YouTubeInhalte für Erwachsene angezeigt werden? Mögliche Lösung Die Sprache der Widget-Inhalte kann von der Sprache der Benutzerschnittstelle abweichen. Das hängt vom jeweiligen Dienstanbieter ab. Wenden Sie sich an den entsprechenden Dienstanbieter. Besuchen Sie die Hilfewebsite, um Informationen über Dienstanbieter zu erhalten. Wenn Ihre Netzwerkverbindung nicht aktiv ist, sind Ihre Dienste möglicherweise nur eingeschränkt funktionsfähig. Deshalb können Sie nur das Einstellungsmenü verwenden, denn damit können Sie die Internetverbindung wieder reparieren. Diese Inhalte werden eigentlich in der Menüliste herausgefiltert. Aber mit der Suchfunktion können sie angezeigt werden. In diesem Fall verwenden Sie die Sperr-Funktion der Widget-Galerie, um den Dienst zu sperren. ¦ Hilfe-Website ✎ Der Zugriff kann später geändert werden. ✎ In einigen Ländern können die Links abweichen. Land Österreich Belgien Tschechisch Dänemark Finnland Frankreich Deutschland Griechenland Ungarn Irland Italien Niederlande Norwegen Polen Portugal Slowakei Spanien Schweden Schweiz GB Türkei Estland Lettland Litauen Russland Ukraine Website www.samsung.com → Produkte → Fernseher → Internet@TV www.samsung.com → Producten → televisies → Internet@TV www.samsung.com → Produits → téléviseurs → Internet@TV www.samsung.com → Produkty → televizory → Internet@TV www.samsung.com → Produkter → stue & soveværelse → Internet@TV www.samsung.com → Tuotteet → kodinelektroniikka → Internet@TV www.samsung.com → Produits → télévisions → Internet@TV www.samsung.com → Privatkunden → Fernseher → Internet@TV www.samsung.com → Προϊόντα → τηλεοράσεις → Internet@TV www.samsung.com → Termékek → televíziók → Internet@TV www.samsung.com → Products → Television → Internet@TV www.samsung.com → Prodotti → TV → Internet@TV www.samsung.com → Producten → televisies → Internet@TV www.samsung.com → Produkter → hverdagsrom & soverom → Internet@TV www.samsung.com → Produkty → telewizory → Internet@TV www.samsung.com → Produtos para Consumidores → televisores → Internet@TV www.samsung.com → Produkty → televízory → Internet@TV www.samsung.com → Productos → televisores → Internet@TV www.samsung.com → Produkter → vardagsrum & sovrum → Internet@TV www.samsung.com → Produits → télévisions → Internet@TV www.samsung.com → Produkte → Fernseher → Internet@TV www.samsung.com → Products → Television → Internet@TV www.samsung.com → Tüketici Ürünleri → televizyon → Internet@TV www.samsung.com → Klientidele → Televiisorid → Internet@TV www.samsung.com → Klientiem → Televizori → Internet@TV www.samsung.com → Namams → Televizoriai → Internet@TV www.samsung.com → Продукты → Телевизоры → Internet@TV www.samsung.com → Потребительские продукты → телевизоры → Internet@TV Deutsch 43 04 Erweiterte Funktionen ¦ Fehlerbehebung für Internet@TV Erweiterte Funktionen Nachricht / Medien / ScreenShare AllShare ¦ Informationen zu AllShare AllShare verbindet Ihr Fernsehgerät und Ihre SamsungMobiltelefone bzw. -Geräte über ein Netzwerk miteinander. Auf Ihrem Fernseher können Sie eingehende Aufrufe, SMS-Nachrichten und Zeitpläne anzeigen, die auf Ihren Mobiltelefonen gespeichert sind. Außerdem können Sie die auf Mobiltelefonen oder anderen Geräten (z. B. Ihrem PC) gespeicherten Medieninhalte wie Videos, Photos und x abspielen, indem Sie sie über das Netzwerk auf dem Musik Fernseher steuern. Außerdem können Sie Ihr Fernsehgerät zum Anzeigen von Webseiten auf Ihrem Mobiltelefon benutzen. Anzeigen einer Liste der Mobiltelefone oder angeschlossenen Geräte, mit denen Sie die Nachrichten-, Medienoder ScreenShare-Funktion in Verbindung mit diesem Fernsehgerät verwenden können. ✎ Die Medien-Funktion steht in allen Mobilgeräten zur Verfügung, sofern diese AllShare unterstützen. ■ Zugelassen / Zurückgewiesen: Hiermit lassen Sie das Mobiltelefon zu bzw. sperren es. ■ Entfenen: Hiermit entfernen Sie das Mobiltelefon aus der Liste. ✎ ✎ Weitere Informationen erhalten Sie unter „www.samsung.com“, oder wenden Sie sich an das Samsung-Callcenter. Auf dem Mobilgerät muss möglicherweise zusätzliche Software installiert werden. Weitere Informationen hierzu finden Sie im jeweiligen Benutzerhandbuch. ¦ Konfigurieren von AllShare ■ Nachricht (Ein/Aus): Aktivieren oder Deaktivieren der Nachrichtenfunktion (für eingehende Aufrufe, SMSNachrichten und Zeitpläne auf Ihren Mobiltelefonen). ■ Medien (Ein / Aus): Aktivieren bzw. Deaktivieren der Medienfunktion. Wenn die Medienfunktion aktiviert ist, können Sie Videos, Fotos und Musik von einem Mobiltelefon oder einem anderen Gerät abspielen, das ScreenShare unterstützt. ■ ScreenShare (Ein / Aus): Aktivieren oder Deaktivieren von ScreenShare-Zugriff auf verschiedene Inhalte von Mobiltelefonen oder andere Geräten, die ScreenShare unterstützen. TV-Name: Festlegen eines Namens für den Fernseher, damit Sie ihn im Mobilgerät einfach finden können. ✎ Wenn Sie Benutzer-Eingabe wählen, können Sie den Namen des Fernsehers mit der Bildschirmtastatur eingeben. AllShare 3/7 einstell. Nachricht Nachricht Medien : ein Medien ScreenShare : ein : ein ScreenShare TV name : Home TV E Select R zurück e beenden ' einstell. R zurück 44 Deutsch Verwenden der Nachrichtenfunktion Mit dieser Funktion können Sie die eingegangenen Anrufe, SMS-Nachrichten und Zeitpläne vom Mobiltelefon im Alarmfenster anzeigen, während Sie das Fernsehgerät verwenden. ✎ HINWEIS Einstellungen ■ Mit dieser Funktion wird aber nur der Name des Mobilgeräts aus der Liste entfernt. Wenn das entfernte Mobilgerät wieder angeschaltet wird oder eine Verbindung zum Fernseher herstellen möchten, wird es möglicherweise wieder in der Liste angezeigt. x x x x Um dieses Alarmfenster nicht anzuzeigen, deaktivieren (Aus) Sie Nachricht bei den Einstellungen von AllShare. Wenn OK gewählt wird oder wenn OK nach dreimaliger Anzeige der Nachricht nicht gewählt wird, wird die Nachricht gelöscht. Die Nachricht wird nicht vom Mobiltelefon gelöscht. Das Alarmfenster kann angezeigt werden, während Sie Anwendungen wie Media Play usw. verwenden. Um den Inhalt der Nachricht zu sehen, schalten Sie in diesem Fall auf Fernsehmodus um. Wenn eine Nachricht von einem unbekannten Mobiltelefon angezeigt wird, wählen Sie das Mobiltelefon im Nachrichtenmenü von AllShare und wählen Sie dann Abweisen, um das Telefon zu sperren. Nachrichtenansicht Wenn eine neue SMS-Nachricht ankommt, während Sie fernsehen, wird das Alarmfenster geöffnet. Wenn Sie auf OK klicken, wird der Inhalt der Nachricht angezeigt. Sie können die Anzeigeeinstellungen für SMS-Nachrichten auf Ihren Mobiltelefonen konfigurieren. Anweisungen finden im Handbuch des Mobiltelefons. ✎ ✎ Manche Zeichen werden möglicherweise als Leerzeichen oder unlesbar angezeigt. Verwenden der ScreenShare-Funktion Wenn ein Anruf eingeht, während Sie fernsehen, wird das Alarmfenster geöffnet. Mit Hilfe von ScreenShare können Sie die verschiedenen von einem Mobiltelefon angebotene Inhalte durchsuchen. Zum Beispiel zeigt die nachfolgende Abbildung eine Zugriffsseite für den Inhalt auf einem Mobiltelefon. Sie können die Dateien des Mobiltelefons und das Telefonbuch und den Kalender auf dem Fernseher anzeigen. Auch können Sie andere vom Telefonbuch aus anrufen oder eine SMS senden. Kalenderalarm Während Sie fernsehen, wird das Alarmsignalfenster geöffnet, um die registrierte Sendung anzuzeigen. ✎ ✎ Sie können die Anzeigeeinstellungen für die Zeitplaninhalte auf Ihren Mobiltelefonen konfigurieren. Anweisungen finden im Handbuch des Mobiltelefons. Manche Sonderzeichen werden möglicherweise als Leerzeichen oder unlesbar angezeigt. Verwenden der Medienfunktion Ein Alarmsignalfenster wird geöffnet und informiert den Benutzer, dass die vom Mobiltelefon gesendeten Medieninhalte (Videos, Photos, Musik) auf dem Fernseher angezeigt werden. Der Inhalt wird automatisch 3 Sekunden nach dem Öffnen des Alarmfensters angezeigt. Wenn Sie bei geöffnetem Alarmfenster auf RETURN oder EXIT drücken, werden die Medieninhalte nicht wiedergegeben. ✎ HINWEIS x x x Damit Sie diese Funktion verwenden können, müssen Sie ScreenShare auf Ihrem SamsungMobiltelefon installieren. Doc Viewer kann Dateien im Doc-Format lesen, sie können aber nicht bearbeitet werden. Die Bildschirmanzeige ann sich je nach angeschlossenem Gerät unterscheiden. My Mobile ✎ HINWEIS x Beim ersten Verwenden der Medienfunktion wird ein Warnhinweis angezeigt. Drücken Sie die Eingabetaste, um Zulassen zu wählen. Danach können Sie die Medienfunktion auf diesem Gerät verwenden. "Unknown Device 0" is requesting that the media file be allowed to play. If you wish to allow the media file to be played at your device, please press "Allow", otherwise press "Deny". You can also change the setting (or resetting) of this feature at "AllShare Setup". Warning: Please note that if your device is connected to unsecured or unfamiliar network, unwanted or inappropriate contents might be played. If you are not sure about the network's identity or content's appropriateness, we strongly recommend that you do not "Allow" the request to play. Allow x x x x x Deny Contacts Calendar Doc viewer E Auswählen C zurück Verwenden eines Samsung-Telefons zum Bedienen des Fernsehgeräts Damit Sie diese Funktion verwenden können, müssen Sie ein Mobiltelefon anschließen, das ScreenShare-Funktionen unterstützt. Wenn Sie das Fernsehgerät mit Ihrem Mobiltelefon bedienen, werden nur die Tasten POWER, y, z und MUTE unterstützt. ✎ Selbst wenn Sie eine Reglertaste (Kanal oder Lautstärke) des Mobiltelefons gedrückt halten, ändert sich der Wert jeweils nur um eine Einheit. Um die Übertragung von Medieninhalten des Mobiltelefons zu deaktivieren, müssen Sie die Medien bei den Einstellungen für AllShare deaktivieren (Aus). Die Inhalte können je nach Auflösung und Format möglicherweise nicht auf Ihrem Fernseher angezeigt werden. Die ENTERE und die Tasten ◄ / ► sind je nach Medieninhalt möglicherweise deaktiviert. Sie können die Medienwiedergabe mit dem Mobiltelefon steuern. Weitere Informationen hierzu finden Sie im Benutzerhandbuch zum Mobiltelefon. Wenn Sie Medieninhalte von Ihrem PC abspielen möchten, wählen Sie das PC-Symbol auf der Hauptanzeige von AllShare. Das Menü Media Play der Fernsehgeräts ändert sich automatisch. Weitere Informationen finden Sie unter „Media Play“. Deutsch 45 04 Erweiterte Funktionen Alarm bei eingehendem Anruf Weitere Informationen Teletext für Analogkanäle Auf der Videotext-Indexseite finden Sie Verwendungshinweise zum Videotext. Für die korrekte Anzeige von Teletextinformationen muss der Senderempfang einwandfrei sein. Andernfalls können Informationen unvollständig sein oder einige Seiten nicht angezeigt werden. ✎ Sie können die Videotextseiten durch Drücken der Zifferntasten auf der Fernbedienung wechseln. 1 / (Videotext an/ mix): Aktivieren Sie den Videotextmodus, nachdem Sie einen Sender ausgewählt haben, der Videotext anbietet. Drücken Sie die Taste zweimal, um die Videotextinformationen gleichzeitig mit der aktuellen Sendung auf dem Bildschirm anzuzeigen. 2 8 (Speichern): Videotextseiten speichern. 3 4 (Größe): Anzeige von Videotext 4 5 8 6 (Index) Anzeigen der Videotext- 9 5 (Verborgenen Inhalt einblenden) 0 Anzeigen der vorherigen Videotextseite. Indexseite (Inhalt) während Sie Teletext verwenden 6 1 9 (halten): Halten einer 3 0 4 ! 7 8 9 A B C Videotextmodus (LISTE/FLOF). Wenn Sie diese Taste im Modus LIST (Liste) drücken, wird in den Listenspeichermodus umgeschaltet. Im Listenspeichermodus können Sie mit der Taste 8 (Speichern) Videotextseiten in einer Liste speichern. 6 3 (Vorherige Seite anzeigen): 5 2 0 (Modus): Wählen Sie den 7 Anzeigen der nächsten Videotextseite. in doppelt großen Buchstaben in der oberen Hälfte des Bildschirms. Drücken Sie die Taste erneut, um den Text auch in der unteren Hälfte des Bildschirms groß anzuzeigen. Zum Ausblenden des Videotextes drücken Sie die Taste erneut. angezeigten Seite, die mit weiteren, untergeordnete Seiten verknüpft ist, um das automatische Umblättern zu verhindern. Drücken Sie zum Fortfahren die Taste erneut. 2 (Nächste Seite anzeigen) D @ Anzeigen von verborgenem Text (z. B. Antworten bei Quizsendungen). Drücken Sie die Taste erneut, um Videotext auszublenden. 7 (Abbrechen): Während der ! Suche nach einer Seite die laufende Fernsehsendung anzeigen. Farbtasten (rot / grün / gelb / @ blau): Wenn der Sender das FASTEXT-System verwendet, sind die verschiedenen Themen auf den Videotextseiten farbig gekennzeichnet und können mit den Farbtasten auf der Fernbedienung angewählt werden. Drücken Sie die Farbtaste, die dem Thema entspricht, das Sie anzeigen möchten. Die Seite wird mit anderen farbig markierten Informationen angezeigt, die auf dieselbe Art ausgewählt werden können. Drücken Sie die entsprechende Farbtaste, um die vorherige oder nächste Seite anzuzeigen. 1 (Unterseite) Anzeigen eine verfügbaren Unterseite. Die Videotextseiten sind in sechs Kategorien unterteilt: Sportergebnisse Inhalt A B C 46 Gewählte Seitennummer Senderkennung Aktuelle Seitenzahl oder Suchhinweise Deutsch Sportergebnisse Inhalt D E F Datum und Uhrzeit Text Statusinformation FASTEXTInformationen 05 Weitere Informationen Anbringen der Wandhalterung ¦ Montieren der Montagehalterung Wenn Sie das Fernsehgerät an der Wand anbringen, befestigen Sie die Montagehalterung an dem Teil, das (wie in der Abbildung gezeigt) mit dem Standfuß verbunden wird. Montagehalterung ¦ Vorbereiten für den Einbau der Wandhalterung (46 ~ 55 Zoll Fernsehgeräts) Beim Einbau einer Wandhalterung eines anderen Herstellers, verwenden Sie den Haltering. ¦ Anbringen der Wandhalterung Mit der separat erhältlichen Wandhalterung können Sie das Fernsehgerät an einer Wand befestigen. Detaillierte Informationen zum Montieren der Wandhalterung finden Sie in den Anweisungen, die im Lieferumfang der Wandhalterung enthalten sind. Lassen Sie sich beim Anbringen der Wandhalterung von einem Techniker helfen. Samsung Electronics haftet nicht für Schäden an Gerät oder Personen, wenn die Montage vom Kunden selbst durchgeführt wird. Deutsch 47 Weitere Informationen ¦ Spezifikation (VESA) der Wandhalterung ✎ Die Wandhalterung wird nicht mitgeliefert, ist aber gesondert erhältlich. Montieren Sie die Wandhalterung an einer soliden Wand, die senkrecht zum Boden steht. Bei Installation auf anderen Trägermaterialien wenden Sie sich bitte an Ihren Fachhändler. Bei Montage an einer Decke oder schrägen Wand kann es herunterfallen und zu Verletzungen kommen. ✎ HINWEIS x x x x x x x x x Samsung Electronics haftet nicht für Schäden an Gerät oder Personen, wenn die Montage vom Kunden selbst durchgeführt wird. Die Standardabmessungen der Wandhalterung finden Sie in der nachfolgenden Tabelle. Beim Kauf unserer Wandhalterung erhalten Sie ein detailliertes Installationshandbuch sowie alle für die Montage erforderlichen Teile. Verwenden Sie keine Schrauben, die länger sind als hier angegeben, da damit innen liegende Bauteile des Fernsehers beschädigt werden können. Bei Wandhalterungen, die nicht der VESA-Standardspezifikation für Schrauben entsprechen, kann die Länge der Schrauben je nach Spezifikation unterschiedlich sein. Verwenden Sie keine Schrauben, die nicht der VESA-Standardspezifikation für Schrauben entsprechen. Ziehen Sie die Schrauben nicht zu fest an, weil Sie so möglicherweise das Gerät beschädigen, oder es dadurch herunterfallen und Verletzungen verursachen könnte. Samsung haftet nicht bei derartigen Unfällen. Samsung haftet nicht für Geräteschäden oder Verletzungen, wenn eine Wandhalterung verwendet wird, die nicht dem VESA-Standard entspricht oder nicht spezifiziert ist, oder wenn der Verbraucher die Installationsanleitung für das Produkt nicht befolgt. Bei der Montage dieses Fernsehgeräts dürfen Sie eine Neigung von 15 Grad nicht überschreiten. Produktfamilie Zoll 19~22 LCD-Fernsehgerät 23~29 30~40 46~55 57~65 70~80 80~ VESA-Spezifikation (A * B) Standardschraube 75 X 75 100 X 100 200 X 100 200 X 200 400 X 400 600 X 400 800 X 400 1400 X 800 Menge M4 M6 4 M8 Installieren Sie die Wandhalterung nicht bei angeschaltetem Fernsehgerät. Sie könnten dabei einen Stromschlag erhalten und sich verletzen. Verlegen der Kabel Verstecken Sie die Kabel im Kabelschlauch, damit sie durch den transparenten Standfuß hindurch nicht zu sehen sind. Kabelbinder 48 Deutsch Ein Kensington-Schloss dient zur physischen Sicherung des Systems bei Verwendung in öffentlichen Bereichen. Je nach Hersteller können Aussehen und Verriegelungsverfahren von der Abbildung abweichen. Informationen zur richtigen Anwendung entnehmen Sie bitte der Bedienungsanleitung des Kensington-Schlosses. 1 2 ✎ Suchen Sie das Symbol „K“ auf der Rückseite des Fernsehgeräts. 1. 2. 3. Neben diesem „K“-Symbol befindet sich der Steckplatz für das Kensington-Schloss. Führen Sie das Schloss in den Kensington-Einschub am LCDFernseher ein 1, und drehen Sie es in die Verriegelungsposition 2. Schließen Sie das Kabel für das Kensington-Schloss an 3. Befestigen Sie das Kensington-Schloss an einem Tisch oder einem schweren feststehenden Objekt. 3 <Optional> ✎ Das Schloss muss separat erworben werden. ✎ Die Position des Kensington-Schlosses ist modellabhängig. Befestigen des Fernsehgeräts an der Wand Achtung: Das Fernsehgerät kann hinfallen, wenn Sie daran ziehen, es schieben oder darauf klettern. Stellen Sie insbesondere sicher, dass sich keine Kinder an das Gerät hängen oder es aus dem Gleichgewicht bringen. Anderenfalls könnte das Gerät umkippen und schwere Verletzungen oder den Tod verursachen. Beachten Sie alle Anweisungen der beigefügten Sicherheitshinweise. Noch mehr Stabilität erreichen Sie, wenn Sie den Kippschutz installieren. Gehen Sie hierzu folgendermaßen vor. ¦ So verhindern Sie, dass das Fernsehgerät umkippt ✎ Da die benötigten Halterungen, Schrauben und das Band nicht zum 1. Lieferumfang gehören, müssen Sie diese Teile gesondert erwerben. Drehen Sie die Schrauben durch die Halterungen und befestigen Sie sie fest an der Wand. Stellen Sie sicher, dass die Schrauben fest mit der Wand verbunden sind. Daten der Schrauben x Für LCD-Fernsehgeräte von 32 – 40 Zoll: M6 x Für LCD-Fernsehgeräte von 46 – 55 Zoll: M8 Entfernen Sie die Schrauben in der Mitte auf der Rückseite des Fernsehgeräts. Setzen Sie diese Schrauben in die Halterungen ein und befestigen Sie die Schrauben dann wieder am Fernsehgerät. Verbinden Sie die Halterungen an der Wand und die Halterung am Fernsehgerät mit einem festen Band miteinander und ziehen Sie das Band dann fest. ✎ 2. 3. ✎ Kontrollieren Sie, ob alle Anschlüsse weiterhin fest verbunden sind. Wand Prüfen Sie regelmäßig die Verbindungen auf Zeichen von Ermüdung oder Versagen. Bei Zweifeln hinsichtlich der Sicherheit Ihrer Halterung wenden Sie sich an einen professionellen Installationsbetrieb. ✎ Stellen Sie das Fernsehgerät in der Nähe der Wand auf, damit es nicht nach hinten kippen kann. ✎ Es ist noch sicherer, wenn die Halterungen an der Wand niedriger als die Halterungen am Fernsehgerät sind. ✎ Lösen Sie das Band, ehe Sie den Fernsehapparat bewegen. Deutsch 49 05 Weitere Informationen Kensington-Schloss als Diebstahlsicherung Weitere Informationen Fehlerbehebung Bei Fragen zum Fernsehgerät schauen Sie zuerst in dieser Liste nach. Wenn keiner dieser Tipps zur Fehlerbehebung weiterhilft, öffnen Sie die Website „www.samsung.com“ und klicken Sie dort auf „Support“ oder wenden Sie sich an das in der Liste auf der letzten Seite angegebene Callcenter. Problem Lösungen und Erklärungen Bildqualität Führen Sie zu allererst den Bildtest durch, um zu bestätigen, dass Ihr Fernsehgerät das Testbild korrekt anzeigt. (Wechseln Sie zu MENU - Unterstützung - Eigendiagnose - Bildtest (Seite 20). Wenn das Testbild richtig angezeigt wird, kann das schlechte Bild durch die Signalquelle oder das Signal verursacht sein. Das Fernsehbild ist nicht so gut wie im Geschäft. • Wenn Sie einen analogen Kabel-/Satellitenreceiver verwenden, ersetzen Sie diesen durch einen digitalen. Verwenden Sie HDMI- oder Komponentenkabel, um Bildqualität in HD (hohe Auflösung) zu ermöglichen. • Kabel-/Satellitenanschluss: Probieren Sie HD-Sender aus der Kanalliste. • Antennenanschluss: Probieren Sie HD-Sender, nachdem Sie die Autoprogrammierung durchgeführt haben. ✎ Viele HD-Kanäle senden aufbereitete SD-Inhalte (Standardauflösung). • Stellen Sie den Kabel-/Satellitenreceiver auf eine Bildauflösung von 1080i oder 720p ein. • Achten Sie darauf, dass Sie beim Fernsehen den Mindestabstand entsprechend der Größe des Fernsehers und der Auflösung des angezeigten Signals einhalten. Das Bild ist verzerrt: Macroblock-Fehler, Smallblock-Fehler, Punkte, Pixelfehler • Durch die Kompression der Videoinhalts kann es zu Bildverzerrungen kommen, insbesondere bei schnellen Bildern wie bei Sportsendungen und Actionfilmen. • Ein niedriger Signalpegel oder schlechte Qualität kann Bildverzerrungen verursachen. Das ist kein Problem des Fernsehgeräts. Farbe ist falsch oder gfehlt. • Wenn Sie einen Komponentenanschluss verwenden, wergewissern Sie sich, ob die Komponentenkabel mit den richtigen Anschlüssen verbunden sind. Falsche oder lose Kontakte können Farbprobleme verursachen oder dazu führen, dass auf dem Bildschirm gar kein Bild angezeigt wird. Schlechte Farbwiedergabe oder Helligkeit. • Stellen Sie die Bild-Optionen im Fernsehmenü ein. (wechseln Sie zum Bild-Modus / Farbe / Helligkeit / Schärfe • Stellen Sie im Fernsehmenü die Optionen für den Energiesparmod. ein. (Wechseln Sie zu MENU Bild - Öko-Lösung - Energiesparmod.). (Seite 14) • Versuchen Sie, die Grundstellung für das Bild wieder herzustellen, damit die Standardbildeinstellungen verwendet werden. (Wechseln Sie zu MENU - Bild - Bild zurücksetzen). Gepunktete Linie am Bildschirmrand. • Wenn die Bildgröße auf Bildschirmanpassung eingestellt ist, ändern Sie dies in 16:9. (Seite 15) • Ändern Sie die Kabel-/Satellitenauflösung. Das Bild ist schwarzweiß. • Wenn Sie einen AV-Composite-Eingang verwenden, schließen Sie das Videokabel (Gelb) an die grüne Buchse des Komponenteneingangs 1 am Fernsehgerät an. Beim Kanalwechsel friert das Bild ein bzw. ist verzerrt, oder die Bildanzeige erfolgt verzögert. • Bei Anschluss an einen Kabelreceiver versuchen Sie, den Kabelreceiver zurückzusetzen. Schließen Sie das Netzkabel wieder an und warten Sie, bis der Kabelreceiver neu startet. Dies kann bis zu 20 Minuten dauern. • Stellen Sie die Bildauflösung des Kabelreceivers auf 1080i oder 720p ein. Tonqualität Führen Sie zu allererst den Audiotest durch, um zu bestätigen, dass Ihr Fernsehgerät den Ton korrekt ausgibt. (Wechseln Sie zu MENU - Unterstützung - Eigendiagnose - Audiotest) (Seite 20). Wenn der Ton richtig ausgegeben wird, kann das Tonproblem möglicherweise durch die Signalquelle oder das Signal verursacht sein. Kein Ton oder Ton zu leise bei maximaler Lautstärke. • Überprüfen Sie die Lautstärke des externen Geräts, das an Ihren Fernseher angeschlossen ist. Bild ist gut, aber kein Ton. • Stellen Sie die Option Lautsprecher auswählen im Tonmenü auf TV-Lautsprecher ein. (Seite 17) • Wenn Sie ein externes Gerät verwenden, vergewissern Sie sich, dass die Audiokabel an die richtigen Audioeingänge am Fernsehgerät angeschlossen sind. • Wenn Sie ein externes Gerät verwenden, überprüfen Sie die Einstellungen für die Tonausgabe des Geräts (z. B. müssen Sie die Toneinstellungen Ihres Kabelreceivers möglicherweise in HDMI ändern, wenn das Gerät über HDMI an Ihr Fernsehgerät angeschlossen ist). • Wenn Sie ein DVI/HDMI-Kabel verwenden, ist ein separates Audiokabel erforderlich. • Wenn Ihr Fernsehgerät über eine Kopfhörerbuchse verfügt, vergewissern Sie sich, dass nichts eingesteckt ist. Die Lautsprecher geben ein unerwünschtes Geräusch von sich. • Überprüfen Sie die Kabelverbindungen. Vergewissern Sie sich, dass kein Videokabel an einen Audioeingang angeschlossen ist. • Überprüfen Sie die Signalstärke des Antennen-/Kabelanschlusses. Ein schwaches Signal kann Verzerrungen verursachen. 50 Deutsch Kein Bild, kein Video Der Fernseher kann nicht eingeschaltet werden. Das Fernsehgerät schaltet sich automatisch aus. Kein Bild/Video. HF-Anschluss (Terrestrisch/Kabel) Das Fernsehgerät empfängt nicht alle Kanäle. Das Bild ist verzerrt: Macroblock-Fehler, Smallblock-Fehler, Punkte, Pixelfehler PC-Verbindung Meldung „Modus nicht unterstützt“ wird angezeigt. Der PC wird immer in der Liste der Signalquellen angezeigt, auch wenn keiner angeschlossen ist. Bild ist gut, aber kein Ton. Netzwerkverbindung (Modellabhängig) Fehler der drahtlosen Netzwerkverbindung. Andere Das Bild wird nicht als Vollbild angezeigt. Die Fernbedienung funktioniert nicht. Die Fernbedienung des Kabel-/ Satellitenreceivers schaltet das Fernsehgerät nicht ein/aus oder regelt auch nicht die Lautstärke. Meldung „Modus nicht unterstützt“ wird angezeigt. Kunststoffgeruch tritt aus dem Fernsehgerät aus. Die Option Signalinformation steht für das Fernsehgerät im Menü Eigendiagnose nicht zur Verfügung. Das Fernsehgerät ist seitlich geneigt. Es gibt Schwierigkeiten, den Sockel des Standfußes zu montieren. Das Kanalmenü wird grau angezeigt. (nicht verfügbar) Lösungen und Erklärungen • Vergewissern Sie sich, dass das Netzkabel sicher mit der Wandsteckdose und dem Fernsehgerät verbunden ist. • Vergewissern Sie sich, dass die Netzsteckdose Strom liefert. • Drücken Sie die POWER am Fernsehgerät, um zu prüfen, ob die Fernbedienung richtig funktioniert. Wenn das Fernsehgerät angeht, lesen Sie den Abschnitt „Die Fernbedienung funktioniert nicht“ weiter unten. • Stellen Sie im Menü Einstell. sicher, dass der Sleep-Timer deaktiviert Aus ist. (Seite 18) • Wenn das Fernsehgerät an Ihren PC angeschlossen ist, überprüfen Sie die Energiespareinstellungen Ihres PCs. • Vergewissern Sie sich, dass das Netzkabel sicher mit der Wandsteckdose und dem Fernsehgerät verbunden ist. • Wenn Sie über Kabel oder Antenne fernsehen, schaltet sich das Fernsehgerät nach 10 – 15 Minuten ohne Signal aus. • Überprüfen Sie die Kabelverbindungen. Unterbrechen Sie kurzzeitig alle Kabelverbindungen zwischen dem Fernsehgerät und den externen Geräten. • Stellen Sie den Videoausgang Ihres externen Geräts (Kabel-/Satellitenreceiver, DVD-/Blu-ray-Player) so ein, dass er zur Verbindung mit dem Fernsehgerät passt. Zum Beispiel: Wenn der HDMI-Ausgang des externen Geräts verwendet wird, schließen Sie es an den HDMI-Eingangs Ihres Fernsehers an. • Stellen Sie sicher, dass die angeschlossenen Geräte angeschaltet sind. • Vergewissern Sie sich, dass die richtige Signalquelle für den Fernseher eingestellt ist. Drücken Sie dazu die Taste SOURCE auf der Fernbedienung des Fernsehers. • Vergewissern Sie sich, dass das Antennenkabel korrekt angeschlossen ist. • Probieren Sie es mit Plug & Play (Erstmaliges Einrichten) um die verfügbaren Kanäle zur Kanalliste hinzuzufügen. Wechseln Sie zu MENU - Plug & Play (Erstmaliges Einrichten) und warten Sie, bis alle verfügbaren Kanäle gespeichert sind. • Prüfen Sie, ob die Antenne korrekt angeordnet ist. • Durch die Kompression der Videoinhalts kann es zu Bildverzerrungen kommen, insbesondere bei schnellen Bildern wie bei Sportsendungen und Actionfilmen. • Ein schwaches Signal kann Verzerrungen verursachen. Das ist kein Problem des Fernsehgeräts. • Stellen Sie die Ausgangsauflösung und Frequenz Ihres PCs so ein, dass sie zu den vom Fernsehgerät unterstützten Auflösungen passen. (Seite 20) • Das ist normal. Der PC wird immer in der Liste der Signalquellen angezeigt, auch wenn keiner angeschlossen ist. • Wenn Sie eine HDMI-Verbindung verwenden, prüfen Sie die Einstellungen des Audioausgangs für Ihren PC. • Es ist ein drahtloser USB-Dongle von Samsung erforderlich, um das Drahtlosnetzwerk zu verwenden. • Vergewissern Sie sich, dass die Netzwerkverbindung auf „Drahlos“ eingestellt ist. • Das Fernsehgerät muss an einen drahtlosen IP-Sharer (Router) angeschlossen sein. • Bei HD-Kanälen werden auf beiden Seiten schwarze Balken angezeigt, wenn Sie aufbereitete SDInhalte (4:3) wiedergeben. • Bei Filmen mit einem anderen Seitenverhältnis als am Fernsehgerät eingestellt werden oben und unten schwarze Balken angezeigt. • Stellen Sie die Bildgröße an Ihrem externen Gerät oder am Fernseher auf Vollbild ein. • Ersetzen Sie die Batterien der Fernbedienung, und achten Sie dabei auf die richtige Polung (+/-). • Reinigen Sie das Sendefenster der Fernbedienung. • Zeigen Sie mit der Fernbedienung aus 1,5 bis 2 m Enternung direkt auf das Fernsehgerät. • Programmieren Sie die Fernbedienung des Kabel-/Satellitenreceivers so, dass sie das Fernsehgerät anspricht. Den Code für SAMSUNG TV finden Sie in der Bedienungsanleitung für Ihren Kabel-/ Satellitenreceiver. • Überprüfen Sie die unterstützte Auflösung des Fernsehgeräts und stellen Sie die Ausgangsauflösung des externen Geräts dementsprechend ein. Weitere Informationen erhalten Sie auf Seite 20 dieses Handbuchs. • Dieser Geruch ist normal und verschwindet im Lauf der Zeit. • Diese Funktion ist nur bei digitalen Kanälen mit Antennenanschluss (HF/Koax) verfügbar. (Seite 20) • Lösen Sie den Sockel des Standfußes vom Fernsehgerät und wiederholen Sie die Montage. • Stellen Sie sicher, dass Ihr Fernsehgerät auf einer ebenen Fläche steht. Wenn Sie die Schrauben nicht vom Fernseher lösen können, verwenden Sie einen magnetischen Schraubendreher. • Das Menü Kanal ist nur dann verfübgar, wenn eine TV-Signalquelle ausgewählt wurde. Deutsch 51 05 Weitere Informationen Problem Weitere Informationen Problem Lösungen und Erklärungen Ihre Einstellungen gehen nach 30 Minuten oder bei jedem Abschalten des Fernsehers verloren. Vorübergehender Ausfall von Bild oder Ton. Sie sehen kleine Partikel, wenn Sie den Rahmen um den Bildschirm herum genau betrachten. Das PIP-Menü ist nicht verfügbar. Die Meldung „Verschlüsseltes Signal“ oder „Kein Signal/Schwaches Signal“ wird angezeigt. Sie haben das Fernsehgerät vor 45 Minuten ausgeschaltet, es schaltet sich aber von selbst wieder ein. Es gibt wiederholte Bild-/Tonprobleme. Es kann eine Reaktion zwischen dem Gummipolster des Sockels und der Oberfläche mancher Möbel geben. • Wenn das Fernsehgerät im Modus Shop-Demo läuft, werden die Ton- und Bildeinstellungen alle 30 Minuten zurückgesetzt. Wechseln Sie mit dem Plug & Play-Prozess (erstmals einrichten) vom Modus Shop-Demo zu Privatgebrauch. Drücken Sie diese Taste SOURCE, um den TV-Modus auszuwählen. Wechseln Sie dann zu MENU → Einstell. → Plug & Play (erstmals einrichten) → ENTERE. • Überprüfen und korrigieren Sie ggf. die Kabelverbindungen. • Der Ausfall von Ton oder Bild kann durch Einsatz übermäßig starrer oder dicker Kabel verursacht werden. Vergewissern Sie sich, dass die Kabel für langfristigen Gebrauch flexibel genug sind. Bei Wandmontage empfehlen wir, Kabel mit 90 Grad-Steckern zu verwenden. • Dies ist Teil des Produktdesigns und kein Defekt. • PIP-Funktionen stehen nur zur Verfügung, wenn Sie eine HDMI-, PC- oder Komponentensignalquelle anzeigen. • Wenn Sie ein CAM (mit „CI“ oder „CI+“-Karte) verwenden, überprüfen Sie, ob es richtig in den CISteckplatz (Common Interface) eingesetzt wurde. • Wenn das Problem fortbesteht, ziehen Sie das CAM aus dem Fernseher heraus und setzen Sie es erneut ein. • Dies ist normal. Das Fernsehgerät aktiviert die OTA-Funktion (Over-the-Air) Funktion selbst, um die Firmware für die Aktualisierung beim Fernsehen herunterzuladen. • Überprüfen und ändern Sie Signal/Signalquelle. • Um dies zu verhindern, bringen Sie Filzblöcke an jeder Fläche des Fernsehers an, die in direkten Kontakt mit Möbeln gerät. ✎ Der TFT-LCD-Bildschirm enthält Unterpixel. Hierfür ist eine ausgefeilte Fertigungstechnologie erforderlich ist. Allerdings können ein paar zu helle oder zu dunkle Pixel auf der Bildfläche zu sehen sein. Diese Pixelfehler haben keinen Einfluss auf die Geräteleistung. ¦ Lizenz Manufactured under licence from Dolby Laboratories. Dolby and the double-D symbol are trademarks of Dolby Laboratories. Manufactured under license under U.S. Patent #’s: 5,451,942; 5,956,674; 5,974,380; 5,978,762; 6,487,535 & other U.S. and worldwide patents issued & pending. DTS and the Symbol are registered trademarks. & DTS 2.0+ Digital Out and the DTS logos are trademarks of DTS, Inc. Product Includes software. © DTS, Inc. All Rights Reserved. DivX Certified to play DivX video up to HD 1080p, including premium content. ABOUT DIVX VIDEO: DivX® is a digital video format created by DivX,Inc. This is an official DivX Certified device that plays DivX video. Visit www.divx.com for more information and software tools to convert your files into DivX video. ABOUT DIVX VIDEO-ON-DEMAND: This DivX Certified® device must be registered in order to play DivX Videoon-Demand (VOD) content. To generate the registration code, locate the DivX VOD section in the device setup menu. Go to vod.divx.com with this code to complete the registration process and learn more about DivX VOD. Pat. 7,295,673;7,460,688; 7,519,274 TheaterSound, SRS and the symbol are trademarks of SRS Labs, Inc. TheaterSound technology is incorporated under license form SRS Lab, Inc. 52 Deutsch Bildschirm (nativ) Umgebungsbedingungen Betriebstemperatur Luftfeuchtigkeit (bei Betrieb) Lagerungstemperatur Luftfeuchtigkeit (Lagerung) TV-System 1920 x 1080 bei 60 Hz 10° C bis 40° C 10% bis 80%, nicht kondensierend -20° C bis 45° C 5% bis 95%, nicht kondensierend Analog: Je nach eingestelltem Land. Digital: DVB-T/DVB-C Analog: PAL, SECAM, NTSC-4.43, NTSC-3.58, PAL60 Digital: MPEG-2 MP@ML, MPEG-4, H.264/AVC MP@L3, [email protected], [email protected] BG. OK NICAM. MPEGl Video: 1080/24p, 1080p, 1080i, 720p, 576p, 576i, 480p, 480i Audio: Lineares Zweikanal-PCM-System für 32,44 1, 48 kHz, 16/20/24bits Analoger Audioeingang (nur HDMI IN1) PC-Anschluss Fernsehnorm/Videosystem Audiosystem HDMI IN 1 – 4 Drehbarer Fuß (Links und rechts) Modellname Bildschirmgröße (Diagonal) Ton Ausgang Abmessungen (BxTxH) Gehäuse Mit Fuß Gewicht Gehäuse Mit Fuß Modellname Bildschirmgröße (Diagonal) Ton Ausgang Abmessungen (BxTxH) Gehäuse Mit Fuß Gewicht Gehäuse Mit Fuß 05 Weitere Informationen Technische Daten -20˚ ~ 20˚ LE32C650 LE32C652 32 Zoll LE37C650 LE40C650 LE40C652 LE46C650 LE46C652 LE55B650 94 cm 102 cm 117 cm 140 cm 10W X 2 15W X 2 789.2 X 77.8 X 509.9 mm 907.6 X 78.5 X 574.4 mm 976.2 X 80.4 X 614.9 mm 1108.6 X 80.3 X 689.7 mm 1301.6 X 85.3 X 801.2 mm 789.2 X 240 X 555.9 mm 907.6 X 255 X 621.2 mm 976.2 X 255 X 659.3 mm 1108.6 X 275 X 734.5 mm 1301.6 X 305 X 845.3 mm 9.1 kg 11.8 kg 11.6 kg 15 kg 14.3 kg 17.7 kg 18.1 kg 21.9 kg 28.1 kg 32.7 kg LE32C653 LE32C654 LE40C653 LE40C654 LE46C653 LE46C654 32 Zoll 40 Zoll 46 Zoll 10W X 2 794.5 X 77.8 X 495.4 mm 794.5 X 240 X 558.6 mm 981.5 X 80.4 X 598.5 mm 981.5 X 255 X 661.9 mm 1113.9 X 80.3 X 674.1 mm 1113.9 X 275 X 737.1 mm 9.3 kg 12 kg 13.5 kg 16.9 kg 18.1 kg 21.9 kg ✎ Änderungen der technischen Daten und des Geräte-Designs vorbehalten. ✎ Die technischen Daten zur benötigten Netzspannung finden Sie auf dem Etikett am Produkt. Deutsch 53 Weitere Informationen Index A H Alle wählen 13 AllShare 44 Anschließen an ein Audiogerät 8 Anynet+ 36 Anschließen an einen PC 22 Audio Out 8, 36 Aufnehmen 37 Autom. Einstellung 16 Automatische Lautstärke 17 Hautton HDMI Heimkino Helligkeit Hintergrundbild Hintergrundmusik B Balance Basisansicht Batterien Bearbeiten von Sendern Bildformat 16 34 5 12 15, 35 D Diashow Digitaler Audioausgang DivX® VOD D-sub Dynamisch 34 8, 36 35 22 13 I Installation Space Internet@TV 2 39 K Kabelbinder Kanal-Manager Kennwort Komp. Kopfhörer 48 11 40 7 8 L Lautsprecherauswahl Lautstärke Lizenz 17 4, 5, 17 52 Eigendiagnose 20 EIN/AUS-Taste 5 Eingang einrichten 24, 26 Elektronischer Programmführer 10 Empfänger 38 Energiesparmod. 14 EPG 10 Equalizer 16 Ext. Lautsprecher 17 Extras 3 F Farbtemperatur Favoritenkanal Fehlerbehebung Feinabstimmung Fernbedienung Filmmodus Fotos Frequenz 15 11 50 13 5 15 34 12 Media Play Melodie Menütransparenz Montagehalterung Musik Optimale Auflösung Optimalkontrast RGB 14 S Schärfe Schwarzton Signalinformation Sleep-Timer Software-Update Sperren Sprache Standby-Modus Symbol 13 14 20 18 20 41 19 4 3 T Technische Daten Timer Titel TV-Empfang TV-Lautsprecher Uhr Untertitel USB 53 18 34 12 17 22 14 W 14 P 6, 19 20 6 18 19 20, 29 V 9 9 4 23 Ö Öko-Sensor 9 R Verstärken Verwenden der Kanalansicht Verwenden der Programmieransicht Verwenden von Favoriten VCR Video Videowiedergabe O PIN ändern PIP Plug & Play Deutsch 29 19 19 47 33 N Name bearbeiten Navigieren Netzanzeige Netzwerkverbindung Quellen U M E 54 Q 14 7, 36 8, 36 13 35 35 Wandhalterung Warm Weißabgleich Wiederholungsmodus 16 10 10 11 9 31 32 47 15 14 35 Diese Seite wurde absichtlich leer belassen. Les figures et illustrations contenues dans ce mode d’emploi sont fournies pour référence uniquement. Elles peuvent différer de l’aspect réel du produit. La conception et les spécifications du produit sont susceptibles d’être modifiées sans préavis. Avis concernant le téléviseur numérique 1. 2. 3. 4. 5. 6. ✎ Les fonctions relatives à la télévision numérique (DVB) ne sont disponibles que dans les pays ou régions où des signaux terrestres numériques de type DVB-T (MPEG2 et MPEG4 AVC) sont diffusés ou dans lesquels vous avez accès à un service de télévision par câble compatible DVB-C (MPEG2 et MPEG4 AAC). Consultez votre distributeur local pour connaître les possibilités en matière de réception des signaux DVB-T ou DVB-C. DVB-T est la norme du consortium européen DVB pour la diffusion de signaux terrestres de télévision numérique. La norme DVB-C est, quant à elle, prévue pour la diffusion des signaux de télévision numérique par câble. Certaines fonctions particulières, telles que le guide électronique des programmes (Electric Program Guide - EPG) ou encore la vidéo à la demande (Video On Demand - VOD), ne sont toutefois pas incluses dans cette spécification. Dès lors, elles ne seront pas traitées pour l’instant. Bien que ce téléviseur soit conforme aux dernières normes DVB-T et DVB-C (août 2008), il n’est pas garanti qu’il soit compatible avec les futures diffusions de signaux numériques terrestres DVB-T et par câble DVB-C. En fonction du pays ou de la région où vous vous trouvez, certains opérateurs de télévision par câble peuvent facturer des frais supplémentaires pour un tel service. Il se peut également que vous deviez accepter les termes et conditions de ces sociétés. Il se peut que certaines fonctions de TV numérique ne soient pas disponibles dans certains pays ou certaines régions et que la réception des signaux DVB-C ne soit pas correcte avec tous les opérateurs. Pour plus d’informations, contactez votre service client Samsung. Les différentes méthodes de diffusion adoptées en fonction des pays peuvent affecter la qualité de réception du téléviseur. Vérifiez le fonctionnement du téléviseur chez votre revendeur agréé SAMSUNG ou contactez le centre d’appel de Samsung pour savoir s’il est possible d’en améliorer les performances en reconfigurant les réglages. Avertissement d’image fixe Evitez d’afficher sur l’écran des images fixes (telles que des photos au format JPEG) ou des éléments d’images fixes (tels que des logos de programmes TV, un format d’image 4:3 ou panoramique, bandeaux d’actualités ou d’informations boursières au bas de l’écran, etc.). L’affichage permanent d’images fixes risque, en effet, d’entraîner une usure irrégulière du phosphore d’écran, ce qui peut se traduire par une dégradation de la qualité d’image. Pour atténuer les risques, suivez scrupuleusement les recommandations suivantes : • Evitez d’afficher le même canal de télévision pendant de longues périodes. • Essayez toujours d’afficher l’image en plein écran ; pour obtenir une correspondance optimale, utilisez le menu de format d’image du téléviseur. • Réduisez les valeurs de luminosité et de contraste sur le minimum requis pour obtenir la qualité d’image souhaitée. L’utilisation de valeurs trop élevées risque d’accélérer le processus de brûlure. • Utilisez fréquemment toutes les fonctions du téléviseur conçues pour réduire le phénomène de rémanence et la brûlure d’écran. Pour plus d’informations à ce sujet, consultez la section appropriée du mode d’emploi. Sécurisation de l’espace d’installation Maintenez les distances requises entre le produit et les autres objets (par exemple, les murs) afin de garantir une ventilation adaptée. Le non-respect de ces distances peut provoquer un incendie ou un problème au produit en raison d’une augmentation de la température interne de celui-ci. ✎ Lors de l’utilisation d’un pied ou d’un support mural, utilisez uniquement les pièces fournies par Samsung Electronics. x L’utilisation de pièces fournies par un autre fabricant peut occasionner un problème au niveau du produit ou la chute de celui-ci, ce qui pourrait vous blesser. ✎ L’aspect peut varier en fonction du produit. Installation avec un pied. Installation avec un support de montage mural. 10 cm 10 cm 10 cm 10 cm 10 cm 10 cm 10 cm Instructions de mise au rebut de ce produit (Déchets d'équipements électriques et électroniques) (Applicable dans les pays de l'Union Européenne et dans d'autres pays européens pratiquant la collecte sélective de déchets) Ce symbole sur le produit, ses accessoires ou sa documentation indique que ni le produit, ni ses accessoires électroniques usagés (chargeur, casque audio, câble USB, etc.) ne peuvent être jetés avec les autres déchets ménagers. La mise au rebut incontrôlée des déchets présentant des risques pour l'environnement et la santé publique, veuillez séparer vos produits et accessoires usagés des autres déchets. Vous favoriserez ainsi le recyclage de la matière qui les compose dans le cadre d'un développement durable. Les particuliers sont invités à contacter le magasin leur ayant vendu le produit ou à se renseigner auprès des autorités locales pour connaître les procédures et les points de collecte de ces produits en vue de leur recyclage. Les utilisateurs professionnels doivent contacter leur fournisseur et consulter les conditions générales du contrat d'achat. Ce produit et ses accessoires ne peuvent être jetés avec les autres déchets professionnels et commerciaux. Élimination des batteries de ce produit (Applicable aux pays de l'Union européenne et aux autres pays européens dans lesquels des systèmes de collecte sélective sont mis en place.) Le symbole sur la pile, le manuel ou l'emballage indique que les batteries de ce produit ne doivent pas être éliminées en fin de vie avec les autres déchets ménagers. L'indication éventuelle des symboles chimiques Hg, Cd ou Pb signifie que la pile ou l'accumulateur contient des quantités de mercure, de cadmium ou de plomb supérieures aux niveaux de référence stipulés dans la directive CE 2006/66. Si les piles ne sont pas correctement éliminées, ces substances peuvent porter préjudice à la santé humaine ou à l'environnement. Afin de protéger les ressources naturelles et de favoriser la réutilisation du matériel, veillez à séparer les batteries des autres types de déchets et à les recycler via votre système local de collecte gratuite des piles et accumulateurs. 2 Français Sommaire 4 4 5 6 6 Accessoires Présentation du panneau de commande Présentation de la télécommande Raccordement à une antenne Plug & Play (configuration initiale) 7 8 9 Connexion à un périphérique AV Connexion à un système audio Changement de la source d’entrée Fonctions de base 9 10 10 12 13 16 18 20 Navigation dans les menus Utilisation du bouton INFO (Guide Now & Next) Planification des émissions à regarder Menus Chaîne Menu Image Menu Son Menu Configuration Menu Assistance Fonctions avancées 22 23 29 36 39 44 Connexion à un ordinateur Connexion réseau Media Play Anynet+ Internet@TV AllShare 46 47 48 49 49 50 53 54 Fonction Télétexte de chaîne analogique Installation du support mural Assemblage des câbles Verrou antivol Kensington Fixation du téléviseur au mur Dépannage Caractéristiques techniques Index Mise en route 4 Connexions 7 9 22 Informations supplémentaires 46 Vérifiez la présence du symbole ! O t Vous pouvez utiliser cette fonction en appuyant sur le bouton TOOLS de la télécommande. Remarque Guide étape par étape Français 3 Mise en route Accessories ✎ Vérifiez que les éléments suivants sont inclus avec votre téléviseur LCD. S’il manque des éléments, contactez votre revendeur. ✎ La couleur et la forme des éléments peuvent varier en fonction du modèle. y Télécommande et piles (AAA x 2) y Instructions d’utilisation y Carte de garantie / Manuel de sécurité (non disponible dans certains pays) y Chiffon de nettoyage y Câble d’alimentation (46 ~ 55 pouces TVs) y Cache y Attache de câble y Holder-Ring (4ea) Pour installer le pied, consultez le guide approprié. ou y Pied (1EA) y Support de guidage (1EA) (M4 X L12) y Vis (9EA) (modèle 32 pouces uniquement : 8EA) Présentation du panneau de commande ✎ La couleur et la forme du produit peuvent varier en fonction du modèle. Capteur de la télécommande Témoin d’alimentation Haut-parleurs P (Alimentation) Permet d’allumer ou d’éteindre le téléviseur. Témoin d’alimentation SOURCEE Clignote, puis s'arrête lorsque le téléviseur est allumé. S'allume en mode Veille. Bascule entre toutes les sources d'entrée disponibles. Dans le menu à l'écran, utilisez ce bouton de la même façon que le bouton ENTERE de la télécommande. Affiche un menu à l'écran (ou OSD) reprenant les fonctions de votre téléviseur. MENU Y z Capteur de la télécommande Règle le volume. Dans le menu à l'écran, utilisez les boutons Y de la même façon que les boutons ◄ et ► de la télécommande. Permet de modifier les chaînes. Dans le menu à l'écran, utilisez les boutons z de la même façon que les boutons ▼ et ▲ de la télécommande. Dirigez la télécommande vers ce point du téléviseur. Mode Veille Ne laissez pas le téléviseur en mode Veille pendant de longues périodes (lorsque vous partez en vacances, par exemple). L’appareil consomme toujours une petite quantité d’énergie, même lorsque le bouton marche/arrêt est en position Off. Il est préférable de débrancher le cordon d’alimentation. 4 Français 01 Mise en route Présentation de la télécommande ✎ Ceci est une télécommande spéciale destinée aux malvoyants. Elle dispose de points Braille sur les boutons Power, Channel et Volume. Permet d’allumer et éteindre la télévision. (P. 6) Lorsque le bouton ON/OFF représentant une ampoule est en position ON et qu’un bouton est enfoncé, les boutons de la télécommande restent allumés pendant un certain temps. (Utiliser la télécommande lorsque ce bouton est réglé sur ON réduit la durée de vie de la pile.) Permet d’afficher et de sélectionner les sources vidéo disponibles. (P. 9) Appuyez pour atteindre les chaînes directement. Permet de revenir à la chaîne précédente. Permet de choisir Télétexte, Double ou Mixte. Permet de couper temporairement le son. Permet de régler le volume. Permet de changer de chaîne. Permet d’afficher le menu principal à l’écran. (P. 9) Affiche la liste des chaînes à l’écran. (P. 13) Affiche le menu Aff. contenu, ce qui comprend Guide, Internet@TV, Media Play et AllShare. Permet d’afficher le Guide électronique des programmes (EPG). (P. 10) Permet de sélectionner rapidement les fonctions fréquemment utilisées. Permet d’afficher des informations sur l’écran du téléviseur. (P. 10) Permettent de sélectionner des éléments de menu à l’écran et de modifier les valeurs des menus. Permet de revenir au menu précédent. Boutons des menus Gestion chaînes, Internet@TV, Media Play, etc. Permet de quitter le menu. A B C D MEDIA.P: permet d’afficher l’application Media Play. (P. 29) INTERNET: permet d’accéder à divers services Internet. (P. 39) DUAL I-II: sélection du mode son Dual. (P. 17) AD: sélection de la description audio. (Non disponible dans certains pays) (P. 17) P.SIZE: permet de choisir la taille d’image. (P. 15) SUBT.: affichage numérique des sous-titres (P. 19) Utilisez ces boutons avec les modes Media Play et Anynet+. (P. 29, 36) (� : permet de contrôler les enregistreurs Samsung avec la fonction Anynet+) Installation des piles (type de pile : AAA) ✎ REMARQUE x x x Utilisez la télécommande à une distance maximale de 7 mètres du téléviseur. Une lumière intense peut affecter le bon fonctionnement de la télécommande. Evitez de l’utiliser à proximité d’une lampe fluorescente spéciale ou d’une enseigne au néon. La couleur et la forme peuvent varier en fonction du modèle. Français 5 Mise en route Raccordement à une antenne Lorsque vous allumez le téléviseur pour la première fois, des réglages de base s’effectuent de manière automatique. ✎ Préréglage : connexion du câble d’alimentation et de l’antenne. Antenne VHF/UHF Câble ou ANT OUT Y Prise D'alimentation Plug & Play (configuration initiale) Lorsque le téléviseur est allumé pour la première fois, plusieurs invites s’affichent pour vous aider à configurer les réglages de base. Appuyez sur le bouton POWERP. Plug & Play est disponible uniquement si la source Entrée est définie sur TV. ✎ Pour revenir à l'étape précédente, appuyez sur le bouton rouge. 1 2 Choix d’une langue 3 Sélection d'un pays Sélection du mode Démo. magasin ou Util. domicile POWER Appuyez sur le bouton ▲ ou ▼, puis sur ENTERE. Sélectionnez la langue de votre choix pour le menu à l'écran. Appuyez sur le bouton ◄ ou ►, puis sur ENTERE. y Sélectionnez le mode Util. domicile. Le mode Démo. magasin est prévu pour un usage en magasin. y Rétablissez les paramètres du téléviseur de Démo. magasin sur Util. domicile (standard) : appuyez sur le bouton Volume du téléviseur. Lorsque le menu du volume s'affiche, appuyez pendant 5 secondes sur le bouton MENU. Appuyez sur le bouton ▲ ou ▼, puis sur ENTERE. Sélectionnez le pays de votre choix. Si le pays ne figure pas dans le menu, sélectionnez Autre. P ✎ Après la sélection du pays dans le menu Pays, certains modèles peuvent demander, en plus, le code PIN. ✎ Lors de l'entrée du code PIN, 0-0-0-0 n'est pas disponible. 4 5 Sélection d'une antenne Appuyez sur le bouton ▲ ou ▼, puis sur ENTERE. Sélectionnez Hertzien ou Câble. Sélection d'une chaîne Appuyez sur le bouton ▲ ou ▼, puis sur ENTERE. Sélectionnez la source de la chaîne à mémoriser. Lors du réglage de la source d'antenne sur Câble, une fenêtre s'affiche pour vous permettre d'attribuer des valeurs numériques (fréquences de station) aux chaînes. Pour plus d'informations, reportez-vous au menu Chaîne → Mémorisation Auto (P. 12). 6 7 8 Réglage du Mode Horloge ✎ Affichage du Guide de connexion HD Profitez de votre téléviseur. Appuyez sur le bouton ENTERE à tout moment pour interrompre la mémorisation. Réglez le Mode Horloge automatiquement ou manuellement. ✎ Si vous choisissez l'option Auto., sélectionnez votre fuseau horaire. La méthode de connexion assurant la meilleure qualité d'image en HD s'affiche à l'écran. Appuyez sur le bouton ENTERE. Si vous souhaitez réinitialiser cette fonction... Sélectionnez Configuration - Plug & Play (Configuration initiale). Entrez votre code PIN à quatre chiffres. Le code PIN par défaut est "0-0-0-0". Si vous souhaitez modifier le code PIN, utilisez la fonction Modifier PIN. 6 Français Connexions 02 Connexions Connexion à un périphérique AV Utilisation d’un câble HDMI/DVI : connexion HD (jusqu’à 1080p) Périphériques disponibles : lecteur DVD, lecteur Blu-ray, décodeur câble HD, décodeur HD, récepteur satellite, décodeur câble, récepteur satellite (décodeur) DVD W Y W r W HDMI OUT Rouge Blanc AUDIO OUT W r-AUDIO-l R DVI OUT ✎ HDMI IN 1(DVI), 2, 3, 4 / PC/DVI AUDIO IN x x x x Lorsque vous utilisez une connexion avec câble HDMI/DVI, vous devez utiliser la prise HDMI IN 1(DVI). Dans le cas d’une connexion avec câble DVI, utilisez un câble DVI vers HDMI ou un adaptateur DVI-HDMI (DVI vers HDMI) pour la connexion vidéo et les prises DVI AUDIO IN pour le son. Si vous connectez un dispositif externe, tel qu’un lecteur DVD / un lecteur Blu-ray / un décodeur câble / un décodeur satellite prenant en charge une version HDMI antérieure à 1.3, il se peut que le téléviseur ne fonctionne pas correctement (par exemple : absence d’image / absence de son / scintillement / couleurs anormales). Si aucun son n’est émis après la connexion d’un câble HDMI, vérifiez la version HDMI du dispositif externe. Si vous pensez qu’il utilise peut-être une version HDMI antérieure à 1.3, contactez le fabricant pour en avoir la confirmation et demander une mise à niveau. Il est conseillé d'acheter un câble certifié HDMI. Dans le cas contraire, il se peut que l'écran n'affiche aucune image ou qu'une erreur de connexion se produise. Utilisation d’un câble Composante (jusqu’à 1080p) ou Audio / Vidéo (480i uniquement) et utilisation d’un câble Péritel Périphériques disponibles : magnétoscope, lecteur DVD, lecteur Blu-ray, décodeur câble, récepteur décodeur R R G B r W W R r-AUDIO-l Y AUDIO OUT VIDEO OUT R Magnétoscope Lecteur Blu-ray W Jaune Rouge Blanc AUDIO OUT r-AUDIO-l R W W G W r R Y B W Y W COMPONENT OUT Pr Pb r b Rouge Bleu G Vert DVD EXT Y ✎ En mode Ext., la sortie DTV prend uniquement en charge les signaux audio et vidéo MPEG SD. ✎ Pour obtenir une qualité d’image optimale, il est préférable d’opter pour la connexion Composante (plutôt que la connexion A/V). Français 7 Connexions Connexion à un système audio Utilisation d’une connexion par câble audio ou optique Périphériques disponibles : système audio numérique, amplificateur, système home cinéma DVD OPTICAL Système audio numérique Ecouteurs ✎ DIGITAL AUDIO OUT (OPTICAL) x x x Lorsqu’un système audio numérique est connecté à la prise DIGITAL AUDIO OUT (OPTICAL), diminuez le volume du téléviseur et du système. Le mode audio 5.1 est disponible uniquement si le téléviseur est relié à un dispositif externe prenant en charge ce mode. Lorsque le récepteur (home cinéma) est activé, vous pouvez écouter le son sortant de la prise optique du téléviseur. Lorsque le téléviseur reçoit un signal DTV, il envoie du son 5.1 canaux au récepteur du système home cinéma. Si la source est un composant numérique (par exemple, un lecteur DVD, un lecteur Blu-ray, un décodeur câble ou un récepteur satellite) connecté au téléviseur en HDMI, le récepteur home cinéma émet uniquement du son sur 2 canaux. Pour obtenir du son en mode 5.1 canaux, connectez directement la prise de sortie audio numérique du lecteur DVD, du lecteur Blu-Ray, du décodeur câble ou du décodeur satellite à un amplificateur ou un système home cinéma. ✎ Ecouteurs H : vous pouvez brancher vos écouteurs sur la prise casque du téléviseur. Lorsque le casque est branché, les enceintes intégrées n’émettent plus de son. x La fonction Son peut être limitée lorsque des écouteurs sont connectés au téléviseur. x Le volume des écouteurs et celui du téléviseur sont réglés séparément. Emplacement COMMON INTERFACE pour les connexions Pour regarder des chaînes cryptées, vous devez insérer la "CARTE CI ou CI+". y Si vous n’insérez pas la "CARTE CI ou CI+", le message "Signal brouillé’’ sera affiché pour certaines chaînes. y Les informations de pairage contenant un numéro de téléphone, l’ID de la "CARTE CI ou CI+", l’ID hôte, ainsi que d’autres informations, s’afficheront après environ 2 ou 3 minutes. Si un message d’erreur s’affiche, contactez votre prestataire de service. y Lorsque la configuration des informations sur les canaux est terminée, le message "Mise à jour terminée" s’affiche, indiquant que la liste des chaînes est désormais à jour. ✎ REMARQUE x x x x x x 8 Vous devez vous procurer une "Carte CI ou CI+" auprès d’un câblo-opérateur local. Lorsque vous sortez la "Carte CI ou CI+", tirez-la délicatement avec vos doigts. Une chute pourrait l’endommager. Insérez la "Carte CI ou CI+" dans le sens indiqué sur celle-ci. L’emplacement de la fente COMMON INTERFACE peut varier en fonction du modèle. La "Carte CI ou CI+" n’est pas prise en charge dans certains pays et certaines régions ; vérifiez auprès de votre revendeur agréé. Si vous rencontrez des problèmes, contactez le prestataire de service. Français Modif. nom ■ Liste Source VCR / DVD / Décodeur Câble / Décodeur satellite / Décodeur PVR / Récepteur AV / Jeux / Caméscope / PC / DVI PC / DVI Devices / TV / IPTV / Blu-ray / HD DVD / DMA Nommez le périphérique connecté aux prises d’entrée pour faciliter la sélection de la source d’entrée. Permet de sélectionner le téléviseur ou d’autres sources d’entrée externes (telles qu’un lecteur DVD, un lecteur Blu-ray, un décodeur câble ou un récepteur décodeur) connectées au téléviseur. ✎ TV / Ext.1 / Ext.2 / AV / Composant / PC / HDMI1/DVI / HDMI2 / HDMI3 / HDMI4 / USB Si un PC d'une résolution de 1 920 x 1 080 à 60 Hz est connecté au port HDMI IN 1(DVI), vous devez passer en mode DVI PC sous Modif. Nom. ✎ Lorsque vous connectez un câble HDMI/DVI au port HDMI IN 1(DVI), vous devez régler le port en mode DVI PC ou Périph. DVI sous Modif. Nom. ■ ✎ Les entrées connectées sont mises en surbrillance dans la Liste Source. ✎ Ext.1 et Ext.2 restent toujours activés. Fonctions de base Utilisation de l’affichage à l’écran (OSD) Navigation dans les menus Avant d’utiliser le téléviseur, procédez comme suit pour apprendre à naviguer dans le menu afin de sélectionner et de régler les différentes fonctions. La méthode d’accès peut varier en fonction du menu sélectionné. 1 MENU m 2 3 4 5 ▲/▼ 1 2 4 3 A B C D 1 Bouton MENU : affiche le menu principal à l’écran. 2 Bouton ENTERE / Bouton directionnel : déplacez le curseur pour sélectionner un élément. Confirmez le réglage. 3 Bouton RETURN : revient au menu précédent. 4 Bouton EXIT : ferme le menu affiché à l’écran. 6 7 ENTERE ▲/▼ ◄/► ENTERE EXIT e Les options du menu principal s'affichent sur l'écran : Image, Son, Chaîne, Configuration, Entrée, Application et Assistance. Sélectionnez une icône à l'aide du bouton ▲ ou ▼. Appuyez sur ENTERE pour accéder au sous-menu. Sélectionnez le sous-menu de votre choix à l'aide du bouton ▲ ou ▼. Réglez la valeur d'un élément à l'aide du bouton ◄ ou ►. Les informations de réglage affichées à l'écran peuvent varier en fonction du menu sélectionné. Appuyez sur le bouton ENTERE pour terminer la configuration. Appuyez sur EXIT. Français 9 02 Connexions Changement de la source d’entrée Fonctions de base Utilisation du bouton INFO (Guide Now & Next) L’affichage identifie la chaîne en cours et l’état de certains paramètres audio et vidéo. Le Guide Now & Next affiche des informations quotidiennes sur les programmes de télévision en fonction de l’heure de diffusion. y Faites défiler à l’aide des boutons ◄, ► pour afficher des informations sur le programme de votre choix, tout en regardant la chaîne actuelle. y Faites défiler à l’aide des boutons ▲, ▼ pour afficher des informations sur d’autres chaînes. Pour accéder à la chaîne actuellement sélectionnée, appuyez sur le bouton ENTERE. abc1 18:11 Thu 6 jan life On Venus Avenue DTV Air 15 Utilisation de l’option Diffusion programmée Guide Family Affairs 18:00 - 18:30 Drama Tanya confesses all to a stunned Babs. Conrad is anxious to hear... 800 five Diffusion programmée 18:30 19:15 Today Today )Family Affairs )Dark Angel 800 800 Mode aff. 1 18:00 ~ 6:00 EWatch 2:10 Mar 1 jui DTV Air 800 five five five Information E Annuler 1 4 6 Rouge (Mode aff.) : affiche la liste des programmes en cours de diffusion ou à venir. 2 Jaune (+24 heures) : affiche la liste des programmes qui seront diffusés dans plus de 24 heures. 3 Bleu (Mode Ch.): Sélectionnez le type des chaînes à afficher dans la fenêtre Vue chaînes. – Le Mode CH varie en fonction de la source d'antenne. Guide 4 (Information) : affiche des détails sur le programme sélectionné. Les informations du Guide électronique des programmes (EPG) sont fournies par les diffuseurs. Les programmes planifiés fournis par les diffuseurs vous permettent de planifier les émissions que vous souhaitez regarder, de telle sorte que le téléviseur change automatiquement de chaîne à l’heure indiquée. Des entrées de programmes peuvent être vides ou ne pas être à jour en raison de l’état d’une chaîne. 5 (Seite) : permet d’accéder à la page précédente / suivante. Unclassified No Detaild Information ' Information Planification des émissions à regarder Utilisation de la Vue chaînes Guide 2:10 Mar 1 jui DTV Air 800 five Home and Away 18:00 - 18:30 Drama Dani is devastated when scott makes clear his views on marriage... 800 five Vue chaînes - TV Today 27 Discovery 28 DiscoveryH&L 800 five 24 price-drop.tv 16 QVC 6 R4DTT 10 18:00 - 19:00 American Chopper Programmes resume at 06:00 Home and... )Family Affairs No Information QVC Selection No Information Mode aff. +24 heures 1 2 Français Mode Ch. 3 19:00 - 20:00 Tine Team Fiv... )Dark Angel Information k Seite E regarder 4 5 6 6 Bouton ENTERE – Si vous sélectionnez le programme en cours, vous pouvez le regarder. – Si vous sélectionnez un programme à venir, vous pouvez le réserver. Pour annuler la programmation, appuyez à nouveau sur la touche ENTERE et sélectionnez Annuler progr.. ¦ Utilisation des chaînes favorites Supprimez ou définissez des chaînes favorites et utilisez le guide des programmes pour les émissions numériques. Sélectionnez une chaîne dans l’écran Chaînes, Mes chaînes ou Programmé. * Mes chaînes Chaînes Hertzien TV 15 Radio Data/Other Analogue 3 23 33 32 5 4 27 Antenne B zoom 1futech * 24ore.tv abc1 ■ r BBC World bid-up.tv Boonerang Cartoon Nwk Class News \ Coming Soon Discovery Sélectionner k Seite T Outils Chaînes : affiche la liste des chaînes selon le type de chaîne. ■ ■ c1 c2 All (dans Gestion chaînes) Affiche toutes les chaînes favorites. * Mes chaînes : affiche le groupe de la chaîne. Modifier mes chaînes t : vous pouvez définir les chaînes sélectionnées dans le groupe Mes chaînes souhaité. ✎ Le symbole "*" s’affiche et la chaîne est définie en tant que Ma chaîne. 1. Sélectionnez une chaîne et appuyez sur le bouton TOOLS. 2. Ajoutez ou supprimez une chaîne dans les groupes Ma chaîne de votre choix : 1, 2, 3 ou 4. x 3. Après avoir modifié les réglages, vous pouvez afficher la liste des chaînes de chaque groupe dans Mes chaînes. Programmé : affiche tous les programmes réservés actuellement. ■ Gestion chaînes x x x x x Rouge (Antenne) : permet de basculer entre Hertzien et Câble. Chaînes ✎ Utilisation des boutons de couleur avec la fonction Vert (Zoom) : agrandit ou réduit un numéro de chaîne. B Jaune (Sélectionner) : Sélectionnez les chaînes voulues, puis appuyez sur le bouton jaune pour traiter toutes les chaînes sélectionnées en même temps. La marque c s’affiche à gauche des chaînes sélectionnées. Vous pouvez sélectionner un ou plusieurs groupes. Hertzien c1 c2 All TV 15 Radio Data/Other Analogue 3 23 33 32 5 4 27 Antenne B zoom 1futech * 24ore.tv abc1 Modiier mes chaînes Verrouil. BBC World Supprimer bid-up.tv Désélectionner tout Choisir tout Boonerang r d Cartoon Nwk Class News \ Coming Soon Discovery Sélectionner k Seite T Outils k (Page) : Permet d’accéder à la page suivante / précédente. T (Outils) : affiche le menu d’options Gestion chaînes. (Les menus Options peuvent varier en fonction de la situation.) Icônes d’état des chaînes Icônes A c * ( \ ) Opération Chaîne analogique. Chaîne sélectionnée. Chaîne définie comme favorite. Programme en cours de diffusion. Chaîne verrouillée. Programme réservé. Français 11 03 Fonctions de base Gestionnaire de chaînes Fonctions de base Menu Chaîne ¦ Nouvelle syntonisation des chaînes Antenne (Hertzien / Câble) t Avant que votre téléviseur ne puisse commencer à mémoriser les chaînes disponibles, vous devez spécifier le type de la source du signal reliée au téléviseur (c’est-à-dire : soit une antenne, soit le câble). Mémorisation Manuelle Recherche manuellement une chaîne et la mémorise dans le téléviseur. ✎ Si une chaîne est verrouillée par la fonction Verrouillage Parental, la fenêtre de saisie du code PIN s’affiche. ■ Chaîne numérique: Une fois la recherche terminée, les chaînes de la liste sont mises à jour. ✎ Lorsque vous sélectionnez Antenne → Hertzien : Chaîne, Fréquence, Bande passante. ✎ Lorsque vous sélectionnez Antenne → Câble : Fréquence, Modulation, Taux de symbole. Pays ■ L’écran de saisie du code PIN apparaît. Entrez votre code PIN à quatre chiffres. ■ Chaîne numérique : permet de changer de pays pour les chaînes numériques. ■ Chaîne analogique : permet de changer de pays pour les chaînes analogiques. ✎ Mode Canal x Mémorisation Auto x Recherche automatiquement une chaîne et la mémorise dans le téléviseur. ✎ Il est possible que les numéros de programme attribués automatiquement ne correspondent pas aux numéros de programme souhaités ou réels. Si une chaîne est verrouillée par la fonction Verrouillage Parental, la fenêtre de saisie du code PIN s’affiche. ■ Antennes Source (Hertzien / Câble): Sélectionnez la source d’antenne à mémoriser. ■ Source des chaînes (Numérique et Analogique / Numérique / Analogique) : sélectionnez la source des chaînes à mémoriser. Lors de la sélection de Câble → Numérique et Analogique ou Numérique : Fournissez une valeur à rechercher pour les chaînes câblées. Mode de recherche (Complet / Réseau / Rapide) : recherche toutes les chaînes avec des stations de diffusion actives et les enregistre dans la mémoire du téléviseur. ✎ Si vous choisissez le mode Rapide, vous pouvez configurer Réseau, ID réseau, Fréquence, Modulation, Taux de symbole manuellement en appuyant sur le bouton de la télécommande. Réseau (Auto / Manuel) : sélectionnez le mode de réglage NID réseau Auto ou Manuel. ID réseau : si Réseau est défini sur Manuel, vous pouvez configurer un ID réseau à l’aide des boutons numériques. Chaîne analogique (Programme, Système de Couleur, Système Sonore, Chaîne, Rechercher, Mémoriser) : Si aucun son ne sort ou si le son produit est anormal, sélectionnez de nouveau la norme son requise. P (mode Programme) : à la fin du réglage, des numéros de position compris entre P00 et P99 sont attribués aux stations de radiodiffusion de votre région. Dans ce mode, vous pouvez sélectionner une chaîne en saisissant son numéro de position. C (Mode canal Hertzien) / S (Mode canal Câble) : ces deux modes vous permettent de sélectionner une chaîne en entrant le numéro attribué à chaque chaîne câblée ou station de radiodiffusion hertzienne. ¦ Modification des chaînes Menu d’options Gestion chaînes (dans Gestion chaînes) 1. Sélectionnez une chaîne et appuyez sur le bouton TOOLS. 2. Modifiez le nom ou le numéro de la chaîne à l’aide du menu Modif. nom chaîne ou Modif. num. chaîne. ■ Modif. nom chaîne (chaînes analogiques uniquement) : attribuez le nom de votre choix à la chaîne. ■ Modif. num. chaîne (chaînes numériques uniquement) : modifiez le numéro en appuyant sur les boutons numériques appropriés. ¦ Autres fonctionnalités Option de recherche du câble (en fonction du pays) Définit des options de recherche supplémentaires, telles que la fréquence et le taux de symbole pour une recherche sur un réseau câblé. Fréquence : affiche la fréquence correspondant à la chaîne (varie d’un pays à l’autre). ■ Fréq. début / Fréq. fin : définit la fréquence dé début ou de fin (différente dans chaque pays). Modulation : affiche les valeurs de modulation disponibles. ■ Modulation : affiche les valeurs de modulation disponibles. Taux de symbole : affiche les taux de symboles disponibles. ■ Taux de symbole : affiche les taux de symboles disponibles. 12 Français (dans Gestion chaînes) Définissez chaque chaîne à l’aide des options du menu Gestion chaînes (Verrouiller / Déverrouiller, Rappel programme, Tri des canaux, Supprimer / Sélectionner tout / Désélectionner tout). Les options de menu peuvent varier selon l’état de la chaîne. 1. Sélectionnez une chaîne et appuyez sur le bouton TOOLS. 2. Sélectionnez une fonction et modifiez ses réglages. ■ Verrouiller / Déverrouiller : vous pouvez verrouiller une chaîne afin qu’elle ne puisse pas être sélectionnée ni visualisée. ✎ REMARQUE x ■ Cette fonction n’est disponible que si l’option Verrouillage Parental est définie sur Activé x L’écran de saisie du code PIN apparaît. Entrez votre code PIN à 4 chiffres ; "par défaut "0-0-0-0". Modifiez le code PIN à l’aide de l’option Modifier PIN. Rappel programme : vous pouvez programmer l’affichage automatique d’une chaîne déterminée à l’heure prévue. Avant d’utiliser cette fonction, vous devez régler l’heure. Lorsqu’une chaîne numérique est sélectionnée, appuyez sur le bouton ► pour afficher le programme numérique. ✎ ■ Tri des canaux (chaînes analogiques uniquement) : cette opération vous permet de changer les numéros de programme des chaînes mémorisées. Cela peut s’avérer nécessaire après avoir utilisé la mémorisation automatique. ■ Supprimer: Vous pouvez supprimer une chaîne afin d'afficher les chaînes de votre choix. ■ Sélectionner tout / Désélectionner tout : permet de sélectionner toutes les chaînes ou de désélectionner celles sélectionnées dans le gestionnaire de chaînes. Programmé (dans Gestion chaînes) Vous pouvez visualiser, modifier ou supprimer une émission dont vous avez réservé l’affichage. ■ Infos modif. : permet de modifier une émission dont vous avez réservé l’affichage. ■ Annuler progr. : permet d’annuler une émission dont vous avez réservé l’affichage. ■ Information : permet d’afficher une émission dont vous avez réservé l’affichage (et d’en modifier les informations de réservation). ■ Sélectionner tout / Désélectionner tout : sélectionne ou désélectionne tous les programmes réservés. Liste des chaînes Vous pouvez afficher toutes les chaînes recherchées. Transfert liste chaînes Importe ou exporte la carte des chaînes. Vous devez connecter un périphérique de stockage USB pour utiliser cette fonction. L'écran de saisie du code PIN apparaît. Entrez votre code PIN à quatre chiffres. ✎ ✎ Le code PIN par défaut d'un nouveau téléviseur est "0-0-0-0". ■ Importer depuis le périphérique USB: permet d'importer une liste de chaînes depuis un périphérique USB. ■ Exporter vers le périphérique USB: permet d'exporter une liste de chaînes vers un périphérique USB. Réglage fin (Chaînes analogiques uniquement) Si le signal est faible ou déformé, vous pouvez effectuer manuellement un réglage fin du canal. Les chaînes qui ont fait l’objet d’un réglage fin sont indiquées par un astérisque "*". ✎ ✎ Pour réinitialiser le réglage précis, sélectionnez Réinit. Menu Image ¦ Changement du mode Image prédéfini Mode t Sélectionnez le type d’image que vous préférez. ■ Dynamique : adapté à un environnement lumineux. ■ Standard : adapté à un environnement normal. ■ Naturel : permet de réduire la fatigue oculaire. ✎ ■ L’option Naturel n’est pas disponible en mode PC. Cinéma : convient au visionnage de films dans une pièce sombre. ¦ Réglages des paramètres de l’image Rétroéclairage / Contraste / Luminosité / Netteté / Couleur / Teinte (V/R) Votre téléviseur dispose de plusieurs options de réglage pour le contrôle de la qualité d’image. ✎ REMARQUE x x x x La fonction Teinte (V/R) n’est pas disponible dans les modes TV, Ext., AV analogiques du système PAL. En mode PC, vous ne pouvez modifier que les options Rétroéclairage, Contraste et Luminosité. Les paramètres peuvent être réglés et mémorisés pour chaque dispositif externe connecté au téléviseur. La réduction de la luminosité de l’image se traduit par une consommation d’énergie moindre. Français 13 03 Fonctions de base Menu d’options Gestion chaînes Fonctions de base ¦ Solutions économiques ■ Réglage Luminosité (-2~+2) : permet d’augmenter la luminosité des images sombres. Désactivé en mode PC. ✎ Solution Eco ■ ■ Mode éco. (Arrêt / Bas / Moyen / Elevé / Image désactivée / Auto.) t : permet de régler la luminosité du téléviseur afin de réduire la consommation d’énergie. Si vous sélectionnez Image désactivée, l’écran est éteint, mais le son reste actif. Appuyez sur n'importe quel bouton, excepté celui du volume, pour allumer l'écran. Capteur ECO (Arrêt / Activé) : cette fonction permet d’optimiser vos économies d’énergie ; les réglages de l’image s’adaptent automatiquement en fonction de la luminosité de la pièce. L'Capteur Eco se coupe lors du réglage du Rétroéclairage. ✎ Rétro-écl. min : lorsque Capteur ECO est défini sur Activé, la luminosité d’écran minimale peut être réglée manuellement. Si Capteur Eco est Activé, la luminosité de l'écran peut changer (il devient plus ou moins lumineux) en fonction de l'intensité de la lumière environnante. ■ Gamma : permet de régler l’intensité des couleurs primaires. ■ Figure Expert (Arrêt / Figure 1 / Figure 2): A l'aide de la fonction Figure Expert, l'image peut être calibrée sans générateur ni filtre. Si le menu à l'écran disparaît ou si un autre menu que le menu Image s'ouvre, la calibration est enregistrée et la fenêtre Figure Expert se ferme. Pendant l'exécution de Figure Expert, aucun son n'est émis. Activé uniquement en mode DTV, Composant et HDMI. ✎ ✎ ■ RVB uniquement (Arrêt / Rouge / Vert / Bleu) : vous pouvez régler la Couleur ou la Teinte du Rouge, Vert ou Bleu pour l’image d’un dispositif externe (lecteur DVD, système home cinéma, etc.). ■ Espace de couleur (Auto / Natif / Personnalisé) : Permet de régler la gamme des couleurs disponibles pour créer l'image. Pour régler Couleur, Rouge, Vert, Bleu et Réinit, définissez l'option Espace de couleur sur Custom. ■ Balance blancs : permet de régler la température des couleurs afin d’obtenir une image plus naturelle. ✎ ■ Pas signal veille (Arrêt / 15 min / 30 min / 60 min) : active le mode Veille si l’état "Absence de signal" ou "Vérifier le signal du câble" reste actif pendant une période définie par l’utilisateur. Il est désactivé lorsque le PC est en mode d’économie d’énergie. Aj. Rouge / Aj. Vert / Aj. Bleu : permet de régler la profondeur de chaque couleur (rouge, vert, bleu). Régl. Rouge / Régl. vert / Régl. bleu : permet de régler la luminosité de chaque couleur (rouge, vert, bleu). ✎ Réinit. : rétablit les paramètres par défaut de l’option Balance blancs. ■ ¦ Modification des options d’image Balance Blancs 10p (Arrêt / Activé): contrôle la balance des blancs par intervalle de 10 points en réglant la luminosité des couleurs rouge, verte et bleue. Ce mode est disponible lorsque le mode d'image est réglé sur Cinéma et lorsque l'entrée externe est définie sur HDMI ou Composant. Cette fonction n'est pas prise en charge par tous les dispositifs externes ✎ Paramètres avancés (Disponible en mode Standard / Cinéma) Vous pouvez régler les paramètres avancés de votre écran, notamment la couleur et le contraste. ✎ ✎ En mode PC, vous ne pouvez modifier que les options Intervalle: permet de sélectionner l'intervalle à ajuster. Contraste Dynamique, Gamma et Balance blancs. Rouge: permet de régler le niveau de rouge. Vert: permet de régler le niveau de vert. Paramètres avancés Nuance de noir : Arrêt Bleu: permet de régler le niveau de bleu. ► Réinit.: rétablit les paramètres Balance Blancs 10p par défaut. Contraste Dynamique : Moyen réglage luminosité :0 Gamma :0 ■ Ton chair : accentue le "Ton chair" rose. Figure expert : Arrêt ■ rVb uniquement : Arrêt Netteté des contours (Arrêt / Activé) : fait ressortir les contours des objets. espace de couleur : Natif ■ xvYCC (Arrêt / Activé) : l’activation du mode xvYCC augmente les détails et agrandit l’espace colorimétrique lors de l’affichage de films à partir d’un appareil externe (lecteur de DVD, etc.) connecté à la prise Entrée Composant ou HDMI. Ce mode est disponible lorsque le mode d’image est réglé sur Cinéma et lorsque l’entrée externe est définie sur HDMI ou Composant. Cette fonction n’est pas prise en charge par tous les dispositifs externes. ▼ U Déplacer E entrer R retour ■ Nuance de noir (Arrêt / Sombre / Plus sombre / Le plus sombre) : sélectionnez le niveau de noir afin de régler la profondeur d’écran. ■ Contraste Dynamique (Arrêt / Bas / Moyen / Elevé) : permet de régler le contraste de l’écran. 14 Français ✎ ✎ ✎ En mode PC, vous pouvez uniquement apporter des modifications aux options Nuance Coul., Taille, Filtre Bruit num. et Temps Protection auto. Options d’image Nuance Coul. : Normal Taille : 16:9 Mode écran : 16:9 Auto Filtre bruit num. : Auto. Filtre bruit MPeG : Auto. Niv. noir HDMI Mode Film : Normal : Arrêt ► ■ ✎ ▼ U Déplacer E entrer R retour ■ ■ ■ Nuance Coul. (Froide / Normal / Chaude1 / Chaude2) Les options Chaude1 ou Chaude2 sont désactivées lorsque le mode d’image est Dynamique. Les paramètres peuvent être réglés et mémorisés pour chaque dispositif externe connecté à une entrée du téléviseur. ✎ ✎ Taille : il se peut que votre décodeur câble / récepteur satellite dispose de son propre jeu de tailles d’écran. Il est toutefois vivement conseillé d’utiliser le mode 16:9. Zoom large : agrandit l’image à une taille supérieure à 4:3. Réglez la position à l’aide des boutons ▲, ▼. ✎ ✎ ■ ✎ ■ ■ x x Les options de taille de l’image peuvent varier en fonction de la source d’entrée. Les options disponibles peuvent varier en fonction du mode sélectionné. 100Hz Motion Plus (Arrêt / Clair / Standard / Lisse / Personnalisé / Démo) : supprime les traînées des scènes rapides avec beaucoup de mouvements, ce qui rend l’image plus claire. Si vous activez le mode 100Hz Motion Plus, des parasites peuvent apparaître sur l’écran. Si cela ce produit, définissez la fonction 100Hz Motion Plus sur Arrêt. ✎ Réduction de flou : règle le niveau de réduction du flou à partir des sources vidéo. ✎ REMARQUE Après avoir sélectionné Adapter écran en mode HDMI (1080i / 1080p) ou Composant (1080i / 1080p), il se peut que vous deviez centrer l’image : 1. Appuyez sur le bouton ◄ ou ► pour sélectionner Position. 2. Appuyez sur le bouton ENTERE. 3. Appuyez sur le bouton ▲, ▼, ◄ ou ► pour déplacer l’image. Mode Film (Arrêt / Auto.1 / Auto.2) : règle le téléviseur de sorte qu’il détecte et traite automatiquement les signaux de cinéma en provenance de toutes les sources et adapte l’image afin d’obtenir une qualité optimale. Disponible en modes TV, AV, COMPOSANT (480i / 1080i) et HDMI (480i / 1080i). ✎ Adapter écran : affiche l’intégralité de l’image sans coupure lors de l’entrée de signaux HDMI (720p / 1080i / 1080p) ou Composant (1080i / 1080p). x Niv. noir HDMI (Normal / Bas) : permet de choisir le niveau de noir pour régler la profondeur de l’écran. Disponible uniquement en mode HDMI (signaux RVB). ✎ ✎ 4:3 : il s’agit du paramètre par défaut pour un film ou une diffusion normale. Ne regardez pas un film au format 4:3 pendant une période prolongée. Les traces de bordures situées sur la gauche, sur la droite et au centre de l’écran peuvent donner lieu au phénomène de rémanence (brûlure d’écran) non couvert par la garantie. Filtre Bruit MPEG (Arrêt / Bas / Moyen / Elevé / Auto.) : réduit le bruit MPEG afin d’offrir une meilleure qualité d’image. Désactivé en mode PC. ✎ ■ ✎ Zoom : agrandit l’image en 16:9 (dans le sens vertical) pour l’adapter à la taille de l’écran. Réglez la position ou la taille à l’aide des boutons ▲, ▼. Filtre Bruit num. (Arrêt / Bas / Moyen / Elevé / Visualisation auto. / Auto Plus) : lorsque le signal de diffusion est faible, des bruits parasites ou une impression fantôme peuvent apparaître. Sélectionnez l’une des options jusqu’à l’obtention d’une image de qualité optimale. Visualisation auto. : Lors du changement des chaînes analogiques, il affiche l'intensité du signal. Disponible uniquement pour les chaînes analogiques. Lorsque la barre est verte, vous recevez le meilleur signal possible. 16:9 Auto : règle automatiquement la taille de l’image sur le format 16:9. 16:9 : règle la taille de l’image sur 16:9 pour les DVD ou la diffusion au format grand écran. En mode PC, seuls les modes 16:9 et 4:3 peuvent être réglés. x Les paramètres peuvent être réglés et mémorisés pour chaque dispositif externe connecté à une entrée du téléviseur. x Si vous utilisez la fonction Adapter écran avec l’entrée HDMI 720p, une ligne sera coupée en haut, en bas, à gauche et à droite, comme c’est le cas avec la fonction Overscan. Mode écran (16:9 / Zoom large / Zoom / 4:3) : disponible uniquement lorsque la taille d’image est définie sur 16:9 Auto. Vous pouvez déterminer la taille d’image souhaitée sur 4:3 WSS (Wide Screen Service) ou sur la taille d’origine. Chaque pays européen impose une taille d’image différente. Non disponible en mode PC, Composant et HDMI. Réduc. vibrations : règle le niveau de réduction des vibrations à partir des sources vidéo lors de la lecture de films. Réinit. : restaure les paramètres par défaut. ■ Temps protection auto (2 heures / 4 heures / 8 heures / 10 heures / Arrêt) : si la même image reste affichée à l'écran, le dispositif de protection automatique contre les brûlures d'écran sera activé. Réinitialisation de l’image (OK / Annuler) Rétablit les paramètres par défaut du mode d’image actuel. Français 15 03 Fonctions de base x Options d’image Fonctions de base ¦ Configuration du téléviseur avec le PC ■ Voix claire : accentue les voix par rapport aux autres sons. Réglez le mode d’entrée sur PC. ■ Amplifier : augmente l’intensité du son aigu pour garantir une meilleure écoute aux personnes malentendantes. Réglage Automatique t Cette option permet de régler les positions/valeurs de fréquence et d’affiner automatiquement les paramètres. ¦ Réglage des paramètres sonores ✎ Non disponible en cas de connexion à l’aide d’un câble HDMI/DVI. Egaliseur Ecran ■ Régl. Base / Regl. Préc : élimine ou réduit les parasites visuels. Si vous ne pouvez pas éliminer ces parasites au moyen d’un réglage précis uniquement, réglez la fréquence (Régl. Base) au mieux, puis effectuez de nouveau un réglage précis. Une fois les parasites réduits, effectuez un nouveau réglage de l’image pour l’aligner au centre de l’écran. ■ Position : réglez la position de l’écran du PC à l’aide des boutons directionnels (▲ / ▼ / ◄ / ►). ■ Réinitialiser Image : rétablit les paramètres d’image par défaut. Utilisation de votre téléviseur comme écran d’ordinateur (PC) Configuration de votre logiciel PC (instructions basées sur Windows XP) En fonction de la version de Windows et de la carte graphique utilisées, les écrans affichés sur votre PC peuvent être différents. Cependant, les mêmes informations de configuration de base seront généralement appliquées. Dans le cas contraire, contactez le fabricant de votre ordinateur ou votre revendeur Samsung. 1. Cliquez sur "Panneau de configuration" dans le menu Démarrer de Windows. 2. Cliquez sur "Apparence et thèmes" dans la fenêtre "Panneau de configuration". Une boîte de dialogue s’ouvre alors. 3. Cliquez sur "Affichage" pour ouvrir une autre boîte de dialogue. 4. Accédez à l’onglet "Paramètres" dans la boîte de dialogue Propriétés de l’Affichage. y Réglage correct de la taille (résolution) [Optimal : 1920 x 1080 pixels] y S’il existe une option de fréquence verticale dans la boîte de dialogue des paramètres d’affichage, la valeur correcte est "60" ou "60 Hz". Sinon, cliquez sur "OK" et quittez la boîte de dialogue. Menu Son ¦ Changement du mode Son prédéfini SRS TheaterSound t ■ Standard : sélectionne le mode son normal. ■ Musique : accentue la musique par rapport aux voix. ■ Cinéma : offre le meilleur son pour les films. 16 Français Règle le mode Son. ■ Balance G/D : règle la balance entre les haut-parleurs droit et gauche. ■ 100Hz / 300Hz / 1kHz / 3kHz / 10kHz (Réglage de la bande passante) : règle le niveau des fréquences de bande passante spécifiques. ■ Réinit. : rétablit les paramètres par défaut de l’égaliseur. ¦ Systèmes sonores, etc. SRS TheaterSound (Arrêt / Activé) t (mode de son standard uniquement) Cette fonction garantit un son surround virtuel 5.1 canaux par le biais de deux haut-parleurs ou d’un casque grâce à la technologie HRTF (Head Related Transfer Function Fonction de transfert asservie aux mouvements de la tête). SRS TruDialog (Arrêt / Activé) (mode de son standard uniquement) Cette fonction permet d’accentuer l’intensité d’une voix par rapport au fond musical ou aux effets sonores, de manière à rendre les dialogues plus clairs lorsque vous regardez une émission. Langue Audio (chaînes numériques uniquement) Permet de modifier la valeur par défaut des langues audio. ✎ La langue disponible peut varier en fonction de l’émission. Format Audio (MPEG / Dolby Digital 5.1) (chaînes numériques uniquement) We get the explanation of echo sound when we use together TV and external speaker using. However, main title is for audio format. Remark sentences are adapted for this title explanation. It’s better to omit red square explanation and fit remark sentences for the main. ✎ L’option Audio Format peut varier en fonction de l’émission. Le son Dolby Digital 5.1 est disponible uniquement en cas de connexion d’un haut parleur externe au moyen d’un câble optique. ■ (non disponible dans tous les pays) (chaînes numériques uniquement) Cette fonction traite le flux audio relatif à la description audio (AD) lorsqu’il est envoyé avec le son principal par le radiodiffuseur. ■ Description audio (Arrêt / Activé) : active ou désactive la fonction de description audio. ■ Volume : permet de régler le volume de description audio. Format Audio : lors de la réception d’une émission de télévision numérique, vous avez le choix entre les options PCM ou Dolby Digital pour le format de sortie audio numérique (SPDIF). ✎ ■ Nuit : ce mode garantit un environnement sonore de meilleure qualité que le mode Normal, avec une absence pratiquement totale de parasites. Il s’avère particulièrement utile pendant la nuit. Sélection Haut-parleur (Ht-parl ext / Haut-parleur TV) Un effet d’écho peut se produire en raison de la différence de vitesse de décodage entre le haut-parleur principal et le récepteur audio. Dans ce cas, réglez le téléviseur sur Ht-parl ext. ✎ Lorsque l’option Sélection Haut-parleur est définie sur Ht-parl ext, les boutons de volume et MUTE ne sont pas opérationnels et les paramètres sonores sont limités. ✎ Lorsque l’option Sélection Haut-parleur est définie sur Ht-parl ext, vous devez utiliser les paramètres suivants : x Haut-parleur TV : Arrêt, Ht-parl ext : Activé La connexion de haut-parleurs 5.1 canaux dans un environnement Dolby Digital vous permet d’optimiser votre environnement sonore 3D interactif. Retard Audio : cette option permet de corriger le décalage audio/vidéo lorsque vous regardez la télévision ou une vidéo et diffusez la sortie audio numérique sur un dispositif externe tel qu’un récepteur AV. Volume auto (Arrêt / Normal / Nuit) Pour équilibrer le niveau de volume sur chaque canal, définissez cette option sur Normal. Sortie SPDIF : le format SPDIF (Sony Philips Digital InterFace) est utilisé pour fournir du son numérique, en réduisant les interférences vers les haut-parleurs et divers dispositifs numériques, tels qu’un lecteur DVD. ■ Comp Dolby Digital (Ligne / RF) : cette fonction réduit la disparité entre un signal Dolby Digital et un signal vocal (à savoir, Audio MPEG, HE-AAC, Son ATV). ✎ Sélectionnez Ligne pour obtenir un son dynamique et RF pour réduire la différence entre les sons forts et faibles pendant la nuit. Ligne : permet de définir le niveau de sortie des signaux supérieurs ou inférieurs à -31 dB (référence) sur -20 dB ou -31 dB. RF : permet de définir le niveau de sortie des signaux supérieurs ou inférieurs à -20 dB (référence) sur -10 dB ou -20 dB. Réinitialisation du son (OK / Annuler) Rétablit les paramètres sonores par défaut définis en usine. ¦ Sélection du mode Son Lorsque vous définissez Dual I-II, le mode Son actuel est affiché à l’écran. ✎ Lorsque l’option Sélection Haut-parleur est définie sur Haut-parleur TV, vous devez utiliser les paramètres suivants : x Haut-parleur TV : Activé, Ht-parl ext : Activé ✎ En l’absence de signal vidéo, les deux haut-parleurs sont coupés. Paramètre supp. Stéréo A2 (chaînes numériques uniquement) ■ Niveau Audio DTV (MPEG / HE-AAC) : cette fonction vous permet de réduire la disparité d’un signal vocal (à savoir l’un des signaux reçus lors d’une émission de télévision numérique) sur le niveau souhaité. ✎ ✎ En fonction du type de signal de radiodiffusion, les options MPEG / HE-AA) peuvent être réglées sur une valeur comprise entre -10 dB et 0 dB. Pour augmenter ou diminuer le volume, réglez ces valeurs entre 0 et -10, respectivement. NICAM Stéréo Type d’audio Mono Stereo Dual Mono Stereo Dual Dual I-II Défaut Mono Stereo ↔ Mono Dual-II ↔ Dual-I Mono Mono ↔ Stereo Mono → Dual I Dual II Changement automatique Dual-I Changement automatique Dual-I ✎ Si le signal stéréo est faible et qu’une commutation automatique se produit, passez alors en Mono. ✎ Cette fonction n’est activée qu’avec un signal sonore stéréo. ✎ Disponible uniquement lorsque la source Entrée est définie sur TV. Français 17 03 Fonctions de base Description audio Fonctions de base Période d’activation / Période de désactivation : sélectionnez l’heure, les minutes et l’action Activer / Désactiver. (Pour activer le minuteur selon les réglages définis, choisissez Activer.) Menu Configuration ¦ Réglage de l’heure Volume : sélectionnez le niveau de volume désiré. Source : sélectionnez le contenu TV ou USB à lire lors de la mise sous tension automatique du téléviseur. (L’option USB peut uniquement être sélectionnée lorsqu’un périphérique USB est connecté au téléviseur.) Heure ■ Horloge : le réglage de l’heure est nécessaire pour utiliser différentes fonctions de minuterie du téléviseur. O L’heure actuelle s’affiche à chaque fois que vous appuyez sur le bouton INFO. Antenne (lorsque Source est réglé sur TV) : sélectionnez ATV ou DTV. ✎ Si vous débranchez le cordon d’alimentation, vous devez régler de nouveau l’horloge. Chaîne (lorsque Source est réglé sur TV) : sélectionnez la chaîne de votre choix. Mode Horloge (Auto. / Manuel) En fonction du signal et de la station de diffusion, il se peut que la configuration automatique de l’heure soit incorrecte. Dans ce cas, réglez l’heure manuellement. L’antenne doit être connectée pour permettre le réglage automatique de l’heure. Contenu (lorsque Source est réglé sur USB) : sélectionnez un dossier de la clé USB contenant les fichiers de musique ou les photos qui doivent être lus lors de la mise sous tension automatique du téléviseur. ✎ ✎ Réglage Horloge : Définissez manuellement les paramètres Jour, Mois, Année, Heure et Minute. Disponible uniquement lorsque l’option Mode Horloge est définie sur Manuel. ✎ Fuseau Horaire: Vous pouvez sélectionner votre fuseau horaire. Cette fonction est uniquement disponible lorsque Mode Horloge est défini sur Auto.. En fonction de la station de diffusion et du signal diffusé, il se peut que l'heure ne soit pas réglée correctement. Si cela se produit, réglez l'heure manuellement. ✎ ✎ Si la clé USB ne contient aucun fichier musical ou si le dossier contenant un fichier musical n’est pas sélectionné, la fonction de veille ne fonctionne pas correctement. ✎ Si le périphérique USB ne contient qu’une seule photo, la fonction Diaporama ne démarre pas. ✎ Les dossiers dont le nom est trop long ne peuvent pas être sélectionnés. ✎ Chaque périphérique USB utilisé se voit attribuer son propre dossier. Si vous utilisez plusieurs périphériques USB du même type, assurez-vous que les dossiers affectés à chacun d’eux portent des noms différents. ✎ ¦ Utilisation de la veille ■ Veille t : éteint automatiquement le téléviseur après une période déterminée (30, 60, 90, 120, 150 ou 180 minutes). Pour annuler la fonction Veille, sélectionnez Arrêt. Répétition : Sélectionnez Une fois, Quotid., Lun~Ven, Lun~Sam, Sam~Dim ou Manuel pour définir l'option suivant vos besoins. Si vous sélectionnez Manuel, vous pouvez choisir le jour d'activation de la minuterie. ✎ Le symbole c indique le jour sélectionné. ✎ Mise hors tension auto. (disponible uniquement lorsque le téléviseur est allumé par le minuteur) : le téléviseur est mis hors tension automatiquement après trois heures d’inactivité pour éviter toute surchauffe. ✎ ■ Réglage de la minuterie de mise en marche / arrêt ¦ Verrouillage des programmes Minuteur 1 / Minuteur 2 / Minuteur 3 : vous pouvez définir trois réglages de mise en marche / arrêt différents. Vous devez, au préalable, régler l’horloge. Sécurité ✎ Entrez votre code PIN à 4 chiffres ; "par défaut "0-0-0-0". Période d’activation ▲ 00 Désactiver ▼ Modifiez le code PIN à l’aide de l’option Modifier PIN. 00 ■ Période de désactivation ▲ 00 Désactiver ▼ Volume Source 10 00 Antenne TV Canal ATV 0 Dim lun Mar Mer jeu Ven Sam Une fois L Déplacer U régler Français Verrouillage Parental (Arrêt / Activé) Vous pouvez verrouiller des chaînes dans la fonction Gestion chaînes afin d’empêcher certains utilisateurs, tels que des enfants, de regarder des émissions qui ne leur sont pas destinées. ✎ répétition 18 ✎ L’écran de saisie du code PIN s’affiche après l’écran de configuration. Minuteur 1 E entrer R retour Disponible uniquement lorsque la source Entrée est définie sur TV. Verrouillage parental (Niveau parental) : Cette fonction permet d’empêcher certains utilisateurs, tels que des enfants, de regarder des émissions qui ne leur sont pas destinées, à l’aide d’un code PIN à 4 chiffres défini par l’utilisateur. Autor. tout : déverrouille toutes les évaluations TV. ✎ ■ Les options du menu Verrouillage parental diffèrent selon les pays. Modifier PIN : permet de modifier le code personnel demandé pour pouvoir configurer le téléviseur. ✎ Si vous avez oublié le code PIN, appuyez sur les boutons de la télécommande dans l’ordre suivant, ce qui a pour effet de le réinitialiser sur "0-0-0-0" : POWER (Arrêt) → MUTE → 8 → 2 → 4 → POWER (Marche). Réseau (Type de réseau / Config. du réseau / Test réseau / Samsung Wireless Link / Connexion SWL) Pour plus d’informations sur la configuration des options, reportez-vous à la section "Connexion réseau". Général ■ Mode Jeu (Arrêt / Activé) : lorsque vous connectez une console de jeux, telle qu’une PlayStation™ ou Xbox™, vous pouvez bénéficier d’une expérience ludique encore plus réaliste en sélectionnant le mode Jeu. ✎ REMARQUE x ¦ Autres fonctionnalités Langue ■ Langue des menus : définissez la langue des menus. ■ Langue du télétexte : sélectionnez la langue de votre choix pour le télétexte. ✎ ■ x x L’anglais est utilisé par défaut si la langue sélectionnée n’est pas diffusée. Préférence (Langue Audio principale / Langue Audio secondaire / Langue princ. sous-titres / Langue sec. sous-titres / Langue Télétexte principale / Langue Télétexte secondaire) : sélectionnez la langue qui sera utilisée par défaut lors de la sélection d’une chaîne. x ■ Sous-titres Précautions et restrictions du mode Jeu – Pour déconnecter la console de jeux et connecter un autre périphérique externe, définissez Mode jeu sur Arrêt dans le menu de configuration. – Si vous affichez le menu du téléviseur en Mode Jeu, l’écran tremble légèrement. L'option Mode Jeu n'est pas disponible dans les modes TV et PC. Après avoir connecté la console de jeux, définissez Mode Jeu sur Activé pour disposer d’une bonne qualité d’image. Si Mode Jeu est défini sur Activé : le mode Image est défini sur Standard et le mode Son, sur Personnalisé. BD Wise (Arrêt / Activé) : fournit une qualité d’image optimale pour les lecteurs DVD, les lecteurs Bluray et les systèmes home cinéma Samsung qui prennent en charge BD Wise. Lorsque la fonction BD Wise est réglée sur Activé, le mode d’image passe automatiquement en résolution optimale. ✎ Utilisez ce menu pour définir le mode Sous-titres. ✎ La fonctionnalité sous-titres n'est Disponible lors de la connexion de produits Samsung prenant en charge BD Wise via un câble HDMI. pas opérationnelle avec les modes Composant, ou HDMI. ■ ■ Sous-titres (Arrêt / Activé) : active ou désactive les sous-titres. Transparence menu (Lumineux / Sombre) : permet de définir la transparence du menu. ■ ■ Mode (Normal / Malentendant) : configure le mode des sous-titres. Mélodie (Arrêt / Bas / Moyen / Elevé) : cette option permet de définir la lecture d’une mélodie lors de la mise en marche ou l’arrêt du téléviseur. ■ Langue des sous-titres : définit la langue des sous-titres. ✎ ✎ Interface commune Si le programme visionné ne prend pas en charge la fonction Malentendant, le mode Normal est automatiquement activé, même si le mode Malentendant est sélectionné. ■ L’anglais est utilisé par défaut si la langue sélectionnée n’est pas diffusée. CI Menu : permet à l’utilisateur d’opérer une sélection dans le menu du module CAM. Sélectionnez le menu CI en fonction du menu PC Card. ■ Infos sur l’application : affiche des informations sur le module CAM inséré dans l’emplacement CI et sur la "CARTE CI ou CI+" insérée dans le module CAM. Vous pouvez installer le module CAM, que le téléviseur soit allumé ou éteint. Texte numérique (Désactiver / Activer) (Royaume-Uni uniquement) Si le programme diffuse du texte numérique, cette fonction est activée. (P. 23) Français 19 03 Fonctions de base ■ Fonctions de base 1. Vous pouvez acheter un module CI CAM chez le revendeur le plus proche ou le commander par téléphone. ■ ✎ 2. Insérez fermement la "CARTE CI ou CI+" dans le module CAM en suivant le sens de la flèche. 3. Insérez le module CAM avec la "CARTE CI ou CI+" dans la fente de l’interface commune (dans le sens de la flèche), de telle sorte qu’il soit aligné parallèlement à la fente. ✎ 4. Vérifiez si une image est visible sur une chaîne à signal brouillé. ■ Informations de signal : (chaînes numériques uniquement) soit la qualité de réception des chaînes HDTV est parfaite, soit les chaînes ne sont pas disponibles. Réglez votre antenne afin d’augmenter l’intensité du signal. ■ Résolution des problèmes : consultez cette description s’il vous semble que le téléviseur rencontre un problème. Si aucun des conseils de dépannage ne s’applique au problème rencontré, contactez le service clientèle de Samsung. Télécommande sans fil (Activé / Arrêt) Active ou désactive les commandes à distance ou donne l’autorisation de les utiliser. ¦ Incrustation d’image (PIP) PIP t Permet de regarder simultanément le tuner TV et une source vidéo externe. PIP (Incrustation d’image) ne fonctionne pas dans le même mode. ✎ REMARQUE x x x x Si vous éteignez le téléviseur alors que le mode PIP est activé, la fenêtre PIP disparaît lorsque vous le rallumez. Il est possible que l’image affichée dans la fenêtre PIP semble légèrement moins naturelle lorsque vous utilisez l’écran principal pour un jeu ou un karaoké. Lorsque la fonction Internet@TV est activée, la fonction PIP est inaccessible. Réglages PIP Image principale Composant, HDMI1/DVI, HDMI2, HDMI3, HDMI4, PC PIP (Arrêt / Activé) : active ou désactive la fonction PIP. Chaîne : permet de choisir la chaîne affichée dans l’écran secondaire. ■ Taille (Õ / Ã) : sélectionnez la taille de l’image secondaire. ■ Position (à / – / — / œ) : sélectionnez la position de l’image secondaire. ■ Sélection du son (Principal / Secondaire) : vous pouvez sélectionner le mode audio de votre choix (Principal / Secondaire) en mode PIP. Menu Assistance Diagnostic automatique Test de l’image (Oui / Non) : utilisez cette option pour rechercher d’éventuels problèmes d’image et, si les problèmes persistent, vérifier la mire de couleur. 20 Français Mise à niveau du logiciel Une Mise à niveau du logiciel peut être effectuée via un signal de radiodiffusion ou en téléchargeant le microprogramme le plus récent sur une clé USB à partir du site Web samsung.com. Version actuelle indique que le logiciel est déjà installé sur votre téléviseur. ✎ Le numéro de version est affiché au format suivant : "année/mois/jour_version". Mise à niveau du logiciel Version actuelle 2010/01/18_000001 USB en ligne Canal Mise à niveau en mode veille : 2 h. plus tard Autre logiciel ----/--/--/--_------ TV ■ ■ ✎ Image secondaire ■ Test du son (Oui / Non) : utilisez la mélodie intégrée pour rechercher d’éventuels problèmes sonores. Si les haut-parleurs du téléviseur restent muets, avant d’effectuer le test du son, vérifiez que l’option Sélection Haut-parleur est réglée sur Haut-parleur TV dans le menu Son. La mélodie est diffusée pendant le test, même si l’option Sélection Haut-parleur est réglée sur Ht-parl ext. ou si le son a été désactivé en appuyant sur le bouton MUTE. ► U Déplacer E entrer R retour Installation de la version la plus récente ■ USB : insérez la clé USB Panneau latéral du téléviseur contenant le fichier de mise à niveau du microprogramme téléchargé sur www.samsung. com dans le téléviseur. Veillez à ne pas couper l’alimentation, ou ni retirer la clé USB tant que les mises à niveau ne sont pas terminées. Une fois la mise à niveau du microprogramme terminée, le téléviseur se met Clé USB automatiquement hors tension, puis se rallume. Lorsque la mise à niveau du logiciel est terminée, les paramètres vidéo et audio par défaut sont réinitialisés. Il est conseillé de prendre note des paramètres afin de pouvoir les rétablir facilement après la mise à niveau. En ligne : permet de mettre le logiciel à niveau par Internet. Commencez par configurer votre réseau. Pour plus d’informations sur l’utilisation de la fonction Config. du réseau, reportez-vous à la section "Connexion réseau". Si la connexion Internet ne fonctionne pas correctement, il se peut que la connexion soit interrompue. Réessayez le téléchargement. Si le problème persiste, effectuez la procédure de téléchargement USB et procédez à la mise à niveau. ✎ ✎ ■ Canal : met à niveau le logiciel en utilisant le signal de télédiffusion. Si la fonction est sélectionnée pendant la période de transmission du logiciel, ce dernier est automatiquement recherché et téléchargé. Le temps nécessaire au téléchargement du logiciel dépend de l’état du signal. ✎ ✎ ■ ■ Autre logiciel (sauvegarde) : Affiche la version du logiciel téléchargée par le biais de l'option En ligne. Cette fonction est activée si la procédure est interrompue au niveau de la dernière étape du processus de mise à niveau du logiciel. Guide de connexion HD Consultez ces informations lors de la connexion de périphériques externes au téléviseur. Contacter Samsung Consultez ces informations si le téléviseur ne fonctionne pas correctement ou si vous voulez mettre à niveau le logiciel. Vous y trouverez des informations concernant nos centres d’appel, ainsi que le téléchargement de nos produits et logiciels. Mise à niveau en mode veille : une mise à niveau manuelle est automatiquement effectuée à l’heure indiquée. Etant donné que la mise sous tension s’effectue de façon interne, il se peut que l’écran LCD s’allume légèrement. Le phénomène peut se poursuivre pendant plus d’une heure jusqu’à ce que la mise à jour du logiciel soit terminée. Français 21 03 Fonctions de base ■ Fonctions avancées Connexion à un ordinateur Utilisation d’un câble HDMI/DVI / D-Sub DVI OUT AUDIO OUT AUDIO OUT PC OUT Modes d’affichage (Entrées D-Sub et HDMI/DVI) La résolution optimale est de 1920 X 1080 à 60 Hz. Mode IBM MAC VESA CVT VESA DMT VESA GTF VESA DMT / DTV CEA Résolution Fréquence horizontale (kHz) Fréquence verticale (kHz) Fréquence d'horloge pixels (MHz) 640 x 350 720 x 400 640 x 480 832 x 624 1152 x 870 720 x 576 1152 x 864 1280 x 720 1280 x 960 640 x 480 640 x 480 640 x 480 800 x 600 800 x 600 800 x 600 1024 x 768 1024 x 768 1024 x 768 1152 x 864 1280 x 1024 1280 x 1024 1280 x 800 1280 x 800 1280 x 960 1280 x 720 1360 x 768 1440 x 900 1440 x 900 1600 x 1200 1680 x 1050 1280 x 720 1280 x 1024 1920 x 1080p 31.469 31.469 35.000 49.726 68.681 35.910 53.783 56.456 75.231 31.469 37.861 37.500 37.879 48.077 46.875 48.363 56.476 60.023 67.500 63.981 79.976 49.702 62.795 60.000 45.000 47.712 55.935 70.635 75.000 65.290 52.500 74.620 67.500 70.086 70.087 66.667 74.551 75.062 59.950 59.959 74.777 74.857 59.940 72.809 75.000 60.317 72.188 75.000 60.004 70.069 75.029 75.000 60.020 75.025 59.810 74.934 60.000 60.000 60.015 59.887 74.984 60.000 59.954 70.000 70.000 60.000 25.175 28.322 30.240 57.284 100.000 32.750 81.750 95.750 130.000 25.175 31.500 31.500 40.000 50.000 49.500 65.000 75.000 78.750 108.000 108.000 135.000 83.500 106.500 108.000 74.250 85.500 106.500 136.750 162.000 146.250 89.040 128.943 148.500 Polarité de synchronisation (H/V) +/-/+ -/-/-/-/+ -/+ -/+ -/+ -/-/-/+/+ +/+ +/+ -/-/+/+ +/+ +/+ +/+ -/+ -/+ +/+ +/+ +/+ -/+ -/+ +/+ -/+ -/+ -/+/+ ✎ REMARQUE x x x x 22 Dans le cas d’une connexion avec câble HDMI/DVI, vous devez utiliser la prise HDMI IN 1(DVI). Le mode entrelacé n’est pas pris en charge. Le téléviseur peut fonctionner de façon anormale si le format vidéo sélectionné n’est pas standard. Les modes Séparé et Composite sont pris en charge. Le mode SOG (Sync On Green) n’est pas pris en charge. Français Vous pouvez configurer votre téléviseur de telle sorte qu'il puisse accéder à Internet par le biais de votre réseau local (LAN) à l'aide d'une connexion câblée ou sans fil. ¦ Connexion à un réseau câblé Vous pouvez connecter votre téléviseur au réseau local de trois manières différentes : y En connectant le port LAN situé à l'arrière du téléviseur à un modem externe à l'aide d'un câble de catégorie 5. Voir le schéma ci-dessous. Connecteur modem mural Panneau arrière du téléviseur Modem externe (ADSL / VDSL / Télédistribution) Câble modem Câble LAN y En connectant le port LAN situé à l'arrière du téléviseur à un routeur IP connecté, à son tour, à un modem externe. Utilisez un câble de catégorie 5 pour effectuer cette connexion. Voir le schéma ci-dessous. Connecteur modem mural Modem externe (ADSL / VDSL / Télédistribution) Câble modem Câble LAN Routeur IP (avec serveur DHCP) Panneau arrière du téléviseur Câble LAN y En fonction de la configuration de votre réseau, il se peut que vous puissiez connecter directement le port LAN situé à l'arrière du téléviseur à une prise réseau murale à l'aide d'un câble de catégorie 5. Voir le schéma ci-dessous. Nous attirons votre attention sur le fait que la prise murale est connectée à un modem ou routeur situé en un autre point de la maison. Connecteur modem mural Panneau arrière du téléviseur Câble LAN Si vous possédez un réseau dynamique, vous devez utiliser un modem ou routeur ADSL prenant en charge le protocole DHCP (Dynamic Host Configuration Protocol). Les modems de ce type fournissent automatiquement l'adresse IP, le masque de sous-réseau, la passerelle et les valeurs DNS dont votre téléviseur a besoin pour accéder à Internet. Aucune saisie manuelle n'est donc requise. La plupart des réseaux domestiques sont de type dynamique. Certains réseaux nécessitent une adresse IP statique. Si tel est votre cas, vous devez saisir manuellement l'adresse IP, le masque de sous-réseau, la passerelle et les valeurs DNS dans l'écran de configuration câble de votre téléviseur lors de la configuration de la connexion réseau. Pour obtenir ces données, contactez votre fournisseur d'accès Internet. Si vous disposez d'un ordinateur Windows, vous pouvez également utiliser ce dernier pour obtenir ces paramètres. ✎ Si votre réseau nécessite une adresse IP statique, vous pouvez utiliser un modem ADSL prenant en charge le protocole DHCP. En effet, les modems de ce type vous permettent également d'utiliser des adresses IP statiques. Français 23 04 Fonctions avancées Connexion réseau Fonctions avancées Config. du réseau (Auto.) Config. du réseau (Manuel) Utilisez l'option Config. du réseau Auto. lors de la connexion du téléviseur à un réseau prenant en charge le protocole DHCP. Pour configurer automatiquement la connexion réseau par câble de votre téléviseur, procédez comme suit : Utilisez l'option Config. du réseau Manuel lors de la connexion du téléviseur à un réseau qui nécessite une adresse IP statique. Procédure de configuration automatique Pour obtenir les valeurs de connexion au réseau sur la plupart des ordinateurs Windows, procédez comme suit : 1. Cliquez avec le bouton droit de la souris sur l'icône Réseau située dans le coin inférieur droit de l'écran. 1. Connectez votre téléviseur au réseau local en suivant la procédure décrite à la section précédente. 2. Allumez le téléviseur, appuyez sur le bouton MENU de la télécommande, utilisez le bouton ▲ ou ▼ pour sélectionner Configuration, puis appuyez sur le bouton ENTERE. 3. Utilisez le bouton ▲ ou ▼ pour sélectionner Réseau dans le menu Configuration et appuyez ensuite sur le bouton ENTERE. L'écran Réseau apparaît. : Câble ► Conig. du réseau Test réseau SWl(Samsung Wireless link) 4. Cliquez sur le bouton Détails dans l'onglet Assistance. Les valeurs de connexion réseau sont affichées. Pour configurer manuellement la connexion réseau par câble de votre téléviseur, procédez comme suit : 1. Suivez les étapes 1 à 6 de la procédure de configuration automatique. 3. Appuyez sur le bouton ▼ de la télécommande pour accéder au premier champ de saisie. U Déplacer E entrer R retour 4. Dans l'écran Réseau, sélectionnez Type de réseau. 5. Définissez l'option Type de réseau sur Câble. 6. Sélectionnez Config. du réseau. L'écran Config. du réseau apparaît. Conig. prot. Internet : Auto. Adresse IP : Masque de sous-réseau : Passerelle : DNS : Auto. Serveur DNS : 4. Entrez les paramètres Adresse IP, Masque de sousréseau, Passerelle et Serveur DNS. Utilisez les touches numériques de votre télécommande pour saisir des chiffres et les touches fléchées pour passer d'un champ de saisie à un autre. 5 Une fois cette opération terminée, appuyez sur le bouton RETURN de votre télécommande. 6. Sélectionnez Test réseau pour vérifier la connexion Internet. Conig. du réseau ► U Déplacer E entrer R retour 7. Définissez l’option Config. prot. Internet sur Auto.. 8. L'option Auto. récupère et entre automatiquement les valeurs Internet requises. 9. Attendez deux minutes et appuyez ensuite sur le bouton RETURN de votre télécommande. 10. Si la fonction Réseau n'a pas récupéré les valeurs de connexion au réseau, consultez les instructions relatives au mode Manuel. Français 3. Cliquez sur Assistance dans la boîte de dialogue affichée. 2. Réglez Config. prot. Internet sur Manuel. : Arrêt SWl connect 24 2. Cliquez sur Etat dans le menu contextuel. Procédure de configuration manuelle Réseau Type de réseau Obtention des valeurs de connexion au réseau Pour établir une connexion sans fil entre le téléviseur et le réseau, vous avez besoin d'un routeur ou d'un modem et d'un adaptateur LAN sans fil Samsung (WIS09ABGN), que vous connectez à la prise USB située sur le panneau latéral ou arrière du téléviseur. Voir l'illustration ci-dessous. ✎ Pour utiliser la fonction SWL(Samsung Wireless Link), connectez-la au port USB 1 (HDD). Panneau latéral du téléviseur Connecteur LAN mural Routeur IP sans fil Adaptateur LAN sans ou fil Samsung Câble LAN L'adaptateur LAN sans fil de Samsung est vendu séparément. Vous pouvez vous le procurer auprès de certains revendeurs, sur les sites de commerce électronique et sur Samsungparts.com. Cet adaptateur prend en charge les protocoles de communication IEEE 802.11A/B/G et N. Samsung vous conseille d'utiliser le protocole IEEE 802.11N. Si vous lisez la vidéo sur une connexion IEEE 802.11B/G, des saccades risquent d'apparaître. ✎ REMARQUE x x x x x x x x x x x Vous devez employer l'adaptateur LAN sans fil Samsung (WIS09ABGN) pour utiliser un réseau sans fil. L'adaptateur LAN sans fil Samsung est vendu séparément. L'adaptateur LAN sans fil WIS09ABGN est disponible auprès de certains revendeurs, sur les sites de commerce électronique et sur Samsungparts.com. Pour utiliser un réseau sans fil, vous devez connecter le téléviseur à un routeur IP sans fil. Si ce routeur prend en charge le protocole DHCP, le téléviseur peut utiliser DHCP ou une adresse IP statique pour se connecter au réseau sans fil. Sélectionnez un canal inutilisé pour le routeur IP sans fil. Si le canal affecté au routeur IP sans fil est actuellement utilisé par un autre périphérique à proximité, il y aura des interférences et des interruptions de communication. Si vous utilisez des paramètres de sécurité différents de ceux indiqués ci-dessous, le routeur ne fonctionnera pas avec le téléviseur. Si le mode Pure High-throughput (Greenfield) 802.11n est sélectionné et que le type de cryptage est défini sur WEP, TKIP ou TKIPAES (WPS2Mixed) pour votre point d'accès, les téléviseurs Samsung ne prendront pas en charge la connexion, conformément aux nouvelles spécifications de certification Wi-Fi. Si votre point d'accès prend en charge le WPS (Wi-Fi Protected Setup), vous pouvez vous connecter au réseau via PBC (Push Button Configuration) ou à l'aide d'un code PIN (Personal Identification Number). La fonction WPS configurera automatiquement le SSID et la clé WPA dans ces deux modes. Tenez l'adaptateur LAN sans fil Samsung éloigné du téléviseur. Si vous regardez la télévision alors que l'adaptateur est connecté à proximité, les images peuvent apparaître altérées sur certaines chaînes. Si votre routeur, modem ou appareil n'est pas certifié, il risque de ne pas pouvoir se connecter au téléviseur via l'adaptateur LAN sans fil Samsung. Méthodes de connexion : vous pouvez configurer la connexion réseau sans fil de six façons différentes. – Configuration automatique Samsung – PBC (WPS) – Configuration automatique (à l'aide de la fonction Recherche réseau automatique) – Configuration manuelle – SWL (Samsung Wireless Link) – Ad Hoc L'adaptateur LAN sans fil Samsung doit être connecté directement au port USB du téléviseur. L'utilisation d'un concentrateur USB n'est pas prise en charge. Français 25 04 Fonctions avancées ¦ Connexion à un réseau sans fil Fonctions avancées Config. du réseau (Configuration automatique Samsung) PBC (WPS) Config. du réseau Cette fonction est disponible sur les points d'accès qui prennent en charge la configuration automatique. Si votre point d'accès ne prend pas en charge cette fonction, vous pouvez établir une connexion via PBC (WPS) ou manuellement. Si votre routeur est pourvu d'un bouton PBC (WPS), procédez comme suit : 1. Connectez votre téléviseur au réseau local en suivant la procédure décrite à la section précédente. ✎ Cette fonction est disponible lorsque SWL (Samsung Configuration à l'aide de la méthode PBC (WPS) 2. Allumez le téléviseur, appuyez sur le bouton MENU de la télécommande, utilisez le bouton ▲ ou ▼ pour sélectionner Configuration, puis appuyez sur le bouton ENTERE. 3. Utilisez le bouton ▲ ou ▼ pour sélectionner Réseau dans le menu Configuration et appuyez ensuite sur le bouton ENTERE. Wireless Link) est défini sur Arrêt. ✎ Vous pouvez rechercher du matériel prenant en charge la fonction de configuration automatique Samsung sur le site Web www.samsung.com. Utilisation de la fonction de configuration automatique Samsung 4. Dans l'écran Réseau, sélectionnez Type de réseau. 1. Placez le point d'accès et le téléviseur l'un à côté de l'autre et mettez-les sous tension. 5. Définissez l'option Type de réseau sur Sans fil. 6. Sélectionnez Config. du réseau. L'écran Config. du réseau apparaît. ✎ ✎ La durée de démarrage varie d'une application à l'autre. Aussi, il se peut que vous deviez patienter environ 2 minutes. Sélectionnez un réseau Conig. prot. Internet Si le câble réseau (LAN) est connecté au port WAN du point d'accès pendant la configuration automatique Samsung, vous pouvez effectuer automatiquement le test de connexion Internet. Dans le cas contraire, la fonction de configuration automatique Samsung vérifiera uniquement la connexion périphérique du point d'accès (et non la connexion Internet). 2. Attendez 2 minutes, puis connectez l'adaptateur LAN sans fil Samsung au téléviseur. Une fois l'adaptateur branché, la fenêtre contextuelle s'affiche. 3. Aussitôt la connexion établie, placez le point d'accès parallèlement à l'adaptateur LAN sans fil Samsung, en laissant un espace maximum de 25 cm. 4. Attendez que la connexion soit établie automatiquement. ✎ Si la connexion échoue, redémarrez le point d'accès, puis réessayez. ✎ Si la fonction de configuration automatique Samsung ne parvient pas à connecter le téléviseur à votre point d'accès, une fenêtre contextuelle s'ouvre pour vous informer de l'échec. Redémarrez le point d'accès, puis réessayez. Si le problème de connexion subsiste, sélectionnez l'une des autres options de configuration : PBC (WPS), automatique ou manuel. 5. Une fois la connexion établie, recherchez le routeur. ✎ Conig. du réseau Si les paramètres du point d'accès ont été modifiés ou si vous utilisez le nouveau point d'accès pour la première fois, vous devez procéder à une nouvelle configuration, en commençant à l'étape 1. : Non sélectionné ► : Auto. Adresse IP : Masque de sous-réseau : Passerelle : DNS Serveur DNS : Auto. : U Déplacer E entrer R retour 7. Appuyez sur le bouton rouge de votre télécommande. 8. Appuyez sur le bouton PBC (WPS) de votre routeur dans les deux minutes. Votre lecteur TV récupère automatiquement tous les paramètres réseau dont il a besoin et se connecte à votre réseau. 9. Une fois la connexion configurée, appuyez sur le bouton RETURN pour quitter l'écran Config. du réseau. Config. du réseau (Auto.) La plupart des réseaux sans fil disposent d'un système de sécurité en option qui oblige les périphériques qui y accèdent à transmettre un code de sécurité chiffré, appelé Clé d'accès ou de sécurité. Cette clé de sécurité repose sur une phrase de passe ; il s'agit généralement d'un mot ou d'une série de lettres et de chiffres d'une longueur donnée que vous avez été invité à saisir lors de la configuration de la sécurité de votre réseau sans fil. Si vous utilisez cette méthode de configuration et qu'une clé de sécurité est définie pour votre réseau sans fil, vous devrez saisir la phrase de phase lors de la procédure de configuration. Procédure de configuration automatique Pour configurer automatiquement la connexion sans fil, procédez comme suit : 1. Suivez les étapes 1 à 6 de la section "Configuration à l'aide de la méthode PBC (WPS)" ci-dessus. 2. 26 Français Appuyez sur le bouton ▼ pour sélectionner (Config. prot. Internet, puis sur le bouton ENTERE. Appuyez sur le bouton ▲ ou ▼ pour sélectionner Auto., puis sur le bouton ENTERE. 4. Appuyez sur le bouton ▲ pour accéder à l'option Sélectionnez un réseau, puis sur le bouton ENTERE. La fonction Réseau recherche les réseaux sans fil disponibles. Lorsque vous avez terminé, la liste des réseaux disponibles s'affiche. Config. du réseau (Ad-Hoc) Dans la liste des réseaux, appuyez sur le bouton ▲ ou ▼ pour sélectionner un réseau, puis sur le bouton ENTERE. ✎ Cette fonction est disponible lorsque SWL (Samsung ✎ Si le point d'accès est caché (Invisible), vous devez sélectionner l'option Ajouter réseau et entrer les valeurs Nom du réseau (SSID) et Code de sécurité pour établir la connexion. 5. Si la fenêtre contextuelle PIN/Sécurité s'affiche, passez à l'étape 6. Si l'écran de connexion réseau apparaît, passez à l'étape 10. 6. Appuyez sur le bouton ▲ ou ▼ pour sélectionner Sécurité ou PIN. Pour la plupart des réseaux domestiques, vous devez choisir Sécurité (pour Code de sécurité). L'écran Sécurité apparaît l'adaptateur LAN sans fil Samsung vous permet de vous connecter à un périphérique mobile sans faire usage d'un point d'accès, en utilisant un réseau point-à-point. Wireless Link) est défini sur Arrêt. Comment établir une nouvelle connexion Ad-hoc 1. Suivez les étapes 1 à 6 de la section "Configuration à l'aide de la méthode PBC (WPS)" ci-dessus. (P. 26) 2. Choisissez l'option Sélectionnez un réseau. La liste des appareils/réseaux s'affiche. 3. Dans la liste des appareils, appuyez sur le bouton bleu de la télécommande. ✎ Conig. du réseau Security Key 4. 0 entered A b C D e F G H I j K l M N O P Q r S T U V W X Y z 0~9 C Delete Space Comment se connecter à un périphérique ad hoc existant ? 1. Suivez les étapes 1 à 6 de la section "Configuration à l'aide de la méthode PBC (WPS)" ci-dessus. (P. 26) 2. Choisissez l'option Sélectionnez un réseau. La liste des périphériques s'ouvre alors. 3. Sélectionnez l'appareil de votre choix dans la liste. 4. Si une clé de sécurité est nécessaire, saisissez-la. n Déplacer E entrer R retour 7. Dans l'écran Sécurité, entrez la phrase de passe de votre réseau. ✎ 8. ✎ La phrase de passe doit normalement se trouver sur l'un des écrans de configuration que vous avez utilisés pour configurer votre routeur ou modem. Pour entrer la phrase de passe, suivez les instructions ci-dessous : – 9. Saisissez le Nom du réseau (SSID) généré, puis le Code de sécurité dans le périphérique auquel vous souhaitez vous connecter. Number lower case B Le message Ad-hoc est connex. Wi-Fi directe avec téléphone portable ou PC. La fonctionnalité du système de réseau existant est peut-être restreinte. Souhaitez-vous changer la connexion réseau?) s'affiche. Appuyez sur les boutons numériques de la télécommande pour entrer des chiffres. – Utilisez les boutons de direction de la télécommande pour passer d'un bouton à un autre sur l'écran Code de sécurité. – Appuyez sur le bouton rouge pour changer la casse ou afficher des symboles/caractères. – Pour entrer une lettre ou un symbole, vous devez y accéder, puis appuyer sur le bouton ENTERE. – Pour supprimer le dernier caractère saisi (chiffre ou lettre), appuyez sur le bouton vert de la télécommande. Une fois cette opération terminée, appuyez sur le bouton bleu de votre télécommande. L'écran de connexion réseau apparaît. Si le réseau ne fonctionne pas correctement, vérifiez à nouveau les paramètres Nom du réseau (SSID) et Code de sécurité. Un Code de sécurité incorrect peut, en effet, provoquer un dysfonctionnement. Config. du réseau (Manuel) Si les autres méthodes ne fonctionnent pas, vous devez saisir manuellement les valeurs de configuration du réseau. Obtention des valeurs de connexion au réseau Pour obtenir les valeurs de configuration du réseau sur la plupart des ordinateurs Windows, procédez comme suit : 1. Cliquez avec le bouton droit de la souris sur l'icône Réseau située dans le coin inférieur droit de l'écran. 2. Cliquez sur Etat dans le menu contextuel. 3. Cliquez sur Assistance dans la boîte de dialogue affichée. 4. Cliquez sur le bouton Détails dans l'onglet Assistance. Les paramètres du réseau s'affichent. 10. Attendez que le message de confirmation de connexion s'affiche, puis appuyez sur le bouton ENTERE. L'écran Config. du réseau s'affiche à nouveau. 11. Pour tester la connexion, appuyez sur le bouton RETURN, sélectionnez Test réseau et appuyez enfin sur le bouton ENTERE. Français 27 04 Fonctions avancées 3. Fonctions avancées Procédure de configuration manuelle Procédure de connexion de Samsung Wireless Link Pour régler les paramètres de configuration du réseau de votre téléviseur, procédez comme suit : 1. Suivez les étapes 1 à 6 de la section "Configuration à l'aide de la méthode PBC (WPS)" ci-dessus. (P. 26) Pour établir une connexion, procédez comme suit : 1. Suivez les étapes 1 à 5 de la section "Configuration à l'aide de la méthode PBC (WPS)" ci-dessus. (P. 26) 2. Appuyez sur le bouton ▼ pour sélectionner Config. prot. Internet, puis sur le bouton ENTERE. Appuyez sur le bouton ▲ ou ▼ pour sélectionner Manuel, puis sur le bouton ENTERE. 3. Appuyez sur le bouton ▼ pour accéder au premier champ de saisie (Adresse IP). 4. Utilisez les boutons numériques pour saisir des chiffres. 5. Après avoir renseigné un champ, utilisez le bouton ► pour passer au champ suivant. Vous pouvez également utiliser les autres boutons fléchés pour vous déplacer vers le haut, vers le bas ou vers l'arrière. 6. Entrez les paramètres Adresse IP, Masque de sousréseau et Passerelle. 7. Appuyez sur le bouton ▲ ou ▼ pour sélectionner DNS. 8. Appuyez sur le bouton ▼ pour accéder au premier champ de saisie DNS. Entrez les valeurs numériques comme indiqué précédemment. 9. Une fois cette opération terminée, appuyez sur le bouton ▲ pour accéder à l'option Sélectionnez un réseau. Sélectionnez votre réseau, puis appuyez sur le bouton ENTERE . 10. Allez à l’étape 4 de la procédure de configuration automatique (P. 26) et suivez les instructions à partir de ce point. Config. du réseau (Samsung Wireless Link) Cette fonction vous permet de connecter, au téléviseur, un appareil Samsung prenant en charge PBC (WPS). Vous pouvez connecter des appareils au téléviseur, même si ce dernier n'est pas relié à un routeur. ✎ Pour utiliser Internet sur le téléviseur, le point d'accès doit être connecté au réseau sans fil. ✎ Si un adaptateur LAN sans fil Samsung est connecté au port USB 2, il se peut que le réseau ne fonctionne pas correctement. Il est conseillé de le connecter au port USB 1 (HDD). ✎ Seuls les routeurs qui utilisent la bande de fréquences de 2,4 GHz sont pris en charge (les routeurs 5 GHz ne sont pas pris en charge). Connexion SWL Vous pouvez connecter directement un appareil prenant en charge la norme PBC (WPS) au téléviseur. ✎ Cette fonction est disponible lorsque SWL (Samsung Wireless Link) est défini sur Activé. 28 Français 2. Sélectionnez Samsung Wireless Link à l'aide du bouton ▼ et appuyez ensuite sur ENTERE pour activer cette fonction. 3. Sélectionnez Connexion SWL à l'aide du bouton ▼ et appuyez ensuite sur ENTERE. 4. Si le message "App. sur touche PBC sur appareil ds 120 proch. secondes pour vous connecter" s'affiche, appuyez sur le bouton PBC situé sur l'appareil pour établir une connexion. ✎ Pour plus d'informations, consultez le manuel de configuration du réseau sans fil de l'appareil à connecter. 5. Si le périphérique est correctement connecté au téléviseur après le démarrage du compteur sur la boîte de dialogue, celle-ci disparaît automatiquement. ✎ Si la connexion échoue, réessayez après 2 minutes. Si le téléviseur ne parvient pas à se connecter à Internet Il se peut que la connexion échoue car votre fournisseur d'accès Internet a enregistré, de manière permanente, l'adresse MAC (numéro d'identification unique) de votre ordinateur ou modem et qu'il utilise cette adresse à des fins d'authentification chaque fois que vous vous connectez à Internet. Cela a pour but d'empêcher tout accès non autorisé. Dans la mesure où votre téléviseur possède une adresse MAC différente, votre fournisseur d'accès Internet ne peut pas l'authentifier, ce qui rend impossible toute connexion. Pour remédier à ce problème, demandez à votre fournisseur d’accès la procédure à suivre pour connecter des appareils autres que votre PC (votre téléviseur, par exemple) à Internet. Si votre fournisseur d'accès exige un identifiant (ID) ou un mot de passe pour la connexion à Internet, votre téléviseur ne pourra peut-être pas se connecter à Internet. Si tel est le cas, vous devez entrer l'identifiant ou le mot de passe lors de la connexion à Internet. La connexion à Internet peut échouer en raison d'un problème de pare-feu. Dans ce cas, contactez votre fournisseur d'accès Internet. Si vous ne parvenez toujours pas à vous connecter à Internet après avoir suivi les procédures indiquées par votre fournisseur d'accès, contactez Samsung Electronics au 1-800-SAMSUNG. 04 Fonctions avancées Media Play MediaPlay Vous pouvez lire les photos, la musique et/ou les films enregistrés sur un périphérique USB de type MSC et/ou sur votre ordinateur. Videos SUM Aficher les app. E entrer R retour Changer disp. ¦ Connexion d’un périphérique USB 1. Allumez votre téléviseur. Panneau latéral du téléviseur 2. Connectez un périphérique USB contenant des fichiers photo, de la musique et/ou des films à la prise USB 1 (HDD) ou USB 2 située sur le côté du téléviseur. 3. Lorsqu’un périphérique USB est connecté au téléviseur, une fenêtre contextuelle s’ouvre. Vous pouvez alors sélectionner Media Play. ou Clé USB ¦ Connexion à l’ordinateur par le biais du réseau Vous pouvez lire les images, la musique et les vidéos enregistrées sur votre ordinateur ou votre téléviseur à l’aide d’une connexion réseau en mode Media Play. ✎ Si vous utilisez Media Play par le biais d’un fichier enregistré sur votre ordinateur, vous devez télécharger “PC Share Manager” et le manuel utilisateur sur le site Web “www.samsung.com”. Panneau latéral du téléviseur PC LAN ou Modem externe (ADSL / VDSL / Télédistribution) Adaptateur LAN sans fil Samsung Routeur IP sans fil Câble LAN 1. Pour plus d’informations sur la procédure de configuration de votre réseau, reportez-vous à la section Connexion réseau. – Nous recommandons de placer le téléviseur et l’ordinateur sur le même sous-réseau. Les 3 premières parties de l’adresse de sous-réseau du téléviseur et les adresses IP du PC doivent être les mêmes et seule la dernière partie (adresse de l’hôte) doit être modifiée. (ex. adresse IP : 123.456.789.**) 2. À l’aide d’un câble réseau, connectez le modem externe et l’ordinateur sur lequel le programme Samsung PC Share Manager sera installé. – Vous pouvez connecter directement le téléviseur à un ordinateur sans passer par un routeur. Français 29 Fonctions avancées ✎ Fonctions non prises en charge lors de la connexion à un ordinateur via un réseau : x x x Fonctions Fond musical et Paramètres de musique de fond. Tri des fichiers par préférence dans les dossiers Photo, Musique et Cinéma. Bouton � (Retour arrière) ou µ (Avance rapide) pendant la lecture d’un film. ✎ Les sous-titres intégrés multi-audio Divx DRM ne sont pas pris en charge. ✎ Samsung PC Share Manager doit être autorisé par le pare-feu de l’ordinateur. ✎ Lors de l’utilisation du mode Media Play sur une connexion réseau, selon les fonctions du serveur fourni : x x x x La méthode de tri peut varier. Il se peut que la fonction de recherche de scène ne soit pas prise en charge. Il se peut que la fonction Lecture en continu, qui reprend la lecture d’une vidéo interrompue, ne soit pas prise en charge. – La fonction Lecture en continu ne prend pas en charge plusieurs utilisateurs. (Elle mémorisera uniquement l’endroit auquel l’utilisateur le plus récent a arrêté la lecture.) Il se peut que le bouton � (Retour arrière), µ (Avance rapide) ou ∑ (Pause) ne fonctionne pas suivant les informations de contenu. ✎ Si la vidéo saccade lors de la lecture sur un réseau sans fil, nous vous recommandons d’utiliser un réseau câblé. ✎ Il se peut que le fonctionnement ne soit pas correct avec des fichiers multimédia sans licence ✎ Ce qu’il faut savoir avant d’utiliser la fonction Media Play x x x x x x x x x x x x x x x x x x x x x 30 Le protocole MTP (Media Transfer Protocol) n’est pas pris en charge. Le système de fichiers prend en charge les formats FAT16, FAT32 et NTFS. Il est possible que certains types d’appareils photo numériques et de périphériques audio USB ne soient pas compatibles avec ce téléviseur. Media Play ne prend en charge que les périphériques de stockage de masse USB de la catégorie MSC. Cette dernière est dédiée aux périphériques de transport de masse uniquement. Il s’agit notamment des clés USB, lecteurs de cartes Flash et disques durs USB (les concentrateurs USB ne sont pas pris en charge). Les périphériques doivent être connectés directement au port USB du téléviseur. Avant de connecter l’appareil au téléviseur, sauvegardez vos fichiers afin d’éviter qu’ils ne soient endommagés ou que des données ne soient perdues. SAMSUNG ne saurait, en aucun cas, être tenue responsable de la perte de données ou de l’endommagement d’un fichier de données. Connectez un disque dur USB au port dédié, USB 1 (HDD). Ne déconnectez pas le périphérique USB en cours de chargement. MSC prend en charge les fichiers MP3 et JPEG, alors qu’un périphérique PTP prend uniquement en charge les fichiers JPEG. Plus la résolution de l’image est élevée, plus le temps d’affichage à l’écran sera long. La résolution JPEG maximale prise en charge est de 15 360 x 8 640 pixels. Pour les fichiers non pris en charge ou endommagés, le message "Format de fichier non compatible" s’affiche. Si le critère de tri est défini sur Aff. de base, il est possible d’afficher jusqu’à 1 000 fichiers dans chaque dossier. Les fichiers MP3 avec gestion des droits numériques (DRM) téléchargés à partir d’un site payant ne peuvent pas être lus. La technologie gestion numérique des droits (DRM) prend en charge la création de contenu, la distribution et la gestion du contenu de manière intégrée et complète (par exemple, la protection des droits et des intérêts des fournisseurs de contenu, la prévention de la copie illégale du contenu), ainsi que la gestion de la facturation et des règlements. Si plusieurs périphériques PTP sont connectés, vous ne pouvez en utiliser qu’un à la fois. Si plusieurs périphériques MSC sont connectés, il se peut que certains d’entre eux ne soient pas reconnus. Un périphérique USB nécessitant beaucoup de puissance (plus de 500 mA ou 5 V) ne sera peut-être pas pris en charge. Si un message d’avertissement de surcharge s’affiche lorsque vous connectez ou utilisez un périphérique USB, il se peut que le périphérique ne soit pas reconnu ou qu’il fonctionne mal. Si aucune entrée n’a été reçue au cours de la période définie dans le paramètre Temps protection auto, l’économiseur d’écran s’active. Le mode d’économie d’énergie de certains disques durs externes peut être désactivé automatiquement lors d’une connexion au téléviseur. Si un câble d’extension USB est utilisé, il se peut que le périphérique USB ne soit pas reconnu ou que les fichiers qui y sont stockés ne soient pas lus. Si un périphérique USB connecté au téléviseur n’est pas reconnu, si la liste des fichiers qui y sont stockés est corrompue ou si un fichier de la liste est illisible, connectez le périphérique en question à l’ordinateur, formatez le périphérique et vérifiez la connexion. S’il s’avère qu’un fichier supprimé de l’ordinateur est encore présent lors de l’exécution de Media Play, utilisez la fonction «Vider la Corbeille» de l’ordinateur pour le supprimer définitivement. Français Accédez au fichier de votre choix à l’aide des boutons haut/bas/droite/gauche et appuyez ensuite sur le bouton ENTERE ou � (Lecture). La lecture du fichier commence. ✎ Prise en charge de Mode Périphérique et Mode Contenu dans la page d’accueil Media Play. Informations : Vous pouvez vérifier le nom du fichier sélectionné, le nombre de fichiers, ainsi que la page. Videos 1/1 Page /Movie 01.avi Movie 01.avi Movie 02.avi Jan.10.2010 Movie 03.avi Jan.10.2010 Movie 04.avi Jan.10.2010 Movie 05.avi Jan.10.2010 Movie 06.avi Jan.10.2010 Section Liste de tri : Affiche l’ordre de tri standard. ✎ Movie 07.avi Jan.10.2010 Movie 08.avi Jan.10.2010 Movie 09.avi Cet ordre de tri varie en fonction du contenu. Jan.10.2010 Movie 10.avi Jan.10.2010 SUM A Section Liste des fichiers : Vous pouvez vérifier les fichiers et groupes classés par catégorie. Jan.10.2010 Tri T Outils Appareil Changer disp. Boutons d’opérations A Rouge (Changer périph): permet de sélectionner un appareil connecté. B Vert (Préférence) : définit la préférence du fichier (N’est pas pris en charge dans l’affichage de base.) C Jaune (Sélectionner) : permet de sélectionner plusieurs fichiers dans la liste. Les fichiers sélectionnés sont marqués d’un symbole. D Bleu (Tri) : permet de sélectionner la liste de tri. T Outils : affiche le menu d’options. ✎ Le bouton � ou µ permet d'accéder à la page suivante ou précédente de la liste des fichiers. Videos Lecture d’une vidéo 1. Appuyez sur le bouton ◄ ou ► pour sélectionner Vidéos et appuyez ensuite sur ENTERE dans le menu Media Play. 2. Appuyez sur le bouton ◄/►/▲/▼ pour sélectionner la vidéo de votre choix dans la liste des fichiers. 3. Appuyez sur le bouton ENTERE ou � (Lecture). – Le fichier sélectionné s’affiche en haut de l’écran, avec le temps de lecture. – Si les informations sur la durée de la vidéo sont inconnues, la durée de lecture et la barre de progression ne sont pas affichées. – Pendant la lecture d’une vidéo, vous pouvez effectuer une recherche à l’aide des boutons ◄ et ►. ✎ Ce mode vous permet d’écouter la bande son d’un jeu vidéo, mais pas de jouer au jeu proprement dit. 00:04:03 / 00:07:38 1/1 Movie 01.avi y Formats de sous-titres pris en charge Nom Extension de fichier MPEG-4 time-based text .ttxt Format XML SAMI .smi HTML SubRip .srt chaînes SubViewer .sub chaînes Micro DVD .sub ou .txt chaînes SUM E Pause L Saut T Outils R retour Français 31 04 Fonctions avancées ¦ Affichage Fonctions avancées • Formats vidéo pris en charge Extension de fichier *.avi *.mkv Conteneur AVI MKV *.asf *.wmv *.mp4 ASF ASF MP4 *.3gp 3GPP *.vro VRO VOB *.mpg *.mpeg PS *.ts *.tp *.trp Codec vidéo Résolution Fréquence d'images (i/s) Débit binaire (Mbit/s) Divx 3.11 / 4.x / 5.1 / 6.0 1920 x 1080 6 ~ 30 8 XviD 1920 x 1080 6 ~ 30 8 H.264 BP / MP / HP 1920 x 1080 6 ~ 30 25 MPEG4 SP / ASP 1920 x 1080 6 ~ 30 8 Motion JPEG 800 x 600 6 ~ 30 8 Divx 3.11 / 4.x / 5.1 / 6.0 1920 x 1080 6 ~ 30 8 XviD 1920 x 1080 6 ~ 30 8 H.264 BP / MP / HP 1920 x 1080 6 ~ 30 25 MPEG4 SP / ASP 1920 x 1080 6 ~ 30 8 Motion JPEG 800 x 600 6 ~ 30 8 Window Media Video v9 1920 x 1080 6 ~ 30 25 H.264 BP / MP / HP 1920 x 1080 6 ~ 30 25 MPEG4 SP / ASP 1920 x 1080 6 ~ 30 8 XVID 1920 x 1080 6 ~ 30 8 H.264 BP/MP/HP 1920 x 1080 6 ~ 30 25 MPEG4 SP / ASP 1920 x 1080 6 ~ 30 8 TS MPEG1 1920 x 1080 24 / 25 / 30 30 MPEG2 1920 x 1080 24 / 25 / 30 30 MPEG1 1920 x 1080 24 / 25 / 30 30 MPEG2 1920 x 1080 24 / 25 / 30 30 H.264 1920 x 1080 6 ~ 30 25 MPEG2 1920 x 1080 24 / 25 / 30 30 H.264 1920 x 1080 6 ~ 30 25 VC1 1920 x 1080 6 ~ 30 25 Codec audio MP3 / AC3 / LPCM / ADPCM / DTS Core MP3 / AC3 / LPCM / ADPCM / WMA WMA MP3 / ADPCM / AAC ADPCM / AAC / HE-AAC AC3 / MPEG / LPCM AC3 / MPEG / LPCM / AAC AC3 / AAC / MP3 / DD+ / HE-AAC Autres restrictions ✎ REMARQUE x x x x Si le contenu d’un codec présente un problème, ce dernier ne sera pas pris en charge. Si les informations concernant un conteneur sont incorrectes et que le fichier présente une erreur, le conteneur ne pourra pas effectuer une lecture correcte. Le son ou la vidéo peuvent ne pas fonctionner si le contenu a un débit binaire/une fréquence d’images standard supérieur aux taux d’images par seconde repris dans le tableau ci-dessus. Si une erreur survient dans la table d’index, la fonction de recherche (passer) n’est pas prise en charge. Décodeur vidéo • Prise en charge jusqu'à la norme H.264, Level 4.1 • Les normes H.264 FMO / ASO / RS, VC1 SP / MP / AP L4 et AVCHD ne sont pas prises en charge. • XVID, MPEG4 SP, ASP : – Résolution inférieure à 1280 x 720 : 60 images max. – Résolution supérieure à 1280 x 720 : 30 images max. • Les normes GMC 2 et au-delà ne sont pas prises en charge. • H.263 n’est pas pris en charge. • Seul Samsung Techwin MJEPG est pris en charge. 32 Français Décodeur audio • Prend en charge jusqu'à WMA 7, 8, 9, STD • WMA 9 PRO ne prend pas en charge l'audio deux canaux, multicanaux ou sans perte. • Le taux d'échantillonnage WMA 22 050 Hz mono n'est pas pris en charge. Si vous quittez la fonction de lecture de vidéos ou de programmes, il est possible de reprendre la lecture ultérieurement, au point où vous l’avez arrêtée. ✎ Si vous appuyez sur le bouton ENTERE pendant la lecture du fichier, vous pouvez le parcourir selon une division en 5 chapitres de votre choix. 1. Pour sélectionner le fichier film que vous souhaitez lire en continu, appuyez sur le bouton ◄ ou ► dans la section Liste des fichiers. 2. Appuyez sur le bouton �(Lecture) / ENTERE. 00:04:03 / 00:07:38 1/1 Movie 01.avi 3. Sélectionnez Aide lecture continue (Resume Play) en appuyant sur le bouton bleu. Le film reprend à l’endroit précis où vous aviez arrêté la lecture. ✎ Le film reprend à l’endroit précis où vous aviez arrêté la lecture. Le bouton bleu est disponible lorsque vous relancez la lecture. ✎ Si la fonction Aide lecture continue est définie sur Activé dans le menu Paramètres, un message s’affiche lorsque vous reprenez la lecture d’un film. lecture continue repr. lect. d. scène. Lecture continue E Scène L Saut T Outils R Retour SUM Musique Lecture de musique 1. Appuyez sur le bouton ◄ ou ► pour sélectionner Musique et appuyez ensuite sur ENTERE dans le menu Media Play. 2. Appuyez sur le bouton ◄/►/▲/▼ pour sélectionner le fichier Music de votre choix dans la liste des fichiers. liste éc. 3. Appuyez sur le bouton ENTERE ou � (Lecture). – Pendant la lecture d’un fichier audio, vous pouvez effectuer une recherche à l’aide des boutons ◄ et ►. I Love You Jhon I Love you Jhon 1st Album Pop 2010 4.2MB No Singer Music 1 Music 2 No Singer Music 3 No Singer – Les boutons � (Retour arrière) et µ (Avance rapide) ne fonctionnent pas durant la lecture. 01:10 / 04:02 Music 4 No Singer Music 5 No Singer ✎ Seuls les fichiers portant l’extension MP3 sont affichés. Les fichiers portant d’autres extensions ne s’affichent pas, même s’ils sont enregistrés sur le même périphérique USB. 3/15 SUM E Pause L Saut T Outils R retour ✎ Si le son est déformé lors de la lecture de fichiers MP3, réglez l’option Egaliseur dans le menu Son. (Un fichier MP3 surmodulé peut être à l’origine d’un problème sonore.) Création de Ma liste lect. 1. Appuyez sur les boutons ◄/►/▲/▼ pour sélectionner les pistes à ajouter, puis appuyez sur le bouton TOOLS. 2. Sélectionnez Aj. liste de lecture. 3. Lorsque le menu correspondant s’affiche, sélectionnez Nouv. liste lecture. ✎ Pour ajouter des pistes à une ancienne liste de lecture, sélectionnez simplement la liste à laquelle les ajouter. 4. La liste de lecture, nouvelle ou mise à jour, se trouve sur la page Musique principale. Lecture de Ma liste lect. Sélectionnez le dossier Ma liste lect. et elle se lance automatiquement. Appuyez sur le bouton ▲ ou ▼ pour sélectionner un autre fichier audio de la liste de lecture. Français 33 04 Fonctions avancées Lecture d’un fichier film en continu (Reprendre la lecture) Fonctions avancées Photos Visualisation d’une photo (ou d’un diaporama) 1. 2. 3. Appuyez sur le bouton ◄ ou ► pour sélectionner Photo et appuyez ensuite sur ENTERE dans le menu Media Play. Appuyez sur le bouton ◄/►/▲/▼ pour sélectionner la photo de votre choix dans la liste des fichiers. Appuyez sur le bouton ENTERE ou � (Lecture). – Lorsqu’une liste de photos est affichée, appuyez sur le bouton (Lecture) / ENTERE de la télécommande pour lancer le diaporama. – Tous les fichiers de la section Liste des fichiers seront affichés dans le diaporama. – Pendant le diaporama, les fichiers apparaissent dans l’ordre, à partir de celui en cours d’affichage. Image1024.jpg Normal 1024x768 2010/2/1 3/15 E Pause L Préc./Suivant T Outils R retour SUM ✎ Des fichiers musicaux peuvent être lus automatiquement pendant le diaporama, si l’option Fond musical est définie sur Activé. ✎ Il n’est pas possible de changer le Mode mus. de fond tant que le chargement de BGM n’est pas terminé. ¦ Lecture de plusieurs fichiers Lecture des fichiers musicaux / vidéos / photos sélectionnés 1. Appuyez sur le bouton jaune dans la liste des fichiers pour sélectionner le fichier de votre choix. 2. Répétez l’opération ci-dessus pour sélectionner plusieurs fichiers. REMARQUE x La marque (c) s’affiche à gauche des fichiers sélectionnés. x Pour annuler une sélection, appuyez à nouveau sur le bouton jaune. x Pour désélectionner tous les fichiers, appuyez sur le bouton TOOLS et sélectionnez Désélectionner tout. 3. Appuyez sur le bouton TOOLS et sélectionnez ensuite Lire contenu sélectionné. Videos 2 ichiers sélect. 1/1 Page /Movie 01.avi ✎ Movie 01.avi Movie 02.avi Jan.10.2010 Jan.10.2010 Movie 03.avi Movie 04.avi Jan.10.2010 Jan.10.2010 Movie 05.avi Movie 06.avi Jan.10.2010 Jan.10.2010 Movie 07.avi Movie 08.avi Jan.10.2010 Jan.10.2010 Movie 09.avi Movie 10.avi Jan.10.2010 SUM Jan.10.2010 Changer disp. Sélectionner Tri T Outils Lecture du groupe de fichiers musicaux / vidéos / photos 1. Lorsqu’une liste de fichiers est affichée, vous pouvez accéder à n’importe quel fichier dans le groupe de votre choix. 2. Appuyez sur le bouton TOOLS et sélectionnez ensuite Lire le groupe actuel. ¦ Fonctions supplémentaires de Media Play Tri de la liste des fichiers Appuyez sur le bouton bleu dans la liste pour trier les fichiers. Catégorie Vidéos Musique Photos Affiche le dossier complet. Pour regarder les photos, sélectionnez le dossier. ✓ ✓ ✓ ✓ ✓ ✓ ✓ ✓ Date pl. réc. Les titres des fichiers sont triés et affichés par symbole / numéro / ordre alphabétique /ordre spécial. Les fichiers sont triés et affichés par préférence. Les préférences d'un fichier peuvent être modifiées dans la section Liste de fichiers à l'aide du bouton vert. Trie et affiche les fichiers selon la date la plus récente. Date pl. anc. Trie et affiche les fichiers selon la date la plus ancienne. ✓ Artiste Les fichiers musicaux sont triés par artiste dans l'ordre alphabétique. Album Trie les fichiers musicaux par album et par ordre alphabétique. Genre Trie les fichiers musicaux par genre. ✓ Trie les fichiers musicaux par ambiance. Vous pouvez modifier les informations d'ambiance de la musique. Trie et affiche les photos par mois. Le tri s’effectue uniquement sur la base du mois (de janvier à décembre), quelle que soit l’année. ✓ Aff. de base Titre Préférence Humeur P. mois 34 Français Opérations ✓ ✓ ✓ ✓ ✓ ✓ ✓ Pendant la lecture d’un fichier, appuyez sur le bouton TOOLS. Catégorie Operations (Opérations) Vidéos Musiqu Vous pouvez lire des fichiers musicaux, vidéo et en boucle. ✓ ✓ Vous pouvez régler le format de l'image suivant vos préférences. ✓ Réglage de l'image Vous pouvez régler les paramètres d'image. (p. 13, 14, 15, 16) ✓ Réglage du son Vous pouvez régler les paramètres sonores. (p. 16, 17) ✓ Réglage des soustitres Vous pouvez visionner le fichier vidéo avec des sous-titres. Cela fonctionne uniquement si les sous-titres ont le même nom de fichier que le fichier vidéo. ✓ Audio Vous pouvez regarder une vidéo avec l’une des langues prises en charge. Cette fonction n’est active que lors de la lecture de fichiers de type streaming prenant en charge plusieurs formats audio. ✓ Arrêter le diaporama / Dém. Diaporama Vous pouvez lancer ou arrêter un diaporama. ✓ Vitesse du diap. Vous pouvez sélectionner la vitesse du diaporama pendant sa diffusion. ✓ Effet diaporama Vous pouvez définir l'effet utilisé lors du changement d'image dans le diaporama. ✓ Fond musical Vous pouvez définir et sélectionner le fond musical d'un diaporama. Zoom Vous pouvez zoomer sur les images lorsque vous êtes en mode Plein écran. Rotation Vous pouvez faire pivoter les images lorsque vous êtes en mode Plein écran. Arr.-plan Acc. Vous pouvez déplacer le fichier vers le bureau de Media Play. Information Vous pouvez afficher des informations détaillées sur le fichier lu. Titre Vous pouvez déplacer directement l'autre fichier. Mode de répétition Format de l'image (Mode1 / Mode2 / Original) ✓ Photos ✓ ✓ ✓ ✓ ✓ ✓ ✓ ✓ ✓ ✓ Paramètres Utilisation du menu Configuration ■ Paramètre arrière-plan : sélectionnez cette option pour afficher l’arrière-plan de votre choix. ■ Aide lecture continue (Resume Play) (Activé / Arrêt) : sélectionnez cette option pour afficher le message d’aide relatif à la lecture continue des films. ■ Obtenir code d’enr. de DivX® VOD : affiche le code d’enregistrement autorisé pour le téléviseur. Connectez-vous au site Web DivX et entrez le code d’enregistrement avec un compte personnel pour pouvoir télécharger le fichier d’enregistrement VOD (vidéo à la demande). Si vous lisez l’enregistrement VOD à l’aide de Media Play, l’enregistrement est terminé. ✎ Pour plus d’informations sur DivX® VOD, rendez-vous sur le site Web www.DivX.com. ■ Obtenir code de désact. de DivX® VOD : si DivX® VOD n’est pas enregistré, le code de désactivation de l’enregistrement s’affiche. Si vous exécutez cette fonction alors que DivX® VOD est enregistré, l’enregistrement DivX® VOD en cours est désactivé. ■ Information : sélectionnez cette option pour afficher des informations sur le périphérique connecté. Français 35 04 Fonctions avancées Menu des options de lecture de vidéos / musique / photos Fonctions avancées Anynet+ En quoi consiste Anynet+ ? t Anynet+ est une fonction qui vous permet de contrôler tous les appareils Samsung connectés compatibles Anynet+ à l’aide de votre télécommande Samsung. Le système Anynet+ peut être utilisé uniquement avec les appareils Samsung disposant de la fonction Anynet+. Pour être sûr que votre appareil Samsung dispose de cette fonction, vérifiez qu’il comporte le logo Anynet+. Connexion à un système home cinéma TV Périphérique Anynet+ 1 Home cinéma Périphériques Anynet+ 2, 3, 4 Câble HDMI 1.3 Câble optique Câble HDMI 1.3 1. 2. A l’aide d’un câble HDMI, reliez la prise HDMI IN (1(DVI), 2, 3 ou 4) du téléviseur à la prise HDMI OUT du périphérique Anynet+ correspondant. A l’aide d’un câble HDMI, reliez la prise HDMI IN du système home cinéma à la prise HDMI OUT de l’appareil Anynet+ correspondant. ✎ REMARQUE x Connectez le câble optique entre la prise DIGITAL AUDIO OUT (OPTICAL) de votre téléviseur et l’entrée Audio numérique de votre système home cinéma. En suivant les instructions de connexion ci-dessus, la prise Optique diffuse uniquement du son sur 2 canaux. Vous n’entendrez donc du son qu’au niveau des haut-parleurs avant gauche et droit et du caisson de basses de votre système home cinéma. Pour écouter du contenu audio 5.1, branchez la prise DIGITAL AUDIO OUT (OPTICAL) du lecteur DVD ou du décodeur satellite (c’est-à-dire, le périphérique Anynet 1 ou 2) directement sur l’amplificateur ou sur le système home cinéma, et non sur le téléviseur. Ne connectez qu’un seul système home cinéma. Vous pouvez connecter un appareil Anynet+ à l’aide du câble HDMI. Il se peut que certains câbles HDMI ne prennent pas en charge les fonctions Anynet+. Anynet+ fonctionne lorsque l’appareil AV compatible est en veille ou en marche. x x x x x Le système Anynet+ prend en charge jusqu’à 12 appareils AV. Vous pouvez connecter jusqu’à 3 appareils du même type. Menu Anynet+ Le menu Anynet+ varie selon le type et l’état des appareils Anynet+ connectés au téléviseur. Anynet+ Menu Voir télévision Liste d'appareils Enregistrement : (*enregistreur) (nom_appareil) MENU (nom_appareil) INFO Arrêter l'enregistrement : (*enregistreur) Récepteur Description Fait basculer le mode Anynet+ en mode de diffusion TV. Affiche la liste des appareils Anynet+. Lance immédiatement l'enregistrement à l'aide de l'enregistreur. (Cette fonction n'est disponible que pour les appareils prenant en charge la fonction d'enregistrement.) Affiche les menus de l'appareil connecté. Par exemple, si un graveur DVD est connecté, son menu de disque s'affiche. Affiche le menu de lecture de l'appareil connecté. Par exemple, si un graveur DVD est connecté, son menu de lecture s'affiche. Arrête l'enregistrement. Le son est diffusé par l'intermédiaire du récepteur. Si plusieurs enregistreurs sont connectés, ils s’affichent sous la forme (*enregistreur) ; si un seul enregistreur est connecté, il s’affiche sous la forme (*nom_appareil). 36 Français ■ Configuration Anynet+ (HDMI-CEC) (Arrêt / Activé) : pour utiliser la fonction Anynet+, l’option Anynet+ (HDMI-CEC) doit être définie sur Activé. Lorsque la fonction Anynet+ (HDMI-CEC) est désactivée, toutes les activités qui y sont associées sont indisponibles. ✎ Arrêt automatique (Non / Oui) : configuration de l’arrêt automatique d’un appareil Anynet+ lorsque le téléviseur est mis hors tension. La source active sur le téléviseur doit être définie sur TV pour pouvoir utiliser la fonction Anynet+. ✎ ✎ Même si un appareil externe est en train d’enregistrer, il se peut qu’il s’éteigne. ¦ Basculement entre des appareils Anynet+ 1. La liste des appareils Anynet+ connectés au téléviseur s’affiche. ✎ Si l’appareil recherché est introuvable, appuyez sur le bouton rouge pour actualiser la liste. 2. Sélectionnez un appareil et appuyez sur le bouton ENTERE. Vous pouvez basculer vers l’appareil sélectionné. ✎ x x Le menu Liste d’appareils s’affiche uniquement si Anynet+ (HDMI-CEC) est défini sur Activé dans le menu Application. Le basculement vers l’appareil sélectionné peut prendre 2 minutes. Il est impossible d’annuler l’opération de basculement. Si vous avez choisi un mode d’entrée externe en appuyant sur le bouton SOURCE, il est impossible d’utiliser la fonction Anynet+. Veillez à basculer vers un appareil Anynet+ à l’aide de la Liste d’appareils. ¦ Enregistrement Vous pouvez enregistrer un programme télévisé à l’aide d’un enregistreur Samsung. 1. Sélectionnez Enregistrement. ✎ ✎ S’il existe plusieurs enregistreurs x Si plusieurs enregistreurs sont connectés, la liste de ces appareils s’affiche. Sélectionnez un enregistreur dans la Liste d’appareils. Si l’enregistreur ne s’affiche pas, sélectionnez Liste d’appareils, puis appuyez sur le bouton rouge pour rechercher des appareils. 2. Appuyez sur le bouton EXIT pour quitter le menu. ✎ ✎ Vous pouvez effectuer un enregistrement en sélectionnant Enregistrement : (nom_appareil). ✎ Avant d’enregistrer, vérifiez la connexion de la prise d’antenne à l’enregistreur. Pour connecter correctement une antenne à un enregistreur, reportez-vous à la documentation de ce dernier. Le bouton � (REC) permet d’enregistrer ce que vous regardez. Si vous regardez une vidéo provenant d’un autre appareil, cette vidéo est enregistrée. Français 37 04 Fonctions avancées ¦ Configuration d’Anynet+ Fonctions avancées ¦ Ecoute via un récepteur Vous pouvez écouter du son via un récepteur (c’est-à-dire un système home cinéma) au lieu du haut-parleur du téléviseur. 1. Sélectionnez Récepteur et définissez l’option sur Activé. 2. Appuyez sur le bouton EXIT pour quitter le menu. Si votre récepteur ne prend en charge que l’audio, il se peut qu’il ne figure pas dans la liste d’appareils. Le récepteur fonctionnera lorsque vous aurez correctement raccordé la prise d’entrée optique du récepteur à la prise DIGITAL AUDIO OUT (OPTICAL) du téléviseur. Lorsque le récepteur (système home cinéma) est activé, vous pouvez écouter le son sortant de la prise optique du téléviseur. Lorsque le téléviseur affiche un signal DTV (antenne), il envoie un son 5.1 canaux au récepteur. Lorsque la source est un composant numérique (un lecteur DVD, par exemple) connecté au téléviseur via HDMI, seul un son 2 canaux est diffusé par le récepteur. ✎ ✎ ✎ ✎ REMARQUE x x x Vous pouvez commander n’importe quel appareil Anynet+ à l’aide de la télécommande, et non des boutons du téléviseur. Il se peut que la télécommande du téléviseur ne fonctionne pas dans certaines situations. Dans ce cas, sélectionnez à nouveau l’appareil Anynet+. Les fonctions Anynet+ ne sont pas opérationnelles sur les produits d’autres fabricants. ¦ Résolution des problèmes Anynet+ Problème Solution possible Anynet+ ne fonctionne pas. • Vérifiez si l'appareil est compatible Anynet+. Le système Anynet+ ne prend en charge que les appareils compatibles Anynet+. • Ne connectez qu'un seul récepteur (home cinéma). • Vérifiez que le cordon d'alimentation de l'appareil Anynet+ est bien connecté. • Vérifiez la connexion des câbles vidéo / audio / HDMI de l'appareil Anynet+. • Vérifiez que l'option Anynet+ (HDMI-CEC) est définie sur On (Activé) dans le menu de configuration d'Anynet+. • Vérifiez si la télécommande du téléviseur est en mode TV. • Vérifiez qu'il s'agit d'une télécommande exclusive Anynet+. • Anynet+ ne fonctionne pas dans certains cas. (Recherche de chaînes, fonctionnement de Media Play ou Plug & Play (configuration initiale), etc.) • Lorsque vous branchez ou retirez le câble HDMI, veillez à relancer une recherche d'appareils ou à éteindre et rallumer votre téléviseur. • Vérifiez que la fonction Anynet+ de l'appareil Anynet+ est activée. Je veux démarrer Anynet+. • Assurez-vous que l'appareil AV est correctement connecté au téléviseur et vérifiez que la fonction Anynet+ (HDMI-CEC) est définie sur Activé dans le menu de configuration d'Anynet+. • Appuyez sur le bouton TOOLS pour afficher le menu Anynet+ et sélectionner le menu de votre choix. Je veux quitter Anynet+. • Sélectionnez Affichage TV dans le menu Anynet+. • Appuyez sur le bouton SOURCE de la télécommande et choisissez un appareil non compatible Anynet+. • Appuyez sur P > / <, PRE-CH et FAV.CH pour changer de mode TV. Remarque : le bouton de chaîne ne fonctionne que si aucun appareil Anynet+ à tuner incorporé n'est connecté. Le message "Connexion à un appareil Anynet+…" s'affiche. • Il est impossible d'utiliser la télécommande lorsque vous configurez Anynet+ ou basculez vers un mode d'affichage. • La télécommande n'est utilisable qu'au terme de la configuration d'Anynet+ ou du passage vers un mode d'affichage. La lecture ne démarre pas sur l'appareil Anynet+. • Vous ne pouvez pas utiliser la fonction de lecture lorsque Plug & Play (configuration initiale) est en cours. Le périphérique connecté ne s'affiche pas. • • • • • Le programme TV ne s'enregistre pas. • Vérifiez que la fiche d'antenne est correctement branchée sur l'enregistreur. Le son du téléviseur n'est pas diffusé par le récepteur. • Reliez le téléviseur au récepteur à l'aide du câble optique. 38 Français Vérifiez si l'appareil est ou non compatible avec les fonctions Anynet+. Vérifiez que le câble HDMI est bien connecté. Vérifiez que l'option Anynet+ (HDMI-CEC) est définie sur Activé dans le menu de configuration d'Anynet+. Lancez une nouvelle recherche d'appareils Anynet+. Vous pouvez uniquement connecter un appareil Anynet+ à l'aide du câble HDMI. Il se peut que certains câbles HDMI ne prennent pas en charge les fonctions Anynet+. • En cas d'arrêt anormal résultant d'une déconnexion du câble HDMI ou du câble d'alimentation, ou encore d'une panne de courant, effectuez une nouvelle recherche d'appareils. ¦ Mise en route d’Internet@TV recommended Internet@TV vous permet de disposer, sur votre téléviseur, de contenu utile et ludique en provenance directe du Web. My Applications Samsung Apps by Date 1/1 Settings A login B Mark as Favorite D Sort by R return ✎ REMARQUE x x x x x x x x Vous devez configurer les paramètres réseau avant d’utiliser Internet@TV. Pour plus d’informations, reportez-vous à la section "Connexion réseau" (P. 23). Si le contenu diffusé par le fournisseur comporte des polices non prises en charge, elles ne s’afficheront pas correctement. Suivant les conditions du réseau, la connexion peut être lente, voire intermittente. En fonction de la région, il se peut que l’anglais soit la seule langue prise en charge dans le service d’applications. Cette fonction n’est pas disponible dans tous les pays. Si l’utilisation d’une application vous pose problème, contactez le fournisseur de contenu. En fonction des circonstances, le fournisseur de contenu peut décider d’interrompre la diffusion des mises à jour de l’application, voire de l’application proprement dite. La prise en charge ou les fonctionnalités de certaines applications peuvent être soumises à la réglementation en vigueur dans le pays. Affichage Ecran de télévision : affiche la chaîne actuelle. recommended Applications recommandées : Affiche le service recommandé par Samsung. Vous ne pouvez pas ajouter ou supprimer de services dans cette liste. by Date 1/1 My Applications Informations : affiche des avis, des nouvelles applications, ainsi que des publicités proposées par Samsung. Service d’applications: Vous pouvez bénéficier de divers services fournis par Samsung. Applications téléchargées : Affiche les applications téléchargées via Samsung Apps. Samsung Apps Settings A login Paramètres Internet@TV : Vous pouvez modifier et configurer les applications et les paramètres Internet@TV. B Mark as Favorite D Sort by R return Commandes : • Rouge (Login) : permet de se connecter à Internet@TV. • B Vert (Mark as Favorite) : permet de marquer l’application comme favorite. • Bleu (Sort by) : permet de trier les applications. • R Return : revient au menu précédent. ✎ Le fonctionnement des boutons de couleur peut varier en fonction de l’application. Français 39 04 Fonctions avancées Internet@TV Fonctions avancées Connexion au compte Si le widget contient plusieurs catégories, utilisez les boutons ◄ et ► pour y accéder. ■ Ticker Autorun n’est pas prise en charge dans tous les pays. Ticker Autorun (Off / On) : active / désactive l’exécution automatique du message déroulant lors de la mise sous tension du téléviseur. Channel Bound Service (Off / On) : certaines chaînes prennent en charge les applications en tant que service de données Internet, ce qui vous permet d’accéder à Internet tout en regardant la télévision. Cette fonction est disponible uniquement si elle est prise en charge par le diffuseur. Login User account : System Setup ✎ adgjm Password : ✎ A Move [0~9] enter PIN R Cancel Reset : rétablit les paramètres Internet@TV par défaut. Change the Service Lock password Le mot de passe par défaut est "0-0-0-0." ✎ Pour tirer pleinement parti des widgets, enregistrezvous et connectez-vous à votre compte. ✎ ✎ ✎ Pour plus d’informations sur la création d’un compte, accédez au menu Setting up Internet@TV → Internet@TV ID → Create. 1. Appuyez sur le bouton rouge dans la page d’accueil Internet@TV. 2. Sélectionnez le User account de votre choix, puis appuyez sur le bouton ENTERE. Si vous voulez créer un compte, appuyez sur le bouton rouge et la fenêtre de création d’un compte s’affiche. 3. Entrez le Password. Une fois la connexion établie, le compte utilisateur s’affiche à l’écran. ✎ ■ ✎ Create : cette option vous permet de créer un compte et d’y associer les applications de service de votre choix. REMARQUE ¦ Configuration d’Internet@TV ✎ Settings Cet écran vous permet de créer des ID et de configurer les paramètres Internet@TV. Pour sélectionner des paramètres, utilisez les boutons ▲ et ▼, puis appuyez sur le bouton ENTERE. Settings ▪ Internet@TV ID ▪ Ticker Autorun : Off ▪ Channel bound Service : Off ▪ Service Manager ▪ Change the Service lock password ▪ Properties ▪ reset R return 40 Français Internet@TV ID Vous pouvez utiliser ce menu lors de la création et de la suppression du compte. Vous pouvez gérer votre compte, y compris les informations de compte du site de contenu. Le compte est réservé à internet@TV. ✎ ▪ System setup Si vous avez oublié le mot de passe, appuyez sur les boutons de la télécommande dans l’ordre suivant afin de le réinitialiser sur "0-0-0-0" : POWER (Arrêt) → MUTE → 9 → 2 → 8 → POWER (Marche). ■ x x Vous ne pouvez pas créer plus de 10 comptes. Le nombre de caractères est limité à 10. Avant la création du User account, vous devez d’abord télécharger l’application via Samsung Apps. 1. A l’aide des boutons ▲/▼/◄/►, sélectionnez Settings. Appuyez ensuite sur le bouton ENTERE. 2. Appuyez sur le bouton ▼ pour sélectionner Internet@TV ID, puis appuyez sur le bouton ENTERE ou ►. 7. Sélectionnez Register pour le site de service souhaité, puis appuyez sur le bouton ENTERE. 8. A l’aide des boutons numériques, saisissez votre ID de site d’applications et votre mot de passe. Appuyez ensuite sur le bouton ENTERE. 3. Sélectionnez Create. L’écran Keypad apparaît. 4. Le clavier s’affiche à l’écran. 9. Enregistrement réalisé avec succès. Si vous ajoutez un autre site de service, sélectionnez Yes. Appuyez ensuite sur le bouton ENTERE et passez à l’étape 5. Utilisation du clavier Appuyer sur le bouton – de la télécommande lorsque vous utilisez le clavier à l’écran vous permet de modifier les zones de texte en minuscules, majuscules, chiffres et symboles. Vous pouvez utiliser ce clavier à l’écran pour plusieurs applications Internet@ TV. Marche à suivre pour saisir des caractères. 4-1. Supposons par exemple que vous souhaitez saisir “105Chang”. 10. Lorsque vous avez fini, sélectionnez OK. Appuyez ensuite sur le bouton ENTERE. Manager – Service Site: vous pouvez enregistrer des informations de connexion pour des sites de service tels que YouTube. – Change Password : permet de modifier le mot de passe du compte. – Delete : permet de supprimer le compte. Si vous avez oublié le mot de passe, appuyez sur les boutons de la télécommande dans l’ordre suivant afin de le réinitialiser sur «0-0-0-0» : POWER (Arrêt) → MUTE → 9 → 2 → 8 → POWER (Marche). 4-2. Appuyez deux fois sur le bouton – de la télécommande pour changer le mode de saisie, de minuscules en chiffres. ✎ 4-3. Appuyez sur les boutons 1, 0 et 5, dans l’ordre numérique. 4-4. Appuyez trois fois sur le bouton – de la télécommande pour changer le mode de saisie, de chiffres en majuscules. ■ 4-5. Appuyez trois fois sur le bouton 2 de la télécommande pour saisir C. Lock : permet de verrouiller l’application. Pour accéder à un widget verrouillé, vous devez saisir un mot de passe. ✎ 4-6. Appuyez trois fois sur le bouton – de la télécommande pour changer le mode de saisie, de majuscules en minuscules. 4-7. Appuyez sur les boutons de la télécommande pour saisir le reste de “Chang”. Lorsque c’est fait, appuyez sur le bouton ENTERE. Service Manager : permet de supprimer et de verrouiller les applications installées sur Internet@TV. Delete : permet de supprimer l’application. ■ Properties : permet d’afficher des informations sur Internet@TV. Utilisez l’option Check the speed of your internet connection pour tester votre connexion réseau. 5. A l’aide des boutons numériques, saisissez le User account et le Password. x x x x Le mot de passe ne peut être composé que de chiffres. A l’aide du bouton –, vous pouvez modifier les zones de texte en minuscules, majuscules, chiffres et symboles. Vous pouvez supprimer le caractère saisi à l’aide du bouton PRE-CH. Les boutons π (REW) et µ (FF) vous permettent de sélectionner le symbole souhaité. Français 41 04 Fonctions avancées 6. Le compte est créé. Vous pouvez utiliser les services fournis par tous les utilisateurs de votre téléviseur Samsung à l’aide d’une simple connexion en associant le compte des utilisateurs à l’ID du téléviseur. Si vous souhaitez enregistrer l’ID du site de service, sélectionnez Yes. Une liste des sites de service s’affiche à l’écran. Création d’un Internet@TV ID Fonctions avancées ¦ Utilisation du service Internet@TV Samsung Apps Samsung Apps est un site de téléchargement d'applications utilisables sur les appareils TV/AV de marque Samsung. Les utilisateurs peuvent bénéficier d'un large éventail de contenu, tel que des vidéos, de la musique, des photos, des jeux, des informations utiles, etc., à l'aide des applications téléchargées. D'autres applications seront disponibles ultérieurement. Samsung AppS What’s New! Featured Video Most downloaded Most recent Travel Name Free Games Sports Lifestyle Information Other Help A login B Thumbnail View D Sort by R return ✎ Utilisation des boutons de couleur avec Samsung Apps. x x x 42 Rouge (Login) : permet de se connecter au service Internet. B Vert (Thumbnail View) : permet de modifier le mode d'affichage. Bleu (Sort by) : Permet de trier les applications selon différents critères : Featured, Most downloaded, Most recent ou Name. R Return : permet de revenir au menu précédent. Français Les catégories suivantes sont disponibles : y What’s New : affiche les applications récemment enregistrées. y Video : affiche divers supports vidéo, tels que des films, des programmes TV et des vidéos courtes. y Games : affiche divers jeux, tels que le sudoku et les échecs. y Sports : affiche divers médias sportifs, tels que des informations sur les matches, des images et des vidéos longue durée. y Lifestyle : comprend plusieurs services de mode de vie, tels que la musique, des outils de gestion de photos et des réseaux sociaux, comme Facebook et Twitter. y Information : comprend plusieurs services d'informations, tels que des actualités, les cours de la Bourse et la météo. y Others : comprend d'autres services divers. y My Page : affiche la liste des applications, ainsi que votre solde de caisse en ligne. Dès le milieu de l'année 2010 (Etats-Unis et Corée uniquement), vous pourrez acheter de l'argent en ligne afin d'acheter des applications via tv.samsung.com. ✎ My Page x Utilisation de Samsung Apps par catégorie y Help : si vous avez des questions sur Internet@TV, consultez d'abord cette section. Problème Le contenu de certaines applications est disponible uniquement en anglais. Comment puis-je en modifier la langue ? Certains services d’application ne fonctionnent pas. Lorsqu'une erreur réseau se produit, le menu des paramètres est le seul utilisable. Est-il possible que des films destinés à un public adulte soient diffusés via YouTube ? Solution possible La langue du contenu des applications peut être différente de celle des widgets de l’interface utilisateur. Ce paramètre dépend du fournisseur de service. Contactez le fournisseur de service. Consultez le site Web d'assistance pour connaître les coordonnées du fournisseur du widget. Si la connexion réseau ne fonctionne pas, il se peut que votre service soit limité. En effet, toutes les fonctions, à l'exception du menu des paramètres, sont nécessaires à l'établissement de la connexion Internet. En principe, ce contenu est bloqué. La fonction de recherche permet toutefois d'afficher ce type de film. Dans ce cas, utilisez la galerie de widgets pour verrouiller le service de widget. ¦ Site Web d’assistance ✎ L’étape d’accès peut être modifiée ultérieurement. ✎ Les liens peuvent varier dans certains pays. Pays Autriche Belgique République tchèque Danemark Finlande France Allemagne Grèce Hongrie Irlande Italie Pays-Bas Norvège Pologne Portugal Slovaquie Espagne Suède Suisse Royaume-Uni Turquie Estonie Lettonie Lituanie Russie Ukraine Site Web www.samsung.com → Produkte → Fernseher → Internet@TV www.samsung.com → Producten → televisies → Internet@TV www.samsung.com → Produits → téléviseurs → Internet@TV www.samsung.com → Produkty → televizory → Internet@TV www.samsung.com → Produkter → stue & soveværelse → Internet@TV www.samsung.com → Tuotteet → kodinelektroniikka → Internet@TV www.samsung.com → Produits → télévisions → Internet@TV www.samsung.com → Privatkunden → Fernseher → Internet@TV www.samsung.com → Προϊόντα → τηλεοράσεις → Internet@TV www.samsung.com → Termékek → televíziók → Internet@TV www.samsung.com → Products → Television → Internet@TV www.samsung.com → Prodotti → TV → Internet@TV www.samsung.com → Producten → televisies → Internet@TV www.samsung.com → Produkter → hverdagsrom & soverom → Internet@TV www.samsung.com → Produkty → televizory → Internet@TV www.samsung.com → Produtos para Consumidores → televisores → Internet@TV www.samsung.com → Produkty → televízory → Internet@TV www.samsung.com → Productos → televisores → Internet@TV www.samsung.com → Produkter → vardagsrum & sovrum → Internet@TV www.samsung.com → Produits → télévisions → Internet@TV www.samsung.com → Produkte → Fernseher → Internet@TV www.samsung.com → Products → Television → Internet@TV www.samsung.com → Tüketici Ürünleri → televizyon → Internet@TV www.samsung.com → Klientidele → Televiisorid → Internet@TV www.samsung.com → Klientiem → Televizori → Internet@TV www.samsung.com → Namams → Televizoriai → Internet@TV www.samsung.com → Продукты → Телевизоры → Internet@TV www.samsung.com → Потребительские продукты → телевизоры → Internet@TV Français 43 04 Fonctions avancées ¦ Résolution des problèmes Internet@TV Fonctions avancées Message / Média / ScreenShare AllShare ¦ A propos de la fonction AllShare AllShare connecte votre téléviseur et vos téléphones portables/appareils Samsung compatibles via un réseau. Vous pouvez ainsi être averti, sur l’écran de votre téléviseur, de la réception d’appels, lire des messages SMS ou encore afficher les programmes définis sur votre téléphone portable. Vous pouvez, en outre, lire du contenu multimédia (photos, vidéos et musique) enregistré sur votre téléphone portable ou d’autres appareils (un PC, par exemple) en le contrôlant via le réseau. Enfin, vous pouvez utiliser votre téléviseur pour surfer sur le Web sur vos téléphones portables. Affiche la liste des téléphones portables ou appareils connectés qui ont été configurés avec ce téléviseur en vue d’utiliser la fonction Message, Média ou ScreenShare. ✎ La fonction Média est disponible sur tous les appareils mobiles prenant en charge la fonction AllShare. ■ Autorisé / Refusé : autorise/bloque le téléphone portable. ■ Supprimer : supprime le téléphone portable de la liste. ✎ ✎ Pour plus d’informations, rendez-vous sur "www.samsung.com" ou contactez le centre d’appel Samsung. Il peut s’avérer nécessaire d’installer des logiciels supplémentaires sur l’appareil mobile. Pour plus d’informations à ce sujet, reportez-vous au mode d’emploi qui accompagne l’appareil mobile. Utilisation de la fonction Message Cette fonction permet d’afficher les appels reçus, les SMS et les programmes définis sur le téléphone portable via la fenêtre d’alarme lorsque vous regardez la télévision. ✎ REMARQUE ¦ Configuration de la fonction AllShare x Configuration x ■ ■ ■ ■ Message (Activé / Arrêt) : active ou désactive la fonction de message (ou la réception d’appels, les SMS ou les programmes définis sur vos téléphones portables). x Media (Activé / Arrêt) : active ou désactive la fonction multimédia. Lorsque cette fonction est activée, elle lit les vidéos, les photos et la musique en provenance d’un téléphone portable ou de tout autre appareil prenant en charge ScreenShare. x ScreenShare (Activé / Arrêt) : active ou désactive l’accès de ScreenShare à divers contenus en provenance de téléphones portables ou d’autres appareils compatibles. Nom du téléviseur : définit le nom du téléviseur afin que vous puissiez le retrouver aisément sur un appareil mobile. ✎ Si vous sélectionnez Entrée utilisateur, vous pouvez entrer le nom du téléviseur à l’aide du clavier virtuel (OSK). AllShare 3/7 Coniguration Message : Activé Message Média : Activé Média ScreenShare : Activé ScreenShare Nom TV : TV domicile E Sélectionner R retour e Quitter ' Coniguration R retour 44 Français Cette fonction efface simplement le nom du téléphone de la liste. Si l’appareil mobile effacé s’allume ou tente de se reconnecter au téléviseur, il est possible qu’il s’affiche à nouveau. Pour désactiver la fenêtre d’alarme, définissez Message sur Arrêt dans le menu Configuration de la fonction AllShare. Si OK est sélectionné, ou s’il ne l’est pas alors que le message a été affiché à trois reprises, le message est supprimé sans toutefois être supprimé du téléphone portable. La fenêtre d’alarme peut s’afficher pendant l’utilisation de certaines applications telles que Media Play, etc. Pour afficher le contenu d’un message, basculez vers le mode d’affichage de la télévision. En cas d’affichage d’un message d’un téléphone portable inconnu, choisissez ce dernier dans le menu Message de la fonction AllShare, puis sélectionnez Refusé pour le bloquer. Affichage du message Si un nouveau message SMS arrive alors que vous regardez la télévision, la fenêtre d’alarme s’affiche. Si vous cliquez sur le bouton OK, le contenu du message s’affiche. Vous pouvez configurer les paramètres d’affichage des SMS sur le téléphone portable. Pour plus d’informations, reportez-vous au manuel du téléphone portable. ✎ ✎ Certains types de caractères spéciaux peuvent s’afficher sous la forme de caractères vides ou altérés. Utilisation de la fonction ScreenShare Si vous recevez un appel alors que vous regardez la télévision, la fenêtre d’alarme s’affiche. La fonction ScreenShare vous permet de naviguer dans les différents types de contenu du téléphone portable. Ainsi, l’image ci-dessous illustre une page d’accès au contenu d’un téléphone portable. Vous pouvez lire les fichiers stockés sur le téléphone portable, consulter le répertoire téléphonique ou encore afficher le calendrier sur le téléviseur. Vous pouvez, en outre, utiliser le répertoire pour passer un appel ou envoyer un SMS. Alarme des programmes Lorsque vous regardez la télévision, la fenêtre d’alarme s’ouvre et affiche l’événement enregistré. Vous pouvez configurer les paramètres d’affichage du contenu du programme sur le téléphone portable. Pour plus d’informations, reportez-vous au manuel du téléphone portable. ✎ ✎ Certains caractères spéciaux peuvent s’afficher sous la forme de caractères vides ou altérés. Utilisation de la fonction Média Une fenêtre d’alarme informe l’utilisateur que le contenu multimédia (vidéos, photos, musique) provenant d’un téléphone portable va s’afficher sur le téléviseur. Le contenu est lu automatiquement 3 secondes après l’affichage de la fenêtre d’alarme. Si vous appuyez sur le bouton RETURN ou EXIT lorsque la fenêtre d’alarme s’affiche, le contenu multimédia n’est pas lu. ✎ REMARQUE x x x ScreenShare doit être installé sur votre téléphone portable / appareil Samsung pour utiliser cette fonction. Doc Viewer peut lire des fichiers au format DOC, mais pas les modifier. L’écran peut changer suivant l’appareil connecté. My Mobile ✎ REMARQUE x S’il s’agit de la première exécution de la fonction Média, la fenêtre contextuelle d’avertissement s’affiche. Appuyez sur le bouton ENTERE pour sélectionner Autor. et vous pourrez utiliser la fonction Média sur ce dispositif. "Unknown Device 0" is requesting that the media file be allowed to play. If you wish to allow the media file to be played at your device, please press "Allow", otherwise press "Deny". You can also change the setting (or resetting) of this feature at "AllShare Setup". Warning: Please note that if your device is connected to unsecured or unfamiliar network, unwanted or inappropriate contents might be played. If you are not sure about the network's identity or content's appropriateness, we strongly recommend that you do not "Allow" the request to play. Allow x x x x x Deny Contacts Calendar Doc viewer E Sélectionner C retour Utilisation de votre téléphone Samsung pour commander facilement votre téléviseur Avant de pouvoir utiliser cette fonction, vous devez établir une connexion à un téléphone portable Samsung prenant en charge les fonctions ScreenShare. Lorsque vous commandez le téléviseur à l’aide du téléphone portable, seuls les boutons POWER, y, z et MUTE sont pris en charge. ✎ Même si vous maintenez enfoncé un bouton de commande (chaîne ou volume) du téléphone portable, la valeur n’augmentera ou ne diminuera que d’une seule unité. Pour désactiver la transmission du contenu multimédia en provenance du téléphone portable, définissez l’option Média sur Arrêt dans la configuration de la fonction AllShare. En fonction de sa résolution et de son format, il se peut que le contenu ne soit pas lu sur le téléviseur. Il se peut que les boutons ENTERE et ◄ / ► ne fonctionnent pas avec certains types de contenu multimédia. Il est possible de contrôler la lecture de contenu multimédia à l’aide de l’appareil mobile. Pour plus d’informations, reportez-vous au mode d’emploi de l’appareil concerné. Si vous souhaitez lire du contenu multimédia à partir de votre ordinateur, sélectionnez l’icône du PC sur l’écran principal de la fonction AllShare. Le menu Media Play du téléviseur change automatiquement. Pour de plus amples informations, reportez-vous à la section "Media Play". Français 45 04 Fonctions avancées Alarme de réception d’appel Informations supplémentaires Fonction Télétexte de chaîne analogique La page d’index du télétexte contient des instructions sur l’utilisation du service. Pour que les informations du télétexte s’affichent correctement, la réception des chaînes doit être stable. Autrement, des informations pourraient manquer ou certaines pages ne pas s’afficher. ✎ Vous pouvez changer de page de télétexte en appuyant sur les boutons numériques de la télécommande. 1 2 / (Télétexte actif / Mixte) : permet d'activer le mode Télétexte après avoir choisi la chaîne diffusant le service. Appuyez deux fois sur ce bouton pour superposer le mode Télétexte à l'émission en cours de diffusion. 4 5 8 (mémoriser) : stocke les 4 (taille) : permet d'afficher la 1 moitié supérieure de l'écran en caractères deux fois plus grands. Pour afficher la moitié inférieure de l'écran au même format, appuyez une nouvelle fois sur ce bouton. Appuyez à nouveau pour rétablir 2 le mode d'affichage normal. 6 9 (maintenir) : permet de 9 7 8 0 ! A B C D @ 0 (mode) : permet de sélectionner le mode Télétexte (LIST/FLOF). si vous appuyez sur ce bouton en mode LISTE, vous accédez au mode d'enregistrement de liste. Dans ce mode, vous pouvez enregistrer une page télétexte dans une liste à l'aide du bouton 8 (mémoriser). 6 1 (sous-page) : affiche la souspage disponible. Les pages de télétexte sont organisées en six catégories : Catégorie Contenu Catégorie Contenu A Numéro de la page sélectionnée. D Date et heure B Identité de la chaîne émettrice. E Texte. C Numéro de la page actuelle ou indications de recherche. F Informations sur l'état. Informations FASTEXT. 46 Français 3 (page précédente) : affiche la 8 6 (index) : affiche, à tout 9 5 (révéler) : affiche le texte 0 page précédente du télétexte. moment, la page d'index (sommaire) du télétexte. bloquer l'affichage sur une page précise, si celle-ci est reliée à 3 plusieurs pages secondaires qui s'affichent automatiquement les unes après les autres. Pour reprendre l'affichage des autres 4 pages, appuyez à nouveau sur ce bouton. 5 7 page suivante du télétexte. pages du télétexte. 3 2 (page suivante) : affiche la masqué (les réponses à un questionnaire, par exemple). Appuyez à nouveau sur ce bouton pour rétablir le mode d'affichage normal. 7 (annuler) : affiche le ! programme en cours pendant la recherche d'une page Boutons de couleur (rouge / @ vert / jaune / bleu) : si la société de radiodiffusion utilise le système FASTEXT, les différents sujets traités dans la page télétexte disposent d'un code couleur et peuvent être sélectionnés à l'aide des boutons de couleur de la télécommande. Appuyez sur le bouton dont la couleur correspond à celle de la rubrique souhaitée. La page affiche d'autres informations en couleur que vous pouvez sélectionner de la même manière. Pour afficher la page précédente ou suivante, appuyez sur le bouton de la couleur correspondante. 05 Informations supplémentaires Installation du support mural ¦ Assemblage du cache Lorsque vous installez le téléviseur en position murale, insérez le cache dans la partie qui se connecte au pied, comme illustré ci-contre. Cache ¦ Préparation avant l’installation d’un dispositif de fixation murale (Téléviseurs de 46 à 55 pouces) Pour installer un support mural d’un autre fabricant, utilisez l’anneau de support. ¦ Installation du kit de montage mural Les éléments du support mural (vendus séparément) permettent de fixer le téléviseur au mur. Pour plus d’informations sur l’installation du support mural, reportez-vous aux instructions fournies avec les éléments du support mural. Faites appel à un technicien pour installer la fixation murale. Si vous choisissez d’effectuer vous-même l’installation murale, Samsung Electronics ne saurait être tenue responsable des éventuels dommages matériels ou des éventuelles blessures dont vous, ou d’autres personnes, pourriez être victimes. Français 47 Informations supplémentaires ¦ Caractéristiques du kit de fixation murale (VESA) ✎ Le kit de fixation murale est vendu séparément. Installez votre fixation murale sur un mur solide perpendiculaire au sol. Si vous souhaitez la fixer sur d’autres matériaux de construction, veuillez prendre contact avec votre revendeur le plus proche. Si vous l’installez au plafond ou sur un mur non droit, la fixation risque de tomber et de provoquer de graves blessures. ✎ REMARQUE x x x x x x x x x Samsung Electronics ne saurait être tenu responsable de tout dommage sur le produit ni de toute blessure subie par vous ou par d’autres personnes si vous choisissez d’effectuer l’installation murale. Les dimensions standard pour tous les kits de fixation murale sont indiquées dans le tableau ci-dessous. Le kit de fixation murale s’accompagne d’un manuel d’installation détaillé et de toutes les pièces nécessaires au montage. N’utilisez pas de vis plus longues que la dimension standard, car elles pourraient endommager l’intérieur du téléviseur. Pour les fixations murales non conformes aux spécifications des vis VESA standard, la longueur des vis peut varier, selon leurs caractéristiques. N’utilisez pas de vis non conformes aux spécifications des vis VESA standard. Ne serrez pas trop les vis ; cela pourrait, en effet, endommager le produit ou provoquer sa chute, entraînant des blessures. Samsung ne peut être tenue responsable de ce type d’accident. Samsung ne peut être tenue responsable de tout dommage au produit ou toute blessure corporelle dans le cas de l’utilisation d’une fixation murale non-VESA ou non spécifiée, ou si l’utilisateur ne suit pas les instructions d’installation du produit. Lors du montage, l’inclinaison du téléviseur ne doit pas dépasser 15 degrés. Famille de produits pouces 19~22 TELEVISEUR LCD 23~29 30~40 46~55 57~65 70~80 80~ Spéc. VESA (A * B) 75 X 75 100 X 100 200 X 100 200 X 200 400 X 400 600 X 400 800 X 400 1400 X 800 Vis standard Quantité M4 M6 4 M8 N’installez pas votre kit de fixation murale lorsque le téléviseur est allumé. Vous risqueriez de vous électrocuter. Assemblage des câbles Insérez les câbles dans l’attache de câble, de telle sorte qu’ils ne soient pas visibles à travers le pied transparent. Attache de câble 48 Français L’antivol Kensington est un dispositif utilisé pour fixer physiquement le système lorsqu’il est utilisé dans un endroit public. L’aspect et la méthode de verrouillage peuvent différer de l’illustration en fonction du fabricant. Consultez le manuel fourni avec le verrou Kensington pour obtenir des instructions d’utilisation. 1 2 ✎ Une icône “K” est présente à l’arrière du téléviseur. Un verrou Kensington se trouve à côté de l’icône “K”. 1. Insérez le dispositif de verrouillage dans la fente Kensington du téléviseur LCD 1, puis tournez-le dans le sens de verrouillage 2. 3 <Optionnel> 2. Branchez le câble du verrou Kensington 3. 3. Fixez le verrou Kensington à un bureau ou tout autre objet lourd inamovible. ✎ Le dispositif de verrouillage est vendu séparément. ✎ L’emplacement du verrou Kensington peut varier en fonction du modèle. Fixation du téléviseur au mur Attention : si vous tirez ou poussez le téléviseur ou si vous grimpez dessus, il risque de tomber. Veillez notamment à ce que vos enfants ne se suspendent pas au téléviseur, ni ne le déséquilibrent, car cela pourrait le faire basculer et occasionner des blessures graves, voire entraîner la mort. Respectez toutes les précautions de sécurité indiquées dans la brochure relative à la sécurité. Pour une stabilité accrue, installez le dispositif antichute comme indiqué ci-après. ¦ Pour éviter toute chute du téléviseur ✎ Les colliers, vis et chaînettes n’étant pas fournis, vous devez les acheter séparément. 1. Faites passer les vis dans les colliers et fixez-les fermement au mur. Assurez-vous que les vis sont bien fixées. Caractéristiques des vis x Pour un téléviseur LCD de 32 à 40 pouces : M6 x Pour un téléviseur LCD de 46 à 55 pouces : M8 2. Retirez les vis situées sur la partie centrale arrière du téléviseur, placez-les dans les colliers, puis fixez-les à nouveau sur le téléviseur. 3. Reliez les colliers fixés au téléviseur et ceux fixés sur le mur à l’aide de chaînettes, puis attachez-les fermement. ✎ ✎ Vérifiez que toutes les connexions sont fixées correctement. Vérifiez régulièrement que les connexions ne présentent aucun signe d’usure. Si vous avez un doute quant à la sécurité des connexions, contactez un installateur professionnel. Mur ✎ Placez le téléviseur à proximité du mur afin qu’il ne bascule pas vers l’arrière. ✎ Il est recommandé de placer la chaînette de façon à ce que les colliers fixés au mur soient placés à la même hauteur ou plus bas que ceux fixés au téléviseur. ✎ Détachez la chaînette avant de déplacer le téléviseur. Français 49 05 Informations supplémentaires Verrou antivol Kensington Informations supplémentaires Resolution des problemes Si vous avez des questions sur le téléviseur, commencez par consulter la liste ci-dessous. Si aucune de ces astuces de dépannage ne s’applique à votre problème, rendez-vous sur le site "www.samsung.com", puis cliquez sur Service ou contactez le centre d’appel dont les coordonnées figurent sur la couverture arrière du présent manuel. Problèmes Solutions et explications Qualité de l'image Exécutez tout d'abord le Test de l'image pour vérifier que votre téléviseur affiche correctement l'image de test. (Accédez à MENU - Assistance - Diagnostic automatique - Test de l'image) (P. 20) Si l'image de test s'affiche correctement, sa qualité médiocre peut être due à la source ou au signal. La qualité de l'image affichée par le téléviseur n'est pas aussi bonne que dans le magasin. • Si vous possédez un décodeur câble / boîtier décodeur analogique, passez à un décodeur numérique. Utilisez des câbles HDMI ou Composant pour fournir une qualité d'image HD (haute définition). • Abonnés câble / satellite : essayez les chaînes HD dans la liste des canaux. • Connexion de l'antenne : essayez les chaînes HD après avoir effectué une mémorisation automatique. ✎ De nombreuses chaînes HD sont mises à niveau par rapport à du contenu SD (définition standard). • Réglez la résolution de sortie vidéo du décodeur câble/boîtier décodeur sur 1080i ou 720p. • Veillez à respecter la distance minimale recommandée entre vous et le téléviseur (distance basée sur la taille et la définition du signal). L'image est déformée : macrobloc, petit bloc, points, pixellisation • La compression de contenu vidéo peut engendrer une déformation de l'image, en particulier pour les mouvements rapides comme le sport et les films d'action. • Un niveau de signal faible ou de mauvaise qualité peut déformer l'image. Il ne s'agit pas d'un problème lié au téléviseur. Couleur incorrecte ou manquante. • Si vous utilisez une connexion Composant, assurez-vous que les câbles Composant sont raccordés aux prises appropriées. Des raccordements desserrés ou incorrects peuvent engendrer des problèmes au niveau de la couleur ou un écran vide. La couleur ou la luminosité est de mauvaise qualité. • Réglez les options Image dans le menu du téléviseur (accédez au mode Image / Couleur / Luminosité / Netteté) • Réglez l'option Mode éco. dans le menu du téléviseur (accédez à MENU - Image - Solution Eco Mode éco.) (P.13) • Essayez de réinitialiser l'image pour en afficher les paramètres par défaut (accédez à MENU - Image - Réinitialisation de l'image) Il y a une ligne pointillée sur les bords de l'écran. • Si la taille de l'image est définie sur Adapter écran, réglez le paramètre sur 16:9. (P. 15) • Changez la résolution du décodeur câble/boîtier décodeur. L'image est en noir et blanc. • Si vous utilisez une entrée composite AV, connectez le câble vidéo (jaune) au connecteur vert de l'entrée composant 1 du téléviseur. Lors d'un changement de chaîne, l'image se bloque, est déformée ou s'affiche avec un léger décalage. • En cas de raccordement à un décodeur câble, essayez de réinitialiser ce dernier. Rebranchez le cordon d'alimentation secteur et patientez jusqu'au redémarrage du décodeur câble. Cette opération peut prendre jusqu'à 20 minutes. • Réglez la résolution de sortie du décodeur câble sur 1080i ou 720p. Qualité sonore Exécutez tout d'abord le Test du son pour vérifier que le système audio de votre téléviseur fonctionne correctement. (Accédez à MENU - Assistance - Diagnostic automatique - Test du son) (P. 20) Si le système audio fonctionne correctement, le problème lié au son peut provenir de la source ou du signal. Il n'y a aucun son ou celui-ci est trop faible au volume maximum. • Vérifiez le volume de l'appareil externe connecté à votre téléviseur. La qualité d'image est bonne, mais aucun son n'est émis. • Réglez l'option Sélection Haut-parleur sur Haut-parleur TV dans le menu Son. (P. 17) • Si vous utilisez un appareil externe, assurez-vous que les câbles audio sont raccordés aux prises d'entrée audio appropriées du téléviseur. • Si vous utilisez un appareil externe, vérifiez l'option de sortie audio de l'appareil connecté (il se peut, par exemple, que vous deviez définir l'option audio de votre décodeur câble sur HDMI si vous utilisez une connexion HDMI). • Si vous utilisez un câble DVI-HDMI, un câble audio distinct est requis. • Si votre téléviseur est équipé d'une prise casque, assurez-vous que rien n'y est connecté. Les haut-parleurs émettent un son inhabituel. • Vérifiez les connexions des câbles. Vérifiez qu'aucun câble vidéo n'est raccordé à une entrée audio. • Pour les connexions de télédistribution ou antenne, vérifiez l'intensité du signal. Un niveau de signal faible peut provoquer une distorsion sonore. Aucune image, aucune vidéo Le téléviseur ne s'allume pas. 50 Français • Vérifiez que le cordon d'alimentation secteur est branché correctement sur la prise murale et sur le téléviseur. • Vérifiez que la prise murale est opérationnelle. • Essayez d'appuyer sur le bouton POWER du téléviseur pour vous assurer que le problème n'est pas dû à la télécommande. Si le téléviseur s'allume, reportez-vous au problème "La télécommande ne fonctionne pas" ci-après. Solutions et explications Le téléviseur s'éteint automatiquement. • Vérifiez que la fonction Veille est réglée sur Arrêt dans le menu Configuration. (P. 18) • Si votre PC est connecté au téléviseur, vérifiez les paramètres d'alimentation de votre PC. • Vérifiez que le cordon d'alimentation secteur est branché correctement sur la prise murale et sur le téléviseur. • Lorsque vous regardez la télévision sur une connexion de télédistribution ou antenne, le téléviseur s'éteint après 10 à 15 minutes en l'absence de signal. Aucune image / vidéo n’est affichée. • Vérifiez le raccordement des câbles (retirez tous les câbles connectés au téléviseur et aux appareils externes, puis rebranchez-les). • Réglez les sorties vidéo de vos périphériques externes (décodeur câble / boîtier décodeur, lecteur DVD, lecteur Blu-ray, etc.) pour faire correspondre les connexions à l'entrée du téléviseur. Par exemple, si la sortie d'un périphérique externe est HDMI, vous devez établir une connexion avec une entrée HDMI du téléviseur. • Vérifiez que les appareils connectés sont sous tension. • Veillez à sélectionner la source appropriée du téléviseur en appuyant sur le bouton SOURCE de la télécommande du téléviseur. Connexion RF (câble / antenne) Le téléviseur ne reçoit pas toutes les chaînes. • Vérifiez que le câble de l'antenne est raccordé correctement. • Essayez la fonction Plug & Play (configuration initiale) pour ajouter des chaînes disponibles à la liste. Accédez à MENU - Configuration - Plug & Play (configuration initiale) et attendez que toutes les chaînes disponibles soient mémorisées. • Vérifiez que l'antenne est positionnée correctement. L'image est déformée : macrobloc, petit bloc, points, pixellisation • La compression de contenu vidéo peut provoquer une déformation de l'image, en particulier pour les mouvements rapides comme le sport et les films d'action. • Un niveau de signal faible peut déformer l'image. Il ne s'agit pas d'un problème lié au téléviseur. Connexion PC Le message "Mode non pris en charge" est affiché. • Réglez la fréquence et la résolution de sortie de votre PC, de telle sorte que ces paramètres correspondent aux résolutions prises en charge par le téléviseur. (P. 20) "PC" reste affiché dans la liste Source, même si aucun ordinateur n'est connecté. • Cela est tout à fait normal ; la mention "PC" apparaît toujours dans la liste Source. La qualité de la vidéo est bonne, mais aucun son n'est émis. • Si vous utilisez une connexion HDMI, vérifiez le paramètre de sortie audio sur votre PC. Connexion réseau (selon les modèles) La connexion au réseau sans fil a échoué. • La clé USB sans fil Samsung est requise pour utiliser un réseau sans fil. • Assurez-vous que le paramètre de connexion réseau est défini sur Wireless (Sans fil). • Assurez-vous que le téléviseur est connecté à un routeur IP sans fil. Autres L'image ne s'affiche pas en mode plein écran. • Des barres noires s'affichent de chaque côté des chaînes HD lors de l'affichage de contenu SD (4:3) mis à niveau. • Des barres noires s'affichent en haut et en bas des films dont le format d'image est différent de celui de votre téléviseur. • Définissez les options de taille de l'image de votre appareil externe ou téléviseur sur Plein écran. La télécommande ne fonctionne pas. • Remplacez les piles de la télécommande en respectant la polarité (+/-). • Nettoyez la lentille de la télécommande. • Essayez de diriger directement la télécommande vers le téléviseur à une distance de 1,5 à 1,8 m. La télécommande du décodeur câble / boîtier décodeur ne permet pas d'allumer ou d'éteindre le téléviseur, ni de régler le volume. • Programmez la télécommande du décodeur câble/boîtier décodeur de telle sorte qu'elle puisse commander le téléviseur. Consultez le mode d'emploi du décodeur câble/boîtier décodeur pour obtenir le code du téléviseur SAMSUNG. Le message "Mode non pris en charge" est affiché. • Vérifiez la résolution prise en charge par le téléviseur et réglez la résolution de sortie du périphérique externe en conséquence. Reportez-vous aux paramètres de résolution à la page 20 du présent manuel. Une odeur de plastique se dégage du téléviseur. • Cette odeur est normale et s'atténuera avec le temps. L'option Informations de signal du téléviseur n'est pas disponible dans le menu de test du diagnostic automatique. • Cette fonction n'est disponible qu'avec des chaînes numériques diffusées sur une connexion d'antenne / RF/coaxiale. (P. 20) Le téléviseur penche sur le côté. • Retirez le support de base du téléviseur et réassemblez-le. L'assemblage du support de base s'effectue difficilement. • Veillez à placer le téléviseur sur une surface plane. Si vous ne parvenez pas à retirer les vis du téléviseur, utilisez un tournevis aimanté. Le menu des chaînes est grisé (indisponible). • Le menu Chaîne n'est disponible que si la source TV est sélectionnée. Vos paramètres sont perdus après 30 minutes ou à chaque mise hors tension du téléviseur. • Si le téléviseur est en mode Démo. magasin, les paramètres audio et vidéo sont réinitialisés toutes les 30 minutes. Remplacez le mode Démo. magasin par le mode Util. domicile dans la procédure Plug & Play (configuration initiale). Appuyez sur le bouton SOURCE pour sélectionner le mode TV et accédez à MENU → Configuration → Plug & Play (configuration initiale) → ENTERE Français 51 05 Informations supplémentaires Problèmes Informations supplémentaires Problèmes Solutions et explications Perte intermittente du signal audio ou vidéo. • Vérifiez le raccordement des câbles ; rebranchez-les au besoin. • Une perte de l'image ou du son peut être provoquée par l'utilisation de câbles trop rigides ou épais. Veillez à ce que les câbles soient suffisamment souples pour une utilisation à long terme. En cas d'installation du téléviseur en position murale, nous vous recommandons d'utiliser des câbles avec des connecteurs de 90 °degrés. Des petites particules sont visibles lorsque vous observez de près le bord du cadre du téléviseur. • Elles font partie de la conception du produit et ne constituent pas un défaut. Le menu PIP n'est pas disponible. • La fonctionnalité PIP n'est disponible que lorsque vous utilisez une source HDMI, PC ou Composant. Le message "Signal brouillé" ou "Signal faible/Aucun signal" s'affiche. • Si vous utilisez une CARTE CAM (CI/CI+), vérifiez qu'elle est installée dans la fente de l'interface commune. • Si le problème persiste, retirez la CARTE CAM du téléviseur et réintroduisez-la dans la fente. Le téléviseur s'est rallumé 45 minutes après sa mise hors tension. • Cela est tout à fait normal. Le téléviseur exécute, en effet, la fonction de liaison radio (OTA) pour mettre à niveau le microprogramme téléchargé au cours de son utilisation. Problèmes récurrents liés à l'image/au son. • Vérifiez et modifiez le signal/la source. Il peut y avoir une réaction entre les coussinets en caoutchouc situés sur le support de base et la finition de certains meubles. • Pour éviter que cela ne se produise, utilisez des coussinets de feutre sur toute surface du téléviseur en contact direct avec un meuble. ✎ Ce téléviseur LCD TFT est équipé d’un écran constitué de sous-pixels dont la fabrication nécessite une technologie sophistiquée. Il se peut toutefois que quelques points clairs ou sombres apparaissent à l’écran. Ils n’ont aucune incidence sur la performance du produit. ¦ Licens Manufactured under licence from Dolby Laboratories. Dolby and the double-D symbol are trademarks of Dolby Laboratories. Manufactured under license under U.S. Patent #’s: 5,451,942; 5,956,674; 5,974,380; 5,978,762; 6,487,535 & other U.S. and worldwide patents issued & pending. DTS and the Symbol are registered trademarks. & DTS 2.0+ Digital Out and the DTS logos are trademarks of DTS, Inc. Product Includes software. © DTS, Inc. All Rights Reserved. DivX Certified to play DivX video up to HD 1080p, including premium content. ABOUT DIVX VIDEO: DivX® is a digital video format created by DivX,Inc. This is an official DivX Certified device that plays DivX video. Visit www.divx.com for more information and software tools to convert your files into DivX video. ABOUT DIVX VIDEO-ON-DEMAND: This DivX Certified® device must be registered in order to play DivX Video-onDemand (VOD) content. To generate the registration code, locate the DivX VOD section in the device setup menu. Go to vod.divx.com with this code to complete the registration process and learn more about DivX VOD. Pat. 7,295,673;7,460,688; 7,519,274 TheaterSound, SRS and the symbol are trademarks of SRS Labs, Inc. TheaterSound technology is incorporated under license form SRS Lab, Inc. 52 Français Résolution native du panneau Conditions ambiantes Température en service Humidité en fonctionnement Température de stockage Humidité sur le lieu de stockage Système TV 1920 x 1080 à 60 Hz 10°C à 40°C (50°F à 104°F) 10% à 80%, sans condensation -20°C à 45°C (-4°F à 113°F) 5% à 95%, sans condensation Analogique : en fonction du pays sélectionné Numérique : DVB-T/DVB-C Analogique : PAL, SECAM, NTSC-4.43, NTSC-3.58, PAL60 Numérique : MPEG-2 MP@ML, MPEG-4, H.264/AVC MP@L3, [email protected], [email protected] B/G. D/K. I. L. A2. NICAM. MPEG1. DD. DD+. HE-AAC Vidéo : 1080/24p, 1080p, 1080i, 720p, 576p, 576i, 480p, 480i Audio : PCM linéaire sur deux voies 32/44.1/48 kHz, 16/20/24bits Entrée audio analogique (HDMI IN1 uniquement) Entrée PC Système de couleur/vidéo Système Sonore HDMI IN 1 ~ 4 Socle orientable (Gauche / droite) Nom du modèle Taille de l’écran (Diagonale) Son Sortie Dimensions (L x P x H) Corps Avec socle Poids Corps Avec socle Nom du modèle Taille de l’écran (Diagonale) Son Sortie Dimensions (L x P x H) Corps Avec socle Poids Corps Avec socle -20˚ ~ 20˚ LE32C650 LE32C652 32 pouces LE37C650 LE40C650 LE40C652 LE46C650 LE46C652 LE55B650 37 pouces 40 pouces 46 pouces 55 pouces 10W X 2 15W X 2 789.2 X 77.8 X 509.9 mm 907.6 X 78.5 X 574.4 mm 976.2 X 80.4 X 614.9 mm 1108.6 X 80.3 X 689.7 mm 1301.6 X 85.3 X 801.2 mm 789.2 X 240 X 555.9 mm 907.6 X 255 X 621.2 mm 976.2 X 255 X 659.3 mm 1108.6 X 275 X 734.5 mm 1301.6 X 305 X 845.3 mm 9.1 kg 11.8 kg 11.6 kg 15 kg 14.3 kg 17.7 kg 18.1 kg 21.9 kg 28.1 kg 32.7 kg LE32C653 LE32C654 LE40C653 LE40C654 LE46C653 LE46C654 32 pouces 40 pouces 46 pouces 10W X 2 794.5 X 77.8 X 495.4 mm 794.5 X 240 X 558.6 mm 981.5 X 80.4 X 598.5 mm 981.5 X 255 X 661.9 mm 1113.9 X 80.3 X 674.1 mm 1113.9 X 275 X 737.1 mm 9.3 kg 12 kg 13.5 kg 16.9 kg 18.1 kg 21.9 kg ✎ La conception et les spécifications peuvent être modifiées sans préavis. ✎ Pour en savoir plus sur l’alimentation et la consommation électrique, consultez l’étiquette apposée sur le produit. Français 53 05 Informations supplémentaires Caractéristiques techniques Informations supplémentaires Index A G Aff. de base AllShare Amplifier Antenne Anynet+ Attache de câble Audio Out Arr.-plan Acc. 34 44 16 12 36 48 8, 36 35 B Balance G/D Balance blancs 16 14 C Cache 47 Capteur Eco 14 Caractéristiques techniques 53 Chaîne favorite 11 Chaude 15 Composant 7 Config. du réseau 24, 26 Connexion à un système audio 8 Connexion à un ordinateur 22 Connexion réseau 23 Contraste Dynamique 14 D Diagnostic automatique Diaporama DivX® VOD D-sub Dynamique 20 34 35 22 13 E Ecouteurs Egaliseur Enregistrement EPG 8 16 37 10 F Fond musical Format de l’image Fréquence 54 Français 35 15, 35 12 O Gestion chaînes Guide Now & Next 11 10 H Haut-parleur TV HDMI Home cinéma Horloge Ht-parl ext. 5 3 P 17 7, 36 8, 36 18 17 Photos PIP (Picture in Picture) Piles Plug & Play 34 20 5 6 R I l’espace d’installation Informations de signal Internet@TV 2 20 39 L Langue Lecture Video Licens Liste Source Luminosité 19 32 52 9 13 M Magnétoscope Media Play Mélodie Minuteur Mise à niveau du logiciel Mode éco. Mode de répétition Mode Film Mode Veille Modifier PIN Modif. nom Mot de passe Musique ON/OFF, bouton Outils 9 29 19 18 20 14 35 15 4 6, 19 9 40 33 N Navigation Netteté Nouvelle syntonisation des chaînes Nuance Coul. Nuance de noir 9 13 12 15 14 Récepteur Réglage Automatique Réglage fin Résolution optimale Résolution des problèmes RVB 38 16 13 22 50 14 S Sélectionner tout Sélection Haut-parleur Sortie audio numérique Sous-titres Support mural Symbole 13 17 8, 36 19 47 3 T Télécommande Témoin d’alimentation Titre Ton chair Transparence menu 5 4 34 14 19 U USB 20, 29 Utilisation de la Vue chaînes 10 Utilisation de l’option Diffusion programmée 10 Utilisation des chaînes favorites 11 V Veille Verrouiller Videos Volume Volume auto 18 13 31 4, 5, 17 17 Cette page est laissée intentionnellement vierge. Le figure e le illustrazioni presenti in questo Manuale dell’utente sono fornite unicamente a titolo di riferimento e possono differire da quelle del prodotto attuale. Le specifiche e il design del prodotto possono variare senza preavviso. Avviso relativo alla trasmissione TV digitale 1. 2. 3. 4. 5. 6. ✎ Le funzioni relative alla televisione digitale (DVB) sono disponibili solo nelle nazioni o nelle aree in cui viene trasmesso il segnale digitale terrestre DVB-T (MPEG2 e MPEG4 AVC) o laddove si abbia accesso a un servizio TV via cavo compatibile DVB-C (MPEG2 e MPEG4 AAC). Verificare con il rivenditore locale la possibilità di ricevere segnali DVB-T o DVB-C. DVB-T è lo standard del consorzio europeo DVB per la trasmissione della televisione digitale terrestre mentre DVB-C è lo standard per la trasmissione della televisione digitale via cavo. Tuttavia, alcune funzioni quali EPG (Electric Program Guide), VOD (Video on Demand) e altre non sono incluse in queste specifiche. Per questo motivo, al momento non sono disponibili. Sebbene questo apparecchio TV soddisfi i più recenti standard DVB-T e DVB-C, aggiornati a [Agosto, 2008], la compatibilità con future trasmissioni digitali via cavo DVB-C e terrestri DVB-T non può essere garantita. In base al paese o all’area in cui si utilizza questo televisore, alcuni fornitori di trasmissioni TV via cavo potrebbero applicare una tariffa aggiuntiva per tali servizi e richiedere all’utente di accettare i termini e le condizioni della loro offerta. Alcune funzioni della trasmissione TV digitale potrebbero non essere disponibili in alcune nazioni o regioni e DVB-C potrebbe non funzionare correttamente con alcuni fornitori di servizi via cavo. Per maggiori informazioni, contattare il locale centro assistenza clienti Samsung. La qualità di ricezione del televisore può essere influenzata dai diversi metodi di trasmissione esistenti nei vari paesi. Verificare le prestazioni del televisore presso un Rivenditore autorizzato SAMSUNG o presso un Call Centre Samsung per sapere se la qualità di ricezione può essere migliorata o meno riconfigurando le impostazioni dell’apparecchio. Avvertenza per la visualizzazione di immagini fisse Evitare la visualizzazione di immagini fisse (per es. file jpeg) o di elementi grafici fissi (come ad esempio il logo di un programma TV, il formato panorama o 4:3, la barra dei titoli di borsa o delle notizie nella parte inferiore dello schermo). La visualizzazione costante di una immagine fissa può causare un consumo non uniforme dei fosfori dello schermo e influenzare la qualità delle immagini. Per ridurre il rischio di tale effetto, seguire le raccomandazioni: • Evitare la visualizzazione dello stesso canale televisivo per lunghi periodi di tempo. • Visualizzare sempre le immagini a schermo pieno, usando il menu del formato immagini per impostarlo al valore più appropriato. • Ridurre la luminosità e il contrasto al minimo necessario per ottenere la qualità visiva desiderata; valori troppo elevati possono accelerare il processo di bruciatura dello schermo. • Usare frequentemente tutte le funzioni TV progettate per ridurre la ritenzione delle immagini e la bruciatura dello schermo. Per maggiori informazioni consultare l’apposita sezione del manuale dell’utente. Messa in sicurezza della posizione di installazione Mantenere le distanze indicate tra il prodotto e gli altri elementi presenti (per esempio le pareti) per garantire un’adeguata ventilazione. Il mancato rispetto di questa precauzione può comportare un incendio o un malfunzionamento provocato dall’aumento della temperatura interna del prodotto. ✎ ✎ Se si usa un piedistallo o un sistema di montaggio a parete, utilizzare solo componenti forniti da Samsung Electronics. x L’uso di parti di altre marche può causare un malfunzionamento o lesioni provocate da una eventuale caduta del prodotto. L’aspetto del prodotto può differire in base al modello. Installazione con piedistallo. Installazione con supporto a parete. 10 cm 10 cm 10 cm 10 cm 10 cm 10 cm 10 cm Corretto smaltimento di questo prodotto (WEEE / RAEE, Rifiuti da apparecchiature elettriche ed elettroniche) (applicabile nei paesi dell’Unione Europea e in quelli con sistemi di raccolta differenziata) Questo simbolo riportato sul prodotto, sugli accessori e sulla documentazione indica che il prodotto e i suoi accessori elettronici (es. caricatore, cuffie, cavo USB) non devono essere smaltiti unitamente ai rifiuti domestici al termine del loro ciclo vitale. Per prevenire eventuali danni all’ambiente o alla salute delle persone derivanti da uno smaltimento non appropriato, separarli da altri tipi di rifiuti e riciclarli in modo responsabile per promuovere il riutilizzo sostenibile delle risorse materiali. Gli utenti residenziali sono invitati a contattare il rivenditore presso il quale hanno acquistato il prodotto, o l’ufficio locale preposto, per richiedere le informazioni relative alla raccolta differenziata e al riciclaggio di questo tipo di prodotto. Gli utenti aziendali sono invitati a contattare il proprio fornitore e verificare i termini e le condizioni del contratto d’acquisto. Questo prodotto e i suoi accessori elettronici non devono essere smaltiti insieme agli altri rifiuti commerciali. Corretto smaltimento delle batterie utilizzate in questo prodotto (applicabile nei paesi dell’Unione Europea e in quelli con sistemi di raccolta differenziata delle batterie) Questo contrassegno posto sulla batteria, sul manuale o sull’imballaggio, indica che le batterie contenute in questo prodotto non devono essere smaltite insieme ai rifiuti domestici una volta esauste. Laddove presenti, i simboli chimici Hg, Cd o Pb indicano che le batterie contengono mercurio, cadmio o piombo sopra i limiti stabiliti nell’ambito della Direttiva CE 2006 / 66. Se le batterie non vengono smaltite in modo corretto, tali sostanze possono causare danni alla salute o all’ambiente. Per proteggere le risorse naturali e promuovere il riutilizzo dei materiali, separare le batterie dagli altri rifiuti e riciclarle utilizzando il sistema locale gratuito di ritiro delle batterie esauste. 2 Italiano Contenuti 4 4 5 6 6 Accessori Vista del Pannello di controllo Vista del telecomando Collegamento all’antenna Plug & Play (Impostazione iniziale) 7 8 9 Collegamento a un dispositivo AV Collegamento a un dispositivo audio Cambiare la sorgente di ingresso Funzioni base 9 10 10 12 13 16 18 20 Come scorrere i menu Uso del tasto INFO (Guida Now & Next) Pianificare la visione Menu Canale Menu Immagine Menu Suono Menu Impostazione Menu Supporto Funzioni avanzate 22 23 29 36 39 44 Collegamento a un PC Connessione di rete Media Play Anynet+ Internet@TV AllShare 46 47 48 49 49 50 53 54 55 Funzione Teletext canali analogici Installazione del supporto a parete Assemblaggio dei cavi Blocco antifurto Kensington Fissaggio del televisore alla parete Risoluzione dei problemi Specifiche Indice Schema blocco Per iniziare 4 Collegamenti 7 9 22 Altre informazioni 46 Questo apparecchio è fabbricato in conformità al D.M.28.08.95 n.548 ed in particolare a quanto specificato nell Art.2, comma 1. Questo apparecchio è fabbricato nella U.E. in conformità al D.M.28.08.95 n.548 Art.2, comma 1 ed al D.M.26.03.92 Art.1 Controllate il simbolo! O t Questa funzione è utilizzabile premendo il tasto TOOLS sul telecomando. Nota Guida passo-passo Italiano 3 Per iniziare Accessori ✎ Controllare che nella confezione del TV LCD siano contenuti i seguenti componenti. Se eventuali componenti risultassero mancanti, contattare il rivenditore. ✎ La forma e il colore dei componenti possono variare in base al modello. y Telecomando e batterie (2 tipo AAA) y Istruzioni per l’utente y Scheda di garanzia / Guida alla sicurezza (non disponibili in tutti i paesi) y Panno per la pulizia y Cavo di alimentazione (46 ~ 55 pollici TVs) y y Fermacavi Staffa preforata y Anello di ritenuta (4ea) Vedere la guida separata per l’installazione del piedistallo. o y Piedistallo (1EA) y Guida piedistallo (1EA) (M4 X L12) y Viti (9EA) (solo modello da 32 pollici: 8EA) Vista del Pannello di controllo ✎ La forma e il colore del prodotto possono variare in base al modello. Sensore del telecomando Indicatore di alimentazione Altoparlanti P (Alimentazione / Power) Accende o spegne il televisore. Indicatore di alimentazione SOURCEE Lampeggia e si spegne quando l’alimentazione è attiva, si accende in modalità standby. Alterna tutte le sorgenti d’ingresso disponibili. Nel menu OSD, utilizzare questo tasto come si usa il tasto ENTERE del telecomando. Visualizza un menu a schermo, l’OSD (on screen display), delle funzioni del televisore. Regola il volume. Nel menu OSD, utilizzare i tasti Y così come si usano i tasti ◄ e ► del telecomando. Cambia i canali. Nel menu OSD, utilizzare i tasti z così come si usano i tasti ▼ e ▲ del telecomando. Puntare il telecomando in direzione di questo punto sul televisore. MENU Y z Sensore del telecomando Modalità Standby Non lasciare il televisore in modalità standby per un lungo periodo di tempo (quando si parte per le vacanze, ad esempio). Anche quando il tasto di accensione è disattivo, l’apparecchio consuma una piccola quantità di energia elettrica. Si consiglia quindi di scollegare il cavo di alimentazione. 4 Italiano ✎ Questo speciale telecomando, progettato per aiutare chi ha problemi di vista, presenta punti in Braille sui tasti Power, Channel e Volume. Spegne e accendere il televisore. (P. 6) Se il tasto di illuminazione ON/OFF è impostato su ON e si preme un tasto qualsiasi, i tasti del telecomando si illuminano per un istante. (L’uso del telecomando con questo tasto impostato su On riduce l’uso della batteria.) Visualizzazione e selezione delle sorgenti video disponibili. (P. 9) Premere per accedere direttamente ai canali. Ritorna al canale precedente. Seleziona alternativamente le modalità Teletext, Double o Mix. Esclude temporaneamente l’audio. Regola il volume. Cambia canali. Visualizza il menu OSD principale. (P. 9) Visualizza l’elenco canali sullo schermo. (P. 13) Visualizza Vista contenuti, che include le opzioni Guida, Internet@TV, Media Play, e AllShare. Visualizza la EPG (Electronic Programme Guide). (P. 10) Scelta rapida delle funzioni usate più di frequente. Visualizza le informazioni sullo schermo TV. (P. 10) Seleziona le voci del menu OSD e ne modifica i valori. Esce dal menu. Ritorna al menu precedente. Tasti dei menu Gestione canali, Internet@TV, Media Play, ecc. A B C D MEDIA.P: Visualizza Media play. (P. 29) INTERNET: Link a vari servizi internet. (P. 39) DUAL I-II: Seleziona la modalità suono. (P. 17) AD: Seleziona la Descrizione audio. (Non disponibile in alcuni paesi) (P. 17) P.SIZE: Seleziona la dimensione dell’immagine. (P. 15) SUBT.: Visualizza i sottotitoli digitali (P. 19) Usare questi tasti in modalità Media Play e Anynet+. (P. 29, 36) (�: controlla la registrazione nei registratori Samsung dotati della funzione Anynet+) Inserimento delle batterie (tipo: AAA) ✎ NOTA x x x Usare il telecomando entro un raggio di 7 metri dal televisore. Una illuminazione intensa può influenzare le prestazioni del telecomando. Evitare l’uso del telecomando nelle immediate vicinanze di lampade fluorescenti o insegne al neon. La forma e il colore possono variare in base al modello. Italiano 5 01 Per iniziare Vista del telecomando Per iniziare Collegamento all’antenna Quando il televisore viene acceso per la prima volta, le impostazioni di base vengono visualizzate automaticamente. ✎ Preimpostato: Collegare l’alimentazione e l’antenna. Antenna VHF/UHF Cavo o ANT OUT Y Ingresso Alimentazione Plug & Play (Impostazione iniziale) Alla prima accensione del televisore, vengono visualizzate alcune schermate che aiutano l’utente a configurare le impostazioni di base. Premere il tasto POWERP. Plug & Play è disponibile solo quando sul televisore è impostata la sorgente Ingressi. ✎ Per tornare al passaggio precedente, premere il tasto Rosso. 1 2 Selezione della lingua 3 Selezionare la nazione Selezionare Demo Negozio o Uso dom. Premere il tasto ▲ o ▼, quindi premere ENTERE. POWER Selezionare la lingua OSD (On Screen Display) desiderata. Premere il tasto ◄ o ► , quindi premere ENTERE. y Selezionare la modalità Uso dom. La modalità Demo Negozio è dedicata a un uso commerciale. y Ripristinare le impostazioni dell'unità da Demo Negozio a Uso dom. (standard): Premere il tasto Volume del televisore. Quando il menu Volume viene visualizzato a schermo, tenere premuto il tasto MENU per 5 secondi. Premere il tasto ▲ o ▼, quindi premere ENTERE. Selezionare la nazione appropriata. Se la nazione desiderata non è riportata nel menu, selezionare Altro. P ✎ Dopo aver selezionato il paese nel menu Nazione, alcuni modelli potrebbero richiedere un’opzione aggiuntiva per l’impostazione del pin. 4 5 ✎ All’inserimento del codice PIN, 0-0-0-0 non è disponibile. Selezionare una antenna Selezionare un canale Premere il tasto ▲ o ▼, quindi premere ENTERE. Selezionare Antenna o Cavo. Premere il tasto ▲ o ▼, quindi premere ENTERE. Selezionare la sorgente del canale da memorizzare. Quando si imposta la sorgente antenna su Cavo, viene visualizzata una procedura che consente di impostare un valore per la ricerca dei canali digitali (frequenza del canale). Per ulteriori informazioni, vedere Canale → Memoriz. automatica (P. 12). ✎ Premere ENTERE in qualsiasi momento per interrompere il processo di 6 7 8 Impostare la Modalità orologio Visualizzare la Guida alla connessione HD. Buon divertimento. memorizzazione. Impostare la Modalità orologio automaticamente o manualmente. ✎ Selezionando l’opzione Automatico, scegliere il fuso orario della zona di residenza. Viene quindi visualizzata la descrizione relativa al metodo di connessione che fornisce la migliore qualità di visione HD. Premere il tasto ENTERE. Per reimpostare questa funzione... Selezionare Impostazione - Plug & Play (Impostazione iniziale) Digitare il PIN a quattro cifre. Il PIN preimpostato è “0-0-0-0.” Per cambiare il codice PIN, utilizzare la funzione Cambia PIN. 6 Italiano Collegamenti 02 Collegamenti Collegare un dispositivo AV Usare un cavo HDMI / DVI: Connessione HD (fino a 1080p) Dispositivi disponibili: DVD, lettore Blu-ray, ricevitore via cavo HD, ricevitore satellitare HD STB (Set-Top-Box), ricevitore via cavo, ricevitore satellitare (STB) DVD W Y W r W HDMI OUT Red White AUDIO OUT W r-AUDIO-l R DVI OUT ✎ HDMI IN 1(DVI), 2, 3, 4 / PC / DVI AUDIO IN x x x x Quando si effettua una connessione mediante cavo HDMI / DVI, è necessario utilizzare la porta HDMI IN 1(DVI). Per la connessione via cavo DVI / HDMI, utilizzare un cavo o una scheda DVI-HDMI per la connessione video e la porta DVI AUDIO IN per l’audio. Collegando al televisore un dispositivo esterno quale un DVD / lettore Blu-ray / ricevitore via cavo / ricevitore satellitare STB che supporta versioni HDMI precedenti alla 1.3, il televisore potrebbe non funzionare regolarmente (es. nessuna immagine visualizzata / nessun audio / fastidiosi disturbi / colori anomali). Se dopo aver collegato un cavo HDMI non si avverte alcun audio, verificare la versione HDMI del dispositivo esterno. Se si sospetta che la versione del dispositivo sia precedente alla 1.3, contattare il fornitore del dispositivo per confermare la versione HDMI e richiedere eventualmente un aggiornamento. Si consiglia l’acquisto di un cavo certificato HDMI. In caso contrario, lo schermo potrebbe non visualizzare alcuna immagine oppure potrebbe verificarsi un errore di connessione. Usare un cavo Component (fino a 1080p) o Audio / Video (solo 480i) e usare un cavo Scart Dispositivi disponibili: VCR, DVD, lettore Blu-ray, ricevitore via cavo, ricevitore satellitare STB R B W W R r-AUDIO-l Y AUDIO OUT VIDEO OUT R VCR G r Blu-ray player W Yellow Red White R AUDIO OUT r-AUDIO-l R W W G W r R Y B W Y W COMPONENT OUT Pr Pb r Red b G Blue Green DVD EXT Y ✎ In modalità Est., l’uscita DTV supporta solo video e audio SD MPEG. ✎ Per ottenere la migliore qualità delle immagini, si consiglia l’uso della connessione Component rispetto alla connessione A/V. Italiano 7 Collegamenti Collegamento di un dispositivo audio Uso di una connessione Ottica o un cavo audio Dispositivi disponibili: sistema audio digitale, amplificatore, DVD home theatre OPTICAL Sistema Audio Digitale Cuffie ✎ DIGITAL AUDIO OUT (OPTICAL) x x x Quando un sistema audio digitale è collegato alla porta DIGITAL AUDIO OUT (OPTICAL), ridurre il volume sia del televisore sia del sistema. L’audio 5.1 CH (canali) è disponibile quando il televisore è collegato a un dispositivo esterno che supporta lo standard 5.1 CH. Quando il ricevitore (home theatre) è impostato su On, è possibile udire l’audio proveniente dall’uscita ottica del televisore. Quando il televisore visualizza un segnale DTV, invia l’audio a 5.1 canali al ricevitore Home Theater. Se la sorgente è un componente digitale, come per es. un lettore DVD / Blu-ray / ricevitore via cavo / ricevitore satellitare (STB) ed è collegata al televisore mediante HDMI, saranno udibili solo 2 canali audio dal ricevitore Home Theater. Per un audio a 5.1 canali, collegare la porta dell’uscita audio digitale del DVD / lettore Blu-ray / udire / ricevitore satellitare STB direttamente a un amplificatore o un home theatre. ✎ Cuffie H: E’ possibile collegare le cuffie all’uscita cuffie del televisore. Quando le cuffie sono collegate, l’audio proveniente dagli altoparlanti incorporati viene disabilitato. x x Collegando le cuffie al televisore l’uso della funzione audio non è disponibile. Il volume delle cuffie e quello del televisore sono regolabili indipendentemente. Slot per CONNESSIONI COMMON INTERFACE Per visualizzare canali a pagamento, è necessario inserire una “SCHEDA CI o CI+”. y Se non si inserisce una “SCHEDA CI o CI+”, alcuni canali visualizzeranno il messaggio “Segnale criptato”. y Le informazioni di pairing che contengono un numero telefonico, l’ID della “SCHEDA CI o CI+”, l’ID host e altri dati, verranno visualizzate entro 2~3 minuti. Se viene visualizzato un messaggio di errore, contattare il fornitore del servizio. y Quando la configurazione delle informazioni relative al canale è stata completata, viene visualizzato il messaggio ‘Aggiornamento completato’, a indicare che l’elenco dei canali è stato aggiornato. ✎ NOTE x x x x x x 8 È necessario richiedere una “SCHEDA CI o CI+” al fornitore del servizio locale. Estrarre con delicatezza la “SCHEDA CI o CI+” tirandola con le dita e prestando attenzione a non farla cadere poiché potrebbe subire danni. Inserire la “SCHEDA CI o CI+” nella direzione indicata sulla scheda stessa. La posizione dell’alloggiamento COMMON INTERFACE può variare in base al modello. La “SCHEDA CI o CI+” non è supportata in alcune nazioni e regioni; controllare con il rivenditore autorizzato di zona. In caso di problemi, contattare il fornitore del servizio. Italiano ■ Elenco sorgenti VCR / DVD / STB cavo / STB satellite / STB PVR / Ricevitore AV / Giochi / Videocamera / PC / DVI PC / Dispositivi DVI / TV / IPTV / Blu-ray / HD DVD / DMA: Assegnare un nome al dispositivo collegato alle porte di ingresso per semplificare la selezione della sorgente di ingresso. Questa funzione viene usata per selezionare il televisore o un’altra sorgente di ingresso esterna come un lettore DVD/Blu-Ray / ricevitore via cavo / ricevitore satellitare STB collegato al televisore. ✎ TV / Est.1 / Est.2 / AV / Component / PC / HDMI1/DVI / HDMI2 / HDMI3 / HDMI4 / USB Quando un PC con una risoluzione di 1920 x 1080 a 60Hz viene collegato alla porta HDMI IN 1(DVI), impostare la modalità DVI PC in Modifica Nome. ✎ Quando si collega un cavo HDMI/DVI alla porta HDMI IN 1(DVI), è necessario impostare la modalità DVI PC o Dispositivi DVI in Modifica Nome. ■ ✎ Nel Elenco sorgenti, gli ingressi collegati vengono evidenziati. ✎ Ext.1 e Ext.2 sono sempre attivi. Funzioni base Come usare il menu OSD (On Screen Display) Come scorrere i menu Prima di utilizzare il televisore, seguire questi passaggi per imparare a scorrere i menu, selezionando e regolando le diverse funzioni. La procedura d’accesso può essere diversa a seconda del menu selezionato. 1 MENU m 2 3 4 5 ▲/▼ 1 2 4 3 A B C D ENTERE ▲/▼ ◄/► 1 Tasto MENU: Visualizza il menu OSD principale. 2 Tasti ENTERE / Freccia: Spostare il cursore e selezionare una voce. Confermare l’impostazione. 3 Tasto RETURN: Torna al menu precedente. 4 Tasto EXIT: Esce dal menu OSD. 6 7 ENTERE EXIT e Sullo schermo vengono visualizzate le opzioni del menu principale: Immagine, Suono, Canale, Impost, Ingressi, Applicazione, Supporto. Selezionare una icona con il tasto ▲ o ▼. Premere ENTERE per accedere al menu secondario. Selezionare il menu secondario desiderato con il tasto ▲ o ▼. Regolare il valore di un elemento con il tasto ◄ o ►. La regolazione nel menu OSD può differire in base al menu selezionato. Premere ENTERE per completare la configurazione. Premere EXIT. Italiano 9 02 Collegamenti Modifica Nome Cambiare la sorgente di ingresso Funzioni base Uso di Vista programmazione Uso del tasto INFO (Guida Now & Next) Il display identifica il canale corrente e lo stato di determinate impostazioni audio e video. La guida Now & Next mostra le informazioni relative alla programmazione giornaliera di ogni canale in base all’orario di trasmissione. y Scorrere ◄, ► per visualizzare le informazioni di un determinato programma durante la visione del canale corrente. y Scorrere ▲, ▼ per visualizzare le informazioni relative ad altri canali. Se si desidera spostarsi sul canale selezionato, premere il tasto ENTERE. abc1 Guida Family Affairs 18:00 - 18:30 Drama 15 18:00 ~ 6:00 Vista programmazione 18:30 19:15 ' Informazioni 3 Blu (Mod. CH): Selezionare il tipo di canali da visualizzare nella finestra Vis. canali. Home and Away 18:00 - 18:30 Drama Dani is devastated when scott makes clear his views on marriage... 1 10 Italiano Mod. CH 2 3 19:00 - 20:00 Tine Team Fiv... )Dark Angel Informazioni k Pagina E Guarda 4 (Pagina): Passa alla pagina precedente / successiva. – Selezionando un evento in programmazione, è possibile prenotarne la visione. Per annullare la programmazione, premere nuovamente il tasto ENTERE quindi selezionare Annulla Programmazioni. 2:10 Mar 1 Giu +24 ore 1 4 6 Rosso (Modalità vis.): Visualizza l’elenco dei programmi attualmente trasmessi o in programmazione. – Selezionando il programma corrente, è possibile visualizzarlo. DTV Air 800 five Mod vis. Informazioni E Annulla 6 Tasto ENTERE Guida 18:00 - 19:00 American Chopper Programmes resume at 06:00 Home and... )Family Affairs No Information QVC Selection No Information five five Giallo (+24 ore): Visualizza l’elenco dei programmi da trasmettere dopo 24 ore. 5 Usare Vis. canali Channel View - TV Today 27 Discovery 28 DiscoveryH&L 800 five 24 price-drop.tv 16 QVC 6 R4DTT 800 800 – La Mod. CH può differire in base alla sorgente antenna. (Informazioni): Visualizza i dettagli del programma 4 selezionato. Le informazioni EPG (Electronic Programme Guide) sono fornite dall’emittente. Usando la programmazione fornita dalle emittenti, è possibile specificare i programmi da visualizzare in anticipo in modo da passare automaticamente al canale desiderato all’orario impostato. Le varie voci dei programmi potranno non essere visualizzate o non essere aggiornate in base allo stato del canale. channel status. 800 five )Family Affairs )Dark Angel 2 Pianificare la visione Guida Today Today Mod vis. 1 EWatch Unclassified No Detaild Information Tanya confesses all to a stunned Babs. Conrad is anxious to hear... 800 five 18:11 Thu 6 jan life On Venus Avenue DTV Air 2:10 Mar 1 Giu DTV Air 800 five 5 6 ¦ Uso dei Canali Preferiti Eliminare o impostare i canali preferiti e utilizzare la guida ai programmi per le trasmissioni digitali. Selezionare un canale nella schermata Canali, Miei canali o Programmato. * Miei canali Canali All Antenna TV 15 Radio Data/Other Analogue 3 23 33 32 5 4 27 Antena B zoom Seleziona (in Gestione canali) Mostra tutti i canali preferiti. 1futech * 24ore.tv abc1 ■ r BBC World bid-up.tv Boonerang Cartoon Nwk Class News \ Coming Soon Discovery Pagina T Strumenti Canali: Mostra l’elenco canali a seconda del tipo di canale. ■ ■ c1 c2 Modifica Miei canali t : E’ possibile impostare i canali selezionati nel gruppo Mio canale. ✎ Il simbolo “*” verrà evidenziato e il canale verrà impostato nel gruppo Mio canale. 1. Selezionare un canale e premere il tasto TOOLS. 2. Aggiungere o eliminare un canale nei gruppi Mio canale quali 1, 2, 3 e 4. x E’ possibile selezionare uno o più gruppi. 3. Una volta modificate le impostazioni, in Miei canali sarà possibile visualizzare l’elenco dei canali di ogni gruppo. * Miei canali: Mostra il gruppo del canale. ✎ Uso dei tasti colorati in Gestione canali x x x x x Canali Programmato: Mostra tutti i programmi attualmente prenotati. ■ Rosso (Antenna): Selezionare Antenna o Cavo. B Verde (Zoom): Aumenta o diminuisce il numero di un canale. Giallo (Seleziona): Selezionare i canali desiderati e premere il tasto giallo per impostare tutti i canali selezionati contemporaneamente. Il simbolo c compare a sinistra dei canali selezionati. Antenna c1 c2 All 1futech * 24ore.tv TV 15 Radio Data/Other Analogue 3 23 33 32 5 4 27 Antena Seleziona B zoom abc1 Modiica Miei canali blocco elimina BBC World bid-up.tv Deseleziona tutto SelezionaBoonerang tutto r d Cartoon Nwk Class News \ Coming Soon Discovery Pagina T Strumenti (Pagina): Passa alla pagina precedente o successiva. T (Strumenti): Visualizza il menu dell’opzione Gestione canali. (Il menu Opzioni può variare a seconda della situazione.) Icone di stato del canale Icone A c * ( \ ) Operazioni Canale analogico. Canale selezionato. Canale impostato come Preferito. Programma attualmente trasmesso. Canale bloccato. Programma prenotato. Italiano 11 03 Funzioni base Gestione canali Funzioni base Menu Canale ¦ Risintonizzazione dei canali Memorizzazione manuale Esegue la scansione automatica di un canale e lo memorizza nel televisore. ✎ Se un canale è stato bloccato mediante le funzione Blocco canali, comparirà la schermata di inserimento del PIN. Antenna (Antenna / Cavo) t Prima che il televisore inizi la memorizzazione dei canali disponibili, è necessario specificare il tipo di sorgente di segnale collegata al televisore (per es. un sistema via Antenna o Cavo). Nazione Viene visualizzata la finestra di immissione del PIN. Digitare il PIN a quattro cifre. ■ Canale digitale: Cambiare la nazione per i canali digitali. ■ Canale analogico: Cambiare la nazione per i canali analogici. ■ ✎ Selezionando Antenna → Antenna: Canale, Frequenza, Larg. di banda ✎ Selezionando Antenna → Cavo: Frequenza, Modulazione, Symbol Rate ■ x Ricerca i canali automaticamente e li memorizza sul televisore. x ✎ I numeri di programma assegnati automaticamente potrebbero non corrispondere ai numeri di programma effettivi o desiderati. Se un canale è stato bloccato mediante la funzione Child Lock (Blocco canali), comparirà la schermata di inserimento del PIN. Sorgente antenna (Antenna / Cavo): Selezionare la sorgente antenna da memorizzare. ■ Sorgente canale (Digitale & Analogico / Digitale / Analogico): Selezionare la sorgente del canale da memorizzare. Quando si seleziona Cavo → Digitale & Analogico o Digitale Inserire un valore per ricercare i canali via cavo. Modalità ricerca (Completa / Rete / Rapida): Scorrere tutti i canali per le stazioni emittenti attive e memorizzarli nella memoria del televisore. ✎ Impostando Rapida, è possibile configurare Rete, ID di rete, Network ID (Frequenza), Modulazione, Symbol Rate manualmente premendo il tasto sul telecomando. Rete Auto /Manuale: Seleziona la modalità di impostazione ID di rete tra Auto o Manuale. ID di rete: Quando Rete è impostata su Manuale, è possibile impostare ID di rete usando i tasti numerici. Frequenza: Visualizza la frequenza del canale. (varia in base alla nazione) Canale analogico (Programma, Sistema colore, Sistema audio, Canale, Ricerca, Memorizza): Se l’audio è anomalo o assente, riselezionare lo standard audio richiesto. ✎ Modalità Canale Memoriz. automatica ■ Canale digitale: Una volta terminata la scansione, i canali vengono aggiornati nell’elenco canali. P (modalità Programma): Una volta completata la sintonizzazione, alle emittenti della propria area viene assegnato un numero compreso tra P0 e P99. In questa modalità, è possibile selezionare un canale digitandone il numero corrispondente. C (modalità canale antenna) / S (modalità canale cavo): Queste due modalità permettono di selezionarne un canale digitandone il numero ad esso assegnato per ogni stazione via etere o canale via cavo. ¦ Modifica dei canali Menu Opzioni di Gestione canali (in Gestione canali) 1. Selezionare un canale e premere il tasto TOOLS. 2. Modificare il nome del canale o il numero usando Modifica nome canale o nel menu Modifica num canale. ■ Modifica nome canale (solo canali analogici): Assegnare il nome preferito al canale. ■ Modifica num canale (solo canali digitali): Modificare il numero premendo i tasti numerici desiderati. ¦ Altre funzioni Opzione ricerca via cavo (in base alla nazione) Imposta ulteriori opzioni di ricerca quali frequenza e symbol rate per ricerche network via cavo. Modulazione: Visualizza i valori di modulazione disponibili. ■ Frequenza inizio / Frequenza arresto: Impostare la frequenza iniziale o finale (Diversa per ogni nazione). Symbol Rate: Visualizza i valori di symbol rate disponibili. ■ Modulazione: Visualizza i valori di modulazione disponibili. ■ Symbol Rate: Visualizza i valori di symbol rate disponibili. 12 Italiano (in Gestione canali) Impostare ogni canale usando le opzioni del menu Gestione canali , Blocco / Sblocco, Timer Visione, Ordina, Elimina, Seleziona tutto / Deseleziona tutto). Gli elementi del menu Opzioni possono differire in base allo stato del canale. 1. Selezionare un canale e premere il tasto TOOLS. 2. Selezionare una funzione e cambiarne le impostazioni. ■ Blocco / Sblocco: E’ possibile bloccare un canale in modo che non possa essere selezionato e visualizzato. ✎ NOTA x x ■ Questa funzione è disponibile solo quando la funzione Blocco canali è impostata su On. Viene visualizzata la finestra di immissione del PIN. Digitare il PIN a 4 cifre; il PIN predefinito è “0-0-0-0”. Cambiare il PIN usando l’opzione Cambia PIN. Timer visione: E’ possibile impostare la visualizzazione automatica di un canale desiderato all’ora prestabilita. Impostare l’orario corrente prima di usare questa funzione. ✎ ■ ■ ■ Importa o esporta la mappatura dei canali. Collegare un dispositivo di memoria USB per utilizzare questa funzione. ✎ Comparirà la richiesta del PIN. Digitare il PIN a quattro cifre. ✎ Il PIN predefinito di un nuovo apparecchio TV è ‘0-0-0-0’. ■ Importa da USB: Importa l’elenco canali dal dispositivo USB. ■ Esporta in USB: Esporta l’elenco canali sul dispositivo USB. Sintonia fine (solo canali analogici) Se il segnale risulta debole o distorto, può essere necessario sintonizzare il canale manualmente. ✎ I canali per i quali si è effettuata la sintonia fine sono contrassegnati con un asterisco “*”. ✎ Per reimpostare la sintonia, selezionare Reset. Menu Immagine Quando un canale digitale viene selezionato, premere il tasto ► per visualizzare il programma digitale. Cambiare la modalità Immagine preimpostata Ordina (solo canali analogici): Questa operazione consente di modificare i numeri di programma dei canali memorizzati. Questa operazione può essere necessaria dopo la memorizzazione automatica dei canali. Modalità t Elimina: E’ possibile eliminare un canale per visualizzare i canali desiderati. ■ Dinamica: Adatta per un ambiente illuminato. ■ Standard: Adatta per condizioni di luce normali. Seleziona tutto / Deseleziona tutto: Per selezionare o deselezionare tutti i canali in gestione canali. Programmato (in Gestione canali) E’ possibile visualizzare, modificare o eliminare un programma prenotato. ■ Modifica info: Per modificare un programma prenotato. ■ Annulla Programmazioni: Per eliminare un programma prenotato. ■ Informazioni: Per visualizzare un programma prenotato. (E’ inoltre possibile modificare le informazioni relative alla prenotazione.) ■ Elenco canali (Trasferim. elenco canali) Seleziona tutto / Deseleziona tutto: Per selezionare o deselezionare tutti i programmi prenotati. Elenco canali E’ possibile visualizzare tutti i canali ricercati. Selezionare il tipo di immagine preferita. ■ Naturale: Adatta per ridurre l’affaticamento della vista. ✎ ■ Naturale non è disponibile in modalità PC. Film: Adatta per la visione di film in un ambiente poco illuminato. Regolazione delle impostazioni delle immagini Retroillumin / Contrasto / Luminosità / Nitidezza / Colore / Tinta (V/R) La televisione ha diverse opzioni di impostazione per il controllo della qualità delle immagini. ✎ NOTA x x x x Nelle modalità analogiche Est., AV del sistema PAL, non è possibile utilizzare la funzione Tinta (V/R). In modalità PC, è possibile modificare solo i parametri Retroillumin, Contrasto e Luminosità. Le impostazioni possono essere modificate e memorizzate per ogni dispositivo esterno collegato al televisore. Riducendo la luminosità delle immagini si riduce anche il consumo energetico. Italiano 13 03 Funzioni base Menu Opzioni di Gestione canali Funzioni base ¦ Soluzioni economiche ■ Gamma: Per regolare l’intensità dei colori primari. ■ Schema avanzato (Off / Motivo 1 / Motivo 2): Eseguendo la funzione Schema avanzato, l’immagine può essere calibrata senza l’uso di un generatore o di un filtro. Se il menu OSD scompare dallo schermo o viene aperto un altro menu diverso da Immagine, la calibrazione viene memorizzata e la finestra Schema avanzato si chiude. Soluzione Eco ■ ■ Risp. energia (Off / Basso / Medio / Alto / Immagine Off / Auto)t: Questa funzione regola la luminosità del televisore in modo da ridurre il consumo di energia. Selezionando Immagine Off, lo schermo viene disattivato, ma l’audio rimane attivo. Per attivare lo schermo premere un tasto qualsiasi, eccetto il tasto di regolazione del volume. Sensore Eco (Off / On): Per migliorare le impostazioni di risparmio energetico; le impostazioni delle immagini vengono automaticamente adattate all’illuminazione ambientale. ✎ Regolando il valore Retroillumin, Sensore Eco verrà impostato su Off. ■ Se Sensore Eco è impostato su On, la luminosità del display potrebbe cambiare (diventando leggermente più scura o più chiara) a seconda dell’intensità della luce del locale. Disabilitata quando il PC è in modalità risparmio energetico. ✎ Attiva solo in modalità DTV, Comp. e HDMI. Solo modalità RGB (Off / Rosso / Verde / Blu): E’ possibile regolare i parametri Colore o Tinta dei valori Rosso, Verde o Blu per le immagini provenienti da un dispositivo esterno (lettore DVD, home theatre, ecc.). ■ Spazio colore (Auto / Nativo / Personale): Regolare l’intervallo dei colori disponibili per creare l’immagine. Per regolare i valori Colore, Rosso, Verde, Blu e Reset, impostare Spazio colore su Personalizzato. ■ Bilan bianco: Regolare la temperatura dei colori al fine di ottenere una immagine più naturale. R-Offset / G-Offset / B-Offset: Regolare l’intensità di ogni colore (rosso, verde, blu). No segnale stnd-by (Off / 15 min / 30 min / 60 min): Attiva la modalità stand-by, nel caso persista per il tempo indicato dall’utente lo stato “No segnale”o “Verificare cavo segnale”. ✎ Durante l’esecuzione di Schema avanzato, l’audio non viene riprodotto. ■ Retroillumin min: Quando Sensore ECO è impostato su On, l’illuminazione minima dello schermo può essere regolata manualmente. ✎ ✎ R-Gain/G-Gain/B-Gain: Regolare la luminosità di ogni colore (rosso, verde, blu). Reset: Ripristina il valore Bilan bianco alle impostazioni predefinite. ¦ Modifica delle Opzioni immagine Bilanc. bianco 10p (Off / On): Controlla il bilanciamento del bianco in un intervallo di 10 punti regolando la luminosità dei colori rosso, verde e blu. Impostazioni avanzate ✎ Disponibile quando la modalità immagine è impostata su Film e l’ingresso esterno è impostato su HDMI o Comp. ✎ Alcuni dispositivi esterni potrebbero non supportare questa funzione. ■ (Disponibile in modalità Standard / Film) E’ possibile regolare le impostazioni avanzate dello schermo compresi il colore e il contrasto. In modalità PC, è possibile modificare solo i parametri Contrasto Dinamico, Gamma e Bilan bianco. ✎ Intervallo: Seleziona l’intervallo da regolare. Rosso: Regola il livello di rosso. Impostazioni avanzate Verde: Regola il livello di verde. Tonalità nero : Off Contrasto Dinamico : Medio Blu: Regola il livello di blu. Dettaglio ombra :0 Gamma :0 Reset: Ripristina il valore Bilanc. bianco 10p alle impostazioni predefinite. Schema avanzato : Off Solo modalità rGb : Off Spazio colore : Nativo ► ■ Incarnato: Enfatizza la tonalità rosa di “Incarnato.” ■ Migliora imm bordi (Off / On): Enfatizza i contorni degli oggetti. ■ xvYCC (Off / On): La modalità xvYCC migliora i dettagli e lo spazio colore durante la visione di film trasmessi da dispositivi esterni (per es attraverso un lettore DVD) collegati alla porta HDMI o Component IN. ▼ U Sposta E Conferma R ritorna ■ Tonalità nero (Off / Scuro / Più scura / Extra scura): Selezionare il livello di nero per regolare la profondità dello schermo. ■ Contrasto Dinamico (Off / Basso / Medio / Alto): Per regolare il contrasto dello schermo. ■ Dettaglio ombra (-2~+2): Per incrementare la luminosità delle immagini scure. Disabilitata in modalità PC. ✎ 14 Italiano ✎ Disponibile qua ndo la modalità immagine è impostata su Film e l’ingresso esterno è impostato su HDMI o Comp. ✎ Alcuni dispositivi esterni potrebbero non supportare questa funzione. ✎ In modalità PC, è possibile modificare solo i parametri Toni Colore Dimensioni, Filtr disturbo digit e Ora Protezione Auto. Opzioni immagine Toni colore : Normale Dimensioni : Auto Wide Mod schermo : 16:9 Filtr disturbo digit : Automatico MPeG Nosie Filter : Automatico livello di nero HDMI Modalità Film : Normale : Off ► ■ ▼ U Sposta E Conferma R ritorna ■ Toni colore (Freddo / Normale / Caldo1 / Caldo2) Le opzioni Caldo1 o Caldo2 verranno disattivate se la modalità immagine è impostata su Dinamica. Le impostazioni possono essere regolate e memorizzate per ogni dispositivo esterno collegato al televisore. ✎ ✎ ■ ✎ ■ Dimensioni: Il ricevitore via cavo/satellitare potrebbe anch’esso avere la propria serie di dimensioni preimpostate. Tuttavia, si consiglia vivamente di utilizzare la modalità 16:9 nella maggior parte dei casi. ✎ ✎ ✎ ■ ■ ■ Modalità Film (Off / Auto1 / Auto2): Il televisore può essere impostato automaticamente per rilevare ed elaborare i segnali dei film provenienti da tutte le sorgenti e per regolare l’immagine in modo da ottenere una visualizzazione ottimale Disponibile in modalità TV, AV, COMP. (480i / 1080i) e HDMI (480i / 1080i). 100Hz Motion Plus (Off / Chiara / Standard / Uniforme / Personalizzata / Demo): Elimina l’effetto ’trascinamento’ dalle scene in rapido movimento per offrire una visione più nitida delle immagini. Se si attiva 100Hz Motion Plus, lo schermo potrebbe risultare disturbato. In questo caso, impostare 100Hz Motion Plus su Off. ✎ ✎ NOTA Dopo aver selezionato Adatta a schermo in HDMI (1080i / 1080p) o Comp. (1080i / 1080p) può essere necessario centrare l’immagine sullo schermo: 1. Premere il tasto ◄ o ► per selezionare il menu Posizione. 2. Premere il tasto ENTERE 3. Premere il tasto ▲, ▼, ◄ o ► per spostare l’immagine. Livello di nero HDMI (Normale / Basso): Consente di selezionare il livello di nero dello schermo per regolare la profondità dell’immagine. Disponibile solo in modalità HDMI (segnali RGB). ✎ Adatta a schermo: Utilizzare questa funzione per visualizzare l’immagine completa senza ritagli con segnali HDMI (720p / 1080i / 1080p) o Comp. (1080i / 1080p). x Filtro disturbo MPEG (Off / Basso / Medio / Alto / Automatico): Riduce il disturbo MPEG per una migliore qualità delle immagini. Disabilitata in modalità PC. ✎ ■ ✎ ✎ La barra di colore verde indica che si sta ricevendo il miglior segnale possibile. ✎ Zoom: Ingrandisce il formato 16:9 per adattarlo alle dimensioni verticali dello schermo. Regola la Posizione o le Dimensioni usando i tasti ▲, ▼. 4:3 : Le impostazioni predefinite per un film o una trasmissione normale. Non visualizzare a lungo trasmissioni in formato 4:3. Le bande nere sulla sinistra e sula desta dell’immagine potrebbero causare immagini residue (bruciatura dello schermo), un fenomeno non coperto dalla garanzia. Filtr disturbo digit (Off / Basso / Medio / Alto / Automatico / Visualizzazione auto): Al cambio dei canali analogici, visualizza l’intensità del segnale. Visualizzazione auto: Al cambio dei canali analogici, visualizza l’intensità del segnale. Disponibile solo per i canali analogici. Auto Wide: Regola automaticamente la dimensione dell’immagine su un formato 16:9. 16:9 : Regola il formato dell’immagine a 16:9, appropriato per la visione di DVD o di trasmissioni in formato wide. Wide Zoom: Ingrandisce l’immagine a oltre 4:3. Regola la Posizione usando i tasti ▲, ▼. A seconda del tipo di sorgente di ingresso, le opzioni relative alla dimensione dell’immagine possono variare. x Le voci disponibili variano in base alla modalità selezionata. x In modalità PC, è possibile regolare solo i formati 16:9 e 4:3. x Le impostazioni possono essere modificate e memorizzate per ogni dispositivo esterno collegato al televisore. x Usando la funzione Adatta a schermo con un ingresso HDMI 720p, 1 riga verrà tagliata in alto, in basso, a sinistra e a destra come nella funzione di overscan. Mod schermo (16:9 / Wide Zoom / Zoom / 4:3): Disponibile solo quando la dimensione delle immagini è impostata su Auto Wide. E’ possibile impostare la dimensione delle immagini desiderata al formato 4:3 WSS (Wide Screen Service) o alla dimensione originale. Ogni paese europeo ha le proprie dimensioni delle immagini. Non disponibile in modalità PC, Comp. o HDMI. ■ Riduz distorsioni: Regola il livello di sfarfallio dalle sorgenti video. Riduz vibrazioni: Regola il livello di vibrazioni dalle sorgenti video durante la riproduzione di un video. Reset: Ripristina le impostazioni personalizzate. Ora protezione auto (2 ore / 4 ore / 8 ore / 10 ore / Off) Se una immagine fissa permane sullo schermo per un determinato periodo di tempo, entra automaticamente in funzione la modalità Protezione automatica da bruciatura. Italiano 15 03 Funzioni base x Opzioni immagine Funzioni base Reset immagine (OK / Annulla) ■ Ripristina la modalità corrente delle immagini ai valori predefiniti. ■ Voce cristallina: Enfatizza le voci rispetto ad altri suoni. ■ Amplificazione: Aumenta l’intensità delle alte frequenze per offrire alle persone con deficit uditivo un ascolto migliore. ¦ Configurazione del televisore con il PC Impostare la sorgente di ingresso su PC. Regolazione auto t Per regolare i valori frequenza/posizioni e le impostazioni di sintonizzazione automaticamente. ✎ Non disponibile quando il televisore è collegato ¦ Regolare le impostazioni audio Equalizzatore Regola la modalità audio. ■ Bilanciamento L/R: Controlla il bilanciamento degli altoparlanti sinistro e destro. ■ 100Hz / 300Hz / 1kHz / 3kHz / 10kHz (Regolazione larghezza di banda): Regola il livello delle frequenze di larghezza di banda. ■ Reset: Ripristina l’equalizzatore alle impostazioni predefinite. mediante cavo HDMI/DVI. Schermo ■ Grossa / Fine: Rimuove o riduce eventuali disturbi dalle immagini. Se non si riesce a eliminare il disturbo mediante la sintonizzazione fine, regolare la frequenza nel modo migliore possibile (Grossa) ed eseguire nuovamente la sintonizzazione fine. Una volta ridotto il disturbo, regolare l’immagine in modo che sia perfettamente centrata sullo schermo. ■ Posizione: Regolare lo schermo del PC usano i tasti freccia (▲ / ▼ / ◄ / ►). ■ Reset immagine: Ripristina l’immagine ai valori predefiniti. Uso del televisore come uno schermo PC Impostazione del software del PC (basato su Windows XP) In base alla versione di Windows e alla scheda video in uso, le schermate effettive del PC possono essere diverse; nel caso, verranno quasi sempre applicate le stesse informazioni di impostazione base. (In caso contrario, contattare la casa costruttrice del computer oppure un rivenditore Samsung). 1. Fare clic sul “Pannello di controllo” nel menu Start di Windows. 2. Fare clic su “Aspetto e temi” nel “Pannello di controllo” per visualizzare una finestra di dialogo. 3. Fare clic su “Schermo” per visualizzare una finestra di dialogo. 4. Fare clic sulla scheda ‘Impostazioni’ nella finestra di dialogo. y Impostazione della dimensione corretta (risoluzione) [Ottimale: 1920 x 1080 pixel] y Se la finestra di dialogo delle impostazioni contiene un’opzione relativa alla frequenza verticale, il valore corretto è “60” o “60 Hz”. In caso contrario, fare clic su ‘OK’ e uscire dalla finestra di dialogo. Menu Suono ¦ Cambiare la Modalità audio preimpostata SRS TheaterSound t ■ Standard: Seleziona la modalità audio normale. ■ Musica: Enfatizza la musica rispetto alle voci. 16 Italiano Film: Offre la migliore qualità audio per la visione di film. ¦ Sistemi audio, ecc. SRS TruSurround HD (Off / On) t (solo modalità audio standard) Questa funzione produce un audio virtuale a 5.1 canali surround attraverso una coppia di altoparlanti o di cuffie mediante l’uso della tecnologia HRTF (Head Related Transfer Function). SRS TruDialog (Off / On) (solo modalità audio standard) Questa funzione permette di incrementare l’intensità della voce rispetto alla musica di fondo o agli effetti sonori in modo che sia possibile udire meglio i dialoghi durante la visione di un programma. Lingua audio (solo canali digitali) Cambia la lingua predefinita per le lingue audio. ✎ Le lingue disponibili possono variare in base alla trasmissione. Formato audio (MPEG / Dolby Digital 5.1) (solo canali digitali) Quando l’audio è generato sia dall’altoparlante principale sia dal ricevitore audio, potrebbe prodursi un effetto di eco a causa della diversa velocità di decodifica dei due dispositivi. In questo caso, attivare la funzione Altoparlante TV. ✎ L’opzione Formato audio può essere diversa in base alla trasmissione. L’audio Dolby digitale 5.1ch è disponibile solo quando viene collegato un altoparlante esterno mediante un cavo ottico. ■ (non disponibile in tutti i paesi) (solo canali digitali) Questa funzione gestisce il flusso audio per l’opzione AD (Audio Description), quando è trasmesso insieme all’Audio principale dall’emittente. ■ Descrizione audio (Off / On): Attiva e disattiva la funzione Descrizione audio. ■ Volume: Regola il volume della descrizione audio. Formato audio: Durante la ricezione di una trasmissione TV digitale, è possibile selezionare il formato uscita audio digitale (SPDIF) tra le opzioni PCM o Dolby Digital. ✎ ■ Notte: Questa modalità fornisce una migliore esperienza audio rispetto alla modalità Normale, escludendo quasi ogni rumore. Questa modalità è utile durante la notte. Selezione altoparlante (Altoparlante est / Altoparlante TV) A causa delle differenze di velocità nella decodifica tra l’altoparlante principale e il ricevitore audio, è possibile avvertire una eco del suono. In questo caso, attivare la funzione Altoparlante est del televisore. ✎ Quando Seleziona altoparlante è impostato su Altoparlante est., i tasti volume e MUTE non sono attivi e le impostazioni audio sono limitate. ✎ Quando Seleziona altoparlante è impostata su Altoparlante est, è necessario usare queste funzioni. x Altoparlante TV: Off, Altoparlante est: On ✎ Quando Seleziona altoparlante è impostata su Altoparlante TV, è necessario usare queste impostazioni. x Altoparlante TV: On , Altoparlante est: On Collegando altoparlanti a 5.1ch in una impostazione Dolby Digital, massimizza l’esperienza audio in 3D. Ritardo audio: Usata per correggere la mancata corrispondenza audio-video durante la visione del televisore o di un video e ascoltando una uscita da un canale digitale mediante un dispositivo esterno come per esempio un ricevitore AV. Volume auto (Off / Normale / Notte) Per equalizzare il volume di ogni canale, impostare su Normale. Uscita SPDIF: SPDIF (Sony Philips Digital InterFace) è usata per fornire un audio digitale riducendo le interferenze agli altoparlanti e ai vari dispositivi digitali come per esempio un lettore DVD. ■ Comp Dolby Digital (Linea / RF): Questa funzione minimizza la disparità dei segnali tra un segnale dolby digital e un segnale vocale (per es. audio MPEG, HEAAC, audio ATV). ✎ Selezionare Linea per ottenere un audio dinamico, e RF per ridurre la differenza tra i suoni alti e bassi durante la notte. Linea: Impostare il livello di uscita dei segnali maggiori o minori di -31dB (riferimento) su -20dB o -31dB. RF: Impostare il livello di uscita dei segnali maggiori o minori di -20dB (riferimento) su -10dB o -20dB. Reset impostazioni audio (OK / Cancel) Ripristina tutte le impostazione dell’immagine ai valori predefiniti. ¦ Selezione della modalità audio Quando si imposta la modalità Dual I-II, la modalità audio corrente viene visualizzata sullo schermo. ✎ In mancanza di segnale video, entrambi gli altoparlanti saranno disattivi. Imp. supplementare (solo canali digitali) ■ Livello audio DTV(MPEG / HE-AAC): Questa funzione permette di ridurre la disparità di un segnale vocale (uno dei segnali ricevuti durante una trasmissione TV digitale) a un determinato livello. ✎ ✎ In base al tipo di segnale della trasmissione, MPEG / HE-AAC può essere regolato tra -10dB e 0dB. Per aumentare o diminuire il volume, regolare rispettivamente tra 0 e -10. A2 Stereo NICAM Stereo Tipo di audio Mono Stereo Dual Mono Stereo Dual Dual I-II Predefinito Mono Stereo ↔ Mono Dual-I ↔ Dual-II Mono Mono ↔ Stereo Mono → Dual-I Dual II Cambio automatico Dual-I Cambio automatico Dual-I ✎ Se il segnale stereo è debole e si verifica un cambio automatico, passare alla modalità Mono. ✎ Attivata solo in caso di segnali audio stereo. ✎ Disponibile solo quando la sorgente Ingressi è impostata su TV. Italiano 17 03 Funzioni base Descrizione audio Funzioni base Orario TV on / Orario TV off: Per impostare l’ora e i minuti e attivare / disattivare. (Per attivare il timer con l’impostazione desiderata, impostare su Attiva.) Volume: Impostare il livello del volume desiderato. Sorgente: Selezionare il contenuto TV o USB da riprodurre quando il televisore viene acceso automaticamente. (La modalità USB può essere selezionata solo quando un dispositivo USB è collegato al televisore) Antenna (quando la Sorgente) è impostata su TV): Selezionare ATV o DTV. Canale (quando la Sorgente) è impostata su TV): Selezionare il canale desiderato. Contenuti (quando la Sorgente è impostata su USB): Selezionare una cartella nel dispositivo USB contenente i file musicali o le immagini da riprodurre quando il televisore si accende automaticamente. Menu Impostazione ¦ Impostazione dell’orario Ora ■ Orologio: L’impostazione dell’ora serve per utilizzare le funzioni timer del televisore. O ✎ L’ora corrente appare ogni volta che si preme il tasto INFO. Se il cavo di alimentazione viene scollegato, è necessario impostare nuovamente l’orologio. Modalità orologio (Automatico / Manuale) ✎ ✎ In base all’emittente e al segnale trasmesso, l’impostazione automatica dell’orario potrebbe non essere corretta. In questo caso, impostare l’orario manualmente. ✎ Per l’impostazione automatica dell’orario è necessario collegare l’antenna o il cavo. ✎ Imposta Ora: Impostare Giorno, Mese, Anno, Ora e Minuti manualmente. ✎ Disponibile solo quando Modalità orologio è impostata su Manuale ✎ ✎ Fuso orario: E’ possibile selezionare il fuso orario della zona di residenza. ✎ Questa funzione è disponibile solo quando Modalità orologio è impostata su Automatico. ✎ In base all’emittente e al segnale, l’impostazione automatica dell’orario potrebbe non essere corretta. In questo caso, impostare l’orario manualmente. ¦ Impostazione Timer stand-by ■ ✎ Per annullare il Timer stand-by, selezionare Off. Timer 1 / Timer 2 / Timer 3: Possono essere impostate tre diverse opzioni del Timer. Prima è necessario impostare l’orologio Timer 1 televisore si accende mediante il Timer): Il televisore viene automaticamente spento dopo 3 ore di inattività al fine di prevenirne il surriscaldamento. ¦ Blocco dei programmi Sicu rezza ✎ Prima della schermata di impostazione compare la schermata di inserimento del PIN. ✎ Digitare il PIN a 4 cifre; il PIN predefinito è “0-0-0-0”. ■ Orario TV on ▲ Disattiva ▼ 00 00 00 00 ▲ ▼ Volume Sorgente 10 Antenna TV ■ Canale ATV 0 ripetizione Dom lun Mar Mer Gio Ven Sab 1 volta L Sposta U regola 18 Italiano Cambiare il PIN usando l’opzione Cambia PIN. Blocco canali (Off / On): Bloccare i canali in Gestione canali per impedire a utenti non autorizzati, per esempio i bambini, di visualizzare programmi non adatti. ✎ Orario TV off Disattiva Il simbolo c indica che è stato selezionato il giorno. ✎ Spegnimento automatico (disponibile solo quando il Impostazione del Timer di accensione / spegnimento ■ Ripetizione: Selezionare 1 volta, Ogni gg, Lun~Ven, Lun~Sab, Sab~Dom o Manuale. Selezionando Manuale, è possibile impostare il giorno che si desidera attivare il timer. Timer stand-by t : Spegne automaticamente il televisore dopo il periodo di tempo preimpostato. (30, 60, 90, 120, 150 e 180 minuti). ✎ Se sul dispositivo USB non sono presenti file musicali, oppure la cartella contenente file musicali non è selezionata, l’opzione Timer non funziona correttamente. Nel caso ci sia una sola foto memorizzata sul dispositivo USB, la funzione Slide Show non è disponibile. Se il nome della cartella è troppo lungo, la cartella non è selezionabile. A ogni dispositivo USB utilizzato viene assegnata una cartella. In caso di più dispositivi USB, verificare che le cartelle assegnate a ogni USB abbiano nomi diversi. E Conferma R ritorna Disponibile solo quando la sorgente di Ingressi è impostata su TV. Blocco Canale (Livello blocco): Impedisce a utenti non autorizzati, per esempio i bambini, di visualizzare programmi non adatti mediante l’inserimento di un codice PIN a 4 cifre. Cons tutto: Sblocca tutti i livelli di blocco del televisore. ✎ La voce Blocco Canale può essere diversa in base al paese. Cambia PIN: Cambiare l’ID personale per impostare il televisore. Generale ✎ ■ Qualora si sia dimenticato il codice PIN, premere i tasti del telecomando nella sequenza seguente per ripristinare il codice PIN predefinito “0-0-0-0” : POWER (off) → MUTE → 8 → 2 → 4 → POWER (on). Modalità gioco (Off / On): Durante la connessione a una console per videogiochi come PlayStation™ o Xbox™, il gioco sarà più realistico selezionando la modalità gioco. ✎ NOTA x ¦ Altre funzioni Lingua ■ Lingua menu: Imposta la lingua dei menu. ■ Lingua Teletext: Imposta la lingua desiderata per il servizio Teletext. ✎ ■ x x La lingua predefinita è l’inglese, nel caso in cui la trasmissione non supporti la lingua selezionata. Preferenze (Lingua principale audio / Lingua secondaria audio / Lingua principale sottotitoli / Lingua secondaria sottotitoli / Lingua principale Teletext / Lingua secondaria Teletext): Selezionare una lingua, che sarà la lingua predefinita alla selezione di un canale. x ■ Sottotitoli in modalità Comp. o HDMI. ■ Sottotitoli (Off / On): Attiva e disattiva i sottotitoli. ■ Modalità (Normale / Non udenti): Imposta la modalità dei sottotitoli. ■ Lingua sottotitoli: Imposta la lingua dei sottotitoli. ✎ ✎ Se il programma che si sta guardando non supporta la funzione Non udenti, si attiva automaticamente l’opzione Normale anche se è selezionata la modalità Non udenti. La lingua predefinita è l’inglese, nel caso in cui la trasmissione non supporti la lingua selezionata. Testo digitale (Disattiva / Attiva) (solo UK) Se il programma è trasmesso con testo digitale, questa funzione è attivata. Rete (Tipo di rete) / Impostazione rete / Test di rete / Samsung Wireless Link / SWL connect) Per la descrizione dettagliata delle procedure per l’impostazione delle opzioni, vedere le istruzioni ‘Connessione di rete’ (P. 23). Modalità gioco non è disponibile in modalità TV e PC. Dopo aver collegato la console per giochi, impostare Modalità gioco su On per prevenire una cattiva qualità delle immagini. Se la Modalità gioco è impostata su On: La modalità Immagine è impostata su Standard e la modalità Suono è impostata su Personalizzata. BD Wise (Off / On): Fornisce la qualità ottimale delle immagini per i prodotti SAMSUNG DVD, Blu-ray e Home Theatre che supportano il formato BD Wise. Quando BD Wise è impostato su On, la modalità immagine viene automaticamente cambiata alla risoluzione ottimale. ✎ Utilizzare questo menu per impostare la modalità Sottotitoli. ✎ La funzione sottotitoli non è disponibile Precauzioni e limitazioni per la modalità gioco – Per scollegare una console per videogiochi e collegare un altro dispositivo esterno, impostare Modalità gioco su Off nel menu di impostazione. – Visualizzando il menu TV in Modalità gioco si potrebbe verificare un leggero sfarfallio. Disponibile in caso di connessione di prodotti Samsung che supportano BD Wise mediante cavo HDMI. ■ Trasparenza menu (Luminoso / Scuro) Imposta la trasparenza del menu. ■ Melodia (Off / Basso / Medio / Alto): Per riprodurre una melodia all’accensione o allo spegnimento del televisore. Common Interface ■ Menu CI: Permette all’utente di accedere al menu del modulo CAM. Selezionare il Menu CI in base alla scheda PC. ■ Info sull’applicazione: Visualizza le informazioni relative al modulo CAM inserito nell’alloggiamento CI e nella “SCHEDA CI o CI+”inserita nel modulo CAM. È possibile installare il modulo CAM in qualsiasi momento, a televisore acceso o spento. 1. Acquistare il modulo CI CAM presso il rivenditore locale o via telefono. 2. Inserire saldamente la “SCHEDA CI o CI+”nel modulo CAM nella direzione indicata dalla freccia. 3. Inserire il modulo CAM con la “SCHEDA CI o CI+” nell’alloggiamento common interface, nella direzione indicata dalla freccia, in modo che sia parallela 4. Verificare la visione dell’immagine su un canale a segnale criptato. Telecomando wireless (On / Off) Per accendere o spegnere il telecomando wireless o consentirne l’accesso. Italiano 19 03 Funzioni base ■ Funzioni base ¦ PIP (Picture In Picture) PIP t Permette la visualizzazione contemporanea di un canale TV e di una sorgente video esterna. PIP (Picture-in-Picture) non funziona nella stessa modalità. ■ Informazioni sul segnale: (solo canale digitali) La qualità di ricezione dei canali HDTV è perfetta o i canali non sono disponibili. Regolare l’antenna per aumentare la forza del segnale. ■ Ricerca e risoluzione guasti: Se il televisore presenta problemi, consultare questa sezione. ✎ ✎ NOTA x x x x Spegnendo il televisore durante la visione in modalità PIP, la finestra PIP scomparirà. L’immagine nella finestra PIP potrebbe apparire leggermente innaturale quando si usa la schermata principale per visualizzare un videogame o il karaoke. Durante l’attivazione di Internet@TV la funzione PIP non è disponibile. Impostazioni PIP Immagine principale Component, HDMI1/DVI, HDMI2, HDMI3, HDMI4, PC Immagine secondaria Aggiornamento software può essere eseguito mediante un segnale di trasmissione o mediante il download del più recente firmware dal sito samsung.com su un dispositivo USB. Versione corrente è il software già installato nel televisore. ✎ La versione del software è rappresentata come “Anno/Mese/Giorno_Versione”. Aggiornamento software ■ PIP (Off / On): Attiva o disattiva la funzione PIP. Canale: Selezionare il canale per lo schermo secondario. ■ Dimensioni (Õ / Ã): Per selezionare la dimensione della immagine secondaria. ■ Posizione (à / – / — / œ): Per selezionare la posizione della immagine secondaria. ■ Selezione audio (Principale / Secondario): E’ possibile scegliere l’audio desiderato (Principale / Secondario) in modalità PIP. Menu Supporto Auto diagnosi ■ Test immagine (Sì / No): Usare questa funzione per verificare eventuali problemi di immagine; nel caso il problema persista, verificare la trama colori. ■ Test audio (Sì / No): Usare la melodia predefinita per verificare eventuali problemi audio. ✎ Se non c’è ritorno audio dagli altoparlanti del televisore, prima di eseguire il test audio verificare che Seleziona altoparlante sia impostato su Altoparlante TV nel menu Suono. ✎ E’ possibile ascoltare la melodia durante il test anche se Seleziona altoparlante è impostato su Altoparlante est oppure quando l’audio è stato disattivato premendo il tasto MUTE. Italiano Aggiornamento software TV ■ 20 Se tra le varie descrizioni non è riportato il problema riscontrato, contattare il Centro di assistenza clienti Samsung. Versione corrente 2010/01/18_000001 Tramite USB ► Online Tramite canale Aggiornamento mod Standby : 2 ore dopo Software alternativo ----/--/--/--_-----U Sposta E Conferma R ritorna Installare la versione più recente ■ Pannello laterale del Tramite USB: Inserire televisore un’unità USB contenente il file di aggiornamento del firmware scaricato dal sito www.samsung.com nel televisore. Fare attenzione a o non scollegare l’alimentazione o rimuovere l’unità USB mentre l’aggiornamento è in corso. Al termine Unità USB dell’aggiornamento del firmware, il televisore si spegnerà e riaccenderà automaticamente. Al termine dell’aggiornamento del software, le impostazioni video e audio modificate torneranno alle impostazioni predefinite. Si consiglia di scrivere le impostazioni in modo da poterle facilmente ripristinare dopo l’aggiornamento. ■ ■ By Online: Aggiornare il software mediante Internet. ✎ Per prima cosa, configurare la propria rete. Per istruzioni dettagliate sull’uso dell’opzione Impostazione rete, vedere la sezione “Impostazione della rete”. ✎ Se la connessione a Internet non funziona correttamente, potrebbe interrompersi. Riprovare. Se il problema persiste, scaricare il file di aggiornamento sul dispositivo USB e riprovare. Tramite canale: Aggiorna il software mediante il segnale trasmesso. ✎ Se la funzione viene selezionata durante il periodo di trasmissione del software, il software verrà automaticamente ricercato e scaricato. ✎ Il tempo necessario per scaricare il software è determinato dallo stato del segnale. ■ Software alternativo (backup): Visualizza la versione software scaricata tramite l’opzione Online. Durante l’aggiornamento software, se la procedura viene interrotta, questa funzione verrà attivata. Guida alla connessione HD Consultare queste informazioni durante la connessione di dispositivi esterni al televisore. Contattare Samsung Fare riferimento a queste informazioni in caso di funzionamento anomalo del televisore o se si desidera aggiornare il software. E’ possibile reperire le informazioni riguardanti i nostri call centre, e come scaricare prodotti e software. Aggiornamento mod Standby: All’orario prestabilito verrà eseguito automaticamente un aggiornamento manuale. Poiché l’alimentazione dell’unità si attiva internamente, lo schermo LCD potrebbe attivarsi per breve tempo. Questo fenomeno può continuare per più di un’ora, fino al termine dell’aggiornamento software. Italiano 21 03 Funzioni base ■ Funzioni avanzate Collegamento a un PC Uso di un Cavo HDMI/DVI / D-sub DVI OUT AUDIO OUT AUDIO OUT PC OUT Modalità di visualizzazione (ingresso D-Sub e HDMI/DVI) La risoluzione ottimale è 1920 X 1080 @ 60 Hz. Modalità IBM MAC VESA CVT VESA DMT VESA GTF VESA DMT / DTV CEA Risoluzione 640 x 350 720 x 400 640 x 480 832 x 624 1152 x 870 720 x 576 1152 x 864 1280 x 720 1280 x 960 640 x 480 640 x 480 640 x 480 800 x 600 800 x 600 800 x 600 1024 x 768 1024 x 768 1024 x 768 1152 x 864 1280 x 1024 1280 x 1024 1280 x 800 1280 x 800 1280 x 960 1280 x 720 1360 x 768 1440 x 900 1440 x 900 1600 x 1200 1680 x 1050 1280 x 720 1280 x 1024 1920 x 1080p Frequenza orizzontale (kHz) 31.469 31.469 35.000 49.726 68.681 35.910 53.783 56.456 75.231 31.469 37.861 37.500 37.879 48.077 46.875 48.363 56.476 60.023 67.500 63.981 79.976 49.702 62.795 60.000 45.000 47.712 55.935 70.635 75.000 65.290 52.500 74.620 67.500 Frequenza verticale (Hz) 70.086 70.087 66.667 74.551 75.062 59.950 59.959 74.777 74.857 59.940 72.809 75.000 60.317 72.188 75.000 60.004 70.069 75.029 75.000 60.020 75.025 59.810 74.934 60.000 60.000 60.015 59.887 74.984 60.000 59.954 70.000 70.000 60.000 Frequenza di clock dei pixel Polarità sync (O/V) (MHz) 25.175 +/28.322 -/+ 30.240 -/57.284 -/100.000 -/32.750 -/+ 81.750 -/+ 95.750 -/+ 130.000 -/+ 25.175 -/31.500 -/31.500 -/40.000 +/+ 50.000 +/+ 49.500 +/+ 65.000 -/75.000 -/78.750 +/+ 108.000 +/+ 108.000 +/+ 135.000 +/+ 83.500 -/+ 106.500 -/+ 108.000 +/+ 74.250 +/+ 85.500 +/+ 106.500 -/+ 136.750 -/+ 162.000 +/+ 146.250 -/+ 89.040 -/+ 128.943 -/148.500 +/+ ✎ NOTE x x x x 22 Quando si effettua una connessione mediante cavo HDMI / DVI, è necessario utilizzare la porta HDMI IN 1(DVI). La modalità interlacciata non è supportata. Questo dispositivo potrebbe non funzionare correttamente se si seleziona un formato video non standard. Le modalità Separata e Composito sono supportate. La modalità SOG (Sync On Green) non è supportata. Italiano E’ possibile impostare il televisore in modo da poter accedere a Internet attraverso una LAN con un collegamento via cavo o wireless. ¦ Collegamento a una rete cablata Vi sono tre modi per collegare il televisore alla LAN via cavo: y E’ possibile collegare il televisore alla LAN connettendo la porta LAN sul retro del televisore a un modem esterno mediante un cavo Cat 5. Vedere lo schema riportato sotto. Porta modem a parete Pannello posteriore del televisore Modem esterno (ADSL / VDSL / TV via cavo) Cavo modem Cavo LAN y E’ possibile collegare il televisore alla LAN connettendo la porta LAN sul retro del televisore al Router IP collegato a un modem esterno. Usare un cavo Cat 5 per la connessione. Vedere lo schema riportato sotto. Porta modem a parete Modem esterno (ADSL / VDSL / TV via cavo Cavo modem Cavo LAN Pannello posteriore del televisore Router IP (con server DHCP) Cavo LAN y In base alla configurazione della LAN, potrebbe essere possibile collegare il televisore alla LAN connettendo la porta LAN sul retro del televisore direttamente alla presa di rete a muro mediante un cavo Cat 5. Vedere lo schema riportato sotto. Notare che la presa a muro è collegata a un modem o un router che potrebbe essere installato in qualsiasi punto dell’abitazione. Pannello posteriore del televisore Porta modem a parete Cavo LAN Se si dispone di una rete dinamica, è necessario utilizzare un modem ADSL o un router in grado di supportare il protocollo DHCP (Dynamic Host Configuration Protocol). Modem e router che supportano il protocollo DHCP forniscono automaticamente indirizzo IP, maschera di sottorete, gateway e DNS necessari al televisore per accedere a Internet, in modo da non costringere l’utente a immetterli manualmente. La maggior parte delle reti domestiche sono di tipo dinamico. Alcune reti richiedono un indirizzo IP statico. Se la rete richiede un indirizzo IP statico, immettere manualmente indirizzo IP, maschera di sottorete, gateway e DNS nella schermata Cable Setup (Impostazioni cavo) del televisore durante l’impostazione della connessione di rete. Per ottenere indirizzo IP, maschera di sottorete, gateway e DNS contattare il proprio Internet Service Provider (ISP). Se si usa un computer basato su Windows, è possibile ottenere tali valori anche via computer. ✎ E’ possibile utilizzare modem ADSL in grado di supportare il protocollo DHCP se la rete richiede un indirizzo IP statico. I modem ADSL che supportano il protocollo DHCP permettono inoltre di usare indirizzi IP statici. Italiano 23 04 Funzioni avanzate Connessione di rete Funzioni avanzate Impostazione rete (Auto) Impostazione rete Manuale Durante la connessione del televisore a una rete che supporta il protocollo DHCP, configurare Impostazione rete su Auto. Per impostare automaticamente la connessione di rete via cavo del televisore, seguire questi passaggi: Configurare Impostazione rete su Manuale quando si collega il televisore a una rete che richiede un indirizzo IP statico. Procedura per l’impostazione automatica Per ottenere le impostazioni per la connessione di rete sulla maggior parte dei computer basati su Windows, seguire questi passaggi: 1. Cliccare con il tasto destro del mouse sull’icona Rete in basso a destra dello schermo. 1. Collegare il televisore alla LAN come descritto nella sezione precedente. 2. Accendere il televisore, premere il tasto MENU sul telecomando, usare il tasto ▲ o ▼ per selezionare Impostazione, quindi premere ENTERE. 3. Usare il tasto ▲ o ▼ per selezionare Rete nel menu Impostazione, quindi premere ENTERE. Verrà visualizzata la schermata Rete. Rete Tipo di rete : Wired ► Test di rete : Off 4. Nella schermata Rete, selezionare Tipo di rete. 5. Impostare Tipo di rete su Cavo. 6. Selezionare Impostazione rete. Verrà visualizzata la schermata Impostazione rete. Impostazione Rete Impostazione IP : Auto Indirizzo IP : Maschera sottorete : Gateway : DNS : Auto Server DNS : ► U Sposta E Conferma R ritorna 7. Impostare Impostazione IP su Auto. 8. Auto acquisisce e immette automaticamente le impostazioni Internet necessarie. 9. Attendere due minuti, quindi premere il tasto RETURN sul telecomando. 10. Se la funzione Rete non ha acquisito le impostazioni di rete, passare alle istruzioni per la procedura Manuale. Italiano 3. Nella finestra di dialogo, cliccare sulla scheda Supporto. 4. Nella scheda Supporto, cliccare su Dettagli. Sullo schermo vengono visualizzate le impostazioni per la connessione di rete. Procedura per l’impostazione manuale 2. Impostare Impostazione IP su Manuale. U Sposta E Conferma R ritorna 24 2. Nel menu a comparsa visualizzato, cliccare su Stato. Per impostare manualmente la connessione di rete via cavo del televisore, seguire questi passaggi: 1. Seguire i passaggi da 1 a 6 della “Procedura per l’impostazione automatica”. Impostazione rete SWl(Samsung Wireless link) Connessione SWl Ottenere le impostazioni per la connessione di rete 3. Premere il tasto ▼ del telecomando per passare al primo campo da compilare. 4. Immettere le impostazioni Indirizzo IP, Maschera sottorete, Gateway e Server DNS. Per digitare i numeri utilizzare i tasti numerici del telecomando, per spostarsi fra i campi utilizzare i tasti freccia. 5. Al termine, premere il tasto RETURN sul telecomando. 6. Selezionare Test di rete per verificare la connettività a Internet. Per collegare il televisore a una rete wireless, è necessario disporre di un router o di un modem wireless e di un adattatore LAN wireless Samsung (WIS09ABGN) da collegare al jack USB sul pannello posteriore o laterale del televisore. Vedere la figura riportata sotto. ✎ Per utilizzare la funzione SWL (Samsung Wireless Link), collegarsi alla porta USB 1 (HDD). Porta LAN a parete Pannello laterale del televisore Router IP wireless (AP con server DHCP) Adattatore LAN wireless Samsung o Cavo LAN L’adattatore LAN wireless Samsung è in vendita presso rivenditori autorizzati, siti di Ecommerce e sul sito Samsungparts. com. L’adattatore LAN wireless Samsung supporta i protocolli di comunicazione IEEE 802.11A/B/G e N. Samsung consiglia di utilizzare il protocollo IEEE 802.11N. La riproduzione di un video mediante connessione IEEE 802.11B/G potrebbe non essere fluida. ✎ NOTA x x x x x x x x x x x Per utilizzare una rete wireless è necessario utilizzare l’adattatore LAN wireless Samsung (WIS09ABGN). L’adattatore LAN wireless Samsung è venduto separatamente. L’adattatore LAN wireless WIS09ABGN è in vendita presso rivenditori autorizzati, siti di Ecommerce e sul sito Samsungparts.com. Per utilizzare una rete wireless, il televisore deve essere collegato a un router IP wireless. Se il router IP wireless supporta il protocollo DHCP, il televisore può utilizzare sia un indirizzo DHCP sia un indirizzo IP statico per collegarsi alla rete in modalità wireless. Selezionare un canale per il router IP wireless che non sia attualmente utilizzato. Se il canale impostato per il router IP wireless è attualmente utilizzato da un altro dispositivo vicino, ciò comporterà interferenze e le comunicazioni potrebbero interrompersi. Sistemi di sicurezza diversi da quelli sotto elencati non sono compatibili con il televisore. Selezionando la modalità Pure High-throughput (Greenfield) 802.11n con crittografia di tipo WEP, TKIP o TKIPAES (WPS2Mixed) per il proprio AP, i televisori Samsung non supporteranno una connessione conforme alle nuove specifiche di certificazione Wi-Fi. Se il proprio AP supporta WPS (Wi-Fi Protected Setup), è possibile collegarsi alla rete mediante PBC (Push Button Configuration) o un PIN (Personal Identification Number). WPS configurerà automaticamente l’SSID e la chiave WPA in entrambe le modalità. Tenere l’adattatore LAN wireless Samsung distante dal televisore. Durante la visione del televisore con un adattatore collegato nelle vicinanze, su alcuni canali le immagini potrebbero risultare distorte. Se il router, il modem o un dispositivo non è certificato, potrebbe non connettersi al televisore mediante l’adattatore LAN wireless Samsung. Metodi di connessione: Vi sono sei modi per impostare la connessione alla rete wireless. – Configurazione automatica Samsung – PBC (WPS) – Auto Setup (Impostazione automatica) (mediante la funzione Auto Network Search (Ricerca rete automatica)) – Impostazione manuale – SWL (Samsung Wireless Link) – Ad-Hoc Tutti gli adattatori LAN wireless Samsung devono essere collegati direttamente alla porta USB del televisore. Gli HUB USB non sono supportati. Italiano 25 04 Funzioni avanzate ¦ Collegamento a una rete wireless Funzioni avanzate Impostazione rete (Configurazione automatica Samsung) Impostazione rete (PBC (WPS)) Questa funzione è disponibile negli AP (Access Point) che supportano la modalità Samsung Auto Configuration (Configurazione automatica Samsung). Se tali AP non sono disponibili, è possibile collegarsi mediante PBC (WPS) oppure manualmente. Se il router è dotato di un tasto PBC (WPS), seguire questi passaggi: 1. Collegare il televisore alla LAN come descritto nella sezione precedente. ✎ Questa funzione è disponibile quando SWL (Samsung Wireless Link) è impostato su Off. ✎ E’ possibile vedere l’elenco delle apparecchiature che supportano la funzione di Configurazione automatica Samsung sul sito www.samsung.com. Procedura per l’impostazione mediante la funzione Configurazione automatica Samsung 1. Posizionare AP e televisore vicini e accenderli entrambi. ✎ ✎ Poiché i tempi di avviamento delle applicazioni sono diversi tra loro, potrebbe risultare necessario attendere circa 2 minuti. Se il cavo LAN è collegato alla porta WAN dell’AP durante la configurazione automatica, sarà possibile completare il test di connessione Internet. Se la connessione non è disponibile, la funzione Configurazione automatica Samsung verificherà solo i dispositivi collegati all’AP (e non la connessione Internet). 2. Dopo 2 minuti, collegare l’adattatore LAN wireless Samsung al televisore. Una volta impostato l’adattatore LAN wireless Samsung, verrà visualizzata la finestra a comparsa. 3. Appena stabilita la connessione, posizionare l’AP di fianco all’adattatore LAN wireless Samsung a una distanza non superiore a 25 cm. 4. Attendere fino all’avvenuta connessione automatica. ✎ Se la connessione non riesce, impostare l’AP e riprovare. ✎ Se la funzione Configurazione automatica Samsung non è in grado di collegare il televisore all’AP, comparirà una schermata che avviserà della mancata connessione. Reimpostare l’AP e riprovare. Se la connessione ancora non riesce, scegliere un altro metodo di connessione, PBC (WPS), automatico o manuale. 5. Una volta stabilita la connessione, individuare il router nella posizione desiderata. ✎ Se le impostazioni dell’AP sono cambiate o è la prima volta che si utilizza l’AP dopo l’acquisto, sarà necessario impostarlo nuovamente iniziando dal passaggio 1. Procedura per l’impostazione mediante PBC (WPS) 2. Accendere il televisore, premere il tasto MENU sul telecomando, usare il tasto ▲ o ▼ per selezionare Impostazione, quindi premere ENTERE. 3. Usare il tasto ▲ o ▼ per selezionare Rete nel menu Impostazione, quindi premere ENTERE. 4. Nella schermata Rete, selezionare Tipo di rete. 5. Impostare Tipo di rete su Wireless. 6. Selezionare Impostazione rete. Verrà visualizzata la schermata Impostazione rete. Impostazione Rete Seleziona una rete Impostazione IP : Non selezionato ► : Automatico Indirizzo IP : Maschera sottorete : Gateway : DNS DNS Server : Automatico : U Sposta E Conferma R ritorna 7. Premere il tasto Rosso del telecomando. 8. Premere il tasto PBC (WPS) sul router entro due minuti. Il televisore acquisirà automaticamente tutte le impostazioni di rete di cui necessita e si collegherà alla rete. 9. Una volta impostata la connessione di rete, premere il tasto RETURN per uscire dalla schermata Impostazione rete. Impostazione rete (Auto) La maggior parte delle reti wireless dispongono di un ulteriore sistema di sicurezza che utilizza l’accesso alla rete tramite dispositivi per la trasmissione di un codice di sicurezza crittografato denominato Chiave di sicurezza o di accesso. La Chiave di sicurezza è basata su una passphrase, solitamente una parola o un codice alfanumerico di una determinata lunghezza richiesti al momento dell’impostazione della funzione di protezione della rete wireless. Utilizzando questo metodo per l’impostazione della connessione di rete, e avendo specificato una Chiave di sicurezza per accedervi, verrà chiesta una passphrase durante la procedura di impostazione. Procedura per l’impostazione automatica Per impostare automaticamente l’accesso a una connessione wireless, seguire questi passaggi: 1. Seguire i passaggi da 1 a 6 della “Procedura per l’impostazione mediante PBC (WPS)” descritta sopra. 26 2. Usare il tasto ▼ per selezionare Impostazione IP, quindi premere ENTERE. Premere il tasto ▲ o ▼ per selezionare Auto, quindi premere ENTERE Italiano 4. Nell’elenco delle reti disponibili, premere il tasto ▲ o ▼ per selezionare le rete desiderata, quindi premere ENTERE. ✎ Se l’AP è impostato su Nascosto, sarà necessario selezionare Aggiungi rete e digitare Nome rete (SSID) e Chiave sicur per stabilire la connessione. 5. Se compare la finestra PIN/Sicurezza, andare al passaggio 6. Se compare la schermata di connessione rete, andare al passaggio 10. 6. Premere il tasto ▲ o ▼ per selezionare Sicurezza o PIN. Per la maggior parte delle reti domestiche, selezionare Sicurezza (per Chiave sicur). Viene visualizzata la schermata Sicurezza. Impostazione rete (Ad-Hoc) E’ possibile collegarsi a un dispositivo mobile senza Access Point tramite la scheda “Samsung Wireless LAN Adapter” usando un network peer-to-peer. ✎ Questa funzione è disponibile quando SWL (Samsung Wireless Link) è impostato su Off. Come collegarsi a un nuovo network Ad-hoc 1. Seguire i passaggi da 1 a 6 della “Procedura per l’impostazione mediante PBC (WPS)” descritta sopra. (P. 26) 2. Scegliere Seleziona una rete Verrà visualizzato un elenco di dispositivi/reti. 3. All’interno dell’elenco dei dispositivi, premere il tasto Blu del telecomando. ✎ Impostazione Rete Security Key 0 entered A b C D e F G H I j K l M N O P Q r S T U V W X Y z 0~9 Number lower case B C Delete Space n Sposta E Conferma R ritorna 7. Nella schermata Sicurezza, digitare la passphrase di rete. ✎ Dovrebbe essere possibile reperire la passphrase in una delle schermate di impostazione usate per impostare il router o il modem. 8. Per digitare la passphrase, seguire queste regole generali: – Premere i tasti numerici del telecomando per digitare i numeri. – Usare i tasti freccia del telecomando per passare da un tasto all’altro nella schermata Chiave sicur. – Premere il tasto Rosso per cambiare da maiuscolo a minuscolo e viceversa o visualizzare simboli/ caratteri. – Per digitare una lettera o un simbolo, passare alla lettera o al simbolo, quindi premere ENTERE. – Per cancellare l’ultima lettera o numero digitato, premere il tasto Verde del telecomando. 9. Al termine, premere il tasto Blu sul telecomando. Verrà visualizzata la schermata Connessione rete. 10. Attendere che venga visualizzato il messaggio di conferma della connessione, quindi premere ENTERE. Verrà visualizzata nuovamente la schermata Impostazione rete. 11. Per verificare la connessione, premere RETURN per selezionare Test di rete, quindi premere ENTERE. Il messaggio Ad-hoc è una connes. Wi-Fi diretta con il telefono cellulare o il PC. Il sistema di rete esistente potrebbe avere funzioni limitate. Cambiare la connessione di rete? comparirà sullo schermo. 4. Digitare il Nome rete (SSID) generato e la Chiave sicur nel dispositivo che si desidera collegare. Come collegarsi a un dispositivo Ad-hoc esistente 1. Seguire i passaggi da 1 a 6 della “Procedura per l’impostazione mediante PBC (WPS)” descritta sopra. (P. 26) 2. Scegliere Seleziona una rete Sullo schermo comparirà l’elenco dei dispositivi disponibili. 3. Selezionare il dispositivo desiderato nell’Elenco dei dispositivi. 4. Se la chiave di sicurezza è stata applicata, digitarla nuovamente. ✎ Se la rete non funziona regolarmente, controllare nuovamente i parametri Nome rete (SSID) e Chiave sicur. Una Chiave sicur errata può causare un malfunzionamento. Impostazione rete (Manuale) Se gli altri metodi non funzionano, digitare le impostazioni di rete manualmente. Ottenere le impostazioni per la connessione di rete Per ottenere le impostazioni per la connessione di rete sulla maggior parte dei computer basati su Windows, seguire questi passaggi: 1. Cliccare con il tasto destro del mouse sull’icona Rete in basso a destra dello schermo. 2. Nel menu a comparsa, cliccare su Stato. 3. Nella finestra di dialogo, cliccare sulla scheda Supporto. 4. Nella scheda Supporto, cliccare su Dettagli. Vengono visualizzate le impostazioni di rete. Italiano 27 04 Funzioni avanzate 3. Premere il tasto ▲ per passare a Seleziona una rete, quindi premere ENTERE. La funzione Rete ricerca le reti wireless disponibili. Al termine, verrà visualizzato l’elenco delle reti wireless disponibili. Funzioni avanzate Procedura per l’impostazione manuale Come collegare Samsung Wireless Link Per immettere le impostazioni di rete nel televisore, seguire questi passaggi: 1. Seguire i passaggi da 1 a 6 della “Procedura per l’impostazione mediante PBC (WPS)” descritta sopra. (P. 26) Per le procedure necessarie a stabilire una connessione, vedere le seguenti indicazioni: 1. Seguire i passaggi da 1 a 5 della “Procedura per l’impostazione mediante PBC (WPS)” descritta sopra. (P. 26) 2. Usare il tasto ▼ per selezionare Impostazione IP, quindi premere ENTERE. Premere il tasto ▲ o ▼ per selezionare Manuale, quindi premere ENTERE. 2. Selezionare Samsung Wireless Link usando il tasto ▼ e premere ENTERE per attivarlo. 3. Premere il tasto ▼ per passare al primo campo da compilare (Indirizzo IP). 4. Usare i tasti numerici per digitare i numeri. 5. Una volta compilato ogni campo, usare il tasto ► per passare al campo successivo. E’ inoltre possibile usare gli altri tasti freccia per spostarsi verso l’alto, il basso e a sinistra. 6. Immettere le impostazioni Indirizzo IP, Maschera sottorete, Gateway. 7. Premere il tasto ▲ o ▼ per passare a DNS. 8. Premere il tasto ▼ per passare al primo campo DNS. Digitare i numeri come indicato sopra. 9. Al termine, premere il tasto ▲ per passare a Seleziona una rete. Selezionare la rete, quindi premere ENTERE. 10. Andare al passaggio 4 della “Procedura per l’impostazione automatica” (P. 26) e seguire le istruzioni a partire da quel punto. Impostazione rete (SWL (Samsung Wireless Link)) Questa funzione permette di collegare un dispositivo Samsung che supporta PBC (WPS) al televisore. E’ possibile collegare altri dispositivi al televisore anche se a quest’ultimo non è collegato un router. ✎ Per utilizzare Internet@TV, l’AP (Access Point) deve essere collegato alla rete wireless. ✎ Se un adattatore LAN wireless Samsung è collegato alla porta USB 2, la rete potrebbe non funzionare regolarmente. Consigliamo di collegarlo alla porta USB 1 (HDD). ✎ Solo i router che utilizzano la banda 2.4 Ghz sono supportati. I router che utilizzano la banda 5 Ghz non sono supportati. SWL connect Al televisore è possibile collegare un dispositivo che supporta PBC (WPS). ✎ Questa funzione è disponibile quando SWL (Samsung Wireless Link) è impostato su On. 28 Italiano 3. Selezionare SWL connect usando il tasto ▼ e premere ENTERE. 4. Se viene visualizzato il messaggio “Premere il tasto PCB sul dispositivo supportato per collegarsi entro 120 secondi” premere il tasto PBC sul dispositivo per collegarlo. ✎ Per maggiori informazioni, vedere il manuale di impostazione della rete wireless del dispositivo da collegare. 5. Se il dispositivo è collegato in modo corretto al televisore dopo l’avvio del conteggio visualizzato nella finestra, questa si chiuderà automaticamente. ✎ Se la connessione non riesce, riprovare dopo 2 minuti. Se il televisore non riesce a stabilire una connessione a Internet Il televisore potrebbe non essere in grado di collegarsi a Internet perché l’ISP ha registrato in modo permanente l’indirizzo MAC (un numero di identificazione univoco) del PC o del modem in uso; ciò consente l’autenticazione dell’utente a ogni accesso a Internet in modo da evitare l’accesso non autorizzato. Poiché il televisore ha un indirizzo MAC diverso, l’ISP non è in grado di autenticare il relativo indirizzo MAC, perciò il televisore non sarà in grado di connettersi. In questo caso, chiedere all’ISP le procedure per collegare dispositivi diversi dal PC (per esempio il televisore) a Internet. Se l’Internet Service Provider richiede un ID o una password per il collegamento a Internet, il televisore potrebbe non essere in grado di collegarsi. In questo caso, digitare l’ID o la password durante l’accesso a Internet. La connessione Internet potrebbe interrompersi a causa di un problema di firewall. In questo caso, contattare l’Internet Service provider. Se ancora non è possibile collegarsi a Internet anche dopo aver seguito le procedure descritte dall’Internet Service Provider, contattare Samsung Electronics al numero 1-800-SAMSUNG.. Godetevi le fotografie, la musica o i film salvati su un dispositivo USB Mass Storage Class (MSC) e/o sul PC. 04 Funzioni avanzate Media Play MediaPlay Videos Visual dispositivi E Conferma R ritorna Nome Dispisitivo SUM ¦ Collegamento di un dispositivo USB 1. Accensione del televisore. Pannello laterale del televisore 2. Collegare un dispositivo USB contenente foto, musica e/o filmati alla porta USB 1 (HDD) o USB 2 sul pannello laterale del televisore. 3. Quando un dispositivo USB viene collegato al televisore, sullo schermo compare una finestra. A questo punto è possibile selezionare Media Play. o Unità USB ¦ Connessione al PC tramite rete E’ possibile riprodurre video, file di immagini e file musicali memorizzati sul PC o sul televisore mediante una connessione di rete in modalità Media Play ✎ Se si utilizza Media Play per riprodurre un file salvato sul PC, è necessario scaricare “PC Share Manager” e il manuale utente dal sito “www.samsung.com.” Pannello laterale del televisore PC LAN o Modem esterno (ADSL / VDSL / TV via cavo) Samsung Wireless LAN Adapter Wireless IP LAN Cavo 1. Per ulteriori informazioni sulla configurazione della rete, vedere ’Connessione di rete’. – È opportuno che il televisore e il PC siano nella stessa subnet. Le prime 3 parti dell’indirizzo subnet e IP del televisore e del PC devono essere uguali e solo l’ultima parte (l’indirizzo host) deve variare (per es. Indirizzo IP: 123.456.789.**) 2. Mediante un cavo LAN, collegare il modem esterno e il PC su cui verrà installato il programma Samsung PC Share Manager. – E’ possibile collegare il televisore al PC direttamente senza dover passare tramite un router. Italiano 29 Funzioni avanzate ✎ Funzioni non supportate quando si effettua il collegamento a un PC tramite rete: x x x Funzioni Background Music (Musica di sottof) e Background Music Setting (Impostazione musica di sottofondo). Ordinamento dei file in base alle preferenze nelle cartelle Photo (Foto), Music (Musica) e Movie (Film). Premere i tasti � (REW) o µ (FF) durante la riproduzione di un film. ✎ Le didascalie incorporate, Divx DRM, Multi-audio, non sono supportate. ✎ Samsung PC Share Manager deve essere autorizzato dal programma firewall del PC. ✎ Quando si utilizza la modalità Media Play mediante una connessione di rete, in base alle funzioni del server: x x x x Il metodo di ordinamento può variare. La funzione di ricerca scene può non essere supportata. La funzione Ripr in continuo, che riprende la riproduzione di un video interrotto, può non essere supportata. – La funzione Ripr in continuo non supporta utenti multipli. (La funzione memorizza solo il punto in cui l’ultimo utente ha interrotto la riproduzione.) I tasti � (REW), µ (FF) o � (Pausa) potrebbero non funzionare a seconda delle informazioni relative al contenuto. ✎ Se attraverso una rete wireless la riproduzione del video dovesse risultare a scatti, si consiglia l’uso di una rete cablata. ✎ Utilizzando file multimediali senza licenza, il prodotto potrebbe non funzionare correttamente. ✎ Elenco delle cose da sapere prima di utilizzare Media Play x x x x x x x x x x x x x x x x x x x x x 30 MTP (Media Transfer Protocol) non è supportato. Il file system supporta FAT16, FAT32 e NTFS. Alcuni dispositivi audio e videocamere digitali USB possono non essere compatibili con questo televisore. Media Play supporta solo i dispositivi USB MSC (Mass Storage Class). MSC è un dispositivo di memorizzazione di massa Bulk-Only Transport. Esempi di MSC sono le unità Thumb, i lettori di schede Flash e le unità HDD USB (le unità HUB USB non sono supportate.) I dispositivi devono essere collegati direttamente alla porta USB del televisore. Prima di collegare il dispositivo al televisore, eseguire il backup dei file per prevenire una perdita accidentale o eventuali danni. SAMSUNG non è responsabile di eventuali danni ai file dati o perdite di dati. Collegare un’unità HDD USB alla porta dedicata, USB 1 (HDD). Non scollegare il dispositivo USB durante il caricamento. MSC supporta file MP3 e JPEG, mentre un dispositivo PTP supporta solo file JPEG. Maggiore è la risoluzione dell’immagine, maggiore è il tempo necessario per visualizzarla sullo schermo. La risoluzione massima supportata in JPEG è 15360X8640 pixel. In caso di file non supportati o danneggiati, comparirà il messaggio “Not Supported File Format” (Formato file non supportato). Se la chiave di ordinamento è impostata su Visual base, è possibile visualizzare in ogni cartella un massimo di 1000 file. I file MP3 con DRM precedentemente scaricati da un sito a pagamento non verrano riprodotti. Digital Rights Management (DRM) è una tecnologia che supporta la creazione, la distribuzione e la gestione di contenuti in modo completo e integrato, compresa la protezione dei diritti e degli interessi dei fornitori dei contenuti, la prevenzione dalla copia illegale, così come la gestione degli addebiti e dei pagamenti. Se sono collegati più di 2 dispositivi PTP, potranno essere utilizzati solo uno alla volta. Se sono collegati più di due dispositivi MSC, alcuni di essi potrebbero non essere riconosciuti. Se un dispositivo richiede molta potenza (più di 500mA o 5V), il dispositivo USB può non essere supportato. Nel caso in cui, quando si collega o si utilizza un dispositivo USB, venga visualizzato un messaggio che indica la presenza di sovratensione, il dispositivo potrebbe non essere riconosciuto o non funzionare correttamente. Se il televisore non ha ricevuto segnali nel tempo prefissato in Ora protezione auto, si attiverà lo screensaver. Le modalità di risparmio energetico di alcuni dischi rigidi possono azzerarsi automaticamente quando queste unità vengono collegate al televisore. Se si usa un cavo di prolunga USB, il dispositivo USB potrebbe non essere riconosciuto o i file sul dispositivo potrebbero non essere letti. Se il dispositivo USB collegato al televisore non viene riconosciuto, l’elenco dei file sul dispositivo è corrotto o uno dei file in elenco non viene riprodotto, collegare il dispositivo USB al PC, formattare il dispositivo e controllare il collegamento. Se un file cancellato dal PC compare nuovamente quando si esegue Media Play, utilizzare la funzione “Svuota cestino” sul PC per eliminare in modo permanente il file. Italiano 04 Funzioni avanzate ¦ Visualizzazione a schermo Posizionarsi sul file desiderato usando i tasti su/giù/sinistra/destra, quindi premere ENTERE o � (Riproduci). Il file selezionato verrà visualizzato. ✎ Supporta Mod. dispositivo e Mod. contenuti nella homepage Media Play. Informazioni: E’ possibile verificare il nome del file selezionato e il numero di file e di pagine. Videos 1/1 Page /Movie 01.avi Movie 01.avi Movie 02.avi Jan.10.2010 Jan.10.2010 Movie 03.avi Movie 04.avi Jan.10.2010 ✎ Lo standard di ordinamento cambia in base ai contenuti. Movie 06.avi Jan.10.2010 Sezione Elenco ordinamento: Visualizza lo standard di ordinamento. Jan.10.2010 Movie 07.avi Movie 08.avi Jan.10.2010 Jan.10.2010 Movie 09.avi Movie 10.avi Jan.10.2010 SUM A Sezione Elenco file: E’ possibile confermare i file e i gruppi ordinati in ogni categoria. Jan.10.2010 Movie 05.avi Dispositivo Jan.10.2010 Seleziona Ordinam T Strumenti Tasti operativi A Rosso (Camb dispos): Seleziona un dispositivo connesso. B Verde (Preferenze): Imposta le preferenze dei file. (non supportato in Visual base) C Giallo (Seleziona): Seleziona più file da un elenco. I file selezionati vengono evidenziati con un simbolo. D Blu (Ordinam.): Seleziona l’elenco ordinato. T Strumenti: Visualizza il menu delle opzioni. ✎ Usando i tasti � o µ, è possibile spostare l’elenco file alla pagina successiva o precedente. Video Riproduzione di video 1. Premere il tasto ◄ o ► per selezionare Video, quindi premere ENTERE nel menu Media Play. 2. Premere ◄/►/▲/▼ per selezionare il file desiderato tra quelli riportati in elenco. 3. Premere ENTERE o il tasto � (Riproduci). – Il file selezionato verrà visualizzato in alto con il relativo tempo di riproduzione. – Se le informazioni sulla durata del video non sono disponibili, il tempo di riproduzione e la barra di avanzamento non vengono visualizzati. – Durante la riproduzione di video è possibile eseguire ricerche utilizzando i tast ◄ e ►. ✎ In questa modalità , è possibile visualizzare clip video contenute in un gioco, tuttavia non è possibile riprodurre il gioco stesso. 00:04:03 / 00:07:38 1/1 Movie 01.avi y Formati sottotitoli supportati Nome Estensione file Testo MPEG-4 time-based .ttxt Formato XML SAMI .smi HTML SubRip .srt string-based SubViewer .sub string-based Micro DVD .sub o .txt string-based SUM E Pausa L Salta T Strumenti R ritorna Italiano 31 Funzioni avanzate y Formati video supportati Estensione file Contenitore *.avi *.mkv *.asf AVI MKV ASF *.wmv ASF *.mp4 MP4 *.3gp 3GPP *.vro VRO VOB *.mpg *.mpeg *.ts *.tp *.trp Codec Video Risoluzione Frame rate (fps) Bit rate (Mbsp) Divx 3.11 / 4.x / 5.1 / 6.0 1920 x 1080 6 ~ 30 8 XviD 1920 x 1080 6 ~ 30 8 H.264 BP / MP / HP 1920 x 1080 6 ~ 30 25 MPEG4 SP / ASP 1920 x 1080 6 ~ 30 8 Motion JPEG 800 x 600 6 ~ 30 8 Divx 3.11 / 4.x / 5.1 / 6.0 1920 x 1080 6 ~ 30 8 XviD 1920 x 1080 6 ~ 30 8 H.264 BP / MP / HP 1920 x 1080 6 ~ 30 25 MPEG4 SP / ASP 1920 x 1080 6 ~ 30 8 Motion JPEG 800 x 600 6 ~ 30 8 Window Media Video v9 1920 x 1080 6 ~ 30 25 H.264 BP / MP / HP 1920 x 1080 6 ~ 30 25 MPEG4 SP / ASP 1920 x 1080 6 ~ 30 8 XVID 1920 x 1080 6 ~ 30 8 H.264 BP / MP / HP 1920 x 1080 6 ~ 30 25 MPEG4 SP / ASP 1920 x 1080 6 ~ 30 8 MPEG1 1920 x 1080 24 / 25 / 30 30 MPEG2 1920 x 1080 24 / 25 / 30 30 MPEG1 1920 x 1080 24 / 25 / 30 30 MPEG2 1920 x 1080 24 / 25 / 30 30 H.264 1920 x 1080 6 ~ 30 25 MPEG2 1920 x 1080 24 / 25 / 30 30 H.264 1920 x 1080 6 ~ 30 25 VC1 1920 x 1080 6 ~ 30 25 PS TS Codec audio MP3 / AC3 / LPCM / ADPCM /DTS Core MP3 / AC3 / LPCM / ADPCM / WMA WMA MP3 / ADPCM / AAC ADPCM / AAC / HE-AAC / AC3 / MPEG / LPCM AC3 / MPEG / LPCM / AAC AC3 / AAC / MP3 / DD+ / HE-AAC Altre limitazioni ✎ NOTA x x x x In caso di problemi con i contenuti di un codec, il codec non verrà supportato. Se le informazioni relative a un Contenitore sono incorrette e il file è in errore, il Contenitore non sarà in grado di riprodurlo correttamente. Le funzioni audio e video possono non funzionare se i contenuti hanno un bitrate/frame rate standard superiore al Fram/sec compatibile elencato nella tabella precedente. Se la Index Table è in errore, la funzione Seek (Cerca) (Jump) (Salta) non è supportata. Decoder video • Supporta fino a H.264, Livello 4.1 • H.264 FMO/ASO/RS, VC1 SP/MP/AP L4 e AVCHD non sono supportati. • XVID, MPEG4 SP, ASP: – Inferiore a 1280 x 720: Max 60 frame – Superiore a 1280 x 720: Max 30 frame • Oltre GMC 2 non supportato. • H.263 non supportato. • Supportata solo la tecnologia Samsung Techwin MJEPG. 32 Italiano Decoder audio • Supporta fino a WMA 7, 8, 9, STD • WMA 9 PRO non supporta 2 canali oltre multicanale o audio "lossless" (privo di perdite). • La velocità di campionamento WMA 22050Hz mono non è supportata. Se si interrompe la riproduzione video, la riproduzione può essere ripresa in seguito a partire dal punto in cui è stata interrotta. ✎ Premendo il tasto ENTERE durante la riproduzione di un file, è possibile esplorare le scene divise in 5 capitoli. 1. Nella sezione elenco file, selezionare il filmato da riprodurre in modo continuo premendo il tasto ◄ o ►. 2. Premere il tasto � (Riproduci) / ENTERE 00:04:03 / 00:07:38 1/1 Movie 01.avi 3. Selezionare Ripr in continuo (Riprendi riproduzione) premendo il tasto blu. La riproduzione del filmato inizierà dal punto di arresto precedente. ✎ ✎ Il tasto blu è disponibile solo quando si riavvia la riproduzione. Se la funzione Prom ripr cont. di un film è impostata su On nel menu Impostaz., comparirà un messaggio alla ripresa della riproduzione del filmato. ripr in continuo ripr da ultima scena vis SUM Ripr in continuo E Capitoli L Salta T Strumenti R Ritorna Musica Riproduzione di musica 1. Premere il tasto ◄ o ► per selezionare Musica, quindi premere ENTERE nel menu Media Play. 2. Premere ◄/►/▲/▼ per selezionare il file desiderato tra quelli riportati in elenco. 3. Premere ENTERE o il tasto � (Riproduci). Playlist – Durante la riproduzione di musica è possibile eseguire ricerche utilizzando i tasti ◄ e ► – I tasti � (REW) e µ non sono attivi durante la riproduzione. I Love You Jhon I Love you Jhon 1st Album Pop 2010 4.2MB No Singer Music 1 Music 2 No Singer Music 3 No Singer 01:10 / 04:02 Music 4 No Singer Music 5 ✎ Visualizza solo i file con estensione MP3 e PCM. I file con altre estensioni non vengono visualizzati, nemmeno se sono stati salvati sul medesimo dispositivo USB. 3/15 No Singer SUM E Pausa L Salta T Strumenti R ritorna ✎ Se il suono risulta anomalo durante la riproduzione di file MP3, regolare Equalizzatore nel menu Suono. (Un file MP3 sovramodulato può causare problemi audio.) Creazione di El. personale 1. Premere i tasti ◄/►/▲/▼ per selezionare i brani da aggiungere e premere TOOLS 2. Selezionare Agg. elenco personale. 3. Quando viene visualizzato il Agg. elenco personale, selezionare Nuovo el. personale. ✎ Per aggiungere un brano a una vecchia playlist, selezionare la playlist desiderata. 4. Sia la playlist nuova sia quella aggiornata verranno salvate nella cartella Musica. Riproduzione dei brani presenti El. personale Selezionare la cartella El. personale per riprodurre automaticamente tutti i brani in essa contenuti. Premere il tasto ▲ o ▼ per selezionare un brano diverso all’interno della playlist. Italiano 33 04 Funzioni avanzate Riproduzione continua di filmati (Riprendi riprod.) Funzioni avanzate Foto Visualizzazione di una foto (o di una proiezione di diapositive) 1. Premere il tasto ◄ o ► per selezionare Foto, quindi premere ENTERE nel menu Media Play. 2. Premere il tasto ◄/►/▲/▼ per selezionare la foto desiderata tra quelle riportate in elenco. 3. Premere ENTERE o il tasto � (Riproduci). – Quando si visualizza un elenco di foto, per iniziare la proiezione di diapositive premere il tasto (Riproduci) / ENTERE sul telecomando. – Nella proiezione di diapositive verranno utilizzate tutte le foto contenute nell’Elenco file. – Durante la proiezione di diapositive, i file appaiono in sequenza a partire da quello correntemente visualizzato. Impostando l’opzione Musica di sottofondo su On durante la proiezione delle diapositive i brani musicali vengono riprodotti automaticamente. La Modalità MdS non può essere modificata fino al completo caricamento della musica di sottofondo. ✎ ✎ Image1024.jpg Normal 1024x768 2010/2/1 3/15 E Pausa L Preced./Succes T Strumenti R ritorna SUM ¦ Riproduzione di più file Riproduzione di filmati/brani musicali/foto selezionati 1. Premere il tasto Giallo per selezionare il file desiderato tra quelli riportati in elenco. Videos 2. Ripetere l’operazione per selezionare più file. ✎ File 2 sel.nati /Movie 01.avi Movie 01.avi Movie 03.avi Jan.10.2010 Movie 04.avi Jan.10.2010 Movie 05.avi Jan.10.2010 Movie 06.avi Jan.10.2010 Movie 07.avi Jan.10.2010 Movie 08.avi Jan.10.2010 Movie 09.avi 3. Premere il tasto TOOLS e selezionare Riproduci cont. selez. Jan.10.2010 Movie 10.avi Jan.10.2010 SUM Riproduzione di un brani musicali/foto Movie 02.avi Jan.10.2010 NOTA x Il simbolo (c) comparirà a sinistra dei file selezionati. x Per annullare una selezione, premere nuovamente li tasto giallo. x Per deselezionare tutti i file selezionati, premere il tasto TOOLS e selezionare Deselez tutto. 1/1 Page Dispositivo Jan.10.2010 Ordinam T Strumenti Seleziona 1. Durante la visualizzazione dell’elenco dei file, posizionarsi su un qualsiasi file del gruppo desiderato. 2. Premere il tasto TOOLS e selezionare Riproduci gruppo corrente ¦ Media Play Additional Function Ordinare l’elenco dei file Premere il tasto Blu nell’elenco dei file per ordinarli. Categoria Operazioni Video Musica Foto Visual base Mostra l’intera cartella. E' possibile visualizzare la foto selezionando la cartella. ✓ ✓ ✓ Titolo Ordina e mostra i titoli dei filmati in ordine di Simbolo/numerico/alfabetico/ speciale. ✓ ✓ ✓ Preferenze Mostra e visualizza il file in base alle preferenze. E' possibile cambiare le preferenze dei file conteuti nella sezione elenco file usando il tasto verde ✓ ✓ ✓ Più recenti Meno recenti Artista Album Genere Atmosfera Mensile 34 Italiano Ordina e visualizza i file in base alla data più recente. Ordina e visualizza i file in base alla data meno recente. Ordina i brani musicali per artista in ordine alfabetico. Ordina i brani musicali per album in ordine alfabetico. Ordina i brani musicali per genere musicale. Ordina i brani musicali in base all'atmosfera. È possibile cambiare le informazioni relative all'atmosfera musicale. Ordina e visualizza i file in base al mese. Li ordina solo in base al mese (da gennaio a dicembre) indipendentemente dall'anno. ✓ ✓ ✓ ✓ ✓ ✓ ✓ ✓ ✓ Durante la riproduzione di un file, premere TOOLS. Categoria Operazioni Video Musica E’ possibile riprodurre ripetutamente i film o brani musicali. ✓ ✓ E' possibile regolare la dimensione dell'immagine in base alle proprie preferenze. ✓ Impostazioni immagine E' possibile regolare l'impostazione dell'immagine. (p. 13, 14, 15, 16) ✓ Impostazioni audio E' possibile regolare l'impostazione dell'audio. (p. 16, 17) Impostazione sottotitoli E' possibile riprodurre il videos con i Sottotitoli. Questa modalità funziona solo se il nome del file dei sottotitoli è uguale a quello del videos. ✓ Audio E’ possibile guardare video in una delle lingue supportate. La funzione è attiva solo quando vengono riprodotti file stream che supportano formati audio multipli. ✓ Arresta proiezione diapositive / Avvia proiezione diapositive E' possibile avviare una Proiezione diapositive. ✓ Velocità slide show Durante la proiezione diapositive è possibile selezionare la velocità di proiezione. ✓ Effetto slide show E’ possibile impostare vari effetti da applicare alla proiezione delle diapositive. ✓ Musica di sottof Durante la proiezione diapositive è possibile impostare la musica di sottofondo desiderata. ✓ Zoom E' possibile ingrandire le immagini a pieno schermo. Ruota E' possibile ruotare le immagini a pieno schermo. Sfondo Home E’ possibile spostare il file sul desktop Media Play. Informazioni E' possibile visualizzare le informazioni dettagliate sul file riprodotto. Titolo E' possibile spostare l'altro file direttamente. Modalità Ripeti Formato immagine (Modalità 1 / Modalità 2 / Nativa) ✓ ✓ Foto ✓ ✓ ✓ ✓ ✓ ✓ ✓ ✓ ✓ Impostazioni Uso del menu Impostazione ■ Impostazione sfondo: Selezionare questa opzione per visualizzare lo sfondo desiderato. ■ Prom ripr cont. di un film (On / Off) (Riproduci continuamente): Selezionare questa opzione per visualizzare il messaggio di aiuto a comparsa per la riproduzione continua del filmato. ■ Ottieni codice registrazione DivX® VOD: Mostra il codice di registrazione autorizzato per il televisore. Se si è connessi al sito web DivX e si registra il codice di registrazione con un account personale, è possibile scaricare il file di registrazione VOD. Se la registrazione VOD viene riprodotta con Media Play, la procedura di registrazione viene completata. ✎ Per ulteriori informazioni su VOD DivX®, visitare il sito www.DivX.com. ■ Ottieni codice disattivazione DivX® VOD: Se DivX® VOD non è registrato, viene visualizzato il codice di disattivazione della registrazione. Se si esegue questa funzione con codice DivX® VOD registrato, la registrazione DivX® VOD corrente viene disattivata. ■ Informazioni: Selezionare questa opzione per visualizzare le informazioni sul dispositivo collegato. Italiano 35 04 Funzioni avanzate Opzioni riproduzione Video/Musica/Foto Funzioni avanzate Anynet+ Che cos’è Anynet+? t Anynet+ è una funzione che permette di controllare mediante il telecomando del televisore Samsung tutti i dispositivi Samsung collegati che supportano Anynet+. Il sistema Anynet+ può essere usato solo con i dispositivi Samsung dotati della funzione Anynet+. Per controllare se il dispositivo Samsung in uso è dotato di questa funzione, verificare la presenza del logo Anynet+. Per collegare un sistema Home Theatre TV Home Theater Dispositivo Anynet+ 1 Dispositivo Anynet+ 2, 3, 4 Cavo HDMI 1.3 Cavo ottico Cavo HDMI 1.3 1. Collegare la porta HDMI IN (1 (DVI), 2, 3 o 4) del televisore alla porta HDMI OUT del dispositivo Anynet+ corrispondente tramite un cavo HDMI. 2. Collegare la porta HDMI IN del sistema Home Theater alla porta HDMI OUT del dispositivo Anynet+ corrispondente tramite un cavo HDMI. ✎ NOTA x x x x x x Collegare un cavo ottico tra la porta DIGITAL AUDIO OUT (OPTICAL) del televisore all’ingresso Digital Audio del sistema Home Theatre. Se si opta per una connessione di questo genere, la presa ottica permette l’uscita di soli 2 canali audio. In questo modo sarà possibile sentire l’audio solo dagli altoparlanti frontali sinistro e destro del sistema Home Theatre e dal subwoofer. Per avere un audio a 5.1 canali, collegare la porta DIGITAL AUDIO OUT (OPTICAL) del lettore DVD / Ricevitore satellitare (p. es. dispositivo Anynet+ 1 o 2) direttamente a un amplificatore o all’Home Theatre, non al televisore. Collegare solo un sistema Home Theatre. E’ possibile collegare un dispositivo Anynet+ tramite un cavo HDMI. Alcuni cavi HDMI potrebbero non supportare le funzioni Anynet+. Anynet+ si attiva solo quando il relativo dispositivo AV è acceso o in modalità Standby. Anynet+ supporta fino a 12 dispositivi AV. Da notare che è possibile connettere fino a 3 dispositivi dello stesso tipo. Menu Anynet+ Il menu Anynet+ può variare a seconda del tipo e dello stato del dispositivo Anynet+ collegato al televisore. Menu Anynet+ Visualizza TV Elenco dispositivi Registrazione: (*registratore) (nome_dispositivo) MENU (nome_dispositivo) INFO Interrompi registrazione: (*registratore) Ricevitore Descrizione La modalità Anynet+ passa alla modalità di trasmissione TV. Visualizza l'elenco dei dispositivi Anynet+. Avvia immediatamente la registrazione mediante il registratore. (Questa funzione è disponibile solo per i dispositivi che supportano la funzione di registrazione.) Mostra i menu del dispositivo collegato. Ad esempio, se è collegato un registratore DVD, comparirà il menu del disco del registratore DVD. Mostra il menu di riproduzione del dispositivo collegato. Ad esempio, se è collegato un registratore DVD, comparirà il menu di riproduzione del registratore DVD. Interrompe la registrazione. L’audio viene riprodotto attraverso il ricevitore. Se al sistema è collegato più di un dispositivo di registrazione, questi vengono visualizzati come (*registratore); in caso il dispositivo collegato sia uno solo, verrà rappresentato come (*nome_dispositivo). 36 Italiano ■ Impostazione Anynet+ (HDMI-CEC) (Off / On): Per utilizzare la funzione Anynet+, Anynet+ (HDMI-CEC) deve essere impostata su On. Quando la funzione Anynet+ (HDMI-CEC) è disattivata, sono disattivate anche tutte le funzioni relative a Anynet+. ✎ Spegnimento auto (No / Sì): Impostazione della disattivazione automatica di un dispositivo Anynet+ allo spegnimento del televisore. La sorgente attiva deve essere impostata sul telecomando in modo che il televisore utilizzi la funzione Anynet+. ✎ ✎ Un dispositivo esterno potrebbe spegnersi anche durante una registrazione. ¦ Passaggio da un dispositivo Anynet+ all’altro 1. Vengono elencati tutti i dispositivi Anynet+ collegati al televisore. ✎ Se non si individua il dispositivo desiderato, premere il tasto rosso per eseguire la scansione dei dispositivi. 2. Selezionare un dispositivo e premere ENTERE. Il dispositivo selezionato viene attivato. ✎ x x Solo all’impostazione di Anynet+ (HDMI-CEC) su On nel menu Applicazione comparirà il menu Elenco dispositivi. Il passaggio al dispositivo selezionato può richiedere fino a 2 minuti. Non è possibile annullare l’operazione durante il passaggio da un dispositivo all’altro. Se si è selezionata una modalità di ingresso esterna tramite il tasto SOURCE non sarà possibile utilizzare la funzione Anynet+. Passare a un dispositivo Anynet+ utilizzando Elenco dispositivi. ¦ Registrazione Con un videoregistratore Samsung è possibile registrare un programma televisivo. 1. Selezionare Registrazione. ✎ ✎ Se vi sono più di due dispositivi di registrazione x Se sono collegati più dispositivi di registrazione, questi vengono elencati. Selezionare un dispositivo di registrazione in Elenco dispositivi. Se il dispositivo di registrazione non è visualizzato, selezionare Elenco dispositivi e premere il tasto rosso per eseguire la ricerca dei dispositivi. 2. Premere EXIT per uscire. ✎ ✎ ✎ E’ possibile registrare il segnale proveniente da una sorgente selezionando Registrazione: (nome_dispositivo). Premendo il tasto � (REC) si eseguirà la registrazione del programma visualizzato sul televisore. Se si sta guardando l’immagine di un altro dispositivo, vengono registrate le immagini di quel dispositivo. Prima di registrare, controllare che il jack dell’antenna sia correttamente collegato al dispositivo di registrazione. Per collegare in modo corretto un’antenna a un dispositivo di registrazione, consultare il manuale dell’utente del dispositivo di registrazione utilizzato. Italiano 37 04 Funzioni avanzate ¦ Configurazione di Anynet+ Funzioni avanzate ¦ Ascolto tramite il ricevitore È possibile ascoltare l’audio tramite un ricevitore (per es. un Home Theatre) anzichè dagli altoparlanti del televisore. 1. Selezionare Ricevitore e impostarlo su On. 2. Premere EXIT per uscire. Se il ricevitore supporta solo l’audio, potrebbe non comparire nell’elenco dei dispositivi. Il ricevitore è operativo solo se è collegata in modo appropriato la porta Optical In del ricevitore alla porta DIGITAL AUDIO OUT (OPTICAL) del televisore. Quando il ricevitore (per es. un home theatre) è impostato su On, è possibile udire l’audio proveniente dall’uscita ottica del televisore. Quando il televisore visualizza un segnale DTV (antenna), invia l’audio a 5.1 canali al ricevitore. Se la sorgente è un componente digitale, come per es. un DVD, ed è collegata al televisore mediante HDMI, saranno udibili solo 2 canali audio dal ricevitore. ✎ ✎ ✎ ✎ NOTA x x x E’ possibile controllare i dispositivi Anynet+ solo mediante telecomando e non con i tasti del televisore. In determinate condizioni, il telecomando del televisore potrebbe non funzionare. In questo caso, selezionare + nuovamente il dispositivo Anynet . Le funzioni Anynet+ non sono attive con prodotti di altre marche. ¦ Risoluzione dei problemi con Anynet+ Problema Possibile soluzione Anynet+ non funziona. • Controllare se si sta utilizzando un dispositivo Anynet+. Il sistema Anynet+ può essere utilizzato solo con dispositivi che supportano Anynet+. • Collegare un solo ricevitore (Home Theatre). • Controllare che il cavo di alimentazione di Anynet+ sia collegato correttamente. • Controllare i collegamenti dei cavi Video/Audio/HDMI del dispositivo Anynet+. • Verificare se Anynet+ (HDMI-CEC) è impostata su On nel menu di impostazione di Anynet+. • Verificare che il telecomando del televisore sia in modalità TV. • Verificare se il telecomando è esclusivo per il dispositivo Anynet+. • In particolari condizioni, Anynet+ non funziona. (Ricerca canali, Media Play o Plug & Play (Impostazione iniziale) ecc.) • Quando si collega o si rimuove il cavo HDMI eseguire una nuova ricerca dei dispositivi oppure spegnere e riaccendere il televisore. • Controllare che la funzione Anynet+ o il dispositivo Anynet+ sia impostato su on. Desidero avviare Anynet+. • Controllare che il dispositivo Anynet+ sia collegato correttamente al televisore e che Anynet+ (HDMI-CEC) sia impostata su On nel menu di impostazione di Anynet+. • Premere il tasto TOOLS per visualizzare il menu Anynet+, quindi selezionare il menu desiderato. Desidera uscire da Anynet+. • Selezionare Visualizza TV nel menu Anynet+. • Premere SOURCE sul telecomando del televisore e selezionare un dispositivo non Anynet+. • Premere P / >/<, PRE-CH e FAV.CH per cambiare la modalità TV. (Notare che il tasto dei canali funziona solo se non è collegato un dispositivo Anynet+ con sintonizzatore incorporato.) Sullo schermo viene visualizzato il messaggio ‘Collegamento a un dispositivo Anynet+ in corso... • Non è possibile utilizzare il telecomando durante la configurazione di Anynet+ o durante il passaggio a un'altra modalità di visualizzazione. • Utilizzare il telecomando solo al termine dell'impostazione di Anynet+ o del passaggio alla nuova modalità di visualizzazione. Il dispositivo Anynet+ non funziona. • Non è possibile riprodurre contenuti mentre è in corso la funzione Plug & Play (Impostazione iniziale). Lo schermo del dispositivo esterno non appare. • • • • • Il programma TV non può essere registrato. • Verificare se la porta dell’antenna sul dispositivo di registrazione è correttamente collegata. L’audio del televisore non viene riprodotto attraverso il ricevitore. • Collegare il televisore e il ricevitore mediante il cavo ottico. 38 Italiano Controllare se il dispositivo supporta le funzioni di Anynet+. Controllare se il cavo HDMI è collegato correttamente. Verificare se Anynet+ (HDMI-CEC) è impostata su On nel menu di impostazione di Anynet+. Cercare nuovamente dispositivi Anynet+. E’ possibile collegare un dispositivo Anynet+ solo tramite un cavo HDMI. Alcuni cavi HDMI potrebbero non supportare le funzioni Anynet+. • In caso di chiusura anomala, a causa di uno scollegamento del cavo HDMI, del cavo di alimentazione oppure di una interruzione di corrente, ripetere la ricerca del dispositivo. ¦ Guida introduttiva di Internet@TV recommended Internet@TV fornisce alcuni utili e interessanti contenuti e servizi direttamente dal web al televisore. My Applications Samsung Apps by Date 1/1 Settings A login B Mark as Favorite D Sort by R return ✎ NOTA x x x x x x x x Configurare le impostazioni di rete prima di usare Internet@TV. Per maggiori informazioni vedere “Connessione di rete” (P. 23). Le font di caratteri contenute all’interno dei contenuti del provider non vengono visualizzate correttamente. Talvolta possono verificarsi tempi di risposta e/o interruzioni a causa delle condizioni della rete. In base alla regione, il servizio applicazione potrebbe essere supportato solo in lingua inglese. Questa funzione non è disponibile in tutti i paesi Se si riscontrano problemi con un applicazione, contattare il fornitore del contenuto. In base alle circostanze correlate al fornitore dei contenuti, l’aggiornamento di una applicazione o l’applicazione stessa potrebbero essere discontinui. In base alle normative vigenti nel proprio paese, alcune applicazioni possono avere un servizio limitato o non supportato. Visualizzazione a schermo recommended Applicazioni consigliate: Visualizza il servizio consigliato da Samsung. Non è possibile aggiungere o eliminare un servizio in questo Schermo TV: Visualizza il canale corrente. Servizio applicazione: E’ possibile utilizzare vari servizi forniti da Samsung. by Date 1/1 My Applications Informazioni: Visualizza avvisi, nuove applicazioni e pubblicità offerti da Samsung. Applicazioni scaricate: Visualizza le applicazioni scaricate tramite Samsung Apps. Samsung Apps Settings A login Internet@TV Impostazioni: Modifi care e confi gurare applicazioni e impostazioni Internet@TV. B Mark as Favorite D Sort by R return Controlli : • Rosso (Login): Accesso a Internet@TV. • B Verde (Mark as Favorite): Contrassegnare un applicazione come preferito. • Blu (Sort by): Ordinare gli applicazione. • R Return: Per tornare al menu precedente. ✎ I tasti colorati possono funzionare in modo diverso in base all’applicazione. Italiano 39 04 Funzioni avanzate Internet@TV Funzioni avanzate Login account ■ adgjm Password : ✎ A Reset: Ripristina Internet@TV alle impostazioni di fabbrica. Change the Service Lock password La password predefinita è “0-0-0-0.” Move [0~9] enter PIN R Cancel ✎ Per una più completa esperienza con un applicazione, ✎ ✎ registrarsi e accedere al proprio account. ✎ Per istruzioni sulla creazione di un account, vedere Setting up Internet@TV → Internet@TV ID → Create. 1. Premere il tasto rosso nella homepage di Internet@TV. 2. Selezionare User account desiderato, quindi premere ENTERE. ✎ Se s i desidera creare un account, premere il tasto Rosso quindi creare l’account quando viene visualizzata la finestra OSD. 3. Digitare la Password. ✎ Al termine del login, sullo schermo verrà visualizzato l’Account utente. ■ ¦ Configurazione di Internet@TV Impostaz. Creare ID e configurare le impostazioni di Internet@TV in questa schermata. Evidenziare le impostazioni usando i tasti ▲ e ▼ quindi premere ENTERE Impostaz ▪ Internet@TV ID ▪ Ticker Autorun : Off ▪ Channel bound Service : Off ▪ Service Manager ▪ Change the Service lock password ▪ Properties ▪ reset R return 40 Italiano Nel caso si sia dimenticata la password, premere i tasti del telecomando nella sequenza seguente per ripristinare la password predefinita su “0-00-0”: POWER (off) → MUTE → 9 → 2 → 8 → POWER (on). Internet@TV ID E’ possibile utilizzare questo menu durante la creazione e l’eliminazione dell’account. E’ possibile controllare il proprio account e le informazioni relative all’account del sito del contenuto. L’account è valido solo per internet@TV. ✎ Create: Crea un account e lo collega agli application del servizio application. NOTA ✎ ▪ System setup Ticker Autorun potrebbe non essere supportata nel paese di residenza. Ticker Autorun (Off / On): Abilita/Disabilita l’esecuzione automatica del ticker all’accensione del televisore. Channel Bound Service (Off / On): Alcuni canali supportano gli application come servizio dati internet, permettendo l’accesso al servizio Internet durante la visione del televisore. Disponibile solo se supportata dall’emittente. Login User account : System Setup ✎ Per un applicazione dotato di più categorie, usare ◄ e ► per accedere alle varie categorie. x x E’ possibile creare un massimo di 10 account. Il numero massimo di caratteri è 10. Prima di creare un User account, scaricare l’applicazione su Samsung Apps. 1. Mediante i tasti ▲/▼/◄/► selezionare Impostaz. Quindi premere ENTERE 2. Premere ▼ per selezionare Internet@TV ID, quindi premere ENTERE o ► 7. Selezionare Register sul Service Site desiderato, quindi premere ENTERE. 3. Selezionare Create. Verrà visualizzata la schermata del tastierino. 8. Utilizzando i tasti numerici, immettere l’ID del sito dell’applicazione e la password. Quindi premere ENTERE 4. L’OSD del tastierino verrà visualizzato a schermo. Uso del tastierino 9. Registrazione effettuata. Aggiungendo un ulteriore sito di servizio, selezionare Yes, quindi premere ENTERE e continuare dal passaggio 5. Premendo il tasto – sul telecomando durante l’uso del tastierino a schermo, è possibile cambiare i campi di testo in minuscolo, maiuscolo, numerico e icone. E’ possibile usare il tastierino a schermo in numerose applicazioni Internet@TV. Di seguito viene indicato come digitare i caratteri. 4-1. Per esempio, supponendo di voler digitare “105Chang”. 10. Al termine, selezionare OK. Quindi premere ENTERE Manager – Service Site: Registrare le informazioni di login per i siti dei servizi quali ad esempio YouTube. – Change Password: Cambia la password dell’account. – Delete: Elimina l’account. Nel caso si sia dimenticata la password, premere i tasti del telecomando nella sequenza seguente per ripristinare la password predefinita su “0-0-0-0”: POWER (off) → MUTE → 9 → 2 → 8 → POWER (on). 4-2. Premere due volte il tasto – sul telecomando per cambiare modalità di immissione, da minuscolo a numerico. ✎ 4-3. Premere i tasti 1, 0 e 5 in ordine numerico. 4-4. Premere tre volte il tasto – sul telecomando per cambiare modalità di immissione da numerico a maiuscolo. 4-5. Premere tre volte il tasto 2 sul telecomando per digitare la lettera C. ■ 4-6. Premere tre volte il tasto – sul telecomando per cambiare la modalità di immissione da maiuscolo a minuscolo. 4-7. Premere i tasti sul telecomando per digitare il resto della parola “Chang”. Al termine, premere ENTERE. 5. Utilizzando i tasti numerici, digitare User account e Password. x x x x Service Manager: Eliminare e bloccare gli application installati per Internet@TV. Lock: Blocca application L’accesso a un application bloccato richiede una password. ✎ Delete: Elimina widget ■ Properties: Visualizza le informazioni di Internet@TV. Usare l’opzione Check the speed of your internet connection per testare la connessione alla rete. La password deve essere solo numerica. Mediante i tasti –, è possibile cambiare i campi di testo in minuscolo, maiuscolo, numerico e icone. E’ possibile cancellare i caratteri immessi premendo il tasto PRE-CH. Premendo i tasti � (REW) o µ (FF) è possibile selezionare l’icona desiderata da immettere nella schermata dal tastierino Italiano 41 04 Funzioni avanzate 6. Creato account. E’ possibile usare i servizi offerti da tutti i partner su un TV Samsung con un singolo login effettuando il collegamento dell’account del partner di servizi all’ID del televisore. Per registrare un ID per il sito del servizio, selezionare Yes. L’elenco dei Service Site verrà visualizzato a schermo. Come creare un ID per Internet@TV Funzioni avanzate ¦ Uso del servizio Internet@TV Uso di Samsung Apps per categoria Samsung Apps Samsung Apps consente di scaricare applicazioni da utilizzare su dispositivi Samsung TV/AV. Gli utenti possono godere di una varietà di contenuti quali video, musica, foto, giochi, informazioni utili e molto altro ancora utilizzando le applicazioni scaricate. Ulteriori applicazioni saranno disponibili in seguito. Samsung AppS What’s New! Featured Video Most downloaded Most recent Travel Name Free Games Sports Lifestyle Information ✎ Other My Page Help A login B Thumbnail View D Sort by R return ✎ Usare i tasti colorati in Samsung Apps. x x x x 42 Rosso (Login): Per accedere al servizio internet. Verde (Thumbnail View): Per cambiare la modalità di visualizzazione. B Blu (Sort By): Per ordinare gli applicazioni in base a Featured, Most Downloaded, Most Recent o Name. R Return: Passa al menu precedente. Italiano Sono disponibili le seguenti categorie: y What’s New: Visualizza le applicazioni registrate più di recente. y Video: Visualizza vari media che trasmettono film, show televisivi e brevi filmati. y Games: Visualizza vari giochi quali sudoku e scacchi. y Sports: Visualizza vari media sportivi che offrono informazioni sulle partite/sugli incontri, immagini e brevi filmati. y Lifestyle: Include vari servizi multimediali che offrono musica, strumenti per la gestione delle fotografie e social network come Facebook e Twitter. y Information: Include vari servizi informativi quali notiziari, quotazioni azionarie e previsioni meteo. y Others: Include altri servizi di varia natura. y My Page: Visualizza l’elenco delle applicazioni e il saldo del proprio credito elettronico. Dalla metà del 2010 (solo per Stati Uniti e Corea), è possibile acquistare credito elettronico per l’acquisto di applicazioni tramite tv.samsung.com. y Help: In caso di domande su Internet@TV, controllare prima di tutto questa sezione. Problema Possibile soluzione Alcuni contenuti Applicazione sono solo in Inglese. Come posso cambiare la lingua? La lingua del contenuto del Applicazione può essere diversa dalla lingua di interfaccia utente del widget. Ciò può dipendere dal fornitore del servizio. Alcuni servizi Applicazione non funzionano. Verificare il servizio con il fornitore. Consultare il sito web di supporto per reperire informazioni sul provider del servizio widget. Quando si verifica un errore di rete, posso utilizzare solo il menu di impostazione. Se non è possibile stabilire una connessione di rete, il servizio potrebbe avere delle restrizioni. Questo perché tutte le funzioni tranne il menu Impostazioni necessitano di una connessione Internet. C'è qualche possibilità di visualizzare film per adulti su YouTube? Generalmente, questi contenuti sono filtrati dall'elenco menu. Tuttavia, utilizzando la funzione di ricerca è possibile visualizzarli. In questo caso, utilizzare la funzione di blocco del servizio della Widget Gallery. ¦ Guida Sito web ✎ L’accesso potrebbe subire modifiche. ✎ Potrebbero esservi link diversi per determinati paesi. Paese Austria Belgio Repubblica Ceca Danimarca Finlandia Francia Germania Grecia Ungheria Irlanda Italia Olanda Norvegia Polonia Portogallo Slovacchia Spagna Svezia Svizzera Regno Unito Turchia Estonia Lettonia Lituania Russia Ucraina Sito web www.samsung.com → Produkte → Fernseher → Internet@TV www.samsung.com → Producten → televisies → Internet@TV www.samsung.com → Produits → téléviseurs → Internet@TV www.samsung.com → Produkty → televizory → Internet@TV www.samsung.com → Produkter → stue & soveværelse → Internet@TV www.samsung.com → Tuotteet → kodinelektroniikka → Internet@TV www.samsung.com → Produits → télévisions → Internet@TV www.samsung.com → Privatkunden → Fernseher → Internet@TV www.samsung.com → Προϊόντα → τηλεοράσεις → Internet@TV www.samsung.com → Termékek → televíziók → Internet@TV www.samsung.com → Products → Television → Internet@TV www.samsung.com → Prodotti → TV → Internet@TV www.samsung.com → Producten → televisies → Internet@TV www.samsung.com → Produkter → hverdagsrom & soverom → Internet@TV www.samsung.com → Produkty → telewizory → Internet@TV www.samsung.com → Produtos para Consumidores → televisores → Internet@TV www.samsung.com → Produkty → televízory → Internet@TV www.samsung.com → Productos → televisores → Internet@TV www.samsung.com → Produkter → vardagsrum & sovrum → Internet@TV www.samsung.com → Produits → télévisions → Internet@TV www.samsung.com → Produkte → Fernseher → Internet@TV www.samsung.com → Products → Television → Internet@TV www.samsung.com → Tüketici Ürünleri → televizyon → Internet@TV www.samsung.com → Klientidele → Televiisorid → Internet@TV www.samsung.com → Klientiem → Televizori → Internet@TV www.samsung.com → Namams → Televizoriai → Internet@TV www.samsung.com → Продукты → Телевизоры → m Internet@TV www.samsung.com → Потребительские продукты → телевизоры → Internet@TV Italiano 43 04 Funzioni avanzate ¦ Risoluzione dei problemi con internet@TV Funzioni avanzate Messag / Media / ScreenShare AllShare ¦ Informazioni su AllShare AllShare collega il televisore e il cellulare Samsung / i dispositivi compatibili attraverso una rete. Sul televisore è possibile visualizzare le chiamate in arrivo, gli SMS e i promemoria impostati sul proprio cellulare. Inoltre, è possibile riprodurre contenuti multimediali compresi video, foto e musica memorizzati sul proprio cellulare o su altri dispositivi (per es il PC) e controllarli sul televisore mediante la rete. E’ anche possibile utilizzare il televisore per navigare in Internet attraverso il proprio cellulare. Mostra un elenco di cellulari o dispositivi connessi configurati con questo televisore per l’uso di Messag, Media, o della funzione ScreenShare. ✎ La funzione Media è disponibile in tutti i dispositivi mobili che supportano AllShare. ■ ■ Ammesso / Negato: Permette/blocca il collegamento del cellulare. Elimina: Elimina il cellulare dall’elenco. ✎ ✎ Per ulteriori informazioni visitare il sito “www.samsung. com” o chiamare il call center Samsung. I dispositivi mobili potrebbero necessitare di ulteriore software. Per maggiori informazioni, vedere la relativa guida dell’utente. ¦ Impostazione di AllShare Messaggio (On / Off): Abilita o disabilita la funzione messaggi (per chiamate in entrata, SMS e promemoria impostati sul proprio cellulare). ■ Media (On / Off): Attiva o disattiva la funzione media. Quando la funzione media è attiva, riproduce video, foto e musica da un cellulare o altro dispositivo che supporti ScreenShare. ■ ScreenShare (On / Off): Abilita o disabilita gli accessi ScreenShare a vari contenuti di cellulari o altri dispositivi che supportino ScreenShare. ■ Nome TV: Imposta il nome del televisore in modo che sia possibile individuarlo rapidamente su un cellulare. Selezionando Input utente, è possibile digitare il nome del televisore mediante OSK (On Screen Keyboard). AllShare 3/7 Impostazione Messaggio Messaggio Media : On Media ScreenShare : On ScreenShare Nome TV : TV domestico : On E Seleziona R ritorna e esci ' Impostazione R ritorna Italiano Utilizzando questa funzione, è possibile visualizzare chiamate in arrivo, SMS e programmi impostati sul cellulare nella finestra degli allarmi durante la visione del televisore. x ■ 44 Uso della funzione Messag ✎ NOTA Impostazione ✎ Questa funzione elimina solo il nome del cellulare dall’elenco. Se il dispositivo mobile eliminato viene acceso o tenta di collegarsi al televisore, potrebbe nuovamente comparire in elenco. x x x Per disabilitare la finestra degli allarmi, impostare Messag su Off in Impostazione di AllShare. Se è selezionato OK, o se OK non viene selezionato mentre il messaggio viene visualizzato tre volte, il messaggio verrà eliminato. Il messaggio non viene eliminato dal telefono cellulare. La finestra degli allarmi può essere visualizzata durante l’uso di alcune applicazioni quali Media Play e altre. Per visualizzare il contenuto di un messaggio, passare alla modalità di visione TV. Quando un messaggio di un cellulare sconosciuto viene visualizzato, selezionare il cellulare nel menu messaggi in AllShare quindi selezionare Negato per bloccare il telefono. Visualizzazione messaggi Se arriva un nuovo SMS mentre si guarda il televisore, viene visualizzato nella finestra degli allarmi. Cliccando sul tasto OK, verrà visualizzato il contenuto del messaggio. E’ possibile configurare la visualizzazione delle impostazioni degli SMS sul cellulare. Per le procedure, vedere il manuale del cellulare. ✎ ✎ Alcuni caratteri speciali possono essere visualizzati come caratteri vuoti o danneggiati. Uso della funzione ScreenShare Se arriva una chiamata mentre si guarda il televisore, viene visualizzata la finestra degli allarmi. Mediante ScreenShare, è possibile ricercare vari contenuti web forniti attraverso il cellulare. Ad esempio, l’immagine sotto visualizza una pagina di accesso per i contenuti provenienti da un cellulare. E’ possibile leggere i vari file contenuti nel cellulare e visualizzare la rubrica e il calendario sul televisore. Inoltre, dalla rubrica è possibile effettuare una chiamata o inviare un SMS. Allarme programma Mentre si guarda il televisore, la finestra degli allarmi appare per visualizzare il programma registrato. ✎ E’ possibile configurare la visualizzazione delle impostazioni degli SMS sul cellulare. Per le procedure, vedere il manuale del cellulare. ✎ Alcuni caratteri speciali possono essere visualizzati come caratteri vuoti o danneggiati. Uso della funzione Media Viene visualizzata una finestra degli allarmi per informare l’utente che i contenuti multimediali (video, foto, musica) inviati dal cellulare verranno visualizzati sul televisore. I contenuti vengono riprodotti automaticamente 3 secondi dopo la visualizzazione della finestra degli allarmi. Premendo RETURN o EXIT quando appare la finestra degli allarmi, i contenuti multimediali non vengono visualizzati ✎ NOTA x x x Per utilizzare questa funzione è necessario installare ScreenShare sul cellulare Samsung/sul dispositivo. Doc Viewer consente di leggere file in formato doc, senza poterli modificare. La schermata visualizzata può differire in base al dispositivo collegato. My Mobile ✎ NOTA x Se la funzione Media viene eseguita per la prima volta, viene visualizzata una finestra di avvertenza. Premendo ENTERE per selezionare Consent, sarà possibile utilizzare la funzione Media sul dispositivo selezionato. Contacts Calendar Doc viewer E Seleziona C ritorna Uso del cellulare Samsung come telecomando TV "Unknown Device 0" is requesting that the media file be allowed to play. If you wish to allow the media file to be played at your device, please press "Allow", otherwise press "Deny". You can also change the setting (or resetting) of this feature at "AllShare Setup". Warning: Please note that if your device is connected to unsecured or unfamiliar network, unwanted or inappropriate contents might be played. If you are not sure about the network's identity or content's appropriateness, we strongly recommend that you do not "Allow" the request to play. Allow x x x x x Prima di utilizzare questa funzione è necessario effettuare il collegamento a un cellulare Samsung in grado di supportare le funzioni ScreenShare. Durante il controllo del televisore con il cellulare, solo i tasti POWER, y, z e MUTE sono supportati. ✎ Anche premendo un tasto di controllo (per cambiare canale o regolare il volume) sul cellulare, il valore aumenterà o diminuirà solo di una unità. Deny Per disattivare la trasmissione dei contenuti multimediali dal telefono cellulare, impostare Media su Off nel menu impostazione di AllShare. I contenuti possono non essere riprodotti sul televisore a seconda della risoluzione e del formato. I tasti ENTERE e ◄ / ► potrebbero non funzionare a seconda del tipo di contenuto multimediale riprodotto. Mediante il dispositivo mobile è possibile controllare la riproduzione del contenuto multimediale. Per maggiori informazioni, vedere la guida dell’utente di ogni prodotto. Per riprodurre contenuti multimediali dal proprio PC, selezionare l’icona del PC nella schermata principale di AllShare. Il menu Media Play del televisore cambia automaticamente. Per maggiori informazioni vedere “Media Play”. Italiano 45 04 Funzioni avanzate Allarme chiamata in arrivo Altre informazioni Funzione Teletext dei canali analogici La pagina dell’indice del servizio Teletext contiene informazioni sull’uso del servizio. Per visualizzare correttamente le informazioni del servizio Teletext, è necessario che la ricezione del canale sia stabile. In caso contrario, alcune informazioni potrebbero essere perse o alcune pagine potrebbero non essere visualizzate correttamente. ✎ E’ possibile cambiare le pagine Teletext premendo i tasti numerici sul telecomando. 1 / (Teletext on/mix): 2 (pagina su) Visualizza la 7 pagina successiva del Teletext. Premere questo tasto per attivare la modalità Teletext dopo avere selezionato un canale che fornisca il servizio. Premere di nuovo il tasto per sovrapporre le informazioni del servizio Teletext alla trasmissione corrente. 2 8 (salva): Memorizza le pagine del Teletext. 3 4 (formato): Premere questo tasto per raddoppiare le dimensioni delle lettere nella metà superiore dello schermo. Premere di nuovo il tasto per ingrandire i caratteri nella metà inferiore dello schermo. Per tornare alla modalità di visualizzazione normale, premere di nuovo il tasto. 4 0 (modalità): Premere questo tasto (indice): In modalità Teletext, 9 premere questo tasto in qualsiasi momento per visualizzare la pagina dell’indice (contenuti). 5 (mostra): Consente di 0 visualizzare eventuale testo nascosto (le risposte ai quiz, per esempio). Per tornare alla 7 modalità di visualizzazione normale, premere di nuovo il tasto. 6 1 2 8 9 3 0 4 ! per selezionare la modalità Teletext (LIST/FLOF). Premendo questo tasto in modalità LIST, si attiva la modalità di salvataggio Elenco. In modalità salvataggio Elenco, è possibile memorizzare la pagina Teletext all’interno di un elenco utilizzando il tasto 8 (memorizza) 6 A B C D @ 1 (pagina secondaria) Visualizza la pagina secondaria disponibile. Le pagine Teletext sono organizzate in base a sei categorie: Parte Indice Parte Contents Indice A Numero della pagina selezionata. D Data e ora. B Identità della stazione emittente. E Testo. C Numero della pagina corrente o stato della ricerca. F Informazioni sullo stato. Informazioni FASTEXT. 46 Italiano 3 (pagina giù) Visualizza la 8 pagina precedente del Teletext. 6 9 (mantieni): Consente di mantenere visualizzata una pagina, se collegata a più pagine secondarie che scorrono automaticamente. Premere nuovamente il tasto per riprendere la visualizzazione. 5 5 7 (annulla): Utilizzato per ! visualizzare le stazioni emittenti durante la ricerca di una pagina. Tasti colorati (rosso/verde/ @ giallo/blu): Se una emittente usa il sistema FASTEXT, i vari argomenti trattati in una pagina Teletext vengono codificati in base ai colori e possono essere selezionati premendo i tasti colorati corrispondenti. Premere il tasto del colore corrispondente a quello dell’argomento desiderato. La pagina viene visualizzata con altre informazioni colorate che possono essere selezionate allo stesso modo. Per visualizzare la pagina successiva o precedente, premere il tasto colorato corrispondente. 05 Altre informazioni Installazione del supporto a parete ¦ Montaggio della staffa preforata Durante l’installazione del televisore a parete, collegare la staffa alla parte che collega il piedistallo come mostrato nella figura. Staffa preforata ¦ Preparazione per l’installazione di un supporto a parete (per televisori da 46 ~ 55 pollici) Per installare un supporto a parete di un altra marca, utilizzare un anello di ritenuta. ¦ Installazione del Kit di montaggio a parete Gli articoli del kit di montaggio a parete (venduti separatamente) consentono di montare il televisore alla parete. Per informazioni dettagliate sull’installazione del kit di montaggio a parete, consultare le istruzioni fornite insieme al kit. Rivolgersi a un tecnico per il montaggio della staffa a parete. Samsung Electronics non può essere ritenuta responsabile per qualsiasi danno al prodotto o infortuni causati da una installazione autonoma del televisore da parte dell’utente. Italiano 47 Altre informazioni ¦ Specifiche del kit di montaggio a parete (VESA) ✎ Il kit di montaggio a parete non è fornito in dotazione ma è venduto separatamente. Installare il supporto su una parete solida perpendicolare al pavimento. Se il supporto deve essere fissato ad altri tipi di materiale, consultare il rivenditore di zona. Una installazione a soffitto o su pareti inclinate può provocare la caduta dell’unità e lesioni personali. ✎ NOTA x x x x x x x x x Samsung Electronics non può essere ritenuta responsabile per qualsiasi danno al prodotto o infortuni causati da una installazione autonoma del televisore da parte dell’utente. Nella tabella sotto riportata vengono indicate le dimensioni standard dei kit di montaggio a parete. All’acquisto di un kit di montaggio a parete, verrà fornita la guida all’installazione e tutte le parti necessarie per il montaggio. Non utilizzare viti di dimensioni diverse da quelle standard poiché potrebbero danneggiare l’interno del televisore. Per i montaggi a parete non conformi alle specifiche delle viti standard VESA, la lunghezza delle viti potrebbe differire in base alle loro specifiche. Non utilizzare viti non conformi agli standard VESA. Non serrare eccessivamente le viti, in quanto potrebbero danneggiare il prodotto o causarne la caduta con conseguente rischio di lesioni. Samsung non può essere ritenuta responsabile per tali incidenti. Samsung non può essere ritenuta responsabile per eventuali danni o lesioni personali qualora vengano usati kit di montaggio a parete non conformi allo standard VESA o l’utente non segua le istruzioni di installazione fornite. Non superare i 15 gradi di inclinazione durante il montaggio del televisore. Famiglia prodotto Spec. VESA (A * B) Standard Screw 23~29 75 X 75 100 X 100 200 X 100 M4 30~40 200 X 200 M6 46~55 400 X 400 57~70 800 X 400 80~ 1400 X 800 80~ 1400 X 800 pollici 19~22 LCD-TV Quantità 4 M8 Non installare il Kit di montaggio a parete mentre il televisore è acceso. In caso contrario, potrebbero verificarsi incidenti con lesioni personali causate da scosse elettriche Assemblaggio dei cavi Racchiudere i cavi nel fermacavi in modo che non siano visibili attraverso il piedistallo trasparente. Fermacavi 48 Italiano Il blocco Kensington è un dispositivo usato per assicurare fisicamente il sistema quando viene utilizzato in un luogo pubblico. L’aspetto del dispositivo e il metodo di blocco possono variare in base alla marca del prodotto. Per informazioni sull’uso, consultare il manuale fornito insieme al blocco Kensington. 1 2 ✎ Trovare l’icona “K” sul retro del televisore. L’alloggiamento del blocco 3 Kensington si trova di fianco all’icona “K”. 1. Inserire il dispositivo nello slot Kensington sul TV LCD 1 e ruotarlo nella direzione di blocco 2. <Opzionale> 2. Collegare il cavo del blocco Kensington.3. 3. Fissare il blocco Kensington a un tavolo o a un oggetto fisso pesante. ✎ Il dispositivo di blocco è in vendita separatamente. ✎ La posizione del blocco Kensington può variare a seconda del modello. Fissaggio del televisore alla parete Attenzione: Tirare, spingere o arrampicarsi sul televisore sono azioni che possono provocarne la caduta. Si raccomanda di non far giocare i bambini con il televisore poiché potrebbero appendersi ad esso destabilizzandolo; se ciò dovesse verificarsi, il televisore potrebbe cadere provocando lesioni personali gravi e perfino mortali. Seguire tutte le precauzioni di sicurezza descritte della documentazione allegata. Per una maggiore stabilità e sicurezza del prodotto, installare il dispositivo anticaduta come segue. ¦ Per evitare una eventuale caduta del televisore ✎ Poiché i ganci, le viti e il cavo di sicurezza non sono forniti in dotazione, è necessario acquistare tali materiali separatamente. 1. Avvitare saldamente i ganci alla parete. Verificare che le viti siano saldamente fissate nella parete. ✎ Specifiche delle viti x x Per un TV LCD da 32 ~ 40 pollici: M6 Per un TV LCD da 46 ~ 55 pollici: M8 2. Rimuovere le viti dal centro del pannello posteriore del televisore, inserirle nei ganci, quindi avvitarle nuovamente al televisore. 3. Collegare i ganci fissati al televisore a quelli fissati alla parete utilizzando un cavo resistente, quindi legarlo strettamente. ✎ Accertarsi che tutte le connessioni siano adeguatamente Parete fissate. Controllare periodicamente le connessioni per verificarne l’eventuale usura o rottura. Per qualsiasi dubbio relativo alla sicurezza delle connessioni effettuate, contattare un installatore specializzato. ✎ Installare il televisore il più possibile vicino alla parete in modo che non possa cadere all’indietro. ✎ Collegare il cavo in modo che i ganci fissati alla parete si trovino allineati o leggermente più in basso di quelli fissati al televisore. ✎ Slegare il cavo prima di spostare il televisore. Italiano 49 05 Altre informazioni Blocco antifurto Kensington Altre informazioni Risoluzione dei problemi In caso di domande sul funzionamento del televisore, consultare per prima cosa l’elenco sottostante. Se nessuno dei consigli sottoriportati si dimostra utile per risolvere il problema, visitare il sito ‘www.samsung.com’, quindi fare clic sulla voce Support (Assistenza), oppure chiamare il numero del Call Center riportato in ultima pagina. Problemi Soluzioni e spiegazioni Qualità dell'immagine Per prima cosa, eseguire il Test immagine per confermare che il televisore sia in grado di visualizzare correttamente l'immagine di prova. (accedere a MENU - Supporto - Auto diagnosi - Test immagine) (P. 20) Se l'immagine di prova viene visualizzata correttamente, la scarsa qualità dell'immagine potrebbe essere causata dalla sorgente o dal segnale. La qualità dell'immagine non sembra all'altezza di quella vista in negozio. • Se si possiede un ricevitore via cavo/set top box analogico passare ad uno digitale. Usare i cavi HDMI o Component per ottenere una qualità delle immagini HD (high definition). • Abbonato servizi cavo/satellite: Provare le stazioni HD dal channel line up. • Connessione antenna: Provare le stazioni HD dopo avere eseguito il programma automatico. ✎ Molti canali HD trasmettono contenuti SD (Standard Definition) aggiornati. • Regolare la risoluzione di uscita video del ricevitore via cavo/satellitare su 1080i o 720p. • Guardare il televisore alla distanza minima raccomandata, basata sulla dimensione dello schermo e la definizione del segnale visualizzato. L'immagine è distorta: sono visibili blocchi grandi, blocchi piccoli, punti e pixel • La compressione di contenuti video può causare la distorsione dell'immagine specialmente nel caso di immagini caratterizzate da movimenti rapidi, come per esempio eventi sportivi o film d'azione. • Un segnale debole o di scarsa qualità può causare la distorsione dell'immagine. Questo non è un problema del televisore. I colori sono errati o mancano. • Se si sta utilizzando una connessione component, verificare che i cavi component siano collegati alla porte appropriate. Collegamenti errati o instabili possono causare problemi di colori o schermate vuote. Colori o luminosità deboli. • Regolare le opzioni Immagine nel menu TV. (accedere alla modalità Immagine / Colore / Luminosità / Nitidezza). • Regolare l'opzione Risp. energia nel menu TV. (accedere a MENU - Immagine - Soluzione Eco Risp. energia) (P. 14) • Provare a reimpostare l'immagine visualizzandola con le impostazioni predefinite. (selezionare MENU - Immagine - Reset immagine) Si nota una linea punteggiata sul bordo dello schermo. • Se la dimensione dell'immagine è impostata su Adatta a schermo, modificarla selezionando 16:9. (P. 15) • Cambiare la risoluzione del ricevitore via cavo/satellitare. L'immagine è in bianco e nero. • Se si sta usando un ingresso composito AV, collegare il cavo video (giallo) alla porta verde dell'ingresso component 1 del televisore. Nel cambiare i canali, l'immagine viene fermata, distorta o ritardata. • Se il prodotto è connesso a un ricevitore via cavo, reimpostare il ricevitore. Riconnettere il cavo CA e attendere fino al riavvio del ricevitore. L'operazione potrebbe richiedere fino a 20 minuti. • Impostare la risoluzione di uscita del ricevitore via cavo su 1080i o 720p. Qualità audio Per prima cosa, eseguire il Test audio per confermare che l'impianto audio del televisore funzioni in modo appropriato. (accedere a MENU - Supporto - Auto diagnosi - Test audio) (P. 20) Se l'audio viene riprodotto correttamente, il problema potrebbe essere causato dalla sorgente o dal segnale. L'audio non viene riprodotto oppure il livello del volume risulta troppo basso anche se impostato al valore massimo. • Verificare il volume del dispositivo esterno collegato al televisore. L'immagine è buona ma l'audio è escluso. • Impostare l'opzione Seleziona altoparlante su Altoparlante TV nel menu Suono. (P. 17) • Se si sta usando un dispositivo esterno, accertarsi che i cavi audio siano collegati alle porte di ingresso audio del televisore. • Se si sta usando un dispositivo esterno, verificare l'opzione di uscita audio del dispositivo (per es. potrebbe risultare necessario cambiare l'opzione audio del ricevitore via cavo su HDMI in caso di una HDMI collegata al televisore). • Se si usa un cavo DVI-HDMI, è necessario utilizzare un cavo audio separato. • Se il televisore è dotato di una porta per le cuffie, verificare che non vi sia un dispositivo ad essa collegato. Gli altoparlanti emettono un rumore anomalo. • Verificare le connessioni dei cavi. Verificare che i cavi video non siano connessi a un ingresso audio. • Per le connessioni Antenna/Cavo, verificare l'intensità del segnale. Un segnale basso può causare la distorsione dell'audio. 50 Italiano Soluzioni e spiegazioni Nessuna immagine, video spento Il televisore non si accende. • Verificare che la spina del cavo di alimentazione CA sia correttamente collegata a una presa a muro e il televisore sia acceso. • Accertarsi che la presa a muro sia funzionante. • Provare a premere il tasto POWER sul televisore per verificare che il problema non sia il telecomando. Se il televisore si accende, vedere la sezione “Il telecomando non funziona” sotto riportata. Il televisore si spegne automaticamente. • Verificare che l'opzione Timer stand-by sia impostata su Off nel Menu Impostazione. (P. 18) • Se il televisore è collegato al PC, verificare le impostazioni di alimentazione del PC. • Verificare che la spina del cavo di alimentazione CA sia correttamente collegata a una presa a muro e il televisore sia acceso. • Durante la visione del televisore mediante connessione via antenna o cavo, l'apparecchio si spegnerà dopo 10 ~ 15 minuti di mancanza di segnale. Nessuna immagine/video. • Verificare le connessioni dei cavi (scollegare e ricollegare tutti i cavi del televisore e dei dispositivi esterni). • Impostare le uscite video dei dispositivi esterni (ricevitore via cavo/STB, lettore DVD, Blu-ray, ecc) in modo che le connessioni corrispondano agli ingressi del televisore. Ad esempio, se l'uscita di un dispositivo esterno è HDMI, deve essere collegata a un ingresso HDMI sul televisore. • Verificare che i dispositivi collegati siano accesi. • Selezionare la corretta sorgente del televisore premendo il tasto SOURCE sul telecomando TV. Connessione RF (Cavo/Antenna) Il televisore non riceve tutti i canali. • Verificare che il cavo dell'antenna sia correttamente collegato. • Provare a impostare Plug & Play (Impostazione iniziale) per aggiungere i canali disponibili all'elenco canali. Accedere a MENU - Impostazione - Plug & Play (Impostazione iniziale) e attendere la memorizzazione di tutti i canali disponibili. • Verificare che l'antenna sia posizionata correttamente. L'immagine è distorta: sono visibili blocchi grandi, blocchi piccoli, punti e pixel • La compressione di contenuti video può causare la distorsione dell'immagine specialmente nel caso di immagini caratterizzate da movimenti rapidi, come per esempio eventi sportivi o film d'azione. • Un segnale basso può causare la distorsione dell'immagine. Questo non è un problema del televisore. Connessione PC Viene visualizzato il messaggio "Modo non supportato". • Impostare la risoluzione di uscita e la frequenza del PC in modo che corrispondano alle risoluzioni supportate dal televisore. (P. 20) “PC” viene sempre riportato nell'elenco delle sorgenti anche quando non risulta collegato alcun PC. • E' normale; nell'elenco sorgenti, “PC” risulta sempre evidenziato anche quando non è collegato alcun PC. Il video è buono ma l’audio è escluso. • Se si sta utilizzando una connessione HDMI, verificare le impostazioni di uscita audio del PC. Connessione di rete (in base al modello) Mancata connessione di rete wireless. • Per la rete wireless, è necessario utilizzare il dongle USB wireless di Samsung. • Verificare che la Connessione di rete sia impostata su Wireless. • Verificare che il televisore sia collegato a un router IP wireless. Altri L'immagine non rimane visualizzata a pieno schermo. • I canali HD riporteranno barre scure verticali su entrambi i lati dello schermo durante la visualizzazione di contenuti SD (4:3). • Quando vengono trasmessi film con un rapporto d'immagine diverso da quello del televisore, appaiono barre nere sui lati superiore e inferiore dello schermo. • Regolare la dimensione dell'immagine sul dispositivo esterno o sul televisore per visualizzare l'immagine a pieno schermo. Il telecomando non funziona. • Sostituire le pile del telecomando prestando attenzione a rispettare le polarità (+/–). • Pulire la finestra di trasmissione del sensore sul telecomando. • Puntare il telecomando direttamente verso il televisore a una distanza di 1,5~2 metri. Il telecomando del ricevitore via cavo/ satellitare non riesce ad accendere o spegnere il televisore o a regolare il volume. • Programmare il telecomando del ricevitore via cavo/satellitare in modo che possa controllare le funzioni del televisore. Consultare il manuale dell'utente del ricevitore via cavo/satellitare per il codice TV SAMSUNG. Viene visualizzato il messaggio "Not Supported Mode" (Modo non supportato). • Verificare la risoluzione del televisore supportata e regolare di conseguenza la risoluzione di uscita del dispositivo esterno. Vedere le impostazioni della risoluzione a pagina 20 di questo manuale. Si avverte un odore di plastica provenire dal televisore. • Ciò è normale e l'odore svanirà nel corso del tempo. Le Informazioni sul segnale del televisore non sono disponibili nel menu Test auto diagnosi. • Questa funzione è disponibile solo con canali digitali e connessione antenna / RF / Coax. (P. 20) Il televisore è inclinato su un lato. • Rimuovere il piedistallo dal televisore quindi rimontarlo. Si riscontrano difficoltà nel rimontare il piedistallo. • Verificare che il televisore sia posizionato su una superficie piana. Se non si riesce a svitare le viti fissate al televisore, utilizzare un cacciavite magnetico. Il menu dei canali è in colore grigio. (non disponibile) • Il menu Canale è disponibile solo se è selezionato il televisore come sorgente. Italiano 51 05 Altre informazioni Problemi Altre informazioni Problemi Soluzioni e spiegazioni Le impostazioni andranno perse dopo 30 minuti o a ogni spegnimento del televisore. • Se il televisore è in modalità Demo Negozio, ogni 30 minuti verranno azzerate le impostazioni audio e immagine. Commutare la modalità Demo Negozio in Uso dom. secondo la procedura Plug & Play (Impostazione iniziale). Premere il tasto SOURCE per selezionare la modalità TV, quindi selezionare MENU → Impostazione → Plug & Play (Impostazione iniziale) → ENTERE Perdita intermittente di segnale audio o video. • Verificare le connessioni e ricollegare i cavi. • La perdita del segnale audio o video può essere causata dall'uso di cavi eccessivamente rigidi o spessi. Verificare che i cavi siano sufficientemente flessibili da consentire un uso prolungato nel tempo. In caso di montaggio a parete, si consiglia di utilizzare cavi con connettori da 90°. Osservando da vicino il bordo della cornice del televisore si notano delle piccole particelle. • Ciò non costituisce un difetto ma fa parte del design del prodotto. Il menu PIP non è disponibile. • La funzione PIP è disponibile solo quando il segnale proviene da una sorgente HDMI, PC o component. Sullo schermo compare Il messaggio “Segnale criptato” o “Segnale debole/ Nessun segnale”. • Se si sta utilizzando un modulo CAM CARD (CI/CI+), verificare che sia installato nell'alloggiamento common interface. • Se il problema persiste, estrarre il modulo CAM CARD dal televisore e reinserirlo. E' stato spento il televisore 45 minuti fa, e il televisore si è riacceso. • Ciò è normale. Il televisore è dotato della funzione OTA (Over The Aerial) per eseguire automaticamente la funzione di aggiornamento del firmware scaricato durante la visione del televisore. Vi sono ricorrenti problemi di immagine/suoni. • Verificare e modificare il segnale/la sorgente. E' possibile che si verifichi una reazione tra la gomma della base del piedistallo e la superficie di alcuni mobili. • Al fine di evitare tale situazione, montare piedini di feltro su qualunque superficie del televisore possa entrare in contatto con il mobile. ✎ Lo schermo LCD TFT utilizza un pannello composto da sotto pixel la cui produzione richiede una speciale tecnologia. Tuttavia, sullo schermo alcuni pixel potrebbero risultare più luminosi o più scuri. Questo fenomeno non ha alcun impatto sulle prestazioni del prodotto. ¦ Licenza Manufactured under licence from Dolby Laboratories. Dolby and the double-D symbol are trademarks of Dolby Laboratories. Manufactured under license under U.S. Patent #’s: 5,451,942; 5,956,674; 5,974,380; 5,978,762; 6,487,535 & other U.S. and worldwide patents issued & pending. DTS and the Symbol are registered trademarks. & DTS 2.0+ Digital Out and the DTS logos are trademarks of DTS, Inc. Product Includes software. © DTS, Inc. All Rights Reserved. DivX Certified to play DivX video up to HD 1080p, including premium content. ABOUT DIVX VIDEO: DivX® is a digital video format created by DivX,Inc. This is an official DivX Certified device that plays DivX video. Visit www.divx.com for more information and software tools to convert your files into DivX video. ABOUT DIVX VIDEO-ON-DEMAND: This DivX Certified® device must be registered in order to play DivX Videoon-Demand (VOD) content. To generate the registration code, locate the DivX VOD section in the device setup menu. Go to vod.divx.com with this code to complete the registration process and learn more about DivX VOD. Pat. 7,295,673;7,460,688; 7,519,274 TheaterSound, SRS and the symbol are trademarks of SRS Labs, Inc. TheaterSound technology is incorporated under license form SRS Lab, Inc. 52 Italiano Pannello nativo Caratteristiche ambientali Temperatura di esercizio Umidità di esercizio Temperatura di stoccaggio Umidità di stoccaggio Sistema TV 1920 x 1080 @ 60 Hz 10°C a 40°C (50°F a 104°F) Da 10% a 80%, senza condensa -20°C a 45°C (-4°F a 113°F) Da 5% a 95%, senza condensa Analogico: In base al paese selezionato Digitale: DVB-T/DVB-C Analogico: PAL, SECAM, NTSC-4.43, NTSC-3.58, PAL60 Digitale: MPEG-2 MP@ML, MPEG-4, H.264/AVC MP@L3, [email protected], [email protected] BG. OK NICAM. MPEGl Video: 1080/24p, 1080p, 1080i, 720p, 576p, 576i, 480p, 480i Audio: Due canali lineari PCM 32/44.1/48 kHz, 16/20/24bits Ingresso audio analogico (solo HDMI IN1) Ingresso PC Sistema colore/video Sistema audio: HDMI IN 1 ~ 4 Piedistallo ruotabile (Sinistra / Destra) Nome modello Dimensione schermo (Diagonale) Suono Uscita Dimensioni (Lar x Pro x Alt) Corpo Con piedistallo Peso Con piedistallo Nome modello Dimensione schermo (Diagonale) Suono Uscita Dimensioni (Lar x Pro x Alt) Corpo Con piedistallo Peso Corpo Con piedistallo -20˚ ~ 20˚ LE32C650 LE32C652 32 inch LE37C650 LE40C650 LE40C652 LE46C650 LE46C652 LE55B650 37 inch 40 inch 46 inch 55 inch 10W X 2 15W X 2 789.2 X 77.8 X 509.9 mm 907.6 X 78.5 X 574.4 mm 976.2 X 80.4 X 614.9 mm 1108.6 X 80.3 X 689.7 mm 1301.6 X 85.3 X 801.2 mm 789.2 X 240 X 555.9 mm 907.6 X 255 X 621.2 mm 976.2 X 255 X 659.3 mm 1108.6 X 275 X 734.5 mm 1301.6 X 305 X 845.3 mm 9.1 kg 11.6 kg 14.3 kg 18.1 kg 28.1 kg 11.8 kg 15 kg 17.7 kg 21.9 kg 32.7 kg LE32C653 LE32C654 LE40C653 LE40C654 LE46C653 LE46C654 32 inch 40 inch 46 inch 10W X 2 794.5 X 77.8 X 495.4 mm 794.5 X 240 X 558.6 mm 981.5 X 80.4 X 598.5 mm 981.5 X 255 X 661.9 mm 1113.9 X 80.3 X 674.1 mm 1113.9 X 275 X 737.1 mm 9.3 kg 12 kg 13.5 kg 16.9 kg 18.1 kg 21.9 kg ✎ Design e specifiche sono soggetti a modifiche senza preavviso. ✎ Per l’alimentazione elettrica e il consumo di corrente, consultare l’etichetta apposta al prodotto. Italiano 53 05 Altre informazioni Specifiche Altre informazioni Indice A G Aggiornamento software AllShare Altoparlante est Altoparlante TV Amplificazione Antenna Anynet+ Audio Out Auto diagnosi 20 44 17 17 16 12 36 8, 36 20 B Batterie Bilan bianco Bilanciamento Blocco 5 14 16 13 Gestione canali Guida Now & Next R 11 10 H HDMI Home Theater 7, 36 8, 36 I Impostazione rete Incarnato Indicatore di alimentazione Informazioni sul segnale Internet@TV 24, 26 14 4 20 39 L Licenza Luminosità C Caldo 15 Cambia PIN 6, 19 Canali preferiti 11 Collegamento di un dispositivo audio 8 Collegamento a un PC 22 Component 7 Connessione di rete 23 Contrasto Dinamico 14 Cuffie 8 52 13 M Media Play Melodia Modalità Film Modalità Ripeti Modalità Standby Modifica dei canali Modifica Nome Musica Musica di sottof 29 19 15 35 4 12 9 33 35 D Digital Audio Out Dinamica Divx® VOD D-sub 8, 36 13 35 22 Nitidezza Elenco sorgenti EPG Equalizzatore 9 10 16 F Fermacavi Formato immagine Foto Frequenza Italiano 48 15, 35 34 12 S Scorrere Seleziona altoparlante Seleziona tutto Sensore Eco Simbolo Sintonia fine Sottotitoli Specifiche Staffa preforata Strumenti Supporto a parete 9 17 13 14 3 13 19 53 47 3 47 T Tasto ON/OFF Telecomando Timer Timer stand-by Titolo Tonalità nero Toni colore Trasparenza menu 5 5 18 18 34 14 15 19 U 18 P Password PIP Plug & Play Posizione di installazione Proiezione di diapositive 37 16 14 50 38 32 22 14 35 13 O Orologio E 54 N Registrazione Regolazione auto RGB Risoluzione dei problemi Ricevitore Riproduzione Video Risoluzione ottimale Risp. energia Ruota 40 20 6 2 34 USB 20, 29 Usare Vis. canali 10 Uso dei Canali Preferiti 11 Uso di Vista programmazione 10 V VCR Video Visual base Volume Volume auto 9 31 34 4, 5, 17 17 Questa pagina è stata lasciata intenzionalmente bianca.