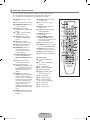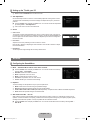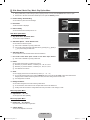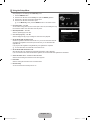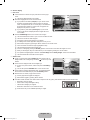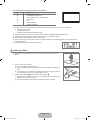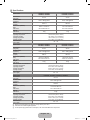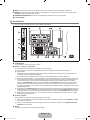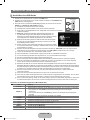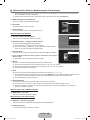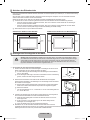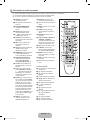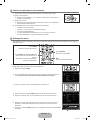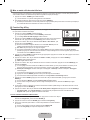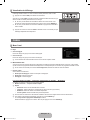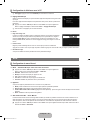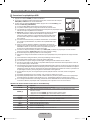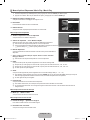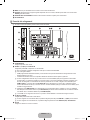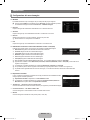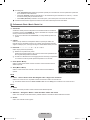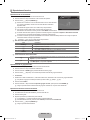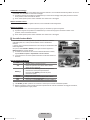
1
Contact SAMSUNG WORLDWIDE If you have any questions or comments relating to Samsung products, please contact the SAMSUNG customer care centre. Country Customer Care Centre Web Site AUSTRIA 0810 - SAMSUNG (7267864, € 0.07/min) www.samsung.com/at 02 201 2418 www.samsung.com/be www.samsung.com/be_fr 800 - SAMSUNG (800-726786) www.samsung.com/cz BELGIUM CZECH REPUBLIC Distributor pro Českou republiku: Samsung Zrt., česká organizační složka, Oasis Florenc, Sokolovská394/17, 180 00, Praha 8 DENMARK 8 - SAMSUNG (7267864) www.samsung.com/dk EIRE 0818 717 100 www.samsung.com/ie FINLAND 30 - 6227 515 www.samsung.com/fi FRANCE 01 4863 0000 www.samsung.com/fr GERMANY 01805 - SAMSUNG (7267864, € 0.14/Min) www.samsung.de HUNGARY 06 - 80 - SAMSUNG (7267864) www.samsung.com/hu ITALIA 800 - SAMSUNG (7267864) www.samsung.com/it LUXEMBURG 02 261 03 710 www.samsung.com/lu NETHERLANDS 0900-SAMSUNG (0900-7267864) (€ 0,10/Min) www.samsung.com/nl NORWAY 3 - SAMSUNG (7267864) www.samsung.com/no POLAND 0 801 1SAMSUNG(172678) 022 - 607 - 93 - 33 www.samsung.com/pl PORTUGAL 808 20 - SAMSUNG (7267864) www.samsung.com/pt SLOVAKIA 0800 - SAMSUNG (7267864) www.samsung.com/sk SPAIN 902 - 1 - SAMSUNG (902 172 678) www.samsung.com/es SWEDEN 075 - SAMSUNG (726 78 64) www.samsung.com/se SWITZERLAND 0848 - SAMSUNG (7267864, CHF 0.08/min) www.samsung.com/ch U.K 0845 SAMSUNG (7267864) www.samsung.com/uk TURKEY 444 77 11 www.samsung.com/tr ESTONIA 800-7267 www.samsung.com/ee LATVIA 8000-7267 www.samsung.com/lv LITHUANIA 8-800-77777 www.samsung.com/lt KAZAHSTAN 8-10-800-500-55-500 www.samsung.com/kz_ru KYRGYZSTAN 00-800-500-55-500 - RUSSIA 8-800-555-55-55 www.samsung.ru TADJIKISTAN 8-10-800-500-55-500 - UKRAINE 8-800-502-0000 www.samsung.ua UZBEKISTAN 8-10-800-500-55-500 www.samsung.com/kz_ru LCD TV user manual imagine the possibilities Thank you for purchasing this Samsung product. To receive more complete service, please register your product at www.samsung.com/register Model Serial No. BN68-02325D-00 BN68-02325D-Cover.indd 1 2009-05-13 �� 10:45:38 ❑ Digital TV Notice 1. Functionalities related to Digital TV(DVB) are only available in countries/areas where DVB-T (MPEG2 and MPEG4 AVC) digital terrestrial signals are broadcasted or where you are able to access to a compatible DVB-C(MPEG2 and MPEG4 AAC) cableTV service. Please check with your local dealer the possibility to receive DVB-T or DVB-C signal. 2. DVB-T is the DVB European consortium standard for the broadcast transmission of digital terrestrial television and DVBC is that for the broadcast transmission of digital TV over cable. However, some differentiated features like EPG (Electric Programme Guide), VOD (Video on Demand) and so on, are not included in this specification. So, they cannot be workable at this moment. 3. Although this TV set meets the latest DVB-T and DVB-C standards, as of [August, 2008], the compatibility with future DVB-T digital terrestrial and DVB-C digital cable broadcasts cannot be guaranteed. 4. Depending on the countries/areas where this TV set is used some cable-TV providers may charge an additional fee for such a service and you may be required to agree to terms and conditions of their business. 5. Some Digital TV functions might be unavailable in some countries or regions and DVB-C might not work correctly with some cable service providers. 6. For more information, please contact your local Samsung customer care centre. ❑ Precautions When Displaying a Still Image A still image may cause permanent damage to the TV screen ● Do not display still image and partially still on the LCD panel for more than 2 hours as it can cause screen image retention. This image retention is also known as screen burn. To avoid such image retention, reduce the degree of brightness and contrast of the screen when displaying a still image. ● Watching the LCD TV in 4:3 format for a long period of time may leave traces of borders displayed on the left, right and centre of the screen caused by the difference of light emission on the screen. Playing a DVD or a game console may cause a similar effect to the screen. Damages caused by the above effect are not covered by the Warranty. ● Displaying still images from Video games and PC for longer than a certain period of time may produce partial after-images. To prevent this effect, reduce the ‘brightness’ and ‘contrast’ when displaying still images. © 2009 Samsung Electronics Co., Ltd. All rights reserved. BN68-02325A-Eng.indb 1 2009-05-19 �� 3:42:36 ANYNET+ Setting up Your TV ■ Accessories........................................................................................ 2 ■ Viewing the Control Panel.................................................................. 2 ■ Viewing the Connection Panel............................................................ 3 ■ Viewing the Remote Control............................................................... 5 ■ Installing Batteries in the Remote Control.......................................... 6 ■ Viewing the menus............................................................................. 6 ■ Placing Your Television in Standby Mode........................................... 7 ■ Plug & Play Feature............................................................................ 7 ■ Viewing the Display............................................................................ 8 CHANNEL ■ Channel Menu.................................................................................... 8 ■ Managing Channels .........................................................................11 PICTURE ■ Configuring the Picture Menu........................................................... 13 ■ Viewing Picture-in-Picture................................................................ 16 ■ Using Your TV as a Computer (PC) Display..................................... 17 ■ Setting up the TV with your PC........................................................ 18 SOUND ■ Configuring the Sound Menu............................................................ 18 ■ Selecting the Sound Mode............................................................... 20 SETUP ■ Configuring the Setup Menu............................................................. 20 ■ Setting the Time................................................................................ 23 ■ Network Connection......................................................................... 24 ■ Setting the Network.......................................................................... 26 INPUT / SUPPORT ■ Input Menu........................................................................................ 29 ■ Support Menu................................................................................... 29 Media Play (USB & DLNA) ■ Connecting a USB Device................................................................ 32 ■ Media Play Function......................................................................... 33 ■ Sorting the Photo / Music / Movie List.............................................. 34 ■ Photo / Music / Movie List Option Menu........................................... 35 ■ Slide Show / Music Play / Movie Play Option Menu ........................ 36 ■ Viewing a Photo or Slide Show........................................................ 37 ■ Playing Music................................................................................... 38 ■ Playing a Movie File......................................................................... 39 ■ Using the Setup Menu...................................................................... 41 Media Play-DLNA ■ Setting the DLNA Network................................................................ 42 ■ Installing the DLNA Application......................................................... 42 ■ Using the DLNA Application.............................................................. 43 ■ Using the DLNA Function................................................................. 44 ■ Connecting Anynet+ Devices............................................................ 45 ■ Setting Up Anynet+. ......................................................................... 46 ■ Switching between Anynet+ Devices................................................ 46 ■ Recording......................................................................................... 47 ■ Listening through a Receiver (Home theatre)................................... 47 ■ Troubleshooting for Anynet+. ........................................................... 48 English Contents Content Library ■ Using the Content Library................................................................. 49 ■ Using the Contents........................................................................... 49 ■ Using the Content Management....................................................... 50 Internet@TV ■ Getting Started with Internet@TV..................................................... 51 ■ Editing Snippets in the Dock............................................................. 53 ■ Using the Profile Widget................................................................... 53 ■ Using the Yahoo!® Widget Gallery................................................... 54 ■ Using the Yahoo!® Weather Widget................................................. 55 ■ Using the Yahoo!® News Widget...................................................... 55 ■ Using the Yahoo!® Flickr Widget...................................................... 56 ■ Using the Yahoo!® Finance Widget.................................................. 56 ■ Troubleshooting for internet@TV...................................................... 57 ■ Help Website.................................................................................... 57 Internet@TV ■ Getting Started with Internet@TV..................................................... 58 ■ Setting up Internet@TV.................................................................... 58 ■ Using the Internet@TV service......................................................... 59 ■ Troubleshooting for internet@TV...................................................... 60 ■ Help Website.................................................................................... 60 Home Network Centre ■ Home Network Centre...................................................................... 61 ■ Setting Up the Home Network Centre.............................................. 62 ■ Using the Message Function............................................................ 62 ■ Using the Media Function................................................................. 63 RECOMMENDATIONS ■ Teletext Feature................................................................................ 64 ■ Installing the Stand........................................................................... 65 ■ Disconnecting the Stand................................................................... 66 ■ Installing the Wall Mount Kit............................................................. 66 ■ Assembling the Cables..................................................................... 66 ■ Anti-Theft Kensington Lock.............................................................. 66 ■ Securing the Installation Space........................................................ 67 ■ Securing the TV to the Wall.............................................................. 67 ■ Troubleshooting: Before Contacting Service Personnel................... 68 ■ Specifications................................................................................... 69 ■ GNU GENERAL PUBLIC LICENSE ■ END OF TERMS AND CONDITIONS ■ GNU Lesser General Public License (LGPL) ■ END OF TERMS AND CONDITIONS ■ LICENSE ISSUES ❑ License TruSurround HD, SRS and symbol are trademarks of SRS Labs, Inc. TruSurround HD technology is incorporated under license from SRS Labs, Inc. Manufactured under license from Dolby Laboratories. Dolby and the double-D symbol are trademarks of Dolby Laboratories. DivX® Certified to play DivX® video, including premium content. ❑ Symbol N O T Note One-Touch Button TOOLS Button Press English - BN68-02325A-Eng.indb 1 2009-05-19 �� 3:42:37 Setting up Your TV N Figures and illustrations in this User Manual are provided for reference only and may differ from actual product appearance. Product design and specifications may be changed without notice in order to enhance product performance. ¦ Accessories Remote Control & Batteries (AAA x 2) Power Cord Warranty Card / Safety Guide (Not available in all locations) Cover-Bottom Cleaning Cloth Holder-Wire Cable (Depending on the model) Programme CD N Please make sure the following items are included with your LCD TV. If any items are missing, contact your dealer. N The items colour and shape may vary depending on the model. ¦ Viewing the Control Panel N The product colour and shape may vary depending on the model. N The front panel buttons can be activated by touching it with your finger. 8 8 7 6 5 4 3 21 8 8 7 6 4 2 1 3 5 1 P (POWER): Press to turn the TV on and off. 2 POWER INDICATOR: Blinks and turns off when the power is on and lights up in stand-by mode. 3 z: Press to change channels. In the on-screen menu, use the z buttons as you would use the ▼ and ▲ buttons on the remote control. 4 Y: Press to increase or decrease the volume. In the on-screen menu, use the Y buttons as you would use the ◄ and ► buttons on the remote control. English - BN68-02325A-Eng.indb 2 2009-05-19 �� 3:42:40 5 MENU: Press to see an on-screen menu of your TV’s features. 6 SOURCEE: Toggles between all the available input sources. In the on-screen menu, use this button as you would use the ENTERE button on the remote control. 7REMOTE CONTROL SENSOR: Aim the remote control towards this spot on the TV. 8 SPEAKERS ¦ Viewing the Connection Panel N The product colour and shape may vary depending on the model. [TV Side Panel] [TV Rear Panel] 1 2 34 5 $ # 2 # @ ! 0 9 8 7 6 Power Input 1 COMPONENT IN Connects Component video / audio. 2 HDMI IN 1, 2, 3(DVI), 4 / DVI AUDIO IN Connects to the HDMI jack of a device with an HDMI output. N No sound connection is needed for an HDMI to HDMI connection. N What is HDMI? • HDMI (High-Definition Multimedia Interface), is an interface that enables the transmission of digital audio and video signals using a single cable. • The difference between HDMI and DVI is that the HDMI device is smaller than DVI’s one. N The TV may not output sound and pictures may be displayed with abnormal colour when DVD / Blu-ray player / Cable Box / Satellite receiver (Set-Top Box) supporting HDMI versions older than 1.3 are connected. When connecting an older HDMI cable and there is no sound, connect the HDMI cable to the HDMI IN 3(DVI) jack and the audio cables to the DVI AUDIO IN jacks on the back of the TV. If this happens, contact the company that provided the DVD / Blu-ray player / Cable Box / Satellite receiver (Set-Top Box) to confirm the HDMI version, then request an upgrade. N Use the HDMI IN 3(DVI) jack for DVI connection to an external device. Use a DVI to HDMI cable or DVI-HDMI adapter (DVI to HDMI) for video connection and the DVI AUDIO IN jacks for audio. When using an HDMI / DVI cable connection, you must use the HDMI IN 3(DVI) jack. N HDMI cables that are not 1.3 may cause annoying flicker or no screen display. 3 PC IN [PC] / [AUDIO] Connects to the video and audio output jacks on your PC. N If your PC supports an HDMI connection, you can connect this to the HDMI IN 1, 2, 3(DVI) or 4 terminal. N If your PC supports a DVI connection, you can connect this to the HDMI IN 3(DVI) / DVI AUDIO IN terminal. 4 ANT IN Connects to an antenna or cable TV system. English - BN68-02325A-Eng.indb 3 2009-05-19 �� 3:42:40 5 LAN Connect a LAN cable to this port to connect to the Network. 6KENSINGTON LOCK (depending on the model) The Kensington Lock (optional) is a device used to physically fix the system when used in a public place. If you want to use a locking device, contact the dealer where you purchased the TV. N The location of the Kensington Lock may be different depending on its model. 7 H(HEADPHONE) Headphone may be connected to the headphone output on your set. While the head phone is connected, the sound from the built-in speakers will be disabled. N Using the sound function is restricted when connecting headphones to the TV. N Prolonged use of headphones at a high volume may damage your hearing. N You will not hear sound from the speakers when you connect headphones to the TV. N The headphone volume and TV volume are adjusted separately. 8 DIGITAL AUDIO OUT (OPTICAL) Connects to a Digital Audio component such as a Home theatre receiver. N When a Digital Audio System is connected to the DIGITAL AUDIO OUT (OPTICAL) jack: Decrease the volume of the TV and adjust the volume level with the system’s volume control. N 5.1CH audio is possible when the TV is connected to an external device supporting 5.1CH. N When the receiver (home theatre) is set to On, you can hear sound output from the TV’s Optical jack. When the TV is displaying a DTV(air) signal, the TV will send out 5.1 channel sound to the Home theatre receiver. When the source is a digital component such as a DVD / Blu-ray player / Cable Box / Satellite receiver (Set-Top Box) and is connected to the TV via HDMI, only 2 channel sound will be heard from the Home Theatre receiver. If you want to hear 5.1 channel audio, connect the digital audio out jack on DVD / Blu-ray player / Cable Box / Satellite receiver (Set-Top Box) directly to an Amplifier or Home Theatre, not the TV. 9 SERVICE Connector for service only. 0 AUDIO OUT [R-AUDIO-L] Connects to the audio input jacks on your Amplifier/Home theatre. When an audio amplifier is connected to the AUDIO OUT [R-AUDIO-L] jacks: Decrease the volume of the TV and adjust the volume level with the Amplifier’s volume control. ! EXT1, 2 Inputs or outputs for external devices, such as VCR, DVD, video game device or video disc players. N In EXT Mode, DTV Out supports MPEG SD Video and Audio only. Input/Output Specification Connector EXT 1 EXT 2 Video O O Input Audio (L / R) O O RGB O X Output Video + Audio (L / R) Only TV or DTV output is available. Output you can choose. @ AV IN [VIDEO] / [R-AUDIO-L] Video and audio inputs for external devices, such as a camcorder or VCR. # USB1(HDD) / USB2 Connector for software upgrades and Media Play, etc. You can connect to Samsung’s network wirelessly using the ‘Samsung Wireless LAN Adapter’ (Sold separately). N For USB HDD, use the USB1 (HDD) port. $ COMMON INTERFACE Slot When not inserting ‘CI(CI+) CARD’ in some channels, ‘Scrambled Signal’ is displayed on the screen. The pairing information containing a telephone number, ‘CI(CI+) CARD’ ID, Host ID and other information will be displayed in about 2~3 minutes. If an error message is displayed, please contact your service provider. When the channel information configuration has finished, the message ‘Updating Completed’ is displayed, indicating that the channel list is now updated. N You must obtain a ‘CI(CI+) CARD’ from a local cable service provider. Remove the ‘CI(CI+) CARD’ by carefully pulling it out with your hands since dropping the ‘CI(CI+) CARD’ may cause damage to it. N Insert the ‘CI(CI+) CARD’ in the direction marked on it. N The place of the COMMON INTERFACE Slot may be different depending on its model. N ‘CI(CI+) CARD’ is not supported in some countries and regions, check with your authorized dealer. N The CI+ function is only applicable to LE********P model. If you have some problems, please contact to service provider. English - BN68-02325A-Eng.indb 4 2009-05-19 �� 3:42:41 ¦ Viewing the Remote Control N You can use the remote control up to a distance of about 23 feet from the TV. N The performance of the remote control may be affected by bright light. N The product colour and shape may vary depending on the model. 1 POWER: Turns the TV on and off. ^ MUTE M: Press to temporarily cut off the sound. 2 TV: Selects the TV mode directly. & > P <: Press to change channels. 3 NUMERIC BUTTONS: Press to change the channel. 4 FAV.CH: Used to display Favourites Channel Lists on the screen. * MENU: Displays the main onscreen menu. ( GUIDE: Electronic Programme Guide (EPG) display 5 Y: Press to increase or decrease the volume. ) RETURN: Returns to the previous menu 6 SOURCE: Press to display and select the available video sources. a UP▲ / DOWN▼ / LEFT◄ / RIGHT► / ENTERE: Use to select on-screen menu items and change menu values. 7 INFO: Press to display information on the TV screen. 8 TOOLS: Use to quickly select frequently used functions. 9 INTERNET@: Press to use various internet services to view useful information and entertaining content. 0 COLOUR BUTTONS: Use these buttons in the Channel list, Internet@TV, Media Play menu, etc. @ CH LIST: Used to display Channel Lists on the screen. # Use these buttons in the Media Play and Anynet+ modes. (∏: This remote can be used to control recording on Samsung recorders with the Anynet+ feature) $ ON/OFF @: Pressing the ON/OFF @ light button toggles between on and off. When the remote control is on, and a button is pressed on the remote control, the remote control buttons will be lit for a moment. (Using the remote control with the ON/OFF @ light button set to On will reduce the battery usage time.) b EXIT: Press to exit the menu. c CONTENT: This function enables you to view the Content Library. 1 2 $ 3 4 % ^ 5 & 6 7 INFO GUIDE 8 ) d MEDIA.P: Allows you to play music files, pictures, and movies. e SUBT.: Digital subtitle display f AD: Audio Description selection. * ( a b 9 0 Teletext Functions 2 : : Exit from the Teletext display ! @ CH LIST AD c d e f # 6 0 : Teletext mode selection (LIST / FLOF) 7 5 : Teletext reveal 8 4 : Teletext size selection 0 Fastext topic selection ! / : Alternately select Teletext, Double or Mix. @ 8 : Teletext store % 1 : Teletext sub page & 2 : Teletext next page 3 : Teletext previous page * 6 : Teletext index ) 9 : Teletext hold b 7 : Teletext cancel % PRE-CH: Enables you to return to the previous channel you were watching. English - BN68-02325A-Eng.indb 5 2009-05-19 �� 3:42:41 ¦ Installing Batteries in the Remote Control 1. Lift the cover at the back of the remote control upward as shown in the figure. 2. Install two AAA size batteries. N Make sure to match the ‘+’ and ‘–’ ends of the batteries with the diagram inside the compartment. 3. Replace the cover. N Remove the batteries and store them in a cool, dry place if you won’t be using the remote control for a long time. N If the remote control doesn’t work, check the following: • Is the TV power on? • Are the plus and minus ends of the batteries reversed? • Are the batteries drained? • Is there a power outage or is the power cord unplugged? • Is there a special fluorescent light or neon sign nearby? OPERATION ¦ Viewing the menus Before using the TV, follow the steps below to learn how to navigate the menu in order to select and adjust different functions. MENU Button Display the main on-screen menu. RETURN Button Return to the previous menu. ENTERE / DIRECTION Button Move the cursor and select an item. Select the currently selected item. Confirm the setting. EXIT Exit the on-screen menu. ❑ How to operate the OSD (On Screen Display) The access step may differ depending on the selected menu. 1. Press the MENU button. Picture 2. The main menu appears on the screen. The menu’s left side has icons : Picture, Sound, Channel, Setup, Input, Application, Support. Mode : Standard Backlight Contrast Brightness Sharpness Colour Tint (G/R) Advanced Settings :7 : 95 : 45 : 50 : 50 : G50/R50 Mode : Standard ▶ 3. Press the ▲ or ▼ button to select one of the icons. 4. Then press the ENTERE button to access the icon’s sub-menu. Picture 5. Press the ▲ or ▼ button to select the icon’s submenu. 6. Press the ◄ or ► button to decrease or increase the value of a particular item. The adjustment OSD may differ depending on the selected menu. 7. Press the ENTERE button to complete the configuration. Press the EXIT button to exit. Backlight : 7 Contrast Brightness Sharpness Colour Tint (G/R) Advanced Settings Picture Options : 95 : 45 : 50 : 50 : G50/R50 ▲ Backlight ▼ ▶ 7 U Move L Adjust E Enter R Return Help icon English - BN68-02325A-Eng.indb 6 2009-05-19 �� 3:42:42 ¦ Placing Your Television in Standby Mode Your set can be placed in standby mode in order to reduce the power consumption. The standby mode can be useful when you wish to interrupt viewing temporarily (during a meal, for example). 1. Press the POWERP button on the remote control. N The screen is turned off and a standby indicator appears on your set. 2. To switch your set back on, simply press the POWERP button again. N Do not leave your set in standby mode for long periods of time (when you are away on holiday, for example). It is best to unplug the set from the mains and aerial. ¦ Plug & Play Feature When the TV is initially powered on, basic settings proceed automatically and subsequently. 1. Press the POWER button on the remote control. N You can also use the POWERP button on the TV. N The message Select the OSD Language. is displayed. 2. Press the ENTERE button. Select the appropriate language by pressing the ▲ or ▼ button. Press the ENTERE button to confirm your choice. Plug & Play Select the OSD Language. 3. Press the ◄ or ► button to select Store Demo or Home Use, then the ENTERE button. Menu Language : English ▶ N We recommend setting the TV to Home Use mode for the best picture in your home environment. E Enter N Store Demo mode is only intended for use in retail environments. N If the unit is accidentally set to Store Demo mode and you want to return to Home Use (Standard): Press the volume button on the TV. When the volume OSD is displayed, press and hold the MENU button on the TV for 5 seconds. 4. Press the ENTERE button. Select the appropriate country by pressing the ▲ or ▼ button. Press the ENTERE button to confirm your choice. 5. Press the ▲ or ▼ button to select Air or Cable, then press the ENTERE button. N Air: Air antenna signal. N Cable: Cable antenna signal. 6. Press the ▲ or ▼ button to select the channel source to memorize. Press the ENTERE button to select Start. N When setting the antenna source to Cable, a step appears allowing you to set a value for the digital channel search. For more information, refer to Channel → Auto Store. N Digital & Analogue: Digital and Analogue channels. / Digital: Digital channels. / Analogue: Analogue channels. N The channel search will start and end automatically. N Press the ENTERE button at any time to interrupt the memorization process. N After all the available channels are stored, the message Set the Clock Mode. is displayed. 7. Press the ENTERE button. Press the ▲ or ▼ button to select Auto, then Press the ENTERE button. N If you select Manual, Set current date and time is displayed. N If you have received a digital signal, the time will be set automatically. If not, select Manual to set the clock. 8. The description for the connection method providing the best HD screen quality is displayed. Check the description and press the ENTERE button. 9. Press the ◄ or ► button to select See Product Guide or Watch TV. Press the ENTERE button. • See Product Guide: You are moved to the Product Guide where you can view the introduction to the main functions of your new HDTV. • Watch TV: You can watch the memorized channels. If you want to reset this feature... 2. Press the ENTERE button again to select Plug & Play. 3. Enter your 4 digit PIN number. The default PIN number of a new TV set is ‘0-0-0-0’. N If you want to change PIN number, use the Change PIN function. N The Plug & Play feature is only available in the TV mode. Setup 1. Press the MENU button to display the menu. Press the ▲ or ▼ button to select Setup, then press the ENTERE button. Plug & Play Menu Language Time Broadcast Security Network General : English ▶ English - BN68-02325A-Eng.indb 7 2009-05-19 �� 3:42:42 ¦ Viewing the Display The display identifies the current channel and the status of certain audio-video settings. O Press the INFO button to viewing the information. Press the INFO button on the remote control. The TV will display the channel, the type of sound, and the status of certain picture and sound settings. ● ▲, ▼: You can view other channel’s information. If you want to move to the currently selected channel, press ENTERE button. ● ◄, ►: You can view the desired program’s information at the current channel. abc1 18:11 Thu 6 Jan Life On Venus Avenue DTV Air 15 18:00 ~ 6:00 Unclassified No Detaild Information E Watch ' Information N Press the INFO button once more or wait approximately 10 seconds and the display disappears automatically. CHANNEL ¦ Channel Menu ❑ Country ■ Channel ■ Analogue Channel You can change the country for analogue channels. Digital Channel You can change the country for digital channels. N The PIN number input screen appears. Enter your 4 digit PIN number. Country Auto Store Manual Store Cable Search Options Full Guide Mini Guide Default Guide Channel List ▶ : Full Guide ❑ Auto Store You can scan for the frequency ranges available to you (and availability depends on your country). Automatically allocated programme numbers may not correspond to actual or desired programme numbers. N If a channel is locked using the Child Lock function, the PIN input window appears. ■ Air / Cable Antenna source to memorize. ● Digital & Analogue: Digital and Analogue channels. ● Digital: Digital channels. ● Analogue: Analogue channels. When selecting Cable → Digital & Analogue or Cable → Digital: Provide a value to scan for cable channels. ● Search Mode → Full / Network / Quick N Quick • Network ID: Displays the network identification code. • Frequency: Displays the frequency for the channel. (Differs in each country) • Modulation: Displays available modulation values. • Symbol Rate: Displays available symbol rates. N Scans for all channels with active broadcast stations and stores them in the TV’s memory. N If you want to stop Auto Store, press the ENTERE button. The Stop Auto Store? message will be displayed. Select Yes by pressing the ◄ or ► button, then press the ENTERE button. English - BN68-02325A-Eng.indb 8 2009-05-19 �� 3:42:43 ❑ Manual Store N Scans for a channel manually and stores it in the TV’s memory. N If a channel is locked using the Child Lock function, the PIN input window appears. ■ Digital Channel Manual store for digital channels. N Digital Channel is only available in DTV mode. ● Channel: Set the Channel number using the ▲, ▼ or number (0~9) buttons. ● Frequency: Set the frequency using the number buttons. ● Bandwidth: Set the bandwidth using the ▲, ▼ or number (0~9) buttons. N When it has finished, channels are updated in the channel list. ■ Analogue Channel Manual store for analogue channel. ● Programme (Programme number to be assigned to a channel): Sets the programme number using the ▲, ▼ or number (0~9) buttons. ● Colour System → Auto / PAL / SECAM / NTSC4.43: Sets the colour system value using the ▲ or ▼ button. ● Sound System → BG / DK / I / L: Sets the sound system value using the ▲ or ▼ button. ● Channel (When you know the number of the channel to be stored): Press the ▲ or ▼ button to select C (Air channel) or S (Cable channel). Press the ► button, then press the ▲, ▼ or number (0~9) buttons to select the required number. N You can also select the channel number directly by pressing the number (0~9) buttons. N If there is abnormal sound or no sound, reselect the sound standard required. ● Search (When you do not know the channel numbers): Press the ▲ or ▼ button to start the search. The tuner scans the frequency range until the first channel or the channel that you selected is received on the screen. ● Store (When you store the channel and associated programme number): Set to OK by pressing the ENTERE button. N Channel mode P (Programme mode): When completing tuning, the broadcasting stations in your area have been assigned to position numbers from P00 to P99. You can select a channel by entering the position number in this mode. C (Air channel mode): You can select a channel by entering the assigned number to each air broadcasting station in this mode. S (Cable channel mode): You can select a channel by entering the assigned number for each cable channel in this mode. ❑ Cable Search Option (depending on the country) Sets additional search options such as the frequency and symbol rate for cable network searches. ● Freq.Start (Frequency Start): Set the start frequency (Differs in each country) ● Freq.Stop (Frequency Stop): Set the stop frequency (Differs in each country) ● Modulation: Displays available modulation values. ● Symbol Rate: Displays available symbol rates. ❑ Full Guide / Mini Guide The EPG (Electronic Programme Guide) information is provided by the broadcasters. Programme entries may appear blank or out of date as a result of the information broadcast on a given channel. The display will dynamically update as soon as new information becomes available. O You can also display the guide menu simply by pressing the GUIDE button. (To configure the Default Guide, refer to the descriptions.) ■ Full Guide Displays the programme information as time ordered One hour segments. Two hours of programme information is displayed which may be scrolled forwards or backwards in time. ■ Mini Guide The information of each programme is displayed by each line on the current channel Mini Guide screen from the current programme onwards according to the programme starting time order. English - BN68-02325A-Eng.indb 9 2009-05-19 �� 3:42:43 ❑ Default Guide → Full Guide / Mini Guide You can decide whether to display either the Full Guide or the Mini Guide when the GUIDE button on the remote control is pressed. ❑ Channel List For detailed procedures on using the Channel List, refer to the Managing Channels instructions. O You can select these options by simply pressing the CH LIST button on the remote control. ❑ Channel Mode When press the P >/< button, Channels will be switched within the selected channel list. ■ Added Ch. Channels will be switched within the memorized channel list. ■ Favourite Ch. Channels will be switched within the favourite channel list. ❑ Fine Tune If the reception is clear, you do not have to fine tune the channel, as this is done automatically during the search and store operation. If the signal is weak or distorted, you may have to fine tune the channel manually. N Fine tuned channels that have been saved are marked with an asterisk ‘*’ on the right-hand side of the channel number in the channel banner. N To reset the fine-tuning, select Reset by pressing the ▲ or ▼ button and then press the ENTERE button. N Only Analogue TV channels can be fine tuned. Using the Full / Mini Guide Full Guide DTV Cable 900 f tn 2:10 Tue 1 Jun Freshmen On Campus 2:00 - 2:30 No Detailed Information 900 Today 900 f tn 901 ITV Play 902 Kerrang! 903 Kiss 904 oneword ▼ 905 Hits 2:00 - 3:00 Freshmen O.. Street Hypn.. Mint Extra Loaded 40 with Dynamite MC The Distillery Smash Hits! Sunday 3:00 - 4:00 No Information Mini Guide No Information Kisstory No Information ▼ E Watch Information��� Page���� Mini Guide +24 Hours 2:00 2:30 5:00 Exit DTV Cable 900 f tn Freshmen On Campus Street Hypnosis Booze Britain E Watch Information��� Page���� Full Guide Exit To... Then... Watch a programme in the EPG list Select a programme by pressing the ▲, ▼, ◄, ► button. Exit the guide Press the blue button. If the next programme is selected, it is scheduled with the clock icon displayed. If the ENTERE button is pressed again, press the ◄, ► button to select Cancel Schedules, the scheduling is cancelled with the clock icon gone. View programme information Select a programme of your choice by pressing the ▲, ▼, ◄, ► button. Then press the INFO button when the programme of your choice is highlighted. The programme title is on the upper part of the screen centre. Please click on INFO button for the detailed information. Channel Number, Running Time, Status Bar, Parental Level, Video Quality Information (HD / SD), Sound Modes, Subtitle or Teletext, languages of Subtitle or Teletext and brief summary of the highlighted programme are included on the detailed information. ‘...’ will be appeared if the summary is long. Toggle between the Full Guide and Mini Guide Press the red button repeatedly. In Full Guide Scrolls backwards quickly (24 hours). Scrolls forwards quickly (24 hours). Press the Green button repeatedly. Press the Yellow button repeatedly. English - 10 BN68-02325A-Eng.indb 10 2009-05-19 �� 3:42:43 ¦ Managing Channels Using this menu, you can add / delete or set favourites channels and use the programme guide for digital broadcasts. All Channels Shows all currently available channels. ■ Added Channels Shows all added channels. ■ ■ Added Channels ■ 824 UKTV Gold 825 UKTV style A 1 C -A 2 C -A 3 C -A 4 C -- A 5 C -- Favourites Shows all favourite channels. O To select the favourites channels you have set up, press the FAV.CH button on the remote control. A 6 C -- A 7 C -A 8 C - All Channel Type Zoom Select T Tools Programmed Shows all current reserved programmes. N Select a channel in the All Channels, Added Channels or Favourites screen by pressing the ▲ / ▼ buttons, and pressing the ENTERE button. Then you can watch the selected channel. N Using the Colour buttons with the Channel List Red (Channel Type): Toggle between your TV, Radio, Data / Other and All. Green (Zoom): Enlarges or shrinks a channel number. Yellow (Select): Selects multiple channel lists. You can perform the add/delete or add to favourites/delete from favourites function for multiple channels at the same time. Select the required channels and press the Yellow button to set all the selected channels at the same time. The c mark appears to the left of the selected channels. TOOLS (Tools): Displays the Delete (or Add), Add to Favourite (or Delete from Favourite), Lock (or Unlock), Timer Viewing, Edit Channel Name, Edit Channel Number, Sort, Select All (or Deselect All), Auto Store menu. (The Options menus may differ depending on the situation.) N Channel Status Display Icons • A : An Analogue channel. • c: A channel selected by pressing the Yellow button. • * : A channel set as a Favourite. • (: A programme currently being broadcast. • \ : A locked channel. • ): A reserved programme Channel List Option Menu (in All Channels / Added Channels / Favourites) N Press the TOOLS button to use the option menu. N Option menu items may differ depending on the channel status. ■ Add / Delete You can delete or add a channel to display the channels you want. N All deleted channels will be shown on All Channels menu. N A gray-coloured channel indicates the channel has been deleted. N The Add menu only appears for deleted channels. N You can also delete a channel to the Added Channels or Favourites menu in the same manner. All Channels ■ 824 UKTV Gold 825 UKTV style A 1 C -A 2 C -A 3 C -A 4 C -- A 5 C -A 6 C -- Delete Add to Favourite Lock Timer Viewing Edit Channel Name Sort A 7 C -A 8 C - All Channel Type Zoom Select T Tools Add to Favourite / Delete from Favourite You can set channels you watch frequently as favourites. T Press the TOOLS button to display the Tools menu. You can also set the add to (or delete from) Favourite by selecting Tools → Add to Favourite (or Delete from Favourite). N The “*” symbol will be displayed and the channel will be set as a favourite. N All favourite channels will be shown on Favourites menu. English - 11 BN68-02325A-Eng.indb 11 2009-05-19 �� 3:42:44 ■ Lock / Unlock You can lock a channel so that the channel cannot be selected and viewed. N This function is available only when the Child Lock is set to On. N The PIN number input screen appears. Enter your 4 digit PIN number. N The default PIN number of a new TV set is “0-0-0-0”. You can change the PIN, by selecting Change PIN from the menu. N The “\” symbol will be displayed and the channel will be locked. ■ Timer Viewing If you reserve a programme you want to watch, the channel is automatically switched to the reserved channel in the Channel List; even when you are watching another channel. To reserve a programme, set the current time first. N Only memorized channels can be reserved. N You can set the channel, day, month, year, hour and minute directly by pressing the number buttons on the remote control. N Reserving a programme will be shown in the Programmed menu. N Digital Programme Guide and Viewing Reservation When a digital channel is selected, and you press the ► button, the Programme Guide for the channel appears. You can reserve a programme according to the procedures described above. ■ Edit Channel Name (analogue channels only) Channels can labelled so that their call letters appear whenever the channel is selected. N The names of digital broadcasting channels are automatically assigned and cannot be renamed. ■ Edit Channel Number (digital channels only) You can also edit the channel number by pressing the number buttons on the remote control. ■ Sort (analogue channels only) This operation allows you to change the programme numbers of the stored channels. This operation may be necessary after using the auto store. ■ Select All / Deselect All ● Select All: You can select all the channels in the channel list. ● Deselect All: You can deselect all the selected channels. N You can only select Deselect All when there is a selected channel. ■ Auto Store N For detailed procedures on setting up options, refer to the ‘Channel Menu’ instructions. N If a channel is locked using the Child Lock function, the PIN input window appears. Channel List Option Menu (in Programmed) You can view, modify or delete a reservation. N Press the TOOLS button to use the option menu. Change Info Select to change a viewing reservation. ■ Cancel Schedules Select to cancel a viewin`g reservation. ■ Information Select to view a viewing reservation. (You can also change the reservation information.) ■ Select All Select all reserved programmes. Programmed ■ All 1 / 1 / 2009 13:59 5 TV1 ) Change Info Cancel Schedules 18:59 2 TV3 ) The Equalizer Information Select All 20:59 2 TV3 ) McMillan & Wife 21:59 2 TV3 ) M.Spillane’s mike Zoom Select T Tools E Information English - 12 BN68-02325A-Eng.indb 12 2009-05-19 �� 3:42:44 PICTURE ¦ Configuring the Picture Menu ❑ Mode ■ Dynamic Selects the picture for increased definition in a bright room. ■ Standard Selects the picture for the optimum display in a normal environment. ■ Natural Selects the picture for an optimum and eye-comfortable display. N This function is not available in PC mode. ■ Movie Selects the picture for viewing movies in a dark room. Picture You can select the type of picture which best corresponds to your viewing requirements. T Press the TOOLS button to display the Tools menu. You can also set the picture mode by selecting Tools → Picture Mode. Mode : Standard Backlight Contrast Brightness Sharpness Colour Tint (G/R) Advanced Settings :7 : 95 : 45 : 50 : 50 : G50/R50 ▶ ❑ Backlight / Contrast / Brightness / Sharpness / Colour / Tint(G/R) Your television has several setting options that allow you to control the picture quality. ▲ Backlight 7 ● Backlight: Adjusts the brightness of LCD back light. ▼ ● Contrast: Adjusts the contrast level of the picture. U Move L Adjust E Enter R Return ● Brightness: Adjusts the brightness level of the picture ● Sharpness: Adjusts the edge definition of the picture. ● Colour: Adjusts colour saturation of the picture. ● Tint(G/R): Adjusts the colour tint of the picture. N In analogue TV, Ext., AV modes of the PAL system, you cannot use the Tint(G/R) Function. N When you make changes to Backlight, Contrast, Brightness, Sharpness, Colour or Tint(G/R) the OSD will be adjusted accordingly. N In PC mode, you can only make changes to Backlight, Contrast and Brightness. N Settings can be adjusted and stored for each external device you have connected to an input of the TV. N The energy consumed during use can be significantly reduced if the brightness level of the picture is lowered, which will reduce the overall running cost. ❑ Advanced Settings Samsung’s new TVs allow you to make even more precise picture settings than previous models. N Advanced Settings is available in Standard or Movie mode. N In PC mode, you can only make changes to Dynamic Contrast, Gamma and White Balance from among the Advanced Settings items. ■ Black Tone → Off / Dark / Darker / Darkest You can select the black level on the screen to adjust the screen depth. ■ Dynamic Contrast → Off / Low / Medium / High You can adjust the screen contrast so that the optimal contrast is provided. ■ Gamma You can adjust the primary colour (red, green, blue) intensity. Advanced Settings Black Tone : Off Dynamic Contrast : Medium Gamma :0 Colour Space : Native ▶ White Balance Flesh Tone :0 Edge Enhancement : On U Move E Enter R Return English - 13 BN68-02325A-Eng.indb 13 2009-05-19 �� 3:42:45 ■ Colour Space Colour space is a colour matrix composed of red, green and blue colours. Select your favourites colour space to experience the most natural colour. ● Auto: Auto Colour Space automatically adjusts to the most natural colour tone based on Programme sources. ● Native: Native Colour Space offers deep and rich colour tone. ● Custom: Adjusts the colour range to suit your preference. N Changing the adjustment value will refresh the adjusted screen. N Settings can be adjusted and stored for each external device you have connected to an input of the TV. For example, if you have a DVD player connected to HDMI 1 and it is currently selected, settings and adjustments will be saved for the DVD player. Colour: Red, Green, Blue, Yellow, Cyan or Magenta N Colour is available when Colour Space is set to Custom. N In Colour, you can adjust the RGB values for the selected colour. N To reset the adjusted RGB value, select Reset. Red: Adjusts the red saturation level of the selected colour. Green: Adjusts the green saturation level of the selected colour. Blue: Adjusts the blue saturation level of the selected colour. Reset: Resets the colour space to the default values. ■ White Balance You can adjust the colour temperature for more natural picture colours. ● R-Offset: Adjusts the red colour darkness. ● G-Offset: Adjusts the green colour darkness. ● B-Offset: Adjusts the blue colour darkness. ● R-Gain: Adjusts the red colour brightness. ● G-Gain: Adjusts the green colour brightness. ● B-Gain: Adjusts the blue colour brightness. ● Reset: The previously adjusted white balance will be reset to the factory defaults. ■ Flesh Tone You can emphasize the pink ‘flesh tone’ in the picture. N Changing the adjustment value will refresh the adjusted screen. ■ Edge Enhancement → Off / On You can emphasize object boundaries in the picture. ■ xvYCC → Off / On Setting the xvYCC mode to on increases detail and colour space when watching movies from an external device (ie. DVD player) connected to the HDMI or Component IN jacks. N xvYCC is available when the picture mode is set to Movie, and the external input is set to HDMI or Component mode. N This function may not be supported depending on your external device. ❑ Picture Options N In PC mode, you can only make changes to the Colour Tone and Size from among the items in Picture Options. ■ Colour Tone → Cool / Normal / Warm1 / Warm2 / Warm3 N Warm1, Warm2 or Warm3 is only activated when the picture mode is Movie. N Settings can be adjusted and stored for each external device you have connected to an input of the TV. Picture Options Colour Tone : Normal Size : Auto Wide Screen Mode : 16:9 Digital NR : Auto HDMI Black Level : Normal Film Mode : Off 100Hz Motion Plus : Standard ▶ ▼ U Move E Enter R Return English - 14 BN68-02325A-Eng.indb 14 2009-05-19 �� 3:42:45 ■ Size Occasionally, you may want to change the size of the image on your screen. Your TV comes with several screen size options, each designed to work best with specific types of video input. Your cable box/satellite receiver may have its own set of screen sizes as well. In general, though, you should view the TV in 16:9 mode as much as possible. T Press the TOOLS button to display the Tools menu. You can also set the size by selecting Tools → Picture Size. ● Auto Wide: Automatically adjusts the picture size to the 16:9 aspect ratio. ● 16:9: Adjusts the picture size to 16:9 appropriate for DVDs or wide broadcasting. ● Wide Zoom: Magnify the size of the picture more than 4:3. ● Zoom: Magnifies the 16:9 wide picture (in the vertical direction) to fit the screen size. ● 4:3: This is the default setting for a video movie or normal broadcasting. ● Screen Fit: Use the function to see the full image without any cut-off when HDMI (720p / 1080i / 1080p) or Component (1080i / 1080p) signals are input. N Depending on the input source, the picture size options may vary. N The items available may differ depending on the selected mode. N In PC Mode, only 16:9 and 4:3 mode can be adjusted. N Settings can be adjusted and stored for each external device you have connected to an input of the TV. N Temporary image retention may occur when viewing a static image on the set for more than two hours. N Wide Zoom: Press the ► button to Select Position, then press the ENTERE button. Press the ▲ or ▼ button to move the picture up / down. Then press the ENTERE button. N Zoom: Press the ► button to Select Position, then press the ENTERE button. Press the ▲ or ▼ button to move the picture up and down. Then press the ENTERE button. Press the ► button to Select Size, then press the ENTERE button. Press the ▲ or ▼ button to magnify or reduce the picture size in the vertical direction. Then press the ENTERE button. N After selecting Screen Fit in HDMI (1080i / 1080p) or Component (1080i / 1080p) mode: Select Position by pressing the ◄ or ► button. Use the ▲, ▼, ◄ or ► button to move the picture. Reset: Press the ◄ or ► button to select Reset, then press the ENTERE button. You can initialize the setting. N If you use the Screen Fit function with HDMI 720p input, 1 line will be cut at the top, bottom, left and right as in the Overscan function. N When Double (À, Œ) mode has been set in PIP, the Picture Size cannot be set. ■ Screen Mode → 16:9 / Wide Zoom / Zoom / 4:3 When setting the picture size to Auto Wide in a 16:9 wide TV, you can determine the picture size you want to see the 4:3 WSS (Wide Screen Service) image or nothing. Each individual European country requires different picture size so this function is intended for users to select it. ● 16:9: Sets the picture to 16:9 wide mode. ● Wide Zoom: Magnify the size of the picture more than 4:3. ● Zoom: Magnify the size of the picture vertically on screen. ● 4:3: Sets the picture to 4:3 normal mode. N This function is available in Auto Wide mode. N This function is not available in PC, Component or HDMI mode. ■ Digital NR → Off / Low / Medium / High / Auto If the broadcast signal received by your TV is weak, you can activate the Digital Noise Reduction feature to help reduce any static and ghosting that may appear on the screen. N When the signal is weak, select one of the other options until the best picture is displayed. ■ HDMI Black Level → Normal / Low You can select the black level on the screen to adjust the screen depth. N This function is active only when an external device is connected to the TV via HDMI (RGB signals). ■ Film Mode → Off / Auto1 / Auto2 The TV can be set to automatically sense and process film signals from all sources and adjust the picture for optimum quality. N Film Mode is supported in TV, AV, COMPONENT(480i / 1080i) and HDMI(480i / 1080i). ● Off: Turn the Film Mode function off. ● Auto1: Automatically adjusts the picture for the best quality when watching a film. ● Auto2: Automatically optimizes the video text on the screen (not including closed captions) when watching a film. English - 15 BN68-02325A-Eng.indb 15 2009-05-19 �� 3:42:45 ■ 100Hz Motion Plus → Off / Clear / Standard / Smooth / Custom / Demo Removes drag from fast scenes with a lot of movement to provide a clearer picture. N If you enable 100 Hz Motion Plus, noise may appear on the screen. If this occurs, set 100Hz Motion Plus to Off. ● Off: Switches 100Hz Motion Plus off. ● Clear: Sets 100Hz Motion Plus to minimum. ● Standard: Sets 100Hz Motion Plus to medium. ● Smooth: Sets 100Hz Motion Plus to maximum. ● Custom: Adjusts the blur and judder reduction level to suit your preference. Blur Reduction: Adjusts the blur reduction level from video sources. Judder Reduction: Adjusts the judder reduction level from video sources when playing films. Reset: Reset the custom settings. ● Demo: Displays the difference between 100Hz Motion Plus on and off modes. ■ Blue Only Mode → Off / On This function is for AV device measurement experts. This function displays the blue signal only by removing the red and green signals from the video signal so as to provide a Blue Filter effect that is used to adjust the Colour and Tint of video equipment such as DVD players, Home Theatres, etc. Using this function, you can adjust the Colour and Tint to preferred values appropriate to the signal level of each video device using the Red / Green / Blue / Cyan / Magenta / Yellow Colour Bar Patterns, without using an additional Blue Filter. N Blue Only Mode is available when the picture mode is set to Movie or Standard. ❑ Picture Reset → Reset Picture Mode / Cancel Resets all picture settings to the default values. N Reset Picture Mode: Current picture values return to default settings. ¦ Viewing Picture-in-Picture Main picture Component HDMI1, HDMI2, HDMI3/DVI, HDMI4 PC Setup You can use the PIP feature to simultaneously watch the TV tuner and one external video source. This product has one built-in tuner, which does not allow PIP to function in the same mode. Please see ‘PIP Settings’ below for details. T Press the TOOLS button to display the Tools menu. You can also configure PIP related settings by selecting Tools → PIP. N If you select the PIP picture sound, refer to the ‘Configuring the Sound Menu’ instructions. N PIP Settings Melody Energy Saving : Medium : Off PIP ▶ Common Interface Sub picture TV N If you turn the TV off while watching in PIP mode and turn it on again, the PIP window will disappear. N You may notice that the picture in the PIP window becomes slightly unnatural when you use the main screen to view a game or karaoke. N While Internet@TV is in operation, the PIP function cannot be used. ❑ PIP → Off / On PIP You can activate or deactivate the PIP function. ❑ Size → Õ / à / À / Œ PIP : On Size :Õ Position :à Channel : ATV 4 ▶ You can select a size of the sub-picture. ❑ Position → à / – / — / œ U Move E Enter R Return You can select a position of the sub-picture. N In Double (Œ, À) mode, Position cannot be selected. ❑ Channel You can select the channel for the sub-screen. English - 16 BN68-02325A-Eng.indb 16 2009-05-19 �� 3:42:45 ¦ Using Your TV as a Computer (PC) Display Setting Up Your PC Software (Based on Windows XP) The Windows display-settings for a typical computer are shown below. The actual screens on your PC will probably be different, depending upon your particular version of Windows and your particular video card. However, even if your actual screens look different, the same basic set-up information will apply in almost all cases. (If not, contact your computer manufacturer or Samsung Dealer.) 1. First, click on ‘Control Panel’ on the Windows start menu. 2. When the control panel window appears, click on ‘Appearance and Themes’ and a display dialog-box will appear. 3. When the control panel window appears, click on ‘Display’ and a display dialogbox will appear. 4. Navigate to the ‘Settings’ tab on the display dialog-box. • The correct size setting (resolution) - Optimum: 1920 X 1080 pixels • If a vertical-frequency option exists on your display settings dialog box, the correct value is ‘60’ or ‘60 Hz’. Otherwise, just click ‘OK’ and exit the dialog box. Display Modes If the signal from the system equals the standard signal mode, the screen is adjusted automatically. If the signal from the system doesn’t equal the standard signal mode, adjust the mode by referring to your videocard user guide; otherwise there may be no video. For the display modes listed on the next page, the screen image has been optimized during manufacturing. ■ D-Sub and HDMI/DVI Input Vertical Frequency (Hz) 70.086 70.087 66.667 74.551 75.062 59.950 59.959 59.855 74.777 74.857 59.940 72.809 75.000 60.317 72.188 75.000 60.004 70.069 75.029 75.000 60.020 75.025 59.810 74.934 60.000 60.015 59.887 74.984 59.954 70.000 70.000 Pixel Clock Frequency (MHz) 25.175 28.322 30.240 57.284 100.000 32.750 81.750 74.500 95.750 130.000 25.175 31.500 31.500 40.000 50.000 49.500 65.000 75.000 78.750 108.000 108.000 135.000 83.500 106.500 108.000 85.500 106.500 136.750 146.250 89.040 128.943 Sync Polarity (H / V) +/-/+ -/-/-/-/+ -/+ -/+ -/+ -/+ -/-/-/+/+ +/+ +/+ -/-/+/+ +/+ +/+ +/+ -/+ -/+ +/+ +/+ -/+ -/+ -/+ -/+ -/- 1920 x 1080p 67.500 60.000 148.500 +/+ Resolution IBM MAC VESA CVT VESA DMT VESA GTF VESA DMT / DTV CEA N N N N N 640 x 350 720 x 400 640 x 480 832 x 624 1152 x 870 720 x 576 1152 x 864 1280 x 720 1280 x 720 1280 x 960 640 x 480 640 x 480 640 x 480 800 x 600 800 x 600 800 x 600 1024 x 768 1024 x 768 1024 x 768 1152 x 864 1280 x 1024 1280 x 1024 1280 x 800 1280 x 800 1280 x 960 1360 x 768 1440 x 900 1440 x 900 1680 x 1050 1280 x 720 1280 x 1024 Horizontal Frequency (KHz) 31.469 31.469 35.000 49.726 68.681 35.910 53.783 44.772 56.456 75.231 31.469 37.861 37.500 37.879 48.077 46.875 48.363 56.476 60.023 67.500 63.981 79.976 49.702 62.795 60.000 47.712 55.935 70.635 65.290 52.500 74.620 Mode When using an HDMI / DVI cable connection, you must use the HDMI IN 3(DVI) jack. The interlace mode is not supported. The set might operate abnormally if a non-standard video format is selected. Separate and Composite modes are supported. SOG is not supported. Too long or low quality VGA cable can cause picture noise at high resolution modes (1920x1080). English - 17 BN68-02325A-Eng.indb 17 2009-05-19 �� 3:42:46 ¦ Setting up the TV with your PC N Preset: Press the SOURCE button to select PC mode. ❑ Auto Adjustment Picture Use the Auto Adjust function to have the TV automatically adjust the video signals it receives. The function also automatically fine-tunes the settings and adjusts the frequency values and positions. T Press the TOOLS button to display the Tools menu. You can also set the Auto Adjustment by selecting Tools → Auto Adjustment. N This function does not work in DVI-HDMI mode. Brightness Sharpness : 45 : 50 Auto Adjustment ▶ Screen Advanced Settings Picture Options Picture Reset ❑ Screen ■ ■ ■ Coarse / Fine The purpose of picture quality adjustment is to remove or reduce picture noise. If the noise is not removed by Fine-tuning alone, then adjust the frequency as best as possible (Coarse) and Fine-tune again. After the noise has been reduced, readjust the picture so that it is aligned on the centre of screen. Screen Coarse 50 Fine 0 PC Position Image Reset PC Position Adjust the PC’s screen positioning if it does not fit the TV screen. Press the ▲ or ▼ button to adjusting the Vertical-Position. Press the ◄ or ► button to adjust the Horizontal-Position. U Move E Enter R Return Image Reset You can replace all image settings with the factory default values. SOUND ¦ Configuring the Sound Menu ❑ Mode → Standard / Music / Movie / Clear Voice / Custom Sound T Press the TOOLS button to display the Tools menu. You can also set the sound mode by selecting Tools → Sound Mode. ● Standard: Selects the normal sound mode. ● Music: Emphasizes music over voices. ● Movie: Provides the best sound for movies. ● Clear Voice: Emphasizes voice over other sounds. ● Custom: Recalls your customized sound settings. Mode Equalizer SRS TruSurround HD Audio Language Audio Format Audio Description Auto Volume Speaker Select : Custom ▶ : Off : ---: ---: Off : TV Speaker ❑ Equalizer The sound settings can be adjusted to suit your personal preferences. ● Mode: Selects the sound mode among the predefined settings. ● Balance L/R: Adjusts the balance between the right and left speaker. ● 100Hz / 300Hz / 1KHz / 3KHz / 10KHz (Bandwidth Adjustment): To adjust the level of different bandwidth frequencies. ● Reset: Resets the equalizer settings to the default values. ❑ SRS TruSurround HD → Off / On SRS TruSurround HD is a patented SRS technology that solves the problem of playing 5.1 multichannel content over two speakers. TruSurround delivers a compelling, virtual surround sound experience through any two-speaker playback system, including internal television speakers. It is fully compatible with all multichannel formats. T Press the TOOLS button to display the Tools menu. You can also set the SRS TruSurround HD by selecting Tools → SRS TS HD. English - 18 BN68-02325A-Eng.indb 18 2009-05-19 �� 3:42:46 ❑ Audio Language You can change the default value for audio languages. Displays the language information for the incoming stream. N While viewing a digital channel, this function can be selected. N You can only select the language among the actual languages being broadcast. ❑ Audio Format → MPEG / Dolby Digital When sound is emitted from both the main speaker and the audio receiver, a sound echo may occur due to the decoding speed difference between the main speaker and the audio receiver. In this case, use the TV Speaker function. N While viewing a digital channel, this function can be selected. N The Audio Format appears according to the broadcasting signal. ❑ Audio Description This is an auxiliary audio function that provides an additional audio track for visually challenged persons. This function handles the Audio Stream for the AD (Audio Description), when it is sent along with the Main audio from the broadcaster. Users can turn the Audio Description On or Off and control the volume. O Press the AD button on the remote control to select Off or On. ■ Audio Description → Off / On Turn the audio description function on or off. ■ Volume You can adjust the audio description volume. N Volume is active when Audio Description is set to On. N While viewing a Digital channel, this function can be selected. ❑ Auto Volume → Off / On Each broadcasting station has its own signal conditions, and so it is not easy to adjust the volume every time the channel is changed. This feature lets you automatically adjust the volume of the desired channel by lowering the sound output when the modulation signal is high or by raising the sound output when the modulation signal is low. ❑ Speaker Select When you watch TV with it connecting to a Home theatre, turn the TV speakers off so you can listen to sound from the Home theatre’s (external) speakers. ● External Speaker: Used to listen to the sound of the External (Home Theatre) Speakers. ● TV Speaker: Used to listen to the sound of the TV Speakers. N The volume and MUTE buttons do not operate when the Speaker Select is set to External Speaker. N If you select External Speaker in the Speaker Select menu, the sound settings will be limited TV Speaker External Speaker Video No Signal TV’s Internal Speakers RF / AV / Component / PC / HDMI Sound Output Mute Mute Audio Out (Optical, L/R Out) to Sound System RF / AV / Component / PC / HDMI Sound Output Sound Output Mute ❑ Sound Select → Main / Sub When the PIP feature is activated, you can listen to the sound of the sub (PIP) picture. N You can select this option when PIP is set to On. T Press the TOOLS button to display the Tools menu. You can also set the sound of the sub picture by selecting Tools → PIP → Sound Select. ❑ Sound Reset → Reset All / Reset Sound Mode / Cancel You can restore the Sound settings to the factory defaults. N Reset Sound Mode: Current sound values return to default settings. Sound Reset Cancel sound reset. Reset All Reset Sound Mode Cancel L Move E Enter R Return English - 19 BN68-02325A-Eng.indb 19 2009-05-19 �� 3:42:46 ¦ Selecting the Sound Mode You can set the sound mode in the Tools menu. When you set to Dual l ll, the current sound mode is displayed on the screen. A2 Stereo NICAM Stereo Audio Type Mono Stereo Dual Mono Stereo Dual Dual 1 / 2 MONO STEREO ↔ MONO DUAL 1 ↔ DUAL 2 MONO MONO ↔ STEREO MONO ↔ DUAL 1 DUAL 2 Default Automatic change DUAL 1 Automatic change DUAL 1 N If the stereo signal is weak and an automatic switching occurs, then switch to the mono. N This function is only activated in stereo sound signal. It is deactivated in mono sound signal. N This function is only available in TV mode. SETUP ¦ Configuring the Setup Menu ❑ Menu Language Plug & Play Setup You can set the menu language. ❑ Time For detailed procedures on setting up options, refer to the ‘Setting the Time’ instructions. Menu Language : English ▶ Time Broadcast Security Network General ❑ Broadcast ■ Subtitle You can activate and deactivate the subtitles. Use this menu to set the Subtitle Mode. Normal under the menu is the basic subtitle and Hard of hearing is the subtitle for a hearing-impaired person. ● Subtitle → Off / On Switches subtitles on or off. ● Mode → Normal / Hard of hearing Sets the subtitle mode. ● Subtitle Language Set the subtitle language. N If the programme you are watching does not support the Hard of hearing function, Normal automatically is activated even though Hard of hearing mode is selected. N English is the default in cases where the selected language is unavailable in the broadcast. N You can select these options simply by pressing the SUBT. button on the remote control. ■ Digital Text → Disable / Enable (UK only) If the programme broadcasts with digital text, this feature is enabled. N MHEG (Multimedia and Hypermedia Information Coding Experts Group) An International standard for data encoding systems used in multimedia and hypermedia. This is at a higher level than the MPEG system which includes data-linking hypermedia such as still images, character service, animation, graphic and video files as well as multimedia data. MHEG is user runtime interaction technology and is being applied to various fields including VOD (Video-On-Demand), ITV (Interactive TV), EC (Electronic Commerce), tele-education, tele-conferencing, digital libraries and network games. English - 20 BN68-02325A-Eng.indb 20 2009-05-19 �� 3:42:47 ■ Teletext Language You can set the Teletext language by selecting the language type. N English is the default in cases where the selected language is unavailable in the broadcast. ■ Preference ● Primary Audio Language / Secondary Audio Language / Primary Subtitle Language / Secondary Subtitle Language / Primary Teletext Language / Secondary Teletext Language Using this feature, users can select one of the languages. The language selected here is the default when the user selects a channel. If you change the language setting, the Subtitle Language, Audio Language, and the Teletext Language of the Language menu are automatically changed to the selected language. The Subtitle Language, Audio Language, and the Teletext Language of the Language menu show a list of languages supported by the current channel and the selection is highlighted. If you change this language setting, the new selection is only valid for the current channel. The changed setting does not change the setting of the Primary Subtitle Language, Primary Audio Language, or the Primary Teletext Language of the Preference menu. ■ Common Interface ● CI Menu This enables the user to select from the CAM-provided menu. Select the CI Menu based on the menu PC Card. ● Application Info. This contains information on CAM inserted in the CI slot and displays it. The Application Info inserting is about the ‘CI(CI+) CARD’. You can install the CAM anytime whether the TV is ON or OFF. 1. Purchase the CI CAM module by visiting your nearest dealer or by phone. 2. Insert the ‘CI(CI+) CARD’ into the CAM in the direction of the arrow until it fits. 3. Insert the CAM with the ‘CI(CI+) CARD’ installed into the common interface slot. (Insert the CAM in the direction of the arrow, right up to the end so that it is parallel with the slot.) 4. Check if you can see a picture on a scrambled signal channel. ❑ Security ■ Child Lock → Off / On This feature allows you to prevent unauthorized users, such as children, from watching unsuitable programme by muting out video and audio. N Before the setup screen appears, the PIN number input screen appears. Enter your 4 digit PIN number. N The default PIN number of a new TV set is 0-0-0-0. You can change the PIN by selecting Change PIN from the menu. N You can lock some channels in Channel List. N Child Lock is available only in TV mode. ■ Parental Lock → Parental Rating This feature allows you to prevent unauthorized users, such as children, from watching unsuitable programme by a 4-digit PIN (Personal Identification Number) code that is defined by the user. N The Parental Rating item differs depending on the country. N Before the setup screen appears, the PIN number input screen appears. Enter your 4 digit PIN number. N The default PIN number of a new TV set is ‘0-0-0-0’. You can change the PIN by selecting Change PIN from the menu. N When the parental ratings are set, the ‘\’ symbol is displayed. N Allow All: Press to unlock all TV ratings. Block All: Press to lock all TV ratings. ■ Change PIN You can change your personal ID number that is required to set up the TV. N Before the setup screen appears, the PIN number input screen appears. Enter your 4 digit PIN number. N The default PIN number of a new TV set is 0-0-0-0. N If you forget the PIN code, press the remote control buttons in the following sequence, which resets the PIN to 0-0-0-0: POWER (Off) → MUTE → 8 → 2 → 4 → POWER (On). English - 21 BN68-02325A-Eng.indb 21 2009-05-19 �� 3:42:47 ❑ Network → Network Type / Network Setup For detailed procedures on setting up options, refer to the ‘Setting the Network’ instructions. ❑ General ■ Game Mode → Off / On When connecting to a game console such as PlayStation™ or Xbox™, you can enjoy a more realistic gaming experience by selecting game menu. N Restrictions on game mode (Caution) To disconnect the game console and connect another external device, set Game Mode to Off in the setup menu. If you display the TV menu in Game Mode, the screen shakes slightly. N Game Mode is not available in regular TV, PC and Ext mode. N While PIP is in operation, the Game Mode function cannot be used. N If the picture is poor when external device is connected to TV, check if Game Mode is On. Set Game Mode to Off and connect external devices. N If Game Mode is On: Picture mode is automatically changed to Standard and cannot be changed. Sound mode is automatically changed to Custom and cannot be changed. Adjust the sound using the equalizer. The Reset Sound function is activated. Selecting the Reset function after setting the equalizer resets the equalizer settings to the factory defaults. ■ BD Wise → Off / On Provides the optimal picture quality for SAMSUNG DVD, Blu-ray and Home Theatre products which support BD Wise. You can enjoy a richer picture when using them connected to this Samsung TV. N Connect SAMSUNG products that have BD Wise using an HDMI cable. N When the BD Wise set to On, the picture mode is automatically changed to the optimal resolution. N BD Wise is available in HDMI mode. ■ Energy Saving → Off / Low / Medium / High / Picture Off / Auto This feature adjusts the brightness of the TV in order to reduce power consumption. When watching TV at night, set the Energy Saving mode option to High to reduce eye fatigue as well as power consumption. If you select Picture Off, the screen is turned off and you can only hear the sound. Press any button to get out of Picture Off. N In the Tools menu, Picture Off function is not supported. T Press the TOOLS button to display the Tools menu. You can also set the Energy Saving option by selecting Tools → Energy Saving. ■ Menu Transparency → Bright / Dark You can set the Transparency of the menu. ■ Melody → Off / Low / Medium / High A melody sound can be set to come on when the TV is powered On or Off. N The Melody does not play When no sound is output from the TV because the MUTE button has been pressed. When no sound is output from the TV because the volume has been reduced to minimum with the volum (-) button. When the TV is turned off by Sleep Timer function. ■ PIP For detailed procedures on setting up options, refer to the ‘Viewing Picture-in- Picture’ instructions. English - 22 BN68-02325A-Eng.indb 22 2009-05-19 �� 3:42:47 ¦ Setting the Time ❑ Clock ■ ■ Clock Mode You can set up the current time manually or automatically. ● Auto: Set the current time automatically using the time from the digital broadcast. ● Manual: Set the current time to a manually specified time. N Depending on the broadcast station and signal, the auto time may not be set correctly. If this occurs, set the time manually. N The Antenna or cable must be connected in order to set the time automatically. Clock Set You can set the current time manually. N This function is only available when Clock Mode is set to Manual. N You can set the day, month, year, hour and minute directly by pressing the number buttons on the remote control. Setup Setting the clock is necessary in order to use the various timer features of the TV. O The current time will appear every time you press the INFO button. N If you disconnect the power cord, you have to set the clock again. Plug & Play Menu Language : English Time ▶ Broadcast Security Network General Time Clock : -- : -- Sleep Timer : Off Timer 1 : Inactivated Timer 2 : Inactivated Timer 3 : Inactivated ▶ U Move E Enter R Return Timer 1 On Time 00 00 Inactivate Off Time ❑ Sleep Timer 00 The sleep timer automatically shuts off the TV after a preset time (30, 60, 90, 120, 150 and 180 minutes). T Press the TOOLS button to display the Tools menu. You can also set the sleep timer by selecting Tools → Sleep Timer. N To cancel the Sleep Timer function, select Off. Volume 10 Repeat 00 Source TV Inactivate Antenna Channel ATV 0 Sun Mon Tue Wed Thu Fri Sat Once L Move U Adjust E Enter R Return ❑ Timer 1 / Timer 2 / Timer 3 Three different on / off timer settings can be made. You must set the clock first. ● On Time: Set the hour, minute, and activate / inactivate. (To activate timer with the setting you’ve chosen, set to Activate.) ● Off Time: Set the hour, minute, and activate / inactivate. (To activate timer with the setting you’ve chosen, set to Activate.) ● Volume: Set the desired volume level. ● Source: You can select the TV or USB device content to be played when the TV is turned on automatically. Select TV or USB. (Make sure that an USB device is connected to your TV.) N When there is only one photo file in the USB, the Slide Show will not play. ● Antenna (when Source is set to TV): Select ATV or DTV. ● Channel (when Source is set to TV): Select the desired channel. ● Contents (when Source is set to USB): You can select a folder on the USB Device with music or photo files to be played when the TV turns on automatically. N If the folder name is too long, the folder can not be selected. N If you are using two of the same type USB device, be sure the folder names are different so the correct USB is read. ● Repeat: Select Once, Everyday, Mon~Fri, Mon~Sat, Sat~Sun or Manual. N When Manual is selected, press the ► button to select the desired day of the week. Press the ENTERE button over the desired day and the c mark will appear. N You can set the hour, minute and channel by pressing the number buttons on the remote control. N Auto Power Off: When you set the timer on, the TV will be eventually turned off, if no controls are operated for 3 hours after the TV was turned on by the timer. This function is only available in timer on mode and prevents overheating, which may occur if a TV is on for too long time. English - 23 BN68-02325A-Eng.indb 23 2009-05-19 �� 3:42:47 ¦ Network Connection You can set up the Internet Protocol so that you can communicate with various connected networks. ❑ Network Connection - Cable ■ LAN Connection for a DHCP Environment The procedures to set up the network using Dynamic Host Configuration Protocol (DHCP) are described below. Since an IP address, subnet mask, gateway, and DNS are automatically allocated when DHCP is selected, you do not have to enter them manually. 1. Connect the LAN port on the rear panel of the TV and the external modem with a LAN Cable. 2. Connect the Modem port on the wall and the external modem with a Modem Cable. The Modem Port on the Wall TV Rear Panel External Modem (ADSL / VDSL / Cable TV) 2 Modem Cable 1 LAN Cable You can connect the LAN via a Sharer (Router). The Modem Port on the Wall TV Rear Panel External Modem (ADSL / VDSL / Cable TV) Modem Cable IP Sharer LAN Cable LAN Cable You can connect the LAN port and the TV directly depending on your network status. TV Rear Panel The LAN Port on the Wall LAN Cable N The terminals (the position of the port and the type) of the external device may differ depending on the manufacturer. N If the IP address allocation by the DHCP server has failed, turn the external modem off, turn it on again after at least 10 seconds and then try again. N For the connections between the external modem and the Sharer (Router), refer to the owner’s manual of the corresponding product. N You can connect the TV to the LAN directly without connecting it through a Sharer (Router) N You cannot use a manual-connection-type ADSL modem because it does not support DHCP. You have to use an automaticconnection-type ADSL modem. English - 24 BN68-02325A-Eng.indb 24 2009-05-19 �� 3:42:48 ■ LAN Connection for Static IP Environment The procedures to set up the network using a static IP address are described below. You have to manually enter the IP address, subnet mask, gateway, and DNS that are provided by your Internet Service Provider (ISP). 1. Connect the LAN port on the rear panel of the TV and the LAN port on the wall using the LAN cable. TV Rear Panel The LAN Port on the Wall 1 LAN Cable You can connect the LAN via a Sharer (Router). The LAN Port on the Wall TV Rear Panel IP Sharer LAN Cable LAN Cable N The terminals (the position of the port and the type) of the external device may differ depending on the manufacturer. N If you are using a static IP address, your ISP will inform you of the IP address, subnet mask, gateway, and DNS. You must enter these values to complete the network settings. If you do not know the values, ask your network administrator. N For the information on how to configure and connect a Sharer (Router), refer to the owner’s manual for the corresponding product. N You can connect the TV to the LAN directly without connecting it through a Sharer (Router). N If you use an IP Sharer (IP Router) that supports DHCP, you can set up the device as either DHCP or static IP. N For the procedures to use a static IP address, ask your Internet Service Provider. ❑ Network Connection - Wireless You can connect to the network wirelessly through a wireless IP sharer. TV Side Panel The LAN Port on the Wall Wireless IP sharer Samsung Wireless LAN Adapter or LAN Cable 1. Connect the ‘Samsung Wireless LAN Adapter’ into the USB1(HDD) or USB2 terminal of the TV. N You must use the ‘Samsung Wireless LAN Adapter’(WIS09ABGN) to use a wireless network. N Samsung’s Wireless LAN adapter is sold separately. The WIS09ABGN Wireless LAN adapter is offered by select retailers, Ecommerce sites and Samsungparts.com. N To use a wireless network, your TV must be connected to a wireless IP sharer. If the wireless IP sharer supports DHCP, your TV can use a DHCP or static IP address to connect to the wireless network. N Samsung’s Wireless LAN adapter supports IEEE 802.11A, IEEE 802.11B, IEEE 802.11G, IEEE 802.11N. When you play DLNA video over IEEE 802.11B/G connection, the video may not be played smoothly. N If the wireless IP sharer allows you to turn the Ping connection function on/off, turn it on. English - 25 BN68-02325A-Eng.indb 25 2009-05-19 �� 3:42:50 N Select a channel for the wireless IP sharer that is not currently being used. If the channel set for the wireless IP sharer is currently being used by another device nearby, this will result in interference and communications may fail. N If you apply a security system other than the systems listed blow, it will not work with the TV. When applying the security key for the AP (wireless IP sharer), only the following is supported. 1) Authentication Mode : OPEN, SHARED, WPAPSK, WPA2PSK 2) Encryption Type : WEP, TKIP, AES When applying the security key for the Ad-hoc mode, only the following is supported. 1) Authentication Mode : SHARED, WPANONE 2) Encryption Type : WEP, TKIP, AES N If your AP supports WPS(Wi-Fi Protected Setup), you can connect to the network via PBC (Push Button Configuration) or PIN (Personal Indentification Number). WPS will automatically configure the SSID and WPA key in either mode. N If the device isn’t certified, it may not connect to the TV via the ‘Samsung Wireless LAN Adapter’. ¦ Setting the Network ❑ Network Type ■ Cable Connect to the network using a cable. ■ Wireless Connect to the network wirelessly. Broadcast Security Setup Select Cable or Wireless as the method to connect to the network. N The menu is activated only if the ‘Samsung Wireless LAN Adapter’ is connected. Network ▶ General ❑ Network Setup ■ Cable Network Setup (when Network Type is set to Cable) N Please check if the LAN cable is connected. ● Internet Protocol Setup → Auto / Manual ● Network Test: You can test or confirm the network connection status after setting up the network. N When unable to connect to a wired network If your Internet service provider has registered the MAC address of the device used to connect to the Internet for the first time and authenticates the MAC address each time you connect to the Internet, your TV may not be able to connect to the Internet as the MAC address differs from that of the device (PC). In this case, ask your Internet service provider about the procedures to connect devices other than your PC (such as your TV) to the Internet. If your Internet service provider requires an ID or password to connect to the Internet (network), your TV may not be able to connect to the Internet. In this case, you have to enter your ID or password when connecting to the Internet using an Internet Sharer (Router). The internet connection may fail due to a firewall problem. In this case, contact your Internet service provider. If you cannot connect to the Internet even if you have followed the procedures of your Internet service provider, please contact Samsung Electronics. Cable Network Setup-Auto If you connect the LAN cable and it supports DHCP, the Internet Protocol (IP) Settings are automatically configured. 1. Set Network Type to Cable. 2. Select Cable Network Setup. 3. Set Internet Protocol Setup to Auto. N The Internet Protocol is set automatically. 4. Select Network Test to check the network connectivity. Cable Network Setup Internet Protocol Setup : Auto ▶ Network Test IP Address : Subnet Mask : Gateway DNS Server : : U Move E Enter R Return English - 26 BN68-02325A-Eng.indb 26 2009-05-19 �� 3:42:50 Cable Network Setup-Manual To connect the TV to the LAN using a static IP address, you must set up the Internet Protocol (IP). 1. Set Network Type to Cable. 2. Select Cable Network Setup. 3. Set Internet Protocol Setup to Manual. Cable Network Setup Internet Protocol Setup : Manual ▶ Network Test IP Address : 0 0 0 0 Subnet Mask : 0 0 0 0 Gateway DNS Server : : 0 0 0 0 0 0 0 0 4. Set up IP Address, Subnet Mask, Gateway and DNS Server. N Press the number buttons on the remote control when you set the Network manually. U Move E Enter R Return 5. Select Network Test to check the network connectivity. ■ Wireless Network Setup N The menu is activated only if the ‘Samsung Wireless LAN Adapter’ is connected. ● Internet Protocol Setup → Auto / Manual ● Network Test: You can test or confirm the network connection status after setting up the network. N When unable to connect to an AP(Access Point) Your TV may fail to locate an AP(Access Point) that is configured as a private SSID type. In this case, please change the AP settings and try again. If your Internet service provider has registered the MAC address of the device used to connect to the Internet for the first time and authenticates the MAC address each time you connect to the Internet, your TV may not be able to connect to the Internet as the MAC address differs from that of the device (PC). In this case, ask your Internet service provider about the procedures to connect devices other than your PC (such as your TV) to the Internet. If you cannot connect to the Internet even if you have followed the procedures of your Internet service provider, please contact a Samsung Electronics. ● Select a network Access Point: You can select the IP sharer to use when using a wireless network. N If a wireless Access Point is not in the Access Point list, press the Red button. N When the connection is made, you will be returned to the screen automatically. Wireless Network Setup N If you have selected an Access Point with a security authentication: Security Key Number A B C D E F The Security Key input screen appears. Enter the security key and press the Blue Delete Done button on the remote control. N If security encryption type is WEP, 0~9, A~F will be available when you input n Move `~9 Number E Enter R Return security key. Connecting WPS (Wi-Fi Protected Setup) ● If Security Key is already set: In access point list, select WPS. N You can select PBC, PIN, Security Key. Wireless Network Setup Select a network Search Ad-hoc 3/9 sson jee AP_1 Ap_2 PBC PIN Security Key U Move E Enter R Return Connecting by using PBC: Select a PBC (Push Button Configuration). Press the PBC button on the AP (access point) within 2minutes, and wait for connection. Press the PBC button on the access point. Access Point Name : AP_1 Cancel Connecting by using PIN: Select a PIN (Personal Identification Number). N The message showing the PIN Code is displayed. Input the PIN Code at AP device within 2minutes. Select OK and wait for connection. N Try again if connecting operation doesn’t work N When the connection is not established although tried again, reset the access point. Please refer to a manual of each access point. Connecting by using Security Key: When selecting Security Key, the input window is displayed. Input the security key and press Blue button. N Try again if connecting operation doesn’t work. Press OK After input TV’s Pin code in the access point’s setup. Access Point Name : AP_1 PIN Code : 12345678 OK Cancel Wireless Network Setup Security Key A B C D E F G H I J K L M N O P Q R S T U V W X Y Z Number Lowercase Delete Done n Move `~9 Number E Enter R Return English - 27 BN68-02325A-Eng.indb 27 2009-05-19 �� 3:42:51 ● If Security Key is not set: When the security setting of AP that supports WPS is NONE, you can select PBC, PIN, None Security. None Security is capable of connecting to AP directly without using WPS function. N Process of PBC, PIN is same as above. Refer to if Security Key is already set. N Try again if connecting operation doesn’t work. Ad-hoc: You can connect to a mobile device without an access point through the ‘Samsung Wireless LAN Adapter’ by using a peer to peer network. Wireless Network Setup Select a network Search Ad-hoc 3/9 sson jee AP_1 Ap_2 PBC PIN None Security U Move E Enter R Return How to connect to new Ad-hoc 1. Choose Select a network, then a device list is displayed. 2. While in the device list, press the Blue button on the remote or select Adhoc. N The message The existing network system may have limited functionality. Do you want to change the network connection? is displayed. The existing network system may have limited functionality. Do you want to change the network connection? 3. Input the generated Network Name(SSID) and Security Key into the device you want to connect. Yes No How to connect an existing Ad-hoc device 1. Choose Select a network, the device list is displayed. 2. Select the device you want in the Device list. 3. If security key was applied, input the security key again. N If network doesn’t operate normally, please check the Network Name(SSID) and Security Key again. If the Security Key is incorrect, it may be the reason for the malfunction. Wireless Network Setup-Auto If you want to connect AP, AP should support DHCP. Only devices which support Ad-hoc mode can be connected without DHCP. Wireless Network Setup Internet Protocol Setup : Auto ▶ Network Test 1. Set Network Type to Wireless. 2. Select Wireless Network Setup. 3. Set Internet Protocol Setup to Auto. N The Internet Protocol is set automatically. Select a network : AP1 IP Address : Subnet Mask : Gateway DNS Server : : 4. Select a network through Select a network. U Move E Enter R Return 5. Select Network Test to check the network connectivity. Wireless Network Setup-Manual Wireless Network Setup 1. Set Network Type to Wireless. Internet Protocol Setup 2. Select Wireless Network Setup. : Manual ▶ Network Test Select a network : AP1 3. Set Internet Protocol Setup to Manual. IP Address : 0 0 0 0 4. Set up IP Address, Subnet Mask, Gateway and DNS Server. N Press the number buttons on the remote control when you set the Network manually. Subnet Mask : 0 0 0 0 Gateway DNS Server : : 0 0 0 0 0 0 0 0 5. Select a network through Select a network. U Move E Enter R Return 6. Select Network Test to check the network connectivity. English - 28 BN68-02325A-Eng.indb 28 2009-05-19 �� 3:42:52 INPUT / SUPPORT ¦ Input Menu ❑ Source List ■ Input Use to select TV or other external input sources such as DVD / Blu-ray players / Cable Box / Satellite receivers (Set-Top Box) connected to the TV. Use to select the input source of your choice. O Press the SOURCE button on the remote control to view an external signal source. TV mode can be selected by pressing the TV button. Source List Edit Name TV / Ext.1 / Ext.2 / AV / Component / PC / HDMI1 / HDMI2 / HDMI3/DVI / HDMI4 N You can choose only those external devices that are connected to the TV. In the Source List, connected inputs will be highlighted and sorted to the top. Inputs that are not connected will be sorted to the bottom. N If USB devices are connected to the USB1(HDD) and USB2 jacks, they are displayed as USB1 and USB2 in order. N Ext. and PC Always stays activated. N Using the Colour buttons on the remote with the Source list Red (Refresh): Refreshes the connected external devices. Press this if your Source is on and connected, but does not appear in the list. TOOLS (Tools): Displays the Edit Name and Information menus. Source List TV Ext. 1 Ext. 2 PC :---:---:---- AV Component :---:---- Refresh T Tools ❑ Edit Name ■ VCR / DVD / Cable STB / Satellite STB / PVR STB / AV Receiver / Game / Camcorder / PC / DVI / DVI PC / TV / IPTV / Blu-ray / HD DVD / DMA Name the device connected to the input jacks to make your input source selection easier. N When a PC with a resolution of 1920 x 1080@60Hz is connected to the HDMI IN 3(DVI) port, you should set the HDMI3/DVI mode to DVI PC in the Edit Name of the Input mode. N When connecting an HDMI/DVI cable to the HDMI IN 3(DVI) port, you should set the HDMI3/DVI mode to DVI or DVI PC in the Edit Name of the Input mode. In this case, a separate sound connection is required. ¦ Support Menu ❑ Legal Notice ❑ Product Guide The Product Guide gives you information on the most important features of this TV. The descriptions provided by this function are in English only. Picture Quality Support View the Legal Notice and General Disclaimer regarding Third Party Contents and Service. N The General Disclaimer may differ depending on the country. Legal Notice ▶ Product Guide Self Diagnosis Software Upgrade HD Connection Guide Contact Samsung Full HD 1080p 100Hz Motion Plus Picture Mode [email protected] Internet@ TV - Content Service Content Library Flash USB2.0 Movie DLNA Wireless Eco-Friendly Energy Saving Mode Eco Material English - 29 BN68-02325A-Eng.indb 29 2009-05-19 �� 3:42:53 Using the Remote Control Buttons in the Product Guide Menu Button Yellow Button ◄/► ENTERE RETURN EXIT Operations Shows the contents of the Product Guide sequentially. (Auto Play) Move the cursor and select an item. Select the currently selected item. Return to the previous menu. Stop the current function and return to the Product Guide main menu. ❑ Self Diagnosis ■ Picture Test Self Diagnosis If you think you have a picture problem, perform the picture test. Check the colour pattern on Picture Test ▶ the screen to see if the problem still exists. Sound Test ● Yes: If the test pattern does not appear or there is noise in the test pattern, select Yes. Signal Information There may be a problem with the TV. Therefore, contact Samsung’s call centre for U Move E Enter R Return assistance. ● No: If the test pattern is properly displayed, select No. There may be a problem with your external equipment. Please check your connections. If the problem still persists, refer to the external device’s user manual. ■ Sound Test If you think you have a sound problem, please perform the sound test. You can check the sound by playing a built-in melody sound through the TV. N If you hear no sound from the TV’s speakers, before performing the sound test, make sure Speaker Select is set to TV speaker in the Sound menu. N The melody will be heard during the test even if Speaker Select is set to External Speaker or the sound is muted by pressing the MUTE button. ● Yes: If during the sound test you can hear sound only from one speaker or not at all, select Yes. There may be a problem with the TV. Therefore, contact Samsung’s call centre for assistance. ● No: If you can hear sound from the speakers, select No. There may be a problem with your external equipment. Please check your connections. If the problem still persists, refer to the external device’s user manual. ■ Signal Information (digital channels only) Unlike analogue channels, which can vary in reception quality from ‘snowy’ to clear, digital (HDTV) channels have either perfect reception quality or you will not receive them at all. So, unlike analogue channels, you cannot fine tune a digital channel. You can, however, adjust your antenna to improve the reception of available digital channels. N If the signal strength meter indicates that the signal is weak, physically adjust your antenna to increase the signal strength. Continue to adjust the antenna until you find the best position with the strongest signal. English - 30 BN68-02325A-Eng.indb 30 2009-05-19 �� 3:42:53 ❑ Software Upgrade Samsung may offer upgrades for the TV’s firmware in the future. These upgrades can be performed via the TV when it is connected to the Internet, or by downloading the new firmware from samsung.com to a USB memory device. N Current Version is the software already installed in the TV. N Alternative Software (Backup) shows the previous version that will be replaced. N Software is represented as ‘Year/Month/Day_Version’. The more recent the date, the newer the software version. Installing the latest version is recommended. ■ By USB Insert a USB drive containing the firmware upgrade downloaded from samsung.com into the TV. Please be careful to not disconnect the power or remove the USB drive while upgrades are being applied. The TV will turn off and turn on automatically after completing the firmware upgrade. Please check the firmware version after the upgrades are complete (the new version will have a higher number than the older version). When software is upgraded, video and audio settings you have made will return to their default (factory) settings. We recommend you write down your settings so that you can easily reset them after the upgrade. TV Side Panel or USB Drive Software Upgrade Current Version 2009/01/18_000001 By USB ▶ By Channel Standby Mode Upgrade : 45 Min Alternative Software 2009/01/15_00000 U Move E Enter R Return ■ By Channel Upgrades the software using the broadcasting signal. N If the function is selected during the software transmission period, this function searches for available software and downloads the software. N The time required to download the software is determined by the signal status. ■ Standby Mode Upgrade To continue software upgrade with master power on, Select On by pressing the ▲ or ▼ button. 45 minutes after entering standby mode, a manual upgrade is automatically conducted. Since the power of the unit is turned on internally, the screen may be on slightly for the LCD product. This phenomenon may continue for more than 1 hour until the software upgrade is completed. ■ Alternative Software (Backup) If there is an issue with the new firmware and it is affecting operation, you can change the software to the previous version. N If software was changed, existing software is displayed. N You can change current software to alternative software by ‘Alternative Software’. ❑ HD Connection Guide This menu presents the connection method that provides the optimal quality for the HDTV. Refer to this information when connecting external devices to the TV. ❑ Contact Samsung View this information when your TV does not work properly or when you want to upgrade the software. You can view the information regarding the call centre, product and software file download method. English - 31 BN68-02325A-Eng.indb 31 2009-05-19 �� 3:42:53 Media Play (USB & DLNA) ¦ Connecting a USB Device 1. Press the POWER button to turn the TV on. TV Side Panel 2. Connect a USB device containing photo, music and/or movie files to the USB1(HDD) or USB2 jack on the side of the TV. 3. When the Application selection screen is displayed, press the ENTERE button to select or Media Play (USB & DLNA). N MTP (Media Transfer Protocol) is not supported. N The file system supports FAT16, FAT32 and NTFS. USB Drive N Certain types of USB Digital camera and audio devices may not be compatible with this TV. SUM N Media Play only supports USB Mass Storage Class devices (MSC). MSC is a Mass Storage Class Bulk-Only Transport device. Examples of MSC are Thumb drives, Flash Card Readers and USB HDD (USB HUB are not PHOTO supported.). N Please connect directly to the USB port of your TV. If you are using a separate cable connection, there may be a USB compatibility problem. Photo Music Movie Setup N Before connecting your device to the TV, please back up your files to prevent R Return Device SUM them from damage or loss of data. SAMSUNG is not responsible for any data file damage or data loss. N Connect a USB HDD to the dedicated port, USB1 (HDD) port. However, if the connected device requires high power, the USB1 (HDD) may fail to support the device. N Do not disconnect the USB device while it is loading. N MSC supports MP3 and JPEG files, while a PTP device supports JPEG files only. N The higher the resolution of the image, the longer it takes to display on the screen. N The maximum supported JPEG resolution is 15360X8640 pixels. N For unsupported or corrupted files, the ‘Not Supported File Format’ message is displayed. N If sort key is set to Basic View, up to 1000 files can be displayed in each folder. The other sort key can display up to 10000 files. N MP3 files with DRM that have been downloaded from a non-free site cannot be played. Digital Rights Management (DRM) is a technology that supports the creation of content, the distribution and management of the content in an integrated and comprehensive way, including the protection of the rights and interests of the content providers, the prevention of the illegal copying of contents, as well as managing billings and settlements. N When moving to a photo, loading may take a few seconds. At this point, the loading icon will appear at the screen. N If more than 2 PTP devices are connected, you can only use one at a time. N If more than one MSC device is connected, some of them may not be recognized. If a device requires high power (more than 500mA or 5V), the USB device may not be supported. N If an over-power (Fail add new device USB1/USB2 Power Overload) warning message is displayed while you are connecting or using a USB device, the device may not be recognized or may malfunction. 851.86MB/993.02MB Free Using the Remote Control Button in Media Play Menu Button ▲/▼/◄/► ENTERE ∂/∑ RETURN TOOLS ∫ π/μ INFO MEDIA.P < P >, EXIT, TV Operations Move the cursor and select an item. Select the currently selected item. While playing a slide show, movie, or music file: - Pressing the ENTERE button during play pauses the play. - Pressing the ENTERE button during pause resumes the play. Play or pause the Slide Show, music or movie. Return to the previous menu. Run various functions from the Photo, Music and Movie menus. Stop the current slide show, Music or Movie file. Jump to previous group/Jump to next group. Show file information. Exit Media Play mode. Stop Media Play mode and Returns to TV mode. English - 32 BN68-02325A-Eng.indb 32 2009-05-19 �� 3:42:54 ¦ Media Play Function This function enables you to view and listen to photo, music and/or movie files saved on a USB Mass Storage Class (MSC) device. N It might not work properly with unlicensed multimedia files. Entering the Media Play (USB & DLNA) Menu 1. Press the MENU button. Press the ▲ or ▼ button to select Application, then press the ENTERE button. SUM 2. Press the ▲ or ▼ button to select Media Play (USB & DLNA), then press the ENTERE button. N The Media Play (USB & DLNA) menu is displayed. O Press the MEDIA.P button on the remote control to display the Media Play menu. O Press the SOURCE button on the remote control to view the source list. Then Press the ▲ or ▼ button to select USB. 851.86MB/993.02MB Free PHOTO Photo SUM Music Movie Setup R Return Device 3. Press the Red button, then press the ▲ or ▼ button to select the USB Memory. Press the ENTERE button. N This function differs depending on the USB Memory Device / DLNA device. N The selected USB device name appears at the bottom left of the screen. 4. Press the ◄ or ► button to select an icon (Photo, Music, Movie, Setup), then press the ENTERE button. N To exit Media Play mode, press the MEDIA.P button on the remote control. Removing a USB Memory Device Safely You can remove the device safely from the TV. Colour Folder Preference 1. Press the TOOLS button in the Media Play file list screen, or while a Slide Show, music or movie is being played. 2. Press the ▲ or ▼ button to select Remove Safely, then press the ENTERE button. 5/15 1231.jpg 1232.jpg 1233.jpg 1234.jpg Basic View Timeline Slide Show Play Current Group Information Remove Safely 1235.jpg 1236.jpg 1237.jpg 3. Remove the USB device from the TV. Screen Display SUM Colour Folder Preference 1 Basic View Favourites Settings Select T Tools R Return Sort key List Section Timeline Group List Section 2 c Device 5/15 File List Section 1231.jpg 1232.jpg 1233.jpg 1235.jpg 1234.jpg 1236.jpg 1237.jpg 3 6 SUM 4 Device 5 1File(s) Selected Favourites Settings Select T Tools R Return Move to either ‘Sort key List Section’, ‘Group List Section’ or ‘File List Section’ using the Up and Down buttons. After selecting a section, press the ◄ or ► buttons to select an item. 1 Current Sort key: This field shows the current standard for sorting files. Press the ◄ or ► button to change the standard for sorting files. 2 View Groups: Shows the detailed groups of the files sorted according the selected Sort key. The sort group where the currently selected file is contained is highlighted. 3 Currently selected file: The selected file is the file you can now control. Photo and movie files are displayed as thumbnail images. 4 Current Device: Shows the currently selected device name. Press the Red button to select a device. • Red (Device) button: Selects a connected device. English - 33 BN68-02325A-Eng.indb 33 2009-05-19 �� 3:43:00 5 Help Items • Green (Favourites Settings) button: Changes the Favourites Settings for the selected file. Press this button repeatedly until the desired value appears. • Yellow (Select) button: Selects file from the file list. Selected files are marked with a symbol c. Press the Yellow button again to cancel a file selection. • TOOLS (Tools) button: Displays the option menus. (The option menu changes according to the current status.) 6 Item Selection Information: Shows the number of files that are selected by pressing the Yellow button. ¦ Sorting the Photo / Music / Movie List ❑ Basic View Shows the folders on the USB memory device. If you select a folder and press the ENTERE button, corresponding files (Photo / Music / Movie) contained in the selected folder are displayed. N When sorted according to the Basic View, you cannot set Favourites files. Colour 1231.jpg 1232.jpg 1233.jpg SUM Basic View Timeline Folder Preference Energetic SUM 1236.jpg Basic View Title 3/37 Glen Hans Once Ost 2007 Soundtrack Want Me Way I Love You Title Sorts and displays the music or movie titles in symbol/number/alphabet/special order. HaHaHa Gold Shine Favourites Settings Select T Tools R Return Device ❑ Timeline (Photo / Movie) 1237.jpg Favourites Settings Select T Tools R Return Genre Lies 1235.jpg 1234.jpg Device ❑ Preference → FFF / FFF / FFF / FFF Sorts the files by preference (Favourites). N Changing the Favourites Settings Select the desired photo in the file list, then press the Green button repeatedly until the desired setting appears. N The stars are for grouping purposes only. For example, the 3 star setting does not have any priority over the one star setting. Preference 5/15 ❑ Folder Sorts the files by folder. If there are many folders in USB, the photos files are shown in order in each folder. The file in the Root folder is shown first and the others are shown in alphabetical order by name. Folder Folder Preference ❑ Title (Music / Movie) Basic View Timeline 5/15 Sorts the music titles in symbol/number/alphabet/special order, and shows the music file. Photo 1231.avi SUM 1232.avi 1233.avi Device ABCD.avi 1235.avi 1236.avi 1237.avi Favourites Settings Select T Tools R Return ❑ Colour → Red / Yellow / Green / Blue / Magenta / Black / Gray / Unclassified Sorts photos by colour. You can change the photo colour information. N You should set the Use Colour View to on in the Setup menu before sorting photos by colour. Music ❑ Artist Sorts the music file by artist in symbol/number/alphabet/special order. ❑ Mood → Energetic / Rhythmical / Sad / Exciting / Calm / Unclassified Sorts music files by the mood. You can change the music mood information. ❑ Genre Sorts music files by the genre. English - 34 BN68-02325A-Eng.indb 34 2009-05-19 �� 3:43:04 ¦ Photo / Music / Movie List Option Menu 1. Press the MEDIA.P button. Basic View 2. Press the ◄ or ► button to select Photo, Music or Movie then press the ENTERE button. 3. Press the ◄ or ► button to select the desired file. N Selecting Multiple Files Press the ◄ or ► button to select the desired file. Then press the Yellow button. Repeat the above operation to select multiple files. The mark c appears to the selected file. Timeline Colour Folder 5/15 1231.jpg 1232.jpg SUM 1233.jpg 1234.jpg Genre Folder Preference Energetic ❑ Play Current Group Lies Using this menu, you can play a SlideShow using only the photo files in the currently selected sorting group. SUM 3/37 Glen Hans Once Ost 2007 Soundtrack Want Me Slide Show Play Current Group Change Group Information 1236.jpg 1235.jpg Safely Remove 1237.jpg Favourites Settings Select T Tools R Return Device 4. Press the TOOLS button. N The option menu changes according to the current status. Preference Way I Love You Basic View Title Play Current Group Information Remove Safely HaHaHa Gold Shine Favourites Settings Select T Tools R Return Device ❑ Deselect All (When at least one file is selected) You can deselect all files. N The c mark indicating the corresponding file is selected is hidden. Title Folder Preference 5/15 ❑ Information The photo/ music/ movie file information is displayed. You can view the information of files during a SlideShow using the same procedures. O Press the INFO button to viewing the information. 1231.avi SUM 1232.avi 1233.avi Device ABCD.avi Basic View Timeline Play Current Group Information Remove Safely 1235.avi 1236.avi 1237.avi Favourites Settings Select T Tools R Return ❑ Remove Safely You can remove the device safely from the TV. Photo ❑ Slide Show Using this menu, you can play a SlideShow using the photo files on the USB memory device. ❑ Change Group (When the Sort key is the Colour) You can change a selected photo file’s (or group of files) colour information in order to move it from one colour group to another. N This does not change the actual colour of the photo. N The group information of the current file is updated and the photos are moved to the new colour group. N To change the information of multiple files, select the files you want by pressing the Yellow button. Music ❑ Change Group (When the Sort key is Mood) You can change the mood information of music files. The group information of the current file is updated and the file is moved to the new group. To change the information of multiple files, select files by pressing the Yellow button. English - 35 BN68-02325A-Eng.indb 35 2009-05-19 �� 3:43:08 ¦ Slide Show / Music Play / Movie Play Option Menu 1. During a slide show (or when viewing a photo) or playing a music or movie, press the TOOLS button to set the option. 2. Press the ▲ or ▼ button to select the desired option, then press the ENTERE button. ❑ Picture Setting / Sound Setting Tools You can select the picture and sound settings. Stop Slide Show ❑ Information Slide Show Speed : Normal Slide Show Effect : Fade1 Rotate Zoom Background Music The file information is displayed. Picture Setting Sound Setting Information ❑ Remove Safely ▼ U Move E Enter e Exit You can remove the device safely from the TV. Slide Show Option Menu Tools Repeat Mode ❑ Stop Slide Show / Start Slide Show Sound Setting Information You can start or stop a SlideShow. Remove Safely ❑ Slide Show Speed → Slow / Normal / Fast U Move L Adjust e Exit You can select the slide show speed. N This function is available only during a slide show. N You can also change the speed of the Slide Show by pressing the π (REW) or μ (FF) button during the Slide Show. Tools Picture Setting Sound Setting ❑ Slide Show Effect Picture Size You can select the screen transition effect used in the slideshow. ■ ◀ On ▶ Picture Setting None / Fade1 / Fade2 / Blind / Spiral / Checker / Linear / Stairs / Wipe / Random N This function is available only during a slide show. : Fit Caption Setting Information Remove Safely U Move E Enter e Exit ❑ Rotate You can rotate photos saved on a USB memory device. N Whenever you press the ◄ button, it rotates by 270˚, 180˚, 90˚, and 0˚. N Whenever you press the ► button, it rotates by 90˚, 180˚, 270˚, and 0˚. N The rotated file is not saved. ❑ Zoom You can magnify photos saved on a USB memory device. (x1 → x2 → x4) N To move the enlarged photo image, press the ENTERE button, then press the ▲/▼/◄/► buttons. Note that when the enlarged picture is smaller than the original screen size, the location change function doesn’t work. N The enlarged file is not saved. ❑ Background Music You can select background music when watching a Slide Show. N To use this feature, there must be music and photo files stored on the USB device. N Loading music files is needed to change BGM mode. Play music files in music category to load. Music Play Option Menu ❑ Repeat Mode → On / Off You can play music files repeatedly. Movie Play Option Menu ❑ Picture Size → Fit / Original Play video at the screen size or original size. ❑ Caption Setting You can set the captions for the movie. English - 36 BN68-02325A-Eng.indb 36 2009-05-19 �� 3:43:08 ¦ Viewing a Photo or Slide Show Viewing a Slide Show All files in the File List Section will be used for the Slide Show. During the slide show, files are displayed in order from the currently shown file. The Slide Show progresses in the order sorted in the File List Section. Music files can be automatically played during the Slide Show if the Background Music is set to On. O While a photo list is displayed, press the ∂(Play)/ENTERE button on the remote control to start slide show. N SlideShow Control Buttons N N N N Button ENTERE ∂ ∑ ∫ π/μ TOOLS Colour Preference 5/15 1231.jpg 1232.jpg SUM 1233.jpg Timeline Basic View Slide Show Play Current Group Information Remove Safely 1236.jpg 1235.jpg 1234.jpg 1237.jpg Favourites Settings Select T Tools R Return Device Operations Play/Pause the Slide Show. Play the Slide Show. Pause the Slide Show. Exit Slide Show and return to the photo list. Change the SlideShow playing speed. Run various functions from the Photo menus. Playing current group Folder ▶ Normal 1234.jpg 580x765 2009/01/02 5/15 E Pause ◀▶ Previous / Next SUM T Tools R Return 1. Press the ▲ button to move to the Sort key Section. 2. Press the ◄ or ► button to select a sorting standard. 3. Press the ▼ button to move to the Group List Section. 4. Select a group using the ◄ and ► buttons. 5. Press the ∂ (Play) button. A slideshow begins with the files of the selected group. ● Colour Folder Preference Basic View Timeline 5/15 Alternatively 1. Select a Sort key and then in the File List Section, select the photos contained in the desired group. N To move to the previous/next group, press the π (REW) or µ (FF) button. 2. Press the TOOLS button. 1231.jpg SUM 1232.jpg 1233.jpg Device 1234.jpg 1235.jpg 1236.jpg 1237.jpg Favourites Settings Select T Tools R Return 3. Press the ▲ or ▼ button to select Play Current Group, then press the ENTERE button. N Only the photos in the sorting group including the selected files will be used for the Slide Show. To perform a Slide Show with only the selected files 1. Press the ▼ button to select the File List Section. 2. Press the ◄ or ► button to select the desired photo in the File List Section. 3. Press the Yellow button. 4. Repeat the above operation to select multiple photos. N The c mark appears to the left of the selected photo. N If you select one file, the Slide Show will not be performed. N To deselect all selected files, press the TOOLS button and select Deselect All. 5. Press the ∂ (Play)/ENTERE button. N The selected files will be used for the Slide Show. ● Alternatively 1. In the File List Section, press the Yellow buttons to select the desired photos. 2. Press the TOOLS button. 3. Press the ▲ or ▼ button to select Slide Show, then press the ENTERE button. N The selected files will be used for the Slide Show. English - 37 BN68-02325A-Eng.indb 37 2009-05-19 �� 3:43:13 ¦ Playing Music Playing a music file ▶ 00:00:04 / 00:04:04 3/37 1. Press the ▼ button to select the File List Section. 2. Press the ◄ or ► button to select a music file to be played. Way I Love You HaHaHa 3. Press the ∂ (Play)/ENTERE button. N This menu only shows files with the MP3 file extension. Files with other file extensions are not displayed, even if they are saved on the same USB device. N The selected file is displayed at the top with its playing time. E Pause ◀▶ Previous / Next T Tools R Return SUM N To adjust the music volume, press the volume button on the remote control. To mute the sound, press the MUTE button on the remote control. N If the sound is odd when playing MP3 files, adjust the Equalizer and SRS TruSurround HD in the Sound menu. (An over-modulated MP3 file may cause a sound problem.) N The playing duration of a music file may be displayed as ‘00:00:00’ if its playing time information is not found at the start of the file. N π (REW) or μ (FF) buttons do not function during play. N Music Play Control Buttons Button ENTERE ∂ ∑ ∫ TOOLS Operations Play/Pause the music file. Play the music file Pause the music file Exit play mode and return to the music list. Run various functions from the Music menus. N Music function information icon p q When all music files in the folder (or the selected file) are repeated. Repeat Mode is On. When all music files in the folder (or the selected file) are played once. Repeat Mode is Off. Playing the music group 1. Press the ▲ button to move to the Sort key Section. 2. Press the ◄ or ► button to select a sorting standard. 3. Press the ▼ or ENTERE button to move to the Group List Section. 4. Press the ∂ (Play) button. The files of the selected group will start playing. ● Alternatively 1. Select a sort key and then in the File List Section, select the files contained in the desired group. N To move to the previous/next group, press the π (REW) or µ (FF) button. 2. Press the TOOLS button. 3. Press the ▲ or ▼ button to select Play Current Group, then press the ENTERE button. N The music files in the sorting group including the selected file are played. Playing the selected music files 1. Press the ▼ button to select the File List Section. 2. Press the ◄ or ► button to select the desired music file. 3. Press the Yellow button. 4. Repeat the above operation to select multiple music files. N The c appears to the left of the selected music file. N To deselect all selected files, press the TOOLS button and select Deselect All. 5. Press the ∂ (Play)/ENTERE button. N The selected files will be played. English - 38 BN68-02325A-Eng.indb 38 2009-05-19 �� 3:43:13 ¦ Playing a Movie File Playing a movie file 1. Press the ▼ button to select the File List Section. ▶ 00:00:01 / 00:05:30 3/37 ABC.avi 2. Pressing the ◄ or ► button to select a movie file to be played. 3. Press the ∂ (Play)/ENTERE button. N The selected file is played. N The selected file is displayed at the top with its playing time. N The playing duration of a movie file may be displayed as ‘00:00:00’ if its playing time information is not found at the start of the file. N You can watch exciting gaming multimedia files, but the gaming function is not supported. N Supported Subtitle Formats Name MPEG-4 time-based text SAMI SubRip SubViewer Micro DVD SUM E Pause ◀ ▶ Jump File extension .ttxt .smi .srt .sub .sub or .txt Format XML HTML string-based string-based string-based Video Decoder Divx 3.11, Divx 4.x, Divx 5.1, Divx 6.0, XviD, H.264 BP, H.264 MP, H.264 HP, MPEG-4 SP, MPEG-4 ASP, Motion JPEG Divx 3.11, Divx 4.x, Divx 5.1 Divx 6.0, XviD, H.264 BP, H.264 MP, H.264 HP MPEG-4 SP, MPEG-4 ASP Motion JPEG Divx 3.11, Divx 4.x, Divx 5.1 Divx 6.0, XviD, H.264 BP, H.264 MP, H.264 HP, MPEG-4 SP, MPEG-4 ASP Window Media Video v9 H.264 BP, H.264 MP, H.264 HP, MPEG-4 SP, MPEG-4 ASP XVID H.264 BP, H.264 MP, H.264 HP MPEG-4 SP, MPEG-4 ASP MPEG2, MPEG1 MPEG1 (Program Stream), MPEG2 (Program Stream) MPEG2 (Transport Stream), H.264 (Transport Stream), VC1 (Transport Stream) Audio codec T Tools R Return N Supported Video Formats File extension Container *.avi AVI *.mkv MKV *.asf ASF *.wmv (VC1) *.mp4 MP4 (SMP4) *.3gp 3GPP *.vro (ps) *.mpg *.mpeg (ps) VRO / VOB others (ts) MP3, AC3, LPCM, ADPCM (MULAW ALAW) MP3, AC3, LPCM, ADPCM (MULAW ALAW), AAC WMA, MP3, AC3, LPCM, ADPCM, (MULAW ALAW), AAC ADPCM, (HE)-AAC, mp3 ADPCM, (HE)-AAC AC3, MPEG, LPCM AC3, MPEG, LPCM AAC, HE-AAC, MP3, DD+ English - 39 BN68-02325A-Eng.indb 39 2009-05-19 �� 3:43:14 N Video Play Control Buttons Button ENTERE ∂ ∑ TOOLS ∫ ◄/► ▲/▼ μ Operations Play/Pause the movie file Play the movie file Pause the movie file Run various functions from the Movie menus. Exit play mode and return to the movie list. Skip forwards or backwards through the movie file. Move to the first/last of the file. Play the file at double speed. This function may not be supported depending on the codec. Playing the movie group 1. Press the ▲ button to move to the Sort key Section. 2. Press the ◄ or ► button to select a sorting standard. 3. Press the ▼ or ENTERE button to move to the Group List Section. 4. Press the ∂ (Play) button. Only the files of the selected group will start playing. ● Alternatively 1. Select a Sort key and then in the File List Section, select the files contained in the desired group. N To move to the previous/next group, press the π (REW) or µ (FF) button. 2. Press the TOOLS button. 3. Press the ▲ or ▼ button to select Play Current Group, then press the ENTERE button. N The movie files in the sorting group including the selected file are played. Playing the selected movie files 1. Press the ▼ button to select the File List Section. 2. Press the ◄ or ► button to select the desired music file. 3. Press the Yellow button. N The c mark appears to the left of the selected movie file. N To deselect all selected files, press the TOOLS button and select Deselect All. 4. Repeat the above operation to select multiple movie files. 5. Press the ∂ (Play)/ENTERE button. N Only the selected file is played. Playing movie continuously (Resume Play) If you exit the playing movie function, the movie can be played later from the point where it was stopped. 1. Select the movie file you want to play continuously by pressing the ◄ or ► button to select it from the File List Section. 2. Press the ∂ (Play)/ENTERE button. 3. Select Play Continuously (Resume Play) by pressing the Blue button. N The Movie will begin to play from where it was stopped. N If Cont. Movie Play Help function is set On in the Setup menu, a pop-up message will appear when you resume play a movie file. English - 40 BN68-02325A-Eng.indb 40 2009-05-19 �� 3:43:14 ¦ Using the Setup Menu Setup displays the user settings of the Media Play menu. SUM 1. Press the MEDIA.P button. 2. Press the ◄ or ► button to select Setup, then press the ENTERE button. 851.86MB/993.02MB Free SETUP 3. Press the ▲ or ▼ button to select the desired option. 4. Press the ◄ or ► button to select the option. N To exit Media Play mode, press the MEDIA.P button on the remote control. ■ Use Colour View → On / Off You can select sorting photos by colour. If this option is set to On, the loading time may be increased to collect colour information from the photos. ■ Music Repeat Mode → On / Off Select to repeatedly play music files. ■ ■ Photo SUM Music Movie Setup e Exit Device Use Colour View Music Repeat Mode ◀ Off On ▶ Cont. movie play help On Get the DivX® VOD registration code Get the DivX® VOD deactivation code Cont. movie play help → On / Off Select to display the help pop-up message for continuous movie playback. Get the DivX® VOD registration code Shows the registration code authorized for the TV. If you connect to the DivX web site and register the registration code with a personal account, you can download VOD registration file. If you play the VOD registration using Media Play, the registration is completed. N For more information on DivX® VOD, visit www.DivX.com. Screen Saver Run Time 4 hours Information Remove Safely If this is set to ON, the loading time increases for collecting the colour information. SUM Device ■ Get the DivX® VOD deactivation code When DivX® VOD is not registered, the registration deactivation code is displayed. If you execute this function when DivX® VOD is registered, the current DivX® VOD registration is deactivated. ■ Screen Saver Run Time → 2 hours / 4 hours / 8 hours Select to set the waiting time before the screen saver appears. ■ Information Select to viewing the information of the connected device. ■ Remove Safely You can remove the device safely from the TV. U Move L Adjust R Return English - 41 BN68-02325A-Eng.indb 41 2009-05-19 �� 3:43:14 Media Play-DLNA ¦ Setting the DLNA Network DLNA allows you to watch pictures, musics and videos saved on your PC or on your TV through a network connection in Media Play mode. This removes the need to copy them to a USB storage device and then connect the device to your TV. To use DLNA, the TV must be connected to the network and the DLNA application must be installed on your PC. Network Connection Diagram-Cable TV PC LAN LAN External Modem (ADSL/VDSL/Cable TV) Network Connection Diagram-Wireless TV Side Panel TV PC or LAN Samsung Wireless LAN Adapter LAN Cable Wireless IP sharer 1. For more information on how to configure your network, refer to ‘Setting the Network’. N You are recommended to locate both TV and PC in same subnet. The first 3 parts of the subnet address of the TV and the PC IP addresses should be the same and only the last part (the host address) should be changed. (e.g. IP Address: 123.456.789.**) 2. Connect the PC to which the Samsung PC Share Manager program will be installed and the external modem using a LAN cable. N You can connect the TV to the PC directly without connecting it through a Sharer (Router). ¦ Installing the DLNA Application To play content on the PC on the TV, you have to first install the application. To use the DLNA function smoothly, use the program in the CD-ROM supplied with the TV or use the Samsung PC Share Manager program corresponding to the TV model that can be downloaded from the Samsung web site. English - 42 BN68-02325A-Eng.indb 42 2009-05-19 �� 3:43:16 System Requirements 1. Insert the Programme CD supplied with this TV into your PC. 2. 30MB of free hard disk space is needed for the programme installation. N If you share files, up to 30MB of hard disk drive space is required for each 100 files. N If you cancel file sharing, the hard disk drive space used for the thumbnail information is also freed. Supported Formats ● Image: JPEG/ Audio: MP3/ Video: AVI, MKV, ASF, MP4, 3GPP, PS, TS container. For detailed supported video formats, refer to the ‘Playing a Movie File’ instructions. Install the application 1. Run the Setup.exe file on the Programme CD supplied with the product. N Alternatively, you can download the file from www.samsung.com. 2. Install the SAMSUNG PC Share Manager as shown in the figures. 3. When the installation is complete, the PC Share Manager icon appears on your Desktop. N Double-click the icon to run the programme. ¦ Using the DLNA Application The Programme Screen Layout 1. Menus: The following application menus are provided : File, Share, Server, and Help. 1 2 3 4 5 2. Click to share the selected PC server folder. 6 7 3. Click to cancel sharing. 4. Click to refresh the PC folder and files. 5. Click to synchronize the share status. 6. The folders and files of the PC to be shared are listed. 7. Folders shared by the user are listed. English - 43 BN68-02325A-Eng.indb 43 2009-05-19 �� 3:43:17 ❑ Share ■ Sharing a Folder You can share a folder from your PC to the TV. ■ Cancelling a Shared Folder You can cancel a shared folder on your PC. Select a folder from the Shared Folder pane and select Unshare Folder. ■ Applying the Current Settings Perform this when synchronization is necessary due to a new shared folder or cancelling a shared folder. The Set Changed State menu applies changes to shared folders to the data saved with the PC share programme. Since applying changes to the internal data is a time-consuming process, this function enables users to apply changes to the data only when required. Until the Set Changed State menu is selected, the changed state of the shared folder is not applied to the server. Changes to the shared folders are not applied to your PC until you select the Set Changed State menu. ■ Setting the Access Permission To enable the TV to find your PC, the TV must be set to Set Device Policy in the Access Permission Settings window. In addition, the PC server and the TV must be on the same subnet. ● Method: Select the Share menu and select Set Device Policy. Rejected items are represented in gray. You can change the access permissions by using the Allow Accept / Deny button. To delete an item, select the item and select Delete Item. ❑ Server ■ Server You can run or stop using your PC as a server. ■ Run DLNA Digital Media Server when Windows Starts You can determine whether to start the PC server automatically when Windows starts. ■ Change server name You can rename the PC server. ¦ Using the DLNA Function Using the DLNA Menu DLNA (Digital Living Network Alliance) enables content saved on a DLNA server (usually your PC) connected to your TV or over a network to be played. Media Play enables playing content saved on a USB memory device connected to the TV, while DLNA enables playing content saved on a DLNA server (your PC) connected to your TV or over the network. The procedures to use the content are the same as those for Media Play (USB & DLNA). 1. Press the MEDIA.P button on the remote control to display the DLNA menu. 2. Press the ◄ or ► button to select an icon (Photo, Music, Movie, Setup), then press the ENTERE button. N To exit DLNA mode, press the MEDIA.P button on the remote control. N DLNA does not support the following functions. The Background Music and Background Music Setting functions. Sorting files by preference in the Photo, Music, and Movie folders. The Change Group function. The Copy / Delete function. The Remove Safely function. The REW/FF (π/µ) key functions while a movie is playing. Playing Movie Continuously (Resume Play) function. N The Skip function may not work with some container such as asf and mkv. N The Divx DRM, Multi-audio, embedded caption does not supported. N Samsung PC Share manager should be permitted by the firewall program on your PC. N The Skip (◄/► keys) or Pause function may not work while a movie is playing for the DLNA of other manufacturers, depending on the corresponding content information. N The playing time may not be displayed while a movie is playing. English - 44 BN68-02325A-Eng.indb 44 2009-05-19 �� 3:43:17 ANYNET+ ¦ Connecting Anynet+ Devices What is Anynet+? Anynet+ is a function that enables you to control all connected Samsung devices that support Anynet+ with your Samsung TV’s remote. The Anynet+ system can be used only with Samsung devices that have the Anynet+ feature. To be sure your Samsung device has this feature, check if there is an Anynet+ logo on it. To connect to a TV Anynet+ Device 1 TV HDMI 1.3 Cable Anynet+ Device 2 HDMI 1.3 Cable Anynet+ Device 3 HDMI 1.3 Cable Anynet+ Device 4 HDMI 1.3 Cable 1. Connect the HDMI IN (1, 2, 3(DVI) or 4) jack on the TV and the HDMI OUT jack of the corresponding Anynet+ device using an HDMI cable. To connect to Home Theatre TV Anynet+ Device 1 Home Theatre HDMI 1.3 Cable Optical Cable HDMI 1.3 Cable Anynet+ Device 2 HDMI 1.3 Cable Anynet+ Device 3 HDMI 1.3 Cable Anynet+ Device 4 HDMI 1.3 Cable 1. Connect the HDMI IN (1, 2, 3(DVI) or 4) jack on the TV and the HDMI OUT jack of the corresponding Anynet+ device using an HDMI cable. 2. Connect the HDMI IN jack of the home theatre and the HDMI OUT jack of the corresponding Anynet+ device using an HDMI cable. N Connect the Optical cable between the DIGITAL AUDIO OUT (OPTICAL) jack on your TV and the Digital Audio Input on the Home Theatre. N When following the connection above, the Optical jack only outputs 2 channel audio. You will only hear sound from the Home Theatre’s Front Left and Right speakers and the subwoofer. If you want to hear 5.1 channel audio, connect the DIGITAL AUDIO OUT (OPTICAL) jack on the DVD / Satellite Box (ie Anynet Device 1 or 2) directly to the Amplifier or Home Theatre, not the TV. N Connect only one Home Theatre. N You can connect an Anynet+ device using the HDMI 1.3 cable. Some HDMI cables may not support Anynet+ functions. N Anynet+ works when the AV device supporting Anynet+ is in the Standby or On status. N Anynet+ supports up to 12 AV devices in total. Note that you can connect up to 3 devices of the same type. English - 45 BN68-02325A-Eng.indb 45 2009-05-19 �� 3:43:18 ¦ Setting Up Anynet+ Media Play (USB & DLNA) Application T Press the TOOLS button to display the Tools menu. You can also display Anynet+ menu by selecting Tools → Anynet+ (HDMI-CEC). Anynet+ (HDMI-CEC) Content Library Internet@TV Home Network Centre ❑ Setup ■ ■ Anynet+ (HDMI-CEC) → Off / On To use the Anynet+ Function, Anynet+ (HDMI-CEC) must be set to On. N When the Anynet+ (HDMI-CEC) function is disabled, all the Anynet+ related operations are deactivated. Auto Turn Off → No / Yes Setting an Anynet+ Device to turn Off automatically when the TV is turned Off. N The active source on the TV remote must be set to TV to use the Anynet+ function. N If you set Auto Turn Off to Yes, connected external devices are also turned off when the TV is turned off. If an external device is still recording, it may or may not turn off. Setup Anynet+ (HDMI-CEC) : On ▶ Auto Turn Off : Yes U Move E Enter R Return Setup Anynet+ (HDMI-CEC) : On Auto Turn Off : Yes ▶ U Move E Enter R Return ¦ Switching between Anynet+ Devices 1. Press the TOOLS button. Press the ENTERE button to select Anynet+ (HDMI-CEC). 2. Press the ▲ or ▼ button to select Device List, then press the ENTERE button. N Anynet+ devices connected to the TV are listed. N If you cannot find a device you want, press the red button to scan for devices. View TV Device List Recording: DVDR DVDR MENU DVDR INFO Receiver: Off Setup 3. Press the ▲ or ▼ button to select a particular device and press the ENTERE button. It is switched to the selected device. N Only when you set Anynet+ (HDMI-CEC) to On in the Application menu, the Device List menu appears. U Move E Enter R Return N Switching to the selected devices may take up to 2 minutes. You cannot cancel the operation during the switching operation. N The time required to scan for devices is determined by the number of connected devices. N When the device scan is complete, the number of devices found are not displayed. N Although the TV automatically searches the device list when the TV is turned on via the power button, devices connected to the TV may not always be automatically displayed in the device list. Press the red button to search for the connected device. N If you have selected external input mode by pressing the SOURCE button, you cannot use the Anynet+ function. Make sure to switch to an Anynet+ device by using the Device List. Anynet+ Menu The Anynet+ menu changes depending on the type and status of the Anynet+ devices connected to the TV. Anynet+ Menu View TV Device List (device_name) MENU (device_name) INFO Recording: (*recorder) Stop Recording: (*recorder) Receiver Description Anynet+ mode changes to TV broadcast mode. Shows the Anynet+ device list. Shows the connected device menus. E.g. If a DVD recorder is connected, the disc menu of the DVD recorder will appear. Shows the play menu of the connected device. E.g. If a DVD recorder is connected, the play menu of the DVD recorder will appear. Starts recording immediately using the recorder. (This is only available for devices that support the recording function.) Stops recording. Sound is played through the receiver. N If more than one recording device is connected, they are displayed as (*recorder) and if only one recording device is connected, it will be represented as (*device_name). English - 46 BN68-02325A-Eng.indb 46 2009-05-19 �� 3:43:18 TV Remote Control Buttons Available in Anynet+ Mode Device Type Operating Status Anynet+ Device After switching to the device, when the menu of the corresponding device is displayed on the screen. Device with built-in Tuner Audio Device After switching to the device, while playing a file After switching to the device, when you are watching a TV program When Receiver is activated Available Buttons Numeric buttons ▲/▼/◄/►/ ENTERE buttons Colour buttons / EXIT button π(Backward search) / μ(Forward search) / ∫(Stop) / ∂(Play) / ∑(Pause) P > / P < button Y / MUTE button N The Anynet+ function only works when the active source on the TV remote control is set to TV. N The ∏ button works only while in the recordable state. N You cannot control Anynet+ devices using the buttons on the TV. You can control Anynet+ devices only using the TV remote control. N The TV remote control may not work under certain conditions. If this occurs, reselect the Anynet+ device. N The Anynet+ functions do not operate with other manufacturers’ products. N The π, μ operations may differ depending on the device. ¦ Recording You can make a recording of a TV program using a Samsung recorder. 1. Press the TOOLS button. Press the ENTERE button to select Anynet+ (HDMI-CEC). 2. Press the ▲ or ▼ button to select Recording Immediately and press the ENTERE button. Recording begins. N When there is more than one recording device When multiple recording devices are connected, the recording devices are listed. Press the ▲ or ▼ button to select a recording device and press the ENTERE button. Recording begins. N When the recording device is not displayed select Device List and press the Red button to search devices View TV Device List Recording: DVDR DVDR MENU DVDR INFO Receiver: Off Setup U Move E Enter R Return 3. Press the EXIT button to exit. N You can record the source streams by selecting Recording: (device_name). N Pressing the ∏ button will record whatever you are currently watching. If you are watching video from another device, the video from the device is recorded. N Before recording, check whether the antenna jack is properly connected to the recording device. To properly connect an antenna to a recording device, refer to the recording device’s users manual. ¦ Listening through a Receiver (Home theatre) You can listen to sound through a receiver instead of the TV speaker. 1. Press the TOOLS button. Press the ENTERE button to select Anynet+ (HDMI-CEC). 2. Press the ▲ or ▼ button to select Receiver. Press the ◄ or ► button to select On or Off. View TV Device List Recording: DVDR DVDR MENU DVDR INFO Receiver: Off Setup 3. Press the EXIT button to exit. N If your receiver supports audio only, it may not appear in the device list. N The receiver will work when you have properly connected the optical in jack of the receiver to the DIGITAL AUDIO OUT (OPTICAL) jack of the TV. U Move E Enter R Return N When the receiver (home theatre) is set to On, you can hear sound output from the TV’s Optical jack. When the TV is displaying a DTV(air) signal, the TV will send out 5.1 channel sound to the Home Theatre receiver. When the source is a digital component such as a DVD and is connected to the TV via HDMI, only 2 channel sound will be heard from the Home Theatre receiver. N If there is a power interruption to the TV when the Receiver is set to On (by disconnecting the power cord or a power failure), the Speaker Select may be set to External Speaker when you turn the TV on again. English - 47 BN68-02325A-Eng.indb 47 2009-05-19 �� 3:43:19 ¦ Troubleshooting for Anynet+ Problem Anynet+ does not work. ● Possible Solution Check if the device is an Anynet+ device. The Anynet+ system supports Anynet+ devices only. Connect only one receiver (home theatre). Check if the Anynet+ device power cord is properly connected. Check the Anynet+ device’s Video/Audio/HDMI 1.3 cable connections. Check whether Anynet+ (HDMI-CEC) is set to On in the Anynet+ setup menu. Check whether the TV remote control is in TV mode. Check whether it is Anynet+ exclusive remote control. Anynet+ doesn’t work in certain situations. (Searching channels, Operating Media Play, Plug & Play, etc.) When connecting or removing the HDMI 1.3 cable, please make sure to search devices again or turn your TV off and on again. Check if the Anynet+ Function of Anynet+ device is set on. Check if the Anynet+ device is properly connected to the TV and check if the Anynet+ (HDMI-CEC) is set to On in the Anynet+ Setup menu. Press the TV button on the TV remote control to switch to TV. Then press the TOOLS button to show the Anynet+ menu and select a menu you want. Select View TV in the Anynet+ menu. Press the SOURCE button on the TV remote control and select a device other than Anynet+ devices. Press P >/<, PRE-CH, and FAV.CH to change the TV mode. (Note that the channel button operates only when a tuner-embedded Anynet+ device is not connected.) You cannot use the remote control when you are configuring Anynet+ or switching to a view mode. Use the remote control when the Anynet+ setting or switching to view mode is complete. ● You cannot use the play function when Plug & Play is in progress. ● ● ● ● ● ● Check whether or not the device supports Anynet+ functions. Check whether or not the HDMI 1.3 cable is properly connected. Check whether Anynet+ (HDMI-CEC) is set to On in the Anynet+ setup menu. Search Anynet+ devices again. You can connect an Anynet+ device using the HDMI 1.3 cable only. Some HDMI cables may not support Anynet+ functions. If it is terminated by an abnormal situation such as disconnecting the HDMI cable or power cord or a power failure, please repeat the device scan. Check whether the antenna jack on the recording device is properly connected. ● Connect the optical cable between TV and the receiver. ● ● ● ● ● ● ● ● ● I want to start Anynet+. ● ● ● I want to exit Anynet+. ● ● ● The message ‘Connecting to Anynet+ device...’ appears on the screen. The Anynet+ device does not play. The connected device is not displayed. ● ● The TV program cannot be recorded. The TV sound is not output through the receiver. English - 48 BN68-02325A-Eng.indb 48 2009-05-19 �� 3:43:19 Content Library ¦ Using the Content Library The Content Library allows you to enjoy various content on your TV. You can use the default content stored in the TV memory or you can enjoy new content using a USB device. Gallery Using the Remote Control Button in Content Library Menu Button ▲/▼/◄/► ENTERE RETURN EXIT <P> Colour button Y / MUTE Gallery Cooking Game Children Wellness R Return e Exit Operations Move the cursor and select an item. Select the currently selected item. Return to the previous menu. Stop the current function and return to the Content Library main menu. Stop Content Library mode and Returns to TV mode. Keys that provide functions are described on the corresponding page. You can control the volume of the played content. CONTENT LIBRARY CONTAINS TEXT, GRAPHICS, IMAGES, MULTIMEDIA, AND OTHER MATERIALS FOR INFORMATIONAL AND PROMOTIONAL PURPOSES ONLY. MATERIALS IN CONTENT LIBRARY HAS BEEN MODIFIED AND KEEPS BEING REVISED AND UPDATED. THE MATERIALS IN THE CONTENT LIBRARY MAY NOT BE SUITABLE FOR ALL AUDIENCES. INFORMATION IN THE CONTENT LIBRARY IS PROVIDED ‘AS IS.’ ALTHOUGH THE INFORMATION PROVIDED TO YOU IN THE CONTENT LIBRARY IS OBTAINED OR COMPLIED FROM SOURCES WE BELIEVE TO BE RELIABLE, SAMSUNG CANNOT AND DOES NOT GUARANTEE THE ACCURACY, VALIDITY, TIMELINESS OR COMPLETENESS OF ANY INFORMATION OR DATA MADE AVAILABLE TO YOU FOR ANY PARTICULAR PURPOSE. UNDER NO CIRCUMSTANCES, INCLUDING NEGLIGENCE, SHALL SAMSUNG BE HELD LIABLE, WHETHER IN CONTRACT OR TORT, FOR ANY DIRECT, INDIRECT, INCIDENTAL, SPECIAL OR CONSEQUENTIAL DAMAGES, ATTORNEY FEES, EXPENSES, OR ANY OTHER DAMAGES WHATSOEVER ARISING OUT OF, OR IN CONNECTION WITH, ANY INFORMATION CONTAINED IN, OR THE USE OF, THE CONTENT LIBRARY, EVEN IF ADVISED OF THE POSSIBILITY OF SUCH DAMAGES. ¦ Using the Contents You can use enjoy content stored in the TV memory. N To return to Content Library main menu, press the EXIT button. ❑ Gallery This function plays a SlideShow with high resolution images and background music and produces various atmospheres. Using the Gallery function of the TV, you can change your home atmosphere. Gallery N The copyrights of the Gallery contents and all issues related to them are reserved by TimeSpace, Inc. N Press the ENTERE button to pause the SlideShow, and also press the ENTERE button R Return e Exit to resume the SlideShow. N Press the INFO button to display information on the selected photo. (This is not displayed if the photo has no information.) Gallery Cooking Game Children Wellness ❑ Cooking You can view various recipes and then easily follow them step by step. Enjoy these contents which will give you great ideas for meals. N The recipes introduced in the Cooking contents on the Samsung TV are based on recipes published by Anness Publishing. N The copyrights of the Cooking contents and all issues related to them are reserved by Practical Pictures. English - 49 BN68-02325A-Eng.indb 49 2009-05-19 �� 3:43:19 ❑ Game This category provides entertainment games for the whole family. N For the buttons used in the games, refer to the directions on the screen. N Colour Buttons for Games Button Red Green Yellow Blue Operations Press to move to the game home screen Press to pause the game Option Key Press to exit the game ❑ Children This is educational and interactive content that children can watch repeatedly. N The copyrights of the Children contents and issues related to them reserved by UpToTen. ❑ Wellness This is beneficial health management content that can be enjoyed by the whole family. ¦ Using the Content Management ❑ Content Management N You can select multiple content items by selecting content items repeatedly and pressing the Yellow button. ■ My Contents You can check the content saved in the TV memory for each subitem of the Content Library. ● Select a content item and press the ENTERE button. You can play or delete the selected content item. Content Management Game Children Wellness Others Content Management R Return e Exit Content Management > My Contents 1/1 ■ My Contents USB USB You can check the content saved on the USB device for each subitem of the Content Library. Setup ● Select a content item and press the ENTERE button. You can play the selected content item. N Content Library only supports USB Mass Storage Class devices (MSC). MSC is a R Return e Exit Mass Storage Class Bulk-Only Transport device. Examples of MSC are Thumb drives and Flash Card Readers. N Playing a game using an external USB memory device will allow you to save your game (depending on the game). Take care as removing the USB memory device while saving data to the USB memory device may cause the data to be lost. N Downloading New Contents New content other than the built-in content will be provided via the Samsung.com website free of charge. When you download the paid contents, you need UDN number to download contents. Check the UDN number before downloading a new content item. • Downloading Content 1. Visit the www.samsung.com website. Gallery Cooking Game Children Wellness TV Memory 17.16GB/189.00MB Available 2. Select a content item in the Contents Download page. 3. Download the contents onto the USB memory device. 4. Go to Content Library main menu by pressing CONTENT button or choosing Content Library (MENU → Application → Content Library). 5. Plug the USB memory into USB port on the side of the TV. 6. You can see the content sub item which you downloaded. 7. Select a content item and press the ENTERE button. 8. You can play the selected content item. ■ Setup ● Screen Saver Run Time: Select to set the waiting time before the screen saver appears. ● Save UDN: Saves the UDN number to a USB device. N An NTFS format USB storage device does not support saving UDN. We recommend using a FAT format USB storage device. English - 50 BN68-02325A-Eng.indb 50 2009-05-19 �� 3:43:20 Internet@TV If you have some problems while using a widget service, please contact to content provider. In the widget, press the green button and get information of contact or refer to help website for widget provider information. N English may be only supported in widget service depending on region. N This function may not be supported depending on your country. (Not available in all locations) ¦ Getting Started with Internet@TV Internet@TV provides an integrated Internet and television experience powered by the Yahoo!® Widget Engine. You can monitor financial stocks, share photos with friends and family, and track news and weather all through the Internet@TV service on your television. N If Network condition is unstable, this function may not work. Then, TV would be turned off automatically. Otherwise turn off the TV using power button. N You may experience slow operation or hesitation when using this function due to network conditions. When running Internet@TV for the first time, the basic settings proceed automatically. N The first step is to set up your network. For more information on how to configure your network, refer to ‘Setting the Network’. N After your network is operational, the Internet@TV software guides you through a step-by-step setup wizard. 1. Press the MENU button. Press the ▲ or ▼ button to select Application, then press the ENTERE button. 2. Press the ▲ or ▼ button to select Internet@TV, then press the ENTERE button. N Internet@TV starts. O Press the INTERNET@ button on the remote control to display the Internet@TV menu. 3. The General Disclaimer is displayed on the screen. Select I accept or I do not accept. N For more information on the General Disclaimer, refer to the ‘Legal Notice’. 4. The ‘welcome screen’ is the starting point of the Internet@TV guided setup. N If you select Exit Setup, this step is resumed when you press the INTERNET@ button. N Select Let’s get started! Yahoo! TV Widgets bring the best of the internet to your TV! You can get updated weather conditions or sports scores, get updated information on stocks, or even view full-screen photos and video! We just need to get a few things set up, and you’ll be on your way! 5. Choosing your location allows TV Widgets to use localized content. N Select your country from the list provided. 6. Accepting the Yahoo!® TV Widget Engine Privacy Policy is required to use Internet@TV. N Select OK, I Accept. 1 Welcome to Yahoo!® TV Widgets! Let’s get started! Exit setup 7. Accepting the Yahoo!® TV Widget System Terms of Service is required to use Internet@TV. N Select OK, I Accept. 8. Enter your name to setup your profile. Each profile has its own list of widgets. You can create a profile for each person who uses Internet@TV. N Enter your name and select Save this name. N For more information, refer to Using the Profile Widget’. 9. Internet@TV tests the network connection. N If the test fails, configure your network again. N For more information, refer to ‘Setting the Network’. 5 What’s your name? Each person in the house who uses the TV can have their own personalized set of widgets. We’ll keep track of these individual widget profiles by the name you enter, Enter the name YOU want to use now. Save this name 10.The guided setup is complete. A tutorial on how to use Internet@TV is next. N Select Continue to view the tutorial. N Select Exit setup to start using Internet@TV now. N To run the tutorial again, select Profile Widget → System Setting → Repeat Tutorial. Skip this step Exit setup 11. Press the INTERNET@ button on the remote control to display the Internet@TV user interface. English - 51 BN68-02325A-Eng.indb 51 2009-05-19 �� 3:43:20 ❑ Screen display ■ Dock mode 1 A welcome banner is shown with your profile name in the top right corner. N This banner disappears after a short delay. 2 The banner highlights two remote control shortcuts. N If you press the blue button (Viewport) on your remote control, the display is toggled between ‘Viewport mode’ and ‘Overlay mode’. In Viewport mode, the TV or video plays in a scaled-down area with graphics outside. In overlay mode, the graphics are displayed on top of the TV or video. N If you press the yellow button (Edit Snippet) on your remote control, a help window is displayed and the snippet with focus can be edited. 1 2 3 Hello John! 5:15 AM Mon January 19th Viewport Edit Snippet 3 Signed in as WEATHER John Widget Gallery FINANCE 3 Press the INTERNET@ button on the remote control to begin. N The horizontal list at the bottom of your TV screen is called ‘the dock’. N The items in the list are called ‘snippets’. N A snippet is a shortcut which launches a TV Widget. N A TV Widget is an Internet application designed to run on your TV. N Move between snippets by pressing the ◄ or ► buttons on the remote control. N Focus is located in the left most region (highlighted in blue). N The dock slides snippets under that focal point. N Launch a TV Widget by pressing the ENTERE button on the remote control when its snippet is in focus. N When you add snippets, they form a stack which you can navigate by pressing the ▲ or ▼ buttons. N Two special TV Widgets appear in the dock: the Profile Widget and the Gallery Widget. These cannot be deleted. N The dock will slide off screen after a timeout period. ■ Sidebar mode 1 Focus on a snippet and press the ENTERE button to launch the TV Widget sidebar. The TV Widget logo and Home are at the top of the sidebar. 2 Current menu is displayed under the TV Widget logo. N To return to a previous screen, select it and press the ENTERE button. N You can also press the RETURN button on the remote control. 3 Current selection is always highlighted in blue. The highlighted button has focus and is activated when you press the ENTERE button. 4 When there is a lot of data, a page control is used. N Current page and total pages are displayed. N Move between pages by pressing ◄ or ► buttons. FINANCE My Stocks To remove a stocks symbol, please select it from the list below. 1 2 ^DJI ^IXIC YHOO AAPL INTC AMZN PAGE 1 OF 2 Add New Symbol... Import Symbols From Yahoo!... Display Format Value About Yahoo! Finance... 3 4 5 5 The bottom toolbar includes colour buttons that correspond to the red, green, yellow and blue buttons on the remote control. • Red button: Close the widget. • Green button: Change the widget’s setting. • Yellow button: Manage your snippets. • Blue button: Size video to fit, or make it full screen. N Some buttons may not be available depending on widget. English - 52 BN68-02325A-Eng.indb 52 2009-05-19 �� 3:43:21 All content and services accessible through this device belong to third parties and are protected by copyright, patent, trademark and/or other intellectual property laws. Such content and services are provided solely for your personal noncommercial use. You may not use any content or services in a manner that has not been authorized by the content owner or service provider. Without limiting the foregoing, unless expressly authorized by the applicable content owner or service provider, you may not modify, copy, republish, upload, post, transmit, translate, sell, create derivative works, exploit, or distribute in any manner or medium any content or services displayed through this device. YOU EXPRESSLY ACKNOWLEDGE AND AGREE THAT USE OF THE DEVICE IS AT YOUR SOLE RISK AND THAT THE ENTIRE RISK AS TO SATISFACTORY QUALITY, PERFORMANCE AND ACCURACY IS WITH YOU. THE DEVICE AND ALL THIRD PARTY CONTENT AND SERVICES ARE PROVIDED “AS IS” WITHOUT WARRANTY OF ANY KIND, EITHER EXPRESS OR IMPLIED. SAMSUNG EXPRESSLY DISCLAIMS ALL WARRANTIES AND CONDITIONS WITH RESPECT TO THE DEVICE AND ANY CONTENT AND SERVICES, EITHER EXPRESS OR, IMPLIED, INCLUDING BUT NOT LIMITED TO, WARRANTIES OF MERCHANTABILITY, OF SATISFACTORY QUALITY, FITNESS FOR A PARTICULAR PURPOSE, OF ACCURACY, OF QUIET ENJOYMENT, AND NON-INFRINGEMENT OF THIRD PARTY RIGHTS. SAMSUNG DOES NOT GUARANTEE THE ACCURACY, VALIDITY, TIMELINESS, LEGALITY, OR COMPLETENESS OF ANY CONTENT OR SERVICE MADE AVAILABLE THROUGH THIS DEVICE AND DOES NOT WARRANT THAT THE DEVICE, CONTENT OR SERVICES WILL MEET YOUR REQUIREMENTS, OR THAT OPERATION OF THE DEVICE OR SERVICES WILL BE UNINTERRUPTED OR ERROR-FREE. UNDER NO CIRCUMSTANCES, INCLUDING NEGLIGENCE, SHALL SAMSUNG BE LIABLE, WHETHER IN CONTRACT OR TORT, FOR ANY DIRECT, INDIRECT, INCIDENTAL, SPECIAL OR CONSEQUENTIAL DAMAGES, ATTORNEY FEES, EXPENSES, OR ANY OTHER DAMAGES ARISING OUT OF, OR IN CONNECTION WITH, ANY INFORMATION CONTAINED IN, OR AS A RESULT OF THE USE OF THE DEVICE, OR ANY CONTENT OR SERVICE ACCESSED BY YOU OR ANY THIRD PARTY, EVEN IF ADVISED OF THE POSSIBILITY OF SUCH DAMAGES. Third party services may be changed, suspended, removed, terminated or interrupted, or access may be disabled at any time, without notice, and Samsung makes no representation or warranty that any content or service will remain available for any period of time. Content and services are transmitted by third parties by means of networks and transmission facilities over which Samsung has no control. Without limiting the generality of this disclaimer, Samsung expressly disclaims any responsibility or liability for any change, interruption, disabling, removal of or suspension of any content or service made available through this device. Samsung may impose limits on the use of or access to certain services or content, in any case and without notice or liability. Samsung is neither responsible nor liable for customer service related to the content and services. Any question or request for service relating to the content or services should be made directly to the respective content and service providers. ¦ Editing Snippets in the Dock 1. Edit a snippet by focusing on it in the dock and pressing the yellow button. 2. The snippet moves to the Second position and its tile slides up to show the following help text: • Delete (red button): Remove this TV Widget. N Deleted widgets can be re-installed using the Widget Gallery. • Move (blue button): Re-order the snippet. Press the ◄ or ► button to scroll. Press the yellow button to drop into the new position. • Done (yellow button): Exit the Edit Snippet menu. ¦ Using the Profile Widget The Profile Widget configures your user profile. You can set up multiple profiles, and each profile maintains its own list of widgets. The Switch Profile menu allows you to switch to a different user profile. N At least two profiles must be registered. If you want to add a profile, refer to ‘Administrative Controls’. PROFILE Signed in as John Switch Profile Profile Settings System Settings Administrative Controls Sign out of Yahoo! English - 53 BN68-02325A-Eng.indb 53 2009-05-19 �� 3:43:22 The Profile Settings menu allows you to customize and protect your profile. ● User profiles can be customized with a unique Name and an Avatar (a picture used to represent your profile). ● Your profile’s Name and Avatar are displayed in the profile snippet in the dock. ● Profiles can be protected by Create Profile PIN. N When setting the PIN for the first time, you can set a Security Question. The Profile Settings menu can limit access to widgets. ● If you forget your Profile PIN you can answer a Security Question that is associated with your profile. ● A profile that has the Limit Profile indicator turned on will not allow new widgets to be installed. N The Owner PIN must be set to use this function. To set the Owner PIN, refer to ‘Administrative Controls’ The System Settings menu allows you to: ● Change your Location and set your Zip Code (US only) to tailor the content to your region. ● Repeat the Tutorial that was shown during guided setup. ● Restore Factory Settings to delete all widget configurations and information. In the Administrative Controls menu you can: ● Set the Screen Saver timeout to avoid screen burn in. ● Create Owner PIN and set a Security Question to control other profiles. ● Create a new Profile which can be configured with a different set of widgets. ● Delete an existing profile. From the Profile Widget you can Sign in to Yahoo!® using your Yahoo! ID. ● If you have a Yahoo! ID, you can access your personalized content using the Yahoo! TV Widgets. ● All Yahoo! TV Widgets that are installed are automatically signed-in with your profile’s Yahoo! ID. ● If you have no Yahoo! account, visit www.yahoo.com and create an account. ● You may fail to log in with an ID created on the Yahoo website in a country that does not support Internet@TV. ❑ About Profile widget Press the green button. You can view a brief description of the Profile Widget, Copyright Policy, Terms of Service, and Privacy Policy. ¦ Using the Yahoo!® Widget Gallery Use the Yahoo!® Widget Gallery to add more widgets to your TV. View available TV Widgets in the following categories: ● Latest Widgets: Displays recently updated widgets. ● Yahoo!® Widgets: Displays widgets provided by Yahoo!®. ● Samsung Widgets: Displays widgets provided by Samsung. ● More Categories: Displays all widgets by category. N To install a widget, navigate to the detail screen and select Add Widget to My Profile and press the ENTERE button. The widget is installed and becomes available in the dock. Widget Gallery Yahoo! News NEWS HEADLINES PAGE 1 OF 2 Top Stories Business Potics Sports Technology More Categories NEWS ❑ Widget Gallery Settings Latest Widgets Press the Green button. Yahoo! Widgets About Yahoo! Widget Gallery... You can view brief information for the Widget Gallery, Copyright Policy, Terms of Service, and Privacy Policy. Samsung Widgets ■ ■ V 0.9.0 by Yahoo! Categories In the Developer Settings menu You can make your own widget. For more information on creating your own widget, visit our developer site at http://connectedtv.yahoo.com/ English - 54 BN68-02325A-Eng.indb 54 2009-05-19 �� 3:43:22 ¦ Using the Yahoo!® Weather Widget The Yahoo!® Weather Widget provides updates on your local and favourites weather locations. This content dynamically changes with weather conditions. ● Press the green button on the remote control to display the Yahoo!® Weather Widget Settings menu. ● From the Settings menu you can add or remove a city for which you want to view weather information. From the Settings menu: ● Add New City by entering the name of the city. Once the search results are displayed, select the city you want and press the ENTERE button. ● Delete City by selecting the city you want to delete from the city list. Press the ENTERE button and confirm the deletion. ● Changing the Temperature Indication Mode You can change the temperature indication mode to Imperial or Metric. For example, Imperial will show temperatures in Fahrenheit and Metric in Celsius. WEATHER 51° Sunnyvale Cloudy Sunnyvale, CA San Francisco, CA New York, NY London, England Paris, France ❑ Create a snippet for a favourites city ● ● ● Select the city from the Yahoo!® Weather Widget’s home page and view the detailed weather information. Press the yellow button. Select the Add Snippet menu and press ENTERE to add the city as a snippet. ❑ Delete a snippet for a city ● ● ● Launch the snippet. Press the yellow button. Select the Delete Snippet menu and press ENTERE to remove the snippet. ¦ Using the Yahoo!® News Widget The Yahoo!® News Widget provides the latest headline news for business, entertainment, politics, sports, top stories, and many other categories. NEWS Select a category, select a headline within the category, and view a dynamically updated news summary. World English - 55 BN68-02325A-Eng.indb 55 2009-05-19 �� 3:43:22 ¦ Using the Yahoo!® Flickr Widget The Flickr Widget can provide you access to your favourites photos from friends and family while watching TV. Share your photos with your family on your big screen TV through a slideshow. ● Personalize the Flickr Widget by logging in with your Yahoo! ID. ● For detailed procedures on log in, refer to the ‘Using the Profile Widget’ instructions. ● For more information on Flickr, visit http://www.flickr.com. N Your Photos shows photos you have registered with Flickr website. ■ ■ To view Flickr photos in a slideshow: ● Select a thumbnail of a photo and press the ENTERE button to view the photo’s details. ● Select Start Slideshow and press the ENTERE button. Your Photos Your Sets Explore To control the slideshow display: Favourite Photos ● Press the ENTERE button during a slideshow. Your Contacts ● The thumbnails of photos are displayed on the bottom of the screen. Your Groups N When the slideshow control is displayed, you can Pause, Play and Stop the slideshow. N If you select the menu and press ENTERE, you can view information for the selected photo. ● The Your Sets menu allows you to view photos you have classified in Flickr. ● The Explore menu allows you to explore photos featured by the Flickr website. You can view the photos updated daily. ● The Mark as Favourite or Remove From Favourites menu moves photos to your favourites Photos set or removes photos from it. ● The Favourite Photos menu allows you to see the photos you have classified as favourites. ● The Your Contacts menu allows you to see updates from family and friends. The Your Groups menu allows you to select your favourites groups from the Flickr website to share and enjoy photos with the Flickr community of users. To configure the Yahoo!® Flickr Widget Settings press the green button on the remote control. ● The Time Per Slide menu controls the speed of the slideshow. ● The Repeat menu will restart the slideshow at the beginning after the last photo is shown. ¦ Using the Yahoo!® Finance Widget View stock information and the latest stock news with the Yahoo!® Finance Widget. Press the green button to set up your stocks. Use the Add New Symbol menu to enter the name of a new stock. ● Select the stock you want to add from the search results and select the Add Symbol menu and press the ENTERE button. N The selected stock is added to the My Stocks list. ● ● ● ● Use the Import Symbols From Yahoo!® menu to retrieve your Yahoo!® Finance portfolio. The Merge Symbols menu merges the symbols in the Yahoo!® Finance Widget with the symbols from your portfolio. The Import Symbols menu deletes the symbols in the Yahoo!® Finance Widget and replaces them with the symbols from your portfolio. FINANCE My Stocks To remove a stocks symbol, plase select it from the list below. ^DJI ^IXIC YHOO AAPL INTC AMZN PAGE 1 OF 2 Add New Symbol... Import Symbols From Yahoo!... Display Format Value About Yahoo! Finance... Use the Display Format menu to change the stock-price fluctuation transition to Value or Percentage. Create a snippet for a favourites stock. Select the stock symbol from the Yahoo!® Finance Widget’s home page and view the detailed finance information. Press the yellow button. Select the Add Snippet menu and press ENTERE to add the stock as a snippet. Delete a snippet Launch the snippet from the dock Press the yellow button. Select the Delete Snippet menu and press ENTERE to remove the snippet. English - 56 BN68-02325A-Eng.indb 56 2009-05-19 �� 3:43:22 ¦ Troubleshooting for internet@TV Problem Possible Solution Some widget services do not work. Check with that service provider. In the widget, press the green button and get contact information or refer to help website for widget service provider information. Refer to Help website page. Some widget contents only have English. How can I change the language? Widget content language may be different from widget user interface language. It depends on service provider. After factory reset, Yahoo Widget service doesn’t work and warning message is displayed. After factory reset, turn off and on your TV. Then restart Internet@TV. At the Flickr widget, I logged in my account. But, I can’t view my picture. Visit Yahoo Web site, and activate your Flickr account at your Yahoo! ID. At the Profile widget, I did change location, but the previous setting still remains. Turn off and on your TV. Then restart Internet@TV. Now, you can enjoy widget services supported in changed location. ¦ Help Website Country Austria Belgium Czech Denmark Website www.samsung.com → Produkte → Fernseher → [email protected] → Internet@TV www.samsung.com → Producten → televisies → [email protected] → Internet@TV www.samsung.com → Produits → téléviseurs → [email protected] → Internet@TV www.samsung.com → Produkty → televizory → [email protected] → Internet@TV www.samsung.com → Produkter → stue & soveværelse → [email protected] → Internet@TV Finland www.samsung.com → Tuotteet → kodinelektroniikka → [email protected] → Internet@TV France www.samsung.com → Produits → télévisions → [email protected] → Internet@TV Germany www.samsung.com → Privatkunden → Fernseher → [email protected] → Internet@TV Greece www.samsung.com → Προϊόντα → τηλεοράσεις → [email protected] → Internet@TV Hungary www.samsung.com → Termékek → televíziók → [email protected] → Internet@TV Ireland www.samsung.com → Products → Television → [email protected] → Internet@TV Italy Netherlands www.samsung.com → Prodotti → TV → [email protected] → Internet@TV www.samsung.com → Producten → televisies → [email protected] → Internet@TV Norway www.samsung.com → Produkter → hverdagsrom & soverom → [email protected] → Internet@TV Poland www.samsung.com → Produkty → telewizory → [email protected] → Internet@TV Portugal www.samsung.com → Produtos para Consumidores → televisores → [email protected] → Internet@TV Slovakia www.samsung.com → Produkty → televízory → [email protected] → Internet@TV Spain Sweden Switzerland United Kingdom www.samsung.com → Productos → televisores → [email protected] → Internet@TV www.samsung.com → Produkter → vardagsrum & sovrum → [email protected] → Internet@TV www.samsung.com → Produits → télévisions → [email protected] → Internet@TV www.samsung.com → Produkte → Fernseher → [email protected] → Internet@TV www.samsung.com → Products → Television → [email protected] → Internet@TV Turkey www.samsung.com → Tüketici Ürünleri → televizyon → [email protected] → Internet@TV Estonia www.samsung.com → Klientidele → Televiisorid → [email protected] → Internet@TV Latvia www.samsung.com → Klientiem → Televizori → [email protected] → Internet@TV Lithuania www.samsung.com → Namams → Televizoriai → [email protected] → Internet@TV Russia www.samsung.com → Продукты → Телевизоры → [email protected] → Internet@TV Ukraine www.samsung.com → Потребительские продукты → телевизоры → [email protected] → Internet@TV N Approaching step may be changed later on. N It can be different links for special countries. English - 57 BN68-02325A-Eng.indb 57 2009-05-19 �� 3:43:22 Internet@TV N This function may not be supported depending on your country. (Not available in all locations) N If you have some problems while using a widget service, please contact to service provider. In the widget, press the green button and get contact information or refer to help website for service provider information. N English may be only supported in widget service depending on region. ¦ Getting Started with Internet@TV Internet@TV provides SAMSUNG’s widget services through a network connection. Internet@TV contents can be changed depending on contents provider. You can access various information such as YouTube, through the Internet@TV service. N The configuration of Widgets and their provided services may differ according to the selected country. After changing country, turn off and on the TV. Then you can use widget service supported changed country. If Country is set to Others, TV can’t recognize your country. In this case, please select directly from the service country list. N If a certain content’s font provided by contents provider is not supported on TV, It may not be viewed normally. N For more information on how how to configure your country, refer to the ‘Plug & Play Feature’ instructions. N You may experience slow operation or hesitation when using this function due to network conditions. N Before using Internet@TV, set up the network first. For more information on how to configure your network, refer to ‘Setting the Network’. When running Internet@TV for the first time, the basic settings proceed automatically. It may take few minutes to update. 1. Press the MENU button. Press the ▲ or ▼ button to select Application, then press the ENTERE button. 2. Press the ▲ or ▼ button to select Internet@TV, then press the ENTERE button. O Press the Internet@ button on the remote control to display the Internet@TV menu. 3. The ‘User Agreement’ is displayed. Select Agree to accept the agreement. 4. The ‘Statistics & Analysis’ is displayed. Select Agree to accept the agreement. ¦ Setting up Internet@TV You can check and use the menus regarding Single Sign On (SSO), system management and properties. Press the ▲ or ▼ button to select Setup, then press the ENTERE button. ❑ Single Sign On You can use this menu when creating, deleting the account. Using the Single Sign On, you can control your account including contents site’s account information. You don’t need additional log in. N Account is only for internet@TV. ■ Create Account You can create account and be linked with desired service site. N Account will be made less than 10. N Character of Account should be limited to 10. N If there is no service that needs log in, you can not create account. ■ Account Management ● Service Site: You can register log in information of service site (such as YouTube). ● Change Password: Change the password of your account. ● Delete: Delete the account. N If you forget the password of account, press the remote control buttons in the following sequence, which resets the Internet@TV: POWER (off) → MUTE → 9 → 4 → 8 → POWER (on). If you use this function, all accounts will be deleted. English - 58 BN68-02325A-Eng.indb 58 2009-05-19 �� 3:43:23 ❑ System Setup N Ticker Autorun, Ticker Duration may not be supported depending on country. ■ Change the Service Lock password N The default password number of a new TV set is 0-0-0-0. N If you forget the password, press the remote control buttons in the following sequence, which resets the password to 0-0-0-0: POWER (off) → MUTE → 8 → 2 → 4 → POWER (on). ■ Service Duration Select to set the service duration time before the screen saver appears. ■ Ticker Autorun → Off / On Select to set ticker to run automatically or not when turning on the TV. ■ Ticker Duration Select to set the service duration time before the screen saver appears. ❑ Properties Display information of Internet@TV. You can measure the speed of your Internet TV service using Measuring the speed of the Internet TV service. ¦ Using the Internet@TV service In a widget that provides multiple category menus, you can view the contents of the category menus using the ◄ and ► buttons. Account Login 1. Press the Red button. 2. Select desired User account, then press the ENTERE button. 3. Input the password. N When login succeeds, User account will be displayed on the screen. N Before login, at least one and more account should be registered. If you want to create account, refer to ‘Setting up Internet@TV’. Using the Widget Gallery You can use Run Service, Lock, Install Service at the existing widget and you can see description of the widget service that isn’t installed. On the Internet@TV, you can add and use various widgets provided by service provider. It may vary according to contents provider. ● Run Service: Runs the widget service. ● Lock: Set the service lock ● Install Service (or Delete Service): Install or delete widget service. Using the YouTube Widget You can watch the movie provided by YouTube. If you have the account in YouTube, Register account information using Account management. Then, you can use My Favourites category. N The menu can be changed by web service. N There may be inappropriate contents for child. In this case, use Lock function in Widget Gallery. Today Most Viewed Top Rated Most Popular Most Discussed Top Favourites Most Linked Most Respomded Featured 1/7 Seeking Justice Decades Later 0:01:30 Views : 819,252 Rating : 2009-02-07 Breaking News Alerts by E-Mail 0:00:45 Views : 819,252 Rating : 2009-02-07 The world reacts to U.S. bailout plan 0:01:30 Views : 819,252 Rating : 2009-02-07 Boo Hoo in the Boardroom 0:03:26 Views : 819,252 Rating : 2009-02-07 ' Change Mode ll rrChange page U Move E OK R Return English - 59 BN68-02325A-Eng.indb 59 2009-05-19 �� 3:43:24 ¦ Troubleshooting for internet@TV Problem Possible Solution Some widget services do not work. Check with that service provider. In the widget, press the green button and get contact information or refer to help website for widget service provider information. Refer to Help website page. What is the advantage of single sign on? If you create account and register your login information of desired service, you can access personalized content without additional login. When a network error occurred, I can’t use other menus except setting menu. If network connection doesn’t work, your service might be limited. Because all of function except setting menu are needed to connect internet. Is there any possibility to show adult movies on YouTube? Basically, at the list on the menu it is filtered out. But by using search function, It can be shown. In this case, using the Widget Gallery lock the widget service. ¦ Help Website Country Austria Belgium Czech Denmark Website www.samsung.com → Produkte → Fernseher → [email protected] → Internet@TV www.samsung.com → Producten → televisies → [email protected] → Internet@TV www.samsung.com → Produits → téléviseurs → [email protected] → Internet@TV www.samsung.com → Produkty → televizory → [email protected] → Internet@TV www.samsung.com → Produkter → stue & soveværelse → [email protected] → Internet@TV Finland www.samsung.com → Tuotteet → kodinelektroniikka → [email protected] → Internet@TV France www.samsung.com → Produits → télévisions → [email protected] → Internet@TV Germany www.samsung.com → Privatkunden → Fernseher → [email protected] → Internet@TV Greece www.samsung.com → Προϊόντα → τηλεοράσεις → [email protected] → Internet@TV Hungary www.samsung.com → Termékek → televíziók → [email protected] → Internet@TV Ireland www.samsung.com → Products → Television → [email protected] → Internet@TV Italy Netherlands www.samsung.com → Prodotti → TV → [email protected] → Internet@TV www.samsung.com → Producten → televisies → [email protected] → Internet@TV Norway www.samsung.com → Produkter → hverdagsrom & soverom → [email protected] → Internet@TV Poland www.samsung.com → Produkty → telewizory → [email protected] → Internet@TV Portugal www.samsung.com → Produtos para Consumidores → televisores → [email protected] → Internet@TV Slovakia www.samsung.com → Produkty → televízory → [email protected] → Internet@TV Spain Sweden Switzerland United Kingdom www.samsung.com → Productos → televisores → [email protected] → Internet@TV www.samsung.com → Produkter → vardagsrum & sovrum → [email protected] → Internet@TV www.samsung.com → Produits → télévisions → [email protected] → Internet@TV www.samsung.com → Produkte → Fernseher → [email protected] → Internet@TV www.samsung.com → Products → Television → [email protected] → Internet@TV Turkey www.samsung.com → Tüketici Ürünleri → televizyon → [email protected] → Internet@TV Estonia www.samsung.com → Klientidele → Televiisorid → [email protected] → Internet@TV Latvia www.samsung.com → Klientiem → Televizori → [email protected] → Internet@TV Lithuania www.samsung.com → Namams → Televizoriai → [email protected] → Internet@TV Russia www.samsung.com → Продукты → Телевизоры → [email protected] → Internet@TV Ukraine www.samsung.com → Потребительские продукты → телевизоры → [email protected] → Internet@TV N Approaching step may be changed later on. N It can be different links for special countries. English - 60 BN68-02325A-Eng.indb 60 2009-05-19 �� 3:43:24 Home Network Centre ¦ Home Network Centre About the Home Network Centre The Home Network Centre connects the TV and mobile phones through a network. You can view call arrivals, text message contents, and schedules set on the mobile phone on the TV using the Home Network Centre. In addition, you can play the media contents saved on the mobile phones such as videos, photos and music by controlling them onto the TV via the network. N If the device supports DLNA DMC (Digital Media Controller) function, Home Network Centre function is available. N This function is for compatibility with Samsung mobile phone which will be released later on. For more information, visit www. samsung.com or contact Samsung call centre. The mobile device may need additional software installation. For details, refer to each user’s guide. Connecting to the Home Network Centre For more information about the network settings, refer to ‘Configuring the Network’. ● Connecting to a Wi-Fi Ad-hoc network 1. Connect the ‘Samsung Wireless LAN Adapter’ to the USB1(HDD) or USB2 port of the TV. TV Side Panel Mobile phone Samsung Wireless LAN Adapter or 2. For more information on how to configure Ad-hoc network, refer to ‘Setting the Network’. N For information on configuring the mobile phone’s network settings, refer to the mobile phone manual. 3. Set up the IP address, SSID and password for the mobile phone in the Ad-hoc Settings of the mobile phone using the Network Name (SSID) and Security Key (password) displayed on the TV. ● Connecting through a wire / wireless IP sharer 1. Connect the LAN port of the TV and the Wired/Wireless IP sharer using the LAN cable or connect the USB1(HDD) or USB2 port of the TV and the ‘Samsung Wireless LAN Adapter’. N For the procedures to set up the wire/wireless sharer and the mobile phone, refer to the manual of the corresponding device. Wired/Wireless IP sharer Mobile phone LAN Cable TV Side Panel Wired/Wireless IP sharer or Mobile phone LAN Cable Samsung Wireless LAN Adapter English - 61 BN68-02325A-Eng.indb 61 2009-05-19 �� 3:43:26 ¦ Setting Up the Home Network Centre ❑ Message / Media Shows a list of mobile phones which have been set up with this TV to use the Message or Media function. N Media function is available in other mobile devices which support DLNA DMC. ■ ■ ■ Allowed Allows the mobile phone. Home Network Centre Message 111-1234-5671 : Allowed Media 111-1234-5672 : Allowed Setup 111-1234-5673 : Denied 111-1234-5674 : Denied Denied Blocks the mobile phone. R Return e Exit Delete Deletes the mobile phone from the list. N This function just deletes the name from the list. If the deleted mobile device turns on or tries to connect to the TV, it may be shown on the list. ❑ Setup ■ ■ ■ Message → On / Off You can determine whether to use the message function (the call arrivals, text message contents, and schedules set on the mobile phone). Media → On / Off You can select whether to use the Media function that plays the contents (videos, photos, music) from the mobile phone. TV name You can set the TV name so as to find it easily on the mobile device. N If you selects User Input, you can type the TV name by OSK(On Screen Keyboard). Home Network Centre Message Message : On Media Media : On Setup TV name : TV R Return e Exit ¦ Using the Message Function Using this function, you can view the call arrivals, text message contents and schedules set on the mobile phone through the alarm window while watching TV. husband N To disable this Message alarm window, set Message to Off in Setup of the Home SMS Network Centre. New message received Do you want to view the details? N The alarm window appears for 20 seconds. If no key is pressed or if Cancel is selected, it appears up to three times at 5 minute intervals. N If OK is selected, or if OK is not selected while the message is displayed three OK Cancel times, the message will be deleted. The message is not deleted from the mobile phone. N The simple alarm window can be displayed, while using some applications such as Media Play, Content Library, etc. In this case, to view the contents of the message, switch to TV viewing mode. N When the message of an unknown mobile phone is displayed, select the mobile phone in the Message item of the Home Network Centre and select Denied to block the phone. English - 62 BN68-02325A-Eng.indb 62 2009-05-19 �� 3:43:27 Message View If a new text message (SMS) arrives while you are watching TV, the alarm window appears. If you click the OK button, the contents of the message are displayed. N You can configure the viewing settings for the text message (SMS) contents on the mobile phone. For the procedures, refer to the mobile phone manual. N Some special characters may be displayed as blank or broken characters. Call Arrival Alarm If a call arrives while you are watching TV, the alarm window appears. Schedule Alarm While you are watching TV, the alarm window appears to display the registered schedule. N You can configure the viewing settings for the schedule contents on the mobile phone. For the procedures, refer to the mobile phone manual. N Some special characters may be displayed as blank or broken characters. ¦ Using the Media Function An alarm window appears informing the user that the media contents (videos, photos, music) sent from the mobile phone will be displayed on the TV. The contents are played automatically 3 seconds after the alarm window appears. If you press the RETURN or EXIT button when the alarm window appears, the Media Contents are not played. N To turn off the media contents transmission from the mobile phone, set Media to Off in Setup of the Home Network Centre. N The contents may not be played on the TV depending on their resolution and format. Media will be played from “111-123 4-5671” \Media play control buttons Button ◄/► ENTERE RETURN TOOLS INFO EXIT Operations Move the cursor and select an item. While playing a movie file: Skip forwards or backwards through the movie file. Pressing the ENTERE button during play pauses the play. Pressing the ENTERE button during pause resumes the play. Return to the previous menu. Run various functions from the Photo, Music and Movie menus. Show file information. Stop Media Play mode and Returns to TV mode. N The ENTERE and ◄/► buttons may not work depending on the type of media content. N Using the mobile device, you can control playing media. For details, refer to each user’s guide. English - 63 BN68-02325A-Eng.indb 63 2009-05-19 �� 3:43:28 RECOMMENDATIONS ¦ Teletext Feature Most television stations provide written information services via Teletext. The index page of the Teletext service gives you information on how to use the service. In addition, you can select various options to suit your requirements by using the remote control buttons. N For Teletext information to be displayed correctly, channel reception must be stable. Otherwise, information may be missing or some pages may not be displayed. 1 : (exit) Exit from the Teletext display. 2 0 (mode) Press to select the Teletext mode (LIST/ FLOF). If you press it in the LIST mode, it switches into the List save mode. In the List save mode, you can save Teletext page into list using the 8(store) button. 3 5 (reveal) Used to display the hidden text (answers to quiz games, for example). To display normal screen, press it again. 4 4 (size) Press to display the double-size letters in the upper half of the screen. For lower half of the screen, press it again. To display normal screen, press it once again. 5 Colour buttons (red/green/yellow/ blue) If the FASTEXT system is used by a broadcasting company, the different topics covered on a Teletext page are colour-coded and can be selected by pressing the coloured buttons. Press one of them corresponding to the required. The page is displayed with other coloured information that can be selected in the same way. To display the previous or next page, press the corresponding coloured button. 6 / (Teletext on/mix) Press to activate Teletext mode after selecting the channel providing the Teletext service. Press it twice to overlap the Teletext with the current broadcasting screen. 1 7 8 (store) Used to store the Teletext pages. 8 1 (sub-page) Used to display the available sub-page. 8 2 9 9 2 (page up) Used to display the next Teletext page. 0 3 (page down) Used to display the previous Teletext page. ! 9 (hold) Used to hold the display on a given page if the selected page is linked with several secondary pages which follow on automatically. To resume, press it again. 0 3 INFO GUIDE ! @ 4 # 5 6 7 CH LIST AD @ 6 (index) Used to display the index (contents) page at any time while you are viewing Teletext. # 7 (cancel) Used to display the broadcast when searching for a page. N You can change Teletext pages by pressing the numeric buttons on the remote control. English - 64 BN68-02325A-Eng.indb 64 2009-05-19 �� 3:43:28 The Teletext pages are organized according to six categories: Part A B C D E F Contents Selected page number. Broadcasting channel identity. Current page number or search indications. Date and time. Text. Status information. FASTEXT information. N Teletext information is often divided between several pages displayed in sequence, which can be accessed by: Entering the page number Selecting a title in a list Selecting a coloured heading (FASTEXT system) N Teletext level supported by the TV is version 2.5 which is capable of displaying additional graphics or text. N Depending upon the transmission, blank side panels can occur when displaying Teletext. N In these cases, additional graphics or text is not transmitted. N Older TV’s which do not support version 2.5 are not capable of displaying any additional graphics or text, regardless of the Teletext transmission. O Press the TV button to exit from the Teletext display. ¦ Installing the Stand N Preset: Place the Guide Stand and Cover Neck onto the stand and fasten it using the screws. Back 1. Attach your LCD TV to the stand. N Two or more people should carry the TV. N Make sure to distinguish between the front and back of the stand when assembling them. N To make sure the TV is installed on the stand at a proper level, do not apply excess downward pressure to the upper left of right sides of the TV. 2. Fasten screws at position 1 and then fasten screws at position 2. N Stand the product up and fasten the screws. If you fasten the screws with the LCD TV placed down, it may lean to one side. N The stand is installed for models with the screen size of 55 inch and above. Front 2 1 English - 65 BN68-02325A-Eng.indb 65 2009-05-19 �� 3:43:29 ¦ Disconnecting the Stand 1. Remove screws from the back of the TV. 2. Separate the stand from the TV. N Two or more people should carry the TV. 3. Cover the bottom hole with the cover. ¦ Installing the Wall Mount Kit Wall mount items (sold separately) allow you to mount the TV on the wall. For detailed information on installing the wall mount, see the instructions provided with the Wall Mount items. Contact a technician for assistance when installing the wall mounted bracket. Samsung Electronics is not responsible for any damage to the product or injury to yourself or others if you elect to install the TV on your own. Do not install your Wall Mount Kit while your TV is turned on. It may result in personal injury due to electric shock. ¦ Assembling the Cables Enclose the cables in the Holder-Wire Cable so that the cables are not visible through the transparent stand. ¦ Anti-Theft Kensington Lock The Kensington Lock is a device used to physically fix the system when using it in a public place. The appearance and locking method may differ from the illustration depending on the manufacturer. Refer to the manual provided with the Kensington Lock for proper use. N The locking device has to be purchased separately. N The location of the Kensington Lock may be different depending on its model. 1. Insert the locking device into the Kensington slot on the LCD TV (1) and turn it in the locking direction (2). 3 2 1 <Optional> 2. Connect the Kensington Lock cable (3). 3. Fix the Kensington Lock to a desk or a heavy stationary object. English - 66 BN68-02325A-Eng.indb 66 2009-05-19 �� 3:43:31 ¦ Securing the Installation Space Keep the required distances between the product and other objects (e.g. walls) to ensure proper ventilation. Failing to do so may result in fire or a problem with the product due to an increase in the internal temperature of the product. Install the product so the required distances shown in the figure are kept. N When using a stand or wall-mount, use parts provided by Samsung Electronics only. • If you use parts provided by another manufacturer, it may result in a problem with the product or an injury due to the product falling. • If you use parts provided by another manufacturer, it may result in a problem with the product or fire due to an increase in the internal temperature of the product due to poor ventilation. N The appearance may differ depending on the product. When installing the product with a stand When installing the product with a wall-mount 10 cm 10 cm 10 cm 10 cm 10 cm 10 cm 10 cm ¦ Securing the TV to the Wall Caution: Pulling, pushing, or climbing on the TV may cause the TV to fall. In particular, ensure your children do not hang over or destabilize the TV; doing so may cause the TV to tip over, causing serious injuries or death. Follow all safety precautions provided on the included Safety Flyer. For added stability, install the anti-fall device for safety purposes, as follows. ■ To avoid the TV from falling: 1. Put the screws into the clamps and firmly fasten them onto the wall. Confirm that the screws have been firmly installed onto the wall. N You may need additional material such as an anchor depending on the type of wall. N Since the necessary clamps, screws, and string are not supplied, please purchase these additionally. Wall 2. Remove the screws from the centre back of the TV, put the screws into the clamps, and then fasten the screws onto the TV again. N Screws may not be supplied with the product. In this case, please purchase the screws of the following specifications. N Screw Specifications For a 17 ~ 29 Inch LCD TV: M4 X L15 / For a 32 ~ 40 Inch LCD TV: M6 X L15 3. Connect the clamps fixed onto the TV and the clamps fixed onto the wall with a strong string and then tie the string tightly. N Install the TV near to the wall so that it does not fall backwards. N It is safe to connect the string so that the clamps fixed on the wall are equal to or lower than the clamps fixed on the TV. N Untie the string before moving the TV. Wall 4. Verify all connections are properly secured. Periodically check connections for any sign of fatigue for failure. If you have any doubt about the security of your connections, contact a professional installer. English - 67 BN68-02325A-Eng.indb 67 2009-05-19 �� 3:43:32 ¦ Troubleshooting: Before Contacting Service Personnel No sound or picture Check that the mains lead has been connected to a wall socket. Check that you have pressed the button on your set. Check the picture contrast and brightness settings. Check the volume. Normal picture but no sound Check the volume. Check whether the MUTEM button has been pressed on the remote control. Check the Speaker Select settings. Screen is black and power indicator light blinks steadily On your computer check; Power, Signal Cable. The TV is using its power management system. Move the computer’s mouse or press any key on the keyboard. No picture or black and white picture Sound and picture interference Adjust the colour settings. Check that the broadcast system selected is correct. Blurred or snowy picture, distorted sound Remote control malfunctions Check the direction, location and connections of your aerial. This interference is often due to the use of an indoor aerial. ‘Check signal cable.’ message is displayed On PC mode, ‘Not Supported Mode.’ message is displayed The damaged picture appears in the corner of the screen The ‘Resets all settings to the default values.’ message appears. You may see small particles if you look closely at the edge of the bezel surrounding the TV screen. Check that the signal cable is firmly connected to the PC or video sources. Check that the PC or video sources are turned on. Try to identify the electrical appliance that is affecting the set and move it further away. Plug your set into a different mains socket. Replace the remote control batteries. Clean the upper edge of the remote control (transmission window). Check the battery terminals. Check the maximum resolution and the frequency of the video adaptor. Compare these values with the data in the Display Modes. If Screen Fit is selected in some external devices, the damaged picture may appear in the corner of the screen. This symptom is caused by external devices, not TV. This appears when you press and hold the EXIT button for a while. The product settings are reset to the factory defaults. This is part of the product’s design and is not a defect. N This TFT LCD panel uses a panel consisting of sub pixels (6 220 800) which require sophisticated technology to produce. However, there may be few bright or dark pixels on the screen. These pixels will have no impact on the performance of the product. English - 68 BN68-02325A-Eng.indb 68 2009-05-19 �� 3:43:32 ¦ Specifications Model Name Screen Size (Diagonal) PC Resolution (Optimum) Sound (Output) Dimensions (WxDxH) Body With stand Weight With Stand Environmental Considerations Operating Temperature Operating Humidity Storage Temperature Storage Humidity Stand Swivel (Left / Right) Model Name Screen Size (Diagonal) PC Resolution (Optimum) Sound (Output) Dimensions (WxDxH) Body With stand Weight With Stand Environmental Considerations Operating Temperature Operating Humidity Storage Temperature Storage Humidity Stand Swivel (Left / Right) Model Name Screen Size (Diagonal) PC Resolution (Optimum) Sound (Output) Dimensions (WxDxH) Body With stand Weight With Stand Environmental Considerations Operating Temperature Operating Humidity Storage Temperature Storage Humidity Stand Swivel (Left / Right) LE32B650, LE32B651 LE32B652, LE32B653 LE37B650, LE37B651 LE37B652, LE37B653 32 inch 37 inch 1920 x 1080 @ 60 Hz 1920 x 1080 @ 60 Hz 10W X 2 10W X 2 803 X 77 X 545 mm 803 X 239 X 601 mm 927 X 78 X 608 mm 927 X 255 X 668 mm 14 kg 17 kg 10°C to 40°C (50°F to 104°F) 10% to 80%, non-condensing -20°C to 45°C (-4°F to 113°F) 5% to 95%, non-condensing -20˚ ~ 20˚ LE40B650, LE40B651 LE40B652, LE40B653 LE46B650, LE46B651 LE46B652, LE46B653 40 inch 46 inch 1920 x 1080 @ 60 Hz 1920 x 1080 @ 60 Hz 10W X 2 10W X 2 995 X 79 X 650 mm 995 X 255 X 706 mm 1126 X 79 X 730 mm 1126 X 277 X 783 mm 19 kg 25 kg 10°C to 40°C (50°F to 104°F) 10% to 80%, non-condensing -20°C to 45°C (-4°F to 113°F) 5% to 95%, non-condensing -20˚ ~ 20˚ LE55B650, LE55B651, LE55B652, LE55B653 55 inch 1920 x 1080 @ 60 Hz 15W X 2 1311 X 80 X 842 mm 1311 X 305 X 895 mm 34 kg 10°C to 40°C (50°F to 104°F) 10% to 80%, non-condensing -20°C to 45°C (-4°F to 113°F) 5% to 95%, non-condensing -20˚ ~ 20˚ N Design and specifications are subject to change without prior notice. N This device is a Class B digital apparatus. N For the power supply and Power Consumption, refer to the label attached to the product. English - 69 BN68-02325A-Eng.indb 69 2009-05-19 �� 3:43:32 ● ● ● This product uses parts of the software from the Independent JPEG Group. This product uses parts of the software owned by the Freetype Project (www.freetype.org). This product uses some software programs which are distributed under the GPL/LGPL license. Accordingly, the following GPL and LGPL software source codes that have been used in this product can be provided after asking to vdswmanager@ samsung.com. GPL software: Linux Kernel, Busybox, Binutils LGPL software: Glibc, ffmpeg, smpeg, libgphoto, libusb, SDL ¦ GNU GENERAL PUBLIC LICENSE Version 3, 29 June 2007 Copyright (C) 2007 Free Software Foundation, Inc. <http://fsf.org/> Everyone is permitted to copy and distribute verbatim copies of this license document, but changing it is not allowed. Preamble The GNU General Public License is a free, copyleft license for software and other kinds of works. The licenses for most software and other practical works are designed to take away your freedom to share and change the works. By contrast, the GNU General Public License is intended to guarantee your freedom to share and change all versions of a program--to make sure it remains free software for all its users. We, the Free Software Foundation, use the GNU General Public License for most of our software; it applies also to any other work released this way by its authors. You can apply it to your programs, too. When we speak of free software, we are referring to freedom, not price. Our General Public Licenses are designed to make sure that you have the freedom to distribute copies of free software (and charge for them if you wish), that you receive source code or can get it if you want it, that you can change the software or use pieces of it in new free programs, and that you know you can do these things. To protect your rights, we need to prevent others from denying you these rights or asking you to surrender the rights. Therefore, you have certain responsibilities if you distribute copies of the software, or if you modify it: responsibilities to respect the freedom of others. For example, if you distribute copies of such a program, whether gratis or for a fee, you must pass on to the recipients the same freedoms that you received. You must make sure that they, too, receive or can get the source code. And you must show them these terms so they know their rights. Developers that use the GNU GPL protect your rights with two steps: (1) assert copyright on the software, and (2) offer you this License giving you legal permission to copy, distribute and/or modify it. For the developers’ and authors’ protection, the GPL clearly explains that there is no warranty for this free software. For both users’ and authors’ sake, the GPL requires that modified versions be marked as changed, so that their problems will not be attributed erroneously to authors of previous versions. Some devices are designed to deny users access to install or run modified versions of the software inside them, although the manufacturer can do so. This is fundamentally incompatible with the aim of protecting users’ freedom to change the software. The systematic pattern of such abuse occurs in the area of products for individuals to use, which is precisely where it is most unacceptable. Therefore, we have designed this version of the GPL to prohibit the practice for those products. If such problems arise substantially in other domains, we stand ready to extend this provision to those domains in future versions of the GPL, as needed to protect the freedom of users. Finally, every program is threatened constantly by software patents. States should not allow patents to restrict development and use of software on general-purpose computers, but in those that do, we wish to avoid the special danger that patents applied to a free program could make it effectively proprietary. To prevent this, the GPL assures that patents cannot be used to render the program non-free. The precise terms and conditions for copying, distribution and modification follow. TERMS AND CONDITIONS 0. Definitions. “This License” refers to version 3 of the GNU General Public License. “Copyright” also means copyright-like laws that apply to other kinds of works, such as semiconductor masks. “The Program” refers to any copyrightable work licensed under this License. Each licensee is addressed as “you”. “Licensees” and “recipients” may be individuals or organizations. To “modify” a work means to copy from or adapt all or part of the work in a fashion requiring copyright permission, other than the making of an exact copy. The resulting work is called a “modified version” of the earlier work or a work “based on” the earlier work. BN68-02325A-Eng.indb 70 2009-05-19 �� 3:43:32 A “covered work” means either the unmodified Program or a work based on the Program. To “propagate” a work means to do anything with it that, without permission, would make you directly or secondarily liable for infringement under applicable copyright law, except executing it on a computer or modifying a private copy. Propagation includes copying, distribution (with or without modification), making available to the public, and in some countries other activities as well. To “convey” a work means any kind of propagation that enables other parties to make or receive copies. Mere interaction with a user through a computer network, with no transfer of a copy, is not conveying. An interactive user interface displays “Appropriate Legal Notices” to the extent that it includes a convenient and prominently visible feature that (1) displays an appropriate copyright notice, and (2) tells the user that there is no warranty for the work (except to the extent that warranties are provided), that licensees may convey the work under this License, and how to view a copy of this License. If the interface presents a list of user commands or options, such as a menu, a prominent item in the list meets this criterion. 1. Source Code. The “source code” for a work means the preferred form of the work for making modifications to it. “Object code” means any non-source form of a work. A “Standard Interface” means an interface that either is an official standard defined by a recognized standards body, or, in the case of interfaces specified for a particular programming language, one that is widely used among developers working in that language. The “System Libraries” of an executable work include anything, other than the work as a whole, that (a) is included in the normal form of packaging a Major Component, but which is not part of that Major Component, and (b) serves only to enable use of the work with that Major Component, or to implement a Standard Interface for which an implementation is available to the public in source code form. A “Major Component”, in this context, means a major essential component (kernel, window system, and so on) of the specific operating system (if any) on which the executable work runs, or a compiler used to produce the work, or an object code interpreter used to run it. The “Corresponding Source” for a work in object code form means all the source code needed to generate, install, and (for an executable work) run the object code and to modify the work, including scripts to control those activities. However, it does not include the work’s System Libraries, or general-purpose tools or generally available free programs which are used unmodified in performing those activities but which are not part of the work. For example, Corresponding Source includes interface definition files associated with source files for the work, and the source code for shared libraries and dynamically linked subprograms that the work is specifically designed to require, such as by intimate data communication or control flow between those subprograms and other parts of the work. The Corresponding Source need not include anything that users can regenerate automatically from other parts of the Corresponding Source. The Corresponding Source for a work in source code form is that same work. 2. Basic Permissions. All rights granted under this License are granted for the term of copyright on the Program, and are irrevocable provided the stated conditions are met. This License explicitly affirms your unlimited permission to run the unmodified Program. The output from running a covered work is covered by this License only if the output, given its content, constitutes a covered work. This License acknowledges your rights of fair use or other equivalent, as provided by copyright law. You may make, run and propagate covered works that you do not convey, without conditions so long as your license otherwise remains in force. You may convey covered works to others for the sole purpose of having them make modifications exclusively for you, or provide you with facilities for running those works, provided that you comply with the terms of this License in conveying all material for which you do not control copyright. Those thus making or running the covered works for you must do so exclusively on your behalf, under your direction and control, on terms that prohibit them from making any copies of your copyrighted material outside their relationship with you. Conveying under any other circumstances is permitted solely under the conditions stated below. Sublicensing is not allowed; section 10 makes it unnecessary. 3. Protecting Users’ Legal Rights From Anti-Circumvention Law. No covered work shall be deemed part of an effective technological measure under any applicable law fulfilling obligations under article 11 of the WIPO copyright treaty adopted on 20 December 1996, or similar laws prohibiting or restricting circumvention of such measures. When you convey a covered work, you waive any legal power to forbid circumvention of technological measures to the extent such circumvention is effected by exercising rights under this License with respect to the covered work, and you disclaim any intention to limit operation or modification of the work as a means of enforcing, against the work’s users, your or third parties’ legal rights to forbid circumvention of technological measures. 4. Conveying Verbatim Copies. You may convey verbatim copies of the Program’s source code as you receive it, in any medium, provided that you conspicuously and appropriately publish on each copy an appropriate copyright notice; keep intact all notices stating that this License and any non-permissive terms added in accord with section 7 apply to the code; keep intact all notices of the absence of any warranty; and give all recipients a copy of this License along with the Program. You may charge any price or no price for each copy that you convey, and you may offer support or warranty protection for a fee. BN68-02325A-Eng.indb 71 2009-05-19 �� 3:43:33 5. Conveying Modified Source Versions. You may convey a work based on the Program, or the modifications to produce it from the Program, in the form of source code under the terms of section 4, provided that you also meet all of these conditions: a) The work must carry prominent notices stating that you modified it, and giving a relevant date. b) The work must carry prominent notices stating that it is released under this License and any conditions added under section 7. This requirement modifies the requirement in section 4 to “keep intact all notices”. c) You must license the entire work, as a whole, under this License to anyone who comes into possession of a copy. This License will therefore apply, along with any applicable section 7 additional terms, to the whole of the work, and all its parts, regardless of how they are packaged. This License gives no permission to license the work in any other way, but it does not invalidate such permission if you have separately received it. d) If the work has interactive user interfaces, each must display Appropriate Legal Notices; however, if the Program has interactive interfaces that do not display Appropriate Legal Notices, your work need not make them do so. A compilation of a covered work with other separate and independent works, which are not by their nature extensions of the covered work, and which are not combined with it such as to form a larger program, in or on a volume of a storage or distribution medium, is called an “aggregate” if the compilation and its resulting copyright are not used to limit the access or legal rights of the compilation’s users beyond what the individual works permit. Inclusion of a covered work in an aggregate does not cause this License to apply to the other parts of the aggregate. 6. Conveying Non-Source Forms. You may convey a covered work in object code form under the terms of sections 4 and 5, provided that you also convey the machine-readable Corresponding Source under the terms of this License, in one of these ways: a) Convey the object code in, or embodied in, a physical product (including a physical distribution medium), accompanied by the Corresponding Source fixed on a durable physical medium customarily used for software interchange. b) Convey the object code in, or embodied in, a physical product (including a physical distribution medium), accompanied by a written offer, valid for at least three years and valid for as long as you offer spare parts or customer support for that product model, to give anyone who possesses the object code either (1) a copy of the Corresponding Source for all the software in the product that is covered by this License, on a durable physical medium customarily used for software interchange, for a price no more than your reasonable cost of physically performing this conveying of source, or (2) access to copy the Corresponding Source from a network server at no charge. c) Convey individual copies of the object code with a copy of the written offer to provide the Corresponding Source. This alternative is allowed only occasionally and noncommercially, and only if you received the object code with such an offer, in accord with subsection 6b. d) Convey the object code by offering access from a designated place (gratis or for a charge), and offer equivalent access to the Corresponding Source in the same way through the same place at no further charge. You need not require recipients to copy the Corresponding Source along with the object code. If the place to copy the object code is a network server, the Corresponding Source may be on a different server (operated by you or a third party) that supports equivalent copying facilities, provided you maintain clear directions next to the object code saying where to find the Corresponding Source. Regardless of what server hosts the Corresponding Source, you remain obligated to ensure that it is available for as long as needed to satisfy these requirements. e) Convey the object code using peer-to-peer transmission, provided you inform other peers where the object code and Corresponding Source of the work are being offered to the general public at no charge under subsection 6d. A separable portion of the object code, whose source code is excluded from the Corresponding Source as a System Library, need not be included in conveying the object code work. A “User Product” is either (1) a “consumer product”, which means any tangible personal property which is normally used for personal, family, or household purposes, or (2) anything designed or sold for incorporation into a dwelling. In determining whether a product is a consumer product, doubtful cases shall be resolved in favor of coverage. For a particular product received by a particular user, “normally used” refers to a typical or common use of that class of product, regardless of the status of the particular user or of the way in which the particular user actually uses, or expects or is expected to use, the product. A product is a consumer product regardless of whether the product has substantial commercial, industrial or nonconsumer uses, unless such uses represent the only significant mode of use of the product. “Installation Information” for a User Product means any methods, procedures, authorization keys, or other information required to install and execute modified versions of a covered work in that User Product from a modified version of its Corresponding Source. The information must suffice to ensure that the continued functioning of the modified object code is in no case prevented or interfered with solely because modification has been made. If you convey an object code work under this section in, or with, or specifically for use in, a User Product, and the conveying occurs as part of a transaction in which the right of possession and use of the User Product is transferred to the recipient in perpetuity or for a fixed term (regardless of how the transaction is characterized), the Corresponding Source conveyed under this section must be accompanied by the Installation Information. But this requirement does not apply if neither you nor any third party retains the ability to install modified object code on the User Product (for example, the work has been installed in ROM). BN68-02325A-Eng.indb 72 2009-05-19 �� 3:43:33 The requirement to provide Installation Information does not include a requirement to continue to provide support service, warranty, or updates for a work that has been modified or installed by the recipient, or for the User Product in which it has been modified or installed. Access to a network may be denied when the modification itself materially and adversely affects the operation of the network or violates the rules and protocols for communication across the network. Corresponding Source conveyed, and Installation Information provided, in accord with this section must be in a format that is publicly documented (and with an implementation available to the public in source code form), and must require no special password or key for unpacking, reading or copying. 7. Additional Terms. “Additional permissions” are terms that supplement the terms of this License by making exceptions from one or more of its conditions. Additional permissions that are applicable to the entire Program shall be treated as though they were included in this License, to the extent that they are valid under applicable law. If additional permissions apply only to part of the Program, that part may be used separately under those permissions, but the entire Program remains governed by this License without regard to the additional permissions. When you convey a copy of a covered work, you may at your option remove any additional permissions from that copy, or from any part of it. (Additional permissions may be written to require their own removal in certain cases when you modify the work.) You may place additional permissions on material, added by you to a covered work, for which you have or can give appropriate copyright permission. Notwithstanding any other provision of this License, for material you add to a covered work, you may (if authorized by the copyright holders of that material) supplement the terms of this License with terms: a) Disclaiming warranty or limiting liability differently from the terms of sections 15 and 16 of this License; or b) Requiring preservation of specified reasonable legal notices or author attributions in that material or in the Appropriate Legal Notices displayed by works containing it; or c) Prohibiting misrepresentation of the origin of that material, or requiring that modified versions of such material be marked in reasonable ways as different from the original version; or d) Limiting the use for publicity purposes of names of licensors or authors of the material; or e) Declining to grant rights under trademark law for use of some trade names, trademarks, or service marks; or f) Requiring indemnification of licensors and authors of that material by anyone who conveys the material (or modified versions of it) with contractual assumptions of liability to the recipient, for any liability that these contractual assumptions directly impose on those licensors and authors. All other non-permissive additional terms are considered “further restrictions” within the meaning of section 10. If the Program as you received it, or any part of it, contains a notice stating that it is governed by this License along with a term that is a further restriction, you may remove that term. If a license document contains a further restriction but permits relicensing or conveying under this License, you may add to a covered work material governed by the terms of that license document, provided that the further restriction does not survive such relicensing or conveying. If you add terms to a covered work in accord with this section, you must place, in the relevant source files, a statement of the additional terms that apply to those files, or a notice indicating where to find the applicable terms. Additional terms, permissive or non-permissive, may be stated in the form of a separately written license, or stated as exceptions; the above requirements apply either way. 8. Termination. You may not propagate or modify a covered work except as expressly provided under this License. Any attempt otherwise to propagate or modify it is void, and will automatically terminate your rights under this License (including any patent licenses granted under the third paragraph of section 11). However, if you cease all violation of this License, then your license from a particular copyright holder is reinstated (a) provisionally, unless and until the copyright holder explicitly and finally terminates your license, and (b) permanently, if the copyright holder fails to notify you of the violation by some reasonable means prior to 60 days after the cessation. Moreover, your license from a particular copyright holder is reinstated permanently if the copyright holder notifies you of the violation by some reasonable means, this is the first time you have received notice of violation of this License (for any work) from that copyright holder, and you cure the violation prior to 30 days after your receipt of the notice. Termination of your rights under this section does not terminate the licenses of parties who have received copies or rights from you under this License. If your rights have been terminated and not permanently reinstated, you do not qualify to receive new licenses for the same material under section 10. 9. Acceptance Not Required for Having Copies. You are not required to accept this License in order to receive or run a copy of the Program. Ancillary propagation of a covered work occurring solely as a consequence of using peer-to-peer transmission to receive a copy likewise does not require acceptance. However, nothing other than this License grants you permission to propagate or modify any covered work. These actions infringe copyright if you do not accept this License. Therefore, by modifying or propagating a covered work, you indicate your acceptance of this License to do so. BN68-02325A-Eng.indb 73 2009-05-19 �� 3:43:33 10.Automatic Licensing of Downstream Recipients. Each time you convey a covered work, the recipient automatically receives a license from the original licensors, to run, modify and propagate that work, subject to this License. You are not responsible for enforcing compliance by third parties with this License. An “entity transaction” is a transaction transferring control of an organization, or substantially all assets of one, or subdividing an organization, or merging organizations. If propagation of a covered work results from an entity transaction, each party to that transaction who receives a copy of the work also receives whatever licenses to the work the party’s predecessor in interest had or could give under the previous paragraph, plus a right to possession of the Corresponding Source of the work from the predecessor in interest, if the predecessor has it or can get it with reasonable efforts. You may not impose any further restrictions on the exercise of the rights granted or affirmed under this License. For example, you may not impose a license fee, royalty, or other charge for exercise of rights granted under this License, and you may not initiate litigation (including a cross-claim or counterclaim in a lawsuit) alleging that any patent claim is infringed by making, using, selling, offering for sale, or importing the Program or any portion of it. 11. Patents. A “contributor” is a copyright holder who authorizes use under this License of the Program or a work on which the Program is based. The work thus licensed is called the contributor’s “contributor version”. A contributor’s “essential patent claims” are all patent claims owned or controlled by the contributor, whether already acquired or hereafter acquired, that would be infringed by some manner, permitted by this License, of making, using, or selling its contributor version, but do not include claims that would be infringed only as a consequence of further modification of the contributor version. For purposes of this definition, “control” includes the right to grant patent sublicenses in a manner consistent with the requirements of this License. Each contributor grants you a non-exclusive, worldwide, royalty-free patent license under the contributor’s essential patent claims, to make, use, sell, offer for sale, import and otherwise run, modify and propagate the contents of its contributor version. In the following three paragraphs, a “patent license” is any express agreement or commitment, however denominated, not to enforce a patent (such as an express permission to practice a patent or covenant not to sue for patent infringement). To “grant” such a patent license to a party means to make such an agreement or commitment not to enforce a patent against the party. If you convey a covered work, knowingly relying on a patent license, and the Corresponding Source of the work is not available for anyone to copy, free of charge and under the terms of this License, through a publicly available network server or other readily accessible means, then you must either (1) cause the Corresponding Source to be so available, or (2) arrange to deprive yourself of the benefit of the patent license for this particular work, or (3) arrange, in a manner consistent with the requirements of this License, to extend the patent license to downstream recipients. “Knowingly relying” means you have actual knowledge that, but for the patent license, your conveying the covered work in a country, or your recipient’s use of the covered work in a country, would infringe one or more identifiable patents in that country that you have reason to believe are valid. If, pursuant to or in connection with a single transaction or arrangement, you convey, or propagate by procuring conveyance of, a covered work, and grant a patent license to some of the parties receiving the covered work authorizing them to use, propagate, modify or convey a specific copy of the covered work, then the patent license you grant is automatically extended to all recipients of the covered work and works based on it. A patent license is “discriminatory” if it does not include within the scope of its coverage, prohibits the exercise of, or is conditioned on the non-exercise of one or more of the rights that are specifically granted under this License. You may not convey a covered work if you are a party to an arrangement with a third party that is in the business of distributing software, under which you make payment to the third party based on the extent of your activity of conveying the work, and under which the third party grants, to any of the parties who would receive the covered work from you, a discriminatory patent license (a) in connection with copies of the covered work conveyed by you (or copies made from those copies), or (b) primarily for and in connection with specific products or compilations that contain the covered work, unless you entered into that arrangement, or that patent license was granted, prior to 28 March 2007. Nothing in this License shall be construed as excluding or limiting any implied license or other defenses to infringement that may otherwise be available to you under applicable patent law. 12.No Surrender of Others’ Freedom. If conditions are imposed on you (whether by court order, agreement or otherwise) that contradict the conditions of this License, they do not excuse you from the conditions of this License. If you cannot convey a covered work so as to satisfy simultaneously your obligations under this License and any other pertinent obligations, then as a consequence you may not convey it at all. For example, if you agree to terms that obligate you to collect a royalty for further conveying from those to whom you convey the Program, the only way you could satisfy both those terms and this License would be to refrain entirely from conveying the Program. 13.Use with the GNU Affero General Public License. Notwithstanding any other provision of this License, you have permission to link or combine any covered work with a work licensed under version 3 of the GNU Affero General Public License into a single combined work, and to convey the resulting work. The terms of this License will continue to apply to the part which is the covered work, but the special requirements of the GNU Affero General Public License, section 13, concerning interaction through a network will apply to the combination as such. BN68-02325A-Eng.indb 74 2009-05-19 �� 3:43:33 14.Revised Versions of this License. The Free Software Foundation may publish revised and/or new versions of the GNU General Public License from time to time. Such new versions will be similar in spirit to the present version, but may differ in detail to address new problems or concerns. Each version is given a distinguishing version number. If the Program specifies that a certain numbered version of the GNU General Public License “or any later version” applies to it, you have the option of following the terms and conditions either of that numbered version or of any later version published by the Free Software Foundation. If the Program does not specify a version number of the GNU General Public License, you may choose any version ever published by the Free Software Foundation. If the Program specifies that a proxy can decide which future versions of the GNU General Public License can be used, that proxy’s public statement of acceptance of a version permanently authorizes you to choose that version for the Program. Later license versions may give you additional or different permissions. However, no additional obligations are imposed on any author or copyright holder as a result of your choosing to follow a later version. 15.Disclaimer of Warranty. THERE IS NO WARRANTY FOR THE PROGRAM, TO THE EXTENT PERMITTED BY APPLICABLE LAW. EXCEPT WHEN OTHERWISE STATED IN WRITING THE COPYRIGHT HOLDERS AND/OR OTHER PARTIES PROVIDE THE PROGRAM “AS IS” WITHOUT WARRANTY OF ANY KIND, EITHER EXPRESSED OR IMPLIED, INCLUDING, BUT NOT LIMITED TO, THE IMPLIED WARRANTIES OF MERCHANTABILITY AND FITNESS FOR A PARTICULAR PURPOSE. THE ENTIRE RISK AS TO THE QUALITY AND PERFORMANCE OF THE PROGRAM IS WITH YOU. SHOULD THE PROGRAM PROVE DEFECTIVE, YOU ASSUME THE COST OF ALL NECESSARY SERVICING, REPAIR OR CORRECTION. 16.Limitation of Liability. IN NO EVENT UNLESS REQUIRED BY APPLICABLE LAW OR AGREED TO IN WRITING WILL ANY COPYRIGHT HOLDER, OR ANY OTHER PARTY WHO MODIFIES AND/OR CONVEYS THE PROGRAM AS PERMITTED ABOVE, BE LIABLE TO YOU FOR DAMAGES, INCLUDING ANY GENERAL, SPECIAL, INCIDENTAL OR CONSEQUENTIAL DAMAGES ARISING OUT OF THE USE OR INABILITY TO USE THE PROGRAM (INCLUDING BUT NOT LIMITED TO LOSS OF DATA OR DATA BEING RENDERED INACCURATE OR LOSSES SUSTAINED BY YOU OR THIRD PARTIES OR A FAILURE OF THE PROGRAM TO OPERATE WITH ANY OTHER PROGRAMS), EVEN IF SUCH HOLDER OR OTHER PARTY HAS BEEN ADVISED OF THE POSSIBILITY OF SUCH DAMAGES. 17.Interpretation of Sections 15 and 16. If the disclaimer of warranty and limitation of liability provided above cannot be given local legal effect according to their terms, reviewing courts shall apply local law that most closely approximates an absolute waiver of all civil liability in connection with the Program, unless a warranty or assumption of liability accompanies a copy of the Program in return for a fee. ¦ END OF TERMS AND CONDITIONS How to Apply These Terms to Your New Programs If you develop a new program, and you want it to be of the greatest possible use to the public, the best way to achieve this is to make it free software which everyone can redistribute and change under these terms. To do so, attach the following notices to the program. It is safest to attach them to the start of each source file to most effectively state the exclusion of warranty; and each file should have at least the “copyright” line and a pointer to where the full notice is found. <one line to give the program’s name and a brief idea of what it does.> Copyright (C) <year> <name of author> This program is free software: you can redistribute it and/or modify it under the terms of the GNU General Public License as published by the Free Software Foundation, either version 3 of the License, or (at your option) any later version. This program is distributed in the hope that it will be useful, but WITHOUT ANY WARRANTY; without even the implied warranty of MERCHANTABILITY or FITNESS FOR A PARTICULAR PURPOSE. See the GNU General Public License for more details. You should have received a copy of the GNU General Public License along with this program. If not, see <http://www.gnu. org/licenses/>. Also add information on how to contact you by electronic and paper mail. If the program does terminal interaction, make it output a short notice like this when it starts in an interactive mode: <program> Copyright (C) <year> <name of author> This program comes with ABSOLUTELY NO WARRANTY; for details type `show w’. This is free software, and you are welcome to redistribute it under certain conditions; type `show c’ for details. The hypothetical commands `show w’ and `show c’ should show the appropriate parts of the General Public License. Of course, your program’s commands might be different; for a GUI interface, you would use an “about box”. You should also get your employer (if you work as a programmer) or school, if any, to sign a “copyright disclaimer” for the program, if necessary. For more information on this, and how to apply and follow the GNU GPL, see <http://www.gnu.org/licenses/>. The GNU General Public License does not permit incorporating your program into proprietary programs. If your program is a subroutine library, you may consider it more useful to permit linking proprietary applications with the library. If this is what you want to do, use the GNU Lesser General Public License instead of this License. But first, please read <http://www.gnu.org/philosophy/ why-not-lgpl.html>. BN68-02325A-Eng.indb 75 2009-05-19 �� 3:43:33 ¦ GNU Lesser General Public License (LGPL) Version 3, 29 June 2007 Copyright (C) 2007 Free Software Foundation, Inc. <http://fsf.org/> Everyone is permitted to copy and distribute verbatim copies of this license document, but changing it is not allowed. Preamble The GNU General Public License is a free, copyleft license for software and other kinds of works. The licenses for most software and other practical works are designed to take away your freedom to share and change the works. By contrast, the GNU General Public License is intended to guarantee your freedom to share and change all versions of a program--to make sure it remains free software for all its users. We, the Free Software Foundation, use the GNU General Public License for most of our software; it applies also to any other work released this way by its authors. You can apply it to your programs, too. When we speak of free software, we are referring to freedom, not price. Our General Public Licenses are designed to make sure that you have the freedom to distribute copies of free software (and charge for them if you wish), that you receive source code or can get it if you want it, that you can change the software or use pieces of it in new free programs, and that you know you can do these things. To protect your rights, we need to prevent others from denying you these rights or asking you to surrender the rights. Therefore, you have certain responsibilities if you distribute copies of the software, or if you modify it: responsibilities to respect the freedom of others. For example, if you distribute copies of such a program, whether gratis or for a fee, you must pass on to the recipients the same freedoms that you received. You must make sure that they, too, receive or can get the source code. And you must show them these terms so they know their rights. Developers that use the GNU GPL protect your rights with two steps: (1) assert copyright on the software, and (2) offer you this License giving you legal permission to copy, distribute and/or modify it. For the developers’ and authors’ protection, the GPL clearly explains that there is no warranty for this free software. For both users’ and authors’ sake, the GPL requires that modified versions be marked as changed, so that their problems will not be attributed erroneously to authors of previous versions. Some devices are designed to deny users access to install or run modified versions of the software inside them, although the manufacturer can do so. This is fundamentally incompatible with the aim of protecting users’ freedom to change the software. The systematic pattern of such abuse occurs in the area of products for individuals to use, which is precisely where it is most unacceptable. Therefore, we have designed this version of the GPL to prohibit the practice for those products. If such problems arise substantially in other domains, we stand ready to extend this provision to those domains in future versions of the GPL, as needed to protect the freedom of users. Finally, every program is threatened constantly by software patents. States should not allow patents to restrict development and use of software on general-purpose computers, but in those that do, we wish to avoid the special danger that patents applied to a free program could make it effectively proprietary. To prevent this, the GPL assures that patents cannot be used to render the program non-free. The precise terms and conditions for copying, distribution and modification follow. TERMS AND CONDITIONS 0. Definitions. “This License” refers to version 3 of the GNU General Public License. “Copyright” also means copyright-like laws that apply to other kinds of works, such as semiconductor masks. “The Program” refers to any copyrightable work licensed under this License. Each licensee is addressed as “you”. “Licensees” and “recipients” may be individuals or organizations. To “modify” a work means to copy from or adapt all or part of the work in a fashion requiring copyright permission, other than the making of an exact copy. The resulting work is called a “modified version” of the earlier work or a work “based on” the earlier work. A “covered work” means either the unmodified Program or a work based on the Program. To “propagate” a work means to do anything with it that, without permission, would make you directly or secondarily liable for infringement under applicable copyright law, except executing it on a computer or modifying a private copy. Propagation includes copying, distribution (with or without modification), making available to the public, and in some countries other activities as well. To “convey” a work means any kind of propagation that enables other parties to make or receive copies. Mere interaction with a user through a computer network, with no transfer of a copy, is not conveying. An interactive user interface displays “Appropriate Legal Notices” to the extent that it includes a convenient and prominently visible feature that (1) displays an appropriate copyright notice, and (2) tells the user that there is no warranty for the work (except to the extent that warranties are provided), that licensees may convey the work under this License, and how to view a copy of this License. If the interface presents a list of user commands or options, such as a menu, a prominent item in the list meets this criterion. BN68-02325A-Eng.indb 76 2009-05-19 �� 3:43:33 1. Source Code. The “source code” for a work means the preferred form of the work for making modifications to it. “Object code” means any non-source form of a work. A “Standard Interface” means an interface that either is an official standard defined by a recognized standards body, or, in the case of interfaces specified for a particular programming language, one that is widely used among developers working in that language. The “System Libraries” of an executable work include anything, other than the work as a whole, that (a) is included in the normal form of packaging a Major Component, but which is not part of that Major Component, and (b) serves only to enable use of the work with that Major Component, or to implement a Standard Interface for which an implementation is available to the public in source code form. A “Major Component”, in this context, means a major essential component (kernel, window system, and so on) of the specific operating system (if any) on which the executable work runs, or a compiler used to produce the work, or an object code interpreter used to run it. The “Corresponding Source” for a work in object code form means all the source code needed to generate, install, and (for an executable work) run the object code and to modify the work, including scripts to control those activities. However, it does not include the work’s System Libraries, or general-purpose tools or generally available free programs which are used unmodified in performing those activities but which are not part of the work. For example, Corresponding Source includes interface definition files associated with source files for the work, and the source code for shared libraries and dynamically linked subprograms that the work is specifically designed to require, such as by intimate data communication or control flow between those subprograms and other parts of the work. The Corresponding Source need not include anything that users can regenerate automatically from other parts of the Corresponding Source. The Corresponding Source for a work in source code form is that same work. 2. Basic Permissions. All rights granted under this License are granted for the term of copyright on the Program, and are irrevocable provided the stated conditions are met. This License explicitly affirms your unlimited permission to run the unmodified Program. The output from running a covered work is covered by this License only if the output, given its content, constitutes a covered work. This License acknowledges your rights of fair use or other equivalent, as provided by copyright law. You may make, run and propagate covered works that you do not convey, without conditions so long as your license otherwise remains in force. You may convey covered works to others for the sole purpose of having them make modifications exclusively for you, or provide you with facilities for running those works, provided that you comply with the terms of this License in conveying all material for which you do not control copyright. Those thus making or running the covered works for you must do so exclusively on your behalf, under your direction and control, on terms that prohibit them from making any copies of your copyrighted material outside their relationship with you. Conveying under any other circumstances is permitted solely under the conditions stated below. Sublicensing is not allowed; section 10 makes it unnecessary. 3. Protecting Users’ Legal Rights From Anti-Circumvention Law. No covered work shall be deemed part of an effective technological measure under any applicable law fulfilling obligations under article 11 of the WIPO copyright treaty adopted on 20 December 1996, or similar laws prohibiting or restricting circumvention of such measures. When you convey a covered work, you waive any legal power to forbid circumvention of technological measures to the extent such circumvention is effected by exercising rights under this License with respect to the covered work, and you disclaim any intention to limit operation or modification of the work as a means of enforcing, against the work’s users, your or third parties’ legal rights to forbid circumvention of technological measures. 4. Conveying Verbatim Copies. You may convey verbatim copies of the Program’s source code as you receive it, in any medium, provided that you conspicuously and appropriately publish on each copy an appropriate copyright notice; keep intact all notices stating that this License and any non-permissive terms added in accord with section 7 apply to the code; keep intact all notices of the absence of any warranty; and give all recipients a copy of this License along with the Program. You may charge any price or no price for each copy that you convey, and you may offer support or warranty protection for a fee. 5. Conveying Modified Source Versions. You may convey a work based on the Program, or the modifications to produce it from the Program, in the form of source code under the terms of section 4, provided that you also meet all of these conditions: a) The work must carry prominent notices stating that you modified it, and giving a relevant date. b) The work must carry prominent notices stating that it is released under this License and any conditions added under section 7. This requirement modifies the requirement in section 4 to “keep intact all notices”. c) You must license the entire work, as a whole, under this License to anyone who comes into possession of a copy. This License will therefore apply, along with any applicable section 7 additional terms, to the whole of the work, and all its parts, regardless of how they are packaged. This License gives no permission to license the work in any other way, but it does not invalidate such permission if you have separately received it. d) If the work has interactive user interfaces, each must display Appropriate Legal Notices; however, if the Program has interactive interfaces that do not display Appropriate Legal Notices, your work need not make them do so. BN68-02325A-Eng.indb 77 2009-05-19 �� 3:43:33 A compilation of a covered work with other separate and independent works, which are not by their nature extensions of the covered work, and which are not combined with it such as to form a larger program, in or on a volume of a storage or distribution medium, is called an “aggregate” if the compilation and its resulting copyright are not used to limit the access or legal rights of the compilation’s users beyond what the individual works permit. Inclusion of a covered work in an aggregate does not cause this License to apply to the other parts of the aggregate. 6. Conveying Non-Source Forms. You may convey a covered work in object code form under the terms of sections 4 and 5, provided that you also convey the machine-readable Corresponding Source under the terms of this License, in one of these ways: a) Convey the object code in, or embodied in, a physical product (including a physical distribution medium), accompanied by the Corresponding Source fixed on a durable physical medium customarily used for software interchange. b) Convey the object code in, or embodied in, a physical product (including a physical distribution medium), accompanied by a written offer, valid for at least three years and valid for as long as you offer spare parts or customer support for that product model, to give anyone who possesses the object code either (1) a copy of the Corresponding Source for all the software in the product that is covered by this License, on a durable physical medium customarily used for software interchange, for a price no more than your reasonable cost of physically performing this conveying of source, or (2) access to copy the Corresponding Source from a network server at no charge. c) Convey individual copies of the object code with a copy of the written offer to provide the Corresponding Source. This alternative is allowed only occasionally and noncommercially, and only if you received the object code with such an offer, in accord with subsection 6b. d) Convey the object code by offering access from a designated place (gratis or for a charge), and offer equivalent access to the Corresponding Source in the same way through the same place at no further charge. You need not require recipients to copy the Corresponding Source along with the object code. If the place to copy the object code is a network server, the Corresponding Source may be on a different server (operated by you or a third party) that supports equivalent copying facilities, provided you maintain clear directions next to the object code saying where to find the Corresponding Source. Regardless of what server hosts the Corresponding Source, you remain obligated to ensure that it is available for as long as needed to satisfy these requirements. e) Convey the object code using peer-to-peer transmission, provided you inform other peers where the object code and Corresponding Source of the work are being offered to the general public at no charge under subsection 6d. A separable portion of the object code, whose source code is excluded from the Corresponding Source as a System Library, need not be included in conveying the object code work. A “User Product” is either (1) a “consumer product”, which means any tangible personal property which is normally used for personal, family, or household purposes, or (2) anything designed or sold for incorporation into a dwelling. In determining whether a product is a consumer product, doubtful cases shall be resolved in favor of coverage. For a particular product received by a particular user, “normally used” refers to a typical or common use of that class of product, regardless of the status of the particular user or of the way in which the particular user actually uses, or expects or is expected to use, the product. A product is a consumer product regardless of whether the product has substantial commercial, industrial or nonconsumer uses, unless such uses represent the only significant mode of use of the product. “Installation Information” for a User Product means any methods, procedures, authorization keys, or other information required to install and execute modified versions of a covered work in that User Product from a modified version of its Corresponding Source. The information must suffice to ensure that the continued functioning of the modified object code is in no case prevented or interfered with solely because modification has been made. If you convey an object code work under this section in, or with, or specifically for use in, a User Product, and the conveying occurs as part of a transaction in which the right of possession and use of the User Product is transferred to the recipient in perpetuity or for a fixed term (regardless of how the transaction is characterized), the Corresponding Source conveyed under this section must be accompanied by the Installation Information. But this requirement does not apply if neither you nor any third party retains the ability to install modified object code on the User Product (for example, the work has been installed in ROM). The requirement to provide Installation Information does not include a requirement to continue to provide support service, warranty, or updates for a work that has been modified or installed by the recipient, or for the User Product in which it has been modified or installed. Access to a network may be denied when the modification itself materially and adversely affects the operation of the network or violates the rules and protocols for communication across the network. Corresponding Source conveyed, and Installation Information provided, in accord with this section must be in a format that is publicly documented (and with an implementation available to the public in source code form), and must require no special password or key for unpacking, reading or copying. 7. Additional Terms. “Additional permissions” are terms that supplement the terms of this License by making exceptions from one or more of its conditions. Additional permissions that are applicable to the entire Program shall be treated as though they were included in this License, to the extent that they are valid under applicable law. If additional permissions apply only to part of the Program, that part may be used separately under those permissions, but the entire Program remains governed by this License without regard to the additional permissions. BN68-02325A-Eng.indb 78 2009-05-19 �� 3:43:33 When you convey a copy of a covered work, you may at your option remove any additional permissions from that copy, or from any part of it. (Additional permissions may be written to require their own removal in certain cases when you modify the work.) You may place additional permissions on material, added by you to a covered work, for which you have or can give appropriate copyright permission. Notwithstanding any other provision of this License, for material you add to a covered work, you may (if authorized by the copyright holders of that material) supplement the terms of this License with terms: a) Disclaiming warranty or limiting liability differently from the terms of sections 15 and 16 of this License; or b) Requiring preservation of specified reasonable legal notices or author attributions in that material or in the Appropriate Legal Notices displayed by works containing it; or c) Prohibiting misrepresentation of the origin of that material, or requiring that modified versions of such material be marked in reasonable ways as different from the original version; or d) Limiting the use for publicity purposes of names of licensors or authors of the material; or e) Declining to grant rights under trademark law for use of some trade names, trademarks, or service marks; or f) Requiring indemnification of licensors and authors of that material by anyone who conveys the material (or modified versions of it) with contractual assumptions of liability to the recipient, for any liability that these contractual assumptions directly impose on those licensors and authors. All other non-permissive additional terms are considered “further restrictions” within the meaning of section 10. If the Program as you received it, or any part of it, contains a notice stating that it is governed by this License along with a term that is a further restriction, you may remove that term. If a license document contains a further restriction but permits relicensing or conveying under this License, you may add to a covered work material governed by the terms of that license document, provided that the further restriction does not survive such relicensing or conveying. If you add terms to a covered work in accord with this section, you must place, in the relevant source files, a statement of the additional terms that apply to those files, or a notice indicating where to find the applicable terms. Additional terms, permissive or non-permissive, may be stated in the form of a separately written license, or stated as exceptions; the above requirements apply either way. 8. Termination. You may not propagate or modify a covered work except as expressly provided under this License. Any attempt otherwise to propagate or modify it is void, and will automatically terminate your rights under this License (including any patent licenses granted under the third paragraph of section 11). However, if you cease all violation of this License, then your license from a particular copyright holder is reinstated (a) provisionally, unless and until the copyright holder explicitly and finally terminates your license, and (b) permanently, if the copyright holder fails to notify you of the violation by some reasonable means prior to 60 days after the cessation. Moreover, your license from a particular copyright holder is reinstated permanently if the copyright holder notifies you of the violation by some reasonable means, this is the first time you have received notice of violation of this License (for any work) from that copyright holder, and you cure the violation prior to 30 days after your receipt of the notice. Termination of your rights under this section does not terminate the licenses of parties who have received copies or rights from you under this License. If your rights have been terminated and not permanently reinstated, you do not qualify to receive new licenses for the same material under section 10. 9. Acceptance Not Required for Having Copies. You are not required to accept this License in order to receive or run a copy of the Program. Ancillary propagation of a covered work occurring solely as a consequence of using peer-to-peer transmission to receive a copy likewise does not require acceptance. However, nothing other than this License grants you permission to propagate or modify any covered work. These actions infringe copyright if you do not accept this License. Therefore, by modifying or propagating a covered work, you indicate your acceptance of this License to do so. 10.Automatic Licensing of Downstream Recipients. Each time you convey a covered work, the recipient automatically receives a license from the original licensors, to run, modify and propagate that work, subject to this License. You are not responsible for enforcing compliance by third parties with this License. An “entity transaction” is a transaction transferring control of an organization, or substantially all assets of one, or subdividing an organization, or merging organizations. If propagation of a covered work results from an entity transaction, each party to that transaction who receives a copy of the work also receives whatever licenses to the work the party’s predecessor in interest had or could give under the previous paragraph, plus a right to possession of the Corresponding Source of the work from the predecessor in interest, if the predecessor has it or can get it with reasonable efforts. You may not impose any further restrictions on the exercise of the rights granted or affirmed under this License. For example, you may not impose a license fee, royalty, or other charge for exercise of rights granted under this License, and you may not initiate litigation (including a cross-claim or counterclaim in a lawsuit) alleging that any patent claim is infringed by making, using, selling, offering for sale, or importing the Program or any portion of it. BN68-02325A-Eng.indb 79 2009-05-19 �� 3:43:34 11. Patents. A “contributor” is a copyright holder who authorizes use under this License of the Program or a work on which the Program is based. The work thus licensed is called the contributor’s “contributor version”. A contributor’s “essential patent claims” are all patent claims owned or controlled by the contributor, whether already acquired or hereafter acquired, that would be infringed by some manner, permitted by this License, of making, using, or selling its contributor version, but do not include claims that would be infringed only as a consequence of further modification of the contributor version. For purposes of this definition, “control” includes the right to grant patent sublicenses in a manner consistent with the requirements of this License. Each contributor grants you a non-exclusive, worldwide, royalty-free patent license under the contributor’s essential patent claims, to make, use, sell, offer for sale, import and otherwise run, modify and propagate the contents of its contributor version. In the following three paragraphs, a “patent license” is any express agreement or commitment, however denominated, not to enforce a patent (such as an express permission to practice a patent or covenant not to sue for patent infringement). To “grant” such a patent license to a party means to make such an agreement or commitment not to enforce a patent against the party. If you convey a covered work, knowingly relying on a patent license, and the Corresponding Source of the work is not available for anyone to copy, free of charge and under the terms of this License, through a publicly available network server or other readily accessible means, then you must either (1) cause the Corresponding Source to be so available, or (2) arrange to deprive yourself of the benefit of the patent license for this particular work, or (3) arrange, in a manner consistent with the requirements of this License, to extend the patent license to downstream recipients. “Knowingly relying” means you have actual knowledge that, but for the patent license, your conveying the covered work in a country, or your recipient’s use of the covered work in a country, would infringe one or more identifiable patents in that country that you have reason to believe are valid. If, pursuant to or in connection with a single transaction or arrangement, you convey, or propagate by procuring conveyance of, a covered work, and grant a patent license to some of the parties receiving the covered work authorizing them to use, propagate, modify or convey a specific copy of the covered work, then the patent license you grant is automatically extended to all recipients of the covered work and works based on it. A patent license is “discriminatory” if it does not include within the scope of its coverage, prohibits the exercise of, or is conditioned on the non-exercise of one or more of the rights that are specifically granted under this License. You may not convey a covered work if you are a party to an arrangement with a third party that is in the business of distributing software, under which you make payment to the third party based on the extent of your activity of conveying the work, and under which the third party grants, to any of the parties who would receive the covered work from you, a discriminatory patent license (a) in connection with copies of the covered work conveyed by you (or copies made from those copies), or (b) primarily for and in connection with specific products or compilations that contain the covered work, unless you entered into that arrangement, or that patent license was granted, prior to 28 March 2007. Nothing in this License shall be construed as excluding or limiting any implied license or other defenses to infringement that may otherwise be available to you under applicable patent law. 12.No Surrender of Others’ Freedom. If conditions are imposed on you (whether by court order, agreement or otherwise) that contradict the conditions of this License, they do not excuse you from the conditions of this License. If you cannot convey a covered work so as to satisfy simultaneously your obligations under this License and any other pertinent obligations, then as a consequence you may not convey it at all. For example, if you agree to terms that obligate you to collect a royalty for further conveying from those to whom you convey the Program, the only way you could satisfy both those terms and this License would be to refrain entirely from conveying the Program. 13.Use with the GNU Affero General Public License. Notwithstanding any other provision of this License, you have permission to link or combine any covered work with a work licensed under version 3 of the GNU Affero General Public License into a single combined work, and to convey the resulting work. The terms of this License will continue to apply to the part which is the covered work, but the special requirements of the GNU Affero General Public License, section 13, concerning interaction through a network will apply to the combination as such. 14.Revised Versions of this License. The Free Software Foundation may publish revised and/or new versions of the GNU General Public License from time to time. Such new versions will be similar in spirit to the present version, but may differ in detail to address new problems or concerns. Each version is given a distinguishing version number. If the Program specifies that a certain numbered version of the GNU General Public License “or any later version” applies to it, you have the option of following the terms and conditions either of that numbered version or of any later version published by the Free Software Foundation. If the Program does not specify a version number of the GNU General Public License, you may choose any version ever published by the Free Software Foundation. If the Program specifies that a proxy can decide which future versions of the GNU General Public License can be used, that proxy’s public statement of acceptance of a version permanently authorizes you to choose that version for the Program. Later license versions may give you additional or different permissions. However, no additional obligations are imposed on any author or copyright holder as a result of your choosing to follow a later version. BN68-02325A-Eng.indb 80 2009-05-19 �� 3:43:34 15.Disclaimer of Warranty. THERE IS NO WARRANTY FOR THE PROGRAM, TO THE EXTENT PERMITTED BY APPLICABLE LAW. EXCEPT WHEN OTHERWISE STATED IN WRITING THE COPYRIGHT HOLDERS AND/OR OTHER PARTIES PROVIDE THE PROGRAM “AS IS” WITHOUT WARRANTY OF ANY KIND, EITHER EXPRESSED OR IMPLIED, INCLUDING, BUT NOT LIMITED TO, THE IMPLIED WARRANTIES OF MERCHANTABILITY AND FITNESS FOR A PARTICULAR PURPOSE. THE ENTIRE RISK AS TO THE QUALITY AND PERFORMANCE OF THE PROGRAM IS WITH YOU. SHOULD THE PROGRAM PROVE DEFECTIVE, YOU ASSUME THE COST OF ALL NECESSARY SERVICING, REPAIR OR CORRECTION. 16.Limitation of Liability. IN NO EVENT UNLESS REQUIRED BY APPLICABLE LAW OR AGREED TO IN WRITING WILL ANY COPYRIGHT HOLDER, OR ANY OTHER PARTY WHO MODIFIES AND/OR CONVEYS THE PROGRAM AS PERMITTED ABOVE, BE LIABLE TO YOU FOR DAMAGES, INCLUDING ANY GENERAL, SPECIAL, INCIDENTAL OR CONSEQUENTIAL DAMAGES ARISING OUT OF THE USE OR INABILITY TO USE THE PROGRAM (INCLUDING BUT NOT LIMITED TO LOSS OF DATA OR DATA BEING RENDERED INACCURATE OR LOSSES SUSTAINED BY YOU OR THIRD PARTIES OR A FAILURE OF THE PROGRAM TO OPERATE WITH ANY OTHER PROGRAMS), EVEN IF SUCH HOLDER OR OTHER PARTY HAS BEEN ADVISED OF THE POSSIBILITY OF SUCH DAMAGES. 17.Interpretation of Sections 15 and 16. If the disclaimer of warranty and limitation of liability provided above cannot be given local legal effect according to their terms, reviewing courts shall apply local law that most closely approximates an absolute waiver of all civil liability in connection with the Program, unless a warranty or assumption of liability accompanies a copy of the Program in return for a fee. ¦ END OF TERMS AND CONDITIONS How to Apply These Terms to Your New Programs If you develop a new program, and you want it to be of the greatest possible use to the public, the best way to achieve this is to make it free software which everyone can redistribute and change under these terms. To do so, attach the following notices to the program. It is safest to attach them to the start of each source file to most effectively state the exclusion of warranty; and each file should have at least the “copyright” line and a pointer to where the full notice is found. <one line to give the program’s name and a brief idea of what it does.> Copyright (C) <year> <name of author> This program is free software: you can redistribute it and/or modify it under the terms of the GNU General Public License as published by the Free Software Foundation, either version 3 of the License, or (at your option) any later version. This program is distributed in the hope that it will be useful, but WITHOUT ANY WARRANTY; without even the implied warranty of MERCHANTABILITY or FITNESS FOR A PARTICULAR PURPOSE. See the GNU General Public License for more details. You should have received a copy of the GNU General Public License along with this program. If not, see <http://www.gnu. org/licenses/>. Also add information on how to contact you by electronic and paper mail. If the program does terminal interaction, make it output a short notice like this when it starts in an interactive mode: <program> Copyright (C) <year> <name of author> This program comes with ABSOLUTELY NO WARRANTY; for details type `show w’. This is free software, and you are welcome to redistribute it under certain conditions; type `show c’ for details. The hypothetical commands `show w’ and `show c’ should show the appropriate parts of the General Public License. Of course, your program’s commands might be different; for a GUI interface, you would use an “about box”. You should also get your employer (if you work as a programmer) or school, if any, to sign a “copyright disclaimer” for the program, if necessary. For more information on this, and how to apply and follow the GNU GPL, see <http://www.gnu.org/licenses/>. The GNU General Public License does not permit incorporating your program into proprietary programs. If your program is a subroutine library, you may consider it more useful to permit linking proprietary applications with the library. If this is what you want to do, use the GNU Lesser General Public License instead of this License. But first, please read <http://www.gnu.org/philosophy/ why-not-lgpl.html>. BN68-02325A-Eng.indb 81 2009-05-19 �� 3:43:34 ¦ LICENSE ISSUES The OpenSSL toolkit stays under a dual license, i.e. both the conditions of the OpenSSL License and the original SSLeay license apply to the toolkit. See below for the actual license texts. Actually both licenses are BSD-style Open Source licenses. In case of any license issues related to OpenSSL please contact [email protected]. OpenSSL License Copyright (c) 1998-2007 The OpenSSL Project. All rights reserved. Redistribution and use in source and binary forms, with or without modification, are permitted provided that the following conditions are met: 1. Redistributions of source code must retain the above copyright notice, this list of conditions and the following disclaimer. 2. Redistributions in binary form must reproduce the above copyright notice, this list of conditions and the following disclaimer in the documentation and/or other materials provided with the distribution. 3. All advertising materials mentioning features or use of this software must display the following acknowledgment: “This product includes software developed by the OpenSSL Project for use in the OpenSSL Toolkit. (http://www.openssl.org/)” 4. The names “OpenSSL Toolkit” and “OpenSSL Project” must not be used to endorse or promote products derived from this software without prior written permission. For written permission, please contact [email protected]. 5. Products derived from this software may not be called “OpenSSL nor may “OpenSSL” appear in their names without prior written permission of the OpenSSL Project. 6. Redistributions of any form whatsoever must retain the following acknowledgment: “This product includes software developed by the OpenSSL Project for use in the OpenSSL Toolkit (http://www.openssl.org/)” THIS SOFTWARE IS PROVIDED BY THE OpenSSL PROJECT ``AS IS’’ AND ANY EXPRESSED OR IMPLIED WARRANTIES, INCLUDING, BUT NOT LIMITED TO, THE IMPLIED WARRANTIES OF MERCHANTABILITY AND FITNESS FOR A PARTICULAR PURPOSE ARE DISCLAIMED. IN NO EVENT SHALL THE OpenSSL PROJECT OR ITS CONTRIBUTORS BE LIABLE FOR ANY DIRECT, INDIRECT, INCIDENTAL, SPECIAL, EXEMPLARY, OR CONSEQUENTIAL DAMAGES (INCLUDING, BUT NOT LIMITED TO, PROCUREMENT OF SUBSTITUTE GOODS OR SERVICES; LOSS OF USE, DATA, OR PROFITS; OR BUSINESS INTERRUPTION) HOWEVER CAUSED AND ON ANY THEORY OF LIABILITY, WHETHER IN CONTRACT, STRICT LIABILITY, OR TORT (INCLUDING NEGLIGENCE OR OTHERWISE) ARISING IN ANY WAY OUT OF THE USE OF THIS SOFTWARE, EVEN IF ADVISED OF THE POSSIBILITY OF SUCH DAMAGE. This product includes cryptographic software written by Eric Young ([email protected]). This product includes software written by Tim Hudson ([email protected]). Original SSLeay License Copyright (C) 1995-1998 Eric Young ([email protected]) All rights reserved. This package is an SSL implementation written by Eric Young ([email protected]). The implementation was written so as to conform with Netscapes SSL. This library is free for commercial and non-commercial use as long as the following conditions are aheared to. The following conditions apply to all code found in this distribution, be it the RC4, RSA, lhash, DES, etc., code; not just the SSL code. The SSL documentation included with this distribution is covered by the same copyright terms except that the holder is Tim Hudson (tjh@ cryptsoft.com). Copyright remains Eric Young’s, and as such any Copyright notices in the code are not to be removed. If this package is used in a product, Eric Young should be given attribution as the author of the parts of the library used. This can be in the form of a textual message at program startup or in documentation (online or textual) provided with the package. Redistribution and use in source and binary forms, with or without modification, are permitted provided that the following conditions are met: 1. Redistributions of source code must retain the copyright notice, this list of conditions and the following disclaimer. 2. Redistributions in binary form must reproduce the above copyright notice, this list of conditions and the following disclaimer in the documentation and/or other materials provided with the distribution. 3. All advertising materials mentioning features or use of this software must display the following acknowledgement: “This product includes cryptographic software written by Eric Young ([email protected])” The word ‘cryptographic’ can be left out if the rouines from the library being used are not cryptographic related :-). 4. If you include any Windows specific code (or a derivative thereof) from the apps directory (application code) you must include an acknowledgement: “This product includes software written by Tim Hudson ([email protected])” THIS SOFTWARE IS PROVIDED BY ERIC YOUNG ``AS IS’’ AND ANY EXPRESS OR IMPLIED WARRANTIES, INCLUDING, BUT NOT LIMITED TO, THE IMPLIED WARRANTIES OF MERCHANTABILITY AND FITNESS FOR A PARTICULAR PURPOSE ARE DISCLAIMED. IN NO EVENT SHALL THE AUTHOR OR CONTRIBUTORS BE LIABLE FOR ANY DIRECT, INDIRECT, INCIDENTAL, SPECIAL, EXEMPLARY, OR CONSEQUENTIAL DAMAGES (INCLUDING, BUT NOT LIMITED TO, PROCUREMENT OF SUBSTITUTE GOODS OR SERVICES; LOSS OF USE, DATA, OR PROFITS; OR BUSINESS INTERRUPTION) HOWEVER CAUSED AND ON ANY THEORY OF LIABILITY, WHETHER IN CONTRACT, STRICT LIABILITY, OR TORT (INCLUDING NEGLIGENCE OR OTHERWISE) ARISING IN ANY WAY OUT OF THE USE OF THIS SOFTWARE, EVEN IF ADVISED OF THE POSSIBILITY OF SUCH DAMAGE. The licence and distribution terms for any publically available version or derivative of this code cannot be changed. i.e. this code cannot simply be copied and put under another distribution licence [including the GNU Public Licence.] BN68-02325A-Eng.indb 82 2009-05-19 �� 3:43:34 This page is intentionally left blank. BN68-02325A-Eng.indb 83 2009-05-19 �� 3:43:34 ❑ Hinweis zu Digitalfernsehen 1. Die Funktionalitäten für Digital TV (DVB) stehen nur in Ländern/Regionen zur Verfügung, in denen digitale terrestrische DVBT-Signale (MPEG2 und MPEG4 AVC) gesendet werden oder in denen Sie Zugang zu einem kompatiblen Kabelfernsehdienst mit DVB-C (MPEG2 und MPEG4 AAC) haben können. Fragen Sie Ihren örtlichen Händler, wenn Sie Informationen über die Verfügbarkeit von DVB-T oder DVB-C in Ihrer Gegend benötigen. 2. DVB-T ist der Standard des europäischen DVB-Konsortiums für die terrestrische Versorgung mit digitalem Fernsehen, und DVB-C ist der Standard des Konsortiums für die Versorgung mit digitalem Kabelfernsehen. Allerdings werden manche Unterscheidungsmerkmale wie EPG (elektrische Programmzeitschrift), VOD (Video on Demand) usw. in dieser Spezifikation nicht berücksichtigt. Deshalb können sie zum jetzigen Zeitpunkt noch nicht eingesetzt werden. 3. Zwar hält dieses Fernsehgerät die aktuellen Standards der DVB-T- und DVB-C-Spezifikationen [Version August 2008] ein, aber es kann nicht garantiert werden, dass die Kompatibilität mit zukünftigen digitalen terrestrischen DVB-T und DBV-CSignalen gewahrt bleibt. 4. In Abhängigkeit von den Ländern/Regionen, in denen dieses Fernsehgerät eingesetzt wird, verlangen manche Kabelfernsehanbieter zusätzliche Gebühren für solch einen Dienst, und möglicherweise wird verlangt, dass Sie den Vertragsbedingungen des Unternehmens zustimmen. 5. Manche Digitalfernsehfunktionen sind in einigen Ländern oder Regionen möglicherweise nicht verfügbar, und bei DVB-C kann das Gerät möglicherweise bei manchen Kabelfernsehanbietern nicht störungsfrei zusammenarbeiten. 6. Für weitere Informationen setzen Sie sich bitte mit dem SAMSUNG-Kundendienstzentrum in Verbindung. ❑ Vorsichtsmaßnahmen beim Anzeigen von Standbildern Ein Standbild kann zu einer dauerhaften Beschädigung des Bildschirms führen. ● Zeigen Sie Standbilder und teilweise unbewegte Bilder nicht länger als 2 Stunden auf dem LCD-Bildschirm an, da das Bild auf diese Weise einbrennen kann. Das Einbrennen von Standbildern wird auch als Bildkonservierung bezeichnet. Sie können das Einbrennen vermeiden, indem Sie die Helligkeit und den Kontrast des Bildschirms beim Anzeigen von Standbildern verringern. ● Der Betrieb des LCD-Monitors im Format 4:3 für einen längeren Zeitraum kann links, rechts und in der Mitte des Monitors Spuren der Bildränder hinterlassen, die durch die unterschiedliche Lichtemission auf dem Monitor verursacht werden. DVD- oder Spielekonsole-Wiedergabe können einen ähnlichen Effekt verursachen. Schäden, die durch die o. g. Effekte verursacht wurden, fallen nicht unter die Garantie. ● Durch das Anzeigen der Standbilder von Videospielen oder vom PC über einen gewissen Zeitraum hinaus können partielle Nachbilder entstehen. Um diesen Effekt zu verhindern, verringern Sie Helligkeit und Kontrast, wenn Sie Standbilder anzeigen möchten. © 2009 Samsung Electronics Co., Ltd. Alle Rechte vorbehalten. BN68-02325A-Ger.indb 1 2009-05-19 �� 3:48:41 Inhalt ANYNET+ Einrichten Ihres Fernsehgeräts ■ Zubehör.............................................................................................. 2 ■ Bedienfeld........................................................................................... 2 ■ Anschlussfeld..................................................................................... 3 ■ Fernbedienung................................................................................... 5 ■ Batterien in die Fernbedienung einsetzen.......................................... 6 ■ Anzeigen von Menüs.......................................................................... 6 ■ Fernsehgerät in den Standby-Modus schalten................................... 7 ■ Plug & Play-Funktion.......................................................................... 7 ■ Anzeigen des Bildschirmmenüs......................................................... 8 Kanal BILD ■ Konfigurieren des Bildmenüs............................................................ 13 ■ Verwenden der Bild-in-Bild-Funktion (PIP)....................................... 16 ■ Verwenden Ihres Computers als Computerbildschirm (PC)............. 17 ■ Fernsehgerät mithilfe des PCs einstellen......................................... 18 Ton ■ Konfigurieren des Tonmenüs............................................................ 18 ■ Tonmodus wählen............................................................................. 20 EINSTELLUNGEN ■ Konfigurieren der Menüeinstellungen............................................... 20 ■ Einstellen der Uhrzeit....................................................................... 23 ■ Netzwerkverbindung......................................................................... 24 ■ Konfigurieren des Netzwerks............................................................ 26 Eingang / UNTERSTÜTZUNG ■ Menü Eingang.................................................................................. 29 ■ Menü Unterstützung......................................................................... 29 Media Play (USB & DLNA) ■ Anschließen eines USB-Geräts........................................................ 32 ■ Media Play funktion.......................................................................... 33 ■ Sortieren der Foto- / Musik- / Filmliste.............................................. 34 ■ Optionsmenü für Foto- / Musik- / Filmliste........................................ 35 ■ Optionsmenü für Diashow / Musikwiedergabe / Filmwiedergabe . .. 36 ■ Anzeigen eines Fotos oder einer Diashow....................................... 37 ■ Wiedergeben von Musik................................................................... 38 ■ Wiedergeben einer Filmdatei............................................................ 39 ■ Verwenden des Menüs Setup........................................................... 41 Media Play-DLNA ■ Einrichten des DLNA-Netzwerks...................................................... 42 ■ Installieren der DLNA-Anwendung................................................... 42 ■ Verwenden der DLNA-Anwendung................................................... 43 ■ Verwenden der DLNA-Funktion........................................................ 44 Content Library ■ Verwenden der Content Library........................................................ 49 ■ Verwenden der Inhalte...................................................................... 49 ■ Verwenden des Management der Inhalte......................................... 50 Internet@TV ■ Erste Schritte mit Internet@TV......................................................... 51 ■ Bearbeiten von Snippets im Dock.................................................... 53 ■ Verwenden des Profil-Widget........................................................... 53 ■ Verwenden der Yahoo!®-Widget-Galerie......................................... 54 ■ Verwenden des Wetter-Widget von Yahoo!®................................... 55 ■ Verwenden des Nachrichten-Widget von Yahoo!®........................... 55 ■ Verwenden des Flickr-Widget von Yahoo!®..................................... 56 ■ Verwenden des Finanz-Widget von Yahoo!®................................... 56 ■ Fehlerbehebung für Internet@TV..................................................... 57 ■ Hilfe-Website.................................................................................... 57 Deutsch ■ Kanalmenü......................................................................................... 8 ■ Verwalten von Kanälen . ...................................................................11 ■ Anschließen von Anynet+-Geräten................................................... 45 ■ Einrichten von Anynet+. ................................................................... 46 ■ Wechseln zwischen von Anynet+-Geräten....................................... 46 ■ Aufnahme......................................................................................... 47 ■ Wiedergabe über einen Empfänger (Heimkinosystem).................... 47 ■ Fehlerbehebung für Anynet+............................................................ 48 Internet@TV ■ Erste Schritte mit Internet@TV......................................................... 58 ■ Konfigurieren von Internet@TV........................................................ 58 ■ Verwenden des Internet@TV-Dienstes............................................ 59 ■ Fehlerbehebung für Internet@TV..................................................... 60 ■ Hilfe-Website.................................................................................... 60 Home Network Centre ■ Home Network Centre...................................................................... 61 ■ Einrichten des Home Network Centre.............................................. 62 ■ Verwenden der Meldungsfunktion.................................................... 62 ■ Verwenden der Medienfunktion........................................................ 63 EMPFEHLUNGEN ■ Videotextfunktion.............................................................................. 64 ■ Anbringen des Standfußes............................................................... 65 ■ Lösen des Standfußes...................................................................... 66 ■ Anbringen der Wandhalterung.......................................................... 66 ■ Verlegen der Kabel........................................................................... 66 ■ Kensington-Schloss als Diebstahlsicherung..................................... 66 ■ Absichern des Einbaubereichs......................................................... 67 ■ Befestigen des Fernsehgeräts an der Wand.................................... 67 ■ Fehlerbehebung: Vor der Kontaktaufnahme mit dem Kundendienst....... 68 ■ Technische Daten............................................................................. 69 ❑ Lizenz TruSurround HD, SRS und das Symbol sind eingetragene Marken von SRS Labs, Inc.Die TruSurround HD-Technologie wird unter Lizenz von SRS Labs, Inc. in das System integriert. Hergestellt unter Lizenz der Dolby Laboratories: Dolby sowie das Doppel-D-Symbol sind Warenzeichen der Dolby Laboratories. DivX®-Zertifizierung. Wiedergabe von DivX®-Video einschließlich Premium-Inhalten. ❑ Symbole N O T Hinweis Zielwahltaste TOOLS-Taste Drücken Deutsch - � BN68-02325A-Ger.indb 1 2009-05-19 �� 3:48:42 Einrichten Ihres Fernsehgeräts N Die Abbildungen und Illustrationen in diesem Handbuch dienen nur zur Information und können vom tatsächlichen Aussehen des Geräts abweichen. Technische Änderungen und Änderungen am Design des Geräts, insbesondere zur Verbesserung der Leistungsfähigkeit des Geräts, sind jederzeit vorbehalten. ¦ Zubehör Fernbedienung und 2 Batterien (Typ AAA) Netzkabel Garantiekarte / Sicherheitshinweise (nicht überall verfügbar) Untere Abdeckung Reinigungstuch Kabelschlauch (je nach Modell) Software-CD N Überprüfen Sie die Verpackung Ihres LCD-Fernsehgeräts auf Vollständigkeit. Falls Komponenten fehlen sollten, setzen Sie sich bitte mit Ihrem Händler in Verbindung. N Die Farbe und die Form der Teile kann je nach Modell unterschiedlich sein. ¦ Bedienfeld N Form und Farbe des Geräts können sich je nach Modell unterscheiden. N Die Tasten auf der Frontblende können Sie durch Berühren mit einem Finger bedienen. 8 8 7 6 5 4 3 21 8 8 7 6 4 2 1 3 5 1 P (Versorgung): Drücken Sie diese Taste, um das Fernsehgerät ein- und auszuschalten. 2 BETRIEBSANZEIGE: Beim Einschalten des Fernsehgeräts blinkt die Netzleuchte kurz und erlischt anschließend. Im Standbymodus leuchtet die Anzeige permanent. 3 z: Hiermit wechseln Sie den Kanal. Im Bildschirmmenü können Sie die z-Schaltflächen wie die Tasten ▼ und ▲ auf der Fernbedienung verwenden. 4 Y : Hiermit erhöhen oder verringern Sie die Lautstärke. Im Bildschirmmenü können Sie die Y-Schaltflächen wie die Tasten ◄ und ► auf der Fernbedienung verwenden. Deutsch - � BN68-02325A-Ger.indb 2 2009-05-19 �� 3:48:44 5 MENU: Drücken Sie diese Taste, um ein Bildschirmmenü zu den Funktionen Ihres Fernsehgeräts einzublenden. 6 SOURCEE: Schaltet zwischen allen verfügbaren Signalquellen um. Im Bildschirmmenü können Sie diese Taste wie die ENTERE auf der Fernbedienung verwenden. 7 FERNBEDIENUNGSSENSOR: Richten Sie die Fernbedienung auf diesen Sensor am Fernsehgerät. 8 LAUTSPRECHER ¦ Anschlussfeld N Form und Farbe des Geräts können sich je nach Modell unterscheiden. [Seitenverkleidung des Fernsehgeräts] [Rückseite des Fernsehgeräts] 1 2 34 5 $ # 2 # @ ! 0 9 8 7 6 Netzanschluss 1 COMPONENT IN Zum Anschließen mit Component-Video / -Audio. 2 HDMI IN 1, 2, 3(DVI), 4 / DVI AUDIO IN Zum Anschließen an die HDMI-Buchse von Geräten mit HDMI-Ausgang. N Beim Anschluss von Geräten über HDMI-Schnittstelle ist keine zusätzliche Audioverbindung erforderlich. N Was ist HDMI? • HDMI (High-Definition Multimedia Interface) ist eine digitale Schnittstelle, die die Übertragung von digitalen Bild- und Tonsignalen über ein einziges Kabel ermöglicht. • Der Unterschied zwischen HDMI und DVI besteht darin, dass HDMI-Geräte kleiner als DVI-Geräte sind. N Bei dem Fernsehgerät erfolgt u. U. keine Tonausgabe und das Fernsehbild weist evtl. anormale Farben auf, wenn DVDoder Blu-Ray-Player bzw. Kabel- oder Satellitenreceiver (Set-Top-Box) angeschlossen werden, die HDMI-Versionen vor 1.3 unterstützen. Beim Anschluss eines älteren HDMI-Kabels und fehlender Tonausgabe schließen Sie das HDMIKabel an den HDMI IN 3(DVI)-Abschluss und die Audiokabel an die DVI AUDIO IN-Anschlüsse auf der Rückseite des Fernsehgeräts an. Wenn dies passiert, wenden Sie sich an die Firma, die Ihnen den DVD- oder Blu-Ray-Player bzw. den Kabel- oder Satellitenreceiver geliefert hat, um die HDMI-Version bestätigen zu lassen. Anschließend fordern Sie ein nötigenfalls Upgrade an. N Verwenden Sie den HDMI IN 3(DVI)-Anschluss für DVI-Verbindungen mit einem externen Gerät. Verwenden Sie ein DVIHDMI-Kabel oder einen DVI-HDMI-Adapter (DVI auf HDMI) für den Videoanschluss und die DVI AUDIO IN-Anschlüsse für die Audioverbindung. Eine Verbindung über HDMI/DVI-Kabel kann nur über den HDMI IN 3(DVI)-Anschluss erfolgen. N HDMI-Kabel für andere Versionen als 1.3 können störendes Flackern des Bildschirms verursachen oder zum völligen Ausfall des Fernsehgeräts führen. 3 PC IN [PC] / [AUDIO] Zum Anschließen an den Video- und Audioausgang Ihres Computers N Wenn Ihr PC die Möglichkeit für HDMI-Verbindungen bietet, können Sie diesen Anschluss mit den HDMI IN 1, 2, 3(DVI) oder 4-Buchsen verbinden. N Wenn Ihr PC die Möglichkeit für DVI-Verbindungen bietet, können Sie diesen Anschluss mit der HDMI IN 3(DVI) / DVI AUDIO IN-Buchse verbinden. 4 ANT IN Anschluss an eine Antenne oder eine Kabelfernsehanlage. Deutsch - � BN68-02325A-Ger.indb 3 2009-05-19 �� 3:48:45 5 LAN Schließen Sie ein Netzwerkkabel zur Verbindung mit dem Server an diesen Anschluss an 6 KENSINGTON-SCHLOSS (modellabhängig) Das (optionale) Kensington-Schloss dient zur Sicherung des Fernsehgeräts bei Verwendung an einem öffentlichen Ort. Wenn Sie ein Schloss verwenden möchten, wenden Sie sich an den Händler, bei dem Sie das Fernsehgerät erworben haben. N Die Position des Kensington-Schlosses ist modellabhängig. 7 H(KOPFHÖRER) Kopfhörer können an den Kopfhörerausgang des Geräts angeschlossen werden. Wenn Kopfhörer angeschlossen sind, ist die Tonwiedergabe über die eingebauten Lautsprecher abgeschaltet. N Wenn Sie Kopfhörer an das Fernsehgerät anschließen, sind die Möglichkeiten zur Nutzung der Tonfunktion eingeschränkt. N Das Verwenden von Kopfhörern bei hoher Lautstärke über einen längeren Zeitraum kann zu Hörschäden führen. N Wenn Sie Kopfhörer an das Fernsehgerät anschließen, wird über die Lautsprecher kein Ton ausgegeben. N Die Lautstärke der Kopfhörer und des Fernsehgeräts werden getrennt geregelt. 8 DIGITAL AUDIO OUT (OPTICAL) Anschluss für ein Digitalaudio-Gerät wie z. B. ein Heimkinosystem. N Ein Digital Audio-System ist mit dem DIGITAL AUDIO OUT (OPTICAL)-Anschluss verbunden: Vermindern Sie die Lautstärke des Fernsehers und stellen Sie die Lautstärke mit dem Lautstärkeregler des Systems ein. N 5.1-Kanalton ist möglich, wenn das Fernsehgerät an ein externes Gerät angeschlossen ist, das 5.1-Kanalton unterstützt. N Wenn der Receiver (Heimkinosystem) angeschaltet ist, können Sie den Ton so hören, wie er vom optischen Ausgang der Fernsehgeräts zur Verfügung gestellt wird. Wenn das Fernsehgerät ein (terrestrisches) DTV-Signal anzeigt, überträgt das Fernsehgerät 5.1-Kanalton an den Receiver des Heimkinosystems. Wenn es sich bei der Signalquelle um eine digitale Komponente wie beispielsweise einen DVD- oder Blu-Ray-Player bzw. einen Kabel- oder Satellitenreceiver (Set-Top-Box) handelt, der über HDMI an das Fernsehgerät angeschlossen ist, kann der Receiver des Heimkinosystems nur 2-Kanalton wiedergeben. Wenn Sie 5.1-Kanalton wünschen, müssen Sie den digitalen Ausdioausgang am DVD- oder Blu-Ray-Player bzw. Kabel- oder Satellitenreceiver (Set-Top-Box) direkt an einen Verstärker oder ein Heimkinosystem anschließen und nicht an das Fernsehgerät. 9 SERVICE Anschluss nur für Servicezwecke 0 AUDIO OUT [R-AUDIO-L] Zum Anschließen an die Audioeingänge Ihres Verstärker-/Heimkinosystems. Ein Audioverstärker ist mit den AUDIO OUT [R-AUDIO-L]-Anschlüssen verbunden: Vermindern Sie die Lautstärke des Fernsehers und stellen Sie die Lautstärke mit dem Lautstärkeregler des Verstärkers ein. ! EXT1, 2 Ein- und Ausgänge für externe Geräte wie z. B. Videorecorder, DVD-Player, Spielekonsolen oder Video-Disc-Player. N Im EXT-Modus unterstützt DTV Out nur MPEG SD-Video und -Audio. Anschlussmöglichkeiten Anschluss EXT 1 EXT 2 Video O O Eingang Audio (L/R) O O RGB O X Ausgang Video + Audio (L/R) Nur TV- oder DTV-Ausgang verfügbar. Ausgang frei wählbar. @ AV IN [VIDEO] / [R-AUDIO-L] Video- und Audioeingänge für externe Geräte wie z. B. Camcorder oder Videorecorder. # USB1(HDD) / USB2 Anschluss für Softwareaktualisierungen und Media Play, usw. Mit dem WLAN-Adapter von Samsung (gesondert erhältlich) können Sie eine Verbindung zum Netzwerk von Samsung herstellen. N Verwenden Sie für eine USB-Festplatte den Anschluss USB1 (HDD). $ COMMON INTERFACE-Steckplatz Ohne eingelegte ‘CI(CI+)-Karte’ zeigt das Fernsehgerät auf einigen Kanälen “Gestörtes Signal” an. Die Verbindungsinformationen mit Telefonnummer, Kennung der ‘CI(CI+)-Karte’, Hostkennung und anderen Angaben wird nach ungefähr 2 bis 3 Minuten angezeigt. Wenn eine Fehlermeldung angezeigt wird, wenden Sie sich bitte an Ihren Dienstanbieter. Wenn die Konfiguration der Kanalinformationen abgeschlossen ist, wird die Meldung "Udating Completed" angezeigt. Dies bedeutet, dass die Kanalliste aktualisiert wurde. N Sie müssen die ‘CI(CI+)-Karte’ bei einem der örtlichen Kabelnetzbetreiber erwerben. Ziehen Sie die ‘CI(CI+)-Karte’ vorsichtig mit den Händen heraus. Sie könnte beim Herunterfallen ansonsten beschädigt werden. N Die Richtung, in der Sie die ‘CI(CI+)-Karte’ einlegen müssen, ist darauf mit einem Pfeil markiert. N Die Position des COMMON INTERFACE-Steckplatzes ist modellabhängig. N ‘CI(CI+)-Karte’ werden in einigen Ländern und Regionen nicht unterstützt. Fragen Sie diesbezüglich Ihren offiziellen Händler. N Die CI+-Funktion steht nur im Modell LE********P zur Verfügung. Bei Problemen wenden Sie sich an den Dienstanbieter. Deutsch - � BN68-02325A-Ger.indb 4 2009-05-19 �� 3:48:45 ¦ Fernbedienung N Die Reichweite der Fernbedienung beträgt ca. 7 m. N Die Leistungsfähigkeit der Fernbedienung kann durch starke Lichteinstrahlung beeinträchtigt werden. N Form und Farbe des Geräts können sich je nach Modell unterscheiden. 1 POWER: Ein- und Ausschalten des Fernsehgeräts. 2 TV: Hiermit können Sie den TVModus direkt aufrufen. 3 ZIFFERNTASTEN: Hiermit wechseln Sie den Kanal. 4 FAV.CH: Zum Anzeigen von Favorit Kanallisten auf dem Bildschirm. 5 Y: Hiermit erhöhen oder verringern Sie die Lautstärke. 6 SOURCE: Hiermit können Sie alle verfügbaren Videosignalquellen anzeigen und auswählen. 7 INFO: Hiermit können Sie Informationen auf dem Fernsehschirm anzeigen. 8 TOOLS: Hiermit können Sie häufig verwendete Funktionen schnell auswählen. 9 INTERNET@: Sie können mit dieser Taste verschiedene Internetdienste für z. B. nützliche Informationen und Unterhaltungsinhalte verwenden. 0 FARBTASTEN: Verwenden Sie diese Tasten bei der Arbeit mit der Kanalliste, Internet@TV und Media Play usw. @ CH LIST: Zum Anzeigen von Kanallisten auf dem Bildschirm. # Verwenden Sie diese Tasten bei der Arbeit mit Media Play und Anynet+. (∏: Mit dieser Fernbedienung können Sie die Aufnahmen von SamsungRekordern mit der Anynet+Funktion fernsteuern. $ ON/OFF @: Durch Drücken der Leuchttaste ON/OFF @ schalten Sie die Beleuchtung abwechselnd an/aus. Wenn Sie bei angeschalteter Fernbedienung eine Taste drücken, werden die Tasten der Fernbedienung für einen kurzen Moment beleuchtet. (Wenn Sie die Fernbedienung mit angeschalteter Hintergrundbeleuchtung (ON/OFF @) verwenden, verkürzt dies die Lebensdauer der Batterie.) ^ MUTE M: Drücken Sie diese Taste, um den Ton vorübergehend auszuschalten. & > P <: Hiermit wechseln Sie den Kanal. * MENU: Hiermit zeigen Sie das Bildschirmmenü an. ( GUIDE: Hiermit zeigen Sie den elektronischen Programmführer (EPG) an. ( RETURN: Hiermit wechseln Sie zurück zum vorherigen Menü ) AUF▲ / AB▼ / LINKS◄ / RECHTS► / ENTERE: Auswählen von Optionen im Bildschirmmenü und Ändern von Menüwerten. 1 2 $ 3 4 % ^ 5 & 6 7 INFO GUIDE 8 ) b EXIT: Drücken Sie diese Taste, um das Menü zu verlassen. c CONTENT: Diese Funktion ermöglicht die Anzeige der Content Library. d MEDIA.P: Hiermit können Sie Musikdateien, Bilder und Filme abspielen. e SUBT.: Mit dieser Taste können Sie Untertitel anzeigen * ( a b 9 0 ! @ CH LIST AD c d e f # f AD: Auswahl der AudioBeschreibung. Videotextfunktionen 6 0: Videotext-Modus auswählen (LIST / FLOF) 7 5: Verborgenen Inhalt einblenden 8 4: Videotextgröße auswählen. 0 Fastext-Thema auswählen ! /: Nacheinander Videotext, Double oder Mix auswählen. @ 8: Videotextseite speichern $ :: Videotext beenden % 1: Untergeordnete Videotextseite & 2: Nächste Videotextseite 3: Vorige Videotextseite * 6: Teletext index ) 9: Nicht umblättern b 7: Teletext abbrechen % PRE-CH: Hiermit können Sie zum zuletzt angezeigten Kanal wechseln. Deutsch - � BN68-02325A-Ger.indb 5 2009-05-19 �� 3:48:45 ¦ Batterien in die Fernbedienung einsetzen 1. Heben Sie die Abdeckung auf der Rückseite der Fernbedienung an, wie in der Abbildung dargestellt. 2. Legen Sie zwei AAA-Batterien ein. N Achten Sie darauf, dass die Pole der Batterien wie im Batteriefach angezeigt ausgerichtet sind. 3. Schieben Sie die Abdeckung wieder auf die Fernbedienung. N Wenn die Fernbedienung für einen längeren Zeitraum nicht verwendet wird, nehmen Sie die Batterien heraus, und lagern Sie sie an einem kühlen, trockenen Ort. N Sollte die Fernbedienung nicht funktionieren, überprüfen Sie Folgendes: • Ist das Fernsehgerät eingeschaltet? • Wurden Plus- und Minuspol der Batterien vertauscht? • Sind die Batterien leer? • Liegt ein Stromausfall vor oder ist das Netzkabel des Fernsehgeräts nicht eingesteckt? • Befindet sich eine Leuchtstoffröhre oder ein Neonschild in der Nähe? BEDIENUNG ¦ Anzeigen von Menüs Vor dem ersten Einsatz des Fernsehgeräts führen Sie die folgenden Schritte aus, um zu erfahren, wie Sie im Menü navigieren, um die verschiedenen Funktionen auszuwählen und einzustellen. MENU-Taste Bildschirmmenü anzeigen. RETURN-Taste Zurück zum vorherigen Menü. ENTERE / NAVIGATIONS-Taste Cursor bewegen und Elemente auswählen. Markiertes Element auswählen. Einstellung bestätigen. EXIT Bildschirmmenü schließen. ❑ Bedienung des Bildschirmmenüs (OSD) Die Zugriffsmethoden können in Abhängigkeit vom jeweiligen Menü variieren. 1. Drücken Sie die Taste MENU. Bild 2. Das Hauptmenü wird auf dem Bildschirm angezeigt. Links im Menü sind Symbole zu sehen: Bild, Ton, Kanal, Einrichtung, Eingang, Anwendung, Unterstützung. Modus : Standard Hinter.Licht Kontrast Helligkeit Schärfe Farbe Farbton (G/R) Erweiterte Einstellungen :7 : 95 : 45 : 50 : 50 : G50/R50 Modus : Standard ▶ 3. Wählen Sie mit den Tasten ▲ oder ▼ eines der Symbole aus. 5. Wählen Sie mit den Tasten ▲ oder ▼ eines der Untermenüs aus. 6. Erhöhen oder verringern Sie mit den Tasten ◄ oder ► den Wert für ein bestimmtes Element. Die Methoden zum Anpassen der Werte im Bildschirmmenü können in Abhängigkeit vom jeweiligen Menü variieren. 7. Drücken Sie die Taste ENTERE, um die Konfiguration abzuschließen. Zum Beenden drücken Sie die Taste EXIT. Bild 4. Drücken Sie die ENTERETaste, um in das Untermenü des jeweiligen Symbols zu wechseln. Hinter.Licht : 7 Kontrast Helligkeit Schärfe Farbe Farbton (G/R) Erweiterte Einstellungen Bildoptionen : 95 : 45 : 50 : 50 : G50/R50 ▲ Hintergrund ▼ ▶ 7 U Verschieben L Einstellen E Eingeben R Zurück Hilfesymbol Deutsch - � BN68-02325A-Ger.indb 6 2009-05-19 �� 3:48:46 ¦ Fernsehgerät in den Standby-Modus schalten Um den Stromverbrauchs zu senken, kann das Gerät in den Standby-Modus geschaltet werden. Der Standby-Modus ist nützlich, wenn Sie das Gerät vorübergehend ausschalten möchten (z. B. während einer Mahlzeit). 1. Drücken Sie die Taste POWERP auf der Fernbedienung drücken. N Der Bildschirm wird ausgeschaltet, und auf der Vorderseite des Fernsehgeräts leuchtet die Standby-Anzeige auf. 2. Drücken Sie einfach erneut die Taste POWERP, um das Gerät wieder einzuschalten. N Der Standby-Modus ist nicht für längere Phasen der Abwesenheit gedacht (z. B. wenn Sie verreist sind). Ziehen Sie dann sicherheitshalber den Netzstecker und das Antennenkabel. ¦ Plug & Play-Funktion Wenn das Fernsehgerät zum ersten Mal eingeschaltet wird, werden automatisch die Grundeinstellungen vorgenommen. 1. Drücken Sie die Taste POWER auf der Fernbedienung. N Sie können auch die Netztaste (POWERP) des Fernsehgeräts verwenden. N Die Meldung Select the OSD Language. wird angezeigt. Plug & Play 2. Drücken Sie die Taste ENTERE. Wählen Sie die gewünschte Sprache mit den Tasten Select the OSD Language. ▲ oder ▼ aus. Drücken Sie die Taste ENTERE, um Ihre Auswahl zu bestätigen. Menu Language : English ▶ 3. Wählen Sie durch Drücken der Tasten ◄ oder ► die Option Shop Demo oder Privatgebrauch, und drücken Sie dann auf ENTERE. E Enter N Wir empfehlen Ihnen, das Fernsehgerät im Modus Privatgebrauch zu verwenden, um das optimale Bild für den Privatgebrauch zu erzielen. N Shop Demo ist nur geeignet, wenn das Gerät in einem Verkaufsbereich verwendet wird. N Wenn das Gerät versehentlich auf den Modus Shop Demo eingestellt wird, und Sie möchten wieder zurück zu Privatgebrauch (Standard) wechseln, gehen Sie so vor: Drücken Sie die Lautstärketaste am Fernsehgerät. Wenn das Menü "Volume" angezeigt wird, halten Sie die Taste MENU am Fernsehgerät 5 Sekunden lang gedrückt. 4. Drücken Sie die Taste ENTERE. Wählen Sie das gewünschte Land mit der Taste ▲ oder ▼ aus. Drücken Sie die Taste ENTERE, um Ihre Auswahl zu bestätigen. 5. Wählen Sie durch Drücken der Tasten ▲ oder ▼ die Option Antenne oder Kabel, und drücken Sie dann die Taste ENTERE. N Antenne: Terrestrisches Antennensignal. N Kabel: Kabelgebundenes Antennensignal. 6. Wählen Sie durch Drücken der Tasten ▲ oder ▼ die Signalquelle aus, die gespeichert werden soll. Drücken Sie die Taste ENTERE, um Start auszuwählen. N Wenn Sie das Antennensignal auf Kabel einstellen, können Sie im nächsten Schritt einen Wert für die Suche nach Digitalkanälen eingeben. Weitere Informationen hierzu finden Sie unter Kanal → Autom. speichern. N Digital und Analog: Digitale und analoge Kanäle. / Digital: Digitale Kanäle. / Analog: Analog Kanäle N Die Kanalsuche wird automatisch gestartet und beendet. N Zum Unterbrechen des Speichervorgangs zu einem beliebigen Zeitpunkt drücken Sie die Taste ENTERE. N Wenn Sie alle verfügbaren Kanäle gespeichert haben, wird die Meldung Uhrmodus einstellen angezeigt. 7. Drücken Sie die Taste ENTERE. Wählen Sie durch Drücken der Tasten ▲ oder ▼ die Option Auto, und drücken Sie dann die Taste ENTERE. N Wenn Sie Manuell wählen, wird Datum und Uhrzeit einstellen angezeigt. N Wenn Sie ein digitales Signal empfangen, wird die Zeit automatisch eingestellt. Anderenfalls wählen Sie Manuell, um die Uhr zu stellen. 8. Die Beschreibung der Verbindungsmethode für optimale HD-Bildqualität wird angezeigt. Lesen Sie die Beschreibung und drücken Sie die Taste ENTERE. 9. Drücken Sie auf ◄ oder ► und wählen Sie Anleitung anzeigen oder Fernsehen. Drücken Sie die Taste ENTERE. • Anleitung anzeigen: Das Produktdemo wird geöffnet, in dem Sie eine Einführung in der Kernfunktionen Ihres neuen HD-Fernsehers erhalten. • Fernsehen: Sie können die gespeicherten Kanäle ansehen. So setzen Sie diese Funktion zurück: 2. Drücken Sie die Taste ENTERE erneut, um Plug & Play auszuwählen. 3. Geben Sie nun Ihre vierstellige PIN ein. Der Standard-PIN-Code eines neuen Fernsehgeräts lautet ‘0-0-0-0’. N Wenn Sie die PIN ändern möchten, verwenden Sie die Funktion PIN ändern. N Die Plug & Play-Funktion gibt es nur im TV-Modus. Einstellungen 1. Drücken Sie die Taste MENU, um das Menü anzuzeigen. Wählen Sie durch Drücken der Tasten ▲ oder ▼ die Option Einstellungen, und drücken Sie dann die Taste ENTERE. Plug & Play Menüsprache Zeit Sendungsoptionen Sicherheit Netzwerk Allgemein : Deutsch ▶ Deutsch - � BN68-02325A-Ger.indb 7 2009-05-19 �� 3:48:46 ¦ Anzeigen des Bildschirmmenüs Auf dem Bildschirm werden der aktuelle Kanal und bestimmte Audio/Video-Einstellungen angezeigt. O Drücken Sie die Taste INFO, um Informationen anzuzeigen. Drücken Sie die Taste INFO auf der Fernbedienung. Auf dem Bildschirm werden der Kanal, der Tonmodus sowie die Werte bestimmter Bild- und Toneinstellungen angezeigt. ● ▲, ▼: Sie können Informationen anderer Kanäle anzeigen. Wenn Sie zum ausgewählten Sender wechseln möchten, drücken Sie auf die ENTERE-Taste. ● ◄, ►: Sie können die Informationen zum aktuellen Programm dieses Senders anzeigen. abc1 18:11 Thu 6 Jan Life On Venus Avenue DTV Air 15 18:00 ~ 6:00 Unclassified No Detaild Information E Watch ' Information N Drücken Sie noch einmal auf die INFO-Taste und warten Sie ca. 10 Sekunden lang, bis die Informationen automatisch angezeigt werden. Kanal ¦ Kanalmenü ❑ Land ■ Analog Sender Sie können das Land für Analogsender ändern. Kanal ■ Digitaler Sender Sie können das Land für Digitalsender ändern. N Der Eingabebildschirm für die PIN wird geöffnet. Geben Sie nun Ihre vierstellige PIN ein. Land ▶ Autom. speichern Sender manuell speichern Suchoptionen für Kabel Ausführlich Übersicht Standard : Ausführlich Senderliste ❑ Autom. speichern Sie können den verfügbaren Frequenzbereich nach Sendern durchsuchen (verfügbare Sender und Frequenzbereiche sind vom jeweiligen Land abhängig). Die automatisch zugewiesenen Programmplätze entsprechen unter Umständen nicht den gewünschten Programmplätzen. N Wenn ein Kanal mit der Funktion Kindersicherung gesperrt wurde, wird das Eingabefenster für die PIN geöffnet. ■ Antenne / Kabel Antennensignal zum Speichern auswählen. ● Digital und Analog: Digitale und analoge Kanäle. ● Digital: Digitaler Sender ● Analog: Analog Sender Bei Auswahl von Kabel → Digital und Analog oder Kabel → Digital: Wert für die Suche nach Kabelkanälen eingeben. ● Suchlaufmodus → Voll / Netzwerk / Schnell N Schnell • Network ID: Anzeigen der Netzwerkkennung. • Frequenz: Hiermit zeigen Sie die Frequenz des Kanals an. (Je nach Land unterschiedlich) • Modulation: Hiermit zeigen Sie die verfügbaren Modulationswerte an. • Symbolrate: Hiermit zeigen Sie die verfügbaren Symbolraten an. N Das Fernsehgerät durchsucht automatisch alle Kanäle mit aktiven Sendern und speichert sie im Speicher des Fernsehgeräts. N Wenn Sie die automatische Speicherung anhalten möchten, drücken Sie auf ENTERE. Die Meldung Automatische Senderspeicherung beenden? wird angezeigt. Drücken Sie die Taste ◄ oder ►, um Ja auszuwählen, und drücken Sie dann die Taste ENTERE. Deutsch - � BN68-02325A-Ger.indb 8 2009-05-19 �� 3:48:47 ❑ Sender manuell speichern N Hiermit wird manuell ein Sender gesucht und dieser im Fernsehspeicher abgelegt. N Wenn ein Kanal mit der Funktion Kindersicherung gesperrt wurde, wird das Eingabefenster für die PIN geöffnet. ■ Digitaler Sender Zum manuellen Speichern von digitalen Sendern. N Digitaler Sender ist nur im DTV-Modus verfügbar. ● Kanal: Stellen Sie die Sendernummer mit den Tasten ▲, ▼ oder einer Zifferntaste (0 – 9) ein. ● Frequenz: Stellen Sie die Frequenz mithilfe der Zifferntasten ein. ● Bandbreite: Stellen Sie die Bandbreite mit den Tasten ▲, ▼ oder einer Zifferntaste (0 – 9) ein. N Nach Abschluss des Suchlaufs werden die Kanäle in der Kanalliste aktualisiert. ■ Analog Sender Zum manuellen Speichern von analogen Sendern. ● Programm (der Programmplatz, der dem Sender zugewiesen werden soll) Stellen Sie den Programmplatz mit den Tasten ▲, ▼ oder einer Zifferntaste (0 – 9) ein. ● Fernsehnorm → Auto / PAL / SECAM / NTSC4.43: Einstellen der Fernsehnorm mithilfe der Taste ▲ oder ▼. ● Tonsystem → BG / DK / I / L: Einstellen des Tonsystems mithilfe der Taste ▲ oder ▼. ● Kanal (Wenn Ihnen die Nummer des zu speichernden Senders bekannt ist) Wählen Sie durch Drücken der Tasten ▲ oder ▼ die Option C (terrestrischer Kanal) oder S (Kabelkanal). Drücken Sie zuerst die Taste ► und dann die Tasten ▲, ▼ oder eine Zifferntaste (0 – 9) , um die gewünschte Nummer auszuwählen. N Die Kanalnummer können Sie auch direkt durch Drücken der Zifferntasten (0 – 9) auswählen. N Falls kein oder nur schlechter Ton zu hören sein sollte, wählen Sie einen anderen Audiostandard aus. ● Suchlauf (Wenn Ihnen die Kanalnummern nicht bekannt sind): Drücken Sie zum Starten des Suchlaufs die Taste ▲ oder ▼. Der Tuner durchsucht den Frequenzbereich, bis der erste Sender bzw. der ausgewählte Sender empfangen wird. ● Speichern (Zum Speichern des Kanals und des zugehörigen Programmplatzes): Drücken Sie die Taste ENTERE, um OK zu wählen. N Kanalmodus P (Programm-Modus): Nach Abschluss der Einstellungen sind den Sendern Ihrer Region Plätze mit den Nummern von P00 bis P99 zugewiesen worden. In diesem Modus können Sie Sender durch Eingabe des Programmplatzes auswählen. C (Antennenempfangsmodus): In diesem Modus können Sie Kanäle durch Eingabe der Nummer anwählen, die jedem Antennensender zugeordnet ist. S (Kabelkanal-Modus): In diesem Modus können Sie Sender durch Eingabe der Nummer anwählen, die jedem Kabelsender zugeordnet ist. ❑ Suchoptionen für Kabel (je nach Land) Einstellen weiterer Suchoptionen für die Kanalsuche im Kabelnetz (z. B. Frequenz oder Symbolrate). ● Startfrequenz (Startfrequenz): Einstellen der Startfrequenz (je nach Land unterschiedlich). ● Stoppfrequenz (Stoppfrequenz): Einstellen der Stoppfrequenz (je nach Land unterschiedlich). ● Modulation: Hiermit zeigen Sie die verfügbaren Modulationswerte an. ● Symbolrate: Hiermit zeigen Sie die verfügbaren Symbolraten an. ❑ Ausführlich / Übersicht Die Informationen des elektronischen Programmführers werden von den Sendern zur Verfügung gestellt. Es kann sein, dass Programmeinträge leer oder veraltet sind. Dies ist auf die für einen bestimmten Kanal übertragenen Informationen zurückzuführen. Die Anzeige wird dynamisch aktualisiert, sobald neue Informationen verfügbar sind. O Sie können das Programmführermenü auch durch Drücken der Taste GUIDE aufrufen. (Weitere Informationen zum Konfigurieren des Standard finden Sie bei den entsprechenden Beschreibungen.) ■ Ausführlich Hier werden die Programminformationen in einem Zeitplan mit einer Unterteilung von jeweils 1 Stunde angezeigt. Es wird ein Zeitfenster von 2 Stunden mit Programminformationen angezeigt. Dieses Fenster kann jedoch in der Zeit nach vorne oder nach hinten verschoben werden. ■ Übersicht Die Informationen für die einzelnen Programme werden im Fenster für den Mini-Programmführer in chronologischer Reihenfolge des Programmstarts zeilenweise ab dem aktuell laufenden Programm angezeigt. Deutsch - � BN68-02325A-Ger.indb 9 2009-05-19 �� 3:48:47 ❑ Standard → Ausführlich / Übersicht Mit der Taste GUIDE auf der Fernbedienung können Sie einstellen, ob der Ausführlich oder der Übersicht angezeigt werden soll. ❑ Senderliste Detaillierte Verfahrensbeschreibungen zur Verwendung der Senderliste entnehmen Sie den Beschreibungen unter Verwalten von Kanälen. O Diese Optionen können Sie auch durch Drücken der Taste CH LIST (Kanalliste) auf der Fernbedienung aufrufen. ❑ Sendermodus Durch Drücken der Taste P >/< wechseln Sie innerhalb der gewählten Senderliste zwischen den Sendern. ■ Hinzugef. Sender Es wird nur zwischen Sendern der gespeicherten Senderliste gewechselt. ■ Favoriten Es wird nur zwischen den Sendern der Favoritenliste gewechselt. ❑ Feinabstimmung Bei klarem Empfang ist keine Feinabstimmung nötig, da diese automatisch während der Sendersuche erfolgt. Falls das Signal jedoch schwach oder das Bild verzerrt ist, müssen Sie unter Umständen eine manuelle Feinabstimmung durchführen. N Gespeicherte feinabgestimmte Kanäle werden mit einem Sternchen "*" auf der rechten Seite der Kanalnummer im KanalBanner markiert. N Wählen Sie zum Zurücksetzen der Feinabstimmung die Option Reset aus, indem Sie zuerst die Taste ▲ oder ▼ und dann die Taste ENTERE drücken. N Eine Feinabstimmung ist nur für Analogfernsehgeräte möglich. Verwenden des vollständigen Programmführers / Mini-Programmführers Ausführlich DTV - Kabel 900 f tn 2:10 Di 1 Jun Freshmen On Campus 2:00 - 2:30 No Detailed Information 900 Heute 900 f tn 901 ITV Play 902 Kerrang! 903 Kiss 904 oneword ▼ 905 Hits 2:00 - 3:00 Freshmen O.. Street Hypn.. Mint Extra Loaded 40 with Dynamite MC The Distillery Smash Hits! Sunday 3:00 - 4:00 No Information No Information Kisstory No Information Übersicht DTV - Kabel 900 f tn 2:00 2:30 5:00 Freshmen On Campus Street Hypnosis Booze Britain ▼ E Ansehen Information Seite Übersicht +24 Std. Beenden E Ansehen Information Seite Ausführlich Beenden Sie möchten... Dann... Programm aus der Liste des Programmführers anzeigen Wählen Sie mit den Tasten ▲, ▼, ◄, ► das Programm aus. Programmführer beenden Drücken Sie die blaue Taste. Sobald Sie ein Programm gewählt haben, wird es zusammen mit einem Uhr-Symbol angezeigt. Nachdem Sie erneut auf ENTERE gedrückt haben, drücken Sie auf ◄ oder ►, um die Option Prog. Löschen zu wählen. Danach wird die Programmwahl aufgehoben und das Uhr-Symbol wird entfernt. Programminformationen anzeigen Wählen Sie mit den Tasten ▲, ▼, ◄, ► das gewünschte Programm aus. Drücken Sie die Taste INFO, wenn das Programm Ihrer Wahl markiert ist. Der Programmtitel wird oben in der Mitte des Bildschirms angezeigt. Klicken Sie auf die Taste INFO, wenn Sie genauere Informationen benötigen. Zu diesen Informationen gehören: Kanalnummer, Programmdauer, Statusleiste, Kindersicherungsstufe, Bildqualität (HD/SD), Tonmodus, Untertitel oder Teletext, Sprache für Untertitel oder Teletext sowie Kurzzusammenfassung des markierten Programms. ‘...’ wird angezeigt. Schalten Sie zwischen Ausführlich und Übersicht Drücken Sie wiederholt die rote Taste. Im ausführlichen Programmführer Schnell zurückblättern (24 Stunden). Schnell weiterblättern (24 Stunden). Drücken Sie mehrmals die grüne Taste. Drücken Sie mehrmals die gelbe Taste. Deutsch - 10 �� BN68-02325A-Ger.indb 10 2009-05-19 �� 3:48:47 ¦ Verwalten von Kanälen Mit diesem Menübefehl können Sie Favoriten hinzufügen, löschen oder einstellen und den digitalen Programmführer für Digitalsendungen verwenden. ■ Hinzugefügte Sender ■ Alle Sender Hiermit zeigen Sie alle verfügbaren Kanäle an. Hinzugefügte Sender Hiermit zeigen Sie alle hinzugefügten Kanäle an. 824 UKTV Gold 825 UKTV style A 1 C -A 2 C -A 3 C -A 4 C -- A 5 C -A 6 C -- A 7 C -A 8 C -- ■ Favorit Hiermit zeigen Sie alle Favoritenkanäle an. O Durch Drücken der Taste FAV.CH auf der Fernbedienung aufrufen können Sie die eingerichteten Favoritenkanäle auswählen. ■ Programmiert Hiermit zeigen Sie alle vorgemerkten Programme an. N Wählen Sie im Fenster Alle Sender, Hinzugefügte Sender oder Favorit einen Kanal. Drücken Sie hierzu die Tasten ▲ / ▼ und die Taste ENTERE. Nun können Sie den gewählten Kanal ansehen. N Verwenden der Farbtasten in Verbindung mit der Kanalliste. Rot (Sendertyp): Schalten Sie zwischen TV, Radio, Daten / And. und Alle um. Grün (Zoom): Hiermit vergrößern oder verkleinern Sie die Kanalnummer. Gelb (Wählen): Hiermit wählen Sie mehrere Kanallisten aus. Sie können die Funktionen zum Hinzufügen / Löschen / Hinzufügen zu Favoriten / Löschen aus Favoriten für mehrere Kanäle gleichzeitig verwenden. Markieren Sie die gewünschten Kanäle und drücken Sie die gelbe Taste, um alle markierten Kanäle zugleich einzustellen. Links neben dem Namen des gewählten Kanals wird das Symbol c angezeigt. TOOLS (Extras): Hiermit zeigen Sie die Menüs Löschen (oder Hinzufügen), Zu Favoriten hinzufügen (oder Aus Favoriten löschen), Sperren (oder Freigegeben), Timer-Wiedergabe, Sendernamen bearbeiten, Programmplatz bearbeiten, Sortieren, Alle wählen (oder Alle abwählen), Autom. speichern an. (Der Inhalt des Menüs "Optionen" hängt von der jeweiligen Situation ab.) N Symbole zur Anzeige des Kanalstatus • A : Ein analoger Kanal. • c: Ein Kanal, der durch Drücken der gelben Taste gewählt wurde. • * : Ein Kanal, der als Favorit eingestellt ist. • (: Ein Programm, das gerade gesendet wird. • \ : Ein gesperrter Kanal. • ): Ein vorgemerktes Programm Alle Sendertyp Zoom Wählen T Extras Optionsmenü für Kanallisten (in Alle Sender / Hinzugefügte Sender / Favorit) ■ Alle Sender N Drücken Sie die Taste TOOLS, um das Optionsmenü zu öffnen. N Der Inhalt des Optionsmenüs hängt vom jeweiligen Kanalstatus ab. 824 UKTV Gold 825 UKTV style A 1 C -- Hinzufüg. / Löschen 2 C -3 C -Sie können Kanäle löschen oder hinzufügen, damit nur die gewünschten Kanäle angezeigt 4 C -5 C -werden. 6 C -7 C -N Alle gelöschten Kanäle werden im Menü Alle Sender angezeigt. 8 C -N Wenn der Kanal in grauer Farbe dargestellt wird, wurde er gelöscht. N Das Menü Hinzufügen wird nur für gelöschte Kanäle angezeigt. N Sie können einen Kanal aus dem Menü Hinzugefügte Sender oder Favorit in gleicher Weise löschen. A A A A A Löschen Zu Favoriten hinzufügen Sperren Timer-Wiedergabe Sendernamen bearbeiten Sortieren A A Alle ■ Sendertyp Zoom Wählen T Extras Zu Favoriten hinzufügen / Aus Favoriten löschen Sie können Kanäle, die Sie häufig sehen, als Favorit festlegen. T Drücken Sie die Taste TOOLS, um das Menü Extras anzuzeigen. Sie können das Hinzufügen zu (oder Löschen aus) den Favoriten auch durch Auswählen von Extras → Zu Favoriten hinzufügen (oder Aus Favoriten löschen) einstellen. N Das Symbol * wird angezeigt, und der Kanal wird als Favorit festgelegt. N Alle Favoritenkanäle werden im Menü Favorit angezeigt. Deutsch - 11 �� BN68-02325A-Ger.indb 11 2009-05-19 �� 3:48:48 ■ Sperren / Freigabe Sie können einen Kanal sperren, sodass er nicht ausgewählt und angezeigt werden kann. N Diese Funktion ist nur verfügbar, wenn die Kindersicherung aktiviert ist (Ein). N Der Eingabebildschirm für die PIN wird geöffnet. Geben Sie nun Ihre vierstellige PIN ein. N Der Standard-PIN-Code eines neuen Fernsehgeräts lautet “0-0-0-0”. Sie können die PIN ändern, indem Sie im Menü den Befehl PIN ändern wählen. N Das Symbol \ wird angezeigt, und der Kanal wird gesperrt. ■ Timer-Wiedergabe Wenn Sie ein Programm zum Anschauen vorgemerkt haben, wechselt das Fernsehgerät automatisch zum vorgemerkten Kanal in der Kanalliste, auch wenn Sie gerade einen anderen Kanal anschauen. Um ein Programm vorzumerken, müssen Sie zuerst die Uhrzeit einstellen. N Sie können nur gespeicherte Kanäle vormerken. N Sie können Kanal, Tag, Monat, Jahr, Stunde und Minute auch direkt über die Zifferntasten auf der Fernbedienung einstellen. N Das Vormerken eines Programms wird im Menü Programmiert angezeigt. N Digitaler Programmführer und Vormerken von Sendungen Wenn Sie einen digitalen Kanal gewählt haben und die Taste ► drücken, wird der Programmführer für diesen Kanal angezeigt. Gehen Sie in der oben beschriebenen Weise vor, wenn Sie ein Programm vormerken möchten. ■ Sendernamen bearbeiten (nur Analogkanäle) Sie können Kanäle mit Beschriftungen versehen, sodass die ersten Buchstaben des Namens immer dann angezeigt werden, wenn Sie den Kanal wählen. N Die Namen der digitalen Sender werden automatisch zugewiesen und können nicht geändert werden. ■ Programmplatz bearbeiten (nur Digitalkanäle) Sie können die Kanalnummer auch mit den Zifferntasten der Fernbedienung einstellen. ■ Sortieren (nur Analogkanäle) Mit diesem Vorgang können Sie die Programmnummern gespeicherter Sender ändern. Das ist möglicherweise nach dem automatischen Speichern von Sendern erforderlich. ■ Alle wählen / Alle abwählen ● Alle wählen: Sie können alle Kanäle in der Kanalliste auswählen. ● Alle abwählen: Nun können Sie die Auswahl aller Kanäle aufheben. N Alle abwählen können Sie nur wählen, wenn mindestens ein Kanal gewählt ist. ■ Autom. speichern N Genaue Beschreibungen für die Verfahren zum Einstellen der Optionen finden Sie im Kapitel "Kanalmenü". N Wenn ein Kanal mit der Funktion Kindersicherung gesperrt wurde, wird das Eingabefenster für die PIN geöffnet. Optionsmenü für Kanallisten (in Programmiert) ■ Info ändern Wählen Sie diese Option, um eine Vormerkung zu ändern. ■ Prog. Löschen Wählen Sie diese Option, um eine Vormerkung zu stornieren. ■ Information Wählen Sie diese Option, um eine Vormerkung anzuzeigen. (Sie können auch die Vormerkinformationen auswählen). ■ Alle wählen Wählen Sie alle vorgemerkten Programme. Programmiert Mit dieser Menüoption können Sie eine Vormerkung anzeigen, ändern oder löschen. N Drücken Sie die Taste TOOLS, um das Optionsmenü zu öffnen. Alle 1 / 1 / 2008 13:59 5 TV1 ) Info ändern Prog. Löschen 18:59 2 TV3 ) The Equalizer Information Alle wählen 20:59 2 TV3 ) McMillan & Wife 21:59 2 TV3 ) M.Spillane’s mike Zoom Wählen T Extras E Information Deutsch - 12 �� BN68-02325A-Ger.indb 12 2009-05-19 �� 3:48:48 BILD ¦ Konfigurieren des Bildmenüs ❑ Modus Bild Sie können den Bildstandard auswählen, der für Ihre Sehgewohnheiten am besten geeignet ist. T Drücken Sie die Taste TOOLS, um das Menü Extras anzuzeigen. Sie können den Bildmodus durch Auswahl von Extras → Bildmodus einstellen. Modus : Standard Hinter.Licht Kontrast Helligkeit Schärfe Farbe Farbton (G/R) Erweiterte Einstellungen :7 : 95 : 45 : 50 : 50 : G50/R50 ■ Dynamisch Wählen Sie diese Option für Anzeige mit höherer Auflösung bei starker Umgebungsbeleuchtung. ■ Standard Wählen Sie diese Option für die optimale Anzeige von Fernsehbildern bei normaler Umgebungsbeleuchtung aus. ■ Natürlich Stellt das Bild für optimale und augenschonende Anzeige ein. N Diese Funktion ist im PC-Modus nicht verfügbar. ■ Film Wählen Sie diese Option für die optimale Anzeige von Filmen in einem abgedunkelten Zimmer. ❑ Hinter.Licht / Kontrast / Helligkeit / Schärfe / Farbe / Farbton (G/R) ▶ ▲ Das Gerät verfügt über mehrere Einstellmöglichkeiten für die Bildqualität: Hinter.Licht 7 ▼ ● Hinter.Licht: Hiermit stellen Sie die Helligkeit der LCD-Hintergrundbeleuchtung ein. U Navig. L Einstellen E Eingeben R Zurück ● Kontrast: Hiermit stellen Sie den Kontrast des Bilds ein. ● Helligkeit: Hiermit stellen Sie die Helligkeit des Bilds ein. ● Schärfe: Hiermit stellen Sie die Kantenauflösung des Bilds ein. ● Farbe: Hiermit stellen Sie die Farbsättigung des Bilds ein. ● Farbton (G/R): Hiermit stellen Sie die Farbtemperatur ein. N Sie können die Funktion Farbton (G/R) im Analogmodus von TV, Ext., AV des PAL-Systems nicht verwenden. N Wenn Sie Änderungen an Hinter.Licht, Kontrast, Helligkeit, Schärfe, Farbe oder Farbton (G/R) vornehmen, wird das Bildschirmmenü entsprechend eingestellt. N Im PC-Modus können Sie nur Hinter.Licht, Kontrast und Helligkeit einstellen. N Sie können die Einstellungen für jedes externe Gerät festlegen und speichern, das Sie an einen Eingang des Fernsehgeräts angeschlossen haben. N Die im Betrieb verbrauchte Energiemenge geht deutlich zurück, wenn Sie die Helligkeit des Bildes reduzieren. Damit senken Sie die Betriebskosten. ❑ Erweiterte Einstellungen Bei den neuen Fernsehgeräten von Samsung können Sie die Bildeinstellungen noch genauer anpassen als mit den früheren Modellen. N Erweiterte Einstellungen stehen in den Modi Standard oder Film zur Verfügung. N Im PC-Modus können von den Erweiterte Einstellungen nur Optimalkontrast, Gamma und Weißabgleich eingestellt werden. ■ Schwarzton → Aus / Dunkel / Dunkler / Dunkelst Sie können den Schwarzwert direkt auf dem Bildschirm auswählen, um die Bildschirmtiefe anzupassen. ■ Optimalkontrast → Aus / Gering / Mittel / Hoch Sie können den Bildschirmkontrast so anpassen, dass ein optimaler Kontrast gewährleistet ist. ■ Gamma Sie können die Intensität der Primärfarben (Rot, Grün und Blau) einstellen. Erweiterte Einstellungen Schwarzton : Aus Optimalkontrast : Mittel Gamma :0 Farbraum : Nativ ▶ Weißabgleich Hautton Kantenglättung :0 : Ein U Navig. E Eingabe R Zurück Deutsch - 13 �� BN68-02325A-Ger.indb 13 2009-05-19 �� 3:48:48 ■ Farbraum Der Farbraum ist eine Farbmatrix bestehend aus den Farben Rot, Grün und Blau. Wählen Sie Ihren bevorzugten Farbraum, um die Welt in den natürlichsten Farben zu erfahren. ● Auto: Bei automatischer Einstellung des Farbraums wird, je nach Programmquelle, der natürlichste Farbton eingestellt. ● Nativ: Der native Farbraum ermöglicht tiefe und lebhafte Farbtöne. ● Benutzerd.: Hiermit stellen Sie den Farbbereich wunschgemäß ein. N Wenn Sie den Anpassungswert ändern, wird der angepasste Bildschirm aktualisiert. N Sie können die Einstellungen für jedes externe Gerät festlegen und speichern, das Sie an einen Eingang des Fernsehgeräts angeschlossen haben. Wenn Sie zum Beispiel einen DVD-Player an HDMI 1 angeschlossen und sie gewählt haben, werden die Einstellungen und Parameter für diesen DVD-Player gespeichert. Farbe: Rot, Grün, Blau, Gelb, Zyan oder Magenta N Farbe ist verfügbar, wenn der Farbraum auf Benutzerd. eingestellt ist. N Unter Farbe können Sie die RGB-Werte der jeweils gewählten Farbe einstellen. N Wählen Sie Reset, um den eingestellten RGB-Wert zurückzusetzen. Rot: Hiermit stellen Sie Rotsättigung der gewählten Farbe ein. Grün: Hiermit stellen Sie Grünsättigung der gewählten Farbe ein. Blau: Hiermit stellen Sie Blausättigung der gewählten Farbe ein. Reset: Setzt den Farbraum auf die Standardwerte zurück. ■ Weißabgleich Um natürlichere Bildfarben zu erhalten, können Sie die Farbtemperatur anpassen. ● R-Offset: Hiermit stellen Sie die Dunkelheit der roten Farbe ein. ● G-Offset: Hiermit stellen Sie die Dunkelheit der grünen Farbe ein. ● B-Offset: Hiermit stellen Sie die Dunkelheit der blauen Farbe ein. ● R-Gain: Hiermit stellen Sie die Helligkeit der roten Farbe ein. ● G-Gain: Hiermit stellen Sie die Helligkeit der grünen Farbe ein. ● B-Gain: Hiermit stellen Sie die Helligkeit der blauen Farbe ein. ● Reset: Der zuvor angepasste Weißabgleich wird auf die Werkseinstellungen zurückgesetzt. ■ Hautton Sie können im Bild den Farbton Rosa (Fleischfarbe) betonen. N Wenn Sie den Anpassungswert ändern, wird der angepasste Bildschirm aktualisiert. ■ Kantenglättung → Aus / Ein Sie können die Objektbegrenzungen im Bild betonen. ■ xvYCC → Aus / Ein Durch Aktivieren des xvYCC-Modus vergrößern Sie die Detailtreue und den Farbraum beim Abspielen von Filmen auf einem externen Gerät (d.h. DVD-Player), das an den HDMI- oder Komponenteneingang angeschlossen ist. N xvYCC ist verfügbar, wenn der Bildmodus auf Film und der externe Eingang auf HDMI oder Component eingestellt ist. N Diese Funktion wird, je nach externem Gerät, möglicherweise nicht unterstützt. ❑ Bildoptionen N Im PC-Modus können von den Bildoptionen nur Farbtemp. und Größe eingestellt werden. ■ Farbtemp. → Kalt / Normal / Warm1 / Warm2 / Warm3 N Warm1, Warm2 oder Warm3 nur aktiviert, wenn der Bildmodus auf Film eingestellt ist. N Sie können die Einstellungen für jedes externe Gerät festlegen und speichern, das Sie an einen Eingang des Fernsehgeräts angeschlossen haben. Bildoptionen Farbtemp. : Normal Größe : Auto Breit Bildschirmmodus : 16:9 Digitale RM : Auto HDMI-Schwarzp. : Normal Filmmodus : Aus 100Hz Motion Plus : Standard ▶ ▼ U Navig. E Eingabe R Zurück Deutsch - 14 �� BN68-02325A-Ger.indb 14 2009-05-19 �� 3:48:48 ■ Größe Gelegentlich möchten Sie vielleicht die Größe des auf Ihrem Monitor angezeigten Bilds ändern. Ihr Fernsehgerät bietet Ihnen unterschiedliche Bildformate, die jeweils für einen bestimmten Bildsignaltyp ideal geeignet sind. Möglicherweise verfügt auch Ihr Kabel/Satellitenreceiver über eigene Bildschirmformate. Im Allgemeinen sollten Sie doch so viel wie möglich im 16:9-Format fernsehen. T Drücken Sie die Taste TOOLS, um das Menü Extras anzuzeigen. Sie können die Größe durch Auswahl von Extras → Bildformat einstellen. ● Auto Breit: Mit dieser Option stellen Sie das Bildformat automatisch auf das Seitenverhältnis 16:9 ein. ● 16:9: Wählen Sie diese Option aus, um als Bildformat das Seitenverhältnis 16:9 für DVDs oder Breitbildsendungen einzustellen. ● BreitZoom: Diese Option vergrößert das Bild auf mehr als 4:3. ● Zoom: Wählen Sie diese Option aus, um das 16:9-Breitbild auf die volle Bildschirmbreite zu vergrößern. ● 4:3: Dies ist die Standardeinstellung zum Anzeigen von Videos und herkömmlichen Fernsehsendungen. ● Bildanpassung: Mit dieser Funktion wird das ganze Bild auch bei Versorgung mit HDMI- (720p/1080i/1080p) oder Komponentensignalen (1080i/1080p) vollständig und ohne Beschneidung angezeigt. N Je nach Signalquelle können die Bildgrößenoptionen variieren. N Die verfügbaren Elemente können in Abhängigkeit vom ausgewählten Modus variieren. N Im PC-Modus können nur die Modi 16:9 und 4:3 eingestellt werden. N Sie können die Einstellungen für jedes externe Gerät festlegen und speichern, das Sie an einen Eingang des Fernsehgeräts angeschlossen haben. N Es kann zu vorübergehender Bildkonservierung kommen, wenn Sie auf dem Gerät mehr als zwei Stunden lang ein unbewegten Bild angezeigt haben. N BreitZoom: Wählen Sie durch Drücken der Taste ► die Option Position, und drücken Sie dann die Taste ENTERE. Mit den Tasten ▲ oder ▼ können Sie das Bild nach oben oder nach unten verschieben. Drücken Sie dann die Taste ENTERE. N Zoom: Wählen Sie durch Drücken der Taste ► die Option Position, und drücken Sie dann die Taste ENTERE. Mit der Taste ▲ oder ▼ können Sie das Bild nach oben oder nach unten verschieben. Drücken Sie dann die Taste ENTERE. Wählen Sie durch Drücken der Taste ► die Option Größe, und drücken Sie dann die Taste ENTERE. Drücken Sie die Tasten ▲ oder ▼, um das Bild in vertikaler Richtung zu vergrößern oder zu verkleinern. Drücken Sie dann die Taste ENTERE. N Auswahl von Bildanpassung im HDMI (1080i / 1080p) oder Komp. modus (1080i / 1080p): Wählen Sie durch Drücken der Tasten ◄ oder ► die Option Position. Mit den Tasten ▲, ▼, ◄ oder ► können Sie das Bild verschieben. Reset: Wählen Sie durch Drücken der Tasten ◄ oder ► die Option Reset, und drücken Sie dann die Taste ENTERE. Sie können die Einstellung initialisieren. N Wenn Sie die Funktion Bildanpassung zusammen mit einem 720p HDMI-Signal verwenden, wird wie bei Overscan oben, unten, links und rechts eine Zeile abgeschnitten. N Wenn der Modus Double (À, Œ) im PIP-Modus eingestellt wurde, können Sie die Bildgröße nicht einstellen. ■ Bildschirmmodus → 16:9 / BreitZoom / Zoom / 4:3 Wenn Sie die Bildgröße bei einem Fernsehgerät im 16:9-Format auf Auto Breit einstellen, können Sie bestimmen, dass das Bild als 4:3 WSS (Breitbilddienst) oder gar nicht angezeigt werden soll. Da jedes europäische Land eine andere Bildgröße verwendet, können die Benutzer sie damit einstellen. ● 16:9: Mit dieser Option stellen Sie das Breitbildformat 16:9 ein. ● BreitZoom: Diese Option vergrößert das Bild auf mehr als 4:3. ● Zoom: Hiermit vergrößern Sie das Bild vertikal. ● 4:3: Hiermit stellen Sie das Bildformat auf den Normal-Modus 4:3 ein. N Diese Funktion ist im Modus Auto Breit verfügbar. N Diese Funktion ist im PC-, Komponenten- oder HDMI-Modus nicht verfügbar. ■ Digitale RM → Aus / Gering / Mittel / Hoch / Auto Wenn das vom Fernsehgerät empfangene Sendesignal schwach ist, können Sie die digitale Rauschunterdrückung aktivieren, um ggf. statische Bilder oder Doppelbilder auf dem Bildschirm zu verringern. N Bei schwachem Signal wählen Sie diejenige der anderen Optionen, bei der das beste Bild angezeigt wird. ■ HDMI-Schwarzp. → Normal / Gering Sie können den Schwarzwert direkt auf dem Bildschirm auswählen, um die Bildschirmtiefe anzupassen. N Diese Funktion ist nur aktiv, wenn ein externes Gerät über HDMI (RGB-Signale) mit dem TV verbunden ist. ■ Filmmodus → Aus / Auto1 / Auto2 Sie können das Fernsehgerät so einstellen, dass eine Filmsignal aus allen Quellen automatisch empfangen und verarbeitet und das Bild auf die optimale Qualität eingestellt werden kann. N Filmmodus wird bei TV, AV, Komp.(480i / 1080i) und HDMI(480i / 1080i) - unterstützt. ● Aus: Deaktiviert den Filmmodus. ● Auto1 : Hiermit wird das Bild bei Filmanzeige automatisch auf die beste Qualität eingestellt. ● Auto2 : Automatische Optimierung von Videotext auf dem Bildschirm (ohne geschlossene Beschriftungen), wenn Sie einen Film sehen. Deutsch - 15 �� BN68-02325A-Ger.indb 15 2009-05-19 �� 3:48:48 ■ 100Hz Motion Plus → Aus / Klar / Standard / Glätten / Benutzerd. / Demo Beseitigt das Verschwimmen schneller Szenen mit viel Bewegung und sorgt für ein klareres Bild. N Wenn Sie 100Hz Motion Plus aktivieren, kann es zu Bildrauschen auf dem Bildschirm kommen. In diesem Fall sollten Sie 100Hz Motion Plus deaktivieren (Aus). ● Aus: Hiermit schalten Sie 100Hz Motion Plus aus. ● Klar: Hiermit stellen Sie 100Hz Motion Plus auf den Minimalwert ein. ● Standard: Hiermit stellen Sie 100Hz Motion Plus auf einen mittleren Wert ein. ● Glätten: Hiermit stellen Sie 100Hz Motion Plus auf den Maximalwert ein. ● Benutzerd.: Hiermit passen Sie die Minderung von Unschärfe und Stocken der Bewegungen wunschgemäß ein. Unschärfeminder.: Hiermit passen Sie die Unschärfeminderung bei Videosignalen an. Judder-Minderung: Hiermit passen Sie die Minderung stockender Bewegungen beim Abspielen von Filmen an. Reset: Hiermit setzen Sie die benutzerdefinierten Einstellungen zurück. ● Demo: Hiermit zeigen Sie den Unterschied mit und ohne Auto Motion Plus 100Hz an. ■ Blaumodus → Aus / Ein Diese Funktion ist für Experten zum Ausmessen von AV-Geräten bestimmt. Mit dieser Funktion werden das rote und das grüne Signal aus dem Videosignal entfernt, sodass nur das blaue Signal angezeigt wird. Damit wird ein Blaufilter erzeugt, mithilfe dessen die Farbe und der Farbton von Videogeräten wie DVD-Playern, Heimkinosystemen usw. eingestellt werden können.Mit dieser Funktion können Sie die Farbe und den Farbton auf Werte einstellen, die dem Signalpegel der verschiedenen Videogeräte angemessen sind. Verwenden Sie hierzu die Streifenmuster für die Farben Rot/Grün/Blau/Cyan/Magenta/Gelb, ohne zusätzlich den Blaufilter zu verwenden. N Blaumodus ist verfügbar, wenn der Bildmodus auf Film oder Standard eingestellt ist. ❑ Bild zurücksetzen → Bildmodus zurücksetzen / Storno Hiermit werden alle Bildeinstellungen auf die Standardwerte zurückgesetzt. N Bildmodus zurücksetzen: Alle aktuellen Bildwerte werden auf die Standardwerte zurückgesetzt. ¦ Verwenden der Bild-in-Bild-Funktion (PIP) Hauptbild Komp. HDMI1, HDMI2, HDMI3/DVI, HDMI4 PC Einstellungen Mit HIlfe der PIP-Funktion können Sie gleichzeitig das Bild vom Fernsehtuner und aus einer externen Signalquelle anzeigen. Dieses Gerät verfügt über einen eingebauten Tuner, der es nicht ermöglicht, dass PIP in gleichen Modus funktioniert. Weitere Informationen finden Sie unter "PIP-Einstellungen" weiter hinten. T Drücken Sie die Taste TOOLS, um das Menü Extras anzuzeigen. Sie können die PIPEinstellungen durch Auswahl von Extras → PIP anpassen. N Wenn Sie den Ton für das PIP-Bild aktivieren möchten, schlagen Sie im Abschnitt "Konfigurieren des Tonmenüs" nach. N PIP-Einstellungen Melodie Energiesparmod. : Mittel : Aus PIP ▶ Common Interface Nebenbild TV N Wenn Sie das Fernsehgerät im PIP-Modus ausschalten und wieder einschalten, wird das PIP-Fenster nicht mehr angezeigt. N Möglicherweise wirkt das Bild im PIP-Fenster leicht unnatürlich, wenn Sie den Hauptbildschirm zum Anzeigen von Spielen oder für Karaoke verwenden. N Solange Sie Internet@TV einsetzen, können Sie die PIP-Funktion nicht verwenden. ❑ PIP → Aus / Ein PIP Sie können die PIP-Funktion aktivieren oder deaktivieren. ❑ Größe → Õ / à / À / Œ PIP : Ein Größe :Õ Position :à Kanal : ATV 4 ▶ Sie können die Größe für das PIP-Bild auswählen. ❑ Position → à / – / — / œ U Navig. E Eingabe R Zurück Sie können die Position für das PIP-Bild auswählen. N Im Modus "Double" (Œ, À) können Sie Position nicht wählen. ❑ Kanal Sie können den Kanal für das Teilbild wählen. Deutsch - 16 �� BN68-02325A-Ger.indb 16 2009-05-19 �� 3:48:49 ¦ Verwenden Ihres Computers als Computerbildschirm (PC) Konfigurieren Ihrer PC-Software (unter Windows XP) Im Folgenden sind die typischen Anzeigeeinstellungen für einen Windows-Computer aufgeführt. Die von Ihrem PC angezeigten Fenster entsprechen je nach installierter WindowsVersion und verwendeter Grafikkarte möglicherweise nicht genau der Abbildung. Dennoch sind die hier nachfolgenden grundlegenden Konfigurationsinformationen in fast allen Fällen anwendbar. (Wenden Sie sich andernfalls an den Computerhersteller oder Samsung-Händler.) 1. Klicken Sie im Startmenü von Windows auf die Systemsteuerung. 2. Wenn das Fenster der Systemsteuerung angezeigt wird, klicken Sie auf „Darstellung und Designs”. Ein Dialogfeld wird geöffnet. 3. Wenn das Fenster der Systemsteuerung angezeigt wird, klicken Sie auf „Anzeige“. Anschließend wird ein Dialogfeld angezeigt. 4. Klicken Sie nun im Dialogfeld „Anzeige“ auf die Registerkarte „Einstellungen”. • Das richtige (optimale) Bildformat lautet: 1920 x 1080 Pixel • Wenn das Dialogfeld eine Option für die Bildschirmfrequenz enthält, muss als Einstellung 60 oder 60 Hz ausgewählt werden. Andernfalls klicken Sie einfach auf OK, um das Dialogfeld zu schließen. Anzeigemodi Wenn das Signal des Computers den folgenden Standards entspricht, wird der Bildschirm automatisch darauf eingestellt. Wenn das Signal des Computers nicht diesen Standards entspricht, stellen Sie einen der aufgeführten Modi ein; Informationen hierzu entnehmen Sie der Bedienungsanleitung der Grafikkarte des Computers. Andernfalls wird u. U. nichts auf dem Bildschirm angezeigt. Für die auf der nächsten Seite gezeigten Anzeigemodi wurde das Bild bereits bei der Produktion optimiert. ■ D-Sub- und HDMI/DVI-Eingang Modus Auflösung IBM 640 x 350 720 x 400 640 x 480 832 x 624 1152 x 870 720 x 576 1152 x 864 1280 x 720 1280 x 720 1280 x 960 640 x 480 640 x 480 640 x 480 800 x 600 800 x 600 800 x 600 1024 x 768 1024 x 768 1024 x 768 1152 x 864 1280 x 1024 1280 x 1024 1280 x 800 1280 x 800 1280 x 960 1360 x 768 1440 x 900 1440 x 900 1680 x 1050 1280 x 720 1280 x 1024 MAC VESA CVT VESA DMT VESA GTF VESA DMT / DTV CEA N N N N N 1920 x 1080p Horizontalfrequenz Vertikalfrequenz (kHz) (Hz) 31,469 70,086 31,469 70,087 35,000 66,667 49,726 74,551 68,681 75,062 35,910 59,950 53,783 59,959 44,772 59,855 56,456 74,777 75,231 74,857 31,469 59,940 37,861 72,809 37,500 75,000 37,879 60,317 48,077 72,188 46,875 75,000 48,363 60,004 56,476 70,069 60,023 75,029 67,500 75,000 63,981 60,020 79,976 75,025 49,702 59,810 62,795 74,934 60,000 60,000 47,712 60,015 55,935 59,887 70,635 74,984 65,290 59,954 52,500 70,000 74,620 70,000 67,500 60,000 25,175 28,322 30,240 57,284 100,000 32,750 81,750 74,500 95,750 130,000 25,175 31,500 31,500 40,000 50,000 49,500 65,000 75,000 78,750 108,000 108,000 135,000 83,500 106,500 108,000 85,500 106,500 136,750 146,250 89,040 128,943 Synchronisationspolarität (H/V) +/-/+ -/-/-/-/+ -/+ -/+ -/+ -/+ -/-/-/+/+ +/+ +/+ -/-/+/+ +/+ +/+ +/+ -/+ -/+ +/+ +/+ -/+ -/+ -/+ -/+ -/- 148,500 +/+ Pixeltakt (MHz) Eine Verbindung über HDMI/DVI-Kabel kann nur über den HDMI IN 3(DVI)-Anschluss erfolgen. Das Zeilensprungverfahren wird nicht unterstützt. Das Fernsehgerät funktioniert möglicherweise nicht ordnungsgemäß, wenn kein Standardmodus ausgewählt wird. Separate- und Composite-Modus werden unterstützt. SOG wird nicht unterstützt. Ein zu langes oder qualitativ geringwertiges VGA-Kabel kann in hochauflösenden Modi (1920 x 1080) zu Bildrauschen führen. Deutsch - 17 �� BN68-02325A-Ger.indb 17 2009-05-19 �� 3:48:49 ¦ Fernsehgerät mithilfe des PCs einstellen N Voreinstellung: Drücken Sie die Taste SOURCE, um den Modus „PC“einzustellen. ❑ Autom. Einstellung Helligkeit Schärfe Bild Verwenden Sie die Funktion zum automatischen Einstellen, damit sich das Fernsehgerät automatisch auf das empfangene Videosignal einstellt. Bei dieser Funktion erfolgt auch automatisch eine Feineinstellung sowie die Anpassung der Frequenzwerte und Positionen. T Drücken Sie die Taste TOOLS, um das Menü Extras anzuzeigen. Sie können die automatische Einstellung durch Auswahl von Extras → Autom. Einstellung durchführen. N Diese Funktion ist im DVI-HDMI-Modus nicht verfügbar. : 45 : 50 Autom. Einstellung ▶ PC-Bildschirm Erweiterte Einstellungen Bildoptionen Bild zurücksetzen ❑ PC-Bildschirm ■ Grob / Fein Durch das Einstellen der Bildqualität können Bildstörungen und Rauschen beseitigt oder verringert werden. Falls sich Bildrauschen durch die Feinabstimmung allein nicht beheben lässt, stellen Sie zunächst die Frequenz möglichst genau ein (Grob). Nachdem Sie das Bildrauschen durch die Grob- und Feinabstimmung des Bildes verringert haben, stellen Sie die Position des Bildes so ein, dass es auf dem Bildschirm zentriert ist. PC-Bildschirm Grob 50 Fein 0 PC-Position Bild zurücksetzen ■ PC-Position U Navig. E Eingabe R Zurück Passen Sie die Position des PC-Bilds an, wenn es nicht auf das Fernsehbild passt. Stellen Sie mit den Tasten ▲ oder ▼ die vertikale Position ein. Stellen Sie mit den Tasten ▲ oder ▼ die horizontale Position ein. ■ Bild zurücksetzen Sie können alle Bildeinstellungen auf die werkseitig eingestellten Ausgangswerte zurücksetzen. Ton ¦ Konfigurieren des Tonmenüs ❑ Modus → Standard / Musik / Film / Sprache / Benutzerd. Ton T Drücken Sie die Taste TOOLS, um das Menü Extras anzuzeigen. Sie können den Tonmodus durch Auswahl von Extras → Tonmodus konfigurieren. ● Standard: Auswahl des normalen Tonmodus. ● Musik: Betont die Musik im Verhältnis zu Stimmen. ● Film: Ermöglicht optimale Tonwiedergabe für Filme. ● Sprache: Betont Stimmen im Verhältnis zu anderen Tönen. ● Benutzerd.: Abrufen ihrer benutzerdefinierten Toneinstellungen. Modus : Benutzerd. ▶ Equalizer SRS TruSurround HD : Aus Wiedergabesprache : ---Audioformat : ---Audio für Sehgeschädigte Auto. Lautst. : Aus Lautsprecherauswahl : TV-Lautsprecher ❑ Equalizer Sie können den Ton Ihrem persönlichen Geschmack anpassen. ● Modus: Auswählen des Tonmodus der definierten Einstellungen. ● Balance L/R: Anpassen der Balance zwischen dem linken und dem rechten Lautsprecher. ● 100Hz / 300Hz / 1KHz / 3KHz / 10KHz (Bandbreitenanpassung): Zum Einstellen der unterschiedlichen Bandbreitenfrequenzen. ● Reset: Hiermit stellen Sie die Equalizereinstellungen auf die Standardwerte zurück. ❑ SRS TruSurround HD → Aus / Ein SRS TEXT (SRS-Text) ist eine patentierte SRS-Technologie, die das Problem mit der Ausgabe von 5.1-Mehrkanalinhalten über zwei Lautsprecher löst. Mit TruSurround kommen Sie mit jedem Stereo-System mit zwei Lautsprechern, auch den internen Gerätelautsprechern, in den Genuss überzeugender Virtual Surround-Effekte. Es ist vollständig kompatibel mit allen Mehrkanalformaten. T Drücken Sie die Taste TOOLS, um das Menü Extras anzuzeigen. Sie können SRS TruSurround HD außerdem durch Auswahl von Extras → SRS TS HD anpassen. Deutsch - 18 �� BN68-02325A-Ger.indb 18 2009-05-19 �� 3:48:49 ❑ Wiedergabesprache Sie können die Standardsprache für Audio ändern. Zeigt die Sprachinformationen für den eingehenden Audiostream an. N Während Sie ein digitales Programm anschauen, können Sie diese Funktion auswählen. N Sie können nur Sprachen auswählen, die auch tatsächlich übertragen werden. ❑ Audioformat → MPEG / Dolby Digital Wenn Sie für die Tonausgabe sowohl den Hauptlautsprecher als auch den Audioreceiver verwenden, kann es aufgrund der Geschwindigkeitsunterschiede beim Dekodieren durch die beiden Systeme zu einem Echoeffekt kommen. Verwenden Sie in diesen Fall die TV-Lautsprecher. N Während Sie ein digitales Programm anschauen, können Sie diese Funktion auswählen. N Entsprechend dem Sendesignal wird Audioformat angezeigt. ❑ Audio für Sehgeschädigte Dies ist eine zusätzliche Audiofunktion, mit der für sehbehinderte Personen eine zusätzliche Tonspur wiedergegeben wird. Diese Funktion verarbeitet den Audiostream für die AB (Audio-Beschreibung), sofern diese vom Sender zusammen mit dem Vordergrundton übertragen wird. Der Benutzer kann die Audio-Beschreibung aktivieren oder deaktivieren und die Lautstärke einstellen. O Drücken Sie die Taste AD auf der Fernbedienung, um Aus oder Ein zu wählen. ■ Audio für Sehgeschädigte → Aus / Ein Hiermit wird der Audiokommentar für Sehbehinderte ein- und ausgeschaltet. ■ Lautst. Hiermit stellen Sie die Lautstärke des Audiokommentars für Sehbehinderte ein. N Lautst. ist aktiv, wenn Audio für Sehgeschädigte aktiviert (Ein) ist. N Während Sie ein digitales Programm anschauen, können Sie diese Funktion auswählen. ❑ Auto. Lautst. → Aus / Ein Aufgrund unterschiedlicher Signalbedingungen unterscheiden sich Fernsehsender in der Lautstärke, so dass es erforderlich sein kann, die Lautstärke beim Umschalten zwischen Sendern jedes Mal nachzuregeln. Mit der Funktion für automatische Lautstärkeeinstellung wird die Lautstärke automatisch bei starkem Modulationssignal verringert und bei schwachem Modulationssignal erhöht. ❑ Lautsprecherauswahl Wenn Sie fernsehen, während das Gerät an ein Heimkinosystem angeschlossen ist, schalten Sie die Fernsehlautsprecher aus, damit Sie nur den Ton der (externen) Lautsprecher des Heinkinosystems hören. ● Ext. Lautsprecher: Tonwiedergabe über die externen Lautsprecher (Heimkinosystem). ● TV-Lautsprecher: Verwenden Sie diese Option, um den Ton über die Fernsehlautsprecher wiederzugeben. N Die Lautstärketasten und MUTE sind deaktiviert, wenn Lautsprecherauswahl auf Ext. Lautsprecher geschaltet ist. N Wenn Sie im Menü Lautsprecherauswahl die Option Ext. Lautsprecher wählen, werden die Audioeinstellungen eingeschränkt. TV-Lautsprecher Ext. Lautsprecher Kein Videosignal Eingebaute Lautsprecher des Fernsehgeräts RF / AV / Komp. / PC / HDMI Audioausgang Ton aus Ton aus Audioausgang (Optical) zum Soundsystem RF / AV / Komp. / PC / HDMI Audioausgang Audioausgang Ton aus ❑ Ton wählen → Erster Tuner / Zweiter Tuner Wenn die PIP-Funktion aktiviert ist, können Sie den Ton des PIP-Bildes wiedergeben. N Diese Option können Sie auswählen, wenn PIP aktiviert Ein ist. T Drücken Sie die Taste TOOLS, um das Menü Extras anzuzeigen. Sie können den Ton des PIP-Bilds durch Auswahl von Extras → PIP → Ton wählen einstellen. ❑ Ton zurücksetzen → Alle zurücksetzen / Ton-Modus reset / Abbrechen Sie können alle Audioeinstellungen wieder auf die Werkseinstellungen zurücksetzen. N Ton-Modus reset: Alle aktuellen Tonwerte werden auf die Standardwerte zurückgesetzt. Ton zurücksetzen Optionen für Zurücksetzen des Tons auswählen. Alle zurücksetzen Ton-Modus reset Abbrechen L Navig. E Eingabe R Zurück Deutsch - 19 �� BN68-02325A-Ger.indb 19 2009-05-19 �� 3:48:49 ¦ Tonmodus wählen Sie können den Tonwiedergabemodus im Menü Extras wählen. Wenn Sie Dual l ll einstellen, wird der aktuelle Tonwiedergabemodus auf dem Bildschirm abgebildet. A2-Stereo NICAMStereo Audiosystem Mono Stereo Dual Mono Stereo Dual Dual 1 / 2 MONO STEREO ↔ MONO DUAL 1 ↔ DUAL 2 MONO MONO ↔ STEREO MONO ↔ DUAL 1 DUAL 2 Standard Automatischer Wechsel DUAL 1 Automatischer Wechsel DUAL 1 N Falls das Stereosignal schwach ist und automatisch umgeschaltet wird, sollten Sie zu mono wechseln. N Diese Funktion ist nur bei einem Stereosignal aktiviert. Bei Monosignalen ist es deaktiviert. N Diese Funktion ist nur im TV-Modus verfügbar. EINSTELLUNGEN ¦ Konfigurieren der Menüeinstellungen ❑ Menüsprache Plug & Play ❑ Zeit Genaue Beschreibungen für die Verfahren zum Einstellen der Optionen finden Sie im Kapitel "Einstellen der Uhrzeit". Einstellungen Sie können die Menüsprache festlegen. Menüsprache : Deutsch ▶ Zeit Sendungsoptionen Sicherheit Netzwerk Allgemein ❑ Sendungsoptionen ■ Untertitel Sie können Untertitel aktivieren und deaktivieren. Mit diesem Menü legen Sie den Untertitelmodus fest. Die Menüoption Normal ist die Grundeinstellung für Untertitel, und die Option Schwerhörig ist für hörgeschädigte Personen bestimmt. ● Untertitel → Aus / Ein Untertitel aktivieren oder deaktivieren. ● Modus → Normal / Schwerhörig Hiermit können Sie den Modus der Untertitelfunktion einstellen. ● Untertitelsprache Hiermit können Sie die Untertitelsprache festlegen. N Wenn das Programm, das Sie gerade sehen, die Funktion Schwerhörig nicht unterstützt, wird selbst bei ausgewählter Funktion Schwerhörig automatisch die Funktion Normal aktiviert. N Englisch ist der Standardwert in Fällen, wo die ausgewählte Sprache für die Sendung nicht verfügbar ist. N Sie können diese Optionen auswählen, indem Sie einfach die Taste SUBT. auf der Fernbedienung drücken. ■ Digitaltext → Deaktivieren / Aktivieren (nur Großbritannien) Wenn das Programm mit Digitaltext gesendet wird, ist diese Funktion aktiviert. N MHEG (Multimedia and Hypermedia Information Coding Experts Group) Ein internationaler Standard für Datenkompressionssysteme für Multimedia- und Hypermedia-Anwendungen. Dies ist ein höheres Niveau als das MPEG-System, das solche datenverknüpfenden Hypertextmedien wie Standbilder, Zeichendienst, Animations-, Grafik- und Videodateien sowie Multimediadateien umfasst. MHEG ist eine Technologie für Laufzeitinteraktion mit dem Benutzer, und sie wird auf verschiedenen Gebieten verwendet, z. B. VOD (Video-On-Demand), ITV (Interactive TV), EC (Electronic Commerce), Teleweiterbildung, Telekonferenzen, digitale Bibliotheken und Netzwerkspiele. Deutsch - 20 �� BN68-02325A-Ger.indb 20 2009-05-19 �� 3:48:49 ■ Teletextsprache Sie können die Videotextsprache durch Auswählen des Sprachtyps einstellen. N Englisch ist der Standardwert in Fällen, wo die ausgewählte Sprache für die Sendung nicht verfügbar ist. ■ Benutzerdef. ● Primäre Wiedergabesprache / Sekundäre Wiedergabesprache / Primäre Untertitelsprache / Sekundäre Untertitelsprache / Primäre Teletextsprache / Sekundäre Teletextsprache Mit dieser Funktion können Sie eine der verfügbaren Sprachen wählen. Die hier gewählte Sprache ist die Standardsprache, wenn der Benutzer einen Kanal auswählt. Wenn Sie die Spracheinstellung ändern, werden die Untertitelsprache, die Audiosprache und die Videotextsprache im Menü Sprache automatisch in die gewünschte Sprache geändert. Mit den Untermenüs für die Untertitelsprache, Audiosprache und Videotextsprache im Menü Sprache zeigen Sie eine Liste der vom aktuellen Kanal unterstützten Sprachen an, und die aktuelle Auswahl wird hervorgehoben. Wenn Sie die Spracheinstellung ändern, gilt die neue Auswahl nur für den aktuellen Kanal. Die geänderte Einstellung hat keinen Einfluss auf die Einstellung der Untertitelsprache, Audiosprache und Teletext-Sprache im Menü Voreinstellung. ■ Common Interface ● CI-Menü Hiermit kann der Benutzer seine Auswahl in dem vom CAM-Modul bereitgestellten Menü treffen. Wählen Sie das CI-Menü ausgehend vom Menü "PC-Karte" ● Anwendungsinformationen Die folgenden Erklärungen gelten für den Fall, dass ein CAM-Modul in den CI-Schlitz gesteckt ist und angezeigt wird. In den Anwendungsinformationen wird die ‘CI(CI+)-Karte’ beschrieben. Sie können das CAM-Modul unabhängig davon anschließen, ob das Fernsehgerät angeschaltet ist oder nicht. 1. Sie können das CI-CAM-Modul bei Ihrem nächsten Händler oder durch telefonische Bestellung erwerben. 2. Schieben Sie die ‘CI(CI+)-Karte’ in Richtung des Pfeils in das CAM-Modul hinein, bis sie fest sitzt. 3. Schieben Sie das CAM-Modul mit installierter ‘CI(CI+)-Karte’ in den CI-Steckplatz (Common Interface) hinein. (Schieben Sie das CAM-Modul parallel zum Steckplatz geführt bis zum Anschlag in Pfeilrichtung.) 4. Kontrollieren Sie, ob Sie ein Bild sehen oder ein gestörtes Signal. ❑ Sicherheit ■ Kindersicherung → Aus / Ein Mit dieser Funktion können Sie nicht autorisierte Benutzer, z. B. Kinder, daran hindern ungeeignete Programme anzuschauen, indem das Bild blockiert und der Ton stummgeschaltet wird. N Ehe das Einstellungsfenster angezeigt wird, wird das Fenster zur Eingabe der PIN geöffnet. Geben Sie nun Ihre vierstellige PIN ein. N Der Standard-PIN-Code eines neuen Fernsehgeräts lautet ‘0-0-0-0’. Sie können die PIN ändern, indem Sie im Menü den Befehl PIN ändern wählen. N Sie können einige der Kanäle in der Kanalliste sperren. N Kindersicherung ist nur im TV-Modus verfügbar. ■ Sicherungsstufe → Sicherungsstufe Mit dieser Funktion können Sie nicht autorisierte Benutzer, z. B. Kinder, daran hindern, ungeeignete Programme anzuschauen. Hierzu verwenden Sie eine benutzerdefinierte vierstellige PIN. N Die für Sicherungsstufe verfügbaren Elemente können in Abhängigkeit vom jeweiligen Land variieren. N Ehe das Einstellungsfenster angezeigt wird, wird das Fenster zur Eingabe der PIN geöffnet. Geben Sie nun Ihre vierstellige PIN ein. N Der Standard-PIN-Code eines neuen Fernsehgeräts lautet ‘0-0-0-0’. Sie können die PIN ändern, indem Sie im Menü den Befehl PIN ändern wählen. N Nachdem die Altersbeschränkungen eingestellt sind, wird das Symbol '\' angezeigt. N Alle zul.: Drücken Sie diese Taste, um alle Altersbeschränkungen aufzuheben. Keine zul.: Drücken Sie diese Taste, um alle Altersbeschränkungen zu aktivieren. ■ PIN ändern Sie können Ihre zum Einrichten des Fernsehgeräts benötigte persönliche Kennnummer ändern. N Ehe das Einstellungsfenster angezeigt wird, wird das Fenster zur Eingabe der PIN geöffnet. Geben Sie nun Ihre vierstellige PIN ein. N Der Standard-PIN-Code eines neuen Fernsehgeräts lautet ‘0-0-0-0’. N Wenn Sie den PIN-Code vergessen haben, drücken Sie die Fernbedienungstasten in der angegebenen Reihenfolge, um die PIN auf ‘0-0-0-0’ zurückzusetzen: POWER (Aus) → MUTE → 8 → 2 → 4 → POWER (Ein). Deutsch - 21 �� BN68-02325A-Ger.indb 21 2009-05-19 �� 3:48:49 ❑ Netzwerk → Netzwerktyp / Eingang einrichten Genaue Beschreibungen für die Verfahren zum Einstellen der Optionen finden Sie im Kapitel "Konfigurieren des Netzwerks". ❑ Allgemein ■ Spielemodus → Aus / Ein Wenn Sie eine Spielekonsole wie PlayStation™ oder Xbox™ anschließen, können Sie durch Auswählen des Spielemenüs ein realitätsnaheres Spielerlebnis genießen. N Einschränkungen im Spielmodus (Achtung!) Wenn Sie die Spielekonsole wieder vom Gerät trennen und ein anderes externes Gerät anschließen möchten, beenden (Aus) Sie über das Einrichtmenü den Spielemodus. Wenn Sie im Spielemodus das TV-Menü anzeigen, zittert das Bild leicht. N Spielemodus ist im normalen TV-, PC- und Ext.-Modus nicht verfügbar. N Solange Sie PIP aktiviert haben, können Sie den Spielemodus nicht verwenden. N Kontrollieren Sie, ob der Spielemodus noch aktiviert (Ein) ist, wenn die Bildqualität bei angeschlossenem externem Gerät schlecht ist. Deaktivieren Sie den Spielemodus (Aus) und schließen Sie externe Geräte an. N Wenn der Spielemodus aktiviert ist: Der Bildmodus wird automatisch auf Standard eingestellt und kann nicht geändert werden. Der Tonmodus wird automatisch auf Benutzerd. eingestellt und kann nicht geändert werden. Passen Sie den Ton unter Verwendung des Equalizers an. Die Funktion zum Zurücksetzen der Audioeinstellungen ist aktiviert. Durch Auswählen der Reset-Funktion nach dem Einstellen des Equalizers wird die Equalizer-Einstellung auf die Werkseinstellungen zurückgesetzt. ■ BD Wise → Aus / Ein Ermöglicht optimale Bildqualität für SAMSUNG DVD, Blu-Ray und Heimkinoprodukte ein, die BD Wise unterstützen. Freuen Sie sich bei Anschluss dieser Geräte an das Fernsehgerät von Samsung auf ein detailreicheres Bild. N Schließen Sie Geräte von Samsung, die über Bd Wise verfügen, mit Hilfe eines HDMI-Kabels an. N Wenn BD Wise aktiviert ist (Ein), wird der Bildmodus automatisch auf die optimale Auflösung eingestellt. N BD Wise steht nur im HDMI-Modus zur Verfügung. ■ Energiesparmod. → Aus / Gering / Mittel / Hoch / Bild aus / Auto Mit dieser Funktion stellen Sie die Helligkeit des Fernsehgeräts ein, um den Stromverbrauch zu senken. Wenn Sie nachts fernsehen, stellen Sie Energiesparmod. auf Hoch ein, um sowohl die Augenermüdung als auch den Stromverbrauch zu senken. Wenn Sie Bild Aus wählen, wird der Bildschirm abgeschaltet und Sie können nur noch den Ton hören. Drücken Sie eine beliebige Taste, um Bild Aus zu beenden. N Im Menü Extras wird die Funktion Bild Aus nicht unterstützt. T Drücken Sie die Taste TOOLS, um das Menü Extras anzuzeigen. Sie können zudem die Energiesparoption durch Auswahl von Extras → Energiesparmod. anpassen. ■ Menütransparenz → Hell / Dunkel Sie können die Transparenz des Menüs einstellen. ■ Melodie → Aus / Gering / Mittel / Hoch Es kann eine Melodie abgespielt werden, wenn der Bildschirm an- oder ausgeschaltet wird. N Die Melodie wird nicht abgespielt. Das Fernsehgerät gibt keinen Ton aus, weil die MUTE-Taste gedrückt wurde. Das Fernsehgerät gibt keinen Ton aus, weil die Lautstärketaste (–) solange gedrückt wurde, bis der Ton aus war. Das Fernsehgerät wurde mit dem Sleep-Timer ausgeschaltet. ■ PIP Genaue Beschreibungen für die Verfahren zum Einstellen der Optionen finden Sie im Kapitel "Konfigurieren der PIP-Optionen". Deutsch - 22 �� BN68-02325A-Ger.indb 22 2009-05-19 �� 3:48:49 ¦ Einstellen der Uhrzeit ❑ Uhr ■ ■ Uhr-Modus Sie können die aktuelle Zeit manuell oder automatisch einstellen. ● Auto: Hiermit stellen Sie die Uhrzeit automatisch anhand der Zeit aus der digitalen Übertragung ein. ● Manuell: Hiermit stellen Sie die aktuelle Zeit auf einen manuell eingestellten Wert ein. N Je nach Sendestation und Signal erfolgt die automatische Zeiteinstellung möglicherweise nicht korrekt. In diesem Fall müssen Sie die Zeit manuell einstellen. N Der Antennen- oder Kabelanschluss muss vorhanden sein, um die Zeit automatisch einzustellen. Zeit einstellen Sie können die aktuelle Zeit manuell einstellen. N Diese Funktion ist nur verfügbar, wenn Sie Uhr-Modus auf Manuell eingestellt haben. N Sie können Tag, Monat, Jahr, Stunde und Minute auch direkt über die Zifferntasten auf der Fernbedienung einstellen. ❑ Sleep-Timer Einstellungen Die Uhr muss eingestellt werden, damit Sie die verschiedenen Timerfunktionen des Fernsehgeräts verwenden können. O Jedes Mal, wenn Sie die Taste INFO drücken, wird die aktuelle Zeit angezeigt. N Wenn Sie das Netzkabel ziehen, müssen Sie die Uhr erneut einstellen. Plug & Play Sprache : Deutsch Zeit ▶ Sendungsoptionen Sicherheit Netzwerk Allgemein Zeit Uhr : -- : -- Sleep-Timer : Aus Timer 1 : Deaktiviert Timer 2 : Deaktiviert Timer 3 : Deaktiviert ▶ U Navig. E Eingabe R Zurück Timer 1 Anschaltzeit 00 00 Deaktiv. Ausschaltzeit 00 Lautst. 00 Quelle 10 Wiederholmodus Deaktiv. TV-Empfang TV So Kanal ATV Mo Di Mi 0 Do Fr Sa Einmal Der Sleep-Timer schaltet das Fernsehgerät automatisch nach einer eingestellten Zeit (30, 60, L Navig. U Einst. E Eingabe R Zurück 90, 120, 150, 180 Minuten) aus. T Drücken Sie die Taste TOOLS, um das Menü Extras anzuzeigen. Sie können den Sleep-Timer durch Auswahl von Extras → Sleep-Timer einstellen. N Um die Sleep-Timer-Funktion abzubrechen, wählen Sie Aus. ❑ Timer 1 / Timer 2 / Timer 3 Sie können drei verschiedene Einstellungen für den Ein-/Ausschalttimer vornehmen. Voraussetzung dafür ist, dass Sie die Uhr gestellt haben. ● Anschaltzeit: Stellen Sie Stunde, Minute ein und aktivieren bzw. deaktivieren Sie die Funktion. (Zum Aktivieren des Timers, wenn Sie mit den Einstellungen fertig sind, wählen Sie Aktivieren.) ● Ausschaltzeit: Stellen Sie Stunde, Minute ein und aktivieren bzw. deaktivieren Sie die Funktion. (Zum Aktivieren des Timers, wenn Sie mit den Einstellungen fertig sind, wählen Sie Aktivieren.) ● Lautst.: Stellen Sie die gewünschte Lautstärke ein. ● Quelle: Sie können den Inhalt des TV- oder USB-Gerät einstellen, der beim Anschalten des Fernsehers automatisch wiedergegeben wird. Wählen Sie TV oder USB. (Stellen Sie sicher, dass ein USB-Gerät an das Fernsehgerät angeschlossen ist.) N Wenn auf dem USB-Gerät nur eine Fotodatei gespeichert ist, wird die Diashow nicht wiedergegeben. ● TV-Empfang (wenn Quelle auf TV eingestellt ist): Wählen Sie ATV oder DTV. ● Kanal (wenn Quelle auf TV eingestellt ist): Wählen Sie den gewünschten Kanal. ● Inhalt (wenn Quelle auf USB eingestellt ist): Sie können auf dem USB-Gerät einen Ordner mit Musik- oder Fotodateien wählen, die beim Anschalten des Fernsehgeräts automatisch angezeigt werden. N Wenn der Ordnername zu lang ist, kann der Ordner nicht ausgewählt werden. N Wenn Sie zwei USB-Geräte desselben Typs verwenden, achten Sie darauf, dass sich die Ordnernamen unterscheiden, damit der richtige USB-Speicher gelesen wird. ● Wiederholmodus: Wählen Sie Einmal, Täglich, Mo~Fr, Mo~Sa, Sa~So oder Manuell. N Wenn Manuell gewählt ist, drücken Sie die Taste ►, um den gewünschten Wochentag einzustellen. Drücken Sie die Taste ENTERE, wenn der gewünschte Tag markiert ist, und das Symbol c wird angezeigt. N Sie können die Stunden, Minuten und den Kanal auch über die Zifferntasten auf der Fernbedienung einstellen. N Autom. Ausschalten: Wenn Sie den Timer aktivieren, schaltet sich das Fernsehgerät drei Stunden nach dem Einschalten durch den Timer ab, wenn in dieser Zeit keine Funktionen verwendet wurden Diese Funktion ist nur verfügbar, wenn der Timer aktiviert ist, und sie verhindert Schäden durch Überhitzung, wenn das Fernsehgerät zu lange eingeschaltet ist. Deutsch - 23 �� BN68-02325A-Ger.indb 23 2009-05-19 �� 3:48:50 ¦ Netzwerkverbindung Sie können das Internetprotokoll so konfigurieren, dass Sie mit verschiedenen angeschlossenen Netzwerken kommunizieren können. ❑ Netzwerkverbindung - Kabel ■ LAN-Verbindung für eine DHCP-Umgebung Die Verfahren zum Einrichten des Netzwerks mithilfe von DHCP (Dynamic Host Configuration Protocol) werden nachfolgend beschrieben. Da eine IP-Adresse sowie Teilnetzmaske, Gateway und DNS automatisch zugeordnet werden, wenn Sie DHCP wählen, müssen Sie diese Parameter nicht von Hand eingeben. 1. Verbinden Sie den LAN-Anschluss auf der Rückseite des Fernsehgeräts über ein LAN-Kabel mit dem externen Modem. 2. Verbinden Sie den Modemanschluss an der Wand über ein Modemkabel mit dem externen Modem. Modemanschluss an der Wand Rückseite des Fernsehgeräts Externes Modem (ADSL/VDSL/Kabelfernsehen) 2 Modem-Kabel 1 LAN-Kabel Sie können die Netzwerkverbindung auch über einen Sharer (Router) herstellen. Modemanschluss an der Wand Rückseite des Fernsehgeräts Externes Modem (ADSL/VDSL/Kabelfernsehen) Modem-Kabel IP-Sharer LAN-Kabel LAN-Kabel Sie können den LAN-Anschluss und das Fernsehgerät je nach Netzwerkstatus direkt anschließen. Rückseite des Fernsehgeräts LAN-Anschluss an der Wand LAN-Kabel N Die Anschlüsse (also Position und Art des Anschlusses) des externen Geräts können sich je nach Hersteller unterscheiden. N Wenn die Zuordnung der IP-Adresse durch den DHCP-Server fehlschlägt, müssen Sie das externe Modem aus und nach frühestens 10 Sekunden wieder anschalten. Wiederholen Sie den Versuch danach. N Informationen zu den Verbindungen zwischen dem externen Modem und dem Sharer (Router) finden Sie im Benutzerhandbuch des entsprechenden Geräts. N Sie können das Fernsehgerät direkt an das LAN anschließen, ohne vorher einen Sharer (Router) dazwischen zu schalten. N Sie können kein ADSL-Modem für manuelle Verbindungen verwenden, da dieses DHCP nicht unterstützt. Sie müssen ein ADSL-Modem für automatische Verbindungen verwenden. Deutsch - 24 �� BN68-02325A-Ger.indb 24 2009-05-19 �� 3:48:51 ■ LAN-Verbindung für eine Umgebung mit statischen IP-Adressen Die Verfahren zum Einrichten des Netzwerks mithilfe einer statischen IP-Adresse werden nachfolgend beschrieben. Sie müssen die Ihnen von Ihrem Internet-Provider genannte IP-Adresse, Teilnetzmaske, Gateway und DNS manuell eingeben. 1. Verbinden Sie den LAN-Anschluss auf der Rückseite des Fernsehgeräts über ein LAN-Kabel mit dem LAN-Anschluss in der Wand. Rückseite des Fernsehgeräts LAN-Anschluss an der Wand 1 LAN-Kabel Sie können die Netzwerkverbindung auch über einen Sharer (Router) herstellen. LAN-Anschluss an der Wand Rückseite des Fernsehgeräts IP-Sharer LAN-Kabel LAN-Kabel N Die Anschlüsse (also Position und Art des Anschlusses) des externen Geräts können sich je nach Hersteller unterscheiden. N Wenn Sie eine statische IP-Adresse verwenden, teilt Ihr Internet-Provider Ihnen die IP-Adresse, Teilnetzmaske, Gateway und DNS mit. Sie müssen diese Werte eingeben, um die Netzwerkeinstellungen abzuschließen. Falls Sie die Werte nicht kennen, fragen Sie Ihren Netzwerkadministrator. N Informationen zum Konfigurieren und Verbinden mit Sharer (Router) finden Sie im Benutzerhandbuch des entsprechenden Geräts. N Sie können das Fernsehgerät direkt an das LAN anschließen, ohne vorher einen Sharer (Router) dazwischen zu schalten. N Wenn Sie einen IP-Sharer (IP-Router) verwenden, der DHCP unterstützt, können Sie das Gerät für DHCP oder statische IP einrichten. N Informationen über die Verfahren zum Einrichten mit einer statischen IP-Adresse erfragen Sie bei Ihrem Internet Service Provider. ❑ Netzwerkverbindung - Drahtlos Sie können die Verbindung zum drahtlosen Netzwerk auch über einen drahtlosen IP-Sharer herstellen. Seitenverkleidung des Fernsehgeräts LAN-Anschluss an der Wand Drahtloser IP-Sharer Samsung Wireless LAN Adapter oder LAN-Kabel 1. Schließen Sie den Samsung WLAN-Adapter an den Anschluss USB1(HDD) oder USB2 des Fernsehgeräts an. N Sie müssen den WLAN-Adapter von Samsung (WIS09ABGN) verwenden, wenn Sie mit einem Drahtlosnetzwerk arbeiten möchten. N Der WLAN-Adapter von Samsung ist gesondert erhältlich. Der WLAN-Adapter WIS09ABGN wird bei Spezialanbietern, Internetshops und bei Samsungparts.com angeboten. N Wenn Sie mit einem Drahtlosnetzwerk arbeiten möchten, müssen Sie Ihr Fernsehgerät an einen drahtlosen IP-Sharer anschließen. Wenn der drahtlose IP-Sharer DHCP unterstützt, kann Ihr Fernsehgerät über DHCP oder über eine statische IP-Adresse mit dem Drahtlosnetzwerk verbunden werden. N Der WLAN-Adapter von Samsung unterstützt IEEE 802.11A, IEEE 802.11B, IEEE 802.11G, IEEE 802.11N. Wenn Sie DLNAVideo über die IEEE 802.11B/G-Verbindung anzeigen, wird das Videobild möglicherweise nicht ohne Stockungen angezeigt. N Wenn Ihr IP-Sharer eine deaktivierbare Funktion anbietet, um einen Verbindungstest mittels Ping durchzuführen, so aktivieren Sie diese Funktion. Deutsch - 25 �� BN68-02325A-Ger.indb 25 2009-05-19 �� 3:48:53 N Wählen Sie einen zurzeit unbenutzten Kanal für den drahtlosen IP-Sharer. Wenn der für den drahtlosen IP-Sharer eingestellte Kanal von einem anderen Gerät in der Nähe belegt ist, führt dies zu Störungen und die Datenübertragung scheitert. N Wenn Sie ein anderes Sicherheitssystem als die nachfolgend angeführten verwenden, so kann dies zusammen mit dem Fernsehgerät nicht eingesetzt werden. Es werden nur folgende Sicherheitsschlüssel für den Zugangspunkt (drahtloser IP-Sharer) unterstützt. 1) Authentifizierungsmodus : OPEN, SHARED, WPAPSK, WPA2PSK 2) Verschlüsselungsmethode : WEP, TKIP, AES Es werden nur folgende Sicherheitsschlüssel für den Ad-Hoc-Modus unterstützt. 1) Authentifizierungsmodus : SHARED, WPANONE 2) Verschlüsselungsmethode : WEP, TKIP, AES N Wenn Ihr Zugangspunkt WPS (Wi-Fi Protected Setup) unterstützt, können Sie die Netzwerkverbindung mittels PBC (Push Button Configuration) oder PIN (Personal Indentification Number) herstellen. WPS konfiguriert den SSID- und WPASchlüssel in jedem Modus automatisch. N Wenn das Gerät nicht zertifiziert ist, kann es die Verbindung zum Fernseher möglicherweise nicht über den WLANAdapter von Samsung herstellen. ¦ Konfigurieren des Netzwerks ❑ Netzwerktyp ■ Kabel Anschließen an das Netzwerk mit einem Kabel. ■ Drahtlos Drahtloser Netzanschluss. Sendungsoptionen Sicherheit Einstellungen Wählen Sie den Kabelzugang oder den Funkzugang als Methode für die Netzwerkverbindung. N Dieses Menü wird nur aktiviert, wenn der WLAN-Adapter von Samsung angeschlossen ist. Netzwerk ▶ Allgemein ❑ Eingang einrichten ■ Kabelnetzwerk einrichten (wenn Netzwerktyp auf Kabel eingestellt ist) N Überprüfen Sie, ob das Netzwerkkabel angeschlossen ist. ● IP-Konfiguration → Auto / Manuell ● Netzwerktest: Sie können den Netzwerkverbindungsstatus nach dem Einrichten des Netzwerks testen bzw. bestätigen. N Verbindung zum drahtgebundenen Netzwerk nicht möglich Wenn Ihr Internet-Provider die MAC-Adresse des Geräts registriert hat, mit dem die erste Internetverbindung hergestellt wurde und diese MAC-Adresse bei jeder Verbindung zum überprüft, besteht die Möglichkeit, dass Ihr Fernsehgerät keine Internetverbindung herstellen kann, da dessen MAC-Adresse von der des Geräts abweicht. Fragen Sie in diesem Fall Ihren Internetprovider, auf welche Weise die Verbindung durch andere Geräte als Ihren PC (z. B. Ihr Fernsehgerät) hergestellt werden kann. Wenn Ihr Internet-Provider eine Kennung oder ein Kennwort erfordert, um die Verbindung zum Internet (Netzwerk) herzustellen, kann Ihr Fernsehgerät möglicherweise keine Internetverbindung aufbauen. In diesem Fall müssen Sie Ihre Kennung oder Ihr Kennwort eingeben, wenn die Verbindung mit dem Internet über den Internet-Sharer (Router) hergestellt wird. Die Internetverbindung kann auch aufgrund von Problemen mit der Firewall fehlschlagen. Setzen Sie sich in diesem Fall mit Ihrem Internetprovider in Verbindung. Wenn Sie selbst noch dann keine Internetverbindung aufbauen können, wenn Sie die Anweisungen Ihres Internet-Providers eingehalten haben, setzen Sie sich mit Samsung Electronics in Verbindung. Kabelnetzwerk einrichten-Auto Wenn Sie das Netzwerkkabel anschließen und DHCP wird unterstützt, werden die Einstellungen für das Internetprotokoll (IP) automatisch konfiguriert. 1. Stellen Sie Netzwerktyp auf Kabel. 2. Wählen Sie Kabelnetzwerk einrichten. 3. Stellen Sie IP-Konfiguration auf Auto. N Das Internetprotokoll wird automatisch eingestellt. 4. Wählen Sie Netzwerktest, um die Netzwerkverbindung zu überprüfen. Kabelnetzwerk einrichten IP-Konfiguration : Auto ▶ Netzwerktest IP-Adresse : Teilnetzmaske : Gateway DNS-Server : : U Navig. E Eingabe R Zurück Deutsch - 26 �� BN68-02325A-Ger.indb 26 2009-05-19 �� 3:48:53 Kabelnetzwerk einrichten-Manuell Wenn Sie das Fernsehgerät mittels einer statischen IP-Adresse mit dem LAN verbinden möchten, müssen Sie das Internetprotokoll (IP) konfigurieren. 1. Stellen Sie Netzwerktyp auf Kabel. 2. Wählen Sie Kabelnetzwerk einrichten. 3. Stellen Sie IP-Konfiguration auf Manuell. Kabelnetzwerk einrichten IP-Konfiguration : Manuell ▶ Netzwerktest IP-Adresse :� 0 0 0 0 Teilnetzmaske :� 0 0 0 0 Gateway :� 0 0 0 0 DNS-Server : 0 0 0 0 4. Geben Sie die Parameter für IP-Adresse, Teilnetzmaske, Gateway und DNS-Server ein. N Drücken Sie die Zifferntasten auf der Fernbedienung, wenn Sie das Netzwerk manuell einstellen. U Navig. E Eingabe R Zurück 5. Wählen Sie Netzwerktest, um die Netzwerkverbindung zu überprüfen. ■ Drahtlos-Netzwerk einrichten N Dieses Menü wird nur aktiviert, wenn der WLAN-Adapter von Samsung angeschlossen ist. ● IP-Konfiguration → Auto / Manuell ● Netzwerktest: Sie können den Netzwerkverbindungsstatus nach dem Einrichten des Netzwerks testen bzw. bestätigen. N Keine Verbindung mit einem Zugangspunkt. Möglicherweise kann Ihr Fernsehgerät keinen Zugangspunkt finden, der mit privater SSID konfiguriert ist. Ändern Sie in diesem Fall die Einstellungen für den Zugangspunkt, und versuchen Sie es erneut. Wenn Ihr Internet-Provider die MACAdresse des Geräts registriert hat, mit dem die erste Internetverbindung hergestellt wurde und diese MAC-Adresse bei jeder Verbindung zum überprüft, besteht die Möglichkeit, dass Ihr Fernsehgerät keine Internetverbindung herstellen kann, da dessen MAC-Adresse von der des Geräts abweicht. Fragen Sie in diesem Fall Ihren Internetprovider, auf welche Weise die Verbindung durch andere Geräte als Ihren PC (z. B. Ihr Fernsehgerät) hergestellt werden kann. Wenn Sie selbst noch dann keine Internetverbindung aufbauen können, wenn Sie die Anweisungen Ihres Internet-Providers eingehalten haben, setzen Sie sich mit Samsung Electronics in Verbindung. ● Wählen Sie ein Netzwerk Zugangspunkt: Sie können wählen, welcher IP-Sharer verwendet werden soll, wenn Sie ein Drahtlosnetzwerk nutzen. Drahtlos-Netzwerk einrichten N Wenn in der Liste der Zugangspunkte kein drahtloser Zugangspunkt enthalten ist, SicherSchl. drücken Sie die rote Taste. Zahl A B C D E F N Sobald die Verbindung aufgebaut ist, wird automatisch wieder das Fenster Löschen Fertig angezeigt. N Sie haben einen Zugangspunkt mit Authentifizierung gewählt: n Navig. `~9 Zahl E Eingabe R Zurück Der Eingabebildschirm für den Sicherheitsschlüssel wird geöffnet. Geben Sie den Sicherheitsschlüssel ein und drücken Sie die blaue Taste auf der Fernbedienung. N Wenn Sie als Sicherheitsverschlüsselung WEP verwenden, können Sie bei der Eingabe des Sicherheitsschlüssels die Zahlen von 0 bis 9 und die Buchstaben von A bis F verwenden. Verbinden mit WPS (Wi-Fi Protected Setup) ● Wenn der Schlüssel bereits eingestellt ist: Wählen Sie in der Liste der Zugangspunkte WPS. N Sie haben die Wahl zwischen PBC, PIN, Schlüssel. Anschließen mit PBC: Wählen Sie PBC (Push Button Configuration). Drücken Sie innerhalb von 2 Minuten die PBC-Taste am Zugangspunkt und warten Sie bis die Verbindung hergestellt ist. Drahtlos-Netzwerk einrichten Wählen Sie ein Netzwerk Suchlauf Ad-hoc 3/9 sson jee AP_1 Ap_2 PBC PIN Schlüssel U Navig. E Eingabe R Zurück Drücken Sie die PBC-Taste am Zugangspunkt. Name des Zugangspunkts : AP_1 Storno Anschließen mit PIN: Wählen Sie eine PIN (Personal Identification Number). Drücken Sie auf OK, nachdem Sie beim Einrichten des Zugangspunkts die PIN-Nummer des Fernsehers eingegeben haben. Name des Zugangspunkts : AP_1 N Es wird eine Meldung mit dem PIN-Code angezeigt. Geben Sie am Zugangspunkt PIN-Nummer : 12345678 innerhalb von 2 Minuten den PIN-Code ein. Wählen Sie OK und warten Sie auf OK Storno den Verbindungsaufbau. N Wiederholen Sie den Versuch, wenn die Verbindung nicht hergestellt wird. N Wenn die Verbindung trotz des erneuten Versuchs nicht wieder aufgebaut wird, setzen Sie den Zugangspunkt zurück. Einzelheiten entnehmen Sie bitte dem Handbuch des jeweiligen Zugangspunkts. Drahtlos-Netzwerk einrichten Vwerbinden mit Schlüssel: Wenn Sie Schlüssel. wählen, wird das Eingabefenster angezeigt. Geben Sie den Sicherheitsschlüssel ein, und drücken Sie die Taste Blau. N Wiederholen Sie den Versuch, wenn die Verbindung nicht hergestellt wird. SicherSchl. A B C D E F G H I J K L M N O P Q R S T U V W X Y Z Zahl Klein Löschen Fertig n Navig. `~9 Zahl E Eingabe R Zurück Deutsch - 27 �� BN68-02325A-Ger.indb 27 2009-05-19 �� 3:48:54 ● Drahtlos-Netzwerk einrichten Wenn der Schlüssel nicht eingestellt ist: Wenn die Sicherheitseinstellung eines 3/9 Zugangspunkts, der WPS unterstützt, NONE lautet, können Sie PBC, PIN, Keine Sicherheit Wählen Sie ein Netzwerk sson wählen. Mit Keine Sicherheit können Sie die Verbindung zum Zugangspunkt direkt und ohne PBC jee PIN die WPC-Funktion herstellen. Suchlauf AP_1 Keine Sicherheit Ad-hoc Ap_2 N Der Prozess bei PBC, PIN entspricht dem oben beschriebenen. Siehe " Wenn der Schlüssel bereits eingestellt ist. U Navig. E Eingabe R Zurück N Wiederholen Sie den Versuch, wenn die Verbindung nicht hergestellt wird. Ad-hoc: Mit dem WLAN-Adapter von Samsung können Sie die Verbindung zu einem Mobilgerät mit Hilfe eines Peer-toPeer-Netzwerks auch ohne Zugriffspunkt herstellen. So stellen Sie eine Verbindung mit einem neuen Ad-hoc 1. Wählen Sie Wählen Sie ein Netzwerk, um die Geräteliste zu öffnen. 2. In der Geräteliste drücken Sie die blaue Taste auf der Fernbedienung, oder Sie wählen Ad-hoc. N Die Meldung Die Meldung Möglicherweise ist das vorhandene Netzwerk funktional eingeschränkt. Möchten Sie die Netzwerkverbindung wechseln? wird angezeigt. Die Meldung Möglicherweise ist das vorhandene Netzwerk funktional eingeschränkt. Möchten Sie die Netzwerkverbindung wechseln? Ja Nein 3. Geben Sie den generierten Name des Netzwerks (SSID) : und den Schlüssel in das Gerät ein, mit dem Sie sich verbinden möchten. So stellen Sie eine Verbindung mit einem vorhandenen Ad-hoc-Gerät her: 1. Wählen Sie Wählen Sie ein Netzwerk, um die Geräteliste zu öffnen. 2. Wählen Sie eine Gerät aus der Geräteliste. 3. Wenn ein Sicherheitsschlüssel erforderlich ist, geben Sie diesen erneut ein. N Wenn das Netzwerk nicht fehlerfrei arbeitet, kontrollieren Sie noch einmal den Name des Netzwerks (SSID): und den Schlüssel. Wenn der Schlüssel falsch ist, kann dies die Ursache für die Störung sein. Drahtlos-Netzwerk einrichten-Auto Wenn Sie eine Verbindung zu einem Zugangspunkt herstellen möchten, muss dieser DHCP unterstützen. Nur Geräte, die den Ad-hoc-Modus unterstützen, können ohne DHCP angeschlossen werden. 1. Stellen Sie Netzwerktyp auf Drahtlos. 2. Wählen Sie Drahtlos-Netzwerk einrichten. 3. Stellen Sie IP-Konfiguration auf Auto. N Das Internetprotokoll wird automatisch eingestellt. Drahtlos-Netzwerk einrichten IP-Konfiguration : Auto ▶ Netzwerktest Wählen Sie ein Netzwerk : AP1 IP-Adresse : Teilnetzmaske : Gateway DNS-Server : : U Navig. E Eingabe R Zurück 4. Wählen Sie mit Wählen Sie ein Netzwerk ein Netzwerk aus. 5. Wählen Sie Netzwerktest, um die Netzwerkverbindung zu überprüfen. Drahtlos-Netzwerk einrichten Drahtlos-Netzwerk einrichten-Manuell IP-Konfiguration 1. Stellen Sie Netzwerktyp auf Drahtlos. : Manuell ▶ Netzwerktest 2. Wählen Sie Drahtlos-Netzwerk einrichten. Wählen Sie ein Netzwerk : AP1 IP-Adresse :� 0 0 0 0 3. Stellen Sie IP-Konfiguration auf Manuell. Teilnetzmaske :� 0 0 0 0 4. Geben Sie die Parameter für IP-Adresse, Teilnetzmaske, Gateway und DNS-Server ein. N Drücken Sie die Zifferntasten auf der Fernbedienung, wenn Sie das Netzwerk manuell einstellen. Gateway :� 0 0 0 0 DNS-Server : 0 0 0 0 U Navig. E Eingabe R Zurück 5. Wählen Sie mit Wählen Sie ein Netzwerk ein Netzwerk aus. 6. Wählen Sie Netzwerktest, um die Netzwerkverbindung zu überprüfen. Deutsch - 28 �� BN68-02325A-Ger.indb 28 2009-05-19 �� 3:48:55 Eingang / UNTERSTÜTZUNG ¦ Menü Eingang ❑ Quellen ■ Eingang Hiermit wählen Sie, ob das Fernsehgerät mit einem Fernsehsignal versorgt wird oder an andere externe Signaleingänge wie z. B. DVD- bzw. Blu-Ray-Player oder an einen Kabelreceiver / Satellitenreceiver (Set-Top Box) angeschlossen ist. Stellen Sie die gewünschte Signalquelle ein. O Drücken Sie die Taste SOURCE auf der Fernbedienung, um eine externe Signalquelle anzuzeigen. Stellen Sie mit der TV-Taste den TV-Modus ein. TV / Ext.1 / Ext.2 / AV / Komp. / PC / HDMI1 / HDMI2 / HDMI3/DVI / HDMI4 N Sie können nur solche externen Geräte wählen, die an das Fernsehgerät angeschlossen sind. Bei Quellen werden die angeschlossenen Signalquellen hervorgehoben und am Anfang dargestellt. Nicht angeschlossene Signalquellen werden am Ende der Liste dargestellt. N Wenn USB-Geräte an die USB1(HDD)- und USB2-Stecker angeschlossen sind, werden sie als USB1 und USB2 angezeigt. N Ext. und PC bleiben immer aktiviert. N Verwenden der Farbtasten auf der Fernbedienung in Verbindung mit der Kanalliste. Rot (Aktual.): Aktualisieren der angeschlossenen externen Geräte. Drücken Sie diese Taste, wenn Ihr Eingangsgerät angeschaltet und angeschlossen ist, aber nicht in der Liste erscheint. TOOLS (Extras): Anzeigen der Menüs Name bearb. und Information. Quellen Name bearb. Quellen TV Ext. 1 Ext. 2 PC :---:---:---- AV Komp. :---:---- Aktual. T Extras ❑ Name bearb. ■ VCR / DVD / Kabel-STB / Sat-STB / PVR-STB / AV-Receiver / Spiel / Camcorder / PC / DVI / DVI PC / TV / IPTV / Blu-ray / HD DVD / DMA Vergeben Sie Namen für die an die Eingangsbuchsen angeschlossenen Geräte, um die Auswahl der Signalquelle zu vereinfachen. N Wenn ein PC mit einer Auflösung von 1920 x 1080 bei 60 Hz an den Anschluss HDMI IN 3(DVI) angeschlossen wird, stellen Sie unter Name bearb. im Modus Eingang den HDMI3/DVI-Modus auf DVI PC ein. N Wenn Sie ein HDMI/DVI-Kabel mit dem HDMI IN 3(DVI)-Anschluss verbinden, stellen Sie den HDMI3/DVI-Modus im Bereich Name bearb. des Modus Eingang auf DVI oder DVI PC ein. In diesem Fall ist ein gesonderter Audioanschluss erforderlich. ¦ Menü Unterstützung ❑ Rechtliche Hinweise Unterstützung Lesen Sie die rechtlichen Hinweise und den allgemeinen Haftungsausschluss hinsichtlich der Inhalte und Dienste Dritter. N Der Haftungsausschluss kann sich je nach Land unterscheiden. ❑ Produktdemo Rechtliche Hinweise ▶ Produktdemo Eigendiagnose Software-Update HD-Anschlussplan Samsung kontaktieren Mit diesem Gerätehandbuch erhalten Sie Informationen zu den wichtigsten Funktionen dieses Fernsehgeräts. Die mit dieser Funktion zur Verfügung gestellten Beschreibungen liegen nur in englischer Sprache vor. Picture Quality Voll HD 1080p 100Hz Motion Plus Picture Mode [email protected] Internet@TV - Content Service Content Library Flash USB2.0 Movie DLNA Wireless Eco-Friendly Energy Saving Mode Eco Material Deutsch - 29 �� BN68-02325A-Ger.indb 29 2009-05-19 �� 3:48:55 Verwenden der Fernbedienungstasten im Menü für das Produktdemo. Taste Gelbe Taste ◄/► ENTERE RETURN EXIT Vorgang Zeigt den nacheinander den Inhalt des Produktdemo an. (Auto Play) Cursor bewegen und Elemente auswählen. Markiertes Element auswählen. Zurück zum vorherigen Menü. Beenden der aktuellen Funktion und wechseln zum Hauptmenü des Produktdemo. ❑ Eigendiagnose ■ Bildtest Eigendiagnose Bei schlechter Bildqualität führen Sie einen Bildtest durch. Prüfen Sie das bunte Testbild auf Bildtest ▶ dem Bildschirm um festzustellen, ob das Problem weiterhin besteht. Audiotest ● Ja: Wenn das Testbild nicht angezeigt wird oder wenn es verrauscht ist, wählen Sie Ja. Signalinformation Möglicherweise liegt ein Problem mit dem Fernsehgerät vor. Hilfe erhalten Sie in diesem U Navig. E Eingabe R Zurück Fall beim beim Callcenter von Samsung. ● Nein: Wenn das Testbild fehlerlos angezeigt wird, wählen Sie Nein. Möglicherweise liegt ein Problem mit Ihrer Haustechnik vor. Bitte überprüfen Sie sämtliche Anschlüsse noch einmal. Wenn das Problem weiterhin besteht, schlagen Sie im Benutzerhandbuch für das externe Gerät nach. ■ Audiotest Bei schlechter Tonqualität führen Sie einen Audiotest durch. Sie können die Tonqualität kontrollieren, indem Sie über den Fernseher ein im Gerät gespeicherte Melodie abspielen. N Wenn die Fernsehlautsprecher keinen Ton ausgeben, müssen Sie vor dem Audiotest sicherstellen, dass Lautsprecherauswahl im Audiomenü auf TV-Lautsprecher eingestellt ist. N Die Melodie ist im Test auch dann zu hören, wenn Lautsprecherauswahl auf Ext. Lautsprecher eingestellt ist, oder wenn der Ton mit der Taste MUTE stumm geschaltet wurde. ● Ja: Wenn Sie den Ton beim Test nur durch einen Lautsprecher oder gar nicht hören, wählen Sie Ja. Möglicherweise liegt ein Problem mit dem Fernsehgerät vor. Hilfe erhalten Sie in diesem Fall beim beim Callcenter von Samsung. ● Nein: Wenn Sie den Ton über die Lautsprecher hören können, wählen Sie Nein. Möglicherweise liegt ein Problem mit Ihrer Haustechnik vor. Bitte überprüfen Sie sämtliche Anschlüsse noch einmal. Wenn das Problem weiterhin besteht, schlagen Sie im Benutzerhandbuch für das externe Gerät nach. ■ Signalinformation (nur Digitalkanäle) Im Gegensatz zu analogen Kanälen, deren Empfangsqualität von "verregnet" bis ungestört variieren kann, zeichnen sich digitale Kanäle (HDTV) dadurch aus, dass sie entweder perfekte Empfangsqualität bieten oder gar keinen Empfang ermöglichen. Deshalb können Sie anders als bei Analogkanälen keine Feinabstimmung vornehmen. Sie können aber Ihre Antenne so einstellen, dass der Empfang der verfügbaren Digitalkanäle besser wird. N Wenn die Signalstärkeanzeige ein schwaches Signal anzeigt, verändern Sie die Position Ihre Antenne so, dass die Signalstärke zunimmt. Machen Sie dies solange, bis Sie die optionale Ausrichtung mit dem stärksten Signal gefunden haben. Deutsch - 30 �� BN68-02325A-Ger.indb 30 2009-05-19 �� 3:48:55 ❑ Software-Update Möglicherweise wird Samsung in der Zukunft Upgrades der TV-Firmware anbieten. Diese Upgrades können über das Fernsehen ausgeführt werden, sofern es an das Internet angeschlossen ist, oder durch Herunterladen der neuen Firmware von samsung.com auf ein USB-Speichergerät. N Aktuelle Version, wenn die Software bereits im Fernsehgerät installiert ist. N Alternative Software (Sicherung) zeigt die alte Version an, die ersetzt wird. N Die Software wird angegeben als Jahr/Monat/Tag_Version. Je aktueller das Datum, desto neuer die Softwareversion. Installieren Sie möglichst immer die aktuellste Version. ■ PER USB Legen Sie ein USB-Laufwerk mit dem gespeicherten Firmwareupgrade von samsung.com in das Fernsehgerät ein. Achten Sie beim Einspielen des Upgrades darauf, die Stromversorgung nicht zu unterbrechen und das USB-Laufwerk nicht zu entfernen. Das Fernsehgerät wird automatisch ab- und wieder angeschaltet, sobald das Firmwareupgrade abgeschlossen ist. Überprüfen Sie die Firmwareversion, nachdem das Upgrade durchgeführt wurde (die neue Version hat eine höhere Nummer als die ältere Version). Nachdem die Software aktualisiert wurde, sind die Video- und Audioeinstellungen wieder auf die werkseitigen Standardwerte zurückgesetzt. Wir empfehlen, diese Werte aufzuschreiben, damit Sie sie nach dem Upgrade einfach wieder einstellen können. Seitenverkleidung des Fernsehgeräts oder USB-Laufwerk Software-Update Aktuelle Version 2009/01/18_000001 PER USB ▶ PER Channel Update im Standby : 45 Min Alternative Software 2009/01/15_00000 U Navig. E Eingabe R Zurück ■ PER Channel Aktualisierung der Software über das Sendesignal. N Wenn Sie diese Funktion während des Übertragungszeitraums für Software wählen, sucht die Funktion nach verfügbarer Software und lädt sie herunter. N Die zum Herunterladen der Software erforderliche Zeit hängt vom Signalstatus ab. ■ Update im Standby Um die Softwareaktualisierung mit eingeschaltetem Hauptnetz fortzusetzen, wählen Sie mit den Tasten ▲ oder ▼ „Ein“ aus. 45 Minuten nach Beginn des Standbymodus wird die manuelle Aktualisierung automatisch ausgeführt. Da intern die Stromversorgung für das Gerät eingeschaltet ist, kann der LCD-Bildschirm leicht beleuchtet sein. Dieser Zustand kann etwas mehr als eine Stunde andauern, bis die Softwareaktualisierung abgeschlossen ist. ■ Alternative Software (Sicherung) Wenn es ein Problem mit der neuen Firmware gibt, durch das der Betrieb beeinflusst wird, können Sie die neue Software durch die vorherige Version ersetzen. N Wenn die Software geändert wurde, wird die vorhandene Software angezeigt. N Sie können die aktuelle Software durch die alternative Software ersetzen, indem Sie "Alternative Software" wählen. ❑ HD-Anschlussplan In diesem Menü wird die Verbindungsmethode für optimale HDTV-Qualität vorgeschlagen. Beachten Sie diese Informationen, wenn Sie externe Geräte an den Fernseher anschließen. ❑ Samsung kontaktieren Zeigen Sie diese Informationen an, wenn Ihr Fernseher nicht ordnungsgemäß arbeitet oder wenn Sie die Software aktualisieren möchten. Sie finden hier Informationen zum Callcenter, zum Gerät und zum Herunterladen der Softwaredateien. Deutsch - 31 �� BN68-02325A-Ger.indb 31 2009-05-19 �� 3:48:55 Media Play (USB & DLNA) ¦ Anschließen eines USB-Geräts 1. Drücken Sie zum Einschalten des Computers die POWER-Taste. 2. Schließen Sie ein USB-Gerät mit Foto-, Musik und/oder Filmdateien an die USB1(HDD) oder USB2 seitlich am Fernsehgerät an. Seitenverkleidung des Fernsehgeräts 3. Wenn das Fenster zur Auswahl der Anwendung angezeigt wird, drücken Sie auf die Taste ENTERE, um Media Play (USB & DLNA) zu wählen. oder N MTP (Media Transfer Protocol) wird nicht unterstützt. N Als Dateisystem wird ausschließlich FAT16, FAT32 und NTFS unterstützt. USB-Laufwerk N Einige Typen von USB-Digitalkameras und -Audiogeräten sind eventuell nicht mit diesem Fernseher kompatibel. SUM N Media Play unterstützt ausschließlich USB-Massenspeichergeräte vom Typ MSC (Mass Storage Class). MSC-Geräte sind Massenspeicher zur Übertragung von Daten. Beispiele für MSC sind Thumb-Laufwerke und Flash PHOTO Card-Lesegeräte sowie USB HDD (USB-HUB wird nicht unterstützt). N Stellen Sie die Verbindung direkt zum USB-Anschluss Ihres Fernsehgeräts her. Wenn Sie eine gesonderte Kabelverbindung verwenden, können USBKompatibilitätsprobleme auftreten. Photo Music Movie Setup N Ehe Sie Ihr Gerät an das Fernsehgerät anschließen, sichern Sie Ihre Dateien, R Zurück Gerät SUM um eventuellem Datenverlust vorzubeugen. SAMSUNG haftet nicht für Verlust und Beschädigung von Daten. N Schließen Sie eine USB-Festplatte an den dafür reservierten Anschluss an: USB1 (HDD). Wenn das angeschlossene Gerät allerdings eine hohe elektrische Leistung abfordert, kann USB1 (HDD) es möglicherweise nicht versorgen. N Trennen Sie das USB-Gerät nicht, solange Daten geladen werden. N MSC unterstützt MP3- und JPEG-Dateien, wogegen PTP-Geräte nur JPEG-Dateien unterstützen. N Je höher die Auflösung des Bilds, desto länger dauert es, um es auf dem Bildschirm anzuzeigen. N Die maximal unterstützte JPEG-Auflösung beträgt 15360x8640 Pixel. N Bei nicht unterstützten oder beschädigten Dateien wird die Meldung "Dateiformat wird nicht unterstützt" angezeigt. N Wenn der Sortierschlüssel auf "Basisansicht" eingestellt ist, können bis zu 1000 Dateien in einem Ordner angezeigt werden. Mit dem anderen Sortierschlüssel sind bis zu 10000 Dateien möglich. N MP3-Dateien mit DRM, die von einer nicht-lizenzfreien Site heruntergeladen worden sind, können nicht abgespielt werden. Digital Rights Management (DRM) ist eine Technologie, die das Erstellen von Inhalten und die Distribution und das Management der Inhalte integriert und umfassend unterstützt. Dies beinhaltet den Schutz der Rechte und der Interessen der Content-Provider, die Verhütung von unerlaubtem Kopieren der Inhalte sowie das Management von Abrechnung und Bezahlung. N Wenn Sie zu einem anderen Foto wechseln, kann das Laden einige Sekunden dauern. In diesem Fall wird das Ladesymbol angezeigt. N Wenn mehr als 2 PTP Geräte angeschlossen sind, können Sie nur jeweils eines verwenden. N Wenn mehr als ein MSC-Gerät angeschlossen ist, werden einige davon möglicherweise nicht anerkannt. Wenn ein Gerät hohe elektrische Leistung (mehr als 500 mA oder 5 V) abfordert, wird es möglicherweise nicht versorgt. N Wenn eine Überstrom-Warnung (Ausfall, neues Gerät hinzufügen. Überstrom an USB1/USB2) angezeigt wird, während Sie ein USB-Gerät anschließen oder verwenden, wird das Gerät möglicherweise nicht erkannt oder weist eine Störung auf. 851,86 MB/993,02 MB Frei Verwenden der Fernbedienungstasten im Menü Media Play Taste ▲/▼/◄/► ENTERE ∂/∑ RETURN TOOLS ∫ π/μ INFO MEDIA.P < P >, EXIT, TV Vorgang Cursor bewegen und Elemente auswählen. Markiertes Element auswählen. Bei der Wiedergabe einer Diashow, eines Films oder eine Musikdatei: - Durch Drücken der Taste ENTERE während der Wiedergabe wird die Wiedergabe unterbrochen. - Durch erneutes Drücken der Taste ENTERE während der Wiedergabe wird die Wiedergabe fortgesetzt. Wiedergabe oder Pause der Diashow oder Musik- bzw. Filmdatei. Zurück zum vorherigen Menü. Ausführen verschiedener Funktionen aus dem Foto-, Musik- und Filmmenü. Anhalten der aktuellen Diashow und Musik- oder MP3-Datei. Wechsel zur vorherigen Gruppe/nächsten Gruppe. Anzeigen von Dateiinformationen. Beenden des Modus Media Play. Beenden des Modus Media Play und Rückehr in den TV-Modus. Deutsch - 32 �� BN68-02325A-Ger.indb 32 2009-05-19 �� 3:48:56 ¦ Media Play funktion Mit dieser Funktion können Sie auf einem USB-Speichermedium (MSC) gespeicherte Foto-, Musik und/oder Filmdateien anzeigen bzw. wiedergeben. N Möglicherweise treten bei lizenzfreien Multimediadateien weniger Probleme auf. Starten des Modus Media Play (USB & DLNA). 1. Drücken Sie die Taste MENU. Wählen Sie durch Drücken der Tasten ▲ oder ▼ die Option Anwendung, und drücken Sie dann die Taste ENTERE. 2. Wählen Sie durch Drücken der Tasten ▲ oder ▼ die Option Media Play (USB & DLNA), und drücken Sie dann die Taste ENTERE. N Das Menü Media Play (USB & DLNA) wird geöffnet. O Drücken Sie die MEDIA.P-Taste auf der Fernbedienung, um das Media PlayMenü anzuzeigen. O Drücken Sie die Taste SOURCE auf der Fernbedienung, um die Liste der Signalquellen anzuzeigen. Drücken Sie dann auf ▲ oder ▼, und wählen Sie USB. 851,86 MB/993,02 MB Frei SUM PHOTO Photo SUM Music Movie Setup R Zurück Gerät 3 Drücken Sie die rote Taste und dann ▲ oder ▼, um den USB-Speicher zu wählen. Drücken Sie die Taste ENTERE. N Diese Funktion unterscheidet sich, je nachdem welches USB-Speichergerät / DLNA-Gerät verwendet wird. N Der Name des USB-Geräts wird links unten auf dem Bildschirm angezeigt. 4. Drücken Sie die Tasten ◄ oder ►, um ein Symbol (Photo, Music, Movie, Setup) auszuwählen, und drücken Sie dann die Taste ENTERE. N Um den Media Play-Modus zu beenden, drücken Sie auf der Fernbedienung die Taste MEDIA.P. Farbe Ordner Benutzerdef. Sicheres Entfernen von USB-Geräten Basisansicht 5/15 Sie können das Gerät sicher vom Fernsehgerät entfernen. 1. Drücken Sie die TOOLS-Taste in der Dateiliste von Media Play oder während eine Diashow oder Musik- bzw. Filmdatei wiedergegeben wird. 2. Wählen Sie durch Drücken der Tasten ▲ oder ▼ die Option Sicher entfernen und drücken Sie dann die Taste ENTERE . 1231.jpg SUM 1232.jpg 1233.jpg Gerät 1234.jpg Erstellung Diashow Gruppe abspielen Information Sicher entfernen 1235.jpg 1236.jpg 1237.jpg Favoriten-Einst. Wählen T Extras R Zurück 3. Entfernen Sie das USB-Gerät sicher vom Fernsehgerät. Bildschirmanzeige Farbe Ordner 1Basisansicht Benutzerdef. Abschnitt mit der Liste der Sortierschlüssel Erstellung Abschnitt mit der Gruppenliste 2 c 5/15 Abschnitt mit der Dateiliste 1231.jpg 1232.jpg 1233.jpg 1235.jpg 1234.jpg 1236.jpg 1237.jpg 3 6 SUM 4 Gerät 5 1Datei(en) gew. Favoriten-Einst. Wählen T Extras R Zurück Wechseln Sie mit den Auf- und Ab-Tasten entweder zu "Abschnitt mit der Liste der Sortierschlüssel", "Abschnitt mit der Gruppenliste" oder zu "Abschnitt mit der Dateiliste". Wählen Sie einen Abschnitt und drücken Sie auf die Taste ◄ oder ►, um einen Eintrag auszuwählen. 1 Aktueller Sortierschlüssel: Dieses Feld zeigt die aktuell eingestellte Sortierreihenfolge. Drücken Sie zum Ändern des Standards für die Sortierung der Dateien die Taste ◄ oder ►. 2 Anzeigegruppen: Zeigt die detaillierten Dateigruppen sortiert nach dem gewählten Sortierschlüssel an. Die Sortiergruppe mit der ausgewählten Musikdatei wird hervorgehoben. 3 Ausgewählte Datei: Die gewählte Datei können Sie nun steuern. Foto- und Filmdateien werden als Miniaturbilder angezeigt. 4 Aktuelles Gerät: Zeigt den Namen des aktuell ausgewählten Geräts an. Wählen Sie mit der roten Taste ein Gerät. • Rote Taste (Gerät): Dient zur Auswahl eines angeschlossenen Geräts. Deutsch - 33 �� BN68-02325A-Ger.indb 33 2009-05-19 �� 3:49:01 5 Hilfe • Grüne Taste (Favoriten-Einst.): Ändert die Favoriteneinstellung für die gewählte Datei. Drücken Sie diese Taste so oft, bis der gewünschte Wert angezeigt wird. • Gelbe Taste (Wählen): Hiermit wählen Sie eine Datei aus der Dateiliste aus. Die ausgewählten Dateien werden mit dem Symbolcgekennzeichnet. Drücken Sie die gelbe Taste noch einmal, um die Auswahl einer Datei zu stornieren. • TOOLS-Taste (Extras): Hiermit zeigen Sie die Optionsmenüs an. (Der Inhalt des Optionsmenüs richtet sich nach dem jeweiligen Status.) 6 Informationen zur Auswahl von Elementen: Zeigt die Anzahl der Dateien an, die durch Drücken der gelben Taste ausgewählt wurden. ¦ Sortieren der Foto- / Musik- / Filmliste ❑ Basisansicht Zeigt die Ordner auf dem USB-Speichergerät an. Wenn Sie einen Ordner auswählen und die Taste ENTERE drücken, werden nur die Filmdateien im gewählten Ordner angezeigt. N Bei Sortierung anhand der Basisansicht können Sie keine Favoritendateien festlegen. Farbe 1231.jpg 1232.jpg 1233.jpg Erstellung SUM Benutzerdef. Ordner Traurig Titel Basisansicht 3/37 Glen Hans Once Ost 2007 Soundtrack Want Me SUM 1237.jpg Favoriten-Einst. Wählen T Extras R Zurück Gerät Genre Lies 1236.jpg 1235.jpg 1234.jpg ❑ Preference → FFF / FFF / FFF / FFF Hiermit werden die Dateien nach den Vorlieben (Favoriten) sortiert. N Ändern der Favoriteneinstellungen Markieren Sie das gewünschte Foto in der Fotoliste und drücken Sie dann so oft die grüne Taste, bis die gewünschte Einstellung angezeigt wird. N Die Sterne dienen nur zum Gruppieren. So hat zum Beispiel ein Eintrag mit 3 Sternen keinerlei Priorität vor dem Eintrag mit einem Stern. Basisansicht 5/15 ❑ Ordner Hiermit werden die Fotos nach Ordnern sortiert. Wenn es auf dem USB-Speicher viele Ordner gibt, werden die Fotodateien nach Ordnern sortiert. Die Filmdatei im Stammordner erscheint als erste und die anderen Dateien werden ordnerweise nach Namen sortiert angezeigt. Benutzerdef. Ordner Way I Love You Shine Favoriten-Einst. Wählen T Extras R Zurück Gerät Titel Gold HaHaHa Ordner Benutzerdef. Basisansicht Erstellung ❑ Zeitstrahl (Photo / Movie) Hiermit werden die Filmtitel nach Symbol/Nummer/Anfangsbuchstabe/Spezial sortiert. 5/15 1231.avi ❑ Titel (Music / Movie) Hiermit werden die Musikdateien nach Symbol/Nummer/Anfangsbuchstabe/Spezial sortiert, und die Musikdatei wird gezeigt. 1232.avi SUM 1233.avi Gerät ABCD.avi 1235.avi 1236.avi 1237.avi Favoriten-Einst. Wählen T Extras R Zurück Photo ❑ Farbe → Rot / Gelb / Grün / Blau / Magenta / Schwarz / Grau / Jedes Alter Hiermit werden die Fotos nach der Farbe sortiert. Sie können die Farbinformation des Fotos ändern. N Aktivieren Sie Farbansicht verwenden im Setup-Menü, ehe Sie Fotos nach der Farbe sortieren. Music ❑ Interpret Hiermit werden die Musikdateien nach Symbol/Nummer/Anfangsbuchstabe/Spezial des Interpreten sortiert. ❑ Stimmung → Dynamisch / Rhythmisch / Traurig / Aufregend / Ruhig / Jedes Alter Hiermit sortieren Sie die Musikdateien nach der Stimmung. Sie können die Informationen zur Stimmung der Musik ändern. ❑ Genre Hiermit sortieren Sie die Musikdateien nach dem Genre. Deutsch - 34 �� BN68-02325A-Ger.indb 34 2009-05-19 �� 3:49:04 ¦ Optionsmenü für Foto- / Musik- / Filmliste 1. Drücken Sie die Taste MEDIA.P. Basisansicht Erstellung 2. Wählen Sie durch Drücken der Tasten ◄ oder ► die Option Photo, Music oder Movie, und drücken Sie dann die Taste ENTERE. 3. Wählen Sie mit den Tasten ◄ oder ► die gewünschte Option aus. N Wählen mehrerer Dateien Wählen Sie mit den Tasten ◄ oder ► die gewünschte Musikdatei. Drücken Sie dann die gelbe Taste. Wiederholen Sie den obigen Vorgang, um mehrere Dateien auszuwählen. Links neben dem Namen der gewählten Datei wird das Symbol c angezeigt. Ordner Benutzerdef. Farbe 5/15 1231.jpg 1232.jpg SUM 1233.jpg 1234.jpg Genre Ordner Benutzerdef. Traurig Lies Way I Love You ❑ Gruppe abspielen Mit diesem Menübefehl können Sie eine Diashow nur mit den Fotodateien aus der aktuell ausgewählten Sortiergruppe ablaufen lassen. SUM Titel Ordner Benutzerdef. Sie können die Auswahl aller Dateien aufheben. N Das Zeichen c zur Darstellung der entsprechenden Datei wird ausgeblendet. ❑ Information 5/15 1231.avi Die Informationen zur Foto-/Musik-/Filmdatei werden angezeigt. Sie können die Informationen von Dateien mit den gleichen Verfahren auch während einer Diashow anzeigen. O Drücken Sie die Taste INFO, um Informationen anzuzeigen. SUM 1232.avi 1233.avi Gerät Titel Basisansicht Gruppe abspielen Information Sicher entfernen HaHaHa Gold Shine Favoriten-Einst. Wählen T Extras R Zurück Gerät ❑ Alle abwählen (Wenn mindestens eine Datei gewählt ist) 3/37 Glen Hans Once Ost 2007 Soundtrack Want Me 1237.jpg Favoriten-Einst. Wählen T Extras R Zurück Gerät 4. Drücken Sie die Taste TOOLS. N Der Inhalt des Optionsmenüs richtet sich nach dem jeweiligen Status. Diashow Gruppe abspielen Grp. ändern Information 1236.jpg 1235.jpgentfernen Sicher ABCD.avi Basisansicht Erstellung Gruppe abspielen Information Sicher entfernen 1235.avi 1236.avi 1237.avi Favoriten-Einst. Wählen T Extras R Zurück ❑ Sicher entfernen Sie können das Gerät sicher vom Fernsehgerät entfernen. Photo ❑ Diashow Mit diesem Menübefehl können Sie eine Diashow mit den Fotodateien auf dem USB-Speicher ablaufen lassen. ❑ Grp. ändern (Beim Sortierungsschlüssel Farbe) Sie können die Farbinformationen einer gewählten Fotodatei (oder Gruppe von Dateien) ändern, um sie von einer Farbgruppe in eine andere zu verschieben. N Damit verändern Sie die tatsächliche Farbe des Fotos aber nicht. N Die Gruppeninformationen der aktuellen Datei werden aktualisiert und die Fotos werden in die neue Farbgruppe verschoben. N Wenn Sie die Informationen für mehrere Dateien ändern möchten, wählen Sie die gewünschten Dateien und drücken Sie die gelbe Taste. Music ❑ Gruppe ändern (Beim Sortierungsschlüssel "Stimmung") Sie können die Informationen zur Stimmung der Musikdateien ändern. Die Gruppeninformationen der aktuellen Datei werden aktualisiert und die Datei wird in die neue Gruppe verschoben. Wenn Sie die Informationen für mehrere Dateien ändern möchten, wählen Sie die entsprechenden Dateien, und drücken Sie die gelbe Taste. Deutsch - 35 �� BN68-02325A-Ger.indb 35 2009-05-19 �� 3:49:08 ¦ Optionsmenü für Diashow / Musikwiedergabe / Filmwiedergabe 1. Während einer Diashow (oder beim Anzeigen eines Fotos) der bei der Wiedergabe von Musik oder eines Films drücken Sie die Taste TOOLS, um die Option einzustellen. 2. Wählen Sie durch Drücken der Tasten ▲ oder ▼ die Option, und drücken Sie dann die Taste ENTERE. ❑ Bildeinstellungen / Toneinstellungen Sie können die Bild- und Toneinstellungen festlegen. Extras Diashow anhalten ❑ Information Diashow-Geschw. : Normal Diashow-Effekt : Ausblend1 Drehen Die Dateiinformationen werden angezeigt. Zoom Hintergrundmusik Bildeinstellungen ❑ Sicher entfernen Toneinstellungen Information Sie können das Gerät sicher vom Fernsehgerät entfernen. ▼ U Navig. E Eingabe e Beenden Menü der Optionen für Diashows Extras ❑ Diashow anhalten / Diashow starten Wiederhol-Modus Hiermit können Sie eine Diashow starten oder anhalten. ❑ Diashow-Geschw. → Langsam / Normal / Schnell Sie können die Geschwindigkeit der Diashow festlegen. N Diese Funktion ist nur während einer Diashow verfügbar. N Wenn Sie die Tasten π (REW) oder µ (FF) während einer Diashow drücken, können Sie auch deren Abspielgeschwindigkeit ändern. ❑ Diashow-Effekt Toneinstellungen Information Sicher entfernen U Navig. L Einst. e Beenden Extras Sie können den in der Diashow verwendeten Effekt bei Bildschirmübergängen auswählen. ■ ◀ Ein ▶ Bildeinstellungen Keine / Ausblend1 / Ausblend2 / Jalousie / Spirale / Schachbrett / Linear / Treppe / Wischen / Zufall N Diese Funktion ist nur während einer Diashow verfügbar. Bildeinstellungen Toneinstellungen Bildformat : Anpassung Einstellung für Text Information Sicher entfernen U Navig. E Eingabe e Beenden ❑ Drehen Sie können alle auf einem USB-Speichergerät gespeicherten Dateien drehen. N Wenn Sie die Taste ◄ drücken, wird es nacheinander um 270˚, 180˚, 90˚ und 0˚ gedreht. N Wenn Sie die Taste ► drücken, wird das Foto nacheinander um 90˚, 180˚, 270˚ und 0˚ gedreht. N Die gedrehte Datei wird nicht gespeichert. ❑ Zoom Sie können alle auf einem USB-Speichergerät gespeicherten Fotos vergrößern. (x1 → x2 → x4) N Um das vergrößerte Foto zu verschieben, drücken sie die Taste ENTERE und anschließend ▲/▼/◄/►. Beachten Sie, dass die Funktion zum Verschieben deaktiviert ist, wenn das vergrößerte Bild kleiner als das ursprüngliche Fenster ist. N Die vergrößerte Datei wird nicht gespeichert. ❑ Hintergrundmusik Sie können die Hintergrundmusik auswählen, während Sie eine Diashow anzeigen. N Um diese Funktion zu verwenden, müssen auf dem UB-Speicher Musik- und Fotodateien gespeichert sein. N Laden der Musikdateien erforderlich, um in den Hintergrundmusikmodus zu wechseln. Musikdateien aus der Kategorie abspielen, die geladen werden soll. Menü der Optionen für die Musikwiedergabe ❑ Wiederhol-M. → Ein / Aus Sie können Musikdateien wiederholt abspielen. Menü der Optionen für Filmwiedergabe ❑ Bildformat → Anpassung / Original Abspielen des Videos im Originalformat oder angepasst an die Bildschirmgröße. ❑ Einstellung für Text Sie können die Beschriftungen für den Film wählen. Deutsch - 36 �� BN68-02325A-Ger.indb 36 2009-05-19 �� 3:49:09 ¦ Anzeigen eines Fotos oder einer Diashow Anzeigen von Diashows N Alle Dateien in der Dateiliste werden für die Diashow verwendet. N Die Bilder werden nacheinander, beginnend mit der aktuell angezeigten Datei angezeigt. N Die Diashow wird entsprechend der Sortierreihenfolge in der Dateiliste ausgeführt. N Musikdateien können während der Diashow automatisch abgespielt werden, wenn Hintergrundmusik aktiviert (Ein) ist. O Drücken Sie die Fernbedienungstaste ∂(Wiedergabe)/ENTERE, während die Fotoliste angezeigtwird, um die Diashow zu starten. N Diashow-Steuertasten Taste ENTERE ∂ ∑ ∫ π/μ TOOLS Vorgang Wiedergabe/Angehalten der Diashow. Abspielen der Diashow. Diashow anhalten. Beenden Sie die Diashow und wechseln Sie wieder zur Fotoliste. Ändern der Abspielgeschwindigkeit der Diashow. Hiermit führen Sie verschiedene Funktionen aus den Fotomenüs aus. Farbe Ordner Benutzerdef. 5/15 1231.jpg 1232.jpg SUM 1233.jpg Basisansicht Diashow Gruppe abspielen Information Sicher entfernen 1236.jpg 1235.jpg 1234.jpg 1237.jpg Favoriten-Einst. Wählen T Extras R Zurück Gerät ▶ Normal 1234.jpg 580x765 2009/01/02 5/15 E Pause ◀▶ Vorherige/Weiter SUM Erstellung T Extras R Zurück Abspielen der aktuellen Gruppe 1. Drücken Sie die Taste ▲, um zum Abschnitt mit den Sortierschlüsseln zu wechseln. 2. Wählen Sie mit den Tasten ◄ oder ► das Sortierverfahren aus. Farbe Ordner 3. Drücken Sie die Taste ▼, um zum Abschnitt mit der Gruppenliste zu wechseln. Benutzerdef. 4. Drücken Sie die Tasten ◄ und ►, um eine Gruppe auszuwählen. 5. Drücken Sie die Taste ∂ (Wiedergabe). Eine Diashow mit den Dateien der gewählten Gruppe beginnt. ● Basisansicht Erstellung 5/15 1231.jpg 1232.jpg 1233.jpg 1234.jpg 1235.jpg 1236.jpg 1237.jpg Alternative: 1. Wählen Sie zuerst einen Sortierschlüssel und dann im Dateilistenabschnitt die Fotos aus der gewünschten Gruppe aus. N Um zur vorherigen/nächsten Gruppe zu wechseln, drücken Sie die Taste π (REW) oder µ (FF). SUM Gerät Favoriten-Einst. Wählen T Extras R Zurück 2. Drücken Sie die Taste TOOLS. 3. Wählen Sie durch Drücken der Tasten ▲ oder ▼ die Option Gruppe abspielen, und drücken Sie dann die Taste ENTERE. N Nur die Fotos aus der Sortiergruppe mit den ausgewählten Dateien werden für die Diashow verwendet. So starten Sie eine Diashow nur mit den gewählten Dateien 1. Drücken die Taste ▼, um den Dateilistenabschnitt zu wählen. 2. Wählen Sie das gewünschte Foto mit den Tasten ◄ oder ► aus der Dateiliste aus. 3. Drücken Sie die gelbe Taste. 4. Wiederholen Sie den obigen Vorgang, um mehrere Fotodateien auszuwählen. N Links neben dem Namen der Fotodatei wird das Symbol c angezeigt. N Wenn Sie nur eine Datei wählen, wird keine Diashow gestartet. N Um die Auswahl sämtlicher Dateien aufzuheben, drücken Sie die Taste TOOLS und wählen Sie dann Alle abwählen. 5. Drücken Sie die Taste ∂ (Wiedergabe)/ENTERE. N Die ausgewählten Dateien werden für die Diashow verwendet. ● Alternative: 1. Wählen Sie die gewünschten Fotos mit der gelben Taste aus der Dateiliste aus. 2. Drücken Sie die Taste TOOLS. 3. Wählen Sie durch Drücken der Tasten ▲ oder ▼ die Option Diashow, und drücken Sie dann die Taste ENTERE. N Die ausgewählten Dateien werden für die Diashow verwendet. Deutsch - 37 �� BN68-02325A-Ger.indb 37 2009-05-19 �� 3:49:13 ¦ Wiedergeben von Musik Wiedergeben einer Musikdatei 1. Drücken die Taste ▼, um den Dateilistenabschnitt zu wählen. 2. Drücken Sie die Taste ◄ oder ►, um eine Musikdatei zu wählen, die abgespielt werden soll. ▶ 00:00:04 / 00:04:04 3/37 Way I Love You HaHaHa 3. Drücken Sie die Taste ∂ (Wiedergabe)/ENTERE. N Dieses Menü zeigt nur Dateien mit der Dateinamenserweiterung MP3. Dateien mit anderer Dateinamenserweiterung werden nicht angezeigt, auch wenn sie auf dem gleichen USB-Gerät gespeichert wurden. E Pause ◀▶ Vorherige/Weiter T Extras R Zurück SUM N Die ausgewählte Datei wird zusammen mit der Abspieldauer oben angezeigt. N Um die Musiklautstärke anzupassen, drücken Sie auf der Fernbedienung die Lautstärketaste auf der Fernbedienung. Wenn Sie den Ton ausschalten möchten, drücken Sie die MUTE-Taste auf der Fernbedienung. N Wenn der Ton beim Abspielen von MP3-Datei "schräg" ist stellen Sie im Tonmenü den Equalizer und SRS TruSurround HD ein. (Bei übermodulierten MP3-Dateien kann es zu Tonproblemen kommen.) N Die Abspieldauer einer Musikdatei wird möglicherweise als 00:00:00 angezeigt, wenn am Anfang der Datei keine Informationen über die Abspieldauer gefunden werden. N π (REW) oder µ (FF) sind bei der Wiedergabe funktionslos. N Regler für Musikwiedergabe Taste ENTERE ∂ ∑ ∫ TOOLS Vorgang Wiedergabe/Angehalten einer Musikdatei. Spielen Sie die Musikdatei ab. Hiermit wird die Musikdatei angehalten. Beenden des Wiedergabemodus und Rückkehr zur Musikliste. Hiermit führen Sie verschiedene Funktionen aus den Musikmenüs aus. N Symbol für Informationen zur Musik-Funktion p q Hiermit werden alle Musikdateien im Ordner (oder die markierte Datei) wiederholt abgespielt. Wiederhol-M. ist aktiviert (Ein). Hiermit werden alle Musikdateien im Ordner (oder die markierte Datei) einmal abgespielt. Wiederhol-M. ist deaktiviert (Aus). Abspielen einer Musikgruppe 1. Drücken Sie die Taste ▲, um zum Abschnitt mit den Sortierschlüsseln zu wechseln. 2. Wählen Sie mit den Tasten ◄ oder ► das Sortierverfahren aus. 3. Drücken Sie die Taste ▼ oder ENTERE, um zur Auswahl der Gruppenliste zu wechseln. 4. Drücken Sie die Taste ∂ (Wiedergabe). Die Dateien der ausgewählten Gruppe werden nun abgespielt. ● Alternative: 1. Wählen Sie zuerst einen Sortierschlüssel und dann im Dateilistenabschnitt die Dateien aus der gewünschten Gruppe aus. N Um zur vorherigen/nächsten Gruppe zu wechseln, drücken Sie die Taste π (REW) oder µ (FF). 2. Drücken Sie die Taste TOOLS. 3. Wählen Sie durch Drücken der Tasten ▲ oder ▼ die Option Gruppe abspielen, und drücken Sie dann die TasteENTERE. N Die Musikdateien in der Sortiergruppe einschließlich der markierten Datei werden einmal abgespielt. Abspielen ausgewählter Musikdateien 1. Drücken die Taste ▼, um den Dateilistenabschnitt zu wählen. 2. Wählen Sie mit den Tasten ◄ oder ► die gewünschte Musikdatei. 3. Drücken Sie die gelbe Taste. 4. Wiederholen Sie den obigen Vorgang, um mehrere Musikdateien auszuwählen. N Links neben dem Namen der Musikdatei wird das Symbol c angezeigt. N Um die Auswahl sämtlicher Dateien aufzuheben, drücken Sie die Taste TOOLS und wählen Sie dann Alle abwählen. 5. Drücken Sie die Taste ∂ (Wiedergabe)/ENTERE. N Die gewählten Dateien werden nun wiedergegeben. Deutsch - 38 �� BN68-02325A-Ger.indb 38 2009-05-19 �� 3:49:13 ¦ Wiedergeben einer Filmdatei Wiedergeben einer Filmdatei 1. Drücken die Taste ▼, um den Dateilistenabschnitt zu wählen. 2. Wählen Sie mit den Tasten ◄ oder ► eine Filmdatei, die abgespielt werden soll. ▶ 00:00:01 / 00:05:30 3/37 ABC.avi 3. Drücken Sie die Taste ∂ (Wiedergabe)/ENTERE. N Die gewählte Datei wird wiedergegeben. N Die ausgewählte Datei wird zusammen mit der Abspieldauer oben angezeigt. N Die Abspieldauer einer Filmdatei wird möglicherweise als 00:00:00 angezeigt, wenn am Anfang der Datei keine Informationen über die Abspieldauer E Angehalten ◀ ▶ Wechseln SUM gefunden werden. N Sie können spannende Multimediaspiele anzeigen, das Spielen selbst wird aber nicht unterstützt. N Unterstützte Formate für Untertitel Name MPEG-4 Text mit Zeitverlauf SAMI SubRip SubViewer Micro DVD Dateinamenserweiterung .ttxt .smi .srt .sub .sub oder .txt T Extra R Zurück Format XML HTML Stringbasiert Stringbasiert Stringbasiert N Unterstützte Videoformate Dateinamenserweiterung Container *.avi AVI *.mkv MKV *.asf ASF *.wmv (VC1) *.mp4 MP4 (SMP4) *.3gp 3GPP *.vro (ps) *.mpg *.mpeg (ps) VRO / VOB Andere (ts) Videodecoder Divx 3.11, Divx 4.x, Divx 5.1, Divx 6.0, XviD, H.264 BP, H.264 MP, H.264 HP, MPEG-4 SP, MPEG-4 ASP, Motion JPEG Divx 3.11, Divx 4.x, Divx 5.1 Divx 6.0, XviD, H.264 BP, H.264 MP, H.264 HP MPEG-4 SP, MPEG-4 ASP Motion JPEG Divx 3.11, Divx 4.x, Divx 5.1 Divx 6.0, XviD, H.264 BP, H.264 MP, H.264 HP, MPEG-4 SP, MPEG-4 ASP Window Media Video V. 9 H.264 BP, H.264 MP, H.264 HP, MPEG-4 SP, MPEG-4 ASP XVID H.264 BP, H.264 MP, H.264 HP MPEG-4 SP, MPEG-4 ASP MPEG2, MPEG1 MPEG1 (Programmstream), MPEG2 (Programmstream) MPEG2 (Transportstream), H.264 (Transportstream), VC1 (Transportstream) Audio-Codec MP3, AC3, LPCM, ADPCM (MULAW ALAW) MP3, AC3, LPCM, ADPCM (MULAW ALAW), AAC WMA, MP3, AC3, LPCM, ADPCM, (MULAW ALAW), AAC ADPCM, (HE)-AAC, mp3 ADPCM, (HE)-AAC AC3, MPEG, LPCM AC3, MPEG, LPCM AAC, HE-AAC, MP3, DD+ Deutsch - 39 �� BN68-02325A-Ger.indb 39 2009-05-19 �� 3:49:13 N Regler für Videowiedergabe Taste ENTERE ∂ ∑ TOOLS ∫ ◄/► ▲/▼ μ Vorgang Wiedergeben / Anhalten der Filmdatei Wiedergeben der Filmdatei Anhalten der Filmwiedergabe Hiermit führen Sie verschiedene Funktionen aus den Filmmenüs aus. Beenden des Wiedergabemodus und Rückkehr zur Filmliste. Schneller Vor- oder Rücklauf durch den Film in Schritten. Wechseln zur ersten oder letzten Ansicht der aktuellen Datei. Wiedergabe einer Datei mit doppelter Geschwindigkeit. Diese Funktion wird, je nach Codec, möglicherweise nicht unterstützt. Abspielen einer Filmgruppe 1. Drücken Sie die Taste ▲, um zum Abschnitt mit den Sortierschlüsseln zu wechseln. 2. Wählen Sie mit den Tasten ◄ oder ► das Sortierverfahren aus. 3. Drücken Sie die Taste ▼ oder ENTERE, um zur Auswahl der Gruppenliste zu wechseln. 4. Drücken Sie die Taste ∂ (Wiedergabe). Nur die Dateien der gewählten Gruppe werden nun abgespielt. ● Alternative: 1. Wählen Sie zuerst einen Sortierschlüssel und dann im Dateilistenabschnitt die Dateien aus der gewünschten Gruppe aus. N Um zur vorherigen/nächsten Gruppe zu wechseln, drücken Sie die Taste π (REW) oder µ (FF). 2. Drücken Sie die Taste TOOLS. 3. Wählen Sie durch Drücken der Tasten ▲ oder ▼ die Option Gruppe abspielen, und drücken Sie dann die Taste ENTERE. N Hiermit werden alle Filmdateien im Ordner (oder die markierte Datei) einmal abgespielt. Abspielen der ausgewählten Filmdateien 1. Drücken die Taste ▼, um den Dateilistenabschnitt zu wählen. 2. Wählen Sie mit den Tasten ◄ oder ► die gewünschte Musikdatei. 3. Drücken Sie die gelbe Taste. N Links neben dem Namen der Filmdatei wird das Symbol cangezeigt. N Um die Auswahl sämtlicher Dateien aufzuheben, drücken Sie die Taste TOOLS und wählen Sie dann Alle abwählen. 4. Wiederholen Sie den obigen Vorgang, um mehrere Filmdateien auszuwählen. 5. Drücken Sie die Taste ∂ (Wiedergabe)/ENTERE. N Nur die gewählte Datei wird wiedergegeben. Filmwiedergabe fortsetzen (Wiedergabe fortsetzen) Wenn Sie die Filmwiedergabefunktion verlassen, kann der Film später von dem Punkt an abgespielt werden, an dem Sie unterbrochen haben. 1. Wählen Sie die Filmdatei, deren Wiedergabe Sie fortsetzen möchten. Drücken Sie dazu in der Filmliste auf ◄ oder ►. 2. Drücken Sie die Taste ∂ (Wiedergabe)/ENTERE. 3. Wählen Sie mit der blauen Taste die Funktion für Ununterbrochen abspielen (Wiedergabe fortsetzen). N Die Filmwiedergabe wird dort fortgesetzt, wo Sie sie angehalten hatten. N Wenn Hilfe zu Schleifenbetrieb im Setup-Menü aktiviert wurde (Ein), wird eine Meldung angezeigt, wenn Sie die Filmdatei fortsetzen. Deutsch - 40 �� BN68-02325A-Ger.indb 40 2009-05-19 �� 3:49:13 ¦ Verwenden des Menüs Setup Mit dem Setup zeigen Sie die im Media Play-Menü vorgenommenen Benutzereinstellungen an. SUM 1. Drücken Sie die Taste MEDIA.P. 851,86 MB/993,02 MB Frei SETUP 2. Wählen Sie durch Drücken der Tasten ◄ oder ► die Option Setup, und drücken Sie dann die Taste ENTERE. 3. Wählen Sie mit den Tasten ▲ oder ▼ die gewünschte Option aus. 4. Wählen Sie mit den Tasten ◄ oder ► die gewünschte Option aus. N Um den Media Play-Modus zu beenden, drücken Sie auf der Fernbedienung die Taste MEDIA.P. ■ ■ ■ Photo SUM Music Farbansicht verwenden → Ein / Farbe Hiermit werden die Fotos nach der Farbe sortiert. Ist diese Option aktiviert, so verlängert sich die Ladezeit, da die Farbinformationen aus den Fotos ermittelt werden. Farbansicht verwenden Wiederhol-M. Wiederhol-M. → Ein / Aus Hiermit können Sie Musikdateien wiederholt abspielen. Laufzeit Bildschirmsch. Hilfe zu Schleifenbetrieb → Ein / Aus Hiermit öffnen Sie das Popupfenster mit Informationen zum Schleifenbetrieb. Movie Setup e Beenden Gerät ◀ Off Ein ▶ Cont. movie play help Ein Divx® VOD-Registrierungscode abrufen Divx® VOD-Deaktivierungscode abrufen 2 Std. Information Sicher entfernen Ist diese Option aktiviert, so verlängert sich die Ladezeit, da die Farbinformationen ermittelt werden. SUM Gerät U Navig. L Einst. R Zurück ■ Divx® VOD-Registrierungscode abrufen Hiermit zeigen Sie den Registrierungscode für den Fernseher an. Wenn Sie eine Verbindung zur DivX-Website herstellen, und den Registrierungscode für ein Privatkonto registrieren, können Sie VOD-Registrierungsdatei herunterladen. Wenn Sie die VOD-Registrierung mit Media Play abspielen, wird die Registrierung abgeschlossen. N Weitere Informationen zu DivX® VOD finden Sie unter www.DivX.com. ■ Divx® VOD-Deaktivierungscode abrufen Wenn DivX® VOD nicht registriert ist, wird der Deaktivierungscode für die Registrierung angezeigt. Wenn Sie diese Funktion ausführen, wenn DivX® VOD registriert ist, wird die aktuelle DivX® VOD-Registrierung deaktiviert. ■ Laufzeit Bildschirmsch. → 2 Std. / 4 std. / 8 std. Wählen Sie die Wartezeit bis zum Aktivieren des Bildschirmschoners. ■ Information Hiermit zeigen Sie die Informationen zum angeschlossenen Gerät an. ■ Sicher entfernen Sie können das Gerät sicher vom Fernsehgerät entfernen. Deutsch - 41 �� BN68-02325A-Ger.indb 41 2009-05-19 �� 3:49:14 Media Play-DLNA ¦ Einrichten des DLNA-Netzwerks Mit DLNA können Sie Videos und Bilder, die auf Ihrem PC gespeichert sind, über eine Netzwerkverbindung im Media Play-Modus anzeigen. Damit brauchen Sie die Dateien nicht mehr auf einen USB-Speicher zu kopieren, den Sie dann an Ihren Fernseher anschließen. Damit Sie DLNA verwenden können, muss der Fernseher mit dem Netzwerk verbunden und die DLNA-Anwendung muss auf Ihrem PC installiert sein. Netzwerkverbindungsdiagramm – Kabel TV PC LAN LAN Externes Modem (ADSL/VDSL/Kabelfernsehen) Netzwerkverbindungsdiagramm – Drahtlos Seitenverkleidung des Fernsehgeräts TV PC oder LAN WLAN-Adapter von Samsung Drahtloser IP-Sharer LAN-Kabel 1. Weitere Informationen zum Konfigurieren Ihres Netzwerks finden Sie unter das "Einrichten des Netzwerks". N Wir empfehlen Ihnen, sowohl das Fernsehgerät als auch den PC in gleichem Teilnetz anzuordnen. Die ersten 3 Teile der Teilnetzadresse des Fernsehgeräts und der IP-Adressen des PCs müssen übereinstimmen und nur der letzte Teil darf geändert werden. (z.B.: IP-Adresse: 123.456.789.**) 2. Schließen Sie den PC, auf dem das Programm Samsung PC Share Manager installiert wird, über ein Netzwerkkabel an das externe Modem an. N Sie können das Fernsehgerät direkt an den PC anschließen, ohne vorher einen Sharer (Router) dazwischen zu schalten. ¦ Installieren der DLNA-Anwendung Damit die Inhalte vom PC auf dem Fernsehgerät abgespielt werden können, müssen Sie die Anwendung installieren. Um die DLNA-Funktion problemlos nutzen zu können, verwenden Sie das Programm von der CD-ROM, die zusammen mit dem Fernsehgerät geliefert wurde, oder verwenden Sie Samsung PC Share Manager für das Fernsehmodell. Diese Software können Sie von der Samsung-Website herunterladen. Deutsch - 42 �� BN68-02325A-Ger.indb 42 2009-05-19 �� 3:49:15 Systemanforderungen 1. Legen Sie die mit diesem Fernsehgerät gelieferte Programm-CD in den PC ein. 2. Zur Installation des Programms benötigen Sie 20 MB freien Platz auf der Festplatte. N Bei Freigabe der Dateien reichen 30MB Festplattenspeicher für jeweils etwa 100 Dateien. N Wenn Sie die Dateifreigabe beenden, wird auch der Festplattenspeicher freigegeben, der ansonsten für die Miniaturbildinformationen verwendet wird. Unterstützte Formate ● Bild: JPEG/ Audio: MP3/ Video: AVI-, MKV-, ASF-, MP4-, 3GPP-, PS-, TS-Container. Details zu den unterstützten Videoformaten erhalten Sie bei den Anweisungen unter "Wiedergeben einer Filmdatei". Installieren Sie die Anwendung 1. Starten Sie die Datei SETUP.EXE, die auf der zusammen mit dem Gerät gelieferten Programm-CD gespeichert ist. N Sie können die Datei allerdings auch von www.samsung.com herunterladen. 2. Installieren Sie den SAMSUNG PC Share Manager (siehe nachfolgende Abbildungen). 3. Nach Abschluss der Installation wird auf dem Desktop das Symbol für den PC Share Manager angezeigt. N Doppelklicken Sie auf das Symbol, um das Programm zu starten. ¦ Verwenden der DLNA-Anwendung Layout des Programmfensters 1. Menüs: Folgende Anwendungsmenüs sind verfügbar: Datei, Freigeben, Server, und Hilfe. 1 2 3 4 5 6 7 2. Klicken Sie, um den markierten Ordner auf dem PC-Server freizugeben. 3. Klicken Sie erneut, um die Freigabe zu beenden. 4. Klicken Sie, um die Ordner und Dateien auf dem PC zu aktualisieren. 5. Klicken Sie, um den Freigabestatus zu synchronisieren. 6. Auf dem PC werden die Ordner und Dateien aufgeführt, die freigegeben werden sollen. 7. Es werden Ordner aufgelistet, die vom Benutzer freigegeben wurden. Deutsch - 43 �� BN68-02325A-Ger.indb 43 2009-05-19 �� 3:49:15 ❑ Freigeben ■ Freigeben eines Ordner Sie können einen Ordner auf dem PC für das Fernsehgerät freigeben. ■ Aufheben der Freigabe eines Freigegebener Ordner Sie können die Freigabe eines Ordners auf Ihrem PC aufheben. Markieren Sie einen Ordner im Bereich Freigegebener Ordner und klicken Sie dann auf Freigabe aufheben. ■ Übernehmen der aktuellen Einstellungen Führen Sie diesen Vorgang aus, wenn aufgrund einer neuen Ordnerfreigabe oder der Aufhebung einer Ordnerfreigabe eine Synchronisierung erforderlich ist. Mit dem Menü Neuen Status einstellen übernehmen Sie die Änderungen in den freigegebenen Ordnern auf die Daten, die mit dem PC-Freigabeprogramm gespeichert wurden. Da das Übernehmen der Änderungen an den internen Daten ein zeitraubender Vorgang ist, wird dem Benutzer mit dieser Funktion die Möglichkeit geboten, die Änderungen an den Daten nur bei Bedarf zu übernehmen. Erst wenn der Befehl Neuen Status einstellen gewählt wird, wird der geänderte Status des freigegebenen Ordners auf den Server übernommen. Änderungen an den freigegebenen Ordnern werden erst auf Ihren PC übernommen, wenn Sie den Befehl Neuen Status einstellen wählen. ■ Festlegen der Zugangsberechtigung Damit Ihr Fernsehgerät den PC finden kann, muss das Fernsehgerät im Fenster mit den Einstellungen für die Zugangsberechtigungen auf Geräterichtlinie einst. eingestellt werden. Zusätzlich müssen sich der PC-Server und das Fernsehgerät im gleichen Teilnetz befinden. ● Vorgehensweise: Klicken Sie auf Freigeben und wählen Sie den Befehl Geräterichtlinie einst.. Nicht verfügbare Elemente werden in Grau dargestellt. Sie können die Zugangsberechtigungen mit den Schaltflächen Accept / Deny einstellen. Um ein Element zu löschen, wählen Sie Gewähltes Element löschen.. ❑ Server ■ Server Sie können Ihren PC als Server verwenden und den Serverstatus später wieder aufheben. ■ Starten von DLNA Digital Media Server zusammen mit Windows Sie können bestimmen, ob der PC-Server automatisch zusammen mit Windows gestartet werden soll. ■ Servernamen ändern Sie können den PC-Server umbenennen. ¦ Verwenden der DLNA-Funktion Verwenden des DLNA-Menüs Durch DLNA (Digital Living Network Alliance) wird es möglich, Inhalte wiederzugeben, die auf einem direkt oder über das Netzwerk an Ihr Fernsehgerät angeschlosenen DLNA-Server (gewöhnlich Ihrem PC) gespeichert sind. Mithilfe von Media Play können Sie Inhalte von einem an das Fernsehgerät angeschlossenen USB-Speicher wiedergeben, wogegen Sie mit DLNA Inhalte von einem DLNA-Server (Ihrem PC) wiedergeben können, der direkt oder über das Netzwerk an Ihr Fernsehgerät angeschlossen ist. Die Verfahren zum Verwenden der Inhalte stimmen mit denen unter Media Play (USB & DLNA) überein. 1. Drücken Sie die MEDIA.P-Taste auf der Fernbedienung, um das DLNA-Menü anzuzeigen. 2. Drücken Sie die Tasten ◄ oder ►, um ein Symbol (Photo, Music, Movie, Setup) auszuwählen, und drücken Sie dann die Taste ENTERE. N Um den DLNA-Modus zu beenden, drücken Sie auf der Fernbedienung die Taste MEDIA.P. N DLNA unterstützt die folgenden Funktionen nicht. Hintergrundmusik und Einstellungen für Hintergrundmusik. Benutzerdefinierte Sortierung von Dateien im Foto-, Musik- und Filmordner. Die Funktion zum Ändern der Gruppe. Die Kopier- / Löschfunktion. Die Funktion zum sicheren Entfernen. Die Tasten REW/FF (π/µ) können Sie verwenden, wenn ein Film abgespielt wird. Funktion zum Fortsetzen der Filmwiedergabe (Wiedergabe fortsetzen), N Bei manchen Containern wie ASF und MKV können Sie die Funktion zum Springen nicht verwenden. N Divx DRM, Multi-Audio und eingebettete Beschriftung werden nicht unterstützt. N Sie müssen Samsung PC Share Manager in der Firewall Ihres PCs freigeben. N Die Funktionen zum Überspingen (Tasten ◄/►) oder die Pause-Funktion sind möglicherweise bei Verwendung der DLNA-Software anderer Hersteller nicht verfügbar. Dies hängt vom jeweiligen Inhalt ab. N Die Wiedergabedauer wird beim Abspielen von Filmen möglicherweise nicht angezeigt. Deutsch - 44 �� BN68-02325A-Ger.indb 44 2009-05-19 �� 3:49:16 ANYNET+ ¦ Anschließen von Anynet+-Geräten Was ist Anynet+? Bei Anynet+ handelt es sich um eine Funktion, mit der Sie alle angeschlossenen Samsung-Geräte, die Anynet+ unterstützen, mit der Fernbedienung für Ihr Samsung-Fernsehgerät steuern können. Das Anynet+-System unterstützt nur Anynet+-fähige SamsungGeräte. Wenn Sie wissen möchten, ob Ihr Samsung-Gerät diese Funktion unterstützt, suchen Sie das Anynet+ auf Ihrem Gerät. Anschließen an ein Fernsehgerät Anynet+ Gerät 1 TV HDMI 1.3-Kabel Anynet+ Gerät 2 HDMI 1.3-Kabel Anynet+ Gerät 3 HDMI 1.3-Kabel Anynet+ Gerät 4 HDMI 1.3-Kabel 1. Verbinden Sie einen der Anschlüsse HDMI IN (1, 2, 3(DVI) oder 4) am Fernsehgerät mit dem HDMI OUT-Anschluss am entsprechenden Anynet+-Gerät. Verwenden Sie hierfür ein HDMI-Kabel. Anschluss an das Heimkinosystem TV Anynet+ Gerät 1 Heimkino HDMI 1.3-Kabel Optisches Kabel HDMI 1.3-Kabel Anynet+ Gerät 2 HDMI 1.3-Kabel Anynet+ Gerät 3 HDMI 1.3-Kabel Anynet+ Gerät 4 HDMI 1.3-Kabel 1. Verbinden Sie einen der Anschlüsse HDMI IN (1, 2, 3(DVI) oder 4) am Fernsehgerät mit dem HDMI OUT-Anschluss am entsprechenden Anynet+-Gerät. Verwenden Sie hierfür ein HDMI-Kabel. 2 Verbinden Sie den HDMI IN-Anschluss des Heimkinosystems mit dem HDMI OUT-Anschluss des entsprechenden Anynet+Geräts. Verwenden Sie hierfür das HDMI-Kabel. N Verbinden Sie DIGITAL AUDIO OUT (OPTICAL)-Anschluss am Fernsehgerät und den Digital Audio-Eingang des Heimkinosystems mit Hilfe des Glasfaserkabels. N Bei obiger Vorgehensweise überträgt der optische Anschluss nur 2-Kanalaudio. Die Tonausgabe erfolgt also nur über den linken und rechten Frontlautsprecher sowie den Subwoofer des Heimkinosystems. Wenn Sie 5.1-Kanalton wünschen, müssen Sie den DIGITAL AUDIO OUT (OPTICAL)-Ausgang des DVD-Players oder des Kabel-/Sattellitenreceivers (also Anynet-Gerät 1 oder 2) direkt an einen Verstärker oder ein Heimkinosystem und nicht an das Fernsehgerät anschließen. N Schließen Sie nur ein Heimkinosystem an. N Sie können Anynet+-Geräte mithilfe eines HDMI 1.3-Kabels verbinden. Einige HDMI-Kabel unterstützen möglicherweise keine Anynet+-Funktionen. N Anynet+ arbeitet, wenn das AV-Gerät, das Anynet+ unterstützt, im Standby-Modus oder angeschaltet ist. N Anynet+ unterstützt maximal 12 AV-Geräte. Beachten Sie, dass Sie maximal 3 Geräte des gleichen Typs anschließen können. Deutsch - 45 �� BN68-02325A-Ger.indb 45 2009-05-19 �� 3:49:17 ¦ Einrichten von Anynet+ ❑ Einstellungen ■ Anynet+ (HDMI-CEC) → Aus / Ein Damit Sie die Funktionen von Anynet+ nutzen können, muss Anynet+ (HDMI-CEC) aktiviert (Ein) sein. N Wenn die Funktion Anynet+ (HDMI-CEC) deaktiviert ist, sind auch alle Funktionen in Verbindung mit Anynet+ deaktiviert. Media Play (USB & DLNA) Anwendung T Drücken Sie die Taste TOOLS, um das Menü Extras anzuzeigen. Sie können das Anynet+-Menü auch durch Auswahl von Extras → Anynet+ (HDMI-CEC) auswählen. Anynet+(HDMI-CEC) Content Library Internet@TV Home Network Centre Einstellungen Anynet+(HDMI-CEC) : Ein ▶ Autom. Ausschalten : Ja U Navig. E Eingabe R Zurück ■ Autom. Ausschalten → Nein / Ja Einstellungen Automatisches Abschalten von Anynet+-Geräten durch Abschalten des Fernsehgeräts Anynet+(HDMI-CEC) : Ein N Damit Sie Anynet+ verwenden können, muss die Geräteauswahl der Fernbedienung auf Autom. Ausschalten : Ja ▶ TV eingestellt sein. U Navig. E Eingabe R Zurück N Wenn Sie Autom. Ausschalten aktivieren (auf Ja setzen), werden auch die angeschlossenen externen Geräte ausgeschaltet, wenn Sie das Fernsehgerät ausschalten. Wenn das externe Gerät jedoch gerade aufnimmt, wird es möglicherweise abgeschaltet oder auch nicht. ¦ Wechseln zwischen von Anynet+-Geräten 1. Drücken Sie die Taste TOOLS. Drücken Sie die Taste ENTERE, um Anynet+ (HDMICEC) auszuwählen. 2. Wählen Sie durch Drücken der Tasten ▲ oder ▼ die Option Geräteliste, und drücken Sie dann die Taste ENTERE. N Anynet+-Geräte aufgelistet. N Wenn Sie das gewünschte Gerät nicht finden, drücken Sie die rote Taste, um nach Geräten zu suchen. Fernsehen Geräteliste Aufnahme: DVDR DVDR MENU DVDR INFO Empfänger Aus Einstellungen 3. Wählen Sie ein bestimmtes Gerät durch Drücken der Tasten ▲ oder ▼, und drücken Sie U Navig. E Eingabe R Zurück dann die Taste ENTERE. Das System wechselt zum ausgewählten Gerät. + N Nur wenn Sie Anynet (HDMI-CEC) im Anwendung-Menü aktivieren (Ein), wird das Menü Geräteliste angezeigt. N Das Umschalten zu den ausgewählten Geräten kann bis zu 2 Minuten dauern. Sie können diesen Vorgang während des Umschaltens nicht abbrechen. N Die zum Suchen nach Geräten erforderliche Zeit hängt von der Anzahl der angeschlossenen Geräte ab. N Wenn die Gerätesuche abgeschlossen ist, wird die Anzahl der gefundenen Geräte nicht angezeigt. N Zwar sucht das Fernsehgerät beim Anschalten mit der Netztaste automatisch die Geräteliste, aber die an das Fernsehgerät angeschlossenen Geräte erscheinen dennoch möglicherweise nicht in der Geräteliste. Drücken Sie die rote Taste, um die angeschlossenen Geräte zu suchen. N Wenn Sie mit der Taste SOURCE eine externe Signalquelle eingestellt haben, können Sie die Anynet+-Funktion nicht verwenden. Achten Sie darauf, immer nur mit Geräteliste zu einem Anynet+-Gerät zu wechseln. Anynet+-Menü Der Inhalt des Anynet+-Menüs hängt vom Typ und Status der an das Fernsehgerät angeschlossenen Anynet+-Geräte ab. Anynet+-Menü Fernsehen Geräteliste (Geräte_Name) MENU (Geräte_Name) INFO Aufnahme: (*Aufnahmegerät) Aufnahme anhalten: (*Aufnahmegerät) Empfänger Beschreibung Wechsel vom Anynet+-Modus zum Fernsehmodus. Anzeige der Anynet+-Geräteliste. Hiermit öffnen Sie die Menüs der angeschlossenen Geräte. Wenn z. B. ein DVDRecorder angeschlossen ist, wird das DVD-Menü des DVD-Recorders angezeigt. Zeigt das Wiedergabemenü des angeschlossenen Geräts an. Wenn z. B. ein DVDRecorder angeschlossen ist, wird das Wiedergabemenü des DVD-Recorders angezeigt. Sofortiges Starten einer Aufnahme mit dem Rekorder (Diese Funktion ist nur für Geräte mit Aufnahmefunktion verfügbar.) Beenden der Aufnahme. Die Tonausgabe erfolgt über den Receiver. N Bei Anschluss von mehr als einem Aufnahmegerät werden sie als (*Aufnahmegerät) angezeigt, bei Anschluss eines einzigen Aufnahmegeräts erfolgt die Anzeige als (*Geräte_Name). Deutsch - 46 �� BN68-02325A-Ger.indb 46 2009-05-19 �� 3:49:17 Im Anynet+-Modus verfügbare Tasten der TV-Fernbedienung N N N N N N Gerätetyp Betriebsstatus Anynet+-Gerät Nach dem Wechseln zum Gerät wird das Menü des entsprechenden Geräts auf dem Bildschirm angezeigt. Gerät mit eingebautem Tuner Audiogerät Nach dem Wechseln zum Gerät beim Abspielen einer Datei Nach dem Wechseln zum Gerät beim Fernsehen Beim Aktivieren des Receivers Verfügbare Tasten Zifferntasten Taste▲/▼/◄/►/ ENTERE Farbtasten / EXIT-Taste π(Suche rückwärts) / µ(Suche vorwärts) ∫(Stopp) / ∂(Wiedergabe) / ∑(Pause) P > / P <-Taste Y / MUTE-Taste Die Anynet+-Funktion ist nur nutzbar, wenn auf der Fernbedienung das Fernsehgerät als Empfänger eingestellt ist. Die ∏-Taste ist nur im Aufnahmestatus belegt. Sie können Anynet+-Geräte nicht mit den Tasten an Ihrem Fernsehgerät bedienen. Sie können Anynet+-Geräte nur mit der TV-Fernbedienung steuern. Die TV-Fernbedienung funktioniert unter bestimmten Umständen nicht. Wählen Sie in diesem Fall das Anynet+-Gerät nochmals aus. Die Anynet+-Funktionen sind für Geräte anderer Hersteller nicht verfügbar. Die Funktionen der Tasten π, µ können je nach Gerät unterschiedlich sein. ¦ Aufnahme Sie können Fernsehprogramme mit einem Samsung-Recorder aufnehmen. 1. Drücken Sie die Taste TOOLS. Drücken Sie die Taste ENTERE, um Anynet+ (HDMICEC) auszuwählen. Fernsehen Geräteliste Aufnahme: DVDR DVDR MENU 2. Wählen Sie durch Drücken der Tasten ▲ oder ▼ ein die Funktion zum sofortigen DVDR INFO Aufnehmen, und drücken Sie dann die Taste ENTERE. Die Aufnahme beginnt. Empfänger Aus Einstellungen N Bei mehr als einem Aufnahmegerät Wenn mehrere Aufnahmegeräte angeschlossen sind, werden diese in einer Liste angezeigt. Wählen Sie durch Drücken der Tasten ▲ oder ▼ ein Gerät, und drücken U Navig. E Eingabe R Zurück Sie dann die Taste ENTERE. Die Aufnahme beginnt. N Wenn das Aufnahmegerät nicht angezeigt wird, wählen Sie Geräteliste und drücken Sie die rote Taste, um nach Geräten zu suchen. 3. Zum Beenden drücken Sie die Taste EXIT. N Sie können das Signal der jeweiligen Quelle aufnehmen. Wählen Sie hierzu Aufnahme: (Geräte_Name). N Durch Drücken von ∏ wird die gerade laufende Sendung aufgenommen. Wenn Sie Bilder aus einer anderen Signalquelle anzeigen, wird das Videosignal aus dieser Quelle aufgenommen. N Überprüfen Sie vor der Aufnahme, ob der Antennenstecker ordnungsgemäß am Aufnahmegerät angeschlossen ist. Informationen zur richtigen Antennenverbindung mit dem Aufnahmegerät finden Sie im Benutzerhandbuch des Aufnahmegeräts. ¦ Wiedergabe über einen Empfänger (Heimkinosystem) Sie können die Tonwiedergabe über einen Receiver anstelle des TV-Lautsprechers laufen lassen. 1. Drücken Sie die Taste TOOLS. Drücken Sie die Taste ENTERE, um Anynet+ (HDMICEC) auszuwählen. 2. Wählen Sie mit den Tasten ▲ oder ▼ die Option Empfänger. Drücken Sie die Taste ◄ oder ►, und wählen Sie Ein oder Aus. Fernsehen Geräteliste Aufnahme: DVDR DVDR MENU DVDR INFO Empfänger Aus Einstellungen 3. Zum Beenden drücken Sie die Taste EXIT. N Wenn Ihr Receiver nur Audiosignale unterstützt, wird er in der Geräteliste möglicherweise nicht angezeigt. U Navig. E Eingabe R Zurück N Der Receiver kann eingesetzt werden, wenn Sie den optischen Eingang des Receivers mit dem Ausgang DIGITAL AUDIO OUT (OPTICAL) des Fernsehgeräts verbunden haben. N Wenn der Receiver (Heimkinosystem) angeschaltet ist, können Sie den Ton so hören, wie er vom optischen Ausgang der Fernsehgeräts zur Verfügung gestellt wird. Wenn das Fernsehgerät ein (terrestrisches) DTV-Signal anzeigt, überträgt das Fernsehgerät 5.1-Kanalton an den Receiver des Heimkinosystems. Wenn es sich bei der Signalquelle um eine digitale Komponente wie beispielsweise einen DVD-Player handelt, der über HDMI an das Fernsehgerät angeschlossen ist, kann der Receiver des Heimkinosystems nur 2-Kanalton wiedergeben. N Wenn es zu einer Unterbrechung der Stromversorgung des Fernsehgeräts kommt, während der Empfänger angeschaltet (Ein) ist (z. B. durch Herausziehen des Netzkabels oder einen Stromausfall), ist möglicherweise Lautsprecherauswahl auf Ext. Lautsprecher gesetzt, wenn Sie das Fernsehgerät wieder anschalten. Deutsch - 47 �� BN68-02325A-Ger.indb 47 2009-05-19 �� 3:49:17 ¦ Fehlerbehebung für Anynet+ Problem Anynet+ funktioniert nicht. ● ● ● ● ● ● ● ● ● Ich möchte Anynet+ starten. ● ● ● Ich möchte Anynet+ beenden. ● ● ● Die Meldung "Verbinden mit Anynet+-Gerät" wird angezeigt. ● Keine Wiedergabe mit dem Anynet+-Gerät. Das angeschlossene Gerät wird nicht angezeigt. ● ● ● Prüfen Sie, ob das Gerät die Anynet+-Funktionen unterstützt. Prüfen Sie, ob das HDMI 1.3-Kabel ordnungsgemäß angeschlossen wurde. Prüfen Sie, ob Anynet+ (HDMI-CEC) im Konfigurationsmenü von Anynet+ aktiviert (auf Ein) ist. Suchen Sie noch mal nach Anynet+-Geräten Sie können Anynet+-Geräte nur mithilfe eines HDMI 1.3-Kabels verbinden. Einige HDMI-Kabel unterstützen möglicherweise keine Anynet+-Funktionen. Wenn es durch eine Störung (z. B. Trennen des HDMI-Kabels, des Netzkabels oder Stromausfall) zu einer Beendigung kommt, wiederholen Sie die Gerätesuche. Prüfen Sie, ob der Antennenstecker des Aufnahmegeräts ordnungsgemäß angeschlossen ist. ● Schließen Sie das Glasfaserkabel an das Fernsehgerät und den Receiver an. ● ● ● ● ● ● Das Fernsehprogramm kann nicht aufgezeichnet werden. Die Ausgabe des Fernsehtons erfolgt über den Receiver. Mögliche Lösung Überprüfen Sie, ob das Gerät Anynet+-tauglich ist. Das Anynet+-System unterstützt nur Anynet+-fähige Geräte. Schließen Sie nur einen Receiver (Heimkinosystem) an. Prüfen Sie, ob das Netzkabel des Anynet+-Geräts richtig angeschlossen ist. Prüfen Sie die Video/Audio/HDMI 1.3-Kabelverbindungen des Anynet+-Geräts. Prüfen Sie, ob Anynet+ (HDMI-CEC) im Setupmenü von Anynet+ aktiviert ist. Überprüfen Sie, ob die Fernbedienung im TV-Modus arbeitet. Prüfen Sie, ob es sich um eine ausschließlich für Anynet+ geeignete Fernbedienung handelt. Anynet+ funktioniert unter bestimmten Umständen nicht. (Kanalsuche, Bedienung von Media Play, Plug & Play usw.) Stellen Sie nach dem Anschließen oder Entfernen des HDMI 1.3-Kabels sicher, dass die Geräte wieder gesucht werden, oder schalten Sie das TV-Gerät aus und wieder ein. Überprüfen Sie, ob die Anynet+-Funktion des Anynet+-Geräts eingeschaltet ist. Prüfen Sie, ob das Anynet+-Gerät ordnungsgemäß an das Fernsehgerät angeschlossen ist, und kontrollieren Sie zudem, ob Anynet Anynet+ (HDMI-CEC) im Anynet+-Menü Einstellungen aktiviert (Ein) ist. Drücken Sie die TV-Taste auf der TV-Fernbedienung, um zu TV zu wechseln. Drücken Sie dann die TOOLS-Taste, um das Anynet+-Menü anzuzeigen und die gewünschte Menüoption auszuwählen. Wählen Sie im Anynet+-Menü die Option Fernsehen. Drücken Sie die Taste SOURCE auf der TV-Fernbedienung, und wählen Sie ein Gerät, bei dem es sich nicht um ein Anynet+-Gerät handelt. Drücken Sie auf P >/<, PRE-CH und FAV.CH, um den Fernsehmodus zu wechseln. (Beachten Sie, dass die Kanaltaste nur funktioniert, wenn kein in den Tuner integriertes Anynet+-Gerät angeschlossen ist.) Sie können die Fernbedienung nicht verwenden, während Sie Anynet+ konfigurieren, oder in einen anderen Anzeigemodus wechseln. Verwenden Sie die Fernbedienung, wenn das Konfigurieren von Anynet+ oder das Ändern des Anzeigemodus abgeschlossen ist. Die Wiedergabefunktion kann nicht verwendet werden, wenn der Plug & Play-Vorgang läuft. Deutsch - 48 �� BN68-02325A-Ger.indb 48 2009-05-19 �� 3:49:17 Content Library ¦ Verwenden der Content Library Mit der Content Library können Sie verschiedene Inhalte auf Ihrem Fernseher genießen. Sie können die im Fernsehspeicher abgelegten Standardinhalte verwenden, oder Sie können sich mit neuen Inhalten vom USB-Gerät Spaß ins Zimmer holen. Galerie Galerie Kochen Spiel Kinder Wellness R Zurück e Beenden Verwenden der Fernbedienungstasten im Menü für die Content Library Taste ▲/▼/◄/► ENTERE RETURN EXIT <P> Farbige Tasten Y / MUTE Vorgang Cursor bewegen und Elemente auswählen. Markiertes Element auswählen. Zurück zum vorherigen Menü. Beenden Sie die aktuellen Funktion und wecheln Sie zum Hauptmenü der Content Library zurück. Beenden des Modus Content Library und Rückkehr zum Fernsehmodus. Die Tasten für Funktionen werden auf den entsprechenden Seiten beschrieben. Sie können die Lautstärke der wiedergegebenen Inhalte einstellen. DER CONTENT LIBRARY ENTHÄLT NUR TEXTE, GRAFIKEN, BILDER, MULTIMEDIA UND WEITERE MATERIALIEN FÜR INFORMATIONS- UND SONSTIGE ZWECKE. DAS MATERIAL IN DER CONTENT LIBRARY WURDE GEÄNDERT UND WIRD STÄNDIG ÜBERARBEITET UND AKTUALISIERT. DAS MATERIAL IN DER CONTENT LIBRARY IST NICHT UNBEDINGT FÜR JEDES PUBLIKUM GEEIGNET. DIE INFORMATIONEN IN DER CONTENT LIBRARY WERDEN OHNE MÄNGELGEWÄHR ZUR VERFÜGUNG GESTELLT. OBWOHL DIE IHNEN IN DER CONTENT LIBRARY ZU VERFÜGUNG GESTELLTEN INHALTE VON QUELLEN STAMMEN ODER ZUSAMMENGESTELLT WERDEN, DIE WIR FÜR ZUVERLÄSSIG ERACHTEN, KANN UND WILL SAMSUNG KEINE GEWÄHRLEISTUNG ÜBERNEHMEN FÜR DIE RICHTIGKEIT, GÜLTIGKEIT, PÜNKTLICHKEIT ODER VOLLSTÄNDIGKEIT DER INFORMATIONEN ODER DATEN, DIE IHNEN FÜR EINEN BESTIMMTEN ZWECK ZUR VERFÜGUNG GESTELLT WERDEN. UNTER KEINEN UMSTÄNDEN (AUCH NICHT BEI FAHRLÄSSIGKEIT) HAFTEN SAMSUNG ODER DER RECHTEINHABER VERTRAGLICH ODER GESETZLICH FÜR DIREKTE ODER INDIREKTE SCHÄDEN, FÜR NEBENSCHÄDEN UND FOLGESCHÄDEN, ANWALTSGEBÜHREN, AUSLAGEN UND SONSTIGE SCHÄDEN, DIE ALS FOLGE VON ODER IM ZUSAMMENHANG MIT SOLCHEN INFORMATIONEN AUS DER CONTENT LIBRARY ODER DEREN VERWENDUNG AUFTRETEN. DIES IST AUCH DANN DER FALL, WENN SAMSUNG AUF DIE MÖGLICHKEIT SOLCHER SCHÄDEN HINGEWIESEN WURDE. ¦ Verwenden der Inhalte Sie können die im Fernsehspeicher gespeicherten Inhalte genießen. N Um zum Hauptmenü der Content Library zurückzukehren, drücken Sie die Taste EXIT. Galerie ❑ Galerie Mit dieser Funktion starten Sie eine Diashow mit hochauflösenden Bildern und Hintergrundmusik, um eine bestimmte Atmosphäre zu schaffen. Mithilfe der Galeriefunktion R Zurück e Beenden Ihres Fernsehgeräts können Sie die Atmosphäre Ihres Heims ändern. N Das Urheberrecht für die Inhalte der Galerie sowie die weiteren entsprechenden Rechte sind TimeSpace, Inc. vorbehalten. N Drücken Sie auf die Taste ENTERE, um die Diashow anzuhalten. Drücken Sie dann noch einmal die Taste ENTERE, um die Diashow fortzusetzen. N Drücken Sie die Taste INFO, um Informationen über das markierte Foto anzuzeigen. (Dies wird nicht angezeigt, wenn es für das Photo keine Information gibt.) Galerie Kochen Spiel Kinder Wellness ❑ Kochen Hiermit öffnen Sie verschiedene Rezepte, die Sie dann schrittweise befolgen können. Freuen Sie sich auf diese Inhalte, denn so erhalten Sie zahlreiche Anregungen für gutes Essen. N Die Rezepte aus dem Abschnitt Kochen auf dem Samsung-Fernseher basieren auf den von Anness Publishing veröffentlichten Rezepten. N Das Urheberrecht für die Inhalte unter Kochen sowie die weiteren entsprechenden Rechte sind Practical Pictures vorbehalten. Deutsch - 49 �� BN68-02325A-Ger.indb 49 2009-05-19 �� 3:49:18 ❑ Spiel In dieser Kategorie finden sich unterhaltsame Spiele für die ganze Familie. N Informationen zu den Schaltflächen in den Spielen erhalten Sie in den Hinweisen auf dem Bildschirm. N Farbtasten für Spiele Taste Rot Grün Gelb Blau Vorgang Mit dieser Taste wechseln Sie zurück zum Startfenster des Spiels. Drücken Sie diese Taste, um das Spiel anzuhalten. Optionstaste Drücken Sie diese Taste, um das Spiel zu beenden. ❑ Kinder Hierbei handelt sich um Lerninhalte und interaktive Inhalte, die Kinder regelmäßig schauen dürfen. N Das Urheberrecht für die Inhalte unter Kinder sowie die weiteren entsprechenden Rechte sind UpToTen vorbehalten. ❑ Wellness Diese nützlichen Inhalte für die Gesundheitspflege , tun Ihrer ganzen Familie gut. ¦ Verwenden des Management der Inhalte ❑ Management der Inhalte N Wählen Sie durch Drücken der gelben Taste mehrere Inhaltselemente nacheinander. ■ Eigene Inhalte Für jedes Unterelement der Bibliothek der Inhalte können Sie die im Fernsehspeicher vorhandenen Inhalte überprüfen. ● Wählen Sie ein Inhaltselement aus und drücken Sie die Taste ENTERE. Sie können das ausgewählte Element ausführen oder löschen. Management der Inhalte Spiel Kinder Wellness Andere Management der Inhalte R Zurück e Beenden Management der Inhalte > Eigene Inhalte 1/1 ■ Eigene Inhalte USB USB Für jedes Unterelement der Content Library können Sie die im USB-Speicher vorhandenen Einstellungen Inhalte überprüfen. ● Wählen Sie ein Inhaltselement aus und drücken Sie die Taste ENTERE. Sie können das gewählte Inhaltselement abspielen. R Zurück e Beenden N Content Library unterstützt ausschließlich USB-Massenspeichergeräte vom Typ MSC (Mass Storage Class). MSC-Geräte sind Massenspeicher zur Übertragung von Daten. Beispiele für MSC sind Thumb-Laufwerke und Flash Card-Lesegeräte. N Wenn Sie ein Spiel mit Hilfe eines externen USB-Speichers spielen, können Sie Ihr Spiel speichern (je nach Spiel). Entfernen Sie niemals den USB-Speicher, solange Daten gespeichert werden, da auf diese Weise Daten verloren gehen können. N Herunterladen neuer Inhalte Neue bzw. andere als die eingebauten Inhalte können Sie kostenlos über die Website Samsung.com beziehen. Wenn Sie kostenpflichtige Inhalte herunterladen, benötigen Sie dafür die UDN-Nummer. Überprüfen Sie vor dem Herunterladen eines neuen Inhaltselements die UDN-Nummer. • Herunterladen von Inhalten 1. Wechseln Sie zur Website unter www.samsung.com. Galerie Kochen Spiel Kinder Wellness TV Memory 17,16 GB/189,00MB Verfügbar 2. Wählen Sie auf der Seite zum Herunterladen von Inhalten ein Inhaltselement aus. 3. Laden Sie den Inhalt in den USB-Speicher. 4. Wechseln Sie zum Hauptmenü der Content Library. Drücken Sie dazu auf die Taste CONTENT oder wählen Sie Content Library (Menü → Anwendung → Content Library). 5. Stecken Sie den USB-Speicher in den USB-Anschluss seitlich am Fernsehgerät. 6. Sie können das Unterelement des Inhalts anzeigen, das Sie heruntergeladen haben. 7. Wählen Sie ein Inhaltselement aus und drücken Sie die Taste ENTERE. 8. Sie können das gewählte Inhaltselement abspielen. ■ Einstellungen ● Laufzeit Bildschirmsch.: Wählen Sie die Wartezeit bis zum Aktivieren des Bildschirmschoners. ● UDN speichern: Speichern Sie die UDN-Nummer des USB-Geräts. N NTFS-formatierte USB-Speicher unterstützen keine Möglichkeiten, um UDN zu speichern. Wir empfehlen, ein USBSpeichergerät mit FAT-Formatierung zu verwenden. Deutsch - 50 �� BN68-02325A-Ger.indb 50 2009-05-19 �� 3:49:18 Internet@TV Bei Problemen mit einem Widget-Dienst wenden Sie sich an den Anbieter der Inhalte. Drücken Sie im Widget die grüne Taste, um Kontaktinformationen abzurufen, oder lesen Sie auf der Hilfe-Website, um Informationen über Dienstanbieter zu erhalten. N Je nach Region wird möglicherweise nur Englisch als Sprache des Widget unterstützt. N Diese Funktion wird, je nach Land, möglicherweise nicht unterstützt. (nicht überall verfügbar) ¦ Erste Schritte mit Internet@TV Internet@TV ist ein integrierter Internet- und Fernsehspaß auf der Grundlage der Yahoo!® Widget Engine. Mit dem Internet@ TV-Dienst Ihres Fernsehgeräts können Sie Aktienkurse im Auge behalten, Fotos mit Freunden und der Familie austauschen und aktuelle Nachrichten oder Wetterinformationen abrufen. N Je nach Netzwerkzustand ist diese Funktion möglicherweise nicht verfügbar. Dann wird das Fernsehgerät automatisch abgeschaltet. Schalten Sie anderenfalls das Fernsehgerät mit der Netztaste aus. N Aufgrund der Netzwerkbedingungen kann es bei dieser Funktion zu Verzögerungen oder Unterbrechungen kommen. Wenn Sie Internet@TV erstmals starten, werden die Grundeinstellungen automatisch durchgeführt. N Zuerst müssen Sie Ihr Netzwerk einrichten. Weitere Informationen zum Konfigurieren Ihres Netzwerks finden Sie unter "Einrichten des Netzwerks". N Sobald Ihr Netzwerk bereit ist, werden Sie von der Software für Internet@TV Schritt für Schritt durch einen Installationsassistenten geführt. 1. Drücken Sie die Taste MENU. Wählen Sie durch Drücken der Tasten ▲ oder ▼ die Option "Anwendung", und drücken Sie dann die Taste ENTERE. 2. Wählen Sie durch Drücken der Tasten ▲ oder ▼ die Option Internet@TV, und drücken Sie dann die Taste ENTERE. N Internet@TV wird gestartet. O Drücken Sie die Taste INTERNET@ auf der Fernbedienung, um das Internet@TV-Menü anzuzeigen. 3. Der Allg. Haftungsausschl. wird auf dem Bildschirm angezeigt. Wählen Sie Ich stimme zu oder Ich stimme nicht zu. N Weitere Informationen zum Allg. Haftungsausschl. finden Sie unter Rechtliche Hinweise. 4. Der Begrüßungsbildschirm ist der Einstieg in die geführte Einrichtung von Internet@TV. N Wenn Sie Setup beenden wählen, wird dieser Schritt noch einmal ausgeführt, wenn Sie die Taste INTERNET@ drücken. N Wählen Sie Fangen wir an! Yahoo! TV Widgets können Sie sich das Beste aus dem Internet auf Ihren Fernseher holen. Sie können aktuelle Wetterdaten oder Sportergebnisse, aktuelle Aktieninformationen und sogar Fotos und Videos im Vollbildmodus abrufen. We just need to get a few things set up, and you’ll be on your way! 5. Anhand Ihrer Standortauswahl passen die TV-Widgets die Inhalte regional an. N Wählen Sie Ihr Land aus der Liste aus. 6. Damit Sie Internet@TV nutzen können, müssen Sie die "Datenschutzrichtlinie für das Yahoo!® TV Widget System" akzeptieren. N Wählen Sie OK, Ich stimme zu. 1 Willkommen bei Yahoo!® TV Widgets! Fangen wir an! Setup beenden 7. Damit Sie Internet@TV nutzen können, müssen Sie die "Nutzungsbedingungen für das Yahoo!® TV Widget System" akzeptieren. Wie heißen Sie? N Wählen Sie OK, Ich stimme zu. 8. Geben Sie Ihren Namen ein, um Ihr Profil anzulegen. Jedes Profil verfügt über eine eigene Widget-Liste. Sie können für jede Person, die Internet@TV nutzt, ein eigenes Profil erstellen. N Geben Sie Ihren Namen ein und wählen Sie Namen speichern. N Weitere Informationen finden Sie unter ‘Verwenden des Profil-Widget’. 9. Internet@TV testet die Netzwerkverbindung. N Wenn der Test fehlschlägt, müssen Sie Ihr Netzwerk neu konfigurieren. N Weitere Informationen finden Sie unter ‘Konfigurieren des Netzwerks’. 5 Jede in Ihrem Haushalt lebende Person, die den Fernseher nutzt, kann ihre eigenen persönlichen Widgets einrichten. Diese individuellen Widget-Profile werden mit dem eingegebenen Namen gespeichert. Geben Sie jetzt den Namen ein, den SIE verwenden möcht Namen speichern Überspringen Setup beenden 10.Die geführte Einrichtung ist abgeschlossen. Anschließend wird eine Schulung zur Verwendung von Internet@TV gestartet. N Wählen Sie Kontinuierlich, um die Schulung anzuzeigen. N Wählen Sie Setup beenden, um Internet@TV sofort zu nutzen. N Um die Schulung noch einmal auszuführen, wählen Sie Profil-Widget → Systemeinstellungen → Lernprogramm wiederholen. 11. Drücken Sie die Taste Internet@ auf der Fernbedienung, um die Benutzerschnittstelle von Internet@TV anzuzeigen. Deutsch - 51 �� BN68-02325A-Ger.indb 51 2009-05-19 �� 3:49:18 ❑ Bildschirmanzeige ■ Verankerte Fenster 1 Nun wird das Begrüßungsfenster mit Ihrem Profilnamen in der oberen rechten Ecke angezeigt. N Warten Sie einen Augenblick, bis das Fenster geschlossen wird. 1 2 Hallo John! 5:15 AM Mo January 19th Viewport Snippet bearbeiten 2 Im Begrüßungsbildschirm werden zwei Fernbedienungstasten hervorgehoben. N Wenn Sie auf Ihrer Fernbedienung die blaue Taste (Viewport) drücken, wechelt die Anzeige zwischen Anzeigefenster und OverlayModus. Bei Verwendung des Anzeigefensters werden Fernseh- und 3 Videosignale in einem verkleinerten Anzeigefenster neben der 3 als Wetter Widget-Galerie FINANCE Grafikanzeige dargestellt. Im Overlay-Modus wird die Grafik oberhalb Angemeldet John des Fernseh- oder Videobilds angezeigt. N Wenn Sie auf Ihrer Fernbedienung die gelbe Taste (Snippet bearbeiten) drücken, wird ein Hilfefenster angezeigt und das aktive Snippet kann bearbeitet werden. 3 Drücken Sie zum Starten auf Ihrer Fernbedienung die Taste INTERNET@. N Die horizontale Liste unten auf Ihrem Fernsehbildschirm wird als das Dock bezeichnet. N Die Elemente dieser Liste sind die sog. Snippets. N Bei einem Snippet handelt es sich um ein Element, das ein Fernseh-Widget startet. N Ein Fernseh-Widget ist eine Internetanwendung, die auf Ihrem Fernseher laufen soll. N Sie können über die Tasten ◄ oder ► auf der Fernbedienung zwischen den Snippets wechseln. N Aktiviert ist der äußerst linke Bereich (blau hervorgehoben). N Im Dock werden die Snippets unter diesen Brennpunkt verschoben. N Sie starten ein Fernseh-Widget durch Drücken der ENTERE-Taste auf der Fernbedienung, wenn das zugehörige Snippet aktiviert ist. N Wenn Sie Snippets hinzufügen, werden diese als Stapel angezeigt, in dem Sie mit den Tasten ▲ und ▼ navigieren können. N Es gibt im Dock zwei spezielle Fernseh-Widgets: das Profil-Widget und das Widget-Galerie. Diese beiden können nicht gelöscht werden. N Das Dock wird nach einer gewissen Zeit aus der Anzeige herausgeschoben. ■ Sidebar-Modus 1 Aktivieren Sie ein Snippet und drücken Sie die ENTERE-Taste, um die Sidebar mit den Fernseh-Widgets zu öffnen. Das Logo des Fernseh-Widget und das Home-Symbol befinden sich oben auf der Sidebar. 2 Das aktuelle Menü wird unterhalb vom Logo für das Fernseh-Widget angezeigt. N Wenn Sie zum vorherigen Bildschirm wechseln möchten, wählen Sie diesen und drücken Sie anschließend auf ENTERE. N Sie können aber auch die Taste RETURN auf der Fernbedienung drücken. FINANCE Meine Aktien Um ein Aktiensymbol zu entfernen, wählen Sie es in der Liste unten aus. 1 2 ^DJI ^IXIC YHOO AAPL INTC AMZN SEITE 1 VON 2 Neues Symbol hinzufügen... Symbole aus Yahoo! importieren... Anzeigeformat Wert Info zu Yahoo! Finanzen... 3 4 5 3 Die aktuelle Auswahl wird immer in blauer Farbe hervogehoben. Die markierte Taste ist aktiviert und durch Drücken von ENTERE führen Sie die entsprechende Funktion aus. 4 Wenn viele Daten vorhanden sind, gibt es eine Navigation. N Es werden die aktuelle Seite und die Gesamtzahl der Seiten angezeigt. N Wechseln Sie durch Drücken von ◄ oder ► von einer Seite zur anderen. 5 Auf der unteren Symbolleiste befinden sich Farbschaltflächen, die der roten, grünen, gelben und blauen Taste der Fernbedienung entsprechen. • Rote Taste: Wideget schließen. • Gelbe Taste: Einstellungen des Widget ändern. • Grüne Taste: Snippets verwalten. • Blaue Taste: Größe des Videos an das Fenster anpassen oder als Vollbild anzeigen. N Manche Tasten sind, je nach Land, möglicherweise nicht verfügbar. Deutsch - 52 �� BN68-02325A-Ger.indb 52 2009-05-19 �� 3:49:20 Alle über dieses Geräte abrufbaren Inhalte und Dienste gehören Dritten und sind durch gewerbliche Schutzrechte und insbesondere durch Urheberrechte, Patentrechte und Marken geschützt. Die Inhalte und Dienste sind ausschließlich für Ihren persönlichen und nicht für den kommerziellen Gebrauch bestimmt. Sie dürfen die Inhalte und die Dienste ohne die Einwilligung des Rechteinhabers nur in der autorisierten Weise nutzen. Ungeachtet des Vorstehenden, dürfen Sie ohne die ausdrückliche Einwilligung des jeweiligen Rechteinhabers oder des Service-Providers, die Inhalte oder Dienste weder verändern, kopieren, erneut veröffentlichen, hochladen, zum Abruf bereit halten, versenden, übertragen, übersetzen, verkaufen, Bearbeitungen davon herstellen, verwerten oder verbreiten, unabhängig davon, in welcher Art und Weise oder über welches Medium der Inhalt oder die Dienste mit Hilfe dieses Gerätes angezeigt werden. DIE INHALTE UND DIENSTE WERDEN VON DRITTEN ZUR VERFÜGUNG GESTELLT. SAMSUNG ÜBERNIMMT WEDER AUSDRÜCKLICH NOCH STILLSCHWEIGEND GEWÄHR FÜR DIE BEREITSTELLUNG DER INHALTE ODER DIENSTE. SAMSUNG SCHLIESST AUSDRÜCKLICH JEDE STILLSCHWEIGENDE GEWÄHRLEISTUNG AUS UND INSBESONDERE JEDE GEWÄHRLEISTUNG FÜR DIE MARKTÜBLICHKEIT ODER DIE EIGNUNG FÜR EINEN BESTIMMTEN ZWECK. SAMSUNG STEHT WEDER FÜR DIE FEHLERFREIHEIT, GÜLTIGKEIT, ZEITGERECHTIGKEIT, RECHTMÄSSIGKEIT ODER VOLLSTÄNDIGKEIT DES INHALTS ODER DER DIENSTE EIN, DIE ÜBER DIESES GERÄT ZUR VERFÜGUNG GESTELLT WERDEN; UNTER KEINEN UMSTÄNDEN UND INSBESONDERE AUCH NICHT IM FALLE DER FAHRLÄSSIGKEIT, GLEICH OB AUS VERTRAG ODER DELIKT, HAFTET SAMSUNG FÜR UNMITTELBARE ODER MITTELBARE SCHÄDEN, FOLGESCHÄDEN, ANWALTSGEBÜHREN, AUFWENDUNGEN ODER IRGENDWELCHE ANDEREN SCHÄDEN, DIE DURCH ODER IN ZUSAMMENHANG MIT INFORMATIONEN ENTSTEHEN ODER DIE AUS DER BENUTZUNG DER INHALTE ODER DER DIENSTE DURCH SIE ODER DRITTE ENTSTEHEN, SELBST WENN SAMSUNG AUF DIE MÖGLICHKEIT EINES SCHADENS HINGEWIESEN WORDEN IST. Dienste Dritter können jederzeit beendet oder unterbrochen werden und Samsung steht weder dafür ein noch gewährleistet sie, dass Inhalte oder Dienste über einen Zeitraum dauerhaft verfügbar bleiben. Inhalte und Dienste werden von Dritten über Netzwerke und Übertragungseinrichtungen übertragen auf die Samsung keinen Zugriff hat. Bezüglich der Inhalte und Dienste, die durch diese Geräte zugänglich gemacht werden schließt Samsung daher insbesondere jede Verantwortung und Haftung aus, die durch eine Unterbrechung oder Aussetzung eines Inhalts oder eines Dienstes verursacht wird. Samsung ist für Kundendienst in Verbindung mit Inhalten oder Diensten weder verantwortlich noch haftbar. Alle Anfragen und Fragen zu den Inhalten oder Diensten sind unmittelbar gegenüber dem jeweiligen Service-Provider für diese Inhalte oder Dienste geltend zu machen. In jedem Falle haftet Samsung gegenüber seinen Kunden für eine leicht fahrlässige Verletzung wesentlicher Pflichten aus dem Schuldverhältnis nur der Höhe nach begrenzt auf die bei Vertragsabschluss typischerweise vorhersehbaren Schäden. Darüber hinaus übernimmt Samsung keine Haftung für eine leicht fahrlässige Verletzung nicht wesentlicher Pflichten aus dem Schuldverhältnis sowie für leichte Fahrlässigkeit im Übrigen und für Ansprüche, die darauf beruhen, dass ein Mangel bereits bei Abschluss des Vertrages vorhanden war. Die Haftungsbeschränkung schränkt eine gesetzlich zwingende Haftung nach dem Produkthaftungsgesetz oder eine Haftung für Garantien und eine Haftung für schuldhaft verursachte Körperschäden nicht ein. ¦ Bearbeiten von Snippets im Dock 1. Sie können ein Snippet bearbeiten, indem Sie es im Dock aktivieren und dann die gelbe Taste drücken. 2. Das Snippet wechselt dann an zweite Stelle und sein Feld bewegt sich nach oben, sodass der folgende Hilfetext angezeigt wird: • Löschen (rote Taste): Fernseh-Widget entfernen. N Gelöschte Widgets können Sie mit Hilfe der Widget-Galerie neu installieren. • Verschieben (blaue Taste): Snippets neu anordnen. Drücken Sie zum Blättern die Taste ◄ oder ►. Drücken Sie die gelbe Taste, um das Widget an der neuen Stelle einzufügen. • Fertig (gelbe Taste): Schließen des Menüs Snippet bearbeiten. ¦ Verwenden des Profil-Widget Mit dem Profil-Widget konfigurieren Sie Ihr Benutzerprofil. Sie können mehrere Profile einrichten, in denen jeweils eine bestimmte Kombination von Widgets verwaltet wird. Mit dem Menü Profil wechseln können Sie zu einem anderen Benutzerprofil wechseln. N Mindestens zwei Profile müssen registriert sein. Wenn Sie ein Profil hinzufügen möchten, schlagen Sie im Abschnitt Verwaltungssteuerung nach. PROFILE Angemeldet als John Profil wechseln Profileinstellungen Systemeinstellungen Verwaltungssteuerung Abmelden bei Yahoo! Deutsch - 53 �� BN68-02325A-Ger.indb 53 2009-05-19 �� 3:49:20 Mit HIlfe des Menüs Profileinstellungen können Sie Profile individuell anpassen und schützen. ● Sie können Benutzerprofilen einen eindeutigen Name und einen Avatar (ein Bild zur Darstellung des Profils) zuordnen. ● Der Name und der Avatar des Profils werden im Profil-Snippet im Dock angezeigt. ● Sie können Profile mit Hilfe von Profil-PIN erstellen schützen. N Wenn Sie den PIN-Code erstmals festlegen, können Sie eine Sicherheitsfrage festlegen. Mit Hilfe des Menüs für die Profileinstellungen können Sie den Zugriff auf Widgets einschränken. ● Wenn Sie Ihre Profil-PIN vergessen, können Sie die Sicherheitsfrage beantworten, die mit Ihrem Profil verbunden ist. ● Wenn Sie ein Profil beschränken, können Sie keine neuen Widgets installieren. N Die Eigentümer-PIN muss festgelegt sein, um diese Funktion verwenden zu können. Informationen zum Festlegen der Eigentümer-PIN finden Sie unter ‘Verwaltungssteuerung’. Mit Hilfe des Menüs Systemeinstellungen können Sie: ● Ihren Ort und Ihre Postleitzahl (nur USA) einstellen, um die Inhalte an Ihre Region anzupassen. ● Lernprogramm wiederholen wiederholen, die bei der geführten Einrichtung angezeigt wurde. ● Zurücksetzen verwenden, um alle Einstellungen und Informationen für das Widget zu löschen. Mit Hilfe des Menüs Verwaltungssteuerung können Sie: ● Den Timeout für den Bildschirmschoner einstellen, um das Einbrennen des Bildschirms zu verhindern. ● Eine Eigentümer-PIN und eine Sicherheitsfrage eingeben, um andere Profile zu kontrollieren. ● Erstellen Sie ein neues Profil, das mit einer eigenen Kombination von Widgets ausgestattet werden kann. ● Löschen Sie ein vorhandenes Profil. Vom Profil-Widget aus können Sie sich mit Ihrer Yahoo!-Kennung bei Bei Yahoo!® anmelden anmelden. ● Wenn Sie über eine Yahoo!- Kennung verfügen, können Sie mit den Fernseh-Widgets von Yahoo! auf Ihre individuellen Inhalte zugreifen. ● Yahoo! Wenn Sie sich mit Ihrer Yahoo!-Kennung anmelden, werden automatisch alle Fernseh-Widgets von Yahoo! installiert. anmelden. ● Wenn Sie kein Yahoo!-Konto besitzen, besuchen Sie www.yahoo.com und legen Sie ein Konto an. ● Möglicherweise können Sie sich in einem Land, das Internet@TV nicht unterstützt, nicht mit einer auf der Yahoo-Website erstellten Kennung anmelden. ❑ Informationen zum Profil-Widget Drücken Sie die grüne Taste. Sie können eine kurze Beschreibung des Profil-Widget, der Richtlinie zum Urheberrecht und der Allgemeine Geschäftsbedingungen sowie der Datenschutz anzeigen. ¦ Verwenden der Yahoo!®-Widget-Galerie Verwenden Sie die Yahoo!®-Widget-Galerie, um weitere Widgets zu Ihrem Fernsehgerät hinzuzufügen. Zeigen Sie alle verfügbaren Fernseh-Widgets in den folgenden Kategorien an: ● Letzte Widgets: Anzeigen der zuletzt hochgeladenen Widgets. ● Yahoo!® Widgets: Anzeigen der Widgets von Yahoo!®. ● Samsung Widgets: Anzeigen der Widgets von Samsung. ● Weitere Kategorien: Anzeigen aller Widgets nach Kategorien. N Um ein Widget zu installieren, navigieren Sie zum Detailfenster und wählen Sie Widget meinem Profil hinzufügen. Drücken Sie dann auf ENTERE. Das Widget wird installiert und steht im Dock zur Verfügung. Widget-Galerie Yahoo! Nachrichten von Yahoo! V 0.9.0 NEWS HEADLINES SEITE 1 VON 2 Top Stories Business Potics Sports Technology Weitere Kategorien NEWS Letzte Widgets ❑ Yahoo! Widgets Widget-Galerie Samsung Widgets Drücken Sie die grüne Taste. Kategorien ■ Info zu Yahoo! Widget Gallery... Sie können eine kurze Beschreibung der Widget-Galerie, Richtlinie zum Urheberrecht, Allgemeine Geschäftsbedingungen und der Datenschutz anzeigen. ■ Mit Hilfe des Menüs für die Entwicklereinstellungen können Sie ein eigenes Widget erstellen. Weitere Informationen zum Erstellen eigener Widgets finden Sie auf unserer Entwickerwebsite unter http://connectedtv.yahoo.com/ Deutsch - 54 �� BN68-02325A-Ger.indb 54 2009-05-19 �� 3:49:20 ¦ Verwenden des Wetter-Widget von Yahoo!® Mit dem Wetter-Widget von Yahoo!® werden Sie über das Wetter bei Ihnen vor Ort und an einigen bevorzugten Standorten auf dem Laufenden gehalten. Der Inhalt wechselt je nach den Wetterbedingungen. ● Drücken Sie die grüne Taste auf der Fernbedienung, um das Einstellungsmenü des WetterWidget von Yahoo!® anzuzeigen. ● Vom Einstellungsmenü aus können Sie Städte hinzufügen oder entfernen, für die Sie Wetterinformationen anzeigen möchten. Ausgehend vom Einstellungsmenü haben Sie folgende Möglichkeiten: ● Neue Stadt hinzufügen. Geben Sie den Namen der Stadt ein. Nach Anzeige der Suchergebnisse wählen Sie die gewünschte Stadt und drücken Sie dann die Taste ENTERE. ● Stadt löschen. Wählen Sie die Stadt aus der Städteliste aus, die Sie entfernen möchten. Drücken Sie die Taste ENTERE, um das Löschen zu bestätigen. ● Wechseln des Temperaturanzeigemodus Sie können den Temperaturanzeigemodus auf ºF oder ºC einstellen. Bei ºF werden beispielsweise Temperaturen in Fahrenheit und bei ºC in Celsius angezeigt. Wetter 51° Sunnyvale Cloudy Sunnyvale, CA San Francisco, CA New York, NY London, England Paris, France ❑ Erstellen Sie ein Snippet für ihre bevorzugte Stadt ● ● ● Wählen Sie aus der Startseite des Wetter-Widget von Yahoo!® eine Stadt aus und zeigen Sie dafür detaillierte Wetterinformationen an. Drücken Sie die gelbe Taste. Wählen Sie den Menübefehl Snippet hinzufügen und drücken Sie auf ENTERE, um diese Stadt als Snippet hinzuzufügen. ❑ Löschen des Snippet einer Stadt ● ● ● Starten Sie das Snippet. Drücken Sie die gelbe Taste. Wählen Sie die Menüoption Snippet löschen und drücken Sie ENTERE, um das Snippet zu entfernen. ¦ Verwenden des Nachrichten-Widget von Yahoo!® Das News-Widget von Yahoo!® zeigt aktuelle Schlagzeilen aus den Bereichen Wirtschaft, Unterhaltung, Politik, Sport, Top Stories und vielen anderen Kategorien an. NEWS Wählen Sie eine Kategorie, innerhalb der Kategorie eine Überschrift und sehen Sie dann die dynamisch erstellte Nachrichtenzusammenfassung. World Deutsch - 55 �� BN68-02325A-Ger.indb 55 2009-05-19 �� 3:49:20 ¦ Verwenden des Flickr-Widget von Yahoo!® Mit dem Flickr-Widget erhalten Sie beim Fernsehen Zugriff auf die Fotos von Freunden und Verwandten. Genießen Sie Ihre Fotos gemeinsam mit Ihrer Familie in einer Diashow auf Ihrem Großbildschirm. ● Personalisieren Sie das Flickr-Widget durch Anmelden mit Ihrer Yahoo!-Kennung. anmelden. ● Detaillierte Anweisungen zum Anmelden finden Sie unter "Verwenden des Profil-Widget". ● Weitere Informationen zu Flickr erhalten Sie auf www.flickr.com. N Meine Fotos können Sie Fotos anzeigen, die Sie auf der Flickr-Website registriert haben. ■ ■ So zeigen Sie Ihre Flickr-Fotos als Diashow an: ● Wählen Sie das Miniaturbild eines Fotos und drücken Sie auf die ENTERE -Taste, um die Details zum Foto anzuzeigen. ● Wählen Sie den Befehl zum Starten der Diashow und drücken Sie auf die ENTERE-Taste. Meine Fotos Meine Alben Entdecken Lieblingsfotos Meine Kontakte So steuern Sie die Anzeige der Diashow: Meine Gruppen ● Drücken Sie während der Diashow auf die ENTERE-Taste. ● Die Miniaturbilder der Fotos werden am unteren Bildschirmrand angezeigt. N Wenn die Diashow-Steuerung angezeigt wird, können Sie die Optionen zum Anhalten, Wiedergeben und Stoppen der Diashow verwenden. N Wenn Sie das Menü wählen und auf ENTERE drücken, werden Informationen zum markierten Foto angezeigt. ● Mit dem Menü Meine Alben können Sie Fotos anzeigen, die Sie in Flickr klassifiziert haben. ● Mit dem Menü Entdecken können Sie in den Fotos auf der Flickr-Website navigieren. Sie können die täglich aktualisierten Fotos anzeigen. ● Mit Als Favorit kennzeichnen oder Aus Favoriten entfernen können Sie den Inhalt der bevorzugten Fotos verändern. ● Mit dem Befehl Lieblingsfotos zeigen Sie die Fotos an, die Sie als Favoriten klassifiziert haben. ● Mit der Option Meine Kontakte können Sie neue Fotos von Freunden und Verwandten anzeigen. Mit Meine Gruppen können Sie diejenigen Favoritengruppen von der Flickr-Website auswählen, deren Fotos Sie mit der FlickrCommunity teilen möchten. Um die Einstellungen für das Flickr-Widget von Yahoo!® zu ändern, drücken Sie die grüne Taste Ihrer Fernbedienung. ● Mit Zeit pro Dia steuern Sie die Geschwindigkeit der Diashow. ● Mit dem Befehl Wiederholen starten Sie die Diashow von Anfang an neu, wenn das letzte Bild erreicht ist. ¦ Verwenden des Finanz-Widget von Yahoo!® Mit dem Finanz-Widget von Yahoo!® können Sie aktuellste Nachrichten und Börseninformationen FINANCE abrufen. Meine Aktien Drücken Sie die grüne Taste, um Ihre eigenen Aktien einzurichten. Um ein Aktiensymbol zu entfernen, wählen Sie es in der Liste unten aus. Mit Neues Symbol hinzufügen können Sie den Namen einer neuen Aktie eingeben. ^DJI ● Wählen Sie aus der Liste der Suchergebnisse die Aktie aus, die Sie hinzufügen möchten. ^IXIC Wählen Sie dann das Symbol zum Hinzufügen und drücken Sie die ENTERE-Taste, um sie YHOO hinzuzufügen. AAPL N Die ausgewählte Aktie wird zur Liste Meine Aktien hinzugefügt. INTC ● Mit dem Menübefehl Symbole aus Yahoo! importieren können Sie Ihr Yahoo!® Finance AMZN Portfolio abrufen. SEITE 1 VON 2 Mit dem Befehl Symbole zusammenführen fügen Sie die Symbole auf dem FinanzWidget von Yahoo!® bei den Symbolen Ihres Portfolios ein. Neues Symbol hinzufügen... Mit Symbole ersetzen löschen Sie die Symbole im Finanz-Widget von Yahoo!® und Symbole aus Yahoo! importieren... ersetzen sie durch die Symbole Ihres Portfolios. Anzeigeformat Wert ● Verwenden Sie den Befehl Anzeigeformat, um die Anzeige der Aktienkurse auf Wert oder Info zu Yahoo! Finanzen... Prozentsatz einzustellen. ● Erstellen Sie ein Snippet für Ihre bevorzugte Aktie. Wählen Sie das Aktiensymbol von der Homepage des Finanz-Widget von Yahoo!® und zeigen Sie detaillierte Finanzinformationen an. Drücken Sie die gelbe Taste. Wählen Sie Snippet hinzufügen und drücken Sie auf ENTERE, um diese Aktie als Snippet hinzuzufügen. ● Löschen eines Snippet Starten Sie das Snippet aus dem Dock. Drücken Sie die gelbe Taste. Wählen Sie Snippet löschen und drücken Sie ENTERE, um das Snippet zu löschen. Deutsch - 56 �� BN68-02325A-Ger.indb 56 2009-05-19 �� 3:49:20 ¦ Fehlerbehebung für Internet@TV Problem Mögliche Lösung Einige Widget-Dienste funktionieren nicht. Wenden Sie sich an den entsprechenden Dienstanbieter. Drücken Sie im Widget die grüne Taste, um Kontaktinformationen abzurufen, oder lesen Sie auf der Hilfe-Website, um Informationen über Anbieter von Widget-Diensten zu erhalten. Siehe Hilfe-Website. Die Inhalte mancher Widgets liegen nur in englischer Sprache vor. Wie kann ich die Sprache ändern? Die Sprache der Widget-Inhalte kann von der Sprache der Benutzerschnittstelle abweichen. Das hängt vom jeweiligen Dienstanbieter ab. Nach dem Zurücksetzen auf die Werkseinstellungen ist der Yahoo WidgetDienst nicht mehr verfügbar und eine Warnmeldung wird angezeigt. Nach dem Zurücksetzen auf die Werkseinstellungen schalten Sie das Fernsehgerät aus und wieder ein. Starten Sie dann Internet@TV neu. Ich habe mich im Flickr-Widget bei meinem Konto angemeldet kann aber meine Bilder nicht sehen. Wechseln Sie auf die Yahoo-Website und aktivieren Sie Ihr Flickr-Konto unter Ihrer Yahoo!-Kennung. anmelden. Obwohl ich im Profil-Widget meinen Standort geändert habe, gelten weiterhin die alten Einstellungen. Schalten Sie Ihr Fernsehgerät aus und wieder ein. Starten Sie dann Internet@TV neu. Genießen Sie die Widget-Dienste für den geänderten Standort. ¦ Hilfe-Website Land Austria Belgium Czech Denmark Hilfe-Website www.samsung.com → Produkte → Fernseher → [email protected] → Internet@TV www.samsung.com → Producten → televisies → [email protected] → Internet@TV www.samsung.com → Produits → téléviseurs → [email protected] → Internet@TV www.samsung.com → Produkty → televizory → [email protected] → Internet@TV www.samsung.com → Produkter → stue & soveværelse → [email protected] → Internet@TV Finland www.samsung.com → Tuotteet → kodinelektroniikka → [email protected] → Internet@TV France www.samsung.com → Produits → télévisions → [email protected] → Internet@TV Germany www.samsung.com → Privatkunden → Fernseher → [email protected] → Internet@TV Greece www.samsung.com → Προϊόντα → τηλεοράσεις → [email protected] → Internet@TV Hungary www.samsung.com → Termékek → televíziók → [email protected] → Internet@TV Ireland www.samsung.com → Products → Television → [email protected] → Internet@TV Italy Netherlands www.samsung.com → Prodotti → TV → [email protected] → Internet@TV www.samsung.com → Producten → televisies → [email protected] → Internet@TV Norway www.samsung.com → Produkter → hverdagsrom & soverom → [email protected] → Internet@TV Poland www.samsung.com → Produkty → telewizory → [email protected] → Internet@TV Portugal www.samsung.com → Produtos para Consumidores → televisores → [email protected] → Internet@TV Slovakia www.samsung.com → Produkty → televízory → [email protected] → Internet@TV Spain Sweden Switzerland United Kingdom www.samsung.com → Productos → televisores → [email protected] → Internet@TV www.samsung.com → Produkter → vardagsrum & sovrum → [email protected] → Internet@TV www.samsung.com → Produits → télévisions → [email protected] → Internet@TV www.samsung.com → Produkte → Fernseher → [email protected] → Internet@TV www.samsung.com → Products → Television → [email protected] → Internet@TV Turkey www.samsung.com → Tüketici Ürünleri → televizyon → [email protected] → Internet@TV Estonia www.samsung.com → Klientidele → Televiisorid → [email protected] → Internet@TV Latvia www.samsung.com → Klientiem → Televizori → [email protected] → Internet@TV Lithuania www.samsung.com → Namams → Televizoriai → [email protected] → Internet@TV Russia www.samsung.com → Продукты → Телевизоры → [email protected] → Internet@TV Ukraine www.samsung.com → Потребительские продукты → телевизоры → [email protected] → Internet@TV N Der Zugriff kann später geändert werden. N In einigen Ländern können die Links abweichen. Deutsch - 57 �� BN68-02325A-Ger.indb 57 2009-05-19 �� 3:49:20 Internet@TV N Diese Funktion wird, je nach Land, möglicherweise nicht unterstützt. (nicht überall verfügbar) N Bei Problemen mit einem Widget-Dienst wenden Sie sich an den Dienstanbieter. Drücken Sie im Widget die grüne Taste, um Kontaktinformationen abzurufen, oder lesen Sie auf der Hilfe-Website, um Informationen über Dienstanbieter zu erhalten. N Je nach Region wird möglicherweise nur Englisch als Sprache des Widget unterstützt. ¦ Erste Schritte mit Internet@TV Internet@TV erhalten Sie über eine Netzwerkverbindung Zugriff auf die Widget-Dienste von SAMSUNG. Die Inhalte von Internet@TV richten sich nach dem Angebot der verschiedenen Anbieter. Sie erhalten mit dem Internet@TV-Dienst Zugriff auf verschiedene Informationen wie beispielsweise von YouTube. N Die Konfiguration von Widgets und deren Diensten kann sich je nach ausgewähltem Land unterscheiden. Nach dem Wechseln des Landes schalten Sie das Fernsehgerät aus und wieder ein. Danach können Sie den Widget-Dienst des neuen Landes nutzen. Wenn Sie das Land auf "Andere" einstellen, kann das Fernsehgerät Ihr Land nicht erkennen. Treffen Sie Ihre Wahl in diesem Fall direkt aus der Liste der unterstützen Länder heraus. N Wenn die Schriftart für die Inhalte eines bestimmten Anbieters von Ihrem Fernsehgerät nicht unterstützt wird, ist die Darstellung auf der Anzeige möglicherweise gestört. N Weitere Informationen zum Konfigurieren für Ihr Land finden Sie unter "Plug-&-Play-Funktion". N Aufgrund der Netzwerkbedingungen kann es bei dieser Funktion zu Verzögerungen oder Unterbrechungen kommen. N Ehe Sie Internet@TV verwenden, müssen Sie das Netzwerk einrichten. Weitere Informationen zum Konfigurieren Ihres Netzwerks finden Sie unter "Einrichten des Netzwerks". Wenn Sie Internet@TV erstmals starten, werden die Grundeinstellungen automatisch durchgeführt. Es dauert eine Weile, bis die Aktualisierung beendet ist. 1. Drücken Sie die Taste MENU. Wählen Sie durch Drücken der Tasten ▲ oder ▼ die Option Anwendung, und drücken Sie dann die Taste ENTERE. 2. Wählen Sie durch Drücken der Tasten ▲ oder ▼ die Option Internet@TV, und drücken Sie dann die Taste ENTERE . O Drücken Sie die Taste Internet@ auf der Fernbedienung, um das Internet@TV-Menü anzuzeigen. 3. Die "Benutzervereinbarung" wird angezeigt. Wählen Sie Zustimmen, um der Vereinbarung zuzustimmen. 4. Die Statistiken und Analysen werden angezeigt. Wählen Sie Zustimmen, um der Vereinbarung zuzustimmen. ¦ Konfigurieren von Internet@TV Sie können die Menüs für Single Sign On (SSO), System Management und Properties verwenden. Wählen Sie durch Drücken der Tasten ▲ oder ▼ die Option Einstellungen, und drücken Sie dann die Taste ENTERE. ❑ Single Sign On Sie können dieses Menü verwenden, wenn Sie ein Konto erstellen oder löschen. Mit Hilfe von Single Sign On können Sie die Informationen über Ihr Konto und das Konto für die Inhaltssite kontrollieren. Sie brauchen sich nicht noch einmal anzumelden. N Das Konto gilt nur für internet@TV. ■ Konto erstellen Sie können ein Konto erstellen und mit der gewünschten Dienstsite verbunden werden. N Sie können maximal 10 Konten erstellen. N Der Name des Kontos sollte maximal 10 Zeichen lang sein. N Wenn es keinen Dienst gibt, für den eine Anmeldung erforderlich ist, können Sie kein Konto erstellen. ■ Kontenmanagement ● Dienst-Site: Sie können die Anmeldeinformation der Dienstsite (wie YouTube) registrieren. ● Kennwort ändern: Ändern Sie das Kennwort Ihres Kontos. ● Löschen: Löschen Sie das Konto. N Internet@TV zurückzusetzen, falls Sie das Kennwort Ihres Kontos vergessen haben, drücken Sie die Fernbedienungstasten in der folgenden Reihenfolge: POWER (Aus) → MUTE → 9 → 4 → 8 → POWER (Ein). Wenn Sie diese Funktion verwenden, werden alle Konten gelöscht. Deutsch - 58 �� BN68-02325A-Ger.indb 58 2009-05-19 �� 3:49:21 ❑ Systemkonfiguration N Ticker-Autostart, Tickeranzeigedauer werden je nach Land möglicherweise nicht unterstützt. ■ Kennwort der Dienstsperre ändern. N Der Standard-PIN-Code eines neuen Fernsehgeräts lautet 0-0-0-0. N Wenn Sie das Kennwort vergessen haben, drücken Sie die Fernbedienungstasten in der folgenden Reihenfolge, um das Kennwort auf 0-0-0-0 zurückzusetzen: POWER (Aus) → MUTE → 8 → 2 → 4 → POWER (Ein). ■ Dienstanzeigedauer Wählen Sie die Dienstanzeigedauer bis zum Aktivieren des Bildschirmschoners. ■ Autostart für Ticker → Aus / Ein Legen Sie fest, ob der Ticker beim Einschalten des Fernsehers automatisch gestartet wird. ■ Tickeranzeigedauer Wählen Sie die Dienstanzeigedauer bis zum Aktivieren des Bildschirmschoners. ❑ Eigenschaften Informationen zu Internet@TV anzeigen Sie können die Geschwindigkeit Ihres Internet TV-Dienstes mit Measuring the speed of the Internet TV service messen. ¦ Verwenden des Internet@TV-Dienstes In einem Widget mit mehreren Kategorienmenüs können Sie den Inhalt der Kategorienmenüs mit Hilfe der Tasten ◄ und ► anzeigen. Anmeldung beim Konto 1. Drücken Sie die rote Taste. 2. Geben Sie das gewünschte Benutzerkonto ein und drücken Sie dann auf ENTERE. 3. Geben Sie das Kennwort ein. N Nach erfolgreicher Anmeldung wird das Benutzerkonto auf dem Bildschirm angezeigt. N Vor dem Anmelden sollten Sie mindestens ein Konto registriert haben. Wenn Sie ein Konto erstellen möchten, lesen Sie nach unter "Konfigurieren von Internet@TV". Verwenden der Widget-Galerie Sie können für das vorhandene Widget Dienst starten, Sperren, Dienst installieren verwenden, und Sie können eine Beschreibung von Widget-Diensten anzeigen, die nicht installiert sind. In Internet@TV können Sie verschiedene Widgets hinzufügen und nutzen, die Ihnen von Dienstanbietern zur Verfügung gestellt werden. Welche Widgets dies sind, hängt von Ihrem Inhaltsanbieter ab. ● Dienst starten: Starten des Widget-Dienstes. ● Sperren: Aktivieren der Dienstsperre ● Dienst installieren (oder Dienst löschen): Installieren oder Löschen des Widget-Dienstes. Verwenden des YouTube-Widget Sie können Filme von YouTube sehen. Wenn Sie in YouTube ein Konto besitzen, registrieren Sie die Kontoinformationen mit Hilfe des Kontenmanagement. Dann können Sie die Kategorie "Eigene Favoriten" verwenden. N Das Menü kann über einen Webdienst geändert werden. N Es kann Inhalte geben, die für Kinder ungeeignet sind. In diesem Fall verwenden Sie die Sperren-Funktion in der Widget-Galerie. Heute Oft gesehen Spitzenbewertung Sehr beliebt Sehr kontrovers Top-Favoriten Gern verlinkt Oft beantwortet Empfohlen 1/7 Seeking Justice Decades Later 0:01:30 Ansichten : 819,252 Bewertung : 2009-02-07 Breaking News Alerts by E-Mail 0:00:45 Ansichten : 819,252 Bewertung : 2009-02-07 The world reacts to U.S. bailout plan 0:01:30 Ansichten : 819,252 Bewertung : 2009-02-07 Boo Hoo in the Boardroom 0:03:26 Ansichten : 819,252 Bewertung : 2009-02-07 ' Modus ändern ll rrSeite ändern U Navig. E OK R Zurück Deutsch - 59 �� BN68-02325A-Ger.indb 59 2009-05-19 �� 3:49:22 ¦ Fehlerbehebung für Internet@TV Problem Mögliche Lösung Einige Widget-Dienste funktionieren nicht. Wenden Sie sich an den entsprechenden Dienstanbieter. Drücken Sie im Widget die grüne Taste, um Kontaktinformationen abzurufen, oder lesen Sie auf der Hilfe-Website, um Informationen über Anbieter von WidgetDiensten zu erhalten. Siehe Hilfe-Website. Worin besteht der Vorteil von Single Sign On? Wenn Sie ein Konto erstellen und Ihre Anmeldeinformationen registrieren, erhalten Sie ohne weitere Anmeldung Zugriff auf individualisierte Inhalte. Nach einem Netzwerkfehler kann ich keine Menüs außer "Einstellungen" verwenden. Wenn Ihre Netzwerkverbindung nicht aktiv ist, sind Ihre Dienste möglicherweise nur eingeschränkt funktionsfähig. Deshalb können Sie nur das Einstellungsmenü verwenden, denn damit können Sie die Internetverbindung wieder reparieren. Besteht die Möglichkeit, dass YouTubeInhalte für Erwachsene angezeigt werden? Diese Inhalte werden eigentlich in der Menüliste herausgefiltert. Aber mit der Suchfunktion können sie angezeigt werden. In diesem Fall verwenden Sie die SperrFunktion der Widget-Galerie, um den Dienst zu sperren. ¦ Hilfe-Website Land Austria Belgium Czech Denmark Hilfe-Website www.samsung.com → Produkte → Fernseher → [email protected] → Internet@TV www.samsung.com → Producten → televisies → [email protected] → Internet@TV www.samsung.com → Produits → téléviseurs → [email protected] → Internet@TV www.samsung.com → Produkty → televizory → [email protected] → Internet@TV www.samsung.com → Produkter → stue & soveværelse → [email protected] → Internet@TV Finland www.samsung.com → Tuotteet → kodinelektroniikka → [email protected] → Internet@TV France www.samsung.com → Produits → télévisions → [email protected] → Internet@TV Germany www.samsung.com → Privatkunden → Fernseher → [email protected] → Internet@TV Greece www.samsung.com → Προϊόντα → τηλεοράσεις → [email protected] → Internet@TV Hungary www.samsung.com → Termékek → televíziók → [email protected] → Internet@TV Ireland www.samsung.com → Products → Television → [email protected] → Internet@TV Italy Netherlands www.samsung.com → Prodotti → TV → [email protected] → Internet@TV www.samsung.com → Producten → televisies → [email protected] → Internet@TV Norway www.samsung.com → Produkter → hverdagsrom & soverom → [email protected] → Internet@TV Poland www.samsung.com → Produkty → telewizory → [email protected] → Internet@TV Portugal www.samsung.com → Produtos para Consumidores → televisores → [email protected] → Internet@TV Slovakia www.samsung.com → Produkty → televízory → [email protected] → Internet@TV Spain Sweden Switzerland United Kingdom www.samsung.com → Productos → televisores → [email protected] → Internet@TV www.samsung.com → Produkter → vardagsrum & sovrum → [email protected] → Internet@TV www.samsung.com → Produits → télévisions → [email protected] → Internet@TV www.samsung.com → Produkte → Fernseher → [email protected] → Internet@TV www.samsung.com → Products → Television → [email protected] → Internet@TV Turkey www.samsung.com → Tüketici Ürünleri → televizyon → [email protected] → Internet@TV Estonia www.samsung.com → Klientidele → Televiisorid → [email protected] → Internet@TV Latvia www.samsung.com → Klientiem → Televizori → [email protected] → Internet@TV Lithuania www.samsung.com → Namams → Televizoriai → [email protected] → Internet@TV Russia www.samsung.com → Продукты → Телевизоры → [email protected] → Internet@TV Ukraine www.samsung.com → Потребительские продукты → телевизоры → [email protected] → Internet@TV N Der Zugriff kann später geändert werden. N In einigen Ländern können die Links abweichen. Deutsch - 60 �� BN68-02325A-Ger.indb 60 2009-05-19 �� 3:49:22 Home Network Centre ¦ Home Network Centre Informationen zum Home Network Centre Das Home Network Centre verbindet das Fernsehgerät und Mobiltelefone über ein Netzwerk. Sie können die eingegangenen Anrufe, Textnachrichten und Zeitpläne vom Mobiltelefon auf dem Fernseher anzeigen. Verwenden Sie hierfür das Home Network Centre. Außerdem können Sie die auf Mobiltelefonen gespeicherten Medieninhalte wie Videos, Photos und Musik abspielen, indem Sie sie über das Netzwerk auf dem Fernseher steuern. N Sofern das Gerät die DLNA DMC (Digital Media Controller)-Funktion unterstützt, ist die Home-Network-Center-Funktion verfügbar. N Diese Funktion soll die Kompatibilität mit einem Samsung-Mobiltelefon sicherstellen, das zu einem späteren Zeitpunkt auf den Markt kommen soll. Weitere Informationen erhalten Sie unter www.samsung.com, oder wenden Sie sich an ein SamsungCallcenter. Auf dem Mobilgerät muss möglicherweise zusätzliche Software installiert werden. Weitere Informationen hierzu finden Sie im jeweiligen Benutzerhandbuch. Verbinden mit dem Home Network Centre Weitere Informationen zu den Einstellungen für Ihr Netzwerk finden Sie unter "Einrichten des Netzwerks". ● Verbinden mit einem Ad-hoc-Netzwerk im WLAN 1. Schließen Sie den Samsung WLAN-Adapter an den Anschluss USB1(HDD) oder USB2 des Fernsehgeräts an. Seitenverkleidung des Fernsehgeräts Mobiltelefon WLAN-Adapter von Samsung oder 2. Weitere Informationen zum Konfigurieren Ihres Ad-hoc-Netzwerks finden Sie unter "Einrichten des Netzwerks". N Informationen zum Konfigurieren der Netzeinstellungen des Mobiltelefons finden Sie im Handbuch für das Mobiltelefon. 3. Richten Sie die IP-Adresse, die SSID und das Kennwort für das Mobiltelefon mit Hilfe des Name des Netzwerks (SSID) und des Schlüssel (Kennwort) bei den Ad-hoc-Einstellungen für das Mobiltelefon ein, die auf dem Fernseher angezeigt werden. ● Verbindung über einen IP-Sharer (Kabel/drahtlos) 1. Schließen Sie den LAN-Anschluss des Fernsehgeräts mit dem LAN-Kabel an den IP-Sharer (Kabel/drahtlos) an, oder verbinden Sie den USB1(HDD) oder USB2-Anschluss des Fernsehgeräts mit dem Samsung Wireless LAN Adapter. N Informationen zum Konfigurieren des Sharers (Kabel/drahtlos) und des Mobiltelefons finden Sie im Benutzerhandbuch des entsprechenden Geräts. Drahtloser/ Kabelgebundener IP-Sharer Mobiltelefon LAN-Kabel Drahtloser/ Kabelgebundener IPSharer Seitenverkleidung des Fernsehgeräts oder Mobiltelefon LAN-Kabel WLAN-Adapter von Samsung Deutsch - 61 �� BN68-02325A-Ger.indb 61 2009-05-19 �� 3:49:24 ¦ Einrichten des Home Network Centre ❑ Message / Medien Hiermit zeigen Sie eine Liste der Mobiltelefone an, mit denen Sie die Nachrichtenoder Medienfunktion in Verbindung mit diesem Fernsehgerät verwenden können. N Die Medienfunktion steht auch in anderen Mobilgeräten zur Verfügung, sofern diese DLNA DMC unterstützen. Home Network Centre Message 111-1234-5671 : Erlaubt Medien 111-1234-5672 : Erlaubt Einstellungen 111-1234-5673 : Vrboten 111-1234-5674 : Vrboten ■ Erlaubt Hiermit lassen Sie das Mobiltelefon zu. ■ Vrboten Hiermit sperren Sie das Mobiltelefon. ■ Löschen Hiermit löschen Sie das Mobiltelefon aus der Liste. N Mit dieser Funktion wird aber nur der Name aus der Liste entfernt. Wenn das entfernte Mobilgerät wieder angeschaltet wird oder eine Verbindung zum Fernseher herstellen möchten, wird es möglicherweise wieder in der Liste angezeigt. R Zurück e Beenden ❑ Einstellungen ■ Message → Ein / Aus Hiermit können Sie bestimmen, ob die Nachrichtenfunktion (eingehende Anrufe, Textnachrichten und Zeitpläne auf dem Mobiltelefon) verwendet werden soll. ■ Medien → Ein / Aus Hiermit können Sie wählen, ob die Medienfunktion zum Abspielen der Inhalte (Videos, Fotos, Musik) vom Telefon verwendet werden soll. ■ Home Network Centre Message Message Medien Medien : Ein Einstellungen TV-Name : TV : Ein TV-Name R Zurück e Beenden Sie können den Namen des Fernsehers so festlegen, dass Sie ihn im Mobilgerät einfach finden können. N Wenn Sie Ben.-Eingabe wählen, können Sie den Namen des Fernsehers mit der OSK (On Screen Keyboard) eingeben. ¦ Verwenden der Meldungsfunktion Mit dieser Funktion können Sie die eingegangenen Anrufe, Textnachrichten und Zeitpläne vom Mobiltelefon auf dem Alarmfenster anzeigen, während Sie das Fernsehgerät verwenden. husband SMS N Um diese Alarmfenster der Message zu deaktivieren, stellen Sie im Einstellungen Neue Nachricht eingegangen Details���������� ��������� anzeigen? des Home-Network-Center die Option Message auf Aus. N Das Alarmfenster erscheint für 20 Sekunden. Wenn Sie keine Taste drücken, oder Storno wählen, wird das Fenster im Abstand von 5 Minuten bis zu dreimal OK Storno angezeigt. N Wenn OK gewählt wird oder wenn OK während der Anzeige der Nachricht nicht dreimal gewählt wird, wird die Nachricht gelöscht. Die Nachricht wird nicht vom Mobiltelefon gelöscht. N Das einfache Alarmfenster kann angezeigt werden, während Sie Anwendungen wie Media Play oder Content Library usw. verwenden.Um den Inhalt der Nachricht zu sehen, schalten Sie in diesem Fall auf Fernsehmodus um. N Wenn eine Nachricht von einem unbekannten Mobiltelefon angezeigt wird, wählen Sie unter Message im Home-NetworkCenter das Mobiltelefon und wählen Sie dann Vrboten, um das Telefon zu sperren. Deutsch - 62 �� BN68-02325A-Ger.indb 62 2009-05-19 �� 3:49:25 Nachrichtenansicht Wenn eine neue Textnachricht (SMS) ankommt, während Sie fernsehen, wird das Alarmfenster geöffnet. Wenn Sie auf OK klicken, wird der Inhalt der Nachricht angezeigt. N Sie können die Anzeigeeinstellungen für den Inhalt von Textnachrichten (SMS) auf dem Mobiltelefon konfigurieren. Anweisungen finden im Handbuch des Mobiltelefons. N Manche Sonderzeichen werden möglicherweise als Leerzeichen oder unlesbar angezeigt. Alarm bei eingehendem Anruf Wenn ein Anruf eingeht, während Sie fernsehen, wird das Alarmfenster geöffnet. Kalenderalarm Während Sie fernsehen, wird das Alarmsignalfenster geöffnet, um den registrierten Kalender anzuzeigen. N Sie können die Anzeigeeinstellungen für den Kalender auf dem Mobiltelefon konfigurieren. Anweisungen finden im Handbuch des Mobiltelefons. N Manche Sonderzeichen werden möglicherweise als Leerzeichen oder unlesbar angezeigt. ¦ Verwenden der Medienfunktion Ein Alarmsignalfenster wird geöffnet und informiert den Benutzer, dass die vom Mobiltelefon gesendeten Medieninhalte (Videos, Photos, Musik) auf dem Fernseher angezeigt werden. Der Inhalt wird automatisch 3 Sekunden nach dem Öffnen des Alarmfensters angezeigt. Wenn Sie bei geöffnetem Alarmfenster auf RETURN oder EXIT drücken, werden die Media Contents nicht wiedergegeben. N Um die Übertragung von Medieninhalten des Mobiltelefons zu deaktivieren, deaktivieren Sie Medien unter Einstellungen von Home-Network-Center (auf Aus schalten). N Die Inhalte können je nach Auflösung und Format möglicherweise nicht auf dem Fernseher angezeigt werden. Medienwiedergabe aus “111-123 4-5671” \Steuerung der Medienwiedergabe Taste ◄/► ENTERE RETURN TOOLS INFO EXIT Vorgang Cursor bewegen und Elemente auswählen. Bei der Wiedergabe der Filmdatei: Schneller Vor- oder Rücklauf durch den Film in Schritten. Durch Drücken der Taste ENTERE während der Wiedergabe wird die Wiedergabe unterbrochen. Durch erneutes Drücken der Taste ENTERE während der Wiedergabe wird die Wiedergabe fortgesetzt. Zurück zum vorherigen Menü. Ausführen verschiedener Funktionen aus dem Foto-, Musikund Filmmenü. Anzeigen von Dateiinformationen. Beenden des Modus Media Play und Rückehr in den TVModus. N Die Tasten ENTERE und ◄/► sind möglicherweise je nach Medieninhalt deaktiviert. N Sie können die Medienwiedergabe mit dem Mobiltelefon steuern. Weitere Informationen hierzu finden Sie im jeweiligen Benutzerhandbuch. Deutsch - 63 �� BN68-02325A-Ger.indb 63 2009-05-19 �� 3:49:26 EMPFEHLUNGEN ¦ Videotextfunktion Die meisten Fernsehsender bieten über Videotext Informationen an. Auf der Videotext-Indexseite finden Sie Verwendungshinweise zum Videotext. Darüber hinaus können Sie über die Tasten der Fernbedienung nach Bedarf verschiedene Optionen einstellen. N Für die korrekte Anzeige von Videotextinformationen muss der Senderempfang einwandfrei sein. Andernfalls können Informationen unvollständig sein oder einige Seiten nicht angezeigt werden. 1 : (Ende) Videotext beenden 2 0 (Modus) Drücken Sie diese Taste, um den Videotextmodus auszuwählen (LISTE/FLOF) Wenn Sie diese Taste im Modus LIST (Liste) drücken, wird in den Listenspeichermodus umgeschaltet. Im Listenspeichermodus können Sie mit der Taste 8(Speichern) Videotextseiten in einer Liste speichern. 3 5 (anzeigen) Drücken Sie diese Taste, um verborgenen Text anzuzeigen (z. B. Antworten bei Quizsendungen). Drücken Sie die Taste erneut, um den Videotext auszublenden. 4 4 (Größe) Drücken Sie diese Taste, um Videotext in doppelt so großen Buchstaben in der oberen Hälfte des Bildschirms anzuzeigen. Drücken Sie die Taste erneut, um den Text in der unteren Hälfte des Bildschirms anzuzeigen. Zum Ausblenden des Videotextes drücken Sie die Taste erneut. 5 Farbtasten (rot/grün/gelb/blau) Wenn der Sender das FASTEXT-System verwendet, sind die verschiedenen Themen auf den Videotextseiten farbig gekennzeichnet und können mit den Farbtasten auf der Fernbedienung angewählt werden. Drücken Sie die Farbtaste, die dem Thema entspricht, das Sie anzeigen möchten. Die Seite wird mit anderen farbig markierten Informationen angezeigt, die auf dieselbe Art ausgewählt werden können. Drücken Sie die entsprechende Farbtaste, um die vorherige oder nächste Seite anzuzeigen. 6 / (Videotext an/mix) Drücken Sie diese Taste, um den Videotextmodus zu aktivieren, nachdem Sie einen Sender ausgewählt haben, der Videotext anbietet. Drücken Sie die Taste zweimal, um die Videotextinformationen gleichzeitig mit der aktuellen Sendung auf dem Bildschirm einzublenden. 1 7 8 (Speichern) Drücken Sie diese Taste, um Videotextseiten zu speichern. 2 8 1 (Unterseite) Drücken Sie diese Taste, um eine verfügbare untergeordnete Seite anzuzeigen. 9 2 (Weiterblättern) Drücken Sie diese Taste, um die nächste Videotextseite anzuzeigen. 0 3 (Zurückblättern) Drücken Sie diese Taste, um die vorherige Videotextseite anzuzeigen. 8 9 0 3 INFO GUIDE ! @ 4 # 5 6 7 CH LIST AD ! 9 (Halten) Drücken Sie diese Taste, um bei einer angezeigten Seite, die mit weiteren, untergeordnete Seiten verknüpft ist, das automatische Umblättern zu verhindern. Drücken Sie zum Fortfahren die Taste erneut. @ 6 (index) Drücken Sie diese Taste, um die Videotext-Indexseite (Index) anzuzeigen. # 7 (Abbrechen) Drücken Sie diese Taste, um beim Suchen nach einer Seite die Sendung anzuzeigen. N Sie können die Videotextseiten durch Drücken der Zifferntasten auf der Fernbedienung wechseln. Deutsch - 64 �� BN68-02325A-Ger.indb 64 2009-05-19 �� 3:49:26 Die Videotextseiten sind in sechs Kategorien unterteilt: Sportergebnisse A B C D E F Inhalt Gewählte Seitennummer Senderkennung Aktuelle Seitenzahl oder Suchhinweise Datum und Uhrzeit Text Statusinformation FASTEXT-Informationen N Videotextinformationen sind oft auf mehrere, aufeinander folgende Seiten verteilt, die wie folgt aufgerufen werden können: Eingabe der Seitennummer Auswahl eines Titels in einer Liste Auswahl einer farbigen Überschrift (FASTEXT-System) N Das Fernsehgerät unterstützt Videotext Version 2.5. Damit können zusätzlich Graphik oder Text angezeigt werden. N Je nach Übertragungsmodus können bei der Anzeige von Videotext am linken und rechten Rand Leerbereiche vorkommen. N In diesem Fall wird keine zusätzliche Graphik oder Text übertragen. N Ältere Fernsehgeräte, die Version 2.5 nicht unterstützen, können zusätzliche Graphiken oder Texte unabhängig vom Modus der Videotextübertragung nicht anzeigen. O Drücken Sie die Taste TV, um Videotext zu beenden. ¦ Anbringen des Standfußes N Voreinstellung: Stellen Sie die Leitschiene und die Halterungsabdeckung auf den Standfuß, und befestigen Sie diese mit den Schrauben. Rückseite Vorderseite 1. Verbinden Sie Ihren LCD-Fernseher mit dem Standfuß. N Der Fernseher sollte von mindestens zwei Personen getragen werden. N Verwechseln Sie beim Zusammenbauen nicht die Vorder- und Rückseite des Standfußes. N Damit sichergestellt ist, dass das Fernsehgerät auf richtiger Höhe mit dem Standfuß verbunden wird, dürfen Sie oben links und rechts nicht zu stark auf den Fernseher drücken. 2 1 2. Ziehen Sie zuerst die Schrauben an Position 1 und dann die Schrauben an Position 2 fest. N Stellen Sie das Gerät aufrecht hin und ziehen Sie die Schrauben fest. Wenn Sie die Schrauben festziehen, während der LCD-Fernseher liegt, kann es passieren, dass er seitlich geneigt ist. N Der Fuß ist bei Modellen mit einer Bildschirmdiagonalen von 55 Zoll und mehr bereits installiert Deutsch - 65 �� BN68-02325A-Ger.indb 65 2009-05-19 �� 3:49:27 ¦ Lösen des Standfußes 1. Entfernen Sie Schrauben von der Rückseite des Fernsehgerätes. 2. Lösen Sie den Standfuß vom Fernsehgerät. N Der Fernseher sollte von mindestens zwei Personen getragen werden. 3. Decken Sie die Aussparung an der Unterseite des Fernsehgeräts mit der Abdeckung ab. ¦ Anbringen der Wandhalterung Mit der separat erhältlichen Wandhalterung können Sie das Fernsehgerät an einer Wand befestigen. Detaillierte Informationen zum Montieren der Wandhalterung finden Sie in den Anweisungen, die im Lieferumfang der Wandhalterung enthalten sind. Lassen Sie sich beim Anbringen der Wandmontagehalterung von einem Techniker helfen. Samsung Electronics haftet nicht für Schäden an Gerät oder Personen, wenn die Montage vom Kunden selbst durchgeführt wird. Installieren Sie die Wandhalterung nicht bei angeschaltetem Fernsehgerät. Sie könnten dabei einen Stromschlag erhalten und sich verletzen. ¦ Verlegen der Kabel Verstecken Sie die Kabel im Kabelschlauch, damit Sie durch den transparenten Standfuß hindurch nicht zu sehen sind. ¦ Kensington-Schloss als Diebstahlsicherung Ein Kensington-Schloss dient zur physischen Sicherung des Systems bei Verwendung in öffentlichen Bereichen. Je nach Hersteller können Aussehen und Verriegelungsverfahren von der Abbildung abweichen. Informationen zur richtigen Anwendung entnehmen Sie bitte der Bedienungsanleitung des Kensington-Schlosses. N Das Schloss muss separat erworben werden. N Die Position des Kensington-Schlosses ist modellabhängig. 1. "Führen Sie das Schloss in den Kensington-Einschub am LCD-Fernseher ein (1), und drehen Sie es in die Verriegelungsposition (2). 3 2 1 <Optionale> 2. Schließen Sie das Kabel für das Kensington-Schloss an (3). 3. Befestigen Sie das Kensington-Schloss an einem Tisch oder einem schweren feststehenden Objekt. Deutsch - 66 �� BN68-02325A-Ger.indb 66 2009-05-19 �� 3:49:29 ¦ Absichern des Einbaubereichs Halten Sie die erforderlichen Abstände zwischen dem Gerät und anderen Objekten (z.B. Wänden) ein, um ausreichende Lüftung sicherzustellen. Wenn Sie dies nicht tun, besteht die Gefahr, dass aufgrund eines Anstiegs der Temperatur im Innern des Geräts ein Brand ausbricht oder andere Probleme mit dem Gerät auftreten. Stellen Sie das Gerät so auf, dass die in der Abbildung gezeigten Mindestabstände eingehalten werden. N Verwenden Sie nur Teile von Samsung Electronics, wenn Sie einen Standfuß oder eine Wandhalterung einsetzen. • Wenn Sie Teile eines anderen Herstellers verwenden, kann es zu Problemen mit dem Gerät oder zu Verletzungen kommen, weil das Gerät herunterfällt. • Wenn Sie Teile eines anderen Herstellers verwenden, kann es zu Problemen mit dem Gerät oder zu einem Brand kommen, weil die Innentemperatur aufgrund schlechter Belüftung des Geräts ansteigt. N Das Aussehen kann sich je nach Gerät unterscheiden. Aufstellen des Geräts mit dem Standfuß Installieren des Geräts mit einer Wandhalterung 10 cm 10 cm 10 cm 10 cm 10 cm 10 cm 10 cm ¦ Befestigen des Fernsehgeräts an der Wand Achtung: Das Fernsehgerät kann hinfallen, wenn Sie daran ziehen, es schieben oder darauf klettern. Stellen Sie insbesondere sicher, dass sich keine Kinder an das Gerät hängen oder es aus dem Gleichgewicht bringen. Anderenfalls könnte das Gerät umkippen und schwere Verletzungen oder den Tod verursachen. Beachten Sie alle Anweisungen der beigefügten Sicherheitshinweise. Noch mehr Stabilität erreichen Sie, wenn Sie den Kippschutz installieren. Gehen Sie hierzu folgendermaßen vor. ■ So verhindern Sie, dass das Fernsehgerät umkippt: 1. Stecken Sie die Schrauben durch die Halterungen und befestigen Sie sie fest an der Wand. Vergewissern Sie sich, dass die Schrauben gut halten. N Je nach Ausführung der Wand benötigen Sie zum Befestigen weiteres Material, wie z. B. einen Dübel. N Da die benötigten Halterungen, Schrauben und das Band nicht zum Lieferumfang gehören, müssen Sie diese Teile gesondert erwerben. Wand 2. Entfernen Sie die Schrauben in der Mitte auf der Rückseite des Fernsehgeräts. Setzen Sie diese Schrauben in die Halterungen ein und befestigen Sie die Schrauben dann wieder am Fernsehgerät. N Die Schrauben werden möglicherweise nicht zusammen mit dem Gerät geliefert. Kaufen Sie in diesem Fall Schrauben entsprechend den folgenden Angaben. N Daten der Schrauben Für LCD-Fernsehgeräte von 17 – 29 Zoll: M4 X L15 / Für LCD-Fernsehgeräte von 32 – 40 Zoll: M6 X L15 3. Verbinden Sie die Halterungen an der Wand und die Halterung am Fernsehgerät mit einem festen Band miteinander und ziehen Sie das Band dann fest. N Stellen Sie das Fernsehgerät in der Nähe der Wand auf, damit es nicht nach hinten kippen kann. N Es ist noch sicherer, wenn die Halterungen an der Wand niedriger als die Halterungen am Fernsehgerät sind. N Lösen Sie das Band, ehe Sie den Fernsehapparat bewegen. Wand 4. Kontrollieren Sie, ob alle Anschlüsse weiterhin fest verbunden sind. Prüfen Sie regelmäßig die Verbindungen auf Zeichen von Ermüdung oder Versagen. Bei Zweifeln hinsichtlich der Sicherheit Ihrer Halterung wenden Sie sich an einen professionellen Installationsbetrieb. Deutsch - 67 �� BN68-02325A-Ger.indb 67 2009-05-19 �� 3:49:29 ¦ Fehlerbehebung: Vor der Kontaktaufnahme mit dem Kundendienst Kein Ton oder Bild Stellen Sie sicher, dass das Netzkabel an eine Steckdose angeschlossen ist. Stellen Sie sicher, dass Sie auf der Fernbedienung die Taste gedrückt haben. Überprüfen Sie die Einstellungen für Kontrast und Helligkeit. Überprüfen Sie die Lautstärke. Normales Bild, aber kein Ton Überprüfen Sie die Lautstärke. Überprüfen Sie, ob die Taste MUTEM auf der Fernbedienung gedrückt wurde. Überprüfen Sie die Einstellungen für Lautsprecher auswählen. Der Bildschirm ist schwarz und die Betriebsanzeige blinkt kontinuierlich. Kein Bild oder nur schwarzweißes Bild Ton- und Bildstörungen Überprüfen Sie Stromversorgung und Signalkabel Ihres Computers. Das Fernsehgerät befindet sich im Energiesparmodus. Bewegen Sie die Maus des Computers, oder drücken Sie eine Taste auf der Tastatur. Verzerrtes oder verschneites Bild, verzerrter Ton Fernbedienung funktioniert nicht richtig Überprüfen Sie Ausrichtung, Standort und Anschlüsse der Antenne. Interferenzen werden oft durch Zimmerantennen verursacht. Es wird eine Meldung angezeigt, dass das Signalkabel überprüft werden soll. Im PC-Modus wird eine Meldung angezeigt, dass dieser Modus nicht unterstützt wird. Das beschädigte Bild wird in der Ecke des Bildschirms angezeigt. Stellen Sie sicher, dass das Signalkabel fest mit dem Computer oder der Videoquelle verbunden ist. Vergewissern Sie sich, dass der Computer bzw. die Videoquelle eingeschaltet ist. Es wird eine Meldung angezeigt, dass alle Einstellungen auf die Standardwerte zurückgesetzt werden. Sie erkennen möglicherweise kleine Partikel, wenn Sie den Rahmen um den Fernsehbildschirm herum genau betrachten. Diese erscheint, wenn Sie die EXIT-Taste gedrückt halten. Die Geräteeinstellungen werden auf die Werkseinstellungen zurückgesetzt. Ändern Sie die Farbeinstellungen. Stellen Sie sicher, dass die korrekte Fernsehnorm ausgewählt ist. "Suchen Sie das elektrische Gerät, das die Störungen am Fernsehgerät verursacht, und stellen Sie es in einem größeren Abstand auf." Schließen Sie das Fernsehgerät an eine andere Steckdose an. Tauschen Sie die Batterien der Fernbedienung aus. Reinigen Sie die Vorderseite der Fernbedienung (dort befindet sich der Infrarotsender). Überprüfen Sie die Batteriekontakte. Ermitteln Sie die maximale Auflösung und Bildwiederholfrequenz der Videokarte. Vergleichen Sie diese Werte mit den Angaben in der Tabelle zu den Anzeigemodi. Wenn für manche externe Geräte Bildschirmanpassung gewählt ist, erscheint in der Ecke des Bildschirms ein beschädigtes Bild. Dieses Symptom ist auf das externe Gerät und nicht auf das Fernsehgerät zurückzuführen. Dies ist Teil des Produktdesigns und kein Defekt. N Der TFT-LCD-Bildschirm enthält Unterpixel (6 220 800), wofür eine ausgefeilte Fertigungstechnologie erforderlich ist. Allerdings können ein paar zu helle oder zu dunkle Pixel auf der Bildfläche zu sehen sein. Diese Pixelfehler haben keinen Einfluss auf die Geräteleistung. Deutsch - 68 �� BN68-02325A-Ger.indb 68 2009-05-19 �� 3:49:30 ¦ Technische Daten Modellname Bildschirmgröße (Diagonal) PC-Auflösung (Optimal) Ton (Ausgang) Abmessungen (BxTxH) Gehäuse Mit Fuß Gewicht Mit Fuß Umgebungsbedingungen Betriebstemperatur Luftfeuchtigkeit (bei Betrieb) Lagerungstemperatur Luftfeuchtigkeit (Lagerung) Drehbarer Fuß (Links und rechts) Modellname Bildschirmgröße (Diagonal) PC-Auflösung (Optimal) Ton (Ausgang) Abmessungen (BxTxH) Gehäuse Mit Fuß Gewicht Mit Fuß Umgebungsbedingungen Betriebstemperatur Luftfeuchtigkeit (bei Betrieb) Lagerungstemperatur Luftfeuchtigkeit (Lagerung) Drehbarer Fuß (Links und rechts) LE32B650, LE32B651 LE32B652, LE32B653 LE37B650, LE37B651 LE37B652, LE37B653 32 Zoll 37 Zoll 1920 x 1080 bei 60 Hz 1920 x 1080 bei 60 Hz 2 X 10 W 2 X 10 W 803 x 77 x 545 mm 803 x 239 x 601 mm 927 x 78 x 608 mm 927 x 255 x 668 mm 14 kg 17 kg 10 °C bis 40 °C (50 °F bis 104 °F) 10% bis 80%, nicht kondensierend -20 °C bis 45 °C (-4 °F bis 113 °F) 5 % bis 95 %, nicht kondensierend -20˚ ~ 20˚ LE40B650, LE40B651 LE40B652, LE40B653 LE46B650, LE46B651 LE46B652, LE46B653 40 Zoll 46 Zoll 1920 x 1080 bei 60 Hz 1920 x 1080 bei 60 Hz 2 X 10 W 2 X 10 W 995 x 79 x 650 mm 995 x 255 x 706 mm 1126 x 79 x 730 mm 1126 x 277 x 783 mm 19 kg 25 kg 10 °C bis 40 °C (50 °F bis 104 °F) 10% bis 80%, nicht kondensierend -20 °C bis 45 °C (-4 °F bis 113 °F) 5 % bis 95 %, nicht kondensierend -20˚ ~ 20˚ Modellname LE55B650, LE55B651, LE55B652, LE55B653 Bildschirmgröße (Diagonal) 55 Zoll PC-Auflösung (Optimal) 1920 x 1080 bei 60 Hz Ton (Ausgang) 2 X 15 W Abmessungen (BxTxH) Gehäuse 1311 X 80 X 842 mm Mit Fuß 1311 X 305 X 895 mm Gewicht Mit Fuß 34 kg Umgebungsbedingungen Betriebstemperatur 10 °C bis 40 °C (50 °F bis 104 °F) Luftfeuchtigkeit (bei Betrieb) 10% bis 80%, nicht kondensierend Lagerungstemperatur -20 °C bis 45 °C (-4 °F bis 113 °F) Luftfeuchtigkeit (Lagerung) 5 % bis 95 %, nicht kondensierend Drehbarer Fuß (Links und rechts) -20˚ ~ 20˚ N Änderungen der technischen Daten und des Geräte-Designs vorbehalten. N Dies ist ein digitales Gerät der Klasse B. N Die technischen Daten zur benötigten Netzspannung finden Sie auf dem Etikett am Produkt. Deutsch - 69 �� BN68-02325A-Ger.indb 69 2009-05-19 �� 3:49:30 ❑ Notifications pour le téléviseur numérique 1. Les fonctions relatives au téléviseur numérique (DVB) ne sont disponibles que dans les pays ou régions où des signaux terrestres numériques de type DVB-T (MPEG2 et MPEG4 AVC) sont diffusés ou dans lesquels vous avez accès à un service de télévision par câble compatible DVB-C (MPEG2 et MPEG4 AAC). Consultez votre distributeur local pour connaître les possibilités de réception des signaux DVB-T ou DVB-C. 2. DVB-T est la norme du consortium européen pour la diffusion de signaux terrestres de télévision numérique. La norme DVBC est quant à elle prévue pour la diffusion des signaux de télévision numérique par câble. Certaines fonctions particulières, telles que le guide électronique des programmes (Electric Program Guide - EPG), la vidéo à la demande (Video on Demand - VOD), etc., ne sont toutefois pas incluses dans cette spécification. Elles ne seront par conséquent pas traitées pour l'instant. 3. Bien que ce téléviseur soit conforme aux dernières normes DVB-T et DVB-C (août 2008), il n'est pas garanti qu'il soit compatible avec les futures diffusions de signaux numériques terrestres DVB-T et par câble DVB-C. 4. En fonction du pays ou de la région où vous vous trouvez, certains opérateurs de télévision par câble peuvent facturer des frais supplémentaires pour un tel service. Vous devrez aussi peut-être accepter les termes et conditions de ces sociétés. 5. Il se peut que certaines fonctions de TV numérique ne soient pas disponibles dans certains pays ou certaines régions et que la réception des signaux DVB-C ne soit pas correcte avec tous les opérateurs. 6. Pour plus d'informations, contactez votre service client Samsung. ❑ Précautions à prendre lors de l'affichage d'une image fixe Une image fixe peut occasionner des dommages irrémédiables à l'écran du téléviseur. ● N'affichez pas d'image fixe sur l'écran LCD pendant plus de 2 heures car cela pourrait provoquer une rémanence de l'image à l'écran. Cette rémanence de l'image est également appelée brûlure de l'écran. Pour l'éviter, réduisez la luminosité et le contraste de l'écran lorsque vous affichez une image fixe. ● L'affichage sur l'écran LCD du téléviseur d'images au format 4:3 pendant une période prolongée peut laisser des traces de bordures à gauche, à droite et au centre de l'écran, dues à la différence d'émission de lumière sur celui-ci. La lecture d'un DVD ou l'utilisation d'une console de jeu peut avoir un effet similaire sur l'écran. Les dommages occasionnés par l'effet précité ne sont pas couverts par la garantie. ● L'affichage d'images fixes de jeux vidéo et d'ordinateurs pendant une période excessive peut produire des rémanences. Pour éviter cela, réduisez la "luminosité" et le "Contraste" lors de l'affichage d'images fixes. © 2009 Samsung Electronics Co., Ltd. Tous droits réservés. BN68-02325A-Fre.indb 1 2009-05-19 �� 3:54:42 Sommaire ANYNET+ Installation du téléviseur ■ Accessoires........................................................................................ 2 ■ Présentation du panneau de commande............................................ 2 ■ Présentation du panneau de branchement........................................ 3 ■ Présentation de la télécommande...................................................... 5 ■ Insertion des piles dans la télécommande......................................... 6 ■ Affichage des menus.......................................................................... 6 ■ Mise en mode veille de votre téléviseur............................................. 7 ■ Fonction Plug & Play.......................................................................... 7 ■ Visualisation de laffichage.................................................................. 8 CANAL ■ Menu Canal........................................................................................ 8 ■ Gestion des chaînes . .......................................................................11 Image ■ Configuration du menu Image.......................................................... 13 ■ Visualisation d'une image dans l'image............................................ 16 ■ Utilisation de votre téléviseur comme écran d'ordinateur (PC)......... 17 ■ Configuration du téléviseur avec le PC............................................ 18 Configuration ■ Configuration du menu Configuration............................................... 20 ■ Réglage de l'heure............................................................................ 23 ■ Connexion réseau............................................................................ 24 ■ Configuration du réseau................................................................... 26 ENTRÉE / Assistance ■ Menu Entrée..................................................................................... 29 ■ Menu Assistance.............................................................................. 29 Media Play (USB & DLNA) ■ Connexion d'un périphérique USB................................................... 32 ■ Fonction Media Play......................................................................... 33 ■ Tri de la liste de fichiers Photo / Music / Movie................................. 34 ■ Menu d'options de la liste des fichiers Photo / Music / Movie........... 35 ■ Menu d'options Diaporama / Music Play / Movie Play . ................... 36 ■ Visualisation d'une photo ou d'un diaporama................................... 37 ■ Lecture de musique.......................................................................... 38 ■ Lecture d'un fichier film..................................................................... 39 ■ Utilisation du menu Setup................................................................. 41 Media Play-DLNA ■ Définition du réseau DLNA............................................................... 42 ■ Installation de l'application DLNA..................................................... 42 ■ Utilisation de l'application DLNA....................................................... 43 ■ Utilisation de la fonction DLNA......................................................... 44 Content Library ■ Utilisation de la Content Library........................................................ 49 ■ Utilisation du contenu....................................................................... 49 ■ Utilisation de la gestion de contenu.................................................. 50 Internet@TV ■ Mise en route d'Internet@TV............................................................ 51 ■ Modification des snippets du dock.................................................... 53 ■ Utilisation du widget Profil................................................................ 53 ■ Utilisation de la galerie de widgets Yahoo!®.................................... 54 ■ Utilisation du widget Météo Yahoo!®................................................ 55 ■ Utilisation du widget Actualités Yahoo!®.......................................... 55 ■ Utilisation du widget Flickr Yahoo!®................................................. 56 ■ Utilisation du widget Finance Yahoo!®............................................. 56 ■ Dépannage d'Internet@TV............................................................... 57 ■ Site Web d'aide................................................................................. 57 Internet@TV ■ Mise en route d'Internet@TV............................................................ 58 ■ Configuration d'Internet@TV............................................................ 58 ■ Utilisation du service Internet@TV................................................... 59 ■ Dépannage d'Internet@TV............................................................... 60 ■ Site Web d'aide................................................................................. 60 Français SON ■ Configuration du menu Sound.......................................................... 18 ■ Sélection du mode son..................................................................... 20 ■ Connexion de périphériques Anynet+.............................................. 45 ■ Configuration d'Anynet+................................................................... 46 ■ Commutation entre périphériques Anynet+...................................... 46 ■ Enregistrement................................................................................. 47 ■ Écoute via un récepteur (home cinéma)........................................... 47 ■ Dépannage d'Anynet+...................................................................... 48 Centre de réseau domestique ■ Centre de réseau domestique.......................................................... 61 ■ Configuration du Centre de réseau domestique............................... 62 ■ Utilisation de la fonction Message.................................................... 62 ■ Utilisation de la fonction Media......................................................... 63 RECOMMENDATIONS ■ Fonction Télétexte............................................................................ 64 ■ Montage du socle............................................................................. 65 ■ Branchement du socle...................................................................... 66 ■ Installation du kit de montage mural................................................. 66 ■ Assemblage des câbles.................................................................... 66 ■ Verrou antivol Kensington................................................................. 66 ■ Sécurisation de l'emplacement d'installation.................................... 67 ■ Fixation du téléviseur au mur........................................................... 67 ■ Dépannage : Avant de contacter un technicien................................ 68 ■ Caractéristiques................................................................................ 69 ❑ Licence TruSurround HD, SRS et le symbole sont des marques de SRS Labs, Inc. La technologie TruSurround HD est incorporée sous licence de SRS Labs, Inc. Fabriqué sous licence de Dolby Laboratories. Dolby et le symbole du double D sont des marques déposées de Dolby Laboratories. Certifié DivX® pour la lecture de vidéos au format DivX®, y compris les vidéos payantes. ❑ Symboles N O T Remarque Bouton tactile Bouton TOOLS Appuyez sur Français - BN68-02325A-Fre.indb 1 2009-05-19 �� 3:54:42 Installation du téléviseur N Les figures et illustrations contenues dans ce mode d'emploi sont fournies pour référence uniquement. Elles peuvent différer de l'aspect réel du produit. La conception et les caractéristiques du produit peuvent être modifiées sans avertissement afin d'améliorer ses performances. ¦ Accessoires Télécommande et piles (2 x AAA) Cordon d'alimentation Carte de garantie / Manuel de sécurité (Non disponible dans tous les pays) Couvercle-Fond Chiffon de nettoyage Serre-câbles (En fonction du modèle) CD du programme N Vérifiez que les éléments suivants sont fournis avec votre téléviseur LCD. S'il manque des éléments, contactez votre revendeur. N La couleur et la forme des éléments peuvent varier en fonction du modèle. ¦ Présentation du panneau de commande N La couleur et la forme du produit peuvent varier en fonction du modèle. N Pour activer les boutons situés en face avant, effleurez-les avec votre doigt. 8 8 7 6 5 4 3 21 8 8 7 6 4 2 1 3 5 1 P (PUISSANCE): Permet d'allumer et d'éteindre le téléviseur. 2 TEMOIN D'ALIMENTATION : Clignote et s'éteint lorsqu'il est sous tension et s'allume en mode veille. 3 z : Permet de changer de chaîne. Dans le menu à l'écran, utilisez les boutons z de la même façon que les boutons ▼ et ▲ de la télécommande. 4 Y : Permet d'augmenter ou de baisser le volume. Dans le menu à l'écran, utilisez les boutons Y de la même façon que les boutons ◄ et ► de la télécommande. Français - BN68-02325A-Fre.indb 2 2009-05-19 �� 3:54:44 5 MENU : Permet d'afficher un menu à l'écran des fonctions du téléviseur. 6 SOURCEE Bascule entre toutes les sources d'entrée disponibles. Dans le menu à l'écran, utilisez ce bouton de la même façon que le bouton ENTERE de la télécommande. 7 CAPTEUR DE LA TÉLÉCOMMANDE : Dirigez la télécommande vers ce point du téléviseur. 8 HAUT-PARLEURS ¦ Présentation du panneau de branchement N La couleur et la forme du produit peuvent varier en fonction du modèle. [Panneau latéral du téléviseur] [Panneau arrière du téléviseur] 1 2 34 5 $ # 2 # @ ! 0 9 8 7 6 Entrée de l'alimentation 1 COMPONENT IN Pour raccorder une prise vidéo / audio à composantes. 2 HDMI IN 1, 2, 3(DVI), 4 / DVI AUDIO IN Pour raccorder la fiche HDMI d'un périphérique équipé d'une sortie HDMI. N Aucune connexion audio n'est nécessaire pour une connexion HDMI-HDMI. N Qu'est-ce que HDMI ? • HDMI (High-Definition Multimedia Interface) est une interface qui permet la transmission des signaux audio et vidéo numériques à l'aide d'un seul câble. • Entre le périphérique HDMI et le périphérique DVI la différence réside dans la taille, le HDMI étant plus petit. N Il se peut que le téléviseur n'émette aucun son et que les images s'affichent dans des couleurs anormales en cas de connexion d'un lecteur DVD, d'un lecteur Blu-ray, d'un décodeur câble ou d'un récepteur satellite compatible avec des versions de l'interface HDMI antérieures à HDMI 1.3. Si, lorsque vous branchez un câble HDMI de génération antérieure, aucun son n'est émis, connectez le câble HDMI à la prise HDMI IN 3 (DVI) et les câbles audio aux prises DVI AUDIO IN situées à l'arrière du téléviseur. Dans ce cas, contactez la société ayant fourni le lecteur DVD, le lecteur Blu-ray, le décodeur câble ou le récepteur satellite afin de vérifier la version de l'interface HDMI, puis demandez une mise à jour de celui-ci. N Utilisez la prise HDMI IN 3 (DVI) pour une connexion DVI à un périphérique externe. Utilisez un câble ou un adaptateur DVI-HDMI pour la connexion vidéo et les prises DVI AUDIO IN pour le son. Lorsque vous utilisez une connexion avec câble HDMI/DVI, vous devez utiliser la prise HDMI IN 3 (DVI). N Les câbles HDMI qui ne sont pas de version 1.3 peuvent provoquer des nuisances à l’écran ou une absence d’image. 3 PC IN [PC] / [AUDIO] Pour raccorder les fiches de sortie audio et vidéo de votre PC. N Si votre PC dispose d'une prise HDMI, vous pouvez la relier à la borne HDMI IN 1, 2, 3 (DVI) ou 4. N Si votre PC dispose d'une prise DVI, vous pouvez la relier à la borne HDMI IN 3 (DVI) / DVI AUDIO IN. 4 ANT IN Pour raccorder une antenne ou un système de câblodiffusion. Français - BN68-02325A-Fre.indb 3 2009-05-19 �� 3:54:45 5 LAN Connectez un câble réseau à ce port pour connecter le téléviseur au réseau. 6Verrou KENSINGTON (en fonction du modèle) Le verrou Kensington (en option) est un dispositif permettant de fixer physiquement le système en cas d'utilisation dans un lieu public. Si vous désirez utiliser un dispositif de verrouillage, contactez le revendeur auquel vous avez acheté le téléviseur. N L'emplacement du verrou Kensington peut varier en fonction du modèle. 7 H (CASQUE) Un casque peut être connecté à la sortie casque du poste. Lorsque le casque est branché, les haut-parleurs intégrés n'émettent plus de son. N L’utilisation de la fonction Son est limitée lorsqu’un casque est connecté au téléviseur. N L'utilisation prolongée d'un casque à un niveau sonore élevé peut endommager l'ouïe. N Aucun son n'est émis depuis les enceintes lorsque vous connectez le casque au téléviseur. N Le volume du casque et celui du téléviseur sont réglés séparément. 8 DIGITAL AUDIO OUT (OPTICAL) Pour raccorder un composant audio numérique tel qu'un récepteur home cinéma. N Lorsqu'un système audio numérique est relié à la prise DIGITAL AUDIO OUT (OPTICAL): réduisez le volume du téléviseur et réglez le volume à l'aide du système audio numérique. N L'audio 5.1 est disponible si le téléviseur est relié à un appareil externe le prenant en charge. N Lorsque le récepteur (home cinéma) est activé, vous pouvez écouter le son sortant de la prise optique du téléviseur. Lorsque le téléviseur affiche un signal DTV (air), il envoie un son canal 5.1 au récepteur du home cinéma. Lorsque la source est un composant numérique (par exemple, un DVD, un lecteur Blu-ray, un décodeur câble ou un récepteur satellite) connecté au téléviseur en HDMI, le récepteur home cinéma n'émet le son que sur 2 canaux. Pour obtenir du son en 5.1, reliez la prise de sortie audio numérique du lecteur DVD, du lecteur Blu-ray, du décodeur câble ou du récepteur satellite directement à un amplificateur ou un système home cinéma, et non au téléviseur. 9 SERVICE Prise pour tests uniquement. 0 AUDIO OUT [R-AUDIO-L] Pour raccorder la fiche d'entrée audio de votre amplificateur ou système home cinéma. Lorsqu'un amplificateur audio est relié aux prises AUDIO OUT [R-AUDIO-L] : réduisez le volume du téléviseur et réglez le volume à l'aide de l'amplificateur. ! EXT1, 2 Entrées ou sorties pour périphériques externes tels que des magnétoscopes, des lecteurs DVD, des consoles de jeux vidéo ou des lecteurs de vidéodisques. N En mode EXT, la sortie DTV prend uniquement en charge les signaux audio et vidéo MPEG SD. Spécifications entrée/sortie Connecteur EXT 1 EXT 2 Vidéo O O Entrée Audio (G / D) O O RVB O X Sortie Vidéo + Audio (G / D) Seule la sortie TV ou DTV est disponible. Sortie que vous pouvez sélectionner. @ AV IN [VIDEO] / [R-AUDIO-L] Entrées audio et vidéo pour périphériques externes, tels qu'un caméscope ou un magnétoscope. # USB1(HDD) / USB2 Prise utilisée pour les mises à jour logicielles, la fonction Media Play, etc. Vous pouvez vous connecter au réseau Samsung sans fil en utilisant l’adaptateur "Samsung Wireless LAN Adapter" (vendu séparément). N Pour branchez un disque dur USB, utilisez le port USB1 (HDD). $ Emplacement COMMON INTERFACE Si vous n'insérez pas la carte d'interface commune CI(CI+) CARD dans certains canaux, le message "Signal brouillé" s'affiche. Les informations de pairage contenant un numéro de téléphone, l'ID de la CI(CI+) CARD, l'ID de l'hôte et d'autres informations s'afficheront dans 2 ou 3 minutes. Si un message d'erreur s'affiche, contactez votre fournisseur de service. Lorsque la configuration des informations sur les chaînes est terminée, le message "Updating Completed" s'affiche, indiquant que la liste des chaînes est à jour. N Vous devez vous procurer une ‘CI(CI+) CARD’ auprès d'un fournisseur local de câblodiffusion. Extrayez la ‘CI(CI+) CARD’ en la tirant délicatement. Une chute pourrait l'endommager. N Insérez la ‘CI(CI+) CARD’ dans le sens indiqué sur celle-ci. N L'emplacement de la fente COMMON INTERFACE peut varier en fonction du modèle. N Il se peut que le module ‘CI(CI+) CARD’ ne soit pas pris en charge dans certains pays ou régions. Vérifiez auprès de votre revendeur agréé. N La fonction CI+ n'est applicable qu'au modèle LE********P. Si vous rencontrez des problèmes, contactez le prestataire de service. Français - BN68-02325A-Fre.indb 4 2009-05-19 �� 3:54:45 ¦ Présentation de la télécommande N Vous pouvez utiliser la télécommande jusqu'à une distance maximale d'environ 7 m du téléviseur. N Une lumière intense peut affecter le bon fonctionnement de la télécommande. N La couleur et la forme du produit peuvent varier en fonction du modèle. 1 POWER: Pour allumer et éteindre la télévision. ^ MUTE M: Vous permet de couper le son temporairement. 2 TV: Sélectionne directement le mode TV. & > P <: Permet de changer de chaîne. 3 TOUCHES NUMÉRIQUES: Permettent de changer de chaîne. * MENU: Affiche le menu principal à l'écran. 4 FAV.CH: Affiche la liste des chaînes favorites à l'écran. ( GUIDE: Affichage du guide électronique des programmes (EPG). 5 Y: Permet d'augmenter ou de baisser le volume. ) RETURN: Revient au menu précédent 6 SOURCE: Permet d'afficher et de sélectionner les sources vidéo disponibles. a HAUT▲ / BAS▼ / GAUCHE◄ / DROITE► / ENTERE: Permettent de sélectionner des options de menu à l'écran et de modifier des valeurs de menu. 7 INFO: Permet d'afficher des informations sur l'écran du téléviseur. 8 TOOLS: Permet de sélectionner rapidement les fonctions fréquemment utilisées. 9 INTERNET@: Permet d'accéder à Internet afin d'afficher du contenu informatique ou ludique. 0 BOUTONS DE COULEUR: Utilisez ces boutons dans les menus Liste des chaînes, Internet@TV, Media Play, etc. @ CH LIST: Permet d'afficher la liste des chaînes sur l'écran du téléviseur. # Utilisez ces boutons avec les modes Media Play et Anynet+. (∏: cette télécommande peut être utilisée pour contrôler les enregistreurs Samsung avec la fonction Anynet+). $ ON/OFF @: Chaque pression sur le bouton lumineux ON/OFF @ permet de basculer entre les positions ON et OFF. Lorsque la télécommande est activée et qu'un de ses bouton est actionné, les boutons de la télécommande s'allument brièvement. (Utiliser la télécommande alors que le bouton lumineux ON/OFF @ en position Marche réduit la durée de vie des piles.) % PRE-CH : Vous permet de revenir à la chaîne que vous regardiez précédemment. b EXIT: Permet de quitter le menu. 1 2 $ 3 4 % ^ 5 & 6 7 INFO GUIDE 8 ) c CONTENT: Cette fonction permet d'afficher la bibliothèque de contenu (Content Library). d MEDIA.P: Permet de lire les fichiers de musique, les images et les films. e SUBT.: Affichage numérique des sous-titres. f AD: Sélection de la description audio. * ( a b 9 0 ! @ CH LIST AD c d e f # Fonctions Télétexte 6 0: Sélection du mode Télétexte (LIST/FLOF). 7 5: Activation du télétexte. 8 4: Sélection de la taille du télétexte. 0 Sélection des rubriques Fastext ! /: Sélection alternative de Teletext, Double ou Mix. @ 8: Mémorisation du télétexte. $ :: fermer l'affichage du télétexte. % 1: Page secondaire du télétexte & 2: Page de télétexte suivante 3: Page de télétexte précédente. * 6: Index du télétexte ) 9: Pause du télétexte. b 7: Annulation du télétexte. Français - BN68-02325A-Fre.indb 5 2009-05-19 �� 3:54:45 ¦ Insertion des piles dans la télécommande 1. Soulevez le couvercle au dos de la télécommande comme illustré dans la figure. 2. Placez-y deux piles AAA. N Assurez-vous que les pôles "+" et "–" des piles correspondent au schéma situé à l'intérieur du compartiment. 3. Replacez le couvercle. N Retirez les piles et stockez-les dans un endroit frais et sec si vous n'utilisez pas la télécommande pendant longtemps. N Si la télécommande ne fonctionne pas, vérifiez les points suivants: • Le téléviseur est-il sous tension ? • Les bornes + et - des piles ne sont-elles pas inversées? • Les piles sont-elles déchargées? • Le cordon d'alimentation est-il débranché ou y a-t-il une panne de courant? • Une lampe fluorescente ou néon est-elle allumée à proximité ? OPERATION ¦ Affichage des menus Avant d'utiliser le téléviseur, procédez comme suit pour apprendre à naviguer dans le menu afin de sélectionner et de régler les différentes fonctions. Bouton MENU Afficher le menu principal à l'écran. Bouton RETURN Revient au menu précédent. Bouton ENTERE / DIRECTIONNELLES Déplace le curseur pour sélectionner un élément. Valide l'élément actuellement sélectionné. Confirmer un paramétrage. EXIT Fermer le menu affiché à l'écran. ❑ Maniement de l'affichage à l'écran L'étape d'accès peut varier en fonctoin du menu sélectionné. 1. Appuyez sur le bouton MENU. Image 2. Le menu principal apparaît à l'écran. Plusieurs icônes s’affichent sur le côté gauche du menu: Image, Son, Canal, Configuration, Entrée, Application, Assistance. Mode : Standard Rétroéclairage Contraste Luminosité Netteté Couleur Teinte (V/R) Paramètres avancés :7 : 95 : 45 : 50 : 50 : V50/R50 Mode : Standard ▶ 3. Appuyez sur le bouton ▲ ou ▼ pour sélectionner l'une des icônes. 5. Appuyez sur le bouton ▲ ou ▼ pour sélectionner l'un des sous-menus de l'icône. 6. Appuyez sur le bouton ◄ ou ► pour diminuer ou augmenter la valeur d'un élément spécifique. Les informations affichées à l'écran peuvent varier en fonction du menu sélectionné. 7. Appuyez sur le bouton ENTERE pour finir la configuration. Appuyez sur le bouton EXIT pour quitter. Image 4. Appuyez ensuite sur le bouton ENTERE pour accéder au sous-menu de l'icône. Rétroéclairage : 7 Contraste Luminosité Netteté Couleur Teinte (V/R) Paramètres avancés Options d'image : 95 : 45 : 50 : 50 : V50/R50 ▶ ▲ Rétroéclairage ▼ 7 U Déplacer L Régler E Entrer R Retour Icône de l’Aide Français - BN68-02325A-Fre.indb 6 2009-05-19 �� 3:54:46 ¦ Mise en mode veille de votre téléviseur Vous pouvez mettre votre téléviseur en mode Veille afin de réduire la consommation électrique. Le mode veille peut être utile si vous souhaitez éteindre votre téléviseur temporairement (pendant un repas par exemple). 1. Appuyez sur le bouton POWERP de la télécommande. N L'écran s'éteint et un voyant de veille apparaît sur votre téléviseur. 2. Pour rallumer le téléviseur, appuyez de nouveau sur le bouton POWERP. N Ne laissez pas le téléviseur en mode Veille pendant de longues périodes (lorsque vous êtes en vacances par exemple). Il est conseillé de débrancher le téléviseur du secteur et de l'antenne. ¦ Fonction Plug & Play Lorsque vous allumez le téléviseur pour la première fois, des réglages de base s'effectuent l'un après l'autre de manière automatique. 1. Appuyez sur le bouton POWER de la télécommande. N Vous pouvez également utiliser le bouton POWERP du téléviseur. N Le message Select the OSD Language. s'affiche à l'écran. Plug & Play 2. Appuyez sur le bouton ENTERE. Sélectionnez la langue de votre choix en appuyant sur le bouton ▲ ou ▼. Appuyez sur le bouton ENTERE pour confirmer votre choix. Select the OSD Language. Menu Language : English ▶ 3. Appuyez sur le bouton ◄ ou ► pour sélectionner Enr. démo ou Util. domicile , puis appuyez sur le bouton ENTERE. E Enter N Nous recommandons de régler le téléviseur sur le mode Util. domicile pour une meilleure qualité d'image dans votre environnement personnel. N Enr. démo n'est prévu que pour un usage en magasin. N Si l'unité est accidentellement réglée sur le mode Enr. démo et que vous souhaitez revenir au mode Util. domicile (Standard): Appuyez sur le bouton Volume du téléviseur. Lorsque l'affichage écran du volume apparaît, appuyez pendant 5 secondes sur le bouton MENU du téléviseur. 4. Appuyez sur le bouton ENTERE. Sélectionnez le pays approprié en appuyant sur le bouton ▲ ou ▼. Appuyez sur le bouton ENTERE pour confirmer votre choix. 5. Appuyez sur le bouton ▲ ou ▼ pour sélectionner Hertzien ou Câble, puis appuyez sur le bouton ENTERE. N Hertzien: signal d'antenne aérienne. N Câble: signal d'antenne câble. 6. Appuyez sur le bouton ▲ ou ▼ pour sélectionner la source de chaîne à mémoriser. Appuyez sur le bouton ENTERE pour sélectionner Démarrer. N Lors du réglage de la source d'antenne sur Câble, une fenêtre s'affiche, qui vous permet de définir une valeur pour la recherche de chaîne numérique. Pour plus d'informations, reportez-vous à Canal → Mémorisation Auto. N Numérique et Analogique: Chaînes numériques et analogiques. / Numérique: Chaînes numériques. / Analogique: Canal analogique. N La recherche de chaînes démarre et se termine automatiquement. N Appuyez sur le bouton ENTERE à tout moment pour interrompre la mémorisation. N Une fois toutes les chaînes disponibles mémorisées, le message Définit le mode Horloge s'affiche. 7. Appuyez sur le bouton ENTERE. Appuyez sur le bouton ▲ ou ▼ pour sélectionner Auto., puis appuyez sur le bouton ENTERE. N Si vous sélectionnez Manuel, le message Définit la date et l’heure s'affiche. N Si vous recevez un signal numérique, l'heure se règle automatiquement. Sinon, sélectionnez Manuel pour régler l'horloge. 8. La description relative à la méthode de connexion fournissant la meilleure qualité d'image en HD s'affiche à l'écran. Lisez-la puis appuyez sur le bouton ENTERE. 9. Appuyez sur le bouton ◄ ou ► pour sélectionner Voir Guide produit ou Regarder la TV. Appuyez sur le bouton ENTERE. • Voir Guide produit: ouvre le Guide Produit qui vous présente les principales fonctions de votre téléviseur HD. • Regarder la TV: permet de regarder les chaînes mémorisées. Si vous souhaitez réinitialiser cette fonction... 2. Appuyez de nouveau sur le bouton ENTERE pour sélectionner Plug & Play. 3. Entrez votre code PIN à quatre chiffres. Le code PIN par défaut d'un nouveau téléviseur est ‘0-0-0-0’. N Si vous voulez modifier le code PIN, utilisez la fonction Modifier PIN. N La fonction Plug & Play est uniquement disponible en mode TV. Configuration 1. Appuyez sur le bouton MENU pour afficher le menu. Appuyez sur le bouton ▲ ou ▼ pour sélectionner Configuration, puis sur le bouton ENTERE. Plug & Play Langue des menus Horloge Diffuser Sécurité Réseau Général : Français ▶ Français - BN68-02325A-Fre.indb 7 2009-05-19 �� 3:54:47 ¦ Visualisation de laffichage L’affichage identifie la chaîne en cours et l’état de certains paramètres audio et vidéo. O Appuyez sur le bouton INFO pour afficher les informations. Appuyez sur le bouton INFO de la télécommande. La télévision affiche la chaîne, le type de son et l’état de certains paramètres de son et d’image. ● ▲, ▼: Vous pouvez afficher des informations relatives à une autre chaîne. Pour accéder à la chaîne actuellement sélectionnée, appuyez sur le bouton ENTERE. ● ◄, ►: Vous pouvez afficher les informations relatives au programme souhaité de la chaîne actuelle. abc1 18:11 Thu 6 Jan Life On Venus Avenue DTV Air 15 18:00 ~ 6:00 Unclassified No Detaild Information E Watch ' Information N Appuyez de nouveau sur le bouton INFO ou attendez environ 10 secondes pour que l'affichage disparaisse automatiquement. CANAL ¦ Menu Canal Canal ❑ Pays ■ Canal analogique Permet de changer de pays pour les chaînes analogiques. ■ Canal numérique Permet de changer de pays pour les chaînes numériques. N L'écran de saisie du code PIN s'affiche. Entrez votre code PIN à quatre chiffres. Pays ▶ Mémorisation Auto Mémorisation Manuelle Option de recherche de câble Guide Complet Mini Guide Par défaut : Guide Complet Liste des chaînes ❑ Mémorisation Auto Vous pouvez chercher les plages de fréquence disponibles par balayage (leur disponibilité dépend de votre pays). Il est possible que les numéros de programme attribués automatiquement ne correspondent pas aux numéros de programme souhaités ou réels. N Si une chaîne est verrouillée par la fonction Verrouillage Canal, la fenêtre de saisie du code PIN s'affiche. ■ Hertzien / Câble Source d'antenne à mémoriser ● Numérique et Analogique: Chaînes numériques et analogiques. ● Numérique: Chaînes numériques. ● Analogique: Canal analogique. Lors de la sélection de Câble → Numérique et Analogique ou de Câble → Numérique: Fournissez une valeur à rechercher pour les chaînes câblées. ● Mode de recherche → Complet / Réseau / Rapide N Rapide • Network ID : affiche le code d'identification du réseau. • Fréquence : affiche la fréquence correspondant au canal (varie d'un pays à l'autre). • Modulation: affiche les valeurs de modulation disponibles. • Taux de symbole: affiche les débits de symboles disponibles. N Cherche toutes les chaînes avec des stations de diffusion actives et les enregistre dans la mémoire du téléviseur. N Pour arrêter la mémorisation automatique, appuyez sur le bouton ENTERE. Le message Arrêter le programme automatique? s'affiche. Sélectionnez Oui en appuyant sur le bouton ◄ ou ► puis appuyez sur le bouton ENTERE. Français - BN68-02325A-Fre.indb 8 2009-05-19 �� 3:54:47 ❑ Mémorisation Manuelle N Permet de chercher manuellement une chaîne et de l'enregistrer dans la mémoire du téléviseur. N Si une chaîne est verrouillée par la fonction Verrouillage Canal, la fenêtre de saisie du code PIN s'affiche. ■ Canal numérique Enregistrement manuel de chaînes numériques. N Canal numérique est uniquement disponible en mode DTV. ● Canal: Sélectionnez le numéro de chaîne à l'aide des boutons ▲, ▼ ou des chiffres (0-9). ● Fréquence : Sélectionnez la fréquence à l'aide des chiffres. ● Bande passante : Sélectionnez la bande passante à l'aide des boutons ▲, ▼ ou des chiffres (0-9). N Au terme de la recherche, les chaînes de la liste sont mises à jour. ■ Canal analogique Enregistrement manuel de chaînes analogiques. ● Programme (numéro de programme à attribuer à une chaîne): Sélectionnez le numéro de chaîne à l'aide des boutons ▲, ▼ ou des touches numériques (0~9). ● Système de Couleur → Auto. / PAL / SECAM / NTSC4.43: Sélectionnez le système de couleurs à l'aide du bouton ▲ ou ▼. ● Système Sonore → BG / DK / I / L: Sélectionnez le système audio à l'aide du bouton ▲ ou ▼. ● Canal (si vous connaissez le numéro de la chaîne à mémoriser): Appuyez sur le bouton ▲ ou ▼ pour sélectionner C (chaîne hertzienne) ou S (chaîne câblée). Appuyez sur le bouton ►, puis sur le bouton ▲, ▼ ou un chiffre (0-9) pour sélectionner le numéro de votre choix. N Vous pouvez également sélectionner le numéro de chaîne directement en appuyant sur les touches numériques (0~9). N Si aucun son ne sort ou si le son produit est anormal, sélectionnez de nouveau la norme son requise. ● Recherche (lorsque vous ne connaissez pas les numéros de chaîne) : Appuyez sur le bouton ▲ ou ▼ pour lancer la recherche. Le syntoniseur balaie la plage de fréquences jusqu'à ce que vous receviez la première chaîne ou la chaîne que vous avez sélectionnée à l'écran. ● Enr. (permet de mémoriser la chaîne et le numéro de programme correspondant): Sélectionnez OK en appuyant sur le bouton ENTERE. N Mode Canal P (Mode Programme): à la fin du réglage, des numéros de position compris entre P00 et P99 sont attribués aux stations de radiodiffusion de votre région. Dans ce mode, vous pouvez sélectionner un chaîne en saisissant son numéro de position. C (Mode chaîne hertzienne): dans ce mode, vous pouvez sélectionner une chaîne en saisissant le numéro attribué à chacune des stations de télédiffusion. S (Mode chaîne câblée): dans ce mode, vous pouvez sélectionner une chaîne en saisissant le numéro attribué à chacune des chaînes câblées. ❑ Option de recherche de câble (en fonction du pays) Définit des options supplémentaires telles que la fréquence et le débit de symboles pour les recherches sur réseau câblé. ● Fréq. début (Frequency Start): définit la fréquence de démarrage (différente dans chaque pays). ● Fréq. fin (Frequency Stop): définit la fréquence d'arrêt (différente dans chaque pays). ● Modulation: affiche les valeurs de modulation disponibles. ● Taux de symbole: affiche les débits de symboles disponibles. ❑ Guide Complet / Mini Guide Les informations relatives au guide électronique des programmes (EPG) sont fournies par les diffuseurs. Des entrées de programmes peuvent être vides ou ne pas être à jour en raison des informations diffusées sur un canal donné. L'affichage est automatiquement actualisé dès que de nouvelles informations sont disponibles. O Vous pouvez aussi afficher le guide en appuyant simplement sur le bouton GUIDE (pour configurer Par défaut, reportez-vous aux descriptions). ■ Guide Complet Affiche le programme heure par heure. Deux heures de programme sont affichées et vous pouvez faire défiler le programme en avançant ou en remontant dans le temps. ■ Mini Guide Les informations de chaque programme sont affichées ligne par ligne sur l'écran du mini-guide de la chaîne actuelle, en commençant par le programme en cours, dans l'ordre des heures de début des programmes. Français - BN68-02325A-Fre.indb 9 2009-05-19 �� 3:54:47 ❑ Par défaut → Guide Complet / Mini Guide Vous pouvez choisir d'afficher le Guide Complet ou le Mini Guide lorsque vous appuyez sur le bouton GUIDE de la télécommande. ❑ Liste des chaînes Pour obtenir plus de détails sur les procédures d'utilisation de la Liste des chaînes, reportez-vous aux instructions de Gestion des chaînes. O Vous pouvez sélectionner ces options en appuyant sur le bouton CH LIST de la télécommande. ❑ Mode des chaînes Lorsque vous appuyez sur le bouton P >/<, les chaînes seront sélectionnées dans la liste des chaînes sélectionnée. ■ Chaînes ajoutées Les chaînes sont sélectionnées dans la liste des chaînes mémorisée. ■ Favoris Les chaînes sont sélectionnées dans la liste des chaînes mémorisée. ❑ Réglage fin Si la réception est claire, vous n'avez pas besoin d'effectuer une syntonisation fine du canal, car cette opération s'effectue automatiquement pendant la recherche et la mémorisation. Si le signal est faible ou distordu, vous pouvez être amené à effectuer manuellement une syntonisation fine du canal. N Les canaux finement syntonisés qui ont été mémorisés sont repérés par un astérisque "*" placé à droite de leur numéro dans la bannière des canaux. N Pour rétablir la syntonisation fine, sélectionnez Réinit. à l'aide du bouton ▲ ou ▼, puis appuyez sur le bouton ENTERE. N La syntonisation fine n'est possible que pour des chaînes analogiques. Utilisation du guide complet / mini-guide Guide Complet Câble DTV 900 f tn 2:10 Mar 1 Jui Freshmen On Campus 2:00 - 2:30 No Detailed Information 900 Aujourd'hui 900 f tn 901 ITV Play 902 Kerrang! 903 Kiss 904 oneword ▼ 905 Hits 2:00 - 3:00 Freshmen O.. Street Hypn.. Mint Extra Loaded 40 with Dynamite MC The Distillery Smash Hits! Sunday 3:00 - 4:00 No information Mini Guide No information Kisstory No information ▼ E Regarder Information Page Mini Guide +24 heures Câble DTV 900 f tn 2:00 2:30 5:00 Quitter Freshmen On Campus Street Hypnosis Booze Britain E Regarder Information Page Guide Complet Quitter Pour… Alors… Regarder un programme de la liste du guide électronique des programmes Sélectionnez un programme à l'aide des boutons ▲, ▼, ◄, ►. Quitter le guide Appuyez sur le bouton bleu. Si le programme suivant est sélectionné, il est planifié avec l'icône de l'horloge affichée. Si vous appuyez de nouveau sur le bouton ENTERE puis sur ◄, ► pour sélectionner Annuler progr., la programmation est annulée et l'icône de l'horloge disparaît. Voir les informations relatives aux programmes Sélectionnez un programme à l'aide des boutons ▲, ▼, ◄, ►. Appuyez ensuite sur le bouton INFO lorsque le programme de votre choix apparaît en surbrillance. Le titre du programme se trouve dans la partie supérieure du centre de l'écran. Cliquez sur le bouton INFO pour obtenir des informations détaillées. Numéro de canal, temps de fonctionnement du programme, barre d'état, niveau de contrôle parental, informations sur la qualité vidéo (HD/SD), modes son, sous-titres ou télétexte, langue des sous-titres ou du télétexte et bref résumé du programme en surbrillance font partie des informations détaillées. ‘...’ s'affiche si le résumé est long. Basculer entre Guide Complet et Mini Guide Appuyez à plusieurs reprises sur le bouton rouge. Dans le guide complet Reculer rapidement (24 heures). Avancer rapidement (24 heures). Appuyez à plusieurs reprises sur le bouton vert. Appuyez à plusieurs reprises sur le bouton jaune. Français - 10 BN68-02325A-Fre.indb 10 2009-05-19 �� 3:54:48 ¦ Gestion des chaînes Ce menu permet d'ajouter/supprimer ou définir des chaînes favorites et d'utiliser le guide des programmes pour les émissions numériques. ■ 824 UKTV Gold 825 UKTV style Chaînes ajoutées ■ Tous les canaux Affiche toutes les chaînes actuellement disponibles. Chaînes ajoutées Affiche toutes les chaînes ajoutées. A 1 C -A 2 C -A 3 C -A 4 C -- A 5 C -A 6 C -- A 7 C -A 8 C -- ■ Favoris Affiche toutes les chaînes favorites. O Pour sélectionner les chaînes favorites que vous avez configurées, appuyez sur le bouton FAV.CH de la télécommande. ■ Programmé Affiche tous les programmes actuellement réservés. N Sélectionnez une chaîne sur l'écran Tous les canaux, Chaînes ajoutées ou Favoris en appuyant sur le boutons ▲ / ▼, puis sur le bouton ENTERE. Vous pouvez alors regarder la chaîne sélectionnée. N Utilisation des boutons de couleur dans la liste des chaînes Rouge (Type de canal) : Permet de basculer entre TV, Radio, Donn / autre et Tous. Vert (Zoom) : Agrandit ou réduit un numéro de chaîne. Jaune (Sélection): Sélectionne plusieurs listes de chaînes. Vous pouvez appliquer les fonctions d'ajout/suppression ou ajout/suppression de favoris à plusieurs chaînes à la fois. Sélectionnez les chaînes voulues, puis appuyez sur le bouton jaune pour traiter toutes les chaînes sélectionnées à la fois. La marque c s'affiche à gauche des chaînes sélectionnées. TOOLS (Outils) : Affiche le menu Supprimer (ou Ajouter), Ajouter aux favoris (ou Supprimer des favoris), Verrouil. (ou Déverr.), Rappel de prog., Modifi. nom de chaîne, Modif. numéro chaîne, Tri des canaux, Sélectionner tout (ou Désélectionner tout), Mémorisation Auto. (Les menus Options peuvent varier en fonction de la situation.) N Icônes d'état des chaînes • A : chaîne analogique. • c: chaîne sélectionnée en appuyant sur le bouton jaune. • * : Chaîne définie comme favorite. • (: Programme en cours de diffusion. • \ : Chaîne verrouillée. • ): Programme réservé. Tous Type de canal Zoom Sélect. T Outils Menu d'options de la liste des chaînes (dans Tous les canaux / Chaînes ajoutées / Favoris) N Appuyez sur le bouton TOOLS pour utiliser le menu d'options. N Les éléments du menu Options peuvent varier selon l'état de la chaîne. ■ Ajouter / Supprimer Vous pouvez supprimer ou ajouter une chaîne afin d'afficher les chaînes de votre choix. N Toutes les chaînes supprimées apparaîtront dans le menu Tous les canaux. N Une chaîne grisée est une chaîne qui a été supprimée. N Le menu Ajouter s'affiche uniquement pour les chaînes supprimées. N Vous pouvez également supprimer une chaîne du menu Chaînes ajoutées ou Favoris de la même manière. Tous les canaux ■ 824 UKTV Gold 825 UKTV style A 1 C -A 2 C -A 3 C -A 4 C -- A 5 C -A 6 C -- Supprimer Ajouter aux favoris Verrouil. Rappel de prog. Modifi. nom de chaîne Tri des canaux A 7 C -A 8 C - Tous Type de canal Zoom Sélect. T Outils Ajouter aux favoris / Supprimer des favoris Vous pouvez définir comme favorites les chaînes que vous regardez souvent. T Appuyez sur le bouton TOOLS pour afficher le menu Outils. Vous pouvez également définir l'ajout aux (ou suppression des) favoris en sélectionnant Outils → Ajouter aux favoris (ou Supprimer des favoris). N Le symbole "*" s’affiche et la chaîne est définie comme favorite. N Toutes les chaînes favorites apparaîtront dans le menu Favoris. Français - 11 BN68-02325A-Fre.indb 11 2009-05-19 �� 3:54:48 ■ Verrouil. / Déverr. Vous pouvez verrouiller une chaîne afin qu'elle ne puisse pas être sélectionnée ni visualisée. N Cette fonction n'est disponible que si l'option Verrouillage Canal est définie sur Marche. N L'écran de saisie du code PIN s'affiche. Entrez votre code PIN à quatre chiffres. N Le code PIN par défaut d’un nouveau téléviseur est "0-0-0-0". Vous pouvez modifier le code PIN en sélectionnant Modifier PIN dans le menu. N Le symbole "\" s'affiche et la chaîne est verrouillée. ■ Rappel de prog. Si vous réservez un programme que vous souhaitez regarder, la chaîne bascule automatiquement vers la chaîne réservée dans la liste de chaînes, même si vous êtes en train de regarder une autre chaîne. Pour réserver un programme, réglez d'abord l'heure actuelle N Il n'est possible de réserver que des chaînes mémorisées. N Vous pouvez régler directement la chaîne, le jour, le mois, l'heure et les minutes à l'aide des touches numériques de la télécommande. N Les programmes réservés apparaissent dans le menu Programmé. N Guide des programmes numérique et affichage des réservations Quand une chaîne numérique est sélectionnée et que vous appuyez sur le bouton ►, le Guide des programmes de la chaîne s'affiche. Vous pouvez réserver un programme en suivant les procédures décrites ci-dessus. ■ Modifi. nom de chaîne (chaînes analogiques uniquement) Vous pouvez attribuer aux chaînes un libellé qui s'affiche chaque fois que vous les sélectionnez. N Les noms des chaînes numériques leur sont automatiquement attribués ; vous ne pouvez pas les modifier. ■ Modif. numéro chaîne (chaînes numériques uniquement) Vous pouvez également modifier le numéro de chaîne à l'aide du pavé numérique de la télécommande. ■ Tri des canaux (chaînes analogiques uniquement) Cette opération permet de changer les numéros de programme des chaînes mémorisées. Cette opération peut s'avérer nécessaire après l'utilisation de la mémorisation automatique. ■ Sélectionner tout / Désélectionner tout ● Sélectionner tout: Vous pouvez sélectionner toutes les chaînes de la liste des chaînes. ● Désélectionner tout : Vous pouvez désélectionner toutes les chaînes sélectionnées. N La fonction Désélectionner tout n'est disponible que si au moins une chaîne est sélectionnée. ■ Mémorisation Auto N Pour la procédure détaillée du réglage des options, reportez-vous à la rubrique "Menu Canal". N Si une chaîne est verrouillée par la fonction Verrouillage Canal, la fenêtre de saisie du code PIN s'affiche. Menu d'options de la liste des chaînes (dans Programmé) ■ Infos modif. Permet de modifier une réservation. ■ Annuler progr. Permet d'annuler une réservation. ■ Information Permet de visualiser une réservation (et d'en changer les données). ■ Sélectionner tout Permet de sélectionner tous les programmes réservés. Programmé Vous pouvez voir, modifier ou supprimer une réservation. N Appuyez sur le bouton TOOLS pour utiliser le menu d'options. Tous 1 / 1 / 2009 13:59 5 TV1 ) Infos modif. Annuler progr. 18:59 2 TV3 ) The Equalizer Information Sélectionner tout 20:59 2 TV3 ) McMillan & Wife 21:59 2 TV3 ) M.Spillane’s mike Zoom Sélection T Outils E Information Français - 12 BN68-02325A-Fre.indb 12 2009-05-19 �� 3:54:48 Image ¦ Configuration du menu Image ❑ Mode ■ Dynamique Sélectionne l'image pour un affichage à plus haute définition dans une pièce lumineuse. ■ Standard Sélectionne l'image pour un affichage optimal dans un environnement normal. ■ Naturel Sélectionne l'image pour un affichage optimal et confortable pour les yeux. N Cette fonction n'est pas disponible en mode PC. ■ Film Sélectionne l'image pour un affichage agréable de films dans une pièce sombre. Image Vous pouvez sélectionner le type d'image correspondant le mieux à vos besoins d'affichage. T Appuyez sur le bouton TOOLS pour afficher le menu Outils. Vous pouvez également définir le mode d'image en sélectionnant Outils → Mode Image. Mode : Standard Rétroéclairage Contrast Luminosité Netteté Couleur Teinte (V/R) Paramètres avancés :7 : 95 : 45 : 50 : 50 : V50/R50 ▶ ❑ Rétroéclairage / Contraste / Luminosité / Netteté / Couleur / Teinte (V/R) Votre téléviseur offre de plusieurs options de paramétrage qui permettent de contrôler la qualité ▲ d'image. Rétroéclairage 7 ▼ ● Rétroéclairage : Règle la luminosité du rétroéclairage de l'écran LCD. U Déplacer L Régler E Entrer R Retour ● Contraste : Règle le niveau de contraste de l'image. ● Luminosité : Règle le niveau de luminosité de l'image. ● Netteté : Règle la définition des bords de l'image. ● Couleur : Règle la saturation de couleur de l'image. ● Teinte (V/R) : Règle la teinte de l'image. N Dans les modes analogiques TV, Ext., AV du système PAL, vous ne pouvez pas utiliser la fonction Teinte (V/R). N Lorsque vous modifiez les paramètres Rétroéclairage, Contraste, Luminosité, Netteté, Couleur ou Teinte (V/R) l'affichage écran change en conséquence. N En mode PC, vous ne pouvez modifier que les options Rétroéclairage, Contraste et Luminosité. N Vous pouvez régler et enregistrer des paramètres pour chaque périphérique externe connecté à une entrée du téléviseur. N Vous pouvez réduire sensiblement l'énergie consommée en cours d'utilisation en baissant le niveau de luminosité de l'image, de façon à diminuer le coût de fonctionnement général. ❑ Paramètres avancés Les nouveaux téléviseurs Samsung permettent d'effectuer des réglages d'image encore plus précis que les modèles précédents. N Paramètres avancés est disponible dans les modes Standard et Film. N En mode PC, vous ne pouvez modifier que les paramètres Contraste Dynam., Gamma et Balance blancs parmi les options du menu Paramètres avancés. ■ Nuance de noir → Arrêt / Sombre / Plus sombre / Le plus sombre Vous pouvez choisir le niveau de noir pour régler la profondeur de l'écran. ■ Contraste Dynam. → Arrêt / Bas / Moyen / Elevé Vous pouvez régler le contraste de l'écran pour obtenir un résultat optimal. ■ Gamma Vous pouvez régler l'intensité des couleurs primaires (rouge, vert, bleu). Paramètres avancés Nuance de noir : Arrêt Contraste Dynam. : Moyen Gamma :0 Espace couleur : Natif ▶ Balance blancs Carnation Netteté des contours :0 : Marche U Déplacer E Entrer R Retour Français - 13 BN68-02325A-Fre.indb 13 2009-05-19 �� 3:54:49 ■ Espace couleur Un espace colorimétrique est une matrice de couleurs composée de rouge, de vert et de bleu. Sélectionnez votre espace colorimétrique préféré et appréciez la couleur la plus naturelle. ● Auto.: règle automatiquement la nuance de couleur la plus naturelle sur la base des sources de programme. ● Natif: offre une nuance de couleur profonde et riche. ● Personnel: permet de régler l'espace colorimétrique en fonction de vos préférences. N La modification des valeurs de réglage actualise l'affichage à l'écran. N Vous pouvez régler et enregistrer des paramètres pour chaque périphérique externe connecté à une entrée du téléviseur. Par exemple, si vous avez un lecteur de DVD connecté à la prise HDMI 1 et s'il est sélectionné, les paramètres et réglages seront enregistrés pour le lecteur de DVD. Couleur: Rouge, Vert, Bleu, Jaune, Cyan ou Magenta N Couleur est disponible lorsque Espace couleur est réglé sur Personnel. N Dans Couleur, vous pouvez régler les valeurs RVB de la couleur sélectionnée. N Pour réinitialiser les valeurs RVB, sélectionnez Réinit.. Rouge: Règle le niveau de saturation en rouge de la couleur sélectionnée. Vert: Règle le niveau de saturation en vert de la couleur sélectionnée. Bleu: Règle le niveau de saturation en bleu de la couleur sélectionnée. Réinit.: rétablit les valeurs par défaut de l'espace de couleur. ■ Balance blancs Vous pouvez régler la température des couleurs pour que celles-ci soient plus naturelles. ● Aj. Rouge: Règle la profondeur du rouge. ● Aj. Vert : Règle la profondeur du vert. ● Aj. Bleu : Règle la profondeur du bleu. ● Regl. Rouge: Règle la luminosité du rouge. ● Regl. vert: Règle la luminosité du vert. ● Regl. bleu: Règle la luminosité du bleu. ● Réinit.: les valeurs par défaut de l'équilibrage du blanc réglé précédemment sont rétablies. ■ Carnation Vous pouvez accentuer le "ton chair" de l'image. N La modification des valeurs de réglage actualise l'affichage à l'écran. ■ Netteté des contours → Arrêt / Marche Vous pouvez faire ressortir les contours des objets dans l'image. ■ xvYCC → Arrêt / Marche L'activation du mode xvYCC augmente les détails et agrandit l'espace colorimétrique lors de l'affichage des films provenant d'un appareil externe (lecteur de DVD, etc.) relié à la prise HDMI ou Component IN. N xvYCC est disponible lorsque le mode d'image est réglé sur Film et lorsque l'entrée externe est en mode HDMI ou Component. N Il se peut que cette fonction ne soit pas prise en charge sur votre périphérique. ❑ Options d'image N En mode PC, vous ne pouvez modifier que les paramètres Nuance Coul. et Taille parmi les options du menu Options d'image. ■ Nuance Coul. → Froide / Normal / Chaude1 / Chaude2 / Chaude3 N Chaude1, Chaude2 ou Chaude3 ne sont activées que si le mode d'image est Film. N Vous pouvez régler et enregistrer des paramètres pour chaque périphérique externe connecté à une entrée du téléviseur. Options d'image Nuance Coul. : Normal Taille : 16/9 auto Mode écran : 16:9 NR numérique : Auto. Niv. noir HDMI : Normal Mode Film : Arrêt 100Hz Motion Plus : Standard ▶ ▼ U Déplacer E Entrer R Retour Français - 14 BN68-02325A-Fre.indb 14 2009-05-19 �� 3:54:49 ■ Taille Vous pouvez parfois modifier la taille de l’image sur votre écran. Votre télévsieur dispose de plusieurs options relatives à la taille de l'écran, chacune d'entre elles étant conçue pour fonctionner au mieux avec un certain type d'entrée vidéo. Votre découdeur câble / récepteur satellite peut également avoir son propre jeu de tailles d'écran. Toutefois, il est conseillé d’utiliser le mode 16:9, autant que possible. T Appuyez sur le bouton TOOLS pour afficher le menu Outils. Vous pouvez également définir la taille en sélectionnant Outils → Format de l'image. ● 16/9 auto : règle automatiquement la taille de l'image sur le format 16:9. ● 16:9 : règle la taille de l'image sur 16:9 de façon appropriée pour les DVD ou la diffusion au format cinémascope. ● Zoom large: agrandit l'image à une taille supérieure à 4:3. ● Zoom: agrandit l'image en 16:9 (dans le sens vertical) pour l'adapter à la taille de l'écran. ● 4:3: paramètre par défaut pour un film vidéo ou une diffusion normale. ● Adapter à l'écran: Permet de voir l'intégralité de l'image sans coupure lors de l'entrée de signaux HDMI (720p / 1080i / 1080p) ou Composant (1080i / 1080p). N Les options de taille de l'image peuvent varier en fonction de la source d'entrée. N Les options disponibles peuvent varier en fonction du mode sélectionné. N En mode PC, seuls les modes 16:9 et 4:3 peuvent être réglés. N Vous pouvez régler et enregistrer des paramètres pour chaque périphérique externe connecté à une entrée du téléviseur. N Une rémanence temporaire peut se produire si vous affichez une image statique pendant plus de deux heures sur l'écran du téléviseur. N Zoom large: Appuyez sur le bouton ► pour sélectionner Position, puis appuyez sur le bouton ENTERE. Appuyez sur le bouton ▲ ou ▼ pour déplacer l'image vers le haut ou vers le bas. Appuyez ensuite sur le bouton ENTERE. N Zoom: Appuyez sur le bouton ► pour sélectionner Position, puis appuyez sur le bouton ENTERE. Appuyez sur le bouton ▲ ou ▼ pour déplacer l'image vers le haut et vers le bas. Appuyez ensuite sur le bouton ENTERE. Appuyez sur le bouton ► pour sélectionner Taille, puis appuyez sur le bouton ENTERE. Appuyez sur le bouton ▲ ou ▼ pour augmenter ou réduire la hauteur de l'image. Appuyez ensuite sur le bouton ENTERE. N Après avoir sélectionné l’option Adapter à l'écran en mode HDMI (1080i / 1080p) ou Composant (1080i / 1080p): sélectionnez Position à l'aide du bouton ◄ ou ►. Utilisez le bouton ▲, ▼, ◄ ou ► pour déplacer l'image. Réinit.: Appuyez sur le bouton ◄ ou ► pour sélectionner Réinit., puis sur le bouton ENTERE. Vous pouvez initialiser le réglage. N Si vous utilisez la fonction Adapter à l'écran avec l'entrée HDMI 720p, une ligne sera coupée en haut, en bas, à gauche et à droite, comme avec la fonction Overscan. N Lorsque le mode PIP est réglée sur Double (À, Œ), l'option Format de l'image est désactivée. ■ Mode écran → 16:9 / Zoom large / Zoom / 4:3 Lorsque vous réglez la taille de l'image sur 16/9 auto sur un téléviseur 16:9, vous pouvez déterminer la taille d'affichage d'une image 4:3 WSS (Wide Screen Service/service d'écran large) ou choisir de ne rien afficher pour ce format. Chaque pays européen impose une taille d'image différente ; cette fonction permet aux utilisateurs de sélectionner la leur. ● 16:9 : règle l'image en mode large, c'est-à-dire en 16:9. ● Zoom large: agrandit l'image à une taille supérieure à 4:3. ● Zoom: agrandit la taille de l'image sur l'écran dans le sens vertical. ● 4:3: règle l'image en mode normal, c'est-à-dire en 4:3. N Cette fonction n'est disponible qu'en mode 16/9 auto. N Cette fonction n'est pas disponible en mode PC, Composant ni HDMI. ■ NR numérique → Arrêt / Bas / Moyen / Elevé / Auto. Si le signal de radiodiffusion reçu est faible, vous pouvez activer la fonction Digital Noise Reduction pour faciliter la réduction d'images fantômes ou statiques qui peuvent apparaître à l'écran. N Lorsque le signal est faible, sélectionnez une autre option jusqu'à obtention de la meilleure image possible. ■ Niv. noir HDMI → Normal / Bas Vous pouvez choisir le niveau de noir pour régler la profondeur de l'écran. N Cette fonction n'est active que si un appareil externe est reliée au téléviseur via la prise HDMI (signaux RVB). ■ Mode Film → Arrêt / Auto.1 / Auto.2 Vous pouvez régler le téléviseur de sorte qu'il détecte et traite automatiquement les signaux de cinéma de toutes les sources et adapte l'image pour obtenir une qualité optimale. N Mode Film n'est prise en charge que dans TV, AV, Composant (480i / 1080i) et HDMI (480i / 1080i). ● Arrêt : désactive la fonction Film Mode. ● Auto.1 : règle automatiquement l'image afin d'obtenir une qualité optimale lors du visionnage d'un film. ● Auto.2 : Optimise automatiquement le texte vidéo affiché l'écran (à l'exception des sous-titres) lors du visionnage d'un film. Français - 15 BN68-02325A-Fre.indb 15 2009-05-19 �� 3:54:49 ■ 100Hz Motion Plus → Arrêt / Clair / Standard / Fluide / Personnel / Démo Supprime les traînées des scènes rapides avec beaucoup de mouvements, ce qui rend l’image plus claire. N Des parasites peuvent apparaître à l'écran lorsque la fonction 100Hz Motion Plus est activée. Si cela ce produit, réglez la fonction 100Hz Motion Plus sur Arrêt. ● Arrêt : désactive la fonction 100Hz Motion Plus. ● Précis : règle la fonction 100Hz Motion Plus au minimum. ● Standard : règle la fonction 100Hz Motion Plus sur son paramètre moyen. ● Fluide: règle la fonction 100Hz Motion Plus au maximum. ● Personnel: Règle les niveaux de réduction de flou et de vibrations selon vos préférences. Réduction de flou: règle le niveau de réduction du flou à partir des sources vidéo. Réduc. vibrations : règle le niveau de réduction des saccades à partir des sources vidéo lors de la lecture des films. Réinit.: Réinitialise les paramètres de l'horloge. ● Démo : Affiche la différence entre les modes activé et désactivé de 100Hz Motion Plus. ■ Mode bleu uniquement → Arrêt / Marche Cette fonction est destinée aux spécialistes de mesure des appareils AV. Elle affiche uniquement le signal bleu en éliminant les signaux rouge et vert du signal vidéo de manière à créer un effet de filtre bleu utilisé pour régler ca Couleur et la teinte des appareils vidéo (lecteurs de DVD, home cinéma, etc.). Cette fonction vous permet de régler la couleur et la teinte sur les valeurs les plus adaptées au signal de chaque appareil vidéo à l'aide des mires de couleur rouge / verte / bleue / cyan / magenta / jaune, et ce, sans devoir utiliser de filtre bleu externe. N Mode bleu uniquement est disponible lorsque le mode d'image est réglé sur Film ou Standard. ❑ Réinitialisation de l'image → Réinitial. mode image / Annuler Rétablit tous les paramètres des images aux valeurs par défaut. N Réinitial. mode image : rétablit les paramètres par défaut pour les valeurs de l'image actuelle. ¦ Visualisation d'une image dans l'image Image principale Composant HDMI1, HDMI2, HDMI3/DVI, HDMI4 PC Configuration La fonction PIP permet de regarder simultanément le tuner TV et une source vidéo externe. Cet appareil est équipé que d'un seul tuner intégré, ce qui signifie qu'il est impossible de regarder deux émissions de télévision en même temps. Reportez-vous à la rubrique "Paramètres de la fonction PIP" ci-dessous pour de plus amples informations. T Appuyez sur le bouton TOOLS pour afficher le menu Outils. Vous pouvez également régler les paramètres de la fonction PIP en sélectionnant Outils → PIP. N Si vous sélectionnez le son de l'image PIP, suivez les instructions de la rubrique "Configuration du menu Sound". N Réglages PIP Mélodie Mode éco. : Moyen : Arrêt PIP ▶ Interface commune Image secondaire TV N Si vous éteignez le téléviseur alors que la fonction PIP est activée, la fenêtre PIP disparaît lorsque vous le rallumez. N Il est possible que l'image dans la fenêtre PIP devienne légèrement moins naturelle lorsque vous utilisez l'écran principale pour un jeu ou un karaoké. N Lorsque la fonction Internet@TV est activée, la fonction PIP est inaccessible. ❑ PIP → Arrêt / Marche PIP Vous pouvez activer ou désactiver la fonction PIP. ❑ Taille → Õ / à / À / Œ PIP : Marche Taille :Õ Position :à Canal : ATV 4 ▶ Vous pouvez sélectionner la taille de l'image secondaire. ❑ Position → à / – / — / œ U Déplacer E Entrer R Retour Vous pouvez sélectionner la position de l'image secondaire. N En mode Double (Œ, À), la Position n'est pas réglable. ❑ Canal Permet de choisir la chaîne affichée dans l'image secondaire. Français - 16 BN68-02325A-Fre.indb 16 2009-05-19 �� 3:54:49 ¦ Utilisation de votre téléviseur comme écran d'ordinateur (PC) Configuration de votre logiciel PC (instructions basées sur Windows XP) Les paramètres d'affichage Windows indiqués ci-dessous sont valables pour ordinateur standard. Les affichages écran sur votre PC seront probablement différents, en fonction de votre version de Windows et votre carte vidéo. Cependant, même si les affichages réels diffèrent, les mêmes informations de configuration de base s'appliquent dans la plupart des cas. (Dans le cas contraire, contactez le fabricant de votre ordinateur ou votre revendeur Samsung.) 1. Dans le menu Démarrer de Windows, cliquez sur "Panneau de configuration". 2. Dans le Panneau de configuration, cliquez sur "Apparence et thèmes". Une boîte de dialogue s'affiche. 3. Cliquez sur "Affichage". Une nouvelle boîte de dialogue s'affiche. 4. Cliquez sur l'onglet "Paramètres". • Réglage correct de la taille (résolution) - Optimal: 1920 x 1080 pixels. • S’il existe une option de fréquence verticale sur votre boîte de dialogue des paramètres d’affichage, la valeur correcte est "60" ou "60 Hz". Sinon, cliquez simplement sur "OK" pour quitter la boîte de dialogue. Modes d'affichage Si le signal du système équivaut au mode de signal standard, l'écran se règle automatiquement. Si le signal du système ne correspond pas au mode de signal standard, réglez le mode en vous reportant le cas échéant au manuel d'utilisation de la carte vidéo. Pour les modes d'affichage répertoriés en page suivante, l'image de l'écran a été optimisée lors de la fabrication. ■ Entrée D-Sub et HDMI/DVI Mode Résolution IBM 640 x 350 720 x 400 640 x 480 832 x 624 1152 x 870 720 x 576 1152 x 864 1280 x 720 1280 x 720 1280 x 960 640 x 480 640 x 480 640 x 480 800 x 600 800 x 600 800 x 600 1024 x 768 1024 x 768 1024 x 768 1152 x 864 1280 x 1024 1280 x 1024 1280 x 800 1280 x 800 1280 x 960 1360 x 768 1440 x 900 1440 x 900 1680 x 1050 1280 x 720 1280 x 1024 31,469 31,469 35,000 49,726 68,681 35,910 53,783 44,772 56,456 75,231 31,469 37,861 37,500 37,879 48,077 46,875 48,363 56,476 60,023 67,500 63,981 79,976 49,702 62,795 60,000 47,712 55,935 70,635 65,290 52,500 74,620 70,086 70,087 66,667 74,551 75,062 59,950 59,959 59,855 74,777 74,857 59,940 72,809 75,000 60,317 72,188 75,000 60,004 70,069 75,029 75,000 60,020 75,025 59,810 74,934 60,000 60,015 59,887 74,984 59,954 70,000 70,000 25,175 28,322 30,240 57,284 100,000 32,750 81,750 74,500 95,750 130,000 25,175 31,500 31,500 40,000 50,000 49,500 65,000 75,000 78,750 108,000 108,000 135,000 83,500 106,500 108,000 85,500 106,500 136,750 146,250 89,040 128,943 Polarité synchronisée (H/V) +/-/+ -/-/-/-/+ -/+ -/+ -/+ -/+ -/-/-/+/+ +/+ +/+ -/-/+/+ +/+ +/+ +/+ -/+ -/+ +/+ +/+ -/+ -/+ -/+ -/+ -/- 1920 x 1080p 67,500 60,000 148,500 +/+ MAC VESA CVT VESA DMT VESA GTF VESA DMT / DTV CEA N N N N N Fréquence horizontale Fréquence verticale (KHz) (Hz) Fréquence d'horloge pixels (MHz) Lorsque vous utilisez une connexion avec câble HDMI/DVI, vous devez utiliser la prise HDMI IN 3 (DVI). Le mode entrelacé n'est pas pris en charge. Le téléviseur peut fonctionner de façon anormale si le format vidéo sélectionné n'est pas standard. Les modes Séparé et Composite sont pris en charge. Le format SOG (SVSV) n'est pas pris en charge. Un câble VGA trop long ou de qualité médiocre peut être source de parasites visuels dans les modes haute résolution (1920 x 1080). Français - 17 BN68-02325A-Fre.indb 17 2009-05-19 �� 3:54:49 ¦ Configuration du téléviseur avec le PC N Préréglage: Appuyez sur le bouton SOURCE pour sélectionner le mode PC. ❑ Réglage Automatique Luminosité Netteté Image Utilisez la fonction Auto Adjust pour que le téléviseur règle automatiquement les signaux vidéo qu'il reçoit. La fonction règle aussi automatiquement les paramètres ainsi que les valeurs et positions de fréquences. T Appuyez sur le bouton TOOLS pour afficher le menu Outils. Vous pouvez également définir le réglage automatique en sélectionnant Outils → Réglage Automatique. N Cette fonction ne s'applique pas en mode DVI-HDMI. : 45 : 50 Réglage Automatique ▶ Ecran Paramètres avancés Options d'image Réinitialisation de l'image ❑ Ecran ■ Regl. Base / Regl. Prec Lorsque vous réglez la qualité de l'image, l'objectif est d'éliminer ou de réduire les parasites visuels. Si vous ne pouvez pas éliminer ces parasites par une syntonisation fine, réglez la fréquence (Regl. Base) au mieux, puis effectuez de nouveau une syntonisation fine. Une fois les parasites réduits, effectuez un nouveau réglage de l'image pour l'aligner au centre de l'écran. Ecran Regl. Base 50 Regl. Prec 0 Position du PC Réinitialiser Image ■ Position du PC U Déplacer E Entrer R Retour Réglez la position d'affichage du PC si elle ne convient pas pour l'écran du téléviseur. Appuyez sur le bouton ▲ ou ▼ pour régler la position verticale. Appuyez sur le bouton ◄ ou ► pour régler la position horizontale. ■ Réinitialiser Image Vous pouvez rétablir les valeurs par défaut de tous les paramètres d'image. SON ¦ Configuration du menu Sound ❑ Mode → Standard / Musique / Film / Voix claire / Personnel Son T Appuyez sur le bouton TOOLS pour afficher le menu Outils. Vous pouvez également définir le mode sonore en sélectionnant Outils → Mode Son. ● Standard : Sélectionne le mode son normal. ● Musique : Accentue la musique par rapport aux voix. ● Film : Offre le meilleur son pour les films. ● Voix claire : Accentue les voix par rapport aux autres sons. ● Personnel: Rétablit vos paramètres de son personnalisés. Mode Egaliseur SRS TruSurround HD Langue audio Format Audio Description audio Volume auto Sélection Haut-parleur : Personnel ▶ : Arrêt : ---: ---: Arrêt : Haut-parleur TV ❑ Egaliseur Vous pouvez régler les paramètres du son en fonction de vos préférences. ● Mode: permet de sélectionner le mode sonore parmi plusieurs paramètres prédéfinis. ● Balance G/D: règle la balance entre les haut-parleurs droit et gauche. ● 100Hz / 300Hz / 1KHz / 3KHz / 10KHz (réglage de la bande passante) : permet de régler le niveau de fréquences de la bande passante. ● Réinit.: Rétablit les valeurs par défaut de l'égaliseur. ❑ SRS TruSurround HD → Arrêt / Marche Le SRS TruSurround HD est une technologie SRS brevetée qui remédie au problème de la lecture de contenu multicanal 5.1 sur deux haut-parleurs. Le TruSurround produit un son surround virtuel excellent au moyen de n'importe quel système de lecture à deux haut-parleurs, dont les haut-parleurs internes du téléviseur. Il est totalement compatible avec tous les formats multicanal. T Appuyez sur le bouton TOOLS pour afficher le menu Outils. Vous pouvez également définir l'option SRS TruSurround HD en sélectionnant Outils→ SRS TS HD. Français - 18 BN68-02325A-Fre.indb 18 2009-05-19 �� 3:54:50 ❑ Langue audio Vous pouvez modifier la langue par défaut des sous-titres et de l'audio. Affiche les informations relatives à la langue pour le flux entrant. N Cette fonction peut être sélectionnée pendant que vous regardez une chaîne numérique. N Vous pouvez sélectionner la langue uniquement parmi les langues en cours de diffusion. ❑ Format Audio → MPEG / Dolby Digital Lorsque le son est émis à la fois par le haut-parleur principal et le récepteur audio, un effet d'écho peut se produire en raison de la différence de vitesse de décodage entre le haut-parleur principal et le récepteur audio. Dans ce cas, utilisez la fonction TV Speaker (haut-parleur du téléviseur). N Cette fonction peut être sélectionnée pendant que vous regardez une chaîne numérique. N Le format audio s'affiche en fonction du signal diffusé. ❑ Description audio Il s'agit d'une fonction audio auxiliaire qui fournit une piste audio supplémentaire à l'intention des personnes malvoyantes. Cette fonction traite le flux audio relatif à la description audio (AD) lorsqu'il est envoyé avec le son principal par le radiodiffuseur. Les utilisateurs peuvent activer ou désactiver la description audio et régler le volume. O Appuyez sur le bouton AD de la télécommande pour sélectionner Arrêt ou Marche. ■ Description audio → Arrêt / Marche Active ou désactive la fonction de description verbale. ■ Volume Il est possible de régler le volume de la description verbale. N Volume est actif lorsque Description audio est défini sur Marche. N Cette fonction peut être sélectionnée pendant que vous regardez une chaîne numérique. ❑ Volume auto → Arrêt / Marche Chaque station de télédiffusion possède ses propres conditions de signal. Il n'est donc pas facile de régler le volume chaque fois que vous changez de chaîne. Cette fonction permet de régler automatiquement le volume du canal désiré en réduisant la sortie son lorsque le signal de modulation est puissant ou en l'augmentant lorsque le signal est faible. ❑ Sélection Haut-parleur Lorsque vous regardez la télévision alors que vous téléviseur est relié à un système home cinéma, éteignez les haut-parleurs du téléviseur afin d'écouter le son sur les haut-parleurs (externes) du système home cinéma. ● Ht-parl ext : permet d'écouter le son des haut-parleurs externes (ceux du système home cinéma). ● Haut-parleur TV : permet d'écouter le son des haut-parleurs du téléviseur. N Les boutons de volume et MUTE ne fonctionnent pas lorsque la fonction Sélection Haut-parleur est réglée sur Ht-parl ext. N Si vous sélectionnez Ht-parl ext dans le menu Sélection Haut-parleur, les paramètres de son sont limités. Haut-parleurs internes du téléviseur Haut-parleur TV Ht-parl ext Absence de signal vidéo RF / AV / Composant / PC / HDMI Sortie son Muet Muet Sortie audio (Optique, Sortie G/D) vers système audio RF / AV / Composant / PC / HDMI Sortie son Sortie son Muet ❑ Sélection du son → Principal / Secondaire Lorsque la fonction PIP est activée, vous pouvez écouter le son accompagnant l'image secondaire. N Cette option est accessible lorsque la fonction PIP est réglée sur Marche. T Appuyez sur le bouton TOOLS pour afficher le menu Outils. Vous pouvez également définir le mode sonore de l'image secondaire en sélectionnant Outils → PIP → Sélection du son. Réinitialisation du son ❑ Réinitialisation du son → Réinitial. tout / Réinitial. mode son / Annuler Vous pouvez rétablir les valeurs par défaut des paramètres audio. N Réinitial. mode son : rétablit les paramètres par défaut pour le son. Choisir les options de rétablissement du son. Réinitial. tout Réinitial. mode son Annuler L Déplacer E Entrer R Retour Français - 19 BN68-02325A-Fre.indb 19 2009-05-19 �� 3:54:50 ¦ Sélection du mode son Vous pouvez configurer le mode son dans le menu Outils. Lorsque vous définissez Dual l ll, le mode son actuel est affiché à l'écran. Stéréo A2 NICAM stéréo Type d'audio Mono Stéréo Dual Mono Stéréo Dual Dual 1 / 2 MONO STEREO ↔ MONO DUAL 1 ↔ DUAL 2 MONO MONO ↔ STEREO MONO ↔ DUAL 1 DUAL 2 Par défaut Changement automatique DUAL 1 Changement automatique DUAL 1 N Si le signal stéréo est faible et qu'une commutation automatique se produit, passez alors en Mono. N Cette fonction n'est activée qu'en son stéréo. Elle est désactivée en mode mono. N Cette fonction n'est disponible qu'en mode TV. Configuration ¦ Configuration du menu Configuration ❑ Langue des menus Plug & Play ❑ Horloge Pour la procédure détaillée du réglage des options, reportez-vous à la rubrique "Réglage de l'heure". Configuration Permet de définir la langue des menus. Langue des menus : Français ▶ Horloge Diffuser sécurité Réseau Général ❑ Diffuser ■ Sous-titres Vous pouvez activer ou désactiver les sous-titres. Utilisez ce menu pour définir le mode des sous-titres. Normal sélectionne les sous-titres de base ; Malentendants sélectionne les sous-titres pour personnes malentendantes. ● Sous-titres → Arrêt / Marche Active/désactive les sous-titres. ● Mode → Normal / Malentendants Sélectionne le mode de la fonction Sous-titres. ● Langue des sous-titres Définit la langue des sous-titres. N Si le programme visionné n'offre pas de fonction Malentendants, le mode Normal est automatiquement activé, même si le mode Malentendants est sélectionné. N L'Français est la langue par défaut si la langue sélectionnée n'est pas diffusée. N Vous pouvez sélectionner ces options en appuyant sur le bouton SUBT. de la télécommande. ■ Texte numérique → Désactiver / Activer (Royaume-Uni uniquement) Si le programme est diffusé avec du texte numérique, cette fonction est activée. N MHEG (Multimedia and Hypermedia Information Coding Experts Group) Norme internationale pour les systèmes de codage des données utilisés avec le multimédia et l'hypermédia. Niveau supérieur à celui du système MPEG, qui inclut de l'hypermédia à liaison de données tel que des images fixes, le service de caractères, l'animation, les fichiers graphiques et vidéo et les données multimédia. MHEG est une technologie d'interaction de l'utilisateur en cours d'utilisation appliquée à divers domaines, dont la vidéo à la demande (VOD), la télévision interactive (ITV), le commerce électronique, la téléformation, la téléconférence, les bibliothèques numériques et les jeux en réseau. Français - 20 BN68-02325A-Fre.indb 20 2009-05-19 �� 3:54:50 ■ Langue du télétexte Vous pouvez définir la langue du télétexte en sélectionnant le type de langue. N L'Français est la langue par défaut si la langue sélectionnée n'est pas diffusée. ■ Préférence ● Première Langue Audio / Deuxième Langue Audio / Langue princ. sous-titres / Langue sec. sous-titres / Première Langue Télétexte / Deuxième Langue Télétexte Cette fonction permet de sélectionner une des langues disponibles. La langue sélectionnée ici est la langue par défaut de la chaîne sélectionnée. Si vous changez la langue, les options Langue des sous-titres, Langue audio et Langue du télétexte du menu Langue sont automatiquement modifiées en conséquence. Les options Langue des sous-titres, Langue audio et Langue du télétexte du menu Langue présentent une liste des langues prises en charge par la chaîne actuelle et la langue sélectionnée est affichée en surbrillance. Si vous modifiez le paramètre de la langue, la nouvelle sélection n'est valable que pour la chaîne actuelle. Le nouveau paramétrage n'affecte pas le réglage des options Langue princ. sous-titres, Première Langue Audio ou Première Langue Télétexte du menu Préférence. ■ Interface commune ● CI Menu Permet à l'utilisateur d'opérer une sélection dans le menu du module CAM. Sélectionnez le menu CI dans le menu PC Card. ● Infos sur l'application Contient des informations sur le module CAM inséré dans la fente CI et les affiche. Les Application Info concernent la ‘CI(CI+) CARD’. Vous pouvez installer le module CAM que le téléviseur soit allumé ou éteint. 1. Achetez le module CI CAM en vous rendant chez le revendeur le plus proche ou par téléphone. 2. Insérez la ‘CI(CI+) CARD’ dans la CAM dans la direction indiquée par la flèche jusqu'à ce qu'elle soit emboîtée. 3. Insérez la CAM avec la ‘CI(CI+) CARD’ installée dans la fente de l'interface commune. (Insérez la CAM dans la direction indiquée par la flèche, juste au-dessus de l'extrémité pour qu'elle soit parallèle à la fente.) 4. Vérifiez si une image est visible sur un canal à signal brouillé. ❑ Sécurité ■ Verrouillage Canal → Arrêt / Marche Cette fonction permet d'empêcher que des utilisateurs non autorisés, tels que des enfants, regardent des programmes inappropriés, en désactivant la vidéo et l'audio. N L'écran de saisie du code PIN s'affiche avant l'écran de configuration. Entrez votre code PIN à quatre chiffres. N Le code PIN par défaut des nouveaux téléviseurs est 0-0-0-0. Pour le modifier, sélectionnez Modifier PIN dans le menu. N Vous pouvez verrouiller certaines chaînes dans la liste des chaînes. N Verrouillage Canal est uniquement disponible en mode TV. ■ Verrouillage parental → Classement parental Cette fonction permet d'empêcher certains utilisateurs, par exemple des enfants, de regarder des émissions inappropriées, en les protégeant à l'aide d’un code de 4 chiffres défini par l'utilisateur. N L'option Classement parental diffère en fonction du les pays. N L'écran de saisie du code PIN s'affiche avant l'écran de configuration. Entrez votre code PIN à quatre chiffres. N Le code PIN par défaut d'un nouveau téléviseur est ‘0-0-0-0’. Vous pouvez modifier le code PIN en sélectionnant Modifier PIN dans le menu. N Une fois la signalétique définie, le symbole ‘\’ s’affiche. N Autor.tout : appuyez sur ce bouton pour déverrouiller toutes les évaluations TV. Bloq. tout: appuyez sur ce bouton pour verrouiller tous les classements TV. ■ Modifier PIN Vous pouvez modifier le code personnel demandé pour pouvoir configurer le téléviseur. N L'écran de saisie du code PIN s'affiche avant l'écran de configuration. Entrez votre code PIN à quatre chiffres. N Le code PIN par défaut d’un nouveau téléviseur est réglé sur 0-0-0-0. N Si vous avez oublié le code, appuyez sur les boutons de la télécommande dans l'ordre suivant, ce qui remet le code à 0-0-00 : POWER (Arrêt) → MUTE → 8 → 2 → 4 → POWER (Marche). Français - 21 BN68-02325A-Fre.indb 21 2009-05-19 �� 3:54:50 ❑ Type de réseau / Config. du réseau Pour la procédure détaillée du réglage des options, reportez-vous à la rubrique "Configuration du réseau". ❑ Général ■ Mode Jeu → Arrêt / Marche En reliant le téléviseur à une console de jeu telle que PlayStation™ ou Xbox™, vous pouvez profiter d'une expérience de jeu plus réaliste en sélectionnant le menu de jeu. N Limitations du mode jeu (attention) Pour déconnecter la console de jeu et connecter un autre périphérique externe, réglez le mode Mode Jeu sur Arrêt dans le menu Configuration. Si vous affichez le menu du téléviseur en mode Mode Jeu, l'écran vacille légèrement. N Mode Jeu n'est pas disponible avec les modes TV, PC et Ext. classiques. N Lorsque la fonction PIP est activée, le mode Mode Jeu est inaccessible. N Si l'image est de mauvaise qualité lorsqu'un périphérique est connecté au téléviseur, vérifiez si le mode Mode Jeu réglé sur Marche. Réglez le mode Mode Jeu sur Arrêt et connectez les périphériques externes. N Si le Mode Jeu est activé: Le mode Image bascule automatiquement sur Standard et il est impossible d'en changer. Le mode Sound bascule automatiquement sur Personnel et il est impossible d'en changer. Réglez le son à l'aide de l'égaliseur. La fonction Régler du menu Son est activée. Sélectionner la fonction Reset après avoir réglé l'égaliseur rétablit ses paramètres par défaut. ■ BD Wise → Arrêt / Marche Fournit une qualité d'image optimale pour les lecteurs DVD, les lecteurs Blu-ray et les système home cinéma SAMSUNG qui prennent en charge le BD Wise. Vous bénéficiez d'une image plus agréable si vous les utilisez conjointement avec ce téléviseur Samsung. N Reliez les appareils SAMSUNG prenant en charge le BD Wise à l'aide d'un câble HDMI. N Lorsque la fonction BD Wise est réglée sur Marche, le mode d'image passe automatiquement en résolution optimale. N BD Wise est disponible en mode HDMI. ■ Mode éco. → Arrêt / Bas / Moyen / Image désactivée / Auto. Cette fonction règle la luminosité du téléviseur afin de réduire la consommation d'énergie. Lorsque vous regardez la télévision le soir, réglez l'option du mode Mode éco. sur Elevé pour reposer vos yeux et réduire la consommation d'énergie. Si vous sélectionnez Image désactivée, l’écran s’éteint. Seul le son est émis. Appuyez à nouveau sur ce bouton pour désactiver la fonction Image désactivée. N Dans le menu TOOLS , la fonction Image désactivée n'est pas prise en charge. T Appuyez sur le bouton TOOLS pour afficher le menu Outils. Vous pouvez également régler l'option d'économie d'énergie en sélectionnant Outils → Mode éco.. ■ Transparence du menu → Lumineux / Sombre Vous pouvez régler la transparence du menu. ■ Mélodie → Arrêt / Bas / Moyen / Elevé Il est possible de programmer la lecture d'une mélodie lors de la mise sous tension ou hors tension du téléviseur. N Aucune mélodie n'est lue dans les cas suivants Aucun son n'est émis par le téléviseur parce que le bouton MUTE a été actionné. Aucun son n'est émis par le téléviseur car le volume est réglé au minimum à l'aide du bouton (-). Lorsque le téléviseur est mis hors tension par la fonction de veille. ■ PIP Pour la procédure détaillée du réglage des options, reportez-vous à la rubrique "Présentation de la fonction Picture-in-Picture". Français - 22 BN68-02325A-Fre.indb 22 2009-05-19 �� 3:54:50 ¦ Réglage de l'heure ❑ Horloge ■ ■ Mode Horloge Vous pouvez définir l'heure actuelle manuellement ou automatiquement. ● Auto.: Définit l'heure en cours automatiquement en utilisant l'heure de la transmission numérique. ● Manuel : Définit l'heure en cours d'après l'heure entrée manuellement. N En fonction de la station de diffusion et du signal diffusé, il se peut que l'heure ne soit pas réglée correctement. Si cela se produit, réglez l'heure manuellement. N Pour que l'heure soit réglée automatiquement, l'antenne ou le câble doit être connecté. Réglage Horloge Vous pouvez définir l'heure en cours manuellement. N Cette option est uniquement disponible lorsque Mode Horloge est réglé sur Manuel. N Vous pouvez régler directement le jour, le mois, l'année, l'heure et la minute en appuyant sur les touches numériques de la télécommande. Configuration Le réglage de l'horloge est nécessaire pour utiliser les différentes fonctions de minuterie de la télévision. O L'heure actuelle s'affiche chaque fois que vous appuyez sur le bouton INFO. N Si vous débranchez le cordon d'alimentation, vous devez régler de nouveau l'horloge. ▶ Horloge Horloge : -- : -- Veille : Arrêt Minuteur 1 : Arrêt Minuteur 2 : Arrêt Minuteur 3 : Arrêt ▶ U Déplacer E Entrer R Retour Minuteur 1 Période d'activation 00 00 Désactiver Période de désactivation 00 10 La minuterie de mise en veille éteint automatiquement la télévision après une durée préréglée (30, 60, 90, 120, 150 ou 180 minutes). T Appuyez sur le bouton TOOLS pour afficher le menu Outils. Vous pouvez également régler la minuterie de mise en veille en sélectionnant Outils → Veille. N Pour annuler la fonction Veille, sélectionnez Arrêt. : Français Horloge Broadcast sécurité Réseau General Volume ❑ Veille Plug & Play Langue Répétition 00 Source TV Désactiver Antenne ATV Canal 0 Dim Lun Mar Mer Jeu Ven Sam Une fois L Déplacer U Régler E Entrer R Retour ❑ Minuteur 1 / Minuteur 2 / Minuteur 3 Trois réglages différents de mise en marche/arrêt peuvent être définis. Vous devez préalablement régler l'horloge. ● Période d'activation : Sélectionnez l'heure, la minute et l'action activer/désactiver (Pour activer le minuteur selon les réglages définis, choisissez Activer.) ● Période de désactivation : Sélectionnez l'heure, la minute et l'action activer/désactiver (Pour activer le minuteur selon les réglages définis, choisissez Activer.) ● Volume : Sélectionne le volume désiré. ● Source: Permet d'indiquer le contenu du périphérique TV ou USB qui doit être lu lorsque le téléviseur s'allume automatiquement. Sélectionnez TV ou USB. (Assurez-vous que le périphérique USB est branché sur le téléviseur.) N S'il n'y a qu'un seul fichier image sur le périphérique USB, la fonction Slide Show ne démarre pas. ● Antenne (lorsque Source est réglé sur TV): Sélectionnez ATV ou DTV. ● Canal (lorsque Source est réglé sur TV): Sélectionnez la chaîne désirée. ● Contenu (lorsque Source est réglé sur USB): Permet de sélectionner le dossier du périphérique USB contenant les fichiers de musique ou les images devant être lus lorsque le téléviseur s'allume automatiquement. N Les dossiers dont le nom est trop long ne peuvent pas être sélectionnés. N Si vous utilisez deux périphériques USB de même type, faites en sorte que les noms de dossiers soient différents afin que la lecture ait lieu sur le bon périphérique. ● Répétition : Sélectionnez Une fois, Ts jours, Lun~Ven, Lun~Sam, Sam~Dim ou Manuel. N Lorsque Manual est sélectionné, appuyez sur le bouton ► pour sélectionner le jour de la semaine. Appuyez sur le bouton ENTERE sur le jour de votre choix. Le symbole c s'affiche alors. N Vous pouvez régler l'heure, la minute et la chaîne directement à l'aide des touches numériques de la télécommande. N Mise hors tension automatique: Lorsque vous réglez la minuterie sur ON, le téléviseur s'éteint si aucune commande n'est utilisée dans les 3 heures qui suivent la mise sous tension par le minuteur. Cette fonction est disponible uniquement lorsque la minuterie est réglée sur ON ; elle permet d'éviter toute surchauffe occasionnée par une utilisation prolongée du téléviseur. Français - 23 BN68-02325A-Fre.indb 23 2009-05-19 �� 3:54:50 ¦ Connexion réseau Vous pouvez régler les paramètres IP afin de pouvoir communiquer avec divers réseaux. ❑ Connexion réseau - Câble ■ Connexion LAN pour un environnement DHCP Les paragraphes qui suivent décrivent les procédures à suivre pour configurer le réseau avec le protocole DHCP (Dynamic Host Configuration Protocol). Étant donné qu'une adresse IP, un masque de sous-réseau, une passerelle et un serveur DNS sont automatiquement attribués lorsque DHCP est sélectionné, vous ne devez pas les spécifier manuellement. 1. Raccordez le port LAN à l'arrière du téléviseur et le modem externe à l'aide d'un câble LAN. 2. Raccordez le connecteur modem mural et le modem externe à l'aide d'un câble modem. Connecteur modem mural Panneau arrière du téléviseur Modem externe (ADSL/VDSL/Câble TV) 2 Câble modem 1 Câble LAN Vous pouvez connecter le réseau via un routeur. Connecteur modem mural Câble modem Panneau arrière du téléviseur Modem externe (ADSL/VDSL/Câble TV) Routeur IP Câble LAN Câble LAN Selon votre réseau, vous pouvez raccorder directement le connecteur LAN et le téléviseur. Panneau arrière du téléviseur Connecteur LAN mural Câble LAN N Les connecteurs (position et type de port) de l'appareil externe peuvent varier selon le fabricant. N Si l'allocation de l'adresse IP par le serveur DHCP échoue, éteignez le modem externe, rallumez-le après au moins 10 secondes et réessayez. N Pour les raccordements entre le modem externe et le routeur (Sharer), reportez-vous à la documentation du produit correspondant. N Vous pouvez connecter le téléviseur directement au réseau sans passer par un routeur. N Vous ne pouvez pas utiliser un modem ADSL à connexion manuelle, car celui-ci ne prend pas en charge DHCP. Vous devez utiliser un modem ADSL à connexion automatique. Français - 24 BN68-02325A-Fre.indb 24 2009-05-19 �� 3:54:51 ■ Connexion LAN pour un environnement IP statique Les paragraphes qui suivent décrivent les procédures à suivre pour configurer le réseau avec une adresse IP statique. Vous devez entrer manuellement l'adresse IP, le masque de sous-réseau, la passerelle et le serveur DNS de votre fournisseur d'accès. 1. Raccordez le port LAN à l'arrière du téléviseur et le connecteur LAN à l'aide d'un câble LAN. Panneau arrière du téléviseur Connecteur LAN mural 1 Câble LAN Vous pouvez connecter le réseau via un routeur. Connecteur LAN mural Panneau arrière du téléviseur Routeur IP Câble LAN Câble LAN N Les connecteurs (position et type de port) de l'appareil externe peuvent varier selon le fabricant. N Si vous utilisez une adresse IP statique, votre fournisseur d'accès vous communiquera l'adresse IP, le masque de sousréseau, la passerelle et le serveur DNS appropriés. Vous devez entrer ces valeurs pour effectuer la configuration réseau. Si vous ne connaissez pas ces valeurs, consultez votre administrateur de réseau. N Pour la configuration et le raccordement d'un routeur (Sharer), reportez-vous à la documentation du produit correspondant. N Vous pouvez connecter le téléviseur directement au réseau sans passer par un routeur. N Si vous utilisez un routeur IP prenant en charge le protocole DHCP, vous pouvez configurer l'appareil comme utilisant DHCP ou une adresse IP statique. N Pour les procédures à suivre si vous utilisez une adresse IP statique, consultez votre fournisseur d'accès. ❑ Connexion réseau - Sans fil Vous pouvez vous connecter au réseau sans fil au travers d'un routeur IP sans fil. Panneau latéral du téléviseur Connecteur LAN mural Routeur IP sans fil Samsung Wireless LAN Adapter ou Câble LAN 1. Connectez le "Samsung Wireless LAN Adapter" au port USB1(HDD) ou USB2 du téléviseur. N Vous devez employer "Samsung Wireless LAN Adapter" (WIS09ABGN) pour utiliser un réseau sans fil. N L'adaptateur Samsung Wireless LAN Adapter est vendu séparément. L'adaptateur réseau sans fil WIS09ABGN Wireless LAN est disponible auprès des détaillants, sur les sites de commerce électronique et sur Samsungparts.com. N Pour utiliser un réseau sans fil, vous devez connecter le téléviseur à un routeur IP sans fil. Si ce routeur prend en charge le protocole DHCP, le téléviseur peut utiliser DHCP ou une adresse IP statique pour se connecter au réseau sans fil. N L'adaptateur Samsung Wireless LAN prend en charge les protocoles IEEE 802.11A, IEEE 802.11B, IEEE 802.11G et IEEE 802.11N. Si vous lisez une vidéo DLNA via une connexion IEEE 802.11B/G, des saccades risquent d'apparaître. N Si le routeur IP sans fil vous permet d'activer ou de désactiver la fonction de connexion Ping, activez-la. Français - 25 BN68-02325A-Fre.indb 25 2009-05-19 �� 3:54:53 N Sélectionnez un canal inutilisé pour le routeur IP sans fil. Si le canal affecté au routeur IP sans fil est actuellement utilisé par un autre périphérique dans le voisinage, il y aura des interférences et la communication peut échouer. N Si vous utilisez des paramètres de sécurité différents de ceux indiqués ci-dessous, le routeur ne fonctionnera pas avec le téléviseur. Pour la clé de sécurité du routeur IP, les options suivantes sont obligatoires. 1) Mode d'authentification : OPEN, SHARED, WPAPSK, WPA2PSK 2) Type de chiffrement : WEP, TKIP, AES Pour la clé de sécurité en mode ad-hoc, les options suivantes sont obligatoires. 1) Mode d'authentification : SHARED, WPANONE 2) Type de chiffrement : WEP, TKIP, AES N Si votre point d'accès prend en charge le WPS (Wi-Fi Protected Setup), vous pouvez vous connecter au réseau via PBC (Push Button Configuration) ou à l'aide d'un PIN (Personal Indentification Number). La fonction WPS configurera automatiquement le SSID et la clé WPA dans ces deux modes. N Si votre appareil n'est pas certifié, il risque de ne pas pouvoir se connecter au téléviseur via l'adaptateur "Samsung Wireless LAN Adapter". ¦ Configuration du réseau ❑ Type de réseau ■ Câble Connexion au réseau par câble. ■ Sans fil Connexion sans fil. Configuration Sélectionnez Cable ou Wireless, selon la méthode utiliser pour la connexion au réseau. N Le menu n'est disponible que si "Samsung Wireless LAN Adapter" est connecté. Broadcast Security Réseau ▶ General ❑ Config. du réseau ■ Configuration internet (lorsque l'option Type de réseau est réglée sur Câble) N Vérifiez si le câble LAN est correctement branché. ● Config. prot. Internet → Auto. / Manuel ● Test réseau: Permet de tester ou vérifier la connexion réseau après la configuration du réseau. N En cas d'impossibilité de se connecter à un réseau câblé Si votre fournisseur d'accès a enregistré l'adresse MAC du périphérique utilisé pour se connecter la première fois à Internet et qu'il authentifie cette adresse MAC chaque fois que vous vous connectez à Internet, votre téléviseur ne pourra pas se connecter à Internet car l'adresse MAC différera de celle du périphérique (votre PC). Dans ce cas, demandez à votre fournisseur d'accès la procédure à suivre pour connecter des périphériques autres que votre PC (p. ex. votre téléviseur) à Internet. Si votre fournisseur d'accès exige un identifiant ou un mot de passe pour la connexion à Internet (réseau), votre téléviseur ne pourra pas se connecter à Internet. Dans ce cas, vous devez entrer l'identifiant ou le mot de passe lors de la connexion à Internet à l'aide d'un routeur. La connexion à Internet peut échouer à cause d'un problème de pare-feu (firewall). Dans ce cas, contactez votre fournisseur d'accès. Si vous ne pouvez pas vous connecter à Internet même en suivant les procédures communiquées par votre fournisseur d'accès, consultez Samsung Electronics. Configuration internet-Auto. Si vous connectez un câble réseau et que le réseau prend en charge DHCP, les paramètres IP (Internet Protocol) sont configurés automatiquement. 1. Réglez Type de réseau sur Câble. 2. Sélectionnez Configuration internet. 3. Réglez Config. prot. Internet sur Auto.. N Le protocole Internet est configuré automatiquement. 4. Sélectionnez Test réseau pour vérifier la connexion au réseau. Configuration internet Config. prot. Internet : Auto. ▶ Test réseau Adresse IP : Masque de sous-réseau : Passerelle : Serveur DNS : U Déplacer E Entrer R Retour Français - 26 BN68-02325A-Fre.indb 26 2009-05-19 �� 3:54:53 Configuration internet-Manuel Pour connecter le téléviseur au réseau en utilisant une adresse IP statique, vous devez configurer les paramètres IP (Internet Protocol). 1. Réglez Type de réseau sur Câble. 2. Sélectionnez Configuration internet. 3. Réglez Config. prot. Internet sur Manuel. Configuration internet Config. prot. Internet : Manuel ▶ Test réseau Adresse IP ��: 0 0 0 0 Masque de sous-réseau ��: 0 0 0 0 Passerelle ��: 0 0 0 0 Serveur DNS ��: 0 0 0 0 4. Configurez les paramètres Adresse IP, Masque de sous-réseau, Passerelle et Serveur U Déplacer E Entrer R Retour DNS. N Appuyez sur les boutons numériques de la télécommande lorsque vous paramétrez le réseau manuellement. 5. Sélectionnez Test réseau pour vérifier la connexion au réseau. ■ Configuration du réseau sans fil N Le menu n'est disponible que si "Samsung Wireless LAN Adapter" est connecté. ● Config. prot. Internet → Auto. / Manuel ● Test réseau: Permet de tester ou vérifier la connexion réseau après la configuration du réseau. N En cas d'impossibilité de se connecter à un point d'accès Il se peut que votre téléviseur ne parvienne pas à localiser un point d'accès configuré comme SSID privé. Dans ce cas, modifiez les paramètres de point d'accès et réessayez. Si votre fournisseur d'accès a enregistré l'adresse MAC du périphérique utilisé pour se connecter la première fois à Internet et qu'il authentifie cette adresse MAC chaque fois que vous vous connectez à Internet, votre téléviseur ne pourra pas se connecter à Internet car l'adresse MAC différera de celle du périphérique (votre PC). Dans ce cas, demandez à votre fournisseur d'accès la procédure à suivre pour connecter des périphériques autres que votre PC (p. ex. votre téléviseur) à Internet. Si vous ne pouvez pas vous connecter à Internet même en suivant les procédures communiquées par votre fournisseur d'accès, consultez Samsung Electronics. ● Sélectionnez un réseau Point d'accès: vous pouvez sélectionner le routeur à utiliser pour la connexion au réseau sans fil. Configuration du réseau sans fil N Si la liste de points d'accès ne comporte pas de point d'accès sans fil, appuyez sur Sais. clé séc. le bouton Rouge. Numéro A B C D E F N Une fois la connexion effectuée, l'écran initial réapparaît. Supprimer Terminé N Si vous avez sélectionné un point d'accès exigeant une authentification : L'écran de saisie de la clé de sécurité apparaît. Saisissez la clé de sécurité puis n Déplacer `~9 Numéro E Entrer R Retour appuyez sur le bouton bleu de la télécommande. N Si le chiffrement est de type WEP, les caractères 0~9 et A~F seront disponibles pour saisir clé de sécurité. Connexion WPS (Wi-Fi Protected Setup) ● Si le paramètre Sais. clé séc. est déjà réglé: Dans la liste des points d'accès, sélectionnez WPS. N Vous avez le choix entre PBC, PIN ou Sais. clé séc.. Configuration du réseau sans fil Sélectionnez un réseau Recherche Ad hoc 3/9 sson jee AP_1 Ap_2 PBC PIN Code de sécurité U Déplacer E Entrer R Retour Connexion par PBC : Sélectionnez un PBC (Push Button Configuration). Appuyez sur le bouton PBC de votre point d'accès dans les 2 minutes et attendez que la connexion s'établisse. Connexion par PIN : Sélectionnez un PIN (Personal Identification Number). N Le message affichant le code PIN apparaît. Insérez le code PIN dans votre point d'accès dans les 2 minutes. Sélectionnez OK et attendez que la connexion s'établisse. N Si cela ne fonctionne pas, réessayez. N Si le problème de connexion persiste, réinitialisez le point d'accès. Reportez-vous au manuel correspondant. Appuyez sur la touche PBC sur le point d'accès. Nom du point d'accès : AP_1 Annuler Appuyez sur OK après avoir entré le code NIP pour configurer le point d'accès. Nom du point d'accès : AP_1 NIP : 12345678 OK Configuration du réseau sans fil Sais. clé séc. A Connexion par Sais. clé séc. : Lorsque vous sélectionnez Sais. clé séc., la fenêtre de saisie s'affiche. Entrez la clé de sécurité et appuyez sur le bouton bleu. N Si cela ne fonctionne pas, réessayez. Annuler E F H I J K L M N O B P Q C D R S T G U V W X Y Z Numéro Minuscule Supprimer Terminé n Déplacer `~9 Numéro E Entrer R Retour Français - 27 BN68-02325A-Fre.indb 27 2009-05-19 �� 3:54:54 ● Configuration du réseau sans fil Si le paramètre Sais. clé séc. n'est pas encore réglé : Si le paramètre de sécurité du point Sélectionnez un réseau 3/9 d'accès prenant en charge le WPS est réglé sur NONE, vous pouvez sélectionner PBC, sson PIN, Aucune sécurité. Aucune sécurité autorise la connexion directe au point d'accès PBC jee PIN sans faire appel à la fonction WPS. Recherche AP_1 Aucune sécurité Ad hoc Ap_2 N La marche à suivre pour PBC, PIN est identique à ce qui précède. Consultez les pages précédentes si le paramètre Sais. clé séc. est déjà réglé. U Déplacer E Entrer R Retour N Si cela ne fonctionne pas, réessayez. Ad hoc : le "Samsung Wireless LAN Adapter" vous permet de vous connecter sans point d'accès à un périphérique mobile en utilisant une connexion réseau peer-to-peer. Comment établir une nouvelle connexion Ad hoc 1. Sélectionnez Sélectionnez un réseau; une liste de périphériques s'affiche. 2. Dans la liste des périphériques, appuyez sur le bouton bleu de la télécommande ou sélectionnez Ad hoc. N Le message La fonctionnalité du système de réseau existant est peut-être restreinte. Souhaitez-vous changer la connexion réseau? s'affiche. La fonctionnalité du système de réseau existant est peutêtre restreinte. Souhaitez-vous changer la connexion réseau? Oui Non 3. Saisissez le Nom du réseau (SSID) : généré puis la Sais. clé séc. dans le périphérique auquel vous souhaitez vous connecter. Comment se connecter à un périphérique Ad hoc existant 1. Sélectionnez Sélectionnez un réseau; une liste de périphériques s'affiche. 2. Sélectionnez l'appareil de votre choix dans la liste. 3. Si une clé de sécurité est nécessaire, tapez-la. N Si le réseau ne fonctionne pas correctement, revérifiez le Nom du réseau (SSID) et la Sais. clé séc.. Si la Sais. clé séc. est incorrecte, cela peut être la cause du problème. Configuration du réseau sans fil-Auto. Si vous voulez vous connecter à un point d'accès, celui-ci doit prendre en charge le DHCP. Seuls les appareils prenant en charge le mode Ad hoc autorisent les connexions sans DHCP. 1. Réglez Type de réseau sur Sans fil. Configuration du réseau sans fil Config. prot. Internet : Auto. ▶ Test réseau Sélectionnez un réseau : AP1 2. Sélectionnez Configuration du réseau sans fil. Adresse IP : 3. Réglez Config. prot. Internet sur Auto.. N Le protocole Internet est configuré automatiquement. Masque de sous-réseau : Passerelle : Serveur DNS : U Déplacer E Entrer R Retour 4. Sélectionnez un réseau via l'option Sélectionnez un réseau. 5. Sélectionnez Test réseau pour vérifier la connexion au réseau. Configuration du réseau sans fil-Manuel Configuration du réseau sans fil 1. Réglez Type de réseau sur Sans fil. Config. prot. Internet : Manuel ▶ Test réseau 2. Sélectionnez Configuration du réseau sans fil. 3. Réglez Config. prot. Internet sur Manuel. 4. Configurez les paramètres Adresse IP, Masque de sous-réseau, Passerelle et Serveur DNS. N Appuyez sur les boutons numériques de la télécommande lorsque vous paramétrez le réseau manuellement. Sélectionnez un réseau : AP1 Adresse IP ��: 0 0 0 0 Masque de sous-réseau ��: 0 0 0 0 Passerelle ��: 0 0 0 0 Serveur DNS ��: 0 0 0 0 U Déplacer E Entrer R Retour 5. Sélectionnez un réseau via l'option Sélectionnez un réseau. 6. Sélectionnez Test réseau pour vérifier la connexion au réseau. Français - 28 BN68-02325A-Fre.indb 28 2009-05-19 �� 3:54:55 ENTRÉE / Assistance ¦ Menu Entrée ❑ Liste Source ■ Entrée Permet de sélectionner le téléviseur ou d'autres sources externes (lecteur DVD, lecteur Blu-ray, décodeur câble, Récepteurs satellite (boîtiers décodeurs) connectés au téléviseur. Permet de sélectionner la source d'entrée de votre choix. O Appuyez sur le bouton SOURCE de la télécommande pour afficher une source de signal externe. Une pression sur le bouton TV sélectionne le mode TV. TV / Ext.1 / Ext.2 / AV / Composant / PC / HDMI1 / HDMI2 / HDMI3/DVI / HDMI4 N Vous ne pouvez sélectionner que des périphériques externes connectés au téléviseur. Dans Liste Source, les entrées connectées s'affichent en surbrillance en début de liste. Les entrées non connectées s'affichent en bas de liste. N Si des appareils USB sont branchés sur les ports USB1(HDD) et USB2 ils s'affichent sous le nom USB1 et USB2, respectivement. N Les options Ext. et PC sont toujours activées. N Utilisation des boutons de couleur de la télécommande dans la liste des sources Rouge (Rafraîchir) : actualise la liste des appareils externes connectés. Appuyez sur ce bouton si votre source est allumée et correctement branchée mais n'apparaît pas dans la liste. TOOLS (Outils) : Affiche les menus Modif. Nom et Information. Liste Source Modif. Nom Liste Source TV Ext. 1 Ext. 2 PC :---:---:---- AV Composant :---:---- Rafraîchir T Outils ❑ Modif. Nom ■ Magnétoscope / DVD / Décodeur Câble / Décodeur satellite / Décodeur PVR / Récepteur AV / Jeu / Caméscope / PC / DVI / DVI PC / TV / IPTV / Blu-ray / HD DVD / DMA Nommez le périphérique connecté aux prises d'entrée pour faciliter la sélection de source d'entrée. N Si un PC d'une résolution de 1 920 x 1 080 à 60 Hz est connecté au port HDMI IN 3(DVI), vous devez régler le mode HDMI1/ DVI sur DVI PC dans le champ Modif. Nom du mode Entrée. N Lorsque vous connectez un câble HDMI/DVI au port HDMI IN 3(DVI), vous devez régler le mode HDMI3/DVI sur DVI ou DVI PC dans le menu Modif. Nom du mode Entrée. Dans ce cas, une connexion audio séparée est indispensable. ¦ Menu Assistance Afficher la notice légale et le déni de responsabilité concernant le contenu et les services provenant de tiers. N L'avis de non-responsabilité peut varier en fonction du pays. Assistance ❑ Notice légale Notice légale ▶ Guide Produit Diagnostic automatique Mise à niveau du logiciel Guide de connexion HD Contacter Samsung ❑ Guide Produit Le Guide de produit vous donne des informations sur les fonctions les plus importantes de ce téléviseur. Les informations affichées par cette fonction sont uniquement disponibles en Français. Qualité d’image Full HD 1080p 100Hz Motion Plus Mode Image [email protected] Internet@TV - Content Service Content Library Flash USB2.0 Film DLNA sans fil Éco-logiques Mode d’économie d’énergie Matériaux Éco-logiques Français - 29 BN68-02325A-Fre.indb 29 2009-05-19 �� 3:54:55 Utilisation des boutons de la télécommande dans le menu Guide Produit Bouton Bouton jaune ◄/► ENTERE RETURN EXIT Opération Affiche le contenu du Guide Produit dans l'ordre (lecture automatique) Déplace le curseur pour sélectionner un élément. Valide l'élément actuellement sélectionné. Revient au menu précédent. Arrête la fonction en cours et revient au menu principal du Guide Produit. ❑ Diagnostic automatique ■ Test de l'image Diagnostic automatique Si vous pensez que l'image n'est pas optimale, exécutez le test d'image. Vérifiez la mire de Test de l'image ▶ couleur à l'écran pour voir si le problème persiste. Test du son ● Oui : si la mire de couleur n'apparaît pas où si elle est parasitée, sélectionnez Oui. Il se Informations de signal peut que le téléviseur soit défaillant. Dans ce cas, demandez de l'aide au centre d'appel de U Déplacer E Entrer R Retour Samsung. ● Non: si la mire de couleur s'affiche correctement, sélectionnez Non. Il se peut que l'équipement externe soit défaillant. Vérifiez les connexions. Si le problème persiste, reportez-vous au mode d'emploi du périphérique externe. ■ Test du son Si vous pensez que le son n'est pas optimal, exécutez le test du son. Vous pouvez contrôler le son en diffusant une mélodie préenregistrée sur le téléviseur. N Si les haut-parleurs du téléviseur restent muets, avant d'effectuer le test du son, vérifiez que l'option Sélection Haut-parleur est réglée sur Haut-parleur TV dans le menu Son. N La mélodie est diffusée pendant le test, même si l'option Sélection Haut-parleur est réglée sur Ht-parl ext ou si le son a été désactivé en appuyant sur le bouton MUTE. ● Oui : si, pendant le test du son, vous n'entendez du son que d'un haut-parleur ou pas de son du tout, sélectionnez Oui. Il se peut que le téléviseur soit défaillant. Dans ce cas, demandez de l'aide au centre d'appel de Samsung. ● Non: Si vous entendez du son des haut-parleurs, sélectionnez Non. Il se peut que l'équipement externe soit défaillant. Vérifiez les connexions. Si le problème persiste, reportez-vous au mode d'emploi du périphérique externe. ■ Informations de signal (chaînes numériques uniquement) À l'inverse des chaînes analogiques, dont la qualité de réception peut varier de "neigeuse" à claire, les chaînes numériques (HDTV) présentent une qualité de réception parfaite ou bien vous ne les recevez pas. Contrairement aux chaînes analogiques, vous ne pouvez donc pas syntoniser une chaîne numérique. Vous avez toutefois la possibilité de régler votre antenne pour améliorer la réception des chaînes numériques disponibles. N Si l'indicateur d'intensité du signal indique que celui-ci est faible, réglez physiquement votre antenne afin d'en augmenter l'intensité. Continuez à régler l'antenne jusqu'à ce que trouver la position offrant le signal le plus puissant. Français - 30 BN68-02325A-Fre.indb 30 2009-05-19 �� 3:54:55 ❑ Mise à niveau du logiciel A l'avenir, Samsung peut proposer des mises à niveau pour le micrologiciel de votre téléviseur. Ces mises à jour peuvent être installées sur le téléviseur lorsque celui-ci se connecte à Internet ou peuvent être téléchargées manuellement sur le site samsung.com et installées via une clé USB. N Version actuelle indique la version du logiciel installé sur votre téléviseur. N Autre logiciel (sauvegarde) indique la version précédente, qui sera remplacée. N Le numéro de version est affiché au format suivant : «année/mois/jour_version». Plus la date est récente, plus la version du logiciel est élevée. Il est toujours recommandé d'installer la dernière version. ■ USB Branchez sur le téléviseur un lecteur USB contenant la mise à niveau du microprogramme téléchargée sur samsung.com. Veillez à ne pas couper l'alimentation ni retirer le lecteur USB pendant l'application des mises à niveau. Une fois la mise à niveau du micrologiciel terminée, le téléviseur se met automatiquement hors puis sous tension. Vérifiez la version du microprogramme une fois la mise à jour terminée (la nouvelle version doit avoir un numéro plus élevé que l'ancienne). Lorsque le logiciel est mis à niveau, les paramètres vidéo et audio définis reprennent leur valeur par défaut (usine). Il est recommandé de noter les paramétrages afin de pouvoir les rétablir facilement après la mise à niveau. Panneau latéral du téléviseur ou Lecteur USB Mise à niveau du logiciel Version actuelle 2009/01/18_000001 USB ▶ Canal Mise à niveau en mode veille : 45 Min. Autre logiciel 2009/01/15_00000 U Déplacer E Entrer R Retour ■ Canal Mise à niveau du logiciel à l'aide du signal de diffusion. N Si elle est sélectionnée pendant la période de transmission du logiciel, cette fonction recherche le logiciel disponible et le télécharge. N Le temps nécessaire au téléchargement du logiciel dépend de l'état du signal. ■ Mise à niveau en mode veille Pour poursuivre la mise à jour du logiciel en gardant le téléviseur sous tension, sélectionnez ON en appuyant sur le bouton ▲ ou ▼. Une mise à jour manuelle a lieu automatiquement 45 minutes après que l'entrée en mode veille. Étant donné que la mise sous tension s'effectue de façon interne, il se peut que l'écran LCD s'allume légèrement. Ce phénomène peut se produire pendant plus d'une heure, jusqu'à ce que la mise à jour logiciel soit terminée. ■ Autre logiciel (sauvegarde) En cas problème avec le nouveau microprogramme (si, par exemple, le téléviseur ne fonctionne plus correctement), vous pouvez revenir à la version précédente. N Si le logiciel a été modifié, la version existante s'affiche. N Vous pouvez passer à la version de sauvegarde du logiciel en sélectionnant "Autre logiciel". ❑ Guide de connexion HD Ce menu indique la méthode de connexion offrant la qualité optimale pour le téléviseur haute définition. Consultez ces informations lors de la connexion de périphériques externes au téléviseur. ❑ Contacter Samsung Consultez ces informations si le téléviseur ne fonctionne pas correctement ou si vous voulez mettre à niveau le logiciel. Vous pouvez consulter les informations concernant le centre d'appel, le produit et la méthode de téléchargement du logiciel. Français - 31 BN68-02325A-Fre.indb 31 2009-05-19 �� 3:54:56 Media Play (USB & DLNA) ¦ Connexion d'un périphérique USB 1. Appuyez sur le bouton POWER pour allumer le téléviseur. Panneau latéral du téléviseur 2. Connectez un périphérique USB contenant des fichiers photo, musicaux et/ou film à la prise USB1(HDD) ou USB2 située sur le côté du téléviseur. 3. Lorsque l'écran de sélection Application s'affiche, appuyez sur le bouton ENTERE pour sélectionner Media Play (USB & DLNA). ou N Le protocole MTP (Media Transfer Protocol) n'est pas pris en charge. N Le système de fichiers prend en charge les formats FAT16, FAT32 et NTFS. Lecteur USB N Il est possible que certains types d'appareils photo numériques et de périphériques audio USB ne soient pas compatibles avec ce téléviseur. N Media Play ne prend en charge que les périphériques de stockage de masse SUM USB de la classe MSC. Cette dernière est dédiée aux périphériques de transport de masse uniquement. Il s'agit notamment des clés USB, lecteurs de cartes Flash et disques durs USB (les concentrateurs USB ne sont pas PHOTO pris en charge). N Connectez-vous directement au port USB de votre téléviseur. Si vous utilisez une connexion par câble distincte, un problème de compatibilité USB risque de se poser. Photo Music Movie Setup N Avant de connecter l'appareil au téléviseur, sauvegardez vos fichiers afin R Retour Périph. SUM d'éviter qu'ils ne soient endommagés ou que des données ne soient perdues. SAMSUNG ne saurait, en aucun cas, être tenu responsable de la perte de données ou de l'endommagement d'un fichier de données. N Connectez un disque dur USB au port dédié, le port USB1 (HDD). Toutefois, si le périphérique connecté nécessite beaucoup de puissance, USB1 (HDD) risque de ne pas le prendre en charge. N Ne déconnectez pas le périphérique USB en cours de chargement. N MSC prend en charge les fichiers MP3 et JPEG, alors qu'un périphérique PTP prend uniquement en charge les fichiers JPEG. N Plus la résolution de l'image est élevée, plus le temps d'affichage à l'écran sera long. N La résolution JPEG maximale prise en charge est 15360 x 8640 pixels. N Pour les fichiers non pris en charge ou endommagés, le message "Format de fichier inconnu" s'affiche. N Si la clé de tri est réglée sur Aff. de base, il est possible d'afficher jusqu'à 1000 fichiers dans chaque dossier. L'autre clé de tri peut afficher jusqu'à 10 000 fichiers. N Les fichiers MP3 avec gestion des droits numériques (DRM) téléchargés à partir d'un site payant ne peuvent pas être lus. La technologie DRM (Gestion des droits numériques) prend en charge la création de contenu, la distribution et la gestion intégrales du contenu (par exemple, la protection des droits et des intérêts des fournisseurs de contenu, la prévention de la copie illégale du contenu), ainsi que la gestion de la facturation et des règlements. N Si vous passez à une photo, son chargement peut prendre quelques secondes. A ce stade, l'icône de chargement apparaît. N Si plusieurs périphériques PTP sont connectés, vous ne pouvez en utiliser qu'un à la fois. N Si plusieurs périphériques MSC sont connectés, certains d'entre eux peuvent ne pas être reconnus. Si un périphérique nécessite beaucoup de puissance (plus de 500 mA ou 5 V), le périphérique USB peut ne pas être pris en charge. N Si un message d'avertissement de surcharge (Fail add new device USB1/USB2 Power Overload) s'affiche lorsque vous connectez ou utilisez un périphérique USB, ce périphérique peut ne pas être reconnu ou mal fonctionner. 851.86MB/993.02MB Libre Utilisation du bouton Remote Control dans le menu Media Play Bouton ▲/▼/◄/► ENTERE ∂/∑ RETURN TOOLS ∫ π/μ INFO MEDIA.P < P >, EXIT, TV Opération Déplace le curseur pour sélectionner un élément. Valide l'élément actuellement sélectionné. Lors de la lecture d'un diaporama, d'un fichier musical ou d'un film: - Appuyer sur le bouton ENTERE pendant la lecture suspend celle-ci. - Appuyer sur le bouton ENTERE en mode Pause relance la lecture. Lance la lecture d'un diaporama ou d'un fichier vidéo/musical, ou le met en pause. Revient au menu précédent. Exécute diverses fonctions dans les menus Photo, Musique et Film. Arrête la lecture du diaporama, du fichier musical ou du film. Passe au groupe précédent/suivant. Affiche des informations sur le fichier. Quitte le mode Media Play Arrête le mode Media Play et retourne au mode TV. Français - 32 BN68-02325A-Fre.indb 32 2009-05-19 �� 3:54:56 ¦ Fonction Media Play Cette fonction vous permet de lire des photos, de la musique et/ou des films enregistrés sur un périphérique de stockage de masse USB (MSC). N Il est se peut que le fonctionnement ne soit pas correct avec des fichiers multimédias sans licence. Entrée dans le menu Media Play (USB & DLNA) 1. Appuyez sur le bouton MENU. Appuyez sur le bouton ▲ ou ▼ pour sélectionner Application, puis sur le bouton ENTERE. 2. Appuyez sur le bouton ▲ ou ▼ pour sélectionner Media Play (USB & DLNA), puis sur le bouton ENTERE. N Le menu Media Play (USB & DLNA) s'affiche. O Appuyez sur le bouton MEDIA.P de la télécommande pour afficher le menu Media Play. O Appuyez sur le bouton SOURCE de la télécommande pour afficher la liste des sources. Appuyez ensuite sur le bouton ▲ ou ▼ pour sélectionner USB. 3. Appuyez sur le bouton rouge, puis sur le bouton ▲ ou ▼ pour sélectionner la mémoire USB. Appuyez sur le bouton ENTERE. N Cette fonction diffère selon les éléments suivants : unité de stockage USB, unité DNLA. N Le nom du périphérique USB sélectionné s'affiche dans le coin inférieur gauche de l'écran. 4. Appuyez sur le bouton ◄ ou ► pour sélectionner une icône (Photo, Music, Movie, Setup), puis appuyez sur le bouton ENTERE. N Pour quitter le mode Media Play, appuyez sur le bouton MEDIA.P de la télécommande. SUM PHOTO Photo SUM Music Movie Colour R Retour Dossier Préférence 5/15 1231.jpg SUM Setup Périph. Retrait d'une unité de stockage USB en toute sécurité Vous pouvez retirer le périphérique du téléviseur en toute sécurité. 1. Appuyez sur le bouton TOOLS dans l'écran de la liste des fichiers Media Play ou pendant la lecture d'un fichier film/musical ou d'un diaporama. 2. Appuyez sur le bouton ▲ ou ▼ pour sélectionner Retrait sécurisé puis sur le bouton ENTERE. 3. Retirez le périphérique USB du téléviseur. 851.86MB/993.02MB Libre 1232.jpg 1233.jpg Périph. 1234.jpg Aff. de base Date Diaporama Lire gp act. Information Retrait sécurisé 1235.jpg 1236.jpg 1237.jpg Favoris Sélection T Outils R Retour Affichage Colour Dossier Préférence 1 Aff. de base Section Liste de clés de tri Date Section Liste de groupes 2 c 5/15 Section Liste de fichiers 1231.jpg 1232.jpg 1233.jpg 1235.jpg 1234.jpg 1236.jpg 1237.jpg 3 6 SUM 4 Périph. 5 1Fich. sél. Favoris Sélection T Outils R Retour Accédez à "Section Liste de clés de tri", "Section Liste de groupes" ou "Section Liste de fichiers" à l'aide des boutons Up et Down. Après avoir sélectionné une section, appuyez sur le bouton ◄ ou ► pour sélectionner un élément. 1 Tri actuellement sélectionné: ce champ affiche l'ordre de tri actuel des fichiers. Appuyez sur le bouton ◄ ou ► pour modifier l'ordre de tri des fichiers. 2 Afficher les groupes: Indique les groupes détaillés des fichiers triés selon la clé de tri sélectionnée. Le groupe de tri contenant le fichier actuellement sélectionné est mis en surbrillance. 3 Fichier actuellement sélectionné: vous pouvez contrôler le fichier sélectionné. Les fichiers photo et film sont affichés sous la forme de miniatures. 4 Périphérique actuel: indique le nom du périphérique actuellement sélectionné. Appuyez sur le bouton rouge pour sélectionner un périphérique. • Bouton rouge (Périph.): Sélectionne un appareil connecté. Français - 33 BN68-02325A-Fre.indb 33 2009-05-19 �� 3:55:01 5 Options d'aide • Bouton vert (Favoris): modifie le réglage des favoris pour le fichier sélectionné. Appuyez plusieurs fois sur ce bouton jusqu'à ce que la valeur voulue apparaisse. • Bouton jaune (Sélection): sélectionne le fichier dans la liste. Les fichiers sélectionnés sont marqués du symbole c. Appuyez une nouvelle fois sur le bouton jaune pour annuler la sélection d'un fichier. • Bouton TOOLS (Outils): affiche les menus d'options (le menu varie en fonction de l'état actuel). 6 Informations de sélection: indique le nombre de fichiers sélectionnés en appuyant sur le bouton jaune. ¦ Tri de la liste de fichiers Photo / Music / Movie ❑ Aff. de base Affiche les dossiers sur l'unité de stockage USB. Si vous sélectionnez un dossier et appuyez sur le bouton ENTERE, les fichiers correspondant (photo / musical / film) contenus dans le dossier sélectionné s'affichent. N Lorsque le tri est effectué en fonction de Aff. de base, vous ne pouvez pas définir les fichiers de favoris. Colour Dossier Préférence Aff. de base Date 5/15 1231.jpg 1232.jpg 1233.jpg 1235.jpg 1234.jpg 1236.jpg 1237.jpg ❑ Dossier Trie les fichiers par dossier. Si le périphérique USB contient de nombreux dossiers, les fichiers photo sont affichés dans l'ordre dans chaque dossier. Le fichier film situé dans le dossier racine est affiché en premier, suivi des autres par ordre alphabétique. SUM Favoris Sélection T Outils R Retour Périph. Genre Dossier Préférence Aff. de base Titre ❑ Préférence → FFF / FFF / FFF / FFF Trie les fichiers musicaux par préférence (Favoris). N Modification des réglages des favoris Sélectionnez la photo de votre choix dans la liste des Fichiers, puis appuyez plusieurs fois sur le bouton vert jusqu'à ce que le réglage voulu apparaisse. N Les étoiles sont destinées au groupement uniquement. Par exemple, le réglage de 3 étoiles n'a aucune priorité sur le réglage d'une étoile. Energique Lies SUM 3/37 Glen Hans Once Ost 2007 Soundtrack Want Me Way I Love You Titre Dossier Préférence Trie les fichiers musicaux ou vidéo par titre et les classe par symbole/ordre alphabétique/ordre personnalisé. ❑ Titre (Music / Movie) Shine Aff. de base Date 5/15 1231.avi Trie les fichiers musicaux par titre et les classe par symbole/numéro/ordre alphabétique/ ordre personnalisé. Gold Favoris Sélection T Outils R Retour Périph. ❑ Date (Photo / Movie) HaHaHa SUM 1232.avi 1233.avi Périph. ABCD.avi 1235.avi 1236.avi 1237.avi Favoris Sélection T Outils R Retour Photo ❑ Couleur → Rouge / Jaune / Vert / Bleu / Magenta / Noir / Gris / Non classé Trie les photos par couleur. Vous pouvez modifier les informations de couleur de la photo. N Vous devez définir Affichage couleur sur Marche dans le menu Setup avant de trier les photos par couleur. Music ❑ Artiste Trie les fichiers musicaux par artiste et les classe par symbole/ordre alphabétique/ordre personnalisé. ❑ Humeur → Energique / Rhytmique / Triste / Enivrante / Calme / Non classé Trie les fichiers musicaux par humeur. Vous pouvez modifier les informations d'ambiance de la musique. ❑ Genre Trie les fichiers musicaux par genre. Français - 34 BN68-02325A-Fre.indb 34 2009-05-19 �� 3:55:05 ¦ Menu d'options de la liste des fichiers Photo / Music / Movie 1. Appuyez sur le bouton MEDIA.P. Aff. de base Date 2. Appuyez sur le bouton ◄ ou ► pour sélectionner Photo, Music ou Movie, puis sur le bouton ENTERE. 3. Appuyez sur le bouton ◄ ou ►pour sélectionner le fichier de votre choix. N Sélection de plusieurs fichiers Appuyez sur le bouton ◄ ou ► pour sélectionner le fichier de votre choix. Appuyez ensuite sur le bouton jaune. Répétez l'opération ci-dessus pour sélectionner fichiers photo. La marque c s'affiche à côté du fichier film sélectionné. Colour Dossier 5/15 1231.jpg 1232.jpg SUM 1233.jpg 1234.jpg Genre Dossier Préférence Energique ❑ Lire gp act. Lies Ce menu vous permet de lire un diaporama portant uniquement sur les fichiers photo du groupe de tri sélectionné. SUM Want Me Diaporama Lire gp act. Changer gp Information 1236.jpg 1235.jpg sécurisé Retrait 1237.jpg Favoris Sélection T Outils R Retour Périph. 4. Appuyez sur le bouton TOOLS. N Le menu varie en fonction de l'état actuel. Préférence 3/37 Glen Hans Once Ost 2007 Soundtrack Way I Love You Aff. de base Titre Lire gp act. Information Retrait sécurisé HaHaHa Shine Gold Favoris Sélection T Outils R Retour Périph. ❑ Désélectionner tout (lorsqu'au moins un fichier est sélectionné) Vous pouvez désélectionner tous les fichiers. N La marquec indiquant que le fichier correspondant est sélectionné est masquée. Titre Dossier Préférence 5/15 ❑ Information Les informations relatives au fichier photo/ music/ movie sont affichées. Vous pouvez appliquer les mêmes procédures pour afficher les informations des fichiers photo pendant un diaporama. O Appuyez sur le bouton INFO pour afficher les informations. 1231.avi SUM 1232.avi 1233.avi Périph. ABCD.avi Aff. de base Date Lire gp act. Information Retrait sécurisé 1235.avi 1236.avi 1237.avi Favoris Sélection T Outils R Retour ❑ Retrait sécurisé Vous pouvez retirer le périphérique du téléviseur en toute sécurité. Photo ❑ Diaporama Ce menu vous permet de lire un diaporama à l'aide des fichiers photo situés sur l'unité de stockage USB. ❑ Changer gp (lorsque la clé de tri est Couleur) Vous pouvez modifier les informations de couleur d'un fichier photo (ou d'un groupe de fichiers) sélectionné afin de le déplacer vers un autre groupe de couleurs. N Ceci ne modifie pas la couleur réelle de la photo. N Les informations de groupe du fichier actuel sont mises à jour et les photos sont déplacées vers le nouveau groupe de couleurs. N Pour modifier les informations de plusieurs fichiers, sélectionnez ceux de votre choix en appuyant sur le bouton jaune. Music ❑ Changer gp (lorsque la clé de tri est Humeur) Vous pouvez modifier les informations d'ambiance des fichiers musicaux. Les informations de groupe du fichier actuel sont mises à jour et le fichier est déplacé vers le nouveau groupe. Pour modifier les informations de plusieurs fichiers, sélectionnez ceux de votre choix en appuyant sur le bouton jaune. Français - 35 BN68-02325A-Fre.indb 35 2009-05-19 �� 3:55:09 ¦ Menu d'options Diaporama / Music Play / Movie Play 1. Pendant un diaporama (ou l'affichage d'une photo), appuyez sur le bouton TOOLS pour définir l'option. 2. Appuyez sur le bouton ◄ ou ► pour sélectionner l'option, puis appuyez sur le bouton ENTERE. ❑ Réglage de l'image / Réglage du son Outils Vous pouvez sélectionner les réglages de l'image et du son. Arrêter le diaporama ❑ Information Vitesse du diaporama : Normal Effet du diaporama Fondu1 : Rotat. Zoom Les informations relatives au fichier sont affichées. Fond musical Réglage de l'image Réglage du son ❑ Retrait sécurisé Information Vous pouvez retirer le périphérique du téléviseur en toute sécurité. ▼ U Déplacer E Entrer e Quitter Menu d'options du diaporama Outils ❑ Arrêter le diaporama / Lancer le diaporama Modo rep. ◀ Marche ▶ Réglage de l'image Réglage du son Vous pouvez lancer ou arrêter un diaporama. Information Retrait sécurisé ❑ Vitesse du diaporama → Lent / Normal / Rapide Sélectionnez cette option pour modifier la vitesse de défilement du diaporama. N Cette fonction est uniquement disponible au cours d'un diaporama. N Vous pouvez également modifier la vitesse du diaporama en appuyant sur la touche π (Retour arrière) ou μ (Avance rapide) pendant la lecture. Outils ❑ Effet du diaporama ■ U Déplacer L Régler e Quitter Réglage de l'image Vous pouvez sélectionner l'effet de transition entre les écrans qui sera utilisé dans le diaporama. Réglage du son Aucun / Fondu1 / Fondu2 / Masquer / Spirale / Damier / Linéaire / Escaliers / Balayage / Aléatoire N Cette fonction est uniquement disponible au cours d'un diaporama. Retrait sécurisé Format de l'image : Ajustement Paramètres des sous-titres Information U Déplacer E Entrer e Quitter ❑ Rotat. Vous pouvez faire pivoter les photos enregistrées sur une unité de stockage USB. N Chaque fois que vous appuyez sur le bouton ◄, la photo pivote successivement à 270˚, 180˚, 90˚ et 0˚. N Chaque fois que vous appuyez sur le bouton ►, la photo pivote successivement de 90˚, 180˚, 270˚ et 0˚. N Le fichier pivoté n'est pas enregistré. ❑ Zoom Vous pouvez faire agrandir les photos enregistrées sur une unité de stockage USB. (x1 → x2 → x4) N Pour déplacer l'image agrandie, appuyez sur le bouton ENTERE, puis sur les boutons ▲/▼/◄/►. Notez que lorsque la taille de l'image agrandie est inférieure à celle de l'écran, la fonction de déplacement est inopérante. N Le fichier agrandi n'est pas enregistré. ❑ Fond musical Vous pouvez sélectionner le fond musical d'un diaporama. N Pour utiliser cette fonction, de la musique et des photos doivent être stockées sur l'unité USB. N Le changement du Mode mus. de fond exige le chargement de fichiers musicaux. Lisez des fichiers musicaux dans la catégorie voulue. Menu d'options de lecture de musique ❑ Mode rep. → Marche / Arrêt Vous pouvez lire des fichiers musicaux en boucle. Menu d'options de lecture du film ❑ Format de l'image → Ajustement / Original Lit la vidéo à la taille de l'écran ou à sa taille d'origine. ❑ Paramètres des sous-titres Vous pouvez configurer les sous-titres du film. Français - 36 BN68-02325A-Fre.indb 36 2009-05-19 �� 3:55:09 ¦ Visualisation d'une photo ou d'un diaporama Visualisation d'un diaporama Tous les fichiers de la section Liste de fichiers seront utilisés pour le diaporama. Durant le diaporama, les fichiers s'affichent dans l'ordre à partir du fichier à l'écran. Le diaporama progresse dans l'ordre de tri choisi dans la section Liste de fichiers. Des fichiers musicaux peuvent être lus automatiquement pendant le diaporama, si l'option Fond musical est définie sur Marche. O Lorsqu'une liste de photos est affichée, appuyez sur le bouton ∂(Lecture)/ ENTERE de la télécommande pour lancer le diaporama. N Boutons de commande du diaporama N N N N Bouton ENTERE ∂ ∑ ∫ π/μ TOOLS Colour Préférence Dossier 5/15 1231.jpg 1232.jpg SUM 1233.jpg Diaporama Lire gp act. Information Retrait sécurisé 1235.jpg 1234.jpg 1236.jpg 1237.jpg Favoris Sélection T Outils R Retour Périph. Opération Lance/interrompt la lecture du diaporama. Lance la lecture du diaporama. Interrompt la lecture du diaporama. Permet de quitter le mode diaporama et de revenir à la liste des photos. Modifie la vitesse de lecture du diaporama. Exécute diverses fonctions dans les menus Photo. Date Aff. de base ▶ Normal 1234.jpg 580x765 2009/01/02 5/15 E Pause ◀▶ Préc/Suiv SUM T Outils R Retour Lecture du groupe courant 1. Appuyez sur le bouton ▲ pour accéder à Sort key Section. 2. Appuyez sur le bouton ◄ ou ► pour sélectionner un ordre de tri. 3. Appuyez sur le bouton ▼ pour accéder à Section Liste de groupes. 4. Sélectionnez un groupe à l'aide des boutons ◄ et ►. Colour Préférence Dossier Aff. de base Date 5. Appuyez sur le bouton ∂ (Lecture). Un diaporama débute par les fichiers du groupe sélectionné. 5/15 ● Ou 1231.jpg 1. Sélectionnez une clé de tri puis, dans Section Liste de fichiers, sélectionnez les photos contenues dans le groupe de votre choix. N Pour passer au groupe précédent/suivant, appuyez sur le bouton π (Retour arrière) ou µ (Avance rapide). 1232.jpg SUM 1233.jpg 1234.jpg Périph. 1235.jpg 1236.jpg 1237.jpg Favoris Sélect. T Outils R Retour 2. Appuyez sur le bouton TOOLS. 3. Appuyez sur le bouton ▲ ou ▼ pour sélectionner Lire gp act., puis sur le bouton ENTERE. N Seules les photos du groupe contenant les fichiers sélectionnés seront utilisées pour le diaporama. Pour exécuter un diaporama avec uniquement les fichiers sélectionnés 1. Appuyez sur le bouton ▼ pour sélectionner Section Liste de fichiers. 2. Appuyez sur le bouton ◄ ou ► pour sélectionner la photo voulue dans la section File List. 3. Appuyez sur le bouton jaune. 4. Répétez l'opération ci-dessus pour sélectionner plusieurs photos. N La marque c s'affiche à gauche des photos sélectionnées. N Si vous sélectionnez un seul fichier, le diaporama ne s'exécute pas. N Pour désélectionner tous les fichiers, appuyez sur le bouton TOOLS, puis sélectionnez Désélectionner tout. 5. Appuyez sur le bouton ∂ (Lecture)/ENTERE. N Les fichiers sélectionnés seront utilisés pour le diaporama. ● Ou 1. Dans File List Section, appuyez sur les boutons jaunes pour sélectionner les photos de votre choix. 2. Appuyez sur le bouton TOOLS. 3. Appuyez sur le bouton ▲ ou ▼ pour sélectionner Diaporama, puis appuyez sur le bouton ENTERE. N Les fichiers sélectionnés seront utilisés pour le diaporama. Français - 37 BN68-02325A-Fre.indb 37 2009-05-19 �� 3:55:13 ¦ Lecture de musique Lecture d'un fichier musical 1. Appuyez sur le bouton ▼ pour sélectionner Section Liste de fichiers. 2. Appuyez sur le bouton ◄ ou ► pour sélectionner le fichier musical à lire. ▶ 00:00:04 / 00:04:04 3/37 Way I Love You HaHaHa 3. Appuyez sur le bouton ∂ (Lecture)/ENTERE. N Ce menu affiche uniquement les fichiers portant l'extension MP3. Les fichiers portant d'autres extensions ne s'affichent pas, même s'ils sont enregistrés sur le même périphérique USB. N Le fichier sélectionné s'affiche en haut de l'écran, avec la durée de lecture. E Pause ◀▶ Préc/Suiv T Outils R Retour SUM N Pour régler le volume sonore, appuyez sur le bouton de volume de la télécommande. Pour couper le son, appuyez sur le bouton MUTE de la télécommande. N Si le son est déformé lors de la lecture de fichiers MP3, réglez les options Egaliseur et SRS TruSurround HD dans le menu Sound. (un fichier MP3 surmodulé peut être à l'origine d'un problème sonore). N La durée de lecture d'un fichier musical peut s'afficher sous la forme "00:00:00" si les informations relatives au temps de lecture ne figurent pas au début du fichier. N π (Retour arrière) et µ (Avance rapide) ne fonctionnent pas durant la lecture. N Boutons de commande de lecture Bouton ENTERE ∂ ∑ ∫ TOOLS Opération Lance/interrompt la lecture du fichier musical. Lance la lecture du fichier musical. Interrompt la lecture du fichier musical. Quitte le mode de lecture et revient à la liste musicale. Exécute diverses fonctions dans les menus Musique. N Icône d'informations sur la fonction Musique p q Tous les fichiers musicaux du dossier (ou le fichier sélectionné) sont répétés. Mode rep. est défini sur Marche. Tous les fichiers musicaux du dossier (ou le fichier sélectionné) sont lus une seule fois. Mode rep. est défini sur Arrêt. Lecture du groupe de musiques 1. Appuyez sur le bouton ▲ pour accéder à la section Sort Key. 2. Appuyez sur le bouton ◄ ou ► pour sélectionner un ordre de tri. 3. Appuyez sur le bouton ▼ ou ENTERE pour accéder à Group List Section. 4. Appuyez sur le bouton ∂ (Lecture). La lecture des fichiers du groupe sélectionné commence. ● Ou 1. Sélectionnez une clé de tri, puis dans Section Liste de fichiers, sélectionnez les fichiers contenus dans le groupe de votre choix. N Pour passer au groupe précédent/suivant, appuyez sur le bouton π (Retour arrière) ou µ (Avance rapide). 2. Appuyez sur le bouton TOOLS. 3. Appuyez sur le bouton ▲ ou ▼ pour sélectionner Lire gp act., puis sur le bouton ENTERE. N Tous les fichiers musicaux du groupe de tri, y compris le fichier sélectionné, sont lus. Lecture des fichiers musicaux sélectionnés 1. Appuyez sur le bouton ▼ pour sélectionner Section Liste de fichiers. 2. Appuyez sur le bouton ◄ ou ► pour sélectionner le fichier musical de votre choix. 3. Appuyez sur le bouton jaune. 4. Répétez l'opération ci-dessus pour sélectionner plusieurs fichiers musicaux. N La marque c s'affiche à gauche du fichier musical sélectionné. N Pour désélectionner tous les fichiers, appuyez sur le bouton TOOLS, puis sélectionnez Désélectionner tout. 5. Appuyez sur le bouton ∂ (Lecture)/ENTERE. N Les fichiers sélectionnés sont lus. Français - 38 BN68-02325A-Fre.indb 38 2009-05-19 �� 3:55:14 ¦ Lecture d'un fichier film Lecture d'un fichier film 1. Appuyez sur le bouton ▼ pour sélectionner Section Liste de fichiers. 2. Appuyez sur le bouton ◄ ou ► pour sélectionner un film à lire. ▶ 00:00:01 / 00:05:30 3/37 ABC.avi 3. Appuyez sur le bouton ∂ (Lecture)/ENTERE. N La lecture du fichier sélectionné commence. N Le fichier sélectionné s'affiche en haut de l'écran, avec la durée de lecture. N La durée de lecture d'un fichier film peut s'afficher sous la forme "00:00:00" si les informations relatives au temps de lecture ne figurent pas au début du SUM fichier. N Vous pouvez regarder des fichiers multimédias, mais la fonction jeu n'est pas prise en charge. N Formats de sous-titres pris en charge Nom MPEG-4 time-based text SAMI SubRip SubViewer Micro DVD E Pause ◀ ▶ Saut Extension de fichier .ttxt .smi .srt .sub .sub ou .txt Format XML HTML chaînes chaînes chaînes Décodeur vidéo Divx 3.11, Divx 4.x, Divx 5.1, Divx 6.0, XviD, H.264 BP, H.264 MP, H.264 HP, MPEG-4 SP, MPEG-4 ASP, JPEG animé Divx 3.11, Divx 4.x, Divx 5.1 Divx 6.0, XviD, H.264 BP, H.264 MP, H.264 HP MPEG-4 SP, MPEG-4 ASP JPEG animé Divx 3.11, Divx 4.x, Divx 5.1 Divx 6.0, XviD, H.264 BP, H.264 MP, H.264 HP, MPEG-4 SP, MPEG-4 ASP Window Media Video v9 H.264 BP, H.264 MP, H.264 HP, MPEG-4 SP, MPEG-4 ASP XVID H.264 BP, H.264 MP, H.264 HP MPEG-4 SP, MPEG-4 ASP MPEG2, MPEG1 MPEG1 (Program Stream), MPEG2 (Program Stream) MPEG2 (Transport Stream), H.264 (Transport Stream) VC1 (Transport Stream) Codec audio T Outils R Retour N Formats vidéo pris en charge Extension de fichier Conteneur *.avi AVI *.mkv MKV *.asf ASF *.wmv (VC1) *.mp4 MP4 (SMP4) *.3gp 3GPP *.vro (ps) *.mpg *.mpeg (ps) VRO / VOB autres (ts) MP3, AC3, LPCM, ADPCM (MULAW ALAW) MP3, AC3, LPCM, ADPCM (MULAW ALAW), AAC WMA, MP3, AC3, LPCM, ADPCM, (MULAW ALAW), AAC ADPCM, (HE)-AAC, mp3 ADPCM, (HE)-AAC AC3, MPEG, LPCM AC3, MPEG, LPCM AAC, HE-AAC, MP3, DD+ Français - 39 BN68-02325A-Fre.indb 39 2009-05-19 �� 3:55:14 N Boutons de commande de lecture vidéo Bouton ENTERE ∂ ∑ TOOLS ∫ ◄/► ▲/▼ μ Opération Lit/interrompt le fichier film. Lit le fichier film. Interrompt la lecture du fichier film. Exécute diverses fonctions dans les menus Film. Quitte le mode de lecture et revient à la liste des films. Avance ou recule dans le film en cours de lecture. Affiche le premier/dernier fichier. Lit le fichier à double vitesse. Selon le codec, cette fonction peut ne pas être prise en charge. Lecture du groupe de films 1. Appuyez sur le bouton ▲ pour accéder à la section Sort Key. 2. Appuyez sur le bouton ◄ ou ► pour sélectionner un ordre de tri. 3. Appuyez sur le bouton ▼ ou ENTERE pour accéder à Group List Section. 4. Appuyez sur le bouton ∂ (Lecture). Seule la lecture des fichiers du groupe sélectionné commence. ● Ou 1. Sélectionnez une clé de tri puis dans Section Liste de fichiers, sélectionnez les fichiers contenus dans le groupe désiré. N Pour passer au groupe précédent/suivant, appuyez sur le bouton π (Retour arrière) ou µ (Avance rapide). 2. Appuyez sur le bouton TOOLS. 3. Appuyez sur le bouton ▲ ou ▼ pour sélectionner Lire gp act., puis sur le bouton ENTERE. N Tous les fichiers film du groupe de tri, y compris le fichier sélectionné, sont lus. Lecture des fichiers film sélectionnés 1. Appuyez sur le bouton ▼ pour sélectionner Section Liste de fichiers. 2. Appuyez sur le bouton ◄ ou ► pour sélectionner le fichier musical de votre choix. 3. Appuyez sur le bouton jaune. N La marque c s'affiche à gauche du fichier film sélectionné. N Pour désélectionner tous les fichiers, appuyez sur le bouton TOOLS, puis sélectionnez Désélectionner tout. 4. Répétez l'opération ci-dessus pour sélectionner plusieurs fichiers film. 5. Appuyez sur le bouton ∂ (Lecture)/ENTERE. N Seul le fichier sélectionné est lu. Lecture d'un film en continu (Reprise de la lecture) Si vous quittez la fonction de lecture de film, il est possible de reprendre ultérieurement au point où vous l'avez arrêté. 1. Pour sélectionner le fichier film que vous souhaitez lire en continu, appuyez sur le bouton ◄ ou ► dans File List Section. 2. Appuyez sur le bouton ∂ (Lecture)/ENTERE. 3. Sélectionnez Lecture continue (Resume Play) en appuyant sur le bouton bleu. N Le film reprend à l'endroit précis où vous aviez arrêté la lecture. N Si la fonction Aide lecture continue a été réglée sur Marche dans le menu Setup, un message s'affiche lors de la lecture d'un film que vous souhaitez lire en continu. Français - 40 BN68-02325A-Fre.indb 40 2009-05-19 �� 3:55:14 ¦ Utilisation du menu Setup Le menu Setup affiche les paramètres utilisateur du menu Media Play. SUM 1. Appuyez sur le bouton MEDIA.P. 2. Appuyez sur le bouton ◄ ou ► pour sélectionner Setup, puis sur le bouton ENTERE. 851.86MB/993.02MB Libre SETUP 3. Appuyez sur le bouton ▲ ou ▼ pour sélectionner l'option de votre choix. 4. Appuyez sur le bouton ◄ ou ► pour sélectionner l'option. N Pour quitter le mode Media Play, appuyez sur le bouton MEDIA.P de la télécommande. ■ ■ ■ Photo SUM Affichage couleur → Marche / Arrêt Vous pouvez choisir de trier les photos par couleur. Si cette option est définie sur Marche, le temps de chargement risque d'augmenter lors de la collecte des informations de couleur des photos. Music Movie Setup e Quitter Périph. Affichage couleur Mode rep. ◀ Arrêt Marche ▶ Aide lecture continue Marche Obtenir code d’enr. de DivX® VOD Obtenir code de désact. de DivX® VOD Mode rep. → Marche / Arrêt Permet de répéter la lecture de fichiers musicaux. Temps d'ex. éco. écran 4 heures Information Retrait sécurisé Aide lecture continue → Marche / Arrêt Sélectionnez cette option pour afficher le message d'aide relatif à la lecture continue des films. Quand cette fonction est activée, le téléchargement est plus long (collecte des informations). SUM Périph. U Déplacer L Régler R Retour ■ Obtenir code d’enr. de DivX® VOD Affiche le code d'enregistrement autorisé pour le téléviseur. Si vous vous connectez au site Web DivX et enregistrez le code d'enregistrement avec un compte personnel, vous pouvez télécharger le fichier d'enregistrement VOD. Si vous lisez l'enregistrement VOD à l'aide de Media Play, l'enregistrement est terminé. N Pour plus d'informations sur la VOD DivX®, visitez le site www.DivX.com. ■ Obtenir code de désact. de DivX® VOD Si DivX® VOD n'est pas enregistré, le code de désactivation de l'enregistrement s'affiche. Si vous exécutez cette fonction alors que DivX® VOD est enregistré, l'enregistrement DivX® VOD en cours est désactivé. ■ Temps d’ex. éco. écran → 2 Heures / 4 Heures / 8 Heures Sélectionnez cette option pour définir le délai avant l'activation de l'écran de veille. ■ Information Affiche les informations de l'appareil connecté. ■ Retrait sécurisé Vous pouvez retirer le périphérique du téléviseur en toute sécurité. Français - 41 BN68-02325A-Fre.indb 41 2009-05-19 �� 3:55:14 Media Play-DLNA ¦ Définition du réseau DLNA DLNA vous permet de visionner, sur votre téléviseur, des vidéos, de la musique et des images enregistrées sur votre ordinateur via une connexion réseau en mode Media Play. Cela vous évite de devoir les copier sur une unité de stockage USB, puis de connecter cette unité au téléviseur. Pour utiliser DLNA, le téléviseur doit être connecté au réseau et l'application DLNA doit être installée sur votre ordinateur. Diagramme représentant la connexion réseau - Câble TV PC LAN LAN Modem externe (ADSL/VDSL/Câble TV) Diagramme représentant la connexion réseau - Sans fil Panneau latéral du téléviseur TV PC ou LAN Samsung Wireless LAN Adapter Câble LAN Routeur IP sans fil 1. Pour plus d'informations sur la configuration de votre réseau, reportez-vous à la section "Configuration du réseau". N Nous recommandons de placer le téléviseur et l'ordinateur sur le même sous-réseau. Les 3 premières parties de l'adresse de sous-réseau du téléviseur et les adresses IP du PC doivent être les mêmes et seule la dernière partie (adresse de l'hôte) doit être modifiée. (ex. adresse IP: 123.456.789.**) 2. Connectez l'ordinateur sur lequel le programme Samsung PC Share Manager sera installé au modem externe à l'aide d'un câble réseau. N Vous pouvez connecter directement le téléviseur à un ordinateur sans passer par un routeur. ¦ Installation de l'application DLNA Pour lire sur votre téléviseur du contenu stocké sur l'ordinateur, vous devez, dans un premier temps, installer l'application. Pour utiliser correctement la fonction DLNA, utilisez le programme figurant dans le CD-ROM fourni avec le téléviseur ou le programme Samsung PC Share Manager correspondant au modèle de téléviseur, que vous pouvez télécharger sur le site Web de Samsung. Français - 42 BN68-02325A-Fre.indb 42 2009-05-19 �� 3:55:15 Configuration requise 1. Introduisez le CD du programme fourni avec le téléviseur dans le lecteur approprié de votre ordinateur. 2. L'installation du programme nécessite 30 Mo d'espace libre sur le disque dur. N Si vous partagez des fichiers, jusqu'à 30 Mo d'espace disque est nécessaire par lot de 100 fichiers. N Si vous annulez le partage de fichiers, l'espace disque utilisé pour les informations sur les miniatures est également libéré. Formats pris en charge ● Image: JPEG / Audio: MP3 / Vidéo: AVI, MKV, ASF, MP4, 3GPP, PS, conteneur TS. Pour de plus amples informations sur les formats vidéo pris en charge, reportez-vous aux instructions de la rubrique "Lecture d'un fichier film". Installation de l'application 1. Exécutez le fichier Setup.exe situé sur le CD du programme fourni avec le téléviseur. N Vous pouvez également télécharger ce fichier sur le site Web de Samsung à l'adresse www.samsung.com. 2. Installez l'application SAMSUNG PC Share Manager, comme illustré. 3. Une fois l'installation terminée, l'icône PC Share Manager apparaît sur votre Bureau. N Double-cliquez sur cette icône pour exécuter le programme. ¦ Utilisation de l'application DLNA Présentation de l'écran du programme 1. Menus: l'application s'accompagne des menus suivants: Fichier, Partager, Serveur et Aide. 1 2 3 4 5 6 7 2. Cliquez sur ce bouton pour partager le dossier serveur sélectionné. 3. Cliquez sur ce bouton pour annuler le partage. 4. Cliquez sur ce bouton pour actualiser la liste des fichiers et dossiers de l'ordinateur. 5. Cliquez sur ce bouton pour synchroniser l'état de partage. 6. Les dossiers et fichiers à partager stockés sur l'ordinateur sont répertoriés. 7. Les dossiers partagés par l'utilisateur sont répertoriés. Français - 43 BN68-02325A-Fre.indb 43 2009-05-19 �� 3:55:16 ❑ Partager ■ Partage d'un Dossier Vous pouvez partager un dossier de votre ordinateur sur le téléviseur. ■ Annulation d'un Partager le dossier Vous pouvez annuler un dossier partagé sur votre ordinateur. Sélectionnez un dossier dans le volet Partager le dossier, puis cliquez sur Annuler le partage du dossier. ■ Application des réglages actuels Effectuez cette opération lorsqu'une synchronisation s'avère nécessaire à la suite du partage d'un nouveau dossier ou de l'annulation d'un partage. Le menu Définir l'état modifié applique les modifications apportées aux dossiers partagés aux données enregistrées avec le programme de partage installé sur l'ordinateur. L'application des modifications aux données internes est une procédure relativement longue. Aussi, cette fonction permet-elle aux utilisateurs de n'appliquer les modifications que lorsque cela s'avère nécessaire. Tant que vous ne sélectionnez pas le menu Définir l'état modifié, l'état modifié du dossier partagé n'est pas appliqué au serveur. Les modifications apportées aux dossiers partagés ne sont pas appliquées à l'ordinateur tant que vous n'avez pas sélectionné le menu Définir l'état modifié. ■ Définition des permissions d'accès Pour permettre au téléviseur de détecter votre ordinateur, le téléviseur doit être défini sur Définir la politique des périphériques dans la fenêtre Access Permission Settings. De plus, le serveur et le téléviseur doivent se trouver sur le même sous-réseau. ● Méthode: sélectionnez le menu Partager, puis cliquez sur Définir la politique des périphériques. Les éléments rejetés apparaissent en gris. Vous pouvez modifier les permissions d'accès en utilisant le bouton Accepter / Refuser.. Pour supprimer un élément, sélectionnez-le, puis cliquez sur Suppr. fichier Item. ❑ Serveur ■ Serveur Vous pouvez utiliser votre ordinateur en tant que serveur ou annuler cette affectation. ■ Run DLNA Digital Media Server when Windows Starts Vous pouvez indiquer si le serveur doit démarrer automatiquement au démarrage de Windows. ■ Modifier le nom du serveur Vous pouvez renommer le serveur. ¦ Utilisation de la fonction DLNA Utilisation du menu DLNA DLNA (Digital Living Network Alliance) permet de lire du contenu enregistré sur un serveur DLNA (généralement votre ordinateur) connecté à votre téléviseur ou sur un réseau. Media Play permet de lire du contenu enregistré sur une unité de stockage USB connectée au téléviseur, tandis que DLNA permet de lire du contenu enregistré sur un serveur DLNA (votre ordinateur) connecté à votre téléviseur ou sur le réseau. Les procédures d'utilisation du contenu sont identiques à celles en usage pour Media Play (USB & DLNA). 1. Appuyez sur le bouton MEDIA.P de la télécommande pour afficher le menu DLNA. 2. Appuyez sur le bouton ◄ ou ► pour sélectionner une icône (Photo, Music, Movie, Setup), puis appuyez sur le bouton ENTERE. N Pour quitter le mode DLNA, appuyez sur le bouton MEDIA.P de la télécommande. N DLNA ne prend pas en charge les fonctions suivantes. Les fonctions Fond musical et Paramètres de musique de fond. Tri des fichiers par préférence dans les dossiers Photo, Music et Film. La fonction Changer gp. La fonction Copier / Supprimer. La fonction Retrait sécurisé. Les fonctions des boutons REW/FF (π/µ) pendant la lecture d'un film. Fonction Lecture d'un film en continu (Reprise de la lecture). N La fonction Skip peut ne pas fonctionner avec certains conteneurs tels que asf et mkv. N Les sous-titres intégrés multi-audio Divx DRM ne sont pas pris en charge. N Samsung PC Share Manager doit être autorisé par le pare-feu de l'ordinateur. N Il se peut que la fonction Skip (touches ◄/►) ou Pause ne soit pas opérationnelle pendant la lecture d'un film pour le DLNA d'autres fabricants. Cela dépend, en fait, des informations de contenu. N Il se peut que la durée de lecture ne soit pas affichée lors de la lecture d'un film. Français - 44 BN68-02325A-Fre.indb 44 2009-05-19 �� 3:55:16 ANYNET+ ¦ Connexion de périphériques Anynet+ Qu’est-ce qu'Anynet+? Anynet+ est une fonction qui vous permet de contrôler tous les appareils Samsung connectés compatibles Anynet+ avec votre télécommande Samsung. Le système Anynet+ peut être utilisé uniquement avec les appareils Samsung disposant de la fonction Anynet+. Pour vérifier que votre périphérique Samsung dispose de cette fonction, assurez-vous qu'il porte le logo Anynet+. Connexion à un téléviseur Périphérique Anynet+ 1 TV Câble HDMI 1.3 Périphérique Anynet+ 2 Câble HDMI 1.3 Périphérique Anynet+ 3 Câble HDMI 1.3 Périphérique Anynet+ 4 Câble HDMI 1.3 1. A l'aide d'un câble HDMI, reliez la prise HDMI IN (1, 2, 3(DVI) ou 4) du téléviseur à la prise HDMI OUT du périphérique Anynet+ correspondant. Connexion à un système home cinéma TV Périphérique Anynet+ 1 Home cinéma Câble HDMI 1.3 Câble optique Câble HDMI 1.3 Périphérique Anynet+ 2 Câble HDMI 1.3 Périphérique Anynet+ 3 Câble HDMI 1.3 Périphérique Anynet+ 4 Câble HDMI 1.3 1. A l'aide d'un câble HDMI, reliez la prise HDMI IN (1, 2, 3(DVI) ou 4) du téléviseur à la prise HDMI OUT du périphérique Anynet+ correspondant. 2. A l'aide du câble HDMI, reliez la prise HDMI IN du système home cinéma à la prise HDMI OUT de l'appareil Anynet+ correspondant. N Connectez le câble optique entre la prise DIGITAL AUDIO OUT (OPTICAL) de votre téléviseur et l'entrée Digital Audio (audio numérique) de votre système home cinéma. N Si vous suivez les instructions de connexion ci-avant, la prise optique produit uniquement un signal audio 2 voies. Vous n'entendrez du son qu'au niveau des haut-parleurs avant gauche et droit et du caisson de basses de votre système home cinéma. Pour écouter des chaînes audio 5.1, branchez la prise DIGITAL AUDIO OUT (OPTICAL) du lecteur DVD ou du récepteur satellite (c.-à-d. appareil Anynet 1 ou 2) directement sur l’amplificateur ou sur un système home cinéma, et non sur le téléviseur. N Ne connectez qu'un seul système home cinéma. N Vous pouvez connecter un périphérique Anynet+ à l'aide du câble HDMI 1.3. Certains câbles HDMI peuvent ne pas prendre en charge les fonctions Anynet+. N Anynet+ fonctionne si le périphérique compatible est en mode veille (Veille) ou en marche (Marche). N Anynet+ prend en charge jusqu'à 12 périphériques AV. Vous pouvez connecter jusqu'à 3 périphériques du même type. Français - 45 BN68-02325A-Fre.indb 45 2009-05-19 �� 3:55:17 ¦ Configuration d'Anynet+ ❑ Configuration ■ ■ Media Play (USB & DLNA) Application T Appuyez sur le bouton TOOLS pour afficher le menu Outils. Vous pouvez également afficher le menu Anynet+ en sélectionnant Outils → Anynet+ (HDMI-CEC). Anynet+ (HDMI-CEC) Content Library Internet@TV Centre de réseau domestique Anynet+ (HDMI-CEC) → Arrêt / Marche Pour utiliser la fonction Anynet+, l'option Anynet+ (HDMI-CEC) doit être activée (Marche). N Lorsque la fonction Anynet+ (HDMI-CEC) est désactivée, toutes les activités associées à Anynet+ sont également désactivées. Arrêt automatique → Non / Oui Extinction automatique d'un périphérique Anynet+ lorsque le téléviseur est mis hors tension N La source active sur la télécommande du téléviseur doit être définie sur TV pour pouvoir utiliser la fonction Anynet+. N Si vous réglez Arrêt automatique sur Oui, les périphériques connectés s'éteignent lors de la mise hors tension du téléviseur. Toutefois, si un périphérique est en train d'enregistrer, il se peut qu'il ne s'éteigne pas. Configuration Anynet+ (HDMI-CEC) : Marche ▶ Arrêt automatique : Oui U Déplacer E Entrer R Retour Configuration Anynet+ (HDMI-CEC) : Marche Arrêt automatique : Oui ▶ U Déplacer E Entrer R Retour ¦ Commutation entre périphériques Anynet+ 1. Appuyez sur le bouton TOOLS. Appuyez sur le bouton ENTERE pour sélectionner Anynet+ (HDMI-CEC). Voir télévision 2. Appuyez sur le bouton ▲ ou ▼ pour sélectionner Liste d'appareils, puis appuyez sur le Liste d'appareils bouton ENTERE. Enregistrement: DVDR DVDR MENU + N La liste des périphériques Anynet connectés au téléviseur s'affiche. DVDR INFO Récepteur: Arrêt N Si le périphérique souhaité est introuvable, appuyez sur le bouton rouge pour Configuration chercher des périphériques. 3. Appuyez sur le bouton ▲ ou ▼ pour sélectionner un périphérique particulier, puis appuyez sur le bouton ENTERE. Vous passez ainsi au périphérique sélectionné. U Déplacer E Entrer R Retour N Le menu Liste d'appareils ne s'affiche que si Anynet+ (HDMI-CEC) est activé dans le menu Application. N Le basculement vers le périphérique sélectionné peut prendre jusqu'à 2 minutes. Il est impossible d'annuler l'opération de basculement en cours. N Le temps de recherche nécessaire dépend du nombre de périphériques connectés. N Au terme de la recherche, le nombre de périphériques trouvés ne s'affiche pas. N Bien que le téléviseur examine automatiquement la liste des périphériques lorsqu'il est mis sous tension à l'aide du bouton marche/arrêt, les périphériques connectés au téléviseur alors que celui-ci est déjà allumé ne s'affichent pas toujours automatiquement dans la liste. Appuyez sur le bouton rouge pour rechercher le périphérique connecté. N Si vous avez choisi un mode d'entrée externe en appuyant sur le bouton SOURCE, vous ne pouvez pas utiliser la fonction Anynet+. Veillez à basculer vers un périphérique Anynet+ à l'aide de la Liste d'appareils. MenuAnynet+ Le menu Anynet+ varie selon le type et l'état des périphériques Anynet+ connectés au téléviseur. MenuAnynet+ Voir télévision Liste d'appareils (nom_périphérique) MENU (nom_périphérique) INFO Enregistrement : (*enregistreur) Arrêter Enregistrement : (*enregistreur) Récepteur Description Le mode Anynet+ change en mode de diffusion TV. Affiche la liste des périphériques Anynet+. Affiche les menus du périphérique connecté. Par exemple, si un graveur DVD est connecté, son menu de disque s'affiche. Affiche le menu de lecture du périphérique connecté. Par exemple, si un graveur DVD est connecté, son menu de lecture s'affiche. Lance immédiatement l'enregistrement avec le graveur (cette fonction n'est disponible que pour les périphériques prenant en charge la fonction d'enregistrement). Arrête l'enregistrement. Le son est émis par l'intermédiaire du récepteur. N Si plusieurs enregistreurs sont connectés, ils s'affichent sous la forme (*enregistreur); si un seul enregistreur est connecté, il s'affiche sous la forme (*nom_périphérique). Français - 46 BN68-02325A-Fre.indb 46 2009-05-19 �� 3:55:18 Boutons de la télécommande du téléviseur disponibles en mode Anynet+ Type de périphérique Périphérique Anynet+ Périphérique à tuner intégré Périphérique audio État de fonctionnement Après basculement vers le périphérique, lorsque son menu s'affiche à l'écran. Après basculement vers le périphérique, pendant la lecture d'un fichier. Après le basculement vers l'appareil, lorsque vous regardez un programme télévisé Lorsque le récepteur est activé. Boutons disponibles Touches numériques boutons ▲/▼/◄/►/ENTERE Boutons de couleur / Bouton EXIT π(recherche vers l'arrière) / μ(recherche vers l'avant) / ∫(Arrêt) / ∂(Lecture) / ∑(Pause) boutons P > / P < bouton Y/ MUTE + N La fonction Anynet n'est utilisable que si la source active définie sur la télécommande est TV. N Le bouton ∏ ne fonctionne que si le périphérique est dans un état où l'enregistrement est possible. N Il est impossible de commander des périphériques Anynet+ à l'aide des boutons situés sur le téléviseur. Vous ne pouvez commander des périphériques Anynet+ qu'au moyen de la télécommande du téléviseur. N Il se peut que la télécommande du téléviseur ne fonctionne pas dans certaines conditions. Dans ce cas, sélectionnez de nouveau le périphérique Anynet+. N Les fonctions d'Anynet+ n'opèrent pas sur des produits d'autres fabricants. N Les opérations π et µ peuvent varier en fonction du périphérique. ¦ Enregistrement Vous pouvez enregistrer un programme télévisé à l'aide d'un enregistreur Samsung. 1. Appuyez sur le bouton TOOLS. Appuyez sur le bouton ENTERE pour sélectionner Anynet+ (HDMI-CEC). 2. Appuyez sur le bouton ▲ ou ▼ pour sélectionner Recording Immediately puis appuyez sur le bouton ENTERE. L'enregistrement commence. N S'il y a plusieurs périphériques d'enregistrement Si plusieurs enregistreurs sont connectés, leur liste s'affiche. Appuyez sur le bouton ▲ ou ▼ pour sélectionner un appareil, puis appuyez sur le bouton ENTERE. L'enregistrement commence. N Si le périphérique d'enregistrement ne s'affiche pas, sélectionnez Liste d’appareils puis appuyez sur le bouton rouge pour chercher des appareils Voir télévision Liste d'appareils Enregistrement: DVDR DVDR MENU DVDR INFO Récepteur: Arrêt Configuration U Déplacer E Entrer R Retour 3. Appuyez sur le bouton EXIT pour quitter le menu. N Vous pouvez effectuer un enregistrement en sélectionnant Enregistrement: (nom_périphérique). N Appuyer sur le bouton ∏ permet d'enregistrer ce que vous regardez. Si vous regardez une vidéo provenant d'un autre périphérique, elle est enregistrée. N Avant d'enregistrer, vérifiez la connexion de la fiche d'antenne au périphérique d'enregistrement. Pour connecter correctement une antenne à un périphérique d'enregistrement, reportez-vous au mode d'emploir de ce dernier. ¦ Écoute via un récepteur (home cinéma) Vous pouvez écouter du son via un récepteur au lieu du haut-parleur du téléviseur. 1. Appuyez sur le bouton TOOLS. Appuyez sur le bouton ENTERE pour sélectionner Anynet+ (HDMI-CEC). 2. Appuyez sur le bouton ▲ ou ▼ pour sélectionner Récepteur: Appuyez sur le bouton ◄ ou ► pour sélectionner Marche et Arrêt. Voir télévision Liste d'appareils Enregistrement: DVDR DVDR MENU DVDR INFO Récepteur: Arrêt Configuration 3. Appuyez sur le bouton EXIT pour quitter le menu. N Si votre récepteur ne prend en charge que l'audio, il se peut qu'il ne figure pas dans la liste des périphériques. N Le récepteur fonctionnera lorsque vous aurez correctement raccordé la fiche d'entrée optique du récepteur à la prise de sortie numérique (optique) DIGITAL AUDIO OUT U Déplacer E Entrer R Retour (OPTICAL) du téléviseur. N Lorsque le récepteur (home cinéma) est activé, vous pouvez écouter le son sortant de la prise optique du téléviseur. Lorsque le téléviseur affiche un signal DTV (air), il envoie un son 5.1 au récepteur du home cinéma. Lorsque la source est un composant numérique (par exemple, un DVD) connecté au téléviseur TV via HDMI, le récepteur home cinéma n'émet qu'un son 2 voies. N Si une coupure de courant se produit alors que l'option Récepteur est réglée sur Marche (câble d'alimentation débranché ou panne de courant), il se peut que l'option Sélection Haut-parleur soit réglée sur Ht-parl ext lorsque vous rallumez le téléviseur. Français - 47 BN68-02325A-Fre.indb 47 2009-05-19 �� 3:55:18 ¦ Dépannage d'Anynet+ Problème Anynet+ ne fonctionne pas. ● ● ● ● ● ● ● ● ● Je veux démarrer Anynet+. ● ● ● Je veux quitter Anynet+. ● ● ● Le message ‘Connexion à Anynet+...’ s’affiche à l’écran. ● ● La lecture ne démarre ● pas sur l'appareil Anynet+. Le périphérique connecté ● ne s'affiche pas. ● ● ● ● Appuyez sur P >/<, PRE-CH et FAV.CH pour modifier le mode TV. (remarque : le bouton de chaîne ne fonctionne que si aucun périphérique Anynet+ à tuner intégré n'est connecté). Il est impossible d'employer la télécommande pendant la configuration d'Anynet+ ou le basculement en mode de visualisation. La télécommande n'est utilisable qu'au terme de la configuration d'Anynet+ ou du basculement en mode de visualisation. Vous ne pouvez pas utiliser la fonction de lecture quand une opération Plug & Play est en cours. ● Vérifiez si le périphérique prend en charge les fonctions Anynet+. Vérifiez si le câble HDMI 1.3 est correctement connecté. Vérifiez si Anynet+ (HDMI-CEC) est réglé sur Marche dans le menu de configuration Anynet+. Lancez une nouvelle recherche de périphériques Anynet+. Vous ne pouvez connecter un périphérique Anynet+ qu'à l'aide d'un câble HDMI 1.3. Certains câbles HDMI peuvent ne pas prendre en charge les fonctions Anynet+. En cas d'arrêt anormal résultant d'une déconnexion du câble HDMI ou du câble d'alimentation, ou encore d'une panne de courant, effectuez une nouvelle recherche de périphériques. Vérifiez que la fiche d'antenne est correctement branchée sur le périphérique d'enregistrement. ● Reliez le téléviseur au récepteur à l'aide du câble optique. ● Le programme TV ne s’enregistre pas. Le son du téléviseur ne sort pas par le récepteur. Solution possible Vérifiez si le périphérique est compatible Anynet+. Le système Anynet+ ne prend en charge que les périphériques compatibles Anynet+. Ne connectez qu'un seul récepteur (home cinéma). Vérifiez si le cordon d'alimentation du périphérique Anynet+ est bien connecté. Vérifiez la connexion des câbles vidéo/audio/HDMI 1.3 du périphérique Anynet+. Vérifiez qu'Anynet+ (HDMI-CEC) est défini sur ON dans le menu de configuration d'Anynet+. Vérifiez si la télécommande du téléviseur est en mode TV. Vérifiez s'il s'agit d'une télécommande spéciale Anynet+. Anynet+ ne fonctionne pas dans toutes les conditions. (Recherche de chaînes, fonctionnement de Media Play, Plug & Play, etc.) Lorsque vous branchez ou retirez le câble HDMI 1.3, veillez à relancer une recherche de périphérique ou à éteindre et rallumer votre téléviseur. Vérifiez si la fonction Anynet+ du périphérique Anynet+ est activée. Assurez-vous que le périphérique Anynet+ est correctement connecté au téléviseur et que la fonction Anynet+ (HDMI-CEC) est réglée sur Marche dans le menu Configuration d'Anynet+. jeu. Appuyez sur le bouton TV de la télécommande pour allumer le téléviseur. Appuyez ensuite sur le bouton TOOLS pour afficher le menu Anynet+ puis sélectionnez le menu de votre choix. Sélectionnez Voir télévision dans le menu Anynet+. Appuyez sur le bouton SOURCE de la télécommande, puis sélectionnez un périphérique non compatible Anynet+ Français - 48 BN68-02325A-Fre.indb 48 2009-05-19 �� 3:55:18 Content Library ¦ Utilisation de la Content Library La Content Library permet de visualiser divers contenus sur votre téléviseur. Vous pouvez utiliser le contenu par défaut enregistré dans la mémoire du téléviseur ou visualiser d'autres contenus à l'aide d'un périphérique USB. Galerie Galerie Cuisine Jeu Enfants Bien-être R Retour e Quitter Utilisation de la télécommande dans le menu Content Library Bouton ▲/▼/◄/► ENTERE RETURN EXIT <P> Bouton de couleur Y / MUTE Opération Déplace le curseur pour sélectionner un élément. Valide l'élément actuellement sélectionné. Revient au menu précédent. Arrête la fonction en cours et revient au menu principal Content Library. Arrête le mode Content Library et revient au mode TV. Les touches qui donnent accès à des fonctions sont décrites sur la page correspondante. Vous pouvez régler le volume du contenu en cours de lecture. La Content Library contient des images, fichiers multimédias et autres documents fournis à titre purement indicatif et promotionnel. Ces données ont été modifiées et sont régulièrement révisées et mises à jour. Certaines peuvent ne pas s'appliquer à tous les utilisateurs. Les informations contenues dans la bibliothèque sont fournies telles quelles. Bien qu'elles proviennent de sources réputées fiables, Samsung ne peut garantir leur exactitude, leur validité, leur pertinence ou leur exhaustivité. En aucun cas, en ce compris la négligence, Samsung ne pourra être tenue responsable, d'un point de vue civil ou pénal, des dépenses, des honoraires d'avocat ni de tous dommages directs, indirects, accidentels, spéciaux, induits ou autres résultant de, ou en rapport avec, toute information contenue dans ou l'utilisation de la Content Library, même si Samsung a été avertie de la possibilité de tels dommages. ¦ Utilisation du contenu Vous pouvez utiliser le contenu enregistré dans la mémoire du téléviseur. N Pour revenir au menu principal Content Library, appuyez sur le bouton EXIT. ❑ Galerie Cette fonction lit un diaporama avec des images haute résolution et un fond musical. Elle crée ainsi différentes ambiances. La fonction Gallery du téléviseur vous permet de changer votre ambiance intérieure. Galerie N Les droits d'auteur relatifs au contenu de la Galerie et tous les litiges qui en découlent sont du ressort de TimeSpace, Inc. N Appuyez sur le bouton ENTERE pour interrompre le diaporama. Appuyez sur le bouton R Retour e Quitter ENTERE pour reprendre le diaporama. N Appuyez sur le bouton INFO pour afficher des informations sur la photo sélectionnée (aucune information n'est affichée si la photo n'est associée à aucune information). Galerie Cuisine Jeu Enfants Bien-être ❑ Cuisine Plusieurs recettes, faciles à réaliser, vous sont proposées. Inspirez-vous de ce contenu pour préparer de délicieux repas. N Les recettes présentées dans la catégorie Cuisine du téléviseur Samsung s'inspirent de recettes publiées par Anness Publishing. N Les droits d'auteur relatifs à la catégorie Cuisine et tous les litiges qui en découlent sont du ressort de Practical Pictures. Français - 49 BN68-02325A-Fre.indb 49 2009-05-19 �� 3:55:18 ❑ Jeu Cette catégorie propose du divertissement pour toute la famille. N Pour connaître les boutons utilisés dans les différents jeux, reportez-vous aux instructions à l'écran. N Boutons de couleur pour les jeux Bouton Rouge Vert Jaune Bleu Opération Accède à l'écran d'accueil des jeux Interrompt le jeu Touche Option Quitte le jeu ❑ Enfants Ce contenu éducatif et interactif fera le bonheur de vos enfants. N Les droits d'auteur relatifs à la catégorie Enfants et les litiges qui en découlent sont du ressort de UpToTen. ❑ Bien-être Ce contenu de gestion de la santé est destiné à toute la famille. ¦ Utilisation de la gestion de contenu ❑ Gestion de contenu N Vous pouvez sélectionner divers éléments de contenu en sélectionnant plusieurs éléments et en appuyant sur le bouton jaune. ■ ■ Mon contenu Vous pouvez consulter le contenu enregistré dans la mémoire du téléviseur pour chaque sousélément de la Content Library. ● Sélectionnez un élément de contenu et appuyez sur le bouton ENTERE. Vous pouvez lire ou supprimer l'élément de contenu sélectionné. Gestion de contenu Jeu Enfants Bien-être Autres Gestion de contenu R Retour e Quitter Gestion de contenu > Mon contenu 1/1 Mon contenu Galerie USB USB Configuration Vous pouvez consulter le contenu enregistré sur le périphérique USB pour chaque sousélément de la Content Library. ● Sélectionnez un élément de contenu et appuyez sur le bouton ENTERE. Vous pouvez R Retour e Quitter lire l'élément de contenu sélectionné. N Content Library ne prend en charge que les périphériques de stockage de masse USB de la classe MSC. Cette dernière est dédiée aux périphériques de transport de masse uniquement. Il s'agit notamment des clés USB et des lecteurs de cartes Flash. N Si vous exécutez un jeu à l'aide d'une unité de stockage USB externe, vous avez la possibilité d'enregistrer votre partie (cela dépend en fait du jeu). Nous attirons votre attention sur le fait que le retrait de l'unité de stockage USB alors que l'enregistrement de données est en cours risque de provoquer une perte de données. N Téléchargement de nouveau contenu Vous pourrez vous procurer gratuitement du nouveau contenu par le biais du site Web www.samsung.com. Lorsque vous téléchargez du contenu payant, vous avez besoin d’un numéro UDN (Unique Device Number). Vérifiez le numéro UDN avant de télécharger du nouveau contenu. • Téléchargement de contenu 1. Rendez-vous sur le site http://www.samsung.com Cuisine Jeu Enfants Bien-être Mémoire TV 17.16GB/189.00MB Disponible 2. Sélectionnez un élément de contenu sur la page Contents Download. 3. Téléchargez le contenu sur l'unité de stockage USB. 4. Accédez au menu principal Content Library en appuyant sur le bouton CONTENT ou en sélectionnant Content Library (Menu → Application → Content Library). 5. Introduisez l'unité USB dans le port USB situé sur le côté du téléviseur. 6. Vous pouvez regarder le sous-élément de contenu que vous avez téléchargé. 7. Sélectionnez un élément de contenu et appuyez sur le bouton ENTERE. 8. Vous pouvez lire l'élément de contenu sélectionné. ■ Configuration ● Temps d'ex. éco. écran: sélectionnez cette option pour définir le délai avant l'activation de l'écran de veille. ● Enregistrer UDN: enregistre le numéro UDN d'un périphérique USB. N Les périphériques de stockage USB formatés en NTFS ne prennen pas en charge l'enregistrement de l'UDN. Nous recommandons l'utilisation d'un périphérique de stockage USB formaté en FAT. Français - 50 BN68-02325A-Fre.indb 50 2009-05-19 �� 3:55:19 Internet@TV Si vous rencontrez des problèmes avec le service d'un widget, contactez le propriétaire du contenu. Dans le widget, appuyez sur le bouton vert et accédez aux informations de contact ou reportez-vous au site Web d'aide pour connaître les coordonnées du fournisseur du widget. N En fonction de votre pays, il se peut que seul l'anglais soit pris en charge dans le service du widget. N En fonction de votre pays, il se peut que cette fonction ne soit pas prise en charge. (Non disponible dans tous les pays) ¦ Mise en route d'Internet@TV Internet@TV vous propose des services Internet et de télévision intégrés via le Widget Engine Yahoo!®. Avec le service Internet@TV disponible sur votre téléviseur, gérez vos actions, partagez vos photos avec des amis et votre famille, suivez les actualités et la météo. N Selon l'état du réseau, il se peut que cette fonction ne fonctionne pas. Le téléviseur s'éteint alors automatiquement. Sinon, éteignez-le au moyen du bouton d'alimentation. N En fonction de l'état du réseau, cette fonction peut se révéler relativement lente ou instable. Lors de la première exécution d'Internet@TV, des réglages de base s'effectuent de manière automatique. N La première étape consiste à configurer votre réseau. Pour plus d'informations sur la configuration de votre réseau, reportezvous à la section "Configuration du réseau". N Une fois le réseau en service, l'assistant du logiciel Internet@TV vous guide tout au long de la procédure de configuration. 1. Appuyez sur le bouton MENU. Appuyez sur le bouton ▲ ou ▼ pour sélectionner Application, puis sur le bouton ENTERE. 2. Appuyez sur le bouton ▲ ou ▼ pour sélectionner Internet@TV, puis sur le bouton ENTERE. N Internet@TV Démarrer. O Appuyez sur le bouton INTERNET@ de la télécommande pour afficher le menu Internet@TV. 3. Le Déni de responsabilité s'affiche à l'écran. Sélectionnez J’accepte ou Je n’accepte pas. N Pour plus d'informations sur le Déni de responsabilité, reportez-vous à la section "Notice légale". 4. L'écran de bienvenue est le point de départ de la procédure de configuration guidée d'Internet@TV. N Si vous sélectionnez Exit Setup, vous pouvez reprendre cette étape en appuyant sur le bouton INTERNET@. N Sélectionnez C'est parti! Yahoo! TV Widgets offrent la meilleure expérience Internet à votre télévision! Vous pouvez consulter la météo ou les derniers résultats sportifs, obtenir des informations mises à jour sur le cours des options ou même visionner vos photos et vidéos! We just need to get a few things set up, and you’ll be on your way! 5. Le choix de l'emplacement permet aux widgets TV d'utiliser du contenu localisé. N Sélectionnez votre pays dans la liste proposée. 6. Vous devez accepter la politique de confidentialité du moteur de widgets TV Yahoo!® pour pouvoir vous servir d'Internet@TV. N Cliquez sur OK, J’accepte. 1 Bienvenue sur Yahoo!® TV Widgets! C'est parti ! Quitter l'installation 7. Vous devez accepter les conditions de service du système de widgets TV Yahoo!® pour pouvoir vous servir d'Internet@TV. N Cliquez sur OK, J’accepte. 8. Saisissez votre nom pour configurer votre profil. Chaque profil possède sa propre liste de widgets. Vous pouvez créer un profil pour chaque personne se servant d'Internet@TV. N Entrez votre nom et sélectionnez Enregistrer ce nom. N Pour plus d'informations, reportez-vous à la section "Utilisation du widget Profil". 9. Internet@TV teste la connexion réseau. N En cas d'échec du test, reconfigurez votre réseau. N Pour plus d'informations, reportez-vous à la section ‘Configuration du réseau’. 5 Comment vous appelez-vous ? Chaque utilisateur de Yahoo! TV peut disposer de son propre ensemble de Widgets personnalisé. Nous effectuerons le suivi de ces profils de Widget personnels en fonction du nom que vous avez saisi. Saisissez le nom de votre choix. Enregistrer ce nom Ignorer cette étape Quitter l'installation 10.La configuration guidée est terminée. Un didacticiel portant sur l'utilisation d'Internet@TV vous est ensuite proposé. N Sélectionnez Continue pour consulter ce didacticiel. N Choisissez Quitter l'installation pour commencer à utiliser Internet@TV. N Pour relancer le didacticiel, sélectionnez Widget Profil → Paramètres du système → Revoir le didacticiel. 11. Appuyez sur le bouton INTERNET@ de la télécommande pour afficher l'interface utilisateur Internet@TV. Français - 51 BN68-02325A-Fre.indb 51 2009-05-19 �� 3:55:19 ❑ Affichage ■ Mode dock 1 Une bannière de bienvenue apparaît dans l'angle supérieur droit; elle indique le nom de votre profil. N Cette bannière disparaît rapidement. 1 2 2 La bannière met en surbrillance deux raccourcis de la télécommande. N Si vous appuyez sur le bouton bleu (Viewport) de la télécommande, l'affichage passe du mode Viewport au mode de superposition. En mode Viewport, la télévision ou la vidéo est affichée dans une zone miniature, graphismes à l'extérieur. En 3 mode de superposition, les graphismes sont affichés par-dessus 3 Vous êtes Météo Galerie de Widgets la télévision ou la vidéo. John N Si vous appuyez sur le bouton jaune (Modifier les extraits) de votre télécommande, une fenêtre d'aide s'affiche. Le snippet (raccourci) sélectionné est alors modifiable. Salut John! 5:15 AM Mon January 19th Viewport Modifier les extraits Finance 3. Appuyez sur le bouton INTERNET@ de la télécommande. N La liste horizontale au bas de votre écran de télévision s'appelle le ‘dock’. N Les éléments de cette liste sont les ‘snippets’. N Un snippet est un raccourci qui lance un widget TV. N Un widget TV est une application Internet compatible avec votre téléviseur. N Vous pouvez parcourir les snippets à l'aide des touches ◄ ou ► de la télécommande. N La sélection se situe dans la zone la plus à gauche (surbrillance bleue). N Le dock fait glisser les snippets sous cette zone de sélection. N Pour lancer un widget TV, appuyez sur le bouton ENTERE de la télécommande lorsque son snippet est sélectionné. N Lorsque vous ajoutez des snippets, ils forment une liste que vous pouvez parcourir en appuyant sur le bouton ▲ ou ▼. N Deux widgets TV spéciaux apparaissent dans le dock: le Widget Profil et le Gallery Widget. Ceux-ci ne peuvent pas être supprimés. N Le dock disparaîtra de l’écran après une période d’inactivité. ■ Mode volet (Sidebar) 1 Sélectionnez un snippet et appuyez sur la touche ENTERE pour activer le volet du widget TV. Le logo du widget TV et la maison ( ) apparaissent en haut du volet. 2 Le menu sélectionné est affiché sous le logo du widget TV. N Pour revenir à un précédent écran, sélectionnez-le et appuyez sur la touche ENTERE. N Vous pouvez également appuyer sur la touche RETURN de la télécommande. 3 La sélection active est toujours en surbrillance bleue. La touche en surbrillance est sélectionnée ; pour l'activer, appuyez sur la touche ENTERE. Finance Mes actions Pour supprimer un symbole d’action, veuillez le sélectionner dans la liste ci-dessous. 1 2 ^DJI ^IXIC YHOO AAPL INTC AMZN PAGE 1 DE 2 Ajouter un nouveau symbole… Importer des symboles à partir de Yahoo!... Afficher le format Valeur À propos de Yahoo! Finance... 3 4 5 4 Lorsque les données sont nombreuses, un contrôle de page est utilisé. N La page en cours et le nombre total de pages sont indiqués. N Parcourez les pages en appuyant sur ◄ ou ►. 5 La barre d'outils inférieur comprend des boutons de couleur qui correspondent aux touches verte, rouge, jaune et bleu de la télécommande. • Bouton rouge: ferme le widget. • Bouton vert: modifie les paramètres du widget. • Bouton jaune: gère le widgets. • Bouton bleu: ajuster l'écran à la vidéo ou passer la vidéo en plein écran. N Selon le widget,certains boutons sont susceptibles de ne pas être disponibles. Français - 52 BN68-02325A-Fre.indb 52 2009-05-19 �� 3:55:20 SAMSUNG N’OFFRE AUCUNE GARANTIE D’ACCÈS AUX CONTENUS ET SERVICES FOURNIS PAR DES TIERCES PARTIES, NI AUCUNE GARANTIE, QUELLE QU’ELLE SOIT, IMPLICITE OU EXPLICITE, QUANT AUX CONTENUS ET AUX SERVICES FOURNIS PAR DES TIERCES PARTIES. SAMSUNG DÉCLINE EXPRESSÉMENT TOUTE GARANTIE ET TOUTE CONDITION QUANT AUX CONTENUS ET AUX SERVICES FOURNIS PAR DES TIERCES PARTIES, Y COMPRIS, MAIS DE FAÇON NON LIMITATIVE, TOUTE GARANTIE ET TOUTE CONDITION RELATIVES À LA QUALITÉ MARCHANDE OU À LA CONVENANCE À UN USAGE PARTICULIER. SAMSUNG N’OFFRE AUCUNE REPRÉSENTATION NI AUCUNE GARANTIE QUANT À L’EXACTITUDE, À LA VALIDITÉ, AUX DÉLAIS DE PRÉSENTATION, À LA LÉGALITÉ ET À LA COMPLÉTUDE DE TOUT CONTENU OU SERVICE RENDU ACCESSIBLE PAR LE BIAIS DE CET APPAREIL ET CE, POUR QUELQUE MOTIF QUE CE SOIT. DE PLUS, SAMSUNG NE PEUT EN AUCUN ÊTRE CAS ÊTRE TENUE RESPONSABLE DE NÉGLIGENCE DÉCOULANT D’UNE RÉCLAMATION EN RESPONSABILITÉ DÉLICTUELLE OU CONTRACTUELLE ET DE TOUTE RÉCLAMATION EN DOMMAGES-INTÉRÊTS DIRECTS, INDIRECTS+E339, CONSÉCUTIFS OU SPÉCIAUX, HONORAIRES D’AVOCAT, FRAIS ET DÉPENS, ET TOUT AUTRE DOMMAGE DÉCOULANT DE VOTRE UTILISATION OU DE L’UTILISATION PAR UN TIERS DE TOUT CONTENU OU SERVICE ET CE, MÊME SI SAMSUNG A ÉTÉ AVISÉE DE LA POSSIBILITÉ DE TELS DOMMAGES. Les services fournis par les tierces parties peuvent être annulés ou interrompus en tout temps par les fournisseurs de contenus et Samsung n’offre aucune représentation ni aucune garantie quant à la disponibilité ou à la période de disponibilité d’un tel contenu ou service. L’accès aux contenus et aux services est fourni par les tierces parties par le biais de réseaux et d’installations de communications sur lesquelles Samsung n’exerce aucun contrôle. Sans restreindre la portée générale de ce qui précède, Samsung décline expressément toute responsabilité et toute obligation relativement à l’interruption ou à l’annulation de tout contenu ou service rendu accessible par le biais de cet appareil. Samsung n’assume aucune responsabilité ni aucune obligation quant au service de soutien à la clientèle associé aux contenus et aux services. Toute question et toute demande relative à un contenu ou à un service donné doivent être adressées directement au propriétaire ou au fournisseur concerné. ¦ Modification des snippets du dock 1. Pour modifier un snippet, sélectionnez-le dans le dock, puis appuyez sur la touche jaune. 2. Le snippet passe en deuxième position ; le texte d'aide suivant s'affiche alors: • Delete (bouton rouge) : Remove this TV Widget. N Vous pouvez réinstaller les widgets supprimés à l'aide de la galerie de widgets (Galerie de Widgets). • Move (bouton bleu): Réorganiser le snippet. Appuyez sur ◄ ou ► pour parcourir les options. Appuyez sur le bouton jaune pour accéder à la nouvelle position. • Done (bouton jaune): Quitter le menu Modifier les extraits. ¦ Utilisation du widget Profil Le widget Profil permet de configurer votre profil utilisateur. Vous pouvez paramétrer plusieurs profils, chacun possédant sa propre liste de widgets. Le menu Basculer vers un autre profil vous permet de changer de profil. N Au moins deux profils doivent être enregistrés. Si vous voulez ajouter un profil, reportez-vous à la section Contrôles d'administration. PROFIL Vous êtes John Basculer vers un autre profil Paramètres du profil Paramètres du système Commandes d’administrateur Déconnexion de Yahoo! Français - 53 BN68-02325A-Fre.indb 53 2009-05-19 �� 3:55:20 Le menu Paramètres du profil vous permet de personnaliser et de protéger votre profil. ● Les profils utilisateur peuvent être personnalisés au moyen d'un Nom unique et d'un Avatar (image représentant votre profil). ● Le Nom et l'Avatar de votre profil sont affichés dans le snippet de profil, dans le dock. ● Vous pouvez protéger vos profils au moyen de l'option Créer code PIN du profil. N Lors du réglage du code PIN pour la première fois, vous pouvez définir une Question secrète. Le menu profil permet de limiter l’accès aux widgets. ● En cas d'oubli du Code PIN du profil, il vous suffit de répondre à la Question secrète associée à votre profil. ● Si l'indicateur Limit Profile d'un profil est activé, aucun autre widget ne peut être installé. N Le code PIN propriétaire doit être défini pour utiliser cette fonction. Pour définir le code PIN propriétaire, reportez-vous à la section Contrôles d'administration. Le menu Paramètres du système vous permet d'effectuer les opérations suivantes ● modifier votre Lieu et de définir votre Code postal (Etats-Unis uniquement) pour adapter le contenu à votre région; ● Revoir le didacticiel présenté lors de la configuration ; ● Réinitialiser paramètres d’usine pour supprimer toutes les configurations et informations relatives aux widgets. Dans le menu Commandes d’administrateur, vous pouvez effectuer les opérations suivantes : ● définir le délai d'affichage de Économiseur d’écran pour éviter de brûler l'écran; ● Créer un code PIN de propriétaire et définir une Question secrète pour contrôler d'autres profils; ● Créer un nouveau profil pouvant être configuré avec des widgets différents. ● supprimer un profil. Dans le widget Profil, vous pouvez Connexion à Yahoo!!® au moyen de votre ID Yahoo!. ID. ● Si vous possédez un ID Yahoo!, vous pouvez accéder à votre contenu personnalisé avec les widgets TV Yahoo!. ● Yahoo! Yahoo!Tous les widgets TV Yahoo!® installés sont automatiquement activés avec l'ID Yahoo! de votre profil. ID. ● Si vous ne disposez pas de compte Yahoo!, visitez le site Web www.yahoo.com et créez un compte. ● La connexion à l'aide d'un ID créé sur le site Web Yahoo dans un pays ne prenant pas en charge Internet@TV peut échouer. ❑ A propos du widget Profil Appuyez sur le bouton vert. Vous pouvez afficher une brève description des éléments suivants : Widget Profil, Copyrights, Conditions d'utilisation et Données personnelles. ¦ Utilisation de la galerie de widgets Yahoo!® Passez par la galerie de widgets Yahoo!® pour ajouter d'autres widgets à votre téléviseur. Consultez les widgets TV disponibles dans les catégories suivantes : ● Dernière le gadgets affiche les widgets récemment mis à jour. ● Yahoo!® Widgets : affiche les widgets fournis par Yahoo!®. ● Samsung Widgets: affiche les widgets fournis par Samsung. ● Plus de Catégories: affiche tous les widgets par catégorie. N Pour installer un widget, accédez à l'écran de détail, sélectionnez Ajouter un Widget à Mon profil, puis appuyez sur la touche ENTERE. Le widget est installé et est désormais disponible dans le dock. ❑ Galerie de Widgets ■ par Yahoo! V 0.9.0 NEWS HEADLINES PAGE 1 DE 2 Top Stories Business Politics Sports Technology Plus de catégories Actualités Dernière le gadgets Appuyez sur le bouton vert. ■ Galerie de Widgets Yahoo! Actualités Yahoo! Widgets À propos de Yahoo! Galerie de Widgets... Vous pouvez afficher de brèves informations concernant les éléments suivants : Galerie de Widgets, Copyrights, Conditions d'utilisation et Données personnelles. Samsung Widgets Catégories Dans le menu Paramètres du développeur, vous pouvez créer votre propre widget. Pour plus d'informations sur la création d'un widget personnalisé, consultez notre site dédié aux développeurs à l'adresse http://connectedtv.yahoo.com/. Français - 54 BN68-02325A-Fre.indb 54 2009-05-19 �� 3:55:20 ¦ Utilisation du widget Météo Yahoo!® Le widget Météo Yahoo!® fournit des informations météorologiques actualisées sur votre zone géographique et sur vos emplacements préférés. Ce contenu évolue de façon dynamique en fonction des conditions météorologiques. ● Appuyez sur le bouton vert de la télécommande pour afficher le menu Yahoo!® Weather Widget Paramètres. ● Dans le menu Paramètres, vous pouvez ajouter ou supprimer la ville pour laquelle vous voulez consulter la météo. Dans le menu Paramètres, choisissez l'une des options suivantes : ● Ajouter une nouvelle ville: ajoutez une ville en saisissant son nom. Une fois les résultats de la recherche affichés, sélectionnez la ville voulue, puis appuyez sur la touche ENTERE. ● Supprimer la ville: supprimez une ville en sélectionnant son nom dans la liste des villes. Appuyez sur le bouton ENTERE et confirmez la suppression. ● Modification du mode d'indication de la température Vous pouvez choisir le mode d'indication de la température: Imperial ou Metric. Imperial affiche les températures en degrés Fahrenheit tandis que Metric les affiche en degrés Celsius. Météo 51° Sunnyvale Cloudy Sunnyvale, CA San Francisco, CA New York, NY London, England Paris, France ❑ Créez un snippet pour la ville favorite. ● ● ● Sélectionnez la ville sur la page d'accueil du widget Météo Yahoo!® et consultez les informations météorologiques détaillées. Appuyez sur le bouton jaune. Sélectionnez le menu Ajouter un extrait, puis appuyez sur ENTERE pour ajouter la ville en tant que snippet. ❑ Supprimez un snippet d'une ville ● ● ● Lancez le snippet. Appuyez sur le bouton jaune. Sélectionnez le menu Supprimer l’extrait? puis appuyez sur ENTERE pour supprimer le snippet. ¦ Utilisation du widget Actualités Yahoo!® Le widget Actualités Yahoo!® vous propose les dernières actualités dans différents domaines : économie, divertissement, politique, sport, people, etc. Actualités Sélectionnez une catégorie et le titre qui vous intéresse, puis consultez un résumé constamment actualisé des actualités correspondantes. World Français - 55 BN68-02325A-Fre.indb 55 2009-05-19 �� 3:55:20 ¦ Utilisation du widget Flickr Yahoo!® Le widget Flickr vous permet d'accéder aux photos favorites de votre famille et de vos amis tout en regardant la télévision. Partagez vos photos avec votre famille en les présentant sous forme de diaporama sur votre téléviseur grand écran. ● Personnalisez le widget Flickr en vous connectant avec votre ID Yahoo! ID. ● Pour plus de détails sur les procédures de connexion, reportez-vous aux instructions de la section Utilisation du widget Profil. ● Pour plus d'informations sur Flickr, visitez le site Web http://www.flickr.com. N Vos photos contient les photos que vous avez enregistrées sur le site Web Flickr. ■ ■ Pour consulter les photos Flickr sous forme de diaporama: ● Sélectionnez la miniature d'une photo et appuyez sur le bouton ENTERE pour afficher les détails de la photo. ● Sélectionnez Lancer le diaporama, puis appuyez sur le bouton ENTERE. Vos photos Vos albums Explorer Photos favorites Vos contacts Pour contrôler la lecture du diaporama: Vos groupes ● Appuyez sur le bouton ENTERE pendant le diaporama. ● Les miniatures des photos sont affichées au bas de l’écran. N Lorsque les boutons de commande du diaporama sont affichés, vous pouvez Pause, Lire et Arrêter le diaporama. N Sélectionnez le menu et appuyez sur ENTERE pour afficher les informations de la photo sélectionnée. ● Le menu Vos albums vous permet d'afficher les photos que vous avez classées dans Flickr. ● Le menu Explorer vous permet d'explorer les photos présentées par le site Web Flickr. Vous pouvez afficher les photos mises à jour quotidiennement. ● Le menu Enregistrer dans les favoris ou Supprimer des Favoris déplace les photos dans votre jeu de photos favorites ou les en enlève. ● Le menu Photos favorites vous permet d'afficher les photos que vous avez classées dans vos favoris. ● Le menu Vos contacts vous permet d'afficher les mises à jour effetuées par vos proches et amis. Le menu Vos groupes vous permet de sélectionner vos groupes favoris sur le site Web Flickr afin de partager et de regarder des photos avec la communauté d'utilisateurs Flickr. Pour configurer le widget Flickr Yahoo!®, appuyez sur le bouton vert de la télécommande. ● Le menu Durée par diapositive permet de contrôler la vitesse du diaporama. ● Le menu Répéter relance le diaporama au début une fois la dernière photo affichée. ¦ Utilisation du widget Finance Yahoo!® Consultez les dernières actualités et informations boursières grâce au widget Finance Yahoo!®. Appuyez sur le bouton vert pour configurer vos actions. Utilisez le menu Ajouter un nouveau symbole pour saisir le nom d'une nouvelle action. ● Dans les résultats de la recherche, sélectionnez l'action à ajouter, sélectionnez le menu Ajouter un symbole, puis appuyez sur le bouton ENTERE. N L'action sélectionnée est ajoutée à la liste Mes actions. ● Utilisez le menu Importer des symboles à partir de Yahoo!® pour récupérer votre portefeuille Yahoo!® Finance. Le menu Fusionner les symboles fusionne les symboles du widget Finance Yahoo!® Widget avec ceux de votre portefeuille. Le menu Importer les symboles supprime les symboles du widget Finance Yahoo!® Widget par ceux de votre portefeuille. Finance Mes actions Pour supprimer une ville, veuillez la sélectionner dans la liste ci-dessous. ^DJI ^IXIC YHOO AAPL INTC AMZN ● ● ● PAGE 1 DE 2 Utilisez le menu Afficher le format pour basculer la transition de fluctuation du cours des actions sur Valeur ou Pourcentage. Ajouter un nouveau symbole… Créez un snippet pour votre action favorite. Importer des symboles à partir de Afficher le format Valeur Sélectionnez le symbole de l'action sur la page d'accueil du widget Finance Yahoo!® et À propos de Yahoo! Finance... consultez les informations financières détaillées. Appuyez sur le bouton jaune. Sélectionnez le menu Ajouter un extrait, puis appuyez sur ENTERE pour ajouter l'action en tant que snippet. Suppression d'un Snippet Lancez le snippet à partir du dock. Appuyez sur le bouton jaune. Sélectionnez le menu Supprimer l'extrait, puis appuyez sur ENTERE pour supprimer le snippet. Français - 56 BN68-02325A-Fre.indb 56 2009-05-19 �� 3:55:21 ¦ Dépannage d'Internet@TV Problème Solution possible Certains services du widget ne fonctionnent pas. Contactez le prestataire de service. Dans le widget, appuyez sur le bouton vert et accédez aux informations de contact ou reportez-vous au site Web d'aide pour connaître les coordonnées du fournisseur du widget. Reportez-vous au site Web d'aide. Certains contenus de widget sont uniquement en anglais. Comment puis-je en modifier la langue? La langue du contenu des widgets peut être différente de celle de l'interface utilisateur des widgets. Ce paramètre dépend du prestataire de service. Après restauration des paramètres d'usine, le service de widget Yahoo ne fonctionne plus et un message d'avertissement s'affiche. Une fois la restauration des paramètres d'usine terminée, éteignez puis rallumez votre téléviseur. Relancez ensuite Internet@TV. Dans le widget Flickr, je me suis connecté à mon compte, mais je ne parviens pas à voir mon image. Visitez le site Web Yahoo et activez votre compte Flickr avec votre ID Yahoo!. ID. Dans le widget Profil, j'ai modifié mon emplacement mais les paramètres précédents restent actifs. Eteignez puis rallumez votre téléviseur. Relancez ensuite Internet@TV. Vous pouvez à présent profiter de tous les services de widget services pris en charge au nouvel emplacement. ¦ Site Web d'aide Pays Austria Belgium Czech Denmark Site Web d’aide www.samsung.com → Produkte → Fernseher → [email protected] → Internet@TV www.samsung.com → Producten → televisies → [email protected] → Internet@TV www.samsung.com → Produits → téléviseurs → [email protected] → Internet@TV www.samsung.com → Produkty → televizory → [email protected] → Internet@TV www.samsung.com → Produkter → stue & soveværelse → [email protected] → Internet@TV Finland www.samsung.com → Tuotteet → kodinelektroniikka → [email protected] → Internet@TV France www.samsung.com → Produits → télévisions → [email protected] → Internet@TV Germany www.samsung.com → Privatkunden → Fernseher → [email protected] → Internet@TV Greece www.samsung.com → Προϊόντα → τηλεοράσεις → [email protected] → Internet@TV Hungary www.samsung.com → Termékek → televíziók → [email protected] → Internet@TV Ireland www.samsung.com → Products → Television → [email protected] → Internet@TV Italy Netherlands www.samsung.com → Prodotti → TV → [email protected] → Internet@TV www.samsung.com → Producten → televisies → [email protected] → Internet@TV Norway www.samsung.com → Produkter → hverdagsrom & soverom → [email protected] → Internet@TV Poland www.samsung.com → Produkty → telewizory → [email protected] → Internet@TV Portugal www.samsung.com → Produtos para Consumidores → televisores → [email protected] → Internet@TV Slovakia www.samsung.com → Produkty → televízory → [email protected] → Internet@TV Spain Sweden Switzerland United Kingdom www.samsung.com → Productos → televisores → [email protected] → Internet@TV www.samsung.com → Produkter → vardagsrum & sovrum → [email protected] → Internet@TV www.samsung.com → Produits → télévisions → [email protected] → Internet@TV www.samsung.com → Produkte → Fernseher → [email protected] → Internet@TV www.samsung.com → Products → Television → [email protected] → Internet@TV Turkey www.samsung.com → Tüketici Ürünleri → televizyon → [email protected] → Internet@TV Estonia www.samsung.com → Klientidele → Televiisorid → [email protected] → Internet@TV Latvia www.samsung.com → Klientiem → Televizori → [email protected] → Internet@TV Lithuania www.samsung.com → Namams → Televizoriai → [email protected] → Internet@TV Russia www.samsung.com → Продукты → Телевизоры → [email protected] → Internet@TV Ukraine www.samsung.com → Потребительские продукты → телевизоры → [email protected] → Internet@TV N L' tape d'acc s peut tre modifi e ult rieurement. N Certains pays peuvent avoir plusieurs liens. Français - 57 BN68-02325A-Fre.indb 57 2009-05-19 �� 3:55:21 Internet@TV N En fonction de votre pays, il se peut que cette fonction ne soit pas prise en charge. (Non disponible dans tous les pays) N Si vous rencontrez des problèmes avec le service d'un widget, contactez le prestataire de service. Dans le widget, appuyez sur le bouton vert et accédez aux informations de contact ou reportez-vous au site Web d'aide pour connaître les coordonnées du prestataire de service. N En fonction de votre pays, il se peut que seul l'anglais soit pris en charge dans le service du widget. ¦ Mise en route d'Internet@TV Internet@TV fournit les services de widget SAMSUNG via une connexion réseau. Le contenu Internet@TV peut varier d'un fournisseur de contenu à l'autre. Vous pouvez accéder à diverses informations, telles que YouTube, via le service Internet@TV. N La configuration des widgets et les services associés peuvent varier en fonction du pays sélectionné. Une fois le pays modifié, éteignez puis rallumez votre téléviseur. Vous pouvez ensuite utiliser le service de widget pris en charge dans le nouveau pays. Si Pays est réglé sur Autres, le téléviseur ne peut pas reconnaître votre pays. Dans ce cas, sélectionnez-en un directement dans la liste des pays de ce service. N Si une police fournie par le propriétaire du contenu n'est pas prise en charge sur le téléviseur, elle ne pourra pas être visualisée correctement. N Pour plus d'informations sur la configuration pour votre pays, reportez-vous aux instructions Fonction Plug & Play. N En fonction de l'état du réseau, cette fonction peut se révéler relativement lente ou instable. N Avant d'utiliser Internet@TV, commencez par configurer le réseau. Pour plus d'informations sur la configuration de votre réseau, reportez-vous à la section "Configuration du réseau". Lors de la première exécution d'Internet@TV, des réglages de base s'effectuent de manière automatique. (Cela peut prendre quelques minutes.) 1. Appuyez sur le bouton MENU. Appuyez sur le bouton ▲ ou ▼ pour sélectionner Application, puis sur le bouton ENTERE. 2. Appuyez sur le bouton ▲ ou ▼ pour sélectionner Internet@TV, puis sur le bouton ENTERE. O Appuyez sur le bouton Internet@ de la télécommande pour afficher le menu Internet@TV. 3. Le contrat d'utilisation s'affiche. Cliquez sur Accepter pour en accepter les conditions. 4. Le message Statistics & Analysis s'affiche. Cliquez sur Accepter pour en accepter les conditions. ¦ Configuration d'Internet@TV Vous pouvez consulter et utiliser les menus relatifs à Signature unique, à la gestion du système et aux propriétés. Appuyez sur le bouton ▲ ou ▼ pour sélectionner Configuration, puis sur le bouton ENTERE. ❑ Signature unique Vous pouvez utiliser ce menu lors de la création et de la suppression du compte. Avec Signature unique, vous pouvez gérer votre compte, y compris les informations de compte du site de contenu. Vous ne devez pas ouvrir d'autre session. N Le compte est réservé à internet@TV. ■ Créer un compte Vous pouvez créer un compte et vous connecter au site du service voulu. N Vous ne pouvez pas créer plus de 10 comptes. N Le nom du compte ne doit pas excéder 10 caractères. N Si aucun service ne requiert de connexion, vous ne pouvez pas créer de compte. ■ Gestion de compte ● Site service : vous pouvez enregistrer les informations de connexion du site du service (comme YouTube). ● Modif. mot de passe: permet de modifier le mot de passe du compte. ● Supprimer: permet de supprimer le compte. N Si vous oubliez le mot de passe du compte, appuyez sur les boutons de la télécommande dans l'ordre suivant, ce qui réinitialise Internet@TV : POWER (Arrêt) → MUTE → 9 → 4 → 8 → POWER (Marche). Si vous utilisez cette fonction, tous les comptes sont supprimés. Français - 58 BN68-02325A-Fre.indb 58 2009-05-19 �� 3:55:22 ❑ Installation du système N Ex. auto. téléscr., Durée téléscripteur ne soit pas prise en charge. ■ Modifier le mot de passe du service de verrouillage N Le mot de passe par défaut d’un nouveau téléviseur est réglé sur 0-0-0-0. N Si vous avez oublié le mot de passe, appuyez sur les boutons de la télécommande dans l'ordre suivant, ce qui remet le code à 0-0-0-0 : POWER (Arrêt) → MUTE → 8 → 2 → 4 → POWER (Marche). ■ Durée du service Sélectionnez l'option voulue pour définir le délai avant l'activation de l'écran de veille. ■ Ex. auto. téléscr. → Arrêt / Marche Sélectionnez l'option voulue pour activer automatiquement ou non le message défilant lors de la mise en marche du téléviseur. ■ Durée téléscripteur Sélectionnez l'option voulue pour définir le délai avant l'activation de l'écran de veille. ❑ Propriétés Permet d'afficher des informations sur Internet@TV. Vous pouvez déterminer la vitesse de votre service de télévision par Internet à l'aide de la section correspondante. ¦ Utilisation du service Internet@TV Dans un widget proposant plusieurs menus de catégories, vous pouvez visualiser le contenu de ces menus grâce aux boutons ◄ et ► Connexion au compte 1. Appuyez sur le bouton rouge. 2. Sélectionnez le Compte utilisateur voulu, puis appuyez sur ENTERE. 3. Saisissez le mot de passe. N Une fois la connexion établie, le compte utilisateur s'affiche à l'écran. N Pour que la connexion soit possible, au moins un compte doit être enregistré. Pour créer un compte, reportez-vous à la section Configuration d'Internet@TV. Utilisation de la galerie des widgets Vous pouvez utiliser la fonction Exéc. service, Verr., Installer service dans le widget existant et afficher la description du service du widget qui n'est pas installé. Sur Internet@TV, vous pouvez ajouter et utiliser divers widgets fournis par votre prestataire de service. Cette possibilité peut différer d'un prestataire à l'autre. ● Exéc. service: permet d'exécuter le service du widget. ● Verrouil.: verrouille le service. ● Installer service (ou Supprimer service): installe ou supprime le service du widget. Utilisation du widget YouTube Vous pouvez regarder le film proposé par YouTube. Si vous avez créé un compte sur YouTube, enregistrez les informations de votre compte via la gestion des comptes. Vous pouvez alors utiliser la catégorie My Favourites. N Le menu peut être modifié selon le service Web. N Le contenu peut être inapproprié pour les enfants. Dans ce cas, utilisez la fonction Verrouil. dans la galerie de widgets (Galerie de Widgets). Aujourd'hui Le plus vu Le plus côté Le plus populaire Le plus débatu Les favoris Le plus de liens Le plus de réponses Présenté 1/7 Seeking Justice Decades Later 0:01:30 Regardé : 819,252 Classement : 2009-02-07 Breaking News Alerts by E-Mail 0:00:45 Regardé : 819,252 Classement : 2009-02-07 The world reacts to U.S. bailout plan 0:01:30 Regardé : 819,252 Classement : 2009-02-07 Boo Hoo in the Boardroom 0:03:26 Regardé : 819,252 Classement : 2009-02-07 ' Modifier le mode rrModifier la page U DéplacerE OK RRetour Français - 59 BN68-02325A-Fre.indb 59 2009-05-19 �� 3:55:22 ¦ Dépannage d'Internet@TV Problème Solution possible Certains services du widget ne fonctionnent pas. Contactez le prestataire de service. Dans le widget, appuyez sur le bouton vert et accédez aux informations de contact ou reportez-vous au site Web d'aide pour connaître les coordonnées du fournisseur du widget. Reportez-vous au site Web d'aide. Quel est l'intérêt présenté par la fonction Signature unique? Si vous créez un compte et que vous enregistrez vos informations de connexion au service souhaité, vous pouvez accéder au contenu personnalisé sans avoir à vous reconnecter. Lorsqu'une erreur réseau se produit, seul le menu Setting est disponible. Si la connexion réseau ne fonctionne pas, il se peut que votre service soit limité. En effet, toutes fonctions à l'exception du menu Setting sont nécessaires à l'établissement de la connexion Internet. Est-il possible de regarder des films pour adultes sur YouTube ? Par défaut, ce contenu est bloqué. Il est toutefois possible de l'afficher au moyen de la fonction de recherche. Dans ce cas, utilisez la galerie de widgets pour verrouiller le service de ce widget. ¦ Site Web d'aide Pays Austria Belgium Czech Denmark Site Web d'aide www.samsung.com → Produkte → Fernseher → [email protected] → Internet@TV www.samsung.com → Producten → televisies → [email protected] → Internet@TV www.samsung.com → Produits → téléviseurs → [email protected] → Internet@TV www.samsung.com → Produkty → televizory → [email protected] → Internet@TV www.samsung.com → Produkter → stue & soveværelse → [email protected] → Internet@TV Finland www.samsung.com → Tuotteet → kodinelektroniikka → [email protected] → Internet@TV France www.samsung.com → Produits → télévisions → [email protected] → Internet@TV Germany www.samsung.com → Privatkunden → Fernseher → [email protected] → Internet@TV Greece www.samsung.com → Προϊόντα → τηλεοράσεις → [email protected] → Internet@TV Hungary www.samsung.com → Termékek → televíziók → [email protected] → Internet@TV Ireland www.samsung.com → Products → Television → [email protected] → Internet@TV Italy Netherlands www.samsung.com → Prodotti → TV → [email protected] → Internet@TV www.samsung.com → Producten → televisies → [email protected] → Internet@TV Norway www.samsung.com → Produkter → hverdagsrom & soverom → [email protected] → Internet@TV Poland www.samsung.com → Produkty → telewizory → [email protected] → Internet@TV Portugal www.samsung.com → Produtos para Consumidores → televisores → [email protected] → Internet@TV Slovakia www.samsung.com → Produkty → televízory → [email protected] → Internet@TV Spain Sweden Switzerland United Kingdom www.samsung.com → Productos → televisores → [email protected] → Internet@TV www.samsung.com → Produkter → vardagsrum & sovrum → [email protected] → Internet@TV www.samsung.com → Produits → télévisions → [email protected] → Internet@TV www.samsung.com → Produkte → Fernseher → [email protected] → Internet@TV www.samsung.com → Products → Television → [email protected] → Internet@TV Turkey www.samsung.com → Tüketici Ürünleri → televizyon → [email protected] → Internet@TV Estonia www.samsung.com → Klientidele → Televiisorid → [email protected] → Internet@TV Latvia www.samsung.com → Klientiem → Televizori → [email protected] → Internet@TV Lithuania www.samsung.com → Namams → Televizoriai → [email protected] → Internet@TV Russia www.samsung.com → Продукты → Телевизоры → [email protected] → Internet@TV Ukraine www.samsung.com → Потребительские продукты → телевизоры → [email protected] → Internet@TV N L' tape d'acc s peut tre modifi e ult rieurement. N Certains pays peuvent avoir plusieurs liens. Français - 60 BN68-02325A-Fre.indb 60 2009-05-19 �� 3:55:22 Centre de réseau domestique ¦ Centre de réseau domestique A propos du Centre de réseau domestique Le Centre de réseau domestique connecte votre téléviseur et vos téléphones portables via un réseau. Vous pouvez afficher les appels reçus, le contenu des messages texte et les programmes définis sur le téléphone portable sur le téléviseur à l'aide du Centre de réseau domestique. En outre, vous pouvez lire le contenu multimédia enregistré sur les téléphones portables (vidéos, photos, musique, etc.) en l'envoyant vers le téléviseur via le réseau. N Si l'appareil prend en charge la fonction DLNA DMC (Digital Media Controller) le Centre de réseau domestique est disponible. N Cette fonction permet la compatibilité avec les téléphones mobiles Samsung ultérieurs. Pour plus d’informations, visitez ou contactez le centre d’appel Samsung. Il peut être nécessaire d'installer des logiciels supplémentaires sur l'appareil mobile. Pour plus d'informations, reportez-vous au manuel de celui-ci. Connexion au Centre de réseau domestique Pour plus d'informations sur les paramètres réseau, reportez-vous à la section "Configuration du réseau". ● Connexion à un réseau Ad-hoc Wi-Fi 1. Connectez le "Samsung Wireless LAN Adapter" au port USB1(HDD) ou USB2 du téléviseur. Panneau latéral du téléviseur Téléphone Samsung Wireless LAN Adapter ou 2. Pour plus d'informations sur la configuration de votre réseau Ad-hoc, reportez-vous à la section "Configuration du réseau". N Pour obtenir des informations sur la configuration des paramètres réseau du téléphone portable, reportez-vous au manuel correspondant. 3. Configurez les adresse IP, SSID et mot de passe du téléphone portable dans les paramètres Ad-hoc de ce dernier à l'aide des Nom du réseau (SSID) et Code de sécurité (mot de passe) affichés sur le téléviseur. ● Connexion via un routeur câblé / sans fil 1. Connectez le routeur IP câblé/sans fil sur le port LAN du téléviseur au moyen du câble LAN ou raccordez le port USB1(HDD) ou USB2 du téléviseur au Samsung Wireless LAN Adapter. N Pour obtenir des informations sur les procédures de configuration du routeur câblé/sans fil et du téléphone portable, reportez-vous au manuel de l'appareil correspondant. Routeur IP câblé/sans fil Téléphone Câble LAN Panneau latéral du téléviseur Routeur IP câblé/sans fil ou Téléphone Câble LAN Samsung Wireless LAN Adapter Français - 61 BN68-02325A-Fre.indb 61 2009-05-19 �� 3:55:24 ¦ Configuration du Centre de réseau domestique ❑ Message / Média Affiche la liste des téléphones portables qui vous permettent d'utiliser la fonction Message. N La fonction Media est disponible sur d'autres appareils mobiles prenant en charge la fonction DLNA DMC. Centre de réseau domestique Message 111-1234-5671 : Autor. Média 111-1234-5672 : Autor. Configuration 111-1234-5673 : Refusé 111-1234-5674 : Refusé ■ Autor. Autorise le téléphone portable. ■ Refusé Bloque le téléphone portable. ■ Supprimer Supprime le téléphone portable de la liste. N Cette fonction efface simplement le nom de la liste. Si l'appareil mobile effacé s'allume ou tente de se reconnecter au téléviseur, il est possible qu'il s'affiche à nouveau. R Retour e Quitter ❑ Configuration ■ Message → Marche / Arrêt Vous pouvez activer ou non l'utilisation de la fonction Message (appels reçus, contenu des messages texte, programmes définis sur le téléphone portable, etc). ■ Média → Marche / Arrêt Vous pouvez choisir d'utiliser ou non la fonction Media qui lit le contenu (vidéos, photos, musique) du téléphone portable. ■ Centre de réseau domestique Message Message : Marche Média Média : Marche Configuration Nom TV : TV Nom TV R Retour e Quitter Vous pouvez donner un nom au téléviseur afin de le retrouver plus facilement sur l'appareil mobile. N Si vous sélectionnez Entrée util., vous pouvez taper le nom du téléviseur à l'aide de l'OSK (On Screen Keyboard, le clavier virtuel). ¦ Utilisation de la fonction Message Cette fonction permet d'afficher les appels reçus, le contenu des messages texte et les programmes définis sur le téléphone portable via la fenêtre d'alarme lorsque vous mari regardez la télévision. SMS N Pour désactiver cette fenêtre d'alarme Message, définissez Message sur Arrêt Nouveau message reçu Voulez-vous afficher les dans le menu Configuration du Centre de réseau domestique. détails ? N La fenêtre d'alarme s'affiche pendant 20 secondes. Si vous n'appuyez sur aucune touche ou si Ann. est sélectionné, elle apparaît jusqu'à trois fois à des intervalles OK Annuler de 5 minutes. N Si OK est sélectionné ou s'il ne l'est pas alors que le message est affiché trois fois, le message est supprimé sans toutefois être supprimé du téléphone portable. N La fenêtre d'alarme simple peut s'afficher durant l'utilisation de certaines applications (Media Play, Content Library, etc.). Dans ce cas, pour afficher le contenu du message, basculez vers le mode de consultation de la télévision. N Lorsque le message d'un téléphone portable inconnu s'affiche, sélectionnez ce dernier dans l'élément Message du Centre de réseau domestique et sélectionnez Refusé pour le bloquer. Français - 62 BN68-02325A-Fre.indb 62 2009-05-19 �� 3:55:25 Affichage du message Si un nouveau message texte (SMS) arrive lorsque vous regardez la télévision, la fenêtre d'alarme s'affiche. Si vous cliquez sur le bouton OK, le contenu du message s'affiche. N Vous pouvez configurer les paramètres de consultation du contenu des messages texte (SMS) sur le téléphone portable. Pour obtenir des informations sur les procédures concernées, reportez-vous au manuel du téléphone portable. N Certains caractères spéciaux peuvent s'afficher sous forme de caractères vides ou cassés. Alarme de réception d'appel Si vous recevez un appel lorsque vous regardez la télévision, la fenêtre d'alarme s'affiche. Alarme des programmes Lorsque vous regardez la télévision, la fenêtre d'alarme apparaît et affiche le programme enregistré. N Vous pouvez configurer les paramètres de consultation du contenu des programmes sur le téléphone portable. Pour obtenir des informations sur les procédures concernées, reportez-vous au manuel du téléphone portable. N Certains caractères spéciaux peuvent s'afficher sous forme de caractères vides ou cassés. ¦ Utilisation de la fonction Media Une fenêtre d'alarme informe l'utilisateur que le contenu multimédia (vidéos, photos, musique) provenant du téléphone portable va s'afficher sur le téléviseur. Le contenu est lu automatiquement 3 secondes après l'affichage de la fenêtre d'alarme. Si vous appuyez sur le bouton RETURN ou EXIT lorsque la fenêtre d'alarme s'affiche, le contenu Media Contents n'est pas lu. N Pour désactiver la transmission du contenu multimédia en provenance du téléphone portable, définissez Média sur Arrêt dans le menu Configuration du Centre de réseau domestique. N En fonction de sa résolution et de son format, le contenu peut ne pas être lu sur le téléviseur. Lecture des médias à partir de “111-123-5671” Boutons de commande du lecteur multimédia Bouton ◄/► ENTERE RETURN TOOLS INFO EXIT Opération Déplace le curseur pour sélectionner un élément. Durant la lecture d'un fichier film : Avance ou recule dans le film en cours de lecture. Appuyer sur le bouton ENTERE pendant la lecture suspend celle-ci. Appuyer sur le bouton ENTERE en mode Pause relance la lecture. Revient au menu précédent. Exécute diverses fonctions dans les menus Photo, Musique et Film. Affiche des informations sur le fichier. Arrête le mode Media Play et retourne au mode TV. N Les boutons ENTERE et ◄/► peuvent ne pas fonctionner selon le type de contenu multimédia. N Il est possible de contrôler la lecture à l'aide de l'appareil mobile. Pour plus d'informations, reportez-vous au manuel de celuici. Français - 63 BN68-02325A-Fre.indb 63 2009-05-19 �� 3:55:26 RECOMMENDATIONS ¦ Fonction Télétexte La plupart des chaînes de télévision offrent des services d'informations écrites via le télétexte. La page d'index du télétexte contient des instructions sur l'utilisation du service. Vous pouvez, en outre, sélectionner différentes options à l'aide des touches de la télécommande. N Pour que les informations du télétexte s'affichent correctement, la réception des chaînes doit être stable. Dans le cas contraire, des informations pourraient manquer ou certaines pages pourraient ne pas s'afficher. 1 : (quitter) Quitte l'affichage du télétexte. 2 0 (mode) Permet de sélectionner le mode Télétexte (LIST/FLOF). Si vous appuyez sur cette touche en mode LISTE, vous basculez en mode d'enregistrement de liste. En mode d'enregistrement de liste, vous pouvez enregistrer une page télétexte dans une liste à l'aide du bouton 8 (mémoriser). 3 5 (afficher) Permet d'afficher le texte masqué (par exemple, les réponses à un questionnaire). Pour rétablir le mode d'affichage normal, appuyez de nouveaux dessus. 4 4 (taille) Permet d'afficher la moitié supérieure de l'écran en caractères deux fois plus grands. Pour afficher la moitié inférieure de l'écran, appuyez de nouveau sur cette touche. Pour rétablir le mode d'affichage normal, appuyez dessus une fois de plus. 5 Boutons de couleur (rouge/vert/ jaune/bleu) Si une société de télédiffusion utilise le système FASTEXT, les différentes rubriques d'une page de télétexte sont associées à un code couleur qui permet de les sélectionner à l'aide des touches de couleur de la télécommande. Appuyez sur la touche dont la couleur correspond à celle de la rubrique souhaitée. La page affiche d'autres informations en couleur que vous pouvez sélectionner de la même manière. Pour afficher la page précédente ou la page suivante, appuyez sur la touche de couleur correspondante. 6 / (télétexte actif/mixte) Permet d'activer le mode Télétexte après avoir choisi la chaîne diffusant le service télétexte. Appuyez deux fois sur cette touche pour superposer le télétexte à l'émission en cours de diffusion. 7 8 (mémoriser) Permet d'enregistrer les pages de télétexte. 8 1 (page secondaire) Permet d'afficher une page secondaire. 9 2 (page suivante) Permet d'afficher la page de télétexte suivante. 1 8 2 9 0 3 INFO GUIDE ! @ 4 0 3 (page précédente) Permet d'afficher la page de télétexte précédente. ! 9 (hold) Permet de bloquer l'affichage sur une page précise, si celle-ci est reliée à plusieurs pages secondaires qui défilent automatiquement. Pour reprendre l'affichage de celles-ci, appuyez de nouveau sur cette touche. # 5 6 7 CH LIST AD @ 6 (index) Permet d'afficher la page d'index du télétexte (sommaire) à tout moment. # 7 (annuler) Permet d'afficher le programme lors de la recherche d'une page. N Vous pouvez changer de page de télétexte en appuyant sur les touches numériques de la télécommande. Français - 64 BN68-02325A-Fre.indb 64 2009-05-19 �� 3:55:26 Les pages de télétexte sont organisées en six catégories : Catégorie A B C D E F Sommaire Numéro de la page sélectionnée. Identité de la chaîne émettrice. Numéro de la page actuelle ou indications de recherche. Date et heure. Texte. Informations sur l'état. Informations FASTEXT. N Les informations du télétexte sont souvent réparties sur plusieurs pages qui s'affichent successivement. Ces pages sont accessibles en : entrant le numéro de page ; sélectionnant un titre dans une liste ; sélectionnant un titre de couleur (système FASTEXT). N Le téléviseur prend en charge le niveau de télétexte 2.5 qui peut afficher des graphiques ou textes supplémentaires. N En fonction de la transmission, des panneaux latéraux vides peuvent apparaître lors de l'affichage du télétexte. N Dans ce cas, les graphiques ou textes supplémentaires ne sont pas transmis. N Les téléviseurs plus anciens qui ne prennent pas en charge la version 2.5 ne peuvent pas afficher les graphiques et textes supplémentaires, indépendamment de la transmission télétexte. O Appuyez sur le bouton TV pour quitter l'affichage du télétexte. ¦ Montage du socle N Préréglage : Placez le support du guide et le goulot du couvercle sur le socle et fixez-les à l'aide des vis. Arrière Avant 1. Fixez le téléviseur LCD sur le socle. N Le téléviseur doit être porté par au moins deux personnes. N Veillez à bien faire la distinction entre l'avant et l'arrière du socle lors de l'assemblage. N Pour être certain d'installer le téléviseur sur son socle au niveau approprié, n'exercez pas de pression vers le bas excessive sur ses côtés supérieurs gauche et droit. 2. Insérez les vis dans l'emplacement 1, puis dans l'emplacement 2. N Redressez le produit et serrez les vis. Si vous serrez les vis tandis que le téléviseur LCD est couché, il se peut qu'il penche d'un côté. N Le socle est monté pour les modèles dont l’écran a une diagonale égale ou supérieure à 55 pouces. 2 1 Français - 65 BN68-02325A-Fre.indb 65 2009-05-19 �� 3:55:27 ¦ Branchement du socle 1. Retirez les vis situées à l’arrière du téléviseur. 2. Retirez le support du téléviseur. N Le téléviseur doit être porté par au moins deux personnes. 3. Recouvrez le trou inférieur à l'aide du cache. ¦ Installation du kit de montage mural Les éléments du support mural (vendus séparément) permettent de fixer le téléviseur au mur. Pour plus d'informations sur l'installation du support mural, reportez-vous aux instructions fournies avec les éléments de montage mural. Faites appel à un technicien pour vous aider à installer le support mural. Samsung Electronics ne saurait être tenu responsable de tout dommage sur le produit ni de toute blessure subie par vous ou par d'autres personnes si vous choisissez d'effectuer l'installation murale. N'installez pas le kit de montage mural lorsque le téléviseur est sous tension. Cela pourrait entraîner une blessure par choc électrique. ¦ Assemblage des câbles Insérez les câbles dans le serre-câbles de telle manière qu'ils ne soient pas visibles à travers le pied transparent. ¦ Verrou antivol Kensington Le verrou Kensington est un dispositif utilisé pour fixer physiquement le système en cas d'utilisation dans un lieu public. L'aspect du verrou et la méthode de verrouillage peuvent différer de l'illustration en fonction du fabricant. Consultez le manuel fourni avec le verrou Kensington pour obtenir des instructions d’utilisation. N Le dispositif de verrouillage est vendu séparément. N L'emplacement du verrou Kensington peut varier en fonction du modèle. 1. Insérez le dispositif de verrouillage dans le logement Kensington du téléviseur LCD (1), puis tournez-le dans le sens de verrouillage (2). 3 2 1 <Optionnel> 2. Branchez le câble du verrou Kensington (3). 3. Fixez le câble du verrou Kensington sur un bureau ou tout autre objet lourd inamovible. Français - 66 BN68-02325A-Fre.indb 66 2009-05-19 �� 3:55:29 ¦ Sécurisation de l'emplacement d'installation Respectez les distances requises entre le produit et d'autres objets (p. ex. murs) pour assurer une ventilation adéquate. Le non-respect de cette consigne pourrait provoquer un incendie ou un problème avec le produit en raison de l'augmentation de la température interne de ce dernier. Installez le produit de manière à respecter les distances requises indiquées sur la figure. N En cas d'utilisation d'un support ou de montage mural, n'utilisez que des pièces Samsung Electronics. • L'emploi de pièces d'un autre fabricant risque d'entraîner des problèmes avec le produit ou d'occasionner des blessures dues à la chute du produit. • L'emploi de pièces d'un autre fabricant risque d'entraîner un problème avec le produit ou de provoquer un incendie en raison de l'augmentation de la température interne du produit due à une ventilation insuffisante. N L'aspect peut varier en fonction du produit. Installation du produit sur un support Montage mural du produit 10 cm 10 cm 10 cm 10 cm 10 cm 10 cm 10 cm ¦ Fixation du téléviseur au mur Attention : Si vous tirez ou poussez le téléviseur ou si vous grimpez dessus, il risque de tomber. Veillez en particulier, à ce que vos enfants ne se suspendent pas au téléviseur, ni ne le déséquilibrent, car cela pourrait le faire basculer et occasionner des blessures graves pouvant entraîner la mort. Respectez toutes les précautions de sécurité indiquées dans la brochure relative à la sécurité. Pour une stabilité accrue, installez le dispositif antichute comme indiqué ci-après. ■ Pour éviter toute chute du téléviseur : 1. Glissez les vis dans les colliers, puis fixez-les solidement au mur. Assurez-vous que les vis sont solidement fixées au mur. N En fonction du type de mur, il est possible que vous ayez besoin de matériel supplémentaire, tel que des chevilles. N Les colliers, vis et chaînettes n'étant pas fournis, vous devez les acheter séparément. Mur 2. Retirez les vis situées sur la partie centrale arrière du téléviseur, glissez-les dans les colliers, puis fixez-les de nouveau sur le téléviseur. N Il est possible que les vis ne soient pas fournies avec le produit. Dans ce cas, achetez des vis présentant les caractéristiques suivantes. N Caractéristiques des vis Pour un téléviseur LCD 17 à 29 pouces : M4 X L15 / Pour un téléviseur LCD 32 à 40 pouces : M6 X L15 3. Reliez les bagues fixées au téléviseur et celles fixées sur le mur à l'aide de chaînettes, puis attachez-les fermement. N Placez le téléviseur à proximité du mur afin qu'il ne bascule pas vers l'arrière. N Il est recommandé de placer la chaînette de façon à ce que les colliers fixés au mur soient placés à même hauteur ou plus bas que ceux fixés au téléviseur. N Détachez la chaînette avant de déplacer le téléviseur. Mur 4. Vérifiez que toutes les connexions sont fixées correctement. Vérifiez régulièrement que les connexions ne présentent aucun signe d'usure. Si vous avez un doute quant à la sécurité des connexions, contactez un installateur professionnel. Français - 67 BN68-02325A-Fre.indb 67 2009-05-19 �� 3:55:30 ¦ Dépannage : Avant de contacter un technicien Aucune image ni aucun son Vérifiez que le cordon d'alimentation secteur est branché à une prise murale. Vérifiez que vous avez appuyé sur le bouton de marche/arrêt du téléviseur. Vérifiez les réglages du contraste et de la luminosité de l'image. Vérifiez le volume. Image normale, mais aucun son Vérifiez le volume. Vérifiez si le bouton MUTEM de la télécommande a été actionné. Vérifiez les paramètres Sélection Haut-parleur. Sur votre ordinateur, contrôlez l'alimentation et le câble du signal. L'écran est noir et le témoin d'alimentation clignote sans arrêt. Le téléviseur utiliser son système de gestion de l'alimentation. Déplacez la souris de l'ordinateur ou appuyez sur une touche du clavier. Aucune image ou image en noir et blanc Interférence de son et d'image Réglez les paramètres de couleur. Vérifiez que le système d'émission sélectionné est correct. Image neigeuse ou floue, distorsion du son Dysfonctionnements de la télécommande Vérifiez l'orientation, l'emplacement et les connexions de l'antenne. Cette interférence est souvent due à l'utilisation d'une antenne intérieure. Le message "Vérifier le signal du câble." s'affiche En mode PC, le message "Mode non pris en charge" s'affiche. L'image endommagée apparaît dans le coin de l'écran Le message "Rétablir tous les paramètres à leur valeur par défaut." s'affiche. Il se peut que vous voyiez de petites particules si vous regardez de près le bord du cadre de l'écran du téléviseur. Assurez-vous que le câble du signal est correctement connecté au PC et aux sources vidéo. Assurez-vous le PC et les sources vidéo sont sous tension. Essayez d'identifier l'appareil électrique qui perturbe le fonctionnement du téléviseur et éloignez-le. Branchez le téléviseur à une autre prise secteur. Remplacez les piles de la télécommande. Nettoyez la lentille de la télécommande. Contrôlez les bornes des piles. Vérifiez la résolution maximale et la fréquence de la carte vidéo. Comparez ces valeurs aux données des modes d'affichage. Si Adapter écran est sélectionné sur certains périphériques externes, l'image endommagée peut apparaître dans le coin de l'écran. Ce problème est dû à des périphériques, pas au téléviseur. Il s'affiche lorsque vous appuyez longuement sur le bouton EXIT. Les valeurs par défaut des paramètres du produit sont rétablies. Elles font partie de la conception du produit et ne constituent pas un défaut. N Ce téléviseur LCD TFT est équipé d'un écran constitué de sous-pixels (6 220 800) dont la fabrication nécessite une technologie sophistiquée. Il se peut toutefois que des points clairs ou sombres apparaissent à l'écran. Ceux-ci n'ont aucune incidence sur les performances du produit. Français - 68 BN68-02325A-Fre.indb 68 2009-05-19 �� 3:55:30 ¦ Caractéristiques Nom du modèle Taille de l'écran (diagonale) Résolution du PC (optimale) Son (Sortie) Dimensions (LxPxH) Corps Avec socle Poids Avec socle Considérations environnementales Température de fonctionnement Humidité en cours de fonctionnement Température de stockage Humidité sur le lieu de stockage Socle orientable (Gauche / droite) Nom du modèle Taille de l'écran (diagonale) Résolution du PC (optimale) Son (Sortie) Dimensions (LxPxH) Corps Avec socle Poids Avec socle Considérations environnementales Température de fonctionnement Humidité en cours de fonctionnement Température de stockage Humidité sur le lieu de stockage Socle orientable (Gauche / droite) LE32B650, LE32B651 LE32B652, LE32B653 LE37B650, LE37B651 LE37B652, LE37B653 32 pouces 37 pouces 1 920 x 1 080 à 60 Hz 1 920 x 1 080 à 60 Hz 10 W X 2 10 W X 2 803 X 77 X 545 mm 803 X 239 X 601 mm 927 X 78 X 608 mm 927 X 255 X 668 mm 14 kg 17 kg 10°C à 40°C (50°F à 104°F) 10% à 80%, sans condensation -20°C à 45°C (-4°F à 113°F) 5 % à 95 %, sans condensation -20˚ ~ 20˚ LE40B650, LE40B651 LE40B652, LE40B653 LE46B650, LE46B651 LE46B652, LE46B653 40 pouces 46 pouces 1 920 x 1 080 à 60 Hz 1 920 x 1 080 à 60 Hz 10 W X 2 10 W X 2 995 X 79 X 650 mm 995 X 255 X 706 mm 1126 X 79 X 730 mm 1126 X 277 X 783 mm 19 kg 25 kg 10°C à 40°C (50°F à 104°F) 10% à 80%, sans condensation -20°C à 45°C (-4°F à 113°F) 5 % à 95 %, sans condensation -20˚ ~ 20˚ Nom du modèle LE55B650T, LE55B651T, LE55B652T, LE55B653T Taille de l'écran (diagonale) 55 ������ pouces Résolution du PC (optimale) 1 920 x 1 080 ������� à������ 60 Hz Son (Sortie) 15W X 2 Dimensions (LxPxH) Corps 1311 X 80 X 842 mm Avec socle 1311 X 305 X 895 mm Poids Avec socle 34 kg Considérations environnementales Température de fonctionnement 10°C à 40°C (50°F à 104°F) Humidité en cours de fonctionnement 10% à 80%, sans condensation Température de stockage -20°C à 45°C (-4°F à 113°F) Humidité sur le lieu de stockage 5 % à 95 %, sans condensation Socle orientable (Gauche / droite) -20˚ ~ 20˚ N La conception et les spécifications peuvent être modifiées sans préavis. N Ce périphérique est un appareil numérique de classe B. N Concernant l'alimentation et la consommation électrique, reportez-vous à l'étiquette apposée sur le produit. Français - 69 BN68-02325A-Fre.indb 69 2009-05-19 �� 3:55:30 ❑ Avviso relativo alla trasmissione TV digitale 1. Le funzioni relative alla trasmissione televisiva digitale (DVB) sono disponibili solo nei paesi o nelle aree in cui vengono trasmessi segnali digitali terrestri DVB-T (MPEG2 E MPEG4 AVC) o laddove l'utente abbia la possibilità di accedere a un servizio TV via cavo DVB-C (MPEG2 e MPEG4 AAC) compatibile. Verificare con il rivenditore locale la possibilità di ricevere segnali DVB-T o DVB-C. 2. DVB-T è lo standard del consorzio europeo DVB per la trasmissione della televisione digitale terrestre mentre DVB-C è lo standard per la trasmissione della televisione digitale via cavo. Tuttavia, alcune funzioni quali EPG (Electric Program Guide), VOD (Video on Demand) e altre non sono incluse in queste specifiche. Per questo motivo, al momento non sono disponibili. 3. Sebbene questo apparecchio TV soddisfi i più recenti standard DVB-T e DVB-C, [Agosto, 2008], la compatibilità con future trasmissioni digitali via cavo DVB-C e terrestri DVB-T non può essere garantita. 4. In base al paese o all'area in cui si utilizza questo televisore, alcuni fornitori di trasmissioni TV via cavo potrebbero applicare una tariffa aggiuntiva per tali servizi e richiedere all'utente di accettare i termini e le condizioni della loro offerta. 5. Alcune funzioni della trasmissione TV digitale potrebbero non essere disponibili in alcuni paesi o regioni e DVB-C potrebbe non funzionare correttamente con alcuni fornitori di servizi via cavo. 6. Per maggiori informazioni contattare il locale centro assistenza clienti SAMSUNG. ❑ Precauzioni da adottare quando si visualizza un'immagine fissa Un'immagine fissa può causare danni permanenti allo schermo TV ● Non visualizzare un’immagine fissa o parzialmente fissa sul pannello LCD per oltre 2 ore poiché può causare la ritenzione dell’immagine sullo schermo. Il fenomeno di ritenzione dell’immagine è anche noto come “bruciatura dello schermo”. Per evitare il fenomeno di ritenzione dell’immagine, ridurre il grado di luminosità e contrasto dello schermo quando si visualizza un’immagine fissa. ● Su un TV LCD, l’uso del formato 4:3 per un periodo di tempo prolungato può lasciare traccia dei bordi sulla parte sinistra, destra e centrale del video a causa delle differenti emissioni luminose dello schermo. La riproduzione di un DVD o l’uso di una console per videogiochi può causare effetti analoghi sullo schermo. Questo tipo di danni non è coperto dalla Garanzia. ● La visualizzazione prolungata di immagini fisse da videogiochi e PC può causare immagini residue parziali. Per evitare questo problema, ridurre la ‘luminosità’ e il ‘contrasto’ mentre si visualizzano immagini fisse. © 2009 Samsung Electronics Co., Ltd. Tutti i diritti riservati. BN68-02325A-Ita.indb 1 2009-05-19 �� 3:56:54 Contenuti ANYNET+ Configurazione del televisore ■ Accessori............................................................................................ 2 ■ Pannello di controllo........................................................................... 2 ■ Pannello dei collegamenti................................................................... 3 ■ Telecomando...................................................................................... 5 ■ Installazione delle batterie nel telecomando....................................... 6 ■ Visualizzazione dei menu................................................................... 6 ■ Attivazione modalità standby.............................................................. 7 ■ Funzioni Plug & Play.......................................................................... 7 ■ Visualizzazione del display................................................................. 8 CANALE ■ Menu Canale...................................................................................... 8 ■ Gestione dei canali ...........................................................................11 Immagine ■ Configurazione del menu Immagine................................................. 13 ■ Visione Picture-in-Picture................................................................. 16 ■ Uso del televisore come uno schermo PC....................................... 17 ■ Configurazione del televisore con il PC............................................ 18 SUONO ■ Configurazione del menu audio........................................................ 18 ■ Selezione della modalità audio......................................................... 20 Impostazione Ingressi / Supporto ■ Menu Ingressi................................................................................... 29 ■ Menu Supporto................................................................................. 29 Media Play (USB & DLNA) ■ Collegamento di un dispositivo USB................................................ 32 ■ Funzione Media Play........................................................................ 33 ■ Ordinamento Photo / Music / Movie List........................................... 34 ■ Photo / Music / Movie List Option Menu........................................... 35 ■ Slide Show / Music Play / Movie Play Option Menu ........................ 36 ■ Visualizzazione di una foto o di una proiezione di diapositive.......... 37 ■ Riproduzione di musica.................................................................... 38 ■ Riproduzione di un filmato................................................................ 39 ■ Utilizzo del menu Impostazione........................................................ 41 Media Play-DLNA ■ Impostazione della rete DLNA.......................................................... 42 ■ Installazione dell’applicazione DLNA................................................ 42 ■ Installazione dell’applicazione DLNA................................................ 43 ■ Uso della funzione DLNA.................................................................. 44 Content Library ■ Uso di Content Library...................................................................... 49 ■ Uso dei contenuti.............................................................................. 49 ■ Uso di Gestione contenuto............................................................... 50 Internet@TV ■ Guida introduttiva di Internet@TV.................................................... 51 ■ Modificare gli snippet nel dock......................................................... 53 ■ Uso del widget Profile....................................................................... 53 ■ Uso di Yahoo!® Galleria Widget...................................................... 54 ■ Uso di Yahoo!® Weather Widget...................................................... 55 ■ Uso del widget Yahoo!® News......................................................... 55 ■ Uso del widget Yahoo!® Flickr.......................................................... 56 ■ Uso del widget Yahoo!® Finance...................................................... 56 ■ Risoluzione dei problemi con internet@TV...................................... 57 ■ Guida Sito web................................................................................. 57 Internet@TV ■ Guida introduttiva di Internet@TV.................................................... 58 ■ Configurazione di Internet@TV........................................................ 58 ■ Uso del servizio Internet@TV........................................................... 59 ■ Risoluzione dei problemi con internet@TV...................................... 60 ■ Guida Sito web................................................................................. 60 CENTRO RETE DOM ■ Centro rete dom................................................................................ 61 ■ Impostazione di Centro rete dom..................................................... 62 ■ Uso della funzione Message............................................................ 62 ■ Uso della funzione Media................................................................. 63 Italiano ■ Configurazione del menu Impostazione........................................... 20 ■ Impostazione dell’orario.................................................................... 23 ■ Connessione di rete.......................................................................... 24 ■ Impostazione della rete.................................................................... 26 ■ Collegamento dei dispositivi Anynet+. ............................................. 45 ■ Configurazione di Anynet+............................................................... 46 ■ Passaggio tra dispositivi Anynet+. ................................................... 46 ■ Registrazione.................................................................................... 47 ■ Ascolto tramite il Ricevitore (Home theater)..................................... 47 ■ Risoluzione dei problemi con Anynet+.............................................. 48 RACCOMANDAZIONI ■ Funzione Teletext............................................................................. 64 ■ Installazione del piedistallo............................................................... 65 ■ Smontare il piedistallo...................................................................... 66 ■ Installazione del Kit di montaggio a parete....................................... 66 ■ Assemblaggio dei cavi...................................................................... 66 ■ Blocco antifurto Kensington.............................................................. 66 ■ Messa in sicurezza della posizione di installazione.......................... 67 ■ Fissaggio del televisore alla parete.................................................. 67 ■ Risoluzione dei problemi: Prima di contattare l’assistenza............... 68 ■ Specifiche......................................................................................... 69 ■ Diagrammi a blocch.......................................................................... 70 Questo apparecchio è fabbricato in conformità al D.M.28.08.95 n.548 ed in particolare a quanto specificato nell Art.2, comma 1. Questo apparecchio è fabbricato nella U.E. in conformità al D.M.28.08.95 n.548 Art.2, comma 1 ed al D.M.26.03.92 Art.1 ❑ Licenza TruSurround HD, SRS e il simbolo sono marchi di SRS Labs, Inc. La tecnologiaTruSurround HD è utilizzata su licenza di SRS Labs, Inc. Prodotto su licenza di Dolby Laboratories. Dolby e il simbolo della doppia D sono marchi di Dolby Laboratories. DivX® Certified riproduce video DivX®, compreso il contenuto extra. ❑ Simbolo N O T Nota Tasto One-Touch Tasto TOOLS Premere Italiano - BN68-02325A-Ita.indb 1 2009-05-19 �� 3:56:54 Configurazione del televisore N Le figure e le illustrazioni presenti in questo Manuale dell'utente sono fornite unicamente a titolo di riferimento e possono differire da quelle del prodotto attuale. Il design e le specifiche del prodotto possono variare senza preavviso allo scopo di migliorare costantemente le prestazioni del prodotto. ¦ Accessori Telecomando e batterie (2 tipo AAA) Cavo di alimentazione Warranty Card / Safety Guide (non disponibili in tutte le nazioni) Copertura-Fondo Panno per la pulizia Ferma cavo (In base al modello) CD del programma N Controllare che nella confezione del TV LCD siano contenuti i seguenti componenti. Se qualsiasi componente risultasse mancante, contattare il rivenditore. N La forma e il colore dei componenti possono variare in base al modello. ¦ Pannello di controllo N La forma e il colore del prodotto possono variare in base al modello. N I tasti del pannello anteriore possono essere attivati toccandoli con un dito. 8 8 7 6 5 4 3 21 8 8 7 6 4 2 1 3 5 1 P (ALIMENTAZIONE): Premere per accendere e spegnere il televisore. 2 INDICATORE DI ALIMENTAZIONE: Lampeggia e si spegne quando l’alimentazione è attiva, si accende in modalità standby. 3 z: Premere per cambiare canale. Nel menu a video, utilizzare i tasti z così come si usano i tasti ▼ e ▲ del telecomando. 4 Y: Premere per aumentare o diminuire il volume. Nel menu a video, utilizzare i tasti Y così come si usano i tasti ◄ e ► del telecomando. Italiano - BN68-02325A-Ita.indb 2 2009-05-19 �� 3:56:57 5 MENU: Premere per visualizzare il menu a video con le funzioni del televisore. 6 SOURCEE: Alterna tutte le sorgenti d’ingresso disponibili. Nel menu a video, utilizzare questo tasto come si usa il tasto ENTERE del telecomando. 7 SENSORE DEL TELECOMANDO: Puntare il telecomando in direzione di questo punto sul televisore. 8 ALTOPARLANTI ¦ Pannello dei collegamenti N La forma e il colore del prodotto possono variare in base al modello. [Pannello laterale del televisore] [Pannello posteriore del televisore] 1 2 34 5 $ # 2 # @ ! 0 9 8 7 6 Ingresso alimentazione 1 COMPONENT IN Collega Component video / audio. 2 HDMI IN 1, 2, 3(DVI), 4 / DVI AUDIO IN Collega alla porta HDMI un dispositivo con uscita HDMI. N Non è necessario un ulteriore collegamento audio per la connessione HDMI-HDMI. N Che cosa significa HDMI? • HDMI (High-Definition Multimedia Interface), è una interfaccia che permette la trasmissione di segnali audio e video digitali mediante un solo cavo. • La differenza tra HDMI e DVI è che il dispositivo HDMI è di dimensioni inferiori rispetto a quello DVI. N Se sono collegati lettori DVD / Blu-ray / ricevitori via cavo / ricevitori satellitari (STB) che supportano versioni HDMI precedenti alla 1.3, il televisore potrebbe non riprodurre l’audio o le immagini visualizzate potrebbero presentare colori anomali. Se collegando un cavo HDMI di una versione precedente non vi è audio, collegare il cavo HDMI alla porta HDMI IN 3(DVI) e i cavi audio alla porta DVI AUDIO IN sul retro del televisore. In questo caso, contattare la società fornitrice del lettore DVD / Blu-ray / ricevitore via cavo / ricevitore satellitare (STB) per verificare la versione HDMI, quindi richiedere un aggiornamento. N Utilizzare la porta HDMI IN 3(DVI) per il collegamento DVI a un dispositivo esterno. Utilizzare un cavo o un adattatore DVI-HDMI per la connessione video e la porta DVI AUDIO IN per l'audio. Quando si effettua una connessione mediante cavo HDMI / DVI, è necessario utilizzare la porta HDMI IN 3(DVI). N I cavi HDMI che non supportano la versione 1.3 possono causare sfarfallio o mancanza di immagini a schermo. 3 PC IN [PC] / [AUDIO] Collegare alla porta di uscita audio e video del PC. N Se il PC supporta una connessione HDMI, è possibile collegare questa alla porta HDMI IN 1, 2, 3(DVI) o al terminale 4. N Se il PC supporta una connessione DVI, è possibile collegare questa al terminale HDMI IN 3(DVI) / DVI AUDIO IN. 4 ANT IN Collega a un sistema TV via cavo o antenna. Italiano - BN68-02325A-Ita.indb 3 2009-05-19 �� 3:56:57 5 LAN Inserire un cavo LAN in questa porta per effettuare il collegamento in rete. 6 BLOCCO KENSINGTON (a seconda del modello) Il blocco Kensington (opzionale) è un dispositivo usato per assicurare fisicamente il sistema quando viene utilizzato in un luogo pubblico. Se si desidera utilizzare un dispositivo di blocco, contattare il punto vendita in cui si è acquistato il televisore. N La posizione del blocco Kensington può variare a seconda del modello. 7 H(CUFFIE) Le cuffie possono essere collegate all'uscita prevista sull'apparecchio. Il collegamento delle cuffie disattiva l'audio proveniente dall'altoparlante interno. N Collegando le cuffie al televisore l’uso della funzione audio è inibita. N L’uso prolungato delle cuffie ad alto volume può causare danni all’udito. N Quando si collegano le cuffie al televisore, gli altoparlanti vengono disattivati. N Il volume delle cuffie e quello del televisore sono regolabili indipendentemente. 8 DIGITAL AUDIO OUT (OPTICAL) Collega a un componente Digital Audio quale un ricevitore Home theatre. N Quando un sistema Digital Audio viene collegato alla porta DIGITAL AUDIO OUT (OPTICAL): Diminuire il volume del televisore e regolarlo con la manopola di regolazione del sistema. N L'audio 5.1CH è disponibile quando il televisore è collegato a un dispositivo esterno che lo supporta. N Quando il ricevitore (home theatre) è impostato su On, è possibile udire l'audio proveniente dall'uscita ottica del televisore. Quando il televisore visualizza un segnale DTV (air), invia l’audio a 5.1 canali al ricevitore Home Theater. Se la sorgente è un componente digitale, come per es. un lettore DVD / Blu-ray / ricevitore digitale / ricevitore satellitare (STB) ed è collegata al televisore mediante HDMI, saranno udibili solo 2 canali audio dal ricevitore Home Theater. Per avere un audio a 5.1 canali, collegare il jack di uscita audio digitale del lettore DVD / Blu-ray / ricevitore digitale / ricevitore satellitare (STB) direttamente a un amplificatore o all’Home Theatre, non al televisore. 9 SERVICE Connettore solo di servizio. 0 AUDIO OUT [R-AUDIO-L] Collega le porte di ingresso audio dell'amplificatore/Home theatre. Quando un amplificatore audio viene collegato alle porte AUDIO OUT [R-AUDIO-L]: Diminuire il volume del televisore e regolarlo con la manopola di regolazione dell'amplificatore. ! EXT1, 2 Ingressi e uscite di dispositivi esterni quali videoregistratori, DVD, periferiche di gioco o lettori di dischi video. N In modalità EXT, l'uscita DTV supporta solo video e audio SD MPEG. Specifiche Ingressi/Uscite Connettore EXT 1 EXT 2 Video O O Ingressi Audio (L / R) O O RGB O X Uscita Video + Audio (L / R) Solo l'uscita TV o DTV è disponibile. Uscita da selezionare. @ AV IN [VIDEO] / [R-AUDIO-L] Ingressi video e audio per dispositivi esterni, come una telecamera o un videoregistratore. # USB1(HDD) / USB2 Connettore per aggiornamenti software e Media Play, ecc. E’ possibile collegarsi alla rete Samsung in modalità wireless usando l’adattatore ’Samsung Wireless LAN Adapter’ (venduto separatamente). N Per le unità HDD USB, usare la porta USB1 (HDD). $ COMMON INTERFACE Alloggiamento Se per alcuni canali non si inserisce la ‘SCHEDA CI(CI+)', il messaggio ‘Scramble Signal’ viene visualizzato sullo schermo. Le informazioni di pairing che contengono un numero telefonico, l’ID della ‘SCHEDA CI (CI+) ', l’ID host e altri dati, verranno visualizzate entro 2~3 minuti. Se viene visualizzato un messaggio di errore, contattare il service provider. Quando la configurazione delle informazioni relative al canale è stata completata, viene visualizzato il messaggio ‘Completato aggiornamento’, a indicare che l’elenco dei canali è stato aggiornato. N È necessario richiedere una ‘SCHEDA CI (CI+)' al service provider locale. Estrarre con delicatezza la scheda ‘SCHEDA CI (CI+)' tirandola con le dita; fare attenzione a non far cadere la ‘SCHEDA CI (CI+)' poiché potrebbe subire danni. N Inserire la scheda ‘SCHEDA CI (CI+)' nella direzione indicata sulla scheda stessa. N La posizione del blocco COMMON INTERFACE può variare a seconda del modello. N La ‘SCHEDA CI (CI+)' non è supportata in alcune nazioni e regioni; controllare con il rivenditore autorizzato di zona. N La funzione CI+ è applicabile solo al modello LE********P. In caso di problemi, contattare il fornitore del servizio. Italiano - BN68-02325A-Ita.indb 4 2009-05-19 �� 3:56:57 ¦ Telecomando N Il telecomando è utilizzabile fino a una distanza di 7 metri dal televisore. N Una illuminazione troppo intensa può avere conseguenze sulle prestazioni del telecomando. N La forma e il colore del prodotto possono variare in base al modello. 1 POWER: Premere per accendere e spegnere il televisore. 2 TV: Seleziona direttamente la modalità TV. 3 TASTI NUMERICI: Premere per cambiare canale. 4 FAV.CH: Utilizzato per visualizzare gli elenchi dei canali preferiti. 5 Y: Premere per aumentare o diminuire il volume. 6 SOURCE: Premere per visualizzare e selezionare le sorgenti video disponibili. 7 INFO: Premere per visualizzare le informazioni sullo schermo TV. 8 TOOLS: Per selezionare rapidamente le funzioni più frequentemente utilizzate. 9 INTERNET@: Premere per usare vari servizi internet, per visualizzare informazioni utili e contenuti di intrattenimento. 0 TASTI COLORATI: Usare questi tasti nel menu Elenco canali e Internet@TV, Media Play. @ CH LIST: Per visualizzare l'elenco dei canali sullo schermo. # Usare questi tasti nelle modalità Media Play E Anynet+. (∏: Questo telecomando può essere usato per controllare la registrazione sui registratori Samsung dotati di funzione Anynet+) $ ON/OFF @: Premere il tasto ON/OFF @per accendere o spegnere l'illuminazione dei tasti. Quando il telecomando è attivo e viene premuto un tasto, i tasti del telecomando si illuminano brevemente. (Usando il telecomando con il tasto di illuminazione dei tasti ON/OFF @ impostato su Acceso, si riduce la durata delle batterie). % PRE-CH: Consente di tornare al canale precedentemente visualizzato. ^ MUTE M: Premere per escludere temporaneamente l'audio. & > P <: Premere per cambiare canale. * MENU: Visualizza il menu a video principale. ( GUIDE: Visualizzazione della Guida elettronica dei programmi (EPG) ) RETURN: Ritorna al menu precedente. a SU ▲ / GIU' ▼ / SINISTRA ◄ / DESTRA ► / ENTERE: Utile per selezionare i menu OSD e modificarne i valori impostati. b EXIT: Premere per uscire dal menu. c CONTENT: Questa funzione permette la visione di Content Library. 1 2 3 4 % ^ 5 & 6 7 INFO GUIDE 8 * ( ) a b 9 d MEDIA.P: Permette di riprodurre brani musicali, immagini e filmati. 0 e SUBT.: Visualizzazione sottotitoli digitali @ f AD: Selezione descrizione audio (AD). $ ! CH LIST AD c d e f # FunzioniTeletext 6 0: Selezione della modalità Teletext (LIST/FLOF) 7 5: Visualizzazione Teletext 8 4: Selezione formato Teletext 0 Selezione argomento Fastext ! /: Seleziona alternativamente le modalità Teletext, Double o Mix.. @ 8: Negozio Teletext $ :: Uscita dalla schermata Teletext % 1: Pagina secondaria Teletext & 2: Pagina Teletext successiva 3: Pagina Teletext precedente * 6: Indice Teletext ) 9: Mantieni Teletext b 7: Annulla Teletext Italiano - BN68-02325A-Ita.indb 5 2009-05-19 �� 3:56:58 ¦ Installazione delle batterie nel telecomando 1. Sollevare il coperchio sul retro del telecomando come mostrato in figura. 2. Installare le due batterie AAA. N Fare corrispondere i poli ‘+’ e ‘–’ delle batterie con lo schema riportato all’interno del vano. 3. Riposizionare il coperchio. N Se si prevede di non utilizzare il telecomando per un periodo di tempo prolungato, rimuovere le batterie e riporle in un luogo asciutto e fresco. N Se il telecomando non funziona, effettuare il seguente controllo: • Il televisore è acceso? • I poli - e + delle batterie sono invertiti? • Le batterie sono esaurite? • Si è verificata una interruzione di corrente o il cavo di alimentazione è scollegato? • È presente una luce a fluorescenza speciale o un neon nelle vicinanze? FUNZIONAMENTO ¦ Visualizzazione dei menu Prima di utilizzare il televisore, seguire questi passaggi per imparare a navigare tra i menu, selezionando e regolando le diverse funzioni. Tasto MENU Visualizza il menu a video principale. Tasto RETURN Ritorna al menu precedente. Tasti ENTERE / FRECCIA Sposta il cursore e seleziona una voce. Attiva la voce attualmente selezionata. Conferma l'impostazione. EXIT Esce dal menu a video. ❑ Uso dei menu OSD (On Screen Display) La procedura d'accesso può essere diversa a seconda del menu selezionato. 1. Premere il tasto MENU. Immagine 2. Il menu principale viene visualizzato a schermo. Sul lato sinistro del menu compaiono alcune icone: Immagine, Suono, Canale, Impostazione, Ingressi, Applicazione, Supporto. Modalità : Standard Retroillumin Contrasto Luminosità Nitidezza Colore Tinta (V/R) Impostazioni avanzate :7 : 95 : 45 : 50 : 50 : V50/R50 Modalità : Standard ▶ 3. Premere il tasto ▲ o ▼ per selezionare una delle icone. 5. Premere ▲ o ▼ per selezionare uno dei sotto menu dell'icona. 6. Premere ◄ o ► per diminuire o aumentare il valore di un elemento. L'OSD di regolazione può differire in base al menu selezionato. 7. Premere ENTERE per completare la configurazione. Per uscire, premere EXIT. Immagine 4. Quindi premere ENTERE per accedere ai sotto menu dell'icona. Retroillumin : 7 Contrasto Luminosità Nitidezza Colore Tinta (V/R) Impostazioni avanzate Opzioni immagine : 95 : 45 : 50 : 50 : V50/R50 ▲ Retroillumin ▼ ▶ 7 U Sposta L Regola E Conf. R Ritorno Icona Guida Italiano - BN68-02325A-Ita.indb 6 2009-05-19 �� 3:56:58 ¦ Attivazione modalità standby E' possibile attivare la modalità standby del televisore per ridurre il consumo di corrente. La modalità standby è particolarmente utile quando si desidera disattivare temporaneamente il televisore (ad esempio durante i pasti). 1. Premere POWERP sul telecomando. N Lo schermo si spegne e sull’apparecchio compare la spia di standby. 2. Per riattivare il televisore, premere nuovamente il tasto POWERP. N Non lasciare il televisore in modalità standby per lunghi periodi di tempo (partendo per le vacanze ad esempio). E' consigliabile scollegare il cavo di alimentazione e il cavo dell'antenna dalle prese a muro. ¦ Funzioni Plug & Play Se il televisore viene acceso per la prima volta, alcune impostazioni di base vengono visualizzate automaticamente e in sequenza. 1. Premere POWER sul telecomando. N E' inoltre possibile usare il tasto POWERP sul televisore. N Viene visualizzato il messaggio Select the OSD Language.. Plug & Play 2. Premere ENTERE. Selezionare la lingua desiderata premendo ▲ o ▼. Premere ENTERE per confermare la scelta. Select the OSD Language. Menu Language : English ▶ 3. Premere ◄ o ► per selezionare Demo Negozio o Uso dom., quindi premere ENTERE. N Si consiglia di impostare la modalità TV su Uso dom. per ottenere la migliore qualità E Enter dell’immagine in un ambiente domestico. N Demo Negozio è intesa solo per un uso commerciale del prodotto. N Se l’unità è stata accidentalmente impostata sulla modalità Demo Negozio e si desidera tornare alla modalità Uso dom. (Standard): Premere il tasto Volume del televisore. Quando il menu OSD Volume viene visualizzato, tenere premuto il tasto MENU del televisore per 5 secondi. 4. Premere ENTERE. Selezionare la nazione desiderata premendo il pulsante ▲ o ▼. Premere ENTERE per confermare la scelta. 5. Premere ▲ o ▼ per selezionare Antenna o Cavo, quindi premere ENTERE. N Antenna: Segnale antenna via etere. N Cavo: Segnale antenna via cavo. 6. Premere il pulsante ▲ o ▼ per selezionare i canali da memorizzare. Premere ENTERE per selezionare Avvio. N Quando si imposta la sorgente antenna su Cavo, viene visualizzata una procedura che consente di impostare un valore per la ricerca dei canali digitali. Per ulteriori informazioni, vedere Canale → Memorizzazione auto. N Digitale e Analogico: Canali digitali e analogici. / Digitale: Canali digitali. / Analogico: Canale analogico. N La ricerca dei canali inizia e termina in modo automatico. N Premere ENTERE in qualsiasi momento per interrompere il processo di memorizzazione. N Una volta memorizzati tutti i canali disponibili, viene visualizzato il messaggio Imposta la modalità Orologio.. 7. Premere ENTERE. Premere ▲ o ▼ per selezionare Automatico, quindi premere ENTERE. N Selezionando Manuale, viene visualizzato il messaggio Imposta la data e l'ora correnti.. N Ricevendo un segale digitale, l’orario verrà impostato automaticamente. In caso contrario, selezionare Manuale per impostare l’orologio. 8. Viene visualizzata la descrizione per il metodo di connessione che fornisce la migliore qualità dello schermo HD. Leggere la descrizione e premere il tasto ENTERE. 9. Premere il tasto ◄ o ► per selezionare Ved Guida prodotto o Guarda TV. Premere il tasto ENTERE. • Ved Guida prodotto: Viene visualizzata la Guida Prodotto dove si possono visualizzare le informazioni relative alle funzioni principali del nuovo HDTV. • Guarda TV: E' possibile visualizzare i canali memorizzati. Per reimpostare questa funzione... 1. Premere il tasto MENU per visualizzare il menu. Premere ▲ o ▼ per selezionare Impost, quindi premere ENTERE. 3. Digitare il PIN a quattro cifre. Il PIN predefinito di un nuovo apparecchio TV è ‘0-0-0-0’. N Per cambiare il codice PIN, utilizzare la funzione Cambia PIN. N La funzione Plug & Play è disponibile solo in modalità TV. Impostazione 2. Premere nuovamente ENTERE per selezionare Plug & Play. Plug & Play Lingua menu Ora Trasmissione Sicurezza Rete Generale : Italiano ▶ Italiano - BN68-02325A-Ita.indb 7 2009-05-19 �� 3:56:59 ¦ Visualizzazione del display Il display identifica il canale corrente e lo stato di determinate impostazioni audio e video. O Premere il tasto INFO per visualizzare le informazioni. Premere INFO sul telecomando. Il televisore visualizzerà il canale, il tipo di audio e lo stato di determinate impostazioni immagine e audio. ● ▲, ▼: E' possibile visualizzare altre informazioni relative al canale. Se si desidera spostarsi sul canale selezionato, premereENTERE. ● ◄, ►: E' possibile visualizzare le informazioni del programma desiderato sul canale corrente. abc1 18:11 Thu 6 Jan Life On Venus Avenue DTV Air 15 18:00 ~ 6:00 Unclassified No Detaild Information E Watch ' Information N Premere nuovamente INFO o attendere 10 secondi finché il display scomparirà automaticamente. CANALE ¦ Menu Canale ❑ Nazione ■ Canale analogico Funzione per la modifica del paese per i canali analogici. Canale ■ Canale digitale Funzione per la modifica del paese per i canali digitali. N Comparirà la richiesta del PIN. Digitare il PIN a quattro cifre. Nazione ▶ Memorizzazione auto Memorizzazione manuale Opzione ricerca via cavo Guida Compl Mini Guida Guida Predefinita : Guida Compl Elenco canali ❑ Memorizzazione auto È possibile effettuare la scansione delle gamme di frequenza disponibili (in base alla nazione). I numeri di programma assegnati automaticamente potrebbero non corrispondere ai numeri di programma effettivi o desiderati. N Se un canale è stato bloccato mediante la funzione Blocco canali, comparirà la schermata di inserimento del PIN. ■ Antenna / Cavo Sorgente antenna per la memorizzazione ● Digitale e Analogico: Canali digitali e analogici. ● Digitale: Canale digitale. ● Analogico: Canale analogico. Quando si seleziona Cavo → Digitale e Analogico o Cavo → Digitale: Inserire un valore per ricercare i canali via cavo. ● Mod ricerca → Completa / Rete / Rapida N Rapida • Network ID: Visualizza il codice di identificazione del network. • Frequenza: Visualizza la frequenza del canale. (Varia in base alla nazione) • Modulazione: Visualizza i valori di modulazione disponibili. • Symbol Rate: Visualizza i valori di symbol rate disponibili. N Scorrere tutti i canali per le stazioni emittenti attive e memorizzarle nella memoria del televisore. N Per interrompere la funzione Auto Store, premere ENTERE. Verrà visualizzato il messaggio Interrompere Memorizzazione auto?. Selezionare Sì premendo ◄ o ► quindi premere ENTERE. Italiano - BN68-02325A-Ita.indb 8 2009-05-19 �� 3:56:59 ❑ Memorizzazione manuale N Ricerca un canale manualmente e lo memorizza nella memoria TV. N Se un canale è stato bloccato mediante la funzione Blocco canali, comparirà la schermata di inserimento del PIN. ■ Canale digitale Memorizzazione manuale dei canali digitali. N Canale digitale è disponibile solo in modalità DTV. ● Canale: Impostare il numero del Canale mediante i tasti ▲, ▼ o i tasti numerici (0~9). ● Frequenza: Impostare la frequenza utilizzando i tasti numerici. ● Larg. di banda: Impostare la larghezza di banda mediante i tasti ▲, ▼ o i tasti numerici (0~9). N Al termine, i canali vengono aggiornati nell'elenco dei canali. ■ Canale analogico Memorizzazione manuale dei canali analogici. ● Programma (Numero di programma da assegnare a un canale): Impostare il numero del programma mediante i tasti ▲, ▼ o i tasti numerici (0~9). ● Sistema colore → Auto / PAL / SECAM / NTSC4.43: Impostare il sistema colore utilizzando i tasti ▲ o ▼. ● Sistema audio → BG / DK / I / L: Impostare il sistema audio utilizzando i tasti ▲ o ▼. ● Canale (quando si conosce il numero del canale da memorizzare): Premere ▲ o ▼ per selezionare C (Antenna) o S (Cavo). Premere il tasto ►, quindi premere ▲, ▼ o un tasto numerico (0~9) per selezionare il numero desiderato. N E’ inoltre possibile selezionare direttamente il numero del canale premendo i tasti numerici (0~9). N Se l’audio è anomalo o assente, riselezionare lo standard audio richiesto. ● Ricerca (quando non si conosce il numero del canale): Premere il tasto ▲ o ▼ per avviare la ricerca. Il sintonizzatore effettua la scansione della gamma di frequenza fino a quando appare il primo canale o il canale selezionato. ● Memorizza (quando si memorizza il canale e il numero di programma corrispondente): Impostare su OK premendo ENTERE. N Mod. Canale P (modalità Programma): Una volta completata la sintonizzazione, alle emittenti della propria area viene assegnato un numero compreso tra P00 e P99. In questa modalità, è possibile selezionare un canale digitando il numero corrispondente. C (modalità Antenna): È possibile selezionare un canale immettendo in questa modalità il numero assegnato a ciascuna emittente. S (modalità Cavo): E’ possibile selezionare un canale immettendo in questa modalità il numero assegnato a ciascun canale via cavo. ❑ Opzione ricerca via cavo (in base alla nazione) Imposta ulteriori opzioni di ricerca quali frequenza e symbol rate per ricerche network via cavo. ● Frequenza inizio (frequenza iniziale): Imposta la frequenza di avvio (Può essere diversa a seconda del paese) ● Frequenza arresto (frequenza finale): Imposta la frequenza di arresto (Può essere diversa a seconda del paese) ● Modulazione: Visualizza i valori di modulazione disponibili. ● Symbol Rate: Visualizza i valori di symbol rate disponibili. ❑ Guida Compl / Mini Guida Le informazioni EPG (Electronic Programme Guide) sono fornite dall’emittente. Le voci relative ai programmi potrebbero risultare vuote o non aggiornate, a seconda delle informazioni trasmesse dall'emittente su un determinato canale. La schermata viene aggiornata automaticamente non appena sono disponibili nuove informazioni. O È anche possibile visualizzare il menu della guida semplicemente premendo il tasto GUIDE. (Per configurare la Guida Predefinita, vedere le relative descrizioni.) ■ Guida Compl Visualizza la informazioni sui programmi ordinate in segmenti di un’ora. Sono comprese due ore di programmi che è possibile scorrere in avanti o indietro. ■ Mini Guida Su ogni riga della Mini guida del canale corrente sono riportate le informazioni relative a ogni programma partendo dal programma corrente in avanti in ordine di orario. Italiano - BN68-02325A-Ita.indb 9 2009-05-19 �� 3:56:59 ❑ Guida Predefinita → Guida Compl / Mini Guida E’ possibile scegliere se visualizzare la Guida Compl o la Mini Guida premendo il tasto GUIDE del telecomando. ❑ Elenco canali Per le istruzioni dettagliate sull’uso di Elenco canali, vedere la sezione Gestione dei canali. O È possibile selezionare queste opzioni semplicemente premendo il tasto CH LIST sul telecomando. ❑ Mod. Canale Premendo il tasto P >/<, i canali verranno attivati secondo l'elenco canali selezionato. ■ Canali aggiunti I canali verranno attivati secondo l'elenco canali memorizzato. ■ Preferiti I canali verranno attivati secondo l'elenco canali preferiti. ❑ Sintonia fine Se la ricezione è chiara, non è necessario sintonizzare il canale poiché questa operazione viene effettuata automaticamente durante le operazioni di ricerca e memorizzazione. Se tuttavia il segnale risulta debole o distorto, può essere necessario sintonizzare il canale manualmente. N I canali sintonizzati e memorizzati sono evidenziati da un asterisco “*” alla destra del numero del canale nel relativo riquadro. N Per reimpostare la sintonia, selezionare Reset premendo il pulsante ▲ o ▼, quindi premere ENTERE. N E' possibile sintonizzare solo i canali TV analogici. Uso della Guida Completa / Mini Guida Guida Compl Cavo DTV 900 f tn 2:10 Mar 1 Giu Freshmen On Campus 2:00 - 2:30 No Detailed Information 900 Oggi 2:00 - 3:00 Freshmen O.. Street Hypn.. Mint Extra Loaded 40 with Dynamite MC The Distillery Smash Hits! Sunday 900 f tn 901 ITV Play 902 Kerrang! 903 Kiss 904 oneword ▼ 905 Hits 3:00 - 4:00 No Information Mini Guida No Information Kisstory No Information ▼ E Guarda Informazioni Pagina Mini Guida +24 ore Esci 2:00 2:30 5:00 Cavo DTV 900 f tn Freshmen On Campus Street Hypnosis Booze Britain E Guarda Informazioni Pagina Guida Compl Esci Per... Eseguire... Guardare un programma nell'elenco EPG Selezionare il programma premendo il tasto ▲, ▼, ◄, ► . Uscire dalla guida Premere il tasto blu. Se si seleziona il programma successivo, appare l’icona dell’orologio che indica la visione programmata. Premendo nuovamente il tasto ENTERE, premere ◄, ► per selezionare Annulla Program; la programmazione verrà annullata e il simbolo a forma di orologio sparirà. Visualizzare le informazioni su un programma Selezionare il programma desiderato premendo il tasto ▲, ▼, ◄, ► . Premere il tasto INFO quando il programma desiderato è evidenziato. Il titolo del programma appare in alto al centro dello schermo. Cliccare sul tasto INFO per ottenere maggiori informazioni. Le informazioni dettagliate includono numero del canale, durata, barra di stato, livello d'età impostato per il programma, informazioni sulla qualità video (HD/SD), modalità audio, sottotitoli o teletext, lingua dei sottotitoli o del teletext e una breve descrizione del programma evidenziato. ‘...’ appare quando la descrizione è molto lunga. Alterna tra la Mini Guida e la Guida Compl Premere ripetutamente il tasto rosso. In modalità Guida Compl Scorrere velocemente indietro (24 ore). Scorrere velocemente avanti (24 ore). Premere ripetutamente il tasto verde. Premere ripetutamente il tasto giallo. Italiano - 10 BN68-02325A-Ita.indb 10 2009-05-19 �� 5:41:59 ¦ Gestione dei canali Usando questo menu è possibile aggiungere, eliminare o impostare i canali preferiti e utilizzare la guida dei programmi per le trasmissioni digitali. ■ Canali aggiunti ■ Tutti i Canali Mostra tutti i canali attualmente disponibili. Canali aggiunti Mostra tutti i canali aggiunti. 824 UKTV Gold 825 UKTV style A 1 C -A 2 C -A 3 C -A 4 C -- A 5 C -A 6 C -- A 7 C -A 8 C -- ■ Preferiti Mostra tutti i canali preferiti. O Per selezionare i canali preferiti impostati, premere FAV.CH sul telecomando. ■ Programmato Mostra tutti i canali prenotati. N Selezionare un canale nella schermata Tutti i Canali, Canali aggiunti o Preferiti premendo i tasti ▲ / ▼, quindi premere ENTERE. Ora è possibile guardare il canale selezionato. N Uso dei tasti colorati nell'elenco dei canali Rosso (Tipo canale): Alterna tra TV, Radio, Dati / Altro e Tutto. Verde (Zoom): Ingrandisce o riduce il numero di un canale. Giallo (Selezione): Seleziona più elenchi di canali. E’ possibile utilizzare contemporaneamente le funzioni Add / Delete o Add to favourite/ Delete from Favourite per più canali alla volta. Selezionare i canali desiderati e premere il tasto giallo per impostare tutti i canali selezionati contemporaneamente. Il simboloc compare a sinistra dei canali selezionati. TOOLS (Strumenti): Visualizza i menu Elimina (o Aggiungi), Aggiungi a Preferiti (o Elimina da Preferiti), Blocco (o Sblocco), Timer visione, Modifica nome canale, Ordina, Modifica numero canale, Seleziona tutto (o Deselez tutto), Memorizzazione auto. (Il menu Options può essere diverso in base alla situazione). N Icone sullo stato del canale • A : Canale analogico. • c: Canale selezionato mediante il tasto giallo. • * : Canale impostato come preferito. • (: Programma attualmente trasmesso. • \ : Canale bloccato. • ): Programma prenotato Tutto Tipo canale Zoom Selezione T Strumenti Menu Elenco canali Opzione (in Tutti i Canali / Canali aggiunti / Preferiti) N Premere il tasto TOOLS per usare il menu Option. N Gli elementi del menu Option possono differire in base allo stato del canale. ■ Agg. / Canc. E' possibile eliminare o aggiungere un canale per visualizzare i canali desiderati. N Tutti i canali eliminati saranno visibili nel menu Tutti i Canali. N Se il canale in elenco è evidenziato in grigio, significa che il canale è stato eliminato. N Il menu Aggiungi viene visualizzato solo per i canali eliminati. N E’ anche possibile eliminare un canale nel menu Canali aggiunti o Preferiti allo stesso modo. Tutti i Canali ■ 824 UKTV Gold 825 UKTV style A 1 C -A 2 C -A 3 C -A 4 C -- A 5 C -A 6 C -- Elimina Aggiungi a Preferiti Blocco Timer visione Modifica nome canale Ordina A 7 C -A 8 C - Tutto Tipo canale Zoom Selezione T Strumenti Aggiungi a Preferiti / Elimina da Preferiti I canali che si guardano più di frequente possono essere impostati come preferiti. T Premere il tasto TOOLS per visualizzare il menu Strumenti. E' inoltre possibile impostare aggiunte (o cancellazioni) tra i canali Preferiti selezionando Strumenti → Aggiungi a Preferiti (o Elimina da Preferiti). N Il simbolo "*" verrà evidenziato e il canale verrà impostato come preferito. N Tutti i canali preferiti saranno visibili nel menu Preferiti. Italiano - 11 BN68-02325A-Ita.indb 11 2009-05-19 �� 3:57:00 ■ Blocco / Sblocco E’ possibile bloccare un canale in modo che non possa essere selezionato e visualizzato. N Questa funzione è disponibile solo quando la funzione Blocco canali è impostata su Acceso. N Comparirà la richiesta del PIN. Digitare il PIN a quattro cifre. N Il PIN predefinito di un nuovo apparecchio TV è ‘0-0-0-0’. E’ possibile modificare il PIN selezionando Cambia PIN nel menu. N Verrà visualizzato il simbolo ‘\’ e il canale verrà bloccato. ■ Timer visione Se si è effettuata la prenotazione di un canale, all’ora stabilita verrà visualizzato il canale prenotato anche durante la visione di un altro canale contenuto nell'Elenco canali. Per prenotare un programma, impostare prima l’orario corrente. N E' possibile prenotare solo i canali memorizzati. N È possibile impostare il canale, il giorno, il mese, l'anno,l'ora e i minuti premendo direttamente i tasti numerici del telecomando. N Durante le prenotazione di un programma comparirà il menu Programmato. N Digital Programme Guide e Visualizzazione prenotazione Selezionando un canale digitale e premendo il tasto ►, comparirà la Programme Guide del canale. Per prenotare un programma seguire le procedure descritte sopra. ■ Modifica nome canale (solo canali analogici) Ai canali è possibile attribuire un nome in modo da visualizzarlo durante la visione. N I nomi dei canali digitali trasmessi vengono automaticamente assegnati e non possono essere modificati. ■ Modifica numero canale (solo canali digitali) È anche possibile impostare il numero di canale premendo i tasti numerici sul telecomando. ■ Ordina (solo canali analogici) Questa operazione consente di modificare i numeri di programma dei canali memorizzati. Questa operazione può essere necessaria dopo la memorizzazione automatica dei canali. ■ Seleziona tutto / Deselez tutto ● Seleziona tutto: Seleziona tutti i canali presenti nell'elenco dei canali. ● Deselez tutto: E' possibile selezionare e deselezionare tutti i canali selezionati. N E’ possibile selezionare Deselez tutto solo quando è stato selezionato almeno un canale. ■ Memorizzazione auto N Per la descrizione dettagliata delle procedure per l'impostazione delle opzioni, vedere le istruzioni 'Menu Canale'. N Se un canale è stato bloccato mediante la funzione Blocco canali, comparirà la schermata di inserimento del PIN. Menu Channel List Opzione (in Programmato) E' possibile visualizzare, modificare o annullare una prenotazione. N Premere il tasto TOOLS per usare il menu Option. ■ ■ Annulla Program Selezionare questa funzione per annullare una prenotazione. ■ Informazioni Selezionare questa funzione per visualizzare una prenotazione. (E' inoltre possibile modificare le informazioni relative alla prenotazione.) ■ Programmato Modifica info Selezionare questa funzione per modificare una prenotazione. Tutto 1 / 1 / 2009 13:59 5 TV1 ) Modifica info Annulla Program 18:59 2 TV3 ) The Equalizer Informazioni Seleziona tutto 20:59 2 TV3 ) McMillan & Wife 21:59 2 TV3 ) M.Spillane’s mike Zoom Selezione T Strumenti EInformazioni Seleziona tutto Selezionare tutti i programmi prenotati. Italiano - 12 BN68-02325A-Ita.indb 12 2009-05-19 �� 3:57:00 Immagine ¦ Configurazione del menu Immagine ❑ Modalità ■ Dinamica Imposta l’immagine da visualizzare in alta definizione in un ambiente luminoso. ■ Standard Imposta l’immagine per una visualizzazione ottimale in condizioni di luce normali. ■ Naturale Seleziona l'immagine per una visione ottimale, confortevole per la vista. N Questa funzione non è disponibile in modalità PC. ■ Film Imposta l'immagine per una visualizzazione confortevole in un ambiente buio. Immagine È possibile selezionare il tipo di immagine che più corrisponde alle proprie esigenze. T Premere il tasto TOOLS per visualizzare il menu Strumenti. E’ inoltre possibile impostare la modalità dell’immagine selezionando Strumenti → Modalità immagine. Modalità : Standard Retroillumin Contrasto Luminosità Nitidezza Colore Tinta (V/R) Impostazioni avanzate :7 : 95 : 45 : 50 : 50 : V50/R50 ▶ ❑ Retroillumin / Contrasto / Luminosità / Nitidezza / Colore / Tinta (V/R) Il televisore ha diverse opzioni che consentono di controllare la qualità dell'immagine. ▲ Retroillumin 7 ● Retroillumin: Regola la luminosità della retroilluminazione dell’LCD. ▼ ● Contrasto: Regola il livello di contrasto dell'immagine. U Sposta L Regola E Conf. R Ritorno ● Luminosità: Regola il livello di luminosità dell’immagine. ● Nitidezza: Regola la definizione dei bordi dell'immagine. ● Colore: Regola la saturazione dei colori dell'immagine. ● Tinta (V/R): Regola la tonalità delle tinte dell'immagine. N Nelle modalità analogiche TV, Est., AV del sistema PAL, non è possibile utilizzare la funzione Tinta (V/R). N Apportando le modifiche ai valori Retroillumin, Contrasto, Luminosità, Nitidezza, Colore o Tinta (V/R), il menu OSD verrà regolato di conseguenza. N In modalità PC, è possibile modificare solo i parametri Retroillumin, Contrasto e Luminosità. N Le impostazioni possono essere regolate e memorizzate per ogni dispositivo esterno connesso a un ingresso TV. N E' possibile ridurre significativamente il consumo di energia, e i costi ad esso associati, diminuendo la luminosità dello schermo. ❑ Impostazioni avanzate I nuovi TV Samsung permettono di impostare ancora più precisamente la visualizzazione delle immagini rispetto ai modelli precedenti. N Impostazioni avanzate è disponibile in modalità Standard o Film. N In modalità PC, è possibile modificare solo i parametri Contrasto Dinamico, Gamma e Bilan bianco tra le opzioni della voce Impostazioni avanzate. ■ Tonalità nero → Off / Scuro / Più scura / Extra scura Consente di selezionare il livello di nero dello schermo per regolare la profondità dell'immagine. ■ Contrasto Dinamico → Off / Basso / Medio / Alta Consente di regolare in modo ottimale il livello di contrasto dello schermo. ■ Gamma Consente di regolare l’intensità dei colori primari (rosso, verde, blu). Impostazioni avanzate Tonalità nero : Off Contrasto Dinamico : Medio Gamma :0 Spazio colore : Nativa ▶ Bilan bianco Incarnato :0 Migliora imm bordi : On U Sposta E Enter R Ritorno Italiano - 13 BN68-02325A-Ita.indb 13 2009-05-19 �� 3:57:01 ■ Spazio colore Spazio colore è la matrice di colori composta dai colori rosso, verde e blu. Per scoprire lo straordinario mondo dei colori naturali basta selezionare lo spazio colore preferito. ● Automatico: Auto Spazio colore regola automaticamente la tonalità più naturale dei colori basata sulle sorgenti del programma. ● Nativa: Native Spazio colore offre tonalità di colore ricche e profonde. ● Personaliz: Regola la gamma colore per adattarla alle proprie preferenze. N Una volta modificato il valore, lo schermo viene automaticamente regolato di conseguenza. N Le impostazioni possono essere regolate e memorizzate per ogni dispositivo esterno connesso a un ingresso TV. Ad esempio, se si ha un lettore DVD connesso alla porta HDMI 1 e correntemente selezionato, verranno memorizzate le impostazioni e le regolazioni per il lettore DVD. Colore: Rosso, Verde, Blu, Giallo, Ciano o Magenta N Colore è disponibile quando l’opzione Spazio colore è impostata su Personaliz. N Colore, è possibile regolare i valori RGB per i colori selezionati. N Per reimpostare il valore RGB regolato, selezionare Reset. Rosso: Regola il livello di saturazione di rosso del colore selezionato. Verde: Regola il livello di saturazione di verde del colore selezionato. Blu: Regola il livello di saturazione di blu del colore selezionato. Reset: Ripristina le impostazioni dello spazio colore ai valori predefiniti. ■ Bilan bianco Consente di regolare la temperatura del colore per ottenere immagini più naturali. ● R-Offset: Regola l'intensità del colore rosso. ● G-Offset: Regola l'intensità del colore verde. ● B-Offset: Regola l'intensità del colore blu. ● R-Gain: Regola la luminosità del colore rosso. ● G-Gain: Regola la luminosità del colore verde. ● B-Gain: Regola la luminosità del colore blu. ● Reset: Consente di ripristinare i valori predefiniti di bilanciamento del bianco. ■ Incarnato E’ possibile enfatizzare il tono ‘incarnato’ dell’immagine. N Una volta modificato il valore, lo schermo viene automaticamente regolato di conseguenza. ■ Migliora imm bordi → Off / On E' possibile enfatizzare i contorni degli oggetti dell'immagine. ■ xvYCC → Off / On Impostando la modalità xvYCC su on, si noterà un miglioramento nei dettagli e nel colore durante la visione di un film da un dispositivo esterno (per es. un lettore DVD) collegato alla porta HDMI o Component IN. N xvYCC è disponibile quando la modalità dell'immagine è impostata a Film, e l'ingresso esterno è impostato su HDMI o Comp.. N Questa funzione potrebbe non essere supportata dal dispositivo esterno in uso. ❑ Opzioni immagine N In modalità PC, è possibile modificare solo i parametri Toni colore e Formato tra le opzioni della voce Opzioni immagine. ■ Toni colore → Freddo / Normale / Caldo1 / Caldo2 / Caldo3 N Caldo1, Caldo2 o Caldo3 vengono attivate solo quando la modalità Immagine è Film. N Le impostazioni possono essere regolate e memorizzate per ogni dispositivo esterno connesso a un ingresso TV. Opzioni immagine Toni colore : Normale Formato : Automatico Mod schermo : 16:9 Digital NR : Automatico Livello di nero HDMI : Normale Modalità Film : Off 100Hz Motion Plus : Standard ▶ ▼ U Sposta E Conf. R Ritorno Italiano - 14 BN68-02325A-Ita.indb 14 2009-05-19 �� 3:57:01 ■ Formato Occasionalmente è possibile variare la dimensione dell'immagine sullo schermo. Il televisore ha diverse possibilità di dimensione, ognuna adatta a dare i migliori risultati con specifici tipi di ingressi video. Il ricevitore via cavo/satellitare potrebbe anch'esso avere la propria serie di dimensioni preimpostate. In generale, tuttavia, si consiglia la visione il più possibile nel formato 16:9. T Premere il tasto TOOLS per visualizzare il menu Strumenti. E’ anche possibile impostare la dimensione selezionando Strumenti → Formato immagine. ● Automatico: Regola automaticamente la dimensione dell'immagine su un formato 16:9. ● 16:9: Regola la dimensione dell’immagine su 16:9, un valore appropriato per visualizzare DVD o trasmissioni panoramiche. ● Wide Zoom: Aumenta le dimensioni dell’immagine a oltre 4:3. ● Zoom: Ingrandisce il formato 16:9 (in senso verticale) per adattarlo alle dimensioni dello schermo. ● 4:3: Questa è l’impostazione predefinita per un filmato video o una trasmissione normale. ● Adatta a schermo: Utilizzare questa funzione per visualizzare l'immagine completa con segnali HDMI (720p/1080i/1080p) o Comp. (1080i/1080p). N A seconda del tipo di sorgente di ingresso, le opzioni relative alla dimensione dell'immagine possono variare. N Le voci disponibili variano in base alla modalità selezionata. N In modalità PC, è possibile regolare solo i formati 16:9 e 4:3. N Le impostazioni possono essere regolate e memorizzate per ogni dispositivo esterno connesso a un ingresso TV. N Se si visualizza una immagine fissa per oltre due ore, sullo schermo potrebbe apparire una immagine residua temporanea. N Wide Zoom: Premere il tasto ► per selezionare Posizione, quindi premere ENTERE. Per spostare la schermata in alto o in basso, utilizzare il tasto ▲ o ▼. Quindi premere il tasto ENTERE. N Zoom: Premere il tasto ► per selezionare Posizione, quindi premere ENTERE. Per spostare l’immagine in alto o in basso, utilizzare il tasto ▲ o ▼. Quindi premere il tasto ENTERE. Premere il tasto ► per selezionare Formato, quindi premere ENTERE. Premere il tasto ▲ o ▼ per aumentare o ridurre la dimensione dell’immagine in direzione verticale. Quindi premere il tasto ENTERE. N Dopo aver selezionato l’opzione Adatta a schermo in HDMI (1080i / 1080p) o Comp. (1080i / 1080p): Selezionare Posizione premendo il tasto ◄ o ►. Utilizzare il tasto ▲, ▼, ◄ o ► per spostare l’immagine. Reset: Premere il tasto ◄ o ► per selezionare Reset, quindi premere ENTERE. E' possibile azzerare le impostazioni. N Usando la funzione Adatta a schermo con un ingresso HDMI 720p, 1 riga verrà tagliata all’inizio, alla fine, a sinistra e a destra come nella funzione Overscan. N Double (À, Œ) la dimensione dell'immagine non potrà essere impostata. ■ Mod schermo → 16:9 / Wide Zoom / Zoom / 4:3 Quando si imposta la dimensione dell’immagine su Automatico su un televisore con formato wide 16:9, è possibile determinare o meno le dimensioni dell’immagine da visualizzare nel formato 4:3 WSS (Wide Screen Service). Ogni nazione europea richiede un formato dell’immagine diverso e questa funzione deve essere quindi selezionata dall’utente. ● 16:9: Imposta l’immagine sul formato wide 16:9. ● Wide Zoom: Aumenta le dimensioni dell’immagine a oltre 4:3. ● Zoom: Ingrandisce verticalmente la dimensione dell'immagine sullo schermo. ● 4:3: Imposta l’immagine sul formato 4:3. N Questa funzione è disponibile in modalità Automatico. N Questa funzione non è disponibile in modalità PC, Comp. o HDMI. ■ Digital NR → Off / Basso / Medio / Alta / Automatico Se il segnale ricevuto dal televisore è debole, è possibile attivare la funzione Digital Noise Reduction per ridurre i disturbi statici e l’effetto ‘ghosting’ sullo schermo. N Se il segnale è debole, selezionare una delle altre opzioni disponibili fino a ottenere la migliore qualità visiva. ■ Livello di nero HDMI → Normale / Basso Consente di selezionare il livello di nero dello schermo per regolare la profondità dell'immagine. N Questa funzione è attiva solo quando un dispositivo esterno viene collegato al televisore mediante una porta HDMI (segnali RGB). ■ Modalità Film → Off / Auto1 / Auto2 Il televisore può essere impostato automaticamente nel senso desiderato, per elaborare i segnali dei film provenienti da tutte le sorgenti e per regolare l'immagine in modo da ottenere una visualizzazione ottimale. N Modalità Film è supportata in modalità TV, AV, COMP. (480i / 1080i) e HDMI (480i / 1080i). ● Off: Disattiva la funzione Modalità Film. ● Auto1: Regola automaticamente l'immagine alla migliore qualità possibile per la visione di un film. ● Auto2: Ottimizza automaticamente il testo visualizzato sullo schermo (esclusi i sottotitoli) durante la visione di un film. Italiano - 15 BN68-02325A-Ita.indb 15 2009-05-19 �� 3:57:01 ■ 100Hz Motion Plus → Off / Chiaro / Standard / Lineare / Personaliz / Demo Elimina l’effetto ’trascinamento’ dalle scene in rapido movimento per offrire una visione più nitida delle immagini. N Se si attiva 100Hz Motion Plus, lo schermo potrebbe risultare disturbato. In questo caso, impostare 100Hz Motion Plus su Off. ● Off: Disattiva la modalità 100Hz Motion Plus. ● Chiaro: Imposta la modalità 100Hz Motion Plus al minimo. ● Standard: Imposta la modalità 100Hz Motion Plus su un valore medio. ● Lineare: Imposta la modalità 100Hz Motion Plus su un valore massimo. ● Personaliz: Regola lo sfarfallio e il livello di riduzione delle vibrazioni in base alle proprie preferenze. Rid distorsione: Regola il livello di sfarfallio dalle sorgenti video. Rid vibrazione: Regola il livello di vibrazioni dalle sorgenti video durante la riproduzione di un video. Reset: Ripristina le impostazioni personalizzate. ● Demo: Visualizza la differenza tra l'attivazione e la disattivazione della modalità 100Hz Motion Plus. ■ Modalità Solo blu → Off / On Questa funzione è solo per gli utenti esperti in grado di regolare le misurazioni del dispositivo AV. Questa funzione visualizza solo il segnale blu rimuovendo i segnali rosso e verde dal video, in modo da offrire un effetto Blue Filter utile per regolare le opzioni Colour e Tint delle apparecchiature video quali lettori DVD, impianti Home Theater, ecc. Questa funzione consente di regolare a livello di segnale le opzioni Colour e Tint di qualsiasi dispositivo video che utilizzi modelli di tipo Color Bar Pattern per i colori Rosso / Verde / Blu / Ciano / Magenta / Giallo, senza l'uso di un ulteriore Blue Filter. N Modalità Solo blu è disponibile solo quando la modalità immagine è impostata su Film o Standard. ❑ Reset immagine → Azzera modalità immagine / Annul Ripristina tutte le impostazione dell'immagine ai valori predefiniti. N Azzera modalità immagine: I valori dell'immagine corrente tornano alle impostazioni predefinite. ¦ Visione Picture-in-Picture Immagine principale Comp. HDMI1, HDMI2, HDMI3/DVI, HDMI4 PC Impostazione La funzione PIP può essere utilizzata per visualizzare contemporaneamente il sintonizzatore TV e una sorgente video esterna. Questo prodotto è dotato di un sintonizzatore incorporato che non permette l'uso della funzione PIP nella stessa modalità. Per maggiori dettagli vedere ‘Impostazioni PIP’ sotto. T Premere il tasto TOOLS per visualizzare il menu Strumenti. Selezionando Strumenti → PIP è possibile regolare le impostazioni relative alla funzione PIP . N Selezionando l'audio dell'immagine PIP, vedere la sezione ‘Configurazione del menu Suono’. N Impostazioni PIP Melodia Risp. energia : Medio : Off PIP ▶ Interfaccia comune Immagine secondaria TV N Spegnendo il televisore durante la visione in modalità PIP e riaccendendolo, la finestra PIP scomparirà. N L’immagine nella finestra PIP potrebbe apparire leggermente innaturale quando si usa la schermata principale per visualizzare un videogame o il karaoke. N Durante l'attivazione di Internet@TV la funzione PIP non può essere usata. ❑ PIP → Off / On PIP La funzione PIP può essere attivata e disattivata. ❑ Formato → Õ / à / À / Œ Consente di selezionare il formato dell'immagine secondaria. ❑ Posizione → à / – / — / œ Utilizzata per selezionare la posizione dell'immagine secondaria. N In modalità Double (Œ, À), Posizione non può essere selezionata. PIP : On Formato :Õ Posizione :à Canale : ATV 4 ▶ U Sposta E Conf. R Ritorno ❑ Canale E' possibile selezionare il canale per lo schermo secondario. Italiano - 16 BN68-02325A-Ita.indb 16 2009-05-19 �� 3:57:01 ¦ Uso del televisore come uno schermo PC Impostazione del software del PC (basato su Windows XP) Di seguito vengono illustrate le impostazioni di visualizzazione di Windows per un PC tipico. Le schermate visualizzate sul PC possono differire in base alla versione di Windows e alla scheda video installate. Nel caso le schermate risultassero differenti, le stesse informazioni di base per la configurazione sono applicabili in quasi tutti i casi. (In caso contrario, contattare la casa costruttrice del computer oppure un rivenditore Samsung.) 1. Fare clic sul ‘Pannello di controllo’ nel menu Start di Windows. 2. Quando appare la finestra del pannello di controllo, fare clic su ‘Aspetto e temi’. Verrà visualizzata una finestra di dialogo. 3. Quando appare la finestra del pannello di controllo, fare clic su ‘Schermo’. Verrà visualizzata una finestra di dialogo. 4. Fare clic sulla scheda ‘Impostazioni’ nella finestra di dialogo. • Impostazione della dimensione corretta (risoluzione) - Ottimale: 1920 x 1080 pixel • Se la finestra di dialogo delle impostazioni contiene un’opzione relativa alla frequenza verticale, il valore corretto è ‘60’ o ‘60 Hz’. In caso contrario, fare clic su ‘OK’ e uscire dalla finestra di dialogo. Modalità di visualizzazione Se il segnale del sistema equivale alla modalità del segnale standard, lo schermo viene automaticamente regolato. Se il segnale del sistema non equivale alla modalità del segnale standard, regolare la modalità riferendosi alla guida dell'utente della scheda video; in caso contrario potrebbe non essere visualizzata alcuna immagine. Per le modalità video elencate alla pagina successiva, l'immagine a schermo è stata ottimizzata durante la produzione. ■ Ingresso D-Sub e HDMI/DVI Modalità Risoluzione IBM 640 x 350 720 x 400 640 x 480 832 x 624 1152 x 870 720 x 576 1152 x 864 1280 x 720 1280 x 720 1280 x 960 640 x 480 640 x 480 640 x 480 800 x 600 800 x 600 800 x 600 1024 x 768 1024 x 768 1024 x 768 1152 x 864 1280 x 1024 1280 x 1024 1280 x 800 1280 x 800 1280 x 960 1360 x 768 1440 x 900 1440 x 900 1680 x 1050 1280 x 720 1280 x 1024 MAC VESA CVT VESA DMT VESA GTF VESA DMT / DTV CEA N N N N N 1920 x 1080p Frequenza orizzontale Frequenza verticale (KHz) (Hz) 31,469 70,086 31,469 70,087 35,000 66,667 49,726 74,551 68,681 75,062 35,910 59,950 53,783 59,959 44,772 59,855 56,456 74,777 75,231 74,857 31,469 59,940 37,861 72,809 37,500 75,000 37,879 60,317 48,077 72,188 46,875 75,000 48,363 60,004 56,476 70,069 60,023 75,029 67,500 75,000 63,981 60,020 79,976 75,025 49,702 59,810 62,795 74,934 60,000 60,000 47,712 60,015 55,935 59,887 70,635 74,984 65,290 59,954 52,500 70,000 74,620 70,000 67,500 60,000 Frequenza di clock dei pixel (MHz) 25,175 28,322 30,240 57,284 100,000 32,750 81,750 74,500 95,750 130,000 25,175 31,500 31,500 40,000 50,000 49,500 65,000 75,000 78,750 108,000 108,000 135,000 83,500 106,500 108,000 85,500 106,500 136,750 146,250 89,040 128,943 Polarità sync (O/V) +/-/+ -/-/-/-/+ -/+ -/+ -/+ -/+ -/-/-/+/+ +/+ +/+ -/-/+/+ +/+ +/+ +/+ -/+ -/+ +/+ +/+ -/+ -/+ -/+ -/+ -/- 148,500 +/+ Quando si effettua una connessione mediante cavo HDMI / DVI, è necessario utilizzare la porta HDMI IN 3(DVI). La modalità interlacciata non è supportata. Questo dispositivo potrebbe non funzionare correttamente se si seleziona un formato video non standard. Le modalità Separate e Composite sono supportate. Il formato SOG non è supportato. Se il cavo VGA è di scarsa qualità o troppo lungo, in alta risoluzione (1920x1080) le immagini possono risultare disturbate. Italiano - 17 BN68-02325A-Ita.indb 17 2009-05-19 �� 3:57:01 ¦ Configurazione del televisore con il PC N Preimpostazione: Premere il tasto SOURCE per selezionare la modalità PC. ❑ Regolazione auto Immagine Usare la funzione Auto Adjust per far sì che il televisore regoli automaticamente i segnali video che riceve. La funzione sintonizza automaticamente le impostazioni e regola i valori della frequenza e le posizioni. T Premere il tasto TOOLS per visualizzare il menu Strumenti. E’ anche possibile impostare la funzione Auto Adjustment selezionando Strumenti → Regolazione auto. N Questa funzione non è disponibile in modalità DVI-HDMI. Luminosità Nitidezza : 45 : 50 Regolazione auto ▶ Schermo Impostazioni avanzate Opzioni immagine Reset immagine ❑ Schermo ■ Grossa / Fine Lo scopo della regolazione della qualità dell’immagine è quello di eliminare o ridurre eventuali disturbi di visualizzazione. Se non si riesce a eliminare il disturbo mediante sintonizzazione, regolare la frequenza nel modo migliore possibile (Grossa) ed eseguire nuovamente la sintonizzazione fine. Una volta ridotto il disturbo, regolare l’immagine in modo che sia perfettamente centrata sullo schermo. Schermo Grossa 50 Fine 0 Posizione PC Reset immagine ■ Posizione PC U Sposta E Conf. R Ritorno Regolare la posizione dello schermo del PC se non si adatta allo schermo del televisore. Premere il tasto ▲ o ▼ per regolare la posizione verticale. Premere il tasto ◄ o ► per regolare la posizione orizzontale. ■ Reset immagine È possibile sostituire tutte le impostazioni dell'immagine ripristinando i valori di fabbrica. SUONO ¦ Configurazione del menu audio ❑ Modalità → Standard / Musica / Film / Voce cristallina / Personaliz Suono T Premere il tasto TOOLS per visualizzare il menu Strumenti. E’ inoltre possibile impostare la modalità audio selezionando Strumenti → Modalità audio. ● Standard: Seleziona la modalità audio normale. ● Musica: Enfatizza la musica rispetto alle voci. ● Film: Offre la migliore qualità audio per la visione di film. ● Voce cristallina: Enfatizza i dialoghi rispetti altri altri suoni. ● Personaliz: Richiama le impostazioni audio personalizzate. Modalità Equalizzatore SRS TruSurround HD Lingua audio Formato audio Descrizione audio Volume auto Selezione altoparlante : Personaliz ▶ : Off : ---: ---: Off : Altoparlante TV ❑ Equalizzatore Le impostazioni audio possono essere regolate in base alle proprie preferenze personali. ● Modalità: Seleziona la modalità audio tra quelle predefinite. ● Bilanciamento S/D: Controlla il bilanciamento degli altoparlanti sinistro e destro. ● 100Hz / 300Hz / 1KHz / 3KHz / 10KHz (Regolazione larghezza di banda): Per regolare il livello delle diverse frequenze di larghezza di banda. ● Reset: Ripristina le impostazione predefinite dell’equalizzatore. ❑ SRS TruSurround HD → Off / On SRS TruSurround HD è una tecnologia SRS brevettata che risolve il problema della riproduzione di contenuti multicanale 5.1 su due altoparlanti. TruSurround offre una straordinaria esperienza Surround Sound virtuale attraverso un sistema di riproduzione a due altoparlanti, inclusi gli altoparlanti interni del televisore. È pienamente compatibile con tutti i formati multicanale. T Premere il tasto TOOLS per visualizzare il menu Strumenti. E’ possibile impostare la funzione SRS TruSurround HD selezionando Strumenti → SRS TS HD. Italiano - 18 BN68-02325A-Ita.indb 18 2009-05-19 �� 3:57:02 ❑ Lingua audio È possibile modificare la lingua predefinita. Visualizza le informazioni sulla lingua relative alla trasmissione in corso. N Durante la visione di un canale digitale, è possibile selezionare questa funzione. N E' possibile selezionare solo una delle lingue trasmesse. ❑ Formato audio → MPEG / Dolby Digital Quando l’audio è generato sia dall’altoparlante principale sia dal ricevitore audio, potrebbe prodursi un effetto di eco a causa della diversa velocità di decodifica dei due dispositivi. In questo caso, attivare la funzione TV Speaker. N Durante la visione di un canale digitale, è possibile selezionare questa funzione. N Il formato audio dipende dal segnale trasmesso dall'emittente. ❑ Descrizione audio Questa funzione audio ausiliaria fornisce una traccia audio aggiuntiva per aiutare le persone con problemi visivi. Questa funzione gestisce il flusso audio per l’opzione AD (Audio Description), quando è trasmesso insieme all’Audio principale dall'emittente. Gli utenti possono attivare o disattivare la funzione Descrizione audio selezionando Acceso o Spenta e regolarne il volume. O Premere il tasto AD del telecomando per selezionare Off o On. ■ Descrizione audio → Off / On Attiva e disattiva la funzione Audio Description. ■ Volume E’ possibile regolare il volume della funzione Descrizione audio. N Volume è attivo quando la funzione Descrizione audio è impostata su On. N Durante la visione di un canale digitale, è possibile selezionare questa funzione. ❑ Volume auto → Off / On Le condizioni del segnale variano a seconda dell’emittente, ma non è pratico regolare il volume ogni volta che si cambia canale. Questa funzione consente di regolare automaticamente il volume del canale desiderato diminuendo il livello dell’uscita audio quando il segnale di modulazione è alto, oppure aumentando il livello dell’uscita audio quando il segnale di modulazione è basso. ❑ Selezione altoparlante Durante la visione del televisore con un sistema Home theatre collegato, disattivare gli altoparlanti in modo da poter ascoltare l'audio proveniente dagli altoparlanti esterni del sistema Home theatre. ● Altoparlante est: Per ascoltare l'audio proveniente dagli altoparlanti esterni (Home Theatre). ● Altoparlante TV: Per ascoltare l’audio tramite gli altoparlanti del televisore. N I tasti di regolazione del volume e il tasto MUTE non sono attivi quando Selezione altoparlante è impostato su Altoparlante est. N Selezionando Altoparlante est nel menu Selezione altoparlante, le impostazioni dell’audio saranno limitate. Altoparlante TV Altoparlante est Nessun segnale video Altoparlanti interni del televisore RF / AV / Comp. / PC / HDMI Uscita audio Muto Muto Da Audio Out (Optical, L/R Out) a Sistema audio RF / AV / Comp. / PC / HDMI Uscita audio Uscita audio Muto ❑ Selezione audio → Principale / Secondario Durante l’uso della funzione PIP, è possibile ascoltare l’audio dell’immagine secondaria (PIP). N Questa funzione è selezionabile quando la funzione PIP è impostata su On. T Premere il tasto TOOLS per visualizzare il menu Strumenti. E' inoltre possibile impostare l'audio dell'immagine secondaria selezionando Strumenti → PIP → Selezione audio ❑ Reset impostazioni audio → Azzera tutto / Azz mod audio / Annulla E' possibile ripristinare le impostazioni audio ai valori di fabbrica. N Azz mod audio: I valori correnti tornano alle impostazioni predefinite. Reset impostazioni audio Selezionare le opzioni di reset dell'audio. Azzera tutto Azz mod audio Annulla L Sposta E Conf. R Ritorno Italiano - 19 BN68-02325A-Ita.indb 19 2009-05-19 �� 3:57:02 ¦ Selezione della modalità audio E’ possibile impostare la modalità audio nel menu Strumenti. Quando si imposta la modalità Dual l ll, la modalità audio corrente viene visualizzata sullo schermo. A2 Stereo NICAM Stereo Tipo di audio Mono Stereo Dual Mono Stereo Dual Dual 1 / 2 MONO STEREO ↔ MONO DUAL 1 ↔ DUAL 2 MONO MONO ↔ STEREO MONO ↔ DUAL 1 DUAL 2 Predefinito Cambio automatico DUAL 1 Cambio automatico DUAL 1 N Se il segnale stereo è debole e si verifica un cambio automatico, passare alla modalità Mono. N Questa funzione è attiva solo con segnale audio stereo. Al contrario, non è attiva con segnale audio mono. N Questa funzione è disponibile solo in modalità TV. Impostazione ¦ Configurazione del menu Impostazione ❑ Lingua menu Plug & Play ❑ Ora Per la descrizione dettagliata delle procedure per l'impostazione delle opzioni, vedere 'Impostazione dell'orario'. Impostazione E' possibile impostare la lingua dei menu. Lingua menu : Italiano ▶ Ora Trasmissione Sicurezza Rete Generale ❑ Sicurezza ■ Sottotitoli È possibile attivare e disattivare i sottotitoli. Utilizzare questo menu per impostare la modalità sottotitoli. Normale rappresenta il sottotitolo di base mentre Non udenti è il sottotitolo per le persone con problemi uditivi. ● Sottotitoli → Off / On Attiva e disattiva i sottotitoli. ● Modalità → Normale / Non udenti Imposta la modalità dei sottotitoli. ● Lingua Sottotitoli Imposta la lingua dei sottotitoli. N Se il programma che si sta guardando non supporta la funzione Non udenti si attiva automaticamente l’opzione Normale anche se è selezionata la modalità Non udenti. N La lingua predefinita è l'inglese, nel caso in cui la trasmissione non supporti la lingua selezionata. N È possibile selezionare queste opzioni semplicemente premendo il tasto SUBT. sul telecomando. ■ Testo digitale → Disattiva / Attiva (solo RU) Se il programma è trasmesso con testo digitale, questa funzione è attivata. N MHEG (Multimedia and Hypermedia Information Coding Experts Group) Uno standard internazionale per i sistemi di codifica dei dati multimediali e ipermediali. È un sistema più complesso rispetto al formato MPEG in quanto include collegamenti a dati ipermediali come immagini fisse, servizi di caratteri, animazione, grafica e file video, oltre ai dati multimediali. MHEG è una tecnologia interattiva con vari campi di applicazione, come sistemi VOD (Video-On-Demand), ITV (Interactive TV), EC (Electronic Commerce), teleformazione, teleconferenza, librerie digitali e giochi di rete. Italiano - 20 BN68-02325A-Ita.indb 20 2009-05-19 �� 3:57:02 ■ Lingua Teletext E' possibile impostare la lingua del Teletext. N La lingua predefinita è l'inglese, nel caso in cui la trasmissione non supporti la lingua selezionata. ■ Preferenze ● Lingua principale audio / Lingua secondaria audio / Lingua principale sottotitoli / Lingua secondaria sottotitoli / Lingua principale Teletext / Lingua secondaria Teletext Mediante questa funzione, gli utenti sono in grado di selezionare una delle lingue disponibili. La lingua selezionata viene impostata automaticamente durante la selezione di un canale. Modificando l’impostazione della lingua, le opzioni Subtitle Language, Audio Language e Teletext Language del menu Language vengono automaticamente impostate sulla lingua selezionata. Le opzioni Lingua Sottotitoli, Lingua audio, e Lingua Teletext del menu Lingua mostrano l’elenco delle lingue supportate dal canale corrente, dove l’opzione corrente appare evidenziata. Se si modifica una di queste opzioni, la nuova lingua viene applicata solo al canale corrente. La nuova impostazione non viene invece applicata alle opzioni Lingua principale sottotitoli, Lingua principale audio o Lingua principale Teletext del menu Preference. ■ Interfaccia comune ● Menu CI Questa modalità permette all’utente di accedere al menu del modulo CAM. Selezionare CI Menu in base alla scheda PC. ● Info sull'applicazione Contiene informazioni sul modulo CAM inserito nello slot CI e le visualizza. Le informazioni sull'applicazione sono relative alla ‘SCHEDA CI (CI+)’. È possibile installare il modulo CAM in qualsiasi momento sia mentre il televisore è acceso sia mentre è spento. 1. Acquistare il modulo CI CAM presso il rivenditore locale o via telefono. 2. Inserire la scheda ‘SCHEDA CI (CI+)’ nel modulo CAM nella direzione indicata dalla freccia. 3. Inserire il modulo CAM con la ‘SCHEDA CI (CI+)’ installata nell'alloggiamento common interface. (Inserire completamente il CAM nella direzione indicata dalla freccia in modo che risulti parallelo allo slot.) 4. Verificare la visione dell’immagine su un canale a segnale criptato. ❑ Sicurezza ■ Blocco canali → Off / On Tramite questa funzione è possibile impedire agli utenti non autorizzati, ad esempio i bambini, di guardare programmi non adatti a loro, annullando il video e azzerando l’audio. N Prima della comparsa dell’immagine, compare la richiesta del PIN. Digitare il PIN a quattro cifre. N Il codice PIN predefinito di un nuovo televisore è 0-0-0-0. E' possibile cambiare il PIN selezionando Cambia PIN nel menu. N E' possibile bloccare alcuni canali nell'elenco dei canali. N Blocco canali è disponibile solo in modalità TV. ■ Blocco Canale → Grado Blocco Canale Questa funzione consente di immettere un codice PIN di identificazione personale a 4 cifre definito dall’utente per impedire agli utenti non autorizzati, come ad esempio i bambini, di vedere programmi non adatti a loro. N La voce Grado Blocco Canale può essere diversa in base alla nazione. N Prima della comparsa dell’immagine, compare la richiesta del PIN. Digitare il PIN a quattro cifre. N Il PIN predefinito di un nuovo apparecchio TV è ‘0-0-0-0’. E' possibile modificare il PIN selezionando Cambia PIN nel menu. N Una volta impostata la classificazione dei programmi, verrà visualizzato il simbolo ‘\’. N Cons tutto: Premere per sbloccare tutte le classificazioni dei canali TV. Bloc tutto: Premere per bloccare tutte le classificazioni dei canali TV. ■ Cambia PIN E' possibile modificare il numero ID necessario per configurare il televisore. N Prima della comparsa dell’immagine, compare la richiesta del PIN. Digitare il PIN a quattro cifre. N Il PIN predefinito di un nuovo apparecchio TV è 0-0-0-0. N Qualora si sia dimenticato il codice PIN, premere i tasti del telecomando nella sequenza seguente per ripristinare il codice PIN predefinito 0-0-0-0 : POWER (Off) → MUTE → 8 → 2 → 4 → POWER (On). Italiano - 21 BN68-02325A-Ita.indb 21 2009-05-19 �� 3:57:02 ❑ Rete → Tipo di rete / Impostazione rete Per la descrizione dettagliata delle procedure per l'impostazione delle opzioni, vedere 'Impostazione della rete'. ❑ Generale ■ Modalità gioco → Off / On Durante la connessione a una console per videogiochi come PlayStation™ o Xbox™, il gioco sarà più realistico selezionando il relativo menu. N Limitazioni della modalità gioco (Attenzione) Per scollegare una console per videogiochi e collegare un altro dispositivo esterno, impostare la modalità Modalità gioco su Off nel menu di impostazione. Visualizzando il menu TV in modalità Modalità gioco si potrebbe verificare un leggero sfarfallio. N Modalità gioco non è disponibile in modalità TV, PC ed Est. N Durante l'uso della funzione PIP la modalità Modalità gioco non può essere usata. N Se la qualità dell'immagine è scadente quando al televisore è collegato un dispositivo esterno, verificare se la Modalità gioco è impostata su On. Impostare Modalità gioco su Off e collegare i dispositivi esterni. N Se Modalità gioco è Acceso: La Modalità immagine viene automaticamente impostata su Standard e non può essere modificata. La Modalità audio viene automaticamente impostata su Personaliz e non può essere modificata. Regolare l'audio mediante l'equalizzatore. La funzione Reset Suono viene attivata. La selezione della funzione Reset dopo l'impostazione dell'equalizzatore ripristina le impostazione di fabbrica dell'equalizzatore. ■ BD Wise → Off / On Fornisce la qualità ottimale delle immagini per i prodotti SAMSUNG DVD, Blu-ray e Home Theatre che supportano il formato BD Wise. Collegando tali dispositivi a questo televisore Samsung le immagini saranno ancora più ricche. N Collegare prodotti SAMSUNG che abbiano BD Wise con un cavo HDMI. N Quando BD Wise è impostato su On, la modalità delle immagini viene automaticamente cambiata alla risoluzione ottimale. N BD Wise è disponibile in modalità HDMI. ■ Risp. energia → Off / Basso / Medio / Alta / Immagine off / Auto Questa funzione regola la luminosità del televisore in modo da ridurre il consumo di energia. Durante la visione notturna del televisore, impostare l’opzione della modalità Risp. energia su Alta in modo da ridurre l’affaticamento degli occhi oltre al consumo energetico. Selezionando Immagine off, lo schermo si spegne lasciando attivo solo l’audio. Premere un tasto qualsiasi per uscire dalla modalità Immagine off. N Nel menu Strumenti, la funzione Immagine off non è supportata. T Premere il tasto TOOLS per visualizzare il menu Strumenti. E' inoltre possibile impostare l'opzione Energy Saving selezionando Strumenti → Risp. energia. ■ Trasparenza menu → Luminoso / Scuro E' possibile impostare la trasparenza del menu. ■ Melodia → Off / Basso / Medio / Alta E' possibile impostare una melodia da attivare a ogni accensione o spegnimento del monitor. N La modalità Melody non funziona Se il televisore non emette alcun suono significa che è stato premuto il tasto MUTE. Se non proviene audio dal televisore, ciò potrebbe essere causato dal volume impostato sul minimo mediante il tasto (-). Se il televisore è stato spento mediante la funzione Timer stand-by. ■ PIP Per la descrizione dettagliata delle procedure per l'impostazione delle opzioni, vedere 'Visione Picture-In-Picture'. Italiano - 22 BN68-02325A-Ita.indb 22 2009-05-19 �� 3:57:02 ¦ Impostazione dell’orario ❑ Orologio ■ ■ Modalità orologio E’ possibile impostare manualmente o automaticamente l’orario corrente. ● Automatico: Imposta automaticamente l’orario corrente utilizzando l’orario inviato dalla trasmissione digitale. ● Manuale: Imposta manualmente l’ora corrente. N In base all'emittente e al segnale, la funzione dell'impostazione automatica dell'orario potrebbe non essere corretta. In questo caso, impostare l'orario manualmente. N La connessione Antenna o Cavo deve consentire l'impostazione automatica dell'orario. Imposta Ora È possibile impostare manualmente l’ora corrente. N Questa funzione è disponibile solo quando la funzione Modalità orologio è impostata su Manuale. N È possibile impostare il giorno, il mese, l’anno, l’ora e i minuti premendo direttamente i tasti numerici del telecomando. Impostazione L’impostazione dell’orologio è necessaria per utilizzare le varie funzioni di timer del televisore. O L’ora corrente appare ogni volta che si preme il tasto INFO. N Se il cavo di alimentazione viene scollegato, è necessario impostare nuovamente l’orologio. ▶ Ora Orologio : -- : -- Timer stand-by : Off Timer 1 : Disattivato Timer 2 : Disattivato Timer 3 : Disattivato ▶ U Sposta E Conf. R Ritorno Timer 1 Orario TV on 00 00 Disattiva Orario TV off 00 10 Il timer di spegnimento disattiva automaticamente il televisore dopo il tempo impostato (30, 60, 90, 120, 150 e 180 minuti). T Premere il tasto TOOLS per visualizzare il menu Strumenti. E’ inoltre possibile impostare il timer di stand-by selezionando Strumenti → Timer stand-by. N Per annullare la funzione Timer stand-by selezionare Off. : Italiano Ora Trasmissione Lingua menu Rete Generale Volume ❑ Timer stand-by Plug & Play Lingua menu Ripetizione 00 Disattiva Sorgente Antenna TV ATV Canale 0 Dom Lun Mar Mer Gio Ven Sab Una volta L Sposta U Regola. E Conf. R Ritorno ❑ Timer 1 / Timer 2 / Timer 3 Possono essere impostate tre diverse opzioni del Timer. Prima è necessario impostare l’orologio. ● Orario TV on: Impostare l’ora e i minuti e attivare / disattivare. (Per attivare il timer selezionare Attiva.) ● Orario TV off: Impostare l’ora e i minuti e attivare / disattivare. (Per attivare il timer selezionare Attiva.) ● Volume: Selezionare il livello del volume desiderato. ● Sorgente: E' possibile selezionare il contenuto del dispositivo TV o USB da riprodurre all'accensione automatica del televisore. Selezionare TV o USB. (Assicurarsi che al televisore sia collegato un dispositivo USB.) N Nel caso ci sia un solo file fotografico memorizzato sul dispositivo USB, la funzione Slide Show non è disponibile. ● Antenna (quando Sorgente è impostata su TV): Selezionare ATV o DTV. ● Canale (quando Sorgente è impostata su TV): Selezionare il canale desiderato. ● Contenuti (quando Sorgente è impostata su USB): E' possibile selezionare una cartella del dispositivo USB con i file musicali o fotografici da riprodurre all'accensione automatica del televisore. N Se il nome della cartella è troppo lungo, la cartella non è selezionabile. N Se si utilizzano due dispositivi USB dello stesso tipo, accertarsi che i nomi delle cartelle siano diversi in modo da leggere il dispositivo USB corretto. ● Ripetizione: Selezionare Una volta, Ogni gg, Lun~Ven, Lun~Sab, Sab~Dom o Manuale. N Quando viene selezionato Manuale, premere il tasto ► per impostare il giorno della settimana. Premere il tasto ENTERE sul giorno desiderato e verrà visualizzato il simbolo c. N È possibile impostare l’ora, i minuti e il canale anche premendo i tasti numerici del telecomando. N Spegnimento automatico: Quando il televisore si accende mediante il timer impostato su on, si spegne automaticamente se per 3 ore non viene premuto alcun tasto di controllo. Questa funzione è disponibile solo se il timer è impostato su Acceso e impedisce l’eventuale surriscaldamento del televisore dovuto a un periodo di accensione troppo lungo. Italiano - 23 BN68-02325A-Ita.indb 23 2009-05-19 �� 3:57:02 ¦ Connessione di rete E' possibile impostare il Protocollo Internet (IP) in modo da poter comunicare con vari network connessi. ❑ Connessione rete - Cable ■ Connessione LAN via cavo per un ambiente DHCP Di seguito è riportata la procedura per impostare una connessione di rete usando il protocollo DHCP (Dynamic Host Configuration Protocol). Poiché alla selezione di DHCP vengono automaticamente impostati un indirizzo IP, una maschera di sottorete, un gateway e un DNS, non è necessario inserirli manualmente. 1. Collegare la porta LAN sul retro del televisore al modem esterno mediante un cavo LAN. 2. Collegare la porta Modem a parete e il modem esterno mediante un cavo modem. Porta Modem a parete Pannello posteriore del televisore Modem esterno (ADSL/VDSL/TV via cavo) 2 Cavo modem 1 Cavo LAN E' possibile collegare il televisore a una LAN mediante un Router. Porta Modem a parete Cavo modem Pannello posteriore del televisore Modem esterno (ADSL/VDSL/TV via cavo) Router IP Cavo LAN Cavo LAN E' possibile collegare la porta LAN al televisore direttamente in base allo stato della rete. Pannello posteriore del televisore Porta LAN a parete Cavo LAN N I terminali (la posizione della porta e il tipo) del dispositivo esterno variano in base alla marca del dispositivo. N Se si è verificato un errore nell'allocazione dell'indirizzo IP da parte del server DHCP, spegnere il modem e riaccenderlo dopo circa 10 secondi. N Per i collegamenti tra il modem esterno e il Router, vedere il manuale di riferimento del prodotto utilizzato. N E' possibile collegare direttamente il televisore alla LAN senza collegarlo tramite un Router. N Non è possibile usare un modem ADSL con connessione manuale poiché non supporta il protocollo DHCP. E' necessario pertanto utilizzare un modem ADSL con connessione automatica. Italiano - 24 BN68-02325A-Ita.indb 24 2009-05-19 �� 3:57:03 ■ Connessioni alla LAN per ambienti con IP statico Di seguito viene descritta la procedura per impostare la rete per l'uso di un indirizzo IP statico. L'indirizzo IP, la maschera di sottorete, il gateway e il DNS devono essere inseriti manualmente così come forniti dall'ISP (Internet Service Provider). 1. Collegare la porta LAN sul retro del televisore alla porta LAN a parete mediante un cavo LAN. Pannello posteriore del televisore Porta LAN a parete 1 Cavo LAN E' possibile collegare il televisore a una LAN mediante un Router. Porta LAN a parete Pannello posteriore del televisore Router IP Cavo LAN Cavo LAN N I terminali (la posizione della porta e il tipo) del dispositivo esterno variano in base alla marca del dispositivo. N In caso di utilizzo di un indirizzo IP statico, l'ISP potrà fornire l'indirizzo IP, la maschera di sottorete, il gateway e il DNS. E' necessario inserire questi valori per completare le impostazioni della rete. Se non si conoscono tali valori, richiederli all'amministratore di rete. N Per maggiori informazioni sulla configurazione e sulla connessione a un router, vedere il manuale di riferimento del prodotto corrispondente. N E' possibile collegare direttamente il televisore alla LAN senza collegarlo tramite un Router. N Se si utilizza un Router IP che supporta il protocollo DHCP, è possibile impostare il dispositivo sia come DHCP sia come IP statico. N Per conoscere le procedure necessarie per impostare un indirizzo IP statico, rivolgersi al proprio Internet Service Provider. ❑ Connessione rete - Wireless E' possibile collegarsi alla rete in modalità senza fili utilizzando un Router IP wireless. Pannello laterale del televisore Porta LAN a parete IP sharer wireless Samsung Wireless LAN Adapter o Cavo LAN 1. Collegare l'adattatore ‘Samsung Wireless LAN Adapter’ alla porta USB1 (HDD) o USB2 del televisore. N Per utilizzare una rete wireless è necessario utilizzare l’adattatore 'Samsung Wireless LAN Adapter' (WIS09ABGN). N L’adattatore ’Samsung Wireless LAN Adapter' è venduto separatamente. L'adattatore LAN Wireless WIS09ABGN è in vendita presso rivenditori autorizzati, siti di Ecommerce e Samsungparts.com. N Per utilizzare una rete wireless, il televisore deve essere collegato a un Router IP wireless. Se il router IP wireless supporta il protocollo DHCP, il televisore può utilizzare sia un indirizzo DHCP sia un indirizzo IP statico per collegarsi alla rete in modalità wireless. N L'adattatore Samsung Wireless LAN adapter supporta i protocolli IEEE 802.11A, IEEE 802.11B, IEEE 802.11G, IEEE 802.11N. Riproducendo un video DLNA su una connessione IEEE 802.11B/G, il video potrebbe non essere riprodotto in modo fluido. N Se il ruoter IP wireless permette di attivare/disattivare la funzione di connessione Ping, attivarla. Italiano - 25 BN68-02325A-Ita.indb 25 2009-05-19 �� 3:57:05 N Selezionare un canale per il Router IP wireless che non sia attualmente utilizzato. Se il canale impostato per il Router IP wireless è attualmente utilizzato da un altro dispositivo vicino, ciò comporterà delle interferenze e le comunicazioni potrebbero cadere. N Sistema di sicurezza diversi da quelli elencati sopra non sono compatibili con il televisore. Durante l'applicazione della chiave di sicurezza per l'AP (Router IP wireless), sono supportate solo le seguenti. 1) Modalità di autenticazione: OPEN, SHARED, WPAPSK, WPA2PSK 2) Tipo crittografia: WEP, TKIP, AES Durante l'applicazione della chiave di sicurezza per l'AP (Router IP wireless) in modalità Ad-hoc, sono supportate solo le seguenti funzioni. 1) Modalità di autenticazione: SHARED, WPANONE 2) Tipo crittografia: WEP, TKIP, AES N Se il proprio AP supporta WPS (Wi-Fi Protected Setup), è possibile collegarsi alla rete mediante PBC (Push Button Configuration) o un PIN (Personal Identification Number). WPS configurerà automaticamente l'SSID e la chiave WPA in entrambe le modalità. N Se il dispositivo non è certificato, potrebbe non connettersi al televisore mediante il 'Samsung Wireless LAN Adapter’. ¦ Impostazione della rete ❑ Tipo di rete ■ Cavo Collegamento alla rete in modalità cavo. ■ Wireless Collegamento alla rete in modalità wireless. Impostazione Selezionare Cable o Wireless come metodo di collegamento alla rete. N Il menu viene attivato solo se l’adattatore 'Samsung Wireless LAN Adapter' è collegato. Trasmissione Sicurezza Rete ▶ Generale ❑ Impostazione rete ■ Impostazione rete via cavo (quando Tipo di rete è impostato su Cavo) N Verificare che il cavo LAN sia collegato. ● Impostazione IP → Automatico / Manuale ● Test di rete Mediante questa funzione è possibile testare o confermare lo stato del collegamento di rete dopo la sua impostazione. N Cosa fare se non si è in grado di collegarsi alla rete in modalità cablata Se il proprio Internet Service Provider ha registrato il MAC address del dispositivo utilizzato per il collegamento a Internet la prima volta ed esegue l'autenticazione a ogni accesso a Internet, il televisore potrebbe non essere in grado collegarsi a Internet poiché il MAC address è diverso da quello utilizzato dal dispositivo (PC) per collegarsi la prima volta a Internet. In questo caso, chiedere all'Internet Service Provider le procedure per collegare dispositivi diversi da un PC (ad esempio il televisore) a Internet. Se l'Internet Service Provider richiede un ID o una password per il collegamento a Internet (rete), il televisore potrebbe non essere in grado di collegarsi. In questo caso, digitare i propri ID o password al collegamento a Internet usando un Router. La connessione internet potrebbe cadere a causa di un problema di firewall. In questo caso, contattare il proprio Internet Service Provider. Se ancora non è possibile collegarsi a Internet anche dopo aver seguito le procedure descritte dall'Internet Service Provider, contattare Samsung Electronics. Impostazione rete via cavo - Automatico Collegando un cavo LAN a una rete che supporta il protocollo DHCP, le impostazioni IP (Internet Protocol) vengono automaticamente configurate. 1. Impostare Tipo di rete su Cavo. 2. Selezionare Impostazione rete via cavo. 3. Impostare Impostazione IP su Automatico. N Il protocollo Internet viene impostato automaticamente. 4. Selezionare Test di rete per verificare la connettività della rete. Impostazione rete via cavo Impostazione IP : Auto ▶ Test di rete Indirizzo IP : Maschera sottorete : Gateway Server DNS : : U Verpl. E Conf. R Ritorno Italiano - 26 BN68-02325A-Ita.indb 26 2009-05-19 �� 3:57:05 Impostazione rete via cavo - Manuale Per collegare il televisore alla LAN mediante un indirizzo IP statico è necessario impostare il protocollo Internet (IP). 1. Impostare Tipo di rete su Cavo. 2. Selezionare Impostazione rete via cavo. 3. Impostare Impostazione IP su Manuale. Impostazione rete via cavo Impostazione IP : Manuale ▶ Test di rete Indirizzo IP : � 0 0 0 0 Maschera sottorete : � 0 0 0 0 Gateway : � 0 0 0 0 Server DNS : � 0 0 0 0 4. Impostare Indirizzo IP, Maschera sottorete, Gateway e Server DNS. N Premere i tasti numerici sul telecomando quando si desidera impostare manualmente la rete. U Verpl. E Conf. R Ritorno 5. Selezionare Test di rete per verificare la connettività della rete. ■ Imp rete wireless N Il menu viene attivato solo se l’adattatore 'Samsung Wireless LAN Adapter' è collegato. ● Impostazione IP → Automatico / Manuale ● Test di rete Mediante questa funzione è possibile testare o confermare lo stato del collegamento di rete dopo la sua impostazione. N In caso sia impossibile collegarsi a un AP (Access Point) Il televisore non riesce a individuare un AP configurato come SSID privato. In questo caso, cambiare le impostazioni dell'AP e riprovare. Se il proprio Internet Service Provider ha registrato il MAC address del dispositivo utilizzato per il collegamento a Internet la prima volta ed esegue l'autenticazione a ogni accesso a Internet, il televisore potrebbe non essere in grado collegarsi a Internet poiché il MAC address è diverso da quello utilizzato dal dispositivo (PC) per collegarsi la prima volta a Internet. In questo caso, chiedere all'Internet Service Provider le procedure per collegare dispositivi diversi da un PC (ad esempio il televisore) a Internet. Se ancora non è possibile collegarsi a Internet anche dopo aver seguito le procedure descritte dall'Internet Service Provider, contattare Samsung Electronics. ● Seleziona una rete Imp rete wireless Access Point: Con questa funzione è possibile selezionare il router IP da utilizzare se Chiave sicur si usa una rete wireless. Numero A B C D E F Elimina N Se l'Access Point wireless non è riportato nell'elenco dei dispositivi disponibili, Eseg premere il tasto Rosso. N Una volta stabilita la connessione, il sistema tornerà automaticamente alla n Sposta `~9 Numero E Conf. R Ritorno schermata. N Una volta avuto accesso a un Access Point mediante autenticazione di sicurezza: Comparirà la richiesta della Chiave di sicurezza. Digitare la chiave di sicurezza e Imp rete wireless premere il tasto Blu sul telecomando. Seleziona una rete 3/9 N Se il tipo di crittografia è WEP, 0~9, A~F sarà disponibile durante la digitazione sson PBC jee PIN della chiave di sicurezza. Ricerca AP_1 Collegamento mediante WPS (Wi-Fi Protected Setup) ● Se Chiave sicur è già impostata: Nell'elenco degli access point disponibili selezionare WPS. N E' possibile selezionare PBC, PIN, Chiave sicur. Chiave sicur Ap_2 Ad-hoc U Verpl. E Conf. R Ritorno Premere il tasto PBC sull’AP. Nome punto di accesso : AP_1 Annulla Premere OK dopo aver immesso il pin del televisore durante la configurazione del punto di accesso. Nome punto di accesso : AP_1 Numero PIN : 12345678 Collegamento mediante PBC: Selezionare una PBC (Push Button Configuration). Premere il tasto PBC sull'AP (access point) entro 2 minuti e attendere la connessione. Collegamento mediante PIN: Selezionare un PIN (Personal Identification Number). N Viene visualizzato il messaggio del Codice PIN. Inserire il Codice PIN al dispositivo AP entro 2 minuti. Selezionare OK e attendere la connessione. N Riprovare nuovamente se la connessione non ha successo. N Se non è ancora possibile stabilire la connessione, reimpostare l'access point. Vedere le istruzioni relative all'access point. OK Annulla Imp rete wireless Chiave sicur A B C D E F G H I J K L M N O P Q R S T U V W X Y Z Numero Minusc Elimina Eseg n Sposta `~9 Numero E Conf. R Ritorno Collegamento mediante Chiave sicur: Selezionando Chiave sicur, viene visualizzata la finestra per la digitazione della chiave. Digitare la chiave di sicurezza e premere Blu. N Riprovare nuovamente se la connessione non ha successo. Italiano - 27 BN68-02325A-Ita.indb 27 2009-05-19 �� 3:57:06 ● Imp rete wireless Se Chiave sicur non è già impostata: Quando l'impostazione di sicurezza dell'AP che Seleziona una rete 3/9 supporta la WPS è NONE, è possibile selezionare PBC, PIN, Nessuna protezione. sson Nessuna protezione permette la connessione diretta all'AP senza l'uso della funzione PBC jee PIN WPS. Ricerca AP_1 Nessuna protezione Ad-hoc Ap_2 N Il processo di PBC, PIN è uguale a quello descritto sopra. Fare riferimento ad esso se Chiave sicur è già impostata U Verpl. E Conf. R Ritorno N Riprovare nuovamente se la connessione non ha successo. Ad-hoc: E' possibile collegarsi a un dispositivo mobile senza la necessità di avere a disposizione un Access Point tramite il ‘Samsung Wireless LAN Adapter’ usando un network peer-to-peer. Come collegarsi a un nuovo network Ad-hoc 1. Selezionare Seleziona una rete, per visualizzare un elenco di dispositivi. 2. All'interno dell'elenco dei dispositivi, premere il tasto Blu sul telecomando o selezionare Ad-hoc. N Il messaggio Il sistema di rete esistente potrebbe avere funzioni limitate. Cambiare la connessione di rete?. Il sistema di rete esistente potrebbe avere funzioni limitate. Cambiare la connessione di rete? Sì No 3. Digitare il Nome rete (SSID) : e la Chiave sicur nel dispositivo che si intende collegare. Come collegarsi a un dispositivo Ad-hoc esistente 1. Selezionare Seleziona una rete, per visualizzare un elenco di dispositivi. 2. Selezionare il dispositivo desiderato nell'Elenco dei dispositivi. 3. Se la chiave di sicurezza è stata applicata, digitarla nuovamente. N Se il network non funziona regolarmente, controllare nuovamente il Nome rete (SSID) e la Chiave sicur. Se la Chiave sicur è errata, potrebbe essere la ragione del malfunzionamento. Imp rete wireless-Automatico Per collegare un AP, questo deve supportare la modalità DHCP. Solo i dispositivi che supportano la modalità Ad-hoc possono essere collegati senza DHCP. 1. Impostare Tipo di rete su Wireless. 2. Selezionare Imp rete wireless. 3. Impostare Impostazione IP su Automatico. N Il protocollo Internet viene impostato automaticamente. Imp rete wireless Impostazione IP : Auto ▶ Test di rete Nessuna protezione : AP1 Indirizzo IP : Maschera sottorete : Gateway Server DNS : : U Verpl. E Conf. R Ritorno 4. Selezionare un network mediante Seleziona una rete. 5. Selezionare Test di rete per verificare la connettività della rete. Imp rete wireless Imp rete wireless - Manuale Impostazione IP 1. Impostare Tipo di rete su Wireless. : Manuale ▶ Test di rete Nessuna protezione : AP1 Indirizzo IP : � 0 0 0 0 3. Impostare Impostazione IP su Manuale. Maschera sottorete : � 0 0 0 0 : � 0 0 0 0 4. Impostare Indirizzo IP, Maschera sottorete, Gateway e Server DNS. N Premere i tasti numerici sul telecomando quando si desidera impostare manualmente la rete. Gateway Server DNS : � 0 0 0 0 2. Selezionare Imp rete wireless. U Verpl. E Conf. R Ritorno 5. Selezionare un network mediante Seleziona una rete. 6. Selezionare Test di rete per verificare la connettività della rete. Italiano - 28 BN68-02325A-Ita.indb 28 2009-05-19 �� 3:57:07 Ingressi / Supporto ¦ Menu Ingressi ❑ Elenco sorgenti ■ Ingressi Per selezionare il televisore o altre sorgenti esterne di ingresso quali DVD / lettori Blu-ray / Cable Box /������������������������������������������������������������������������������������������ Ricevitori ����������������������������������������������������������������������������������������� satellitari (Set-Top Box) collegati al televisore. Utilizzare la funzione per selezionare la sorgente di ingresso desiderata. O Premere il tasto SOURCE sul telecomando per visualizzare una sorgente del segnale esterna. La modalità TV può essere selezionata premendo il tasto TV. TV / Est.1 / Est.2 / AV / Comp. / PC / HDMI1 / HDMI2 / HDMI3/DVI / HDMI4 N E’ possibile scegliere solo i dispositivi esterni collegati al televisore. In Elenco sorgenti, gli ingressi collegati verranno evidenziati e ordinati in cima all'elenco. Gli ingressi non collegati verranno ordinati in fondo all’elenco. N Se i dispositivi USB sono collegati alle porte USB1(HDD) e USB2, vengono visualizzati nell'ordine come USB1 e USB2. N Est. e PC rimangono sempre attive. N Uso dei tasti colorati del telecomando nell'elenco delle sorgenti Rosso (Aggiorna): Aggiorna il collegamento ai dispositivi esterni. Premere questo tasto se la propria sorgente è accesa e collegata ma non compare nell'elenco. TOOLS (Strumenti): Visualizza i menu Modifica Nome e Informazioni. Elenco sorgenti Modifica Nome Elenco sorgenti TV Est.1 Est.2 PC :---:---:---- AV Comp. :---:---- Aggiorna T Strumenti ❑ Modifica Nome ■ VCR / DVD / STB cavo / STB satellite / STB PVR / Ricevitore AV / Giochi / Videocamera / PC / DVI / DVI PC / TV / IPTV / Blu-ray / HD DVD / DMA Assegnare un nome al dispositivo collegato ai jack di ingresso per semplificare la selezione della sorgente di ingresso. N Quando un PC con una risoluzione di 1920 x 1080 a 60Hz è collegato alla porta HDMI IN 3(DVI) è necessario impostare la modalità HDMI3/DVI su DVI PC in Modifica Nome della modalità Ingressi. N Quando si collega un cavo HDMI/DVI alla porta HDMI IN 3(DVI), impostare la modalità HDMI3/DVI su DVI o DVI PC alla voce Modifica Nome della modalità Ingressi. In questo caso, è necessaria una connessione separata per il segnale audio. ¦ Menu Supporto ❑ Legal Notice ❑ Guida Prodotto La Product Guide fornisce le informazioni riguardanti le principali funzioni del televisore. Le descrizioni fornite sono solo in lingua Inglese. Picture Quality Supporto Prendere visione della Legal Notice e del Generale Disclaimer riguardanti i Contenuti e i Servizi di Terze parti. N Il Generale Disclaimer può essere diverso da paese a paese. Legal Notice ▶ Guida Prodotto Auto diagnosi Aggiornamento software Guida alla connessione HD Contattare Samsung Full HD 1080p 100Hz Motion Plus Picture Mode [email protected] Internet@ TV - Content Service Content Library Flash USB2.0 Movie DLNA Wireless Eco-Friendly Energy Saving Mode Eco Material Italiano - 29 BN68-02325A-Ita.indb 29 2009-05-19 �� 3:57:07 Usare i tasti del telecomando nel menu Guida Prodotto. Tasto Tasto giallo ◄/► ENTERE RETURN EXIT Operazioni Mostra i contenuti della Guida Prodotto in modo sequenziale. (Riproduzione automatica) Sposta il cursore e seleziona una voce. Attiva la voce attualmente selezionata. Ritorna al menu precedente. Arresta la funzione corrente e ritorna al menu principale di Guida Prodotto. ❑ Auto diagnosi ■ Test immagine Auto diagnosi In caso di problemi di visualizzazione dell'immagine, eseguire il test pertinente. Verificare il color Test immagine ▶ pattern sullo schermo per vedere se il problema persiste. Test audio ● Sì: Se il test pattern non compare oppure presenta disturbi, selezionare Sì. Potrebbe Informazioni sul segnale essersi verificato un problema con il televisore. Contattare il call center Samsung per U Sposta E Conf. R Ritorno richiedere assistenza. ● No: Se il test pattern è visualizzato correttamente, selezionare No. Potrebbe essersi verificato un problema con i dispositivi esterni. Controllare lo stato dei collegamenti. Se il problema persiste, consultare il manuale dell'utente dei dispositivi esterni. ■ Test audio In caso di problemi di audio, eseguire il test pertinente. Controllare l'audio riproducendo un test melodico attraverso le casse del televisore. N Se non c'è ritorno audio dagli altoparlanti del televisore, prima di eseguire il test audio verificare che Selezione altoparlante sia impostato su Altoparlante TV nel menu Suono. N E' possibile ascoltare la melodia durante il test anche se Selezione altoparlante è impostato su Altoparlante est oppure l'audio è stato disattivato mediante la pressione del tasto MUTE. ● Sì: Se durante l'esecuzione del test audio il suono proviene da un solo altoparlante, selezionare Sì. Potrebbe essersi verificato un problema con il televisore. Contattare il call center Samsung per richiedere assistenza. ● No: Se è possibile ascoltare il suono dagli altoparlanti, selezionare No. Potrebbe essersi verificato un problema con i dispositivi esterni. Controllare lo stato dei collegamenti. Se il problema persiste, consultare il manuale dell'utente dei dispositivi esterni. ■ Informazioni sul segnale (solo canali digitali) Diversamente dai canali analogici, la cui qualità di ricezione può variare da ‘molto disturbata’ a 'chiara', i canali digitali (HDTV) sono caratterizzati da una perfetta qualità oppure dalla totale mancanza di ricezione. Non è quindi possibile sintonizzare i canali digitali. Per migliorare la ricezione dei canali digitali disponibili è tuttavia possibile regolare l'antenna. N Se il misuratore della potenza del segnale indica che il segnale è debole, regolare fisicamente l'antenna per aumentare il segnale. Continuare a regolare l'antenna fino a trovare la posizione migliore per ricevere il segnale in modo ottimale. Italiano - 30 BN68-02325A-Ita.indb 30 2009-05-19 �� 3:57:07 ❑ Aggiornamento software Samsung potrà in futuro rendere disponibili aggiornamenti del firmware del televisore. Tali aggiornamenti possono essere scaricati mediante il televisore se collegato a Internet, o scaricando il nuovo firmware dal sito samsung.com su un dispositivo USB. N Versione corrente è il software già installato nel televisore. N Software alternativo (Backup) mostra la versione precedente che verrà sostituita. N Il software è rappresentato da ‘Anno/Mese/Giorno_Versione’. Più recente è la data, più recente la versione del software. Si consiglia di installare la più recente versione disponibile. ■ Tramite USB Inserire un’unità USB contenente l’aggiornamento del firmware scaricato dal sito samsung.com nel televisore. Fare attenzione a non disattivare l'alimentazione o rimuovere l'unità USB mentre l'aggiornamento è in corso. Al termine dell'aggiornamento del firmware, il televisore si spegnerà e riaccenderà automaticamente. Verificare la versione del firmware dopo avere effettuato l'aggiornamento (la nuova versione avrà un numero superiore rispetto alla precedente.) Al termine dell'aggiornamento del software, le impostazioni video e audio modificate torneranno alle impostazioni predefinite di fabbrica. Si consiglia di scrivere le impostazioni in modo da poterle facilmente ripristinare dopo l’aggiornamento. Pannello laterale del televisore o Unità USB Aggiornamento software Versione corrente 2009/01/18_000001 Tramite USB ▶ Tramite canale Aggiornamento mod Standby : 45 Min Software alternativo 2009/01/15_00000 U Sposta E Conf. R Ritorno ■ Tramite canale Aggiorna il software mediante il segnale trasmesso. N Se la funzione viene selezionata durante la trasmissione software, questa funzione ricerca il software disponibile e ne scarica gli aggiornamenti. N Il tempo necessario per scaricare il software è determinato dallo stato del segnale. ■ Aggiornamento mod Standby Per continuare l’aggiornamento software anche quando l’alimentazione principale è attiva, selezionare Acceso premendo il tasto ▲ o ▼. 45 minuti dopo l’ingresso in modalità Standby, viene effettuato un aggiornamento manuale. Poiché l’alimentazione dell’unità si attiva internamente, lo schermo LCD potrà attivarsi per breve tempo. Questo fenomeno può continuare per più di un’ora, fino al termine dell’aggiornamento software. ■ Software alternativo (Backup) In caso di problemi con il nuovo firmware che possano influenzare il regolare funzionamento del prodotto, è possibile ripristinare la versione precedente del software. N Se il software è stato cambiato, viene visualizzata la versione corrente. N E' possibile cambiare la versione del software corrente selezionando ‘Software alternativo’. ❑ Guida alla connessione HD Questo menu presenta la modalità di connessione in grado di offrire la qualità ottimale per i televisori HDTV. Consultare queste informazioni durante la connessione di dispositivi esterni al televisore. ❑ Contattare Samsung Fare riferimento a queste informazioni in caso di funzionamento anomalo del televisore o se si desidera aggiornare il software. E' possibile visualizzare le informazioni relative a call centre, prodotto e metodo di scaricamento del software. Italiano - 31 BN68-02325A-Ita.indb 31 2009-05-19 �� 3:57:07 Media Play (USB & DLNA) ¦ Collegamento di un dispositivo USB 1. Per accendere il televisore premere il tasto POWER. Pannello laterale del televisore 2. Collegare un dispositivo USB contenente foto, musica e/o filmati al jack USB1 (HDD)o USB2 sul pannello laterale del televisore. 3. Quando la schermata di selezione dell'Applicazione viene visualizzata, premere il tasto o ENTERE per selezionare Media Play (USB & DLNA). N MTP (Media Transfer Protocol) non è supportato. N Il file system supporta FAT16, FAT32 e NTFS. Unità USB N Alcuni dispositivi audio e videocamere digitali USB possono non essere compatibili con questo televisore. SUM N Media Play supporta solo il dispositivo USB MSC (Mass Storage Class). MSC è un dispositivo di memorizzazione di massa Bulk-Only Transport. Esempi di MSC sono le unità Thumb, i Flash Card Reader e le unità HDD USB (le unità PHOTO HUB USB non sono supportate.) N Collegare direttamente alla porta USB del TV. Se si utilizza un cavo separato, possono verificarsi problemi di compatibilità USB. N Prima di collegare il dispositivo al televisore, eseguire il backup dei file Photo Music Movie Setup per prevenire una perdita accidentale o eventuali danni. SAMSUNG non è R Ritorno Dispositivo SUM responsabile di eventuali danni ai file dati o perdite di dati. N Collegare un'unità HDD USB alla porta dedicata, USB1 (HDD). Tuttavia, se il dispositivo collegato è molto esigente in termini di alimentazione, la porta USB1 (HDD) potrebbe non essere in grado di supportare il dispositivo. N Non scollegare il dispositivo USB durante il caricamento. N MSC supporta file MP3 e JPEG, mentre un dispositivo PTP supporta solo file JPEG. N Maggiore è la risoluzione dell’immagine, più lungo è il tempo necessario per visualizzarla sullo schermo. N La risoluzione massima supportata in JPEG è di 15360X8640 pixel. N In caso di file non supportati o danneggiati, comparirà il messaggio ‘Formato file non supportato’. N Se la chiave di ordinamento è impostata su Basic View, è possibile visualizzare in ogni cartella un massimo di 1000 file. L'altra chiave di ordinamento può visualizzare un massimo di 10000 file. N I file MP3 con DRM precedentemente scaricati da un sito a pagamento non potranno essere riprodotti. Digital Rights Management (DRM) è una tecnologia che supporta la creazione, la distribuzione e la gestione di contenuti in modo completo e integrato, compresa la protezione dei diritti e degli interessi dei fornitori dei contenuti, la prevenzione dalla copia illegale, così come la gestione degli addebiti e dei pagamenti. N Passare da una foto all’altra potrebbe richiedere alcuni secondi. Ora, sullo schermo comparirà l’icona che indica il caricamento in corso. N Se sono collegati più di 2 dispositivi PTP, potranno essere utilizzati solo uno alla volta. N Se sono collegati più dispositivi MSC, alcuni di essi potrebbero non essere riconosciuti. Se un dispositivo richiede molta potenza (più di 500mA o 5V), il dispositivo USB può non essere supportato. N Nel caso in cui venga visualizzato un messaggio (Fail add new device USB1/USB2 Power Overload) che indica la presenza di sovratensione quando si collega o si utilizza un dispositivo USB, il dispositivo potrebbe non essere riconosciuto o non funzionare correttamente. 851.86MB/993.02MB Libero Utilizzo del tasto Telecomando nel menu Media Play Tasto ▲/▼/◄/► ENTERE ∂/∑ RETURN TOOLS ∫ π/μ INFO MEDIA.P < P >, EXIT, TV Operazioni Sposta il cursore e seleziona una voce. Attiva la voce attualmente selezionata. Durante la riproduzione di una presentazione, un filmato o un brano musicale: - Premendo il tasto ENTERE durante una riproduzione, l’esecuzione si arresta in pausa. - Premendo il tasto ENTERE durante una pausa, l’esecuzione riprende. Riproduce o interrompe la proiezione di diapositive o la riproduzione di un brano musicale o di un filmato. Ritorna al menu precedente. Esegue varie funzioni nei menu Photo, Music e Movie. Arresta la proiezione di diapositive, la riproduzione di un brano musicale o di un filmato. Passa al gruppo precedente/successivo. Mostra le informazioni relative al file. Esce dalla modalità Media Play. Interrompe la modalità Media Play e torna alla modalità TV. Italiano - 32 BN68-02325A-Ita.indb 32 2009-05-19 �� 3:57:08 ¦ Funzione Media Play Questa funzione consente di visualizzare e riprodurre file fotografici e audio memorizzati su un dispositivo di memorizzazione di massa USB. N Utilizzando file multimediali senza licenza, il prodotto potrebbe non funzionare correttamente. Accesso al menu Media Play (USB & DLNA) 1. Premere il tasto MENU. Premere il tasto ▲ o ▼ per selezionare Applicazione, quindi premere il tasto ENTERE. SUM 2. Premere il tasto ▲ o ▼ per selezionare Media Play (USB & DLNA), quindi premere il tasto ENTERE. N Viene visualizzato il menu Media Play (USB & DLNA). O Premere il tasto MEDIA.P sul telecomando per visualizzare il menu Media Play. O Premere il tasto SOURCE sul telecomando per visualizzare l'elenco delle sorgenti. Quindi premere il tasto ▲ o ▼ per selezionare USB. 3. Premere il tasto rosso, quindi il tasto ▲ o ▼ per selezionare la memoria USB. Premere il tasto ENTERE. N Questa funzione può risultare diversa in base al dispositivo di memoria USB / DLNA in uso. N Nella parte inferiore sinistra dello schermo comparirà il nome del dispositivo USB selezionato. 851.86MB/993.02MB Libero PHOTO Photo Music Movie Setup R Ritorno Dispositivo SUM 4. Premere il tasto ◄ o ► per selezionare un'icona (Photo, Music, Movie, Setup), quindi premere il tasto ENTERE. N Per uscire dalla modalità Media Play premere il tasto MEDIA.P sul telecomando. Colore Preferenze Cartella Rimozione sicura di un dispositivo USB Il dispositivo può essere rimosso dal televisore in modo sicuro. 5/15 1. Premere il tasto TOOLS nella schermata di elenco dei file Media Play, o durante la proiezione di diapositive, la riproduzione di un brano musicale o di un filmato. 1231.jpg 1232.jpg 1233.jpg 1234.jpg Visual base Orario Slide show Riproduci gruppo corrente Informazioni Rimozione sicura 1235.jpg 1236.jpg 1237.jpg 2. Premere il tasto ▲ o ▼ per selezionare Rimozione sicura, quindi premere il tasto ENTERE. 3. Rimuovere il dispositivo USB dal televisore. SUM Dispositivo Impostazioni preferite Selezione T Strumenti R Ritorno Schermo Colore Cartella Preferenze 1 Visual base Sezione Elenco tasti ordinamento Orario Sezione Elenco gruppi 2 c 5/15 Sezione Elenco file 1231.jpg 1232.jpg 1233.jpg 1235.jpg 1234.jpg 1236.jpg 1237.jpg 3 6 SUM 4 Dispositivo 5 1 File selez Impostazioni preferite Selezione T Strumenti R Ritorno Passare alla sezione ‘Sezione Elenco tasti ordinamento’, ‘Sezione Elenco gruppi’ o ‘Sezione Elenco file’ utilizzando i tasti Su e Giù. Dopo avere selezionato una sezione, premere il tasto ◄ o ► per selezionare una voce. 1 Tasto ordinamento attuale: Questo campo mostra lo standard attuale per l’ordinamento dei file. Premere il tasto ◄ o ► per cambiare lo standard di ordinamento dei file. 2 Visualizza gruppi: Visualizza in dettaglio i gruppi di file ordinati in base al tasto di ordinamento selezionato. Il gruppo di ordinamento che contiene il file attualmente selezionato viene evidenziato. 3 File attualmente selezionato: Il file selezionato è quello che è possibile controllare. I file fotografici e i filmati vengono visualizzati come miniature. 4 Dispositivo corrente: Mostra il nome del dispositivo attualmente selezionato. Premere il tasto Rosso per selezionare un dispositivo. • Tasto Rosso (Dispositivo): Seleziona un dispositivo connesso. Italiano - 33 BN68-02325A-Ita.indb 33 2009-05-19 �� 3:57:13 5 Voci della guida • Verde (Impostazioni pref): Modifica le impostazioni preferite per il file selezionato. Premere ripetutamente questo tasto fino a visualizzare il valore desiderato. • Tasto Giallo (Selezione): Seleziona il file dall’elenco. I file selezionati vengono evidenziati con un simbolo c. Premere nuovamente il tasto giallo per deselezionare il file. • Tasto TOOLS (Strumenti): Visualizza i menu delle opzioni. (Il menu delle opzioni varia in base allo stato corrente). 6 Informazioni sulla selezione degli elementi: Mostra il numero di file selezionati premendo il tasto Giallo. ¦ Ordinamento Photo / Music / Movie List ❑ Visual base Visualizza le cartelle presenti sul dispositivo di memorizzazione USB. Se si seleziona una cartella e si preme il tasto ENTERE, vengono visualizzati solo i file (Photo / Music / Movie) contenuti nella cartella selezionata. N Se i file sono ordinati secondo la Visual base, non sarà possibile impostare i file preferiti. Colore Preferenze Cartella Visual base Orario 5/15 1231.jpg 1232.jpg 1233.jpg 1236.jpg 1235.jpg 1234.jpg 1237.jpg ❑ Cartella Ordina le foto per cartella. Se nel dispositivo USB sono presenti più cartelle, i file fotografici vengono visualizzati in ordine in ogni cartella. I file nella cartella principale vengono mostrati per primi, mentre gli altri vengono ordinati alfabeticamente per nome. SUM Impostazioni preferite Selezione T Strumenti R Ritorno Dispositivo Genere Cartella Preferenze Visual base Titolo ❑ Preferenze → FFF / FFF / FFF / FFF Ordina i file per preferenza (Favourites). N Modificare le impostazioni dei preferiti Selezionare l'immagine nell’elenco foto e premere il tasto Verde ripetutamente fino alla comparsa dell’impostazione desiderata. N Le stelle sono utilizzate solo ai fini del raggruppamento. Ad esempio, l'impostazione con 3 stelle non ha alcuna priorità rispetto all'impostazione con una stella. Energetico Lies 3/37 Glen Hans Once Ost 2007 Soundtrack Want Me SUM Way I Love You Titolo Cartella Preferenze Ordina e mostra i titoli dei filmati o dei brani musicali in ordine di simbolo/numerico/ alfabetico/speciale. ❑ Titolo (Music / Movie) Visual base Orario 5/15 1231.avi Ordina e mostra i titoli dei brani musicali in ordine di simbolo/numerico/alfabetico/ speciale. Shine Impostazioni preferite Selezione T Strumenti R Ritorno Dispositivo ❑ Orario (Photo / Movie) Gold HaHaHa 1232.avi SUM 1233.avi Dispositivo ABCD.avi 1235.avi 1236.avi 1237.avi Impostazioni preferite Selezione T Strumenti R Ritorno Photo ❑ Colore → Rosso / Giallo / Verde / Blu / Magenta / Nero / Grigio / Non classificato Ordina le foto in base al colore. È possibile cambiare le informazioni relative al colore della foto. N È necessario attivare la funzione Usare visualizz a colori nel menu Setup prima di ordinare le foto in base al colore. Music ❑ Artista Ordina i file musicali per artista in ordine di simbolo/numero/alfabeto/speciale. ❑ Atmosfera → Energetico / Ritmico / Triste / Eccitante / Calmo / Non classif Ordina i brani musicali in base all'atmosfera. È possibile cambiare le informazioni relative all'atmosfera musicale. ❑ Genere Ordina i brani musicali in base al genere. Italiano - 34 BN68-02325A-Ita.indb 34 2009-05-19 �� 3:57:17 ¦ Photo / Music / Movie List Option Menu 1. Premere il tasto MEDIA.P. Visual base Orario 2. Premere il tasto ◄ o ► per selezionare Photo, Music o Movie, quindi premere ENTERE. 3. Per selezionare il file desiderato, premere il tasto ◄ o ►. N Selezione di più file Per selezionare il file desiderato, premere il tasto ◄ o ►. Quindi premere il tasto giallo. Ripetere l'operazione per selezionare più file. Il contrassegno c appare per il file selezionato. Colore Cartella 5/15 1231.jpg 1232.jpg SUM 1233.jpg 1234.jpg Genere Cartella Preferenze Energetico Lies 3/37 Glen Hans Once Ost 2007 Soundtrack Want Me Slide show Riproduci gruppo corrente Mod. gruppo Informazioni 1236.jpg 1237.jpg 1235.jpg Rimozione sicura Impostazioni preferite Selezione T Strumenti R Ritorno Dispositivo 4. Premere il tasto TOOLS. N Il menu delle opzioni varia in base allo stato corrente. Preferenze Way I Love You Visual base Titolo Riproduci gruppo corrente Informazioni Rimozione sicura HaHaHa Gold Shine ❑ Riproduci gruppo corrente Questo menu consente di avviare una proiezione di diapositive solo delle foto contenute nel gruppo di ordinamento selezionato. SUM Impostazioni preferite Selezione T Strumenti R Ritorno Dispositivo Titolo ❑ Deselez tutto (se è selezionato almeno un file) Cartella Preferenze È possibile deselezionare tutti i file. N Il contrassegno c che indica che il file corrispondente è selezionato è nascosto. 5/15 1231.avi ❑ Informazioni Vengono visualizzate le informazioni relative alla foto, al brano musicale o al filmato. Usando le stesse procedure durante una proiezione di diapositive, è possibile vedere le informazioni relative ai file fotografici. O Premere il tasto INFO per visualizzare le informazioni. SUM 1232.avi 1233.avi Dispositivo ABCD.avi Visual base Orario Riproduci gruppo corrente Informazioni Rimozione sicura 1235.avi 1236.avi 1237.avi Impostazioni preferite Selezione T Strumenti R Ritorno ❑ Rimozione sicura Il dispositivo può essere rimosso dal televisore in modo sicuro. Photo ❑ Slide show Questo menu consente di avviare una proiezione di diapositive delle foto contenute nel dispositivo USB. ❑ Mod. gruppo (quando la chiave di ordinamento è Colore) È possibile modificare le informazioni sul colore di un file, o un gruppo di file, di foto selezionato in modo da spostare il file in un altro gruppo di colore. N Il colore effettivo della foto non verrà modificato. N Le informazioni del gruppo del file corrente vengono aggiornate e le foto vengono spostate nel nuovo gruppo di colore. N Per modificare le informazioni di più file, selezionare i file desiderati premendo il tasto giallo. Music ❑ Change Group (quando la chiave di ordinamento è Mood) È possibile modificare le informazioni relative all'atmosfera del file musicale. Le informazioni del gruppo del file corrente vengono aggiornate e il file viene spostato nel nuovo gruppo. Per modificare le informazioni di più file, selezionare i file desiderati premendo il tasto giallo. Italiano - 35 BN68-02325A-Ita.indb 35 2009-05-19 �� 3:57:20 ¦ Slide Show / Music Play / Movie Play Option Menu 1. Durante una proiezione di diapositive (o la visualizzazione di una foto) o durante la riproduzione di un brano musicale o di un filmato, premere il tasto TOOLS per impostare l'opzione. 2. Premere il tasto ▲ o ▼ per selezionare l'opzione, quindi premere ENTERE. ❑ Impostazioni immagine / Impostazioni audio Strumenti È possibile selezionare le impostazioni delle immagini e dell'audio. Arresta proiezione diapositive Velocità slide show : Normale Effetto slide show : Dissolv1 Ruota ❑ Informazioni Zoom Musica di sottofondo Vengono visualizzate le informazioni relative al file. Impostazioni immagine Impostazioni audio Informazioni ❑ Rimozione sicura ▼ U Sposta E Conf. e Esci Il dispositivo può essere rimosso dal televisore in modo sicuro. Menu opzioni di Slide Show Strumenti Mod Ripetiz. ❑ Arresta proiezione diapositive / Avvia proiezione diapositive E’ possibile iniziare o interrompere la proiezione di diapositive. ❑ Velocità slide show → Lenta / Normale / Veloce Impostazioni audio Informazioni Rimozione sicura U Sposta L Regola e Esci Selezionare questa opzione per determinare la velocità di proiezione delle diapositive. N La funzione è disponibile solo durante una proiezione. N La velocità di proiezione delle diapositive può essere modificata premendo il tasto π (REW) o µ (FF) durante le proiezione. Strumenti Impostazioni immagine ❑ Effetto slide show Impostazioni audio È possibile selezionare l'effetto di transizione dello schermo da utilizzare nella proiezione di diapositive. ■ ◀ Acceso ▶ Impostazioni immagine Nessuno / Dissolv1 / Dissolv2 / Veneziana / Spirale / Scacchiera / Lineare / Scale / A comparsa / Casuale N La funzione è disponibile solo durante una proiezione. Formato immagine : Adatta Impostazione didascalie Informazioni Rimozione sicura U Sposta E Conf. e Esci ❑ Ruota E’ possibile ruotare le foto memorizzate su un dispositivo USB. N Premendo il tasto ◄, la foto verrà ruotata di 270˚, 180˚, 90˚ e 0˚. N Premendo il tasto ►, la foto verrà ruotata di 90˚, 180˚, 270˚ e 0˚. N Il file ruotato non viene memorizzato. ❑ Zoom E’ possibile ingrandire le foto memorizzate su un dispositivo USB. (x1 → x2 → x4) N Per spostare l'immagine ingrandita, premere il tasto ENTERE, quindi i tasti ▲/▼/◄/►. Notare che se l’immagine ingrandita è più piccola della dimensione dello schermo originale, la funzione di modifica della posizione non avrà alcun effetto. N Il file ingrandito non può essere memorizzato. ❑ Musica di sottof Durante una proiezione di diapositive è possibile impostare la musica di sottofondo desiderata. N Per usare questa funzione, la musica scelta deve essere memorizzata sul dispositivo USB. N Per modificare la modalità Musica di sottofondo è necessario caricare i brani musicali. Riprodurre i brani musicali nella categoria musica per caricarli. Menu Opzione della riproduzione di file musicali ❑ Mod Ripetiz. → Acceso / Spenta E’ possibile riprodurre ripetutamente i brani musicali. Menu opzioni della riproduzione di filmati ❑ Formato immagine → Adatta / Originale Riproduce un video in dimensione originale o a tutto schermo. ❑ Impostazione didascalie È possibile impostare le didascalie per il filmato. Italiano - 36 BN68-02325A-Ita.indb 36 2009-05-19 �� 3:57:20 ¦ Visualizzazione di una foto o di una proiezione di diapositive Proiezione di diapositive N Nella proiezione di diapositive verranno utilizzate tutte le foto contenute nell’Elenco file. N Durante la proiezione di diapositive, i file appaiono in sequenza a partire da quello correntemente visualizzato. N La proiezione di diapositive prosegue in base all’ordine specificato nell'Elenco file. N Impostando l'opzione Musica di sottof su Acceso durante la proiezione delle diapositive i brani musicali vengono riprodotti automaticamente. O Quando si visualizza un Elenco foto, per iniziare la proiezione di diapositive premere il tasto ∂(Riproduci)/ENTERE sul telecomando. N Tasti di controllo per la proiezione di diapositive Tasto ENTERE ∂ ∑ ∫ π/μ TOOLS Operazioni Riproduci/Arresta la proiezione di diapositive. Riproduci la proiezione di diapositive. Arresta la proiezione di diapositive. Esce dalla proiezione diapositive e torna all'elenco delle foto. Varia la velocità di riproduzione della proiezione. Esegue varie funzioni nei menu Photo. Colore Cartella Preferenze Visual base Slide show Riproduci gruppo corrente Informazioni Rimozione sicura 5/15 1231.jpg 1232.jpg SUM 1233.jpg Orario 1235.jpg 1234.jpg 1236.jpg 1237.jpg Impostazioni preferite Selezione T Strumenti R Ritorno Dispositivo ▶ Normale 1234.jpg 580x765 2009/01/02 5/15 E Pausa ◀▶ Precedente / Successivo SUM T Strumenti R Ritorno Riproduce il gruppo corrente 1. Premere il tasto ▲ per passare alla sezione dei tasti di ordinamento. 2. Premere il tasto ◄ o ► per selezionare l'ordinamento. Colore 3. Premere il tasto ▼ per passare alla sezione Elenco gruppi. Cartella Preferenze Visual base Orario 4. Selezionare un gruppo utilizzando i tasti ◄ e ►. 5. Premere il tasto ∂ (Riproduci). Viene avviata una proiezione di diapositive con i file del gruppo selezionato. ● 5/15 1231.jpg 1232.jpg 1233.jpg 1234.jpg 1235.jpg 1236.jpg 1237.jpg In alternativa 1. Selezionare un tasto di ordinamento e, nella sezione Elenco file, selezionare le foto SUM contenute nel gruppo desiderato. N Per passare al gruppo successivo/precedente, premere il tasto π (REW) o µ (FF) . Dispositivo Impostazioni preferite Selezione T Strumenti R Ritorno 2. Premere il tasto TOOLS. 3. Premere il tasto ▲ o ▼ per selezionare Riproduci gruppo corrente, quindi premere il tastoENTERE. N Per la proiezione verranno utilizzati solo i file contenuti nel gruppo di ordinamento. Per riprodurre una proiezione di diapositive dei soli file selezionati 1. Premere il tasto ▼ per selezionare la sezione Elenco file. 2. Premere il tasto ◄ o ► per selezionate la foto desiderata nell'Elenco file. 3. Premere il tasto giallo. 4. Ripetere l'operazione per selezionare più foto. N Il contrassegno cappare a sinistra della foto selezionata. N Selezionando un solo file, la proiezione di diapositive non avrà inizio. N Per deselezionare tutti i file, premere il tasto TOOLS quindi selezionare Deselez tutto. 5. Premere il tasto ∂ (Riproduci)/ENTERE. N I file selezionati verranno utilizzati per la proiezione di diapositive. ● In alternativa 1. Nell'Elenco file, premere il tasto giallo per selezionare le foto desiderate. 2. Premere il tasto TOOLS. 3. Premere il tasto ▲ o ▼ per selezionare Slide show, quindi premere il tasto ENTERE. N I file selezionati verranno utilizzati per la proiezione di diapositive. Italiano - 37 BN68-02325A-Ita.indb 37 2009-05-19 �� 3:57:25 ¦ Riproduzione di musica Riproduzione di un file musicale 1. Premere il tasto ▼ per selezionare la sezione Elenco file. 2. Premere il tasto ◄ o ► per selezionare un file musicale da riprodurre. ▶ 00:00:04 / 00:04:04 3/37 Way I Love You HaHaHa 3. Premere il tasto ∂ (Riproduci)/ENTERE. N Questo menu mostra solo i file con estensione MP3. I file con altre estensioni non vengono visualizzati, nemmeno se sono stati salvati sul medesimo dispositivo USB. N Il file selezionato appare in alto con il relativo tempo di riproduzione. E Pausa ◀▶ Precedente / Successivo T Strumenti R Ritorno SUM N Per regolare il volume della musica, premere il tasto del volume sul telecomando. Per azzerare il volume, premere il tasto MUTE sul telecomando. N Se l'audio risulta anomalo quando si riproducono file MP3, regolare le impostazioni Equalizer e SRS TruSurround HD nel menu Sound. (Un file MP3 sovramodulato può causare problemi audio.) N La durata di un filmato può essere visualizzata come ‘00:00:00’ se all'inizio della riproduzione non vengono reperite le informazioni relative al tempo di riproduzione. N π (REW) e µ (FF) non sono attivi durante la riproduzione. N Tasti di controllo della riproduzione musicale Tasto ENTERE ∂ ∑ ∫ TOOLS Operazioni Riproduce/Interrompe il brano musicale. Riproduce il brano musicale Interrompe il brano musicale Esce dalla modalità di riproduzione e torna all’Elenco musica. Esegue varie funzioni nei menu Music. N Icona informazioni sulla funzione Music p q Quando tutti i brani musicali presenti nella cartella (o i file selezionati) sono stati ripetuti Mod Ripetiz. è impostata su Acceso. Quando tutti i brani musicali presenti nella cartella (o i file selezionati) sono stati riprodotti una volta Mod Ripetiz. è impostata su Spento. Riproduzione di un gruppo di brani 1. Premere il tasto ▲ per passare alla sezione dei tasti di ordinamento. 2. Premere il tasto ◄ o ► per selezionare l'ordinamento. 3. Premere il tasto ▼ o ENTERE per passare alla sezione Elenco gruppi. 4. Premere il tasto ∂ (Riproduci). Viene avviata la riproduzione dei file del gruppo selezionato. ● In alternativa 1. Selezionare un tasto di ordinamento e, nella sezione Elenco file, selezionare i file contenuti nel gruppo desiderato. N Per passare al gruppo successivo/precedente, premere il tasto π (REW) o µ (FF) . 2. Premere il tasto TOOLS. 3. Premere il tasto ▲ o ▼ per selezionare Riproduci gruppo corrente, quindi premere il tasto ENTERE . N Vengono riprodotti i brani musicali inseriti nel gruppo di ordinamento, compresi i brani selezionati. Riproduzione dei brani musicali selezionati 1. Premere il tasto ▼ per selezionare la sezione Elenco file. 2. Per selezionare il file musicale desiderato, premere il tasto ◄ o ►. 3. Premere il tasto giallo. 4. Ripetere l'operazione per selezionare più file musicali. N Il contrassegno c appare a sinistra del brano musicale selezionato. N Per deselezionare tutti i file, premere il tasto TOOLS quindi selezionare Deselez tutto. 5. Premere il tasto ∂ (Riproduci)/ENTERE. N Vengono riprodotti i file selezionati. Italiano - 38 BN68-02325A-Ita.indb 38 2009-05-19 �� 3:57:25 ¦ Riproduzione di un filmato Riproduzione di un filmato. 1. Premere il tasto ▼ per selezionare la sezione Elenco file. ▶ 00:00:01 / 00:05:30 3/37 ABC.avi 2. Premere il tasto ◄ o ► per selezionare un filmato da riprodurre. 3. Premere il tasto ∂ (Riproduci)/ENTERE. N Verrà visualizzato il file selezionato. N Il file selezionato appare in alto con il relativo tempo di riproduzione. N La durata di un filmato può essere visualizzata come ‘00:00:00’ se all'inizio della riproduzione non vengono reperite le informazioni relative al tempo di riproduzione. N È possibile guardare giochi multimediali, ma la funzione gioco non è supportata. N Formati sottotitoli supportati Nome MPEG-4 time-based text SAMI SubRip SubViewer Micro DVD SUM E Pausa ◀ ▶ Passa a Estensione file .ttxt .smi .srt .sub .sub o .txt Formato XML HTML string-based string-based string-based Decoder video Divx 3.11, Divx 4.x, Divx 5.1, Divx 6.0, XviD, H.264 BP, H.264 MP, H.264 HP, MPEG-4 SP, MPEG-4 ASP, Motion JPEG Divx 3.11, Divx 4.x, Divx 5.1 Divx 6.0, XviD, H.264 BP, H.264 MP, H.264 HP MPEG-4 SP, MPEG-4 ASP Motion JPEG Divx 3.11, Divx 4.x, Divx 5.1 Divx 6.0, XviD, H.264 BP, H.264 MP, H.264 HP, MPEG-4 SP, MPEG-4 ASP Window Media Video v9 H.264 BP, H.264 MP, H.264 HP, MPEG-4 SP, MPEG-4 ASP XVID H.264 BP, H.264 MP, H.264 HP MPEG-4 SP, MPEG-4 ASP MPEG2, MPEG1 MPEG1 (Program Stream), MPEG2 (Program Stream) MPEG2 (Transport Stream), H.264 (Transport Stream), VC1 (Transport Stream) Codec audio T Strumenti R Ritorno N Formati video supportati Estensione file Container *.avi AVI *.mkv MKV *.asf ASF *.wmv (VC1) *.mp4 MP4 (SMP4) *.3gp 3GPP *.vro (ps) *.mpg *.mpeg (ps) VRO / VOB Altro (ts) MP3, AC3, LPCM, ADPCM (MULAW ALAW) MP3, AC3, LPCM, ADPCM (MULAW ALAW), AAC WMA, MP3, AC3, LPCM, ADPCM, (MULAW ALAW), AAC ADPCM, (HE)-AAC, mp3 ADPCM, (HE)-AAC AC3, MPEG, LPCM AC3, MPEG, LPCM AAC, HE-AAC, MP3, DD+ Italiano - 39 BN68-02325A-Ita.indb 39 2009-05-19 �� 3:57:25 N Tasti di controllo della riproduzione video Tasto ENTERE ∂ ∑ TOOLS ∫ ◄/► ▲/▼ μ Operazioni Riproduci/ Arresta il filmato Riproduce il filmato Interrompe la riproduzione del filmato Esegue varie funzioni nei menu dei filmati. Esce dalla modalità di riproduzione e torna all’Elenco filmati. Salta in avanti o indietro all’interno del filmato. Passa al primo/all'ultimo fotogramma del file. Riproduce il file a doppia velocità. Questa funzione potrebbe non essere supportata in base al codec. Riproduzione di un gruppo di filmati 1. Premere il tasto ▲ per passare alla sezione dei tasti di ordinamento. 2. Premere il tasto ◄ o ► per selezionare l'ordinamento. 3. Premere il tasto ▼ o ENTERE per passare alla sezione Elenco gruppi. 4. Premere il tasto ∂ (Riproduci). Viene avviata la riproduzione solo dei file del gruppo selezionato. ● In alternativa 1. Selezionare un tasto di ordinamento e, nella sezione Elenco file, selezionare i file contenuti nel gruppo desiderato. N Per passare al gruppo successivo/precedente, premere il tasto π (REW) o µ (FF) . 2. Premere il tasto TOOLS. 3. Premere il tasto ▲ o ▼ per selezionare Riproduci gruppo corrente, quindi premere il tasto ENTERE. N Vengono riprodotti i filmati inseriti nel gruppo di ordinamento, compresi i file selezionati. Riproduzione dei filmati selezionati 1. Premere il tasto ▼ per selezionare la sezione Elenco file. 2. Per selezionare il file musicale desiderato, premere il tasto ◄ o ►. 3. Premere il tasto giallo. N Il simbolo cappare a sinistra del filmato selezionato. N Per deselezionare tutti i file, premere il tasto TOOLS quindi selezionare Deselez tutto. 4. Ripetere l'operazione per selezionare più filmati. 5. Premere il tasto ∂ (Riproduci)/ENTERE. N Verrà riprodotto solo il file selezionato. Riproduzione continua dei filmati (Resume Play) Uscendo dalla funzione di riproduzione di un filmato, la sua riproduzione può essere ripresa in seguito a partire dal punto nel quale era stata interrotta. 1. Selezionare il filmato da riprodurre in modo continuo premendo il tasto ◄ o ► nell'Elenco file. 2. Premere il tasto ∂ (Riproduci)/ENTERE. 3. Selezionare Ripr in continuo (ripristina riproduzione) premendo il tasto blu. N La riproduzione del filmato inizierà dal punto di arresto precedente. N Se la funzione Prom ripr cont di un film è impostata su Acceso nel menu Setup comparirà un messaggio alla ripresa della riproduzione del filmato. Italiano - 40 BN68-02325A-Ita.indb 40 2009-05-19 �� 3:57:26 ¦ Utilizzo del menu Impostazione Il menu Impostazioni mostra le impostazioni utente del menu Media Play. SUM 1. Premere il tasto MEDIA.P. 2. Premere il tasto ◄ o ► per selezionare Setup, quindi premere il tasto ENTERE. SETUP 3. Per selezionare l’opzione desiderata, premere il tasto ▲ o ▼. 4. Premere ◄ o ► per selezionare l'opzione. N Per uscire dalla modalità Media Play premere il tasto MEDIA.P sul telecomando. ■ ■ ■ Usare visualizz a colori → Acceso / Spento È possibile selezionare l'ordinamento delle foto in base al colore. Se l'opzione è impostata su Acceso, il tempo di caricamento può aumentare a causa del reperimento delle informazioni relative alle foto. Photo SUM Music Movie Setup e Esci Dispositivo Usare visualizz a colori Modalità Ripeti musica ◀ Spento Acceso ▶ Guida riproduzione continua di un film Acceso Ottieni codice registrazione DivX® VOD Modalità Ripeti musica → Acceso / Spento Selezionare questa opzione per riprodurre ripetutamente i brani musicali. Prom ripr cont di un film → Acceso / Spento Selezionare questa opzione per visualizzare il messaggio a comparsa di aiuto per la riproduzione continua del filmato. 851.86MB/993.02MB Libero Ottieni codice disattivazione DivX® VOD Durata salvaschermo 2 ore Informazioni Rimozione sicura Se l'opzione è impostata su ON, il tempo di caricamento aumenta per il reperimento di informazioni sul colore. SUM Dispositivo U Sposta L Regola R Ritorno ■ Ottieni codice registrazione DivX® VOD Mostra il codice di registrazione autorizzato per il televisore. Se si è connessi al sito web DivX e si registra il codice di registrazione con un account personale, è possibile scaricare il file di registrazione VOD. Se la registrazione VOD viene riprodotta con Media Play, la procedura di registrazione viene completata. N Per ulteriori informazioni su VOD DivX®, visitare il sito www.DivX.com. ■ Ottieni codice disattivazione DivX® VOD Se VOD DivX® non è registrato, viene visualizzato il codice di disattivazione della registrazione. Se si esegue questa funzione con il VOD DivX® registrato, la registrazione VOD DivX® corrente viene disattivata. ■ Durata salvaschermo → 2 ore / 4 ore / 8 ore Selezionare questa opzione per impostare il tempo di attesa prima che lo screen saver entri in funzione. ■ Informazioni Selezionare questa opzione per visualizzare le informazioni sul dispositivo collegato. ■ Rimozione sicura Il dispositivo può essere rimosso dal televisore in modo sicuro. Italiano - 41 BN68-02325A-Ita.indb 41 2009-05-19 �� 3:57:26 Media Play-DLNA ¦ Impostazione della rete DLNA DLNA permette la visione di immagini, musica e video memorizzati sul PC o sul televisore mediante una connessione di rete in modalità Media Play. Ciò elimina la necessità di copiare i file su un dispositivo di memorizzazione USB per poi collegarlo al televisore. Per utilizzare DLNA, il televisore deve essere collegato alla rete e l’applicazione DLNA deve essere installata sul PC. Schema connessioni di rete - Cavo TV PC LAN LAN Modem esterno (ADSL/VDSL/TV via cavo) Schema connessioni di rete - Wireless Pannello laterale del televisore TV PC o LAN Samsung Wireless LAN Adapter Cavo LAN IP sharer wireless 1. Per ulteriori informazioni sulla configurazione della rete, vedere ‘Impostazione della rete’. N È opportuno che il televisore e il PC siano nella stessa subnet. Le prime 3 parti dell'indirizzo subnet e IP del televisore e del PC devono essere uguali e solo l'ultima parte (l'indirizzo host) deve variare (per es. Indirizzo IP: 123.456.789.**) 2. Collegare il PC su cui verrà installato il programma Samsung PC Share Manager e il modem esterno mediante un cavo LAN. N E’ possibile collegare direttamente il televisore al PC senza dover passare tramite uno Sharer (Router). ¦ Installazione dell’applicazione DLNA Per riprodurre il contenuto del PC sul televisore, è necessario prima installare l'applicazione. Per utilizzare la funzione DLNA senza problemi, utilizzare il programma presente sul CD-ROM fornito con il televisore o il programma Samsung PC Share Manager corrispondente al modello di televisore che può essere scaricato dal sito web Samsung. Italiano - 42 BN68-02325A-Ita.indb 42 2009-05-19 �� 3:57:27 Requisiti di sistema 1. Inserire nel PC il CD del programma fornito in dotazione con il televisore. 2. Per l’installazione del programma sono necessari 30MB di spazio libero sul disco rigido. N Se si intende condividere file, è necessario disporre di 30MB di spazio libero sul disco rigido ogni 100 file. N Annullando la condivisione dei file, lo spazio sul disco fisso utilizzato per le informazioni delle miniature verrà liberato. Formati supportati ● Immagine: JPEG/ Audio: MP3/ Video: AVI, MKV, ASF, MP4, 3GPP, PS, TS container. Per informazioni dettagliate sui formati video supportati, vedere le istruzioni in ‘Riproduzione di un filmato’. Installare l’applicazione 1. Eseguire il file Setup.exe contenuto nel CD del programma fornito in dotazione con il prodotto. N In alternativa, è possibile scaricare il file dal sito web www.samsung.com. 2. Installare SAMSUNG PC Share Manager come mostrato nelle figure sottostanti. 3. Una volta completata l’installazione, sul desktop verrà visualizzata l’icona PC Share Manager. N Fare doppio clic sull’icona per avviare il programma. ¦ Installazione dell’applicazione DLNA La schermata del programma 1. Menu: Vengono forniti i seguenti menu dell’applicazione: File, Dividere, Server e Aiutare. 1 2 3 4 5 6 7 2. Fare clic per condividere la cartella del server PC selezionata. 3. Fare clic per annullare la condivisione. 4. Fare clic per aggiornare la cartella del PC e i file. 5. Fare clic per sincronizzare lo stato della condivisione. 6. Vengono elencate le cartelle e i file del PC da condividere. 7. Vengono elencate le cartelle condivise dall’utente. Italiano - 43 BN68-02325A-Ita.indb 43 2009-05-19 �� 3:57:28 ❑ Dividere ■ Condivisione di una cartella E’ possibile condividere una cartella del PC sul televisore. ■ Annullamento della Cartella condivisa È possibile annullare la condivisione di una cartella sul PC. Selezionare una cartella dal riquadro Cartella condivisa e selezionare Non condividere cartella. ■ Applicazione delle impostazioni correnti Eseguire questa operazione quando la sincronizzazione è necessaria a causa di una nuova cartella condivisa o dell’annullamento di una condivisione. Il menu Imposta stato modificato applica le modifiche apportate alle cartelle condivise ai dati memorizzati con il programma di condivisione PC. Poiché l'applicazione delle modifiche ai dati interni è un processo lungo, questa funzione permette agli utenti di applicare le modifiche ai dati solo quando è necessario. Finché il menu Set Changed State non viene selezionato, le modifiche alla cartella condivisa non verranno applicate al server. Le modifiche alle cartelle condivise non vengono applicate al PC finché non viene selezionato il menu Set Changed State. ■ Impostazione delle autorizzazioni per l'accesso Per consentire al televisore di vedere il PC, il televisore deve essere impostato su Imposta politica dispositivo nella finestra delle impostazioni delle autorizzazioni per l'accesso. Inoltre, il server del PC e il televisore devono appartenere alla stessa subnet. ● Metodo: Selezionare il menu Condividi, quindi selezionare Imposta politica dispositivo. Le voci rifiutate vengono rappresentate in grigio. È possibile modificare le autorizzazioni per l'accesso mediante il tasto Allow Accept / Deny. Per eliminare una voce, selezionarla e selezionare Elimina voce selezionata. ❑ Server ■ Server E’ possibile eseguire o interrompere usando il PC come server. ■ Esegui DLNA Digital Media Server all’avvio di Windows E’ possibile impostare il server del PC per essere eseguito automaticamente all’avvio di Windows. ■ Modifica nome server È possibile rinominare il server del PC. ¦ Uso della funzione DLNA Uso del menu DLNA DLNA (Digital Living Network Alliance) consente la riproduzione dei contenuti memorizzati su un server DLNA (solitamente il PC) collegato al proprio televisore tramite una rete. Media Play consente la riproduzione di contenuti memorizzati su un dispositivo USB collegato al televisore, mentre DLNA consente la riproduzione di contenuti memorizzati su un server DLNA (PC) collegato al televisore tramite una rete. Le procedure di utilizzo dei contenuti sono le stesse previste per Media Play (USB & DLNA). 1. Premere il tasto MEDIA.P sul telecomando per visualizzare il menu DLNA. 2. Premere il tasto ◄ o ► per selezionare un'icona (Photo, Music, Movie, Setup), quindi premere il tasto ENTERE. N Per uscire dalla modalità DLNA, premere il tasto MEDIA.P sul telecomando. N DLNA non supporta le seguenti funzioni. Le funzioni Musica di sottofondo e Impostazione musica di sottofondo. Ordinamento dei file in base alle preferenze nelle cartelle Photo, Music e Movie. La funzione Change Group. La funzione Copia / Elimina. La funzione Remove Safely. Le funzioni dei tasti REW/FF (π/µ) durante la riproduzione di un filmato. Funzione Playing Movie Continuously (Resume Play) N La funzione di passaggio a un altro fotogramma può non funzionare con alcuni container, ad esempio asf e mkv. N Le didascalie incorporate, Divx DRM, Multi-audio, non sono supportate. N Samsung PC Share Manager deve essere autorizzato dal programma firewall del PC. N In base al contenuto delle informazioni corrispondenti, la funzione Skip (tasti ◄/►) o Pause potrebbe non funzionare durante la riproduzione di un filmato per DLNA di altri produttori. N Il tempo di riproduzione può non essere visualizzato durante la riproduzione di un filmato. Italiano - 44 BN68-02325A-Ita.indb 44 2009-05-19 �� 3:57:29 ANYNET+ ¦ Collegamento dei dispositivi Anynet+ Cos'è Anynet+? Anynet+ è una funzione che permette di controllare mediante il telecomando del televisore Samsung tutti i dispositivi Samsung collegati che supportano Anynet+. Il sistema Anynet+può essere usato solo con i dispositivi Samsung dotati della funzione Anynet+. Per controllare se il dispositivo Samsung in uso è dotato di questa funzione, verificare la presenza del logo Anynet+. Per effettuare il collegamento a un televisore Anynet+ 1 TV Cavo HDMI 1.3 Anynet+ 2 Cavo HDMI 1.3 Anynet+ 3 Cavo HDMI 1.3 Anynet+ 4 Cavo HDMI 1.3 1. Collegare la porta HDMI IN (1, 2, 3(DVI)o 4) del televisore alla porta HDMI OUT del dispositivo Anynet+ corrispondente tramite un cavo HDMI. Per effettuare il collegamento a un sistema Home Theatre TV Anynet+ 1 Home Theater Cavo HDMI 1.3 Cavo ottico Cavo HDMI 1.3 Anynet+ 2 Cavo HDMI 1.3 Anynet+ 3 Cavo HDMI 1.3 Anynet+ 4 Cavo HDMI 1.3 1. Collegare la porta HDMI IN (1, 2, 3(DVI)o 4) del televisore alla porta HDMI OUT del dispositivo Anynet+ corrispondente tramite un cavo HDMI. 2. Collegare la porta HDMI IN del sistema Home Theatre alla porta HDMI OUT del dispositivo Anynet+ corrispondente tramite un cavo HDMI. N Collegare un cavo ottico tra la porta DIGITAL AUDIO OUT (OPTICAL) del televisore all'ingresso Digital Audio del sistema Home Theatre. N Se si opta per una connessione di questo genere, la presa Ottica permette l’uscita di soli 2 canali audio. In questo modo sarà possibile sentire l’audio solo dagli altoparlanti frontali sinistro e destro del sistema Home Theatre e dal subwoofer. Per avere un audio a 5.1 canali, collegare la porta DIGITAL AUDIO OUT (OPTICAL) del lettore DVD / Ricevitore satellitare (p. es. dispositivo Anynet 1 o 2) direttamente a un amplificatore o all’Home Theatre, non al televisore. N Collegare solo un sistema Home Theatre. N E’ possibile collegare un dispositivo Anynet+ tramite un cavo HDMI 1.3. Alcuni cavi HDMI potrebbero non supportare le funzioni Anynet+. N Anynet+ si attiva solo quando il relativo dispositivo AV che supporta Anynet+ è acceso o in modalità Standby. N Anynet+ supporta fino a 12 dispositivi AV. Da notare che è possibile collegare fino a 3 dispositivi dello stesso tipo. Italiano - 45 BN68-02325A-Ita.indb 45 2009-05-19 �� 3:57:30 ¦ Configurazione di Anynet+ ❑ Impostazione ■ ■ Anynet+ (HDMI-CEC) → Off / On Per utilizzare la funzione Anynet+, Anynet+ (HDMI-CEC) deve essere impostato su On. N Quando la funzione Anynet+ (HDMI-CEC) è disattivata, sono disattivate anche tutte le funzioni relative a Anynet+. Spegnimento auto → No / Sì Impostazione della disattivazione automatica di un dispositivo Anynet+ allo spegnimento del televisore. N La sorgente attiva deve essere impostata sul telecomando in modo che il televisore utilizzi la funzione Anynet+. N Se si imposta Spegnimento auto su Sì, i dispositivi esterni collegati al televisore si spengono ogniqualvolta si spegne il televisore. Se un dispositivo esterno è in fase di registrazione, potrebbe non spegnersi automaticamente. Media Play (USB & DLNA) Applicazione T Premere il tasto TOOLS per visualizzare il menu Strumenti. E' inoltre possibile visualizzare il menu Anynet+ selezionando Strumenti → Anynet+ (HDMI-CEC). Anynet+ (HDMI-CEC) Content Library Internet@TV Centro rete dom Impostazione Anynet+ (HDMI-CEC) : On ▶ Spegnimento auto : Sì U Verpl. E Conf. R Ritorno Impostazione Anynet+ (HDMI-CEC) : On Spegnimento auto : Sì ▶ U Verpl. E Conf. R Ritorno ¦ Passaggio tra dispositivi Anynet+ 1. Premere il tasto TOOLS. Premere ENTERE per selezionare Anynet+ (HDMI-CEC). 2. Premere il tasto ▲ o ▼ per selezionare Elenco dispositivi, quindi premere ENTERE. N Vengono elencati tutti i dispositivi Anynet+ collegati al televisore. N Se non si trova il dispositivo desiderato, premere il tasto rosso per eseguire la scansione dei dispositivi. Visualizza TV Elenco dispositivi Registrazione: DVDR DVDR MENU DVDR INFO Ricevitore: Off Impostazione 3. Premere il tasto ▲ o ▼ per selezionare un particolare dispositivo, quindi premere ENTERE. Il dispositivo selezionato viene attivato. N Solo all’impostazione di Anynet+ (HDMI-CEC) su On nel menu Applicazione U Verpl. E Conf. R Ritorno comparirà il menu Elenco dispositivi. N Il passaggio al dispositivo selezionato può richiedere fino a 2 minuti. Non è possibile annullare l’operazione durante il passaggio da un dispositivo all’altro. N Il tempo richiesto per la scansione dei dispositivi dipende dal numero di dispositivi collegati. N Al termine della scansione, il numero di dispositivi trovati non appare. N Sebbene all’accensione del televisore l’apparecchio ricerchi automaticamente tutti i dispositivi collegati, questi non vengono automaticamente visualizzati nell’elenco dei dispositivi collegati. Per ricercare il dispositivo collegato premere il tasto rosso. N Se si è selezionata una modalità di ingresso esterna tramite il tasto SOURCE non sarà possibile utilizzare la funzione Anynet+. Passare a un dispositivo Anynet+ utilizzando Elenco dispositivi. Menu Anynet+ Il menu Anynet+ può variare a seconda del tipo e dello stato del dispositivo Anynet+ collegato al televisore. Menu Anynet+ Visualizza TV Elenco dispositivi (nome_dispositivo) MENU (nome_dispositivo) INFO Registrazione: (*registratore) Interrompere registrazione: (*registratore) Ricevitore Descrizione Anynet+ passa alla modalità di trasmissione TV. Visualizza l’elenco dei dispositivi Anynet+. Mostra i menu del dispositivo collegato. Ad esempio, se è collegato un registratore DVD, comparirà il menu del disco del registratore DVD. Mostra i menu di riproduzione del dispositivo collegato. Ad esempio, se è collegato un registratore DVD, comparirà il menu di riproduzione del registratore DVD. Avvia immediatamente la registrazione mediante il registratore. (Questa funzione è disponibile solo per i dispositivi che supportano la funzione di registrazione.) Interrompe la registrazione. L’audio viene riprodotto attraverso il ricevitore. N Se al sistema è collegato più di un dispositivo di registrazione, questi vengono visualizzati come (*registratore); in caso il dispositivo collegato sia uno solo, verrà rappresentato come (*nome_dispositivo). Italiano - 46 BN68-02325A-Ita.indb 46 2009-05-19 �� 3:57:30 Tasti del telecomando disponibili in modalità Anynet+ Tipo dispos Stato operativo Dispositivo Anynet+ Una volta attivato il dispositivo, quando il menu del dispositivo corrispondente appare sullo schermo. Dispositivo con sintonizzatore incorporato Dispositivo audio Una volta attivato il dispositivo, quando si riproduce un file Tasti disponibili Tasti numerici ▲/▼/◄/►/ ENTERE Tasti colorati / tasto EXIT π(Ricerca indietro) / µ(Ricerca avanti) ∫(Arresta) / ∂(Riproduci) / ∑(Pausa) Una volta attivato il dispositivo, durante la visione di un programma televisivo P>/P< Una volta attivato il ricevitore Y / MUTE N La funzione Anynet+ è utilizzabile solo quando il telecomando è impostato su TV. N Il tasto ∏ è attivo solo in fase di registrazione. N Non è possibile gestire i dispositivi Anynet+ utilizzando i pulsanti del televisore. I dispositivi Anynet+ possono essere gestiti solo tramite telecomando. N In determinate condizioni, il telecomando del televisore potrebbe non funzionare. In questo caso, selezionare nuovamente il dispositivo Anynet+. N Le funzioni Anynet+ non sono attive con prodotti di altre marche. N Le operazioni π, µ possono differire in base al dispositivo in uso. ¦ Registrazione Con un videoregistratore Samsung è possibile registrare un programma televisivo. 1. Premere il tasto TOOLS. Premere ENTERE per selezionare Anynet+ (HDMI-CEC). 2. Premere il tasto ▲ o ▼ per selezionare Recording Immediately, quindi premere ENTERE. La registrazione ha inizio. N Se sono presenti più dispositivi di registrazione Se sono collegati più dispositivi di registrazione, questi vengono elencati. Premere il tasto ▲ o ▼ per selezionare un particolare dispositivo, quindi premere ENTERE. La registrazione ha inizio. N Se il dispositivo di registrazione non è visualizzato,selezionareElenco dispositivi e premere il tasto rosso per eseguire la ricerca dei dispositivi Visualizza TV Elenco dispositivi Registrazione: DVDR DVDR MENU DVDR INFO Ricevitore: Off Impostazione U Verpl. E Conf. R Ritorno 3. Per uscire, premere EXIT. N E’ possibile registrare il segnale preveniente da una sorgente selezionando Registrazione: (nome_dispositivo). N Premendo il tasto ∏ si eseguirà la registrazione del programma attualmente visualizzato sul televisore. Se si stanno guardando le immagini provenienti da un altro dispositivo, vengono registrate le immagini di quel dispositivo. N Prima di registrare, controllare che il jack dell’antenna sia correttamente collegato al dispositivo di registrazione. Per collegare in modo corretto un’antenna a un dispositivo di registrazione, consultare il manuale dell'utente del dispositivo di registrazione utilizzato. ¦ Ascolto tramite il Ricevitore (Home theater) È possibile ascoltare l’audio tramite un ricevitore anzichè dagli altoparlanti del televisore. 1. Premere il tasto TOOLS. Premere ENTERE per selezionare Anynet+ (HDMI-CEC). 2. Premere ▲ o ▼ per selezionare Ricevitore. Premere ◄ o ► per selezionare On o Off. Visualizza TV Elenco dispositivi Registrazione: DVDR DVDR MENU DVDR INFO Ricevitore: Off Impostazione 3. Per uscire, premere EXIT. N Se il ricevitore supporta solo l’audio, potrebbe non comparire nell’elenco dei dispositivi. N Il ricevitore è operativo solo se è collegata in modo appropriato la porta ottica di ingresso del ricevitore alla porta DIGITAL AUDIO OUT (OPTICAL) del televisore. U Verpl. E Conf. R Ritorno N Quando il ricevitore (home theatre) è impostato su Acceso, è possibile udire l'audio proveniente dall'uscita ottica del televisore. Quando il televisore visualizza un segnale DTV (etere), invia l'audio a 5.1 canali al ricevitore Home Theatre. Se la sorgente è un componente digitale, come per es. un DVD, ed è collegata al televisore mediante HDMI, saranno udibili solo 2 canali audio dal ricevitore Home Theatre. N Nel caso di una interruzione di corrente al televisore quando il menu Ricevitore è impostato su On (per lo scollegamento del cavo o un calo di potenza), la funzione Selezione altoparlante può essere impostata su Altoparlante est alla riaccensione del televisore. Italiano - 47 BN68-02325A-Ita.indb 47 2009-05-19 �� 3:57:30 ¦ Risoluzione dei problemi con Anynet+ Problema Anynet+ non funziona. ● ● ● ● ● ● ● ● ● Per avviare Anynet+. ● ● ● Per uscire da Anynet+. ● ● ● Sullo schermo viene visualizzato il messaggio ‘‘Connessione a un dispositivo Anynet + ...’. Impossibile avviare la riproduzione sul dispositivo Anynet+. Lo schermo del dispositivo esterno non appare. ● ● ● ● ● ● ● ● ● Il programma TV non può ● essere registrato. L’audio del televisore ● non viene riprodotto attraverso il ricevitore. Possibile soluzione Controllare se si sta utilizzando un dispositivo Anynet+. Il sistema Anynet+ può essere utilizzato solo con dispositivi che supportano Anynet+. Collegare un solo ricevitore (Home Theatre). Controllare che il cavo di alimentazione di Anynet+ sia correttamente collegato. Controllare i collegamenti dei cavi Video/Audio/HDMI 1.3 del dispositivo Anynet+. Verificare se Anynet+ (HDMI-CEC) è impostato su Acceso nel menu Impostazione di Anynet+. Verificare che il telecomando del televisore sia in modalità TV. Verificare che sia Anynet+ la modalità esclusiva del telecomando. In particolari condizioni, Anynet+ non funziona. (Ricerca canali, Media Play, Plug & Play, ecc). Quando si collega o si rimuove il cavo HDMI 1.3, eseguire una nuova ricerca dei dispositivi oppure spegnere e riaccendere il televisore. Controllare che la funzione Anynet+ del dispositivo Anynet+ sia attivata. Verificare che il dispositivo Anynet+ sia collegato correttamente al televisore e che Anynet+ (HDMI-CEC) sia impostato su On nel menu Anynet+ Impostazione. Premere il tasto TV sul telecomando per passare al controllo del televisore. Premere il tasto TOOLS per visualizzare il menu Anynet+ e selezionare l’opzione desiderata. Selezionare Visualizza TV nel menu Anynet+. Premere il tasto SOURCE sul telecomando del televisore e selezionare un dispositivo non Anynet+. Premere P >/<, PRE-CH e FAV.CH per cambiare la modalità TV. (Notare che il tasto dei canali funziona solo se non è collegato un dispositivo Anynet+ con sintonizzatore incorporato.) Non è possibile utilizzare il telecomando durante la configurazione di Anynet+ o il passaggio a un’altra modalità di visualizzazione. Utilizzare il telecomando solo al termine dell’impostazione di Anynet+ o del passaggio alla nuova modalità di visualizzazione. Non è possibile utilizzare la funzione di riproduzione mentre è in corso la funzione Plug & Play. Controllare se il dispositivo supporta le funzioni Anynet+. Verificare che il cavo HDMI 1.3 sia collegato correttamente. Verificare che Anynet+ (HDMI-CEC) sia impostato su On nel menu Anynet+ Impostazione. Cercare nuovamente altri dispositivi Anynet+. E’ possibile collegare un dispositivo Anynet+ solo tramite un cavo HDMI 1.3. Alcuni cavi HDMI potrebbero non supportare le funzioni Anynet+. In caso di chiusura anomala, a causa di uno scollegamento del cavo HDMI, del cavo di alimentazione oppure di una interruzione di corrente, ripetere la ricerca del dispositivo. Verificare se il jack dell’antenna sul dispositivo di registrazione è correttamente collegato. Collegare il televisore e il ricevitore mediante il cavo ottico. Italiano - 48 BN68-02325A-Ita.indb 48 2009-05-19 �� 3:57:30 Content Library ¦ Uso di Content Library Contenuto libreria consente di utilizzare diversi contenuti sul televisore. È possibile utilizzare i contenuti presenti nella memoria del televisore o nuovi contenuti trasferiti mediante un dispositivo USB. Galleria Galleria Cucina Giochi Bambini Benessere R Ritorno e Esci Uso dei tasti del telecomando nel menu Content Library Tasto ▲/▼/◄/► ENTERE RETURN EXIT <P> Tasti colorati Y / MUTE Operazioni Sposta il cursore e seleziona una voce. Attiva la voce attualmente selezionata. Ritorna al menu precedente. Arresta la funzione corrente e ritorna al menu principale di Content Library. Interrompe la modalità Content Library e torna alla modalità TV. I tasti che attivano le funzioni sono descritti nella pagina corrispondente. Questa barra serve per regolare il volume del contenuto riprodotto. CONTENT LIBRARY CONTIENE TESTO, GRAFICA, IMMAGINI, CONTENUTI MULTIMEDIALI E ALTRI MATERIALI UNICAMENTE PER USO INFORMATIVO E PROMOZIONALE. I MATERIALI CONTENUTI IN CONTENT LIBRARY SONO IN CONTINUO AGGIORNAMENTO. I MATERIALI CONTENUTI IN CONTENT LIBRARY POTREBBERO NON ESSERE IDONEI AD ALCUNE FASCE DI PUBBLICO. LE INFORMAZIONI CONTENUTE IN CONTENT LIBRARY SONO FORNITE "COSÌ COME SONO". BENCHÉ LE INFORMAZIONI FORNITE IN CONTENT LIBRARY SIANO OTTENUTE O RICAVATE DA SORGENTI RITENUTE AFFIDABILI, SAMSUNG NON GARANTISCE LA PRECISIONE, LA VALIDITÀ, LA PUNTUALITÀ O LA COMPLETEZZA DELLE INFORMAZIONI E DEI DATI MESSI A DISPOSIZIONE DELL'UTENTE PER QUALSIASI SCOPO. IN NESSUNA CIRCOSTANZA, INCLUSA LA NEGLIGENZA, SAMSUNG PUÒ ESSERE RITENUTA RESPONSABILE, SIA PER CONTRATTO SIA PER ILLECITO, DI EVENTUALI DANNI DIRETTI, INCIDENTALI, SPECIALI O CONSEQUENZIALI, PARCELLE LEGALI, SPESE O QUALSIASI ALTRO DANNO DI QUALSIASI NATURA POSSA DERIVARE, O ESSERE ASSOCIATO, ALLE INFORMAZIONI CONTENUTE IN, O ALL'USO DI, CONTENT LIBRARY, ANCHE SE AVVISATI DEL POSSIBILE VERIFICARSI DI TALI DANNI. ¦ Uso dei contenuti È possibile utilizzare i contenuti salvati nella memoria del televisore. N Per tornare al menu principale Content Library, premere il tasto EXIT. ❑ Galleria Questa funzione attiva una presentazione di diapositive con immagini ad alta risoluzione e musica di sottofondo e produce varie atmosfere. Usando la funzione Galleria del televisore, è possibile cambiare atmosfera. Galleria N I copyright dei contenuti di Galleria e tutte le informazioni ad essi relative sono riservati a TimeSpace, Inc. N Premere il tasto ENTERE per interrompere la proiezione di diapositive, quindi premere il R Ritorno e Esci tasto ENTERE per riprendere la proiezione. N Premere il tasto INFO per visualizzare le informazioni sulla foto selezionata. (Il tasto non appare se per la foto non sono disponibili informazioni.) Galleria Cucina Giochi Bambini Benessere ❑ Cucina Mediante questa funzione è possibile visualizzare diverse ricette da seguire passo passo. Questi contenuti potranno fornire agli utenti ottime idee per pranzi e cene. N Le ricette inserite nei contenuti di Cucina sul televisore Samsung si basano su ricette pubblicate da Anness Publishing. N I copyright dei contenuti di Cucina e tutte le informazioni ad essi relative sono riservati a Practical Pictures. Italiano - 49 BN68-02325A-Ita.indb 49 2009-05-19 �� 3:57:31 ❑ Giochi Questa categoria mette a disposizione giochi per tutta la famiglia. N Per i tasti utilizzati nei giochi, seguire le istruzioni visualizzate sullo schermo. N Tasti colorati per Giochi Tasto Rosso Verde Giallo Blu Operazioni Premere per passare alla schermata iniziale del gioco Premere per mettere in pausa il gioco Tasto opzione Premere per uscire dal gioco ❑ Bambini Questo è un contenuto educativo e interattivo che i bambini possono vedere più volte. N I copyright dei contenuti di Bambini e tutte le implicazioni ad essi relative sono riservati a UpToTen. ❑ Benessere Questo contenuto dedicato al benessere può essere utilizzato da tutta la famiglia. ¦ Uso di Gestione contenuto ❑ Gestione contenuto N È possibile selezionare più contenuti selezionando ripetutamente i contenuti e premendo il pulsante giallo. ■ ■ Contenuti personali È possibile verificare i contenuti salvati nella memoria del televisore per ogni voce secondaria di Contenuto libreria. ● Selezionare un contenuto e premere il tasto ENTERE. Il contenuto può essere riprodotto o eliminato. Gestione contenuto Giochi Bambini Benessere Altri Gestione contenuto R Ritorno e Esci Gestione contenuto > Contenuti personali 1/1 Contenuti personali Galleria USB Cucina USB Setup È possibile verificare i contenuti salvati nella memoria del dispositivo USB per ogni voce secondaria di Content Library. ● Selezionare un contenuto e premere il tasto ENTERE. Il contenuto selezionato può R Ritorno e Esci essere riprodotto. N Content Library supporta solo dispositivi USB MSC (Mass Storage Class). MSC è un dispositivo di memorizzazione di massa Bulk-Only Transport. Esempi di MSC sono le unità Thumb e i lettori di schede Flash. N La riproduzione di alcuni giochi mediante un dispositivo di memorizzazione USB esterno consente di salvare i giochi. Prestare attenzione quando si rimuove il dispositivo USB mentre si salvano i dati poiché ciò potrebbe causare la perdita dei dati. N Download di nuovi contenuti Nuovi contenuti diversi da quelli inclusi nel prodotto possono essere scaricati dal sito web Samsung.com a titolo gratuito. Per poter scaricare contenuti a pagamento, è necessario disporre del numero UDN. Verificare il numero UDN prima di scaricare un nuovo contenuto. • Download di contenuti 1. Accedere al sito www.samsung.com. Giochi Bambini Benessere Memoria TV 17,16GB/189MB disponibili 2. Selezionare un contenuto nella pagina Contents Download. 3. Scaricare il contenuto sul dispositivo USB. 4. Passare al menu Content Library premendo il tasto CONTENT o scegliendo Content Library (MENU → Applicazione → Content Library). 5. Collegare il dispositivo USB alla porta USB posta sul lato del televisore. 6. E’ possibile vedere le voci secondarie dei contenuti scaricati. 7. Selezionare un contenuto e premere il tasto ENTERE. 8. Il contenuto selezionato può essere riprodotto. ■ Impostazione ● Durata salvaschermo: Selezionare questa opzione per impostare il tempo di attesa prima che lo screen saver entri in funzione. ● Salva UDN: Salva il numero UDN su un dispositivo USB. N Un dispositivo USB in formato NTFS non supporta la memorizzazione UDN. Si consiglia di usare un dispositivo USB formattato FAT. Italiano - 50 BN68-02325A-Ita.indb 50 2009-05-19 �� 3:57:31 Internet@TV In caso di problemi nell'uso di un servizio widget, contattare il fornitore del contenuto. In widget, premere il tasto verde per le informazioni di contatto, oppure visitare la guida del sito web per reperire informazioni sul provider del servizio widget. N In base alla regione, il servizio widget potrebbe essere supportato solo in lingua inglese. N Questa funzione potrebbe non essere supportata in base alla nazione. (non disponibile in tutti i paesi) ¦ Guida introduttiva di Internet@TV Internet@TV permette un'esperienza web e TV interattiva. E' possibile controllare i titoli finanziari, condividere fotografie con amici e parenti, apprendere notizie di cronache e consultare il meteo attraverso il servizio Internet@TV del televisore. N Se la condizione della rete non è stabile, questa funzione potrebbe non funzionare. In questo caso, il televisore si spegnerà automaticamente. In caso contrario, spegnere il televisore premendo il tasto Power. N Durante l'uso di questa funzione si potrebbe verificare una certa lentezza operativa a causa delle condizioni della rete. Quando si esegue Internet@TV per la prima volta, le impostazioni di base vengono applicate automaticamente. N Il primo passo da compiere è impostare la propria rete. Per ulteriori informazioni sulla configurazione della rete, vedere ‘Impostazione della rete’. N Una volta impostata la rete, attraverso il software Internet@TV sarà possibile procedere con l'installazione guidata. 1. Premere il tasto MENU. Premere il tasto ▲ o ▼ per selezionare Application, quindi premere il tasto ENTERE. 2. Premere il tasto ▲ o ▼ per selezionare Internet@TV, quindi premere il tasto ENTERE. N Il servizio Internet@TV viene avviato. O Premere il tasto INTERNET@ sul telecomando per visualizzare il menu Internet@TV. 3. Viene visualizzata la schermata General Disclaimer. Selezionare Accetto o Non accetto. N Per ulteriori informazioni sulla General Disclaimer, fare riferimento all'Legal Notice. 4. La ‘schermata di benvenuto’ rappresenta la pagina iniziale dell'impostazione guidata di Internet@TV. N Selezionando Chiudi configurazione, questo passaggio viene ripreso alla pressione del tasto INTERNET@. N Selezionare Iniziamo! 1 Benvenuti in Yahoo!® TV Widgets! 5. La scelta del paese permette agli widget TV di utilizzare un contenuto localizzato nella lingua locale. N Selezionare il paese nell'elenco visualizzato. Yahoo! TV Widgets porta il meglio di Internet sulla tua TV! Puoi ricevere aggiornamenti sulle condizioni meteo e risultati sportivi, informazioni sul mercato finanziario e persino video e foto a schermo intero. We just need to get a few things set up, and you’ll be on your way! Iniziamo! Chiudi configurazione 6. L'accettazione della Privacy Policy di Yahoo!® TV Widget Engine è necessaria per utilizzare Internet@TV. N Selezionare OK, Accetto. 7. L'accettazione dei Terms of Service del servizio di Yahoo!® TV Widget System è necessaria per utilizzare Internet@TV. N Selezionare OK, Accetto. 8. Digitare il proprio nome per impostare il profilo. Ogni profilo ha un elenco di widget. E' possibile creare un profilo per ogni persona che utilizza Internet@TV. N Immettere il nome e selezionare Salva questo nome. N Per ulteriori informazioni, vedere ‘Uso del widget Profile’. 9. Internet@TV testa la connessione di rete. N Se il test della connessione di rete ha esito negativo, configurare di nuovo la rete. N Per ulteriori informazioni, vedere ‘Impostazione della rete’. 5 Qual è il tuo nome? Ciascuna persona in casa tua che utilizza la TV può disporre di un set personalizzato di widget. Teniamo traccia di ciascun profilo di widget utilizzando il nome da te specificato. Immetti ora il nome che desideri utilizzare. Salva questo nome Salta il passaggio Chiudi configurazione 10.L'impostazione guidata è ora completa. Di seguito verrà visualizzato un tutorial sull'uso di Internet@TV. N Selezionare Continue per visualizzare il tutorial. N Selezionare Chiudi configurazione per iniziare a usare Internet@TV. N Per eseguire il tutorial di nuovo, selezionare Profile Widget → Impostazioni di sistema → Ripeti esercitazione. 11. Premere INTERNET@ sul telecomando per visualizzare il menu Internet@TV. Italiano - 51 BN68-02325A-Ita.indb 51 2009-05-19 �� 3:57:31 ❑ Schermo ■ Dock mode 1 Sullo schermo verrà visualizzato un banner di benvenuto con il nome del proprio profilo nell'angolo in alto a destra. N Questo banner scompare dopo pochi secondi. 1 2 2 Il banner evidenzia due tasti di scelta rapida sul telecomando. N Premendo il tasto blu (Viewport) del telecomando, il display passa dalla modalità ‘Viewport’ alla modalità ‘Overlay’ e viceversa. In modalità Viewport, il televisore o il video viene visualizzato con un'area in scala ridotta e con la grafica 3 all'esterno. In modalità overlay, la grafica viene visualizzata al di 3 Iscritto come METEO sopra della visualizzazione del televisore o del video. John N Premendo il tasto giallo (Modifica snippet) del telecomando, verrà visualizzata una finestra di guida e lo snippet selezionato potrà essere modificato. Galleria widget Ciao John! 5:15 AM Mon January 19th Viewport Modifica snippet Finance... 3 Premere il tasto INTERNET@ del telecomando per iniziare. N L'elenco orizzontale in fondo alla schermata del televisore è denominato ‘dock’. N Gli elementi dell'elenco sono denominati ‘snippet’. N Uno snippet è un collegamento che attiva un widget del televisore. N Un widget del televisore è un'applicazione internet da eseguire sul televisore. N Scorrere da uno snippet all'altro premendo i tasti ◄ o ► del telecomando. N L'elemento selezionato è situato nella zona più a sinistra (evidenziato in blu). N Il dock scorre gli snippet sotto il punto focale. N Avviare un widget TV premendo il tasto ENTERE sul telecomando quando lo snippet è in evidenza. N Quando si aggiungono snippet, questi formano un insieme all’interno del quale è possibile navigare premendo il tasto ▲ o ▼. N Nel dock vengono visualizzati due widget TV speciali: Profile Widget e Gallery Widget. Questi non possono essere eliminati. N Il dock scorrerà fuori della schermata dopo un determinato periodo di tempo. ■ Modalità Sidebar 1 Selezionare uno snippet e premere il tasto ENTERE per attivare la barra laterale degli widget. Il logo TV Widget e Home sono situati nella parte superiore della barra laterale. 2 Il menu corrente è visualizzato sotto il logo TV Widget. N Per tornare alla schermata precedente, selezionarla e premere il tasto ENTERE. N E' possibile inoltre premere il tasto RETURN del telecomando. 3 La selezione corrente è sempre evidenziata in blu. Il tasto evidenziato è selezionato e viene attivato premendo ENTERE. 4 Qualora vi siano molti dati, viene utilizzata una suddivisione a pagine. N Vengono visualizzate la pagina corrente e le pagine totali. N Scorrere le pagine mediante il tasto ◄ o ►. FINANZA Le mie azioni Per rimuovere un simbolo di ticker, selezionalo dall’elenco seguente. 1 2 ^DJI ^IXIC YHOO AAPL INTC AMZN PAGINA 1 DI 2 Aggiungi nuovo simbolo… Importa simboli da Yahoo!... Formato di visualizzazione Valore Info su Yahoo! Finanza... 3 4 5 5 La barra degli strumenti inferiore comprende i tasti colorati corrispondenti ai tasti rosso, verde, giallo e blu del telecomando. • Tasto rosso: Chiude il widget. • Tasto verde: Gestisce gli snippet. • Tasto giallo: Cambia le impostazioni del widget. • Tasto blu: Dimensiona il video per adattarlo o renderlo a pieno schermo. N Alcuni tasti potrebbero non essere disponibili in base al widget. Italiano - 52 BN68-02325A-Ita.indb 52 2009-05-19 �� 5:42:24 Tutti i contenuti e i servizi accessibili attraverso il presente apparecchio appartengono a terzi e sono protetti dalle leggi in materia di diritto d’autore, brevetti, marchi e/o altre leggi in materia di proprietà intellettuale. Tali contenuti e servizi sono forniti esclusivamente per un Suo uso personale e non commerciale. Lei non può utilizzare alcun contenuto o servizio in modi non autorizzati dal proprietario del contenuto o dal fornitore del servizio. In particolare, Lei non potrà modificare, copiare, ripubblicare, caricare, pubblicare, trasmettere, tradurre, vendere, creare opere derivate, sfruttare o distribuire in qualunque modo o con qualunque mezzo alcun contenuto o servizio visualizzato attraverso il presente apparecchio senza l’espressa autorizzazione del relativo proprietario del contenuto o fornitore del sevizio. IL CONTENUTO ED I SERVIZI DI TERZI SONO FORNITI “COSÌ COME SONO”. SAMSUNG NON GARANTISCE IL CONTENUTO O I SERVIZI COSÌ FORNITI, NÉ ESPRESSAMENTE NE’ IMPLICITAMENTE, PER QUALSIASI SCOPO. SAMSUNG ESCLUDE ESPRESSAMENTE QUALSIASI GARANZIA IMPLICITA, INCLUSE, A TITOLO ESEMPLIFICATIVO, LE GARANZIE DI COMMERCIABILITÀ O IDONEITÀ PER UNO SCOPO SPECIFICO. SAMSUNG NON GARANTISCE L’ACCURATEZZA, VALIDITÀ, TEMPESTIVITÀ, LEGALITÀ O COMPLETEZZA DI QUALSIASI CONTENUTO O SERVIZIO RESO DISPONIBILE ATTRAVERSO IL PRESENTE APPARECCHIO, E IN NESSUN CASO, INCLUSO IL CASO DI COLPA, FERMO RESTANDO QUANTO PREVISTO ALL’ART. 1229 DEL CODICE CIVILE, SAMSUNG SARÀ RESPONSABILE, SIA PER RESPONSABILITÀ CONTRATTUALE CHE EXTRACONTRATTUALE, PER QUALSIASI DANNO DIRETTO, INDIRETTO, INCIDENTALE, SPECIALE O CONSEQUENZIALE, PER GLI ONORARI DI AVVOCATO, SPESE, LUCRO CESSANTE O QUALUNQUE ALTRO DANNO DERIVANTE DA, O RELATIVO A, QUALSIASI INFORMAZIONE CONTENUTA IN, O CONSEGUENZA DELL’UTILIZZO DI, QUALUNQUE CONTENUTO O DEL SERVIZIO DA PARTE SUA O DA PARTE DI TERZI, ANCHE SE AL CORRENTE DELLA POSSIBILITÀ DI TALI DANNI. I servizi di terzi possono essere terminati o interrotti in qualsiasi momento, e Samsung non dichiara né garantisce che qualsiasi contenuto o servizio rimarrà disponibile per un certo periodo di tempo. I contenuti e i servizi sono trasmessi da terzi attraverso reti e apparecchiature di trasmissione sulle quali Samsung non ha alcun controllo. Senza che ciò limiti quanto detto sopra, Samsung esclude espressamente ogni tipo di responsabilità per qualsiasi interruzione o sospensione di qualsiasi contenuto o servizio reso disponibile attraverso il presente apparecchio. Samsung non è nemmeno in alcun modo responsabile per il servizio assistenza clienti relativo ai contenuti e servizi. Qualsiasi domanda o richiesta di servizio relativa ai contenuti o ai servizi dovrebbe essere fatta direttamente ai relativi fornitori di contenuti e servizi. ¦ Modificare gli snippet nel dock 1. Per modificare uno snippet selezionarlo nel dock e premere il tasto giallo. 2. Lo snippet si porta in seconda posizione e la sua immagine scorre per mostrare il testo di aiuto: • Delete (tasto rosso): Rimuove il widget. N Gli widget eliminati possono essere ripristinati usando la Galleria widget. • Move (tasto blu): Riordina lo snippet. Premere il tasto ◄ o ► per scorrere. Premere il tasto giallo per spostarlo in una nuova posizione. • Done (tasto giallo): Esce dal menu Modifica snippet. ¦ Uso del widget Profile Il widget Profile configura il profilo dell'utente. E' possibile impostare più profili, mantenendo per ognuno il proprio elenco di widget. Il menu Cambia profilo permette di passare da un profilo utente all'altro. N È necessario registrare almeno due profili. Se si desidera aggiungere un profilo, vedere ‘Controlli di amministrazione’. PROFILE Iscritto come John Cambia profilo Impostazioni profilo Impostazioni di sistema Controlli amministrativi Esci da Yahoo! Italiano - 53 BN68-02325A-Ita.indb 53 2009-05-19 �� 3:57:33 Il menu profilo permette di personalizzare e proteggere i profili. ● I profili utenti possono essere personalizzati mediante un Nome e un Avatar (una immagine usata per rappresentare il profilo) univoci. ● Il Nome e l'Avatar del profilo vengono visualizzati nello snippet del profilo del dock. ● I profili possono essere protetti mediante Crea PIN profilo. N Quando si imposta il PIN per la prima volta, è possibile impostare una domanda di sicurezza. Il menu Profile Settings può limitare l'accesso agli widget. ● Nel caso si dimentichi il proprio profilo PIN è possibile rispondere a una Domanda di sicurezza associata al profilo. ● Un profilo che abbia attivo il Limit Profile non permetterà l'installazione di nuovi widget. N Per utilizzare questa funzione, è necessario impostare il PIN del titolare. Per impostare il PIN, vedere ‘Controlli di amministrazione’ Il menu Impostazioni di sistema permette di: ● Cambiare Località e impostare il proprio CAP (solo USA) per attivare il contenuto locale. ● Ripeti esercitazione mostrato durante l'impostazione guidata. ● Ripristina impost. di fabbrica per eliminare tutte le configurazioni degli widget e le informazioni. Nel menu Controlli di amministrazione è possibile: ● Impostare l'intervallo di Screen Saver per evitare le bruciature dello schermo. ● Crea PIN fondatore e impostare la Domanda di sicurezza per controllare gli atri profili. ● Create crea un nuovo Profile che può essere configurato con diversi gruppi di widget. ● Cancella elimina un profilo esistente. Dal widget Profile è possibile eseguire Accedi a Yahoo!® usando il proprio Yahoo! ID ● Se si dispone di un ID Yahoo! è possibile accedere a contenuti personalizzati mediante Yahoo! TV Widgets. ● All Yahoo! Gli widget TV installati vengono automaticamente attivati insieme al profilo Yahoo! ID. ● Se non si dispone di un account Yahoo!, visitare il sito www.yahoo.com e creare un account. ● Potrebbe non essere possibile accedere con un ID creato sul sito web di Yahoo! in un paese che non supporti Internet@TV. ❑ Informazioni widget Profilo Premere il tasto verde. È possibile visualizzare una breve descrizione degli widget Profile, Copyright, Condizioni di utilizzo e Politica sulla privacy. ¦ Uso di Yahoo!® Galleria Widget Utilizzare Yahoo!® Widget Gallery per aggiungere ulteriori widget al proprio televisore. Visualizzare tutti gli widget TV disponibili nelle seguenti categorie: ● Widget aggiornati: Visualizza i widget aggiornati di recente. ● Yahoo!® Widget: Visualizza gli widget forniti da Yahoo!® ● Samsung Widget: Visualizza gli widget forniti da Samsung. ● Altre Categorie: Visualizza tutti gli widget per categoria. N Per installare un widget, accedere alla schermata dei dettagli e selezionare Install Widget per My Profile e premere il tasto ENTERE. Il widget viene quindi installato e diventa disponibile nel dock. Galleria widget Yahoo! Notiziari di Yahoo! PAGE 1 OF 2 Top Stories Business Politics Sports Technology More Categories Notiziari ❑ Impostazioni di Galleria widget V 0.9.0 NEWS HEADLINES Widget aggiornati Premere il tasto verde. Yahoo! Widget Samsung Widget ■ Informazioni su Yahoo! Galleria widget... È possibile visualizzare brevi informazioni su Galleria widget, Copyright, Condizioni di utilizzo e Politica sulla privacy. ■ Nel menu Developer Settings è possibile creare i propri widget personali. Per maggiori informazioni sulla creazione di widget personalizzati, visitare il sito web di sviluppo http://connectedtv.yahoo.com/ Categorie Italiano - 54 BN68-02325A-Ita.indb 54 2009-05-19 �� 3:57:33 ¦ Uso di Yahoo!® Weather Widget Yahoo!® Weather Widget fornisce aggiornamenti sulla situazione meteo locale o preferita. Questo contenuto cambia dinamicamente in base alle condizioni climatiche. ● Premere il tasto verde del telecomando per visualizzare il menu Yahoo!® Weather Widget Impostazioni. ● Nel menu Impostazioni è possibile aggiungere o eliminare una città per la quale si desidera visualizzare la situazione meteo. Nel menu Impostazioni: ● Aggiungi nuova città digitando il nome di una città. Una volta visualizzati i risultati della ricerca, selezionare la città desiderata e premere il tasto ENTERE. ● Elimina città selezionando la città da eliminare dall'elenco delle città. Premere ENTERE per confermare l'eliminazione. ● Modifica della modalità di indicazione della temperatura È possibile modificare la modalità di indicazione della temperatura da Imperiale a Metrico e viceversa. Ad esempio, Imperiale mostrerà la temperatura in gradi Fahrenheit mentre Metrico in gradi Centigradi. METEO 51° Sunnyvale Cloudy Sunnyvale, CA San Francisco, CA New York, NY London, England Paris, France ❑ Creare uno snippet per una città preferita ● ● ● Selezionare la città nella home page del widget Yahoo!® Weather e visualizzare le informazioni meteo. Premere il tasto giallo. Selezionare il menu Aggiungi snippet e premere ENTERE per aggiungere la città come snippet. ❑ Cancella elimina lo snippet di una città ● ● ● Avviare lo snippet. Premere il tasto giallo. Selezionare il menu Eliminare snippet e premere il tasto ENTERE per eliminarlo. ¦ Uso del widget Yahoo!® Notizie Il widget Yahoo!® Notizie fornisce le ultime notizie su economia, intrattenimenti, politica, sport, avvenimenti di interesse generale e molte altre categorie. Notizie Selezionare una categoria, un argomento all'interno di una categoria e visualizzare il riepilogo delle notizie aggiornato dinamicamente. World Italiano - 55 BN68-02325A-Ita.indb 55 2009-05-19 �� 3:57:33 ¦ Uso del widget Yahoo!® Flickr Il widget Flickr fornisce un accesso alle fotografie preferite di amici e parenti durante la visione del televisore. Ora è possibile condividere le immagini con la famiglia sullo schermo del televisore come una proiezione di diapositive. ● Personalizzare il widget Flickr collegandosi al proprio ID di Yahoo! ID. ● Per le procedure di accesso dettagliate, fare riferimento alle istruzioni ‘Uso del widget Profile’. ● Per ulteriori informazioni su Flickr, visitare il sito www.flickr.com. N Foto personali mostra le fotografie registrate sul sito web con Flickr. ■ ■ Per visualizzare le fotografie Flickr in una proiezione di diapositive: ● Selezionare una miniatura di una foto e premere il tasto ENTERE per visualizzare i dettagli della fotografia. ● Selezionare Avvia proiezione diapositive e premere ENTERE. Foto personali Serie Esplorazione Foto preferite Contatti Per controllare la visualizzazione della proiezione di diapositive: Gruppi ● Premere il tasto ENTERE durante la proiezione. ● Le miniature delle fotografie vengono visualizzate nella parte bassa dello schermo. N Quando il controllo della proiezione di diapositive viene visualizzato, è possibile utilizzare i comandi Pause, Play e Stop. N Selezionando il menu e premendo il tasto ENTERE, è possibile visualizzare le informazioni della fotografia selezionata. ● Il menu I tuoi set permette di visualizzare le fotografie classificate in Flickr. ● Il menu Esplora permette di esplorare le fotografie presentate sul sito web Flickr. Si possono visualizzare le foto aggiornate ogni giorno. ● Il menu Contrassegna come preferita o Rimuovi dalle preferite sposta le fotografie nella cartella Foto preferite o le rimuove. ● Il menu Foto preferite permette di visualizzare le fotografie classificate come preferite. ● Il menu I tuoi contatti permette di visualizzare gli aggiornamenti inseriti da parenti e amici. Il menu Gruppi permette di selezionare i gruppi preferiti nel sito web Flickr per condividere le fotografie con la comunità di utenti Flickr. Per configurare le impostazioni del widget Yahoo!® Flickr premere il tasto verde del telecomando. ● Il menu Tempo per diapositiva controlla la velocità di riproduzione della proiezione di diapositive. ● Il menu Ripeti ripeterà la proiezione dall'inizio dopo l'ultima fotografia. ¦ Uso del widget Yahoo!® Finance Con il widget Yahoo!® Finance è possibile visualizzare le ultime notizie di borsa. Premere il tasto verde per impostare le proprie azioni. Usare il menu Aggiungi nuovo simbolo per inserire il nome di un nuovo titolo. ● Selezionare il titolo da aggiungere nei risultati di ricerca, quindi il menu Add Symbol e premere il tasto ENTERE. N Il titolo selezionato viene aggiunto all'elenco Le mie azioni. FINANZA Le mie azioni Per rimuovere un simbolo di ticker, selezionalo dall’elenco seguente. ^DJI ^IXIC YHOO ● ● ● ● Usare il menu Importa simboli da Yahoo!® per recuperare il proprio portfolio Yahoo!® Finance. Il menu Unisci simboli unisce i simboli del widget Yahoo!® Finance ai simboli presenti nel proprio portfolio. Il menu Importa simboli elimina i simboli del widget Yahoo!® Finance e li sostituisce con i simboli presenti nel proprio portfolio. AAPL INTC AMZN PAGINA 1 DI 2 Aggiungi nuovo simbolo… Importa simboli da Yahoo!... Formato di visualizzazione Valore Info su Yahoo! Finanza... Usare il menu Formato di visualizzazione per modificare la transizione della fluttuazione delle quotazioni in Valore o Percentage. Creare uno snippet per un titolo preferito Selezionare il simbolo del titolo nella home page del widget Yahoo!® Finance e visualizzare le quotazioni dettagliate. Premere il tasto giallo. Selezionare il menu Aggiungere snippet e premere ENTERE per aggiungere il titolo come snippet. Cancella elimina uno snippet Avviare lo snippet dal dock Premere il tasto giallo. Selezionare il menu Cancella Snippet e premere il tasto ENTERE per eliminarlo. Italiano - 56 BN68-02325A-Ita.indb 56 2009-05-19 �� 5:42:25 ¦ Risoluzione dei problemi con internet@TV Problema Possibile soluzione Alcuni servizi widget non funzionano. Verificare il servizio con il fornitore. In widget, premere il tasto verde per le informazioni di contatto, oppure visitare la guida del sito web per reperire informazioni sul provider del servizio widget. Vedere la guida sulla pagina del sito web. Alcuni contenuti degli widget sono solo in Inglese. Come posso cambiare la lingua? La lingua del contenuto del widget può essere diversa dalla lingua di interfaccia utente del widget. Ciò può dipendere dal fornitore del servizio. Dopo un ripristino ai valori preimpostati, il servizio Yahoo Widget non funziona e compare un messaggio di avviso. Dopo un ripristino ai valori preimpostati, spegnere e riaccendere il televisore. Quindi riavviare Internet@TV. Nel widget Flickr, ho effettuato l'accesso al mio account. Tuttavia, non riesco a visualizzare le mie foto. Visitare il sito web Yahoo e attivare l'account con il proprio ID Yahoo!. ID. Nel widget Profile ho cambiato l'area, ma sono rimaste le impostazioni precedenti. Spegnere e riaccendere il televisore. Quindi riavviare Internet@TV. Ora potrete usufruire dei servizi widget supportati nella nuova area. ¦ Guida Sito web Paese Guida Sito web Austria www.samsung.com → Produkte → Fernseher → [email protected] → Internet@TV Belgium Czech Denmark www.samsung.com → Producten → televisies → [email protected] → Internet@TV www.samsung.com → Produits → téléviseurs → [email protected] → Internet@TV www.samsung.com → Produkty → televizory → [email protected] → Internet@TV www.samsung.com → Produkter → stue & soveværelse → [email protected] → Internet@TV Finland www.samsung.com → Tuotteet → kodinelektroniikka → [email protected] → Internet@TV France www.samsung.com → Produits → télévisions → [email protected] → Internet@TV Germany www.samsung.com → Privatkunden → Fernseher → [email protected] → Internet@TV Greece www.samsung.com → Προϊόντα → τηλεοράσεις → [email protected] → Internet@TV Hungary www.samsung.com → Termékek → televíziók → [email protected] → Internet@TV Ireland www.samsung.com → Products → Television → [email protected] → Internet@TV Italy Netherlands www.samsung.com → Prodotti → TV → [email protected] → Internet@TV www.samsung.com → Producten → televisies → [email protected] → Internet@TV Norway www.samsung.com → Produkter → hverdagsrom & soverom → [email protected] → Internet@TV Poland www.samsung.com → Produkty → telewizory → [email protected] → Internet@TV Portugal www.samsung.com → Produtos para Consumidores → televisores → [email protected] → Internet@TV Slovakia www.samsung.com → Produkty → televízory → [email protected] → Internet@TV Spain Sweden Switzerland United Kingdom www.samsung.com → Productos → televisores → [email protected] → Internet@TV www.samsung.com → Produkter → vardagsrum & sovrum → [email protected] → Internet@TV www.samsung.com → Produits → télévisions → [email protected] → Internet@TV www.samsung.com → Produkte → Fernseher → [email protected] → Internet@TV www.samsung.com → Products → Television → [email protected] → Internet@TV Turkey www.samsung.com → Tüketici Ürünleri → televizyon → [email protected] → Internet@TV Estonia www.samsung.com → Klientidele → Televiisorid → [email protected] → Internet@TV Latvia www.samsung.com → Klientiem → Televizori → [email protected] → Internet@TV Lithuania www.samsung.com → Namams → Televizoriai → [email protected] → Internet@TV Russia www.samsung.com → Продукты → Телевизоры → [email protected] → Internet@TV Ukraine www.samsung.com → Потребительские продукты → телевизоры → [email protected] → Internet@TV N L'accesso potrebbe subire modifiche. N Potrebbero esservi link diversi per determinati paesi. Italiano - 57 BN68-02325A-Ita.indb 57 2009-05-19 �� 3:57:33 Internet@TV N Questa funzione potrebbe non essere supportata in base alla nazione. (non disponibile in tutti i paesi) N In caso di problemi nell'uso di un servizio widget, contattare il fornitore del servizio. In widget, premere il tasto verde per le informazioni di contatto, oppure visitare la guida del sito web per reperire informazioni sul provider del servizio. N In base alla regione, il servizio widget potrebbe essere supportato solo in lingua inglese. ¦ Guida introduttiva di Internet@TV Internet@TV fornisce i servizi widget di SAMSUNG attraverso una connessione di rete. I contenuti del servizio Internet@TV possono subire modifiche da parte del fornitore. Grazie al servizio Internet@TV è possibile accedere a varie informazioni fornite per es. da YouTube. N La configurazione dei widget e dei relativi servizi forniti può variare a seconda del paese. Dopo la modifica del paese, spegnere e riaccendere il televisore. Dopodiché sarà possibile utilizzare il servizio widget supportato dal paese selezionato. Se Country è impostato su Others, il televisore non può riconoscere il paese. In questo caso, selezionarlo direttamente dall'elenco dei paesi che supportano il servizio. N Se il televisore non supporta i caratteri di un contenuto fornito dal content provider, il contenuto potrebbe non essere visualizzato correttamente. N Per maggiori informazioni sulla configurazione del paese, vedere le istruzioni nella sezione ‘Funzioni Plug & Play’. N Durante l'uso di questa funzione si potrebbe verificare una certa lentezza operativa a causa delle condizioni della rete. N Prima di utilizzare Internet@TV, impostare la rete. Per ulteriori informazioni sulla configurazione della rete, vedere ‘Impostazione della rete’. Quando si esegue Internet@TV per la prima volta, le impostazioni di base vengono applicate automaticamente. L'aggiornamento potrebbe richiedere alcuni minuti. 1. Premere il tasto MENU. Premere il tasto ▲ o ▼ per selezionare Applicazione, quindi premere il tasto ENTERE. 2. Premere il tasto ▲ o ▼ per selezionare Internet@TV, quindi premere il tasto ENTERE. O Premere il tasto Internet@ sul telecomando per visualizzare il menu Internet@TV. 3. Viene visualizzata la sezione ‘Accordo utente’. Selezionare Accetto per accettare i termini contenuti nell'accordo. 4. Viene visualizzata la sezione ‘Statistiche e analisi’. Selezionare Accetto per accettare i termini contenuti nell'accordo. ¦ Configurazione di Internet@TV E' possibile verificare e utilizzare i menu relativi a Single Sign On (SSO), gestione del sistema e proprietà. Premere ▲ o ▼ per selezionare Impostazione, quindi premere ENTERE. ❑ Single Sign On E' possibile utilizzare questo menu durante la creazione e l'eliminazione dell'account. Mediante Single Sign On, è possibile controllare il proprio account oltre alle informazioni dell'account utilizzato per accedere al sito dei contenuti. Non è necessario effettuare un nuovo login. N L'account è valido solo per internet@TV. ■ Crea Account E' possibile creare un account per il collegamento al sito del servizio desiderato. N E' possibile creare fino a 10 account. N Il numero massimo di caratteri utilizzabili per l'account è 10. N Se non vi sono servizi che richiedono di effettuare il login, non sarà necessario creare un account. ■ Gestione account ● Sito serviz: E' possibile memorizzare le informazioni per eseguire il login sul sito del servizio (per es. YouTube). ● Cambia password: Modifica la password dell'account. ● Cancella: Elimina l'account. N Nel caso si sia dimenticata la password dell'account, reimpostare Internet@TV premendo in questa sequenza i seguenti tasti del telecomando: POWER (off) → MUTE → 9 → 4 → 8 → POWER (on). Questa sequenza elimina tutti gli account. Italiano - 58 BN68-02325A-Ita.indb 58 2009-05-19 �� 3:57:34 ❑ Impostazione del sistema N Autoeseg Ticker, Durata ticker potrebbero non essere supportate nel paese di residenza. ■ Modifica la password per l'opzione Blocco servizio N La password predefinita di un nuovo apparecchio TV è 0-0-0-0. N Qualora si sia dimenticata la password, premere i tasti del telecomando nella sequenza seguente per ripristinare la password predefinita 0-0-0-0: POWER (Off) → MUTE → 8 → 2 → 4 → POWER (On). ■ Durata servizio Selezionare questa opzione per impostare il tempo di attesa del servizio prima che lo screensaver entri in funzione. ■ Autoeseguibile Ticker → Off / On Selezionare questa opzione per impostare o meno l'esecuzione automatica del Ticker all'accensione del televisore. ■ Durata ticker Selezionare questa opzione per impostare il tempo di attesa del servizio prima che lo screensaver entri in funzione. ❑ Proprietà Visualizza le informazioni di Internet@TV. E' possibile misurare la velocità del servizio Internet TV mediante l'opzione Measuring the speed of the Internet TV service. ¦ Uso del servizio Internet@TV In un widget che offre menu per diverse categorie, è possibile visualizzare i contenuti di tali menu premendo i tasti ◄ e ►. Login account 1. Premere il tasto rosso. 2. Selezionare lo Account utente desiderato, quindi premere ENTERE. 3. Inserire password. N Al termine del login, sullo schermo verrà visualizzato lo User account. N Prima del login, è necessario registrare almeno un account. Se si desidera creare un account, vedere la sezione ‘Configurazione di Internet@TV’. Uso di Galleria widget E' possibile utilizzare Esegui servizio, Blocco, Installa servizio per il widget esistente e vedere la descrizione del servizio widget che non è installato. Su Internet@TV, è possibile aggiungere e utilizzare vari widget forniti dal provider del servizio. L'offerta può variare a seconda del fornitore dei contenuti. ● Esegui servizio: Esegue il servizio widget. ● Blocco: Imposta il blocco del servizio ● Installa servizio (o Elimina servizio): Installa o elimina il servizio widget. Uso del widget YouTube E' possibile guardare un filmato disponibile su YouTube. Se si dispone di un account su YouTube, eseguire la registrazione delle informazioni sull'account mediante Gestione account. Dopodiché sarà possibile utilizzare la categoria My Favourites. N Il menu può essere modificato dal provider del servizio. N Il contenuto potrebbe non essere adatto ai minori. In questo caso, utilizzare la funzione Blocco di Galleria widget. Oggi I più visti Più gettonati I più popolari I più discussi Preferiti I più linkati Con più risposte Realizzati 1/7 Seeking Justice Decades Later 0:01:30 Viste : 819,252 Gradimento : 2009-02-07 Breaking News Alerts by E-Mail 0:00:45 Viste : 819,252 Gradimento : 2009-02-07 The world reacts to U.S. bailout plan 0:01:30 Viste : 819,252 Gradimento : 2009-02-07 Boo Hoo in the Boardroom 0:03:26 Viste : 819,252 Gradimento : 2009-02-07 ' Cambia modalità ll rrCambia pagina U Sposta E OK R Ritorno Italiano - 59 BN68-02325A-Ita.indb 59 2009-05-19 �� 3:57:34 ¦ Risoluzione dei problemi con internet@TV Problema Possibile soluzione Alcuni servizi widget non funzionano. Verificare il servizio con il fornitore. In widget, premere il tasto verde per le informazioni di contatto, oppure visitare la guida del sito web per reperire informazioni sul provider del servizio widget. Vedere la guida sulla pagina del sito web. Quali sono i vantaggi offerti da single sign on? Se si crea un account e si registrano le informazioni di login per il servizio desiderato, è possibile accedere ai contenuti personalizzati senza dover effettuare un ulteriore login. Quando si verifica un errore di rete, posso utilizzare solo il menu di impostazione. Se non è possibile stabilire una connessione di rete, il servizio potrebbe avere delle restrizioni. Questo perché tutte le funzioni tranne il menu Impostazioni necessitano di connessione Internet. C'è qualche possibilità di visualizzare film per adulti su YouTube? Generalmente, questi contenuti sono filtrati dall'elenco menu. Tuttavia, utilizzando la funzione di ricerca è possibile visualizzarli. In questo caso, utilizzare la funzione Lock disponibile su Widget Gallery. ¦ Guida Sito web Paese Guida Sito web Austria www.samsung.com → Produkte → Fernseher → [email protected] → Internet@TV Belgium Czech Denmark www.samsung.com → Producten → televisies → [email protected] → Internet@TV www.samsung.com → Produits → téléviseurs → [email protected] → Internet@TV www.samsung.com → Produkty → televizory → [email protected] → Internet@TV www.samsung.com → Produkter → stue & soveværelse → [email protected] → Internet@TV Finland www.samsung.com → Tuotteet → kodinelektroniikka → [email protected] → Internet@TV France www.samsung.com → Produits → télévisions → [email protected] → Internet@TV Germany www.samsung.com → Privatkunden → Fernseher → [email protected] → Internet@TV Greece www.samsung.com → Προϊόντα → τηλεοράσεις → [email protected] → Internet@TV Hungary www.samsung.com → Termékek → televíziók → [email protected] → Internet@TV Ireland www.samsung.com → Products → Television → [email protected] → Internet@TV Italy Netherlands www.samsung.com → Prodotti → TV → [email protected] → Internet@TV www.samsung.com → Producten → televisies → [email protected] → Internet@TV Norway www.samsung.com → Produkter → hverdagsrom & soverom → [email protected] → Internet@TV Poland www.samsung.com → Produkty → telewizory → [email protected] → Internet@TV Portugal www.samsung.com → Produtos para Consumidores → televisores → [email protected] → Internet@TV Slovakia www.samsung.com → Produkty → televízory → [email protected] → Internet@TV Spain Sweden Switzerland United Kingdom www.samsung.com → Productos → televisores → [email protected] → Internet@TV www.samsung.com → Produkter → vardagsrum & sovrum → [email protected] → Internet@TV www.samsung.com → Produits → télévisions → [email protected] → Internet@TV www.samsung.com → Produkte → Fernseher → [email protected] → Internet@TV www.samsung.com → Products → Television → [email protected] → Internet@TV Turkey www.samsung.com → Tüketici Ürünleri → televizyon → [email protected] → Internet@TV Estonia www.samsung.com → Klientidele → Televiisorid → [email protected] → Internet@TV Latvia www.samsung.com → Klientiem → Televizori → [email protected] → Internet@TV Lithuania www.samsung.com → Namams → Televizoriai → [email protected] → Internet@TV Russia www.samsung.com → Продукты → Телевизоры → [email protected] → Internet@TV Ukraine www.samsung.com → Потребительские продукты → телевизоры → [email protected] → Internet@TV N L'accesso potrebbe subire modifiche. N Potrebbero esservi link diversi per determinati paesi. Italiano - 60 BN68-02325A-Ita.indb 60 2009-05-19 �� 3:57:34 CENTRO RETE DOM ¦ Centro rete dom Informazioni su Centro rete dom Centro rete dom consente di collegare il televisore a un telefono cellulare tramite una rete. È possibile visualizzare sul televisore le chiamate in arrivo, i contenuti dei messaggi di testo e i programmi impostati sul cellulare utilizzando Centro rete dom. Inoltre, è possibile riprodurre i contenuti multimediali salvati sul cellulare, ad esempio video, foto e musica, importandoli sul televisore attraverso la rete. N Se il dispositivo supporta la funzione DLNA DMC (Digital Media Controller), la funzione Centro rete domestica è disponibile. N Questa funzione è utile per la compatibilità del prodotto con i telefoni cellulari Samsung di prossima uscita. Per ulteriori informazioni visitare il sito www.samsung.com o chiamare il call center Samsung. Il dispositivo mobile potrebbe necessitare di ulteriore software. Per maggiori informazioni, vedere la guida dell'utente di ogni prodotto. Collegamento a Centro rete dom Per ulteriori informazioni sulle impostazioni della rete, vedere ‘Configurazione della rete’. ● Connessione a una rete Wi-Fi Ad-hoc 1. Collegare la scheda LAN wireless Samsung alla porta USB1 (HDD) o USB2 del televisore. Pannello laterale del televisore Telefono cellulare Samsung Wireless LAN Adapter o 2. Per ulteriori informazioni sulla configurazione della rete Ad-hoc, vedere ‘Impostazione della rete’. N Per informazioni sulla configurazione delle impostazioni di rete per il telefono cellulare, consultare il manuale del cellulare. 3. Impostare indirizzo IP, SSID e password per il cellulare nelle impostazioni Ad-hoc del cellulare utilizzando Nome rete (SSID) e Chiave sicur (password) visualizzati sul televisore. ● Collegamento tramite un router IP wireless/cablato 1. Collegare la porta LAN del televisore al router IP wireless/cablato oppure collegare la porta USB1(HDD) o USB2 del televisore alla ‘Samsung Wireless LAN Adapter’. N Per le procedure di impostazione del router wireless/cablato e del telefono cellulare, fare riferimento al manuale del dispositivo corrispondente. Wired/Wireless IP sharer Telefono cellulare Cavo LAN Pannello laterale del televisore Wired/Wireless IP sharer o Telefono cellulare Cavo LAN Samsung Wireless LAN Adapter Italiano - 61 BN68-02325A-Ita.indb 61 2009-05-19 �� 3:57:36 ¦ Impostazione di Centro rete dom ❑ Messag / Media Mostra un elenco di telefoni cellulari configurati con questo televisore per utilizzare le funzioni Message o Media. N La funzione Media è disponibile in altri dispositivi mobili che supportano DLNA DMC. ■ ■ ■ Consent Consente il collegamento del cellulare. Centro rete dom Messaggio 111-1234-5671 : Consent Media 111-1234-5672 : Consent Impostazione 111-1234-5673 : Negato 111-1234-5674 : Negato Negato Blocca il collegamento del cellulare. R Ritorno e Esci Elimina Elimina il cellulare dall'elenco. N Questa funzione cancella solo il nome dall'elenco. Se il dispositivo mobile eliminato viene acceso o tenta di collegarsi al televisore, potrebbe comparire in elenco. ❑ Impostazione ■ ■ ■ Messag → On / Off È possibile determinare se utilizzare le funzioni dei messaggi (chiamate in arrivo, contenuti dei messaggi di testo e programmi impostati sul telefono cellulare). Media → On / Off E' possibile indicare se utilizzare la funzione Media per la riproduzione dei contenuti (video, foto, musica) dal cellulare. Centro rete dom Messaggio Messag : On Media Media : On Impostazione Nome TV : TV Nome TV E' possibile impostare il nome del televisore in modo da trovarlo facilmente tramite il dispositivo mobile. N Selezionando Input utente, è possibile digitare il nome del televisore mediante OSK (On Screen Keyboard). R Ritorno e Esci ¦ Uso della funzione Message Utilizzando questa funzione, è possibile visualizzare le chiamate in arrivo, i contenuti dei messaggi di testo e i programmi impostati sul cellulare nella finestra degli allarmi husband mentre si guarda la TV. SMS N Per disabilitare la finestra di allarme Messag, impostare Messag su Spento in Nuovo messaggio ricevuto Impostazione alla voce Centro rete dom. Visualizzare i dettagli? N La finestra degli allarmi appare per 20 secondi. Se non si preme alcun tasto o è selezionata l'opzione Annul, la finestra appare tre volte a intervalli di 5 minuti. OK Annul N Se è selezionato OK o se OK non viene selezionato mentre il messaggio viene visualizzato tre volte, il messaggio verrà eliminato. Il messaggio non viene eliminato dal telefono cellulare. N La sola finestra di allarme può essere visualizzata durante l'uso di alcune applicazioni quali Media Play, Contents Library, ecc. In questo caso, per visualizzare il contenuto di un messaggio passare alla modalità di visualizzazione TV. N Quando viene visualizzato il messaggio proveniente da un cellulare sconosciuto, selezionare il cellulare alla voce Messag di Centro rete dom e selezionare Negato per bloccare il telefono. Italiano - 62 BN68-02325A-Ita.indb 62 2009-05-19 �� 3:57:37 Visualizzazione messaggi Se arriva un nuovo messaggio di testo (SMS) mentre si guarda il televisore, viene visualizzata la finestra degli allarmi. Se si fa clic sul tasto OK, viene visualizzato il contenuto del messaggio. N È possibile configurare le impostazioni di visualizzazione per il contenuto dei messaggi di testo (SMS) sul telefono cellulare. Per le procedure, vedere il manuale del cellulare. N Alcuni caratteri speciali possono essere visualizzati come caratteri vuoti o danneggiati. Allarme chiamata in arrivo Se arriva una chiamata mentre si guarda il televisore, viene visualizzata la finestra degli allarmi. Allarme programma Mentre si guarda il televisore, la finestra degli allarmi appare per visualizzare il programma registrato. N È possibile configurare le impostazioni di visualizzazione per il contenuto dei programmi sul telefono cellulare. Per le procedure, vedere il manuale del cellulare. N Alcuni caratteri speciali possono essere visualizzati come caratteri vuoti o danneggiati. ¦ Uso della funzione Media Viene visualizzata una finestra degli allarmi per informare l'utente che i contenuti multimediali (video, foto, musica) inviati dal cellulare verranno visualizzati sul televisore. I contenuti vengono riprodotti automaticamente 3 secondi dopo la visualizzazione della finestra degli allarmi. Se si preme il tasto RETURN o ENTER quando appare la finestra degli allarmi, i Media Contents non vengono riprodotti. N Per disattivare la trasmissione dei contenuti multimediali dal telefono cellulare, impostare Media su Spento in Impostazione di Centro rete dom. N I contenuti possono non essere riprodotti sul televisore in base alla risoluzione e al formato. Il supporto verrà riprodotto da “111-123 4-5671” Tasti di controllo di Media Play Tasto ◄/► ENTERE RETURN TOOLS INFO EXIT Operazioni Sposta il cursore e seleziona una voce. Durante la riproduzione di un filmato: Salta in avanti o indietro all’interno del filmato. Premendo il tasto ENTERE durante una riproduzione, l'esecuzione si interrompe temporaneamente. Premendo il tasto ENTERE durante una pausa, l'esecuzione riprende. Ritorna al menu precedente. Esegue varie funzioni nei menu Photo, Music e Movie. Mostra le informazioni relative al file. Interrompe la modalità Media Play e torna alla modalità TV. N I tasti ENTERE e ◄/► potrebbero non funzionare in base al tipo di contenuto multimediale riprodotto. N Mediante il dispositivo mobile è possibile controllare la riproduzione del contenuto multimediale. Per maggiori informazioni, vedere la guida dell'utente di ogni prodotto. Italiano - 63 BN68-02325A-Ita.indb 63 2009-05-19 �� 3:57:38 RACCOMANDAZIONI ¦ Funzione Teletext La maggior parte delle emittenti televisive fornisce servizi informativi tramite il servizio Teletext. La pagina dell’indice del servizio Teletext contiene informazioni sull’uso del servizio. Inoltre, è possibile selezionare varie opzioni tramite i tasti del telecomando. N Per visualizzare correttamente le informazioni del servizio Teletext, è necessario che la ricezione del canale sia stabile. In caso contrario, alcune informazioni potrebbero essere perse o alcune pagine potrebbero non essere visualizzate correttamente. 1 : (esci) Esce dalla visualizzazione del servizio Teletext. 2 0 (modalità) Premere questo tasto per selezionare la modalità Teletext (LIST/FLOF). Premendo questo tasto nella modalità LIST, si attiva la modalità di memorizzazione dell’elenco. In modalità di salvataggio List, è possibile memorizzare la pagina Teletext all'interno di un elenco utilizzando il tasto 8(memorizza). 3 5 (scopri) Consente di visualizzare il testo nascosto (risposte a quiz, ad esempio). Per tornare alla modalità di visualizzazione normale, premere di nuovo il tasto. 4 4 (dimensione) Premere questo tasto per raddoppiare le dimensioni dei caratteri nella metà superiore dello schermo. Premere di nuovo il tasto per ingrandire i caratteri nella metà inferiore dello schermo. Per tornare alla modalità di visualizzazione normale, premere di nuovo il tasto. 5 Tasti colorati (rosso/verde/giallo/ blu) Se una emittente usa il sistema FASTEXT, i vari argomenti trattati in una pagina Teletext vengono codificati in base ai colori e possono essere selezionati premendo i relativi tasti colorati. Premere il tasto il cui colore corrisponde a quello dell’argomento desiderato. La pagina viene visualizzata con altre informazioni colorate che possono essere selezionate allo stesso modo. Per visualizzare la pagina successiva o precedente, premere il tasto colorato corrispondente. 6 / (Teletext on/mix) Premere questo tasto per attivare la modalità Teletext dopo avere selezionato un canale che fornisce questo tipo di servizio. Premere di nuovo il tasto per sovrapporre le informazioni del servizio Teletext alla trasmissione corrente. 7 8 (memorizza) Utilizzato per memorizzare le pagine Teletext. 8 1 (pagina secondaria) Visualizza la pagina secondaria disponibile. 9 2 (pagina su) Consente di visualizzare la pagina Teletext successiva. 0 3 (pagina giù) Consente di visualizzare la pagina Teletext precedente. ! 9 (mantieni) Consente di mantenere visualizzata una pagina, se la pagina è collegata a più pagine secondarie che scorrono automaticamente. Premerlo nuovamente per riprendere la visualizzazione. 1 8 2 9 0 3 INFO GUIDE ! @ 4 # 5 6 7 CH LIST AD @ 6 (indice) In modalità Teletext, premere questo tasto in qualsiasi momento per visualizzare la pagina dell’indice (contenuti). # 7 (annulla) Utilizzato per visualizzare le stazioni emittenti durante la ricerca di una pagina. N E’ possibile cambiare le pagine Teletext premendo i tasti numerici sul telecomando. Italiano - 64 BN68-02325A-Ita.indb 64 2009-05-19 �� 3:57:38 Le pagine Teletext sono organizzate in base a sei categorie: Parte A B C D E F Contenuti Numero della pagina selezionata. Identità della stazione emittente. Numero della pagina corrente o stato della ricerca. Data e ora. Testo. Informazioni sullo stato. Informazioni FASTEXT. N Le informazioni del servizio Teletext sono spesso suddivise su più pagine visualizzate in sequenza alle quali è possibile accedere come segue: Digitando il numero di pagina Selezionando un titolo in un elenco Selezionando un’intestazione colorata (sistema FASTEXT) N Il servizio Teletext supportato dal televisore è la versione 2.5 che consente di visualizzare ulteriori elementi grafici o di testo. N In base alla trasmissione, possono comparire bande laterali vuote durante la visualizzazione del servizio Teletext. N In questo caso, non verranno trasmessi ulteriori elementi grafici o di testo. N I televisori meno recenti che non supportano la versione 2.5 non sono in grado di visualizzare alcun elemento grafico o di testo aggiuntivo, a prescindere dal tipo di trasmissione Teletext. O Premere il tasto TV per uscire dal servizio Teletext. ¦ Installazione del piedistallo N Preimpostazione: Collocare la guida del piedistallo e il collare della copertura sul piedistallo e avvitarli usando le viti fornite. Retro Fronte 1. Assemblare il TV LCD al piedistallo. N Il televisore deve essere sorretto da due o più persone. N Prima di assemblare le due parti, controllare se il lato del piedistallo (anteriore/ posteriore) è quello corretto. N Per installare il televisore sul piedistallo a un'altezza corretta, non applicare una forza eccessiva verso il basso sul lati sinistro o destro superiori del televisore. 2. Avvitare le viti nella posizione 1, quindi avvitare le altre viti nella posizione 2. N Raddrizzare il prodotto e serrare le viti. Avvitando le viti con lo schermo LCD appoggiato sul piano, una volta sollevato il prodotto potrebbe risultare inclinato su un lato. N Il piedistallo è preinstallato su modelli con schermi da 55 pollici o superiori. 2 1 Italiano - 65 BN68-02325A-Ita.indb 65 2009-05-19 �� 3:57:39 ¦ Smontare il piedistallo 1. Svitare le viti sul retro del televisore. 2. Separare il piedistallo dal televisore. N Il televisore deve essere sorretto da due o più persone. 3. Coprire il foro sul fondo con l'apposito tappo. ¦ Installazione del Kit di montaggio a parete Gli articoli del kit di montaggio a parete (venduti separatamente) consentono di montare il televisore alla parete. Per informazioni dettagliate sull’installazione del kit di montaggio a parete, consultare le istruzioni fornite insieme agli articoli del kit. Contattare un tecnico per richiedere assistenza quando si monta la staffa a parete. Samsung Electronics non può essere ritenuta responsabile per qualsiasi danno al prodotto o infortuni causati da una installazione autonoma del televisore da parte dell’utente. Non installare il Kit di montaggio a parete mentre il televisore è acceso. In caso contrario, potrebbero verificarsi incidenti con lesioni personali causate da scosse elettriche. ¦ Assemblaggio dei cavi Racchiudere i cavi nel fermacavi in modo che non siano visibili attraverso il piedistallo trasparente. ¦ Blocco antifurto Kensington Il blocco Kensington è un dispositivo usato per fissare fisicamente il sistema quando viene utilizzato in un luogo pubblico. L’aspetto del dispositivo e il metodo di blocco possono variare in base alla marca del prodotto. Per informazioni sull’uso, consultare il manuale fornito insieme al blocco Kensington. N Il dispositivo di blocco è in vendita separatamente. N La posizione del blocco Kensington può variare a seconda del modello. 1. Inserire il dispositivo nell’alloggiamento del blocco Kensington sul TV LCD (1) e ruotarlo nella direzione di chiusura (2). 3 2 1 <Opzionale> 2. Collegare il cavo del blocco Kensington (3). 3. Fissare il blocco Kensington a un tavolo o un altro oggetto pesante. Italiano - 66 BN68-02325A-Ita.indb 66 2009-05-19 �� 3:57:41 ¦ Messa in sicurezza della posizione di installazione Mantenere le distanze necessarie tra il prodotto e gli altri elementi presenti (per esempio le pareti) per garantire un’adeguata ventilazione. La mancata osservanza di tale precauzione può comportare un pericolo d’incendio o un malfunzionamento a causa del surriscaldamento del prodotto. Installare il prodotto mantenendo le distanze indicate in figura. N Quando si usa un piedistallo o un sistema di montaggio a parete, utilizzare solo le parti fornite da Samsung Electronics. • L’uso di parti di altre marche può causare un malfunzionamento o lesioni provocate da una eventuale caduta del prodotto. • L’uso di parti di altre marche può comportare un malfunzionamento o un pericolo di incendio per il surriscaldamento del prodotto a causa di una ventilazione inadeguata. N L’aspetto del prodotto può variare a seconda del modello. Durante l’installazione del prodotto con un piedistallo Durante l’installazione del prodotto con un sistema di montaggio a parete 10 cm 10 cm 10 cm 10 cm 10 cm 10 cm 10 cm ¦ Fissaggio del televisore alla parete Attenzione: Tirare, spingere o arrampicarsi sul televisore sono azioni che possono provocarne la caduta. Si raccomanda di non far giocare i bambini con il televisore poiché potrebbero appendersi ad esso destabilizzandolo; se ciò dovesse verificarsi, il televisore potrebbe cadere provocando lesioni personali gravi e perfino mortali. Seguire tutte le precauzioni di sicurezza descritte della documentazione allegata. Per una maggiore stabilità e sicurezza del prodotto, installare il dispositivo anticaduta come segue. ■ Per evitare una eventuale caduta del televisore: 1. Avvitare saldamente i ganci alla parete. Verificare che le viti di fissaggio siano ben serrate. N A seconda del tipo di parete, potrebbe essere necessario utilizzare anche un fisher. N Poiché i ganci, le viti e il cavo di sicurezza non sono forniti in dotazione, è necessario acquistare tali materiali separatamente. Parete 2. Rimuovere le viti dal centro del pannello posteriore del televisore, inserirle nei ganci e quindi avvitarle nuovamente al televisore. N Le viti potrebbero non essere fornite insieme al prodotto. In questo caso, acquistare le viti separatamente in base alle specifiche qui riportate. N Specifiche delle viti Per un TV LCD da 17 ~ 29 pollici: M4 X L15 / Per TV LCD da 32 a 40 pollici: M6 X L15 3. Collegare i ganci fissati al televisore a quelli fissati alla parete utilizzando un cavo resistente, quindi legarlo strettamente. N Installare il televisore il più possibile vicino alla parete in modo che non possa cadere all’indietro. N Collegare il cavo in modo che i ganci fissati alla parete si trovino allineati o Parete leggermente più in basso di quelli fissati al televisore. N Slegare il cavo prima di spostare il televisore. 4. Accertarsi che tutte le connessioni siano adeguatamente fissate. Controllare periodicamente le connessioni per verificarne l’eventuale usura o rottura. Per qualsiasi dubbio relativo alla sicurezza delle connessioni effettuate, contattare un installatore specializzato. Italiano - 67 BN68-02325A-Ita.indb 67 2009-05-19 �� 3:57:42 ¦ Risoluzione dei problemi: Prima di contattare l’assistenza Nessun audio o immagine Controllare che il cavo di alimentazione sia collegato alla presa di corrente. Verificare di aver premuto il tasto sul dispositivo. Controllare le impostazioni relative al contrasto e alla luminosità dell’immagine. Controllare il volume. Immagine normale ma audio assente Controllare il volume. Controllare se il tasto MUTEM del telecomando è stato premuto. Verificare le impostazioni dell’opzione Selezione altoparlante. Lo schermo è nero e l’indicatore di alimentazione lampeggia in modo continuo Nessuna immagine oppure immagine in bianco e nero Interferenze audio e immagine Sul computer controllare l’alimentazione e il cavo di segnale. Il televisore sta utilizzando il proprio sistema di gestione alimentazione. Muovere il mouse o premere un tasto qualsiasi sulla tastiera del computer. Immagini offuscate o poco nitide, audio distorto Telecomando non funzionante Controllare la direzione, la posizione e i collegamenti dell’antenna. Questo problema si verifica spesso quando si utilizza un’antenna interna. Viene visualizzato il messaggio 'Controlla cavo segnale.'. In modalità PC, viene visualizzato il messaggio 'Modo non supportato'. L’immagine danneggiata viene visualizzata nell’angolo dello schermo. Viene visualizzato il messaggio ‘Ripristina tutte le impostazioni ai valori predefiniti.’. Guardando da vicino il bordo della cornice dello schermo del televisore è possibile notare delle piccole particelle. Controllare che il cavo del segnale sia saldamente collegato al PC o alle sorgenti video. Controllare che le sorgenti video o il PC siano accesi. Regolare le impostazioni del colore. Controllare se la selezione del sistema di trasmissione è corretta. Provare a identificare l’apparecchiatura elettrica che causa le interferenze e spostarla più lontano. Collegare il televisore a un’altra presa di alimentazione. Sostituire le batterie del telecomando. Pulire il bordo superiore del telecomando (finestra di trasmissione). Controllare i terminali delle batterie. Controllare la risoluzione massima e la frequenza dell’adattatore video. Confrontare questi valori con i dati delle modalità di visualizzazione. Se Adatta a schermo è selezionata in alcuni dispositivi esterni, l’immagine danneggiata può essere visibile nell’angolo dello schermo. Questa anomalia è causata dalle periferiche esterne, non dal televisore. Ciò si verifica quando si tiene premuto il tasto EXIT per qualche istante. Le impostazioni del prodotto vengono reimpostate ai valori di fabbrica. Ciò non costituisce un difetto ma fa parte del design del prodotto. N Lo schermo LCD TFT usa un pannello composto da sotto pixel (6 220 800) che richiedono una speciale tecnologia di produzione. Tuttavia, alcuni pixel potrebbero risultare più luminosi o più scuri. Questo fenomeno non ha alcun impatto sulle prestazioni del prodotto. Italiano - 68 BN68-02325A-Ita.indb 68 2009-05-19 �� 3:57:42 ¦ Specifiche Nome modello Dimensione schermo (Diagonale) Risoluzione PC (Ottimale) Audio (Uscita) Dimensioni (LarxProxAlt) Corpo Con piedistallo Peso Con piedistallo Caratteristiche ambientali Temperatura di esercizio Umidità di esercizio Temperatura di stoccaggio Umidità di stoccaggio Piedistallo ruotabile (Sinistra / Destra) Nome modello Dimensione schermo (Diagonale) Risoluzione PC (Ottimale) Audio (Uscita) Dimensioni (LarxProxAlt) Corpo Con piedistallo Peso Con piedistallo Caratteristiche ambientali Temperatura di esercizio Umidità di esercizio Temperatura di stoccaggio Umidità di stoccaggio Piedistallo ruotabile (Sinistra / Destra) LE32B650, LE32B651 LE32B652, LE32B653 LE37B650, LE37B651 LE37B652, LE37B653 32 poll. 37 poll. 1920 x 1080 a 60 Hz 1920 x 1080 a 60 Hz 2 x 10W 2 x 10W 803 X 77 X 545 mm 803 X 239 X 601 mm 927 X 78 X 608 mm 927 X 255 X 668 mm 14 kg 17 kg Da 10 °C a 40 °C (da 50 °F a 104 °F) Dal 10% al 80%, senza condensa Da -20 °C a 45 °C (da -4 °F a 113 °F) Dal 5% al 95%, senza condensa -20˚ ~ 20˚ LE40B650, LE40B651 LE40B652, LE40B653 LE46B650, LE46B651 LE46B652, LE46B653 40 poll. 46 poll. 1920 x 1080 a 60 Hz 1920 x 1080 a 60 Hz 2 x 10W 2 x 10W 995 X 79 X 650 mm 995 X 255 X 706 mm 1126 X 79 X 730 mm 1126 X 277 X 783 mm 19 kg 25 kg Da 10 °C a 40 °C (da 50 °F a 104 °F) Dal 10% al 80%, senza condensa Da -20 °C a 45 °C (da -4 °F a 113 °F) Dal 5% al 95%, senza condensa -20˚ ~ 20˚ Nome modello LE55B650, LE55B651, LE55B652, LE55B653 Dimensione schermo (Diagonale) 55 poll. Risoluzione PC (Ottimale) 1920 x 1080 a 60 Hz Audio 2 x 15W (Uscita) Dimensioni (LarxProxAlt) Corpo 1311 X 80 X 842 mm Con piedistallo 1311 X 305 X 895 mm Peso Con piedistallo 34 kg Caratteristiche ambientali Temperatura di esercizio Da 10 °C a 40 °C (da 50 °F a 104 °F) Umidità di esercizio Dal 10% al 80%, senza condensa Temperatura di stoccaggio Da -20 °C a 45 °C (da -4 °F a 113 °F) Umidità di stoccaggio Dal 5% al 95%, senza condensa Piedistallo ruotabile (Sinistra / Destra) -20˚ ~ 20˚ N Design e specifiche sono soggetti a modifiche senza preavviso. N Questo prodotto è un’apparecchiatura digitale di Classe B. N Per l’alimentazione elettrica e il consumo di corrente, consultare l’etichetta apposta al prodotto. Italiano - 69 BN68-02325A-Ita.indb 69 2009-05-19 �� 3:57:43 Correct Disposal of This Product (Waste Electrical & Electronic Equipment) (Applicable in the European Union and other European countries with separate collection systems) This marking on the product, accessories or literature indicates that the product and its electronic accessories (e.g. charger, headset, USB cable) should not be disposed of with other household waste at the end of their working life. To prevent possible harm to the environment or human health from uncontrolled waste disposal, please separate these items from other types of waste and recycle them responsibly to promote the sustainable reuse of material resources. Household users should contact either the retailer where they purchased this product, or their local government office, for details of where and how they can take these items for environmentally safe recycling. Business users should contact their supplier and check the terms and conditions of the purchase contract. This product and its electronic accessories should not be mixed with other commercial wastes for disposal. [English] Les bons gestes de mise au rebut de ce produit (Déchets d’équipements électriques et électroniques) (Applicable dans les pays de l’Union Européenne et dans d’autres pays européens pratiquant le tri sélectif) Ce symbole sur le produit, ses accessoires ou sa documentation indique que ni le produit, ni ses accessoires électroniques usagés (chargeur, casque audio, câble USB, etc.) ne peuvent être jetés avec les autres déchets ménagers. La mise au rebut incontrôlée des déchets présentant des risques environnementaux et de santé publique, veuillez séparer vos produits et accessoires usagés des autres déchets. Vous favoriserez ainsi le recyclage de la matière qui les compose dans le cadre d’un développement durable. Les particuliers sont invités à contacter le magasin leur ayant vendu le produit ou à se renseigner auprès des autorités locales pour connaître les procédures et les points de collecte de ces produits en vue de leur recyclage. Les entreprises et professionnels sont invités à contacter leurs fournisseurs et à consulter les conditions de leur contrat de vente. Ce produit et ses accessoires ne peuvent être jetés avec les autres déchets professionnels et commerciaux. [Français] Korrekte Entsorgung von Altgeräten (Elektroschrott) (In den Ländern der Europäischen Union und anderen europäischen Ländern mit einem separaten Sammelsystem) Die Kennzeichnung auf dem Produkt, Zubehörteilen bzw. auf der dazugehörigen Dokumentation gibt an, dass das Produkt und Zubehörteile (z. B. Ladegerät, Kopfhörer, USB-Kabel) nach ihrer Lebensdauer nicht zusammen mit dem normalen Haushaltsmüll entsorgt werden dürfen. Entsorgen Sie dieses Gerät und Zubehörteile bitte getrennt von anderen Abfällen, um der Umwelt bzw. der menschlichen Gesundheit nicht durch unkontrollierte Müllbeseitigung zu schaden. Helfen Sie mit, das Altgerät und Zubehörteile fachgerecht zu entsorgen, um die nachhaltige Wiederverwertung von stofflichen Ressourcen zu fördern. Private Nutzer wenden sich an den Händler, bei dem das Produkt gekauft wurde, oder kontaktieren die zuständigen Behörden, um in Erfahrung zu bringen, wo Sie das Altgerät bzw. Zubehörteile für eine umweltfreundliche Entsorgung abgeben können. Gewerbliche Nutzer wenden sich an ihren Lieferanten und gehen nach den Bedingungen des Verkaufsvertrags vor. Dieses Produkt und elektronische Zubehörteile dürfen nicht zusammen mit anderem Gewerbemüll entsorgt werden. [Deutsch] Correcte verwijdering van dit product (elektrische & elektronische afvalapparatuur) Dit merkteken op het product, de accessoires of het informatiemateriaal duidt erop dat het product en zijn elektronische accessoires (bv. lader, headset, USB-kabel) niet met ander huishoudelijk afval verwijderd mogen worden aan het einde van hun gebruiksduur. Om mogelijke schade aan het milieu of de menselijke gezondheid door ongecontroleerde afvalverwijdering te voorkomen, moet u deze artikelen van andere soorten afval scheiden en op een verantwoorde manier recyclen, zodat het duurzame hergebruik van materiaalbronnen wordt bevorderd. Huishoudelijke gebruikers moeten contact opnemen met de winkel waar ze dit product hebben gekocht of met de gemeente waar ze wonen om te vernemen waar en hoe ze deze artikelen milieuvriendelijk kunnen laten recyclen. Zakelijke gebruikers moeten contact opnemen met hun leverancier en de algemene voorwaarden van de koopovereenkomst nalezen. Dit product en zijn elektronische accessoires mogen niet met ander bedrijfsafval voor verwijdering worden gemengd. [Nederlands] Corretto smaltimento del prodotto (rifiuti elettrici ed elettronici) (Applicabile nell’Unione Europea e in altri paesi europei con sistema di raccolta differenziata) Il marchio riportato sul prodotto, sugli accessori o sulla documentazione indica che il prodotto e i relativi accessori elettronici (quali caricabatterie, cuffia e cavo USB) non devono essere smaltiti con altri rifiuti domestici al termine del ciclo di vita. Per evitare eventuali danni all’ambiente o alla salute causati dall’inopportuno smaltimento dei rifiuti, si invita l’utente a separare il prodotto e i suddetti accessori da altri tipi di rifiuti e di riciclarli in maniera responsabile per favorire il riutilizzo sostenibile delle risorse materiali. Gli utenti domestici sono invitati a contattare il rivenditore presso il quale è stato acquistato il prodotto o l’ufficio locale preposto per tutte le informazioni relative alla raccolta differenziata e al riciclaggio per questo tipo di materiali. Gli utenti aziendali sono invitati a contattare il proprio fornitore e verificare i termini e le condizioni del contratto di acquisto. Questo prodotto e i relativi accessori elettronici non devono essere smaltiti unitamente ad altri rifiuti commerciali. [Italiano] Eliminación correcta de este producto (Residuos de aparatos eléctricos y electrónicos) (Aplicable en la Unión Europea y en países europeos con sistemas de recogida selectiva de residuos) La presencia de este símbolo en el producto, accesorios o material informativo que lo acompañan, indica que al finalizar su vida útil ni el producto ni sus accesorios electrónicos (como el cargador, cascos, cable USB) deberán eliminarse junto con otros residuos domésticos. Para evitar los posibles daños al medio ambiente o a la salud humana que representa la eliminación incontrolada de residuos, separe estos productos de otros tipos de residuos y recíclelos correctamente. De esta forma se promueve la reutilización sostenible de recursos materiales. Los usuarios particulares pueden contactar con el establecimiento donde adquirieron el producto o con las autoridades locales pertinentes para informarse sobre cómo y dónde pueden llevarlo para que sea sometido a un reciclaje ecológico y seguro. Los usuarios comerciales pueden contactar con su proveedor y consultar las condiciones del contrato de compra. Este producto y sus accesorios electrónicos no deben eliminarse junto a otros residuos comerciales. [Español] Eliminação Correcta Deste Produto (Resíduos de Equipamentos Eléctricos e Electrónicos) Esta marca apresentada no produto, nos acessórios ou na literatura – indica que o produto e os seus acessórios electrónicos (por exemplo, o carregador, o auricular, o cabo USB) não deverão ser eliminados juntamente com os resíduos domésticos no final do seu período de vida útil. Para impedir danos ao ambiente ou à saúde humana causados pela eliminação incontrolada de resíduos, deverá separar estes equipamentos de outros tipos de resíduos e reciclá-los de forma responsável, para promover uma reutilização sustentável dos recursos materiais. Os utilizadores domésticos deverão contactar o estabelecimento onde adquiriram este produto ou as entidades oficiais locais para obterem informações sobre onde e de que forma podem entregar estes equipamentos para permitir efectuar uma reciclagem segura em termos ambientais. Os utilizadores profissionais deverão contactar o seu fornecedor e consultar os termos e condições do contrato de compra. Este produto e os seus acessórios electrónicos não deverão ser misturados com outros resíduos comerciais para eliminação. [Português] Weee.indd 1 2009-05-19 �� 4:29:50 Ustrezno odstranjevanje tega izdelka (odpadna električna in elektronska oprema) Oznaka na izdelku, dodatni opremi ali dokumentaciji pomeni, da izdelka in njegove elektronske dodatne opreme (npr. električni polnilnik, slušalke, kabel USB) ob koncu dobe uporabe ni dovoljeno odvreči med gospodinjske odpadke. Te izdelke ločite od drugih vrst odpadkov in jih odgovorno predajte v recikliranje ter tako spodbudite trajnostno vnovično uporabo materialnih virov. Tako boste preprečili morebitno tveganje za okolje ali zdravje ljudi zaradi nenadzoro vanega odstranjevanja odpadkov. Uporabniki v gospodinjstvih naj se za podrobnosti o tem, kam in kako lahko te izdelke predajo v okolju prijazno recikliranje, obrnejo na trgovino, kjer so izdelek kupili, ali na krajevni upravni organ. Poslovni uporabniki naj se obrnejo na dobavitelja in preverijo pogoje kupne pogodbe. Tega izdelka in njegove elektronske dodatne opreme pri odstranjevanju ni dovoljeno mešati z drugimi gospodarskimi odpadki. [Slovenščina] Korrekt avfallshantering av produkten (elektriska och elektroniska produkter) Denna markering på produkten, tillbehören och i manualen anger att produkten och de elektroniska tillbehören (t.ex. laddare, headset, USB-kabel) inte bör sorteras tillsammans med annat hushållsavfall när de kasseras. Till förebyggande av skada på miljö och hälsa bör dessa föremål hanteras separat för ändamålsenlig återvinning av beståndsdelarna. Hushållsanvändare bör kontakta den återförsäljare som sålt produkten eller sin kommun för vidare information om var och hur produkten och tillbehören kan återvinnas på ett miljösäkert sätt. Företagsanvändare bör kontakta leverantören samt verifiera angivna villkor i köpekontraktet. Produkten och de elektroniska tillbehören bör inte hanteras tillsammans med annat kommersiellt avfall. [Svenska] Korrekt affaldsbortskaffelse af dette produkt (elektrisk & elektronisk udstyr) Mærket på dette produkt, på tilbehør eller i den medfølgende dokumentation betyder, at produktet og elektronisk tilbehør hertil (f.eks. oplader, hovedsæt, USB-ledning) ikke må bortskaffes sammen med almindeligt husholdningsaffald efter endt levetid. For at undgå skadelige miljø- eller sundhedspåvirkninger på grund af ukontrolleret affaldsbortskaffelse skal ovennævnte bortskaffes særskilt fra andet affald og indleveres behørigt til fremme for bæredygtig materialegenvinding. Forbrugere bedes kontakte forhandleren, hvor de har købt produktet, eller kommunen for oplysning om, hvor og hvordan de kan indlevere ovennævnte med henblik på miljøforsvarlig genvinding. Virksomheder bedes kontakte leverandøren og læse betingelserne og vilkårene i købekontrakten. Dette produkt og elektronisk tilbehør hertil bør ikke bortskaffes sammen med andet erhvervsaffald. [Dansk] Korrekt avhending av dette produktet (Avfall fra elektrisk og elektronisk utstyr) Denne merkingen som vises på produktet, dets tilbehør eller dokumentasjon, indikerer at produktet eller det elektroniske tilbehøret (for eksempel lader, headset, USB-kabel) ikke skal kastes sammen med annet husholdningsavfall ved slutten av levetiden. For å hindre potensiell skade på miljøet eller helseskader grunnet ukontrollert avfallsavhending ber vi om at dette avfallet holdes adskilt fra andre typer avfall og resirkuleres på ansvarlig måte for å fremme bærekraftig gjenbruk av materielle ressurser. Private forbrukere bør kontakte enten forhandleren de kjøpte produktet av, eller lokale myndigheter, for detaljer om hvor og hvordan disse artiklene kan resirkuleres på en miljøvennlig måte. Forretningsbrukere bør kontakte sin leverandør og undersøke vilkårene i kjøpskontrakten. Dette produktet og det elektroniske tilbehøret skal ikke blandes med annet kommersielt avfall som skal kastes. [Norsk] Tuotteen turvallinen hävittäminen (elektroniikka ja sähkölaitteet) Oheinen merkintä tuotteessa, lisävarusteissa tai käyttöohjeessa merkitsee, että tuotetta tai lisävarusteina toimitettavia sähkölaitteita (esim. laturia, kuulokkeita tai USB kaapelia) ei saa hävittää kotitalousjätteen mukana niiden käyttöiän päätyttyä. Virheellisestä jätteenkäsittelystä ympäristölle ja terveydelle aiheutuvien haittojen välttämiseksi tuote ja lisävarusteet on eroteltava muusta jätteestä ja kierrätettävä kestävän kehityksen mukaista uusiokäyttöä varten. Kotikäyttäjät saavat lisätietoja tuotteen ja lisävarusteiden turvallisesta kierrätyksestä ottamalla yhteyttä tuotteen myyneeseen jälleenmyyjään tai paikalliseen ympäristöviranomaiseen. Yrityskäyttäjien tulee ottaa yhteyttä tavarantoimittajaan ja selvittää hankintasopimuksen ehdot. Tuotetta tai sen lisävarusteita ei saa hävittää muun kaupallisen jätteen seassa. [Suomi] A termék hulladékba helyezésének módszere(WEEE – Elektromos és elektronikus berendezések hulladékai) Ez a jelzés a terméken, tartozékain vagy dokumentációján arra utal, hogy hasznos élettartama végén a terméket és elektronikus tartozékait (pl. töltőegység, fejhallgató, USB kábel) nem szabad a háztartási hulladékkal együtt kidobni. A szabálytalan hulladékba helyezés által okozott környezet- és egészségkárosodás megelőzése érdekében ezeket a tárgyakat különítse el a többi hulladéktól, és felelősségteljesen gondoskodjon az újrahasznosításukról az anyagi erőforrások fenntartható újrafelhasználásának elősegítése érdekében. A háztartási felhasználók a termék forgalmazójától vagy a helyi önkormányzati szervektől kérjenek tanácsot arra vonatkozóan, hová és hogyan vihetik el az elhasznált termékeket a környezetvédelmi szempontból biztonságos újrahasznosítás céljából. Az üzleti felhasználók lépjenek kapcsolatba beszállítójukkal, és vizsgálják meg az adásvételi szerződés feltételeit. Ezt a terméket és tartozékait nem szabad az egyéb közületi hulladékkal együtt kezelni. [Magyar] Prawidłowe usuwanie produktu (zużyty sprzęt elektryczny i elektroniczny) To oznaczenie umieszczone na produkcie, akcesoriach lub dokumentacji oznacza, że po zakończeniu eksploatacji nie należy tego produktu ani jego akcesoriów (np. ładowarki, zestawu słuchawkowego, przewodu USB) wyrzucać wraz ze zwykłymi odpadami gospodarstwa domowego. Aby uniknąć szkodliwego wpływu na środowisko naturalne i zdrowie ludzi wskutek niekontrolowanego usuwania odpadów, prosimy o oddzielenie tych przedmiotów od odpadów innego typu oraz o odpowiedzialny recykling i praktykowanie ponownego wykorzystania materiałów. W celu uzyskania informacji na temat miejsca i sposobu bezpiecznego dla środowiska recyklingu tych przedmiotów, użytkownicy w gospodarstwach domowych powinni skontaktować się z punktem sprzedaży detalicznej, w którym dokonali zakupu produktu, lub z organem władz lokalnych. Użytkownicy w firmach powinni skontaktować się ze swoim dostawcą i sprawdzić warunki umowy zakupu. Produktu ani jego akcesoriów nie należy usuwać razem z innymi odpadami komercyjnymi. [Polski] Weee.indd 2 2009-05-19 �� 4:29:50 Σωστή Απόρριψη αυτού του Προϊόντος (Απόβλητα Ηλεκτρικού & Ηλεκτρονικού Εξοπλισμού) (Ισχύει για την Ευρωπαϊκή Ένωση και για άλλες ευρωπαϊκές χώρες με χωριστά συστήματα συλλογής) Αυτό το σήμα που εμφανίζεται επάνω στο προϊόν, στα εξαρτήματά του ή στα εγχειρίδια που το συνοδεύουν, υποδεικνύει ότι το προϊόν και τα ηλεκτρονικά του εξαρτήματα (π.χ. φορτιστής, ακουστικά, καλώδιο USB) δεν θα πρέπει να ρίπτονται μαζί με τα υπόλοιπα οικιακά απορρίμματα μετά το τέλος του κύκλου ζωής τους. Προκειμένου να αποφευχθούν ενδεχόμενες βλαβερές συνέπειες στο περιβάλλον ή την υγεία εξαιτίας της ανεξέλεγκτης διάθεσης απορριμμάτων, σας παρακαλούμε να διαχωρίσετε αυτά τα προϊόντα από άλλους τύπους απορριμμάτων και να τα ανακυκλώσετε, ώστε να βοηθήσετε στην βιώσιμη επαναχρησιμοποίηση των υλικών πόρων. Οι οικιακοί χρήστες θα πρέπει να έλθουν σε επικοινωνία είτε με το κατάστημα απ’ όπου αγόρασαν αυτό το προϊόν, είτε με τις κατά τόπους υπηρεσίες, προκειμένου να πληροφορηθούν τις λεπτομέρειες σχετικά με τον τόπο και τον τρόπο με τον οποίο μπορούν να δώσουν αυτά τα προϊόντα για ασφαλή προς το περιβάλλον ανακύκλωση. Οι επιχειρήσεις-χρήστες θα πρέπει να έλθουν σε επαφή με τον προμηθευτή τους και να ελέγξουν τους όρους και τις προϋποθέσεις του συμβολαίου αγοράς. Αυτό το προϊόν και τα ηλεκτρονικά του εξαρτήματα δεν θα πρέπει να αναμιγνύονται με άλλα συνηθισμένα απορρίμματα προς διάθεση. [Ελληνικά] Правилно третиране на изделието след края на експлоатационния му живот (Отпадъци, представляващи електрическо и електронно оборудване)(Важи за държавите на Европейския съюз и други европейски държави със системи за разделно сметосъбиране) Този знак, поставен върху изделието, негови принадлежности или печатни материали, означава, че продуктът и принадлежностите (например зарядно устройство, слушалки, USB кабел) не бива да се изхвърлят заедно с другите битови отпадъци, когато изтече експлоатационният му живот. Отделяйте тези устройства от другите видови отпадъци и ги предавайте за рециклиране. Спазвайки това правило не излагате на опасност здравето на други хора и предпазвате околната среда от замърсяване, предизвикано от безконтролно изхвърляне на отпадъци. Освен това, подобно отговорно поведение създава възможност за повторно (екологично съобразно) използване на материалните ресурси. Домашните потребители трябва да се свържат с търговеца на дребно, от когото са закупили изделието, или със съответната местна държавна агенция, за да получат подробни инструкции къде и кога могат да занесат тези устройства за рециклиране, безопасно за околната среда. Корпоративните потребители следва да се свържат с доставчика си и да проверят условията на договора за покупка. Това изделие и неговите електронни принадлежности не бива да се сместват с другите отпадъци на търговското предприятие. [Български] Správná likvidace výrobku (Elektrický a elektronický odpad) Toto označení na výrobku, jeho příslušenství nebo dokumentaci znamená, že výrobek a jeho elektronické příslušenství (například nabíječku, náhlavní sadu, USB kabel) je po skončení životnosti zakázáno likvidovat jako běžný komunální odpad. Možným negativním dopadům na životní prostředí nebo lidské zdraví způsobeným nekontrolovanou likvidací zabráníte oddělením zmíněných produktů od ostatních typů odpadu a jejich zodpovědnou recyklací za účelem udržitelného využívání druhotných surovin. Uživatelé z řad domácností by si měli od prodejce, u něhož produkt zakoupili, nebo u příslušného městského úřadu vyžádat informace, kde a jak mohou tyto výrobky odevzdat k bezpečné ekologické recyklaci. Podnikoví uživatelé by měli kontaktovat dodavatele a zkontrolovat všechny podmínky kupní smlouvy. Tento výrobek a jeho elektronické příslušenství nesmí být likvidován spolu s ostatním průmyslovým odpadem. [Čeština] Správna likvidácia tohoto výrobku (Elektrotechnický a elektronický odpad) (Platné pre Európsku úniu a ostatné európske krajiny so systémom triedeného odpadu) Toto označenie na výrobku, príslušenstve alebo v sprievodnej brožúre hovorí, že po skončení životnosti by produkt ani jeho elektronické príslušenstvo (napr. nabíjačka, náhlavná súprava, USB kábel) nemali byť likvidované s ostatným domovým odpadom. Prípadnému poškodeniu životného prostredia alebo ľudského zdravia môžete predísť tým, že budete tieto výrobky oddeľovať od ostatného odpadu a vrátite ich na recykláciu. Používatelia v domácnostiach by pre podrobné informácie, ako ekologicky bezpečne naložiť s týmito výrobkami, mali kontaktovať buď predajcu, ktorý im ich predal, alebo príslušný úrad v mieste ich bydliska. Priemyselní používatelia by mali kontaktovať svojho dodávateľa a preveriť si podmienky kúpnej zmluvy. Tento výrobok a ani jeho elektronické príslušenstvo by nemali byť likvidované spolu s ostatným priemyselným odpadom. [Slovensky] Cum se elimină corect acest produs (Deşeuri de echipamente electrice şi electronice) (Aplicabil în ţările Uniunii Europene şi în alte ţări cu sisteme de colectare selectivă) Acest simbol de pe produs, accesorii şi documentaţie indică faptul că produsul şi accesoriile sale electronice (încărcător, căşti, cablu USB) nu trebuie eliminate împreună cu alte deşeuri menajere la finalul duratei lor de utilizare. Dat fiind că eliminarea necontrolată a deşeurilor poate dăuna mediului înconjurător sau sănătăţii umane, vă rugăm să separaţi aceste articole de alte tipuri de deşeuri şi să le reciclaţi în mod responsabil, promovând astfel reutilizarea durabilă a resurselor materiale. Utilizatorii casnici trebuie să-l contacteze pe distribuitorul care le-a vândut produsul sau să se intereseze la autorităţile locale unde şi cum pot să ducă aceste articole pentru a fi reciclate în mod ecologic. Utilizatorii comerciali trebuie să-şi contacteze furnizorul şi să consulte termenii şi condiţiile din contractul de achiziţie. Acest produs şi accesoriile sale electronice nu trebuie eliminate împreună cu alte deşeuri comerciale. [Română] Izstrādājuma pareiza likvidēšana (Attiecas uz nolietotām elektriskām un elektroniskām ierīcēm) (Spēkā Eiropas Savienībā un pārējās Eiropas valstīs, kas izmanto atkritumu dalītu savākšanu) Šis uz izstrādājuma un tā piederumiem vai pievienotajā dokumentācijā izvietotais marķējums norāda, ka izstrādājumu un tā elektroniskos piederumus (piem., uzlādes ierīci, austiņas, USB kabeli) pēc ekspluatācijas laika beigām nedrīkst likvidēt kopā ar citiem sadzīves atkritumiem. Lai nepieļautu atkritumu nekontrolētas likvidēšanas radītu varbūtēju kaitējumu videi un cilvēku veselībai, lūdzam minētās ierīces nošķirt no citiem atkritumiem un disciplinēti nodot pienācīgai pārstrādei, tā sekmējot materiālo resursu atkārtotu izmantošanu. Lai uzzinātu, kur un kā minētās ierīces iespējams nodot ekoloģiski drošai pārstrādei, mājsaimniecībām jāsazinās ar izstrādājuma pārdevēju vai savu pašvaldību. Iestādēm un uzņēmumiem jāsazinās ar izstrādājuma piegādātāju un jāiepazīstas ar pirkuma līguma nosacījumiem. Izstrādājumu un tā elektroniskos piederumus nedrīkst nodot likvidēšanai kopā ar citiem iestāžu un uzņēmumu atkritumiem. [Latviešu] Weee.indd 3 2009-05-19 �� 4:29:50 Tinkamas šio gaminio išmetimas (elektros ir elektroninės įrangos atliekos) Šis ženklas, pateiktas ant gaminio, jo priedų ar dokumentacijoje, nurodo, kad gaminio ir jo elektroninių priedų (pvz., įkroviklio, ausinių, USB kabelio) negalima išmesti kartu su kitomis buitinėmis atliekomis gaminio naudojimo laikui pasibaigus. Kad būtų išvengta galimos nekontroliuojamo atliekų išmetimo žalos aplinkai arba žmonių sveikatai ir skatinamas aplinką tausojantis antrinių žaliavų panaudojimas, atskirkite šiuos elementus nuo kitų rūšių atliekų ir atiduokite perdirbti. Informacijos kur ir kaip pristatyti šiuos elementus saugiai perdirbti, privatūs vartotojai turėtų kreiptis į parduotuvę, kurioje šį gaminį pirko, arba į vietos valdžios institucijas. Verslo vartotojai turėtų kreiptis į savo tiekėją ir peržiūrėti pirkimo sutarties sąlygas. Tvarkant atliekas, šio gaminio ir jo elektroninių priedų negalima maišyti su kitomis pramoninėmis atliekomis. [Lietuvių kalba] Õige viis toote kasutuselt kõrvaldamiseks (elektriliste ja elektrooniliste seadmete jäätmed) Selline tähistus tootel või selle tarvikutel või dokumentidel näitab, et toodet ega selle elektroonilisi tarvikuid (nt laadija, peakomplekt, USBkaabel) ei tohi kasutusaja lõppemisel kõrvaldada koos muude olmejäätmetega. Selleks et vältida jäätmete kontrollimatu kõrvaldamisega seotud võimaliku kahju tekitamist keskkonnale või inimeste tervisele ning edendada materiaalsete vahendite säästvat taaskasutust, eraldage need esemed muudest jäätmetest ja suunake need vastutustundlikult taasringlusse. Kodukasutajad saavad teavet nende esemete keskkonnaohutu ringlussevõtu kohta kas toote müüjalt või keskkonnaametist. Firmad peaksid võtma ühendust tarnijaga ning kontrollima ostulepingu tingimusi ja sätteid. Toodet ega selle elektroonilisi tarvikuid ei tohi panna muude hävitamiseks mõeldud kaubandusjäätmete hulka. [Eesti] Weee.indd 4 2009-05-19 �� 4:29:50 Correct disposal of batteries in this product (Applicable in the European Union and other European countries with separate battery return systems.) This marking on the battery, manual or packaging indicates that the batteries in this product should not be disposed of with other household waste at the end of their working life. Where marked, the chemical symbols Hg, Cd or Pb indicate that the battery contains mercury, cadmium or lead above the reference levels in EC Directive 2006/66. If batteries are not properly disposed of, these substances can cause harm to human health or the environment. To protect natural resources and to promote material reuse, please separate batteries from other types of waste and recycle them through your local, free battery return system. [English] Elimination des batteries de ce produit (Applicable aux pays de l’Union européenne et aux autres pays européens dans lesquels des systèmes de collecte sélective sont mis en place.) Le symbole sur la batterie, le manuel ou l’emballage indique que les batteries de ce produit ne doivent pas être éliminées en fin de vie avec les autres déchets ménagers. L’indication éventuelle des symboles chimiques Hg, Cd ou Pb signifie que la batterie contient des quantités de mercure, de cadmium ou de plomb supérieures aux niveaux de référence stipulés dans la directive CE 2006/66. Si les batteries ne sont pas correctement éliminées, ces substances peuvent porter préjudice à la santé humaine ou à l’environnement. Afin de protéger les ressources naturelles et d’encourager la réutilisation du matériel, veillez à séparer les batteries des autres types de déchets et à les recycler via votre système local de collecte gratuite des batteries. [Français] Korrekte Entsorgung der Batterien dieses Produkts (In den Ländern der Europäischen Union und anderen europäischen Ländern mit einem separaten Altbatterie-Rücknahmesystem) Die Kennzeichnung auf der Batterie bzw. auf der dazugehörigen Dokumentation oder Verpackung gibt an, dass die Batterie zu diesem Produkt nach seiner Lebensdauer nicht zusammen mit dem normalen Haushaltsmüll entsorgt werden darf. Wenn die Batterie mit den chemischen Symbolen Hg, Cd oder Pb gekennzeichnet ist, liegt der Quecksilber-, Cadmium- oder Blei-Gehalt der Batterie über den in der EG-Richtlinie 2006/66 festgelegten Referenzwerten. Wenn Batterien nicht ordnungsgemäß entsorgt werden, können sie der menschlichen Gesundheit bzw. der Umwelt schaden. Bitte helfen Sie, die natürlichen Ressourcen zu schützen und die nachhaltige Wiederverwertung von stofflichen Ressourcen zu fördern, indem Sie die Batterien von anderen Abfällen getrennt über Ihr örtliches kostenloses AltbatterieRücknahmesystem entsorgen. [Deutsch] Correcte behandeling van een gebruikte accu uit dit product (Van toepassing op de Europese Unie en andere Europese landen met afzonderlijke inzamelingssystemen voor accu’s en batterijen.) Dit merkteken op de accu, handleiding of verpakking geeft aan dat de accu in dit product aan het einde van de levensduur niet samen met ander huishoudelijk afval mag worden weggegooid. De chemische symbolen Hg, Cd of Pb geven aan dat het kwik-, cadmium- of loodgehalte in de accu hoger is dan de referentieniveaus in de Richtlijn 2006/66/EC. Indien de gebruikte accu niet op de juiste wijze wordt behandeld, kunnen deze stoffen schadelijk zijn voor de gezondheid van mensen of het milieu. Ter bescherming van de natuurlijke hulpbronnen en ter bevordering van het hergebruik van materialen, verzoeken wij u afgedankte accu’s en batterijen te scheiden van andere soorten afval en voor recycling aan te bieden bij het gratis inzamelingssysteem voor accu’s en batterijen in uw omgeving. [Nederlands] Corretto smaltimento delle batterie del prodotto (Applicabile nei paesi dell’Unione Europea e in altri paesi europei con sistemi di conferimento differenziato delle batterie.) Il marchio riportato sulla batteria o sulla sua documentazione o confezione indica che le batterie di questo prodotto non devono essere smaltite con altri rifiuti domestici al termine del ciclo di vita. Dove raffigurati, i simboli chimici Hg, Cd o Pb indicano che la batteria contiene mercurio, cadmio o piombo in quantità superiori ai livelli di riferimento della direttiva UE 2006/66. Se le batterie non vengono smaltite correttamente, queste sostanze possono causare danni alla salute umana o all’ambiente. Per proteggere le risorse naturali e favorire il riutilizzo dei materiali, separare le batterie dagli altri tipi di rifiuti e riciclarle utilizzando il sistema di conferimento gratuito previsto nella propria area di residenza. [Italiano] Eliminación correcta de las baterías de este producto (Aplicable en la Unión Europea y en otros países europeos con sistemas de recogida selectiva de baterías.) La presencia de esta marca en las baterías, el manual o el paquete del producto indica que cuando haya finalizado la vida útil de las baterías no deberán eliminarse junto con otros residuos domésticos. Los símbolos químicos Hg, Cd o Pb, si aparecen, indican que la batería contiene mercurio, cadmio o plomo en niveles superiores a los valores de referencia admitidos por la Directiva 2006/66 de la Unión Europea. Si las baterías no se desechan convenientemente, estas sustancias podrían provocar lesiones personales o dañar el medioambiente. Para proteger los recursos naturales y promover el reciclaje, separe las baterías de los demás residuos y recíclelas mediante el sistema de recogida gratuito de su localidad. [Español] Eliminação correcta das baterias existentes neste produto (Aplicável na União Europeia e noutros países europeus com sistemas de recolha de baterias separados.) Esta marca, apresentada na bateria, manual ou embalagem, indica que as baterias existentes neste produto não devem ser eliminadas juntamente com os resíduos domésticos indiferenciados no final do seu período de vida útil. Onde existentes, os símbolos químicos Hg, Cd ou Pb indicam que a bateria contém mercúrio, cádmio ou chumbo acima dos níveis de referência indicados na Directiva CE 2006/66. Se as baterias não forem correctamente eliminadas, estas substâncias poderão ser prejudiciais para a saúde humana ou para o meio ambiente. Para proteger os recursos naturais e promover a reutilização dos materiais, separe as baterias dos outros tipos de resíduos e recicle-as através do sistema gratuito de recolha local de baterias. [Português] Ustrezno odstranjevanje baterij v tem izdelku (Uporabno v EU in ostalih evropskih državah s sistemi ločenega odstranjevanja baterij) Ta oznaka na bateriji, v navodilih ali na embalaži pomeni, da baterij ob izteku njihove življenjske dobe v tem izdelku ne smete odstraniti skupaj z ostalimi gospodinjskimi odpadki. Oznake za kemijske elemente Hg, Cd ali Pb pomenijo, da baterija vsebuje živo srebro, kadmij ali svinec v količinah, ki presegajo referenčne nivoje v direktivi EC 2006/66. Če te baterije niso ustrezno odstranjene, te snovi lahko škodujejo zdravju ljudi oziroma okolju. Za zaščito naravnih virov in za vzpodbujanje ponovne uporabe materialov prosimo, ločite te baterije od ostalih odpadkov in jih oddajte na predvidenih lokalnih zbirnih reciklažnih mestih. [Slovenščina] Korrekt avfallshantering av batterierna i denna produkt (Gäller EU och andra europeiska länder med särskild batteriåtervinning.) Denna markering på batteriet, i manualen eller på förpackningen anger att batterierna i denna produkt inte bör slängas tillsammans med annat hushållsavfall. De kemiska symbolerna Hg, Cd eller Pb visar i förekommande fall att batterierna innehåller kvicksilver, kadmium eller bly i mängder överstigande de gränsvärden som anges i EU-direktivet 2006/66. Om batterierna inte slängs på ett ansvarsfullt sätt kan dessa substanser utgöra en fara för hälsa eller miljö. Hjälp till att skydda naturresurser och bidra till materialåtervinning genom att sortera batterierna separat från annat avfall och lämna in dem på en återvinningsstation. [Svenska] Weee.indd 5 2009-05-19 �� 4:29:50 KKorrekt bortskaffelse af batterierne i dette produkt (Gælder i EU og andre europæiske lande med særlige retursystemer for batterier). Mærket på dette batteri, dokumentationen eller emballagen betyder, at batterierne i dette produkt efter endt levetid ikke må bortskaffes sammen med andet husholdningsaffald. Mærkning med de kemiske symboler Hg, Cd eller Pb betyder, at batteriet indeholder kviksølv, cadmium eller bly over grænseværdierne i EU-direktiv 2006/66. Hvis batterierne ikke bortskaffes korrekt, kan disse stoffer være skadelige for menneskers helbred eller for miljøet. For at beskytte naturens ressourcer og fremme genbrug, skal batterier holdes adskilt fra andre typer affald og genanvendes via dit lokale, gratis batteriretursystem. [Dansk] Korrekt avhending av batterier i dette produkt (Kommer til anvendelse i Den europeiske union og i andre europeiske land med separate systemer for retur av batterier.) Denne merkingen på batteriet, håndboken eller emballasjen angir at batteriene i dette produktet ikke skal kastes sammen med annet husholdningsavfall ved slutten av sin levetid. Der det er merket, angir de kjemiske symbolene Hg, Cd eller Pb at batteriet inneholder kvikksølv, kadmium eller bly over referansenivåene i EF-direktiv 2006/66. Hvis batteriene ikke avhendes på riktig måte, kan disse stoffene skade menneskers helse eller miljøet. For å beskytte naturressurser og for å fremme gjenbruk av materialer, ber vi deg adskille batterier fra andre typer avfall og resirkulere dem ved å levere dem på din lokale, gratis mottaksstasjon. [Norsk] Tuotteen paristojen oikea hävittäminen (Koskee Euroopan Unionia ja muita Euroopan maita, joissa on erillinen paristojen palautusjärjestelmä.) Pariston, käyttöoppaan tai pakkauksen tämä merkintä tarkoittaa, että tämän tuotteen sisältämiä paristoja ei saa hävittää muun kotitalousjätteen seassa, kun niiden käyttöikä on päättynyt. Kemiallinen symboli Hg, Cd tai Pb ilmaisee, että paristo sisältää elohopeaa, kadmiumia tai lyijyä ylin EU: n direktiivien 2006/66 viiterajojen. Jos paristoja ei hävitetä oikein, nämä aineet voivat vahingoittaa ihmisten terveyttä tai ympäristöä. Suojaa luonnonvaroja ja edistä materiaalien uusiokäyttöä - erottele paristot muusta jätteestä ja toimita ne kierrätettäväksi paikalliseen maksuttomaan paristojen palautusjärjestelmään. [Suomi] A termékhez tartozó akkumulátorok megfelelő ártalmatlanítása (Az Európai Unió területén és más, önálló akkumulátorleadó rendszerrel rendelkező európai országok területén alkalmazandó.) Az akkumulátoron, a kézikönyvön vagy a csomagoláson szereplő jelzés arra utal, hogy hasznos élettartama végén a terméket nem szabad egyéb háztartási hulladékkal együtt kidobni. Ahol szerepel a jelzés, a Hg, Cd vagy Pb kémiai elemjelölések arra utalnak, hogy az akkumulátor az EK 2006/66. számú irányelvben rögzített referenciaszintet meghaladó mennyiségű higanyt, kadmiumot vagy ólmot tartalmaz. Az akkumulátorok nem megfelelő kezelése esetén ezek az anyagok veszélyt jelenthetnek az egészségre vagy a környezetre. A természeti erőforrások megóvása és az anyagok újrafelhasználásának ösztönzése érdekében kérjük, különítse el az akkumulátorokat a többi hulladéktól és vigye vissza a helyi, ingyenes akkumulátorleadó helyre. [Magyar] Sposób poprawnego usuwania baterii, w które wyposażony jest niniejszy produkt (Dotyczy obszaru Unii Europejskiej oraz innych krajów europejskich posiadających oddzielne systemy zwrotu zużytych baterii.) Niniejsze oznaczenie na baterii, instrukcji obsługi lub opakowaniu oznacza, że po upływie okresu użytkowania baterie, w które wyposażony był dany produkt, nie mogą zostać usunięte wraz z innymi odpadami pochodzącymi z gospodarstw domowych. Przy zastosowaniu takiego oznaczenia symbole chemiczne (Hg, Cd lub Pb) wskazują, że dana bateria zawiera rtęć, kadm lub ołów w ilości przewyższającej poziomy odniesienia opisane w dyrektywie WE 2006/66. Jeśli baterie nie zostaną poprawnie zutylizowane, substancje te mogą powodować zagrożenie dla zdrowia ludzkiego lub środowiska naturalnego. Aby chronić zasoby naturalne i promować ponowne wykorzystanie materiałów, należy oddzielać baterie od innego typu odpadów i poddawać je utylizacji poprzez lokalny, bezpłatny system zwrotu baterii. [Polski] Σωστή απόρριψη των μπαταριών αυτού του προϊόντος (Ισχύει στην Ευρωπαϊκή Ένωση και άλλες ευρωπαϊκές χώρες με συστήματα ξεχωριστής ανακύκλωσης μπαταριών.) Αυτή η επισήμανση πάνω στη μπαταρία, το εγχειρίδιο ή τη συσκευασία υποδεικνύει ότι οι μπαταρίες αυτού του προϊόντος δεν πρέπει να απορρίπτονται μαζί με άλλα οικιακά απορρίμματα στο τέλος του κύκλου ζωής τους. Όπου υπάρχουν, τα χημικά σύμβολα Hg, Cd ή Pb υποδεικνύουν ότι η μπαταρία περιέχει υδράργυρο, κάδμιο ή μόλυβδο πάνω από τα επίπεδα αναφοράς της Ευρωπαϊκής Οδηγίας 2006/66. Αν οι μπαταρίες δεν απορριφθούν σωστά, αυτές οι ουσίες ενδέχεται να προκαλέσουν βλαβερές συνέπειες στην ανθρώπινη υγεία ή το περιβάλλον. Παρακαλούμε διαχωρίζετε τις μπαταρίες από άλλους τύπους απορριμμάτων και ανακυκλώνετέ τις μέσω του τοπικού σας, δωρεάν συστήματος ανακύκλωσης μπαταριών, για την προστασία των φυσικών πόρων και την προώθηση της επαναχρησιμοποίησης υλικών. [Ελληνικά] Правилно изхвърляне на батериите в този продукт (Приложимо в Европейския съюз и други европейски държави със самостоятелни системи за връщане на батерии.) Това обозначение върху батерията, ръководството или опаковката, показва, че батериите в този продукт не бива да се изхвърлят с другите битови отпадъци в края на техния полезен живот. Където са маркирани, химическите символи Hg, Cd или Pb показват, че батерията съдържа живак, кадмий или олово над контролните нива в Директива 2006/66 на ЕО. Ако батериите не се изхвърлят правилно, тези вещества могат да предизвикат увреждане на човешкото здраве или на околната среда. За да предпазите природните ресурси и за да съдействате за многократната употреба на материалните ресурси, моля отделяйте батериите от другите видове отпадъчни продукти и ги рециклирайте посредством Вашата локална система за безплатно връщане на батерии. [Български] Weee.indd 6 2009-05-19 �� 4:29:51 Správná likvidace baterií v tomto výrobku (Platí v Evropské unii a dalších evropských zemích s vlastními systémy zpětného odběru baterií.) Tato značka na baterii, návodu nebo obalu znamená, že baterie v tomto výrobku nesmí být na konci své životnosti likvidovány společně s jiným domovním odpadem. Případně vyznačené symboly chemikálií Hg, Cd nebo Pb upozorňují na to, že baterie obsahuje rtuť, kadmium nebo olovo v množství překračujícím referenční úrovně stanovené směrnicí ES 2006/66. Pokud baterie nejsou správně zlikvidovány, mohou tyto látky poškodit zdraví osob nebo životní prostředí. Pro ochranu přírodních zdrojů a pro podporu opakovaného využívání materiálů oddělte, prosím, baterie od ostatních typů odpadu a nechte je recyklovat prostřednictvím místního bezplatného systému zpětného odběru baterií. [Čeština] Správna likvidácia batérií v tomto výrobku (Aplikovateľné v krajinách Európskej únie a v ostatných európskych krajinách, v ktorých existujú systémy separovaného zberu batérií.) Toto označenie na batérii, príručke alebo balení hovorí, že batérie v tomto výrobku by sa po skončení ich životnosti nemali likvidovať spolu s ostatným domovým odpadom. V prípade takéhoto označenia chemické symboly Hg, Cd alebo Pb znamenajú, že batéria obsahuje ortuť, kadmium alebo olovo v množstve presahujúcom referenčné hodnoty smernice 2006/66/ES. Pri nevhodnej likvidácii batérií môžu tieto látky poškodiť zdravie alebo životné prostredie. Za účelom ochrany prírodných zdrojov a podpory opätovného použitia materiálu batérie likvidujte oddelene od iných typov odpadou a recyklujte ich prostredníctvom miestneho systému bezplatného zberu batérií. [Slovensky] Dispoziţii privind eliminarea corectă a bateriilor acestui produs (aplicabile în Uniunea Europeană şi în alte ţări europene cu sisteme separate de colectare a bateriilor) Acest marcaj de pe baterie, de pe manualul de utilizare sau de pe ambalaj indică faptul că bateriile acestui produs nu trebuie eliminate împreună cu alte deşeuri menajere la sfârşitul ciclului lor de viaţă. Dacă sunt marcate, simbolurile chimice Hg, Cd sau Pb indică faptul că bateria conţine mercur, cadmiu sau plumb peste nivelurile de referinţă prevăzute în Directiva CE 2006/66. În cazul în care bateriile nu sunt eliminate corespunzător, aceste substanţe pot fi dăunătoare pentru sănătatea omului sau pentru mediu. În vederea protejării resurselor naturale şi a promovării refolosirii materialelor, vă rugăm să separaţi bateriile de celelalte tipuri de deşeuri şi să le reciclaţi prin intermediul sistemului gratuit de returnare a bateriilor la nivel local. [Română] Šī izstrādājuma bateriju pareiza utilizācija (Piemērojama Eiropas Savienībā un citās Eiropas valstīs ar atsevišķām bateriju nodošanas sistēmām.) Šis marķējums uz baterijas, rokasgrāmatā vai uz iepakojuma norāda, ka šī izstrādājuma bateriju pēc tās kalpošanas laika beigām nedrīkst izmest ar citiem sadzīves atkritumiem. Ja uz baterijas ir atzīmēti ķīmiskie simboli, piem., Hg, Cd vai Pb, tie norāda, ka baterija satur dzīvsudrabu, kadmiju vai svinu, kura saturs ir lielāks par EK Direktīvā 2006/66 minētajiem lielumiem. Ja baterijas tiek nepareizi likvidētas, šīs vielas var radīt kaitējumu cilvēku veselībai vai videi. Lai aizsargātu dabas resursus un veicinātu materiālu otrreizēju izmantošanu, šķirojiet baterijas atsevišķi no citiem atkritumu veidiem un nododiet tās otrreizējai pārstrādei, izmantojot bateriju vietējo bezmaksas nodošanas sistēmu. [Latviešu] Tinkamas šio produkto akumuliatorių tvarkymas (Taikoma Europos Sąjungoje ir kitose Europos šalyse, kuriose galioja atskiros akumuliatorių grąžinimo sistemos.) Šis ženklas yra pateikiamas ant akumuliatoriaus, jo dokumentacijoje ar ant pakuotės nurodo, kad šio produkto akumuliatorių, pasibaigus jų tarnavimo laikui, negalima išmesti kartu su kitomis buitinėmis atliekomis. Cheminiai simboliai Hg, Cd arba Pb rodo, kad akumuliatoriuje yra gyvsidabrio, kadmio ar švino, kurio kiekis viršija normą, nurodytą ES direktyvoje 2006/66. Jei akumuliatoriai nebus tinkamai išmesti, šios medžiagos gali sukelti žalos žmonių sveikatai ar aplinkai. Tam, kad būtų apsaugoti gamtos ištekliai ir skatinamas antrinių žaliavų panaudojimas, pašome atskirti akumuliatorių nuo kitų rūšių atliekų ir atiduoti perdirbti vietinėje akumuliatorių grąžinimo sistemai. [Lietuvių kalba] Őige viis toote akude kasutusest kőrvaldamiseks (Rakendatav Euroopa Liidus ja teistes Euroopa riikides, kus on kasutusel spetsiaalsed akude kogumissüsteemid). Selline tähistus akul, dokumentidel vői pakendil näitab, et toote akusid ei tohi kasutusaja lőppemisel kőrvaldada koos muude olmejäätmetega. Keemilised elemendid Hg, Cd, vői Pb näitavad, et aku elavhőbeda, kaadmiumi vői plii sisaldus on EÜ direktiivi 2006/66 sihttasemest suurem. Kui akusid ei kőrvaldata őigel viisil, vőib nende sisu pőhjustada tervise-vői keskkonnakahjustusi. Selleks, et kaitsta loodusvarasid ja edendada materjalide taaskasutamist, eraldage akud muudest jäätmetest ja suunake need taaskasutusse kohaliku, tasuta teenusena pakutava akude tagastussüsteemi abil. [Eesti] Weee.indd 7 2009-05-19 �� 4:29:51