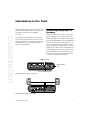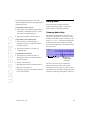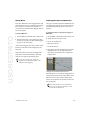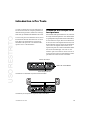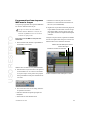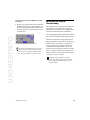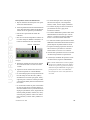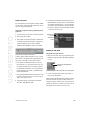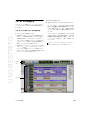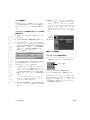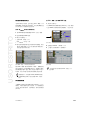
1
USO RESTRITO ® Introduction to Pro Tools Legal Notices USO RESTRITO © 2013 Avid Technology, Inc., (“Avid”), all rights reserved. This guide may not be duplicated in whole or in part without the written consent of Avid. 003, 192 Digital I/O, 192 I/O, 96 I/O, 96i I/O, Adrenaline, AirSpeed, ALEX, Alienbrain, AME, AniMatte, Archive, Archive II, Assistant Station, AudioPages, AudioStation, AutoLoop, AutoSync, Avid, Avid Active, Avid Advanced Response, Avid DNA, Avid DNxcel, Avid DNxHD, Avid DS Assist Station, Avid Ignite, Avid Liquid, Avid Media Engine, Avid Media Processor, Avid MEDIArray, Avid Mojo, Avid Remote Response, Avid Unity, Avid Unity ISIS, Avid VideoRAID, AvidRAID, AvidShare, AVIDstripe, AVX, Beat Detective, Beauty Without The Bandwidth, Beyond Reality, BF Essentials, Bomb Factory, Bruno, C|24, CaptureManager, ChromaCurve, ChromaWheel, Cineractive Engine, Cineractive Player, Cineractive Viewer, Color Conductor, Command|8, Control|24, Cosmonaut Voice, CountDown, d2, d3, DAE, D-Command, D-Control, Deko, DekoCast, D-Fi, D-fx, Digi 002, Digi 003, DigiBase, Digidesign, Digidesign Audio Engine, Digidesign Development Partners, Digidesign Intelligent Noise Reduction, Digidesign TDM Bus, DigiLink, DigiMeter, DigiPanner, DigiProNet, DigiRack, DigiSerial, DigiSnake, DigiSystem, Digital Choreography, Digital Nonlinear Accelerator, DigiTest, DigiTranslator, DigiWear, DINR, DNxchange, Do More, DPP-1, D-Show, DSP Manager, DS-StorageCalc, DV Toolkit, DVD Complete, D-Verb, Eleven, EM, Euphonix, EUCON, EveryPhase, Expander, ExpertRender, Fairchild, FastBreak, Fast Track, Film Cutter, FilmScribe, Flexevent, FluidMotion, Frame Chase, FXDeko, HD Core, HD Process, HDpack, Home-to-Hollywood, HyperSPACE, HyperSPACE HDCAM, iKnowledge, Impact, Improv, iNEWS, iNEWS Assign, iNEWS ControlAir, InGame, Instantwrite, Instinct, Intelligent Content Management, Intelligent Digital Actor Technology, IntelliRender, Intelli-Sat, Intelli-Sat Broadcasting Recording Manager, InterFX, Interplay, inTONE, Intraframe, iS Expander, iS9, iS18, iS23, iS36, ISIS, IsoSync, LaunchPad, LeaderPlus, LFX, Lightning, Link & Sync, ListSync, LKT-200, Lo-Fi, MachineControl, Magic Mask, Make Anything Hollywood, make manage move|media, Marquee, MassivePack, MassivePack Pro, Maxim, Mbox, Media Composer, MediaFlow, MediaLog, MediaMix, Media Reader, Media Recorder, MEDIArray, MediaServer, MediaShare, MetaFuze, MetaSync, MIDI I/O, Mix Rack, Moviestar, MultiShell, NaturalMatch, NewsCutter, NewsView, NewsVision, Nitris, NL3D, NLP, NSDOS, NSWIN, OMF, OMF Interchange, OMM, OnDVD, Open Media Framework, Open Media Management, Painterly Effects, Palladiium, Personal Q, PET, Podcast Factory, PowerSwap, PRE, ProControl, ProEncode, Profiler, Pro Tools, Pro Tools|HD, Pro Tools LE, Pro Tools M-Powered, Pro Transfer, QuickPunch, QuietDrive, Realtime Motion Synthesis, Recti-Fi, Reel Tape Delay, Reel Tape Flanger, Reel Tape Saturation, Reprise, Res Rocket Surfer, Reso, RetroLoop, Reverb One, ReVibe, Revolution, rS9, rS18, RTAS, Salesview, Sci-Fi, Scorch, ScriptSync, SecureProductionEnvironment, Shape-to-Shape, ShuttleCase, Sibelius, SimulPlay, SimulRecord, Slightly Rude Compressor, Smack!, Soft SampleCell, Soft-Clip Limiter, SoundReplacer, SPACE, SPACEShift, SpectraGraph, SpectraMatte, SteadyGlide, Streamfactory, Streamgenie, StreamRAID, SubCap, Sundance, Sundance Digital, SurroundScope, Symphony, SYNC HD, SYNC I/O, Synchronic, SynchroScope, Syntax, TDM FlexCable, TechFlix, Tel-Ray, Thunder, TimeLiner, Titansync, Titan, TL Aggro, TL AutoPan, TL Drum Rehab, TL Everyphase, TL Fauxlder, TL In Tune, TL MasterMeter, TL Metro, TL Space, TL Utilities, tools for storytellers, Transit, TransJammer, Trillium Lane Labs, TruTouch, UnityRAID, Vari-Fi, Video the Web Way, VideoRAID, VideoSPACE, VTEM, Work-N-Play, Xdeck, X-Form, and XMON are either registered trademarks or trademarks of Avid Technology, Inc. in the United States and/or other countries. Bonjour, the Bonjour logo, and the Bonjour symbol are trademarks of Apple Computer, Inc. Thunderbolt and the Thunderbolt logo are trademarks of Intel Corporation in the U.S. and/or other countries. This product may be protected by one or more U.S. and nonU.S. patents. Details are available at www.avid.com/patents. Product features, specifications, system requirements, and availability are subject to change without notice. Guide Part Number 9329-65294-00 REV A 05/13 USO RESTRITO Contents Introduction to Pro Tools. . . . . . . . . . . . . . . . . . . . . . . . . . . . . . . . . . . . . . . . . . . . . . . . . . . . . . . 1 Connecting Headphones or Speakers . . . . . . . . . . . . . . . . . . . . . . . . . . . . . . . . . . . . . . . . . 1 Playing Back the Demo Session . . . . . . . . . . . . . . . . . . . . . . . . . . . . . . . . . . . . . . . . . . . . . 2 Creating a New Session . . . . . . . . . . . . . . . . . . . . . . . . . . . . . . . . . . . . . . . . . . . . . . . . . . . 6 Recording Audio . . . . . . . . . . . . . . . . . . . . . . . . . . . . . . . . . . . . . . . . . . . . . . . . . . . . . . . . 6 Measuring Time in Minutes and Seconds or Bars and Beats . . . . . . . . . . . . . . . . . . . . . . . . . 9 Importing Audio . . . . . . . . . . . . . . . . . . . . . . . . . . . . . . . . . . . . . . . . . . . . . . . . . . . . . . . . 13 Editing Audio . . . . . . . . . . . . . . . . . . . . . . . . . . . . . . . . . . . . . . . . . . . . . . . . . . . . . . . . . . 16 Sequencing MIDI with a Virtual Instrument Plug-In . . . . . . . . . . . . . . . . . . . . . . . . . . . . . . . 20 Mixing and Plug-In Processing . . . . . . . . . . . . . . . . . . . . . . . . . . . . . . . . . . . . . . . . . . . . . 28 Exporting Your Mix . . . . . . . . . . . . . . . . . . . . . . . . . . . . . . . . . . . . . . . . . . . . . . . . . . . . . . 36 Learn More . . . . . . . . . . . . . . . . . . . . . . . . . . . . . . . . . . . . . . . . . . . . . . . . . . . . . . . . . . . 37 Introduction à Pro Tools . . . . . . . . . . . . . . . . . . . . . . . . . . . . . . . . . . . . . . . . . . . . . . . . . . . . . . 38 Connexion d'un casque ou de haut-parleurs . . . . . . . . . . . . . . . . . . . . . . . . . . . . . . . . . . . 38 Lecture de la session de démonstration . . . . . . . . . . . . . . . . . . . . . . . . . . . . . . . . . . . . . . . 39 Création d'une nouvelle session . . . . . . . . . . . . . . . . . . . . . . . . . . . . . . . . . . . . . . . . . . . . 43 Enregistrement audio . . . . . . . . . . . . . . . . . . . . . . . . . . . . . . . . . . . . . . . . . . . . . . . . . . . . 43 Mesure du temps en minutes et secondes ou en mesures et temps . . . . . . . . . . . . . . . . . . 46 Importation de fichiers audio . . . . . . . . . . . . . . . . . . . . . . . . . . . . . . . . . . . . . . . . . . . . . . . 50 Édition audio . . . . . . . . . . . . . . . . . . . . . . . . . . . . . . . . . . . . . . . . . . . . . . . . . . . . . . . . . . 53 Programmation MIDI avec un plug-in d'instrument virtuel . . . . . . . . . . . . . . . . . . . . . . . . . . 57 Mixage et traitement de plug-in . . . . . . . . . . . . . . . . . . . . . . . . . . . . . . . . . . . . . . . . . . . . . 66 Exportation de votre mix . . . . . . . . . . . . . . . . . . . . . . . . . . . . . . . . . . . . . . . . . . . . . . . . . . 74 Pour en savoir plus. . . . . . . . . . . . . . . . . . . . . . . . . . . . . . . . . . . . . . . . . . . . . . . . . . . . . . 75 Contents iii USO RESTRITO Einführung in Pro Tools. . . . . . . . . . . . . . . . . . . . . . . . . . . . . . . . . . . . . . . . . . . . . . . . . . . . . . . 76 Anschließen von Kopfhörern oder Lautsprechern . . . . . . . . . . . . . . . . . . . . . . . . . . . . . . . . 76 Wiedergabe der Demo-Session . . . . . . . . . . . . . . . . . . . . . . . . . . . . . . . . . . . . . . . . . . . . 77 Erstellen einer neuen Session . . . . . . . . . . . . . . . . . . . . . . . . . . . . . . . . . . . . . . . . . . . . . . 81 Aufnehmen von Audio . . . . . . . . . . . . . . . . . . . . . . . . . . . . . . . . . . . . . . . . . . . . . . . . . . . 81 Zeitmessung in Minuten und Sekunden oder Takten und Beats . . . . . . . . . . . . . . . . . . . . . 84 Importieren von Audiodateien . . . . . . . . . . . . . . . . . . . . . . . . . . . . . . . . . . . . . . . . . . . . . . 88 Bearbeiten von Audiomaterial . . . . . . . . . . . . . . . . . . . . . . . . . . . . . . . . . . . . . . . . . . . . . . 92 MIDI-Sequencing mit einem Virtual Instruments-Plug-In . . . . . . . . . . . . . . . . . . . . . . . . . . . 96 Mischen und Plug-In-Verarbeitung . . . . . . . . . . . . . . . . . . . . . . . . . . . . . . . . . . . . . . . . . 105 Exportieren Ihres Mix . . . . . . . . . . . . . . . . . . . . . . . . . . . . . . . . . . . . . . . . . . . . . . . . . . . 114 Weitere Informationen . . . . . . . . . . . . . . . . . . . . . . . . . . . . . . . . . . . . . . . . . . . . . . . . . . 115 Introducción a Pro Tools . . . . . . . . . . . . . . . . . . . . . . . . . . . . . . . . . . . . . . . . . . . . . . . . . . . . . 116 Conectar auriculares o altavoces . . . . . . . . . . . . . . . . . . . . . . . . . . . . . . . . . . . . . . . . . . 116 Reproducción de la sesión de demostración . . . . . . . . . . . . . . . . . . . . . . . . . . . . . . . . . . 117 Creación de una sesión . . . . . . . . . . . . . . . . . . . . . . . . . . . . . . . . . . . . . . . . . . . . . . . . . 121 Grabación de audio . . . . . . . . . . . . . . . . . . . . . . . . . . . . . . . . . . . . . . . . . . . . . . . . . . . . 121 Medición del tiempo en minutos y segundos o barras y compases . . . . . . . . . . . . . . . . . . 124 Importación de audio . . . . . . . . . . . . . . . . . . . . . . . . . . . . . . . . . . . . . . . . . . . . . . . . . . . 128 Edición de audio . . . . . . . . . . . . . . . . . . . . . . . . . . . . . . . . . . . . . . . . . . . . . . . . . . . . . . 131 Secuenciación MIDI con un plug-in de instrumento virtual . . . . . . . . . . . . . . . . . . . . . . . . 135 Mezclas y procesamiento con plug-ins . . . . . . . . . . . . . . . . . . . . . . . . . . . . . . . . . . . . . . 144 Exportación de la mezcla . . . . . . . . . . . . . . . . . . . . . . . . . . . . . . . . . . . . . . . . . . . . . . . . 152 Más información . . . . . . . . . . . . . . . . . . . . . . . . . . . . . . . . . . . . . . . . . . . . . . . . . . . . . . . 153 Pro Tools Contents ................................................. ............................. ...................................... ....................................... .......................................... ............................... ...................................... .......................................... MIDI . ............................. ...................................... .......................................... 154 154 155 159 159 162 166 169 173 181 188 189 iv USO RESTRITO Pro Tools キϸ . . . . . . . . . . . . . . . . . . . . . . . . . . . . . . . . . . . . . . . . . . . . . . . . . . 䔋ᣒ㕠ᱧᝃយฝக . . . . . . . . . . . . . . . . . . . . . . . . . . . . . . . . . . . . . . . . . . . . . ᧚ᩫ⑁ጒ⼸ . . . . . . . . . . . . . . . . . . . . . . . . . . . . . . . . . . . . . . . . . . . . . . . ݈ᐧጒ⼸ . . . . . . . . . . . . . . . . . . . . . . . . . . . . . . . . . . . . . . . . . . . . . . . . . 䴠䶾ᒂ ݣ. . . . . . . . . . . . . . . . . . . . . . . . . . . . . . . . . . . . . . . . . . . . . . . . . . В “ ܳহ ” ᝃ “ ᄼ㞯হ㞯 ” ≸䛼ᬣ䬡 . . . . . . . . . . . . . . . . . . . . . . . . . . . . . . . ᄩڒ䴠䶾 . . . . . . . . . . . . . . . . . . . . . . . . . . . . . . . . . . . . . . . . . . . . . . . . . . 㑃䒾䴠䶾 . . . . . . . . . . . . . . . . . . . . . . . . . . . . . . . . . . . . . . . . . . . . . . . . . . Ҭ⩕㮇᠌ͽகУ㑃䒾 MIDI Ꮌ݄ . . . . . . . . . . . . . . . . . . . . . . . . . . . . . . . . . . . ⌤䴠হУั⤳ . . . . . . . . . . . . . . . . . . . . . . . . . . . . . . . . . . . . . . . . . . . . . . ᄩ⌤ܧ䴠 . . . . . . . . . . . . . . . . . . . . . . . . . . . . . . . . . . . . . . . . . . . . . . . . . . γ㼐ᰡ็ . . . . . . . . . . . . . . . . . . . . . . . . . . . . . . . . . . . . . . . . . . . . . . . . . . Contents 190 190 191 195 195 198 202 205 208 215 223 224 v Introduction to Pro Tools USO RESTRITO Read this guide if you are new to Pro Tools®. This guide provides examples of how to record, edit, and mix audio, as well as how to use MIDI in Pro Tools. If you have not yet installed Pro Tools, install it now according to the instructions in the Pro Tools Installation Guide. For information on connecting and installing drivers for your audio hardware, refer to its documentation. Connecting Headphones or Speakers To hear the audio from Pro Tools, connect headphones or speakers to your audio hardware (this guide uses an Mbox audio interface as an example). If you are using headphones, lower the Headphone level control (by turning it counterclockwise). If you are using speakers, lower the Master volume control (by turning it counterclockwise). It is important to start with the volume sufficiently low to avoid damaging your ears or your equipment. Once you have started Pro Tools and opened a session (or created a new one) you can adjust the volume controls to a comfortable listening level. Headphone level Master volume level 1/4-inch headphone jack Mbox front panel connectors and controls Mbox back panel speaker connections Introduction to Pro Tools 1 Playing Back the Demo Session Use the demo session to test your headphones and speakers, and start exploring what you can do with Pro Tools. USO RESTRITO To install and open the demo session: 1 Do one of the following: • Insert the Pro Tools Installer disc into your DVD drive, locate and open the Additional Files folder, and then drag the Demo Session folder to your hard drive (for best performance, use an Avid-qualified external hard drive rather than the system drive). 2 Launch Pro Tools. 3 Do one of the following, depending on what you see on-screen: • If the Quick Start dialog appears, click Open Session, then click OK. Locate the Demo Session file (.ptx), select it, and click Open. • If the Quick Start dialog does not appear, choose File > Open Session, then locate the Demo Session file (.ptx), select it, and click Open. For more information about the demo session, see the Demo Session Read Me. • Download the Pro Tools demo session from your online Avid account to your hard drive (for best performance, use an Avid-qualified external hard drive rather than the system drive). Toolbar Tracks Introduction to Pro Tools 2 To play the Demo Session: 1 2 Turn the volume down on your audio interface so that you don’t play back audio at an uncomfortably high level. Start playback of the demo session in Pro Tools. To start or stop Pro Tools, do one of the following: USO RESTRITO • Press the Spacebar on your computer keyboard. • Click the Play or Stop button in the Transport window (Window > Transport) or in the Edit window toolbar. Stop Play • The Transport window provides controls for transport related functions such as Play, Stop, Record, Fast Forward, and Rewind. • Plug-In windows provide controls for audio processing and virtual instrument plug-ins. • MIDI Editor windows let you edit MIDI data using a “piano-roll” style interface, breakpoint editing, and traditional music notation. • The Score Editor window lets you edit the session’s MIDI data using traditional music notation. You can even print the score directly from Pro Tools. • The Workspace provides an interactive database for all of the media in your session as well as for your system. 5 Press the Spacebar or click the Stop button to stop playback. 6 When you’re finished checking out the Demo Session, choose File > Close Session. Stop and Play controls in the Transport window 3 While the session plays, raise the volume on your audio interface to a comfortable listening level. 4 Explore Pro Tools while the demo session plays back (see the different options available in the Window menu): The Demo Session is an example of a finished project that has been arranged, edited, and mixed. You don’t need to return to the Demo Session for anything else in this guide, but you might want to check it out again later, after you’ve been introduced to a few more Pro Tools features. • The Edit window provides a Timeline display of audio, video, MIDI data, and mixer automation for recording, editing, and arranging on tracks. Use the Edit window for editing and arranging audio, MIDI, and automation data in your session. • The Mix window shows tracks as channel strips—much like a mixing board—with level meters and controls for plug-in and hardware inserts, sends, input and output assignments, panning, volume, solo, mute, and record enable. Use the Mix window for routing and mixing audio and MIDI in your session. Introduction to Pro Tools 3 Viewing the Edit and Mix Windows The Edit window and the Mix window are the two main work areas in Pro Tools. Throughout the rest of this guide, you will see examples of both windows being used for different types of production work. Viewing the Edit Window To display the Edit window: USO RESTRITO Choose Window > Edit. To display all Edit window view options: Select View > Edit Window > All. Edit window Introduction to Pro Tools 4 Viewing the Mix Window To display the Mix window: Choose Window > Mix. To display all Mix window view options: Select View > Mix Window > All. USO RESTRITO Mix window (with Transport and Plug-In windows shown) Introduction to Pro Tools 5 Creating a New Session Recording Audio This section shows you how to create a new session. You can create a new session when you first launch Pro Tools or while it is already running. This section shows how to connect a microphone or instrument (such as a guitar or keyboard) to an Mbox and record audio. To create a new session: Connecting a Microphone or Instrument to an Mbox USO RESTRITO 1 2 If Pro Tools is not already running, launch Pro Tools. Do one of the following: To connect a microphone or an instrument: 1 Do one of the following: • When launching Pro Tools, if the Quick Start dialog opens, select Create Blank Session and click OK. • If you are using a microphone, connect it to a Mic/Line input on the Mbox using an XLR cable. • Choose File > New Session. If you currently have a session open, you will be prompted to save any changes. In the New Session dialog, select Create Blank Session and click OK. • If you are using an instrument, connect it to a DI input on the Mbox using a 1/4-inch cable. 3 In the Save dialog, navigate to where you want to save the session, name it, and then click Save. You have just created a new session with no tracks. Next, you will connect a microphone or instrument cable and create new tracks for audio recording. Input 1 source selector (Front/Rear switch) 2 Do one of the following: • With an Mbox, ensure that the Front/Rear switch is set correctly for either a front panel or rear panel connection. • With an Mbox Mini, depending on which input you are using, ensure that the Line/DI switch or the Mic/Line switch is set correctly for the type of connection. Input 1 Mic/Line input Connecting a mic to Mic/Line Input 1 on the rear panel of an Mbox with an XLR cable Introduction to Pro Tools 6 Creating a Track 5 Pro Tools uses tracks for recording audio and MIDI in a session. Before you can record audio, you need to create an Audio track. To create and prepare an audio track for recording: USO RESTRITO 1 Create a new session, or open an existing session. 2 Choose Track > New. 3 To record a single microphone or instrument connected to your audio interface, set the New Tracks dialog for 1 Mono Audio Track, in Samples, and click Create. In the middle of the new track’s channel strip, notice where it says “Analog 1 (Mono).” This shows which Input channel (Input 1 or Input 2) is assigned to this track. (To specify a different Input channel, click the Audio Input Path selector and choose the other channel.) Audio Input Path selector Recording Your Performance to a Track Creating a new mono audio track If you want to record both inputs at once, create one stereo track or two mono tracks depending on what you have plugged in and what you plan to record: • To record two different sources (such as one vocal mic and one electric guitar), create 2 Mono audio tracks. This lets you record two input signals simultaneously. After recording, these can be edited, processed, and balanced independently. • To record a two-channel stereo source (such as a stereo keyboard), create 1 Stereo audio track. 4 Make sure the Mix window is open by choosing Window > Mix. Introduction to Pro Tools To record an audio track: 1 Click the track’s Record Enable button to arm the track for recording. The button flashes red. Record Enable button Record enabling a track in the Mix window 2 Sing or play into the mic, or play your instrument. Watch the meter level in the Pro Tools track while you raise the input gain on your audio interface. (Note that moving the on-screen fader has no effect on input levels; it’s only for adjusting monitoring levels.) 7 3 Turn up the input gain on your audio interface until you see the on-screen track meter show green most of the time, or yellow for louder passages. 4 In the Transport window, click the Return to Zero button if you want to start recording from the beginning of the session. 5 Click the Record button in the Transport to record arm the session. The button flashes red. (This tells Pro Tools that you are ready to record—think of this as a “master” record enable button for the session.) USO RESTRITO Input 1 Gain (Mbox) Return to Zero Play Record • If the track meter shows red, gain is too high; lower the input gain. • If you barely see green in the track meter, gain is too low; raise the input gain. Track meter 6 Choose Window > Edit so you can watch what happens when you record. 7 When you are ready to start recording, press the Spacebar or click the Play button in the Transport. The Transport Record button and the track’s Record Enable button turn solid red while recording. 8 To stop recording, press the Spacebar again or click the Stop button in the Transport. (The Transport Record button disengages, but the track’s Record Enable button remains enabled and flashes red until you click it). You have just recorded your first audio track. A mono audio track after recording Introduction to Pro Tools 8 Listening to Your Recording After you have recorded some audio, you can play it back for review, editing, and mixing. USO RESTRITO To play back a recorded track: 1 Click the track’s Record Enable button again to take it out of Record mode. The Record Enable button stops flashing red. 2 To start playback, press the Spacebar or click Play in the Transport. 3 To stop playback, press the Spacebar or click Stop in the Transport. Recording More Tracks Simply repeat the same steps to create another audio track (mono or stereo) and continue recording more tracks. In this way, you can record additional parts against the tracks you have recorded previously. This is a common production technique for layering different parts to create an arrangement of a song. Measuring Time in Minutes and Seconds or Bars and Beats Pro Tools lets you measure time in minutes and seconds (absolute time), or bars and beats (relative time). For music production, it is often desirable to measure time in bars and beats. The timing of beats is relative in that it depends on the tempo. The timing of bars is relative in that it depends on the meter. Pro Tools lets you set tempo and meter changes using markers in the session Timeline at the top of the Edit window. These settings scale the relative time of bars and beats against the absolute time of minutes and seconds (or samples). This distinction is referred to in Pro Tools as tick-based (relative) time versus sample-based (absolute) time, and both audio and MIDI data can be set to follow either on a track-by-track basis (for more information, see the Pro Tools Reference Guide). Main Counter Grid mode Timebase Rulers Timeline Pro Tools Timeline and Main Counter (with the Main Time Scale set to Minutes and Seconds) Introduction to Pro Tools 9 USO RESTRITO The Pro Tools Main Time Scale for the session’s Timeline is set to Min:Secs (minutes and seconds) by default, but you can change the Main Time Scale to Bar|Beats (bars and beats) if you want to record with a click track in a specified meter at a specified tempo. Setting the Main Time Scale to bars and beats is also useful if you want to create, edit, and arrange audio and MIDI on a bar/beat grid. Recording with a Click Track A click track provides a metronomic click for tempo reference while recording. Set the Main Scale to Bar|Beats to record and edit your track material according to the specified meter and tempo instead of Min:Secs. To create a click track: 1 Changing the Main Time Scale To set the Main Time Scale, do one of the following: Click a Main Counter selector (located at the top of the Edit or Transport window (when it is set to display Counters) and select a Time Scale. Pro Tools creates a new Auxiliary Input track with the Click plug-in on the first track insert. When you start playback or recording, the click provides a countoff and continues according to the meter and tempo map in the Pro Tools Timeline. 2 Select View > Transport > MIDI Controls to view the MIDI controls in the Transport Window. 3 In the Transport, ensure that the Metronome and Count Off buttons are selected. 4 Ensure that the Conductor button is enabled if you want the click to follow the session tempo (on the Timeline). Disable the Conductor button if you want to adjust the tempo manually. 5 Press the Spacebar or click the Play button in the Transport to start playback and hear the click. Main Counter selector (in the Edit window) If a Timebase ruler is displayed, click its name so it becomes highlighted. Setting the Main Time Scale to the timebase currently displayed in the Sub Counter switches the two Time Scales, setting the Sub Time Scale to the previous timebase of the Main Time Scale. Choose Track > Create Click Track. Tempo Count Off button Metronome button Setting the Main Time Scale to Bars|Beats Introduction to Pro Tools Conductor button 10 To set the Click settings: 1 Choose Setup > Click/Countoff. 2 Select one of the following options: • During play and record—the click sounds during playback and recording USO RESTRITO • Only during record—the click only sounds while recording and not during playback • Only during countoff—the click only sounds when counting off before recording or playback starts Setting the Session Meter Be sure to set the session meter to match the meter of your music. If your session’s meter does not match the music you’re recording, the accented clicks from the Click track will not line up with what you’re playing, and, as a result, the recorded material may not align with the bars and beats grid in the Edit window. To set the meter for a session: 1 Double-click the Current Meter button in the Transport window. Current Meter button 2 Enter the Meter for the session and set the Location to 1|1|000 (to ensure that the inserted meter event replaces the default). Main Counter selector (in the Edit window) 3 Click OK. To silence the click track, do one of the following: Mute the Click track by clicking the M (Mute) button in the Track controls for the Click track. In the Transport window, deselect the Metronome button so it is not highlighted blue. Then deselect the Count Off button so it is not highlighted. (Doing both silences the click track and disables Count Off.) Introduction to Pro Tools Meter Change window 3 From the Click pop-up menu, select a note value for the beat. (For example, if you are in 6/8, select a dotted-quarter note). 4 Click OK to insert the new meter event. 11 Setting the Session Tempo New sessions in Pro Tools default to a tempo of 120 BPM. If you want to record with a click at a tempo other than 120 BPM, make sure to set the tempo accordingly. To change the session tempo: USO RESTRITO 1 Do one of the following: • Double-click the Song Start Marker in the Edit window. • Click the Add Tempo Change button (+) at the head of the Tempo ruler. Song Start Marker 3 Set the Location to 1|1|000 (to ensure that the inserted tempo event replaces the default session tempo). 4 From the Resolution pop-up menu, select the note value for the beat. (For example, if you are in 6/8, select a dotted-quarter note.) 5 Click OK. Using Manual Tempo Mode In Manual Tempo mode, Pro Tools ignores tempo events in the Tempo ruler and instead plays back a Manual Tempo. This tempo can be set numerically by tapping in the tempo. To set tempo manually: Tempo ruler 1 Ensure that the MIDI controls are shown in the Transport by selecting View > Transport > MIDI Controls. 2 In the Transport, disable the Tempo ruler by clicking the Conductor button so it is not highlighted. Pro Tools switches to Manual Tempo mode. In this mode, any tempo events in the Tempo ruler are ignored. Add Tempo Change button Tempo ruler 2 In the Tempo Change dialog, enter the BPM value for the session. Tempo Resolution Tempo Conductor button Manual Tempo mode 3 Tempo Change window Click the Tempo Resolution selector and select a note value. (For example, if you are in 6/8, select the dotted-quarter note, or if you are in 3/4, select the quarter note.) You can type in a specific tempo, or you can use the T key to tap in the tempo. Introduction to Pro Tools 12 4 To enter a new tempo, do one of the following: • Click the Tempo value, type a new number, and press Enter. USO RESTRITO • Click the Tempo value and drag up or down to change the setting. For finer resolution, hold Command (Mac) or Control (Windows) while dragging. • Click the Tempo value and press the “T” key on your computer keyboard at the desired tempo to set the value. Using the Import Audio Command The Import Audio command lets you import audio files or clips into your Pro Tools session. To import audio files or clips into a session using the Import Audio command: 1 Choose File > Import > Audio. 2 In the Import Audio dialog, locate and select an audio file to display its properties and associated clips. Importing Audio Many music production workflows include using audio loops and audio from sample libraries. For example, you can use drum loops instead of a click track for recording. You can even combine and arrange audio loops and “one-shot” samples from a variety of sources to create a whole new piece of music. Pro Tools provides a number of ways to import audio files from different sources into a session. You can import audio from a hard drive, a network volume, an audio CD, or removable media using the Import Audio command, or by dragging from a Workspace browser, or from the Finder (Mac) or Windows Explorer (Windows). Import Audio dialog 3 To preview a selected file or clip before you import it, click the Play button in the Import Audio dialog. Click the Stop button to stop preview. You can adjust the preview volume with the vertical slider. To navigate to a particular location in the file, use the horizontal slider under the Play and Stop buttons. The Preview Volume control in the Import Audio dialog also affects the preview volume when auditioning clips in the Clip List. Introduction to Pro Tools 13 4 Do any of the following: 8 • To place a file or clip in the Import list, select the file and click Add or Convert. In the Audio Import Options dialog, select where the imported files will go in the session: • To import all files and clips in the current directory, click Add All or Convert All. USO RESTRITO • To remove a file or clip from the Import list, select it and click Remove. • To remove all files and clips, click Remove All. Pro Tools lets you add files to a session that are at a different sample rate than the session. In the comments field of the Import Audio dialog, a warning is posted that these files will play back at the wrong speed and pitch if they are not converted. 5 When you have added all audio files and clips you want to the Import list, you can apply sample rate conversion by doing the following: • Enable Apply SRC. • Specify the Source Sample Rate either by typing a number, or by selecting a sample rate from the pop-up menu. • Select the sample rate conversion quality from the Quality pop-up menu. This setting overrides the Sample Rate Conversion Quality setting in the Processing Preferences page. 6 Click Done. 7 If you are copying or converting files, select a location for the new files, such as the Audio Files folder for the current session. When adding files, the file is referenced from its original location. Introduction to Pro Tools Audio Import Options dialog New Track Each audio file is imported into its own individual track and into the Clip List. Clip List Audio files are imported into the Clip List without creating a new track. Imported audio files appear in the Clip List and can then be dragged to audio tracks. 9 If you chose to create a new track, select a location for the imported file in the track: Session Start Places the file or clip at the start of the session. Song Start Aligns the beginning of the file or clip to the Song Start marker. Selection Aligns the beginning of the file or clip to the edit cursor or to the beginning of a selection in the Timeline. Spot Displays the Spot dialog, which lets you spot the file or clip to a precise location based on any of the available Time Scales. 10 Click OK. 14 Importing Files by Dragging USO RESTRITO Pro Tools lets you import audio, MIDI, video, and session files by dragging files from a Workspace browser, the Mac Finder, or Windows Explorer to the Pro Tools application icon, the session Timeline, a track, the Track List, or the Clip List. Workspace Drag media or session files to existing tracks, or to the Track List to add as new tracks Drag files to the Clip List to import Importing from the Workspace by dragging Introduction to Pro Tools 15 The preceding figure illustrates some of the options available to import files by dragging from a Workspace browser. To import files into the Clip List: USO RESTRITO 1 2 Select audio, video, MIDI, clip group, REX, or ACID files in a Workspace browser, or in the Mac Finder or Windows Explorer. Drag the selected files onto the Clip List. To import files into an existing track: 1 Select the files you want to import in a Workspace browser, or in the Mac Finder or Windows Explorer. 2 Drag the selected file to a location on a compatible track. Editing Audio Pro Tools lets you edit audio on tracks by trimming, separating, cutting or copying and pasting, moving, re-arranging, and more. Trimming Audio Clips The following example shows you how to do a simple edit to change where a song starts. In this example, the drummer is heard “counting off” the tempo (“1...2...1.2.3...”) before the song starts (let’s assume this stereo track recorded the overhead mics on the drum kit). Here’s what the audio looks like in Pro Tools. To import files as new tracks: 1 2 Select the files you want to import in a Workspace browser, or in the Mac Finder or Windows Explorer. countoff song start waveforms (left and right channels) Do any of the following: • Shift-drag files anywhere in the Edit window. • Drag files to the Track List. • Drag files to empty space in the Edit window, below or between tracks. Introduction to Pro Tools The stereo waveforms let you visualize the different sections of the song. You can take advantage of this “what you see is what you hear” aspect of Pro Tools to be able to quickly silence the countoff by “trimming” the beginning of the song. 16 To trim an audio clip: 1 Selector tool Click to select the Trim tool (located in the Edit window Toolbar). Grabber tool Smart Tool Trim tool song start USO RESTRITO Edit Tools 3 2 Click in the track after the countoff and before the start of the song (you’ll see the cursor display the Trim icon). Drag right to trim the beginning of the clip in, or drag left to trim the beginning of the clip out. If using the Grabber tool, click the clip you want to copy and paste. If using the Selector tool, double-click the clip you want to copy and paste. Use the Smart Tool to have the Edit cursor switch between different Edit tools, depending on where you place it over a clip. You can “untrim” the clip by clicking and dragging back to the left with the Trim tool. You’ll see that the previous audio (the countoff) is still there. This is an example of how Pro Tools lets you edit nondestructively. Copying and Pasting Clips The following example shows you how to copy and paste an audio clip on a track to different timeline and track locations in a session. This example uses an imported rhythmic audio loop. To copy and paste a clip: 1 Import a rhythmic audio loop into a Pro Tools session (see “Importing Audio” on page 13). 2 Click to select the Grabber tool or the Selector tool (located in the Edit window Toolbar). Introduction to Pro Tools Selecting a clip with the Grabber tool 4 Choose Edit > Copy. 5 With the Selector tool, place the Edit cursor at the location where you want to paste the copied clip. 17 6 Choose Edit > Paste. Separating Clips at the Edit Selection To separate a clip at the current Edit location: USO RESTRITO 1 Pasting a clip to a different time location on a different track Making an Edit selection 2 Press Command+C (Mac) or Control+C (Windows) to copy the current Edit selection to the clipboard. Press Command+V (Mac) or Control+V (Windows) to paste the contents of the clipboard to the current Edit location. With the Selector tool, make an Edit selection within an audio clip. Choose Edit > Separate Clip > At Selection. Press Command+E (Mac) or Control+E (Windows) to separate clips at the current Edit selection. Separating and Rearranging Clips There are many ways to create new audio clips in Pro Tools. You can import or record whole file audio clips. You can also create audio clips that only refer to parts of audio files by trimming (see “Trimming Audio Clips” on page 16) or by separating whole file clips. The following example demonstrates different ways that you can separate and rearrange audio clips in a session. This example uses an imported rhythmic audio loop. Introduction to Pro Tools New clips created by separating the parent clip at the boundaries of the Edit selection Use Edit > Separate Clip > On Grid to separate the audio selection according to the current grid. This is useful when working with audio on a Bar|Beat grid. Use Edit > Separate Clip > At Transients to separate the audio selection according to individual attacks in the audio. This is useful for separating audio out into individual “hits,” such as each hit in a drum loop or each note in a guitar riff. 18 Rearranging Separated Clips USO RESTRITO There are many ways to rearrange clips in Pro Tools. The selected Edit mode (set in the leftmost section of the Edit window Toolbar) determines how Pro Tools handles audio clips when you move them. The following provides just a few of the many possibilities for arranging audio clips in your Pro Tools session. Select a clip with the Grabber or Selector tool and choose Edit > Repeat. In the subsequent Repeat dialog, enter the number of times you want to repeat the selection and click OK. The selection is repeated as separate clips, which are then placed one after the other. Edit modes, Grid mode selected To rearrange clips, do any of the following: With the Grabber tool in Slip mode, drag an audio clip to a new location. The clip moves to the exact location where you moved it. With the Grabber tool in Grid mode, drag an audio clip to a new location. The clip snaps to the nearest grid location where you moved it. A rhythmic audio loop separated at transients and “shuffled” For more information about editing and arranging audio, see the sections on Edit Modes and Edit Tools, Clip Groups, and Elastic Audio in the Pro Tools Reference Guide. With the Grabber tool in Spot mode, drag an audio clip to a new location. The Spot dialog opens and you can specify an exact time location for the clip. With the Grabber tool in Shuffle mode, drag an audio clip to a new location between other clips. Adjacent clips shuffle to make room for the moved clip. Select a clip with the Grabber or Selector tool and choose Edit > Duplicate. The selected clip is duplicated and placed directly after the current selection. Introduction to Pro Tools 19 Sequencing MIDI with a Virtual Instrument Plug-In USO RESTRITO The following provides an example of how to program a MIDI sequence on an Instrument track to play a virtual instrument plug-in. This example uses the Xpand!2 plug-in from AIR Music Technology. The Xpand!2 plug-in is part of the AIR Creative Collection, which is bundled with Pro Tools as a separate, downloaded installer. Be sure to run the AIR Creative Collection Installer, including the associated content, before proceeding with this example. For more information, see the AIR Creative Collection Plug-Ins Guide. What is MIDI? MIDI (Musical Instrument Digital Interface) data is not audio. MIDI does not generate sound. MIDI is a way for MIDI-equipped devices—like synthesizers, samplers, controllers, keyboards, and sequencers—to communicate control data, to “talk” to one another. MIDI effectively tells sound generating devices (like hardware synthesizers or samplers, or software virtual instruments) what to play. USB and FireWire-compatible MIDI interfaces send and receive MIDI messages to and from the computer over USB or FireWire. Hardware MIDI instruments are connected using MIDI cables to the MIDI inputs and outputs on your MIDI interface. Virtual instruments are inserted as plug-ins on Instrument tracks in Pro Tools and accessed directly from within Pro Tools. Introduction to Pro Tools 20 Creating an Instrument Track with an Instrument Plug-In You can use either an Instrument track or a MIDI track to record, program, and play back MIDI sequences in Pro Tools. If you are working with virtual instrument plug-ins (such as Xpand!2 from AIR), you will generally want to use an Instrument track. Instrument tracks let you both work with MIDI sequences and monitor audio. You can also use Instrument tracks with external MIDI devices. USO RESTRITO To create an Instrument track and insert an instrument plug-in: 1 Choose Track > New. In the New Track dialog, do the following: • Select Stereo. • Click the pop-up menu that shows Audio Track and select Instrument Track. • Click Create. New Track dialog, Stereo and Instrument track selected 2 If necessary, select Window > Mix to show the Mix window. 3 Click the track Insert selector near the top of the Instrument track and select Xpand2 from the Instrument submenu. Insert selector Inserting the Xpand!2 plug-in on an Instrument track Introduction to Pro Tools 21 4 A plug-in window appears showing the Xpand!2 plug-in. You can now select a sound preset to play using MIDI. For more information about the Xpand!2 plug-in, see the AIR Creative Collection Plug-Ins Guide. To select a preset sound in the Xpand!2 plug-in: USO RESTRITO At the top of the plug-in window, click the Librarian menu (<factory default>) and select a preset from any of the sub-menus. With Xpand!2, presets are grouped in sub-menus by category. Insert selector Selecting an Xpand!2 factory preset from the Plug-In Librarian menu Introduction to Pro Tools 22 Playing a Virtual Instrument 7 You can play a virtual instrument (such as Xpand!2) using a MIDI sequence or from an external MIDI controller. Play your MIDI controller’s keyboard. You should hear the sound you selected. 8 When you are ready to start recording, click Play or press the Spacebar. To stop, click Stop or press the Spacebar. To play a virtual instrument using an Instrument track, do one of the following: USO RESTRITO If you have a MIDI controller connected, you can play the virtual instrument as long as the Instrument track on which it is inserted is selected or record enabled. You can record your performance as a MIDI sequence while you play. Import a MIDI sequence (or program a MIDI sequence) to the Instrument track on which the virtual instrument is inserted, and then start playback. Recording MIDI with an External Controller Recorded MIDI data on an Instrument track 9 Penciling In a MIDI Sequence You can program a MIDI sequence in Pro Tools using the Pencil tool. When inserting MIDI notes or other MIDI data with the Pencil tool, MIDI clip boundaries are created on the nearest barlines. Pro Tools lets you record MIDI data from a MIDI controller. To record MIDI on an Instrument Track: 1 Make sure your MIDI controller is connected either to a MIDI interface with MIDI cables or directly to your computer with a USB cable. 2 Create a stereo Instrument track and insert Xpand!2 on it (see “Creating an Instrument Track with an Instrument Plug-In” on page 21). 3 Select a bass preset (also known as a “patch”). 4 Select Options > MIDI Thru. (Verify that MIDI Thru is checked; if not, select it.) 5 Click the track’s Record Enable button to enable the Instrument track for MIDI recording. 6 In the Transport window, click the Record button. Introduction to Pro Tools Click the track Record Enable button again to take it out of record enable and play back what you just recorded. To insert a MIDI Note on a track in the Edit window: 1 In the Edit window, set the Instrument track (or MIDI track) to Notes view. Selecting Notes view on an Instrument track 23 2 Select the Pencil tool and make sure it is set to Free Hand. The cursor will change to the Pencil tool when located over the playlist area of a MIDI or Instrument track in Notes view. 5 When you reach the pitch and time location you want, click to insert the note. USO RESTRITO MIDI note inserted with the Pencil tool 3 To insert quarter notes on the beat, do the following: • Set the Main Time Scale to Bars|Beats. • Set the Edit mode to Grid. • Set the Grid value to quarter note. • Set the Default Note Duration value either to quarter note (or to Follow Grid). 4 Move the Pencil tool into the playlist area for the MIDI or Instrument track. Use the Edit window’s ruler and the track’s mini-keyboard as a reference to locate the pitch and time location you want. When using the Pencil tool, the Cursor location and value are displayed in the Window Toolbar. Cursor pitch location Pencil Cursor Cursor Timeline location With Grid mode enabled, the start point of the MIDI note snaps to the nearest Grid boundary by default. With the Free Hand Pencil tool, hold Command (Mac) or Control (Windows) while clicking to temporarily suspend Snap to Grid. The velocity for inserted notes is determined by the Default Note On Velocity setting. The duration is determined by the Default Note Duration value. When in Grid mode, the Note On location is determined by the Grid value. If the Play MIDI Notes When Editing option is enabled, each note sounds as it is inserted. The Pencil tool can be dragged after clicking (and before releasing) to adjust the note’s pitch or duration. Drag right to lengthen the note without changing its start point. Drag left to shorten the note without changing its end point. With the Grid mode enabled, the end point of the MIDI note snaps to the nearest Grid boundary by default. Command-drag (Mac) or Control-drag (Windows) with the Pencil tool to temporarily suspend Snap to Grid. Editing MIDI Notes Cursor location and value Introduction to Pro Tools MIDI notes can be edited in the Edit window or in a MIDI Editor window, including start and end points, duration, pitch, and velocity. The Selector, Grabber, Trim, and Pencil tools can operate on individual notes or groups of notes. 24 Selecting MIDI Notes Transposing Notes MIDI notes must be selected before they can be edited. MIDI notes can be transposed by dragging them up or down with the Pencil tool or any Grabber tool. If several notes are selected before dragging, each note is transposed. USO RESTRITO To select MIDI notes: 1 Set the MIDI or Instrument track to Notes view. 2 Do one of the following: With the Pencil tool or any Grabber tool, Shiftclick each note. With any Grabber tool, move the cursor to where there are no notes (the Marquee appears) and draw a rectangle around the group of notes you want to edit. To transpose a MIDI note: 1 Set the MIDI or Instrument track to Notes view. 2 Select the Pencil tool or any Grabber tool. 3 While holding Shift, drag the note up or down. Transposing with a Grabber tool Selecting notes with a Grabber tool When using a Grabber tool, if any portion of the rectangle touches a note (either its start or end point), the note is included in the selection. With the Selector tool, drag across a range of notes. Selecting notes with the Selector tool When using the Selector tool, a note’s start point must be included in order for it to be selected. Introduction to Pro Tools The Shift key ensures that the transposed note maintains its original start point on the Pro Tools Timeline. While dragging, each new note sounds and the Cursor Location Value indicator (in the Edit window) indicates the number of semitones and direction (+/–) for the transposition. Hold Control (Mac) or Start (Windows) and press Plus (+) on the numeric keypad to transpose the selected MIDI notes up by one semitone, or press Minus (–) on the numeric keypad to transpose the selected MIDI notes down by one semitone. To transpose a copy of the note, leaving the original unchanged, hold Option (Mac) or Alt (Windows) while dragging. 25 Moving Notes Trimming Note Start and End Times Like clips, MIDI notes can be dragged left or right with the Pencil tool or any Grabber tool to change their start point on the Pro Tools Timeline. If several notes are selected before dragging, they are all moved together. Like clips, start and end points for MIDI notes can be adjusted with the Trim tool. If several notes are selected when performing the trim, each note is changed. USO RESTRITO To move a MIDI note: To change the start or end points for a group of MIDI notes: 1 Set the MIDI or Instrument track to Notes view. 1 Set the MIDI or Instrument track to Notes view. 2 With the Pencil tool or any Grabber tool, drag the note left or right (press Shift while dragging to preserve the note’s pitch). 2 Select the notes you want to trim. 3 Do one of the following: As the note is dragged, the Cursor Location Value indicator (in the Edit window) displays the new start point. If the Edit mode is set to Grid, the dragged note snaps to the nearest Grid boundary. If the Edit mode is set to Spot, the Spot dialog opens. • Select the Trim tool. • Use the Pencil tool. 4 Move the cursor near the beginning of any of the highlighted notes, so the Trim tool appears. Drag right to shorten the notes, or drag left to lengthen them. To copy the selected notes, leaving the originals intact, hold Option (Mac) or Alt (Windows) while dragging. Changing note end times with the Trim tool If the Edit mode is set to Grid, the dragged start or end point snaps to the nearest Grid boundary. If the Edit mode is set to Spot, the Spot dialog opens, where you can enter the new location for the note’s start or end point. When in Grid mode, use the Command key (Mac) or the Control key (Windows) to temporarily disable Grid mode. Introduction to Pro Tools 26 USO RESTRITO Manually Editing Note Velocities Deleting MIDI Notes When a MIDI or Instrument track is set to Velocity view, or when the Velocity lane is revealed under a track, each note’s attack velocity is represented with a velocity stalk. The taller the velocity stalk, the higher the velocity value (0–127). In addition to deleting selected notes with the Clear command in the Edit menu, individual notes can also be deleted with the Pencil tool. To edit MIDI velocity in the Edit window: 1 Select the notes to be deleted. 2 Do one of the following: 1 Do one of the following: • Set the MIDI or Instrument track to Velocity view. • Reveal the Controller lane for the MIDI or Instrument track and show Velocity. To delete a group of MIDI notes with the Clear command: • Choose Edit > Clear to delete the selected notes. The track’s underlying controller data remains intact. • With any Edit tool, Right-click any selected note and choose Clear. • Press the Delete (Mac) or the Backspace (Windows) key. When deleting MIDI notes within a time range selection, all underlying controller and automation data is also deleted. Revealing the Velocity Lane 2 Select any Grabber tool. 3 Drag the top (diamond) of the velocity stalk up or down. To delete a single MIDI note with the Pencil tool: With the Pencil tool selected, Option-click (Mac) or Alt-click (Windows) the note. The Pencil tool changes to an Eraser when Option (Mac) or Alt (Windows) is pressed. Deleting a note with Pencil tool Dragging a velocity stalk The velocities for a range of notes can be edited with any Pencil tool. Introduction to Pro Tools Program change events and Sysex events can also be deleted by Option-clicking (Mac) or Alt-clicking (Windows) them with the Pencil tool. 27 Mixing and Plug-In Processing USO RESTRITO Mixing in Pro Tools involves working with elements of audio signal flow, including inputs, outputs, buses, inserts, and sends, for purposes of submixing and mixdown. In addition to the final mixdown, mixing tasks can occur any time during a session. During mixing, real-time plug-ins and hardware inserts provide effects and signal processing. Pro Tools comes with a suite of audio effects processing plug-ins that you can use to change the sounds you’ve recorded. This section shows two examples of how to use plug-ins to process your sound. For detailed information about the plug-ins included with Pro Tools, see the Audio PlugIns Guide (Help > Audio Plug-Ins Guide). Introduction to Pro Tools Applying Equalization and Compression Typically, when mixing audio, you will want to apply equalization and compression on individual tracks to get your audio to sound just right. Equalization (EQ) Lets you shape the frequency spectrum of the sound. A simple example equalization is the bass and treble controls on many stereo systems. You can use these controls to boost (make louder) or attenuate (make quieter) the low frequencies and the high frequencies of the audio. You can use EQ to help separate the bass and guitar, to sharpen the drums, emphasize the vocals, and even to cut out unwanted noise. Pro Tools provides several different types of EQ plug-ins for sculpting your sound. Compression Lets you smooth the dynamics of your audio. It acts like an automatic volume control by keeping the loud parts from getting too loud. You can use compression to make vocals sound more intimate, or to keep cymbals from sounding too shrill. Use a limiter to keep peaks in the audio signal from exceeding a certain threshold without affecting audio that doesn’t exceed that level. Pro Tools provides several different types of dynamics plug-ins for shaping the dynamics your sound. 28 USO RESTRITO To apply EQ to a track: 1 Choose Window > Mix. 2 In the top part of the track, click the next Track Insert selector and choose EQ 3 7-Band from the EQ submenu. 3 The EQ III Plug-In window opens. You can use the plug-in presets as a starting point for exploring how different settings affect the sound. EQ III Plug-In window, Plug-In Preset selector 4 Start playback to hear the effect. Insert selector for a track in the Mix window Introduction to Pro Tools 29 USO RESTRITO To apply compression to a track: 1 Choose Window > Mix. 2 In the top part of the track, click the next Track Insert selector and choose Dyn 3 Compressor/Limiter from the Dynamics submenu. Pro Tools inserts the Dynamics III Compressor/Limiter plug-in on your track and opens its plug-in window. 3 The Dyn III Plug-In window opens. You can use the plug-in presets as a starting point for exploring how different settings affect the sound. Using Reverberation Reverberation (Reverb) provides a sense of room acoustics. Reverb effects are essentially a bunch of delays that are used to mimic the reflection of sound off of surfaces in different rooms, halls, and other spaces. You can use reverb effects to create a sense of space for your entire mix using sends from your source tracks and processing using an Auxiliary Input track. Reverb effects can make your mix sound like it is in a big concert hall, an intimate room, or even a narrow hallway. One of the best ways to incorporate reverb in your mix is in a “send-and-return” configuration. In Pro Tools, using sends from tracks makes it easy to route audio from multiple tracks to and through the same reverb effect. This way, your source tracks will all sound as if they are in the same room. Dyn III Plug-In window, Plug-In Preset selector 4 Start playback to hear the effect. Introduction to Pro Tools 30 USO RESTRITO To use reverb with an Auxiliary Input track and multiple source tracks: 1 Choose Window > Mix. 2 Choose Track > New, and set it to create 1 stereo Auxiliary Input track, then click Create. Creating a new Auxiliary Input track 3 On the Auxiliary Input track you just added, click the Track Input selector and select Bus > Bus 1–2. Track Input selector Selecting Bus 1–2 from the Input selector on an Auxiliary Input track Introduction to Pro Tools 31 4 Click Send selector A on your source track as shown below and select Bus > Bus 1-2. USO RESTRITO Send A selector Selecting Bus 1–2 for Send A on an audio track 5 Repeat the previous step for each additional track that you want to send to the Auxiliary Input track for reverb processing. Introduction to Pro Tools 32 USO RESTRITO 6 Insert a Reverb plug-in on the Auxiliary Input track. Bussing sends from audio tracks to an Auxiliary Input track for reverb processing with D-Verb 7 You can use individual Send Output windows to adjust the Send level from source tracks; or, you can set the Sends view to display the send controls for a particular send (for example, select View > Sends A–E > Send A). 8 Press the Spacebar and slowly raise the small fader in the Send Output window or in the Sends track controls. This adjusts how much of the source track you are sending to the Auxiliary Input track for Reverb processing. 9 Keep playing and listening, adjusting the individual track send levels, and checking out different plug-in settings to find just the right effect for your mix. Introduction to Pro Tools 33 Using Automation 3 In the Mix or Edit window, click the Automation Mode selector on each of the tracks you want to automate, and set the Automation mode. For the initial automation pass, select Write. 4 Start playback to begin writing automation. 5 Move the controls you want to automate (such as a track Volume fader). Writing Automation 6 When you have finished, stop playback. You can write automation for all write-enabled controls by moving those controls during playback. 7 Switch the Automation mode back to Read to play back the automation you just wrote. USO RESTRITO Pro Tools features dynamic automation of mixing controls on each of the track types. You can write automation moves and view them in real time during playback of your session. You can also edit automation data with many if the same techniques you use to edit audio and MIDI data. To write automation on tracks: 1 Choose Window > Automation. 2 Make sure the automation type is write-enabled. Track Automation Mode selector Automation window Moving Volume Fader during playback After the first automation pass, you can write additional automation to the track without completely erasing the previous pass by choosing Touch mode or Latch mode. These modes add new automation only when you actually move a control. Manually Editing Automation For all tracks in a session, Pro Tools provides several ways to edit automation data. You can edit automation data graphically by adjusting breakpoints in any automation playlist. You can also cut, copy, and paste automation data in the same manner as audio and MIDI data. Automation data takes the form of a line graph with editable breakpoints. Automation breakpoint Automation window, volume automation enabled Introduction to Pro Tools 34 USO RESTRITO By dragging these breakpoints, you can modify the automation data directly in the Edit window and MIDI Editor windows. When you drag an automation breakpoint up or down, the change in value is indicated. Using the Grabber Tools Automation breakpoint value Using the Grabber tool to create a new breakpoint Dragging an automation breakpoint to the left or right adjusts the timing of the automation event. Using the Pencil Tool To view the breakpoint automation type on any track, either select the corresponding Track View or reveal the corresponding Automation or Controller lane under the track. For example, you can view and edit Volume, Panning, Mute, MIDI controller data, or even plug-in automation. Track View selector Automation Type selector Volume automation track view The Grabber tools let you create new breakpoints by clicking on the graph line, or adjust existing breakpoints by dragging them. Option-click (Mac) or Alt-click (Windows) breakpoints with a Grabber tool to remove them. The Pencil tool lets you create new breakpoints by clicking once on the graph line. Option-click (Mac) or Alt-click (Windows) breakpoints with the Pencil tool to remove them. Using the Pencil tool to delete a breakpoint Using the Trim Tools The Trim tools let you adjust all selected breakpoints up or down by dragging anywhere within that selection. Automation lanes Track View and Automation lanes Introduction to Pro Tools Using the Trim tool to move breakpoints 35 Exporting Your Mix After you’ve finished recording, editing, and mixing tracks in a Pro Tools session, you’re ready to mix down your session and export the results for burning to CD or publishing on the Internet. You can use the Bounce to Disk command to export your mix from the session to a single audio file. To export the mix from your session as a stereo audio file: USO RESTRITO 1 Use the Selector to select the length of the session in the Timeline (or on a track). Selector tool Timeline selection Session audio selected and ready to Bounce to Disk Making a Timeline selection to Bounce to Disk 2 Choose File > Bounce to > Disk. 3 In the Bounce Options dialog, do the following: • Select the as the Bounce Source (this will be the main channel path for your mix, such as main (Stereo) –> Analog 1–2). • Select the File Type (for example, WAV). • Select Interleaved for the Format. • If you will be burning the bounced audio file to CD, select 16 Bit for the Bit Depth. • If you will be burning the bounced audio file to CD, select 44.1 kHz for the Sample Rate. • For faster than real-time Bounce, select the Offline option. 4 Click Bounce. (If you didn’t make a Timeline selection, the entire session will bounce from start to finish.) Bounce dialog Introduction to Pro Tools 36 5 In the Save dialog, type the name for the audio file you are bouncing, and select the location where you want it saved. 6 Click Save. USO RESTRITO Pro Tools begins the bounce to disk. If the Offline option is not enabled, Pro Tools bounces are done in real time, so you can hear audio playback of your mix during the bounce. (However, you cannot adjust any Pro Tools controls during a bounce.) Burning Your Mix to CD After the bounce is completed, you will have an audio file that you can burn to an audio CD using CD burning software (such as iTunes or Roxio Toast) that can be played on standard CD players. Listening to a reference CD in an environment other than your studio is a time-tested way to hear how your mix translates to other systems and listening environments. Introduction to Pro Tools Learn More We hope this quick introduction to Pro Tools has inspired you to make music. To learn more about any of the topics presented here, see the Pro Tools Reference Guide (Help > Pro Tools Reference Guide) for complete details on all Pro Tools systems and software. The Pro Tools Reference Guide provides a thorough explanation of all Pro Tools features and concepts, organized by audio and music production tasks (such as Recording, Editing, and Mixing). You can also use the online Pro Tools Help (Help > Pro Tools Help) to search for specific topics. 37 Introduction à Pro Tools USO RESTRITO Ce guide est destiné aux nouveaux utilisateurs de Pro Tools®. Il fournit des exemples présentant les méthodes d'enregistrement, d'édition et de mixage audio ainsi que d'utilisation du MIDI dans Pro Tools. Si vous n'avez pas encore installé Pro Tools, suivez les instructions du Guide d'installation de Pro Tools. Pour obtenir des informations de connexion et d'installation des pilotes de votre matériel audio, reportez-vous à sa documentation. Connexion d'un casque ou de haut-parleurs Pour entendre l'audio provenant de Pro Tools, connectez un casque ou des haut-parleurs à votre matériel audio (ce guide prend l'exemple d'une interface audio Mbox). Si vous utilisez un casque, baissez tout d'abord son niveau (sens inverse des aiguilles d'une montre). Pour des haut-parleurs, baissez le niveau de volume Master (sens inverse des aiguilles d'une montre). Il est important de partir d'un volume suffisamment faible afin d'éviter d'endommager votre ouïe ou votre matériel. Après avoir lancé Pro Tools et ouvert ou créé une session, ajustez les commandes de volume pour définir un niveau d'écoute confortable. Volume du casque Bouton de volume Master Prise casque 6,35 mm Connecteurs et commandes du panneau avant d'une Mbox Connecteurs pour haut-parleurs du panneau arrière d'une Mbox Introduction à Pro Tools 38 Lecture de la session de démonstration Utilisez la session de démonstration pour tester votre casque et vos haut-parleurs et commencer à découvrir les possibilités de Pro Tools. USO RESTRITO Pour installer et ouvrir la session de démonstration : 1 Effectuez l'une des opérations suivantes : • Insérez le disque d'installation de Pro Tools dans votre lecteur DVD, recherchez et ouvrez le dossier Additional Files, puis faites glisser le dossier Demo Session sur votre disque dur (pour des performances optimales, utilisez un disque dur externe qualifié par Avid plutôt que le disque système). 2 Démarrez Pro Tools. 3 Effectuez l'une des opérations suivantes, selon ce qui est affiché à l'écran : • Si la boîte de dialogue Quick Start s'affiche, cliquez sur Open Session, puis sur OK. Naviguez jusqu'au fichier Demo Session (.ptx), sélectionnez-le, puis cliquez sur Open. • Si la boîte de dialogue Quick Start n'apparaît pas, sélectionnez File > Open Session puis naviguez jusqu'au fichier Demo Session (.ptx), sélectionnez-le et cliquez sur Open. Pour de plus amples informations sur la session de démonstration, reportez-vous au fichier Lisez-moi associé. • Depuis votre compte Avid en ligne, téléchargez la session de démonstration de Pro Tools sur votre disque dur (pour des performances optimales, utilisez un disque dur externe qualifié par Avid plutôt que le disque système). Barre d'outils Pistes Introduction à Pro Tools 39 Pour lancer la lecture de la session de démonstration : 1 Baissez le volume sur votre interface audio afin que le niveau de lecture audio ne soit pas trop élevé. Lancez la lecture de la session de démonstration dans Pro Tools. Pour lancer ou interrompre la lecture dans Pro Tools, effectuez l'une des opérations suivantes : • Appuyez sur la barre d'espace de votre clavier. USO RESTRITO 2 • Cliquez sur le bouton Play ou Stop de la fenêtre de transport (Window > Transport) ou de la barre d'outils de la fenêtre Edit. Arrêt Lecture Commandes Play et Stop de la fenêtre de transport 3 Pendant que la session est en cours de lecture, montez le volume sur votre interface audio pour obtenir un niveau d'écoute confortable. Explorez Pro Tools en poursuivant la lecture de la session de démonstration (découvrez les différentes options du menu Window) : • La fenêtre Edit présente les données audio, MIDI, vidéo et d'automation du mixeur sur une timeline, réparties sur des pistes qui permettent d'enregistrer, d'éditer et d'organiser vos projets. Utilisez la fenêtre Edit pour éditer et manipuler les données audio, MIDI et d'automation de votre session. • La fenêtre Mix affiche les pistes sous la forme de tranches, comme sur une console de mixage, avec des indicateurs de niveau et des commandes pour les inserts de plug-ins et matériels, les départs, les assignations d'entrée et de sortie, le panoramique, le volume, les fonctions solo et mute et l'activation pour l'enregistrement. Utilisez la fenêtre Mix pour le routing et le mixage audio et MIDI de votre session. 4 Introduction à Pro Tools • La fenêtre de transport fournit des commandes exécutant des fonctions relatives au transport, telles que Play, Stop, Record, Fast Forward et Rewind. • Les fenêtres de plug-in fournissent des commandes pour les plug-ins de traitement audio et d'instrument virtuel. • La fenêtre de l'éditeur MIDI permet d'éditer les données MIDI à partir d'une interface de type « rouleau à musique », d'ajuster les points d'automation ou même de les afficher sous forme de notation musicale traditionnelle. • La fenêtre de l'éditeur de partition permet d'éditer les données MIDI de la session sous la forme de notation musicale traditionnelle. Vous pouvez également imprimer la partition directement à partir de Pro Tools. • L'espace de travail permet d'accéder à une base de données interactive constituée de tous les médias présents dans votre session ainsi que sur votre système. 5 Appuyez sur la barre d'espace ou cliquez sur le bouton Stop pour interrompre la lecture. 6 Lorsque vous aurez découvert l'ensemble de la session de démonstration, sélectionnez File > Close Session. La session de démonstration est un exemple typique de projet arrangé, édité, mixé, puis finalisé. Les sections suivantes de ce guide ne se réfèrent pas à la session de démonstration, mais vous pouvez la réutiliser ultérieurement, une fois que vous saurez utiliser plus de fonctionnalités de Pro Tools. 40 Affichage des fenêtres Edit et Mix Les fenêtre Edit et Mix sont les deux principales zones de travail dans Pro Tools. Tout au long de ce guide, vous trouverez des exemples d'utilisation de ces deux fenêtres pour différentes tâches de production. Affichage de la fenêtre Edit Pour afficher la fenêtre Edit : USO RESTRITO Sélectionnez Window > Edit. Pour afficher tous les composants de la fenêtre Edit : Sélectionnez View > Edit Window > All. Fenêtre Edit Introduction à Pro Tools 41 Affichage de la fenêtre Mix Pour afficher la fenêtre Mix : Sélectionnez Window > Mix. Pour afficher tous les composants de la fenêtre Mix : Sélectionnez View > Mix Window > All. USO RESTRITO Fenêtre Mix (avec fenêtres de transport et de plug-in) Introduction à Pro Tools 42 Création d'une nouvelle session Cette section explique comment créer une nouvelle session. Vous pouvez créer une nouvelle session immédiatement après avoir lancé Pro Tools, ou lorsqu'il est en cours d'exécution. Enregistrement audio Cette section explique comment connecter un microphone ou un instrument tel qu'une guitare ou un clavier à une Mbox, puis enregistrer de l'audio. Connexion d'un microphone ou d'un instrument à une Mbox USO RESTRITO Pour créer une nouvelle session : 1 2 Si Pro Tools n'est pas en cours d'exécution, lancez l'application. Effectuez l'une des opérations suivantes : • Lors du lancement de Pro Tools, si la boîte de dialogue Quick Start s'ouvre, sélectionnez Create Blank Session et cliquez sur OK. • Sélectionnez File > New Session. Si une autre session est ouverte, un message vous invitera à enregistrer les modifications. Dans la boîte de dialogue New Session, sélectionnez Create Blank Session et cliquez sur OK. 3 Dans la boîte de dialogue d'enregistrement, donnez un nom à la session, sélectionnez l'emplacement où vous souhaitez l'enregistrer, puis cliquez sur Save. Pour connecter un microphone ou un instrument : 1 Effectuez l'une des opérations suivantes : • Si vous utilisez un microphone, connectez-le à une entrée micro/ligne de la Mbox à l'aide d'un câble XLR. • Si vous utilisez un instrument, connectez-le à une entrée DI de la Mbox à l'aide d'un câble 6,35 mm. 2 Effectuez l'une des opérations suivantes : • Avec une Mbox, assurez-vous que le commutateur Front/Rear est sur la position appropriée (connexion sur le panneau avant ou arrière). • Avec une Mbox Mini, assurez-vous que le commutateur Line/DI ou Mic/Line est sur la position appropriée en fonction du type de connexion et d'entrée utilisée. Vous venez de créer une nouvelle session qui ne contient encore aucune piste. Vous devez ensuite connecter un câble de microphone ou d'instrument et créer de nouvelles pistes d'enregistrement audio. Sélecteur de source de l'entrée 1 (bouton Front/Rear) Entrée 1 Entrée micro/ligne Connexion d'un micro avec un câble XLR à l'entrée micro/ligne 1 du panneau arrière d'une Mbox Introduction à Pro Tools 43 Création d'une piste 5 Pro Tools utilise des pistes pour enregistrer des données audio et MIDI dans une session. Avant de pouvoir enregistrer de l'audio, vous devez créer une piste audio. USO RESTRITO Pour créer une piste audio et la préparer à l'enregistrement : 1 Créez une nouvelle session, ou ouvrez une session existante 2 Sélectionnez Track > New. 3 Pour enregistrer un seul micro ou instrument connecté à votre interface audio, configurez les options de la boîte de dialogue New Tracks comme suit : 1 Mono Audio Track, en Samples, puis cliquez sur Create. Au milieu de la tranche du canal de la nouvelle piste se trouve un sélecteur sur lequel l'information Analog 1 (Mono) est affichée. Ce sélecteur indique quel canal d'entrée (Entrée 1 ou 2) est assigné à cette piste. En cliquant sur le sélecteur du chemin d'entrée audio, vous pouvez sélectionner l'autre canal. Sélecteur de chemin d'entrée audio Enregistrement d'une performance sur une piste Pour enregistrer une piste audio : Création d'une nouvelle piste audio mono 1 Si vous souhaitez enregistrer les deux entrées simultanément, créez une piste stéréo ou deux pistes mono selon le type de source à enregistrer et le matériel utilisé : • Pour enregistrer deux sources différentes, telles qu'un micro chant et une guitare électrique, créez 2 pistes audio Mono. Vous pourrez ainsi enregistrer les deux signaux d'entrée simultanément. Après l'enregistrement, vous pourrez éditer, traiter et mixer ces pistes indépendamment. • Pour enregistrer une source stéréo sur deux canaux telle qu'un clavier stéréo, créez 1 piste audio Stereo. 4 Ouvrez la fenêtre Mixage en sélectionnant Window > Mix. Introduction à Pro Tools Cliquez sur le bouton d'activation pour l'enregistrement de la piste afin qu'elle soit prête à enregistrer un signal audio. Le bouton clignote en rouge. Bouton d'activation pour l'enregistrement Activation d'une piste pour l'enregistrement dans la fenêtre Mix 2 Chantez ou jouez de votre instrument. Augmentez le gain d'entrée de votre interface audio tout en surveillant l'indicateur de niveau de la piste dans Pro Tools. Notez que les faders à l'écran n'agissent pas sur les niveaux d'entrée. Ils contrôlent uniquement les niveaux de monitoring. 44 3 Montez le gain d'entrée sur votre interface audio jusqu'à ce que le niveau de la piste soit affiché dans le segment vert de l'indicateur la plupart du temps, ou dans le segment jaune pour les passages les plus forts. 4 Dans la fenêtre de transport, cliquez sur le bouton de retour à zéro si vous souhaitez que la lecture parte du début de la session. 5 Cliquez sur le bouton Record de la fenêtre de transport pour préparer la session à l'enregistrement. Le bouton clignote en rouge. Vous indiquez ainsi à Pro Tools que vous êtes prêt à enregistrer. Ce bouton est une sorte de commande globale d'activation pour l'enregistrement de la session. USO RESTRITO Gain de l'entrée 1 (Mbox) Retour à zéro Lecture Enregistrement • Si le niveau de la piste atteint la zone rouge de l'indicateur, votre gain est trop élevé et vous devez alors le réduire. • Si le niveau n'apparaît que sporadiquement dans le segment vert, votre gain est trop faible et vous devez alors l'augmenter. Indicateur de niveau de piste 6 Sélectionnez Window > Edit afin de pouvoir visualiser ce qui se produit lorsque vous enregistrez. 7 Lorsque vous êtes prêt à lancer l'enregistrement, appuyez sur la barre d'espace ou cliquez sur le bouton Play de la fenêtre de transport. Au cours de l'enregistrement, le bouton Record de la fenêtre de transport et le bouton Record Enable de la piste cessent de clignoter et restent allumés. 8 Pour arrêter l'enregistrement, appuyez de nouveau sur la barre d'espace ou cliquez sur le bouton Stop de la fenêtre de transport. Le bouton Record de la fenêtre de transport est désenclenché, mais le bouton Record Enable de la piste reste activé et clignotera en rouge jusqu'à ce que vous cliquiez dessus. Vous venez d'enregistrer votre première piste audio. Une piste audio mono après enregistrement Introduction à Pro Tools 45 Écoute de votre enregistrement Après avoir enregistré de l'audio, vous pouvez lancer la lecture pour l'écouter, l'éditer et le mixer. USO RESTRITO Pour lire une piste enregistrée : 1 Cliquez de nouveau sur le bouton Record Enable de la piste pour la sortir du mode d'enregistrement. Le bouton Record Enable arrête de clignoter en rouge. 2 Pour lancer la lecture, appuyez sur la barre d'espace ou cliquez sur le bouton Play de la fenêtre de transport. 3 Pour arrêter la lecture, appuyez sur la barre d'espace ou cliquez sur le bouton Stop de la fenêtre de transport. Enregistrement sur d'autres pistes Répétez simplement les mêmes étapes pour créer une seconde piste audio (mono ou stéréo) et enregistrer d'autres prises. Vous pouvez enregistrer des parties supplémentaires sur les pistes utilisées pour les enregistrements précédents. Il s'agit d'une technique de production courante permettant d'ajouter plusieurs couches d'enregistrement pour créer un arrangement de morceau. Mesure du temps en minutes et secondes ou en mesures et temps Pro Tools permet de mesurer le temps en minutes et secondes (temps absolu) ou en mesures et temps (temps relatif). Pour la production musicale, il est conseillé de se baser sur les mesures et temps. La répartition temporelle des temps est relative car elle est liée au tempo. Celle des mesures est également relative car elle est liée à la signature rythmique. Pro Tools permet de définir les changements de tempo et de mesure en plaçant des marqueurs sur la timeline de la session située en haut de la fenêtre Edit. Ces paramètres déterminent le rapport entre les valeurs temporelles relatives en mesures et temps et les valeurs absolues en minutes et secondes (ou échantillons). Dans Pro Tools, cette distinction apparaît sous la forme de valeurs temporelles basées sur le tempo (relatives) ou sur les échantillons (absolues). Les données audio et MIDI peuvent être référencées par rapport à l'un ou l'autre de ces types de valeurs, piste par piste (pour plus d'informations, reportezvous au Guide de référence Pro Tools). Compteur principal Mode Grid Règles de base de temps Timeline Timeline et compteur principal de Pro Tools (l'échelle temporelle principale est définie sur minutes et secondes) Introduction à Pro Tools 46 USO RESTRITO L'échelle temporelle principale de Pro Tools pour la timeline de la session est définie par défaut sur Min:Secs (minutes et secondes). Vous pouvez également l'afficher en Bar|Beats (mesures et temps) si vous souhaitez enregistrer avec une piste de clic, à une signature rythmique et un tempo spécifiques. Une échelle temporelle principale basée sur les mesures et temps est également utile pour la création, l'édition et la manipulation de données audio et MIDI sur une grille graduée en mesures et temps. Modification de l'échelle temporelle principale Pour définir l'échelle temporelle principale, effectuez l'une des opérations suivantes : Cliquez sur le sélecteur de compteur principal (situé en haut de la fenêtre Edit ou de la fenêtre de transport lorsque l'affichage des compteurs est activé) et sélectionnez une échelle temporelle. Sélecteur de compteur principal (dans la fenêtre Edit) Enregistrement avec une piste de clic Une piste de clic produit des battements de métronome que vous pouvez utiliser comme référence en enregistrement. Définissez l'echelle principale sur Bar|Beats pour enregistrer et éditer le contenu de votre piste en vous basant sur la métrique et le tempo spécifiés plutôt que sur une valeur exprimée en Min:Secs. Pour créer une piste de clic : 1 Pro Tools ajoute une nouvelle piste d'entrée auxiliaire avec le plug-in Click sur le premier insert. Lorsque vous lancez la lecture ou l'enregistrement, vous entendez un décompte suivi de battements respectant la métrique et le tempo définis sur la timeline de Pro Tools. 2 Sélectionnez View > Transport > MIDI Controls pour afficher les commandes MIDI de la fenêtre de transport. 3 Assurez-vous que les boutons du métronome et de décompte de la fenêtre de transport soient activés. 4 Si vous souhaitez que le clic suive le tempo de la session (défini sur la timeline), activez également le bouton du chef d'orchestre. Désactivez-le si vous souhaitez ajuster le tempo manuellement. 5 Appuyez sur la barre d'espace ou cliquez sur le bouton Play de la fenêtre de transport pour lancer la lecture et entendre le clic. Si une règle de base de temps est déjà affichée, cliquez sur son nom. Il s'affiche alors en surbrillance. Lorsque vous définissez l'échelle temporelle principale sur la base de temps affichée dans le compteur secondaire, les deux échelles temporelles sont modifiées. En d'autres termes, l'échelle temporelle secondaire prend l'ancienne valeur de la référence temporelle de l'échelle principale. Sélectionnez Track > Create Click Track. Tempo Bouton de décompte Bouton du métronome Définition de l'échelle temporelle principale sur Bars|Beats Introduction à Pro Tools Bouton du chef d'orchestre 47 Pour configurer les paramètres du clic : 1 Sélectionnez Setup > Click/Countoff. 2 Choisissez l'une des options suivantes : • During play and record : le clic est audible pendant la lecture et l'enregistrement USO RESTRITO • Only during record : le clic n'est audible que pendant l'enregistrement, et non pendant la lecture • Only during countoff : le clic n'est audible que pendant le décompte précédant le début de la lecture ou de l'enregistrement Configuration de la métrique de la session Veillez à définir la métrique de la session afin qu'elle corresponde à celle de votre musique. Si la métrique d'une session ne correspond pas à celle de la musique que vous enregistrez, les temps forts de la piste de clic ne tomberont pas sur ceux de votre musique. Par conséquent, les données enregistrées risquent de ne pas être alignées sur les intervalles en mesures et temps de la grille de la fenêtre Edit. Pour définir la métrique d'une session : 1 Double-cliquez sur la métrique actuelle affichée dans la zone Meter de la fenêtre de transport. Bouton de la métrique actuelle 2 Saisissez la métrique de la session et définissez la valeur du champ Location sur 1|1|000 afin que l'événement de métrique inséré remplace celui créé par défaut. Sélecteur de compteur principal (dans la fenêtre Edit) 3 Cliquez sur OK. Pour couper le son de la piste de clic, effectuez l'une des opérations suivantes : Mutez la piste de clic en cliquant sur son bouton M (Mute) parmi les commandes de cette piste. Désactivez le bouton du métronome de la fenêtre de transport ; il ne doit plus être allumé en bleu. Désactivez ensuite le bouton de décompte qui lui aussi n'apparaîtra plus en surbrillance. Cette procédure coupe le son de la piste de clic et désactive le décompte. Introduction à Pro Tools Fenêtre Meter Change 3 Dans le menu déroulant Click, sélectionnez une valeur de note pour les battements. Pour une mesure en 6/8 par exemple, sélectionnez une noire pointée. 4 Cliquez sur OK pour insérer le nouvel événement de métrique. 48 Configuration du tempo de la session Dans Pro Tools, les nouvelles sessions sont créées avec un tempo par défaut de 120 BPM. Si vous souhaitez enregistrer à un tempo différent de 120 BMP, ajustez le tempo en conséquence. USO RESTRITO Pour modifier le tempo de la session : 1 Effectuez l'une des opérations suivantes : • Double-cliquez sur le marqueur de début de morceau de la fenêtre Edit. • Cliquez sur le bouton d'ajout de changement de tempo (+), situé au début de la règle de tempo. Marqueur de début de morceau 3 Définissez la valeur du champ Location sur 1|1|000 afin que l'événement de tempo inséré remplace celui créé par défaut. 4 Dans le menu déroulant Resolution, sélectionnez une valeur de note pour les temps. Pour une mesure en 6/8 par exemple, sélectionnez une noire pointée. 5 Cliquez sur OK. Utilisation du mode de tempo manuel En mode de tempo manuel, Pro Tools ignore les événements de tempo de la règle de tempo et suit un tempo manuel à la place. Ce tempo peut être déterminé automatiquement en battant la mesure. Pour définir le tempo manuellement : Règle de tempo 1 Assurez-vous que les commandes MIDI de la fenêtre de transport sont bien affichées en sélectionnant View > Transport > MIDI Controls. 2 Désactivez la règle de tempo à partir de la fenêtre de transport en cliquant sur le bouton du chef d'orchestre. Le bouton doit être éteint. Pro Tools passe en mode de tempo manuel. Dans ce mode, tous les événements de tempo de la règle de tempo sont ignorés. Bouton d'ajout de changement de tempo Règle de tempo 2 Dans la boîte de dialogue Tempo Change, entrez la valeur du tempo de la session en BPM. Résolution du tempo Tempo Bouton du chef d'orchestre Mode de tempo manuel 3 Fenêtre Tempo Change Cliquez sur le sélecteur de résolution du tempo et sélectionnez une valeur de note. Pour une mesure en 6/8 par exemple, sélectionnez une noire pointée, ou une noire pour une mesure en 3/4. Vous pouvez saisir un tempo spécifique ou utiliser la touche T pour battre la mesure. Introduction à Pro Tools 49 4 Pour entrer un nouveau tempo, effectuez l'une des opérations suivantes : USO RESTRITO • Cliquez sur la valeur du tempo, tapez une nouvelle valeur et appuyez sur Entrée. • Cliquez sur la valeur de tempo et faites glisser votre souris vers le haut ou le bas pour modifier le tempo en conséquence. Pour un contrôle plus précis, maintenez la touche Ctrl (Windows) ou Commande (Mac) enfoncée pendant que vous faites glisser votre souris. Utilisation de la commande Import Audio La commande Import Audio permet d'importer des fichiers et clips audio dans votre session Pro Tools. Pour importer des fichiers ou des clips audio dans une session à l'aide de la commande Import Audio : 1 Sélectionnez File > Import > Audio. 2 Dans la boîte de dialogue Import Audio, localisez et sélectionnez un fichier audio afin d'afficher ses propriétés et les clips associés. • Cliquez sur la valeur de tempo et appuyez à plusieurs reprises sur la touche T du clavier de votre ordinateur en battant la mesure au tempo souhaité. Importation de fichiers audio Des boucles audio ainsi que des samples issus de bibliothèques sont fréquemment utilisés dans les workflows de production musicale. Vous pouvez par exemple utiliser des boucles de batterie à la place d'une piste de clic en tant que référence de tempo pour l'enregistrement. Il est également possible de mélanger plusieurs boucles audio avec des samples « one-shot » (sons séparés) provenant de diverses sources pour créer des morceaux entièrement inédits. Pro Tools propose plusieurs méthodes d'importation de fichiers audio à partir de différentes sources pour les exploiter dans une session. Vous pouvez importer de l'audio à partir d'un disque dur, d'un volume réseau, d'un CD audio ou d'un support amovible à l'aide de la commande Import Audio ou en faisant glisser un fichier à partir d'un navigateur de l'espace de travail, du Finder (Mac) ou de l'Explorateur (Windows). Boîte de dialogue Import Audio 3 Pour écouter un fichier ou un clip sélectionné avant de l'importer, cliquez sur le bouton Play de la boîte de dialogue Import Audio. Cliquez sur le bouton Stop pour arrêter la lecture. Pour régler le volume de pré-écoute, déplacez le curseur vertical. Pour accéder à un endroit particulier du fichier, déplacez le curseur horizontal qui se trouve sous les boutons Play et Stop. La commande de volume de pré-écoute de la boîte de dialogue Import Audio détermine également le volume de pré-écoute des clips dans la liste des clips. Introduction à Pro Tools 50 USO RESTRITO 4 Effectuez l'une des opérations suivantes : • Pour ajouter un fichier ou un clip à la liste d'importation, sélectionnez le fichier puis cliquez sur Add ou Convert. • Pour importer tous les fichiers et clips présents dans le répertoire actuel, cliquez sur Add All ou Convert All. • Pour supprimer un fichier ou un clip de la liste d'importation, sélectionnez cet élément et cliquez sur Remove. • Pour supprimer l'ensemble des fichiers et clips, cliquez sur Remove All. Pro Tools permet d'ajouter des fichiers dont la fréquence d'échantillonnage est différente de celle de la session. Dans le champ des commentaires de la boîte de dialogue Import Audio, un avertissement indique que ces fichiers ne seront pas lus à la bonne vitesse et à la bonne hauteur s'ils ne sont pas convertis. Lorsque vous avez ajouté tous les fichiers et clips audio à la liste d'importation, vous pouvez convertir les fréquences d'échantillonnage en effectuant les opérations suivantes : • Activez l'option Apply SRC. • Spécifiez la fréquence d'échantillonnage d'origine dans le champ Source Sample Rate en tapant sa valeur ou en sélectionnant une fréquence dans le menu déroulant. • Sélectionnez la qualité de conversion de la fréquence d'échantillonnage dans le menu déroulant Quality. Ce paramètre prime sur le paramètre Sample Rate Conversion Quality de la page des préférences de traitement. 5 6 Cliquez sur Done. 7 Si vous copiez ou convertissez des fichiers, sélectionnez un emplacement de stockage des nouveaux fichiers comme par exemple le dossier Audio Files de la session actuelle. Lorsque vous ajoutez des fichiers, leur emplacement d'origine est référencé. Introduction à Pro Tools 8 Dans la boîte de dialogue Audio Import Options, indiquez à quel emplacement les fichiers doivent être importés dans la session : Boîte de dialogue Audio Import Options New Track : chaque fichier audio est importé sur une piste individuelle et dans la liste des clips. Clip List : les fichiers audio sont importés dans la liste des clips et aucune piste n'est créée. Les fichiers audio importés apparaissent dans la liste des clips et vous pouvez les faire glisser vers des pistes audio. 9 Si vous choisissez la première option, sélectionnez l'emplacement auquel les fichiers doivent être importés sur les pistes : Session Start : les fichiers ou clips sont placés au début de la session. Song Start : le début des fichiers ou clips est aligné sur le marqueur de début du morceau. Selection : le début des fichiers ou clips est aligné sur le curseur d'édition ou le début d'une sélection de timeline. Spot : affiche la boîte de dialogue Spot qui permet de placer les fichiers ou les clips à un emplacement précis en se basant sur les échelles temporelles disponibles. 10 Cliquez sur OK. 51 Importation de fichiers par glisser-déposer USO RESTRITO Pro Tools permet d'importer des fichiers audio, MIDI, vidéo et de session en faisant glisser les fichiers à partir d'un navigateur de l'espace de travail, du Finder Mac ou de l'Explorateur Windows, puis en les déposant sur l'icône de l'application Pro Tools, la timeline de la session, une piste, la liste des pistes ou la liste des clips. Espace de travail Déposez des fichiers médias ou de session sur des pistes existantes ou sur la liste des pistes pour les ajouter sur de nouvelles pistes Déposez des fichiers sur la liste des clips pour les importer Importation par glisser-déposer à partir de l'espace de travail Introduction à Pro Tools 52 La figure précédente illustre certaines options disponibles pour l'importation de fichiers par glisser-déposer depuis un navigateur de l'espace de travail. Pour importer des fichiers dans la liste des clips : USO RESTRITO 1 2 Sélectionnez des fichiers audio, vidéo, MIDI, REX, ACID ou de groupe de clips dans un navigateur de l'espace de travail, le Finder Mac ou l'Explorateur Windows. Faites glisser les fichiers sélectionnés vers la liste des clips. Pour importer des fichiers sur une piste existante : 1 Sélectionnez les fichiers à importer dans un navigateur de l'espace de travail, le Finder Mac ou l'Explorateur Windows. 2 Faites glisser les fichiers sélectionnés vers l'emplacement souhaité sur une piste compatible. Pour importer des fichiers en créant de nouvelles pistes : 1 Sélectionnez les fichiers à importer dans un navigateur de l'espace de travail, le Finder Mac ou l'Explorateur Windows. 2 Effectuez l'une des opérations suivantes : • Maintenez la touche Maj enfoncée et faites glisser les fichiers vers la fenêtre Edit. • Faites glisser les fichiers vers la liste des pistes. Édition audio De nombreuses opérations d'édition de l'audio des pistes de Pro Tools peuvent être réalisées : trim, séparation, couper ou copier et coller, déplacement, réorganisation, etc. Trim des clips audio L'exemple suivant montre comment effectuer une opération d'édition simple pour ajuster la position du point de départ d'un morceau. Dans ce cas particulier, on peut entendre le décompte du batteur (« 1...2...1, 2, 3... ») avant le début du morceau (les overheads ont probablement été enregistrés sur cette piste stéréo). Voici à quoi ressemble l'audio dans Pro Tools. Décompte Début du morceau Formes d'onde (canaux gauche et droit) Les formes d'onde stéréo permettent de visualiser les différentes parties du morceau. L'interface « ce que vous voyez est ce que vous entendez » de Pro Tools permet de supprimer rapidement le décompte en effectuant une opération de « trim » sur le début du morceau. • Faites glisser les fichiers vers un espace vide de la fenêtre Edit, en dessous ou entre des pistes. Introduction à Pro Tools 53 Pour effectuer une opération de trim sur un clip audio : 1 Sélecteur Cliquez sur l'outil de trim de la barre d'outils de la fenêtre Edit. Outil de saisie (Main) Outil Smart Outil de trim USO RESTRITO Début du morceau Outils d'édition 3 2 Si vous utilisez la Main, cliquez sur le clip que vous souhaitez copier. Si vous utilisez le Sélecteur, double-cliquez sur le clip que vous souhaitez copier. Utilisez l'outil Smart afin que le curseur d'édition alterne entre différents outils d'édition en fonction de la partie du clip sur lequel vous le placez. Cliquez sur la piste après le décompte et avant le début du morceau ; vous constaterez que le pointeur se transforme en icône de trim. Faites glisser vers la droite pour raccourcir le début du clip, ou vers la gauche pour l'allonger. Vous pouvez récupérer le début du clip en cliquant puis en faisant glisser son début vers la gauche avec l'outil de trim. Vous pourrez alors constater que le segment audio précédemment supprimé (le décompte) est toujours présent. Il s'agit d'un exemple simple du mode d'édition non-destructif de Pro Tools. Copier-coller de clips Sélection d'un clip avec la Main L'exemple suivant montre comment copier et coller un clip audio d'une piste vers d'autres endroits de la timeline ou d'autres pistes de la session. Une boucle audio rythmique importée sera utilisée. 4 Sélectionnez Edit > Copy. 5 Avec le Sélecteur, positionnez le curseur d'édition à l'emplacement auquel vous souhaitez coller le clip copié. Pour copier et coller un clip : 1 Importez une boucle audio rythmique dans une session Pro Tools (reportez-vous à la section « Importation de fichiers audio » à la page 50). 2 Cliquez sur la Main ou le Sélecteur sur la barre d'outils de la fenêtre Edit. Introduction à Pro Tools 54 6 Sélectionnez Edit > Paste. Séparation de clips sur la sélection d'édition Pour séparer un clip sur la sélection d'édition actuelle : USO RESTRITO 1 Collage d'un clip à un emplacement temporel différent et sur une autre piste Appuyez sur Commande+C (Mac) ou Ctrl+C (Windows) pour copier la sélection d'édition actuelle dans le presse-papiers. Appuyez sur Commande+V (Mac) ou Ctrl+V (Windows) pour coller le contenu du presse-papiers à l'emplacement actuel de la fenêtre Edit. Créez une sélection d'édition à l'intérieur d'un clip audio avec le Sélecteur. Création d'un sélection d'édition 2 Sélectionnez Edit > Separate Clip > At Selection. Appuyez sur Commande+E (Mac) ou Ctrl+E (Windows) pour séparer des clips sur la sélection d'édition actuelle. Séparation et réorganisation des clips Il existe plusieurs façons de créer de nouveaux clips audio dans Pro Tools. Vous pouvez importer ou enregistrer des clips audio de fichier entier. Il est également possible de créer des clips audio qui ne se réfèrent qu'à certaines parties de fichiers audio en effectuant des opérations de trim (reportez-vous à la section « Trim des clips audio » à la page 53) ou en séparant des clips de fichier entier. L'exemple suivant présente diverses méthodes de séparation et de réorganisation des clips audio d'une session. Une boucle audio rythmique importée sera utilisée. Introduction à Pro Tools Nouveaux clips créés suite à la séparation du clip parent aux limites de la sélection d'édition Utilisez la commande Edit > Separate Clips > On Grid pour séparer la sélection audio sur les limites de la grille actuelle. Cette méthode est particulièrement utile lorsque vous travaillez avec de l'audio sur une grille Bars|Beats. Utilisez la commande Edit > Separate Clips > At Transients pour séparer la sélection audio sur les attaques successives de l'audio. Vous pouvez ainsi séparer l'audio en « sons » individuels, comme par exemple un coup de caisse claire dans une boucle de batterie ou une note d'un riff de guitare. 55 USO RESTRITO Réorganisation de clips séparés Il existe plusieurs techniques de réorganisation des clips dans Pro Tools. Le mode d'édition actif (sélectionné dans la section la plus à gauche de la barre d'outils de la fenêtre Edit) détermine de quel manière les clips audio peuvent être déplacés dans Pro Tools. Les instructions suivantes ne présentent qu'une partie des possibilités de réorganisation des clips audio de votre session Pro Tools. Modes d'édition, mode Grid sélectionné Pour réorganiser des clips, effectuez l'une des opérations suivantes : Avec l'outil Main en mode Slip, faites glisser un clip audio vers un nouvel emplacement. Le clip est déplacé à l'emplacement exact où vous l'avez fait glisser. Sélectionnez un clip avec la Main ou le Sélecteur, puis sélectionnez Edit > Repeat. Dans la boîte de dialogue Repeat, entrez le nombre de répétitions de la sélection souhaitées et cliquez sur OK. La sélection est répétée en utilisant des clips séparés placés les uns à la suite des autres. Une boucle audio séparée sur les transitoires et réorganisée Pour plus d'informations sur l'édition et l'organisation des clips audio, reportez-vous aux sections du Guide de référence Pro Tools relatives aux modes et outils d'édition, aux groupes de clips et au traitement Elastic Audio. Avec l'outil Main en mode Grid, faites glisser un clip audio vers un nouvel emplacement. Le clip s'aligne sur la limite de grille la plus proche de l'emplacement où vous l'avez fait glisser. Avec l'outil Main en mode Spot, faites glisser un clip audio vers un nouvel emplacement. La boîte de dialogue Spot s'ouvre et vous pouvez spécifier un emplacement temporel précis pour le clip. Avec l'outil Main en mode Shuffle, faites glisser un clip audio vers un nouvel emplacement situé entre d'autres clips. Un espace est créé entre les clips adjacents pour le clip déplacé. Sélectionnez un clip avec la Main ou le Sélecteur, puis choisissez Edit > Duplicate. Le clip sélectionné est dupliqué et positionné immédiatement après la sélection actuelle. Introduction à Pro Tools 56 Programmation MIDI avec un plug-in d'instrument virtuel USO RESTRITO Cette section présente un exemple de programmation d'une séquence MIDI sur une piste d'instrument qui sera jouée par un plug-in d'instrument virtuel. Le plug-in Xpand!2 de AIR Music Technology sera utilisé. Le plug-in Xpand!2 fait partie de la AIR Creative Collection, fournie en téléchargement avec Pro Tools sous la forme d'un programme d'installation distinct. Assurez-vous de bien avoir installé cette collection de plug-ins et leurs contenus avant de poursuivre avec cet exemple. Pour plus d'informations, reportez-vous au Guide des plug-ins AIR Creative Collection. Qu'est-ce que le MIDI ? Les données MIDI (Musical Instrument Digital Interface) ne sont pas de l'audio, elles ne produisent aucun son. Le MIDI est un protocole permettant aux périphériques compatibles MIDI tels que les synthétiseurs, sampleurs, contrôleurs, claviers et séquenceurs de communiquer en échangeant des données de contrôle. En d'autres termes, le MIDI indique aux périphériques capables de produire du son (tels que des synthétiseurs ou sampleurs matériels ou des instruments virtuels logiciels) ce qu'ils doivent jouer. Les interfaces MIDI compatibles USB et FireWire échangent des messages MIDI avec l'ordinateur via un câble USB ou FireWire. Les instruments MIDI matériels sont reliés à l'aide de câbles MIDI aux entrées et sorties MIDI de votre interface MIDI. Les instruments virtuels sont insérés sous la forme de plug-ins sur les pistes d'instrument de Pro Tools et sont accessibles directement à partir de Pro Tools. Introduction à Pro Tools 57 Création d'une piste d'instrument avec un plug-in d'instrument Dans Pro Tools, vous pouvez enregistrer, programmer et lire des séquences MIDI sur une piste d'instrument ou une piste MIDI. Si vous travaillez avec des plug-ins d'instrument virtuel tels que le AIR Xpand!2, vous utiliserez la plupart du temps une piste d'instrument. Les pistes d'instrument permettent à la fois de travailler avec des séquences MIDI et de prendre en charge le monitoring audio. Vous pouvez également les utiliser avec des périphériques MIDI externes. USO RESTRITO Pour créer une piste d'instrument et insérer un plug-in d'instrument : 1 Sélectionnez Track > New. Dans la boîte de dialogue New Track, procédez comme suit : • Sélectionnez Stereo. • Cliquez sur le menu déroulant où apparaît l'option Audio Track et sélectionnez Instrument Track. • Cliquez sur Create. Boîte de dialogue New Track, options Stereo et Instrument track sélectionnées 2 Si nécessaire, sélectionnez Window > Mix pour afficher la fenêtre Mix. 3 Cliquez sur le sélecteur d'insert de piste situé dans la partie supérieure de la piste d'instrument et sélectionnez Xpand2 à partir du sous-menu Instrument. Sélecteur d'insert Insertion du plug-in Xpand!2 sur une piste d'instrument Introduction à Pro Tools 58 4 Une fenêtre de plug-in apparaît avec l'interface du plug-in Xpand!2. Vous pouvez maintenant sélectionner un preset de son qui sera utilisé pour jouer en MIDI. Pour plus d'informations sur le plug-in Xpand!2, reportez-vous au Guide des plug-ins AIR Creative Collection. Pour sélectionner un preset de son du plug-in Xpand!2 : USO RESTRITO En haut de la fenêtre de plug-in, cliquez sur le menu de bibliothèque (<factory default>) et sélectionnez un preset dans l'un des sous-menus. Les presets du plug-in Xpand!2 sont classés par catégorie dans des sous-menus. Sélecteur d'insert Sélection d'un preset d'usine Xpand!2 à partir du menu de bibliothèque du plug-in Introduction à Pro Tools 59 Utilisation d'un instrument virtuel pour produire de l'audio Un instrument virtuel tel que Xpand!2 peut produire de l'audio à partir d'une séquence MIDI ou d'un contrôleur MIDI externe. USO RESTRITO Pour jouer d'un instrument virtuel via une piste d'instrument, effectuez l'une des opérations suivantes : Si un contrôleur MIDI est connecté, vous pouvez jouer de l'instrument virtuel tant que la piste d'instrument sur laquelle il est inséré est sélectionnée ou activée pour l'enregistrement. Vous pouvez enregistrer les parties que vous interprétez sous la forme d'une séquence MIDI. Importez ou programmez une séquence MIDI sur la piste d'instrument sur laquelle l'instrument virtuel est inséré, puis lancez la lecture. Enregistrement MIDI avec un contrôleur externe Vous pouvez enregistrer dans Pro Tools des données MIDI provenant d'un contrôleur MIDI. 5 Cliquez sur le bouton d'activation pour l'enregistrement de la piste d'instrument afin de la préparer à l'enregistrement MIDI. 6 Dans la fenêtre de transport, cliquez sur le bouton Record. 7 Jouez sur le clavier de votre contrôleur MIDI. Vous devriez entendre la partie que vous jouez avec le son sélectionné. 8 Dès que vous êtes prêt à commencer l'enregistrement, cliquez sur le bouton Play ou appuyez sur la barre d'espace. Pour interrompre l'enregistrement, cliquez sur le bouton Stop ou appuyez sur la barre d'espace. Données MIDI enregistrées sur une piste d'instrument 9 Cliquez une nouvelle fois sur le bouton Record Enable de la piste pour la sortir du mode d'activation pour l'enregistrement et écouter ce que vous venez d'enregistrer. Pour enregistrer du MIDI sur une piste d'instrument : 1 Assurez-vous que votre contrôleur MIDI est connecté à une interface MIDI avec des câbles MIDI ou directement à votre ordinateur via un câble USB. 2 Créez une piste d'instrument stéréo et insérez le plug-in Xpand!2 (reportez-vous à la section « Création d'une piste d'instrument avec un plug-in d'instrument » à la page 58). 3 Sélectionnez un preset de basse (aussi appelé « patch »). 4 Sélectionnez Options > MIDI Thru. (Vérifiez si l'option MIDI Thru est cochée et sélectionnez-la si elle ne l'est pas.) Introduction à Pro Tools 60 Programmation d'une séquence MIDI avec le Crayon Vous pouvez programmer une séquence MIDI dans Pro Tools en utilisant l'outil Crayon. USO RESTRITO Lorsque vous insérez des notes MIDI ou d'autres données MIDI avec le Crayon, des limites de clip MIDI sont créées sur les barres de mesure les plus proches. Pour insérer une note MIDI sur une piste de la fenêtre Edit : 1 Dans la fenêtre Edit, affichez la piste MIDI ou d'instrument en vue Notes. • Définissez la valeur de grille sur une noire. • Définissez la valeur Default Note Duration sur une noire (ou sur Follow Grid). 4 Déplacez le Crayon dans la zone de la playlist de la piste MIDI ou d'instrument. Utilisez la règle de la fenêtre Edit et le mini-clavier de la piste pour repérer la hauteur et l'emplacement temporel souhaités. Lorsque le Crayon est activé, la position et la hauteur de note de l'emplacement ciblé par le curseur sont affichées dans la barre d'outils de la fenêtre. Hauteur de note ciblée par le curseur Curseur du Crayon Position du curseur sur la timeline Sélection de la vue Notes sur une piste d'instrument 2 3 Sélectionnez le Crayon et assurez-vous qu'il soit en mode Main levée. Le curseur se transforme en crayon lorsque vous le placez sur la playlist d'une piste MIDI ou d'une piste d'instrument en vue Notes. Position et hauteur de note ciblées par le curseur Pour insérer des noires sur les temps, effectuez les opérations suivantes : • Définissez l'échelle temporelle principale sur Bars|Beats. • Sélectionnez le mode d'édition Grid. Introduction à Pro Tools 61 5 Lorsque vous avez atteint la hauteur de note et l'emplacement temporel, cliquez pour créer la note. USO RESTRITO Note MIDI insérée avec le crayon En mode Grid, le point de début de la note MIDI est aligné par défaut sur la limite de grille la plus proche. Avec le Crayon en mode Main levée, cliquez et maintenez enfoncé le bouton de la souris puis appuyez sur la touche Ctrl (Windows) ou Commande (Mac) pour désactiver momentanément l'alignement sur la grille. La vélocité des notes insérées est déterminée par le paramètre Default Note On Velocity. La durée est déterminée par la valeur Default Note Duration. En mode Grid, l'emplacement de l'attaque de la note est déterminé par la valeur de grille. Édition de notes MIDI Les notes MIDI peuvent être éditées dans la fenêtre Edit ou une fenêtre de l'éditeur MIDI pour ajuster leurs points de début et de fin, leurs durées, hauteurs et vélocités. Le Sélecteur, la Main et le Crayon agissent sur des notes individuelles ou des groupes de notes. Sélection de notes MIDI Vous devez sélectionner les notes MIDI avant de pouvoir les éditer. Pour sélectionner des notes MIDI : 1 Affichez la piste MIDI ou d'instrument en vue Notes. 2 Effectuez l'une des opérations suivantes : Cliquez sur chaque note avec la Main ou le Crayon tout en maintenant la touche Maj enfoncée. Avec l'un des outils de saisie, positionnez le curseur à un emplacement vide (un pointeur de sélection apparaît) et tracez un rectangle autour du groupe de notes à éditer. Si l'option Play MIDI Notes when Editing est activée, un son est émis à chaque fois qu'une note est insérée. Vous pouvez faire glisser le Crayon après avoir cliqué (et avant d'avoir relâché le bouton de la souris), pour ajuster la hauteur et la durée de la note. Faites glisser la souris vers la droite pour allonger la note sans en modifier le point de début et vers la gauche pour raccourcir la note sans en modifier le point de fin. Lorsque le mode Grid est activé, le point de fin de la note MIDI est aligné par défaut sur la limite de grille la plus proche. Pour désactiver momentanément l'alignement sur la grille, maintenez la touche Commande (Mac) ou Ctrl (Windows) enfoncée pendant que vous faites glisser le Crayon. Introduction à Pro Tools Sélection de notes à l'aide d'un outil de saisie Lorsque vous utilisez un outil de saisie, si une partie du rectangle touche une note (que ce soit son point de début ou de fin), celle-ci est incluse dans la sélection. 62 USO RESTRITO Faites glisser le sélecteur sur une plage de notes. Sélection de notes avec le sélecteur Lorsque vous utilisez le sélecteur, une note n'est sélectionnée que si son point de début est inclus. Transposition des notes Vous pouvez transposer les notes MIDI en les faisant glisser avec un outil de saisie ou le Crayon vers le haut ou le bas. Si plusieurs notes sont sélectionnées avant de faire glisser l'outil de saisie, elles sont toutes transposées. Vous entendez les notes à mesure que vous les faites glisser et l'indicateur de valeur d'emplacement du curseur (dans la fenêtre Edit) indique le nombre de demi-tons et le sens (+/-) de la transposition. Maintenez la touche Ctrl (Mac) ou Windows (Windows) enfoncée et appuyez sur la touche Plus (+) du pavé numérique pour transposer les notes MIDI sélectionnées d'un demi-ton vers le haut, ou sur la touche Moins (–) pour les transposer d'un demi-ton vers le bas. Pour créer une copie de la note afin de la transposer en conservant la note d'origine, maintenez la touche Option (Mac) ou Alt (Windows) enfoncée pendant que vous faites glisser la note. Pour transposer une note MIDI : 1 Affichez la piste MIDI ou d'instrument en vue Notes. 2 Sélectionnez le Crayon ou un outil de saisie. 3 Maintenez la touche Maj enfoncée et faites glisser la note vers le haut ou le bas. Transposition à l'aide d'un outil de saisie La touche Maj garantit que la note transposée conserve son point de début d'origine sur la timeline de Pro Tools. Introduction à Pro Tools 63 Déplacement des notes USO RESTRITO Tout comme les clips, le point d'entrée des notes MIDI peut être déplacé vers la gauche ou la droite sur la timeline de Pro Tools avec un outil de saisie ou le Crayon. Si plusieurs notes sont sélectionnées avant de faire glisser la sélection, elles sont déplacées ensemble. Pour déplacer une note MIDI : 1 2 Affichez la piste MIDI ou d'instrument en vue Notes. Avec un outil de saisie ou le Crayon, faites glisser la note vers la gauche ou la droite (appuyez sur Maj pour conserver la hauteur de la note). Au fur et à mesure que vous faites glisser la note, l'indicateur de valeur d'emplacement du curseur (dans la fenêtre Edit) affiche le nouveau point de début. En mode d'édition Grid, la note déplacée s'aligne sur la limite de grille la plus proche. En mode d'édition Spot, la boîte de dialogue Spot s'ouvre. Trim des points de début et de fin d'une note Tout comme les clips, vous pouvez ajuster les points de début et de fin des notes MIDI avec l'outil de trim. Si plusieurs notes sont sélectionnées lorsque vous utilisez l'outil de trim, elles sont toutes modifiées. Pour ajuster la position des points de début ou de fin d'un groupe de notes MIDI : 1 Affichez la piste MIDI ou d'instrument en vue Notes. 2 Sélectionnez les notes sur lesquelles vous souhaitez réaliser l'opération de trim. 3 Effectuez l'une des opérations suivantes : • Sélectionnez l'outil de trim. • Utilisez le Crayon. 4 Déplacez le curseur près du début de l'une des notes sélectionnées ; le pointeur de l'outil de trim apparaît. Faites-le glisser vers la droite pour raccourcir les notes ou vers la gauche pour les rallonger. Pour copier les notes sélectionnées et conserver les notes d'origine, maintenez la touche Option (Mac) ou Alt (Windows) enfoncée pendant que vous faites glisser les notes. Modification de la position de fin des notes avec l'outil de trim En mode d'édition Grid, le point de début ou de fin déplacé s'aligne sur la limite de grille la plus proche. En mode d'édition Spot, la boîte de dialogue Spot s'ouvre et vous invite à entrer le nouvel emplacement des points de début et de fin de la note. En mode Grid, appuyez sur la touche Ctrl (Windows) ou Commande (Mac) pour désactiver momentanément le mode Grid. Introduction à Pro Tools 64 Édition manuelle de la vélocité des notes Suppression de notes MIDI Lorsqu'une piste MIDI ou d'instrument est affichée en vue Velocity ou si la ligne de vélocité est affichée sous une piste, la vélocité d'attaque des notes est représentée par une barre verticale. Plus elle est haute, plus la valeur de vélocité est élevée (0 à 127). Il est possible de supprimer des notes sélectionnées via la commande Clear du menu Edit ; des notes individuelles peuvent également être supprimées avec le Crayon. USO RESTRITO Pour modifier la vélocité MIDI dans la fenêtre Edit : 1 Effectuez l'une des opérations suivantes : • Affichez la piste MIDI ou d'instrument en vue Velocity. • Affichez la ligne de contrôleur de la piste MIDI ou d'instrument et affichez les vélocités. Pour supprimer un groupe de notes MIDI à l'aide de la commande Clear : 1 Sélectionnez les notes à supprimer. 2 Effectuez l'une des opérations suivantes : • Sélectionnez Edit > Clear pour supprimer les notes sélectionnées. Les données de contrôleur sousjacentes de la piste demeurent intactes. • Avec un outil d'édition, effectuez un clic droit sur une note sélectionnée, puis sélectionnez Clear. • Appuyez sur la touche Retour arrière (Windows) ou Suppr (Mac). Lorsque vous supprimez des notes MIDI dans une sélection de plage temporelle, toutes les données de contrôleur et d'automation sousjacentes sont également supprimées. Affichage de la ligne de vélocité 2 Sélectionnez un outil de saisie. 3 Faites glisser l'extrémité supérieure (losange) de la barre de vélocité vers le haut ou le bas. Déplacement d'une barre de vélocité Les vélocités d'une plage de notes peuvent être éditées à l'aide du Crayon. Introduction à Pro Tools Pour supprimer une seule note MIDI avec le Crayon : Sélectionnez le Crayon, puis cliquez sur la note tout en appuyant sur la touche Alt (Windows) ou Option (Mac). Le Crayon se transforme en gomme. Suppression d'une note avec le Crayon Vous pouvez également supprimer des événements de changement de programme et Sysex en maintenant la touche Option (Mac) ou Alt (Windows) enfoncée puis en cliquant dessus avec le Crayon. 65 Mixage et traitement de plug-in USO RESTRITO Le mixage dans Pro Tools consiste à travailler avec des éléments du flux des signaux audio, dont les entrées, les sorties, les bus, les inserts et les départs, pour les mélanger au sein d'un sous-groupe ou d'un mixdown final. Les tâches de mixage peuvent être réalisées à tout moment dans une session, y compris avant le mixdown final. Au cours du mixage, des plug-ins en temps réel et des inserts matériels sont utilisés pour les effets et le traitement des signaux. Pro Tools est livré avec une suite de plug-ins d'effets audio qui permettent de modifier les sons enregistrés. Cette section fournit deux exemples d'utilisation de ces plug-ins pour le traitement de vos sons. Pour des d'informations détaillées sur les plug-ins fournis avec Pro Tools, consultez le Guide des plug-ins audio (Help > Audio Plug-ins Guide). Introduction à Pro Tools Application d'une égalisation et d'une compression Habituellement, lorsque vous mixez de l'audio, vous appliquerez une égalisation ainsi qu'une compression aux pistes individuelles pour améliorer leur son. Égalisation (EQ) : permet d'agir sur le spectre fréquentiel du son. Les réglages de basses et d'aigus de la plupart des systèmes stéréo sont un exemple simple d'égaliseur. Ces réglages permettent de relever (augmenter le niveau) ou atténuer (baisser le niveau) des basses et hautes fréquences de l'audio. Vous pouvez utiliser un EQ pour vous aider à séparer les fréquences d'une basse et d'une guitare, pour rendre la batterie plus agressive, mettre les voix en avant ou même supprimer des bruits parasites. Pro Tools propose plusieurs types différents de plug-ins d'égalisation afin de mettre en forme vos sons. Compression : permet d'homogénéiser la dynamique de votre audio. Une compression est une sorte de contrôle automatique du volume agissant sur le niveau des passages les plus forts. Utilisez la compression pour donner plus de proximité aux voix ou rendre les sons de cymbale moins stridents. Un limiteur agit sur les crêtes du signal audio dépassant un certain seuil, sans affecter l'audio n'excédant pas ce niveau. Pro Tools propose plusieurs types différents de plug-ins de traitement de la dynamique de vos sons. 66 USO RESTRITO Pour appliquer un EQ sur une piste : 1 Sélectionnez Window > Mix. 2 Dans la partie supérieure de la piste, cliquez sur le premier sélecteur d'insert de piste disponible et sélectionnez EQ 3 7-Band dans le sous-menu EQ. 3 La fenêtre du plug-in EQ III s'ouvre. Utilisez les presets du plug-in comme point de départ et découvrez comment chaque paramètre de l'égaliseur agit sur le son. Sélecteur de preset de la fenêtre du plug-in EQ III 4 Lancez la lecture pour entendre l'effet. Sélecteur d'insert d'une piste de la fenêtre Mix Introduction à Pro Tools 67 USO RESTRITO Pour appliquer une compression à une piste : 1 Sélectionnez Window > Mix. 2 Dans la partie supérieure de la piste, cliquez sur le premier sélecteur d'insert de piste disponible et sélectionnez Dyn 3 Compressor/Limiter dans le sous-menu Dynamics. Pro Tools insère le plug-in Dynamics III Compressor/Limiter sur la piste et affiche la fenêtre du plug-in. 3 La fenêtre du plug-in Dyn III s'ouvre. Utilisez les presets du plug-in comme point de départ et découvrez comment chaque paramètre de l'égaliseur agit sur le son. Utilisation d'une réverbération Une réverbération (ou reverb) reproduit les caractéristiques acoustiques d'un lieu. Les effets de reverb sont en réalité formés d'une série de retards (échos) recréant les réflexions du son sur les surfaces de diverses pièces, salles et autres lieux. Employez les effets de reverb pour simuler une sensation d'espace acoustique pour votre mix. Utilisez pour cela les départs de vos pistes source pour les envoyer sur une piste d'entrée auxiliaire. Les effets de reverb peuvent donner l'illusion que votre musique a été enregistrée dans une grande salle de concert, une pièce feutrée ou même un couloir étroit. La configuration « départ-retour » est l'une des plus efficaces afin d'incorporer une reverb à un mix. Dans Pro Tools, les départs des pistes permettent de router très facilement l'audio provenant de plusieurs pistes vers un même effet de reverb. Les pistes source sembleront ainsi toutes avoir été enregistrées dans la même pièce. Sélecteur de preset de la fenêtre du plug-in Dyn III 4 Lancez la lecture pour entendre l'effet. Introduction à Pro Tools 68 USO RESTRITO Pour utiliser une reverb avec une piste d'entrée auxiliaire et plusieurs pistes source : 1 Sélectionnez Window > Mix. 2 Sélectionnez Track > New, choisissez d'ajouter 1 piste d'entrée auxiliaire stéréo puis cliquez sur Create. Création d'une nouvelle piste d'entrée auxiliaire 3 Cliquez sur le sélecteur d'entrée de piste de la piste d'entrée auxiliaire que vous venez de créer et sélectionnez Bus > Bus 1–2. Sélecteur d'entrée de piste Sélection du Bus 1-2 à partir du sélecteur d'entrée d'une piste d'entrée auxiliaire Introduction à Pro Tools 69 4 Cliquez sur le sélecteur du départ A de votre piste source comme illustré sur la figure ci-dessous, et sélectionnez Bus > Bus 1-2. USO RESTRITO Sélecteur du départ A Sélection du Bus 1–2 pour le départ A d'une piste audio 5 Répétez l'étape précédente pour chaque piste supplémentaire que vous souhaitez envoyer vers la piste d'entrée auxiliaire pour le traitement de reverb. Introduction à Pro Tools 70 USO RESTRITO 6 Insérez un plug-in de reverb sur la piste d'entrée auxiliaire. Routing des départs de pistes audio vers une piste d'entrée auxiliaire pour leur traitement dans la reverb D-Verb 7 Utilisez les fenêtres de départs individuelles pour ajuster le niveau du départ des pistes source. Vous pouvez également configurer la vue Sends afin que les commandes d'un départ particulier soient affichées (sélectionnez par exemple View > Sends A–E > Send A). 8 Appuyez sur la barre d'espace et montez doucement le petit fader de la fenêtre de sortie du départ ou des commandes de piste du départ. Vous ajustez ainsi la quantité de signal source envoyée sur la piste d'entrée auxiliaire pour le traitement de reverb. 9 Continuez à écouter votre mix et ajustez les niveaux des départs de piste individuels et expérimentez différents paramétrages du plug-in pour obtenir l'effet souhaité. Introduction à Pro Tools 71 Utilisation de l'automation USO RESTRITO Les commandes de mixage de chaque type de piste de Pro Tools peuvent être automatisées de manière dynamique. Vous pouvez écrire des mouvements d'automation et les voir en temps réel au cours de la lecture d'une session. Vous pouvez également modifier des données d'automation à l'aide des techniques d'édition des données audio et MIDI. 3 Dans la fenêtre Mix ou Edit, cliquez sur le sélecteur de mode d'automation de chaque piste à automatiser, puis définissez le mode d'automation. Pour un premier passage d'automation, optez pour le mode Write. 4 Lancez la lecture pour démarrer l'écriture de l'automation. 5 Déplacez les commandes que vous souhaitez automatiser (tel qu'un fader de volume de piste). 6 Une fois l'opération terminée, arrêtez la lecture. 7 Repassez en mode d'automation Read pour lire l'automation que vous venez d'écrire. Écriture d'une automation Vous pouvez écrire une automation pour toutes les commandes activées en écriture, en les déplaçant durant la lecture. Pour écrire une automation sur des pistes : 1 Sélectionnez Window > Automation. 2 Assurez-vous que l'écriture est activée pour ce type d'automation. Sélecteur de mode d'automation de piste Fenêtre Automation Déplacement du fader de volume pendant la lecture Après la première passe d'automation, vous pouvez écrire d'autres mouvements d'automation sur la piste sans effacer complètement le passage précédent, en mode Touch ou Latch. Ces modes ajoutent des données d'automation uniquement lorsque vous déplacez une commande. Édition manuelle d'une automation Pro Tools propose plusieurs méthodes d'édition des données d'automation des pistes d'une session. Vous pouvez modifier les données d'automation graphiquement, en ajustant les points d'une playlist d'automation. Vous pouvez également couper, copier et coller les données d'automation comme s'il s'agissait de données audio ou MIDI. Les données d'automation se présentent sous la forme d'une ligne graphique avec des points d'inflexion modifiables. Point d'automation Fenêtre d'automation, automation de volume activée Introduction à Pro Tools 72 USO RESTRITO Faites glisser ces points d'inflexion pour modifier les données d'automation directement dans la fenêtre Edit et les fenêtres de l'éditeur MIDI. Lorsque vous déplacez un point d'automation vers le haut ou le bas, la variation de la valeur est affichée. Variation de la valeur d'un point d'automation Le déplacement d'un point d'automation vers la gauche ou la droite permet d'ajuster la position temporelle de l'événement d'automation. Pour afficher un type d'automation de piste spécifique, sélectionnez la vue de piste correspondante ou affichez la ligne d'automation ou de contrôleur correspondante sous la piste. Vous pouvez par exemple afficher et éditer les données de volume, panoramique, mute, de contrôleur MIDI, et même d'automation de plug-in. Utilisation des outils de saisie Les outils de saisie permettent de créer de nouveaux points d'automation en cliquant sur la ligne du graphique ou d'ajuster la position de points existants en les déplaçant. Maintenez la touche Option (Mac) ou Alt (Windows) enfoncée et cliquez sur des points d'automation avec un outil de saisie pour les supprimer. Création d'un point d'automation avec la Main Utilisation du Crayon Le Crayon permet de créer des points d'automation en cliquant une fois sur la courbe de gain. Maintenez la touche Option (Mac) ou Alt (Windows) enfoncée et cliquez sur des points d'automation avec le Crayon pour les supprimer. Sélecteur de vue de piste Sélecteur de type d'automation Suppression d'un point d'automation avec le Crayon Vue de piste d'automation du volume Les outils de trim permettent de déplacer les points d'automation sélectionnés vers le haut ou le bas en les faisant glisser à partir d'un point quelconque de la sélection. Utilisation des outils de trim Lignes d'automation Vue de piste et lignes d'automation Déplacement de points d'automation avec l'outil de trim Introduction à Pro Tools 73 Exportation de votre mix Après avoir enregistré, édité et mixé les pistes d'une session Pro Tools, vous êtes prêt à créer le mix final de votre session et à l'exporter pour le graver sur CD ou le publier sur Internet. Utilisez la commande Bounce to Disk pour exporter le mix de la session dans un fichier audio unique. Pour exporter le mix de votre session dans un fichier audio stéréo : USO RESTRITO 1 Utilisez le Sélecteur pour créer une sélection sur la timeline (ou sur une piste) de la durée de votre session. Sélecteur Sélection de timeline Sélection audio de la session prête pour le bounce sur disque Sélection de timeline pour un bounce sur disque 2 Sélectionnez File > Bounce to > Disk. 3 Dans la boîte de dialogue des options de bounce, effectuez les opérations suivantes : • Sélectionnez une source dans le menu Bounce Source (chemin principal de sortie des canaux de votre mix, tel que main (Stereo) –> Analog 1–2). • Sélectionnez un type de fichier dans le menu File Type (WAV par exemple). • Sélectionnez Interleaved dans le menu Format. Vous obtiendrez ainsi un fichier stéréo. • Si vous souhaitez graver sur CD le fichier résultant, sélectionnez 16 Bit dans le menu Bit Depth. • Si vous souhaitez graver sur CD le fichier résultant, sélectionnez 44,1 kHz dans le menu Sample Rate. • Pour un bounce plus rapide qu'en temps réel, sélectionnez l'option Offline. Boîte de dialogue Bounce Introduction à Pro Tools 74 USO RESTRITO 4 Cliquez sur Bounce. Si aucune sélection de timeline n'est active, l'opération de bounce s'appliquera à la durée totale de la session, du début à la fin. 5 Dans la boîte de dialogue Save, entrez le nom du fichier audio qui sera généré et sélectionnez son emplacement d'enregistrement. 6 Cliquez sur Save. Pro Tools lance l'opération de bounce sur disque. Si l'option Offline n'est pas activée, le processus de bounce de Pro Tools est réalisé en temps réel et vous pouvez entendre la lecture audio de votre mix pendant l'opération. Cependant, il est impossible de modifier les paramètres d'un mix Pro Tools pendant cette procédure. Gravure de votre mix sur CD Pour en savoir plus Nous espérons que cette rapide présentation du logiciel Pro Tools vous a donné envie de vous mettre à l'œuvre. Pour en savoir plus sur les fonctionnalités abordées dans ce document, reportez-vous au Guide de référence Pro Tools (Help > Pro Tools Reference Guide). Vous accéderez à des informations détaillées sur tous les logiciels et systèmes Pro Tools. Le Guide de référence Pro Tools fournit des explications exhaustives sur l'ensemble des aspects et fonctionnalités de Pro Tools, classés par tâche de production audio et musique (comme Enregistrement, Édition et Mixage). Vous pouvez également utiliser l'aide en ligne de Pro Tools (Help > Pro Tools Help) pour rechercher des informations spécifiques. Lorsque l'opération de bounce est terminée, vous obtenez un fichier audio que vous pouvez graver sur un CD audio à l'aide d'un logiciel de gravure tel qu'iTunes ou Roxio Toast. Ce CD pourra être lu par n'importe quel lecteur CD standard. Écouter un CD de référence dans un autre environnement que votre studio est un excellent moyen de se rendre compte si votre mix sonne correctement sur d'autres systèmes et environnements d'écoute. Introduction à Pro Tools 75 USO RESTRITO Einführung in Pro Tools Nehmen Sie sich Zeit, dieses Handbuch zu lesen, wenn Sie mit Pro Tools® noch nicht vertraut sind. In diesem Handbuch wird anhand von Beispielen erläutert, wie Sie in Pro Tools Audiomaterial aufnehmen, bearbeiten und mischen sowie MIDI verwenden. Sollten Sie Pro Tools noch nicht installiert haben, tun Sie dies gemäß den Anweisungen im Pro Tools-Installationshandbuch. Hinweise zum Anschließen Ihrer Audio-Hardware und zur Installation der dazugehörigen Treiber finden Sie in der jeweiligen Dokumentation Ihrer Hardware. Anschließen von Kopfhörern oder Lautsprechern Zum Abhören des Audiomaterials in Pro Tools schließen Sie Kopfhörer oder Lautsprecher an Ihre Audio-Hardware an (in diesem Handbuch wird das Mbox-Audio-Interface als Beispiel verwendet). Wenn Sie Kopfhörer verwenden , verringern Sie den Kopfhörerpegel (indem Sie den Regler gegen den Uhrzeigersinn drehen). Wenn Sie Lautsprecher verwenden, verringern Sie den Master-Lautstärkepegel (indem Sie den Regler gegen den Uhrzeigersinn drehen). Es ist äußerst wichtig, dass Sie mit einer niedrigen Lautstärke beginnen, damit Sie weder Ihr Gehör noch Ihr Equipment beschädigen. Sobald Sie Pro Tools gestartet und eine Session geöffnet haben (oder eine neue erstellt haben), können Sie die Lautstärkepegel auf eine angenehme Lautstärke regeln. Kopfhörerpegel Master-Lautstärkepegel 6,3-mm-Kopfhörerbuchse Bedienelemente und Anschlüsse auf der Mbox-Vorderseite Lautsprecheranschlüsse auf der Mbox-Rückseite Einführung in Pro Tools 76 Wiedergabe der DemoSession Verwenden Sie die Demo-Session, um Ihre Kopfhörer und Lautsprecher zu testen und herauszufinden, was Sie alles mit Pro Tools machen können. USO RESTRITO So installieren und öffnen Sie die Demo-Session: 1 Sie haben folgende Möglichkeiten: • Legen Sie die Installations-DVD für Pro Tools in das DVD-Laufwerk ein, suchen und öffnen Sie den Additional Files-Ordner und ziehen Sie den Demo Session-Ordner auf Ihre Festplatte (das beste Ergebnis erzielen Sie mit einer von Avid qualifizierten externen Festplatte anstatt mit dem Systemlaufwerk). 2 Starten Sie Pro Tools. 3 Je nachdem, was Sie auf Ihrem Bildschirm sehen, wählen Sie eine der folgenden Vorgehensweisen: • Wenn das Quick Start-Dialogfeld erscheint, klicken Sie auf Open Session und dann auf OK. Navigieren Sie zur Demo Session-Datei (.ptx), wählen Sie sie aus und klicken Sie auf Open. • Wenn das Quick Start-Dialogfeld nicht erscheint, gehen Sie auf File > Open Session, navigieren Sie zur Demo Session-Datei (.ptx), wählen Sie sie aus und klicken Sie auf Open. Weitere Informationen zur Demo-Session finden Sie im Readme-Dokument zur Demo-Session. • Laden Sie die Pro Tools-Demo von Ihrem OnlineAvid-Konto auf Ihre Festplatte herunter (das beste Ergebnis erzielen Sie mit einer von Avid qualifizierten externen Festplatte anstatt mit dem Systemlaufwerk). Symbolleiste Spuren Einführung in Pro Tools 77 So geben Sie die Demo-Session wieder: 1 2 Drehen Sie die Lautstärke Ihres Audio-Interfaces herunter, damit Sie das Audio nicht in einer unangenehm hohen Lautstärke wiedergeben. Starten Sie die Wiedergabe der Demo-Session in Pro Tools. So starten oder beenden Sie Pro Tools: USO RESTRITO • Drücken Sie die Leertaste auf Ihrer Computertastatur. • Klicken Sie auf die Play- oder Stop-Schaltfläche im Transport-Fenster (Window > Transport) oder in der Symbolleiste des Edit-Fensters. Stop Play • Das Transport-Fenster beinhaltet Steuerelemente für Transport-Funktionen wie Play, Stop, Aufnahme, Vor- und Zurückspulen. • Plug-In-Fenster bieten Steuerungen für AudioBearbeitung und Virtual Instrument-Plug-Ins. • In MIDI Editor-Fenstern bearbeiten Sie MIDIDaten mit Hilfe eines Interface im Notenrollen-Stil, mit Breakpoint-Editing und mit herkömmlicher Notenschrift. • Im Score-Editor-Fenster bearbeiten Sie die MIDI-Daten einer Session mit Hilfe herkömmlicher Notenschrift. Sie können die Partitur sogar direkt von Pro Tools aus drucken. • Der Workspace bietet eine interaktive Datenbank für alle Medien in Ihrer Session und für Ihr gesamtes System. Stop- und Play-Schaltflächen im Transport-Fenster 3 Stellen Sie den Monitorpegel auf eine angenehme Lautstärke ein, während die Session abgespielt wird. 4 Erkunden Sie Pro Tools, während die DemoSession abgespielt wird (verschiedene Optionen hierzu finden Sie im Window-Menü): • Das Edit-Fenster bietet eine Timeline-Ansicht von Audio-, Video- und MIDI-Daten und Mischautomation zum Aufnehmen, Editieren und Anordnen von Spuren. Verwenden Sie das EditFenster zum Bearbeiten und Arrangieren von Audio-, MIDI- und Automationsdaten Ihrer Session. 5 Drücken Sie die Leertaste oder klicken Sie auf die Stop-Schaltfläche, um die Wiedergabe anzuhalten. 6 Wenn Sie nicht länger nur die Demo-Session betrachten wollen, wählen Sie File > Close Session. Die Demo-Session ist ein Beispiel für ein umfassendes und abgeschlossenes Projekt, das arrangiert, bearbeitet und gemischt wurde. Die Demo-Session ist für die weiteren Inhalte dieses Handbuchs nicht erforderlich. Sie können sie aber wieder aufrufen, wenn Sie weitere Funktionen von Pro Tools kennengelernt haben. • Im Mix-Fenster erscheinen Spuren als Kanalzüge – wie auf einem Mischpult – mit Pegelanzeigen und Steuerelementen für Plug-In- und HardwareInserts, Sends, Eingangs- und Ausgangszuweisungen, Panoramaregler, Lautstärke, Solo, Mute und Record Enable. Verwenden Sie das Mix-Fenster zum Routen und Mixen von Audio und MIDI in Ihrer Session. Einführung in Pro Tools 78 Anzeigen des Edit- und des Mix-Fensters Das Edit-Fenster und das Mix-Fenster sind die zwei wichtigsten Arbeitsbereiche von Pro Tools. In diesem Handbuch finden Sie Beispiele für die Verwendung beider Fenster für unterschiedliche Produktionsabläufe. Anzeigen des Edit-Fensters So blenden Sie das Edit-Fenster ein: USO RESTRITO Wählen Sie Window > Edit. So zeigen Sie die Darstellungsoptionen im Edit-Fenster an: Wählen Sie View > Edit Window > All. Edit-Fenster Einführung in Pro Tools 79 Anzeigen des Mix-Fensters So blenden Sie das Mix-Fenster ein: Wählen Sie Window > Mix. So zeigen Sie die Darstellungsoptionen im Mix-Fenster an: Wählen Sie View > Mix Window > All. USO RESTRITO Mix-Fenster (mit eingeblendeten Transport- und Plug-In-Fenstern) Einführung in Pro Tools 80 USO RESTRITO Erstellen einer neuen Session Aufnehmen von Audio In diesem Abschnitt erfahren Sie, wie Sie eine neue Session erstellen.Sie können eine neue Session entweder gleich beim Start von Pro Tools erstellen oder auch, wenn die Software bereits läuft. In diesem Abschnitt wird erläutert, wie Sie ein Mikrofon oder ein Instrument (z. B. Gitarre oder Keyboard) an eine Mbox anschließen und Audio aufnehmen. So erstellen Sie eine neue Session: Anschließen eines Mikrofons oder Instruments an eine Mbox 1 2 Wenn Pro Tools noch nicht ausgeführt wird, öffnen Sie Pro Tools. Sie haben folgende Möglichkeiten: So schließen Sie ein Mikrofon oder ein Instrument an: 1 Sie haben folgende Möglichkeiten: • Wenn Sie Pro Tools starten und das Quick StartDialogfeld geöffnet wird, wählen Sie Create Blank Session und klicken Sie auf OK. • Wenn Sie ein Mikrofon verwenden, schließen Sie es mit einem XLR-Kabel an einen Mic-/LineEingang einer Mbox an. • Wählen Sie File > New Session. Wenn bereits eine Session geöffnet ist, werden Sie aufgefordert, Ihre Änderungen zu speichern. Wählen Sie im New Session-Dialogfeld die Create Blank Session-Option und klicken Sie auf OK. • Wenn Sie ein Instrument verwenden, schließen Sie es mit einem XLR-Kabel an einen DI-Eingang einer Mbox an. 3 Geben Sie im Save-Dialogfeld an, wo die Session gespeichert werden soll, geben Sie ihr einen Namen und klicken Sie auf Save. Sie haben soeben eine neue Session ohne Spuren erstellt. Als Nächstes schließen Sie ein Mikrofonoder Instrumentenkabel an und erstellen neue Spuren für das Audio-Recording. Quellen-Selektor für Eingang 1 (Front/Rear-Taste) 2 Sie haben folgende Möglichkeiten: • Bei Verwendung einer Mbox stellen Sie sicher, dass die Taste zum Umschalten zwischen vorne und hinten für die richtige Verbindung (Vorderoder Rückseite) eingestellt ist. • Bei Verwendung einer Mbox Mini stellen Sie sicher, dass entweder der Line/DI-Schalter oder der Mic/Line-Schalter für die jeweilige Verbindung richtig eingestellt ist – je nachdem, welchen Eingang Sie verwenden. Eingang 1 Mic/Line-Eingang Anschließen eines Mikrofons mit einem XLR-Kabel an den Mic/Line-Eingang 1 auf der Rückseite einer Mbox Einführung in Pro Tools 81 Erstellen einer Spur 5 Pro Tools verwendet Spuren zum Aufnehmen von Audio und MIDI in einer Session. Bevor Sie eine Audioaufnahme starten können, müssen Sie eine Audiospur erstellen. USO RESTRITO So erstellen Sie eine Instrumentenspur und bereiten sie für die Aufnahme vor: 1 Erstellen Sie eine neue Session oder öffnen Sie eine bestehende Session. 2 Wählen Sie Track > New. 3 Um von einem einzelnen an Ihr Audio-Interface angeschlossenen Mikrofon oder einem Instrument aufzunehmen, wählen Sie im New TracksDialogfeld 1 Mono Audio Track unter Samples und klicken Sie auf Create. In der Mitte des Kanalzugs der neuen Spur wird „Analog 1 (Mono)“ angezeigt. Dies zeigt an, welcher Eingangskanal (Eingang 1 oder Eingang 2) dieser Spur zugewiesen ist. Sie können einen anderen Eingangskanal angeben, indem Sie auf den Audioeingangspfad-Selektor klicken und den anderen Kanal wählen. Audio Input Path-Selektor Aufnehmen Ihrer Performance in einer Spur So nehmen Sie eine Audiospur auf: Erstellen einer neuen Mono-Audiospur 1 Wenn Sie beide Eingänge gleichzeitig aufnehmen möchten, erstellen Sie je nach angeschlossenen Geräten und der gewünschten Aufnahmequelle eine Stereospur oder zwei Monospuren: • Zur Aufnahme zweier unterschiedlicher Quellen (z. B. einer Gesangsstimme und einer E-Gitarre) erstellen Sie zwei Mono-Audiospuren. Auf diese Weise können Sie zwei Eingangssignale gleichzeitig aufnehmen. Nach der Aufnahme können diese unabhängig voneinander editiert, verarbeitet und ausgeglichen werden. • Erstellen Sie zum Aufnehmen einer ZweikanalStereo-Quelle (z. B. eines Stereo-Keyboards) eine Stereo-Audiospur. 4 Öffnen Sie das Mix-Fenster, indem Sie Window > Mix auswählen. Einführung in Pro Tools Klicken Sie auf die Record Enable-Schaltfläche, um die Spur zum Aufnehmen scharfzuschalten. Das Steuerelement blinkt rot. Record Enable-Schaltfläche Scharfschalten einer Spur im Mix-Fenster 2 Singen oder spielen Sie in das Mikro oder spielen Sie Ihr Instrument. Behalten Sie die Pegelanzeige in Ihrer Pro ToolsSpur im Auge, während Sie die Eingangsverstärkung („input gain“) auf Ihrem Audio-Interface erhöhen. (Beachten Sie, dass es keinen Einfluss auf den Eingangspegel hat, wenn Sie die Fader auf der Softwareoberfläche bewegen – diese sind nur für die Abhörpegel.) 82 3 Drehen Sie den Eingangs-Gain auf Ihrem AudioInterface im Uhrzeigersinn, bis die Pegelanzeige auf dem Bildschirm meistens grün ist und nur bei lauteren Passagen gelb. 4 Klicken Sie im Transport-Fenster auf „Return to Zero“, wenn Sie die Wiedergabe am Anfang der Session beginnen möchten. 5 Klicken Sie im Transport-Fenster auf die RecordSchaltfläche, um die Session zum Aufnehmen scharfzuschalten. Das Steuerelement blinkt rot. (Das teilt Pro Tools mit, dass Sie zur Aufnahme bereit sind. Diese Schaltfläche ist quasi der Hauptschalter für die Session.) USO RESTRITO Gain für Eingang 1 (Mbox) Zurück zu Null Play Aufnahme • Wenn die Pegelanzeige rot wird, ist die Verstärkung zu hoch. Verringern Sie den Eingangs-Gain. • Wird kaum ein grüner Pegel angezeigt, ist die Verstärkung zu gering. Erhöhen Sie den Eingangs-Gain. Pegelanzeige der Spur 6 Wählen Sie Window > Edit, damit Sie beobachten können, was während der Aufnahme geschieht. 7 Wenn Sie zur Aufnahme bereit sind, drücken Sie die Leertaste oder klicken Sie auf die PlaySchaltfläche im Transport-Fenster. Die RecordSchaltfläche im Transport-Fenster und die Record Enable-Schaltfläche der Spur leuchten während der Aufnahme rot. 8 Zum Beenden der Aufnahme drücken Sie entweder erneut die Leertaste oder klicken Sie auf die Stop-Schaltfläche im Transport-Fenster. (Die Record-Schaltfläche im Transport-Fenster wird deaktiviert, doch die Record Enable-Schaltfläche der Spur bleibt aktiviert und blinkt rot, bis Sie darauf klicken.) Sie haben soeben Ihre erste Audiospur aufgenommen. Eine Mono-Audiospur nach der Aufnahme Einführung in Pro Tools 83 Abhören Ihrer Aufnahme Nachdem Sie Audiomaterial aufgenommen haben, können Sie es zum Überprüfen, Editieren und Mixen wiedergeben. So geben Sie eine aufgenommene Spur wieder: USO RESTRITO 1 Klicken Sie erneut auf die Record EnableSchaltfläche, um den Aufnahme-Modus zu deaktivieren. Die Record Enable-Schaltfläche hört auf, rot zu blinken. 2 Um mit der Wiedergabe zu beginnen, drücken Sie die Leertaste oder klicken Sie im TransportFenster auf die Play-Schaltfläche. 3 Zum Beenden der Wiedergabe drücken Sie entweder erneut die Leertaste oder klicken Sie im Transport-Fenster auf die Stop-Schaltfläche. Aufnehmen von mehr Spuren Wiederholen Sie einfach dieselben Schritte, um eine weitere Audiospur (Mono oder Stereo) zu erstellen, und fahren Sie mit der Aufnahme weiterer Spuren fort. Auf diese Art können Sie vor dem Hintergrund der bereits aufgenommenen Spuren zusätzliche Stimmen aufnehmen. Dies ist eine gängige Produktionstechnik, um verschiedene Stimmen übereinanderzulegen und ein Songarrangement zu erstellen. Zeitmessung in Minuten und Sekunden oder Takten und Beats In Pro Tools können Sie Zeit in Minuten und Sekunden (absolute Zeitangabe) oder Takten und Beats (relative Zeitangabe) messen. Für die Musikproduktion empfiehlt es sich zumeist, die Zeitmessung in Takten und Beats zu wählen. Das Timing von Beats ist relativ, da es vom Tempo abhängt. Das Timing von Takten ist relativ, da es von der Taktart abhängt. In Pro Tools können Sie Tempo- und Taktartwechsel mit Hilfe von Marken in der Session-Timeline oben im Edit-Fenster setzen. Anhand dieser Einstellungen wird die relative Dauer von Takten und Beats im Vergleich mit der absoluten Dauer von Minuten und Sekunden (oder Samples) berechnet. Hauptzähler GridModus (RasterModus) TimebaseLeiste Timeline Pro Tools-Timeline und -Hauptzähler (mit der Haupt-Zeitskala in Minuten und Sekunden) Einführung in Pro Tools 84 USO RESTRITO Diese In dieser Pro Tools-Session ist die HauptZeitskala für die Timeline standardmäßig auf Min:Secs (Minuten und Sekunden) eingestellt. Sie können die Haupt-Zeitskala jedoch zu Bar|Beats (Takte und Beats) ändern, wenn Sie mit einer Metronomspur in einer festgelegten Taktart und einem festgelegten Tempo aufnehmen möchten. Die Haupt-Zeitskala auf Takte und Beats zu setzen ist auch dann hilfreich, wenn Sie Audio und MIDI in einem Bar|Beat-Raster erstellen, bearbeiten und arrangieren möchten. Ändern der Haupt-Zeitskala So stellen Sie die Haupt-Zeitskala ein: Klicken Sie auf einen Main Counter-Selektor (oben im Edit- oder Transport-Fenster, wenn Zähler angezeigt werden) und wählen Sie eine Zeitskala aus. Aufnehmen mit einer Metronomspur Eine „Click“-Spur (Metronomspur) bietet während der Aufnahme einen Metronom-Klick als Temporeferenz. Setzen Sie die Haupt-Zeitskala auf Bars|Beats statt auf Min:Secs, um Ihr Material mit der festgelegten Taktart und dem festgelegten Tempo aufzunehmen und zu bearbeiten. So erstellen Sie eine Metronomspur: 1 Pro Tools erstellt mit dem Click-Plug-In auf dem Insert der ersten Spur eine neue Auxiliary-Eingangs-Spur. Wenn Sie mit der Wiedergabe oder Aufnahme beginnen, zählt Ihnen der Klick das Tempo vor und bietet je nach Taktart und Tempo-Map in der Pro Tools-Timeline eine fortlaufende Referenz. 2 Wählen Sie View > Transport > MIDI Controls, um die MIDI-Steuerelemente im Transportfenster anzuzeigen. 3 Stellen Sie sicher, dass im Transport-Fenster die Metronom- und die Count Off-Schaltflächen aktiviert sind. 4 Wenn Sie möchten, dass der Klick dem SessionTempo (in der Timeline) folgt, aktivieren Sie die Dirigent-Schaltfläche. Wenn Sie das Tempo manuell anpassen möchten, deaktivieren Sie die Dirigenten-Schaltfläche. Hauptzähler-Selektor (im Edit-Fenster) Wenn eine Zeitbasis-Leiste angezeigt wird, klicken Sie auf ihren Namen, sodass sie hervorgehoben wird. Wenn Sie die Haupt-Zeitskala auf die derzeit im Nebenzähler angezeigte Zeitbasis einstellen, werden die zwei Zeitskalen vertauscht, d. h., die Sub-Zeitskala wird auf die Haupt-Zeitskala eingestellt. Wählen Sie Track > Create Click Track. Einstellen der Haupt-Zeitskala auf „Bars|Beats“ Einführung in Pro Tools 85 5 Drücken Sie die Leertaste oder klicken Sie auf die Play-Schaltfläche im Transport-Fenster, um die Wiedergabe zu starten und den Klick zu hören. Tempo USO RESTRITO Vorzählen-Schaltfläche So passen Sie die Metronom-Einstellungen an: 1 Wählen Sie Setup > Click/Countoff. 2 Wählen Sie eine der folgenden Optionen: • During play and record – der Klick ist während der Wiedergabe und der Aufnahme zu hören. • Only during record – der Klick ist nur während der Aufnahme, nicht während der Wiedergabe zu hören. Metronom (Schaltfläche) • Only during countoff – der Klick ist nur beim Vorzählen, vor Beginn von Aufnahme oder Wiedergabe, zu hören. Dirigent (Schaltfläche) Hauptzähler-Selektor (im Edit-Fenster) 3 Klicken Sie auf OK. Zum Stummschalten einer Metronomspur wählen Sie eine der folgenden Methoden: Einführung in Pro Tools Klicken Sie auf die M-Schaltfläche (M für Mute) in den Spur-Steuerelementen auf der Metronomspur, um sie stummzuschalten. Deaktivieren Sie im Transport-Fenster die Metronom-Schaltfläche, sodass sie nicht mehr blau hervorgehoben ist. Dann deaktivieren Sie die Count Off-Schaltfläche, sodass sie nicht mehr hervorgehoben ist. (Wenn Sie diese beiden Optionen deaktivieren, wird die Metronomspur stummgeschaltet und das Vorzählen ausgeschaltet.) 86 USO RESTRITO Festlegen der Taktart der Session Festlegen des Tempos der Session Achten Sie darauf, die Session-Taktart so zu wählen, dass sie zu Ihrer Musik passt. Wenn die Taktart einer Session nicht zu der Musik passt, die Sie aufnehmen, stimmen die betonten Klicks nicht mit der gespielten Musik überein. Das führt dazu, dass auch das aufgenommene Material nicht in das Takte- und Beats-Raster im Edit-Fenster passt. Neue Sessions in Pro Tools werden mit einem Standardtempo von 120 BPM geöffnet. Wenn Sie ein Metronom mit einem anderen Tempo als 120 BPM zur Aufnahme benutzen möchten, stellen Sie das Tempo entsprechend ein. So legen Sie die Taktart für eine Session fest: 1 Doppelklicken Sie im Transport-Fenster auf die Current Meter-Schaltfläche. So ändern Sie das Tempo einer Session: 1 Sie haben folgende Möglichkeiten: • Doppelklicken Sie im Edit-Fenster auf den Songstart-Marker. • Klicken Sie auf das Symbol zum Hinzufügen eines Tempowechsels (+) oben in der TempoLeiste. Songstart-Marker Current Meter-Schaltfläche 2 Geben Sie die Taktart (Meter) für die Session ein und stellen Sie Location auf „1|1|000“ (um das Standard-Event durch das eingefügte TaktartEvent zu ersetzen). Tempoleiste Add Tempo Change (Schaltfläche) Tempoleiste 2 Geben Sie im Tempo Change-Dialogfeld den BPM-Wert für die Session ein. Meter Change-Fenster 3 Wählen Sie im Click-Popup-Menü einen Notenwert für den Takt. (Bei 6/8 wählen Sie beispielsweise eine punktierte Viertelnote.) 4 Klicken Sie auf OK, um das neue Taktart-Event einzufügen. Tempo Change-Fenster Sie können ein bestimmtes Tempo eingeben oder mit der T-Taste das Tempo „klopfen“. Einführung in Pro Tools 87 USO RESTRITO 3 Stellen Sie Location auf „1|1|000“ (um das Standard-Event durch das eingefügte TempoEvent zu ersetzen). 4 Wählen Sie im Resolution-Popup-Menü einen Notenwert für den Takt aus. (Bei 6/8 wählen Sie beispielsweise eine punktierte Viertelnote.) 5 Klicken Sie auf OK. Verwenden des Manual Tempo-Modus Im Manual Tempo-Modus ignoriert Pro Tools die Tempo-Events in der Tempo-Leiste und gibt stattdessen ein manuelles Tempo wieder. Das manuelle Tempo kann durch „Klopfen“ eingegeben werden. So geben Sie Tempo manuell ein: 1 Stellen Sie sicher, dass die MIDI-Steuerelemente im Transport-Fenster angezeigt werden (unter View > Transport > MIDI Controls). 2 Deaktivieren Sie im Transport-Fenster die TempoLeiste – klicken Sie dazu auf die DirigentSchaltfläche, sodass sie nicht hervorgehoben ist. Pro Tools schaltet in den Manual Tempo-Modus um. In diesem Modus werden sämtliche TempoEvents in der Tempo-Leiste ignoriert. Tempoauflösung Tempo Dirigent (Schaltfläche) 4 So geben Sie ein neues Tempo ein: • Klicken Sie auf den Tempowert, geben Sie eine neue Zahl ein und drücken Sie die Eingabetaste. • Klicken Sie auf den Tempowert und ziehen Sie ihn nach oben oder unten, um die Einstellung zu ändern. Um detailliertere Anpassungen vorzunehmen, halten Sie beim Ziehen die Befehlstaste (Mac) bzw. die Strg-Taste (Windows) gedrückt. • Klicken Sie auf den Tempowert und drücken Sie die T-Taste auf Ihrer Computertastatur im gewünschten Tempo, um einen Wert festzulegen. Importieren von Audiodateien In vielen Musikproduktions-Workflows werden Audio-Loops und Audio aus Sample-Bibliotheken verwendet. So können Sie beim Aufnehmen etwa Drum-Loops anstelle einer Metronomspur verwenden. Sie können sogar Audio-Loops und One-Shot-Samples aus einer Vielfalt von Quellen kombinieren und arrangieren, um ein ganz neues Musikstück zu erstellen. Pro Tools bietet eine Reihe von Möglichkeiten, um Audiodateien verschiedener Quellen in eine Session zu importieren. Sie können Audiodateien von einer Festplatte, einem Netzwerkdatenträger, einer Audio-CD oder Wechselmedien über den Import Audio-Befehl oder durch Ziehen aus einem Workspace-Browser oder aus dem Finder (Mac) bzw. Windows Explorer (Windows) importieren. Manual Tempo-Modus 3 Klicken Sie auf den Tempo Resolution-Selektor und wählen Sie einen Notenwert. (Bei 6/8 wählen Sie beispielsweise eine punktierte Viertelnote oder bei 3/4 eine Viertelnote.) Einführung in Pro Tools 88 USO RESTRITO Über den Import Audio-Befehl 4 Mit dem Import Audio-Befehl können Sie Audiodateien oder -Clips in Ihre Pro Tools-Session importieren. • Um eine Datei oder einen Clip in die Importliste zu übernehmen, wählen Sie sie aus und klicken Sie auf Add oder Convert. So importieren Sie Audiodateien oder -Clips in eine Session mit Hilfe des Import Audio-Befehls: Sie haben folgende Möglichkeiten: 1 Wählen Sie File > Import > Audio. • Um alle Dateien und Clips im aktuellen Verzeichnis zu importieren, klicken Sie auf Add All oder Convert All. 2 Wählen Sie im Import Audio-Dialogfeld eine Audiodatei aus, um ihre Eigenschaften und die dazugehörigen Clips anzuzeigen. • Um eine Datei oder einen Clip aus der Importliste zu entfernen, wählen Sie sie aus und klicken Sie auf Remove. • Um alle Dateien oder Clips zu entfernen, klicken Sie auf Remove All. Mit Pro Tools können Sie einer Session Dateien mit abweichenden Samplerates hinzufügen. Im Comments-Feld des Import Audio-Dialogfelds wird eine Warnmeldung angezeigt, dass diese Dateien mit der falschen Geschwindigkeit und Tonhöhe wiedergegeben werden, wenn sie nicht konvertiert werden. 5 Import Audio-Dialogfeld 3 Um vor dem Importieren eine Vorschau einer ausgewählten Datei oder eines Clips anzuzeigen, klicken Sie auf die Play-Schaltfläche im Import Audio-Dialogfeld. Klicken Sie auf die StopSchaltfläche, um die Vorschau zu beenden. Passen Sie die Vorschaulautstärke mit dem vertikalen Regler an. Mit dem horizontalen Regler unterhalb der Play- und Stop-Schaltflächen können Sie zu einer bestimmten Stelle in der Datei navigieren. Über das Vorschaulautstärke-Steuerelement im Import Audio-Dialogfeld beeinflussen Sie die Lautstärke der Vorschau beim Abhören von Clips in der Clipliste. Einführung in Pro Tools Wenn Sie alle gewünschten Audiodateien und Clips zur Importliste hinzugefügt haben, können Sie die Konvertierung der Samplerate wie im Folgenden beschrieben anwenden: • Aktivieren Sie Apply SRC. • Geben Sie die Source Sample Rate an, indem Sie eine Zahl eingeben oder im Popup-Menü eine Samplerate auswählen. • Wählen Sie die Konvertierung der Samplerate im Quality-Popup-Menü aus. Diese Einstellung setzt die Sample Rate Conversion Quality-Einstellung auf der Processing Preferences-Seite außer Kraft. 6 Klicken Sie auf Done. 7 Wenn Sie Dateien kopieren oder konvertieren, wählen Sie einen Speicherort für die neuen Dateien, etwa den Audio Files-Ordner der aktuellen Session. Beim Hinzufügen von Dateien wird auf den ursprünglichen Speicherort der Datei verwiesen. 89 USO RESTRITO 8 Wählen Sie im Audio Import Options-Dialogfeld aus, wo die importierten Dateien in der Session platziert werden sollen. Audio Import Options-Dialogfeld New Track – jede Audiodatei wird in eine eigene Spur und in die Clipliste importiert. Clip List – Audiodateien werden in die Clipliste importiert, ohne dass eine neue Spur erstellt wird. Importierte Audiodateien werden in der Clipliste angezeigt und können dann in Audiospuren gezogen werden. 9 Beim Erstellen einer neuen Spur wählen Sie eine Position für die importierte Datei in der Spur aus: Session Start – platziert die Datei oder den Clip am Start der Session. Song Start – setzt den Beginn der Datei oder des Clips an den Songstart-Marker. Selection – setzt den Beginn der Datei oder des Clips auf den Edit-Cursor oder auf den Beginn einer Auswahl in der Timeline. Spot – zeigt das Spot-Dialogfeld an, über das Sie die Datei oder den Clip an präzisen Positionen, basierend auf einer der verfügbaren Zeitskalen, positionieren können. 10 Klicken Sie auf OK. Einführung in Pro Tools 90 Importieren von Dateien durch Ziehen USO RESTRITO Mit Pro Tools können Sie Audio-, MIDI-, Video- und Session-Dateien durch Ziehen von Dateien aus einem Workspace-Browser, dem Mac Finder oder Windows Explorer auf das Pro Tools-Anwendungssymbol, in die Session-Timeline, in eine Spur, in die Tracks-Liste oder in die Clipliste importieren. Arbeitsbereich Ziehen von Medien oder SessionDateien in bestehende Spuren oder die Tracks-Liste, um sie als neue Spuren hinzuzufügen Ziehen von Dateien in die Clipliste, um sie zu importieren Importieren aus dem Workspace durch Ziehen Einführung in Pro Tools 91 Die folgende Abbildung zeigt einige Optionen für das Importieren von Dateien durch Ziehen aus einem Workspace-Browser. So importieren Sie Dateien in die Clipliste: USO RESTRITO 1 2 Wählen Sie Audio-, Video-, MIDI-, Clipgruppen-, REX- oder ACID-Dateien in einem WorkspaceBrowser, im Mac Finder oder im Windows Explorer aus. Ziehen Sie die ausgewählten Dateien auf die Clipliste. So importieren Sie Dateien in eine vorhandene Spur: 1 Wählen Sie in einem Workspace-Browser, im Mac Finder oder im Windows Explorer die Dateien für den Import aus. 2 Ziehen Sie die ausgewählte Datei auf eine Position in einer kompatiblen Spur. Bearbeiten von Audiomaterial In Pro Tools können Sie Audiomaterial in Spuren mit verschiedenen Optionen für Trimmen, Trennen, Ausschneiden bzw. Kopieren und Einfügen, Verschieben, Neuarrangieren und mehr bearbeiten. Trimmen von Audioclips Das folgende Beispiel zeigt, wie Sie durch einfaches Editieren die Stelle ändern können, an der ein Song beginnt. In diesem Beispiel hört man, wie der Schlagzeuger das Tempo „vorzählt“ („1...2...1.2.3...“), bevor der Song beginnt (gehen wir davon aus, dass diese Stereospur von einem der Overhead-Mikros des Schlagzeugs stammt). So sieht das Audiomaterial in Pro Tools aus: So importieren Sie Dateien als neue Spur: 1 2 Wählen Sie in einem Workspace-Browser, im Mac Finder oder im Windows Explorer die Dateien für den Import aus. Vorzählen Song-Beginn Wellenformen (linker und rechter Kanal) Sie haben folgende Möglichkeiten: • Ziehen Sie die Dateien bei gedrückter Umschalttaste an eine beliebige Stelle im Edit-Fenster. • Ziehen Sie die Dateien in die Tracks-Liste. • Ziehen Sie die Dateien in einen leeren Bereich des Edit-Fensters (unter einer Spur oder zwischen Spuren). Einführung in Pro Tools Die Stereo-Wellenformen geben eine Vorstellung von den unterschiedlichen Abschnitten des Songs. Dieses „What you see is what you hear“-Prinzip von Pro Tools kann dafür genutzt werden, das Vorzählen ganz einfach durch Trimmen des Songanfangs zu entfernen. 92 So trimmen Sie einen Audioclip: 1 Selector-Tool Wählen Sie das Trim-Tool aus (in der Symbolleiste des Edit-Fensters). Grabber-Tool Smart-Tool Trim-Tool Song-Beginn USO RESTRITO Edit-Tools 3 2 Klicken Sie dort in die Spur, wo das Vorzählen aufhört und der Song anfängt (der Cursor zeigt das Trim-Symbol an). Ziehen Sie den Beginn des Clips nach rechts, um ihn (zeitlich gesehen) nach vorne zu verschieben, oder ziehen Sie den Beginn des Clips nach links, um ihn nach hinten zu verschieben. Wenn Sie das Grabber-Tool verwenden, klicken Sie auf den Clip, den Sie kopieren und einfügen möchten. Wenn Sie das Selector-Tool verwenden, doppelklicken Sie auf den Clip, den Sie kopieren und einfügen möchten. Verwenden Sie das Smart-Tool, damit der Edit-Cursor zwischen verschiedenen EditTools umschaltet – je nachdem, wo Sie ihn über einem Clip platzieren. Sie können das Trimmen des Clips rückgängig machen, indem Sie den Clip mit dem Trim-Tool zurück nach links ziehen. Sie werden feststellen, dass das ursprüngliche Audiomaterial (das Vorzählen noch da ist. Dieses Beispiel zeigt Ihnen, wie Sie in Pro Tools nichtdestruktiv editieren. Kopieren und Einfügen von Clips Im folgenden Beispiel wird gezeigt, wie Sie einen Audioclip auf einer Spur auf andere Timeline- und Spur-Positionen kopieren und einfügen. Dieses Beispiel verwendet einen importierten rhythmischen Audio-Loop. Auswählen eines Clips mit dem Grabber-Tool 4 Wählen Sie Edit > Copy. 5 Platzieren Sie den Edit-Cursor mit dem Selector-Tool an der Position, an der Sie den kopierten Clip einfügen möchten. So kopieren Sie einen Clip und fügen ihn ein: 1 Importieren Sie einen rhythmischen AudioLoop in eine Pro Tools-Session (siehe Abschnitt Importieren von Audiodateien auf Seite 88). 2 Wählen Sie das Grabber-Tool oder das SelectorTool aus (in der Symbolleiste des Edit-Fensters). Einführung in Pro Tools 93 6 Wählen Sie Edit > Paste. Trennen von Clips an der Edit-Selektion So trennen Sie einen Clip an der aktuellen EditPosition: USO RESTRITO 1 Einfügen eines Clips an einer anderen Zeitposition auf einer anderen Spur Vornehmen einer Edit-Selektion 2 Drücken Sie Befehl + C (Mac) oder Strg + C (Windows), um die aktuelle Edit-Selektion in die Zwischenablage zu kopieren. Drücken Sie Befehl + V (Mac) oder Strg + V (Windows), um den Inhalt der Zwischenablage in die aktuelle Edit-Position einzufügen. Nehmen Sie mit dem Selector-Tool eine EditSelektion in einem Audioclip vor. Wählen Sie Edit > Separate Clip > At Selection. Drücken Sie Befehl + E (Mac) oder Strg + E (Windows), um Clips an der aktuellen EditSelektion zu trennen. Trennen und Neuarrangieren von Clips Es gibt verschiedenste Möglichkeiten, neue AudioClips in Pro Tools zu erstellen. Sie können Audioclips als ganze Datei importieren oder aufnehmen (Whole-File-Clips). Oder Sie erstellen Audioclips, die sich nur auf Teile von Audiodateien beziehen, indem Sie eine ganze Clipdatei trimmen (siehe Abschnitt Trimmen von Audioclips auf Seite 92) oder trennen. Im folgenden Beispiel sehen Sie verschiedene Möglichkeiten, Audioclips in einer Session zu trennen und neu zu arrangieren. Dieses Beispiel verwendet einen importierten rhythmischen Audio-Loop. Einführung in Pro Tools Erstellen neuer Clips durch Trennen des übergeordneten Clips an den Grenzen der Edit-Selektion Verwenden Sie „Edit > Separate Clips > On Grid“, um die Audio-Auswahl entsprechend dem aktuellen Raster zu trennen. Dies ist nützlich, wenn Sie mit Audio auf einem Bar|Beat-Raster arbeiten. Verwenden Sie „Edit > Separate Clip > At Transients“, um die Audio-Auswahl entsprechend individueller Attacks im Audio zu trennen. Dies ist nützlich für das Herausfiltern individueller „Hits“ aus dem Audiomaterial – etwa jeden Schlag in einem Drum-Loop oder jede Note in einem Gitarrenriff. 94 USO RESTRITO Neuarrangieren getrennter Clips Clips können in Pro Tools auf verschiedene Arten neu arrangiert werden. Der gewählte Edit-Modus (wird ganz links in der Symbolleiste des Edit-Fensters eingestellt) bestimmt, wie Pro Tools mit Audioclips umgeht, wenn diese verschoben werden. Im folgenden Abschnitt sehen Sie einige der vielen Möglichkeiten zum Arrangieren von Audioclips in Ihrer Pro Tools-Session. Wählen Sie einen Clip mit dem Grabber- oder Selector-Tool aus und gehen Sie auf Edit > Repeat. Geben Sie im daraufhin erscheinenden Repeat-Dialogfeld eine Zahl ein, mit der Sie bestimmen, wie oft die Auswahl wiederholt werden soll, und klicken Sie dann auf OK. Die Auswahl wird als separate, aneinandergereihte Clips wiederholt. Edit-Modi, Grid-Modus ausgewählt Sie haben folgende Möglichkeiten, um Clips neu zu arrangieren: Ziehen Sie mit dem Grabber-Tool im Slip-Modus einen Audioclip an eine neue Position. Der Clip wird an genau die Position verschoben, an die Sie ihn gezogen haben. Ziehen Sie mit dem Grabber-Tool im GridModus einen Audioclip an eine neue Position. Der Clip wird, nachdem Sie ihn loslassen, an der nächsten Grid-Position ausgerichtet. Rhythmischer Audio-Loop, an Transienten getrennt und im Shuffle-Modus aneinandergereiht Weitere Informationen zum Editing und Arrangieren von Audiomaterial entnehmen Sie bitte den Abschnitten zu Edit-Modi und EditTools, Clipgruppen und Elastic Audio im Pro Tools-Referenzhandbuch. Ziehen Sie mit dem Grabber-Tool im SpotModus einen Audioclip an eine neue Position. Das Spot-Dialogfeld öffnet sich und Sie können eine exakte Zeitposition für den Clip angeben. Ziehen Sie mit dem Grabber-Tool im ShuffleModus einen Audioclip an eine neue Position zwischen anderen Clips. Angrenzende Clips reihen sich direkt an den verschobenen Clip an. Wählen Sie einen Clip mit dem Grabber- oder Selector-Tool aus und gehen Sie auf Edit > Duplicate. Der ausgewählte Clip wird dupliziert und direkt nach der aktuellen Auswahl angereiht. Einführung in Pro Tools 95 MIDI-Sequencing mit einem Virtual Instruments-Plug-In USO RESTRITO Im Folgenden wird anhand eines Beispiels erläutert, wie Sie eine MIDI-Sequenz auf einer Instrumentenspur programmieren, um ein Plug-In für virtuelle Instrumente zu spielen. Dieses Beispiel verwendet das Xpand!2-Plug-In von AIR Music Technology. Das Xpand!2-Plug-In ist Teil der AIR Creative Collection, die im Bundle mit Pro Tools als separates Installationsprogramm zum Download verfügbar ist. Führen Sie das AIR Creative Collection-Installationsprogramm mit den dazugehörigen Inhalten aus, bevor Sie mit diesem Beispiel fortfahren. Weitere Informationen finden Sie im AIR Creative Collection Plug-Ins Guide. Was ist MIDI? Bei MIDI-Daten (Musical Instrument Digital Interface) handelt es sich nicht um Audiodaten. MIDI erzeugt keinen Sound. MIDI ist ein Standard, über den MIDI-fähige Geräte – wie Synthesizer, Sampler, Controller, Keyboards und Sequencer – Steuerinformationen austauschen, also miteinander kommunizieren können. Im Grunde teilt MIDI klangerzeugenden Geräten (wie HardwareSynthesizern oder -Samplern oder virtuellen Software-Instrumenten) mit, was sie spielen sollen. Das Senden und Empfangen der MIDI-Daten erfolgt über USB oder FireWire zwischen USB- und FireWire-kompatiblen MIDI-Interfaces und dem Computer. Hardware-MIDI-Instrumente werden über MIDI-Kabel an Ihr MIDI-Interface angeschlossen. Virtuelle Instrumente werden in Pro Tools als Plug-Ins auf Instrumentenspuren eingeschleift. Sie können in Pro Tools direkt geöffnet werden. Einführung in Pro Tools 96 Erstellen einer Instrumentenspur mit einem Instrumenten-Plug-In Sie können entweder eine Instrumentenspur oder eine MIDI-Spur verwenden, um MIDI-Sequenzen in Pro Tools aufzunehmen, zu programmieren und wiederzugeben. Wenn Sie mit Virtual Instruments-Plug-Ins (wie Xpand!2 von AIR) arbeiten, ist es empfehlenswert, eine Instrumentenspur zu erstellen. In Instrumentenspuren können Sie sowohl mit MIDI-Sequenzen arbeiten als auch Audio abhören. Sie können auch Instrumentenspuren mit externen MIDI-Geräten verwenden. USO RESTRITO So erstellen Sie eine Instrumentenspur und schleifen ein Instrumenten-Plug-In ein: 1 Wählen Sie Track > New. Nehmen Sie im New Tracks-Dialogfeld die folgenden Einstellungen vor: • Wählen Sie Stereo. • Klicken Sie auf das Popup-Menü, in dem Audio Track steht, und wählen Sie Instrument Track. • Klicken Sie auf Create. New Tracks-Dialogfeld; „Stereo“ und „Instrument Track“ ausgewählt 2 Wählen Sie ggf. Window > Mix, um das Mix-Fenster anzuzeigen. 3 Klicken Sie auf den Insert-Selektor oben in der Instrumentenspur und wählen Sie Xpand!2 im Instrument-Untermenü. InsertSelektor Einschleifen des Xpand!2-Plug-Ins auf einer Instrumentenspur Einführung in Pro Tools 97 4 Ein Plug-In-Fenster mit dem Xpand!2-Plug-In erscheint. Sie können nun ein Sound-Preset für die Wiedergabe mit MIDI auswählen. Weitere Informationen zum Xpand!2-Plug-In finden Sie im AIR Creative Collection Plug-Ins Guide. So wählen Sie ein Sound-Preset im Xpand!2-Plug-In: USO RESTRITO Klicken Sie oben im Plug-In-Fenster auf das Librarian-Menü (<factory default>) und wählen Sie einen Preset aus einem der Untermenüs. Bei Xpand!2 sind Presets in Untermenüs nach Kategorie geordnet. Insert Selektor Auswählen eines werkseitigen Presets im Librarian-Menü des Xpand!2-Plug-Ins. Einführung in Pro Tools 98 Spielen eines virtuellen Instruments Sie können ein virtuelles Instrument (wie Xpand!2) mit einer MIDI-Sequenz oder über einen externen MIDI-Controller spielen. USO RESTRITO So spielen Sie ein virtuelles Instrument in einer Instrumentenspur: Wenn Sie einen MIDI-Controller angeschlossen haben, können Sie das virtuelle Instrument spielen, solange die Instrumentenspur, auf der es eingeschliffen ist, ausgewählt oder scharfgeschaltet ist. Während Sie spielen, können Sie Ihre Performance als MIDI-Sequenz aufnehmen. Importieren Sie eine MIDI-Sequenz (oder programmieren Sie eine MIDI-Sequenz) in die Instrumentenspur, auf der das virtuelle Instrument eingeschliffen ist, und starten Sie die Wiedergabe. MIDI-Aufnahme mit externem Controller Sie können in Pro Tools MIDI-Daten über einen MIDI-Controller aufnehmen. 5 Klicken Sie auf die Record Enable-Schaltfläche der Spur, um die Instrumentenspur für die MIDI-Aufnahme scharfzuschalten. 6 Klicken Sie im Transport-Fenster auf die Record-Schaltfläche. 7 Spielen Sie auf dem Keyboard Ihres MIDIControllers. Nun sollten Sie den Sound hören, den Sie ausgewählt haben. 8 Klicken Sie auf Play oder drücken Sie die Leertaste, wenn Sie mit der Aufnahme beginnen möchten. Zum Anhalten klicken Sie auf Stop oder drücken Sie erneut die Leertaste. Aufgenommene MIDI-Daten in einer Instrumentenspur 9 Klicken Sie erneut auf die Record EnableSchaltfläche der Spur, um die Scharfschaltung aufzuheben, und geben Sie wieder, was Sie soeben aufgenommen haben. So nehmen Sie MIDI auf einer Instrumentenspur auf: 1 Vergewissern Sie sich, dass Ihr MIDI-Controller entweder mit MIDI-Kabel an ein MIDI-Interface oder über ein USB-Kabel direkt an Ihren Computer angeschlossen ist. 2 Erstellen Sie eine neue Stereo-Instrumentenspur und schleifen Sie Xpand!2 ein (siehe Abschnitt Erstellen einer Instrumentenspur mit einem Instrumenten-Plug-In auf Seite 97). 3 Wählen Sie ein Bass-Preset (auch bekannt als „Patch“). 4 Wählen Sie Options > MIDI Thru. (Prüfen Sie, ob MIDI Thru aktiviert ist. Ist dies nicht der Fall, aktivieren Sie es.) Einführung in Pro Tools 99 Aufschreiben einer MIDI-Sequenz Sie können eine MIDI-Sequenz in Pro Tools mit Hilfe des Pencil-Tools programmieren. USO RESTRITO Beim Einfügen von MIDI-Noten oder anderen MIDI-Daten mit dem Pencil-Tool werden die Grenzen von MIDI-Clips an den nächstgelegenen Taktstrichen erstellt. So fügen Sie eine MIDI-Note in einer Spur im EditFenster ein: 1 Stellen Sie im Edit-Fenster für die MIDI- oder Instrumentenspur die Notendarstellung ein. Auswahl der Notendarstellung in einer Instrumentenspur 2 Wählen Sie das Pencil-Tool aus. Es muss auf „Free Hand“ eingestellt sein. Wenn Sie in der Notendarstellung den Cursor auf den PlaylistBereich einer MIDI-Spur setzen, nimmt er die Form eines Bleistifts (Pencil-Tool) an. 3 So fügen Sie Viertelnoten im Takt ein: 4 Bewegen Sie das Pencil-Tool über die Playlist der MIDI- oder Instrumentenspur. Verwenden Sie die Leiste im Edit-Fenster und das MiniKeyboard der Spur als Referenz, um die gewünschte Tonhöhe und zeitliche Position zu bestimmen. Beim Arbeiten mit dem Pencil-Tool werden Cursorposition und -wert in der Symbolleiste des Fensters angezeigt. Cursor-Tonhöhen-Position Pencil-Cursor Cursor-Timeline-Position Cursorposition und -wert • Stellen Sie die Haupt-Zeitskala auf „Bars|Beats“ ein. • Setzen Sie den Edit-Modus auf „Grid“. • Stellen Sie den Grid-Wert auf Viertelnoten ein. • Legen Sie den Wert für „Default Note Duration“ auf Viertelnoten (oder auf Follow Grid) fest. Einführung in Pro Tools 100 USO RESTRITO 5 Wenn Sie die gewünschten Werte für Tonhöhe und Zeit der einzufügenden Note erreicht haben, fügen Sie die Note mit einem Mausklick ein. Mit dem Pencil-Tool eingefügte MIDI-Note Bei aktiviertem Grid-Modus wird der Anfangspunkt der MIDI-Note automatisch an der nächstgelegenen Rastergrenze ausgerichtet. Drücken Sie bei ausgewähltem Free-HandPencil-Tool die Befehlstaste (Mac) bzw. die Strg-Taste (Windows), während Sie gleichzeitig klicken, um die Ausrichtung am Raster vorübergehend auszusetzen. Der Velocity-Wert für eingefügte Noten wird von der Einstellung „Default Note On Velocity“ bestimmt. Die Dauer wird durch den Wert für „Default Note Duration“ bestimmt. Im Grid-Modus wird die Position für den Notenanfang durch den Rasterwert bestimmt. Wenn die Option Play MIDI Notes When Editing aktiviert ist, erklingt jede Note beim Einfügen. So lange Sie die Maustaste gedrückt halten, können Sie mit dem Pencil-Tool ziehen und so Tonhöhe und Dauer der eingefügten Note verändern. Ziehen Sie die Note nach rechts, um sie zu verlängern, ohne dabei ihren Anfangspunkt zu verändern. Ziehen Sie die Note nach links, um sie zu verkürzen, ohne dabei ihren Endpunkt zu verändern. Bei aktiviertem Grid-Modus wird der Endpunkt der MIDI-Note automatisch am nächstgelegenen Rasterpunkt ausgerichtet. Drücken Sie die Befehlstaste (Mac) bzw. die Strg-Taste (Windows) und ziehen Sie das Pencil-Tool, um die Ausrichtung am Raster vorübergehend zu deaktivieren. Einführung in Pro Tools Editieren von MIDI-Noten MIDI-Noten können im Edit-Fenster oder in einem MIDI Editor-Fenster bearbeitet werden, einschließlich Anfangs- und Endpunkt, Notendauer, Tonhöhe und Velocity-Werte. Selector-, Grabber-, Trim- und Pencil-Tool können auf einzelne Noten, aber auch auf ganze Notengruppen angewendet werden. Selektieren von MIDI-Noten MIDI-Noten müssen vor dem Editieren selektiert werden. So selektieren Sie MIDI-Noten: 1 Zeigen Sie die MIDI- oder Instrumentenspur in der Notendarstellung an. 2 Sie haben folgende Möglichkeiten: Klicken Sie bei gedrückter Umschalttaste mit dem Pencil-Tool oder einem Grabber-Tool auf jede Note. Klicken Sie mit dem Grabber-Tool auf eine Stelle ohne Noten (das Fadenkreuz erscheint) und ziehen Sie ein Rechteck um die Notengruppe, die Sie editieren möchten. Selektieren einer Notengruppe mit einem Grabber-Tool Wenn bei Verwendung eines Grabber-Tools ein Teil des Rechtecks eine Note berührt (ihren Anfangsoder Endpunkt), wird diese Note in die Selektion aufgenommen. 101 USO RESTRITO Ziehen Sie mit dem Selector-Tool über den gewünschten Notenbereich. Während des Ziehens wird jede neue Note akustisch wiedergegeben und die aktuelle CursorpositionswertAnzeige im Edit-Fenster zeigt die Anzahl der Halbtonschritte sowie die Richtung (+/–) der Transposition an. Halten Sie die Befehlstaste (Mac) oder die Windowstaste (Windows) gedrückt und drücken Sie Plus (+) auf dem numerischen Ziffernblock, um die ausgewählten MIDINoten um einen Halbton nach oben zu transponieren, oder drücken Sie Minus (–) auf dem numerischen Ziffernblock, um die ausgewählten MIDI-Noten um einen Halbton nach unten zu transponieren. Auswählen von Noten mit dem Selector-Tool Bei Verwendung des Selector-Tools werden nur solche Noten in die Selektion aufgenommen, deren Anfangspunkt im Selektionsbereich liegt. Transponieren von Noten Sie können MIDI-Noten transponieren, indem Sie sie mit dem Pencil-Tool oder einem Grabber-Tool nach oben oder unten ziehen. Wenn mehrere Noten selektiert wurden, werden sie alle transponiert. So transponieren Sie eine MIDI-Note: 1 Zeigen Sie die MIDI- oder Instrumentenspur in der Notendarstellung an. 2 Aktivieren Sie das Pencil-Tool oder eines der Grabber-Tools. 3 Ziehen Sie die Note bei gedrückter Umschalttaste nach oben oder unten. Transponieren mit einem Grabber-Tool Durch das Drücken der Umschalttaste wird sichergestellt, dass die transponierte Note ihren Anfangspunkt behält. Einführung in Pro Tools Um die Kopie einer Note zu transponieren, ohne dabei die Originalnote zu ändern, drücken Sie beim Ziehen der Note die Wahltaste (Mac) bzw. die Alt-Taste (Windows). Verschieben von Noten Ähnlich wie Clips können auch MIDI-Noten mit dem Pencil-Tool oder einem Grabber-Tool nach rechts oder links verschoben werden, um ihren Anfangspunkt in der Pro Tools-Timeline zu ändern. Wenn vor dem Verschieben mehrere Noten selektiert sind, werden alle gemeinsam verschoben. So verschieben Sie eine MIDI-Note: 1 Zeigen Sie die MIDI- oder Instrumentenspur in der Notendarstellung an. 2 Ziehen Sie die Note mit dem Pencil-Tool oder einem Grabber-Tool nach rechts oder links. (Halten Sie die Umschalttaste gedrückt, wenn Sie die Tonhöhe der Note beibehalten möchten.) Beim Verschieben der Note zeigt die aktuelle Cursorpositionswert-Anzeige im Edit-Fenster den jeweiligen neuen Anfangspunkt an. 102 USO RESTRITO Wenn der Edit-Modus auf „Grid“ eingestellt ist, wird die verschobene Note automatisch am nächstgelegenen Rasterpunkt ausgerichtet. Wenn der Edit-Modus auf „Spot“ eingestellt ist, öffnet sich das Spot-Dialogfeld. 4 Bewegen Sie den Cursor an den Anfang einer beliebigen ausgewählten Note, sodass das TrimTool erscheint. Ziehen Sie nach rechts, um die Dauer der Noten zu verkürzen, oder nach links, um sie zu verlängern. Um die ausgewählten Noten zu kopieren, ohne die Originalnoten dabei zu ändern, halten Sie beim Ziehen der Noten die Wahltaste (Mac) bzw. die Alt-Taste (Windows) gedrückt. Trimmen der Anfangs- und Endpunkte von Noten Ähnlich wie bei Clips können auch die Anfangsund Endpunkte von MIDI-Noten mit dem TrimTool geändert werden. Wenn mehrere Noten selektiert wurden, werden all diese Noten verändert. So ändern Sie die Anfangs- und Endpunkte einer Gruppe von MIDI-Noten: 1 Zeigen Sie die MIDI- oder Instrumentenspur in der Notendarstellung an. 2 Selektieren Sie die Noten, die Sie trimmen möchten. 3 Sie haben folgende Möglichkeiten: Ändern der Endpunkte von Noten mit dem Trim-Tool Wenn der Edit-Modus auf „Grid“ eingestellt ist, wird der verschobene Anfangs- oder Endpunkt automatisch am nächstgelegenen Rasterpunkt ausgerichtet. Wenn der Edit-Modus auf „Spot“ eingestellt ist, öffnet sich das Spot-Dialogfeld, in das Sie die neue Position des Anfangs- bzw. Endpunkts der Note eingeben können. Wenn der Grid-Modus aktiviert ist, können Sie ihn mit Hilfe der Befehlstaste (Mac) bzw. der Strg-Taste (Windows) vorübergehend deaktivieren. • Wählen Sie das Trim-Tool. • Verwenden Sie das Pencil-Tool. Einführung in Pro Tools 103 Manuelles Bearbeiten der Velocity-Werte von Noten USO RESTRITO Wenn für eine MIDI- oder Instrumentenspur die Velocity-Darstellung eingestellt ist oder die VelocityLane unter einer Spur angezeigt wird, wird die AttackVelocity jeder Note mit einem Velocity-Balken dargestellt. Je länger der Velocity-Balken, desto höher ist der Velocity-Wert (0–127). Löschen von MIDI-Noten Selektierte Noten können mit dem Clear-Befehl im Edit-Menü gelöscht werden. Darüber hinaus haben Sie die Möglichkeit, selektierte Noten mit dem Pencil-Tool zu löschen. So löschen Sie eine Gruppe von MIDI-Noten mit dem Clear-Befehl: 1 Wählen Sie die Noten aus, die gelöscht werden sollen. 2 Sie haben folgende Möglichkeiten: So bearbeiten Sie die MIDI-Velocity im Edit-Fenster: 1 Sie haben folgende Möglichkeiten: • Zeigen Sie die MIDI- oder Instrumentenspur in der Velocity-Darstellung an. • Zeigen Sie die Controller-Lane für die MIDI- oder Instrumentenspur sowie die Velocity an. • Wählen Sie Edit > Clear, um die ausgewählten Noten zu löschen. Die der Spur zugewiesenen Controller-Daten bleiben unverändert. • Klicken Sie mit einem beliebigen Edit-Tool mit der rechten Maustaste auf eine selektierte Note und wählen Sie Clear. • Drücken Sie die Entf-Taste (Mac) bzw. die Rücktaste (Windows). Anzeigen der Velocity-Lane 2 Wählen Sie ein Grabber-Tool. 3 Ziehen Sie die Spitze des Velocity-Balkens (Raute) nach oben oder unten. Wenn Sie MIDI-Noten innerhalb eines selektierten Zeitbereichs löschen, werden gleichzeitig auch alle zugewiesenen Controller- und Automation-Daten gelöscht. Ziehen eines Velocity-Balkens Die Velocity-Werte eines Notenbereichs können mit einem Pencil-Tool bearbeitet werden. Einführung in Pro Tools 104 So löschen Sie eine einzelne MIDI-Note mit dem Pencil-Tool: USO RESTRITO Klicken Sie mit dem Pencil-Tool bei gedrückter Wahltaste (Mac) bzw. Alt-Taste (Windows) auf die Note. Bei gedrückter Wahltaste (Mac) bzw. Alt-Taste (Windows), wird aus dem Pencil-Tool ein Eraser-Tool. Mischen und Plug-InVerarbeitung Dieses Kapitel befasst sich mit den Grundlagen des Mischens in Pro Tools. Behandelt werden der Signalfluss der Audiosignale, u. a. Ausgänge, Busse, Inserts und Sends für Submixe und Mixdown. Vor dem endgültigen Mixdown können schon während einer Session verschiedene Mischvorgänge anfallen. Löschen einer Note mit dem Pencil-Tool Programmwechselbefehle und Sysex-Events können ebenfalls durch Anklicken mit dem Pencil-Tool bei gedrückter Wahltaste (Mac) bzw. Alt-Taste (Windows) gelöscht werden. Während des Abmischens ermöglichen EchtzeitPlug-Ins und Hardware-Inserts die Verwendung von Effekten und die Verarbeitung von Signalen. In Pro Tools ist bereits eine Plug-In-Suite für die Audioeffektbearbeitung enthalten, die Sie zum ändern bereits aufgenommener Sounds verwenden können. In diesem Abschnitt wird anhand zweier Beispiele erläutert, wie Sie Ihren Sound mit Hilfe von Plug-Ins bearbeiten können. Ausführliche Informationen zu den mit Pro Tools gelieferten Plug-Ins finden Sie im Audio-Plug-Ins-Handbuch (Help > Audio Plug-ins Guide). Einführung in Pro Tools 105 Anwenden von Equalizern und Kompression USO RESTRITO Beim Mixen von Audiomaterial ist es für ideale Ergebnisse üblich, auf einzelnen Spuren Equalizer und Kompression anzuwenden. So wenden Sie EQs auf einer Spur an: 1 Wählen Sie Window > Mix. 2 Klicken Sie oben in der Spur auf den nächsten Insert-Selektor und wählen Sie die EQ 3 7-BandOption aus dem EQ-Untermenü. Equalizer (EQ) – lässt Sie das Frequenzspektrum des Sounds gestalten. Ein einfaches Beispiel für EQs sind die Bass- und Höhenregler auf vielen Stereosystemen. Mit diesen Reglern können Sie die tiefen und die hohen Frequenzen von Audio verstärken (lauter machen) oder dämpfen (leiser machen). Sie können EQs etwa dazu verwenden, Gitarre und Bass voneinander zu trennen, am Drumsound zu feilen, Stimmen zu betonen und sogar ungewollte Geräusche herauszuschneiden. In Pro Tools haben Sie eine ganze Reihe von EQ-Plug-Ins zum Gestalten Ihres Sounds zur Verfügung. Kompression – lässt Sie den Dynamikverlauf Ihres Audiomaterials glätten. Dabei kann man den Kompressor mit einer automatischen Lautstärkesteuerung vergleichen, die dafür sorgt, dass die lauten Passagen nicht zu laut werden. Sie können Kompression dazu verwenden, Gesang inniger erscheinen oder Becken nicht zu schrill klingen zu lassen. Ein Limiter sorgt etwa dafür, dass die Spitzen des Audiosignals einen bestimmten Schwellenwert nicht überschreiten, ohne dabei das Audiomaterial anzugreifen, das diesen Wert nicht überschreitet. In Pro Tools haben Sie eine ganze Reihe von Dynamik-Plug-Ins zum Gestalten der Dynamik Ihres Sounds zur Verfügung. Insert-Selektor für eine Spur im Mix-Fenster Einführung in Pro Tools 106 USO RESTRITO 3 Das EQ III-Plug-In-Fenster öffnet sich. Für den Anfang können Sie die Plug-In-Presets verwenden, um auszuprobieren, wie sich die verschiedenen Einstellungen auf Ihren Sound auswirken. So komprimieren Sie eine Spur: 1 Wählen Sie Window > Mix. 2 Klicken Sie oben in der Spur auf den nächsten Insert-Selektor und wählen Sie Dyn 3 Compressor/Limiter aus dem DynamicsUntermenü. Pro Tools schleift das Dynamics III Compressor/Limiter-Plug-In auf die Spur ein und öffnet das entsprechende PlugIn-Fenster. 3 Das Dyn III-Plug-In-Fenster öffnet sich. Für den Anfang können Sie die Plug-In-Presets verwenden, um auszuprobieren, wie sich die verschiedenen Einstellungen auf Ihren Sound auswirken. EQ III-Plug-In-Fenster, Plug-In-Preset-Selektor 4 Starten Sie die Wiedergabe, um den Effekt zu hören. Dyn III-Plug-In-Fenster, Plug-In-Preset-Selektor 4 Einführung in Pro Tools Starten Sie die Wiedergabe, um den Effekt zu hören. 107 USO RESTRITO Verwenden von Hall Hall (Reverb) vermittelt den Eindruck einer Raumakustik. Halleffekte sind im Grunde eine Aneinanderreihung von Delays, die die SoundReflexion von Oberflächen in verschiedenen Räumen, Sälen und anderen Orten nachbilden. Sie können Halleffekte verwenden, um einen künstlichen Raumeffekt für Ihren gesamten Mix zu erzeugen, indem Sie Sends aus Ihrer Quellspur und verarbeitung auf einer Auxiliary-Eingangs-Spur verwenden. Mit Halleffekten können Sie Ihren Mix so klingen lassen, als wäre er in einer großen Konzerthalle, in einem kleinen Raum oder sogar in einem engen Gang aufgenommen worden. Eine gute Möglichkeit zum Einfügen von Hall in Ihren Mix ist eine Send/Return-Konfiguration. In Pro Tools ermöglicht es das Verwenden von Sends aus Spuren, Audiomaterial mehrerer Spuren auf und durch denselben Halleffekt zu routen. Auf diese Weise werden Ihre gesamten Quellspuren so klingen, als ob sie im selben Raum aufgenommen wurden. Einführung in Pro Tools 108 USO RESTRITO So verwenden Sie Hall mit einer Auxiliary-Eingangs-Spur und mehreren Quellspuren: 1 Wählen Sie Window > Mix. 2 Wählen Sie Track > New und erstellen Sie eine Stereo-Auxiliary-Eingangs-Spur. Klicken Sie dann auf Create. Erstellen einer neuen Auxiliary-Eingangs-Spur 3 Klicken Sie auf der eben erstellten Auxiliary-Eingangs-Spur auf den Input-Selektor und wählen Sie Bus > Bus 1–2. Input-Selektor Auswählen von Bus 1-2 aus dem Input-Selektor auf einer Auxiliary-Eingangs-Spur Einführung in Pro Tools 109 4 Wählen Sie Send A auf Ihrer Quellspur (siehe Abbildung unten) und wählen Sie Bus > Bus 1–2. USO RESTRITO Send A-Selektor Auswählen von Bus 1–2 für Send A auf einer Audiospur 5 Für weitere Spuren, die Sie zur Hallbearbeitung an die Auxiliary-Eingangs-Spur senden möchten, wiederholen Sie den letzten Schritt. Einführung in Pro Tools 110 USO RESTRITO 6 Fügen Sie der Auxiliary-Eingangs-Spur ein Hall-Plug-In hinzu. Bus-Sends von einer Audiospur auf eine Auxiliary-Eingangs-Spur zur Reverb-Bearbeitung mit D-Verb 7 Zum Einstellen der Send-Pegel von Quellspuren können Sie einzelne Send-Output-Fenster verwenden. Alternativ können Sie auch die Sends-Ansicht so einstellen, dass die Send-Steuerelemente für einen bestimmten Send angezeigt werden (wählen Sie etwa View > Sends A–E > Send A). 8 Drücken Sie die Leertaste und schieben Sie langsam den kleinen Fader im Send-Output-Fenster oder in den Sends-Spur-Steuerelementen nach oben. Damit legen Sie fest, wie viel Ihrer Quellspur für die Reverb-Verarbeitung an die Auxiliary-Eingangs-Spur gesendet wird. 9 Hören Sie sich das Resultat an, passen Sie die Send-Pegel der einzelnen Spuren an und testen Sie die verschiedenen Plug-In-Einstellungen, bis Sie den richtigen Effekt für Ihren Mix gefunden haben. Einführung in Pro Tools 111 Verwenden von Automation USO RESTRITO Pro Tools ermöglicht die dynamische Automation von Mixing-Einstellungen auf den einzelnen Spurarten. Sie können Automationsbewegungen aufzeichnen und sie in Echtzeit während der Wiedergabe Ihrer Session anzeigen. Sie können Automationsdaten auch mit denselben Methoden editieren, die Sie für Audio- und MIDI-Daten verwenden. 3 Klicken Sie im Mix- oder Edit-Fenster auf den Automation Mode-Selektor jeder Spur, die Sie automatisieren möchten, und stellen Sie den Automationsmodus ein. Wählen Sie für den ersten Automationsdurchgang Write. 4 Starten Sie die Wiedergabe, um mit der Aufzeichnung der Automation zu beginnen. 5 Bewegen Sie die Steuerelemente, die Sie automatisieren möchten (beispielsweise einen Lautstärke-Fader der Spur). 6 Stoppen Sie nach Beendigung des Vorgangs die Wiedergabe. 7 Schalten Sie den Automationsmodus zurück auf Read, um die soeben aufgenommene Automation wiederzugeben. Schreiben von Automationsdaten Sie können Automationsdaten aller für die Aufzeichnung aktivierten Steuerelemente schreiben, indem Sie diese während der Wiedergabe bewegen. So schreiben Sie Automationsdaten auf Spuren: 1 Wählen Sie Window > Automation. 2 Stellen Sie sicher, dass der Automationstyp für die Aufzeichnung aktiviert (write-enabled) ist. Track Automation ModeSelektor AutomationFenster Verschieben des LautstärkeFaders während der Wiedergabe Automation-Fenster, Lautstärkeautomation aktiviert Einführung in Pro Tools Nach dem ersten Automationsdurchgang können Sie der Spur zusätzliche Automationsdaten hinzufügen, ohne den vorherigen Durchgang völlig zu löschen. Dazu müssen Sie den Touchoder Latch-Modus wählen. In diesen beiden Modi werden nur dann neue Automationsdaten hinzugefügt, wenn Sie einen Regler des betreffenden Parameters verschieben. Manuelles Bearbeiten von Automation Pro Tools bietet für alle Spuren in einer Session verschiedene Möglichkeiten, Automationsdaten zu bearbeiten. Sie können Automationsdaten grafisch bearbeiten, indem Sie Breakpoints in AutomationsPlaylists anpassen. Sie können Automationsdaten auch in der gleichen Weise wie Audio- und MIDIDaten ausschneiden, kopieren und einfügen. Die Automationsdaten werden als Liniendiagramm mit editierbaren Breakpoints dargestellt. Automations-Breakpoint 112 USO RESTRITO Durch Ziehen dieser Breakpoints lassen sich die Automationsdaten direkt im Edit-Fenster und in den MIDI Editor-Fenstern editieren. Wenn Sie einen Automations-Breakpoint nach oben oder unten ziehen, wird die Wertänderung angezeigt. Automations-Breakpoint-Wert Das Ziehen eines Automations-Breakpoints nach links oder rechts ändert den Zeitpunkt, zu dem das Automations-Event gesendet wird. Um den Automationstyp des Breakpoints auf einer Spur anzuzeigen, wählen Sie entweder die entsprechende Spurdarstellung aus oder blenden Sie die entsprechende Automations- oder Controller-Lane unter der Spur ein. Beispielsweise können Sie Lautstärke, Panorama, Mute, MIDI-Controller-Daten oder sogar Plug-InAutomation anzeigen und bearbeiten. Verwenden des Grabber-Tools Mit dem Grabber-Tool können Sie durch Klicken auf eine Diagrammlinie neue Breakpoints erstellen oder durch Ziehen die Position vorhandener Breakpoints ändern. Zum Entfernen von Breakpoints klicken Sie mit dem Grabber-Tool bei gedrückter Wahltaste (Mac) bzw. Alt-Taste (Windows) darauf. Verwenden des Grabber-Tools zum Erzeugen eines neuen Breakpoints Verwenden des Pencil-Tools Mit dem Pencil-Tool können Sie neue Breakpoints erzeugen, indem Sie auf die Diagrammlinie klicken. Zum Entfernen von Breakpoints klicken Sie mit dem Pencil-Tool bei gedrückter Wahl- (Mac) bzw. Alt-Taste (Windows) darauf. Track ViewSelektor Automation Type-Selektor Spurdarstellung „Volume Automation“ Verwenden des Pencil-Tools zum Löschen eines Breakpoints Verwenden des Trim-Tools Mit dem Trim-Tool können Sie alle selektierten Breakpoints nach oben oder unten verschieben, indem Sie sie innerhalb der Selektion ziehen. AutomationLanes Spurdarstellung und Automation-Lanes Verwenden des Trim-Tools zum Verschieben von Breakpoints Einführung in Pro Tools 113 Exportieren Ihres Mix Nachdem Sie die Spuren Ihrer Pro Tools-Session fertig aufgenommen, bearbeitet und gemischt haben, ist Ihre Session zum Abmischen und Exportieren bereit, damit Sie das Ergebnis auf eine CD brennen oder im Internet veröffentlichen können. Sie können den Befehl Bounce to Disk verwenden, um Ihren Mix von der Session in eine einzelne Audiodatei zu exportieren. So exportieren Sie den Mix von Ihrer Session als Stereo-Audiodatei. USO RESTRITO 1 Verwenden Sie den Selektor, um die Länge der Session in der Timeline (oder in der Spur) festzulegen. Selector-Tool Timeline-Selektion: Session-Audio selektiert und für „Bounce to Disk“ bereit Timeline-Selektion für „Bounce to Disk“ 2 Wählen Sie File > Bounce to > Disk. 3 Nehmen Sie im Bounce-Dialogfeld die folgenden Einstellungen vor: • Wählen Sie die Bounce Source (dies ist für Ihren Mix der Pfad für den Hauptkanal, wie etwa main (Stereo) –> Analog 1–2). • Wählen Sie den File Type (z. B. WAV). • Wählen Sie Interleaved als Format. • Wenn Sie vorhaben, die gebouncte Audiodatei auf CD zu brennen, legen Sie 16 Bit für die Bit Depth fest. • Wenn Sie vorhaben, die gebouncte Audiodatei auf CD zu brennen, legen Sie 44,1 kHz für die Samplerate fest. • Wählen Sie die Offline-Option für Bouncen schneller als in Echtzeit. Bounce-Dialogfeld Einführung in Pro Tools 114 USO RESTRITO 4 Klicken Sie auf Bounce. (Wenn Sie keinen Bereich in der Timeline selektieren, wird die gesamte Session von Anfang bis Ende gebounct.) 5 Tippen Sie im Save-Dialogfeld den Namen der Audiodatei, die Sie bouncen, und wählen Sie einen Speicherort. 6 Klicken Sie auf Save. Pro Tools beginnt mit dem Bouncing auf die Festplatte. Wenn die Offline-Option deaktiviert ist, erfolgt das Bouncen in Pro Tools in Echtzeit, sodass Sie während des Bounce-Vorgangs die Audiowiedergabe Ihrer Mischung anhören können. (Währenddessen können Sie jedoch keine Pro Tools-Steuerelemente betätigen.) Brennen der Mischung auf CD Weitere Informationen Wir hoffen, mit dieser kurzen Einführung Ihr Interesse an der Musikgestaltung mit Pro Tools geweckt zu haben. Lesen Sie bitte das Pro ToolsReferenzhandbuch (Help > Pro Tools Reference Guide), um mehr zu den hier vorgestellten Themen zu erfahren und ausführliche Informationen zu Pro Tools-Systemen und -Software zu erhalten. Das Pro Tools-Referenzhandbuch bietet detaillierte Informationen zu allen Pro Tools-Features und Arbeitsabläufen, geordnet nach Audio- und Musikproduktions-Aufgaben (wie etwa Aufnahme, Editing und Abmischen). Sie können außerdem online die Pro Tools-Hilfe benutzen (Help > Pro Tools Help), um Antworten zu spezifischen Themen zu erhalten. Nach Abschluss des Bounce-Vorgangs erhalten Sie eine Audiodatei, die Sie auf eine Audio-CD brennen können. Verwenden Sie dazu eine Software zum Brennen von CDs (etwa iTunes oder Roxio Toast). Die Audiodatei kann dann auf Standard-CD-Playern wiedergegeben werden. Das Anhören einer Referenz-CD außerhalb des eigenen Studios ist ein lang erprobtes Verfahren zum Prüfen der Umsetzung der Mischung auf anderen Systemen oder in einer anderen Hörumgebung. Einführung in Pro Tools 115 Introducción a Pro Tools USO RESTRITO Lee esta guía si eres un usuario nuevo de Pro Tools® La guía contiene ejemplos de cómo grabar, editar y mezclar audio y explicaciones sobre el uso de MIDI en Pro Tools. Si todavía no tienes instalado Pro Tools, instálalo según las instrucciones en la Guía de instalación de Pro Tools. Para obtener información sobre la conexión e instalación de drivers de tu sistema de audio, consulta la documentación correspondiente. Conectar auriculares o altavoces Para escuchar el audio de Pro Tools, conecta auriculares o altavoces a tu hardware de audio (esta guía usa un interface de audio Mbox de ejemplo). Si utilizas auriculares, baja el nivel de volumen Headphone (girándolo en sentido contrario a las agujas del reloj). Si utilizas altavoces, baja el nivel de volumen general (Master) girándolo en sentido contrario a las agujas del reloj. Es importante que empieces con el volumen bajo para no hacerte daño en los oídos o perjudicar tu equipo. Una vez que hayas iniciado Pro Tools, abre o crea una sesión y ajusta los controles de volumen a tu gusto para una escucha apropiada. Nivel de auriculares Nivel de volumen principal Jack de auriculares de 1/4" Controles y conectores del panel frontal de Mbox Conexiones del panel posterior de Mbox Introducción a Pro Tools 116 Reproducción de la sesión de demostración Utiliza la sesión de demostración para comprobar tus auriculares y altavoces y comenzar a explorar lo que puedes hacer con Pro Tools. USO RESTRITO Para instalar y abrir la sesión de demostración: 1 Lleva a cabo uno de estos procedimientos: • Coloca el disco Pro Tools Installer en tu unidad de DVD, ubica y abre la carpeta Additional Files; después arrastra la carpeta Demo Session a tu disco duro (para más velocidad, usa un disco duro externo homologado por Avid en lugar del disco de sistema). 2 Inicia Pro Tools. 3 A continuación, ejecuta uno de estos procedim ientos, dependiendo de lo que veas en pantalla: • Si aparece el cuadro de diálogo Quick Start, haz clic en Open Session y después en OK. Busca el archivo de sesión de demostración (.ptx), selecciónalo y haz clic en Open. • Si el cuadro de diálogo Quick Start no aparece, elige File › Open Session. Busca el archivo de sesión de demostración (.ptx), selecciónalo y haz clic en Open. Para obtener más información sobre la sesión de demostración, consulta el archivo Read Me (Léeme) de la sesión de demostración. • Descarga la sesión de demostración de Pro Tools de tu cuenta Avid online a tu disco duro (para el mejor rendimiento, usa un disco duro externo homologado por Avid en lugar del disco de sistema). Barra de herramientas Pistas Introducción a Pro Tools 117 Para reproducir la sesión de demostración: 1 Baja el volumen de tu interfaz para evitar que el audio suene demasiado alto. 2 Inicia la reproducción de la sesión de demostración en Pro Tools. Para iniciar o detener la reproducción, efectúa uno de los siguientes procedimientos: USO RESTRITO • Pulsa la barra espaciadora del teclado del ordenador. • Haz clic en los botones Reproducir o Detener en la ventana Transport (Window › Transport) o en la barra de herramientas de la ventana Edit. Detener Reproducir • La ventana Transport ofrece controles para funciones de transporte, como Reproducir, Detener, Grabar, Avanzar rápido y Rebobinar. • Las ventanas de plug-ins ofrecen controles de procesamiento de audio y plug-ins de instrumentos virtuales. • Las ventanas MIDI Editor permiten editar datos MIDI mediante una interfaz de tipo “rollo de pianola”, con edición de puntos de inflexión e incluso con notación musical tradicional. • La ventana Score Editor permite editar los datos MIDI de la sesión usando notación musical; incluso puedes imprimir la partitura desde Pro Tools. • El espacio de trabajo proporciona una base de datos interactiva para todos los contenidos audiovisuales en la sesión o en el sistema. Controles Reproducir o Detener en la ventana Transport 3 Mientras se reproduce la sesión, sube el volumen de tu interfaz de audio a un nivel de escucha cómodo. 4 Explora Pro Tools mientras tanto (observa las opciones disponibles en el menú Window): • La ventana Edit proporciona una presentación de línea de tiempo de datos de audio y MIDI y automatización de mezclas para grabar, editar y organizar pistas. Utiliza esta ventana para editar y arreglar audio, MIDI y datos de automatización en la sesión. 5 Pulsa la barra espaciadora o haz clic en el botón de detención para detener la reproducción. 6 Cuando hayas terminado de explorar la sesión de demostración, elige File › Close Session. La sesión de demostración es un buen ejemplo de un proyecto acabado con arreglos, edición y mezcla. No es preciso regresar a la sesión de demostración para nada más de esta guía, pero puede que desees volver a escucharla más tarde, después de conocer otras funciones de Pro Tools. • La ventana Mix muestra las pistas como bandas de canal, al estilo de una consola de mezcla; en ella verás medidores de nivel y controles de insertos de plug-ins y de hardware, envíos, asignaciones de entrada y salida, panorama, volumen, solo, mute y activación para grabación. Utiliza esta ventana para encaminar y mezclar audio y MIDI en la sesión. Introducción a Pro Tools 118 Ver las ventanas Edit y Mix Las ventanas Edit y Mix son las dos áreas de trabajo principales de Pro Tools. A lo largo del resto de esta guía, verás ejemplos de ambas ventanas y de su uso para diferentes tipos de procesos de producción. Ver la ventana Edit Para mostrar la ventana Edit: USO RESTRITO Elige Window › Edit. Para mostrar todas las opciones de visualización de la ventana Edit: Selecciona View › Edit Window › All. Ventana Edit Introducción a Pro Tools 119 Ver la ventana Mix Para mostrar la ventana Mix: Elige Window › Mix. Para mostrar todas las opciones de visualización de la ventana Mix: Selecciona View › Mix Window › All. USO RESTRITO Ventana Mix (se muestran las ventanas Transport y Plug-In) Introducción a Pro Tools 120 USO RESTRITO Creación de una sesión Grabación de audio Esta sección ilustra cómo crear una sesión nueva. Puedes crear una sesión al iniciar Pro Tools por primera vez o en cualquier momento posterior. Esta sección explica cómo conectar un micrófono o un instrumento (como una guitarra o un teclado) a tu sistema Mbox para grabar audio. Para crear una sesión: 1 Si Pro Tools no está abierto, inícialo. Conexión de un micrófono o instrumento a Mbox 2 Lleva a cabo uno de estos procedimientos: Para conectar un micrófono o un instrumento: • Si al iniciar Pro Tools se abre el cuadro de diálogo Quick Start, selecciona Create Blank Session y haz clic en OK. • Elige File › New Session. Si tienes una sesión abierta actualmente, se te pedirá que guardes todos los cambios. En el cuadro de diálogo New Session, selecciona Create Blank Session y haz clic en OK. 3 En el cuadro de diálogo Save, selecciona la ubicación donde desees guardar la sesión, dale un nombre y haz clic en Save. Mediante este procedimiento se ha creado una sesión nueva sin pistas. A continuación, puedes conectar un micrófono o cable de instrumento y crear pistas nuevas para grabar audio. Selector de fuente de entrada 1 (conmutador Front/Rear) 1 Lleva a cabo uno de estos procedimientos: • Si vas a utilizar un micrófono, conéctalo a una entrada Mic/Line del equipo Mbox mediante un cable XLR. • Si vas a utilizar un instrumento, conéctalo a una entrada DI del equipo Mbox con un cable con conector de ¼". 2 Lleva a cabo uno de estos procedimientos: • Si tienes un sistema Mbox, asegúrate de que el interruptor Front/Rear esté en la posición correcta para una conexión frontal o posterior. • Si tienes un sistema Mbox Mini, según la entrada que uses, asegúrate de que el interruptor Line/DI o Mic/Line esté en la posición correcta para el tipo de conexión. Entrada 1 Entrada Mic/Line Conexión de un micrófono mediante cable XLR a la entrada 1 Mic/Line del panel posterior de un sistema Mbox Introducción a Pro Tools 121 Crear una pista 5 Pro Tools utiliza pistas para grabar el audio y MIDI de cada sesión. Antes de poder grabar audio, tienes que crear una pista apropiada. USO RESTRITO Para crear una pista de audio y prepararla para la grabación: 1 Crea una sesión nueva o abre una sesión existente. 2 Selecciona Track › New. 3 Para grabar con un solo micrófono o instrumento conectado a tu interface de audio, configura el cuadro de diálogo New Tracks a 1 Mono Audio Track en Samples y haz clic en Create. En medio de la banda de canal de la pista nueva, fíjate donde dice “Analog 1 (Mono)”. Esto muestra qué canal de entrada (Input 1 o 2) está asignado a esta pista. (Para definir otro canal de entrada, haz clic en el selector de ruta de entrada de audio y selecciona el otro canal). Selector de ruta de entrada de audio Grabar en una pista Creación de una pista de audio mono Si deseas grabar ambas entradas a la vez, crea una pista estéreo o dos pistas mono, dependiendo de lo que tengas conectado y lo que pienses grabar: • Para grabar dos fuentes diferentes (como un micrófono de voz y una guitarra eléctrica), crea dos pistas de audio Mono. Esto permite grabar dos señales de entrada a la vez. Tras la grabación, puedes editarlas, procesarlas y equilibrarlas de forma independiente. • Para grabar una fuente estéreo de dos canales, como un piano electrónico estéreo, crea una pista de audio con la opción Stereo. 4 Comprueba que la ventana Mix esté abierta. Para ello, elige Window › Mix. Introducción a Pro Tools Para grabar una pista de audio: 1 Haz clic en el botón Activar para grabación para habilitar la pista para grabar. El botón parpadeará en rojo. Activación para grabación (botón) Activación de una pista para grabar en la ventana Mix 2 Canta o interpreta algo frente al micrófono, o bien toca el instrumento. Observa el nivel del medidor en la pista de Pro Tools mientras aumentas la ganancia de entrada en el interface de audio. (Observa que mover el fader en pantalla no afecta a los niveles de entrada; solo es para ajustar los niveles de monitorización). 122 3 Aumenta la ganancia de entrada hasta que veas que el medidor de pista está en verde la mayor parte del tiempo, o en amarillo para las partes más fuertes. 4 En la ventana Transport, haz clic en el botón Volver a cero si quieres iniciar la reproducción desde el principio de la sesión. 5 Haz clic en el botón Grabar de la ventana Transport para preparar la sesión para grabación. El botón parpadeará en rojo. (De este modo Pro Tools considera que estás listo para grabar, como si fuera un botón maestro de activación para la sesión). USO RESTRITO Ganancia de entrada Volver a cero Reproducir Grabar • Si el medidor de pista se pone en rojo, la ganancia es demasiado alta y debes reducirla. • Si apenas puedes ver el verde en el medidor de pista, la ganancia es demasiado baja, por lo que debes subirla. Medidor de pista 6 Elige Window › Edit para que puedas ver lo que sucede cuando grabas. 7 Cuando estés listo para empezar la grabación, pulsa la barra espaciadora o haz clic en el botón Reproducir de la ventana Transport. El botón Grabar y el botón Activar para grabación de la pista dejan de parpadear y permanecen encendidos en rojo durante la grabación. 8 Para detener la grabación, pulsa la barra espaciadora de nuevo o haz clic en el botón Detener de la ventana Transport. (El botón Grabar de la ventana Transport se apaga, pero el botón Activar para grabación de la pista sigue encendido y parpadeando en rojo hasta que hagas clic sobre él). Acabas de grabar tu primera pista de audio. Una pista de audio mono después de la grabación Introducción a Pro Tools 123 Escuchar la grabación Después de grabar el audio, puedes reproducir el resultado para revisarlo, editarlo y mezclarlo. USO RESTRITO Para reproducir una pista grabada: 1 Haz clic de nuevo en el botón Activar para grabación de una pista para salir del modo de grabación. El botón Activar para grabación deja de parpadear en rojo. 2 Para iniciar la reproducción, pulsa la barra espaciadora o haz clic en Reproducir en la ventana Transport. 3 Para detener la reproducción, pulsa la barra espaciadora o haz clic en Detener en la ventana Transport. Grabar más pistas Repite estos pasos para crear otra pista de audio (mono o estéreo) y continuar grabando. De esta manera puedes grabar fragmentos adicionales de las pistas que ya has grabado. Esta es una técnica de producción habitual para ir creando “capas” de sonido con distintas partes que forman el arreglo completo de un tema musical. Medición del tiempo en minutos y segundos o barras y compases Pro Tools permite medir el tiempo en minutos y segundos (tiempo absoluto) o compases y tiempos (tiempo relativo). En producción de música, suele ser ventajoso medir el tiempo en compases y tiempos. Los tiempos son relativos en cuanto que dependen del tempo; los compases dependen del ritmo. Es posible introducir cambios de tempo y de compás mediante marcadores en la línea de tiempo de la sesión de Pro Tools, en la parte superior de la ventana Edit. Estos ajustes colocan el tiempo relativo de los compases y tiempos frente al tiempo absoluto en minutos y segundos (o muestras). En Pro Tools, esta distinción se llama tiempo basado en tics (relativo) frente a tiempo basado en muestras (absoluto). El tiempo del audio y los datos MIDI se puede configurar en una u otra medida en cada pista. (Para más información, consulta la Guía de referencia de Pro Tools.) Contador principal Modo Grid Reglas de base de tiempo Línea de tiempo Línea de tiempo de Pro Tools con contador principal (tiempo en minutos y segundos) Introducción a Pro Tools 124 USO RESTRITO Por defecto, el formato de la escala de tiempo principal de la sesión es Min:Secs (minutos y segundos), pero puedes cambiarlo a Bars|Beats (compases y tiempos) si quieres efectuar una grabación con una pista de metrónomo con un compás y tempo determinados. Establecer el formato de tiempo principal en compases y tiempos es útil para crear, editar y arreglar audio y MIDI en una cuadrícula de compases y tiempos. Grabación con una pista de metrónomo Cambio del formato de tiempo principal Para crear una pista de metrónomo: Para establecer el formato de tiempo principal, elige una de las siguientes opciones: Pro Tools crea una nueva pista de entrada auxiliar con el plug-in Click en el primer inserto de la pista. Cuando comienzas la reproducción o la grabación, el clic proporciona una cuenta previa y después continúa según las asignaciones de compás y de tempo en la línea de tiempo de Pro Tools. Haz clic en un selector de contador principal; se encuentran en la parte superior de las ventanas Edit o Transport (si está configurada para mostrar contadores). Después, selecciona un formato de tiempo. Selector de contador principal (en la ventana Edit) Una pista de metrónomo ofrece un tempo basado en clics para usar como referencia de metrónomo al grabar. Para grabar y editar el material de la pista de acuerdo con un compás y un tiempo específicos, configura el formato de tiempo principal en Bars|Beats (en vez de Min:Secs). 1 2 Selecciona View › Transport › MIDI Controls para ver los controles MIDI en la ventana Transport. 3 En esta ventana, asegúrate de que los botones Metronome y Count Off estén seleccionados. 4 Asegúrate de que el botón Director esté activado si quieres que el clic adopte el tempo de la sesión (el de la línea de tiempo). Desactiva el botón Director si prefieres ajustar el tempo manualmente. 5 Pulsa la barra espaciadora o haz clic en el botón Reproducir de la ventana Transport para iniciar la reproducción y escuchar el clic de metrónomo. Si hay una regla de base de tiempo visible, haz clic en su nombre para resaltarla. La configuración del formato de tiempo principal como la base de tiempo mostrada actualmente en el subcontador conmuta los dos formatos de tiempo, configurando el subformato como la base de tiempo anterior del formato de tiempo principal. Elige Track › Create Click Track. Tempo Botón Cuenta previa Metrónomo (botón) Configuración de la escala de tiempo principal en Bars|Beats Introducción a Pro Tools Director (botón) 125 Para ajustar la configuración del plug-in Click: 1 Elige Setup › Click/Countoff. 2 Selecciona una de las opciones siguientes: • During play and record: el metrónomo suena durante la grabación y reproducción. USO RESTRITO • Only during record: el metrónomo se escuchará en la grabación, pero no en la reproducción. • Only during countoff: el metrónomo solo se escuchará al realizar una cuenta previa antes de que comience la grabación o la reproducción. Configuración del compás de sesión Asegúrate de configurar el ritmo de la sesión de modo que coincida con el compás de tu música. Si el compás de la sesión no coincide con el de la música que se graba, la parte fuerte del metrónomo no se alineará con lo que se esté tocando y, por tanto, el material grabado no coincidirá con los compases y tiempos de la ventana Edit. Para definir el compás de una sesión: 1 Haz doble clic en el botón de compás actual en la ventana Transport. Botón de compás actual 2 En Meter, indica el compás que vas a usar para la sesión y configura el valor de Location como 1|1|000 (para que el compás insertado sustituya al predeterminado). Selector de contador principal (en la ventana Edit) 3 Haz clic en Aceptar. Para silenciar una pista, realiza una de estas acciones: Silencia la pista de metrónomo haciendo clic sobre el botón M (silenciar) en los controles de pista. En la ventana Transport, anula la selección del botón Metronome, de forma que no se muestre resaltado en azul. Después anula la selección del botón Count Off para que no esté resaltado. (Hacer ambas cosas silencia la pista de metrónomo y desactiva la opción Count Off). Introducción a Pro Tools Ventana Meter Change 3 En el menú emergente Click, selecciona un valor de nota para el tiempo. (Por ejemplo, si estás en 6/8, selecciona una negra con puntillo). 4 Haz clic en OK para insertar el nuevo evento de compás. 126 Configuración del tempo de sesión USO RESTRITO A las nuevas sesiones de Pro Tools se les asigna un valor de tempo predeterminado de 120 ppm (pulsos por minuto). Si vas a grabar con metrónomo usando un tempo que no sea 120 ppm, asegúrate de definir el tempo según corresponda. Para cambiar el tempo de la sesión: 1 Lleva a cabo uno de estos procedimientos: • En la ventana Edit, haz doble clic en el marcador de inicio de canción. • Haz clic en el botón Añadir cambio de tempo (+) a la cabecera de la regla de tempo. 3 Define la ubicación (Location) en 1|1|000 (para asegurarte de que el evento de tempo insertado reemplace al tempo predeterminado de la sesión). 4 En el menú emergente Resolution, selecciona el valor de nota para el tiempo. (Por ejemplo, si estás en 6/8, selecciona una negra con puntillo). 5 Haz clic en Aceptar. Uso del modo de tempo manual En el modo Manual Tempo, Pro Tools puede pasar por alto los eventos de tempo de la pista de tempo y, en su lugar, reproducir con un tempo manual. Este tempo se puede establecer marcándolo. Para configurar el tempo manualmente: Marcador de inicio de canción Regla de tempo 1 Asegúrate de que se muestran los controles MIDI en la ventana Transport (selecciona View › Transport › MIDI Controls). 2 En la ventana de transporte, desactiva la regla de tempo haciendo clic en el botón Director (Conductor), de forma que no aparezca resaltado. Pro Tools pasa a modo Manual Tempo. En este modo se omiten los eventos de tempo que aparecen en la regla respectiva. Botón Añadir cambio de tempo Regla de tempo 2 En el cuadro de diálogo Tempo Change, introduce el valor en pulsos por minuto (BPM) de la sesión. Resolución de tempo Tempo Director (botón) Manual Tempo (modo) 3 Ventana Tempo/Meter Change Haz clic en el selector de resolución de tempo (Tempo Resolution) y elige un valor de nota. (Por ejemplo, si estás utilizando 6/8, selecciona una corchea con puntillo; si estás usando 3/4, selecciona una negra). Puedes introducir un tempo concreto o usar la tecla T. Introducción a Pro Tools 127 4 Para especificar un tempo nuevo, realiza una de estas acciones: • Haz clic en el valor Tempo, escribe otro número y pulsa Intro. USO RESTRITO • Haz clic en el valor Tempo y arrástralo hacia arriba o hacia abajo para cambiarlo. Para realizar un ajuste más preciso, pulsa la tecla Comando (Mac) o Control (Windows) mientras arrastras. Uso del comando Import Audio El comando Import Audio permite importar archivos de audio o clips a la sesión de Pro Tools. Para importar archivos de audio o clips a una sesión con el comando Import Audio: 1 Elige File › Import › Audio. 2 En el cuadro de diálogo Import Audio, localiza y selecciona un archivo de audio para ver sus propiedades y clips asociados. • Haz clic en el valor Tempo y pulsa repetidamente la tecla “T” en el teclado del ordenador con el tempo que desees para introducir el valor. Importación de audio Muchos flujos de trabajo de producción musical incluyen el uso de bucles de audio y audio de bibliotecas de muestras. Por ejemplo, puedes usar bucles de batería en vez de una pista de metrónomo para grabar. Incluso puedes combinar y arreglar bucles de audio y muestras únicas de distintas fuentes para crear una pieza de música totalmente nueva. Pro Tools ofrece varias maneras de importar archivos de audio de distintas fuentes a la sesión. Puedes importar audio del disco duro, de una unidad en red, de un CD de audio o de otro soporte extraíble mediante el comando Import Audio; también puedes arrastrar y soltar audio desde un navegador de espacio de trabajo, o desde el Finder de Mac o el Explorador de Windows. Cuadro de diálogo Import Audio 3 Para preescuchar un clip o un archivo seleccionado antes de importarlo, utiliza el botón Reproducir del cuadro de diálogo Import Audio. Haz clic en el botón Detener para parar la reproducción. Para ajustar el volumen de la audición previa, mueve el control deslizante vertical. Para situarte en un punto determinado en el archivo, usa el control deslizante horizontal bajo los botones Reproducir y Detener. El control de volumen del cuadro de diálogo Import Audio también afecta al volumen de la preescucha cuando se reproducen clips de la lista de clips. Introducción a Pro Tools 128 4 Efectúa cualquiera de los procedimientos siguientes: 7 Si estás copiando o convirtiendo archivos, selecciona una ubicación para los nuevos archivos, como la carpeta Audio Files de la sesión actual. Al añadir archivos, la referencia es el archivo en su ubicación original. 8 En el cuadro de diálogo Audio Import Options, selecciona en qué ubicación de la sesión se colocarán los archivos importados: • Para colocar un archivo o un clip en la lista de importación, selecciona el archivo y haz clic en Add o en Convert. USO RESTRITO • Para importar todos los archivos y clips del directorio activo, haz clic en Add All o en Convert All. • Para eliminar un archivo o un clip de la lista de importación, selecciona el elemento y haz clic en Remove. • Para eliminar todos los archivos o todos los clips, haz clic en Remove All. Pro Tools permite agregar a una sesión archivos con una frecuencia de muestreo distinta a la de la sesión. En el campo de comentarios del cuadro de diálogo Import Audio, aparece un mensaje advirtiendo sobre la reproducción a una velocidad y una altura musical inadecuadas si los archivos no se convierten previamente. 5 Después de añadir todos los archivos de audio y clips que desees a la lista de importación, puedes realizar la conversión de la frecuencia de muestreo del siguiente modo: Cuadro de diálogo Audio Import Options Pista nueva Cada archivo de audio se importa en su propia pista independiente y a la lista de clips. Lista Los archivos de audio se importan a la lista de clips sin crear una pista. Los archivos de audio importados se muestran en la lista de clips y pueden arrastrarse a pistas de audio. 9 • Activa Apply SRC. • Especifica el valor de Source Sample Rate escribiendo un número o seleccionando una frecuencia de muestreo en el menú desplegable. • Selecciona la calidad de conversión de la frecuencia de muestreo en el menú desplegable Quality. Este valor anula la opción Sample Rate Conversion Quality de la página Processing de Preferences. 6 Haz clic en Done. Si decides crear una pista, elige una ubicación para el archivo importado en la pista: Session Start Sitúa el archivo o clip al principio de la sesión. Song Start Alinea el principio del archivo o del clip con el punto inicial de la canción. Selection Alinea el principio del archivo o del clip con el cursor de edición o el inicio de una selección de la línea de tiempo. Spot Abre el cuadro de diálogo Spot, que permite emplazar el archivo o el clip en una ubicación específica, según cualquiera de las escalas de tiempo. 10 Introducción a Pro Tools Haz clic en Aceptar. 129 Importar archivos arrastrándolos USO RESTRITO Pro Tools permite importar archivos de sesión, audio, MIDI y vídeo arrastrando archivos desde un navegador de espacio de trabajo, el Explorador de Windows o el Finder de Mac hasta el icono de la aplicación Pro Tools, la línea de tiempo de la sesión, una pista, la lista de pistas o la lista de clips. Workspace Arrastra archivos de contenidos o de sesión a pistas existentes, o a la lista de pistas para añadirlos como pistas nuevas. Arrastra archivos a la lista de clips para importarlos Importar desde el espacio de trabajo arrastrando Introducción a Pro Tools 130 La ilustración precedente muestra algunas de las opciones disponibles para importar archivos arrastrándolos desde un navegador de espacio de trabajo. Para importar archivos a la lista de clips: USO RESTRITO 1 2 Selecciona archivos de audio, vídeo, MIDI, grupo de clips, REX o ACID en un navegador de espacio de trabajo, el Explorador de Windows o el Finder de Mac. Arrastra los archivos seleccionados a la lista de clips. Para importar archivos a una pista: 1 Selecciona los archivos que quieras importar en un navegador de espacio de trabajo, el Explorador de Windows o el Finder de Mac. 2 Arrastra el archivo seleccionado hasta una pista compatible. Para importar archivos como pistas nuevas: 1 Selecciona los archivos que quieras importar en un navegador de espacio de trabajo, el Explorador de Windows o el Finder de Mac. 2 Efectúa cualquiera de los procedimientos siguientes: • Pulsa Mayús y arrastra los archivos a la ventana Edit. • Arrastra los archivos a la lista de pistas. Edición de audio Pro Tools permite editar audio en pistas mediante diversos métodos: ajustar, separar, cortar, copiar y pegar, mover, reorganizar, entre otros. Ajuste de clips de audio En este ejemplo te mostraremos cómo realizar una edición sencilla para cambiar el punto de inicio de una canción. En este ejemplo, se escucha al batería marcando el tempo (“1...2...1.2.3...”) antes de empezar el tema (supongamos que en esta pista estéreo se grabaron los micrófonos suspendidos sobre la batería). Este es el aspecto del audio en Pro Tools. Cuenta previa Inicio de la pieza formas de onda (canales derecho e izquierdo) En la imagen, las formas de onda estéreo te permiten visualizar las distintas secciones del tema musical. Podemos aprovechar la característica “lo que se ve es lo que se oye” de Pro Tools para silenciar rápidamente la cuenta previa ajustando el inicio de la canción. • Arrastra archivos hasta un espacio vacío en la ventana Edit, debajo de las pistas o entre pistas. Introducción a Pro Tools 131 Para ajustar un clip de audio: 1 Herramienta de selección Haz clic para seleccionar la herramienta de ajuste (Trim, situada en la barra de herramientas Edit). Herramienta de mano Smart Tool (herramienta inteligente) Herramienta de ajuste Inicio de la pieza USO RESTRITO Herramientas de edición 3 2 Haz clic en la pista después de la cuenta previa y antes del inicio de la canción (verás que el cursor muestra el icono de ajuste). Arrastra a la derecha para ajustar el principio del clip, o a la izquierda para recortar el principio del clip. Si estás usando la herramienta de mano, haz clic en el clip que deseas copiar y pegar. Si usas la herramienta de selección, haz doble clic en el clip que deseas copiar y pegar. Usa la Smart Tool para que el cursor de edición conmute entre las distintas herramientas de edición según donde lo ubiques sobre un clip. Puedes reducir el ajuste del clip haciendo clic sobre él y arrastrando nuevamente a la izquierda con la herramienta de ajuste. Verás que el audio anterior (la cuenta previa) sigue en su sitio. Este es un pequeño ejemplo de cómo Pro Tools permite editar de modo no destructivo. Copiado y pegado de clips El ejemplo siguiente muestra cómo copiar y pegar un clip de audio de una pista a diversas ubicaciones en la pista y la línea de tiempo en una sesión. Este ejemplo usa un bucle de audio rítmico importado. Para copiar y pegar un clip: 1 Importa un bucle de audio rítmico en una Sesión de Pro Tools (consulta “Importación de audio” en la página 128). 2 Haz clic en la herramienta de mano o la herramienta de selección (ubicada en la barra de herramientas de edición). Introducción a Pro Tools Selección de una pista con la herramienta de mano 4 Elige Edit › Copy. 5 Con la herramienta de selección, ubica el cursor de edición en la ubicación donde deseas pegar el clip copiado. 132 6 Elige Edit › Paste. Separación de clips en la selección de edición Para separar un clip en la ubicación de edición actual: USO RESTRITO 1 Define una selección de edición con la herramienta de selección en un clip de audio. Pegado de un clip en una ubicación temporal diferente en una pista diferente Selección de edición Pulsa Comando+C (Mac) o Control+C (Windows) para copiar la actual selección de edición al portapapeles. Pulsa Comando+V (Mac) o Control+V (Windows) para pegar el contenido del portapapeles a la ubicación de edición actual. 2 Elige Edit › Separate Clip › At Selection. Pulsa Comando+E (Mac) o Control+E (Windows) para separar clips en la actual selección de edición. Separación y reorganización de clips Hay varias maneras de crear nuevos clips de audio en Pro Tools: Puedes importar o grabar clips de audio de archivo entero. También puedes crear clips de audio que solo se refieren a partes de archivos de audio mediante ajuste (consulta “Ajuste de clips de audio” en la página 131) o separando clips de archivo entero. El ejemplo siguiente muestra varias maneras en que puedes separar y reorganizar los clips de audio en una sesión. Este ejemplo usa un bucle de audio rítmico importado. Introducción a Pro Tools Clips nuevos creados al separar el clip superior en el límite de la selección de edición Usa Edit › Separate Clips › On Grid para separar la selección de audio según la cuadrícula actual. Esto resulta especialmente útil si se trabaja con audio en una cuadrícula de compases y tiempos (Bars|Beats) Usa Edit › Separate Clips › At Transients para separar la selección de audio siguiendo los ataques individuales en el audio. Esto resulta útil para separar el audio en fragmentos individuales como cada golpe en un bucle de batería o cada nota en un riff de guitarra. 133 USO RESTRITO Reorganización de clips separados Hay muchas maneras de reorganizar clips en Pro Tools. El modo de edición seleccionado (definido en la sección izquierda de la barra de herramientas de la ventana Edit) determina cómo Pro Tools maneja los clips de audio cuando el usuario los mueve. Lo siguiente indica solo algunas de las muchas posibilidades para organizar clips de audio en tu sesión de Pro Tools. Modos de edición, modo Grid seleccionado Para reorganizar clips, sigue cualquiera de los siguientes procedimientos: Con la herramienta de mano en modo Slip, arrastra un clip de audio a una nueva ubicación. El clip se traslada a esa ubicación exacta. Con la herramienta de mano en modo Grid, arrastra un clip de audio a una nueva ubicación. El clip se adhiere a la ubicación más próxima en la cuadrícula donde lo hayas movido. Selecciona un clip con la herramienta de mano o de selección y elige Edit › Repeat. En el cuadro de diálogo Repeat, escribe el número de veces que deseas repetir el material y haz clic en OK. Se repite la selección como clips separados, que se colocan uno después del otro. Bucle de audio rítmico separado por transitorios e intercalado Para más información sobre edición y organización del audio, consulta las secciones sobre modos de edición y herramientas de edición, grupos de clips y Elastic Audio en la Guía de referencia de Pro Tools. Con la herramienta de mano en modo Spot, arrastra un clip de audio a una nueva ubicación. Se abre el cuadro de diálogo Spot y puedes especificar una ubicación temporal exacta para el clip. Con la herramienta de mano en modo Shuffle, arrastra un clip de audio a una nueva ubicación entre otros clips. Los clips adyacentes se desplazan para hacer espacio. Selecciona un clip con la herramienta de mano o de selección y elige Edit › Duplicate. El clip seleccionado se duplica y se coloca inmediatamente a continuación de la selección actual. Introducción a Pro Tools 134 Secuenciación MIDI con un plug-in de instrumento virtual USO RESTRITO El ejemplo a continuación muestra cómo programar una secuencia MIDI en una pista de instrumento para utilizar un plug-in de instrumento virtual. Este ejemplo usa el plug-in Xpand!2 de AIR Music Technology. El plug-in Xpand!2 forma parte de la AIR Creative Collection, que se incluye en Pro Tools como un instalador descargado para instalar separadamente. Asegúrate de ejecutar este instalador, con el contenido vinculado, antes de seguir con este ejemplo. Para más datos, consulta el manual AIR Creative Collection Plug-Ins Guide. ¿Qué es MIDI? Los datos MIDI (Musical Instrument Digital Interface) no son audio, ya que el protocolo MIDI no produce sonido. MIDI es una manera para que los equipos que lo utilizan —como sintetizadores, samplers, controladores, teclados y secuenciadores— se envíen datos de control, para comunicarse entre sí. Lo que hace MIDI es indicar a los dispositivos que generan sonido (como equipos sintetizadores o samplers, o instrumentos virtuales en software) qué deben reproducir. Los dispositivos MIDI compatibles con USB y FireWire envían y reciben mensajes MIDI del ordenador mediante conexiones USB o FireWire. Los equipos MIDI se conectan mediante los cables apropiados a las entradas y salidas correspondientes del interface MIDI. Los instrumentos MIDI virtuales se insertan como plug-ins en pistas de instrumento en Pro Tools y se accede directamente a ellos desde Pro Tools. Introducción a Pro Tools 135 Crear una pista de instrumento con un plug-in de instrumento Puedes usar una pista de instrumento o una pista MIDI para grabar, programar y reproducir secuencias MIDI en Pro Tools. Si estás trabajando con plug-ins de instrumentos virtuales (como Xpand!2 de AIR), generalmente querrás usar una pista de instrumento. Las pistas de instrumento te permiten trabajar con secuencias MIDI y también monitorizar audio. También puedes usar pistas de instrumento con dispositivos MIDI externos. USO RESTRITO Para crear una pista de instrumento e insertar un plug-in de instrumento: 1 Selecciona Track › New. En el cuadro de diálogo New Tracks, haz lo siguiente: • Selecciona Stereo. • Haz clic en el menú emergente que muestra Audio Track y selecciona Instrument Track. • Haz clic en Create. Cuadro de diálogo New Tracks, con estéreo y pista de instrumento seleccionada 2 Si es preciso, selecciona Window › Mix para mostrar la ventana de mezcla. 3 Haz clic en el selector de inserto de pista, que se encuentra cerca de la parte superior de la pista de instrumento, y elige Xpand!2 en el submenú Instrumento. Selector de inserto Inserción del plug-in Xpand!2 en una pista de instrumento Introducción a Pro Tools 136 4 Aparece una ventana de plug-in con el plug-in Xpand!2. Ahora puedes seleccionar un preset de sonido para reproducir usando MIDI. Para mayor información sobre el plug-in Xpand!2, consulta el manual AIR Creative Collection Plug-Ins Guide. Para seleccionar un sonido predefinido (preset) en el plug-in Xpand!2: USO RESTRITO En la parte superior de la ventana del plug-in, haz clic en el menú Librarian (<factory default>) y selecciona un preset de cualquiera de los submenús. Con Xpand!2, los presets se agrupan en submenús por categoría. Selector de insertos Selección de un preset de fábrica de Xpand!2 en el menú Librarian Introducción a Pro Tools 137 Reproducción de un instrumento virtual Puedes reproducir un instrumento virtual (como Xpand!2) con una secuencia MIDI o de un controlador MIDI externo. USO RESTRITO Para reproducir un instrumento virtual con una pista de instrumento, efectúa uno de estos procedimientos: 5 Haz clic en el botón Activar para grabación para activar la pista de instrumento para la grabación MIDI. 6 En la ventana de transporte, haz clic en el botón Grabar. 7 Toca usando el teclado del controlador MIDI. Deberías escuchar el sonido que has seleccionado. 8 Cuando tengas todo listo para grabar, haz clic en el botón Reproducir o pulsa la barra espaciadora. Para parar, haz clic en Detener o pulsa la barra espaciadora. Si tienes un controlador MIDI conectado, puedes reproducir el instrumento virtual con tal de que la pista de instrumento en la que está insertado esté seleccionada o activada para grabación. Puedes grabar tu interpretación como una secuencia MIDI mientras la tocas. Importa una secuencia MIDI (o programa una secuencia MIDI) a la pista de instrumento en la que está insertado el instrumento virtual, y comienza a reproducir. Grabación MIDI con un controlador externo Pro Tools te permite grabar datos MIDI de un controlador MIDI. Para grabar MIDI en una pista de instrumento: 1 Asegúrate de que el controlador o teclado MIDI esté conectado a un interface MIDI con los cables correspondientes o directamente al ordenador con un cable USB. 2 Crea una nueva pista de instrumento estéreo e insértale Xpand!2 (consulta “Crear una pista de instrumento con un plug-in de instrumento” en la página 136). 3 Selecciona un preset de bajo (también conocido como “patch”). 4 Selecciona Options › MIDI Thru. (Comprueba que la opción MIDI Thru esté seleccionada; si no lo está, selecciónala). Introducción a Pro Tools Datos MIDI grabados en una pista de instrumento 9 Haz clic de nuevo en el botón de grabación de la pista para salir de la grabación y reproducir lo que acabas de grabar. Dibujo de una secuencia MIDI Puedes programar una secuencia MIDI en Pro Tools usando la herramienta de lápiz. Al insertar notas MIDI u otros datos MIDI con la herramienta de lápiz, los límites de clip MIDI se crean en las barras de compás más cercanas. 138 Para insertar una nota MIDI en una pista en la ventana Edit: 1 En la ventana Edit, configura la pista MIDI o de instrumento a la vista de notas. 4 Mueve la herramienta de lápiz al área de la lista de reproducción para la pista MIDI o de instrumento. Para localizar la altura y la ubicación de nota deseados, usa como referencia la regla de la ventana Edit y el miniteclado de la pista. USO RESTRITO Cuando se usa la herramienta de lápiz, la ubicación del cursor y el valor se visualizan en la barra de herramientas de la ventana. Ubicación del cursor de altura musical Cursor de lápiz Ubicación del cursor en la línea de tiempo Selección de la vista de notas en una pista de instrumento 2 Selecciona la herramienta de lápiz y configúrala en el modo Free Hand (dibujo a mano alzada). El cursor adoptará la forma de la herramienta de lápiz cuando se coloque sobre el área de lista de reproducción de una pista MIDI o de instrumento en la modalidad de vista de notas. Ubicación del cursor y valor 3 Para insertar negras en el pulso, realiza lo siguiente: • Configura la escala de tiempo principal en Bars|Beats. • Activa el modo Edit en Grid. • Establece el valor de Grid en negras. • Establece el valor de la opción Default Note Duration en negras o en Follow Grid. Introducción a Pro Tools 139 5 Cuando hayas encontrado el tiempo y la altura adecuados, haz clic para insertar la nota. USO RESTRITO Nota MIDI insertada mediante la herramienta de lápiz Con el modo Grid activado, el punto de inicio de la nota MIDI se alinea, de forma predeterminada, con el límite de cuadrícula más próximo. Con la herramienta de lápiz en modo Free Hand, mantén pulsado Comando (Mac) o Control (Windows) mientras haces clic para desactivar temporalmente la alineación con la cuadrícula. La velocidad de las notas insertadas la determina la configuración de la opción Default Note On Velocity. La duración viene determinada por el valor de la opción Default Note Duration. En modo Grid, la ubicación de la nota activada viene determinada por el valor de Grid. Si está activada la preferencia Play MIDI Notes When Editing, cada nota sonará al insertarla. Editar notas MIDI Es posible editar todos los aspectos de las notas MIDI desde la ventana Edit o una de las ventanas MIDI Editor, incluidos los puntos de inicio y fin, la duración, la altura y la velocidad de ataque. Las herramientas de selección, de ajuste, de mano y de lápiz se pueden aplicar a notas concretas o a grupos de notas. Selección de notas MIDI Para poder editar las notas MIDI, primero se deben seleccionar. Para seleccionar notas MIDI: 1 Configura la pista MIDI o de instrumento en vista de notas. 2 Lleva a cabo uno de estos procedimientos: Con la herramienta de lápiz o cualquier herramienta de mano, pulsa la tecla Mayús mientras haces clic en cada nota. Con cualquier herramienta de mano, mueve el cursor donde no haya notas (aparecerá el recuadro), haz clic y dibuja un rectángulo alrededor del grupo de notas que deseas editar. Es posible arrastrar la herramienta de lápiz después de hacer clic (y antes de soltar) para ajustar la altura o la duración de la nota. Arrastra hacia la derecha para alargar la nota sin cambiar su punto de inicio. Arrastra hacia la izquierda para acortarla sin cambiar su punto final. Con el modo Grid activado, el punto final de la nota MIDI se alinea, de forma predeterminada, con el límite de cuadrícula más próximo. Para desactivar temporalmente la alineación con la cuadrícula, pulsa la tecla Comando (Mac) o Control (Windows) mientras arrastras con la herramienta de lápiz. Introducción a Pro Tools Selección de notas con una herramienta de mano Con una herramienta de mano, si cualquier parte del rectángulo toca una nota (en el punto de inicio o fin), esta se incluirá en la selección. 140 Con la herramienta de selección, arrastra para seleccionar un grupo de notas. La tecla Mayús garantiza que la nota transportada mantenga el punto original de inicio en la línea de tiempo. USO RESTRITO Al realizar el arrastre, sonará cada nota nueva y el indicador del valor de ubicación del cursor indicará (en la ventana Edit) el número de semitonos y la dirección (+/–) del transporte. Selección de notas con la herramienta de selección Cuando se utiliza la herramienta de selección, para que se pueda seleccionar una nota se debe incluir su punto de inicio. Transporte de notas Las notas MIDI se pueden transportar arrastrándolas hacia arriba o hacia abajo con la herramienta de lápiz o cualquier herramienta de mano. Si se seleccionan varias notas antes de arrastrarlas, se transportará cada una de ellas. Mientras pulsas Control (Mac) o Inicio (Windows) y pulsa la tecla Más (+) del teclado numérico para subir las notas MIDI seleccionadas un semitono, o pulsa la tecla Menos (–) del teclado numérico para bajar las notas MIDI seleccionadas un semitono. Para transportar una copia de la nota, sin cambiar la original, pulsa la tecla Opción (Mac) o Alt (Windows) mientras arrastras. Para transportar una nota MIDI: 1 Configura la pista MIDI o de instrumento en vista de notas. 2 Selecciona la herramienta de lápiz o cualquier herramienta de mano. 3 Mantén pulsada la tecla Mayús mientras arrastras la nota hacia arriba o hacia abajo. Transporte mediante una herramienta de mano. Introducción a Pro Tools 141 Desplazar notas USO RESTRITO Al igual que los clips, las notas MIDI pueden arrastrarse hacia la derecha o izquierda con la herramienta de lápiz o cualquier herramienta de mano para cambiar su punto de inicio en la línea de tiempo. Si se seleccionan varias notas antes de arrastrarlas, se desplazarán todas a la vez. Para desplazar una nota MIDI: Ajuste de los tiempos de inicio y de fin de nota Al igual que los clips, los puntos de inicio y de fin de las notas MIDI se pueden ajustar con la herramienta de ajuste. Si se seleccionan varias notas cuando se está realizando el ajuste, se cambiarán todas ellas. Para cambiar los puntos de inicio o fin de un grupo de notas MIDI: 1 Configura la pista MIDI o de instrumento en vista de notas. 1 Configura la pista MIDI o de instrumento en vista de notas. 2 Con la herramienta de lápiz o cualquier herramienta de mano, arrastra la nota hacia la derecha o hacia la izquierda (pulsa la tecla Mayús durante el arrastre para conservar la altura de la nota). 2 Selecciona las notas que desees ajustar. 3 Lleva a cabo uno de estos procedimientos: El indicador del valor de ubicación del cursor (en la ventana Edit) muestra dinámicamente el nuevo punto de inicio a medida que se arrastra la nota. • Selecciona la herramienta de ajuste. • Utiliza la herramienta de lápiz. 4 Coloca el cursor cerca del comienzo de cualquier nota resaltada para que aparezca la herramienta de ajuste. Arrastra las notas a la derecha para acortarlas o a la izquierda para alargarlas. Si el modo Edit está configurado en Grid, la nota arrastrada se alinea con el límite de cuadrícula más próximo. Si el modo Edit está configurado en Spot, se abre el cuadro de diálogo Spot. Para copiar las notas seleccionadas, sin cambiar las originales, pulsa la tecla Opción (Mac) o Alt (Windows) mientras arrastras. Cambiar los tiempos de fin de nota con la herramienta de ajuste Si el modo Edit está configurado en Grid, el punto de inicio o fin arrastrado se alinea con el límite de cuadrícula más próximo. Si el modo Edit está configurado en Spot, se abre el cuadro de diálogo Spot; en él, puedes indicar la nueva ubicación del punto de inicio o de fin de la nota. En modo Grid, utiliza la tecla Comando (Mac) o Control (Windows) para desactivar el modo Grid de forma temporal. Introducción a Pro Tools 142 USO RESTRITO Edición manual de velocidades de notas Eliminación de notas MIDI Cuando una pista MIDI o de instrumento está configurada en la vista de velocidad, o cuando la ruta de velocidad se muestra bajo una pista, la velocidad de ataque de cada una de las notas se representa con un tallo de velocidad. Cuanto más alto sea este indicador, mayor será el valor de velocidad (0-127). Además de eliminar las notas seleccionadas con el comando Clear del menú Edit, las notas también se pueden eliminar una a una con la herramienta de lápiz. 1 Selecciona las notas que quieras eliminar. Para editar la velocidad MIDI en la ventana Edit: 2 Lleva a cabo uno de estos procedimientos: 1 Lleva a cabo uno de estos procedimientos: • Configura la pista MIDI o de instrumento en la vista de velocidad. • Muestra la ruta de controlador de la pista MIDI o de instrumento y la velocidad Para eliminar un grupo de notas MIDI con el comando Clear: • Elige Edit › Clear para eliminar las notas seleccionadas. Los datos de controlador subyacentes en la pista permanecen intactos. • Con cualquier herramienta de edición, haz clic derecho en cualquier nota seleccionada y elige Clear. • Pulsa la tecla Supr (Mac) o Retroceso (Windows). Al eliminar notas MIDI dentro de una selección de lapso de tiempo, también se eliminan todos los datos subyacentes de controlador y automatización. Mostrar ruta de velocidad 2 Selecciona cualquier herramienta de mano. 3 Arrastra la parte superior (en forma de rombo) del indicador de velocidad arriba o abajo. Para eliminar una nota MIDI con la herramienta de lápiz: Con la herramienta de lápiz seleccionada, pulsa la tecla Opción (Mac) o Alt (Windows) y haz clic en la nota. La herramienta de lápiz se convierte en una goma de borrar al pulsar la tecla Opción (Mac) o Alt (Windows). Eliminación de una nota con la herramienta de lápiz Arrastre de un indicador de velocidad Las velocidades de una selección de notas se pueden editar con cualquiera de las herramientas de lápiz. Introducción a Pro Tools Los eventos de cambio de programas y los eventos exclusivos del sistema también se pueden eliminar si mantienes pulsada la tecla Opción (Mac) o Alt (Windows) al mismo tiempo que haces clic en ellos con la herramienta de lápiz. 143 Mezclas y procesamiento con plug-ins USO RESTRITO Realizar mezclas en Pro Tools implica trabajar con elementos del flujo de la señal de audio, como entradas, salidas, buses, inserciones y envíos, para submezclas y mezclas finales. En el transcurso de una sesión, además de la mezcla final, pueden tener lugar tareas de mezcla. Durante la mezcla, los plug-ins en tiempo real y los insertos de hardware ofrecen efectos y procesamiento de señal. Pro Tools viene con un paquete de plugins de efectos de audio que puedes usar para cambiar los sonidos que has grabado. En esta sección se muestran ejemplos de uso de los plug-ins para procesar el sonido. Para obtener información completa y detallada sobre los plug-ins incluidos con Pro Tools, consulta la Guía de plug-ins de Audio (Help › Audio Plug-ins Guide). Introducción a Pro Tools Ecualización y compresión Seguramente, al mezclar audio, querrás aplicar ecualización y compresión en pistas individuales para que el audio suene a tu gusto. Ecualización (EQ) Te permite modificar el espectro de frecuencias del sonido. Un ejemplo de ecualización sencilla son los controles de graves y agudos de muchos equipos estéreo. Puedes usar estos controles para reforzar o atenuar las frecuencias bajas y altas del audio. Puedes usar la EQ para ayudar a separar el bajo y la guitarra, para hacer más nítido el sonido de la batería, destacar la voz, e incluso eliminar ruidos indeseados. Pro Tools proporciona varios tipos diferentes de plug-ins de EQ para modelar el sonido. Compresión Te permite suavizar la dinámica del audio. Actúa como un control automático de volumen que evita que las partes intensas resulten demasiado fuertes. Puedes usar compresión para dar más intimidad a una voz, o para evitar que los platillos suenen demasiado estridentes. Usa un limitador para evitar que los picos en la señal de audio excedan cierto umbral sin afectar el audio que no exceda ese nivel. Pro Tools proporciona varios tipos diferentes de plug-ins para modelar la dinámica del sonido. 144 USO RESTRITO Para aplicar ecualización a una pista: 1 Elige Window › Mix. 2 En la parte superior de la pista, haz clic en el primer selector de inserto de pista y elige EQ 3 7-Band en el submenú EQ. 3 Se abre la ventana del plug-in EQ III. Puedes usar los ajustes preconfigurados (presets) del plug-in como un punto de partida para investigar cómo las diversas configuraciones afectan al sonido. Ventana del plug-in EQ III, selector de presets 4 Comienza a reproducir para escuchar el efecto. Selector de inserto en una pista de audio en la ventana Mix Introducción a Pro Tools 145 USO RESTRITO Para aplicar compresión a una pista: 1 Elige Window › Mix. 2 En la parte superior de la pista, haz clic en el siguiente selector de inserción de pista y elige Dyn 3 Compressor/Limiter en el submenú Dynamics. Pro Tools inserta el plug-in Dynamics III Compressor/Limiter en la pista y abre su ventana de plug-in. 3 Se abre la ventana del plug-in Dyn III. Puedes usar los ajustes preconfigurados (presets) del plugin como un punto de partida para investigar cómo las diversas configuraciones afectan al sonido. Uso de la reverberación La reverberación (reverb) agrega una sensación de acústica ambiental. Los efectos de reverberación son básicamente un conjunto de “retardos” que se usan para simular la reflexión de sonido sobre las superficies de distintas salas, auditorios y otros espacios. Puedes usar efectos de reverberación para darle un sentido de espacio a toda la mezcla usando envíos de las pistas fuente y procesándolas con una pista de entrada auxiliar. Los efectos de reverberación pueden hacer que tu mezcla suene como si se hubiera grabado en un gran auditorio, en un salón pequeño, o incluso en un pasillo. Una de las mejores formas de incorporar reverberación en una mezcla es mediante una configuración “de envío y retorno”. En Pro Tools, el envío desde las pistas facilita hacer pasar el audio de muchos pistas a través del mismo efecto de reverberación. De esta manera, tus pistas fuente sonarán como si todas provinieran de la misma sala. Ventana del plug Dyn III, selector de presets 4 Comienza a reproducir para escuchar el efecto. Introducción a Pro Tools 146 USO RESTRITO Para usar reverb con una pista de entrada auxiliar y muchas pistas fuente: 1 Elige Window › Mix. 2 Selecciona Track › New y configúrala para crear una pista de entrada auxiliar estéreo. Después, haz clic en Create. Creación de una pista de entrada auxiliar. 3 En la pista de entrada auxiliar que has añadido, haz clic en el selector de entrada de pista y selecciona Bus › Bus 1–2. Selector de entrada de pista Seleccionar Bus 1–2 del selector de entrada o una pista de entrada auxiliar Introducción a Pro Tools 147 4 Haz clic en el selector de envío A en la pista de origen como se muestra a continuación y elige Bus › Bus 1-2. USO RESTRITO Selector de envío A Selección de Bus 1–2 para Send A en una pista de audio 5 Repite el paso anterior por cada pista adicional que desees enviar a la pista de entrada auxiliar para procesar con reverb. Introducción a Pro Tools 148 USO RESTRITO 6 Inserta un plug-in Reverb en la pista de entrada auxiliar. Enviar pistas de audio a una pista de entrada auxiliar para procesamiento de reverb con D-Verb 7 Puedes usar las ventanas individuales Send Output para ajustar el nivel de envío de pistas fuente; o puedes configura la opción vista de envíos para mostrar los controles de envío para un envío concreto (por ejemplo, selecciona View › Sends A–E › Send A). 8 Pulsa la barra espaciadora y levanta lentamente el pequeño fader en la ventana Send Output o en los controles de pista Sends. Esto ajusta qué cantidad de la pista fuente envías a la pista de entrada auxiliar para procesamiento con reverb. 9 Sigue escuchando y reproduciendo, ajustando los niveles individuales de envío, y comprobando distintos ajustes de plug-ins para encontrar el efecto apropiado para tu mezcla. Introducción a Pro Tools 149 Uso de la automatización USO RESTRITO Pro Tools presenta la automatización dinámica de los controles de mezcla en cada uno de los tipos de pista. Puedes escribir los movimientos de automatización y verlos en tiempo real durante la reproducción de la sesión. También puedes editar datos de automatización con las mismas técnicas que usas para editar audio y datos MIDI. 3 En la ventana Mix o Edit, haz clic en el selector del modo de automatización en todas las pistas que desees automatizar y define el modo de automatización. Para un pase inicial de automatización, selecciona Write. 4 Inicia la reproducción para comenzar a escribir automatización. 5 Desplaza los controles que desees automatizar (como un fader de volumen de pista). 6 Cuando hayas terminado, detén la reproducción. 7 Conmuta nuevamente el modo de automatización a Read para reproducir la automatización que acabas de grabar. Escritura de automatización Puedes escribir automatización de todos los controles automatizables si los mueves durante la reproducción. Para escribir automatización en las pistas: 1 Elige Window › Automation. 2 Comprueba que el tipo de automatización esté activado para escritura. Selector de modo de automatización de pista La ventana Automation Mover el control deslizante de volumen durante la reproducción Ventana Automation, automatización de volumen activada Introducción a Pro Tools Después del primer pase de automatización, puedes escribir automatización adicional en la pista sin borrar el pase anterior mediante los modos Touch o Latch. Estos modos solo añaden nuevos datos de automatización cuando desplaza un control. Editar automatización manualmente Pro Tools ofrece varios métodos para modificar los datos de automatización de todas las pistas de una sesión. Puedes editar los datos de automatización de forma gráfica si ajustas los puntos críticos en una lista de reproducción de automatización. También puedes cortar, copiar y pegar datos de automatización de la misma manera que lo harías con datos de audio y MIDI. Los datos de automatización se muestran en forma de gráfica, con puntos críticos editables. Punto crítico de automatización 150 USO RESTRITO Al arrastrar estos puntos críticos, podrás modificar los datos de automatización directamente en las ventanas Edit y MIDI Editor. Al arrastrar un punto crítico de automatización hacia arriba o hacia abajo, se indica el cambio del valor. Valor del punto crítico de automatización Arrastrar un punto crítico de automatización hacia la izquierda o la derecha ajusta la temporización del evento de automatización. Para visualizar el tipo de punto crítico de automatización de una pista, selecciona la vista de pista correspondiente o muestra la correspondiente ruta de automatización o de controlador de la pista. Por ejemplo, puedes ver y editar volumen, panorama, silenciamiento, datos del controlador MIDI y hasta la automatización de plug-ins. Uso de las herramientas de mano Las herramientas de mano permiten crear puntos críticos al hacer clic en la gráfica o ajustar los puntos críticos existentes arrastrándolos. Pulsa la tecla Opción (Mac) o Alt (Windows) y haz clic en los puntos críticos con una herramienta de mano para eliminarlos. Uso de la herramienta de mano para crear un punto crítico Uso de la herramienta de lápiz La herramienta de lápiz permite crear puntos críticos haciendo clic en el gráfico. Pulsa la tecla Opción (Macintosh) o Alt (Windows) y haz clic en los puntos de edición con la herramienta de lápiz para eliminarlos. Selector de vista de pista Selector de tipo de automatización Vista de pista de automatización de volumen Uso de la herramienta de lápiz para eliminar un punto crítico Uso de las herramientas de ajuste La herramienta de ajuste permite ajustar los puntos críticos seleccionados hacia arriba o hacia abajo arrastrándolos a cualquier lugar en la selección. Rutas de automatización Vista de pistas y rutas de automatización Uso de la herramienta de ajuste para mover puntos críticos Introducción a Pro Tools 151 Exportación de la mezcla Después de terminar de grabar, editar y mezclar pistas en una sesión de Pro Tools, puedes mezclar la sesión y exportar los resultados para crear un CD o publicarla en Internet. Puedes usar el comando Bounce to Disk para exportar tu mezcla de la sesión a un solo archivo de audio. Para exportar la mezcla como un archivo de audio estéreo: USO RESTRITO 1 Usa la herramienta de selección para seleccionar la duración de la sesión en la línea de tiempo (o en una pista). Herramienta de selección Selección de línea de tiempo Sesión de audio seleccionada y lista para usar el comando Bounce to Disk Selección en la línea de tiempo para realizar un bounce a disco 2 Elige File › Bounce to › Disk. 3 En el cuadro de diálogo Bounce Options, haz lo siguiente: • Selecciona la fuente como Bounce Source (este será el camino principal para tu mezcla, main (Stereo) –› Analog 1–2). • Selecciona el tipo de archivo (File Type, como por ejemplo WAV). • Selecciona Interleaved como formato (Format). • Si vas a grabar el archivo de audio exportado a CD, selecciona 16 Bit para la profundidad de bits (Bit Depth). • Si vas a grabar el archivo de audio exportado a CD, selecciona 44.1 kHz en Sample Rate. • Para un hacer bounce más rápido que en tiempo real, selecciona la opción Offline. Cuadro de diálogo Bounce Introducción a Pro Tools 152 USO RESTRITO 4 Haz clic en Bounce. (Si no efectúas ninguna selección, se utilizará la sesión completa, de principio a fin). 5 En el cuadro de diálogo Save, escribe el nombre del archivo de audio que estás exportando, y selecciona la ubicación donde quieres que se guarde. 6 Haz clic en Save. Pro Tools comienza el proceso. Si esta opción no está habilitada, los “bounces” se realizan en tiempo real, para poder escuchar la reproducción de la mezcla durante la exportación. (No obstante, no es posible ajustar ningún control de Pro Tools durante el bounce). Más información Esperamos que esta introducción rápida a Pro Tools te haya inspirado para crear música. Para aprender más sobre cualquiera de los temas presentados aquí, Consulta la Guía de referencia de Pro Tools (Help › Pro Tools Reference Guide) para datos completos sobre el programa y los sistemas Pro Tools. La Guía de referencia de Pro Tools proporciona una explicación detallada de todos los conceptos y las características del programa, organizada por tareas de audio y producción musical (como grabar, editar, y mezclar). También puedes usar la ayuda de Pro Tools online (Help › Pro Tools Help) para cualquier tema específico. Grabar la mezcla en un CD Al terminar el bounce, tendrás un archivo de audio que puedes grabar en un CD de audio con un programa apropiado (como iTunes o Roxio Toast) para poder usarlo en reproductores de CD normales. Escuchar un CD de referencia en un entorno distinto al del estudio es una forma profesional y de eficacia comprobada para descubrir cómo se reproducirá la mezcla en otros sistemas o en otros entornos de audición. Introducción a Pro Tools 153 Pro Tools Pro Tools® USO RESTRITO Pro Tools MIDI Pro Tools Mbox Pro Tools Pro Tools Pro Tools Pro Tools 1/4 Mbox Mbox Pro Tools 154 2 Pro Tools 3 • Pro Tools Open Session Demo Session OK .ptx 1 • USO RESTRITO • Pro Tools Open Quick Start File > DVD Open Session Additional Files Demo Session Open Avid • Pro Tools Avid Avid Avid Pro Tools 155 • Mbox 1 • MIDI 2 Pro Tools Pro Tools MIDI • • USO RESTRITO MIDI Pro Tools • Window > Transport • 5 6 File > Close Session Pro Tools 3 4 Pro Tools • MIDI MIDI • / MIDI • Pro Tools 156 Pro Tools 2 USO RESTRITO Pro Tools Window > View > 2 Edit Edit Window > All 157 View > Mix Mix Window > All USO RESTRITO Window > Pro Tools 158 Pro Tools Mbox Mbox USO RESTRITO 1 Pro Tools Pro Tools 1 2 • Pro Tools Start Quick Create Blank Session OK • Mbox Mic/Line XLR • Mbox DI 1/4 • File > New Session 2 • Mbox Front/Rear New Session Create Blank Session OK • Mbox Mini Line/DI Save 3 Mic/Line Save 1 Front/Rear 1 Mic/Line Mbox Pro Tools Mic/Line 1 XLR 159 5 1 Mono USO RESTRITO Pro Tools MIDI 1 2 1 2 Track > New 3 1 1 Mono 1 Mono New Tracks Audio Track Samples Create 1 2 1 2 • 2 1 1 2 2 2 • 2 Pro Tools 1 4 Pro Tools Window > Mix 160 3 4 5 USO RESTRITO 1 Mbox • • 6 Window > Edit 7 8 Pro Tools 161 Pro Tools Pro Tools : ) | 1 ) USO RESTRITO MIDI 2 / 3 Pro Tools ( Pro Tools MIDI Pro Tools Pro Tools Pro Tools 162 1 Track > Create Click Track AUX Click USO RESTRITO Pro Tools 2 View > MIDI Transport > MIDI Controls MIDI 3 4 5 | : Pro Tools | 163 1 / Setup > Click/Countoff 2 / • • — — USO RESTRITO 1 • — 1|1|000 2 3 OK M 3 Click 6/8 4 Pro Tools 4 OK 164 4 Resolution 6/8 120BPM 120BPM 4 5 OK Pro Tools USO RESTRITO 1 • • + MIDI 1 View > Transport > MIDI MIDI Controls 2 Pro Tools 2 BPM 3 6/8 4 4 • Enter • Command Mac Control Windows T 3 Pro Tools Location 1|1|000 • T 165 USO RESTRITO Pro Tools 1 Pro Tools 2 File > Audio Import > Import Audio Finder Mac Windows CD 3 Pro Tools 166 4 8 • Add Convert • Add All Convert All USO RESTRITO • Remove • Remove All Pro Tools 5 • Apply SRC 9 • Session Start Source Sample Rate • Quality Song Start Processing Sample Rate Conversion Selection Quality 6 Done 7 Spot 10 OK Pro Tools 167 Pro Tools Mac Finder Pro Tools & USO RESTRITO MIDI Windows Pro Tools 168 & Pro Tools Mac Finder Windows 1 MIDI USO RESTRITO & REX ACID 2 … … … Pro Tools 1 Mac Finder Windows 2 1 Mac Finder Windows Pro Tools 2 • Shift- • • Pro Tools 169 USO RESTRITO 1 & 3 & 2 Pro Tools & & 4 Edit > Copy 5 & Pro Tools 1 166 2 Pro Tools 170 6 Edit > Paste USO RESTRITO 1 2 Command+C Mac Control+C Windows Command+V Mac Control+V Windows Edit > Region > Separate At Selection Command+E Mac Control+E Windows Pro Tools 169 Edit > Separate Clips > On Grid | Edit > Separate Clips Transients Pro Tools > At 171 Edit > Pro Tools Repeat OK USO RESTRITO Pro Tools Pro Tools Pro Tools Spot Edit > Pro Tools Duplicate 172 MIDI MIDI AIR Music Technology Xpand!2 USO RESTRITO Xpand!2 Pro Tools AIR Creative Collection AIR Creative Collection Installer AIR Creative Collection MIDI MIDI Musical Instrument Digital Interface MIDI MIDI MIDI MIDI USB USB FireWire FireWire MIDI MIDI MIDI MIDI MIDI MIDI Pro Tools Pro Tools Pro Tools 173 Pro Tools MIDI MIDI Xpand!2 MIDI USO RESTRITO MIDI 1 Track > • Stereo • • 2 New Track New (Audio Track Instrument Track Create Window > Mix 3 Xpand2 Xpand!2 Pro Tools 174 Xpand!2 4 MIDI Xpand!2 AIR Creative Collection Xpand!2 <factory default> USO RESTRITO Xpand!2 Xpand!2 Pro Tools 175 7 MIDI Xpand! MIDI USO RESTRITO 2 8 MIDI MIDI MIDI 9 MIDI MIDI MIDI MIDI Pro Tools MIDI MIDI Pro Tools MIDI MIDI MIDI MIDI MIDI MIDI MIDI 1 MIDI / MIDI MIDI 1 MIDI USB 2 Xpand!2 174 3 4 Options Thru > MIDI MIDI MIDI 5 MIDI 6 Pro Tools 176 Free 2 5 Hand MIDI USO RESTRITO MIDI 3 4 MIDI • | Command Windows • • Control 4 • Mac Default Note Duration 4 Follow Grid 4 MIDI MIDI MIDI CommandWindows Mac Control- MIDI MIDI MIDI Pro Tools 177 MIDI MIDI MIDI MIDI MIDI 1 MIDI MIDI USO RESTRITO 2 1 MIDI Shift- 2 & 3 Shift Shift Pro Tools +/– Control Mac MIDI Start Windows + 1 – MIDI Alt Option Pro Tools 1 Windows Mac 178 MIDI MIDI Pro Tools MIDI MIDI USO RESTRITO 1 MIDI 1 MIDI 2 2 Shift 3 • • 4 Option Windows Mac Alt Control Pro Tools Command Windows Mac 179 MIDI MIDI MIDI 0-127 USO RESTRITO MIDI 1 1 2 • MIDI • • MIDI Edit > • Clear 1 Clear • Delete Mac Backspace Windows MIDI MIDI 2 3 OptionMac Windows Option Alt Windows OptionWindows Pro Tools Mac AltMac Alt- 180 Pro Tools Pro Tools EQ USO RESTRITO 1 Window > Mix 2 EQ Pro Tools EQ 3 7-Band 2 Pro Tools > EQ EQ Pro Tools EQ Pro Tools 181 USO RESTRITO 3 EQ III 3 Dyn III Dyn III EQ III 4 4 1 Window > Mix 2 Dynamics Compressor/Limiter Dyn 3 AUX Dynamics III Compressor/Limiter & Pro Tools Pro Tools 182 AUX 1 Window > USO RESTRITO 2 Track > Create Mix New 1 AUX AUX AUX 3 1-2 AUX Pro Tools Bus > Bus 1–2 1-2 183 A 4 Bus > 1-2 Bus 1–2 USO RESTRITO A 1-2 5 Pro Tools A AUX 184 AUX USO RESTRITO 6 D-Verb AUX 7 View > A-E Sends A–E > A Send A 8 AUX 9 Pro Tools 185 3 Pro Tools MIDI 4 USO RESTRITO 5 6 7 1 Window > Automation 2 Pro Tools MIDI Pro Tools 186 MIDI USO RESTRITO Mac Alt- OptionWindows 1 Mac Alt- OptionWindows MIDI Pro Tools 187 Pro Tools CD USO RESTRITO 1 2 File > Disk Bounce to > Bounce Options 3 • Bounce Source -> 1-2 main (Stereo) –> Analog 1–2 • File Type • WAV Format Interleaved • CD Bit Depth 16 16 Bit • CD Bit Depth 44.1 16 Bit • Offline Pro Tools 188 4 5 Bounce Pro Tools Pro Tools Save Pro Tools 6 > Save Pro Tools Pro Tools USO RESTRITO Pro Tools Pro Tools Offline Pro Tools Pro Tools Pro Tools > Pro Tools CD CD iTunes Roxio Toast CD CD CD CD Pro Tools 189 Pro Tools 简介 USO RESTRITO 初次使用 Pro Tools® 时,请阅读本指南。本指南提供多 个示例,详细讲解如何使用 Pro Tools 进行录音、编辑、 混音以及如何在 Pro Tools 中使用 MIDI。 若尚未安装 Pro Tools,请按照《Pro Tools 安装指南》 中的说明立刻安装。有关连接和安装音频硬件驱动程序 的信息,请参见其相关文档。 连接耳机或扬声器 若要收听 Pro Tools 中的音频,请将耳机或扬声器连接 至音频硬件 (本指南使用 Mbox 音频接口作为示例)。 若在使用耳机,请调低耳机音量控制 (逆时针旋转音量 旋钮) 。若在使用扬声器,请调低其主音量控制 (逆时 针旋转音量旋钮)。开始时请尽量调低音量,以免对耳朵 或设备造成伤害,这一点非常重要。若已启动 Pro Tools 并打开了工程 (或创建了新工程),则可将音量调高至令 人舒服的收听音量。 耳机音量 主音量 1/4 英寸耳机插孔 Mbox 前面板的连接器与控制装置 Mbox 后面板的扬声器连接器 Pro Tools 简介 190 3 按照屏幕指示执行以下操作之一: 播放演示工程 使用演示工程测试耳机和扬声器,并开启 功能探索之旅。 • 若显示 Quick Start (快速启动)对话框,请单击 Pro Tools USO RESTRITO 安装并打开演示工程: Open Session (打开工程),然后单击 OK (确定)。 找到并选中 Demo Session(演示工程)文件 (.ptx), 然后单击 Open (打开)。 • 若未显示 Quick Start (快速启动)对话框,请选择 1 执行以下操作之一: File > Open Session(文件 > 打开工程),找到并选中 • 将 Pro Tools 安装程序光盘插入 DVD 驱动器,找到 并打开 Additional Files (附加文件)文件夹,然后将 Demo Session (演示工程)文件夹拖至硬盘 (为获 得最佳性能,请使用 Avid 认证的外置硬盘而非系统 Open (打开)。 驱动器)。 Demo Session (演示工程)文件 (.ptx),然后单击 有关演示工程的详细信息,请参阅 《演示工程自述 文件》。 • 将 Pro Tools 演示工程从在线 Avid 帐户下载至硬盘 (为获得最佳性能,请使用 Avid 认证的外置硬盘而非 系统驱动器)。 2 启动 Pro Tools。 工具栏 音轨 Pro Tools 简介 191 播放演示工程: 1 调低音频接口上的音量,确保回放音频时不会因音量 过高而让人感到不适。 2 在 Pro Tools 中开始回放演示工程。若要开始或停止 Pro Tools,请执行以下操作之一: • 在电脑键盘上按下空格键。 USO RESTRITO • 单击 Transport(传输)窗口中的 Play(播放)或 Stop (停止)按钮(Window > Transport(窗口 > 传输)) 或 Edit (编辑)窗口中的工具栏。 停止 播放 • Score Editor (乐谱编辑器)窗口可让您使用传统的 音乐记谱法编辑工程中的 MIDI 数据。您甚至可以使 用 Pro Tools 直接打印乐谱。 • Workspace (工作区)提供互动式数据库,可用于工 程中的所有媒体,也可用于系统。 5 按空格键或单击 Stop (停止)按钮可停止回放。 6 在查看完 “ 演示工程 ” 后,选择 File > Close Session (文件 > 关闭工程)。 “ 演示工程 ” 是经过编排、编辑和混音的完成项目 示例。您无需返回 “ 演示工程 ” 查看本指南所述的其 它内容,但在了解 Pro Tools 更多功能后,您可能 会希望再次查阅。 Transport(传输)窗口中的 Play(播放)或 Stop(停止)控件: 3 在工程播放时,可将音频接口上的音量调高至令人舒 服的收听音量。 4 您可以一边播放演示工程,一边了解 Pro Tools (参见 Window (窗口)菜单中可用的不同选项): • Edit (编辑)窗口可提供音频、视频、 MIDI 数据以 及混音器自动化的时间轴显示,以便进行录制、编辑 和分配轨道。使用 Edit (编辑)窗口可在工程中编辑 和分配音频、 MIDI 和自动化数据。 • Mix (混音)窗口会以通道条形式显示音轨 (就象个 混音台),还会显示各种插件和硬件插入所用的电平表 及控件、发送、输入或输出分配、声像设置效果、音量、 独奏、静音和启用录音。使用 Mix (混音)窗口可在 工程中进行音频和 MIDI 的路由及混音。 • Transport (传输)窗口提供传输相关功能的控件,如 Play (播放)、 Stop (停止)、 Record (录制)、 Fast Forward (快进)和 Rewind (倒带)。 • Plug-In (插件)窗口提供对音频处理和虚拟乐器插 件的管理。 • MIDI Editor (MIDI 编辑器)窗口方便您使用钢琴 卷帘窗式接口、分界点编辑和传统的音乐记谱法编辑 MIDI 数据。 Pro Tools 简介 192 查看 Edit (编辑)和 Mix (混音)窗口 “ 编辑 ” 窗口和 “ 混音 ” 窗口是 Pro Tools 的两个主要工作区域。在本手册的余下部分中,您会看到这两个窗口用于各 种制作工作的示例。 查看 Edit (编辑)窗口 显示编辑窗口: USO RESTRITO 选择 Window > Edit (窗口 > 编辑)。 显示编辑窗口中所有的视图选项: 依次选择 View > Edit Window > All (视图 > 编辑窗口 > 全部)。 Edit (编辑)窗口 Pro Tools 简介 193 查看 Mix (混音)窗口 显示混音窗口: 选择 Window > Mix (窗口 > 混音)。 显示混音窗口中所有的视图选项: 选择 View > Mix Window > All(视图 > 混音窗口 > 全部)。 USO RESTRITO Mix (混音)窗口 (同时会显示 Transport (传输)和插件窗口) Pro Tools 简介 194 创建新工程 音频录制 本节介绍如何创建新的工程 。您可以在首次启动 Pro Tools 时创建,也可以在其运行过程中创建。 本节介绍如何将麦克风或乐器(例如吉他或键盘)连接到 Mbox 并进行音频录制。 创建新工程: 将麦克风或乐器连接到 1 若 Pro Tools 尚未运行,请启动 Pro Tools。 USO RESTRITO 2 执行以下操作之一: • 在启动 Pro Tools 时,若出现 Quick Start(快速启动) Mbox 连接麦克风或乐器: 1 执行以下操作之一: 对话框,请选择 Create Blank Session(创建空白工程) 并单击 OK (确定)。 • 若在使用麦克风,请使用 XLR 电缆将其连接到 Mbox 上的 Mic/Line (麦克风 / 线路)输入。 • 选择 File > New Session (文件 > 新建工程)。若目前 打开一个工程,则系统将提示保存所做更改。在 New Session (新建工程)对话框中,选择 Create Blank • 若在使用乐器,请使用 1/4 英寸电缆将其连接到 Mbox 上的 DI 输入。 Session (创建空白工程)并单击 OK (确定)。 3 在 Save (保存)对话框中,命名该工程,选择适当的 保存位置,然后单击 Save (保存)。 这样,您就创建了一个不含音轨的新工程。然后,将连 接麦克风或乐器线缆并创建音频录制所用的新音轨。 输入 2 执行以下操作之一: • 若使用 Mbox,请确保已针对前面板或后面板连接正 确设置 Front/Rear (前 / 后)开关。 • 若使用 Mbox Mini,请根据所用的输入方式,确保 Line/DI(线路 /DI)开关或 Mic/Line(麦克风 / 线路) 开关针对具体连接类型正确设置。 1 声源选择器 (前 / 后开关) 输入 1 麦克风 / 线路输入 请使用 XLR 电缆将麦克风连接到 Mbox 后面板上 Mic/Line (麦克风 / 线路)输入 1 Pro Tools 简介 195 创建音轨 将演奏录制至音轨 Pro Tools 使用音轨在工程中进行音频和 MIDI 录制。 录制音轨: 在录音前,您需要创建音轨。 1 单击音轨上的 Record Enable (启用录音)按钮, 创建音轨并做好录音准备: 启用音轨准备录音。按钮闪烁红光。 1 创建新工程或打开现有工程。 USO RESTRITO 2 选择 Track > New (音轨 > 新建)。 “ 启用录音 ” 按钮 3 若要使用音频接口连接的单个麦克风或乐器进行录制, 请在 New Tracks(新建音轨)对话框中设置 1 个单 声道音轨(在 Samples(样本)中),然后单击 Create (创建)。 在 Mix (混音)窗口中使音轨处于录音启用状态 2 对着麦克风唱歌或放音,或演奏乐器。 在增加音频接口上的输入增益的同时观察 Pro Tools 音轨 的音频表位。(请注意,移动屏幕上的推子不会对输入电 平产生任何影响,它只用于调整监听电平。) 创建新单声道音轨 若希望一次录制两个输入,请创建一个立体声音轨或两 个单声道音轨,具体取决于您所插接的连接器和计划录 制的内容: • 若要录制两个不同的声源 (例如声乐麦克风和电子吉 他),请创建 2 个单声道音轨。这样您就可以同时录 制两个输入信号。录制结束后,可以对这些内容分别 进行编辑、处理和平衡。 • 若要录制双通道立体声声源(例如立体声键盘),请创 建 1 个立体声音轨。 4 确保已通过选择 Window > Mix (窗口 > 混音)打开 Mix (混音)窗口。 5 在新音轨控制条的中间位置,注意标示 “Analog 1 (Mono).” (模拟 1 (单声道))的位置。该位置显 示分配至该音轨的输入通道 (输入 1 或 输入 2) 。 (若要指定不同的输入通道,请单击 Audio Input Path (音频输入路径)选择器并选择其他声道。) “ 音频输入路径 ” 选择器 Pro Tools 简介 196 3 调高音频接口上的输入增益,直至屏幕上的音轨表在 大部分时间显示为绿色,或黄色(对于音量较高的强 声片段)。 输入 1 增益 (Mbox) 4 在 Transport(传输)窗口中,单击 Return to Zero (归零),则从工程的起始处开始录音。 5 单击 “ 传输 ” 中的 Record (录制)按钮以录制配备 工程。按钮闪烁红光。(Pro Tools 将视为已准备好 开始录音,即您可将它作为启用工程录音的 “ 主控 ” 按钮。) USO RESTRITO 回零位 播放 录制 • 若音轨表显示红色,则表示增益过高,需要降低输入 增益。 • 若几乎很少看到音轨表显示绿色,则表示增益过低; 此时,请提高输入增益。 6 选择 Window > Edit (窗口 > 编辑)以观看录音期间 的情况。 7 一 切 就 绪 并 准 备 开 始 录 音 时,请 按 空 格 键 或 单 击 Transport (传输)中的 Play (播放)按钮。录音 过程中, Transport (传输)的 Record (录制)按钮 和音轨上的 Record Enable (启用录音)按钮会变 成纯红色。 8 若要停止录音,请再次按空格键或单击 Transport (传输)中的 Stop(停止)按钮。(Transport(传输) 的 Record(录制)按钮会断开,而音轨上的 Record Enable(启用录音)按钮会保持启用状态并闪烁红光, 直到您单击它为止。) 音轨表 您已录制了自己的首段音轨。 录制后的单声道音轨 Pro Tools 简介 197 聆听录音 录制过某段音频后,您可以将其回放,查看效果、进行编 辑和混音等。 回放录制的音轨: 1 再次单击音轨的 Record Enable (启用录音)按钮 退出 “ 录音 ” 模式。Record Enable(启用录音)按钮 USO RESTRITO 不再闪烁红光。 2 若要开始回放,请按空格键或单击 Transport(传输) 中的 Play (播放)按钮。 3 若要停止回放,请按空格键或单击 Transport(传输) 中的 Stop (停止)按钮。 录制更多音轨 只需重复上述步骤,创建另一段音轨(单声道或立体声), 并继续录制更多音轨。这样,您就可以对照之前录制的 音轨录制另外的分谱。这是对不同分谱进行分层并创建 歌曲编排的常用制作技巧。 以 “ 分和秒 ” 或 “ 小节和节拍 ” 测量时间 Pro Tools 可以 “ 分和秒 ” (绝对时间)或 “ 小节和节拍 ” (相对时间)来测量时间。对于音乐制作,经常需要用小 节和节拍来测量时间。节拍计时一般对应于乐曲的速度。 小节计时一般对应于乐曲的拍号。 Pro Tools 中对该工程 Timeline (时间轴)的 Main Time Scale (主时间刻度)默认设置为 Min:Secs (分和秒)。但若要使用节拍音轨以指定的节拍和速度进 行录音,则可将 Main Time Scale (主时间刻度)更改为 Bar|Beats (小拍和节拍)。若希望在小节 / 节拍网格中 创建、编辑和编排音频和 MIDI,将 Main Time Scale (主时间刻度)改成 “ 小节和节拍 ” 会非常有用。 Pro Tools 可以设置速度和节拍的变化,方法是使用 Edit (编辑)窗口顶部工程 Timeline (时间轴)中的 标记点来进行。这些设置可调整 “ 小节和节拍 ” 的相对时 间(相对于 “ 分和秒 ” 的绝对时间(或采样))。这一特 点在 Pro Tools 中又称为基于时基 (相对)的时间与基 于采样 (绝对)的时间,音频和 MIDI 两种数据均可为 逐个轨道设置任一时间格式 (有关详细信息,请参见 《Pro Tools 参考指南》)。 主计数器 Grid 模式 时间基准标尺 时间轴 Pro Tools 中的 Timeline (时间轴)和 Main Counter (主计数器)(Main Time Scale (主时间刻度)设置为 Minutes and Seconds (分和秒)) Pro Tools 简介 198 更改主时间标度 若要设置 Main Time Scale (主时间刻度),请执 行以下操作之一: 单击 Main Counter(主计数器)选择器(位于 Edit (编辑)或 Transport (传输)窗口的顶部 (当 Transport(传输)窗口设置为显示计时器时)), 然后选择一个 Time Scale (时间刻度)。 使用节拍音轨录制 节拍音轨可在录音时提供一个节拍器节拍用于速度参考。 将主刻度设置为 Bar|Beats (小节 | 节拍)可按照指定的 节拍和速度 (而非 Min:Secs (分 : 秒))来录制和编辑 音轨素材。 创建节拍音轨: 1 选择 Track > Create Click Track (音轨 > 创建节拍 USO RESTRITO 音轨)。 Pro Tools 会创建一个新的 Auxiliary Input(辅助输入) 音轨,其中 Click (节拍)插件位于首个音轨插入上。 在您 开 始回 放或 录音 时,该节 拍 会按 照 Pro Tools Timeline(时间轴)中的节拍与速度表进行报数并继续。 Main Counter(主计数器)选择器(位于 Edit(编辑)窗口中) 若显示有 Timebase (时间基准)标尺,请单击其名 称使其高亮显示。 若将 Main Time Scale (主时间刻度)设置为当 前显示在子计数器中的时间基准,则会在两个时 间刻度之间切换,并将子时间刻度设置为主时间 刻度以前的时间基准。 2 选择 View > Transport > MIDI Controls (查看 > 传输 > MIDI 控件)以查看 Transport Window(传输 窗口)中的 MIDI 控件。 3 在 Transport(传输)窗口中,确保已选择 Metronome and Count Off (节拍器和报数)按钮。 4 若要节拍跟随工程速度 (时间轴上),请确保已启用 Conductor 按钮。若要手动调整速度,请禁用 Conductor 按钮。 5 按空格键或单击 Transport(传输)窗口中 Play(播放) 按钮可开始回放并听到节拍。 速度 “ 报数 ” 按钮 将主时间刻度设置为小节 | 节拍 Metronome 按钮 Conductor 按钮 Pro Tools 简介 199 设置相关节拍设置: 设置工程拍号 1 选择 Setup > Click/Countoff(设置 > 节拍器 / 报数)。 设置工程拍号时务必要匹配乐曲拍号。若工程拍号与您 录制的音乐不匹配,则节拍音轨的重音节拍器将不会出 现在您要播放的合适位置,结果,录制的素材可能不会 与 Edit (编辑)窗口中的小节和节拍网格对齐。 2 请选择以下任一选项: • 在回放和录制过程中 — 节拍器会在回放和录制过程中 发出声音 • USO RESTRITO • 仅在录制过程中 — 节拍器仅会在录制(而非回放)过程 设置工程的拍号: 中发出声音 1 双击 Transport (传输)窗口中的 Current Meter 仅在报数过程中 — 节拍器仅在录制或回放开始前的报 (当前拍号)按钮。 数过程中发出声音 Current Meter (当前拍号)按钮 2 输入工程所用的节拍,并将位置设置为 1|1|000 (以确 保插入的节拍项将替换默认节拍项)。 Main Counter(主计数器)选择器(位于 Edit(编辑)窗口中) 3 单击 OK (确定)。 若要使节拍音轨静音,请执行以下操作之一: 单击 “ 节拍 ” 音轨 “ 音轨 ” 控件中的 M(静音)按钮使 “ 节拍 ” 音轨静音。 在 Transport(传输)窗口中,取消选择 Metronome (节拍器)按钮,使它不再以蓝色高亮显示。然后取 消选择 Count Off(报数)按钮,使它不再高亮显示。 (这两个操作能够使节拍音轨静音并禁用报数) Pro Tools 简介 Meter Change (拍号更改)窗口 3 从 Click (节拍器) 弹出菜单中选择节拍的音符值。 (例如,若采用 6/8 拍,则选择符点 4 分音符)。 4 单击 OK (确定)以插入新的节拍事件。 200 设置工程速度 使用手动速度模式 Pro Tools 中新工程的默认速度为 120 BPM。若要使用 120 BPM 以外的节拍器录制,请确保设置相应的速度。 在 Manual Tempo(手动速度)模式下, Pro Tools 忽略 速度标尺中的速度事件,反而播放手动速度。该速度可 以数字点击方式进行设置。 更改工程速度: 手动设置速度: 1 执行以下操作之一: • 在 Edit(编辑)窗口中双击 Song Start Marker(歌曲 USO RESTRITO 起点标记)。 • 单击速度标尺顶部的 Add Tempo Change (增加速 度变化)按钮 (+)。 Song Start Marker 1 确保在 Transport (传输)窗口中显示 MIDI 控件 (依次选择 View > Transport > MIDI Controls (视图 > 传输 > MIDI 控件))。 2 在 Transport(传输)中,禁用 Tempo(速度)标尺, 方法为单击 Conductor 按钮使其不再高亮显示。 Pro Tools 将切换到 Manual Tempo (手动速度) 模式。在该模式下,将忽略速度标尺中的所有速度事件。 速度精度 “ 速度 ” 标尺 速度 Conductor 按钮 Manual Tempo 模式 Add Tempo Change 按钮 “ 速度 ” 标尺 2 在 Tempo Change (速度变化)对话框中,输入该 工程的 BPM 值。 3 单击 Tempo Resolution(速度精度)选择器并选择 一个音符值。(例如,若采用 6/8 拍,则选择符点 4 分音符;若采用 3/4 拍,则选择 4 分音符。) 4 若要输入新速度,请执行以下操作之一: • 单击速度值,键入一个新的数字,然后按 Enter。 • 单击速度值并上下拖动,以更改设置。若要精调,请在 按住 Command (Mac) 或 Ctrl (Windows) 的同时 拖动滑杆。 • 单击 Tempo (速度)值,然后以期望的速度按下计算 机键盘上的 “T” 键,以设定相应的值。 Tempo Change (速度变化)窗口 可以输入特定速度,或可以使用 T 键以点击方式 设置新速度。 3 将 Location (位置)设置为 1|1|000 (以确保插入的 速度替换默认速度)。 4 从 Resolution(精度)弹出菜单中选择节拍的音符值。 (例如,若采用 6/8 拍,则选择符点 4 分音符。) 5 单击 OK (确定)。 Pro Tools 简介 201 导入音频 很多音乐制作流程中都使用样品库中的音频循环和片断。 例如,您可以使用鼓声循环代替节拍音轨进行录音。您甚 至可以将来自多种音源的音频循环与 “ 单镜头 ” 样本进行 结合和编排,从而创建出一整段新音乐来。 3 若 要 在 导 入 之 前 预 览 所 选 的 文 件 或 片 段,请 单 击 Import Audio(导入音频)对话框中的 Play(播放) 按钮。单击 Stop (停止)按钮可停止预览。使用垂 直滑块可调节预览音量。若要导航到文件中的特定 位置,请使用 Play (播放)和 Stop (停止)按钮下面 的水平滑块。 在试听片段列表中的片段时,Import Audio(导入 USO RESTRITO Pro Tools 提供多种方式,可将不同来源的音频文件导 入到工程中。您可以使用 Import Audio (导入音频)命令 从硬盘、网络卷、音频 CD 或移动介质中导入音频,也可 以通过拖放操作从 Workspace (工作区)浏览器或从 Finder (Mac) 或 Windows Explorer (Windows) 中导 入音频。 使用 Import Audio (导入音频)命令。 音频)对话框中的 Preview Volume(预览音量) 控件也会影响预览音量。 4 执行以下操作之一: • 若要将文件或片段放入导入列表,请在选择后单击 Add (添加)或 Convert (转换)。 • 若要导入当前目录中的全部文件和片段,请单击 Add All (全部添加)或 Convert All (全部转换)。 使用 Import Audio (导入音频)命令可以将音频文件或 片段导入到自己的 Pro Tools 工程中。 • 若要将文件或片段移出导入列表,请在选择后单击 Import Audio (导入音频)命令将音频文件或 • 若要删除全部文件或片段,请单击 Remove All (全部 使用 Remove (删除)。 片段导入到工程中: 删除)。 1 依次选择 File > Import > Audio(文件 > 导入 > 音频)。 Pro Tools 还可以将文件添加到采样率不同的 工程。在 Import Audio (导入音频)对话框的 “ 注释 ” 字段中会显示警告信息,提示若不转换这 2 在 Import Audio (导入音频)对话框中,找到并选 择音频文件以显示其属性和关联片段。 些文件,则其播放速度和音高会不正确。 5 您在将全部音频文件和片段添加到导入列表后,可以执 行以下操作来应用采样率转换功能: • 启用 Apply SRC (应用 SRC)。 • 通 过 键 入 数 字 或 从 弹 出 菜 单 中 选 择 采 用 率,指 定 Source Sample Rate (源采样率)。 • 从 Quality (质量)弹出菜单中选择采样率转换质量。 此设 置 将覆 盖 Processing (处 理)首选 项页 中 的 Sample Rate Conversion Quality(采用率转换质量) 设置。 6 单击 Done (完成)。 7 在复制或转换文件时,请为新文件选择合适的保存 位置,例如用于当前工程的 Audio Files (音频文件) 文件夹。在添加文件时,此文件会从其原始位置引用。 Import Audio (导入音频)对话框 Pro Tools 简介 202 8 在 Audio Import Options(音频导入选项)对话框中, USO RESTRITO 选择所导入文件在工程中的位置: “ 音频导入选项 ” 对话框 新音轨 每个音频文件均导入其各自的音轨和片段列表中。 片段列表 音频文件在不创建新音轨的情况下导入片段 列表。导入的音频文件将显示在片段列表中,随后还可 以拖到音频轨中。 9 若选择创建新音轨,请在音轨中为导入的文件选择一 个位置: 工程起点 将文件或片段放在工程的起始位置。 歌曲起点 将文件或片段的开始点对齐到曲目起始标记点。 选区 将文件或片段的开始处与编辑光标或时间轴中选 区的开始处对齐。 对位 显示 Spot (对位)对话框,您可根据任何可用的 时间标尺将文件或片段对位到精确位置。 10 单击 OK (确定)。 Pro Tools 简介 203 通过拖放导入文件 USO RESTRITO Pro Tools 方便您通过拖放方式将文件从 Workspace (工作区)浏览器、 Mac Finder 或 Windows Explorer 中拖到 Pro Tools 应用程序图标、工程时间轴、音轨、音轨列表或者片段列表,以此导入音频、 MIDI、视频和工程文件。 工作区 将媒体或工程文件拖放到现有音轨中, 或作为新音轨拖放到 Track List (音轨列表)中 将文件拖动到 Clip List (片段列表)中以便导入 通过拖放从工作区导入 上图举例说明了以拖放方式从 Workspace(工作区)浏 览器中导入文件时的某些可用选项。 Pro Tools 简介 204 将文件导入到片段列表中: 1 在 Workspace (工作区)浏览器、 Mac Finder 或 Windows Explorer 中选择音频、视频、 MIDI、 片段组、 REX 或 ACID 文件。 2 将选定的文件拖入片段列表中。 USO RESTRITO 将文件导入到现有轨道中: 1 在 Workspace (工作区)浏览器、 Mac Finder 或 Windows Explorer 中选择要导入的文件。 2 将选定文件拖到兼容音轨上的某个位置。 编辑音频 Pro Tools 可以编辑轨道上的音频,可进行修整、分割、 剪切、复制和粘贴、移动、重新编排等多项操作。 修整音频片段 以下示例介绍如何通过简单编辑来改变歌曲的开始位置。 在本示例中,可以听到鼓手在歌曲开始之前 “ 报数 ” 拍子 (“1...2...1.2.3...”) (假定这一立体声音轨是通过架子鼓 上方的麦克风录制的) 。以下为这段音频在 Pro Tools 中的视觉效果。 将文件导入为新轨道: 1 在 Workspace (工作区)浏览器、 Mac Finder 或 Windows Explorer 中选择要导入的文件。 2 执行以下操作之一: • 按住 Shift 的同时,将文件拖动到 Edit (编辑)窗口 报数 歌曲起点 波形(左右通道) 中的任意位置。 • 将文件拖动到音轨列表。 • 将文件拖动到 Edit(编辑)窗口中的空白位置处、音轨 下方或音轨之间。 Pro Tools 简介 立体声波形可使您看到歌曲的不同段落。您可利用 Pro Tools 的 “ 所看即所听 ” 功能 “ 修整 ” 歌曲的起始 位置,从而快速使报数静音。 205 修整音频片段: 1 单击选择 Trim (修整)工具 (位于 Edit (编辑) 窗口的工具栏内)。 3 若使用 Grabber(抓取器)工具,请单击要复制和粘 贴的片段。若使用 Selector (选择器)工具,请双击 要复制和粘贴的片段。 使用 修整工具 Smart Tool(智能工具)在不同的编辑工具 中切换编辑光标 (视光标在片段上的位置而定)。 USO RESTRITO 歌曲起点 2 在报数后和歌曲开始前单击音轨 (您会看到光标显 示为 “ 修整 ” 图标)。向右拖动以将片断的起始位置向 内修整,或向左拖动以将片断的起始位置向外修整。 您还可以使用 “ 修整 ” 工具单击并向左拖回来 “ 撤销修整 ”。 您将会看到之前的音频 (报数)仍然存在。这是关于 Pro Tools 如何进行非破坏性编辑的示例。 使用 Grabber (抓取器)工具选择片段 4 选择 Edit > Copy (编辑 > 复制)。 5 使用 Selector (选择器)工具,将 Edit (编辑)光标 放到您要粘贴片段的位置。 6 选择 Edit > Paste (编辑 > 粘贴)。 复制和粘贴片段 以下示例介绍如何将音轨上的音频片段复制并粘贴到工 程中的不同时间轴和音轨位置。本示例使用导入的一段 节奏性音频循环。 复制和粘贴一个片段: 1 将一段节奏性音频循环导入到 Pro Tools 工程中(请参 阅第 202 页的 “ 导入音频 ”)。 2 单击选择 Grabber(抓取器)工具(位于 Edit(编辑) 窗口的工具栏内)。 “ 选择器 ” 工具 将片段粘贴到不同音轨的不同时间位置 “ 抓取器 ” 工具 智能工具 按下 Command+C (Mac) 或 Ctrl+C (Windows) Edit (编辑)选区复制到剪贴板。按下 Command+V (Mac) 或 Ctrl+V (Windows) 将剪 贴板上的内容粘贴到当前的 Edit (编辑)位置。 将当前的 编辑工具 Pro Tools 简介 206 分割和重新编排片段 Pro Tools 提供了用于创建新音频片段的多种方式。您可 以导入或录制音频片段的整个文件。您还可以通过修整 (参阅第 205 页的 “ 修整音频片段 ”)或分割整个文件的 片段来创建仅参考部分音频文件的音频片段。 2 选择 Edit > Separate Clip > At Selection (编辑 > 分割片段 > 在选区)。 按下 Command+E (Mac) 或 Ctrl+E (Windows) 在当前的 Edit (编辑)选区分割片段。 以下示例介绍了可用于在工程中分割和重新编排音频片 段的不同方式。本示例使用导入的一段节奏性音频循环。 USO RESTRITO 在 Edit Selection (编辑选区)内分割片段 在当前编辑选区分割片段: 1 使用 Selector(选择器)工具,在音频片段内选择一 个编辑选区。 在 Edit (编辑)选区的边界处分割父片段会创建新片段 使用 Edit > Separate Clips > On Grid (编辑 > 分割 片段 > 在网格)可根据当前网格分割音频选区。这对 于在 Bar|Beat (小节 | 节拍)网格上操作音频时非常 有用。使用 Edit > Separate Clips > At Transients (编辑 > 分割片段 > 在瞬态)可根据音频中的单个音 头分割音频选区。这对于将音频分割成单个 “ 敲击 ” 创建一个编辑选区 (例如鼓声循环中的每次敲击或吉他谱表中的每个 音符)非常有用。 重新编排分割的片段 Pro Tools 提供了用于重新编排片段的多种方式。所选 定的 Edit (编辑)模式 (可在 Edit (编辑)窗口工具 栏 的 最 左 侧 设 定)决 定 了 在 您 移 动 音 频 片 段 时 Pro Tools 会如何进行操作。有很多方法可用于重新编 排您 Pro Tools 工程中的音频片段,以下仅列出其中一些: 各种 Edit (编辑)模式、所选的 Grid (网格)模式 Pro Tools 简介 207 若要重新编排片段,请执行以下操作之一: USO RESTRITO 在 Slip(滑移)模式下使用 Grabber(抓取器)工具, 将音频片段拖到新的位置。该片段会移至您移动的确 切位置。 在 Grid(网格)模式下使用 Grabber(抓取器)工具, 将音频片段拖到新的位置。该片段会跳至您移动的最 近网格位置。 在 Spot(对位)模式下使用 Grabber(抓取器)工具, 将音频片段拖到新的位置。Spot(对位)对话框会打开, 您可为该片段指定确切的时间位置。 在 Shuffle (梭进)模式下使用 Grabber (抓取器) 工具,将音频片段拖到其他片段之间的新位置。相邻 的片段会来回活动,为所移动的片段腾出空间。 使用 Grabber (抓取器)或 Selector (选择器)工具 选择一个片段,然后选择 Edit > Duplicate (编辑 > 复制)。所选片段会被复制并直接放到当前选区之后。 使用 Grabber (抓取器)或 Selector (选择器)工具 选择一个片段,然后选择 Edit > Repeat(编辑 > 重复)。 在之后出现的 Repeat (重复)对话框中,输入要对 选区重复的次数,然后单击 OK(确定)。该选区会作 为单个片断进行重复,然后一个接一个排列。 使用虚拟乐器插件编辑 MIDI 序列 以下提供一个示例,介绍如何在 Instrument(乐器)轨道 上编辑 MIDI 序列以演奏虚拟乐器插件。本例中使用 AIR Music Technology 提供的 Xpand!2 插件。 Xpand!2 插件包含在 AIR Creative Collection 中, 以下载的单独安装程序形式随 Pro Tools 配套提供。 请务必在继续本例前运行 AIR Creative Collection 安装程序,包括其相关内容。有关详细信息,请参阅 《AIR 什么是 Creative Collection 插件指南》。 MIDI? MIDI (乐器数字接口)数据并非音频。 MIDI 不会发出 声音。 MIDI 是 MIDI 设备 (例如合成器、采样器、 控制器、键盘和音序器)之间用来交换控制数据和互相 “ 对话 ” 的一种方式。 MIDI 可有效告知各种发声设备 (例如硬件合成器或采样器,或软件虚拟乐器)应该演奏 何种乐器。 USB 和兼容 FireWire 的 MIDI 接口可以通过 USB 或 FireWire 与计算机交换 MIDI 消息。硬件 MIDI 乐器 通过 MIDI 电缆连接到 MIDI 接口上的 MIDI 输入和 输出。虚拟乐器作为插件插入 Pro Tools 的乐器音轨, 并可通过 Pro Tools 直接访问。 节奏性音频循环在瞬态下分割并 “ 来回活动 ” 有 关 编 辑 和 重 新 编 排 音 频 的 详 细 信 息,请 参 见 《Pro Tools 参考指南》中描述 Edit Modes (编辑 模式)和 Edit Tools (编辑工具)、 Clip Groups (片段组)以及 Elastic Audio(弹性音频)的章节。 Pro Tools 简介 208 使用乐器插件创建乐器音轨 您可使用乐器音轨或 MIDI 音轨在 Pro Tools 中录制、编辑和播放 MIDI 序列。若在使用虚拟乐器插件 (如 提供的 Xpand!2),您通常会使用 Instrument (乐器)音轨。乐器音轨可同时操作 MIDI 序列和监听音频。 另外,您还可以配合使用乐器音轨和外部 AIR MIDI 设备。 创建乐器音轨并插入乐器插件: USO RESTRITO 1 选择 Track > New (音轨 > 新建)。在 New Tracks (新建音轨)对话框中,执行以下操作: • 选择立体声 。 • 单击显示有 Audio Track (音轨)的弹出菜单并选择 Instrument Track (乐器音轨)。 • 点击 Create (创建)。 在 New Track (新建音轨)对话框中选择 Stereo and Instrument (立体声和乐器)音轨 2 必要时,选择 Window > Mix (窗口 > 混音)以显示 Mix (混音)窗口。 3 单击乐器音轨上方旁边的音轨插入选择器,并从乐器子菜单中选择 Xpand2。 “ 插入 ” 选择器 将 Xpand!2 插件插入乐器音轨 4 此时会出现插件窗口,其中显示有 Xpand!2 插件。您可以选择一个声音预设用于播放 MIDI。 有关 Xpand!2 插件的详细信息,请参阅 《AIR Pro Tools 简介 Creative Collection 插件指南》。 209 选择 USO RESTRITO Xpand!2 插件中预设的声音: 在插件窗口的顶部,单击 Librarian (资源管理)菜单 (< 出厂默认设置 >)并从任意子菜单中选择预设。使用 Xpand!2 时,子菜单中的预设按类别分组。 插入 选择器 从 Plug-In Librarian (插件资源管理)菜单中选择一项 Xpand!2 出厂预设。 Pro Tools 简介 210 用铅笔修改 您可以使用 MIDI 序列或通过外部 MIDI 控制器演奏虚 拟乐器 (如 Xpand!2)。 您可 使 用 Pencil (铅 笔)工具 在 MIDI 序列。 Pro Tools 中编 辑 Pencil (铅笔)工具插入 MIDI 音符或其他 MIDI 数据时,会在最近的小节线上创建 MIDI 使用 若要使用乐器音轨演奏虚拟乐器,请执行以下操作之一: USO RESTRITO MIDI 序列 演奏一种虚拟乐器 若连接有 MIDI 控制器,则可在所插入的乐器音轨已 选中或已启用录音时演奏虚拟乐器。在演奏的同时, 还可以将自己的演奏录制成 MIDI 序列。 在 将 MIDI 序列导入 (或编辑 MIDI 序列)到插入了 虚拟乐器的乐器音轨中,然后开始回放。 1 在 Edit(编辑)窗口中,将乐器音轨(或 MIDI 音轨) 设置为 Notes (音符)视图。 使用外部控制器录制 片段边界。 Edit (编辑)窗口于音轨上插入 MIDI 音符: MIDI Pro Tools 方便您通过 MIDI 控制器录制 MIDI 数据。 在乐器音轨上录制 MIDI: 1 确定 MIDI 控制器已通过 MIDI 电缆连接到 MIDI 接口或通过 USB 电缆直接连接到计算机。 2 创建一个立体声乐器音轨并插入 Xpand!2 插件(请参 阅第 209 页的 “ 使用乐器插件创建乐器音轨 ”)。 3 选择预设低音 (也称为 “ 音色 ”) 4 选择 Options > MIDI Thru (选项 > MIDI Thru) 。 (确认是否已选择 MIDI Thru ;若尚未选择,请选择 该选项。) 5 单击音轨中的 Record Enable (启用录音)按钮, 启用乐器音轨进行 MIDI 录音。 在 “ 乐器 ” 音轨中选择 “ 音符 ” 视图 2 选择 Pencil (铅笔)工具并确保被设置为徒手绘制。 在 Notes (音符)视图中将光标移到 MIDI 轨或乐 器轨的播放表区域上时,光标即变成 Pencil (铅笔) 工具。 6 在 Transport(传输)窗口中,单击 Record(录制) 按钮。 7 演奏 MIDI 控制器的键盘。您应该能听到所选的声音。 8 准备好开始录音时,单击 Play(播放)或按空格键。 若要停止,请单击 Stop (停止)或按空格键。 3 若要在拍子上插入 4 分音符,请执行以下操作: • 将 Main Time Scale (主时间标度)设置为 Bars|Beats (小节 | 节拍)。 • 将 Edit (编辑)模式设置为 Grid (网格)。 • 将 Grid (网格)值设置为 4 分音符。 录制 “ 乐器 ” 音轨中的 MIDI 数据 9 再次单击音轨中的 Record Enable (启用录音)按钮 • 将 Default Note Duration (默认音符长度)值设为 4 分音符 (或 Follow Grid (跟随网格))。 可停止启用录音并播放录制的片段。 4 将 Pencil (铅笔)工具移动到 MIDI 轨或乐器轨的 播放表区域中。利用 Edit (编辑)窗口的标尺和音 Pro Tools 简介 轨上的微型键盘作为参考,找到想要的音高和时间 位置。 211 Pencil (铅 笔)工 具 时,光 标 位 置 和 值显 示在 Window 任务栏中。 使用 光标音高位置 在单击之后 (且释放鼠标之前)可拖动 Pencil (铅笔) 工具来调整音符的音高或长度。向右拖动可加长音符, 但不改变其起始点。后向左拖动可减短音符,但不改变 其结束点。 铅笔光标 在打开 光标时间轴位置 Grid (网格)模式的情况下, MIDI 音符 的结束点默认与 最接近的网格边界对 齐。按住 USO RESTRITO Ctrl (Windows) 或 Command (Mac) 的同时使用 Pencil (铅笔)工具拖动,可暂时禁用 Snap to Grid (对齐到网格)功能。 编辑 MIDI 音符 可在 Edit(编辑)窗口或 MIDI Editor(MIDI 编辑器) 窗口中对 MIDI 音符进行编辑,包括音符的开始与结 束点、长度、音高以及力度等。 Selector (选择器) 、 Grabber (抓取器)、 Trim (修整)和 Pencil (铅笔) 工具可以操作单个音符或成组音符。 选择 光标位置和值 5 找到所要的音高和时间位置时,单击鼠标以插入音符。 MIDI 音符 必须首先选择 选择 MIDI 音符才能对其进行编辑。 MIDI 音符: 1 将 MIDI 轨或乐器轨设置到 Notes (音符)视图。 2 执行以下操作之一: 用 Pencil (铅笔)工具插入的 MIDI 音符 在打开 Grid (网格)模式的情况下, MIDI 音符 使用 Pencil(铅笔)工具或任一 Grabber(抓取器) 工具,按住 Shift 的同时单击每个音符。 使用 Grabber(抓取器)工具,将光标移动到没有音 符的地方 (选框出现),围绕要编辑的音符组拖画出 一个选取方框。 的开始点默认与最接近的网格边界对齐。利用徒手 Pencil(铅笔)工具,单击并按住 Ctrl (Windows) 或 Command (Mac),可暂时禁用 Snap to Grid (对齐到网格)功能。 插入音符的力度由 Default Note On Velocity (默认 音 符 打 开 当 力 度)设 置 确 定。长 度 由 Default Note Duration (默认音符长度)确定。在 Grid (网格) 模式下, Note On (音符开)位置由网格值确定。 若启用了 Play MIDI Notes When Editing (编辑时播放 MIDI 音符)选项,则每个音符在插入时即可发声。 Pro Tools 简介 使用 Grabber (抓取器)工具选择音符 在使用 Grabber (抓取器)工具时,若选取方框的任何 部分接触到音符 (开始点或结束点) ,则音符包含在选 取范围中。 212 使用 Selector(选择器)工具,跨一段范围的音符进 行拖动。 在拖动时,每个新位置上的音符都会发声,同时光标位 置值指示器 (在 Edit (编辑)窗口中)指示转调的方向 (+/-) 以及转移了多少个半音。 Control (Mac) 或 Start (Windows) 的同 Plus (+) 键,可 将所 选 MIDI 音符向上移调半个音,或者按下数字键盘 上的 Minus (–) 键,可将所选 MIDI 音符向下移 按住 时按 下 数 字键 盘 上的 USO RESTRITO 调半个音。 若要使该音符的副本转调但保持原始音符不变, 用 Selector (选择器)工具选择音符 请按 Alt (Windows) 或 Option (Mac) 键的同时 使用 Selector (选择器)工具时,要选取音符,选择范 围中必须包含音符的起始点。 音符转调 可以使用 Pencil(铅笔)工具或任一 Grabber(抓取器) 工具上下拖动 MIDI 音符以对其转调。若在拖动前选择 了多个音符,则会对每个音符进行转调。 对 MIDI 音符转调: 拖动。 移动音符 与操作片段的方式类似,可以使用 Pencil (铅笔)工具 或任一 Grabber(抓取器)工具左右拖动 MIDI 音符来 改变它们在 Pro Tools Timeline(时间轴)上的开始点。 若在拖动之前选择了多个音符,则将一并移动。 移动 MIDI 音符: 1 将 MIDI 轨或乐器轨设置到 Notes (音符)视图。 1 将 MIDI 轨或乐器轨设置到 Notes (音符)视图。 2 选择 Pencil(铅笔)工具或任一 Grabber(抓取器) 2 使用 Pencil(铅笔)工具或任一 Grabber(抓取器) 工具左右拖动音符(拖动时按住 Shift 可保持音符的 工具。 3 按住 Shift 的同时上下拖动音符。 音高不变)。 拖动音符时,光标位置值指示器(在 Edit (编辑)窗口中) 显示音符的新开始点位置。 若 Edit (编辑)模式设置为 Grid (网格),则被拖动 音符将自动与最近的网格边界对齐; 若 Edit(编辑)模式 设置为 Spot (定点),则会打开 Spot (定点)对话框。 若要复制所选音符但保持原始音符不变,请按 Alt (Windows) 或 Option (Mac) 键的同时 使用 Grabber (抓取器)工具进行转调 拖动。 Shift 键可以确保转调的音符在 Pro Tools Timeline (时间轴)上的原始开始点保持不变。 按住 Pro Tools 简介 213 Edit (编辑)窗口编辑 MIDI 力度: 修剪音符开始与结束时间点 在 与操作片段的方式类似,也可以通过 Trim (修整)工具 调整 MIDI 音符的开始点和结束点。若在执行修剪前选 择了多个音符,将更改所有这些音符。 1 执行以下操作之一: 更改一组 • 将 MIDI 轨或乐器轨设置到 Velocity(力度)视图。 • 显示 MIDI 音轨或乐器音的控制器行,并显示力度。 MIDI 音符的开始或结束点: 1 将 MIDI 轨或乐器轨设置到 Notes (音符)视图。 USO RESTRITO 2 选择要修整的 MIDI 音符。 3 执行以下操作之一: • 选择 Trim (修整)工具。 • 使用 Pencil (铅笔)工具。 4 将光标移动到任何加亮显示音符的开始处附近,此时 即显示 Trim(修整)工具。向右拖动光标可缩短音符, 向左拖动光标可加长音符。 使用 Trim (修整)工具更改音符结束时间点 若将 Edit (编辑)模式设置 Grid (网格),则被拖动的 开始点或结束点与最近的网格边界对齐。如 Edit(编辑) 模式被设置为 Spot(定点)模式,将会打开 Spot(定点) 对话框,可在其中输入音符的开始或结束点的新位置。 显示力度行 2 选择任意 Grabber (抓取器)工具。 3 上下拖动力度线的顶部 (菱形图标)。 拖动力度线 一系列音符的力度可利用 Pencil (铅笔)工具 进行编辑。 在网格模式下,可以使用 Control (Windows) 键或 Command 键 (Mac) 可暂时禁用 Grid (网格) 模式。 手动编辑音符力度 当 MIDI 音轨或乐器音轨被设置到 Velocity (力度) 视图时,或者在音轨下显示力度行时,每个音符的起音 力度用一条力度线来表示。力度线越高,表示力度值越高 (0–127)。 Pro Tools 简介 214 删除 MIDI 音符 混音和插件处理 除了使用 Edit (编辑)菜单中的 Clear (清除)命令删 除选定音符外,还可以使用 Pencil (铅笔)工具删除单 个音符。 使用清除命令删除一组 MIDI 音符: 1 选择要删除的音符。 USO RESTRITO 2 执行以下操作之一: • 选择 Edit > Clear(编辑 > 清除)命令删除选定音符。 音轨的隐含控制器数据保持不变。 • 利用任意编辑工具,右键单击任意选定的音符并选择 Clear (清除)。 • 按退格键 (Windows) 或 Delete (Mac) 键。 删除一段选定时间范围内的音符时,将同时删除 其中的所有隐含控制器和自动化数据。 使用 Pencil (铅笔)工具删除单个 MIDI 音符: Pencil (铅笔)工具后,按 Alt (Windows) 或 Option (Mac) 键的同时单击音符。按 Alt (Windows) 或 Option (Mac) 时, Pencil 选中 (铅笔)工具变为橡皮擦。 利用 Pencil (铅笔)工具删除音符 音色变化事件和系统专用信息事件也可以使用 Pro Tools 的混音需要使用音频信号流的元素,包括输入、 输出、总线、插入和发送,以便进行辅助混音和合成。 除了最终合成外,在一个 音任务。 Session 中也可能随时发生混 混音期间,实时插件和硬件插件提供特效和信号处理。 Pro Tools 随附音频特效处理插件套件,可以用于改变 所录制的声音。本节将说明两个有关如何使用插件处理 声音的示例。 有关 Pro Tools 随附插件的详细信息,请参阅 《音频插件指南》(Help > Audio Plug-ins Guide (帮助 > 音频插件指南))。 应用 “ 均衡 ” 与 “ 压缩 ” 在音频混音时,您通常需要对各个音轨应用均衡和压缩 以获得满意的声音效果。 均衡 (EQ) 可塑造声音的频谱。均衡的一个简单例子就 是很多立体声音响系统上的低音和高音控件。使用这些 控件可以增加 (增大)或减小 (降低)音频的低频和高 频部分。使用 EQ 可帮助分开贝司和吉他、提高鼓声、 突出声乐,甚至可以消除不必要的噪声。 Pro Tools 提供 多种不同类型的 EQ 插件,用于塑造声音。 Compression (压缩)可让音频动态变得更加流畅。 就象是一个音量自动控制,让响亮的部分不至过于高亢。 使用压缩可让声乐部分听起来更为亲切,或让铙钹听起 来不至于太刺耳。使用限制器可让音频信号的峰值部分 不会超出某种阈值,从而不影响低于此电平的音频效果。 Pro Tools 提供多种不同类型的动态插件,用于塑造声 音的动态。 Pencil (铅笔)工具通过 Alt- 单击 (Windows) 或 Option- 单击 (Mac) 进行删除。 Pro Tools 简介 215 对音轨应用 EQ: 1 选择 Window > Mix (窗口 > 混音)。 3 EQ III 插件窗口会打开。您可以从插件预设开始逐 步了解不同设置对音质的影响。 2 在音轨顶部,单击下一个 Track Insert (音轨插入) USO RESTRITO 选择器,并选择 EQ 3 7-Band(位于 EQ 子菜单)。 EQ III 插件窗口, Plug-In Preset (插件预设)选择器 4 开始回放以聆听效果。 插入选择器用于 Mix (混音)窗口中的音轨 Pro Tools 简介 216 对音轨应用压缩: 使用回响 1 选择 Window > Mix (窗口 > 混音)。 Reverberation (混响)可提供一种室内声学效果。混响 2 在音轨顶部,单击下一个 Track Insert (音轨插入) 选择器,并选择 Dyn 3 Compressor/Limiter (压缩器 / 限制器) (位于 Dynamics(动态)子菜单)。Pro Tools 将在音轨上插入 Dynamics III Compressor/Limiter (动态 III 压缩器 / 限制器)插件并打开插件窗口。 USO RESTRITO 3 动态 III 插件窗口会打开。您可以从插件预设开始逐 步了解不同设置对音质的影响。 特效实际上是一系列声音延迟,用于模拟声音从不同 房间、大厅或其他空间表面反射回来的效果。您可使用 混响特效为整个混音营造一种空间感,具体是使用源音 轨中的发送并使用 Auxiliary Input (辅助输入)音轨 进行处理。混响特效可使混音产生如同大型音乐厅、狭小 的房间、或是狭窄走廊那样的效果。 将混响整合到混音中的最好方式之一是采用 “ 发送与返回 ” 配置。在 Pro Tools 中,使用音轨中的发送可以将多个 音轨中的音频轻松分配至相同的混响特效。这样可使所 有源音轨听起来就象在同一房间内一样。 动态 III 插件窗口, Plug-In Preset (插件预设)选择器 4 开始回放以聆听效果。 Pro Tools 简介 217 将混响与 Auxiliary Input (辅助输入)音轨以及多个源音轨一起使用: 1 选择 Window > Mix (窗口 > 混音)。 USO RESTRITO 2 选择 Track > New(音轨 > 新建),然后将它设置为创建 1 个立体声 “ 辅助输入 ” 音轨,然后单击 Create(创建)。 创建新的 Auxiliary Input (辅助输入)音轨。 3 在刚刚添加的 Auxiliary Input (辅助输入)音轨上,单击 Track Input (音轨输入)选择器并选择 Bus > Bus 1–2 (总线 > 总线 1-2) . “ 音轨输入 ” 选择器 在辅助输入音轨上从输入选择器选择总线 1-2 Pro Tools 简介 218 4 单击如下所示的源音轨上的 Send (发送)选择器,然后选择 Bus > Bus 1–2 (总线 > 总线 1-2)。 USO RESTRITO “ 发送 A” 选择器 选择 “ 总线 1–2” 用于音轨上的 Send A (发送 A) 5 重复上述步骤,将每个所需辅助音轨发送至 Auxiliary Input (辅助输入)音轨用于混响处理。 Pro Tools 简介 219 USO RESTRITO 6 将 Reverb (混响)插件插入到 Auxiliary Input (辅助输入)音轨上。 采用总线实现从音频音轨到辅助输入音轨的发送,以便使用 D-Verb 进行混响处理 7 您可以使用单个 Send Output (发送输出)窗口从源音轨中调整发送音量,也可以设置发送视图以显示针对特定 发送的发送控制 (例如,选择 View > Sends A–E > Send A (视图 > 发送 A-E > 发送 A))。 8 按住空格键,然后在 Send Output (发送输出)窗口中或在 “ 发送 ” 轨道控件中缓慢推高小推子。这样可以调节 发送到 Auxiliary Input (辅助输入)音轨用于混响处理的源音轨输出量。 9 继续播放和聆听,调整各个音轨发送音量,并检查不同插件设定,从而找到您所要的混音效果。 Pro Tools 简介 220 使用自动化 6 完成后,停止播放。 Pro Tools 在每种类型的轨道上均拥有混音控件动态自 7 将 “ 自动化 ” 模式切回 Read(读取)可播放您刚刚写 动化功能。您可以写入自动化移动,并在播放工程时实 时观看这些移动。还可以用编辑音频和 MIDI 数据的相 同方法来编辑自动化数据。 入的自动化。 在第一次自动化操作后,可以通过选择触摸模式 或栓连模式将附加自动化写入该轨道,而不必完 USO RESTRITO 写入自动化 通过在播放过程中移动处于写入启用状态的控件来针对 所有这些控件实现写入自动化。 向轨道中写入自动化: 1 选择 Window > Automation (窗口 > 自动化)。 2 确保自动化类型处于写入启用状态。 “ 轨道自动化模式 ” 全删除先前的自动化操作。这些模式只有在您实 际移动控件时才会新增自动化。 手动编辑自动化 对于一个工程中的所有轨道, Pro Tools 提供多种方法 用于编辑自动化数据。您可以调整任何自动化播放表中 的分界点,以图形方式编辑自动化数据。也可以用编辑 音频和 MIDI 数据的相同方法来剪切、拷贝和粘贴自动 化数据。 自动化数据是用由可编辑分界点组成的线形表示的。 选择器 “ 自动化 ” 窗口 自动化分界点 通过拖动这些分界点,可以直接在编辑窗口和 MIDI 编辑 器窗口中修改自动化数据。上下拖动自动化分界点时, 值的变化会显示出来。 在播 放 过程 中 移动 音量推子 自动化分界点值 左右拖动自动化分界点可以调整自动化事件的计时。 自动化窗口 (已启用音量自动化) 3 在混音窗口或编辑窗口中,单击想要进行自动化的每 个轨道上的自动化模式选项,然后设置自动化模式。 若为首次自动缩混,请选择 Write (写入)。 4 开始播放以开始写入自动化。 5 将所需控件移动到自动化 (例如轨道音量推子)。 Pro Tools 简介 221 若要查看任意轨道上的分界点自动化类型,请选择相应 的音轨视图或显示轨道下相应的自动化行或控制器行。 例如,您可以查看并编辑音量、声像、静音、 MIDI 控制 器数据,甚至还有插件自动化。 使用 “ 修整 ” 工具 使用 “ 修整 ” 工具在选区内任意拖动,可以向上或向下调 节所有选定的分界点。 “ 音轨视图 ” 选择器 USO RESTRITO “ 自动化类型 ” 选择器 使用修整工具移动分界点 音量自动化 视图 Automation 行 音轨视图和自动化行 使用抓取器工具 使用抓取器工具单击线形可创建新的分界点,或者用抓 取器工具拖动现有分界点可以对它们进行调整。按住 Option (Mac) 或 Alt (Windows) 的同时用抓取器工具 单击分界点可将分界点删除。 使用抓取器工具新建分界点 使用 Pencil (铅笔)工具 使用 “ 铅笔 ” 工具在线形上单击一次即可创建新分界点。 按住 Option (Mac) 或 Alt (Windows) 的同时用铅笔 工具单击分界点可将分界点删除。 使用铅笔工具删除分界点 Pro Tools 简介 222 导出混音 完成一个 Pro Tools 工程中的音轨录制、编辑和混音后,您就可以进行工程混音,并导出结果以便刻录 联网上发布。您可以使用 Bounce to Disk (并轨到磁盘) 命令将混音从工程导出到单独的音频文件中。 CD 或在互 将混音从工程导出为立体声音频文件: USO RESTRITO 1 使用 “ 选择器 ” 在 Timeline (时间轴)或音轨上选择工程长度。 “ 选择器 ” 工具 时间轴选区 已选择并且准备并轨至 磁盘的工程音频 制作 Bounce to Disk (并轨到磁盘)的时间轴选区 2 选择 File > Bounce to > Disk(文件 > 并轨到 > 磁盘)。 3 在 Bounce Options (并轨选项)对话框中,执行以 下操作: • 选择 Bounce Source (并轨源)(这将是混音的主声 道路径,例如 main (Stereo) –> Analog 1–2)。 • 选择 File Type (文件类型)(例如 WAV)。 • 选择 Interleaved (叠加)用于 Format (格式)。 • 若要将并轨音频文件刻录到 CD 上,请选择 16 比特 作为比特精度。 • 若要将并轨音频文件刻录到 CD 上,请选择 44.1 kHz 作为采样率。 • 若要超越实时并轨速度,请选择 Offline(脱机)选项。 4 单击 Bounce (并轨)。(若您没有制作时间轴选区, 则整个工程将从开始并轨到结束。) 5 在 Save (保存)对话框中,键入并轨的音频文件的 名称,然后选择要保存的位置。 6 单击 Save (保存)。 Bounce (并轨)对话框 Pro Tools 简介 223 Pro Tools 开始并轨到磁盘。 若未启用 Offline(脱机)选项,则会实时完成 Pro Tools 并轨,因此您可以在并轨过程中听到混音的音频播放。 (但在并轨期间,您不可调节任何 Pro Tools 控件。) USO RESTRITO 将混音刻录到 CD 上 完成并轨后,您可以使用 CD 刻录软件 (如 iTunes 或 Roxio Toast)将生成的音频文件刻录到音频 CD 中, 以便在标准 CD 播放器上进行播放。在工作室以外的环 境中聆听参考 CD 是验证混音如何转换至其他系统与聆 听环境的行之有效的方式。 Pro Tools 简介 了解更多 我们希望通过这个 Pro Tools 快速介绍,能激发起您创 作音乐的兴趣。若要了解关于所阐述任何话题的更多 信息,请参阅 《Pro Tools 参考指南》(Help > Pro Tools Reference Guide (帮助 > Pro Tools 参考 Pro Tools 系统及软件的完整详细 信息。《Pro Tools 参考指南》通过音频和音乐制作任务 (例如录制、编辑和混音)对所有 Pro Tools 功能和概 念做了透彻的解释。 指南) )中关于所有 Pro Tools 帮助(Help > Pro Tools Help (帮助 > Pro Tools 帮助))搜索特定主题。 您也可以使用联机 224 USO RESTRITO Avid Technical Support (USA) Product Information 2001 Junipero Serra Boulevard Daly City, CA 94014-3886 USA Visit the Online Support Center at www.avid.com/support For company and product information, visit us on the web at www.avid.com