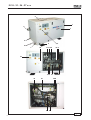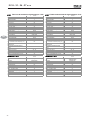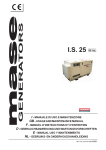
1
GRUPPO ELETTROGENO MANUALE DI USO E MANUTENZIONE mase GENERATORS GENSET USE AND MAINTENANCE MANUAL ELEKTROAGGREGATE BRAUCHSANWEISUNG UND WARTUNGSVORSCHRIFTEN I GB D GROUPE ÉLECTROGÈNE MANUEL DUTILISATION ET DENTRETIEN F GROUPE ÉLECTROGÈNE MANUAL DE USO Y MANTENIMIENTO E STROOMOPWEKKINGSGROEP GEBRUIKS- EN ONDERHOUDSHANDLEIDING IS 18 / 21 / 24 / 27 50 Hz REV.1 S.S. 08/04/2003 cod.42404 NL IS 18 - 21 - 24 - 27 50 Hz MASE GENERATORS S.p.A. Sede legale ed Amm.: 47023 CESENA (FC) ITALY - Via Tortona, 345 C.F./P.I. 00687150409 Cap. Soc. milioni 1625 interamente versato Registro Società Tribunale Forl' n. 6818 - CCIAA Forl' n.164063 c.c.p. n. 11541471 - EXPORT FO n. 006368 -2 IS 18 - 21 - 24 - 27 50 Hz 1 4 2 3 5 6 7 8 10 9 11 12 16 13 14 15 17 Fig. 2 -3 IS 18 - 21 - 24 - 27 50 Hz 2 1 6 3 9 8 5 7 24 13 17 25 4 15 17 18 1112 16 19 20 14 1022 23 26 Fig. 3 -4 IS 18 - 21 - 24 - 27 50 Hz 2 1 3 4 6 9 7 10 8 11 12 5 Fig. 4 5 4 3 1 2 2 Fig. 5 -5 IS 18 - 21 - 24 - 27 50 Hz : S.A.E Service Grade 3 : : 2 : : 1 : -30 Fig. 6 MIN -20 -10 0 10 20 30 o Ambient temperature ( C) Fig. 8 TAB "A" MAX 1 3 4 4 7 2 6 5 Fig. 7 -6 40 IS 18 - 21 - 24 - 27 50 Hz 4 5 3 2 1 Fig. 8 2 4 4 1 Fig. 9 -7 IS 18 - 21 - 24 - 27 50 Hz Schema elettrico versione "Standard" -8 100Kohm 60HZ 1 3 5 3A 5C 4 6 5A 7 5B A.V.R. Cod. 45727 Fig. 10 IS 18 - 21 - 24 - 27 50 Hz Schema elettrico versione "Poli Isolati" Cod. 45765 Fig. 11 -9 I IS 18 - 21 - 24 - 27 50 Hz I INDICE Figure ...................................................................... 2 Schema elettrico ..................................................... 8 1 1.1 1.2 1.3 1.4 1.5 1.6 1.7 1.8 2 2.1 2.2 2.3 2.4 3 INFORMAZIONI GENERALI ............................. 11 Scopo e campo di applicazione del manuale ... 11 Simbologia .................................................... 11 Documenti di riferimento ................................. 12 Facsimile della dichiarazione CE di conformità .. 12 Norme e disposizioni legislative di riferimento .... 12 Identificazione della macchina ......................... 12 Composizione dei gruppi elettrogeni ................. 13 Pannello strumenti ......................................... 13 informazioni generali ................................... 14 Documenti di riferimento ................................. 14 Conformità alle norme ..................................... 14 Marcatura ...................................................... 14 Identificazione della macchina ......................... 14 CARATTERISTICHE DEL GENERATORE ........ 15 3.1 Caratteristiche generali ................................... 15 3.4.1 Tabella caratteristiche tecniche IS 18 ................. 16 3.4.1.1 Tabella caratteristiche tecniche IS 21 .............. 16 3.4.1.2 Tabella caratteristiche tecniche IS 24 ............ 17 3.4.1.3 Tabella caratteristiche tecniche IS 27 ............. 17 4 4.1 4.2 5 5.1 5.2 5.3 5.4 6 6.1 6.2 6.3 6.4 6.5 I - 10 NORME DI SICUREZZA ................................... 18 Precauzioni generali ....................................... 18 Prescrizioni per la sicurezza durante ................ 18 l'installazione e la messa in servizio ................. 18 UTILIZZO DEL GENERATORE ......................... 18 Controlli preliminari ......................................... 18 Disareazione dell'impianto di alimentazione ...... 19 Avviamento .................................................... 19 Arresto del gruppo .......................................... 19 PROTEZIONI .................................................. 19 Protezione bassa pressione olio ...................... 19 Protezione alta temperatura acqua .................. 19 Protezione sovratemperatura alternatore ........... 20 Protezione da cortocircuito e sovraccarico ........ 20 Protezione da cortocircuito dell'impianto elettrico in bassa tensione. ............................................. 20 7 MANUTENZIONE ............................................ 20 7.1 7.2 7.3 7.4 7.5 7.6 7.7 Premessa...................................................... 20 Manutenzione ordinaria del motore .................. 20 Cambio dell'olio motore e filtro olio ................... 20 Pulizia del filtro aria ......................................... 21 Sostituzione del filtro carburante ...................... 21 Controllo liquido refrigerante ............................. 21 Controllo della tensione delle ........................... 21 cinghie trapezoidali ........................................ 21 7.8 Svuotamento impianto di raffreddamento .......... 22 7.9 Sostituzione del liquido refrigerante .................. 22 7.10 Sostituzione anodi di zinco ............................. 22 7.11 Manutenzione della pompa acqua mare ........... 22 7.12 Manutenzione dell'alternatore ........................... 22 7.13 Manutenzione della batteria ............................. 22 7.14 Periodi di inattività ........................................... 23 7.15 Tavola degli interventi programmati ..................... 23 7.16 Tavola guasti .................................................. 23 8 TRASPORTO E MOVIMENTAZIONE ............... 24 9 ROTTAMAZIONE ............................................ 24 10 RIFERIMENTI SCHEMA ELETTRICO ............... 24 IS 18 - 21 - 24 - 27 50 Hz I 1 INFORMAZIONI GENERALI Consultare attentamente questo manuale prima di procedere a qualsiasi intervento sulla macchina. IL MANCATO RISPETTO DELLE SPECIFICHE CONTENUTE NEL SEGUENTE MANUALE DI USO E MANUTEZIONE COMPORTA IL DECADIMENTO DELLA GARANZIA SUL PRODOTTO 1.1 Scopo e campo di applicazione del manuale Grazie per aver scelto un prodotto mase. Questo manuale è stato redatto dal Costruttore allo scopo di fornire le informazioni e le istruzioni essenziali per effettuare, correttamente e in condizioni di sicurezza l'utilizzo e la manutenzione, e costituisce parte integrante del corredo del gruppo elettrogeno e deve essere conservato con cura da qualsiasi agente che potrebbe deteriorarlo per tutto il ciclo di vita dello stesso. Il presente manuale deve seguire il gruppo elettrogeno qualora questo sia trasferito ad un nuovo utente o proprietario. Le informazioni in esso contenute sono dirette a tutte le persone coinvolte nel ciclo di vita operativo del gruppo elettrogeno e sono necessarie per informare sia chi materialmente effettuerà le diverse attività, sia chi dovrà coordinarle, predisporre la necessaria logistica e regolamentare gli accessi al luogo dove sarà installato ed opererà il gruppo elettrogeno. Il manuale definisce lo scopo per cui la macchina è stata costruita e contiene tutte le informazioni necessarie per garantirne un uso sicuro e corretto. La costante osservanza delle indicazioni, in esso contenute, garantisce la sicurezza delloperatore, leconomia desercizio ed una maggiore durata della macchina stessa. Si consiglia vivamente di leggere attentamente quanto contenuto in questo manuale e nei documenti di riferimento; solo così viene assicurato il regolare funzionamento nel tempo del gruppo elettrogeno, la sua affidabilità e la salvaguardia da danni a persone e cose. I disegni sono forniti a scopo esemplificativo. Anche se la macchina in vostro possesso si differenzia sensibilmente dalle illustrazioni contenute in questo manuale la sicurezza e le informazioni sulla stessa sono garantite. Per facilitare la consultazione esso è stato suddiviso in sezioni che ne identificano i concetti principali; per una consultazione rapida degli argomenti consultare lindice descrittivo. Nota: le informazioni contenute in questa pubblicazione sono corrette al momento della stampa. Il Costruttore, nel perseguire una politica di costante sviluppo ed aggiornamento del prodotto, si riserva di apportare modifiche senza preavviso. 1.2 Simbologia Le parti di testo da non trascurare sono state evidenziate in grassetto e precedute da simboli qui di seguito illustrati e definiti. Indica che è necessario prestare attenzione al fine di non incorrere in serie conseguenze che potrebbero provocare la morte, o possibili danni alla salute, del personale. Situazione che potrebbe verificarsi durante il periodo di vita di un prodotto, sistema o impianto considerato a rischio in materia di danni alle persone, alle proprietà, allambiente o di perdite economiche. Indica che è necessario prestare attenzione al fine di non incorrere in serie conseguenze che potrebbero portare al danneggiamento di beni materiali quali le risorse o il prodotto Indicazioni di particolare importanza. I - 11 IS 18 - 21 - 24 - 27 50 Hz I 1.3 Documenti di riferimento Le Istruzioni per l'uso fornite con ciascun gruppo elettrogeno sono costituite da una raccolta di documenti di cui il presente manuale rappresenta la Parte Generale. Normalmente sono forniti i seguenti documenti: a - Dichiarazione CE di Conformità. b - Manuale di Istruzioni per l'uso e la manutenzione dei gruppi elettrogeni (il presente manuale). c - Manuale d'Installazione dei gruppi elettrogeni. d - Schema elettrico del quadro di comando, controllo e potenza. e - Manuale d'Uso e Manutenzione del Motore. f - Manuale d'Uso e Manutenzione emesso dal Costruttore dell'Alternatore. g - Eventuali altri manuali degli accessori opzionali, emessi dai rispettivi Costruttori. h - Elenco Centri Assistenza Mase. i - Certificato di garanzia l - Cartolina di garanzia 1.4 Facsimile della dichiarazione CE di conformità I gruppi elettrogeni, costruiti dalla ditta mase, destinati ai paesi della Comunità Europea sono conformi alle direttive CEE applicabili (vedi 1.5), e sono corredati di una Dichiarazione CE di Conformità (Fig.B). 1.5 Norme e disposizioni legislative di riferimento Tutti i gruppi elettrogeni diesel Mase sono progettati e prodotti nel rispetto delle vigenti legislazioni. Il gruppo elettrogeno e i suoi componenti sono realizzati in accordo alle seguenti Norme e Direttive applicabili: EN 292-1/2 : Norme per la sicurezza del macchinario. Principi generali di progettazione. EN 294 : Norme per la sicurezza del macchinario. Distanze di sicurezza per impedire il raggiungimento di parti pericolose con gli arti superiori. ISO 3046 : Motori alternativi a combustione interna. IEC 34-1 : Macchine elettriche rotanti. ISO 8528 -1 : Gruppi elettrogeni a corrente alternata azionati da motore alternativo a combustione interna. EN 60204 -1(CEI 44-5) : - Sicurezza del macchinario. - Equipaggiamento elettrico delle macchine. EN 60439 -1 (CEI 17-13/1) : Apparecchiature assiemate di protezione e manovra per bassa tensione (quadri BT). I - 12 EN 50081-1/2 (Compatibilità elettromagnetica) : Norma generale sull'emissione - parte 1 - ambienti residenziali, commerciali, e industria leggera - parte 2 - ambiente industriale. EN 50082-1/2 (Compatibilità elettromagnetica) : Norma generale sull'immunità - parte 1 - ambienti residenziali, commerciali, e industria leggera - parte 2 - ambiente industriale. 89/392/CEE e successive modificazioni contenute nelle direttive 91/368/CEE, 93/44/CEE e 93/68/CEE : Requisiti essenziali delle macchine, ai fini della sicurezza e della tutela della salute (direttiva "Macchine"). 73/23/CEE e successive modificazioni contenute nella direttiva 93/68/CEE : Garanzie di sicurezza che deve possedere il materiale elettrico destinato ad essere utilizzato entro taluni limiti di tensione (direttive "Bassa Tensione"). 1.6 Identificazione della macchina Vedere Fig.2 1 - Nome macchina 2 - Codice macchina 3 - Numero di serie 4 - Potenza continua 5 - Frequenza dichiarata 6 - Fattore di potenza 7 - Tensione nominale 8 - Corrente nominale 9 - Grado di protezione 10 - Classe disolamento 11 - Temperatura max.utilizzo 12 - Altitudine max.utilizzo 13 - Livello rumorosità 14 - Classe di prestazione 15 - Anno di costruzione 16 - Costruttore - Indirizzo 17 - Peso I dati che identificano il nro di codice della macchina, il nro di serie e lanno di costruzione devono essere sempre precisati al Costruttore per informazioni, richieste di ricambi, ecc. IS 18 - 21 - 24 - 27 50 Hz I 1.7 Composizione dei gruppi elettrogeni Vedere Fig.3 I gruppi elettrogeni sono composti essenzialmente dai seguenti componenti: 1 - Cassa insonorizzante 2 - Portello di accesso superiore 3 - Portello di accesso laterale 4 - Pannello strumenti 5 - Staffe di ancoraggio 6 - Raccordo scarico fumi e acqua di raffreddamento 7 - Raccordo collegamento presa acqua mare 8 - Raccordi di collegamento a serbatoio carburante 9 - Morsetti di collegamento alla batteria 10 - Filtro aria motore 11 - Vaso di espansione liquido refrigerante 12 - Pompa estrazione olio motore 13 - Cartuccia filtro gasolio 14 - Pompa acqua mare 15 - Pompa carburante 16 - Cartuccia filtro olio 17 - Tappo carico olio 18 - Scatola collegamento linea elettrica 19 - Alternatore caricabatteria 20 - Collettore raffreddato ad acqua 21 - Scambiatore di calore acqua/aria 22 - Collettore scarico 23 - Motorino di avviamento 24 - Connettore pannello di comando a distanza 25 - Vite di regolazione giri del motore 26 - Scambiatore di calore acqua/acqua 1.8 Pannello strumenti Vedere Fig.4 Ogni gruppo elettrogeno dispone di un pannello strumenti per i comandi e i controlli sul quale si trovano i seguenti componenti: 1 2 3 4 5 6 7 8 9 10 11 12 - Contaore - Interruttore magnetotermico - Interruttore termico corrente DC - Pulsante START / STOP - Modulo protezione motore - Spia "RUN" motore avviato - Spia "OIL" bassa pressione olio - Spia " °C " alta temperatura alternatore - Spia "BATT." funzionamento caricabatteria - Spia " °C " alta temperatura motore - Spia preriscaldo candelette (non presenti) - Fuoriuscita carburante (versione "RINA") I - 13 IS 18 - 21 - 24 - 27 50 Hz I 2 INFORMAZIONI GENERALI 2.1 Documenti di riferimento 2.4 Identificazione della macchina Le istruzioni per l'uso fornite con ciascun gruppo elettrogeno sono costituite da una raccolta di documenti di cui il presente manuale rappresenta la Parte Generale. Normalmente sono forniti i seguenti documenti. Vedere Fig. A a Dichiarazione CE di Conformità. b Manuale di istruzioni per l'uso e la manutenzione dei gruppi elettrogeni, (il presente manuale). c Manuale d'uso e manutenzione del motore. d Elenco Centri Assistenza mase. e Certificato di garanzia mase. f Cartolina garanzia. 2.2 Conformità alle norme I gruppi elettrogeni, costruiti dalla ditta mase, destinati ai paesi della Comunità Europea sono conformi alle direttive CE applicabili, e sono corredati di una Dichiarazione CE di Conformità. 1 2 3 4 5 6 7 8 9 10 11 12 13 14 15 16 - Nome macchina - Codice macchina - Numero di serie - Potenza continua - Frequenza dichiarata - Fattore di potenza - Tensione nominale - Corrente nominale - Grado di protezione - Classe disolamento - Temperatura max.utilizzo - Altitudine max.utilizzo - Classe di prestazione - Anno di costruzione - Costruttore - Indirizzo - Peso 89/37CE e successive modifica: Requisiti essenziali delle macchine, ai fini della sicurezza e della tutela della salute, (Direttiva "Macchine"). 73/23/CEE e successive modifiche contenute nella direttiva 93/68/CEE : Garanzie di sicurezza che deve possedere il materiale elettrico destinato ad essere utilizzato entro taluni limiti di tensione, (Direttive "Bassa Tensione"). 1 2000/14 CE: Direttiva ambientale sullemissione sonora (solo nei modelli indicati in tabella emissione sonora) 4 2.3 Marcatura 6 La targa predisposta per i gruppi elettrogeni contiene tutti i dati identificativi secondo quanto richiesto per la Marcatura CE, per i casi in cui è prevista. Si riporta qui il facsimile della targa identificativa che è fissata sul quadro di controllo di ciascuna macchina, (Fig. 1). 8 3 2 5 7 10 9 11 15 14 16 12 13 Fig.A I dati che identificano il numero di codice della macchina, il numero di serie e lanno di costruzione devono essere sempre precisati al costruttore per informazioni, richieste di ricambi, ecc.. I - 14 IS 18 - 21 - 24 - 27 50 Hz I 3 CARATTERISTICHE DEL GENERATORE 3.1 Caratteristiche generali I gruppi elettrogeni IS sono stati progettati per essere installati agevolmente a bordo di imbarcazioni. La cassa insonorizzante, ottenuta con pannelli coibentati di alluminio marino verniciato, permette un facile accesso al motore e all'alternatore per gli interventi di manutenzione, di controllo e al tempo stesso consente un elevato abbattimento del livello sonoro. Il motore diesel, 4 tempi, a iniezione diretta, costruito dalla Yanmar, è estremamente affidabile e robusto; le emissioni allo scarico sono conformi alle normative CARB . L'alternatore, di tipo sincrono, 4 poli, senza spazzole, dispone di regolatore elettronico di tensione (SR7) che ne garantisce la stabilità a ± 5% rispetto al valore nominale. La grande capacità di spunto dell'alternatore rende il gruppo elettrogeno particolarmente adatto all'alimentazione di motori elettrici di condizionatori, dissalatori, compressori, ecc. Il gruppo elettrogeno dispone di un pannello di comando locale [fig.3 rif.4 ] sul quale si trovano i comandi e gli strumenti di controllo. 3.2 Sistema di raffreddamento Il motore del gruppo elettrogeno viene raffreddato tramite circolazione, in circuito chiuso, di liquido refrigerante che cede calore all'acqua di mare per mezzo di uno scambiatore di calore [fig.3 rif.26] . Tale scambiatore, è stato progettato appositamente da mase per la marinizzazione del motore. Un secondo scambiatore di calore provvede a raffreddare l'aria all'interno della cassa insonorizzante e l'aria necessaria alla ventilazione dell'alternatore. All'atto dell'installazione è necessario predisporre un circuito di adduzione dell'acqua di mare per il raffreddamento e un sistema di scarico per convogliare all'esterno i gas della combustione e l'acqua utilizzata per il raffreddamento, come indicato nel manuale di installazione. 3.3 Pannello di comando Sul gruppo elettrogeno è posizionato un pannello di comando (fig.4) per i controlli e per eseguire le operazioni di avviamento e arresto. Un modulo protezione motore [fig. 4, rif. 5] gestisce le protezioni del gruppo elettrogeno arrestando il motore in caso di guasto e segnalando, tramite le apposite spie l'anomalia rilevata. - Lampada spia "RUN" [fig. 4, rif. 6] colore verde segnala, se accesa, che il gruppo è in funzione e nessuna anomalia di funzionamento è rilevata. - Lampada spia "BATT." [fig. 4, rif. 9] colore rosso segnala, se accesa, che l'alternatore caricabatteria è in avaria. - Lampada spia "OIL" [fig.4, rif. 7] colore rosso segnala, se accesa, che la pressione olio motore è insufficiente. - Lampada spia " °C" [fig.4, rif.10] colore rosso segnala, se accesa, che la temperatura del liquido di raffreddamento o dell'acqua circolante negli scambiatori di calore, è troppo elevata. - Lampada spia " °C" [fig.4, rif. 8] colore rosso segnala, se accesa, che gli avvolgimenti dell'alternatore hanno raggiunto temperature troppo elevate. - Lampada spia [fig.4, rif. 11] colore giallo se accesa segnala che le candelette di preriscaldo sono sono attivate. L'accensione delle candelette avviene prima dell'avviamento, spostando la chiave d'accensione dalla posizione di Stop a quella di ON; una volta raggiunta la temperatura si spengono automaticamente e quindi si può proocdedere all'avviamento. - Lampada spia [fig.4, rif. 12] colore rosso se accesa segnala che il pulsante di emergenza è inserito. Per riavviare il gruppo è indispensabile disinserirlo. Sul pannello di comando si trova anche: - un interruttore magnetotermico bipolare [fig. 4, rif. 2] il quale interrompe l'erogazione della corrente in caso di sovraccarico e cortocircuito; - un'interruttore termico [fig. 4, rif.3] a protezione dell'impianto elettrico in bassa tensione da cortocircuito; - un contaore [fig. 4, rif.1]; - il pulsante per l'avviamento e l'arresto del gruppo elettrogeno [fig. 4, rif.4]. Il gruppo elettrogeno è predisposto per essere collegato, tramite connettore [fig.3, rif.24] al pannello di avviamento a distanza, fornito come optional dalla mase, installabile eventualmente in plancia di comando. Sono disponibili due diversi modelli di pannello avviamento a distanza come rappresentato in fig. 5. La versione più semplice [fig. 5, rif.1] dispone del pulsante per l'avviamento e l'arresto, una lampada spia colore verde [fig. 5, rif. 2] che, se accesa, indica gruppo avviato. La seconda versione di pannello comando a distanza [fig. 5, rif. 3] prevede, oltre al pulsante di avviamento e arresto e alla lampada spia, uno strumento che indica il valore della pressione olio motore [fig. 5, rif. 4], uno strumento che indica il valore della temperatura del liquido di raffreddamento [fig. 5, rif. 5]. Quando si eseguono interventi di manutenzione sul gruppo elettrogeno scollegare il polo negativo della batteria di avviamento per evitare avviamenti accidentali. I - 15 IS 18 - 21 - 24 - 27 50 Hz I 3.4.1 Tabella caratteristiche tecniche IS 18 3.4.1.1 Tabella caratteristiche tecniche IS 21 0RWRUH 0RWRUH Modello Tipo Cilindri (nr.) Materiale blocco cilindri Alesaggio (mm) Corsa (mm) Cilindrata (cc) Potenza (hp) RPM Rapporto di compressione Sistema di iniezione Materiale testata Regolatore di giri Sistema di lubrificazione Capacità carter olio (l) Sistema di arresto motore Pompa alimentazione carburante Prevalenza max.pompa carburante (cm) Consumo carburante a pieno carico(l/h) Volume aria combustione (l/min) 50 Hz Yanmar 4TNE94A Diesel 4 tempi 4 Ghisa 94 100 2776 39 1500 18:1 Diretta Ghisa Centrifugo, meccanico Forzata 10,2 Solenoide Meccanica Modello Tipo Cilindri (nr.) Materiale blocco cilindri Alesaggio (mm) Corsa (mm) Cilindrata (cc) Potenza (hp) RPM Rapporto di compressione Sistema di iniezione Materiale testata Regolatore di giri Sistema di lubrificazione Capacità carter olio (l) Sistema di arresto motore Pompa alimentazione carburante 50 Hz Yanmar 4TNE94A Diesel 4 tempi 4 Ghisa 94 100 2776 39 1500 18:1 Diretta Ghisa Centrifugo, meccanico Forzata 10,2 Solenoide Meccanica 80 Prevalenza max.pompa carburante (cm) 80 7,2 Consumo carburante a pieno carico(l/h) 7,2 1900 Volume aria combustione (l/min) 1900 Batteria d’avviamento (Ah-V) Carica batteria (A-V) 80 - 12 40 - 12 Batteria d’avviamento (Ah-V) Carica batteria (A-V) 80 - 12 40 - 12 Motorino d’avviamento (kW-V) 2,3 - 12 Motorino d’avviamento (kW-V) 2,3 - 12 Inclinazione max.di utilizzo Portata pompa acqua mare (l/min) $OWHUQDWRUH Tipo Regolazione Raffreddamento Tensione (V) Frequenza (Hz) Amps Potenza max. (kW) Potenza cont. (kW) Fattore di potenza ( cos ø ) Classe d’isolamento Stabilità di tensione Stabilità di frequenza I - 16 30° 40 50 Hz Sincrono, 4-poli, autoeccitato Elettronica Aria / acqua (intercooler W/A) 115 - 230 50 156 - 78 20 18 1 H ±2% ±5% Inclinazione max.di utilizzo Portata pompa acqua mare (l/min) $OWHUQDWRUH Tipo Regolazione Raffreddamento Tensione (V) Frequenza (Hz) Amps Potenza max. (kW) Potenza cont. (kW) Fattore di potenza ( cos ø ) Classe d’isolamento Stabilità di tensione Stabilità di frequenza 30° 40 50 Hz Sincrono, 4-poli, autoeccitato Elettronica Aria / acqua (intercooler W/A) 115 - 230 50 200 - 100 23 21 1 H ±2% ±5% IS 18 - 21 - 24 - 27 50 Hz 3.4.1.2 Tabella caratteristiche tecniche IS 24 3.4.1.3 Tabella caratteristiche tecniche IS 27 0RWRUH 0RWRUH Modello Tipo Cilindri (nr.) Materiale blocco cilindri Alesaggio (mm) Corsa (mm) Cilindrata (cc) Potenza (hp) RPM Rapporto di compressione Sistema di iniezione Materiale testata Regolatore di giri Sistema di lubrificazione Capacità carter olio (l) Sistema di arresto motore Pompa alimentazione carburante Prevalenza max.pompa carburante (cm) Consumo carburante a pieno carico (l/h) Volume aria (l/min) 50 Hz Yanmar 4TNE98 Diesel 4 tempi 4 Ghisa 98 110 3319 46,4 1500 18:1 Diretta Ghisa Centrifugo, meccanico Forzata 10,2 Solenoide Meccanica 80 9,6 2500 Modello Tipo Cilindri (nr.) Materiale blocco cilindri Alesaggio (mm) Corsa (mm) Cilindrata (cc) Potenza (hp) RPM Rapporto di compressione Sistema di iniezione Materiale testata Regolatore di giri Sistema di lubrificazione Capacità carter olio (l) Sistema di arresto motore Pompa alimentazione carburante Prevalenza max.pompa carburante (cm) Consumo carburante a pieno carico (l/h) Volume aria (l/min) 50 Hz Yanmar 4TNE98 Diesel 4 tempi 4 Ghisa 98 110 3319 46,4 1500 18:1 Diretta Ghisa Centrifugo, meccanico Forzata 10,2 Solenoide Meccanica 80 10,8 2500 Batteria d’avviamento (Ah-V) Carica batteria (A-V) 80 - 12 40 - 12 Batteria d’avviamento (Ah-V) Carica batteria (A-V) 80 - 12 40 - 12 Motorino d’avviamento (kW-V) 2,3 - 12 Motorino d’avviamento (kW-V) 2,3 - 12 Inclinazione max.di utilizzo Portata pompa acqua mare (l/min) $OWHUQDWRUH Tipo Regolazione Raffreddamento Tensione (V) Frequenza (Hz) Amps Potenza max. (kW) Potenza cont. (kW) Fattore di potenza ( cos ø ) Classe d’isolamento Stabilità di tensione Stabilità di frequenza 30° 40 50 Hz Sincrono, 4-poli, autoeccitato Elettronica Aria / acqua (intercooler W/A) 115 - 230 50 226 - 113 26 24 1 H ±2% ±5% Inclinazione max.di utilizzo Portata pompa acqua mare (l/min) $OWHUQDWRUH Tipo Regolazione Raffreddamento Tensione (V) Frequenza (Hz) Amps Potenza max. (kW) Potenza cont. (kW) Fattore di potenza ( cos ø ) Classe d’isolamento Stabilità di tensione Stabilità di frequenza I 30° 40 50 Hz Sincrono, 4-poli, autoeccitato Elettronica Aria / acqua (intercooler W/A) 115 - 230 50 252 - 126 29 27 1 H ±2% ±5% I - 17 IS 18 - 21 - 24 - 27 50 Hz I 4 NORME DI SICUREZZA 4.1 Precauzioni generali Prima di avviare il gruppo elettrogeno e prima di iniziare qualunque operazione di lubrificazione o manutenzione, è indispensabile che il personale incaricato, abbia letto e compreso tutte le AVVERTENZE ed i richiami all'ATTENZIONE e PERICOLO riportati in questo manuale e nella ulteriore documentazione tecnica fornita a corredo. Il Costruttore non può comunque prevedere tutte le possibili circostanze che possono comportare potenziali rischi nelle effettive condizioni d'impiego e di uso del gruppo elettrogeno. Le varie operazioni e/o procedure per la manutenzione, non espressamente raccomandate o indicate nei manuali d'uso, dovranno essere sempre notificate al Costruttore e da questi approvate. Qualora si debba utilizzare un procedimento non specificatamente consigliato, sarà cura e responsabilità dell'utente accertarsi che esso sia sicuro e non rechi danno a persone o cose. Il Costruttore declina ogni responsabilità per danni a persone o cose, conseguenti dallinosservanza delle norme di sicurezza. Esaminare attentamente le targhe segnaletiche di sicurezza applicate sulla macchina e rispettarne le indicazioni in esse contenute. - Non consentire luso del gruppo elettrogeno a persone non competenti o senza una adeguata istruzione. - Non consentire a bambini o animali di avvicinarsi al gruppo elettrogeno in funzione. - Non accedere al generatore con mani bagnate essendo il generatore una potenziale fonte di shock elettrici se mal utilizzato. - Eventuali controlli su gruppo elettrogeno vanno eseguiti a motore spento; controlli con il gruppo in funzione vanno effettuati solo da personale specializzato. - Non aspirare i fumi di combustione perché contengono sostanze nocive alla salute. - Utilizzare il gruppo elettrogeno con i portelli di accesso chiusi. - Non toccare mai con le mani il corpo del motore o dell'alternatore quando il gruppo elettrogeno è in funzione o è ancora caldo. - Quando si eseguono interventi di manutenzione sul gruppo elettrogeno scollegare il polo negativo della batteria di avviamento per evitare avviamenti accidentali. - Nel caso si verifichino perdite di olio o di carburante provvedere ad una accurata pulizia per non creare condizioni di rischio di incendio. I - 18 - Divieto di accesso alle persone dotate di pacemaker, a causa delle possibili interferenze elettromagnetiche sugli apparecchi cardiocircolatori. - In caso d'incendio utilizzare estintore omologato e non utilizzare mai acqua. Dovesse presentarsi un problema, o doveste aver bisogno di qualche chiarimento, vogliate contattare l'ufficio SERVICE della Mase. 4.2 Prescrizioni per la sicurezza durante l'installazione e la messa in servizio - Il personale incaricato all'installazione o messa in opera del gruppo elettrogeno dovrà sempre usare casco protettivo; indossare scarpe antinfortunistiche e la tuta. - Usare guanti antinfortunistici. - Non lasciare parti smontate, attrezzi o quant'altro non facente parte dell'impianto sul motore o nelle vicinanze. - Non lasciare mai liquidi infiammabili o stracci imbevuti di liquido infiammabile in prossimità del gruppo elettrogeno, vicino ad apparecchiature elettriche (incluse lampade) o parti d'impianto elettrico. - Prendere precauzioni per evitare il pericolo di folgorazioni. 5 UTILIZZO DEL GENERATORE 5.1 Controlli preliminari Prima di iniziare qualsiasi procedura di avviamento è estremamente importante "familiarizzare" con il gruppo elettrogeno e i suoi comandi. Si dovrà inoltre eseguire un controllo di sicurezza visivo della macchina e dell'installazione. Qualsiasi fonte di pericolo reale o potenziale deve essere eliminata prima di procedere. - Individuare la posizione dei pulsanti di arresto di emergenza, interruttori e altri sistemi di emergenza presenti sul gruppo elettrogeno. - Conoscere le particolari procedure di emergenza attinenti all'installazione in questione. - che lolio sia a livello tramite lastina [fig. 7, rif. 2], vedi tabella "A" oli consigliati, [fig. 8 ] - Che tutti i punti di ancoraggio del gruppo siano adeguatamente serrati. - Che tutte le utenze elettriche siano disinserite per evitare di avviare il gruppo sotto carico. - Che le linee acqua e combustibile siano correttamente collegate IS 18 - 21 - 24 - 27 50 Hz - Che tutti i collegamenti elettrici siano stati eseguiti in maniera corretta e non vi siano connessioni in cattivo stato. - Che il rubinetto dell'acqua sia aperto [fig. 6, rif. 2] - Che sia stato riempito manualmente il tratto del circuito acqua dalla pompa alla valvola nel caso sia montata una valvola di non-ritorno sulla presa a mare (come consigliato sul manuale d'installazione) [fig. 4, rif. 1]. 5.2 Disareazione dell'impianto di alimentazione La presenza di bolle daria, allinterno dellimpianto di alimentazione, è causa di funzionamento irregolare del motore o d'incapacità di raggiungere il numero di giri nominale. Laria può penetrare, allinterno del circuito di alimentazione, attraverso una giunzione non perfettamente a tenuta (tubazione, filtri, serbatoio) o quando il carburante, allinterno del serbatoio, è al livello minimo. Per eliminare le bolle daria , prima di tutto, rimuovere la causa che ne ha permesso lentrata ed eseguire le seguenti operazioni: 1 - Agire manualmente sulla leva della pompa carburante [fig.7, rif.3] fino a quando non è fuoriuscita tutta laria contenuta allinterno dellimpianto di alimentazione. 2 - Ripetere le operazioni sopra descritte se il funzionamento del motore non risultasse ancora regolare. Per informazioni più dettagliate consultare il manuale fornito dal costruttore del motore che accompagna ogni gruppo elettrogeno. 5.3 Avviamento Prima di avviare il gruppo accertarsi che i controlli preliminari, descritti al paragrafo 5.1, siano stati eseguiti. Procedere allavviamento premendo il pulsante di START posto pannello di comando [fig.4, rif. 4] e rilasciare solo ad avviamento avvenuto facendo attenzione a non superare 15 sec. per ogni tentativo e rispettando una pausa di almeno 30 sec. Si noterà laccensione per qualche secondo di tutte le spie di segnalazione del modulo protezioni motore [fig. 4, rif. 5] e se non vi sono anomalie sul motore o sul generatore resterà accesa solo la spia verde di RUN [fig. 4, rif.6] ad indicare che il gruppo è avviato e il funzionamento è regolare. Ripetuti tentativi di avviamento, con esito negativo, possono causare un eccessivo accumulo di acqua nell'impianto di scarico, con possibili gravi conseguenze al motore. Qualora si verificasse la condizione di difficoltoso avviamento del motore è indispensabile non insistere a lungo senza aver prima chiuso il rubinetto della presa a mare [fig. 6, rif. 2] . I 5.4 Arresto del gruppo Il gruppo si arresta premendo il pulsante [fig.4, rif.4] in posizione di STOP sul cruscotto comandi . Prima di arrestare il gruppo elettrogeno si consiglia di farlo funzionare, per alcuni minuti, senza prelevare corrente elettrica, al fine di consentire un graduale raffreddamento del motore e dell'alternatore. 6 PROTEZIONI I gruppi elettrogeni sono dotati di una serie di protezioni che li salvaguardano da un utilizzo non corretto e da inconvenienti che ne possono pregiudicare l'integrità. Quando il gruppo elettrogeno si arresta per l'intervento di una protezione, sul modulo protezioni motore [fig. 5, rif. 5], del pannello comandi, si illuminerà la spia di segnalazione relativa all'avaria verificatasi. 6.1 Protezione bassa pressione olio Interviene spegnendo il gruppo quando la pressione dellolio motore è insufficiente; il suo intervento è segnalato dallaccensione della spia "OIL" [fig. 4, rif. 7]. E generalmente sufficiente reintegrare la quantità di olio mancante per poter riavviare il gruppo. La protezione bassa pressione olio non da una indicazione sul livello dellolio motore in coppa. Un controllo giornaliero di questo livello è quindi indispensabile. Il motore funziona correttamente se non supera un'inclinazione massima di 30° per tempi inferiori a 3 minuti; 25° senza limiti di tempo, sia sull'asse longitudinale che su quello trasversale. Qualora il motore si trovasse nelle condizioni di funzionare a inclinazioni maggiori, il rischio che corre è quello di insufficiente lubrificazione o aspirazione dal filtro aria di olio lubrificante. 6.2 Protezione alta temperatura acqua Interviene spegnendo il gruppo elettrogeno qualora la temperatura del liquido refrigerante del motore sia troppo elevata o venga a mancare la circolazione dell'acqua di mare. L'intervento della protezione è segnalato dallaccensione della spia [fig. 4, rif. 10]. Il gruppo elettrogeno deve essere riavviato solo dopo aver individuato ed eliminato la causa dellanomalia. I - 19 IS 18 - 21 - 24 - 27 50 Hz I 6.3 Protezione sovratemperatura alternatore Interviene spegnendo il gruppo elettrogeno quando si verifica un sovraccarico termico allalternatore. L' intervento della protezione è segnalato dallaccensione della spia [fig. 4, rif. 8] . Il gruppo elettrogeno può essere riavviato dopo qualche minuto quando la temperatura degli avvolgimenti dellalternatore si riporta ai valori normali. Si raccomanda, comunque, di ricercare ed eliminare le cause che ne ha provocato lintervento. Nel caso di intervento di una delle protezioni sopra indicate, dopo aver accertato ed eliminato la causa dellintervento, è necessario premere il pulsante STOP per resettare il pannello di comando (il segnale rimarrebbe altrimenti in memoria inibendo l'avviamento del motore). 6.4 Protezione da cortocircuito e sovraccarico Il gruppo elettrogeno è protetto da cortocircuito e sovraccarico elettrico. Un interruttore magnetotermico bipolare [fig. 4, rif. 2] interrompe l'erogazione della corrente elettrica al verificarsi di un cortocircuito o quando la corrente elettrica erogata supera il valore nominale. Prima di ripristinare il contatto sollevando la leva dell'interruttore magnetotermico scollegare gli utilizzi. 6.5 Protezione da cortocircuito dell'impianto elettrico in bassa tensione. In caso di cortocircuito dell'impianto elettrico in bassa tensione un interruttore termico [fig. 4, rif.3] interromperà il circuito arrestando il gruppo elettrogeno. In questo caso le spie di segnalazione del modulo protezioni motore saranno tutte spente e non sarà possibile ritentare l'avviamento. Prima di ripristinare il circuito elettrico, premendo il pulsante posto sull'interruttore termico [fig. 4, rif. 3] è necessario far ricercare ed eliminare, ad un tecnico specializzato, la causa del cortocircuito. 7 MANUTENZIONE 7.1 Premessa Qualsiasi intervento di manutenzione al gruppo elettrogeno va effettuato a motore spento , dopo averlo lasciato raffreddare a sufficienza e va eseguito da personale autorizzato o debitamente istruito. Si raccomanda di seguire scrupolosamente le indicazioni riportate sul manuale fornito dal Costruttore del motore, allegato ad ogni gruppo elettrogeno. I - 20 E' importante controllare ed eseguire la manutenzione del gruppo elettrogeno regolarmente e gli interventi devono essere decisi in base alle ore di funzionamento. Per procedere alla manutenzione è necessario rimuovere i portelli laterali e quello superiore. Prima di accedere al gruppo elettrogeno staccare un polo della batteria di avviamento, al fine di evitare avviamenti accidentali. 7.2 Manutenzione ordinaria del motore Gli interventi periodici da eseguire sul motore sono indicati sulla tabella TAB. "B" ripotata al paragrafo 6.15. Per informazioni più dettagliate consultare il manuale fornito dal costruttore del motore che accompagna ogni gruppo elettrogeno. Controllare il livello dellolio motore tramite lapposita astina graduata [fig. 7, rif. 2]. Il livello deve sempre essere compreso fra le tacche MAX e MIN riportate sullastina [fig. 7, rif. 1] . 7.3 Cambio dell'olio motore e filtro olio La capacità carter motore è di 10.2 litri I rabbocchi e i caricamenti di olio motore vanno eseguiti attraverso i fori [fig. 3, rif.17 ]. Per la sostituzione dellolio nel carter motore si procede togliendo lastina di indicazione livello [fig.7, rif. 2] e agendo sull'apposita pompa di estrazione [fig.7, rif. 7] dopo aver tolto la vite che funge da tappo. Si consiglia di eseguire lo svuotamento con olio ancora sufficientemente caldo in modo da consentire un agevole deflusso. Per gli oli consigliati si veda la tabella TAB."A", riportata in fig. 8. - Il primo cambio dell'olio motore deve essere effettuato dopo 50h di utilizzo del gruppo elettrogeno; per il secondo e successivi è sufficiente una sostituzione ogni 200h. - Per informazioni più dettagliate sulla lubrificazione del motore, consultare il manuale uso e manutenzione del motore allegato al gruppo elettrogeno. - Non disperdere nell'ambiente l'olio esausto o carburante in quanto prodotti inquinanti. Consegnare l'olio lubrificante esausto presso gli appositi Centri di Raccolta incaricati dello smaltimento. IS 18 - 21 - 24 - 27 50 Hz I Non portare a contatto della pelle Non portare a contatto della pelle l'olio motore. Durante le operazioni di manutenzione usare guanti e occhiali protettivi. In caso di contatto con olio lubrificante lavare immediatamente e accuratamente la parte con acqua e sapone. il carburante. Durante le operazioni di manutenzione usare guanti e occhiali protettivi. In caso di contatto con carburante lavare immediatamente e accuratamente la parte con acqua e sapone. Per sostituire la cartuccia del filtro olio motore [fig. 3, rif.16] è necessario svitarla dall'apposito supporto utilizzando appropriati attrezzi reperibili normalmente in commercio. Riposizionare la nuova cartuccia avendo cura di lubrificare la guarnizione di gomma ad anello. Il primo cambio deve essere eseguito dopo 50 h di funzionamento del gruppo elettrogeno, per il secondo e i successivi rispettare un intervallo di 400 h. Per maggiori informazioni consultare il manuale di uso e manutenzione del motore. Per la sicurezza del motore utilizzare solo parti di ricambio originali. Ad operazioni ultimate pulire accuratamente tutte le parti del gruppo elettrogeno sporche di olio e carburante. 7.4 Pulizia del filtro aria I gruppi elettrogeni della serie IS dispongono di un filtro aria a secco che impedisce l'entrata nella camera di combustione di corpi estranei. Per la sua manutenzione è sufficiente pulire con gasolio la massa filtrante una volta all'anno, per liberarla dalla presenza di impurità. Non disperdere nell'ambiente i liquidi utilizzati per il lavaggio del filtro aria che devono essere versati presso appositi Centri di Raccolta. 7.5 Sostituzione del filtro carburante Per garantire una lunga durata ed il corretto funzionamento del motore, è estremamente importante sostituire periodicamente la cartuccia del filtro carburante, rispettando i tempi indicati dal costruttore del motore riportati alla tabella al paragrafo 7.15. Tale operazione si esegue tramite i seguenti passaggi: - svitare completamente la ghiera del supporto [fig.3, rif.13] - rimuovere la vecchia cartuccia e posizionare la nuova. - per il rimontaggio ripetere le operazioni con sequenza inversa. A sostituzione avvenuta è necessario disareare l'impianto di alimentazione eseguendo le operazioni descritte al paragrafo 5.2 Ad operazione ultimata pulire accuratamente tutte le tracce di carburante e versare gli stracci utilizzati presso gli appositi Centri di Raccolta. 7.6 Controllo liquido refrigerante E' necessario controllare periodicamente il livello del liquido refrigerante del circuito chiuso di raffreddamento. Gli indici di riferimento, per tale controllo, sono stampigliati sul vaso di espansione [fig. 3, rif. 11]. Qualora il livello fosse insufficiente, inserire liquido refrigerante all'interno del vaso di espansione, facendo attenzione a non superare l'indice di livello massimo. Non aprire mai il tappo di chiusura del vaso di espansione [fig. 3, rif. 11] e del serbatoio [fig. 3, rif. 26] a motore caldo, per evitare pericolose fuoriuscite di liquido refrigerante. 7.7 Controllo della tensione delle cinghie trapezoidali Una cinghia trapezoidale viene usata per trasmettere il moto di rotazione dalla puleggia dell'albero motore a quella della pompa acqua di mare [fig. 8, rif. 1] . Un'eccessiva tensione della cinghia ne accelera l'usura, mentre una scarsa tensione fa girare a vuoto le pulegge e non permette un sufficiente circolo di acqua. Regolare la tensione della cinghia nel modo seguente: allentare le due viti di regolazione [fig. 8, rif. 2] e spostare la pompa acqua di mare verso l'esterno per aumentare la tensione, o verso l'interno per diminuirla. Bloccare le viti e verificarne la tensione. Una giusta tensione della cinghia è quella che permette, sotto lo sforzo di spinta di 8 Kg, un cedimento di circa 5 mm [fig.8 ]. Una seconda cinghia è utilizzata per trasmettere il moto di rotazione dalla puleggia dell'albero motore a quella della pompa del liquido a circuito chiuso e dell'alternatore DC caricabatteria [fig.8, rif.3]. Regolare la tensione della cinghia nel modo seguente: allentare la vite di registro [fig.8, rif.4] e spostare l'alternatore DC caricabatteria [fig. 8, rif. 5] verso l'esterno per aumentare la tensione e verso l'interno per diminuirla. Una giusta tensione della cinghia è quella che permette, sotto lo sforzo di spinta di 8 Kg, un cedimento di circa 10 mm [fig. 8 ]. I - 21 IS 18 - 21 - 24 - 27 50 Hz I Per evitare che la cinghia giri a vuoto, non sporcarla con olio. Pulire la cinghia con benzina se al controllo risultasse sporca di olio. Non avvicinarsi con le mani alla cinghia trapezoidale o alle pulegge a motore avviato. 7.8 Svuotamento impianto di raffreddamento Per eseguire la manutenzione sullo scambiatore acquaaria o sull'impianto di raffreddamento è necessario vuotare il circuito di aspirazione dall'acqua di mare. Tale operazione si esegue operando nel seguente modo: - chiudere il rubinetto di presa a mare [fig.6, rif.2]; - aprire l'apposito rubinetto di scarico [fig.6, rif.3] fino a far defluire completamente l'acqua; - richiudere il rubinetto di scarico. Riaprire il rubinetto di presa acqua a mare prima di riavviare il gruppo elettrogeno. 7.9 Sostituzione del liquido refrigerante Ogni anno sostituire il liquido refrigerante all'interno del circuito chiuso di raffreddamento come segue: - Togliere lo sportello laterale (fig.3, rif.3) . - Munirsi di un tubo in gomma, della lunghezza di circa 50 cm e con diametro interno di 30/40 mm. - Infilare il tubo sotto il rubinetto (fig.7, rif.4) e collegarlo all'interno di un recipiente della capacità di circa 10 litri. - Aprire il tappo e svuotare completamente il circuito chiuso di raffreddamento. Ad operazione ultimata chiudere il rubinetto e riempire nuovamente il circuito con nuovo liquido refrigerante. Non disperdere nell'ambiente liquido refrigerante esausto in quanto prodotto inquinante. Consegnare il liquido refrigerante esausto presso gli appositi Centri di Raccolta incaricati dello smaltimento. 7.10 Sostituzione anodi di zinco A protezione dello scambiatore di calore acqua-aria [fig.9, rif.1] e dello scambiatore di calore acqua - liquido [fig.9, rif. 2] ,da correnti galvaniche, sono stati inseriti al loro interno due anodi sacrificali in zinco.[fig.9, rif. 4] E' necessario controllarne periodicamente lo stato di usura ed eventualmente operare la loro sostituzione al fine di evitare che le correnti galvaniche corrodano irreparabilmente lo scambiatore. Si consiglia di controllare gli zinchi almeno una volta al mese, a gruppo nuovo, per verificarne la velocità di consumo, e successivamente regolarsi di conseguenza. I - 22 E' comunque opportuno sostituire gli anodi di zinco almeno una volta all'anno. In fig. 9 sono indicati i punti dove sono collocati gli anodi di zinco 7.11 Manutenzione della pompa acqua mare Almeno una volta all'anno è necessario controllare l'integrità della girante in gomma della pompa acqua mare (fig.7 rif. 5). Prima di aprire la pompa acqua mare per l'ispezione della girante è necessario svuotare l'impianto di raffreddamento dall'acqua di mare come descritto al paragrafo 7.8. Per accedere alla girante è necessario rimuovere il coperchio di chiusura (fig.7 rif. 6) e con l'ausilio di un paio di pinze estrarre la girante tirandola con forza verso l'esterno. Per il rimontaggio di una nuova girante ripetere le operazioni sopra descritte operando in sequenza inversa. 7.12 Manutenzione dell'alternatore L'alternatore impiegato su questo modello di generatore è di tipo sincrono, autoeccitato,. Tale modello di alternatore, privo di collettore e spazzole non necessita di operazioni di manutenzione particolari. I controlli e le manutenzioni periodiche si limitano ad eliminare eventuali tracce di umidità e ossidazione che potrebbero danneggialo. 7.13 Manutenzione della batteria Si consiglia di utilizzare, per l'avviamento di tutti i modelli di gruppo elettrogeno, una batteria da 80 A/h per temperatura ambientale superiore a 0° C e da 100 A/h per temperature inferiori. Prima di installare una nuova batteria è importante che questa sia stata sottoposta ad un ciclo completo di ricarica. Controllare almeno una volta al mese il livello dell'elettrolita ed eventualmente rabboccare con acqua distillata. Durante un lungo periodo d'inutilizzo del gruppo elettrogeno è consigliabile scollegare la batteria e immagazzinarla in un luogo asciutto e a temperatura superiore a 10° C, ed eseguire una volta al mese un ciclo completo di ricarica. Se la batteria viene lasciata per lunghi periodi completamente scarica, si rischia di danneggiarla irreparabilmente. E' necessario aver cura di proteggere con grasso di vaselina il morsetto positivo della batteria per prevenire corrosione e formazione di ossido. Per rabbocchi con acido solforico è indispensabile utilizzare soluzioni già preparate IS 18 - 21 - 24 - 27 50 Hz Le operazioni di rabbocco delle batterie, con acqua distillata e o con acido, vanno eseguite con guanti in gomma e occhiali protettivi per evitare contatti accidentali di acido solforico con la pelle. In caso di contatto accidentale lavare con cura la parte interessata con acqua e sapone e consultare un medico. Prima di procedere alla ricarica delle batterie controllare il livello dell'elettrolita ed eventualmente ripristinarlo con acqua distillata. Tale operazione va ripetuta a ciclo di ricarica ultimato. 7.14 Periodi di inattività Avviare il gruppo elettrogeno almeno una volta al mese. Se il gruppo elettrogeno deve rimanere inutilizzato per un lungo periodo, è necessario procedere alle seguenti operazioni: - Sostituire l'olio motore. - Sostituire la cartuccia filtro olio (vedi par.7.3). - Sostituire la cartuccia del filtro combustibile (vedi par. 7.5). - Togliere gli iniettori e inserire all'interno di ciascun cilindro 2 cc di olio motore e far eseguire alcuni giri al motore agendo manualmente sulla puleggia dell'albero motore. Rimontare gli iniettori. - Sostituire le pastiglie di zinco (vedi par. 7.10) - Far aspirare, dal tubo presa acqua di mare, del liquido anticongelante, la cui funzione è di proteggere gli scambiatori dalle basse temperature e di lubrificare la girante della pompa acqua di mare e le parti metalliche interne all'impianto di raffreddamento. - Scollegare la batteria di avviamento e collocarla in ambiente asciutto (vedi par. 7.13) - Scollegare il tubo dello scarico a mare dal collettore del motore. - Pulire il filtro acqua di mare - Chiudere il rubinetto della presa acqua di mare - Svuotare la marmitta dall'acqua di mare - Pulire e lubrificare la valvola antisifone, se installata (siphon break) I 7.15 Tavola degli interventi programmati OPERAZIONE Controllo livello olio motore Controllo livello liquido refrigerante Controllare che non vi siano perdite di olio Controllare che non vi siano perdite di carbur. Controllare che non vi siano perdite di liquido Regolazione tensione cinghia trapezoidale Verifica carica batteria Pulire filtro combustibile Regolazione della tensione cinghie * Cambio olio motore Controllare la girante pompa acqua mare Controllare il numero di giri motore Controllare l'integrità dei collegamenti elettr. Sostituzione filtro combustibile * Sostituzione filtro olio Controllare iniettori Controllare la fasatura iniezione Regolazione gioco valvola presa/scarico Controllare la pompa di iniezione combustib. Controllo livello elettrolita batteria Pulire e disossidare le parti metalliche Pulizia filtro aria Sostituzione totale liquido refrigerante Sostituzione anodi di zinco ORE 10 10 20 20 20 100 100 200 200 200 400 400 400 400 400 400 400 400 1000 mens. anno anno anno anno TAB. "B" * Eseguire il primo intervento dopo 50 ore i successivi secondo gli intervalli previsti. 7.16 Tavola guasti Il motorino di avviamento gira ma il motore principale non si avvia. - Verificare la presenza di carburante allinterno del serbatoio. (Rifornire) - Verificare se lelettromagnete di stop è in posizione di tiro. (Consultare Centro Assistenza) - Eseguire l'operazione di spurgo da bolle d'aria all'interno del circuito di alimentazione. (Vedi par. 5.2) Il modulo protezioni motore non si attiva premendo il pulsante START - Controllare se l'interruttore termico [fig. 4, rif. 3] di protezione è aperto. (Ripristinare il contatto premendo sul pulsante rosso [fig. 4, rif. 3] ) - Controllare i cavi e i morsetti di collegamento alla batteria e le connessioni elettriche. (Ricollegare ) - Controllare lintegrità della batteria. (Ricaricare o sostituire) Il gruppo elettrogeno si spegne durante il periodo di lavoro. - Verificare se è stata attivata una protezione con laccensione della relativa spia. (Rimuoverne la causa e ritentare lavviamento) I - 23 IS 18 - 21 - 24 - 27 50 Hz I 9 ROTTAMAZIONE - Controllare la presenza di carburante nel serbatoio. (Ripristinare il livello) Il motore ha un'alta fumosità allo scarico - Controllare che il livello olio in coppa non superi l'indice MAX. (Ripristinare il livello) - Verificare che il gruppo non sia in sovraccarico. - Controllare la taratura degli iniettori. (Consultare Centro Assistenza) Il motore funziona in maniera irregolare. - Controllare i filtri del carburante. (Sostituire) - Eseguire l'operazione di spurgo da bolle d'aria all'interno del circuito di alimentazione. (Vedi par. 4.2) La tensione dell'alternatore è troppo bassa. - Controllare il nro giri motore: 1560 rpm senza utilizzi collegati a 50Hz - Correggere il valore della tensione agendo sul regolatore elettronico - Regolatore di tensione guasto (sostituire). Batteria di avviamento scarica. - Controllare il livello dell'elettrolita all'interno della batteria. (Ripristinare il livello) - Controllare il funzionamento dell'alternatore DC. - Controllare l'integrità della batteria Il gruppo elettrogeno non eroga tensione. - Controllare che l'interruttore magnetotermico [fig.4 rif.2 ] sia in posizione "ON". Se tale operazione non ha esito positivo contattare un Centro di Assistenza Autorizzato 8 TRASPORTO E MOVIMENTAZIONE Per il trasporto, tutti i gruppi elettrogeni sono fissati mediante viti, ad un pallet. Per movimentazione su barca utilizzare i ganci di sollevamento del motore posti sotto il portello di accesso superiore [fig.3, rif.2]. Agganciare con cura e sollevare lentamente, senza effettuare movimenti bruschi. - Agganciare il gruppo elettrogeno in punti diversi da quello indicato potrebbe causare danni al gruppo elettrogeno stesso o diventare pericoloso per gli operatori. - Durante la fase di sollevamento tutto il personale deve stare a debita distanza e gli operatori devono essere muniti di elmetto protettivo. I - 24 Completato il ciclo di vita del gruppo elettrogeno questo va consegnato alle ditte incaricate alla rottamazione. Non gettare il gruppo elettrogeno in discarica in quando molte parti che lo compongono sono inquinanti per l'ambiente. 10 RIFERIMENTI SCHEMA ELETTRICO Vedere Fig. 10 1 Interruttore magnetotermico 2 Contaore 3 Alternatore 4 Rotore 5 Statore 6 Regolatore di tensione 7 Morsettiera di potenza 8 PULSANTE ARRESTO DI EMERGENZA 9 Interruttore termico 10 Pulsante START / STOP 11 Modulo protezione motore 12 Morsettiera 13 Connettore per collegamento pannello a distanza 14 Indicato relivello carburante 15 Indicatore di temperatura acqua 16 Indicatore di pressione olio 17 Sensore alta temperatura acqua 18 Sensore alta temperatura liquido refrigerante 19 Pressostato olio 20 Alternatore carica batteria 21 Elettromagnete stop 22 Motorino davviamento 23 Morsetti di collegamento batteria 24 Cavo di collegamento pannello 25 Pulsante START / STOP 26 Strumento indicatore pressione olio 27 Strumento indicatore temperatura liquido refrigerante 28 Kit pannello comando a distanza con strumenti 29 Kit pannello comando a distanza 30 Vite di terra IS 18 - 21 - 24 - 27 50 Hz I Vedere Fig. 11 1 2 3 4 5 6 7 8 9 10 11 12 13 14 15 16 17 18 19 20 21 22 23 24 25 26 27 ALTERNATORE ALTERNATORE RICARICA BATTERIA BATTERIA CONNETTORE 12P CONTAORE DIODO ELETTROMAGNETE STOP MODULO PROTEZIONE MOTORE MOTORINO DI AVVIAMENTO PRESSOSTATO OLIO PULSANTE ARRESTO DI EMERGENZA REGOLATORE ELETTRONICO DI TENSIONE ROTORE STATORE TERMICO TERMOSTATO MOTORE STRUMENTO INDICATORE TEMPERATURA STRUMENTO INDICATORE PRESSIONE OLIO MAGNETOTERMICO 2P COLLEGAMENTO DI TERRA RELE RELE PULSANTE START-STOP TERMOSTATO ALTERNATORE SENSORE TEMPERATURA SENSORE PRESSIONE OLIO CONNETTORE 6P I - 25 I IS 18 - 21 - 24 - 27 50 Hz index GB Pictures .................................................................. 2 Wiring diagram ...................................................... 8 1 1.1 1.2 1.3 1.5 1.6 1.7 1.8 2 2.1 2.2 2.3 2.4 GENERAL INFORMATION ............................ 11 Purpose and field of application of the manual11 Symbols ....................................................... 11 Reference documents ................................... 12 Reference regulations and ............................ 12 legislative provisions ..................................... 12 Machine identification ................................... 12 Generetors conposition ................................. 13 Instrument panel ........................................... 13 GENERAL INFORMATION ............................ 14 Reference documents ................................... 14 Reference regulations and legislative provisions 14 Marking ........................................................ 14 Identification of the generator unit ................. 14 7 7.1 7.2 7.3 7.4 7.5 7.6 7.7 7.8 7.9 7.10 7.11 7.12 7.13 7.14 7.15 7.16 MAINTENANCE ............................................ 20 Preamble ...................................................... 20 Ordinary engine maintenance ....................... 20 Engine oil and oil filter change ...................... 20 Air filter cleaning ........................................... 21 Fuel filter replacement .................................. 21 Coolant check .............................................. 21 V-belt tension check ..................................... 21 Emptying the cooling system ....................... 21 Coolant replacement ..................................... 21 Zinc anode replacement ................................ 22 pump maintenance ....................................... 22 Alternator maintenance ................................. 22 Battery maintenance .................................... 22 Periods of inactivity....................................... 22 Table of scheduled maintenance ................... 23 Troubleshooting ............................................ 23 GENERATOR CARACTERISTIC .................... 15 8 TRANSPORT AND HANDLING ..................... 23 3.1 General caracteristic .................................... 15 3.2 Cooling system ............................................ 15 3.3 Control panel ................................................ 15 3.4.1 Data sheet IS 18 ......................................... 16 3.4.1.1 Data sheet IS 21 ....................................... 16 3.4.1.2 Data sheet IS 24 ....................................... 17 3.4.1.3 Data sheet IS 27 ....................................... 17 9 SCRAPPING ................................................. 23 10 WIRING DIAGRAM REFERENCES ................ 24 3 4 SAFETY REGULATIONS ............................... 18 4.1 4.2 General precautions ..................................... 18 Prescriptions for safety during installation ..... 18 and setup ..................................................... 18 5 USING THE GENERATOR ............................ 18 5.1 5.2 5.3 5.4 Preliminary checks ....................................... 18 Bleeding the fuel system .............................. 19 Starting ........................................................ 19 Stopping ....................................................... 19 6 6.1 6.2 6.3 6.4 6.5 GB - 10 PROTECTIONS ............................................. 19 Low oil pressure protection ........................... 19 High water temperature protection ................ 19 Alternator overheating protection ................... 19 Protection against short-circuit and overload . 20 Protection against short-circuit of the ........... 20 low-voltage electric system ........................... 20 IS 18 - 21 - 24 - 27 50 Hz GB 1 GENERAL INFORMATION Carefully consult this manual before proceeding with any operation on the generator. FAILURE TO RESPECT THE SPECIFICATIONS CONTAINED IN THIS USE AND MAINTENANCE MANUAL WILL RESULT IN FORFEITURE OF THE GUARANTEE ON THE PRODUCT 1.1 Purpose and field of application of the manual Thank you for choosing a mase product. This manual has been drawn up by the manufacturer with the purpose of providing essential information and instructions for proper use and maintenance in conditions of safety and constitutes an integral part of the generator equipment. The manual must be kept safely, protected from any agent which might damage it, for the entire life of the generator and must accompany the generator if transferred to another user or owner. The information contained in the manual is addressed to all those persons involved in the operating life cycle of the generator, and is necessary to inform both those who effectively carry out the different operations and those who coordinate the activities, arrange the necessary logistics and regulate access to the place where the generator will be installed and operated. The manual defines the purpose for which the generator was constructed and contains all the information necessary to guarantee safe and proper use. Constant observance of the instructions contained in this manual guarantees the safety of the operator, operating economy and a longer life of the generator. It is warmly recommended to carefully read the contents of this manual and the reference documents; only thus can regular functioning and reliability of the generator be guaranteed over time, and protection against damage to persons or things. The drawings are provided by way of example. Even if the generator in your possession differs considerably from the illustrations contained in this manual, the safety of the generator and the information provided are nevertheless guaranteed. To facilitate consultation, it has been divided into sections identifying the main concepts; for a quick look at the topics, consult the index. Note: the information contained in this publication is correct at the time of printing. The manufacturer in his pursuit of a policy of constant development and upgrading of the product reserves the right to make modifications without prior notice. 1.2 Symbols Those parts of the text not to be ignored are highlighted in bold type preceded by a symbol, as illustrated and defined below. Indicates that particular attention must be paid in order to prevent running into serious danger which could lead to death or possible hazards to the health of personnel. A condition which may occur during the lifetime of a product, system or plant considered at risk regarding damage to persons, property, the environment or economic loss. Indicates that particular attention must be paid in order to prevent serious consequences which could result in damage to tangible goods, such as the resources or the product. Instructions of particular importance. GB - 11 IS 18 - 21 - 24 - 27 50 Hz GB 1.3 Reference documents The instructions for use provided with each generator are made up of a collection of documents of which this manual represents the General Part. Normally, the following documents are provided: a - CE declaration of conformity. b - Instruction manual for use and maintenaqnce of the generators (this manual). c - Installation manual of the generators. d - Wiring diagrams of the control panels and power board. e - Engine use and maintenance manual f - Alternator use and maintenance manual g - Any other manuals for the optional accessories issued by the respective manufacturers. h - List of Mase Service Centres i - Certificate of guarantee l - Guarantee card 1.4 Facsimile of CE declaration of conformity The generators constructed by mase, intended for countries in the European Community, are in conformity with the applicable EEC Directives (see 1.5) and are furnished with an EC declaration of conformity (Fig. B). 1.5 Reference regulations and legislative provisions All the mase diesel generators are designed and manufactured in compliance with the legislation in force. The generator and its components are constructed in accordance with the following applicable regulations and directives: EN 292-1/2: Machine safety regulations. General design principles. EN 294: Machine safety regulations. Safety distances to prevent contact of dangerous parts with the upper limbs. ISO 3046: Alternate internal-combustion engines. IEC 34-1: Rotary electric machines. ISO 8528-1: Alternate current generators driven by alternate internal-combustion engines. EN 60204-1 (CEI 44-5): - Machine safety. - Electrical equipment of machines. EN 60439-1 (CEI 17-13/1): Assembled protection and manoeuvring equipment for low voltage (low-voltage panels). GB - 12 EN 50081-1/2 (Electromagnetic compatibility): General regulation on emission - Part 1: Residential, commercial and light-industry environments. - Part 2: Industrial environment. EN 50082-1/2 (Electromagnetic compatibility): General regulation on immunity. - Part 1: Residential, commercial and light-industry environments. - Part 2: Industrial environment. 89/392/EEC and subsequent amendments contained in the Directives 91/368/EEC, 93/44/EEC and 93/68/EEC: Essential machine requirements for safety and health protection (Machine directive). 73/23/EEC and subsequent amendments contained in the Directive 93/68/EEC: Guarantee of safety of electrical material intended for use within certain voltage limits (Low Voltage directives). 1.6 Machine identification See Fig.2 1 - Machine name 2 - Machine code 3 - Serial number 4 - Rated power 5 - Declared frequency 6 - Rated power factor 7 - Rated voltage 8 - Rated current 9 - Degree of protection 10 - Class of isolation 11 - Temperature max. of use 12 - Altitude max. of use 13 - Noise level 14 - Performance class 15 - Year of construction 16 - Manufacturer - Adress 17 - Weight The machine code number, the serial number and the year of construction must always be quoted when contacting the manufacturer for information, requests for spare parts, etc. IS 18 - 21 - 24 - 27 50 Hz GB 1.7 Generetors conposition See Fig.3 The generators are essentially composed of the following components: 1 - Soundproof casing 2 - Top access door 3 - Side access door 4 - Instrument panel 5 - Anchoring brackets 6 - Exhaust and cooling water pipe fitting 7 - Seawater intake connection pipe fitting 8 - Connection pipe fittings to fuel tank 9 - Connection terminals to battery 10 - Engine air filter 11- Coolant expansion tank 12 - Engine oil extraction pump 13 - Diesel fuel filter cartridge 14 - Seawater pump 15- Fuel pump 16 - Oil filter cartridge 17 - Oil fillercap 18 - Electric line connection box 19 - Battery charger alternator 20 - Collector cooled to water 21 - Water/air heat exchanger 22 - Exhaust manifold 23 - Starter motor 24 - Remote control panel connector 25 - RPM adjusting screw of engine 26 - Water/Air intercooler 1.8 Instrument panel See Fig.4 Each generators is fitted with an instrument panel for the controls with the following components 1 - Hour counter 2 - Magnetothermal switch 3 - DC current thermal switch 4 - START/STOP-Preheat button 5 - Engine protection module 6 - RUN light engine running 7 - OIL light low oil pressure 8 - ºC light high engine temperature 9 - BATT light battery charger operating 10 - ºC light high alternator temperature 11 - Preheat ligh - (not present) 12 - Fuel leak (version RINA) GB - 13 IS 18 - 21 - 24 - 27 50 Hz GB 2 GENERAL INFORMATION 2.1 Reference documents The instructions for use provided with each generator are made up of a collection of documents of which this manual represents the General Part. The following documents are normally provided separate. a CE declaration of conformity. b Instruction manual for use of the generators, (this manual). c Engine use and maintenance manual. d List of mase Service Centres. e Mase Warranty certificate. f Warranty card. 2.2 Reference regulations and legislative provisions All the mase generators are designed and manufactured in compliance with the legislation in force. The generator and its components are constructed in accordance with the following applicable regulations and directives. 2.4 Identification of the generator unit See Fig.A 1 2 3 4 5 6 7 8 9 10 11 12 13 14 15 16 - Machine name - Machine code - Serial number - Rated power - Declared frequency - Rated power factor - Rated voltage - Rated current - Degree of protection - Class of isolation - Temperature max. of use - Altitude max. of use - Performance class - Year of construction - Manufacturer - Adress - Weight 98/37/EC and subsequent amendments: Essential machine requirements for safety and health protection (Machine directive). 73/23/EEC and subsequent amendments contained in the directive 93/68/EEC : Guarantee of safety of electrical material intended for use within certain voltage limits, (Low Voltage Directives). 1 2000/14/EC Directive on noise emission into the environment. 2.3 Marking The generator identification plate carries all the identification data in accordance with the provisions for EEC marking for those cases where required. Below is a facsimile of the identification plate fixed on the hull of each generator, (Fig.1). 4 3 2 5 6 7 8 10 9 11 15 14 16 12 13 Fig.A The machine code number, the serial number and the year of construction must always be indicated when contacting the manufacturer for information, order of spare parts, etc.. GB - 14 IS 18 - 21 - 24 - 27 50 Hz GB 3. GENERATOR CARACTERISTIC 3.1 General caracteristic The IS generators were designed for easy installation on boats. The soundproof casing, obtained with insulated, painted marine aluminium panels, allows easy access to the engine and the alternator for maintenance and inspection operations, and at the same time strongly reduces noise. The 4-stroke, direct-injection, diesel engine, built by Yanmar, is extremely reliable and robust. Exhaust emission is in conformity with CARB regulations. The synchronous-type, 4-pole, brushless alternator has an electronic voltage regulator (SR7) which guarantees stability to + 5% with respect to the nominal value. The high pickup capacity of the alternator makes the generator particularly suitable for the power supply of electric motors of air conditioners, desalination plants, compressors, etc. The generator has a local control panel [Fig. 3 Ref. 4] on which the controls and control instruments are housed. 3.2 Cooling system The generator engine is cooled by closed-circuit circulation of coolant which yields heat to the seawater by means of a heat exchanger [Fig. 3, Ref. 26]. This heat exchanger was specially designed by mase to make the engine suitable for use at sea. A second heat exchanger cools the air inside the soundproof casing and the air necessary for alternator ventilation. At the time of installation a seawater feed circuit for cooling must be installed and an exhaust system to convey the combustion gas and the water used for cooling to the outside, as indicate in the installation manual. 3.3 Control panel When on it signals that the pre-heating glow plugs have been activated. The glow plugs are turned on before starting by turning the ignition key from the STOP to the ON position; once the operating temperature has been reached, they automatically go off and the engine can be started. - Red [Fig.4, Ref.12] When on it signals that the emergency stop button has been pressed. Turn it to reset it. The following may also be found on the control panel: - A bipolar magnetothermal switch [Fig. 4 Ref. 2] which cuts the power in case of an overload or shortcircuit. - A thermal switch (Fig. 4 Ref. 3] to protect the lowvoltage electric system against short-circuit. - An hour counter (Fig. 4 Ref. 1]. - The generator start/stop button [Fig. 4 Ref. 4]. The generator can be connected with a connector to the remote starting panel, [Fig. 3 Ref. 24] supplied by mase as an optional, and can be installed on the dashboard. Two different remote starting panels are available as shown in Fig. 5. The most simple version has a start/stop button [Fig. 5 Ref. 1] and a green pilot light [Fig. 5 Ref. 2] which, when on, indicates that the generator is running. The second version of the remote starting panel [Fig. 5 Ref. 3] has, in addition to the start/stop button, an instrument which indicates the engine oil pressure value (Fig. 5 Ref. 4] and an instrument which indicates the coolant temperature value [Fig. 5, Ref. 5]. When carrying out maintenance operations on the generator, disconnect the negative pole of the starter battery to prevent accidental starting. A control panel is positioned on the generator for running checks and to start and stop the generator. An engine protection module [Fig. 4 Ref. 5] controls the generator protections, stopping the engine in case of a fault and signalling the fault detected by means of special warning lights. - Green RUN pilot light [Fig. 4 Ref. 6], when on, indicates that the generator is running and no operating fault has been detected. - Red BATT pilot light [Fig. 4 Ref. 9), when on, indicates that the alternator battery charger is faulty. - Red OIL pilot light [Fig. 4 Ref. 7], when on, indicates that the engine oil pressure is insufficient. - Red "°C" [Fig. 4 Ref. 10] pilot light, when on, indicates that the temperature of the coolant or the water circulating in the heat exchangers is too high. - Red "°C" [Fig. 4 Ref. 8] pilot light, when on, indicates that the alternator windings have reached too high temperatures. - Yellow [Fig.4, Ref.11] GB - 15 IS 18 - 21 - 24 - 27 50 Hz GB 3.4.1 Data sheet IS 18 (QJLQH Model Type Cylinders (nr.) Cylinder block material Bore (mm. - in.) Stroke (mm.- in.) Displacement (cc. - CID) Power (hp) RPM Compression ratio Combustion system Engine head material Speed governor Lubrication system Oil sump capacity with filter(l -gl) Engine stop system Fuel pump Fuel pump discharge (cm. - ft) Fuel consumption (l/h - gl/h) Air intake (l/min. - gl/min.) Starting battery (Ah-V) Battery charger (A-V) Starter (kW-V) Max. inclination Water pump flow (l/min. - gl/min.) $OWHUQDWRU Type Regulation Cooling Voltage (V) Frequency (Hz) Amps Max. power (kW) Continuous power (kW) Power factor (cos ø) Insulating class Voltage stability Frequency stability GB - 16 3.4.1.1 Data sheet IS 21 50 Hz Yanmar 4TNE94A Diesel 4 stroke 4 Cast iron 94 - 3.7 100 - 3.9 2776 - 169.4 39 1500 18:1 Direct injection Cast iron Centrifugal mechanical Forced 10.2 - 2.24 Stop solenoid Mechanical 80 - 2,62 7,2 - 1,58 1900 - 416 80 - 12 40 - 12 2.3 - 12 30° 40 - 8.8 50 Hz Synchronous, 4-poles, brush less self-excited Electronic Air/water ( Intercooler W/A ) 115 - 230 50 156 - 78 20 18 1 H ±2% ±5% (QJLQH Model Type Cylinders (nr.) Cylinder block material Bore (mm. - in.) Stroke (mm.- in.) Displacement (cc. - CID) Power (hp) RPM Compression ratio Combustion system Engine head material Speed governor Lubrication system Oil sump capacity with filter(l -gl) Engine stop system Fuel pump Fuel pump discharge (cm. - ft) Fuel consuption (l/h - gl/h) Air intake (l/min. - gl/min.) Starting battery (Ah-V) Battery charger (A-V) Starter (kW-V) Max. inclination Water pump flow (l/min. - gl/min.) $OWHUQDWRU Type Regulation Cooling Voltage (V) Frequency (Hz) Amps Max. power (kW) Continuous power (kW) Power factor (cos ø) Insulating class Voltage stability Frequency stability 50 Hz Yanmar 4TNE94A Diesel 4 stroke 4 Cast iron 94 - 3.7 100 - 3.9 2776 - 169.4 39 1500 18:1 Direct injection Cast iron Centrifugal mechanical Forced 10.2 - 2.24 Stop solenoid Mechanical 80 - 2.62 7.2 - 1.58 1900 - 416 80 - 12 40 - 12 2.3 - 12 30° 40 - 8.8 50 Hz Synchronous, 4-poles, brush less self-excited Electronic Air/water ( Intercooler W/A ) 115 - 230 50 200 - 100 23 21 1 H ±2% ±5% IS 18 - 21 - 24 - 27 50 Hz GB 3.4.1.2 Data sheet IS 24 (QJLQH Model Type Cylinders (nr.) Cylinder block material Bore (mm. - in.) Stroke (mm.- in.) Displacement (cc. - CID) Power (hp) RPM Compression ratio Combustion system Engine head material Speed governor Lubrication system Oil sump capacity with filter(l -gl) Engine stop system Fuel pump Fuel consuption (l/h - gl/h) Air intake (l/h - gl/h) Starting battery (Ah - V) Battery charger (A-V) Starter (kW-V) Max. inclination Water pump flow (l/min. - gl/min.) $OWHUQDWRU Type Regulation Cooling Voltage (V) Frequency (Hz) Amps Max. power (kW) Continuous power (kW) Power factor (cos ø) Insulating class Voltage stability Frequency stability Frequency stability 3.4.1.3 Data sheet IS 27 50 Hz Yanmar 4TNE98 Diesel 4 stroke 4 Cast iron 98 - 3.8 110 - 4.3 3319 - 169.4 46.4 1500 18:1 Direct injection Cast iron Centrifugal mechanical Forced 10.2 - 2.24 Stop solenoid Mechanical 9,6 - 2,1 2500 - 547 80 - 12 40 - 12 2.3 - 12 30° 40 - 8.8 50 Hz Synchronous, 4-poles, brush less self-excited Electronic Air/water ( Intercooler W/A ) 115 - 230 50 226 - 113 26 24 1 H ±2% ±5% ±5% (QJLQH Model Type Cylinders (nr.) Cylinder block material Bore (mm. - in.) Stroke (mm.- in.) Displacement (cc. - CID) Power (hp) RPM Compression ratio Combustion system Engine head material Speed governor Lubrication system Oil sump capacity with filter(l -gl) Engine stop system Fuel pump Fuel consuption (l/h - gl/h) Air intake (l/h - gl/h) Starting battery (Ah - V) Battery charger (A-V) Starter (kW-V) Max. inclination Water pump flow (l/min. - gl/min.) $OWHUQDWRU Type Regulation Cooling Voltage (V) Frequency (Hz) Amps Max. power (kW) Continuous power (kW) Power factor (cos ø) Insulating class Voltage stability Frequency stability Frequency stability 50 Hz Yanmar 4TNE98 Diesel 4 stroke 4 Cast iron 98 - 3.8 110 - 4.3 3319 - 169.4 46.4 1500 18:1 Direct injection Cast iron Centrifugal mechanical Forced 10.2 - 2.24 Stop solenoid Mechanical 10,8 - 2,3 2500 - 547 80 - 12 40 - 12 2.3 - 12 30° 40 - 8.8 50 Hz Synchronous, 4-poles, brush less self-excited Electronic Air/water ( Intercooler W/A ) 115 - 230 50 252 - 126 29 27 1 H ±2% ±5% ±5% GB - 17 IS 18 - 21 - 24 - 27 50 Hz GB 4 SAFETY REGULATIONS 4.1 General precautions Before starting the generator and before starting any lubrication or maintenance operation, it is indispensable for the staff responsible to read and understand all the WARNINGS and all the CAUTION and DANGER indications listed in this manual and in the supplementary documentation furnished. Nevertheless, the manufacturer cannot foresee all the possible circumstances which may lead to potential risks in the effective conditions of use of the generator. Any operations and/or procedures for maintenance not expressly recommended or indicated in the user manuals must always be notified to and approved by the manufacturer. In the event that a procedure not specifically recommended needs to be applied, the user is responsible for assuring that such procedure is safe and does not cause harm to persons or things. The manufacturer declines all responsibility for damage to persons or things deriving from inobservance of the safety regulations. Carefully examine the safety warning plates on the machine and respect the relevant instructions. - Do not permit incompetent persons or without adequate training to use the generator. - Do not permit children or animals to approach the generator when it is in operation. - Do not access the generator with wet hands, since it is a potential source of electric shock if improperly used. - Any inspections of the generator must be carried out with the engine off. Inspections with the engine on are to be carried out by specialised personnel only. - Do not inhale the combustion smoke since it contains substances hazardous to health. - Use the generator with the access doors closed. - Never touch the engine or alternator body with the hands when the generator is running or still hot. - When carrying out maintenance operations on the generator, disconnect the negative pole of the starter battery to prevent accidental starting. - In the event of oil or fuel leaks, clean off thoroughly to prevent creating fire hazard conditions. - In the event of fire, use a homologated fire extinguisher never use water. - Do not allow access to persons wearing a pacemaker because of possible electromagnetic interference with the device. Should any problem arise or should youhaveanyquestions,pleasecontacttheMaseSERVICE department. GB - 18 When using the generator always bear in mind that in wet or very humid places and in confined conduction spaces it is obligatory to comply with articles 313 and 318 of Presidential Decree No. 547 27/04/55, as well as Chap. 11 Section IV of the CEI 64-8 regulation. 4.2 Prescriptions for safety during installation and setup - The personnel in charge of installation and starting of the generator must always wear a protective helmet, safety shoes and overalls. - Use protective gloves. - Do not leave disassembled parts, tools or anything else not forming part of the system on or near the engine. - Never leave inflammable liquids or cloths soaked in inflammable liquids in proximity of the generator, near electric equipment (including lamps) or parts of the electrical system. - Take the necessary precautions to prevent the danger of electrocution. - Check that the earthing system has been installed and constructed in accordance with regulations. 5 USING THE GENERATOR 5.1 Preliminary checks Before beginning with any starting procedure, it is extremely important to become familiar with the generator and its controls. Furthermore, a visual inspection must be carried out on the machine and the installation. Any source of potential or real danger must be eliminated before proceeding. · Identify the position of the emergency stop buttons, switches and other emergency systems on the generator. · Learn the special emergency procedures relative to the installation in question. - the oil level by means of the dipstick [Fig. 7 Ref. 2] (see table A for recommended oils [Fig. 8]). - that all the anchoring points of the generator are properly tightened. - that all the electrical utilities are off to prevent starting the generator on load - that the water and fuel pipes are properly connected - that all the electrical connections have properly been carried out and that there are no electrical connections in a bad state. - that the water cock is open [Fig. 6 Ref. 2] - that the section of the water circuit from the pump to the valves has been filled manually if a non-return valve has been mounted on the sea intake (as recommended in the installation manual) [Fig. 4 Ref. 1]. IS 18 - 21 - 24 - 27 50 Hz GB 6 PROTECTIONS 5.2 Bleeding the fuel system The presence of air bubbles in the fuel system is caused by irregular functioning of the engine or the incapacity to reach the nominal number of revolutions. Air might enter the fuel circuit through a not perfectly tight seal (pipes, filters, tank) or when the fuel in the tank is at minimum level. The fuel system has been designed in such a way as to autonomously eliminate air bubbles that have penetrated the circuit. To eliminate the air bubbles, first of all eliminate the cause and carry out the following operations: 1 - Adjust the fuel pump lever manually [fig.7, ref.3] until all the air in the supply system has been released. 2 - Repeat the operations described above if engine operation is still irregular. For more detailed information, consult the manual supplied by the engine manufacturer that accompanies each generator . 5.3 Starting Before starting the generator, ensure that the preliminary checks described in paragraph 5.1 have been carried out. Start the generator by pressing the START button located on the control panel [Fig. 4 Ref. 4] and release it only when the generator has started, taking care not to exceed 15 sec. for each attempt and respecting an interval of at least 30 sec. All the warning lights of the engine protection module [Fig. 4, Ref. 5] will come on for a few seconds, and if there are no engine or generator faults, only the green RUN light [Fig. 4 Ref. 6] will remain on to indicate that the generator has been started and that functioning is regular. Repeated attempts at starting with negative outcome may cause excess accumulation of waterintheexhaustsystemwithpossibleseriousdamage to the engine. If it is difficult to start the engine, do not insist for too long without first having closed the sea intake cock [Fig. 6 Ref. 2]. 5.4 Stopping The generator is stopped by pressing the button [Fig.4, Ref.4] on the control panel in "STOP"position. Before stopping the generator it is recommended to let it run for a few minutes without drawing electric current, in order to allow the engine and the alternator to cool down. The generators are equipped with a series of protections which safeguard it against improper use and faults which may compromise integrity. When the generator stops because a protection has tripped, on the engine protection module [Fig. 5, Ref. 5] of the control panel the warning light relative to the fault will come on. 6.1 Low oil pressure protection Intervenes switching off the generator when the engine oil pressure is insufficient. Its intervention is signalled by the OIL light [Fig., 4, Ref. 7] coming on. Normally it is sufficient to top up with the lacking quantity of oil to be able to restart the generator. - The low oil pressure protection does not give an indication of the level of engine oil in the sump. Therefore, check this level daily. - The engine functions properly if it does not exceed an inclination of maximum 30º for less than 3 minutes, 25º without time limit, both on the longitudinal and the transverse axis. If the engine is operated at a greater inclination, the risk is insufficient lubrication or aspiration of engine oil through the air filter. 6.2 High water temperature protection Intervenes switching off the generator when the engine coolant temperature is too high or there is no circulation of seawater. Its intervention is signalled by the ºC light [Fig. 4, Ref. 10] coming on. Only restart the generator after the cause of the fault has been identified and removed. 6.3 Alternator overheating protection Intervenes switching off the generator when there is a thermal overload on the alternator. Its intervention is signalled by the ºC light [Fig. 4, Ref. 8] coming on. The generator can be restarted after a few minutes when the temperature of the alternator windings has returned to normal values. It is, however, recommended to find and remove the causes of the intervention. In the event of one of the above described protections intervening, after ascertaining and removing the cause of the intervention, press the STOP button to reset the control panel (otherwise the signal would remain in memory preventing the engine from starting). GB - 19 IS 18 - 21 - 24 - 27 50 Hz GB 6.4 Protection against short-circuit and overload The generator is protected against short-circuit and overload. A bipolar magnetothermal switch [Fig. 4 Ref. 2] cuts the supply of electric current when a short-circuit occurs or when the electric current delivered exceeds the nominal value. Before restoring the contact by lifting the lever of the magnetothermal switch, disconnect the utilities. 6.5 Protection against short-circuit of the low-voltage electric system In the event of a short-circuit in the low-voltage electric system, a thermal switch [Fig. 4, Ref. 3] breaks the circuit stopping the generator. In this case the warning lights of the engine protection module will all be off and it will not be possible to re-attempt starting. Before restoring the electric circuit by pressing the button located on the thermal switch [Fig. 4 Ref. 3], have a specialised technician find and remove the cause of the short-circuit. 7 MAINTENANCE 7.1 Preamble Any maintenance operation on the generator must be carried out with the engine off and leaving it to cool down sufficiently, and must only be carried out by authorised and suitably trained personnel. It is recommended to scrupulously follow the instructions in the manual provided by the engine Manufacturer with each generator. It is important to regularly inspect and carry out maintenance on the generator. The frequency of maintenance should be decided on the basis of the number of hours of operation. To proceed with maintenance the side and top doors must be removed. Before accessing the generator, disconnect one pole of the starter battery in order to prevent accidental starting. 7.2 Ordinary engine maintenance The periodic maintenance to be carried out on the engine is listed in TABLE B. For more detailed information consult the manual provided with each generator by the engine manufacturer. GB - 20 Check the oil level by means of the graduated dipstick [Fig. 7, Ref. 2]. The level must always be between the MAX and MIN notches on the dipstick [Fig. 7 Ref. 1]. 7.3 Engine oil and oil filter change The engine oil sump capacity is 10.2 litres. Top-ups and filling with engine oil is carried out through the hole [Fig. 3, Ref. 17]. To change the oil in the oil sump, remove the dipstick [Fig. 7, Ref. 2] and operate the special extraction pump [Fig. 7, Ref. 7] after having removed the screw which functions as plug. It is recommended to drain the oil when it is still sufficiently warm to flow easily. For recommended oils see table A, Fig. 8. - The first engine oil change must be carried out after 50 hours of generator operation. For the second and subsequent oil changes, every 200 hours is sufficient. - For more detailed information on engine lubrication, consult the engine use and maintenance manual attached to the generator. - Dispose of the used oil or fuel in an appropriate manner as they are polluting products. Take the used engine oil to special collection centres responsible for disposal. Avoid contact of engine oil with the skin. During maintenance operations use gloves and protective glasses. In case of contact with engine oil, immediately and thoroughly wash the affected part with soap and water. To replace the engine oil filter cartridge [Fig. 3, Ref.16], unscrew it from its support, using suitable tools normally found on the market. Reposition the new cartridge, taking care to lubricate the rubber ring gasket. The first replacement must be carried out after 50 hours of generator operation. For the second and subsequent replacements, respect an interval of 400 hours. For further information consult the engine use and maintenance manual. For the safety of the engine, use only original spare parts. When the operation has been completed, thoroughly wipe off all oil and fuel from the engine parts. IS 18 - 21 - 24 - 27 50 Hz GB 7.4 Air filter cleaning The generators of the IS series have a dry air filter which prevents foreign bodies from entering the combustion chamber. For its maintenance it is sufficient to clean the filtering mass with diesel fuel once a year to remove nay impurities. Dispose of the liquids used for air filter washing in an appropriate manner. Take them to special collection centres. 7.5 Fuel filter replacement To guarantee long life and proper functioning of the engine, it is extremely important to periodically replace the fuel filter cartridge, respecting the frequency indicated by the engine manufacturer as listed in the table in Paragraph 7.15. This operation is carried out in the following steps: - Completely unscrew the ring nut of the support [Fig. 3, Ref. 13] - Remove the old cartridge and position the new one. - For remounting repeat the operations in reverse order. When the filter has been replaced, bleed the fuel system carrying out the operations described in Paragraph 5.2. Avoid contact of the fuel oil with the skin. During maintenance operations use gloves and protective glasses. In case of contact with fuel, immediately and thoroughly wash the affected part with soap and water. When the operation has been completed, thoroughly wipe off all traces of fuel and take the used cloths to special collection centres. 7.6 Coolant check Periodically check the coolant level in the closed-circuit cooling system. The reference index for this check is printed on the expansion tank [Fig. 3, Ref. 11]. If the level is insufficient, pour coolant into the expansion tank, taking care not to exceed the maximum level index. Never open the cap of the expansion tank [Fig. 3, Ref. 11] or coolant tank [Fig. 3, Ref. 26] when the engine is hot to prevent dangerous coolant leaks. 7.7 V-belt tension check A V-belt is used to transmit the rotary motion from the drive shaft pulley to that of the seawater pump [Fig. 8 Ref. 1]. Excessive belt tension accelerates wear, while a slack belt makes the pulleys idle and does not allow sufficient water circulation. Adjust the belt tension as follows: Loosen the two adjusting screws [Fig. 8, Ref. 2] and move the seawater pump outwards to increase the tension or inwards to decrease it. Lock the screws and check the tension. The correct belt tension is such as to allow a yield of about 5 mm [Fig. 8] under a thrust force of 8 kg. A second belt is used to transmit the rotary motion from the drive shaft pulley to that of the closed-circuit coolant pump and the battery charger DC alternator [Fig. 8 Ref. 3]. Adjust the belt tension as follows: Loosen the adjusting screw [Fig. 8 Ref. 4] and move the battery charger DC alternator [Fig. 8, Ref. 5] outwards to increase the tension and inwards to decrease it. The correct belt tension is such as to allow a yield of about 10 mm [Fig. 8] under a thrust force of 8 kg. To prevent the belt from slipping, do not dirty it with oil. Clean the belt with petrol if any oil is spilled. Keep hands away from the V-belt or the pulleys when the engine is running. 7.8 Emptying the cooling system To carry out maintenance on the water/air exchanger or on the cooling system the seawater must be drained from the intake circuit. This operation is carried out as follows: - Close the sea intake cock [Fig. 6, Ref. 2] - Open the drain tap [Fig. 6, Ref. 3] until all the water has run out - Close the drain tap. Reopen the seawater intake cock before starting the generator. 7.9 Coolant replacement Annually replace the coolant in the closed cooling circuit as follows: - To remove the side counter(Fig.3, Ref.3) . - Take a rubber hose of about 50 cm long with an inside diameter of 30-40 mm. - insert the pipe under the faucet (Fig.7, Ref.4) and connect it to the inside of a container of about 10 litre capacity. - Open the cap and completely drain the closed cooling circuit. When the operation has been completed, close the faucet and fill the circuit with new coolant. GB - 21 IS 18 - 21 - 24 - 27 50 Hz GB Dispose of the used coolant in an appropriate manner as it is a polluting product. Take the used coolant to special collection centres responsible for disposal. 7.10 Zinc anode replacement To protect the water/air heat exchanger [Fig. 9, Ref. 1] and the water/coolant heat exchanger [Fig. 9, Ref. 2] against galvanic current, two sacrificial zinc anodes [Fig. 9, Ref. 4] have been inserted inside them. Periodically check their state of wear and, if necessary, replace them in order to prevent that the galvanic current irreparably corrodes the heat exchanger. It is recommended to check the zinc anodes at least once a month when the generator is new to check how fast consumption is, to then be able to act accordingly. It is, however, opportune to replace the zinc anodes at least once a year. Fig. 9 shows the points where the zinc anodes are positioned. 7.11 Seawater pump maintenance At least once a year check the integrity of the rubber rotor of the seawater pump [Fig. 7, Ref. 5]. Before opening the seawater pump to inspect the rotor, drain the seawater from the cooling system as described in Paragraph 7.8. To access the rotor, remove the cover [Fig. 7, Ref. 6] and with the aid of a pair of pliers extract the rotor pulling it out with force. To remount a new rotor, repeat the operations described above in reverse order. 7.12 Alternator maintenance The alternator used on this model of generator is type synchronous, self-energised, with electronic voltage regulation. This model alternator, without manifold and brushes, does not require particular maintenance operations. The periodic checks and maintenance are limited to removing any traces of damp and oxidation which might damage it. 7.13 Battery maintenance For starting all the generator models, it is recommended to use an 70 A/h battery for ambient temperatures exceeding 0ºC, and 100 A/h for lower temperatures. Before installing a new battery it is important that it undergoes a full charging cycle. At least once a month check the level of the electrolyte and, if necessary, top up with distilled water. If the generator is not to be used for a long period, it is recommended to disconnect the battery and store it in a dry place at a temperature over 10ºC and to carry out a full charging cycle once a month. GB - 22 If the battery is left completely flat for long periods, there is a risk of irreparably damaging it. The positive terminal of the battery must be protected with Vaseline to prevent corrosion and the formation of oxide. For top-ups with sulphuric acid, ready solutions must be used. The battery top-up operations with distilled water or with acid must be carried out with rubberglovesandprotectiveglassestopreventaccidental contact of the sulphuric acid with the skin. In the event of accidental contact, thoroughly wash the part affected with soap and water and consult a doctor. Before recharging the battery check the level of the electrolyte and, if necessary, fill up with distilled water. This operation must be repeated when the recharging cycle has been completed. 7.14 Periods of inactivity Start up the generator at least once a month. If the generator is not to be used for a long time, the following operations must be carried out: - Change the engine oil - Replace the oil filter cartridge (see par. 7.3) - Replace the fuel filter cartridge (see par. 7.5) - Remove the injectors and pour 2 cc engine oil into each cylinder and let the engine turn over a few times, manually operating the drive shaft pulley. Remount the injectors. - Replace the zinc anodes (see par. 7.10) - Through the seawater intake pipe aspirate some antifreeze whose function is to protect the heat exchangers against low temperatures and to lubricate the seawater pump rotor and the metallic parts in the cooling system. - Disconnect the starter battery and store it in a dry place (see par. 7.13) - Disconnect the sea exhaust pipe from the engine manifold. - Clean the seawater filter. - Close the seawater intake cock. - Drain the seawater from the exhaust. - Clean and lubricate the antisiphon valve, if installed (siphon break). IS 18 - 21 - 24 - 27 50 Hz GB 7.15 Table of scheduled maintenance OPERATION Check engine oil level Check coolant Check for oil leaks Check for fuel leaks Check for coolant leaks Adjust V-belt tension Check battery charger Clean fuel filter Adjust belt tension *Change engine oil Check seawater pump rotor Check engine rpm Check integrity of electrical connections Replace fuel filter * Replace oil filter Check injectors Check injector timing Adjust play on intake/exhaust valve Check the fuel injection pump Check battery electrolyte level Clean and deoxidise the metallic parts Clean air filter Replace coolant completely Replace zinc anodes HOURS 10 10 20 20 20 100 100 200 200 200 400 400 400 400 400 400 400 400 1000 monthly yearly yearly yearly yearly TAB. "B" * Carry out the first maintenance operation after 50 hours, subsequently according the required intervals. 7.16 Troubleshooting The starter motor turns but the main engine does not start - Check that there is fuel in the tank (fill up) - Check if the stop electromagnet is in the firing position (consult Service Centre) - Bleed the air bubbles from the fuel circuit (see par. 4.2) The engine protection module is not activated when the START button is pressed - battery, and the electrical connections (reconnect). - Check integrity of the battery (recharge or replace). The generator switches off during the operating period - Check if a protection has been activated with the relevant light coming on (remove the cause and retry starting). - Check if there is fuel in the tank (fill up). The engine runs irregularly - Check the fuel filters (replace). - Bleed the air bubbles from the fuel circuit (see par. 4.2). The alternator voltage is too low - Check the engine rpm: 1560 rpm without utilities connected at 50Hz - Excitation capacitors damaged (replace). Starter battery flat - Check the electrolyte level in the battery (restore the level). - Check functioning of the DC alternator. - Check integrity of the battery. The generator does not deliver power - Check that the magnetothermal switch [Fig. 4, Ref. 2] is in the ON position. If not, contact an authorised Service Centre. 8 TRANSPORT AND HANDLING For transport, all the generators are fixed to a pallet by means of screws. For handling on the boat use the engine lifting hooks located under the top access door [Fig.3, Ref.2]. Hook the generator carefully and lift it slowly without sudden movements. - Hooking the generator at points different from that indicated may cause damage to the generator or be dangerous to the operators. - During lifting all personnel must keep a safe distance and the operators must wear protective helmets. 9 SCRAPPING At the end of its lifetime the generator must be taken to official scrapyards. Do not dispose of the generator at household refuse disposal sites, as many of its parts are polluting. There is a high grade of smoke at the engine exhaust - Check that the oil level in the sump does not exceed the MAX index (restore level). - Check that the generator is not in overload. - Check calibration of the injectors (consult Service Centre). GB - 23 IS 18 - 21 - 24 - 27 50 Hz GB 10 WIRING DIAGRAM REFERENCES See Fig. 10 1 2 3 4 5 6 7 8 9 10 11 12 13 14 15 16 17 18 19 20 21 22 23 24 25 26 27 28 29 30 Magnetothermal switch Hour counter Alternator Rotor Stator Voltage regulator Power terminal board EMERGENCY STOP BUTTON Thermal switch START / STOP button Engine protection module Terminal board Connector for remote control panel connection Fuel level gauge Water temperature gauge Oil pressure gauge High water temperature sensor High coolant temperature sensor Oil pressure switch Battery charger alternator Stop electromagnet Starter motor Battery connection terminals Panel connection cable START / STOP button Oil pressure gauge instrument Coolant temperature gauge instrument Remote control panel kit with instruments Remote control panel kit Screw's earth See Fig. 11 1 2 3 4 5 6 7 8 GB - 24 ALTERNATOR BATTERY CHARGER ALTERNATOR BATTERY CONNECTOR 12P HOUR COUNTER DIODE STOP ELECTROMAGNET ENGINE PROTECTION MODULE 9 10 11 12 13 14 15 16 17 18 19 20 21 22 23 24 25 26 27 STARTER MOTOR OIL PRESSURE SWITCH EMERGENCY STOP BUTTON ELECTRONIC VOLTAGE REGULATOR ROTOR STATOR THERMAL SWITCH ENGINE THERMOSTAT TEMPERATURE GAUGE INSTRUMENT OIL PRESSURE GAUGE INSTRUMENT MAGNETOTHERMAL SWITCH 2P 0 RELAY RELAY START-STOP BUTTON ALTERNATOR THERMOSTAT TEMPERATURE SENSOR OIL PRESSURE SENSOR CONNECTOR 6P IS 18 - 21 - 24 - 27 50 Hz GB GB - 25 I IS 18 - 21 - 24 - 27 50 Hz INHALT Abbildungen .......................................................... 2 D Schaltplan .............................................................. 8 1 1.1 1.2 1.3 1.4 1.5 1.6 1.7 1.8 2 2.1 2.2 2.3 2.4 ALLGEMEINE NFORMATIONEN ................... 11 Zweck und Anwendungsbereich der Bedienungsanleitung .................................... 11 Symbole ....................................................... 11 Unterlagen .................................................... 12 Faksimile der EG-Konformitätserklärung ....... 12 Einschlägige Normen und Gesetzesverordnungen ................................. 12 Identifizierung der Maschine ......................... 12 Bauteile der Elektroaggregate ....................... 13 Instrumententafel .......................................... 13 ALLGEMEINE INFORMATIONEN .................. 14 Bezugsdokumente ........................................ 14 Konformität mit den Normen ......................... 14 Kennzeichnung ............................................. 14 Identifizierung der Maschine ......................... 14 7 WARTUNG ................................................... 20 7.1 7.2 7.3 7.4 7.5 7.6 7.7 7.8 7.9 7.10 7.11 7.12 7.13 7.14 7.15 Vorbemerkungen ......................................... 20 Ordentliche Wartung des Motors .................. 20 Wechsel des Motoröls und des Ölfilters ....... 20 Reinigung des Luftfilters ................................ 21 Austausch des Treibstofffilters ...................... 21 Kontrolle der Kühlflüssigkeit ......................... 21 Kontrolle der Riemenspannung ..................... 21 Entleerung der Kühlanlage ............................ 22 Auswechseln der Kühlflüssigkeit .................. 22 Austausch der Zinkanoden ........................... 22 Wartung der Meerwasserpumpe ................... 22 Wartung des Wechselstromgenerators ......... 22 Wartung der Batterie .................................... 22 Betriebspausen ............................................ 23 Übersicht über die geplanten Wartungsmassnahmen ................................. 23 7.16 Übersicht über mögliche Störungen .............. 23 MERKMALE DES GENERATORS .................. 15 8 TRANSPORT ................................................. 24 3.1 Allgemeine Merkmale ................................... 15 3.2 Kühlsystem .................................................. 15 3.3 Anschluß für Fernbedienungsschalttafel ....... 15 3.4.1 Tabelle der technischen Merkmale IS 18 ...... 16 3.4.1.1 Tabelle der technischen Merkmale IS 21 .... 16 3.4.1.2 Tabelle der technischen Merkmale IS 24 .... 17 3.4.1.3 Tabelle der technischen Merkmale IS 27 .... 17 9 VERSCHROTTUNG ....................................... 24 10 ERLAUTERUNGEN ZUM SCHALTPLAN ....... 24 3 4 4.1 4.2 5 5.1 5.2 5.3 5.4 6 6.1 6.2 6.3 6.4 6.5 D - 10 SICHERHEITSVORSCHRIFTEN .................... 18 Allgemeine Vorsichtsmaßnahmen ................ 18 Sicherheitsvorschriften während .................... 18 der Installation und Inbetriebnahme ............... 18 VERWENDUNG DES GENERATORS ............ 18 Vorbereitende Kontrollarbeiten ...................... 18 Entlüftung der Anlage ................................... 19 Starten ......................................................... 19 Stillsetzen des Elektroaggregats .................. 19 SICHERHEITSVORRICHTUNGEN ................. 19 Schutzvorrichtungen gegen niedrigen Öldruck 19 Schutzvorrichtung gegen Wasserüberhitzung 19 Schutzvorrichtungen gegen Wechselstromgeneratorüberhitzung .............. 20 Schutzvorrichtung gegen Kurzschluß ........... 20 und Überlastung ........................................... 20 Schutzvorrichtung gegen Kurzschluss der Niederstromelektroanlage ............................. 20 IS 18 - 21 - 24 - 27 50 Hz 1 ALLGEMEINE NFORMATIONEN Vor sämtlichen Eingriffen an der Maschine die vorliegende Bedienungsanleitung D aufmerksam durchlesen. DIE NICHTBEACHTUNG DER IN DER FOLGENDEN BEDIENUNGS- UND WARTUNGSANLEITUNG ENTHALTENEN ANWEISUNGEN FÜHRT ZUM VERFALL DER GARANTIELEISTUNGEN FÜR DAS PRODUKT 1.1 Zweck und Anwendungsbereich der Bedienungsanleitung Vor allen Dingen möchten wir Ihnen danken, daß Sie ein MASE-Produkt gewählt haben. Die vorliegende Bedienungsanleitung wurde vom Hersteller verfaßt, um die wesentlichen Informationen und Anweisungen zu liefern, die für eine korrekte und sichere Durchführung der Wartungsarbeiten erforderlich sind. Sie stellt einen integralen Bestandteil des Elektroaggregats dar und muß für dessen gesamte Lebensdauer sorgfältig aufbewahrt sowie vor sämtlichen Einwirkungen geschützt werden, die ihre Verwendung beeinträchtigen können. Falls das Elektroaggregat den Eigentümer wechselt, muß die Bedienungsanleitung dem neuen Benutzer oder Eigentümer des Elektroaggregats übergeben werden. Die in der vorliegenden Bedienungsanleitung enthaltenen Informationen richten sich an alle Personen, die während des Lebenszyklusses des Elektroaggregats damit Umgang haben; es informiert darüber, wer welche Tätigkeiten ausführt und wer die Tätigkeiten koordiniert und liefert die logistischen Angaben für die Reglementierung des Zugangs zu dem Ort, an dem das Elektroaggregat installiert ist und betrieben wird. Die Bedienungsanleitung dient als Grundlage für den bestimmungsgemäßen Einsatz der Maschine und enthält alle nötigen Informationen für einen sicheren und ordnungsgemäßen Betrieb. Die gewissenhafte Befolgung der Anleitungen ist Voraussetzung für ein Arbeiten in voller Sicherheit, einen sparsamen Betrieb und eine lange Lebensdauer der Maschine. Es wird dringend empfohlen, die vorliegenden Bedienungsanleitung sowie die dazugehörigen Unterlagen aufmerksam durchzulesen. Nur auf diese Weise werden langfristig ein ordnungsgemäßer Betrieb, Zuverlässigkeit des Elektroaggregats sowie die Vermeidung von Personen- und Sachschäden gewährleistet. Die Zeichnungen dienen nur zur Veranschaulichung. Selbst wenn Ihre Maschine von den im Handbuch dargestellten Illustrationen abweicht, werden Maschinensicherheit und Zuverlässigkeit der Informationen hierdurch nicht beeinträchtigt. Für ein leichteres Nachschlagen wurde die Bedienungsanleitung in Abschnitte unterteilt, in denen die wichtigsten Themen behandelt werden; das Inhaltsverzeichnis ermöglicht ein schnelles Auffinden der verschiedenen Argumente. Anmerkung: Die in der vorliegenden Veröffentlichung enthaltenen Informationen sind zum Zeitpunkt der Drucklegung gültig und können ohne Vorankündigung geändert werden. 1.2 Symbole Wichtige Hinweise sind halbfett gedruckt und durch Symbole gekennzeichnet, die nachstehend dargestellt und aufgeschlüsselt werden. Größte Achtsamkeit und Vorsicht anwenden, um Todesfolgen oder Gesundheitsschäden zu vermeiden. Gefahrensituationen, die während der Nutzdauer gewisser Produkte, Systeme oder Anlagen eintreten und Personen-, Sach- oder Umgebungsschäden, sowie wirtschaftliche Verluste bewirken könnten. Unbedingt zu beachtende Regeln, um Sachschäden oder Produktschäden zu vermeiden Besonders wichtige Hinweise. D - 11 IS 18 - 21 - 24 - 27 50 Hz 1.3 Unterlagen D Die mit jedem Elektroaggregat gelieferte Bedienungsanleitung besteht aus einer Reihe von Unterlagen, wovon das vorliegende Handbuch den Hauptbestandteil bildet. Normalerweise werden zusammen mit der Maschine folgende Unterlagen ausgehändigt: a - EG-Konformitätserklärung. b - Bedienungs- und Wartungsanleitung zum Gebrauch der Elektroaggregate (vorliegendes Handbuch) c - Installationshandbuch d - Elektrischer Schaltplan der Schalttafel. e - Bedienungs- und Wartungsanleitung des Motors f - Bedienungs- und Wartungsanleitung des Herstellers des Drehstromgenerators. g - Eventuell weitere Anleitungen für Sonderzubehör, von den jeweiligen Herstellern abgefaßt. h - Verzeichnis der Mase - Kundendienststelle i - Garantiebescheinigung l - Garantiekarte 1.4 Faksimile der EG-Konformitätserklärung Die von MASE für die Länder der europäischen Gemeinschaft hergestellten Elektroaggregate entsprechen den einschlägigen EWG-Richtlinien (siehe 1.5) und sind mit einer EG-Konformitätserklärung versehen (Abb.B). 1.5 Einschlägige Normen und Gesetzesverordnungen Sämtliche Diesel-Elektroaggregate der Fa. Mase werden unter strengster Beachtung der geltenden gesetzlichen Bestimmungen gebaut. Das Elektroaggregat und die dazugehörige Komponenten wurden gemäß den folgenden Normen und Richtlinien entwickelt und hergestellt: EN 292-1/2: Normen für die Maschinensicherheit. Allgemeine Planungsprinzipien. EN 294: Normen für die Maschinensicherheit. Sicherheitsabstände zum Schutz der Arme vor Verletzungen durch gefährliche Maschinenteile. ISO 3046: Kolben-Verbrennungsmotoren. IEC 34-1: elektrische Drehmaschinen ISO 8528 -1: Drehstrom-Elektroaggregate mit Antrieb durch Kolben-Verbrennungsmotor. EN 60204 -1(CEI 44-5): - Maschinensicherheit - elektrische Maschinenausrüstung. D - 12 EN 60439 -1 (CEI 17-13/1): Zusammengebaute Schutzvorrichtungen und Niederspannungsschaltungen (BT-Schalttafeln) EN 50081-1/2 (elektromagnetische Verträglichkeit): Allgemeine Emissionsnorm. - Teil 1 - Wohn-, Büro-, Industrieräume (Leichtindustrie) - Teil 2 - Industrieräume. EN 50082-1/2 (elektromagnetische Verträglichkeit): Allgemeine Schutznorm. - Teil 1 - Wohn-, Büro-, Industrieräume (Leichtindustrie) - Teil 2 - Industrieräume. 89/392/CEE und nachträgliche Änderungen, die in den Richtlinien 91/368/CEE, 93/44/CEE und 93/68/CEE enthalten sind: Wesentliche Maschineneigenschaften, die für die Sicherheit und den Gesundheitsschutz erforderlich sind (Maschinenrichtlinie). 73/23/CEE und nachträgliche Änderungen, die in der Richtlinie 93/68/CEE enthalten sind: Sicherheitsgarantie des elektrischen Materials, das zur Verwendung innerhalb gewisser Spannungsgrenzwerte (NiederspannungsRichtlinien) bestimmt ist. 1.6 Identifizierung der Maschine Siehe Abb.2 1 - Maschinen 2 - Kennnummer 3 - Seriennummer 4 - Dauerleistung 5 - Nennfrequenz 6 - Leistungsfaktor 7 - Nennspannung 8 - Nennstrom 9 - Grad Schutz 10 - Klasse von Isolierung 11 - Temperatur max. 12 - Höhe max. 13 - Geräuschniveau 14 - Aufführungsklasse 15 - Baujahr 16 - Hersteller 17 - Gewicht Maschinenkennummer, Seriennummer und Baujahr der Maschine müssen stets bei allen Informationsanfragen, Ersatzteilbestellungen usw. angegeben werden. IS 18 - 21 - 24 - 27 50 Hz 1.7 Bauteile der Elektroaggregate D Siehe Abb.3 Die Elektroaggregate bestehen im wesentlichen aus folgenden Bauteilen: 1 - Schallschluckender Kasten 2 - Obere Tür 3 - Seitliche Tür 4 - Instrumententafel 5 - Verankerungsbügel 6 - Rauch- und Kühlwasserablaßstutzen 7 - Anschlußstutzen für Meerwasser 8 - Anschlußstutzen Kraftstofftank 9 - Batterie-Anschlußklemmen 10 - Motorluftfilter 11 - Expansionsgefäß Kühlflüssigkeit 12 - Motorölpumpe 13 - Dieselöl-Filtereinsätze 14 - Meerwasserpumpe 15 - Kraftstoffpumpe 16 - Ölfiltereinsatz 17 - Ölfüllschraube 18 - Stromanschlußdose 19 - Drehstromgenerator 20 - Sammler kühlte ab, um zu bewässern 21 - Wasser/Luft Wärmeaustauscher 22 - Auspuffkrümmer 23 - Anlasser 24 - Anschluß für Fernbedienungsschalttafel 25 - Regulierschraube f. Motordrehzahl 26 - Wasser / Luft intercooler 1.8 Instrumententafel Zeichenerklärung ABB. 4 1 2 3 4 5 6 7 8 9 10 - Stundenzählwerk - Magnet-Thermoschalter - Thermoschalter DC-Strom - START / STOPP Taste - Motorschutzmodul - RUN-Kontrolleuchte Motor gestartet - OIL-Kontrolleuchte niedriger Öldruck - °C-Kontrolleuchte hohe Motortemperatur - BATT-Kontrolleuchte Ladegerätfunktion - °C-Kontrolleuchte DrehstromgeneratorÜbertemperatur 11 - Zündkerzen (nicht vorhanden) 12 - Kraftstofflecks (Version RINA) D - 13 IS 18 - 21 - 24 - 27 50 Hz 2. ALLGEMEINE INFORMATIONEN D 2.1 Bezugsdokumente 2.4 Identifizierung der Maschine Die mit jedem Elektroaggregat gelieferte Bedienungsanleitung besteht aus einer Reihe von Unterlagen, wovon das vorliegende Handbuch den Hauptbestandteil bildet. Normalerweise werden folgende Unterlagen mitgeliefert: Siehe Abb. A a EG-Konformitätserklärung b Anleitungshandbuch für den Gebrauch und die Wartung der Elektroaggregate (vorliegendes Handbuch) c Gebrauchs- und Wartungshandbuch für den Motor d Verzeichnis der Mase-Kundendienststellen. e Garantiezertifikat Mase. f Garantiekarte. 2.2 Konformität mit den Normen 89/37 EG sowie den darauffolgenden Änderungen: Grundlegende Anforderungen an die Maschine im Hinblick auf die Sicherheit und den Gesundheitsschutz (Maschinen-Richtlinie). 1 2 3 4 5 6 7 8 9 10 11 12 13 14 15 16 - Name der Maschine - Maschinen-Kennnummer - Seriennummer - Dauerleistung - Nennfrequenz - Leistungsfaktor - Nennspannung - Nennstrom - Schutzgrad - Isolationsklasse - Höchsttemperatur für die Benutzung - Höchsthöhe für die Benutzung - Leistungsklasse - Baujahr - Hersteller - Anschrift - Gewicht 73/23/EEC und nachfolgende Änderungen enthielten in der Direktive 93/68/EEC: Garantie der Sicherheit elektrischen Materials beabsichtigte für die Verwendung als bestimmte Spannungsgrenzen, (Niedrige Spannung Direktiven. 2000/14 EG: Umweltrichtlinie zur Schallemission (nur bei den in der Tabelle Schallemission angegebenen Modellen) 1 2.3 Kennzeichnung 4 Das Typenschild für die Elektroaggregate trägt sämtliche Identifikationsdaten gemäß der Vorgaben für die EG-Kennzeichnung, sofern vorgesehen. Es folgt ein Faksimile des Typenschildes, das auf jeder einzelnen Maschine angebracht ist (Abb. A). 3 2 5 6 7 8 10 9 11 15 14 16 12 13 Fig.A Auf die maschinelle Codenummer, die Seriennummer und das Jahr Konstruktion muß immer hingewiesen werden, als das des Herstellers für Informationen Verständigen, Reihenfolge der Ersatzteile, und so weiter. D - 14 IS 18 - 21 - 24 - 27 50 Hz 3 MERKMALE DES GENERATORS 3.1 Allgemeine Merkmale Die Elektroaggregate IS sind für eine problemlose Installation auf Schiffen ausgelegt. Der schallschluckende Kasten mit Isolierplatten aus meerwasserbeständigem, lackiertem Aluminium ermöglicht einen leichten Zugriff zum Motor und zum Drehstromgenerator bei der Ausführung der Wartungsund Kontrollarbeiten und hat ein extrem hohes Schalldämpfungsvermögen. Der 4-Takt Dieselmotor mit direkter Einspritzung, Hersteller Yanmar, weist eine extrem robuste Bauweise auf und gewährleistet hohe Zuverlässigkeit; die Auspuffemission entspricht den CARB-Normen. Der Drehstromgenerator, synchron, 4-polig, ohne Bürsten, ist mit einem elektronischen Spannungsregler (SR7) versehen, der eine ±5%ige Stabilität zum Sollwert garantiert. Durch das hohe Anlaufvermögen des Drehstromgenerators eignet sich das Elektroaggregat vortrefflich zur Stromversorgung der Elektromotoren von Klimaanlagen, Entsalzungsanlagen, Verdichtern usw. Das Elektroaggregat ist mit einer Steuertafel (Abb. 3 Bez. 4) ausgestattet, auf der die Bedienungsvorrichtungen und Kontrollinstrumente vereint sind. 3.2 Kühlsystem Die Kühlung des Elektroaggregatmotors erfolgt durch den Umlauf von Kühlflüssigkeit in einem geschlossenen Kreis, in dem ein Wärmeaustauscher für die Wärmeableitung in das Meerwasser sorgt (Abb. 3 Bez. 26). Dieser Wärmeaustauscher aus wurde eigens von mase für den Einsatz in Meeresumgebung entwickelt. Die Luft im schallschluckenden Kasten und jene zur Kühlung des Drehstromgenerators wird von einem zweiten Wärmeaustauscher gekühlt. Bei der Installation ist unbedingt eine Meerwasserzufuhrleitung für die Kühlung und eine Ableitung ins Freie der Verbrennungsgase und des verbrauchten Kühlwassers herzustellen, wie im Installationshandbuch angegeben. 3.3 Anschluß für Fernbedienungsschalttafel Das Elektroaggregat ist mit einer Steuertafel versehen, die zur Bedienung und zum Starten bzw. Stoppen dient. Das Elektroaggregat ist durch ein eigenes Modul (Abb. 4 Bez. 5) gesichert, das den Motor bei Auftreten von Störungen, die von einer Kontrolleuchte angezeigt werden, stoppt. - Kontrolleuchte RUN (Abb. 4, Bez. 6), grün, meldet im Leuchtzustand, daß das Elektroaggregat störungsfrei in Betrieb steht. - Kontrolleuchte BATT (Abb. 4, Bez. 9), rot, meldet im Leuchtzustand, daß das Batterieladegerät defekt ist. - Kontrolleuchte OIL (Abb. 4, Bez. 7), rot, meldet im Leuchtzustand, daß der Motoröldruck unzureichend ist. - Kontrolleuchte "°C" , rot, meldet im Leuchtzustand, daß die Kühlflüssigkeit oder das in den Wärmeaustauschern zirkulierende Wasser zu warm ist. - Kontrolleuchte "°C" , rot, meldet im Leuchtzustand, daß die Wicklung des Drehstromgenerators unzulässig hohe Temperaturwerte erreicht haben. - Kontrollleuchte [Abb. 4, Punkt 11] bei Erleuchten gelb; zeigt an, dass die Glühkerzen aktiviert worden sind. Das Anschalten der Glühkerzen erfolgt vor dem Anlassen des Motors, indem der Zündschlüssel von Stop auf ON gedreht wird. Bei Erreichen der Temperatur werden die Glühkerzen automatisch abgeschaltet, und der Motor kann angelassen werden. - Kontrollleuchte [Abb. 4, Punkt 12] bei Erleuchten rot; zeigt an, dass die Not-Aus-Taste gedrückt ist. Zum Wiederanlassen des Aggregats, muss zunächst die Taste zurückgestellt werden. D Auf der Steuertafel sind zudem installiert: - Ein zweipoliger Magnet-Thermoschalter (Abb. 4, Bez.2), der bei Überlastung oder Kurzschluß die Stromzufuhr unterbricht. - Ein Thermoschalter (Abb.4, Bez.3), der die Niederspannungsanlage vor Kurzschluß schützt. - Ein Stundenzählwerk (Abb.4, Bez.1). - Eine Start/Stoptaste des Elektroaggregats (Abb.4, Bez.4). Das Elektroaggregat kann über eine Anschlußbuchse mit dem entfernt aufgestellten (Abb.3, Bez.24)Startpult verbunden werden, das von mase als Sonderausstattung geliefert wird und eventuell auch in der Steuertafel integriert werden kann. Das Fernstartpult ist in zwei verschiedenen Modellen erhältlich (Abb. 5). In der einfacheren Version hat es eine Start/Stoptaste (Abb. 5, Bez. 1) und eine grüne Kontrolleuchte (Abb. 5, Bez. 2), die im Leuchtzustand die erfolgte Einschaltung meldet. Bei der anderen Version des Fernstartpults (Abb. 5, Bez. 3) ist außer der Start/Stopptaste eine Motoröldruckanzeige (Abb.5,Bez.4) und eine Kühlflüssigkeitstemperaturanzeige (Abb.5,Bez.5) vorhanden. Bei angeschlossenem Fernstartpult kann das Elektroaggregat nicht über das Steuerpult am Aggregat gestartet werden. Vor der Ausführung sämtlicher Wartungsarbeiten am Elektroaggregat ist der negative Pol der Startbatterie abzuschließen, um ein versehentliches Starten zu vermeiden. D - 15 IS 18 - 21 - 24 - 27 50 Hz D 3.4.1 Tabelle der technischen Merkmale IS 18 3.4.1.1 Tabelle der technischen Merkmale IS 21 0RWRU 0RWRU Ich modelliere Typ Zylinder (num.) Material block zylinder Bohrung (mm) Lauf (mm) Hubraum (cc) Macht (hp) Du drehst motor Beziehung von komprimierung System von Injektion Materielles kontoinhaber Regler von drehungen System von schmierung Fähigkeit kettenschutz Öl (l) System von festnahme motor Pumpt ernährung treibstoff 50 Hz Yanmar 4TNE94A Diesel 4 Zeiten 4 Gußeisen 94 100 2776 39 1500 18:1 Direkte Gußeisen Zentrifugal, Mechaniker Gezwungen 10,2 Solenoid Mechanik Ich modelliere Typ Zylinder (num.) Material block zylinder Bohrung (mm) Lauf (mm) Hubraum (cc) Macht (hp) Du drehst motor Beziehung von komprimierung System von Injektion Materielles kontoinhaber Regler von drehungen System von schmierung Fähigkeit kettenschutz Öl (l) System von festnahme motor Pumpt ernährung treibstoff 50 Hz Yanmar 4TNE94A Diesel 4 Zeiten 4 Gußeisen 94 100 2776 39 1500 18:1 Direkte Gußeisen Zentrifugal, Mechaniker Gezwungen 10,2 Solenoid Mechanik vorherrschen devise pumpt treibstoff (cm) 80 vorherrschen devise pumpt treibstoff (cm) 80 Ich verbrauche zu voll Belastung (l/h) 7,2 Ich verbrauche zu voll Belastung (l/h) 7,2 1900 Volumen arische verbrennung (l/min) Volumen arische verbrennung (l/min) Batterie Einschalt (Ah-V) Es lädt Batterie (A-V) Moped Einschalt (kW-V) Schräge Maxime von Benutzung bringt Pumpe Wasser Motor (l/min) :HFKVHOVWURPJHQHUDWRU 80 - 12 40 - 12 2,3 - 12 30° 40 50 Hz Batterie Einschalt (Ah-V) Es lädt Batterie (A-V) Moped Einschalt (kW-V) Schräge Maxime von Benutzung bringt Pumpe Wasser Motor (l/min) :HFKVHOVWURPJHQHUDWRU 1900 80 - 12 40 - 12 2,3 - 12 30° 40 50 Hz Typ Gleichzeitig, 4-Pole, Auto erregt Typ Gleichzeitig, 4-Pole, Auto erregt Regelung Abkühlung Spannung (V) Häufigkeit (Hz) Amps Macht maxime (kW) Ständige macht (kW) Faktor von macht ( cos ø ) Klasse von isolierung Stabilität von spannung Stabilität von häufigkeit Elektronik Luft / Wasser (intercooler W/A) 115 - 230 50 156 - 78 20 18 1 H ±2% ±5% Regelung Abkühlung Spannung (V) Häufigkeit (Hz) Amps Macht maxime (kW) Ständige macht (kW) Faktor von macht ( cos ø ) Klasse von isolierung Stabilität von spannung Stabilität von häufigkeit Elektronik Luft / Wasser (intercooler W/A) 115 - 230 50 200 - 100 23 21 1 H ±2% ±5% D - 16 IS 18 - 21 - 24 - 27 50 Hz 3.4.1.2 Tabelle der technischen Merkmale IS 24 0RWRU Ich modelliere Typ Zylinder (num.) Material block zylinder Bohrung (mm) Lauf (mm) Hubraum (cc) Macht (hp) Du drehst motor Beziehung von komprimierung System von Injektion Materielles kontoinhaber Regler von drehungen System von schmierung Fähigkeit kettenschutz Öl (l) System von festnahme motor Pumpt ernährung treibstoff 50 Hz Yanmar 4TNE98A Diesel 4 Zeiten 4 Gußeisen 98 110 3319 46,4 1500 18:1 Direkte Gußeisen Zentrifugal, Mechaniker Gezwungen 10,2 Solenoid Mechanik 3.4.1.3 Tabelle der technischen Merkmale IS 27 0RWRU Ich modelliere Typ Zylinder (num.) Material block zylinder Bohrung (mm) Lauf (mm) Hubraum (cc) Macht (hp) Du drehst motor Beziehung von komprimierung System von Injektion Materielles kontoinhaber Regler von drehungen System von schmierung Fähigkeit kettenschutz Öl (l) System von festnahme motor Pumpt ernährung treibstoff 50 Hz Yanmar 4TNE98A Diesel 4 Zeiten 4 Gußeisen 98 110 3319 46,4 1500 18:1 Direkte Gußeisen Zentrifugal, Mechaniker Gezwungen 10,2 Solenoid Mechanik vorherrschen devise pumpt treibstoff (cm) 80 vorherrschen devise pumpt treibstoff (cm) Ich verbrauche zu voll Belastung (l/h) 9,6 Ich verbrauche zu voll Belastung (l/h) 10,8 Volumen arische verbrennung (l/min) 2500 Volumen arische verbrennung (l/min) 2500 Batterie Einschalt (Ah-V) Es lädt Batterie (A-V) Moped Einschalt (kW-V) Schräge Maxime von Benutzung bringt Pumpe Wasser Motor (l/min) :HFKVHOVWURPJHQHUDWRU 80 - 12 40 - 12 2,3 - 12 30° 40 50 Hz Batterie Einschalt (Ah-V) Es lädt Batterie (A-V) Moped Einschalt (kW-V) Schräge Maxime von Benutzung bringt Pumpe Wasser Motor (l/min) :HFKVHOVWURPJHQHUDWRU D 80 80 - 12 40 - 12 2,3 - 12 30° 40 50 Hz Typ Gleichzeitig, 4-Pole, Auto erregt Typ Gleichzeitig, 4-Pole, Auto erregt Regelung Abkühlung Spannung (V) Häufigkeit (Hz) Amps Macht maxime (kW) Ständige macht (kW) Faktor von macht ( cos ø ) Klasse von isolierung Stabilität von spannung Stabilität von häufigkeit Elektronik Luft / Wasser (intercooler W/A) 115 - 230 50 226 - 113 26 24 1 H ±2% ±5% Regelung Abkühlung Spannung (V) Häufigkeit (Hz) Amps Macht maxime (kW) Ständige macht (kW) Faktor von macht ( cos ø ) Klasse von isolierung Stabilität von spannung Stabilität von häufigkeit Elektronik Luft / Wasser (intercooler W/A) 115 - 230 50 252 - 126 29 27 1 H ±2% ±5% D - 17 IS 18 - 21 - 24 - 27 50 Hz 4 SICHERHEITSVORSCHRIFTEN D 4.1 Allgemeine Vorsichtsmaßnahmen Vor der Inbetriebnahme des Elektroaggregats und vor Ausführung von Schmierungs- und Wartungsmaßnahmen muß das Personal sämtliche WARNUNGS- und ACHTUNGS-Hinweise des vorliegenden Handbuches und der beiliegenden technischen Unterlagen gelesen und verstanden haben. Der Hersteller kann nicht alle möglichen Umstände vorhersehen, welche potentielle Risiken beim effektiven Gebrauch des Elektroaggregats bergen könnten. Operationen und/oder Verfahren bei der Wartung der Maschine, die in den Handbüchern nicht ausdrücklich erwähnt oder angegeben werden, müssen dem Hersteller in jedem Fall mitgeteilt und von diesem genehmigt werden. Sollte ein Verfahren angewendet werden, welches nicht ausdrücklich empfohlen wird, hat sich der Benutzer zu versichern, daß dieses Verfahren keine Gefahren birgt und keine Personen- oder Sachschäden verursacht. Der Hersteller haftet nicht für Personen- oder Sachschäden, die durch Nichtbeachtung der Sicherheitsvorschriften hervorgerufen werden. Die Angaben auf den Warnschildern der Maschine sind aufmerksam zu lesen und zu befolgen. - Das Elektroaggregat darf ausschließlich von Personen mit entsprechender Befähigung und Schulung verwendet werden. - Kinder und Tiere sind vom Elektroaggregat fernzuhalten, während es in Betrieb ist. - Nie mit nassen Händen am Generator arbeiten, da bei nicht sachgemäßer Verwendung Stromschlaggefahr besteht. - Vor Überprüfungen des Elektroaggregats ist der Motor abzuschalten; Überprüfungen bei laufendem Motor dürfen ausschließlich von Fachpersonal vorgenommen werden. - Abgase nicht einatmen, da sie gesundheitsschädliche Stoffe enthalten. - Verwenden Sie das Elektroaggregat mit geschlossenen Inspektionsklappen. - Motor oder Wechselstromgenerator niemals mit den Händen berühren, wenn das Elektroaggregat in Betrieb oder noch heiss ist. - Bei Wartungsarbeiten am Elektroaggregat ist der Minuspol der Starterbatterie abzuziehen, um unbeabsichte Startvorgänge zu vermeiden. - Bei Öl- oder Treibstoffverlust ist die ausgelaufene Flüssigkeit sorgfältig aufzunehmen, um einer möglichen Brandgefahr vorzubeugen. - Personen mit Herzschrittmachern ist der Zutritt zur Maschine aufgrund der möglichen D - 18 elektromagnetischen Interferenzen mit HerzKreislaufgeräten zu untersagt. - Im Brandfall ist ein zugelassenes Feuerlöschgerät zu verwenden. Keinesfalls Wasser als Löschmittel gebrauchen. Sollte Sie Probleme oder Fragen haben, wenden Sie sich bitte an das MASEKUNDENDIENSTBÜRO. BeimGebrauchdesElektroaggregats ist zu beachten, daß in nassen oder sehr feuchten Räumen die Artikel 313 und 318 des Erlasses des Präsidenten der Republik NR.547 vom 27/04/55, sowie KAP. 11; ABSCHNITT IV der C.E.I.-Norm 64-8 befolgt werden müssen. 4.2 Sicherheitsvorschriften während der Installation und Inbetriebnahme - Das mit der Montage und Inbetriebsetzung des Elektroaggregats beauftragte Personal hat stets einen Schutzhelm, Sicherheitsschuhe und einen Arbeitsanzug zu tragen. - Schutzhandschuhe verwenden. - Demontierte Teile, Werkzeuge oder sonstige Teile der Anlage nicht auf dem Motor oder in dessen Nähe liegen lassen. - Entflammbare Flüssigkeiten oder damit durchtränkte Lappen dürfen sich keinesfalls in der Nähe des Elektroaggregats, elektrischer Geräte (auch nicht Lampen) oder Teile der elektrischen Ausrüstung befinden. - Es sind sämtliche Vorsichtsmaßnahmen zur Vermeidung von Stromschlägen zu treffen. 5 VERWENDUNG DES GENERATORS 5.1 Vorbereitende Kontrollarbeiten Vor der Inbetriebsetzung des Elektroaggregats hat man sich mit dem Aggregat und seinen Bedienungselementen vertraut zu machen. Ferner ist die Maschine einer Sichtkontrolle zu unterziehen und auf einwandfreie Montage zu überprüfen. Effektive und potentielle Gefahrenquellen sind vor der Ausführung sämtlicher Arbeitsgänge zu beseitigen. - Sämtliche Not-Aus-Tasten, Schalter und andere Notstopsysteme des Elektroaggregats sind ausfindig zu machen. - Die in Notsituationen zu verfolgenden Vorgänge sind genau zu kennen. - der Ölstand mittels Messtab [Abb. 7, Punkt 2] kontrollieren: siehe Tabelle "A" Empfohlene Schmierstoffe, [Abb. 8 ] IS 18 - 21 - 24 - 27 50 Hz - alle Verankerungspunkte des Generators müssen gut befestigt sein. - kontrollieren, daß sämtliche elektrischen Verbraucher ausgeschaltet sind, damit das Elektroaggregat nicht im belasteten Zustand eingeschaltet wird; - Wasser- und Treibstoffleitungen müssen richtig angeschlossen sein - alle Elektroanschlüsse müssen richtig ausgeführt und die Anschlüsse müssen sich in einwandfreiem Zustand befinden. - der Wasserhahn muss geöffnet sein [Abb. 6, Punkt 2] - Bei Einbau eines Rückschlagventils (gemäss den Empfehlungen des Installationshandbuches) an der Meerwasseransaugleitung muss der Wasserleitungsabschnitt zwischen der Pumpe und dem Ventil manuell aufgefüllt worden sein [Abb. 4, Punkt 1]. 5.2 Entlüftung der Anlage Luftblasen im Versorgungssystem verursachen, daß der Motor Betriebsstörungen aufweist oder die Solldrehzahl nicht erreicht. Luftdurchbruch im Versorgungssystem kann auf eine undichte Verbindung (Rohre, Filter, Tank) oder auf den Mindeststand des Kraftstoffes im Tank zurückzuführen sein. Zur Beseitigung der Luftblasen zuerst die Ursache für das Eindringen der Luft beheben und dann wie folgt vorgehen: 1 - Von Hand den Hebel der Kraftstoffpumpe [Abb.7 Pos.3] betätigen, bis an den Entlüftungsschrauben keine Luft mehr. 2 - Den oben beschriebenen Vorgang wiederholen, falls der Motor noch nicht ordnungsgemäß funktioniert. Die Arbeitsgänge gemäß den Herstellervorgaben in der Bedienungsanleitung des Motors, die jedem Elektroaggregat beigepackt ist, ausführen . 5.3 Starten Vor Starten des Elektroaggregats sicherstellen, daß sämtliche im Abs 5.1 beschriebenen Überprüfungen ausgeführt wurden. An dieser Stelle wird das Aggregat über die START-Taste auf der Steuertafel (Abb. 4, Bez. 4) gestartet. Die Taste erst nach Anspringen des Motors freigeben und bei etwaiger Wiederholung eines Startversuches nie länger als 15 Sek. betätigen, wobei ein neuer Startversuch erst nach mindestens 30 Sek. vorgenommen werden darf. Es leuchten dabei alle Meldeleuchten des Motorschutzmoduls (Abb. 4, Bez. 5) auf und sofern keine Motor- oder Generatorstörungen vorliegen, bleibt nur die grüne Kontrolleuchte RUN (Abb. 4, Bez. 6) im Leuchtzustand, die das erfolgte Starten und den einwandfreien Betrieb des Aggregats anzeigt. Wiederholte und erfolglose Startversuche können eine übermäßige Wasseransammlung im Ablaßsystem verursachen und somit schwere Motorschäden bewirken. Bei hartnäckiger Startunwilligkeit des Motors ist vor dem Fortsetzen der Startversuche der Meerwasserhahn (Abb. 6, Bez. 2) zu schließen. D 5.4 Stillsetzen des Elektroaggregats Zum Anhalten des Aggregats wird einfach die Taste STOP auf der Steuertafel betätigt. Es empfiehlt sich, das Elektroaggregat vor dem Anhalten einige Minuten ohne Stromentnahme laufen zu lassen, damit Motor und Drehstromgenerator abkühlen. 6 SICHERHEITSVORRICHTUNGEN Die Elektroaggregate sind mit einer Reihe von Schutzvorrichtungen ausgestattet, die sie gegen eine unsachgemäße Verwendung sowie gegen Störungen schützen, die ihre Unversehrtheit beeinträchtigen können. Wenn der Betrieb des Elektroaggregats durch eine Schutzvorrichtung unterbrochen wird, schaltet sich auf dem Motorschutzmodul [Abb. 5, Punkt 5] des Steuerbretts die der Störung entsprechende Kontrolleuchte ein. 6.1 Schutzvorrichtungen gegen niedrigen Öldruck Diese Sicherheit spricht unter Stoppen des Aggregats bei unzureichendem Öldruck an. Anzeige durch Leuchtzustand der Kontrolleuchte OIL (Abb. 4, Bez. 7). Normalerweise startet das Aggregat, wenn das Öl bis zum vorgeschriebenen Stand nachgefüllt wird. Der Ölstand in der Ölwanne des Motors wird bei Ansprechen dieser Sicherheit nicht angezeigt. Es ist daher wichtig, daß der Ölfüllstand täglich überprüft wird. Der einwandfreie Motorbetrieb setzt voraus, daß der Motor für weniger als 3 Minuten die max. Neigung von 30° nicht überschreitet; 25° ohne Zeitbeschränkung auf der Längs- und Querachse. Im Falle, daß der Motor mit größeren Neigungen arbeitet, besteht die Gefahr einer mangelhaften Schmierung oder Absaugung durch den Schmieröl-Luftfilter. 6.2 Schutzvorrichtung gegen Wasserüberhitzung Diese Sicherheit spricht unter Stoppen des Aggregats an, wenn die Temperatur der Kühlflüssigkeit des Motors zu hoch ist oder das Meerwasser nicht um Umlauf steht. D - 19 IS 18 - 21 - 24 - 27 50 Hz D Ansprechen der Sicherheit wird durch den Leuchtzustand der Kontrolleuchte °C (Abb. 4, Bez. 10) angezeigt. Das Elektroaggregat darf erst nach Beseitigung der Störungsursache gestartet werden. 6.3 Schutzvorrichtungen gegen Wechselstromgeneratorüberhitzung Diese Sicherheit spricht bei Überhitzung des Drehstromgenerators unter Stoppen des Aggregats an. Ansprechen der Sicherheit wird durch den Leuchtzustand der Kontrolleuchte °C (Abb. 4, Bez. 8) angezeigt. Das kann gestartet werden, nachdem die Temperatur der Generatorwicklungen auf die Normwerte abgesunken ist. Es empfiehlt sich auf jeden Fall, der Störung auf den Grund zu gehen. Bei Ansprechens einer der beschriebenen Sicherheiten ist nach Feststellung und Beseitigung der Störungsursache die Steuertafel über die Taste STOP rückzustellen, andernfalls bleibt das Signal gespeichert und verhindert den Motorstart. 6.4 Schutzvorrichtung gegen Kurzschluß und Überlastung Das Elektroaggregat ist gegen Kurzschluß und Überlastung geschützt. Ein zweipoliger Magnet-Thermoschalter (Abb. 4, Bez. 2) unterbricht die Stromabgabe, wenn ein Kurzschluß vorliegt oder der abgegebene Strom über dem Sollwert liegt. 6.5 Schutzvorrichtung gegen Kurzschluss der Niederstromelektroanlage Bei Eintreten eines Kurzschlusses in der elektrischen NiederspannungsanlageunterbrichteinThermoschalter (Abb. 4, Bez. 3) den Stromkreis, wodurch das Elektroaggregat gestoppt wird. Sämtliche Meldeleuchten des Motorschutzmoduls befinden sich in diesem Fall im erloschenen Zustand und ein Wiederstart ist daher unmöglich. Bevor der Stromkreis durch Betätigen der Schaltertaste (Abb. 4, Bez. 3) rückgestellt wird, ist ein Fachelektriker zur Behebung des Kurzschlusses zu Hilfe zu ziehen. 7. WARTUNG 7.1 Vorbemerkungen Jede Wartungsmaßnahme am Elektroaggregat darf nur bei ausgeschaltetem und ausreichend abgekühltem Motor von befugtem und entsprechendgeschultemPersonaldurchgeführtwerden. Die Arbeitsgänge gemäß den Herstellervorgaben in der Bedienungsanleitung des Motors, die jedem Elektroaggregat beigepackt ist, ausführen . D - 20 Es ist wichtig, daß die Wartungseingriffe in regelmäßigen Zeitabständen, die auf der Grundlage der Betriebsstunden zu bestimmen sind, vorgenommen werden. Zur Durchführung von Wartungsarbeiten sind die seitlichen und die obere Klappen zu entfernen. Vor Eingriffen am Elektroaggregat ist ein Pol der Starterbatterie abzuziehen, um unbeabsichtigte Startvorgänge zu vermeiden. 7.2 Ordentliche Wartung des Motors Die Zeitintervalle zur Ausführung der Wartungsarbeiten sind in der Tabelle B angegeben. Genauere Angaben finden Sie im Motorhandbuch, das vom Hersteller jedem Elektroaggregat beigepackt wird. Den Füllstand des Motoröls anhand des Ölstabs (Ab. 7, Bez. 2) überprüfen. Das Öl muß stets zwischen die MAX.- und MIN.-Markierung des Ölstabs reichen (Abb. 7, Bez. 1). 7.3 Wechsel des Motoröls und des Ölfilters Das Motorgehäuse hat ein Fassungsvermögen (Inhalt) von 10.2 Liter. Das Motoröl wird durch die Füllöffnung (Abb. 3, Bez. 17) nachgefüllt. Zum Ölwechsel im Motorgehäuse wird nach Abdrehen der Füllschraube der Ölstab (Abb. 7, Bez. 2) entfernt und die Ölpumpe (Abb. 7, Bez. 7) eingeschaltet. Hier sei darauf hingewiesen, daß heißes Öl flüssiger ist und daher noch in diesem Zustand ausgepumpt werden sollte. Die empfohlenen Ölsorten sind in der Tab. A, Abb. 8, angegeben. - Das Öl ist erstmalig nach 50 Betriebsstunden des Elektroaggregats zu wechseln. Danach alle 200 Betriebsstunden. - Genauere Angaben über die Motorschmierung können in der Bedienungs- und Wartungsanleitung, die dem Motor beigefügt ist, nachgeschlagen werden. - Aböle oder Kraftstoff sind stets normgerecht zu entsorgen, indem sie den zuständigen Entsorgungsstellen ausgeliefert werden. Es ist unbedingt zu vermeiden, daß das Motoröl mit der Haut in Berührung kommt. Während derWartungsarbeitensinddaherstetsArbeitshandschuhe und Schutzbrillen zu tragen. Bei versehentlichem Kontakt die betroffene Stelle unverzüglich mit Wasser und Seife gründlich waschen. IS 18 - 21 - 24 - 27 50 Hz Der Motorölfiltereinsatz (Abb. 3, Bez. 16) wird für den Austausch vom eigenen Halter unter Verwendung handelsüblicher Werkzeuge abgedreht. Bei Anbringen des neuen Filtereinsatzes darf nicht vergessen werden, den Gummidichtring zu schmieren. Das Öl ist erstmalig nach 50 Betriebsstunden des Elektroaggregats zu wechseln. Danach alle 400 Betriebsstunden. Genauere Angaben können in der Bedienungs- und Wartungsanleitung, die dem Motor beigefügt ist, nachgeschlagen werden. Zur Gewährleistung eines einwandfreien Motorbetriebs dürfen ausschließlich Original-Ersatzteile verwendet werden. Nach Beendung der Arbeiten sind die dabei durch Öl und Kraftstoff verschmutzten Teile des Elektroaggregats gründlich zu säubern. 7.4 Reinigung des Luftfilters Die Elektroaggregate der Serie IS sind mit einem Trockenluftfilter ausgestattet, der verhindert, daß Fremdkörper in die Verbrennungskammer gelangen. Damit er stets funktionstüchtig ist, genügt es, einmal jährlich, die Filtriermasse unter Verwendung von Dieselöl zu säubern. Die verwendeten Reinigungsflüssigkeiten sind an die zuständigen Entsorgungsstellen auszuliefern. 7.5 Austausch des Treibstofffilters ZurGewährleistungeinerlangenNutzdauerundeinwandfreien Funktion des Motors, ist es von ausschlaggebender Wichtigkeit, daß der Kraftstoffilter regelmäßig, in den vom Hersteller vorgegebenen Zeitintervallen, die in der Tabelle Abs. 7.15 angegeben sind, ausgewechselt wird. Hierzu werden die folgenden Arbeitsschritte vorgenommen: - Die Nutmutter des Lagers (Abb. 3, Bez. 13) vollständig abdrehen. - Den Filtereinsatz durch einen neuen austauschen. - Zur Wiedermontage die beschriebenen Arbeitsgänge in umgekehrter Folge ausführen. Nach erfolgtem Austausch die Versorgungsanlage wie im Abs. 5.2 beschrieben entlüften. Es ist unbedingt zu vermeiden, daß der Kraftstoff mit der Haut in Berührung kommt. Während derWartungsarbeitensinddaherstetsArbeitshandschuhe und Schutzbrillen zu tragen. Bei versehentlichem Kontakt die betroffene Stelle unverzüglich mit Wasser und Seife gründlich waschen. Nach Beendung der Arbeiten sämtliche Kraftstoffspuren sorgfältig wegputzen und die verwendeten Lappen an die zuständigen Entsorgungsstellen ausliefern. D 7.6 Kontrolle der Kühlflüssigkeit Die im geschlossenen Kühlkreis im Umlauf stehende Kühlflüssigkeit ist regelmäßig auf ordnungsgemäßen Füllstand zu überprüfen. Hierzu sind auf dem Expansionsgefäß (Abb. 3, Bez. 11) die entsprechenden Markierungen eingeschlagen. Die Kühlflüssigkeit, wenn nötig, nachfüllen und achtgeben, daß sie nicht über die Max.-Markierung reicht. Den Verschluß des Expansionsgefäßes (ab. 3, Bez. 11) und des Tanks (Abb. 3, Bez. 26) nie bei warmgelaufenem Motor abschrauben, um ein gefährliches Austreten der Kühlflüssigkeit zu vermeiden. 7.7 Kontrolle der Riemenspannung Die Keilriemen sorgen für die Übertragung der Drehbewegung von der Motorwellen-Riemenscheibe an die Meerwasserpumpe (Abb. 8, Bez. 1). Die Riemen werden durch eine zu starke Spannung rascher abgenützt, während bei zu schwacher Spannung die Riemenscheiben leer drehen, was einen unzureichenden Wasserumlauf zur Folge hat. Die Spannung der Riemen wird folgendermaßen geregelt: Die beiden Regulierungsschrauben (Abb. 8, Bez. 2) lösen und für eine stärkere Spannung die Meerwasserpumpe nach außen verschieben, und umgekehrt zum Lockern der Spannung. Die Spannung ist regelrecht, wenn der Riemen unter einer Druckkraft von 8 KG etwa 5 mm durchhängt (Abb. 8). Ein zweiter Riemen überträgt die Drehbewegung von der Motorwellen-Riemenscheibe an die Pumpe der im geschlossenen Kreis zirkulierenden Flüssigkeit und an den Batterielade-DC-Drehstromgenerator (Abb. 8, Bez. 3). Die Spannung dieses Riemens wird folgendermaßen geregelt: Die Regulierungsschraube (Abb. 8, Bez. 4) lösen und für eine stärkere Spannung den Generator nach außen verschieben, und umgekehrt zum Lockern der Spannung. Die Schrauben festspannen und Spannung kontrollieren. Die Spannung ist regelrecht, wenn der Riemen unter einer Druckkraft von 8 KG etwa 10 mm durchhängt (Abb. 8). Ein durch Öl verschmierter Riemen dreht durch und muß daher stets sauber sein. Nötigenfalls mit Benzin reinigen. D - 21 IS 18 - 21 - 24 - 27 50 Hz D Bei laufendem Motor nie die Hände der Keilriemenscheibe oder den Riemenscheiben nähern. 7.8 Entleerung der Kühlanlage Vor der Ausführung der Wartungsarbeiten am Wasser/ Luft-Wärmeaustauscher oder an der Kühlanlage ist stets der Meerwasser-Saugkreis zu entleeren. Dies wir auf folgende Weise vorgenommen: - Das Meerwasseranschlußventil (Abb.6, Bez.2) schließen. - Das Ablaßventil (Abb.6, Bez. 3) öffnen und das Wasser vollständig ausfließen lassen. - Das Ablaßventil schließen. Vor Starten des Elektroaggregats ist das Meerwasseranschlußventil wieder zu öffnen. 7.9 Auswechseln der Kühlflüssigkeit Die Kühlflüssigkeit im geschlossenen Kühlkreis ist jährlich wie folgt auszutauschen: - Um den Seite-Schalter zu entfernen (Abb.3, Punkt 3) - Einen Schlauch mit einer Länge von etwa 50 cm und mit einem Innendurchmesser von 30-40 mm verwenden. - stecken Sie die Leitung unter den Wasserhahn hinein (Abb. 7, Punkt 4) positionieren und ihn mit einem Gefäß mit einem Fassungsvermögen von etwa 10 Litern verbinden. - Den Deckel öffnen und den geschlossenen Kühlkreis vollständig entleeren. Den Deckel nach Beendigung des Vorgangs schließen und den Kreis wieder mit neuer Kühlflüssigkeit füllen. Die abgelassene Kühlflüssigkeit ist stets normgerecht zu entsorgen, indem sie den zuständigen Entsorgungsstellen ausgeliefert wird. 7.10 Austausch der Zinkanoden Um den Wasser/Luft-Wärmeaustauscher (Abb. 9, Bez. 1) und den Wasser/Kühlflüssigkeit-Wärmeaustauscher (Abb. 9, Bez. 2) vor galvanischem Strom zu schützen, sind in diesen Austauschern zwei Zinkanoden integriert (Abb. 9, Bez. 4). Diese Anoden sind regelmäßig auf Abnützungserscheinungen zu überprüfen und nötigenfalls auszuwechseln, um unbehebbare Korrosionsschäden der Wärmeaustauscher zu vermeiden. In einem neuen Aggregat sind diese Zinke wenigstens einmal im Monat auf ihren Abnützungsgrad zu überprüfen und folglich in erfahrungsgemäß festgestellten Zeitabständen. Die Zinkanoden sollten auf jeden Fall jährlich ausgewechselt werden. In Abb. 9 sind die Anbringungsstellen der Zinkanoden gezeigt. D - 22 7.11 Wartung der Meerwasserpumpe Das Gummilaufrad der Meerwasserpumpe (Abb. 7, Bez. 1) ist wenigstens einmal im Jahr auf einwandfreien Zustand zu überprüfen. Bevor die Pumpe für die Kontrolle des Laufrades geöffnet wird, muß das Meerwasser aus der Kühlanlage ausgelassen werden, vgl. hierzu Abs. 7.8. Den Deckel (Abb. 7, Bez. 2) abnehmen und mithilfe von zwei Zangen das Laufrad herausziehen. Für die Montage des neuen Laufrades die beschriebenen Arbeitsgänge in umgekehrter Folge ausführen. 7.12 Wartung des Wechselstromgenerators Der für dieses Generatormodell verwendete Drehstromgenerator ist synchron, mit Selbsterregung und elektronischer Spannungsregelung. Dieser Drehstromgenerator bedarf durch die Abwesenheit von Kollektor und Bürsten keiner besonderen Wartung. Die Überprüfungen und regelmäßigen Wartungseingriffe sind auf die Beseitigung der Spuren schädlicher Feuchtigkeit und Oxydation beschränkt. 7.13 Wartung der Batterie Zum Starten sämtlicher Elektroaggregate ist bei Raumtemperaturen über 0°C eine 70 A/h-Batterie empfohlen und eine 100 A/h-Batterie für Minustemperaturen. Eine neue Batterie ist vor dem Einbau einem kompletten Ladezyklus zu unterziehen. Die Batterieflüssigkeit (Elektrolyt) wenigstens einmal im Monat auf vorschriftsmäßigen Füllstand überprüfen und nötigenfalls mit destilliertem Wasser auffüllen. Bei längeren Stillstandzeiten ist die Batterie abzuschließen und in einem trockenen Raum bei einer Temperatur von über 10°C zu lagern und einmal im Monat einem kompletten Ladezyklus zu unterziehen. Die Batterie darf nie über lange Zeit ungeladen bleiben, da sie dadurch endgültig beschädigt würde. Auf die positive Batterieklemme Fett oder Vaselin auftragen, um sie vor Oxydation zu schützen. Zum Auffüllen der Schwefelsäure sind unbedingt verwendungsfertige Lösungen zu benutzen. Beim Auffüllen der Batterieflüssigkeit durch destilliertes Wasser oder Säure sind unbedingt Gummihandschuhe und Schutzbrillen zu tragen, um Haut- bzw. Augenschäden durch einen versehentlichen Kontakt mit der Schwefelsäure zu vermeiden. Sollte dies dennoch passieren, ist die betroffene Stelle unverzüglich mit Wasser und Seife gründlich zu waschen und ein Arzt zu rufen. IS 18 - 21 - 24 - 27 50 Hz Vor dem Aufladen der Batterie den Elektrolytstand kontrollieren und, sofern nötig, nach erfolgter Ladung mit destilliertem Wasser auffüllen. 7.14 Betriebspausen Das Elektroaggregat wenigstens einmal im Monat anlassen. Soll das Elektroaggregat eine längere Zeit außer Betrieb stehen, sind die folgenden Arbeitsschritte vorzunehmen: - Das Motoröl wechseln. - Den Ölfiltereinsatz austauschen (vgl. hierzu Abs. 6.3). - Den Kraftstoffiltereinsatz austauschen (vgl. hierzu Abs. 6.5). - Die Einspritzventile entfernen und in jeden Zylinder 2 Kubikzentimeter Motoröl füllen und den Motor unter Handbetätigung der Motorwellenriemenscheibe einige Umdrehungen ausführen lassen. Die Einspritzventile wieder montieren. - Die Pastillen aus Zink austauschen (vgl. hierzu Abs. 6.10). - Durch das Rohr für den Meerwassereinlaß eine Frostschutzflüssigkeit ansaugen, damit die Wärmeaustauscher nicht einfrieren und das Laufrad der Meerwasserpumpe sowie die Metallteile im Inneren der Kühlanlage schmieren. - Die Startbatterie abschließen und in einem trockenen Raum abstellen (vgl. hierzu Abs. 6.13). - Das Rohr für den Meerwasserausfluß vom Motorkrümmer abtrennen. - Den Meerwasserfilter reinigen. - Das Meerwasserventil schließen. - Den Auspuff vom Meerwasser entleeren. - Das Antisiphonventil (siphon break), sofern installiert, reinigen und schmieren. 7.15 Übersicht über die geplanten Wartungsmassnahmen ARBEIT ZEITINTERVALL IN STUNDEN Überprüfung Motorölstand 10 Überprüfung Kühlflüssigkeitsstand 10 Überprüfung auf Öllecks 20 Überprüfung auf Kraftstofflecks 20 Überprüfung auf Flüssigkeitslecks 20 Regulierung der Keilriemenspannung 100 Überprüfung der Batterieladung 100 Reinigung des Kraftstoffilters 200 Regulierung der Riemenspannung 200 * Motorölwechsel 200 Überprüfung des Meerwasserpumpenlaufrades 400 Überprüfung der Motordrehzahl 400 Überprüfung der elektr. Anschlüsse 400 Austausch des Kraftstoffilters 400 * Austausch des Ölfilters 400 Überprüfung der Einspritzventile 400 Überprüfung der Einspritzsteuerzeiten 400 Spielausgleich Ein-/Auslaßventil 400 Überprüfung der Kraftstoffpumpe 1000 Überprüfung des Batterieflüssigkeitsstandesmonatlich Reinigung und Schmierung der Metallteile jährlich Reinigung des Luftfilters jährlich Vollständiger Wechsel der Kühlflüssigkeit jährlich Austausch der Zinkanoden jährlich D TAB. "B" * Den ersten Eingriff nach 50 Betriebsstunden und darauffolgend in den geplanten Zeitabständen ausführen 7.16 Übersicht über mögliche Störungen Der Anlassermotor läuft, der Hauptmotor springt aber nicht an. - Kraftstoffstand im Tank überprüfen und ggf. nachfüllen. - Überprüfen, ob der Stopp-Solenoid gezogen ist (mit einem Service-Zentrum Rücksprache nehmen). - Den Versorgungskreis entlüften, bis der Kraftstoff blasenfrei austritt (vgl. hierzu Abs.4.2). Das Motorschutzmodul wird bei Betätigen der Starttaste nicht aktiviert. - Überprüfen, ob der Thermoschalterkontakt (Abb. 4, Bez. 3) offen ist und den Kontakt über die rote Taste (Abb. 4, Bez. 3) rückstellen. - Anschlußkabel und Anschlußklemmen der Batterie, sowie die elektr. Anschlüsse überprüfen. - Die Batterie auf einwandfreien Zustand überprüfen (aufladen oder austauschen). D - 23 IS 18 - 21 - 24 - 27 50 Hz 9 VERSCHROTTUNG D Das Elektroaggregat schaltet sich während des Betriebs aus. - Überprüfen, ob eine Sicherheitsvorrichtung unter Aufleuchten der dazugehörigen Kontrolleuchte angesprochen hat (die Störungsursache beseitigen und erneut starten). - Kraftstoffstand im Tank überprüfen (ggf. nachfüllen). Motorauspuff raucht stark - Sich vergewissern, daß der Ölstand in der Ölwanne nicht über die Max.-Markierung reicht (auf den richtigen Füllstand bringen). - Sicherstellen, daß das Aggregat nicht überlastet ist. - Einstellung der Einspritzventile überprüfen (mit einem Service-Zentrum Rücksprache nehmen). Ordnungswidriger Motorbetrieb - Kraftstoffilter überprüfen (auswechseln). - Den Versorgungskreis entlüften, bis der Kraftstoff blasenfrei austritt (vgl. hierzu Abs. 4.2) Die Spannung des Wechselstromgenerators ist zu gering. - Drehzahl des Motors kontrollieren : 1560 U/min ohne bei 50Hz angeschlossene Verbraucher. - Erregungskondensator beschädigt (austauschen). Startbatterie entladen - Elektrolytstand in der Batterie kontrollieren (auffüllen). - DC-Drehstromgenerator auf Funktionstüchtigkeit überprüfen. - Batterien auf einwandfreien Zustand überprüfen. Elektroaggregat gibt keine Spannung ab - Überprüfen, ob der Magnet-Thermoschalter (Abb. 4, Bez. 2) auf ON steht, wenn nicht, mit einem ServiceZentrum Rücksprache nehmen. 8 TRANSPORT Für den Transport sind alle Elektroaggregate mittels Schrauben auf einer Palette befestigt. Zum Transport auf Schiffen sind die unterhalb der oberen Eingriffsklappe [Abb.3, Punkt 2] befindlichen Haken zum Anheben zu verwenden. Sorgfältig anhaken und beim Anheben keine ruckartigen Bewegungen ausführen, damit das Elektroaggregat nicht beschädigt wird. - Das Anhaken des Elektroaggregat an anderen als den vorgesehenen Punkten kann zu Beschädigungen desselben führen und gefährlich für die Bediener sein. - Während des Anhebens muß das gesamte Personal einen angemessenen Abstand von der Maschine einhalten und einen Schutzhelm tragen. D - 24 Nach endgültiger Außerbetriebsetzung ist das Elektroaggregat den zuständigen Verschrottungsstellen auszuliefern. Das Elektroaggregat nicht auf Müllstellen entsorgen, da viele seiner Komponenten umweltbelastend sind. 10 ERLAUTERUNGEN ZUM SCHALTPLAN abb.10 1 2 3 4 5 6 7 8 9 10 11 12 13 14 15 16 17 18 19 20 21 22 23 24 25 26 27 28 29 30 Magnetothermischer Schalter Stundenzähler Wechselstromgenerator Rotor Stator Spannungsregler Leistungsklemmenbrett NOT-AUS-TASTE Thermoschalter START / STOP Taste Motorschutzmodul Klemmenbrett Verbinder zum Anschluss der Fernbedienung Treibstoffanzeiger Wassertemperaturanzeiger Öldruckanzeiger Sensor für zu hohe Wassertemperatur Sensor für zu hohe Kühlflüssigkeitstemperatur Öldruckwächter Drehstromgenerator Elektromagnet Stop Startermotor Batterieanschlussklemmen Steuerbrettanschlusskabel START / STOP Taste Öldruckanzeigeinstrument Anzeigeinstrument für Kühlflüssigkeitstemperatur Fernbedienungsschalttafelkit mit Instrumenten Fernbedienungsschalttafelkit Leben von Erde IS 18 - 21 - 24 - 27 50 Hz abb.11 D 1 WECHSELSTROMGENERATOR 2 WECHSELSTROMGENERATOR ZUM WIEDERAUFLADEN DER BATTERIE 3 BATTERIE 4 VERBINDER 12P 5 STUNDENZÄHLER 6 DIODE 7 ELEKTROMAGNET-STOP 8 MOTORSCHUTZMODUL 9 STARTERMOTOR 10 ÖLDRUCKWÄCHTER 11 NOT-AUS-TASTE 12 ELEKTRONISCHER SPANNUNGSREGLER 13 ROTOR 14 STATOR 15 THERMOSCHALTER 16 MOTORTHERMOSTAT 17 TEMPERATURANZEIGE 18 ÖLDRUCKANZEIGE 19 MAGNET-THERMOSCHALTER 2P 20 0 21 RELAIS 22 RELAIS 23 START-STOP-TASTE 24 THERMOSTAT WECHSELSTROMGENERATOR 25 SENSOR TEMPERATUR 26 ÖLDRUCKGEBER 27 VERBINDER 6P D - 25 I IS 18 - 21 - 24 - 27 50 Hz TABLE DES MATIERES Figure ..................................................................... 2 Schéma électrique ................................................ 8 1 F 1.1 1.2 1.3 1.4 1.5 1.6 1.7 1.8 2 2.1 2.2 2.3 2.4 3 INFORMATIONS GENERALES ..................... 11 Objectif et domaine dapplication du manuel . 11 Symboles ..................................................... 11 Documentation de référence ......................... 12 Fac-similé de la déclaration de conformité CE12 Normes et dispositions légales de référence . 12 Identification de la machine .......................... 12 Composition des groupes électrogènes ........ 13 Tableau instruments ..................................... 13 INFORMACION GENERAL ............................ 14 Documents de référence ............................... 14 Conformité aux normes ................................. 14 Marquage ..................................................... 14 Identification de la machine .......................... 14 GENERATOR CARACTERISTIC .................... 15 3.1 General caracteristic .................................... 15 3.2 ooling system ............................................... 15 3.3 Control panel ................................................ 15 3.4.1 Data sheet IS 18 ........................................ 16 3.4.1.1 Data sheet IS 21 ....................................... 16 3.4.1.2 Data sheet IS 24 ....................................... 17 3.4.1.3 Data sheet IS 27 ....................................... 17 4 4.1 4.2 5 5.1 5.2 5.3 5.4 6 6.1 6.2 6.3 6.4 6.5 F - 10 SAFETY REGULATIONS ............................... 18 General precautions ..................................... 18 Prescriptions for safety during installation ..... 18 and setup ..................................................... 18 USING THE GENERATOR ............................. 18 Preliminary checks ....................................... 18 Bleeding the fuel system .............................. 19 Starting ........................................................ 19 Stopping ....................................................... 19 PROTECTIONS ............................................. 19 Low oil pressure protection ........................... 19 High water temperature protection ................ 19 Alternator overheating protection ................... 19 Protection against short-circuit and overload . 20 Protection against short-circuit of the ........... 20 low-voltage electric system ........................... 20 7 7.1 7.2 7.3 7.4 7.5 7.6 7.7 7.8 7.9 7.10 7.11 7.12 7.13 7.14 7.15 7.16 MAINTENANCE ............................................ 20 Preamble ...................................................... 20 Ordinary engine maintenance ....................... 20 Engine oil and oil filter change ...................... 20 Air filter cleaning ........................................... 21 Fuel filter replacement .................................. 21 Coolant check .............................................. 21 V-belt tension check ..................................... 21 Emptying the cooling system ....................... 21 Coolant replacement ..................................... 21 Zinc anode replacement ................................ 22 Seawater pump maintenance........................ 22 Alternator maintenance ................................. 22 Battery maintenance .................................... 22 Periods of inactivity....................................... 22 Table of scheduled maintenance ................... 23 Troubleshooting ............................................ 23 8 TRANSPORT AND HANDLING ..................... 23 9 SCRAPPING ................................................. 23 10 WIRING DIAGRAM REFERENCES ................ 24 IS 18 - 21 - 24 - 27 50 Hz 1 INFORMATIONS GENERALES Consulter attentivement ce manuel avant deffectuer toute intervention sur la machine. LE NON-RESPECT DES SPECIFICATIONS DU PRESENT MANUEL DUTILISATION ET DENTRETIEN ENTRAINE LANNULATION DE LA GARANTIE F 1.1 Objectif et domaine dapplication du manuel Nous vous remercions davoir choisi un produit MASE. Ce manuel a été rédigé par le fabricant dans le but de fournir les informations et les instructions essentielles pour utiliser et entretenir la machine correctement et en toute sécurité, il constitue une partie intégrante de léquipement du groupe électrogène et doit être conservé soigneusement, à labri de tout agent susceptible de le détériorer, durant tout le cycle de vie du groupe électrogène. Le présent manuel doit suivre le groupe électrogène en cas de transfert à un nouvel utilisateur ou propriétaire. Les informations de ce manuel sadressent à toutes les personnes concernées par le cycle de vie opérationnelle du groupe électrogène et sont nécessaires pour informer les opérateurs chargés des différentes opérations, de leur coordination, de lorganisation logistique ainsi que de la réglementation relative aux accès à lendroit où le groupe sera installé et fonctionnera. Le manuel définit lobjectif pour lequel la machine a été fabriquée et contient toutes les informations nécessaires permettant de garantir son utilisation correcte et en toute sécurité. Lobservation constante des indications de ce manuel garantit la sécurité de lopérateur, léconomie dexercice ainsi quune plus longue durée de vie de la machine. Il est vivement conseillé de lire attentivement ce manuel ainsi que les documents de référence; seule cette lecture permet un fonctionnement du groupe électrogène régulier dans le temps, sa fiabilité ainsi que la sécurité des personnes et choses. Les dessins sont fournis à titre dexemple. Même si la machine en votre possession est sensiblement différente des illustrations de ce manuel, les informations quil contient et la sécurité sont garanties. Pour faciliter la consultation du manuel, celui-ci est divisé en chapitres qui en identifient les principaux concepts. Pour une consultation rapide des sujets abordés, consulter la table des matières. Remarque: Les informations contenues dans cette publication sont correctes au moment de limpression. Le fabricant, soucieux de poursuivre une politique de développement constant et de mise à jour du produit, se réserver le droit dapporter des modifications sans préavis. 1.2 Symboles Les parties de texte les plus importantes sont écrites en gras et sont précédées de symboles indiqués et définis ci-après. Indique quil est nécessaire de prêter une attention particulière afin déviter tout risque de conséquences sérieuses, susceptibles de provoquer la mort ou des lésions pour la santé du personnel. Situations susceptibles de se produire durant la durée de vie dun produit, système ou installation considéré dangereux en matière de dommages pour les personnes, la propriété, lenvironnement ou et susceptible dengendrer des pertes économiques. Indique quil est nécessaire de prêter une attention particulière afin déviter tout risque de conséquences sérieuses susceptibles de provoquer des dommages des biens matériels comme les ressources ou le produit. Indications particulièrement importantes. F - 11 IS 18 - 21 - 24 - 27 50 Hz 1.3 Documentation de référence F Les instructions dutilisation fournies avec chaque groupe électrogène sont constituées dune série de documents dont ce manuel représente la Partie Principale. Normalement, les documents suivants sont fournis: a - Déclaration de conformité CE. b - Manuel dinstructions pour lutilisation des Groupes électrogènes (le présent manuel) c - Manuel d'intallation. d - Schéma électrique du tableau de commande, contrôle et puissance. e - Manuel dUtilisation et dEntretien du Moteur. f - Manuel dUtilisation et dEntretien de lalternateur. g - Eventuels autres manuels des accessoires en option, fournis par les fabricants respectifs. h - Liste des centres de Service Après-vente Mase i - Certificat de garantie. l - Coupon de garantie. 1.4 Fac-similé de la déclaration de conformité CE Les groupes électrogènes, fabriqués par la société MASE et destinés aux pays de la Communauté Européenne sont conformes aux directives CEE applicables (voir 1.5) et sont accompagnés dune Déclaration de conformité CE (fig.B). 1.5 Normes et dispositions légales de référence Tous les groupes électrogènes diesel Mase sont conçus et produits conformément aux normes légales en vigueur. Le groupe électrogène et ses composants sont réalisés conformément aux Normes et Directives applicables suivantes: EN 292-1/2: Normes pour la sécurité des machines. Principes généraux de conception. EN 294: Normes pour la sécurité des machines. Distances de sécurité pour interdire laccès aux pièces dangereuses avec les membres supérieurs. EN 50081-1/2 (Compatibilité électromagnétique): Norme générale relative à lémission. - partie 1 - environnements résidentiels, commerciaux et industrie légère - partie 2 - environnement industriel. EN 50082-1/2(Compatibilité électromagnétique): Norme générale relative à la protection. - partie 1 - nvironnements résidentiels, commerciaux et industrie légère - partie 2 - environnement industriel. 89/392/CEE et modifications successives contenues dans les directives 91/368/CEE, 93/44/CEE e 93/68/ CEE: Conditions requises essentielles pour les machines en matière de sécurité et de protection de la santé (directive Machines). 73/23/CEE et modifications successives contenues dans la directive 93/68/CEE: Garanties de sécurité que doit avoir le matériel électrique destiné à être utilisé dans ces limites de tension (directives Basse Tension») 1.6 Identification de la machine Voir FIG. 2 1 - Nom machine 2 - Code machine 3 - Numéro de série 4 - Puissance continue 5 - Fréquence déclarée 6 - Facteur de puissance 7 - Tension nominale 8 - Courant nominale 9 - Degré de protection 10 - Classe d'isolement 11 - Température max. jouissance 12 - Altitude max. jouissance 13 - Je nivelle bruit 14 - Classes de performance 15 - Année de construction 16 - Constructeur - Adresse 17 - Je pends ISO 3046: Moteurs alternatifs à combustion interne. IEC 34-1: Machines électriques tournantes ISO 8528 -1: Groupes électrogènes à courant alterné actionnés par un moteur alternatif à combustion interne. EN 60204 -1(CEI 44-5): - Sécurité des machines. - Equipement électrique des machines. EN 60439 -1 (CEI 17-13/1): Appareils équipés de protection et manuvre pour basse tension (tableaux BT) F - 12 Les données identifiant le n° de code de la machine, le n° de série et lannée de construction doivent toujours être précisées au constructeur pour toutes demandes dinformations et de pièces détachées. IS 18 - 21 - 24 - 27 50 Hz 1.7 Composition des groupes électrogènes Voir Fig. 3 Les groupes électrogènes sont essentiellement constitués des composants suivants: 1 2 3 4 5 6 7 8 9 10 11 12 13 14 15 16 17 18 19 20 21 22 23 24 25 26 F - Caisse insonorisante - Porte supérieure daccès - Porte latérale daccès - Tableau des instruments - Etriers dancrage - Raccord échappement de la fumée et évacuation de leau de refroidissement - Raccord de raccordement prise deau de mer - Raccords de raccordement au réservoir carburant - Bornes de connexion à la batterie - Filtre à air moteur - Vase dexpansion liquide réfrigérant - Pompe extraction huile moteur - Cartouche filtre gasoil - Pompe eau de mer - Pompe carburant - Cartouche filtre à huile - Bouchon de remplissage dhuile - Boîtier de branchement ligne électrique - Alternateur chargeur batterie - Le collecteur a refroidi pour arroser - Echangeur thermique eau/air - Collecteur dévacuation - Démarreur - Connecteur tableau de commande à distance - Vis de régulation des tours du moteur - L'eau / Air intercooler 1.8 Tableau instruments Voir Fig. 4 Chaque groupe électrogène dispose dun tableau instruments pour les commandes et les contrôles, sur lequel se trouvent les composants suivants: 1 2 3 4 5 6 7 8 9 - Compteur horaire - Interrupteur magnétique et thermique - Interrupteur thermique courant continu (cc) - Bouton START / STOP - Module protection moteur - Voyant lumineux «RUN» moteur démarré - Voyant lumineux «OIL» basse pression de lhuile - Voyant lumineux «°C» haute température du moteur - Voyant lumineux «BATT.» fonctionnement du chargeur batterie 10 - Voyant lumineux «°C» haute température alternateur 11 - Bougies (pas présentes) 12 - Sortie carburant (version «RINA») F - 13 IS 18 - 21 - 24 - 27 50 Hz 2. INFORMACION GENERAL F 2.1 Documents de référence 2.4 Identification de la machine Les consignes dutilisation fournies avec chaque groupe électrogène sont constituées dune série de documents dont ce manuel représente la Partie Principale. Normalement, les documents suivants sont fournis: Voir Fig. A a Déclaration CE de conformité. b Manuel dinstructions pour lutilisation et lentretien des groupes électrogènes, (le présent manuel). c Manuel dutilisation et dentretien du Moteur. e Liste des centres de Service Après-vente Mase. f Certificat de garantie Mase. g Coupon de garantie. 2.2 Conformité aux normes 89/37CE et à leurs modifications : Conditions requises essentielles pour les machines en matière de sécurité et de protection de la santé (directive Machines). 1 2 3 4 5 6 7 8 9 10 11 12 13 14 15 16 - Nom de la machine - Code machine - Numéro de série - Puissance continue - Fréquence déclarée - Facteur de puissance - Tension nominale - Courant nominal - Degré de protection - Classe disolation - Température maxi de service - Altitude maxi de service - Classe de fonctionnement - Année de fabrication - Fabricant - Adresse - Poids 73/23/CEE et modifications suivantes contenues dans la directive 93/68/CEE: Garanties de sûreté qu'il doit posséder le matériel électrique destiné à être utilisé d'ici certains limites de tension, (Directives "Basse Tension"). 2000/14 CE: Directive de lenvironnement sur le bruit émis par les machines (seulement sur les modèles indiqués dans le tableau bruit émis) 1 2.3 Marquage La plaque signalétique appliquée sur les groupes électrogènes comprend toutes les informations didentification de la machine, conformément au marquage CE, dans les cas pour lesquels il est prévu. Vous trouverez cidessous le fac-similé de la plaque signalétique fixée sur chaque machine, (Fig. A). 4 3 2 5 6 7 8 10 9 11 15 14 16 12 13 Fig.A Les données qui identifient le numéro de code de la voiture, le numéro de série et l'an de construction doivent être précisé toujours au constructeur pour renseignements, demandes de rechange, etc.. F - 14 IS 18 - 21 - 24 - 27 50 Hz 3. GENERATOR CARACTERISTIC 3.1 General caracteristic The IS generators were designed for easy installation on boats. The soundproof casing, obtained with insulated, painted marine aluminium panels, allows easy access to the engine and the alternator for maintenance and inspection operations, and at the same time strongly reduces noise. The 4-stroke, direct-injection, diesel engine, built by Yanmar, is extremely reliable and robust. Exhaust emission is in conformity with CARB regulations. The synchronous-type, 4-pole, brushless alternator has an electronic voltage regulator (SR7) which guarantees stability to + 5% with respect to the nominal value. The high pickup capacity of the alternator makes the generator particularly suitable for the power supply of electric motors of air conditioners, desalination plants, compressors, etc. The generator has a local control panel [Fig. 3 Ref. 4] on which the controls and control instruments are housed. 3.2 ooling system The generator engine is cooled by closed-circuit circulation of coolant which yields heat to the seawater by means of a heat exchanger [Fig. 3, Ref. 26]. This heat exchanger was specially designed by mase to make the engine suitable for use at sea. A second heat exchanger cools the air inside the soundproof casing and the air necessary for alternator ventilation. At the time of installation a seawater feed circuit for cooling must be installed and an exhaust system to convey the combustion gas and the water used for cooling to the outside, as indicate in the installation manual. 3.3 Control panel - Lampe témoin [fig.4, pos. 11] jaune, si allumée signale que les bougies de préchauffage sont activées. Lactionnement des bougies seffectue avant le démarrage, en tournant la clé de contact de la position Stop à la position ON. Elles sarrêtent automatiquement une fois la température obtenue et le démarrage seffectue. - Lampe témoin [fig.4, pos. 12] rouge, si allumée signale que le bouton coup-de-poing de secours est enclenché. Pour faire redémarrer le groupe, il faut impérativement débloquer ce dernier. F The following may also be found on the control panel: - A bipolar magnetothermal switch [Fig. 4 Ref. 2] which cuts the power in case of an overload or short-circuit. - A thermal switch (Fig. 4 Ref. 3] to protect the lowvoltage electric system against short-circuit. - An hour counter (Fig. 4 Ref. 1]. - The generator start/stop button [Fig. 4 Ref. 4]. The generator can be connected with a connector to the remote starting panel, [Fig. 3 Ref. 24] supplied by mase as an optional, and can be installed on the dashboard. Two different remote starting panels are available as shown in Fig. 5. The most simple version has a start/stop button [Fig. 5 Ref. 1] and a green pilot light [Fig. 5 Ref. 2] which, when on, indicates that the generator is running. The second version of the remote starting panel [Fig. 5 Ref. 3] has, in addition to the start/stop button, an instrument which indicates the engine oil pressure value (Fig. 5 Ref. 4] and an instrument which indicates the coolant temperature value [Fig. 5, Ref. 5]. When carrying out maintenance operations on the generator, disconnect the negative pole of the starter battery to prevent accidental starting. A control panel is positioned on the generator for running checks and to start and stop the generator. An engine protection module [Fig. 4 Ref. 5] controls the generator protections, stopping the engine in case of a fault and signalling the fault detected by means of special warning lights. - Green RUN pilot light [Fig. 4 Ref. 6], when on, indicates that the generator is running and no operating fault has been detected. - Red BATT pilot light [Fig. 4 Ref. 9), when on, indicates that the alternator battery charger is faulty. - Red OIL pilot light [Fig. 4 Ref. 7], when on, indicates that the engine oil pressure is insufficient. - Red "°C" [Fig. 4 Ref. 10] pilot light, when on, indicates that the temperature of the coolant or the water circulating in the heat exchangers is too high. - Red "°C" [Fig. 4 Ref. 8] pilot light, when on, indicates that the alternator windings have reached too high temperatures. F - 15 IS 18 - 21 - 24 - 27 50 Hz 3.4.1 Data sheet IS 18 0RWHXU F Modèle Type Cylindres (n.) Matériaux bloc cylindres Alésage (mm) Course (mm) Cylindrée (cc) Puissance Tours/min. Rapport de compression Système d'injection Matériaux tête Régulateur de tours Système de lubrification Capacité carter huile (l) Système d'arrêt moteur Pompe alimentation carburant Hauteur d'élévation max. pompe carburant (cm) carburant à pleine Consommation charge (l/h) Volume d'air combustion (l/min) Batterie de démarrage (Ah-V) Chargeur batterie (A-V) Démarreur (kW-V) Inclinaison max. d'utilisation Débit pompe eau de mer (l/min) $OWHUQDWHXU Type Régulation Refroidissement Tension (V) Fréquence (Hz) Amps Puissance max. (kW) Puissance continue (kW) Facteur de puissance (cos ø ) Classe d'isolation Stabilité de tension Stabilité de fréquence F - 16 3.4.1.1 Data sheet IS 21 50 Hz Yanmar 4TNE94A Diesel 4 temps 4 Fonte 94 100 2776 39 1500 18:1 Directe Fonte Centrifuge, mécanique Forcée 10,2 Solénoïde Mécanique 80 7,2 1900 80 - 12 40 - 12 2,3 - 12 30° 40 50 Hz Synchrone, 4 pôles, auto-excité Électronique Air / eau (Intercooler W/A) 115 - 230 50 156 - 78 20 18 1 H ±2% ±5% 0RWHXU Modèle Type Cylindres (n.) Matériaux bloc cylindres Alésage (mm) Course (mm) Cylindrée (cc) Puissance Tours/min. Rapport de compression Système d'injection Matériaux tête Régulateur de tours Système de lubrification Capacité carter huile (l) Système d'arrêt moteur Pompe alimentation carburant Hauteur d'élévation max. pompe carburant (cm) carburant à pleine Consommation charge (l/h) Volume d'air combustion (l/min) Batterie de démarrage (Ah-V) Chargeur batterie (A-V) Démarreur (kW-V) Inclinaison max. d'utilisation Débit pompe eau de mer (l/min) $OWHUQDWHXU Type Régulation Refroidissement Tension (V) Fréquence (Hz) Amps Puissance max. (kW) Puissance continue (kW) Facteur de puissance (cos ø ) Classe d'isolation Stabilité de tension Stabilité de fréquence 50 Hz Yanmar 4TNE94A Diesel 4 temps 4 Fonte 94 100 2776 39 1500 18:1 Directe Fonte Centrifuge, mécanique Forcée 10,2 Solénoïde Mécanique 80 7,2 1900 80 - 12 40 - 12 2,3 - 12 30° 40 50 Hz Synchrone, 4 pôles, auto-excité Électronique Air / eau (Intercooler W/A) 115 - 230 50 200 - 100 23 21 1 H ±2% ±5% IS 18 - 21 - 24 - 27 50 Hz 3.4.1.2 Data sheet IS 24 0RWHXU Modèle Type Cylindres (n.) Matériaux bloc cylindres Alésage (mm) Course (mm) Cylindrée (cc) Puissance Tours/min. Rapport de compression Système d'injection Matériaux tête Régulateur de tours Système de lubrification Capacité carter huile (l) Système d'arrêt moteur Pompe alimentation carburant Hauteur d'élévation max. pompe carburant (cm) carburant à pleine Consommation charge (l/h) Volume d'air combustion (l/min) Batterie de démarrage (Ah-V) Chargeur batterie (A-V) Démarreur (kW-V) Inclinaison max. d'utilisation Débit pompe eau de mer (l/min) $OWHUQDWHXU Type Régulation Refroidissement Tension (V) Fréquence (Hz) Amps Puissance max. (kW) Puissance continue (kW) Facteur de puissance (cos ø ) Classe d'isolation Stabilité de tension Stabilité de fréquence 3.4.1.3 Data sheet IS 27 50 Hz Yanmar 4TNE98 Diesel 4 temps 4 Fonte 98 110 3319 46,4 1500 18:1 Directe Fonte Centrifuge, mécanique Forcée 10,2 Solénoïde Mécanique 80 9,6 2500 80 - 12 40 - 12 2,3 - 12 30° 40 50 Hz Synchrone, 4 pôles, auto-excité Électronique Air / eau (Intercooler W/A) 115 - 230 50 226 - 113 26 24 1 H ±2% ±5% 0RWHXU Modèle Type Cylindres (n.) Matériaux bloc cylindres Alésage (mm) Course (mm) Cylindrée (cc) Puissance Tours/min. Rapport de compression Système d'injection Matériaux tête Régulateur de tours Système de lubrification Capacité carter huile (l) Système d'arrêt moteur Pompe alimentation carburant Hauteur d'élévation max. pompe carburant (cm) carburant à pleine Consommation charge (l/h) Volume d'air combustion (l/min) Batterie de démarrage (Ah-V) Chargeur batterie (A-V) Démarreur (kW-V) Inclinaison max. d'utilisation Débit pompe eau de mer (l/min) $OWHUQDWHXU Type Régulation Refroidissement Tension (V) Fréquence (Hz) Amps Puissance max. (kW) Puissance continue (kW) Facteur de puissance (cos ø ) Classe d'isolation Stabilité de tension Stabilité de fréquence 50 Hz Yanmar 4TNE98 Diesel 4 temps 4 Fonte 98 110 3319 46,4 1500 18:1 Directe Fonte Centrifuge, mécanique Forcée 10,2 Solénoïde Mécanique 80 10,8 2500 80 - 12 40 - 12 2,3 - 12 30° 40 F 50 Hz Synchrone, 4 pôles, auto-excité Électronique Air / eau (Intercooler W/A) 115 - 230 50 252 - 126 29 27 1 H ±2% ±5% F - 17 IS 18 - 21 - 24 - 27 50 Hz 4 SAFETY REGULATIONS 4.1 General precautions F Before starting the generator and before starting any lubrication or maintenance operation, it is indispensable for the staff responsible to read and understand all the WARNINGS and all the CAUTION and DANGER indications listed in this manual and in the supplementary documentation furnished. Nevertheless, the manufacturer cannot foresee all the possible circumstances which may lead to potential risks in the effective conditions of use of the generator. Any operations and/or procedures for maintenance not expressly recommended or indicated in the user manuals must always be notified to and approved by the manufacturer. In the event that a procedure not specifically recommended needs to be applied, the user is responsible for assuring that such procedure is safe and does not cause harm to persons or things. The manufacturer declines all responsibility for damage to persons or things deriving from inobservance of the safety regulations. Carefully examine the safety warning plates on the machine and respect the relevant instructions. - Do not permit incompetent persons or without adequate training to use the generator. - Do not permit children or animals to approach the generator when it is in operation. - Do not access the generator with wet hands, since it is a potential source of electric shock if improperly used. - Any inspections of the generator must be carried out with the engine off. Inspections with the engine on are to be carried out by specialised personnel only. - Do not inhale the combustion smoke since it contains substances hazardous to health. - Use the generator with the access doors closed. - Never touch the engine or alternator body with the hands when the generator is running or still hot. - When carrying out maintenance operations on the generator, disconnect the negative pole of the starter battery to prevent accidental starting. - In the event of oil or fuel leaks, clean off thoroughly to prevent creating fire hazard conditions. - In the event of fire, use a homologated fire extinguisher never use water. - Do not allow access to persons wearing a pacemaker because of possible electromagnetic interference with the device. Should any problem arise or should you have any questions, please contact the Mase SERVICE department. F - 18 When using the generator always bear in mind that in wet or very humid places and in confined conduction spaces it is obligatory to comply with articles 313 and 318 of Presidential Decree No. 547 27/04/55, as well as Chap. 11 Section IV of the CEI 64-8 regulation. 4.2 Prescriptions for safety during installation and setup - The personnel in charge of installation and starting of the generator must always wear a protective helmet, safety shoes and overalls. - Use protective gloves. - Do not leave disassembled parts, tools or anything else not forming part of the system on or near the engine. - Never leave inflammable liquids or cloths soaked in inflammable liquids in proximity of the generator, near electric equipment (including lamps) or parts of the electrical system. - Take the necessary precautions to prevent the danger of electrocution. - Check that the earthing system has been installed and constructed in accordance with regulations. 5 USING THE GENERATOR 5.1 Preliminary checks Before beginning with any starting procedure, it is extremely important to become familiar with the generator and its controls. Furthermore, a visual inspection must be carried out on the machine and the installation. Any source of potential or real danger must be eliminated before proceeding. · Identify the position of the emergency stop buttons, switches and other emergency systems on the generator. · Learn the special emergency procedures relative to the installation in question. - the oil level by means of the dipstick [Fig. 7 Ref. 2] (see table A for recommended oils [Fig. 8]). - that all the anchoring points of the generator are properly tightened. - that all the electrical utilities are off to prevent starting the generator on load - that the water and fuel pipes are properly connected - that all the electrical connections have properly been carried out and that there are no electrical connections in a bad state. - that the water cock is open [Fig. 6 Ref. 2] IS 18 - 21 - 24 - 27 50 Hz 6 PROTECTIONS - that the section of the water circuit from the pump to the valves has been filled manually if a non-return valve has been mounted on the sea intake (as recommended in the installation manual) [Fig. 4 Ref. 1]. 5.2 Bleeding the fuel system The presence of air bubbles in the fuel system is caused by irregular functioning of the engine or the incapacity to reach the nominal number of revolutions. Air might enter the fuel circuit through a not perfectly tight seal (pipes, filters, tank) or when the fuel in the tank is at minimum level. The fuel system has been designed in such a way as to autonomously eliminate air bubbles that have penetrated the circuit. To eliminate the air bubbles, first of all eliminate the cause and carry out the following operations: 1- Adjust the fuel pump lever manually [fig.7, ref.3] until all the air in the supply system has been released. 2- Repeat the operations described above if engine operation is still irregular. For more detailed information, consult the manual supplied by the engine manufacturer that accompanies each generator . 5.3 Starting Before starting the generator, ensure that the preliminary checks described in paragraph 5.1 have been carried out. Start the generator by pressing the START button located on the control panel [Fig. 4 Ref. 4] and release it only when the generator has started, taking care not to exceed 15 sec. for each attempt and respecting an interval of at least 30 sec. All the warning lights of the engine protection module [Fig. 4, Ref. 5] will come on for a few seconds, and if there are no engine or generator faults, only the green RUN light [Fig. 4 Ref. 6] will remain on to indicate that the generator has been started and that functioning is regular. Repeated attempts at starting with negative outcome may cause excess accumulation of water in the exhaust system with possible serious damage to the engine. If it is difficult to start the engine, do not insist for too long without first having closed the sea intake cock [Fig. 6 Ref. 2]. 5.4 Stopping The generator is stopped by pressing the button [Fig.4, Ref.4] on the control panel in "STOP"position. Before stopping the generator it is recommended to let it run for a few minutes without drawing electric current, in order to allow the engine and the alternator to cool down. The generators are equipped with a series of protections which safeguard it against improper use and faults which may compromise integrity. When the generator stops because a protection has tripped, on the engine protection module [Fig. 5, Ref. 5] of the control panel the warning light relative to the fault will come on. F 6.1 Low oil pressure protection Intervenes switching off the generator when the engine oil pressure is insufficient. Its intervention is signalled by the OIL light [Fig., 4, Ref. 7] coming on. Normally it is sufficient to top up with the lacking quantity of oil to be able to restart the generator. - The low oil pressure protection does not give an indication of the level of engine oil in the sump. Therefore, check this level daily. - The engine functions properly if it does not exceed an inclination of maximum 30º for less than 3 minutes, 25º without time limit, both on the longitudinal and the transverse axis. If the engine is operated at a greater inclination, the risk is insufficient lubrication or aspiration of engine oil through the air filter. 6.2 High water temperature protection Intervenes switching off the generator when the engine coolant temperature is too high or there is no circulation of seawater. Its intervention is signalled by the ºC light [Fig. 4, Ref. 10] coming on. Only restart the generator after the cause of the fault has been identified and removed. 6.3 Alternator overheating protection Intervenes switching off the generator when there is a thermal overload on the alternator. Its intervention is signalled by the ºC light [Fig. 4, Ref. 8] coming on. The generator can be restarted after a few minutes when the temperature of the alternator windings has returned to normal values. It is, however, recommended to find and remove the causes of the intervention. In the event of one of the above described protections intervening, after ascertaining and removing the cause of the intervention, press the STOP button to reset the control panel (otherwise the signal would remain in memory preventing the engine from starting). F - 19 IS 18 - 21 - 24 - 27 50 Hz 6.4 Protection against short-circuit and overload F The generator is protected against short-circuit and overload. A bipolar magnetothermal switch [Fig. 4 Ref. 2] cuts the supply of electric current when a short-circuit occurs or when the electric current delivered exceeds the nominal value. Before restoring the contact by lifting the lever of the magnetothermal switch, disconnect the utilities. 6.5 Protection against short-circuit of the low-voltage electric system In the event of a short-circuit in the low-voltage electric system, a thermal switch [Fig. 4, Ref. 3] breaks the circuit stopping the generator. In this case the warning lights of the engine protection module will all be off and it will not be possible to re-attempt starting. Before restoring the electric circuit by pressing the button located on the thermal switch [Fig. 4 Ref. 3], have a specialised technician find and remove the cause of the short-circuit. 7 MAINTENANCE 7.1 Preamble Any maintenance operation on the generator must be carried out with the engine off and leaving it to cool down sufficiently, and must only be carried out by authorised and suitably trained personnel. It is recommended to scrupulously follow the instructions in the manual provided by the engine Manufacturer with each generator. It is important to regularly inspect and carry out maintenance on the generator. The frequency of maintenance should be decided on the basis of the number of hours of operation. To proceed with maintenance the side and top doors must be removed. Before accessing the generator, disconnect one pole of the starter battery in order to prevent accidental starting. 7.2 Ordinary engine maintenance The periodic maintenance to be carried out on the engine is listed in TABLE B. For more detailed information consult the manual provided with each generator by the engine manufacturer. F - 20 Check the oil level by means of the graduated dipstick [Fig. 7, Ref. 2]. The level must always be between the MAX and MIN notches on the dipstick [Fig. 7 Ref. 1]. 7.3 Engine oil and oil filter change The engine oil sump capacity is 10.2 litres. Top-ups and filling with engine oil is carried out through the hole [Fig. 3, Ref. 17]. To change the oil in the oil sump, remove the dipstick [Fig. 7, Ref. 2] and operate the special extraction pump [Fig. 7, Ref. 7] after having removed the screw which functions as plug. It is recommended to drain the oil when it is still sufficiently warm to flow easily. For recommended oils see table A, Fig. 8. - The first engine oil change must be carried out after 50 hours of generator operation. For the second and subsequent oil changes, every 200 hours is sufficient. - For more detailed information on engine lubrication, consult the engine use and maintenance manual attached to the generator. - Dispose of the used oil or fuel in an appropriate manner as they are polluting products. Take the used engine oil to special collection centres responsible for disposal. Avoid contact of engine oil with the skin. During maintenance operations use gloves and protective glasses. In case of contact with engine oil, immediately and thoroughly wash the affected part with soap and water. To replace the engine oil filter cartridge [Fig. 3, Ref.16], unscrew it from its support, using suitable tools normally found on the market. Reposition the new cartridge, taking care to lubricate the rubber ring gasket. The first replacement must be carried out after 50 hours of generator operation. For the second and subsequent replacements, respect an interval of 400 hours. For further information consult the engine use and maintenance manual. For the safety of the engine, use only original spare parts. When the operation has been completed, thoroughly wipe off all oil and fuel from the engine parts. IS 18 - 21 - 24 - 27 50 Hz 7.4 Air filter cleaning The generators of the IS series have a dry air filter which preventsforeignbodiesfromenteringthecombustionchamber. For its maintenance it is sufficient to clean the filtering mass with diesel fuel once a year to remove nay impurities. Dispose of the liquids used for air filter washing in an appropriate manner. Take them to special collection centres. 7.5 Fuel filter replacement To guarantee long life and proper functioning of the engine, it is extremely important to periodically replace the fuel filter cartridge, respecting the frequency indicated by the engine manufacturer as listed in the table in Paragraph 7.15. This operation is carried out in the following steps: - Completely unscrew the ring nut of the support [Fig. 3, Ref. 13] - Remove the old cartridge and position the new one. - For remounting repeat the operations in reverse order. When the filter has been replaced, bleed the fuel system carrying out the operations described in Paragraph 5.2. Avoid contact of the fuel oil with the skin. During maintenance operations use gloves and protective glasses. In case of contact with fuel, immediately and thoroughly wash the affected part with soap and water. When the operation has been completed, thoroughly wipe off all traces of fuel and take the used cloths to special collection centres. 7.6 Coolant check Periodically check the coolant level in the closed-circuit cooling system. The reference index for this check is printed on the expansion tank [Fig. 3, Ref. 11]. If the level is insufficient, pour coolant into the expansion tank, taking care not to exceed the maximum level index. Never open the cap of the expansion tank [Fig. 3, Ref. 11] or coolant tank [Fig. 3, Ref. 26] when the engine is hot to prevent dangerous coolant leaks. 7.7 V-belt tension check A V-belt is used to transmit the rotary motion from the drive shaft pulley to that of the seawater pump [Fig. 8 Ref. 1]. Excessive belt tension accelerates wear, while a slack belt makes the pulleys idle and does not allow sufficient water circulation. Adjust the belt tension as follows: Loosen the two adjusting screws [Fig. 8, Ref. 2] and move the seawater pump outwards to increase the tension or inwards to decrease it. Lock the screws and check the tension. The correct belt tension is such as to allow a yield of about 5 mm [Fig. 8] under a thrust force of 8 kg. A second belt is used to transmit the rotary motion from the drive shaft pulley to that of the closed-circuit coolant pump and the battery charger DC alternator [Fig. 8 Ref. 3]. Adjust the belt tension as follows: Loosen the adjusting screw [Fig. 8 Ref. 4] and move the battery charger DC alternator [Fig. 8, Ref. 5] outwards to increase the tension and inwards to decrease it. The correct belt tension is such as to allow a yield of about 10 mm [Fig. 8] under a thrust force of 8 kg. F To prevent the belt from slipping, do not dirty it with oil. Clean the belt with petrol if any oil is spilled. Keep hands away from the V-belt or the pulleys when the engine is running. 7.8 Emptying the cooling system To carry out maintenance on the water/air exchanger or on the cooling system the seawater must be drained from the intake circuit. This operation is carried out as follows: - Close the sea intake cock [Fig. 6, Ref. 2] - Open the drain tap [Fig. 6, Ref. 3] until all the water has run out - Close the drain tap. Reopen the seawater intake cock before starting the generator. 7.9 Coolant replacement Annually replace the coolant in the closed cooling circuit as follows: - To remove the side counter(Fig.3, Ref.3) . - Take a rubber hose of about 50 cm long with an inside diameter of 30-40 mm. - insert the pipe under the faucet (Fig.7, Ref.4) and connect it to the inside of a container of about 10 litre capacity. - Open the cap and completely drain the closed cooling circuit. When the operation has been completed, close the faucet and fill the circuit with new coolant. F - 21 IS 18 - 21 - 24 - 27 50 Hz Dispose of the used coolant in an appropriate manner as it is a polluting product. Take the used coolant to special collection centres responsible for disposal. F 7.10 Zinc anode replacement To protect the water/air heat exchanger [Fig. 9, Ref. 1] and the water/coolant heat exchanger [Fig. 9, Ref. 2] against galvanic current, two sacrificial zinc anodes [Fig. 9, Ref. 4] have been inserted inside them. Periodically check their state of wear and, if necessary, replace them in order to prevent that the galvanic current irreparably corrodes the heat exchanger. It is recommended to check the zinc anodes at least once a month when the generator is new to check how fast consumption is, to then be able to act accordingly. It is, however, opportune to replace the zinc anodes at least once a year. Fig. 9 shows the points where the zinc anodes are positioned. 7.11 Seawater pump maintenance At least once a year check the integrity of the rubber rotor of the seawater pump [Fig. 7, Ref. 5]. Before opening the seawater pump to inspect the rotor, drain the seawater from the cooling system as described in Paragraph 7.8. To access the rotor, remove the cover [Fig. 7, Ref. 6] and with the aid of a pair of pliers extract the rotor pulling it out with force. To remount a new rotor, repeat the operations described above in reverse order. 7.12 Alternator maintenance The alternator used on this model of generator is type synchronous, self-energised, with electronic voltage regulation. This model alternator, without manifold and brushes, does not require particular maintenance operations. The periodic checks and maintenance are limited to removing any traces of damp and oxidation which might damage it. 7.13 Battery maintenance For starting all the generator models, it is recommended to use an 70 A/h battery for ambient temperatures exceeding 0ºC, and 100 A/h for lower temperatures. Before installing a new battery it is important that it undergoes a full charging cycle. At least once a month check the level of the electrolyte and, if necessary, top up with distilled water. If the generator is not to be used for a long period, it is recommended to disconnect the battery and store it in a dry place at a temperature over 10ºC and to carry out a full charging cycle once a month. F - 22 If the battery is left completely flat for long periods, there is a risk of irreparably damaging it. The positive terminal of the battery must be protected with Vaseline to prevent corrosion and the formation of oxide. For top-ups with sulphuric acid, ready solutions must be used. The battery top-up operations with distilled water or with acid must be carried out with rubber gloves and protective glasses to prevent accidental contact of the sulphuric acid with the skin. In the event of accidental contact, thoroughly wash the part affected with soap and water and consult a doctor. Before recharging the battery check the level of the electrolyte and, if necessary, fill up with distilled water. This operation must be repeated when the recharging cycle has been completed. 7.14 Periods of inactivity Start up the generator at least once a month. If the generator is not to be used for a long time, the following operations must be carried out: - Change the engine oil - Replace the oil filter cartridge (see par. 7.3) - Replace the fuel filter cartridge (see par. 7.5) - Remove the injectors and pour 2 cc engine oil into each cylinder and let the engine turn over a few times, manually operating the drive shaft pulley. Remount the injectors. - Replace the zinc anodes (see par. 7.10) - Through the seawater intake pipe aspirate some antifreeze whose function is to protect the heat exchangers against low temperatures and to lubricate the seawater pump rotor and the metallic parts in the cooling system. - Disconnect the starter battery and store it in a dry place (see par. 7.13) - Disconnect the sea exhaust pipe from the engine manifold. - Clean the seawater filter. - Close the seawater intake cock. - Drain the seawater from the exhaust. - Clean and lubricate the antisiphon valve, if installed (siphon break). IS 18 - 21 - 24 - 27 50 Hz 7.15 Table of scheduled maintenance OPERATION Check engine oil level Check coolant Check for oil leaks Check for fuel leaks Check for coolant leaks Adjust V-belt tension Check battery charger Clean fuel filter Adjust belt tension *Change engine oil Check seawater pump rotor Check engine rpm Check integrity of electrical connections Replace fuel filter * Replace oil filter Check injectors Check injector timing Adjust play on intake/exhaust valve Check the fuel injection pump Check battery electrolyte level Clean and deoxidise the metallic parts Clean air filter Replace coolant completely Replace zinc anodes HOURS 10 10 20 20 20 100 100 200 200 200 400 400 400 400 400 400 400 400 1000 monthly yearly yearly yearly yearly TAB. "B" * Carry out the first maintenance operation after 50 hours, subsequently according the required intervals. 7.16 Troubleshooting The starter motor turns but the main engine does not start - Check that there is fuel in the tank (fill up) - Check if the stop electromagnet is in the firing position (consult Service Centre) - Bleed the air bubbles from the fuel circuit (see par. 5.2) The engine protection module is not activated when the START button is pressed - battery, and the electrical connections (reconnect). - Check integrity of the battery (recharge or replace). The generator switches off during the operating period - Check if a protection has been activated with the relevant light coming on (remove the cause and retry starting). - Check if there is fuel in the tank (fill up). The engine runs irregularly - Check the fuel filters (replace). - Bleed the air bubbles from the fuel circuit (see par. 4.2). The alternator voltage is too low - Check the engine rpm: 1560 rpm without utilities connected at 50Hz - Excitation capacitors damaged (replace). F Starter battery flat - Check the electrolyte level in the battery (restore the level). - Check functioning of the DC alternator. - Check integrity of the battery. The generator does not deliver power - Check that the magnetothermal switch [Fig. 4, Ref. 2] is in the ON position. If not, contact an authorised Service Centre. 8 TRANSPORT AND HANDLING For transport, all the generators are fixed to a pallet by means of screws. For handling on the boat use the engine lifting hooks located under the top access door [Fig.3, Ref.2]. Hook the generator carefully and lift it slowly without sudden movements. - Hooking the generator at points different from that indicated may cause damage to the generator or be dangerous to the operators. - During lifting all personnel must keep a safe distance and the operators must wear protective helmets. 9 SCRAPPING At the end of its lifetime the generator must be taken to official scrapyards. Do not dispose of the generator at household refuse disposal sites, as many of its parts are polluting. There is a high grade of smoke at the engine exhaust - Check that the oil level in the sump does not exceed the MAX index (restore level). - Check that the generator is not in overload. - Check calibration of the injectors (consult Service Centre). F - 23 IS 18 - 21 - 24 - 27 50 Hz 10 WIRING DIAGRAM REFERENCES Voir Fig. 11 F Voir Fig. 10 1 Interrupteur magnétique et thermique 2 Compteur horaire 3 Alternateur 4 Rotor 5 Stator 6 Régulateur électronique de tension 7 Boîte à bornes de puissance 8 POUSSOIR DARRET DURGENCE 9 Interrupteur thermique 10 Bouton START / STOP 11 Module protection moteur 12 Boîte à bornes 13 Connecteur pour le raccordement à un tableau à distance 14 Indicateur de niveau carburant 15 Indicateur de température de leau 16 Indicateur de pression dhuile 17 Capteur haute température de leau 18 Capteur haute température du liquide de refroidissement 19 Pressostat huile 20 Alternateur chargeur batterie 21 Electroaimant stop 22 Démarreur 23 Bornes de raccordement batterie 24 Câble de raccordement au tableau 25 Bouton START / STOP 26 Instrument indicateur pression dhuile 27 Instrument indicateur température liquide de refroidissement 28 Kit tableau de commande à distance avec instruments 29 Kit tableau de commande à distance 30 vigne de terre F - 24 1 2 3 4 5 6 7 8 9 10 11 12 13 14 15 16 17 18 19 20 21 22 23 24 25 26 27 ALTERNATEUR ALTERNATEUR CHARGEUR BATTERIE BATTERIE CONNECTEUR 12P COMPTEUR HORAIRE DIODE ELECTRO-AIMANT STOP MODULE PROTECTION MOTEUR DEMARREUR PRESSOSTAT HUILE POUSSOIR DARRET DURGENCE REGULATEUR ELECTRONIQUE DE TENSION ROTOR STATOR INTERRUPTEUR THERMIQUE THERMOSTAT MOTEUR INSTRUMENT INDICATEUR TEMPERATURE INSTRUMENT INDICATEUR PRESSION DHUILE MAGNETOTHERMIQUE 2P 0 RELAIS RELAIS POUSSOIR START-STOP THERMOSTAT ALTERNATEUR CAPTEUR TEMPERATURE CAPTEUR PRESSION DHUILE CONNECTEUR 6P IS 18 - 21 - 24 - 27 50 Hz F F - 25 I IS 18 - 21 - 24 - 27 50 Hz INDICE Figuras .................................................................... 2 Esquema eléctrico ................................................. 8 1 E 1.1 1.2 1.3 1.4 1.5 1.6 1.7 1.8 2 2.2 2.3 INFORMACION GENERAL ............................ 11 Finalidad y campo de aplicación del manual . 11 Simbología ................................................... 11 Documentación de referencia ........................ 12 Facsímil de la declaración CE de conformidad12 Normas y disposiciones legislativas ............. 12 de referencia ................................................. 12 Identificación de la máquina .......................... 12 Composición de los grupos electrógenos ...... 13 Panel de mandos ......................................... 13 INFORMACION GENERAL ............................ 15 Facsímil de la declaración CE de conformidad15 Marca ........................................................... 15 7 7.1 7.2 7.3 7.4 7.5 7.7 7.8 7.9 7.10 7.11 7.13 7.14 7.15 7.16 MANTENIMIENTO ......................................... 21 Información preliminar ................................... 21 Mantenimiento ordinario del motor ................ 21 Cambio del aceite motor y del filtro de aceite 21 Limpieza del filtro de aire .............................. 22 Sustitución del filtro carburante ..................... 22 Control de la tensión de las correa trapezoidale 22 Cebado circuito de enfriamiento .................... 23 Sustitución del líquido refrigerante ................ 23 Sustitución ánodos de zinc .......................... 23 Mantenimiento de la bomba agua de mar ..... 23 Mantenimiento de la batería .......................... 23 Períodos de inactividad ................................. 24 Tabla de intervenciones programadas ........... 24 Tabla de averías ............................................ 24 CARACTERISTICAS DEL GENERADOR ....... 16 8 TRANSPORTE Y DESPLAZAMIENTO ........... 25 3.1 Características generales ............................. 16 3.2 Sistema de enfriamiento ............................... 16 3.4.1 Tabla características técnicas IS 18 ............ 17 3.4.1.1 Tabla características técnicas IS 21 .......... 17 3.4.1.2 Tabla características técnicas IS 24 - 28 ... 18 3.4.1.3 Tabla características técnicas IS 27 - 31 ... 18 9 DESGUACE ................................................... 25 10 REFERENCIAS ESQUEMA ELECTRICO ....... 25 3 4 4.1 4.2 5 5.1 5.3 5.4 6 6.1 6.2 6.3 6.4 6.5 E - 10 NORMAS DE SEGURIDAD ............................ 19 Precauciones generales ............................... 19 Prescripciones de seguridad para la ............. 19 instalación y la puesta en servicio ................ 19 USO DEL GENERADOR ................................ 19 Controles preliminares .................................. 19 Arranque ....................................................... 20 Parada del grupo .......................................... 20 PROTECCIONES ........................................... 20 Dispositivo de protección baja presión aceite 20 Dispositivo de protección alta ....................... 21 temperatura agua ......................................... 21 Dispositivo de protección recalentamiento alternador ..................................................... 21 Dispositivo de protección contra ................... 21 cortocircuito y sobrecarga ............................ 21 Dispositivo de protección contra cortocircuitos de la instalación eléctrica en baja tensión .... 21 IS 18 - 21 - 24 - 27 50 Hz 1 INFORMACION GENERAL Consultar este manual detenidamente antes de proceder a realizar cualquier tipo de intervención en la máquina. LA INOBSERVANCIA DE LAS INDICACIONES INCLUIDAS EN EL PRESENTE MANUAL DE USO Y MANTENIMIENTO COMPORTA LA CADUCIDAD DE LA GARANTIA DEL PRODUCTO. 1.1 Finalidad y campo de aplicación del manual Gracias por haber elegido un producto MASE. Este manual ha sido redactado por el Fabricante con el fin de brindar la información y las instrucciones esenciales para un uso y mantenimiento correctos y en condiciones de seguridad. El mismo constituye una parte integrante del equipamiento del grupo electrógeno y debe ser preservado con cuidado contra cualquier agente que pueda deteriorarlo durante la vida útil del grupo electrógeno. El presente manual debe acompañar el grupo electrógeno en caso de que este último sea transferido a un nuevo usuario o propietario. E La información incluida en el mismo es destinada a todas las personas comprometidas en el ciclo de vida operativa del grupo electrógeno y es necesaria para informar tanto a quien efectuará las diferentes actividades, como a quienes deberán coordinarlas, preparar la logística y reglamentar los accesos al sitio donde será instalado y operará el grupo electrógeno. El manual define la finalidad específica de la máquina y contiene toda la información necesaria para garantizar un uso seguro y correcto. La constante observación de las indicaciones incluidas en el mismo garantiza la seguridad del operador, la economía de ejercicio y una mayor duración de la máquina. Es sumamente importante leer detenidamente el contenido de este manual y de la documentación de referencia; sólo de esa manera es posible asegurar el regular funcionamiento del grupo electrógeno a lo largo del tiempo, su fiabilidad y la tutela contra daños a personas y cosas. Las ilustraciones se suministran a título de ejemplo. Aunque la máquina entregada se diferencie notablemente de las ilustraciones incluidas en este manual, la seguridad y la información sobre la misma están garantizadas. Para facilitar la consulta, el manual ha sido subdividido en secciones que identifican sus conceptos principales; para una rápida consulta de los argumentos, véase el índice descriptivo. Nota: La información incluida en esta publicación es correcta en el momento de la impresión. El Fabricante, manteniendo una política de constante desarrollo y actualización del producto, se reserva de aportar modificaciones sin avisos previos. 1.2 Simbología Las partes de texto más importantes han sido resaltadas en negrita y precedidas por los símbolos que se ilustran y definen a continuación. Indica que es necesario prestar atención a fin de no incurrir en serias consecuencias que podrían provocar la muerte o posibles daños a la salud del personal. Situación que puede presentarse durante el período de vida de un producto, sistema o equipo considerado a riesgo en materia de daños a las personas, a las propiedades, al ambiente, o bien de pérdidas económicas. Indica que es necesario prestar atención a fin de no incurrir en serias consecuencias que podrían provocar el daño de bienes materiales, como los recursos o el producto. Indicaciones de suma importancia. E - 11 IS 18 - 21 - 24 - 27 50 Hz 1.3 Documentación de referencia Las Instrucciones para el uso suministradas con cada grupo electrógeno están constituidas por un conjunto de documentos, de los cuales el presente manual representa la Parte General. Normalmente se entrega la siguiente documentación: E a - Declaración CE de Conformidad. b - Manual de Instrucciones para el uso de los Grupos Electrógenos (el presente manual). c - Manual de Instalacion. d - Esquema eléctrico del cuadro de mando, control y potencia. e - Manual de Uso y Mantenimiento del Motor f - Manual de Uso y Mantenimiento del Alternador g - Eventuales manuales de los accesorios opcionales, redactados por los respectivos fabricantes h - Lista de los Centros de Asistencia Mase i - Certificado de Garantía l - Postal de garantía 1.4 Facsímil de la declaración CE de conformidad Los grupos electrógenos fabricados por la firma MASE y destinados a los países de la Comunidad Europea son conformes a las directivas CEE aplicables (véase 1.5) y cuentan con una Declaración CE de Conformidad (Fig.B). 1.5 Normas y disposiciones legislativas de referencia Todos los grupos electrógenos diesel Mase han sido proyectados y producidos respetando las legislaciones vigentes. El grupo electrógeno y sus componentes están realizados en conformidad con las siguientes Normas y Directivas aplicables: EN 292-1/2: Normas para la seguridad de la maquinaria. Principios generales de proyección. EN 294: Normas para la seguridad de la maquinaria. Distancias de seguridad para impedir el alcance de partes peligrosas con los miembros superiores. ISO 3046: Motores alternativos de combustión interna. IEC 34-1: Máquinas eléctricas giratorias ISO 8528 -1: Grupos electrógenos de corriente alterna accionados por motor alternativo de combustión interna. EN 60204 -1(CEI 44-5): - Seguridad de la maquinaria - Equipamiento eléctrico de las máquinas E - 12 EN 60439 -1 (CEI 17-13/1): Conjunto de dispositivos de protección y maniobra para baja tensión (cuadros BT) EN 50081-1/2 (Compatibilidad electromagnética): Norma general sobre la emisión. - Parte 1 - Ambientes residenciales, comerciales e industria ligera - Parte 2 - Ambientes industriales EN 50082-1/2 (Compatibilidad electromagnética): Norma general sobre la inmunidad. - Parte 1 - Ambientes residenciales, comerciales e industria ligera - Parte 2 - Ambientes industriales 89/392/CEE y sucesivas modificaciones incluidas en las directivas 91/368/CEE, 93/44/CEE y 93/68/CEE: Requisitos esenciales de las máquinas en términos de seguridad y de tutela de la salud (directiva Máquinas). 73/23/CEE y sucesivas modificaciones incluidas en la directiva 93/68/CEE: Garantías de seguridad que debe poseer el material eléctrico destinado a ser utilizado dentro de determinados límites de tensión (directivas Baja tensión). 1.6 Identificación de la máquina Véase Fig.2 1 - Fabricante - Dirección 2 - Nombre maquina 3 - Código maquina 4 - Año de construcción 5 - Factor de potencia 6 - Frecuencia declarada 7 - Potencia continua 8 - Tensión nominal 9 - Corriente nominal 10 - Grado de protección 11 - Clase de aislamiento 12 - Temperatura max. empleo 13 - Altitud max. empleo 14 - Nivel rumorosidad 15 - Peso 16 - Clase de prestaciones 17 - Número de serie Los datos que identifican el número de código de la máquina, el número de matrícula y el año de fabricación deben ser comunicados siempre al fabricante cuando se solicita información o piezas de repuesto. IS 18 - 21 - 24 - 27 50 Hz 1.7 Composición de los grupos electrógenos Véase Fig.3 Los grupos electrógenos están compuestos esencialmente por las siguientes partes: 1 - Caja de insonorización 2 - Puerta de acceso posterior 3 - Puerta de acceso lateral 4 - Panel de mando 5 - Estribos de anclaje 6 - Boca de evacuación gases y agua de refrigeración 7 - Boca de conexión toma agua de mar 8 - Boca de conexión a tanque de combustible 9 - Bornes de conexión a la batería 10 - Filtro aire motor 11 - Depósito de expansión líquido refrigerante 12 - Bomba de extracción aceite motor 13 - Cartucho filtro gasoil 14 - Bomba agua de mar 15 - Bomba carburante 16 - Cartucho filtro aceite 17 - Tapón de carga aceite 18 - Caja de conexiones línea eléctrica 19 - Alternador cargador de batería 20 - El coleccionista refrescó agua 21 - Intercambiador de calor agua/aire 22 - Colector de evacuación 23 - Motor de arranque 24 - Conexión panel de control remoto 25 - Tornillo de regulación revoluciones del motor 26 - Agua / el intercooler Aéreo E 1.8 Panel de mandos Véase Fig.4 Cada grupo electrógeno dispone de un panel de mandos para los accionamientos y controles, en el cual se encuentra la siguiente instrumentación: 1 2 3 4 5 6 7 8 9 10 1 12 - Cuentahoras - Interruptor magnetotérmico - Interruptor térmico corriente CC - Pulsador START/STOP - Módulo protección motor - Luz testigo RUN (motor en marcha) - Luz testigo OIL (baja presión aceite) - Luz testigo ºC (alta temperatura motor) - Luz testigo BATT (funcionamiento cargador de batería) - Luz testigo ºC (alta temperatura alternador) - Bujías (no presentes) - Pérdida de combustible (versión RINA) E - 13 IS 18 - 21 - 24 - 27 50 Hz 2. INFORMACION GENERAL E 2.1 Documentación de referencia 1.7 Identificazione della macchina Las Instrucciones para el uso suministradas con cada grupo electrógeno están constituidas por un conjunto de documentos, de los cuales el presente manual representa la Parte General. Normalmente se entrega la siguiente documentación: Vedere Fig. A a Declaración CEE de Conformidad. b Manual de Instrucciones para el uso y el mantenimiento de los Grupos Electrógenos (el presente manual). c Manual de Uso y Mantenimiento del Motor. d Manual de uso y mantenimiento del alternador (en el caso de alternadores que no fabrique mase). e Lista de los Centros de Asistencia Mase. f Certificato de garantía Mase. g Cupón de garantía. 1.5 Conformità alle norme 1 2 3 4 5 6 7 8 9 10 11 12 13 14 15 16 - Nome macchina - Codice macchina - Numero di serie - Potenza continua - Frequenza dichiarata - Fattore di potenza - Tensione nominale - Corrente nominale - Grado di protezione - Classe disolamento - Temperatura max.utilizzo - Altitudine max.utilizzo - Classe di prestazione - Anno di costruzione - Costruttore - Indirizzo - Peso I gruppi elettrogeni, costruiti dalla ditta mase, destinati ai paesi della Comunità Europea sono conformi alle direttive CE applicabili, e sono corredati di una Dichiarazione CE di Conformità. 89/37CE e successive modifica: Requisiti essenziali delle macchine, ai fini della sicurezza e della tutela della salute, (Direttiva "Macchine"). 73/23/CEE e successive modifiche contenute nella direttiva 93/68/CEE : Garanzie di sicurezza che deve possedere il materiale elettrico destinato ad essere utilizzato entro taluni limiti di tensione, (Direttive "Bassa Tensione"). 2000/14 CE: Direttiva ambientale sullemissione sonora (solo nei modelli indicati in tabella emissione sonora) 1.6 Marcatura 1 4 3 2 5 6 7 8 10 9 11 15 12 13 La targa predisposta per i gruppi elettrogeni 14 contiene tutti i dati identificativi secondo quanto richiesto per la Marcatura CE, per i casi in cui è prevista. Si riporta qui il facsimile della targa identificativa che è fissata sul quadro di controllo di ciascuna macchina, (Fig. 1). 16 Fig.A I dati che identificano il numero di codice della macchina, il numero di serie e lanno di costruzione devono essere sempre precisati al costruttore per informazioni, richieste di ricambi, ecc.. E - 14 IS 18 - 21 - 24 - 27 50 Hz 3 CARACTERISTICAS DEL GENERADOR 3.1 Características generales Los grupos electrógenos IS 8 han sido proyectados para ser instalados fácilmente a bordo de embarcaciones. La caja de insonorización, fabricada con paneles aislantes de aluminio marino pintado, permite un fácil acceso al motor y al alternador para efectuar operaciones de mantenimiento y de control, y al mismo tiempo reduce eficazmente la intensidad acústica. El motor diesel de 4 tiempos e inyección directa fabricado por la firma Yanmar es sumamente seguro y robusto; las emisiones de escape son conformes a las normativas CARB. El alternador de tipo sincrónico, con 4 polos y sin cepillos, dispone de un regulador electrónico de tensión (SR7) que garantiza su estabilidad a ± 5% respecto del valor nominal. El gran poder de arranque del alternador hace que el grupo electrógeno sea ideal para la alimentación de motores eléctricos de acondicionadores, desaladores, compresores, etc. El grupo electrógeno dispone de un panel de mando local (fig.3 - ref. 4) en el cual se encuentran los mandos y la instrumentación de control. 3.2 Sistema de enfriamiento El motor del grupo electrógeno es enfriado mediante un circuito cerrado de circulación, con líquido refrigerante que transmite calor al agua de mar por medio de un intercambiador de calor (fig. 3 ref. 26). Este intercambiador, ha sido diseñado por la firma Mase específicamente para la marinización del motor. Un segundo intercambiador de calor enfría el aire dentro de la caja de insonorización y el necesario para la ventilación del alternador. En el momento de la instalación es necesario preparar un circuito de aducción para el agua marina de refrigeración y un sistema de evacuación para conducir hacia el exterior los gases de combustión y el agua utilizada para el enfriamiento, como se indica en el manual de instalación. 3.3 Panel de mandos El grupo electrógeno está dotado de un panel de mando para los controles y las operaciones de arranque y parada. Un módulo de protección motor (fig. 4 ref. 5) controla las protecciones del grupo electrógeno, parando el motor en caso de avería y señalando, por medio de la luz testigo correspondiente, la anomalía detectada. - Luz testigo RUN (fig. 4 ref. 6) de color verde: Cuando está encendida señala que el grupo está en funcionamiento y que no se ha detectado ninguna avería. - Luz testigo BATT (fig. 4 ref. 9) de color rojo: Cuando está encendida, señala que existe una avería en el alternador cargador de batería. - Luz testigo OIL (fig. 4 ref. 7) de color rojo: Cuando está encendida, señala que la presión del aceite motor es insuficiente. - Luz testigo "°C" de color rojo: Cuando está encendida, señala que la temperatura del líquido refrigerante o del agua que circula por los intercambiadores de calor es demasiado alta. - Luz testigo "°C" de color rojo: Cuando está encendida, señala que las bobinas del alternador han alcanzado una temperatura demasiado alta. - Luz testigo [fig.4, ref. 11] color amarillo. Si está encendida señala que las bujías de precalentamiento se han activado. El encendido de las bujías se verifica antes de la puesta en marcha, desplazando la llave para la puesta en marcha desde la posición de Stop a la de ON; una vez alcanzada la temperatura se apagan automáticamente y por lo tanto se puede proceder a la puesta en marcha. - Luz testigo [fig.4, ref. 12] color rojo. Si está encendida señala que el pulsador de emergencia está conectado. Para volver a iniciar el grupo es indispensable desconectarlo. E El panel de mando también contiene: - Un interruptor magnetotérmico bipolar (fig. 4 ref. 2) que interrumpe el suministro de corriente en caso de sobrecarga y cortocircuito - Un interruptor térmico (fig. 4 ref. 3) que protege la instalación eléctrica en baja tensión por cortocircuito - Un cuentahoras (fig. 4 ref. 1) - El pulsador de arranque y parada del grupo electrógeno (fig. 4 ref. 5) El grupo electrógeno está preparado para ser conectado, mediante un conector, al panel de control remoto, que Mase suministra como accesorio opcional y que se puede instalar eventualmente en la plancha de mando. Existen dos modelos diferentes de panel de control remoto, como ilustrado en la fig. 5. La versión más sencilla dispone del pulsador de arranque y parada (fig. 5 ref. 1) y una luz testigo de color verde (fig. 5 ref. 2) que cuando está encendida indica que el grupo está en funcionamiento. La segunda versión de panel de control remoto (fig. 5 ref. 3) contiene, además del pulsador de arranque y parada, un instrumento que indica el valor de la temperatura del líquido refrigerante (fig. 5 ref. 5). Cuando el panel de control remoto está conectado, ya no es posible efectuar la puesta en marcha del grupo electrógeno desde el panel de mando local. Cuando se efectúan operaciones de mantenimiento del grupo electrógeno, desconectar el polo negativo de la batería para evitar arranques accidentales. E - 15 IS 18 - 21 - 24 - 27 50 Hz 3.4.1 Tabla características técnicas IS 18 0RWRU E Modelo Tipo Cilindros (nr.) Material bloque cilindro Desplazamiento (mm) Carrera (mm) Cilindrada (cc) Potencia (hp) RPM Fuerza de compresión Sistema de inyección Material tapa Regulador Sistema de lubrificación Capacidad de aceite (l) Sistema de paro motor Bomba de carburante Altura máxima carburante (cm) Consumo carburante máximo (l/h) Volumen aire combustión (l/min) Batería de arranque (Ah-V) Cargabatería (A-V) Motor de arranque (kW-V) Inclinación max. uso Rendimiento bomba de agua de mar (l/min) $OWHUQDGRU Tipo Regulación Enfriamiento Tensión (V) Frecuencia (Hz) Amps Potencia máx. (kW) Potencia Cont. (kW) Factor de potencia ( cos ø ) Tipo de aislamiento Estabilidad de tensión Estabilidad de frecuencia E - 16 50 Hz Yanmar 4TNE94A Diesel 4 tempi 4 Fundición 94 100 2776 39 1500 18:1 Directa Fundición Centrífugo, mecánico Forzada 10,2 Solenoide Mecanica 80 7,2 1900 80 - 12 40 - 12 2,3 - 12 30° 40 50 Hz Sincrónico, 4 polos, autoexcitado Electrónica Aire / agua (Intercooler W/A) 115 - 230 50 156 - 78 20 18 1 H ±2% ±5% 3.4.1.1 Tabla características técnicas IS 21 0RWRU Modelo Tipo Cilindros (nr.) Material bloque cilindro Desplazamiento (mm) Carrera (mm) Cilindrada (cc) Potencia (hp) RPM Fuerza de compresión Sistema de inyección Material tapa Regulador Sistema de lubrificación Capacidad de aceite (l) Sistema de paro motor Bomba de carburante Altura máxima carburante (cm) Consumo carburante máximo (l/h) Volumen aire combustión (l/min) Batería de arranque (Ah-V) Cargabatería (A-V) Motor de arranque (kW-V) Inclinación max. uso Rendimiento bomba de agua de mar (l/min) $OWHUQDGRU Tipo Regulación Enfriamiento Tensión (V) Frecuencia (Hz) Amps Potencia máx. (kW) Potencia Cont. (kW) Factor de potencia ( cos ø ) Tipo de aislamiento Estabilidad de tensión Estabilidad de frecuencia 50 Hz Yanmar 4TNE94A Diesel 4 tempi 4 Fundición 94 100 2776 39 1500 18:1 Directa Fundición Centrífugo, mecánico Forzada 10,2 Solenoide Mecanica 80 7,2 1900 80 - 12 40 - 12 2,3 - 12 30° 40 50 Hz Sincrónico, 4 polos, autoexcitado Electrónica Aire / agua (Intercooler W/A) 115 - 230 50 200 - 100 23 21 1 H ±2% ±5% IS 18 - 21 - 24 - 27 50 Hz 3.4.1.2 Tabla características técnicas IS 24 - 28 0RWRU Modelo Tipo Cilindros (nr.) Material bloque cilindro Desplazamiento (mm) Carrera (mm) Cilindrada (cc) Potencia (hp) RPM Fuerza de compresión Sistema de inyección Material tapa Regulador Sistema de lubrificación Capacidad de aceite (l) Sistema de paro motor Bomba de carburante Altura máxima carburante (cm) Consumo carburante máximo (l/h) Volumen aire combustión (l/min) Batería de arranque (Ah-V) Cargabatería (A-V) Motor de arranque (kW-V) Inclinación max. uso Rendimiento bomba de agua de mar (l/min) $OWHUQDGRU Tipo Regulación Enfriamiento Tensión (V) Frecuencia (Hz) Amps Potencia máx. (kW) Potencia Cont. (kW) Factor de potencia ( cos ø ) Tipo de aislamiento Estabilidad de tensión Estabilidad de frecuencia 50 Hz Yanmar 4TNE98 Diesel 4 tempi 4 Fundición 98 110 3319 46,4 1500 18:1 Directa Fundición Centrífugo, mecánico Forzada 10,2 Solenoide Mecanica 80 9,6 2500 80 - 12 40 - 12 2,3 - 12 30° 40 50 Hz Sincrónico, 4 polos, autoexcitado Electrónica Aire / agua (Intercooler W/A) 115 - 230 50 226 - 113 26 24 1 H ±2% ±5% 3.4.1.3 Tabla características técnicas IS 27 - 31 0RWRU Modelo Tipo Cilindros (nr.) Material bloque cilindro Desplazamiento (mm) Carrera (mm) Cilindrada (cc) Potencia (hp) RPM Fuerza de compresión Sistema de inyección Material tapa Regulador Sistema de lubrificación Capacidad de aceite (l) Sistema de paro motor Bomba de carburante Altura máxima carburante (cm) Consumo carburante máximo (l/h) Volumen aire combustión (l/min) Batería de arranque (Ah-V) Cargabatería (A-V) Motor de arranque (kW-V) Inclinación max. uso Rendimiento bomba de agua de mar (l/min) $OWHUQDGRU Tipo Regulación Enfriamiento Tensión (V) Frecuencia (Hz) Amps Potencia máx. (kW) Potencia Cont. (kW) Factor de potencia ( cos ø ) Tipo de aislamiento Estabilidad de tensión Estabilidad de frecuencia 50 Hz Yanmar 4TNE98 Diesel 4 tempi 4 Fundición 98 110 3319 46,4 1500 18:1 Directa Fundición Centrífugo, mecánico Forzada 10,2 Solenoide Mecanica 80 10,8 2500 80 - 12 40 - 12 2,3 - 12 30° E 40 50 Hz Sincrónico, 4 polos, autoexcitado Electrónica Aire / agua (Intercooler W/A) 115 - 230 50 252 - 126 29 27 1 H ±2% ±5% E - 17 IS 18 - 21 - 24 - 27 50 Hz 4 NORMAS DE SEGURIDAD 4.1 Precauciones generales E Antes de poner en marcha el grupo electrógeno y antes de realizar cualquier operación de lubricación o mantenimiento, es indispensable que el personal encargado haya leído y comprendido todas las ADVERTENCIAS y los llamados de ATENCION y PELIGRO señalados en este manual y en el resto de la documentación técnica suministrada con el grupo. De todos modos, el Fabricante no puede prever todas las eventuales circunstancias que puedan comportar riesgos potenciales en las efectivas condiciones de empleo del grupo electrógeno. Las diferentes operaciones y/o procedimientos para el mantenimiento, no aconsejadas o indicadas expresamente en los manuales de instrucciones, deberán ser notificadas y aprobadas por el Fabricante. En caso de tener que emplear un procedimiento no aconsejado específicamente, es obligación y responsabilidad del usuario cerciorarse de que el mismo sea seguro y no comporte daños a personas o cosas. El fabricante declina cualquier responsabilidad por daños a personas o cosas causados por la inobservancia de las normas de seguridad. Observar atentamente las placas de señalización relativas a la seguridad aplicadas en la máquina y respetar las indicaciones de las mismas. No permitir el uso del grupo a personas incompetentes o sin una instrucción adecuada. No permitir el acercamiento de niños o animales al grupo electrógeno en funcionamiento. No acceder al generador con las manos mojadas, dado que el mismo es una fuente potencial de choque eléctrico si es usado incorrectamente. Los controles al grupo electrógeno deben ser efectuados con el motor apagado; los que se necesiten hacer con el motor encendido deben ser efectuados por personal especializado. - No aspirar los gases de combustión porque contienen sustancias nocivas para la salud. - Utilizar el grupo electrógeno con los postigos de acceso cerrados. - Nunca tocar con las manos el cuerpo del motor o del alternador cuando el grupo electrógeno se encuentra en funcionamiento o aún está caliente. - Cuando se realicen operaciones de mantenimiento en el grupo electrógeno, desconectar el polo negativo de la batería de arranque para evitar puestas en marcha involuntarias. - Si se detectan pérdidas de aceite o de combustible, proceder a una detenida limpieza para no crear condiciones de riesgo de incendio. - Prohibido el acceso a las personas dotadas de E - 18 marcapasos, a causa de las posibles interferencias electromagnéticas en los dispositivos cardiocirculatorios. - En caso de incendio, nunca utilizar agua sino extintores homologados. Si se presentara algún problema o tuvieran necesidad de aclaraciones, se ruega ponerse en contacto con la oficina SERVICE de la firma Mase. Cuando se utiliza el generador, es necesario tener presente que en los sitios mojados o muy húmedos, o bien en sitios conductores pequeños, existe la obligación de respetar los artículos 313 y 318 del D.P.R. 27/04/55 NR.547, además del CAP. 11 SECC. IV de la norma C.E.I. 64-8. 4.2 Prescripciones de seguridad para la instalación y la puesta en servicio - El personal encargado de la instalación o puesta en servicio del grupo electrógeno deberá llevar siempre casco protector, calzado de seguridad contra accidentes y el mono. - Usar guantes de seguridad. - No dejar piezas desmontadas, herramientas o cualquier otra cosa que no forme parte del equipo sobre el motor o cerca del mismo. - Nunca dejar líquidos inflamables o paños embebidos en los mismos cerca del grupo electrógeno, de dispositivos eléctricos (incluso lámparas) o de partes de la instalación eléctrica. - Tomar las precauciones necesarias para evitar el peligro de fulguración. 5 USO DEL GENERADOR 5.1 Controles preliminares Antes de comenzar cualquier operación de puesta en marcha, es sumamente importante "ponerse en confianza" con el grupo electrógeno y sus mandos. Además, es importante efectuar un control visual de seguridad de la máquina y su instalación. Cualquier fuente de peligro real o potencial debe ser eliminada antes de proceder al uso del grupo. - Individuar la posición de los pulsadores de parada de emergencia, interruptores y otros sistemas de emergencia presentes en el grupo electrógeno. - Conocer los particulares procedimientos de emergencia relacionados con la instalación en cuestión. - Que el aceite esté a nivel, mediante la varilla [fig. 7, ref. 2]; véase la tabla "A" de losa ceites aconsejados [fig. 8 ]. - Que todos los puntos de anclaje del grupo estén ajustados lo suficiente. IS 18 - 21 - 24 - 27 50 Hz - Que todos los aparatos eléctricos estén desactivados, para evitar el arranque del grupo con baja carga de tensión. - Que las líneas de agua y combustible estén conectadas correctamente. - Que todas las conexiones eléctricas hayan sido efectuadas de manera correcta y que no existan conexiones en mal estado. - Que el grifo del agua esté abierto [fig. 6, ref. 2] - Que se haya llenado el tramo del circuito del agua que va de la bomba a la válvula en caso de que se haya montado una válvula de retención en la toma de mar (como se indica en el manual de instalación) [fig. 4, ref. 1]. 5.2 Purga del circuito de alimentación La presencia de burbujas de aire dentro del circuito de alimentación provoca irregularidades de funcionamiento del motor o la incapacidad de alcanzar el número nominal de revoluciones. El aire puede penetrar en el circuito de alimentación a través de una junta no completamente estanca (tuberías, filtro, tanque) o cuando el combustible llega al nivel mínimo dentro del tanque. Para eliminar las burbujas de aire, antes que nada es necesario eliminar la causa que ha permitido su ingreso y efectuar luego las siguientes operaciones: 1 - Mover manualmente la palanca de la bomba carburante [fig.7, ref.3] hasta que salga todo el aire existente en el equipo de alimentación. 2 - Repetir las operaciones mencionadas en caso de que el funcionamiento del motor no resulte todavía regular. Para obtener información más detallada, se ruega consultar el manual entregado por el fabricante del motor que acompaña cada grupo electrógeno. 5.3 Arranque Antes de poner en marcha el grupo, cerciorarse de que hayan sido efectuados los controles preliminares previstos en el apartado 5.1. Proceder al arranque presionando el pulsador de START situado en el panel de mando (fig.4 ref.4) y soltándolo sólo tras el arranque del grupo. Prestar atención en no superar los 15 seg. por cada tentativa y en respetar una pausa de al menos 30 seg. entre las mismas. Todas las luces testigos del módulo protección motor (fig.4 ref.5) se encenderán algunos segundos y, si no se verifican anomalías en el motor o en el alternador, quedará encendida sólo la luz testigo verde de RUN (fig.4 ref.6) indicando que el grupo está en marcha y que su funcionamiento es regular. Numerosas tentativas de arranque con éxito negativo pueden causar una excesiva acumulación de agua en el circuito de evacuación, con graves consecuencias para el motor. Si el arranque del motor fuese dificultoso, es indispensable no insistir demasiadas veces sin haber cerrado antes la llave de la toma de mar (fig. 6 ref. 2). 5.4 Parada del grupo El grupo se para presionando el pulsador [fig.4, ref.4] de STOP en el panel de mando. E Antes de parar el grupo electrógeno, se aconseja hacerlo funcionar algunos minutos sin absorber corriente eléctrica, con el fin de permitir el enfriamiento del motor y del alternador. 6 PROTECCIONES Los grupos electrógenos están dotados de una serie de dispositivos que los protegen contra un uso incorrecto y contra inconvenientes que puedan perjudicar su integridad. Cuando el grupo electrógeno se detiene por la intervención de un dispositivo de protección, en el módulo de protecciones motor [fig. 5, ref. 5] del tablero de mandos se iluminará la luz testigo correspondiente a la avería presente. 6.1 Dispositivo de protección baja presión aceite Interviene apagando el grupo cuando la presión del aceite motor es insuficiente; su intervención es señalada por el encendido de la luz testigo OIL (fig. 4 ref. 7). Para poder encender nuevamente el grupo, generalmente es suficiente reintegrar la cantidad de aceite faltante. El dispositivo de protección de baja presión aceite no da indicaciones sobre el nivel del aceite motor en el cárter. Por tanto es indispensable efectuar un control diario de este nivel. El motor funciona correctamente si no supera una inclinación máxima de 30º por períodos inferiores a los 3 minutos y de 25º sin límite de tiempo, tanto sobre el eje longitudinal como sobre el transversal. Si el motor se encontrara en condiciones de funcionar a inclinaciones superiores, el riesgo que corre es el de una insuficiente lubricación o el de la aspiración de aceite lubricante por parte del filtro de aire. E - 19 IS 18 - 21 - 24 - 27 50 Hz 7 MANTENIMIENTO 6.2 Dispositivo de protección alta temperatura agua E Interviene apagando el grupo electrógeno cuando la temperatura del líquido refrigerante del motor es demasiado elevada o falta la circulación del agua de mar. La intervención de este dispositivo de protección es señalada por la luz testigo ºC (fig.4, ref.10). El grupo electrógeno debe ser puesto en marcha nuevamente sólo tras haber detectado y eliminado la causa de la anomalía. 6.3 Dispositivo de protección recalentamiento alternador Interviene apagando el grupo electrógeno cuando se presenta una sobrecarga térmica en el alternador. La intervención de este dispositivo de protección es señalada por la luz testigo ºC (fig. 4 ref. 8). El grupo electrógeno puede ser puesto en marcha nuevamente algunos minutos después, cuando la temperatura de los bobinas del alternador vuelva a los valores normales. De todos modos, se aconseja detectar y eliminar las causas que han provocado la intervención. En caso de que intervenga uno de los dispositivos de protección mencionados anteriormente, tras haber detectado y eliminado la causa de la intervención, es necesario presionar el pulsador STOP para restablecer el panel de mando (de lo contrario la señal queda memorizada, inhibiendo el arranque del motor). 6.4 Dispositivo de protección contra cortocircuito y sobrecarga El grupo electrógeno está protegido contra los cortocircuitos y sobrecargas eléctricas. Un interruptor magnetotérmico bipolar (fig.4, ref.2) interrumpe el suministro de corriente eléctrica en caso de cortocircuito o cuando la corriente suministrada supera el valor nominal. Antes de restablecer el contacto mediante la palanca del interruptor magnetotérmico es importante desconectar los otros dispositivos conectados a la red eléctrica. 6.5 Dispositivo de protección contra cortocircuitos de la instalación eléctrica en baja tensión En caso de cortocircuito de la instalación eléctrica en baja tensión, un interruptor térmico (fig.4, ref. 3) interrumpe el circuito parando el grupo electrógeno. En este caso, las luces testigos del módulo de protección del motor estarán todas apagadas y no será posible intentar otro arranque. Antes de restablecer el circuito eléctrico presionando el pulsador situado en el interruptor térmico (fig.4, ref. 3), es necesario hacer detectar y eliminar la causa del cortocircuito por un técnico especializado. E - 20 7.1 Información preliminar Todas las operaciones de mantenimiento del grupo electrógeno deben ser efectuadas con el motor apagado, tras haberlo dejado enfriar lo suficiente, y exclusivamente por personal autorizado o adecuadamente preparado. Se aconseja seguir escrupulosamente las indicaciones señaladas en el manual redactado por el Fabricante del motor y que se entrega con cada grupo. Es importante controlar y efectuar el mantenimiento del grupo electrógeno regularmente; las operaciones deben ser intervaladas en base a las horas de funcionamiento. Para proceder al mantenimiento es necesario remover los postigos laterales y el superior. Antes de acceder al grupo electrógeno, desconectar un polo de la batería de arranque con el fin de evitar su puesta en marcha involuntaria. 7.2 Mantenimiento ordinario del motor Las operaciones periódicas a efectuar en el motor se encuentran señaladas en la tabla B. Si se desea información más detallada, consultar el manual suministrado por el fabricante del motor y que acompaña cada grupo electrógeno. Controlar el nivel del aceite motor mediante la varilla graduada correspondiente (fig. 7 ref. 2). El nivel debe estar comprendido entre las marcas MAX y MIN de la varilla (fig. 7 ref. 1). 7.3 Cambio del aceite motor y del filtro de aceite La capacidad del cárter motor es de 10.2 litros. Las restauraciones de nivel y las cargas de aceite deben ser efectuadas a través del orificio correspondiente (fig. 3 - ref. 17). Para el cambio de aceite en el cárter motor, proceder extrayendo la varilla indicadora de nivel (fig. 7 ref. 2) y sirviéndose de la correspondiente bomba de extracción (fig. 7 - ref. 7) tras haber quitado el tornillo que funciona como tapón. Se aconseja efectuar el vaciado con el aceite todavía bastante caliente, de manera de facilitar su salida. Los aceites aconsejados se encuentran indicados en la tabla A de la fig. 8. - El primer cambio de aceite motor debe ser efectuado después de 50 horas de uso del grupo electrógeno; para el segundo y los sucesivos es suficiente un cambio cada 200 horas. IS 18 - 21 - 24 - 27 50 Hz - Si se desea información más detallada acerca de la lubricación del motor, consultar el manual de uso y mantenimiento específico, adjunto al grupo electrógeno. - No desechar en el medio ambiente el aceite descargado o el combustible, dado que se trata de productos contaminantes. Llevar el aceite lubricante descargado a los centros de recolección especializados para su desecho. Evitar que el aceite motor entre en contacto con la piel. Durante las operaciones de mantenimiento utilizar guantes y gafas de protección. En caso de contacto con aceite lubricante, lavar inmediata y detenidamente la zona en cuestión con agua y jabón. Para sustituir el cartucho del filtro aceite motor (fig.3, ref.16) es necesario desenroscarlo de su soporte sirviéndose de las herramientas apropiadas que normalmente se encuentran en el mercado. Colocar el cartucho nuevo prestando atención en lubricar el anillo de goma. El primer cambio debe ser efectuado después de 50 horas de funcionamiento del grupo electrógeno; para el segundo y los sucesivos respetar un intervalo de 400 horas. Para más información consultar el manual de uso y mantenimiento del motor. Para la seguridad del motor, utilizar exclusivamente piezas de repuesto originales. Una vez terminadas estas operaciones, limpiar detenidamente todas las piezas del grupo electrógeno que se hayan ensuciado con aceite y combustible. 7.4 Limpieza del filtro de aire Los grupos electrógenos de la serie IS disponen de un filtro de aire en seco que impide la entrada de cuerpos extraños a la cámara de combustión. Para su mantenimiento es suficiente limpiar la masa filtrante con gasoil una vez por año para eliminar la presencia de impurezas. No desechar en el medio ambiente los líquidos utilizados para el lavado del filtro de aire; los mismos deben ser enviados a los centros de recolección especializados. 7.5 Sustitución del filtro carburante Para asegurar una gran duración y un funcionamiento correcto del motor, es sumamente importante sustituir periódicamente el cartucho del filtro carburante, respetando los intervalos indicados por el fabricante del motor que se encuentran en la tabla del apartado 7.15. Dicha operación se realiza de la siguiente manera: - Desenroscar completamente la brida del soporte (fig. 3, ref.13) - Extraer el cartucho viejo y sustituirlo por el nuevo - Para el montaje, repetir las operaciones en secuencia inversa Una vez efectuada la sustitución, es necesario purgar el circuito de alimentación siguiendo las operaciones descritas en el apartado 5.2. E Evitar que el combustible entre en contacto con la piel. Durante las operaciones de mantenimiento utilizar guantes y gafas de protección. En caso de contacto con el combustible, lavar inmediata y detenidamente la zona en cuestión con agua y jabón. Una vez terminadas estas operaciones, limpiar bien todos los restos de combustible y desechar los trapos utilizados en los centros de recolección especializados. 7.6 Control del líquido refrigerante Es necesario controlar periódicamente el nivel del líquido refrigerante del circuito cerrado de refrigeración. Las marcas de referencia para dicho control están impresas en el depósito de expansión (fig.3, ref.11). Si el nivel fuera insuficiente, versar líquido refrigerante en el depósito de expansión prestando atención en no superar la marca de nivel máximo. Nunca abrir el tapón de cierre del depósito de expansión (fig.3, ref.11) y del tanque (fig.3, ref.26) con el motor caliente, para evitar pérdidas peligrosas de líquido refrigerante. 7.7 Control de la tensión de las correa trapezoidale Una de las correas trapezoidales se utiliza para transmitir el movimiento de rotación de la polea del eje motor a la de la bomba del agua de mar (fig.8, ref.1). Una tensión excesiva de la correa acelera su desgaste, mientras que su aflojamiento hace girar las poleas en vacío e impide una circulación de agua suficiente. Regular la tensión de la correa de la siguiente manera: Aflojar los dos tornillos de regulación (fig.8, ref.2) y desplazar la bomba del agua de mar hacia afuera para aumentar la tensión, o bien hacia adentro para disminuirla. Ajustar los tornillos y comprobar la tensión. La tensión correcta de la correa es la que permite un aflojamiento de aproximadamente 5 mm con una fuerza de empuje de 8 Kg (fig. 8). La segunda correa se utiliza para transmitir el movimiento de rotación de la polea del eje motor a la de la bomba del líquido en circuito cerrado y a la del alternador CC cargador de E - 21 IS 18 - 21 - 24 - 27 50 Hz batería (fig.8, ref.3). Regular la tensión de la correa de la siguiente manera: Aflojar el tornillo de regulación (fig.8, ref.4) y desplazar el alternador CC cargador de batería (fig.8, ref.5) hacia afuera para aumentar la tensión, o bien hacia adentro para disminuirla. La tensión correcta de la correa es la que permite un aflojamiento de aproximadamente 10 mm con una fuerza de empuje de 8 Kg (fig.8). E Para evitar que la correa gire en vacío, no ensuciarla con aceite. Limpiar la correa con gasolina si se nota sucia de aceite. No acercar las manos a la correa trapezoidal o a las poleas con el motor en funcionamiento. 7.10 Sustitución ánodos de zinc Para proteger el intercambiador de calor agua-aire (fig.9, ref.1) y el intercambiador de calor agua-líquido (fig.9, ref.2) contra las corrientes galvánicas, los mismos contienen dos ánodos de zinc (fig.9, ref.4). Es necesario controlar periódicamente su estado de desgaste y sustituirlos cuando sea necesario con el fin de evitar que las corrientes galvánicas corroan los intercambiadores irreparablemente. Cuando el grupo es nuevo, se aconseja controlar los ánodos de zinc al menos una vez por mes para constatar su velocidad de consumo y más adelante regularse en base a ello. De todos modos es oportuno cambiar los ánodos de zinc al menos una vez por año. En la fig. 9 se indican los puntos donde están ubicados los ánodos de zinc. 7.8 Cebado circuito de enfriamiento 7.11 Mantenimiento de la bomba agua de mar Para efectuar el mantenimiento del intercambiador aguaaire o del circuito de refrigeración, es necesario vaciar el circuito de aspiración del agua de mar. Dicha operación se efectúa de la siguiente manera: - Cerrar la llave de la toma de mar (fig.6, ref.2) - Abrir la llave de desagüe correspondiente (fig.6, ref.3) hasta que el agua salga por completo - Cerrar nuevamente la llave de desagüe Al menos una vez por año, es necesario controlar la integridad del rodete de goma de la bomba para el agua de mar (fig.7, ref.5). Antes de abrir la bomba agua de mar para la inspección del rodete es necesario vaciar el circuito de refrigeración del agua de mar como se describe en el apartado 7.8. Para acceder al rodete, quitar la tapa de cierre (fig.7, ref.6) y, con el auxilio de un par de pinzas, extraer el rodete tirando con fuerza hacia el exterior. Para montar un nuevo rodete repetir las operaciones anteriores en secuencia inversa. Abrir nuevamente la llave de toma del agua de mar antes de poner en marcha el grupo electrógeno. 7.9 Sustitución del líquido refrigerante Una vez por año, cambiar el líquido refrigerante del circuito cerrado de refrigeración de la siguiente manera: - Para quitar el tablero lateral(Fig. 3, ref.3) - Utilizar un tubo de goma de aproximadamente 50 cm de longitud y 30-40 mm de diámetro interno. - inserte la cañería bajo el grifo (fig.7, ref.4) y colocar el otro extremo dentro de un recipiente de aproximadamente 10 litros de capacidad. - Abrir el tapón y vaciar completamente el circuito cerrado de refrigeración. Una vez terminada la operación, cerrar el grifo y llenar nuevamente el circuito con líquido refrigerante nuevo. No desechar en el medio ambiente el líquido refrigerante descargado, dado que se trata de un producto contaminante. Llevar el líquido refrigerante descargado a los centros de recolección especializados para su desecho. E - 22 7.12 Mantenimiento del alternador El alternador empleado en este modelo de generador es de tipo sincrónico, autoexcitado y con regulación electrónica de la tensión. Este modelo de alternador, sin colector ni cepillos, no necesita operaciones particulares de mantenimiento. Los controles y las operaciones de mantenimiento periódico se limitan a eliminar los posibles restos de humedad y de óxido que podrían dañarlo. 7.13 Mantenimiento de la batería Para el arranque de todos los modelos de grupo electrógeno, se aconseja utilizar una batería de 70 A/h para temperatura ambiente superior a 0ºC y de 100 A/h para temperaturas inferiores. Antes de instalar una nueva batería es importante que la misma haya sido sometida a un ciclo completo de recarga. Al menos una vez por mes, controlar el nivel del electrólito y versar agua destilada si es necesario. Durante un largo período de inactividad del grupo electrógeno, se aconseja desconectar la batería y conservarla en un lugar seco y a temperaturas superiores a los 10ºC, efectuando una vez por mes un ciclo completo de recarga. IS 18 - 21 - 24 - 27 50 Hz Si la batería queda completamente descargada por mucho tiempo, existe el riesgo de que se dañe irreparablemente. Es necesario tomar la precaución de proteger con vaselina el borne positivo de la batería para prevenir la corrosión y la formación de óxido. Para restablecer el nivel del ácido sulfúrico es indispensable utilizar soluciones ya preparadas. Las operaciones de aplicación de agua destilada o de ácido en la batería deben ser efectuadas con guantes de goma y gafas de protección, para evitar contactos accidentales de ácido sulfúrico con la piel. En ese caso, lavar detenidamente la parte en cuestión con agua y jabón y consultar a un médico. Antes de proceder a la recarga de la batería, controlar el nivel del electrólito y restablecerlo con agua destilada si es necesario. Dicha operación debe ser repetida una vez terminado el ciclo de recarga. 7.14 Períodos de inactividad Poner en marcha el grupo electrógeno al menos una vez por mes. Si el grupo electrógeno debiera quedar inutilizado por un largo período, es necesario efectuar las siguientes operaciones: - Sustituir el aceite motor - Sustituir el cartucho del filtro aceite (véase apartado 7.3) - Sustituir el cartucho del filtro combustible (véase apartado 7.5) - Quitar los inyectores, introducir en cada cilindro 2 cc de aceite motor y hacer cumplir algunos giros al motor moviendo la polea del eje manualmente. Luego montar nuevamente los inyectores. - Sustituir los ánodos de zinc (véase apartado 7.10) - Hacer que el tubo de toma agua de mar aspire líquido anticongelante, cuya función es la de proteger los intercambiadores contra las bajas temperaturas, y lubricar el rodete de la bomba agua de mar y las partes metálicas internas del circuito de refrigeración. - Desconectar la batería de arranque y conservarla en un ambiente seco (véase apartado 7.13) - Desconectar el tubo de desagüe al mar del colector del motor - Limpiar el filtro del agua de mar - Cerrar la llave de la toma para el agua de mar - Eliminar el agua de mar del silenciador del escape - Limpiar y lubricar la válvula de antisifonaje (siphon break), en caso de que haya sido instalada 7.15 Tabla de intervenciones programadas OPERACION Control nivel aceite motor Control nivel líquido refrigerante Control pérdidas de aceite Control pérdidas de combustible Control pérdidas de líquido Regulación tensión correa trapezoidal Control carga batería Limpieza filtro combustible Regulación tensión correas * Cambio aceite motor Control rodete bomba agua mar Control número revoluciones motor Control integridad conexiones eléctricas Sustitución filtro combustible * Sustitución filtro aceite Control inyectores Control calado inyección Regulación juego válvula toma/desagüe Control bomba de inyección combustible Control nivel electrólito batería Limpieza y desoxidación partes metálicas Limpieza filtro aire Sustitución total líquido refrigerante Sustitución ánodos de zinc HORAS 10 10 20 20 20 100 100 200 200 200 400 400 400 400 400 400 400 400 1000 mensual anual anual anual anual TAB "B" * Efectuar la primera intervención después de 50 horas, luego en base a los intervalos previstos. E 7.16 Tabla de averías El motor de arranque gira pero el motor principal no arranca - Controlar si hay combustible en el tanque. (Cargar combustible) - Controlar si el electroimán de parada se encuentra en posición de tiro. (Consultar el Centro de Asistencia) - Eliminar las burbujas de aire purgando el circuito de alimentación (Véase apartado 5.2) El módulo de protección motor no se activa cuando se presiona el pulsador START - Controlar si el interruptor térmico (fig.4, ref.3) de protección está abierto. (Restablecer el contacto presionando el pulsador rojo, fig.4, ref.3) - Controlar los cables y los bornes de conexión a la batería y las conexiones eléctricas. (Conectar nuevamente) - Controlar la integridad de la batería. (Recargarla o cambiarla) El grupo electrógeno se apaga durante su funcionamiento - Controlar si se ha activado un dispositivo de protección con el encendido de la luz testigo correspondiente. (Eliminar la causa e intentar un nuevo arranque) - Controlar si hay combustible en el tanque. (Restablecer el nivel) E - 23 IS 18 - 21 - 24 - 27 50 Hz 9 DESGUACE El motor emite un elevado nivel de humo de escape - Controlar que el nivel de aceite en el cárter no supere la marca de MAX. (Restablecer el nivel) - Controlar que el grupo no esté en sobrecarga. - Controlar el calibrado de los inyectores. (Consultar el Centro de Asistencia) E El motor funciona de manera irregular - Controlar los filtros de combustible. (Sustituirlos) - Eliminar las burbujas de aire purgando el circuito de alimentación. (Véase apartado 4.2) La tensión del alternador es demasiado baja - Controlar el número de revoluciones del motor: 1560 r.p.m. sin servicios conectados a 50Hz 1860 rpm sin servicios conectados a 60Hz - Condensador de excitación averiado (sustituirlo). La batería de arranque está descargada - Controlar el nivel del electrólito dentro de la batería. (Restablecer el nivel) - Controlar el funcionamiento del alternador CC. - Controlar la integridad de la batería. El grupo electrógeno no suministra tensión - Controlar que el interruptor magnetotérmico (fig.4, ref.2) se encuentre en posición ON. Si no es así, ponerse en contacto con un Centro de Asistencia Autorizado. 8 TRANSPORTE Y DESPLAZAMIENTO Para el transporte, todos los grupos electrógenos se aseguran a una paleta mediante tornillos. Para desplazamientos sobre embarcaciones, utilizar los ganchos de elevación del motor situados debajo del postigo de acceso superior [fig.3, ref.2]. Enganchar con cuidado y levantar lentamente, evitando movimientos bruscos. - El enganche del grupo electrógeno en puntos diversos del indicado puede causar daños al mismo y es una fuente de peligro para los operadores. - Durante la fase de elevación, todo el personal debe estar a una distancia prudencial y los operadores deben llevar casco de protección. E - 24 Una vez terminado el ciclo de vida útil del grupo electrógeno, el mismo debe ser entregado a los centros encargados del desguace. No desechar el grupo electrógeno en una escombrera, dado que numerosas partes del mismo son contaminantes para el medio ambiente. 10 REFERENCIAS ESQUEMA ELECTRICO Fig.10 1 2 3 4 5 6 7 8 9 10 11 12 13 14 15 16 17 18 19 20 21 22 23 24 25 26 27 28 Interruptor magnetotérmico Cuentahoras Alternador Rotor Estator Regulador de tensión Tablero de bornes de potencia PULSADOR DE PARADA DE EMERGENCIA Interruptor térmico Pulsador START / STOP Módulo protección motor Tablero de bornes Conector para control remoto Indicador de nivel combustible Indicador de temperatura agua Indicador de presión aceite Sensor alta temperatura agua Sensor alta temperatura líquido refrigerante Presóstato aceite Alternador carga batería Electroimán de stop Motor de arranque Bornes de conexión batería Cable de conexión tablero Pulsador START / STOP Instrumento indicador presión aceite Instrumento indicador temperatura líquido refrigerante Equipo completo panel de control remoto con instrumentación 29 Equipo completo panel de control remoto 30 Vida de tierra IS 18 - 21 - 24 - 27 50 Hz Fig.11 1 2 3 4 5 6 7 8 9 10 11 12 13 14 15 16 17 18 19 20 21 22 23 24 25 26 27 ALTERNADOR ALTERNADOR CARGABATERIA BATERIA CONECTOR 12P CUENTAHORAS DIODO ELECTROIMAN DE STOP MODULO PROTECCION MOTOR MOTOR DE ARRANQUE PRESOSTATO ACEITE PULSADOR DE PARADA DE EMERGENCIA REGULADOR ELECTRONICO DE TENSION ROTOR ESTATOR INTERRUPTOR TERMICO TERMOSTATO MOTOR INDICADOR TEMPERATURA INDICADOR PRESION ACEITE MAGNETOTERMICO 2P 0 RELE RELE PULSADOR START-STOP TERMOSTATO ALTERNADOR SENSOR TEMPERATURA SENSOR PRESION ACEITE CONECTOR 6P E E - 25 I IS 18 - 21 - 24 - 27 50 Hz INHOUDSOPGAVE Afbeeldingen ......................................................... 2 Schakelschema ..................................................... 8 1 1.1 1.2 1.4 NL 1.5 1.6 1.7 1.8 2 2.1 2.2 2.3 3 ALGEMENE INFORMATIE ............................. 11 Wij danken u om te hebben gekozen voor een product mase. .............................................. 11 Symbolen ..................................................... 11 Facsimile van de EG-verklaring ..................... 12 van overeenstemming ................................... 12 Wettelijke referentienormen- en bepalingen ... 12 Identificatie van de machine .......................... 12 Samenstelling van de .................................... 13 stroomopwekkingsgroepen ........................... 13 Instrumentenpaneel ...................................... 13 6.1 6.2 6.3 ALGEMENE INFORMATIE ............................. 15 7.1 7.2 7.3 Referentiedocumenten .................................. 15 Facsimile van de EG-verklaring van overeenstemming ......................................... 15 Markering .................................................... 15 EIGENSCHAPPEN VAN DE GENERATOR .... 16 3.1 3.2 3.3 3.4.1 Algemene eigenschappen ............................. 16 Koelsysteem ................................................ 16 Bedieningspaneel ......................................... 16 Tabel van de technische eigenschappen IS18 17 3.4.1.1 Tabel van de technische eigenschappen IS 21 17 3.4.1.2 Tabel van de technische eigenschappen IS 24 18 3.4.1.3 Tabel van de technische eigenschappen IS 27 18 4 4.1 4.2 5 5.1 5.3 5.4 - 10 6 6.4 6.5 7 7.4 7.5 7.6 7.7 7.8 7.9 7.10 7.11 7.12 7.13 7.14 7.15 7.16 BESCHERMINGEN ........................................ 20 Bescherming lage oliedruk ............................ 20 Bescherming hoge temperatuur water ........... 21 Bescherming overtemperatuur ...................... 21 wisselstroomdynamo .................................... 21 Bescherming tegen kortsluiting ..................... 21 en overbelasting ............................................ 21 Bescherming tegen kortsluiting van .............. 21 de elektrische laagspanningsinstallatie ......... 21 ONDERHOUD ................................................ 21 Voorwoord .................................................... 21 Gewoon onderhoud van de motor .................. 21 Verversing van de motorolie en ..................... 21 vervanging van de oliefilter ............................. 21 Reiniging van de luchtfilter ............................ 22 Vervanging van de brandstoffilter ................... 22 Controle van de koelvloeistof ......................... 22 Controle van de spanning van de V-snaren .... 22 Lediging van het koelsysteem ....................... 23 Verversing van de koelvloeistof ...................... 23 Vervanging van de zinkanodes ...................... 23 Onderhoud van de zeewaterpomp ................. 23 Onderhoud van de wisselstroomdynamo ....... 23 Onderhoud van de accu ................................ 23 Periodes van inactiviteit ................................ 24 Samenvattingstabel van de geprogrammeerde ingrepen ....................................................... 24 Tabel storingen ............................................. 24 8 TRANSPORT EN VERPLAATSING ............... 25 VEILIGHEIDSVOORSCHRIFTEN .................. 19 9 AFDANKEN ................................................... 25 Algemene voorzorgsmaatregelen .................. 19 Voorschriften voor de veiligheid tijdens de ..... 19 installatie en de inbedrijfstelling .................... 19 9 REFERENTIES SCHAKELSCHEMA .............. 25 GEBRUIK VAN DE GENERATOR .................. 19 Controles vooraf ............................................ 19 Starten ......................................................... 20 Stoppen van de groep ................................... 20 IS 18 - 21 - 24 - 27 50 Hz 1 ALGEMENE INFORMATIE Neem aandachtig deze handleiding door alvorens u onderhoudswerkzaamheden uitvoert aan de machine IN GEVAL DE SPECIFICATIES UIT DEZE INSTALLATIE-HANDLEIDING VERONACHTZAAMD WORDEN, KOMT DE GARANTIE OP HET PRODUCT TE VERVALLEN 1.1 Doel en toepassingsgebied van de handleiding 1.1 Wij danken u om te hebben gekozen voor een product mase. Deze handleiding werd opgesteld door de Fabrikant, met als doel alle essentiële informatie en instructies te leveren om het product op correcte en veilige wijze te gebruiken en te onderhouden, en maakt wezenlijk deel uit van de uitrusting relatief aan de stroomopwekkingsgroep. Bewaar hem zorgvuldig gedurende de hele levensduur van de machine. Deze handleiding moet de stroomopwekkingsgroep begeleiden indien deze wordt verplaatst of van gebruiker/eigenaar veranderd. NL De informatie bevat in de handleiding is bestemd voor alls personen betrokken bij de bedrijfscyclus van de stroomopwekkingsgroep, en zijn noodzakelijk, zowel voor wie de verschillende handelingen feitelijk uitvoert, als voor wie belast is met de coördinatie ervan, om de nodige logistiek voor te bereiden en de toegang tot de ruimte waar de stroomopwekkingsgroep wordt geïnstalleerd en zal werken te reglementeren. De handleiding definieert het doel waarvoor de machine werd ontworpen en bevat alle nodige informatie om borg te staan voor een veilig en correct gebruik. De constante inachtneming van de aanwijzingen bevat in de handleiding, garandeert de veiligheid van de operator, een zuinig gebruik en langere levensduur van de machine. Het is stellig aangeraden de inhoud van deze handleiding en de referentiedocumenten aandachtig te lezen; Alleen op deze manier kan worden borg gestaan voor een regelmatige en betrouwbare werking van de stroomopwekkingsgroep, en wordt schade aan personen en zaken voorkomen. De tekeningen dienen als voorbeeld. Ook als uw machine aanzienlijk verschilt van de illustraties gegeven in deze handleiding, worden de veiligheid en de geleverde informatie gegarandeerd. Om de handleiding makkelijker te raadplegen, werd hij onderverdeeld in hoofdstukken, volgens de belangrijkste begrippen; Voor een snelle raadpleging verwijzen wij naar de inhoudsopgave. Nota: de informatie bevat in deze uitgave is correct op het moment van het drukken. De Fabrikant behoudt zich het recht voor om zonder kennisgeving veranderingen aan te brengen, in het raam van een beleid afgestemd op de voortdurende ontwikkeling en bijwerking van het product. 1.2 Symbolen De belangrijkste tekstdelen staan vetjes gedrukt en worden voorafgegaan door symbolen, die hieronder worden geïllustreerd en toegelicht. Betekent dat men attent moet zijn, om ernstige gevolgen te voorkomen die de dood kunnen veroorzaken of schade kunnen toebrengen aan de gezondheid van het personeel. Situatie die kan optreden tijdens de levensloop van een product, systeem of installatie beschouwd als zijnde risicodragend voor het personeel, de eigenschappen, het milieu of de zuinige werking. Betekent dat men attent moet zijn, om ernstige gevolgen te voorkomen die schade kunnen toebrengen aan materiale bezittingen zoals de hulpbronnen of het product Belangrijke aanwijzingen. - 11 IS 18 - 21 - 24 - 27 50 Hz 1.3 Referentiedocumenten De gebruiksinstructies geleverd met elke stroomopwekkingsgroep bestaan uit een reeks documenten waarvan deze handleiding het Algemeen Deel is. Normaal gezien worden de volgende documenten geleverd: NL a - EG-verklaring van overeenstemming. b - Handleiding met instructies voor het gebruik en het onderhoud van de stroomopwekkingsgroepen (deze handleiding). c - Handleiding voor de installatie van de stroomopwekkingsgroepen. d - Schakelschema van het bedienings-, controle- en vermogenspaneel. e - Handleiding voor het Gebruik en het Onderhoud van de Motor. f - Handleiding voor het Gebruik en het Onderhoud geleverd door de Fabrikant van de Wisselstroomdynamo. g - Eventuale andere handleidingen relatief aan de optionele accessoires, geleverd door hun respectieve Fabrikanten. h - Lijst Technische Centra Mase. i - Garantiebewijs l - Garantiekaart 1.4 Facsimile van de EG-verklaring van overeenstemming De stroomopwekkingsgroepen, gebouwd door het bedrijf mase, bestemd voor de landen van de Europee Gemeenschap, zijn conform de van kracht zijnde EGrichtlijnen (zie 1.5), en zijn voorzien van een EG-verklaring van overeenstemming (Fig.B). 1.5 Wettelijke referentienormen- en bepalingen Alle stroomopwekkingsgroepen op diesel van Mase werden ontworpen en gebouwd overeenkomstig de van kracht zijnde wetgeving. De stroomopwekkingsgroep en zijn componenten werden gerealiseerd overeenkomstig de volgende toepasbare Normen en Richtlijnen: EN 292-1/2 : Normen relatief aan de veiligheid van de operator. Algemene ontwerpprincipes. EN 294 : Normen relatief aan de veiligheid van de operator. Veiligheidsafstand om te voorkomen dat de bovenste ledematen in contact komen met gevaarlijke onderdelen. ISO 3046 : Wisselstroommotors met interne verbranding. IEC 34-1 : Roterende elektrische machines. ISO 8528 -1 : Wisselstroomopwekkings-groepen, aangedreven met een wisselstroommotor met interne verbranding. - 12 EN 60204 -1 (CEI 44-5) : - Veiligheid van de operator. - Elektrische uitrusting van de machines. EN 60439 -1 (CEI 17-13/1) : Geheel van veiligheids- en manoeuvreerinrichtingen voor laagspanning (LSbedieningspanelen). EN 50081-1/2 (Elektromagnetische compatibiliteit) : Algemene uitstotingsnormen - deel 1 - woonwijken, handelswijken en zones met matige industriële activiteit - deel 2 - industriezones. EN 50082-1/2 (Elektromagnetische compatibiliteit) : Algemene immuniteitsnormen - deel 1 - woonwijken, handelswijken en zones met matige industriële activiteit - deel 2 - industriezones. 89/392/CEE en daaropvolgende wijzigingen bevat in de richtlijnen 91/368/CEE, 93/44/CEE en 93/68/CEE : Essentiële vereisten van de machines, met het oog op de veiligheid en het behoud van de gezondheid (richtlijn "Machines"). 73/23/CEE en daaropvolgende wijzigingen bevat in de richtlijn 93/68/CEE : Veiligheidsgarantie die het elektrisch materiaal - bestemd om te worden gebruikt in een bepaald spanningsbereik - moet bezitten (richtlijnen "Laagspanning"). 1.6 Identificatie van de machine Zie afb.2 1 - Naam machine 2 - Machinecode 3 - Serienummer 4 - Continu vermogen 5 - Aangegeven frequentie 6 - Vermogensfactor 7 - Nominale spanning 8 - Nominale stroom 9 - Beschermingsgraad 10 - Isolatieklasse 11 - Max. gebruikstemperatuur 12 - Max. gebruikshoogte 13 - Geluidsniveau 14 - Prestatieklasse 15 - Bouwjaar 16 - Fabrikant 17 - Gewicht De gegevens die het coden van de machine, het serien en het bouwjaar identificeren, moeten steeds aan de Fabrikant worden meegedeeld bij verzoeken om informatie, wisselonderdelen, enz. IS 18 - 21 - 24 - 27 50 Hz 1.7 Samenstelling van de stroomopwekkingsgroepen Zie afb.3 De stroomopwekkingsgroepen bestaan voornamelijk uit de volgende componenten: 1 - Geluidsisolerende kast 2 - Bovenste toegangsdeur 3 - Laterale toegangsdeur 4 - Instrumentenpaneel 5 - Verankeringsbeugels 6 - Afvoerkanaal voor rook en koelwater 7 - Verbinding zeewaterinlaat 8 - Verbindingen met brandstoftank 9 - Verbindingsklemmen accu 10-Luchtfilter motor 11-Expansievat koelvloeistof 12-Extractiepomp motorolie 13-Filterpatroon stookolie 14-Zeewaterpomp 15 - Brandstofpomp 16-Filterpatroon olie 17-Bijvuldop olie 18-Aansluitdoos stroomnet 19-Wisselstroomdynamo acculading 2021-Warmtewisselaar water/lucht 22-Uitlaatspruitstuk 23-Startmotor 24 - Connector afstandsbedieningspaneel 25 - Regelschroef motortoerental 26 - Warmtewisselaar water/water NL 1.8 Instrumentenpaneel Zie afb.4 Elke stroomopwekkingsgroep beschikt over een instrumentenpaneel voor de bediening en de controle, dat de volgende componenten bevat: 1 2 3 4 5 6 7 8 - 9 10 11 12 - Urenteller Magnetothermische schakelaar Thermische gelijkstroomschakelaar START/STOP-knop Motorbeschermingsmodule Controlelampje "RUN" motor gestart Controlelampje "OIL" lage druk olie Controlelampje " °C " hoge temperatuur wisselstroomdynamo Controlelampje "BATT." acculading Controlelampje " °C " hoge temperatuur motor Controlelampje voorgloeiing bougies (niet aanwezig) Uitstromen brandstof (model "RINA") - 13 IS 18 - 21 - 24 - 27 50 Hz 2. ALGEMENE INFORMATIE De stroomopwekkingsgroep is ontworpen, gebouwd en getest om te voldoen aan de geldende Europese en nationale voorschriften, en om risicos van elektrische aard tot een minimum te beperken door overeenkomstigheid met de volgende normen: 89/336 EEG Richtlijn inzake de elektromagnetische compatibiliteit 73/23 EEG Laagspanningsrichtlijn CE 98/37 richtlijn machines 2.1 Referentiedocumenten De gebruiksinstructies geleverd met elke stroomopwekkingsgroep bestaan uit een reeks documenten waarvan deze handleiding het Algemeen Deel is. Normaal gezien worden de volgende documenten geleverd: NL a b c d - EG-verklaring van overeenstemming. - Handleiding met instructies voor het gebruik en het onderhoud van de stroomopwekkingsgroepen (deze handleiding). - Handleiding voor het gebruik en het onderhoud van de motor. - Handleiding voor het gebruik en het onderhoud van de wisselstroomdynamo (bij wisselstroomdynamos die niet door mase geproduceerd zijn). e - Lijst Technische Centra mase. f - Garantiebewijs mase. g - Garantiekaart. 2.2 Facsimile van de EG-verklaring van overeenstemming De stroomopwekkingsgroepen, gebouwd door het bedrijf mase, bestemd voor de landen van de Europee Gemeenschap, zijn conform de van kracht zijnde EG-richtlijnen (zie 1.5), en zijn voorzien van een EG-verklaring van overeenstemming (Fig.1). 2.3 Markering Op de plaat voor de stroomopwekkingsgroepen staan alle identificatiegegevens vermeld, zoals wordt voorgeschreven door de norm ISO 8528 e n volgens de vereisten voor CE-markering, voor de gevallen waarop dat van toepassing is. Hier wordt een voorbeeld van de identificatieplaat afgebeeld, die op het bedieningspaneel van elke machine is bevestigd (afb. A). 1 2 3 4 5 6 7 8 9 10 11 12 13 14 15 16 - Naam machine - Machinecode - Serienummer - Continu vermogen - Aangegeven frequentie - Vermogensfactor - Nominale spanning - Nominale stroom - Beschermingsgraad - Isolatieklasse - Max. gebruikstemperatuur - Max. gebruikshoogte - Prestatieklasse - Bouwjaar - Fabrikant - Gewicht 1 4 3 2 5 6 7 8 10 4 3 11 15 14 16 12 6 13 8 10 12 9 15 Fig.A 9 71 11 2 5 13 14 16 afb.A - 14 IS 18 - 21 - 24 - 27 50 Hz 3 EIGENSCHAPPEN VAN DE GENERATOR 3.1 Algemene eigenschappen De stroomopwekkingsgroepen IS werden ontworpen om makkelijk in schepen te worden geïnstalleerd. De geluidsisolerende kast, voorzien van blauw geverfde alluminiumpanelen, zorgt voor een makkelijke bereikbaarheid van de motor en de wisselstroomdynamo, voor een onderhouds- of een controlebeurt, en dempt tegelijk aanzienlijk het geluid. De 4-taktdieselmotor met directe injectie, gebouwd door Yanmar, is bijzonder betrouwbaar en sterk; de uitstootwaarden aan de uitlaat zijn conform de CARBnormen. De synchrone wisselstroomdynamo, met 4 polen, zonder borstels, beschikt over een elektronische spanningsregelaar (SR7) die een stabiliteit van ± 5% garandeert tegenover de nominale waarde. De grote startcapaciteit van de wisselstroomdynamo maakt de stroomopwekkingsgroep bijzonder geschikt voor de voeding van de elektrische motors van airconditionings, ontzoutingssystemen, compressoren, enz. De stroomopwekkingsgroep beschikt over een lokaal bedieningspaneel [afb. 3 ref. 4 ] met bedieningsknoppen en -instrumenten. 3.2 Koelsysteem De motor van de stroomopwekkingsgroep wordt afgekoeld door circulatie, in een gesloten circuit, met een koelvloeistof die warmte afstaat aan het zeewater, via een warmtewisselaar [afb. 3 ref. 26] . Deze warmtewisselaar, werd speciaal door mase ontworpen voor het gebruik van motors op zee. Een tweede warmtewisselaar koelt de lucht binnen in de geluidsisolerende kast en de lucht die nodig is voor de ventilatie van de wisselstroomdynamo. Bij de installatie moet voor de koeling een circuit aangelegd worden dat zeewater aanvoert en een systeem dat het mengsel van verbrandingsgassen en water afvoert, zoals aangeduid in de handleiding relatief aan de installatie. - Als het rood controlelampje "OIL" [afb. 4, ref. 7] brandt, betekent dit dat de druk van de motorolie ontoereikend is. - Als het rood controlelampje "°C" [afb. 4, ref. 10] brandt, betekent dit dat de temperatuur van de koelvloeistof of het water dat in de warmtewisselaar stroomt te hoog is. - Geel controlelampje [fig.4, ref. 11] geeft aan dat de bougies voor de voorverwarming in werking zijn. De ontsteking van de bougies vindt plaats vóór de start, waarbij de sleutel van de stand Stop in de stand ON wordt gebracht; van zodra de correcte temperatuur werd bereikt, worden de bougies uitgeschakeld en kan worden gestart. - Rood controlelampje [fig.4, ref. 12] geeft aan dat de noodknop werd ingedrukt. Om de groep opnieuw te starten, dient deze knop te worden vrijgegeven. NL Op het bedieningspaneel bevinden zich ook: - een magnetothermische bipolaire schakelaar [afb. 4, ref. 2] die de stroomtoevoer onderbreekt in geval van overbelasting en kortsluiting; - een thermische schakelaar [afb. 4, ref. 3] ter bescherming van de elektrische laagspanningsinstallatie tegen kortsluiting; - een urenteller [afb. 4, ref. 1]; - de start/stopknop relatief aan de stroomopwekkingsgroep [afb. 4, ref. 4]. De stroomopwekkingsgroep is voorzien om m.b.v. van een connector [afb. 3, ref. 24] te worden aangesloten op het afstandsstartpaneel, dat als optie wordt geleverd door mase, en eventueel op de commandobrug kan worden geïnstalleerd. Het afstandsstartpaneel is beschikbaar in twee modellen, zoals geïllustreerd in afb. 5. Het meest eenvoudige model [afb. 5, ref. 1] beschikt over de start/stopknop, en een groen controlelampje [afb. 5, ref. 2] dat brandt als de groep in werking is. Het tweede model van het paneel [afb. 5, ref. 3] heeft, naast de start/stopknop en het controlelampje, een instrument dat de drukwaarde van de motorolie meet [afb. 5, ref. 4] en een ander instrument dat de temperatuur van de koelvloeistof meet [afb. 5, ref. 5]. 3.3 Bedieningspaneel Op de stroomopwekkingsgroep bevindt zich een bedieningspaneel (afb. 4) voor de bediening en de uitvoering van de start- en stophandelingen. Een motorbeschermingsmodule [afb. 4, ref. 5] staat in voor de bescherming van de stroomopwekkingsgroep, door de motor stil te leggen bij een defect en de opgespoorde onregelmatigheid te melden m.b.v. de controlelampjes. - Als het groen controlelampje "RUN" [afb. 4, ref. 6] brandt, betekent dit dat de groep in werking is en geen enkele onregelmatigheid werd vastgesteld. - Als het rood controlelampje "BATT." [afb. 4, ref. 9] brandt, betekent dit dat de wisselstroomdynamo die de accu oplaadt beschadigd is. Tijdens het uitvoeren van onderhoudswerkzaamheden aan de stroomopwekkingsgroep moet de negative pool van de startaccu losgekoppeld zijn om een onverwachte start van de groep te vermijden. - 15 IS 18 - 21 - 24 - 27 50 Hz 3.4.1 Tabel van de technische eigenschappen IS18 0RWRU NL Model Type Cilinders (aantal) Materiaal cilinderblok Boring (mm) Slag (mm) Cilinderinhoud (cc) Vermogen (PK) Toerental Compressieverhouding Injectiesysteem Materiaal kop Toerenregelaar Smeersysteem Inhoud oliepan (l) Motorstopsysteem Brandstofpomp Max. vloeistofdruk brandstofpomp (cm) Brandstofverbruik in volbelaste toestand (l/h) Hoeveelheid verbrandingslucht (l/min) Startaccu (Ah-V) Lading accu (A-V) Startmotor (kW-V) Max. kanteling tijdens gebruik Opbrengst zeewaterpomp (l/min) :LVVHOVWURRPG\QDPR Type Regeling Koeling Spanning (V) Frequentie (Hz) Amp. Max. vermogen (kW) Cont. vermogen (kW) Vermogensfactor (cos ø) Isolatieklasse Spanningsstabiliteit Frequentiestabiliteit - 16 50 Hz Yanmar 4TNE94A Diesel 4-takt 4 Gietijzer 94 100 2776 39 1500 18.01 Direkt Gietijzer Centrifugaal, mechanisch Onder druk 10,2 Spoel Mechanisch 80 7,2 1900 80 - 12 40 - 12 2,3 - 12 30° 40 50 Hz Synchroon, 4-polig, zelfbekrachtigd Elektronisch Lucht / water (Intercooler W/A) 115 - 230 50 156 - 78 20 18 1 H ±2% ±5% 3.4.1.1 Tabel van de technische eigenschappen IS 21 0RWRU Model Type Cilinders (aantal) Materiaal cilinderblok Boring (mm) Slag (mm) Cilinderinhoud (cc) Vermogen (PK) Toerental Compressieverhouding Injectiesysteem Materiaal kop Toerenregelaar Smeersysteem Inhoud oliepan (l) Motorstopsysteem Brandstofpomp Max. vloeistofdruk brandstofpomp (cm) Brandstofverbruik in volbelaste toestand (l/h) Hoeveelheid verbrandingslucht (l/min) Startaccu (Ah-V) Lading accu (A-V) Startmotor (kW-V) Max. kanteling tijdens gebruik Opbrengst zeewaterpomp (l/min) :LVVHOVWURRPG\QDPR Type Regeling Koeling Spanning (V) Frequentie (Hz) Amp. Max. vermogen (kW) Cont. vermogen (kW) Vermogensfactor (cos ø) Isolatieklasse Spanningsstabiliteit Frequentiestabiliteit 50 Hz Yanmar 4TNE94A Diesel 4-takt 4 Gietijzer 94 100 2776 39 1500 18.01 Direkt Gietijzer Centrifugaal, mechanisch Onder druk 10,2 Spoel Mechanisch 80 7,2 1900 80 - 12 40 - 12 2,3 - 12 30° 40 50 Hz Synchroon, 4-polig, zelfbekrachtigd Elektronisch Lucht / water (Intercooler W/A) 115 - 230 50 200 - 100 23 21 1 H ±2% ±5% IS 18 - 21 - 24 - 27 50 Hz 3.4.1.2 Tabel van de technische eigenschappen IS 24 0RWRU Model Type Cilinders (aantal) Materiaal cilinderblok Boring (mm) Slag (mm) Cilinderinhoud (cc) Vermogen (PK) Toerental Compressieverhouding Injectiesysteem Materiaal kop Toerenregelaar Smeersysteem Inhoud oliepan (l) Motorstopsysteem Brandstofpomp Max. vloeistofdruk brandstofpomp (cm) Brandstofverbruik in volbelaste toestand (l/h) Hoeveelheid verbrandingslucht (l/min) Startaccu (Ah-V) Lading accu (A-V) Startmotor (kW-V) Max. kanteling tijdens gebruik Opbrengst zeewaterpomp (l/min) :LVVHOVWURRPG\QDPR Type Regeling Koeling Spanning (V) Frequentie (Hz) Amp. Max. vermogen (kW) Cont. vermogen (kW) Vermogensfactor (cos ø) Isolatieklasse Spanningsstabiliteit Frequentiestabiliteit 50 Hz Yanmar 4TNE98A Diesel 4-takt 4 Gietijzer 98 110 3319 46,4 1500 18.00 Direkt Gietijzer Centrifugaal, mechanisch Onder druk 10,2 Spoel Mechanisch 80 9,6 2500 80 - 12 40 - 12 2,3 - 12 30° 40 50 Hz Synchroon, 4-polig, zelfbekrachtigd Elektronisch Lucht / water (Intercooler W/A) 115 - 230 50 226 - 113 26 24 1 H ±2% ±5% 3.4.1.3 Tabel van de technische eigenschappen IS 27 0RWRU Model Type Cilinders (aantal) Materiaal cilinderblok Boring (mm) Slag (mm) Cilinderinhoud (cc) Vermogen (PK) Toerental Compressieverhouding Injectiesysteem Materiaal kop Toerenregelaar Smeersysteem Inhoud oliepan (l) Motorstopsysteem Brandstofpomp Max. vloeistofdruk brandstofpomp (cm) Brandstofverbruik in volbelaste toestand (l/h) Hoeveelheid verbrandingslucht (l/min) Startaccu (Ah-V) Lading accu (A-V) Startmotor (kW-V) Max. kanteling tijdens gebruik Opbrengst zeewaterpomp (l/min) :LVVHOVWURRPG\QDPR Type Regeling Koeling Spanning (V) Frequentie (Hz) Amp. Max. vermogen (kW) Cont. vermogen (kW) Vermogensfactor (cos ø) Isolatieklasse Spanningsstabiliteit Frequentiestabiliteit 50 Hz Yanmar 4TNE98A Diesel 4-takt 4 Gietijzer 98 110 3319 46,4 1500 18.00 Direkt Gietijzer Centrifugaal, mechanisch Onder druk 10,2 Spoel Mechanisch NL 80 10,8 2500 80 - 12 40 - 12 2,3 - 12 30° 40 50 Hz Synchroon, 4-polig, zelfbekrachtigd Elektronisch Lucht / water (Intercooler W/A) 115 - 230 50 252 - 126 29 27 1 H ±2% ±5% - 17 IS 18 - 21 - 24 - 27 50 Hz 4 VEILIGHEIDSVOORSCHRIFTEN 4.1 Algemene voorzorgsmaatregelen NL Alvorens de stroomopwekkingsgroep te starten en alvorens met elke willekeurige smeer- of onderhoudshandeling te beginnen is het absoluut noodzakelijk dat het personeel dat de groep zal gebruiken alle WAARSCHUWINGEN en de tekstblokken waar LET OP en GEVAAR bij staat die in deze handleiding staan en in de nadere technische documentatie die erbij verstrekt wordt goed gelezen en begrepen heeft. De fabrikant kan echter niet alle mogelijke situaties voorzien die tijdens de toepassing en het gebruik van de stroomopwekkingsgroep in de praktijk potentiële risico's met zich mee kunnen brengen. De diverse handelingen en/of procedures om onderhoud te plegen die niet uitdrukkelijk geadviseerd worden of aangegeven zijn in de gebruikshandleidingen moeten altijd aan de fabrikant gemeld worden en goedgekeurd worden door de fabrikant. Wanneer er een procedure gehanteerd moet worden die niet specifiek geadviseerd is moet de gebruiker ervoor zorgen en dit valt bovendien onder zijn verantwoordelijkheid dat de betreffende procedure veilig is en geen persoonlijk letsel of materiële schade teweeg brengt. De fabrikant aanvaardt geen enkele aansprakelijkheid voor persoonlijk letsel of materiële schade die voortkomen uit veronachtzaming van de veiligheidsvoorschriften. Bekijk de veiligheidsborden die op de machine aangebracht zijn goed en neem de aanwijzingen die erop staan in acht. - Laat de stroomopwekkingsgroep niet gebruiken door ondeskundige personen of personen die geen geschikte opleiding hebben gehad. - Laat kinderen of dieren niet in de buurt komen van de stroomopwekkingsgroep wanneer deze in werking is. - Kom niet met natte handen aan de generator, aangezien de generator een mogelijke oorzaak van elektrische schokken is als hij verkeerd wordt gebruikt. - Eventuele controles op de stroomopwekkingsgroep moeten uitgevoerd worden terwijl de motor uitgeschakeld is; controles op een groep die ingeschakeld is mogen uitsluitend verricht worden door gespecialiseerd personeel. - Adem de verbrandingsgassen nooit in, want zij bevatten stoffen die schadelijk zijn voor de gezondheid. - Zorg ervoor dat de toegangsdeuren gesloten zijn wanneer de stroomopwekkingsgroep in gebruik is. - Raak het motorblok of de wisselstroomdynamo nooit met uw handen aan als de stroomopwekkingsgroep in werking is of nog warm is. - 18 - Tijdens het uitvoeren van onderhoudswerkzaamheden aan de stroomopwekkingsgroep moet de minpool van de startaccu losgekoppeld zijn om plotseling starten te vermijden. - Als er olie- of brandstoflekkages geconstateerd worden dient u te zorgen voor een nauwkeurige reiniging om brandgevaar te vermijden. - Toegang verboden voor personen die een pacemaker dragen, omwille van de mogelijke elektromagnetische interferenties met de cardiocirculaire apparaten. - Ingeval van brand gebruikt u gehomologeerde brandblussers en nooit water. Als er zich problemen voordoen of als u uitleg nodig heeft, neem dan contact op met de SERVICEDIENST van Mase. 4.2 Voorschriften voor de veiligheid tijdens de installatie en de inbedrijfstelling - Het personeel dat met de installatie of de inbedrijfstelling van de stroomopwekkingsgroep belast is moet altijd een beschermende helm opzetten; draag veiligheidsschoenen en een overal. - Gebruik veiligheidshandschoenen. - Laat geen gedemonteerde onderdelen, gereedschap of iets dergelijks dat niet bij de installatie hoort op de motor of in de buurt daarvan liggen. - Laat nooit brandbare vloeistoffen of poetslappen die doordrenkt zijn met brandbare vloeistoffen in de buurt van de stroomopwekkingsgroep, elektrische apparaten (met inbegrip van lampen) of delen van de elektrische installatie achter. - Tref voorzorgsmaatregelen om het gevaar van blikseminslag te vermijden. 5 GEBRUIK VAN DE GENERATOR 5.1 Controles vooraf Alvorens de groep op de een of andere manier te starten is het zeer belangrijk dat u zich vertrouwd maakt met de stroomopwekkingsgroep en de bediening ervan. Bovendien moet u een visuele veiligheidscontrole op de machine en de installatie verrichten. Elke reële of mogelijke bron van gevaar moet weggenomen worden voordat u verder gaat. - Controleer de stand van de noodstopknoppen, de schakelaars en andere noodsystemen die voorhanden zijn op de stroomopwekkingsgroep. - Zorg ervoor dat u de bijzondere noodprocedures kent die van toepassing zijn op de installatie in kwestie. IS 18 - 21 - 24 - 27 50 Hz - Controleer met behulp van de peilstok (afb. 7 - ref. 2) of de olie op het juiste peil is, zie tabel "A" van de aanbevolen oliën (afb. 8). - Controleer of alle verankeringspunten van de groep goed vastgezet zijn. - Controleer of alle elektrische gebruikers afgekoppeld zijn om te vermijden dat de groep gestart wordt terwijl hij belast wordt. - Controleer of alle water- en brandstofleidingen goed aangesloten zijn. - Controleer of alle elektrische aansluitingen op de juiste manier uitgevoerd zijn en of er geen aansluitingen in slechte staat zijn. - Controleer of de waterkraan open staat (afb. 6 - ref. 2). - Controleer of het gedeelte van het watercircuit van de pomp naar de kleppen met de hand gevuld is, in het geval er een terugslagklep op de zeewaterinlaat gemonteerd is (zoals geadviseerd in de installatiehandleiding) [afb. 4, ref. 1]. 5.2 Ontluchting van de toevoerinstallatie of de generator wordt geconstateerd, blijft alleen het groene controlelampje RUN [afb. 4, ref. 6] branden om aan te geven dat de groep gestart is en naar behoren functioneert. Herhaalde en tevergeefse startpogingen, kunnen leiden tot een overdreven accumulatie van water in de afvoerleiding, met mogelijke ernstige gevolgen voor de motor. Indien moeilijkheden worden ondervonden bij het starten van de motor, wordt niet aangedrongen vóór de toevoerkraan van het zeewater werd dichtgedraaid [afb. 6, ref. 2]. NL 5.4 Stoppen van de groep De groep wordt gestopt door op de knop [afb. 4, ref. 4] "STOP" op het bedieningspaneel te drukken. Alvorens de stroomopwekkende groep De aanwezigheid van luchtbellen in de toevoerinstallatie, is de oorzaak van een onregelmatige werking van de motor of verhindert dat het nominale toerental wordt gehaald. Lucht kan in het circuit van de toevoerinstallatie dringen doorheen een niet perfect luchtdichte verbinding (buis, filter, reservoir) of wanneer de brandstof in de brandstoftank het minimumpeil bereikt heeft. De luchtbellen kunnen uit het voedingscircuit worden verwijderd door ten eerste de oorzaak op te heffen waardoor de lucht heeft kunnen binnendringen en vervolgens de volgende handelingen te verrichten: 1 - Bedien de hendel van de brandstofpomp met de hand [afb.7, ref.3] totdat alle lucht door de ontluchtingsschroeven uit de voedingsinstallatie naar buiten gekomen is. 2 - Herhaal bovenstaande werkzaamheden als de motor nog steeds niet regelmatig functioneert. te stoppen, is het raadzaam hem gedurende enkele minuten te laten functioneren zonder stroom, om de motor en de wisselstroomdynamo geleidelijk te laten afkoelen. Voor meer gedetailleerde informatie dient u de door de fabrikant van de motor geleverde handleiding te raadplegen, waarvan elke groep vergezeld gaat. Stopt de groep als de druk van de motorolie ontoereikend is; hierbij ontsteekt het controlelampje "OIL" [afb. 4, ref. 7]. Meestal volstaat het de juiste hoeveelheid olie bij te vullen om de groep weer te starten. 6. BESCHERMINGEN De stroomopwekkingsgroepen zijn uitgerust met een aantal beschermingen die ze behoeden voor onjuist gebruik en storingen die nadelige gevolgen voor de goede werking kunnen hebben. Wanneer de stroomopwekkingsgroep stopt doordat er een bescherming ingeschakeld is, zal het lampje op de motorbeschermingsmodule (afb. 5 - ref. 5) van het bedieningspaneel dat de storing die opgetreden is aangeeft gaan branden. 6.1 Bescherming lage oliedruk 5.3 Starten Alvorens de groep te starten dient u zich ervan te vergewissen dat de voorafgaande controles, die beschreven worden in paragraaf 5.1, uitgevoerd zijn. Start de groep door te drukken op de START-knop op het bedieningspaneel [afb. 4, ref. 4] en laat de knop los wanneer de motor gestart is. Houd bij elke startpoging de knop niet langer dan 15 sec. ingedrukt, en respecteer een pauze van minstens 30 sec. tussen twee pogingen. Alle controlelampjes van de motorbeschermingsmodule gaan gedurende een aantal seconden branden [afb. 4, ref. 5], en als geen onregelmatige werking van de motor - De bescherming tegen lage oliedruk geeft geen aanduidingen over het niveau van de olie in de olietank. Een dagelijkse controle van het oliepeil is bijgevolg noodzakelijk. - De motor functioneert goed bij een maximale helling van 30° voor perioden van minder dan 3 minuten; 25° zonder tijdslimiet, zowel op de lengteas als de dwarsas. Indien de motor functioneert bij grotere hellingen, bestaat het risico van een ontoereikende smering of een ontoereikende aanzuiging van de smeerolie uit de luchtfilter. - 19 IS 18 - 21 - 24 - 27 50 Hz 7 ONDERHOUD 6.2 Bescherming hoge temperatuur water Stopt de stroomopwekkende groep wanneer de temperatuur van de koelvloeistof van de motor te hoog is of in afwezigheid van circulerend zeewater. Hierbij gaat het controlelampje branden [afb. 4, ref. 10]. De stroomopwekkende groep wordt alleen weer gestart na identificatie en verwijdering van de oorzaak van de storing. 6.3 Bescherming overtemperatuur wisselstroomdynamo NL Stopt de stroomopwekkingsgroep als een thermische overbelasting van de wisselstroomdynamo wordt geconstateerd. Hierbij gaat het controlelampje branden [afb. 4, ref. 8]. De stroomopwekkingsgroep kan na enkele minuten opnieuw worden gestart, wanneer de temperatuur van de windingen van de wisselstroomdynamo opnieuw normale waarden heeft bereikt. Het is in ieder geval aangeraden te peilen naar de oorzaken van de storing en deze te verwijderen. 7.1 Voorwoord Alle onderhoudswerkzaamheden op de stroomopwekkingsgroep moeten verricht worden terwijl de motor uitgeschakeld is, nadat deze voldoende afgekoeld is en mogen alleen verricht worden door bevoegd personeel dat naar behoren geïnstrueerd is. Er wordt geadviseerd om de aanwijzingen die in de handleiding staan die door de fabrikant van de motor verstrekt wordt en die bij elke stroomopwekkingsgroep gevoegd wordt nauwgezet op te volgen. Het is belangrijk om de stroomopwekkingsgroep regelmatig te controleren en er onderhoud aan te plegen; de ingrepen dienen op basis van het aantal bedrijfsuren bepaald te worden. Om onderhoud te plegen moet u de deuren aan de zijkant en de deur aan de bovenkant verwijderen. Voordat Ingeval van een ingreep op een van bovenvernoemde beveiligingen, en na de oorzaak van het probleem te hebben opgespoord en verholpen, moet verplicht op de "STOP"-knop worden gedrukt om het bedieningspaneel terug te stellen (zoniet blijft het signaal in het geheugen en wordt de start van de motor verhinderd). 6.4 Bescherming tegen kortsluiting en overbelasting De stroomopwekkingsgroep wordt beveiligd tegen kortsluitingen en elektrische overbelasting. Een bipolaire magnetothermische schakelaar [afb. 4, ref. 2] onderbreekt de stroomtoevoer wanneer een kortsluiting optreedt of wanneer de nominale stroomwaarde wordt overschreden. Alvorens het contact te herstellen door de magnetothermische schakelaar in geheven stand te zetten, koppelt u de machines los. 6.5 Bescherming tegen kortsluiting van de elektrische laagspanningsinstallatie Ingeval van kortsluiting van de elektrische laagspanningsinstallatie, onderbreekt een thermische schakelaar [afb. 4, ref. 3] de stroomtoevoer, waarna de stroomopwekkingsgroep stilvalt.In dit geval zijn alle meldingslampjes van de motorbeschermingsmodule gedoofd, en is een nieuwe startpoging onmogelijk. Alvorens het elektrisch circuit te herstellen m.b.v. de drukknop op de thermische schakelaar [afb. 4, ref. 3], dient een gespecialiseerd technicus de oorzaak van de kortsluiting op te sporen en te verhelpen. - 20 u aan de stroomopwekkingsgroep komt moet u een pool van de startaccu loskoppelen om plotseling starten te vermijden. 7.2 Gewoon onderhoud van de motor De periodieke onderhoudswerkzaamheden uit te voeren op de motor worden aangeduid in de tabel TAB. "B" in paragraaf 6.15. Voor meer gedetailleerde informatie, raadpleeg de handleiding geleverd door de fabrikant van de motor, en die elke stroomopwekkingsgroep vergezelt. Controleer het niveau van de motorolie m.b.v. de peilstok [afb. 7, ref. 2]. Het niveau moet steeds begrepen zijn tussen het MAX/ MIN-peil aangeduid op de peilstok [afb. 7, ref. 1]. 7.3 Verversing van de motorolie en vervanging van de oliefilter De inhoud van de oliepan is 10,2 liter De motorolie wordt bijgevuld doorheen de opening [afb. 3, ref. 17 ]. Om de olie van de oliepan te verversen wordt de peilstok weggenomen [afb.7, ref. 2] en gebruik gemaakt van de extractiepomp [afb.7, ref. 7] na de schroef te hebben verwijderd die dienst doet als dop. Het is aangeraden de olie af te tappen wanneer deze nog voldoende warm is, om hem vlot te laten stromen. Voor de aangewezen types olie, raadpleeg de tabel TAB."A", in de afb. 8. IS 18 - 21 - 24 - 27 50 Hz 7.5 Vervanging van de brandstoffilter - De motorolie dient de eerste keer te worden verversd na 50 gebruiksuren van de stroomopwekkingsgroep; voor de tweede en de daaropvolgende keren volstaat een verversing elke 200 uren. - Voor meer gedetailleerde informatie over de smering van de motor, raadpleeg de gebruiks- en onderhoudshandleiding van de motor, geleverd met de stroomopwekkingsgroep. - Oude olie of brandstof zijn vervuilend voor de omgeving. Laat ze dus niet achter. Lever de oude smeerolie af in de Verzamelcentra die belast zijn met de vernietiging ervan. Breng de motorolie niet in contactmetdehuid.Tijdensonderhoudswerkzaamheden draagt u beschermende handschoenen en een veiligheidsbril. In geval van contact met de smeerolie, wast u de huid onmiddellijk en grondig met water en zeep. Om het filterpatroon van de motorolie te vervangen [afb. 3, ref. 16] schroeft u hem van zijn houder, m.b.v. van gereedschap dat makkelijk in de handel verkrijgbaar is. Plaats het nieuw filterpatroon en smeer de ringvormige rubberen pakking. De eerste vervanging wordt uitgevoerd na 50 werkingsuren van de stroomopwekkingsgroep, voor de tweede en daaropvolgende keren respecteert u een interval van 400 uren. Voor meer informatie, raadpleeg de gebruiks- en onderhoudshandleiding van de motor. Voor de veiligheid van de motor, gebruikt u steeds originele wisselonderdelen. Na deze Om borg te staan voor een lange levensduur en correcte werking van de motor, is het van wezenlijk belang het brandstoffilterpatroon regelmatig te vervangen, volgens de intervallen bepaald door de fabrikant in de tabel in paragraaf 7. 15. Een dergelijke handeling wordt als volgt uitgevoerd: - schroef het mondstuk van de houder volledig open [afb. 3, ref. 13] - neem het oude patroon weg en plaats het nieuwe. - voor de hermontage volgt u de handelingen in omgekeerde volgorde. Na de vervanging is het noodzakelijk de toevoerinstallatie te ontluchten volgens de handelingen beschreven in paragraaf 5.2 NL Zorg ervoor dat de brandstof niet in contact komt met de huid. Tijdens onderhoudswerkzaamheden draagt u beschermende handschoenen en een veiligheidsbril. In geval van contact met de brandstof, wast u de huid onmiddellijk en grondig met water en zeep. Na de handelingen verwijdert u zorgvuldig elk spoor van brandstof en levert u de oude olie af in een Verzamelcentrum. 7.6 Controle van de koelvloeistof Regelmatig dient het niveau van de koelvloeistof van het gesloten koelcircuit te worden gecontroleerd. De referentiewaarden voor een dergelijke controle staan gedrukt op het expansievat [afb. 3, ref. 11]. Indien het niveau te laag is, giet u koelvloeistof in het expansievat. Let erop het maximumniveau niet te overschrijden. handelingen verwijdert u grondig alle olie en brandstof van de onderdelen van de stroomopwekkinsggroep. 7.4 Reiniging van de luchtfilter De stroomopwekkingsgroepen van de serie IS zijn uitgerust met eem droge-luchtfilter die voorkomt dat vreemde voorwerpen binnendringen in de inlaat van de verbrandingskamer. Voor het onderhoud volstaat het de filtereenheid eenmaal per jaar schoon te maken met stookolie, om onzuiverheden weg te werken. Verspreid de vloeistoffen gebruikt voor het spoelen van de luchtfilter niet in het milieu, maar lever ze af in een speciaal Verzamelcentrum. Open nooit de afsluitdop van het expansievat [afb. 3, ref. 11] of het reservoir [afb. 3, ref. 26] als de motor nog warm is, om de gevaarlijke uitstroming van koelvloeistof te voorkomen. 7.7 Controle van de spanning van de V-snaren Een V-snaar wordt gebruikt om de roterende beweging van de motoraspoelie over te dragen op die van de zeewaterpomp [afb. 8, ref. 1]. Een overdreven spanning van deze snaar versnelt het slijtageproces, terwijl een ontoereikende spanning de poelie laat doldraaien, waardoor het water niet voldoende circuleert. De spanning van de snaar wordt als volgt geregeld: schroef de twee stelschroeven los [afb. 8, ref. 2] en verplaats de zeewaterpomp naar buiten toe om de druk te verhogen, of naar binnen toe om de druk te verminderen. Zet de schroeven aan en controleer de spanning. Een correcte spanning van de snaar laat bij een duwkracht van 8 kg een afwijking toe van ongeveer 5 mm [afb.8]. - 21 IS 18 - 21 - 24 - 27 50 Hz Een tweede snaar wordt gebruikt om de roterende beweging van de motoraspoelie over te brengen op die van de vloeistofpomp in het gesloten circuit en van de wisselstroomdynamo voor de acculading [afb. 8, ref. 3]. De spanning van de snaar wordt als volgt geregeld: schroef de stelschroeven los [afb. 8, ref. 4] en verplaats de wisselstroomdynamo voor de acculading [afb. 8, ref. 5] naar buiten toe om de spanning te verhogen en naar binnen toe om de spanning te verminderen. Een correcte spanning van de snaar laat bij een duwkracht van 8 kg een afwijking toe van ongeveer 10 mm [afb. 8]. NL Om de vermijden dat de snaar dol draait, hem niet bevuilen met olie. Reinig de riem met benzina indien bij een controle oliesporen worden geconstateerd. Kom met de handen niet in de buurt van de V-snaar of de poelie terwijl de motor loopt. 7.8 Lediging van het koelsysteem Om de water-luchtwisselaar of de koelinstallatie te onderhouden, is het noodzakelijk het aanzuigcircuit van het zeewater te ledigen. Dergelijke handeling wordt als volgt uitgevoerd: - Draai het kraantje van het zeewater dicht [afb. 6, ref. 2]; - draai de afvoerkraan open [fig. 6, rif. 3] om het water volledig te laten wegvloeien; - draai de afvoerkraan weer dicht. Draai de zeewaterkraan weer open alvorens de stroomopwekkingsgroep te herstarten. 7.9 Verversing van de koelvloeistof Elk jaar wordt de koelvloeistof in het gesloten koelcircuit als volgt vervangen: - Maak gebruik van een rubberen pijp, met een lengte van ongeveer 50 cm en een inwendige diameter van 30/40 mm. - Steek de pijp door de onderste opening, positioneer hem onder de dop (afb. 7, ref. 4) en sluit hem aan op een reservoir met een inhoud van ongeveer 10 liter. - Open de dop en tap het gesloten koelcircuit volledig af. Na deze handeling plaats u de dop terug en vult u het circuit opnieuw met koelvloeistof. Verspreid de oude koelvloeistof niet in de omgeving, omdat hij vervuilend is. Lever de oude koelvloeistof af in een verzamelcentrum dat belast is met de vernietiging ervan. - 22 7.10 Vervanging van de zinkanodes Mte het oog op de bescherming van de water-luchtwisselaar [afb.9, ref.1], de warmtewisselaar water-vloeistof [afb.9, ref. 2] tegen galvanische stromen, werden twee zinkanodes voorzien.[afb.9, ref. 4] Het is nodig regelmatig de slijtage te controleren en eventueel over te gaan tot de vervanging, om te voorkomen dat de galvanische stromen de wisselaar onherroepelijk aantasten. Het is aangeraden de zinkanodes minstens eenmaal per maand te controleren, voor een nieuwe groep, om de verbruikssnelheid na te gaan en in functie hiervan regelingen uit te voeren. Het is in ieder geval raadzaam de zinkanodes minstens eenmaal per jaar te vervangen. In de afb. 9 werden de aansluitpunten van de zinkanodes aangeduid 7.11 Onderhoud van de zeewaterpomp Minstens eenmaal per jaar wordt de staat nagegaan van het rubberen draaielement van de zeewaterpomp (afb. 7 ref. 5). Alvorens de zeewaterpomp te openen, ter controle van het draaielement, wordt de koelinstallatie volledig geledigd zoals beschreven in paragraaf 7.8. Om het draaielement te bereiken is het noodzakelijk het afsluitdeksel weg te nemen (afb. 7 ref. 6) en m.b.v. een tang het draaielement te verwijderen door het naar buiten toe te trekken. Voor de montage van een nieuw draaielement, herhaal de hierboven beschreven handelingen in omgekeerde volgorde. 7.12 Onderhoud van de wisselstroomdynamo De wisselstroomdynamo waarmee dit model is uitgerust is van het synchrone, zelfbekrachtigde type. Een dergelijk model, dat niet voorzien is van een uitlaatspruitstuk en borstels, behoeft geen bijzondere onderhoudsbeurt. De periodieke controles en onderhoudsbeurten beperken zich tot de verwijdering van eventuele sporen van vocht en roest die de groep kunnen beschadigen. 7.13 Onderhoud van de accu Het is aangewezen om, voor de start van alle modellen van de stroomopwekkinggroep, een accu te gebruiken van 80 A/ u bij een omgevingstemperatuur groter dan 0° C en van 100 A/u voor lagere temperaturen. Alvorens een nieuwe accu te installeren is het belangrijk dat deze eerst volledig wordt geladen. Controleer minstens eenmaal per maand het niveau van de elektrolytische vloeitstof en vul eventueel bij met gedistilleerd water. Indien de stroomopwekkingsgroep gedurende een lange periode niet gebruikt wordt, is het raadzaam de accu te verwijderen en te bewaren op een droge plaats bij een temperatuur van meer dan 10° C, en de accu minstens eenmaal per maand volledig te laden. IS 18 - 21 - 24 - 27 50 Hz Als de accu gedurende lange periodes volledig leeg wordt gelaten, kan deze onherroepelijke schade oplopen. Het is belangrijk de positieve klem van de accu te beschermen met vaselinevet, om aantasting en roestvorming te voorkomen. Om zwavelzuur bij te vullen gebruikt u verplicht reeds bereide oplossingen. Om de accu op te vullen met gedistilleerd water of zuur, worden rubberen handschoenen en een beschermende bril gedragen, om te voorkomen dat de huid in contact komt met het zwavelzuur. Bij een toevallig contact met het zwavelzuur, wast u de huid met water en zeep en raapleegt u een arts. INFORMATIE - Alvorens de accu te laden, controleer het niveau van de elektrolytische vloeistof en vul eventueel gedistilleerd water bij. Deze handeling wordt herhaald nadat de accu werd geladen. 7.14 Periodes van inactiviteit Start de stroomopwekkingsgroep minstens eenmaal per maand. Als de stroomopwekkingsgroep gedurende een lange periode niet wordt gebruikt, dient u de volgende handelingen uit te voeren: - Ververs de motorolie. - Vervang het patroon van de oliefilter (zie par. 7. 3). - Vervang het patroon van de brandstoffilter (zie par. 7. 5). - Verwijder de injectoren, giet in elke cilinder 2 cc motorolie en laat de motor manueel enkele toeren draaien m.b.v. de motoraspoelie. Hermonteer de injectoren. - Vervang de zinkpastilles (zie par. 7.10) - Zuig m.b.v. van de zeewater-inlaatpijp koelvloeistof op, die de wisselaars en het draaielement van de zeewaterpomp en de metalen onderdelen van de koelinstallatie smeert. - Koppel de startaccu los en bewaar hem op een droge plaats (zie par. 7.13) - Koppel de zeewateruitlaatpijp los van het uitlaatspruitstuk van de motor. - Maak de zeewaterfilter schoon - Sluit de zeewaterinlaatkraan - Ledig het zeewaterreservoir - Reinig en smeer de terugslagklep, indien geïnstalleerd (siphon break) 7.15 Samenvattingstabel van de geprogrammeerde ingrepen HANDELING UUR Controleer het niveau van de motorolie 10 Controleer het niveau van de koelvloeistof 10 Spoor de aanwezigheid van eventuele olielekken op 20 Spoor de aanwezigheid van eventuele brandstoflekken op. 20 Spoor de aanwezigheid van eventuele vloeistoflekken op 20 Regeling van de spanning van de V-snaren 100 Controleer de lading van de accu 100 Reinig de brandstoffilter 200 Regel de snaarspanning 200 * Ververs de motorolie 200 Controleer het draaielement van de zeewaterpomp 400 Controleer het toerental van de motor 400 Controleer de staat van de elektrische aansluitingen. 400 Vervang de brandstoffilter 400 * Vervang de oliefilter 400 Controleer de injectoren 400 Controleer de injectiefasen 400 Regel de speling van de inlaat/uitlaatklep 400 Controleer de injectiepomp van de brandstof. 1000 Controleer het niveau van de elektrolytische vloeistof in de accu maandelijks Reinig en deoxideer de metalen onderdelen jaarlijks Reinig de luchtfilter jaarlijks Vervang volledig de koelvloeistof jaarlijks Vervang de zinkanodes jaarlijks TAB "B" * Voer de eerste ingreep uit na 50 uur, en de daaropvolgende ingrepen volgens de voorziene intervallen. NL 7.16 Tabel storingen De startmotor draait maar de hoofdmotor start niet. - Controleer of er brandstof in de tank is. (Bijvullen) - Controleer of de elektromagnetische stopmagneet ingeschakeld is. (Raadpleeg Technisch Centrum) - Blaas de luchtbellen af die zich gevormd hebben in het toevoercircuit. (Zie par. 5.2) De motorbeschermingsmodule wordt niet ingeschakeld met de START-knop. - Controleer of de thermische veiligheidsschakelaar [afb. 4, ref. 3] open is. (Herstel het contact m.b.v. de rode drukknop [afb. 4, ref. 3] ) - Controleer de kabels en aansluitklemmen van de accu en de elektrische aansluitingen. (Heraansluiten) - Controleer de staat van de accu. (Laden of vervangen) - 23 IS 18 - 21 - 24 - 27 50 Hz De stroomopwekkingsgroep valt stil tijdens de bedrijfscyclus. - Controleer of een controlemapje brandt dat duidt op de inschakeling van een beveiliging. (Verwijder de oorzaak en herstart) - Controleer of er brandstof in de tank is. (Bijvullen) NL De motor geeft veel rook af aan de uitlaat - Controleer of het oliepeil de MAX-aanduiding niet overschrijdt. (Bijvullen) - Controleer of de groep niet overbelast is. - Controleer de tarrage van de injectoren. (Raadpleeg Technisch Centrum) De motor loopt op onregelmatige wijze. - Controleer de brandstoffilters. (Vervangen) - Blaas de luchtbellen af die zich gevormd hebben in het toevoercircuit. (Zie par. 4. 2) De spanning van de wisselstroomdynamo is te laag. - Controleer het toerental van de motor: 1560 rpm zonder aangesloten gebruikers op 50Hz - Regel de spanningswaarde m.b.v. de elektronische regelaar - Spanningsregelaar defect (vervangen). Startaccu leeg. - Controleer het niveau van de elektrolytische vloeistof in de accu. (Bijvullen) - Controleer de werking van de wisselstroomdynamo. - Controleer de staat van de accu De stroomopwekkingsgroep staat niet onder spanning. - Controleer of de magnetothermische schakelaar [afb.4 ref.2 ] in de stand "ON" staat. Als deze handeling geen positief gevolg heeft, contacteer een Geautoriseerd Technisch Centrum 8 TRANSPORT EN VERPLAATSING Met het oog op het transport worden alle stroomopwekkingsgroepen door middel van schroeven aan een pallet bevestigd. Om de stroomopwekkingsgroepen aan boord van schepen te verplaatsen moet gebruik gemaakt worden van de hijshaken van de motor die onder de toegangsdeur aan de bovenkant (afb. 3 - ref. 2) aangebracht zijn. Haak de groep zorgvuldig vast en hijs de groep langzaam op, zonder abrupte bewegingen te maken. - 24 - Als de stroomopwekkingsgroep aan andere punten vastgehaakt wordt dan aangegeven dan kan de stroomopwekkingsgroep hierdoor beschadigd worden of dit kan gevaarlijk zijn voor de medewerkers. - Tijdens het ophijsen moet al het personeel de nodige afstand houden en moeten de medewerkers een beschermende helm dragen. 9 AFDANKEN Op het einde van de levensduur van de stroomopwekkingsgroep, wordt deze afgeleverd aan een bedrijf dat instaat voor de afdanking. Gooi de stroomopwekkingsgroep niet weg, aangezien vele componenten ervan vervuilend zijn voor het milieu. 9 REFERENTIES SCHAKELSCHEMA Afb. 10 1 2 3 4 5 6 7 8 9 10 11 12 13 14 15 16 17 18 19 20 21 22 23 24 25 26 27 28 29 30 Magnetothermische schakelaar Urenteller Wisselstroomdynamo Rotor Stator Spanningsregelaar Vermogensklemmenbord NOODDRUKKNOP Thermische schakelaar START/STOP knop Motorbeschermingsmodule Klemmenbord Connector voor verbinding afstandsbedieningspaneel Brandstofmeter Indicator watertemperatuur Indicator oliedruk Sensor hoge watertemperatuur Sensor hoge koelvloeistoftemperatuur Oliedrukschakelaar Acculaadwisselstroomdynamo Elektromagnetische stopmagneet Startmotor Verbindingsklemmen accu Verbindingskabel bedieningspaneel START/STOP knop Instrument indicator oliedruk Instrument indicator koelvloeistoftemperatuur Set afstandsbedieningspaneel met instrumenten Set afstandsbedieningspaneel Wijnberg jouw anden IS 18 - 21 - 24 - 27 50 Hz Afb. 11 1 2 3 4 5 6 7 8 9 10 11 12 13 14 15 16 17 18 19 20 21 22 23 24 25 26 27 WISSELSTROOMDYNAMO WISSELSTROOMDYNAMO ACCULADING ACCU CONNECTOR 12P URENTELLER DIODE ELEKTROMAGNETISCHE STOPMAGNEET MOTORBESCHERMINGSMODULE STARTMOTOR OLIEDRUKSCHAKELAAR NOODDRUKKNOP ELEKTRONISCHE SPANNINGSREGELAAR ROTOR STATOR THERMISCHE SCHAKELAAR MOTORTHERMOSTAAT INSTRUMENT TEMPERATUURWIJZER INSTRUMENT OLIEDRUKWIJZER MAGNETOTHERMISCHE SCHAKELAAR 2P 0 RELAIS RELAIS START-STOPKNOP WISSELSTROOMTHERMOSTAAT TEMPERATUURSENSOR OLIEDRUKSENSOR CONNECTOR 6P NL - 25