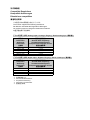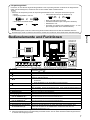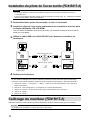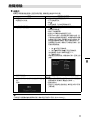
1
日本語
Color LCD Monitor
English
Touch Panel Color LCD Monitor
Deutsch
Français
セットアップマニュアル
ご使用前に必ずこのセットアップマニュアルおよび取扱説明書(CD-ROM内)
をよくお読みになり、正しくお使いください。
このセットアップマニュアルは大
切に保管してください。
Setup Manual
Important: Please read this Setup Manual and the User’s Manual stored (on the CD-
ROM) carefully to familiarize yourself with safe and effective usage. Please
retain this manual for future reference.
Installationshandbuch
Wichtig:
Lesen Sie dieses Handbuch zur Einrichtung und das Benutzerhandbuch
(auf der CD-ROM) aufmerksam durch, um sich mit der sicheren und
effizienten Bedienung vertraut zu machen. Bewahren Sie dieses Handbuch
zum späteren Nachschlagen auf.
Manuel d’installation
Important : Veuillez lire attentivement ce Manuel d’installation et le Manuel d’utilisation
(inclus sur le CD-ROM) afin de vous familiariser avec ce produit et de
l’utiliser efficacement et en toute sécurité. Veuillez conserver ce manuel
pour référence ultérieure.
设定手册
重要事项: 请仔细阅读本设定手册和用户手册(储存在光盘上),以便掌握如何安全、
有效地使用本产品。请保留本手册,以备日后参考。
中文
重要:
対応解像度
Compatible Resolutions
Kompatible Auflösungen
Résolutions compatibles
兼容的分辨率
この製品は次の解像度に対応しています。
The monitor supports the following resolutions.
Der Monitor unterstützt die folgenden Auflösungen.
Ce moniteur prend en charge les résolutions suivantes.
本显示器支持下列分辨率。
アナログ信号入力時 / Analog Input / Analoger Eingang / Entrée analogique / 模拟输入
解像度
Resolution
Auflösung
Résolution
分辨率
垂直走査周波数
Vertical Scan Frequency
Vertikale Abtastfrequenz
Fréquence de balayage vertical
垂直扫描频率
640 × 400
640 × 480
720 × 400
800 × 600
1024 × 768*1
~70 Hz
~75 Hz
70 Hz
~75 Hz
~75 Hz
デジタル信号入力時 / Digital Input / Digitaler Eingang / Entrée numérique / 数字输入
*1
*1
*1
*1
*1
解像度
Resolution
Auflösung
Résolution
分辨率
垂直走査周波数
Vertical Scan Frequency
Vertikale Abtastfrequenz
Fréquence de balayage vertical
垂直扫描频率
640 × 480
720 × 400
800 × 600
1024 × 768*1
60 Hz
70 Hz
60 Hz
60 Hz
推奨解像度です。
Recommended resolution.
Empfohlene Auflösung.
Résolution recommandée.
推荐的分辨率。
カラー液晶モニター
日本語
タッチパネル装着カラー液晶モニター
絵表示について
本書および本体では次の絵表示を使用しています。内容をよく理解してから本文をお読みください。
警告
この表示を無視して誤った取扱いをすると、人が死亡または重傷を負う可能性がある内容を示
しています。
注意
この表示を無視して誤った取扱いをすると、人が傷害を負う可能性がある内容、および物的損
害のみ発生する可能性がある内容を示しています。
注意(警告を含む)を促すものです。例えば
禁止の行為を示すものです。例えば
は「感電注意」を示しています。
は「分解禁止」を示しています。
行為を強制したり指示するものです。例えば
ます。
は「アース線を接続すること」を示してい
この装置は、クラスB情報技術装置です。この装置は、家庭環境で使用することを目的としていま
すが、この装置がラジオやテレビジョン受信機に近接して使用されると、受信障害を引き起こすこ
とがあります。取扱説明書に従って正しい取扱いをしてください。
また、製品の付属品(ケーブル含む)や当社が指定するオプション品を使用しない場合、VCCIの技術
基準に適合できない恐れがあります。
VCCI-B
本装置は、社団法人 電子情報技術産業協会の定めたパーソナルコンピュータの瞬時電圧低下対策規
格を満足しております。しかし、規格の基準を上回る瞬時電圧低下に対しては、不都合が生じるこ
とがあります。
本装置は、高調波電流を抑制する日本工業規格JIS C 61000-3-2に適合しております。
セットアップマニュアルと取扱説明書の記載内容について
セットアップマニュアル
(本書)
コンピュータとの接続から使いはじめるまでの基本説明。
モニターの取扱説明書※1
モニターの画面調整や設定、仕様などについての応用説明。
タッチパネルドライバの取
扱説明書※1
タッチパネルドライバのインストール方法や使用方法につい
ての説明。
※1 CD-ROM内、PDFファイル(PDFファイルを見るには、Adobe Readerのインストールが必要です。)
1.本書の著作権はEIZO株式会社に帰属します。本書の一部あるいは全部をEIZO株式会社からの事前の許諾
を得ることなく転載することは固くお断りします。
2.本書の内容について、将来予告なしに変更することがあります。
3.本書の内容については、万全を期して作成しましたが、万一誤り、記載もれなどお気づきの点がありま
したら、ご連絡ください。
4.本機の使用を理由とする損害、逸失利益などの請求につきましては、上記にかかわらず、いかなる責任
も負いかねますので、あらかじめご了承ください。
5.乱丁本、落丁本の場合はお取り替えいたします。販売店までご連絡ください。
1
使用上の注意
重要
• ご使用前には、「使用上の注意」および本体の「警告表示」をよく読み、必ずお守りください。
警告表示位置
警告
万一、異常現象(煙、異音、においなど)が発生した場合は、すぐに電源を切り、電源プラグ
を抜いて販売店またはEIZOサポートに連絡する
そのまま使用すると火災や感電、故障の原因となります。
裏ぶたを開けない、製品を改造しない
この製品の内部には、高電圧や高温になる部分があり、感電、やけどの原因となります。ま
た、改造は火災、感電の原因となります。
修理は販売店またはEIZOサポートに依頼する
お客様による修理は火災や感電、故障の原因となりますので、絶対におやめください。
異物を入れない、液体を置かない
この製品の内部に金属、燃えやすい物や液体が入ると、火災や感電、故障の原因となります。
万一、この製品の内部に液体をこぼしたり、異物を落とした場合には、すぐに電源プラグを抜
き、販売店またはEIZOサポートにご連絡ください。
丈夫で安定した場所に置く
不安定な場所に置くと、落下することがあり、けがの原因となります。
万一、落とした場合は電源プラグを抜いて、販売店またはEIZOサポートにご連絡ください。そ
のまま使用すると火災、感電の原因となります。
次のような場所で使用しない
火災や感電、故障の原因となります。
• 屋外。車両・船舶などのような強い振動や衝撃を受ける場所への搭載。
• 湿気やほこりの多い場所。
• 水滴のかかる場所。浴室、水場など。
• 油煙や湯気が直接当たる場所や熱器具、加湿器の近く。
• 直射日光が直接製品に当たる場所。
• 可燃性ガスのある環境。
2
警告
プラスチック袋は子供の手の届かない場所に保管する
包装用のプラスチック袋をかぶったりすると窒息の原因となります。
日本語
付属の電源コードを100VAC電源に接続して使用する
付属の電源コードは日本国内100VAC専用品です。
誤った接続をすると火災や感電の原因となります。
電源コードを抜くときは、プラグ部分を持つ
コード部分を引っ張るとコードが傷つき、火災、感電の原因となります。
電源コンセントが二芯の場合、付属の二芯アダプタを使用し、安全(感電防止)
および電磁界輻射低減のため、アースリード(緑)を必ず接地する
なお、アースリードは電源プラグをつなぐ前に接続し、電源プラグを抜いてから
外してください。順序を守らないと感電の原因となります。
二芯アダプタのアースリード、および三芯プラグのアースが、コンセントの他の
電極に接触しないようにしてください。
次のような誤った電源接続をしない
誤った接続は火災、感電、故障の原因となります。
• 取扱説明書で指定された電源電圧以外への接続。
• タコ足配線。
電源コードを傷つけない
電源コードに重いものをのせる、引っ張る、束ねて結ぶなどをしないでください。電源コード
が破損(芯線の露出、断線など)し、火災や感電の原因となります。
雷が鳴り出したら、電源プラグやコードには触れない
感電の原因となります。
アーム(または他のスタンド)を使用する場合は、それらの取扱説明書の指示に従い、確実に
設置する
確実に設置されていないと、外れたり、倒れたりしてけがや故障の原因となります。万一、落
とした場合は電源プラグを抜いて、販売店またはEIZOサポートにご連絡ください。そのまま使
用すると火災、感電の原因となります。また、取り外したスタンドを再度取り付ける場合には
必ず元のねじを使用し、確実に固定してください。
液晶パネルが破損した場合、破損部分に直接素手で触れない
もし触れてしまった場合には、手をよく洗ってください。
万一、漏れ出た液晶が、誤って口や目に入った場合には、すぐに口や目をよく洗い、医師の診
断を受けてください。そのまま放置した場合、中毒を起こす恐れがあります。
3
注意
運搬のときは、接続コードやオプション品を外す
コードを引っ掛けたり、移動中にオプション品が外れたりして、けがの原因となります。
この製品を移動するときは、右図のように画面の下部をしっかりと持つ
落としたりするとけがや故障の原因となります。
風通しの悪い、狭いところに置かない
内部が高温になり、火災や感電、故障の原因となります。
濡れた手で電源プラグや電源アダプタに触れない
感電の原因となります。
電源プラグの周囲にものを置かない
火災や感電防止のため、異常が起きたときすぐ電源プラグを抜けるようにしておいてくださ
い。
電源プラグ周辺は定期的に掃除する
ほこり、水、油などが付着すると火災の原因となります。
クリーニングの際は電源プラグを抜く
プラグを差したままでおこなうと、感電の原因となります。
長時間使用しない場合には、安全および省エネルギーのため、本体の電源を切った後、電源
コンセントから電源プラグも抜く
4
モニターについて
この製品は、日本国内専用品です。日本国外での使用に関して、当社は一切責任を負いかねます。
This product is designed for use in Japan only and cannot be used in any other countries.
本書に記載されている用途以外での使用は、保証外となる場合があります。
本書に定められている仕様は、付属の電源コードおよび当社が指定する信号ケーブル使用時にのみ適用いた
します。
この製品には、当社オプション品または当社が指定する製品をお使いください。
製品内部の電気部品の動作が安定するのに、約30分かかります。モニターの調整は電源を入れて30分以上
経過するまでお待ちください。
経年使用による輝度変化を抑え、安定した輝度を保つためには、ブライトネスを下げて使用されることをお
勧めします。
同じ画像を長時間表示することによって、表示を変えたときに前の画像が残像として見えることがありま
す。長時間同じ画像を表示するようなときには、コンピュータのスクリーンセーバーまたはパワーセーブ機
能を使用してください。
この製品を美しく保ち、長くお使いいただくためにも定期的にクリーニングをおこなうことをお勧めします
(「クリーニングの仕方」(P.6)参照)。
液晶パネルは、非常に精密度の高い技術で作られていますが、画素欠けや常時点灯する画素が見える場合が
ありますので、あらかじめご了承ください。また、有効ドット数の割合は99.9994% 以上です。
液晶パネルに使用されるバックライトには寿命があります。画面が暗くなったり、ちらついたり、点灯しな
くなったときには、販売店またはEIZOサポートにお問い合わせください。
パネルを固い物や先のとがった物などで押したり、こすったりしないようにしてください。傷が付く恐れが
あります。なお、ティッシュペーパーなどで強くこすっても傷が入りますのでご注意ください。
この製品を冷え切った状態のまま室内に持ち込んだり、急に室温を上げたりすると、製品の表面や内部に露
が生じることがあります(結露)。結露が生じた場合は、結露がなくなるまで製品の電源を入れずにお待ち
ください。そのまま使用すると故障の原因となることがあります。
(タッチパネル使用時の注意事項)
• タッチ操作時
次の点に注意してください。故障の原因となります。
-- パネルを強く押したり、こすったり、突いたりしないでください。
-- ボールペンや金属類などの硬い物でパネルをタッチしないでください。
5
日本語
この製品は、文書作成やマルチメディアコンテンツの閲覧など一般的な用途の他、端末機器操作などの各種
専用用途に適しています。
クリーニングの仕方
注意点
• アルコール、消毒薬などの薬品は、キャビネットやパネル面の光沢の変化、変色、色あせ、画質の劣化などにつ
ながる恐れがあります。
• シンナー、ベンジン、ワックス、研磨クリーナは、キャビネットやパネル面をいためるため絶対に使用しないで
ください。
• パネル面とパネルの外枠との間に、液体が入らないように注意してください。
参考
• キャビネットやパネル面のクリーニングにはScreenCleaner(オプション品)をご利用いただくことをお勧めしま
す。
キャビネットやパネル面の汚れは、やわらかい布に少量の水をしめらせて、やさしくふき取ってくださ
い。
モニターを快適にご使用いただくために
• 画面が暗すぎたり、明るすぎたりすると目に悪影響をおよぼすことがあります。状況に応じてモニ
ター画面の明るさを調整してください。
• 長時間モニター画面を見続けると目が疲れますので、1時間に約10分の休憩を取ってください。
6
梱包品の確認
次のものがすべて入っているか確認してください。万一、不足しているものや破損しているものがある場合は、販売
店またはEIZOサポートにご連絡ください。
日本語
参考
• 梱包箱や梱包材は、この製品の移動や輸送用に保管していただくことをお勧めします。
• USBケーブル:MD-C93(FDX1501T-Aのみ)
• モニター本体
• 電源コード(二芯アダプタ)
•
•
•
•
•
• アナログ信号ケーブル:MD-C87
• ステレオミニジャックケーブル
EIZO LCDユーティリティディスク(CD-ROM)
セットアップマニュアル(保証書付き(本書))
お客様ご相談窓口のご案内
クランパー 2 個
クランパー固定用ねじM4 × 14 2 本
(別途、ドライバを準備してください。)
各部の名称と機能
クランパー取付方法
・FDX1501-A
15
設定メニュー※1
1
2
16
3
4
5
6
7
8 9 10
11
・FDX1501T-A
12 13 14 8
1.
2.
ボタン
ボタン
音量の調整画面を表示します。(
表示する入力信号を切り替えます。
3.
ボタン
カラーモードを切り替えます。
4.
ボタン
設定メニューを表示し、各メニューの調整項目を決定したり、調整結果を保存しま
す。
5.
6.
ボタン
ボタン
を押して調整してください。)
• 設定メニューの選択や、機能の調整または設定をします。
• 明るさ(ブライトネス)調整画面を表示します。
電源のオン/オフを切り替えます。
7. 電源ランプ
モニターの動作状態を表します。
青:画面表示 橙:省電力モード 消灯:主電源/電源オフ
8. スピーカー
音声を再生します。
9. 主電源スイッチ
主電源のオン/ オフを切り替えます。
10. 電源コネクタ
電源コードを接続します。
11. 信号入力コネクタ
左:DVI-Dコネクタ/右:D-Sub15ピン(ミニ)コネクタ
12. USBアップストリームポート
(FDX1501T-Aのみ)※2
タッチパネルモニターとして使用する場合に、コンピュータとモニターをUSB
ケーブルで接続します。
13. RS-232Cポート
(FDX1501T-Aのみ)※2
タッチパネルモニターとして使用する場合に、コンピュータとモニターをRS232Cケーブルで接続します。
14. ステレオミニジャック
ステレオミニジャックケーブルを接続します。
15. スタンド
角度が調整できます。
16. クランパー固定用ねじ穴
(2 箇所)
ケーブルの抜け防止のためのクランパーを取り付けます。
ケーブルをクランパーにはめ、ねじ(M4 × 14)で固定してください(上図参照)。
※1 使用方法は取扱説明書(CD-ROM内)を参照してください。
※2 同時に使用することはできません。両方にケーブルを接続すると、USB接続が優先されます。
7
接続する
注意点
• コンピュータ、周辺機器の電源は切った状態で接続してください。
• 今まで使用していたモニターをこの製品に置き換える場合、コンピュータと接続する前に対応解像度表を参照し
て、コンピュータの設定を、必ずこの製品で表示できる解像度、垂直走査周波数に変更しておいてください。
参考
• この製品に複数のコンピュータをつなぐ場合は、モニターの取扱説明書(CD-ROM内)を参照して接続してくださ
い。
1.信号ケーブルを信号入力コネクタとコンピュータに接続します。
コンピュータのコネクタの形状を確認して、ケーブルを接続してください。
信号ケーブル接続後、各コネクタの固定ねじを最後までしっかりと回して、確実に固定してくださ
い。
CDプレーヤー
など
ステレオミニジャックケーブル(付属)
DVI
D-Sub
デジタル接続
(DVI)の場合
アナログ接続
(D-Sub)の場合
AUDIO OUTPUT
信号ケーブル
DD200 (オプション)
または
信号ケーブル
MD-C87(付属)
DVI
D-Sub
2.付属の電源コードをモニターの電源コネクタと電源コンセントに接続します。
3.
を押して、モニターの電源を入れます。
モニターの電源ランプが青色に点灯します。
4.コンピュータの電源を入れます。
画面が表示されます。
電源を入れても画面が表示されない場合には、「画面が表示されない場合には」(P.11)を参照し
てください。
FDX1501T-Aを使用する場合は、引き続きタッチパネルドライバのインストール、キャリブレーショ
ンをおこなってください。
注意点
• 使用後は、電源を切ってください。
• 完全な省電力のためにはモニターの電源を切ることをお勧めします。主電源を切るか、電源プラグを抜くこと
で、確実にモニター本体への電源供給は停止します。
8
角度を調整する
モニターの左右を両手で持ち、上下の角度を作業に適した状態になるように調整します。
日本語
注意点
• ケーブル類が正しく接続されているかご確認ください。
オプションアーム取付方法
この製品はスタンド部分を取り外すことによって、オプションアーム(またはオプションスタンド)に
取り付けることが可能になります。対応しているオプションアーム(またはオプションスタンド)につ
いては、当社のWebサイトを参照してください。http://www.eizo.co.jp
注意点
• 取り付けの際は、アームまたはスタンドの取扱説明書の指示に従ってください。
• 他社製のアームまたはスタンドを使用する場合は、次の点をアームまたはスタンドメーカーにご確認の上、
VESA規格準拠のものを選択してください。取り付けには本体部分とスタンドを固定しているねじをご使用く
ださい。
-- 取付部のネジ穴間隔:75mm × 75mm または100mm×100mm
-- プレートの厚み:2.6mm
-- 許容質量:モニター本体の質量(スタンドなし)とケーブルなどの装着物の総質量に耐えられること
• ケーブル類は、アームまたはスタンドを取り付けた後に接続してください。
• モニターおよびアームまたはスタンドは重量があります。落としたりするとけがや故障の原因になります。
取付方法
1.パネル面が傷つかないよう、安定した場所に柔らかい布などを敷いた上に、パネル
面を下に向けて置きます。
2.スタンド部分を取り外します。
別途ドライバを準備ください。ドライバを使って、本体部分とスタンドを固定しているねじ4箇所を
取り外します。
3.モニターにアーム(またはスタンド)を取り付けます。
アームまたはスタンドの取扱説明書で指定のねじを使って取り付けます。
• アームまたはスタンドの取付部の
ねじ穴間隔:75mm×75mmの場合
• アームまたはスタンドの取付部の
ねじ穴間隔:100mm×100mmの場合
9
タッチパネルドライバをインストールする(FDX1501T-A)
注意点
• タッチパネルドライバをインストールする場合、ユーザーアカウントに「コンピュータの管理者」権限が必要と
なります。
• ドライバのアップデートなどのため、タッチパネルドライバを再インストールする場合は、ドライバをアンイン
ストールし、コンピュータを再起動してからインストールしてください。
1.他のタッチパネルドライバをインストールしている場合は、アンインストールしま
す。
2.CD-ROMの指示に従って、タッチパネルドライバをインストールします。
タッチパネルドライバのインストール方法については、タッチパネルドライバの取扱説明書(CDROM内)を参照してください。
3.USBケーブルまたはRS-232Cケーブルを使って、コンピュータとモニターを接続し
ます。
USBケーブルMD-C93(付属)
USB
または
RS-232Cケーブル※1(オプション)
COM
※1 クロスタイプ
4.コンピュータを再起動します。
注意点
• RS-232Cケーブルを使用している場合は、再起動後、次の手順でデバイスの設定をおこなってください。詳細は、
タッチパネルドライバの取扱説明書(CD-ROM内)を参照してください。
1. 「スタート」-「すべてのプログラム」-「DMC」-「DMCタッチパネル設定ツール」をクリックして、「タッ
チパネルドライバ プロパティ」画面を表示します。
2. 「シリアルデバイスの追加」をクリックし、新しいシリアルデバイスを登録します。
3. 「デバイス」をクリックし、「接続ポート」で使用するCOMポート番号を指定します。
4. 「適用」をクリックします。
5. 「閉じる」をクリックします。
キャリブレーションをする(FDX1501T-A)
タッチパネルドライバの取扱説明書(CD-ROM 内)に従って、キャリブレーションをおこないます。
参考
• 設置場所を変更した場合は、キャリブレーションを実行してください
10
こんなときは
症状に対する処置をおこなっても解消されない場合は、販売店またはEIZOサポートにご相談くださ
い。
症状
原因と対処方法
1. 画面が表示されない
• 電源ランプが点灯しない
• 電源コードは正しく接続されていますか。
• 主電源を入れてください。
•
を押してください。
• 主電源を切り、数分後にもう一度電源を入れてみてく
ださい。
• 電源ランプが点灯:青色
• 設定メニューの「ブライトネス」、「ゲイン」の各調
整値を上げてみてください。
• 電源ランプが点灯:橙色
•
で入力信号を切り替えてみてください。
• マウス、キーボードを操作してみてください。
• コンピュータの電源は入っていますか。
• ご使用のコンピュータおよびグラフィックスボードに
よっては、入力信号が検出されず、省電力モードから
復帰しない場合があります。マウス、キーボードを操
作しても画面が表示されない場合は、モニターの電源
ボタンで電源を切って、再度電源を入れてください。
画面が表示されたら、次の手順を実行してください。
症状が改善される場合があります。
1.
2.
を押して、モニターの電源を切ります。
を押しながら を押してモニターの電源を入れ
ます。
設定メニューの「インフォメーション」のメニュータ
イトルに「x」が表示されます。
3. コンピュータを再起動します。
設定を元に戻す場合は、手順1~3を再度実行しま
す。
2. 次のようなメッセージが表示される
• 入力されている信号が周波数仕様範囲外であ
ることを示す表示です。
例:
この表示はモニターが正常に機能していても、信号が正し
く入力されないときに表示されます。
• コンピュータの設定が、この製品で表示できる解像
度、垂直走査周波数になっていますか(「表示解像度
について」参照)。
• コンピュータを再起動してみてください。
• グラフィックスボードのユーティリティなどで、適切
な設定に変更してください。詳細はグラフィックス
ボードの取扱説明書を参照してください。
参考
• 表示された画面に関する症状やタッチパネルに関する症状については、モニターの取扱説明書(CD-ROM内)を参
照してください。
11
日本語
●●画面が表示されない場合には
仕様
液晶パネル
タッチパネル
(FDX1501T-A)
映像信号
種類
TN
バックライト
LED
サイズ
38 cm(15.0)型(可視域対角38.0 cm)
解像度
1024ドット×768ライン
表示面積(横×縦)
304.1mm×228.0mm
画素ピッチ
0.297 mm
表示色
8bitカラー:
視野角
(水平/垂直、標準値)
160˚/160˚
コントラスト比
(標準値)
600:1
応答速度(標準値)
8ms(黒→白→黒)
方式
アナログ抵抗膜方式
通信方式
USB転送、RS-232C転送(※同時に使用することはできません。)
表面処理
アンチグレア
表面硬度
2H
対応OS
Microsoft Windows 7 Service Pack 1(32ビット版/64ビット版)
Microsoft Windows Vista Service Pack 2(32 ビット版)
Microsoft Windows XP Service Pack 3(32ビット版)
(Mac OSには対応していません。)
入力端子
DVI-Dコネクタ × 1、D-Subコネクタ×1
デジタル走査周波数
(水平/垂直)
31kHz~49kHz / 59Hz~61Hz(VGA TEXT: 69Hz~71Hz)
アナログ走査周波数
(水平/垂直)
24kHz~61kHz / 55Hz~76Hz
ドットクロック(最大)
デジタル:
65MHz
アナログ:
80MHz
同期信号
約1677万色
セパレート、TTL、正/負極性
通信 (FDX1501T-A) 入力端子
RS-232C:
USB (FDX1501T-A)
ポート
アップストリーム × 1
規格
USB Specification Rev.2.0
スピーカー
0.5W+0.5W
入力端子
ステレオミニジャック×1
電源入力
AC100V±10%、50/60Hz、0.3A
最大消費電力
15.0W以下
省電力時消費電力
0.5W以下(信号1系統入力時、USB機器非接続時)
待機時消費電力
0.5W以下(USB機器接続時)
外観寸法
(幅×高さ×奥行)
346mm×373mm×197mm(チルト角度30°時)
346mm×349mm×157mm(チルト角度0°時)
外観寸法(モニター部)
(幅×高さ×奥行)
346mm×280mm×69mm
質量
FDX1501-A:
約5.4kg
FDX1501T-A:
約5.8kg
FDX1501-A:
約3.0kg
FDX1501T-A:
約3.4kg
音声
電源
機構
質量(モニター部)
動作環境条件
チルト
上30˚、下0˚
温度
0˚C~50˚C
湿度
20%~90% R.H.(結露なきこと)
気圧
540hPa~1060hPa
輸送/保存環境条件 温度
12
D-Sub9ピン(オス)
-20˚C~60˚C
湿度
10%~90% R.H.(結露なきこと)
気圧
200hPa~1060hPa
●●主な初期設定値
User1
スムージング
3
パワーセーブ
オン
Ecoタイマー
オフ
言語選択
日本語
入力信号
オート
日本語
カラーモード
外観寸法
単位:mm
スタンドタイプ
40
69
317
220
(123)
(100)
(VESA)
(123)
10
(50)
100
(VESA)
197
346
305.5
157
111
69
15
20
209
(131)
373
229.5
280
349
30 °
26
フリーマウントタイプ
40
69
317
(123)
100
(VESA)
75
(VESA)
(123)
10
75
(VESA)
(131)
100
(VESA)
229.5
280
(50)
346
305.5
13
アフターサービス
この製品のサポートに関してご不明な場合は、EIZOサポートネットワーク株式会社(EIZOサポート)にお
問い合わせください。EIZOサポート一覧は別紙の「お客様ご相談窓口のご案内」に記載してあります。
修理を依頼されるとき
• 保証期間中の場合
保証書の規定に従い、EIZOサポートにて修理または交換をさせていただきます。お買い求めの販売
店、またはEIZOサポートにご連絡ください。
• 保証期間を過ぎている場合
お買い求めの販売店、またはEIZOサポートにご相談ください。修理範囲(サービス内容)、修理費
用の目安、修理期間、修理手続きなどを説明いたします。
修理を依頼される場合にお知らせいただきたい内容
• お名前、ご連絡先の住所、電話番号/FAX番号
• お買い上げ年月日、販売店名
•
• 製品名、製造番号
(製造番号は、本体の背面部のラベル上および保証書に表示されている8桁の番号です。
例)S/N 12345678)
• 使用環境(コンピュータ/グラフィックスボード/OS、システムのバージョン/表示解像度など)
• 故障または異常の内容(できるだけ詳細に)
修理について
• 修理の際に当社の品質基準に達した再生部品を使用することがありますのであらかじめご了承くだ
さい。
製品回収・リサイクルシステムについて
パソコン及びパソコン用モニターは「資源有効利用促進法」の指定再資源化製品に指定されてお
り、メーカーは自主回収及び再資源化に取り組むことが求められています。
当社製品は、一般社団法人「パソコン3R推進協会」が回収させていただきます。
回収を希望されるお客様は当社のWebサイトよりお申し込みください。
(http://www.eizo.co.jp)
※ この製品は業務用途を意図した製品ですので、ご使用後廃棄される場合は有償となります。
ユーザー登録のお願い
お買い上げいただきましたお客様へより充実したサポートをお届けするため、次のアドレス
にアクセスし、ユーザー登録をお願いいたします。
http://www.eizo.co.jp/registration/
14
Color LCD Monitor
Touch Panel Color LCD Monitor
SAFETY SYMBOLS
WARNING
Failure to abide by the information in a WARNING may result in serious injury and can be
life threatening.
CAUTION
Failure to abide by the information in a CAUTION may result in moderate injury and/or
property or product damage.
Indicates a warning or caution. For example,
Indicates a prohibited action. For example,
Indicates a mandatory action. For example,
indicates an “electrical shock” hazard.
means “Do not disassemble”.
means “Ground the unit”.
About Setup Manual and User’s Manual
Setup Manual
(this manual)
Describes basic information ranging from connection of the monitor
to a PC to using the monitor.
User’s Manual of
this monitor*1
Describes the application information of the monitor such as screen
adjustments, settings, and specifications.
User’s Manual of
Touch Panel Driver*1
Describes the installation and use of the touch panel driver.
*1 PDF file on the CD-ROM (Installation of Adobe Reader is required.)
No part of this manual may be reproduced, stored in a retrieval system, or transmitted, in any form or by
any means, electronic, mechanical, or otherwise, without the prior written permission of EIZO Corporation.
EIZO Corporation is under no obligation to hold any submitted material or information confidential unless
prior arrangements are made pursuant to EIZO Corporation’s receipt of said information. Although every
effort has been made to ensure that this manual provides up-to-date information, please note that EIZO
monitor specifications are subject to change without notice.
1
English
This manual and this product use the safety symbols below. They denote critical information. Please
read them carefully.
PRECAUTIONS
IMPORTANT
• To ensure personal safety and proper maintenance, please read carefully this section and the
caution statements on the monitor.
Location of the Caution Statements
WARNING
If the unit begins to emit smoke, smells like something is burning, or makes strange
noises, disconnect all power connections immediately and contact your local EIZO representative for advice.
Attempting to use a malfunctioning unit may result in fire, electric shock, or equipment damage.
Do not open the cabinet or modify the unit.
Opening the cabinet or modifying the unit may result in fire, electric shock, or burn.
Refer all servicing to qualified service personnel.
Do not attempt to service this product yourself as opening or removing covers may result in fire,
electric shock, or equipment damage.
Keep small objects or liquids away from the unit.
Small objects accidentally falling through the ventilation slots into the cabinet or spillage into
the cabinet may result in fire, electric shock, or equipment damage. If an object or liquid falls/
spills into the cabinet, unplug the unit immediately. Have the unit checked by a qualified service
engineer before using it again.
Place the unit at the strong and stable place.
A unit placed on an inadequate surface may fall and result in injury or equipment damage. If the
unit falls, disconnect the power immediately and ask your local EIZO representative for advice.
Do not continue using a damaged unit. Using a damaged unit may result in fire or electric shock.
2
WARNING
English
Use the unit in an appropriate location.
Not doing so may result in fire, electric shock, or equipment damage.
•Do not place outdoors.
•Do not place in a transportation system (ship, aircraft, train, automobile, etc.) where it may be
affected by strong vibration or shock.
•Do not place in a dusty or humid environment.
•Do not place in a location where water is splashed on the screen (bathroom, kitchen, etc.).
•Do not place in a location where the steam comes directly on the screen.
•Do not place near heat generating devices or a humidifier
•Do not place in a location where the product is subject to direct sunlight.
•Do not place in an inflammable gas environment.
To avoid danger of suffocation, keep the plastic packing bags away from babies and
children.
If using the AC power connector, make sure the power cord meets the following requirements.
This product does not include a power cord. Please prepare separately a power cord which
meets the requirements.
* The power cord must be compliance with the mandatory standards of the country and region
in which this product is to be used.
- For Europe: The power cord set has rated value of at least AC 250V~ 10A and has cord type
H05VV-F, GTCE-3, 0.75mm2.
- For USA:
The power cord set has rated value of at least AC 125V~ 10A and has cord type SVT,
3/18AWG (0.75mm2).
- For China: The power cord set has rated value of at least AC 250V~ 10A and has cord type “ 配
60227 IEC53 3×1 平方毫米”
To disconnect the power cord, grasp the plug firmly and pull.
Tugging on the cord may damage and result in fire or electric shock.
The equipment must be connected to a grounded main outlet.
Failure to do so may result in fire or electric shock.
Use the correct voltage.
•The unit is designed for use with a specific voltage only. Connection to another voltage than
specified in this User’s Manual may cause fire, electric shock, or equipment damage.
•Do not overload your power circuit, as this may result in fire or electric shock.
Handle the power cord with care.
•Do not place the cord underneath the unit or other heavy objects.
•Do not pull on or tie the cord.
If the power cord becomes damaged, stop using it. Use of a damaged cord may result in fire or
electric shock.
Never touch the plug and power cord if it begins to thunder.
Touching them may result in electric shock.
3
WARNING
When attaching an arm stand, please refer to the user’s manual of the arm stand and
install the unit securely.
Otherwise, the unit may become detached, resulting in injury and/or equipment damage. If
the unit falls, please ask your local EIZO representative for advice. Do not continue using a
damaged unit. Using a damaged unit may result in fire or electric shock. When reattaching the
tilt stand, please use the same screws and tighten them securely.
Do not touch a damaged LCD panel directly with bare hands.
Liquid crystal is poisonous. If any part of your skin comes in direct contact with the panel, wash
thoroughly. If liquid crystal enters your eyes or mouth, immediately flush with large amounts of
water and seek medical attention.
CAUTION
Handle with care when carrying the unit.
Disconnect the power cord and cables when moving the unit. Moving the unit with the cord
attached is dangerous. It may result in injury.
When carrying the unit, grasp and hold it firmly by the bottom as shown in the
illustration on the right.
Dropping the unit may result in injury or equipment damage.
Do not install the unit in a closed space.
If the inerior becomes hot, it may result in fire, electric shock or damage.
Do not touch the plug with wet hands.
Doing so may result in electrical shock.
Use an easily accessible power outlet.
This will ensure that you can disconnect the power quickly in case of a problem.
Periodically clean the area around the plug.
Dust, water, or oil on the plug may result in fire.
Unplug the unit before cleaning it.
Cleaning the unit while it is plugged into a power outlet may result in electric shock.
If you plan to leave the unit unused for an extended period, disconnect the power cord
from the wall socket after turning off the power for safety and power conservation.
4
Notice for this monitor
Aside from creating documents, viewing multimedia content, and other general purposes, this product is also
suited to the dedicated usages such as operation of terminal equipment.
This product has been adjusted specifically for use in the region to which it was originally shipped. If the
product is used outside the region, it may not operate as specified in the specifications.
This product may not be covered by warranty for uses other than those described in this manual.
English
The specifications noted in this manual are only applicable when the following are used:
· Signal cables specified by us
Only use optional products manufactured or specified by us with this product.
It takes about 30 minutes for the performance of electrical parts to stabilize. Please wait 30 minutes or more
after the monitor power has been turned on, and then adjust the monitor.
Monitors should be set to a lower brightness to reduce changes in luminosity caused by long-term use and
maintain a stable display.
When the screen image is changed after displaying the same image for extended periods of time, an
afterimage may appear. Use the screen saver or power save function to avoid displaying the same image for
extended periods of time.
Periodic cleaning is recommended to keep the monitor looking new and to prolong its operation lifetime (refer
to “Cleaning” (page 6)).
The LCD panel is manufactured using high-precision technology. Although, missing pixels or lit pixels may
appear on the LCD panel, this is not a malfunction. Percentage of effective dots: 99.9994% or higher.
The backlight of the LCD panel has a fixed lifetime. When the screen becomes dark or begins to flicker,
please contact your local EIZO representative.
Do not scratch or press on the panel with any sharp objects, as this may result in damage to the panel. Do
not attempt to brush with tissues as this may scratch the panel.
When the monitor is cold and brought into a room or the room temperature goes up quickly, dew
condensation may occur on the interior and exterior surfaces of the monitor. In that case, do not turn the
monitor on. Instead wait until the dew condensation disappears, otherwise it may cause some damage to
the monitor.
(Cautions for the Use of the Touch Panel)
•During touch operation
Be careful of the following points. Otherwise, damage may occur to the monitor.
-- Do not strongly press, scratch, or poke the panel.
-- Do not touch the panel with hard objects such as ballpoint pens or metals.
5
Cleaning
Attention
• Chemicals such as alcohol and antiseptic solution may cause gloss variation, tarnishing, and fading of the cabinet
or panel, and also quality deterioration of the image.
• Never use any thinner, benzene, wax, and abrasive cleaner, which may damage the cabinet or panel.
• Do not allow liquid to enter the clearance between the panel and the panel frame.
Note
• The optional ScreenCleaner is recommended for cleaning the cabinet and panel surface.
The stains on the cabinet and panel surface can be removed by moistening part of a soft cloth with water.
To use the monitor comfortably
• An excessively dark or bright screen may affect your eyes. Adjust the brightness of the monitor
according to the environmental conditions.
• Staring at the monitor for a long time tires your eyes. Take a 10-minute rest every hour.
6
Package Contents
Check that all the following items are included in the packaging box. If any items are missing or damaged, contact
your local EIZO representative.
Note
• Please keep the packaging box and materials for future movement or transport of the monitor.
• USB cable: MD-C93 (for FDX1501T-A only)
• Monitor
• Analog signal cable : MD-C87
EIZO LCD Utility Disk (CD-ROM)
Setup Manual (this manual)
Clamper : 2 pcs.
Screws for fixing the clamper M4 × 14 : 2 pcs.
(Prepare a screwdriver.)
English
•
•
•
•
• Stereo mini jack cable
Attention
• This product does not include a power cord. Please provide separately a power cord which meets the usage
requirements. For more information, please contact your local EIZO representative.
Controls and Functions
Attaching the clamper
・FDX1501-A
15
Setting menu*1
1
1.
2.
3.
4.
2
16
3
4
5
6
7
8 9 10
11
・FDX1501T-A
12 13 14 8
button
button
button
button
Displays the volume adjustment menu. (Press
or
to adjust volume.)
Switches input signals for display.
Changes Color Mode.
Displays the Setting menu, determines an item on the menu screen, and saves
adjusted values.
5.
button
• Provides the menu selection as well as the adjustment and setting of a function.
• Displays the Brightness menu.
6.
button
Turns the power on or off.
7. Power indicator
Indicates the monitor’s operation status.
Blue : Operating Orange : Power saving mode OFF: Main power/Power off
8. Speaker
Outputs audio source.
9. Main power switch
Turns the main power on or off.
10. Power connector
Connects the power cord.
11. Input signal connector
Left : DVI-D connector / Right : D-Sub mini 15-pin connector
12. USB upstream port
Connects a PC and monitor via a USB cable when this product is used as a touch
(for FDX1501T-A only)*2
panel monitor.
13. RS-232C port
Connects a PC and monitor via a RS-232C cable when this product is used as a
(for FDX1501T-A only)*2
touch panel monitor.
14. Stereo mini jack
Connects the stereo mini jack cable.
15. Stand
Used to adjust the angle of the monitor screen.
16. Screw holes for securing Attach the clamper to prevent the cable from falling off. Fit the cable in the clamper
the clamper (2)
and fit it with the set screw (M4 × 14), as shown in the diagram above.
*1 For instructions for use, refer to the User’s Manual on the CD-ROM.
*2 These ports cannot be used at the same time. When cables are connected to both ports, the USB port is
prioritized.
7
Connecting Cables
Attention
• Check that the monitor and the PC are powered off.
• When replacing the current monitor with this monitor, be sure to change the PC settings for resolution and
vertical scan frequency to those that are available for this monitor. Refer to the compatible resolution table before
connecting the PC.
Note
• When connecting multiple PCs to the monitor, refer to the User’s Manual on the CD-ROM.
1.Connect the signal cables to the input signal connectors and PC.
Check the shape of the connectors, and connect the cables.
After connecting the signal cable, tighten the screws of the connectors to secure the coupling.
CD player, etc
Stereo mini jack cable (supplied)
Digital connection
(DVI)
DVI
Analog connection
(D-Sub)
D-Sub
or
AUDIO OUTPUT
Signal cable FD-C39
(Option)
DVI
Signal cable MD-C87
(supplied)
D-Sub
2.Plug the power cord into a power outlet and the power connector on the
monitor.
3.Press
to turn on the monitor.
The monitor’s power indicator lights up blue.
4.Turn on the PC.
The screen image appears.
If an image does not appear, refer to “No picture” (page 11) for additional advice.
If using the FDX1501T-A proceed with installation and calibration of the touch panel driver.
Attention
• Turn off the monitor and PC after using them.
• For the maximum power saving, it is recommended that the Power button be turned off. Turning off the main
power switch or unplugging the power plug completely shuts off power supply to the monitor.
8
Adjusting the Screen Angle
Hold left and right edge of the monitor with both hands, tilt the screen to the best condition for working.
English
Attention
• Be sure that the cables are correctly connected.
Attaching the Optional Arm
An optional arm (or an optional stand) can be attached by removing the stand section. Please refer to our
web site for the corresponding optional arm (or optional stand). http://www.eizo.com
Attention
• When attaching an arm or stand, follow the instructions of their User’s Manual.
• When using another manufacturer’s arm or stand, confirm the following in advance and select one conforming to
the VESA standard. Use the screws securing the unit and the stand.
-- Clearance between the screw holes : 75 mm × 75 mm or 100 mm × 100 mm
-- Thickness of plate : 2.6mm
-- Strong enough to support weight of the monitor unit (except the stand) and attachments such as cables.
• Connect the cables after attaching an arm or stand.
• The monitor and arm or stand are heavy. Dropping them may result in injury or equipment damage.
Procedure
1.Lay the LCD monitor on a soft cloth spread over on a stable surface with the
panel surface facing down.
2.Remove the stand.
Prepare a screwdriver. Loosen the screws (four) securing the unit and the stand with the screwdriver.
3.Attach the arm or stand to the monitor.
Secure the monitor to the arm or stand using the screws specified in the User’s Manual of the arm or
stand.
• Clearance between the screw holes when attach
an arm or stand: In case of 75 mm × 75 mm
• Clearance between the screw holes when attach
an arm or stand: In case of 100 mm × 100 mm
9
Installing the Touch Panel Driver (FDX1501T-A)
Attention
• The user account to be used for installing the touch panel driver must have the “Administrators” privilege.
• When reinstalling the touch panel driver to update the driver, etc., restart the PC after uninstalling the driver and
then install it.
1.Uninstall the other touch panel driver, if it is installed.
2.Install the touch panel driver according to the instructions included in the CDROM.
For how to install the touch panel driver, see the Touch Panel Driver User’s Manual (on the CD-ROM).
3.Use the USB cable or RS-232C cable to connect the monitor and the PC.
USB
USB Cable MD-C93 (supplied)
or
COM
RS-232C Cable*1 (option)
*1 crossover type
4.Restart the PC.
Attention
• When using the RS-232C cable, set up the device using the following procedure after the restart. For details, refer
to the Touch Panel Driver User’s Manual (on the CD-ROM).
1. Click “Start” - “All Program” - “DMC” - “DMC Touch Panel Configuration” to display “Properties” window.
2. Click “Add a serial device”, and register a new serial device.
3. Click “Device”, and specify the COM port number used for the “COM port”.
4. Click “Apply”.
5. Click “Close”.
Calibrating the Monitor (FDX1501T-A)
Calibrate the monitor according to the Touch Panel Driver User’s Manual (on the CD-ROM).
Note
• If its installation location has changed, please perform calibration.
10
Troubleshooting
●●No picture
If a problem still remains after applying the suggested remedies, contact your local EIZO
representative.
Problem
1. No picture
• Power indicator does not light.
Possible cause and remedy
Check whether the power cord is connected properly.
Turn the main power switch on.
Press .
Turn off the main power, and then turn it on again a few
minutes later.
• Power indicator is lighting blue.
• Increase “Brightness” and/or “Gain” in the Setting menu.
• Power indicator is lighting orange.
•
•
•
•
Switch the input signal with .
Move the mouse or press any key on the keyboard.
Check whether the PC is turned on.
Depending on the PC and graphics board, the input
signal is not detected and the monitor does not recover
from the power saving mode. If the screen is not
displayed even after moving the mouse or pressing any
key on the keyboard, turn the monitor off and on using
its power button. When the screen is displayed, execute
the following procedure. The problem may be improved.
1.Press
to turn off the monitor.
2. Hold down
while pressing
to turn on the
monitor.
“x” is displayed on the menu title of “Information” of the
Setting menu.
3. Reboot the PC.
To return to the previous setting, perform steps 1 to 3
again.
2. The message below appears.
• The message shows that the input signal is
out of the specified frequency range.
Example:
This message appears when the signal is not input correctly
even when the monitor functions properly.
• Check whether the PC is configured to meet the
resolution and vertical scan frequency requirements of
the monitor (see “Compatible Resolutions”).
• Reboot the PC.
• Select an appropriate setting using the graphics board’s
utility. Refer to the User’s Manual of the graphics board
for details.
Note
• If there is a problem with the image displayed or with the touch panel, refer to the Monitor User’s Manual (on
the CD-ROM).
11
English
•
•
•
•
Specifications
LCD Panel
Touch Panel
(FDX1501T-A)
Video Signals
Type
TN
Backlight
LED
Size
38 cm (15.0 inch) (38.0 cm diagonal)
Native Resolution
1024 dots × 768 lines
Display Size (H x V)
304.1 mm × 228.0 mm
Pixel Pitch
0.297 mm
Display Colors
8bit colors :
Viewing Angles (H / V, typical)
160˚ / 160˚
Contrast ratio (typical)
600 : 1
Response Time (typical)
8 ms (Black - white - black)
Method
Analog resistive technology
Communication method
USB, RS-232C (* Cannot be used at the same time.)
Surface treatment
Anti-glare
Surface hardness
2H
OS
Microsoft Windows 7 Service Pack 1 (32 bit / 64 bit)
Microsoft Windows Vista Service Pack 2 (32 bit)
Microsoft Windows XP Service Pack 3 (32 bit)
(Not compatible with Mac OS)
Input Terminals
DVI-D connector × 1, D-Sub mini 15-pin × 1
Digital Scanning
Frequency (H / V)
31 kHz - 49 kHz / 59 Hz - 61 Hz (VGA TEXT : 69 Hz - 71 Hz)
Analog scan frequency
Frequency (H / V)
24 kHz - 61 kHz / 55 Hz - 76 Hz
Dot Clock
Digital :
65 MHz
Analog :
80 MHz
Synchronous signal
Separate, TTL, positive / negative
Communication Input Terminals
(FDX1501T-A)
RS-232C :
USB
(FDX1501T-A)
Port
Upstream port × 1
Standard
USB Specification Rev.2.0
Audio
Speaker
0.5 W + 0.5 W
Input Terminals
Stereo mini jack × 1
Input
AC 100 V - 240 V ± 10%, 50 / 60 Hz 0.3 A - 0.2 A
Maximum Power Consumption
15.0 W or less
Power Save Mode
0.5 W or less
(for single signal input, no USB device is connected)
Standby Mode
0.5 W or less (USB device is connected)
Dimensions
(Width) × (Height) × (Depth)
346 mm × 373 mm × 197 mm (Tilt : 30˚)
346 mm × 349 mm × 157 mm (Tilt : 0˚)
Dimensions (Without Stand)
(Width) × (Height) × (Depth)
346 mm × 280 mm × 69 mm
Net Weight
FDX1501-A :
Power
Physical
Specifications
Net Weight (Without Stand)
12
16.77 million colors
D-Sub 9-pin (male)
Approx. 5.4 kg
FDX1501T-A :
Approx. 5.8 kg
FDX1501-A :
Approx. 3.0 kg
FDX1501T-A :
Approx. 3.4 kg
Tilt
Up 30˚, down 0˚
Operating
Environmental
Requirements
Temperature
0˚C to 50˚C (32˚F to 122˚F)
Humidity
20% to 90% R.H. (no condensation)
Air pressure
540 hPa to 1060 hPa
Transportation
/ Storage
Environmental
Requirements
Temperature
-20˚C to 60˚C (-4˚F to 140˚F)
Humidity
10% to 90% R.H. (no condensation)
Air pressure
200 hPa to 1060 hPa
●●Main default settings
Color Mode
User1
Smoothing
3
Power Save
On
Eco Timer
Off
Language
English
Input Signal
Auto
Unit : mm
Stand type
40
69
317
220
(123)
(100)
(VESA)
(123)
10
(50)
100
(VESA)
197
346
305.5
157
111
69
15
20
209
(131)
373
229.5
280
349
30 °
26
Free mount type
40
69
317
(123)
100
(VESA)
75
(VESA)
(123)
10
75
(VESA)
(131)
100
(VESA)
229.5
280
(50)
346
305.5
13
English
Outside Dimensions
LCD-Farbmonitor
LCD-Farbmonitor mit Touch-Panel
SICHERHEITSSYMBOLE
In diesem Handbuch und für dieses Produkt werden die unten aufgeführten Sicherheitssymbole
verwendet. Sie geben Hinweise auf äußerst wichtige Informationen. Bitte lesen Sie diese
Informationen sorgfältig durch.
Die Nichtbefolgung von unter VORSICHT angegebenen Anweisungen kann schwere
Verletzungen oder sogar lebensbedrohende Situationen zur Folge haben.
ACHTUNG
Die Nichbeachtung unter ACHTUNG angegebener Informationen kann mittelschwere
Verletzungen und/oder Schäden oder Veränderungen des Produkts zur Folge haben.
Kennzeichnet Warnhinweise und Vorsichtsmaßnahmen. So steht das Symbol
die Gefahr eines elektrischen Schlags.
Kennzeichnet unerlaubte Handlungen. So bedeutet das Symbol
Kennzeichnet vorgeschriebene Maßnahmen. So bedeutet das Symbol
erden“.
Deutsch
VORSICHT
für
„Nicht zerlegen“.
„Gerät
Über das Installationshandbuch und das Benutzerhandbuch
Installationshandbuch
(das vorliegende Handbuch)
Informationen zum Installieren des Monitors und zur
Inbetriebnahme.
Benutzerhandbuch zu
diesem Monitor*1
Beschreibt die Anwendungsinformationen für den Monitor,
wie zum Beispiel Bildschirmjustierungen, Einstellungen und
technischen Daten.
Benutzerhandbuch für
den Touch-Panel-Treiber*1
Beschreibt die Installation und Verwendung des TouchPanel-Treibers.
*1 PDF-Datei auf CD-ROM (Erfordert die Installation von Adobe Reader.)
Kein Teil dieses Handbuchs darf ohne die vorherige schriftliche Zustimmung von EIZO Corporation in
irgendeiner Form oder mit irgendwelchen Mitteln – elektronisch, mechanisch oder auf andere Weise –
reproduziert, in einem Suchsystem gespeichert oder übertragen werden.
EIZO Corporation ist in keiner Weise verpflichtet, zur Verfügung gestelltes Material oder Informationen
vertraulich zu behandeln, es sei denn, es wurden mit EIZO Corporation beim Empfang der Informationen
entsprechende Abmachungen getroffen. Obwohl größte Sorgfalt aufgewendet wurde, um zu gewährleisten,
dass die Informationen in diesem Handbuch dem neuesten Stand entsprechen, ist zu beachten, dass die
Spezifikationen der Monitore von EIZO ohne vorherige Ankündigung geändert werden können.
1
VORSICHTSMASSNAHMEN
Wichtig
• Lesen Sie diesen Abschnitt und die Warnhinweise am Monitor sorgfältig durch, um
Personensicherheit und richtige Wartung zu gewährleisten.
Stelle der Warnungshinweise
VORSICHT
Wenn das Gerät Rauch entwickelt, verbrannt riecht oder merkwürdige Geräusche produziert, ziehen Sie sofort alle Netzkabel ab, und bitten Sie Ihren lokalen EIZO-Handelsvertreter um Rat.
Der Versuch, mit einem fehlerhaften Gerät zu arbeiten, kann Feuer, einen elektrischen Schlag
oder eine Beschädigung des Geräts verursachen.
Öffnen Sie nicht das Gehäuse, und nehmen Sie keine Änderungen am Gerät vor.
Dadurch werden möglicherweise Feuer, elektrischer Schlag oder Verbrennungen verursacht.
Überlassen Sie die Wartung qualifiziertem Servicepersonal.
Führen Sie Wartungsarbeiten an diesem Produkt nicht selbst durch, da das Öffnen oder
Entfernen von Abdeckungen möglicherweise Feuer, einen Stromschlag oder Schäden am
Gerät verursacht.
Halten Sie Flüssigkeiten und kleine Gegenstände vom Gerät fern.
Flüssigkeiten oder kleine Gegenstände können aus Versehen durch die Lüftungsschlitze in das
Gehäuse gelangen und somit Feuer, einen elektrischen Schlag oder eine Beschädigung des
Geräts verursachen.
Sollte ein Gegenstand oder eine Flüssigkeit in das Gehäuse gelangt sein, ist sofort das
Netzkabel des Geräts abzuziehen. Lassen Sie das Gerät in diesem Fall von einem qualifizierten
Servicetechniker überprüfen, bevor Sie wieder damit arbeiten.
Stellen Sie das Gerät auf eine feste, stabile Fläche.
Ein an einer ungeeigneten Stelle aufgestelltes Gerät kann herunterfallen und dabei
Verletzungen oder Geräteschäden verursachen. Fällt das Gerät herunter, ziehen Sie sofort das
Netzkabel ab, und wenden Sie sich an Ihren lokalen EIZO-Handelsvertreter. Arbeiten Sie nicht
mit einem beschädigten Gerät, da Brand- und Stromschlaggefahr besteht.
2
VORSICHT
Deutsch
Verwenden Sie das Gerät an einem geeigneten Platz.
Andernfalls könnte das Gerät beschädigt werden, und es besteht Brand- und
Stromschlaggefahr.
•Verwenden Sie das Gerät nicht im Freien.
•Geben Sie das Gerät nicht als Transportgut auf (per Schiff, Flugzeug, Zug, Auto usw.), da es
dort starken Vibrationen oder Stößen ausgesetzt werden kann.
•Installieren Sie es nicht in staubiger oder feuchter Umgebung.
•Stellen Sie das Gerät nicht an einem Ort ab, an dem Wasser auf den Bildschirm spritzen
könnte (Bad, Küche usw.).
•Stellen Sie es nicht an einen Platz, an dem Licht direkt auf den Bildschirm fällt.
•Stellen Sie es nicht in die Nähe eines Wärme erzeugenden Geräts oder eines
Luftbefeuchters.
•Stellen Sie ihn nicht an einem Platz auf, wo das Produkt direkter Sonneneinstrahlung
ausgesetzt ist.
•Nicht in feuergefährlicher Umgebung aufstellen (z. B. Gas).
Zur Vermeidung von Erstickungsgefahr bewahren Sie die Kunststoffverpackungstüten
außer Reichweite von Säuglingen und Kleinkindern auf.
Achten Sie darauf, dass das Netzkabel die folgenden Anforderungen erfüllt.
Ein Netzkabel gehört nicht zum Lieferumfang dieses Produkts. Benutzen Sie bitte ein
Netzkabel, dass die Anforderungen erfüllt. (Für weitere Informationen wenden Sie sich bitte an
Ihren lokalen EIZO-Handelsvertreter.)
* Das Netzkabel entspricht den Standards in dem Land und in der Region, wo das Produkt
verwendet werden soll.
Zum Beispiel
Für Europa : Der Netzkabelsatz hat einen Nennwert von mindestens AC 250 V / 10 A und hat den
Kabeltyp H05VV-F, GTCE-3, 0,75 mm2
Für USA
: Der Netzkabelsatz hat einen Nennwert von mindestens 125 V / 10 A und hat den
Kabeltyp SVT, 3/18 AWG (0,75 mm2).
Für China
Das Netzkabelset ist mindestens für 250 V AC und 10 A zugelassen. Es handelt sich
um den Kabeltyp „ 配 60227 IEC53 3×1 平方毫米“
Zum Abziehen des Netzkabels fassen Sie den Stecker fest an, und ziehen
Sie ihn ab.
Ziehen am Kabel kann Schäden verursachen, die zu Brand- und
Stromschlaggefahr führen.
Das Gerät muss an eine ordnungsgemäß geerdete Steckdose angeschlossen werden.
Andernfalls besteht Brand- und Stromschlaggefahr.
Arbeiten Sie mit der richtigen Spannung.
• Das Gerät ist ausschließlich für den Betrieb mit einer bestimmten Spannung konfiguriert.
Bei Anschluss an eine andere als die in dieser Bedienungsanleitung angegebene Spannung
besteht die Gefahr von Bränden, Stromschlag oder Geräteschäden.
• Überlasten Sie den Stromkreis nicht, da dies Feuer oder einen Stromschlag verursachen
kann.
3
VORSICHT
Gehen Sie mit dem Netzkabel sorgfältig um.
• Stellen Sie das Gerät oder andere schwere Gegenstände nicht auf das Kabel.
• Ziehen Sie nicht am Kabel, und knicken Sie es nicht.
Verwenden Sie kein beschädigtes Netzkabel. Die Verwendung eines beschädigten Kabels
kann Feuer oder einen Stromschlag verursachen.
Berühren Sie bei Gewitter niemals den Stecker oder das Netzkabel.
Andernfalls erleiden Sie möglicherweise einen Stromschlag.
Wenn Sie einen Schwenkarm anbringen, befolgen Sie die Anweisungen in der
Bedienungsanleitung des Schwenkarms, und installieren Sie das Gerät sorgfältig.
Andernfalls kann es herunterfallen und dabei Verletzungen oder Schäden am Gerät
verursachen. Sollte das Gerät heruntergefallen sein, wenden Sie sich an Ihren Fachhändler.
Arbeiten Sie nicht mit einem beschädigten Gerät. Die Verwendung eines beschädigten Geräts
kann Feuer oder einen Stromschlag verursachen. Wenn Sie den Kippträger wieder anbringen,
verwenden Sie die gleichen Schrauben, und ziehen Sie sie sorgfältig fest.
Berühren Sie ein beschädigtes LCD-Display nicht mit bloßen Händen.
Der austretende Flüssigkristall ist giftig und sollte nicht in Augen oder Mund gelangen. Sollte
Haut oder ein Körperteil mit dem Display in Berührung gekommen sein, waschen Sie die Stelle
gründlich ab.Treten körperliche Symptome auf, wenden Sie sich an einen Arzt.
ACHTUNG
Tragen Sie das Gerät vorsichtig.
Ziehen Sie das Netzkabel und andere Kabel ab, wenn Sie das Gerät tragen. Das Tragen des
Geräts mit angeschlossenen Kabeln ist gefährlich. Sie können sich dabei verletzen.
Halten Sie das Gerät beim Tragen gut an der Unterseite fest (siehe Abbildung
rechts).
Wird das Gerät fallen gelassen, besteht Verletzungsgefahr, und das Gerät kann
beschädigt werden.
Stellen Sie das Gerät icht in einem beengten genschlossenen Raum auf.
Wenn sich das Geräteinnere erhitzt, kann dies zu Feuer, elektrischer Schlag oder
Beschädigung führen.
Berühren Sie den Stecker nicht mit nassen Händen.
Dies führt zu einem Stromschlag.
Schließen Sie das Netzkabel an eine leicht zugängliche Steckdose an.
Damit stellen Sie sicher, dass Sie das Netzkabel im Notfall schnell abziehen können.
Reinigen Sie den Bereich um den Stecker in regelmäßigen Abständen.
Staub, Wasser oder Öl auf dem Stecker erhöht die Brandgefahr.
Ziehen Sie das Netzkabel ab, bevor Sie das Gerät reinigen.
Wenn Sie das Gerät bei angeschlossenem Netzkabel reinigen, können Sie einen Stromschlag
erleiden.
Wenn Sie das Gerät längere Zeit nicht benutzen, ziehen Sie das Netzkabel aus Sicherheitsgründen sowie zur Energieeinsparung nach Ausschalten des Geräts aus der Steckdose.
4
Hinweise für diesen Monitor
Außer für die Erstellung von Dokumenten, die Wiedergabe von Multimedia-Inhalten und sonstige allgemeine
Zwecke eignet sich dieses Produkt auch für spezielle Anwendungen, wie etwa den Betrieb von technischen
Arbeitsstationen.
Dieses Produkt wurde speziell an die Einsatzbedingungen in der Region, in die es ursprünglich geliefert
wurde, angepasst. Wird es außerhalb dieser Region eingesetzt, ist der Betrieb eventuell nicht wie
angegeben möglich.
Die Garantie für dieses Produkt erstreckt sich ausschließlich auf die in diesem Handbuch beschriebenen
Anwendungen.
Die in diesem Handbuch enthaltenen technischen Daten gelten nur, wenn folgendes Zubehör benutzt wird:
· Von uns angegebene Signalkabel
Deutsch
Verwenden Sie mit diesem Produkt nur Zubehör, das von uns hergestellt oder empfohlen wird.
Es dauert etwa 30 Minuten, bis sich das Betriebsverhalten der elektrischen Bauteile stabilisiert hat. Bitte
warten Sie nach dem Einschalten 30 Minuten oder mehr mit dem Einstellen des Monitors.
Je heller Monitore eingestellt sind desto eher läßt die Helligkeit der Hintergrundbeleuchtung langfristig nach.
Stellen Sie eine möglichst geringe Helligkeit ein um den Monitor für lange Zeit mit nahezu gleichbleibender
Anzeige zu nutzen.
Wird dasselbe Bild über einen langen Zeitraum hinweg angezeigt und dann geändert, treten möglicherweise
Nachbilder auf. Verwenden Sie den Bildschirmschoner oder die Abschaltfunktion, um zu vermeiden, dass
dasselbe Bild über längere Zeit hinweg angezeigt wird.
Um den Monitor immer wie neu aussehen zu lassen und die Lebensdauer des Geräts zu verlängern, wird
eine regelmäßige Reinigung empfohlen (Beachten Sie den Abschnitt „Reinigung“ (Seite 6)).
Das LCD-Display wurde mit hochpräziser Technologie hergestellt. Auf dem LCD-Display fehlen oder
leuchten möglicherweise Pixel. Dabei handelt es sich jedoch nicht um eine Fehlfunktion. Anteil der
effektiven Bildpunkte: mindestens 99,9994%.
Die Hintergrundbeleuchtung des LCD-Displays hat eine begrenzte Lebensdauer. Wenn der Bildschirm
dunkel wird oder flackert, wenden Sie sich bitte an Ihren lokalen EIZO-Handelsvertreter.
Berühren Sie das Display nicht mit scharfen Gegenständen, da es dadurch verkratzt und beschädigt werden
könnte. Reinigen Sie das Display keinesfalls mit Taschentüchern, da es dadurch verkratzt werden könnte.
Wird der Monitor in einen Raum mit höherer Raumtemperatur gebracht oder steigt die Raumtemperatur
schnell an, bildet sich möglicherweise Kondensationsflüssigkeit an den Innen- und Außenseiten
des Monitors. Stellen Sie in diesem Fall den Monitor nicht an. Warten Sie stattdessen bis die
Kondensationsflüssigkeit verdunstet ist. Andernfalls können Schäden am Monitor entstehen.
(Vorsichtshinweise zur Verwendung des Touch-Panel)
•Bei der Touch-Bedienung
Beachten Sie die folgenden Punkte. Anderenfalls kann es zu Schäden am Monitor kommen.
-- Üben Sie keinen starken Druck auf das Display aus, kratzen Sie nicht daran und durchstechen Sie es
nicht.
-- Berühren Sie das Display nicht mit harten Gegenständen wie z. B. Kugelschreibern oder Metallobjekten.
5
Reinigung
Achtung
• Chemikalien wie Alkohol und antiseptische Lösungen können bei Gehäuse oder Display zu Veränderungen im
Glanz, Trübungen, Verblassen und einer Beeinträchtigung der Bildqualität führen.
• Verwenden Sie kein Verdünnungsmittel, Benzol, Wachs oder Poliermittel. Dadurch könnte das Gehäuse oder das
Display beschädigt werden.
• Verhindern Sie, dass Flüssigkeit in die Öffnung zwischen Display und Bildschirmrahmen gelangt.
Hinweis
• Der optionale „ScreenCleaner“ wird zur Reinigung des Gehäuses und der Displayoberfläche empfohlen.
Flecken auf dem Gehäuse und der Displayoberfläche lassen sich entfernen, indem Sie einen Teil eines
Tuchs mit Wasser befeuchten.
So arbeiten Sie optimal mit dem Monitor
• Eine übermäßig dunkle/helle Anzeige ist schlecht für die Augen. Stellen Sie die Helligkeit der
Bildschirmanzeige den Umgebungsbedingungen entsprechend ein.
• Die Augen ermüden durch langes Arbeiten am Monitor. Legen Sie jede Stunde 10 min. Pause ein.
6
Verpackungsinhalt
Prüfen Sie, ob sich alle der folgenden Gegenstände in der Verpackung befinden. Sollte einer der Gegenstände
fehlen oder beschädigt sein, wenden Sie sich an Ihren lokalen EIZO-Handelsvertreter.
Hinweis
• Heben Sie die Verpackung sowie die Verpackungsmaterialien für evtl. Transporte des Monitors gut auf.
• USB-Kabel: MD-C93 (nur für FDX1501T-A)
• Monitor
• Analoges Signalkabel : MD-C87
•
•
•
•
• Stereo-Kabel mit Klinkenstecker
Beachte
EIZO LCD Utility Disk (CD-ROM)
Installationshandbuch (das vorliegende Handbuch)
Kabelklemme 2 St.
Schrauben zum Fixieren der Kabelklemme M4 × 14: 2 St.
(Sie benötigen dafür einen Schraubendreher.)
• Ein Netzkabel gehört nicht zum Lieferumfang dieses Produkts. Benutzen Sie bitte ein Netzkabel, dass die
Anforderungen erfüllt. Für weitere Informationen wenden Sie sich bitte an Ihren lokalen EIZO-Handelsvertreter.
Deutsch
Bedienelemente und Funktionen
Anbringen der
Kabelklemme
・FDX1501-A
15
Einstellungsmenü*1
1
1.
2
16
3
4
5
6
7
8 9 10
11
・FDX1501T-A
12 13 14 8
Taste
Zeigt das Lautstärkejustierungsmenü an. (Drücken Sie zum Einstellen der
Lautstärke
oder .)
Taste
Schaltet zwischen den Eingangssignalen für die Anzeige um.
2.
Taste
Ändert den Farbmodus.
3.
Taste
Zeigt das Einstellungsmenü an, legt ein Element im Menübildschirm fest und
4.
speichert geänderte Werte.
5.
Taste
• Dienen der Menüsteuerung sowie der Justage oder Auswahl von
Funktionen.
• Zeigt den Bildschirm für die Helligkeit Justierungsmenü.
6.
Taste
Zum Ein- und Ausschalten.
7. Netzkontroll-LED
Zeigt den Betriebsstatus des Monitors an.
Blau: In Betrieb Orange: Energiesparmodus AUS: Hauptnetz/Netzschalter aus
8. Lautsprecher
Zur Verbindung mit dem AC-Netzteil.
9. Hauptnetz-Schalter
Schaltet das Hauptnetz ein oder aus
10. Netzanschluss
Dient zum Anschluss des Netzkabels.
11. Eingangsignal-Anschluss
Links: DVI-D-Anschluss / Rechts: 15-poliger Mini-D-Sub-Anschluss
12. USB-Ausgang
Dient zum Verbinden eines PCs mit dem Monitor mithilfe eines USB-Kabels,
(nur für FDX1501T-A)*2
wenn das Produkt als Touch-Panel verwendet wird.
13. RS-232C-Anschluss
Dient zum Verbinden eines PCs mit dem Monitor mithilfe eines RS-232C-Kabels,
(nur für FDX1501T-A)*2
wenn das Produkt als Touch-Panel verwendet wird.
14. Stereo Mini-Jack
Dient zum Anschluss des Stereo Mini-Jack-Kabels.
15. Standfuß
Wird zum Justieren des Winkels des Monitorbildschirms verwendet.
16. Gewindelöcher zum Sichern Bringen Sie die Kabelklemme an, damit das Kabel nicht herabfallen kann.
Setzen Sie das Kabel in die Kabelklemme und benutzen Sie dazu die
der Kabelklemme (2)
Feststellschrauben (M4 × 14).
*1 Informationen zur Verwendung entnehmen Sie dem Benutzerhandbuch (auf der CD-ROM).
*2 Diese Anschlüsse können nicht gleichzeitig verwendet werden. Sind an beide Anschlüsse Kabel angeschlossen,
so hat der USB-Ausgang Priorität.
7
Kabel anschließen
Beachte
• Stellen Sie sicher, dass Computer und Monitor ausgeschaltet sind.
• Wenn der vorhandene Monitor durch diesen Monitor ersetzt wird, müssen auf jeden Fall die PC-Einstellungen
für die Auflösung und die vertikale Abtastfrequenz auf diejenigen umgeändert werden, die für diesen Monitor
verfügbar sind. Ziehen Sie vor dem Anschließen des PCs die Tabelle Kompatible Auflösung zu Rate.
Hinweis
• Wenn Sie mehrere PCs mit dem Produkt verbinden, lesen Sie im Benutzerhandbuch des Monitors (auf der CDROM) nach.
1.Verbinden Sie die Signalkabel mit den Signaleingängen und dem PC.
Prüfen Sie die Form der Anschlüsse, bevor Sie die Kabel verbinden.
Ziehen Sie nach dem Anschließen der Kabel die Schrauben der Anschlüsse an, um die Verbindung
zu sichern.
CD-Player usw.
Stereo-Kabel mit Klinkenstecker (mitgeliefert)
Digitale Verbindung
(DVI)
DVI
Analoge Verbindung
(D-Sub)
D-Sub
oder
AUDIO OUTPUT
Signalkabel FD-C39
(option)
DVI
Signalkabel MD-C87
(mitgeliefert)
D-Sub
2.Verbinden sie mithilfe des Netzkabels den Netzanschluss des Monitors mit
einer Steckdose.
3.Drücken Sie
, um den Monitor einzuschalten.
Die Netzkontroll-LED des Monitors leuchtet auf (blau).
4.Schalten Sie den Computer ein.
Das Bildschirmbild erscheint.
Falls kein Bild erscheint, siehe „Kein Bild“ (Seite 11) für weitere Hilfe.
Bei Verwendung des FDX1501T-A fahren Sie mit der Installation und Kalibrierung des Touch-PanelTreibers fort.
Beachte
• Schalten Sie Computer und Monitor aus, wenn Sie sie nicht mehr benötigen.
• Um möglichst viel Energiesparen, empfiehlt es sich, auch den Netzschalter auszuschalten. Durch Ausschalten
des Hauptnetz-Schalters oder durch Abtrennen des Netzkabels wird die Stromversorgung des Monitors
vollständig unterbrochen.
8
Anpassen des Bildschirmwinkels
Halten Sie den Monitor mit beiden Händen am linken und rechten Rand fest, und stellen Sie die für Ihren
Arbeitsplatz optimale Neigung des Bildschirms ein.
Beachte
• Vergewissern Sie sich, dass die Kabel richtig angeschlossen sind.
Deutsch
Anbringen des optionalen Schwenkarms
Durch Abnehmen des Standfußelements kann ein optionaler Schwenkarm (oder ein optionaler Standfuß)
angebracht werden. Hinweise zu einem passenden optionalen Schwenkarm (oder optionalen Standfuß)
finden Sie auf unserer Website. http://www.eizo.com
Beachte
• Wenn Sie einen Schwenkarm oder einen Standfuß anbringen, befolgen Sie die Anweisungen im jeweiligen
Benutzerhandbuch.
• Wenn Sie den Schwenkarm oder Standfuß eines anderen Herstellers verwenden, achten Sie im Voraus darauf,
dass er dem VESA-Standard entspricht. Verwenden Sie die Schrauben, die das Gerät und den Standfuß sichern.
-- Lochabstand für die Schrauben : 75 mm × 75 mm oder 100 mm × 100 mm
-- Stärke der Platte : 2,6 mm
-- Ausreichende Stabilität, um das Gewicht des Monitors (außer dem Standfuß) und Zubehör wie Kabel zu tragen.
• Schließen Sie die Kabel nach dem Befestigen eines Schwenkarms oder Standfußes an.
• Der Monitor und der Schwenkarm oder Standfuß sind schwer. Wenn sie herunterfallen, kann dies zu Verletzungen
oder Schäden am Gerät führen.
Vorgehensweise
1.Legen Sie den LCD-Monitor auf ein weiches Tuch, das auf einer stabilen
Unterlage ausgebreitet ist, und zwar mit der Displayoberfläche nach unten.
2.Entfernen Sie den Standfuß.
Sie benötigen dafür einen Schraubendreher. Lösen Sie mit dem Schraubendreher die (vier)
Schrauben, die das Gerät und den Standfuß verbinden.
3.Bringen Sie den Schwenkarm oder Standfuß am Monitor an.
Befestigen Sie den Monitor mithilfe der im Benutzerhandbuch des Schwenkarms oder Standfußes
angegebenen Schrauben am Schwenkarm oder Standfuß.
• Abstand zwischen den Löchern für die Schrauben
beim Anbringen eines Schwenkarms oder
Standfußes: Bei 75 mm × 75 mm
• Abstand zwischen den Löchern für die Schrauben
beim Anbringen eines Schwenkarms oder
Standfußes: Bei 100 mm × 100 mm
9
Installieren des Touch-Panel-Treibers (FDX1501T-A)
Beachte
• Das Benutzerkonto, das zum Installieren des Touch-Panel-Treibers verwendet werden soll, muss „Administrator“Rechte aufweisen.
• Wenn Sie den Touch-Panel-Treiber z. B. zum Aktualisieren des Treibers neu installieren, starten Sie den PC nach
der Deinstallation des Treibers neu, und installieren Sie den Treiber erst dann.
1.Deinstallieren Sie ggf. den anderen Touch-Panel-Treiber.
2.Installieren Sie den Touch-Panel-Treiber gemäß der Anleitung auf der CD-ROM.
Zur Installation des Touch-Panel-Treibers siehe die Benutzerhandbuch des Touch-Panel-Treibers (auf
der CD-ROM).
3.Verwenden Sie das USB-Kabel oder RS-232C-Kabel, um den Monitor mit dem
PC zu verbinden.
USB-Kabel MD-C93 (mitgeliefert)
oder
RS-232C-Kabel*1 (option)
USB
COM
*1Kreuzungstyp
4.Starten Sie den Computer neu.
Beachte
• Bei Verwendung das RS-232C-Kabel, richten Sie das Gerät nach dem Neustart auf folgende Weise ein.
Einzelheiten entnehmen Sie dem Benutzerhandbuch des Touch- Panel-Treibers (auf der CD-ROM).
1. Klicken Sie auf „Start“ - „All Program“ - „DMC“ - „DMC Touch Panel Configuration“ zur Anzeige des
„Properties“-Fensters.
2. Klicken Sie auf „Add a serial device“, und registrieren Sie ein neues serielles Gerät.
3. Klicken Sie auf „Device“, und legen Sie die COM Port-Nr. fest, die für den „COM port“ verwendet wird.
4. Klicken Sie auf „Apply“.
5. Klicken Sie auf „Close“.
Kalibrierung des Monitors (FDX1501T-A)
Kalibrieren Sie den Monitor gemäß den Anweisungen im Benutzerhandbuch des Touch-Panel-Treibers (auf
der CD-ROM).
Hinweis
• Falls sich der Einsatzort geändert hat, führen Sie erneut eine Kalibrierung durch.
10
Fehlerbeseitigung
●●Kein Bild
Besteht ein Problem auch nach Anwendung aller angegebenen Lösungen, wenden Sie sich an einen
lokalen EIZO-Handelsvertreter in Ihrer Nähe.
Problem
Mögliche Ursache und Lösung
1. Kein Bild
• Die Netzkontroll-LED leuchtet nicht.
• Die Netzkontroll-LED leuchtet blau.
• Die Netzkontroll-LED leuchtet orange.
1. Drücken Sie , um den Monitor auszuschalten.
2. Halten Sie
gedrückt, während Sie
drücken, um
den Monitor einzuschalten.
„x“ wird im Menütitel der „Informationen“ im
Einstellungsmenü angezeigt.
3. Starten Sie den PC neu.
Zum Zurückkehren zu der vorherigen Einstellung führen
Sie die Schritte 1 bis 3 erneut aus.
2. Die nachstehende Meldung wird
eingeblendet.
• Diese Meldung zeigt an, dass sich
das Eingangssignal außerhalb des
angegebenen Frequenzbereichs befindet.
Beispiel:
Diese Meldung wird eingeblendet, wenn das Signal
nicht korrekt eingespeist wird, selbst wenn der Monitor
ordnungsgemäß funktioniert.
• Prüfen Sie, ob der PC so konfiguriert ist, dass er
die Anforderungen für die Auflösung und vertikale
Abtastfrequenz des Monitors erfüllt (siehe „Kompatible
Auflösungen“).
• Starten Sie den PC neu.
• Wählen Sie mithilfe des zur Grafikkarte gehörenden
Dienstprogramms eine geeignete Einstellung. Für weitere
Informationen hierzu siehe das Benutzerhandbuch der
Grafikkarte.
Hinweis
• Wenn mit dem angezeigten Bild oder dem Touch-Panel ein Problem vorliegt, lesen Sie im Benutzerhandbuch
des Monitors (auf der CD-ROM) nach.
11
Deutsch
• Prüfen Sie, ob das Netzkabel ordnungsgemäß
angeschlossen ist.
• Schalten Sie den Hauptnetz-Schalter ein.
• Drücken Sie .
• Schalten Sie das Hauptnetz aus und einige Minuten
später wieder ein.
• Erhöhen Sie im Einstellungsmenü die Werte für
„Helligkeit“ und/oder „Gain-Einstellung“.
• Wechseln Sie das Eingangssignal mit .
• Bedienen Sie die Maus oder die Tastatur.
• Prüfen Sie, ob der Computer eingeschaltet ist.
• Je nach dem PC und der Grafikkarte kann das
Eingangssignal möglicherweise nicht erkannt werden, und
der Monitor schaltet nicht aus dem Energiesparmodus
zurück. Wenn das Bildschirmbild auch nicht angezeigt
wird, nachdem die Maus bewegt wurde oder eine Taste
auf der Tastatur gedrückt wurde, schalten Sie den Monitor
mit seinem Netzschalter ein und aus.
Wenn das Bildschirmbild angezeigt wird, führen Sie
folgende Schritte aus. Das Problem wird möglicherweise
behoben.
Technische Daten
LCD-Display
Touch-Panel (FDX1501T-A)
Videosignale
Type
Hintergrundbeleuchtung
Größe
TN
LED
38 cm (15,0 Zoll) (38,0 cm diagonal)
Native Auflösung
1024 Bildpunkte × 768 Zeilen
Anzeigegröße (H x V)
304,1 mm × 228,0 mm
Punktabstand
0,297 mm
Darstellbare Farben
8-Bit-Farben :
Betrachtungswinkel
(H × V, typisch)
Kontrastverhältnis (typisch)
160˚ / 160˚
Audio
Stromversorgung
600 : 1
Reaktionszeit (typisch)
8 ms (Schwarz-weiß-schwarz)
Technik
Analoge resistive Technologie
Kommunikation
USB, RS-232C (* Keine gleichzeitige Verwendung.)
Oberflächenbehandlung
Antireflexion
Oberflächenhärte
2H
Betriebssystem
Microsoft Windows 7 Service Pack 1 (32 bit / 64 bit)
Microsoft Windows Vista Service Pack 2 (32 bit)
Microsoft Windows XP Service Pack 3 (32 bit)
(nicht kompatibel mit Mac OS)
DVI-D-Anschluss × 1, 15-poliger Mini-D-Sub × 1
Eingangsanschlüsse
Digitale Abtastfrequenz
(H / V)
Analoge Scan Frequenz
(H / V)
Dot Clock
Communication
(FDX1501T-A)
USB (FDX1501T-A)
16,77 Millionen Farben
31 kHz - 49 kHz / 59 Hz - 61 Hz
(VGA TEXT : 69 Hz - 71 Hz)
24 kHz - 61 kHz / 55 Hz - 76 Hz
Synchrinsierungs Signal
Eingangsanschlüsse
Digital :
65 MHz
Analog :
80 MHz
Getrennt, TTL, Positiv / Negativ
RS-232C :
D-Sub 9-polig (Stecker)
Anschluss
USB-Ausgang × 1
Standard
USB Specification Rev.2,0
Lautsprecherausgang
Eingangsanschlüsse
Eingang
0,5 W + 0,5 W
Stereo Mini-Jack × 1
AC 100 V - 240 V ± 10%, 50 / 60 Hz 0,3 A - 0,2 A
Maximale Leistungsaufnahme 15,0 W oder weniger
Stromsparmodus
0,5 W oder weniger
(bei einfachem Signaleingang, keine USB Geräte
verbunden)
Physische Daten
Bereitschaftsmodus
0,5 W oder weniger (USB Geräte verbunden)
Abmessungen
( Breite × Höhe × Tiefe )
Abmessungen (ohne
Standfuß)
( Breite × Höhe × Tiefe )
Nettogewicht
346 mm × 373 mm × 197 mm (Tilt : 30˚)
346 mm × 349 mm × 157 mm (Tilt : 0˚)
346 mm × 280 mm × 69 mm
FDX1501-A :
FDX1501T-A :
Nettogewichtt (ohne Standfuß) FDX1501-A :
FDX1501T-A :
Kippen
Umgebungsbedingungen im Temperatur
Betrieb
Luftfeuchte
Luftdruck
Nach oben 30˚, nach unten 0˚
0˚C bis 50˚C (32˚F bis 122˚F)
20% bis 90% R.H. (ohne Kondensierung)
540 hPa bis 1060 hPa
Umgebungsbedingungen bei Temperatur
Transport / Lagerung
Luftfeuchte
-20˚C bis 60˚C (-4˚F bis 140˚F)
10% bis 90% relative Luftfeuchte. (ohne
Kondensierung)
200 hPa bis 1060 hPa
Luftdruck
12
Ca. 5,4 kg
Ca. 5,8 kg
Ca. 3,0 kg
Ca. 3,4 kg
●●Main default settings
Farbmodus
User1
Glätten
3
Energiesp.
Ein
Eco-Timer
Aus
Sprache
English
Eingangssignal
Automatik
Outside Dimensions
Einheit: mm
Standfußtyp
317
220
40
69
Deutsch
(123)
(100)
(VESA)
(123)
10
(50)
100
(VESA)
197
346
305.5
157
111
69
15
20
209
(131)
373
229.5
280
349
30 °
26
Frei montierbarer Typ
40
69
317
(123)
100
(VESA)
75
(VESA)
(123)
10
75
(VESA)
(131)
100
(VESA)
229.5
280
(50)
346
305.5
13
Moniteur couleur LCD
Moniteur couleur LCD à écran tactile
SYMBOLES DE SECURITE
Ce manuel et ce produit utilisent les symboles de sécurité présentés ci-dessous. Ils signalent des
informations critiques. Veuillez les lire attentivement.
AVERTISSEMENT
Le non respect des consignes données dans un message AVERTISSEMENT
peut entraîner des blessures sérieuses ou même la mort.
ATTENTION
Le non respect des consignes données dans un message ATTENTION peut
entraîner des blessures et/ou des dommages au matériel ou au produit.
Indique un avertissement ou une mise en garde. Par exemple,
risque de « choc électrique ».
Indique une action interdite. Par exemple,
signifie « Ne pas démonter ».
signifie « Procéder à la mise à
A propos du manuel d’installation et du manuel d’utilisation
Manuel d’installation
(Ce manuel d’installation)
Décrit les informations de base depuis la connexion du
moniteur à l’ordinateur jusqu’à l’utilisation du moniteur.
Manuel d’utilisation de
ce moniteur*1
Décrit les informations d’application pour le moniteur telles que
les ajustages d’écran, les réglages et les spécifications.
Manuel d’utilisation du
pilote de l’écran tactilece
moniteur*1
Décrit l’installation et l’utilisation du pilote d’écran tactile.
*1 Fichier PDF inclus sur le CD-ROM (Installation du logiciel Adobe Reader nécessaire.)
Aucune partie de ce manuel ne peut être reproduite, enregistrée dans un système documentaire ou
transmise sous quelque forme et par quelque moyen que ce soit électronique, mécanique ou autre, sans
l’autorisation écrite préalable de EIZO Corporation.
EIZO Corporation n’est tenu à aucun engagement de confidentialité sauf en cas d’accord préalable passé
avant la réception de ces informations par EIZO Corporation. Malgré tous les efforts déployés pour
garantir la mise à jour des informations contenues dans ce manuel, veuillez noter que les caractéristiques
techniques du moniteur EIZO sont sujettes à modification sans préavis.
1
Français
Indique une action obligatoire. Par exemple,
la terre de l’appareil ».
indique un
PRECAUTIONS
IMPORTANT
• Pour votre sécurité comme pour la bonne utilisation de l’appareil, veuillez lire attentivement cette
section ainsi que les indications de sécurité portées sur le moniteur.
Emplacements des étiquettes de sécurité
AVERTISSEMENT
Si de la fumée provient du moniteur, que celui-ci sent le brûlé ou émet des bruits anormaux, débranchez immédiatement tous les cordons secteur et prenez contact avec
votre représentant local EIZO.
Il peut être dangereux d’utiliser un moniteur au fonctionnement défectueux.
Ne démontez pas la carrosserie et ne modifiez pas le moniteur.
Le démontage de la carrosserie ou la modification du moniteur peut causer un choc électrique
ou une brûlure.
Confiez toute intervention à un technicien qualifié.
Ne tentez pas de dépanner vous-même cet appareil, l’ouverture ou la dépose des capots vous
expose à un risque d’incendie, de choc électrique ou de dégâts à l’appareil.
Eloignez les petits objets ou les liquides de l’appareil.
L’introduction accidentelle de petits objets ou de liquide dans les fentes de ventilation de la
carrosserie peut entraîner un choc électrique, un incendie ou des dégâts à l’appareil. Si un
objet tombe dans la carrosserie ou si du liquide se répand sur ou à l’intérieur de l’appareil,
débranchez immédiatement le cordon secteur. Faites contrôler l’appareil par un technicien
qualifié avant de l’utiliser à nouveau.
Placez le moniteur sur une surface stable et robuste.
Il y a risque de chute de l’appareil sur une surface inappropriée, qui pourrait entraîner des
blessures ou endommager l’appareil. En cas de chute, débranchez immédiatement le cordon
secteur et demandez conseil à votre représentant local EIZO. Toute utilisation de l’appareil
après une chute peut entraîner un incendie ou un choc électrique.
2
AVERTISSEMENT
Utilisez l’appareil dans un endroit approprié.
Il y a des risques de dégâts à l’appareil, d’incendie ou de choc électrique.
•Ne pas utiliser à l’extérieur.
•Ne pas utiliser dans des moyens de transport (bateau, avion, trains, automobiles, etc.) où il
pourrait subit des vibrations ou des chocs intenses.
•Ne pas installer l’appareil dans un environnement poussiéreux ou humide.
•Ne pas placer dans un lieu où de l’eau peut être projetée sur l’écran (salle de bains, cuisine,
etc.).
•Ne pas installer l’appareil à un endroit exposé directement à la vapeur d’eau.
•Ne pas placer l’appareil près des appareils de chauffage ou d’humidification.
•Ne pas placer à un endroit où le produit est soumis à la lumière directe du soleil.
•Ne placez pas l’appareil dans un environnement contenant des gaz inflammables.
Gardez les sacs plastique d’emballage hors de portée des enfants pour éviter tout
risque d’étouffement.
Français
Veuillez vous assurer que le cordon d’alimentation réponde aux exigences suivantes.
Ce produit n’inclut pas le cordon d’alimentation. Veuillez fournir séparément un cordon
d’alimentation répondant aux exigences. (Pour en savoir plus, veuillez contacter votre
représentant local EIZO.)
* Le cordon d’alimentation se conforme aux normes du pays et de la région dans lesquels ce
produit doit être utilisé.
Par exemple
En Europe
: Le cordon d’alimentation réglé a une valeur nominale d’au moins 250VAC / 10A et un
type de H05VV-F, GTCE-3, 0,75 mm2.
Aux E.U.
: Le cordon d’alimentation réglé a une valeur nominale d’au moins 125V / 10A et un
type SVT, 3/18AWG (0,75mm2).
Pour la Chine : La valeur nominale du cordon d’alimentation fixe est au minimum de 250 V~ 10 A,
avec un câble de type « 配 60227 IEC53 3×1 平方毫米 »
Pour débrancher le cordon secteur, tirez fermement sur la fiche exclusivement.
Ne tirez jamais sur le câble, cela pourrait endommager le cordon et entraîner un
incendie ou un choc électrique.
L’appareil doit être relié à une prise avec terre.
Le non-respect de ces consignes peut présenter des risques d’incendie ou de choc électrique.
Utilisez la tension correcte.
•L’appareil a été conçu pour une utilisation avec une tension de secteur particulière. L’utilisation
sur une tension différente de celle spécifiée dans ce manuel pourrait causer un choc
électrique, un incendie ou d’autres dégâts.
•Ne surchargez pas les circuits d’alimentation électrique, cela pourrait entraîner un incendie
ou un choc électrique.
Manipulez correctement le cordon secteur.
•Ne faites pas passer le cordon sous le moniteur ou un autre objet lourd.
•Ne tirez pas sur le cordon et ne le fixez pas.
Cessez d’utiliser tout cordon secteur endommagé. L’utilisation d’un cordon défectueux peut
entraîner un incendie ou un choc électrique.
3
AVERTISSEMENT
Ne touchez pas au cordon secteur ni à la fiche si des étincelles apparaissent.
Vous risqueriez un choc électrique.
Pour fixer un bras de support, consultez le manuel d’utilisation du bras pour installer
correctement le moniteur.
Sinon, l’appareil peut se séparer ce qui pourrait l’endommager ou causer une blessure. Si
l’appareil a subi une chute, demandez conseil à votre représentant local EIZO. Toute utilisation
de l’appareil après une chute peut entraîner un incendie ou un choc électrique. Pour refixer le
socle inclinable, utilisez les mêmes vis et serrez-les correctement.
Ne touchez pas un panneau LCD endommagé à mains nues.
Les cristaux liquides sont toxiques. En cas de contact de la peau avec le panneau, lavez
immédiatement à grande eau. Si des cristaux liquides pénètrent dans vos yeux ou votre
bouche, rincez immédiatement abondamment avec de l’eau et consultez un médecin.
ATTENTION
Procédez avec précaution pour transporter l’appareil.
Débranchez les câbles et cordon secteur avant de déplacer l’appareil. Il est dangereux de
déplacer l’appareil avec son cordon branché. Vous risquez de vous blesser.
Lors du transport de l’appareil, maintenez-le fermement par le bas, comme
illustré à droite.
Une chute de l’appareil pourrait l’endommager ou causer des blessures.
N’utilisez pas l’appareil dans un endroit fermé.
Si l’intérieur devient chaud, un incendie, un choc électrique ou des dommages pourraient
survenir.
Ne touchez jamais aux fiches électriques avec les mains humides.
Tout contact avec la fiche électrique les mains humides peut être dangereux et peut
causer un choc électrique.
Utilisez une prise électrique facilement accessible.
Ceci vous permettra de débrancher rapidement l’appareil en cas de problème.
Nettoyez régulièrement les alentours de la prise.
L’accumulation de poussière, d’eau ou d’huile sur la fiche peut entraîner un incendie.
Débranchez le moniteur avant de le nettoyer.
Le nettoyage du moniteur sous tension peut causer un choc électrique.
Si vous n’allez pas utiliser l’appareil pour un certain temps, débranchez le cordon d’alimentation de la prise murale après avoir mis l’appareil hors tension, pour des raisons
de sécurité et d’économie d’énergie.
4
Avertissement concernant le moniteur
En complément de la création de documents, de l’affichage de contenu multimédia et de toute autre
utilisation d’ordre général, ce produit est également conçu pour des usages particuliers tels que le
fonctionnement des équipements terminaux.
Ce produit a été réglé spécialement en usine en fonction de la région de destination prévue. Les
performances du produit peuvent être différentes de celles indiquées dans les caractéristiques en cas
d’utilisation dans une région différente de celle prévue à l’origine.
Ce produit peut ne pas être couvert par la garantie pour des usages autres que ceux décrits dans le présent
manuel.
Les spécifications notées dans ce manuel ne sont applicables que lorsque les éléments suivants sont
utilisés :
· Câbles de signalisation spécifiés par nos soins
Utilisez uniquement avec ce produit les produits optionnels fabriqués ou spécifiés par nos soins.
30 minutes sont nécessaires à la stabilisation des performances des composants électriques. Veuillez
attendre au moins 30 minutes après avoir mis en marche le moniteur pour le régler.
Lorsque l’image de l’écran change après que la même image est restée affichée pendant une période
prolongée, une image rémanente risque de s’afficher. Utilisez l’économiseur d’écran ou la fonction d’économie
d’énergie pour éviter d’afficher la même image pendant une période prolongée.
Un nettoyage périodique est recommandé pour conserver son aspect neuf au moniteur et prolonger sa
durée de vie (Référez-vous à « Nettoyage » (page 6)).
Le panneau LCD est fabriqué à l’aide d’une technologie de haute précision. Bien que, il est possible
que des pixels manquants ou des pixels allumés apparaissent sur l’écran LCD. Il ne s’agit pas d’un
dysfonctionnement. Pourcentage de points effectifs : 99,9994 % ou supérieur.
La durée de vie du rétro-éclairage du panneau LCD est limitée. Si l’écran s’assombrit ou se brouille, prenez
contact avec votre représentant local EIZO.
Ne rayez et n’appuyez pas sur le panneau avec des objets pointus, car cela pourrait endommager le
panneau. Ne tentez jamais de le nettoyer à sec avec du tissu, au risque de le rayer.
Lorsque le moniteur est froid et déplacé dans une autre pièce ou lorsque la température de la pièce
augmente rapidement, de la condensation peut se former à l’intérieur et à l’extérieur du moniteur. Dans
ce cas, ne mettez pas le moniteur sous tension. Et attendez la disparition de la condensation. Sinon, le
moniteur pourrait être endommagé.
(Précautions lors de l’utilisation de l’écran tactile)
•Pendant l’opération tactile
•Soyez attentif aux points suivants. Sinon cela peut entraîner des dommages au moniteur.
-- N’appuyez pas trop fort sur l’écran, évitez de le rayer ou de le pousser.
-- Ne touchez pas l’écran avec des objets durs comme des stylos à billes ou du métal.
5
Français
Les moniteurs devraient être réglés à une luminosité inférieure pour réduire les changements de luminosité
causés par une utilisation à long terme et maintenir un affichage stable.
Nettoyage
Attention
• Les produits chimiques tels que l’alcool et les solutions antiseptiques peuvent provoquer des variations du brillant,
ternir et atténuer la carrosserie ou du panneau et détériorer la qualité de l’image.
• N’utilisez jamais de diluant, de la benzine, de cire et de poudre abrasive, ce qui peut endommager la carrosserie
ou le panneau.
• Ne laissez aucun liquide pénétrer dans l’espace situé entre le panneau et le cadre de l’écran.
Remarque
• L’outil ScreenCleaner en option est recommandé pour nettoyer la carrosserie et la surface de l’écran.
Vous pouvez enlever les taches de la carrosserie et la surface de l’écran en humidifiant partiellement un
chiffon avec de l’eau.
Pour un confort d’utilisation du moniteur
• Un écran trop sombre ou trop lumineux peut abîmer les yeux. Ajustez la luminosité du moniteur en
fonction des conditions ambiantes.
• Regarder le moniteur trop longtemps entraîne une fatigue oculaire. Faites des pauses de 10
minutes toutes les heures.
6
Contenu de l’emballage
Vérifiez que tous les éléments indiqués ci-dessous sont inclus dans le carton d’emballage. Contactez votre
représentant local EIZO si l’un des éléments est manquant ou endommagé.
Remarque
• Veuillez conserver le carton et les matériaux d’emballage pour les réutiliser lors d’un déplacement ultérieur du
moniteur.
• Moniteur
• Câble USB: MD-C93 (pour FDX1501T-A seulement)
• Câble de signal analogique: MD-C87
•
•
•
•
• Câble à mini-prise stéréo
Attention
EIZO LCD Utility Disk (CD-ROM)
Manuel d’installation (ce manuel)
Serre-câble 2 pièces
Vis pour la fixation du serre-câble M4 × 14: 2 pièces
(Préparez un tournevis.)
• Ce produit n’inclut pas le cordon d’alimentation. Veuillez fournir séparément un cordon d’alimentation répondant
aux exigences. Pour en savoir plus, veuillez contacter votre représentant local EIZO.
Commandes et fonctions
Fixation du serre-câble
・FDX1501-A
Français
15
Menu de réglage*1
1
2
16
3
4
5
1. Touche
2. Touche
3. Touche
4. Touche
5. Touche
6. Touche
7. Témoin de fonctionnement
8. Haut-parleur
9. Commutateur d’alimentation
principal
10. Connecteur d’alimentation
11. Connecteur de signal d’entrée
12. Port USB amont
(pour FDX1501T-A seulement)*2
13. Port RS-232C
(pour FDX1501T-A seulement)*2
14. Miniprise stéréo
15. Pied
16. Orifices filetés pour la fixation
du serre-câble (2)
6
7
8 9 10
11
・FDX1501T-A
12 13 14 8
Permet d’afficher le menu de réglage du volume. (Appuyez sur
ou
pour
régler le volume.)
Commute les signaux d’entrée de l’affichage
Permet de changer le mode Couleur.
Permet d’afficher le menu Réglage, de sélectionner un élément de l’écran de
menu et de sauvegarder les valeurs ajustées.
• Permet la sélection du menu ainsi que l’ajustement et le réglage d’une
fonction.
• Permet d’afficher l’écran de menu du luminosité.
Pour mettre sous/hors tension.
Indique l’état de fonctionnement du moniteur.
Bleu: En fonctionnement Orange: Mode économie d’énergie
ARRÊT: Alimentation/Arrêt
Permet de diffuser une source audio.
Permet de mettre le moniteur sous/hors tension.
Permet de connecter le cordon d’alimentation.
Gauche: connecteur DVI-D / Droite: connecteur D-Sub mini 15 broches
Permet de raccorder un moniteur à un ordinateur à l’aide d’un câble USB
lorsque ce produit est utilisé comme écran tactile.
Permet de raccorder un moniteur à un ordinateur à l’aide d’un câble RS-232C
lorsque ce produit est utilisé comme écran tactile.
Permet de raccorder le câble à mini-prise stéréo.
Permet d’ajuster l’angle de l’écran du moniteur.
Fixez le serre-câble pour éviter que les câbles ne tombent. Ajustez le câble
dans le serre-câble et fixez-le à l’aide des vis de fixation (M4 × 14), comme
indiqué sur le diagramme ci-dessous.
*1 Reportez-vous au Manuel d’utilisation (sur le CD-ROM) pour obtenir des instructions d’utilisation.
*2 Ces ports ne peuvent pas être utilisés simultanément. Lorsque des câbles sont raccordés aux deux ports, le port USB est
prioritaire.
7
Branchement des câbles
Attention
• Vérifiez que le moniteur et le PC sont hors tension.
• Lorsque vous remplacez le moniteur actuel par ce moniteur, veillez à modifier les réglages de votre ordinateur en
fonction de la résolution et de la fréquence de balayage vertical propres à ce moniteur. Reportez-vous au tableau
des résolutions compatibles avant de brancher l’ordinateur.
Remarque
• Pour brancher plusieurs PC sur ce produit, reportez-vous au Manuel d’utilisation du moniteur (sur le CD-ROM).
1.Branchez les câbles de signal aux connecteurs signal d’entrée et au PC.
Vérifiez la forme des connecteurs et branchez les câbles.
Une fois que les câbles de signal sont branchés, serrez les vis des connecteurs pour assurer le
couplage.
Lecteur CD, etc.
Câble à mini-prise stéréo (fourni)
DVI
D-Sub
Connexion numérique
(DVI)
Connexion analogique
(D-Sub)
ou
AUDIO OUTPUT
FD-C39 (option)
DVI
MD-C87 (fourni)
D-Sub
2.Branchez le cordon d’alimentation dans une prise secteur et dans le
connecteur d’alimentation du moniteur.
3.Appuyez sur
pour mettre le moniteur sous tension.
Le témoin de fonctionnement du moniteur s’éclaire en bleu.
4.Mettez le PC sous tension.
L’image affichée à l’écran apparaît.
Si une image n’apparaît pas, reportez-vous à la section « Aucune image » (page 11) pour savoir
comment procéder.
Si vous utilisez le FDX1501T-A, procédez à l’installation et au calibrage du pilote d’écran tactile.
Attention
• Mettez le moniteur et le PC hors tension lorsque vous ne les utilisez plus.
• Pour une économie d’énergie maximale, il est recommandé que le touche d’alimentation soit éteint.
L’alimentation du moniteur est coupée lorsque vous débranchez le cordon d’alimentation ou lorsque vous
désactivez le commutateur d’alimentation principal.
8
Réglage de l’angle de l’écran
Placez vos mains des deux côtés du moniteur et réglez la hauteur, Inclinez l’écran dans la meilleure position
pour travailler.
Attention
• Verifiez que les cables sont correctement branches.
Fixation du bras facultatif
Un bras en option (ou un pied en option) peut être fixé en retirant la section du pied. Pour le bras (ou le pied)
disponible en option, veuillez consulter notre site Web. http://www.eizo.com
Attention
Procédure
1.Posez le moniteur LCD sur un tissu doux étalé sur une surface stable avec la
surface de l’écran tournée vers le bas.
2.Enlevez le pied.
Préparez un tournevis. Desserrez les vis (quatre) fixant l’appareil et le pied à l’aide du tournevis.
3.Fixez le bras ou le pied au moniteur.
Fixez le moniteur au bras ou pied à l’aide des vis spécifiées dans le manuel d’utilisation du bras ou
pied.
• Espacement entre les trous des vis avec un bras
ou un support fixé : 75 mm × 75 mm
• Espacement entre les trous des vis avec un bras
ou un support fixé : 100 mm × 100 mm
9
Français
• Fixez le bras ou pied conformément aux instructions de son manuel d’utilisation.
• Avant d’utiliser un bras ou un pied d’une autre marque, vérifiez les points suivants et choisissez un produit
conforme à la norme VESA.
-- Espacement entre les trous de vis : 75 mm × 75 mm ou 100 mm × 100 mm
-- Epaisseur de la plaque : 2,6 mm
-- Suffisamment solide pour supporter le poids du moniteur (à l’exception du pied) et les accessoires tels que les
câbles.
• Raccordez les câbles après avoir fixé le bras ou pied.
• Le moniteur et le bras ou pied sont lourds. Vous pourriez vous blesser ou endommager le matériel en les laissant
tomber.
Installation du pilote de l’écran tactile (FDX1501T-A)
Attention
• Le compte d’utilisateur à utiliser pour l’installation du pilote de l’écran tactile doit disposer de droits d’
« Administrateurs ».
• Lorsque vous souhaitez réinstaller le pilote de l’écran tactile pour le mettre à jour, etc., redémarrez l’ordinateur
après avoir désinstallé le pilote, puis installez-le.
1.Désinstallez l’autre pilote d’écran tactile, si celui-ci est installé.
2.Installez le pilote de l’éran tactile conforméent aux instructions fournies dans
le disque d’utilitaires LCD (CD-ROM).
Pour la méthode d’installation du pilote d’écran tactile, voir le Manuel d’utilisation du pilote d’écran
tactile (sur le CD-ROM).
3.Utilisez le câble USB ou le câble RS-232C pour brancher le moniteur sur
l’ordinateur.
Câble USB MD-C93 (fourni)
ou
USB
COM
Câble RS-232C*1 (option)
*1Type croisé
4.Redémarrez l’ordinateur.
Attention
• Si vous utilisez le câble RS-232C, réglez le dispositif en utilisant la procédure suivante après le redémarrage.
Reportez-vous au manuel d’utilisation du pilote de l’écran tactile (sur le CD-ROM) pour obtenir plus de détails.
1. Cliquez sur « Start » - « All Program » - « DMC » - « DMC Touch Panel Configuration » pour afficher la
fenêtre « Properties ».
2. Cliquez sur « Add a serial device », et enregistrez un nouveau dispositif sériel.
3. Cliquez sur « Device », et précisez le numéro du port COM utilisé pour le « COM port ».
4. Cliquez sur « Apply ».
5. Cliquez sur « Close ».
Calibrage du moniteur (FDX1501T-A)
Calibrez le moniteur conformément au Manuel d’utilisation du pilote d’écran tactile (sur le CD-ROM).
Remarque
• Si l’emplacement d’installation a changé, effectuez un étalonnage.
10
Dépannage
●●Aucune image
Si un problème persiste après application des corrections proposées, veuillez prendre contact avec
votre représentant local EIZO.
Problème
1. Aucune image
• Le témoin de fonctionnement ne s’allume
pas.
Cause possible et solution
• Vérifiez que le cordon d’alimentation est correctement
branché.
• Activez le commutateur d’alimentation principal.
• Appuyez sur .
• Coupez l’alimentation du moniteur, puis rétablissezla
quelques minutes plus tard.
• Le témoin de fonctionnement s’allume en
bleu.
• Augmentez les valeurs de « Luminosité » et/ou « Gain »
dans le menu Réglage.
• Le témoin de fonctionnement s’allume en
orange.
•
•
•
•
1. Appuyez sur
pour mettre le moniteur hors tension.
lorsque vous
2. Maintenez enfoncée la touche
appuyez sur
pour mettre le moniteur sous tension.
« x » s’affiche sur le titre du menu d’ « informations » du
menu Réglage.
3. Redémarrez le PC.
Pour retourner au réglage précédent, refaîtes les étapes 1
à 3.
2. Le message ci-dessous s’affiche.
• Le message indique que le signal d’entrée
est en dehors de la bande de fréquence
spécifiée.
Exemple :
Ce message s’affiche lorsque le signal n’entre pas
correctement, même si le moniteur fonctionne correctement.
• Vérifiez que l’ordinateur est configuré de façon à
correspondre aux besoins du moniteur en matière de
résolution et de fréquence de balayage vertical (voir «
Réolutions compatibles »).
• Redémarrez l’ordinateur.
• Sélectionnez un réglage approprié à l’aide de l’utilitaire de
la carte vidéo. Reportez-vous au manuel d’utilisation de la
carte vidéo pour plus d’informations.
Remarque
• Si l’image affichée ou l’écran tactile sont victimes d’un problème, reportez-vous au Manuel d’utilisation du
moniteur (sur le CD-ROM).
11
Français
Changez le signal d’entrée en appuyant sur .
Déplacez la souris ou appuyez sur une touche du clavier.
Vérifiez si l’ordinateur est sous tension.
En fonction du PC et de la carte graphique, le signal
d’entrée n’est pas détecté et le moniteur ne récupère pas
du mode économie d’énergie. Si l’écran n’est pas affiché
même après le déplacement de la souris ou la pression
d’une touche du clavier, arrêtez le moniteur et remettezle en marche en appuyant sur le bouton marche. Lorsque
l’écran s’affiche, exécutez la procédure suivante. Le
problème pourrait être résolu.
Spécifications
Panneau LCD
Ecran tactile
(FDX1501T-A)
Signaux vidéo
Communication
(FDX1501T-A)
USB
(FDX1501T-A)
Audio
Type
Rétroéclairage
Taille
Résolution en natif
Taille de l’écran (H × V)
Espace entre pixels
Couleurs de l’écran
Angles d’affichage
(H x V, typique)
Rapport de contraste
(typique)
Temps de réponse
(typique)
Méthode
Méthode de
communication
Traitement de la surface
Dureté de surface
SE
Bornes d’entrée
Fréquence de balayage
numérique (H / V)
Fréquence de balayage
analogique (H / V)
Fréquence de point
Poids net (sans pied)
Conditions
de transport /
stockage
12
600 : 1
8 ms (Noir-blanc-noir)
Technologie résistive analogique
USB, RS-232C (*Pas d’utilisation simultanée.)
anti-reflet
2H
Microsoft Windows 7 Service Pack 1 (32 bit / 64 bit)
Microsoft Windows Vista Service Pack 2 (32 bit)
Microsoft Windows XP Service Pack 3 (32 bit)
(non compatible avec Mac OS)
Connecteur DVI-D × 1, D-Sub mini 15 broches × 1
31 kHz - 49 kHz / 59 Hz - 61 Hz (VGA TEXT : 69 Hz - 71 Hz)
24 kHz - 61 kHz / 55 Hz - 76 Hz
Numérique
65 MHz
Analogique
80 MHz
Signal de synchronisation Séparé, TTL, positif/négatif
Bornes d’entrée
RS-232C :
D-Sub 9 broches (mâle)
Port
Norme
Haut-parleur
Bornes d’entrée
Alimentation
Entrée
Consommation
électrique maximale
Mode d’économie
d’énergie
Mode veille
Caractéristiques Dimensions
physiques
(largeur) × (hauteur) ×
(profondeur)
Dimensions
(sans pied)
(largeur) × (hauteur) ×
(profondeur)
Poids net
Conditions de
fonctionnement
TN
LED
38 cm (15,0 pouces) (Diagonale 38,0 cm)
1024 dots × 768 lines
304,1 mm × 228,0 mm
0,297 mm
Couleurs 8 bits :
16,77 Millionen Farben
160˚ / 160˚
Inclinaison
Température
Humidity
Pression atmosphérique
Température
Humidity
Pression atmosphérique
Port amont, 1 pièce
USB Specification Revision 2,0
0,5 W + 0,5 W
Miniprise stéréo × 1
100 V - 240 VCA ± 10%, 50 / 60 Hz 0,3 A - 0,2 A
15,0 W ou moins
0,5 W ou moins (quand seul le connecteur de signal est branché,
aucun périphérique USB raccordé)
0,5 W ou moins (périphérique USB raccordé )
346 mm × 373 mm × 197 mm (inclinaison: 30˚)
346 mm × 349 mm × 157 mm (inclinaison: 0˚)
346 mm × 280 mm × 69 mm
FDX1501-A :
Env. 5,4 kg
FDX1501T-A :
Env. 5,8 kg
FDX1501-A :
Env. 3,0 kg
FDX1501T-A :
Env. 3,4 kg
Vers le haut, 30˚, vers le bas 0˚
0˚C à 50˚C (32˚F à 122˚F)
20% à 90% HR (sans condensation)
540 hPa à 1060 hPa
-20˚C à 60˚C (-4˚F à 140˚F)
10% à 90% HR (sans condensation)
200 hPa à 1060 hPa
●●Principaux réglages par défaut
Mode Couleur
User1
Lissage
3
Veille
Marche
Minuterie Eco
Arrêt
Langue
English
Signal entrée
Auto
Outside Dimensions
Unité : mm
Sur pied
40
69
317
220
(123)
10
(50)
100
(VESA)
(100)
(VESA)
157
111
69
15
20
209
(131)
373
229.5
280
349
30 °
26
Montage libre
40
69
317
(123)
100
(VESA)
75
(VESA)
(123)
10
75
(VESA)
(131)
100
(VESA)
229.5
280
(50)
346
305.5
13
Français
(123)
197
346
305.5
彩色液晶显示器
触摸式彩色液晶显示器
安全符号
本手册和本产品使用以下安全符号。这些符号表示重要信息。请仔细阅读这些信息。
警告
若不遵守“警告”中的信息,可能会造成严重伤害或威胁到生命安全。
注意
若不遵守“注意”中的信息,可能会造成中度伤害并/或使财产或产品受损。
表示需要注意的事项。例如,图示符号
表示禁止的动作。例如,图示符号
表示“触电危险”等类型的风险。
表示“禁止拆卸”等特别禁止的操作。
表示必须遵照执行的命令动作。例如,图示符号
告知事项。
表示“接地装置”等一般禁止的
关于设定手册与用户手册
说明显示器连接到个人计算机以及使用显示器的基本信
息。
本显示器的用户手册 *1
说明屏幕调整、设定和规格等应用信息。
触摸屏驱动程序用户手册 *1
触摸屏驱动程序的安装和使用说明。
*1 光盘上的PDF文件(需要安装Adobe Reader。)
未经EIZO Corporation事先书面许可,不得以任何形式或以任何方式(电子、机械或其它方式)复制
本手册的任何部分、或者将其存放到检索系统中或进行发送。EIZO Corporation没有义务为任何已
提交的材料或信息保密,除非已经依照EIZO Corporation书面接收的或口头告知的信息进行了事先
商议。尽管本公司已经尽最大努力使本手册提供最新信息,但是请注意,EIZO显示器规格仍会进行
变更,恕不另行通知。
1
中文
设定手册 (本手册)
预防措施
重要
• 为了确保人员安全和正确维护,请仔细阅读本节内容以及显示器上显示的注意事项。
警告声明的位置
警告
若机器出现烟雾,闻起来像是东西着火,或者有奇怪声音,请立刻断开所有电源,并与您
当地EIZO的代表联系以寻求建议。
尝试使用功能异常的机器可能会造成火灾、电击或设备受损。
切勿打开机壳或改装设备。
打开机壳或改装设备可能会导致火灾、触电或灼伤。
请委托合格的维修人员进行各种维修。
切勿试图自行维修本产品,因为打开或取下机盖可能会导致火灾、触电或设备损坏。
请将小东西或液体放置在远离设备的地方。
如果小东西通过通风孔意外掉入设备或液体意外流入设备,则可能导致火灾、触电或设
备损坏。
如果物体或液体掉入/流入设备,请立即拔出设备插头。重新使用设备以前,请委托合格
的维修工程师对其进行检查。
将设备安置在坚固稳定的地方。
如果设备放在不恰当的平面上,则设备可能会跌落并导致人身伤害或设备损坏。如果设
备跌落,请立即切断电源并与您当地EIZO的代表联系以寻求建议。使用已损坏的设备可
能会导致火灾或触电。
请在适宜的场所使用本设备。
否则可能会导致火灾、触电或设备损坏。
• 切勿放在室外。
• 不要放置于可能受强烈振动或冲击影响的运输系统中(船舶、航空、火车、汽车等)。
• 切勿放置在多尘或潮湿的场所。
• 禁止将设备放置在水滴可溅到屏幕的位置(浴室、厨房等)。
• 切勿放置在蒸汽会直接接触屏幕的场所。
• 切勿放置在供暖设备或增湿器附近。
• 禁止将设备放置在阳光可直射本产品的位置上。
• 请勿放于有易燃气体的环境中。
2
警告
为避免出现窒息的危险,请将塑料包装袋放在远离婴儿和儿童的地方。
如果使用AC电源连接器,需确保电源线满足以下要求。
本产品不自带电源线。请另行准备一根符合要求的电源线。
* 电源线须符合本产品使用所在国家和地区的强制性标准。
- 在中国:
- 在欧洲:
- 在美国:
电源线装置额定值至少为AC250V~ 10A,线的类型为“配60227 IEC53 3×1平方
毫米”。
电源线装置额定值至少为AC250V~ 10A,线的类型为H05VV-F, GTCE-3,
0.75mm2。
电源线装置额定值至少为AC125V~ 10A,线的类型为SVT, 3/18AWG
(0.75mm2)。
若要断开电源线,请抓紧插头并拔出。
拉址电源线可能会使其受损,从而导致火灾或触电。
设备必须连接到接地的电源插座。
否则可能引起火灾或触电。
中文
请使用正确的电压。
• 本设备只能在特定电压下使用。若将设备连接到本用户手册中指定的电压以外的电压,
可能会导致火灾、触电或设备损坏。
• 切勿使电路超载,否则可能会导致火灾或触电。
请小心使用电源线。
• 切勿将电源线压在本设备或其他重物下面。
• 切勿拉扯或缠绕电源线。
如果电源线已破损,请停止使用。使用已破损的电源线可能会导致火灾或触电。
打雷时,绝对不要触摸插头和电源线。
否则可能会导致触电。
安装悬挂臂时,请参阅悬挂臂的用户手册,并牢固安装设备
否则,设备可能会脱落,导致人身伤害和/ 或设备损坏。如果设备跌落,请与您当地EIZO
的代表联系以寻求建议。切勿继续使用已损坏的设备。使用已损坏的设备可能会导致火
灾或触电。重新安装倾斜底座时,请使用相同的螺丝并进行紧固。
切勿直接光着手触摸已损坏的液晶显示屏。
液晶为有毒物质。如果皮肤有任何部位与显示屏直接接触,请彻底清洗该处。如果液晶
进入眼睛或口中,请立即使用大量清水冲洗并就医。
3
注意
搬动设备时,请务必小心。
移动设备时,请断开电源线和电缆。在电源线保持连接时移动设备是非常危险的。因为
这样可能会导致人身伤害。
搬运本装置时,请如右图所示由底部抓紧装置。
设备跌落可能会造成人身伤害或设备损坏。
切勿在封闭场所安装该单元。
如果内部发热,可能会导致火灾、触电或设备损坏。
切切勿用湿手触摸插头。
否则可能会导致触电。
请使用易于接近的电源插座。
这样可确保在出现问题时快速切断电源。
定期清洁插头附近的区域。
插头上的灰尘、水或油可能会导致火灾。
设备清洁以前,请先将插头拔出。
与电源插座相连时清洁设备可能会导致触电。
如果计划长期不使用本装置,为了安全和节电,请在关闭电源后拔掉电源插头。
4
有关此显示器的注意事项
除创建文档、查看多媒体内容以及其它一般用途之外,本产品还适用于某些专门的应用场合,如操作
终端设备。
为配合在销售目标区域使用,本产品已经过专门调整。如果产品使用地并非销售目标区域,则本产品
的工作性能可能与规格说明不符。
本产品担保仅在此手册中所描述的用途范围之内有效。
本手册中所述规格仅适用于以下配件:
• 我们指定的信号线
本产品只能与我们制造或指定的备选产品配合使用。
电子零件的性能需要约30分钟才能稳定下来。 显示器的电源开启之后请等待至少30分钟,然后调节
显示器。
为了降低因长期使用而出现的发光度变化以及保持稳定的发光度,应将显示器设置为较低亮度。
当显示器长期显示一个图像的情况下再次改变显示画面会出现残影。使用屏幕保护程序或省电模式
避免长时间显示同样的图像。
建议定期清洁,以保持显示器外观清洁同时延长使用寿命(请参阅“清洁”(第6页))。
液晶显示屏的背光灯有一定的使用寿命。当显示屏变暗或开始闪烁时,请与您当地EIZO的代表联
系。
切勿用尖锐物体刮擦或按压显示屏,否则可能会使显示屏受损。切勿尝试用纸巾擦拭显示屏,否则可
能会留下划痕。
如果将较冷的显示器带入室内,或者室内温度快速升高,则显示器内部和外部表面可能会产生结露。
此种情况下,请勿开启显示器。等待直到结露消失,否则可能会损坏显示器。
(触摸屏使用警告)
• 在触摸操作过程中
请注意以下几点。否则,可能会使显示器受损。
- 切勿用力按压、刮擦或戳划面板。
- 切勿用坚硬物体(如圆珠笔或金属)触碰面板。
5
中文
液晶面板采用高精技术制造而成。尽管液晶面板上可能会出现像素缺失或像素发亮,但这并非故障。
有效点百分比:99.9994%或更高。
清洁
注意
• 酒精、消毒液等化学试剂可能导致机壳或面板光泽度变化、失去光泽、褪色及图像质量降低。
• 切勿使用任何可能会损伤机壳或面板的稀释剂、苯、蜡和研磨型清洗剂。
• 严禁液体进入面板和面板框之间的缝隙。
注
• 建议使用选购的ScreenCleaner清洁机壳和面板表面。
请将小块软布用水蘸湿,以去除机壳和面板表面上的污垢。
舒适地使用显示器
• 屏幕极暗或极亮可能会影响您的视力。请根据环境调节显示器的亮度。
• 长时间盯着显示器会使眼睛疲劳。每隔一小时应休息十分钟。
6
打包内容
请检查包装盒中是否包含下列物品。如果缺少物品,或物品存在损坏现象,请与您当地EIZO的代表联系。
注
• 请保留好包装盒和包装材料,以便将来显示器移动或搬运时使用。
• 显示器
• EIZO USB电缆:MD-C93(仅限于FDX1501T-A)
• 模拟信号线:MD-C87
•
•
•
•
• 立体声迷你插孔线
EIZO LCD Utility Disk(CD-ROM)
设定手册(本手册)
2个接线板
用于固定接线板的螺钉 M4 × 14:2个
(准备一把螺丝刀。)
注意
• 产品中不带电源线。请个别提供符合该设备的电源线。详细信息,请联系当地EIZO的代表。
控制和功能
安装接线板
FDX1501-A
15
设定菜单*1
1.
2.
3.
4.
5.
2
3
4
按钮
按钮
按钮
按钮
按钮
按钮
6.
7. 电源指示器
8.
9.
10.
11.
12.
13.
扬声器
主电源开关
电源连接器
输入信号连接器
上游USB端口
(仅限于FDX1501T-A)*2
RS-232C端口
(仅限于FDX1501T-A)*2
立体声微型插孔
底座
螺孔,用于固定接线板(2)
5
6
7
8 9 10
11
FDX1501T-A
中文
1
16
12 13 14 8
显示音量调节菜单(按 或 调节音量。)
切换显示输入信号。
更改Color Mode。
显示设定菜单,确定菜单屏幕上的某个项目,并保存已调节的值。
• 提供菜单选择以及某个功能的调节和设定。
• 显示亮度调整菜单。
开关电源。
说明显示器工作状态。
蓝色:工作 橙色:省电模式 关闭:主电源/电源关闭
输出音频源。
打开或关闭主电源。
连接电源线。
左:DVI-D连接器 / 右:D-Sub微型15针连接器
本产品用作触摸屏显示器时用USB电缆连接PC和显示器。
本产品用作触摸屏显示器时用RS-232C电缆连接PC和显示器。
连接立体声微型插孔电缆。
用于调节显示器屏幕角度。
安装接线板以防止电缆掉落。
在接线板上安装电缆并使用固定螺钉(M4 × 14)固定,如上图所示。
*1 关于使用说明,请参照用户手册(在CD-ROM上)。
*2 无法同时使用这些端口。电缆连接到这两个端口时,USB端口优先。
14.
15.
16.
7
连接电缆
注意
• 确保显示器和个人计算机的电源关闭
• 将当前的显示器换成该显示器时,请务必将分辨率和垂直扫描频率等PC设置更改为该显示器可用的设
置。连接PC之前,请参照兼容的分辨率表格。
注
• 当多台个人计算机连接到本产品时,请参照显示器用户手册(在CD-ROM上)。
1.将信号线连接至输入信号连接器和PC。
检查连接器的形状,然后连接电缆。
连接到信号线后,请拧紧连接器的螺钉,固定连接。
CD播放器等
立体声迷你插孔电缆(已提供)
DVI
D-Sub
数字连接(DVI)
模拟连接(D-Sub)
或
AUDIO OUTPUT
FD-C39(选购件)
DVI
MD-C87(已提供)
D-Sub
2.将电源线插头插入电源插座和显示器上的电源连接器。
3.按
打开显示器电源。
显示器电源指示灯以蓝色亮起。
4.打开个人计算机电源。
出现画面图像。
如果未出现图像,请参照“无图片”(第11页)获得帮助。
如果使用FDX1501T-A,请继续进行触摸屏驱动程序的安装和校准。
注意
• 使用后关闭显示器和个人计算机。
• 为了最大限度地省电,建议您关闭电源按钮。断开主电源开关,或者拔掉电源插头,彻底断开显示器电源
供应。
8
调整屏幕角度
用双手抓住显示器的左右两边,将屏幕倾斜并转到最适合工作的状态。
注意
• 请确认各接线是否正确。
安装任选悬挂臂
可以卸下底座部分,安装任选悬挂臂(或任选底座)。请访问我们的网页了解任选悬挂臂(或任选底
座)。http://www.eizo.com
注意
中文
• 在安装悬挂臂或底座时,遵循相应用户手册上的说明。
• 在使用其他制造商提供的悬挂架或底座时,请先确认下列事项,并选择符合 VESA 标准的悬挂架或底
座。
- 螺孔间距:75 mm × 75 mm 或 100 mm × 100 mm
- 板厚度:2.6 mm
- 其强度足以支承显示器(不包括底座)和电缆等附件的重量。
• 在安装悬挂臂或底座之后,连接电缆。
• 显示器和悬挂臂或底座很重。坠落可能会导致受伤或设备损坏
步骤
1.把液晶显示器放在铺有软布的稳定台面上,面板表面朝下。
2.卸下底座。
准备一把螺丝刀。用螺丝刀松开显示器和底座的(四个)固定螺钉。
3.将悬挂臂或支架安装到显示器上。
使用悬挂臂或底座用户手册指定的螺钉,把显示器固定在悬挂臂或底座上。
• 安装支撑臂或底座时,螺丝孔之间的距离:
75 mm × 75 mm 时
• 安装支撑臂或底座时,螺丝孔之间的距离:
100 mm × 100 mm 时
9
安装触摸屏驱动程序(FDX1501T-A)
注意
• 安装触摸屏驱动程序所使用的用户账号必须具有“管理员”权限。
• 重新安装触摸屏驱动程序更新驱动程序等时,请在卸载驱动程序后重新启动个人计算机,然后安装触摸
屏驱动程序。
1.如果安装了其它触摸屏驱动程序,请将其卸载。
2.根据CD-ROM中的说明安装触摸屏驱动程序。
如要了解触摸屏驱动程序的安装说明,请参照触摸屏驱动程序用户手册(在CD-ROM上)。
3.使用USB电缆或RS-232C电缆连接显示器和个人计算机。
USB电缆 MD-C93(已提供)
或
RS-232C电缆*1 (选购件)
USB
COM
*1 交叉型
4.重新启动个人计算机。
注意
• 使用RS-232C电缆时,重新启动后,根据下列步骤设置设备。详情请参阅触摸屏驱动程序用户手册(在
CD-ROM上)。
1. 单击“Start”-“All Program”-“DMC”-“DMC Touch Panel Configuration”显示“Properties”窗口。
2. 单击“Add a serial device”
,并记录为一个新串行设备。
3. 单击“Device”
,并指定“COM port”使用的COM端口号。
4. 单击“Apply”。
5. 单击“Close”。
校准显示器(FDX1501T-A)
校准显示器,校准方法根据触摸屏驱动程序用户手册(在CD-ROM上)。
Note
• 如果安装场所发生变动,请进行校准
10
故障排除
● 无图片
如果在采取建议的措施之后仍然有问题,请联系当地的EIZO代表。
问题
1. 无图片
• 电源指示灯不亮。
• 电源指示灯是蓝色。
• 电源指示灯是橙色。
原因和补救措施
•
•
•
•
•
•
•
•
•
•
检查电源线连接是否正确。
打开主电源开关。
按 。
关闭主电源,几分钟后再将其打开。
通过设定菜单增大“亮度”和/或“增益”。
用 切换输入信号。
操作鼠标或键盘。
请试一下触摸屏幕。
检查个人计算机的电源是否已打开。
取决于PC与显卡,会出现检测不到输入信号,显
示器未退出省电模式的情况。如果移动鼠标或敲
击键盘上的任何键,但屏幕仍未显示出来时,请
使用显示器的电源按钮,将显示器关闭并打开。
当屏幕显示出来时,请按以下步骤进行操作。这个
问题可得到改善。
1. 按 关闭显示器电源。
2. 按住 的同时按 打开显示器电源。
设定菜单的“信息”菜单标题显示“x”。
3. 重新启动PC。
如需返回之前的设定,请重复执行第一至第三的
步骤。
中文
2. 显示下列信息。
• 该信息表示输入信号不在指定频率范围之
内。
例如:
即使显示器正常工作,如果不正确输入信号,也显示
此信息。
• 检查PC配置是否符合显示器的分辨率和垂直扫
描频率要求(请参照“兼容的分辨率”)。
• 重新启动PC。
• 用显卡工具选择合适的设定。参照显卡用户手册
了解详情。
注
• 如果显示的图像或者触摸屏有问题,请参照显示器用户手册(在CD-ROM上)。
11
规格
液晶面板
类型
背光
尺寸
原始分辨率
显示尺寸(水平×垂直)
像素间距
显示色彩
视角(水平/垂直,典型)
TN
LED
38 cm (15.0 英寸) (38.0 cm 对角线)
1024点 × 768行
304.1 mm × 228.0 mm
0.297 mm
8 位色:
16.77万色
160˚ / 160˚
对比度(典型)
600 : 1
响应时间(典型)
触摸屏
方式
(FDX1501T-A) 通信方式
表面处理
表面硬度
OS
视频信号
通信
(FDX1501T-A)
USB
(FDX1501T-A)
音频
功率
规格
输入端口
数字扫描频率
(水平/垂直)
模拟扫描频率
(水平/垂直)
点时钟
同步信号
输入端口
端口
标准
扬声器
输入端口
输入
最大功耗
省电模式
待机模式
尺寸
(宽度)×(高度)×(深度)
尺寸
(不含底座)
(宽度)×(高度)×(深度)
净重
净重 (不含底座)
倾斜
工作环境要求 温度
湿度
大气压
运输/存储环 温度
境要求
湿度
大气压
12
8毫秒 (黑色 - 白色 - 黑色)
模拟电阻技术
USB, RS-232C (*无法同时使用。)
防反射
2H
Microsoft Windows 7 Service Pack 1 (32 bit / 64 bit)
Microsoft Windows Vista Service Pack 2 (32 bit)
Microsoft Windows XP Service Pack 3 (32 bit)
(与Mac OS 不兼容)
DVI-D连接器× 1, D-Sub微型15针 × 1
31 kHz - 49 kHz / 59 Hz - 61 Hz
(VGA TEXT : 69 Hz - 71 Hz)
24 kHz - 61 kHz / 55 Hz - 76 Hz
数字
65 MHz
模拟
80 MHz
单独、TTL、正/负
RS-232C :
D-Sub9针(公)
上游端口× 1
USB Specification Rev.2.0
0.5 W + 0.5 W
立体声微型插孔 × 1
100 V - 240 VAC ± 10%, 50 / 60 Hz 0.3 A - 0.2 A
15.0 W或更低
0.5 W或更低 (对于单信号输入, 未连接USB设备)
0.5 W或更低 (连接USB设备)
346 mm × 373 mm × 197 mm (倾斜: 30˚)
346 mm × 349 mm × 157 mm (倾斜: 0˚)
346 mm × 280 mm × 69 mm
FDX1501-A :
约5.4 kg
FDX1501T-A :
约5.8 kg
FDX1501-A :
约3.0 kg
FDX1501T-A :
约3.4 kg
向上30˚,向下0˚
0˚C至50˚C (32˚F至122˚F)
20%至90%相对湿度(不凝结)
540 hPa至1060 hPa
-20˚C至60˚C (-4˚F至140˚F)
20%至90%相对湿度(不凝结)
200 hPa至1060 hPa
● 主要初期设定
色彩模式
User1
平滑处理
3
节能
开启
环保节能设定
关闭
语言
English
输入信号
自动
外形尺寸
单位 : mm
支架型
40
69
317
220
(123)
(100)
(VESA)
(123)
10
(50)
100
(VESA)
197
346
305.5
157
111
69
15
20
209
(131)
373
中文
229.5
280
349
30 °
26
自由装配型
40
69
317
(123)
100
(VESA)
75
(VESA)
(123)
10
75
(VESA)
(131)
100
(VESA)
229.5
280
(50)
346
305.5
13
For U.S.A. , Canada, etc. (rated 100-120 Vac) Only
FCC Declaration of Conformity
We, the Responsible Party
EIZO Inc.
5710 Warland Drive, Cypress, CA 90630
Phone: (562) 431-5011
declare that the product
Trade name: EIZO
Model: DuraVision FDX1501-A/FDX1501T-A
is in conformity with Part 15 of the FCC Rules. Operation of this product is subject to the
following two conditions: (1) this device may not cause harmful interference, and (2) this
device must accept any interference received, including interference that may cause undesired
operation.
This equipment has been tested and found to comply with the limits for a Class B digital
device, pursuant to Part 15 of the FCC Rules. These limits are designed to provide reasonable
protection against harmful interference in a residential installation. This equipment generates,
uses, and can radiate radio frequency energy and, if not installed and used in accordance with
the instructions, may cause harmful interference to radio communications. However, there is
no guarantee that interference will not occur in a particular installation. If this equipment does
cause harmful interference to radio or television reception, which can be determined by turning
the equipment off and on, the user is encouraged to try to correct the interference by one or
more of the following measures.
* Reorient or relocate the receiving antenna.
* Increase the separation between the equipment and receiver.
* Connect the equipment into an outlet on a circuit different from that to which the receiver is
connected.
* Consult the dealer or an experienced radio/TV technician for help.
Changes or modifications not expressly approved by the party responsible for compliance could
void the user’s authority to operate the equipment.
Note
Use the attached specified cable below or EIZO signal cable with this monitor so as to keep
interference within the limits of a Class B digital device.
- Shielded Signal Cable (enclosed)
Canadian Notice
This Class B digital apparatus complies with Canadian ICES-003.
Cet appareil numérique de le classe B est comforme à la norme NMB-003 du Canada.
关于电子信息产品污染控制标识
本标识根据「电子信息产品污染控制管理办法」,适用于在中华人民共和国销售的电子信息产品。标识中央的
数字为环保使用期限的年数。只要您遵守该产品相关的安全及使用注意事项,在自制造日起算的年限内,不会
产生对环境污染或人体及财产的影响。上述标识粘贴在机器背面。
• 有毒有害物质或元素的名称及含量
部件名称
有毒有害物质或元素
铅
汞
镉
六价铬
多溴联苯
多溴二苯醚
(Pb)
(Hg)
(Cd)
(Cr(VI))
(PBB)
(PBDE)
印刷电路板
×
○
○
○
○
○
机箱
○
○
○
○
○
○
液晶显示器
×
○
○
○
○
○
其他
×
○
○
○
○
○
○ : 表示该有毒有害物质在该部件所有均质材料中的含量均在 SJ/T 11363-2006 规定的限量要求以下。
× : 表示该有毒有害物质至少在该部件的某一均质材料中的含量超出 SJ/T 11363-2006 规定的限量要求。
( 企业可在此处 , 根据实际情況对上表中打“×”的技术原因进行进一步说明 )
(For Japanese Market Only.)
この保証書は所定事項を記入して効力を発するものですから、必ず製品名・製造番号(S/N)
・お名前・ご住所・電話
番号・お買い上げ年月日・販売店の記入をご確認ください。
保証
期間
お買い上げの日より 製品名
3 年間
お客様
フリガナ
お名前
製造番号
(S/N)
(製造番号は、本体の背面部のラベル上に表示されている8桁の番号です。例)S/N 12345678)
ご住所 〒
様
TEL ( )
販売店
お買い上げ年月日 年 月 日
住所・店名・TEL・担当者
保証規定
1. 本製品の取扱説明書、本体添付ラベルなどの注意書に従った使用状態で保証期間内に故障した場合、無料にて
故障箇所の修理または交換をさせていただきますので、保証書を添えてお買い上げの販売店またはEIZOサポー
トまでお申しつけください。
2. 保証期間内でも次のような場合には、有償修理とさせていただきます。 ● 保証書のご提示がない場合
● 保証書の所定事項が未記入、
または字句が書き換えられている場合
● 使用上の誤り、
または不当な修理や改造による故障及び損傷 ● お買い上げの後の輸送・移動・落下などによる故障及び損傷 ● 火災・地震・水害・落雷・その他の天災地変ならびに公害や異常電圧などの外部要因に起因する故障及び損傷
● 車両・船舶などのような強い振動や衝撃を受ける場所に搭載された場合に生じる故障及び損傷
● 電池の液漏れによる故障及び損傷
● 液晶パネル、
バックライトの経年劣化(輝度の変化、色の変化、輝度と色の均一性の変化、焼き付き、
欠点の増加など)
● センサーの経年劣化
● 外装品
(液晶パネルの表面を含む)の損傷、変色、劣化、錆
● 付属品
(リモコン、ケーブル、取扱説明書など)の交換
● 当社指定の消耗品
(電池、
スイッチ/ボタン/レバー類、回転部など)
● 技術革新などにより製品に互換性がなくなった場合
3. 保証書は日本国内においてのみ有効です。
This warranty is valid only in Japan.
4. 保証書は再発行いたしませんので紛失しないよう大切に保管してください。
* 保証書は、保証書に明示した期間、条件のもとにおいて無償修理をお約束するものです。なお、保証期間経過後
の修理についてご不明な場合はお買い上げの販売店またはEIZOサポートまでお問い合わせください。
* 当社では、
この製品の補修用性能部品(製品の機能を維持するために必要な部品)を、製品の製造終了後、最低
7年間保有しています。補修用性能部品の最低保有期間が経過した後も、故障箇所によっては修理可能な場合
がありますので、EIZOサポートにご相談ください。
〒924-8566 石川県白山市下柏野町 153 番地
153 Shimokashiwano, Hakusan, Ishikawa 924-8566 Japan
Phone: +81 76 277 6792 Fax: +81 76 277 6793
http://www.eizo.co.jp
http://www.eizo.com
Copyright © 2014 EIZO Corporation All rights reserved.
Helmut-Grashoff-Strasse 18, 41179 Mönchengladbach, Germany
Phone: +49 2161 8210210 Fax: +49 2161 8210150
中国苏州市苏州工业园区展业路8号中新科技工业坊5B
Phone: +86 512 6252 0100 Fax: +86 512 6252 1508
1st Edition-October, 2014
Printed in Japan.
00N0L896A1
(U.M-SUMFDX1501A-AL)