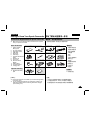
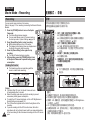
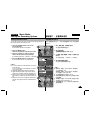
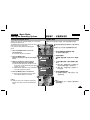
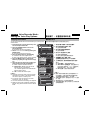
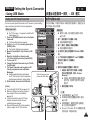
1
ENGLISH
中
Sports Camcorder
运动型摄录一体机
VP-X205L/X210L/X220L
VP-X205L/X210L/X220L
AF
CCD
Auto-Focus
LCD
Liquid Crystal
Display
AF
CCD
LCD
W
Charge Coupled
Device
T
MEN
U
MOD
文
自动调焦
电荷耦合器件
液晶显示器
E
DC IN
HOLD
DELETE
DISPLAY
Owner’s Instruction Book
使用说明书
Before operating the unit, please read this
Instruction Book thoroughly, and retain it for
future reference.
在操作使用本机前,请彻底阅读本说明书,并保
存好供将来参考
This product meets the intent of
Directive 89/336 CEE, 73/23 CEE, 93/68 CEE.
Use only approved battery packs.
Otherwise, there is a danger of overheating, fire or explosion.
Samsung is not responsible for problems occurring due to using
unapproved batteries.
本产品符合下列标准
89/336 CEE, 73/23 CEE, 93/68 CEE.
请使用提供的电池组,否则有过热,着火或者爆炸的危险。
三星对由于不使用提供的电池发生的这些问题不承担责任。
AD68-00994W
ENGLISH
文
Contents
目
Notices and Safety Precautions ..................... 8
注意事项和安全注意事项 ...................................... 8
Precautions when using the Sports Camcorder ............................8
Notes Regarding COPYRIGHT ..........................................................9
Notes Regarding Moisture Condensation .......................................9
Notes Regarding the Sports Camcorder .........................................9
Notes Regarding the Battery Pack .................................................10
Notes Regarding the Lens ...............................................................11
Notes Regarding the LCD Display ..................................................11
Precautions Regarding Service ......................................................11
Precautions Regarding Replacement Parts ..................................11
使用此运动型摄录一体机注意事项 .......................................................8
版权注意事项 ........................................................................................9
潮气凝结注意事项 .................................................................................9
运动型摄录一体机注意事项 ..................................................................9
电池组注意事项...................................................................................10
镜头注意事项 ......................................................................................11
液晶显示屏注意事项 ...........................................................................11
维修注意事项 ......................................................................................11
备件注意事项 ......................................................................................11
Getting to Know Your Sports Camcorder.... 12
开始了解运动型摄录一体机 ..................................... 12
Features .............................................................................................12
Accessories Supplied with the Sports Camcorder ......................13
特点 .....................................................................................................12
随摄录一体机提供的附件 ....................................................................13
Location of Controls ...................................... 14
各部分名称 ....................................................... 14
Rear & Left View ...............................................................................14
Side & Bottom View..........................................................................15
External Camera Module View ........................................................16
LCD Display .......................................................................................17
OSD (On Screen Display in Movie Record Mode/Movie Play Mode) ..17
OSD (On Screen Display in Photo Capture Mode/Photo View
Mode) ..............................................................................................18
OSD (On Screen Display in MP3 Mode) .......................................19
OSD (On Screen Display in Voice Record Mode/Voice Play Mode) ..20
OSD (On Screen Display in File Browser Mode/System Settings
Mode) ..............................................................................................21
后视图和左视图...................................................................................14
右视图和仰视图...................................................................................15
外置摄像头模块视图 ...........................................................................16
液晶显示屏 ..........................................................................................17
OSD (视频录制模式/视频播放模式下的屏幕显示) .....................17
OSD (拍照/查看相片模式下的屏幕显示) .........................................18
OSD (MP3模式下的屏幕显示) ..............................................................19
OSD (语音录制/语音播放模式下的屏幕显示) .................................20
OSD (文件浏览/系统设置模式下的屏幕显示) .................................21
How to Use the Battery Pack ........................ 22
电池组安装/弹出 .................................................................................22
维护电池组 ..........................................................................................23
电池组充电 ..........................................................................................25
Battery Pack Installation / Ejection ................................................22
Maintaining the Battery Pack ..........................................................23
Charging the Battery Pack ..............................................................25
2
中
录
如何使用电池组 ................................................ 22
ENGLISH
中
文
Contents
目
Getting Started ............................................. 26
入门 ................................................................ 26
The LED Colour.................................................................................26
Before You Start Operating the Sports Camcorder .....................26
Using the MODE button ...................................................................27
Using the Function button...............................................................28
Using the Joystick ............................................................................28
Using the MENU button ...................................................................28
Using the DISPLAY button ..............................................................29
Using the DELETE button................................................................29
Structure of the Folders and Files ..................................................30
Recording Time and Capacity .........................................................31
Using a Memory card (SD/MMC) (not supplied) ...........................33
Inserting / Ejecting the memory card (SD/MMC) (not supplied) ..34
LED指示灯的颜色 .................................................................................26
在操作运动型摄录一体机之前 ............................................................26
使用模式按钮 ......................................................................................27
使用功能按钮 ......................................................................................28
使用摇杆 ..............................................................................................28
使用菜单按钮 ......................................................................................28
使用显示按钮 ......................................................................................29
使用删除按钮 ......................................................................................29
文件夹和文件的结构 ...........................................................................30
录制时间和容量...................................................................................31
使用记忆卡(SD/MMC) (不提供) ..........................................................33
插入/拔除记忆卡(SD/MMC) (不提供) .................................................34
录
Movie Mode .................................................... 35
视频模式 ........................................................... 35
Recording ..........................................................................................36
Recording .......................................................................................36
Zooming In and Out........................................................................37
Playing................................................................................................38
Playing Movie Files on the LCD monitor .......................................38
Playing Multiple Movie Files ...........................................................39
Setting the Recording Options .......................................................41
Setting the Movie Size....................................................................41
Setting the Movie Quality ...............................................................42
Setting the White Balance ..............................................................43
Setting the Program AE (Programmed Auto Exposure) ...............44
Setting the Effect ............................................................................45
Setting the EIS (Electronic Image Stabilizer).................................46
Setting the Focus............................................................................47
Setting the BLC (Backlight Compensation) ...................................48
Setting the Digital Zoom .................................................................49
Setting the Record Mode ...............................................................50
录制 .....................................................................................................36
录制 .................................................................................................36
放大和缩小......................................................................................37
播放 .....................................................................................................38
在LCD 显示器上播放视频文件 ........................................................38
播放多重视频文件...........................................................................39
设置录制选项 ......................................................................................41
设置视频文件大小...........................................................................41
设置视频文件质量...........................................................................42
设置白平衡......................................................................................43
设置程序AE (自动程序曝光)..........................................................44
设置效果 .........................................................................................45
设置 EIS (电子图像稳定器) .........................................................46
设置焦点 .........................................................................................47
设置BLC (背光补偿).......................................................................48
设置数字变焦 ..................................................................................49
设置录制模式 ..................................................................................50
3
ENGLISH
4
中
文
Contents
目
Setting the Line In/Out....................................................................51
Setting the Viewing Options............................................................52
Deleting Movie Files .......................................................................52
Setting the Play Mode ....................................................................53
Locking Movie Files ........................................................................54
Copying Movie Files .......................................................................55
设置线路输入/输出.........................................................................51
设置查看选项 ......................................................................................52
删除视频文件 ..................................................................................52
设置播放模式 ..................................................................................53
锁定视频文件 ..................................................................................54
复制视频文件 ..................................................................................55
Photo Mode ..................................................... 56
相片模式 ........................................................... 56
Capturing ...........................................................................................57
Capturing Images ...........................................................................57
Zooming In and Out........................................................................58
Viewing...............................................................................................59
Viewing Photo Files on the LCD monitor .......................................59
Viewing Multiple Photo Files ..........................................................60
Setting the Capturing Options ........................................................61
Setting the White Balance ..............................................................61
Setting the Program AE (Programmed Auto Exposure) ...............62
Setting the Effect ............................................................................63
Setting the Flash.............................................................................64
Setting the Continuous Shot ..........................................................65
Setting the EIS (Electronic Image Stabilizer).................................66
Setting the Focus............................................................................67
Setting the BLC (Backlight Compensation) ...................................68
Setting the Digital Zoom .................................................................69
Setting the Viewing Options............................................................70
Deleting Photo Files .......................................................................70
Setting the Slide show....................................................................71
Setting the DPOF (Digital Print Order Format) Function ...............72
Locking Photo Files ........................................................................73
Copying Photo Files .......................................................................74
拍照 .....................................................................................................57
拍照 .................................................................................................57
放大和缩小......................................................................................58
查看 .....................................................................................................59
在液晶屏上查看相片文件 ...............................................................59
查看多个相片文件...........................................................................60
设置拍照选项 ......................................................................................61
设置白平衡......................................................................................61
设置程序AE (程序自动曝光)..........................................................62
设置效果 .........................................................................................63
设置闪光灯......................................................................................64
设置连拍 .........................................................................................65
设置 EIS (电子图像稳定器) .........................................................66
设置焦点 .........................................................................................67
设置BLC (背光补偿).......................................................................68
设置数字变焦 ..................................................................................69
设置查看选项 ......................................................................................70
删除相片文件 ..................................................................................70
设置幻灯模式显示...........................................................................71
设置 DPOF (设置数码打印)功能 ....................................................72
锁定照片文件 ..................................................................................73
复制相片文件 ..................................................................................74
MP3 Mode........................................................ 75
MP3 模式 ........................................................... 75
Storing MP3 Files in the Sports Camcorder..................................76
在运动型摄录一体机中存储MP3文件 ...................................................76
录
ENGLISH
中
文
Contents
目
Copying MP3 Files to the Sports Camcorder ................................76
Playing................................................................................................77
Playing MP3 Files...........................................................................77
Setting the MP3 Play Options .........................................................78
Deleting MP3 Files .........................................................................78
Setting the Repeat Play .................................................................79
Setting the Equalizer ......................................................................80
Locking MP3 Files ..........................................................................81
Copying MP3 Files .........................................................................82
复制MP3文件到运动型摄录一体机 ..................................................76
播放 .....................................................................................................77
播放MP3 文件..................................................................................77
设置 MP3 播放选项.............................................................................78
删除MP3 文件..................................................................................78
设置重复播放 ..................................................................................79
选择均衡器......................................................................................80
锁定 MP3 文件................................................................................81
复制 MP3 文件................................................................................82
Voice Recorder Mode..................................... 83
录音模式 ........................................................... 83
Recording ..........................................................................................84
Recording Voice Files ....................................................................84
Playing................................................................................................85
Playing Voice Files .........................................................................85
Setting the Voice Play Options .......................................................86
Deleting Voice Files........................................................................86
Setting the Play Mode ....................................................................87
Locking Voice Files ........................................................................88
Copying Voice Files........................................................................89
录制 .....................................................................................................84
录制语音文件 ..................................................................................84
播放 .....................................................................................................85
播放语音文件 ...............................................................................85
设置语音播放功能 .............................................................................86
删除语音文件 ..................................................................................86
设置菜单模式 ..................................................................................87
锁定语音文件 ..................................................................................88
复制语音文件 ..................................................................................89
Using File Browser ......................................... 90
使用文件浏览器 ................................................ 90
Viewing Files or Folders .................................................................91
Deleting Files or Folders ................................................................92
Locking Files ...................................................................................93
Copying Files or Folders ................................................................94
Viewing File Information .................................................................95
查看文件或文件夹...........................................................................91
删除文件或文件夹...........................................................................92
锁定文件 .........................................................................................93
复制文件或文件夹...........................................................................94
查看文件信息 ..................................................................................95
Setting the Sports Camcorder ...................... 96
设置运动型摄录一体机 ...................................... 96
Setting Memory .................................................................................97
Selecting the Storage Type ............................................................97
Setting USB Mode.............................................................................98
Setting USB Mode ..........................................................................98
设置存储器 ..........................................................................................97
选择存储类型 ..................................................................................97
设置 USB 模式 ....................................................................................98
设置 USB 模式..................................................................................... 98
录
5
ENGLISH
中
文
Contents
目
Setting Memory .................................................................................99
Setting the File No. Function..........................................................99
Formatting the Memory ................................................................100
Viewing Memory Space ...............................................................101
Adjusting the LCD monitor............................................................102
Adjusting the LCD Brightness ......................................................102
Adjusting the LCD Colour.............................................................103
Adjusting Date/Time .......................................................................104
Setting Date&Time .......................................................................104
Setting Date Format .....................................................................105
Setting Time Format .....................................................................106
Setting Date/Time Display............................................................107
Setting the System Settings ..........................................................108
Setting the Beep Sound ...............................................................108
Setting Start-up Mode ..................................................................109
Resetting the Sports Camcorder..................................................110
Selecting Language......................................................................111
Setting the Auto Shut off ..............................................................112
Setting the Demonstration Function.............................................113
Viewing Version Information ........................................................114
Using USB Mode .............................................................................115
Transferring files to a computer ...................................................115
Printing with PictBridge ................................................................116
Using the PC Cam Function ........................................................117
设置存储器 ..........................................................................................99
设置文件号功能 ..............................................................................99
格式化 ...........................................................................................100
查看存储空间 ................................................................................101
调节液晶显示屏.................................................................................102
调节液晶显示屏亮度 .....................................................................102
调节液晶显示屏颜色 .....................................................................103
设置日期/时间 ..................................................................................104
设置日期/时间 ..............................................................................104
设置日期格式 ................................................................................105
设置时间格式 ................................................................................106
设置日期/时间显示.......................................................................107
设置摄录一体机 ..........................................................................................108
设置蜂鸣音....................................................................................108
设置启动模式 ................................................................................109
复位摄录一体机 ............................................................................110
选择语言 .......................................................................................111
设置自动关闭 ................................................................................112
设置演示功能 ................................................................................113
查看款式信息 ................................................................................114
USB 模式 ...........................................................................................115
把文件传输到计算机 .....................................................................115
将摄象机连接至打印机 .................................................................116
使用PC摄像头功能.........................................................................117
录
Using the External Camera Module ............ 118 使用外置摄像头模块 ....................................... 118
Recording with the External Camera Module .............................119
Recording Movie using the External Camera Module .................119
Wearing the External Camera Module .........................................120
Mounting the External Camera Module on Rubber Mount..........120
Using the Long Mount Band .......................................................121
6
使用外部摄像头录制 .........................................................................119
使用外部摄像头录制视频 .............................................................119
佩带外置摄像头模块 .........................................................................120
将外置摄像头模块安装到橡胶座上 ...............................................120
使用长固定带 ...............................................................................121
ENGLISH
中
文
Contents
目
Miscellaneous Information ......................... 122
其它信息 ......................................................... 122
USB Interface Environment ...........................................................123
USB connection to a computer ...................................................123
System Environment ....................................................................123
Installing Software ..........................................................................124
Installing DV Media Pro 1.0 .........................................................124
Ulead Video Studio.......................................................................125
Connecting To Other Devices ......................................................126
Connecting to a PC using a USB Cable ......................................126
Connecting to a TV monitor .........................................................127
Connecting to a VCR / DVD Recorder ........................................128
Recording unscrambled content from other digital devices ........129
Printing Photos ...............................................................................130
Printing with DPOF .......................................................................130
USB 接口 ...........................................................................................123
USB 连接至计算机.....................................................................123
系统环境 .......................................................................................123
安装程序 ............................................................................................124
安装 DV Media Pro 1.0 ..............................................................124
安装Ulead Video Studio.............................................................125
连接到其它设备.................................................................................126
使用USB线连接到PC.......................................................................126
连接到电视监视器.........................................................................127
连接到录像机/DVD刻录机 .............................................................128
从其它数字设备录制内容 .............................................................129
打印照片 ............................................................................................130
按照DPOF方式打印照片 .................................................................130
录
Maintenance ................................................ 131
清理和维护摄录一体机 ..................................... 131
Cleaning and Maintaining the Sports Camcorder ......................131
After using the Sports Camcorder................................................131
Cleaning the Body ........................................................................132
Using the Built-in Rechargeable Battery ......................................132
Regarding the Battery ..................................................................133
Using the Sports Camcorder Abroad ...........................................134
清理和维护摄录一体机......................................................................131
使用运动型摄录一体机后 .............................................................131
清理机身 .......................................................................................132
使用内置充电电池.........................................................................132
关于电池 .......................................................................................133
在国外使用摄录一体机 .................................................................134
Troubleshooting ........................................ 135
故障排除 ....................................................... 135
Self Diagnosis Display ...................................................................135
自检显示 ............................................................................................135
Using the Menu............................................ 137
使用菜单 ........................................................ 137
Specifications ............................................. 139
规格 .............................................................. 139
Index ............................................................. 141
索引 ............................................................... 141
7
ENGLISH
Notices and Safety Precautions
注意事项和安全注意事项
Precautions when using the Sports Camcorder
使用此运动型摄录一体机注意事项
✤ Please note the following precautions for use:
✤ Please keep this device in a safe place. The device contains a lens that
can be damaged by shock.
Keep away from the reach of the children.
■
■
■
■
■
■
■
■
■
■
■
8
中
Do not place your device in a wet place. Moisture and water may cause
the device to malfunction.
To avoid electric shock, do not touch your device or power cable with
wet hands.
Do not use the flash close to another’s eyes. The flash emits a strong
light that may cause damage similar to direct sunlight on one’s eyesight.
Particular care should be observed if photographing infants, when the
flash should be no less than 3 feet from your subject.
If the device is not working properly, please consult your nearest dealer
or authorized Samsung service facility.
Disassembling the device yourself may cause irrecoverable damage
which will be difficult to repair.
Clean the device with a dry, soft cloth. Use a soft cloth moistened with a
mild detergent solution for removing stains.
Do not use any type of solvent, especially benzene, as it may seriously
damage the finish.
Keep your device away from rain and saltwater. After using, clean the
device. Saltwater may cause the parts to corrode.
To disconnect the apparatus from the mains, the plug must be pulled
out from the mains socket, therefore the mains plug shall be readily
operable.
Using the earphone or headphone for an extended time can cause a
serious damage to your hearing.
- If you are exposed to a sound in higher than 85db for an extended
time, you will be adversely affected on your hearing. The higher the
sound is, the more seriously damaged your hearing is (an ordinary
conversation is made in 50 to 60 db and the noise level on the road
is approximately 80 db).
- You are strongly advised to set the volume level to medium (the
medium level is usually less than 2/3 of the maximum).
If you feel a ringing in the ear(s), lower the volume or stop using the
earphone or headphone.
Do not use the earphone while you are driving a bicycle, automobile or
motorcycle.
- Otherwise it can cause a serious accident and, furthermore, it is
prohibited by the law in some areas.
- Using the earphone on the way, in particular, on the crosswalk can
lead to a serious accident.
For your safety, make sure the earphone cable should not get in the way
of your arm or other surrounding objects while you are taking exercise or
a walk.
文
✤ 请注意下列使用注意事项:
✤ 请把本机置于安全之处,本机带有镜头,冲击可能会损坏镜头。
置于小孩接触不到的地方。
■
■
■
■
■
■
■
■
■
■
■
不要把机器放置在潮湿的环境。 湿气和水分可能引起机器故
障。不要用湿手触摸本机或电源线,以免触电。
使用闪光灯时不要靠近他人的眼睛。闪光灯发出强光,类似阳光
直射眼睛,可能造成损伤。如果拍摄婴儿,应特别小心,闪光灯距
拍摄对象应小于3英尺。
如果本机工作异常,请咨询最近的经销商或三星授权维修单
位.擅自拆卸本机,可能会造成无法弥补的损坏,难以维修。
用干软布清理本机,使用柔和洗涤溶液蘸湿的软布清洁污物,不
要使用任何类型的溶剂。
特别是苯,否则可能严重损坏罩面漆。
让本机远离雨水和盐水.使用后,清理本机.盐水可能损坏零件造
成腐蚀。
为了断开设备和主电源,必须把插头从主电源拔出,因此主电源
插座应该易操作。
为了将此设备与主电源断开,应将插头从主电源插座上拔下。
因此,主电源插头应该易于操作。
长时间使用耳机会对您的听力造成严重伤害。
- 如果您长时间暴露在高于 85db 的噪声下,将对您的听力造
成伤害。噪声越高,听力受损的情况就越严重(普通谈话
的噪声级别为 50 到 60 db,而交通噪声级别则约为 80
db)。
- 强烈奉劝您将音量级别设为中等音量(中等音量通常比最大
音量低三分之二)。
如果出现耳鸣,请降低音量或停止使用耳机。
请勿在骑脚踏车、摩托车或开车时其使用耳机。
- 否则,将导致严重交通意外,并且这在某些区域也受到法律
禁止。
- 在马路上使用耳机,尤其是斑马线,将可能导致严重交通意
外。
为了您的安全,请确保在慢跑或散步时耳机电线不会缠着您的
手臂或周围的其他物件。
ENGLISH
中
Notices and Safety Precautions
注意事项和安全注意事项
Notes Regarding COPYRIGHT
版权注意事项
✤ Television programmes, movie video tapes, DVD titles, films
and other programme materials may be copyrighted.
Unauthorized recording of copyrighted materials may infringe
on the rights of the Copyright owners and is contrary to
copyright laws.
✤ All the trade names and registered trademarks mentioned in
this manual or other documentation provided with your
Samsung product are trademarks or registered trademarks of
their respective holders.
Notes Regarding Moisture Condensation
✤ A sudden rise in atmospheric temperature may cause
condensation to form inside the Sports Camcorder.
For Example:
✤ Entering or leaving a heated place on a cold day might cause
condensation inside the product.
✤ To prevent condensation, place the product in a carrying case
or a plastic bag before exposing it to a sudden change of
temperature.
Notes Regarding the Sports Camcorder
1. Do not leave the Sports Camcorder exposed to high
temperature (above 60°C or 140°F).
For example, in a parked closed car in summer or exposed to
direct sunlight.
2. Do not let the Sports Camcorder get wet.
Keep the Sports Camcorder away from rain, salt water, or
any other form of moisture.
The Sports Camcorder will be damaged if immersed in water or
subjected to high levels of moisture.
文
✤ 电视节目,电影录像带,DVD字幕,胶片和其他节目材料可能受到
版权保护。擅自录制受到版权保护的材料,可能会侵犯版权所有
人的权利,并违反版权法
✤ 在本手册或随三星产品提供的其他文件中提到的所有商品名称和
注册商标是各所有人的商标或注册商标
潮气凝结注意事项
✤ 大气温度突然升高,可能会使运动型摄录一体机内部形成冷凝水。
例如:
✤ 在冷天进入或离开受热处,可能会在本机内部形成冷凝水。
✤ 为了防止形成冷凝水,在承受温度突变之前,把本机置于手提包或
塑料袋中
运动型摄录一体机注意事项
1. 不要让摄录一体机承受高温(60°C 或 140°F 以上)。
例如,夏季在停放的封闭汽车中,或受日光直射。
2. 不要让摄录一体机沾水,让摄录一体机远离雨水,盐水或其他形
式的湿气。
如果摄录一体机侵入水中或高度受潮,可能会损坏。
将摄录机浸入水中或将其置于高度潮湿的环境会使其受损。
9
ENGLISH
10
中
Notices and Safety Precautions
注意事项和安全注意事项
Notes Regarding the Battery Pack
电池组注意事项
文
✤ We recommend using the original battery pack that is available
at the retailer where you purchased the Sports Camcorder.
✤ Make sure the battery pack is fully charged before starting to
record.
✤ To preserve battery power, keep the Sports Camcorder turned
off when you are not operating it.
✤ If your device is left in STBY mode without being operated for
more than 5 minutes, it will automatically turn itself off to protect
against unnecessary battery discharge.
✤ Make sure that the battery pack is attached firmly in place.
✤ The new battery pack provided with the product is not charged.
Before using the battery pack, you need to fully charge it.
✤ Do not drop the battery pack. Dropping the battery pack may
damage it.
✤ Fully discharging a Lithium Polymer battery damages the
internal cells. The battery pack may be prone to leakage when
fully discharged.
✤ To avoid damage to the battery pack, make sure to remove the
battery when no charge remains.
✤ Clean the terminal to remove foreign substance before inserting
the battery pack.
✤
✤
✤
✤
✳ When the battery reaches the end of its life, please contact
your local dealer.
Batteries must be disposed of as chemical waste.
✳ Be careful not to drop the battery pack when you release it
from the Sports Camcorder.
✳ 当电池组使用寿命到期时,请联系本地经销商,必须以化学废弃物
处理废弃电池。
✳ 小心当从运动型摄录一体机松开电池组时,不要掉下电池组。
✤
✤
✤
✤
✤
✤
我们推荐您使用原装电池组,在当地销售商处可以购买。
必须确保在开始录制前电池组充足电。
为了节约电池电量,当不使用时应该关闭摄录机。
如果本机处于待机模式时超过5分钟未操作本机,本机将自动关
机,以防电池白白耗电。
必须确保电池组牢牢安装到位
随机附带的新电池组未充电。在使用电池组之前,需要给电池组
充电。
不要掉下电池组,电池组掉下可能会损坏.
锂聚合物电池完全放电,会损坏内部电池单元,当完全放电时,电
池组可能易于泄漏。
为了避免损坏电池组,必须保证当没有剩余电量时取出电池
在插入电池组之前,清洁电极处异物。
ENGLISH
中
Notices and Safety Precautions
注意事项和安全注意事项
Notes Regarding the Lens
镜头注意事项
✤ Do not film with the Sports Camcorder lens pointing directly at the
sun.
Direct sunlight can damage the CCD (Charge Coupled Device, the
imaging sensor).
Notes Regarding the LCD Display
1. The LCD monitor has been manufactured using the high precision
technology. However, there may be tiny dots (red, blue or green in
colour) that appear on the LCD monitor. These dots are normal and
do not affect the recorded picture in any way.
2. When you use the LCD monitor under direct sunlight or outdoors, it
may be difficult to see the picture clearly.
3. Direct sunlight can damage the LCD monitor.
Precautions Regarding Service
✤ Do not attempt to service the Sports Camcorder yourself.
✤ Opening or removing covers may expose you to dangerous voltage
or other hazards.
✤ Refer all servicing to qualified service personnel.
Precautions Regarding Replacement Parts
✤ When replacement parts are required, be sure the service technician
has used replacement parts specified by the manufacturer and
having the same characteristics as the original part.
✤ Unauthorized substitutions may result in fire, electric shock or other
hazards.
Correct Disposal of This Product
(Waste Electrical & Electronic Equipment)
(Applicable in the European Union and other European
countries with separate collection systems)
This marking shown on the product or its literature, indicates that
it should not be disposed with other household wastes at the end
of its working life. To prevent possible harm to the environment or
human health from uncontrolled waste disposal, please separate this
from other types of wastes and recycle it responsibly to promote the
sustainable reuse of material resources. Household users should
contact either the retailer where they purchased this product, or
their local government office, for details of where and how they can
take this item for environmentally safe recycling. Business users
should contact their supplier and check the terms and conditions of
the purchase contract. This product should not be mixed with other
commercial wastes for disposal.
文
✤ 不要把摄录一体机的镜头直接对着太阳摄像,受阳光直射可能会
损坏CCD(电荷耦合器件,成像传感器)。
液晶显示屏注意事项
1. 采用高精密技术制造液晶显示屏。但是,液晶显示屏上可能显示
小点(红色,蓝色或绿色)。这些小点属于正常现象,不会对录制
的画面有任何影响。
2. 受日光直射或在户外使用液晶显示屏时,可能难以看清画面。
3. 受阳光直射可能损坏液晶显示屏。
维修注意事项
✤ 不要自行维修摄录一体机
✤ 打开或拆除机盖可能会使您受到触电危险或其他危险。
✤ 请具备资格的维修人员完成所有维修工作。
备件注意事项
✤ 需要备件时,必须保证维修技术人员使用有制造商指定并与原件
性能相同的备件。
✤ 擅自替换可能会造成起火,触电或其他危险
正确处理这个产品
(废弃电气电子设备)
(在欧盟和其他欧洲国家按单独分离收集系统实施)
本产品或印刷品上的这个标识说明它不能按家庭废弃物处理。为
了避免因不控制废弃此产品造成对环境或人的危害, 请区别处
理本产品和其他废弃物并且自觉推进原材料资源持续再利用。家
庭用户应该联系销售此产品的销售商或是当地政府,咨询详细内
容如何及在哪里可以取得环境安全回收的条款.商业用户应该联
系供应商,确认购买合同的相应条款。此产品不应该和其他商业
废弃物混合处理。
11
ENGLISH
中
文
Getting to Know Your Sports Camcorder 开始了解运动型摄录一体机
Features
●
●
●
●
●
●
●
●
●
●
●
●
●
●
12
Integrated Digital Camcorder/ operation
An integrated digital imaging device that easily converts between a Digital
Camcorder and a Digital Still Camera with comfortable and easy recording.
High Resolution Image Quality (Digital Still Camera)
Employing 800K CCD Pixel, a maximum resolution of 640X480 is available.
100x Digital Zoom
Allows the user to magnify an image up to 100x its original size.
Colourful TFT LCD
A high-resolution(230K) colourful TFT LCD gives you clean, sharp images as
well as the ability to review your recorded files immediately.
Electronic Image Stabilizer (EIS)
The EIS helps you reduce unstable images by compensating for natural
shaking movements.
Various Digital Effects
The DSE (Digital Special Effects) allows you to give the film a special look by
adding various special effects.
USB Interface for Data Transfer
You can transfer still images and movie files or any other files to a PC using
the USB interface.
PC Cam for multi-entertaining
You can use this Sports Camcorder as a PC camera for video chatting, video
conference and other PC camera applications.
Voice Record / Playback with vast memory
You can record voices and store it in the internal memory, memory card (not
supplied) and play back the recorded voice files.
Download & Listen to MP3 Files
With the Sports Camcorder, you can play back MP3 files stored in the internal
memory or memory card (not supplied).
Enjoy your favorite songs with your Sports Camcorder.
A Sports Camcorder equipped with External Camera Module
The Sports Camcorder is equipped with an External Camera Module, which
enables you to directly record when connected to the main unit
Weatherproof (External Camera Module only)
The External Camera Module is weatherproof according to IP42 standard.
IP-Protection Level
4- The External Camera is protected against penetration from particles over
1mm in diameter.
2- The External Camera is protected against water sprayed from a vertical
position above the centre of Sports Camcorder top
(Power LED facing up) at 15 degree angles.
Multi OSD Language
Supports various foreign languages to display the menu and information.
You can select the desired OSD language from OSD list.
Multi jack
The Multi jack functions as an Earphone, AV Input/Output or External Camera
Module jack.
You can use various functions with only one jack.
特点
●
●
●
●
●
●
●
●
●
●
●
●
●
●
数字运动型摄录一体机/数码相机集于一身
集成式数字成像设备,易于在数字摄录一体机和数码相机之间切换,录
制舒适方便。
高分辨率图像质量(数码相机)
采用 800K CCD像素,最大分辨率 640X480。
100倍数字变焦
允许使用者把图像放大到原始大小的100倍。
彩色TFT液晶显示屏
最高分辨率(230K)彩色TFT液晶显示屏显示清晰的图像,并能够立即查
看录制的文件。
电子图像稳定器 (EIS)
使用摄录一体机,通过避免自然摇动,可以减少发虚的图像。
各种数字效果
通过DSE (数字特殊效果) 可以添加各种特殊效果,使影片展现特殊的
外观。
USB数据传输接口
可以使用USB接口向计算机传送静止图像和视频文件或任何其他文件。
供多种娱乐的PC摄像头
可以把本摄录一体机用作计算机摄像头,用于视频聊天,视频会议及其
他计算机摄像头应用的场合。
大存储容量录音/播放
可以录音并存入闪存,记忆棒和记忆棒Pro(选件)中,并播放录制的语
音。
下载并聆听 MP3 文件
使用运动型摄录一体机,可以播放闪存,记忆棒和记忆棒Pro(选件)中存
储的MP3文件,使用运动型摄录一体机可以通过MP3文件欣赏喜欢的歌
曲。
运动型摄录一体机配置外置摄像头模块
运动型摄录一体机配置了外置摄像头,使用它连接到摄录一体机可以直
接录制。
防风雨(仅外置摄像头)
外置摄像头防风雨,符合 IP42标准。IP-Protection 水平
4- 外置摄像头经得住直径在1mm以上的固体物的接触。
2- 外置摄像头可以经受以摄像头为中心(电源指示灯面)15度范围内
水的喷洒
多种OSD语言
支持多种外语显示菜单和信息。在 OSD 列表中您可以选择期望的OSD
语言。
多功能接口
多种接口包括耳机,AV输入/输出,或外置摄像头接口。您可以只用一个
接口实现多种功能。
ENGLISH
中
文
Getting to Know Your Sports Camcorder 开始了解运动型摄录一体机
Accessories Supplied with the Sports Camcorder
随摄录一体机提供的附件
✤
✤ 必须保证随摄录一体机提供下列基本附件。
Make sure that the following basic accessories are supplied
with your Sports Camcorder.
Basic Accessories
1.
2.
3.
4.
5.
6.
7.
8.
9.
10.
11.
12.
13.
Lithium Polymer
Battery pack
AC Power Adapter
Audio/Video Cable
USB Cable
Earphones
Hand Strap
Instruction Book/Quick
Guide
Software CD
Lens Cover
External Camera
Module
Rubber Mount
Long Mount Band
Carrying Case
1. Lithium Polymer Battery pack 2. AC Power Adapter
3. Audio/Video Cable
4. USB Cable
5. Earphones
6. Hand Strap
7. Instruction Book/Quick Guide 8. Software CD
9. Lens Cover
10. External Camera Module
11. Rubber Mount
13. Carrying Case
14. Extended life Battery pack
Optional Accessory
14. Extended life Battery
pack
[ Notes ]
✤ Parts and accessories are available at your local Samsung dealer
and service centre.
✤ You can download programmes, the latest driver software, and
audio/video CODECs from the Samsung Electronics webpage.
(www.samsung.com)
12. Long Mount Band
基本附件
1. 锂聚合物电池组
2. 交流电源适配器
3. 视频/音频电缆
4. USB电缆
5. 耳机
6. 手链
7. 说明书/快速指南
8. 软件光盘
9. 镜头盖
10. 外置摄像头模块
11. 橡皮底座
12. 长固定带
13. 便携包
可选附件
14. 耐用电池组
[ 注意 ]
✤ 当地Samsung销售商和客服中心可以提供部品和附件
✤ 在三星电子网页(www.samsung.com)您可以下载程序,
最新的驱动软件 和音频/视频多媒体数字信号编解码器
13
ENGLISH
中
Location of Controls
各部分名称
Rear & Left View
后视图和左视图
T
1
U
MEN
2
DI
W
T
MENU
MODE
DELETE
DISPLAY
13
HOLD
14
DC IN
3
E
MOD
DELETE
SPLAY
Connect the
earphones to the
multi jack as shown
in the diagram.
HOLD
W
How to Connect
Earphones
DC IN
7
8
9
10
11
12
文
15
4 5 6
1.
2.
3.
4.
5.
6.
7.
LCD monitor
DELETE button
DISPLAY button
Built-in speaker
POWER button
MP3/ External Camera
Module HOLD switch
Record / Power /Charging
indicator
8.
9.
10.
11.
12.
13.
14.
15.
PLAY button
Record /Stop button
[W/T] switch
Joystick (Up, Down, Left,
Right, OK)
MENU button
MODE button
DC IN jack
Multi jack
[ Note ]
✤ Multi jack is a unified Earphones, AV Input/Output and External
Camera Module jack.
14
1.
2.
3.
4.
5.
6.
液晶显示屏
删除按钮 (DELETE)
显示按钮 (DISPLAY)
内置扬声器
电源按钮
MP3/外置摄像头保持按钮
(HOLD)
7. 录制/电源/充电指示灯
8. 播放按钮 (PLAY)
9.
10.
11.
12.
13.
14.
15.
录制/停止按钮
[放大/缩小] 开关 (W/T)
摇杆(上,下,左,右,确认)
菜单按钮 (MENU)
模式按钮
直流电源接口 (DC IN)
多功能接口
[ 注意 ]
✤ 多功能接口融合了耳机,AV输入/输出和外置摄像头功能。
ENGLISH
中
Location of Controls
各部分名称
Side & Bottom View
右视图和仰视图
文
Hanging Lens Cover on the
Sports Camcorder
1
5
<Left Side>
9
2
USB
6
MMC/SD
3
4
1.
2.
3.
4.
5.
6.
Lens
Flash
Battery pack
Battery eject
switch
Front cover
USB port
7
8
7.
Built-in
Usable Memory
microphone
Cards (2GB Max)
8. Memory card slot
9. Tripod receptacle
10. Strap hook
SD
可使用的记忆卡
(最大2GB)
10
1.
2.
3.
4.
5.
6.
镜头
闪光灯
电池组
电池弹出按钮
前面板盖
USB 接口
7.
8.
9.
10.
内置麦克风
记忆卡插槽
三角架插口
带钩
MMC
15
ENGLISH
中
Location of Controls
各部分名称
External Camera Module View
外置摄像头模块视图
1
4
5
9
6
2
Bottom View
3
8
7
1.
2.
3.
4.
5.
6.
16
Built-in microphone
Lens
Rubber Mount
Picture Rotator
Record/Power indicator
POWER/Record /Stop
button
文
7.
8.
9.
Clip
External Camera Module
cable
Rubber Mount receptacle
1.
2.
3.
4.
5.
6.
内置麦克风
镜头
橡胶底座
画面旋转器
录制/电源指示器
电源/录制/停止按钮
7. 夹子
8. 外置摄像头电缆
9. 橡胶底座插座
ENGLISH
中
Location of Controls : LCD Display
各部分名称 : 液晶显示屏
OSD (On Screen Display in Movie Record Mode/Movie Play Mode)
OSD (视频录制/视频播放模式下的屏幕显示)
Movie Record Mode
Movie Record Mode
1. Mode indicator
2. Image size indicator
3. Image quality indicator
4. White balance indicator
5. Program AE indicator
6. Date/Time indicator
7. Effect indicator
8. BLC indicator *
9. Focus indicator *
10 EIS indicator
11. Battery life indicator
12. Memory type indicator
13. Counter (Elapsed time /Remaining time)
14. Warning and note indicator
15. Record/STBY indicator
16. Optical zoom indicator
17. Digital zoom indicator
Movie Play Mode
1. Mode indicator
2. Lock indicator
3. Current display indicator
4. Move (Help Key)
5. Play (Help Key)
6. Damaged file indicator
7. Scroll bar
8. Multi selection indicator
9. Battery life indicator
10. Memory type indicator
11. Image counter (Current image)
12. Image size indicator
13. Date/Time indicator
14. Volume indicator
15. Counter (Elapsed time /Recorded time)
[ Notes ]
✤ Settings indicated with * will not be retained
when the Sports Camcorder is turned off.
✤ The OSD indicators of this product are based
on model VP-X205L.
✤ The OSD indicators are based on internal
memory.
15
3
13
视频录制模式
12 11
STBY
00:00:00/00:40:05
STBY00:00:00/00:40:05
1
2
14
W
F
9
F
Recording...
Recording...
00:00:00/00:40:05
STBY
4
5
16
8
10X
10X
T
S
W
10W1X1X W
1X
1X
720i
10X
10X
1X
W
W
1X
T
F
S
Recording...
12:00AM
Sepia
12:00AM2006.01.01
2006.01.01
Sepia
STBY 00:00:00/00:40:05
6
T
T
10X
10X
T
7
W
17
1X
SF
W
1X
T
100-0001
12:00AM
2006.01.01
Movie
Play ModeSepia
100-0001
Recording...
11
1
10 9
10X
T
T
Sepia
8
2
3
10X
S
100-0001
12:00AM 2006.01.01
Move
Move
Play
Play 100-0001
7
?
ERROR
00:00:15/00:05:20
OK Play
00:00:15/00:05:20
Move
720X480
720X576
4
5
6
00:00:15/00:05:20
Movie
Play
Move
Play Mode
720X576
15
00:00:15/00:05:20
100-0001
12:00AM
100-0001
12:00AM2006.01.01
2006.01.01
720X576
12
12:00AM 2006.01.01
文
100-0001
12:00AM 2006.01.01
100-0001
13
11
2
14
1. 模式指示图标
2. 图像大小指示图标
3. 图像质量指示图标
4. 白平衡指示图标
5. 程序自动曝光指示图标
6. 日期/时间指示图标
7. 效果指示图标
8. 背光补偿指示图标*
9. 聚焦指示图标*
10. EIS 指示图标
11. 电池电量指示图标
12. 存储类型指示图标
13. 计数器(过去时间/剩余时间)
14. 警告/注意指示图标
15. 录制/待机指示图标
16. 光学变焦指示图标
17. 数字变焦指示图标
视频播放模式
1. 模式指示图标
2. 锁定指示图标
3. 当前显示指示图标
4. 移动(帮助键)
5. 播放(帮助键)
6. 被损坏的文件指示图标
7. 滚动条
8. 多选指示图标
9. 电池电量指示图标
10. 存储类型指示图标
11. 图标图像计数器(当前图像)
12. 图像大小指示图标
13. 日期/时间指示图标
14. 音量指示图标
15. 计数器(过去时间/剩余时间)
[ 注意 ]
✤ 当摄录一体机关机时,带*标识的设置不能保
留。
✤ 此机的OSD指示图标以VP-X205L型号为基础。
✤ OSD指示图标基于内置记忆卡。
17
ENGLISH
中
Location of Controls : LCD Display
文
各部分的名称 : 液晶显示屏
OSD (On Screen Display in Photo Capture Mode/Photo View Mode) OSD (拍照/查看相片模式下的屏幕显示)
Photo Capture Mode
1. Mode indicator
2. White balance indicator
3. Program AE indicator
4. Date/Time indicator
5. Effect indicator
6. BLC indicator *
7. Focus indicator *
8. EIS indicator
9. Battery life indicator
10. Memory type indicator
11. Warning and note indicator
12. Multi shot indicator
13. Flash indicator
14. Optical zoom indicator
15. Digital zoom indicator
Photo View Mode
1. Mode indicator
2. Lock indicator
3. Current display indicator
4. Move (Help Key)
5. View (Help Key)
6. Scroll bar indicator
7. Multi selection indicator
8. Battery life indicator
9. Memory type indicator
10. Image counter indicator (Current image)
11. DPOF indicator
12. Date/Time indicator
13. Slide indicator
[ Notes ]
✤ Settings indicated with * will not be retained
when the Sports Camcorder is turned off.
✤ The OSD indicators are based on internal
memory.
18
Photo Capture Mode
13 12
11
10 9
1
2
1X
3
W
8
WW
Capturing...
Capturing...
1X
10X10X
10X
14
6
10X
T
W
1X
T
W
1X 1X
7
TW
1X
T
12:00AM
2006.01.01
Sepia
12:00AM
2006.01.01
Sepia
Capturing...
4
5
100-0001
100-0001
15
W
Photo View Mode
Capturing...
12:00AM 2006.01.01
11 10
1
1
10X
10X
1X
1X
T
9Sepia
8
1
10X
10X
T
100-0001
T
2
12:00AM 2006.01.01
ViewView
3 MoveMove
1
100-0001
SlideSlide
Sepia
7
6
100-0001
100-0001
Move
OK
View1
1
5
4
1
100-0001
Photo View
View Mode
Slide
Move
10
13
W
T
1
12:00AM
2006.01.01
12:00AM
2006.01.01
Slide
100-0001
2
1
11
拍照模式
1. 模式指示图标
2. 白平衡指示图标
3. 程序自动曝光指示图标
4. 日期/时间指示图标
5. 效果指示图标
6. 背光补偿指示图标*
7. 聚焦指示图标*
8. EIS 指示图标
9. 电池电量指示图标
10. 存储类型指示图标
11. 警告/注意指示图标
12. 连拍指示图标
13. 闪光灯指示图标
14. 光学变焦指示图标
15. 数字变焦指示图标
查看相片模式
1.
2.
3.
4.
5.
6.
7.
8.
9.
10.
11.
12.
13.
模式指示图标
锁定指示图标
当前显示指示图标
移动(帮助键)
查看(帮助键)
滚动条指示图标
多选指示图标
电池电量指示图标
存储类型指示图标
图标图像计数器(当前图像)
DPOF 指示图标
日期/时间指示图标
幻灯指示符
12:00AM 2006.01.01
12:00AM 2006.01.01
12
[ 注意 ]
✤ 当摄录一体机关机时,带 *标识的设置不能
保留。
✤ OSD指示图标基于内置记忆卡。
ENGLISH
中
Location of Controls : LCD Display
各部分的名称 : 液晶显示屏
OSD (On Screen Display in MP3 Mode)
OSD (MP3模式下的屏幕显示)
MP3 Mode
1. Mode indicator
2. File name indicator
3. Lock indicator
4. Move (Help Key)
5. Play (Help Key)
6. Scroll bar indicator
7. Battery life indicator
8. Memory type indicator
9. Counter(Elapsed time)
10. Repeat indicator
11. Multi selection indicator
MP3 Mode
1. Mode indicator
2. File name indicator
3. Artist indicator
4. Sampling rate/Bit rate
5. Operation indicator
6. Progress bar indicator
7. Search (Help Key)
8. Counter(Elapsed time/Full time)
9. List (Help Key)
10. Play/Pause (Help Key)
11. Volume indicator
12. Equalizer indicator
13. Lock indicator
14. Battery life indicator
15. Memory type indicator
16. File number indicator (Current / Total)
MP3 模式
MP3 Mode
10
1
2
3
11
8 7
9
00:12
Life is cool.mp3
Everytime.mp3
Toxic.mp3
00:12push me.mp3
Don't
Love you.mp3
Life is cool.mp3
OK Play
MoveEverytime.mp3
Toxic.mp3
4 Don't push5 me.mp3
Love you.mp3 1/10
Move
16
1
2
3
4
5
6
6
MP3 Play
Mode
Life is cool.mp3
Sweetbox
15 POP14
1/10
Life is cool.mp3
Sweetbox
Search
List
13
POP
Pause
Stereo 44.1KHz 192Kbps
7
[ Notes ]
✤ MP3 files with tag information will display the artist name.
✤ The MP3 file with tag information will display the artist name.
MP3 files with no tag information will leave the item blank.
List
8
9
12
11
00:01:07/00:03:27
Search
OK
文
Pause
10
1.
2.
3.
4.
5.
6.
7.
8.
9.
10.
11.
模式指示图标
文件名指示图标
锁定指示图标
移动(帮助键)
播放(帮助键)
滚动条指示图标
电池电量指示图标
记忆类型指示图标
计数器(过去时间)
重复指示图标
多重选择指示符
MP3 模式
1. 模式指示图标
2. 文件名指示图标
3. 艺术家指示图标
4. 采样率/比特率
5. 操作指示图标
6. 进度条指示图标
7. 搜索(帮助键)
8. 计数器(过去时间/全时间)
9. 列表(帮助键)
10. 播放/暂停(帮助键)
11. 音量指示图标
12. 平衡器指示图标
13. 锁定指示图标
14. 电池电量指示图标
15. 记忆类型指示图标
16. 文件编号指示图标(当前/总体)
[ 注意 ]
✤ 如果再次打开摄录一体机,不会取消设定的功能。
✤ 带有标签信息的MP3文件能显示艺术家名称,没有标签信息的将显示
空白。
19
ENGLISH
中
Location of Controls : LCD Display
各部分的名称 : 液晶显示屏
OSD (On Screen Display in Voice Record Mode/Voice Play Mode)
OSD (语音录制/语音播放模式下的屏幕显示)
Voice Record Mode
Voice Record Mode
1.
2.
3.
4.
5.
6.
7.
8.
Mode indicator
File name indicator
Date/Time indicator
Sampling rate/Bit rate
Operation indicator
Counter (Elapsed Time / Remaining Time)
Battery life indicator
Memory type indicator
8
3
4
5
Voice Play Mode
1. Mode indicator
2. Date/Time indicator
3. Lock indicator
4. Move (Help Key)
5. Play (Help Key)
6. Scroll bar indicator
7. Battery life indicator
8. Memory type indicator
9. File number indicator (Current / Total)
10. Counter(Elapsed time)
11. Repeat indicator
12. Multi selection indicator
1
2
3
12
Voice Play Mode
1. File name indicator
2. Date/Time indicator
3. Operation indicator
4. Progress bar indicator
5. Search (Help Key)
6. List (Help Key)
7. Counter (Elapsed time / Recorded time)
8. Play/Pause (Help Key)
9. Volume indicator
10. Lock indicator
11. File Number indicator (Current / Total)
[ Note ]
✤ Settings will be retained when the Sports
Camcorder is turned off.
20
语音录制模式
1.
2.
3.
4.
5.
6.
7.
8.
7
1
2
SWAV0001.WAV
2006/01/01 12:00:00 AM
Stereo 8.0KHz 64Kbps
00:00:12/34:59:48
SWAV0001.WAV
2006/01/01
12:00:00 AM
Stop
00:00:12/34:59:48 6
1/3
00:12
SWAV0001.WAV
Voice Play Mode
AM
2006/01/01
12:00:0012:00:00
AM
Stop 2006/01/01
8 7
11 10
9
2006/01/01 12:00:10 AM
00:00:12/34:59:48
12:00:20
1/3 AM
1 2006/01/01
00:12
2006/01/01 12:00:00 AM
Stop
Move2006/01/01
Play
12:00:10 AM
2006/01/01 12:00:20
1/3 AM
00:12
1/3
2006/01/01 12:00:00 AM
OK Play
Move2006/01/01
SWAV0001.WAV
12:00:10 AM
2006/01/01 12:00:00 AM
2006/01/01 12:00:20 AM
4
5
1/3
00:00:02/00:00:12
Voice Play Mode
SWAV0001.WAV
Move
Play
11 Pause
2006/01/01
Search 12:00:00
List AM
6
Pause
00:00:02/00:00:12
Search
5
List
6
OK
7
Pause
8
1.
2.
3.
4.
5.
6.
7.
8.
9.
10.
11.
12.
模式指示图标
日期/时间指示图标
锁定指示图标
移动(帮助键)
播放(帮助键)
滚动条指示图标
电池电量指示图标
存储类型指示图标
文件编号指示图标(当前/全部l)
计数器(过去时间)
重复指示图标
多重选择指示符
语音播放模式
10
SWAV0001.WAV
2006/01/01
Search 12:00:00
List AM
Stereo 8.0KHz 64Kbps
3
4
模式指示图标
文件名指示图标
日期/时间指示图标
采样率/比特率
操作指示图标
计数器(过去时间/剩余时间)
电池电量指示图标
存储类型指示图标
语音播放模式
1/3
1
00:00:02/00:00:12
1
2
文
9
1.
2.
3.
4.
5.
6.
7.
8.
9.
10.
11.
文件名指示图标
日期/时间指示图标
操作指示图标
进度条指示图标
查找(帮助键)
列表(帮助键)
计数器(过去时间/录制时间)
播放/暂停(帮助键)
音量指示图标
锁定指示图标
文件编号指示符(当前/总数)
[ 注意 ]
✤ 如果再次打开摄录一体机,不会取消设定的功
能。
ENGLISH
中
文
各部分名称 : 液晶显示屏
Location of Controls : LCD Display
OSD (On Screen Display in File Browser
OSD1/4(文件浏览/系统设置模式下的屏幕显示)
Mode/System Settings Mode)
/DCIM/100SSDVC
DCAM0001.JPG
DCAM0002.JPG
FileDCAM0003.JPG
Browser Mode
File Browser Mode
1.
2.
3.
4.
5.
6.
7.
8.
9.
10.
11.
Mode indicator
Current selected folder indicator
Current selected file indicator
Lock indicator
Multi selection indicator
Move (Help Key)
Play (Help Key)
Scroll bar indicator
Battery life indicator
Memory type indicator
File number indicator (Current / Total)
DCAM0004.JPG
1
Mode indicator
Menu tab
Setup item
Move (Help Key)
Select (Help Key)
Battery life indicator
Memory type indicator
Play
Play
/DCIM/100SSDVC
DCAM0001.JPG
DCAM0002.JPG
Coin
DCAM0003.JPG
DCAM0004.JPG
Dart
4
5
Move
OK
OK
8
Play
Play
6
7
Move
Play
System Settings Mode
Coin
Dart
System Settings
1
2
Ver.
TYPE
Storage Type
3
文件浏览
9
1/4
2
System Settings Mode
1.
2.
3.
4.
5.
6.
7.
Move
11 10
Move
Internal
External
Move
Play
OK
Select
System Settings
5
4
Storage Type
7
6
1.
2.
3.
4.
5.
6.
7.
8.
9.
10.
11.
模式指示图标
最近被选择文件夹指示图标
最近被选择文件指示图标
锁定指示图标
多重选择指示符
移动(帮助键)
选择(帮助键)
卷动轴指示图标
电池电量指示图标
记忆卡指示图标
文件编号指示符(当前/总数)
系统设置模式
1.
2.
3.
4.
5.
6.
7.
模式指示图标
菜单符号
设备项目
移动(帮助键)
选择(帮助键)
电池电量指示图标
记忆卡
Internal
External
Move
Select
21
ENGLISH
中
How to Use the Battery Pack
文
如何使用电池组
Battery Pack Installation / Ejection
电池组安装/弹出
It is recommended you purchase one or more additional battery packs
to allow continuous use of your Sports Camcorder.
建议您购买一个或多个额外电池组以便连续使用您的摄录机
<Insert>
<Eject>
1
2
To insert the battery pack
Slide the battery pack into the groove until it clicks.
To eject the battery pack
Pull the Battery eject switch to eject the battery pack.
Battery
SB-P120A (1200mAh)
SB-P190A (1900mAh)
[ Notes ]
✤ Clean the terminals to remove foreign substances before inserting
the battery pack.
✤ If the Sports Camcorder will not be in use for a while, remove the
battery pack from the Sports Camcorder.
22
装入电池组
将电池组推入凹槽中直到听见滴答声。
退出电池组
按下退出电池组开关退出电池组
电池
SB-P120A (1200mAh)
SB-P190A (1900mAh)
[ 注意 ]
✤ 在装入电池组前请先清洁端子上的异物。
✤ 如果长时间不使用摄录一体机,请把电池组从摄录一体机上拿
下。
ENGLISH
中
How to Use the Battery Pack
文
如何使用电池组
Maintaining the Battery Pack
维护电池组
✤ The battery pack should be recharged in an environment of
between 32°F(0°C) and 104°F(40°C).
✤ The battery pack should never be charged in a room temperature
that is below 32°F(0°C).
✤ The life and capacity of the battery pack will be reduced if it is used
in temperatures below 32°F(0°C) or left in temperatures above
104°F(40°C) for a long period.
✤ Do not put the battery pack near any heat sources (fire or flames,
for example).
✤ Do not disassemble, process, press or heat the battery pack.
✤ Do not allow the + and - terminals of the battery pack to be shortcircuited. It may cause leakage, heat generation, induce fire and
overheating.
✤ It is recommended that you use the original Samsung battery pack
that is available at the retailer where you purchased the Sports
Camcorder.
✤ 电池组必须在介于32°F(0°C) 和 104°F(40°C)的环境下充
电。
✤ 电池组不能在低于32°F(0°C)的室内温度下充电。
✤ 如果在低于32°F(0°C)或高于104°F(40°C)的环境下放置摄
录一体机很长时间,那么电池组使用寿命和容电量将会减小。
✤ 不要将电池组靠近任何热源 (例如,火或火焰)。
✤ 不要分解,加工,按压或加热电池组。
✤ 不要短接电池组的+ 和 - 两端。它可能会导致漏电,产生过热
或起火。
✤ 建议使用购入三星的原厂电池组。
Continuous recording time based on battery type
If you close the LCD screen, it switches off automatically.
The continuous recording times given in the table below are
approximations. Actual recording time depends on usage.
Time
Continuous Recording Time
Battery
LCD ON
Backlight OFF
SB-P120A (1200mAh) Approx. 1 hr. 20 min. Approx. 1 hr. 40 min.
SB-P190A (1900mAh) Approx. 2 hr. 30 min. Approx. 2 hr. 50 min.
[ Warning ]
✤ When you eject the battery pack from the Sports Camcorder, hold
the battery pack to prevent it from dropping to the floor.
[ Notes ]
✤ Prepare an extra battery if you use the Sports Camcorder
outdoors.
✤ Contact a Samsung retailer to purchase a new battery pack.
✤ If you zoom in or out, the recording time becomes shorter.
✤ ‘The Continuous Recording Time' listed is approximate and is
affected by functions such as zooming.
基于电池类型的连续录像时间
如果你关闭LCD,它将自动关闭电源
下表中列出连续录像的时间,实际录像时间与使用情况而定
时间
电池
SB-P120A (1200mAh)
SB-P190A (1900mAh)
连续录像时间
LCD 打开
约 1 小时 20 分钟
约 2 小时 30 分钟
背景灯关闭
约 1 小时 40 分钟
约 2 小时 50 分钟
[ 警告 ]
✤ 当你从运动摄录一体机上弹出电池组后, 防止电池组落到地面
上。
[ 注意 ]
✤ 如果在户外使用请额外准备电池组。
✤ 如果要购买性的电池组请联系三星服务中心。
✤ 如果你执行放大或缩小动作,录像时间将会缩短。
✤ ‘连续录像时间' 被一些功能影响例如变焦
23
ENGLISH
中
How to Use the Battery Pack
如何使用电池组
Battery Level Display
电池电量显示
The Battery Level Display shows the amount of battery power remaining in
the battery pack.
Battery Level
Indicator
State
电池电量显示器将显示电池剩余的电量。
Message
STBY
BY 00:00:00:00:40:05
状态
信息
-
完全充电
-
-F
20~40% 已用
-
40~60% used
-
40~60% 已用
-
60~80% used
-
60~80% 已用
-
80~95% used
-
80~95% 已用
-
Exhausted(flickers)
The device will soon turn off.
Change the Battery Pack
as soon as possible.
S
耗尽(闪烁)
设备很快就会关闭。
尽快更换电池组。
-
Fully charged
20~40% used
(flickers)
The device will be forced
to turn off after 5 seconds.
12:00AM
2006/01/01
Charge
indicator
Charging time based on battery type
SB-P120A (1200mAh)
SB-P190A (1900mAh)
Sepia
(闪烁)
“电池电量不足”
设备将在5分钟后强制关闭。
"Low
battery"
Tips for Battery Identification
Capacity
电池电量指示图标
Recording...
If the battery has been fully charged, the charge indicator is green.
If you are charging the battery, the colour of the charge indicator is orange.
The charge indicator flickers if the battery is abnormal.
using AC Power
Adapter
Approx. 1 hr. 50 min
Approx. 3 hr. 20 min
using USB cable
Approx. 3hr. 40 min
Approx. 6hr. 20 min
[ Notes ]
✤ You may charge your Sports Camcorder by connecting it to a PC with
the USB cable.
✤ You may not charge via USB if the power is on.
✤ The charging time with the USB cable may differ depending on the PC.
24
文
电池识别提示
如果电池组充电结束, 充电指示灯将变成绿色。
如果你正在充电,充电指示灯 为橙色。
如果电池出现异常,电池指示灯将会闪动。
基于电池类型的充电时间
容量
SB-P120A (1200mAh)
SB-P190A (1900mAh)
使用AC适配器
约 1 小时 50 分钟
约 3 小时 20 分钟
使用USB 线
约 3 小时 40 分钟
约 6 小时 20 分钟
[ 注意 ]
✤ 您可以利用USB线连接PC来对运动型摄录一体机进行充电。
✤ 当电源打开时,通过USB不可以充电。
✤ 使用USB充电所用的时间和充电使用的PC不同有关。
ENGLISH
中
How to Use the Battery Pack
如何使用电池组
Charging the Battery Pack
电池组充电
4. 使用AC适配器或USB线给电池组充
电。
AC 适配器
DC IN jack
USB线
Connecting the USB Cable
把运动型摄录一体机与
AC适配器连接。
同时适配器与电源连
接。
把运动型摄录一体
机与USB线连接。
同时USB线与PC连接。
SD
USB
[ 注意 ]
✤ 在室内使用运动型摄录一体机,您
可以使用AC适配器提供电源。
USB port
USB
[ Warning ]
✤ It is recommended you fully charge
the battery pack before use.
✤ You should only charge the battery
in an environment between 32°F
and 104°F.
✤ If ambient temperature is too low
when charging, the battery may
take a long time to fully charge, or
may not charge completely and the
green indicator will not turn on.
✤ Before connecting the cable, make
sure that you don’t have any foreign
substances between connectors.
3. 打开连接处的盖。
D
[ Note ]
✤ You may use the Sports Camcorder
powered by the AC Power Adapter
indoors where available.
2. 插入电池组。
USB
Connect the AC Power
with the Sports
AC Power Adapter
and plug the
Adapter Camcorder
AC Power Adapter to the
wall outlet.
Connect the USB
Cable with the Sports
USB Cable Camcorder and connect
the other side to a USB
port on your PC.
1. 按[电源]键关闭运动型摄录一体
机。
Connecting the AC Power Adapter
MMC/SD
1. Turn off the Sports Camcorder by
pressing the [POWER] button.
2. Insert the battery pack to the unit.
3. Open the connector cover of the
unit.
4. Charge the battery pack by using
AC Power Adapter or USB Cable.
文
[ 警告 ]
✤ 您必须确认电池组被完全充满电后
再使用。
✤ 您只能在32°F 和104°F 之间进行
充电。
✤ 如果充电时周围的温度非常低, 那
么电池组充电需要很长的时间被
充满或不能完全被充满, 这是因为
绿色指示图标没有打开。
✤ 在线连接之前,必须确认没有忘记
需要连接的任何连接器。
25
ENGLISH
中
Getting Started
入门
The LED Colour
LED指示灯的颜色
The LED Colour indicates the power or charge status.
LED显示电量或充电情况。
Recording / Charging Indicator
During
During
LED Colour
Recording
Charging
Recording
<Movie and
Red
Voice Recorder
mode>
Orange
Charging
Green
Fully Charged
记录 / 充电指示图标
Recording /
Charging Indicator
DC IN
Power Indicator
LED Colour
Blue
Power
On
LED 颜色
录制时
充电时
红色
录制
<电影和视频录制器模式>
-
橙色
-
充电中
绿色
-
充满
电源指示灯
LED 颜色
兰色
电源
开
Before You Start Operating the Sports Camcorder
在操作运动型摄录一体机之前
Before using the Sports Camcorder, refer to this page for easy
operation. The memory card is not supplied.
使用此摄录一体机前,参阅此页可以让您简单操作此设备,存储卡不随
机附送。
1. Insert the battery pack and insert a memory card into the
memory card slot. ➥page 34
2. Charge the battery pack by directly connecting the AC Power
Adapter to the Sports Camcorder.
➥page 25
3. Press the [POWER] button to turn on the Sports Camcorder.
4. Select the desired mode by pressing the [MODE] button.
5. Press the [Record / Stop] button to take a picture, start
recording movie / voice.
6. When finished, press the [POWER] button to turn the Sports
Camcorder off.
26
文
1. 插入电池组,将记忆棒插入记忆插槽中。➥见34页
2. 直接利用AC适配器连接运动型摄录一体机对电池组进行充电。
➥见25页
3. 按 [电源] 键 打开运动型摄录一体机。
4. 选择希望的模式并按 [模式] 键。
5. 按 [录制/停止] 键照相, 开始记录电影/声音。
6. 当结束后, 按 [电源] 键关闭运动型摄录一体机。
Movie
Movie
ENGLISH
中
Getting Started
入门
Photo
Movie
Using the Mode button
文
Movie
Movie
Photo
使用模式按钮
The [MODE] button is used to change the
模式按键用来改变摄录一体机的模式。可利用的模式有电影,
MP3Sports Camcorder mode.
Photo
Photo
Photo
MP3
Available modes are Movie, Photo, Mp3,
Voice Recorder, File Browser 照相,MP3,声音记录,文件浏览和系统设置。
and System Settings.
Setting the Mode
Voice recorder
Set the desired mode by pressing
theMP3
[MODE] button.
The Sports Camcorder switches to the designated mode.
Functions of Each Mode
Movie
mode
You can record
and play movie
files.
Photo
mode
You can take
and view photo
files.
Mp3 mode
You can play
back mp3 files.
Movie
Movie
Photo
Photo
MP3
MP3
Voice recorder
Voice recorder
File Browser
Voice recorder
Movie
Photo
Time
10 min.
3 min.
MP3
Voice recorder
MP3
File Browser
mode
You can delete,
lock, copy the file
and view file information.
System
Settings mode
System Settings
Using this mode,
you can set / adjust
settings regarding the LCD display,
Date / Time, Reset and Memory
management.
System Settings
Movie
Movie
Movie
Photo
Photo
File Browser
File
System
USB
Browser Settings
30 sec. 30 sec. 30 sec. 60 sec. 60 sec.
MP3
按[模式]按钮设置模式。
运动型摄录一体机选择指定的模式。
各模式功能
Voice recorder
mode
You can record and
listen to voice files.
Power Saving Function
The LCD monitor is turned off after a certain period of time has passed
(see
below) in each mode in order to prevent unnecessary battery
File Browser
File Browser
power
consumption.
Press any button to go back and turn on the LCD monitor.
Mode
设置模式
Voice
Photo
MP3
MP3
MP3
视频模式
您可以记录并播
放电影文档。
照片模式
您可以记录并
播放照相文
档。
MP3 模式
您可以播放
mp3 文档。
Voice
Voice recorder
recorder
File Browser
录音机模式
您可以记录并播放
声音文档。
File
File Browser
Browser
文件浏览器模式
您可以删除,锁
定,复制文档并且
阅读文档内容。
System Settings
系统设置模式
用这个模式,你可
使
以设置/调整LCD 的
显示,日期/时间,
设置和存储管理。
Voice recorder
recorder
Voice
System
System Settings
Settings
Voice recorder
省电功能
各种模式下经过一段时间后,LCD显示屏会关闭(见下面),已防止
File Browser
Browser
File
不必要的电量消耗。
File Browser
按任何一个键都可以返回,并将LCD显示屏打开。
模式
Movie
(视频)
Photo
(照片)
MP3
Voice File Browser System
Settings
(语音) (文件浏览器) (系统设置)
时间 10 分钟。 3 分钟。 30秒。 30秒。 30 秒。
USB
60 秒。 60 秒。
27
System Settings
ENGLISH
中
Getting Started
入门
Using the Function button
使用功能按钮
The Function button is used to make a selection, move the cursor,
select the functions and exit from the menu.
功能按钮被用来选择, 移动光标, 选择功能或选择退出菜单。
Using the Function button
Button
28
Recording /
Capturing
文
使用模式按钮
Zoom out (▲)
Playing/
Viewing
Multi-Play
screen / List
Zoom in (▼)
-
Change from
Record/
Capture to
Play/View
Play/Pause
Recording
Change from
Play/View
to Record/
Capture
按钮
Function button
Move Upwards
Move Left
Confirm Selection
Select menu
Move Right
Move
Downwards
录像/拍摄
放像/观看
放大 (▲)
多播放屏幕 /
清单
缩小(▼)
-
从录像中改变/
拍摄放像/观看
放像/停止
录像
从播放/
观看转换到录制
/拍摄
Using the Joystick
使用摇杆
✤ The joystick is used to make a selection, move the cursor, select
functions, and exit from the menu.
1. Move the cursor left / right by moving the [Joystick].
2. Move the cursor up / down by moving the [Joystick].
◆ You can adjust the volume by moving the [Joystick] (up / down)
in Movie / MP3 / Voice Recorder playback modes
3. Confirm your selection by pressing the [Joystick(OK)].
✤ 摇杆用来选择, 移动指针, 选择功能, 和退出菜单。
1. 左右移动[摇杆]来控制指针左右移动。
2. 上下移动[摇杆]来控制指针上下移动
◆ 你可以通过调整摇杆[摇杆] (上/下)选择电影/MP3/声音 播放
背景等模式。
3. 利用[摇杆(OK)]确认你的选择。
Using the MENU button
使用菜单按钮
1. Set the desired mode by pressing the [MODE] button.
2. Press the [MENU] button.
3. Move the cursor by moving the [Joystick] up / down / left
/ right to select desired menu item, and then press the
[Joystick(OK)] to confirm.
4. Press the [MENU] button to finish.
1. 利用[模式] 按钮确定期望的模式。
2. 按[菜单]按钮。
3. 通过上/下/左/右/移动[摇杆]
控制光标选择期望的菜单项, 并且按[摇杆(OK)] 确认。
4. 按[菜单] 按钮结束操作。
ENGLISH
中
Getting Started
文
入门
Using the DISPLAY button
使用显示按钮
Each press of the [DISPLAY] button toggles the OSD indicator on and off.
每次按下[显示]按钮,OSD指示器在打开和关闭之间切换
1. Open the LCD monitor.
2. Press the [POWER] button to turn on the Sports Camcorder.
◆ The Movie Record screen appears.
◆ You can select Movie Mode or Previous Mode as the Start-up
mode in System Settings. ➥page 109
3. Press the [DISPLAY] button.
1. 打开LCD显示器。
2. 按[电源]按钮打开运动型摄录一体机。
电影屏幕出现。
你可以选择电影模式或以前的模式 当在系统设置为开启模式。
➥见109页
3. 按[显示]键。
If you press the [DISPLAY] button in
Movie and Photo modes
如果你在电影模式和照相模式下按
[显示]按钮
✤ Once : All indicators will disappear on the
screen.
✤ Twice : The backlight turns off.
✤ 3 times : It returns to the initial screen.
[ Note ]
✤ Above description applies to the Movie and
Photo mode.
✤ Once : The back light turns off.
✤ Twice : It returns to the initial screen.
[ Note ]
✤ Above description applies to the MP3/Voice
Recorder/File Browser/System Settings mode.
Y
DISPLA
100-0001
Move
如果您在其他模式下按 [显示]按钮
✤ 一次 : 背景灯关闭
✤ 二次 : 返回最初的显示。
DISPLAY DELETE
button
button
[ 注意 ]
✤ 以上描述适合于MP3/录音机/文件浏览器/系
统设置模式
Play
Using the DELETE button
The [DELETE] button is used to delete saved files.
◆ <OK>: The selected file is deleted.
◆ <Multi Select>: The selected files will be deleted.
◆ <All>: All files will be deleted.
◆ <Cancel>: Cancels deletion.
[ 注意 ]
✤ 上面的描述适合于视频模式和照相模式。
DELETE
HOLD
If you press the [DISPLAY] button in
another mode
✤ 一次 : 所有指示图标在屏幕上消失。
✤ 两次 : 背景灯关闭。
✤ 三次 : 返回最初的显示。
使用删除按钮
100-0003
OK
Multi Select
All
Cancel
Move
OK
?
[删除] 按钮用来删除存储的文档
◆ <OK> (确定): 删除的文档被删除。
◆ <Multi Select> (多项选择): 选择的文档被删除。
◆ <All> (全部): 所有的文档被删除。
◆ <Cancel> (取消): 取消删除。
ERROR
Select
29
ENGLISH
Getting Started
Structure of the Folders and Files
文件夹和文件的结构
电影文档和相片文档被保存在内部存储器或存储卡中。
[ Warning ]
✤ Do not turn the power off while
recording, playing, erasing
files or formatting.
✤ Turn the power off before you insert
or eject the memory card to avoid
losing data.
✤ Save important files separately.
✤ Memory cards are made with
precision technology. They are
sensitive and vulnerable to electric
shock, temperature and humidity. Be
cautious with handling them to avoid losing data.
✤ Damaged data may not be recovered, and SAMSUNG is not responsible for lost
data. Make sure to back up important files on your PC separately.
文
入门
The movie files and photo files are stored in internal memory or on a
memory card as shown below.
[ Notes ]
✤ Refer to page 33 for details about
memory card.
✤ You can store general data in files
and folders of the Sports Camcorder.
✤ You can store up to 9,999 files and
999 folders.
✤ A file number from DCAM0001
is sequentially assigned to each
recorded file.
✤ Each folder is numbered from
100SSDVC and recorded in memory.
✤ A file name is stipulated by DCF
(Design rule for Camera File system)
✤ DCAM✽✽✽✽.JPG: Photo file
SMOV✽✽✽✽.AVI: Movie file
SWAV✽✽✽✽.WAV: Voice file
✽✽✽✽✽✽✽✽.MP3: MP3 file
✤ MISC: DPOF files are stored.
✤ You can freely change the file or
folder names in the MUSIC folder on
your PC.
✤ Movie files made on other
manufacturers' equipment may not
play on this Sports Camcorder.
30
中
Photo file
MP3 file
Movie
file
[ 注意 ]
✤ 关于记忆卡详细的介绍在33页。
✤ 你可以在文档和文件夹中存储一般
的数据。
✤ 您可以存储 9,999个文档和 999
文件夹。
✤ 在DCAM0001连续的生成每一个录象
文档的顺序号
✤ 在100SSDVC生成每个文件夹的顺序
号并记录在内存中。
✤ 文档的名字由DCF规定(相机文件设
计规则系统)
✤ DCAM✽✽✽✽.JPG: 相片文件
SMOV✽✽✽✽.AVI: 电影文件
SWAV✽✽✽✽.WAV: 声音文件
✽✽✽✽✽✽✽✽.MP3: MP3文件
✤ MISC: DPOF文档存储
✤ 在音乐文件夹中,您可以自由改变
文档或文件夹名字。
✤ 在其他制造商产品录制的电影文档
该摄录一体机上摄像或放像。
[ 注意 ]
✤ 在录像,放像,删除文档和格式化
的时候不能关掉电源。
✤ 在插入或拔出记忆棒前关闭电源防
止数据丢失
✤ 分别存储重要的文档
✤ 记忆棒是精密的设备,非常容易被
电击,温度和湿度等因素破坏。
✤ 破坏的数据不能被恢复,三星对丢失的数据没有任何责任。确认将
重要的文档存储于分离的PC中。
Voice
file
ENGLISH
中
Getting Started
入门
Recording Time and Capacity
录制时间和容量
Movie Record Time
Media
Internal
Memory
SD/MMC
Capacity
512MB (VP-X205L)
1GB (VP-X210L)
2GB (VP-X220L)
32MB
64MB
128MB
256MB
512MB
1GB
2GB
Fine
352p
approx. 32min.
approx. 65min.
approx. 130min.
approx. 2min.
approx. 4min.
approx. 7min.
approx. 17min.
approx. 32min.
approx. 65min.
approx. 130min.
720i/720p
approx. 21min.
approx. 43min.
approx. 86min.
approx. 1min. 20sec.
approx. 3min.
approx. 4min.
approx. 11min.
approx. 21min.
approx. 43min.
approx. 86min.
文
视频录制时间
Super Fine
352p
approx. 21min.
approx. 43min.
approx. 86min.
approx. 1min. 20sec.
approx. 3min.
approx. 4min.
approx. 11min.
approx. 21min.
approx. 43min.
approx. 86min.
720i/720p
approx. 14min.
approx. 29min.
approx. 58min.
approx. 50sec.
approx. 2min.
approx. 3min.
approx. 7min.
approx. 14min.
approx. 29min.
approx. 58min.
Normal
352p
720i/720p
approx. 65min.
approx. 32min.
approx. 131min.
approx. 65min.
approx. 262min.
approx. 130min.
approx. 4min.
approx. 2min.
approx. 7min.
approx. 4min.
approx. 17min.
approx. 7min.
approx. 32min.
approx. 17min.
approx. 65min.
approx. 32min.
approx. 131min.
approx. 65min.
approx. 262min.
approx. 130min.
[ Notes ]
✤ The recording time and capacity is an approximation.
✤ The recording times shown are maximum figures based on using one function.
In actual use, using more than one function will reduce the capacity of each.
✤ The compressibility is changed automatically depending on the recorded images.
The maximum recording time and capacity can be changed in ‘Movie Record’.
✤ The Sports camcorder supports 2GB memory cards and lower. Any card above
2GB may not record or play properly.
✤ If you record movie files at Normal(352/720) quality to the internal memory or a
memory card, the recording time increases but the movie may have lower quality
than other levels.
✤ The recording time and capacity may vary if a bad sector(section) is generated
when you record movie files to a memory card.
媒体
容量
512MB (VP-X205L)
1GB (VP-X210L)
2GB (VP-X220L)
内制
存储
SD/MMC
Super Fine (非常好)
352p
720i/720p
大约 21分钟。
大约 14分钟。
大约 43分钟。
大约 29分钟。
大约 86分钟。
大约 58分钟。
32MB
大约 20秒。
大约 50分 钟 。
64MB
128MB
256MB
512MB
1GB
2GB
大约 3分钟。
大约 4分钟。
大约 11分钟。
大约 21分钟。
大约 43分钟。
大约 86分钟。
大约 2分钟。
大约 3分钟。
大约 7分钟。
大约 14分钟。
大约 29分钟。
大约 58分钟。
Fine (好)
Normal (一般)
720i/720p
352p
720i/720p
352p
大约 32分钟。
大约 65分钟。
大约 130分钟。
大约 2分钟。
大约 4分钟。
大约 7分钟。
大约 17分钟。
大约 32分钟。
大约 65分钟。
大约 21分钟。
大约 43分钟。
大约 86分钟。
大约 20秒。
大约 3分钟。
大约 4分钟。
大约 11分钟。
大约 21分钟。
大约 43分钟。
大约 65分钟。
大约 131分钟。
大约 262分钟。
大约 4分钟。
大约 7分钟。
大约 17分钟。
大约 32分钟。
大约 65分钟。
大约 131分钟。
大约 32分钟。
大约 65分钟。
大约 130分钟。
大约 2分钟。
大约 4分钟。
大约 7分钟。
大约 17分钟。
大约 32分钟。
大约 65分钟。
大约 130分钟。
大约 86分钟。
大约 262分钟。
大约 130分钟。
[ 注意 ]
✤ 录像时间和容量都是大约值。
✤ 录像时间的最大值和使用的
✤ 根据录像的图片可压缩性会自动变化。在‘电影录像’模式下最大的录像时
间和能力会变化。
✤ 运动型摄录一体机支持2GB及2GB以下的记忆卡。任何2GB以上的卡都不能记
录。
✤ 如果你在(352/720)质量下录像到内制记忆卡或记忆卡中, 录像时间会增加但
是质量低于其他水平。
✤ 在使用记忆卡中录制电影时如果发生坏的扇面,记录的能力和时间会有变化。 31
ENGLISH
中
Getting Started
Number of Photos that can be taken
Media
Capacity
512MB (VP-X205L)
1GB (VP-X210L)
2GB (VP-X220L)
32MB
64MB
128MB
SD/MMC
256MB
512MB
1GB
2GB
Internal
Memory
Quality
640x480
approx. 2875
approx. 5754
approx. 11511
approx. 177
approx. 357
approx. 716
approx. 1436
approx. 2875
approx. 5754
approx. 11511
入门
Number of MP3 files that can be saved
Media
Capacity
512MB (VP-X205L)
Internal 1GB (VP-X210L)
Memory
2GB (VP-X220L)
32MB
64MB
128MB
SD/MMC
256MB
512MB
1GB
2GB
MP3 files
approx. 128files
approx. 256files
approx. 512files
approx. 8files
approx. 16files
approx. 32files
approx. 64files
approx. 128files
approx. 256files
approx. 512files
Capacity
512MB (VP-X205L)
Internal
Memory 1GB (VP-X210L)
2GB (VP-X220L)
32MB
64MB
128MB
SD/MMC
256MB
512MB
1GB
2GB
32
照片容量
MP3 存储量
Quality (质量)
媒介
能力
640x480
512MB (VP-X205L) 大约 2875
内置内存 1GB (VP-X210L)
大约 5754
2GB (VP-X220L)
大约 11511
32MB
大约 177
64MB
大约 357
128MB
大约 716
SD/MMC
256MB
大约 1436
512MB
大约 2875
1GB
大约 5754
2GB
大约 11511
媒介
能力
512MB (VP-X205L)
内制记忆卡 1GB (VP-X210L)
2GB (VP-X220L)
32MB
64MB
128MB
SD/MMC
256MB
512MB
1GB
2GB
MP3 文档大小
大约 128文件
大约 256文件
大约 512文件
大约 8文件
大约 16文件
大约 32文件
大约 64文件
大约 128文件
大约 256文件
大约 512文件
声音录制时间
Voice Record Time
Media
文
Time
approx. 17hr.
approx. 35hr.
approx. 70hr.
approx. 1hr.
approx. 2hr.
approx. 4hr.
approx. 8hr.
approx. 17hr.
approx. 35hr.
approx. 70hr.
[ Notes ]
✤ Number of MP3 files that can be saved is based on 128Kbps sampling / 4MB
size.
✤ Capacity may vary depending on file size.
✤ You must only format the memory card on the Sports Camcorder. ➥page 100
✤ Do not format the memory card on your PC.
✤ If you set the light on, the number of photos that can be taken will be reduced.
✤ The recordable time and number of files are maximum figures based on using
one function.
In actual use, using more than one function will reduce the capacity of each.
✤ While saving to a memory card, recording may stop and a message will appear
saying <Low speed card. Please record at lower quality.> It is because the
writing speed of the memory card is slow. We recommended using a memory
card of 1.25MB/sec or greater.
媒介内
容量
512MB (VP-X205L)
内置内存 1GB (VP-X210L)
2GB (VP-X220L)
32MB
64MB
128MB
SD/MMC
256MB
512MB
1GB
2GB
Time (时间)
大约 17小时。
大约 35小时。
大约 70小时。
大约 1小时。
大约 2小时。
大约 4小时。
大约 8小时。
大约 17小时。
大约 35小时。
大约 70小时。
[ 注意 ]
✤ MP3存储量以128Kbps采样率/文件大小为4GB为基准。
✤ 存储能力与文档的大小有关。
✤ 您必须在运动型摄录一体机上进行记忆卡格式化。➥100页
✤ 不要在PC上进行记忆卡格式化。
✤ 如果您设置灯为打开状态, 照片的存储数量将会下降。
✤ 录像时间和文档的数量最大化与使用的模式数量有关。
在使用中, 使用一种以上的模式会降低存储能力。
✤ 记忆卡中存储时, 录像会停止并且有消息显示 <卡速度低。请以
较低质量录制。> 这是因为记忆卡的写入速度低。我们推荐使用
1.25MB/sec 或更高的记忆卡。
ENGLISH
中
Getting Started
入门
Using a Memory card (SD/MMC) (not supplied)
使用记忆卡(SD/MMC) (不提供)
文
✤ Samsung is not responsible for data loss due to misuse.
✤ 由于误操作而使数据丢失三星不负责。
✤ Turning the power off / ejecting the memory card during memory
✤ 在进行格式化,删除,记录和重放时,关闭电源或拿出记忆卡会破
operation such as formatting, deleting, recording, and playback may
坏数据。
damage the data.
✤ 你可以使用PC更改文档/文件夹,存储在记忆卡中。运动型摄录一体
✤ You may modify the name of a file / folder stored in the memory card
using a PC. The Sports Camcorder may not recognise modified files.
机不能识别俄文文档名。
✤ It is recommended that you power off before inserting or ejecting the
✤ 建议您插入和弹出记忆卡时关闭电源,以防止数据丢失。
memory card to avoid losing data.
✤ 不能保证您可以使用在其他设备上格式化过的记忆卡。一定要用摄
✤ It is not guaranteed that you may use a memory card formatted on
other devices. Be sure to format your memory card using the Sports
录一体机格式化记忆卡。
Camcorder.
✤ 将重要文件保存在其他媒体上,例如“软盘、硬盘或者CD”。
✤ Save important files separately on other media, such as floppy disk,
✤ 您需要将新购的记忆卡进行格式化,摄录机不能识别其他设备保存的
hard disk, or CD.
数据。
✤ You have to format newly-purchased memory cards, memory cards
that the Sports Camcorder cannot recognise or the cards that have
✤ 记忆卡有一定的寿命。长时间使用后,记忆卡可能不能记录新数
data saved by other devices.
据。在这种情况下,您需要买一张新卡。
✤ A memory card has a certain life span. If you use it for a long time, you
may not be able to record new data. In this case, you have to purchase ✤ 不要弯曲、掉落或使记忆卡受到外力冲击。
✤ 不要将其存放在高温、多尘或潮湿的环境。
a new memory card.
✤ Do not bend, drop, or apply a strong impact to the memory card.
✤ 不要使外部异物附着在记忆卡的端子上。需要的时候用干的软布擦
✤ Do not use or store in a hot, dusty or humid environment.
拭。
✤ Do not allow foreign substances on the memory card terminals. Use a
✤ 使用记忆卡罩防止因移动和静电引起的数据丢失。
soft dry cloth to clean the terminals if required.
✤ Use a memory card case to avoid losing data from moving and static
✤ 使用一段时间后记忆卡会发热,这是正常的。
electricity.
✤ 损坏的数据不能修复。SAMSUNG 对丢失的数据不负责任。一定要将
✤ After a period of use, the memory card may get warm. This is normal
重要的文件保存在电脑上。
and not a malfunction.
✤ SD/RS-MMC 必须装入适配器才能使用。
✤ Damaged data may not be recovered, and SAMSUNG is not
responsible for the lost data. Make sure to back up important files
✤ 使用前一定要将SD/RS-MMC卡装入适配器内。不使用适配器将卡直
separately on a PC.
接插入摄录机会使卡损坏
✤ miniSD/RS-MMC cards must be inserted in a special card adapter in
✤ 不要将空的卡适配器插入摄录一体机。不要将适配器遗留在摄录机
order to be used.
✤ Be sure to insert miniSD/RS-MMC cards in the dedicated card adapter
内。
before use. Inserting a card in the Sports Camcorder
without the adapter may damage the Sports
Terminals
Camcorder or the card.
Protection
✤ Do not insert an empty card adapter in the Sports
Tab
Camcorder. Do not leave the adapter in the
Sports Camcorder while inserting or removing
Label
miniSD/RS-MMC cards. This may cause the Sports
Camcorder to malfunction.
<SD/MMC>
33
ENGLISH
中
Getting Started
文
入门
Inserting / Ejecting the memory card (SD/MMC) (not supplied) 插入/拔出记忆卡(SD/MMC) (不提供)
Inserting a memory card
插入记忆卡
1. Open the Front cover.
Label
pasting portion
2. 将记忆卡插入插槽,直到发出轻微的喀哒声。
USB
2. Insert the memory card into the memory
card slot until it softly clicks.
1. 打开前面盖。
3. 关闭前面盖。
SD Memory Card
MMC/SD
3. Close the Front cover.
STBY 00:00:00/00:40:05
Caution:
This screen will appear if the memory card is
inserted with the power on.
◆ If you select <OK>, the memory type changes
to ‘External’ and if you select <Cancel>, files
are stored in internal memory.
◆ If you insert a locked memory card, the [ ]
icon is displayed next to the memory type
indicator.
警告:
STBY 00:00:00/00:40:05
720i
External memory inserted.
F
Do you want to change
memory to external?
OK
Cancel
S
如果在开机的情况下插入记忆卡,屏幕会显示出
右图所示画面。
◆ 如果你选择 <OK> (确定), 记忆形式变化为
“External”(外部) 如果你选择 <Cancel> (取
消), 文档被储存在内置内存卡中。
◆ 如果您插入一个被锁定的记忆卡, [ ] 图标会
显示在记忆卡类型显示器旁边。
F
External memory inserted.
Do you want to change
memory to external?
S
STBY 00:00:00/00:40:05
F
External memory inserted.
Do you want to change
memory to external?
S
Ejecting a memory card
弹出记忆卡
1. 打开前盖。
2. Slightly push the memory card inwards to
pop it out.
2. 轻轻按下记忆卡将其弹出。
USB
1. Open the Front cover.
SD Memory Card
34
MMC/SD
3. 将记忆卡从卡槽中拔出,关闭仓盖。
3. Pull the memory card out of the memory
card slot and close the Front cover.
ENGLISH
1
中
1
Movie Mode
文
视频模式
Recording .....................................................................................36
Recording ...............................................................................36
Zooming In and Out ...............................................................37
Playing...........................................................................................38
Playing Movie Files on the LCD monitor ...............................38
Playing Multiple Movie Files ..................................................39
Setting the Recording Options ..................................................41
Setting the Movie Size ...........................................................41
Setting the Movie Quality .......................................................42
Setting the White Balance .....................................................43
Setting the Program AE (Programmed Auto Exposure) .......44
Setting the Effect ....................................................................45
Setting the EIS (Electronic Image Stabilizer) ........................46
Setting the Focus ...................................................................47
Setting the BLC (Backlight Compensation) ...........................48
Setting the Digital Zoom ........................................................49
Setting the Record Mode .......................................................50
Setting the Line In/Out ...........................................................51
Setting the Viewing Options.......................................................52
Deleting Movie Files...............................................................52
Setting the Play Mode............................................................53
Locking Movie Files ...............................................................54
Copying Movie Files...............................................................55
录制 ................................................................................................36
录制 ........................................................................................36
放大和缩小 .............................................................................37
播放 ................................................................................................38
在LCD 显示器上播放视频文件 ...............................................38
播放多重视频文件 ..................................................................39
设置录制选项 .................................................................................41
设置视频文件大小 ..................................................................41
设置视频文件质量 ..................................................................42
设置白平衡 .............................................................................43
设置程序AE (自动程序曝光) .................................................. 44
设置效果 .................................................................................45
设置 EIS (电子图像稳定器) .................................................46
设置焦点 .................................................................................47
设置BLC (背光补偿) ..............................................................48
设置数字变焦..........................................................................49
设置录制模式..........................................................................50
设置线路输入/输出 ................................................................51
设置查看选项 .................................................................................52
删除视频文件..........................................................................52
设置播放模式..........................................................................53
锁定视频文件..........................................................................54
复制视频文件..........................................................................55
◆ Save important data / recordings separately on other media, to
avoid accidental loss due to a system failure or other reasons.
◆ 将重要的数据存在其它存储介质上C,以防止因为系统错误或其
它原因引起的意外数据丢失。
How to set to Movie mode
如何设置视频模式
STBY 00:00:00:00:40:05
U
MEN
Power
button
STBY 00:00:00:00:40:05
U
MEN
720i
F
Recording...
E
MOD
[电源]
按钮
F
Recording...
E
MOD
12:00AM 2006/01/01
S
Sepia
1. Press the [POWER] button to turn 2. The Movie Record
screen appears.
on the Sports Camcorder.
OLD
S
OLD
720i
1. 按下[电源] 按钮打开摄录一体机。
12:00AM 2006/01/01
Sepia
2. Movie (视频) 模式屏幕
出现。
35
ENGLISH
中
Movie Mode : Recording
视频模式 : 录制
Recording
录制
文
You can record movie and store it in memory.
你可以录制视频文件并把它存储到记忆卡中。
Refer to the page 119 for recording movie using the External Camera
使用外置摄像头电缆录制可以参照119页。
Module.
STBY 00:00:00:00:40:05
STBY 00:00:00:00:40:05
1. Press the [power] button to turn on the Sports
1 720i STBY 00:00:00:00:40:05
Camcorder.
1.按下 [电源] 按钮打开运动型摄录一体机。
720iF
720i
◆ The Movie Record screen appears.
F
◆ 视频录制屏幕将会出现。
Recording...
F
◆ You can select Movie mode or Previous mode as
Recording...
◆ 在系统设置里你可以选择视频模式或者是其
Recording...
the start-up mode in System Settings. ➥page 109
它模式作为开机模式。➥109页
2. Press [Record/Stop] button to start recording.
S
2.按下 [录制/停止]按钮开始录制。
◆ [ ● ] indicator displays on the LCD monitor.
S
12:00AM
2006/01/01
Sepia
S
◆ [ ●] 指示器会在LCD显示器上显示。
◆ The elapsed and remaining times are displayed and 12:00AM
2006/01/01
Sepia
12:00AM 2006/01/01
Sepia
the Sports Camcorder starts recording.
◆ 机器开始录制,并且会显示已用以及可用的
00:00:02:00:40:03
3. Press the [Record/Stop] button again to stop
时间。
00:00:02:00:40:03
2
00:00:00:00:40:05
STBY
00:00:02:00:40:03
recording.
720i
00:00:00:00:40:05
STBY
3.再次按下
[录制/停止]按钮停止录制。
720iF
◆ 720i
The Sports Camcorder stops recording.
720i
◆720i
机器停止录制。
F
4. After recording, press the [POWER] button to turn
Recording...
F
F
4.录制结束后,
按下 [电源]按钮关闭机器以防止
Recording...
off the
Sports Camcorder to prevent battery power
F
Recording...
不必要的电池电量消耗。
consumption. Recording...
Recording...
S
Reading the Counter
◆ The timestamp will be recorded along with the
S
movie
to enable faster searching.
◆
12:00AMElapsed
2006/01/01
Sepia
time Remaining
time
00:00:02:00:40:03
3
S
12:00AM
2006/01/01
S
12:00AM 2006/01/01
12:00AM 2006/01/01
720i
720iF
720i
F
F
720i
F
STBY 00:00:02:00:40:03
STBY 00:00:02:00:40:03
STBY 00:00:02:00:40:03
S
Sepia
Sepia
Sepia
读计数器
◆ 为了方便快速查找,时间信息也随着视频被一
S
起记录。
◆ 12:00AM 2006/01/01
已用时间 可用时间Sepia
Recording...
Recording...
Recording...
00:00:02:00:40:03
720i
[ Notes ]
F
S
12:00AM
2006/01/01
Sepia
S
✤ If the Auto Shut Recording...
Off is set, the Sports Camcorder turns
12:00AM 2006/01/01
Sepia
Recording...
12:00AM
2006/01/01
Sepia
off automatically after 5 minutes.
[ 注意 ]
✤ Detach the battery pack when you finish recording to prevent
✤ 如果设置了自动关闭,机器在5分钟后就会自动关闭。
unnecessary battery power consumption.
✤ 停止录制之后拆下电池组以防止不必要的电池电量浪费。
S
✤ To adjust
the LCD screen brightness, set the <LCD Brightness> in
S 在系统设置模式里设置 <LCD Brightness>
✤ 要调节 LCD 屏幕亮度,
System
Settings
mode.
➥page
102
12:00AM 2006/01/01
Sepia
(LCD亮度)。➥102页12:00AM 2006/01/01
Sepia
✤ The LCD monitor brightness will not affect the brightness of the
✤ LCD 显示器的亮度将不会影响录制的文件的亮度。
recording.
✤ If you are recording with the LCD monitor closed, the built-in
✤ 如果您录制时将 LCD 显示屏向外合上,可能也会挡住麦克风,造
00:00:02:00:40:03
STBYwill
microphone
not be facing forward, which can cause deterioration
STBY 00:00:02:00:40:03
成声音强度失真并产生噪音。
of the
720i sound strength. We recommend recording with the LCD screen
因此,确保在录制时麦克风一直向外打开。
720i
36
open.F
F
ENGLISH
中
Movie Mode : Recording
视频模式 : 录制
Zooming In and Out
放大和缩小
Zooming allows you to change the size of the subject captured in a
scene.
You can take advantage of the 10x optical electro motion zoom lens.
放大和缩小可以使你调节捕捉到屏幕上的物体的大小。
你可以利用10x 光学电动变焦镜头。
00:00:00/00:40:05
1. Press the [POWER] button to turn on the Sports Camcorder.
◆ The Movie Record screen appears.
◆ You can select Movie mode or Previous mode as the start-up
mode in System Settings. ➥page 109
2. Press the [Record/Stop] button to start recording.
S
●
●
●
●
Zoom Out
1. 按下[电源]按钮打开运动型摄录一体机。
W
◆ 视频录制屏幕将会出现。
◆ 在系统设置里你可以选择视频模式或者是其它模式作为开机模
式。➥ 109页
00:00:00/00:40:05
2. 按下 [录制/停止]TW 按钮开始录制。
1X
F
Slide the [W/T] switch up to
zoom out.
● The subject’s size is
reduced, and you can
record movies as if you
were far away from the
subject.
On the zoom indicator in the LCD screen,
the arrow moves to W.
The smallest rate of zoom out is the default
rate (original resolution of the subject).
10X
1X
F
12:00AM 2006/01/01
00:00:00/00:40:05 Sepia
F
S
12:00AM 2006/01/01
00:00:02/00:40:03
S
Sepia
10X
T
W
1X
F
12:00AM
2006/01/01
00:00:02/00:40:03
●
Sepia
10X
T
W
720i
1X
SF
W
T
10X
1X
F
S
Sepia
10X
T
00:00:04/00:40:01
S
W
720i
12:00AM
2006/01/01
F
00:00:04/00:40:01
●
1X
Sepia
10X
W
T
1X
Zoom In
把 [W/T]开关拨到放大。
拍摄的物体的尺寸就会
变大,你可以就像离物
体很
● 近的样子拍摄。在LCD的
变焦指示器上的肩头指
向T。
最大的光学放大比率是 10x。
●
12:00AM 2006/01/01
00:00:02/00:40:03 Sepia
12:00AM 2006/01/01
把 [W/T] 开关拨到缩小。
拍摄的物体的尺寸就会变
小,你可以就像离物体很
远的样子拍摄。
● 在LCD的变焦指示器上的
箭头指向 W。
缩小的最大比率是默认的比率。(物体原始
分辨率)。
●
W
T
10X
1X
720i
Slide the [ W/T] switch down
to zoom in.
● The subject is larger, and
you can record movies as
if you were close to the
subject.
On the zoom indicator the arrow moves to T.
The largest optical zoom ratio is 10x.
[ Notes ]
✤ Frequent use of zooming may result in
higher battery power consumption.
✤ Optical zoom preserves the image quality.
✤ Refer to page 49 to read about Digital Zoom.
文
SF
12:00AM 2006/01/01
00:00:04/00:40:01 Sepia
W
T
10X
1X
[ 注意 ]
✤ 频繁的使用放大和缩小可能会使电池消耗电
量增大。
✤ 光学变焦保护图片的质量。
✤ 转到 49页可以阅读关于数字变焦的内容。
F
S
12:00AM 2006/01/01
Sepia
10X
T
S
12:00AM 2006/01/01
Sepia
37
ENGLISH
中
Movie Mode : Playing
视频模式 : 播放
Playing Movie Files on the LCD monitor
在LCD 显示器上播放视频文件
You can view playback of movie files on the LCD monitor.
你可以在LCD显示器上查看或者播放视频文件。
1
1. Press the [POWER] button to turn on the
Sports Camcorder.
◆ The Movie Record screen appears.
STBY 00:00:00/00:40:05
720i
1. 按下 [电源]按钮打开运动型摄录一体机。
◆ 视频录制屏幕将会显示。
F
Recording...
2. Press the [PLAY] button or [Joystick(OK)].
◆ Switches to Movie Play mode.
S
12:00AM 2006/01/01
Sepia
STBY
00:00:00/00:40:05
STBY 00:00:00/00:40:05
00:00:00/00:05:20
2
STBY 00:00:00/00:40:05
[PLAY ]
button
720X576
F
F
3. Move the [Joystick] left / right to find the movie
file you want to view.
◆ Each movement of the [Joystick] goes to the
previous/next movie.
F
Recording...
Recording...
Recording...
S
12:00AM 2006/01/01
Sepia
00:00:00/00:05:20
S
S
720X576
12:00AM
12:00AM 2006/01/01
2006/01/01
4. Press the [PLAY]button or [Joystick(OK)] to
play the movie file you want.
◆ Each time you press the [PLAY] button or
[Joystick(OK)], play or pause is selected
repeatedly.
100-0001
3
00:00:15/00:16:15
720X576
12:00AM 2006/01/01
720X576
720X576
720X576
2. 按下 [PLAY] 按钮或者[摇杆(OK)]。
◆ 转到视频播放模式。
3. 左右移动 [摇杆] 找到你想要查看的视频文件。
◆ 每次移动 [摇杆] 都会转到 上一个/下一个
文件。
Sepia
Sepia
100-0001
00:00:00/00:05:20
00:00:00/00:05:20
00:00:15/00:16:15
4. 按下[PLAY]按钮或者 [摇杆(OK)] 播放你想要播
放的文件。
◆ 每次按下[PLAY] 按钮或者 [摇杆(OK)],播放
或者暂停会循环设置。
100-0004
12:00AM 2006/01/01
[ Notes ]
✤ To adjust volume, move the [Joystick] up/down
during playback.
✤ If there is no file stored to view, the message <No
Files...> appears.
4
100-0001
100-0001
100-0004
00:00:15/00:16:15
00:00:15/00:16:15
720X576
720X576
12:00AM
12:00AM 2006/01/01
2006/01/01
38
文
100-0004
100-0004
[ 注意 ]
✤ 要调节音量,在回放时上下移动 [摇杆]。
✤ 如果没有存储可供查看的文件, 将会出现提示
<No Files...> (无文件...)。
ENGLISH
中
Movie Mode : Playing
视频模式 : 播放
Playing Multiple Movie Files
播放多重视频文件
文
Using the [W/T] switch in Movie Play mode, you can display multiple
在视频播放模式下使用 [W/T] 开关,可以在LCD显示器上显示多重文
STBY 00:00:00/00:40:05
images on the LCD monitor.
件。
STBY 00:00:00/00:40:05
STBY
You can also select and play the desired movie file in 1
也可以在多重查看屏幕下选择和播放想播放的视频文
00:00:00/00:40:05
STBY 00:00:00/00:40:05
a multi-view screen.
720i
件。
Recording...
F
F
F
F
1. Press the [POWER] button to turn on the
Sports Camcorder.
◆ The Movie Record screen appears.
Recording...
Recording...
Recording...
S
12:00AM
2006/01/01
S
Sepia
S
2. Press the [PLAY] button or [Joystick(OK)] and
move the [W/T] switch to W(WIDE).
2
◆ The Multi-view screen appears.
S
12:00AM
2006/01/01
Sepia
12:00AM
Sepia
12:00AM 2006/01/01
2006/01/01
Sepia
00:00:00/00:05:20
720X576 00:00:00/00:05:20
720X576
720X576
720X576
00:00:00/00:05:20
00:00:00/00:05:20
100-0001
100-0001
100-0001
100-0001
100-0001
3
100-0001
100-0001
100-0001
?
Move
[ Notes ]
✤ If there is no file stored to view, the message
<No Files...> appears.
✤ When the earphones, Audio / Video cable or
External Camera Module is connected
to the Sports Camcorder, the built-in speaker will
automatically turn off.
2. 按下 [PLAY] 按钮或者[摇杆(OK)]然后移动 [W/
T] 开关到 W(WIDE)。
◆ 多重查看屏幕会出现。
3. 上下左右移动 [摇杆] 选择想要播放的文件。
3. Move the [Joystick] to left / right / up / down to
find the movie file you want to play.
4. Press the [PLAY] button or [Joystick(OK)] to
play the movie file you want.
◆ Each time you press the [PLAY] button or
[Joystick(OK)], play or pause is selected
repeatedly.
1. 按下[电源]按钮打开运动型摄录一体机。
◆ 视频录制屏幕就会出现。
Move
Move
Move
4
Play
OK
ERROR
Play
Play
Play
00:00:05/00:05:20
720X576 00:00:05/00:05:20
720X576
720X576
720X576
00:00:05/00:05:20
00:00:05/00:05:20
12:00AM 2006/01/01
100-0001
12:00AM 2006/01/01
12:00AM
12:00AM 2006/01/01
2006/01/01
100-0001
100-0001
100-0001
4. 按下 [PLAY] 按钮或者[摇杆(OK)] 播放想播放
的文件。
◆ 每次按下 [PLAY] 按钮或者 [摇杆(OK)], 播
放或者暂停将被循环设置。
[ 注意 ]
✤ 如果没有存储可供查看的文件, 会出现提示 <No
Files...> (无文件...)。
✤ 当耳机,视频 / 音频 线或者其他外设模块连接
到机器上,机器的内置扬声器将自动关闭。
39
ENGLISH
中
Movie Mode : Playing
文
视频模式 : 播放
Controls used to play the movie file
用于播放视频文件的控制
[PLAY] button or [Joystick(OK)]: Play or pause the movie file
[PLAY] 按钮或者 [摇杆(OK)]:播放或者暂停播放视频文件
[W] switch: The Multi-view screen appears.
[W] 开关 : 多重播放屏幕显示。
[Joystick](left): In Movie Play mode: Press it to move to previous file. [摇杆](左): 在视频播放模式:按下它转到上一个文件。
Press and hold it to use RPS (Reverse Playback
按住它使用 RPS (反向播放搜索)功能。
Search) function.
(RPS 速度: 2x➝4x➝8x➝16x➝32x➝64x➝128x)
(RPS rate: 2x➝4x➝8x➝16x➝32x➝64x➝128x)
[Joystick](right): In Movie Play mode: Press it to move to next file.
[摇杆](右): 在视频播放模式: 按下它转到下一个文件。
Press and hold it to use FPS (Forward Playback
按住它使用 FPS (正向播放搜索) 功能。
Search) function.
(FPS 速度: 2x➝4x➝8x➝16x➝32x➝64x➝128x)
(FPS rate: 2x➝4x➝8x➝16x➝32x➝64x➝128x)
在视频播放模式: 当暂停时按住它,就可以慢放。当暂
In Movie Play mode: Press and hold it to play
slowlywhen paused. Press it to move to the next
停时,按一下它就会转到下一帧。
00:00:00/00:05:20
frame when paused.
1 720X576 00:00:00/00:05:20
调节声音
720X576
Adjusting the Sound
1. 在视频播放模式下按下 [PLAY] 按钮或者 [摇杆
1. Press the [PLAY] button or [Joystick(OK)] to
(OK)]播放视频。
play the movie file in Movie Play mode.
2. 向上移动[摇杆]来增大声音。
2. Move the [Joystick] up to increase the volume.
◆ 每次向上移动 [摇杆], 声音指示条会增大,
◆ Each time you move the [Joystick] up, the volume 12:00AM 2006/01/01
100-0001
声音就会逐渐增大
bar increases and the sound level will get louder. 12:00AM 2006/01/01
100-0001
◆ 1~2秒钟后,声音指示条就会消失。
◆ The volume bar disappears after 1~2 seconds.
3
3. Move the [Joystick] down to decrease the
volume.
◆ Each time you move the [Joystick] down, the
volume bar decreases and the sound level will
get quieter.
◆ The volume bar disappears after 1~2 seconds.
40
720X576
00:00:05/00:05:15
00:00:05/00:05:15
720X576
[ Notes ]
12:00AM 2006/01/01
✤ You can adjust the volume up to 10 steps.
12:00AM 2006/01/01
✤ You can also play the movie file on a TV screen by connecting the
Sports Camcorder to a TV. ➥page 127
✤
✤ A video codec is required to play the movie files recorded on the
Sports Camcorder on a computer.
Install the software provided in the Software CD to have the
CODEC automatically installed in the system. If you do not have
the CD, search the product model name in the Download Centre
on the Samsung Electronics home page (www.samsung.com) to
get the CODEC installation file. ➥page 124
3. 向下移动 [摇杆] 来减小声音。
◆ 每次向下移动 [摇杆], 声音指示条会减小,
声音也会逐渐减小。
◆ 1~2秒钟之后,声音指示条就会消失。
[ 注意 ]
✤ 你最高可以调节声音到10级。
✤ 把运动型摄录一体机连接到电视上,可以在电视
屏幕上播放视频文件。➥127页
运动型摄录一体机录制的视频文件在电脑上播放需要视频数字信号
编解码器软件。安装随机器提供的光盘上的软件,视频数字信号编
解码器会自动安装到系统里。如果你没有光盘, 到三星电子主页的
下载中心搜索机器的型号 (www.samsung.com) 就可以获得 视频数
字信号编解码器的 安装文件。➥124页
100-0001
100-0001
Movie Mode :
Setting the Recording Options
ENGLISH
中
文
视频模式 : 设置录制选项
Setting the Movie Size
设置视频文件大小
You can set the movie files size. The file storage capacity depends on
the memory capacity and movie file size.
你可以设置视频文件的大小。文件的存储容量取决于记忆卡的容量和文
件的大小。
1. Press the [POWER] button to turn on the
Sports Camcorder.
◆ The Movie Record screen appears.
1
2. Press the [MENU] button.
Move the [Joystick] left / right to select <Size>.
3. Move the [Joystick] up / down to select an
option, and then press the [Joystick(OK)].
◆ Available options are: <720x576> / <352X288> 2
4. Press the [MENU] button to exit the menu.
◆ The selected function icon is displayed.
[ Notes ]
✤ If <TV> is selected in <Record Mode>, the size is
set to 720i only.
3
If <PC> is selected in <Record Mode>, the size is
set to 720p or 352p.
✤ Regarding detailed image capacity. ➥page 31.
✤ Higher resolution requires more memory space,
which results in shorter maximum recording time.
✤ When the screen size is set to 352(352X288), it is
played back in smaller size than 720(720X576) on
PC.
✤ While the menu screen is displayed, pressing the 4
[Record / Stop] button will move to Movie Record
mode.
STBY 00:00:00/00:40:05
STBY 00:00:00/00:40:05
STBY
00:00:00/00:40:05
STBY 00:00:00/00:40:05
1. 按下 [电源]按钮,打开摄录一体机。
◆ 视频录制屏幕将会显示。
F
720i
Recording...
Recording...
Recording...
Recording...
F
F
F
S
S
12:00AM
2006/01/01
S
S
12:00AM 2006/01/01
12:00AM 2006/01/01
2006/01/01
12:00AM
Movie
Movie
Movie
Movie
Size
Size 720
720x576
Size
Size 720
720x576
352
352x288
720
720x576
720
720x576
352
352x288
352
352x288
352
352x288
Move
Move
Move
Move
OK
Movie
Movie
Movie
Movie
Size
Size
720x576
Size
Size
720x576
352x288
720x576
720x576
352x288
352x288
352x288
Move
Move
Move
Move
352p
Select
Select
Select
Select
Sepia
Sepia
Sepia
Sepia
AE
MENU
Exit
Exit
Exit
Exit
720
720
352
720
720
352
352
352
Select
Select
Select
Select
MENU
Exit
Exit
Exit
Exit
STBY 00:00:00/01:00:07
STBY 00:00:00/01:00:07
STBY
00:00:00/01:00:07
STBY 00:00:00/01:00:07
F
F
F
F
3. 上下移动 [摇杆]来选择一个选项, 然后按下[摇
杆(OK)]。
◆ 可选的选项是 : <720x576> / <352X288>
4. 按下[菜单]按钮退出菜单。
◆ 被选中的功能的图标会出现。
AE
OK
2. 按下[菜单]按钮。
左右移动[摇杆]选择 <Size> (大小)。
Recording...
Recording...
Recording...
Recording...
[ 注意 ]
✤ 如果<TV> 设置为 <Record Mode> (录制模式),
大小只能设置为 720i。
如果<PC> 设置为 <Record Mode> (录制模式),
大小可设置为 720p 或者 352p。
✤ 关于详细的图像尺寸请参照。➥31页
✤ 高解析度需要更大的存储空间,这会导致最大录制
时间的缩短。
✤ 当屏幕尺寸设置为 352(352X288),在电脑上播放
的时候尺寸会比720(720X576) 小。
✤ 当菜单屏幕出现, 按下 [录制/停止]按钮将转到
视频录制模式。
S
S
12:00AM
2006/01/01
S
S
12:00AM 2006/01/01
12:00AM
2006/01/01
12:00AM 2006/01/01
Sepia
Sepia
Sepia
Sepia
41
Movie Mode :
Setting the Recording Options
视频模式 : 设置录制选项
Setting the Movie Quality
设置视频文件质量
ENGLISH
中
文
You can set the movie file's quality. The files storage capacity depends 你可以设置视频文件的质量。文件存储的容量取决于记忆卡的容量和视
on the memory capacity and movie file quality.
频文件的质量。
1. Press the [POWER] button to turn on the
Sports Camcorder.
◆ The Movie Record screen appears.
1
STBY 00:00:00/00:40:05
00:00:00/00:40:05
STBY
STBY
00:00:00/00:40:05
STBY 00:00:00/00:40:05
F
720i
1. 按下 [电源] 按钮,打开摄录一体机。
◆ 视频录制屏幕将会显示。
Recording...
Recording...
Recording...
Recording...
F
F
F
S
2. Press the [MENU] button.
Move the [Joystick] left / right to select
<Quality>.
2
3. Move the [Joystick] up / down to select an
option, and then press the [Joystick(OK)].
◆ Available options are: <Super Fine> / <Fine> /
<Normal>
S
12:00AM
2006/01/01
SS
12:00AM
2006/01/01
12:00AM
12:00AM 2006/01/01
2006/01/01
Movie
Movie
Movie
Movie
Quality
AE
Quality
Super
Fine SF
Quality
Quality SFF
Fine
SF
Super
Fine
SF
Super
Super Fine
Fine FN
Normal
F
Fine
F
Fine
Fine
N
N
Normal
N
Normal
Normal
Move
Select
Move
Move
Move
4. Press the [MENU] button to exit the menu.
◆ The selected function icon is displayed.
[ Notes ]
✤ Regarding detailed image capacity. ➥page 31.
✤ While the menu screen is displayed, pressing the
[Record / Stop] button will move to Movie Record
mode.
3
OK
Movie
Movie
Movie
Movie
Quality
Quality
Super
Fine
Quality
Quality
Fine
Super
Fine
Super
Super Fine
Fine
Normal
Fine
Fine
Fine
Normal
Normal
Normal
Move
Move
Move
Move
4
720i
Select
Select
Select
Sepia
Sepia
Sepia
Sepia
Exit
MENU
4. 按下 [菜单] 按钮退出菜单。
◆ 被选中的功能的图标会出现。
AE
SF
F
SF
SF
SF
N
F
F
F
N
N
N
Select
OK
Select
Select
Select
Exit
MENU
Exit
Exit
Exit
STBY 00:00:00/00:26:43
00:00:00/00:26:43
STBY
STBY
00:00:00/00:26:43
STBY 00:00:00/00:26:43
Recording...
Recording...
Recording...
Recording...
S
42
3. 上下移动 [摇杆] 选择一个选项, 然后按下 [摇
杆(OK)]。
◆ 可选的选项是: <Super Fine> (高清晰) /
<Fine> (佳) / <Normal> (标准)
Exit
Exit
Exit
SF
SF
SF
SF
2. 按下 [菜单]按钮。
左右移动 [摇杆] 选择 <Quality> (质量)。
S
12:00AM
2006/01/01
SS
12:00AM
2006/01/01
12:00AM
12:00AM 2006/01/01
2006/01/01
Sepia
Sepia
Sepia
Sepia
[ 注意 ]
✤ 查阅详细的图像容量。➥见31页。
✤ 当菜单屏幕出现, 按下[录制/停止]按钮将转到视
频录制模式。
Movie Mode :
Setting the Recording Options
视频模式 : 设置录制选项
Setting the White Balance
设置白平衡
ENGLISH
中
文
白平衡会随着光线条件改变。白平衡是用来在不同的光线条件下保护自
STBY 00:00:00/00:40:05
The White Balance may vary depending on the lighting conditions.
然色彩的。
STBY 00:00:00/00:40:05
The White Balance is used to preserve natural colours
STBY
00:00:00/00:40:05
STBY 00:00:00/00:40:05
1
under different lighting conditions.
720i
1. 按下 [电源] 按钮打开摄录一体机。
Recording...
1. Press the [POWER] button to turn on the Sports
◆ 视频拍摄屏幕将会显示。
Recording...
Recording...
Recording...
Camcorder.
2. 按下 [菜单]按钮。
◆ The Movie Record screen appears.
S
左右移动 [摇杆] 选择 <White Balance> (白平
S
2. Press the [MENU] button.
12:00AM
2006/01/01
Sepia
衡)。
S
S
Move the [Joystick] left / right to select <White
12:00AM 2006/01/01
Sepia
3. 上下移动 [摇杆]选择一个选项, 然后按下[摇杆
12:00AM
Sepia
12:00AM 2006/01/01
2006/01/01
Sepia
Balance>.
(OK)]。
Movie
3. Move the [Joystick] up / down to select an
◆ 想自己设定白平衡, 将摄录一体机对准一个
Movie
Movie
2
Movie
option, and then press the [Joystick(OK)].
White Balance
白色的地方 (例如墙),使LCD监视器上全是白
AE
◆ To set Custom, frame your Sports Camcorder
White Balance
色。按下 [摇杆(OK)] 按钮来设置。自己设定
White
Balance
Auto
White
Balance
on a white area (such as a wall), filling the
白平衡后,拍摄的视频都将受到影响。
Daylight
Auto
A
Auto
LCD monitor with white colour. Press the
Auto
Fluorescent
Daylight
Auto
(自动) 根据周围的环境自动设置。
Daylight
Daylight
[Joystick(OK)] to set.
Fluorescent
F
F
F
F
Automatically sets according to the recording
environment.
Adjusts the colour according to daylight/indoor,
Daylight
outdoor light
Fluorescent Suitable for a fluorescent light environment.
Tungsten Suitable for an incandescent light environment.
You can adjust the white balance as you wish
Custom
based on the recording environment.
Fluorescent
Fluorescent
Move
Select
Auto
Move
Move
Move
3
4. Press the [MENU] button to exit the menu.
◆ The selected function icon is displayed.
◆ If <Auto> is selected, no icon will be displayed.
OK
Select
Select
Select
MENU
Movie
Movie
Movie
Movie
White Balance
AE
White
Balance
Auto
White
White Balance
Balance
Daylight
Auto
Auto
Auto
Daylight
Fluorescent
Daylight
Daylight
Fluorescent
Fluorescent
Fluorescent
Move
Select
Move
Move
Move
4
OK
Select
Select
Select
MENU
Exit
Exit
Exit
Exit
Exit
Exit
Exit
Exit
STBY 00:00:00/00:40:05
[ Notes ]
720i STBY 00:00:00/00:40:05
STBY
00:00:00/00:40:05
STBY 00:00:00/00:40:05
✤ When recording outdoors, the <Auto> setting will
allow you to achieve the best results.
Recording...
✤ As the lighting conditions change, set the appropriate
Recording...
Recording...
white balance before recording.
Recording...
✤ The subject used for <Custom> should be white
S
colour. If not, the colour balance will not be natural.
S
12:00AM
2006/01/01
S
S
✤ While the menu screen is displayed, pressing the
12:00AM 2006/01/01
12:00AM
2006/01/01
[Record / Stop] button will move to Movie Record mode.12:00AM 2006/01/01
SFF
SFF
SFF
SFF
Sepia
Sepia
Sepia
Sepia
Daylight
(日光)
Fluorescent
(荧光灯)
Tungsten
(钨丝灯)
Custom
(自定义白平衡)
根根据日光/室内、室外光线设置颜色。
适合于日光灯光线环境。
适合于白炽灯光线环境。
您可以根据拍摄环境设置白平衡。
4. 按下 [菜单] 按钮退出菜单。
◆ 被选择的功能图标会出现。
◆ 如果选择的是 <Auto> (自动) 那么将没有图
标显示。
[ 注意 ]
✤ 当在室外拍摄时, 设置为 <Auto> (自动) 将达到
最佳效果。
✤ 当光线条件改变的时候,在拍摄之前请重新设置白
平衡。
✤ 使用 <Custom> (自定义白平衡) 时对准的物体应
该是白色的。否则颜色会不自然。
✤ 当菜单屏幕出现, 按下 [录制/停止]按钮将转到
视频录制模式。
43
Movie Mode :
Setting the Recording Options
ENGLISH
中
文
视频模式 : 设置录制选项
Setting the Program AE (Programmed Auto Exposure) 设置程序AE(自动程序曝光)
00:00:00/00:40:05
STBY
Program AE modes are preset automatic exposure modes based
upon
自动程序曝光模式可以根据内在的程序自动调整曝光。可以让你调整光
00:00:00/00:40:05
STBY 00:00:00/00:40:05
an internal computer programme. It allows you
圈以适合不同的情况。
STBY
00:00:00/00:40:05
STBY
1
to adjust the aperture setting to suit different
720i
conditions.
Recording...
1. 按下 [电源]按钮打开运动型摄录一体机。
Recording...
Recording...
Recording...
◆ 视频录制屏幕将会显示。
1. Press the [POWER] button to turn on the
S
Sports Camcorder.
S
12:00AM
2006/01/01
Sepia 2. 按下 [菜单]按钮。
S
◆ The Movie Record screen appears.
S
12:00AM 2006/01/01
Sepia
12:00AM
Sepia
左右移动 [摇杆]来选择 <Program AE> (编程
Sepia
12:00AM 2006/01/01
2006/01/01
Movie
2. Press the [MENU] button.
AE)。
Movie
Move the [Joystick] left / right to select
Movie
2
Movie
Program
AE
<Program AE>.
AE
Program AE
3. 上下移动[摇杆] 选择一个选项, 然后按下[摇杆
Program
Auto
Program AE
AE
(OK)]。
3. Move the [Joystick] up / down to select an
Sports
Auto
Auto
Auto
Spotlight
Sports
option, and then press the [Joystick(OK)].
Sports
自动平衡曝光和快门速度以获得最佳效
F
F
F
F
AE
AUTO
Auto balances between the subject and
background to get the best result.
The shutter speed automatically varies from
1/50 to 1/250 per second depending on the
scene.
For recording fast-moving people or objects.
Sports
It is suitable for sports events and recording
outside in the car.
Compensates for a subject that appears
bright under strong direct light such as
Spotlight too
spotlight. It is suitable for concerts and school
performances.
when the light is very strong such as on
Sand/Snow Use
the beach or in the snow.
Sports
Spotlight
Spotlight
Spotlight
Move
Move
Move
Move
Auto
44
MENU
AE AE
Program AE
Program
Auto
Program AE
AE
Auto
Sports
Auto
Auto
Sports
Spotlight
Sports
Sports
Spotlight
Spotlight
Spotlight
Move
Select
Move
Move
Move
720i
Exit
Exit
Exit
Exit
OK
Select
Select
Select
Auto (自动) 果。根据场景而定快门速度将在1/50秒
到1/250秒之间自动改变。
用于录制快速移动的人物和物体。适合录
Sports
(运动)
制体育活动和在车窗内录制窗外的景物。
Spotlight 补偿直接出现在强光下过亮的物件.适合
(聚光)
录制音乐会和学校表演会。
Sand/Snow 在照明非常强(例如:雪地,沙滩)的情
(海滩/雪地) 况下使用。
MENU
Exit
Exit
Exit
Exit
STBY 00:00:00/00:40:05
STBY 00:00:00/00:40:05
STBY
00:00:00/00:40:05
STBY 00:00:00/00:40:05
4. 按下[菜单]按钮退出菜单。
◆ 被选择功能的图标将会显示。
◆ 如果选择了<Auto> (自动)将没有图标显示。
SFF
SFF
SFF
SFF
[ Note ]
✤ While the menu screen is displayed, pressing the
[Record / Stop] button will move to Movie Record
mode.
Select
Select
Select
Select
Movie
Movie
Movie
Movie
Program
3
4
4. Press the [MENU] button to exit the menu.
◆ The selected function icon is displayed.
◆ If <Auto> is selected, no icon will be displayed.
OK
[ 注意 ]
✤ 当菜单屏幕出现, 按下 [录制/停止]按钮将转到
视频记录模式。
Recording...
Recording...
Recording...
Recording...
S
S
12:00AM
2006/01/01
S
S
12:00AM 2006/01/01
12:00AM
12:00AM 2006/01/01
2006/01/01
Sepia
Sepia
Sepia
Sepia
Movie Mode :
Setting the Recording Options
ENGLISH
中
文
视频模式 : 设置录制选项
Setting the Effect
设置效果
You can apply various digital effects to your recording.
在你的摄录中可以提供多种数字特效。
STBY 00:00:00/00:40:05
1
1. Press the [POWER] button to turn on the
Sports Camcorder.
◆ The Movie Record screen appears.
F
STBY
00:00:00/00:40:05
STBY 00:00:00/00:40:05
STBY 00:00:00/00:40:05
720i
1. 按下 [电源]按钮打开运动型摄录一体机。
◆ 视频录制屏幕将会显示。
Recording...
F
F
F
Recording...
Recording...
Recording...
S
2. Press the [MENU] button.
Move the [Joystick] left / right to select
<Effect>.
3. Move the [Joystick] up / down to select an
option, and then press the [Joystick(OK)].
Cancels the <Effect>.
Adds artistic effects to your movie file.
A mosaic overlay appears on your movie
file.
Sepia The image is displayed in sepia colour
similar to that of an old photograph.
Negative Reverses the colours, creating the look of
a negative.
Mirror This mode cuts the image in half using a
Mirror effect.
B&W
Changes the images into Black and White.
Sepia
12:00AM
12:00AM 2006/01/01
2006/01/01
12:00AM 2006/01/01
Movie
Sepia
Sepia
Sepia
S
2
Effect
Off Effect
Effect
Art
Off
Off
Off
Mosaic
Art
Art
Art
Mosaic
Mosaic
Move
Mosaic
Move
Move
Move
Select
Select
Select
Exit
MENU
Exit
Exit
Exit
Movie
Movie
Movie
Effect
AE
Effect
Effect
Negrtive
Effect
Mirror
Negrtive
Negrtive
Negrtive
B&W
Mirror
Mirror
Mirror
B&W
B&W
Move
B&W
Move
Move
Move
4
Select
OK
Select
Select
Select
Exit
MENU
Exit
Exit
Exit
Off (关)
Art (艺术)
Mosaic
(马赛克)
Sepia (仿旧)
Negative
(底片)
Mirror (镜像)
B&W (黑白)
取消 <Effect> (效果)。
在您的视频文件上创建艺术效果。
在您的视频文件上创建马赛克效果。
图片将显示为类似旧照片的仿旧颜色。
反转颜色,创造底片效果。
此模式使用镜面效果把图像切成一半。
把图像变成黑白的。
4. 按下 [菜单] 按钮退出菜单。
◆ 被选择的功能的图标将会出现。
◆ 如果选择了 <Off> (关) 将没有图标出现。
STBY 00:00:00/00:40:05
720i
SFF
[ Note ]
✤ While the menu screen is displayed, pressing the
[Record / Stop] button will move to Movie Record
mode.
Select
OK
Movie
3
2. 按下 [菜单] 按钮。
左右移动 [摇杆] 选择 <Effect> (效果)。
3. 上下移动[摇杆]选择一个选项, 然后按下[摇杆
(OK)]。
Movie
Movie
Movie
Effect
AE
Off
Art
Mosaic
4. Press the [MENU] button to exit the menu.
◆ The selected effect and icon are displayed.
◆ If <Off> is selected, no icon will be displayed.
12:00AM
2006/01/01
SS
F
SF
SFF
SFF
STBY
00:00:00/00:40:05
STBY 00:00:00/00:40:05
STBY 00:00:00/00:40:05
[ 注意 ]
✤ 当菜单屏幕出现, 按下 [录制/停止]按钮将转到
视频录制模式。
Recording...
Recording...
Recording...
Recording...
S
12:00AM
2006/01/01
SS
Mirror
12:00AM
12:00AM 2006/01/01
2006/01/01
12:00AM 2006/01/01
Mirror
Mirror
Mirror
S
45
Movie Mode :
Setting the Recording Options
视频模式 : 设置录制选项
Setting the EIS (Electronic Image Stabilizer)
设置 EIS (电子图像稳定器)
ENGLISH
中
文
The Electrical Image Stabilizer is a function that compensates for hand 电子图像稳定器功能是用来补偿在拍摄过程中的手抖和其它抖动的。
shake and other movements while recording.
EIS 会提供更稳定的图像当:
STBY 00:00:00/00:40:05
EIS provides a more stable image when:
◆ 变焦拍摄一个小物体时
STBY 00:00:00/00:40:05
00:00:00/00:40:05
STBY
◆ Recording while zooming
STBY 00:00:00/00:40:05
◆ 走路或者移动拍摄时
1
◆ Recording small objects
720i
◆ 在汽车中透过窗子拍摄时
Recording...
◆ Recording while walking or moving
Recording...
◆ 在汽车中透过车窗拍摄时
Recording...
Recording...
◆ Recording through the window of a moving
S
vehicle
1. 按下 [电源]按钮打开运动型摄录一体机。
F
F
F
F
1. Press the [POWER] button to turn on the
Sports Camcorder.
◆ The Movie Record screen appears.
2
2. Press the [MENU] button.
Move the [Joystick] left / right to select <EIS>.
3. Move the [Joystick] up / down to select an
option, and then press the [Joystick(OK)].
◆ <On>: Enables EIS function.
◆ <Off>: Disables EIS function.
S
12:00AM
2006/01/01
S
S
12:00AM
2006/01/01
12:00AM 2006/01/01
2006/01/01
12:00AM
Movie
Movie
Movie
Movie
EIS
On EIS
EIS
On
Off EIS
On
On
Off
Off
Off
Move
Move
Move
Move
3
4. Press the [MENU] button to exit the menu.
◆ If you select <On>, the EIS icon (
) is
displayed.
◆ If you select <Off>, no icon is displayed.
Move
Move
Move
Move
720i
46
Select
Select
Select
Select
TV
MENU
SFF
SFF
F
SFF
SF
Exit
Exit
Exit
Exit
TV
PC
OK
Select
Select
Select
Select
MENU
2. 按下 [菜单]按钮。
左右移动 [摇杆] 选择 <EIS> (手震补偿)。
3. 上下移动 [摇杆] 选择一个选项, 然后按下[摇
杆(OK)]。
◆ <On> (开): 使用 EIS 功能。
◆ <Off> (关): 关闭 EIS 功能。
4. 按下 [菜单]按钮退出菜单。
)
◆ 如果你选择了 <On> (开), EIS 图标 (
将会出现。
◆ 如果你选择了 <Off> (关),没有图标出现。
Exit
Exit
Exit
Exit
[ 注意 ]
✤ 当菜单屏幕出现, 按下 [录制/停止]按钮将转到
视频录制 模式。
STBY 00:00:00/00:40:05
STBY 00:00:00/00:40:05
00:00:00/00:40:05
STBY 00:00:00/00:40:05
STBY
Recording...
Recording...
Recording...
Recording...
S
S
12:00AM
2006/01/01
S
S
12:00AM
2006/01/01
12:00AM
2006/01/01
12:00AM 2006/01/01
◆ 视频拍摄屏幕将会出现。
PC
Movie
Movie
Movie
Movie
EIS
On EIS
EIS
EIS
On
Off
On
On
Off
Off
Off
4
[ Note ]
✤ While the menu screen is displayed, pressing the
[Record / Stop] button will move to Movie Record
mode.
OK
Sepia
Sepia
Sepia
Sepia
Sepia
Sepia
Sepia
Sepia
Movie Mode :
Setting the Recording Options
ENGLISH
视频模式 : 设置录制选项
中
文
Setting the Focus
设置焦点
You can set the focus depending on the subject or environment. In
most situations, it is best to use the AF(Auto Focus).
你可以根据环境或者是被拍摄物体来设置聚焦。大多数情况下最好使用
AF(自动聚焦)。
1. Press the [POWER] button to turn on the
Sports Camcorder.
◆ The Movie Record screen appears.
F
F
F
Recording...
Recording...
Recording...
Recording...
2. 按下[菜单]按钮
左右移动 [摇杆]来选择 <Focus> (对焦)。
S
S
S
12:00AM
S
2
4. Press the [MENU] button to exit the menu.
◆ The selected function icon is displayed.
◆ If you select <AF>, no icon is displayed.
Manual Focus <MF>
3
Adjust the focus by moving the [Joystick] up/
down to zoom in or out manually.
◆ When a picture contains objects that are both
close and far away from the Sports Camcorder.
◆ When a person is enveloped in fog or
surrounded by snow.
[ Notes ]
✤ The focus is set to <AF> automatically when the
Sports Camcorder is turned off.
✤ While the menu screen is displayed, pressing the
[Record / Stop] button will move to Movie Record
mode.
1. 按下[电源]按钮打开运动型摄录一体机。
◆ 视频录制屏幕将会出现。
F
720i
2. Press the [MENU] button.
Move the [Joystick] left / right to select
<Focus>.
3. Move the [Joystick] up / down to select an
option, and then press the [Joystick(OK)].
◆ <AF>: Set the focus automatically.
◆ <MF>: Set the focus manually.
STBY 00:00:00/00:40:05
STBY 00:00:00/00:40:05
STBY
00:00:00/00:40:05
STBY 00:00:00/00:40:05
1
2006/01/01
12:00AM 2006/01/01
12:00AM
12:00AM 2006/01/01
2006/01/01
Movie
Movie
Movie
Movie
Focus
Focus
AF Focus
Focus
AF
AF
MF
AF
MF
MF
MF
Move
Move
Move
Move
OK
Sepia
Sepia
Sepia
Sepia
TV
Select
Select
Select
Select
Movie
Movie
Movie
Movie
Focus
Focus
AF Focus
Focus
AF
AF
MF
AF
MF
MF
MF
Move
Move
Move
Move
4
720i
PC
Exit
Exit
Exit
Exit
MENU
S
S
4. 按下 [菜单] 按钮退出菜单。
◆ 被选择功能的图标会出现。
◆ 如果选择了<AF>,没有图标出现。
手动聚焦 <MF>
上下移动 [摇杆]手动推远或拉近镜头来调整聚焦。
◆ 当画面中同时有近的物体和远的物体时。
◆ 当人在雾中或者是被雪环绕的时候。
TV
PC
OK
Select
Select
Select
Select
MENU
Exit
Exit
Exit
Exit
STBY 00:00:00/00:40:05
STBY 00:00:00/00:40:05
STBY
00:00:00/00:40:05
STBY 00:00:00/00:40:05
F
F
F
F
3. 上下移动[摇杆] 选择一个选项, 然后按下[摇杆
(OK)]。
◆ <AF>: 设置自动聚焦。
◆ <MF>: 设置手动聚焦。
Recording...
Recording...
Recording...
Recording...
S
12:00AM
2006/01/01
S
12:00AM 2006/01/01
12:00AM
12:00AM 2006/01/01
2006/01/01
Sepia
Sepia
Sepia
Sepia
[ 注意 ]
✤ 当运动型摄录一体机被关闭时,将自动设置为
<AF>。
✤ 当菜单屏幕出现, 按下 [录制/停止]按钮将转到
视频记录模式。
47
Movie Mode :
Setting the Recording Options
视频模式 : 设置录制选项
Setting the BLC (Backlight Compensation)
设置BLC(背光补偿)
ENGLISH
中
文
The Backlight Compensation function helps to make the subject
背光补偿功能是在被拍摄物体暗得无法分辨或者是物体在窗前时使被拍
brighter when the subject is in front of a window or the subject STBY
is too00:00:00/00:40:05
摄物体更明亮。当运动型摄录一体机在比较亮的背景或者是雪地上使用
STBY 00:00:00/00:40:05
dark to distinguish. You can use this function when
时,可以使用这个功能。
STBY
00:00:00/00:40:05
STBY 00:00:00/00:40:05
1
using the Sports Camcorder in bright or snowy
720i
backgrounds.
Recording...
1. 按下 [电源] 按钮打开运动型摄录一体机。
Recording...
Recording...
Recording...
◆ 视频录制屏幕将会显示。
1. Press the [POWER] button to turn on the
S
Sports Camcorder.
SS
12:00AM
2006/01/01
Sepia
S
◆ The Movie Record screen appears.
12:00AM 2006/01/01
2006/01/01
Sepia
12:00AM
Sepia
2. 按下 [菜单]按钮。
12:00AM
2006/01/01
Sepia
Movie
左右移动[摇杆] 选择 <BLC> (背光补偿)。
F
F
F
F
2. Press the [MENU] button.
Move the [Joystick] left / right to select <BLC>.
3. Move the [Joystick] up / down to select an
option, and then press the [Joystick(OK)].
◆ <On>: Set the BLC function.
◆ <Off>: Cancel the BLC function.
2
Move
Move
Move
Move
3
4. Press the [MENU] button to exit the menu.
) icon is displayed.
◆ The selected function (
◆ If you select <Off>, no icon is displayed.
[ Notes ]
✤ The BLC is set to <Off> when the Sports
Camcorder is turned off.
✤ While the menu screen is displayed, pressing the
[Record / Stop] button will move to Movie Record
mode.
48
Movie
Movie
Movie
BLC
BLC
On BLC
BLC
On
On
Off
On
Off
Off
Off
TV
PC
OK
Movie
Movie
Movie
Movie
BLC
BLC
On BLC
BLC
On
On
Off
On
Off
Off
Off
Move
Move
Move
Move
4
720i
Select
Select
Select
Select
MENU
Exit
Exit
Exit
Exit
4. 按下[菜单] 按钮退出菜单。
◆ 如果选择了此功能 (
) 图标将会显示。
◆ 如果选择了 <Off> (关),没有图标显示。
TV
PC
OK
Select
Select
Select
Select
MENU
Exit
Exit
Exit
Exit
STBY 00:00:00/00:40:05
00:00:00/00:40:05
STBY 00:00:00/00:40:05
STBY
00:00:00/00:40:05
STBY
F
F
F
F
S
S
Recording...
Recording...
Recording...
Recording...
S
12:00AM
2006/01/01
S
12:00AM 2006/01/01
12:00AM
12:00AM 2006/01/01
2006/01/01
3. 上/下移动[摇杆] 选择一个选项, 然后按下[摇
杆(OK)]。
◆ <On> (开): 设置背光补偿功能。
◆ <Off> (关): 取消背光补偿功能。
Sepia
Sepia
Sepia
Sepia
[ 注意 ]
✤ 当运动型摄录一体机被关闭时。背光补偿将会设
置为 <Off> (关)。
✤ 当菜单屏幕出现, 按下[录制/停止]按钮将转到
视频录制模式。
Movie Mode :
Setting the Recording Options
视频模式 : 设置录制选项
Setting the Digital Zoom
设置数字变焦
ENGLISH
中
文
Zooming more than 10x is achieved digitally, up to 100X when
变焦超过10x可以通过数字方式实现, 结合光学变焦最大可以达到
combined with optical zoom.
100X。
STBY 00:00:00/00:40:05
00:00:00/00:40:05
STBY 00:00:00/00:40:05
The Digital Zoom processes data to enlarge the centre
数字变焦处理数据通过放大图像的中心位置来添满屏
STBY
00:00:00/00:40:05
STBY
1
portion of the image to fill the frame.
幕。
720i
It may produce a less detailed and slightly grainy
Recording...
有可能会产生不太清楚以及有轻微颗粒感的图像。
Recording...
picture.
Recording...
Recording...
F
F
F
F
1. Press the [POWER] button to turn on the
Sports Camcorder.
◆ The Movie Record screen appears.
2. Press the [MENU] button.
Move the [Joystick] left / right to select <Digital
Zoom>.
S
S
S
12:00AM
2006/01/01
S
12:00AM 2006/01/01
2006/01/01
12:00AM
12:00AM
2006/01/01
2
Movie
Movie
Movie
Movie
Digital ZoomPC
Digital Zoom
Zoom
Digital
On
Digital
Zoom
On
On
Off
On
Off
Off
Off
4. Press the [MENU] button to exit the menu.
◆ When using the digital zoom switch, a digital
zoom indicator appears on the screen.
Move
Move
Move
Move
OK
Select
Select
Select
Select
MENU
3. 上/下移动[摇杆]选择一个选项,然后按下[摇杆
(OK)]。
◆ <On> (开): 使用数字变焦。当变焦超过10x
时会自动启用数字变焦。(最高达100x)
◆ <Off> (关): 关闭数字变焦。只能使用 10x
的光学变焦。
Exit
Exit
Exit
Exit
Movie
Movie
Movie
Movie
Digital ZoomPC
Digital Zoom
Zoom
Digital
On
Digital
Zoom
On
On
Off
On
Off
Off
Off
TV
Move
Move
Move
Move
4
720i
F
F
F
F
S
S
Select
OK Select
Select
Select
S
12:00AM
2006/01/01
S
12:00AM 2006/01/01
2006/01/01
12:00AM
12:00AM
2006/01/01
4. 按下[菜单]按钮退出菜单。
◆ 当使用数字变焦开关, 屏幕上会显示一个数
字变焦指示器。
Exit
MENU Exit
Exit
Exit
STBY 00:00:00/00:40:05
00:00:00/00:40:05
STBY 00:00:00/00:40:05
STBY
00:00:00/00:40:05
STBY
Recording...
Recording...
Recording...
Recording...
1. 按下[电源]按钮打开运动型摄录一体机。
◆ 视频录制屏幕将会显示。
2. 按下[菜单]按钮。
左右移动 [摇杆]选择 <Digital Zoom> (数字变
焦)。
TV
3. Move the [Joystick] up / down to select an
option, and then press the [Joystick(OK)].
◆ <On>: Enables digital zoom. Attempts to zoom
in more than 10x will automatically apply digital
3
zooming. (up to 100x)
◆ <Off>: Disables digital zoom. Only optical zoom
10x will be supported for zooming
[ Note ]
✤ While the menu screen is displayed, pressing the
[Record / Stop] button will move to Movie Record
mode.
Sepia
Sepia
Sepia
Sepia
W
W
W
W
1X
1X
1X
1X
10X
10X
10X
10X
T
T
Sepia
T
T
Sepia
Sepia
Sepia
[ 注意 ]
✤ 当菜单屏幕出现, 按下 [录制/停止]按钮将转到
视频录制模式。
49
Movie Mode :
Setting the Recording Options
ENGLISH
中
视频模式 : 设置录制模式
Setting the Record Mode
You can set the proper record mode before starting
movie file recording.
设置录制模式
1
STBY 00:00:00/00:40:05
STBY 00:00:00/00:40:05
00:00:00/00:40:05
STBY
STBY 00:00:00/00:40:05
F
F
F
1. Press the [POWER] button to turn on the
Sports Camcorder.
◆ The Movie Record screen appears.
在拍摄之前你可以设置适当的录制模式。
Recording...
Recording...
Recording...
Recording...
720iF
S
2. Press the [MENU] button.
Move the [Joystick] left / right to select <Record
Mode>.
2
12:00AM
2006/01/01
S
S
S
12:00AM
2006/01/01
12:00AM
2006/01/01
12:00AM
Movie2006/01/01
Sepia
Sepia
Sepia
Sepia
Movie
Movie
Movie Mode
Record
TV
RecordPCMode
Record
Record Mode
Mode
PC
TV
TV
TV
PC
PC
PC
TV
3. Move the [Joystick] up / down to select an
option, and then press the [Joystick(OK)].
◆ <TV>: The system generates clear images
when played back on TV.
◆ <PC>: The system generates clear images
when played back on PC.
◆ We recommend copying the file onto a PC or
connecting the Sports Camcorder to a TV for
a better playback picture.
Move
Select
Move
Move
Move
OK
Movie
Movie
Movie
MoviePCMode
Record
3
Select
Select
Select
Exit
MENU
Exit
Exit
Exit
TV
TV
Record Mode
Record
Record Mode
Mode
PC
TV
TV
TV
PC
PC
PC
4. Press the [MENU] button to exit the menu.
◆ If you select <TV>, <i> is displayed with size
icon.
◆ If you select <PC>, <p> is displayed with size
icon.
Move
Move
Move
Move
4
720p
Select
OK
Select
Select
Select
Exit
MENU
1. 按下[电源] 按钮打开运动型摄录一体机。
◆ 视频录制屏幕将会显示。
2. 按下[菜单]按钮。
左右移动 [摇杆]选择 <录制模式>。
3. 上下移动 [摇杆]选择一个选项, 然后按下[摇杆
(OK)]。
◆ <TV>: 系统输出在电视上播放清楚的图像。
◆ <PC>: 系统输出在个人电脑上播放清楚的图
像。
◆ 为了得到更好的图像效果,我们推荐把
视频文件复制到电脑上或者是把运动型
摄录一体机器连接到电视上。
4. 按下[菜单] 按钮退出菜单。
◆ 如果你选择<TV>, <i>跟 尺寸图标会显示。
◆ 如果你选择<PC>, <p>跟尺寸图标会显示。
Exit
Exit
Exit
STBY 00:00:00/00:40:05
STBY 00:00:00/00:40:05
00:00:00/00:40:05
STBY
STBY 00:00:00/00:40:05
[ Notes ]
✤ If <TV> is selected as the Record Mode, the size is
Recording...
set to 720i only.
Recording...
Recording...
✤ If <PC> is selected as the Record Mode, the size
Recording...
is set to 720p or 352p.
S
✤ When the size is set to <352(352X288)>, <PC> is
12:00AM
2006/01/01
S
S
S
automatically selected for movie files recording.
12:00AM
2006/01/01
12:00AM
2006/01/01
12:00AM
2006/01/01
✤ While the menu screen is displayed, pressing the [Record / Stop]
button will move to Movie Record mode.
F
F
F
F
50
文
Sepia
Sepia
Sepia
Sepia
[ 注意 ]
✤ 如果<TV>被选为录制模式,尺寸只能设置为720i。
✤ 如果<PC> 被选为录制模式, 尺寸只能设置为
720p或者352p。
✤ 当尺寸被选为 <352>, 录制模式会自动选择
<PC>。
✤ 当菜单屏幕出现, 按下 [录制/停止]按钮将转到
视频记录模式。
Movie Mode :
Setting the Recording Options
视频模式 : 设置录制模式
Setting the Line In/Out
设置线路输入/输出
ENGLISH
中
文
You can record or play back the contents of the Sports Camcorder
你可以把机器连接到外接设备上,播放或者录制视频文件。
onto an external device and vice versa. ➥pages 127~129
➥见127~129页
STBY 00:00:00/00:40:05
1. Press the [POWER] button to turn on the
Sports Camcorder.
◆ The Movie Record screen appears.
1
STBY 00:00:00/00:40:05
STBY 00:00:00/00:40:05
Recording...
F
720i
F
F
Recording...
Recording...
S
2. Press the [MENU] button.
Move the [Joystick] left / right to select <Line
In/Out>.
12:00AM 2006/01/01
Sepia
12:00AM 2006/01/01
12:00AM 2006/01/01
Movie
Sepia
Sepia
S
S
2
3. Move the [Joystick] up / down to select an
option, and then press the [Joystick(OK)].
◆ <In>: Select this when recording the contents
of an external device into the Sports Camcorder.
◆ <Out>: Select this when recording or playing
back the contents of the Sports Camcorder
onto an external device.
1. 按下 [电源]按钮打开运动型摄录一体机。
◆ 视频拍摄屏幕将会出现.
Movie
Line In/Out
Movie
PC
In
Line In/Out
Out
In Line In/Out
In
Out
Out
TV
Move
Move
Move
3
OK
AE
Select
Select
Select
Exit
MENU
3. 上下移动[摇杆] 选择一个选项, 然后按下[摇杆
(OK)]。
◆ <In> (输入): 当使用运动型摄录一体机录制
外接设备上的信号时,选择这个功能。
◆ <Out> (输出): 当使用外接设备播放运动型
摄录一体机上的视频文件时,选择这个功能。
Movie
TV
AE
PC
4. Press the [MENU] button to exit the menu.
◆ The Sports Camcorder is set to the selected
setting.
Exit
Exit
2. 按下[菜单]按钮。
左右调节 [摇杆] 选择 <Line In/Out> (信号输
入/输出)。
Movie
Line In/Out
Movie
In
Line In/Out
Out
In Line In/Out
In
Out
Out
Move
Move
Move
[ Note ]
✤ While the menu screen is displayed, pressing the [Record / Stop]
button will move to Movie Record mode.
OK
Select
MENU
Select
[ 注意
Select
4. 按下 [菜单]按钮退出菜单。
◆ 运动型摄录一体机会设置为已经选择的设
置。
Exit
Exit
Exit
]
✤ 当菜单屏幕显示按下 [录制/停止]按钮将会转到视频录制模式。
51
Movie Mode :
Setting the Viewing Options
视频模式 : 设置查看选项
Deleting Movie Files
删除视频文件
ENGLISH
You can delete saved movie files.
1. Press the [POWER] button to turn on the
Sports Camcorder.
◆ The Movie Record screen appears.
2. Press the [PLAY] button or [Joystick(OK)].
◆ Switches to Movie Play mode.
◆ Move to the desired movie file, using the
[Joystick].
Deleting a Movie File in Full Screen-View
中
[PLAY]
button
[Joystick(OK)]
3
Deleting Movie Files in Multi-View
3. Move the [W/T] switch to W (WIDE).
◆ The screen switches to multi-view.
3
4. Press the [DELETE] button on the LCD monitor.
5. Select an option by moving the [Joystick] up /
down and then press the [Joystick(OK)].
◆ <OK>: Deletes the selected movie file using
the [Joystick(OK)].
◆ <Multi Select>: Multiple movie files can be
selected using the [Joystick(OK)].
< ✔ > indicator appears on the selected files.
Press the [PLAY] button to delete.
◆ <All>: All movie files will be deleted.
4
◆ <Cancel>: Cancels the deletion.
[ Notes ]
✤ Locked files will not be deleted.
✤ While the menu screen is displayed, pressing the
[Record / Stop] button will move to Movie Record
mode.
52
你可以删除存储的视频文件。
2
3. Press the [DELETE] button on the LCD monitor.
4. Select an option by moving the [Joystick] up /
down and then press the [Joystick(OK)].
◆ <OK>: Deletes the selected movie file.
◆ <Cancel>: Cancels the deletion.
文
00:00:00/00:10:40
00:00:00/00:10:40
720X576
OK
Cancel
Move
OK
Select
100-0001
100-0001
100-0001
00:00:00/00:10:40
00:00:00/00:10:40
?
720X576
Move
Play
Move
Move
OK
Select
ERROR
Play
100-0001
100-0003
100-0003
OK
Multi Select
All
Cancel
Move
Move
OK
?
ERROR
Select
Select
1. 按下 [电源] 打开运动型摄录一体机。
◆ 视频录制屏幕将会出现。
2. 按下 [PLAY]或者 [摇杆(OK)] 按钮。
◆ 转到视频播放模式。
◆ 使用 [摇杆]选择要选择的文件。
在全屏模式下删除视频文件
3. 在LCD显示器上 按下 [删除] 按钮。
4. 上/下移动 [摇杆]选择一个选项然后按下[摇杆
(OK)]。
◆ <OK> (确定): 删除选择的视频文件。
◆ <Cancel> (取消): 取消删除。
在 多重显示模式下删除视频文件
3. 移动[W/T]开关到 W (WIDE)。
◆ 屏幕转到多重显示模式。
4. 按下在LCD显示器上的[删除]按钮。
5. 上/下移动 [摇杆]选择一个选项然后按下 [摇杆
(OK)]。
◆ <OK> (确定): 使用 [摇杆(OK)]删除选择的
视频文件。
◆ <Multi Select> (多项选择): 使用[摇杆
(OK)]可以多重选择视频文件。
< ✔ > 图标出现在选择了的文件上。按下
[PLAY] 按钮删除。
◆ <All> (全部): 所有的视频文件都会被删除。
◆ <Cancel> (取消): 取消删除。
[ 注意 ]
✤ 锁定了的文件不会被删除。
✤ 当菜单屏幕显示时按下 [录制/停止]按钮将会转
到电影录制模式。
ENGLISH
中
Movie Mode : Setting the Viewing Options
文
视频模式 : 设置查看选项
Setting the Play Mode
设置播放模式
You can play all files continuously or play the selected file only. You
can also set the repeat option for all files.
你可以连续地播放所有的文件,也可以只播放选定的文件。还可以对所
有的文件选择重复播放。
1. Press the [POWER] button to turn on the
Sports Camcorder.
◆ The Movie Record screen appears.
2
720X576
720X576
720X576
720X576
00:00:00/00:10:40
00:00:00/00:10:40
00:00:00/00:10:40
00:00:00/00:10:40
2. 按下[PLAY]或者[摇杆(OK)]按钮。
◆ 转到视频播放模式。
2. Press the [PLAY] button or [Joystick(OK)].
◆ Switches to Movie Play mode.
3. Press the [MENU] button.
Move the [Joystick] left / right to select <Play
Mode>.
100-0001
100-0001
100-0001
100-0001
3
4. Move the [Joystick] up / down to select an
option, and then press the [Joystick(OK)].
◆ <Play One>: The selected movie file will be
played.
◆ <Play All>: Plays back from the selected file
to the last file.
◆ <Repeat One>: The selected movie file will be 4
played repeatedly.
◆ <Repeat All>: All movie files will be played
repeatedly.
5. Press the [MENU] button to exit the menu.
Press the [PLAY] button.
◆ The selected option will be applied.
[ Note ]
✤ While the menu screen is displayed, pressing the
[Record / Stop] button will move to Movie Record
mode.
1. 按下[电源]按钮打开运动型摄录一体机。
◆ 视频录制屏幕将会出现。
Movie
Movie
Movie
Movie
Play Mode
Play Mode
Mode
Play
Play
Mode
Play
One
1
Play One
One
Play
Play One
All
Play
ALL
Play
All
Play
All
Repeat One 1
Play
All
Repeat One
One 11
Repeat
Repeat One 1
Move
Move
Move
Move
Select
Select
Select
Select
MENU
Movie
Movie
Movie
Movie
Play Mode
Play Mode
Mode
Play
Play
Mode
Play
One
1
Play One
One
Play
Play One
All
Play
Play
All One ALL1
Play
All
Repeat
Play
All
Repeat One
One 11
Repeat
Repeat One 1
Move
Move
Move
Move
5
OK
OK
Select
Select
Select
Select
MENU
Exit
Exit
Exit
Exit
Exit
Exit
Exit
Exit
00:00:10/00:10:30
00:00:10/00:10:30
00:00:10/00:10:30
720X576 00:00:10/00:10:30
720X576
720X576
720X576
3. 按下[菜单]按钮。
左/右移动 [摇杆]选择 <Play Mode> (播放模
式)。
4. 上下移动[摇杆] 选择一个选项, 然后按下[摇杆
(OK)]。
◆ <Play One> (播放一个): 选定的视频文件
将会播放。
◆ <Play All> (全部播放): 所有的视频文件都
会播放。
◆ <Repeat One> (重复一个): 选定视频文件
将会重复播放。
◆ <Repeat All> (全部重复): 所有的视频文件
都会重复播放。
5. 按下 [菜单]按钮退出菜单。
按下 [PLAY]按钮。
◆ 选定的选项将会被设定。
[ 注意 ]
✤ 当菜单屏幕显示按下 [录制/停止]按钮将会转到
视频录制。
100-0001
100-0001
100-0001
100-0001
53
ENGLISH
中
Movie Mode : Setting the Viewing Options
视频模式 : 设置查看选项
Locking Movie Files
锁定视频文件
You can lock saved important movie files from
accidental deletion. Locked files will not be deleted
unless you release the lock or format the memory.
1. Press the [POWER] button to turn on the
Sports Camcorder.
◆ The Movie Record screen appears.
2. Press the [PLAY] button or [Joystick(OK)].
◆ Switches to Movie Play mode.
◆ Move to the desired movie file, using the
[Joystick].
3
Lock
Lock
Lock
Lock
Move
Move
4
Locking a Movie File in Full Screen-View
3. Press the [MENU] button.
Move the [Joystick] left / right to select <Lock>.
4. Press the [Joystick(OK)] to lock.
◆ The selected movie file is locked.
Locking Movie Files in Multi-View
54
Movie
Movie
3. Move the [W/T] switch to W (WIDE).
3
◆ The screen switches to multi-view.
4. Press the [MENU] button.
Move the [Joystick] left / right to select <Lock>.
5. Move the [Joystick] up / down to select an
option, and then press the [Joystick(OK)].
◆ <Lock>: Locks the selected movie file using
the [Joystick(OK)].
◆ <Multi Select>: Multiple movie files can be
selected using the [Joystick(OK)].
< > indicator appears on the selected files. 4
Press the [PLAY] button to lock.
◆ <Lock All>: All movie files are locked.
◆ <Unlock All>: Unlocks all movie files.
[ Notes ]
> icon is displayed on the locked file.
✤ The <
✤ While the menu screen is displayed, pressing the
[Record / Stop] button will move to Movie Record
mode.
720X576
720X576
OK
Select
Select
MENU
Exit
Exit
00:00:00/00:10:40
00:00:00/00:10:40
100-0001
100-0001
文
你可以保护存储的重要文件避免被误删。除非你取消
保护或者格式化记忆卡,
被保护的文件将不会被删除。
1. 按下[电源] 按钮打开运动型摄录一体机。
◆ 视频录制画面将会出现。
2. 按下 [PLAY] 或者 [摇杆(OK)]。
◆ 转到视频播放模式
◆ 通过 [摇杆]选定文件。
在全屏模式下锁定视频文件
3. 按下 [菜单] 按钮。
左右移动[摇杆] 选择 <Lock> (锁定)。
4. 按下 [摇杆(OK)]来锁定。
◆ 被选择的视频文件就会被锁定。
在多重查看模式下锁定视频文件
3. 移动 [W/T]开关到W (WIDE)。
◆ 屏幕转到多重查看。
4. 按下[菜单]按钮。
左右移动[摇杆] 选择 <Lock> (锁定)。
5. 上下移动 [摇杆] 选择一个选项, 然后按下[摇
杆(OK)]。
◆ <Lock> (锁定): 使用 [摇杆(OK)]锁定文
件。
◆ <Multi Select> (多项选择): 使用 [摇杆
(OK)]可以选择多重视频文件。
< > 会在选择了的文件上出现。按下[PLAY]
按钮锁定。
◆ <Lock All> (全部打开): 锁定所有视频文
件。
◆ <Unlock All> (全部关闭):取消所有文件的
锁定功能。
[ 注意 ]
✤ 图标 < > 将会在锁定的文件上显示。
✤ 当菜单屏幕显示按下 [录制/停止]按钮将会转到
视频录制。
ENGLISH
中
Movie Mode : Setting the Viewing Options
视频模式 : 设置查看选项
Copying Movie Files
复制视频文件
You can copy saved files from the internal memory to a
memory card and vice versa.
1. Insert a memory card in the memory card slot on
Sports Camcorder.
2. Press the [POWER] button to turn on the Sports
Camcorder.
◆ The Movie Record screen appears.
3. Press the [PLAY] button or [Joystick(OK)].
◆ Switches to Movie Play mode.
◆ Move to the desired movie file, using the [Joystick].
4
Move
Move
5
Copying a Movie File in Full Screen-View
4. Press the [MENU] button.
Move the [Joystick] left / right to select <Copy To>.
5. Press the [Joystick(OK)] to copy.
◆ Copies the selected movie file.
你可以复制内存里的视频文件到记忆卡中,或从记忆
卡中复制到内存里。
Select
OK
Select
Exit
MENU
Exit
Movie
Movie
Copying file(s)...
Copy To
SMOV0005.AVI
Copying file(s)...
Copy To
OK
SMOV0005.AVI
OKPress OK to cancel.
Move
4
5
[ Notes ]
✤ The Sports Camcorder copies from the currently-used
memory to another. If the internal memory was used,
it copies to a memory card.
✤ If the memory card is not inserted, you cannot perform
the <Copy To> function.
✤ While the menu screen is displayed, pressing the [Record / Stop]
button will move to Movie Record mode.
OK
Select
Select
1. 把记忆卡插入记忆卡插槽中。
2. 按下 [电源] 按钮打开运动型摄录一体机。
◆ 视频录制屏幕将会显示。
3. 按下[PLAY]或[摇杆(OK)]。
◆ 转到视频播放模式。
◆ 使用 [摇杆]选定要复制的文件。
在全屏模式下复制视频文件
4. 按下 [菜单] 按钮。
左右移动 [摇杆] 选择 <Copy To> (复制到)。
5. 按下 [摇杆(OK)]来复制。
◆ 复制选择了的文件
Press OK to cancel.
Cancel
Move
Copying Movie Files in Multi-View
4. Move the [W/T] switch to W (WIDE).
◆ The screen switches to multi-view.
5. Press the [MENU] button.
Move the [Joystick] left / right to select <Copy
To>.
6. Move the [Joystick] up / down to select an option,
and then press the [Joystick(OK)].
◆ <OK>: Copies the selected movie file.
◆ <Multi Select>: Multiple movie files can be
selected using the [Joystick(OK)].
< ✔ > indicator appears on the selected files.
Press the [PLAY] button to copy.
◆ <All>: Cancels copying movie file.
Movie
Movie
Copy To
Copy To
OK
OK
文
MENU
Exit
Exit
在多重查看模式下复制视频文件
4. 移动 [W/T] 开关到 W (WIDE)。
◆ 屏幕转到多重查看模式。
5. 按下 [菜单] 按钮。
左右移动[摇杆] 选择 <Copy To> (复制到)。
6. 上下移动 [摇杆] 选择一个选项, 然后按下 [摇
杆(OK)]。
◆ <OK> (确定): 复制选择了的文件。
◆ <Multi Select> (多项选择): 使用 [摇杆
(OK)]可以多重选择视频文件。
< ✔ > 图标将会出现在选择了的文件上。按
下 [PLAY] 按钮来选择。
◆ <All> (全部): 复制所有视频文件。
[ 注意 ]
✤ 摄录一体机从当前的存储器拷贝到另一存储器。
如果内部存储器被使用
✤ 而且没有插入记忆棒,并且没有插入记忆卡,您
将不能使用这一功能。
✤ 按[录制/停止]按钮进入视频录制模式。
55
ENGLISH
2
中
Photo Mode
相片模式
Capturing ............................................................................................... 57
Capturing Images ............................................................................ 57
Zooming In and Out ........................................................................ 58
Viewing................................................................................................... 59
Viewing Photo Files on the LCD monitor ....................................... 59
Viewing Multiple Photo Files ........................................................... 60
Setting the Capturing Options ............................................................ 61
Setting the White Balance .............................................................. 61
Setting the Program AE (Programmed Auto Exposure) ................ 62
Setting the Effect ............................................................................. 63
Setting the Flash ............................................................................. 64
Setting the Continuous Shot ........................................................... 65
Setting the EIS (Electronic Image Stabilizer) ................................. 66
Setting the Focus ............................................................................ 67
Setting the BLC (Backlight Compensation) .................................... 68
Setting the Digital Zoom ................................................................. 69
Setting the Viewing Options................................................................ 70
Deleting Photo Files ........................................................................ 70
Setting the Slide show .................................................................... 71
Setting the DPOF (Digital Print Order Format) Function ............... 72
Locking Photo Files......................................................................... 73
Copying Photo Files ........................................................................ 74
拍照 57
拍照 ........................................................................................57
放大和缩小 .............................................................................58
查看 ................................................................................................59
在液晶屏上查看相片文件 .......................................................59
查看多个相片文件 ..................................................................60
设置拍照选项 .................................................................................61
设置白平衡 .............................................................................61
设置程序AE (程序自动曝光) .................................................62
设置效果 .................................................................................63
设置闪光灯 .............................................................................64
设置连拍 .................................................................................65
设置 EIS (电子图像稳定器) .................................................66
设置焦点 .................................................................................67
设置 BLC (背光补偿) ............................................................68
设置数字变焦..........................................................................69
设置查看选项 .................................................................................70
删除相片文件..........................................................................70
设置幻灯模式显示 ..................................................................71
设置 DPOF (设置数码打印)功能 ...........................................72
锁定照片文件..........................................................................73
复制相片文件..........................................................................74
◆ Save important data / recordings separately on other media, to avoid
accidental loss due to a system failure or other reasons.
◆ 存储重要的数据到其它存储介质上,避免因系统错误或其它原因
导致的意外数据丢失。
How to set to Photo mode
U
MEN
Power
button
如何设置相片模式
U
MEN
Photo
E
MOD
56
2
文
1. Press the [POWER] button
to turn on the Sports
Camcorder.
[电源]
按钮
Photo
E
MOD
2. Set the Photo mode
by pressing the
[MODE] button.
1. 按[电源]按钮打开摄录一体
机。
2. 按 [模式]按钮设置照
片 模式。
ENGLISH
中
Photo Mode : Capturing
相片模式 : 拍照
Capturing Images
拍照
You can take a photo image as well as record movie
files.
文
您既可以拍照,也可以录制视频文件。
1
U
MEN
1. Press the [POWER] button to turn on the
Sports Camcorder.
◆ The Movie Record screen appears.
POWER
button
ODE
1. 按下 [电源] 按钮打开运动型摄录一体机。
◆ 视频录制屏幕将会出现。
C IN
HOLD
M
2. 按下 [模式]按钮选择图片模式。
◆ 图片拍摄屏幕将会出现。
2
2. Set the Photo mode by pressing the [MODE]
button.
◆ The Photo Capture screen appears.
S
S
Capturing...
Capturing...
3. 按下 [录制/停止]按钮拍摄一张图片。
3. Press the [Record / Stop] button to take a
photo image.
12:00AM 2006/01/01
12:00AM 2006/01/01
Capturing...
S
12:00AM 2006/01/01
3
4. After capturing, press the [POWER] button
to turn off the Sports Camcorder to prevent
battery power consumption.
S
Sepia
Sepia
4. 拍摄完毕后,按下 [电源] 按钮关闭运动型摄录
一体机以避免电池电量消耗。
Sepia
Capturing...
S
12:00AM 2006/01/01
S
Capturing...
Capturing...
Sepia
12:00AM 2006/01/01
12:00AM 2006/01/01
[ Notes ]
✤ If the battery is low, the flash will not operate automatically.
✤ In order to take pictures on the memory card, insert a memory card
and then set the storage type to <External>. ➥page 97
Sepia
Sepia
[ 注意 ]
✤ 如果电池电量低,闪光灯将不会自动工作。
✤ 为了把图片存储到记忆卡上,装入一块记忆卡然后
把存储模式选择为 <External> (外部)。➥97页
57
ENGLISH
中
Photo Mode : Capturing
相片模式 : 拍照
Zooming In and Out
放大和缩小
文
光学变焦
100
Zooming lets you change the size of the subject captured in a scene. 缩放技术可以让你更改所拍摄场景中物件的大小。你可以使用10x
W
You can take advantage of the 10x optical electro motion zoom lens. 的镜头拍得效果不错的照片。
1X
1. 按下 [电源]按钮打开运动型摄录一体机。
◆ 视频录制屏幕将会显示。
100
1. Press the [POWER] button to turn on the Sports Camcorder.S
W
2. 按下[模式]按钮选择照片模式。
T
◆ The Movie Record screen appears.
。
◆
照片取景器屏幕将会出现
2. Set the Photo mode by pressing the
S
12:00AM 2006/01/01 100 Sepia
[MODE] button.
Zoom Out
◆ The Photo Capture screen appears.
T
W
10X
1X
10X
●
●
●
●
1X
Slide the [W/T] switch up
to zoom out.
● The subject’s size is
reduced, and you can
take a picture as if you
were far away from the
subject.
On the zoom indicator in the LCD screen,
the arrow moves to W.
The smallest rate of zoom out is the
default rate
(original resolution of the subject).
12:00AM 2006/01/01
Sepia
S
10X
T
W
12:00AM 2006/01/01
1X
Sepia
●
滑动 [W/T] 开关到缩小。
●
被拍摄物体的尺寸将会缩
小,你可以拍得看起来
像你离物体很远的照片。
●
在LCD的变焦指示器上箭
头移动到W。
缩小的最小比率是默认比率。(物体的最初分
辨率)。
S
10X
1X
S
12:00AM
2006/01/01
W
T
Sepia
10X
T
W
1X
Slide the [W/T] switch
down to zoom in.
● The subject is larger, and
you can take a picture as
if you were close to the
subject.
On the zoom indicator the arrow moves to T.
The largest optical zoom ratio is 10x, which is
the biggest among the basic zoom.
12:00AM 2006/01/01
Sepia
S
10X
T
W
1X
12:00AM 2006/01/01
Sepia
●
滑动 [W/T] 开关到放大。
●
被拍摄物体的尺寸将会放
大,你可以拍得看起来像
你离物体很近的照片。
●
将LCD 的变焦指示器上
箭头移动到T。
最大的光学变焦放大倍数是 10x。
S
10X
1X
Zoom In
S
12:00AM
2006/01/01
W
T
Sepia
10X
T
W
[ Notes ]
✤ Frequent use of zooming may result in higher battery power
[ 2006/01/01
注意 ]
12:00AM
Sepia
consumption.
✤ 频繁使用变焦会使电池耗电量增加。
✤ You can take advantage of 10x digital zoom as well as 10x opticalS
✤ 你可以使用10X的数字变焦跟10X的光学变焦得到100X变焦。
T
zoom for a total of 100x zoom.
✤ 光学变焦决定图片质量。
58 ✤ Optical zoom preserves the image quality.
1X
10X
12:00AM 2006/01/01
Sepia
ENGLISH
中
Photo Mode : Viewing
文
相片模式 : 查看
Viewing Photo Files on the LCD monitor
在液晶屏上查看相片文件
It is handy and practical to view photos using the LCD monitor in
locations such as in a car, indoors, or outdoors.
无论何地例如:车内,室内,室外使用LCD显示器查看照片都是方便实用的
1. Press the [POWER] button to turn on the
Sports Camcorder.
◆ The Movie Record screen appears.
1
U
MEN
2. 按下[模式]按钮来选择照片模式。
◆ 照片取景器屏幕将会显示。
N
HOLD
2. Set the Photo mode by pressing the [MODE]
button.
◆ The Photo Capture screen appears.
100
100
100
2
3. Press the [PLAY] button or [Joystick(OK)].
◆ Switches to Photo View mode.
SS
S
4. Move the [Joystick] left / right to find the photo
you want to view.
◆ Each movement of the joystick goes to the
3
previous / next photo.
[ Notes ]
✤ If there is no file stored to view, the message <No
Files...> appears.
✤ Moving the [Joystick] right at the last photo will
move to the first photo.
✤ Moving the [Joystick] left at the first photo will
move to the last photo.
✤ Moving the [Joystick] left / right for more than 1
second will start fast search.
✤ While the menu screen is displayed, pressing the
[Record / Stop] button will move to Photo Capture
mode.
Power
button
E
MOD
1. 按下[电源]按钮打开运动型摄录一体机
◆ 视频录制屏幕将会显示。
3. 按下 [PLAY]或者[摇杆(OK)] 按钮。
◆ 转入照片查看模式。
Capturing...
Capturing...
Capturing...
12:00AM
12:00AM 2006/01/01
2006/01/01
12:00AM 2006/01/01
Sepia
Sepia
Sepia
100-0001
100-0001
100-0001
01
01
01
12:00AM
12:00AM 2006/01/01
2006/01/01
12:00AM 2006/01/01
4
4. 左右移动 [摇杆]来查找你想要看的照片。
◆ 每次移动操纵杆都会显示上一张/下一张照片。
Sepia
Sepia
Sepia
100-0002
100-0002
100-0002
01
01
01
12:00AM
12:00AM 2006/01/01
2006/01/01
12:00AM 2006/01/01
Sepia
Sepia
Sepia
[ 注意 ]
✤ 如果没有存储可供查看的照片, 将会出现提示
<No Files...> (无文件...) 。
✤ 在显示最后一张照片的时候,向右移动 [摇杆]将显示
第一张照片。
✤ 在显示第一张照片的时候,向左移动 [摇杆]将显示
最后一张照片。
✤ 向左或者向右按住 [摇杆] 超过一秒钟将开始快
速搜索。
✤ 当菜单屏幕显示的时候按下[录制/停止]将进入照
片查看模式。
59
ENGLISH
中
Photo Mode : Viewing
相片模式 : 查看
Viewing Multiple Photo Files
查看多个相片文件
Using the [W/T] switch in Photo View mode, you can display multiple
images on one LCD screen.
在照片查看模式下使用[W/T]开关, 你可以显示多张照片在 LCD 屏幕上。
1. Press the [] button to turn on the Sports
Camcorder.
◆ The Movie Record screen appears.
2. Set the Photo mode by pressing the [MODE]
button.
◆ The Photo Capture screen appears.
100
100
100
2
S
S
S
12:00AM 2006/01/01
12:00AM
12:00AM 2006/01/01
2006/01/01
3
4. Move the [Joystick] to the left/ right/ up/ down
4
to find the photo file you want to view.
5. Press [PLAY] button or [Joystick(OK)] to view
the photo file you want.
◆ The full screen is displayed.
1. 按下[电源]按钮打开运动型摄录一体机。
◆ 视频录制屏幕将会出现。
Capturing...
Capturing...
Capturing...
01
01
01
12:00AM 2006/01/01
12:00AM
12:00AM 2006/01/01
2006/01/01
100-0001
100-0001
100-0001
01
01
01
Move
Move
Move
[ Notes ]
✤ If there is no file stored to view, the message <No Files...>
appears.
✤ Display time may vary depending on the picture size.
✤ The image edited or turned in Image Viewer programme on your
PC may not be displayed.
Sepia
Sepia
Sepia
100-0001
100-0001
100-0001
720X480
720X480
720X480
3. Press the [PLAY] button or [Joystick(OK)] and
slide the [W/T] switch to W(WIDE).
◆ The Multi-view screen appears.
60
文
OK
Sepia
Sepia
Sepia
2. 按下 [模式] 按钮选择照片模式。
◆ 照片取景器屏幕将会出现。
3. 按下 [PLAY] 按钮或者 [摇杆(OK)],滑动[W/T]
开关到W(WIDE)。
◆ 多重播放屏幕将会显示。
4. 左右或上下移动 [摇杆] 选择你想要查看的照片。
5. 按下 [PLAY] 按钮或者 [摇杆(OK)] 查看你选定
的照片。
◆ 所选定的照片就会全屏显示。
View
View
View
[ 注意 ]
✤ 如果没有存储可供查看的照片,将会出现提示 <No Files...>(无文
件...)。
✤ 显示时间可能会根据图片大小而不同。
✤ 你在计算机“图像浏览器”程序中编辑的图像可能无法显示。
中
Modo Photo (Foto) :
Photo Mode : Setting the Capturing Options Ajuste de las opciones de captura
ENGLISH
Setting the White Balance
Ajuste del balance de blanco
The White Balance allows calibration of the picture for accurate colour display in
different lighting conditions. We recommended setting the white balance prior to
any photo capturing.
白平衡可能会根据照明条件有所不同。
1. Press the [POWER] button to turn on the Sports
Camcorder.
◆ The Movie Record screen appears.
Daylight
Fluorescent
Tungsten
Custom
Automatically sets according to the shooting env
ironment.
Adjusts the colour according to daylight/indoor,
outdoor light.
Suitable for a fluorescent light environment.
Suitable for an incandescent light environment.
Adjusts the white balance based on the shooting
environment.
2. 按下[模式]按钮进入相片模式。
◆ 照片录制屏幕将会显示。
12:00AM 2006/01/01
12:00AM
12:00AM 2006/01/01
2006/01/01
12:00AM
2006/01/01
Sepia
Sepia
Sepia
Sepia
White Balance
White
White Balance
Balance
White
Balance
Auto
Auto
A
Auto
Daylight
Auto
Daylight
Daylight
Fluorescent
Daylight
Fluorescent
Fluorescent
Fluorescent
Move
Move
Move
Move
Select
OK Select
Select
Select
自动 (Auto) 根据照明条件自动调整 。
Exit
MENU Exit
Exit
Exit
Photo
Photo
Photo
Photo
4
White Balance
White
White Balance
Balance
White
Balance
Auto
A
Auto
Auto
Daylight
Auto
Daylight
Daylight
Fluorescent
Daylight
Fluorescent
Fluorescent
Fluorescent
Move
Move
Move
Move
OK
Select
Select
Select
Select
MENU
荧光灯
适合于荧光灯环境。
(Fluorescent)
钨丝灯
(Tungsten) 适合于白炽灯环境。
Exit
Exit
Exit
Exit
Sepia
Sepia
Sepia
Sepia
[ 注意 ]
✤ 在室外进行照片拍摄, <Auto>(自动) 模式能使您获得
最好的效果。
✤ 当照明条件变化时, 请先设置白平衡模式然后再进行
照片拍摄。
✤ 在<Custom>(自定义白平衡)方式中,所参照的物体应
当是亮白彩色的,否则彩色白平衡会不自然。
✤ 在有菜单画面时, 按下 [录制/停止]按钮可切换到照
片录制模式。
61
Capturing...
Capturing...
Capturing...
Capturing...
12:00AM 2006/01/01
12:00AM
12:00AM 2006/01/01
2006/01/01
12:00AM
2006/01/01
日光 (Daylight) 根据日光/室内、室外光线调节颜色。
自定义白平衡 根据拍摄环境调节白平衡。
(Custom)
5. 按下[菜单]按钮以完成设置。
◆ 所选择的功能图标将会显示在屏幕上。
◆ 如果您选择<Auto>(自动),则不会显示任何图标。
5
S
S
S
S
3. 按下[菜单] 按钮。左右移动[摇杆] 摇杆选择 <White
Balance>(白平衡)。
4. 上下移动[摇杆]选择白平衡,然后按下 [摇杆(OK)]
按钮。
◆ 设置<自定义白平衡>, 将运动型摄录一体机对准
白色区域(比如墙壁),使整个 LCD 显示屏都显示
白色画面,然后按下[摇杆(OK)]按钮。
Photo
Photo
Photo
Photo
3
5. Press the [MENU] button to exit the menu.
◆ The selected function icon is displayed.
◆ If <Auto> is selected, no icon will be displayed.
[ Notes ]
✤ When taking pictures outdoors, <Auto> setting will allow
you to obtain the best results.
✤ As the lighting condition changes, set the appropriate
white balance before taking a picture.
✤ The subject used for <Custom> should be white colour.
If not, the colour balance will not be natural.
✤ While the menu screen is displayed, pressing the [Record
/ Stop] button will move to Photo Capture mode.
1. 向下移动[电源] 按钮以打开运动型摄录一体机。
◆ 视频录制屏幕将会显示。
Capturing...
Capturing...
Capturing...
Capturing...
S
S
S
S
3. Press the [MENU] button.
Move the [Joystick] left / right to select <White
Balance>.
Auto
白平衡用于在不同的照明条件下保持自然色彩。
2
2. Set the Photo mode by pressing the [MODE] button.
◆ The Photo Capture screen appears.
4. Move the [Joystick] up / down to select an option, and
then press the
[Joystick(OK)].
◆ To set Custom, frame your Sports Camcorder on a
white area (such as a wall), filling the LCD monitor with
white colour. Press the [Joystick(OK)] to set.
文
ENGLISH
中
Photo Mode : Setting the Capturing Options
相片模式 :设置拍照选项
Setting the Program AE (Programmed Auto Exposure)
设置程序AE (程序自动曝光)
文
Program AE modes are preset automatic exposure modes based upon 设置程序AE 模式是一种基于电脑程序的自动曝光模式。
an internal computer programme. Program AE allows you to adjust the 设置程序AE 可以自动调节曝光量来适应环境的需要。
aperture setting to suit different conditions.
1. Press the [POWER] button to turn on the
Sports Camcorder.
◆ The Movie Record screen appears.
2. Set the Photo mode by pressing the [MODE]
button.
◆ The Photo Capture screen appears.
3. Press the [MENU] button.
Move the [ Joystick] left / right to select
<Program AE>.
4. Move the [Joystick] up / down to select an
option, and then press the [Joystick(OK)].
Auto balances between the subject and
background to get the best result.
Auto
The shutter speed automatically varies from
1/50 to 1/250 per second depending on the
scene.
For recording fast-moving people or objects.
Sports
It is suitable for sports events and recording
outside in the car.
Compensates for a subject that appears too
bright under strong direct light such as
Spotlight spotlight. It is suitable for concerts and
school performances.
Use when the light is very strong such as on
Sand/Snow the beach or in the snow.
5. Press the [MENU] button to exit the menu.
◆ The selected function icon is displayed.
◆ If you select <Auto>, no icon is displayed.
[ Note ]
✤ While the menu screen is displayed, pressing the
[Record / Stop] button will move to Photo Capture
mode.mode.
62
100
100
100
100
2
Capturing...
Capturing...
Capturing...
Capturing...
S
S
S
S
2. 按下[模式]按钮进入相片模式。
◆ 照片录制屏幕将会显示。
12:00AM 2006/01/01
12:00AM
2006/01/01
12:00AM
12:00AM2006/01/01
2006/01/01
3
Sepia
Sepia
Sepia
Sepia
Photo
Photo
Photo
Photo
Program AE
Program
AE
Program
ProgramAE
AE
Auto
Auto
Auto
Sports
Auto
Sports
Sports
Spotlight
Sports
Spotlight
Spotlight
Spotlight
Move
Move
Move
Move
4
1. 按下 [电源] 按钮打开运动型摄录一体机。
◆ 视频录制屏幕将会显示。
OK
4. 上下移动[摇杆]摇杆选择曝光模式, 然后按下 [摇
杆(OK)按钮。
Select
Select
Select
Select
MENU
Photo
Photo
Photo
Photo
Program AE
Program
AE
Program
ProgramAE
AE
Auto
Auto
Auto
Sports
Auto
Sports
Sports
Spotlight
Sports
Spotlight
Spotlight
Spotlight
Move
Move
Move
Move
OK
Select
Select
Select
Select
5
MENU
Exit
Exit
Exit
Exit
Exit
Exit
Exit
Exit
100
100
100
100
S
S
S
S
“自动”模式:平衡曝光和快门速度以获得
自动 (Auto) 最佳效果,根据场景而定,快门速度会从每
秒1/50到1/250 之间自动改变。
“运动”模式:用于录制快速移动的人物或
运动
者物体,适合录制体育活动,或者在汽车内
(Sports)
录车窗外的景物。
“聚光”模式:补偿出现在直接强光(例
聚光
如:聚光等)下的过亮的物体的
(Spotlight) 亮度,适合录制音乐会或者学校表演会。
海滩/雪地 “沙滩/雪地”模式:在照明非常强时(例
(Sand/Snow) 如:在沙滩上或白雪中)使用。
5. 按下[菜单]按钮以完成设置。
◆ 所选择的功能图标将会显示在屏幕上,若您选择
<Auto>(自动),则不会显示任何图标。
[ 注意 ]
✤ 在有菜单画面时, 按下 [录制/停止]按钮可切换到
照片录制模式。
Capturing...
Capturing...
Capturing...
Capturing...
12:00AM 2006/01/01
12:00AM 2006/01/01
12:00AM
12:00AM2006/01/01
2006/01/01
3. 按下[菜单]按钮
左右移动 [摇杆] 摇杆选择<Program AE>(编程AE)。
Sepia
Sepia
Sepia
Sepia
ENGLISH
中
文
Photo Mode : Setting the Capturing Options 照片模式 : 设置拍照选项
Setting the Effect
设置效果
You can apply various effects to your photos.
您可以在您的照片上运用数字效果。
100
1. Press the [POWER] button to turn on the
Sports Camcorder.
◆ The Movie Record screen appears.
S
S
3
4. Move the [Joystick] up / down to select an
option, and then press the [Joystick(OK)].
Off
Art
Mosaic
Sepia
Negative
Mirror
B&W
Cancels the <Effect>.
Adds artistic effects to your photo file.
A mosaic overlay appears on your photo file.
The picture is displayed in sepia colour
similar to that of an old photograph.
Reverses the colours, creating the look of a
negative.
This mode cuts the picture in half using a
mirror effect.
Changes the images into Black and White.
5. Press the [MENU] button to exit the menu.
◆ The selected effect and icon are displayed.
◆ If you select <Off>, no icon is displayed.
12:00AM 2006/01/01
12:00AM 2006/01/01
12:00AM
12:00AM 2006/01/01
2006/01/01
Photo
Photo
Photo
Photo
Effect
Effect
Off Effect
Off Effect
Art
Off
Art
Off
Mosaic
Art
Mosaic
Art
Mosaic
Move
Select
Mosaic
Move
Select
Move
Move
4
5
1. 按下[电源]按钮打开运动型摄录一体机。
◆ 视频录制屏幕将会显示。
Capturing...
Capturing...
Capturing...
Capturing...
S
S
2. Set the Photo mode by pressing the [MODE]
button.
◆ The Photo Capture screen appears.
3. Press the [MENU] button.
Move the [Joystick] left / right to select
<Effect>.
100
100
100
2
OK
Select
Select
Photo
Photo
Photo
Photo
Effect
Effect
Sepia
Effect
SepiaEffect
Negative
Sepia
Negative
Sepia
Mirror
Negative
Mirror
Negative
Mirror
Move
Select
Mirror
OK Select
Move
Move
Move
Select
Select
Sepia
Sepia
Sepia
Sepia
2. 按下[模式]按钮进入相片模式。
◆ 照片录制屏幕将会显示。
3. 按下[菜单] 按钮。左右移动[摇杆]。选择
<Effect>(效果)。
4. 上下移动 [摇杆] 选择数字效果选项, 然后按下
[摇杆(OK)]按钮。
Exit
Exit
MENU Exit
Exit
MENU
Exit
Exit
Exit
Exit
关 (Off )
艺术 (Art )
马赛克 (Mosaic)
仿旧 (Sepia)
底片 (Negative)
镜像 (Mirror )
黑白 (B&W)
取消<效果>。
在您的视频文件上创建艺术效果。
在您的视频文件上显示马赛克。
图片显示为类似旧照片的仿旧颜色。
反转颜色,制造底片效果。
用“镜像”效果将图片切成一半。
将图片转变成黑白。
5. 按下[菜单]按钮以完成设置。
◆ 被选择的功能的图标将会出现。
◆ 如果选择了<Off>(关) 将没有图标出现。
[ 注意 ]
✤ 在有菜单画面时, 按下 [录制/停止]按钮可切换
到照片录制模式。
[ Note ]
✤ While the menu screen is displayed, pressing the
[Record / Stop] button will move to Photo Capture
mode.
Mirror
Mirror
Mirror
Mirror
63
ENGLISH
中
文
Photo Mode : Setting the Capturing Options 相片模式 : 设置拍照选项
Setting the Flash
设置闪光灯
Flash is very useful not only for brighter subjects at night, but also in
daytime when there is not enough lighting on the subject, such as in a
shadow, indoors, and in backlight situations.
闪光灯不仅仅在晚上使用起到增亮的作用,在白天光线比较暗的时候也
100
是非常必要的,比如在阴影处,室内,以及背光处
100
2
1. Press the [power] button to turn on the
Sports Camcorder.
◆ The Movie Record screen appears.
2. Set the Photo mode by pressing the [MODE]
button.
◆ The Photo Capture screen appears.
3. Press the [MENU] button.
Move the [joystick] left / right to select <Flash>.
3
4. Move the [joystick] up / down to select an
option, and then press the [joystick(OK)].
On
Auto
Off
Flash will go on.
Flash will be set automatically
according to lighting conditions.
Flash will not come on. Select this
option when you cannot use the flash
in locations such as a museum.
Capturing...
12:00AM
2006/01/01
S
Capturing...
S
12:00AM 2006/01/01
Sepia
Sepia
Sepia
Sepia
On Flash
Photo
Auto
Photo
On
Off Flash
Auto
Flash
Off
On
OK Select
Move
On
Auto
OK Select
Move
Auto
Off
Off
4
[ Notes ]
✤ If the battery is low, the flash will not operate
automatically.
5
✤ Flash is not as effective as a normal strobe light.
✤ While the menu screen is displayed, pressing the
[Record / Stop] button will move to Photo Capture
mode.
1.按下[电源] 按钮打开运动型摄录一体机。
◆ 视频录制屏幕将会显示。
Photo
12:00AM
Photo2006/01/01
12:00AM
2006/01/01
Flash
Move
Move
Photo
5. Press the [MENU] button to exit the menu.
◆ The selected function icon is displayed.
64
Capturing...
100
Capturing... 100
S
S
OK
Select
Select
MENU
Exit
MENU
Exit
MENU
MENU
Exit
Exit
Photo
Flash
Move
Move
S
S
On (开)
闪光灯会打开
Auto (自动) 根据照明条件自动设置闪光灯开/关。
Off (关)
闪光灯将关闭。当您在博物馆这
样不能使用闪光灯的地方进行拍
摄时,请选择该选项。
5.按下[菜单]按钮以完成设置。
◆ 所选闪光模式的图标将会显示在屏幕上。
MENU
Exit
MENU
Exit
100
Select MENU Exit
OK Select
100MENU Exit
OK
3.按下[菜单] 按钮。 左右移动摇杆/ 选择 <Flash> (闪光)。
4.上下移动摇杆选择一种闪光模式, 然后按下 [摇
杆(OK)] 按钮。
OK
Flash
OnPhoto
Photo
Auto
On
Off Flash
Auto
Off Flash OK
Move
Select
On
On
Auto
OK Select
Move
Auto
Off
Off
2.按下[模式]按钮进入相片模式。
◆ 照片录制屏幕将会显示。
Capturing...
100
Capturing... 100
Capturing...
12:00AM
2006/01/01
S
Capturing...
S
12:00AM 2006/01/01
Sepia
Sepia
[ 注意 ]
✤ 如果电池电量不足,闪光灯将自动不能使用。
✤ 在光线充足的情况下没有必要使用闪光灯。
✤ 在有菜单画面时, 按下 [录制/停止]按钮可切换
到照片录制模式。
ENGLISH
中
文
Photo Mode : Setting the Capturing Options 相片模式 : 设置拍照选项
Setting the Continuous Shot
设置连拍
You can take a series of pictures continuously with just one press of
the shutter.
您可以按一下快门拍摄出一组连续的照片。
1. Press the [POWER] button to turn on the
Sports Camcorder.
◆ The Movie Record screen appears.
2. Set the Photo mode by pressing the [MODE]
button.
◆ The Photo Capture screen appears.
2
S
3
4
5. Press the [MENU] button to exit the menu.
◆ The selected function icon is displayed.
◆ If <Off> is selected, no icon will be displayed.
[ Notes ]
✤ When you set <Continuous Shot>, you cannot use
the flash.
✤ While the menu screen is displayed, pressing the
[Record / Stop] button will move to Photo Capture
mode.
12:00AM 2006/01/01
12:00AM 2006/01/01
12:00AM 2006/01/01
12:00AM 2006/01/01
Photo
Photo
Photo
Photo Shot
Continuous
Continuous Shot
Continuous
Shot
Off
Off
Continuous
3 shots Shot
Off
3 shots
3Off
shots
3 shots
Move
Move
Move
Move
OK
Photo
Photo
Photo
Continuous
Photo Shot
Continuous Shot
Continuous Shot
Off
Off
Continuous
3 shots Shot
Off
3 shots
3Off
shots
3 shots
Move
Move
Move
Move
5
S
S
S
S
1. 按下[电源] 按钮打开运动型摄录一体机。
◆ 视频录制屏幕将会显示。
Capturing...
Capturing...
Capturing...
Capturing...
S
S
S
3. Press the [MENU] button.
Move the [Joystick] left / right to select
<Continuous Shot>.
4. Move the [Joystick] up / down to select an
option, and then press the [Joystick(OK)].
◆ <Off>: Disables Continuous Shot and takes
one photo at a time.
◆ <3 shots>: Enables Continuous Shot and
takes 3 photos in a row.
100
100
100
100
OK
Sepia
Sepia
Sepia
Sepia
3. 按下[菜单]按钮。
左右移动[摇杆] / 选择<Continuous Shot>(连拍)。
Select
Select
Select
Select
Select
Select
Select
Select
MENU
MENU
100
100
100
100
Exit
Exit
Exit
Exit
Exit
Exit
Exit
Exit
4. 上下移动 [摇杆] 摇杆选择一种连拍模式, 然后
按下 [摇杆(OK)]按钮。
◆ <Off>(关): 关闭连拍功能,每次只拍一张照片。
◆ <3 shots>(拍摄 3 张): 打开连拍功能,每
次连续拍三张照片。
5. 按下[菜单]按钮以完成设置。
◆ 所选的连拍功能图标将会显示在屏幕上
◆ 如果选择的是 <Off>(关) 模式,那么将不会
显示图标。
[ 注意 ]
✤ 当您使用<Continuous Shot>(连拍) 功能时, 您
将无法使用<闪光>功能。
✤ 在有菜单画面时, 按下 [录制/停止]按钮可切换
到照片录制模式。
Capturing...
Capturing...
Capturing...
Capturing...
12:00AM 2006/01/01
12:00AM 2006/01/01
12:00AM 2006/01/01
12:00AM 2006/01/01
2. 按下[模式]按钮进入相片模式。
◆ 照片录制屏幕将会显示。
Sepia
Sepia
Sepia
Sepia
65
ENGLISH
中
文
Photo Mode : Setting the Capturing Options 相片模式 : 设置拍照选项
Setting the EIS (Electronic Image Stabilizer)
设置EIS (电子图像稳定器)
EIS(电子图像稳定器)是一种能够减轻因手或者外界因素引起画面抖动
The Electronic Image Stabilizer is a function that compensates for
100
100
的功能。EIS在下列情况下能够增强画面的稳定性:
hand shake and other movements while taking pictures.
EIS provides more stable photo when:
100
100
2
◆ 在使用ZOOM功能进行摄像时
Capturing...
◆ Photo capturing while zooming
S
Capturing...
◆ 拍摄比较小的目标时
S
◆ Capturing small objects
◆ 走动或移动拍摄时
Capturing...
◆ Capturing while walking or moving
S
Capturing...
S
◆ 在运动的车辆透过车窗进行拍摄时
◆ Capturing through the window of a
12:00AM 2006/01/01
Sepia
moving vehicle
12:00AM 2006/01/01
Sepia
1. Press the [POWER] button to turn on the
Sports Camcorder.
◆ The Movie Record screen appears.
2. Set the Photo mode by pressing the [MODE]
button.
◆ The Photo Capture screen appears.
3. Press the [MENU] button.
Move the [Joystick] left / right to select <EIS>.
4. Move the [Joystick] up / down to select an
option, and then press the
[Joystick(OK)].
◆ <On>: Enables EIS function.
◆ <Off>: Disables EIS function.
5. Press the [MENU] button to exit the menu.
) is
◆ If you select <On>, the EIS icon (
displayed.
◆ If you select <Off>, no icon is displayed.
[ Note ]
✤ While the menu screen is displayed, pressing the
[Record / Stop] button will move to Photo Capture
mode.
3
12:00AM
2006/01/01
Photo
12:00AM
2006/01/01
Photo
PhotoEIS
Photo
EIS
On
On
Off EIS
EIS
Off
On
On
Off
Move
Select
Off
Move
Move
Move
Move
Move
Move
5
Exit
Exit
Select
Select
Select
OK Select
MENU
Exit
Exit
Exit
MENU Exit
Select
Select 100
Exit
Exit
100
S
S
S
S
66
OK
1. 按下[电源] 按钮打开运动型摄录一体机。
◆ 视频录制屏幕将会显示。
2. 按下[模式]按钮进入相片模式。
◆ 照片录制屏幕将会显示。
Select
Photo
Photo
PhotoEIS
Photo
EIS
On
On
Off EIS
EIS
Off
On
On
Off
Move
Off
4
Sepia
Sepia
3. 按下[菜单] 按钮。
左右移动摇杆/ 选择 <EIS> (手震补偿)。
4. 上下移动 [摇杆] 选择打开或者关闭, 然后按下
[摇杆(OK)]按钮。
◆ <On>(开): 启用EIS功能。
◆ <Off>(关): 关闭EIS功能。
5. 按下[菜单]按钮以完成设置。
) 将会
◆ 如果您选择<On>(开),EIS 图标 (
显示在屏幕上。
◆ 如果您选择<Off>(关), 将没有相关图标显示。
[ 注意 ]
✤ 在有菜单画面时, 按下 [录制/停止] 按钮可切换
到照片录制模式。
100
100
Capturing...
Capturing...
Capturing...
Capturing...
12:00AM 2006/01/01
12:00AM 2006/01/01
Sepia
Sepia
12:00AM 2006/01/01
12:00AM 2006/01/01
Sepia
Sepia
ENGLISH
中
文
Photo Mode : Setting the Capturing Options 相片模式 : 设置拍照选项
Setting the Focus
设置焦点
Select an appropriate focus method for the best results.
100
设置恰当的聚焦方式能够得到更好的聚焦效果。
100
100
1. Press the [POWER] button to turn on the
Sports Camcorder.
◆ The Movie Record screen appears.
2. Set the Photo mode by pressing the [MODE]
button.
◆ The Photo Capture screen appears.
3. Press the [MENU] button.
Move the [Joystick] left / right to select
<Focus>.
4. Move the [Joystick] up / down to select an
option, and then press the
[Joystick(OK)].
◆ <AF>: Set the focus automatically.
◆ <MF>: Set the focus manually.
5. Press the [MENU] button to exit the menu.
◆ If you select the <MF>, the icon ( ) is
displayed.
◆ If you select the <AF>, no icon is displayed.
2
S
Capturing...
Capturing...
SS
Capturing...
12:00AM 2006/01/01
S
3
Sepia
Sepia
12:00AM 2006/01/01
Photo
Sepia
Photo
Photo
Focus
Photo
AF Focus
Focus
MF
AF Focus
AF
MF
MF
AF
Move
Move
Select
OK
Photo
4
Manual Focus <MF>
Sepia
12:00AM 2006/01/01
2006/01/01
12:00AM
Move
MF
Adjust the focus by moving [Joystick] up/down to
zoom in or out manually.
◆ When a picture has subjects close or distant
to the Sports Camcorder
5
◆ When a person is enveloped in fog or
surrounded by snow
Move
Exit
Select
Select
MENU
Move
MF
Move
Move
Move
OK
2. 按下[模式]按钮进入相片模式。
◆ 照片录制屏幕将会显示。
3. 按下[菜单] 按钮。
左右移动摇杆 / 选择 <Focus> (对焦)。
4. 上下移动 [摇杆]选择一种模式, 然后按下[摇杆
(OK)]按钮。
◆ <AF>: 设置为自动聚焦模式。
◆ <MF>: 设置为手动聚焦模式。
Exit
Exit
Select
Exit
Select
Exit
Photo
Photo
Focus
Photo
AF Focus
Focus
MF
AF Focus
AF
MF
MF
AF
5. 按下[菜单]按钮以完成设置。
◆ 如果您选择<MF>,功能图标 ( ) 将显示。
◆ 如果您选择<AF>,将不显示图标。
手动聚焦 <MF>
Select
Select
MENU
Select
Exit
Exit
Exit
100
左右移动摇杆进行手动聚焦调节。
◆ 一般的,如果要求将近距和远距物体同时拍
摄清楚,或者当人物被雾气笼罩或周围有白
雪时使用手动聚焦模式。
100
100
S
[ Note ]
✤ While the menu screen is displayed, pressing the
[Record / Stop] button will move to Photo Capture
mode.
1. 按下[电源] 按钮打开运动型摄录一体机。
◆ 视频录制屏幕将会显示。
100
Capturing...
SS
[ 注意 ]
✤ 在有菜单画面时, 按下 [录制/停止] 按钮可切
换到照片录制模式。
100
Capturing...
Capturing...
Capturing...
Capturing...
12:00AM 2006/01/01
S
Sepia
12:00AM 2006/01/01
2006/01/01
12:00AM
Sepia
Sepia
12:00AM 2006/01/01
Sepia
67
ENGLISH
中
文
Photo Mode : Setting the Capturing Options 相片模式 : 设置拍照选项
Setting the BLC (Backlight Compensation)
The Backlight Compensation function helps to make the subject
brighter when the subject is in front of a window or
2
the subject is too dark to distinguish. You can use
S
this function when using the Sports Camcorder in the
S
bright backgrounds including snow scenes.
S
1. Press the [POWER] button to turn on the
Sports Camcorder.
◆ The Movie Record screen appears.
2. Set the Photo mode by pressing the [MODE]
button.
◆ The Photo Capture screen appears.
3
3. Press the [MENU] button.
Move the [Joystick] left /right to select <BLC>.
4. Move the [Joystick] up / down to select an
option, and then press the [Joystick(OK)].
◆ <On>: Set the BLC function.
◆ <Off>: Cancel the BLC function.
5. Press the [MENU] button to exit the menu.
◆ The selected function icon (
) is displayed.
◆ If you select <Off>, no icon is displayed.
[ Notes ]
✤ The BLC is set to <Off> when the Sports
Camcorder is turned off.
✤ While the menu screen is displayed, pressing the
[Record / Stop] button will move to Photo Capture
mode.
68
设置BLC (背光补偿)
100
“背光补偿”功能可以在物体处于窗口前面或物体太暗而无法与背景区
100
别时帮助使物体变得亮些。您也可以在明亮背景(包括
100
雪景)中使用运动型摄录一体机时使用此功能。
Capturing...100
Capturing...
Capturing...
Capturing...
S
12:00AM 2006/01/01
Sepia
12:00AM 2006/01/01
12:00AM 2006/01/01
12:00AM
Photo2006/01/01
Sepia
Sepia
Sepia
Photo
BLC
Photo
Photo
On BLC
Off BLC
On
BLC
On
Off
On
Off
Move
Off
Move
Move
Photo
Move
4
5
S
2. 按下[模式]按钮进入相片模式。
◆ 照片录制屏幕将会显示。
3. 按下[菜单] 按钮。
左右移动摇杆 / 选择 <BLC> (背光补偿)。
Select
Exit
Select
OK Select
Select
Exit
MENU Exit
Exit
Photo
BLC
Photo
Photo
On BLC
Off BLC
On
BLC
On
Off
On
Off
Move
Off
Move
Move
Move
1. 按下[电源] 按钮打开运动型摄录一体机。
◆ 视频录制屏幕将会显示。
Select
OK
Select
Select
Select
Exit
MENU
100
Exit
Exit
Exit
4. 上下移动 摇杆选择一种模式, 然后按下 [摇杆
(OK)]按钮。
◆ <On>(开): 设置BLC 功能。
◆ <Off>(关): 取消BLC 功能。
5. 按下[菜单]按钮以完成设置。
) 将
◆ 如果选择<On>(开),功能图标 (
显示在屏幕上
◆ 如果选择<Off>(关), 将没有相关图标显示。
[ 注意 ]
✤ 运动型摄录一体机关闭以后,BLC(背光补偿)
功能将设置为<Off>(关)关闭。
✤ 在有菜单画面时, 按下 [录制/停止]按钮可切
换到照片录制模式。
100
100
Capturing...100
Capturing...
Capturing...
Capturing...
S
12:00AM 2006/01/01
Sepia
12:00AM 2006/01/01
12:00AM 2006/01/01
12:00AM 2006/01/01
Sepia
Sepia
Sepia
S
S
ENGLISH
中
文
Photo Mode : Setting the Capturing Options 相片模式 : 设置拍照选项
Setting the Digital Zoom
设置数字变焦
100
As well as the 10x optical zoom, this Sports Camcorder supports 10x
超过10倍的缩放使用数码变焦执行,与光学变焦结合可高达100倍
100
100
digital zoom which produces a total of 100x zoom.
的变焦效果,“数字变焦”可以处理数据并将图像
100
2
Exceeding the optical zoom limit will automatically
的中间部分放大至填满画面,使用数字变焦可能会
Capturing...
S
engage the digital zoom when available. Digital zoom
产生比较不细致和稍微有颗粒感的图片。
Capturing...
S
Capturing...
may produce a grainy picture.
S
S
1. Press the [POWER] button to turn on the
Sports Camcorder.
◆ The Movie Record screen appears.
2. Set the Photo mode by pressing the [MODE]
button.
◆ The Photo Capture screen appears.
3
3. Press the [MENU] button.
Move the [Joystick] left /right to select <Digital
Zoom>.
4. Move the [Joystick] up / down to select an
4
option, and then press the [Joystick(OK)].
◆ <On>: Enables digital zoom. Attempts to zoom
in more than 10x will automatically apply digital
zooming.(up to 100x)
◆ <Off>: Disables digital zoom. Only optical zoom
10x will be supported for zooming
5. Press the [MENU] button to exit the menu.
◆ When using the digital zoom switch, a digital
zoom indicator appears on the screen.
5
Capturing...
12:00AM 2006/01/01
12:00AM 2006/01/01
12:00AM 2006/01/01
12:00AM 2006/01/01
Photo
Photo
Photo
Digital
PhotoZoom
Digital Zoom
OnDigital Zoom
Off
OnDigital Zoom
On
Off
On
Off
Off
Move
Move
Move
Move
Photo
Select
Select
Select
Select
OK
Photo
Photo
Digital
PhotoZoom
Digital Zoom
OnDigital Zoom
Off
OnDigital Zoom
On
Off
On
Off
Off
Move
Move
Move
Move
Select
Select
Select
Select
OK
Sepia
Sepia
Sepia
Sepia
2. 按下[模式]按钮进入相片模式。
◆ 照片录制屏幕将会显示。
3. 按下[菜单]按钮。
左右移动[摇杆] / 选择 <Digital Zoom>(数字
变焦)。
MENU
Exit
Exit
Exit
Exit
Exit
Exit
Exit
Exit
MENU
4. 上下移动 [摇杆] 摇杆选择打开或者关闭, 然
后按下 [摇杆(OK)] 按钮。
◆ <On>(开): 打开数字变焦,变焦时10倍以
上的变焦将自动进入数字变焦
模式。(最高100x)
◆ <Off>(关): 关闭数字变焦,变焦时只能使
用10倍以内的光学变焦。
5. 按下[菜单]按钮以完成设置。
◆ 当使用数字变焦功能时, 数字变焦指示器
将会显示在屏幕上。
W
1X
1X
1X
[ Note ]
✤ While the menu screen is displayed, pressing the
[Record / Stop] button will move to Photo Capture
mode.
1. 按下[电源] 按钮打开运动型摄录一体机。
◆ 视频录制屏幕将会显示。
W
W
W
1X
10X
10X
10X
T
[ 注意 ]
✤ 在有菜单画面时, 按下 [录制/停止]按钮可切
换到照片录制模式。
10X
Sepia
T
T
Sepia
SepiaT
Sepia
69
ENGLISH
中
Photo Mode : Setting the Viewing Options
相片模式 : 设置查看选项
Deleting Photo Files
删除相片文件
You can delete saved photo files.
1. Press the [POWER] button to turn on the
Sports Camcorder.
◆ The Movie Record screen appears.
2. Set the Photo mode by pressing the [MODE]
button.
◆ The Photo Capture screen appears.
3. Press the [PLAY] button or [Joystick(OK)].
◆ Switches to Photo View mode.
◆ Move to the desired photo file, using the
[Joystick].
您可以删除存储的照片文件。
1. 按下[电源] 按钮打开运动型摄录一体机。
◆ 视频录制屏幕将会显示。
2. 按下[模式]按钮进入相片模式。
◆ 照片录制屏幕将会显示。
[Joystick(OK)] 3. 按下[PLAY]按钮或者[摇杆(OK)]。
◆ 切换到照片预览模式。
◆ 使用[摇杆] 选择目标照片文件。
3
[PLAY]
button
4
01
OK
Cancel
OK Select
Move 2006/01/01
12:00AM
100-0001
4
Deleting Photo Files in Multi-View
4. Slide the [W/T] switch to W (WIDE).
◆ The screen switches to multi-view.
5. Press the [DELETE] button on the LCD monitor.
6. Select an option by moving the [Joystick] up /
down and then press the [Joystick(OK)].
◆ <OK>: Deletes the selected photo file.
◆ <Multi Select>: Multiple photo files can be
5
selected using the [Joystick(OK)].
< ✔ > indicator appears on the selected files.
Press the [PLAY] button to delete.
◆ <All>: All photo files will be deleted.
◆ <Cancel>: Cancels the deletion.
70
全屏预览模式下删除照片文件
100-0001
Deleting a Photo File in Full Screen-View
4. Press the [DELETE] button on the LCD monitor.
5. Select an option by moving the [Joystick] up /
down and then press the [Joystick(OK)].
◆ <OK>: Deletes the selected photo file using the
[Joystick(OK)].
◆ <Cancel>: Cancels the deletion.
6. Press the [MENU] button to exit the menu.
文
[ Notes ]
✤ Locked files will not be deleted.
✤ While the menu screen is displayed, pressing the
[Record / Stop] button will move to Photo Capture mode.
100-0001
100-0001
Move
Move
View
01
OK
View
Sepia
Move 2006/01/01
Select
12:00AM
100-0001
OK
Multi Select
All
Cancel
Move
OK
Select
Sepia
4. 按下LCD显示器上的[删除]按钮。
5. 上下移动[摇杆] 选择一种选项,然后按下[摇杆
(OK)]按钮。
◆ <OK>(确定): 删除所选照片文件。
◆ <Cancel>(取消): 取消删除。
6. 按下[菜单]按钮以完成设置。
多画面模式下删除照片文件
4.拨动 [W/T]按钮到W (WIDE)(远端)
◆ 屏幕切换到多画面模式。
5. 按下LCD显示器上的[删除]按钮。
6. 上下移动[摇杆] 选择一种选项,然后按下 [摇杆
(OK)] 按钮。
◆ <OK>(确定): 删除所选照片文件。
◆ <Multi Select>(多项选择): 可以使用[摇杆
(OK)]选择多个照片文件。< ✔ > 图标将显示
在所选文件上,然后按下[PLAY]按钮删除所
选文件。
◆ <All>(全部): 所有照片文件将被删除。
◆ <Cancel>(取消): 取消删除操作。
[ 注意 ]
✤ 锁定文件将不能删除。
✤ 在有菜单画面时, 按下 [录制/停止]按钮可切换
到照片录制模式。
ENGLISH
中
Photo Mode : Setting the Viewing Options
相片模式 : 设置查看选项
Setting the Slide show
设置幻灯模式显示
文
You can set a slide show, and also set the interval and repetition options 您可以设置幻灯模式显示的时间间隔以及是否重复播放。
for the slide show.
1. Press the [POWER] button to turn on the Sports
Camcorder.
◆ The Movie Record screen appears.
2. Set the Photo mode by pressing the [MODE]
button.
◆ The Photo Capture screen appears.
3. Press the [PLAY] button or [Joystick(OK)].
◆ Switches to Photo View mode.
◆ Move to the desired photo file, using the
[Joystick].
4. Press the [MENU] button.
Move the [Joystick] left / right to select <Slide>.
5. Select <Interval (sec.)> by moving the [Joystick]
up / down and then press the [Joystick(OK)].
6. Set the interval by moving the [Joystick] up /
down and then press the [Joystick(OK)].
◆ Interval range: 1 ~ 10 seconds.
7. Select <Repeat> by moving the [Joystick] up /
down and then press the [Joystick(OK)].
8. Set the repeat option by moving the [Joystick]
up / down and then press the [Joystick(OK)].
◆ <Off>: Sets not to repeat the slide show.
◆ <On>: Sets to repeat the slide show.
9. Select <Start> by moving the [Joystick] up /
down and then press the [Joystick(OK)].
◆ Slide show starts. To stop the slide show, press
the [Joystick(OK)].
[ Notes ]
✤ The interval between photos may vary depending
on the size of the photo.
✤ Slide show starts from the current photo displayed.
✤ Slide show cannot start from a damaged photo file.
Damaged photos will be skipped during the slide
show.
✤ While the menu screen is displayed, pressing the
[Record / Stop] button will move to Photo Capture
mode.
100-0001
100-0001
100-0001
3
01
01
01
5
100-0001
Photo
Sta
Repeat
Move
Of
OK
Select
OK
Select
MENU
Exit
MENU
Exit
7
Start
Repeat
Move
Of
9
01
01
01
OK
Sepia
Stop
Sepia
Stop
Sepia
Stop
1. 按下[电源]按钮以打开运动型摄录一体机。
◆ 视频录制画面将会出现。
2. 按下[模式]按钮进入相片模式。
◆ 照片录制屏幕将会显示。
3. 按下[PLAY]按钮或[摇杆(OK)]按钮。
◆ 切换到照片预览模式。
◆ 使用[摇杆] 选择目标照片文件。
4. 按下[菜单]按钮
左右移动[摇杆] 选择<Slide>(幻灯片)。
5. 上/下移动[摇杆]选择<Interval (sec.)>(幻灯片放
映速度),然后按下[摇杆(OK)]按钮。
6. 上下移动[摇杆]设置时间间隔,然后按下 [摇杆
(OK)]按钮。
◆ 间隔范围: 1 ~ 10 秒。
7. 上/下移动[摇杆]选择<重复>,然后按下[摇杆
(OK)]按钮。
8. 上/下移动[摇杆]选择<开>或者<关>,然后按下
[摇杆(OK)] 按钮。
◆ <Off> (关): 不进行重复顺序播放。
◆ <On> (开): 重复顺序播放。
9. 上/下移动[摇杆]选择<开始>,然后按下 [摇杆
(OK)]。
◆ 开始进行顺序播放,想结束顺序播放,按下
[摇杆(OK)]按钮。
[ 注意 ]
✤ 照片跟照片之间的时间间隔会根据照片大小的不
同有所不同。
✤ 顺序播放时从当前显示的图片开始播放。
✤ 顺序播放不能够从损坏的照片开始,损坏的照片
在顺序播放时将被略过不进行播放。
✤ 在有菜单画面时, 按下 [录制/停止]按钮可切换
到照片录制模式。
71
100-0001
100-0001
01
01
ENGLISH
Photo Mode : Setting the Viewing Options
中
文
相片模式 : 设置查看选项
Sepia
Setting the DPOF (Digital Print Order Format) Function 设置DPOF
Sepia(设置数码打印)功能
You can automatically print a photo file recorded with a printer
6
that supports DPOF.
Setting the DPOF is only available when using a memory card.
1. Insert the memory card into the memory card slot on the
Sports Camcorder.
2. Press the [POWER] button to turn on the Sports
Camcorder.
◆ The Movie Record screen appears.
3. Set the Photo mode by pressing the [MODE] button.
◆ The Photo Capture screen appears.
4. Press the [PLAY] button or [Joystick(OK)].
7
◆ Switches to Photo View mode.
◆ Move to the desired photo file, using the [Joystick].
Photo
Photo
100-0001
100-0001
DPOF
DPOF
Copies
Copies
Off
Off
1
1
Move
Move
OK
Select
Select
MENU
100-0001
100-0001
100-0001
100-0001
1 01
1 01
Setting the DPOF in Full Screen-View
5. Press the [MENU] button.
Move the [Joystick] left / right to select <DPOF>.
6. Select an option by moving the [Joystick] up / down and
then press the [Joystick(OK)].
◆ <Copies>: Move the [Joystick] up / down to select the
number of copies you want to print
7
and press the [Joystick(OK)]. (copy range: 0 ~ 30)
◆ <Off>: Cancels DPOF setting.
7. Press the [MENU] button to exit the menu.
Sepia
Sepia
5. 按下[菜单]按钮
左/右移动[摇杆]选择<DPOF>(数码打印)。
6. 上下移动[摇杆] 选择一个选项,然后按下[摇杆(OK)]按钮。
◆ <Copies>(张数): 上下移动[摇杆]设置想要打印的份数,
然后按下[摇杆(OK)]按钮。(份数范围: 0 ~ 30)。
◆ <Off>(关): 取消DPOF(数码打印)。
7. 按下[菜单]按钮以完成设置。
多画面模式下设置 DPOF
Setting the DPOF in Multi-View
5. Slide the [W/T] switch to W (WIDE).
◆ The screen switches to multi-view.
6. Press the [MENU] button.
Move
Move the [Joystick] left / right to select <DPOF>.
7. Select an option by moving the [Joystick] up / down
8
and then press the [Joystick(OK)].
◆ <Copies>: Move the [Joystick] up / down to select
the number of copies you want to print and press the
1
[Joystick(OK)]. (copy range: 0 ~ 30)
1
◆ <Set All>: All photo files will be marked with DPOF settings.
◆ <Reset All>: All photo files will be resetted.
8. Press the [MENU] button to exit the menu.
[ Notes ]
Move
Move
✤ < > icon is displayed on the photos with DPOF setup.
✤ Refer to page 130 for further details about printing DPOF files.
✤ While the menu screen is displayed, pressing the [Record / Stop] button will
72
move to Photo Capture mode.
Exit
Exit
使用支持DPOF功能的打印机可以自动进行录制照片的打印,只有
在使用记忆卡时才需要设置DPOF。
1. 将记忆卡插入运动型摄录一体机的记忆卡插槽。
2. 按下[电源]按钮以打开运动型摄录一体机。
◆ 视频录制画面将会出现。
3. 按下[模式]按钮进入相片模式。
◆ 照片录制屏幕将会显示。
4. 按下[PLAY] 按钮。
◆ 切换到照片预览模式。
◆ 使用[摇杆]按钮选择想要进行设置的照片。
全屏模式下设置 DPOF
1
OK
Select
MENU
100-0001
OK
View
View
Exit
5. 拨动 [W/T]按钮到W (WIDE)(远端)
◆ 屏幕切换到多画面模式。
6. 按下[菜单]按钮。
左右移动[摇杆]选择<DPOF>(数码打印)。
7. 上下移动[摇杆]选择一个选项,然后按下[摇杆(OK)]按钮。
◆ <Copies>(张数): 上下移动[摇杆](摇杆)设置想要
打印的份数,然后按下[摇杆(OK)] 按钮。
(份数范围: 0 ~ 30)。
◆ <Set All>(全部): 设置所有照片文件进行DPOF
◆ <Reset All> (全部关闭): 取消所有照片DPOF。
8. 按下[菜单]按钮以完成设置。
[ 注意 ]
✤ < > 图标将显示在设置了的DPOF文件上。
✤ 2有关打印 DPOF 文件的详细信息,请参阅第 130 页。
✤ 在有菜单画面时,按下[录制/停止]按钮可切换到照片录制模式。
100-0001
100-0001
01
01
ENGLISH
Photo Mode : Setting the Viewing Options
Sepia
Sepia
锁定照片文件
4
您能够保护存储的重要照片文件不被意外删除,被保护的文件
将不能够被删除,
除非您取消保护该照片文件或者记忆卡被格式化。
100-0001
100-0001
Photo
Photo
Lock
Lock
Lock
Lock
Move
Move
OK
5
Select
Select
MENU
Exit
Exit
100-0001
100-0001
1
1
Locking a Photo File in Full Screen-View
4. Press the [MENU] button.
Move the [Joystick] left / right to select <Lock>.
5. Press the [Joystick(OK)].
◆ Locks the selected photo file.
◆ Press the [MENU] button once again to set
unlock.
文
相片模式 : 设置查看选项
Locking Photo Files
You can lock important saved photo files from
accidental erasure. Locked files will not be deleted
unless you release the lock or format the memory.
1. Press the [POWER] button to turn on the
Sports Camcorder.
◆ The Movie Record screen appears.
2. Set the Photo mode by pressing the [MODE]
button.
◆ The Photo Capture screen appears.
3. Press the [PLAY] button or [Joystick(OK)].
◆ Switches to Photo View mode.
◆ Move to the desired photo file, using the
[Joystick].
中
Sepia
Sepia
5
全屏模式下设置文件锁定
4. 按下[菜单]菜单按钮。
左右移动[摇杆]选择<Lock>(锁定)。
5. 按下[摇杆(OK)]。
◆ 锁定所选择文件
◆ 再次 按下 [菜单]按钮取消锁定。
多画面模式下设置文件锁定
P
Locking Photo Files in Multi-View
4. Slide the [W/T] switch to W (WIDE).
◆ The screen switches to multi-view.
5. Press the [MENU] button.
Move the [Joystick] left / right to select <Lock>.
Move
6. Select an option by moving the [Joystick] up /
down and then press the [Joystick (OK)].
◆ <Lock>: Locks the selected photo file using the
6
[Joystick(OK)].
◆ <Multi Select>: Multiple photo files can be
selected using the [Joystick(OK)].
< > indicator appears on the selected files.
Press the [PLAY] button to lock.
◆ <Lock All>: All photo files are locked.
◆ <Unlock All>: Unlocking all photo files.
Move
Move
[ Notes ]
✤ The < > icon is displayed on the locked file.
✤ While the menu screen is displayed, pressing the [Record / Stop]
button will move to Photo Capture mode.
1. 按下[电源]按钮以打开运动型摄录一体机。
◆ 视频录制画面将会出现。
2. 按下[模式]按钮进入相片模式。
◆ 照片录制屏幕将会显示。
3. 按 [PLAY] 按钮或 [摇杆(OK)]。
◆ 切换到照片预览模式
◆ 使用[摇杆]按钮选择想要进行设置的照片。
S
OK
1
View
View
OK
xit
4. 拨动 [W/T]按钮到 W (WIDE)(远端)
◆ 屏幕切换到多画面模式。
5. 按下[菜单] 按钮
左右移动[摇杆]选择 <Lock>(锁定)。
6. 上下移动[摇杆](摇杆)选择一个选项,然后按下 [摇杆]
按钮 [摇杆(OK)]。
◆ <Lock>(锁定): 使用[摇杆(OK)]按钮锁定所选文件。
◆ <Multi Select>(多项选择): 可以使用[摇杆(OK)] 按
钮锁定多个照片文件 < > 将显示在锁定的照片文件
上。按 [PLAY] 按钮锁定。
◆ <Lock All>(全部打开): 锁定所有照片文件。
◆ <Unlock All>(全部关闭): 解锁所有照片文件。
[ 注意 ]
✤ 图 <
> 将显示在被锁定的文件上。
✤ 在有菜单画面时, 按下 [录制/停止] 按钮可切换到照片录
制模式。
73
ENGLISH
中
Photo Mode : Setting the Viewing Options
相片模式 : 设置查看选项
Copying Photo Files
复制相片文件
You can copy saved files from the internal memory to a
memory card and vice versa.
1. Insert the memory card into the memory card slot
on the Sports Camcorder.
2. Press the [POWER] button to turn on the Sports
Camcorder.
◆ The Movie Record screen appears.
3. Set the Photo mode by pressing the [MODE] button.
◆ The Photo Capture screen appears.
4. Press the [PLAY] button or [Joystick(OK)].
◆ Switches to Photo View mode.
◆ Move to the desired photo file, using the [Joystick].
4
Sepia
01
01
OK
Move
Copying Photo Files in Multi-View
5
Select
OK
Exit
Sepia
MENU
100-0001
100-0001
Photo
Photo
Copying
Copyfile(s)...
To
DPOF
SMOV0001.JPG
OK
OK
OK
All
Press OK to cancel.
Move
Move
Move
7
OK
Select
Select
Select
MENU
Exit
Exit
Exit
100-0001
Photo
Copying file(s)...
DPOF
Copying
file(s)...
SMOV0001.JPG
DPOF
DCAM0001.JPG
OK
OK
PressOK
OKto
tocancel.
cancel.
Press
Cancel
Move
Move
Photo
Select
Select
OK
MENU
Exit
Exit
100-0001
Copying file(s)...
DPOF
OK
Press OK to cancel.
Move
Select
1. 将记忆卡插入运动型摄录一体机的记忆卡插槽。
2. 按下[电源]按钮以打开运动型摄录一体机。
◆ 视频录制画面将会出现。
3. 按下[模式]按钮进入相片模式。
◆ 照片录制屏幕将会显示。
4. 按 [PLAY] 按钮或 [摇杆(OK)]。
◆ 切换到照片预览模式。
◆ 使用[摇杆]按钮选择要复制的照片。
在全屏模式下复制照片文件
Copy To
5. Press the [MENU] button.
Move the [Joystick] left / right to select <Copy To>.
6. Press the [Joystick(OK)].
◆ Copies the selected photo file.
74
100-0001
100-0001
100-0001
Photo
Copying a Photo File in Full Screen-View
5. Slide the [W/T] switch to W (WIDE).
◆ The screen switches to multi-view.
6. Press the [MENU] button.
Move the [Joystick] left / right to select <Copy To>.
7. Select an option by moving the [Joystick] up / down
and then press the [Joystick (OK)].
◆ <OK>: Copies the selected photo file.
◆ : Multiple photo files can be selected using the
[Joystick(OK)].
< ✔ > indicator appears on the selected files. Press
the [PLAY] button to copy.
◆ <All>: Cancels copying a photo file.
[ Notes ]
✤ The Sports Camcorder copies from the currently-used
memory to another. If the internal memory was used, it
copies to a memory card.
✤ If the memory card is not inserted, you cannot perform
the <Copy To> function.
✤ While the menu screen is displayed, pressing the
[Record / Stop] button will move to Photo Capture
mode.
您可以把存储在内存中的照片文件复制到记忆卡上或相反
100-0001
01
5
文
Exit
5. 按下[菜单]按钮
左右移动[摇杆]选择<Copy To>(复制到)。
6. 按下[摇杆(OK)]按钮。
◆ 复制所选文件。
多画面模式下复制文件
5. 拨动 [W/T]按钮到W (WIDE)(远端)
◆ 屏幕切换到多画面模式。
6. 按下[菜单]按钮
左右移动[摇杆]选择 <Copy To>(复制到)。
7. 上下移动[摇杆] 选择一个选项,然后按下[摇杆
(OK)]按钮。
◆ <OK>(确定):复制所选文件。
◆ <Multi Select>(多项选择): 可以使用[摇杆(OK)]
按钮选择多个照片文件 < ✔ > 将显示在所选文件
上,然后按下[PLAY]按钮进行复制。
◆ <All>(全部): 复制所有文件。
[ 注意 ]
✤ 文件从一种存储介质复制到另一存储介质中,如果当前
使用的是内部记忆卡则文件将被复制到外部记忆卡上。
✤ 当没有外部记忆卡时,您将不能够使用<Copy To>(复
制到) 功能。
✤ 在有菜单画面时, 按下 [录制/停止]按钮可切换到
照片录制模式。
ENGLISH
3
中
3
MP3 Mode
文
MP3模式
Storing MP3 Files in the Sports Camcorder......................76
Copying MP3 Files to the Sports Camcorder .................76
Playing....................................................................................77
Playing MP3 Files ............................................................77
Setting the MP3 Play Options .............................................78
Deleting MP3 Files ..........................................................78
Setting the Repeat Play...................................................79
Setting the Equalizer .......................................................80
Locking MP3 Files ...........................................................81
Copying MP3 Files ..........................................................82
在运动型摄录一体机内存储MP3文件 ................... 76
复制MP3文件到运动型摄录一体机 ................. 76
播放 ............................................. 77
播放MP3 文件 .................................. 77
设置 MP3 播放选项 ................................ 78
删除MP 3文件 .................................. 78
设置重复播放 .................................. 79
选择均衡器 .................................... 80
锁定 MP3 文件 ................................ 81
复制 MP3 文件 ................................ 82
◆ Save important data / recordings separately on other media, to
avoid accidental loss due to a system failure or other reasons.
◆ 将重要的数据/记录内容保在其它存储介质上,以防止因系
统错误或其它原因导致的意外数据丢失。
How to set to MP3 mode
U
MEN
Power
button
如何设置MP3模式
U
MEN
MP3
E
MOD
1. Press the [POWER] button
to turn on the Sports
Camcorder.
[电源]
按钮
MP3
E
MOD
2. Set the MP3 mode by
pressing the [MODE]
button.
1. 按下[POWER] (电源)按钮
以打开运动型摄录一体机。
2. 按下[MODE] (模式)
按钮进入MP3 模式。
75
MP3 Mode : Storing
MP3 files in the Sports Camcorder
ENGLISH
中
MP3模式:
在运动型摄录一体机中存储MP3文件
Copying MP3 Files to the Sports Camcorder
复制MP3文件到运动型摄录一体机
You can copy MP3 files from a PC to the Sports Camcorder while connected to the
PC with a USB cable.
Before your start!
◆ You can copy the MP3 files when <USB Mode>
sets to <Mass Storage> ➥page 98
B
1. Press the [POWER] button to turn on the
Sports Camcorder.
◆ The Movie Record screen appears.
2. Connect the Sports Camcorder to the PC
using the USB cable provided.
◆ A - Connect the USB cable to the Sports
Camcorder.
◆ B - Connect the other end of the USB cable to
the PC.
3. Double-click the new removable drive to open.
4. Select the MUSIC folder and double-click to
enter.
5. Drag and drop the MP3 file from your PC into
the MUSIC folder.
◆ The maximum music memory capacity is
2000 MP3 files.
用USB线与PC连接后,您可以将MP3文件复制到运动型摄录一体机上。
Disconnecting USB Connection
After completing the data transfer, you must
disconnect the cable in the following way.
1. Select the removable disk icon and click the
right mouse button to select ‘Safely Remove
Hardware’.
2. Select ‘Stop’ and disconnect the USB cable when
the pop-up screen disappears.
[ Warning ]
✤ Copying and redistributing of MP3 files may
violate the copyright law.
✤ You cannot create a new folder on your Sports
Camcorder.
[ Notes ]
✤ You can copy a folder on your Sports Camcorder.
✤ To see MP3 file capacity with regards to the
Sports Camcorder's memory capacity.➥page 32.
✤ It is recommended to use an AC Power Adapter
during the file transfer to avoid unintended power
76
outage due to low battery power.
文
在开始之前!
◆ 将USB模式 <USB Mode>(USB模式) 设置为
<Mass Storage>(大容量存储)模式后,您可
以复制 MP3文件 ➥见98页
MMC/SD
USB
A
1. 按[电源]按钮打开运动型摄录一体机。
◆ 视频录制屏幕出现。
2. 使用提供的USB线将摄录一体机与电脑连接起来。
◆ A - 连接USB线到摄录一体机;
◆ B - 将USB线的另一端连接到电脑。
3. 双击打开新的可移动驱动器。
4. 选择MUSIC文件夹双击进入。
5. 将您电脑上的MUSIC文件拖到音乐文件夹中。
◆ 最大的音乐记忆容量为2000 个MP3文件。
断开USB连接
数据传输完成后, 您必须按照下列方法断开线缆。
1. 选择移动硬盘图标,然后点击鼠标的右按
钮选择“安全删除硬件”
(‘SafelyRemoveHardware’)。
2. 选择停止(‘Stop’),当弹出的屏幕消失后,
断开USB线缆。
[ 警告 ]
✤ 拷贝和复制MP3文件可能违反版权法。
✤ 您不能在摄录一体机上建立新文件夹。
[ 注意 ]
✤ 您可以在摄录一体机上拷贝一个文件夹。
✤ 查看MP3 文件容量以及摄录一体机的记忆容量。
➥见32页。
✤ 为了防止电池低电量引起的掉电,文件传输时推
荐使用交流电源线。
ENGLISH
中
MP3 Mode : Playing
MP3 模式 : 播放
Playing MP3 Files
播放MP3 文件
You can play back stored MP3 files.
1. Press the [POWER] button to turn on the Sports
Camcorder.
◆ The Movie Record screen appears.
2. Set the MP3 mode by pressing the [MODE] button.
◆ The MP3 playlist appears.
◆ If there is no MP3 file stored, the message <No Files...>
appears.
3. Select an MP3 file to play by moving the [Joystick] up /
down, and then press the [Joystick(OK)].
4. The selected MP3 file is played back.
◆ Each time you press the [PLAY] button or [Joystick(OK)],
play or pause is selected repeatedly.
◆ To adjust volume, move [Joystick] up / down.
Volume indicator appears and disappears after few
seconds.
Using the Joystick (left/right)
Move the [Joystick] left
◆ Within 2 seconds after starting playback - Previous file plays.
◆ In Pause/Stop mode - Previous file appears.
◆ 2 seconds after starting playback - Current file starts again.
Move the [Joystick] right
◆ During playback - The next file plays.
◆ In Pause/Stop mode - The next file appears.
◆ During playback, press and hold [Joystick(OK)] left / right to
forward or reverse search the currently playing MP3 file.
3
您可以播放存储的MP3文件。
1. 按[电源]按钮打开摄录一体机。
◆ 电影记录屏幕出现。
2. 按模式[模式]按钮选择MP3模式。
◆ MP3播放清单出现。
◆ 如果没有存储的MP3 文件, 会出现“没有文件”<No
Files...>(无文件...) 的信息。
3. 上/下移动[摇杆]选择要播放的MP3文件 按[摇杆(OK)]。
4. 已选择MP3 文件被播放。
◆ 每次您按下播放[PLAY] 按钮或[摇杆(OK)],画面在播放和
暂停之间切换。
◆ 为了调节音量, 上下移动摇杆[摇杆]
音量图标出现几秒钟后会消失。
Life is cool.mp3
Everytime.mp3
Life
is cool.mp3
Toxic.mp3
Everytime.mp3
Don't push me.mp3
Toxic.mp3
Love push
you.mp3
Don't
me.mp3
Love you.mp3
Move
Move
OK
Play
Play
4
Life is cool.mp3
Sweetbox
Life
is cool.mp3
Stereo 44.1KHz 192Kbps
Sweetbox
1/6
1/6
使用摇杆 (左/右)
00:01:07/00:03:27
Search
Search
List
List
文
OK
Pause
Pause
向左移动[摇杆]
◆ 开始播放后2秒钟之内 - 播放前一文件。
◆ 在暂停/停止模式 - 前一文件出现。
◆ 开始播放后2秒钟 - 当前文件重新开始。
向右移动[摇杆]
◆ 播放中 - 下一文件播放.
◆ 在暂停/停止模式 - 下一文件出现。
◆ 在回放时,向左/向右按住 [摇杆(OK)] 分别正向/反向搜
索当前正在播放的 MP3 文件。
Setting to Hold - [MP3/ External Camera Module HOLD] switch
If you slide the [MP3/ External Camera Module HOLD] switch down, all buttons except the
Power button and Volume control are locked.
The [MP3/ External Camera Module HOLD] switch operates only in the MP3 mode or when
connecting External Camera Module.
[ Notes ]
✤ The MP3 file with tag information will display the artist name. MP3 files with no tag
information will leave the item blank.
✤ If a broken file name is displayed, try renaming it on a PC.
✤ When the language set is not the same as the MP3 file Tag information language, the
Artist information may not display correctly.
✤ When the earphones, Audio/Video cable or External Camera Module cable is connected
to the Sports Camcorder, the built-in speaker will turn off automatically.
✤
The Sports Camcorder only supports MP3 file format.
✤ Damaged or non-standard MP3 files may not display properly or fail to play back.
✤ Playback will fail to start if the first file is damaged.
✤ The title may not be displayed if the language is not supported or in Chinese.
✤ MP3 files with VBR setting will appear as VBR on the LCD monitor and its play time and
recording time may differ from the displayed diagram.
✤ If a title of a track is too long, it may appear cropped on the LCD monitor.
✤ Supported bitrates for MP3 files is 8Kbps~320Kbps and VBR.
设置 [MP3/ 外部摄像模块保持] 开关
如果您将[MP3/ 外部摄像模块保持] 开关向下波动,除了电源按钮和音量控制外所有的按
钮会被锁住.连接外部摄像头以后,[MP3/外部摄像模块保持] 开关仅工作于MP3 模式。
[ 注意 ]
✤ 带有附加标语信息的MP3文件可以显示歌手信息。没有标语信息的MP3文件此项为空白。
✤ 如果文件名被损坏, 请在电脑上重新命名.
✤ 如果设置的语言与MP3附加标语信息不一致,MP3文件的附加标语信息将不能正确显示。
✤ 当耳机, 音频/视频线或外部摄像模块连接到摄录一体机时,内置扬声器会自动关闭
✤ 运动型只支持MP3 文件格式
✤ 受损或不标准的MP3 文件可能会显示不正常或播放失败。
✤ 如果第一个文件坏了,将无法开始回放。
✤ 如果语言不被支持或是中文,题目将不会被显示。
✤ 带有VBR设置的MP3文件在LCD显示器上显示为VBR。播放时间和录制时间可能与显示段
落有差异。
✤ 如果一个标题太长,在LCD显示屏可能只显示一部分。
✤ MP3支持的码率从8Kbps~320Kbps 以及VBR。
77
ENGLISH
Mp3 Mode :
Setting the Mp3 Play Options
中
MP3模式 : 设置 MP3 播放选项
Deleting Mp3 Files
删除MP3 文件
You can delete a selected mp3 file or group of MP3 files.
1. Press the [power] button to turn on the
2
Sports Camcorder.
◆ The Movie Record screen appears.
2. Set the MP3 mode by pressing the [MODE]
button.
◆ The MP3 playlist appears.
◆ Move to the desired MP3 file, using the [joystick].
您可以删除选中的MP3文件或 MP3文件组。
Deleting Mp3 Files in MP3 playlist
3. Press the [DELETE] button on the LCD
monitor in pause mode. Select an option by
moving the [joystick] up / down and then
press the [joystick(OK)].
◆ <OK>: Deletes the selected Mp3 file.
◆ <Multi Select>: Multiple Mp3 files can be
selected using the [joystick(OK)].
< ✔ > indicator appears on the selected files.
Press the [PLAY] button.
◆ <All>: All Mp3 files will be deleted.
cool.mp3
◆ <Cancel>: Cancels Life
theisdeletion.
Life is cool.mp3
78
1/6
1.按电源按钮打开运动型摄录一体机。
1/6
is cool.mp3
◆ Life
视频录制屏幕出现。
Life is cool.mp3
Life is cool.mp3
Everytime.mp3
Everytime.mp3
Toxic.mp3
Toxic.mp3
Don't
push me.mp3
Don't push me.mp3
Love you.mp3
Love you.mp3
Move
Move
OK
OK
Life is cool.mp3
Sweetbox
Sweetbox
Stereo 44.1KHz 192Kbps
Stereo 44.1KHz 192Kbps
2.按模式[模式]按钮选择MP3模式
00:00:00/00:03:27
00:00:00/00:03:27
◆ MP3播放清单出现。
◆ 拨动摇杆到想要播放的MP3文件。
OK Pause
Search
List
Play
Play
Search
OK
OK
3
Select
Select
1/6
1/6
全屏下删除MP3
00:00:00/00:03:27
List
List
OK
OK
Pause
Pause
1/6
1/6
Cancel
Cancel
Move
Move
Pause
3.按播放[PLAY]按钮或[摇杆(OK)]。
◆ 选中的MP3文件被播放。
Stereo
44.1KHz 192Kbps
00:00:00/00:03:27
4
OK
3.在暂停模式按LCD屏幕下方的删除[DELETE]按
1/6
1/6
钮。上/下移动摇杆按钮选择选项,然后按[摇
杆(OK)]按钮。
◆ <关>: 删除选中MP3文件。
◆ <多项选择>: 使用[摇杆(OK)]可以选中多个
Cancel
MP3文件。< ✔ > 指示图标出
Cancel
现在选中的文件上。按播放
OK Select
OK Play
Move
OK Select
OK Play
Move
[PLAY]按钮。
◆ <全部>: 所有的MP3文件将被删除
◆ <取消>: 取消删除。
Life is cool.mp3
Life is cool.mp3
Sweetbox
Sweetbox
Stereo 44.1KHz 192Kbps
Search
Search
List
在MP3播放清单中删除MP3文件
3
Everytime.mp3
Everytime.mp3
Toxic.mp3
Deleting an Mp3 File in Full
screen
Toxic.mp3
Don't
push me.mp3
Don't you.mp3
push me.mp3
Love
3. press the [PLAY] button
or
[Joystick(OK)].
Love you.mp3
Move
Play
◆ The selected MP3
file is OK
played.
Move
Play
4. Press the [DELETE]
buttonOKon
the LCD
monitor in pause mode. Select an option by
moving the [joystick] up / down and then
press the [joystick(OK)].
◆ <OK>: Deletes the selected Mp3 file.
◆ <Cancel>: Cancels the deletion.
[ Notes ]
✤ Locked files will not be deleted.
Select playback.
✤ You cannot access the menuOK
during
OK Select
文
4.暂停模式下按LCD显示屏的删除[DELETE]按
钮。上/下移动摇杆[摇杆]选择好后按 [摇杆
(OK)]。
◆ <OK>(确定): 删除选中的MP3文件。
◆ <Cancel>(取消): 取消删除。
[ 注意 ]
✤ 锁住的文件不会被删除。
✤ 播放时您不能进入菜单。
OK
OK
Select
Select
OK
OK
Play
Play
MP3 Mode :
Setting the MP3 Play Options
ENGLISH
中
MP3 模式 : 设置 MP3 播放选项
Setting the Repeat Play
设置重复播放
You can repeat a selected MP3 file or group of MP3
files, or play the MP3 files at random.
您可以重复播放MP3文件或MP3文件组,或者随机播放MP3文件。
1. Press the [POWER] button to turn on the
Sports Camcorder.
◆ The Movie Record screen appears.
2. Set the MP3 mode by pressing the [MODE]
button.
◆ The MP3 playlist appears.
3. Press the [MENU] button in pause mode.
Move the [Joystick] left / right to select
<Repeat>.
4. Select an option by moving the [Joystick] up /
down and then press the [Joystick (OK)].
◆ <Off>: No repeat, plays each title once in the
order from the selected MP3 file.
◆ <Repeat One>: One selected MP3 file will
play repeatedly.
◆ <Repeat Folder>: All files in the folder will
play repeatedly.
◆ <Repeat All>: All MP3 files will play through
in order and start again from the beginning.
◆ <Shuffle Folder>: All files in the folder will
play at random.
◆ <Shuffle All>: All MP3 files will play in
random order once.
5. Press the [MENU] button to exit the menu.
◆ Move the MP3 file of the desired folder using
the [Joystick].
◆ When the MP3 file plays back, the selected
option will be applied.
◆ The selected function icon is displayed.
◆ If you select <Off>, no icon is displayed.
[ Notes ]
✤ When the earphones, Audio/Video cable or
External Camera Module cable is connected to
the Sports Camcorder, the built-in speaker will
not operate.
✤ You cannot access the menu during playback.
文
3
Move
Move
Move
4
OK
2. 按模式[模式]按钮选择MP3模式。
◆ MP3播放清单出现。
Play
Play
Play
MP3
MP3
MP3
MP3
Repeat
Repeat
Life is cool.mp3
Repeat
Off Repeat
Off
1
RepeatEverytime.mp3
One
Off Toxic.mp3
1
Repeat
Off
Repeat One
Folder 1
RepeatDon't
One
on't
't push
me.mp3
me.m 3
1 me
One
Repeat
Folder
Repeat
Folderyou.mp3
MoveLove
Select
Exit
Repeat
Folder
Move
Move
Move
5
1. 按[电源]按钮打开摄录一体机。
◆ 视频记录屏幕出现。
Life is cool.mp3
Life
is cool.mp3
Everytime.mp3
Life is
is cool.mp3
cool.mp3
Everytime.mp3
Life
Toxic.mp3
Everytime.mp3
Toxic.mp3
Everytime.mp3
Don't push me.mp3
Toxic.mp3
Don't
push me.mp3
Toxic.mp3
Love you.mp3
Don'tyou.mp3
push me.mp3
me.mp3
Love
Don't
push
Love you.mp3
you.mp3
MoveLove
Play
OK
Select
Select
Select
MENU
MP3
MP3
MP3
MP3
Repeat
Life is cool.mp3
Repeat
Everytime.mp3
Repeat
Off Repeat
Off
1
RepeatToxic.mp3
One
Off Don't
1 me.mp3
Repeat
Off
't push
me
me.m 3
Repeat One
Folder
1
Repeat
One
1
One you.mp3
RepeatLove
Folder
Repeat
Folder
Move Folder Select
Repeat
Move
Move
Move
OK
Select
Select
Select
1
1
1
1
MENU
Life is cool.mp3
Life
is cool.mp3
Everytime.mp3
Life is
is cool.mp3
cool.mp3
Everytime.mp3
Life
Toxic.mp3
Everytime.mp3
Toxic.mp3
Everytime.mp3
Don't push me.mp3
Toxic.mp3
Don't
push me.mp3
Toxic.mp3
Love you.mp3
Don'tyou.mp3
push me.mp3
me.mp3
Love
Don't
push
Love
you.mp3
OK Play
MoveLove you.mp3
Move
Move
Move
Play
Play
Play
Exit
Exit
Exit
Exit
Exit
Exit
Exit
3. 在暂停模式下按菜单[菜单]按钮。
左/右移动[摇杆] 选择<Repeat>(重复)。
4. 上下移动摇杆[摇杆]选择好选项,然后按[摇杆
(OK)]。
◆ <Off>(关): 没有重复, 按照选择的MP3文件播放
顺序1次播放一个文件。
◆ <Repeat One>(重复一个): 重复播放一个选择
的MP3文件。
◆ <Repeat Folder>(重复文件夹): 文件夹中所有
的文件重复播放。
◆ <Repeat All>(全部重复): MP3 文件从头开始全
部重复播放。
◆ <Shuffle Folder>(随机播放文件夹): 文件夹中
所有的文件随机播放。
◆ <Shuffle All>(全部随机播放): 所有MP3 文件按
随机的顺序播放一次。
5. 按[菜单]退出菜单。
◆ 使用[摇杆]移动想要文件夹的MP3文件。
◆ 当MP3 文件播放时, 已选择的选项会起作用。
◆ 所选的功能图标将会显示在屏幕上。
◆ 如果选择的是 <Off>(关) 模 式,那么将不会显
示图标。
[ 注意 ]
✤ 当耳机,音频/视频线或外部摄像头模块线与摄录机
连接后,内置扬声器将不起作用。
✤ 重放时您将不能进入菜单。
79
MP3 Mode :
Setting the MP3 Play Options
ENGLISH
中
MP3模式 : 设置 MP3 播放选项
Setting the Equalizer
选择均衡器
You can choose an Equalizer mode for different types of music.
您可以为不同类型的音乐选择均衡模式。
1. Press the [POWER] button to turn on the
Sports Camcorder.
◆ The Movie Record screen appears.
2
2. Set the MP3 mode by pressing the [MODE]
button.
◆ The MP3 playlist appears.
3. Press the [MENU] button in pause mode.
Move the [Joystick] left / right to select
<Equalizer>.
4. Select an option by moving the [Joystick] up /
down and then press the [Joystick (OK)].
◆ <Off> / <Pop> / <Classic> / <Jazz>
Move
3
OK
2. 按模式[模式]按钮选择MP3模式。
◆ MP3播放清单出现。
Play
3. 在暂停模式下按菜单[菜单]按钮。
左/右移动[摇杆] 选择 <Equalizer>(均衡器)。
MP3
Move
4
1. 按[电源]按钮打开摄录一体机。
◆ 视频记录屏幕出现。
Life is cool.mp3
Life
is cool.mp3
Everytime.mp3
Life
is cool.mp3
cool.mp3
Everytime.mp3
Life
is
Toxic.mp3
Everytime.mp3
Toxic.mp3
Everytime.mp3
Don't push me.mp3
Toxic.mp3
Don't
push me.mp3
Toxic.mp3
Love you.mp3
Don't
push me.mp3
me.mp3
Love you.mp3
Don't
push
Love
you.mp3
Love you.mp3
OK
MENU
Exit
MP3
Move
OK
Select
5
MENU
Exit
[ 注意 ]
✤ 播放时2您不能进入菜单。
1/6
Life is cool.mp3
Life
is cool.mp3
Sweetbox
Life
is 44.1KHz
cool.mp3
Sweetbox
Life
is
cool.mp3
Stereo
192Kbps
Sweetbox
Sweetbox
POP
POP
POP
POP
00:01:07/00:03:27
80
Search
Search
Search
Search
4. 上/下移动[摇杆]选择选项,然后按[摇杆(OK)]。
◆ <Off>(关) / <Pop>(流行) /
<Classic>(古典) / <Jazz>(爵士)
5. 按菜单[菜单]按钮退出菜单。
◆ 选择的选项起作用。
◆ 如果选择的是 <Off>(关) 模式,那么将不会
显示图标。
5. Press the [MENU] button to exit the menu.
◆ The selected option is applied.
◆ If you select <Off>, no icon is displayed.
[ Note ]
✤ You cannot access the menu during playback.
文
List
List
List
List
OK
Pause
Pause
Pause
Pause
ENGLISH
MP3 Mode :
Setting the MP3 Play Options
MP3模式 : 设置 MP3 播放选项
Locking MP3 Files
锁定 MP3 文件
中
文
You can lock saved important MP3 files from accidental deletion.
您可以锁定重要的MP3文件以免被删除。被保护的文件只有在取消锁定
Locked files will not be deleted unless you release the lock or format
后才能被删除或者被格式化。
the memory.
1/6
1/6
2
1. 按下 [电源] 按钮打开运动型摄录机。
1. Press the [POWER] button to turn on the
◆
视频录制
屏幕将显示。
Life is
is cool.mp3
cool.mp3
Sports Camcorder.
Life is
is cool.mp3
cool.mp3
Life
Life
Sweetbox
◆ The Movie Record screen appears.
Everytime.mp3
2. Sweetbox
按下模式[模式]按钮设置MP3模式。
Everytime.mp3
Toxic.mp3
2. Set the MP3 mode by pressing the [MODE]
Toxic.mp3
◆ MP3播放清单显示。
Don't push
push me.mp3
me.mp3
Don't
button.
◆ 使用[摇杆]选择想要保护的MP3文件。
Love
you.mp3
Love you.mp3
◆ The MP3 playlist appears.
Search
List
Pause
在MP3播放清单里锁定MP3
文件
◆ Move to the desired MP3 file, using the [Joystick].
Move
Play
OK Play
Search
List
Pause
Move
3. 在暂停模式下按下[菜单]按钮。
Locking MP3 Files in MP3 playlist
左右移动[摇杆]选择
1/6 <Lock>(锁定)。
3
MP3
MP3
1/6
MP3
MP3
3. Press the [MENU] button in pause mode.
4.
上下移动
[摇杆]
选择功能然后按下[摇杆(OK)]
Life is cool.mp3
Lock
Lock
Move the [Joystick] left / right to select
Lock
Lock
确定。
Everytime.mp3
<Lock>.
◆
Lock Toxic.mp3
Lock<Lock>(锁定): 选定的MP3文件锁定。
Lock
Lock
4. Select an option by moving the [Joystick] up /
Multi Select
Select
Don't
't push me
me.mp3
me.m 3
◆ <Multi Select>(多项选择): 可以通过[摇杆
Multi
down and then press the [Joystick (OK)].
Love you.mp3
Lock All
All
Lock
(OK)]选择多个 MP3文件。< > 图标将会出
◆ <Lock>: The selected MP3 file is locked.
现在被选择的文件上。按下
[PLAY]按钮。
OK Select
MENU Exit
Move
Move
Select
Exit
◆ <Multi Select>: Multiple MP3 files can be
Move
Select
Exit
Move
Select
Exit
◆ <Lock All>(全部打开): 锁定所有MP3 文件。
selected using the [Joystick(OK)].
◆ <Unlock All>(全部关闭): 所有 MP3 文件未
<
> indicator appears on the selected files.
1/6
被锁定。
1/6
Press the [PLAY] button.
3
◆ <Lock All>: All MP3 filesLife
areis locked.
Life is cool.mp3
cool.mp3
Life is cool.mp3
全屏锁定 MP3 文件
Life
cool.mp3
Sweetbox
◆ <Unlock All>: UnlockingEverytime.mp3
all is
MP3
files.
Sweetbox
Everytime.mp3
3.
按下[PLAY]或[摇杆(OK)] 按钮
Toxic.mp3
Stereo
192Kbps
44.1KHz
Toxic.mp3
Don't push me.mp3
◆ 播放被选定的 MP3文件。
Locking an MP3 File in Full screen
00:00:00/00:03:27
Don't push me.mp3
Love you.mp3
you.mp3
4. 在暂停模式下按下 [菜单]。
3. Press the [PLAY]button or Love
[Joystick(OK)]
Search
List
Pause
左右移动[摇杆]选择 <Lock>(锁定)。
◆ The selected MP3 fileMove
is played.Play
OK Pause
Search
List
Move
Play
4. Press the [MENU] button in pause mode.
5. 按下[摇杆(OK)]。
Move the [Joystick] leftMP3
/ right to select
◆ 锁定MP3 文件。
1/6
4
MP3
1/6
MP3
MP3
<Lock>.
[
注意
]
5. Press the [Joystick(OK)]. Lock
Lock
Lock
✤ 图标 < > 将显示在被锁定的文件上。
◆ The selected MP3 file is Lock
locked.
Stereo
Lock
Lock 44.1KHz 192Kbps
Lock
Lock
✤ 在播放过程中不能使用菜单功能。
[Notes]
00:00:00/00:03:27
Multi Select
Multi Select
✤ The < > icon is displayed
Lockon
All the locked file.
Lock All
✤ You cannot access the menu during playback.
Move
Move
Select
Select
Exit
Exit
Move
Move
OK
Select
Select
MENU
Exit
Exit
81
MP3 Mode :
Setting the MP3 Play Options
MP3模式 : 设置 MP3 播放选项
Copying MP3 Files
复制 MP3 文件
ENGLISH
You can copy saved files from the internal memory to the
memory card and vice versa.
1. Insert the memory card into the memory card slot
on the Sports Camcorder.
2. Press the [POWER] button to turn on the Sports
Camcorder.
◆ The Movie Record screen appears.
3. Set the MP3 mode by pressing the [MODE]
button.
◆ The MP3 playlist appears.
◆ Move to the desired the MP3 file, using the
[Joystick].
Life is cool.mp3
中
Move
Move
Toxic.mp3
OK
List
Select
Select
List
在MP3菜单列表中复制MP3文件
1/6
MP3
MP3
Pause
Exit
Exit
Pause
MENU
1/6
MP3
5
LifeMP3
is cool.mp3
Copy To
Life is cool.mp3
OK Copy To
Sweetbox
Move
LifeDPOF
is cool.mp3
DPOF
6
Select
OK
Select
MP3
Exit
MENU
Exit
1/6
MP3 file(s)...
Copying
LifeDPOF
is cool.mp3
Copying file(s)...
is cool.mp3
OKLifeDPOF
1/6
OKPress OK to cancel.
Cancel
Press OK to cancel.
Move
Move
OK
Select
Select
1/6
1/6
Copying file(s)...
复制全屏MP3文件
Copying file(s)...
00:00:00/00:03:27
Move
1/6
[菜单]。
4. 在暂停模式下按下
Life
cool.mp3
Life is
is
cool.mp3 <Copy To>(复制到)。
Copy
左右移动[摇杆]选择
Copy To
To
[摇杆] 选择功能然后按下[摇杆 (OK)]确定。
5. 上下移动
OK
OK
◆ <OK>(确定):
复制选定的MP3 文件。
◆ <Multi Select>(多项选择): 可以通过[摇杆(OK)]选
择多个 MP3文件。
Move
Select
Exit
< ✔
> 图标出现在被选定的文件上.
按下[PLAY]
Move
Select
Exit
按钮。
◆ <All>(全部): 取消复制 MP3 文件。
MP3
MP3
1/6
Stereo
OK 44.1KHz 192Kbps
All
82
Play
Play
OK
1/6
MP3
MP3
1/6
Life is cool.mp3
LifeTo
is cool.mp3
Copy
Sweetbox
Copy
To
Life is cool.mp3
Everytime.mp3
Sweetbox
OK
OK Toxic.mp3
Don't
't push me.mp3
me.m
me
3
Multi
Multi Select
Select
Love you.mp3
All
All
Search
Move
Move
Search
Multi
Copying an MP3 File
Full screen
OKinSelect
Multi Select
4. Press the [PLAY]button
or [Joystick(OK)]
◆ The selected MP3All
file is played.
Move
Select
Exit
5. Press the [MENU] button in pause mode.
Move
Select
Exit
Move the [Joystick] left / right to select <Copy
To>.
6. Press the [Joystick (OK)].
◆ Copies the selected MP3 file.
[ Notes ]
✤ The Sports Camcorder copies from the currently-used
memory to another. If the internal memory is being
used, it copies to a memory card.
✤ If the memory card is not inserted, you cannot
perform the <Copy To> function.
✤ You cannot access the menu during playback.
1/6
Life
1. 将记忆卡插入摄录一体机的记忆卡插槽里。
Life is
is cool.mp3
cool.mp3
Sweetbox
[电源]按钮打开摄录机。
2. 按下Sweetbox
◆ 显示视频录制屏幕。
3. 通过[模式] 按钮选择MP3模式。
◆ 出现MP3 菜单列表。
◆ 使用[摇杆]选择要选择的MP3
文件。
Search
List
Pause
Search
List
Pause
Life
Life is
is cool.mp3
cool.mp3
Everytime.mp3
Everytime.mp3
Toxic.mp3
Toxic.mp3
Don't
Don't push
push me.mp3
me.mp3
Love
Love you.mp3
you.mp3
Everytime.mp3
Copying MP3 Files in MP3
Life playlist
is cool.mp3
Everytime.mp3
4. Press the [MENU] button
in pause
mode.
Don't
push me.mp3
Toxic.mp3
Move the [Joystick] left Love
/ right
to select <Copy To>.
you.mp3
Don't
push
me.mp3
5. Select an option by moving the [Joystick] up /
Love
you.mp3
Move
Play (OK)].
down and then press
the
[Joystick
◆ <OK>: Copies the Move
selected MP3
Playfile.
◆ <Multi Select>: Multiple MP3 files can be selected
MP3
using the [Joystick(OK)].
< ✔ > indicator appears
MP3 on the selected files.
Copy To
Press the [PLAY] button.
◆ <All>: Cancels copying
MP3
To files.
OK Copy
你能将保存在内置存储器中的文件复制到记忆卡上。
1/6
3
4
文
MENU
Exit
Exit
Life is cool.mp3
按钮
4. 按下 [PLAY]或[摇杆(OK)]
OK
OK
◆ 菜单被选择的
MP3文件。
Press OK to cancel.
Press OK to cancel.
5. 在暂停模式下按下
[菜单]。
左右移动[摇杆]选择 <Copy To>(复制到)。
6. 按下[摇杆(OK)]。
Move
Select
Exit
Move
Select
◆ 复制被选择的
MP3
文件。 Exit
[ 注意 ]
✤ 摄录机将当前使用的记忆内容复制到另一个记忆存储器
中.如果当前使用的是内置存储器, 文件将复制到外置
存储器上.反之亦然。
✤ 如果没有插入记忆卡, 就无法使用 <Copy To>(复制到)
功能。
✤ 在播放过程中不能使用菜单功能。
ENGLISH
4
中
Voice Recorder
Mode
4
文
录音模式
Recording ..............................................................................84
Recording Voice Files .......................................................84
Playing....................................................................................85
Playing Voice Files ......................................................85
Setting the Voice Play Options ...........................................86
Deleting Voice Files ..........................................................86
Setting the Play Mode ......................................................87
Locking Voice Files ...........................................................88
Copying Voice Files ..........................................................89
录制............................................... 84
录制语音文件 ................................... 84
播放.............................................85
播放语音文件 ............................. 85
设置语音播放功能 .................................86
删除语音文件 ................................... 86
设置菜单模式 ................................... 87
锁定语音文件 ................................... 88
复制语音文件 ................................... 89
◆ Save important data / recordings separately on other media,
to avoid accidental loss due to a system failure or other
reasons.
◆ 将重要数据保存在其它存储介质中,避免因系统错误或其
它原因导致的意外数据丢失。
How to set to Voice Recorder mode
U
MEN
Power
button
U
MEN
Voice Recorder
E
MOD
1. Press the [POWER] button
to turn on the Sports
Camcorder.
如何设置录音模式
[电源]
按钮
Voice Recorder
E
MOD
2. Set the Voice Recorder
mode by pressing the
[MODE] button.
1. 按下[电源]按钮打开摄录一
体机。
2. 按下[模式]按钮设置
录音 模式。
83
ENGLISH
中
Voice Recorder Mode : Recording
录音模式 : 录制
Recording Voice Files
录制语音文件
The built-in microphone allows users to record voices without any
additional devices.
使用者可以使用内置麦克风录音而不用其它外置设备。
1. Press the [POWER] button to turn on the
Sports Camcorder.
◆ The Movie Record screen appears.
2
文
SWAV0001.WAV
SWAV0001.WAV
SWAV0001.WAV
1. 按下[电源]按钮打开摄录一体机。
◆ 显示视频录制屏幕。
00:00:00/35:00:00
Stereo 8.0KHz 64Kbps
00:00:00/35:00:00
00:00:00/35:00:00
2. Set the Voice Recorder mode by pressing
the [MODE] button.
◆ The Voice Record screen appears.
2. 按下[模式]按钮设置 录音模式。
◆ 显示录音屏幕。
3
3. Press the [Record / Stop] button to start
recording.
◆ < > icon appears on the screen and starts
recording.
SWAV0001.WAV
2006/01/01 12:00:00 AM
SWAV0001.WAV
SWAV0001.WAV
2006/01/01 12:00:00 AM
2006/01/01
12:00:00 AM
00:00:12/34:59:48
Stereo 8.0KHz 64Kbps
00:00:12/34:59:48
00:00:12/34:59:48
4
4. To stop recording, press the [Record / Stop]
button again.
4. 再次按下 [录制/停止] 按钮录音停止。
SWAV0002.WAV
SWAV0002.WAV
SWAV0002.WAV
Stereo 8.0KHz 64Kbps
00:00:12/34:59:48
00:00:12/34:59:48
00:00:12/34:59:48
[ Notes ]
✤ Recorded voice files are saved in a list automatically.
✤ Optimal distance for voice recording is 40cm.
✤ During voice recording or in the Voice Record mode, the menu is
not accessed.
84
3. 按下[录制/停止] 按钮开始录制。
◆ < > 图标在屏幕上出现开始录音。
[ 注意 ]
✤ 录音文件会自动保存在列表里。
✤ 在录音时或录音模式下, 菜单选项不能使用。
ENGLISH
中
Voice Recorder Mode : Playing
录音模式 : 播放
Playing Voice Files
播放语音文件
You can play back recorded voice files using the built-in speaker or
the earphones.
可以通过使用内置扬声器或耳机收听语音文件。
1. Press the [POWER] button to turn on the
Sports Camcorder.
◆ The Movie Record screen appears.
2. Set the Voice Recorder mode by pressing
the [MODE] button.
◆ The Voice Record screen appears.
3. Press the [PLAY] button or [Joystick(OK)].
◆ The Voice Playlist screen appears.
4. Select a voice file to play by moving the
[Joystick] up/down, and then press the
[Joystick(OK)].
5. The selected voice file is played back.
◆ To pause playback, press the [Joystick(OK)].
◆ To search backward / forward, move the
[Joystick] left / right.
6. To adjust the volume, move the [Joystick]
up / down.
◆ Volume indicator appears and disappears
after a few seconds.
[ Notes ]
✤ When you record the voice file after you set
date&time, the date&time displayed on the LCD
monitor indicates the date & time you started to
record.
✤ When the earphones, Audio/Video cable or
External Camera Module cable is connected to
the Sports Camcorder, the built-in speaker will
not operate.
✤ You cannot access the menu during voice
playback.
✤ While the menu screen is displayed, pressing
the [Record / Stop] button will move to Voice
Record mode.
2
1. 按下[电源]按钮打开摄录一体机。
◆ 显示视频录制屏幕。
SWAV0004.WAV
SWAV0004.WAV
SWAV0004.WAV
SWAV0004.WAV
2. 按下(模式)按钮设置录音模式。
◆ 显示录音屏幕。
00:00:00/30:20:00
Stereo
00:00:00/30:20:00
8.0KHz 64Kbps
00:00:00/30:20:00
00:00:00/30:20:00
3
1
3/3
3/3
3/3
3/3 AM
2006/01/01 12:00:00
2006/01/01 12:00:00 AM
2006/01/01
12:36:25
AM
12:00:00
2006/01/01
12:00:00
AM
2006/01/01 12:36:25 AM
2006/01/01 01:00:02
AM
2006/01/01 12:36:25
12:36:25
01:00:02 AM
2006/01/01
2006/01/01 01:00:02
01:00:02 AM
AM
Move
Move
Move
Move
4
1
OK
Play
Play
Play
Play
2/3
2/3
2/3
2/3 AM
2006/01/01 12:00:00
2006/01/01 12:00:00 AM
2006/01/01
12:36:25
12:00:00
2006/01/01 12:36:25
12:00:00 AM
AM
2006/01/01
AM
2006/01/01 01:00:02
AM
12:36:25
12:36:25 AM
2006/01/01 01:00:02
2006/01/01
2006/01/01 01:00:02
01:00:02 AM
AM
Move
Move
Move
Move
6
文
OK
Play
Play
Play
Play
11
2/3
2/3
2/3
2/3
SWAV0002.WAV
SWAV0002.WAV
2006/01/01
12:36:25 AM
SWAV0002.WAV
2006/01/01
12:36:25 AM
SWAV0002.WAV
Stereo 8.0KHz 64Kbps
2006/01/01
2006/01/01 12:36:25
12:36:25 AM
AM
00:00:12/00:02:15
00:00:12/00:02:15
00:00:12/00:02:15
00:00:12/00:02:15
Search
Search
Search
Search
List
List
List
List
OK
Pause
Pause
Pause
Pause
3. 按下[PLAY]或 [摇杆(OK)]按钮。
◆ 显示语音播放清单。
4. 通过上下移动 [摇杆]选择要播放的语音文件,
然后按下 [摇杆(OK)]。
5. 播放选中的语音文件。
◆ 按下[摇杆(OK)]暂停播放。
◆ 左/右移动[摇杆]进行向前或者向后搜索。
6. 上/下移动[摇杆]调整声音。
◆ 声音图标将显示,几秒后图标消失。
[ 注意 ]
✤ 设置日期和时间后,当您想记录语音文件时, LCD
监视器上显示的日期和时间指明您开始记录的日
期和时间。
✤ 当摄录机与耳机, 视频/音频线或者 外置摄像线
相连接时,不能使用内置扬声器。
✤ 播放语音文件时不能使用菜单选项。
✤ 当菜单屏幕显示时, 按下[录制/停止] 按钮将会
转到录音模式。
85
Voice Recorder Mode :
Setting the Voice Play Options
ENGLISH
中
录音模式 : 设置语音播放功能
Deleting Voice Files
删除语音文件
You can delete a selected voice file or group of voice files.
你可以选择删除一个或者是一组语音文件。
1. Press the [POWER] button to turn on the
Sports Camcorder.
◆ The Movie Record screen appears.
2
文
SWAV0004.WAV
1. 按下[电源]按钮打开摄录一体机。
◆ 显示视频录制屏幕。
SWAV0004.WAV
SWAV0004.WAV
00:00:00/30:20:00
Stereo 8.0KHz 64Kbps
00:00:00/30:20:00
00:00:00/30:20:00
2. Set the Voice Recorder mode by pressing
the [MODE] button.
◆ The Voice Record screen appears.
3. Press the [PLAY] button or [Joystick(OK)]
◆ The Voice Playlist screen appears.
◆ Move to the desired voice file, using the
[Joystick].
4. Press the [DELETE] button on the LCD
monitor in pause mode. Select an option by
moving the [Joystick] up / down and then
press the [Joystick(OK)].
◆ <OK>: Deletes the selected voice file.
◆ <Multi Select>: Multiple voice files can be
selected using the [Joystick(OK)].
< ✔ > indicator appears on the selected
files. Press the [PLAY] button.
◆ <All>: All voice files will be deleted.
◆ <Cancel>: Cancels the deletion.
3/3
3
1
3/3
3/3 AM
2006/01/01 12:00:00
2006/01/0112:00:00
12:36:25AM
AM
2006/01/01
2006/01/01
12:00:00
AM
2006/01/01 01:00:02AM
AM
2006/01/01
2006/01/01 12:36:25
12:36:25 AM
2006/01/01
2006/01/01 01:00:02
01:00:02 AM
AM
Move
4
OK
1
Play
1/3
2006/01/01 12:00:00 AM
All
Cancel
Move
[ Notes ]
✤ Locked files will not be deleted.
✤ You cannot access the menu during voice playback.
✤ While the menu screen is displayed, pressing the [Record / Stop]
button will move to Voice Record mode.
86
2. 按下[模式]按钮设置录音模式。
◆ 显示录音屏幕。
OK
Select
3. 按下 [PLAY] 或[摇杆(OK)]按钮。
◆ 显示语音播放清单。
◆ 使用 [摇杆]选择要播放的语音文件。
4. 暂停模式下使用LCD显示器上的 [删除]功能操
作。通过上下移动[摇杆]选择功能然后按下[摇杆
(OK)]。
◆ <OK>(确定): 删除选择的语音文件。
◆ <Multi Select>(多项选择): 可以通过[摇杆
(OK)]按钮选择多个声音文件。
< ✔ > 图标在被选择的文件上显示.按下
[PLAY] 按钮。
◆ <All>(全部): 删除所有的语音文件。
◆ <Cancel>(取消): 取消删除。
[ 注意 ]
✤ 锁定的文件不能被删除。
✤ 播放语音文件时不能使用菜单选项。
✤ 当显示菜单时, 按下[录制 /停止]按钮将会转到录音模式。
Voice Recorder Mode :
Setting the Voice Play Options
ENGLISH
中
文
录音模式 : 设置语音播放功能
Setting the Play Mode
设置菜单模式
You can play all files continuously or play the selected file only. You
can also set the repeat option.
你可以连续播放也可以选择一个文件播放,同样也可以反复播放。
1. Press the [POWER] button to turn on the
Sports Camcorder.
◆ The Movie Record screen appears.
2. Set the Voice Recorder mode by pressing the
[MODE] button.
◆ The Voice Record screen appears.
3. Press the [PLAY] button or [Joystick(OK)]
◆ Switches to the Voice Playlist screen.
◆ Move to the desired voice file, using the
[Joystick].
4. Press the [MENU] button.
Move the [Joystick] left / right to select <Play
Mode>.
5. Move the [Joystick] up / down to select an
option, and then press the [Joystick(OK)].
◆ <Play One>: The selected voice file will be
played.
◆ <Play All>: Plays back from selected file to
the last file.
◆ <Repeat One>: The selected voice file will be
played repeatedly.
◆ <Repeat All>: All voice files will be played
repeatedly.
6. Press the [MENU] button to exit the menu.
◆ When you play back, the selected option will
be applied.
◆ The selected function icon is displayed.
[ Notes ]
✤ You cannot access the menu during voice
playback.
✤ While the menu screen is displayed, pressing the
[Record / Stop] button will move to Voice Record
mode.
3
1/3
1/3
2006/01/01 12:00:00
1/3
1/3 AM
1
2006/01/01 12:36:25
12:00:00 AM
2006/01/01
2006/01/01 12:00:00
12:00:00 AM
AM
2006/01/01
2006/01/01 01:00:02
12:36:25 AM
AM
2006/01/01
2006/01/01 12:36:25
12:36:25 AM
AM
2006/01/01 01:00:02 AM
2006/01/01
2006/01/01 01:00:02
01:00:02 AM
AM
Move
4
OK
Play
Voice Recorder
1/3
Play All
OK
MENU
5
1/3
Repeat One
Move
6
Exit
1
OK
Select
MENU
Exit
1. 按下[电源]按钮打开摄录一体机。
◆ 显示视频录制屏幕。
2. 按下模式[模式]按钮设置 录音模式。
◆ 显示录音屏幕。
3. 按下 [PLAY]或[摇杆(OK)]按钮。
◆ 转换到语音播放清单。
◆ 使用 [摇杆]选择要播放的语音文件。
4. 按下[菜单] 按钮。
左右移动[摇杆] 选择 <Play Mode>(播放模式)。
5. 上下移动[摇杆] 进行功能选择, 然后按下[摇杆
(OK)]。
◆ <Play One>(播放一个): 播放选择的语音文件。
◆ <Play All>(全部播放): 从选定的文件开始回
放,一直到最后一个文件。
◆ <Repeat One>(重复一个): 反复播放被选择
的语音文件。
◆ <Repeat All>(全部重复): 反复播放所有的
语音文件。
6. 按下[菜单]按钮退出播放选项。
◆ 播放时,应用所选择的操作。
◆ 显示选定的功能图标。
1/3
1
2006/01/01 12:00:00 AM
2006/01/01 12:36:25
12:00:00 AM
2006/01/01
2006/01/01 12:00:00
12:00:00 AM
AM
2006/01/01
2006/01/01 01:00:02
12:36:25 AM
AM
2006/01/01
2006/01/01 12:36:25
12:36:25 AM
AM
2006/01/01 01:00:02 AM
2006/01/01
2006/01/01 01:00:02
01:00:02 AM
AM
Move
Move
Move
Move
OK
[ 注意 ]
✤ 播放语音文件时不能使用菜单选项。
✤ 当显示菜单时, 按下[录制/停止]按钮将会转到录
音模式。
Play
Play
Play
Play
87
Voice Recorder Mode :
Setting the Voice Play Options
ENGLISH
Locking Voice Files
锁定语音文件
您可以锁定重要的语音文件,以防止这些文件被意外删除。
直到您释放锁定和格式化存储器之前锁定的文件将不能被删除。
[ Notes ]
✤ The <
> icon is displayed on the locked file.
✤ You cannot access the menu during voice
playback.
✤ While the menu screen is displayed, pressing the
[Record / Stop] button will move to Voice Record
mode.
3
1
1/3
1/3
1/3
2006/01/01 12:00:00
1/3 AM
2006/01/0112:00:00
12:36:25AM
AM
2006/01/01
12:00:00
AM
2006/01/01
2006/01/01 01:00:02
12:00:00 AM
AM
2006/01/01
2006/01/01
12:36:25 AM
AM
2006/01/01
12:36:25
2006/01/01 12:36:25 AM
2006/01/01
01:00:02
AM
2006/01/01 01:00:02 AM
2006/01/01 01:00:02 AM
Move
Move
Move
Move
4
Play
Play
Play
Play
1/3
VoiceRecorder
Recorder
Voice
Lock
Voice
Recorder
1/3
1/3
1/3
Move
Select MENU Exit
Exit
OK Select
Move
Move
Select1/3
Exit
Voice Recorder
1/3
Voice Recorder
Recorder 1/3
Voice
Lock
Voice
Recorder 1/3
Lock
LockLock
Lock
Multi Select
Lock
Lock
2006/01/01
006/01/01
6
01:00:0
01:00:02
:00:022 A
AM
M
Lock
All
Multi Select
Select
Multi
MultiAll
Select
Lock
Lock
All
Move
Select
Exit
Lock All
Move
Move
Move
OK
Select
Select
Select
MENU
Exit
Exit
Exit
1/3
1
1/3
1/3
2006/01/01 12:00:00
1/3 AM
2006/01/0112:00:00
12:36:25AM
AM
2006/01/01
12:00:00
AM
2006/01/01
2006/01/01 01:00:02
12:00:00 AM
AM
2006/01/01
2006/01/01
12:36:25 AM
AM
2006/01/01
12:36:25
2006/01/01 12:36:25 AM
2006/01/01 01:00:02
01:00:02 AM
AM
2006/01/01
2006/01/01 01:00:02 AM
Move
Move
Move
Move
OK
Play
Play
Play
Play
1. 按下[电源]按钮打开运动型摄录一体机。
◆ 视频录制屏幕出现。
2. 按[模式] 按钮选择录音机模式。
◆ 录音机屏幕出现。
3. 按[PLAY]按钮或[摇杆(OK)]按钮。
◆ 将开关拨到声音播放清单屏幕。
◆ 拨动[摇杆],移动到想要的语音文件。
OK
Voice Recorder
2006/01/01 12:00:00 AM
Lock
LockLock
Lock
Multi 2006/01/0
Select
2006/01/01
006/01/01
6/01/01 12:36
12:3
12:36:25
:36:25
:36:
66:25
: A
AM
M
Lock
Lock
Lock
All
2006/01/01
006/01/01
6
01:00:0
01:00:02
:00:022 A
AM
Multi Select
Select
Multi
MultiAll
Select
Lock
Lock
All
Move
Select
Exit
Lock All
5
文
录音机模式 : 设置声音播放选项
You can lock saved important voice files from accidental erasure.
Locked files will not be deleted unless you release the lock or format
the memory.
1. Press the [POWER] button to turn on the
Sports Camcorder.
◆ The Movie Record screen appears.
2. Set the Voice Recorder mode by pressing the
[MODE] button.
◆ The Voice Record screen appears.
3. Press the [PLAY] button or [Joystick(OK)]
◆ Switches to the Voice Playlist screen.
◆ Move to the desired voice file, using the
[Joystick].
4. Press the [MENU] button.
Move the [Joystick] left / right to select
<Lock>.
5. Move the [Joystick] up / down to select an
option, and then press the
[Joystick(OK)].
◆ <Lock>: The selected voice file is locked.
◆ <Multi Select>: Multiple voice files can be
selected using the [Joystick(OK)].
> indicator appears on the selected files.
<
Press [PLAY] button.
◆ <Lock All>: All voice files are locked.
◆ <Unlock All>: Unlocks all voice files.
88
中
4. 按下[菜单] 按钮。
左右移动摇杆选择 <Lock>(锁定)。
5. 上下移动[摇杆] 选择一个选项,然后按[摇杆
(OK)]按钮。
◆ <Lock>(锁定):选择的声音文件被锁定。
◆ <Multi Select>(多项选择): 使用[摇杆(OK)]
可以选择多个声音文件。
< >指示图标出现在选定的文件上。
按[PLAY] 按钮。
◆ <Lock All>(全部打开): 锁定所有的声音文件。
◆ <Unlock All>(全部关闭):解除所有文件的锁定。
[ 注释 ]
✤ 图标 <
>显示在锁定的文件上。
✤ 声音播放期间您不能进入菜单。
✤ 当菜单屏幕出现时,按记录/停止[录3制/停止]按
钮可以进入语音记录模式。
Voice Recorder Mode :
Setting the Voice Play Options
录音模式 : 设置语音菜单功能
Copying Voice Files
复制语音文件
ENGLISH
中
文
1/3
You can copy saved files from the internal memory to a memory card
你能将保存在内置存储器中的文件复制到记忆卡上。
1/3 AM
2006/01/01 12:00:00
and vice-versa.
1/3
1. 将记忆卡插入到摄录一体机的记忆槽中。
2006/01/01 12:36:25 AM
1. Insert the memory card into the memory card 4
1
2006/01/01 12:00:00
1/3 AM
2006/01/01
2006/01/0101:00:02
12:00:00AM
AM
slot on the Sports Camcorder.
2006/01/01 12:36:25 AM
2. 按下[电源]按钮打开摄录一体机。
2006/01/01 12:00:00
12:36:25 AM
2. Press the [POWER] button to turn on the
2006/01/01 01:00:02
AM
◆ 显示视频录制屏幕。
2006/01/01 12:36:25
01:00:02 AM
Sports Camcorder.
2006/01/01 01:00:02 AM
3. 按下[模式]按钮设置录音模式。
◆ The Movie Record screen appears.
◆ 显示录音屏幕。
3. Set the Voice Recorder mode by pressing the
[MODE] button.
OK Play
Move
4. 按下[PLAY]或[摇杆(OK)]按钮。
◆ The Voice Record screen appears.
◆ 转换到语音播放清单。
4. Press the [PLAY] button or [Joystick(OK)].
5
1/3
Voice Recorder
◆ 使用 [摇杆]选择想要的语音文件。
◆ Switches to the Voice Playlist screen.
◆ Move to the desired voice file, using the [Joystick].
5. 在暂停模式下按下[菜单] 按钮。
5. Press the [MENU] button in pause mode.
左右移动[摇杆]选择<Copy To>(复制到)。
Move the [Joystick] left / right to select <Copy
Multi Select
6. 上下移动[摇杆] 进行功能选择然后按下[摇杆
To>.
All
(OK)]。
6. Select an option by moving the [Joystick] up /
OK Select
MENU Exit
Move
◆ <OK>(确定): 复制选择的语音文件。
down and then press the [Joystick(OK)].
◆ <Multi Select>(多项选择): 使用[摇杆(OK)]
◆ <OK>: Copies the selected voice file.
6
1/3
可以选择多个语音文件。< ✔ > 光标将出现
◆ <Multi Select>: Multiple voice files can be
在被选择的文件上. 按下[PLAY] 按钮。
selected using the [Joystick(OK)].
◆ <All>(全部): 复制所有的语音文件。
< ✔ > indicator appears on the selected files.
Press the [PLAY] button.
◆ <All>: All voice files will be copied.
All
[ 注意 ]
[ Notes ]
OK Select
MENU Exit
✤ 摄录一体机将当前使用的记忆内容复制到另一个
Move
✤ The Sports Camcorder copies from the currently记忆存储器中。如果当前使用的是内置存储器,
used memory to another. If the internal memory
Voice Recorder 1/3
文件将复制到外置存储器上。反之亦然。
was used, it copies to a memory card.
✤ 如果没有插入记忆卡,就不能执行<Copy To>(复制
Copying file(s)...
✤ If a memory card is not inserted, you cannot
DPOF
SWAVE0001.WAV
到) 功能。
perform the <Copy To> function.
Copying file(s)...
✤ 播放声音文件时,不能使用菜单选项。
DPOFfile(s)...
SWAVE0001.WAV
Copying
✤ You cannot access the menu during voice playback.
Press
OK to cancel.
DPOF
SWAVE0001.WAV
✤ 当显示菜单屏幕时,按下[录制/停止] 按钮将会转
Copying file(s)...
✤ While the menu screen is displayed, pressing the
DPOF
SWAVE0001.WAV
Cancel
到声音录制模式。
Press OK to cancel.
[Record / Stop] button will move to Voice Record
Press OK to cancel.
OK Select
MENU Exit
Move
mode.
Press OK to cancel.
Move
Move
Select
Select
Exit
Exit
Move
Select
Exit
89
ENGLISH
5
中
Using File Browser
使用文件浏览器
Viewing Files or Folders ......................................................91
Deleting Files or Folders......................................................92
Locking Files .........................................................................93
Copying Files or Folders .....................................................94
Viewing File Information ......................................................95
查看文件或文件夹 .................................. 91
删除文件或文件夹 .................................. 92
锁定文件 .......................................... 93
复制文件或文件夹 .................................. 94
查看文件信息 ...................................... 95
◆ Save important data / recordings separately on other media,
to avoid accidental loss due to a system failure or other
reasons.
◆ 将重要文件保存到其它存储介质上,避免由于系统错误或
其它原因导致的意外数据丢失。
How to set to File Browser mode
U
MEN
Power
button
1. Press the [POWER] button
to turn on the Sports
Camcorder.
如何设置文件浏览器模式
U
MEN
File Browser
E
MOD
90
5
文
[电源]
按钮
File Browser
E
MOD
2. Set the File Browser
mode by pressing the
[MODE] button.
1. 按下[电源]按钮打开摄录一
体机
2. 按下[模式]按钮设置查
看文件模式。
ENGLISH
中
Using File Browser
使用文件浏览器
Viewing Files or Folders
查看文件或文件夹
You can play back the stored file(AVI, JPEG, MP3, WAV) in your
Sports Camcorder.
1. Press the [POWER] button to turn on the
Sports Camcorder.
◆ The Movie Record screen appears.
2. Set the File Browser mode by pressing the
[MODE] button.
◆ The File Browser screen appears.
1/5
1/5
1. 按下 [电源]按钮打开摄录一体机。
◆ 显示视频录制屏幕。
DCIM
MISC
Move MUSIC Play
Move
Play
MoveVIDEO Play
VOICE
3
3. Select the desired folder or file by moving
the [Joystick] up/down and then press the
[Joystick(OK)].
◆ Perform these steps repeatedly until the file
you want to view appears.
OK
2. 按下[模式]按钮切换到文件浏览器模式。
◆ 系统设置屏幕将会显示。
Play
/DCIM
/DCIM
100SSDVC
/DCIM
100SSDVC
100SSDVC
3. 上/下移动[摇杆]选择要播放的文件或文件夹然后
按下[摇杆(OK)]。
/DCIM
100SSDVC
Move
Move
Move
Move
4. The selected file will be played back.
[ Notes ]
✤ If you slide the [W/T] switch to W(WIDE) in play
mode, return to the file list screen.
✤ If you move the [Joystick] left, the previous
folder screen appears.
1/5
本机可以播放所有储存在机器里的所有文件(AVI,
JPEG, MP3, WAV)。
1/5
2
Move
文
4
OK
Play
Play
Play
Play
4. 播放已经选择的文件。
1/4
1/4
1/4
/DCIM/100SSDVC
/DCIM/100SSDVC
DCAM0001.JPG
/DCIM/100SSDVC
DCAM0001.JPG 1/4
DCAM0002.JPG
DCAM0001.JPG
DCAM0002.JPG
DCAM0003.JPG
DCAM0002.JPG
/DCIM/100SSDVC
DCAM0003.JPG
DCAM0004.JPG
DCAM0003.JPG
DCAM0004.JPG
DCAM0001.JPG
DCAM0004.JPG
MoveDCAM0002.JPG
Play
OK Play
Move
MoveDCAM0003.JPG
Play
DCAM0004.JPG
100-0001
100-0001
Move
Play
720X480
100-0001
720X480
720X480
100-0001
01
01
01
[ 注意 ]
✤ 如果在播放模式下移动[W/T]键到W(WIDE)端,回
到文件列表屏幕操作。
✤ 如果向左移动[摇杆], 将会回到上一级文件夹屏
幕。
720X480
01
12:00AM 2006/01/01
12:00AM 2006/01/01
12:00AM 2006/01/01
Sepia
Sepia
Sepia
12:00AM 2006/01/01
Sepia
91
ENGLISH
中
Using File Browser
使用文件浏览器
Deleting Files or Folders
删除文件或文件夹
1/5
You can delete the file(AVI, JPEG, MP3, WAV) or folders you
recorded.
1. Press the [POWER] button to turn on the
Sports Camcorder.
◆ The Movie Record screen appears.
2. Set the File Browser mode by pressing the
[MODE] button.
◆ The File Browser screen appears.
3. Select the desired file or folder by using the
[Joystick].
◆ Move the [Joystick] up/down and press the
[Joystick(OK)] repeatedly until the file or
folder you want appears.
4. Press the [DELETE] button on the LCD
monitor. Select an option by moving the
[Joystick] up / down and then press the
[Joystick(OK)].
◆ <OK>: The selected file or folder are
deleted.
◆ <Multi Select>: Multiple files or folders will
be selected using the [Joystick(OK)].
< ✔ > indicator appears on the selected
files or folders. Press the [PLAY] button.
◆ <All>: All files or folders will be deleted.
◆ <Cancel>: Cancels deleting files or folders.
[ Notes ]
✤ If you slide the [W/T] switch to W(WIDE) in play
mode, it returns to the previous screen.
✤ Locked files will not be deleted.
✤ The folder with a locked file will not be deleted.
Only unlocked files in the folder will be deleted.
✤ If you move the [Joystick] left, the previous
folder screen appears.
92
2
你可以删除录制在摄像机里的文件(AVI,
JPEG, MP3, WAV)或文件夹。
1/5
DCIM
MISC
DCIM
MUSIC
MISC
VIDEO
DCIM
MUSIC
VOICE
MISC
DCIM
VIDEO
MUSIC
MISC
VOICE
VIDEO
MUSIC
VOICE
VIDEO
VOICE
Move
1/5
1/5
OK
1/5
DCIM
Select
1/5
DCIM
OK
3. 上下移动[摇杆]选择想要的文件或文件夹然后按
下[摇杆]。
◆ 重复进行上述操作直到你想要的视频文件出现。
4. 在LCD显示器上选择按下[DELETE]按钮。上下移动
[摇杆]选择想要功能然后按下[摇杆(OK)]。
◆ <OK>(确定): 删除选择的文件或文件夹。
◆ <Multi Select>(多项选择): 使用[摇杆(OK)]
可以选择多个文件或文件夹。
< ✔ > 指示图标出现在被选择的文件上,按
[PLAY]按钮。
◆ <All>(全部): 删除所有文件或文件夹。
◆ <Cancel>(取消): 取消删除。
Select
1/4
1/4
MISC
MUSIC
1/4
MISC
VIDEO
1/4
MUSIC
VOICE
MISC
VIDEO
MUSIC
MISC
VOICE
VIDEO
MUSICOKOKPlay
Play
Move
Move
VOICE
VIDEO
VOICE
Play
Move
Move
Play
Move
Move
Move
Move
1. 按下 [电源]按钮打开摄录一体机。
◆ 显示视频录制屏幕。
2. 按下 [模式]按钮切换到文件浏览器模式。
◆ 系统录制屏将会显示。
Play
4
Move
文
Play
Play
Play
Play
[ 注意]
✤ 如果在播放模式下移动 [W/T]键到W(WIDE)端,
回到文件列屏幕。
✤ 无法删除锁定的文件。
✤ 无法删除包含锁定文件的文件夹。只能删除解除
锁定的文件。
✤ 如果向左移动[摇杆], 将会回到上一级文件夹屏幕。
ENGLISH
中
Using File Browser
使用文件浏览器
Locking Files
锁定文件
You can lock the important files so they can not be deleted.
你可以将重要的文件锁定以便不被删除。
1. Press the [POWER] button to turn on the
2
Sports Camcorder.
◆ The Movie Record screen appears.
2. Set the File Browser mode by pressing the
[MODE] button.
◆ The File Browser screen appears.
3. Select the desired file or folder by using the
[Joystick].
◆ Move the [Joystick] up / down and press the
3
[Joystick(OK)] repeatedly until the file you want
appears.
4. Press the [MENU] button.
Move the [Joystick] left / right to select
<Lock>.
5. Move the [Joystick] up / down to select an
option, and then press the
[Joystick(OK)].
4
◆ <Lock>: The selected file is locked.
◆ <Multi Select>: Multiple files can be selected
using the [Joystick(OK)].
> indicator appears on the selected files.
<
Press the [PLAY] button.
◆ <Lock All>: All files are locked.
◆ <Unlock All>: Unlocking all files.
[ Notes ]
✤ You can’t lock folders.
✤ The < > icon is displayed when the file is
locked.
✤ If you slide the [W/T] switch to W(WIDE) in play
mode, return to the file list screen.
✤ If you move the [Joystick] left, the previous folder
screen appears.
5
1/5
1/5
1/5
DCIM
DCIM
DCIM
MISC
MISC
MUSIC
MISC
MUSIC
VIDEO
MUSIC
VIDEO
VOICE
VIDEO
VOICE
VOICE
Move
Move
Move
1. 按下 [电源]按钮打开摄录一体机。
◆ 显示视频录制屏幕。
2. 按下[模式]按钮切换到文件浏览器模式。
◆ 文件浏览器将会显示。
OK
Play
Play
Play
3. 使用选择要播放的文件或文件夹。
◆ 上下移动[摇杆]选择要的文件或文件夹然后
按下[摇杆(OK)]。
重复进行上述操作直到你想要的视频文件出
现。
1/4
1/4
1/4
/DCIM/100SSDVC
/DCIM/100SSDVC
/DCIM/100SSDVC
DCAM0001.JPG
DCAM0001.JPG
DCAM0001.JPG
DCAM0002.JPG
DCAM0002.JPG
DCAM0002.JPG
DCAM0003.JPG
DCAM0003.JPG
DCAM0003.JPG
DCAM0004.JPG
DCAM0004.JPG
DCAM0004.JPG
Move
Move
Move
OK
4. 按下[菜单]按钮。
左右移动[摇杆]选择<Lock>(锁定)。
Play
Play
Play
1/4
File Browser
1/4
File
1/4
File Browser
Browser
Lock
/DCIM/100SSDVC
Lock
Lock
Lock DCAM0001.JPG
Lock
D
AM0002 JPG
PG
G
Lock
Multi DCAM0002.JPG
Select
Multi
Select
DCAM0003.JPG
D
G
Multi
Lock Select
All AM0003 JPG
Lock
DCAM0001.JPG
D
AM0001 JPG
G
Lock All
All
Move
Move
Move
OK
Select
Select
Select
MENU
1/4
1/4
1/4
/DCIM/100SSDVC
/DCIM/100SSDVC
/DCIM/100SSDVC
DCAM0001.JPG
DCAM0001.JPG
DCAM0001.JPG
DCAM0002.JPG
DCAM0002.JPG
DCAM0002.JPG
DCAM0003.JPG
DCAM0003.JPG
DCAM0003.JPG
DCAM0004.JPG
DCAM0004.JPG
DCAM0004.JPG
Move
Move
Move
OK
文
Play
Play
Play
Exit
Exit
Exit
5. 上下移动[摇杆]选择功能, 然后按下[摇杆
(OK)]。
◆ <Lock>(锁定): 锁定选择的文件。
◆ <Multi Select>(多项选择): 使用[摇杆(OK)]
选择多个文件。
< > 图标出现在被选择的文件上。按下
[PLAY]按钮。
◆ <Lock All>(全部打开): 锁定所有文件。
◆ <Unlock All>(全部关闭): 取消锁定。
[ 注意 ]
✤ 不能锁定文件夹。
✤ < > 光标显示在被锁定的文件上。
✤ 如果在播放模式下移动 [W/T]键到W(WIDE)端,
回到文件列表屏幕。
✤ 如果向左移动 [摇杆], 将会回到上一级文件夹
屏幕。
93
ENGLISH
中
Using File Browser
Copying Files or Folders
复制文件或文件夹
你可以将文件或文件夹复制到内置或外置存储器
[ Notes ]
✤ The Sports Camcorder copies from the currentlyused memory to another. If the internal memory
6
was used, it copies to a memory card.
✤ If a memory card is not inserted, you cannot
perform the <Copy To> function.
✤ If you slide the [W/T] switch to W(WIDE) in play
mode, the Sports Camcorder returns to the file list
screen.
✤ If you move the [Joystick] left, the previous folder
screen appears.
94
使用文件浏览器
You can copy the file or folder to the internal or external memory.
1. Insert the memory card into the memory card
3
slot on the Sports Camcorder.
2. Press the [POWER] button to turn on the
Sports Camcorder.
◆ The Movie Record screen appears.
3. Set the File Browser mode by pressing the
[MODE] button.
◆ The File Browser screen appears.
4. Select the desired file or folder by using the
[Joystick].
◆ Move the [Joystick] up / down and press the
4
[Joystick(OK)] repeatedly until the file or folder
you want appears.
5. Press the [MENU] button.
Move the [Joystick] left / right to select <Copy
To>.
6. Move the [Joystick] up / down to select an
option, and then press the [Joystick(OK)].
◆ <OK>: Copies the selected file or folder.
◆ <Multi Select>: Multiple files or folders can be 5
selected using the [Joystick(OK)].
< ✔ > indicator appears on the selected files
or folders.
Press the [PLAY] button.
◆ <All>: All files or folders will be copied.
文
1/5
1/5
1/5
DCIM
DCIM
DCIM
MISC
MISC
MUSIC
MISC
MUSIC
VIDEO
MUSIC
VIDEO
VOICE
VIDEO
VOICE
VOICE
Move
Move
Move
1. 将记忆卡插到摄录机的卡槽中。
2. 按下 [电源]按钮打开摄录一体机。
◆ 显示视频录制屏幕。
3. 按下 [模式] 按钮切换到文件浏览器模式。
◆ 文件浏览器将会显示。
OK
Play
Play
Play
4. 使用[摇杆]选择要播放的文件或文件夹。
◆ 上下移动[摇杆]选择要的文件或文件夹然后
按下[摇杆(OK)]。重复进行上述操作直到你
想要的视频文件出现。
5. 按下[菜单]按钮。
左右移动[摇杆]选择<Copy To>(复制到)。
6. 上下移动[摇杆]选择功能, 然后按下[摇杆
(OK)]。
◆ <OK>(确定): 复制选择的文件夹。
◆ <Multi Select>(多项选择): 使用[摇杆(OK)]
选择多个文件或文件夹。
< ✔ > 图标出现在被选择的文件或文件夹
上。按下[PLAY]按钮。
◆ <All>(全部): 复制所有文件或文件夹。
1/4
1/4
1/4
/DCIM/100SSDVC
/DCIM/100SSDVC
/DCIM/100SSDVC
DCAM0001.JPG
DCAM0001.JPG
DCAM0002.JPG
DCAM0001.JPG
DCAM0002.JPG
DCAM0003.JPG
DCAM0002.JPG
DCAM0003.JPG
DCAM0004.JPG
DCAM0003.JPG
DCAM0004.JPG
DCAM0004.JPG
Move
Move
Move
Move
Move
Move
Play
Play
Play
Play
Play
Play
OK
OK
1/4
File Browser
1/4
File Browser
1/4
File Browser
Copy
To
/DCIM/100SSDVC
Copy To
Copy To
OK DCAM0001.JPG
OK DCAM0002.JPG
D AM0002 JPG
PG
G
OK Select
Multi
Multi Select
DCAM0003.JPG
D
AM0003 JPG
G
All
Multi Select
All D
DCAM0001.JPG
AM0001 JPG
G
All
Move
Move
Move
Select
Select
Select
OK
Exit
Exit
Exit
MENU
File Browser
File Browser
File Browser
Copying file(s)...
Copying
file(s)...
DPOFfile(s)...
DCAM0001.JPG
Copying
DPOF
DCAM0001.JPG
DPOF
DCAM0001.JPG
OK
OK
OKPress OK to cancel.
Press OK to cancel.
Press OK to cancel.
Cancel
Move
Move
Move
OK
Select
Select
Select
MENU
Exit
Exit
Exit
[ 注意 ]
✤ 将当前使用的记忆内容复制到另一个记忆存储器
中。如果当前使用的是内置存储器, 文件将复制
到外置存储器上。反之亦然。
✤ 如果没有插入记忆卡, 就不能执行 <复制到>功能。
✤ 如果在播放模式下移动 [W/T]键到W(WIDE)端,
摄像机将回到文件列表屏幕。
✤ 如果向左移动 [摇杆], 将会回到上一级文件夹
屏幕
ENGLISH
中
Using File Browser
使用文件浏览器
Viewing File Information
查看文件信息
You can see the file name, format, size and date.
你可以看文件名,格式, 大小和日期。
1. Press the [POWER] button to turn on the
Sports Camcorder.
◆ The Movie Record screen appears.
2
2. Set the File Browser mode by pressing the
[MODE] button.
◆ The File Browser screen appears.
3
4. Press the [MENU] button.
Move the [Joystick] left / right to select <File
Info.>.
4
[ Notes ]
✤ You cannot view folder information. You can
only view file information.
✤ If you move the [Joystick] left, the previous
folder screen appears.
2. 按下[模式] 按钮切换到文件浏览器模式。
◆ 文件浏览器屏幕。
Play
Play
Play
Play
OK Play
OK Play
3. 使用[摇杆]按钮选择你想看的文件列表。
上下移动[摇杆]选择要查看的文件信息然后按下
[摇杆(OK)]。
◆ 重复进行上述操作直到你想要的文件列表出现。
OK
OK
4. 按下[菜单]按钮。
左右移动[摇杆]选择<File Info.>(文件信息)。
Play
Play
Play
Play
5. 按下[摇杆(OK)]查看文件信息。
◆ 屏幕将会显示文件名, 大小,日期, 锁定情况。
1/13
File Browser
1/13
File Browser
1/13
File Browser
File Info.
/DCIM/100SSDVC
File Info.
File Info.
OK DCAM0001.JPG
OK DCAM0002.JPG
PG
G
OK D AM0002 JPG
DCAM0003.JPG
D
AM0003 JPG
G
DCAM0004.JPG
D
AM0004 JPG
G
Move
Move
Move
5
1.按下 [电源]按钮打开摄录一体机。
◆ 显示视频录制屏幕。
1/4
1/4
1/4
/DCIM/100SSDVC
/DCIM/100SSDVC
DCAM0001.JPG
/DCIM/100SSDVC
DCAM0001.JPG
DCAM0002.JPG
DCAM0001.JPG
DCAM0002.JPG
DCAM0003.JPG
DCAM0002.JPG
DCAM0003.JPG
DCAM0004.JPG
DCAM0003.JPG
DCAM0004.JPG
DCAM0004.JPG
Play
Move
Move
Play
Move
Move
Move
Move
5. Press the [Joystick(OK)] to view the file
information.
◆ The screen with file name, size, date, locked
state appears.
1/5
1/5
1/5
DCIM
DCIM
MISC
DCIM
MISC
MUSIC
MISC
MUSIC
VIDEO
MUSIC
VIDEO
VOICE
VIDEO
VOICE
VOICE
Move
Move
Move
Move
Move
Move
3. Select the desired file list by using the
[Joystick].
Move the [Joystick] up / down to want to
view file information.
◆ Move the [Joystick] up / down and press the
[Joystick(OK)] repeatedly until the file list
you want appears.
6. Press the [Joystick(OK)] to finish viewing
file information.
文
Select
Select
Select
OK
MENU
6. 按下[摇杆(OK)]结束文件信息查看。
Exit
Exit
Exit
1/4
File Browser
1/4
File Browser
1/4
File Browser
DCAM0001.JPG
File Info.
DCAM0001.JPG
Size
92805
bytes
File
Info.
DCAM0001.JPG
Size
92805 bytes
File Info.2006/01/01
Date
OKSize
92805 bytes
Date
2006/01/01
12:00:00 AM
OKDate
2006/01/01
OKLocked 12:00:00
AM
No
AM
Locked 12:00:00
No
Locked No Close : OK
Move
Move
Move
OK
Select
Select
Select
MENU
[ 注意 ]
✤ 不能看文件夹信息。只能看文件信息。
✤ 如果向左移动 [摇杆], 将会回到上一级文件夹
屏幕。
Exit
Exit
Exit
95
ENGLISH
6
中
Setting the Sports
Camcorder
Setting Memory ............................................................................................ 97
Selecting the Storage Type .................................................................. 97
Setting USB Mode........................................................................................ 98
Setting USB Mode ................................................................................ 98
Setting Memory ............................................................................................ 99
Setting the File No. Function ................................................................ 99
Formatting the Memory....................................................................... 100
Viewing Memory Space ...................................................................... 101
Adjusting the LCD monitor....................................................................... 102
Adjusting the LCD Brightness ............................................................ 102
Adjusting the LCD Colour ................................................................... 103
Adjusting Date/Time .................................................................................. 104
Setting Date&Time.............................................................................. 104
Setting Date Format............................................................................ 105
Setting Time Format ........................................................................... 106
Setting Date/Time Display .................................................................. 107
Setting the System Settings ..................................................................... 108
Setting the Beep Sound...................................................................... 108
Setting Start-up Mode ......................................................................... 109
Resetting the Sports Camcorder ........................................................ 110
Selecting Language ............................................................................ 111
Setting the Auto Shut off..................................................................... 112
Setting the Demonstration Function ................................................... 113
Viewing Version Information ............................................................... 114
Using USB Mode ........................................................................................ 115
Transferring files to a computer.......................................................... 115
Printing with PictBridge ....................................................................... 116
Using the PC Cam Function ............................................................... 117
◆
Save important data / recordings separately on other media, to avoid
accidental loss due to a system failure or other reasons.
How to set to System Settings mode
U
MEN
Power
button
96
设置运动型摄录一体机
设置存储器 ........................................................ 97
选择存储类型 ................................................ 97
设置 USB 模式 .................................................... 98
设置 USB 模式 ............................................... 98
设置存储 .......................................................... 99
设置文件号功能............................................... 99
格式化 ..................................................... 100
查看存储空间 ............................................... 101
调节液晶显示屏 ................................................... 102
调节液晶显示屏亮度.......................................... 102
调节液晶显示屏颜色.......................................... 103
调整日期/时间 .................................................... 104
设置日期/时间 .............................................. 104
设置日期格式 ............................................... 105
设置时间格式 ............................................... 106
设置日期/时间显示........................................... 107
设置摄录一体机 ................................................... 108
设置蜂鸣音 ................................................. 108
设置启动模式 ............................................... 109
设置摄录一体机.............................................. 110
选择语言 ................................................... 111
设置自动关闭 ............................................... 112
设置演示功能 ............................................... 113
查看版本信息 ............................................... 114
USB 模式 ........................................................ 115
把文件传输到计算机.......................................... 115
将摄象机连接至打印机........................................ 116
使用PC摄像头功能............................................ 117
◆
将重要数据保存到其它存储介质上,避免由于系统错误或其它原因导致的
意外数据丢失。
系统设置模式
U
MEN
System Settings
E
MOD
1. Press the [POWER] button
to turn on the Sports
Camcorder.
6
文
[电源]
按钮
System Settings
E
MOD
2. Set the System Settings
mode by pressing the
[MODE] button.
1. 按下[电源] 按钮打开摄录机。
2. 按下[模式]按钮设置系
统模式。
ENGLISH
中 文
Setting the Sports Camcorder
: Setting Memory
设置运动型摄录一体机 : 设置存储器
Selecting the Storage Type
选择存储类型
System
You can set the storage to the internal memory or memory card
(notSettings你可以设置内置存储器或外置存储器的存储类型(不提供)。
supplied).
System Settings
Storage Type
1. Press the [POWER] button to turn on the
Sports Camcorder.
◆ The Movie Record screen appears.
3
Internal
Move
External
Move
2. Set the System Settings mode by pressing
the [MODE] button.
◆ The System Settings screen appears.
3. Move the [Joystick] left / right to select
<Storage Type>.
4. Move the [Joystick] up / down to select an
option, and then press the [Joystick(OK)].
◆ <Internal>: Movie, photo, music and voice
files are stored in the internal memory.
◆ <External>: Movie, photo, music and voice
files are stored in the external memory
(SD/MMC).
5. After you finish setting, move to the desired
mode by pressing the [MODE] button.
Internal
Storage Type
System Settings
External
Internal
Ver.
TYPE
External
Storage Type
Move
Select
Select
OK
Select
System Settings
4
System Settings
StorageTYPEType
Ver.
Internal
Storage Type
System Settings
External
Internal
External
Storage Type
Internal
Move
External
Move
5
1. 按下 [电源] 按钮打开摄录一体机。
◆ 视频录制屏幕将会显示。
2. 按下 [模式] 按钮进入系统设置模式。
◆ 系统设置屏幕将会显示。
3. 左右移动 [摇杆] 选择 <Storage Type>(存储类
型)。
4. 上下移动 [摇杆]选择功能, 然后按下[摇杆(OK)]。
◆ <Internal>(内置): 视频, 照片, 音乐和声
音文件将会存储到内部存储器。
◆ <External>(外部): 视频, 照片, 音乐和声
音文件将会存储到外部存储器(SD/MMC)。
Select
OK
Select
5. 完成设置后, 按下[模式]按钮选择想要的模式。
STBY 00:00:00/00:40:05
Move
Select
STBY 00:00:00/00:40:05
720i
F
F
Recording...
STBY 00:00:00/00:40:05
Recording...
[ Notes ]
S
✤ If you insert a memory card when the Sports
Recording...
12:00AM
2006/01/01
Sepia [ 注意 ]
S
Camcorder is on, the “pop-up message” will
Sepia ✤ 在摄录机打开的时候插入记忆卡, 将会弹出对话
prompt you automatically to select the storage type . 12:00AM 2006/01/01
框自动提示你选择存储类型。
✤ If there is no memory card inserted, only the <Internal> option
will
S
✤ 如果没有插入记忆卡, 仅有 <Internal>(内置) 功能可用。
be available.
12:00AM 2006/01/01
Sepia
✤ 系统需要占用一部分空间,
所以实际容量会与存储器上标明的存储
✤ System requires a small portion of memory space, actual storage
容量不一致。
capacity may differ from the printed memory capacity.
✤ 最长的录制时间和图片容量将会由所使用的存储介质决定。
✤ The maximum recording time and image capacity is subject to
➥第 31, 32页
change depending on the media used. ➥pages 31, 32
F
97
ENGLISH
中 文
System Settings
Setting the Sports Camcorder
USB Mode 设置运动型摄录一体机 : 设置 USB 模式
: Setting USB Mode
Mass Storage
PictBridge
Setting USB Mode
PC-Cam
Before connecting your Sports Camcorder to a computer or a printer
Move
via USB, please set the proper USB mode.
1. Press the [POWER] button to turn on the
Sports Camcorder.
◆ The Movie Record screen appears.
3
在通过 USB 接口将运动型摄录一体机连接至计算机或打印机之前,请
设置合适的 USB 模式。
Select
System Settings
TYPE
1. 按下 [电源] 按钮打开摄录一体机。
◆ 视频录制屏幕将会显示。
USB Mode
Mass Storage
PictBridge
2. Set the System Settings mode by pressing the
[MODE] button.
◆ The System Settings screen appears.
3. Move the [Joystick] left / right to select <USB
Mode>.
设置 USB 模式
2. 按下 [模式] 按钮进入系统设置模式。
◆ 系统设置模式屏幕将会显示。
PC-Cam
Move
OK
Select
3. 左右移动 [摇杆] 选择 <USB Mode>(USB模式)。
4
System Settings
TYPE
4. 上下移动 [摇杆]选择功能, 然后按下[摇杆(OK)]。
USB Mode
Mass Storage
PictBridge
4. Move the [Joystick] up / down to select an
option, and then press the [Joystick(OK)].
PC-Cam
Move
OK
Select
Transferring files from the Sports Camcorder to your
System Settings 大容量存储
Mass Storage computer. ➥page 115
By connecting the Sports Camcorder to printersUSB
withMode
PictBridge support (sold separately), you canMass
sendStorage
PictBridge images from the internal memory or external PictBridge
memory
PictBridge
(SD/MMC) directly to the printer with a few simple
PC-Cam
operations. ➥page 116
Move
Select
You can use the Sports Camcorder as a PC camera
PC-Cam
for video chatting, video conference and other PC
PC摄像机
camera applications. ➥page 117
98
将摄录机的文件传送至计算机 ➥第 115页
将摄录机连接到支持 PictBridge 的打印机(另需购
买), 您只需要进行简单的操作即可将图像从内部存储
卡或外部存储卡 (SD/MMC) 直接发送到打印机 ➥第
116页
您可以用摄录机作为PC摄像头使用以进行视频聊天,视
频会议以及其它 PC 摄像头应用。 ➥第 117页
Setting the Sports Camcorder
设置摄录一体机 : 设置存储器
: Setting Memory
ENGLISH
中
文
Setting the File No. Function
设置文件号功能
You can set the file numbers so that they reset each time the memory
card is formatted, or so that they count up continuously.
你可以设置文件号, 从而使他们可以在每次存储卡格式化后重置,或可
以连续记数。
1. Press the [POWER] button to turn on the
Sports Camcorder.
◆ The Movie Record screen appears.
3
RGB
File No.
File No.
Series
Series
Reset
Reset
2. Set the System Settings mode by pressing the
[MODE] button.
◆ The System Settings screen appears.
Move
Move
4
3. Move the [Joystick] left / right to select <File
No.>.
System Settings
System Settings
1. 按下 [电源] 按钮打开摄录一体机。
◆ 视频录制屏幕将会显示。
2. 按下 [模式] 按钮进入系统设置模式。
◆ 系统设置模式屏幕将会显示。
OK
Select
Select
3. 左右移动 [摇杆] 选择<File No.>(文件
号...)。
System Settings
System Settings
RGB
File No.
File No.
Series
Series
Reset
Reset
4. Move the [Joystick] up / down to select an
Move
option, and then press the
Move
[Joystick(OK)].
◆ <Series>: Numbering is continuous between the memory
cards, so that the first file number assigned on a new memory
card is 1 more than the last file number assigned on the
previous memory card.
◆ <Reset>: When the storage memory is formatted, the file
number goes back to its default value (100-0001).
OK
Select
Select
4. 上下移动[摇杆] 选择功能, 然后按下[摇杆(OK)]。
◆ <Series>(连续): 编号会在存储卡之间连续
进行, 从而使分配到存储卡上的第一个文件
号比分配到上一张存储卡上的文件号多出1。
◆ <Reset>(初始化): 当存储的存储被格式化
后, 文件编号将恢复到默认值 (100-0001)。
5. 完成设置后, 按下[模式]按钮选择想要的模式。
5. After you finish, move to the desired mode by pressing the
[MODE] button.
[ Note ]
✤ When you set <File No.> to <Series>, each file is assigned with
a different number so as to avoid duplicating file names. It is
convenient when you want to manage your files on a PC.
[ 注意 ]
✤ 将文件号<File No.>(文件号...)设置为<Series>(连续)时, 每个
文件将会分配到不同的文件号以避免设置重复 此设置可以让您 便
利的在您的计算机上管理文件。
99
ENGLISH
Setting the Sports Camcorder
设置摄录一体机 : 设置存储器
: Setting Memory
Formatting the Memory
中
文
System Settings
格式化
You can format the internal memory or the memory card to eraseFormat
all
你可以格式化内置存储或者外置存储卡上的所有文件。
System Settings
Internal
files.
External
System Settings
1. 按下 [电源] 按钮打开摄录一体机。
Format
3
System
Settings
◆ 视频录制屏幕将会显示。
1. Press the [POWER] button to turn on the
Internal
Format
Sports Camcorder.
Move
Format Select
External
Internal
◆ The Movie Record screen appears.
Internal
External
2. Set the System Settings mode by pressing the
2. 按下 [模式] 按钮进入系统设置模式。
External
System Settings
Move
Select
◆ 系统设置屏幕将会显示。
[MODE] button.
◆ The System Settings screen appears.
Move
Format OK Select
Move
Select
3. Move the [Joystick] left / right to select
System Settings
Internal
<Format>.
3. 左/右移动 [摇杆]选择<Format>(格式化)。
System Settings
4 External
4. Move the [Joystick] up / down to select an
Format
System
Settings
option, and then press the [Joystick(OK)].
Internal
Format
Move
◆ <Internal>: Format the internal memory.
Format Select
4. 上/下移动 [摇杆] 选择功能, 然后按下[摇杆(OK)]。
External
Internal
◆ <External>: Format the external memory.
◆ <Internal>(内置): 格式化内置存储。
Internal
External
◆ <External>(外部): 格式化外置存储。
When the [Joystick(OK)] is pressed, the pop-up
External
Move
Select
message appears.
当按下[摇杆(OK)]时, 将会弹出对话框。
System Settings
OK Select
Move
Select <OK> or <Cancel> by moving the
通过上/下移动[摇杆]选择<OK>(确定) 或
Move
Select
AreFormat
you sure you
want to
[Joystick] up / down and then press the
<Cancel>(取消) 然后按下[摇杆(OK)]。
format the external memory,
System
Settings
Internal
all
files will
be erased?
[Joystick(OK)].
External
5. After you finish setting, move to the desired
System
Settings
AreFormat
you sure you want to
System
Settings
mode by pressing the [MODE] button.
5. 完成设置后, 按下[模式]按钮选择想要的模式。
format the external memory,
RGB
RGB
RGB
[ Warning ]
✤ Previous information can not be restored after
formatting.
[ Notes ]
✤ There is no guarantee on the operation of a
memory card which has not been formatted on
the Sports Camcorder. Make sure to format the
memory card on the Sports Camcorder before
using.
✤ If the memory card is not inserted, <External>
option is not displayed.
100
Arefiles
youwill
sure
want to
Internal
all
beyou
erased?
Format
Are
youthe
sure
you
want
to
format
external
memory,
Move
Select
Format
External
format
memory,
Internal
all filesthe
willexternal
be erased?
Internal
OK
all files will be erased?
External
Cancel
External
Move
OK
Select
[ 警告 ]
✤ 格式化后将无法恢复以前的信息。
Move
Select
Move
Select
System Settings
RGB
Formatting
Format
external memory...
System Settings
Internal
External
System Settings
Formatting
Format
System
Settings
external memory...
Formatting
Internal
Format
Formatting
external
memory...
OK Select
Move
Format
External
external memory...
Internal
Internal
External
External
Move
Select
Move
Move
Select
Select
[ 注意 ]
✤ 无法为未在本摄像机上格式化的存储卡提供任何
保证.确定在本摄录机上格式化存储卡
✤ 如果没有插入存储卡, <External>(外部) 功能
不显示。
ENGLISH
中 文
Setting the Sports Camcorder
设置运动型摄录一体机 : 设置存储器
: Setting Memory
Viewing Memory Space
查看存储空间
You can check used memory space and total memory space of the
Sports Camcorder.
您可以查看摄像机上可用的存储空间和总存储空间
1. Press the [POWER] button to turn on the
Sports Camcorder.
◆ The Movie Record screen appears.
4
1. 按下 [电源]按钮 打开运动型摄录一体机。
◆ 视频录制屏幕将会显示。
System Settings
RGB
Memory Space
1
Internal
3MB/983MB
External
2. Set the System Settings mode by pressing the
[MODE] button.
◆ The System Settings screen appears.
0MB/243MB
Move
2
Memory Space
3. Move the [Joystick] left / right to select
<Memory Space>.
1
2
Used memory capacity indicator
Total memory capacity indicator
2. 按下 [模式] 按钮进入系统设置模式。
◆ 系统设置屏幕将会显示。
3. 左右移动摇杆选择<Memory Space>(存储器空
间)。
4. 可用的存储空间和总存储空间将会显示。
4. The used memory space and total memory space are
displayed.
5. 查看完存储空间后,按下[模式]按钮退出菜单屏幕。
5. After you viewing memory space, move to the desired mode
by pressing the [MODE] button.
[ Notes ]
✤ System requires a small portion of memory space, actual storage
capacity may differ from the printed memory capacity.
✤ If the memory card is not inserted, <External> option is not
displayed
✤ The OSD indicators of this manual are based on the model
VP-X210L.
[ 注意 ]
✤ 系统需要很小的内存, 所以实际的存储空间小于标称的存储空间。
✤ 如果不是内置记忆卡,外置记忆卡的容量不会显示出来。
✤ 此手册的OSD是基于VP-X210L的。
101
ENGLISH
中 文
Setting the Sports Camcorder
设置运动型摄录一体机 : 调节液晶显示屏
: Adjusting the LCD monitor
Adjusting the LCD Brightness
调节液晶显示屏亮度
You can adjust the brightness of the LCD monitor to compensate for
您可以调整液晶显示屏亮度来补偿周围环境照明条件。
System Settings
ambient lighting conditions.
12
24
1. Press the [POWER] button to turn on the
Sports Camcorder.
◆ The Movie Record screen appears.
LCD Brightness
3
12
RGB
24
LCD Brightness
2. Set the System Settings mode by pressing
the [MODE] button.
◆ The System Settings screen appears.
3. Move the [Joystick] left / right to select <LCD
Brightness>.
System Settings
Move
Move
4
Adjust
Set
30%
Adjust
OK
4. Move the [Joystick] up / down to adjust the
brightness, and then press the [Joystick(OK)].
◆ Moving the [Joystick] up will brighten the
screen whereas moving it down will darken
the screen.
◆ Brightness range: You can adjust the LCD
Brightness from 0% to 100%.
2. 按下 [模式] 按钮进入系统设置模式。
◆ 系统设置菜单将会显示。
Set
24
3. 左右移动[摇杆] 选择<LCD Brightness>(LCD亮
度)液晶显示屏亮度选项。
24
4. 上下移动[摇杆],调节LCD亮度, 按下[摇杆(OK)]。
System Settings
12
RGB
1. 按下 [电源]按钮 打开运动型摄录一体机。
◆ 视频录制屏幕将会显示。
LCD Brightness
System Settings
60%
12
LCD Brightness
Move
Adjust
Move
Adjust
5. After you finish setting, move to the desired mode by pressing
the [MODE] button.
OK
Set
Set
◆ 向上移动摇杆可以使LCD变亮,向下移动摇杆
使LCD变暗。
◆ 亮度范围: 您可以调整介于0%到100%.之间的
LCD 亮度。
5. 设置完后, 按下[模式]按钮退出菜单屏幕。
[ Notes ]
✤ A brighter LCD screen setting consumes more battery power.
✤ Adjust the LCD brightness when the ambient lighting is too bright
and the monitor is hard to see.
✤ LCD Brightness does not affect the brightness of images to be
stored.
102
[ 注意 ]
✤ 比较亮的LCD显示会消耗更多的电池电量。
✤ 当周围亮度很强时,调节LCD亮度以方便观看。
✤ LCD的亮度不影响存储画面的亮度。
ENGLISH
中 文
Setting the Sports Camcorder
设置运动型摄录一体机 : 调节液晶显示屏
: Adjusting the LCD monitor
Adjusting the LCD Colour
调节液晶显示屏颜色
You can adjust the colour of the LCD monitor depending on the
situation.
1. Press the [POWER] button to turn on the
Sports Camcorder.
◆ The Movie Record screen appears.
3
System Settings
System Settings
1. 按下 [电源]按钮 打开运动型摄录一体机。
◆ 视频录制屏幕将会显示。
12
24
12
LCD Colour
LCD Colour
2. Set the System Settings mode by pressing
the [MODE] button.
◆ The System Settings screen appears.
3. Move the [Joystick] left / right to select <LCD
Colour>.
您可以根据环境调整LCD显示器的颜色。
24
50%
Adjust
Adjust
Move
Move
4
System Settings
System Settings
OK
Set
Set
2. 按下 [模式] 按钮进入 系统设置。
◆ 系统设置菜单将会显示。
3. 左右移动 [摇杆]选择<LCD Colour>(LCD颜色)。
12
24
12
LCD Colour
LCD Colour
24
10%
4. Move the [Joystick] up / down to adjust the
LCD colour, and then press the [Joystick(OK)].
◆ You can adjust the LCD colour from 0% to
100%.
Move
Move
5. After you finish setting, move to the desired mode by pressing
the [MODE] button.
Adjust
Adjust
OK
Set
Set
4. 上下移动[摇杆]调节 LCD颜色, 按下[摇杆(OK)]
选定。
◆ 您可以调整介于0%到100%.之间的LCD 颜色。
5. 设置完后, 按下[模式]按钮退出菜单屏幕。
103
中 文
Setting the Sports Camcorder
: Adjusting Date/Time
设置运动型摄录一体机 : 设置日期/时间
ENGLISH
Setting Date&Time
设置日期/时间
You can set the date/time using this menu.
您可以使用菜单设置日期和时间。
1. Press the [POWER] button to turn on the
Sports Camcorder.
◆ The Movie Record screen appears.
3
System Settings
12
12
RGB
2. Set the System Settings mode by pressing
the [MODE] button.
◆ The System Settings screen appears.
4. Set the desired value by moving the [Joystick]
up / down.
2. 按下 [模式] 按钮进入系统设置。
◆ 系统设置菜单将会显示。
2006 01 01
12 : 00 AM
Move
3. Move the [Joystick] left / right to select
<Date/Time Set> and then press the
[Joystick(OK)].
1. 按下 [电源]按钮 打开运动型摄录一体机。
◆ 视频录制屏幕将会显示。
24
24
Date/Time Set
4
OK
3. 左右移动[摇杆]选择<Date/Time Set>(日期/时
间设置)按下[摇杆(OK)]按钮。
Set
System Settings
12
12
RGB
4. 上下移动[摇杆]更改设置。
24
24
Date/Time Set
2006 01 01
12 : 00 AM
Move
5. Move to the next item by moving the
[Joystick] left / right, and then set values by
moving the [Joystick] up / down.
◆ Items are displayed in the order of the date format.
◆ By default, it appears in the order of Year, Month, Date, Hour,
Minute and AM/PM.
Adjust
OK
Set
5. 左右移动[摇杆]移动到下一个菜单, 上/下移动
[摇杆]更改设置。
◆ 菜单按照时间的顺序显示。
◆ 系统默认的显示顺序为 年,月,日 小时,
分,上午,下午
6. 当设置完最后一项时,按下[摇杆(OK)]按钮确认设置。
7. 设置完后, 按下[模式]按钮退出菜单屏幕。
6. After setting the last item, press the [Joystick(OK)] to finish
the setting.
7. After you finish setting, move to the desired mode by pressing
the [MODE] button.
[ Notes ]
✤ See page 107 to set the <Date/Time> to display on the LCD.
✤ You can set the year up to 2037.
104
[ 注意 ]
✤ LCD上<Date/Time>(日期/时间)的显示详见107页。
✤ 设置年份最高到2037年。
ENGLISH
中 文
Setting the Sports Camcorder
设置运动型摄录一体机 : 设置日期/时间
: Adjusting Date/Time
Setting Date Format
设置日期格式
You can select the date format to display.
您可以选择日期显示格式。
System Settings
12
24
1. Press the [POWER] button to turn on the
Sports Camcorder.
◆ The Movie Record screen appears.
2. Set the System Settings mode by pressing
the [MODE] button.
◆ The System Settings screen appears.
3
Date Format
System Settings
YY/MM/DD
DD/MM/YY
Date Format
MM/DD/YY
YY/MM/DD
12
24
DD/MM/YY
Move
MM/DD/YY
Move
4
M
Select
OK
System Settings
24
Date Format
System Settings
YY/MM/DD
DD/MM/YY
Date Format
MM/DD/YY
YY/MM/DD
12
24
1.按下 [电源]按钮 打开运动型摄录一体机。
◆ 视频录制屏幕将会显示。
2. 按下 [模式] 按钮进入 系统设置。
◆ 系统设置菜单将会显示。
Select
12
3. Move the [Joystick] left / right to select <Date
Format>.
M
M
3. 左/右移动[摇杆]选择<Date Format>(日期格
式)。
M
4. 上/下移动摇杆选择选项然后按下摇杆确认设置。
◆ <YY/MM/DD>: 显示的顺序为年/月/日。
◆ <DD/MM/YY>: 显示的顺序为日/月/年。
◆ <MM/DD/YY>: 显示的顺序为月/日/年。
DD/MM/YY OK
Move
Select
4. Move the [Joystick] up / down to select an
MM/DD/YY
option, and then press the
[Joystick(OK)].
Move
Select
◆ <YY/MM/DD>: The date is displayed in the order of Year /
Month / Date.
5. 设置完后, 按下[模式]按钮退出菜单屏幕。
◆ <DD/MM/YY>: The date is displayed in the order of Date /
Month / Year.
◆ <MM/DD/YY>: The date is displayed in the order of Month /
Date / Year.
5. After you finish setting, move to the desired mode by pressing
the [MODE] button.
105
ENGLISH
中 文
Setting the Sports Camcorder
: Adjusting Date/Time
设置运动型摄录一体机 : 设置日期/时间
Setting Time Format
设置时间格式
You can select the time format to display.
您可以选择时间显示格式。
1. Press the [POWER] button to turn on the
Sports Camcorder.
◆ The Movie Record screen appears.
2. Set the System Settings mode by pressing
the [MODE] button.
◆ The System Settings screen appears.
3
System Settings
System Settings
12
24
Time Format
12Time
HourFormat
12
12
24 Hour
Hour
24 Hour
Move
Move
4
System Settings
System Settings
24
Time Format
12Time
HourFormat
12
12
24 Hour
Hour
24 Hour
OK
5. After you finish setting, move to the desired mode by pressing
the [MODE] button.
106
M
3. 左/右移动 [摇杆]选择<Time Format>(时间格
式)。
M
24
4. Move the [Joystick] up / down to select an
Move
Move
option, and then press the [Joystick(OK)].
◆ <12 Hour>: The time is displayed as the
unit of 12 hours.
◆ <24 Hour>: The time is displayed as the unit of 24 hours.
1. 向下按 [电源]按钮 打开运动型摄录一体机。
◆ 视频录制屏幕将会显示。
2. 按下 [模式] 按钮进入系统设置。
◆ 系统设置菜单将会显示。
Select
OK Select
12
3. Move the [Joystick] left / right to select
<Time Format>.
M
M
24
Select
Select
4. 上/下移动[摇杆]选择选项然后按下[摇杆(OK)]按钮。
◆ <12 Hour>(12小时制): 时间将以12小时的单
位显示。
◆ <24 Hour>(24小时制): 时间将以24小时的单
位显示。
5. 设置完后, 按下[模式]按钮退出菜单屏幕。
中 文
Setting the Sports Camcorder
设置运动型摄录一体机 : 设置日期/时间
: Adjusting Date/Time
ENGLISH
Setting Date/Time Display
设置日期/时间显示
You can set to display date and time on the LCD monitor.
您可以设置是否在LCD显示器上显示日期和时间。
1. Press the [POWER] button to turn on the
Sports Camcorder.
◆ The Movie Record screen appears.
2. Set the System Settings mode by pressing
the [MODE] button.
◆ The System Settings screen appears.
3
Move
Move
1. 按下 [电源]按钮打开运动型摄录一体机。
◆ 视频录制屏幕将会显示。
M
M
M
Date/Time
Date/Time
Off
Off
Date
Date
Time
Time
2. 按下 [模式] 按钮进入 系统设置。
◆ 系统设置菜单将会显示。
Select
Select
OK
3. 左右移动 [摇杆]选择<Date/Time>(日期/时间)。
4
System Settings
System Settings
12
12
24
1224
24
Date/Time
Date/Time
Date
Date
Time
Time
Date/Time
Date/Time
3. Move the [Joystick] left / right to select
<Date/Time>.
4. Move the [Joystick] up / down to select an
option, and then press the [Joystick(OK)].
◆ <Off>: The date and time are not displayed.
◆ <Date>: The date is displayed.
◆ <Time>: The time is displayed.
◆ <Date/Time>: The date and time are
displayed.
System Settings
System Settings
12
12
24
1224
24
Move
Move
5
OK
M
M
M
4. 上下移动[摇杆]选择选项然后按下[摇杆(OK)]确
认设置。
◆ <Off>(关): 日期时间都不显示
◆ <Date>(日期): 显示日期
◆ <Time>(时间): 显示时间
◆ <Date/Time>(日期/时间): 日期时间都显示
Select
Select
STBY 00:00:00/00:40:05
STBY 00:00:00/00:40:05
720i
5. 设置完后, 按下[模式]按钮退出菜单屏幕。
◆ 选择的日期/时间将会显示在录影带或图片中。
FF
F
Recording...
Recording...
SS
S
12:00AM 2006.01.01
12:00AM 2006.01.01
5. After you finish setting, move to the desired
mode by pressing the [MODE] button.
◆ The selected Date/Time is displayed in Movie or Photo mode.
Sepia
Sepia
107
ENGLISH
中 文
Setting the Sports Camcorder
设置运动型摄录一体机 : 设置摄录一体机
: Setting the System Settings
Setting the Beep Sound
设置蜂鸣音
You can set the beep sound to on/off. When on, a beep will sound
every time a button is pressed.
你可以设置蜂鸣音的开/关。设置为开时,每次按下一个按钮时将会响起
一个蜂鸣音。
1. Press the [POWER] button to turn on the
Sports Camcorder.
◆ The Movie Record screen appears.
System Settings
3
M
System Settings
Beep Sound
On
Beep Sound
Off
On
2. Set the System Settings mode by pressing
the [MODE] button.
◆ The System Settings screen appears.
3. Move the [Joystick] left / right to select
<Beep Sound>.
4. Move the [Joystick] up / down to select an
option, and then press the
[Joystick(OK)].
◆ <On>: Turn the beep sound on.
◆ <Off>: Turn the beep sound off.
M
2. 按下 [模式] 按钮进入系统设置。
◆ 系统设置菜单将会显示。
Off
Move
Move
4
1. 向下按 [电源]按钮 打开运动型摄录一体机。
◆ 视频录制屏幕将会显示。
Select
OK
Select
3. 左右移动[摇杆]选择<Beep Sound>(蜂鸣音)。
System Settings
M
System Settings
Beep Sound
On
Beep Sound
Off
On
M
Off
Move
Move
OK
4. 上下移动[摇杆]选择选项, 然后按下[摇杆(OK)]
按钮。
◆ <On>(开): 打开蜂鸣音。
◆ <Off>(关): 关闭蜂鸣音。
Select
Select
5. 设置完后, 按下[模式]按钮退出菜单屏幕。
5. After you finish setting, move to the desired mode by pressing
the [MODE] button.
[ Note ]
✤ When the earphones, Audio / Video cable or External Camera
Module is connected to the Sports Camcorder, the <Beep Sound>
function will not operate.
108
[ 注意 ]
✤ 将耳机或声频/视频电缆连接至摄录一体机时,蜂鸣音功能将无法操
作。
ENGLISH
中 文
Setting the Sports Camcorder
设置运动型摄录一体机 : 设置摄录一体机
: Setting the System Settings
Setting Start-up Mode
设置启动模式
You can select the starting mode displayed when you turn the Sports
Camcorder on.
您可以选择在打开摄录机电源时所显示的启动模式。
1. Press the [POWER] button to turn on the
Sports Camcorder.
◆ The Movie Record screen appears.
System Settings
3
DEMO
M
Movie
Mode
Start-up
Previous
Mode
Movie
Mode
2. 按下 [模式] 按钮进入系统设置。
◆ 系统设置菜单将会显示。
Previous Mode
2. Set the System Settings mode by pressing
the [MODE] button.
◆ The System Settings screen appears.
Move
Select
Move
4
3. Move the [Joystick] left / right to select
<Start-up>.
1. 按下 [电源]按钮 打开运动型摄录一体机。
◆ 视频录制屏幕将会显示。
SystemMSettings
Start-up
OK
Select
3. 左/右移动[摇杆]选择<Start-up>(启动)。
System Settings
SystemMSettings
Start-up
M
Movie
Mode
Start-up
Previous
Mode
Movie Mode
DEMO
4. 上下移动[摇杆]选择选项, 然后按下[摇杆]按钮。
◆ <Movie Mode>(视频模式): 运动型摄录机会
在视频模式下启动。
◆ <Previous Mode>(上一个模式): 运动型摄录
机会在您最后使用的模式中启动。
Previous Mode
4. Move the [Joystick] up / down to select an
OK Select
option, and then press the [Joystick(OK)].
Move
◆ <Movie Mode>: The Sports Camcorder
Move
Select
starts up in the Movie mode.
◆ <Previous Mode>: The Sports Camcorder starts up in the
5. 设置完后, 按下[模式]按钮退出菜单屏幕。
mode you used last.
5. After you finish setting, move to the desired mode by pressing
the [MODE] button.
[ Note ]
[ 注意 ]
✤ Make sure that the start-up mode is set to the selected mode when ✤ 请确定将启动模式设置为再次打开摄录机电源时所选定的模式。
turning on the Sports Camcorder again.
109
中 文
Setting the Sports Camcorder
设置运动型摄录一体机 : 设置摄录一体机
: Setting the System Settings
ENGLISH
Resetting the Sports Camcorder
复位摄录一体机
You can reset the Sports Camcorder to the default (factory) settings.
您可以将摄录机的设置恢复到出厂状态。
1. Press the [POWER] button to turn on the
Sports Camcorder.
◆ The Movie Record screen appears.
3
System Settings
DEMO
M
Ver.
1. 按下 [电源]按钮 打开运动型摄录一体机。
◆ 视频录制屏幕将会显示。
Reset
2. Set the System Settings mode by pressing
the [MODE] button.
◆ The System Settings screen appears.
OK
Move
3. Move the [Joystick] left / right to select <Reset> and then
press the [Joystick(OK)].
◆ The Sports Camcorder will be initialized to the default settings.
[ Warning ]
✤ If you reset the Sports Camcorder, all functions you set are
re-initialized to the default (factory) settings.
[ Note ]
✤ After resetting the Sports Camcorder, set <Date/Time Set>.
➥page 104
110
2. 按下 [模式] 按钮进入 系统设置。
◆ 系统设置菜单将会显示。
OK
Select
3. 左右移动[摇杆]选择<Reset>(初始化)设置。
◆ 运动型摄录机设置恢复到出厂状态。
[ 警告 ]
✤ 如果重新启动运动型摄录一体机 所有设置都会默认为出厂设置。
[ 注意 ]
✤ 重新启动运动型摄录一体机后 重新设置<Date/Time Set><日期/时
间设置>详见
➥104页
ENGLISH
中 文
Setting the Sports Camcorder
设置运动型摄录一体机 :设置摄录一体机
: Setting the System Settings
Selecting Language
选择语言
You can select the desired language of the Sports Camcorder.
您可以选择运动型摄录一体机里需要的语言选项。
1. Press the [POWER] button to turn on the
Sports Camcorder.
◆ The Movie Record screen appears.
2. Set the System Settings mode by pressing
the [MODE] button.
◆ The System Settings screen appears.
1. 按下 [电源]按钮 打开运动型摄录一体机。
◆ 视频录制屏幕将会显示。
3
er.
PE
2. 按下 [模式] 按钮进入系统设置模式。
◆ 系统设置菜单将会显示。
3. 左右移动 [摇杆]按钮选择<Language>。
4
er.
3. Move the [Joystick] left / right to select
<Language>.
4. Move the [Joystick] up / down to select the
desired language, and then press the [Joystick(OK)].
◆ English / Español / Français / Português / Deutsch / Italiano /
Nederlands / Polski / Русский /
/
/ Iran / Arab /
Magyar / ไทย / Українська / Svenska
PE
4. 上下移动[摇杆]按钮选择语言项, 然后按下[摇杆
(OK)]按钮确认。
◆ English / Español / Français / Português
/ Deutsch / Italiano / Nederlands / Polski
/ Русский /
/
/ Iran / Arab /
Magyar / ไทย / Українська / Svenska
5. 设置完后, 按下[模式]按钮退出菜单屏幕。
5. After you finish setting, move to the desired mode by pressing
the [MODE] button.
111
ENGLISH
中 文
Setting the Sports Camcorder
设置运动型摄录一体机 :设置摄录一体机
: Setting the System Settings
Setting the Auto Shut off
设置自动关闭
To save battery power, you can set the <Auto Shut off> function which
turns off the Sports Camcorder if there is no operation for a certain
period of time.
如果一段时间内不进行操作,为了节省能量或电池,您可以设置自动关
闭功能。
1. Press the [POWER] button to turn on the
Sports Camcorder.
◆ The Movie Record screen appears.
3
Auto Shut off
Auto Shut off
Off
DEMO
4. Move the [Joystick] up / down to select an
option, and then press the [Joystick(OK)].
◆ <Off>: Cancels the <Auto Shut off> function.
◆ <5 Minutes>: Automatically turns off after 5
minutes.
Ver.
TYPE
5Off
Minutes
5 Minutes
2. Set the System Settings mode by pressing
the [MODE] button.
◆ The System Settings screen appears.
3. Move the [Joystick] left / right to select <Auto
Shut off>.
System Settings
System Settings
2. 按下 [模式] 按钮进入系统设置模式。
◆ 系统设置菜单将会显示。
Move
Move
4
OK
Select
Select
System Settings
System Settings
DEMO
3. 左右移动 [摇杆]按钮选择<Auto Shut off>(自
动关闭)。
Ver.
Auto Shut off
Auto Shut off
Off
5Off
Minutes
5 Minutes
Move
Move
1. 按下 [电源]按钮 打开摄录一体机。
◆ 视频录制屏幕将会显示。
OK
5. After you finish setting, move to the desired mode by pressing
the [MODE] button.
Select
Select
TYPE
4. 上下移动[摇杆]按钮选择语言项, 然后按下[摇杆
(OK)]按钮确认。
◆ <Off>(关): 不启用<Auto Shut off>(自动关
闭)功能
◆ <5 Minutes>(5分钟): 摄录一体机会在5分钟
后自动关闭
5. 设置完后, 按下[模式]按钮退出菜单屏幕。
[ Notes ]
✤ The <Auto Shut off> will not function when you connect the AC
Power Adapter to the Sports Camcorder.
The <Auto Shut off> functions when the battery pack is the only
power source.
✤ <Auto Shut off> will only function when you set this function in
System Settings mode.
112
[ 注意 ]
✤ 如果您将电源适配器连接至摄录一体机,<Auto Shut off>(自动关
闭)功能将无法操作,只有在装入电池组时此功能才可启用。
✤ <Auto Shut off>(自动关闭) 只能在设置后才可以使用。
✤ 按 [电源]按钮重新启动运动型摄录一体机。
ENGLISH
中 文
Setting the Sports Camcorder
设置运动型摄录一体机 :设置摄录一体机
: Setting the System Settings
设置演示功能
Setting the Demonstration Function
The Demonstration function will allow you to view all the functions that 演示功能可以让您查看摄录一体机支持的所有功能。
the Sports Camcorder supports.
System Settings
1. Press the [POWER] button to turn on the
Sports Camcorder.
◆ The Movie Record screen appears.
3
DEMO
Play
Now
5 Minutes
Move
TYPE
Select
Select
Play
Now
Move
Move
4
4. Move the [Joystick] up / down to select an
option, and then press the [Joystick(OK)].
◆ <Off>: Cancels the Demonstration function.
◆ <5 Minutes>: Starts the Demonstration
function in 5 minutes.
◆ <Play Now>: Starts the Demonstration
function now.
Ver.
Off
5Demonstration
Minutes
5
Minutes
Play
Now
Off
2. Set the System Settings mode by pressing
the [MODE] button.
◆ The System Settings screen appears.
3. Move the [Joystick] left / right to select
<Demonstration>.
System Settings
Demonstration
System Settings
Demonstration
Off
OK
DEMO
Off
5Demonstration
Minutes
5Play
Minutes
Off
Now
Play
Now
5
Minutes
Move
2. 按下 [模式] 按钮进入系统设置模式
◆ 系统设置菜单将会显示。
Select
System Settings
System Settings
Demonstration
Ver.
TYPE
System Settings
Demonstration
Off
Move
Play
Now
Move
1. 按下 [电源]按钮 打开摄录一体机。
◆ 视频录制屏幕将会显示。
Select
OK Select
Select
STBY 00:00:00/00:40:05
STBY 00:00:00/00:40:05
Functions
1.
Digital
Camcorder
Functions
00:00:00/00:40:05
STBY
DigitalCamcorder
Camera
1.2.Digital
Functions
MP3 Player
2.3.Digital
Camera
1.4.Digital
Camcorder
Stereo
Audio Recorder
3. MP3
Player
2.5.Digital
Camera
PC-Camera
4. Stereo
Audio Recorder
3.6.MP3
Player
Data Storage
5. PC-Camera
4. Stereo Audio Recorder
6. Data Storage
5. PC-Camera
3. 左右移动 [摇杆]按钮选择<Demonstration>(演
示)。
4. 上下移动[摇杆]按钮选择选择, 然后按下[摇杆]
按钮确认。
◆ <Off>(关): 关闭演示功能。
◆ <5 Minutes>(5分钟): 在5分钟内开始演示功
能。
◆ <Play Now>(现在播放): 现在开始演示功
能。
6. Data Storage
[ Note ]
✤ If you set the Demonstration function, it operates only in Movie
Record mode.
[ 注意 ]
✤ 如果您设置演示功能,它只可以在视频录制模式中操作。
113
中 文
Setting the Sports Camcorder
设置运动型摄录一体机 :设置摄录一体机
: Setting the System Settings
ENGLISH
Viewing Version Information
查看规格信息
You can see the firmware version information.
你可以查看硬件版本信息。
1. Press the [POWER] button to turn on the
Sports Camcorder.
◆ The Movie Record screen appears.
2. Set the System Settings mode by pressing
the [MODE] button.
◆ The System Settings screen appears.
3
System Settings
DEMO
Ver.
1. 按下 [电源]按钮 打开摄录一体机。
◆ 视频录制屏幕将会显示。
Version Info
Samsung Elec. Co. LTD
S/W 1.00 Feb 16 2006 00:20:10
Syscon 1.00 Feb 17 2006 08:53:39
Move
3. Move the [Joystick] left / right to select <Version Info>.
◆ The firmware version of the Sports Camcorder is displayed.
4. After you view the version information, move to the desired
mode by pressing the [MODE] button.
114
TYPE
2. 按下 [模式] 按钮进入系统设置模式。
◆ 系统设置菜单将会显示。
3. 左/右移动 [摇杆] 选择 <Version Info>(版本
信息)。
◆ 摄录机的硬件版本信息会显示。
4. 设置完后, 按下[模式]按钮退出菜单屏幕。
中
Setting the Sports Camcorder
设置运动型摄录一体机 : USB 模式
: Using USB Mode
ENGLISH
Transferring files to a computer
把文件传输到计算机
You can use transfer photo and movie files to your PC.
您可以将图片或影音文件传输到计算机。
Before your start!
You can copy the files when <USB Mode>
sets to <Mass Storage> ➥page 98
开始之前的注意事项!
Open the front cover and
connect the USB cable.
在 <USB Mode>(USB 模式)设置为
<Mass Storage>(大容量存储)时可以传
输文件 ➥第 98 页
1. Turn on your PC.
USB
1. 打开计算机。
MMC/SD
USB cable
2. Press the [POWER] button to turn on
the Sports Camcorder.
◆ The Movie Record screen appears.
2. 按下 [电源]按钮 打开摄录一体机。
◆ 视频录制屏幕将会显示。
3. Connect the Sports Camcorder to your
PC with the USB cable.
3. 使用USB线将摄录一体机连接至计算机。
USB
4. 将所需要的文件从运动型摄录一体机拷贝
到计算机上。
USB
4. Copy the desired file from the Sports
Camcorder to your PC.
文
5. 传输完毕后拔掉USB线。
5. When finished, disconnect the USB
cable.
[ Notes ]
✤ Disconnecting the USB cable while the
data transfer will stop the data transfer and
might damage the data stored.
✤ Multiple USB devices connected to a PC
or using USB hubs may cause
communication / installation errors with
the Sports Camcorder.
[ 注意 ]
✤ 如果您在数据传输期间从计算机或摄录一
体机拔下USB线,数据传输将会停止且数
据可能会损坏。
✤ 如果您在连接USB线至计算机的同时使用
USB集线器或其它设备,将可能会导致冲
突且可能无法正确操作。
115
中
Setting the Sports Camcorder
设置运动型摄录一体机 : USB 模式
: Using USB Mode
ENGLISH
文
Printing with PictBridge
将摄录一体机连接至打印机
With the provided USB cable and a PictBridge-supporting printer, you
can print your photo images directly without connecting to a PC.
将摄象机连接到支持PictBridge的打印机,您无须使用电脑便可直接打
印图片。
4
1. 按下 [电源]按钮打开摄录一体机。
◆ 视频录制屏幕将会显示。
2. 按下[模式] 按钮设置 系统设置。
◆ 系统设置菜单将会显示。
3. 左右移动[摇杆]按钮选择<USB Mode>(USB
模式)。
4. 上下移动[摇杆]按钮选择<PictBridge>然
后按下[摇杆]按钮确认。
5. 使用USB线 。
6. 左/右移动[摇杆]按钮选择想要打印的文
件。
7. 上/下移动[摇杆]按钮选择张数。
◆ 可能的范围: 01 ~ 30
8. 按下[摇杆]按钮确认开始打印。
9. 打印完后拔下USB线。
System
SystemSettings
Settings
TYPE
USB
USB Mode
Mode
Mass
Mass Storage
Storage
PictBridge
PictBridge
[ Warning ]
✤ This function works only with printers that support
PictBridge.
[ Notes ]
✤ For printing information, refer to the user's manual
of the printer.
✤ Depending on the printer, printing failure may
occur. In this case, download JPEG files directly to
the PC and print them.
✤ Depending on the printer, date and time option may
not be supported. In this case, date and time menu
will not be displayed.
116
USB
MMC/SD
USB
PictBridge Supporting Printer
(sold separately)
USB
1. Press the [POWER] button to turn on the
Sports Camcorder.
◆ The Movie Record screen appears.
2. Set the System Settings mode by
pressing the [MODE] button.
◆ The System Settings screen appears.
3. Move the [Joystick] left / right to select
<USB Mode>.
4. Move the [Joystick] up / down to select
<PictBridge> and then press the
[Joystick(OK)].
5. Connect the Sports Camcorder and the
PictBridge supporting printer with a USB
cable.
6. Move the [Joystick] left/right to select the
file you want to print.
7. Move the [Joystick] up/down to set the
number of copies.
◆ Range of possibilities: 01 ~ 30
8. Press the [Joystick(OK)] to begin printing.
9. When finished, disconnect the USB cable.
PC-Cam
PC-Cam
Move
Move
7
OK
[ 警告 ]
✤ 此功能只可以在支持PictBridge的打印机上使
用。
Select
Select
100-0001
100-0001
01
01
Search
Search
Copies
Copies
OK
Print
Print
[ 注意 ]
✤ 关于打印方面的信息请参照用户手册。
✤ 如果打印失败,直接将JPEG文件下载到电脑上打
印。
✤ 某些打印机可能不支持日期和时间选项,这种情
况下,日期和时间不会显示。
SystemSettings
ENGLISH
Setting
中
the Sports Camcorder
USBMode
MassStorage
设置运动型摄录一体机 : USB 模式
: Using USB Mode
PictBridge
TYPE
PC-Cam
Using the PC Cam Function
Move
You can use your Sports Camcorder as a PC camera for video chatting,
video conference and other PC camera applications.
您可以将本摄录一体机作为PC摄录一体机使用进行视频聊天,视频会议以及
其它PC摄录一体机应用范围
开始之前!
◆ 使用PC 摄录一体机功能用先安装DV 驱动
➥见124页
1.按下 [电源]按钮 打开摄录一体机。
◆ 视频录制屏幕将会显示。
SystemSettings
TYPE
USBMode
MassStorage
PictBridge
PC-Cam
Move
4
oK
2.按下 [模式] 按钮进入系统设置模式。
◆ 系统设置菜单将会显示。
Select
SystemSettings
3.左/右移动 [摇杆]按钮选择<USB Mode>(USB模
式)。
4.上/下移动[摇杆]按钮选择<PC-Cam>(PC摄像机)
然后按下[摇杆(OK)]按钮确认。
5.打开 PC。
6.使用USB线连接运动型摄录一体机与PC
7.本摄录一体机可作为PC摄录一体机使
用以执行某些程序,例如:Windows
Messenger。
◆ PC摄录一体机的使用将会根据 软件而
有所不同,请参阅个别软件产品的说
明文件
8.使用完后拔下USB线。
TYPE
USBMode
MassStorage
PictBridge
PC-Cam
Move
oK
Select
Open the front cover and
SystemSettings
connect the USB cable.
TYPE
USBMode
PC-Cam
USB cable
Select
USB
oK
MMC/SD
Move
USB
MassStorage
PictBridge
MMC/SD
[ Notes ]
✤ You must install the DV Driver. ➥page 124
✤ When the USB port connection changed, it
may require DV Driver re-installation.
➥page 124
✤ It is recommended to use an AC Power
Adapter during data transfer to avoid
unintended power outages.
✤ Microsoft Windows 98 SE or later operating
systems support the PC Cam function.
3
Select
USB
◆ For PC Cam use, it is required to install the DV
Driver.➥page 124
1. Press the [power] button to turn on the Sports
Camcorder.
◆ The Movie Record screen appears.
2. Set the System Settings mode by pressing the
[MODE] button.
◆ The System Settings screen appears.
3. Move the [joystick] left / right to select <USB
Mode>.
4. Move the [joystick] up / down to select
<PC-Cam> and then press the [joystick(OK)].
5. Turn on your PC.
6. Connect the Sports Camcorder to your PC with
the USB cable.
7. The Sports Camcorder can be used as a PC
Cam for programmes such as Windows
Messenger.
◆ Various applications take advantage of
the PC Cam function. Refer to respective
product documentation for further details.
8. When finished, disconnect the USB cable.
使用PC摄像头功能
oK
MMC/SD
Before your start!
文
[ 注意 ]
✤ 必须按装DV驱动。➥见124页
✤ 当USB端口改变时需要重新安装DV 驱动。
➥见124页
✤ 当数据传输时,推荐使用直流电源适配
器,防止过程中电量耗尽
✤✤Microsoft Windows 98 SE 或者更新的操
作系统支持 PC摄像头功能。
117
ENGLISH
7
中
Using the External
Camera Module
Recording the External Camera Module .................................119
Recording Movie using the External Camera Module ........119
Wearing the External Camera Module ....................................120
Mounting the External Camera Module on Rubber Mount ..120
Using the Long Mount Band ................................................121
◆ Save important data / recordings separately on other media, to
avoid accidental loss due to a system failure or other reasons.
118
7
文
使用外置摄像头模块
使用外部摄像头录制 .............................
使用外部摄像头录制视频 .....................
佩带外置摄像头模块 .............................
将外置摄像头模块安装到橡胶座上 .............
使用长固定带 ...............................
119
119
120
120
121
◆ 将重要文件保存到其它存储介质上,避免因系统错误或
其它原因导致的意外数据丢失。
中 文
Using the External Camera Module :
Recording with the External Camera Module
使用外置摄像头模块 :使用外部摄像头录制
ENGLISH
使用外部摄像头录制视频
Recording Movie using the External Camera Module
Your Sports Camcorder offers the ability
to record those thrilling moments. Whether
you're snow boarding or skiing, you can
record the moments with the External
Camera Module and accessories.
2.
3.
4.
5.
6.
MENU
1. 将外置摄像头与运动型摄录一体
机的端子连接。
◆ 您可以用三脚架(未提
供)、橡胶座或固定带安装
外置摄像头
2. 按下外置摄像头[电源/录制/停
止]按钮2秒钟以上。
◆ 将外置摄像头打开。
◆ 如果只按下 [电源] 按钮,只有运动型摄录一
体机打开
转动 画面旋转器到希望的角度。
◆ 向左或向右旋转90度选择需要的画面角度。
按下外置摄像头 [电源/录制/停止] 按钮开始录
制。
◆ LED显示红色
◆ 按下外置摄像头 [电源/录制/停止] 按钮开
始录制
按下外置摄像头 [电源/录制/停止] 按钮停止录
制。
◆ 录像停止,摄录机重新准备好。
录制完毕后按下外置摄像头 [电源/录制/停止]按
钮2秒钟以上关闭,防止耗损电量。
◆ 运动型摄录一体机的开关和外置摄像头的开
关都关闭
◆ 如果按下[电源]按钮,摄录一体机与外置摄
像头电源也都关闭
MODE
DELETE
DISPLAY
HOLD
Connect the External Camera
Module cable to the multi jack of
Sports Camcorder.
◆ You may fix the External Camera
Module using a Tripod (not
supplied), Rubber Mount, or
Mounting Band.
Press the [POWER/Record /Stop]
button of External Camera Module for more than 2
seconds.
◆ The power of the Sports Camcorder and the External
Camera Module is turned on.
◆ If you press the [POWER] button of the Sports
Camcorder, only the Sports Camcorder is turned on.
Turn the Picture Rotator to the desired direction.
◆ The Picture Rotator turns 90 degrees left or right to
select the desired picture angle.
Press the [POWER/Record /Stop] button of the External
Camera Module to start recording.
◆ LED lamp lights in red.
◆ Press the [Record /Stop]button of the Sports Camcorder
to start recording.
Press the [POWER/Record /Stop] button of the External
Camera Module to stop recording.
◆ Recording stops and the Sports Camcorder is ready
again.
After recording, to prevent battery consumption, press
the [POWER/Record /Stop] button of the External
Camera Module more than 2 seconds to turn off.
◆ The power of the Sports Camcorder and the External
Camera Module is turned off.
◆ If you press the [POWER] button of the Sports
Camcorder, only the Sports Camcorder is turned off.
T
DC IN
1.
[POWER/
Record /Stop] button
您的运动型摄录一体机可以支持防抖
功能,不管是在下雪时,或是在滑行
时,您都可以使用外置摄像头录制。
W
3
90 degrees (max.)
3.
4.
4
5.
STBY 00:00:02:00:40:03
720i
F
6.
Recording...
S
12:00AM 2006/01/01
[ Notes ]
✤ The External Camera Module is available for recording movie only.
✤ You can use the [POWER/Record /Stop] button of the External Camera Module to
power on/off and to start/stop recording simultaneously.
✤ Multi jack is used as a Earphones jack, AV Input/Output jack and External Camera
Module jack.
Sepia
1
[ 注意 ]
✤ 外置摄像头只可以在录制影片时使用
✤ 您可以同时使用 [电源/录制/停止] 按钮控制外置摄像头的开关和
开始停止录制
✤ 多功能插座可以作为耳机插座,AV 输入/输出插座或外部摄像头模
块插座使用。
119
Using the External Camera Module :
Wearing the External Camera Module
使用外置摄像头模块 : 佩带外置摄像头模块
Mounting the External Camera Module on Rubber Mount
将外置摄像头模块安装到橡胶座上
ENGLISH
1
中
Rubber Mount receptacle
文
2
screw
1. Set the Rubber Mount receptacle of the External Camera
Module to the screw of Rubber Mount.
1. 将外部摄像头模块安装到橡胶座上。
2. 向右拧紧橡胶座螺丝。
2. Turn the Rubber Mount's screw to the right to fasten.
[ Note ]
[ 注意 ]
✤ Dropping the External Camera Module or bumping it to other
objects may cause device failure. When using the device, you must ✤ 掉落或与其他物体碰撞会损坏外置摄像头模块。使用它时, 您一定
要将它附着到橡胶座上,不要使其掉落
attach it to the rubber mount, and be careful not to drop or strike it.
或与其他物体发生碰撞。
120
Using the External Camera Module :
Wearing the External Camera Module
使用外置摄像头模块 : 佩带外置摄像头模块
Using the Long Mount Band
使用长固定带
While the Sports Camcorder is inside your carrying case
or backpack, you can attach the External Camera Module
mounted on the Rubber Mount with help of the Long Mount
Band.
当摄录一体机放在你的手提箱或背包里时,你可以将外部摄像头模块安
装在橡胶托架上。
ENGLISH
1. Run the strap of Long Mount Band
through both of the slots on the
rubber mount as illustrated.
◆ You can use both the short part
and long part of Rubber Mount as
slots.
2. Run the strap through the buckle
to adjust the tightness.
3. Fasten the strap.
[ Notes ]
✤ Dropping the External Camera
Module or bumping it to other objects
may cause device failure. When
using the device, you must attach it
to the rubber mount, and be careful
not to drop or strike it.
✤ Direct contact of the Rubber Mount
with your skin for a long period of
time may cause skin irritation or
allergy. Avoid long term contact.
中
文
1. 将安装带的带子穿过橡胶托架的两个安装
槽,如插图所示。
◆ 橡胶托架安装槽的短的部分和长的部
分都可以使用。
1
2. 通过卡扣调整带子的松紧。
3. 扣紧带子。
2
3
Rubber Mount
[ 注意 ]
✤ 外部摄像模块跌落或撞击其它物体可能导
致设备故障。当使用外部摄像模块时, 请
务必在橡胶托架上安装好, 小心避免跌落
或撞击。
✤ 皮肤长时间与橡胶托架直接接触可能引起
皮肤不适或过敏。应避免长时间接触
121
ENGLISH
8
122
中
Miscellaneous
Information
8
文
其它信息
USB Interface Environment ......................................................123
USB connection to a computer ...........................................123
System Environment ............................................................123
Installing Software .....................................................................124
Installing DV Media Pro 1.0 .................................................124
Ulead Video Studio ..............................................................125
Connecting To Other Devices .................................................126
Connecting to a PC using USB Cable.................................126
Connecting to a TV monitor .................................................127
Connecting to a VCR / DVD Recorder ................................128
Recording unscrambled content from other digital devices ..129
Printing Photos ..........................................................................130
Printing with DPOF ..............................................................130
Maintenance ...............................................................................131
Cleaning and Maintaining the Sports Camcorder .................131
After using the Sports Camcorder .......................................131
Cleaning the Body................................................................132
Using the Built-in Rechargeable Battery .............................132
Regarding the Battery ..........................................................133
Using the Sports Camcorder Abroad ..................................134
USB 接口 ....................................... 123
USB 连接至计算机 .......................... 123
系统环境 .................................... 123
安装程序 ........................................ 124
安装 DV Media Pro 1.0 ...................... 124
安装Ulead Video Studio ..................... 125
连接到其它设备 .................................. 126
使用USB线连接到PC ........................... 126
连接到电视监视器 ............................ 127
连接到录像机/DVD刻录机 ...................... 128
从其它数字设备录制内容 ...................... 129
打印照片 ........................................ 130
按照DPOF方式打印照片 ........................ 130
清理和维护摄录一体机 ............................ 131
使用运动型摄录一体机后 ...................... 131
清理机身 .................................... 132
使用内置充电电池 ............................ 132
关于电池 .................................... 133
在国外使用摄录一体机 ........................ 134
◆ Save important data / recordings separately on other media, to
avoid accidental loss due to a system failure or other reasons.
◆ 将重要数据或记录保存到其它存储介质上,避免由于系
统错误或其它原因导致的意外数据丢失。
ENGLISH
Miscellaneous Information :
USB Interface Environment
其它信息 : USB 接口
USB connection to a computer
USB 连接至计算机
High Speed USB is not guaranteed if the supplied driver is not installed on an OS other than
Microsoft Windows or Apple's Mac OS X.
✤ Windows 98SE/ME: Full Speed USB
✤ Windows 2000: Service Pack 4 or higher - High Speed USB
✤ Windows XP: Service Pack 1 or higher - High Speed USB
✤ Mac OS X: 10.3 or higher - High Speed USB
System Environment
中
除了Microsoft(Windows)或 Apple(Mac OS X)或附带的驱动程序之外,不保证高速USB。
✤ Windows 98SE/ME: 全速 USB
✤ Windows 2000: Service Pack 4 以上 - 高速USB
✤ Windows XP: Service Pack 1 以上 - 高速 USB
✤ Mac OS X: 10.3 以上- 高速 USB
系统环境
Windows环境
Windows Environment
Minimum
Recommended
CPU
Pentium III, 600MHz
Pentium 4, 2GHz
OS
Windows 98SE/ME
Windows 2000/XP
Memory
200MB (For applications only)
512MB or above
Free space on the
hard disk
Apart from this,
1GB or more free space
2GB or above
Display Resolution
800x600 dots
16-bit colour
1024x768 dots
24-bit colour
USB
USB 1.1
USB 2.0 High Speed
Macintosh Environment
Minimum
G3 500MHz
Mac OS 10.2
128MB
200MB(For applications only.
Apart from this, 1GB or more free space
800x600 dots
16-bit colour
USB 1.1
Recommended
G4 Processor
Mac OS 10.3
512MB or above
2GB or above
1024x768 dots
24-bit colour
USB 2.0 High Speed
[ Notes ]
✤ Not all PCs configured with the above environment are guaranteed to operate properly.
✤ USB connection using an external USB hub or an additional USB daughterboard is not
guaranteed.
✤ If your OS is Windows 2000/XP, log in as the [Administrator(administrator of the PC)] (or a
user with the equivalent privileges) to install the OS.
✤ If the capacity of PC is low, the movie file may not play normally or will often stop.
✤ If the capacity of PC is low, it may take a long time to edit the movie file.
✤ Intel® Pentium III™ or Pentium 4™ is a trademark of the Intel Corporation.
✤ Mac, Macintosh and Mac OS are trademarks of Apple Computer, Inc.
✤ Windows® is a registered trademark of the Microsoft® Corporation.
✤ All other brands and names are property of their respective owners.
文
最低
建议
CPU
Pentium III, 600MHz
Pentium 4, 2 GHz
操作系统
Windows 98SE/ME
Windows 2000/XP
存储器
200 MB
512MB 或以上
硬盘上的可用空间
200MB(仅用于应用程序。除此
之外,1GB 或以上可用空间
2GB或以上
显示器分辨率
800x600 点
16-位色
1024x768 点
24-位色
USB
USB 1.1
USB 2.0 高速
Macintosh 环境
最低
建议
G3 500 MHz
G4 处理器
Mac OS 10.2
Mac OS 10.3
128 MB
512MB或以上
200MB(仅用于应用程序。除此
之外,1GB 或以上可用空间
2GB或以上
800x600 点
16-位色
1024x768 点
24-位色
USB 1.1
USB 2.0 高速
[ 注意 ]
✤ 并非所有计算机都按照上述环境配置,并能保证正常操作。
✤ 通过 USB 集线器 或 USB卡使用计算机并不在保证的范围内.
✤ 若您的操作系统是Windows 2000/XP, 请登陆为 [管理员(计算机的管理
员)] (或具有同等特权的用户)以安装操作系统。
✤ 若计算机具备的容量低,视频文件可能无法正常播放或文件会经常停
止。
✤ 若计算机具备的容量低, 编辑视频文件可能需要很长的时间。
✤ Intel® Pentium III™或 Pentium 4是Intel Corporation的商标。
✤ Mac, Macintosh 和 Mac OS 是Apple Computer Inc 的注册商标。
✤ Windows®是MicrosoftCorporation 的注册商标。
✤ 所有其它品牌和名称是其相应所有者的财产。
123
ENGLISH
Miscellaneous Information :
Installing Software
中
文
其它信息 : 安装程序
Installing DV Media Pro 1.0
安装 DV Media Pro 1.0
You need to install DV Media Pro 1.0 to play back recorded movie files or the
transferred data from Sports Camcorder with the USB cable on your PC.
你必须安装 DV Media Pro 1.0 才能在计算机上播放摄录一体机所录
制的视频文件或通过USB电缆传输数据。
Before your start!
◆ Turn on your PC. Exit all other applications running.
◆ Insert the provided CD into the CD-ROM drive.
The setup screen appears automatically soon after the CD was inserted. If
the setup screen does not appear, click on “Start” on the bottom left corner
and select “Run” to display a dialog. Type “D:\autorun.exe” and then press
ENTER, if your CD-ROM drive is mapped to “D:Drive”.
Installing Driver - DV Driver and DirectX 9.0
◆ DV Driver is a software driver that is required to support establishing
connection to a PC.
(If it is not installed, some functions will not be supported.)
1. Click on “DV Driver” on the Setup screen.
◆ Driver software required is installed automatically.
Following drivers will be installed:
- USB Removable disk driver (Windows 98 SE only)
- USB PC-CAMERA driver
2. Click on <Confirm> to finish driver installation.
◆ Windows 98 SE users need to restart the PC.
3. If the "DirectX 9.0" is not installed, it is installed automatically after
setting "DV Driver".
◆ After installing DirectX 9.0, PC needs to be restarted.
◆ If DirectX 9.0 is installed already, there is no need to restart the PC.
Application Installation - Video Codec
在你开始之前!
◆ 启动计算机。退出所有的应用程序。
◆ 插入提供的 CD 到 CD-ROM 驱动器。
CD 插入以后安装界面将自动出现。 如果安装界面不出现, 请点击
计算机屏幕左下角的“开始”按钮,然后选择“Run”。
如果显示“运行”窗口,请输入“D:\autorun.exe”(如果CD-ROM
驱动器设置为“D:Drive”)然后按下 ENTER键。
安装驱动 - DV Driver 和 DirectX 9.0
◆ DV Driver是支持设备与PC建立连接的必备的驱动程序。
(如果不安装, 一些功能将不被支持。)
1.在安装界面中点击“DV Driver”。
◆ 必备的驱动程序将被自动安装。
以下程序将被安装:
- USB 可移除磁盘驱动程序 (仅限于Windows 98 SE )
- USB PC-摄像机 驱动程序
2.点击 <确认> 完成驱动安装。
◆ Windows 98 SE 用户需要重新启动 PC。
3. 如果没有安装过"DirectX 9.0",安装 "DV Driver"后它将自动安装。
◆ 安装DirectX 9.0后, PC 需要重新启动。
◆ 如果已经安装过DirectX 9.0, 不必重新启动 PC。
应用程序安装 - Video Codec
◆ Click on “Video Codec” on the Setup screen.
Video Codec is required to play movie files recorded by this Sports Camcorder
on a PC.
◆ 点击安装界面中的“Video Codec”(视频解码器)。
视频解码器是在PC上播放摄像机拍摄的视频文件所必需的。
[ Note ]
✤ If a message saying “Digital Signature not found” or something similar
appears, ignore the message and continue with the installation.
[ 注意 ]
✤ 如果出现信息提示“Digital Signature not found”或者类似的
信息提示, 请忽略此信息继续安装。
124
ENGLISH
Miscellaneous Information :
Installing Software
Application Installation – Photo Express
1. Click “Photo Express” on the Setup screen.
◆ It is a photo editing tool that allows users to edit images.
Application Installation – Quick Time
中
文
其他信息 : 安装程序
应用程序安装 Photo Express
1.点击安装界面的“Photo Express”。
◆ 这是一个照片编辑工具, 帮助用户编辑图片。
应用程序安装 Quick Time
1. Click “Quick Time” on the Setup screen.
◆ QuickTime is Apple's technology for handling movie, sound,
animation, graphics, text, music, and even 360-degree virtual
reality (VR) scenes.
1.点击安装界面的“Quick Time”。
◆ QuickTime是Apple's technology出品的用于处理影音,动画,
图片,文本及音乐的应用程序软件。
Ulead Video Studio
Ulead Video Studio
Setting up Ulead Video Studio
设置 Ulead Video Studio
After inserting the CD, the setup screen displays automatically.
Follow the instruction to start installation.
It is a video editing tool that allows users to edit movie files.
插入 CD后, 安装界面自动显示. 跟随安装指令开始安装。
这是一个视频编辑工具,帮助用户编辑视频文件。
[ Notes ]
✤ Please install by using the Software CD that
came with this Sports Camcorder.
We do not guarantee compatibility for different
CD versions.
✤ For photo editing, use Photo Express.
✤ For movie playback on a PC, install software
in this order : DV Driver - DirectX 9.0 - Video
Codec
✤ For movie editing, use the Ulead Video Studio.
✤ For PC Cam use, it is required to install the DV
Driver installation is required.
✤ You have to install “DV Driver”, “Video Codec” and “DirectX 9.0”
to run DV Media Pro 1.0 properly.
✤ If a message saying “Digital Signature not found” or something
similar appears, ignore the message and continue with the
installation.
[ 注意 ]
✤ 请使用本运动型摄录一体机的配套软件 CD 安
装。
对不同 CD 版本的兼容性,我们不作保证。
✤ 进行照片编辑,使用 Photo Express。
✤ 在PC上播放录像, 按以下顺序安装软件: DV
Driver - DirectX 9.0 - Video Codec
✤ 进行电影编辑,使用 Ulead Video Studio。
✤ 用作PC摄像头, 必须安装DV 驱动程序。
✤ 你必须安装 “DV Driver",“Video Codec”和“DirectX 9.0",
才能正确运行 DV Media Pro 1.0。
✤ 如果出现信息提示“Digital Signature not found”或者类似的
信息提示, 请忽略此信息继续安装。
125
ENGLISH
Miscellaneous Information :
Connecting To Other Devices
其它信息 :连接到其它设备
Connecting to a PC using a USB Cable
使用USB线连接到PC
中
Connect to a PC with the provided USB cable. You
can view your files on your PC.
USB
MMC/SD
USB cable
USB
Connecting to a PC – Playing Files
1. Press the [POWER] button to turn on the
Sports Camcorder.
2. Connect the Sports Camcorder to the PC
with the provided USB cable as shown in
the diagram.
3. Copy the file to your PC.
◆ We recommend copying the files onto your
PC for better viewing.
4. Double-click on the copied file name.
It starts to play back.
USB
Before your start!
You can transfer the files when <USB Mode>
sets to <Mass Storage> ➥page 98
文
使用指定的USB线连接到电脑,你可以在电脑
上浏览文件。
开始之前的注意事项!
在 <USB Mode>(USB 模式)设置为<Mass
Storage>(大容量存储)时可以传输文件
➥第 98 页
连接到电脑 – 播放文件
1.按下[电源]按钮打开运动型摄录一体机
2.按照图示使用配套的USB线将运动型摄录
一体机连接到PC上。
3.把文件复制到电脑上。
◆ 我们推荐将文件拷贝到电脑上以获得
更好的视觉效果。
4.双击拷贝的文件的文件名,并开始重放画
面文件。
MMC/SD
MMC/SD
Disconnecting from a PC
<Open the front cover and connect the USB cable.>
与PC断开连接
1. Click on the “Safely remove hardware” tray
icon on the bottom right side of the desktop.
1.点击桌面右下角的“安全删除硬件”图标。选择设备并点击
Select the device and click on the “Stop” button.
2. When the message saying that it is safe to remove the hardware
“STOP”按纽。
appears, unplug the cable from the PC.
2.当有可以安全删除硬件的信息提示出现时,可以从电脑上拔出线缆。
[ Warning ]
✤ When data communication is disrupted due to static electricity, magnetic
field or other reason, restart the programme or try to disconnect / connect
the communication cable (USB cable) again.
[ 警告 ]
✤ 当数据传输中断时有可能是静电问题,在磁场中或其它原因 此时
可以重新启动程序或者断开连接/并再次连接传输数据线(USB电缆)
[ Notes ]
✤ Multiple USB devices connected to a PC or using USB hubs may cause
communication / installation errors with the Sports Camcorder.
✤ Refer to page 123 for PC recommendations on USB use. Some PCs
meeting the requirements may not support proper USB operation due to
various reasons. Please refer to the product documentation of the PC for
further details.
✤ If you disconnect the USB cable from the PC or the Sports Camcorder
during the data transfer, the data transfer will stop and the data may be
damaged.
✤ The Sports Camcorder may operate abnormally in the recommended
system environment depending on your PC.
126 For example, the movie file may play abnormally.
[ 注意 ]
✤ 多媒体USB设备连接至电脑或者使用USB集线器有可能产生传输/安
装问题
✤ 请查阅第123页有关在PC上使用USB的一些建议。由于各种原因有些
PC不支持正当的USB操作。这时请参阅电脑的产品说明书以获得更详
细的资料。
✤ 如果在数据传输期间USB电缆断开了与PC或者运动摄录一体机的连接
的话,数据传输将会停止并且数据有可能被损坏。
✤ 运动型摄录一体机在推荐的系统下正常工作与否取决于你的电脑系
统。例如, 电影有可能不正常播放。
Miscellaneous Information :
Connecting To Other Devices
其它信息 :连接到其它设备
Connecting to a TV monitor
连接到电视监视器
ENGLISH
DC IN
1. Connect the provided Audio/
Line Input
Video cable to the [Multi jack] of
VIDEO AUDIO
the Sports Camcorder.
(L) (R)
2. Connect the other end of the
cable to the TV set by matching
the colours of the terminals.
3. Turn on the TV and set the
TV's <Source> to the external
input the Sports Camcorder is
connected to.
◆ <Source> may be represented
as <Line In>, <Input>, <A/V
Input>, etc. depending on the
manufacturer.
4. Press the [POWER] button to
turn on the Sports Camcorder.
◆ Movie Record mode is displayed
on the TV screen.
5. Press the [PLAY] button or [Joystick(OK)] to switch to Movie
Play mode.
6. Move the [Joystick] left / right to select a movie and then
press the [Joystick(OK)].
◆ It begins playback.
◆ To pause playback, press the [Joystick(OK)].
[ Notes ]
✤ You can play back photo files as well as movie files.
✤ When you connect your Sports Camcorder to a TV, some
indicators may not partly appear.
✤ If you wish to input/output an image from another device to the
Sports Camcorder, you must first set <Line In/out> in movie mode.
➥page 51
文
你可以将运动型摄录一体机直接连接到TV上。设置适当的视频输入,在
电视上重放动态图像。
DC IN
You can connect your Sports Camcorder directly to a TV set. Set the
appropriate video input when viewing Sports Camcorder playback on
the TV.
中
1. 将配套的音频/视频电缆连接到运动
摄录一体机的多媒体接口。
2. 将线的另一端按照接口上对应的颜色
连接到TV上。
3. 打开电视并设置视频来源为运动摄录
一体机为信号输入源。
◆ 信号的再现有可能根据制造商的
不同会采用 <Source>(线路输
入)。
<Input>(输入),<Line In>(信号
输入),<A/V Input>(视频/音频
输入) 等不同的端口。
4. 按[电源]按钮打开运动摄录一体机。
◆ 视频录制模式会显示在电视屏幕
上。
5. 按下 [PLAY] 按纽或[摇杆(OK)]按
纽以开关视频模式。
6. 左/右移动 [摇杆]按钮选择一个电影然后按下 [摇杆(OK)]。
◆ 开始回放。
◆ 暂停回放, 按下[摇杆(OK)]。
[ 注意 ]
✤ 你可以象电影文件一样重放照片文件。
✤ 当你把运动摄录一体机连接到TV上时, 有些显示器可能不会显示。
✤ 如果你想从其它设备与运动摄录一体机之间进行图象的输入/输出,
首先你必须在视频录制模式下进行<线性输入/输出>设置。➥51页
127
ENGLISH
Miscellaneous Information :
Connecting To Other Devices
其它信息 :连接到其它设备
Connecting to a VCR / DVD Recorder
连接到录像机/DVD刻录机
You can connect your Sports Camcorder to a TV set through a VCR/
DVD Recorder.
你可以通过录像机/DVD刻录机把你的运动型摄录一体机连接到TV上。
1. Connect the provided
Audio/Video cable to the
[Multi jack] of the Sports
Camcorder.
Line Input
Line Output
2. 将线的另一端按照接口上对应
的颜色连接到录像机/DVD录放
机上
DC IN
DC IN
Line Input
4. Turn on the TV and set the
<Source> to the external
input the VCR/DVD
Recorder is connected.
文
1. 将配套的音频/视频线连接到
运动摄录一体机的多媒体接口
上。
VIDEO AUDIO
(L) (R)
2. Connect the other end of
the cable to the VCR/DVD
Recorder by matching the
colours of the terminals.
3. Connect the Audio/Video
cable from TV Input
to Video Output of the
VCR/DVD Recorder.
中
3. 将音频/视频电缆连接至视频
信号输出和电视信号 输入。
4. 打开电视并设置视频来源为录
像机/DVD刻录机为信号输入
源。
5. 打开录像机/DVD并设置视频来
源为已连接的运动摄录一体机
为信号输入源。
5. Turn on the VCR/DVD Recorder and set the <Source> to
the external input source where you connected the Sports
Camcorder.
[ Notes ]
✤ You can play back photo files as well as the movie files.
✤ If you wish to input/output an image from another device to the
Sports Camcorder, you must first set <Line In/out> in movie mode.
➥page 51
128
[ 注意 ]
✤ 你可以象电影文件一样重放照片文件。
✤ 如果你想从其它设备与运动摄录一体机之间进行图象的输入/输出,
首先你必须在电影模式下进行<线性输入/输出>设置。➥51页
Miscellaneous Information :
Connecting To Other Devices
ENGLISH
Recording unscrambled content from other
digital devices
You can connect other external digital devices to Sports Camcorder to
record unscrambled contents.
中
其它信息 :连接到其它设备
从其它数字设备录制内容
您可以将其它外部数码设备连接到运动摄录一体机。以录制未解码的内
容
1. 将配送的视频/音频线连接到运
动摄录一体机的多媒体端口。
1. Connect the provided Audio/
Video cable to the [Multi jack]
of the Sports Camcorder.
2. 匹配电缆和端子的颜色。将视
频/音频信号连接至数码设备
(DVD、DVC等)的外部输出端
子。
Line Output
DC IN
2. Connect the Audio/Video cable
to the external output terminal
of your digital devices (DVD,
DVC, etc.) by matching the
cable to the colours of the
terminals.
文
3. 按[电源]按钮打开运动摄录一体
机。
◆ 视频录制屏幕将会显示。
4. 按下[菜单]按纽。左右移动
[摇杆] 按钮并选择<Line In/
Out>(信号输入/输出)。
3. Press the [POWER] button to
turn on the Sports Camcorder.
◆ The Movie Record screen
appears.
4. Press the [MENU] button.
Move the [Joystick] left / right to select <Line In/Out>.
5. 上下移动 [摇杆]选择 <In>(输入) 然后按下[摇杆] 按钮上的(确
定)按纽。
5. Move the [Joystick] up / down to select <In> and then press
the [Joystick(OK)].
6. 播放其它设备上的影音文件。
6. Play back the other digital devices.
7. Press the [Record/Stop] button to start recording.
7. 按下 [录制/停止] 按纽开始录像。
8. 要停止录象, 再一次按下[录制/停止]按纽。
8. To stop recording, press the [Record/Stop] button again.
[ Note ]
✤ The quality of an input signal recorded through the Line input
terminal cannot be guaranteed unless it comes from digital devices
(DVD, DVC, etc.).
[ 注意 ]
✤ 通过信号输入端子录制的输入信号的质量将不保证 除非它来自数
码设备 (DVD, DVC等.)。
129
ENGLISH
Miscellaneous Information :
Printing Photos
其它信息 : 打印照片
Printing with DPOF
按照DPOF方式打印照片
DPOF (Digital Printing Order Format) defines the print information for
each photo on the memory card. You can easily make prints using
a DPOF-compatible printer or order copies from commercial digital
image developers.
DPOF (数码打印命令格式) 为记忆卡上的每张照片定义打印信息。你
可以使用DPOF兼容的打印机轻松实现打印或者从商业数码图片开发者手
里要求拷贝复印件。
Printing DPOF files in the memory card
1. Set the DPOF information for the photo you want to print.
➥page 72
2. Insert a memory card into the DPOF- supporting printer.
3. Follow the steps of the printer to print out photos.
中
文
从记忆卡中打印DPOF文件
1.为你想打印的照片设置DPOF信息。➥72页
2.将记忆卡插入到支持DPOF打印的打印机中。
3.按照打印机的步骤打印需要的照片。
[ Notes ]
[ 注意 ]
✤ For further details about printing photos, refer to the user's manual ✤ 获得更多有关照片打印的信息, 请查阅用户手册中与打印机相关的
of the printer.
内容。
✤ Printing may not be performed depending on types of printers.
✤ 根据不同型号的打印机照片有可能不能被打印。
In this case, download JPEG files directly to the PC and print them.
在这个情况下, 直接下载JPEG文件并打印。
130
ENGLISH
Maintenance : Cleaning and
Maintaining the Sports Camcorder
清理和维护摄录一体机
After using the Sports Camcorder
使用运动型摄录一体机后
✤ For safekeeping of the Sports Camcorder, follow these steps.
✓ Turn the Sports Camcorder off.
✓ Remove the battery pack ➥page 22.
✓ Remove the memory card ➥page 34.
✤ To prevent any damage to the LCD monitor, do not apply excessive
force on its moving parts.
✤ Do not drop or in anyway shock the Sports Camcorder.
✤ For prolonged use of the Sports Camcorder, avoid using it in places
subject to excessive humidity or dust.
✤ Do not leave the Sports Camcorder in places subject to:
✓ Excessive humidity, steam, soot or dust.
✓ Excessive shock or vibration.
✓ Extremely high (over 50°C or 122°F) or extremely low (under 0°C or
32°F) temperatures.
✓ Strong electromagnetic fields.
✓ Direct sunlight or in a closed car on a hot day.
✤ For the safe use of the battery pack, follow these.
✓ To conserve battery power, be sure to turn off the Sports Camcorder
when not in use.
✓ Battery consumption may vary depending on the condition of use.
Recording with many starts and stops, frequent zooming, and
recording in low temperatures will shorten actual recording times.
✓ Dispose of used battery packs promptly. Do not dispose of them in
fire.
✓ The battery pack will become warm during charging and use. This is
not a malfunction.
✓ The battery pack has a limited service life. If the period of use
becomes noticeably shorter with a normal charge, the battery pack is
at the end of its service life. Replace it with a new battery pack.
✤ For the safe use of the Memory Card, follow these.
✓ The memory card should be stored away from heaters and other heat
sources. Avoid storing memory cards under direct sunlight and avoid
electromagnetic fields.
✓ Do not power off any devices while transferring data, as this may
destroy the data.
✓ Back up your image data often to a hard disk or other permanent
storage media.
✓ Format the memory card periodically.
✓ When formatting the memory card, format in the Sports Camcorder.
✤ 为了保护摄录一体机,请遵循以下指示
✓ 关闭摄录一体机电源
✓ 取出电池组 ➥第22页
✓ 取出存储卡 ➥第34页
✤ 为了防止对LCD 显示器造成的任何伤害,请不要在其移动部件上用
力过大。
✤ 请勿跌落摄录一体机和让它受到其它任何形式的撞击。
✤ 为了延长摄录一体机的使用寿命,请避免在过度潮湿或布满灰尘的地
方使用摄录一体机。
✤ 请勿将摄录一体机放置在具有以下特征的地方:地方:
✓ 过度潮湿、蒸汽、烟雾或灰尘过多
✓ 过度震动或者摇动。
✓ 温度过高(超过 50°C 或 122°F以上) 或者温度过低
(低于0°C或32°F以下 )。
✓ 强大电磁场。
✓ 阳光直射或者热天里密封汽车内。
✤ 若要安全使用电池组.请遵循以下指示
✓ 为了节省电池电量,请确认在不使用摄录一体机时关闭
✓ 电池的消耗可能会根据使用情况不同而有所不同
录制时多次开始和停止、频繁使用缩放 、以及在低温下
录制,将会缩短实际的录制时间。
✓ 及时废弃用过的电池组,不要将他们丢在水里
✓ 电池组在充电和使用过程中可能会变热,这不是故障
✓ 电池组的使用寿命有限
如果使用的时间明显比正常充电时间短,即表示电池组
的使用寿命已经结束,请换上新的电池组
✤ 若要安全使用存储卡.请遵循以下指示
✓ 请将存储卡放置在远离加热器和其他热源的地方,避免
将存储卡放在直射阳光下和避开磁场的地方
✓ 不要在传输数据时关闭任何设备电源,因为这样可能做
会丢失数据
✓ 经常将你的图像数据备份到硬盘或其他永久性的存储媒
体上
✓ 定期格式化存储卡
✓ 格式化存储卡时,请在摄录一体机中格式化
中
文
131
Maintenance : Cleaning and
Maintaining the Sports Camcorder
清理和维护摄录一体机
Cleaning the Body
清理机身
ENGLISH
中
文
✤ To Clean the Exterior of the Sports Camcorder
✤ 清理摄录一体机的机身
✓ To clean the exterior, use a soft dry cloth. Wipe the body
✓ 若需要清洁 机身,请使用一块干燥的软布,轻轻的擦拭
gently.
Do not apply excessive force when cleaning, gently rub the
机身
surface.
若清洁时请勿用力过大,轻轻擦拭表面
✓ The LCD monitor surface should not be pressed. Use a soft dry
✓ 不要按压 LCD显示器表面,请使用干燥的软布清洁表面
✓ 若要清洁镜头,请使用可选的吹风机吹出尘埃和其他的
cloth to clean the surface.
✓ To clean the lens, use an optional air blower to blow out dirt
细小物
and other small objects. Do not wipe the lens with cloth or
不要用布或者您的手指擦拭镜头,如有必要,请使用镜
your fingers. If necessary, use lens cleaning paper.
头清洁纸
✓ Do not use thinner, alcohol or benzene for cleaning. Otherwise,
✓ 请不要使用稀释剂、酒精、苯清洁机身,否则可能损坏
the finish may be damaged.
光面表面
✓ Cleaning should be done only after the battery pack has been
✓ 只有在取出电池组,以及断开其他电源后才进行清洁
removed, and other power sources have been disconnected.
[ Note ]
✤ If the lens looks dimmer, turn off the Sports Camcorder and leave
it for about 1 hour.
[ 注意 ]
✤ 如果镜头看起来比较暗,请关闭摄录一体机然后让它保持关闭约1小
时
Using the Built-in Rechargeable Battery
使用内置充电电池
The Sports Camcorder incorporates a rechargeable lithium cell that
maintains the date and other settings even when the AC Power
Adapter and the battery are removed. The rechargeable lithium cell is
automatically recharged when the Sports Camcorder is used.
摄录一体机装入一个可充电的锂电池,以便在取出交流电源适配器和电
池时,可以保留时间和其他设置
可充电的锂电池会在使用摄录一体机时自动充电
Charging the Built-in Rechargeable Battery
为内置可充电电池充电
✤ If the Sports Camcorder is not used at all, the cell runs down in 5
days. In this case, connect the AC Power Adapter to the Sports
Camcorder and press the [POWER] button to turn on the Sports
Camcorder. Then leave it for 24 hours.
After that, set the date and other settings again.
✤ 如果完全不使用摄录一体机,该电池将会在5天内用完
在此情况下, 将交流电源适配器连接至摄录一体机,然后向下移动
[电源]选项以打开摄录一体机电源,之后让它保持打开24小时,接
着设置日期和其他选项
132
Maintenance : Cleaning and
Maintaining the Sports Camcorder
ENGLISH
Regarding the Battery
■
■
■
■
■
■
■
■
■
■
■
Battery pack performance decreases when the surrounding
temperature is 10°C (50°F) or below, and shortens the battery life.
In that case, do one of the following so that the durability of the
battery life can be extended for a longer period of time.
- Put the battery pack in a pocket to warm it up, and insert it in
your Sports Camcorder immediately prior to use.
- Use a large capacity battery pack.
Be sure to set the power button to off when not recording or
playing back. The battery power is also consumed in standby,
playback and pause mode.
Have your battery packs ready for two or three times the expected
recording time, and make trial recordings before making the actual
recording.
Do not expose the battery packs to water.
The battery pack is not water resistant.
Keep the battery out of reach of children. If it is swallowed, seek
medical assistance immediately.
Wipe the battery with a clean dry cloth to ensure proper contact.
Do not pick up the battery using metal tools as this may cause a
short circuit.
Do not short the battery or dispose of the battery in fire.
Do not disassemble the battery. The battery could explode or catch
fire.
Use only recommended batteries and accessories. Use of
batteries not expressly recommended for this equipment may
cause an explosion or leakage, resulting in fire, injury or damage
to the surroundings.
Install the battery according to the instructions. Improperly installed
batteries can cause damage to the sports camcorder.
When you do not use for a long time, remove the battery pack.
Otherwise, the battery may leak. To avoid damage to the product,
be sure to remove the battery when no charge remains.
中
文
清理和维护摄录一体机
关于电池
■
电池组的性能会在环境温度10°C(50°F ) 时或以下降低,
电池的使用寿命随之也会缩短。
在此情况下, 执行下列操作可使电池使用寿命的耐久力,延长
更长的一段时间。
- 将电池组放在口袋中使它变暖,然后在使用前立即放入您的
摄录一体机。
- 使用容量大的电池组(可选)
■
当不录制或播放时,请务必将电源开关设置位OFF,在待机、播
放和暂停模式下中也会消耗电池电源。
■
让你的电池组具备预期的两到三倍电容量,
以便在实际录制前先进行试录。
■
不要将电池组暴露在水中,电池组不具备防水功能。
■
将电池组放在儿童无法触及的地方。
如果儿童误吞下电池组,请立即寻求医学帮助。
■
使用清洁的干布擦拭电池组,以确保接点的接触良好。
■
不要用金属工具拿取电池组,因为这样有可能造成短路。
■
不要使电池短路或者将它投入火中。
不要分解电池组。
电池可能爆炸或者着火。
■
请仅使用建议的电池和附件。
本设备中使用非明确建议的电池可能会爆炸或漏电,而引起火
灾,受伤或损坏周围环境。
■
按照说明安装电池。
当您长时间不用电池组时请将它取出。否则,电池可能漏电 。
为了避免损坏产品,请确保在电池电量用完时将它取出。
133
ENGLISH
Maintenance : Cleaning and
Maintaining the Sports Camcorder
清理和维护摄录一体机
Using the Sports Camcorder Abroad
在国外使用摄录一体机
✤ Each country or region has its own electric and colour
systems. (NTSC/PAL)
✤ Before using the Sports Camcorder abroad, check the
following items:
Power Sources
✤ You can use the Sports Camcorder in any country or area
with the supplied AC Power Adapter where the power input
range is 100V - 240V, 50/60Hz.
✤ Use a commercially available AC plug adapter if necessary,
depending on the design of the local wall outlets.
✤ 每一个国家和地区都具备他们各自的电源和色彩制式。(NTSC/PAL)
✤ 在国外使用摄录一体机前,请检查以下事项:
Colour System
✤ You can view your video files using the built-in LCD monitor.
However, to view your recordings on a television set or to
copy them to a video cassette recorder (VCR), the television
set or the VCR must be PAL-compatible and have the
appropriate Audio / Video ports. Otherwise, you may need to
use a separate Video Format Transcoder (PAL-NTSC format
Converter).
Países / regiones con sistemas de colour compatibles con PAL:
Alemania, Arabia Saudita, Australia, Austria, Bélgica, Bulgaria, CEI,
China, Dinamarca, Egipto, España, Finlandia, Francia, Gran Bretaña,
Grecia, Holanda, Hong Kong, Hungría, India, Irak, Irán, Kuwait,
Libia, Malasia, Mauricio, Noruega, República Checa, República de
Eslovaquia, Rumania, Singapur, Siria, Suecia, Suiza, Tailandia,
Túnez, etc.
Países / regiones con sistemas de colour compatibles con NTSC:
América Central, Bahamas, Canadá, Corea, Estados Unidos,
Filipinas, Japón, México, Taiwán, etc.
134
中
文
电源设备
✤ 你可以在 具备电源 输入范围 100V - 240V, 50/60Hz的 任何国家
和地区, 通过随附的交流电源适配器使用摄录一体机。
✤ 若有必要,您可以根据当地的墙上插座设计,使用市场上销售的交
流电插头适配器。
色彩制式
✤ 您可以使用内置LCD显示器查看您的视频文件
但是,要在电视上查看你录制的或者将它复制到录像带(VCR),电
视机 或VCR必须与PAL兼容,并且具备适当的音频/视频端口。
否则,您可能需要一个单独的视频格式转换器 (PAL-NTSC格式转换
器)。
PAL制兼容国家/地区
澳大利亚, 奥地利, 比利时, 保加利亚, 中国, 独联体, 捷克共和
国, 丹麦, 埃及, 芬兰,法国, 德国, 希腊, 英国, 荷兰, 香港, 匈
牙利, 印度, 伊朗, 伊拉克, 科威特, 比利亚, 马拉西亚, 毛里求
斯, 挪威, 罗马尼亚去, 沙特阿拉伯, 新加坡, 斯洛伐克共和国,
西班牙, 瑞典, 瑞士, 叙利亚, 泰国, 突尼斯等等。
NTSC制兼容国家/地区
巴哈马群岛, 加拿大,中美洲, 日本, 墨西哥,菲律宾, 韩国, 台湾,
美国等等。
ENGLISH
中
Troubleshooting
故障排除
Self Diagnosis Display
Display
Not enough free
space
Corrupted file
Paper error
Informs that…
Not enough free space for
saving files .
The file is corrupted.
Paper has run out.
Ink error
File Error
Communication
Error
Low battery
Ink is low.
The file is wrong.
An error has occurred while
transferring data.
Battery is low.
Holding the key
The HOLD switch is locked.
Card error
The memory card is
corrupted.
Format the memory card.
Failed to write.
Not formatted
Write error
自检显示
Action
Check the space of internal memory or
the external memory.
Delete the corrupted file.
Check the paper in the printer. If there is
no paper, insert the paper.
Check if the ink or toner is low.
Check that the file is JPEG.
Disconnect the USB cable and connect it
again.
Charge the battery pack or connect the
AC Power Adapter.
Unlock the HOLD switch and operate the
Sports Camcorder.
Format the memory card or replace it
with a new one.
Format the memory card.
Check the memory space or format the
memory.
Delete the file.
The AVI or JPEG file that is not
supported. Check the supported file. on
page 30.
Unlock the memory card. (except MMC)
Read error
Not supported
format
Failed to read.
The format is not supported.
Write protected
Memory card is protected to
write.
The movie file is corrupted. Delete the corrupted file.
MPEG decoding
Error
✤
If these instructions do not solve your problem, contact your nearest Samsung dealer or
authorized service center/personnel.
Symptom
No power is
supplied
Date/Time is
wrong
Possible Causes
The power is not connected
properly
The battery is dead
The battery is too cold
The Date/Time is not set
文
Measure
Connect the AC Power Adapter
properly, page 25
Replace the dead Battery Pack
Warm up the battery or move to
warmer place
Set the Date/Time, page 104
显示屏
通知......
操作
空间不足
没有足够的空间保存文件
检查内部或者外部存储空间
损坏的文件.
文件已损坏
删除损坏的文件
纸张错误!
纸张不足
检查打印机里的纸张,如果没有纸
张,请添加
墨水错误!
墨水不足
检查墨水或者碳粉是否不足
文件错误!
文件不正确.
检查文件是否是JPEG格式
通信错误!
传输数据时出现错误
拔下USB电缆重新再连接
电池电量不足
电池中的电量低.
电池组充电或者连接交流电源适配
器
按住键
“HOLD”(保持)开关被锁 解除“HOLD”(保持)开关然后操作
定
摄录一体机
卡错误
存储记忆卡错误
格式化存储卡或者更换新的
未格式化
格式化存储卡
格式化存储记忆卡
写入错误
读取错误
无法写入
无法读取
不支持的格式
格式不被支持
写入保护
存储卡具有写入保护功能
检查存储空间或者格式化存储卡
删除文件.
不支持的 AVI 或 JPEG格式文件
请检查第30页中支持的文件
解锁存储卡 (除了MMC)
MPEG解码错误
视频文件已损坏
删除损坏的文件
✤
如果这份说明书解决不了您的问题, 请联系就近的(Samsung)三星经销商
或者授权服务中心/人员。
症状
可能原因
解决方法
不加电
电源未正确连接
电池电量已完
电池组太冷
正确连接交流电源适配器,请参照第25页
更换用完的电池组
使电池组暖化或者移动到温暖的地方
日期/时间错误
日期/时间未设置
设置日期和时间,请参照第104页
135
ENGLISH
中
Troubleshooting
Symptom
Focus does not adjust
automatically
The memory card will not
load properly
Possible Causes
Focus is set to manual mode
Recording is being done in a dark
place
Lens is covered with condensation
The memory card is in wrong
position
A foreign object is in the memory
card slot
Colour balance of picture is White balance adjustment is
not natural
required
The effect(Digital special effect) is
Digital zoom does not
applied
work
Files stored in the memory Memory card is protected
card cannot be deleted
File is locked
故障排除
Measure
Set focus to AUTO
Use the flash or light the
location
Clear the lens and check the
focus
Insert the memory card
properly, page 34
Clear the memory card slot
Set proper white balance,
pages 43, 61
Turn off the effect(Digital
special effect), pages 45, 63
Remove the protection tab of
memory card (except MMC)
Remove the lock on the file,
pages 54, 73, 81, 88, 93
Images on the LCD
Ambient is too bright
Adjust the brightness and
monitor appear dark
Ambient temperature is too low
angle of LCD
Low temperatures may
produce a dark LCD display
This is not a malfunction
Rear of the LCD monitor is Prolonged use of the LCD
Close the LCD monitor to turn
hot
monitor.
it off, or turn your device off to
cool down
Play, rewind and fast
The Photo Mode is selected
Select ‘Movie Mode’ and
forwarding do not work
select ‘Play’
Memory card cannot be
The Movie Mode is selected
Select ‘Photo Mode’ and
played back (Photo mode)
select ‘View’
No picture is taken
Not enough free memory space Delete files from the memory
is remaining
card or internal memory
Memory card is formatted by
Format the memory card on
different devices
the Sports Camcorder
Built-in flash does not fire Light is forced to cancel
Select different Flash mode,
Light is not available for recording page 64
Cannot record a movie
The ‘Photo Mode’ is selected
Select ‘Movie Mode’
image.
The LCD monitor turns off To save power consumption,
Operating any button will turn
the LCD monitor and Sports
the Sports Camcorder on
Camcorder's power turns off if
Pressing the button once
there is no button operation for a again will operate its function
certain period of time (depending
on operation mode).
136
文
症状
解决方法
解决方法
对焦无法自动调整
对焦设置为手动模式
录制在黑暗地方进行
镜头被露水遮盖
设置对焦为[AUTO]自动模式
使用闪光测速器或加亮所录制的地
方
使镜头恢复清晰然后检查对焦
存储卡无法正确存储
存储卡记忆位置错误
有异物掉入存储卡槽内
正确插入存储卡,请参照第34页
清洁存储卡槽内的异物
照片的颜色平衡不自然 需要调整白平衡
设置正确的白平衡, 43, 61页
LCD显示器的后部非常
使用LCD显示器过久
热
关闭效果(数码特殊效果), 45,
63页
去除存储卡上的保护舌片 (除了
MMC)
删除文件的锁定, 54, 73, 81,
88, 93页
调整LCD的亮度和角度
温度低可能会产生黑暗的LCD显示
屏
这不是故障
合上LCD显示器以将它关闭,或关
闭您的设备以将它冷却
播放, 倒带和快进无
已选定“照片模式”
法操作
选择‘视频模式’然后 选择‘播
放’
存储卡无法播放 (照
已选定“视频模式”
片模式)
选择‘照片模式’然后选择‘查
看’
数字缩放无法操作
应用效果(数码特殊效果)
存储在存储卡上的文
件无法删除
存储卡被写保护
文件被锁定
LCD上的图象看起来很 环境太亮
暗
环境温度太低
完全按下时没有拍摄
照片
剩余的可用存储空间不足
从存储卡删除文件
存储卡在其它设备上格式化 在摄像机上格式化存储卡
内置闪光不能触发
闪光被强制取消
闪光不可用于录制
设置其它闪光模式, 64页
无法录制视频
已选定‘照片模式’
选择‘视频模式’
LCD显示器关闭
为了节省电源消耗,LCD显示
操作任何按钮将可以打开摄像机
器和摄像机的电源会在特定
再次按下该按钮将可以操作它的功
时间内没有按钮操作时关闭
能
(取决于操作模式)
ENGLISH
中
Using the Menu
使用菜单
Movie
1. Record
Size
720x576
352x288
Quality
Super Fine
Fine
Normal
White Balance
Auto
Daylight
Fluorescent
Tungsten
Custom
Program AE
Auto
Sports
Spotlight
Sand/Snow
Effect
Off
Art
Mosaic
Sepia
Negative
Mirror
B&W
EIS
On
Off
Focus
AF
MF
BLC
On
Off
Digital Zoom
On
Off
Record Mode
TV
PC
Line In/Out
In
Out
MP3
Photo
2. Play
Play Mode
Play One
Play All
Repeat One
Repeat All
Lock
Lock
Multi Select
Lock All
Unlock All
Copy To
OK
Multi Select
All
文
1. Capture
2. View
1. Play
White Balance
Slide
Repeat
Auto
Daylight
Fluorescent
Tungsten
Custom
Program AE
Auto
Sports
Spotlight
Sand/Snow
Effect
Off
Art
Mosaic
Sepia
Negative
Mirror
B&W
Flash
On
Auto
Off
Continuous Shot
Off
3 shots
EIS
On
Off
Focus
AF
MF
BLC
On
Off
Digital Zoom
On
Off
Start
Interval (sec.)
Repeat
DPOF
Copies
Set All
Reset All
Lock
Lock
Multi Select
Lock All
Unlock All
Copy To
OK
Multi Select
All
Off
Repeat One
Repeat Folder
Repeat All
Shuffle Folder
Shuffle All
Equalizer
Off
Pop
Classic
Jazz
Lock
Lock
Multi Select
Lock All
Unlock All
Copy To
OK
Multi Select
All
视频
1. 录放
大小
720x576
352x288
质量
高清晰
佳
标准
白平衡
自动
室外
荧光
卤素灯
用户
编程AE
自动
运动
聚光
沙滩/ 雪地
效果
关
艺术
马赛克
仿旧
底片
镜像
黑白
手震补偿
输入
输出
2. 播放
播放模式
播放一个
播放全部
重复一个
重复全部
锁定
已锁定
多项选择
全部
取消全部
复制到
已选定
多项选择
全部
1. 拍摄
2. 查看
1. 播放
白平衡
幻灯片
重复
自动
室外
荧光
卤素灯
用户
编程AE
自动
运动
聚光
沙滩/ 雪地
效果
关
艺术
马赛克
仿旧
底片
镜像
黑白
闪光
开
自动
关
对焦
数字变焦
开
关
拷贝
选择所有l
重复所有
锁定
已锁定
多项选择
全部
取消全部
复制到
已选定)
多项选择
全部
均衡器
关
流行
经典
爵士
锁定
已锁定
多项选择
全部
取消全部
复制到
已选定
多项选择
全部
手震补偿
对焦
开
关
DPOF
关
重复一个
重复文件夹
重复所有
移动文件夹
移动所有
关
连续3 张
开
关
背光补偿
开始
间隔 (秒。)
重复
连续拍摄
开
关
AF
MF
MP3
照片
信号输入/输出
AF
MF
背光补偿
开
关
数字变焦
开
关
录制模式
TV
PC
137
ENGLISH
中
Using the Menu
Voice
Recorder
1. Record
2. Play
Play Mode
Play One
Play All
Repeat One
Repeat All
Lock
System
Settings
Storage Type
Copy To
OK
Multi Select
All
Lock
Lock
Multi Select
Lock All
Unlock All
Copy To
OK
Multi Select
All
File Info.
OK
USB Mode
Start-up
Mass Storage
PictBridge
PC-Cam
Series
Reset
Format
Internal
External
Memory Space
LCD Brightness
0%
...
100%
LCD Colour
0%
...
100%
Date/Time Set
Date Format
YY/MM/DD
DD/MM/YY
MM/DD/YY
Time Format
12 Hour
24 Hour
Date/Time
Off
Date
Time
Date/Time
138
Beep Sound
On
Off
000MB/000MB
File
Browser
录音机
Internal
External
File No.
Lock
Multi Select
Lock All
Unlock All
使用菜单
1. 录制
存储类型
蜂鸣音
2. 播放
内置
外部
开
关
播放模式
播放一个
播放所有
重复一个
重复所有
Movie Mode
Previous Mode
Reset
文件浏览器
USB 模式
大容量存储
PictBridge
PC-摄像机
锁定
OK
Language
English / Español /
Français / Português
/ Deutsch / Italiano /
Nederlands / Polski /
Русский /
/
已锁定
多项选择
全部
取消全部
复制到
已选定
多项选择
全部
系统设置
Auto Shut off
Demonstration
Off
5 Minutes
Play Now
Version Info
确定
语言
English / Español /
Français / Português
格式
内置
外部
000MB/000MB
/ Magyar / ไทย /
Off
5 Minutes
连续
初始化
视频模式
上一个模式
初始化
/ Deutsch / Italiano /
Nederlands / Polski /
Русский /
存储器空间
/ Iran / Arab
Українська / Svenska
文件号。
启动
LCD亮度
0%
...
锁定
已锁定
多项选择
全部
取消全部
复制到
已选定
多项选择
全部
文件信息。
确定
100%
LCD颜色
0%
...
100%
日期/时间设置
日期格式
YY/MM/DD
DD/MM/YY
MM/DD/YY
时间格式
12小时
24小时
日期/时间
关
日期
时间
日期/时间
/
/ Iran / Arab
/ Magyar / ไทย /
Українська / Svenska
自动关闭
关
5 分钟
演示
关
5 分钟
现在播放
版本信息
文
ENGLISH
Specifications
Model Name
VP-X205L/X210L/X220L
The Sports Camcorder System
Movie Recording System MPEG4 AVI Format
Photo System
JPEG (640x480, DPOF, Exif 2.2)
MP3
Stereo Playing
WAVE File Recording/Play (8KHz Sampling, 16 bit,
Voice
Stereo)
512MB (VP-X205L)
Internal memory
1GB (VP-X210L)
Memory
2GB (VP-X220L)
SD
External memory
MMC
CCD Pixel
1/6 inch CCD, 800K(Maximum)
Optical Zoom Ratio
x10
Focal Length
f=2.4~24mm, F1.8~2.4
Minimum Illumination
3.0 Lux
LCD monitor
2.0” Transmission Type, 230K
Connectors
USB
Mini-B type (USB 2.0 High Speed)
DC Power In connector Proprietary 3 pins connector
Earphones ø 3.5 Stereo
Video (1.0p_p, 75Ω), Audio (-7.5dBm 47KΩ, Stereo)
Multi jack AV Input/
Output
External CMOS Camera
General
Operating Temperature 0°C-40°C (32°F-104°F)
Operating Humidity
10%-80%
Power Source
3.8V (Li-Polymer Battery Pack), 4.8V (AC Adapter)
Power Consumption
2.8W (LCD ON)
Dimensions (WxHxD)
61.3 mm X 93.6 mm X 30.3 mm (Including the
Battery Pack)
Weight
150g
Built-in Microphone
Omni-directional condenser microphone
中
文
规格
VP-X205L/X210L/X220L
型号名称
摄像机系统
视频录制系统
照片系统
MP3
语音
存储器
CCD 像素
缩放比率
聚焦
最小照明
LCD 显示器
连接器
USB
直流电源输入连接器
耳机
通用连接器
微型-B 类 (USB 2.0高速)
特殊 3 针脚连接器
ø 3.5 立体声
视频 (1.0p_p, 75), 音频 (-7.5dBm 47K,
AV 输入/输出 立体声)
外部 CMOS照相机
一般
操作温度
操作湿度
操作电源
功耗
尺寸 (宽x高x深)
重量
内置麦克风
MPEG4 AVI 格式
JPEG (640x480, DPOF, Exif 2.2)
立体声播放
录制/播放WAVE文件 (8KHz采样, 16位, 立体声)
512MB (VP-X205L)
1GB (VP-X210L)
内置存储器
2GB (VP-X220L)
SD
外部存储器
MMC
1/6 英寸 CCD, 800K(最大)
x10
f=2,4~24 mm, F1,8~2,4
3.0 勒克斯
2.0英寸抗反射, 230K
0°C-40°C (32°F-104°F)
10%-80%
3.8V (锂聚合体电池组), 4.8V (交流电源适配
器)
2.8W (打开LCD)
61.3mm x 93.6mm x 30.3mm (包括锂聚合体电
池组)
150 g
全方位电容麦克风
139
ENGLISH
中
Specifications
Model Name
AC Adapter
Power Requirement
DC Output
Operating Temperature
Dimensions
Weight
VP-X205L/X210L/X220L
AC 100 ~ 240V, 50 / 60 Hz
DC 4.8V, 1.0 A
0°C (32°F) ~ 40° (104°F)
70 mm x 29.7 mm x 59.1 mm
85.1g
Model Name
XC-L2P
External CMOS Camera
CMOS Pixel
1/3 inch CMOS, 320K(Maximum)
Video Resolution
640x480 (VGA)
Exposure
Auto
White Balance
Auto
Focus Type
Fixed
Focal Length
f=5.56mm, F2.0
Connector
AV Output
Video (1.0Vp_p), Audio (-7.5dBm 47KΩ,
Input : mono)
General
Operating Temperature 0°C~40°C (32°F~104°F)
Operating Humidity
20%~80%
Power Source
B+ (3.2V~4.8V)
Power Consumption
0.7W
Dimensions (LxHxD)
94.5mm x 34.7mmx33mm
Weight
96g
Built-in Microphone
Omni-directional condenser microphone
The product design and specifications are subject to change without
notice for better performance and quality.
140
文
规格
型号名称
交流电源适配器
电源要求
直流输出
操作温度
尺寸
重量
VP-X205L/X210L/X220L
外置型号名称
CMOS照相机
CMOS 像素
视频分辨率
曝光
白平衡
聚焦类型
聚焦
连接器
AV输出
XC-L2P
一般
操作温度
操作湿度
操作电源
功耗
尺寸 (宽X高X深)
重量
内置麦克风
100V-240V de CA, 50/60 Hz
4,8V de CC, 1,0 A
0°C (32°F) ~ 40° (104°F
70 mm x 29,7 mm x 59,1 mm
85,1 g
1/3 英寸 CMOS, 320K(最大)
640 x 480 (VGA)
自动
自动
固定
f=5.56mm, F2.0
视频(1.0Vp_p), 音频(-7.5dBm 47K,输入
: 单声道)
0°~40°C (32°~104°F)
20%~80%
B+ (3,2 V ~ 4,8 V)
0,7 W
94,5mm x 34,7mm x 33mm
96g
全方位电容麦克风
本产品的设计和技术规格可能会修改,恕不另行通知
ENGLISH
中
Index
文
索引
-A-
AC Power Adapter ........................................................................................13, 25
AF(Auto Focus) .............................................................................................47, 67
Auto Shut off .....................................................................................................112
-B-
-A交流电源适配器 ................................................. 13, 25
AF(自动聚焦) .................................................. 47, 67
自动快门off ....................................................... 112
-B-
Battery Pack ..................................................................................................22~25
Beep Sound ......................................................................................................108
BLC ....................................................................................................................68
电池组群 ........................................................ 22~25
嗡鸣音............................................................ 108
背光补偿 ........................................................... 68
-CCharging the battery pack ..................................................................................25
Capturing.............................................................................................................57
Copy To...................................................................................... 55, 74, 82, 89, 94
Cleaning and Maintenance .......................................................................131~134
充电的电池组 ....................................................... 25
捕获 ............................................................. 57
复制到.............................................55, 74, 82, 89, 94
清洁与保养 .................................................... 131~134
-DDate&Time ........................................................................................................104
Demonstration ...................................................................................................113
Digital Zoom ..................................................................................................49, 69
DPOF ..........................................................................................................72, 130
DV Media Pro 1.0 .....................................................................................124, 125
-EEarphones ..........................................................................................................14
Effect .............................................................................................................45, 63
-FFile Browser ........................................................................................................90
File No. ...............................................................................................................99
Format ...............................................................................................................100
-JJoystick................................................................................................................28
-C-
-D数据&时间设置 .................................................... 104
演示 ............................................................. 113
数字变焦 ........................................................... 69
DPOF ......................................................... 72, 130
DV 媒体 Pro 1.0 ............................................ 124, 125
-E耳机 ............................................................. 14
效果 .......................................................... 45, 63
-F文件浏览 ........................................................... 90
文件编号 .......................................................... 99
格式化............................................................ 100
-J控制杆............................................................. 28
141
ENGLISH
中
Index
文
索引
-L-
Language ..........................................................................................................111
LCD Brightness .................................................................................................102
LCD Colour .......................................................................................................103
LOCK.......................................................................................... 54, 73, 81, 88, 93
-MMODE button ......................................................................................................27
MENU button ......................................................................................................28
MF(Manual Focus) ........................................................................................47, 67
-PPC Cam.............................................................................................................117
PictBridge ..........................................................................................................116
Program AE ..................................................................................................44, 62
-L语言 ............................................................ 111
LCD 亮度 ....................................................... 102
LCD 颜色 ....................................................... 103
锁定 ............................................. 54, 73, 81, 88, 93
-M模式按钮 .......................................................... 27
菜单按钮 .......................................................... 28
手动聚焦 ...................................................... 47, 67
-PPC 摄像头 ...................................................... 117
PictBridge....................................................... 116
自动程序曝光 .................................................. 44, 62
-Q-
-Q-
Quality .................................................................................................................42
质量 ............................................................. 42
-RReset .................................................................................................................110
-SStart-up Mode ...................................................................................................109
Sepia .............................................................................................................45, 63
Storage type ........................................................................................................97
-TTroubleshooting ........................................................................................135, 136
-UUSB ....................................................................................................................98
-VVersion Information ...........................................................................................114
Voice Record ......................................................................................................84
-WWhite Balance ...............................................................................................43, 61
-ZZooming In and Out ......................................................................................37, 58
142
-R复位 ............................................................ 110
-S向上启动模式 ..................................................... 109
仿旧 ......................................................... 45, 63
存储类型 .......................................................... 97
-T发现并修理故障 .............................................. 135, 136
-UUSB ............................................................. 98
-V翻译情报 ........................................................ 114
声音记录 ......................................................... 84
-W白平衡........................................................ 43, 61
-Z镜头变焦 ...................................................... 37, 58
ENGLISH
中
Contact SAMSUNG WORLD WIDE
If you have any questions or comments relating to Samsung products,
please contact the SAMSUNG customer care center.
Region Country
North America
Latin America
Europe
CIS
Customer
CANADA
MEXICO
U.S.A
ARGENTINE
BRAZIL
CHILE
COSTA RICA
ECUADOR
EL SALVADOR
GUATEMALA
JAMAICA
PANAMA
PUERTO RICO
REP. DOMINICA
TRINIDAD & TOBAGO
VENEZUELA
BELGIUM
CZECH REPUBLIC
DENMARK
FINLAND
FRANCE
GERMANY
HUNGARY
ITALIA
LUXEMBURG
NETHERLANDS
NORWAY
POLAND
PORTUGAL
SLOVAKIA
SPAIN
SWEDEN
U.K
RUSSIA
UKRAINE
AUSTRALIA
CHINA
HONG KONG
INDIA
Asia Pacific
INDONESIA
JAPAN
MALAYSIA
PHILIPPINES
SINGAPORE
THAILAND
TAIWAN
Middle East & Africa VIETNAM
SOUTH AFRICA
U.A.E
Care Center
1-800-SAMSUNG (726-7864)
01-800-SAMSUNG (726-7864)
1-800-SAMSUNG (726-7864)
0800-333-3733
0800-124-421
800-726-7864(SAMSUNG)
0-800-507-7267
1-800-10-7267
800-6225
1-800-299-0013
1-800-234-7267
800-7267
1-800-682-3180
1-800-751-2676
1-800-7267-864
1-800-100-5303
02 201 2418
844 000 844
38 322 887
09 693 79 554
08 25 08 65 65 (0,15€/Min)
01805 - 121213 (€ 0,12/Min)
06 40 985 985
199 153 153
02 261 03 710
0900 20 200 88 (€ 0.10/Min)
231 627 22
0 801 801 881
80 8 200 128
0850 123 989
902 10 11 30
08 585 367 87
0870 242 0303
8-800-200-0400
8-800-502-0000
1300 362 603
800-810-5858, 010- 6475 1880
2862 6001
3030 8282
1600 1100 11
0800-112-8888
0120-327-527
1800-88-9999
1800-10-SAMSUNG (7267864)
1800-SAMSUNG (7267864)
1800-29-3232
02-689-3232
0800-329-999
1 800 588 889
0860 7267864 (SAMSUNG)
800SAMSUNG (7267864)
Web Site
www.samsung.com/ca
www.samsung.com/mx
www.samsung.com
www.samsung.com/ar
www.samsung.com/br
www.samsung.com/cl
www.samsung.com/latin
www.samsung.com/latin
www.samsung.com/latin
www.samsung.com/latin
www.samsung.com/latin
www.samsung.com/latin
www.samsung.com/latin
www.samsung.com/latin
www.samsung.com/latin
www.samsung.com/latin
www.samsung.com/be
www.samsung.com/cz
www.samsung.com/dk
www.samsung.com/fi
www.samsung.com/fr
www.samsung.de
www.samsung.com/hu
www.samsung.com/it
www.samsung.lu
www.samsung.com/nl
www.samsung.com/no
www.samsung.com/pl
www.samsung.com/pt
www.samsung.com/sk
www.samsung.com/es
www.samsung.com/se
www.samsung.com/uk
www.samsung.ru
www.samsung.com/ur
www.samsung.com/au
www.samsung.com.cn
www.samsung.com/hk
Region Country
North America
Latin America
Europe
CIS
www.samsung.com/th
www.samsung.com/tw
www.samsung.com/vn
www.samsung.com/za
www.samsung.com/mea
Customer
CANADA
MEXICO
U.S.A
ARGENTINE
BRAZIL
CHILE
COSTA RICA
ECUADOR
EL SALVADOR
GUATEMALA
JAMAICA
PANAMA
PUERTO RICO
REP. DOMINICA
TRINIDAD & TOBAGO
VENEZUELA
BELGIUM
CZECH REPUBLIC
DENMARK
FINLAND
FRANCE
GERMANY
HUNGARY
ITALIA
LUXEMBURG
NETHERLANDS
NORWAY
POLAND
PORTUGAL
SLOVAKIA
SPAIN
SWEDEN
U.K
RUSSIA
UKRAINE
AUSTRALIA
CHINA
HONG KONG
INDIA
www.samsung.com/in
www.samsung.com/id
www.samsung.com/jp
www.samsung.com/my
www.samsung.com/ph
www.samsung.com/sg
文
三星全球服务网
如果您对三星产品有任何咨询或建议 , 请联系三星客服中心
Asia Pacific
INDONESIA
JAPAN
MALAYSIA
PHILIPPINES
SINGAPORE
THAILAND
TAIWAN
Middle East & Africa VIETNAM
SOUTH AFRICA
U.A.E
Care Center
1-800-SAMSUNG (726-7864)
01-800-SAMSUNG (726-7864)
1-800-SAMSUNG (726-7864)
0800-333-3733
0800-124-421
800-726-7864(SAMSUNG)
0-800-507-7267
1-800-10-7267
800-6225
1-800-299-0013
1-800-234-7267
800-7267
1-800-682-3180
1-800-751-2676
1-800-7267-864
1-800-100-5303
02 201 2418
844 000 844
38 322 887
09 693 79 554
08 25 08 65 65 (0,15€/Min)
01805 - 121213 (€ 0,12/Min)
06 40 985 985
199 153 153
02 261 03 710
0900 20 200 88 (€ 0.10/Min)
231 627 22
0 801 801 881
80 8 200 128
0850 123 989
902 10 11 30
08 585 367 87
0870 242 0303
8-800-200-0400
8-800-502-0000
1300 362 603
800-810-5858, 010- 6475 1880
2862 6001
3030 8282
1600 1100 11
0800-112-8888
0120-327-527
1800-88-9999
1800-10-SAMSUNG (7267864)
1800-SAMSUNG (7267864)
1800-29-3232
02-689-3232
0800-329-999
1 800 588 889
0860 7267864 (SAMSUNG)
800SAMSUNG (7267864)
Web Site
www.samsung.com/ca
www.samsung.com/mx
www.samsung.com
www.samsung.com/ar
www.samsung.com/br
www.samsung.com/cl
www.samsung.com/latin
www.samsung.com/latin
www.samsung.com/latin
www.samsung.com/latin
www.samsung.com/latin
www.samsung.com/latin
www.samsung.com/latin
www.samsung.com/latin
www.samsung.com/latin
www.samsung.com/latin
www.samsung.com/be
www.samsung.com/cz
www.samsung.com/dk
www.samsung.com/fi
www.samsung.com/fr
www.samsung.de
www.samsung.com/hu
www.samsung.com/it
www.samsung.lu
www.samsung.com/nl
www.samsung.com/no
www.samsung.com/pl
www.samsung.com/pt
www.samsung.com/sk
www.samsung.com/es
www.samsung.com/se
www.samsung.com/uk
www.samsung.ru
www.samsung.com/ur
www.samsung.com/au
www.samsung.com.cn
www.samsung.com/hk
www.samsung.com/in
www.samsung.com/id
www.samsung.com/jp
www.samsung.com/my
www.samsung.com/ph
www.samsung.com/sg
www.samsung.com/th
www.samsung.com/tw
www.samsung.com/vn
www.samsung.com/za
www.samsung.com/mea
ENGLISH
THE SPORTS CAMCORDER IS
MANUFACTURED BY:
中
文
这款运动型摄录一体机的制造商是:
RoHS compliant
Our product complies with “The Restriction Of the use of
certain Hazardous Substances in electrical and electronic
equipment”, and we do not use the 6 hazardous materialsCadmium(Cd), Lead (Pb), Mercury (Hg), Hexavalent
Chromium (Cr+6), Poly Brominated Biphenyls (PBBs), Poly Brominated
Diphenyl Ethers(PBDEs)- in our products.
符合 RoHS 标准
我们的产品符合“在电子电气设备禁用某些有害物质”
指令规定,产品中不含 6 种有害物质,即镉 (Cd)、铅
(Pb)、汞 (Hg)、六价铬 (Cr+6)、聚合溴化联苯(PBB)、聚合
溴化联苯乙醚 (PBDE)。