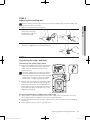
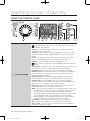
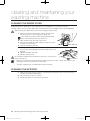
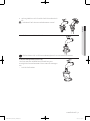
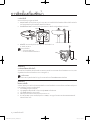
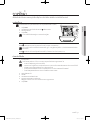
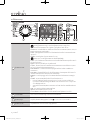
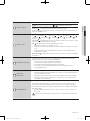
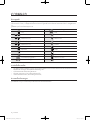
1
WF806U4SA** Washing Machine user manual This manual is made with 100% recycled paper. imagine the possibilities Thank you for purchasing this Samsung product. To receive a more complete service, please register your product at www.samsung.com/register WF806U4SA-03205H-02_EN.indd 1 2013-7-6 9:49:08 features of your new samsung washing machine Your new washing machine will change the way you feel about doing laundry. From its specialised Eco Bubble function to its energy efficiency, your new Samsung washing machine has all the benefits to make washing laundry as easy and pleasant as possible. • Energy Saving This model offers more efficient energy use compared to standard A rated machine with the special Bubble generator system and Samsung Inverter motor. • Eco Bubble Wash Samsung’s effective Eco Bubble delivers improved cleanliness with advanced fabric care. Eco Bubble allows detergent to distribute evenly and penetrate fabrics faster and deeper. • Less Noise & Vibration This Samsung washer performs very quietly minimizing noise and vibration with smart control technology, which enables it to maintain the lowest possible vibration. Thus, the drum keeps perfect balance. • Quick Wash No time to waste! Quick Wash program can help your busy life - now you can wash your favorite clothes (up to 2Kg) in 15 minutes! • Eco Drum Clean Using Eco Drum Clean helps to keep washing machine clean even without any chemical detergent or bleach. Keep your drum clean and odorless with specialized cleaning program. • Baby Care Your Samsung washing machine includes wash programs that add protection to the clothing of children with sensitive skin. These programs reduce skin irritation in children by minimizing detergent residue. In addition, these programs classify laundry into various types and the wash is performed according to the laundry characteristics so that children’s clothes feel refreshingly clean whenever they are put on. • Hand Wash Special care can be determined by the appropriate temperature, the gentle wash action and the appropriate amount of water. 2_ features WF806U4SA-03205H-02_EN.indd 2 2013-7-6 9:49:08 • Delay End Delay a cycle for up to 19 hours in one-hour increments and increase the convenience of using your washing machine especially when you have to go out. • Child Lock The Child Lock function ensures that curious little hands are kept out of your washing machine. This safety feature stops your children from playing with the operation of the washing machine, and alerts you when it is activated. • Aqua Hose & Leakage Sensor (Selected models) The smartly designed water safety system for Samsung washing machines includes an intelligent hose for stopping water leaks at the source and leakage sensor at the bottom. If the hose breaks or if water leaks are detected, an internal sponge will expand to block water from the spigot. • Ceramic Heater for Durability & Energy Saving (selected models) Our truly innovative Ceramic Heater is twice as durable as regular heaters. That saves you money on repairs. Plus, it eliminates the scale of hard water and save energy. • Digital Graphic Display The Digital Graphic Display control panel is clear and easy to use for minimum fuss and hassle. And while it is easy to operate, the Digital Graphic Display enables you to make quick and accurate adjustments to your wash for excellent washing results. This manual contains important information on the installation, use, and care of your new Samsung washing machine. Refer to it for descriptions of the control panel, instructions on how to use the washing machine, and tips for making the most of its state-of-the-art features and functions. The “Troubleshooting and information codes” section on page 37 tells you what to do if something goes wrong with your new washing machine. features _3 WF806U4SA-03205H-02_EN.indd 3 2013-7-6 9:49:08 safety information Congratulations on your new Samsung washer. This manual contains important information on the installation, use and care of your appliance. Please take time to read this manual to take full advantage of your washer’s many benefits and features. What you need to know about safety instructions Please read this manual thoroughly to ensure that you know how to safely and efficiently operate the extensive features and functions of your new appliance and retain it at a safe place near the appliance for your future reference. Use this appliance only for its intended purpose as described in this instruction manual. Warnings and Important Safety Instructions in this manual do not cover all possible conditions and situations that may occur. It is your responsibility to use common sense, caution, and care when installing, maintaining, and operating your washer. Because these following operating instructions cover various models, the characteristics of your washer may differ slightly from those described in this manual and not all warning signs may be applicable. If you have any questions or concerns, contact your nearest service center or find help and information online at www.samsung.com. Important safety symbols and precautions What the icons and signs in this user manual mean: WARNING Hazards or unsafe practices that may result in severe personal injury, death and/or property damage. CAUTION Hazards or unsafe practices that may result in personal injury and/or property damage. CAUTION To reduce the risk of fire, explosion, electric shock, or personal injury when using your washer, follow these basic safety precautions: Do NOT attempt. Do NOT disassemble. Do NOT touch. Follow directions explicitly. Unplug the power plug from the wall socket. Make sure the machine is grounded to prevent electric shock. Call the service centre for help. Note These warning signs are here to prevent injury to you and others. Please follow them explicitly. After reading this section, keep it in a safe place for future reference. Read all instructions before using the appliance. As with any equipment using electricity and moving parts, potential hazards exist. To safely operate this appliance, become familiar with its operation and exercise care when using it. 4_ safety information WF806U4SA-03205H-02_EN.indd 4 2013-7-6 9:49:09 Do not let children (or pets) play on or in your washing machine. The washing machine door does not open easily from the inside, and children may be seriously injured if trapped inside. WARNING This appliance can be used by children aged from 8 years and above and persons with reduced physical, sensory or mental capabilities or lack of experience and knowledge if they have been given supervision or instruction concerning use of the appliance in a safe way and understand the hazards involved. Children shall not play with the appliance. Cleaning and user maintenance shall not be made by children without supervision. Children should be supervised to ensure that they do not play with the appliance. If the plug (power supply cord) is damaged, it must be replaced by the manufacturer or its service agent or a similarly qualified person in order to avoid a hazard. This appliance should be positioned to be accessible to the power plug, the water supply tabs and the drain pipes. For washing machines with ventilation openings in the base, ensure that the opening is not obstructed by carpet or any other obstacles. Use the new hose-sets and old hose-sets should not be reused. safety information _5 WF806U4SA-03205H-02_EN.indd 5 2013-7-6 9:49:09 safety information WARNING SEVERE WARNING SIGNS FOR INSTALLATION The installation of this appliance must be performed by a qualified technician or service company. - Failure to do so may result in electric shock, fire, an explosion, problems with the product, or injury. The appliance is heavy, take care upon lifting it Plug the power cord into an AC 220-240V / 50Hz wall socket or higher and use the socket for this appliance only. In addition, do not use an extension cord. - Sharing a wall socket with other appliances using a power strip or extending the power cord may result in electric shock or fire. - Ensure that the power voltage, frequency and current are the same as those of the product specifications. Failure to do so may result in electric shock or fire. Plug the power plug into the wall socket firmly. Remove all foreign substances such as dust or water from the power plug terminals and contact points using a dry cloth on a regular basis. - Unplug the power plug and clean it with a dry cloth. - Failure to do so may result in electric shock or fire. Plug the power plug into the wall socket in the right direction so that the cord runs towards the floor. - If you plug the power plug into the socket in the opposite direction, the electric wires within the cable may be damaged and this may result in electric shock or fire. Keep all packaging materials well out of the reach of children, as packaging materials can be dangerous to children. - If a child places a bag over its head, it may result in suffocation. When the appliance or power plug or power cord is damaged, contact your nearest service centre. This appliance must be properly grounded. Do not ground the appliance to a gas pipe, plastic water pipe, or telephone line. - This may result in electric shock, fire, an explosion, or problems with the product. - Never plug the power cord into a socket that is not grounded correctly and make sure that it is in accordance with local and national codes. Do not install this appliance near a heater, inflammable material. Do not install this appliance in a humid, oily or dusty location, in a location exposed to direct sunlight and water (rain drops). Do not install this appliance in a location of low temperature - Frost may cause tubes to burst. Do not install this appliance in a location where gas may leak. - This may result in electric shock or fire. Do not use an electric transformer. - It may result in electric shock or fire. Do not use a damaged power plug, damaged power cord or loose wall socket. - This may result in electric shock or fire. Do not pull or excessively bend the power cord. Do not twist or tie the power cord. 6_ safety information WF806U4SA-03205H-02_EN.indd 6 2013-7-6 9:49:09 Do not hook the power cord over a metal object, place a heavy object on the power cord, insert the power cord between objects, or push the power cord into the space behind the appliance. - This may result in electric shock or fire. Do not pull the power cord, when unplugging the power plug. - Unplug the power plug by holding the plug. - Failure to do so may result in electric shock or fire. Do not lay the power cord and tubes where you may fall over them. CAUTION CAUTION SIGNS FOR INSTALLATION This appliance should be positioned in such a way that it is accessible to the power plug. - Failure to do so may result in electric shock or fire due to electric leakage. Install your appliance on a level and hard floor that can support its weight. - Failure to do so may result in abnormal vibrations, moves, noise, or problems with the product. WARNING SEVERE WARNING SIGNS FOR USING If the appliance is flooded, turn off the water & power supply immediately and contact your nearest service centre. - Do not touch the power plug with wet hands. - Failure to do so may cause electric shock. If the appliance generates a strange noise, a burning smell or smoke, unplug the power plug immediately and contact your nearest service centre. - Failure to do so may result in electric shock or fire. In the event of a gas leak (such as propane gas, LP gas, etc.), ventilate immediately without touching the power plug. Do not touch the appliance or power cord. - Do not use a ventilating fan. - A spark may result in an explosion or fire. Do not let children play in or on the washer. In addition, when disposing of the appliance, remove the washer door lever. - If trapped inside, the child may become trapped and suffocate to death. Make sure to remove the packaging (sponge, styrofoam) attached to the bottom of the washer before using it. safety information _7 WF806U4SA-03205H-02_EN.indd 7 2013-7-6 9:49:09 safety information Do not wash items contaminated with gasoline, kerosene, benzene, paint thinner, alcohol or other flammable or explosive substances. - This may result in electric shock, fire or an explosion. Do not open the washer door by force while it is operating (high-temperature washing/ drying/spinning). - Water flowing out of the washer may result in burns or cause the floor to be slippery. This may result in injury. - Opening the door by force may result in damage to the product or injury. Do not insert your hand under the washer. - This may result in injury. Do not touch the power plug with wet hands. - This may result in electric shock. Do not turn the appliance off by unplugging the power plug while an operation is in progress. - Plugging the power plug into the wall socket again may cause a spark and result in electric shock or fire. Do not let children or infirm persons use this washer unsupervised. Do not let children climb in the appliance. - Failure to do so may result in electric shock, burns or injury. Do not insert your hand or a metal object under the washer while it is operating. - This may result in injury. Do not unplug the appliance by pulling at the power cord, always grip plug firmly and pull straight out from the outlet. - Damage to the cord may cause short-circuit, fire and/or electric shock. Do not attempt to repair, disassemble, or modify the appliance yourself. - Do not use any fuse (such as cooper, steel wire, etc.) other than the standard fuse. - When repairing or reinstalling the appliance is required, contact your nearest service centre. - Failure to do so may result in electric shock, fire, problems with the product, or injury. If the water supply hose comes loose from the Water tap and floods the appliance, unplug the power plug. - Failure to do so may result in electric shock or fire. Unplug the power plug when the appliance is not being used for long periods of time or during a thunder/lightning storm. - Failure to do so may result in electric shock or fire. 8_ safety information WF806U4SA-03205H-02_EN.indd 8 2013-7-6 9:49:09 CAUTION CAUTION SIGNS FOR USING When the washer is contaminated by a foreign substance such as detergent, dirt, food waste, etc., unplug the power plug and clean the washer using a damp and soft cloth. - Failure to do so may result in discolouration, deformation, damage or rust. The front glass may be broken by a strong impact. Take care when using the washer. - When the glass is broken, it may result in injury. After a water supply failure or when reconnecting the water supply hose, open the Water Tap slowly. Open the Water Tap slowly after a long period of non-use. - The air pressure in the water supply hose or the water pipe may result in damage to a part or in water leakage. If a drain error occurs during an operation, check if there is a draining problem. - If the washer is used when it is flooded because of a draining problem, it may result in electric shock or fire due to electric leakage. Insert the laundry into the washer completely so that laundry does not get caught in the door. - If laundry gets caught in the door, it may result in damage to the laundry or the washer, or result in water leakage. Ensure that the Water Tap is turned off when the washer is not being used. - Ensure that the screw on the water supply hose connector is properly tightened. - Failure to do so may result in property damage or injury. Take care that the rubber seal and the front door glass are not contaminated by a foreign substance (e.g. waste, thread, hair, etc.) - If a foreign substance is caught in the door or the door is not completely closed, it may cause a water leakage. Open the Water Tap and check if the water supply hose connector is firmly tightened and that there is no water leaking before using the product. - If the screws or the water supply hose connector are loose, it may result in water leakage. The product you have purchased is designed for domestic use only. The use for business purposes qualifies as product misuse. In this case, the product will not be covered by the standard warranty provided by Samsung and no responsibility can be attributed to Samsung for malfunctions or damages resulting from such misuse. safety information _9 WF806U4SA-03205H-02_EN.indd 9 2013-7-6 9:49:09 safety information Do not stand on top of the appliance or place objects (such as laundry, lighted candles, lighted cigarettes, dishes, chemicals, metal objects, etc.) on the appliance. - This may result in electric shock, fire, problems with the product, or injury. Do not spray volatile material such as insecticide onto the surface of the appliance. - As well as being harmful to humans, it may also result in electric shock, fire or problems with the product. Do not place an object that generates a electromagnetic field near the washer. - This may result in injury due to a malfunction. Since the water drained during a high-temperature wash or drying cycle is hot, do not touch the water. - This may result in burns or injury. Do not wash, spin or dry water-proof seats, mats or clothing (*) unless your appliance has a special program for washing these items. - Do not wash thick, hard mats even if the washer mark is on the care label. - This may result in injury or damage to the washer, walls, floor or clothing due to abnormal vibrations. * Woollen Bedding, rain covers, fishing vests, ski pants, sleeping bags, diaper covers, sweat suits, and bicycle, motor cycle, car covers, etc. Do not operate the washer when the detergent box is removed. - This may result in electric shock or injury due to water leakage. Do not touch the inside of the tub during or just after drying as it is hot. - This may result in burns. Do not insert your hand into the detergent box after opening it. - This may result in injury as your hand may be caught by the detergent input device. Do not place any objects (such as shoes, food waste, animals) other than laundry into the washer. - This may result in damage to the washer, or injury and death in the case of pets due to the abnormal vibrations. Do not press the buttons using sharp objects such as pins, knifes, fingernails, etc. - This may result in electric shock or injury. Do not wash laundry contaminated by oils, creams or lotions usually found in skincare shops or massage clinics. - This may result in the rubber seal becoming deformed and water leakage. Do not leave metal objects such as a safety pin or hair pin, or bleach in the tub for long periods of time. - This may cause the tub to rust. - If rust starts appearing on the surface of the tub, apply a cleansing agent (neutral) to the surface and use a sponge to clean it. Never use a metal brush. Do not use dry cleaning detergent directly and do not wash, rinse, or spin laundry contaminated by dry cleaning detergent. - This may result in spontaneous combustion or ignition due to the heat of the oxidation of the oil. Do not use hot water from water cooling/heating devices. - This may result in problems with the washer. 10_ safety information WF806U4SA-03205H-02_EN.indd 10 2013-7-6 9:49:09 Do not use natural hand-washing soap for the washer. - If it hardens and accumulates inside the washer, it may result in problems with the product, discolouration, rust or bad odors. Do not wash large laundry items such as Bedding in the washing net. - Place socks and brassieres into the washing net and wash them with the other laundry. - Failure to do so may result in injury due to abnormal vibrations. Do not use hardened detergent. - If it accumulates inside the washer, it may result in water leakage. For washing machines with ventilation openings in the base, ensure that the opening is not obstructed by carpet or any other obstacles. Make sure that the pockets of all clothing to be washed are empty. - Hard, sharp objects, such as coins, safety pins, nails, screws, or stones can cause extensive damage to the appliance. Do not wash clothing with large buckles, buttons, or other heavy metal. WARNING SEVERE WARNING SIGNS FOR CLEANING Do not clean the appliance by spraying water directly onto it. Do not use the strong acid cleaning agent. Do not use benzene, thinner or alcohol to clean the appliance. - This may result in discolouration, deformation, damage, electric shock or fire. Before cleaning or performing maintenance, unplug the appliance from the wall socket. - Failure to do so may result in electric shock or fire. safety information _11 WF806U4SA-03205H-02_EN.indd 11 2013-7-6 9:49:09 contents setting up your washing machine 13 washing a load of laundry 21 cleaning and maintaining your washing machine 32 troubleshooting and information codes 37 39 40 cycle chart appendix 13Checking the parts 14Meeting installation requirements 14 Electrical supply and grounding 14 Water Supply 15Drain 15Flooring 15 Surrounding temperature 15 Alcove or closet installation 15Installing your washing machine 21Washing for the first time 21Basic instructions 22Using the control panel 25 Child lock 25 Sound off 26 Delay end 26 My cycle 27 Eco Bubble 28 Washing clothes using the cycle selector 29 Washing clothes manually 29Laundry guidelines 30Detergent and additives information 30 Which detergent to use 31 Detergent drawer 31 Liquid Detergent (Selected models) 32Eco Drum Clean 33Draining the washing machine in an emergency 34Cleaning the debris filter 34Cleaning the exterior 35Cleaning the detergent drawer and drawer recess 35Cleaning the water hose mesh filter 36Repairing a frozen washing machine 36Storing your washing machine 37Check these points if your washing machine... 38Information codes 39Cycle chart 40Fabric care chart 40Protecting the environment 40Declaration of conformity 41Sheet of household washing machines 12_ contents WF806U4SA-03205H-02_EN.indd 12 2013-7-6 9:49:10 setting up your washing machine Checking the parts Carefully unpack your washing machine, and make sure you’ve received all of the parts shown below. If your washing machine was damaged during shipping, or if you do not have all of the parts, contact Samsung Customer Service or your Samsung dealer. 01 setting up Be sure to have your installer follow these instructions closely so that your new washing machine works properly and so that you’re not at risk of injury when doing laundry. Work top Release lever Detergent drawer Control panel Plug Door Drain hose Emergency drain tube Levelling feet Tub Debris filter Filter Cover Spanner * Bolt hole covers Cold Cap fixer Hot (Selected model) Hose guide Water supply hose Liquid detergent box (Selected model) * Bolt hole covers : The number of bolt hole covers depends on the model (3~5 covers). setting up your washing machine _13 WF806U4SA-03205H-02_EN.indd 13 2013-7-6 9:49:10 setting up your washing machine Meeting installation requirements Electrical supply and grounding WARNING Never use an extension cord. Use only the power cord that comes with your washing machine. When preparing for installation, ensure that your power supply offers: • AC 220-240 V / 50 Hz fuse or circuit breaker • Individual branch circuit serving only your washing machine Your washing machine must be grounded. If your washing machine malfunctions or breaks down, grounding will reduce the risk of electric shock by providing a path of least resistance for the electric current. Your washing machine comes with a power cord having a three-prong grounding plug for use in a properly installed and grounded outlet. Never connect the ground wire to plastic plumbing lines, gas lines, or hot water pipes. Improperly connecting the equipment-grounding conductor can result in electric shock. Check with a qualified electrician or serviceman if you are unsure if the washing machine is properly grounded. Do not modify the plug provided with the washing machine. If it does not fit the outlet, have a proper outlet installed by a qualified electrician. Water Supply Your washing machine will fill properly when your water pressure is 50 kPa ~ 800 kPa. Water pressure less than 50 kPa may cause water valve failure, not allowing the water valve to shut off completely. Or, it may take the washing machine longer to fill than what the controls allow, resulting in your washing machine turning off. (A fill-time limit, designed to prevent overflows/ flooding if an internal hose becomes loose, is built into the controls.) The water taps must be within 120cm of the back of your washing machine for the provided inlet hoses provided to reach your washing machine. Most plumbing supply stores sell inlet hoses of various lengths up to 305 cm long. You can reduce the risk of leaks and water damage by: • Making water taps easily accessible. • Turning off taps when the washing machine is not in use. • Periodically checking for leaks at water inlet hose fittings. WARNING Before using your washing machine for the first time, check all connections at the water valve and taps for leaks. 14_ setting up your washing machine WF806U4SA-03205H-02_EN.indd 14 2013-7-6 9:49:10 Drain Samsung recommends a standpipe height of 65cm. The drain hose must be routed through the drain hose clip to the standpipe. The standpipe must be large enough to accept the outside diameter of the drain hose. The drain hose is attached at the factory. For best performance, your washing machine must be installed on a solidly constructed floor. Wood floors may need to be reinforced to minimize vibration and/or unbalanced loads. Carpeting and soft tile surfaces are contributing factors to vibrations and the tendency for your washing machine to move slightly during the spin cycle. Never install your washing machine on a platform or poorly supported structure. 01 setting up Flooring Surrounding temperature Do not install your washing machine in areas where water may freeze, since your washing machine always retains some water in its water valve, pump, and hose areas. Frozen water in the lines can cause damage to belts, the pump, and other components. Alcove or closet installation To operate safely and properly, your new washing machine requires minimum clearances of: Sides – 25 mm Top – 25 mm Rear – 50 mm Front – 465 mm If both the washing machine and a dryer are installed together, the front of the alcove or closet must have at least 465 mm unobstructed air opening. Your washing machine alone does not require a specific air opening. Installing your washing machine STEP 1 Selecting a location Before you install the washing machine, make sure the location: • • • • • • Has a hard, level surface without carpeting or flooring that may obstruct ventilation Is away from direct sunlight Has adequate ventilation Will not be freezing (below 0 ˚C) Is away from heat sources such as oil or gas Has enough space so that the washing machine doesn’t stand on its power cord setting up your washing machine _15 WF806U4SA-03205H-02_EN.indd 15 2013-7-6 9:49:11 setting up your washing machine STEP 2 Removing the shipping bolts Before installing the washing machine, you must remove all shipping bolts from the back of the unit. 1. Loosen all the bolts with the supplied wrench. Option 2. Hold the bolt with the spanner and pull it through the wide section of the hole. Repeat for each bolt. 3. Fill the holes with the supplied plastic covers. Option Option 4. Store the shipping bolts away safely in case you have to move the washing machine in the future. WARNING Packaging materials can be dangerous to children; keep all packaging material (plastic bags, polystyrene, etc.) well out of the reach of children. 16_ setting up your washing machine WF806U4SA-03205H-02_EN.indd 16 2013-7-6 9:49:11 STEP 3 Adjusting the Levelling feet When installing your washing machine, ensure that the power plug, the water supply and the drain are easily accessible. 01 setting up 1. Slide the washing machine into position. 2. Level your washing machine by turning the levelling feet in and out as necessary by hand. 3. When your washing machine is level, tighten the nuts using the wrench supplied with your washing machine. STEP 4 Connecting the water and drain Connecting the water supply hose 1. Take the L-shaped arm fitting for the cold water supply hose and connect it to the cold water supply intake on the back of the machine. Tighten by hand. Option The water supply hose must be connected to the washing machine at one end and to the water tap at the other. Do not stretch the water supply hose. If the hose is too short, replace the hose with a longer, high pressure hose. 2. Connect the other end of the cold water supply hose to your sink’s cold water tap and tighten it by hand. If necessary, you can reposition the water supply hose at the washing machine end by loosening the fitting, rotating the hose, and retightening the fitting. For selected models with an additional hot water intake: 1. Take the red L-shaped arm fitting for the hot water supply hose and connect it to the hot water supply intake on the back of the machine. Tighten by hand. 2. Connect the other end of the hot water supply hose to your sink’s hot water tap and tighten it by hand. 3. Use a Y-piece if you only want to use cold water. setting up your washing machine _17 WF806U4SA-03205H-02_EN.indd 17 2013-7-6 9:49:11 setting up your washing machine Connecting the water supply hose 1. Remove the adaptor from the water supply hose. Adaptor Water supply hose 2. First, using a ‘+’ type screwdriver, loosen the four screws on the adaptor. Next, take the adaptor and turn part (2) following the arrow until there is a 5 mm gap. 1 5 mm 2 3. Connect the adaptor to the water tap by tightening the screws firmly while lifting the adaptor upwards. Turn part (2) following the arrow and connect (1) and (2). Water tap 1 2 4. Connect the water supply hose to the adaptor. When you release part (3), the hose automatically connects to the adaptor making a ‘click’ sound. After you have connected the water supply hose to the adaptor, ensure that it is connected correctly by pulling the water supply hose downwards. 3 5. Connect the other end of the water supply hose to the inlet water valve at the rear of the washing machine. Screw the hose clockwise all the way in. Option 18_ setting up your washing machine WF806U4SA-03205H-02_EN.indd 18 2013-7-6 9:49:12 6. Turn on the water supply and ensure that no water leaks from the water valve, tap or adaptor. If there is a water leaks, repeat the previous steps. WARNING Do not use your washing machine if there is a water leak. This may cause electric shock or injury. ✗ 01 setting up ✗ • If the water tap has a screw type tap, connect the water supply hose to the tap as shown. Use the most conventional type of tap for the water supply. In case the tap is square or too big, remove the spacing ring before inserting the tap into the adaptor. Connecting the Aqua Hose (Selected models) The Aqua Hose was invented for perfect leakage protection. It is attached to the water supply hose and automatically cuts off the water flow if the hose is damaged. It also displays a warning indicator. • Connect the water supply hose to the tap as shown. setting up your washing machine _19 WF806U4SA-03205H-02_EN.indd 19 2013-7-6 9:49:12 setting up your washing machine Connecting the drain hose The end of the drain hose can be positioned in three ways: 1. Over the edge of a wash basin: The drain hose must be placed at a height of between 60 and 90 cm. To keep the drain hose spout bent, use the supplied plastic hose guide. Secure the guide to the wall with a hook or to the tap with a piece of string to prevent the drain hose from moving. 2. ln a sink drain pipe branch: The drain pipe branch must be above the sink siphon so that the end of the hose is at least 60 cm above the ground. 60 ~ 90 cm Drain hose Hose guide The standpipe drain requires; • minimum diameter 5 cm. • minimum carry-away capacity 60 liter per minute. 60 ~ 90 cm 3. ln a drain pipe: We recommend using a 65 cm high vertical pipe; it must be no shorter than 60 cm and no longer than 90 cm. STEP 5 Powering your washing machine Plug the power cord into a wall sockets, an AC 220-240V / 50Hz approved electrical outlet protected by a fuse or circuit breaker. (For more information on electrical and grounding requirements, see page 14.) Test run Make sure that you install your washing machine correctly by running the Rinse+Spin cycle after the installation is complete. STEP 6 Calibration mode Samsung washing machine detects the laundry weight automatically. For more accurate weight detection, please run Calibration Mode after the installation. Calibration mode is done by following the steps below. 1. Remove laundry or any contents in the machine and turn off the machine. 2. Press the Temp button and Delay End button simultaneously, and press the Power button in addition. Then the machine turns on. 3. Press the Start button to activate “Calibration Mode”. 4. The drum rotates clockwise and counterclockwise approximately for 3 minutes. 5. When “Calibration Mode” is finished, “END(En)” appears on the display, and the machine automatically turns off. The washing machine is now ready for use. 20_ setting up your washing machine WF806U4SA-03205H-02_EN.indd 20 2013-7-6 9:49:13 washing a load of laundry With your new Samsung washing machine, the hardest part of doing laundry will be deciding which load to wash first. Washing for the first time 1. Press the Power button. 2. Add a little detergent to the detergent compartment the detergent drawer. 3. Turn on the water supply to the washing machine. 4. Press the Start/Pause button. in This will remove any water that might be left over in the machine from the manufacturer’s test run. Compartment Compartment :D etergent for prewash, or starch. :D etergent for the main wash, water softener, pre-soaking agent, bleach and stain removal product. 02 Washing a load of laundry Before washing laundry for the first time, you must run a complete empty cycle (i.e. no laundry). To use liquid detergent, use the liquid detergent box (refer to page 31 of the manual for the corresponding model). Do not add powdered detergent into the liquid detergent box. Compartment :A dditives, e.g. fabric softener or former (fill no higher than lower edge (MAX) of “A”). Basic instructions 1. Load your laundry into the washing machine. WARNING Do not overload the washing machine. To determine the load capacity for each type of laundry, refer to the chart on page 30. • Make sure that laundry is not caught in the door, as this may cause a water leak. • Washing detergent may remain in the front rubber part of the washer after a wash cycle. Remove any remaining detergent, as they may cause a water leak. • Do not touch the door glass while your washing machine is running or it may be hot. • Do not open the detergent drawer or the debris filter while your washing machine is running or you might be exposed to hot water or steam. • Do not wash water-proofed items in normal cycle except outdoor care program. 2. 3. 4. 5. Close the door until it latches. Turn the power on. Add detergent and additives to the dispenser drawer. Select the appropriate cycle and options for the load. The Wash Indicator light will illuminate and the estimated cycle time will appear in the display. 6. Press the Start/Pause button. washing a load of laundry _21 WF806U4SA-03205H-02_EN.indd 21 2013-7-6 9:49:13 washing a load of laundry Using the control panel 1 2 3 4 5 6 7 8 9 10 11 12 13 Select the tumble pattern and spin speed for the cycle. For detailed information, refer to “Washing clothes using the cycle selector”. (see page 28) Cotton - For average or lightly soiled cottons, bed linen, table linen, underwear, towels, shirts, etc. Synthetics - For averagely or lightly soiled blouses, shirts, etc., made of polyester (diolen, trevira), polyamide (perlon, nylon) or other similar blends. Denim - A higher water level in the main wash and extra rinse ensure that no washing powder remains that may mark your clothing. Bedding - For bed spread, bed sheet, Bedding cover etc. Wash under 2.5 kg and only 1 kind of Bedding to achieve the best result. 1 CYCLE SELECTOR Dark Garment - Additional rinses and reduced spinning ensure that your favourite dark clothes are washed gently and rinsed thoroughly. Daily Wash - Use for everyday items such as underwear and shirts. Eco Drum Clean - Use for drum cleaning. It cleanses dirt and bacteria of drum. Regular use (after every 40 washes) is recommended. No detergent or bleach needed. Super Eco Wash - Low temperature Eco Bubble ensures that you achieve perfect wash results while allowing effective energy saving. Outdoor Care - Use for outdoor wear such as mountain clothes, skiwear, and sports wear. Fabrics include functional technology finishes and fibers such as spandex, stretch, and micro-fiber. Baby Care - High temperature wash and extra rinses ensure that no washing powder remains to mark your thin clothes. Wool - Only for machine-washable wool. A load should be less than 2.0 kg. • The wool course washes the laundry using gentle cradling actions. During the wash, the gentle cradling and soaking actions are continued to protect the wool fibers from shrinkage / distortion and for a super gentle clean. This stop operation is not a problem. • Neutral detergent is recommended for wool course, for improved washing results and for improved care of the wool fibers. Hand Wash - A very light wash cycle as gentle as a hand wash. Spin - Performs an additional spin cycle to remove more water. Rinse + Spin - Use for a load that needs rinsing only or to add rinseadded fabric softener to a load. 22_ washing a load of laundry WF806U4SA-03205H-02_EN.indd 22 2013-7-6 9:49:14 DIGITAL GRAPHIC DISPLAY Displays the remaining wash cycle time, all cycle information, and error messages. 3 TEMP SELECTION BUTTON Press this button repeatedly to cycle through the available water temperature options: (Cold Water , 20 ˚C, 30 ˚C, 40 ˚C , 60 ˚C and 95 ˚C). RINSE SELECTION BUTTON Press this button to add additional rinse cycles. The maximum number of rinse cycles is five. 4 Press the button repeatedly to cycle through the available speeds for the spin cycle. WF806U4 5 6 7 8 SPIN SELECTION BUTTON , , 400, 800, 1200, 1400 rpm “No spin ” - The laundry remains in the drum and no spin cycle is performed after the final drain. “Rinse Hold ” - The laundry remains soaking in the final rinse water. Before the laundry can be unloaded, either a Drain or Spin cycle must be performed. OPTION SELECTION BUTTON Press this button repeatedly to cycle through the options: Soak Intensive Prewash Soak + Intensive Soak + Prewash Intensive + Prewash Soak + Intensive + Prewash off “Prewash ”: Press this button to select pre-wash. Pre-wash is only available with: Cotton, Synthetics, Denim, Bedding, Dark Garment, Daily Wash, Super Eco Wash, Baby Care. “Soak ”: Use this option to effectively remove stains from your laundry by soaking your laundry. • The Soak function is performed 13 minutes into the wash cycle. • The Soak function continues for 30 minutes with six cycles, where one cycle is a soak cycle that spins for 1 minute and stands still for 4 minutes. • The Soak function is only available for the following wash programs: Cotton, Synthetics, Denim, Bedding, Daily Wash, Super Eco Wash , Baby Care. “Intensive ”: Press this button when the laundry is heavily soiled and needs to be washed intensively. The cycle time is increased for each cycle. Eco Bubble SELECTION BUTTON Eco Bubble selection is turned on as a default. Press the Eco Bubble option button once to deselect and the Bubble Generator OFF (shown on the panel), press it again to turn the function back ON. • Some wash cycles must have Eco Bubble option ON (will show on the panel, and the Generator will turn on automatically). • Other wash cycles do not need this option and automatically turn the Generator OFF. • On many cycles, you can manually adjust this option, which will visibly affect wash time on the panel to achieve results (please see page 27 for more information). EASY IRON SELECTION BUTTON Press this button to prepare your laundry so that it can be easily ironed by reducing the wrinkles during the spin cycle. • Easy Iron is only available for the following wash programs: Cotton, Synthetics, Denim, Bedding, Dark garment, Daily wash, Super Eco Wash, Baby Care • When Easy Iron is selected, you can set the spin cycle speed up to 800 rpm. (If you select Easy Iron with a spin cycle speed set to higher than 800 rpm, the spinning speed is automatically changed to 800 rpm.) 02 Washing a load of laundry 2 washing a load of laundry _23 WF806U4SA-03205H-02_EN.indd 23 2013-7-6 9:49:15 washing a load of laundry 9 QUICK WASH SELECTION BUTTON For lightly soiled garments and less than 2 kg laundry that you require quickly. It takes about minimum 15 minute, but can vary from the indicated values depending on water pressure, water hardness, water inlet temperature, room temperature, type and amount of washing and degree of soiling, utilized detergent unbalaced load, fluctuation in the electricity supply and extra options selected. • Press this button repeatedly to choose cycle time: 15 min 20 min 30 min 40 min 50 min 1 hr Off WARNING Powdered/Liquid detergent should be under 20 g (for 2 kg load) or detergent may remain on the clothes. 10 DELAY END SELECTION BUTTON Press this button repeatedly to cycle through the available Delay End options (from 3 hours to 19 hours in one hour increments). The hour displayed indicates the time when the wash cycle will be finished. 11 START/PAUSE SELECTION BUTTON Press to pause and restart a cycle. 12 MY CYCLE SELECTION BUTTON Choose your favorite cycle including temperature, spin, soil level, option, etc. POWER BUTTON Press it once to turn your washing machine on, press it again to turn your washing machine off. If the washing machine is left on for more than 10 minutes without any buttons being touched, the power automatically turns off. 13 24_ washing a load of laundry WF806U4SA-03205H-02_EN.indd 24 2013-7-6 9:49:15 Child lock The Child Lock function allows you to lock the buttons so that the wash cycle you’ve chosen can’t be changed. Activating/Deactivating 02 Washing a load of laundry If you want to activate or deactivate the Child Lock function, press the Temp and Rinse buttons at the same time for 3 seconds. “Child Lock ” will be lit when this feature is activated. When the Child Lock function is activated, only the Power button works. The Child Lock function remains on even after the power is turned on and off or after the disconnecting and reconnecting the power cord. 3 SEC. Sound off The Sound Off function can be selected during all courses. When this function is selected, sound is turned off for all courses. Even if the power is turned on and off repeatedly, the setting is retained. Activating/Deactivating If you want to activate or deactivate the Sound Off function, press the Spin and Option buttons at the same time for 3 seconds. The “Sound Off ” will be lit when this feature is activated. 3 SEC. washing a load of laundry _25 WF806U4SA-03205H-02_EN.indd 25 2013-7-6 9:49:16 washing a load of laundry Delay end You can set the washing machine to finish your wash automatically at a later time, choosing a delay of between 3 to 19 hours (in 1 hour increments). The hour displayed indicates the time at which the wash will be finished. 1. Manually or automatically set your washing machine according to the type of laundry you are washing. 2. Press the Delay End button repeatedly until the delay time is set. 3. Press the Start/Pause button. The “Delay End ” indicator will be lit, and the clock will begin counting down until it reaches the set time. 4. To cancel a Delay End function, press the Power button and then turn the washing machine on again. My cycle Allows you to activate your custom wash (temperature, spin, soil level, etc.) with one button convenience. By pushing the My Cycle button, press the My Cycle button to load and use the saved My Cycle options. The “My Cycle” light will indicate activation. Also, the chosen course and option lights will flicker. You can set all options as follows in the My Cycle mode. 1. Turn the water supply on. 2. Press the Power button. 3. Select cycle using the Cycle Selector. 4. After cycle selection, set each option. See the “Cycle Chart” on page 39 for available option settings with each cycle. 5. You can then store the selected cycle and options by pressing and holding the My Cycle button for longer than 3 seconds in My Cycle mode. The cycle and options you select will be displayed the next time you choose the My Cycle function. You can change the My Cycle settings by repeating the same process above. The last used setting will be displayed the next time you choose the My Cycle function. If you press My Cycle and release it within 3 seconds, the previously saved course and options appear. If you press and hold My Cycle for 3 second or longer, the currently set course and options are saved and the LED blinks for 3 seconds. 26_ washing a load of laundry WF806U4SA-03205H-02_EN.indd 26 2013-7-6 9:49:16 Eco Bubble Eco Bubble allows detergent to distribute evenly and penetrate fabrics faster and deeper. The bubble function is available in all courses except for Eco Drum Clean course and the function availability is as follows. Bubble function Canceling the bubble function Available Available Not available Not available - • A different bubble function may be applied depending the course. Eco Bubble selection is default. Press it once to deselect bubble option, press it again to select bubble option. 1. 2. 3. 4. Open the door, place the laundry inside the wash tub and close the door. Press the Power button. Select a function. Place the appropriate amount of detergent and fabric softener into the corresponding compartments depending on the amount of laundry and close the detergent drawer. • Add the appropriate amount of detergent into the detergent compartment , and add the fabric softener just under the fiber softener to softener compartment base line (MAX) of “A”). • When the Prewash course is selected, add detergent into the prewash compartment as well. • To use liquid detergent, leave the liquid detergent box in the drawer(refer to “Liquid Detergent” section on page 31). 02 Washing a load of laundry Course Cotton, Synthetics, Denim, Bedding, Dark Garment, Daily Wash Super Eco Wash, Outdoor Care, Baby Care, Wool, Hand Wash Eco Drum Clean Do not add powdered detergent into the liquid detergent box. 5. Press the Start/Pause button. • Press the Start/Pause button to start the wash. • The amount of the laundry is automatically detected and the laundry is washed. • Once a washing machine operation begins, you cannot add or select the bubble function. • Enough bubbles are generated with the specified amount of detergent. • Please clean the Debris filter frequently. Periodic cleaning helps generate sufficient bubbles. • Depending on the detergent and the laundry, the bubbles may be absorbed and seem like a small quantity. • Although bubbles are generated once the wash begins, it may take several minutes for users to see them. washing a load of laundry _27 WF806U4SA-03205H-02_EN.indd 27 2013-7-6 9:49:16 washing a load of laundry Washing clothes using the cycle selector Your new washing machine makes washing clothes easy, using Samsung’s “Fuzzy Control” automatic control system. When you select a wash program, the machine will set the correct temperature, washing time, and washing speed. 1. Turn on your sink’s water tap. 2. Press the Power button. 3. Open the door. 4. Load the articles one at a time loosely into the drum, without overfilling it. 5. Close the door. 6. Add detergent, softener, and pre-wash detergent (if necessary) into the appropriate compartments. Pre-wash is only available when selecting the Cotton, Synthetics, Denim, Bedding, Dark Garment, Daily Wash, Super Eco Wash, Baby care cycles. It is only necessary if your clothing is heavily soiled. 7. Use the Cycle Selector to select the appropriate cycle according to the type of material: Cotton, Synthetics, Denim, Bedding, Dark Garment, Daily Wash, Eco Drum Clean, Super Eco Wash, Outdoor Care, Baby Care, Wool, Hand Wash. The relevant indicators will illuminate on the control panel. 8. At this time, you can control the wash temperature, the amount of rinses, the spinning speed, and the delay time by pressing the appropriate option button. 9. Press the Start/Pause button and the wash will begin. The process indicator will light up and the remaining time for the cycle will appear in the display. Pause Option Within 5 minutes of starting a wash, it is possible to add/remove laundry items. 1. Press the Start/Pause button to unlock the door. The door cannot be opened when the water is too HOT or the water level is too HIGH. 2. After closing the door, press the Start/Pause button to restart the wash. When the cycle is finished: After the total cycle has finished, the power will turn off automatically. 1. Open the door. 2. Remove laundry. 28_ washing a load of laundry WF806U4SA-03205H-02_EN.indd 28 2013-7-6 9:49:16 Washing clothes manually 02 Washing a load of laundry You can wash clothes manually without using the Cycle Selector. 1. Turn the water supply on. 2. Press the Power button on the washing machine. 3. Open the door. 4. Load the articles loosely into the drum one at a time, without overfilling it. 5. Close the door. 6. Add detergent and, if necessary, softener or prewash detergent, into the appropriate compartments. 7. Press the Temp button to select the temperature. (Cold Water , 20 ˚C, 30 ˚C, 40 ˚C, 60 ˚C, 95 ˚C) 8. Press the Rinse button to select the required number of rinse cycles. The maximum number of rinse cycles is five. The wash duration is increased accordingly. 9. Press the Spin button to select the spin speed.( : No Spin; : Rinse Hold ) 10.Press the Delay End button repeatedly to cycle through the available Delay End options (from 3 hour to 19 hours in one hour increments). The hour displayed indicates the time at which the wash will be finished. 11.Press the Start/Pause button and the machine will begin the cycle. Laundry guidelines Follow these simple guidelines for the cleanest laundry and the most efficient wash. Always check the Care label on clothing before washing. Sort and wash your laundry according to the following criteria: • Care Label: Sort laundry into cottons, mixed fibres, synthetics, silks, wools and rayons. • Colour: Divide whites and colours. Wash new colour items separately. • Size: Placing items of different sizes in the same load will improve the wash action. • Sensitivity: Wash delicate items separately, using the Delicate wash cycle for pure, new woollen items, curtains and silk articles. Check the labels on the items you are washing or refer to the fabric care chart in the appendix. Emptying pockets Before each wash, empty all the pockets of your laundry. Small, irregularly shaped hard objects, such as coins, knives, pins, and paperclips could damage your washing machine. Do not wash clothing with large buckles, buttons, or other heavy metal objects. Metal on clothing may damage your clothing as well as the tub. Turn clothing with buttons and embroidered clothes inside out before washing them. If zips of pants and jackets are open while washing, the spin basket may be damaged. Zips should be closed and fixed with a string before washing. Clothing with long strings may become entangled with other clothes damaging them. Be sure to fix the strings before starting the wash. Prewashing cotton Your new washing machine, combined with modern detergents, will give perfect washing results, thus saving energy, time, water and detergent. However, if your cotton is particularly dirty, prewash with a protein-based detergent. washing a load of laundry _29 WF806U4SA-03205H-02_EN.indd 29 2013-7-6 9:49:16 washing a load of laundry Determining the load capacity Do not overload the washing machine or your laundry may not wash properly. Use the chart below to determine the load capacity for the type of laundry you are washing. Fabric Type Load Capacity Model WF806 Cotton - average/lightly soiled - heavily soiled 8.0 kg Synthetics 3.0 kg Denim 3.0 kg Bedding 2.0 kg Outdoor Care 2.0 kg Wool 2.0 kg • When the laundry is unbalanced (“UE” lights up on the display), redistribute the load. If the laundry is unbalanced, the spin efficiency may be degraded. • When washing Bedding or Bedding cover, the wash time may be lengthened or the spin efficiency may be degraded. • For Bedding or Bedding cover, the recommended load capacity is 2.5 kg or less. Make sure to insert brassieres (water washable) into a laundry net (to be purchased additionally). • The metal parts of the brassieres may break through the material and damage the laundry. Therefore make sure to place them inside a fine laundry net. • Small, light clothing such as socks, gloves, stockings and handkerchiefs may become caught around the door. Place them inside a fine laundry net. Do not wash the laundry net by itself without other laundry. This may cause abnormal vibrations that could move the washing machine and cause an accident resulting in injury. CAUTION Detergent and additives information Which detergent to use The type of detergent you should use is based on the type of fabric (cotton, synthetic, delicate items, wool), colour, wash temperature, and degree of soiling. Always use “low suds” laundry detergent, which is designed for automatic washing machines. Follow the detergent manufacturer’s recommendations based on the weight of the laundry, the degree of soiling, and the hardness of the water in your area. If you do not know how hard your water is, enquire at your local water authority. Do not use detergent that has hardended or solidified as the detergent may remain in the rinse cycle. It may cause your washing machine to not rinse properly or result in the overflow becoming blocked. 30_ washing a load of laundry WF806U4SA-03205H-02_EN.indd 30 2013-7-6 9:49:16 Detergent drawer Your washing machine has separate compartments for dispensing detergent and fabric softener. Add all laundry additives to the correct compartment before starting your washing machine. Do not open the detergent drawer while your washing machine is running or you might be exposed to hot water or steam. 02 Washing a load of laundry 1. Pull out the detergent drawer on the left side of the control panel. 2. Add the recommended amount of laundry detergent before starting directly into the detergent compartment your washing machine. To use liquid detergent, use the liquid detergent box (refer to “Liquid Detergent” for the corresponding model). • Do not add powdered detergent into the liquid detergent box. 3. Add the recommended amount of fabric softener into the softener compartment if required. Do not exceed the MAX FILL ( ) line. CAUTION Do NOT add any powder/liquid detergent to the softener compartment ( ). 4. When using the Prewash option, add the recommended amount of laundry detergent into the prewash compartment . When washing large items do NOT use the following detergetnt types. • Tablet and capsule type detergents • Detergents using a ball and net MAX Concentrated or thick fabric softener and conditioner must be diluted with a little water before being poured into the dispenser (prevents the overflow from becoming blocked). Be careful that the fabric softener does not overflow, when you close the detergent drawer after adding fabric softener into the rinse detergent compartment. Liquid Detergent (Selected models) To use liquid detergent, place the liquid detergent box into the main wash section of the detergent drawer and pour liquid detergent into the liquid detergent box. • Do not fill above the MAX line. Liquid • When using powdered detergent, remove the liquid detergent box detergent box from the detergent drawer. Powdered detergent will not dispense with liquid detergent box. • After a wash, some liquid may remain in the detergent drawer. washing a load of laundry _31 WF806U4SA-03205H-02_EN.indd 31 2013-7-6 9:49:17 cleaning and maintaining your washing machine Keeping your washing machine clean improves its performance, wards off unnecessary repairs, and lengthens its life. Eco Drum Clean This course is a self-cleaning course that removes mold that may occur inside the washing machine. 1. Press the Power button. 2. Turn the Cycle Selector to the ECO Drum Clean course. • You can only use the Delay End function. • The water temperature during the ECO Drum Clean is set to 70 ˚C. You cannot change the temperature. • It will auto set cotton 30 ˚C middle water level program when cloth is put in. 3. Place the appropriate amount of cleansing agent into the and close the detergent drawer detergent compartment (when cleaning the drum using a cleansing agent). • Be sure to use the recommended cleansing agent for cleaning the drum. • There are powder-type and liquid-type drum cleansing agents. The liquid-type cleaning agent is only available with liquid detergent box (option). 4. Press the Start/Pause button. • If you press the Start/Pause button, the ECO Drum Clean course begins. • Using the ECO Drum Clean course, you can clean the drum without using a cleansing agent. • Never use the ECO Drum Clean course when laundry is in the washing machine. This may result in damage to the texture or a problem with the washing machine. • In the ECO Drum Clean course, never use normal detergent. • Use only 1/10 of the amount of the drum cleansing agent recommended by the CAUTION cleansing agent manufacturer. • Since using a chlorine bleaching agent may discolour the product, be sure to use only oxygen bleaching agents. • Powder-type cleansing agent: Use a [powder-type bleaching agent] or a [cleansing agent for drum cleaning only]. • Liquid-type cleansing agent: Use a [liquid-type oxygen bleaching agent] or a [cleansing agent for drum cleaning only]. 32_ cleaning and maintaining your washing machine WF806U4SA-03205H-02_EN.indd 32 2013-7-6 9:49:19 03 cleaning and maintaining The ECO Drum Clean Auto Alarm Function • If the “ECO Drum Clean” indicator on the display and the lamp on the Cycle Selector are lit after a wash, it indicates that tub (drum) cleaning is required. In this case, remove the laundry from the washing machine, turn the power on, and clean the drum by performing the ECO Drum Clean course. • If you do not perform the ECO Drum Clean course, the “ECO Drum Clean” indicator on the display and the lamp on the Cycle Selector are turned off. However, the “ECO Drum Clean” indicator on the display and the lamp on the Cycle Selector are turned on again after two washes are performed. However, this will not result in a problem with the washing machine. • Although generally, the ECO Drum Clean Auto Alarm appears once a month or so, the frequency may differ depending on the number of times the washing machine is used. • In case of the alarm, please also clean the debris filter (refer to “Cleaning the debris filter” section on page 34). Otherwise the performance of the bubble function may lower down. Draining the washing machine in an emergency 1. Unplug the washing machine from the power supply. 2. Open the filter cover by pressing down and pulling its handle. Filter cover 3. Open the emergency drain cap by pulling it. Emergency drain cap 4. Hold the cap on the end of the emergency drain tube and slowly pull it out. 5. Allow all the water to flow into a bowl. Emergency drain tube Remain water maybe more than you expected. Prepare larger bowl. 6. Reinsert the emergency drain cap and the drain tube. 7. Replace the filter-cover. cleaning and maintaining your washing machine _33 WF806U4SA-03205H-02_EN.indd 33 2013-7-6 9:49:20 cleaning and maintaining your washing machine Cleaning the debris filter We recommend cleaning the debris filter 5 or 6 times a year, or when the error message of “5E” is displayed. (Refer to “Draining the washing machine in an emergency” in the previous section.) If foreign substances accumulate debris filter, the performance of the bubble function will be degraded. Before cleaning the debris filter, make sure to unplug the power cord. CAUTION 1. Remove the remaining water first (refer to “Draining the washing machine in an emergency” on page 33.) If you separate the filter without draining the remaining water, the remaining water may trickle out. 2. Open the filter cover by using a key or coin. 3. Unscrew the emergency drain cap by turning it to the left and drain off all the water. 4. Unscrew the debris filter cap. Debris filter cap 5. Wash any dirt or other material from the debris filter. Make sure the drain pump propeller behind the debris filter is not blocked. 6. Replace the debris filter cap. 7. Replace the filter cover. CAUTION Do not open the debris filter cap while the machine is running or hot water may flow out. • ake sure to replace the filter cap after the filter cleaning. If the filter is out of the machine, your M washing machine may malfunction or leak water. • The filter should be fully assembled after the filter cleaning. Cleaning the exterior 1. Wipe the washing machine surfaces, including the control panel, with a soft cloth using a nonabrasive household detergent. 2. Use a soft cloth to dry the surfaces. 3. Do not pour water onto the washing machine. 34_ cleaning and maintaining your washing machine WF806U4SA-03205H-02_EN.indd 34 2013-7-6 9:49:20 Cleaning the detergent drawer and drawer recess Release lever liquid detergent box (Option) 03 cleaning and maintaining 1. Press the release lever on the inside of the detergent drawer and pull the drawer out. 2. Remove the softener divider and the liquid detergent box(option) from the detergent drawer. Softener divider 3. Wash all parts under running water. 4. Clean the drawer recess with an old toothbrush. 5. Replace the softener divider and the liquid detergent box (option) by pushing it firmly into the drawer. 6. Push the drawer back into place. 7. To remove any remaining detergent, perform a rinse cycle without any laundry in the drum. Cleaning the water hose mesh filter You should clean the water hose mesh filter at least once a year, or when the error message of “4E” is displayed: 1. Turn off the water supply to the washing machine. 2. Unscrew the hose from the back of the washing machine. To prevent water from gushing out due to the air pressure in the hose, cover the hose with a cloth. 3. Gently pull out the mesh filter from the end of the hose using a pair of pliers and rinse it under water until clean. Also clean inside and outside the threaded connector. 4. Push the filter back into place. 5. Screw the hose back onto the washing machine. 6. Make sure the connections are watertight and turn on the tap. cleaning and maintaining your washing machine _35 WF806U4SA-03205H-02_EN.indd 35 2013-7-6 9:49:21 cleaning and maintaining your washing machine Repairing a frozen washing machine If the temperature drops below freezing and your washing machine is frozen: 1. 2. 3. 4. 5. Unplug the washing machine. Pour warm water over the tap to loosen the water supply hose. Remove the water supply hose and soak it in warm water. Pour warm water into the washing machine drum and let it sit for 10 minutes. Reconnect the water supply hose to the water tap and check if the water supply and drain are operating normal. Storing your washing machine If you need to store your washing machine for an extended time, it’s better to drain and disconnect it. Washing machines can be damaged if water is left in the hoses and internal components before storage. 1. Select the Cotton cycle and push the Quick Wash button and run your washing machine through the cycle without a load. 2. Turn the water taps off and disconnect the inlet hoses. 3. Unplug your washing machine from the electrical outlet, and leave your washing machine door open to allow air to circulate inside the tumbler. If your washing machine has been stored in below-freezing temperatures, allow time for any leftover water in your washing machine to thaw out before using it. 36_ cleaning and maintaining your washing machine WF806U4SA-03205H-02_EN.indd 36 2013-7-6 9:49:21 troubleshooting and information codes Check these points if your washing machine... SOLUTION Will not start • • • • • • • • • Has no water or not enough water Has detergent remaining in the detergent drawer after the wash cycle is complete Vibrates or is too noisy The washing machine does not drain and/or spin Door is locked shut or will not open. • • • • • • • • Make sure your washing machine is plugged in. Make sure the door is firmly closed. Make sure the water source tap(s) are turned on. Make sure to press the Start/Pause button. Turn the water tap on fully. Make sure the water source hose is not frozen. Straighten the water intake hoses. Clean the filter on the water intake hose. Make sure your washing machine is running with sufficient water pressure. Make sure the detergent is added to the center of the detergent drawer. Make sure your washing machine is on a level surface. If the surface is not level, adjust the washing machine feet to level the appliance. Make sure that the shipping bolts are removed. Make sure your washing machine is not touching any other object. Make sure the laundry load is balanced. Straighten the drain hose. Eliminate kinked hoses. Make sure the debris filter is not clogged. The door will not open until 3 minutes after the machine stops or the power turns off. 04 troubleshooting PROBLEM If the problem persists, contact your local Samsung Customer Service. troubleshooting and information codes _37 WF806U4SA-03205H-02_EN.indd 37 2013-7-6 9:49:21 troubleshooting and information codes Information codes If your washing machine malfunctions, you may see an information code on the display. If this happens, please check the table below and try the suggested solution before calling Customer Service. CODE SYMBOL dE 4E 5E UE cE/3E Sd/Sud Uc SOLUTION • • • • • • • • • Make sure the door is firmly closed. Make sure that laundry is not caught in the door. Make sure the source water tap is turned on. Check the water pressure. Clean the mesh filters of water hose. Clean the debris filter. Make sure the drainage hose is installed correctly. Clean the water hose mesh filter. The laundry load is unbalanced. Redistribute the load. If only one item of clothing needs washing, such as a bathrobe or pair of jeans, the final spin result might be unsatisfactory and an “UE” error message will be shown in the display window. • Call the after-sales service. • This occurs when too much foaming is detected. It is also displayed while foaming is removed. When the removal is finished, the normal cycle proceeds.(This is one of the normal operations. It is an error for preventing non-sensing faults.) • If the voltage of the supplied power is instable, the washing machine will be paused to protect its electric devices. • If the correct voltage is supplied, the cycle will resume automatically. For any codes not listed above, or if the suggested solution doesn’t fix the problem, call your Samsung Service Centre or local Samsung dealer. 38_ troubleshooting and information codes WF806U4SA-03205H-02_EN.indd 38 2013-7-6 9:49:21 cycle chart Cycle chart ( user option) Spin Speed(MAX) rpm WF806 wash WF806U4 Cotton 8.0 yes 95 1400 Synthetics 3.0 yes 60 1200 Denim 3.0 yes 60 800 Bedding 2.0 yes 40 800 Dark Garment 4.0 yes 40 1200 Daily Wash 4.0 yes 60 1400 Eco Drum Clean - - yes - 70 400 Super Eco Wash 4.0 yes 40 1200 Outdoor Care 2.0 - yes 40 1200 Baby Care 4.0 yes 95 1400 Wool 2.0 - yes 40 800 Hand Wash 2.0 - yes 40 400 Max Temp (˚C) Softener 05 Cycle chart DETERGENT Prewash Max load(kg) PROGRAM PROGRAM Eco Bubble Delay end Easy Iron Intensive Soak Quick Wash Cotton Synthetics - Denim - Bedding - Dark Garment - - Daily Wash - Eco Drum Clean - - - - - Super Eco Wash - Outdoor Care - - - - Baby Care - Wool - - - - Hand Wash - - - - 1. A cycle with a prewash takes approx. 18 minutes longer. 2. The cycle duration data has been measured under the conditions specified in Standard IEC60456/ EN60456. Cotton 60˚C + Intensive + Eco Bubble are programs according to EN60456. Please run Calibration Mode after the installation (see page 20). 3. Course time in individual homes may differ from the values given in the table due to variations in the pressure and temperature of the water supply, the load and the type of laundry. 4. When the Intensive Wash function is selected, the cycle time is increased for each cycle. cycle chart _39 WF806U4SA-03205H-02_EN.indd 39 2013-7-6 9:49:21 appendix Fabric care chart The following symbols provide garment care directions. The care labels include four symbols in this order: washing, bleaching, drying and ironing (and dry cleaning when necessary). The use of symbols ensures consistency among garment manufacturers of domestic and imported items. Follow the care label directions to maximize garment life and reduce laundery problems. Resistant material Can be ironed at 100 ˚C max Delicate fabric Do not iron Item may be washed at 95 ˚C Can be dry cleaned using any solvent Item may be washed at 60 ˚C Dry clean with perchloride, lighter fuel, pure alcohol or R113 only Item may be washed at 40 ˚C Dry clean with aviation fuel, pure alcohol or R113 only Item may be washed at 30 ˚C Do not dry clean Item may be hand washed Dry flat Dry clean only Can be hung to dry Can be bleached in cold water Dry on clothes hanger Do not bleach Tumble dry, normal heat Can be ironed at 200 ˚C max Tumble dry, reduced heat Can be ironed at 150 ˚C max Do not tumble dry Protecting the environment • This appliance is manufactured from recyclable materials. If you decide to dispose of this appliance, please observe local waste disposal regulations. Cut off the power cord so that the appliance cannot be connected to a power source. Remove the door so that animals and small children cannot get trapped inside the appliance. • Do not exceed the detergent quantities recommended in the detergent manufactures’ instructions. • Use stain removal products and bleaches before the wash cycle only when strictly necessary. • Save water and electricity by only washing full loads (the exact amount depends upon the program used). Declaration of conformity This appliance complies with European safety standards, EC directive 93/68 and EN Standard 60335. 40_ appendix WF806U4SA-03205H-02_EN.indd 40 2013-7-6 9:49:23 Specifications TYPE FRONT LOADING WASHING MACHINE WF806U4SA** DIMENSIONS WATER PRESSURE 06 appendix W600mm X D600mm X H850mm 50 kPa ~ 800 kPa WATER VOLUME 80 ℓ WF806U4SA** NET WEIGHT 67 kg WASH AND SPIN CAPACITY 8.0 kg MODEL WF806U4SA** WASHING POWER CONSUMPTION WASH AND HEATING SPIN SPIN REVOLUTIONS 220 V 60 W 240 V 60 W 220 V 2000 W 240 V 2400 W MODEL WF806U4SA** 230V 400 W PUMPING 34 W MODEL WF806U4SA** rpm 1400 The appearance and specifications of the product are subject to change without prior notice for purposes of product enhancement. appendix _41 WF806U4SA-03205H-02_EN.indd 41 2013-7-6 9:49:23 WF806U4SA-03205H-02_EN.indd 42 2013-7-6 9:49:24 WF806U4SA-03205H-02_EN.indd 43 2013-7-6 9:49:24 QUESTIONS OR COMMENTS? Country CALL OR VISIT US ONLINE AT THAILAND 1800-29-3232 02-689-3232 www.samsung.com Code No. DC68-03205H-02_EN WF806U4SA-03205H-02_EN.indd 44 2013-7-6 9:49:24 WF806U4SA** เครื่องซักผ้า คู่มือผู้ใช้ คู่มือนี้ใช้กระดาษรีไซเคิล 100% imagine the possibilities ขอขอบคุณที่เลือกซื้อผลิตภัณฑ์ Samsung ในการรับบริการที่ครบครันยิ่งขึ้น โปรดลงทะเบียน ผลิตภัณฑ์ได้ที่ www.samsung.com/register WF806U4SA-03205H-02_TH.indd 1 2013-7-6 9:52:22 คุณสมบัติของเครื่องซักผ้า Samsung เครื่องใหม่ของคุณ เครื่องซักผ้าเครื่องใหม่ของคุณจะเปลี่ยนความรู้สึกในการซักผ้าของคุณอย่างสิ้นเชิง ฟังก์ชั่นซักฟองแบบประหยัดที่เป็นเอกสิทธิ เฉพาะ ตลอดจนประสิทธิภาพในการใช้พลังงาน ทำ�ให้เครื่องซักผ้า Samsung ของคุณได้รับประโยชน์ในการซักที่แสนง่ายดาย • ประหยัดพลังงาน เครื่องซักผ้ารุ่นนี้มีการใช้พลังงานที่มีประสิทธิภาพเพิ่มขึ้น เมื่อเทียบกับเครื่องซักผ้าระดับ A ด้วยระบบสร้างฟองพิเศษและมอเตอร์อินเวอร์เตอร์ของ Samsung • เทคโนโลยีซักฟองแบบประหยัด ระบบซักฟองแบบประหยัดที่มีประสิทธิภาพสูงของ Samsung ช่วยปรับปรุงการซักให้สะอาดและดูแลเนื้อผ้ายิ่งขึ้น ระบบซักฟองแบบประหยัดช่วย ให้สามารถกระจายสารซักฟอกอย่างสม่ำ�เสมอ และทำ�งานกับผ้าได้รวดเร็วและลึกล้ำ�ยิ่งขึ้น • ลดเสียงรบกวนและการสั่นสะเทือน เครื่องซักผ้า Samsung รุ่นนี้ทำ�งานเงียบเป็นพิเศษ โดยลดเสียงรบกวนและการสั่นสะเทือนด้วยเทคโนโลยีสมาร์ทคอนโทรล ช่วยให้มีการสั่นสะเทือนต่ำ�สุด ช่วยให้ถังซักมีความสมดุลสูงสุด • ซักเร็ว ไม่ต้องเสียเวลาอีกต่อไป โปรแกรมซักเร็ว ของเราจะเป็นทางออกสำ�หรับวันที่แสนยุ่ง ขณะนี้คุณสามารถซักเสื้อผ้าชิ้นโปรด (สูงสุดถึง 2 กก.) ได้ในเวลาเพียง 15 นาทีเท่านั้น • ล้างถังซัก การใช้ฟังก์ชันล้างถังซัก จะช่วยให้เครื่องซักผ้าของคุณสะอาดอยู่เสมอ แม้ว่าจะไม่มีสารซักฟอกที่เป็นสารเคมีก็ตาม ทำ�ให้ถังซักของเครื่องสะอาด ปราศจากกลิ่นด้วยโปรแกรมทำ�ความสะอาดพิเศษ • ชุดเด็กอ่อน เครื่องซักผ้า Samsung มีโปรแกรมซักผ้าที่เพิ่มการปกป้องเสื้อผ้าเด็กที่มีผิวละเอียดอ่อน โปรแกรมเหล่านี้จะช่วยลดการระคายเคืองผิวเด็ก ด้วยการลดสารซักฟอกที่ตกค้าง นอกจากนี้ โปรแกรมเหล่านี้จะแบ่งผ้าออกเป็นประเภทต่างๆ และซักตามลักษณะของผ้าเพื่อให้เด็กรู้สึกได้ถึง ความสะอาดสดชื่นเมื่อสวมใส่เสื้อผ้า • ซักมือ ให้การดูแลเป็นพิเศษด้วยอุณหภูมิที่เหมาะสม การซักที่นุ่มนวลและปริมาณน้ำ�ที่พอเหมาะ 2_ คุณสมบัติของเครื่องซักผ้า Samsung เครื่องใหม่ของคุณ WF806U4SA-03205H-02_TH.indd 2 2013-7-6 9:52:22 • ตั้งเวลาซักล่วงหน้า ตั้งเวลาหน่วงการเริ่มต้นโปรแกรมได้ถึง 19 ชั่วโมง โดยเพิ่มได้ครั้งละหนึ่งช่วยโมง ช่วยเพิ่มความสะดวกในการใช้เครื่องซักผ้า โดยเฉพาะเมื่อคุณจำ�เป็นต้องออกไปข้างนอก • ล็อคป้องกันเด็ก ฟังก์ชันล็อคป้องกันเด็กช่วยป้องกันมือไม่ให้มือน้อยๆ ที่ซุกซนสามารถเปิดเครื่องซักผ้าได้โดยไม่ตั้งใจ คุณลักษณะเพื่อความปลอดภัยนี้ช่วยป้องกัน ไม่ให้เด็กๆ เล่นกับการทำ�งานของเครื่องซักผ้า และยังเตือนให้คุณทราบเมื่อมีการใช้งาน • ท่อน้ำ�และเซนเซอร์การรั่วซึม (เฉพาะบางรุ่น) ระบบน้ำ�แบบนิรภัยที่ออกแบบมาอย่างชาญฉลาดสำ�หรับเครื่องซักผ้า Samsung ประกอบด้วยท่อพิเศษที่ป้องกันน้ำ�รั่วที่ต้นทาง และเซนเซอร์การรั่ว ซึมที่ด้านล่าง ถ้าตรวจพบท่อแตกหรือถ้าน้ำ�รั่ว ฟองน้ำ�ภายในจะขยายตัวเพื่อกั้นน้ำ�จากก๊อก • เครื่องทำ�ความร้อนที่เป็นเซรามิคเพื่อความทนทานและการประหยัดพลังงาน (เฉพาะบางรุ่น) นวัตกรรมเครื่องทำ�ความร้อนที่เป็นเซรามิคของเรามีความทนทานมากกว่าเครื่องทำ�ความร้อนทั่วไปถึงสองเท่า ซึ่งจะช่วยประหยัดเงินสำ�หรับการซ่อมแซม รวมทั้งยังช่วยขจัดระดับความกระด้างของน้ำ�และประหยัดพลังงาน • จอแสดงผลดิจิตัล จอแสดงผลดิจิตัล (แผงควบคุม) มีความชัดเจนและใช้งานง่าย เพื่อความสะดวกในการใช้งาน นอกจากนี้ จอแสดงผลดิจิตัลนี้ยังให้ความสะดวก ในการปรับค่าต่างๆ เพื่อให้การซักที่ดีเยี่ยม คู่มือนี้มีข้อมูลที่สำ�คัญเกี่ยวกับการติดตั้ง การใช้งานและการบำ�รุงรักษาเครื่องซักผ้า Samsung เครื่องใหม่ของคุณ โปรดอ่านคู่มือนี้เพื่อดูคำ�อธิบายแผง ควบคุม คำ�แนะนำ�เกี่ยวกับการใช้เครื่องซักผ้า และเคล็ดลับในการใช้ประโยชน์สูงสุดจากคุณสมบัติและฟังก์ชันที่ล้ำ�หน้า หัวข้อ “การแก้ไขปัญหาและ รหัสข้อมูล” ในหน้า 37 จะให้ข้อมูลเกี่ยวกับสิ่งที่สามารถดำ�เนินการ ถ้ามีข้อผิดพลาดกับเครื่องซักผ้าของคุณ คุณสมบัติของเครื่องซักผ้า Samsung เครื่องใหม่ของคุณ _3 WF806U4SA-03205H-02_TH.indd 3 2013-7-6 9:52:22 ข้อมูลเกี่ยวกับความปลอดภัย ขอแสดงความยินดีกับเครื่องซักผ้า Samsung เครื่องใหม่ของคุณ คู่มือนี้มีข้อมูลที่สำ�คัญเกี่ยวกับการติดตั้ง การใช้งานและการบำ� รุงรักษาเครื่องซักผ้า Samsung เครื่องใหม่ของคุณ โปรดสละเวลาเพื่ออ่านคู่มือนี้ เพื่อใช้ประโยชน์สูงสุดจากคุณสมบัติและคุณป ระโยชน์มากมายของเครื่องซักผ้า สิ่งที่คุณต้องทราบเกี่ยวกับคำ�แนะนำ�เพื่อความปลอดภัย โปรดอ่านคู่มือนี้โดยละเอียดเพื่อให้มั่นใจว่าคุณทราบวิธีใช้คุณลักษณะและฟังก์ชันต่างๆ ของอุปกรณ์ชิ้นใหม่นี้ได้อย่างปลอดภัยและมีประสิทธิภาพ และโปรดเก็บไว้ในที่ปล อดภัยใกล้กับอุปกรณ์ เพื่อให้สามารถอ้างอิงได้ในภายหลัง ใช้อุปกรณ์นี้เพื่อวัตถุประสงค์ที่อธิบายในคู่มือคำ�แนะนำ�นี้เท่านั้น คำ�เตือนและคำ�แนะนำ�เพื่อความปลอดภัยในคู่มือนี้ไม่ได้ครอบคลุมถึงสภาวะและสถานการณ์ทั้งหมดที่สามารถเกิดขึ้นได้ คุณมีหน้าที่จะต้องใช้สามัญสำ�นึก ความระมัดระวัง และใส่ใจกับการติดตั้ง บำ�รุงรักษา และใช้งานเครื่องซักผ้า เนื่องจากคำ�แนะนำ�ในการใช้งานต่อไปนี้ใช้สำ�หรับหลายรุ่น ลักษณะของเครื่องซักผ้าของคุณอาจแตกต่างจากที่อธิบายในคู่มือนี้ และสัญญาณคำ�เตือนบางอาจอาจไม่มีผล ถ้าคุณมีข้อซักถามหรือข้อกังวลใด โปรดติดต่อศูนย์บริการที่ใกล้ที่สุด หรือหาความช่วยเหลือและข้อมูลออนไลน์ได้ที่ www.samsung.com สัญลักษณ์และคำ�เตือนเพื่อความปลอดภัยที่สำ�คัญ ความหมายของสัญลักษณ์และเครื่องหมายในคู่มือผู้ใช้นี้: คำ�เตือน ข้อควรระวัง ข้อควรระวัง อันตรายหรือการกระทำ�ที่ไม่ปลอดภัยที่อาจทำ�ให้เกิด การบาดเจ็บรุนแรง การเสียชีวิต หรือทรัพย์สินเสียหาย อันตรายหรือการกระทำ�ที่ไม่ปลอดภัยที่อาจทำ�ให้เกิด การบาดเจ็บหรือทำ�ให้สิ่งของเสียหาย ในการลดความเสี่ยงจากไฟ การระเบิด ไฟฟ้าช็อต หรือการบาดเจ็บขณะใช้เครื่องซักผ้า โปรดปฏิบัติตาม ข้อควรระวังเพื่อความปลอดภัยต่อไปนี้: ห้ามทำ� ห้ามถอดประกอบ ห้ามสัมผัส ทำ�ตามคำ�แนะนำ�อย่างเคร่งครัด ถอดปลั๊กของเครื่องซักผ้าจากเต้าเสียบที่ผนัง ตรวจสอบว่าเครื่องมีการลงกราวด์เพื่อป้องกันไฟฟ้าดูด ติดต่อศูนย์บริการเพื่อขอรับความช่วยเหลือ หมายเหตุ สัญลักษณ์คำ�เตือนเหล่านี้มีให้เพื่อป้องกันการบาดเจ็บของตัวคุณเองและบุคคลอื่น โปรดปฏิบัติตามอย่างเคร่งครัด หลังจากอ่านส่วนนี้แล้ว โปรดเก็บไว้เพื่อนำ�มาอ้างอิงในภายหลัง อ่านคำ�แนะนำ�ทั้งหมดก่อนที่จะใช้อุปกรณ์ เช่นเดียวกับอุปกรณ์ทุกชนิดที่ใช้ไฟฟ้าและมีชิ้นส่วนที่เคลื่อนไหว อุปกรณ์นี้อาจมีอันตรายได้ ในการใช้อุปกรณ์นี้อย่างปลอดภัย โปรด ทำ�ความเข้าใจกับการทำ�งานและใช้ความระมัดระวังขณะใช้งาน 4_ ข้อมูลเกี่ยวกับความปลอดภัย WF806U4SA-03205H-02_TH.indd 4 2013-7-6 9:52:23 คำ�เตือน อย่าให้เด็ก (หรือสัตว์เลี้ยง) เล่นบนเครื่องซักผ้าหรือใน เครื่องซักผ้า ประตูเครื่องซักผ้านั้นไม่สามารถเปิดได้โดย ง่ายจากภายใน และเด็กอาจได้รับบาดเจ็บร้ายแรงถ้ าติดอยู่ภายใน อุปกรณ์นี้สามารถใช้งานโดยเด็กที่มีอายุ 8 ปีขึ้นไปและ บุคคลที่มีสมรรถภาพร่างกาย ประสาทสัมผัส หรือสภาพ จิตไม่เป็นปกติ หรือขาดประสบการณ์หรือความรู้ ถ้าได้ รับการดูแลหรือได้รับคำ�แนะนำ�ในการใช้งานโดยบุคคลที่ รับหน้าที่ดูแล ห้ามเด็กเล่นกับอุปกรณ์นี้ ห้ามเด็กทำ�ความ สะอาดหรือบำ�รุงรักษาอุปกรณ์โดยไม่มีผู้ดูแล โปรดดูแลมิให้เด็กเล่นกับอุปกรณ์นี้ กรณีที่ปลั๊ก (สายไฟ) ของเครื่องใช้ไฟฟ้านี้เกิดเสียหาย ต้องให้ผู้ผลิต ตัวแทนให้บริการ หรือผู้ที่มีความชำ�นาญ เป็นผู้เปลี่ยนสายไฟ เพื่อไม่ให้เกิดอันตราย ควรจัดวางอุปกรณ์นี้เพื่อให้สามารถเข้าถึงปลั๊กไฟ ก๊อกน้ำ� และท่อระบายน้ำ�ได้โดยง่าย สำ�หรับเครื่องซักผ้าที่มีช่องระบายอากาศที่ฐาน โปรดอย่า ให้พรมหรือวัสดุชนิดอื่นปิดกั้นช่องนี้ ใช้ชุดท่อใหม่ ไม่ควรนำ�ชุดท่อเดิมกลับมาใช้ใหม่ ข้อมูลเกี่ยวกับความปลอดภัย _5 WF806U4SA-03205H-02_TH.indd 5 2013-7-6 9:52:23 ข้อมูลเกี่ยวกับความปลอดภัย คำ�เตือน สัญญาณคำ�เตือนสำ�คัญสำ�หรับการติดตั้ง การติดตั้งอุปกรณ์นี้ต้องกระทำ�โดยช่างเทคนิคที่ได้รับการรับรอง หรือบริษัทผู้ให้บริการ - มิฉะนั้นอาจทำ�ให้เกิดไฟฟ้าช็อต เพลิงไหม้ การระเบิด ปัญหากับผลิตภัณฑ์ หรือการบาดเจ็บ อุปกรณ์นี้มีน้ำ�หนักมาก โปรดใช้ความระมัดระวังเมื่อยก ต่อสายไฟเข้ากับเต้ารับไฟฟ้า AC 220-240V/50Hz ขึ้นไป และใช้เต้ารับสำ�หรับอุปกรณ์นี้เพียงอย่างเดียว นอกจากนี้ โปรดอย่าใช้สายไฟ สำ�หรับต่อ - การใช้เต้ารับไฟฟ้าที่ผนังร่วมกับอุปกรณ์อื่นโดยผ่านสายไฟสำ�หรับต่อ หรือแถบปลั๊กไฟ อาจทำ�ให้เกิดไฟฟ้าช็อตหรือเพลิงไหม - ตรวจสอบว่าแรงดันไฟฟ้า ความถี่ และกระแสไฟฟ้าตรงกับในข้อมูลจำ�เพาะของผลิตภัณฑ์ มิฉะนั้นอาจทำ�ให้เกิดไฟฟ้าช็อต เพลิงไหม้ ต่อ สายไฟเข้ากับเต้ารับไฟฟ้าที่ผนังอย่างแน่นหนา นำ�สิ่งแปลกปลอมทั้งหมด เช่น ฝุ่นละอองหรือน้ำ�ออกจากขั้วของปลั๊กไฟและหน้าสัมผัสเป็นประจำ� โดยใช้ผ้าแห้ง - ถอดปลั๊กไฟและทำ�ความสะอาดด้วยผ้าแห้ง - มิฉะนั้นอาจทำ�ให้เกิดไฟฟ้าช็อต เพลิงไหม ต่อปลั๊กไฟเข้ากับเต้ารับให้ถูกทิศทาง เพื่อให้สายไฟพาดไปทางพื้น - ถ้าคุณต่อปลั๊กไฟกับเต้ารับในทางตรงกันข้าม ลวดนำ�ไฟฟ้าภายในสายไฟอาจเสียหายและทำ�ให้เกิดไฟฟ้าช็อตหรือเพลิงไหม้ บรรจุภัณฑ์อาจเป็นอันตรายต่อเด็ก โปรดเก็บบรรจุภัณฑ์ทั้งหมด (ถุงพลาสติก โฟม ฯลฯ) ให้พ้นมือเด็ก - ถ้าเด็กนำ�ถุงพลาสติกมาสวมศีรษะ อาจทำ�ให้หายใจไม่ออก เมื่ออุปกรณ์หรือปลั๊กไฟ หรือสายไฟเสียหาย โปรดติดต่อศูนย์บริการใกล้บ้านคุณ อุปกรณ์ต้องได้รับการลงกราวด์อย่างเหมาะสม ห้ามลงกราวด์อุปกรณ์กับท่อก๊าซ ท่อน้ำ�พลาสติก หรือสายโทรศัพท - มิฉะนั้นอาจทำ�ให้เกิดไฟฟ้าช็อต เพลิงไหม้ การระเบิด หรือปัญหากับผลิตภัณฑ์ - ห้ามต่อปลั๊กไฟฟ้ากับเต้ารับไฟฟ้าที่ไม่ได้ลงกราวด์อย่างถูกต้อง และโปรดตรวจสอบว่าเป็นไปตามข้อกำ�หนดของท้องถิ่นและของประเทศ ห้ามติดตั้งอุปกรณ์นี้ใกล้เครื่องทำ�ความร้อน วัสดุที่ติดไฟง่าย ห้ามติดตั้งอุปกรณ์นี้ในที่ชื้น มีน้ำ�มัน หรือมีฝุ่นมาก ในตำ�แหน่งที่ได้รับแสงแดดหรือน้ำ� (น้ำ�ฝน) โดยตรง ห้ามติดตั้งอุปกรณ์นี้ในตำ�แหน่งที่มีอุณหภูมิต่ำ� - น้ำ�ที่แข็งตัวจะทำ�ให้ท่อต่างๆ ระเบิด ห้ามติดตั้งอุปกรณ์นี้ในตำ�แหน่งที่อาจมีก๊าซรั่วไหล - อาจทำ�ให้เกิดไฟฟ้าช็อตหรือไฟไหม ห้ามใช้เครื่องแปลงไฟฟ้า - อาจทำ�ให้เกิดไฟฟ้าช็อตหรือไฟไหม้ ห้ามใช้ปลั๊กไฟที่เสียหาย สายไฟ หรือเต้ารับไฟฟ้าที่เสียหาย หลวม - อาจทำ�ให้เกิดไฟฟ้าช็อตหรือไฟไหม ห้ามใช้แรงดึงหรือหักงอสายไฟ ห้ามบิดหรือผูกปมกับสายไฟ อย่าแขวนสายไฟไว้กับโลหะ วางของหนักทับสายไฟ เดินสายไฟไว้ระหว่างวัตถุอื่น หรือดันสายไฟเข้าสู่ช่องว่างด้านหลังอุปกรณ - อาจทำ�ให้เกิดไฟฟ้าช็อตหรือไฟไหม ห้ามดึงสายไฟ เมื่อถอดปลั๊กไฟออกจากเต้ารับ - ถอดปลั๊กไฟด้วยการจับที่ตัวปลั๊ก - มิฉะนั้นอาจทำ�ให้เกิดไฟฟ้าช็อต เพลิงไหม ห้ามวางสายไฟและท่อในที่ซึ่งคุณอาจสะดุดได้ง่าย 6_ ข้อมูลเกี่ยวกับความปลอดภัย WF806U4SA-03205H-02_TH.indd 6 2013-7-6 9:52:23 ข้อควรระวัง สัญญาณข้อควรระวังสำ�หรับการติดตั้ง อุปกรณ์นี้ควรอยู่ในตำ�แหน่งที่สามารถเอื้อมถึงปลั๊กไฟได้ง่าย - มิฉะนั้นอาจทำ�ให้เกิดไฟฟ้าช็อต เพลิงไหม้เนื่องจากไฟฟ้ารั่ว ติดตั้งและปรับระดับเครื่องซักผ้าบนพื้นที่สามารถรับน้ำ�หนักได้ - มิฉะนั้นอาจทำ�ให้มีการสั่นสะเทือนผิดปกติ มีการเคลื่อนที่ เสียงรบกวน หรือมีปัญหากับผลิตภัณฑ์ คำ�เตือน สัญญาณคำ�เตือนสำ�คัญสำ�หรับการใช้งาน ถ้าอุปกรณ์มีน้ำ�ท่วม ให้ตัดไฟฟ้าและการจ่ายน้ำ�ทันที และติดต่อศูนย์บริการใกล้บ้าน - ห้ามสัมผัสปลั๊กไฟด้วยมือที่เปียก - มิฉะนั้นอาจทำ�ให้เกิดไฟฟ้าช็อต ถ้าอุปกรณ์มีเสียงผิดปกติ มีควันหรือกลิ่นไหม้ ให้ถอดปลั๊กทันที และติดต่อศูนย์บริการใกล้บ้าน - มิฉะนั้นอาจทำ�ให้เกิดไฟฟ้าช็อต เพลิงไหม ถ้ามีก๊าซรั่ว (เช่น ก๊าซโพรเพน ก๊าซหุงต้ม ฯลฯ) ให้ระบายอากาศทันที โดยไม่สัมผัสกับปลั๊กไฟ ห้ามสัมผัสกับอุปกรณ์หรือสายไฟ - ห้ามใช้พัดลมไฟฟ้า - อาจเกิดประกายไฟที่ทำ�ให้ระเบิดหรือเพลิงไหม้ อย่าให้เด็กเล่นบนเครื่องซักผ้าหรือในเครื่องซักผ้า นอกจากนี้ เมื่อทิ้งอุปกรณ์ ให้ถอดก้านล็อคประตูเครื่องซักผ้าออก - ถ้าติดอยู่ภายใน เด็กอาจไม่สามารถออกมาได้และอาจหายใจไม่ออกจนกระทั่งเสียชีวิต โปรดนำ�บรรจุภัณฑ์ (ฟองน้ำ� โฟม) ที่ด้านล่างของเครื่องซักผ้าออกก่อนที่จะใช้งาน ข้อมูลเกี่ยวกับความปลอดภัย _7 WF806U4SA-03205H-02_TH.indd 7 2013-7-6 9:52:23 ข้อมูลเกี่ยวกับความปลอดภัย ห้ามซักผ้าที่เปื้อนน้ำ�มันเชื้อเพลิง น้ำ�มันก๊าด เบนซีน ทินเนอร์ แอลกอฮอล์ หรือสารไวไฟหรือสารระเหยชนิดต่างๆ - อาจทำ�ให้เกิดไฟฟ้าช็อต ไฟไหม้หรือระเบิดได้ ห้ามเปิดประตูเครื่องโดยใช้แรงขณะที่เครื่องทำ�งาน (การซัก/อบแห้ง/ปั่นหมาดขณะอุณหภูมิสูง) - น้ำ�ที่ไหลออกจากเครื่องซักผ้าอาจทำ�ให้ร้อนลวกหรือทำ�ให้พื้นลื่น อาจทำ�ให้เกิดการบาดเจ็บได้ - การใช้แรงเปิดประตูอาจทำ�ให้ผลิตภัณฑ์เสียหายหรือทำ�ให้เกิดการบาดเจ็บ โปรดอย่าสอดมือเข้าใต้เครื่องซักผ้า - อาจทำ�ให้เกิดการบาดเจ็บได้ ห้ามสัมผัสปลั๊กไฟด้วยมือที่เปียก - อาจทำ�ให้เกิดไฟฟ้าช็อตได้ ห้ามปิดเครื่องด้วยการถอดปลั๊กไฟ ขณะที่เครื่องกำ�ลังทำ�งานอยู่ - การต่อปลั๊กไฟเข้ากับเต้ารับไฟฟ้าอีกครั้งอาจทำ�ให้เกิดประกายไฟและทำ�ให้เกิดไฟฟ้าช็อตหรือเพลิงไหม อย่าปล่อยให้เด็กหรือบุคคลที่ไม่แข็งแรงใช้เครื่องซักผ้านี้โดยไม่มีผู้ดูแล อย่าให้เด็กเข้าสู่ภายในอุปกรณ์ - มิฉะนั้นอาจทำ�ให้เกิดไฟฟ้าช็อต น้ำ�ร้อนลวก หรือบาดเจ็บได้ โปรดอย่าสอดมือหรือโลหะเข้าใต้เครื่องซักผ้าขณะที่เครื่องกำ�ลังทำ�งาน - อาจทำ�ให้เกิดการบาดเจ็บได้ โปรดอย่าถอดปลั๊กอุปกรณ์ด้วยการดึงที่สายไฟ ให้จับที่ตัวปลั๊กและดึงออกจากเต้ารับไฟฟ้าตรงๆ - ความเสียหายที่เกิดขึ้นกับสายไฟอาจทำ�ให้เกิดการลัดวงจร เพลิงไหม้ และ/หรือไฟฟ้าช็อต โปรดอย่าซ่อมแซม ถอดประกอบ หรือดัดแปลงเครื่องด้วยตนเอง - ห้ามใช้ฟิวส์ (เช่น สายทองแดง ลวดโลหะ ฯลฯ) นอกเหนือจากฟิวส์มาตรฐาน - เมื่อจำ�เป็นต้องซ่อมแซมหรือติดตั้งอุปกรณ์ซ้ำ�อีกครั้ง โปรดติดต่อศูนย์บริการใกล้บ้านคุณ - มิฉะนั้นอาจทำ�ให้เกิดไฟฟ้าช็อต เพลิงไหม้ ปัญหากับผลิตภัณฑ์ หรือการบาดเจ็บ เมื่อท่อจ่ายน้ำ�หลวมหลุดออกจากก๊อกและทำ�ให้น้ำ�ท่วมอุปกรณ์ ให้ถอดปลั๊กไฟ - มิฉะนั้นอาจทำ�ให้เกิดไฟฟ้าช็อต เพลิงไหม ถอดปลั๊กไฟเมื่อไม่ได้ใช้อุปกรณ์เป็นเวลานาน หรือระหว่างพายุฝนฟ้าคะนอง - มิฉะนั้นอาจทำ�ให้เกิดไฟฟ้าช็อต เพลิงไหม 8_ ข้อมูลเกี่ยวกับความปลอดภัย WF806U4SA-03205H-02_TH.indd 8 2013-7-6 9:52:23 ข้อควรระวัง สัญญาณข้อควรระวังสำ�หรับการใช้งาน เมื่อเครื่องซักผ้าเปื้อนสิ่งแปลกปลอมเช่น สารซักฟอก สิ่งสกปรก เศษอาหาร ฯลฯ ให้ถอดปลั๊กไฟและทำ�ความสะอาดเครื่องด้วยผ้านุ่ม ชุบน้ำ�หมาดๆ - มิฉะนั้นอาจทำ�ให้ผลิตภัณฑ์เปลี่ยนสี เปลี่ยนรูป เสียหาย หรือเกิดสนิม กระจกด้านหน้าสามารถแตกได้เมื่อกระแทกแรงๆ โปรดใช้ความระมัดระวังเมื่อใช้เครื่องซักผ้า - เมื่อกระจกแตก อาจทำ�ให้เกิดการบาดเจ็บได้ หลังจากการจ่ายน้ำ�ไม่ทำ�งานหรือเมื่อต่อท่อจ่ายน้ำ�ใหม่ ให้เปิดก๊อกน้ำ�ช้าๆ เปิดก๊อกน้ำ�ช้าๆ หลังจากไม่ได้ใช้งานมาเป็นเวลานาน - แรงดันอากาศในท่อจ่ายน้ำ�หรือท่อน้ำ�ประปาอาจทำ�ให้ชิ้นส่วนของเครื่องเสียหายหรือทำ�ให้น้ำ�รั่ว ถ้าเกิดข้อผิดพลาดในการระบายน้ำ�ระหว่างการทำ�งาน ให้ตรวจสอบว่ามีปัญหาของการระบายน้ำ�หรือไม - ถ้าใช้เครื่องซักผ้าเมื่อมีน้ำ�ท่วม เนื่องจากปัญหาการระบายน้ำ� อาจทำ�ให้เกิดไฟฟ้าช็อตหรือเพลิงไหม้เนื่องจากไฟฟ้ารั่ว ใส่ผ้าในเครื่องซักผ้าโดยระวังอย่าให้ผ้าติดอยู่ที่ประตู - ถ้าผ้าติดอยู่ที่ประตู อาจทำ�ให้ผ้าเสียหายหรือเครื่องซักผ้าเสียหาย หรือทำ�ให้น้ำ�รั่ว ตรวจสอบว่าปิดก๊อกน้ำ�ไว้ เมื่อไม่ได้ใช้เครื่องซักผ้า - ตรวจสอบว่าสกรูของข้อต่อท่อจ่ายน้ำ�นั้นมีการขันไว้อย่างถูกต้อง - มิฉะนั้นอาจทำ�ให้เกิดความเสียหายแก่ทรัพย์สินหรือเกิดการบาดเจ็บ โปรดระมัดระวังอย่าให้ซีลยางและกระจกด้านหน้ามีสิ่งแปลกปลอมติดอยู่ (เช่น สิ่งสกปรก เส้นด้าย ผม ฯลฯ) - ถ้ามีสิ่งแปลกปลอมติดอยู่ในประตู หรือประตูไม่ปิดสนิท อาจทำ�ให้นํ้ารั่ว เปิดก๊อกและตรวจสอบว่าข้อต่อของท่อจ่ายน้ำ�มีการขันไว้อย่างแน่นหนาแล้วหรือไม่ และไม่มีน้ำ�รั่ว ก่อนที่จะใช้ผลิตภัณฑ์ - ถ้าสกรูหรือข้อต่อท่อจ่ายน้ำ�หลวม อาจทำ�ให้น้ำ�รั่ว ผลิตภัณฑ์ที่คุณซื้อนี้ได้รับการออกแบบมาสำ�หรับใช้ในครัวเรือนเท่านั้น การใช้เพื่อธุรกิจจะถือเป็นการใช้ผิดวัตถุประสงค์ ในกรณีนี้ ผลิตภัณฑ์จะไม่ได้รับความคุ้มครองตามการรับประกันมาตรฐานที่มาจาก Samsung และ Samsung จะไม่มีส่วนรับผิดชอบต่อการทำ�งานผิดปกติหรือความเสียหายที่เกิดจากการใช้ผิดวัตถุประสงค์ดังกล่าว ข้อมูลเกี่ยวกับความปลอดภัย _9 WF806U4SA-03205H-02_TH.indd 9 2013-7-6 9:52:23 ข้อมูลเกี่ยวกับความปลอดภัย อย่ายืนบนอุปกรณ์หรือวางสิ่งของ (เช่น ผ้า เทียนที่จุดไฟแล้ว บุหรี่ที่ติดไฟ จาน สารเคมี วัตถุที่เป็นโลหะ ฯลฯ) บนอุปกรณ์ - มิฉะนั้นอาจทำ�ให้เกิดไฟฟ้าช็อต เพลิงไหม้ หรือปัญหากับผลิตภัณฑ์ ห้ามพ่นสารระเหยเช่นยาฆ่าแมลงบนพื้นผิวผลิตภัณฑ์โดยตรง - นอกจากจะเป็นอันตรายต่อมนุษย์แล้ว ยังอาจทำ�ให้เกิดไฟฟ้าช็อต เพลิงไหม้ หรือมีปัญหากับผลิตภัณฑ์ได้ อย่าวางวัตถุที่สร้างสนามแม่เหล็กไฟฟ้าไว้ใกล้เครื่องซักผ้า - อาจทำ�ให้เกิดการบาดเจ็บเนื่องจากการทำ�งานผิดปกติได้ เนื่องจากน้ำ�ที่ระบายระหว่างการซักผ้าอุณหภูมิสูงหรือรอบการอบแห้งนั้นจะร้อนจัด โปรดอย่าสัมผัสน้ำ� - อาจทำ�ให้เกิดการลวกหรือบาดเจ็บได้ ห้ามซัก ปั่น หรืออบแห้งเบาะรองนั่ง เบาะ หรือเสื้อผ้า (*) ที่กันน้ำ� ยกเว้นอุปกรณ์ของคุณมีโปรแกรมพิเศษสำ�หรับซักสิ่งของเหล่านี้ - อย่าซักเบาะที่หนาและแข็ง แม้ว่าจะมีสัญลักษณ์เครื่องซักผ้าบนป้ายดูแลผ้าก็ตาม - อาจทำ�ให้เกิดการบาดเจ็บหรือทำ�ให้เครื่องซักผ้า ผนัง พื้น หรือผ้าเสียหาย เนื่องจากการสั่นสะเทือนมากเกินไป * เครื่องนอนขนสัตว์ เสื้อกันฝน เสื้อชูชีพ กางเกงเล่นสกี ถุงนอน ผ้าปิดผ้าอ้อม ชุดกันลม และผ้าคลุมจักรยาน จักรยานยนต์ รถยนต์ ฯลฯ อย่าใช้เครื่องซักผ้าขณะที่ถอดลิ้นชักใส่ผงซักฟอกออก - อาจทำ�ให้ไฟฟ้าช็อตหรือเกิดการบาดเจ็บเนื่องจากน้ำ�รั่ว อย่าสัมผัสภายในของถังซักระหว่างหรือหลังจากการอบแห้ง เนื่องจากจะร้อนจัด - อาจทำ�ให้เกิดการร้อนลวกได้ อย่าสอดมือเข้าสู่ช่องใส่ผงซักฟอกหลังจากที่เปิดออก - อาจทำ�ให้เกิดการบาดเจ็บ เนื่องจากมืออาจติดอยู่ในช่องใส่ผงซักฟอก อย่าวางวัตถุใดๆ (เช่น รองเท้า เศษอาหาร สัตว์) นอกเหนือ จากเสื้อผ้าในเครื่องซักผ้า - อาจทำ�ให้เกิดความเสียหายกับเครื่องซักผ้า หรือเกิดการบาดเจ็บหรือเสียชีวิตในกรณีของสัตว์เลี้ยง เนื่องจากการสั่นสะเทือนมากกว่าปกติ อย่ากดปุ่มต่างๆ ด้วยของแหลม เช่น หมุด มีด เล็บ ฯลฯ - อาจทำ�ให้เกิดไฟฟ้าช็อตหรือบาดเจ็บได้ ห้ามซักผ้าที่เปื้อนน้ำ�มัน ครีม หรือโลชั่นทั่วไปที่ใช้ในร้านดูแลผิวหรือร้านนวด - อาจทำ�ให้ซีลยางเสื่อมสภาพและทำ�ให้น้ำ�รั่ว อย่าทิ้งโลหะ เช่น เข็มกลัดหรือกิ๊บติดผมหรือสารซักฟอกไว้ในถังซักเป็นเวลานาน - อาจทำ�ให้ถังซักขึ้นสนิม - หากถังซักเริ่มมีลักษณะเป็นสนิมที่พื้นผิว ให้ใช้สารทำ�ความสะอาด (ไม่เป็นกรดหรือด่าง) กับพื้นผิว และใช้ฟองน้ำ�ทำ�ความสะอาด ห้ามใช้ แปรงขนลวดเด็ดขาด ห้ามใช้สารทำ�ความสะอาดแบบซักแห้งโดยตรงและห้ามซัก ล้าง หรือปั่นหมาดผ้าที่เปื้อนสารซักแห้ง - อาจทำ�ให้เกิดการติดไฟขึ้นในทันทีเนื่องจากความร้อนของการออกซิเดชันของน้ำ�มัน ห้ามใช้น้ำ�ร้อนจากอุปกรณ์ทำ�น้ำ�ร้อน/น้ำ�เย็น - อาจทำ�ให้เครื่องซักผ้าเกิดปัญหา 10_ ข้อมูลเกี่ยวกับความปลอดภัย WF806U4SA-03205H-02_TH.indd 10 2013-7-6 9:52:23 ห้ามใช้สารซักฟอกสำ�หรับซักมือกับเครื่องซักผ้า - ถ้ามีการแข็งตัวและสะสมอยู่ในเครื่องซักผ้า อาจทำ�ให้เกิดปัญหากับผลิตภัณฑ์ ทำ�ให้สีเปลี่ยน ขึ้นสนิม หรือทำ�ให้มีกลิ่นอับ ห้ามซักผ้าชิ้นใหญ่เช่นผ้าปูที่นอนในถุงซักผ้า - ใส่ถุงเท้าและเสื้อชั้นในลงในถุงซักผ้าและซักร่วมกับผ้าอื่นๆ - มิฉะนั้นอาจเกิดการบาดเจ็บเนื่องจากการสั่นสะเทือนผิดปกต ห้ามใช้ผงซักฟอกแบบก้อน - ถ้ามีการสะสมในเครื่อง อาจทำ�ให้เกิดน้ำ�รั่ว สำ�หรับเครื่องซักผ้าที่มีช่องระบายอากาศที่ฐาน โปรดอย่าให้พรมหรือวัสดุชนิดอื่นปิดกั้นช่องนี้ ตรวจสอบว่าไม่มีสิ่งใดอยู่ในกระเป๋าเสื้อผ้าที่จะซัก - ของแข็ง ของมีคม เช่น เหรียญ เข็มกลัด ตะปู ตะปูควง หรือก้อนหินอาจทำ�ให้เกิดความเสียหายแก่อุปกรณ์ได้ ห้ามซักผ้าที่มีหัวเข็มขัด กระดุม หรือโลหะหนักติดอยู่ คำ�เตือน สัญญาณคำ�เตือนสำ�คัญสำ�หรับการทำ�ความสะอาด ห้ามทำ�ความสะอาดอุปกรณ์ด้วยการพ่นน้ำ�ลงบนเครื่องโดยตรง ห้ามใช้สารทำ�ความสะอาดที่เป็นกรดรุนแรง โปรดอย่าใช้สารเคมีเช่น เบนซิน ทินเนอร์ แอลกอฮอล์เพื่อทำ�ความสะอาดอุปกรณ์ - อาจทำ�ให้สีเปลี่ยน เสื่อมสภาพ เสียหาย เกิดไฟฟ้าช็อตหรือไฟไหม้ ก่อนที่จะทำ�ความสะอาดหรือดูแลรักษาเครื่อง โปรดถอดปลั๊กของเครื่องออกจากแหล่งจ่ายไฟ หรือปิดเครื่องที่ปุ่มเปิด/ปิด - มิฉะนั้นอาจทำ�ให้เกิดไฟฟ้าช็อต เพลิงไหม ข้อมูลเกี่ยวกับความปลอดภัย _11 WF806U4SA-03205H-02_TH.indd 11 2013-7-6 9:52:23 สารบัญ การติดตั้งเครื่องซักผ้า 13 การซักผ้า 21 13การตรวจสอบชิ้นส่วนอุปกรณ์ 14การปฏิบัติตามข้อกำ�หนดในการติดตั้ง 14 คำ�เตือนเกี่ยวกับไฟฟ้าและการลงกราวด์ 14 การจ่ายน้ำ� 15 การระบายน้ำ� 15 พื้น 15 อุณหภูมิโดยรอบ 15 การติดตั้งในซุ้มหรือตู้ 15การติดตั้งเครื่องซักผ้า 21การซักครั้งแรก 21คำ�แนะนำ�เบื้องต้น 22การใช้แผงควบคุม 25 ล็อคป้องกันเด็ก 25 ปิดเสียง 26 ตั้งเวลาล่วงหน้า 26 กำ�หนดโปรแกรม 27 ซักฟองแบบประหยัด 28 การซักโดยใช้ปุ่มเลือกโปรแกรมซัก 29 การซักด้วยตนเอง 29คำ�แนะนำ�ของผ้า 30ข้อมูลผงซักฟอกและสารเพิ่มเติมต่างๆ 30 ควรใช้ผงซักฟอกแบบใด 31 ช่องใส่ผงซักฟอก 31 สารซักฟอกชนิดน้ำ� (เฉพาะบางรุ่น) การทำ�ความสะอาดและดูแลรักษา เครื่องซักผ้า 32 32ล้างถังซัก 33การทิ้งน้ำ�เมื่อเกิดเหตุฉุกเฉิน 34การทำ�ความสะอาดตัวกรองเศษด้าย 34การทำ�ความสะอาดภายนอก 35การทำ�ความสะอาดช่องใส่และที่พักผงซักฟอก 35การทำ�ความสะอาดตัวกรองท่อจ่ายน้ำ� 36การซ่อมแซมเครื่องซักผ้าหากน้ำ�แข็งตัว 36การจัดเก็บเครื่องซักผ้า การแก้ไขปัญหาและรหัสข้อมูล 37ตรวจสอบสิ่งต่อไปนี้ถ้าเครื่องซักผ้าของคุณ... 38รหัสข้อมูล 37 ผังโปรแกรม 39 ภาคผนวก 40 39ผังโปรแกรม 40ผังการดูแลผ้า 40การปกป้องสิ่งแวดล้อม 40ประกาศเกี่ยวกับมาตรฐาน 41ข้อมูลจำ�เพาะ 42ข้อมูลจำ�เพาะ 12_ สารบัญ WF806U4SA-03205H-02_TH.indd 12 2013-7-6 9:52:24 การติดตั้งเครื่องซักผ้า โปรดให้ผู้ติดตั้งปฏิบัติตามคำ�แนะนำ�นี้อย่างเคร่งครัด เพื่อให้เครื่องซักผ้าใหม่ของคุณทำ�งานอย่างถูกต้อง และไม่เสี่ยงต่อการบา ดเจ็บขณะซักผ้า การตรวจสอบชิ้นส่วนอุปกรณ์ 01 การตั้งค่า นำ�เครื่องซักผ้าออกจากบรรจุภัณฑ์ และตรวจสอบว่าคุณได้รับชิ้นส่วนทั้งหมดที่แสดงด้านล่างนี้ ถ้าเครื่องซักผ้าของคุณได้รับความเสียหายระหว่างการขนส่ง หรือถ้า คุณไม่ได้รับชิ้นส่วนทั้งหมดครบถ้วน โปรดติดต่อฝ่ายบริการลูกค้าของ Samsung หรือตัวแทนจำ�หน่ายของ Samsung พื้นผิวส่วนบน คันปลด ช่องใส่ผงซักฟอก แผงควบคุม ปลั๊ก ประตู ท่อน้ำ�ทิ้ง ท่อทิ้งน้ำ�ฉุกเฉิน ขาตั้งปรับระดับ ถังซัก ตัวกรอง ฝาครอบตัวกรอง ประแจ * ที่ปิดช่องใส่หมุด แผ่นปิดช่อง เย็น ร้อน(เฉพาะบางรุ่น) ท่อจ่ายน้ำ� ตัวนำ�ท่อ ที่แบ่งสารซักฟอก ชนิดน้ำ� (เฉพาะบางรุ่น) * ที่ปิดช่องใส่หมุด : จำ�นวนที่ปิดช่องใส่หมุดจะแตกต่างกันในแต่ละรุ่น (3-5 จุด) การติดตั้งเครื่องซักผ้า _13 WF806U4SA-03205H-02_TH.indd 13 2013-7-6 9:52:24 การติดตั้งเครื่องซักผ้า การปฏิบัติตามข้อกำ�หนดในการติดตั้ง คำ�เตือนเกี่ยวกับไฟฟ้าและการลงกราวด์ คำ�เตือน ห้ามใช้สายไฟสำ�หรับต่อ ใช้สายไฟที่มากับเครื่องซักผ้าเท่านั้น ขณะที่เตรียมพร้อมสำ�หรับการติดตั้ง โปรดตรวจสอบว่าแหล่งจ่ายไฟของคุณมีสิ่งต่อไปนี้: • ฟิวส์หรือเบรกเกอร์ AC 220V~240V 50 Hz • วงจรสาขาแยกสำ�หรับเครื่องซักผ้าโดยเฉพาะ เครื่องซักผ้าต้องได้รับการลงกราวด์อย่างเหมาะสม ถ้าเครื่องซักผ้าทำ�งานผิดปกติหรือเสียหาย การลงกราวด์จะช่วยลดความเสี่ยงที่จะเกิดไฟฟ้าช็อต โดยจะเป็นทางระบายกระแสไฟฟ้าที่มีแรงต้านทานน้อยที่สุด เครื่องซักผ้าของคุณมาพร้อมกับสายไฟที่มีปลั๊กลงกราวด์สามขา สำ�หรับใช้กับเต้าเสียบไฟฟ้าที่ติดตั้งและลงกราวด์อย่างเหมาะสม ห้ามต่อสายกราวด์เข้ากับท่อพลาสติก ท่อก๊าซ หรือท่อน้ำ�ร้อน การเชื่อมต่อสายกราวด์อุปกรณ์อย่างไม่เหมาะสมจะทำ�ให้เกิดไฟฟ้าช็อต โปรดติดต่อช่างไฟฟ้าหรือช่างซ่อมบำ�รุงที่มีความชำ�นาญ ถ้าคุณสงสัยว่าเครื่องซักผ้ามีการลงกราวด์อย่างเหมาะสมหรือไม ห้ามดัดแปลงปลั๊กที่มากับ เครื่องซักผ้า ถ้าไม่สามารถใช้ร่วมกับเต้าเสียบได้ โปรดให้ช่างที่มีความชำ�นาญเป็นผู้ติดตั้งเต้าเสียบที่เหมาะสม การจ่ายน้ำ� เครื่องซักผ้าของคุณจะเติมน้ำ�อย่างเหมาะสมเมื่อมีแรงดันน้ำ� 50 kPa ~ 800 kPa แรงดันน้ำ�ต่ำ�กว่า 50 kPa จะทำ�ให้วาล์วน้ำ�ทำ�งานผิดพลาด ทำ�ให้วาล์ว น้ำ�ไม่สามารถปิดอย่างเหมาะสม หรือมิฉะนั้น อาจทำ�ให้เครื่องซักผ้าใช้เวลาในการเติมน้ำ�นานเกินกว่าที่ระบบควบคุมกำ�หนด ทำ�ให้เครื่องซักผ้าปิดลง (ใน ระบบควบคุมมีขีดจำ�กัดเวลาการเติมน้ำ� ได้รับการออกแบบเพื่อป้องกันน้ำ�ล้น/ท่วมถ้าท่อน้ำ�หลวม) ก๊อกน้ำ�ต้องห่างไม่เกิน 120 ซม. จากด้านหลังของเครื่องซักผ้า เพื่อให้สามารถต่อท่อจ่ายน้ำ�ที่ให้มากับเครื่องซักผ้าได้ ร้านจำ�หน่ายอุปกรณ์เดินท่อจะมีท่อจ่ายน้ำ�ความยาวต่างๆ ถึง 305 ซม. คุณสามารถลดความเสี่ยงของน้ำ�รั่วและความเสียหายจากน้ำ�โดย: • ติดตั้งให้ท่อน้ำ�อยู่ในระยะที่เอื้อมถึงได้ง่าย • ปิดก๊อกเมื่อไม่ได้ใช้งานเครื่องซักผ้า • ตรวจสอบรอยรั่วที่ข้อต่อของท่อจ่ายน้ำ�เป็นประจำ� คำ�เตือน ก่อนที่จะใช้เครื่องซักผ้าเป็นครั้งแรก โปรดตรวจสอบการต่อท่อและวาล์วจ่ายน้ำ�เพื่อหารอยรั่ว 14_ การติดตั้งเครื่องซักผ้า WF806U4SA-03205H-02_TH.indd 14 2013-7-6 9:52:24 การระบายน้ำ� Samsung แนะนำ�ให้ใช้ท่อตั้งมีความสูง 65 ซม. ท่อระบายน้ำ�ต้องวางผ่านคลิปท่อระบายน้ำ�ไปยังท่อตั้งดังกล่าว ท่อตั้งจะต้องมีขนาดใหญ่พอที่จะรับ เส้นผ่าศูนย์กลางภายนอกของท่อระบายน้ำ� ท่อระบายน้ำ�ติดมาจากโรงงาน เพื่อให้ได้ประสิทธิภาพสูงสุด โปรดติดตั้งเครื่องซักผ้าบนพื้นที่แข็งแรงมั่นคง พื้นไม้อาจต้องได้รับการเสริมแรงเพื่อลดการสั่นสะเทือน และ/ หรือการรับน้ำ�หนักที่ขาดสมดุล พื้นผิวที่ปูพรมและวัสดุอ่อนนุ่มอาจทำ�ให้เกิดการสั่นสะเทือน และอาจทำ�ให้เครื่องซักผ้าเคลื่อนตัวเล็กน้อยระหว่างรอบการ ปั่นหมาด 01 การตั้งค่า พื้น ห้ามติดตั้งเครื่องซักผ้าบนที่ยกพื้นหรือโครงสร้างที่ไม่แข็งแรง อุณหภูมิโดยรอบ ห้ามติดตั้งเครื่องซักผ้าในพื้นที่ซึ่งน้ำ�อาจแข็งตัวได้ เนื่องจากเครื่องซักผ้าของคุณจะมีน้ำ�อยู่ในวาล์ว ปั๊ม และท่อเสมอ น้ำ�ที่แข็งตัวในท่ออาจทำ�ให้สายพาน ปั๊ม และองค์ประกอบอื่นๆ เสียหาย การติดตั้งในซุ้มหรือตู้ ในการใช้งานอย่างปลอดภัยและเหมาะสม เครื่องซักผ้าต้องมีระยะห่าง: ด้านข้าง – 25 มม. ด้านบน – 25 มม. ด้านหลัง – 50 มม. ด้านหน้า – 465 มม. ถ้าติดตั้งทั้งเครื่องซักผ้าและเครื่องอบผ้าไว้ด้วยกัน ด้านหน้าของซุ้มหรือตู้จะต้องมีช่องเปิดที่ไม่มีสิ่งกีดขวางอย่างน้อย 465 มม. เครื่องซักผ้า เพียงอย่างเดียวจะไม่ต้องมีช่องเปิดสำ�หรับอากาศโดยเฉพาะ การติดตั้งเครื่องซักผ้า ขั้นตอนที่ 1 การเลือกที่ตั้ง ก่อนที่จะติดตั้งเครื่องซักผ้า โปรดตรวจสอบว่าสถานที่ตั้ง: • • • • • • มีพื้นผิวแข็ง ได้ระดับ โดยไม่มีพรมหรือวัสดุปูพื้นที่อาจปิดกั้นการระบายอากาศ พ้นจากแสงแดดโดยตรง มีการระบายอากาศที่เพียงพอ ไม่ทำ�ให้น้ำ�แข็งตัว (ต่ำ�กว่าh 0 °C) ห่างจากแหล่งความร้อน เช่น น้ำ�มันหรือก๊าซ มีพื้นที่ว่างเพียงพอที่ไม่ทำ�ให้เครื่องซักผ้าทับสายไฟ การติดตั้งเครื่องซักผ้า _15 WF806U4SA-03205H-02_TH.indd 15 2013-7-6 9:52:24 การติดตั้งเครื่องซักผ้า ขั้นตอนที่ 2 การถอดหมุดสำ�หรับการขนส่ง ก่อนที่จะติดตั้งเครื่องซักผ้า คุณต้องนำ�หมุดสำ�หรับการขนส่งทั้งหมดออกจากด้านหลังของเครื่อง 1. คลายหมุดด้วยประแจที่ให้มา ตัวเลือก 2. ดึงส่วนหัวของหมุดออกทางส่วนกว้างของช่อง ทำ�ตามขั้นตอนนี้สำ�หรับหมุดแต่ละตัว 3. นำ�ฝาปิดพลาสติกที่ให้มาใส่ในช่อง ตัวเลือก ตัวเลือก 4. เก็บหมุดสำ�หรับขนส่งไว้ต่างหากในกรณีที่คุณต้องการย้ายเครื่องซักผ้าในอนาคต คำ�เตือน บรรจุภัณฑ์อาจเป็นอันตรายต่อเด็ก โปรดเก็บบรรจุภัณฑ์ทั้งหมด (ถุงพลาสติก โฟม ฯลฯ) ให้พ้นมือเด็ก 16_ การติดตั้งเครื่องซักผ้า WF806U4SA-03205H-02_TH.indd 16 2013-7-6 9:52:25 ขั้นตอนที่ 3 การปรับขาตั้งปรับระดับ เมื่อติดตั้งเครื่องซักผ้า ให้ตรวจสอบว่าปลั๊กไฟ ท่อจ่ายน้ำ�และท่อระบายน้ำ�อยู่ในระยะที่เอื้อมถึงได้ง่าย 01 การตั้งค่า 1. เลื่อนเครื่องซักผ้าเข้าสู่ที่ติดตั้ง 2. ปรับระดับเครื่องซักผ้าด้วยการหมุนขาตั้ง เข้าและออกด้วยมือตามความต้องการ 3. เมื่อเครื่องซักผ้าได้ระดับแล้ว ให้ขันน็อตให้แน่นโดยใช้ประแจที่ให้มาพร้อมกับเครื่องซักผ้า ขั้นตอนที่ 4 การต่อท่อจ่ายน้ำ�และท่อระบายน้ำ� การต่อท่อจ่ายน้ำ� ตัวเลือก 1. นำ�ข้อต่อรูปตัว L สำ�หรับท่อจ่ายน้ำ�เย็นมาต่อเข้ากับท่อน้ำ�เย็นที่ด้านหลังของ เครื่องซักผ้า ใช้มือหมุนให้แน่น ท่อจ่ายน้ำ�จะต้องต่อเข้ากับเครื่องซักผ้าและต่อปลายอีกด้านเข้ากับก๊อกน้ำ� โปรดอย่าดึงท่อจ่ายน้ำ�จนตึง หากท่อจ่ายน้ำ�สั้นเกินไป โปรดเปลี่ยนเป็นท่อ แรงดันสูงที่ยาวขึ้น 2. ต่อปลายอีกด้านเข้ากับก๊อกน้ำ�เย็นที่อ่างซักล้าง และขันให้แน่นด้วยมือ หาก จำ�เป็น คุณสามารถจัดตำ�แหน่งของท่อจ่ายน้ำ�ที่เครื่องซักผ้า โดยคลายข้อต่อ หมุนสาย และขันข้อต่อเข้าที่อีกครั้ง สำ�หรับบางรุ่นที่มีช่องรับน้ำ�ร้อน: 1. นำ�ข้อต่อรูปตัว L สำ�หรับท่อจ่ายน้ำ�เย็นมาต่อเข้ากับท่อน้ำ�เย็นที่ด้านหลังของ เครื่องซักผ้า ใช้มือหมุนให้แน่น 2. เชื่อมต่อปลายอีกด้านหนึ่งของท่อจ่ายน้ำ�ร้อนไปยังก็อกประปาของน้ำ�ร้อน และหมุนให้แน่นด้วยมือ 3. ใช้อุปกรณ์รูปตัว Y เฉพาะหากคุณต้องการใช้น้ำ�เย็น การติดตั้งเครื่องซักผ้า _17 WF806U4SA-03205H-02_TH.indd 17 2013-7-6 9:52:25 การติดตั้งเครื่องซักผ้า การต่อท่อจ่ายน้ำ� 1. ถอดข้อต่อออกจากท่อจ่ายน้ำ� ข้อต่อ ท่อจ่ายน้ำ� 2. ใช้ไขควงแบบ “+” คลายสกรูที่ตัวแปลง ถัดจากนั้น ให้นำ�ตัวแปลงมาหมุนส่วน (2) ตามลูกศร จนมีช่องว่าง 5 มม. 1 5 มม. 2 3. ต่อตัวแปลงเข้ากับก๊อกน้ำ�โดยขันสกรูให้แน่น และยกตัวแปลงขึ้น หมุนส่วน (2) ตามลูกศร และต่อ (1) เข้ากับ (2) ก๊อกน้ำ� 1 2 4. ให้ต่อท่อจ่ายน้ำ�เข้ากับข้อต่อตัวแปลง เมื่อปล่อยส่วน (3) ท่อจะต่อเข้ากับตัวแปลงโดยอัตโนมัติ พร้อมกับมีเสียง “คลิก” หลังจากต่อท่อจ่ายน้ำ�เข้ากับข้อต่อแล้ว ให้ตรวจสอบว่ามีการเชื่อมต่ออย่างถูกต้อง โดยดึงท่อจ่ายน้ำ�ลง 3 5. ต่อปลายอีกด้านของท่อจ่ายน้ำ�เข้ากับวาล์วน้ำ�เข้าที่ด้านหลังของเครื่อง ไขท่อตามเข็มนาฬิกาจน สุด ตัวเลือก 18_ การติดตั้งเครื่องซักผ้า WF806U4SA-03205H-02_TH.indd 18 2013-7-6 9:52:26 6. เปิดน้ำ� และดูว่าไม่มีน้ำ�รั่วจากวาล์วน้ำ� ก๊อก หรือข้อต่อ ถ้ามีน้ำ�รั่ว ให้ทำ�ตามขั้นตอนก่อนหน้า นี้ซ้ำ� คำ�เตือน ✗ ห้ามใช้เครื่องซักผ้าถ้ามีน้ำ�รั่ว เนื่องจากอาจทำ�ให้ไฟฟ้าช็อตหรือเกิดการบาดเจ็บได้ • 01 การตั้งค่า ✗ หากก๊อกน้ำ�มีปากเป็นเกลียว ให้ต่อท่อจ่ายน้ำ�เข้ากับก๊อกตามภาพ ใช้ก๊อกน้ำ�แบบทั่วไปในการจ่ายน้ำ� หากก๊อกน้ำ�เป็นแบบเหลี่ยมหรือใหญ่เกินไป ให้นำ�วงแหวนออกก่อนที่จะต่อก๊อกเข้ากับตัวแปลง การต่อท่อจ่ายน้ำ� Aqua Hose (เฉพาะบางรุ่น) ท่อจ่ายน้ำ� Aqua Hose ได้รับการคิดค้นขึ้นเพื่อป้องกันการรั่วไหลได้อย่างสมบูรณ์แบบ โดยจะต่ออยู่กับท่อจ่ายน้ำ�และจะตัดน้ำ�โดยอัตโนมัติ ถ้าท่อเกิดความเสียหาย และจะแสดงสัญญาณ เตือน • ต่อท่อจ่ายน้ำ�เข้ากับก๊อกดังที่แสดง การติดตั้งเครื่องซักผ้า _19 WF806U4SA-03205H-02_TH.indd 19 2013-7-6 9:52:26 การติดตั้งเครื่องซักผ้า การต่อท่อน้ำ�ทิ้ง ปลายของท่อน้ำ�ทิ้งจะสามารถอยู่ในตำ�แหน่งต่อไปนี้: 1. พาดขอบอ่างซักล้าง ท่อน้ำ�ทิ้งจะต้องมีความสูงระหว่าง 60 ถึง 90 ซม. ในการติดตั้งให้ท่อน้ำ�ทิ้งโค้งโดยไม่พับ ให้ใช้ตัวนำ�ท่อที่ให้มา ยึดท่อเข้ากับ ผนังด้วยขอยึด หรือยึดเข้ากับก๊อกน้ำ�โดยใช้เชือก เพื่อไม่ให้ท่อน้ำ�ทิ้งเคลื่อนตัว 2. ท่อแยกน้ำ�ทิ้งของอ่างซักล้าง ท่อแยกน้ำ�ทิ้งจะต้องอยู่เหนือท่อพักของอ่าง เพื่อให้ปลายท่ออยู่เหนือพื้นดินอย่างน้อย 60 ซม. 60 ~ 90 cm ท่อน้ำ�ทิ้ง ตัวนำ�ท่อ ท่อระบายน้ำ�จะต้องมี • เส้นผ่าศูนย์กลางขั้นต่ำ� 5 ซม. • สามารถระบายน้ำ�ได้ขั้นต่ำ� 60 ลิตรต่อนาที 60 ~ 90 cm 3. ในท่อน้ำ�ทิ้ง เราขอแนะนำ�ให้คุณใช้ท่อแนวตั้งความสูง 65 ซม. ซึ่งจะต้องไม่สั้นกว่า 60 ซม. และไม่ยาวเกิน 90 ซม. ขั้นตอนที่ 5 การต่อสายไฟของเครื่องซักผ้า ต่อสายไฟเข้ากับเต้ารับไฟฟ้าที่ผนัง ซึ่งเป็นเต้ารับไฟฟ้า AC 220-240V / 50Hz ที่ผ่านการรับรองและมีการป้องกันด้วยฟิวส์หรือเบรกเกอร์วงจร (สำ�หรับ ข้อมูลเพิ่มเติมเกี่ยวกับข้อกำ�หนดด้านไฟฟ้าและการลงกราวด์ โปรดดูที่หน้า 14) การใช้งานทดสอบ โปรดตรวจสอบว่าคุณติดตั้งเครื่องซักผ้าอย่างถูกต้อง โดยทดลองใช้โปรแกรม ล้างและปั่นหมาด หลังจากที่ติดตั้งเสร็จ ขั้นตอนที่ 6 โหมดการปรับตั้ง เครื่องซักผ้า Samsung จะตรวจจับนํ้าหนักผ้าโดยอัตโนมัติ เพื่อให้มีการตรวจจับนํ้าหนักได้แม่นยำ� โปรดเรียกใช้โหมดการปรับตั้งหลังจากติดตั้งอุปกรณ์ โหมดการปรับตั้งสามารถดำ�เนินการตามขั้นตอนต่อไปนี้ 1. นำ�ผ้าและสิ่งที่อยู่ในเครื่องออก และปิดเครื่อง 2. กดปุ่ม อุณหภูมิ และ ตั้งเวลาล่วงหน้า พร้อมกัน และกดปุ่ม เปิด/ปิด จากนั้นเครื่องจะเปิด 3. กดปุ่ม เริ่ม/พัก เพื่อเปิดใช้งาน “โหมดการปรับตั้ง” 4. ถังซักจะหมุนทวนเข็มนาฬิกาและตามเข็มนาฬิกาเป็นเวลาประมาณ 3 นาที 5. เมื่อ “Calibration Mode” (โหมดการปรับตั้ง) สิ้นสุดลง ข้อความ “END(En)” จะปรากฏในหน้าจอแสดงผล และเครื่องจะปิดโดยอัตโนมัติ ขณะนี้ เครื่องซักผ้าพร้อมใช้งานแล้ว 20_ การติดตั้งเครื่องซักผ้า WF806U4SA-03205H-02_TH.indd 20 2013-7-6 9:52:27 การซักผ้า เมื่อใช้เครื่องซักผ้าใหม่ของ Samsung สิ่งที่ยากที่สุดในการซักผ้าก็คือการตัดสินใจว่าจะซักผ้าชิ้นไหนก่อนดี การซักครั้งแรก ก่อนที่จะซักผ้าเป็นครั้งแรก คุณต้องเปิดเครื่องให้ทำ�งานครบทุกขั้นตอนโดยที่ถังซักว่าง (ไม่มีผ้า) กดปุ่ม เปิด/ปิด เติมผงซักฟอกปริมาณเล็กน้อยในช่องใส่ผงซักฟอก เปิดน้ำ�เข้าสู่เครื่องซักผ้า กดปุ่ม เริ่ม/พัก 02 การซักผ้า 1. 2. 3. 4. ในลิ้นชักผงซักฟอก การทำ�งานนี้จะทิ้งน้ำ�ที่หลงเหลืออยู่จากการทดสอบเครื่องของผู้ผลิต ช่องใส ช่องใส : ผงซักฟอกสำ�หรับการแช่ก่อนซัก หรือน้ำ�ยาแช่ผ้า : ผงซักฟอกสำ�หรับการซัก น้ำ�ยาปรับสภาพน้ำ� สารแช่ผ้า สารฟอกขาว และสารขจัดคราบ ถ้าต้องการใช้น้ำ�ยาซักผ้าเหลว ให้ใช้ที่แบ่งสารซักฟอกชนิดน้ำ� (ดูหน้า 31 ของคู่มือสำ�หรับรุ่นที่ต้องการ) อย่าใส่ผงซักฟอกชนิดผงในช่องใส่สาร ซักฟอกชนิดน้ำ� ช่องใส : สารเพิ่มเติม เช่น น้ำ�ยาปรับผ้านุ่มหรือน้ำ�ยารักษาเนื้อผ้า (ห้ามเติมเกินกว่าขอบด้านล่าง (MAX) ของ “A”) คำ�แนะนำ�เบื้องต้น 1. ใส่ผ้าในเครื่องซักผ้า ห้ามใส่ผ้าเกินปริมาณที่กำ�หนด ถ้าต้องการทราบระดับความจุสำ�หรับผ้าแต่ละชนิด โปรดดูแผนผังในหน้า 30 คำ�เตือน • • • • • ตรวจสอบว่าผ้าไม่ติดกับประตู เนื่องจากจะทำ�ให้น้ำ�รั่ว ผงซักฟอกอาจตกค้างอยู่ที่ส่วนของยางในเครื่องซักผ้าหลังจากรอบการซัก โปรดล้างผงซักฟอกที่หลงเหลือออก เนื่องจากอาจทำ�ให้น้ำ�รั่วได้ อย่าสัมผัสกระจกของประตูขณะที่เครื่องซักผ้าทำ�งาน เนื่องจากอาจร้อนจัด อย่าเปิดช่องใส่สารซักฟอกหรือตัวกรองเศษด้าย ขณะที่เครื่องซักผ้าทำ�งาน เนื่องจากอาจสัมผัสกับน้ำ�ร้อนหรือไอน้ำ� ห้ามซักผ้าที่มีคุณสมบัติกันน้ำ�ในโปรแกรมปกติ ยกเว้นเมื่อใช้โปรแกรมซักคราบฝังลึก 2. 3. 4. 5. ปิดประตูให้สลักล็อคเข้าที่ เปิดเครื่อง เติมผงซักฟอกและสารเพิ่มเติมในช่องเติม เลือกโปรแกรมซักและตัวเลือกการซักที่เหมาะสม ไฟสัญญาณการซักจะสว่าง และเวลาในการซักโดยประมาณจะปรากฏในจอแสดงผล 6. กดปุ่ม เริ่ม/พัก การซักผ้า _21 WF806U4SA-03205H-02_TH.indd 21 2013-7-6 9:52:27 การซักผ้า การใช้แผงควบคุม 1 2 3 4 5 6 7 8 9 10 11 12 13 เลือกรูปแบบการหมุนของถังซักและความเร็วการปั่นหมาดสำ�หรับรอบการซัก สำ�หรับข้อมูลโดยละเอียด โปรดดูที่ “การซักผ้าโดยใช้ปุ่มเลือกโปรแกรมซัก” (โปรดดูหน้า 28) ผ้าฝ้าย - สำ�หรับผ้าฝ้ายทั่วไปหรือสกปรกน้อย ผ้าปูที่นอน ผ้าปูโต๊ะ ชุดชั้นใน ผ้าเช็ดตัว เชิ้ต ฯลฯ ผ้าใยสังเคราะห์ - สำ�หรับเสื้อ เสื้อเชิ้ต ฯลฯ ที่เปื้อนปานกลางถึงเล็กน้อย ทำ�จากโพลีเอสเตอร์ (ไดโอเลน, เทรวิรา) โพ ลีอาไมด์ (เพอร์ลอน ไนลอน) หรือส่วนผสมอื่นๆ ผ้ายีนส์ - ระดับน้ำ�ที่สูงยิ่งขึ้นในการซักหลักและการล้างน้ำ�เพิ่มอีกหนึ่งรอบช่วยให้มั่นใจว่าผงซักฟอกจะไม่หลงเหลือ เป็นรอยบนผ้า ผ้าปูที่นอน - สำ�หรับผ้าปูที่นอน ผ้าคลุมเตียง หรือปลอกผ้านวม ฯลฯ ซักไม่เกิน 2.5 กก. และซักผ้าปูที่นอนชนิดเดียวกัน เพื่อให้ได้ผลลัพธ์ที่ดีที่สุด ผ้าสีเข้ม - การล้างน้ำ�เพิ่มเติมและการปั่นหมาดที่ลดความเร็วลงช่วยให้เสื้อผ้าสีเข้มชิ้นโปรดของคุณได้รับการซักอย่าง นุ่มนวลและล้างอย่างสะอาด ซักทุกวัน - ใช้สำ�หรับการซักผ้าที่ใช้ทุกวัน เช่น ชุดชั้นในและเชิ้ต ล้างถังซัก - ใช้สำ�หรับล้างถังซัก เป็นการขจัดสิ่งสกปรกและแบคทีเรียในถังซัก ขอแนะนำ�ให้ใช้เป็นประจำ� (หลังจาก ซักผ้า 40 ครั้ง) ไม่จำ�เป็นต้องใส่สารซักฟอกหรือสารฟอกขาว ซักประหยัดพลังงาน - การซักฟองแบบประหยัดด้วยอุณหภูมิต่ำ�ช่วยให้มั่นใจว่าจะได้ผลการซักที่ดีเยี่ยม และ ประหยัดพลังงาน ซักคราบฝังลึก - ใช้สำ�หรับเสื้อผ้าที่ใช้กลางแจ้ง เช่น เสื้อผ้าสำ�หรับปีนเขา เล่นสกี หรือชุดกีฬา เนื้อผ้าประกอบด้วย เทคโนโลยีการเคลือบและเส้นใยเช่น สแปนเด็กซ์ ผ้ายืด และไมโครไฟเบอร ชุดเด็กอ่อน - การซักด้วยอุณหภูมิสูง และล้างน้ำ�มากเป็นพิเศษ เพื่อให้มั่นใจว่าจะไม่มีผงซักฟอกหลงเหลืออยู่บน เสื้อผ้า ผ้าขนสัตว์์ - เฉพาะสำ�หรับขนสัตว์ที่ซักด้วยเครื่องได้ ผ้าควรมีน้ำ�หนักไม่เกิน 2.0 กก. • โปรแกรมผ้าขนสัตว์จะซักผ้าโดยใช้การหมุนแบบนุ่มนวล ระหว่างการซัก การหมุนและการแช่ที่นุ่มนวลจะ คุ้มครองเส้นใยผ้าขนสัตว์ไม่ให้หดตัว/ผิดรูป และเพื่อให้มีความสะอาดพร้อมกับการถนอมผ้า การหยุดทำ�งานใน ระหว่างนี้ไม่ใช่ปัญหาแต่อย่างใด • ขอแนะนำ�ให้ใช้สารซักฟอกที่มีฤทธิ์เป็นกลางสำ�หรับโปรแกรมผ้าขนสัตว์ เพื่อให้ผลการซักดียิ่งขึ้นและเพื่อรักษา เนื้อผ้า ซักมือ - รอบการซักที่เบามากซึ่งอ่อนโยนเหมือนกับซักด้วยมือ ปั่นหมาด - ปั่นหมาดเพิ่มเพื่อเอาน้ำ�ออกจากผ้ามากขึ้น ล้าง และ ปั่นหมาด - ใช้สำ�หรับผ้าที่ต้องการล้างเท่านั้น หรือเติมน้ำ�ยาปรับผ้านุ่มที่เติมระหว่างการล้างผ้า 1 ปุ่มเลือกโปรแกรมซัก 2 จอแสดงผลดิจิตัล แสดงเวลาของรอบการซักที่เหลือ ข้อมูลการซัก และข้อความแสดงข้อผิดพลาด 3 ปุ่มเลือกอุณหภูมิ กดปุ่มนี้ซ้ำ�ๆ เพื่อเลือกตัวเลือกอุณหภูมิของน้ำ�: (น้ำ�เย็น , 20 °C, 30 °C, 40 °C , 60 °C และ 95 °C) 4 ปุ่มเลือกการล้างน้ำ� กดปุ่มนี้เพื่อเพิ่มรอบการล้างน้ำ� จำ�นวนรอบการล้างสูงสุดคือห้ารอบ 22_ การซักผ้า WF806U4SA-03205H-02_TH.indd 22 2013-7-6 9:52:28 กดปุ่มนี้ซ้ำ�ๆ เพื่อเลือกตัวเลือกความเร็วในการปั่นหมาด WF806U4 6 7 8 9 , , 400, 800, 1200, 1400 รอบต่อนาที 02 การซักผ้า 5 ปุ่มเลือกการปั่นหมาด “ไม่ปั่นหมาด ” - ผ้าจะอยู่ในถังและไม่มีการปั่นหมาดหลังจากการระบายน้ำ�ครั้งสุดท้าย “หยุดการล้างนํ้า ” - ผ้าจะแช่อยู่ในนํ้าล้างรอบสุดท้าย ก่อนที่จะนำ�ผ้าออกจากเครื่อง จะต้องมีการใช้โปรแกรม Drain (ทิ้งนํ้า) หรือ Spin (ปั่น) ก่อน ปุ่มเลือกการทำ�งาน กดปุ่มนี้ซ้ำ�ๆ เพื่อสลับตัวเลือกต่างๆ: แช่ผ้า เพิ่มประสิทธิภาพ การซักล่วงหน้า แช่ผ้า + เพิ่มประสิทธิภาพ แช่ผ้า + การซักล่วงหน้า เพิ่มประสิทธิภาพ + การซักล่วงหน้า แช่ผ้า + เพิ่มประสิทธิภาพ + การ ซักล่วงหน้า ปิด การซักล่วงหน้า : กดปุ่มนี้เพื่อเลือกแช่ผ้าก่อนซัก การแช่ผ้าก่อนซักสามารถใช้ได้กับ: ผ้าฝ้าย ผ้าใยสังเคราะห์ ผ้ายีนส์ ผ้าปูที่นอน ผ้าสีเข้ม ซักทุกวัน ซักประหยัดพลังงาน ชุดเด็กอ่อน แช่ผ้า : ใช้ตัวเลือกนี้เพื่อขจัดคราบจากผ้าอย่างมีประสิทธิภาพด้วยการแช่ผ้า • ฟังก์ชั่นแช่ผ้าจะทำ�งานเป็นเวลา 13 นาทีในโปรแกรมการซัก • ฟังก์ชั่นแช่ผ้าจะทำ�งานต่อไปอีก 30 นาทีโดยมีหกรอบ โดยที่รอบหนึ่งเป็นรอบการแช่ผ้าที่ปั่น 1 นาที และอยู่นิ่ง 4 นาที • ฟังก์ชันแช่ผ้าจะใช้ได้เฉพาะโปรแกรมซักผ้าต่อไปนี้ ผ้าฝ้าย ผ้าใยสังเคราะห์ ผ้ายีนส์ ผ้าปูที่นอน ซักทุกวัน ซักประหยัดพลังงาน ชุดเด็กอ่อน เพิ่มประสิทธิภาพ : กดปุ่มนี้เมื่อผ้าเปื้อนมากและต้องการการซักล้างมากเป็นพิเศษ เวลาของรอบการซักจะเพิ่มขึ้น สำ�หรับแต่ละรอบ ปุ่มเลือกซักฟองแบบประหยัด การเลือกซักฟองแบบประหยัดจะทำ�งานเป็นค่าเริ่มต้น กดปุ่มซักฟองแบบประหยัดหนึ่งครั้งเพื่อยกเลิกการเลือก และปิดเครื่องสร้างฟอง (แสดงบนแผงควบคุม) กดอีกครั้งเพื่อเปิดฟังก์ชั่น • โปรแกรมซักบางโปรแกรมต้องมีการเปิดตัวเลือกซักฟองแบบประหยัด (จะแสดงบนแผงควบคุม และเครื่องสร้างฟองจะทำ�งานโดยอัตโนมัติ) • โปรแกรมซักอื่นๆ ไม่ต้องมีตัวเลือกนี้และจะเปิดเครื่องสร้างฟองโดยอัตโนมัติ • ในหลายโปรแกรม คุณสามารถปรับตัวเลือกนี้ได้ ซึ่งจะมีผลกับเวลาในการซักที่แสดงบนแผงควบคุม (โปรดดูข้อมูลเพิ่มเติมในหน้า 27) ปุ่มเลือกการซัก โปรแกรมรีดง่าย กดปุ่มนี้เพื่อเตรียมเสื้อผ้าของคุณเพื่อให้รีดง่าย ด้วยการลดรอยยับระหว่างรอบการปั่นหมาด • โปรแกรมรีดง่ายจะใช้ได้เฉพาะโปรแกรมซักผ้าต่อไปนี้ ผ้าฝ้าย ผ้าใยสังเคราะห์ ผ้ายีนส์ ผ้าปูที่นอน ผ้าสีเข้ม ซัก ทุกวัน ซักประหยัดพลังงาน ชุดเด็กอ่อน • เมื่อเลือกโปรแกรมรีดง่าย คุณสามารถตั้งค่าความเร็วในการปั่นหมาดได้ไม่เกิน 800 รอบต่อนาที (ถ้าคุณเลือก โปรแกรมรีดง่าย โดยตั้งค่าความเร็วการปั่นหมาดมากกว่า 800 รอบต่อนาที ความเร็วในการปั่นหมาดจะถูก เปลี่ยนเป็น800 รอบต่อนาทีโดยอัตโนมัติ) ปุ่มเลือกฟังก์ชั่นซักเร็ว สำ�หรับผ้าที่สกปรกน้อยและมีน้ำ�หนักน้อยกว่า 2 กก. ที่ต้องการซักอย่างรวดเร็ว การทำ�งานนี้จะใช้เวลาขั้นต่ำ� 15 นาที แต่อาจแตกต่างไปจากค่าที่ระบุ ทั้งนี้ขึ้นอยู่กับแรงดันน้ำ� ความกระด้างของน้ำ� อุณหภูมิของน้ำ� อุณหภูมิห้อง ประเภทและปริมาณของการซักและระดับความสกปรก สารซักฟอกที่ใช้ ปริมาณผ้า การเปลี่ยนแปลงของกระแสไฟฟ้า และตัวเลือกอื่นๆ ที่เลือก • กดปุ่มนี้ซ้ำ�ๆ เพื่อเลือกเวลาของโปรแกรม: 15 นาที 20 นาที 30 นาที 40 นาที 50 นาที 1 ชั่วโมง ปิด คำ�เตือน สารซักฟอกแบบผง/เหลวไม่ควรเกิน 20 กรัม (สำ�หรับผ้าหนัก 2 กก.) มิฉะนั้นอาจมีสารซักฟอกหลงเหลือบน ผ้า การซักผ้า _23 WF806U4SA-03205H-02_TH.indd 23 2013-7-6 9:52:29 การซักผ้า 10 ปุ่มเลือกตั้งเวลาซักล่วงหน้า กดปุ่มนี้ซ้ำ�ๆ เพื่อเลือกตัวเลือกการตั้งเวลาล่วงหน้าที่ใช้ได้ (ตั้งแต่ 3 ถึง 19 ชั่วโมง โดยเพิ่มได้ครั้งละหนึ่งชั่วโมง) จำ�นวนชั่วโมงที่แสดงนั้นเป็นเวลาที่รอบการซักจะสิ้นสุดลง 11 ปุ่มเริ่ม/พัก กดปุ่มนี้เพื่อเริ่มต้นและหยุดโปรแกรมต่างๆ 12 ปุ่มเลือกกำ�หนดโปรแกรม เลือกโปรแกรมซักที่ต้องการ รวมถึงอุณหภูมิ การปั่นหมาด ระดับความสกปรก เลือกการทำ�งาน 13 ปุ่มเปิด/ปิด กดปุ่มนี้หนึ่งครั้งเพื่อเปิดใช้เครื่องซักผ้า และกดอีกครั้งเพื่อปิดเครื่อง หากเครื่องซักผ้าถูกเปิดทิ้งไว้นานกว่า 10 นาทีโดยไม่มีการกดปุ่มใดๆ เครื่องจะปิดเองโดยอัตโนมัติ 24_ การซักผ้า WF806U4SA-03205H-02_TH.indd 24 2013-7-6 9:52:29 ล็อคป้องกันเด็ก ฟังก์ชันล็อคป้องกันเด็กจะใช้ล็อคปุ่ม เพื่อป้องกันการเปลี่ยนรอบการซักที่คุณเลือกไว้ การเปิดใช้/การปิด 02 การซักผ้า ถ้าต้องการเปิดหรือปิดฟังก์ชั่นล็อคป้องกันเด็ก ให้กดปุ่ม อุณหภูมิ และ ล้างน้ำ� พร้อมกันเป็นเวลา 3 วินาที สัญญาณ “ล็อคป้องกันเด็ก ” จะสว่างเมื่อใช้งานฟังก์ชั่นนี้ ขณะที่ใช้ฟังก์ชันล็อคป้องกันเด็ก จะมีเพียงปุ่ม เปิด/ปิด เท่านั้นที่ใช้ได้ ฟังก์ชันล็อคป้องกันเด็กจะ ทำ�งานแม้ว่าจะเปิดหรือปิดเครื่อง หรือหลังจากถอดปลั๊กและเสียบปลั๊กใหม่ 3 วินาที ปิดเสียง สามารถเลือกฟังก์ชันปิดเสียงได้กับทุกโปรแกรม เมื่อมีการเลือกฟังก์ชันนี้ เสียงจะถูกปิดสำ�หรับทุกโปรแกรม แม้ว่าจะเปิดหรือปิดเครื่องซ้ำ�ๆ การตั้งค่านี้ก็ยังคงทำ�งานอยู่ การเปิดใช้/การปิด ถ้าต้องการเปิดหรือปิดฟังก์ชั่นปิดเสียง ให้กดปุ่ม ปั่นหมาด และ เลือกการทำ�งาน พร้อมกันเป็นเวลา 3 วินาที สัญญาณ “ปิดเสียง ” จะสว่างเมื่อเปิดใช้งานคุณสมบัตินี้ 3 วินาที การซักผ้า _25 WF806U4SA-03205H-02_TH.indd 25 2013-7-6 9:52:30 การซักผ้า ตั้งเวลาล่วงหน้า คุณสามารถกำ�หนดให้เครื่องซักผ้าเสร็จในเวลาอื่นโดยอัตโนมัติ โดยเลือกได้ตั้งแต่ 3 ถึง 19 ชั่วโมง (เพิ่มได้ครั้งละ 1 ชั่วโมง) จำ�นวนชั่วโมงที่แสดงนั้น เป็นเวลาที่รอบการซักจะสิ้นสุดลง 1. กำ�หนดเครื่องซักผ้าด้วยตนเองหรือซักอัตโนมัติตามประเภทของผ้าที่ซัก 2. กดปุ่ม ตั้งเวลาล่วงหน้า ซ้ำ�ๆ เพื่อตั้งเวลา 3. กดปุ่ม เริ่ม/พัก สัญญาณ “ตั้งเวลาล่วงหน้า ” จะกะพริบและนาฬิกาจะเริ่มนับถอยหลังจนกระทั่งถึงเวลาที่กำ�หนดไว้ 4. ในการยกเลิกฟังก์ชันตั้งเวลาล่วงหน้า ให้กดปุ่ม เปิด/ปิด จากนั้นเปิดเครื่องอีกครั้ง กำ�หนดโปรแกรม ใช้สำ�หรับเปิดใช้การซักที่กำ�หนดเอง (อุณหภูมิ การปั่นหมาด ระดับความสกปรก ฯลฯ) ด้วยความสะดวกเพียงปุ่มเดียว เมื่อกดปุ่ม กำ�หนดโปรแกรม คุณสามารถกดปุ่มกำ�หนดโปรแกรมเพื่อโหลดผ้า และใช้ตัวเลือกของการกำ�หนดโปรแกรมที่บันทึกไว้ ไฟ “กำ�หนด โปรแกรม” จะแสดงว่าฟังก์ชั่นนี้ทำ�งาน นอกจากนี้ ไฟของโปรแกรมและการเลือกการทำ�งานจะกะพริบ คุณสามารถตั้งค่าตัวเลือกทั้งหมดดังนี้ในโหมดกำ�หนดโปรแกรม 1. เปิดท่อจ่ายน้ำ� 2. กดปุ่ม เปิด/ปิด 3. เลือกโปรแกรมโดยใช้ ปุ่มเลือกโปรแกรม 4. หลังจากเลือกโปรแกรม ให้ตั้งค่าตัวเลือกแต่ละตัว ดู “ผังโปรแกรม” ในหน้า 39 เพื่อดูการตั้งค่าตัวเลือกที่ใช้ได้สำ�หรับแต่ละโปรแกรม 5. จากนั้นคุณสามารถบันทึกโปรแกรมและตัวเลือกที่เลือกไว้ ด้วยการกดปุ่ม กำ�หนดโปรแกรม ค้างไว้มากกว่า 3 วินาทีในโหมดกำ�หนดโปรแกรม โปรแกรมและตัวเลือกที่คุณเลือกจะปรากฏในครั้งถัดไปที่คุณเลือก กำ�หนดโปรแกรม คุณสามารถเปลี่ยนการตั้งค่า กำ�หนดโปรแกรม ด้วยการทำ�ตามกระบวนการข้างต้นซ้ำ� การตั้งค่าล่าสุดจะถูกนำ�มาใช้เมื่อคุณเลือก กำ�หนดโปรแกรม ในครั้งถัดไป ถ้าคุณกด กำ�หนดโปรแกรม และปล่อยภายใน 3 วินาที โปรแกรมและตัวเลือกที่บันทึกไว้ก่อนหน้านั้นจะปรากฏ ถ้าคุณกด กำ�หนดโปรแกรม ค้างไว้ 3 วินาทีขึ้นไป โปรแกรมและตัวเลือกที่ตั้งไว้ปัจจุบันจะถูกบันทึก และ LED จะกะพริบเป็นเวลา 3 วินาที 26_ การซักผ้า WF806U4SA-03205H-02_TH.indd 26 2013-7-6 9:52:30 ซักฟองแบบประหยัด ระบบซักฟองแบบประหยัดช่วยให้สามารถกระจายสารซักฟอกอย่างสม่ำ�เสมอ และทำ�งานกับผ้าได้รวดเร็วและลึกล้ำ�ยิ่งขึ้น ฟังก์ชั่นซักฟองแบบประหยัดสามารถใช้ได้ในทุกโปรแกรม ยกเว้น ล้างถังซัก และสามารถใช้งานฟังก์ชั่นดังต่อไปนี้ • ฟังก์ชั่นซักฟอง การยกเลิกฟังก์ชั่นซักฟอง ใช้ได้ ไม่มี 02 การซักผ้า โปรแกรม ผ้าฝ้าย ผ้าใยสังเคราะห์ ผ้ายีนส์ ผ้าปูที่นอน ผ้าสีเข้ม ซักทุกวัน ซักประหยัดพลังงาน ซักคราบฝังลึก ชุดเด็กอ่อน ผ้า ขนสัตว์ ซักมือ ล้างถังซัก ใช้ได้ ไม่มี - อาจมีการใช้ฟังก์ชั่นซักฟองแบบอื่น ทั้งนี้ขึ้นอยู่กับโปรแกรม การเลือก ซักฟองแบบประหยัด เป็นตัวเลือกมาตรฐาน กดหนึ่งครั้งเพื่อยกเลิกการเลือกตัวเลือกซักฟอง กดอีกครั้งเพื่อเลือกตัวเลือกซักฟอง 1. 2. 3. 4. เปิดประตู ใส่ผ้าในเครื่อง และปิดประตู กดปุ่ม เปิด/ปิด เลือกฟังก์ชั่น ใส่สารซักฟอกและน้ำ�ยาปรับผ้านุ่มในปริมาณที่เหมาะสมในช่องใส่ที่ถูกต้อง โดยขึ้นอยู่กับปริมาณผ้า จากนั้นปิดช่องใส่สารซักฟอก เพิ่มสารซักฟอกในปริมาณที่เหมาะสมในช่องใส่สารซักฟอก และเพิ่มน้ำ�ยาปรับผ้านุ่มในช่องใส่น้ำ�ยาปรับผ้านุ่ม โดยไม่เกินเส้น (MAX) ของ A ) • เมื่อเลือกโปรแกรมที่มีการแช่ผ้า ให้เพิ่มสารซักฟอกในช่องแช่ผ้า ด้วย • ถ้าต้องการใช้สารซักฟอกชนิดน้ำ� ให้ใส่ช่องน้ำ�ยาซักผ้าในช่องใส่ (โปรดดู “สารซักฟอกชนิดน้ำ�” ในหน้า 31) อย่าใส่ผงซักฟอกชนิดผงในช่องใส่ สารซักฟอกชนิดน้ำ� 5. กดปุ่ม เริ่ม/พัก • กดปุ่ม เริ่ม/พัก เพื่อเปิดเครื่องซักผ้า • ปริมาณของผ้าจะถูกตรวจจับโดยอัตโนมัติ และเครื่องจะเริ่มซักผ้า • เมื่อเครื่องซักผ้าเริ่มทำ�งาน คุณจะไม่สามารถเพิ่มหรือเลือกฟังก์ชั่นซักฟองได้อีก • • • • เครื่องจะสร้างฟองให้เพียงพอดวยปริมาณสารซักฟอกที่ระบุ ทำ�ความสะอาดตัวกรองเศษด้ายบ่อยๆ การทำ�ความสะอาดเป็นประจำ�จะช่วยให้มีการสร้างฟองได้อย่างเพียงพอ ฟองอาจถูกดูดซับไว้และดูเหมือนมีปริมาณน้อย ทั้งนี้ขึ้นอยู่กับสารซักฟอกและผ้า แม้ว่าจะมีการสร้างฟองเมื่อเริ่มต้นการซัก แต่ผู้ใช้อาจมองเห็นฟองหลังจากเวลาผ่านไปหลายนาที การซักผ้า _27 WF806U4SA-03205H-02_TH.indd 27 2013-7-6 9:52:30 การซักผ้า การซักโดยใช้ปุ่มเลือกโปรแกรมซัก เครื่องซักผ้าของคุณทำ�ให้งานซักกลายเป็นเรื่องง่าย ด้วยระบบควบคุมอัตโนมัติ “ฟัซซี่คอนโทรล” ของ Samsung เมื่อคุณเลือกโปรแกรมซัก เครื่องจะกำ�หนดอุณหภูมิ เวลาซัก และความเร็วในการซักให้ 1. เปิดก๊อกน้ำ�ที่อ่างซักล้าง 2. กดปุ่ม เปิด/ปิด 3. เปิดประตู 4. ใส่ผ้าครั้งละชิ้น โดยอย่าให้ผ้าพันกัน และอย่าใส่ผ้ามากเกินไป 5. ปิดประตู 6. เติมผงซักฟอก น้ำ�ยาปรับผ้านุ่ม และน้ำ�ยาแช่ผ้า (ถ้าจำ�เป็น) ในช่องที่เหมาะสม ฟังก์ชั่นแช่ผ้าจะใช้ได้เฉพาะเมื่อเลือกรอบการซักของ ผ้าฝ้าย ผ้าใยสังเคราะห์ ผ้ายีนส์ ผ้าปูที่นอน ผ้าสีเข้ม ซักทุกวัน ซักประหยัดพลังงาน ชุดเด็กอ่อน และจำ�เป็นเฉพาะกรณีที่ผ้าเปื้อนมากเท่านั้น 7. ใช้ ปุ่มเลือกโปรแกรมซัก เพื่อเลือกโปรแกรมซักที่เหมาะสมตามประเภทเนื้อผ้า: ผ้าฝ้าย ผ้าใยสังเคราะห์ ผ้ายีนส์ ผ้าปูที่นอน ผ้าสีเข้ม ซักทุกวัน ล้างถังซัก ซักประหยัดพลังงาน ซักคราบฝังลึก ชุดเด็กอ่อน ผ้าขนสัตว์ ซักมือ สัญญาณที่เกี่ยวข้องจะสว่างบนแผงควบคุม 8. ในขั้นตอนนี้ คุณจะสามารถควบคุมอุณหภูมิการซัก ปริมาณการล้างน้ำ� ความเร็วในการปั่น ตั้งเวลาซัก โดยกดปุ่มตัวเลือกที่ต้องการ 9. กดปุ่ม เริ่ม/พัก และเครื่องจะเริ่มต้นการซัก สัญลักษณ์ของขั้นตอนการซักจะสว่างขึ้น และเวลาที่เหลือของรอบการซักจะปรากฏในจอแสดงผล ตัวเลือกการหยุด ภายใน 5 นาทีนับจากเริ่มต้นการซัก คุณยังสามารถเพิ่มหรือนำ�ผ้าออกได้ 1. กดปุ่ม เริ่ม/พัก เพื่อปลดล็อคประตู คุณจะไม่สามารถเปิดประตูได้อีก เมื่อน้ำ�ร้อนเกินไป หรือระดับน้ำ�สูงเกินไป 2. หลังจากปิดประตู ให้กดปุ่ม เริ่ม/พัก เพื่อเริ่มต้นการซักอีกครั้ง เมื่อสิ้นสุดรอบการซัก: เมื่อสิ้นสุดรอบการซักทั้งหมด เครื่องจะปิดเองโดยอัตโนมัต 1. เปิดประตู 2. นำ�ผ้าออกจากเครื่อง 28_ การซักผ้า WF806U4SA-03205H-02_TH.indd 28 2013-7-6 9:52:30 การซักด้วยตนเอง 02 การซักผ้า คุณสามารถซักผ้าด้วยตนเองโดยไม่ใช้ปุ่มเลือกโปรแกรมซักได้ 1. เปิดท่อจ่ายน้ำ� 2. กดปุ่ม เปิด/ปิด 3. เปิดประตู 4. ใส่ผ้าครั้งละชิ้น โดยอย่าให้ผ้าพันกัน และอย่าใส่ผ้ามากเกินไป 5. ปิดประตู 6. ใส่ผงซักฟอก และถ้าจำ�เป็น ใส่น้ำ�ยาปรับผ้านุ่ม น้ำ�ยาแช่ผ้าก่อนซักในช่องที่เหมาะสม 7. กดปุ่ม อุณหภูมิ เพื่อเลือกอุณหภูม (น้ำ�เย็น , 20 °C, 30 °C, 40 °C , 60 °C และ 95 °C) 8. กดปุ่ม ล้างน้ำ� เพื่อเลือกจำ�นวนรอบการล้าง จำ�นวนรอบการล้างสูงสุดคือห้ารอบ ระยะเวลาการซักจะเพิ่มขึ้นตามที่กำ�หนด 9. กดปุ่ม ปั่นหมาด เพื่อเลือกความเร็วในการปั่น ( : ไม่มีการปั่น : หยุดการล้างนํ้า ) 10. กดปุ่ม ตั้งเวลาล่วงหน้า ซ้ำ�ๆ เพื่อเลือกตัวเลือกเวลาสิ้นสุดที่ใช้ได้ (ตั้งแต่ 3 ชั่วโมงถึง 19 ชั่วโมง โดยเพิ่มได้ครั้งละหนึ่งชั่วโมง) จำ�นวนชั่วโมงที่ แสดงนั้นเป็นเวลาที่รอบการซักจะสิ้นสุดลง 11. กดปุ่ม เริ่ม/พัก และเครื่องจะเริ่มต้นการซัก คำ�แนะนำ�ของผ้า ทำ�ตามคำ�แนะนำ�ง่ายๆ เพื่อให้ได้ผ้าสะอาด และการซักที่มีประสิทธิภาพ ตรวจสอบฉลากการดูแลผ้าเสมอก่อนที่จะซัก แยกผ้าตามประเภทของเนื้อผ้า ดังนี้: • ฉลากดูแลผ้า: แยกผ้าเป็น ผ้าฝ้าย ผ้าเนื้อผสม ผ้าใยสังเคราะห์ ผ้าไหม ผ้าขนสัตว์ และเรยอน • สี: แยกผ้าเป็นผ้าสีและผ้าขาว โปรดซักผ้าใหม่ที่เป็นผ้าสีแยกต่างหาก • ขนาด: การใส่ผ้าขนาดต่างๆ กันในการซักจะทำ�ให้การซักมีประสิทธิภาพดีขึ้น • ความบอบบาง: ซักผ้าบางแยกต่างหาก ใช้โปรแกรมถนอมผ้าสำ�หรับผ้าขนสัตว์ใหม่ ผ้าม่าน และผ้าไหม ตรวจสอบป้ายของผ้าที่ซัก หรือดูผังการดูแลผ้าในภาคผนวก นำ�สิ่งของออกจากกระเป๋า ก่อนการซักแต่ละครั้ง ให้นำ�สิ่งของออกจากประเป๋าของผ้าก่อน ของแข็งขนาดเล็กที่มีรูปร่างต่างๆ เล่น เหรียญ มีด เข็มหมุด และคลิปหนีบกระดาษอาจทำ�ให้เครื่องซักผ้าเสียหาย ห้ามซักผ้าที่มีหัวเข็มขัด กระดุม หรือโลหะหนักติดอยู่ โลหะบนเสื้อผ้าอาจทำ�ให้เกิดความเสียหายกับผ้าและถังซักได้ กลับผ้าที่มีกระดุมและเสื้อผ้าที่มีลายปักก่อนที่จะซัก ถ้าไม่รูดซิปกางเกงปิดไว้ขณะซัก ถังปั่นอาจเสียหายได้ โปรดรูปซิปปิดไว้ก่อนที่จะซักผ้า เสื้อผ้าที่มีเชือกยาวอาจพันกับผ้าชิ้นอื่น และอาจทำ�ให้ผ้าเสียหาย โปรดมัดเชือกไว้ก่อนที่จะซัก โปรดมัดเชือกไว้ก่อนที่จะซักผ้า การแช่ผ้าฝ้าย เครื่องซักผ้าของคุณ เมื่อใช้ร่วมกับผงซักฟอกชนิดใหม่ๆ จะสามารถให้ผลการซักที่ดีเยี่ยม พร้อมทั้งประหยัดพลังงาน เวลา น้ำ�และผงซักฟอก แต่หากผ้า ฝ้ายสกปรกมาก คุณสามารถใช้การแช่ผ้ากับผงซักฟอกชนิดโปรตีน การซักผ้า _29 WF806U4SA-03205H-02_TH.indd 29 2013-7-6 9:52:30 การซักผ้า การพิจารณาปริมาณผ้าที่จะซัก โปรดอย่าใส่ผ้ามากเกินไปในเครื่อง เนื่องจากจะทำ�ให้ผ้าไม่สะอาด โปรดใช้ผังด้านล่างนี้เพื่อพิจารณาปริมาณผ้าที่จะซัก สำ�หรับประเภทของเนื้อผ้าที่ซัก ประเภทของผ้า ปริมาณผ้า รุ่น WF806 ผ้าฝ้าย - เปื้อนปานกลาง/น้อย - เปื้อนมาก 8.0 กก. ผ้าใยสังเคราะห์ 3.0 กก. ผ้ายีนส์ 3.0 กก. ผ้าปูที่นอน 2.0 กก. ซักคราบฝังลึก 2.0 กก. ผ้าขนสัตว์ 2.0 กก. • เมื่อผ้าไม่สมดุล (“UE” สว่างในอแสดงผล) ให้กระจายชิ้นผ้าให้เสมอกัน ถ้าผ้าไม่สมดุล ประสิทธิภาพในการปั่นหมาดจะลดลง • เมื่อซักชุดเครื่องนอนหรือผ้านวม เวลาในการซักอาจนานขึ้น และประสิทธิภาพในการปั่นหมาดจะลดลง • สำ�หรับชุดเครื่องนอนหรือผ้านวม น้ำ�หนักที่แนะนำ�คือ 2.5 กิโลกรัม หรือน้อยกว่า โปรดใส่ชุดชั้นในสตรี (ซักน้ำ�ได้) ลงในถุงใส่ผ้าสำ�หรับซัก (ต้องซื้อเพิ่ม) • ส่วนที่เป็นเหล็กของชุดชั้นในสตรีอาจทำ�ให้วัสดุแตกหักและทำ�ความเสียหายแก่เสื้อผ้าได้ ดังนั้นโปรดใส่ชุด ชั้นในลงในถุงใส่ผ้าสำ�หรับซัก • เสื้อผ้าชิ้นเล็กและมีน้ำ�หนักเบา เช่น ถุงเท้า ถุงมือ ถุงน่อง และผ้าเช็ดหน้า อาจติดอยู่บริเวณประตู โปรดใส่ เสื้อผ้าเหล่านี้ไว้ในถุงใส่ผ้าสำ�หรับซัก ข้อควรระวัง อย่าซักถุงใส่ผ้าเพียงอย่างเดียวโดยไม่มีผ้าอื่น เนื่องจากอาจทำ�ให้เกิดการสั่นสะเทือนที่ทำ�ให้เครื่องซักผ้า เคลื่อนที่ และอาจทำ�ให้เกิดอุบัติเหตุ ข้อมูลผงซักฟอกและสารเพิ่มเติมต่างๆ ควรใช้ผงซักฟอกแบบใด ประเภทของผงซักฟอกที่จะใช้นั้นขึ้นอยู่กับเนื้อผ้า (ผ้าฝ้าย ผ้าสังเคราะห์ ผ้าบาง ขนสัตว์) สี อุณหภูมิที่ซัก ระดับความสกปรก โปรดใช้ผงซักฟอกชนิด “ฟองน้อย” ซึ่งได้รับการออกแบบสำ�หรับเครื่องซักผ้าอัตโนมัติ ปฏิบัติตามคำ�แนะนำ�ของผู้ผลิตผงซักฟอก ตามน้ำ�หนักของผ้า ความสกปรก และความกระด้างของน้ำ� หากคุณไม่ทราบว่าน้ำ�ที่ใช้กระด้างมากเพียงใด โปรดติดต่อผู้ให้บริการน้ำ�ประปาในพื้นที่ ห้ามใช้ผงซักฟอกที่เกาะตัวหรือแข็ง เนื่องจากผงซักฟอกอาจค้างอยู่ในรอบการซัก และทำ�ให้เครื่องซักผ้าไม่สามารถล้างน้ำ�ให้สะอาด และทำ�ให้ช่องระบายน้ำ�ล้นอุดตัน 30_ การซักผ้า WF806U4SA-03205H-02_TH.indd 30 2013-7-6 9:52:30 ช่องใส่ผงซักฟอก เครื่องซักผ้าของคุณมีช่องแยกสำ�หรับจ่ายผงซักฟอกและน้ำ�ยาปรับผ้านุ่ม เติมสารเพิ่มเติมในช่องที่ถูกต้องก่อนที่จะเริ่มต้นเครื่องซักผ้า อย่าเปิดช่องใส่สารซักฟอก ขณะที่เครื่องซักผ้าทำ�งาน เนื่องจากอาจสัมผัสกับน้ำ�ร้อนหรือไอน้ำ� 02 การซักผ้า 1. ดึงช่องใส่ผงซักฟอกทางซ้ายของแผงควบคุมออก 2. เติมผงซักฟอกตามปริมาณที่แนะนำ� ในช่องใส่ผงซักฟอก ก่อนที่จะเริ่มต้นใช้เครื่องซักผ้า ถ้าต้องการใช้น้ำ�ยาซักผ้าเหลว ให้ใช้ช่องใส่สารซักฟอกเหลว (โปรดดู “สารซักฟอกชนิดน้ำ�” สำ�หรับรุ่นที่ต้องการ) • อย่าใส่ผงซักฟอกชนิดผงในช่องใส่สารซักฟอกชนิดน้ำ� 3. เติมน้ำ�ยาปรับผ้านุ่มตามปริมาณที่แนะนำ�ในช่องสำ�หรับใส่น้ำ�ยาปรับผ้านุ่ม อย่า เติมเกินเส้น MAX FILL ( ) ข้อควรระวัง ถ้าต้องการ อย่าเติม สารซักฟอก ทั้งแบบผง/น้ำ�ในช่องใส่น้ำ�ยาปรับผ้านุ่ม ( ) 4. เมื่อใช้ตัวเลือกการแช่ผ้า ให้เพิ่มผงซักฟอกในปริมาณที่แนะนำ�ในช่องสำ�หรับแช่ผ้า เมื่อซักผ้าชิ้นใหญ่ โปรดอย่าใช้ผงซักฟอกประเภทต่อไปนี้ • ผงซักฟอกชนิดเม็ดและแคปซูล • ผงซักฟอกที่ใช้บอลและตาข่าย สูงสุด น้ำ�ยาปรับผ้านุ่มชนิดเข้มข้นจะต้องมีการเจือจางด้วยน้ำ�สะอาด ก่อนที่จะเทลงในช่องใส่ (เพื่อไม่ให้ช่องทางไหลอุดตัน) โปรดระวังอย่าให้น้ำ�ยาปรับผ้านุ่มล้น เมื่อปิดช่องใส่ผงซักฟอก หลังจากเติมน้ำ�ยาปรับผ้านุ่มในช่องใส่น้ำ�ยาสำ�หรับการล้างน้ำ� สารซักฟอกชนิดน้ำ� (เฉพาะบางรุ่น) ในการใช้สารซักฟอกชนิดน้ำ� ให้ใส่ที่แบ่งสารซักฟอกชนิดน้ำ�ในส่วนของการซักหลักของช่องใส่สารซักฟอก และใส่สารซักฟอกชนิดน้ำ�ในช่องสำ�หรับ สารซักฟอกชนิดน้ำ�โดยเฉพาะ • อย่า เติมเกินเส้น MAX • เมื่อใช้สารซักฟอกแบบผง ให้ถอดที่แบ่งสารซักฟอกชนิดน้ำ�ออกจากช่องใส่ผงซักฟอก สารซักฟอกชนิดผงจะไม่สามารถเข้าสู่ถังซักได้เมื่อมีช่องใส่สารซักฟอกชนิดน้ำ� • หลังจากการซัก สารซักฟอกชนิดน้ำ�อาจยังหลงเหลืออยู่ในช่องใส่สารซักฟอก ที่แบ่งสาร ซักฟอกชนิดน้ำ� การซักผ้า _31 WF806U4SA-03205H-02_TH.indd 31 2013-7-6 9:52:31 การทำ�ความสะอาดและดูแลรักษา เครื่องซักผ้า การรักษาความสะอาดของเครื่องซักผ้าจะช่วยเพิ่มประสิทธิภาพของเครื่อง หลีกเลี่ยงการซ่อมบำ�รุงที่ไม่จำ�เป็น และยืดอายุการใช้งาน ล้างถังซัก โปรแกรมนี้เป็นโปรแกรมทำ�ความสะอาดตนเอง ซึ่งจะขจัดเชื้อราที่อาจเกิดขึ้นภายในเครื่องซักผ้า 1. กดปุ่ม เปิด/ปิด 2. หมุนปุ่มเลือก โปรแกรมซัก ไปที่ตำ�แหน่ง ล้างถังซัก • คุณสามารถใช้ฟังก์ชั่นตั้งเวลาล่วงหน้า • อุณหภูมิของน้ำ�ระหว่างการล้างถังซักจะถูกตั้งค่าไว้ที่ 70°C คุณไม่สามารถเปลี่ยนอุณหภูมิได้ • ระบบจะตั้งค่าอัตโนมัติที่โปรแกรมผ้าฝ้ายระดับน้ำ�ปานกลาง 30 °C เมื่อบรรจุผ้าลงมา 3. ใส่สารทำ�ความสะอาดในปริมาณที่เหมาะสมในช่องใส่สารซักฟอก และปิดช่องใส่สารซักฟอก (เมื่อทำ�ความสะอาดถังด้วยสารทำ�ความสะอาด) • โปรดใช้สารทำ�ความสะอาดที่แนะนำ�สำ�หรับการทำ�ความสะอาดถัง • สารทำ�ความสะอาดถังซักมีทั้งชนิดผงและชนิดน้ำ� สารทำ�ความสะอาดชนิดน้ำ�นั้นมีเฉพาะที่ ใช้ช่องแบ่งสารซักฟอกชนิดน้ำ� (ตัวเลือก) 4. กดปุ่ม เริ่ม/พัก • ถ้าคุณกดปุ่ม เริ่ม/พัก โปรแกรมล้างถังซักจะเริ่มต้น ข้อควรระวัง • • • • • • • เมื่อใช้โปรแกรมล้างถังซัก คุณสามารถทำ�ความสะอาดถังซักโดยไม่ต้องใช้สารทำ�ความสะอาด ห้ามใช้โปรแกรม ล้างถังซัก เมื่อมีผ้าอยู่ในเครื่อง อาจทำ�ให้เนื้อผ้าเสียหาย หรือเกิดปัญหากับเครื่องซักผ้า ในโปรแกรมล้างถังซัก ห้ามใช้สารซักฟอกปกติเด็ดขาด ให้ใช้สารทำ�ความสะอาดถังซักในปริมาณเพียง 1 ใน 10 ของปริมาณที่ผู้ผลิตสารทำ�ความสะอาดแนะนำ� เนื่องจากการใช้สารฟอกสีที่เป็นคลอรีนจะทำ�ให้ผลิตภัณฑ์เปลี่ยนสี โปรดใช้สารฟอกสีแบบออกซิเจนเท่านั้น สารทำ�ความสะอาดแบบผง: ใช้สารฟอกสีแบบผงหรือสารทำ�ความสะอาดสำ�หรับการล้างถังซักเท่านั้น สารทำ�ความสะอาดแบบน้ำ�: ใช้สารฟอกสีแบบน้ำ�หรือสารทำ�ความสะอาดสำ�หรับการล้างถังซักเท่านั้น 32_ ���������������������������������������� WF806U4SA-03205H-02_TH.indd 32 2013-7-6 9:52:32 03 การทำ�ความสะอาดและการดูแลรักษา ฟังก์ชั่นเตือนอัตโนมัติของการล้างถังซัก • ถ้าสัญญาณ “ล้างถังซัก” บนจอแสดงผลและไฟที่ปุ่มเลือกโปรแกรมสว่างหลังจากการซัก แสดงว่าถังซักต้องได้รับการทำ�ความสะอาด ในกรณีนี้ ให้นำ�ผ้าออกจากเครื่องซักผ้า เปิดเครื่อง และทำ�ความสะอาดถังด้วยการเลือกโปรแกรมล้างถังซัก • ถ้าคุณไม่ใช้โปรแกรม ล้างถังซัก สัญญาณ “ล้างถังซัก” บนจอแสดงผลและไฟบนปุ่มเลือก โปรแกรมจะดับ แต่สัญญาณ “ล้างถังซัก” บนจอและไฟสัญญาณบนปุ่มเลือกโปรแกรมจะสว่าง อีกครั้งหลังจากที่ซักผ้าอีกสองครั้ง อย่างไรก็ตาม กรณีนี้จะไม่ทำ�ให้เกิดปัญหากับเครื่องซักผ้า • โดยทั่วไป สัญญาณเตือนล้างถังซักจะปรากฏประมาณเดือนละครั้ง ความถี่นี้อาจแตกต่างกัน ไป โดยขึ้นอยู่กับจำ�นวนครั้งที่ใช้เครื่องซักผ้า • ในกรณีที่มีสัญญาณเตือน ให้ทำ�ความสะอาดตัวกรองเศษด้ายด้วย (โปรดดูที่ “การ ทำ�ความสะอาดตัวกรองเศษด้าย” ที่หน้า 34) มิฉะนั้นประสิทธิภาพของฟังก์ชั่นซักฟอง อาจลดลง การทิ้งน้ำ�เมื่อเกิดเหตุฉุกเฉิน 1. ถอดปลั๊กของเครื่องซักผ้า 2. เปิดฝาครอบที่กรองโดยกดและดึงด้ามของฝาครอบตัวกรอง ฝาครอบตัวกรอง 3. เปิดฝาท่อน้ำ�ทิ้งฉุกเฉินด้วยการดึง ฝาท่อน้ำ�ทิ้งฉุกเฉิน 4. ยึดฝาที่ปลายของท่อนํ้าทิ้งฉุกเฉิน และค่อยๆ ดึงออกมา 5. ปล่อยให้น้ำ�ไหลงในอ่าง ท่อทิ้งน้ำ�ฉุกเฉิน น้ำ�ที่หลงเหลืออาจมากกว่าที่คุณคิด โปรดเตรียมอ่างขนาดใหญ่ 6. ใส่ฝาปิดท่อระบายกลับเข้าที่ 7. ปิดฝาครอบของตัวกรอง ���������������������������������������� _33 WF806U4SA-03205H-02_TH.indd 33 2013-7-6 9:52:33 การทำ�ความสะอาดและดูแลรักษา เครื่องซักผ้า การทำ�ความสะอาดตัวกรองเศษด้าย ขอแนะนำ�ให้ทำ�ความสะอาดตัวกรองเศษด้าย 5 หรือ 6 ครั้งต่อปี หรือเมื่อข้อความ “5E” ปรากฏ (โปรดดูที่ “การทิ้งน้ำ�เมื่อเกิดเหตุฉุกเฉิน” ในหัวข้อก่อนหน้า) ถ้ามีสิ่งแปลกปลอมสะสมในตัวกรองเศษด้าย ประสิทธิภาพของฟังก์ชั่นซักฟองจะลดลง ก่อนที่จะทำ�ความสะอาดตัวกรองเศษด้าย ให้ถอดปลั๊กไฟออกก่อน ข้อควรระวัง 1. ขจัดน้ำ�ที่เหลือค้างอยู่ก่อน (ดูที่ “การทิ้งน้ำ�เมื่อเกิดเหตุฉุกเฉิน” ในหน้า 33) ถ้าคุณถอดตัวกรองโดยไม่ได้ระบายน้ำ�ออกก่อน น้ำ�ที่เหลืออาจหกล้นออกมา 2. เปิดฝาตัวกรองโดยใช้เหรียญหรือกุญแจ 3. ไขสกรูของท่อน้ำ�ทิ้งฉุกเฉิน โดยหมุนไปทางซ้าย เพื่อทิ้งน้ำ�ให้หมด 4. ไขตัวกรองเศษด้ายออก ฝาปิดตัวกรองเศษผ้า 5. ล้างเศษฝุ่นละอองหรือวัสดุอื่นออกจากตัวกรองเศษด้าย ตรวจสอบว่าใบพัดของปั๊มน้ำ�ทิ้งที่ด้าน หลังของตัวกรองไม่อุดตัน 6. ปิดฝาของตัวกรองเศษด้าย 7. ปิดฝาครอบของตัวกรอง ข้อควรระวัง อย่าเปิดฝาครอบตัวกรองเศษด้ายขณะที่เครื่องทำ�งานหรือร้อนจัดอาจมีน้ำ�ไหลออกมา • โปรดใส่ฝาครอบตัวกรองหลังจากทำ�ความสะอาดตัวกรอง ถ้าตัวกรองหลุดออกจากเครื่องเครื่องซักผ้า ของคุณอาจทำ�งานผิดปกติหรือมีน้ำ�รั่ว • ควรประกอบตัวกรองให้เสร็จหลังจากทำ�ความสะอาดตัวกรองแล้ว การทำ�ความสะอาดภายนอก 1. เช็ดผิวด้านนอกของเครื่องซักผ้า รวมถึงแผงควบคุม ด้วยผ้านุ่มและผงซักฟอกที่ไม่มีสารขัดถู 2. ใช้ผ้านุ่มเช็ดให้แห้ง 3. ห้ามเทน้ำ�บนเครื่องซักผ้า 34_ ���������������������������������������� WF806U4SA-03205H-02_TH.indd 34 2013-7-6 9:52:34 การทำ�ความสะอาดช่องใส่และที่พักผงซักฟอก 1. กดสลักคลายที่ด้านในของที่ใส่ผงซักฟอก และดึงออก 2. ถอดทีแ่ บ่งน้ำ�ยาปรับผ้านุ่มและกล่องใส่สารซักฟอกแบบน้ำ� (ตัวเลือก) ออกจากลิ้นชักใส่สารซักฟอก คันปลด ที่แบ่งสารซักฟอกชนิดน้ำ� (ตัวเลือก) 03 การทำ�ความสะอาดและการดูแลรักษา ที่แบ่งน้ำ�ยาปรับผ้านุ่ม 3. ล้างทุกส่วนด้วยน้ำ�สะอาดที่ไหล 4. 5. 6. 7. ล้างที่พักผงซักฟอกด้วยแปรงสีฟันเก่า ใส่ที่แบ่งน้ำ�ยาปรับผ้านุ่มและกล่องใส่สารซักฟอกชนิดน้ำ� (ตัวเลือก) ด้วยการดันเข้าที่ให้แน่น ดันช่องใส่เข้าที่ ถ้าต้องการขจัดผงซักฟอกที่หลงเหลือ ให้ใช้โปรแกรมล้างน้ำ�โดยไม่ต้องมีผ้าในถัง การทำ�ความสะอาดตัวกรองท่อจ่ายน้ำ� คุณควรทำ�ความสะอาดตัวกรองของท่อจ่ายน้ำ�อย่างน้อยปีละครั้ง หรือเมื่อมีข้อความ “4E” ปรากฏขึ้น: 1. 2. 3. 4. 5. 6. ปิดน้ำ�ที่จ่ายเข้าสู่เครื่องซักผ้า ไขท่อออกจากด้านหลังของเครื่องซักผ้า เพื่อป้องกันไม่ให้น้ำ�ไหลออกเนื่องจากแรงดันอากาศในท่อ ให้ใช้ผ้าปิดปลายท่อไว้ ใช้คีมจับตะแกรงตัวกรองออกจากปลายของท่อ และล้างด้วยน้ำ�สะอาด นอกจากนี้ ให้ทำ�ความสะอาดด้านนอกและด้านในของข้อต่อที่เป็นเกลียวด้วย ดันตัวกรองเข้าที่ ไขท่อเข้ากับเครื่องซักผ้าดังเดิม ตรวจสอบว่าไม่มีน้ำ�รั่วและเปิดก๊อก ���������������������������������������� _35 WF806U4SA-03205H-02_TH.indd 35 2013-7-6 9:52:34 การทำ�ความสะอาดและดูแลรักษา เครื่องซักผ้า การซ่อมแซมเครื่องซักผ้าหากน้ำ�แข็งตัว หากอุณหภูมิต่ำ�กว่าจุดเยือกแข็ง และน้ำ�ในเครื่องซักผ้ากลายเป็นน้ำ�แข็ง ให้ทำ�ดังนี้ 1. 2. 3. 4. 5. ถอดปลั๊กของเครื่องซักผ้า เทน้ำ�อุ่นที่ก๊อกจ่ายน้ำ� เพื่อให้ท่อจ่ายน้ำ�หลวม ถอดท่อจ่ายน้ำ� และแช่ในน้ำ�อุ่น เทน้ำ�อุ่นในถังซักของเครื่องซักผ้า และทิ้งไว้ประมาณ 10 นาที ต่อท่อจ่ายน้ำ�เข้าที่ และตรวจสอบว่าการจ่ายน้ำ�และการทิ้งน้ำ�เป็นปกติ การจัดเก็บเครื่องซักผ้า ถ้าคุณจำ�เป็นต้องจัดเก็บเครื่องซักผ้าเป็นเวลานาน คุณควรระบายน้ำ�ออกและถอดปลั๊กและท่อน้ำ� เครื่องซักผ้าอาจได้รับความเสียหายถ้ามีน้ำ�ค้างอยู่ในท่อ และองค์ประกอบภายใน ในระหว่างที่จัดเก็บ 1. จากนั้นกดปุ่ม ผ้าฝ้าย และกดปุ่ม ซักเร็ว และให้เครื่องซักผ้าทำ�งานโดยไม่ต้องใส่ผ้า 2. ปิดก๊อกน้ำ�และถอดท่อจ่ายน้ำ� 3. ถอดปลั๊กเครือ่ งซักผ้าจากเต้าเสียบไฟฟ้า และเปิดประตูเครื่องทิ้งไว้เพื่อให้อากาศหมุนเวียน ถ้าเครื่องซักผ้าของคุณมีการจัดเก็บในอุณหภูมิต่ำ�กว่าจุดเยือกแข็ง โปรดรอให้น้ำ�ที่ตกค้างในเครื่องละลายก่อนที่จะใช้งานอีกครั้ง 36_ ���������������������������������������� WF806U4SA-03205H-02_TH.indd 36 2013-7-6 9:52:34 การแก้ไขปัญหาและรหัสข้อมูล ตรวจสอบสิ่งต่อไปนี้ถ้าเครื่องซักผ้าของคุณ... การแก้ไข ไม่ทำ�งาน • • • • • • • • • • • • • • • • • ไม่มีน้ำ�หรือน้ำ�ไม่เพียงพอ มีผงซักฟอกหลงเหลือในช่องใส่ หลังจากการซัก สั่นสะเทือนหรือมีเสียงดัง เครื่องซักผ้าไม่ทิ้งน้ำ� และ/หรือปั่นหมาด ประตูล็อคและไม่สามารถเปิดได้ ตรวจสอบว่าเครื่องซักผ้าเสียบปลั๊กเรียบร้อย ตรวจสอบว่าประตูปิดสนิท ตรวจสอบว่าก๊อกจ่ายน้ำ�เปิดอยู่ โปรดตรวจสอบว่าได้กดปุ่ม เริ่ม/พัก แล้ว เปิดก๊อกน้ำ�จนสุด ตรวจสอบว่าท่อจ่ายน้ำ�ไม่จับตัวเป็นน้ำ�แข็ง ยืดให้ท่อจ่ายน้ำ�ตรง ทำ�ความสะอาดตัวกรองที่ท่อจ่ายน้ำ� ตรวจสอบว่าเครื่องซักผ้าต่อกับแหล่งจ่ายน้ำ�ที่มีแรงดันเพียงพอ ตรวจสอบว่าได้เติมผงซักฟอกในช่องกลางของที่ใส่ ตรวจสอบว่าเครื่องตั้งอยู่บนพื้นที่ซึ่งราบเสมอกัน หากพื้นที่ไม่ราบเสมอกัน ให้ปรับขาตั้งของเครื่องให้ได้ระดับ ตรวจสอบว่านำ�หมุดสำ�หรับการขนส่งออกแล้ว ตรวจสอบว่าเครื่องซักผ้าไม่ได้สัมผัสกับวัตถุอื่น ตรวจสอบว่าปริมาณผ้าอยู่ในถังอย่างสมดุล ทำ�ให้ท่อน้ำ�ทิ้งตรง จัดให้ท่อไม่บิดงอ ตรวจสอบว่าตัวกรองเศษผ้าไม่อุดตัน ฝาเครื่องจะไม่สามารถเปิดได้จนกว่าจะครบ 3 นาทีหลังจากที่เครื่องหยุดการทำ�งานหรือมีการปิดเครื่อง 04 การแก้ไขปัญหา ปัญหา ถ้าปัญหาเหล่านี้ยังคงอยู่ โปรดติดต่อศูนย์บริการลูกค้าของ Samsung ใกล้บ้าน การแก้ไขปัญหาและรหัสข้อมูล _37 WF806U4SA-03205H-02_TH.indd 37 2013-7-6 9:52:34 การแก้ไขปัญหาและรหัสข้อมูล รหัสข้อมูล เมื่อเครื่องซักผ้าทำ�งานผิดปกติ คุณอาจพบรหัสข้อมูลในจอแสดงผล ในกรณีนี้ ให้ตรวจสอบตารางต่อไปนี้และลองใช้วิธีแก้ไขที่แนะนำ�ก่อนที่จะติดต่อฝ่ายบริการลูกค้า สัญลักษณ์ของรหัส การแก้ไข dE 4E 5E UE cE/3E • • • • • • • • • ตรวจสอบว่าประตูปิดสนิท ตรวจสอบว่าผ้าไม่ติดกับประตู ตรวจสอบว่าเปิดก๊อกจ่ายน้ำ�แล้ว ตรวจสอบแรงดันน้ำ� ทำ�ความสะอาดตัวกรองที่ท่อจ่ายน้ำ� ทำ�ความสะอาดตัวกรองเศษผ้า ตรวจสอบว่าท่อระบายน้ำ�ได้รับการติดตั้งอย่างเหมาะสม ทำ�ความสะอาดตัวกรองท่อจ่ายน้ำ� ผ้าไม่สมดุล ให้คลายผ้าที่พันกันออก หากมีการซักผ้าเพียงชิ้นเดียว เช่น เสื้อคลุมอาบน้ำ�หรือกางเกงยีนส์ การปั่นครั้งสุดท้ายอาจไม่ได้ผลดีเท่าที่ควร และข้อความแสดงข้อผิดพลาด “UE” จะปรากฏในจอแสดงผล • ติดต่อฝ่ายบริการหลังการขาย • แสดงขึ้นเมื่อการตรวจพบฟองจำ�นวนมากเกินไป อีกทั้งยังแสดงในขณะที่ฟองถูกกำ�จัดออกไปแล้วด้วยเช่นกัน เมื่อกำ�จัดฟองออกเรียบร้อยแล้ว เครื่องจะหมุนปกติ (นี้เป็นหนึ่งในขั้นตอนการทำ�งานตามปกติ ซึ่งเป็นการแสดงความผิดพลาดเพื่อป้องกันในกรณีที่เครื่องไม่สัมผัส ถึงความผิดปกติ) กรณีที่กระแสไฟฟ้าไม่เสถียร เครื่องซักผ้าจะพักการทำ�งานเพื่อป้องกันอุปกรณ์ไฟฟ้า กรณีที่กระแสไฟฟ้ากลับมาสู่ภาวะปกติ เครื่องจะเริ่มการหมุนอีกครั้งโดยอัตโนมัติ Sd/Sud Uc • • สำ�หรับรหัสที่ไม่ปรากฏข้างต้น หรือถ้าคำ�แนะนำ�ใช้ไม่ได้ผล โปรดติดต่อศูนย์บริการของ Samsung หรือตัวแทนจำ�หน่าย Samsung ใกล้บ้าน 38_ การแก้ไขปัญหาและรหัสข้อมูล WF806U4SA-03205H-02_TH.indd 38 2013-7-6 9:52:34 ผังโปรแกรม ผังโปรแกรม ( ตัวเลือกสำ�หรับผู้ใช้) น้ำ�หนักสูงสุด (กก.) ผงซักฟอก อุณหภูมิสูงสุด (°C) ความเร็วในการปั่น (สูงสุด) รอบต่อนาที WF806 แช่ผ้า ซัก น้ำ�ยาปรับ ผ้านุ่ม ผ้าฝ้าย 8.0 ใช่ 95 1400 ผ้าใยสังเคราะห์ 3.0 ใช่ 60 1200 WF806U4 ผ้ายีนส์ 3.0 ใช่ 60 800 ผ้าปูที่นอน 2.0 ใช่ 40 800 ผ้าสีเข้ม 4.0 ใช่ 40 1200 ซักทุกวัน 4.0 ใช่ 60 1400 ล้างถังซัก - - ใช่ - 70 400 ซักประหยัดพลังงาน 4.0 ใช่ 40 1200 ซักคราบฝังลึก 2.0 - ใช่ 40 1200 ชุดเด็กอ่อน 4.0 ใช่ 95 1400 ผ้าขนสัตว์ 2.0 - ใช่ 40 800 ซักมือ 2.0 - ใช่ 40 400 05 ผังโปรแกรม โปรแกรม โปรแกรม ซักฟองแบบประหยัด ตั้งเวลาล่วงหน้า โปรแกรมรีดง่าย เพิ่มประสิทธิภาพ แช่ผ้า ซักเร็ว ผ้าฝ้าย ผ้าใยสังเคราะห์ - ผ้ายีนส์ - ผ้าปูที่นอน - ผ้าสีเข้ม - ซักทุกวัน - ล้างถังซัก - - - - - ซักประหยัดพลังงาน - ซักคราบฝังลึก - - - - ชุดเด็กอ่อน - ผ้าขนสัตว์ - - - - ซักมือ - - - - 1. โปรแกรมที่มีการแช่ผ้าจะใช้เวลานานขึ้นประมาณ 18 นาที 2. ข้อมูลระยะเวลาของโปรแกรมได้รับการวัดตามเงื่อนไขที่ระบุในมาตรฐาน IEC 60456 / EN 60456 ผ้าฝ้าย 60°C + เพิ่มประสิทธิภาพ + ซักฟองแบบประหยัด เป็นโปแรกรมตาม EN60456 โปรดเรียกใช้ โหมดปรับตั้ง หลังจากการติดตั้ง (ดูที่หน้า 20) 3. เวลาของโปรแกรมในแต่ละบ้านอาจต่างจากค่าที่ระบุในตาราง เนื่องจากแรงดันและอุณหภูมิของน้ำ� ปริมาณผ้า และประเภทของผ้า 4. เมื่อมีการเลือกฟังก์ชัน Intensive Wash (เพิ่มประสิทธิภาพ) เวลาของรอบจะเพิ่มขึ้นสำ�หรับแต่ละรอบ ผังโปรแกรม _39 WF806U4SA-03205H-02_TH.indd 39 2013-7-6 9:52:35 ภาคผนวก ผังการดูแลผ้า สัญลักษณ์ต่อไปนี้เป็นคำ�แนะนำ�ในการดูแลผ้า ฉลากการดูแลผ้าประกอบด้วยสัญลักษณ์สี่อย่างตามลำ�ดับ: การซัก การฟอกขาว การอบแห้ง และการรีด (ตลอดจนการซักแห้ง ถ้าจำ�เป็น) การใช้สัญลักษณ์ช่วยให้มีความสม่ำ�เสมอระหว่างผู้ผลิตเสื้อผ้าแต่ละรายทั้งสำ�หรับผ้าในประเทศและผ้าที่นำ�เข้า โปรดปฏิบัติตามฉลาก การ ดูแลเพื่อยืดอายุการใช้งานของผ้าและลดปัญหาในการซัก ผ้าหนา สามารถรีดที่ความร้อนสูงสุด 100 °C ผ้าบาง ห้ามรีด ซักได้ที่ความร้อน 95 °C ซักแห้งด้วยสารทำ�ละลายใดก็ได้ ซักได้ที่ความร้อน 60 °C ซักแห้งด้วยเปอร์คลอไรด์ น้ำ�มันไฟแช็ก แอลกอฮอล์ หรือ R113 เท่านั้น ซักได้ที่ความร้อน 40 °C ซักแห้งด้วยน้ำ�มันก๊าด แอลกอฮอล์ หรือ R113 เท่านั้น ซักได้ที่ความร้อน 30 °C ห้ามซักแห้ง ซักด้วยมือ ห้ามแขวน ซักแห้งเท่านั้น แขวนได้ ใช้สารฟอกในน้ำ�เย็น ตากด้วยไม้แขวนเสื้อ ห้ามใช้สารฟอก ใช้เครื่องอบ ความร้อนปกติ สามารถรีดที่ความร้อนสูงสุด 200 °C ใช้เครื่องอบ ความร้อนต่ำ� สามารถรีดที่ความร้อนสูงสุด 150 °C ห้ามใช้เครื่องอบ การปกป้องสิ่งแวดล้อม • • • • อุปกรณ์นี้ได้รับการผลิตจากวัสดุรีไซเคิล หากคุณต้องการทิ้งอุปกรณ์นี้ โปรดปฏิบัติตามระเบียบการทิ้งขยะของพื้นที่ ตัดสายไฟ เพื่อป้องกันไม่ให้มีการต่อสายไฟกับเ ครื่องใช้ไฟฟ้านี้อีก ถอดประตูออก เพื่อป้องกันไม่ให้สัตว์หรือเด็กติดอยู่ภายใน อย่าใช้ผงซักฟอกเกินปริมาณที่แนะนำ�โดยผู้ผลิตผงซักฟอก ใช้สารขจัดคราบและสารฟอกขาวก่อนการซักเฉพาะเมื่อจำ�เป็นเท่านั้น ประหยัดน้ำ�และไฟฟ้าโดยซักเต็มถัง (ปริมาณผ้าขึ้นอยู่กับโปรแกรมที่ใช้) ประกาศเกี่ยวกับมาตรฐาน อุปกรณ์นี้เป็นไปตามมาตรฐานความปลอดภัยของยุโรป EC directive 93/68 และ EN Standard 60335 40_ ภาคผนวก WF806U4SA-03205H-02_TH.indd 40 2013-7-6 9:52:37 ข้อมูลจำ�เพาะ ประเภท เครื่องซักผ้าฝาหน้า WF806U4SA** 06 ภาคผนวก ขนาด ก 600 มม. X ล 600 มม. X ส 850 มม. แรงดันน้ำ� 50 kPa ~ 800 kPa ปริมาณน้ำ� 80 ลิตร WF806U4SA** น้ำ�หนักสุทธิ 67 กก. ความจุในการซักและการปั่นหมาด 8.0 กก. รุ่น WF806U4SA** ขณะซัก การใช้พลังงานไฟฟ้า ซักและอบร้อน ปั่นหมาด การหมุนปั่นหมาด 220 โวลต์ 60 วัตต์ 240 โวลต์ 60 วัตต์ 220 โวลต์ 2000 วัตต์ 240 โวลต์ 2400 วัตต์ รุ่น WF806U4SA** 230โวลต์ 400 วัตต์ ปั๊ม 34 วัตต์ รุ่น WF806U4SA** รอบต่อนาที 1400 ลักษณะและข้อมูลจำ�เพาะของผลิตภัณฑ์อาจมีการเปลี่ยนแปลงโดยไม่ได้แจ้งให้ทราบล่วงหน้า ภาคผนวก _41 WF806U4SA-03205H-02_TH.indd 41 2013-7-6 9:52:37 WF806U4SA-03205H-02_TH.indd 42 2013-7-6 9:52:37 WF806U4SA-03205H-02_TH.indd 43 2013-7-6 9:52:37 ถ้าคุณมีคำ�ถามหรือข้อคิดเห็น ประเทศ โทรศัพท์ หรือเยี่ยมชมเว็บไซต์ของเราที่ THAILAND 1800-29-3232 02-689-3232 www.samsung.com รหัส DC68-03205H-02_TH WF806U4SA-03205H-02_TH.indd 44 2013-7-6 9:52:37