1
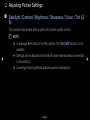
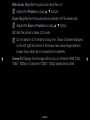
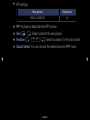
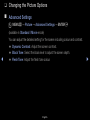
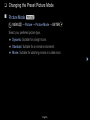
❑❑ Changing the Preset Picture Mode
■■ Picture Mode t
OO MENUm → Picture → Picture Mode → ENTERE
Select your preferred picture type.
●● Dynamic: Suitable for a bright room.
●● Standard: Suitable for a normal environment.
●● Movie: Suitable for watching movies in a dark room.
English
▶
❑❑ Adjusting Picture Settings
■■ Backlight / Contrast / Brightness / Sharpness / Colour / Tint (G/
R)
Your product has several setting options for picture quality control.
NN NOTE
●● In analogue AV modes of the PAL system, the Tint (G/R) function is not
◀
available.
●● Settings can be adjusted and stored for each external device connected
to the product.
●● Lowering picture brightness reduces power consumption.
English
▶
■■ Picture Size
OO MENUm → Picture → Picture Size → ENTERE
Set the various picture options such as picture size and aspect ratio.
NN The available items may differ depending on the selected mode.
NN Depending on the input source, the picture size options may vary.
●● Picture Size t: Your cable box/satellite receiver may have its own set
◀
of screen sizes as well. However, we highly recommend you use 16:9 mode
most of the time.
Auto Wide: Automatically adjusts the picture size to the 16:9 aspect ratio.
16:9: Sets the picture to 16:9 wide mode.
English
▶
Wide Zoom: Magnifies the picture size more than 4:3.
NN Adjusts the Position by using ▲, ▼ buttons.
Zoom: Magnifies the 16:9 wide pictures vertically to fit the screen size.
NN Adjusts the Zoom or Position by using ▲, ▼ button.
4:3: Sets the picture to basic (4:3) mode.
NN Do not watch in 4:3 format for a long time. Traces of borders displayed
◀
on the left, right and centre of the screen may cause image retention
(screen burn) which are not covered by the warranty.
Screen Fit: Displays the full image without any cut-off when HDMI (720p /
1080i / 1080p) or Component (1080i / 1080p) signals are inputted.
English
▶
●● Zoom/Position: Adjust the picture size and position. It is only available in
Zoom.
●● Position: Adjust the picture position. It is only available in Screen Fit or Wide
Zoom.
◀
▶
English
NN NOTE
●● After selecting Screen Fit in HDMI (1080i / 1080p) or Component (1080i
/ 1080p) mode, you may need to centre the picture:
1. Select the Position. Press the ENTERE button.
2. Press the ▲, ▼, ◄ or ► button to move the picture.
●● If you want to reset the position you adjusted, select Reset in the
◀
Position screen. The picture will be set to its default position.
●● If you use the Screen Fit function with HDMI 720p input, 1 line will be cut
at the top, bottom, left and right as in the overscan function.
English
▶
■■ PIP t
OO MENUm → Picture → PIP → ENTERE
View two sources on the LED display at the same time.
NN NOTE
●● If you turn the product off while watching in PIP mode, the PIP window
will disappear.
●● You may notice that the picture in the PIP window becomes slightly
unnatural when you use the main screen to view a game or karaoke.
◀
▶
English
●● PIP settings
●●
●●
●●
●●
Main picture
Sub picture
HDMI1, HDMI2/DVI
AV
PIP: Activate or deactivate the PIP function.
Size (õ / ã): Select a size for the sub-picture.
Position (ã / – / — / œ): Select a position for the sub-picture.
Sound Select: You can choose the desired sound in PIP mode.
◀
▶
English
❑❑ Changing the Picture Options
■■ Advanced Settings
OO MENUm → Picture → Advanced Settings → ENTERE
(available in Standard / Movie mode)
You can adjust the detailed setting for the screen including colour and contrast.
◀
●● Dynamic Contrast: Adjust the screen contrast.
●● Black Tone: Select the black level to adjust the screen depth.
●● Flesh Tone: Adjust the flesh tone colour.
English
▶
●● RGB Only Mode: Displays the Red, Green and Blue colour for making fine
adjustments to the hue and saturation.
●● Colour Space: Adjust the range of colours available to create the image.
●● White Balance: You can adjust the colour temperature of the picture to make
white objects look white, and the overall picture appear natural.
●● R-Offset / G-Offset / B-Offset: Adjusts each colour’s (red, green, blue)
◀
darkness.
●● R-Gain / G-Gain / B-Gain: Adjusts each colour’s (red, green, blue)
brightness.
●● Reset: Resets the White Balance to its default settings.
English
▶
●● Gamma: Adjust the primary colour intensity.
●● Motion Lighting: Reduce power consumption by brightness control adapted
motion.
NN Only available in Standard mode.
NN When changing a setting value of Backlight / Brightness or Contrast,
Motion Lighting will be set to Off.
◀
▶
English
■■ Picture Options
OO MENUm → Picture → Picture Options → ENTERE
●● Colour Tone
NN Warm1 or Warm2 will be deactivated when the picture mode is
Dynamic.
NN Settings can be adjusted and stored for each external device connected
to an input on the product.
◀
●● Digital Clean View: Reduces picture noise to avoid distracting lines and
flickering.
English
▶
●● MPEG Noise Filter: Reduces MPEG noise to provide improved picture
quality.
●● HDMI Black Level: Selects the black level on the screen to adjust the screen
depth.
NN Available only in HDMI mode (RGB signals).
◀
▶
English
●● Film Mode: Sets the product to automatically sense and process film signals
from all sources and adjust the picture for optimum quality.
NN Available in HDMI (1080i).
NN If the screen does not seem natural, change its option to Off / Auto1 /
Auto2 in Film Mode.
●● LED Clear Motion: Removes drag from fast scenes with a lot of movement
to provide a clear picture.
NN It will be deactivated when the picture mode is set to Natural.
◀
NN The screen may become slightly darker when you play LED Clear
Motion.
English
▶
■■ Picture Off t
OO MENUm → Picture → Picture Off → ENTERE
The screen is turned off but the sound remains on. Press any button except
power and volume button to turn on the screen.
◀
▶
English
■■ Reset Picture
OO MENUm → Picture → Reset Picture → ENTERE
Resets your current picture mode to its default settings.
◀
▶
English
❑❑ Changing the Preset Sound Mode
■■ Sound Mode
OO MENUm → Sound → Sound Mode → ENTERE
◀
●●
●●
●●
●●
●●
Standard: Selects the normal sound mode.
Music: Emphasizes music over voices.
Movie: Provides the best sound for movies.
Clear Voice: Emphasizes voices over other sounds.
Amplify: Increase the intensity of high-frequency sound to allow a better
listening experience for the hearing impaired.
NN If Speaker Select is set to External Speaker, Sound Mode is disabled.
English
▶
❑❑ Adjusting Sound Settings
■■ Sound Effect
(standard sound mode only)
OO MENUm → Sound → Sound Effect → ENTERE
●● DTS TruSurround HD (DTS TruSurround)
◀
This function provides a virtual 5.1 channel surround sound experience
through a pair of speakers using HRTF (Head Related Transfer Function)
technology.
NN DTS TruSurround HD and DTS TruSurround are functionally equivalent.
●● DTS TruDialog
This function allows you to increase the intensity of a voice over background
music or sound effects so that dialogue can be heard more clearly.
English
▶
●● Equaliser
Use Equaliser to customize sound setting for each speaker.
Balance: Adjusts the balance between the right and left speaker.
100Hz / 300Hz / 1kHz / 3kHz / 10kHz (Bandwidth Adjustment): Adjusts the
level of specific bandwidth frequencies.
Reset: Resets the equaliser to its default settings.
NN If Speaker Select is set to External Speaker, Sound Effect is disabled.
◀
▶
English
■■ Speaker Settings
OO MENUm → Sound → Speaker Settings → ENTERE
●● Speaker Select t
A sound echo may occur due to a difference in decoding speed between the
main speaker and the audio receiver. In this case, set the product to External
Speaker.
NN When Speaker Select is set to External Speaker, the volume and
MUTE buttons will not operate and the sound settings will be limited.
◀
▶
English
NN When Speaker Select is set to External Speaker.
●● Device Speaker: Off, External Speaker: On
NN When Speaker Select is set to Device Speaker.
●● Device Speaker: On, External Speaker: On
NN If there is no video signal, both speakers will be mute.
◀
▶
English
■■ Digital Audio Out
OO MENUm → Sound → Digital Audio Out → ENTERE
Digital Audio Out is used to provide digital sound, reducing interference going to
speakers and various digital devices such as a DVD player.
●● Audio Format: You can select the Digital Audio output format. The available
Digital Audio output format may differ depending on the input source.
NN By connecting to 5.1ch speakers in a Dolby Digital setup, maximize your
interactive 3D sound experience.
◀
●● Audio Delay: Correct audio-video sync problems, when watching product or ▶
video, and when listening to digital audio output using an external device such
as an AV receiver (0ms ~ 250ms).
English
●● Auto Volume
To equalize the volume level on each channel, set to Normal.
Night: This mode provides an improved sound experience compared to
Normal mode, making almost no noise. It is useful at night.
NN To use the volume control on the source device connected to the
product, set Auto Volume to Off on the product. Otherwise, a change to
the volume control of the source device may not be applied.
◀
▶
English
■■ Reset Sound
OO MENUm → Sound → Reset Sound → ENTERE
Reset all sound settings to the factory defaults.
◀
▶
English
❑❑ Setting the Time
■■ Time
OO MENUm → System → Time → ENTERE
The current time will appear every time you press the INFO button.
●● Clock Set: Set the Date and Time.
NN You can set the Date and Time directly by pressing the number buttons
◀
on the remote control.
NN If you disconnect the power cord, you have to set the clock again.
English
▶
❑❑ Using the Sleep Timer
OO MENUm → System → Time → Sleep Timer → ENTERE
●● Sleep Timer t: Automatically shuts off the product after a preset period
of time. (30, 60, 90, 120, 150 and 180 minutes)
NN Use the ▲/▼ buttons to select a period of time, and then press
ENTERE. To cancel the Sleep Timer, select Off.
◀
▶
English
❑❑ Setting the On / Off Timer
OO MENUm → System → Time → On Timer <or> Off Timer → ENTERE
●● On Timer: You can set up three separate On Timer configurations. (On Timer
1, On Timer 2, On Timer 3)
Setup: Select Off, Once, Everyday, Mon~Fri, Mon~Sat, Sat~Sun or
Manual to set at your convenience. If you select Manual, you can set up the
day you want to activate the timer.
◀
NN The c mark indicates the day you’ve selected.
Time: Set the hour and minute.
Volume: Set the desired volume level.
English
▶
Source: To select the source of the content that will play when the product
turns on. You can:
–– Select USB and have the product play back photo or audio files from a
USB device.
–– Select a source on your product (HDMI1, HDMI2/DVI, AV, Component,
◀
etc.) that you have connected a set-top box to, and have the product
display a channel from the set-top box.
NN The USB device must be connected to your product before you can
select USB.
English
▶
NN If you select a source other than USB, you must:
●● Have a cable or satellite set-top box attached to that source
●● Set the set-top box to the channel you want to watch when the
product goes on
●● Leave the set-top box turned on.
◀
▶
English
Music / Photo (when the Source is set to USB): Select a folder in the USB
device containing music or photo files to be played when the product is
turned on automatically.
–– If there is no music file on the USB device or the folder containing a music
file is not selected, the timer function does not operate correctly.
–– When there is only one photo file in the USB device, the slide show will not
play.
◀
–– If a folder name is too long, the folder cannot be selected.
–– Each USB you use is assigned its own folder. When using more than one
of the same type of USB, make sure the folders assigned to each USB
have different names.
English
▶
–– It is recommended that you use a USB memory stick and a multi card
reader when using On Timer.
–– The On Timer function may not work with USB devices with a built-in
battery, MP3 players, or PMPs made by some manufacturers because
these devices take a long time to be recognized.
●● Off Timer: You can set up three separate Off Timer configurations. (Off Timer
◀
1, Off Timer 2, Off Timer 3)
Setup: Select Off, Once, Everyday, Mon~Fri, Mon~Sat, Sat~Sun or
Manual to set at your convenience. If you select Manual, you can set up the
day you want to activate the timer.
NN The c mark indicates the day you’ve selected.
Time: Set the hour and minute.
English
▶
❑❑ Economical Solutions
■■ Eco Solution
OO MENUm → System → Eco Solution → ENTERE
●● Energy Saving: This adjusts the brightness of the product in order to reduce
◀
power consumption.
●● Auto Power Off: If the product remains turned on for four hours without any
user input, the product will automatically turn off to prevent overheating.
NN In some areas, you can establish a period of up to 8 hours.
English
▶
❑❑ Other Features
■■ Menu Language
OO MENUm → System → Menu Language → ENTERE
Set the menu language.
■■ Auto Protection Time
OO MENUm → System → Auto Protection Time → ENTERE
◀
●● Auto Protection Time (Off / 2 hours / 4 hours / 8 hours / 10 hours):
If the screen remains idle with a still image for a certain period of time defined by
the user, the screen saver is activated to prevent the formation of ghost images
on the screen.
English
▶
■■ General
OO MENUm → System → General → ENTERE
●● Game Mode: When connecting to a game console such as PlayStation™ or
Xbox™, you can enjoy a more realistic gaming experience by selecting game
mode.
NN NOTE
●● Precautions and limitations for game mode
–– To disconnect the game console and connect another external
◀
device, set Game Mode to Off in the setup menu.
–– If you display the product menu in Game Mode, the screen
shakes slightly.
English
▶
●● After connecting the game console, set Game Mode to On.
Unfortunately, you may notice reduced picture quality.
●● If Game Mode is On:
–– Picture Mode is set to Standard and Sound Mode is set to
Movie.
●● Panel Lock: Lock or unlock all the keys on the panel at once. when Panel
Lock is on, none of the keys on the panel will work.
●● Boot Logo: Display Samsung logo when the product is turned on.
◀
▶
English
■■ Change PIN
OO MENUm → System → Change PIN → ENTERE
Change your password required to reset the product.
NN The PIN input screen appears before the reset screen.
NN Enter your 4-digit PIN. Change the PIN using the Change PIN option.
◀
▶
English
■■ DivX® Video On Demand
OO MENUm → System → DivX® Video On Demand → ENTERE
Shows the registration code authorized for the product. If you connect to the DivX
web site and register with 10-digit registration code, you can download the VOD
activation file.
Once you play it using Videos, the registration is completed.
NN For more information on DivX® VOD, visit http://vod.divx.com.
◀
▶
English
❑❑ Using the Source List
■■ Source List
OO MENUm → Applications → Source List → ENTERE
NN When you press the SOURCE button, Source screen will be displayed at
once.
NN You can only choose external devices that are connected to the product. In
Source, connected inputs are highlighted.
◀
NN For the detailed information, refer to User Manual.
English
▶
❑❑ Connecting a USB Device
1. Turn on your product.
2. Connect a USB device containing photo, music and movie files to the USB
port on the side of the product.
3. When USB is connected to the product, popup window appears. You can
select the Photos, Videos or Music directly.
◀
▶
English
NN It might not work properly with unlicenced multimedia files.
NN Need-to-Know List before using Media Contents
●● MTP (Media Transfer Protocol) is not supported.
●● Supported file systems are FAT,exFAT and NTFS.
●● Certain types of USB Digital camera and audio devices may not be
◀
compatible with this product.
●● Media Play only supports sequential jpeg format.
●● Media Play only supports USB Mass Storage Class (MSC) devices. MSC
is a Mass Storage Class Bulk-Only Transport device. Examples of MSC
are Thumb drives, Flash Card Readers (USB HUB are not supported).
Devices should be connected directly to the product’s USB port.
English
▶
●● Before connecting your device to the product, please back up your files to
●●
●●
●●
●●
◀
●●
prevent them from damage or loss of data. SAMSUNG is not responsible
for any data file damage or data loss.
Do not disconnect the USB device while it is loading.
The higher the resolution of the image, the longer it takes to display on
the screen.
The maximum supported JPEG resolution is 15360 x 8640 pixels.
For unsupported or corrupted files, the “Not Supported File Format”
message is displayed.
The scene search and thumbnail functions are not supported in the
Videos.
English
▶
●● MP3 files with DRM that have been downloaded from a non-free site
◀
cannot be played. Digital Rights Management (DRM) is a technology that
supports the creation, distribution and management of the content in an
integrated and comprehensive way, including the protection of the rights
and interests of the content providers, the prevention of the illegal copying
of contents, as well as managing billings and settlements.
●● PTP connection mode is fully available only with digital cameras. When
connecting a smartphone or tablet to the product using PTP mode, it
may not be recognised.
●● A USB device that requires high power (more than 500mA or 5V) may
not be supported. The HDD (Hard Disk Drive) connected to USB is not
supported.
English
▶
●● If a USB extension cable is used, the USB device may not be recognized
◀
or the files on the device may not be read.
●● If a USB device connected to the product is not recognised, the list of
files on the device is corrupted or a file in the list is not played, connect
the USB device to the PC, format the device and check the connection.
●● If a file deleted from the PC is still found when Media Contents is run, use
the “Empty the Recycle Bin” function on the PC to permanently delete the
file.
●● If the number of files and folders saved on a USB storage device is
approximately over 4000, the files and folders may not appear and some
folders may not be opened.
English
▶
Disconnecting a USB Device
1. Press the SOURCE button.
2. Select a desired USB device, and then press the TOOLS button. The Tools
menu appears.
3.Select Disconnect USB Device, and then wait until the selected USB device
is disconnected. You can remove a USB device from the product.
NN To remove a USB device from the product, we recommend use Disconnect
USB Device function.
◀
▶
English
❑❑ Using the Media Contents
OO MENUm → Applications → Media Play → ENTERE
Enjoy photos, music and movie files saved on a USB Mass Storage Class (MSC)
device.
1. Press the MEDIA.P button.
2.Press ◄/► button to select desired menu (Photos, Videos, Music), then
press the ENTERE button.
◀
3.Press ◄/► button to select desired device, then press the ENTERE button
again.
4. Press the ▲/▼/◄/► button to select the desired file in the list, then press the
ENTERE button or ∂ (Play) button.
English
▶
Playing the selected files
1. Press the ▲ button to select Options at the top of each main screen and
select Play Selected.
2. Select the desired files.
NN The check box appears to the left of the selected files.
NN Press ENTERE button again to deselect the file.
◀
3. Press the ▲ button to select Play.
NN You can select or deselect all files pressing the Select All / Deselect All.
English
▶
❑❑ Playing the Photos / Videos / Music
During playing a file, press the ▲/▼/◄/► button to select the desired menu.
NN When the option menu is not displayed, press the TOOLS button or
ENTERE button.
NN You can also use ∂/∑/∫/π/µ buttons on the remote control during
playback.
NN If you press the INFO button during playback, you can view the playback
information.
◀
▶
English
Playback menu
◀
Button
Operation
Photos
Videos
Music
/
Previous / Next
●
/
Start Slide Show / Stop Slide Show
●
Play / Pause
Mini Player*
●
●
/
Previous / Next
Mini Player*
●
●
/
Rewind / Fast Forward
●
●
* When setting the Background Music to Mini Player in Photos, these buttons appear.
English
▶
Setting menu
●● Photos
Button
◀
Operation
Slideshow Settings
You can set the Speed and Effects during the slide show.
Zoom
You can zoom the image.
Rotate
You can rotate images in full screen mode.
Background Music /
Mini Player
You can set background music when watching a slide show. /
You can control simple playback menus.
Settings
Picture Mode / Sound Mode: You can adjust the picture or
sound setting.
Information: You can see detailed information about the played
file.
English
▶
NN During the slide show, all files in the file list will be displayed in order.
NN When you press the ∂ (Play) button (or ▲ button → Options → Slide
Show) in the file list, slide show will be started immediately.
NN During the slide show, you can adjust the slide show speed using π (REW)
or μ (FF) button.
●● Supported Photo Formats
NN For the details, refer to User Manual.
◀
▶
English
●● Videos
Button
Operation
Search
Search Titles: You can move the other file directly.
Search Time Bar: You can search the video using ◄ and ► button
at one minute interval or entering the number directly.
NN It may not be supported depending on the input source.
Repeat Mode
You can play movie files repeatedly.
Picture Size
You can adjust the picture size to your preference.
◀
▶
English
Button
Operation
Settings
Subtitle Settings: You can play the video with subtitles. This function
only works if the subtitles are the same file name as the video.
Picture Mode / Sound Mode: You can adjust the picture or sound
setting.
Audio language: You can change the audio language if the video has
more than one language.
Information: You can see detailed information about the played file.
◀
▶
English
NN If video time information is unknown, play time and progress bar are not
displayed.
NN In this mode, you can enjoy movie clips contained on a Game, but you
cannot play the Game itself.
●● Supported Subtitle / Video Formats
NN For the details, refer to User Manual.
◀
▶
English
●● Music
Button
Operation
Repeat
You can play music files repeatedly.
Shuffle
You can play the music randomly.
Sound Mode
You can adjust the sound setting.
NN Only displays the files with supported music file extension. Other file
extensions are not displayed, even if they are saved on the same USB device.
◀
NN If the sound is abnormal when playing music files, adjust the Equaliser in the
Sound menu. (An over-modulated music file may cause a sound problem.)
●● Supported Music Formats
NN For the details, refer to User Manual.
English
▶
Setting the Encoding language
Set the encoding language if the text is not supported.
1. Press the ▲ button to select Options at the top of music main screen and
select Encoding.
2. Select the desired encoding language.
◀
▶
English
Support resolution (16:9 only)
NN For the details, refer to User Manual.
●● Videos / Photos (In Media Play)
For the details, refer to User Manual.
◀
▶
English
❑❑ Viewing the e-Manual
■■ e-Manual
OO MENUm → Support → e-Manual → ENTERE
You can read the introduction and instructions about the product features stored
in your product.
NN For the detailed information, refer to User Manual.
◀
▶
English
❑❑ Using the Self Diagnosis
■■ Self Diagnosis
OO MENUm → Support → Self Diagnosis → ENTERE
NN Self Diagnosis might take few seconds, this is part of the normal operation
of the product.
◀
●● Picture Test: Use to check for picture problems.
●● Sound Test: Use the built-in melody sound to check for sound problems.
NN If you hear no sound from the product’s speakers, before performing the ▶
sound test, make sure Speaker Select is set to Device Speaker in the
Sound menu.
English
NN The melody will be heard during the test even if Speaker Select is set to
External Speaker or the sound is muted by pressing the MUTE button.
●● Reset: Reset all settings to the factory defaults except network settings.
NN The PIN input screen appears before the reset screen.
NN Enter your 4-digit PIN. Change the PIN using the Change PIN option.
◀
▶
English
❑❑ Updating the Software
■■ Software Update
OO MENUm → Support → Software Update → ENTERE
The Software Update menu lets you upgrade your product’s software to the
latest version.
NN When software is upgraded, video and audio settings you have made will
◀
return to their default settings. We advise you to write down your settings so
that you can easily reset them after the upgrade.
English
▶
●● Update now
The product's firmware can be updated through USB connection.
–– By USB: Insert a USB drive containing the firmware upgrade file,
downloaded from “www.samsung.com” into the product.
NN Please be careful not to disconnect the power or remove the USB
drive until upgrades are complete. The product will be turned off and
on automatically after completing the firmware upgrade.
◀
▶
English
❑❑ Changing the Use Mode
■■ Use Mode
OO MENUm → Support → Use Mode → ENTERE
Select the Use Mode suitable for your place. We strongly recommend you select
Home Use.
●● Home Use: Home Use is the default setting.
●● Store Demo: Store Demo is for retail environments only. If you select Store
◀
Demo, some functions will not work, and the picture settings will be reset
every 5 minutes.
English
▶
❑❑ Viewing the Contact Samsung
■■ Contact Samsung
OO MENUm → Support → Contact Samsung → ENTERE
View this information when your product does not work properly or when you
want to upgrade the software. You can find information regarding our call centres,
and how to download products and software.
◀
▶
English
❑❑ Using the Football Mode
■■ Football Mode t
OO MENUm → Applications → Football Mode → ENTERE
This mode provides optimized condition for watching football games.
●● a (Zoom): Pause playback and divide the picture into 9 parts. Select a part
to zoom it in. Press this button again to resume.
◀
NN When the Football Mode is on, the picture and sound modes are set to
Stadium automatically.
NN If you turn the product off while watching Football Mode, the Football Mode
will be disable.
English
▶
NN Zoom doesn't operate in the following modes:
–– PIP On
–– Media play videos
◀
English